Posted on Leave a comment

Slow Cooker Pot Roast Recipe with Chuck Roast, Potatoes, Carrots & Gravy

Plated slow cooker pot roast with tender chuck roast, carrots, potatoes, softened onions, and rich brown gravy on a cream plate.

Slow cooker pot roast sounds simple until you are standing in the kitchen with a big piece of beef, wondering if you bought the right cut, added too much liquid, or started too late for dinner. This version is built to remove that guesswork: tender chuck roast, soft potatoes and carrots, and cooking juices that become real gravy instead of thin broth.

The method keeps the liquid controlled, uses the fork test instead of blind timing, and finishes the juices properly so the whole meal tastes complete. You get the comfort of classic pot roast without the usual problems: a tough roast, watery sauce, mushy vegetables, or broth pretending to be gravy.

By the end, the onions should have melted into the sauce, the carrots should taste sweet and savory, the potatoes should catch the sauce, and the beef should feel like it finally relaxed. This is the kind of dinner where the gravy disappears first.

Use LOW when you can. Use HIGH when you need to. Sear the roast for deeper flavor, or skip the sear if the day is already busy. Pot roast is forgiving once you know what to look for; a firm roast usually needs more time, not more panic.

Quick Answer: Slow Cooker Pot Roast

For the best slow cooker pot roast, use a 3 to 4 lb / 1.4 to 1.8 kg beef chuck roast. Season it well, sear it if possible, then cook it with onions, carrots, potatoes, garlic, beef broth, Worcestershire sauce, tomato paste, thyme, rosemary, and bay leaves.

Cook on LOW for 8 to 10 hours or HIGH for 5 to 6 hours, until the roast is tender enough for a fork to slide in easily and the beef gives with gentle pressure. The fork test is the real timer.

Use 1½ cups / 360 ml beef broth for rich, concentrated cooking juices. Use up to 2 cups / 480 ml if you want extra sauce for the table. Keep the roast partly surrounded by liquid, not buried in it. The beef and vegetables release moisture as they cook.

When the beef is tender, remove the roast and vegetables, then thicken the juices with a cornstarch slurry or a quick flour gravy. That final step is what turns a slow cooker full of beef and vegetables into proper pot roast dinner.

Slow Cooker Pot Roast Recipe Card

Recipe at a Glance

Prep time20 minutes
Cook time8 to 10 hours on LOW, or 5 to 6 hours on HIGH
Total time5 hours 20 minutes to 10 hours 20 minutes, depending on HIGH or LOW setting
Servings6 to 8
Best slow cooker size6-quart for a 3 to 4 lb roast; 7 to 8-quart for a 5 lb roast with vegetables
Best cutBeef chuck roast
Best settingLOW
TextureTender, sliceable, or shreddable

Equipment

  • 6-quart slow cooker
  • Large skillet or Dutch oven for searing
  • Tongs
  • Cutting board
  • Small bowl and whisk for the cornstarch slurry
  • Ladle or measuring cup for the cooking juices

Ingredients

For the pot roast:

IngredientAmount
Beef chuck roast3 to 4 lb / 1.4 to 1.8 kg
Olive oil or avocado oil2 tbsp / 30 ml
Fine salt1½ to 2 tsp / 9 to 12 g
Black pepper1 tsp / 2 to 3 g
Garlic powder1 tsp / about 3 g
Onion powder1 tsp / about 2 to 3 g
Paprika, sweet or smoked1 tsp / about 2 to 3 g
Dried thyme1 tsp / about 1 g
Dried rosemary½ tsp / about 0.5 g
Yellow onion, sliced thick1 large / about 250 g
Garlic cloves, minced or smashed4 to 6 cloves / about 15 to 25 g
Carrots, cut into large pieces1 lb / 450 g
Baby potatoes, Yukon gold, or red potatoes1½ to 2 lb / 680 to 900 g
Beef broth1½ cups / 360 ml
Worcestershire sauce1 to 2 tbsp / 15 to 30 ml
Tomato paste1 to 2 tbsp / 16 to 32 g
Bay leaves1 to 2

For the gravy:

IngredientAmount
Hot cooking juices1½ to 2 cups / 360 to 480 ml
Cornstarch2 tbsp / about 16 g
Cold water3 tbsp / 45 ml

Instructions

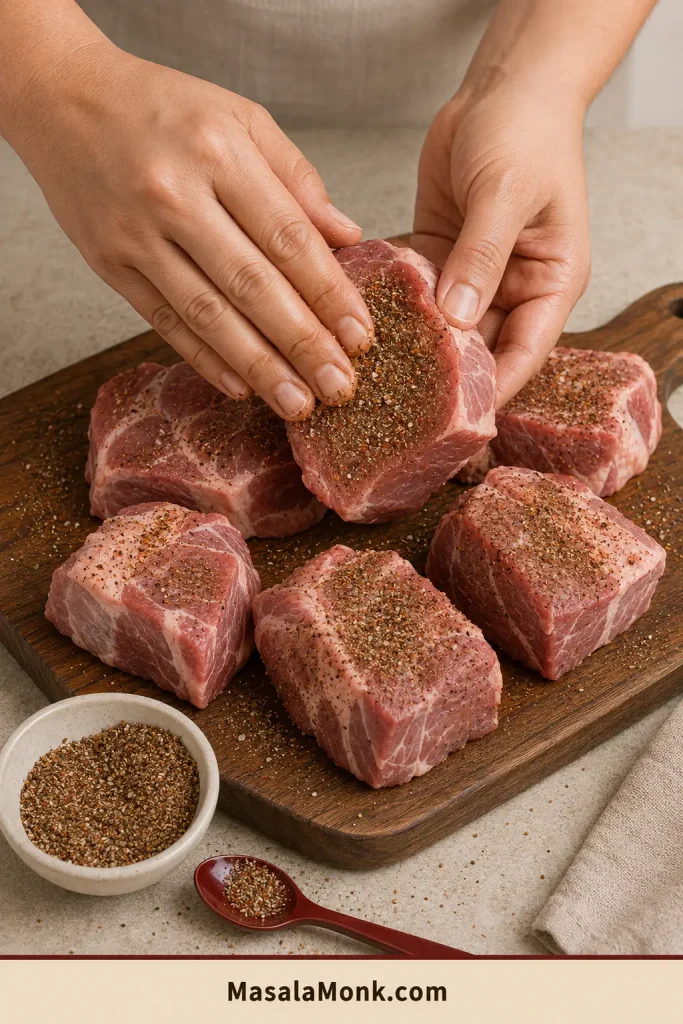
  1. Dry and season the roast. Pat the chuck roast dry. Mix the salt, pepper, garlic powder, onion powder, paprika, thyme, and rosemary, then rub the seasoning over every side of the beef.
  2. Sear for deeper flavor. Heat oil in a large skillet over medium-high heat. Brown the roast for 3 to 4 minutes per side. Skipping the sear still works; the finished flavor will simply be lighter.
  3. Layer the vegetables. Add the onion, carrots, and potatoes to the slow cooker. Keep the pieces large so they hold up during the long cook.
  4. Add the roast. Place the roast on top of or slightly between the vegetables. The lid should close easily.
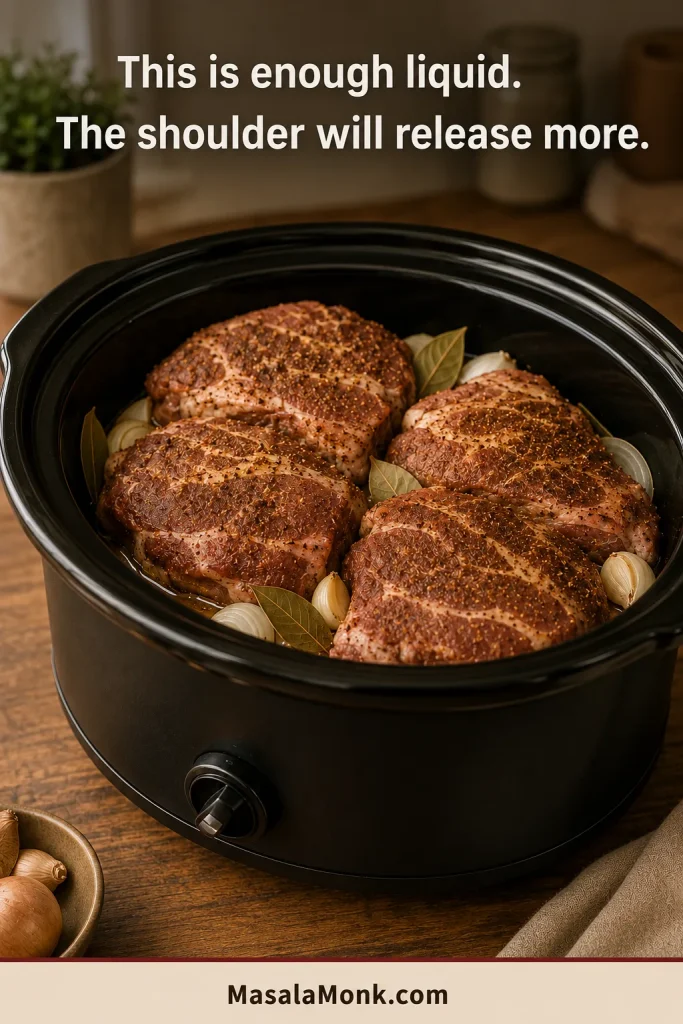
  5. Add the broth mixture. Stir together the beef broth, Worcestershire sauce, tomato paste, garlic, and bay leaves. Pour around the roast. The beef should sit in some liquid but not be fully covered.
  6. Cook low and slow. Cover and cook on LOW for 8 to 10 hours, or on HIGH for 5 to 6 hours. Keep the lid on as much as possible.
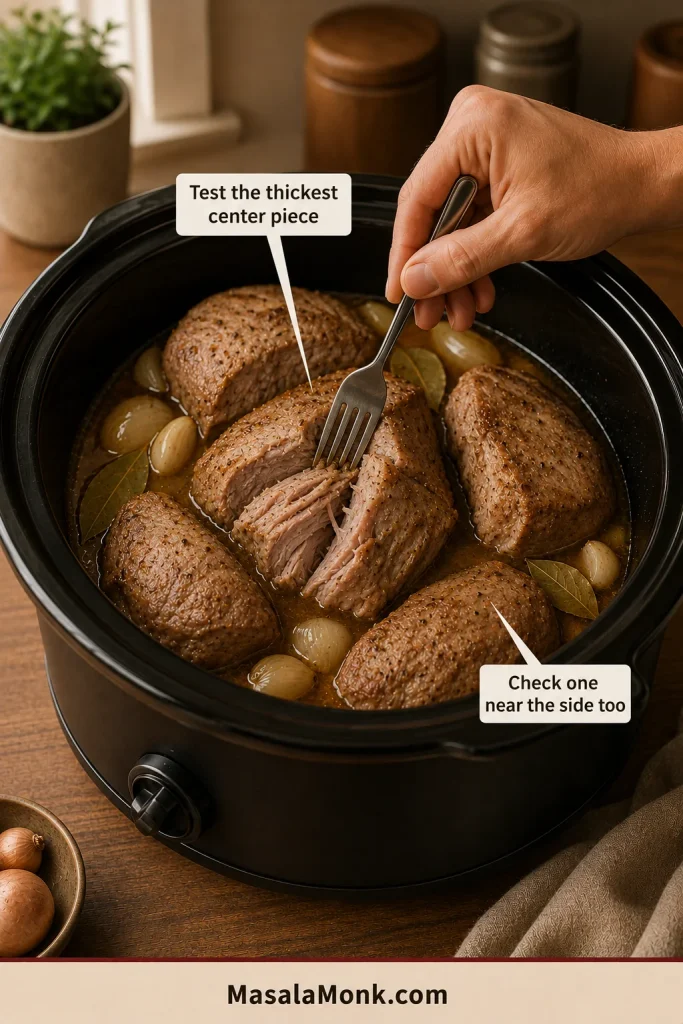
  7. Check for tenderness. The roast is ready when a fork slides in easily and the meat pulls apart with gentle pressure. A tight or rubbery roast needs more cooking time.
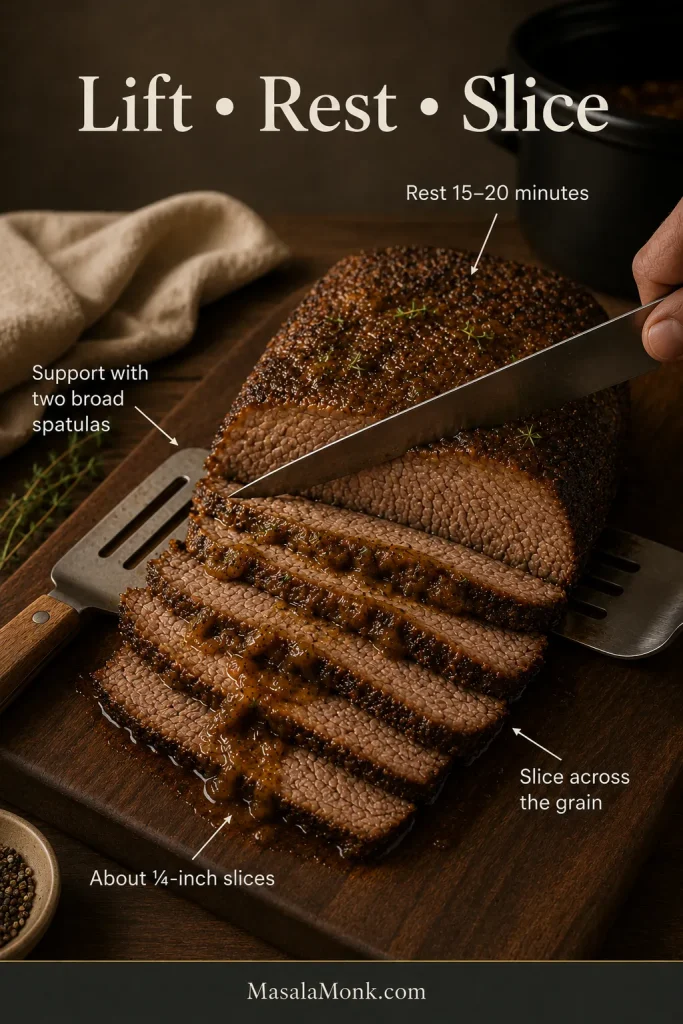
  8. Rest the beef. Transfer the roast to a cutting board and the vegetables to a serving dish. Rest the beef for about 10 minutes while you make the gravy.
  9. Make the gravy. Ladle 1½ to 2 cups hot cooking juices into a saucepan. Whisk cornstarch with cold water, then whisk the slurry into the simmering liquid. Cook for 2 to 3 minutes, until glossy and thickened.
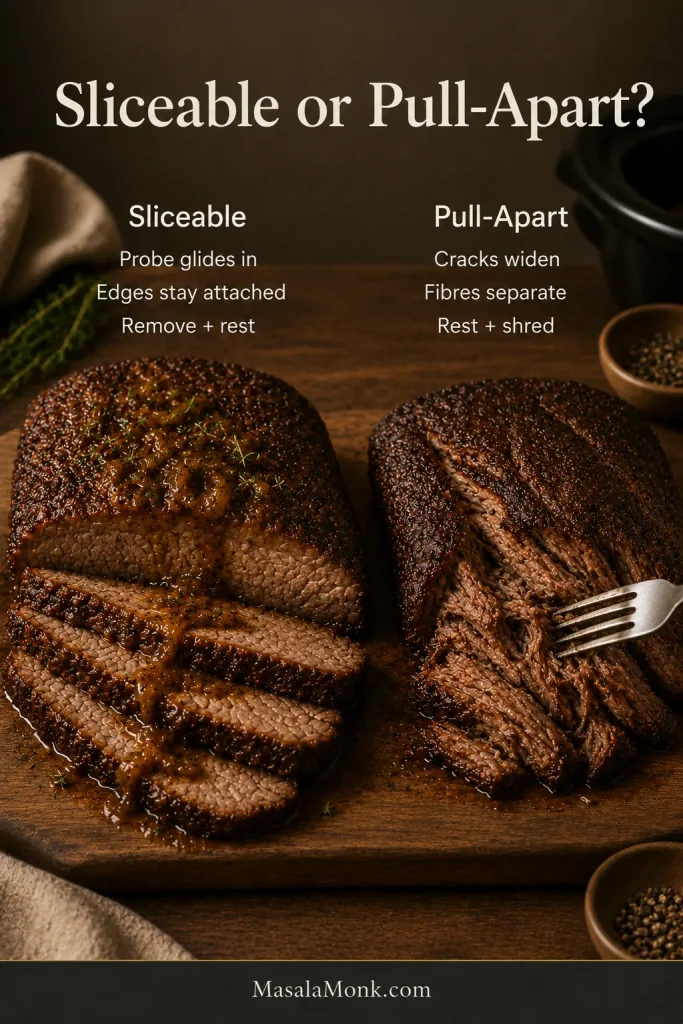
  10. Slice or shred. Slice across the grain for neat pieces, or pull into large chunks for a fall-apart pot roast.
  11. Serve. Spoon the gravy over the beef, potatoes, and carrots.

Recipe Notes

  • Start with thawed beef, not frozen.
  • Use 1½ cups / 360 ml broth for balanced flavor and a concentrated gravy base. Use up to 2 cups / 480 ml if you want more sauce, but plan to simmer and thicken it.
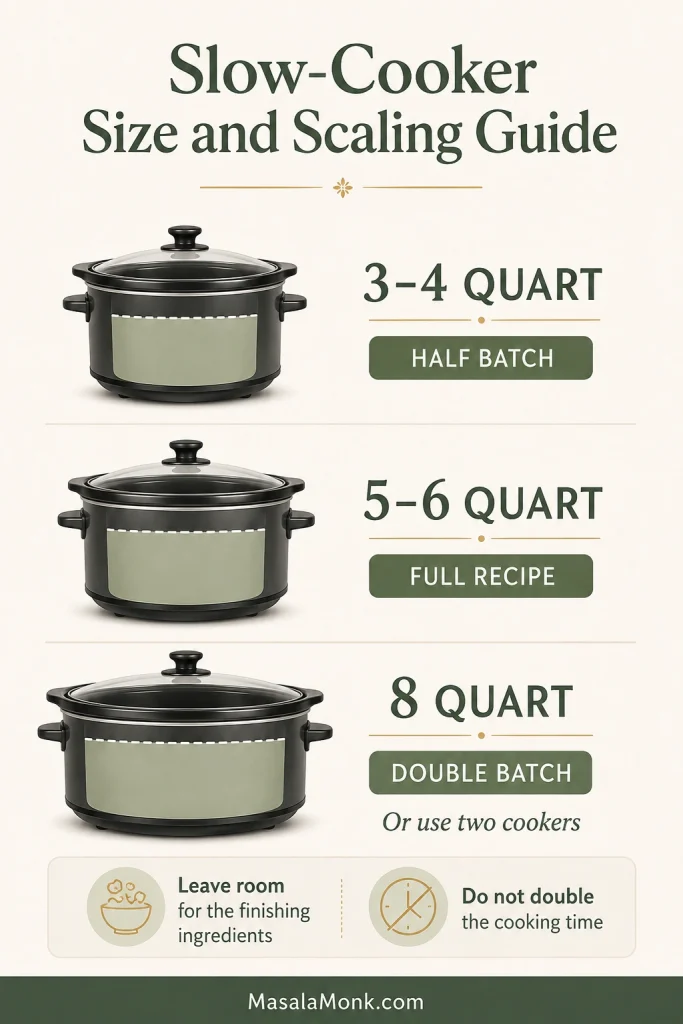
  • For best cooking, the slow cooker should be about half to two-thirds full. A tightly packed cooker or barely closed lid can slow the recipe down.
  • For firmer potatoes and carrots, add them after the first 2 to 3 hours instead of at the beginning.
  • Reduce the salt if using salted broth, bouillon, onion soup mix, ranch seasoning, au jus mix, or brown gravy packets.

The No-Guesswork Pot Roast Method

Pot roast is not difficult, but a few choices decide whether it turns out rich and tender or thin and disappointing. This method keeps the recipe simple by focusing on the four things that matter most.

  1. Choose chuck roast. It has the marbling and connective tissue that soften during long cooking.
  2. Use controlled liquid. The slow cooker gives liquid back to you as the beef and vegetables cook.
  3. Cook until the fork test works. The timer is a guide; tenderness is the goal.
  4. Finish the juices into gravy. Simmer and thicken them so they taste like sauce, not plain broth.
Four-panel pot roast method board showing chuck roast, controlled liquid, fork-test doneness, and finished gravy.
The no-guesswork method is simple: choose chuck roast, control the liquid, trust the fork test, and finish the juices into gravy.

The biggest mistake with slow cooker pot roast is treating the liquid like soup. A little broth is enough to braise the beef; the real magic happens when those juices are finished into gravy.

Your Pot Roast Is Right When…

  • A fork slides into the beef with little resistance.
  • The roast separates into large tender chunks instead of springing back.
  • The potatoes and carrots are soft but not completely collapsed.
  • The gravy coats the back of a spoon after thickening.
  • The finished sauce tastes savory and concentrated, not weak or broth-like.

The best moment is when the roast stops resisting. The fork goes in, the beef pulls into soft pieces, and the onions have almost disappeared into the sauce. That is when the slow cooker has done its job.

Jump to What You Need

Why This Pot Roast Turns Tender Instead of Tough

Pot roast becomes tender because a tougher, well-marbled cut of beef cooks gently for a long time. Chuck roast has connective tissue that softens during slow cooking. That is what gives you the rich, fall-apart texture people want from a classic slow cooker pot roast.

The controlled liquid matters too. A slow cooker traps steam, and the beef, onions, carrots, and potatoes all release moisture. Starting with 1½ cups / 360 ml broth gives you enough moisture for cooking and enough concentrated flavor for the sauce at the end.

Searing adds deeper color and a more roasted flavor, but it is not what makes the roast tender. Tenderness comes from the cut, the gentle heat, and enough time. The final sauce step is where the meal comes together: thin juices become a glossy finish that coats the beef and vegetables instead of running past them.

The clock gets you close, but the fork tells you the truth. Once the beef gives, the whole slow-cooker promise finally pays off.

Best Cut for Slow Cooker Pot Roast

The best cut for slow cooker pot roast is beef chuck roast. It has the right balance of beefy flavor, fat, and connective tissue. When cooked low and slow, it becomes tender enough to slice into soft pieces or pull apart into large chunks.

Labels may say chuck roast, chuck shoulder, shoulder roast, arm roast, blade roast, or pot roast. Look for visible marbling and a roast meant for slow cooking or braising. A very lean, smooth-looking roast may be better sliced than shredded.

Raw chuck roast on butcher paper with visible marbling, ready for slow cooker pot roast.
Clear marbling is what helps chuck roast stay moist and tender during long slow cooking.
Cut of BeefGood for Slow Cooker Pot Roast?Best Result
Chuck roastBest choiceTender, juicy, classic fall-apart pot roast
Chuck shoulder roastYesSimilar to chuck roast, rich and tender
Arm roastYesGood slow-cooker cut, often sliceable
Blade roastYesFlavorful and tender when cooked low and slow
BrisketYesRich, beefy, usually better sliced
Rump roastWorks, but leanerBetter sliced than shredded
Bottom round roastWorks carefullyLeaner, can dry out; slice thinly across the grain
Eye of roundNot idealToo lean for classic fall-apart pot roast

Which Beef Cuts Work Best for Pot Roast?

This comparison separates classic fall-apart pot roast cuts from leaner roasts that usually need slicing, careful timing, and extra sauce.

Beef cut comparison board for slow cooker pot roast showing chuck roast, shoulder roast, brisket, rump roast, bottom round, and eye of round.
Chuck roast is the safest pick, while leaner cuts usually work best when sliced instead of shredded.

For the most forgiving result, choose chuck roast. Shoulder roast or arm roast can still make a good dinner. Rump roast and bottom round work better when sliced thinly with plenty of sauce.

If you are specifically using shoulder roast instead of chuck, MasalaMonk’s beef shoulder roast crock pot recipe goes deeper into that cut.

Ingredients That Build Tender Beef and Rich Gravy

Before the slow cooker starts, the recipe is really about balance: a marbled roast, sturdy vegetables, savory broth, and a few small ingredients that make the sauce taste complete.

Overhead flat lay of slow cooker pot roast ingredients including chuck roast, carrots, potatoes, onion, garlic, broth, Worcestershire sauce, tomato paste, and herbs.
Keeping the ingredients organized makes the whole pot roast feel easier before it even starts cooking.

Beef

A 3 to 4 lb chuck roast fits well in a 6-quart slow cooker with vegetables. Smaller roasts cook faster. Larger roasts may need a bigger cooker and more time.

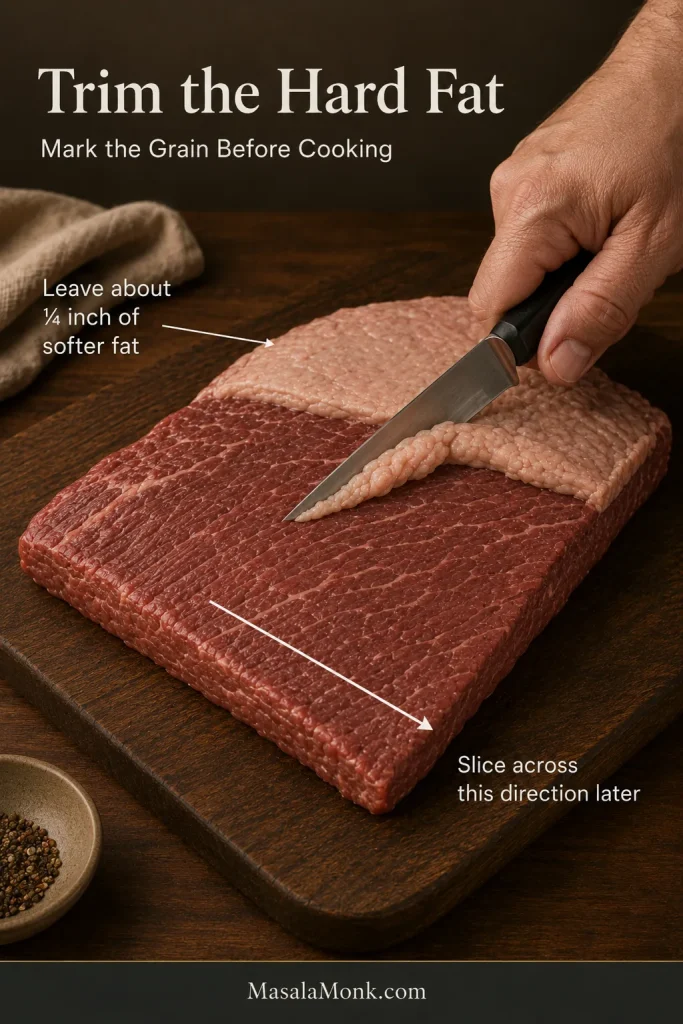
Some visible marbling is a good thing. Trim large hard fat caps if needed, but keep enough marbling to help the roast stay moist and flavorful.

If you prefer smaller beef pieces instead of one large roast, MasalaMonk’s slow cooker beef stew recipe is a better fit than cutting this pot roast into small cubes.

Vegetables

Baby potatoes, Yukon gold potatoes, and red potatoes hold their shape well. Cut larger potatoes into big chunks so they stay intact during the long cook.

Thick-cut carrots give the best texture. Baby carrots are fine when convenience matters; they will be softer, but they still belong in a cozy pot roast.

Onion and garlic build the base of the sauce. Slice the onion thick so it softens into the sauce without disappearing too early.

Flavor Builders

Beef broth gives the cooking juices body and flavor. Low-sodium broth is best if you plan to add bouillon, onion soup mix, ranch seasoning, au jus mix, or brown gravy packets.

Worcestershire sauce adds savory depth, while tomato paste gives the sauce color and richness without making the pot roast taste like tomato sauce. Thyme, rosemary, and bay leaf keep the flavor classic; go easy on dried rosemary because it can take over.

Mushrooms can release a lot of moisture in the slow cooker. Add them halfway through for better shape, or use MasalaMonk’s creamy mushroom sauce as a separate finish for potatoes, rice, or leftover roast.

Gravy Ingredients

Cornstarch makes a quick glossy gravy. Always mix it with cold water first, then whisk the slurry into hot juices. For a more old-fashioned gravy, use butter and flour instead.

How to Make Slow Cooker Pot Roast Step by Step

Step 1: Season the Roast

Pat the roast dry, then coat it with salt, pepper, garlic powder, onion powder, paprika, thyme, and rosemary. Season every side so each slice or shredded piece tastes finished.

Hands seasoning a chuck roast on a board with visible spice coverage for slow cooker pot roast.
Season every side well so the beef tastes finished all the way through, not just on the outside.

Step 2: Sear for Deeper Flavor

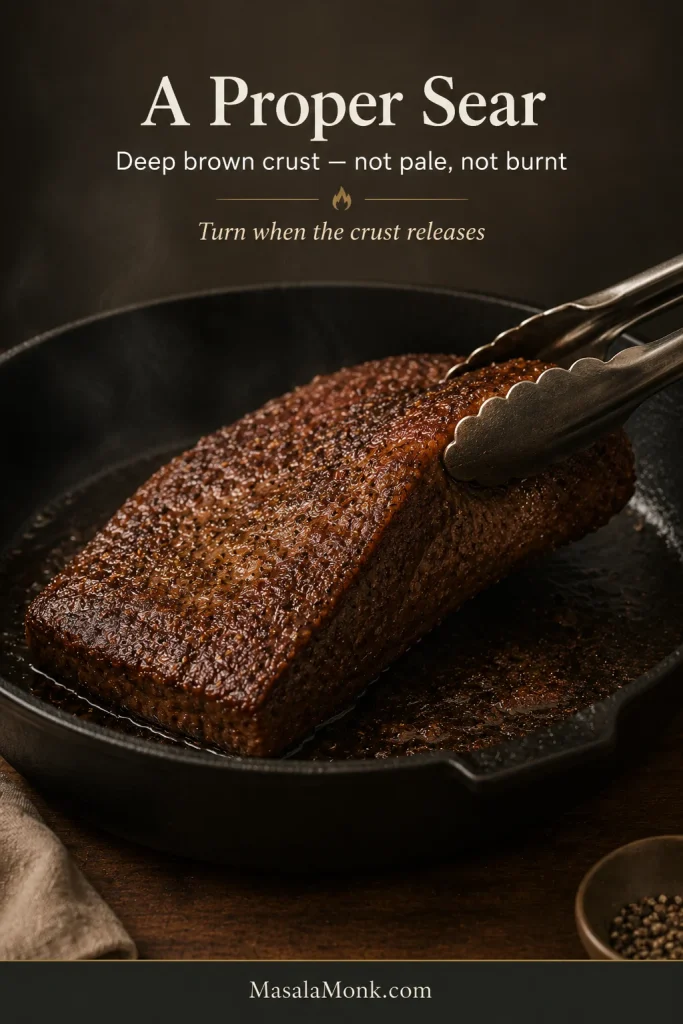
Heat oil in a skillet until hot, then brown the roast for 3 to 4 minutes per side. Let the crust form before turning. A good sear gives the gravy a deeper, roasted flavor.

Chuck roast searing in a skillet with a browned crust before going into the slow cooker.
Searing is optional, but it adds a deeper browned flavor that carries into the sauce.

Skipping the sear is still okay. On a busy morning, a well-seasoned no-sear pot roast is better than no pot roast at all.

Step 3: Layer the Vegetables

Add the onion, potatoes, and carrots to the slow cooker. Keep the pieces large. Place the roast on top of or slightly between the vegetables, leaving enough space for the lid to close comfortably.

Potatoes, carrots, onions, and chuck roast layered in a slow cooker for pot roast.
Large vegetable pieces go in first so they can hold their shape during the long cook.

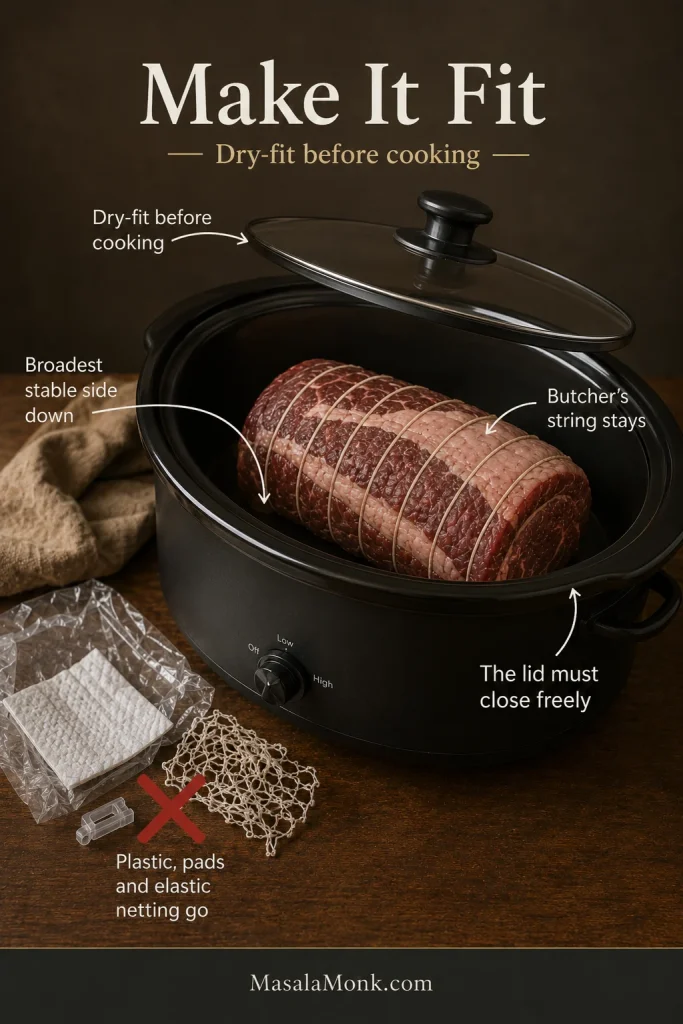
A roast that does not fit can be cut into 2 or 3 large pieces. Large pieces still cook like pot roast; small stew-sized chunks cook differently.

Step 4: Add the Broth Mixture

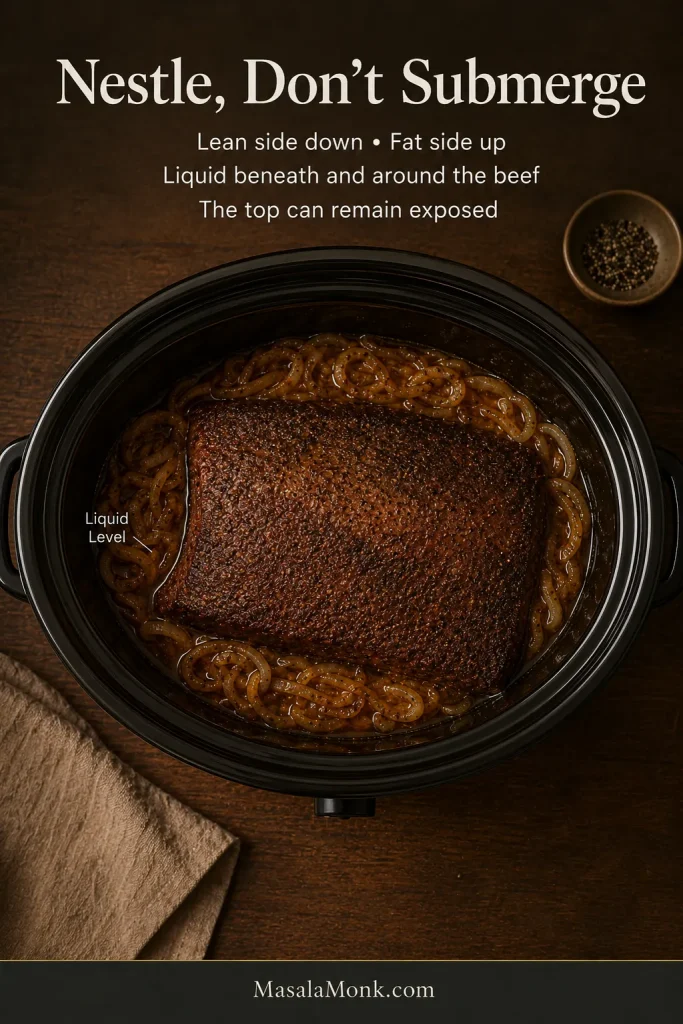
Stir together beef broth, Worcestershire sauce, tomato paste, garlic, and bay leaves. Pour it around the roast. The beef should sit in some liquid, but the top does not need to be covered.

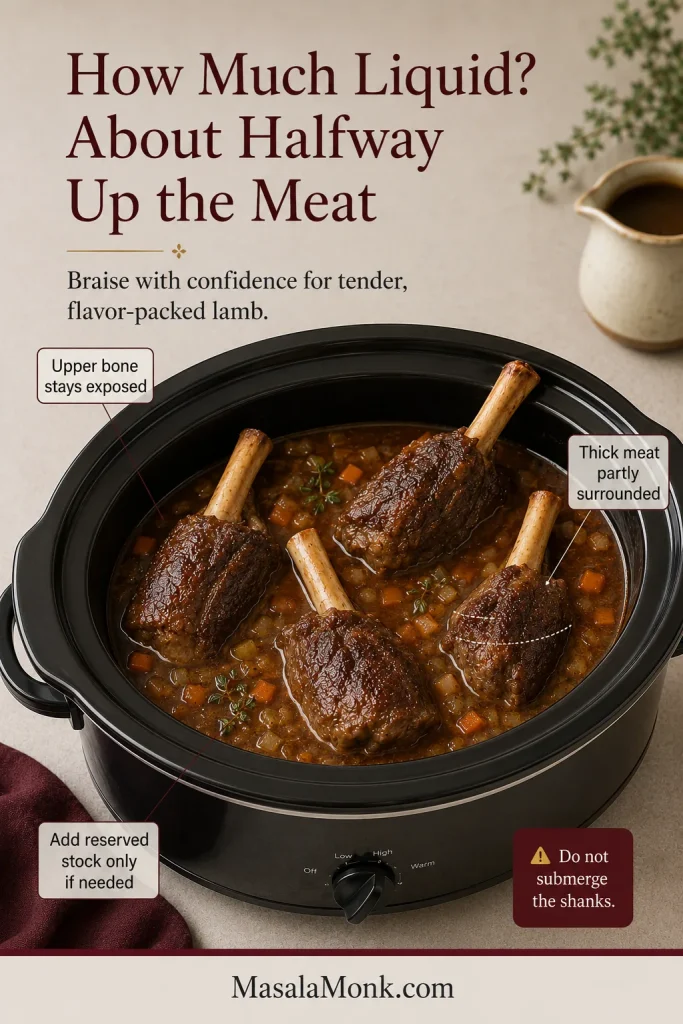
Some recipes use enough broth to nearly cover the roast. This version uses less liquid on purpose so the juices stay concentrated enough to become sauce. Pot roast should braise gently, not cook like soup.

Slow cooker pot roast with the roast partly surrounded by broth, showing the correct liquid level.
The broth should braise the beef, not bury it; that balance keeps the flavor concentrated.

Step 5: Cook Until the Beef Gives

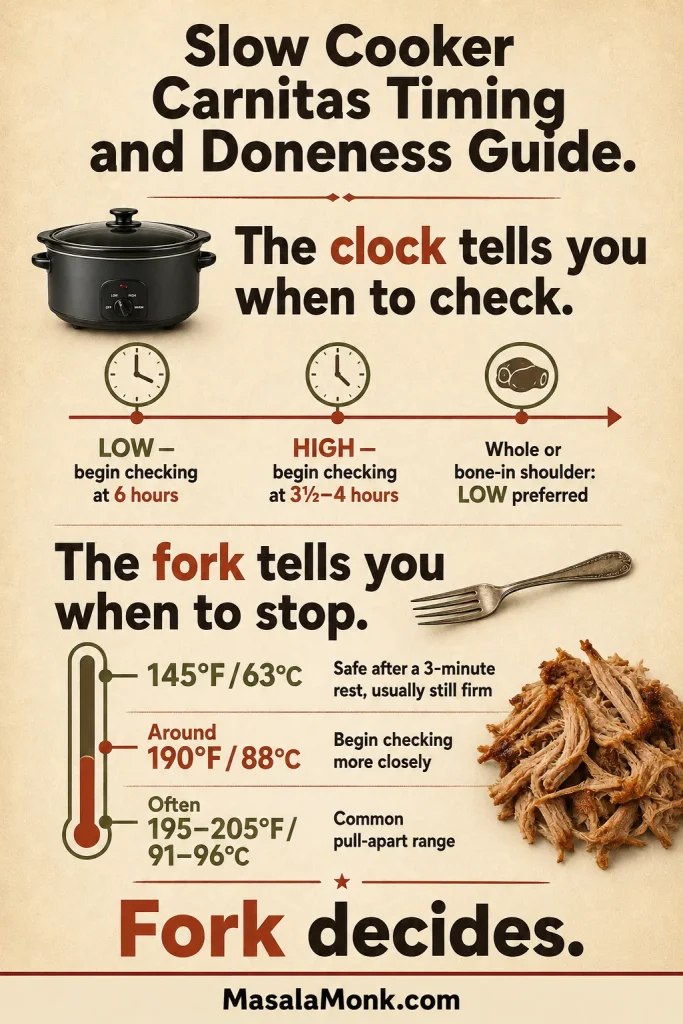
Cover and cook on LOW for 8 to 10 hours, or on HIGH for 5 to 6 hours. LOW gives chuck roast more time to soften and usually creates the best texture.

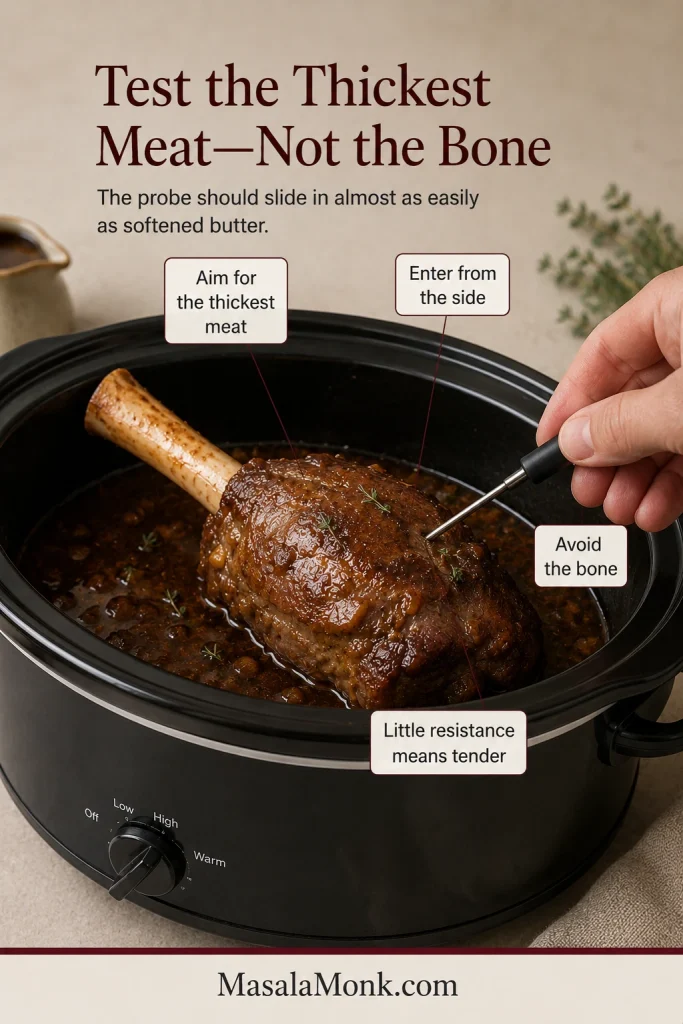
The roast is ready when a fork slides in easily and the meat pulls apart with gentle pressure. A tight or springy roast needs more time in the cooker.

Fork pulling apart tender slow cooker pot roast to show the fork test for doneness.
When the fork slides in easily, the roast is ready and the texture should feel soft, not tight.

Step 6: Rest, Make Gravy, and Serve

Move the roast to a cutting board and the vegetables to a serving dish. Rest the beef for 10 minutes while you make the sauce.

Ladle the cooking juices into a saucepan, skim excess fat if needed, and simmer. Whisk in a cornstarch slurry or make a flour gravy. Once the sauce coats the spoon, the whole dish changes from cooked beef and vegetables into proper pot roast dinner.

Slice across the grain for neat pieces, or pull the beef into large chunks. Spoon the glossy sauce over everything before serving.

What the Finished Slow Cooker Should Look Like

Before serving, the beef should look relaxed and tender, the vegetables should still be recognizable, and the cooking juices should be ready to finish into sauce.

Finished pot roast in a slow cooker with tender beef, carrots, potatoes, onions, and glossy sauce.
This is the slow-cooker checkpoint: tender beef, intact vegetables, and enough juices to finish the meal.

Slow Cooker Pot Roast Cook Time Chart

Cook time depends on the size, thickness, cut, slow cooker, and how full the cooker is. Use this chart as a guide, then let tenderness decide.

Roast SizeLOW SettingHIGH SettingBest Result
2 lb / 900 g6 to 7 hours3½ to 4½ hoursTender, usually sliceable
3 lb / 1.4 kg8 to 9 hours4½ to 5½ hoursBest standard family size
4 lb / 1.8 kg9 to 10 hours5 to 6 hoursClassic fall-apart pot roast
5 lb / 2.25 kg10 to 11 hours6 to 7+ hoursLarge roast, needs patience

A thick 3 lb roast can take longer than a flatter 4 lb roast. Older slow cookers, very full cookers, and leaner cuts can also change the timing. The clock gets dinner close; the fork tells you when the beef is really ready.

Is It Better to Cook Pot Roast on LOW or HIGH?

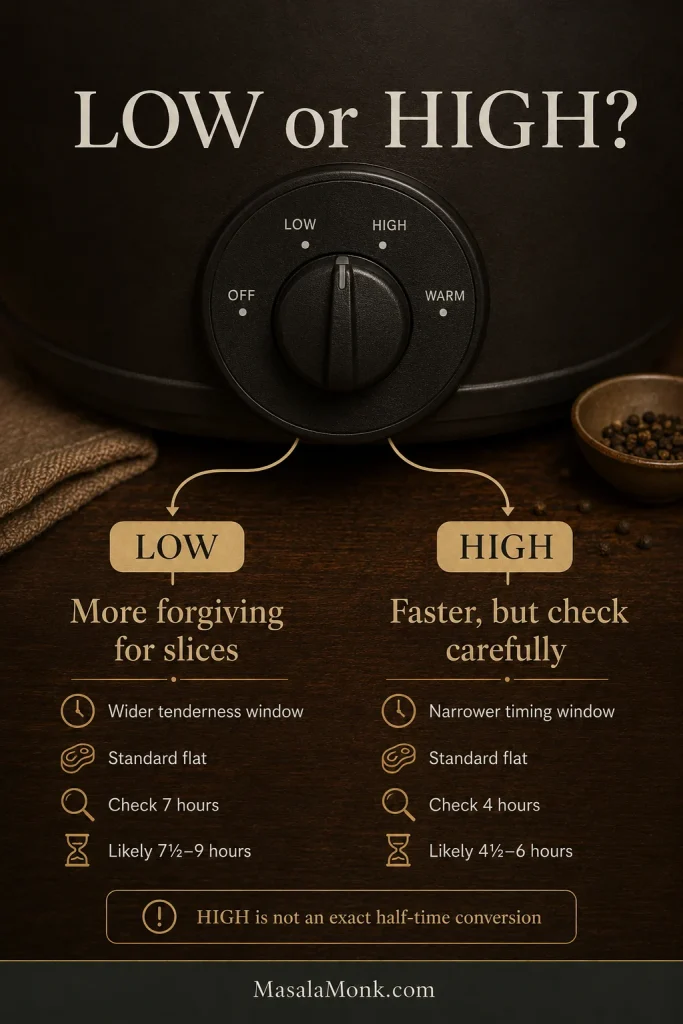
LOW is better for slow cooker pot roast because chuck roast has more time to soften. LOW is the comfort setting. HIGH is the schedule setting.

HIGH works when dinner needs to happen faster, but it is less forgiving. The roast may still need extra time if it feels tight at the end.

SettingTime for 3 to 4 lb Chuck RoastResult
LOW8 to 10 hoursBest tenderness and texture
HIGH5 to 6 hoursFaster, still good when cooked until tender

How Much Liquid to Use for Slow Cooker Pot Roast

Use less liquid than you might think. A slow cooker traps steam, and the beef and vegetables release moisture as they cook. The visual cue from Step 4 still applies here: the roast should be partly surrounded by liquid, not submerged. Starting with too much broth can leave you with thin flavor and extra reducing at the end.

GoalLiquid Amount
Rich, concentrated pot roast1 to 1½ cups / 240 to 360 ml
Balanced pot roast with gravy1½ cups / 360 ml
Extra gravy2 cups / 480 ml
Very large 5 lb roast2 to 2½ cups / 480 to 600 ml

Keep the roast partly surrounded by liquid, not submerged. Extra broth is fine when you love a spoonable sauce, but plan to simmer and thicken the juices before serving.

How to Turn the Slow Cooker Juices into Gravy

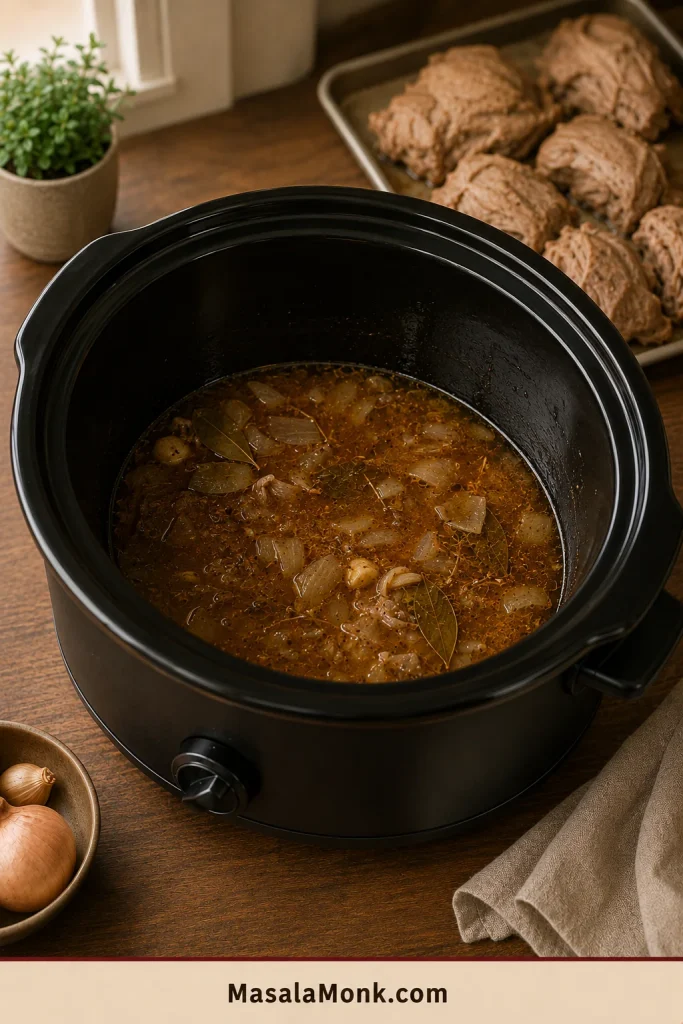
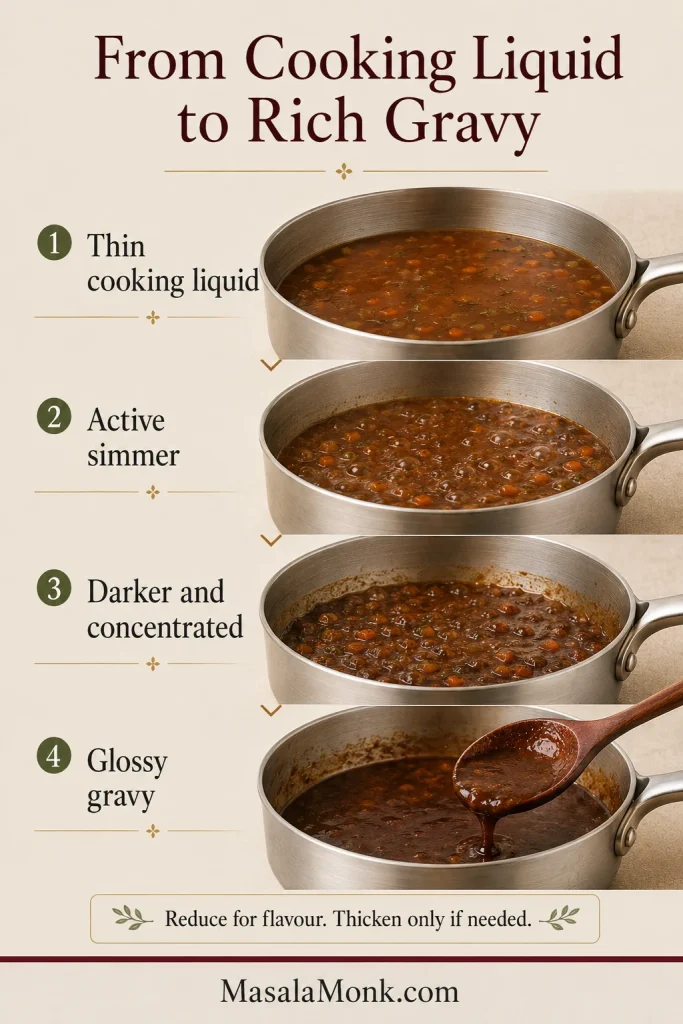
The juices in the slow cooker are one of the best parts of pot roast, but they need finishing. Straight from the cooker, they may be thin. After simmering and thickening, they become the rich sauce that pulls the plate together.

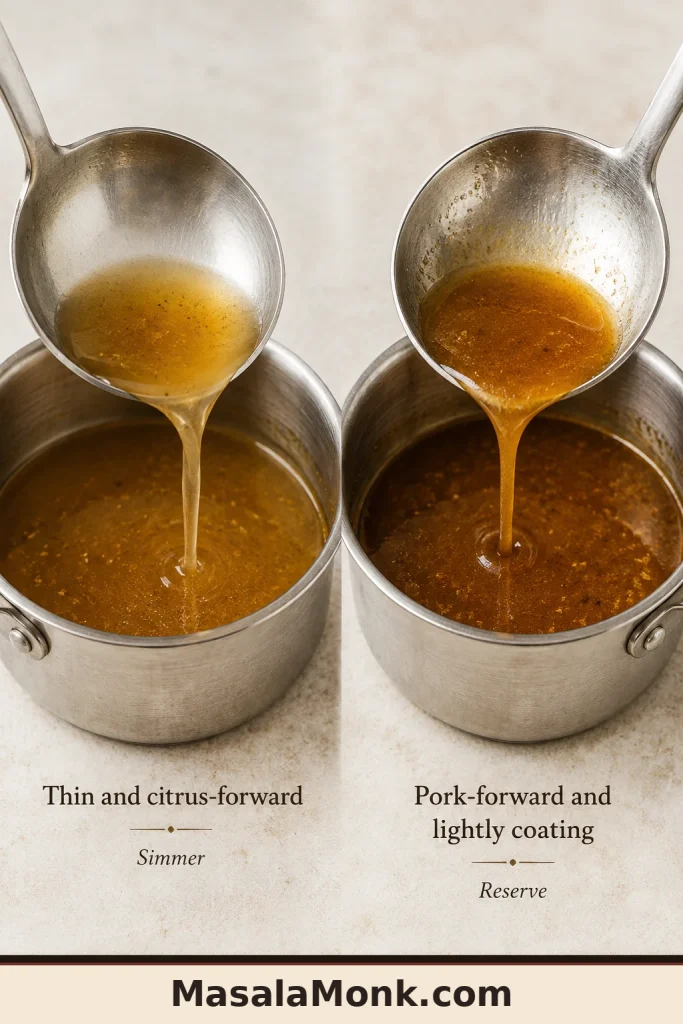
Two-panel pot roast gravy guide showing thin cooking juices before and glossy thick gravy after thickening.
Simmering and thickening turn thin cooking juices into a spoonable sauce.

Cornstarch Slurry Gravy

Choose this for a fast, glossy gravy.

IngredientAmount
Hot cooking juices1½ to 2 cups / 360 to 480 ml
Cornstarch2 tbsp / about 16 g
Cold water3 tbsp / 45 ml

Whisk the cornstarch and cold water in a small bowl until smooth. Bring the cooking juices to a simmer in a saucepan. Whisk in the slurry and cook for 2 to 3 minutes, until the sauce thickens and turns glossy.

Flour Gravy

Choose this for a more old-fashioned gravy.

IngredientAmount
Butter2 tbsp / about 28 g
Flour2 tbsp / about 16 g
Hot cooking juices1½ to 2 cups / 360 to 480 ml

Melt the butter in a saucepan. Whisk in the flour and cook for 1 to 2 minutes. Slowly whisk in the hot juices, then simmer until thickened.

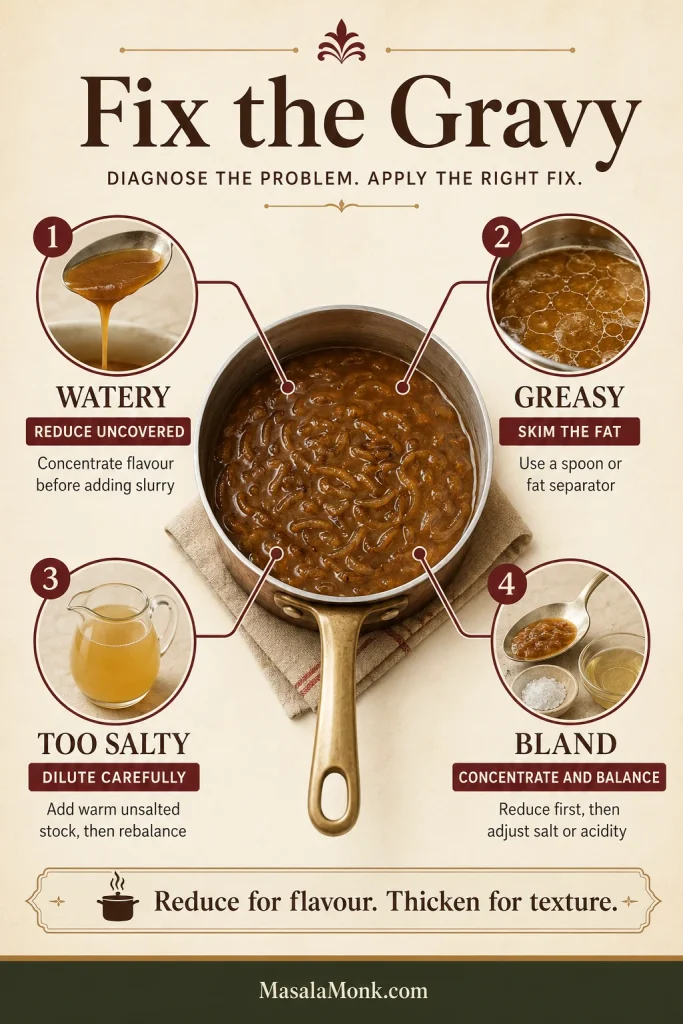
Gravy Fixes

ProblemFix
Gravy is waterySimmer the juices to reduce, then thicken with slurry
Gravy is greasySkim fat before thickening
Gravy is blandAdd salt after reducing, plus pepper, Worcestershire sauce, or a pinch of bouillon
Gravy is too saltyAdd unsalted broth or potato water; avoid reducing further
Gravy tastes flatAdd a small splash of Worcestershire sauce or a pinch of thyme
Gravy is too thickWhisk in warm broth, a little at a time

Taste the gravy after it has reduced and thickened. The flavor is easier to judge once the sauce has body, and that glossy finish is what makes the beef, potatoes, and carrots feel like one complete dinner.

How the Finished Gravy Should Look

Once the gravy coats the beef and vegetables instead of running past them, the pot roast tastes richer and the whole plate feels finished.

Gravy being poured over tender slow cooker pot roast with carrots and potatoes on a rustic plate.
The finished sauce should coat the beef and vegetables instead of running off like broth.

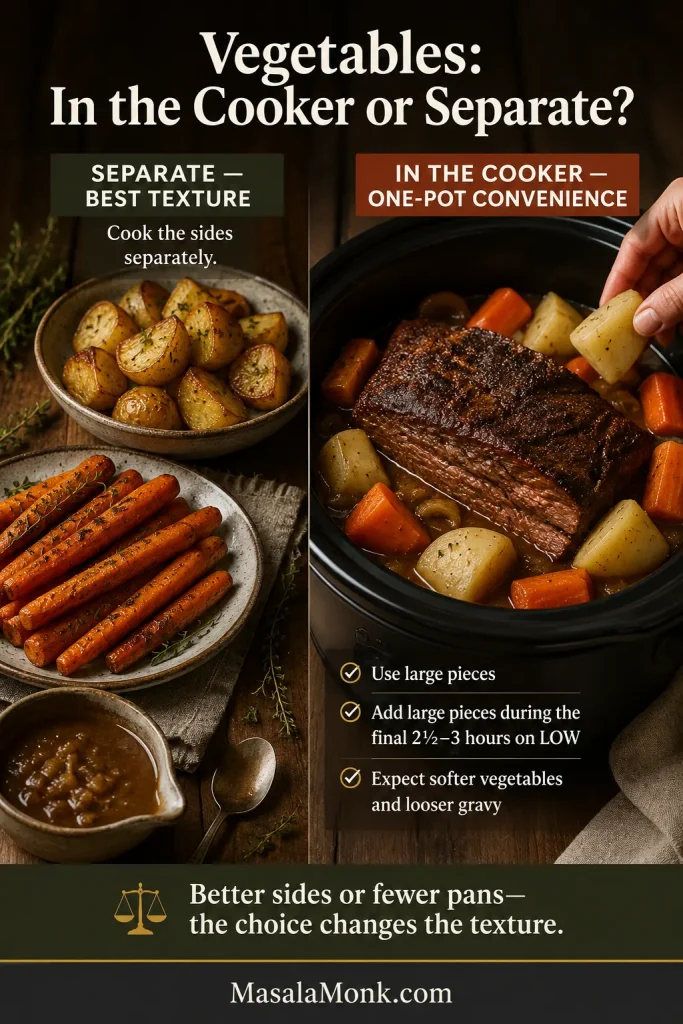
When to Add Potatoes and Carrots

Most people expect slow cooker pot roast to come with soft carrots and potatoes. Add them at the beginning for that classic comfort-food texture, or add them later when you want more bite.

Desired TextureWhen to Add Potatoes and Carrots
Soft, classic pot roast vegetablesAdd at the beginning
Medium-soft vegetablesAdd after 2 hours
Firmer potatoes and carrotsAdd halfway through
Very soft carrotsUse baby carrots from the beginning
Less mushy potatoesUse baby potatoes, Yukon gold, or red potatoes in large pieces

Large pieces hold up better during a long LOW cook. Thin carrot coins and small potato cubes soften quickly.

Pot roast vegetable size guide comparing large carrot chunks and potato pieces with smaller pieces that can turn mushy.
Bigger carrot and potato pieces hold up better during long cooking and are less likely to turn mushy.

No-Sear Slow Cooker Pot Roast

You can make slow cooker pot roast without searing it first. The roast will still become tender; the flavor will be lighter and less roasted.

MethodResult
Sear firstDeeper flavor, darker gravy, richer finish
No searEasier, still tender, lighter flavor

Sear vs No-Sear Comparison

This comparison shows why searing gives a darker finish, while the no-sear version still works when convenience matters most.

Side-by-side comparison of seared and no-sear pot roast showing the difference in flavor and finish.
Searing gives deeper flavor, but skipping it still works when you need the easier route.

For a no-sear pot roast, season the beef well and lean on Worcestershire sauce, tomato paste, onion, garlic, and good broth for flavor. A busy morning version can still become a generous dinner by evening.

Homemade Pot Roast Seasoning

This blend gives you familiar packet-style comfort without making the gravy too salty.

SeasoningAmount
Fine salt1½ tsp
Black pepper1 tsp
Garlic powder1 tsp
Onion powder1 tsp
Paprika1 tsp
Dried thyme1 tsp
Dried rosemary½ tsp
Dried parsley, optional½ tsp
Bouillon powder, optional½ tsp

Use this blend for a 3 to 4 lb roast. Use less salt when cooking with salted broth, onion soup mix, ranch seasoning, au jus mix, bouillon, or gravy packets.

For stronger flavor, season the roast up to 24 hours ahead and refrigerate it covered. Even 30 minutes helps. This blend also works for slow cooker beef stew, beef shoulder roast, and other slow-cooked beef dinners.

Shortcut Variations

There is nothing wrong with a packet-style pot roast if that is the flavor your family loves. Think of these as quick variations; the same rules still apply — use the right cut, control the salt, and finish the juices like gravy.

Four-panel slow cooker pot roast variations board showing onion soup mix, 3-packet, Mississippi style, and cream of mushroom versions.
Shortcut versions can still taste rich when the salt, liquid, and final sauce stay controlled.

Onion Soup Mix Pot Roast

Use 1 packet onion soup mix with a 3 to 4 lb chuck roast, 1 to 1½ cups beef broth or water, potatoes, carrots, onions, and optional Worcestershire sauce. Treat the packet as seasoning, not as the whole gravy plan.

For another dinner built around onion soup mix and a proper gravy finish, MasalaMonk’s slow cooker French onion chicken is a good companion recipe.

3 Packet Pot Roast

A common 3-packet pot roast uses ranch seasoning mix, Italian dressing mix, and brown gravy mix. It is very flavorful, but salt can build fast, so use low-sodium broth and season carefully.

Mississippi Pot Roast Style

Mississippi pot roast usually uses ranch seasoning, au jus mix, pepperoncini, butter, and chuck roast. It is tangy, rich, and usually served shredded over mashed potatoes, rice, noodles, or sandwich rolls.

Cream of Mushroom Pot Roast

For an old-fashioned creamy version, add cream of mushroom soup and reduce the broth. Canned soup adds both liquid and body, so the recipe needs less extra broth.

Red Wine Pot Roast

Replace ½ cup / 120 ml of the broth with dry red wine. Keep the total liquid controlled so the sauce does not become thin.

Keto or Low-Carb Pot Roast

Skip the potatoes and use celery, mushrooms, turnips, radishes, or cauliflower mash. The beef and gravy are still the center of the meal.

Fixes for Tough, Watery, Bland, or Mushy Pot Roast

Most pot roast problems come down to cut, time, liquid, salt, or how the gravy was finished. Start with the simple fix before changing the whole recipe.

Pot roast troubleshooting guide showing fixes for tough roast, too much liquid, watery gravy, mushy vegetables, salty gravy, and bland flavor.
Use this as a quick rescue map for cut, time, liquid, salt, texture, and flavor.
ProblemMost Likely CauseBest Fix
Roast is toughNeeds more time or is too leanKeep cooking if it is chuck; slice thinly if it is lean
Roast is dryLean cut, overholding, or not enough sauceSlice thinly and serve with plenty of sauce
Too much liquidBeef and vegetables released moistureSimmer the juices down before thickening
Gravy is weakToo much broth or not reducedReduce, thicken, then season
Vegetables are mushyPieces were small or cooked too longUse larger pieces or add them later next time
Pot roast is blandNot enough seasoning or browningSeason the finished sauce and add Worcestershire sauce if needed
Too saltyPackets, bouillon, salted broth, or reduced gravyAdd unsalted broth or potato water; avoid further reducing

Most pot roast problems feel bigger in the moment than they really are. Once the beef is tender and the sauce has body, dinner usually comes back together.

Why Is My Slow Cooker Pot Roast Tough?

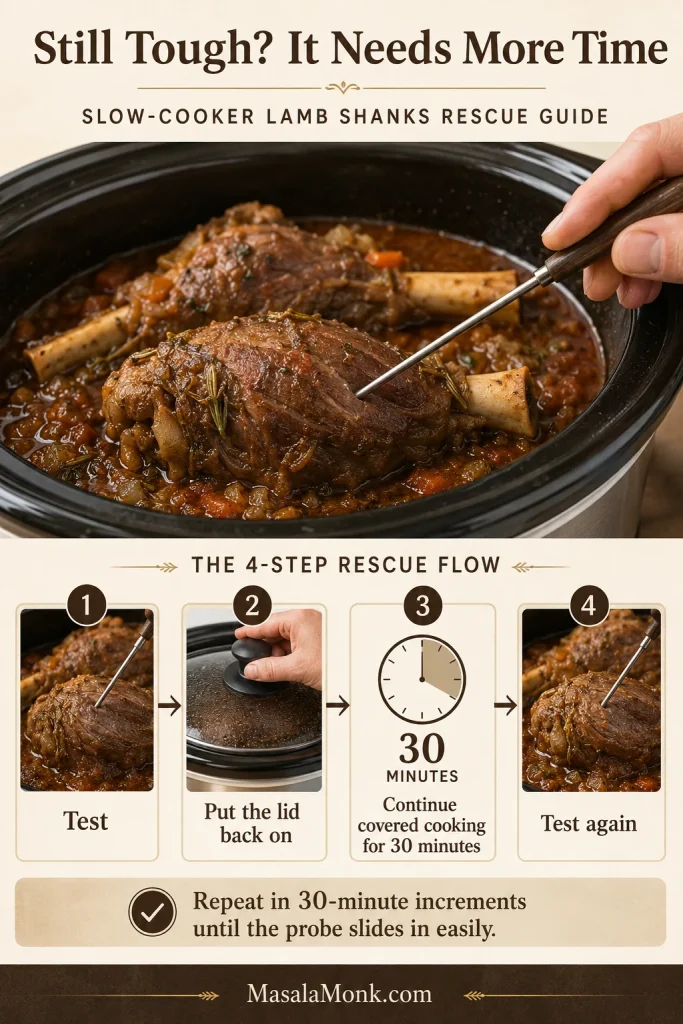
A chuck roast that feels tight, chewy, or hard to pull apart usually needs more time. The connective tissue has not softened yet. Keep the lid on, cook longer, and check again near the end.

A leaner cut like rump roast or bottom round may never shred like chuck. Slice it thinly across the grain and serve it with sauce.

What If Dinner Is Close and the Roast Is Still Tough?

Move the vegetables out if they are ready, then let the beef keep cooking in the juices. For a stovetop rescue, transfer the beef and liquid to a covered pot and keep it at a gentle simmer. A hard boil can tighten the outside before the inside softens.

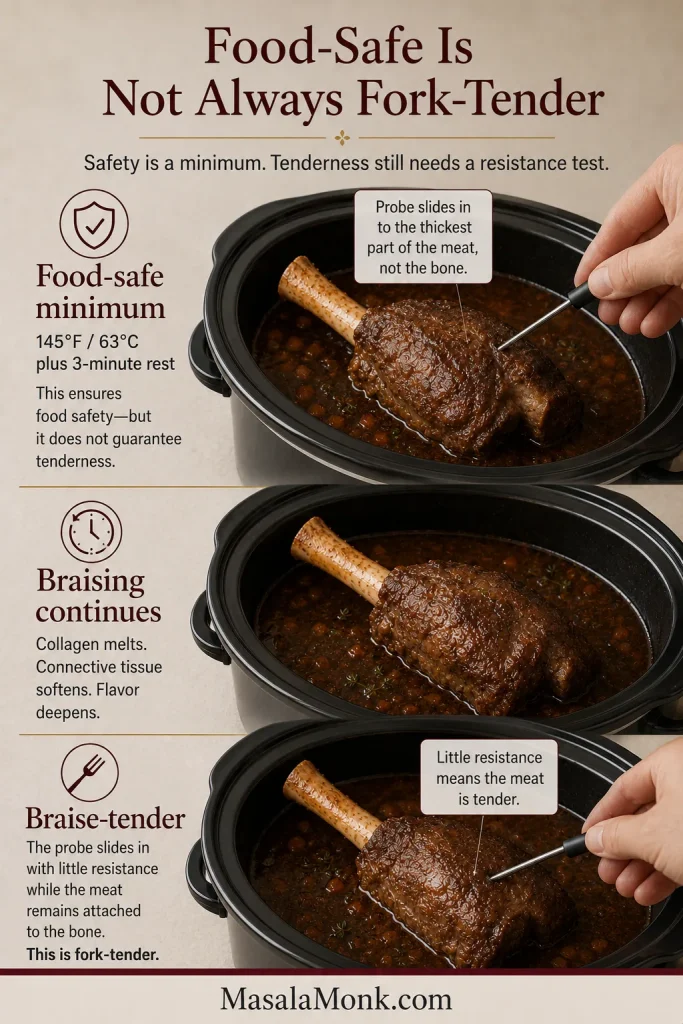
Why Is My Roast Chewy Even Though It Reached a Safe Temperature?

Safe temperature and tender pot roast are not the same thing. Beef roast can reach a safe temperature before chuck roast has cooked long enough to become soft and pull-apart tender.

Why Is There So Much Liquid in My Slow Cooker?

The roast and vegetables release moisture as they cook. Remove the meat and vegetables, simmer the juices in a saucepan, then thicken them into gravy. Next time, start with less broth unless extra sauce is the goal.

Why Are My Potatoes and Carrots Mushy?

They cooked too long or were cut too small. Large pieces of carrot and sturdy potatoes like baby potatoes, Yukon gold, or red potatoes hold up better. For firmer vegetables, add them after the first 2 to 3 hours.

Can I Cook a Frozen Roast in the Slow Cooker?

It is better to thaw the roast first. USDA guidance says to thaw meat or poultry before putting it into a slow cooker, because frozen meat can take too long to heat safely and may cook unevenly. You can read more in the USDA’s slow cooker food safety guidance.

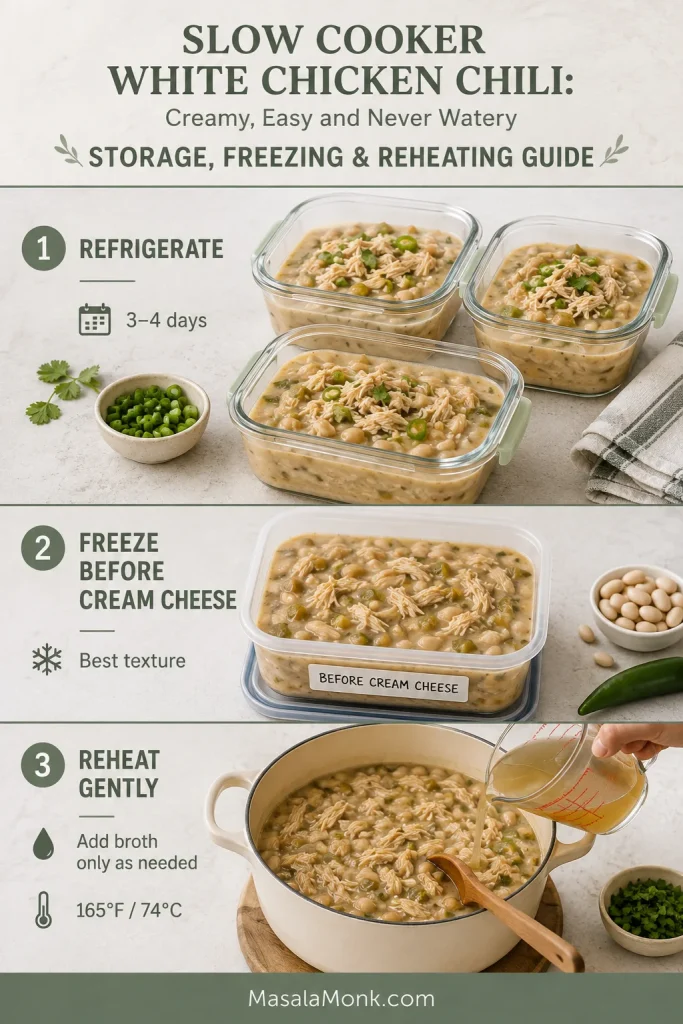
How to Store and Reheat Without Drying It Out

Pot roast keeps best when the beef is stored with sauce. That moisture protects the meat from drying out and makes reheating easier.

Storage and reheating guide showing pot roast stored with gravy in a container and reheated gently in a saucepan.
Store leftovers with sauce so the beef reheats gently instead of drying out.
Storage MethodBest Practice
RefrigeratorStore beef, vegetables, and gravy in airtight containers for 3 to 4 days
FreezerFreeze beef with gravy for 2 to 3 months
Best freezer methodFreeze sliced or shredded beef with gravy, not dry
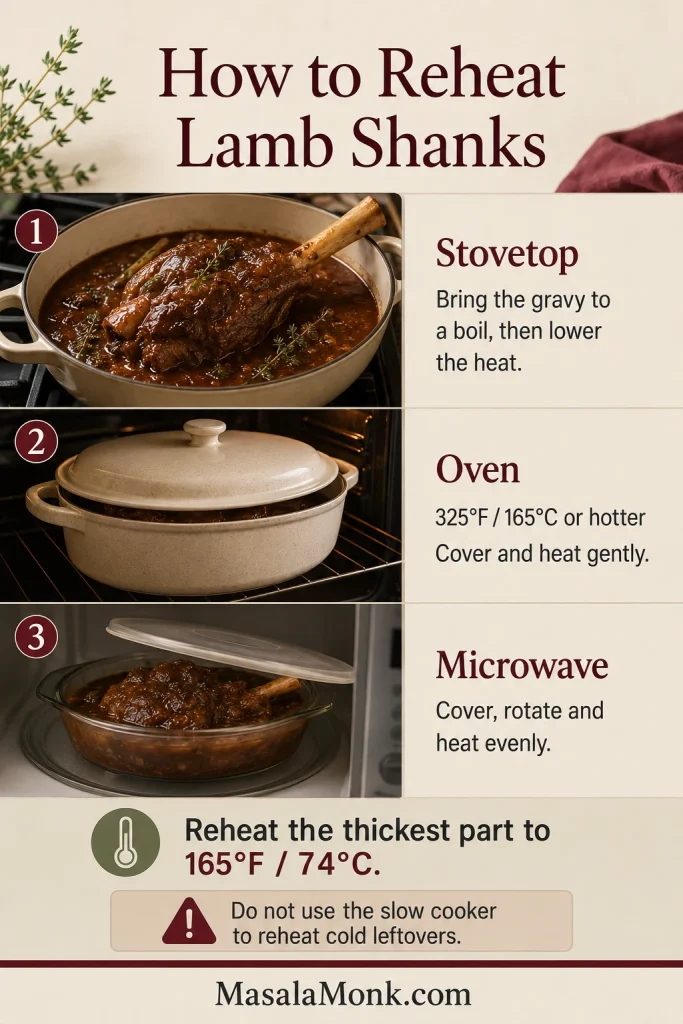
ReheatingReheat gently with gravy on the stovetop or in the microwave
Potatoes after freezingPotatoes may soften after thawing

For the best freezer result, freeze the beef with its sauce and make fresh potatoes later.

Can You Make Pot Roast Ahead?

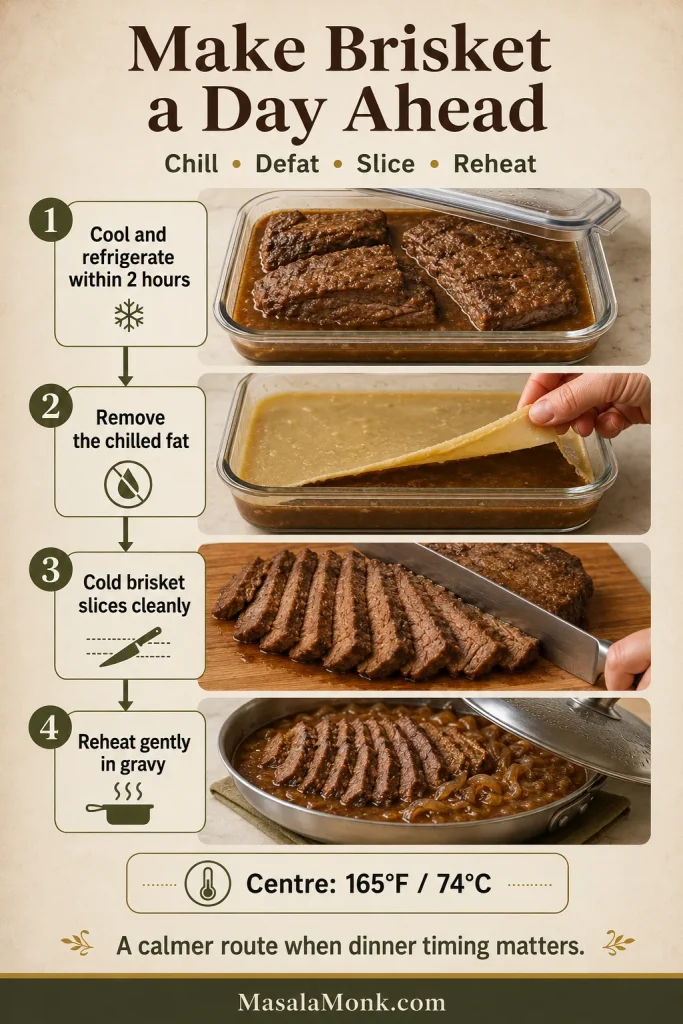
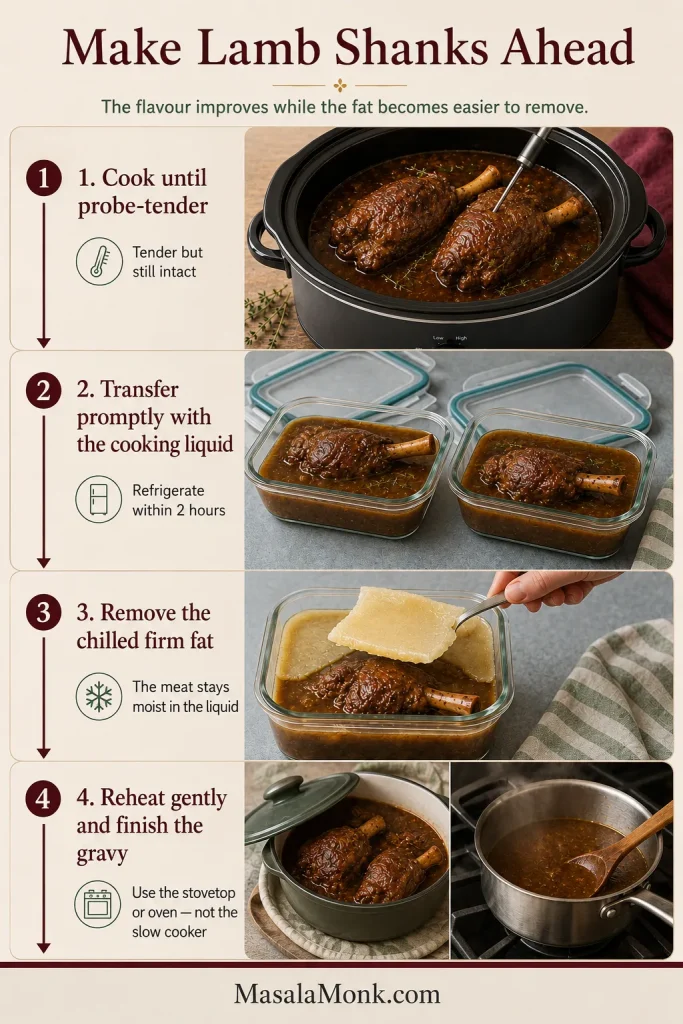
Yes. Pot roast is one of those dinners that often tastes even better the next day, especially when the beef is stored with sauce. Cook it fully, cool it, and refrigerate the beef with the cooking juices. The next day, skim any hardened fat from the top and reheat gently until hot.

The beef and sauce usually hold up better than the potatoes after chilling, so fresh potatoes or a fresh side can make leftovers feel new again.

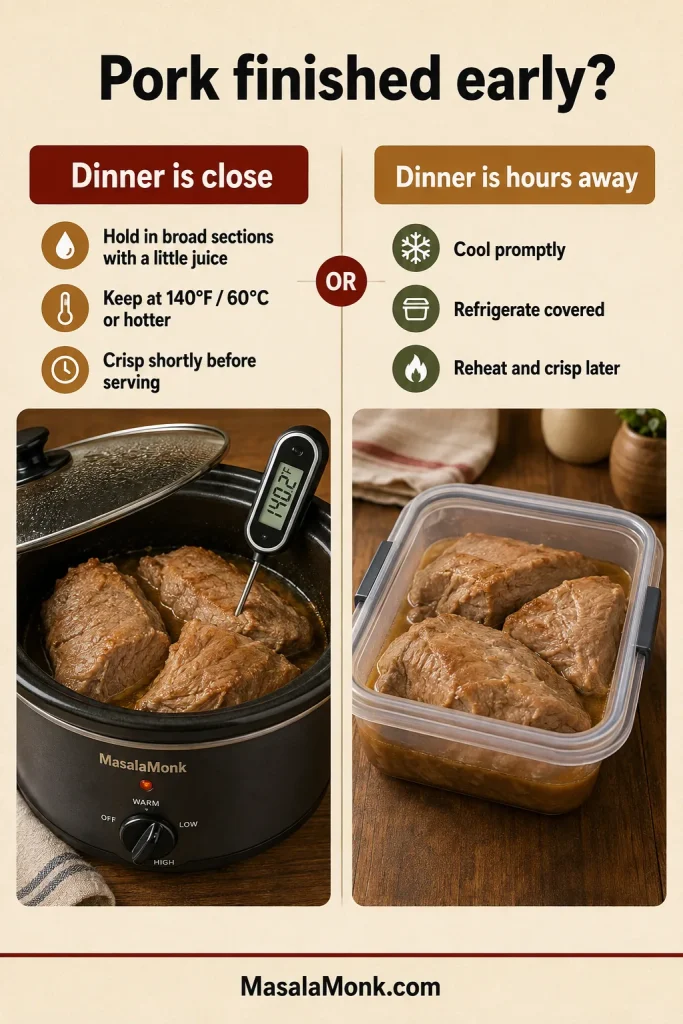
Can You Hold Pot Roast on Warm?

You can hold pot roast on WARM for 1 to 2 hours after it is tender, as long as the food stays hot and the beef remains moist. Use LOW or HIGH until the roast is actually tender; WARM is for holding, not finishing.

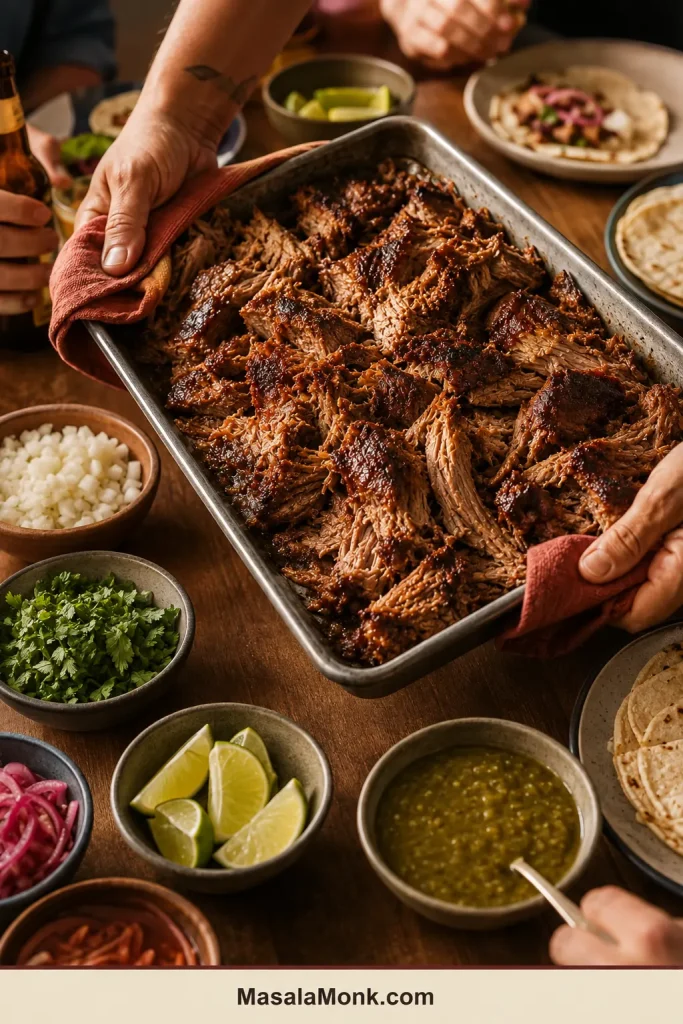
Leftover Pot Roast Ideas

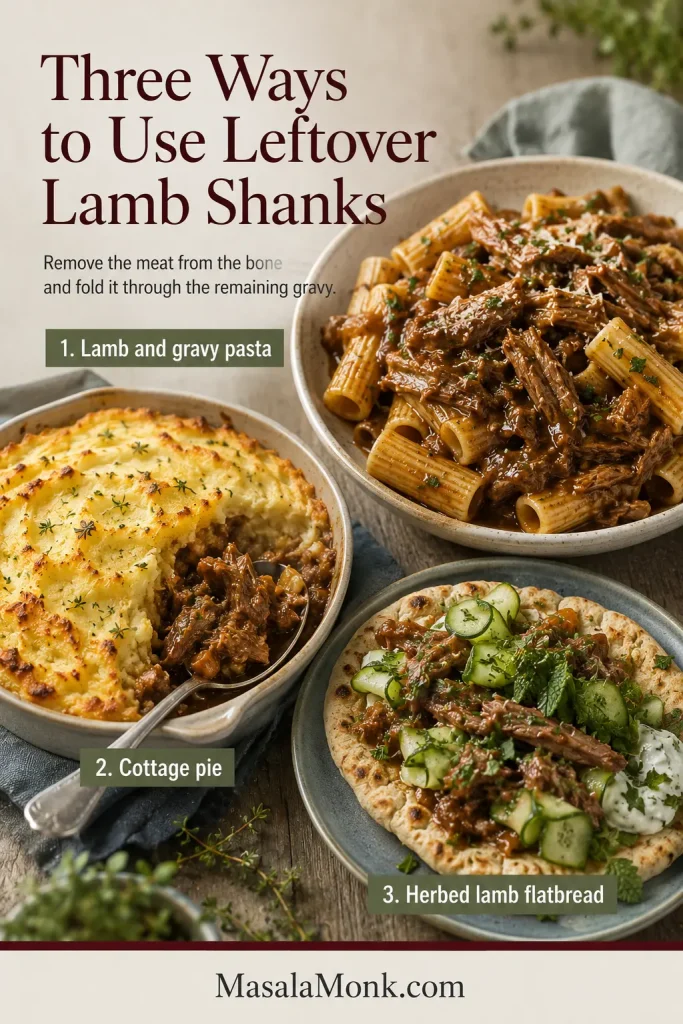
Leftover pot roast is one of the best reasons to make a large roast. Keep the beef with sauce, then turn it into easy meals for the next day.

  • Pot roast sandwiches with melted cheese
  • Pot roast grilled cheese
  • Beef over mashed potatoes
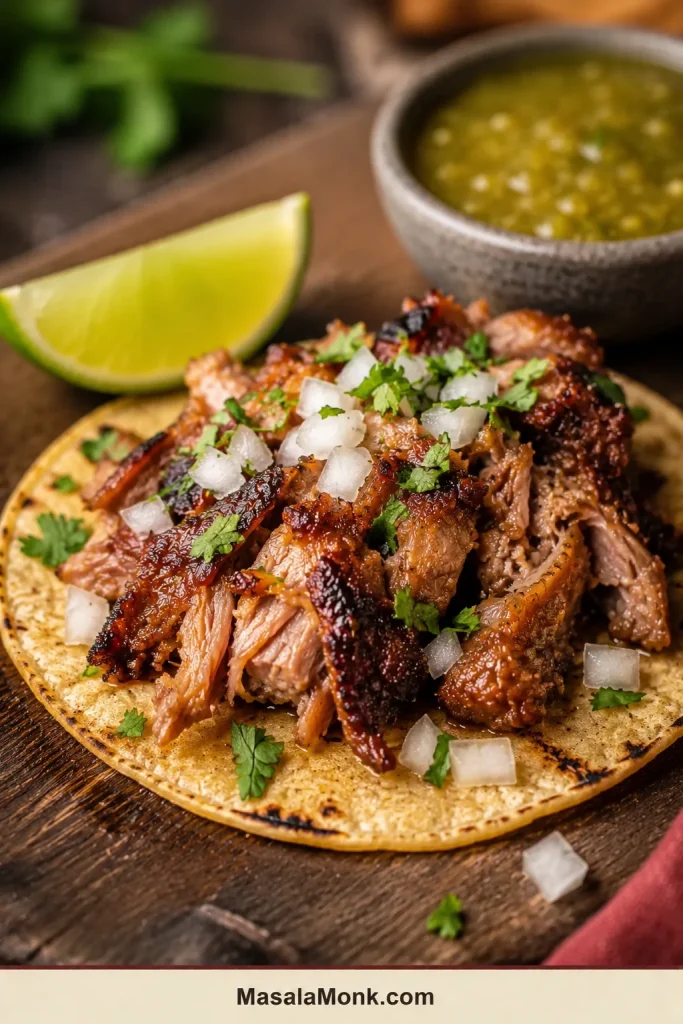
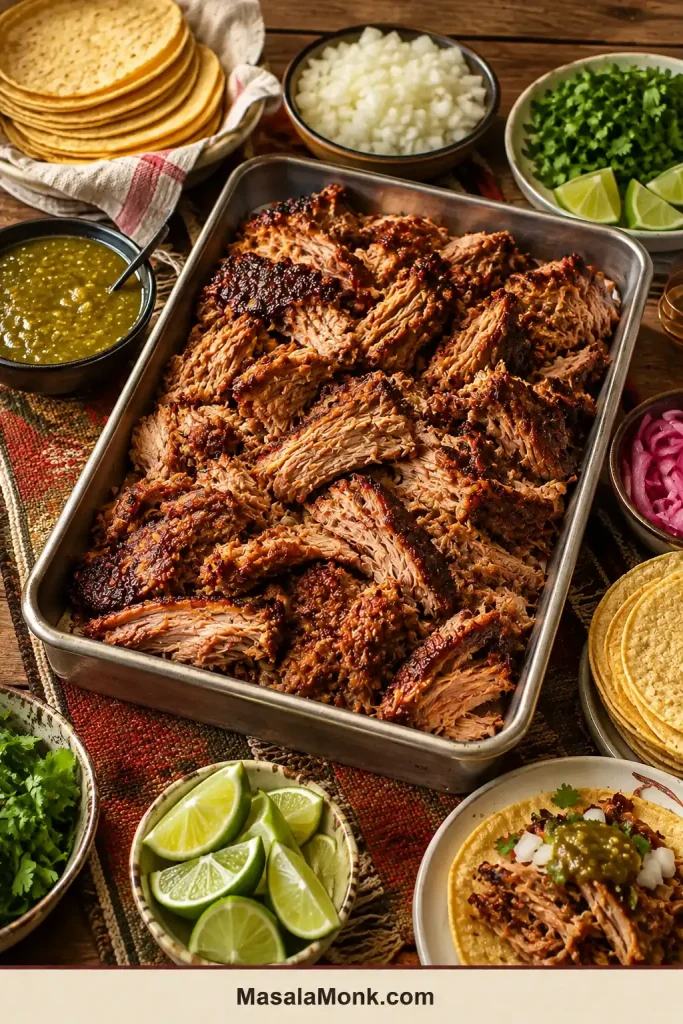
  • Pot roast tacos
  • Rice bowls with sauce and vegetables
  • Pot roast soup
  • Pot roast stroganoff
  • Loaded baked potatoes
  • Breakfast hash with eggs
  • Sliders with horseradish sauce
  • Egg noodles with beef and sauce
Leftover pot roast sandwich with tender beef, melted cheese, pickles, and a cup of gravy on the side.
Leftover pot roast makes a great sandwich when the beef stays moist and the filling is warmed through.

If you are turning leftovers into rice bowls, MasalaMonk’s how to cook rice guide helps keep the grains fluffy enough to catch the sauce without turning gummy.

If leftover sandwiches, sliders, bowls, and loaded potatoes are what you like most, MasalaMonk’s slow cooker pulled pork follows that same make-once, eat-many-ways comfort-food logic.

What to Serve With Pot Roast and Gravy

This recipe already includes potatoes and carrots, so it can be a full meal on its own. To stretch it or make the plate feel more complete, serve it with something that catches the sauce or balances the richness.

By the time it reaches the table, the meal should feel complete without needing anything fancy: tender beef, sweet carrots, soft potatoes, and enough sauce to pull it all together.

  • Mashed potatoes
  • Dinner rolls
  • Egg noodles
  • Rice
  • Green beans
  • Buttered peas
  • Roasted broccoli
  • Simple green salad
  • Creamed spinach
  • Biscuits
Finished slow cooker pot roast dinner plate with tender beef, carrots, potatoes, gravy, and sides on a cream plate.
The final plate should feel complete without fuss: tender beef, sweet carrots, soft potatoes, and sauce in every bite.

If you skip the potatoes in the slow cooker, serve the beef and gravy over MasalaMonk’s mashed potatoes recipe for the most classic plate.

Because pot roast is rich and gravy-heavy, a cold side can help the plate feel fresher. This cucumber salad recipe gives you that crisp, tangy contrast.

If you want another slow-cooker beef dinner with brown gravy, MasalaMonk’s crock pot Salisbury steak keeps the same mashed-potatoes-and-gravy comfort.

FAQs

What is the best cut of meat for slow cooker pot roast?

Chuck roast is the best cut for slow cooker pot roast. It has enough marbling and connective tissue to become tender during long cooking. Chuck shoulder, arm roast, and blade roast can also work well. Rump roast and bottom round are leaner, so they are better sliced than shredded.

Is this the same as Crock Pot pot roast?

Yes. Crock Pot is a popular slow cooker brand, so this recipe works as a Crock Pot pot roast or any 6-quart slow cooker pot roast. The timing and tenderness cues are the same.

Is it better to cook pot roast on LOW or HIGH?

LOW is better for the most tender pot roast. A 3 to 4 lb chuck roast usually needs 8 to 10 hours on LOW. HIGH works when needed and usually takes 5 to 6 hours, but the texture is often better on LOW.

How long does a 3 lb chuck roast take in the slow cooker?

A 3 lb chuck roast usually takes 8 to 9 hours on LOW or about 4½ to 5½ hours on HIGH. The exact time depends on the thickness of the roast and your slow cooker. Cook until a fork slides in easily.

How much liquid should I add to slow cooker pot roast?

For a rich, concentrated pot roast, start with 1 to 1½ cups / 240 to 360 ml. Use 2 cups / 480 ml for extra gravy. The slow cooker will create more liquid as the beef and vegetables cook, so the meat does not need to be fully covered.

How full should my slow cooker be?

For best results, aim for the slow cooker to be about half to two-thirds full. A cooker packed to the top can heat unevenly and may slow the recipe down.

Do potatoes and carrots go in at the beginning?

They can. Add potatoes and carrots at the beginning for soft, classic pot roast vegetables. For firmer vegetables, add them after the first 2 to 3 hours or halfway through cooking.

Do I have to sear the roast first?

No. Searing adds deeper flavor and a richer gravy, but the roast can still become tender without it. Season the beef well and use good broth, Worcestershire sauce, tomato paste, onion, and garlic.

What if the roast does not fit in the slow cooker?

Cut it into 2 or 3 large pieces. Avoid cutting it into small cubes unless you want a stew-like texture instead of classic pot roast.

How do I make gravy from the slow cooker juices?

Remove the meat and vegetables, then ladle 1½ to 2 cups of hot cooking juices into a saucepan. Simmer them, then whisk in a slurry made from 2 tablespoons cornstarch and 3 tablespoons cold water. Cook for 2 to 3 minutes until thickened.

Why is my pot roast still tough?

It usually needs more time. Chuck roast becomes tender after long, slow cooking. If it does not pull apart easily, keep cooking and check again near the end of the cooking window.

Can I use onion soup mix for slow cooker pot roast?

Yes. Use 1 packet onion soup mix with the broth, but reduce the added salt. Onion soup mix is already salty and flavorful, so taste the gravy before adding more seasoning.

Can I make pot roast ahead of time?

Yes. Pot roast often tastes even better the next day when the beef is stored with gravy. The sauce keeps it moist and makes reheating easier. Cook it fully, refrigerate the beef with the gravy, skim any hardened fat the next day, and reheat gently until hot.

Can I hold pot roast on warm?

Yes, once the roast is already tender. Keep it on WARM for 1 to 2 hours with gravy, as long as the food stays hot. Use LOW or HIGH to finish cooking a firm roast.

What if my slow cooker turns off during cooking?

If the slow cooker turns off during cooking and you do not know how long the food sat without heat, it is safest to discard it. If the interruption was very brief and the food is still steaming hot, restart cooking and use a thermometer, but do not guess with meat that may have cooled for a long time.

Can I freeze leftover pot roast?

Yes. Freeze sliced or shredded pot roast with gravy for the best texture. The gravy helps protect the beef so it reheats more gently. Use within 2 to 3 months. Potatoes can soften after freezing, so freeze the beef and gravy separately if you want the best reheated result.

What internal temperature should pot roast reach?

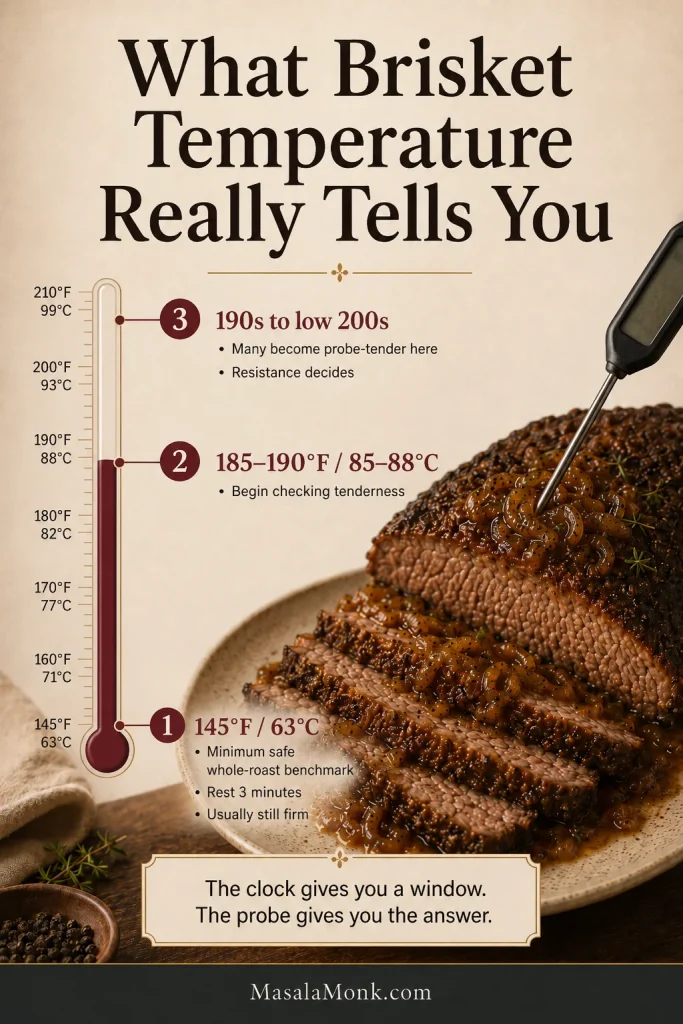
Beef roasts are safely cooked at 145°F / 63°C with a 3-minute rest, according to FoodSafety.gov’s safe minimum internal temperature chart. For pot roast, safe temperature is not the same as tenderness. Chuck roast usually needs much longer cooking before it becomes tender enough to pull apart.

Final Note

Slow cooker pot roast is at its best when it feels calm and generous: tender beef, soft vegetables, and enough gravy to spoon over every bite. Choose chuck roast when you can, keep the liquid controlled, and let the fork, not the clock, tell you when dinner is ready.

If you make it, leave a comment with your roast size, cut, slow cooker setting, liquid amount, and cook time — especially if you adjusted anything. Those details help other readers and make pot roast problems much easier to solve.

Posted on Leave a comment

Salisbury Steak Recipe: Easy Old-Fashioned Ground Beef Patties With Mushroom Gravy

Salisbury steak patties with mushroom onion gravy, mashed potatoes, and green beans on a cream plate.

This Salisbury steak recipe is for the night you want old-fashioned comfort without making anything complicated: tender oval beef patties, glossy mushroom onion gravy, and a plate that feels made for mashed potatoes. It cooks in about 40 minutes, all in one skillet, with enough gravy for potatoes, rice, or egg noodles.

It keeps the part people remember from TV dinners — the beef, the gravy, the mashed-potato comfort — and fixes the part nobody misses: dry meat, flat sauce, and that one-note salty taste. The first bite should feel like the Salisbury steak people remember, but the second bite should taste like the version they always wished it was.

Fork cutting into Salisbury steak with mushroom gravy and mashed potatoes in the background.
Look for a patty that cuts cleanly with a fork but still looks moist inside. That is the texture you get when the beef is handled lightly and simmered gently.

The goal is simple: juicy patties, savory gravy, and a dinner that feels familiar in the best way — not dry, bland, salty, or fussy. The secret is not making ground beef fancy. It is getting three humble things right: tender patties, browned flavor, and gravy that tastes like it had more time than it did.

Start with the classic skillet version: browned beef patties, mushroom onion gravy, and a low, gentle finish in the pan. From there, you can take the same method wherever your kitchen needs it: no mushrooms, brown gravy mix, cream of mushroom soup, frozen hamburger patties, baked Salisbury steak, Crock Pot-style dinners, or make-ahead leftovers without ending up with dry meat or salty gravy.

Quick Answer: How to Make Salisbury Steak

To make Salisbury steak, mix ground beef with egg, breadcrumbs, grated onion, Worcestershire sauce, ketchup, mustard, salt, and pepper. Shape the mixture into oval patties, brown them in a skillet, make mushroom onion gravy in the same pan, then simmer the patties in the gravy until cooked through.

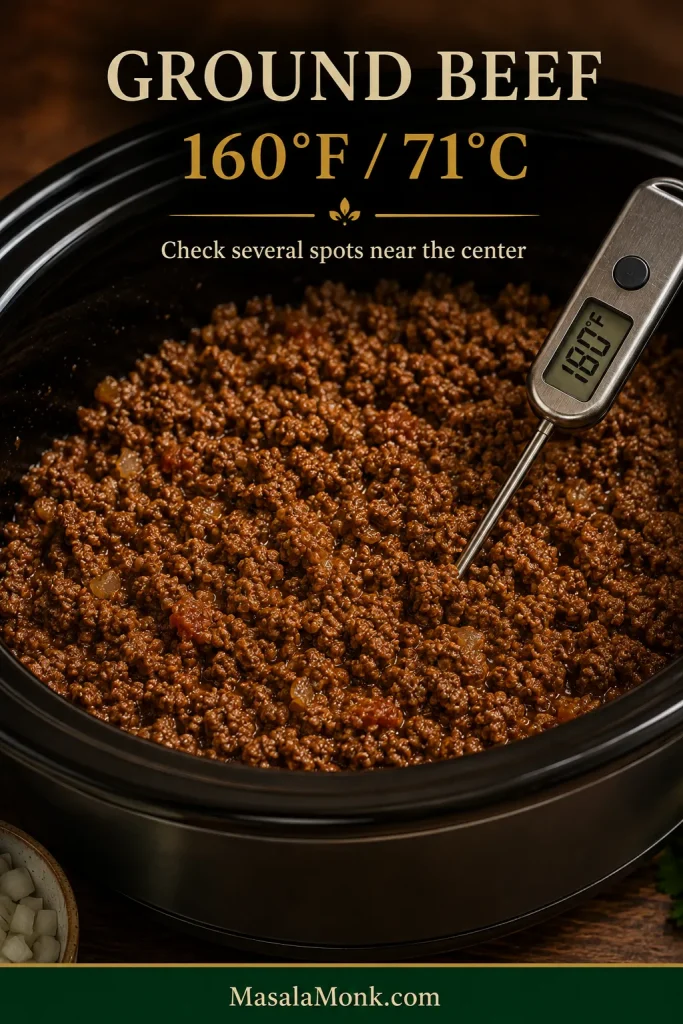
The best patties are about 3/4 inch / 2 cm thick. Brown them for 2–3 minutes per side, then simmer gently in gravy for about 8–10 minutes, or until the center reaches 160°F / 71°C.

Fast path: 1 lb / 454 g ground beef, or up to 500 g, makes 4 oval patties. Brown first, build the gravy in the same skillet, finish gently in the pan gravy, and serve with mashed potatoes, rice, or egg noodles.

This skillet view shows the core method: brown the patties, keep the flavor in the pan, and let the mushroom onion gravy finish the dinner.

Oval Salisbury steak patties simmering in mushroom onion gravy in a black skillet.
One skillet gives you better gravy because the browned bits stay in the pan. After the patties sear, the mushrooms, onions, and broth pick up that flavor.

Need the full flow? Jump to the step-by-step method · Choosing a shortcut? Compare the versions · Patties or gravy misbehaving? Go to patty fixes or gravy fixes.

Make This Salisbury Steak When

  • You have ground beef and want something cozier than plain burgers.
  • Dinner needs gravy, mashed potatoes, and an old-fashioned feel.
  • You want a skillet meal with pantry ingredients, not a complicated steakhouse recipe.
  • Your family likes hamburger steak, brown gravy, mushroom gravy, or onion gravy.
  • You need a recipe that includes shortcuts without losing the homemade feel.

If ground beef is doing dinner duty this week, this Korean beef bowl recipe is faster and saucier, while this American goulash recipe turns ground beef and macaroni into a one-pot comfort dinner.

Salisbury Steak Recipe Card

Salisbury Steak With Mushroom Onion Gravy

Tender old-fashioned ground beef patties browned in a skillet and simmered in rich mushroom onion gravy. Serve with mashed potatoes for the classic plate, or spoon the pan gravy over rice or egg noodles for an easy weeknight dinner.

Prep Time15 minutes
Cook Time25 minutes
Total Time40 minutes
Servings4
Yield4 Salisbury steak patties
CourseDinner
CuisineAmerican comfort food
MethodStovetop skillet
Finish Temp160°F / 71°C

Equipment

  • Large skillet or cast-iron skillet
  • Mixing bowl
  • Box grater or sharp knife for the onion
  • Whisk
  • Wide spatula
  • Instant-read thermometer

For the Salisbury Steak Patties

  • 1 lb / 454 g ground beef, or up to 500 g if that is your package size, preferably 80/20 or 85/15
  • 1 large egg
  • 1/2 cup panko, about 30 g, or 1/2 cup fine dry breadcrumbs, about 45–55 g
  • 1/4 cup finely grated onion, from about 1/2 small onion, or very finely minced onion
  • 1–2 garlic cloves, minced
  • 1 tablespoon ketchup
  • 1 teaspoon Worcestershire sauce
  • 1 teaspoon Dijon mustard, or 1/2 teaspoon dry mustard
  • 3/4 teaspoon salt
  • 1/2 teaspoon black pepper
  • 1 tablespoon oil, for browning
  • Optional: 1/2 teaspoon onion powder, garlic powder, or smoked paprika

For the Mushroom Onion Gravy

  • 2 tablespoons butter
  • 6–8 oz / 170–225 g mushrooms, sliced, such as cremini, baby bella, or white button mushrooms
  • 1/2 to 1 medium onion, sliced or finely chopped
  • 2 tablespoons all-purpose flour
  • 2 cups / 480 ml beef broth, low-sodium if possible
  • 1 teaspoon Worcestershire sauce
  • 1 teaspoon Dijon mustard
  • 1 tablespoon ketchup for classic flavor, or tomato paste for a deeper gravy
  • Black pepper, to taste
  • Salt, only if needed
  • Optional: 2–3 tablespoons cream for a richer gravy

Before you start: Slice the mushrooms and onion, measure the broth, and keep the flour nearby. Once the patties are browned, the gravy comes together quickly in the same skillet.

Shape and Brown the Patties

  1. Mix the patties gently. In a large bowl, combine ground beef, egg, breadcrumbs, grated onion, garlic, ketchup, Worcestershire sauce, Dijon mustard, salt, pepper, and any optional seasoning. Mix just until combined. Do not knead or overwork the beef.
  2. Shape the patties. Divide the mixture into 4 oval patties about 3/4 inch / 2 cm thick. Each patty should be about 4 oz / 115–125 g. If the mixture feels soft, chill the shaped patties for 10–15 minutes before browning.
  3. Brown the patties. Heat oil in a large skillet over medium-high heat. Brown the patties for 2–3 minutes per side. They should get color but do not need to cook through yet. That is exactly what you want.
Make the Gravy and Finish

  1. Cook the mushrooms and onions. Transfer the patties to a plate. In the same skillet, melt the butter. Add mushrooms and onion. Cook for 5–7 minutes, stirring often, until the mushrooms look smaller, darker, and no longer watery in the pan.
  2. Make the gravy. Sprinkle flour over the mushrooms and onions. Stir for 1 minute. Slowly whisk in beef broth, scraping up the browned bits from the skillet. Add Worcestershire sauce, Dijon mustard, ketchup or tomato paste, and black pepper.
  3. Finish in the gravy. Return the browned patties and any juices to the skillet. Spoon gravy over the top. Reduce heat to medium-low and simmer gently for 8–10 minutes, or until the patties reach 160°F / 71°C in the center.
  4. Taste and serve. Add salt only if needed. Stir in cream at the end if using. Serve hot with mashed potatoes, rice, egg noodles, or vegetables.

Recipe Cues Before Serving

Recipe cue: The gravy should coat a spoon, the patties should feel tender when pressed, and the skillet should be at a quiet simmer rather than a hard boil.

Common mistake to avoid: Do not fully cook the patties during the browning step. They only need color on the outside. They finish cooking gently in the gravy, which keeps them more tender.

Cooking from the card? Keep the cooking cues handy, or jump straight to the photo-guided steps.

Salisbury Steak Success Check: The patties should be browned on the outside, 160°F / 71°C in the center, and tender when pressed. The gravy should coat a spoon, move slowly over mashed potatoes, and taste savory before it tastes salty. If it tastes flat, add Worcestershire sauce, Dijon, black pepper, or a little tomato paste before adding more salt.

Why this method works: Grated onion keeps the patties moist, a quick sear builds flavor without drying the beef, and finishing in gravy lets the meat cook gently while the sauce picks up the pan flavor.

Use this success check before serving so the patties, gravy, and finish temperature all line up.

Salisbury steak success check showing browned patties, gravy, and cooking cues.
Before the plate goes out, check the cues that matter: browned patties, a fully cooked center, and gravy that coats the spoon without becoming gluey.

Salisbury Steak Cooking Cues at a Glance

Best beef80/20 or 85/15 ground beef
Patty size4 oval patties, about 4 oz / 115–125 g each
Patty thicknessAbout 3/4 inch / 2 cm thick
BinderEgg + breadcrumbs or panko
Main gravyMushroom onion gravy with beef broth
Browning time2–3 minutes per side
Finish methodLow, gentle finish in the gravy
Safe temperature160°F / 71°C in the center
Best sidesMashed potatoes, rice, egg noodles, green beans, peas, carrots

Once the patties are shaped and the skillet is hot, the rest is mostly patience: let the meat brown, let the mushrooms cook down, and let the pan gravy finish the job.

Table of Contents

Cooking now? Use the recipe card above. Want the why, the fixes, and the shortcut versions? Use the guide below.

What Is Salisbury Steak?

Most Salisbury steak starts with ground beef mixed with egg, breadcrumbs, onion, Worcestershire sauce, ketchup or mustard, and seasonings. The mixture is shaped into small oval steaks, browned in a skillet, and served with brown gravy, mushroom gravy, or onion gravy.

Despite the name, it is not cut from a whole steak. It is a ground beef dinner, closer to hamburger steak, but usually with more seasoning and binder mixed into the meat.

That is why it feels familiar before you even cook it: a browned beef patty, a pool of gravy, and something soft on the plate to catch every spoonful.

What This Recipe Is Built Around

The whole dinner works because the method stays simple: season the beef well, shape it gently, brown it properly, then let the pan gravy finish the job.

Think of it as the frozen-dinner idea rebuilt properly: better beef, better browning, and gravy that comes from the skillet instead of a tray. It keeps the familiar comfort of the old tray-dinner version, but gives you the part those dinners never really had: fresh pan flavor and gravy you can adjust at the stove.

Old-fashioned Salisbury steak dinner with mushroom gravy, mashed potatoes, and green beans.
Old-fashioned Salisbury steak works best when the nostalgia is backed by real skillet flavor. Browned patties and homemade gravy make it taste far better than the TV-dinner version people remember.

The flavor comes from small pantry ingredients that work together. Worcestershire sauce adds savoriness, ketchup gives a little sweet tang, mustard adds balance, mushrooms and onions build the gravy base, and beef broth gives it body.

Why This Salisbury Steak Recipe Works

  • Egg and breadcrumbs help the patties hold together while still keeping them tender.
  • Grated onion adds moisture without leaving large raw onion pieces in the beef.
  • Worcestershire, ketchup, and mustard give classic flavor with pantry ingredients.
  • Browning first builds flavor and helps the patties stay intact.
  • Same-pan gravy uses the browned bits left behind from the beef.
  • A quiet simmer finishes the patties without turning them tough.

Ingredients and Why They Matter

This recipe is forgiving, but the ingredients still have jobs to do. The patties need structure and moisture, while the gravy needs enough browning and seasoning to taste like more than thickened broth.

Ingredients for Salisbury steak including ground beef, egg, breadcrumbs, onion, mushrooms, broth, butter, flour, and seasonings.
The patty ingredients and gravy ingredients do different jobs. Keep the beef mixture gentle, then let the skillet build the sauce after browning.
IngredientWhat it does
Ground beef80/20 or 85/15 gives the best balance of flavor and tenderness.
EggHelps bind the patties so they do not fall apart in the skillet.
Breadcrumbs or pankoAdd structure and keep the patties from becoming dense.
Grated onionAdds moisture and old-fashioned flavor throughout the beef.
Worcestershire sauceAdds deep savory flavor.
KetchupGives a small sweet-tangy note that tastes familiar in the patties.
Dijon or dry mustardBalances the richness of the beef and gravy.
MushroomsGive the gravy body, earthiness, and classic mushroom-gravy flavor.
OnionSweetens as it cooks and makes the pan gravy feel fuller.
FlourThickens the gravy into a spoonable sauce.
Beef brothForms the main gravy liquid.

Once those pieces are in place, the recipe is less about perfect measurements and more about good cues: do not overmix, do not rush the browning, and do not let the gravy boil hard.

Best Ground Beef for This Recipe

Use 80/20 or 85/15 ground beef if you can. The patties need some fat to stay juicy, especially because they are browned first and then finished in gravy.

Very lean beef can work, but it is less forgiving. With 90/10 beef, mix gently, avoid overcooking, and consider adding a splash of milk or a little extra grated onion to keep the centers moist.

Panko gives a slightly lighter patty. Regular breadcrumbs make the texture softer and more old-fashioned. Crushed crackers also work well, especially if you like the classic pantry-dinner style.

Start with 1/2 cup. If the mixture feels too wet after mixing, add 1–2 tablespoons more and let it sit for a few minutes before shaping.

Useful Equipment

You do not need special equipment, but a few tools make this skillet dinner easier and more reliable.

  • Large skillet: A 12-inch skillet gives the patties room to brown instead of steam.
  • Wide spatula: Helps turn soft patties without breaking them.
  • Whisk: Keeps the gravy smooth when broth goes into the flour.
  • Box grater: Useful for grating onion into the patty mixture.
  • Instant-read thermometer: The easiest way to check that ground beef patties reached 160°F / 71°C.

How to Make Salisbury Steak

1. Mix the beef gently

Add the ground beef, egg, breadcrumbs, grated onion, garlic, ketchup, Worcestershire sauce, mustard, salt, and pepper to a bowl. Mix just until the ingredients are evenly combined.

Do not knead the beef like dough. Overmixing makes the patties firm and springy instead of tender.

Ground beef mixture for Salisbury steak patties in a bowl with visible breadcrumbs and onion.
A just-combined mixture is better than a compact one. If it holds its shape without being packed hard, it is ready for patties.

Optional flavor check: Cook a teaspoon-sized piece of the beef mixture in the skillet before shaping all the patties. Taste it, then adjust salt, pepper, Worcestershire sauce, or mustard if needed.

2. Shape oval patties

Divide the mixture into 4 portions and shape them into oval patties about 3/4 inch / 2 cm thick. They should look more like small chopped steaks than thick burger patties.

Four raw oval Salisbury steak patties shaped on parchment paper before cooking.
Smooth the edges and keep the thickness even so each oval patty browns at the same pace and sits flat in the gravy.

They do not need to look perfect. A slightly rustic oval patty feels right here; it just needs to be even enough to cook gently in the gravy.

If the mixture feels soft, that does not mean you ruined it. Chill the shaped patties for 10–15 minutes so they firm up before they hit the pan, or add 1–2 tablespoons breadcrumbs if the mixture is still loose.

Best Patty Size

For 1 lb / 454 g ground beef, or up to 500 g, make 4 oval patties. Each patty should be about 4 oz / 115–125 g and about 3/4 inch / 2 cm thick. This size browns well, cooks evenly, and still feels like old-fashioned Salisbury steak instead of a regular burger.

Side view of raw Salisbury steak patties showing about three quarter inch thickness.
Use thickness as a cooking control. Too thin dries out quickly, while too thick needs extra simmering and can tighten before the center is done.

The finished patties should be fork-tender like a soft meatball, not chewy like a dry burger.

3. Brown before simmering

Heat oil in a large skillet over medium-high heat. Brown the patties for 2–3 minutes per side. They should develop color, but they do not need to be cooked through yet.

Salisbury steak patties browning in a skillet before gravy is added.
At this stage, browning matters more than cooking through. The crust builds flavor first, then the patties finish safely and gently in the gravy.

If the patties stick, give them another 30 seconds before flipping. Meat usually releases more cleanly once a crust has formed.

Move them to a plate while you make the gravy. The browned bits left in the pan are part of the flavor base.

4. Make the gravy in the same skillet

Melt butter in the skillet, then cook the mushrooms and onions until they soften and begin to brown. This is where the dish starts to smell like dinner instead of just browned beef, so let the mushrooms and onions do their work before you rush in with the broth.

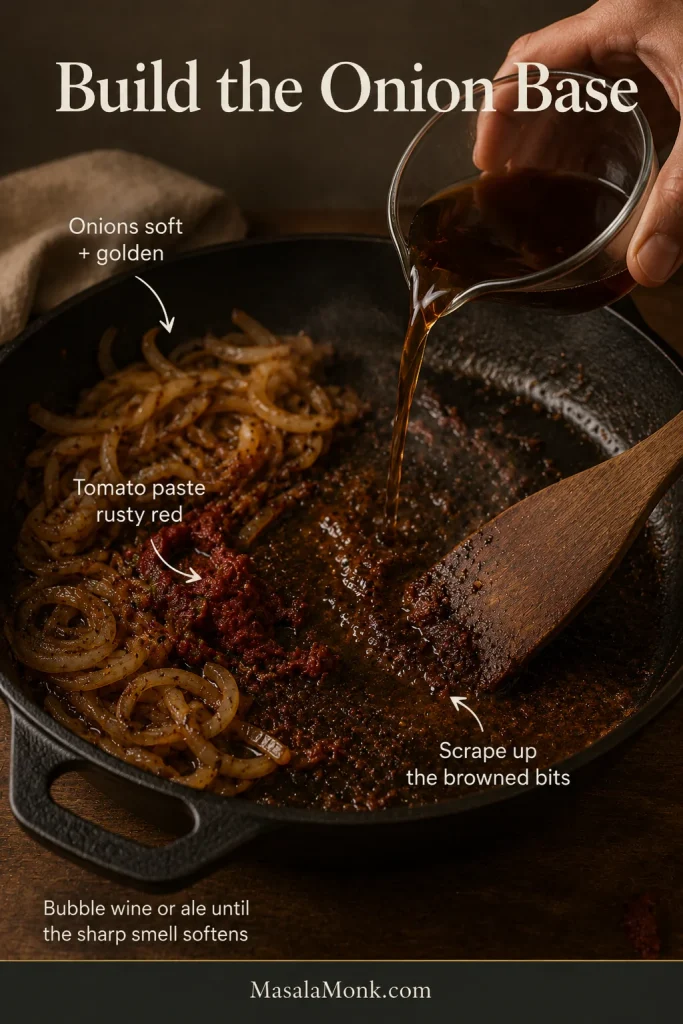
Stir in flour, then slowly whisk in beef broth with Worcestershire sauce, Dijon mustard, ketchup or tomato paste, and black pepper. As the broth goes in, scrape the bottom of the skillet to pull up the browned bits from the patties. Those bits are what make the gravy taste deeper instead of flat.

5. Finish gently in the gravy

Return the patties to the skillet and spoon gravy over them. Simmer gently for 8–10 minutes, or until the centers reach 160°F / 71°C.

Browned Salisbury steak patties returned to mushroom gravy in a skillet.
Bring the gravy down to a slow bubble before adding the patties back. Then the sauce warms the meat gently instead of tightening it.

The skillet should bubble quietly. If the gravy is boiling hard, lower the heat so the meat stays tender.

Salisbury steak patties gently simmering in mushroom gravy with small bubbles.
Keep the bubbles small once the patties return to the skillet. Gentle simmering keeps the beef tender, while hard boiling can make it tight.

Check the temperature and serve

A thermometer helps here because color alone can be misleading. The patties may look done before the center reaches the safe finish temperature, especially if they are thick.

Instant-read thermometer checking the center of a Salisbury steak patty.
Color alone is not the safest guide for ground beef. Use an instant-read thermometer and cook the center of each patty to 160°F / 71°C.

Back to recipe card · Next: mushroom onion gravy · Troubleshoot gravy · Back to top

How to Make Mushroom Onion Gravy

The gravy is half the comfort here. It should taste savory first, then rich — thick enough to coat a spoon but loose enough to flow over mashed potatoes.

Brown the mushrooms and onions

Cook the mushrooms and onions until the mushrooms release moisture and the onions begin to soften. The mushrooms are ready when they look smaller, darker, and no longer watery in the pan.

Before and after comparison of mushrooms and onions cooking down for Salisbury steak gravy.
Wait for mushroom moisture to cook off before adding broth. That gives the gravy a deeper base instead of a watery one.

Do not add broth the moment the vegetables hit the skillet. A few extra minutes here gives the pan gravy deeper flavor.

If you only have canned mushrooms, drain them well and add them after the onions soften. They will not brown like fresh mushrooms, but they still add mushroom flavor to the gravy.

Cook the flour briefly

Once the mushrooms and onions are ready, sprinkle flour over them and stir for about 1 minute. After the flour goes in, the vegetables should look lightly coated, not dry and clumpy.

Flour stirred into cooked mushrooms and onions in a skillet before adding broth.
Stir until no dry flour patches remain around the vegetables. A smooth coating now means smoother gravy once the broth goes in.

Whisk in broth slowly

Add the beef broth slowly while whisking. The gravy will look a little loose at first. That is normal. Once the broth is whisked in, it should look smooth; it will tighten as it simmers and becomes spoonable once the patties go back into the skillet.

The 2 tablespoons flour to 2 cups broth ratio makes a medium-thick gravy. Worcestershire sauce, Dijon, and ketchup or tomato paste round out the flavor.

Beef broth being poured into a skillet while mushroom onion gravy is whisked.
Slow pouring matters more than speed here. Each splash of broth should loosen the flour mixture before the next one goes in.

Need more mushroom-sauce detail? This creamy mushroom sauce recipe goes deeper into browning, texture, and no-cream adjustments.

Adjust the texture at the end

If the gravy is too thick, add broth or water a splash at a time. If it is too thin, simmer uncovered for a few minutes or use a small cornstarch slurry. The finished sauce should move slowly, not sit stiffly.

Mushroom onion gravy coating the back of a spoon.
Look for gravy that clings briefly, then flows. If it sits on the spoon like paste, add a splash of broth before serving.

Choose Your Salisbury Steak Version

This is the real-life pantry section: brown gravy mix, cream of mushroom soup, frozen hamburger patties, no mushrooms, baked Salisbury steak, and Crock Pot versions can all work if you keep the patties tender and the salt under control. Pick the route that matches your kitchen tonight, then use the main method as the base.

Shortcut Decision Table

What you have or wantBest route
You want the classic homemade versionUse the main mushroom onion gravy recipe.
You have no mushroomsMake onion gravy instead. Cook the onions longer so the sauce still tastes deep and sweet.
You have a brown gravy packetUse the liquid amount on the packet, but replace water with low-sodium beef broth. Taste before adding salt.
You have cream of mushroom soupStart with 1 can condensed soup plus 1/2 cup beef broth. Add another 1/4 cup broth if it looks too thick.
You want more onion flavorUse extra onions or a French onion-style gravy, but watch the salt if using soup mix.
You want a hands-off dinnerBrown the patties first, then use the Crock Pot section below for a softer, saucier finish.
You want to bake itBrown the patties, cover with hot gravy, and bake until 160°F / 71°C.
You have frozen hamburger pattiesThaw first if you can. Frozen works, but fresh or thawed patties brown better.
You want a kid-friendly versionShape the beef mixture into meatballs and simmer them in gravy.
You want a lighter dinnerUse leaner beef or turkey and serve with vegetables or cauliflower mash.

Shortcut Salt Rule

You do not have to make every version from scratch to get a good dinner. The trick is to keep the patties tender, keep the gravy balanced, and avoid stacking too much salt when using packets, canned soup, or bouillon.

Shortcut rule: If you use gravy mix, bouillon, canned soup, or onion soup mix, choose low-sodium broth and do not add extra salt until the gravy is finished.

Salisbury Steak vs Hamburger Steak

These two comfort-food dinners overlap, but they are not always exactly the same.

DishWhat it usually means
Salisbury steakSeasoned ground beef patties mixed with egg, breadcrumbs, onion, Worcestershire sauce, ketchup or mustard, then served with gravy.
Hamburger steakA simpler seasoned ground beef patty, often served with onion gravy or brown gravy.
Burger steakOften used for Filipino or Jollibee-style ground beef patties with mushroom gravy, usually served with rice.

The easiest way to think about it: hamburger steak is usually closer to a seasoned burger patty, while Salisbury steak eats more like a meatball-style patty with gravy.

For a regular weeknight dinner, the important part is simple: if you want ground beef patties with mushroom gravy, onion gravy, or brown gravy, this recipe gives you the right result.

Salisbury Steak Variations and Shortcuts

The base recipe is the safest place to start. The shortcut versions are there for the nights when the pantry, the freezer, or the clock makes the choice for you.

Think of these as kitchen routes, not separate recipes. The browning-and-gravy logic stays the same; you are simply changing the sauce, cooking method, or shortcut ingredient.
Choose one route and stay with it. Mixing every shortcut at once is usually how the gravy becomes too salty or too thick.
No-Mushroom Salisbury Steak

Skip the mushrooms and make onion gravy instead. Use 1 large sliced onion, cook it in butter until soft and lightly golden, then add flour and beef broth. Worcestershire sauce, Dijon, and a small spoon of ketchup or tomato paste help the gravy taste full.

This is the easiest route for anyone who dislikes mushrooms but still wants the old-fashioned gravy dinner.

Salisbury steak with onion gravy, mashed potatoes, and green beans without mushrooms.
If mushrooms are not an option, onions can still carry the gravy. Cook them until soft and golden so the sauce tastes sweet, savory, and complete.

Onion Gravy Version

Want the gravy to taste more oniony and old-fashioned? Use 1 large onion or 2 medium onions, slice them thin, and cook them until soft, sweet, and lightly browned. The deeper the onions cook, the richer the pan sauce tastes.

If onion gravy is your favorite part of the plate, this smothered pork chops recipe uses the same brown-first, finish-gently logic with a rich onion gravy.

Brown Gravy Mix Shortcut

Brown gravy mix is useful when speed matters. For most packets, use the liquid amount listed on the package, but replace water with low-sodium beef broth. That keeps the shortcut easy while making the gravy taste more like dinner than a packet.

If you are also using bouillon, canned soup, or onion soup mix, start with half the packet or taste carefully before adding the full amount. These shortcuts can stack salt quickly.

Brown gravy mix packet with beef broth and brown gravy for a Salisbury steak shortcut.
For Salisbury steak with brown gravy mix, keep the packet ratio but use low-sodium beef broth instead of water. Then season only after tasting.

Cream of Mushroom Soup Version

A can of cream of mushroom soup can work when you want the old-school pantry version. Start with 1 can condensed cream of mushroom soup plus 1/2 cup beef broth. Add another 1/4 cup broth if the sauce looks too thick after simmering.

Add Worcestershire sauce and black pepper so it tastes more like a proper gravy. If you use cream soup with brown gravy mix or onion soup mix, reduce the added salt and use low-sodium broth.

Cream of mushroom soup, beef broth, and creamy mushroom gravy for Salisbury steak.
Start thick and loosen slowly. One can plus 1/2 cup broth gives you control, and extra broth can be added only if the sauce needs it.

If you like creamy mushroom gravy dinners, this cream of mushroom pork chops recipe uses a similar pantry-friendly sauce direction.

French Onion Salisbury Steak

French onion Salisbury steak leans into the onion-gravy side of the dish. Use extra sliced onions and beef broth, or replace part of the broth with French onion soup. Onion soup mix can work too, but start with less because it is salty.

For deeper onion-gravy flavor ideas, this French onion soup recipe shows how cooked-down onions, broth, and savory boosters build that sweet, rich onion base.

Baked Salisbury Steak

To bake Salisbury steak, brown the patties first, then place them in a 9×13 / 13×9 baking dish. Pour hot gravy over the patties, cover with foil, and bake at 375°F / 190°C for 20–25 minutes, or until the patties reach 160°F / 71°C.

Let the dish rest for 5–10 minutes before serving so the gravy settles and the patties stay juicy.

Baked Salisbury steak patties in a dish with brown mushroom gravy.
Covering the dish traps moisture while hot gravy finishes the patties. Resting afterward lets the sauce settle before serving.

Crock Pot Salisbury Steak

The slow cooker version deserves its own method because the patties, gravy, and timing behave differently. Brown the patties first for the best flavor, place them in the slow cooker with onions, mushrooms if using, and gravy, then cook on low until tender and 160°F / 71°C in the center.

This skillet version is faster. Use this Crock Pot Salisbury steak recipe when you want the hands-off route with a softer, saucier finish, frozen patty tips, cream soup shortcuts, and slow-cooker gravy guidance.

Salisbury steak patties with mushroom onion gravy in a slow cooker.
Slow cooking makes the patties extra soft and saucy; browning first keeps the flavor from tasting steamed.

Frozen Hamburger Patties

Fresh homemade patties have the best texture, but frozen hamburger patties can work for a shortcut dinner.

Frozen patties work best when they are thawed first, patted dry, seasoned, browned, and then simmered in gravy. If cooking from frozen, use a quiet simmer and check the center with a thermometer. The patties must reach 160°F / 71°C. Expect a softer, less homemade texture than fresh patties.

For a separate burger-focused method with time, temperature, and frozen-patty cues, see this air fryer burgers recipe.

Shortcut guide showing frozen patties, thawed patties, and browned patties for Salisbury steak.
Thawing and drying the patties helps them sear instead of steam, which makes the shortcut taste much closer to homemade.

Meatball Version

For a kid-friendly twist, shape the same beef mixture into meatballs instead of oval patties. Brown the meatballs, then simmer them in mushroom gravy until cooked through. This gives you the same flavor in smaller pieces that are easy to serve over rice or noodles.

Gluten-Free Version

Use gluten-free breadcrumbs or crushed gluten-free crackers in the patties. For the gravy, skip the flour and thicken with a cornstarch slurry instead. Check the labels on Worcestershire sauce, broth, gravy packets, canned soup, and onion soup mix.

Lighter Version

Use leaner beef or ground turkey, reduce the butter slightly, and serve the patties with vegetables, cauliflower mash, or salad. Leaner meat dries out faster, so cook gently and stop once the patties reach 160°F / 71°C.

Back to choose your version · Fix patties · Fix gravy · Serving ideas · Back to top

Patty Fixes: Falling Apart, Tough, or Dry

If the mixture feels imperfect, do not panic. Salisbury steak is forgiving before it hits the pan. A little more breadcrumb, a short chill, or a splash of moisture can usually bring the patties back into shape.

The fastest fix before cooking: If the mixture feels too soft, add 1–2 tablespoons breadcrumbs and chill the shaped patties for 10–15 minutes. If the mixture feels dry and crumbly, add a spoon of grated onion or a tiny splash of milk.

If the patties feel too soft, break while flipping, or fall apart in the gravy, use this troubleshooting guide before changing the whole recipe.

Troubleshooting guide showing how to fix Salisbury steak patties with breadcrumbs, chilling, and gentle flipping.
When Salisbury steak patties fall apart, fix the structure before blaming the pan. Add breadcrumbs, chill the mixture briefly, and flip with a wide spatula.

Why Salisbury Steak Patties Fall Apart

ProblemLikely causeFix
Breaks when flippingFlipped too early or pan was not hot enoughLet the first side brown and use a wide spatula.
Mixture feels wetToo much onion or not enough binderAdd a little more breadcrumbs and rest the mixture briefly.
Falls apart in gravyGravy is boiling too hardLower the heat to a gentle simmer.
Too soft to handleMixture needs time to firm upChill shaped patties for 10–15 minutes.
Cracks around edgesPatties are too loosely shaped or too thinShape gently but firmly and keep them about 3/4 inch thick.

Why Salisbury Steak Gets Tough

  • Overmixed beef: Mix only until combined.
  • Very lean beef: Use 80/20 or 85/15 for a juicier result.
  • Patties too thick: Thick patties take longer to cook through.
  • Hard simmer: Keep the gravy bubbling gently.
  • Overcooking: Stop once the patties reach 160°F / 71°C.

Why Salisbury Steak Turns Dry

Dry patties usually come from very lean beef, patties that are too thin, or cooking them too far past 160°F / 71°C. Use beef with a little fat, keep the patties evenly shaped, and let the gravy finish the cooking instead of leaving the meat on high heat.

Gravy Fixes: Too Thin, Too Thick, Salty, or Bland

The gravy should be thick enough to spoon over the patties but not so thick that it turns gluey. Most problems are easy to fix before serving.

Taste the gravy before you add salt. Most Salisbury steak problems are easier to fix before the patties go back into the pan.

Gravy texture guide showing thin gravy, spoonable gravy, and gravy that is too thick.
Gravy is easiest to fix by texture. Simmer if it is thin, loosen with broth if it is thick, and aim for a spoonable sauce that still moves.

Quick Fixes for Gravy Problems

Gravy problemHow to fix it
Too thinSimmer uncovered for a few minutes, or stir in 1 tablespoon cornstarch mixed with 1 tablespoon cold water.
Too thickAdd beef broth or water, a splash at a time.
Too saltyAdd unsalted broth or water. Avoid stacking gravy mix, bouillon, and onion soup mix without tasting.
Too blandAdd Worcestershire sauce, black pepper, Dijon, tomato paste, or a little beef bouillon.
LumpyWhisk while adding broth slowly. If needed, strain and return the gravy to the skillet.
Not brown enoughBrown the mushrooms and onions longer and scrape up the browned bits from the pan.
PastyCook the flour briefly before broth goes in, then loosen with more broth if needed.

Salt and Leftover Gravy Notes

Salt is the one thing to watch most closely. Beef broth, Worcestershire sauce, gravy packets, canned soup, bouillon, and onion soup mix can stack salt quickly, so dilute with unsalted broth or water before adding more seasoning.

Leftover gravy also thickens as it chills. Loosen it with a splash of broth or water when reheating.

Once the gravy is right, jump to serving ideas or return to the recipe card.

What to Serve With Salisbury Steak

This is the kind of gravy dinner where the side dish matters. Because the gravy is rich, the best plates usually have one soft side to catch the sauce and one simple vegetable to balance it.

For the most dependable plate, give the gravy somewhere soft to land and add something green for contrast. That keeps the dinner cozy without making it feel one-note.

Labeled Salisbury steak plate with one patty, mashed potatoes, green beans, and gravy touching all three.
Use gravy as the connector, not just a topping. It should reach the patty, the soft side, and the vegetable so every bite feels balanced.

Spoon the gravy over the patties at the table if you can. It is a small thing, but it makes the whole plate feel more generous without feeling expensive.

Dinner styleBest sides
Classic comfort plateMashed potatoes, peas, green beans, corn
Easy weeknight dinnerWhite rice, egg noodles, roasted carrots, simple salad
Extra cozyGarlic mashed potatoes, buttered noodles, dinner rolls
Lighter plateCauliflower mash, steamed broccoli, roasted vegetables, salad
Family-style dinnerMashed potatoes, green beans, glazed carrots, biscuits

The most classic plate is Salisbury steak, creamy mashed potatoes, and green beans. For a richer side, use garlic mashed potatoes. Rice and egg noodles are also excellent because they soak up the mushroom gravy without competing with it.

For a holiday-style green bean side, this green bean casserole recipe fits the gravy-and-comfort theme well.

Storage, Freezing, and Reheating

Leftovers are one of the quiet wins of this recipe because the gravy keeps the meat from drying out.

How to store leftovers

Store leftover Salisbury steak with the gravy in an airtight container in the refrigerator for 3–4 days. Keeping the patties in gravy helps them stay moist.

How to freeze Salisbury steak

For convenience, cool the patties and gravy completely, then freeze them together in a freezer-safe container for up to 2–3 months. For the best texture, freeze the patties and gravy separately, then reheat them together gently after thawing.

How to reheat without drying it out

Reheat gently on the stovetop over low heat with a splash of broth or water to loosen the gravy. You can also microwave in short intervals, spooning sauce over the patties between bursts.

Avoid high heat when reheating because it can make the patties firm or rubbery.

Salisbury steak leftovers stored with gravy and reheated in a skillet with broth.
The key is moisture: store with sauce, then reheat gently with a splash of broth so the gravy loosens before the meat overcooks.

Make-Ahead Tips

You can shape the patties up to 24 hours ahead and refrigerate them covered. This can help them hold together when browning. Let the patties sit at room temperature for about 10 minutes before cooking so they are not ice-cold in the center.

The full dish also reheats well because the patties sit in gravy. If the sauce thickens in the refrigerator, add a splash of broth or water when reheating.

Ground Beef Safety Note

Because this recipe uses ground beef, cook the patties to 160°F / 71°C in the center. An instant-read thermometer keeps you from guessing or overcooking them.

USDA guidance: Ground Beef and Food Safety.

FAQs About Salisbury Steak

What is Salisbury steak made of?

Most Salisbury steak starts with ground beef mixed with egg, breadcrumbs, onion, Worcestershire sauce, ketchup or mustard, and seasonings. The mixture is shaped into oval patties, browned, and finished in gravy.

Is Salisbury steak the same as hamburger steak?

They are similar, but not always identical. Salisbury steak usually has binders and seasonings mixed into the meat, while hamburger steak is often a simpler seasoned beef patty with gravy.

Which ground beef works best?

80/20 or 85/15 ground beef gives the best flavor and tenderness. Very lean beef works, but it needs gentler cooking because it dries out faster.

Why is my Salisbury steak falling apart?

The mixture may be too wet, the patties may need more binder, or they may have been flipped before a crust formed. Use egg and breadcrumbs, shape evenly, brown before simmering, and chill soft patties for 10–15 minutes before cooking.

How do you keep the patties tender?

Use beef with some fat, mix gently, avoid overcooking, and simmer the patties gently in gravy. Do not boil the sauce hard after the patties go back into the skillet.

Does Salisbury steak need egg?

Egg helps bind the patties so they are easier to brown and simmer without falling apart. If you skip it, keep the mixture slightly firmer, chill the shaped patties, and flip them gently.

Panko, breadcrumbs, or crackers — which works best?

All three can work. Panko gives a slightly lighter texture, regular breadcrumbs make a softer old-fashioned patty, and crushed crackers give a classic pantry-style result.

Can I make Salisbury steak without mushrooms?

Yes. Skip the mushrooms and lean on onions instead. Cook them until soft and golden before building the gravy so the sauce still tastes full.

How do I use brown gravy mix for Salisbury steak?

Use the liquid amount on the packet, but replace water with low-sodium beef broth. Taste before adding salt, especially if you are also using bouillon, canned soup, or onion soup mix.

What is the best way to use cream of mushroom soup?

Start with 1 can condensed cream of mushroom soup and 1/2 cup beef broth. Add another 1/4 cup broth if the sauce looks too thick after simmering.

How thick should the patties be?

About 3/4 inch / 2 cm thick is a good target. Patties that are too thick take longer to cook and can dry out before the center reaches 160°F / 71°C.

How do I know the patties are fully cooked?

The patties should reach 160°F / 71°C in the center because they are made from ground beef. Use an instant-read thermometer for the most reliable result.

How do I bake Salisbury steak instead of simmering it?

Brown the patties first, place them in a baking dish, cover with hot gravy, and bake at 375°F / 190°C for 20–25 minutes, or until fully cooked in the center.

Do frozen hamburger patties work for Salisbury steak?

Yes. They are a useful shortcut, though fresh or thawed patties brown better and taste more homemade. If cooking from frozen, simmer gently and check that the center reaches 160°F / 71°C.

How far ahead can I make Salisbury steak?

You can shape the patties up to 24 hours ahead, or refrigerate the cooked patties and gravy for 3–4 days. The finished dish also freezes well for 2–3 months.

What sides go best with Salisbury steak?

Mashed potatoes are the classic choice. Rice, egg noodles, green beans, peas, corn, roasted carrots, broccoli, and simple salads also work well.

Final Notes

The best version does not need to be complicated. A little fat in the beef, a gentle hand with the mixing, a proper sear, and a gravy that has time to taste rich are what turn plain hamburger patties into the kind of old-fashioned dinner people actually remember.

Do not chase perfection here. A slightly uneven patty, a little extra onion, or a gravy that needs one more splash of broth is normal. This is the kind of dinner that forgives small mistakes.

Serve it with mashed potatoes for the classic plate, rice for an easy weeknight dinner, or egg noodles when you want the gravy to do most of the work. If you made the no-mushroom, frozen-patty, brown-gravy-mix, cream-of-mushroom, baked, or Crock Pot version, leave a comment with what you used and how the gravy turned out. Those real kitchen notes help the next cook choose their route.

Back to recipe card · Back to table of contents · Back to top

Posted on Leave a comment

Crock Pot Salisbury Steak Recipe

Two Salisbury steak patties covered with mushroom onion brown gravy over mashed potatoes, served with green beans on a cream plate.

This crock pot Salisbury steak is the slow cooker dinner you make when mashed potatoes are already on your mind. Tender ground beef patties cook in rich brown gravy with soft onions, mushrooms if you like them, and enough sauce to spoon over everything on the plate.

A good crock pot Salisbury steak is really a gravy dinner with beef patties in the middle, so the sauce has to be treated like the main event. It should taste beefy, oniony, and rich — not thin, salty, or steamed.

You also get clear shortcut options for thawed hamburger patties, cream of mushroom soup, brown gravy mix, onion soup mix, French onion soup, and meatballs, because some nights dinner starts with the pantry or freezer. The goal is not to pretend packets and cans do not exist. Instead, use them in a way that still tastes balanced, cozy, and cared for.

If you want the classic side ready too, this mashed potatoes recipe is built for creamy, fluffy potatoes that can hold a lot of gravy.

Quick Answer: Can You Make Salisbury Steak in a Crock Pot?

Yes. Salisbury steak works well in a crock pot when the patties are shaped firmly, browned first if possible, and cooked in a flavorful sauce. For homemade browned patties, cook on low for 4 to 5 hours, or on high for 2½ to 3½ hours, until the centers reach 160°F / 71°C.

The sauce will usually look thinner while it cooks because slow cookers trap moisture. Give it its final 15 to 20 minutes after the cornstarch slurry; that is when it turns from slow cooker liquid into spoonable gravy.

This is not a fussy dinner. It is the kind of meal that feels best when the gravy is generous, the potatoes are soft, and nobody is asking what else is for dinner.

Remember this: mix the beef gently, brown first if you can, cook on low when possible, and save the real thickening for the end.

Make This When

Make this when you want the slow cooker to help, but you still want the plate to feel like real comfort food.

  • You want an easy slow cooker dinner that still feels old-fashioned and cozy.
  • A sauce-heavy meal for mashed potatoes, noodles, or rice sounds right.
  • Pantry shortcuts need to taste balanced, not flat or too salty.
  • Frozen hamburger patties need to become a proper dinner.
  • Broken patties, watery gravy, tough beef, or bland sauce need clear fixes.

This is the kind of dinner that smells like it has been waiting for mashed potatoes all afternoon. Keep the sides simple and do not ration the gravy.

Crock Pot Salisbury Steak Recipe

Tender ground beef patties slow cooked in rich brown mushroom onion gravy until the sauce is glossy, spoonable, and ready for mashed potatoes, egg noodles, rice, or cauliflower mash.

Prep Time
15 minutes
Browning Time
6 to 8 minutes
Cook Time
4 to 5 hours on low
Thickening Time
15 to 20 minutes
Total Time
About 5 to 6 hours
Servings
6 patties
Best Crock Pot
6-quart oval
Patty Size
About 4 oz / 113 g each
Safe Beef Temp
160°F / 71°C

Ingredients

For the Salisbury Steak Patties

  • 1½ lb / 680 g lean ground beef
  • ½ cup / about 45 to 55 g plain breadcrumbs, or ⅓ cup / about 20 to 25 g panko
  • 1 large egg
  • 3 tbsp / 45 ml milk
  • 1 tbsp / 15 ml Worcestershire sauce
  • ½ tsp salt, or less if using onion soup mix
  • ½ tsp black pepper
  • ½ tsp garlic powder
  • ½ tsp onion powder
  • 1 tbsp oil, for browning

For the Brown Gravy

  • ½ medium onion, thinly sliced, about 60 to 75 g
  • 4 to 8 oz / 113 to 227 g mushrooms, sliced, optional
  • 2 cups / 480 ml low-sodium beef broth
  • 1 packet brown gravy mix, about 0.87 to 1 oz / 25 to 28 g
  • 1 tbsp / 15 ml Worcestershire sauce
  • 1 tbsp / 15 ml ketchup
  • 1 tsp / 5 ml Dijon mustard
  • 1 small garlic clove, minced, or ½ tsp garlic powder
  • 1 to 2 tbsp / 8 to 16 g cornstarch
  • 1 to 2 tbsp / 15 to 30 ml cold water

Optional Shortcut Add-Ins

  • ½ packet onion soup mix, for stronger onion flavor
  • 1 can cream of mushroom soup, usually 10.5 oz / 298 g, for a creamier gravy
  • 1 can golden mushroom soup, usually 10.5 oz / 298 g, for deeper mushroom flavor
  • 1 can French onion soup, usually 10.5 oz / 298 g, to replace part of the beef broth
  • 1 can cream of chicken soup, usually 10.5 oz / 298 g, for a milder creamy shortcut
  • 1 packet au jus mix, to use instead of brown gravy mix

Instructions

  1. Mix the patties gently. In a large bowl, combine ground beef, breadcrumbs, egg, milk, Worcestershire sauce, salt, pepper, garlic powder, and onion powder. Mix only until combined. Avoid squeezing or overworking the meat.
  2. Shape the patties. Divide into 6 oval patties, about 4 oz / 113 g each. Keep them even in thickness so they cook at the same pace.
  3. Brown the patties. Heat oil in a skillet over medium-high heat. Brown patties for 2 to 3 minutes per side. They do not need to cook through.
  4. Layer the crock pot. Add onions and mushrooms to the bottom of a 6-quart oval slow cooker. Place browned patties on top, overlapping only if needed.
  5. Whisk the gravy. In a bowl, whisk beef broth, brown gravy mix, Worcestershire sauce, ketchup, Dijon, and garlic until smooth.
  6. Slow cook. Pour gravy over the patties. Cover and cook on low for 4 to 5 hours, or on high for 2½ to 3½ hours, until the patties reach 160°F / 71°C.
  7. Thicken the gravy. Mix 1 tablespoon cornstarch with 1 tablespoon cold water. Stir into the hot gravy, cover, and cook for 15 to 20 minutes. Repeat with another tablespoon of cornstarch and water if you want it thicker.
  8. Serve. Let the patties rest in the gravy for a few minutes, then serve over mashed potatoes, egg noodles, rice, or cauliflower mash.

Recipe Notes

  • Low heat gives the best texture. High heat works, but the patties can become firmer.
  • If your slow cooker runs hot, start checking near the early end of the time range.
  • Keep the patties about ½ to ¾ inch thick so they hold together and cook evenly.
  • Do not overfill the slow cooker. The patties need enough space for heat and gravy to move around them.
  • Use low-sodium beef broth if adding gravy mix, onion soup mix, au jus, or canned soup.
  • For extra gravy, increase broth to 2½ cups / 600 ml and use extra slurry before serving.
  • You can shape or brown the patties up to 1 day ahead and refrigerate them covered until ready to assemble.

This finished-dish view gives readers a quick visual reference after the recipe card: tender patties, generous brown gravy, and a plate that works with potatoes, noodles, or rice.

Vertical recipe image showing crock pot Salisbury steak with tender patties, rich brown gravy, and mashed potatoes.
Tender patties, rich brown gravy, and a soft side underneath make this slow cooker Salisbury steak feel like a complete comfort-food dinner.

Need a specific fix? Jump to gravy thickening, frozen patties, shortcut gravy options, or troubleshooting.

Before You Start: Crock Pot Salisbury Steak Basics

Best beef amount1½ lb / 680 g for 6 patties
Best patty sizeAbout 4 oz / 113 g each
Best thicknessAbout ½ to ¾ inch thick
Best slow cooker6-quart oval slow cooker
Best settingLow for 4 to 5 hours
Fast settingHigh for 2½ to 3½ hours
Safe beef temperature160°F / 71°C in the center
Best gravy finishUse a cornstarch slurry near the end
Best serving baseMashed potatoes, egg noodles, or rice

Slow cookers vary, so use the time range as a guide. Thick patties, tightly stacked patties, thawed frozen patties, and smaller cookers may need more time.

The win is simple: beef that stays together, sauce that tastes deeper than a packet, and enough gravy for the potatoes to disappear under it.

Choose Your Salisbury Steak Version

Below, the main recipe branches into homemade patties, easy brown gravy, and the shortcut ingredients already in your pantry or freezer.

Salisbury steak version guide showing six options: classic, creamy, onion gravy, freezer shortcut, meatballs, and no mushrooms, with cook time and temperature reminders.
This version guide helps you choose the best route for your pantry: classic brown gravy, creamy mushroom, onion gravy, freezer shortcut, meatballs, or no mushrooms. After that, use temperature as the final doneness check.
GoalUse This RouteWatch This
Classic crock pot Salisbury steakHomemade browned patties, beef broth, brown gravy mixThicken near the end if the sauce looks loose
More homemade flavorAdd Worcestershire, Dijon, ketchup, onions, mushrooms, garlicMix the beef gently
Frozen hamburger patty shortcutThaw raw frozen patties safely first, then brown and slow cookExpect extra liquid if patties were frozen
Fully cooked frozen pattiesHeat thoroughly in gravy according to package guidancePull them before they turn firm
Creamier gravyAdd cream of mushroom or golden mushroom soupReduce salt
Milder creamy shortcutAdd cream of chicken soupLess beefy; add Worcestershire or au jus
Onion gravy flavorAdd onion soup mix or French onion soupUse low-sodium broth
No mushroomsSkip mushrooms and add extra onionsAdd flavor with Worcestershire and Dijon
Meatball versionUse frozen or homemade meatballsCook until hot and thicken the sauce

Best Route for the First Time

For your first batch, start with the classic browned-patty version. If you came here because of freezer patties or canned soup, use the shortcut sections below and keep the salt low.

Once you know your route, the job is simple: keep the beef sturdy, keep the sauce spoonable, and keep the salt from taking over.

Choosing a shortcut? Go straight to cream of mushroom, French onion, frozen hamburger patties, or meatballs and variations.

Why This Crock Pot Salisbury Steak Works

Slow cookers are great at tenderness, but they are not great at reducing sauce. That is why this recipe gives the beef a quick browned edge first, then waits until the end to thicken the gravy.

The beef stays tender because it is mixed gently with breadcrumbs, egg, and milk instead of being packed tight. Browning adds flavor and helps each oval hold its shape once it settles into the sauce.

The sauce starts simple — beef broth and brown gravy mix — then gets enough Worcestershire, Dijon, ketchup, onion, mushroom, and garlic to taste more like dinner than a packet.

Save the real thickening for the end. By then, the beef is cooked, the onions have softened, and you can turn the cooking liquid into glossy spoon-over-potatoes gravy without guessing.

Think of it this way: give the beef structure, give the sauce body, and keep the salt under control.

That same slow-cooker liquid-control problem shows up in slow cooker cottage pie too; the lid keeps everything tender, but it does not let sauce reduce like an open pan.

The comfort-food rule: Salisbury steak should taste browned, beefy, and gravy-rich — not steamed, watery, or packet-salty.

Ingredients You’ll Need

Nothing here is fancy. The balance is what matters: enough binder to keep the beef together, enough seasoning to make the sauce savory, and enough restraint that the shortcut ingredients do not take over.

Overhead ingredient board with ground beef, breadcrumbs, egg, milk, sliced onion, mushrooms, beef broth, brown gravy mix, Worcestershire sauce, Dijon, ketchup, garlic, and cornstarch.
These ingredients build flavor in stages: beef and breadcrumbs help the patties hold together, broth and gravy mix create body, and Worcestershire, Dijon, onions, and mushrooms add the deeper Salisbury steak flavor.

Ground Beef

Use lean ground beef, preferably 85/15 or 90/10. It has enough fat for flavor without making the sauce greasy. If your beef is fattier, brown the patties first and skim excess fat before tightening the sauce.

Breadcrumbs, Egg, and Milk

Breadcrumbs help the patties hold together, egg binds the mixture, and milk keeps the crumbs from making the beef dense. The mixture should feel moist and shapeable, not wet or crumbly.

Worcestershire, Dijon, and Ketchup

These small ingredients make the brown sauce taste more complete. Worcestershire adds savory depth, Dijon gives balance, and ketchup adds a little sweetness and body. In the final dish, they should blend into the gravy instead of standing out separately.

Onions and Mushrooms

Onions soften into the gravy and make it taste fuller. Mushrooms add that classic Salisbury steak flavor, but this dinner does not fall apart without them; extra onions can carry the sauce just fine.

Love a mushroom-heavy gravy? This creamy mushroom sauce goes deeper into building that rich mushroom flavor.

Beef Broth and Brown Gravy Mix

Beef broth gives the sauce a stronger base than water, especially after a few hours in the slow cooker. Brown gravy mix keeps the recipe easy and familiar, while the extra seasonings make it taste less like a packet and more like dinner.

How to Make Crock Pot Salisbury Steak

The slow cooker does the long work, but the first few minutes decide the final texture. Shape the patties gently, brown them quickly, and let the sauce carry the rest.

1. Mix the Patty Ingredients

In a large bowl, combine the ground beef, breadcrumbs, egg, milk, Worcestershire sauce, salt, pepper, garlic powder, and onion powder. Stir only until the ingredients come together. Overmixing makes the patties heavy and tough.

Bowl of gently mixed Salisbury steak patty mixture with ground beef, breadcrumbs, egg, milk, and seasonings.
Mix just until the beef mixture comes together. A gentle hand keeps the Salisbury steak patties tender instead of dense.

2. Shape Even Oval Patties

Divide the mixture into 6 oval patties. Aim for about 4 oz / 113 g each. The oval shape is classic, but even thickness matters more than perfect shape.

Six raw oval Salisbury steak patties arranged on parchment paper before browning.
Shape even oval patties so they fit neatly in the crock pot and cook at the same pace.

Aim for about ½ to ¾ inch thick. Very thin patties can break more easily, while very thick ones may need extra time in the center.

Salisbury steak patty thickness guide showing too-thin, ideal, and too-thick patties, with the ideal thickness labeled 1/2 to 3/4 inch.
Thickness helps decide whether the patties stay tender or fall apart. Aim for 1/2 to 3/4 inch: thin enough to cook through, but sturdy enough to survive slow cooking in gravy.

If the mixture feels very soft, chill it for 10 to 15 minutes before browning. Cold patties are easier to lift and less likely to crack.

3. Brown the Patties

In a skillet, heat oil over medium-high heat. Brown the patties for 2 to 3 minutes per side. They should get color on the outside but do not need to cook through. Use a wide spatula and turn them gently.

Oval Salisbury steak patties browning in a skillet with a visible seared crust.
Browning adds deeper flavor and helps the patties hold their shape once they simmer in the gravy.

For a slightly thicker, more old-fashioned gravy, lightly dust the patties with flour before browning. Skip this if you want the simpler version or need the recipe to stay gluten-free.

4. Build the Slow Cooker

Add onions and mushrooms to the bottom of the crock pot. Place the browned patties over them, overlapping only if needed. A little overlap is fine; a tight stack can make the middle patties cook more slowly and break more easily.

Sliced onions and mushrooms spread across the bottom of a dark slow cooker insert.
Layer onions and mushrooms under the patties so they soften into the gravy as everything cooks.

Whisk the sauce ingredients separately, then pour the mixture over the beef. You should still be able to see the patties underneath; they do not need to be completely buried.

Browned oval Salisbury steak patties arranged over sliced onions and mushrooms in a slow cooker.
Place browned patties gently over the vegetables, leaving a little space so heat and gravy can move around them.

The liquid should look generous at this stage. It may seem a little loose, but that is better than starting too thick and having the sauce catch around the edges before the beef is done.

Brown gravy being poured from a glass measuring cup over Salisbury steak patties in a slow cooker.
The gravy starts thin on purpose. It carries flavor first, then thickens with slurry near the end.

5. Cook Low and Slow

Cook on low for 4 to 5 hours, or high for 2½ to 3½ hours. Low gives the most tender texture. High works when dinner needs to move faster, but the patties can become firmer if they cook too long.

Slow cooked Salisbury steak patties in brown gravy with softened onions and mushrooms inside a dark slow cooker.
After cooking, the patties should be tender and the onions and mushrooms soft before the final thickening step.

6. Bring the Gravy Together

When the patties are done, stir cornstarch and cold water together until smooth. Stir the slurry into the hot sauce, cover, and cook another 15 to 20 minutes. This is when thin slow cooker liquid turns into proper spoon-over-potatoes gravy.

Three-step cornstarch slurry guide showing cornstarch with cold water, a smooth slurry, and slurry added near the end to hot gravy, with a 15 to 20 minute cook time.
Mix cornstarch with cold water first, then stir the slurry into hot gravy near the end until the sauce turns glossy.

At first the slurry may leave pale streaks. Stir gently and give it time; the sauce will turn darker, smoother, and glossier as it cooks.

Back to top

Once the patties are cooking, the rest of the recipe is mostly about small adjustments: keeping the sauce spoonable, choosing the shortcut that fits your pantry, and knowing what to do if the slow cooker gives you more liquid than expected.

Browning vs Raw Patties: What Works Best?

Browned patties give the best flavor and the cleanest texture. Browning keeps the dish from tasting like boiled ground beef and gives the outside a sturdier edge before it sits in the sauce.

Split comparison of browned Salisbury steak patties and raw oval patties with labels about flavor, structure, and softer texture.
Browned patties are best for flavor and structure, while raw patties save time when convenience matters. Whichever route you choose, handle the beef gently and cook it to a safe center temperature.

Raw patties can still go into the crock pot when convenience matters. Keep them slightly thicker, avoid tight stacking, and use lean beef if possible because raw patties release more liquid and fat as they cook.

If it is one of those nights where browning feels like one pan too many, skip it without guilt. Just expect a softer patty, a little more fat to skim, and slightly less browned flavor. Check the center temperature before serving.

Slow Cooker Size, Cook Time, and Doneness

A 6-quart oval slow cooker is best because the patties have more room and do not need to be pressed into a tight pile. For 4 patties, a 4-quart cooker can work, but a narrow round crock may need more overlap and gentler handling.

As another slow-cooked beef dinner, this beef shoulder roast crock pot recipe uses the same gentle-heat logic with a tougher cut that needs time to turn tender.

Cook Time Guide

Once the patties are in the crock, time matters, but it is not the only thing that matters. Patty thickness, cooker shape, stacking, and whether the patties were previously frozen can all shift the finish.

Time and temperature guide for slow cooker Salisbury steak showing low for 4 to 5 hours, high for 2 and a half to 3 and a half hours, beef at 160°F, and poultry at 165°F.
Slow cooker timing helps you plan dinner, but temperature tells you when the meat is safe. Ground beef Salisbury steak should reach 160°F / 71°C; poultry versions should reach 165°F / 74°C.
MethodTimeBest For
Homemade browned patties on low4 to 5 hoursBest texture and gravy flavor
Homemade browned patties on high2½ to 3½ hoursFaster dinner
Raw homemade pattiesUsually 4 to 5 hours on lowNo-brown shortcut, softer texture
Raw frozen hamburger pattiesThaw safely first, then follow thawed-patty timingFood-safety-conscious freezer shortcut
Fully cooked frozen pattiesHeat thoroughly in gravyFastest patty shortcut
Frozen meatballs4 to 6 hours on low, depending size and package directionsNo-shaping variation

Safe Internal Temperature

Use the timer as a guide, then check the center temperature. Ground beef Salisbury steak is done at 160°F / 71°C. For turkey or chicken versions, the center should reach 165°F / 74°C.

Brown gravy can make a patty look done before the center is fully cooked, so temperature is safer than color. For reference, the USDA safe minimum internal temperature chart lists ground meats such as ground beef at 160°F / 71°C, while ground poultry should reach 165°F / 74°C.

Helpful Tools

  • Large skillet: for browning the patties.
  • Mixing bowl: for the beef mixture.
  • Whisk: for the gravy mixture.
  • Wide spatula: for moving patties without breaking them.
  • Instant-read thermometer: for checking doneness.

How to Make the Gravy Thick, Rich, and Not Watery

The gravy is the reason this recipe exists. It should coat the spoon, cling to the beef, and move slowly through mashed potatoes instead of running around the plate.

Close-up of thick glossy brown Salisbury steak gravy with mushrooms and onions clinging to a spoon.
The best brown gravy should cling to the spoon instead of running off like broth. When it looks glossy and holds mushrooms and onions in place, it is ready for potatoes, noodles, or rice.

Slow cooker gravy often looks thin because moisture stays trapped under the lid. That does not mean the recipe failed. Let the beef cook first, then thicken the sauce near the end.

Comparison guide showing watery gravy that needs slurry and thick spoonable gravy that is ready to serve.
Thin gravy is usually easy to fix. Add a smooth slurry near the end, give it time to thicken, and stop when the sauce coats the spoon without turning gluey.

The same problem shows up in slow cooker beef recipes like slow cooker beef stew: tender beef is wonderful, but the sauce still needs enough body to feel like gravy instead of broth.

For Thicker Gravy

  • Mix 1 tablespoon cornstarch with 1 tablespoon cold water.
  • Stir it into the hot gravy once the patties are cooked.
  • Cover and cook for 15 to 20 minutes.
  • Repeat with another small slurry if the gravy still looks thin.

For Richer Gravy

  • Use beef broth instead of water.
  • Worcestershire sauce adds savory depth.
  • Dijon mustard brings balance.
  • Ketchup gives gentle sweetness and body.
  • Cook onions and mushrooms in the gravy from the start.
  • Browned patties add more flavor than raw patties when time allows.

When it is right, the gravy should drag slowly through the potatoes, cling to the beef, and leave the plate looking like someone already went back for seconds.

For Less Salty Gravy

Use low-sodium broth and reduce the salt in the patties when using brown gravy mix, onion soup mix, au jus, cream soup, or canned French onion soup. If the sauce tastes salty after cooking, stretch it with unsalted broth, a splash of cream, extra mushrooms or onions, or plain potatoes on the plate.

Mix cornstarch with cold water before adding it. A smooth slurry disappears into hot gravy; dry cornstarch can clump.

Gravy not behaving? See watery vs thick gravy, shortcut gravy options, or common fixes.

Shortcut Gravy Options

There is no shame in using the packet, the can, or the soup mix. The mistake is letting several salty shortcuts pile up without adjusting anything else.

Use the table below to see what each shortcut adds and what you need to watch.

Shortcut gravy options board showing brown gravy mix, au jus mix, onion soup mix, cream of mushroom soup, golden mushroom soup, French onion soup, cream of chicken soup, beef broth, and Worcestershire sauce.
Shortcut gravy ingredients can save time, but they also affect salt, thickness, and flavor. Therefore, choose one main shortcut, taste before adding extra seasoning, and adjust with broth as needed.
ShortcutWorks?Best UseWatch Out For
Brown gravy mixYesClassic easy brown gravyCan be salty
Au jus mixYesBeefier flavorUsually thinner
Onion soup mixYesStrong onion flavorReduce added salt
Cream of mushroom soupYesCreamier gravyLess classic brown gravy flavor
Golden mushroom soupYesDeeper mushroom flavorStill salty
Cream of chicken soupYesMilder creamy shortcutLess beefy; add Worcestershire or au jus
French onion soupYesRich onion gravyNeeds thickening

Cream of Mushroom Version

For a creamier crock pot Salisbury steak, add 1 can of cream of mushroom soup, usually 10.5 oz / 298 g, to the gravy mixture. Use 1 can for a lighter creamy gravy or 2 cans for a thicker cream-soup style version.

Cream of mushroom Salisbury steak with oval patties, creamy mushroom-brown gravy, and mashed potatoes on a cream plate.
Cream of mushroom Salisbury steak should taste creamy and savory, not flat. Balance the soup with broth, Worcestershire, Dijon, and mushrooms so the sauce stays rich without becoming heavy.

If you use cream of mushroom soup with brown gravy mix or onion soup mix, reduce the added salt and use low-sodium broth. Add Worcestershire and Dijon so the sauce still tastes savory instead of flat.

If cream-of-mushroom dinners are your kind of shortcut, these cream of mushroom pork chops use the same creamy mushroom-gravy idea with browned meat, rice and potato notes, baked options, and crock pot tips.

French Onion Soup Version

For a French onion soup version, replace 1 cup / 240 ml of the beef broth with canned French onion soup, usually 10.5 oz / 298 g per can. You can replace all the broth for a stronger onion flavor, but skip or reduce onion soup mix so the gravy does not become too salty.

French onion Salisbury steak with oval patties, mashed potatoes, glossy brown onion gravy, and caramelized onion ribbons.
French onion Salisbury steak works when the onions carry the flavor. Let the soft onion ribbons melt into the deep brown gravy, then spoon it generously over the mashed potatoes.

This version usually needs a cornstarch slurry near the finish because canned soup gives flavor but does not always thicken enough on its own.

For a deeper look at the onion side of the flavor, this French onion soup recipe shows how slow-cooked onions become sweet, savory, and rich.

Onion Soup Mix Version

Use ½ packet onion soup mix in the gravy or patties for a balanced onion flavor. For a stronger shortcut taste, use a full packet. Reduce added salt and choose low-sodium broth.

Brown Gravy Mix or Au Jus Version

Brown gravy mix gives the most familiar Salisbury steak gravy. Au jus mix gives a beefier flavor, but it usually makes a thinner sauce, so plan to give it body with slurry once the patties are cooked.

Can You Use Frozen Hamburger Patties?

Yes, freezer patties can still save dinner. The key is knowing whether they are raw or fully cooked, because those two need different handling.

Raw Frozen vs Fully Cooked Patties

For raw frozen hamburger patties, thaw them safely in the refrigerator before adding them to the crock pot. The USDA slow cooker safety guidance recommends thawing meat or poultry before it goes into a slow cooker. Once thawed, brown the patties if possible, then let them cook gently in the gravy until the centers reach 160°F / 71°C.

Fully cooked frozen patties are different. Follow the package directions, heat them thoroughly in the gravy, and avoid cooking them so long that they turn firm or dry. They are already cooked, so the goal is heating, flavoring, and giving the sauce body.

If the package gives a reheating temperature or stovetop/microwave timing, use that as your safety guide, then let the gravy do the flavor work.

Frozen Patty Method Table

Use this table to match the method to the patties you actually have, not the patties you wish you had thawed yesterday.

Frozen hamburger patty guide for Salisbury steak showing raw frozen patties should be thawed first, fully cooked patties heated through, and leftover cooked patties warmed gently.
Frozen hamburger patties need the right slow cooker path. Raw frozen patties should be thawed first, while fully cooked patties can be heated through gently in the gravy.
Patty TypeBest MethodWhat to Watch
Raw frozen hamburger pattiesThaw in the refrigerator first, then brown and slow cookAvoid adding raw frozen meat straight to the slow cooker
Homemade frozen raw pattiesThaw overnight in the fridge, then brown gentlyThey may be fragile after thawing
Thawed raw pattiesBrown first, then cook in gravyCheck 160°F / 71°C in the center
Fully cooked frozen pattiesHeat thoroughly in gravy according to package directionsStop before they turn firm
Leftover cooked burger pattiesWarm gently in gravyBest added later so they do not dry out

Previously frozen patties may release more liquid than freshly shaped patties, so plan on thickening the sauce before serving. Use a wide spatula when lifting them out because thawed or reheated patties can be softer than freshly browned Salisbury steaks.

Best Method for Thawed Hamburger Patties

Thawed and browned hamburger-style patties arranged in a slow cooker with brown gravy, onions, and mushrooms for Salisbury steak.
Thawed hamburger patties become more dinner-worthy when they are browned, layered with onions and mushrooms, and finished in gravy. Finally, thicken the sauce so the shortcut still tastes intentional.
  1. Thaw raw frozen patties safely in the refrigerator.
  2. Brown the thawed patties for 2 to 3 minutes per side, if possible.
  3. Add onions, mushrooms, patties, and whisked gravy to the slow cooker.
  4. Cook on low until the patties reach 160°F / 71°C.
  5. Skim extra grease if needed.
  6. Stir in slurry near the finish to give the sauce body.

Easy Variations

Once the basic method is clear, the recipe is flexible. Keep the same idea — sturdy beef, enough sauce, and salt control — then adjust the flavor around it.

Salisbury Steak Meatballs

Use frozen fully cooked meatballs or homemade meatballs with the same gravy. Meatballs are easier than patties because you do not need to shape ovals and there is less risk of breaking. Cook until hot all the way through, then thicken the sauce near the end.

Salisbury steak meatballs in glossy mushroom onion brown gravy served over egg noodles in a cream bowl.
Salisbury steak meatballs give you the same brown gravy comfort in an easier-to-portion form. They work especially well over egg noodles because the sauce settles into every fold.

No Mushroom Salisbury Steak

Skip the mushrooms and add extra onions. The gravy will be less earthy, but still savory and comforting. Worcestershire, Dijon, black pepper, and garlic help carry the flavor.

Extra Onion Gravy

Use a full sliced onion instead of half, and add ½ packet onion soup mix or replace part of the broth with French onion soup. This is the best route if you want onion gravy without mushrooms.

Gluten-Free Version

Use gluten-free breadcrumbs and check the labels on gravy mix, onion soup mix, canned soup, and Worcestershire sauce. Cornstarch is usually the easiest gluten-free thickener, but packet mixes vary by brand. Skip the optional flour dusting before browning.

Low-Carb or Keto Version

Use almond flour, crushed pork rinds, or another low-carb binder instead of breadcrumbs. Serve with mashed cauliflower, cauliflower rice, green beans, or sautéed cabbage. Use a low-carb thickener if cornstarch does not fit your plan.

Ground Turkey Version

For a lighter version, ground turkey works, but handle the patties gently because they are leaner and more delicate. Cook ground turkey patties to 165°F / 74°C and season the sauce well because turkey is milder than beef.

What to Serve With Crock Pot Salisbury Steak

Mashed potatoes are the classic because they catch the gravy. If you want to stretch the meal, egg noodles or rice also work beautifully.

Serving guide for Salisbury steak showing mashed potatoes, egg noodles, rice, green beans, roasted carrots, and cauliflower mash as side dish options.
Choose sides that make the gravy useful: mashed potatoes, egg noodles, rice, green beans, roasted carrots, or cauliflower mash. Meanwhile, a bright vegetable keeps the meal from feeling too rich.
  • Mashed potatoes: the best classic comfort-food pairing.
  • Egg noodles: good when you want a beef-and-noodles feel.
  • Rice: budget-friendly and excellent with extra gravy.
  • Green beans: simple and fresh next to rich gravy.
  • Roasted carrots: sweet, cozy, and easy.
  • Peas or corn: family-style sides that keep dinner simple.
  • Biscuits or dinner rolls: useful when there is extra gravy.
  • Cauliflower mash: a good lower-carb base.

For a garlic-forward potato side, these garlic mashed potatoes are especially good when the gravy is rich and beefy.

If the plate needs something crisp and cold beside all that gravy, a wedge salad gives you that steakhouse-style contrast.

The best plate has something plain underneath. Give the gravy somewhere to go: into potatoes, over noodles, across rice, or around cauliflower mash.

Troubleshooting Crock Pot Salisbury Steak

If your last slow cooker Salisbury steak came out thin, salty, or broken, you are not alone. None of those problems means dinner is ruined; most of them just need a small adjustment.

Most problems come from fragile patties, trapped slow-cooker moisture, or salty shortcut ingredients. Here is how to fix them.

Troubleshooting guide for Salisbury steak with fixes for patties falling apart, watery gravy, salty gravy, and tough patties.
Most Salisbury steak problems have simple fixes. Shape thicker patties if they break, use slurry for watery gravy, choose low-sodium broth for salty sauce, and cook gently for better texture.

Why Did My Patties Fall Apart?

The patties may have been too thin, too loosely shaped, moved too often, or stacked too tightly. Browning helps, but even unbrowned patties hold better when they are thick enough and moved with a wide spatula.

Why Is My Gravy Watery?

Slow cookers trap moisture, and beef releases juices as it cooks. Add a cornstarch slurry once the patties are done, cover, and let the sauce tighten. Use a second small slurry if needed.

Why Is My Gravy Too Salty?

Packets, soup mixes, canned soup, and broth can all add salt. Use low-sodium broth and reduce added salt. To fix a salty batch, add unsalted broth, a splash of cream, extra mushrooms or onions, or serve over plain potatoes or rice.

Why Are My Patties Tough?

The meat was likely overmixed, packed too tightly, or cooked too long on high. Mix gently, shape without compressing too much, and use low heat when possible.

Why Is There Grease on Top?

Ground beef releases fat as it cooks. Browning first removes some of it before the patties go into the crock pot. If grease collects on top, skim it off before thickening the sauce.

Why Does the Gravy Taste Flat?

Add Worcestershire, Dijon, black pepper, garlic, or a little more onion flavor. A small spoonful of ketchup can round out the gravy without making it taste sweet.

Why Did the Mushrooms Get Too Soft?

Mushrooms soften a lot in the slow cooker. For firmer mushrooms, use thicker slices or add half at the beginning and half during the last hour.

Can I Make the Patties Ahead?

Yes. Shape the patties up to a day ahead and refrigerate them covered. You can also brown the patties ahead, cool them, and refrigerate until you are ready to assemble the crock pot.

Storage, Freezing, and Reheating

  • Refrigerator: Store leftovers in an airtight container for 3 to 4 days.
  • Freezer: Freeze cooked patties with gravy for 2 to 3 months.
  • Reheating: Warm gently with a splash of broth or water to loosen the gravy.
  • After freezing: The gravy may thin after thawing. Simmer gently and thicken again with a small slurry if needed.

For the best freezer texture, freeze the patties with gravy instead of freezing the patties dry. The sauce protects the beef and makes leftovers feel more like dinner than a rescue mission.

FAQ

Should Salisbury steak patties be browned before slow cooking?

Browning is not required, but it gives better flavor and helps the patties hold together. If you skip it, make them slightly thicker and handle them gently.

Can frozen hamburger patties go straight into the crock pot?

For raw frozen hamburger patties, thaw them in the refrigerator first, then brown and slow cook them in the gravy. Fully cooked frozen patties are different; follow the package directions and heat them thoroughly in the sauce.

Is cream of mushroom soup a good shortcut?

Yes. Use 1 can, usually 10.5 oz / 298 g, for a lighter creamy gravy or 2 cans for a thicker cream-soup version. Reduce salt if you also use gravy mix or onion soup mix.

Can I use cream of chicken soup instead?

Yes. It makes a milder, creamier sauce. Add Worcestershire, au jus, or extra black pepper so it still tastes savory and not flat.

What does onion soup mix add?

Onion soup mix adds savory onion flavor and salt. Use ½ packet for balance or a full packet for a stronger shortcut version, then reduce added salt and use low-sodium broth.

How do you thicken slow cooker Salisbury steak gravy?

Mix cornstarch with cold water, stir it into the hot gravy once the patties are cooked, and cook for 15 to 20 minutes. Add another small slurry if you want it thicker.

What can replace mushrooms?

Use extra onions, onion gravy, French onion soup, or cream of onion soup. Brown gravy versions also work well without mushrooms.

What internal temperature should Salisbury steak reach?

Ground beef patties should reach 160°F / 71°C in the center. For ground turkey or ground chicken patties, use 165°F / 74°C.

Is Salisbury steak the same as hamburger steak?

They are closely related. Salisbury steak usually includes seasoned ground beef with a binder such as breadcrumbs or egg, then gravy. Hamburger steak is often simpler: seasoned beef patties with onion gravy or brown gravy.

Final Thoughts

Crock pot Salisbury steak does not need to be fancy to be memorable. It just needs tender beef, brown gravy, soft onions, and the kind of sauce that makes mashed potatoes disappear from the plate.

Whether you start with homemade patties or a freezer shortcut, the win is the same: tender beef, a spoonable brown sauce, and a plate of potatoes, noodles, or rice that catches every bit of it.

Complete crock pot Salisbury steak dinner with mashed potatoes, mushroom onion gravy, green beans, a gravy boat, and a slow cooker in the background.
This final dinner scene shows the payoff: tender Salisbury steak, mashed potatoes, green beans, and glossy mushroom onion gravy. The slow cooker handles the work, while the plate still feels like a full comfort-food meal.

Back to top

Posted on Leave a comment

Crockpot Chili Recipe: Easy Slow Cooker Chili With Ground Beef and Beans

Bowl of crockpot chili topped with cheddar cheese, sour cream, green onions, tortilla chips, and cornbread, with a slow cooker in the background

This crockpot chili recipe is for the night you want dinner to smell like it has been simmering all day, without standing over the stove all afternoon. It is thick, beefy, tomato-rich, and built to avoid the usual slow-cooker chili problems: watery sauce, greasy beef, bland seasoning, and beans that go too soft.

You brown and drain the beef first, build a quick tomato-spice base, add beans and tomatoes, then cook everything on Low for 6 to 8 hours or High for 3 to 4 hours. The result is cozy, spoonable chili that can hold cheese, sour cream, onions, and chips without turning into soup.

This is the kind of chili that tastes right with a spoon, a handful of chips, or a pile of toppings. It is not fancy. Instead, it is dependable: rich enough for adults, familiar enough for kids, and sturdy enough for leftovers.

The secret to thick crockpot chili is starting with a pot that looks almost too thick, because the slow cooker gives moisture back. Slow cookers trap steam instead of reducing liquid like a stovetop pot, so this recipe uses less added liquid, tomato paste for body, browned beef for flavor, and a short uncovered rest at the end.

This version stays with the familiar tomato-based beef-and-bean style. White chicken chili, turkey chili, vegetarian chili, and no-bean chili all need their own balance of ingredients, so they are treated here as simple variations rather than the main recipe.

Quick Answer: How to Make Crockpot Chili

To make crockpot chili, brown ground beef in a skillet, drain the grease, then cook onion, bell pepper, garlic, tomato paste, and chili spices for a minute to build flavor. Transfer everything to a slow cooker with beans, diced tomatoes, tomato sauce, a small amount of broth or beer, and Worcestershire sauce.

Cook on Low for 6 to 8 hours for the best flavor, or on High for 3 to 4 hours when you need chili sooner. Let the chili rest uncovered for 10 to 15 minutes before serving so it thickens just enough to hold a spoonful of cheese, sour cream, onions, and chips without turning soupy.

The mistake-proof chili rule: the pot should look thick and saucy before cooking, not loose. As the tomatoes release moisture, this recipe starts with only 1/2 cup added liquid and lets tomato paste, drained beans, and resting time do the thickening work.

Once the beef is browned, the recipe becomes very hands-off. The slow cooker handles the long simmer while the base stays sturdy enough for toppings, chili dogs, baked potatoes, nachos, or tomorrow’s lunch.

Crockpot Chili Recipe Card

Easy Crockpot Chili With Ground Beef and Beans

A hearty, family-style slow cooker chili made with browned ground beef, beans, tomatoes, tomato paste, chili spices, and a 6-quart crockpot. It is easy enough for a weeknight, sturdy enough for game day, and perfect for leftovers.

Prep time20 minutes
Cook time6 to 8 hours on Low, or 3 to 4 hours on High
Total timeAbout 3 hours 20 minutes to 8 hours 20 minutes, depending on setting
Servings8 to 10 servings
YieldAbout 10 to 12 cups chili
Recommended slow cooker size6-quart slow cooker

Equipment

  • 6-quart slow cooker
  • Large skillet or frying pan
  • Wooden spoon or spatula for breaking up the beef
  • Colander or strainer for draining and rinsing beans
  • Ladle for serving
  • Airtight containers or freezer bags for leftovers
  • Optional instant-read thermometer, especially if using a dump-and-go raw beef method

Ingredients

  • 2 lb / 900 g ground beef, preferably 85/15 for richer chili or 90/10 for leaner chili
  • 1 large yellow onion, diced, about 150 to 180 g
  • 1 medium green bell pepper, diced, about 120 to 150 g
  • 4 garlic cloves, minced, about 12 to 16 g
  • 2 to 3 tablespoons / 30 to 45 g tomato paste
  • 2 1/2 to 3 tablespoons chili powder blend
  • 2 teaspoons ground cumin
  • 1 teaspoon smoked paprika
  • 1 teaspoon dried oregano
  • 1 1/2 teaspoons salt, plus more to taste
  • 1/2 teaspoon black pepper
  • 1 can kidney beans, 15 oz / 425 g, drained and rinsed
  • 1 can black beans or pinto beans, 15 oz / 425 g, drained and rinsed
  • 1 can diced tomatoes, 28 oz / 794 g, undrained
  • 1 can plain canned tomato sauce, 15 oz / 425 g
  • 1/2 cup / 120 ml beef broth or beer
  • 1 tablespoon / 15 ml Worcestershire sauce

Instructions

  1. Heat a large skillet over medium-high heat. Add the ground beef and cook for 6 to 8 minutes, breaking it into small pieces, until browned.
  2. Drain the excess grease. A little fat is fine, but too much will make the finished chili oily.
  3. Add the onion and bell pepper to the skillet. Cook for 4 to 5 minutes, until they begin to soften.
  4. Stir in the garlic, tomato paste, chili powder blend, cumin, smoked paprika, oregano, salt, and black pepper. Cook for 30 to 60 seconds, until the tomato paste darkens slightly and the spices smell warm.
  5. Transfer the beef mixture to a 6-quart slow cooker.
  6. Add the drained beans, undrained diced tomatoes, plain canned tomato sauce, Worcestershire sauce, and about half the broth or beer. Stir well.
  7. Check the texture before the lid goes on. It should look saucy and sturdy, not loose. If it looks tight and dense, add the remaining broth or beer; if it already looks loose, hold it back.
  8. Cover and cook on Low for 6 to 8 hours or High for 3 to 4 hours. At the end, the chili should bubble gently around the edges and look thicker than it did when you started.
  9. Taste near the end. Add more salt, chili powder, Worcestershire sauce, or a small splash of apple cider vinegar if the chili tastes flat.
  10. Let the chili rest uncovered for 10 to 15 minutes before serving so the sauce tightens slightly.
  11. Serve with shredded cheese, sour cream, green onions, jalapeños, tortilla chips, cornbread, or your favorite chili toppings.

Success Notes

  • Need more body? Use the full 3 tablespoons tomato paste, keep broth to 1/2 cup, and rest the chili uncovered before serving.
  • To round out the flavor: add 1 teaspoon cocoa powder for depth, 1 teaspoon brown sugar to soften acidity, or 1 teaspoon apple cider vinegar to brighten a flat pot.
  • For more smoke: try smoked paprika, chipotle powder, cooked bacon, or a tiny splash of liquid smoke.
  • To raise the heat: add jalapeño, cayenne, hot sauce, or diced tomatoes with green chiles.
  • Keeping it mild? Use mild chili powder and plain diced tomatoes.
  • Using a packet? Replace most dried spices with one chili seasoning packet, then taste before adding extra salt.

Serve when the chili looks thick, smells savory, and holds softly on a spoon after resting.

Before the deeper notes, here is the finished texture you are aiming for.

What Thick Crockpot Chili Should Look Like

Close-up of crockpot chili in a bowl with ground beef, beans, tomato sauce, melted cheddar cheese, sour cream, and green onions
Look for sauce that clings to the beef and beans instead of pooling underneath; that is the difference between cozy crockpot chili and a watery bowl.

Timing and Make-Ahead Notes

Timing at a Glance

Low is the setting to choose when the day allows it. The chili has time to settle, the tomato base tastes rounder, and the beef and beans feel like one pot instead of separate ingredients. High works for a faster batch in 3 to 4 hours. Use Warm only after the chili is fully cooked, when you are holding it for serving.

This is the chili for the day when dinner needs to take care of itself after the first 20 minutes. The pot does not need much attention, but the early browning step is what makes it taste like someone paid attention.

Can You Prep Crockpot Chili the Night Before?

Yes. Brown the beef, cook the onion, bell pepper, garlic, tomato paste, and spices, then cool the mixture and refrigerate it in an airtight container. The next day, add it to the slow cooker with the beans, tomatoes, tomato sauce, Worcestershire sauce, and broth or beer.

If you refrigerate ingredients in a removable slow cooker insert, check your manufacturer’s guidance before placing a very cold insert into the heating base. When in doubt, refrigerate the cooked beef mixture separately and load the slow cooker fresh the next day.

Make This Crockpot Chili When

  • Dinner needs to be started before the busy part of the day hits.
  • A short skillet step is fine, but the rest of the meal needs to be hands-off.
  • Classic beef-and-bean chili sounds better than white chicken chili or vegetarian chili.
  • The pot needs to hold cheese, sour cream, onions, and chips without turning soupy.
  • Game day needs something easy that still tastes homemade.
  • Leftovers should become chili dogs, nachos, baked potatoes, rice bowls, or chili mac.
  • A bigger spread is planned with other slow-cooker snacks like grape jelly meatballs.

The flavor also settles well overnight, which makes this a good make-ahead chili for parties, meal prep, and second-day leftovers.

Texture Notes for Crockpot Chili

This is a thick beef-and-bean chili, not a loose tomato soup. The balance is simple: 2 lb beef, 2 cans beans, 28 oz undrained diced tomatoes, 15 oz plain canned tomato sauce, 2 to 3 tablespoons tomato paste, and only 1/2 cup added liquid.

Texture note: the best balance for this style of crockpot chili is 2 lb beef, 2 cans beans, 28 oz diced tomatoes, 15 oz tomato sauce, 2 to 3 tablespoons tomato paste, and only 1/2 cup added liquid. More liquid can make the chili looser after several hours because the slow cooker holds onto steam instead of reducing like a stovetop pot.

The pot may look denser than you expect before cooking. That is a good sign. If your slow cooker runs hot or the mixture looks too tight, add the remaining broth or beer a splash at a time.

What the Chili Should Look Like

StageTexture cue
Before cookingThick and saucy, with visible beef and beans, not swimming in liquid
Halfway throughJuicier around the edges as the tomatoes release moisture
FinishedDarker chili bubbling gently around the sides
After restingSpoonable chili that holds toppings on top instead of swallowing them
Four-panel guide showing crockpot chili before cooking, halfway cooked, finished, and after resting
Use the texture shift as your guide: sturdy at the start, looser midway, darker when done, and spoonable again after a short uncovered rest.

What It Tastes Like: Flavor and Heat Level

This is a classic tomato-based beef chili with a mild-to-medium heat level, depending on your chili powder. Use mild chili powder and skip jalapeños or cayenne for a kid-friendly pot. Beer adds a subtle malty depth, not a boozy flavor, and broth works perfectly if you want the chili classic and alcohol-free.

The finished chili tastes savory, gently smoky, and beefy, with enough tomato to feel rich but not so much that it tastes like plain canned tomatoes. It is sturdy enough for bowls, nachos, chili dogs, baked potatoes, and leftovers.

Why This Slow Cooker Chili Works

This slow cooker chili works because it does not rely on time alone. Time helps, but the real flavor comes from building the base correctly before the lid goes on.

Browning the beef gives the chili better flavor and better texture. It also lets you drain off excess grease so the finished bowl tastes rich instead of oily. This is the step that keeps the chili from tasting like ground beef floating in tomatoes.

Tomato paste gives the chili body. It deepens the tomato flavor and helps the sauce cling to the beef and beans instead of sitting loose in the bottom of the bowl.

Two kinds of beans make the chili feel hearty without becoming heavy. Kidney beans give the familiar chili bite. Pinto or black beans add softness, body, and a slightly different texture.

A small amount of broth or beer helps everything cook evenly without thinning the chili too much. Extra liquid feels safe at the beginning, but it is usually what makes slow cooker chili soupy at the end. Start small; you can always loosen a tight pot later.

The final rest matters. Chili thickens as it sits. Ten minutes uncovered can make the difference between a loose pot and a bowl that holds nicely under cheese, sour cream, onions, and chips.

Ingredients for Crockpot Chili

The ingredient list is simple, but nothing is just filler. Each piece helps the chili taste fuller, thicker, warmer, or more balanced.

Ingredients for crockpot chili arranged on a table, including ground beef, beans, tomatoes, tomato sauce, tomato paste, onion, bell pepper, garlic, spices, Worcestershire sauce, and broth
These simple ingredients build different layers: beef gives body, beans add bite, tomatoes make the base, and spices turn the slow cooker into something deeper.

Ground Beef

Choose 2 lb / 900 g ground beef. An 85/15 blend gives a richer chili, while 90/10 makes a leaner pot. Both work well as long as you brown and drain the beef before adding it to the crockpot.

If you use very lean beef, taste the chili near the end. Lean meat can taste milder, so it may need a little more salt, Worcestershire sauce, chili powder, or tomato paste to feel full and savory.

Onion, Bell Pepper, and Garlic

Onion, bell pepper, and garlic are what make the chili smell like dinner before the tomatoes even go in. Green bell pepper tastes familiar and old-school. Red bell pepper makes the pot slightly sweeter. Jalapeño can be added here if you want more heat.

Cooking the vegetables briefly with the beef helps them lose their raw edge and melt into the base instead of tasting like separate pieces floating in tomato sauce.

Beans

This version uses one can of kidney beans and one can of black or pinto beans. Kidney gives the classic chili bite, while the second can brings a softer texture and more body. Drain and rinse both for better control over salt and texture.

If you use chili beans in sauce, you can add the sauce too, but remember that they are already seasoned. Taste before adding extra salt or chili powder.

Tomatoes

Diced tomatoes bring the chunks, tomato sauce fills in the base, and tomato paste gives the chili that deeper, thicker body you want from a slow-cooked pot. Use plain canned tomato sauce here, not ketchup or sweet table sauce.

To make the chili spicier, replace some of the diced tomatoes with diced tomatoes and green chiles. For a smoother pot, use crushed tomatoes instead of diced tomatoes.

Broth or Beer

Keep the broth or beer to 1/2 cup / 120 ml. A broth version tastes familiar and straightforward. Beer leans the pot a little deeper, with a malty background that works especially well for game day. Choose broth if you want to keep everything alcohol-free.

Extra liquid feels helpful at the start, but the slow cooker gives moisture back as the tomatoes, beef, and beans cook together. Begin with less; a thick pot is easier to loosen than a watery pot is to fix.

Chili Seasoning

Chili powder blend, cumin, smoked paprika, oregano, salt, and black pepper give this recipe its main flavor. Use a chili powder blend, not pure hot red chile powder. When your chili powder is mostly ground hot chiles, use much less and build the heat slowly.

With salted broth, chili beans, or a seasoning packet, start with a little less salt and adjust near the end. When the first spoonful tastes almost right but a little dull, it probably needs brightness, not more cooking time. A little salt, Worcestershire sauce, tomato paste, chili powder, or apple cider vinegar can wake the whole pot up.

What Size Slow Cooker to Use for Chili

A 6-quart slow cooker is the best size for this full batch of crockpot chili. It gives the beef, beans, tomatoes, and sauce enough room to heat evenly without bubbling over.

  • Half batch: use a 4-quart slow cooker.
  • Full recipe: choose a 6-quart slow cooker.
  • Larger batch or chili bar: move up to a 7- to 8-quart slow cooker.

For a half batch, use half the ingredients and keep the same cooking cues. A smaller pot can run hotter or finish a little sooner, so check the texture near the early end of the time range.

Keep the slow cooker no more than about three-quarters full so the chili has room to bubble gently and heat evenly. For a double batch, a very large cooker or two separate batches is safer than one overloaded pot.

How to Make Crockpot Chili

1. Brown the Beef

Brown the ground beef in a large skillet over medium-high heat, breaking it into small pieces as it cooks. You want browned, crumbly beef, not large soft clumps.

Drain the excess grease before adding the beef to the slow cooker. That one small step keeps the bowl cozy instead of greasy.

Browned ground beef crumbles cooking in a skillet with a wooden spoon
Well-browned beef should look crumbly and deeply colored, not gray; that early skillet color is what keeps slow cooker chili from tasting flat.

2. Soften the Vegetables

Add the onion and bell pepper to the skillet. Cook for a few minutes until they begin to soften, then add the garlic. From there, the base already starts smelling like chili before the slow cooker even takes over.

Browned ground beef cooking with diced onion, green bell pepper, and garlic in a skillet
Once the onion, bell pepper, and garlic soften around the beef, the chili base starts tasting cooked and savory instead of simply dumped together.

3. Bloom the Tomato Paste and Spices

Stir in tomato paste, chili powder blend, cumin, smoked paprika, oregano, salt, and pepper. Cook for 30 to 60 seconds. The mixture should smell warm and savory, not raw or dusty.

This small step makes the chili taste more developed. It also helps the tomato paste blend into the sauce instead of sitting in sharp little pockets.

Ground beef, onion, bell pepper, tomato paste, and chili spices cooking together in a skillet
Tomato paste should darken slightly as it hits the hot skillet, while the chili spices coat the beef instead of sitting dry on top.

4. Load the Slow Cooker

Transfer the beef mixture to the slow cooker. Add the beans, undrained diced tomatoes, plain canned tomato sauce, Worcestershire sauce, and about half the broth or beer. Stir until everything is evenly combined.

The mixture should look saucy but not loose before the lid goes on. Add the remaining broth or beer only if it looks thick and tight. Hold the rest back when the pot already looks loose.

Uncooked crockpot chili mixture in a slow cooker with ground beef, beans, tomatoes, and thick red sauce
Before cooking, the pot can look almost too dense; that is a good sign because tomatoes, beans, and beef release moisture under the lid.

5. Cook Low or High

Cook on Low for 6 to 8 hours or High for 3 to 4 hours. Low gives the best flavor, but High works when you need chili ready sooner.

Try not to keep lifting the lid. Each time the lid opens, heat escapes and the cooking time stretches. At the end, the chili should bubble gently around the edges and look darker and thicker than it did when you started.

Finished crockpot chili in an open slow cooker with ground beef, beans, tomatoes, and thick red sauce
Finished crockpot chili should look settled and darker, with beef and beans still visible instead of disappearing into thin tomato liquid.

6. Taste and Finish

Taste the chili near the end. When it tastes flat, add more salt, a small splash of Worcestershire sauce, or 1 teaspoon apple cider vinegar. If it tastes too acidic, add a tiny pinch of sugar or a little extra tomato sauce.

Let the chili rest uncovered for 10 to 15 minutes before serving. As it sits, the sauce thickens slightly and the flavors taste more complete.

The finished chili should taste savory, gently smoky, and tomato-rich, with beans that still hold their shape and a sauce thick enough to cling to the spoon. If it tastes sharp, flat, or thin, the fix is usually seasoning, acid, or a short uncovered rest.

Spoon lifting slow cooker chili with ground beef, beans, and red tomato sauce
When a spoonful holds together for a moment, the chili is sturdy enough for toppings, tortilla chips, baked potatoes, or chili mac.

Once the basic method is clear, the details below help you adjust the chili for thickness, timing, beans, toppings, leftovers, and a crowd.

Choose Your Chili Path

Once the base is right, you do not need a new recipe every time. Change the heat, toppings, beans, or shortcut ingredients around the same thick tomato-beef base.

If you want…Do this
Family-style chiliUse the recipe as written with kidney and pinto or black beans.
More spoonable chiliUse 3 tablespoons tomato paste, mash some beans, and rest uncovered.
Game-day chiliKeep it warm in the slow cooker and set toppings out separately.
Spicy chiliAdd jalapeño, chipotle, cayenne, hot sauce, or diced tomatoes with green chiles.
Mild chiliUse mild chili powder, plain diced tomatoes, and no cayenne.
No-bean chiliReplace beans with extra beef, peppers, mushrooms, or tomatoes and reduce liquid.
Leaner chiliUse 90/10 beef or ground turkey, then season a little more boldly.
Shortcut chiliUse a chili seasoning packet and keep the tomato, bean, and liquid balance the same.

Do You Have to Brown Ground Beef Before Crockpot Chili?

You do not absolutely have to brown ground beef before crockpot chili, but for the best chili, you should. Browning gives the beef better flavor, improves the texture, and lets you drain grease before it goes into the slow cooker.

If raw ground beef goes straight into the crockpot, it can cook through, but the finished chili is usually softer, greasier, and less flavorful. The beef may also clump together instead of staying in small, even pieces.

Can You Make Dump-and-Go Crockpot Chili?

You can make a dump-and-go version, but it is a compromise. Use thawed lean ground beef, break it up very well, and make sure it cooks through fully. The chili will usually be softer and a little greasier than the browned-beef version.

For the best balance of easy and flavorful, brown the beef first. It adds a few minutes, but it makes the whole pot taste better.

A Quick Safety Note

Before you change the beef, beans, or prep method, these few safety details are worth keeping in mind.

For the best texture and flavor, this recipe browns the ground beef before slow cooking. If you use a dump-and-go raw beef method, use thawed beef, break it up well, and make sure it cooks through fully. Ground beef should reach 160°F / 71°C.

Do not start with frozen ground beef in the slow cooker; it may heat unevenly. Canned beans are the easiest, most reliable choice here. Dried kidney beans need proper soaking and boiling before they go into the slow cooker.

For broader slow-cooker handling, the USDA slow cooker safety guide is a useful reference. To handle leftovers safely, cool the chili in shallow containers and refrigerate it within 2 hours rather than leaving the pot out for hours.

Crockpot Chili Cook Time: Low vs High

Crockpot chili is forgiving, but the setting changes the final texture and flavor. Low is best when you have time. High is useful when the beef is already browned and you need dinner sooner.

Cooking methodTimeResult
Low6 to 8 hoursBest flavor, thicker texture, more developed chili
High3 to 4 hoursGood for same-day cooking
Longer than 8 to 10 hoursNot idealBeans can soften too much and flavor can turn dull
Warm setting1 to 2 hours after cookingGood for serving, not endless holding

Can Chili Cook Too Long in a Crockpot?

Yes. Chili can handle slow cooking, but it is not impossible to overcook. After too many hours, canned beans can get mushy, the beef can lose texture, and the flavor can become muddy instead of bright and hearty.

Can You Leave Chili on Warm?

You can leave chili on Warm for serving, especially for a party or game day, but it should stay hot, be stirred occasionally, and not drift into lukewarm territory. If the chili is sitting out for a crowd, a food thermometer is useful. Keep it around 140°F / 60°C or above so it stays safely hot, not just warm to the touch.

For the best texture, do not treat the Warm setting as an all-day extension of cooking time. It is for serving, not for endlessly stretching the batch.

How to Thicken Crockpot Chili

If you have ever lifted the slow cooker lid and found chili that looks more like soup, this is the section that saves the pot.

The slow cooker is good at simmering; it is not good at evaporating. That is why thick chili starts with less liquid, not with a rescue mission at the end.

Do not judge the texture straight from under the lid. Slow cookers trap steam, so let the chili rest uncovered for 10 to 15 minutes before adding thickeners. If it still looks loose after resting, use one of the fixes below.

Once the chili coats the spoon and leaves a soft trail when you stir, it is thick enough.

Best Ways to Give a Loose Pot More Body

Thickening methodHow to use it
Tomato pasteAdd 2 to 3 tablespoons at the start
Cook uncoveredRemove the lid for the last 20 to 30 minutes
Mash beansMash 1/2 to 1 cup beans into the chili before serving
Refried beansStir in 1/2 cup for a creamier, fuller base
Masa harina or cornmealAdd 1 tablespoon at a time and let it cook in
Rest before servingLet chili sit uncovered for 10 to 15 minutes

Easy thick chili trick: mash some of the beans directly into the pot before serving. It gives the sauce body naturally without making the chili taste starchy. Refried beans work the same way if you want an even creamier base.

Guide showing ways to thicken crockpot chili with tomato paste, mashed beans, refried beans, masa or cornmeal, and resting uncovered
If your crockpot chili turns loose, fix the body before serving: rest it uncovered, mash beans, add tomato paste, or stir in refried beans.

For the next batch, start with less broth, drain the beans, and keep tomato paste in the recipe. The chili should look almost too dense before cooking, because the slow cooker will give moisture back.

Best Beans for Crockpot Chili

Beans make chili hearty, but the mix decides whether the bowl feels firm, creamy, or too soft. The easiest rule is to use one firm bean and one softer bean so the chili has both bite and body.

  • Kidney beans: classic chili bite, sturdy texture, and a familiar look.
  • Pinto beans: softer and creamier, especially if you like a slightly thicker-feeling bowl.
  • Black beans: darker, earthier, and a little firmer than pinto beans.
  • Chili beans: useful as a shortcut because they are already seasoned, but taste before adding more salt.
  • Refried beans: not a main bean here, but useful if you want to thicken the sauce naturally.

Kidney plus pinto gives the most classic texture. Pairing kidney with black beans makes the chili a little darker and heartier. If your family does not love kidney beans, use pinto and black beans instead.

Bowls of kidney beans, pinto beans, black beans, chili beans, and refried beans beside a slow cooker of chili
For better bean texture, mix one firm bean with one softer bean; kidney beans give bite, while pinto, black, or refried beans add body.

Should You Drain Canned Beans for Chili?

For this recipe, yes. Draining and rinsing gives you better control over salt and keeps the chili base cleaner. If you use chili beans in sauce, you can include the sauce, but reduce other seasoning until you taste the finished pot.

Can You Use Dried Beans in Crockpot Chili?

Canned beans are the easiest, most reliable choice for this slow cooker chili. They are already cooked and ready for the crockpot.

Dried kidney beans need proper soaking and boiling before they go into a slow cooker recipe. If you want to use dried beans, cook them safely first, then add them to the chili.

Flavor Upgrades for Better Crockpot Chili

Once the base tastes right, upgrades should make the chili deeper, not busier. Choose one or two, not the whole table.

UpgradeWhat it doesHow much to use
BaconAdds smoky richness4 to 6 cooked slices, chopped
Italian sausageAdds savory depthReplace 1/2 to 1 lb beef
BeerAdds a deeper, malty baseUse 1/2 cup instead of broth
Worcestershire sauceAdds umami1 tablespoon
Cocoa powderAdds dark depth, not sweetness1 teaspoon
Brown sugarBalances tomato acidity1 to 2 teaspoons
Apple cider vinegarBrightens flat chili1 teaspoon at the end
Chipotle or smoked paprikaAdds smoky heatStart with 1/2 to 1 teaspoon
Jalapeño or cayenneMakes chili spicierAdd to taste
Beef bouillonBoosts beefy flavor1 cube or 1 teaspoon paste

For a familiar family-style chili, tomato paste and Worcestershire sauce are enough. A richer game-day pot can take bacon, beer, cocoa powder, or a little chipotle. To brighten chili that tastes dull, add a small splash of vinegar at the end instead of adding more spice.

If bacon is your upgrade, making a tray of oven-cooked bacon first is easier than frying strips while the chili is coming together.

Crockpot Chili Variations

The base method is built for beef-and-bean chili, but it can still flex without turning into a completely different dinner.

No-Bean Crockpot Chili

Skip the two cans of beans and add extra ground beef, diced bell peppers, mushrooms, or more tomatoes. Reduce the broth slightly so the chili does not turn soupy. A true no-bean chili needs a meatier balance, so build the pot around beef, peppers, tomatoes, and seasoning instead of simply removing the beans.

Turkey Chili

Use ground turkey in place of the beef. Because turkey is leaner and milder, add a little extra tomato paste, Worcestershire sauce, chili powder, or smoked paprika.

Spicy Crockpot Chili

Add jalapeño, cayenne, chipotle powder, hot sauce, or diced tomatoes with green chiles. Start small because the heat spreads through the whole pot as the chili cooks.

Mild Crockpot Chili

Use mild chili powder, plain diced tomatoes, no cayenne, and only a small amount of smoked paprika. If everyone at the table likes a different heat level, keep the base mild and let toppings do the arguing with jalapeños, hot sauce, chipotle, or mango habanero sauce.

5-Ingredient Shortcut Chili

For the fastest version, use ground beef, beans, diced tomatoes, tomato sauce, and a chili seasoning packet. It will not have the same depth as the full recipe, but it works when dinner needs to be simple.

Chili Seasoning Packet Version

Use one chili seasoning packet in place of the chili powder blend, cumin, smoked paprika, oregano, salt, and pepper. Taste near the end before adding more salt because packets vary.

Vegetarian Chili

For vegetarian crockpot chili, skip the beef and add extra beans, lentils, bell peppers, corn, zucchini, mushrooms, or sweet potato. Because the beef is no longer carrying the base, vegetarian chili needs extra body from beans, lentils, mushrooms, or vegetables.

White Chicken Chili

White chicken chili follows a different path. It usually uses chicken, white beans, green chiles, broth, and often cream cheese or cream. This recipe is the tomato-based beef chili version.

Toppings for Crockpot Chili

Toppings are where the bowl gets fun: cold sour cream against hot chili, sharp cheddar melting into the top, onions for crunch, and chips for scooping.

  • Shredded cheddar cheese
  • Sour cream or Greek yogurt
  • Green onions
  • Diced red onion
  • Pickled jalapeños
  • Fresh jalapeños
  • Cilantro
  • Avocado
  • Tortilla chips
  • Corn chips
  • Lime wedges
  • Hot sauce
Chili toppings arranged on a board, including shredded cheddar, sour cream, green onions, red onion, jalapenos, avocado, cilantro, lime wedges, tortilla chips, and hot sauce
Toppings change the same pot in different ways: cheese adds richness, sour cream cools heat, onions add crunch, and lime keeps the bowl bright.

On game day, the easiest move is to keep the chili warm and let the toppings do the work. A rich, balanced pot makes every topping taste better.

If you are turning chili into nachos or chili cheese fries, a spoonable cheese sauce gives a smoother finish than shredded cheese alone.

What to Serve With Crockpot Chili

A bowl of chili can stand on its own, but the right side makes it feel like a full table instead of just a full bowl.

  • Cornbread
  • Rice
  • Baked potatoes
  • Tortilla chips
  • Nachos
  • Hot dogs
  • French fries
  • Garlic bread
  • Simple green salad
Bowl of crockpot chili served with cornbread, tortilla chips, baked potato, green salad, and macaroni and cheese
To make chili feel like a full meal, pair it with something scoopable, something soft, and something fresh: chips, cornbread, potatoes, mac and cheese, or salad.

For a bigger comfort-food table, chili pairs well with creamy sides like macaroni and cheese. Keep the chili bold and the side creamy, and the plate feels balanced instead of heavy in one note.

If the chili spread is already rich, a cold wedge salad gives the table something crisp, creamy, and fresh without competing with the chili.

Leftover Chili Ideas

Leftovers are not a compromise here. They are part of the plan. Spoon chili over baked potatoes, use it for chili dogs, turn it into chili nachos, serve it over rice, or stir it into cooked macaroni for chili mac. For another ground-beef pasta night, homemade cheeseburger macaroni keeps the same cozy skillet-dinner feeling without repeating chili.

How Much Chili Per Person?

This recipe makes about 10 to 12 cups of chili, which is enough for 8 to 10 servings. The exact amount depends on whether chili is the main meal, part of a chili bar, or a topping for potatoes, hot dogs, nachos, or fries.

Serving stylePlan for
Main meal1 to 1 1/2 cups per person
Chili bar with toppingsAbout 1 cup per person
Side dish1/2 to 3/4 cup per person
Topping for potatoes, nachos, or hot dogs1/2 cup per person

How to Set Up a Crockpot Chili Bar

For a chili bar, keep the pot hot, set toppings out separately, and plan for people to come back for a little more. Chili has a way of turning one bowl into “just one more spoonful.”

Crockpot chili bar with a slow cooker of chili, ladle, bowls, tortilla chips, cornbread, sour cream, cheese, onions, jalapenos, and serving spoons
A crockpot chili bar works best when the hot chili, bowls, toppings, chips, and cornbread are close enough for people to build their own bowls easily.

If you are feeding a crowd, keep the slow cooker no more than about three-quarters full. Make two batches if needed, or use a larger 7- to 8-quart slow cooker so the chili has room to heat evenly.

Storage, Freezing, and Reheating

How Long Does Crockpot Chili Last in the Fridge?

Store leftover chili in shallow airtight containers in the refrigerator for 3 to 4 days. Let the steam settle briefly, then refrigerate it within 2 hours rather than leaving the pot out for hours.

Leftover crockpot chili stored in glass containers with a serving of chili on a baked potato nearby
Leftover chili should feel like a second dinner, not a backup plan; store it well, then use it over baked potatoes, rice, nachos, chili mac, or hot dogs.

Can You Freeze Crockpot Chili?

Yes. Crockpot chili freezes well for up to 3 months for best quality. Freeze it in meal-size containers or freezer bags, leaving a little space at the top because chili expands as it freezes.

How to Reheat Chili

Reheat chili on the stovetop over medium-low heat or in the microwave, stirring occasionally. Add a splash of broth or water when it is too thick after chilling or freezing. When it is too thin, simmer uncovered until it tightens back up.

Is Chili Better the Next Day?

Yes, chili often tastes better the next day. The spices settle, the tomato base mellows, and the beef and beans absorb more flavor. Tomorrow’s bowl tastes like a plan, not a leftover.

Common Crockpot Chili Mistakes and Fixes

If the chili does not taste right at the end, do not panic. Most problems need a small adjustment, not a new pot. The final 15 minutes should be for toppings, not rescue work, but this table will still save a pot that needs help.

ProblemFix
Chili is wateryRest uncovered first, then cook uncovered, add tomato paste, or mash beans
Chili is greasyBrown and drain the beef before slow cooking
Chili tastes blandAdd salt, Worcestershire sauce, chili powder, or a splash of vinegar
Chili is too spicyAdd beans, tomato sauce, sour cream, or a tiny pinch of sugar
Beans are mushyAdd canned beans later next time if you prefer firmer beans
Chili is too firmAdd broth or water in small splashes
Beef is clumpyBreak it up well while browning before adding it to the slow cooker
Chili tastes acidicAdd a small pinch of sugar, more beans, or a little extra tomato sauce

The easiest way to avoid most of these problems is to brown and drain the beef, use tomato paste, avoid too much liquid, and taste the chili near the end instead of assuming it is finished. If the pot tastes flat, it usually needs salt or brightness, not more hours.

FAQ

How long does chili cook in a crockpot?

Cook crockpot chili for 6 to 8 hours on Low or 3 to 4 hours on High. Low gives deeper flavor and a more settled, spoonable texture.

Best setting for crockpot chili: Low or High?

Choose Low when you have time. High works when the beef is already browned and you need the chili ready sooner.

Do you have to brown ground beef before crockpot chili?

Yes, for the best result. Browning gives the beef better texture, adds deeper flavor, and lets you drain grease before it goes into the slow cooker.

Can raw ground beef go in the slow cooker?

Technically yes, if it is thawed, broken up well, and cooked through fully to 160°F / 71°C. Browning first gives better texture, deeper flavor, and less grease.

Night-before prep: can you start crockpot chili ahead?

Yes. Brown the beef and cook the aromatics and spices, then cool and refrigerate that mixture. Add it to the slow cooker with the canned ingredients the next day.

Is this chili spicy?

It is mild to medium, depending on your chili powder. For kid-friendly chili, use mild chili powder and skip cayenne, jalapeños, and hot sauce.

How do you thicken crockpot chili?

Rest it uncovered for 10 to 15 minutes first. If it still looks loose, add tomato paste, mash some beans, stir in refried beans, or cook uncovered briefly.

What beans are best for crockpot chili?

Kidney beans give classic bite, pinto beans make the bowl softer and creamier, and black beans add a darker, earthier flavor. A mix of one firm bean and one softer bean works well.

Should canned beans be drained for chili?

Yes. Draining and rinsing canned beans gives you better control over salt and texture. If you use chili beans in sauce, add the sauce but season carefully.

Dried beans in crockpot chili: are they safe?

No, especially not dried kidney beans. Use canned beans here, or soak and boil dried beans properly before slow cooking.

How do you make crockpot chili without beans?

Replace the beans with extra ground beef, peppers, mushrooms, or more tomatoes, and reduce the added liquid. No-bean chili needs a meatier balance.

Does beer work in crockpot chili?

Yes. Beer adds a subtle malty depth, but broth works just as well if you want a classic or alcohol-free chili.

What size slow cooker do I need for chili?

A 6-quart slow cooker is best for this full recipe. Use a 4-quart slow cooker for a half batch, or a 7- to 8-quart slow cooker for a larger batch.

Doubling crockpot chili: what should change?

You can double it only if your slow cooker is large enough. Keep it no more than about three-quarters full, or make two separate batches.

Using a chili seasoning packet: does it work?

One chili seasoning packet can replace the dried spices. Taste near the end before adding more salt because packets vary.

Why does my chili taste bland?

Bland chili usually needs salt, acidity, or deeper savory flavor. Add salt, Worcestershire sauce, tomato paste, chili powder, or a small splash of apple cider vinegar near the end.

Freezing crockpot chili: does it work?

Crockpot chili freezes well. Cool it, portion it into freezer-safe containers or bags, and freeze for up to 3 months for best quality. Thaw overnight in the fridge and reheat gently.

Is chili better the next day?

Chili often tastes better the next day because the spices, beef, beans, and tomatoes have more time to settle. That makes it ideal for parties, meal prep, and leftovers.

Final Notes for Thick Crockpot Chili

Save this one for the days when you want dinner handled early and a pot of chili waiting when everyone is hungry. Make it once as written, then adjust the heat, beans, and toppings the way your table likes it.

The base is the part that matters: browned beef, tomato paste, low liquid, and enough time for the slow cooker to turn everything thick, savory, and scoopable. When that base is right, the chili smells good before anyone asks what is for dinner and lands on the table ready for cheese, sour cream, onions, chips, or a second bowl.

Back to top

Posted on Leave a comment

Slow Cooker Chicken Fajitas: Easy Crock Pot Chicken Fajita Recipe

Slow cooker chicken fajitas served with shredded chicken, colorful bell peppers, onions, warm tortillas, lime wedges, salsa, avocado, cilantro, and hot sauce on a dinner table.

These slow cooker chicken fajitas are for the nights when you want the Crock Pot to handle dinner, but you still want the meal to feel fresh when everyone sits down. You get smoky, lime-bright chicken with sweet peppers and soft onions, ready to tuck into warm tortillas or spoon over rice.

The only tricky part is knowing what the slow cooker will do once the lid goes on. It traps moisture, so fajitas can become too wet, too soft, or a little flat if everything cooks together with too much liquid. This version keeps the method easy but gives you one simple rule to remember: less liquid, later peppers, lime at the end.

By the time you warm the tortillas and cut the lime, the chicken is tender, the peppers are sweet, the onions are soft, and dinner feels like more than something you simply left in the slow cooker. Use the cooked chicken and peppers for classic fajitas, tacos, bowls, quesadillas, nachos, or easy leftovers.

It will not have the same char as skillet or sheet pan fajitas, but it gives you an easy, reliable Crock Pot dinner with very little hands-on work.

Quick Answer: How to Make Slow Cooker Chicken Fajitas

To make slow cooker chicken fajitas, add boneless chicken breasts or thighs to a 5.5 to 6 quart slow cooker with sliced bell peppers, onion, garlic, fajita seasoning, and ¾ to 1 cup salsa, Rotel, or diced tomatoes. Cook on low for 4 to 6 hours or high for 2½ to 3½ hours, until the chicken reaches 165°F / 74°C. Slice or shred the chicken, return it with only enough juices to coat, finish with lime, and serve in tortillas, bowls, tacos, salads, or quesadillas.

The three keys are less liquid, later peppers, and lime at the end. For better texture, add only half the peppers and onions at the beginning. Add the rest during the last 30 to 60 minutes so they stay brighter, firmer, and less watery.

For the easiest version, add everything at the beginning and drain before serving. If you want better texture, save some peppers for the end, keep the filling glossy, and finish with lime. The rest of the guide helps you make it tighter for tortillas, saucier for bowls, or softer for shredded leftovers.

Start with Less Liquid

This is the first texture decision in slow cooker chicken fajitas: add enough salsa or Rotel to season the chicken, but not so much that the pot turns soupy.

Salsa being poured from a measuring cup into a slow cooker with chicken, bell peppers, onions, garlic, and fajita seasoning.
First, control the liquid. For tortilla-style slow cooker chicken fajitas, about ¾ cup salsa or Rotel seasons the chicken without flooding the pot or making the filling hard to fold.

Slow Cooker Chicken Fajitas at a Glance

Slow cooker size5.5 to 6 quart / 5.2 to 5.7 L
Fill levelAim for about half to two-thirds full for even cooking
Chicken amount2 lb / 900 g
Chicken to useBreasts for slicing, thighs for juicier shredded fajitas
Liquid amount¾ cup for tortillas, up to 1 cup for bowls
Low cook time4 to 6 hours
High cook time2½ to 3½ hours
Pepper methodHalf early, half late
Safe chicken temperature165°F / 74°C
Finish withFresh lime juice after cooking
Serve asFajitas, tacos, bowls, quesadillas, salads, nachos, meal prep

Slow Cooker Chicken Fajitas Recipe

Description: Easy Crock Pot chicken fajitas with juicy chicken, sweet peppers, soft onions, smoky fajita seasoning, lime, and just enough salsa or Rotel to keep everything flavorful without turning watery.

Prep time: 10 to 15 minutes
Cook time: 2½ to 3½ hours on high, or 4 to 6 hours on low
Total time: About 2 hours 45 minutes to 6 hours 15 minutes
Servings: 6
Yield: Enough chicken and peppers for 8 to 12 fajitas, depending on tortilla size
Equipment: 5.5 to 6 quart / 5.2 to 5.7 L slow cooker, knife, cutting board, tongs, slotted spoon, instant-read thermometer

Ingredients

  • 2 lb / 900 g boneless skinless chicken breasts or thighs
  • 3 large bell peppers / 420 to 500 g, sliced, preferably mixed colors
  • 1 large onion / 180 to 220 g, sliced
  • ¾ to 1 cup / 180 to 240 ml salsa, Rotel, or diced tomatoes
  • 3 to 4 garlic cloves / 12 to 16 g, minced
  • 2½ to 3 tablespoons / 22 to 28 g fajita seasoning, homemade or store-bought
  • 2 tablespoons / 30 ml fresh lime juice, plus extra lime wedges for serving
  • 8 to 12 tortillas, flour or corn
  • Optional toppings: sour cream, avocado, guacamole, cilantro, shredded cheese, salsa, jalapeños, lettuce, or hot sauce

Use ¾ cup / 180 ml salsa or Rotel for thicker tortilla-friendly fajitas. For juicier bowls or meal prep, use closer to 1 cup / 240 ml.

Instructions

  1. Slice the vegetables. Cut the bell peppers and onion into strips. Set aside about half of them to add near the end of cooking.
  2. Layer the slow cooker. Add the first half of the peppers and onions to the bottom of the slow cooker. Place the chicken on top.
  3. Add flavor. Sprinkle the chicken with fajita seasoning and garlic. Pour the salsa, Rotel, or diced tomatoes over the top. Do not add extra water.
  4. Cook. Cover and cook on high for 2½ to 3½ hours or low for 4 to 6 hours, until the chicken reaches 165°F / 74°C. Very thick chicken breasts may need the longer end of the range.
  5. Add the remaining peppers. Stir in the reserved peppers and onions during the last 30 to 60 minutes. Use 30 minutes for firmer peppers and 60 minutes for softer peppers.
  6. Slice or shred. Remove the chicken. Rest it for 5 minutes if slicing, or shred it with two forks. Shredded fajitas should pull apart easily. Sliced fajitas should cut cleanly after resting.
  7. Adjust the juices. If there is a lot of liquid in the slow cooker, ladle some out. Return the chicken with only enough juices to coat the meat and vegetables.
  8. Finish with lime. Stir in the lime juice. Taste and adjust salt, seasoning, or lime.
  9. Serve. Fill warm tortillas with the chicken and peppers, or spoon them into bowls, quesadillas, or leftover meals.

Recipe Notes

  • Use ¾ cup / 180 ml salsa or Rotel for tortillas, or up to 1 cup / 240 ml for bowls.
  • Do not add extra water. The chicken, peppers, onions, and tomatoes release liquid as they cook.
  • Add half the peppers and onions late if you want better texture.
  • Thaw frozen chicken before using it in a slow cooker.
  • Finish with lime juice after cooking so the flavor stays fresh.
  • For tortillas, think glossy, not soupy. Drain or lift with tongs before filling tortillas.

Want better texture? See when to add peppers. Need to fix extra liquid? Read the watery fajitas section. Planning leftovers? Jump to storage and meal prep.

Why You’ll Make This Again

This is the kind of recipe that earns its place on a weeknight because it does more than make one dinner. It helps when the day is long, the chicken is already in the fridge, and you need something that can turn into warm tortillas tonight and easy leftovers tomorrow.

  • Mostly hands-off. Once the slow cooker is loaded, dinner is already moving.
  • It works with shortcuts. Use homemade fajita seasoning, a packet, salsa, Rotel, or diced tomatoes.
  • It solves the usual slow-cooker problems. The filling stays glossy instead of watery.
  • It can be tight or saucy. Keep it neat for tortillas or leave it juicier for bowls.
  • It turns into more than fajitas. Use the same batch for tacos, bowls, quesadillas, and leftovers.

Once the basic method is set, you can decide whether you want a tighter tortilla filling, a saucier bowl, or soft shredded chicken for leftovers.

Why This Crock Pot Chicken Fajita Recipe Works

A slow cooker does not brown food, so the flavor has to come from seasoning, acidity, vegetables, and the way you manage the juices. That is why this recipe uses a controlled amount of salsa or Rotel, adds some peppers late, and finishes with lime instead of relying on char.

A lot of Crock Pot chicken fajita recipes are easy, but they make the same mistake: too much liquid, all the peppers added too early, and no clear plan for what to do with the juices at the end. The result can still taste good, but it often behaves more like wet shredded chicken than fajita filling.

Here, you still get the easy Crock Pot dinner, but the chicken stays juicy and the peppers do not all collapse into the sauce. A smaller amount of salsa or Rotel gives the meat enough moisture without drowning it. Some peppers and onions go in early to flavor the chicken, while the rest go in near the end so the finished chicken and peppers still have color and bite. Lime juice goes in after cooking, when it can wake up the smoky seasoning and sweet peppers instead of disappearing into the pot.

  • Controlled liquid keeps the chicken useful for tortillas.
  • Two-stage peppers give you flavor and better texture.
  • Chicken breasts or thighs both work depending on your goal.
  • Sliced or shredded chicken lets you choose classic fajita-style strips or easier pulled chicken.
  • Fresh lime at the end keeps the flavor lively.

Do Slow Cooker Fajitas Taste Like Skillet Fajitas?

Not exactly, and that is worth saying clearly. This is not the sizzling-pan version. It is the weeknight version: softer, juicier, easier, and still bright enough to feel fresh when the tortillas hit the table.

Expect soft, juicy fajita chicken with sweet peppers, smoky seasoning, and a fresh lime finish. It is not charred or sizzling, but it should taste bright, savory, and easy to fold into warm tortillas.

To make the slow-cooked version taste more fajita-like, add some peppers near the end, finish with fresh lime, avoid too much liquid, and use smoked paprika in the seasoning. For more roasted edges and oven-style flavor, try these sheet pan chicken fajitas. They give you the same chicken, peppers, and onion idea with more browning and less slow-cooker softness.

Ingredients You Need

The ingredient list is simple, but each part matters. Good slow cooker fajitas need enough seasoning to stand up to the long cook, enough moisture to keep the chicken juicy, and not so much liquid that the finished chicken and peppers become soupy.

Ingredient checkpoint: the chicken, peppers, onion, seasoning, salsa or Rotel, lime, tortillas, and toppings all support a different part of the final fajita texture.

Ingredients for slow cooker chicken fajitas arranged on a prep surface, including chicken, bell peppers, onion, salsa, fajita seasoning, garlic, lime, tortillas, and cilantro.
Chicken, peppers, onion, seasoning, salsa or Rotel, lime, and tortillas each support a different part of the finished fajita texture.
IngredientWhat it doesUse
ChickenMain proteinBreasts for leaner sliced fajitas; thighs for juicier shredded fajitas
Bell peppersSweetness, color, fajita flavorUse mixed colors for better flavor and appearance
OnionSavory sweetnessYellow, white, or red onion all work
Fajita seasoningMain flavor baseHomemade, packet fajita seasoning, or taco seasoning in a pinch
Salsa, Rotel, or tomatoesMoisture and flavorUse less for tortillas and more for bowls
GarlicDepth and aromaFresh garlic is ideal; garlic powder works if needed
Lime juiceFreshness and balanceAdd after cooking for the liveliest flavor
Tortillas and toppingsTurn the chicken and peppers into dinnerUse tortillas, rice, lettuce cups, or bowls

Chicken Breast vs Chicken Thighs

Choose chicken breasts if you want leaner pieces that can be sliced into strips. They cook well here, but they can dry out if they sit too long, so start checking closer to the shorter end of the timing range.

If chicken breast is your default cut and dry slow-cooker chicken is a recurring problem, this guide to crock pot chicken breast recipes goes deeper into timing, sauce, and keeping lean chicken useful for bowls, wraps, and leftovers.

Choose chicken thighs if you want the most forgiving version. They stay juicier, shred easily, and are especially good for tacos, bowls, and meal prep. If your slow cooker runs hot or dinner timing is unpredictable, thighs are usually easier to work with.

Both breasts and thighs should reach 165°F / 74°C before serving.

Homemade Fajita Seasoning, Packet Seasoning, or Taco Seasoning?

Use what fits the night. A packet of fajita seasoning is fast, easy, and completely acceptable for a weeknight slow cooker dinner. Homemade fajita seasoning gives you more control over salt, heat, smoke, and sweetness.

Taco seasoning also works in a pinch. It may taste a little more like taco chicken than fajitas, but the peppers, onions, lime, and smoked paprika help pull it back toward fajita flavor. If you use a packet, wait until the end before adding extra salt because many store-bought blends are already salty.

Simple Homemade Fajita Seasoning

SpiceAmount
Chili powder1 tablespoon
Ground cumin2 teaspoons
Smoked paprika1 teaspoon
Garlic powder1 teaspoon
Onion powder1 teaspoon
Dried oregano½ teaspoon
Ground coriander½ teaspoon
Black pepper½ teaspoon
Salt1 to 1½ teaspoons
Cayenne pepper⅛ to ¼ teaspoon, optional

This amount seasons about 2 lb / 900 g chicken. If your chili powder or store-bought seasoning already contains salt, reduce the added salt and adjust after cooking.

How to Make Slow Cooker Chicken Fajitas

The easiest method is to add everything at once and cook. That works, especially for shredded tacos and bowls. The better method is almost as easy: add some vegetables at the beginning and some near the end. That small move makes the dish feel more like fajitas and less like slow-cooker chicken stew.

Step 1: Slice the Peppers and Onion

Slice the bell peppers and onion into strips. Keep them similar in size so they cook evenly. Set aside about half of the peppers and onions if you want better texture in the finished fajitas.

Step 2: Build the First Layer

Add half the peppers and onions to the bottom of the slow cooker. This gives the chicken a flavorful base and helps season the cooking juices.

Step 3: Add Chicken, Garlic, Seasoning, and Salsa

Place the chicken on top of the vegetables. Sprinkle the fajita seasoning and garlic over the chicken, then add the salsa, Rotel, or diced tomatoes. Do not add extra water. In most slow cookers, the chicken, peppers, onions, and tomatoes release more liquid than you expect.

Before the lid goes on: the pot should look seasoned and lightly sauced, not flooded. That setup helps the chicken cook juicy without creating a watery tortilla filling later.

Raw chicken breasts layered in a slow cooker with sliced bell peppers, onions, salsa, garlic, and fajita seasoning before cooking.
Before cooking, the pot should look coated, not drowned. That controlled start keeps the final fajita filling easier to serve.

Step 4: Cook Until the Chicken Is Done

Cook on high for 2½ to 3½ hours or low for 4 to 6 hours. Chicken breasts are usually best closer to the shorter end if you want slices that hold together. Thighs can handle a longer cook and are better for shredding.

Step 5: Add the Remaining Peppers and Onions

Add the reserved peppers and onions during the last 30 to 60 minutes. Use 30 minutes for more bite, or go closer to 60 minutes if you want them softer but still fresher than the vegetables that cooked from the beginning.

Step 6: Slice or Shred the Chicken

Once the chicken reaches 165°F / 74°C, remove it from the slow cooker. Rest it for a few minutes before slicing, or shred it with two forks if you want pulled chicken for tacos, bowls, or leftovers.

Step 7: Manage the Cooking Juices

If the slow cooker has a lot of liquid, ladle some out before returning the chicken. The finished chicken should look shiny and coated, with a little sauce clinging to the peppers, not a pool of liquid under every tortilla. You are not trying to make dry chicken. Instead, keep the chicken and peppers juicy enough to taste good but firm enough to pick up in a tortilla.

Step 8: Finish with Lime and Serve

Stir in fresh lime juice at the end. When the lime goes in, the whole pot should smell brighter. Taste and adjust salt, seasoning, or lime. Serve with warm tortillas, bowls, or whatever leftovers need rescuing tomorrow.

Slow Cooker Timing: Low vs High

Once the pot is set up, timing is the main thing to watch. The goal is not just cooked chicken. It is chicken that is done before it turns stringy.

Slow cookers are not all the same, and chicken breast can go from juicy to dry faster than people expect. Use the times below as a guide, then let temperature and texture decide when the chicken is done. Chicken should reach 165°F / 74°C. You can confirm poultry temperature guidance from FoodSafety.gov.

Temperature checkpoint: once the chicken reaches 165°F / 74°C, you can safely slice or shred it and then decide how much cooking juice to keep.

Instant-read thermometer inserted into cooked chicken fajitas in a slow cooker with bell peppers and onions around the chicken.
Use temperature, not just time. Once the chicken reaches 165°F / 74°C, you can safely slice, shred, and finish the filling.
GoalSettingTimeWhat to know
Sliced chicken fajitasLow4 to 5 hoursHelpful when you want the chicken to hold its shape
Shredded chicken fajitasLow5 to 6 hoursWorks well for tacos, bowls, quesadillas, and meal prep
Faster dinnerHigh2½ to 3½ hoursUseful, but check early to avoid dry chicken breast
Chicken thighsLow5 to 6 hoursJuicier and more forgiving than breasts
Holding after cookingWarmAs short as possibleLong holding can make chicken breast dry or stringy

Very thick chicken breasts may need the longer end of the range. If the chicken is done before dinner, remove it from the slow cooker and keep it covered. Return it to the warm chicken and peppers closer to serving time so lean breast meat does not keep cooking while the vegetables sit in the hot pot.

How to Keep Slow Cooker Chicken Fajitas from Getting Watery

If there is one place slow cooker fajitas usually go wrong, it is the liquid. The chicken may taste good, but if it drips through the tortilla, dinner becomes messy fast.

Do not panic if the slow cooker looks juicy when you open the lid. That is normal. The trick is deciding how much of that liquid belongs in the final tortilla filling.

Look for Glossy, Not Soupy

This is the visual cue for tortilla fajitas. The chicken and peppers should be coated with seasoned juices, but the filling should not be loose enough to run through a warm tortilla.

Tongs lifting glossy slow cooker chicken fajita filling with colorful bell peppers and onions from the slow cooker.
This is the texture cue to remember: glossy, not soupy. The chicken and peppers should be coated with seasoned juices, but not swimming if they are going into tortillas.

If past slow-cooker chicken has turned out watery or bland, this is the part that changes it: start with less liquid, add some peppers later, and brighten the pot at the end. A few small choices make the difference between juicy and soggy. For tortillas, think glossy, not soupy. Bowls can stay a little juicier because rice, quinoa, or cauliflower rice can soak up the seasoned liquid.

ProblemFix
Too much salsa, Rotel, or tomatoUse ¾ cup / 180 ml for 2 lb / 900 g chicken if serving in tortillas
Peppers release too much waterAdd half the peppers near the end instead of all at the beginning
Chicken releases a lot of juiceRemove extra liquid before returning sliced or shredded chicken
Tortillas get soggyServe with tongs or a slotted spoon
The pot looks soupyAfter the chicken reaches 165°F / 74°C, remove the lid or set it slightly ajar on high for 20 to 30 minutes to reduce excess liquid
You want bowl-style fajitasLeave it a little juicier for rice, quinoa, or cauliflower rice

How to Fix Watery Fajitas

If the pot gave you more liquid than expected, treat it as a final adjustment instead of a failure. Drain, reduce, or lift the filling with tongs so the flavor stays concentrated.

Before and after comparison showing watery slow cooker chicken fajitas on one side and drained glossy chicken fajita filling on the other.
If the pot looks watery, do not panic. Lift the chicken and peppers with tongs, drain or reduce the extra liquid, then add lime so the filling tastes bright instead of diluted.

Before serving, look at the bottom of the slow cooker. A little seasoned juice is fine. However, a pool of liquid means the chicken and peppers should be lifted with tongs, drained with a slotted spoon, or reduced briefly before they go into tortillas.

After the extra liquid is out of the way, the filling tastes more concentrated: smoky, bright, and juicy enough to fold into a tortilla without losing half of it on the plate.

Do not add water at the beginning unless your slow cooker is unusually dry. For most slow cookers, the chicken, vegetables, and salsa or tomatoes create enough moisture on their own.

Use the Tortilla Test Before Serving

Before the filling goes to the table, try one tortilla. If it folds neatly and tastes juicy without dripping, the texture is right for fajitas.

Hand holding a warm tortilla filled with slow cooker chicken fajitas, bell peppers, onions, salsa, avocado, and lime nearby.
Then, use the tortilla test. The filling should be juicy enough to taste good, but controlled enough to fold into warm tortillas without soaking, tearing, or dripping everywhere.

Choose Your Version: Tortillas, Bowls, Meal Prep, or Dump-and-Go

One pot can give you a few different dinners, depending on how much juice you leave behind. Choose the tighter version for tortillas, the juicier version for bowls, the shredded version for meal prep, and the late-pepper version when you want the freshest texture.

Use the visual guide: one batch can become tighter tortilla fajitas, juicier bowls, shredded meal prep, dump-and-go dinner, or creamy low-carb fajita chicken.

Visual guide showing slow cooker chicken fajitas served as tortillas, rice bowls, meal prep containers, dump-and-go style, and creamy low-carb fajita chicken.
Once the chicken is cooked, choose the version that fits the meal. Keep it tighter for tortillas, saucier for rice bowls, shredded for meal prep, or creamy for a low-carb plate.
What you wantLiquidChickenPeppersFinish
Tortilla fajitas¾ cup / 180 mlSliced or chunkyHalf early, half lateDrain well, then add lime
Rice bowls1 cup / 240 mlShredded or chunkyEarly or half-lateKeep some juices
Meal prep¾ to 1 cup / 180 to 240 mlShreddedSofter is finePack toppings separately
Best texture¾ cup / 180 mlSlicedAdd some peppers lateUse lime and tongs
Dump-and-go¾ to 1 cup / 180 to 240 mlShreddedAll at the beginningDrain before serving
Creamy low-carb¾ cup / 180 mlShreddedHalf-lateAdd cream cheese at the end

After the juices are right and the lime goes in, the same batch can become warm tortillas tonight, rice bowls tomorrow, or easy leftovers for lunch.

Dump-and-Go vs Best Texture

Both paths work. The fastest path is dump-and-go, while the best-texture version keeps some peppers back so the finished fajitas look brighter and eat less soft.

Comparison of dump-and-go slow cooker chicken fajitas with uncooked ingredients in the pot and best-texture fajitas with cooked chicken and bright peppers.
Dump-and-go is the easiest route, while the best-texture version saves some peppers for the end. That one timing change keeps Crock Pot chicken fajitas brighter and less mushy.

When to Add Peppers and Onions

Once you know whether you are making tortillas, bowls, or meal prep, the next choice is how fresh you want the peppers to feel.

Peppers are where slow cooker fajitas can either feel fresh or fall flat. If they cook for the full time, they become soft and saucy. That is fine for shredded chicken bowls or tacos, but it does not feel as much like classic fajitas.

For the best balance, use the half early, half late method. Early vegetables flavor the chicken. The late peppers should still look colorful and taste sweet, not faded into the sauce.

Add Some Peppers Late

Late peppers are the simplest way to make slow cooker fajitas feel more like fajitas. They add color, sweetness, and bite without requiring a separate skillet.

Fresh sliced red, yellow, orange, and green bell peppers being added to cooked chicken fajitas in a slow cooker.
Add some peppers during the last 30 to 60 minutes when you want more color and bite. This keeps slow cooker fajitas lively without adding another pan to dinner.

If using frozen sliced peppers, add them late and expect a softer, juicier result. Fresh peppers give the best color and bite, but frozen peppers are still useful for quick bowls, tacos, and weeknight dinners.

When you add themResultUse when
At the beginningVery soft peppers and onionsYou want the easiest dump-and-go dinner
Halfway throughBalanced textureYou want a simple family dinner
Last 30 to 60 minutesBrighter, firmer peppersYou want more fajita-like texture
Sauté separatelyMost bite and closest skillet feelYou do not mind one extra pan
Half early, half lateFlavor plus textureYou want the most practical slow cooker method

Shredded vs Sliced Slow Cooker Chicken Fajitas

Once the liquid is under control, the next choice is how you want to eat the chicken. Traditional fajitas usually use sliced meat, but Crock Pot chicken naturally becomes tender enough to shred. Neither option is wrong.

Shredded vs Sliced Chicken

Sliced chicken feels more classic in tortillas. Shredded chicken is easier for tacos, bowls, quesadillas, and leftovers, especially when the juices are controlled.

Side-by-side comparison of sliced slow cooker chicken fajitas and shredded chicken fajita filling with peppers, tortillas, lime, salsa, and cilantro.
Slice the chicken for a more classic fajita feel, or shred it for bowls, tacos, quesadillas, and leftovers. Either way, return it with just enough juice to coat.
StyleUse forHow to do it
Sliced chicken fajitasClassic tortillasCook just until done, rest 5 minutes, then slice across the grain
Shredded chicken fajitasTacos, bowls, quesadillas, leftoversCook until fork-tender, shred with two forks, toss with controlled juices
Chunky chicken fajitasRice bowls and saladsCut cooked chicken into thick pieces and fold back into the peppers and onions

For the most classic fajita feel, slice the chicken and add some peppers late. The easiest meal prep option is shredded chicken with just enough juice to coat.

Troubleshooting Slow Cooker Chicken Fajitas

If the pot looks a little messy at the end, that is normal. Slow cooker fajitas usually need one final adjustment before they become dinner.

If the pot does not look the way you hoped, it is usually one of four easy fixes: too much liquid, peppers that cooked too long, chicken breast that stayed on heat too long, or a finish that needs lime and salt.

Quick Fixes for Common Slow Cooker Fajita Problems

ProblemLikely causeFix
The pot is wateryToo much salsa, Rotel, tomato, or trapped steamDrain extra liquid, reduce it after the chicken is fully cooked, or use ¾ cup liquid next time
Peppers are mushyAll the peppers cooked from the beginningAdd half the peppers in the last 30 to 60 minutes
Chicken breast is dryCooked too long or held on warm too longCheck early, use thighs next time, and return chicken with some juices
Flavor tastes flatSlow cooking muted the seasoningAdd lime juice, salt, smoked paprika, hot sauce, or fresh cilantro
Tortillas get soggyThe chicken and peppers are too wet when assembledUse tongs or a slotted spoon and let liquid drip back into the cooker
Fajitas do not taste fajita-likeNo char, soft peppers, or too much sauceAdd peppers late, sauté peppers separately, or use the sheet pan method next time
Chicken is too dry after chillingIt absorbed liquid in the fridgeReheat with a spoonful of salsa, water, or reserved cooking liquid
Too loose for quesadillasToo much cooking juice left in the meatDrain well and reheat uncovered before adding to tortillas with cheese

From there, the fix is simple: drain a little, brighten with lime, or save the extra juice for bowls. Tortillas need a tighter filling. Quesadillas need the chicken drained well so the cheese and tortilla can crisp instead of steam.

Variations: Dump-and-Go, Rotel, No Tomato, and Creamy Low-Carb

Once the texture is handled, the flavor base can flex around what you have: Rotel, salsa, taco seasoning, no tomatoes, or a creamy finish.

You do not need the exact same jar, can, or seasoning blend every time. Use this section when you want the fastest version, a Rotel version, a no-tomato version, or a creamy low-carb fajita chicken.

Rotel, Salsa, or No Tomato

This choice changes both flavor and moisture. Tomato-based options add a red base, while the no-tomato version stays lighter and depends more on peppers, seasoning, garlic, and lime.

Three slow cooker chicken fajita variations labeled Rotel, Salsa, and No Tomato, each served in tortillas with peppers, onions, lime, and cilantro.
Rotel gives tomato-chile flavor, salsa keeps the recipe shortcut-friendly, and the no-tomato version stays lighter and less saucy. Choose the base based on flavor, moisture, and texture.
VariationWhat changesBest for
4-ingredientUse chicken, peppers and onions, seasoning, and salsa or RotelBusiest nights
RotelUse one 10 oz / 285 g can; drain lightly if very juicyTomato-chile flavor
No tomatoUse seasoning, garlic, lime, peppers, onions, and a small splash of broth only if neededLess watery fajitas
Cream cheeseAdd 3 to 4 oz / 85 to 115 g cream cheese during the last 20 to 30 minutesBowls, lettuce cups, low-carb plates
Taco seasoningUse a packet and adjust salt after cookingShortcut version
Salsa verde toppingAdd after cooking or at the tableBrighter green flavor

Rotel is canned diced tomatoes with green chiles. If you do not have it, use diced tomatoes plus a little chopped green chile, mild salsa, or another tomato-chile blend you like.

No-tomato fajitas need a little extra lime, smoked paprika, garlic, and seasoning so the chicken does not taste flat. For creamy fajita chicken, use the lower amount of salsa or Rotel so the sauce does not become loose.

Creamy Low-Carb Fajita Chicken

Add cream cheese near the end so the sauce stays smooth and the peppers do not disappear into a heavy base. This version works especially well with cauliflower rice or lettuce cups.

Creamy low-carb slow cooker fajita chicken served in a bowl with bell peppers, avocado slices, lime, cilantro, and cauliflower rice.
For creamy low-carb fajita chicken, stir in cream cheese near the end instead of at the beginning. The sauce should turn smooth and glossy while peppers, lime, and avocado keep the bowl balanced.

A fast dump-and-go Crock Pot chicken fajitas version can be made with chicken, fajita seasoning, one can Rotel, peppers, onions, and lime. It will still work; just drain before serving if the pot looks juicy.

For a brighter green topping instead of more red salsa, a spoon of salsa verde works especially well with the chicken, peppers, lime, and tortillas.

Can You Add Rice to the Slow Cooker?

Cook the rice separately. It is the safer, fluffier option because uncooked rice changes the liquid balance in this recipe and can turn mushy in the slow cooker. For reliable bowls, spoon the chicken, peppers, onions, and some of the juices over cooked rice instead.

Serve It Over Rice

Rice bowls are the place to keep a little more seasoned juice. The rice catches the sauce, while avocado, salsa, cilantro, and lime keep the bowl balanced.

Slow cooker chicken fajita rice bowl with seasoned chicken, bell peppers, white rice, avocado, lime, salsa, cilantro, and a slow cooker in the background.
Rice bowls can stay a little juicier because the rice absorbs the seasoned fajita juices.

If rice texture is where dinner usually goes wrong, this guide on how to cook rice covers stovetop, rice cooker, and Instant Pot timing so your bowl base stays fluffy instead of wet or gummy.

For meal prep, pack the rice and fajita chicken together only after both have cooled. Keep fresh toppings like lettuce, sour cream, avocado, and cilantro separate until serving.

Can You Use Frozen Chicken for Slow Cooker Fajitas?

No. Thaw the chicken first before using it in this recipe. Slow cookers heat gradually, and frozen chicken can take too long to move through unsafe temperatures. FoodSafety.gov’s slow-cooker guidance says frozen meat, poultry, or seafood should be thawed safely before adding it to the slow cooker.

Forgot to thaw? Use a pressure cooker method or cook the chicken separately from frozen with a faster method, then combine it with the peppers, seasoning, salsa, and lime after it is fully cooked. Check that the chicken reaches 165°F / 74°C before serving.

What to Serve with Slow Cooker Chicken Fajitas

Warm tortillas are the classic choice, but this chicken is flexible. One batch can become dinner tonight and a different lunch tomorrow.

Warm tortillas in a dry skillet for 20 to 30 seconds per side, or wrap a stack in foil and place it in a 250°F / 120°C oven until soft. Soft, warm tortillas fold better, hold the chicken more neatly, and make even a simple Crock Pot dinner feel fresher.

Put the tortillas, lime wedges, avocado, salsa, and hot sauce on the table and let everyone build their own. That is where this slow cooker dinner starts to feel fresh.

Table setup: set the chicken and peppers beside warm tortillas and fresh toppings so everyone can build the fajita they want.

Build-your-own fajita table with slow cooker chicken and peppers, tortillas, lime wedges, guacamole, salsa, sour cream, cilantro, jalapeños, hot sauce, and hands assembling fajitas.
Set out warm tortillas, glossy chicken, peppers, lime, salsa, guacamole, and hot sauce so everyone can build their own fajitas.
Serving ideaWhy it fits
Flour or corn tortillasClassic fajita dinner
Rice bowlsEasy meal prep and filling lunches
Cauliflower riceLower-carb bowl option
Lettuce cupsLighter fajita wraps
TacosFamily-friendly and easy to assemble
QuesadillasOne of the best uses for leftovers
SaladHigh-protein lunch with avocado, lime, and crisp vegetables
NachosCasual snack or game-day style dinner
Pasta or pasta bakeComfort-food variation
CasseroleGood for stretching leftovers into another family dinner

Best Toppings for Chicken Fajitas

Because the chicken is warm and saucy, the best toppings are the ones that wake it up: lime, cilantro, avocado, salsa, crunch, or heat.

  • Sour cream or Greek yogurt
  • Avocado or guacamole
  • Fresh cilantro
  • Lime wedges
  • Shredded lettuce
  • Cheese, shredded or crumbled
  • Salsa or pico de gallo
  • Pickled jalapeños
  • Hot sauce
  • Crushed tortilla chips for bowls or salads

For the creamy avocado route, this guacamole recipe is the easiest topping to put beside warm tortillas, salsa, lime, and fajita chicken.

If you like heat at the table, a thin vinegar-style hot sauce, jalapeño sauce, or smoky chile sauce can wake up the whole plate. This pepper sauce guide gives you several directions, from bright and sharp to smoky and fruity.

Storage, Freezing, and Reheating

Slow cooker chicken fajita filling stores well. Keep tortillas, rice, lettuce, and fresh toppings separate so they do not become soggy.

Pack It for Meal Prep

Cool the rice and chicken before packing, then keep wet or fresh toppings separate. That one step keeps fajita bowls from turning soggy in the fridge.

Meal prep containers filled with slow cooker chicken fajitas, rice, peppers, lime wedges, shredded cheese, pico de gallo, guacamole, and separate toppings.
Cool the rice and fajita filling first, then add salsa, guacamole, cheese, and lime after reheating.
Storage methodHow to do it
FridgeStore cooked chicken and peppers in an airtight container for 3 to 4 days
FreezerFreeze cooked chicken and vegetables for 2 to 3 months
Freezer tipFreeze without tortillas or fresh toppings
ReheatingReheat in a skillet or microwave until hot
Meal prep tipPack rice or tortillas separately and add toppings after reheating
To avoid sogginessDrain extra liquid before packing tortillas, tacos, or wraps

If the chicken looks dry after refrigeration, reheat it with a spoonful of salsa, water, or reserved cooking liquid. When it looks too wet, reheat it uncovered in a skillet for a few minutes so some moisture evaporates.

Leftover fajita chicken can also become a baked dinner using the same shredded chicken-and-tortilla logic in this chicken enchilada casserole.

Slow Cooker Chicken Fajitas FAQ

How long do chicken fajitas take in the slow cooker?

Most chicken fajitas take 4 to 6 hours on low or 2½ to 3½ hours on high. Chicken breasts are usually better closer to the shorter end if you want slices. For shredded chicken, cook until the meat is fork-tender and reaches 165°F / 74°C.

Is low or high better for Crock Pot chicken fajitas?

Low is usually better for juicier chicken and more even cooking. High works when you need dinner faster, but chicken breast can dry out if it cooks too long. Start checking around 2½ hours on high, especially if the chicken pieces are not very thick.

Why are my slow cooker fajitas watery?

They are usually watery because a covered slow cooker traps steam while chicken, peppers, onions, salsa, and tomatoes release liquid. Use less salsa, add some peppers late, and drain before filling tortillas.

When should I add peppers and onions?

Add all the peppers and onions at the beginning for the easiest dump-and-go version. For better texture, add half at the beginning and half during the last 30 to 60 minutes so every pepper strip does not turn soft.

Should the chicken be shredded or sliced?

Either works. Sliced chicken feels more like classic fajitas. Shredded chicken is easier in the slow cooker and works well for tacos, rice bowls, quesadillas, nachos, and meal prep.

Can I use taco seasoning instead of fajita seasoning?

Yes. Taco seasoning works in a pinch. It may taste slightly more like taco chicken, but peppers, onions, smoked paprika, and lime help pull the flavor back toward fajitas.

Is Rotel good in Crock Pot fajitas?

Yes. Rotel adds tomatoes, green chiles, and flavor in one can. For 2 lb / 900 g chicken, one 10 oz / 285 g can works well. If the can is very juicy, drain a little first or remove excess liquid after cooking.

Can I make chicken fajitas without tomatoes?

Yes. Skip the salsa, Rotel, or diced tomatoes. Use chicken, peppers, onions, garlic, fajita seasoning, lime, and only a small splash of broth if your slow cooker needs moisture. Add extra lime, smoked paprika, garlic, or seasoning if the flavor tastes flat.

Can I use frozen chicken in the slow cooker?

For this recipe, thaw it first. Slow cookers heat gradually, and frozen chicken can take too long to cook safely. Use a pressure cooker or another faster method if you need to cook chicken from frozen, then check that it reaches 165°F / 74°C.

Can I add rice to the same slow cooker?

Cook rice separately and serve the fajita chicken over it. Uncooked rice changes the liquid ratio and can become mushy in this recipe. For meal prep, cool the rice and chicken before packing them together.

What can I make with leftover chicken fajitas?

Use leftovers in quesadillas, tacos, rice bowls, salads, nachos, or casseroles. Drain juicy chicken before adding it to tortillas or quesadillas. Reheat dry leftovers with a spoonful of salsa or cooking liquid.

Final Note

This slow cooker dinner works because it solves the hard part before dinner starts. Keep the filling glossy, add a handful of peppers late, squeeze in lime at the end, and the pot tastes brighter than a slow cooker dinner usually does.

That is the kind of dinner that feels easy before you eat it and useful again the next day.

If you make it, leave a comment with the version you chose: tighter tortilla fajitas, saucier bowls, dump-and-go, or creamy low-carb. That choice helps other readers decide which path to take.