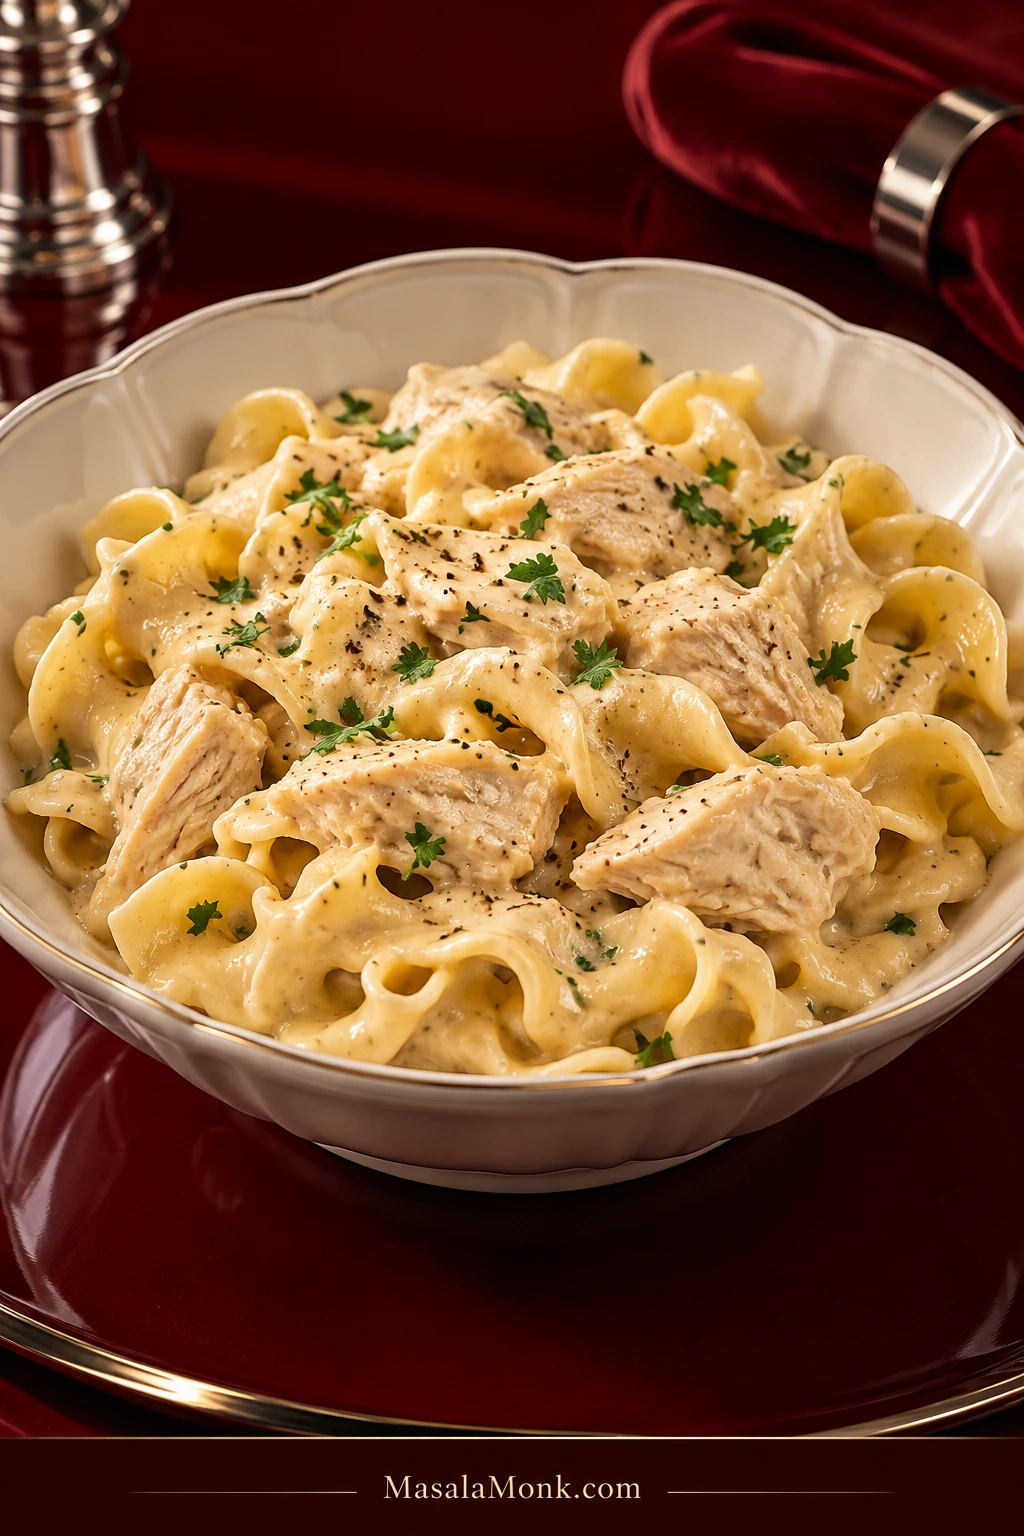
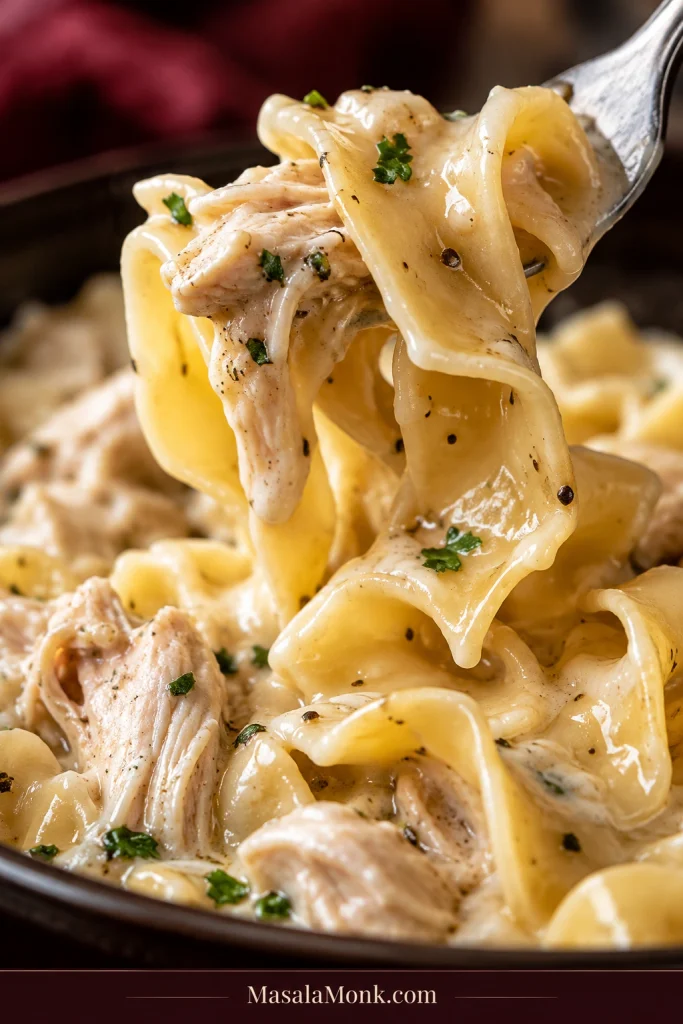
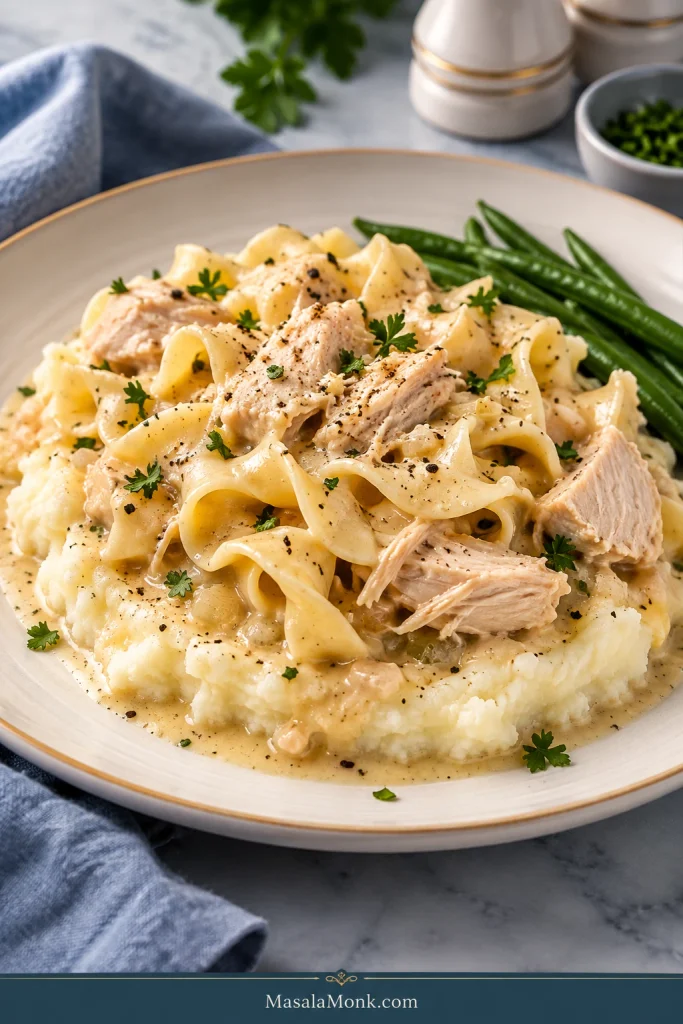
This Crock Pot chicken and noodles recipe gives you wide egg noodles and tender chicken in a savory cream sauce that slips into the folds and clings to every piece, with no pool of broth underneath. If a brothy bowl is what you want, this chicken noodle soup recipe is the better fit.
With slow cooker chicken and noodles, the timing is simple: cook the chicken first and add the noodles only at the end. Most of the cooking is hands-off. Stay nearby once the noodles go in; they can move quickly from firm to tender.
1 teaspoon concentrated chicken base or paste, or the amount of bouillon your brand recommends for about 1 cup (240 mL) broth
1 teaspoon dried thyme
½ teaspoon poultry seasoning
½ teaspoon freshly ground black pepper, plus more to taste
½ cup (120 mL) heavy cream, added after the chicken cooks
8 oz (227 g) dried extra-wide egg noodles, shelf-stable from the pasta aisle, not frozen homestyle noodles
2 tablespoons chopped fresh parsley, optional
Salt, as needed after cooking
Instructions
1. Slow-cook the chicken
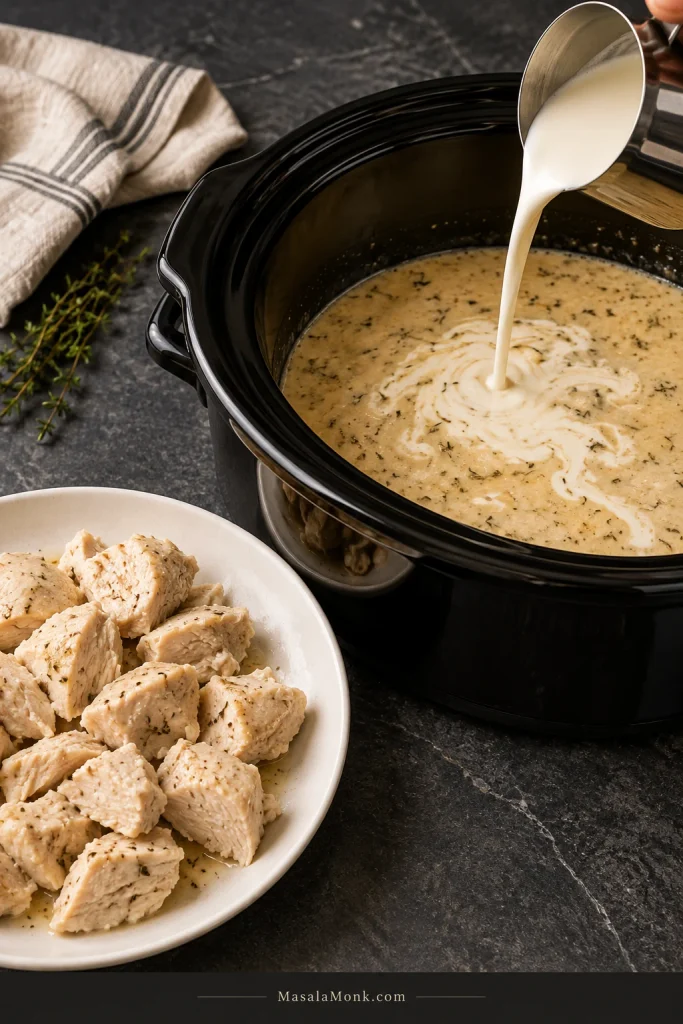
Whisk the condensed cream of chicken soup with 2 cups (475 mL) of the broth, chicken base, thyme, poultry seasoning and black pepper directly in the slow cooker. Stir in the onion and garlic, then nestle the thawed chicken breasts into the sauce.
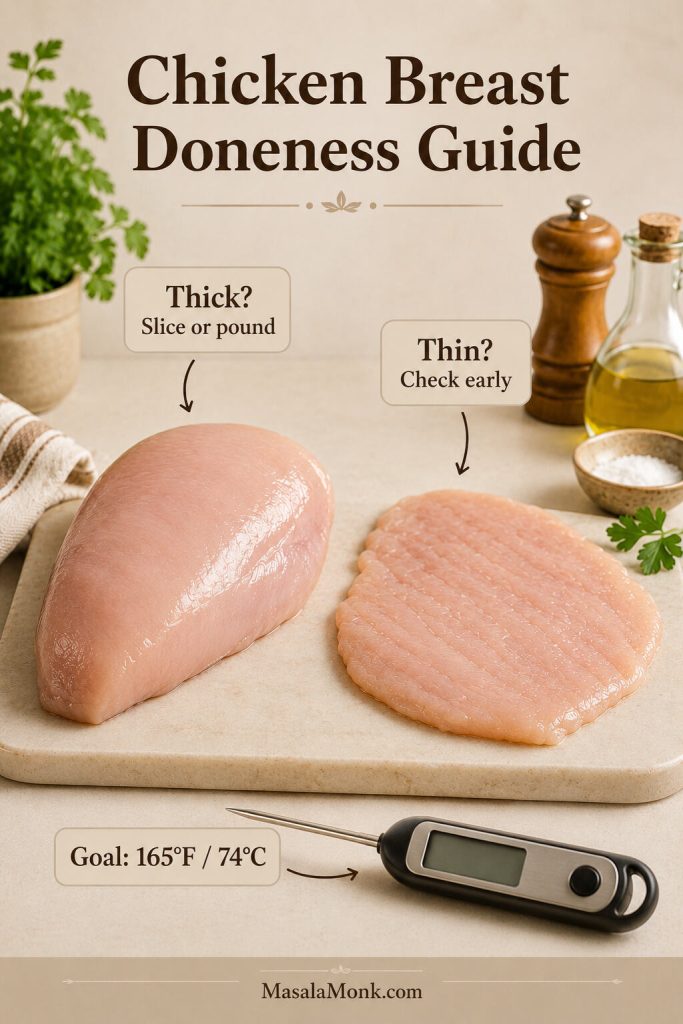
Cover and cook on LOW for about 3–5 hours or HIGH for about 2–3 hours. Begin taking the chicken’s temperature at about 3 hours on LOW or 2 hours on HIGH. Remove it once the thickest part reaches 165°F (74°C). Do not keep cooking lean breast meat simply because it has not fallen apart on its own; it will rest while the noodles cook.
Use thawed chicken. USDA slow-cooker guidance recommends thawing meat and poultry before they go into a slow cooker.
Hold the salt for now. The condensed soup and chicken base already bring plenty of seasoning to the pot.
2. Remove the chicken and start the noodles
Transfer the chicken to a plate and cover it loosely. Stir the heavy cream into the sauce in the slow cooker. Warm the reserved ½ cup (120 mL) broth separately and keep it nearby.
Here, cream enriches the slow cooker sauce, while the reserved broth stays back as a consistency fix. Add that broth only if the noodles need more liquid later.
The sauce may look a little loose now. Leave it that way; the noodles still have liquid to absorb.
Turn the slow cooker to HIGH if needed. Add the dried extra-wide egg noodles and press them gently into the sauce. They do not have to be perfectly submerged.
3. Cook the noodles and return the chicken
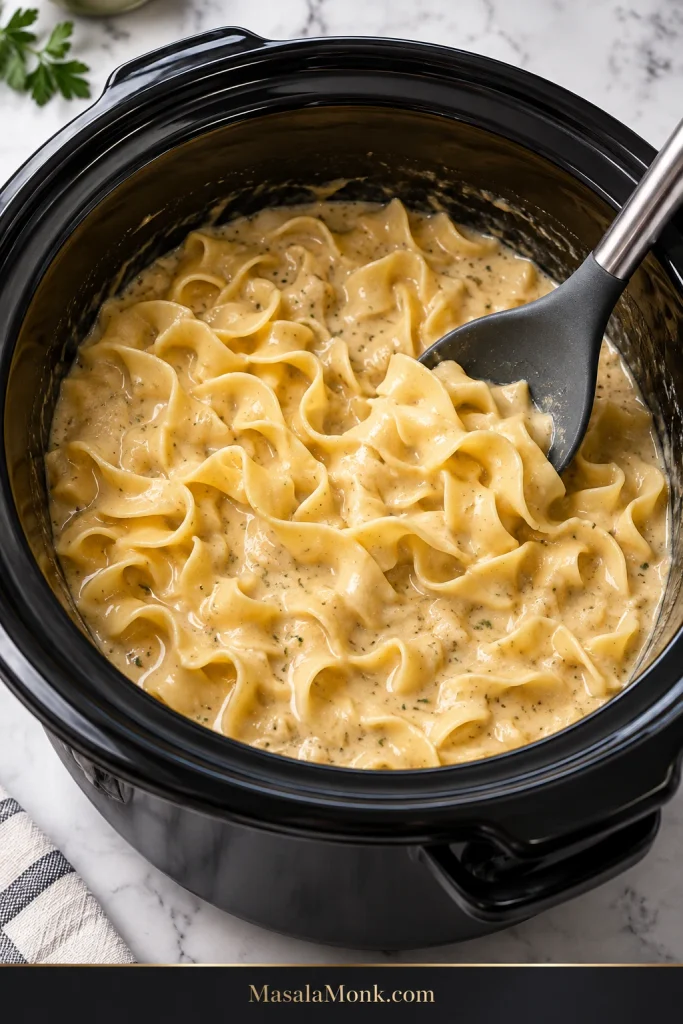
Cover for 8–10 minutes, then stir gently to separate the noodles. Re-cover and test one for tenderness at 12 minutes. Most extra-wide dried egg noodles will need about 15–25 minutes total, though noodle thickness and slow-cooker temperature vary.
At the first stir, focus on separating the softening ribbons rather than repeatedly working the pot. Gentle handling helps extra-wide egg noodles stay broad and distinct.
While they cook, pull the rested chicken into chunky bite-size pieces. Fine shreds tend to disappear into the sauce.
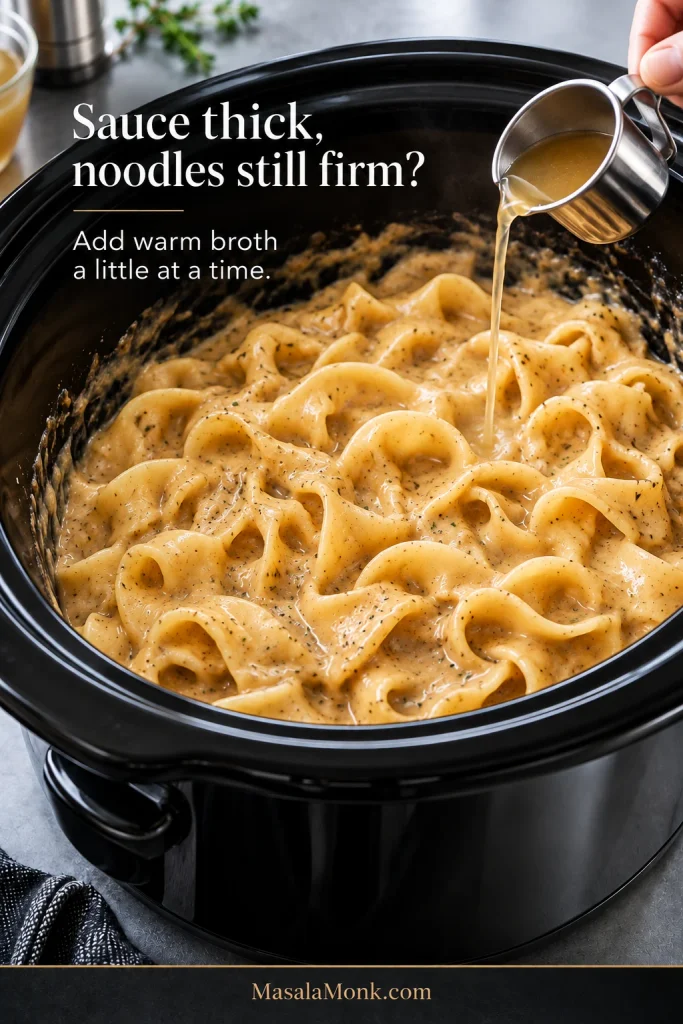
If the noodles are still firm and the sauce is getting thick, add the warm reserved broth 2–4 tablespoons at a time. You may use only a little of it.
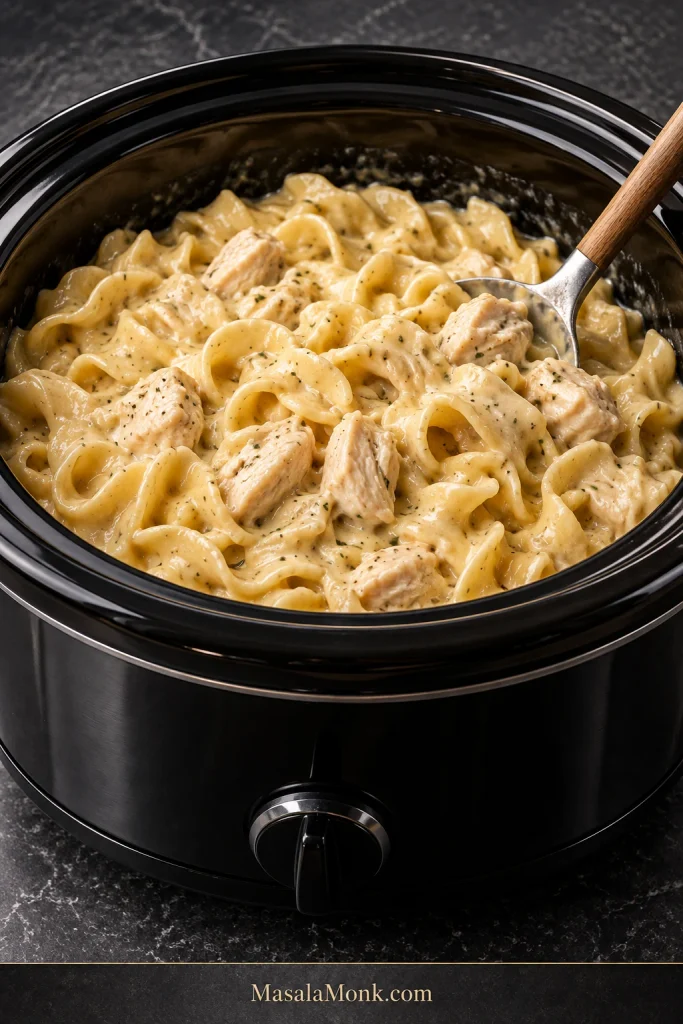
Once the noodles are tender through the center, switch off the slow cooker and fold the chicken back in. If the sauce still seems loose, leave the pot uncovered for about 5 minutes before doing anything else.
Taste. Add salt or more black pepper if it needs it, then fold in the parsley, if using. Serve while the noodles still hold their shape.
When it’s ready: the sauce should cling to the chicken and noodles and settle lightly between the folds. The noodles should separate easily when you spoon them out.
The finished chicken and noodles should still have some movement in the pot. That small amount of looseness matters because the noodles continue taking up moisture after cooking stops.
Recipe Notes
Use the right noodles: these timings are for dried, shelf-stable extra-wide egg noodles. Frozen homestyle noodles need a different method.
Do not hold the noodles on WARM for hours: egg noodles keep softening as they sit in the sauce. Once they are tender, serve rather than leaving the cooker on WARM.
Dried extra-wide egg noodles are the best fit here because they pick up some of the chicken sauce as they cook and still give you broad, distinct noodles. They can cook directly in the sauce once the chicken comes out. Cook them separately when exact texture or better leftovers matter more than keeping everything in one pot.
Frozen homestyle noodles need a different approach. They are thicker and denser, so follow their package directions rather than the dried-noodle timing in this recipe.
Choose the cooking path before choosing the brand: shelf-stable dried, separately cooked and frozen homestyle noodles behave differently. As a result, one timing cannot serve all three.
Noodle Choice
Best When
Dried extra-wide noodles in the Crock Pot
Best for the easiest one-pot method and noodles that absorb some of the chicken sauce.
Dried noodles cooked separately
Best when precise texture or better leftovers matter more than one-pot convenience.
Frozen Reames or homestyle noodles
Choose these when you specifically want thicker homestyle noodles and don’t mind cooking them separately.
Cook dried egg noodles in the Crock Pot
Use 8 oz (227 g) dried, shelf-stable extra-wide egg noodles from the pasta aisle. Start tasting early; once the center is tender, they are done. Thin egg noodles have less room for error, so test them sooner.
Cook the noodles separately
Follow the chicken stage as written, but begin with 1½ cups (360 mL) broth instead of 2 cups. When the chicken is done, remove it and stir in the cream.
Near serving time, boil 8 oz (227 g) dried egg noodles until barely al dente. Drain them well and fold them into the chicken sauce. Keep up to ½ cup (120 mL) warm broth nearby only if the sauce needs loosening. You will not usually need the full 2½ cups of broth listed in the main recipe.
This is also the better method for meal prep because the noodles keep their texture better when stored separately. Combine only the portions you are reheating. For the rest, see storing and reheating chicken and noodles.
Use frozen Reames or homestyle noodles
Do not swap frozen homestyle noodles ounce-for-ounce into the dried-noodle method and expect the same timing.
Reames recommends cooking its frozen noodles according to the package directions before combining them with the other ingredients, and says not to thaw them first. Use the reduced-broth approach above when you fold separately cooked noodles into the chicken mixture.
How to Tell When It’s Done
The timer gets you close. The noodles and sauce tell you when to stop.
Noodles: bite into one. It should be tender through the middle and still look like a distinct ribbon. Swollen noodles that are splitting or losing their shape have gone too far.
Sauce: drag a spoon through the pot. The sauce should move slowly back into the space and cling to the noodles as it does.
Look at the noodle’s outline as well as its center. A finished ribbon keeps clean, defined edges instead of looking swollen, frayed or beginning to split.
If something looks off, match what you’re seeing in the Crock Pot to the fix below.
What You Are Seeing
What to Do
Sauce looks too soupy before the noodles go in
Leave it alone for now. The dry noodles still need that liquid.
Sauce thickened before the noodles became tender
Add warm reserved broth 2–4 tablespoons at a time and keep testing the noodles.
Noodles are still firm in the middle
Stir them back into the sauce, cover the pot and give them a few more minutes on HIGH.
Noodles are starting to get very soft
Switch off the slow cooker. They are done, or very close to it.
Chicken turned dry or stringy
Dry chicken breast usually means it stayed in the slow cooker too long. Next time take its temperature sooner and remove it at 165°F (74°C).
Dish tastes too salty
Condensed soup, chicken base and broth all bring salt. Use low-sodium broth and season only after tasting the dish.
Flavor seems flat
Check the salt, black pepper and chicken base before adding more broth. More liquid usually dilutes the flavor further.
Noodles are done, but the sauce is still thin
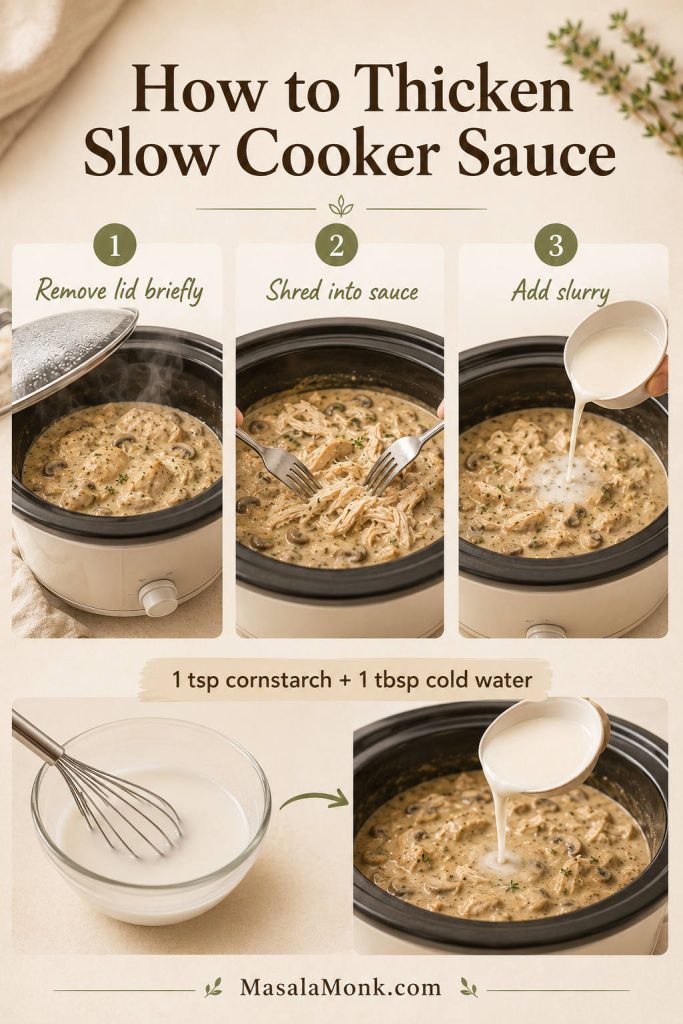
Leave the pot uncovered for 5 minutes first. Still too loose? Mix 1 teaspoon cornstarch with 1 tablespoon cold water and stir it into the very hot sauce. Keep the cooker on HIGH only until the sauce begins to tighten, then switch it off immediately.
Warm broth is a correction tool, not an automatic addition. Its job is to give firm noodles enough liquid to finish without thinning the final sauce more than necessary.
Chicken thighs are the more forgiving choice if your slow cooker runs hot or you need a wider cooking window. Use the same weight of boneless skinless thighs and cook them to at least 165°F (74°C) and until they are tender enough to pull apart easily.
If chicken breast timing is the part you struggle with, the Crock Pot chicken breast recipes guide goes deeper into cooker size, timing and knowing when lean chicken is ready to come out.
Rotisserie or already-cooked chicken
Already have cooked chicken? You can skip the long chicken stage and turn this into a much faster Crock Pot dinner. Replace the fresh onion and garlic with 1 teaspoon onion powder and ½ teaspoon garlic powder, since they will not have hours to soften in the sauce.
Combine the condensed soup, 2 cups (475 mL) broth, chicken base, onion powder, garlic powder, thyme, poultry seasoning and black pepper in the slow cooker. Heat on HIGH for about 30–45 minutes, until steaming, then stir in the cream and add the noodles. Reserve the remaining broth in case the noodles need more liquid.
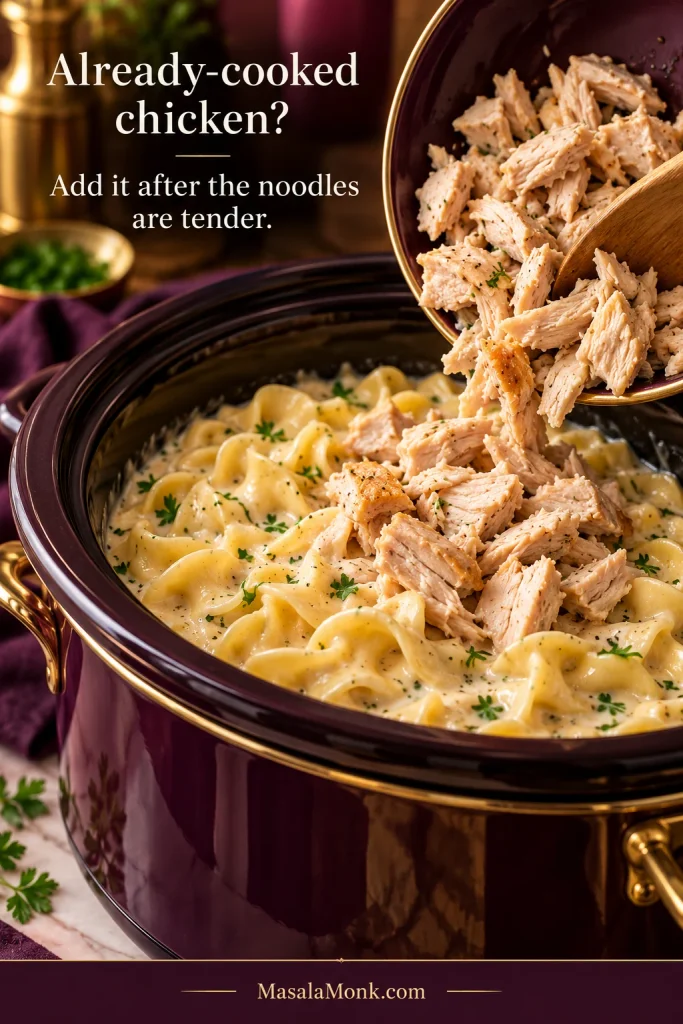
The cooked chicken goes in only after the noodles are tender. If you’re using chilled leftover chicken, reheat it separately to 165°F (74°C) before folding in about 3 cups shredded chicken. If the rotisserie chicken is still hot, fold it through just before serving.
With rotisserie or already-cooked chicken, the shortcut is in the chicken stage—not the noodles. Get the sauce steaming and cook the noodles properly before the chicken joins the pot.
Got more cooked chicken to use? Chicken tetrazzini is another good home for rotisserie or leftover chicken.
Carrots, celery or peas
Carrots and celery can go in with the onion—up to about 1 cup total. Dice carrots fairly small, especially if you are cooking on HIGH. Stir peas in when the noodles are nearly tender.
For more than a handful of frozen vegetables, warm them separately first. A large cold addition can slow the noodle stage just when the sauce needs steady heat.
For a crisp green side instead, green beans almondine gives you tender-crisp beans, lemon and toasted almonds alongside the tender chicken and broad noodles.
No condensed cream of chicken soup
Skip the condensed soup, increase the heavy cream to ¾ cup (180 mL) and use 1–1½ teaspoons concentrated chicken base or paste, or the amount of bouillon your brand recommends for about 1 cup (240 mL) broth. Use 2 cups (475 mL) broth with the chicken and hold the remaining ½ cup (120 mL) in reserve.
Whisk 2 tablespoons cornstarch into the cold cream until smooth. Cook the chicken as directed, then remove it and stir the cream mixture into the sauce before adding the noodles. Leave the cooker on HIGH while the noodles cook.
This version starts thinner than the condensed-soup recipe and thickens as the cornstarch cooks. Add reserved broth only if the noodles are still firm and the sauce tightens first. Fold the chicken back in when the noodles are tender, then taste before adding more chicken base or salt.
Storing, Reheating and Freezing Chicken and Noodles
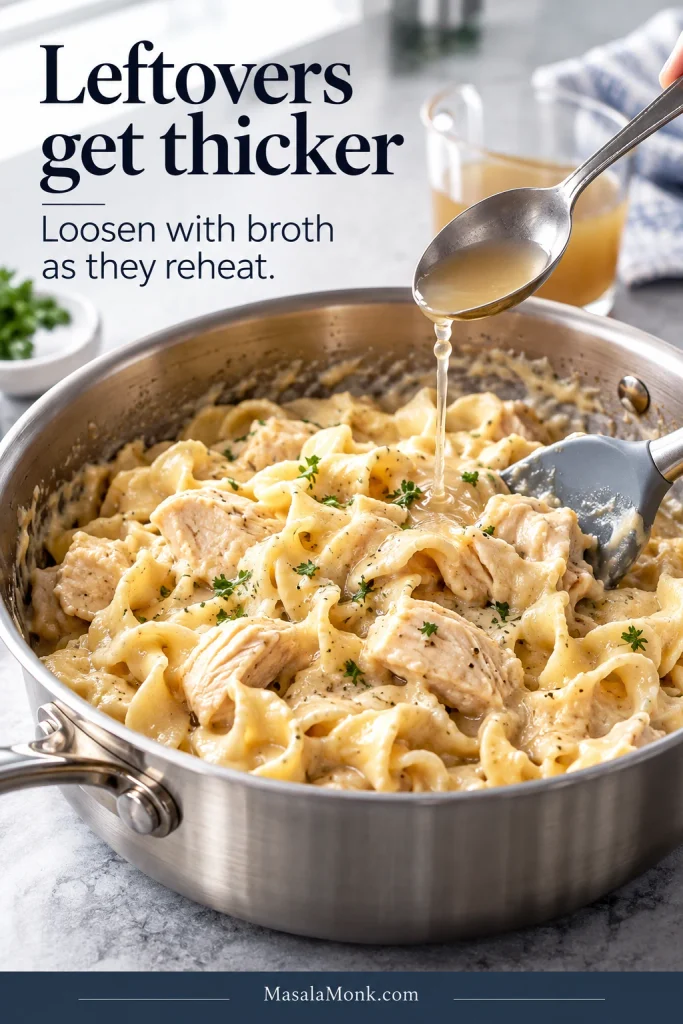
The noodles keep taking up moisture as the dish sits, so tomorrow’s chicken and noodles will be thicker than tonight’s.
Refrigerating
Divide leftovers into shallow containers and refrigerate within 2 hours. Use within 3–4 days.
Making it ahead
If this is tomorrow’s lunch as well as tonight’s dinner, keeping the noodles separate is worth the extra container. Reheat the chicken and sauce first, then add noodles only to the portions you are serving. The noodles will hold their texture much better.
Reheating
USDA guidance recommends reheating leftovers to 165°F (74°C), so use the stovetop or microwave rather than the slow cooker. Loosen the sauce with chicken broth a little at a time; if the consistency is already right, a small splash of cream can bring some richness back.
Judge the sauce after it starts heating. If it is still too tight, add broth a little at a time; if the texture is already right, a small splash of cream restores richness instead.
Freezing
For freezer meal prep, stop after the chicken has cooked and come out of the sauce. Cool and freeze the chicken and sauce base before adding the cream or noodles. Once thawed and reheated, stir in the cream and prepare the noodles fresh.
Fully assembled chicken and noodles can be frozen, but the noodles will be noticeably softer after thawing.
What Goes With Chicken and Noodles?
Chicken and noodles are filling enough to be the whole meal, especially with carrots or peas mixed in. A simple salad, roasted broccoli or green beans adds something fresh against the broad noodles and creamy sauce. Soft dinner rolls are good for catching any sauce left behind.
In parts of the Midwest, thick chicken and noodles are spooned right over creamy mashed potatoes. With something crisp and green alongside, you have a simple, substantial plate of tender chicken, broad noodles and plenty of sauce to catch with every forkful.
For a Midwestern-style plate, mashed potatoes are the base rather than part of the slow cooker recipe. Spoon the chicken and noodles over them at serving so the creamy sauce can work like gravy.
Recipe development disclosure: MasalaMonk developed this version by comparing established chicken-and-noodles methods, manufacturer guidance and recurring reader-reported problems. MasalaMonk has not independently kitchen-tested this exact formulation.
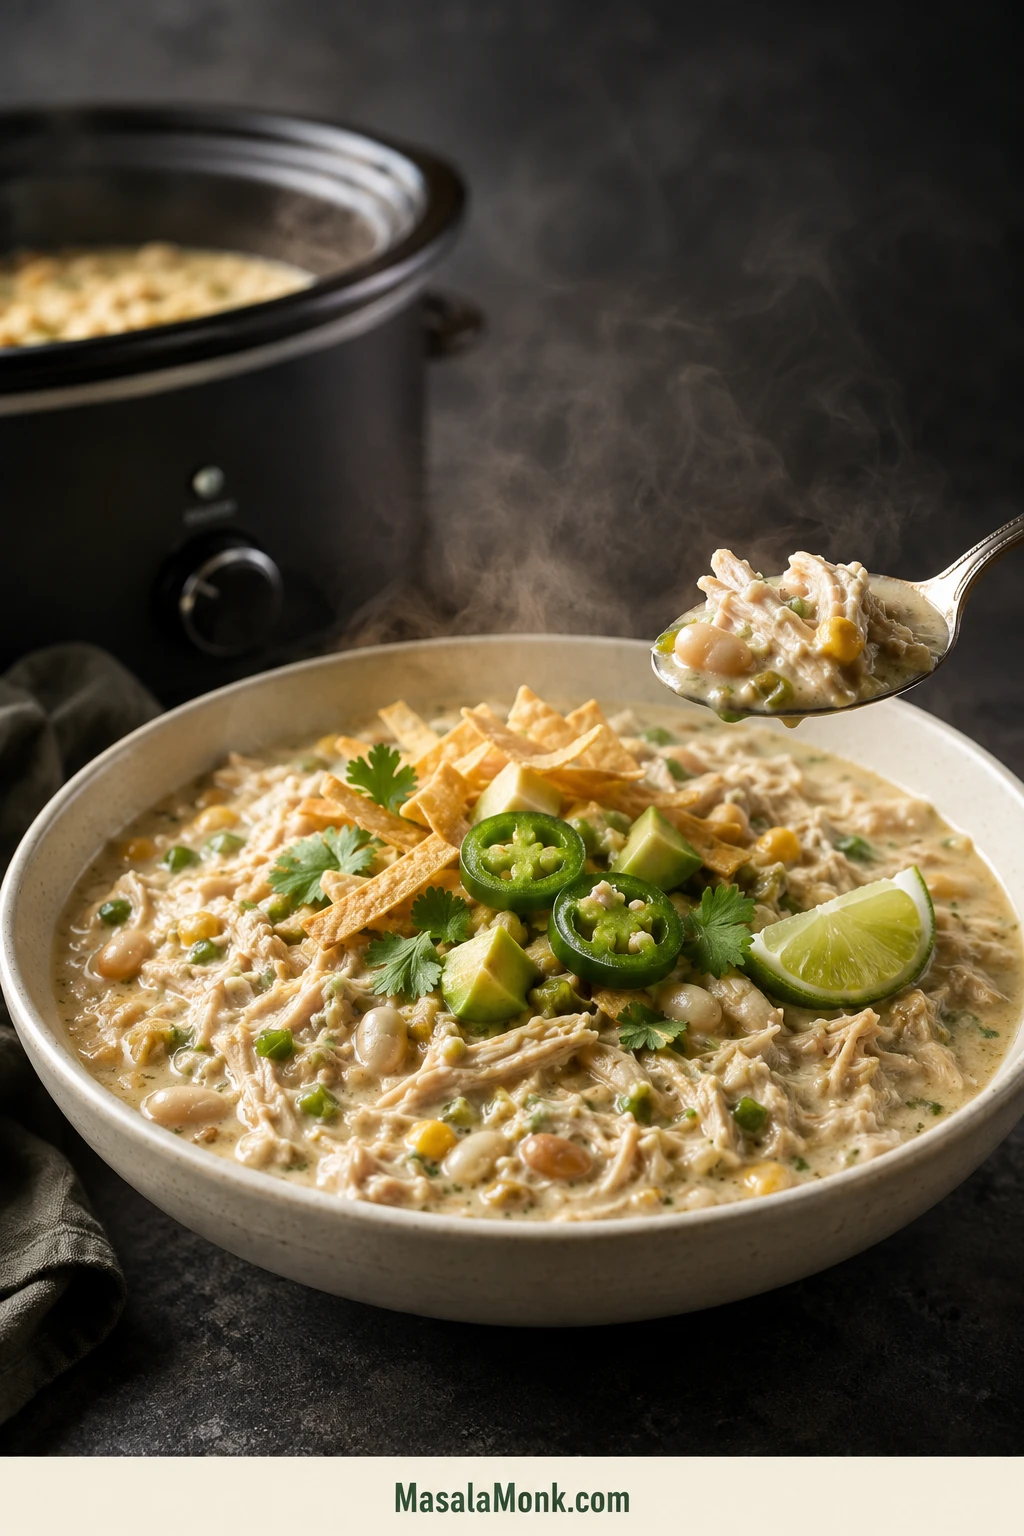
Lift the slow-cooker lid and you should find creamy white chicken chili—not pale chicken soup with beans drifting through it.
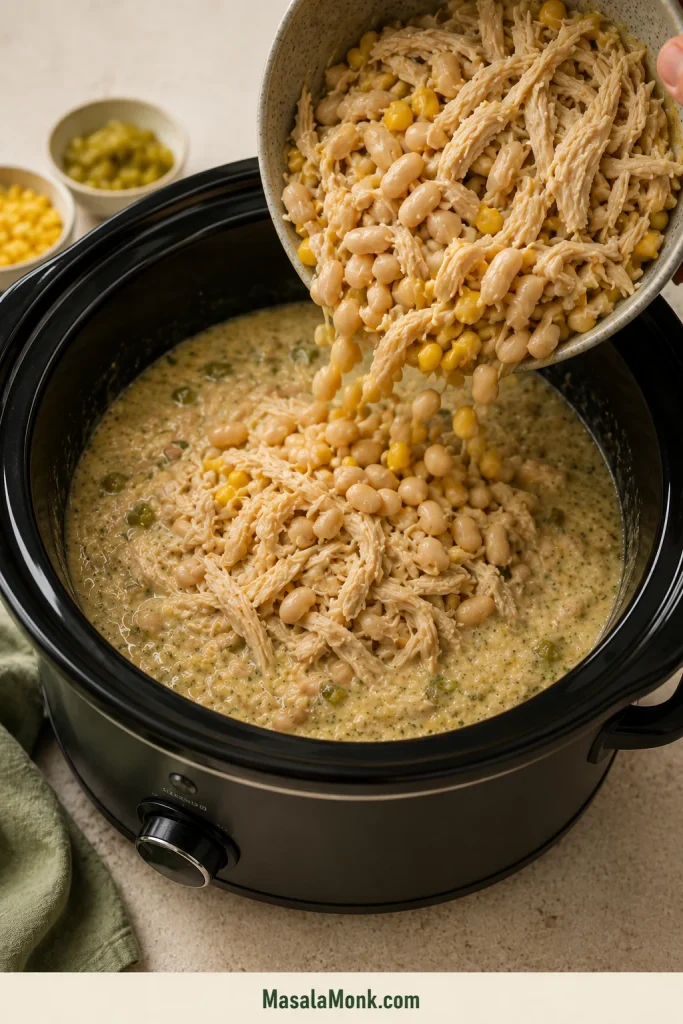
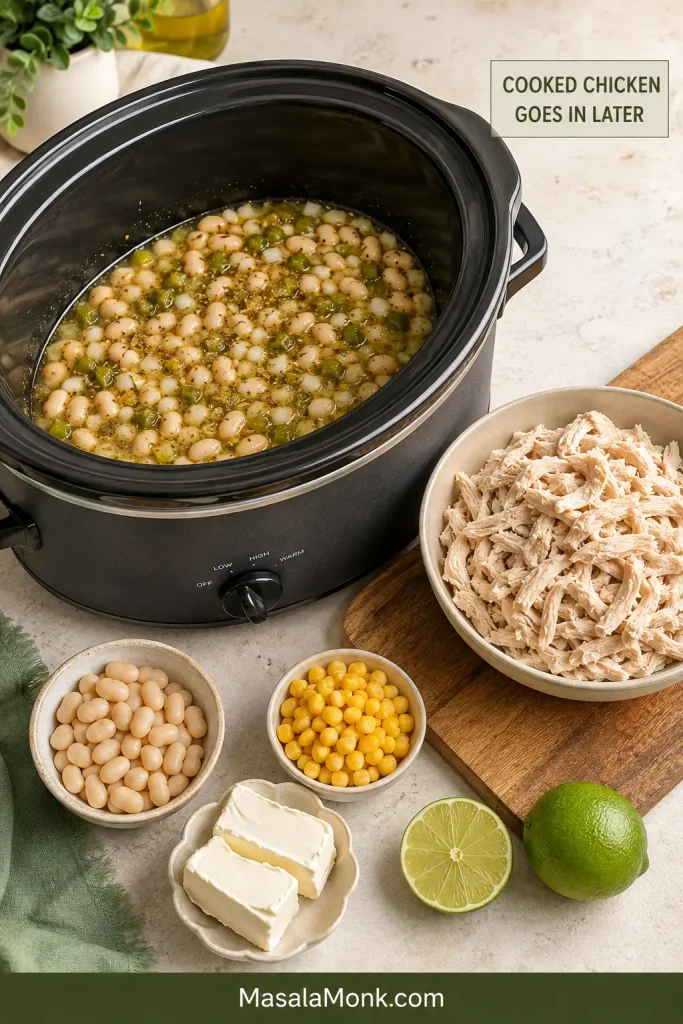
This version keeps the chicken moist and gives the broth a thick, spoon-coating texture without relying on an entire block of cream cheese. The chicken comes out as soon as it is ready, while blended white beans pull the broth together near the end.
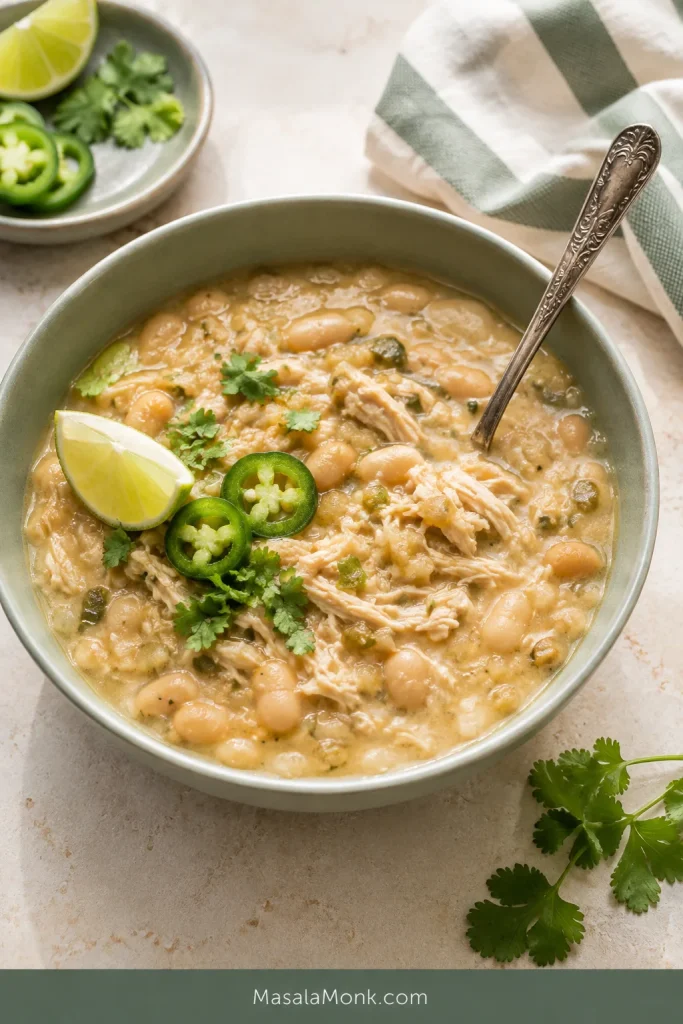
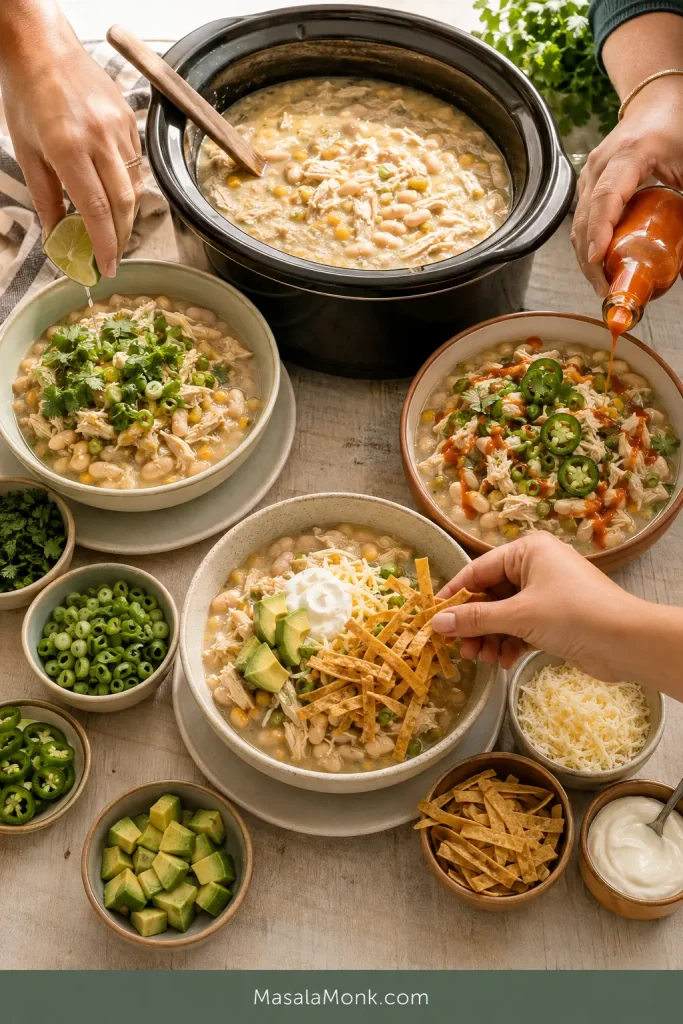
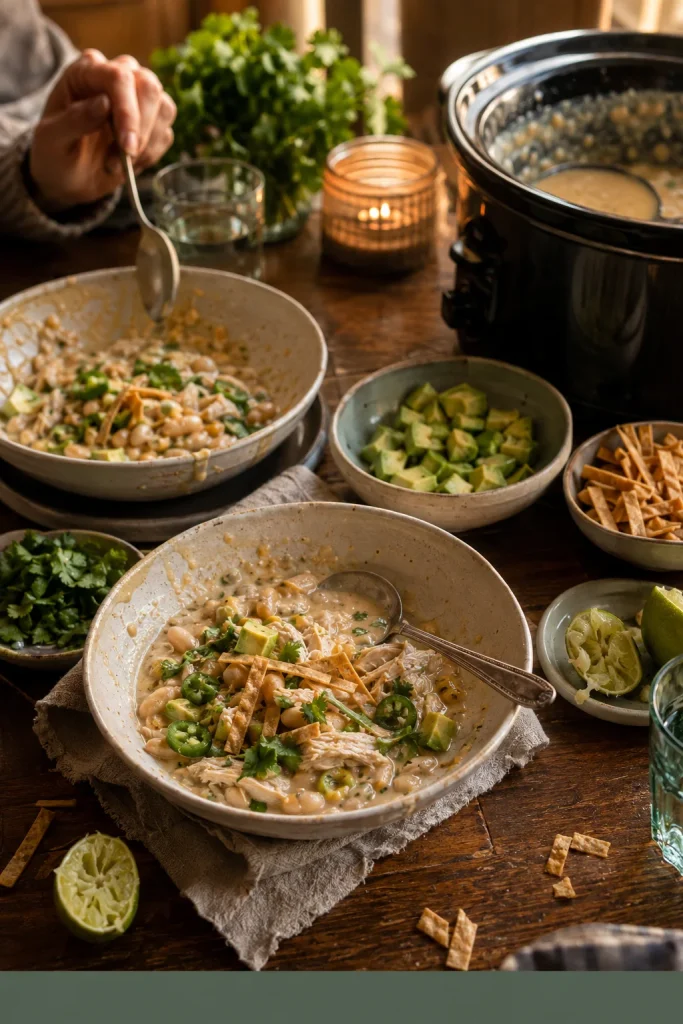
Every bowl brings tender shreds of chicken, creamy whole beans and mild green-chile warmth, with fresh lime keeping the richness lively. Set out avocado, jalapeño and tortilla chips and one mild pot can still give everyone the bowl they want.
Most of the cooking is hands-off; the useful work comes in a 10–15-minute finish.
The chicken decides when the chili is cooked. The beans and final additions decide how creamy the bowl becomes.
For a 5–6 quart slow cooker, use 1½ lb / 680 g chicken, three 15 oz / 425 g cans of white beans and 2½ cups / 590 ml broth. Two cans cook in the base. From the third, one cup is blended into the broth and the remaining beans return whole.
Check the chicken pieces individually and take each one out when its thickest part reaches 165°F / 74°C. Return the shredded meat with the beans, whisk softened cream cheese with hot chili liquid and let the chili rest uncovered before adding extra broth.
Initial prep 15 minutes
Active finishing 10–15 minutes
High setting Begin checking at 2½ hours
Low setting Begin checking at 4 hours
Yield About 8 servings
Cooker size 5–6 quart
Slow cookers and chicken pieces vary. Start checking at the earlier time; the thermometer and texture decide when each piece comes out.
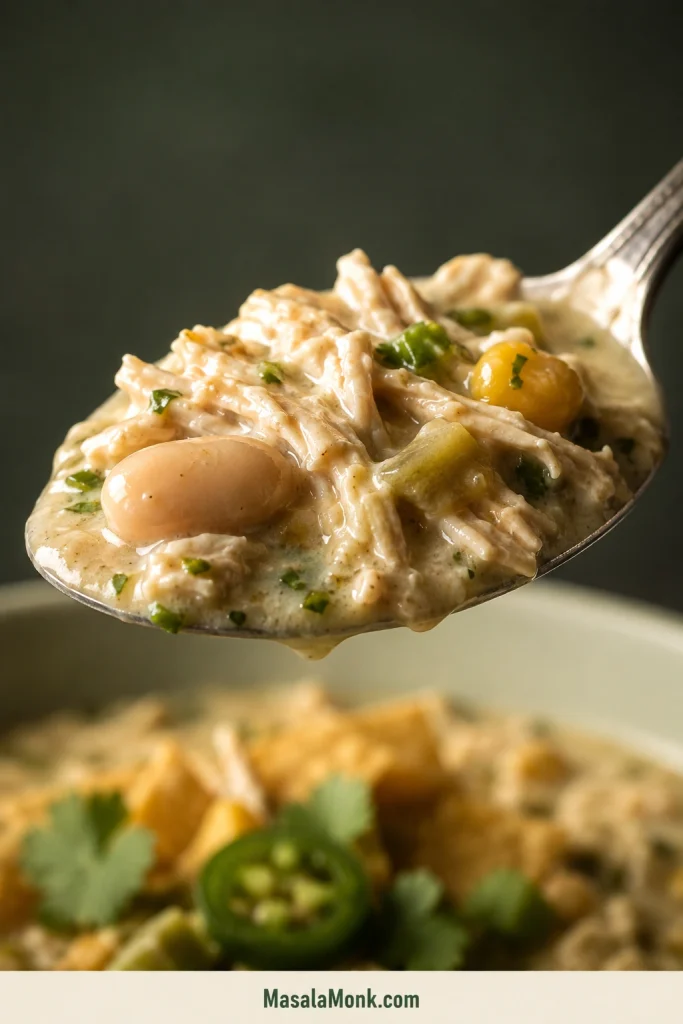
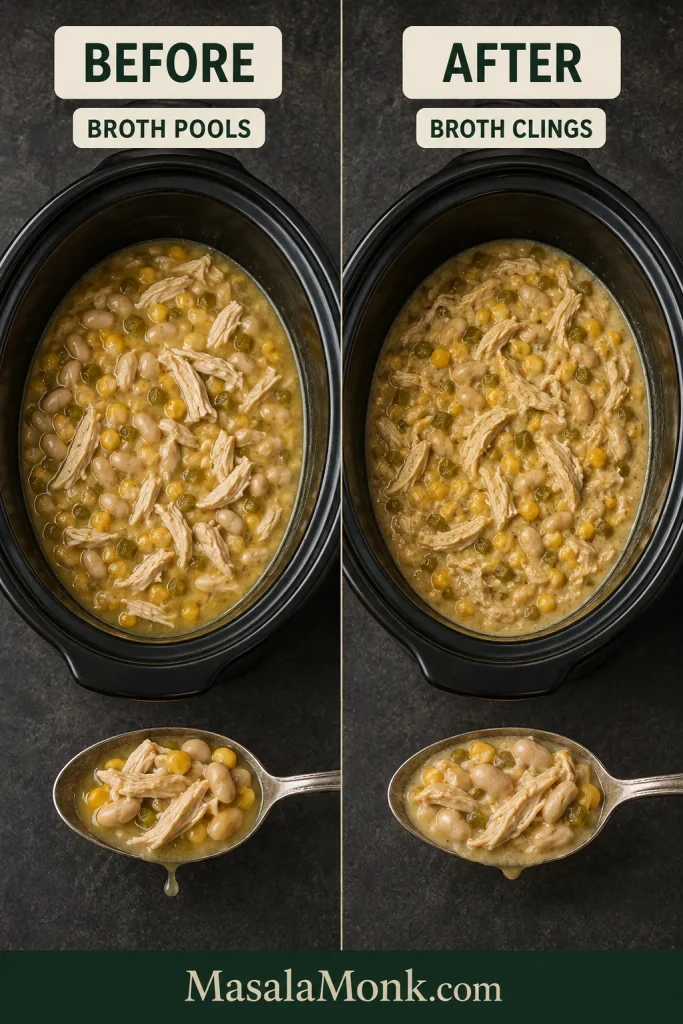
Tilt the spoon: the broth should travel briefly with the chicken and beans before slipping back into the bowl.
Slow Cooker White Chicken Chili Recipe
Most of the cooking is hands-off. The short finish leaves you with moist shredded chicken, whole creamy beans and a broth that clings rather than pools.
Prep time: 15 minutes Slow-cooker time: About 2½–3½ hours on High or 4–6 hours on Low Finishing time: 10–15 minutes Rest: 10 minutes Total time: About 3–4¼ hours on High or 4½–6¾ hours on Low Yield: About 8 main-dish servings
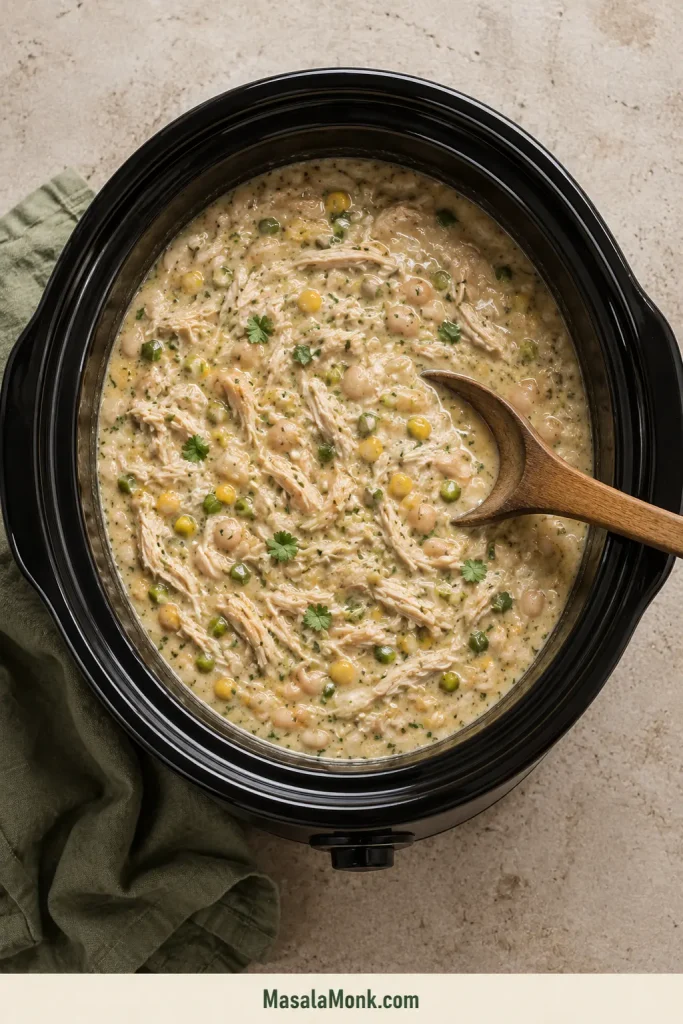
A finished pot should keep chicken and beans suspended through the creamy broth rather than beneath a layer of liquid.
Equipment
5–6 quart slow cooker
Instant-read food thermometer
Can opener
Cutting board and two forks
Blender, immersion blender or potato masher
Medium bowl and whisk
Ladle
Ingredients
Low-sodium broth leaves room to adjust the final seasoning after the beans, green chiles and cream cheese are in.
For the slow-cooker base
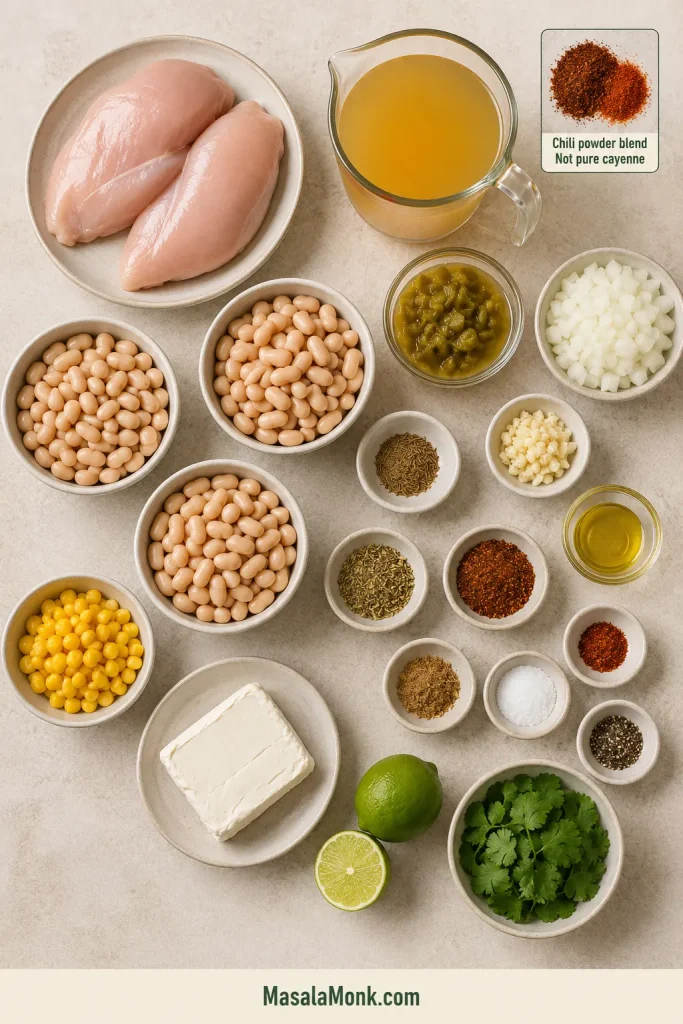
1½ lb / 680 g boneless, skinless chicken breasts, preferably of similar thickness
2 cans white beans, 15 oz / 425 g each, drained and rinsed
1 medium yellow onion, about 6–7 oz / 170–200 g, finely diced
4 garlic cloves, minced
2 cans mild diced green chiles, 4 oz / 113 g each, undrained
2½ cups / 590 ml low-sodium chicken broth
1 teaspoon / about 1 g dried oregano
2 teaspoons / about 4 g ground cumin
1 teaspoon / about 3 g mild US-style chili powder blend, not pure cayenne
½ teaspoon / about 1 g ground coriander
¼ teaspoon cayenne pepper, optional
1 teaspoon / about 5 g fine sea salt, plus more to taste
½ teaspoon / about 1 g black pepper
2 teaspoons / 10 ml neutral oil, optional, for sautéing the onion
Kosher salt varies considerably by brand. When using it instead of fine sea salt, season by taste rather than assuming an equal-volume swap.
For thickening and finishing
1 can white beans, 15 oz / 425 g, drained and rinsed
1 cup / about 150 g frozen or well-drained canned corn, optional
4 oz / 113 g full-fat block cream cheese, softened
1–2 tablespoons / 15–30 ml fresh lime juice
¼–½ cup chopped fresh cilantro
Additional warm low-sodium chicken broth, if needed
Corn is optional. Drained canned corn only needs to heat through; frozen corn may need a few extra minutes.
Optional toppings
Diced avocado
Sliced fresh or pickled jalapeño
Chopped scallions
Monterey Jack or Pepper Jack
Sour cream or plain Greek yogurt
Crushed tortilla chips or tortilla strips
Fresh cilantro
Lime wedges
Hot sauce
Instructions
1. Build the slow-cooker base
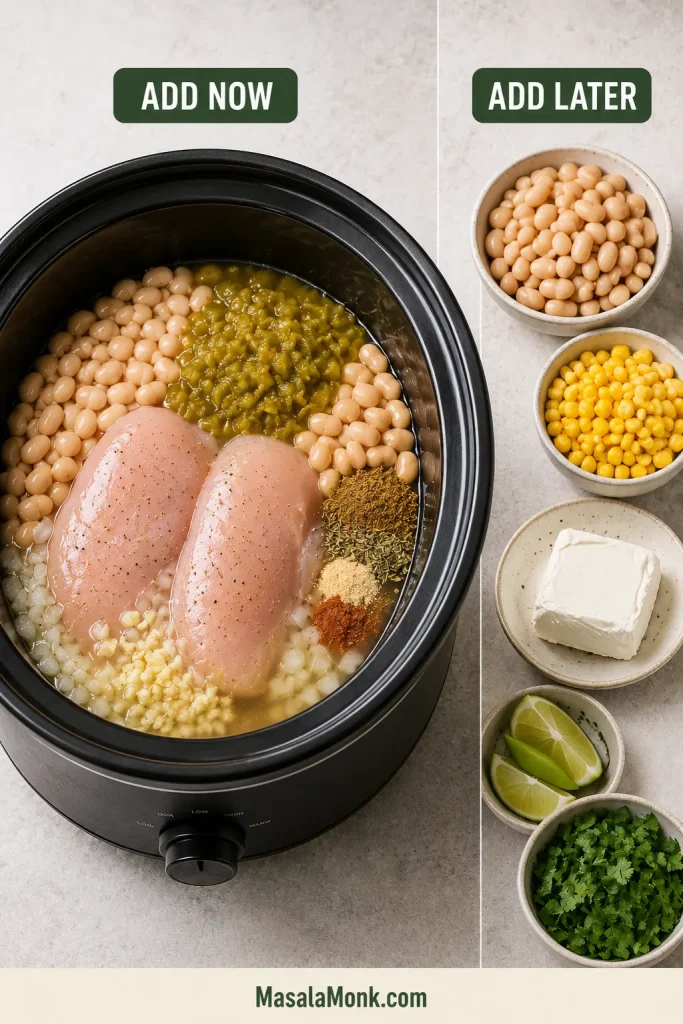
Keep the third can of beans, corn, cream cheese, lime and cilantro aside for the finishing stages.
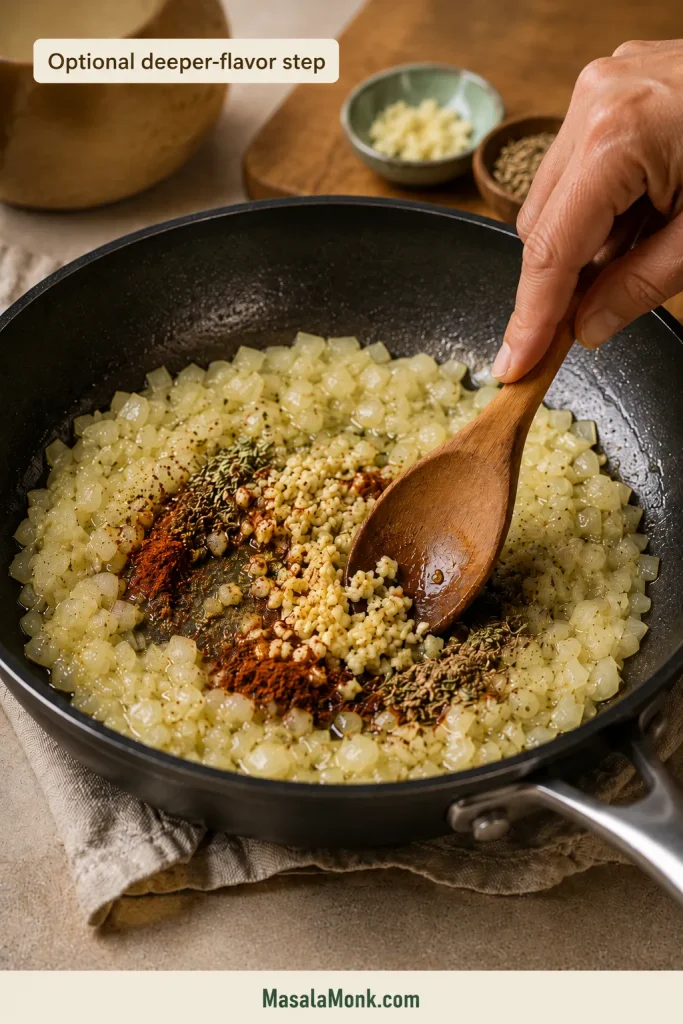
The default route is simple: use the onion, garlic and spices without sautéing them first.
For deeper flavor and especially soft onion: heat the optional oil in a small skillet. Cook the onion for 3–4 minutes, then add the garlic and dry spices for 30 seconds. Transfer the mixture to the slow cooker.
Aim for softened onion and fragrant spices with only light color; deep browning would shift the chili’s mild flavor.
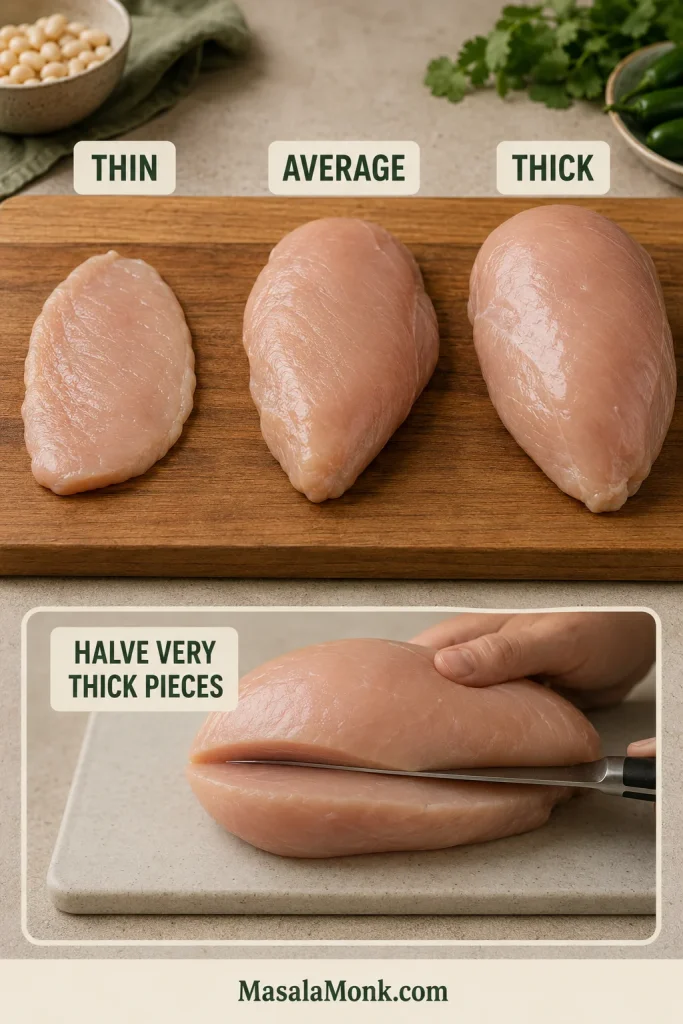
Add the raw onion and garlic—or the sautéed mixture—to the slow cooker. Place the chicken breasts over them. If one breast is much thicker than the others, halve it horizontally or expect it to finish later.
Add two cans of beans, the undrained green chiles, broth, cumin, oregano, chili powder, coriander, cayenne if using, salt and black pepper. If the spices went into the skillet, do not add them again. Stir the beans and broth around the chicken.
Keep the third can of beans, corn, cream cheese, lime and cilantro out for now.
2. Cook until the chicken is ready
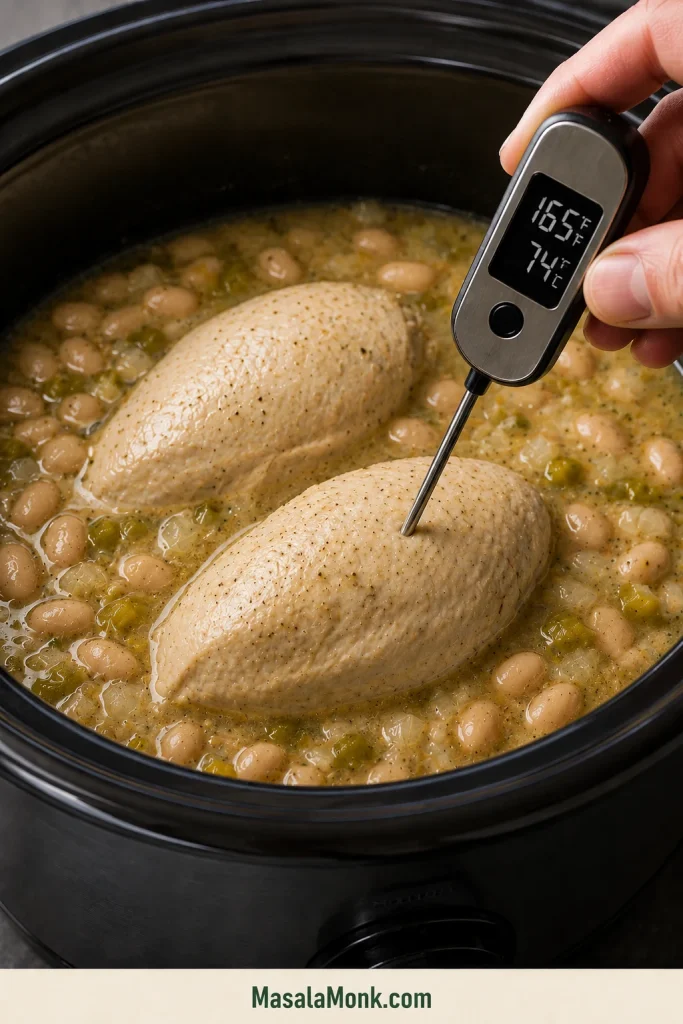
Place the thermometer tip in the center of the thickest part of each chicken piece, away from the hot broth.
Cover and cook until the thickest part of each piece reaches 165°F / 74°C and separates easily under light pressure.
On High, begin checking at about 2½ hours.
On Low, begin checking at about 4 hours.
Check each piece in its thickest part, starting with the largest. Transfer pieces to a cutting board individually as they become ready. Pulling one breast out before the others can feel early, but moist shreds on the board matter more than the longest number on the timer.
Remove each chicken piece as it reaches 165°F / 74°C; thicker pieces can keep cooking while smaller ones rest.
3. Shred the chicken
Shred the chicken with two forks. It should pull apart easily while still looking moist, not chalky or fibrous.
Shred just to broad, bite-size strands. Stopping early keeps the chicken looking moist instead of fine and stringy.
4. Blend part of the reserved beans
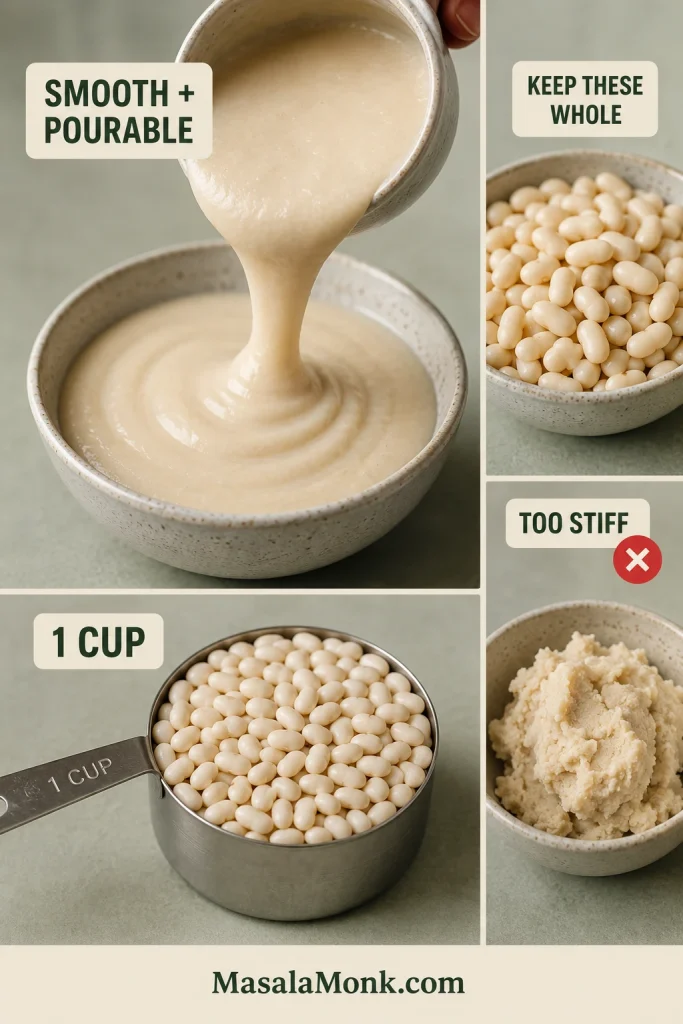
Measure 1 cup of drained beans from the third can. Blend them with ¾ cup / 180 ml hot liquid from the slow cooker until smooth and pourable.
The bean purée should pour, not mound. Loosen it with a little more hot cooking liquid if needed.
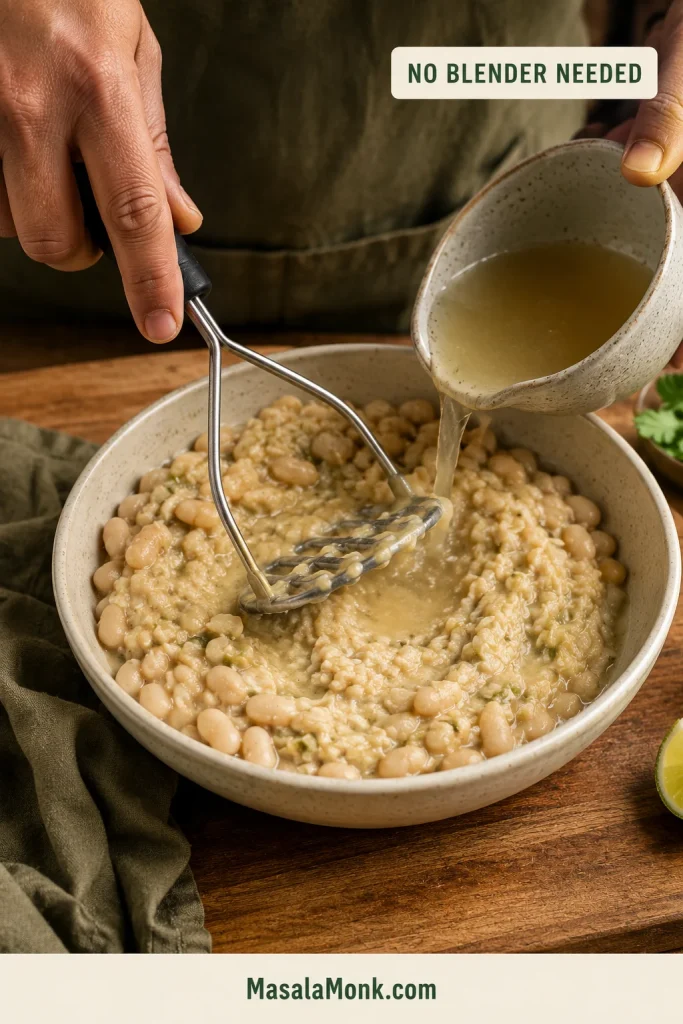
For a no-blender method, mash the measured beans and hot liquid thoroughly in a bowl. Keep the remaining beans whole.
Mash firmly enough to break the bean skins and release starch; a few visible pieces are completely fine.
When using a countertop blender, vent hot liquid according to the manufacturer’s instructions and blend only a small amount at a time.
5. Bring the chili together
Stir in the shredded chicken, bean purée, remaining whole beans and corn.
Fold the chicken back in gently to keep broad, juicy shreds intact as the chili finishes.
Cover and cook for another 10–15 minutes, or a few minutes longer when using frozen corn. The broth should begin clinging to the chicken and beans instead of pooling beneath them.
6. Add the cream cheese gently
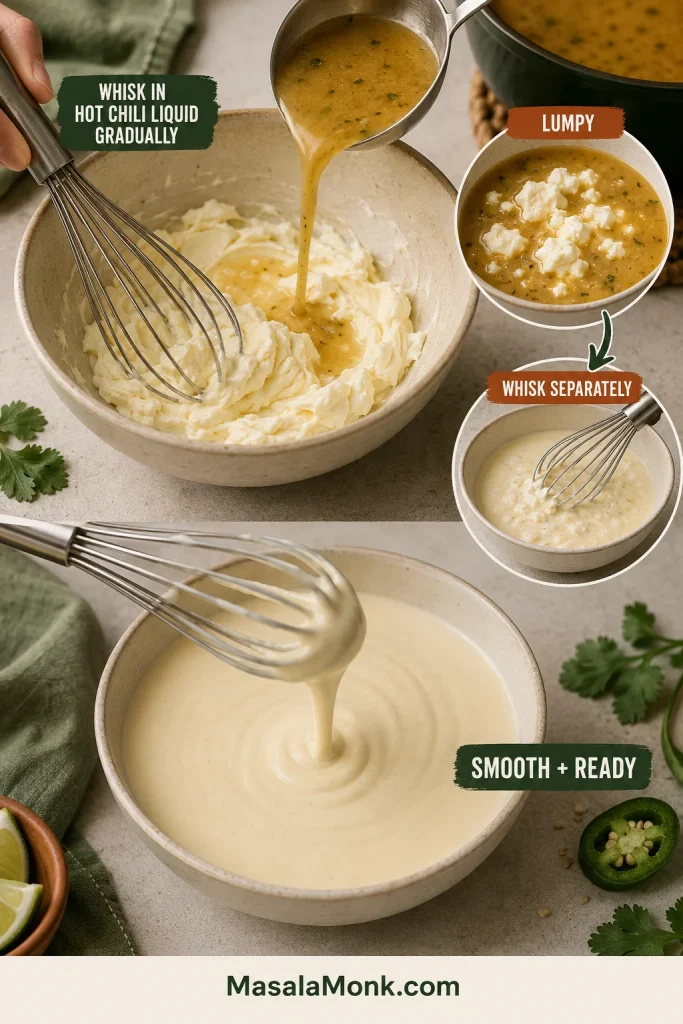
Place the softened cream cheese in a medium bowl. Add about ¾ cup / 180 ml hot chili liquid in several additions, whisking after each one until mostly smooth.
Whisk hot chili liquid into softened cream cheese first so it melts into the broth smoothly.
Stir the cream cheese mixture into the slow cooker on Low or Warm. Gentle stirring should help it melt into the broth without hard boiling.
7. Add lime, rest and taste
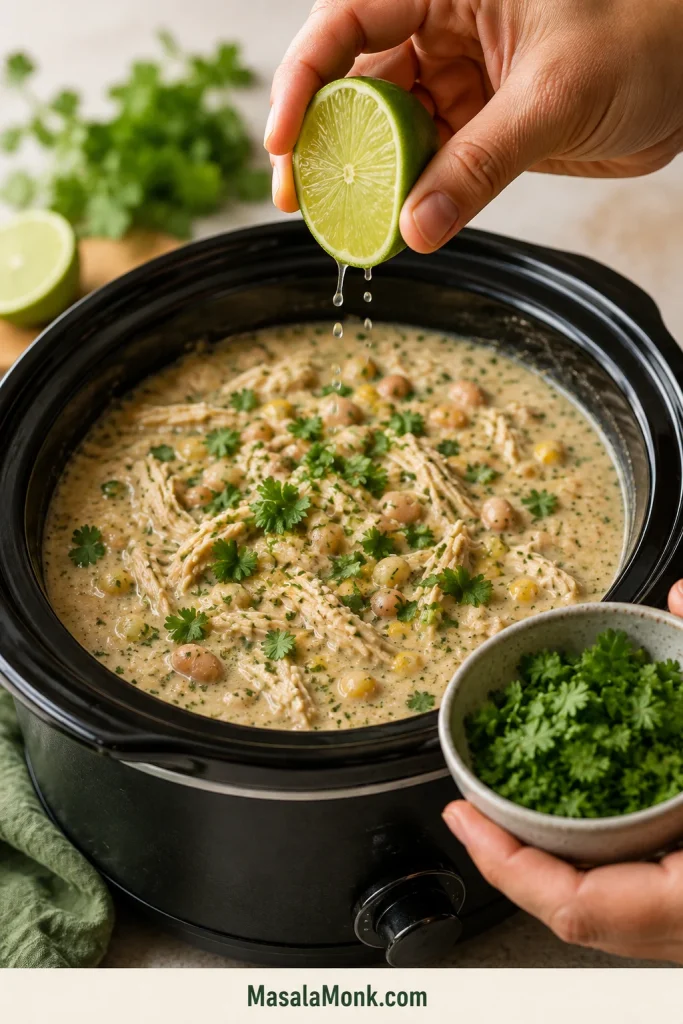
Stir in 1 tablespoon / 15 ml lime juice and the cilantro. Turn off the slow cooker and leave the lid off for 10 minutes.
Add the first lime, let the chili rest, then taste again before deciding whether it needs more.
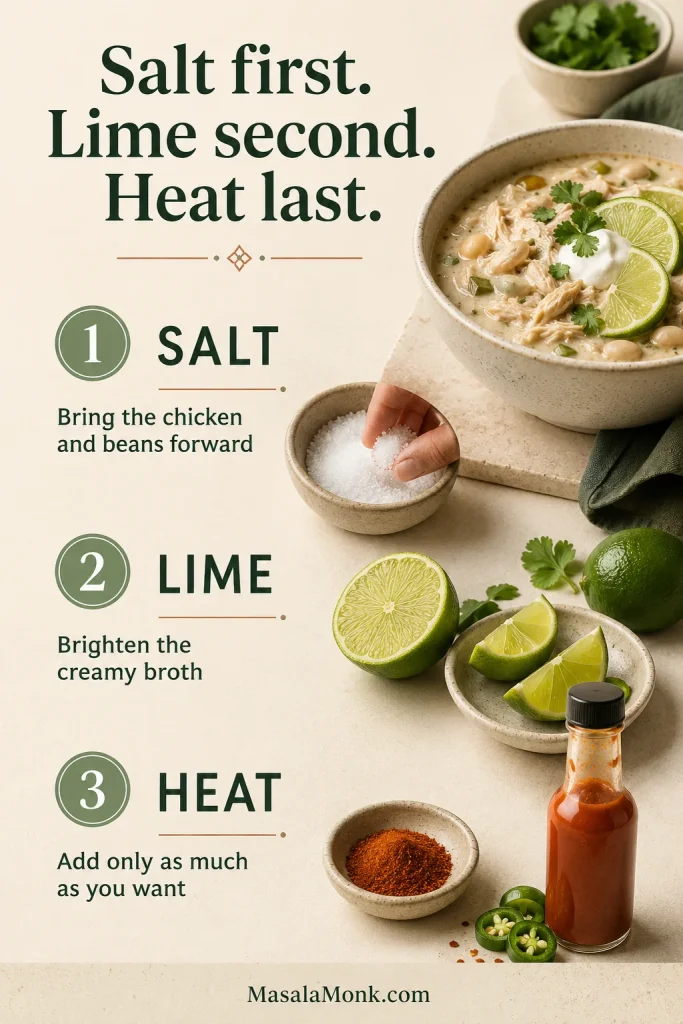
A creamy pot can taste finished before it tastes fully awake. Taste in this order: salt first, lime second and heat last. Salt brings the chicken and beans forward, lime lifts the creamy broth, and cayenne or hot sauce raises the heat without changing the whole pot.
Taste in sequence—salt first, lime second, heat last—so each adjustment has a clear purpose.
If the chili is thicker than you prefer, add warm broth a quarter cup at a time.
Full-fat block cream cheese melts more smoothly than whipped or tub-style products.
Add the green chiles with their liquid; the starting broth amount already accounts for that extra moisture.
If the onion is still firmer than you prefer when the chicken is ready, remove the chicken and let the base continue for another 10–15 minutes. Dice the onion finely or use the sautéed route next time.
The chili thickens after refrigeration, so loosen leftovers gradually while reheating.
The recipe above is all you need for dinner. Keep the guide below nearby for chicken that cooks faster than expected, a pot that looks too loose or the version you want to make next time.
Why This White Chicken Chili Stays Thick and Creamy
Very little moisture escapes beneath a slow-cooker lid. Steam condenses and falls back into the pot while the chicken, onion and green chiles release liquid of their own.
That is why white chicken chili needs a different balance from a tomato-based crockpot chili. Red chili can draw thickness from tomatoes, tomato paste, meat and reduction. Here, the beans must do more of the work.
Most of the beans remain whole. One cup is blended into the broth so it coats the chicken rather than behaving like clear stock. The cream cheese adds richness without having to do all the thickening.
Choose the Ingredients and Cook the Chicken
Chicken breasts or thighs
Chicken breasts make a leaner bowl but can dry out when left in the cooker after they are ready. Boneless thighs are juicier and more forgiving during longer cooking. Keep the total weight close to 1½ pounds whichever cut you choose.
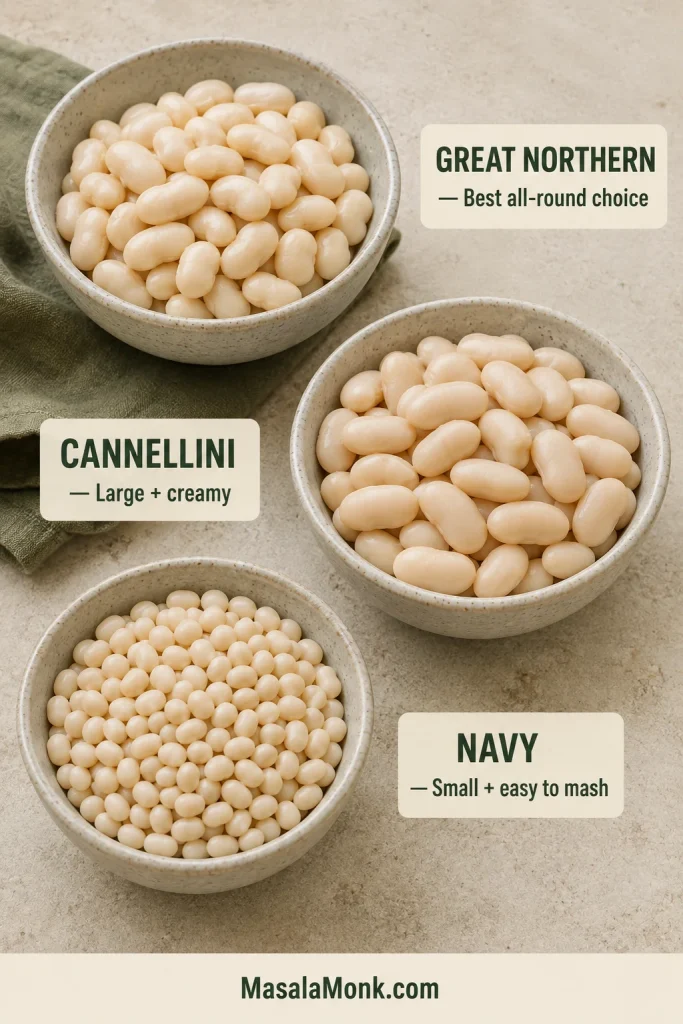
Best beans for white chicken chili
Great Northern beans are mild, medium-sized and a dependable default.
Cannellini beans are larger and especially creamy when blended.
Navy beans are smaller, softer and easy to mash.
Great Northern beans balance whole-bean texture and blending; cannellini are plumper, while navy beans mash especially easily.
Dried beans are not a direct swap because they need their own soaking, liquid and cooking-time plan.
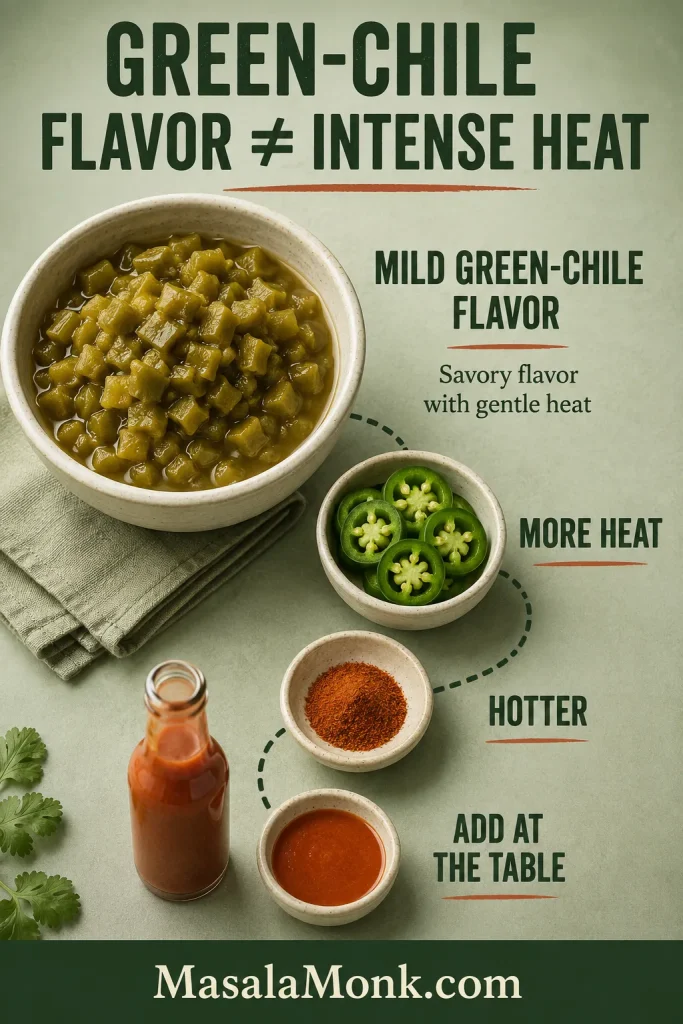
Green chiles and lime
Two small cans of mild green chiles keep their flavor noticeable after the beans and cream cheese go in. Add jalapeño, cayenne or hot sauce separately when you want more heat.
Mild green chiles build flavor in the base; jalapeño, cayenne or hot sauce can raise the heat later.
Add lime only near the end so its brightness stays clear against the beans and cream cheese.
How long to cook white chicken chili in the slow cooker
Compare chicken from the side: similar-looking breasts can cook differently when one is much thicker through the center.
All chicken should reach 165°F / 74°C. The ranges below tell you when to begin checking; remove each piece when it reaches temperature and still looks moist.
On a phone, swipe sideways to see every column.
Chicken
Setting
Begin checking
Likely range
Texture cue
Average chicken breasts
High
2½ hours
About 2½–3½ hours
Easy to shred and still moist
Average chicken breasts
Low
4 hours
About 4–6 hours
Easy to shred and still moist
Boneless chicken thighs
High
3 hours
About 3–4 hours
Tender and separating easily
Boneless chicken thighs
Low
4½ hours
About 5–6½ hours
Tender and separating easily
Chicken first-check times for slow cooker white chicken chili.
Check every piece in its thickest part, starting with the largest. Remove pieces individually as they reach 165°F / 74°C and still look moist. USDA safe-temperature guidance gives 165°F / 74°C as the minimum internal temperature for poultry.
What the Chili Should Look Like at Each Stage
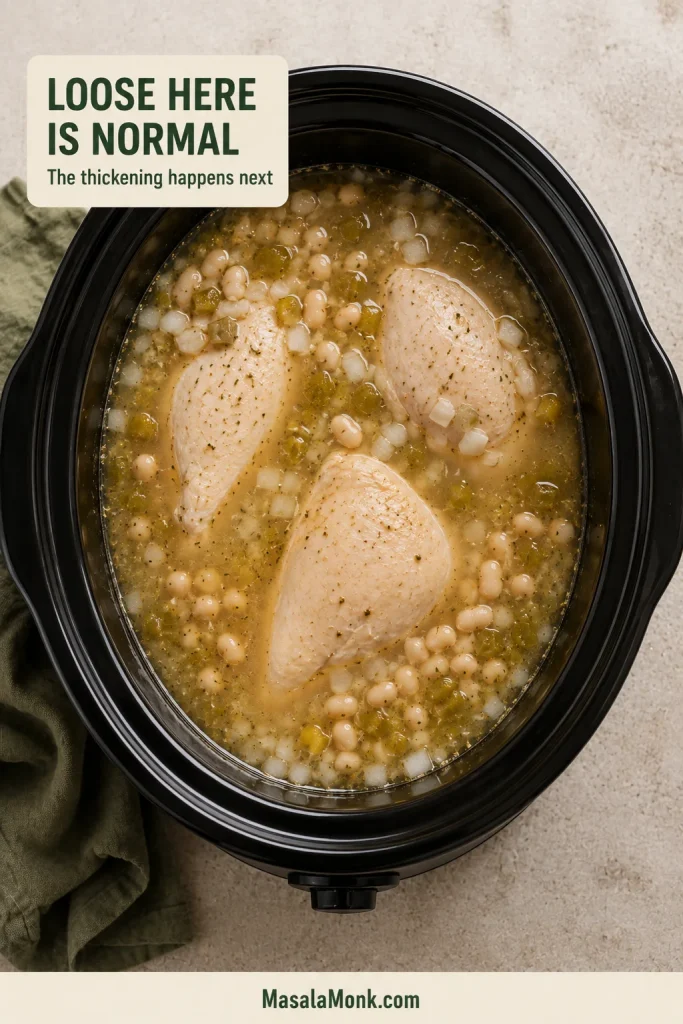
When the lid first opens
The pot may look looser than expected. The chicken is still whole, the blended beans are still outside the cooker and the final additions have not gone in. A brothier appearance here is normal.
Keep the loose liquid. It will help blend the reserved beans and temper the cream cheese before the chili thickens.
After the chicken and bean purée return
The broth becomes creamier-looking and starts clinging to the shredded chicken. The chicken and beans stop looking separate from the broth.
Watch movement more than color: after the bean purée returns, the solids should stay suspended longer while the chili still pours.
After resting
The broth should lightly coat the spoon and settle slowly when ladled. It remains looser than tomato-heavy beef chili but should be visibly thicker than chicken soup.
Once the spoon looks right, choose how rich or tangy you want the finished bowl.
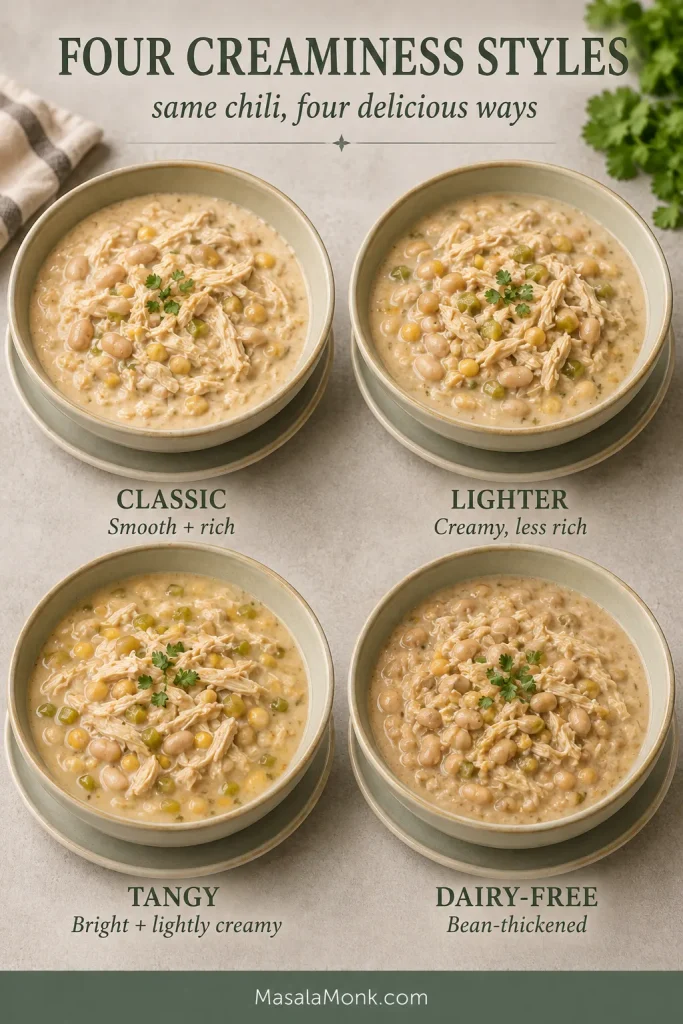
Choose Your Creamy White Chicken Chili Style
Style
Use
How to add it
Result
Classic
4 oz / 113 g cream cheese
Whisk with hot chili liquid before stirring it in
Smooth and rich without hiding the beans and chiles
Lighter
2 oz / 57 g cream cheese
Add it using the same gentle method
Creamy with less dairy richness
Tangy
¼ cup / 60 g sour cream or plain Greek yogurt instead of cream cheese
Temper with hot chili liquid, then stir it in with the cooker off or set to Warm. Do not let it boil
Brighter, lighter and gently tangy
Dairy-free
No dairy
Use the bean purée; mash another ½ cup of beans only if needed after resting
Bean-forward and naturally creamy
Bean purée provides the body in every version; changing the dairy mainly changes richness and tang.
For sour cream or yogurt, use the gentle approach in this chicken paprikash recipe: warm the dairy gradually with hot liquid and avoid boiling it afterward.
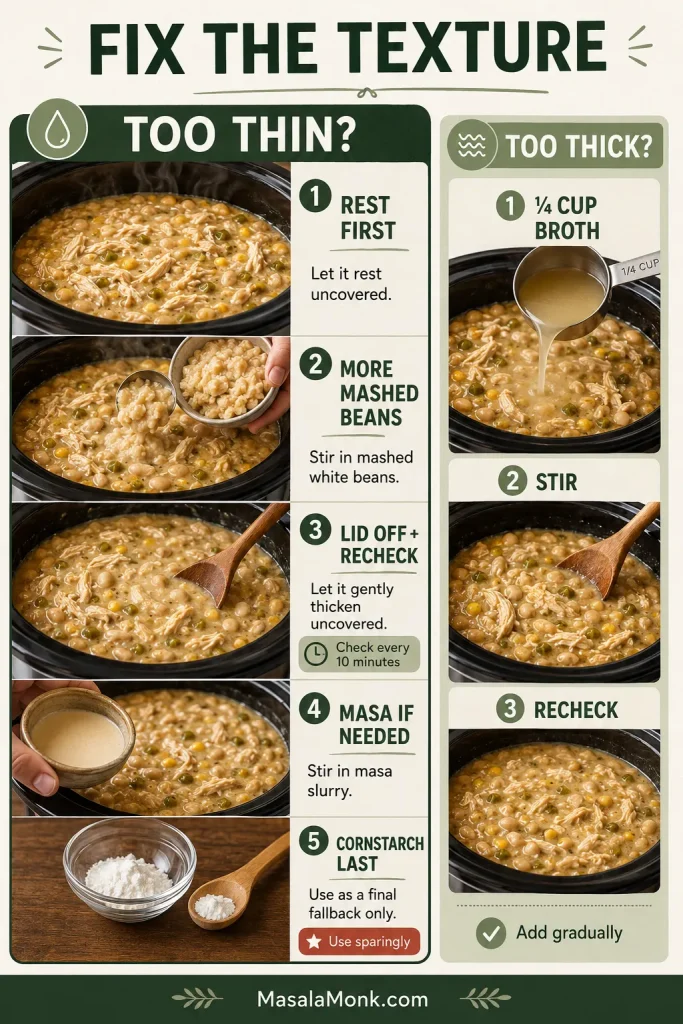
How to Fix Thin or Overly Thick White Chicken Chili
Start with the least irreversible fix: rest, beans and gentle reduction before concentrated starches.
When the chili is too thin
Give the beans the first chance to fix the pot. Reach for masa or cornstarch only when they are not enough.
Finish the recipe and let the chili rest.
Mash or blend another ½ cup of beans.
Leave the lid off and continue cooking, stirring occasionally, until the broth coats the spoon more clearly. Check every 10 minutes rather than assuming one fixed reduction time.
Whisk 1 tablespoon masa harina with 2 tablespoons cool water or broth and stir it in.
Use cornstarch only as the last resort.
For a cornstarch slurry, whisk 1 tablespoon cornstarch with 1–2 tablespoons cool water. Stir it into the hot chili and allow 5–10 minutes for it to thicken.
When the chili is too thick
Add warm broth a quarter cup at a time. Stir, wait briefly and check the spoon before pouring in more.
Keep rotisserie chicken in broad shreds; it will soften further as it warms in the seasoned chili.
Use the main recipe quantities, replacing the raw chicken with 3 cups / 425–450 g cooked shredded chicken and reducing the broth to 2 cups / 473 ml.
Already-cooked chicken needs seasoned broth and enough time to become hot—not another afternoon of cooking. Leftover meat from a whole chicken cooked in the Crock Pot works as well as store-bought rotisserie chicken.
Sauté the diced onion in 2 teaspoons / 10 ml oil for 3–4 minutes. Add the garlic and spices for 30 seconds.
Transfer to the slow cooker with two cans of beans, the green chiles and 2 cups / 473 ml broth.
Cook on Low for about 2 hours, until the onion is tender.
Blend one cup of beans from the third can with hot liquid from the cooker.
Add the purée, remaining beans, corn and cooked chicken.
Cook for another 20–30 minutes, until the chili is steaming throughout and reaches 165°F / 74°C near the center of the cooker. Stir in the cream cheese mixture, lime and cilantro.
Rotisserie chicken, canned ingredients and broth can all be salty, so taste before adding any final salt.
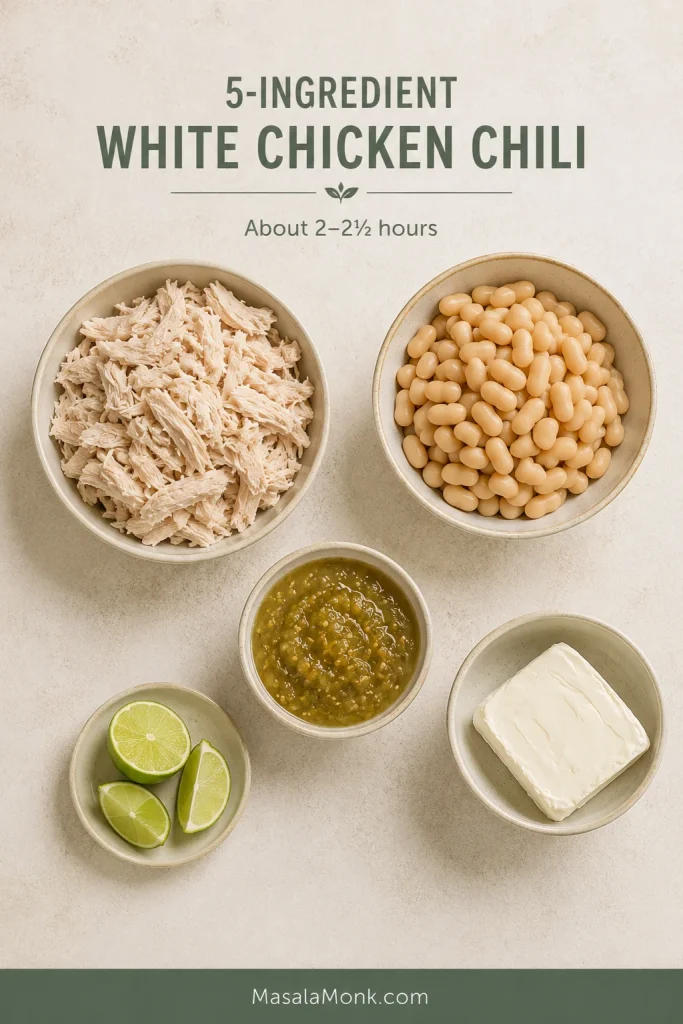
5-Ingredient White Chicken Chili With Salsa Verde
With only five ingredients, salsa verde carries most of the seasoning. Use one you already enjoy on its own.
Prep time: About 10 minutes Slow-cooker time: About 2–2½ hours Yield: About 6–8 servings
3 cups / 425–450 g cooked shredded chicken
3 cans white beans, 15 oz / 425 g each, drained and rinsed
16 oz / 454 g salsa verde
4 oz / 113 g softened cream cheese
1–2 tablespoons / 15–30 ml fresh lime juice
Add two cans of beans and the salsa verde to the slow cooker. Cook on Low for 1½–2 hours, until hot.
Blend one cup of beans from the third can with some of the hot salsa mixture. Return the purée with the remaining beans and chicken. Cover and cook for another 20–30 minutes, until steaming hot throughout.
Whisk the softened cream cheese with hot chili liquid, stir it into the pot and finish with lime. Begin without broth because salsa verde varies in thickness; add warm broth only if the chili needs loosening.
What the Salsa-Verde Shortcut Should Look Like
Jarred salsa keeps this route fast. For more control over acidity, heat and texture, use homemade roasted salsa verde.
Salsa verde changes the flavor direction; blended white beans still give the shortcut chili most of its body.
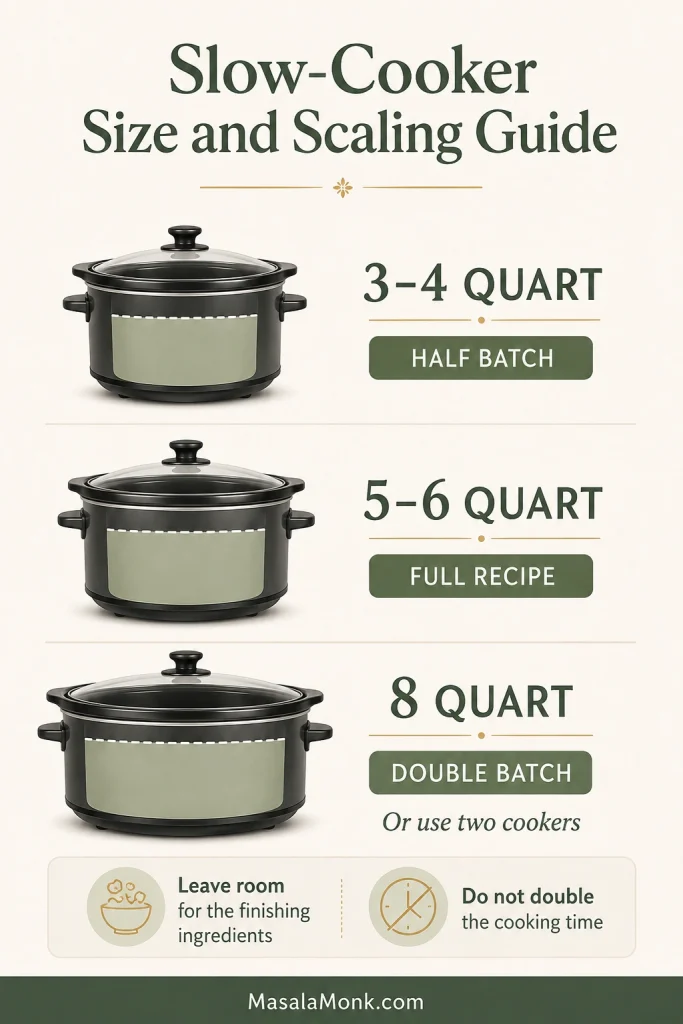
Capacity and cooking time are separate questions; a larger batch needs room, while chicken thickness and temperature still determine doneness.
Half batch: use a 3–4 quart slow cooker. Keep the chicken pieces similar in thickness and use the same early checkpoints; a smaller batch may heat faster, but temperature still decides when each piece is ready.
Full batch: use a 5–6 quart slow cooker.
Double batch: use an 8 quart cooker with comfortable stirring room, or divide the recipe between two cookers. Do not double the cooking time; a fuller cooker may simply take longer to heat.
Do not fill the cooker beyond the manufacturer’s recommended level. The uncooked mixture needs room for the shredded chicken, remaining beans and purée added near the end.
Dice the onion and measure the spices the night before. Keep the raw chicken and other perishable ingredients covered and refrigerated until the cooker is ready to start.
White Chicken Chili Troubleshooting
On a phone, swipe sideways to see every column.
Problem
Likely cause
What to do now
Dry chicken
It stayed in the cooker after it was ready
Shred it finely and stir in a little warm broth
Lumpy cream cheese
Cold cream cheese went directly into the pot
Ladle some hot liquid and the visible lumps into a bowl, whisk as smooth as possible, then return the mixture over gentle heat
Oily or grainy broth
The dairy boiled or overheated
Turn off the heat, whisk gently and add a small splash of warm broth; badly overheated dairy may not become completely smooth again
Creamy but bland
The pot needs sharper seasoning
Adjust salt first, lime second and heat last
Too spicy
Hot salsa, jalapeño or too much cayenne
Add unsalted beans or broth and serve with avocado or sour cream
Too salty
Salty broth, rotisserie chicken, beans or toppings
Dilute with unsalted beans and broth
Common white chicken chili problems and practical ways to rescue the pot.
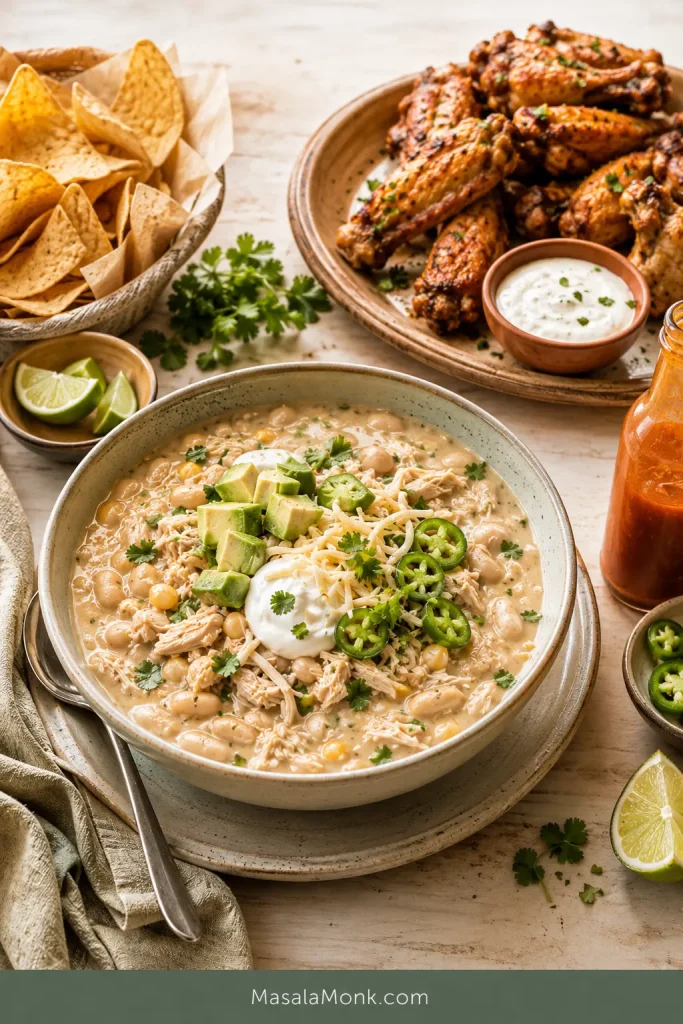
The chili already contains chicken and beans, so one simple side and a small topping bar are usually enough.
For game day, pair it with crispy air fryer chicken wings. The wings add crunch while the chili remains the warm, spoonable center of the meal.
Crisp wings and tortilla chips give a creamy bowl the texture contrast that works especially well for game day.
Build a White Chicken Chili Topping Bar
Freshness: lime, cilantro, scallions or diced tomato
Creaminess: avocado, sour cream or Greek yogurt
Crunch: tortilla strips, crushed tortilla chips or sliced radishes
Heat: jalapeño, cayenne or hot sauce
Richness: Monterey Jack or Pepper Jack
Simple side: cornbread, warm tortillas, a green salad or roasted vegetables
Pass the toppings around and let each bowl lean brighter, hotter, creamier or crunchier.
Serve dairy, chile, acid and crunch separately so one balanced pot can suit different appetites at the table.
The slow cooker has done the long work; dinner can now feel as relaxed as it was supposed to.
Keeping it warm for serving
Once the chili is completely cooked, switch the cooker to Warm. Stir periodically and add a small splash of broth if the beans continue tightening the pot.
Warm is for holding the finished chili rather than extending the chicken’s cooking time. Keep hot food at 140°F / 60°C or above; the USDA slow-cooker safety guidance uses the same threshold for hot holding.
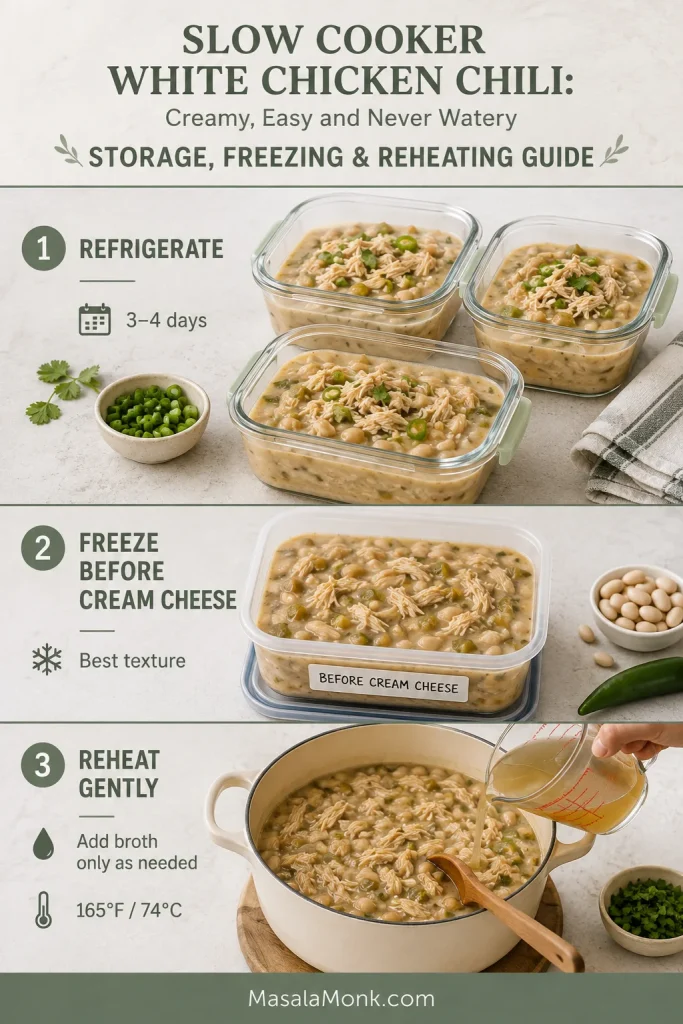
Storage, Freezing and Reheating
Shallow containers cool and portion leftovers efficiently; keep avocado, herbs and crunchy toppings separate.
Once dinner is over, the same beans that thickened the broth will keep absorbing liquid in the refrigerator.
Refrigerating
Transfer the chili to shallow airtight containers and refrigerate it within two hours. Keep avocado, herbs and crunchy toppings separate and use the chili within 3–4 days.
The next-day chili will be thicker than the first bowl. That is normal.
Freezing
For the smoothest reheated texture, freeze the chicken-and-bean base before adding cream cheese, lime and cilantro. Stir those in after reheating.
A fully finished batch can also be frozen, although the dairy may look slightly grainy after thawing. For best quality, use it within about three months.
Reheating
Reheat gently on the stovetop or in the microwave, stirring occasionally and adding broth only as needed. Bring leftovers to 165°F / 74°C.
A refrigerator-cold batch should not be reheated from scratch in the slow cooker. Reheat it promptly first, then transfer the hot chili to a preheated cooker on Warm for serving. See the USDA guidance on leftovers and food safety for further storage and reheating advice.
Thaw raw chicken before slow cooking so it heats safely and evenly. Frozen or partially frozen pieces take longer to come up to temperature and make the cooking time difficult to predict.
Can I use canned chicken?
Yes. Drain it well and add it near the end, just as you would other already-cooked chicken. Its texture will be softer, so stir gently and check the salt after it is hot.
Can I use dried beans?
Not in the same method. Dried beans need separate soaking and cooking instructions.
Is white chicken chili spicy?
The classic version is mild. The green chiles add flavor without intense heat. Add jalapeño, cayenne or hot sauce for a hotter bowl.
What makes this chili rather than chicken soup?
Chili has more bean-led thickness and less free broth than chicken soup. The liquid should cling lightly to the chicken instead of behaving like clear stock.
A Creamy Pot That Still Tastes Like Chili
There is a satisfying moment near the end when the broth begins clinging to the shredded chicken. Add the lime, leave the lid off and give the pot a few quiet minutes.
Then ladle it into bowls and set out the toppings. The chili is creamy, bright and substantial, and everyone at the table can decide how much heat, crunch or lime belongs in their bowl.
Made it? Tell us which chicken cut and slow-cooker size you used, and whether you kept the chili thick or loosened your bowl with a little more broth.
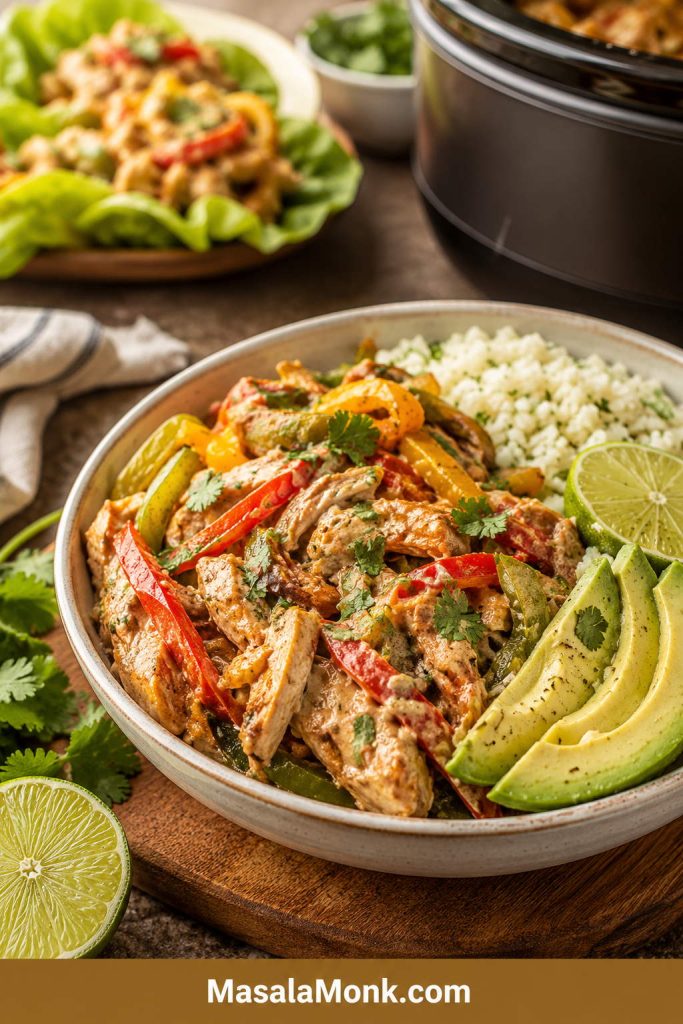
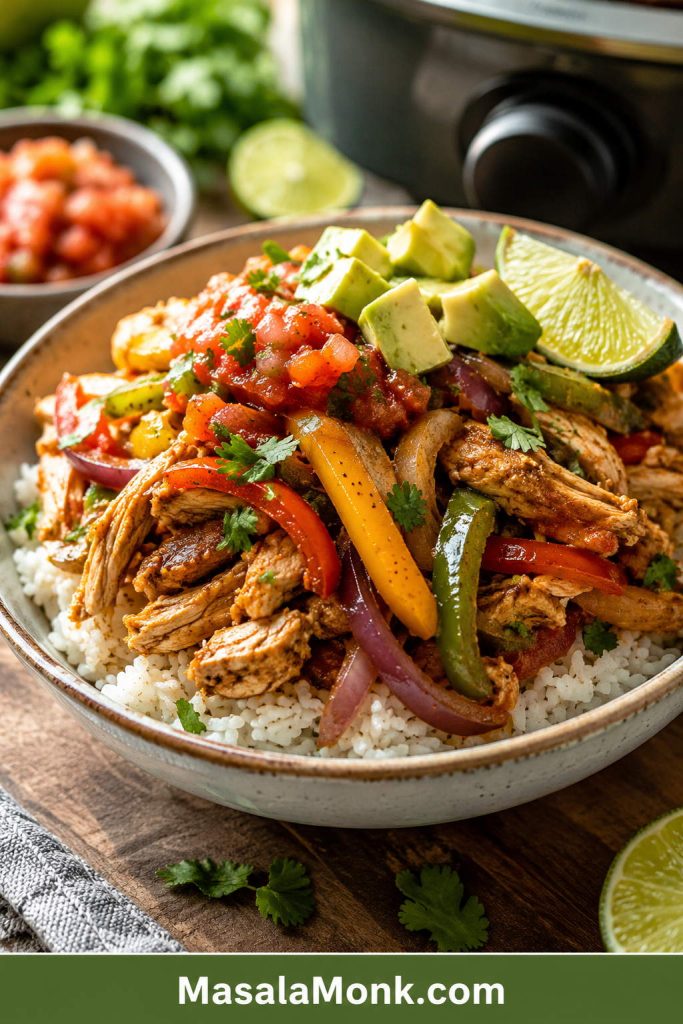
These slow cooker chicken fajitas are for the nights when you want the Crock Pot to handle dinner, but you still want the meal to feel fresh when everyone sits down. You get smoky, lime-bright chicken with sweet peppers and soft onions, ready to tuck into warm tortillas or spoon over rice.
The only tricky part is knowing what the slow cooker will do once the lid goes on. It traps moisture, so fajitas can become too wet, too soft, or a little flat if everything cooks together with too much liquid. This version keeps the method easy but gives you one simple rule to remember: less liquid, later peppers, lime at the end.
By the time you warm the tortillas and cut the lime, the chicken is tender, the peppers are sweet, the onions are soft, and dinner feels like more than something you simply left in the slow cooker. Use the cooked chicken and peppers for classic fajitas, tacos, bowls, quesadillas, nachos, or easy leftovers.
It will not have the same char as skillet or sheet pan fajitas, but it gives you an easy, reliable Crock Pot dinner with very little hands-on work.
Quick Answer: How to Make Slow Cooker Chicken Fajitas
To make slow cooker chicken fajitas, add boneless chicken breasts or thighs to a 5.5 to 6 quart slow cooker with sliced bell peppers, onion, garlic, fajita seasoning, and ¾ to 1 cup salsa, Rotel, or diced tomatoes. Cook on low for 4 to 6 hours or high for 2½ to 3½ hours, until the chicken reaches 165°F / 74°C. Slice or shred the chicken, return it with only enough juices to coat, finish with lime, and serve in tortillas, bowls, tacos, salads, or quesadillas.
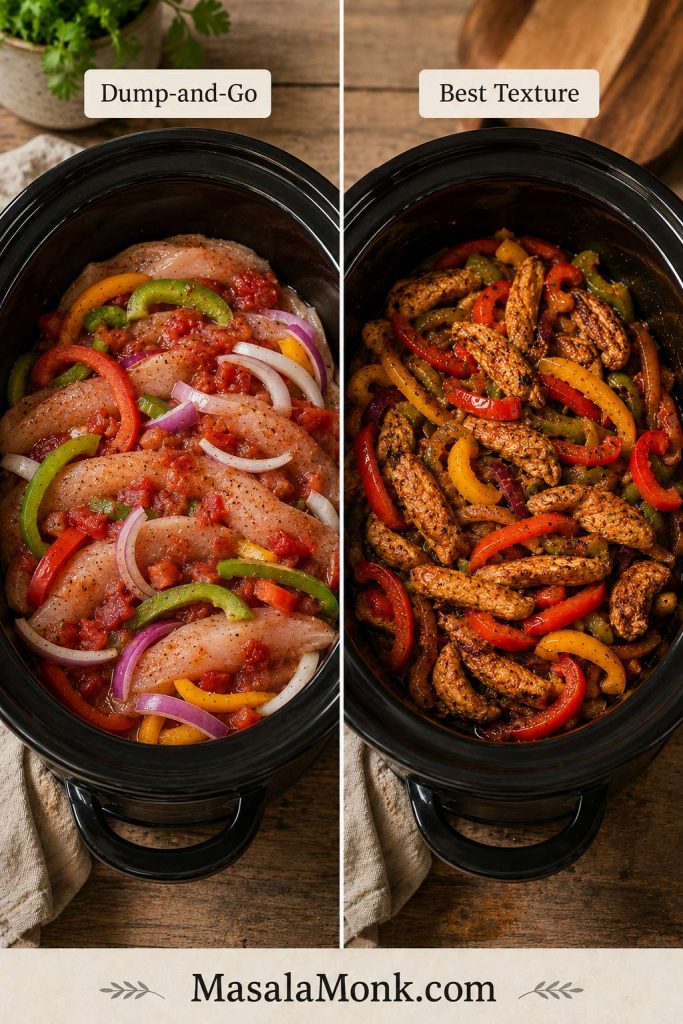
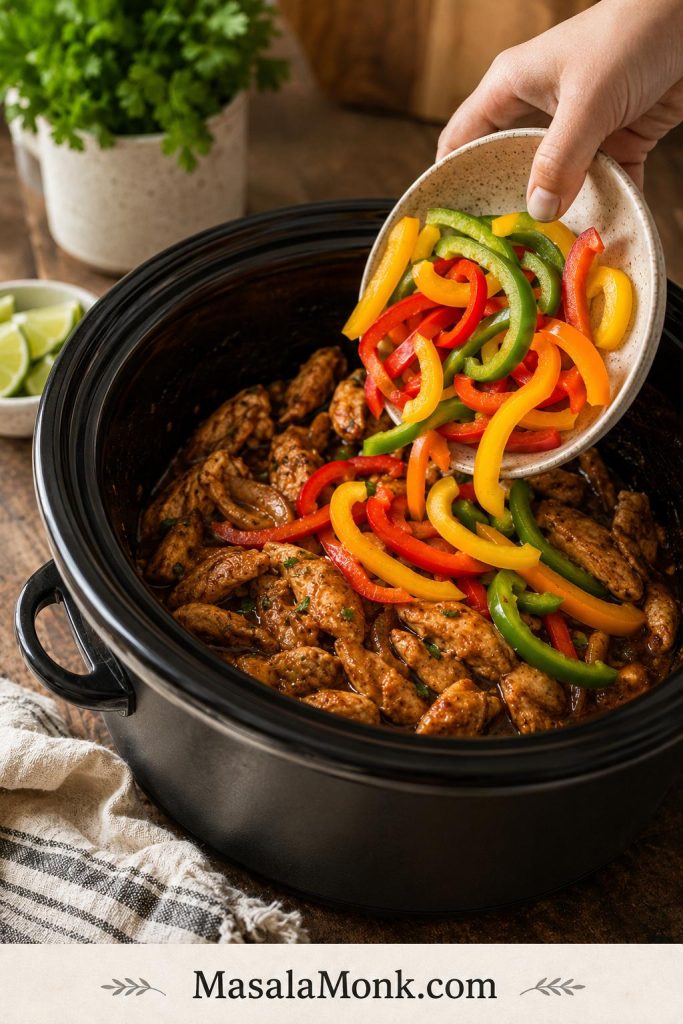
The three keys are less liquid, later peppers, and lime at the end. For better texture, add only half the peppers and onions at the beginning. Add the rest during the last 30 to 60 minutes so they stay brighter, firmer, and less watery.
For the easiest version, add everything at the beginning and drain before serving. If you want better texture, save some peppers for the end, keep the filling glossy, and finish with lime. The rest of the guide helps you make it tighter for tortillas, saucier for bowls, or softer for shredded leftovers.
Start with Less Liquid
This is the first texture decision in slow cooker chicken fajitas: add enough salsa or Rotel to season the chicken, but not so much that the pot turns soupy.
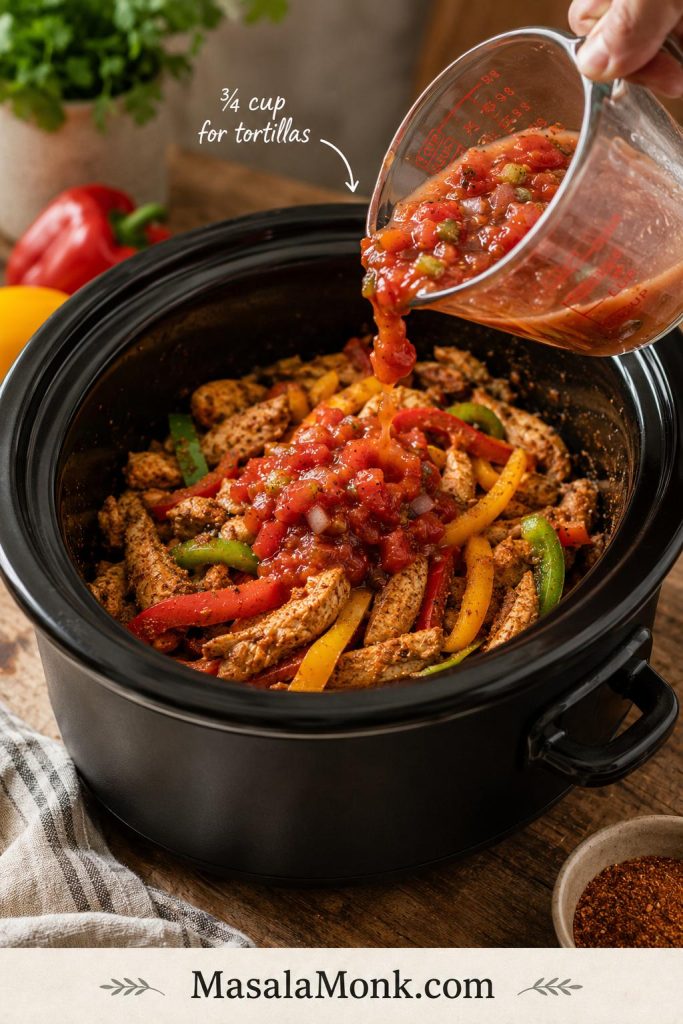
First, control the liquid. For tortilla-style slow cooker chicken fajitas, about ¾ cup salsa or Rotel seasons the chicken without flooding the pot or making the filling hard to fold.
Slow Cooker Chicken Fajitas at a Glance
Slow cooker size
5.5 to 6 quart / 5.2 to 5.7 L
Fill level
Aim for about half to two-thirds full for even cooking
Chicken amount
2 lb / 900 g
Chicken to use
Breasts for slicing, thighs for juicier shredded fajitas
Description: Easy Crock Pot chicken fajitas with juicy chicken, sweet peppers, soft onions, smoky fajita seasoning, lime, and just enough salsa or Rotel to keep everything flavorful without turning watery.
Prep time: 10 to 15 minutes Cook time: 2½ to 3½ hours on high, or 4 to 6 hours on low Total time: About 2 hours 45 minutes to 6 hours 15 minutes Servings: 6 Yield: Enough chicken and peppers for 8 to 12 fajitas, depending on tortilla size Equipment: 5.5 to 6 quart / 5.2 to 5.7 L slow cooker, knife, cutting board, tongs, slotted spoon, instant-read thermometer
Ingredients
2 lb / 900 g boneless skinless chicken breasts or thighs
3 large bell peppers / 420 to 500 g, sliced, preferably mixed colors
1 large onion / 180 to 220 g, sliced
¾ to 1 cup / 180 to 240 ml salsa, Rotel, or diced tomatoes
3 to 4 garlic cloves / 12 to 16 g, minced
2½ to 3 tablespoons / 22 to 28 g fajita seasoning, homemade or store-bought
2 tablespoons / 30 ml fresh lime juice, plus extra lime wedges for serving
8 to 12 tortillas, flour or corn
Optional toppings: sour cream, avocado, guacamole, cilantro, shredded cheese, salsa, jalapeños, lettuce, or hot sauce
Use ¾ cup / 180 ml salsa or Rotel for thicker tortilla-friendly fajitas. For juicier bowls or meal prep, use closer to 1 cup / 240 ml.
Instructions
Slice the vegetables. Cut the bell peppers and onion into strips. Set aside about half of them to add near the end of cooking.
Layer the slow cooker. Add the first half of the peppers and onions to the bottom of the slow cooker. Place the chicken on top.
Add flavor. Sprinkle the chicken with fajita seasoning and garlic. Pour the salsa, Rotel, or diced tomatoes over the top. Do not add extra water.
Cook. Cover and cook on high for 2½ to 3½ hours or low for 4 to 6 hours, until the chicken reaches 165°F / 74°C. Very thick chicken breasts may need the longer end of the range.
Add the remaining peppers. Stir in the reserved peppers and onions during the last 30 to 60 minutes. Use 30 minutes for firmer peppers and 60 minutes for softer peppers.
Slice or shred. Remove the chicken. Rest it for 5 minutes if slicing, or shred it with two forks. Shredded fajitas should pull apart easily. Sliced fajitas should cut cleanly after resting.
Adjust the juices. If there is a lot of liquid in the slow cooker, ladle some out. Return the chicken with only enough juices to coat the meat and vegetables.
Finish with lime. Stir in the lime juice. Taste and adjust salt, seasoning, or lime.
Serve. Fill warm tortillas with the chicken and peppers, or spoon them into bowls, quesadillas, or leftover meals.
Recipe Notes
Use ¾ cup / 180 ml salsa or Rotel for tortillas, or up to 1 cup / 240 ml for bowls.
Do not add extra water. The chicken, peppers, onions, and tomatoes release liquid as they cook.
Add half the peppers and onions late if you want better texture.
Thaw frozen chicken before using it in a slow cooker.
Finish with lime juice after cooking so the flavor stays fresh.
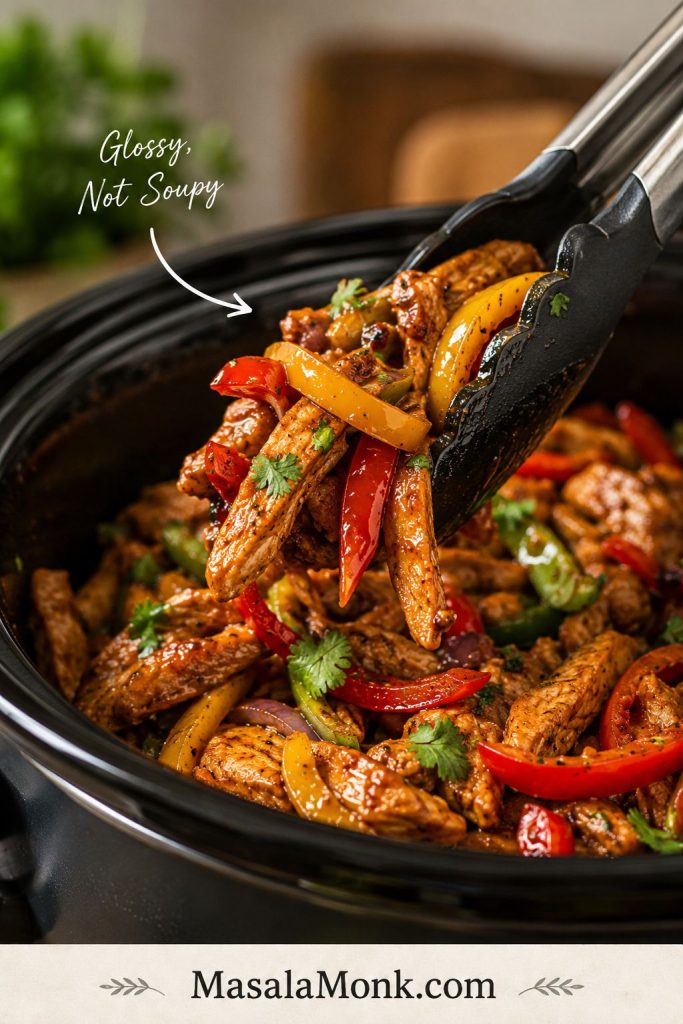
For tortillas, think glossy, not soupy. Drain or lift with tongs before filling tortillas.
This is the kind of recipe that earns its place on a weeknight because it does more than make one dinner. It helps when the day is long, the chicken is already in the fridge, and you need something that can turn into warm tortillas tonight and easy leftovers tomorrow.
Mostly hands-off. Once the slow cooker is loaded, dinner is already moving.
It works with shortcuts. Use homemade fajita seasoning, a packet, salsa, Rotel, or diced tomatoes.
It solves the usual slow-cooker problems. The filling stays glossy instead of watery.
It can be tight or saucy. Keep it neat for tortillas or leave it juicier for bowls.
It turns into more than fajitas. Use the same batch for tacos, bowls, quesadillas, and leftovers.
Once the basic method is set, you can decide whether you want a tighter tortilla filling, a saucier bowl, or soft shredded chicken for leftovers.
Why This Crock Pot Chicken Fajita Recipe Works
A slow cooker does not brown food, so the flavor has to come from seasoning, acidity, vegetables, and the way you manage the juices. That is why this recipe uses a controlled amount of salsa or Rotel, adds some peppers late, and finishes with lime instead of relying on char.
A lot of Crock Pot chicken fajita recipes are easy, but they make the same mistake: too much liquid, all the peppers added too early, and no clear plan for what to do with the juices at the end. The result can still taste good, but it often behaves more like wet shredded chicken than fajita filling.
Here, you still get the easy Crock Pot dinner, but the chicken stays juicy and the peppers do not all collapse into the sauce. A smaller amount of salsa or Rotel gives the meat enough moisture without drowning it. Some peppers and onions go in early to flavor the chicken, while the rest go in near the end so the finished chicken and peppers still have color and bite. Lime juice goes in after cooking, when it can wake up the smoky seasoning and sweet peppers instead of disappearing into the pot.
Controlled liquid keeps the chicken useful for tortillas.
Two-stage peppers give you flavor and better texture.
Chicken breasts or thighs both work depending on your goal.
Sliced or shredded chicken lets you choose classic fajita-style strips or easier pulled chicken.
Fresh lime at the end keeps the flavor lively.
Do Slow Cooker Fajitas Taste Like Skillet Fajitas?
Not exactly, and that is worth saying clearly. This is not the sizzling-pan version. It is the weeknight version: softer, juicier, easier, and still bright enough to feel fresh when the tortillas hit the table.
Expect soft, juicy fajita chicken with sweet peppers, smoky seasoning, and a fresh lime finish. It is not charred or sizzling, but it should taste bright, savory, and easy to fold into warm tortillas.
To make the slow-cooked version taste more fajita-like, add some peppers near the end, finish with fresh lime, avoid too much liquid, and use smoked paprika in the seasoning. For more roasted edges and oven-style flavor, try these sheet pan chicken fajitas. They give you the same chicken, peppers, and onion idea with more browning and less slow-cooker softness.
Ingredients You Need
The ingredient list is simple, but each part matters. Good slow cooker fajitas need enough seasoning to stand up to the long cook, enough moisture to keep the chicken juicy, and not so much liquid that the finished chicken and peppers become soupy.
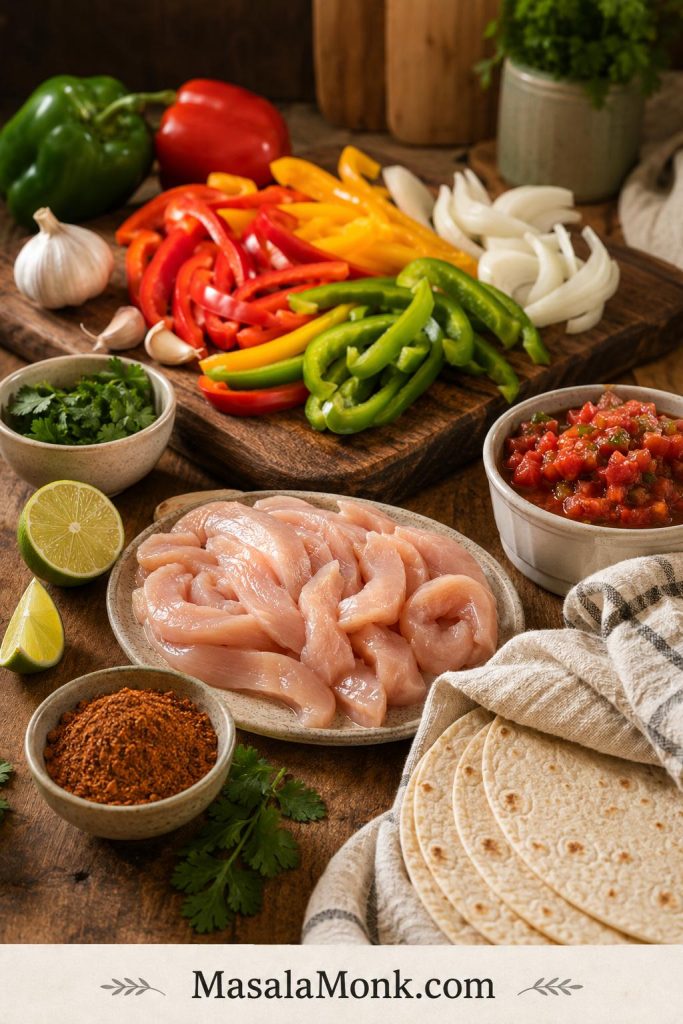
Ingredient checkpoint: the chicken, peppers, onion, seasoning, salsa or Rotel, lime, tortillas, and toppings all support a different part of the final fajita texture.
Chicken, peppers, onion, seasoning, salsa or Rotel, lime, and tortillas each support a different part of the finished fajita texture.
Ingredient
What it does
Use
Chicken
Main protein
Breasts for leaner sliced fajitas; thighs for juicier shredded fajitas
Bell peppers
Sweetness, color, fajita flavor
Use mixed colors for better flavor and appearance
Onion
Savory sweetness
Yellow, white, or red onion all work
Fajita seasoning
Main flavor base
Homemade, packet fajita seasoning, or taco seasoning in a pinch
Salsa, Rotel, or tomatoes
Moisture and flavor
Use less for tortillas and more for bowls
Garlic
Depth and aroma
Fresh garlic is ideal; garlic powder works if needed
Lime juice
Freshness and balance
Add after cooking for the liveliest flavor
Tortillas and toppings
Turn the chicken and peppers into dinner
Use tortillas, rice, lettuce cups, or bowls
Chicken Breast vs Chicken Thighs
Choose chicken breasts if you want leaner pieces that can be sliced into strips. They cook well here, but they can dry out if they sit too long, so start checking closer to the shorter end of the timing range.
If chicken breast is your default cut and dry slow-cooker chicken is a recurring problem, this guide to crock pot chicken breast recipes goes deeper into timing, sauce, and keeping lean chicken useful for bowls, wraps, and leftovers.
Choose chicken thighs if you want the most forgiving version. They stay juicier, shred easily, and are especially good for tacos, bowls, and meal prep. If your slow cooker runs hot or dinner timing is unpredictable, thighs are usually easier to work with.
Both breasts and thighs should reach 165°F / 74°C before serving.
Homemade Fajita Seasoning, Packet Seasoning, or Taco Seasoning?
Use what fits the night. A packet of fajita seasoning is fast, easy, and completely acceptable for a weeknight slow cooker dinner. Homemade fajita seasoning gives you more control over salt, heat, smoke, and sweetness.
Taco seasoning also works in a pinch. It may taste a little more like taco chicken than fajitas, but the peppers, onions, lime, and smoked paprika help pull it back toward fajita flavor. If you use a packet, wait until the end before adding extra salt because many store-bought blends are already salty.
Simple Homemade Fajita Seasoning
Spice
Amount
Chili powder
1 tablespoon
Ground cumin
2 teaspoons
Smoked paprika
1 teaspoon
Garlic powder
1 teaspoon
Onion powder
1 teaspoon
Dried oregano
½ teaspoon
Ground coriander
½ teaspoon
Black pepper
½ teaspoon
Salt
1 to 1½ teaspoons
Cayenne pepper
⅛ to ¼ teaspoon, optional
This amount seasons about 2 lb / 900 g chicken. If your chili powder or store-bought seasoning already contains salt, reduce the added salt and adjust after cooking.
How to Make Slow Cooker Chicken Fajitas
The easiest method is to add everything at once and cook. That works, especially for shredded tacos and bowls. The better method is almost as easy: add some vegetables at the beginning and some near the end. That small move makes the dish feel more like fajitas and less like slow-cooker chicken stew.
Step 1: Slice the Peppers and Onion
Slice the bell peppers and onion into strips. Keep them similar in size so they cook evenly. Set aside about half of the peppers and onions if you want better texture in the finished fajitas.
Step 2: Build the First Layer
Add half the peppers and onions to the bottom of the slow cooker. This gives the chicken a flavorful base and helps season the cooking juices.
Step 3: Add Chicken, Garlic, Seasoning, and Salsa
Place the chicken on top of the vegetables. Sprinkle the fajita seasoning and garlic over the chicken, then add the salsa, Rotel, or diced tomatoes. Do not add extra water. In most slow cookers, the chicken, peppers, onions, and tomatoes release more liquid than you expect.
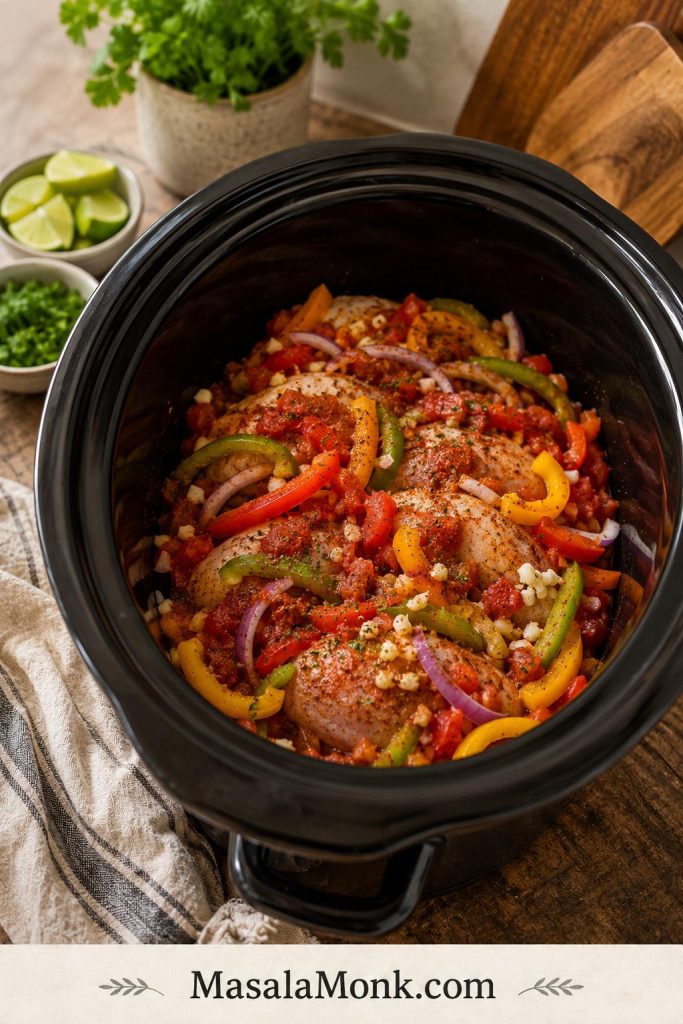
Before the lid goes on: the pot should look seasoned and lightly sauced, not flooded. That setup helps the chicken cook juicy without creating a watery tortilla filling later.
Before cooking, the pot should look coated, not drowned. That controlled start keeps the final fajita filling easier to serve.
Step 4: Cook Until the Chicken Is Done
Cook on high for 2½ to 3½ hours or low for 4 to 6 hours. Chicken breasts are usually best closer to the shorter end if you want slices that hold together. Thighs can handle a longer cook and are better for shredding.
Step 5: Add the Remaining Peppers and Onions
Add the reserved peppers and onions during the last 30 to 60 minutes. Use 30 minutes for more bite, or go closer to 60 minutes if you want them softer but still fresher than the vegetables that cooked from the beginning.
Step 6: Slice or Shred the Chicken
Once the chicken reaches 165°F / 74°C, remove it from the slow cooker. Rest it for a few minutes before slicing, or shred it with two forks if you want pulled chicken for tacos, bowls, or leftovers.
Step 7: Manage the Cooking Juices
If the slow cooker has a lot of liquid, ladle some out before returning the chicken. The finished chicken should look shiny and coated, with a little sauce clinging to the peppers, not a pool of liquid under every tortilla. You are not trying to make dry chicken. Instead, keep the chicken and peppers juicy enough to taste good but firm enough to pick up in a tortilla.
Step 8: Finish with Lime and Serve
Stir in fresh lime juice at the end. When the lime goes in, the whole pot should smell brighter. Taste and adjust salt, seasoning, or lime. Serve with warm tortillas, bowls, or whatever leftovers need rescuing tomorrow.
Slow Cooker Timing: Low vs High
Once the pot is set up, timing is the main thing to watch. The goal is not just cooked chicken. It is chicken that is done before it turns stringy.
Slow cookers are not all the same, and chicken breast can go from juicy to dry faster than people expect. Use the times below as a guide, then let temperature and texture decide when the chicken is done. Chicken should reach 165°F / 74°C. You can confirm poultry temperature guidance from FoodSafety.gov.
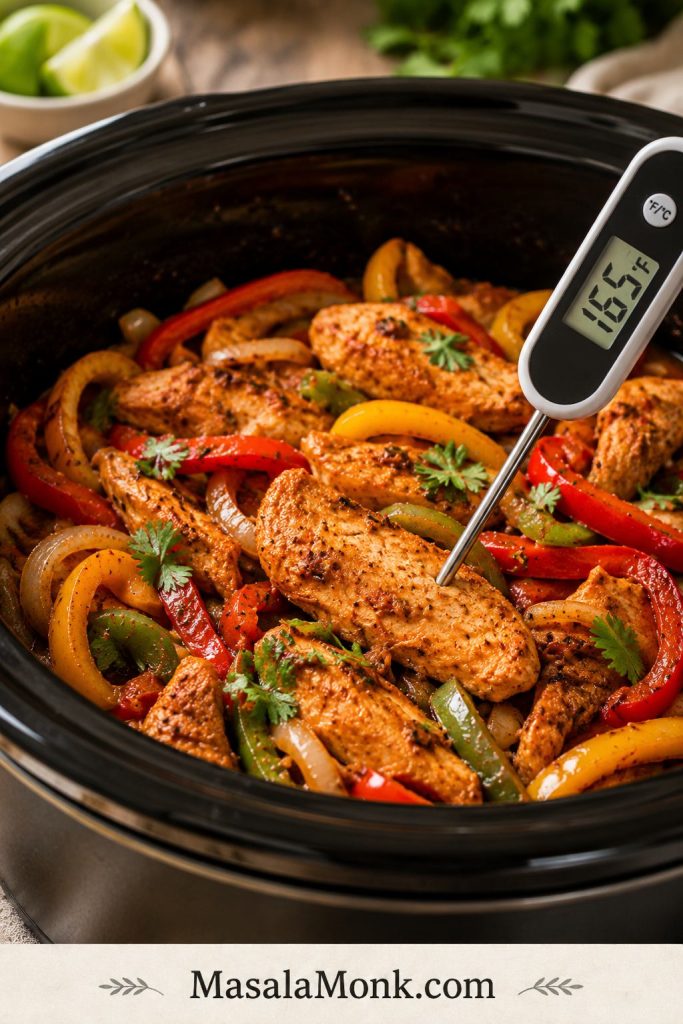
Temperature checkpoint: once the chicken reaches 165°F / 74°C, you can safely slice or shred it and then decide how much cooking juice to keep.
Use temperature, not just time. Once the chicken reaches 165°F / 74°C, you can safely slice, shred, and finish the filling.
Goal
Setting
Time
What to know
Sliced chicken fajitas
Low
4 to 5 hours
Helpful when you want the chicken to hold its shape
Shredded chicken fajitas
Low
5 to 6 hours
Works well for tacos, bowls, quesadillas, and meal prep
Faster dinner
High
2½ to 3½ hours
Useful, but check early to avoid dry chicken breast
Chicken thighs
Low
5 to 6 hours
Juicier and more forgiving than breasts
Holding after cooking
Warm
As short as possible
Long holding can make chicken breast dry or stringy
Very thick chicken breasts may need the longer end of the range. If the chicken is done before dinner, remove it from the slow cooker and keep it covered. Return it to the warm chicken and peppers closer to serving time so lean breast meat does not keep cooking while the vegetables sit in the hot pot.
How to Keep Slow Cooker Chicken Fajitas from Getting Watery
If there is one place slow cooker fajitas usually go wrong, it is the liquid. The chicken may taste good, but if it drips through the tortilla, dinner becomes messy fast.
Do not panic if the slow cooker looks juicy when you open the lid. That is normal. The trick is deciding how much of that liquid belongs in the final tortilla filling.
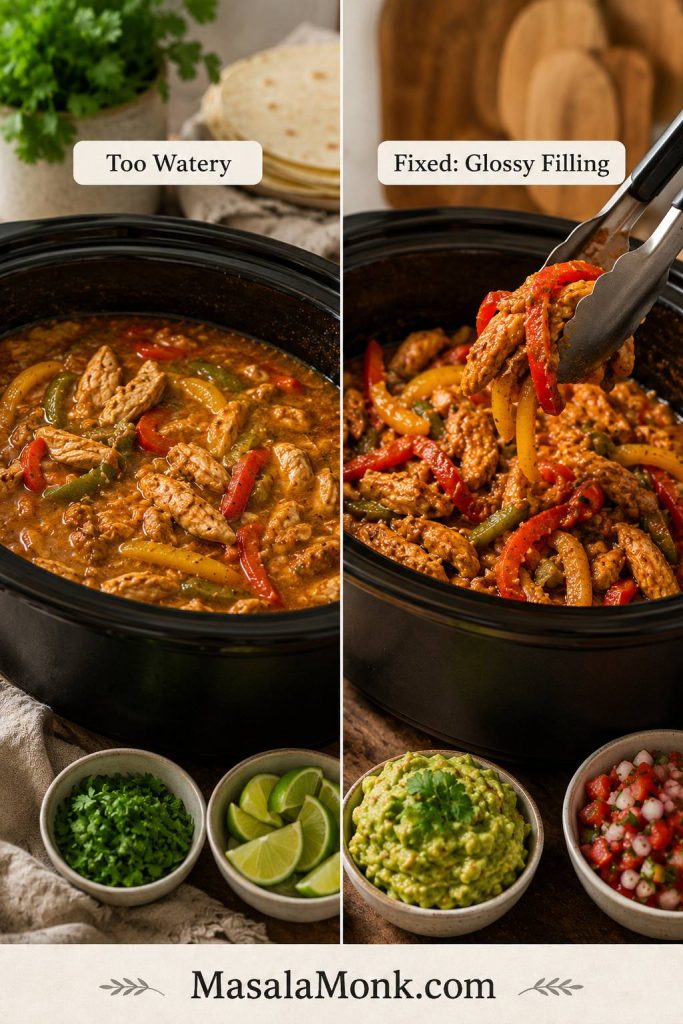
Look for Glossy, Not Soupy
This is the visual cue for tortilla fajitas. The chicken and peppers should be coated with seasoned juices, but the filling should not be loose enough to run through a warm tortilla.
This is the texture cue to remember: glossy, not soupy. The chicken and peppers should be coated with seasoned juices, but not swimming if they are going into tortillas.
If past slow-cooker chicken has turned out watery or bland, this is the part that changes it: start with less liquid, add some peppers later, and brighten the pot at the end. A few small choices make the difference between juicy and soggy. For tortillas, think glossy, not soupy. Bowls can stay a little juicier because rice, quinoa, or cauliflower rice can soak up the seasoned liquid.
Problem
Fix
Too much salsa, Rotel, or tomato
Use ¾ cup / 180 ml for 2 lb / 900 g chicken if serving in tortillas
Peppers release too much water
Add half the peppers near the end instead of all at the beginning
Chicken releases a lot of juice
Remove extra liquid before returning sliced or shredded chicken
Tortillas get soggy
Serve with tongs or a slotted spoon
The pot looks soupy
After the chicken reaches 165°F / 74°C, remove the lid or set it slightly ajar on high for 20 to 30 minutes to reduce excess liquid
You want bowl-style fajitas
Leave it a little juicier for rice, quinoa, or cauliflower rice
How to Fix Watery Fajitas
If the pot gave you more liquid than expected, treat it as a final adjustment instead of a failure. Drain, reduce, or lift the filling with tongs so the flavor stays concentrated.
If the pot looks watery, do not panic. Lift the chicken and peppers with tongs, drain or reduce the extra liquid, then add lime so the filling tastes bright instead of diluted.
Before serving, look at the bottom of the slow cooker. A little seasoned juice is fine. However, a pool of liquid means the chicken and peppers should be lifted with tongs, drained with a slotted spoon, or reduced briefly before they go into tortillas.
After the extra liquid is out of the way, the filling tastes more concentrated: smoky, bright, and juicy enough to fold into a tortilla without losing half of it on the plate.
Do not add water at the beginning unless your slow cooker is unusually dry. For most slow cookers, the chicken, vegetables, and salsa or tomatoes create enough moisture on their own.
Use the Tortilla Test Before Serving
Before the filling goes to the table, try one tortilla. If it folds neatly and tastes juicy without dripping, the texture is right for fajitas.
Then, use the tortilla test. The filling should be juicy enough to taste good, but controlled enough to fold into warm tortillas without soaking, tearing, or dripping everywhere.
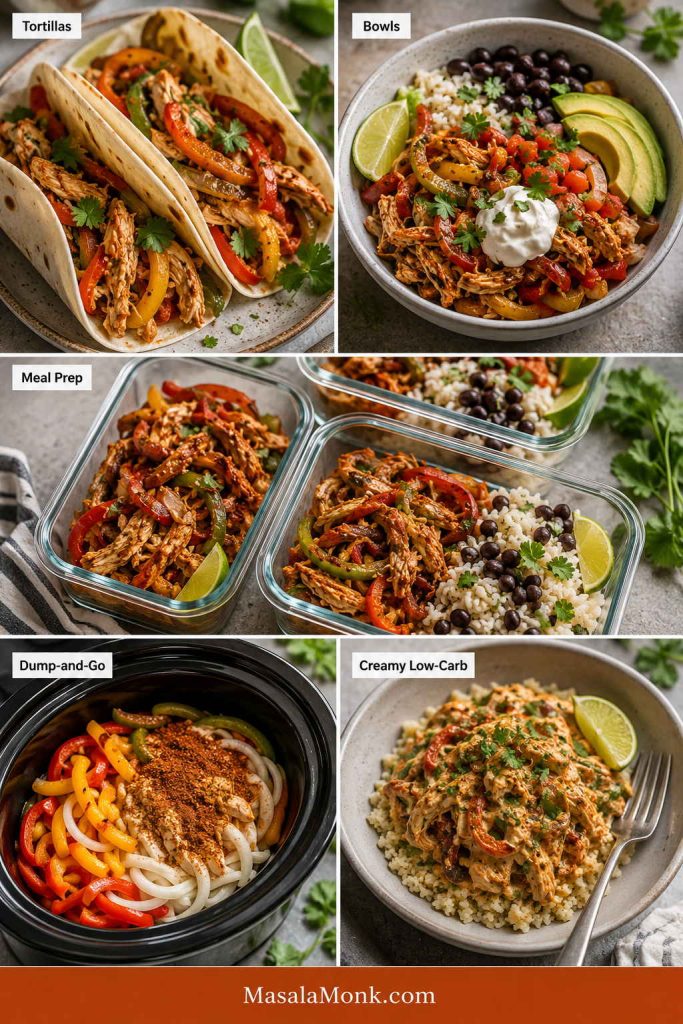
Choose Your Version: Tortillas, Bowls, Meal Prep, or Dump-and-Go
One pot can give you a few different dinners, depending on how much juice you leave behind. Choose the tighter version for tortillas, the juicier version for bowls, the shredded version for meal prep, and the late-pepper version when you want the freshest texture.
Use the visual guide: one batch can become tighter tortilla fajitas, juicier bowls, shredded meal prep, dump-and-go dinner, or creamy low-carb fajita chicken.
Once the chicken is cooked, choose the version that fits the meal. Keep it tighter for tortillas, saucier for rice bowls, shredded for meal prep, or creamy for a low-carb plate.
What you want
Liquid
Chicken
Peppers
Finish
Tortilla fajitas
¾ cup / 180 ml
Sliced or chunky
Half early, half late
Drain well, then add lime
Rice bowls
1 cup / 240 ml
Shredded or chunky
Early or half-late
Keep some juices
Meal prep
¾ to 1 cup / 180 to 240 ml
Shredded
Softer is fine
Pack toppings separately
Best texture
¾ cup / 180 ml
Sliced
Add some peppers late
Use lime and tongs
Dump-and-go
¾ to 1 cup / 180 to 240 ml
Shredded
All at the beginning
Drain before serving
Creamy low-carb
¾ cup / 180 ml
Shredded
Half-late
Add cream cheese at the end
After the juices are right and the lime goes in, the same batch can become warm tortillas tonight, rice bowls tomorrow, or easy leftovers for lunch.
Dump-and-Go vs Best Texture
Both paths work. The fastest path is dump-and-go, while the best-texture version keeps some peppers back so the finished fajitas look brighter and eat less soft.
Dump-and-go is the easiest route, while the best-texture version saves some peppers for the end. That one timing change keeps Crock Pot chicken fajitas brighter and less mushy.
When to Add Peppers and Onions
Once you know whether you are making tortillas, bowls, or meal prep, the next choice is how fresh you want the peppers to feel.
Peppers are where slow cooker fajitas can either feel fresh or fall flat. If they cook for the full time, they become soft and saucy. That is fine for shredded chicken bowls or tacos, but it does not feel as much like classic fajitas.
For the best balance, use the half early, half late method. Early vegetables flavor the chicken. The late peppers should still look colorful and taste sweet, not faded into the sauce.
Add Some Peppers Late
Late peppers are the simplest way to make slow cooker fajitas feel more like fajitas. They add color, sweetness, and bite without requiring a separate skillet.
Add some peppers during the last 30 to 60 minutes when you want more color and bite. This keeps slow cooker fajitas lively without adding another pan to dinner.
If using frozen sliced peppers, add them late and expect a softer, juicier result. Fresh peppers give the best color and bite, but frozen peppers are still useful for quick bowls, tacos, and weeknight dinners.
When you add them
Result
Use when
At the beginning
Very soft peppers and onions
You want the easiest dump-and-go dinner
Halfway through
Balanced texture
You want a simple family dinner
Last 30 to 60 minutes
Brighter, firmer peppers
You want more fajita-like texture
Sauté separately
Most bite and closest skillet feel
You do not mind one extra pan
Half early, half late
Flavor plus texture
You want the most practical slow cooker method
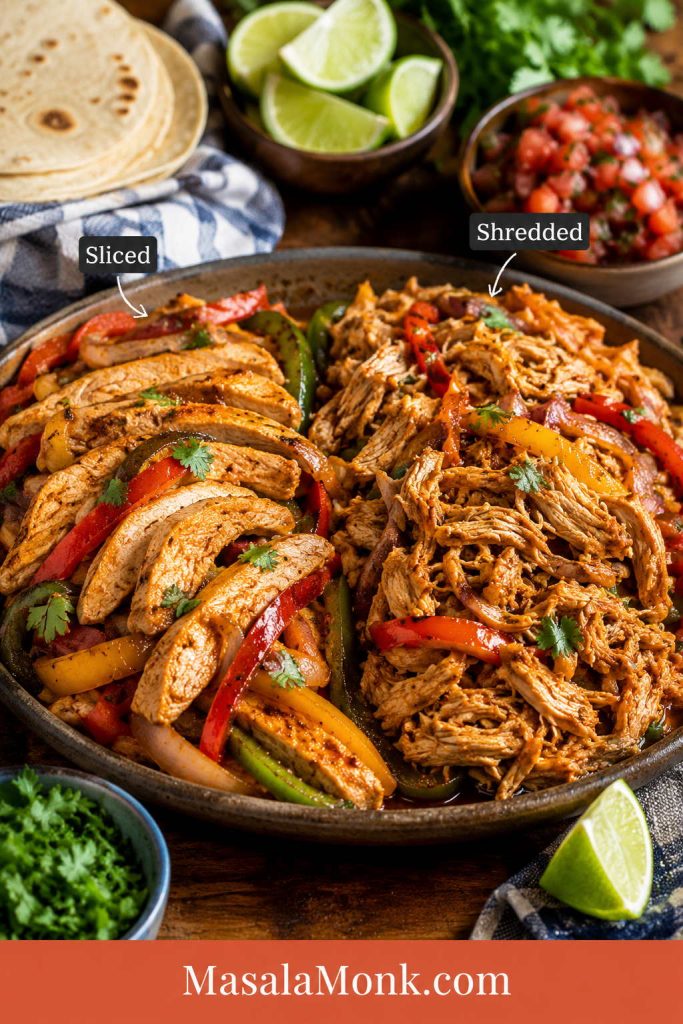
Shredded vs Sliced Slow Cooker Chicken Fajitas
Once the liquid is under control, the next choice is how you want to eat the chicken. Traditional fajitas usually use sliced meat, but Crock Pot chicken naturally becomes tender enough to shred. Neither option is wrong.
Shredded vs Sliced Chicken
Sliced chicken feels more classic in tortillas. Shredded chicken is easier for tacos, bowls, quesadillas, and leftovers, especially when the juices are controlled.
Slice the chicken for a more classic fajita feel, or shred it for bowls, tacos, quesadillas, and leftovers. Either way, return it with just enough juice to coat.
Style
Use for
How to do it
Sliced chicken fajitas
Classic tortillas
Cook just until done, rest 5 minutes, then slice across the grain
Shredded chicken fajitas
Tacos, bowls, quesadillas, leftovers
Cook until fork-tender, shred with two forks, toss with controlled juices
Chunky chicken fajitas
Rice bowls and salads
Cut cooked chicken into thick pieces and fold back into the peppers and onions
For the most classic fajita feel, slice the chicken and add some peppers late. The easiest meal prep option is shredded chicken with just enough juice to coat.
Troubleshooting Slow Cooker Chicken Fajitas
If the pot looks a little messy at the end, that is normal. Slow cooker fajitas usually need one final adjustment before they become dinner.
If the pot does not look the way you hoped, it is usually one of four easy fixes: too much liquid, peppers that cooked too long, chicken breast that stayed on heat too long, or a finish that needs lime and salt.
Quick Fixes for Common Slow Cooker Fajita Problems
Problem
Likely cause
Fix
The pot is watery
Too much salsa, Rotel, tomato, or trapped steam
Drain extra liquid, reduce it after the chicken is fully cooked, or use ¾ cup liquid next time
Peppers are mushy
All the peppers cooked from the beginning
Add half the peppers in the last 30 to 60 minutes
Chicken breast is dry
Cooked too long or held on warm too long
Check early, use thighs next time, and return chicken with some juices
Flavor tastes flat
Slow cooking muted the seasoning
Add lime juice, salt, smoked paprika, hot sauce, or fresh cilantro
Tortillas get soggy
The chicken and peppers are too wet when assembled
Use tongs or a slotted spoon and let liquid drip back into the cooker
Fajitas do not taste fajita-like
No char, soft peppers, or too much sauce
Add peppers late, sauté peppers separately, or use the sheet pan method next time
Chicken is too dry after chilling
It absorbed liquid in the fridge
Reheat with a spoonful of salsa, water, or reserved cooking liquid
Too loose for quesadillas
Too much cooking juice left in the meat
Drain well and reheat uncovered before adding to tortillas with cheese
From there, the fix is simple: drain a little, brighten with lime, or save the extra juice for bowls. Tortillas need a tighter filling. Quesadillas need the chicken drained well so the cheese and tortilla can crisp instead of steam.
Variations: Dump-and-Go, Rotel, No Tomato, and Creamy Low-Carb
Once the texture is handled, the flavor base can flex around what you have: Rotel, salsa, taco seasoning, no tomatoes, or a creamy finish.
You do not need the exact same jar, can, or seasoning blend every time. Use this section when you want the fastest version, a Rotel version, a no-tomato version, or a creamy low-carb fajita chicken.
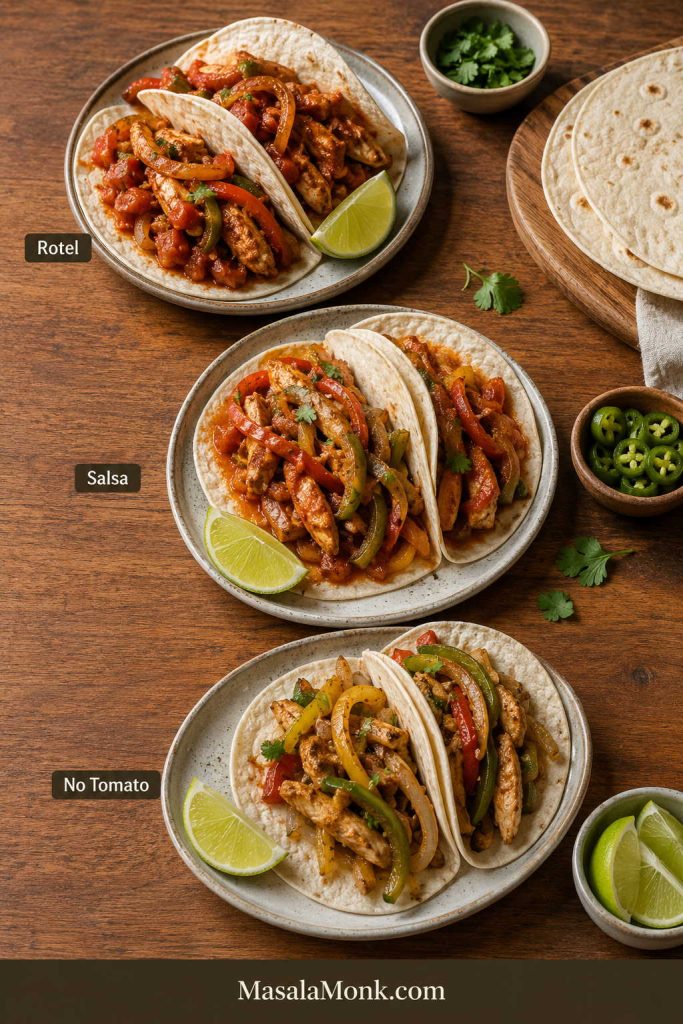
Rotel, Salsa, or No Tomato
This choice changes both flavor and moisture. Tomato-based options add a red base, while the no-tomato version stays lighter and depends more on peppers, seasoning, garlic, and lime.
Rotel gives tomato-chile flavor, salsa keeps the recipe shortcut-friendly, and the no-tomato version stays lighter and less saucy. Choose the base based on flavor, moisture, and texture.
Variation
What changes
Best for
4-ingredient
Use chicken, peppers and onions, seasoning, and salsa or Rotel
Busiest nights
Rotel
Use one 10 oz / 285 g can; drain lightly if very juicy
Tomato-chile flavor
No tomato
Use seasoning, garlic, lime, peppers, onions, and a small splash of broth only if needed
Less watery fajitas
Cream cheese
Add 3 to 4 oz / 85 to 115 g cream cheese during the last 20 to 30 minutes
Bowls, lettuce cups, low-carb plates
Taco seasoning
Use a packet and adjust salt after cooking
Shortcut version
Salsa verde topping
Add after cooking or at the table
Brighter green flavor
Rotel is canned diced tomatoes with green chiles. If you do not have it, use diced tomatoes plus a little chopped green chile, mild salsa, or another tomato-chile blend you like.
No-tomato fajitas need a little extra lime, smoked paprika, garlic, and seasoning so the chicken does not taste flat. For creamy fajita chicken, use the lower amount of salsa or Rotel so the sauce does not become loose.
Creamy Low-Carb Fajita Chicken
Add cream cheese near the end so the sauce stays smooth and the peppers do not disappear into a heavy base. This version works especially well with cauliflower rice or lettuce cups.
For creamy low-carb fajita chicken, stir in cream cheese near the end instead of at the beginning. The sauce should turn smooth and glossy while peppers, lime, and avocado keep the bowl balanced.
A fast dump-and-go Crock Pot chicken fajitas version can be made with chicken, fajita seasoning, one can Rotel, peppers, onions, and lime. It will still work; just drain before serving if the pot looks juicy.
For a brighter green topping instead of more red salsa, a spoon of salsa verde works especially well with the chicken, peppers, lime, and tortillas.
Cook the rice separately. It is the safer, fluffier option because uncooked rice changes the liquid balance in this recipe and can turn mushy in the slow cooker. For reliable bowls, spoon the chicken, peppers, onions, and some of the juices over cooked rice instead.
Serve It Over Rice
Rice bowls are the place to keep a little more seasoned juice. The rice catches the sauce, while avocado, salsa, cilantro, and lime keep the bowl balanced.
Rice bowls can stay a little juicier because the rice absorbs the seasoned fajita juices.
If rice texture is where dinner usually goes wrong, this guide on how to cook rice covers stovetop, rice cooker, and Instant Pot timing so your bowl base stays fluffy instead of wet or gummy.
For meal prep, pack the rice and fajita chicken together only after both have cooled. Keep fresh toppings like lettuce, sour cream, avocado, and cilantro separate until serving.
Can You Use Frozen Chicken for Slow Cooker Fajitas?
No. Thaw the chicken first before using it in this recipe. Slow cookers heat gradually, and frozen chicken can take too long to move through unsafe temperatures. FoodSafety.gov’s slow-cooker guidance says frozen meat, poultry, or seafood should be thawed safely before adding it to the slow cooker.
Forgot to thaw? Use a pressure cooker method or cook the chicken separately from frozen with a faster method, then combine it with the peppers, seasoning, salsa, and lime after it is fully cooked. Check that the chicken reaches 165°F / 74°C before serving.
What to Serve with Slow Cooker Chicken Fajitas
Warm tortillas are the classic choice, but this chicken is flexible. One batch can become dinner tonight and a different lunch tomorrow.
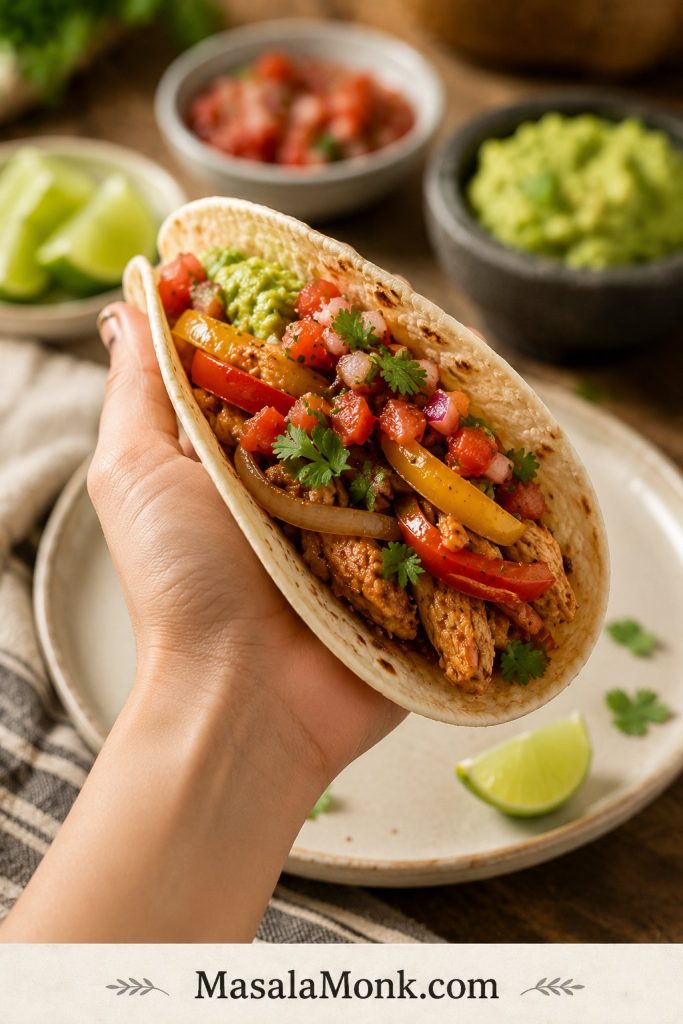
Warm tortillas in a dry skillet for 20 to 30 seconds per side, or wrap a stack in foil and place it in a 250°F / 120°C oven until soft. Soft, warm tortillas fold better, hold the chicken more neatly, and make even a simple Crock Pot dinner feel fresher.
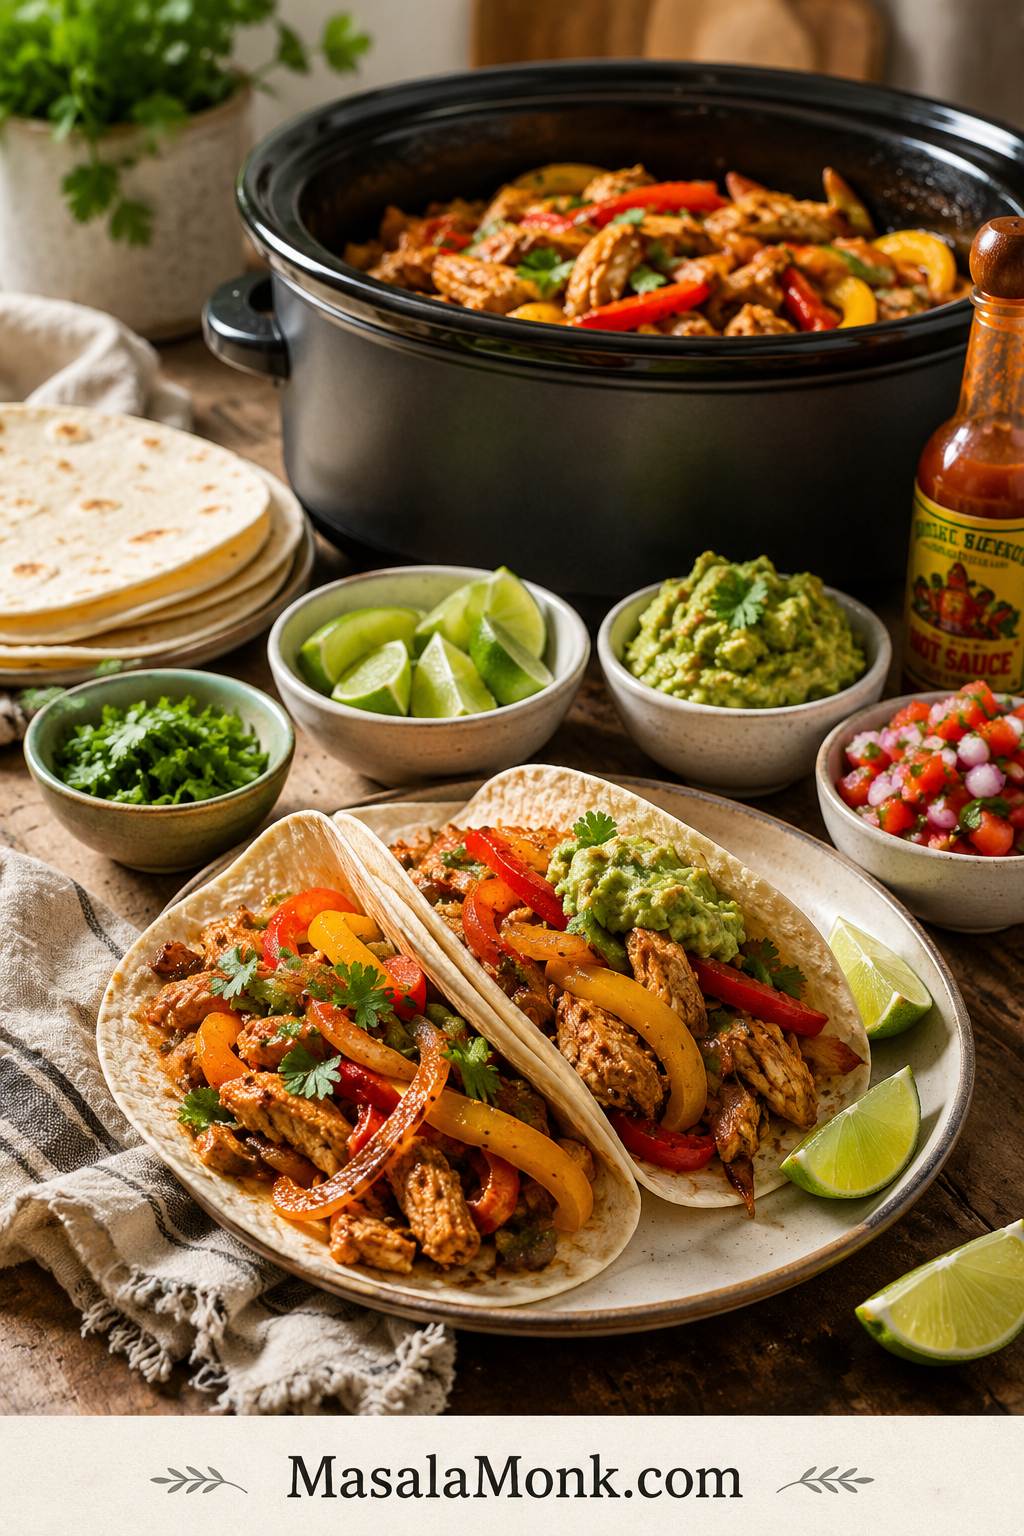
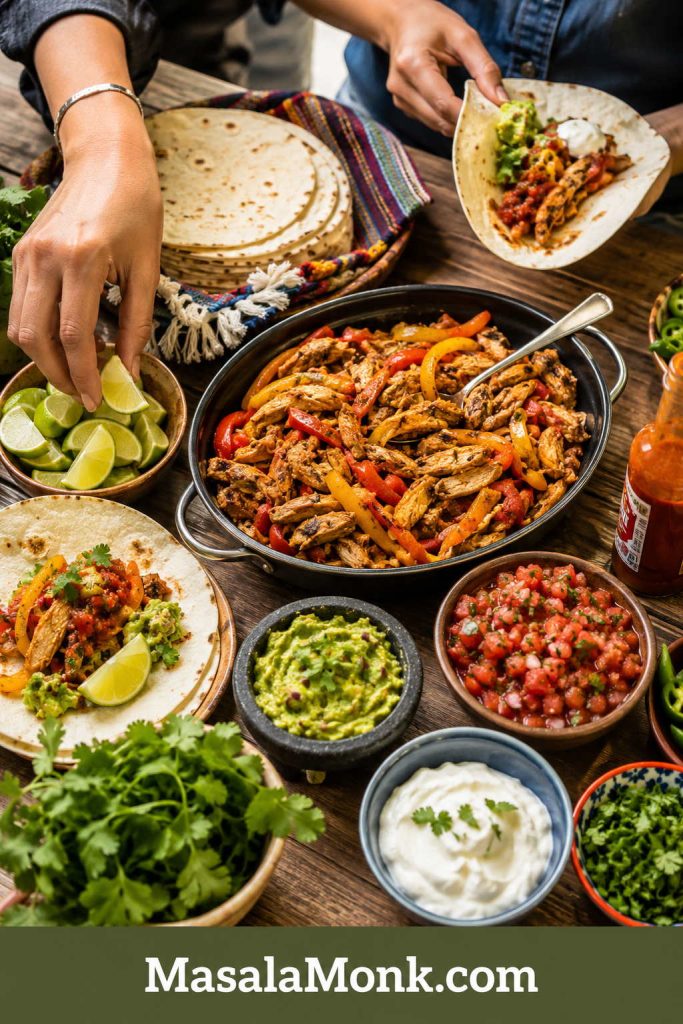
Put the tortillas, lime wedges, avocado, salsa, and hot sauce on the table and let everyone build their own. That is where this slow cooker dinner starts to feel fresh.
Table setup: set the chicken and peppers beside warm tortillas and fresh toppings so everyone can build the fajita they want.
Set out warm tortillas, glossy chicken, peppers, lime, salsa, guacamole, and hot sauce so everyone can build their own fajitas.
Serving idea
Why it fits
Flour or corn tortillas
Classic fajita dinner
Rice bowls
Easy meal prep and filling lunches
Cauliflower rice
Lower-carb bowl option
Lettuce cups
Lighter fajita wraps
Tacos
Family-friendly and easy to assemble
Quesadillas
One of the best uses for leftovers
Salad
High-protein lunch with avocado, lime, and crisp vegetables
Nachos
Casual snack or game-day style dinner
Pasta or pasta bake
Comfort-food variation
Casserole
Good for stretching leftovers into another family dinner
Best Toppings for Chicken Fajitas
Because the chicken is warm and saucy, the best toppings are the ones that wake it up: lime, cilantro, avocado, salsa, crunch, or heat.
Sour cream or Greek yogurt
Avocado or guacamole
Fresh cilantro
Lime wedges
Shredded lettuce
Cheese, shredded or crumbled
Salsa or pico de gallo
Pickled jalapeños
Hot sauce
Crushed tortilla chips for bowls or salads
For the creamy avocado route, this guacamole recipe is the easiest topping to put beside warm tortillas, salsa, lime, and fajita chicken.
If you like heat at the table, a thin vinegar-style hot sauce, jalapeño sauce, or smoky chile sauce can wake up the whole plate. This pepper sauce guide gives you several directions, from bright and sharp to smoky and fruity.
Storage, Freezing, and Reheating
Slow cooker chicken fajita filling stores well. Keep tortillas, rice, lettuce, and fresh toppings separate so they do not become soggy.
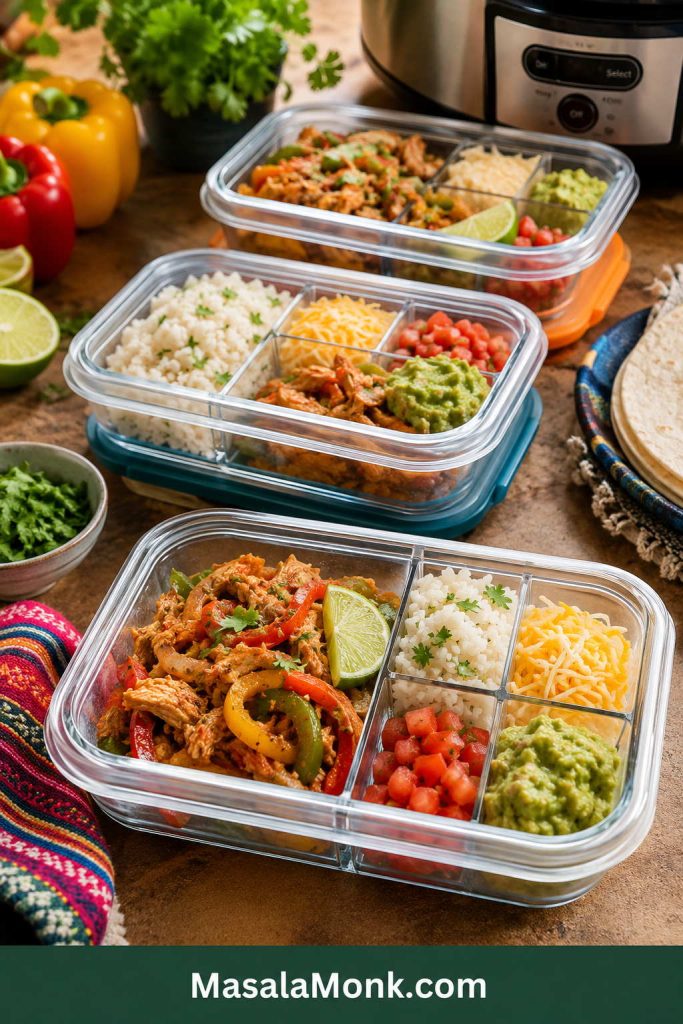
Pack It for Meal Prep
Cool the rice and chicken before packing, then keep wet or fresh toppings separate. That one step keeps fajita bowls from turning soggy in the fridge.
Cool the rice and fajita filling first, then add salsa, guacamole, cheese, and lime after reheating.
Storage method
How to do it
Fridge
Store cooked chicken and peppers in an airtight container for 3 to 4 days
Freezer
Freeze cooked chicken and vegetables for 2 to 3 months
Freezer tip
Freeze without tortillas or fresh toppings
Reheating
Reheat in a skillet or microwave until hot
Meal prep tip
Pack rice or tortillas separately and add toppings after reheating
To avoid sogginess
Drain extra liquid before packing tortillas, tacos, or wraps
If the chicken looks dry after refrigeration, reheat it with a spoonful of salsa, water, or reserved cooking liquid. When it looks too wet, reheat it uncovered in a skillet for a few minutes so some moisture evaporates.
Leftover fajita chicken can also become a baked dinner using the same shredded chicken-and-tortilla logic in this chicken enchilada casserole.
Slow Cooker Chicken Fajitas FAQ
How long do chicken fajitas take in the slow cooker?
Most chicken fajitas take 4 to 6 hours on low or 2½ to 3½ hours on high. Chicken breasts are usually better closer to the shorter end if you want slices. For shredded chicken, cook until the meat is fork-tender and reaches 165°F / 74°C.
Is low or high better for Crock Pot chicken fajitas?
Low is usually better for juicier chicken and more even cooking. High works when you need dinner faster, but chicken breast can dry out if it cooks too long. Start checking around 2½ hours on high, especially if the chicken pieces are not very thick.
Why are my slow cooker fajitas watery?
They are usually watery because a covered slow cooker traps steam while chicken, peppers, onions, salsa, and tomatoes release liquid. Use less salsa, add some peppers late, and drain before filling tortillas.
When should I add peppers and onions?
Add all the peppers and onions at the beginning for the easiest dump-and-go version. For better texture, add half at the beginning and half during the last 30 to 60 minutes so every pepper strip does not turn soft.
Should the chicken be shredded or sliced?
Either works. Sliced chicken feels more like classic fajitas. Shredded chicken is easier in the slow cooker and works well for tacos, rice bowls, quesadillas, nachos, and meal prep.
Can I use taco seasoning instead of fajita seasoning?
Yes. Taco seasoning works in a pinch. It may taste slightly more like taco chicken, but peppers, onions, smoked paprika, and lime help pull the flavor back toward fajitas.
Is Rotel good in Crock Pot fajitas?
Yes. Rotel adds tomatoes, green chiles, and flavor in one can. For 2 lb / 900 g chicken, one 10 oz / 285 g can works well. If the can is very juicy, drain a little first or remove excess liquid after cooking.
Can I make chicken fajitas without tomatoes?
Yes. Skip the salsa, Rotel, or diced tomatoes. Use chicken, peppers, onions, garlic, fajita seasoning, lime, and only a small splash of broth if your slow cooker needs moisture. Add extra lime, smoked paprika, garlic, or seasoning if the flavor tastes flat.
Can I use frozen chicken in the slow cooker?
For this recipe, thaw it first. Slow cookers heat gradually, and frozen chicken can take too long to cook safely. Use a pressure cooker or another faster method if you need to cook chicken from frozen, then check that it reaches 165°F / 74°C.
Can I add rice to the same slow cooker?
Cook rice separately and serve the fajita chicken over it. Uncooked rice changes the liquid ratio and can become mushy in this recipe. For meal prep, cool the rice and chicken before packing them together.
What can I make with leftover chicken fajitas?
Use leftovers in quesadillas, tacos, rice bowls, salads, nachos, or casseroles. Drain juicy chicken before adding it to tortillas or quesadillas. Reheat dry leftovers with a spoonful of salsa or cooking liquid.
Final Note
This slow cooker dinner works because it solves the hard part before dinner starts. Keep the filling glossy, add a handful of peppers late, squeeze in lime at the end, and the pot tastes brighter than a slow cooker dinner usually does.
That is the kind of dinner that feels easy before you eat it and useful again the next day.
If you make it, leave a comment with the version you chose: tighter tortilla fajitas, saucier bowls, dump-and-go, or creamy low-carb. That choice helps other readers decide which path to take.
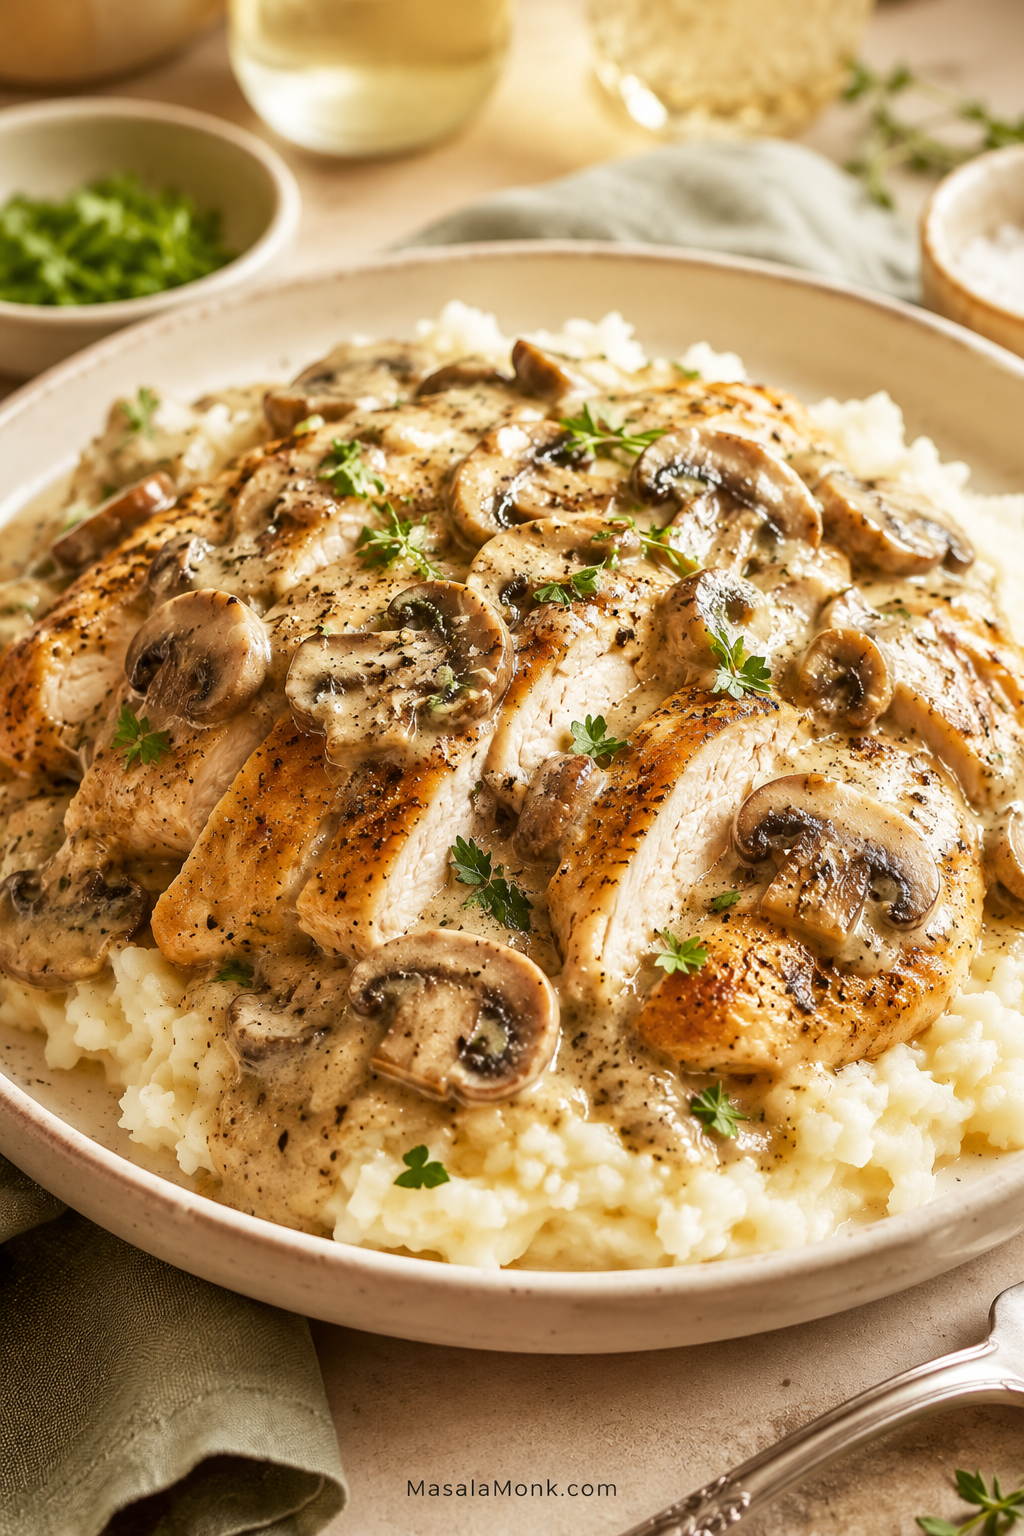
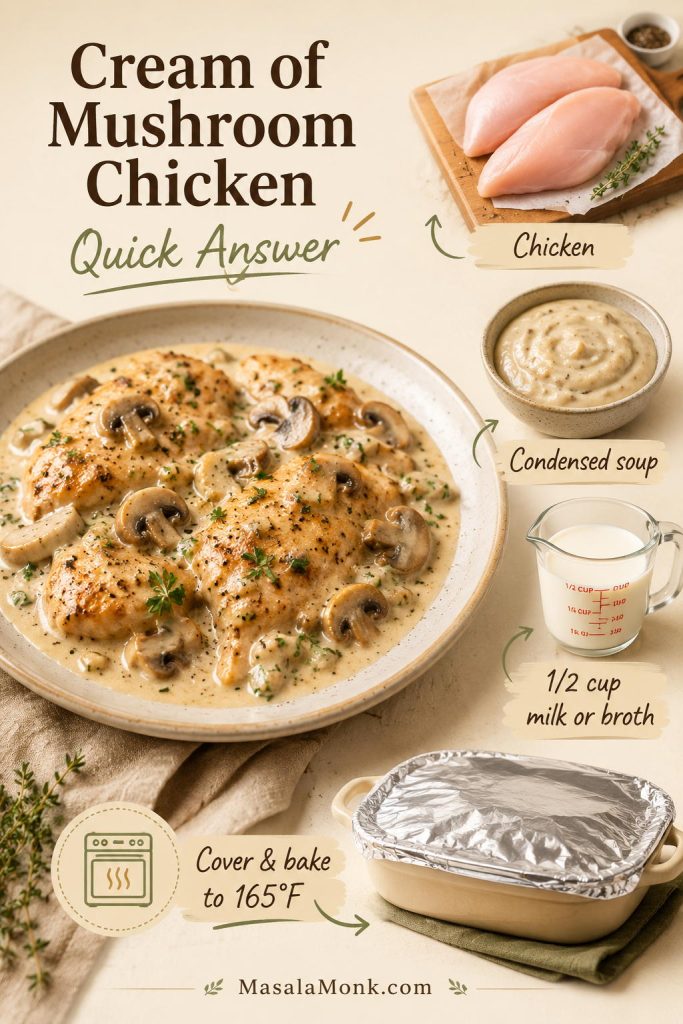
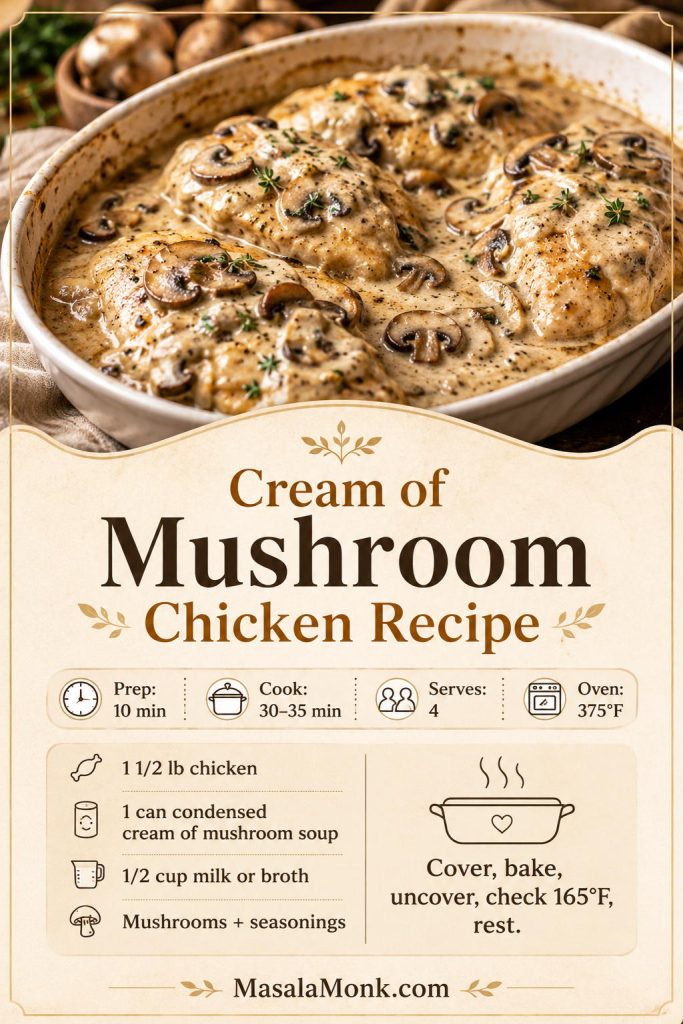
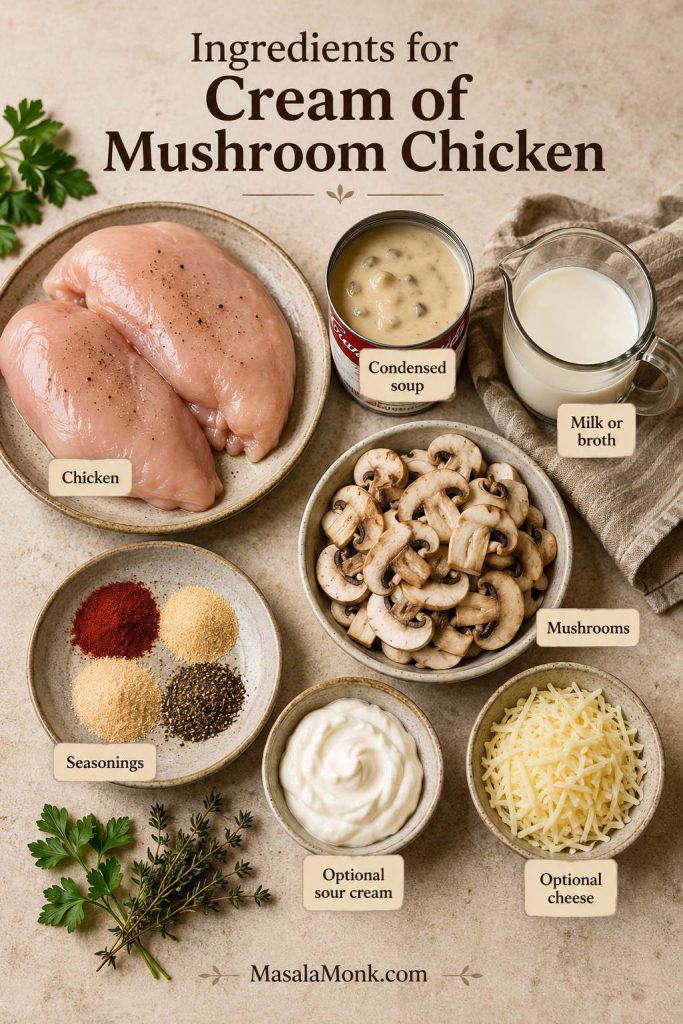
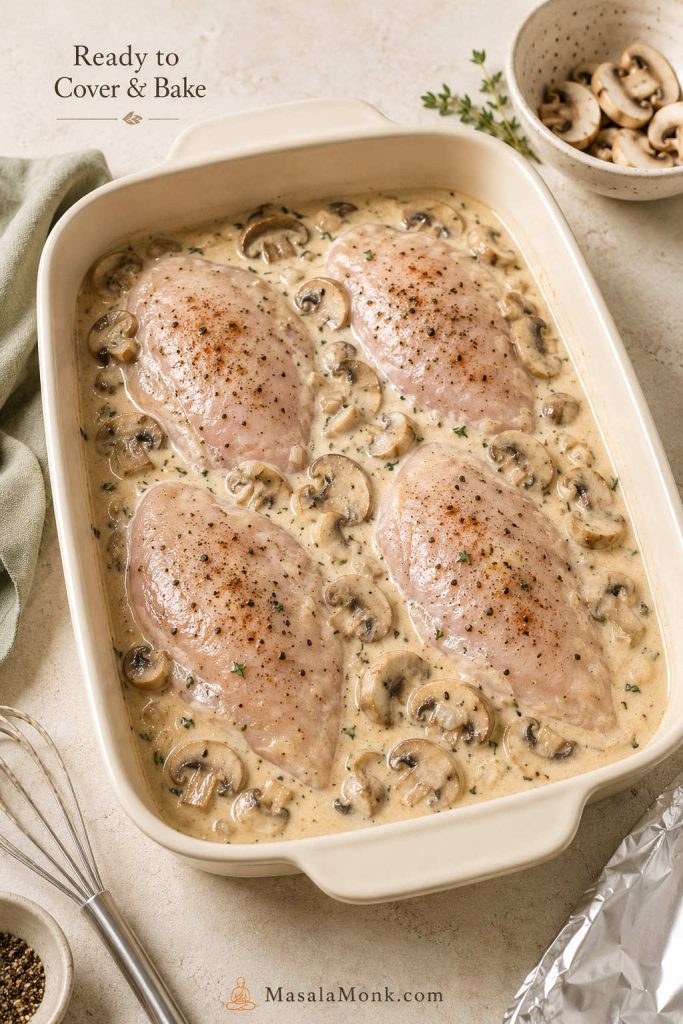
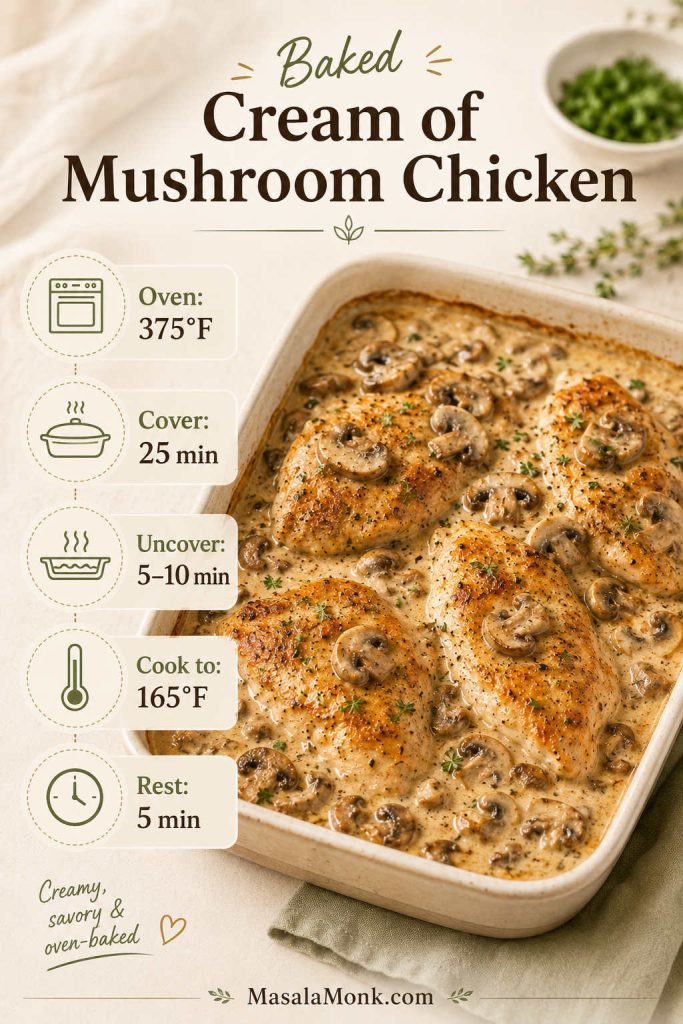
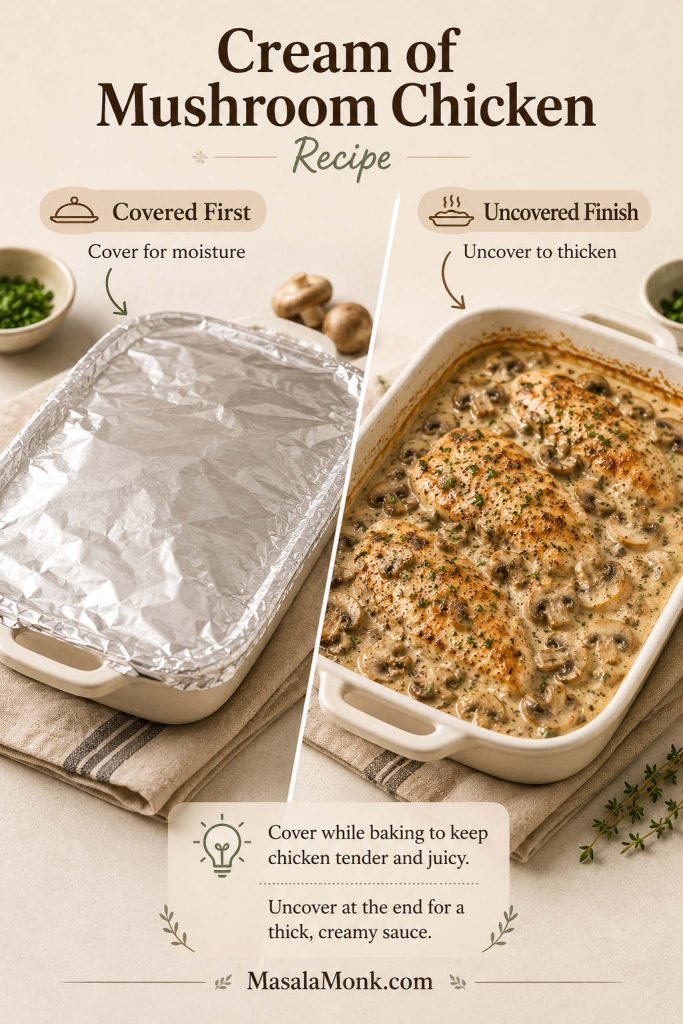
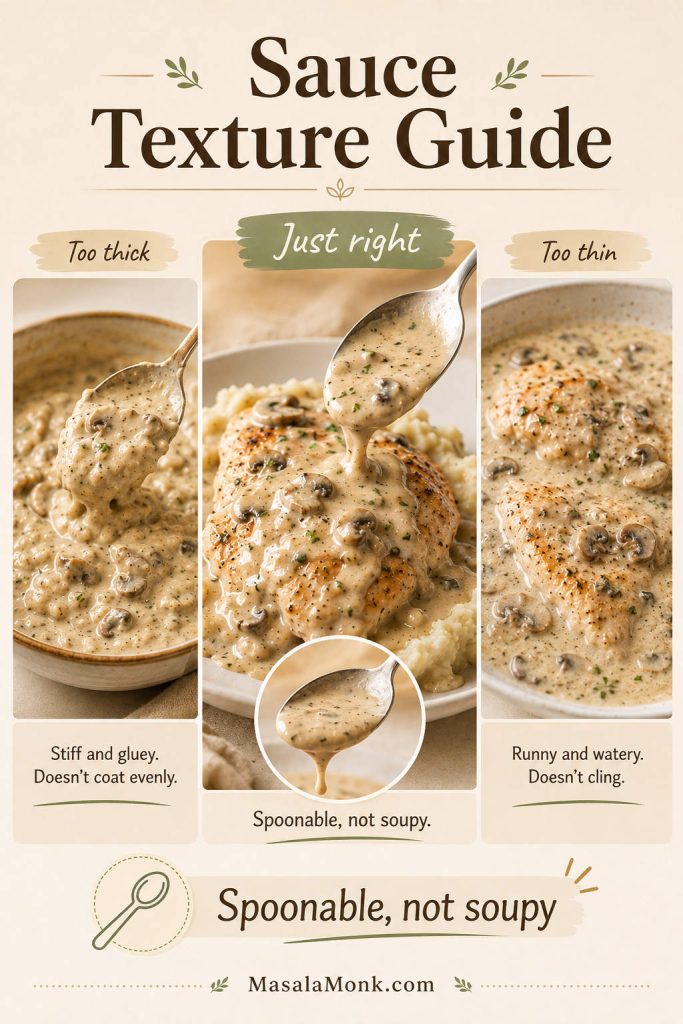
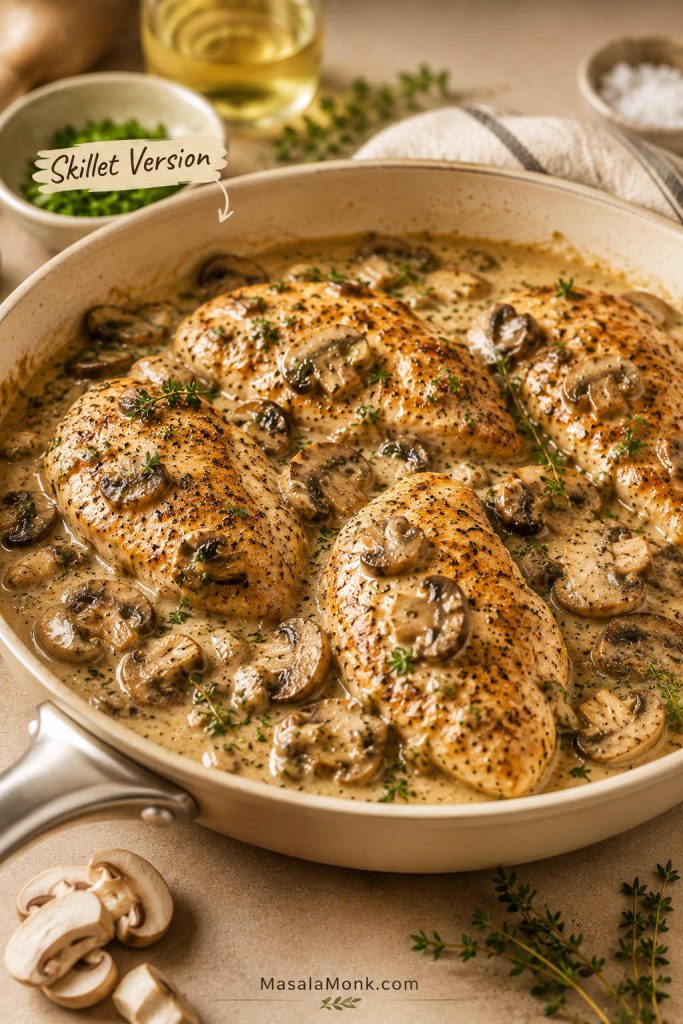
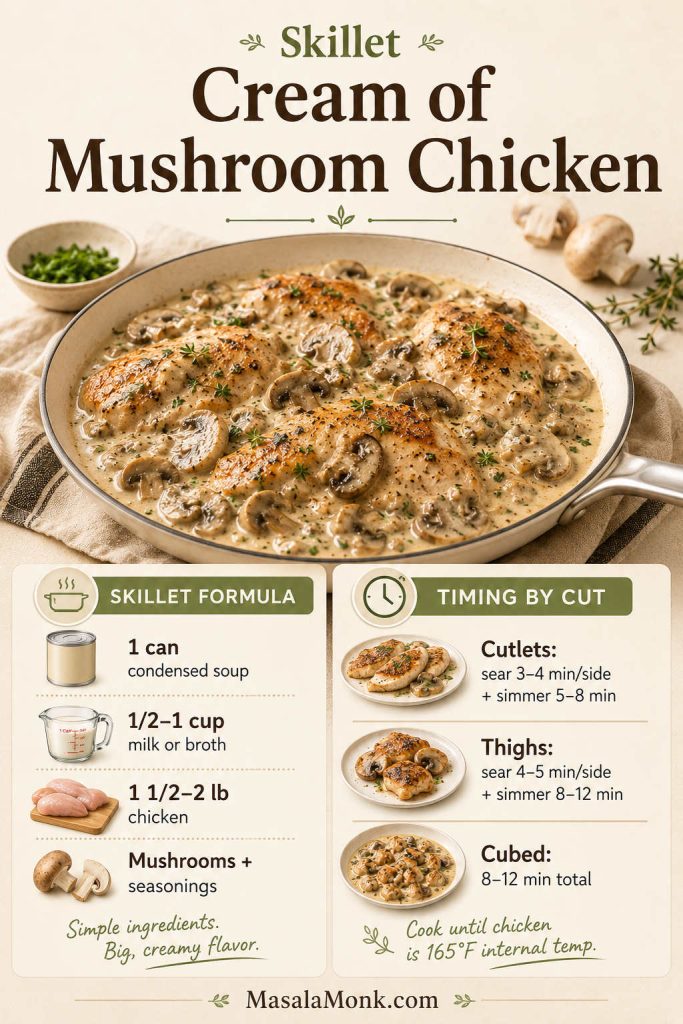
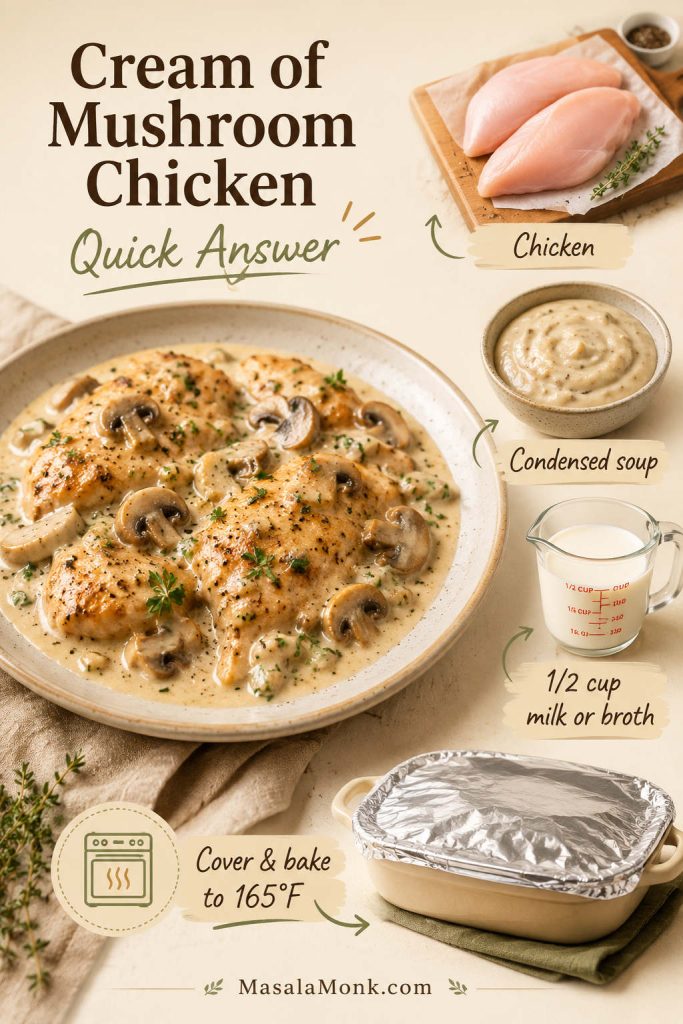
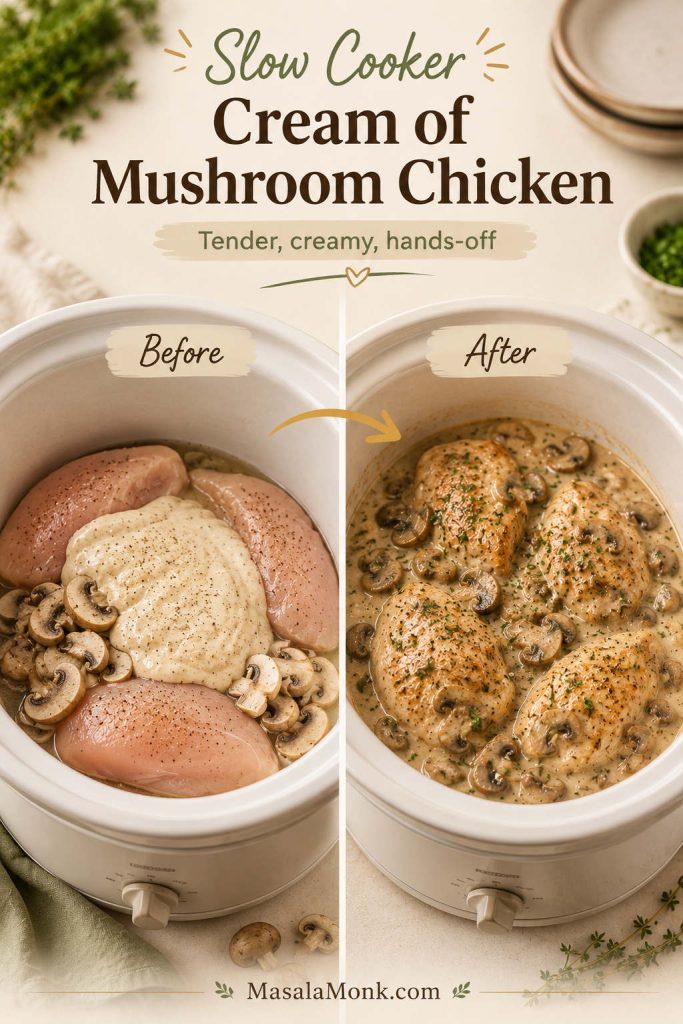
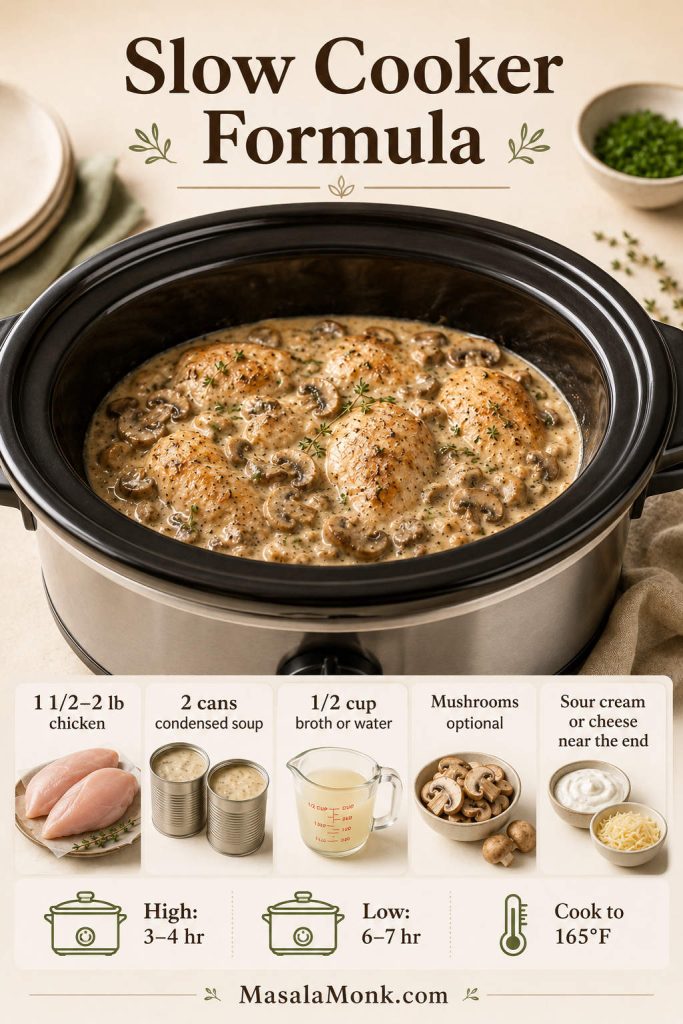
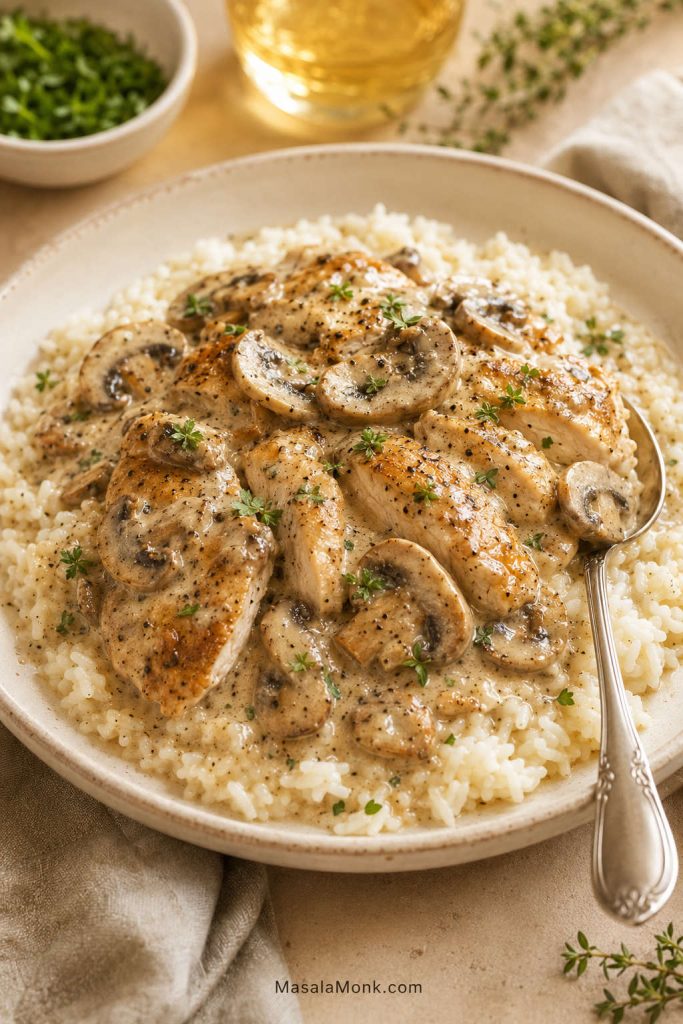
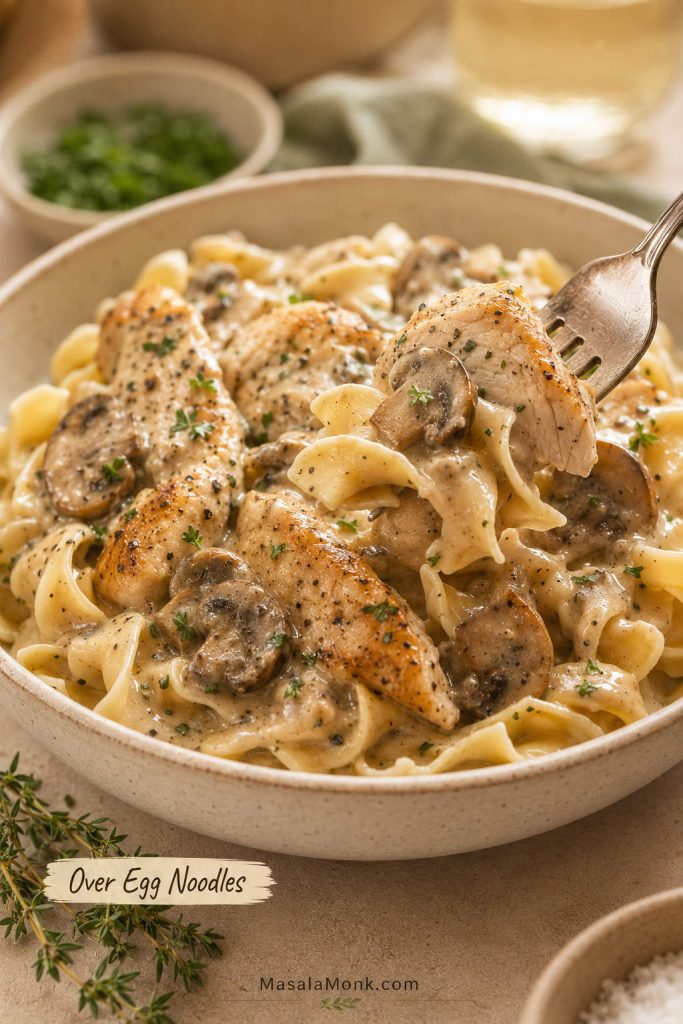
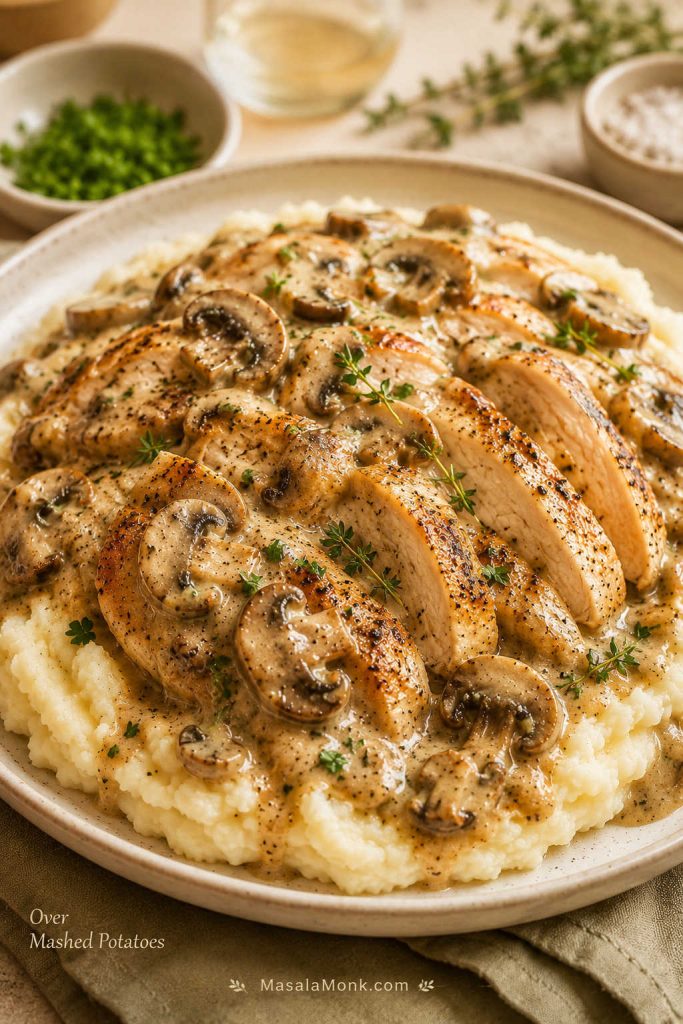
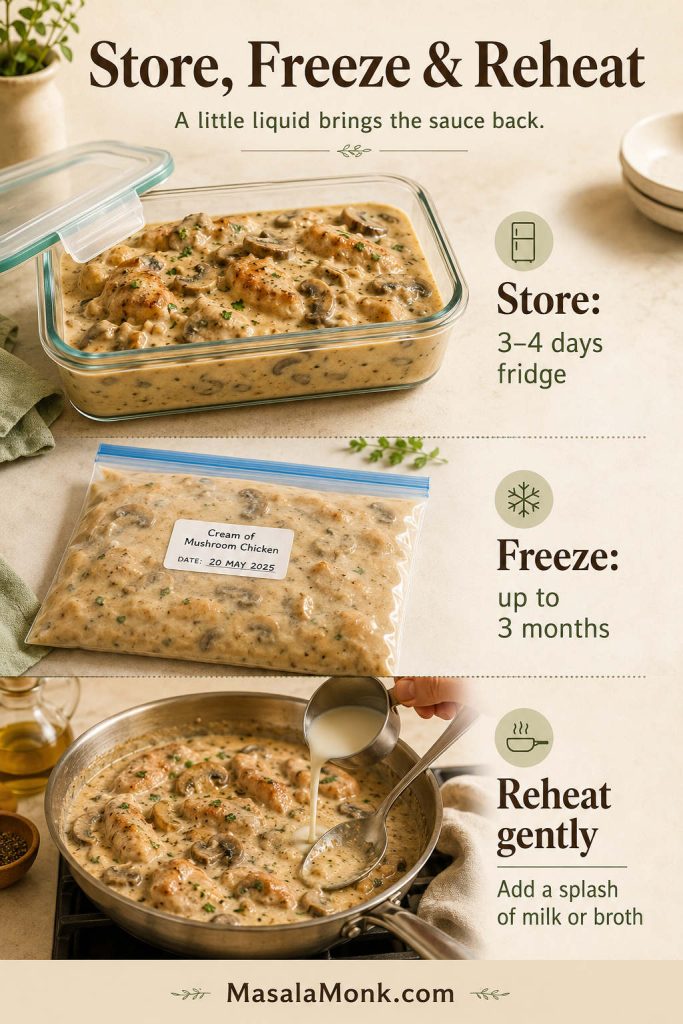
This cream of mushroom chicken recipe is for the night when you have chicken in the fridge, a can of cream of mushroom soup in the pantry, and no patience for a complicated sauce. The goal is simple: tender chicken, creamy mushroom gravy, and a dinner that works with rice, egg noodles, mashed potatoes, biscuits, or whatever vegetable you already have.
This is the kind of dinner that feels like a shortcut while it cooks, but like comfort food once it hits the plate. It is not fancy food; it is the creamy, spoon-over-something meal you make when the day has been long and everyone still needs to eat.
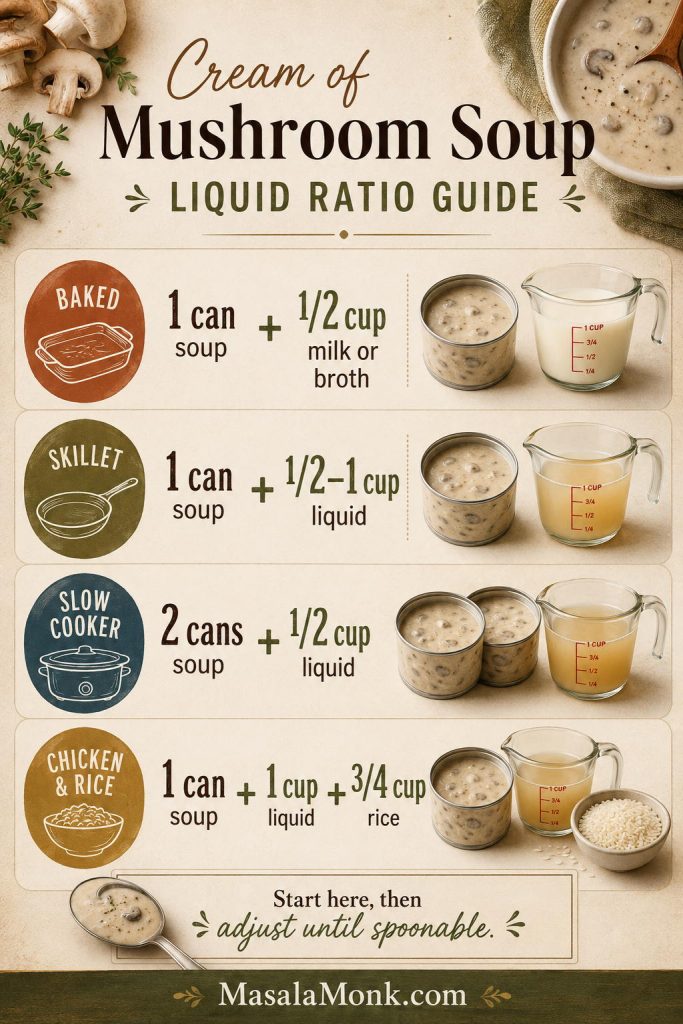
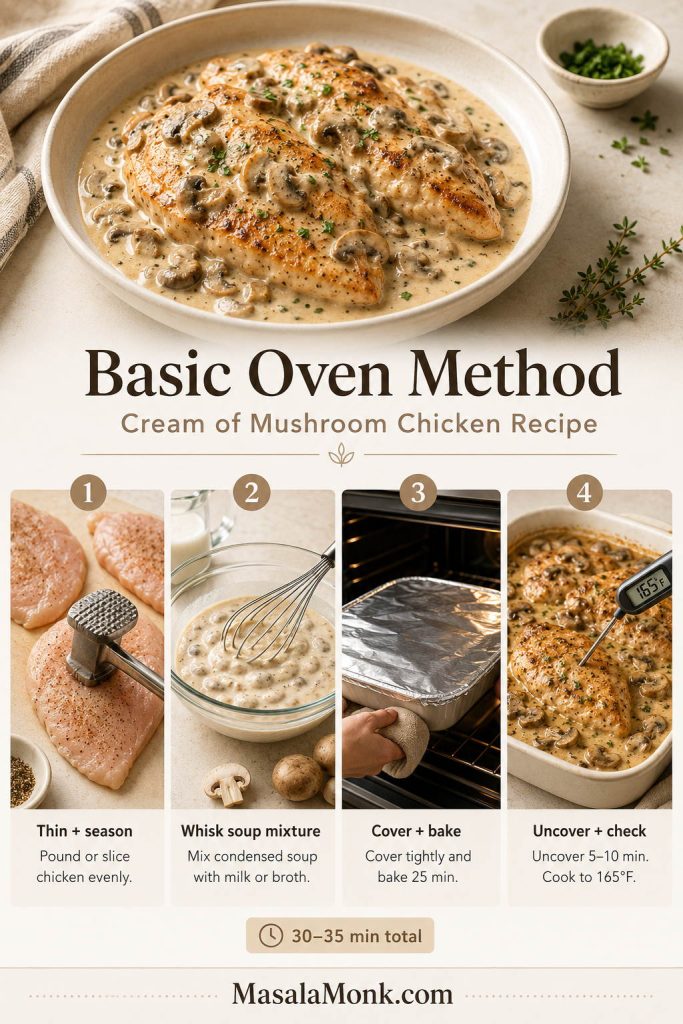
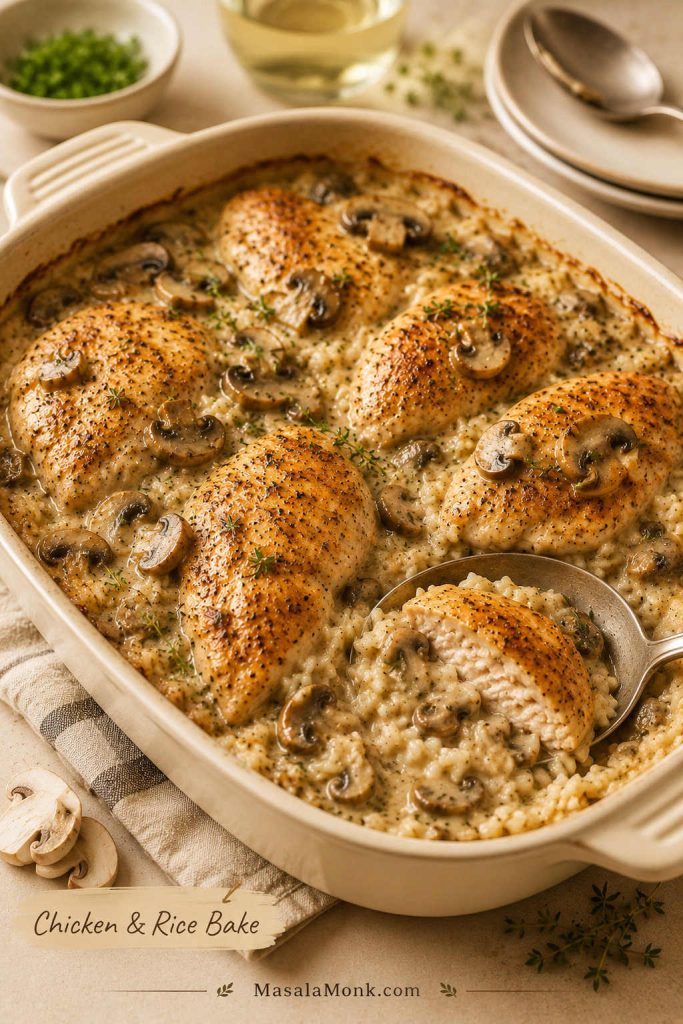
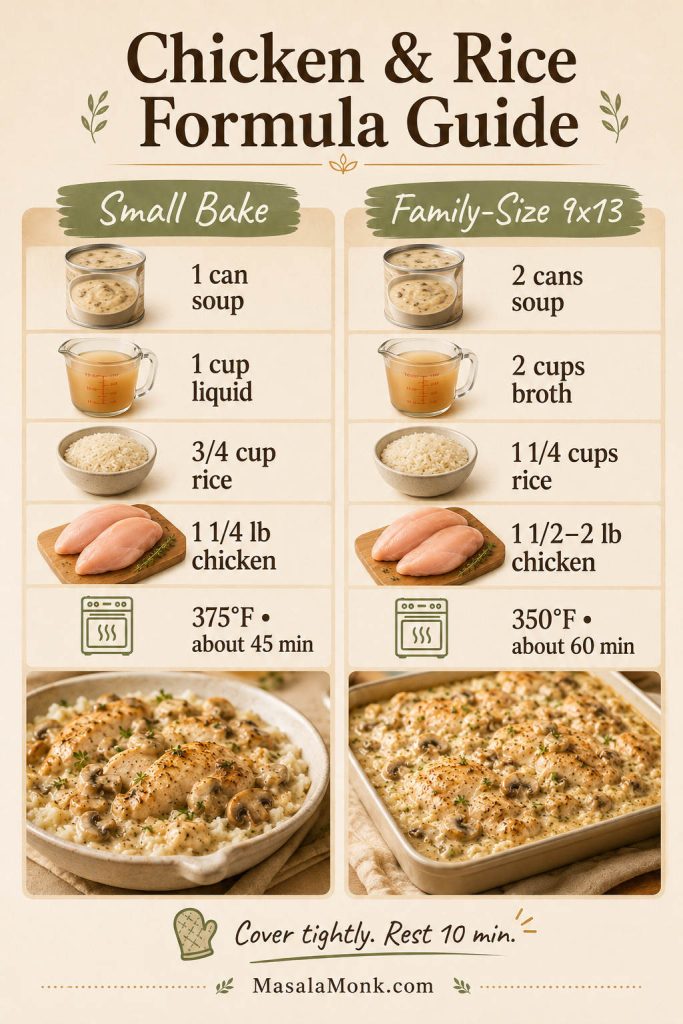
Bake it when you want the easiest family dinner. Use the skillet when dinner needs to happen faster, the slow cooker when the meal should take care of itself, and the rice bake when chicken and rice should land in one dish.
The dish works best with condensed cream of mushroom soup, thin or evenly pounded chicken, and just enough milk or broth to turn the soup into a spoonable sauce. A thermometer keeps the chicken from drying out while still getting it safely to 165°F / 74°C.
Quick Answer: How to Make Cream of Mushroom Chicken
To make cream of mushroom chicken, season chicken breasts or thighs, place them in a baking dish, whisk condensed cream of mushroom soup with milk or low-sodium chicken broth, pour the sauce over the chicken, cover, and bake until the chicken reaches 165°F / 74°C. Uncover near the end if the sauce needs to thicken or cheese is going on top.
The result should be chicken that slices easily with creamy mushroom gravy you can spoon over rice, noodles, mashed potatoes, biscuits, or vegetables. This is still a low-effort dinner: about 10 minutes of prep, then the oven does most of the work.
The skillet version is faster, the slow cooker version is more hands-off, and the rice bake turns it into a one-dish meal. The trick is changing the liquid slightly for each method, so use the version guide or the soup and liquid ratios before switching methods.
Best first version: Bake thin chicken breasts or thighs with 1 can condensed cream of mushroom soup and ½ cup milk or broth at 375°F / 190°C. Cover first for moisture, then uncover near the end so the sauce thickens.
For the simplest version, build the dish in four parts: chicken, condensed cream of mushroom soup, a little milk or broth, and a covered bake.
Before you open the soup can, decide how dinner needs to work tonight. The same basic ingredients can become an easy oven dinner, a quick skillet meal, a slow cooker comfort dish, or a chicken-and-rice bake.
The one thing that changes most between versions is the soup-to-liquid ratio. The oven, skillet, slow cooker, and rice bake each need slightly different treatment, which is what keeps the chicken juicy and the sauce creamy instead of watery.
Choose This Version
Best When
Key Ratio
Baked cream of mushroom chicken
You want the easiest family dinner with minimal prep.
1 can soup + ½ cup milk or broth
Skillet cream of mushroom chicken
You want dinner faster and more control over the sauce.
1 can soup + ½–1 cup broth or milk
Slow cooker cream of mushroom chicken
You want hands-off creamy chicken for rice, noodles, or potatoes.
2 cans soup + ½ cup liquid
Cream of mushroom chicken and rice
You want a full one-dish meal.
1 can soup + 1 cup liquid + ¾ cup rice
Creamy chicken over egg noodles
You want mushroom-sauce chicken without baking rice.
Cook noodles separately and spoon sauce over them
Instead of using one formula for every method, adjust the liquid for baked, skillet, slow cooker, and chicken-and-rice versions.
How Much Liquid to Add to Cream of Mushroom Soup
Use these ratios as starting points, then adjust until the sauce looks spoonable, not stiff and not soupy.
Version
Condensed Soup
Added Liquid
Why It Works
Baked chicken
1 can / 10.5 oz / 298 g
½ cup / 120 ml milk or broth
Creates a creamy, spoonable sauce without making the dish watery.
Skillet chicken
1 can / 10.5 oz / 298 g
½–1 cup / 120–240 ml broth or milk
The sauce reduces as it simmers, so you can loosen or thicken it as needed.
Slow cooker chicken
2 cans / about 596 g total
½ cup / 120 ml broth or water
The slow cooker traps moisture, so too much liquid makes the sauce thin.
Small chicken and rice bake
1 can / 10.5 oz / 298 g
1 cup / 240 ml liquid + ¾ cup rice
Rice needs measured liquid and trapped steam to cook properly.
Large 9×13 rice bake
2 cans / about 596 g total
2 cups / 480 ml broth + 1¼ cups rice
Better for a family-size casserole with more rice and chicken.
Condensed soup gives the sauce body; however, each cooking method needs a different amount of liquid to stay creamy.
Once the ratio is right, everything gets easier: the chicken cooks gently, the sauce stays spoonable, and the sides do half the work. When you are ready to cook the oven version, go straight to the cream of mushroom chicken recipe card.
Water works in a pinch, but broth gives the dish more savory flavor and milk makes the sauce softer and creamier. Regular condensed soup, regular broth, cheese, and onion soup mix can all add salt, so taste before adding more.
Basic Oven Method at a Glance
Use this as the quick map before the full recipe card.
Thin and season the chicken. Slice large breasts in half lengthwise or pound them evenly, then season lightly.
Whisk the soup mixture. Mix condensed cream of mushroom soup with milk or broth until smooth.
Cover and bake. Pour the mixture over the chicken, cover with foil, and bake so the meat stays moist.
Uncover, check, and rest. Finish uncovered, cook to 165°F / 74°C, and rest before serving.
Once the chicken is even in thickness and the soup mixture is loosened, the oven version becomes simple and predictable.
Cream of Mushroom Chicken Recipe Card
This baked cream of mushroom chicken is the oven version to make first: tender chicken, condensed cream of mushroom soup, a little milk or broth, simple seasonings, and enough creamy mushroom sauce to spoon over rice, egg noodles, mashed potatoes, or vegetables.
1½ lb / 680 g boneless skinless chicken breasts or thighs
1 can condensed cream of mushroom soup, 10.5 oz / 298 g
½ cup / 120 ml milk or low-sodium chicken broth
½ tsp garlic powder, divided
½ tsp onion powder, divided
½ tsp paprika, divided
¼ tsp black pepper, divided, plus more to taste
8 oz / 225 g sliced mushrooms, optional
¼–½ cup / 60–120 g sour cream, optional
¾–1 cup / 85–115 g shredded mozzarella, Monterey Jack, or cheddar, optional
Salt only after tasting, if needed
Instructions
Heat oven to 375°F / 190°C. Lightly grease a 9×13-inch baking dish.
Slice large chicken breasts in half lengthwise or pound them to an even thickness.
Place the chicken in the baking dish. Sprinkle with about half of the garlic powder, onion powder, paprika, and black pepper.
Scatter raw mushrooms around the chicken for convenience, or brown them first for deeper flavor and less extra moisture.
In a bowl, whisk the condensed cream of mushroom soup with milk or broth and the remaining garlic powder, onion powder, paprika, and pepper until smooth. Whisk in sour cream now if using it for the baked version.
Taste the sauce. Add salt only if it needs it. A flat-tasting sauce can take a little more pepper, paprika, thyme, garlic powder, or Dijon.
Pour the sauce over the chicken and spread it so the chicken is mostly covered.
Cover the dish tightly with foil.
Bake for 25 minutes.
Uncover and bake 5–10 minutes more, or until the chicken reaches 165°F / 74°C in the thickest part.
Sprinkle cheese over the chicken during the uncovered finish if using it, then bake until melted.
When the chicken is done but the sauce is still thin, move the chicken to a plate and thicken the sauce separately in a small pan, or in the baking dish only if your dish is stovetop-safe.
Rest for 5 minutes before serving.
Serve over rice, egg noodles, mashed potatoes, biscuits, broccoli, green beans, or roasted vegetables.
Notes
Use condensed cream of mushroom soup, not ready-to-eat mushroom soup.
Browned mushrooms give the sauce a deeper, less canned flavor.
Water works if that is all you have, but broth gives better flavor and milk makes the sauce creamier.
A cream of chicken swap works too: replace half or all of the cream of mushroom soup with condensed cream of chicken soup.
For skillet or slow cooker versions, add sour cream or cheese near the end over gentle heat for the smoothest finish.
Save this basic baked cream of mushroom chicken formula first, then use the other sections when you want skillet, slow cooker, or rice variations.
The baked version works because it solves two problems at once: thick chicken and loose sauce. Thin pieces cook before they dry out, while condensed soup gives the sauce enough body to stay creamy. A small splash of milk or broth loosens the canned base, covered baking protects the chicken, and the uncovered finish lets the sauce settle.
The real win is not making it fancy. It is keeping the chicken juicy and turning the canned soup into a sauce that tastes like it belongs on the plate.
Ingredient Notes That Keep It Creamy, Not Watery
Nothing here is precious. The point is knowing which shortcuts help and which ones make the dish watery, salty, or dry.
A pantry base can still taste rounded when you add smart upgrades like broth, browned mushrooms, thyme, pepper, sour cream, or cheese.
Chicken: Boneless skinless breasts or thighs both work. Breasts give you a classic sliced dinner; thighs give you more forgiveness.
Condensed cream of mushroom soup: The word condensed matters because the soup starts thick and becomes sauce when you add liquid.
Milk, broth, or water: Broth gives savory depth, milk gives a softer creamy finish, and water works when that is all you have.
Fresh mushrooms: Raw mushrooms are convenient, but browned mushrooms add deeper flavor and release less water into the dish.
Sour cream: Use it for tang. Whisk it into the oven version before baking, or stir it into skillet and slow cooker versions near the end over gentle heat.
Cheese: Mozzarella, Monterey Jack, cheddar, Swiss, or Muenster can turn this into a richer family bake.
Taste before baking: Once the soup, liquid, and seasonings are mixed, taste the sauce before pouring it over the chicken. A bland sauce can take black pepper, garlic powder, paprika, thyme, or a small spoon of Dijon; a salty sauce does not need extra salt.
For the oven version, a 9×13-inch baking dish, foil, a mixing bowl, and an instant-read thermometer are enough. The stovetop route needs a lidded skillet, while the crockpot option works best in a 4–6 quart slow cooker.
Using Campbell’s or Any Condensed Mushroom Soup
Campbell’s condensed cream of mushroom soup works well here, and so do other condensed brands. The label matters less than the word condensed.
Condensed vs Ready-to-Eat Soup
Condensed soup is thick enough to become sauce when mixed with a small amount of milk, broth, or water. Ready-to-eat mushroom soup is already diluted, so it can make the dish watery unless you reduce or skip the added liquid.
Condensed cream of mushroom soup starts thick, while ready-to-eat soup is already diluted; that difference matters when you want a creamy sauce.
Low-sodium condensed soup gives you more control if you are also using broth, cheese, onion soup mix, or another salty ingredient.
The same cream-soup comfort logic shows up in MasalaMonk’s tuna noodle casserole recipe, where condensed soup turns into a creamy noodle bake.
Best Chicken to Use: Breasts, Thighs, or Cubed Chicken
That is really the whole chicken decision: breasts for a classic sliced dinner, thighs when you want more forgiveness, and cubed chicken when you want a faster skillet or casserole-style meal.
Your cut changes the result: breasts slice neatly, thighs stay juicy, and cubed chicken cooks quickly for skillet-style dinners.
Chicken Breasts
Chicken breasts work well when they are not too thick. Large breasts should be sliced in half lengthwise to make thinner cutlets, or pounded to an even thickness. This helps the chicken cook through before the sauce dries out.
For more detail on baking chicken breast without drying it out, see MasalaMonk’s baked chicken breast recipe.
Chicken Thighs
Boneless skinless thighs stay juicy even when the dish needs a few extra minutes. They are especially good for the slow cooker or chicken-and-rice versions because they can handle longer cooking better than thin breasts.
Cubed Chicken
Cubed chicken is useful for a quick skillet dinner or a casserole-style variation. It cooks faster and mixes easily with noodles or rice, though it does not give you the same sliced-chicken presentation as baked breasts or thighs.
Baked Cream of Mushroom Chicken
This is the version to make first. It gives you the classic creamy mushroom chicken experience without needing a skillet, a roux, or a separate sauce.
The best pan comes out bubbling around the edges, with mushroom gravy tucked around the chicken and enough creamy sauce to drag through rice, noodles, or mashed potatoes.
Before Baking
The dish should look assembled but not finished: chicken tucked into the mushroom mixture, mushrooms visible, and just enough sauce to coat the pan before it is covered.
Before baking, the chicken should be coated and nestled into the mushroom mixture, not buried under too much liquid.
Baked Version at a Glance
Detail
Best Answer
Oven temperature
375°F / 190°C
Baking dish
9×13-inch dish
Chicken
1½ lb / 680 g boneless skinless breasts or thighs
Soup
1 can condensed cream of mushroom soup, 10.5 oz / 298 g
Liquid
½ cup / 120 ml milk or low-sodium chicken broth
Covered bake
25 minutes
Uncovered finish
5–10 minutes
Safe internal temperature
165°F / 74°C
Resting time
5 minutes
Baked cream of mushroom chicken works best with a covered start, a short uncovered finish, and a thermometer check at 165°F.
Once this version is in the oven, there is not much left to do except make something for the sauce to land on.
Covered or Uncovered?
Cover the chicken for the first part of baking. The foil traps steam, keeps the meat moist, and prevents the sauce from drying out too quickly. The final uncovered minutes help looseness cook off and let cheese melt if you are using it.
Very thin pieces should be checked early. Thicker pieces need a thermometer more than they need a guessed time.
Covering helps the chicken stay moist; afterward, uncovering lets the creamy mushroom sauce reduce just enough.
If the chicken is done but the sauce is thin: Do not keep baking the chicken just to thicken the sauce. Move the chicken to a plate, cover it loosely, and thicken the sauce in a small pan, or in the baking dish only if your dish is stovetop-safe.
What the Sauce Should Look Like
The finished sauce should be creamy and spoonable, thick enough to coat the chicken but loose enough to run into rice, noodles, or mashed potatoes. It should not be stiff like paste, and it should not run like soup.
A sauce that looks too thick before baking needs another splash of milk or broth. When the sauce looks watery but the chicken still needs time, uncover the dish for the last few minutes. Once the chicken is already at 165°F / 74°C, remove it and thicken the sauce separately instead of overbaking dinner.
Look for sauce that coats a spoon without running like soup, since that texture will sit better on rice, noodles, or mashed potatoes.
In the oven version, ½ cup / 120 ml milk or broth per 10.5 oz / 298 g can of condensed soup is the safest starting point. The skillet version can handle more liquid because the pan sauce reduces as it simmers. The slow cooker needs less because the lid traps moisture as everything cooks. When the texture looks off, use the troubleshooting guide instead of guessing.
Skillet Cream of Mushroom Chicken
The skillet version is best when dinner needs to be faster and the sauce needs more hands-on control. It tastes a little more cooked, not just assembled, because the chicken and mushrooms get direct heat before the sauce comes together.
This is the version with the most dinner-pan flavor: a little browning, a little butter, and creamy mushroom sauce pulled together in the same skillet.
The skillet version adds extra savory depth because the chicken and mushrooms brown before the cream sauce is finished.
Skillet Formula
1½–2 lb / 680–900 g chicken
1 tbsp oil or butter, for searing
1 can condensed cream of mushroom soup, 10.5 oz / 298 g
½–1 cup / 120–240 ml milk, water, or low-sodium chicken broth
8 oz / 225 g sliced mushrooms, optional
Garlic powder, onion powder, paprika, black pepper, and herbs to taste
Oil helps the chicken sear without burning. A small knob of butter added with the mushrooms gives the pan a richer, rounder flavor.
Skillet Timing
Chicken Type
Timing
What to Watch
Thin chicken cutlets
Sear 3–4 minutes per side, then simmer 5–8 minutes in sauce
Check early so they do not dry out.
Boneless thighs
Sear 4–5 minutes per side, then simmer 8–12 minutes in sauce
They stay juicier and can handle a little longer cooking.
Cubed chicken
Cook 8–12 minutes total, depending on cube size
Stir often so the sauce coats the pieces evenly.
Skillet cream of mushroom chicken cooks quickly, so cut size matters: thin cutlets, thighs, and cubed chicken all need different timing.
How to Make It in a Skillet
Season the chicken, then sear it in a large skillet until lightly browned on both sides. Add fresh mushrooms after removing the chicken briefly, then cook them until they release moisture and start to brown. Whisk in the condensed soup with enough broth or milk to make a sauce, then return the chicken to the pan.
Sear first, then simmer gently; that sequence builds flavor while keeping the chicken from drying out.
Cover and simmer gently until the chicken reaches 165°F / 74°C. A pan sauce that tightens too much only needs a tablespoon or two of milk or broth. A loose sauce needs the opposite: a few uncovered minutes so extra moisture can cook off. Use the sauce texture guide if you are unsure whether to loosen or reduce it. For a quick slurry, mix 1 tsp cornstarch with 1 tbsp cold water, then stir it into the simmering sauce. Sour cream should go in near the end over low heat so everything stays smooth.
Slow Cooker Cream of Mushroom Chicken
The slow cooker is best when you want tender, saucy chicken waiting for you later. It is less about speed and more about having creamy chicken ready when the rice, noodles, or potatoes are done.
Because the lid traps moisture, start with less liquid than you would use in the oven or skillet. Thawed chicken gives the most predictable timing and texture; frozen chicken releases more moisture and can make the sauce thin.
Slow cooker cream of mushroom chicken needs a thicker starting mixture because the covered cooker creates its own moisture.
If you like this kind of hands-off chicken dinner, MasalaMonk’s crock pot chicken breast recipes has more ways to keep slow-cooked chicken juicy instead of dry.
Slow Cooker Formula
1½–2 lb / 680–900 g chicken breasts or thighs
2 cans condensed cream of mushroom soup, 10.5 oz / 298 g each
½ cup / 120 ml low-sodium chicken broth or water
8 oz / 225 g sliced mushrooms, optional
½ packet onion soup mix, optional, only if you like a saltier old-school flavor
Sour cream or cheese near the end, optional
Start the slow cooker with less liquid than the oven version, then adjust near the end if the sauce needs loosening or enrichment.
Cook on High for 3–4 hours or Low for 6–7 hours, until the chicken reaches 165°F / 74°C. Thighs handle the longer cook better than thin breasts. By the end, the chicken should be fork-tender and the sauce should taste like it has had time to settle into the meat.
Serve the pieces whole, or shred the chicken into the sauce if you want it to spoon over rice, noodles, or potatoes. Add sour cream or cheese near the end, not at the beginning, for the smoothest finish.
How to Thicken Slow Cooker Cream of Mushroom Chicken
A thin slow cooker sauce can be fixed by removing the lid for a short time, shredding the chicken into the sauce, or thickening it with a small slurry made from 1 tsp cornstarch and 1 tbsp cold water. Use this fix before the chicken overcooks.
If slow cooker sauce turns thin, you can fix it calmly with uncovered time, shredded chicken, or a small cornstarch slurry.
For another saucy crockpot chicken dinner, MasalaMonk’s slow cooker French onion chicken follows a similar comfort-food idea with onion gravy, cheese, and a base of noodles, potatoes, rice, or toast.
Cream of Mushroom Chicken and Rice
Rice can absolutely work here, but it needs its own formula. Dry rice needs extra liquid, trapped steam, and more time than the basic baked chicken version. Before you bake, scan the rice mistakes to avoid if you are using brown rice, instant rice, or thick chicken pieces.
Rice version rule: Use extra liquid, a tight foil cover, and longer baking time. The soup base alone is too thick to cook raw rice evenly.
Cream of mushroom chicken and rice needs its own method, since dry rice requires extra liquid, trapped steam, and resting time.
Campbell’s classic one-dish chicken and rice bake follows this same condensed-soup pattern: condensed soup, measured liquid, uncooked long-grain white rice, and chicken baked together under a tight cover. You can see that reference here: Campbell’s One-Dish Chicken & Rice Bake.
Small Classic Chicken and Rice Bake
This smaller rice bake makes about 4 servings.
1 can condensed cream of mushroom soup, 10.5 oz / 298 g
1 cup / 240 ml water or low-sodium chicken broth
¾ cup / about 140 g uncooked long-grain white rice
1¼ lb / 565 g boneless skinless chicken breast or thighs
¼ tsp paprika, plus pepper and garlic powder if desired
Mix the soup, liquid, rice, and seasoning in a greased baking dish. Place the chicken on top, cover tightly, and bake at 375°F / 190°C for about 45 minutes, or until the rice is tender and the chicken reaches 165°F / 74°C. Let it stand for 10 minutes before serving so the rice can finish absorbing the sauce.
Chicken and rice timing tip: Thicker chicken pieces or thighs work better for rice bakes because the rice needs longer to cook. Thin chicken breasts may finish before the rice is tender. When that happens, remove the chicken, keep the rice covered, and continue baking the rice until soft.
Larger 9×13 Family Rice Bake
A larger family-style casserole needs more soup, more rice, and more liquid.
2 cans condensed cream of mushroom soup, 10.5 oz / 298 g each
2 cups / 480 ml low-sodium chicken broth
1¼ cups / about 230 g long-grain white rice
1½–2 lb / 680–900 g chicken
Optional onion, thyme, Dijon, black pepper, or Parmesan
Cover tightly and bake at 350°F / 175°C for about 60 minutes. Check the rice, stir gently around the chicken if needed, add a splash of hot broth if the rice is still firm, then cover again and bake 10–15 minutes more. Rest 10 minutes before serving.
Chicken and Rice Formula Guide
Use the small bake when you want a compact dinner, and use the 9×13 formula when the casserole needs to feed more people without leaving the rice undercooked.
Use the right chicken-and-rice formula from the start, and you avoid the common problem of tender chicken with undercooked rice.
Rice Mistakes to Avoid
The rice version is forgiving once the steam is right, but it is less forgiving when the cover is loose or the liquid is guessed.
A loose cover will not trap enough steam. Rice needs a tight cover to soften properly.
Brown rice needs a different plan. It takes more time and usually more liquid than white rice.
Instant rice cooks too fast for this long bake. It can turn mushy unless you change the method.
Ready-to-eat soup can make the bake watery. It is already diluted, unlike condensed soup.
The chicken can finish before the rice. Check both before calling the dish done.
Resting matters. The rice absorbs the final sauce as it stands.
Long-grain white rice is the easiest choice; brown rice and instant rice need different liquid and timing to work well.
Serving the chicken over plain rice instead of baking rice in the dish? MasalaMonk’s how to cook rice guide is useful for getting fluffy grains that do not turn gummy under the sauce.
Cream of Chicken + Cream of Mushroom Variation
You can mix cream of chicken and cream of mushroom soup. Cream of chicken makes the sauce milder and more savory, while cream of mushroom adds deeper mushroom flavor. A 50/50 mix works especially well for larger bakes, chicken and rice, and slow cooker meals.
For a bigger casserole or crockpot dinner, try 1 can cream of mushroom soup and 1 can cream of chicken soup. Low-sodium versions are the safest choice because two condensed soups can make the dish salty fast.
Cream of mushroom brings deeper flavor, cream of chicken tastes milder, and a 50/50 blend gives a softer creamy sauce.
This same cream-soup swap logic also shows up in comfort casseroles like MasalaMonk’s green bean casserole recipe ideas, where condensed cream soup is part of the classic creamy base.
How to Make Cream of Mushroom Chicken Taste Better
The shortcut works as-is, but one or two small upgrades can make it taste more like a creamy mushroom dinner than plain canned soup.
The easiest upgrades are browned mushrooms for depth, broth for savoriness, and a small spoon of Dijon or thyme for balance.
Small upgrades like browned mushrooms, broth, Dijon, thyme, sour cream, cheese, pepper, and parsley make the shortcut taste more complete.
Browned vs Raw Mushrooms
Raw mushrooms can go straight into the dish, but browning them first gives the sauce more flavor and reduces the extra moisture that can loosen the pan.
Raw mushrooms keep prep easy; meanwhile, browned mushrooms add deeper flavor and reduce extra moisture in the sauce.
Brown fresh mushrooms first: This adds real mushroom flavor, cooks off extra moisture, and gives the sauce a deeper base.
Choose broth instead of water: Low-sodium chicken broth gives the dish more savory depth.
Add garlic and onion powder: These make the pantry version taste fuller.
Add thyme: Thyme works naturally with mushrooms and chicken.
Stir in a small spoon of Dijon: It cuts through the richness without making the dish taste mustardy.
Finish with sour cream: It gives the sauce a tangier, creamier finish. In skillet and slow cooker versions, add it near the end over gentle heat.
Melt cheese on top: Mozzarella, Monterey Jack, cheddar, Swiss, or Muenster can turn this into a cheesy baked chicken dinner.
Add black pepper and parsley at the end: This keeps the final plate from tasting too heavy.
What to Serve with Cream of Mushroom Chicken
The sauce is the point, so serve it with something that catches every spoonful: fluffy rice, buttered egg noodles, mashed potatoes, biscuits, broccoli, or green beans.
The best sides give the sauce somewhere to go, whether you choose rice, egg noodles, mashed potatoes, biscuits, broccoli, or green beans.
Over Rice
Plain white rice is the easiest pairing. Brown rice, leftover rice, or seasoned rice also work, but keep them separate unless you are following a true chicken-and-rice bake formula.
Rice keeps this creamy chicken dinner simple, filling, and easy to serve on a busy weeknight.
Over Egg Noodles
Egg noodles make this feel like old-school chicken and gravy. Cook the noodles separately, then spoon the chicken and mushroom sauce over the top. Dry egg noodles should not go into the baking dish unless you are using a tested noodle-casserole formula.
Broad egg noodles hold the mushroom sauce in their folds, so this version feels cozy without needing extra prep.
Over Mashed Potatoes
Mashed potatoes make the plate even cozier. If you want a creamy potato side that will hold the sauce without turning gluey, try MasalaMonk’s garlic mashed potatoes recipe.
Mashed potatoes make the richest plate because the soft potatoes hold the creamy mushroom sauce instead of letting it run.
With Vegetables
Green beans, broccoli, peas, carrots, roasted mushrooms, or a simple salad balance the richness. For a holiday-style comfort plate, serve it with green bean casserole, roasted vegetables, or a crisp side salad.
For a bigger comfort-food spread, MasalaMonk’s hashbrown casserole recipe also works as a creamy potato side, especially when the chicken is served with green beans or salad. Planning leftovers? The storage and reheating tips explain how to loosen the sauce again without drying out the chicken.
How to Fix Cream of Mushroom Chicken
Even when this dish goes a little sideways, it is usually fixable. Most problems are texture problems: the sauce is too thick, too watery, or too salty, while the chicken dries out because the pieces were too thick or cooked too long.
The usual culprits are ready-to-eat soup instead of condensed soup, too much liquid, a loose cover on rice, or thick chicken breasts that needed more time than the sauce did.
Common Sauce, Chicken, and Rice Fixes
Problem
What Happened
How to Fix It
Sauce is too thick or gluey
Not enough liquid was added to the condensed soup.
Add milk or broth 1–2 tbsp at a time until it is spoonable.
Sauce is watery
Too much liquid was added, ready-to-eat soup was used, or raw mushrooms released extra moisture.
When the chicken still needs time, bake uncovered 5–10 minutes. When the chicken is already done, remove it and thicken the sauce separately with a small slurry: 1 tsp cornstarch mixed with 1 tbsp cold water.
Sauce is too salty
Condensed soup, broth, cheese, or onion soup mix added too much salt.
Serve with rice, noodles, or potatoes to soften the saltiness. A spoonful of sour cream can also mellow the sauce. Next time, use low-sodium soup and broth.
Chicken is dry
The pieces were too thick, uncovered too long, or cooked past 165°F / 74°C.
Slice breasts thinner, cover while baking, check early, or use thighs.
Chicken is done but sauce is thin
The sauce needs more time, but the chicken does not.
Remove the chicken, cover it loosely, and thicken the sauce separately in a small pan.
Rice is undercooked
The dish needed more steam, liquid, or time.
Add ¼–½ cup hot broth, cover tightly again, and bake longer.
Rice is mushy
Too much liquid or too much bake time.
Use long-grain white rice, measure carefully, and rest the dish instead of overbaking.
Dish tastes bland
The sauce was not boosted with enough seasoning or fresh ingredients.
Add black pepper, garlic powder, onion powder, thyme, paprika, Dijon, or browned mushrooms.
Sauce splits when reheated
It was reheated too aggressively.
Reheat gently with a splash of milk or broth and stir slowly.
Most cream of mushroom chicken problems are fixable once you know whether the issue is texture, salt, timing, or seasoning.
Storage, Freezing and Reheating
Store leftovers in an airtight container in the refrigerator for 3–4 days. Rice or noodles are best stored separately when possible so they do not soak up all the sauce.
To reheat, warm the chicken gently on the stovetop or in the microwave with a splash of milk or broth. The sauce thickens as it chills, so that splash of liquid helps bring it back to a spoonable texture.
You can freeze the cooked chicken and sauce, but the sauce may loosen or look slightly grainy after thawing. It is still usable; reheat gently and whisk in a splash of milk or broth to bring it back together.
Chicken-and-rice leftovers thicken more in the fridge because the rice keeps absorbing the sauce. Reheat them with a splash of broth or milk so the rice loosens instead of turning dry.
Creamy leftovers thicken in the fridge, so reheat gently and add a splash of milk or broth to bring the sauce back.
Cream of Mushroom Chicken FAQs
How long should cream of mushroom chicken bake?
Thin boneless chicken breasts or thighs usually need about 25 minutes covered at 375°F / 190°C, then 5–10 minutes uncovered. Thickness matters more than the clock, so check that the chicken reaches 165°F / 74°C.
Covered or uncovered?
Cover the dish first so the chicken stays moist and the sauce does not dry out. Uncover near the end when the sauce needs to thicken or cheese is going on top.
Campbell’s soup vs other condensed brands
A standard 10.5 oz / 298 g can of Campbell’s condensed cream of mushroom soup works well, but other condensed brands work too. The important detail is that the soup is condensed, not ready-to-eat.
Chicken breasts vs thighs
Boneless skinless thighs are the more forgiving choice because they stay juicy even when the dish needs a few extra minutes. Breasts work well too, but they should be thin and even before baking.
How much liquid should I add to condensed soup?
For baked chicken, ½ cup / 120 ml milk or low-sodium broth per 10.5 oz / 298 g can makes a creamy sauce. Skillet chicken can take ½–1 cup / 120–240 ml because the pan sauce reduces as it simmers.
How to make it on the stove
The stovetop version works best with thin pieces because they cook quickly and stay tender. Sear them first, then simmer gently in the mushroom sauce until they reach 165°F / 74°C. A few uncovered minutes will tighten a loose pan sauce.
Homemade mushroom sauce instead of canned soup
This becomes a different style of recipe, but it can work. For a quick homemade mushroom cream sauce, start with 2 tbsp butter, 8 oz mushrooms, 1 minced garlic clove, 2 tbsp flour, 1 cup broth, and ½ cup milk or cream, then cook the chicken in that sauce. For the classic shortcut flavor, use condensed soup.
Adding rice safely
Rice can work beautifully, but treat it like its own bake, not a last-minute add-in. It needs extra liquid, trapped steam, and more time than the basic chicken version. Start with 1 can condensed soup, 1 cup / 240 ml water or broth, ¾ cup / about 140 g long-grain white rice, and about 1¼ lb / 565 g chicken.
Should you use frozen chicken?
Thawed chicken is the safer bet here because it cooks more evenly and keeps the sauce from turning watery. Frozen chicken can release a lot of moisture, especially in the oven or skillet, so thaw it first when you can.
Why the sauce turns watery
Watery sauce usually comes from too much liquid, ready-to-eat soup instead of condensed soup, raw mushrooms releasing moisture, or keeping the dish covered for the whole bake. Once the chicken is done, remove it and thicken the sauce separately with a small slurry made from 1 tsp cornstarch and 1 tbsp cold water.
Fixing a salty sauce
Condensed soup is already salty, and broth, cheese, or onion soup mix can add even more. Rice, noodles, or potatoes help soften the saltiness on the plate. A spoonful of sour cream can also mellow the sauce.
Best sides for creamy mushroom chicken
Rice, egg noodles, mashed potatoes, biscuits, broccoli, green beans, peas, carrots, and roasted mushrooms all work. The best side is something that catches the creamy mushroom sauce.
Slow cooker ratio
In the slow cooker, use less liquid than you might expect because the lid traps moisture. For 1½–2 lb / 680–900 g chicken, use 2 cans condensed cream of mushroom soup and about ½ cup / 120 ml broth or water. Cook on High for 3–4 hours or Low for 6–7 hours, until the chicken reaches 165°F / 74°C.
Final Thoughts
Start with the oven version first. Once you understand the soup-to-liquid ratio, the recipe bends to the night: faster in a skillet, easier in the slow cooker, or heartier with rice.
However you make it, the goal stays the same: juicy chicken, creamy mushroom gravy, and a dinner that asks very little from you but still feels like someone cared.
Slow Cooker French Onion Chicken is what you make when you want the comfort of French onion soup but need it to feel like dinner: tender chicken, soft onions, savory gravy, and melted cheese spooned over mashed potatoes, rice, egg noodles, or toasted bread.
The base version is a true shortcut dinner: chicken, sliced onion, condensed French onion soup, dry onion soup mix, a little broth, and cheese at the end. It is simple enough for a busy day, but a few small choices keep the chicken tender and the onion gravy balanced instead of watery, harsh, or too salty.
When you lift the lid, you want soft onions, a savory gravy smell, chicken that still tastes juicy, and cheese that melts over the top instead of disappearing into the sauce. That is why this guide covers cook times, chicken breasts vs thighs, onion soup mix balance, gravy thickening, and the best way to finish the cheese.
The main recipe uses condensed French onion soup and dry onion soup mix, but you can also make it creamy, use thighs instead of breasts, broil the cheese, add mushrooms, or use the no-canned-soup version when you want a more homemade onion sauce.
Before the timing details, this is the result to aim for: a full dinner plate with tender chicken, softened onions, glossy onion gravy, and something underneath to catch the sauce.
Because the onion gravy needs something to catch it, noodles, potatoes, rice, or toast help turn the chicken into a complete comfort-food dinner.
Quick Answer: How Long to Cook Slow Cooker French Onion Chicken
Cook slow cooker French onion chicken on low for 4–6 hours or on high for 3–4 hours, depending on the thickness of the chicken and whether you want sliceable or shreddable meat. Thin chicken breasts may be ready closer to 3–4 hours on low. Boneless thighs can usually handle a little longer and stay juicier.
The chicken is done when the thickest piece reaches 165°F / 74°C on an instant-read thermometer. Add the cheese only after the chicken is cooked through, then cover the slow cooker until the cheese melts, or transfer the chicken to a broiler-safe dish for a browned, bubbling top.
Start with the cook time, but trust the thermometer: the thickest piece of chicken should reach 165°F / 74°C before the cheese goes on.
For food safety, use thawed chicken rather than frozen chicken in the slow cooker. FoodSafety.gov lists 165°F / 74°C as the safe minimum internal temperature for poultry, and USDA slow-cooker guidance recommends thawing meat or poultry before adding it to a slow cooker. FoodSafety.gov’s temperature chart and USDA/FSIS slow-cooker guidance are useful references if you want the safety details.
A 5- to 6-quart slow cooker keeps the chicken mostly in one layer, helping the onions, broth, soup mix, and cheese cook more evenly around it.
Use the table as your baseline, then choose the texture you want: sliceable chicken for plates, shredded chicken for bowls and sandwiches, or a creamier sauce for noodles and rice.
Choose Your Result: Sliceable, Shredded, Creamy, or Extra Cheesy
The best version depends on how you want to serve it. For a plated dinner, keep the chicken sliceable. For rice, noodles, mashed potatoes, or sandwiches, let it go softer and shred it into the onion gravy.
Choose the result before you cook: sliceable chicken for plates, shredded chicken for bowls, creamy sauce for noodles, or broiled cheese for a deeper finish.
What you want
Use
Best method
Sliceable chicken
Thin or evenly pounded chicken breasts
Check early, around 3–4 hours on low
Shredded chicken and gravy
Breasts or thighs
Cook longer, then shred into the onion sauce
Juiciest version
Boneless chicken thighs
Cook low and slow; thighs are more forgiving
Creamy version
Sour cream, Greek yogurt, cream cheese, or heavy cream
Stir in at the end, after cooking
French onion soup-style finish
Swiss, Gruyère, or provolone
Broil the cheese for 2–5 minutes after slow cooking
Slow Cooker French Onion Chicken Recipe
This slow cooker French onion chicken cooks tender chicken in a savory onion gravy, then finishes with melted Swiss, provolone, or Gruyère cheese. Keep it simple with condensed French onion soup and onion soup mix, or use the notes below for thicker gravy, a broiled cheese finish, chicken thighs, creamy sauce, or a no-canned-soup version.
Prep Time10 minutes
Cook Time3–4 hours high or 4–6 hours low
Total TimeAbout 3 hr 10 min–6 hr 10 min
Servings4–6
Equipment
5- to 6-quart slow cooker
Instant-read thermometer
Medium mixing bowl
Tongs
Optional broiler-safe dish for browning the cheese
Ingredients
2 lb / 900 g boneless skinless chicken breasts or thighs
1 large yellow or sweet onion, thinly sliced, about 200–250 g
1 can condensed French onion soup, 10.5 oz / about 298 g, undiluted
1 packet dry onion soup mix, 1 oz / 28 g
½ cup / 120 ml low-sodium beef broth, plus more if needed
1 tbsp / 15 ml Worcestershire sauce
1 tsp Dijon mustard or 2 tsp balsamic vinegar, optional
½ tsp black pepper
½ tsp dried thyme or 2–3 fresh thyme sprigs
4–6 slices Swiss, provolone, or Gruyère, or 1 cup / 100–115 g shredded cheese
Optional for thickening: 1 tbsp cornstarch + 1 tbsp cold water
Instructions
Add the sliced onions to the bottom of a 5- to 6-quart slow cooker.
Place the chicken over the onions in a mostly even layer.
In a bowl, stir together the undiluted condensed French onion soup, dry onion soup mix, beef broth, Worcestershire sauce, Dijon or balsamic if using, black pepper, and thyme.
Pour the sauce mixture over the chicken.
Cover and cook on high for 3–4 hours or on low for 4–6 hours, until the thickest piece of chicken reaches 165°F / 74°C.
If you want thicker gravy, remove the chicken to a plate. Stir together cornstarch and cold water, then stir the slurry into the slow-cooker sauce. Cover and cook on high for 10–15 minutes, until slightly thickened.
Return the chicken to the sauce. Top with cheese, cover, and cook 10–30 minutes until melted.
For a browned cheese finish, transfer the cooked chicken and some sauce to a broiler-safe dish, top with cheese, and broil for 2–5 minutes, watching closely.
Serve over mashed potatoes, rice, egg noodles, pasta, toasted bread, or vegetables.
Notes
Use low-sodium broth because condensed soup, onion soup mix, and cheese already season the gravy.
If you prefer a milder onion gravy, start with ½ packet onion soup mix and add more only after tasting.
For sliceable chicken breasts, check early and avoid cooking much past 165°F / 74°C.
For shredded chicken, cook until very tender, shred into the sauce, then add cheese.
For a creamier sauce, stir in sour cream, Greek yogurt, cream cheese, or heavy cream at the end, once the slow cooker is on warm or the sauce is no longer bubbling hard.
Keep the basic build simple, then use the extra notes when you want thicker gravy, a browned cheese top, or a no-canned-soup version.
Why This Recipe Works
This recipe works because the onion flavor comes from three places: sliced onions for sweetness, condensed French onion soup for body, and dry onion soup mix for shortcut seasoning. Low-sodium broth loosens the sauce without diluting it, while Worcestershire, thyme, and a little Dijon or balsamic keep the flavor from tasting flat.
The cheese waits until the end because it has a job: it should sit on top like a French onion soup finish. Melt it in the slow cooker for the easiest version, or broil it for browned edges and a deeper, toastier flavor.
What the Finished Chicken Should Be Like
When this dish is right, the chicken should be tender enough to cut with a fork but not dry around the edges. The onions should be soft and tucked into the gravy, not sitting on top as sharp raw slices. You want a sauce that drapes over potatoes or noodles, not one that runs straight to the edge of the plate.
At the finish, the cheese should stay visible and melty instead of blending into the gravy. If you broil it, look for browned spots, bubbling edges, and that French onion soup feeling when the cheese pulls slightly as you serve it.
The best onion gravy should drape instead of run, so it coats potatoes, noodles, or rice without turning watery or paste-thick.
Ingredients You Need
The ingredient list is short, but each part has a job: onions for sweetness, soup mix for shortcut flavor, broth for a spoonable base, and cheese for the French onion finish. Amounts are written in both US and metric measurements where useful.
Although the ingredient list is short, the balance matters: soup mix seasons, broth loosens, onions sweeten, and cheese gives the French onion finish.
Chicken
The chicken is the only part of this recipe that can really punish you if it overcooks. Use 2 lb / 900 g boneless skinless chicken breasts or thighs. Breasts give you a leaner, more sliceable dinner, while thighs stay juicier and are more forgiving if you want shredded chicken in the sauce.
Chicken Breast Thickness and Doneness
If your chicken breasts are very thick, slice them horizontally or pound them to a more even thickness. This helps them cook evenly and reduces the chance of dry edges before the center is done. For exact timing by cut, use the cook-time table.
Even thickness helps chicken breasts cook predictably. Slice or pound thick pieces, and start checking thin pieces early.
If you want more slow-cooker ideas built around lean chicken, these crock pot chicken breast recipes are helpful for keeping chicken breast tender instead of dry.
For a different dinner built around a whole bird instead of boneless pieces, this whole chicken in crock pot guide is the better match.
Onions
Use 1 large yellow or sweet onion, thinly sliced. This is usually about 200–250 g, or roughly 2 cups sliced onion. Yellow onions give classic savory-sweet flavor. Sweet onions make the sauce softer and slightly sweeter.
For a more onion-heavy, French onion soup-style sauce, add a second onion. On busy nights, 1 large onion is still enough because the soup base and onion soup mix bring plenty of onion flavor too.
Condensed French Onion Soup
The shortcut base is 1 can condensed French onion soup, usually 10.5 oz / about 298 g. Use it straight from the can; do not prepare it with water first. The condensed soup brings savory onion flavor, body, and seasoning.
Dry Onion Soup Mix
Use 1 packet dry onion soup mix, usually 1 oz / 28 g. Any standard dry onion soup mix works. Because the mix already seasons the sauce, the rest of the recipe uses low-sodium broth and waits until the end for final adjustments.
For a better-balanced gravy: use low-sodium broth and wait to add extra salt until the end. Condensed soup, onion soup mix, and cheese already season the sauce, so you may not need much more.
Beef Broth or Beef Consommé
Use ½ cup / 120 ml low-sodium beef broth for a saucier version. Beef consommé can also work when you want a deeper, more concentrated flavor, but it is often richer and saltier than broth. Taste the sauce before adjusting the seasoning.
Worcestershire, Dijon, Balsamic, and Thyme
Worcestershire gives the sauce a deeper savory edge, while Dijon or balsamic keeps the onion sweetness from feeling flat. Thyme brings it closer to the flavor of French onion soup.
Use 1 tbsp / 15 ml Worcestershire sauce, plus either 1 tsp Dijon mustard or 2 tsp balsamic vinegar. Add ½ tsp dried thyme or a few fresh thyme sprigs.
Cheese
Use 4–6 slices Swiss, provolone, or Gruyère, or about 1 cup / 100–115 g shredded cheese. Gruyère gives the most classic French onion soup flavor. Swiss is easy to find and budget-friendly. Provolone melts smoothly and is mild enough for kids or picky eaters.
Gruyère gives the most classic French onion flavor, Swiss keeps it easy and budget-friendly, and provolone melts into a smooth, mild topping.
Slow Cooker French Onion Chicken with Onion Soup Mix
Dry onion soup mix is what gives this crock pot French onion chicken its easiest shortcut flavor. One standard packet, usually 1 oz / 28 g, is enough for the main recipe because the condensed French onion soup and cheese also season the gravy.
Onion Soup Mix Balance
If you prefer a milder gravy, start with half the packet, use low-sodium beef broth, and taste the sauce before adding any extra seasoning. Two packets can work in some creamy onion soup mix chicken recipes, but for this French onion chicken, one packet usually gives a better balance.
Condensed French onion soup gives body, dry onion soup mix adds seasoning, and low-sodium broth helps keep the gravy savory instead of harsh.
For a creamier onion soup mix chicken variation, use the main recipe as written, then stir in sour cream, Greek yogurt, cream cheese, or heavy cream after the chicken has finished cooking. Keep the creamy ingredient out of the slow cooker during the long cook so the sauce stays smoother.
Best shortcut balance: use 1 can condensed French onion soup, 1 packet dry onion soup mix, ½ cup / 120 ml low-sodium beef broth, and cheese at the end. That gives you a rich onion gravy without making the sauce harsh.
Chicken Breasts vs Thighs
Both work, but they give different results. If you want tidy, sliceable pieces, use chicken breasts and check them early. If you want juicy, pull-apart chicken in onion gravy, use thighs.
Breasts work best for cleaner slices, while thighs stay juicier and more forgiving if you want pull-apart French onion chicken in gravy.
Chicken cut
Best for
What to watch
Boneless skinless breasts
Lean, sliceable French onion chicken
Can dry out if cooked too long; check early
Thin-sliced breasts
Faster, more even cooking
May be done closer to 3–4 hours on low
Boneless skinless thighs
Juicier, richer, more forgiving chicken
Best if you like shredded or very tender meat
Bone-in thighs
Deeper flavor
Less convenient to serve; check around the bone
If you are making this for the first time, boneless thighs are the most forgiving. If you prefer chicken breasts, keep the pieces even and start checking before the longest listed cook time.
Best Crock Pot Size for French Onion Chicken
A 5- to 6-quart slow cooker is the best size for about 2 lb / 900 g chicken. It gives the chicken enough room to sit in a mostly even layer while still keeping the onions and sauce close around it.
Keeping the chicken mostly in one layer helps it cook evenly while the onions stay close enough to soften into the slow-cooker sauce.
A very large slow cooker can let the sauce spread thin and cook down faster. A small one may stack thick chicken breasts and cook them unevenly. Whenever possible, keep the chicken in one layer.
How to Make Crock Pot French Onion Chicken
The method is simple, but the order matters: onions underneath, chicken in an even layer, sauce over the top, and cheese only once the chicken is cooked.
Do not let the extra notes make the recipe feel complicated. The basic version is still simple: layer the onions, add the chicken, pour over the sauce, cook until done, then finish with cheese. For more detail, use the cook-time guide or the gravy-thickening section.
Once the onions and chicken are layered, the slow cooker does most of the work; the final texture depends on doneness, gravy thickness, and cheese timing.
1. Layer the onions
Add the sliced onions to the bottom of a 5- to 6-quart slow cooker. Spreading the onions underneath the chicken helps them soften into the sauce instead of sitting raw on top.
Layer the onions underneath the chicken so they soften into the sauce rather than sitting on top with a sharp, raw bite.
2. Add the chicken
Place the chicken in a single layer over the onions. A little overlap is fine, but try not to stack thick chicken breasts directly on top of one another.
3. Mix the sauce
In a bowl, stir together the undiluted condensed French onion soup, dry onion soup mix, low-sodium beef broth, Worcestershire sauce, Dijon or balsamic if using, black pepper, and thyme. Pour this mixture over the chicken.
4. Slow cook until done
Cook on low for 4–6 hours or on high for 3–4 hours, until the thickest piece of chicken reaches 165°F / 74°C.
5. Thicken the gravy if needed
If the sauce is thinner than you like, remove the chicken to a plate. Stir together 1 tbsp cornstarch and 1 tbsp cold water, then stir the slurry into the sauce. Cover and cook on high for 10–15 minutes, until the sauce thickens slightly.
6. Add cheese
Place the chicken back into the sauce, top with cheese, and cover until melted. For a browned French onion finish, transfer the chicken and some sauce to a broiler-safe dish, add cheese, and broil for 2–5 minutes, watching closely.
Cooking Time: Low vs High
Slow cookers vary, and chicken thickness matters. Use the times below as a guide, then trust the thermometer.
Cook time changes with cut and thickness, so check thin breasts early and use 165°F as the final doneness cue.
Chicken style
Low setting
High setting
Best result
Thin or lightly pounded chicken breasts
3–4 hours
2–3 hours
Sliceable, tender chicken
Regular boneless chicken breasts
4–6 hours
3–4 hours
Tender chicken that can be sliced or lightly shredded
Boneless chicken thighs
5–7 hours
3–4 hours
Juicy, saucy, more forgiving meat
Shredded French onion chicken
5–6 hours
3–4 hours
Pull-apart chicken mixed into the gravy
Frozen chicken
Not recommended
Not recommended
Thaw first before slow cooking
Chicken breast tip: if your slow cooker runs hot or your chicken breasts are thin, start checking around 3 hours on low. The goal is tender chicken at 165°F / 74°C, not chicken that stays in the pot until the longest possible time.
The same “check by temperature, not just time” idea matters with other lean slow-cooker meats too. This slow cooker pork loin recipe uses that same approach to keep lean pork sliceable and juicy.
How to Make the Onion Gravy Spoonable, Not Watery
The sauce should thicken enough to coat chicken, potatoes, or noodles. If your slow cooker releases a lot of liquid from the chicken and onions, thicken the sauce at the end instead of adding more soup mix.
For a simple thickener, stir together 1 tbsp cornstarch with 1 tbsp cold water. Remove the chicken, stir the slurry into the sauce, cover, and cook on high for 10–15 minutes. Add the chicken back once the sauce has thickened.
When the slow-cooker liquid looks thin, a cornstarch slurry helps turn it into onion gravy that coats the chicken instead of pooling underneath.
When the sauce tastes strong rather than thin, use the troubleshooting table instead of adding more soup mix.
For a thicker gravy from the start, use only ½ cup / 120 ml broth. And for more sauce to spoon over rice, noodles, or mashed potatoes, use up to 1 cup / 240 ml broth and thicken at the end.
French Onion Chicken Gravy Thickness Guide
The goal is not a stiff gravy or a watery sauce. You want the middle texture: glossy, spoonable, and thick enough to cling to whatever you serve underneath.
Aim for the middle texture: glossy enough to flow, yet thick enough to coat a spoon and cling to potatoes, noodles, or rice.
Melt the Cheese in the Slow Cooker or Broil It Until Bubbly
You have two good options for the cheese. The easiest is to melt it right in the slow cooker. The most French onion soup-like finish is to broil it briefly.
If you are still choosing the topping, see the best cheese options before deciding between a slow-cooker melt and a broiled finish.
The slow-cooker melt keeps dinner easy; the broiled finish adds browned, bubbling cheese for a more French onion soup-style result.
Finish
How to do it
Best for
Slow cooker melt
Top the cooked chicken with cheese, cover, and cook 10–30 minutes until melted
Easy weeknight dinners, no extra dishes
Broiled cheese finish
Transfer chicken and sauce to a broiler-safe dish, add cheese, and broil 2–5 minutes
Browned, bubbling, French onion soup-style cheese
The slow cooker melt is easiest. The broiled finish is best if you want this dish to feel closer to French onion soup. Transfer the cooked chicken and onion gravy to a broiler-safe dish, add Swiss, Gruyère, or provolone, and broil until the cheese is bubbling and browned in spots.
Watch closely under the broiler; the cheese can move from beautifully browned to burnt quickly.
Optional 5-Minute Upgrade for Deeper Onion Gravy
The easy version works well as written. But if you have five extra minutes, this is where the dish starts to taste less like a shortcut and more like slow-cooked French onion gravy.
Small upgrades can make a big difference: sautéed onions, garlic, deeper broth, and a browned cheese finish all build more layered French onion flavor.
Sauté the onions first: cook them in butter for 5–8 minutes before adding them to the crock pot.
Add garlic: one or two minced cloves make the gravy taste less flat.
Use beef consommé: it gives a richer flavor than regular broth, but taste before adjusting the seasoning.
Add Worcestershire and Dijon or balsamic: this balances the sweetness of the onions.
Broil the cheese: the browned top gives the dish a more classic French onion soup finish.
Variations
Once you have made the basic version, the recipe is easy to bend toward what you have: thighs instead of breasts, mushrooms in the sauce, a creamy finish, or a broth-based gravy when you do not want canned soup.
This is also where the recipe becomes more personal: some people want it creamy, some want it onion-heavy, and some just want the easiest version with the cheese browned on top.
Once the base recipe works, you can make it creamier, more homemade, mushroom-rich, potato-friendly, or thicker and dip-style for toast.
Creamy French Onion Chicken
For a creamy version, stir in ¼–½ cup sour cream, Greek yogurt, cream cheese, or heavy cream at the end. This makes the gravy softer and richer, especially if you are serving the chicken over rice, mashed potatoes, or noodles.
Add the creamy ingredient after the chicken is cooked and the slow cooker is on warm or no longer bubbling hard. This keeps the sauce smoother and reduces the chance of splitting.
No Canned Soup French Onion Chicken
For a no-canned-soup version, use a broth-based onion gravy instead of condensed soup and dry onion soup mix. It tastes less salty and more homemade, but it needs either sautéed onions or a slurry at the end for body.
Instead of canned soup, this version builds flavor from onions, broth, garlic, herbs, and a simple slurry for a more homemade French onion chicken.
Choose this version when you want the dish to taste more like slow-cooked onions and broth than a pantry shortcut. It takes a little more effort, but the flavor is softer, deeper, and easier to adjust.
If you make the no-canned-soup version, the biggest choice is how onion-forward you want it. Two onions keep it balanced; three onions push it closer to French onion soup.
Use the same 2 lb / 900 g chicken and the same cheese finish from the main recipe; only the soup base changes.
2–3 yellow or sweet onions, thinly sliced
1 tbsp butter or oil for sautéing the onions, optional but helpful
1½ cups / 360 ml low-sodium beef broth
2 cloves garlic, minced
1 tbsp / 15 ml Worcestershire sauce
1 tbsp balsamic vinegar or 1 tsp Dijon mustard
½ tsp dried thyme or 2–3 fresh thyme sprigs
1 bay leaf, optional
1 tbsp cornstarch + 1 tbsp cold water, added at the end
No-Canned-Soup Method
For best flavor, sauté the onions in butter for 8–10 minutes before adding them to the slow cooker. Cook the chicken in the broth mixture, then thicken the sauce at the end and finish with Swiss, Gruyère, or provolone.
Sautéing the onions first gives the no-canned-soup version a deeper base before the broth, chicken, thickener, and cheese finish come together.
Chicken Thighs and Potatoes
For a one-pot comfort dinner, use boneless chicken thighs and add halved baby potatoes under or around the chicken. Potatoes need enough time to soften, so keep them in small pieces and cook on low until both the potatoes are tender and the chicken reaches 165°F / 74°C.
French Onion Chicken with Mushrooms
Add 8 oz / 225 g sliced mushrooms with the onions. Mushrooms make the sauce deeper and more savory, especially if you are serving the chicken over egg noodles or mashed potatoes.
French Onion Dip-Style Chicken
For a richer dip-style version, reduce the added broth, then stir in sour cream or cream cheese at the end. This variation is thicker, creamier, and especially good served with toasted bread, rice, or roasted potatoes.
What to Serve with Slow Cooker French Onion Chicken
Spoon it over mashed potatoes for the coziest plate, pile it onto egg noodles for a weeknight dinner, or shred the leftovers into sandwich rolls with extra cheese.
This is not a recipe that wants to sit alone on a plate. It wants something soft underneath it — potatoes, noodles, rice, or toasted bread — so the onion gravy and melted cheese become part of the whole dinner.
Mashed potatoes, noodles, rice, toast, and rolls all give the onion gravy somewhere to go, so the dish feels like a full dinner.
Mashed potatoes: the best comfort-food pairing.
Egg noodles: easy, cozy, and great for shredded chicken.
Rice: simple and practical for weeknights.
Toasted bread: gives the dish a French onion soup feel.
Pasta: works well if you keep the sauce loose enough.
Roasted vegetables: a good lighter side with the rich sauce.
Sandwich rolls: shred the chicken, spoon it into rolls, add cheese, and broil.
Leftover French Onion Chicken Melt
If you are making this for a family dinner, mashed potatoes or egg noodles make it feel the coziest. For leftovers, shred the chicken into the onion gravy, tuck it into sandwich rolls, add extra cheese, and broil until the top looks like a French onion melt.
For leftovers, the gravy does the work: shredded chicken, rolls, and melted cheese turn yesterday’s slow-cooker dinner into a French onion melt.
Because the chicken is rich, salty-savory, and cheesy, a crisp side helps. This cucumber salad recipe gives you a fresh, tangy contrast without adding much work.
Make-Ahead and Freezer Meal Tips
You can slice the onions and mix the sauce ingredients a day ahead, then keep them covered in the refrigerator until you are ready to cook. Keep the raw chicken separate until it goes into the slow cooker.
For a freezer meal, combine the chicken, sliced onions, undiluted condensed soup, onion soup mix, broth, Worcestershire, thyme, and pepper in a freezer-safe bag. Freeze without the cheese. Thaw overnight in the refrigerator before cooking, then add the cheese at the end.
Storage, Freezing, and Reheating
Store leftovers in an airtight container in the refrigerator for up to 3–4 days. Reheat gently on the stove, in the microwave, or in the slow cooker on low until hot. Add a splash of broth if the sauce has thickened too much.
You can freeze the cooked chicken and sauce for up to 2–3 months. For best texture, freeze the chicken and gravy without the cheese, then add fresh cheese when reheating and serving.
Small Mistakes That Can Change the Result
Adding cheese too early: it can melt into the sauce and disappear instead of giving you that French onion-style finish.
Salting before tasting: condensed soup, soup mix, broth, and cheese may already season the gravy enough.
Cooking thin chicken breasts all day: check early if you want sliceable chicken instead of shredded chicken.
Adding regular pasta at the beginning: it can turn mushy in the slow cooker, so serve the chicken over cooked pasta instead.
Troubleshooting Slow Cooker French Onion Chicken
Most issues are easy to fix at the end. The chicken can be shredded back into the sauce, thin gravy can be thickened, and a strong sauce can be softened with broth, cream, or a plain side.
If your main issue is thin sauce, start with the gravy-thickening method. If the problem is dry chicken, strong sauce, sharp onions, or disappearing cheese, use the fixes below.
Most fixes are simple: add moisture to dry chicken, thicken thin gravy with slurry, and soften a strong sauce with broth or cream.
Problem
Why it happened
How to fix it
Chicken is dry
Breasts cooked too long or pieces were too thin
Shred the chicken into the sauce and add a splash of broth or cream
Sauce is too thin
Chicken and onions released more liquid than expected
Use a cornstarch slurry and cook on high for 10–15 minutes
Sauce is too strong
Condensed soup, soup mix, broth, and cheese all season the gravy
Add unsalted broth, cream, sour cream, or Greek yogurt; serve over potatoes, rice, or noodles
Sauce is too thick
Not enough broth or too much thickener
Add ¼ cup / 60 ml broth at a time until spoonable
Flavor tastes flat
Needs acidity or savory depth
Add Worcestershire, Dijon, balsamic, black pepper, or thyme
Cheese disappeared into the sauce
Cheese was added too early
Add cheese only after the chicken is cooked, or broil it separately
Onions are still sharp
Onions were too thick or did not cook long enough
Slice thinly next time; for this batch, cook a little longer if the chicken can handle it, or remove chicken while sauce continues cooking
FAQs
Frozen chicken in the slow cooker: safe or not?
Use thawed chicken for this recipe. USDA slow-cooker guidance recommends thawing meat or poultry before adding it to a slow cooker. Frozen chicken may take too long to heat evenly in the slow cooker.
Chicken breasts or thighs: which is better?
For sliceable pieces, chicken breasts are leaner and cleaner on the plate. Thighs are juicier, more forgiving, and better when you want shreddable chicken in a rich onion gravy.
Best cheese for French onion chicken
Gruyère is the most classic choice because it echoes French onion soup. Swiss is easier to find and usually cheaper. Provolone melts smoothly and gives a milder finish.
How to make French onion chicken without canned soup
Use extra sliced onions, low-sodium beef broth, Worcestershire sauce, Dijon or balsamic, garlic, thyme, and a cornstarch slurry at the end. Sautéing the onions first gives the best flavor, but you can still make a simpler no-canned-soup slow-cooker version.
Can I use French onion dip instead of condensed soup?
You can use French onion dip for a creamier, thicker version, but it will taste different from classic French onion soup-style chicken. Use less added broth, cook the chicken until done, then stir the dip in near the end so the sauce stays smoother.
How to balance a strong onion gravy
If the sauce tastes stronger than you like, it is usually from stacked seasoning in the condensed soup, dry onion soup mix, broth, and cheese. Use low-sodium broth next time, taste before adding salt, and soften the current batch with a splash of unsalted broth, cream, sour cream, Greek yogurt, or a plain side like mashed potatoes, rice, or noodles.
How to make the French onion gravy thicker
Remove the chicken, stir 1 tbsp cornstarch with 1 tbsp cold water, then stir that slurry into the sauce. Cover and cook on high for 10–15 minutes until the sauce thickens.
Rice or pasta in the crock pot: what works?
For this recipe, it is better to serve the chicken over cooked rice, noodles, or pasta instead of adding them at the beginning. Regular pasta can turn mushy in the slow cooker, and rice needs a recipe built specifically around rice timing and liquid ratios. If you want a chicken-and-pasta dinner instead, this Cajun chicken pasta guide uses a better method: cook the pasta separately, then fold it into the sauce.
How to make creamy French onion chicken without splitting the sauce
Stir in sour cream, Greek yogurt, cream cheese, or heavy cream at the end, after the chicken is cooked. Add it gently and avoid boiling the sauce hard after the dairy goes in.
Best sides for slow cooker French onion chicken
Mashed potatoes, rice, egg noodles, pasta, toasted bread, roasted vegetables, or sandwich rolls all work well. Anything that catches the onion gravy will make the dish feel more complete.
If you try this with thighs, mushrooms, or the broiled cheese finish, that is the kind of variation other readers will want to know about too.
Final Thoughts
Slow Cooker French Onion Chicken is at its best when it stays easy without tasting careless. Keep the chicken from overcooking, let the onions soften into the sauce, and finish it in a way that feels generous. Then serve it over potatoes, noodles, rice, or toasted bread — the kind of simple dinner that feels bigger than the effort it took.