A chicken quesadilla can fool you. The tortilla looks done, but the cheese in the middle is still firm. Or the cheese melts and the bottom turns soft because the filling was wetter than it looked.
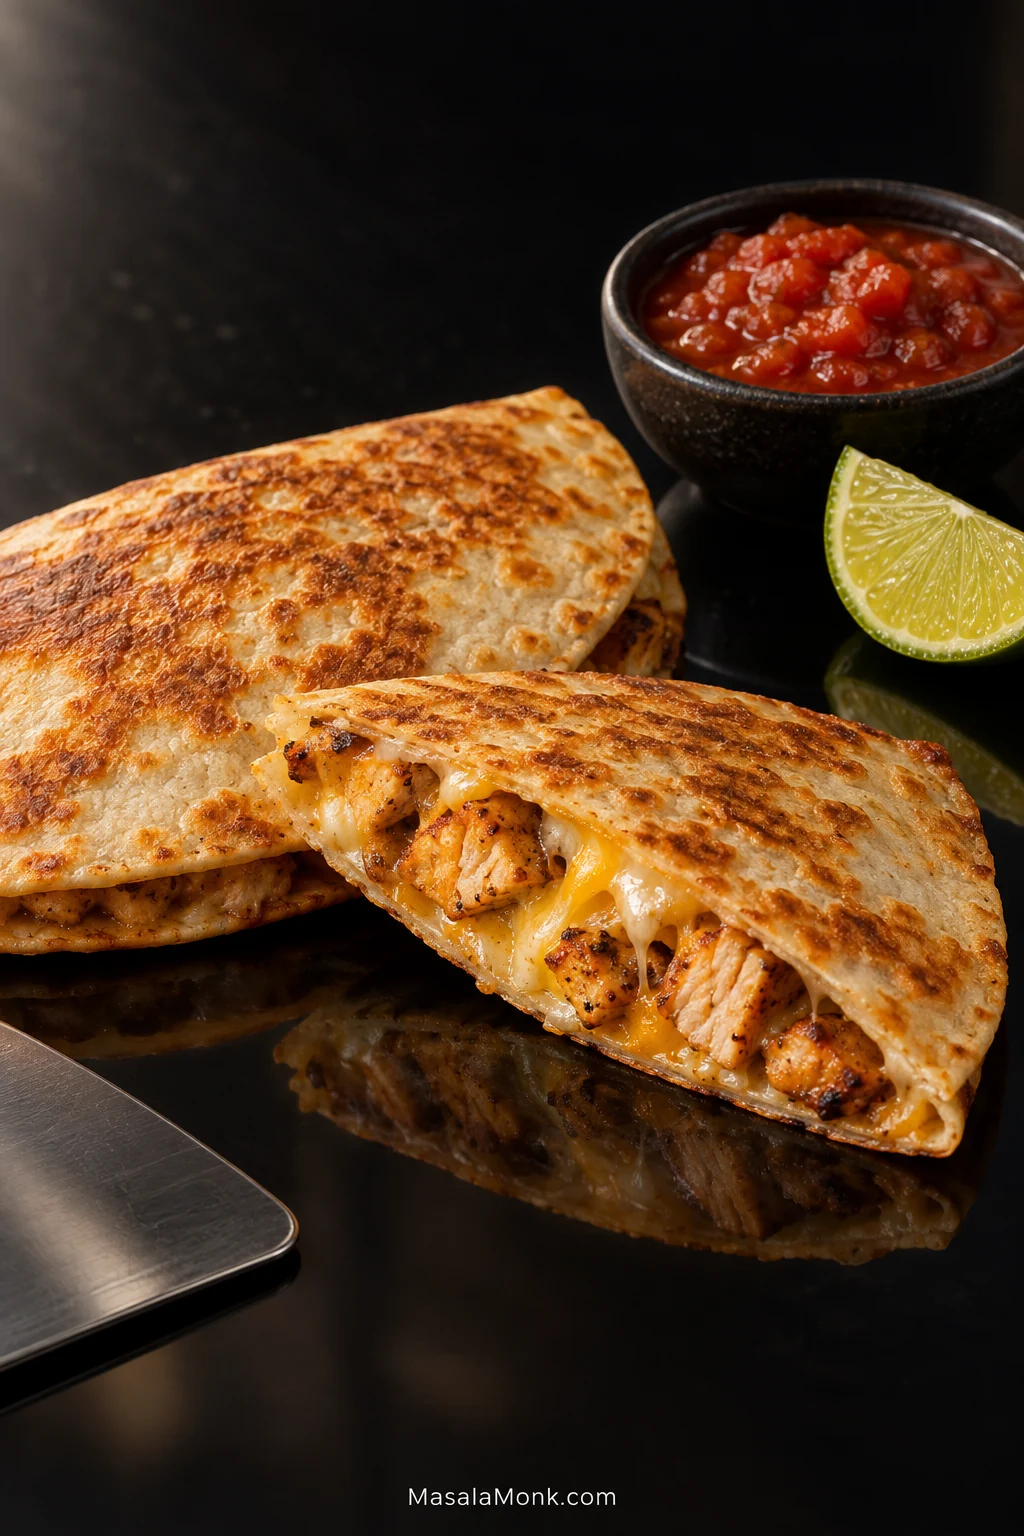
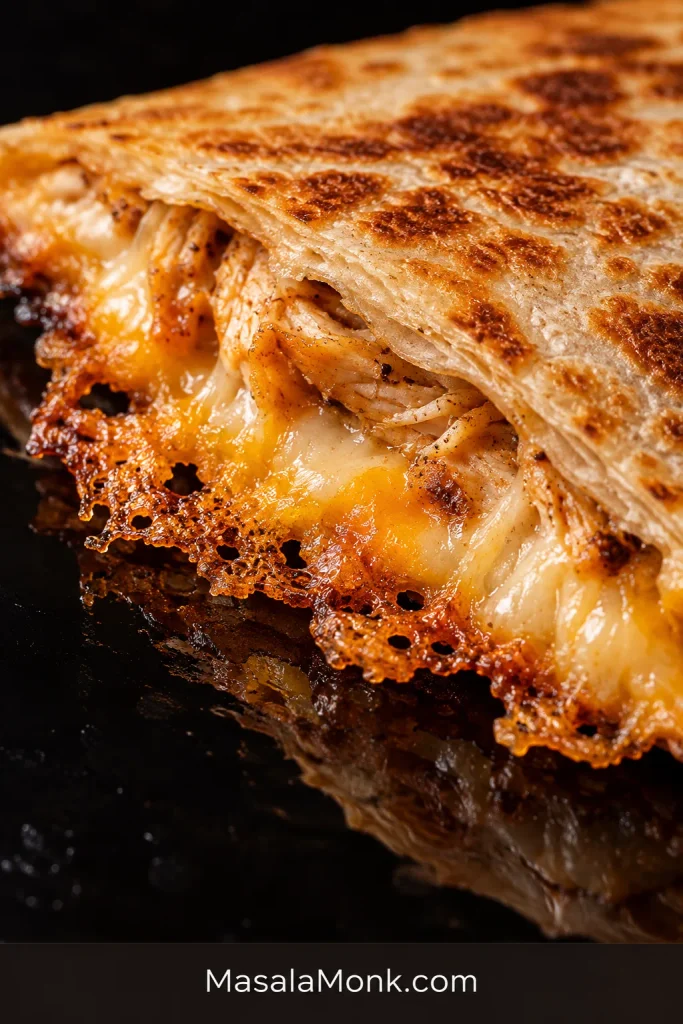
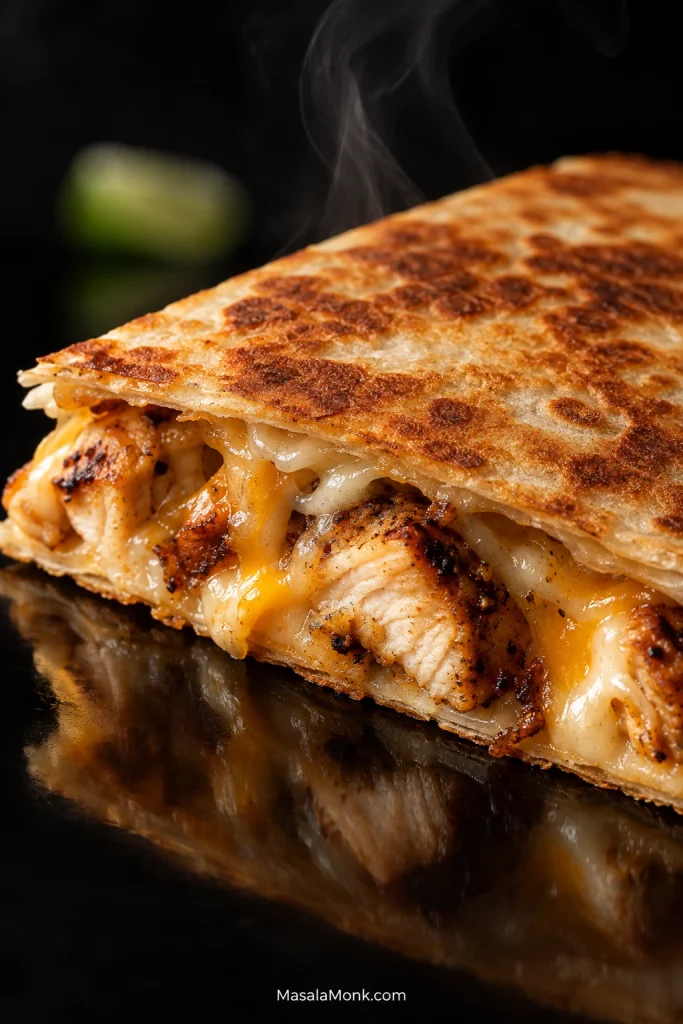
Keep the filling fairly thin, season the chicken well and give the cheese enough time to melt before the tortilla gets too dark. The payoff is simple: juicy chicken, hot melted cheese and a tortilla that turns golden in broad patches and gives a light crackle at the edge when you cut it.
This chicken quesadilla recipe works with raw chicken, leftovers or rotisserie chicken, so use whichever route gets dinner into the pan with the least fuss.
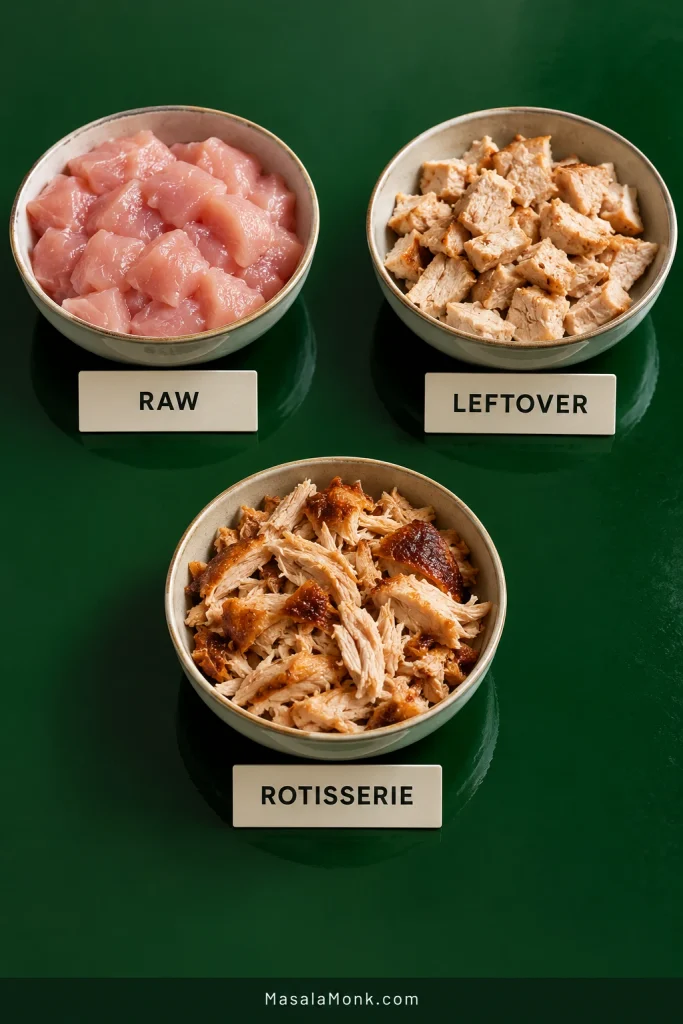
Raw, leftover and rotisserie chicken all work. Pick the route that matches what is already in your kitchen.
Raw Chicken
35–40 minutes. Season it, cook it through, then assemble.
Leftover Chicken
25–30 minutes. Warm it gently and season only as much as it needs.
Rotisserie Chicken
25–30 minutes. Shred or chop it, warm it and taste before adding salt.
Taste before seasoning cooked chicken. Leftovers and rotisserie may already bring plenty of salt and flavor.
Chicken Quesadilla Recipe
Easy Crispy Chicken Quesadillas
Smoky cumin-lime chicken, melted Monterey Jack and sharp cheddar folded into flour tortillas and cooked until crisp and golden in the skillet.
Makes: 4 large folded quesadillas
Serves: About 4 with sides
With cooked chicken: 25–30 minutes
From raw chicken: 35–40 minutes
Tortillas: 10 in / 25 cm flour
Safe minimum for raw chicken: 165°F / 74°C
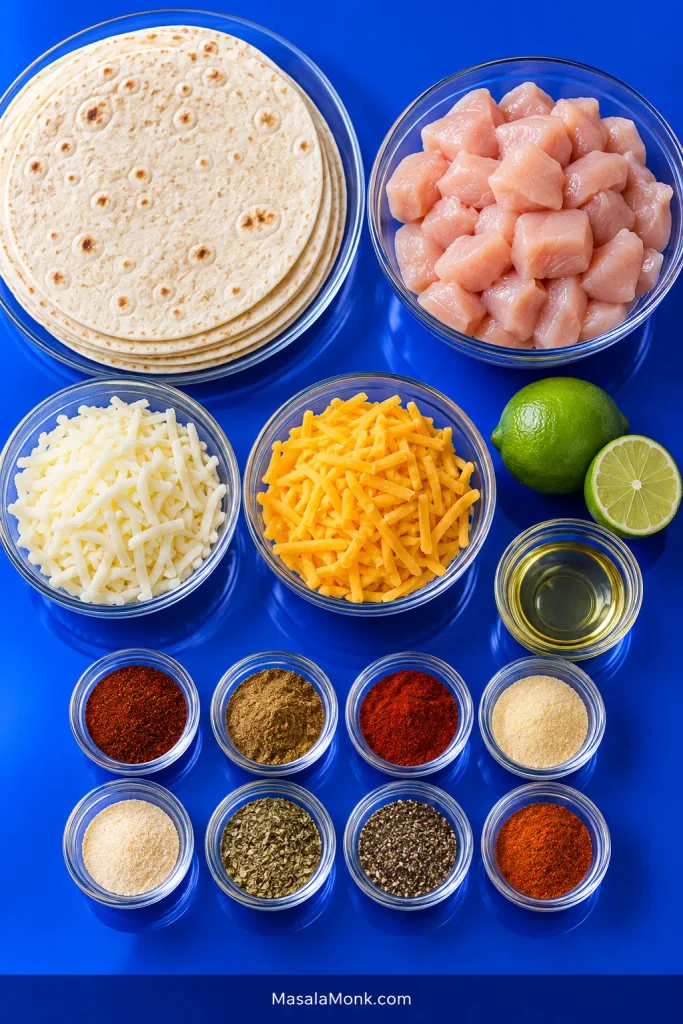
Ingredients
Seasoning Blend
2 tsp mild American-style chili powder seasoning blend
1 tsp ground cumin
1 tsp smoked paprika
1 tsp garlic powder
½ tsp onion powder
½ tsp dried oregano
¼ tsp black pepper
⅛–¼ tsp cayenne, optional
Shortcut: Start with 1½ tbsp taco seasoning for 450 g / 1 lb raw chicken instead of the individual spices. Check the salt in the blend before adding more.
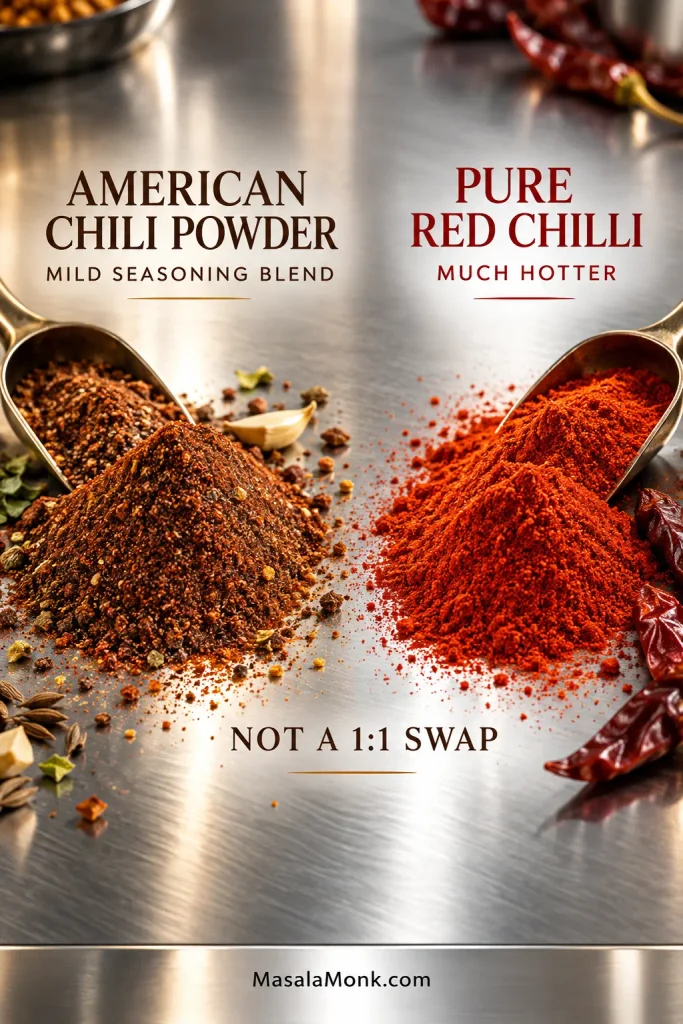
A note on chili powder: American-style chili powder is usually a fairly mild seasoning blend. Pure ground red chile or chilli powder is much hotter and isn’t a teaspoon-for-teaspoon substitute, so use a small amount to taste instead.
Pure red chilli replaces heat, not the rest of the blend. Cumin, paprika, garlic, onion and oregano still supply the aromatic seasoning.
Raw Chicken Ingredients
450 g / 1 lb boneless, skinless chicken breast or thighs, cut into roughly ½-inch / 1.25-cm pieces
Full seasoning blend above
¾ tsp fine salt
1 tbsp / 15 ml neutral cooking oil
2–3 tsp / 10–15 ml fresh lime juice
Cooked or Rotisserie Chicken Ingredients
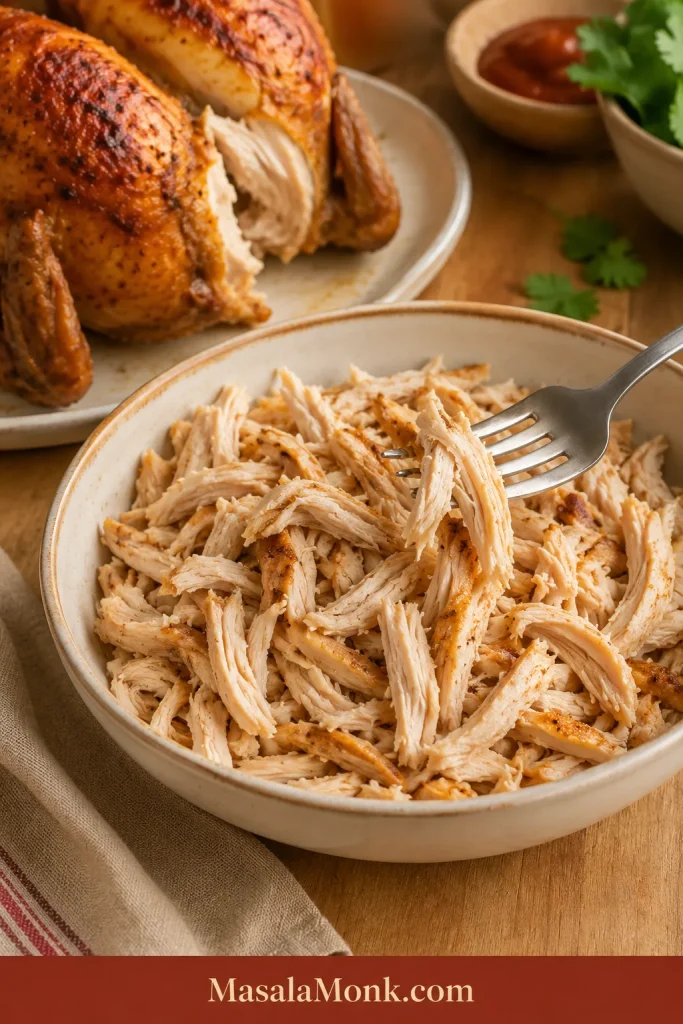
320–340 g / 11–12 oz cooked chicken, chopped or shredded
Roughly half the seasoning blend above — about 1 tablespoon of the mixed blend — to start, or less for already-seasoned chicken
Salt only as needed
2–3 tsp / 10–15 ml fresh lime juice
1–2 tbsp / 15–30 ml water only for genuinely dry chicken
Tortillas, Cheese and Skillet Oil
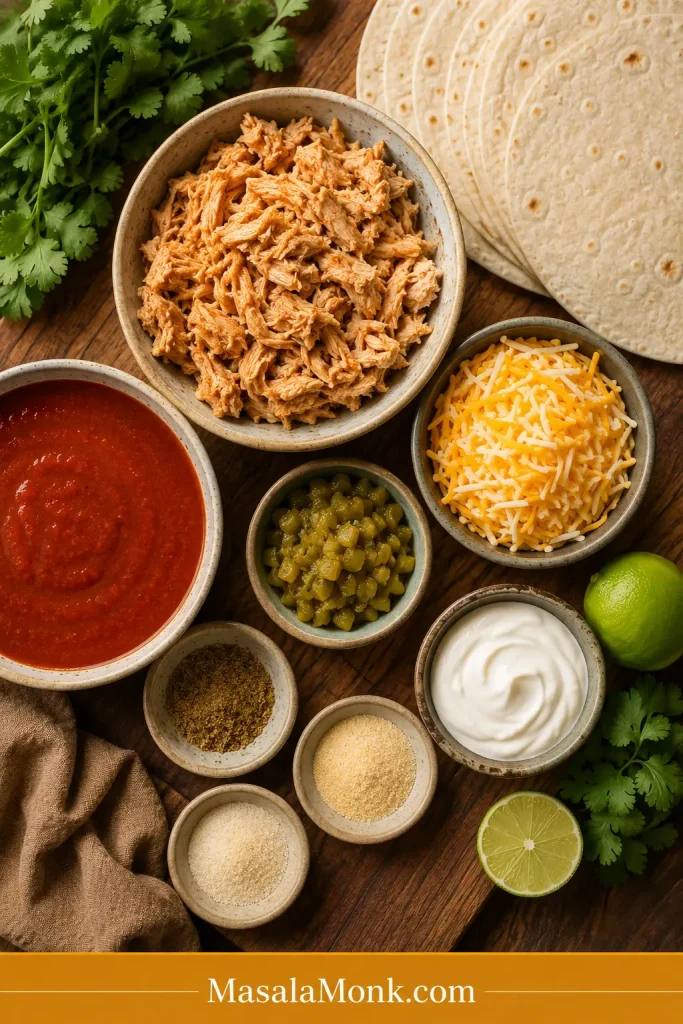
4 large flour tortillas, about 10 inches / 25 cm each
120 g / 4.2 oz Monterey Jack, grated
80 g / 2.8 oz sharp cheddar, grated
2 tsp / 10 ml neutral oil for the skillet, used a little at a time
Equipment
12-inch skillet preferred
Wide spatula
Cutting board and sharp knife
Instant-read thermometer if starting with raw chicken
Box grater, optional
A smaller skillet is fine for the quesadillas themselves. If raw chicken is crowded in your pan, cook it in two batches; otherwise it sheds water faster than the pan can get rid of it.
Cook the Chicken
Starting With Raw Chicken
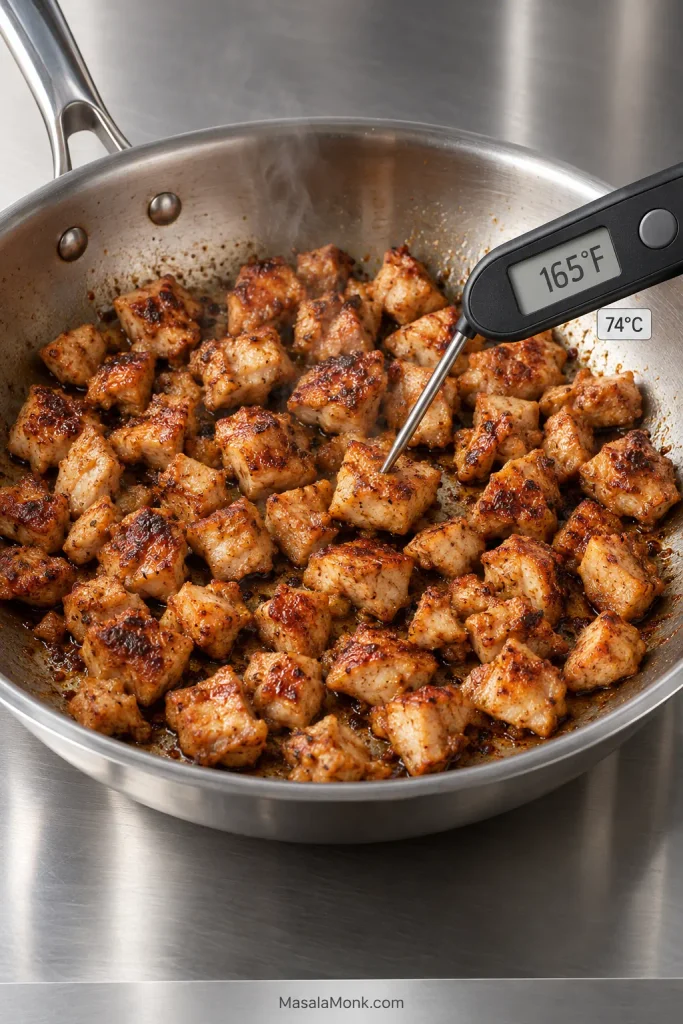
Cook it. Toss the chicken with the seasoning blend and salt. Heat 1 tbsp / 15 ml oil in the skillet over medium-high heat, add the chicken in an even layer and cook until browned in places. Start checking around the 5-minute mark; the largest pieces should reach at least 165°F / 74°C.
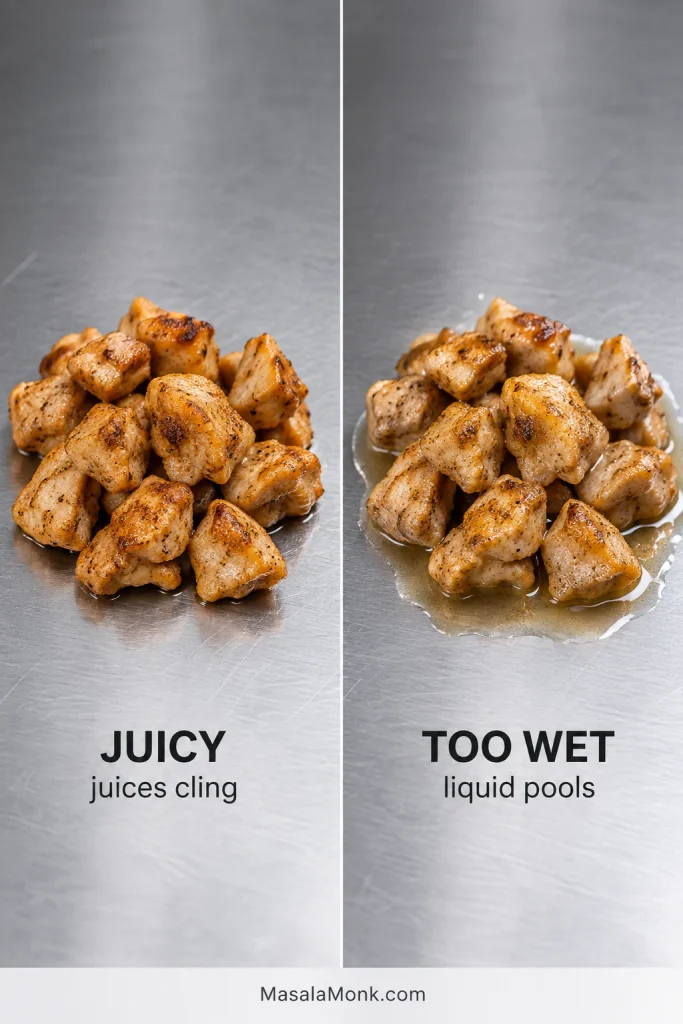
Finish it. Add 2 tsp lime juice and taste a piece. Add the final teaspoon if you want more acidity, then move the chicken to a plate. Juices clinging to the pieces are fine; a puddle of liquid is not.
Check one of the largest pieces rather than the smallest browned ones. The center should reach at least 165°F / 74°C.
Raw chicken doesn’t always lose exactly the same amount of moisture as it cooks. If you end up with a little more than the 320–340 g needed for four quesadillas, don’t force it in; a little extra chicken is better than an overfilled tortilla.
Starting With Cooked or Rotisserie Chicken
Warm it gently in the skillet over medium heat. Plain leftover chicken can take roughly half the seasoning blend; rotisserie, grilled or fajita chicken may need almost none. A spoonful of water helps genuinely dry meat, but let visible liquid disappear before assembly. Finish with lime and give it one last taste.
With rotisserie chicken, remove the bones first. Crisp pieces of skin are welcome; large soft pieces of fatty skin tend to make the filling greasy.
A sheen that clings to the chicken is useful moisture. Liquid that runs away and pools underneath is what can soften the tortilla.
Assemble and Cook
Assemble the Filling
Mix the cheeses. Use 50 g / 1.75 oz for each quesadilla.
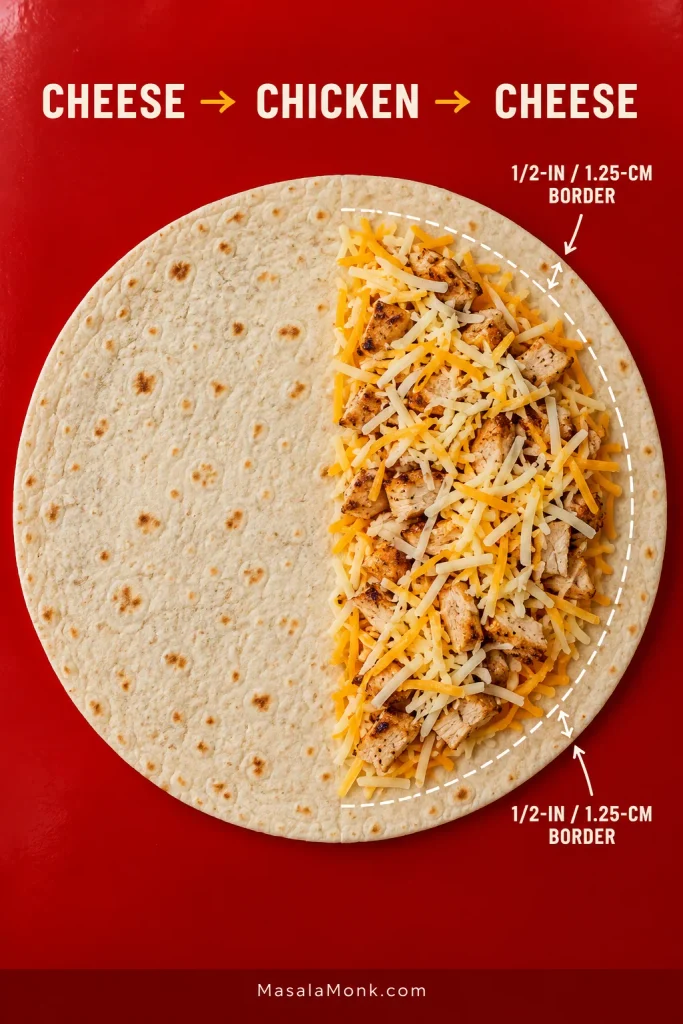
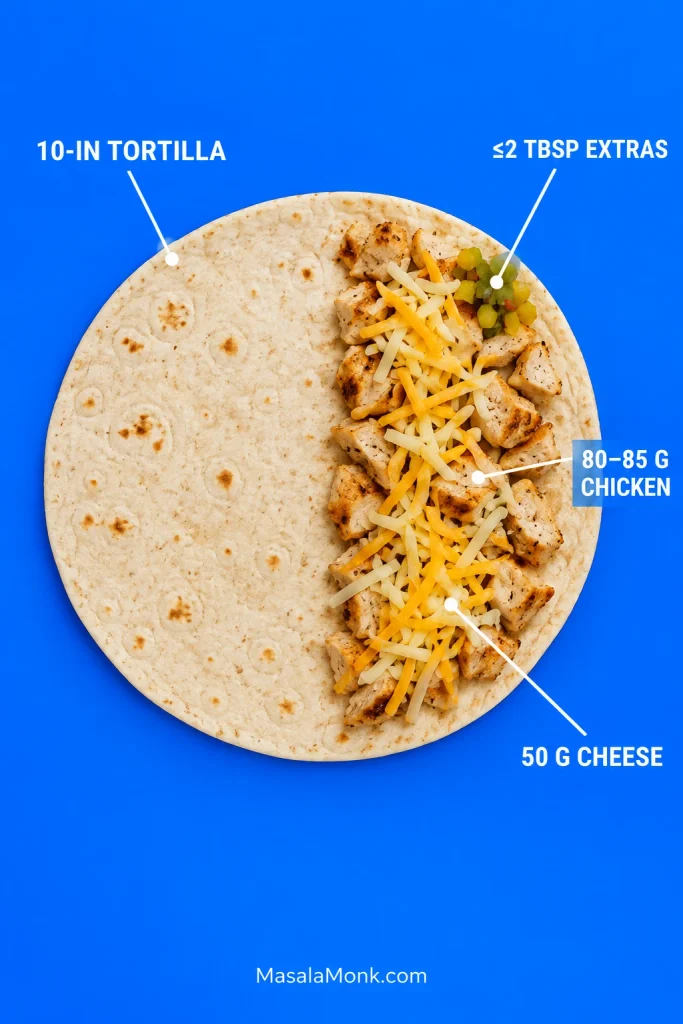
Build one half of the tortilla. Scatter 25 g cheese over one half, stopping roughly ½ inch / 1.25 cm from the edge. Add 80–85 g cooked chicken and finish with another 25 g cheese. Fold the tortilla over and press gently.
Cheese on both sides of the chicken melts into a kind of glue, helping the filling stay together when the quesadilla is flipped.
Cook and Flip
Heat the skillet over medium. Wipe away any dark seasoning left from the chicken, then spread ½ tsp / 2.5 ml oil into a thin film.
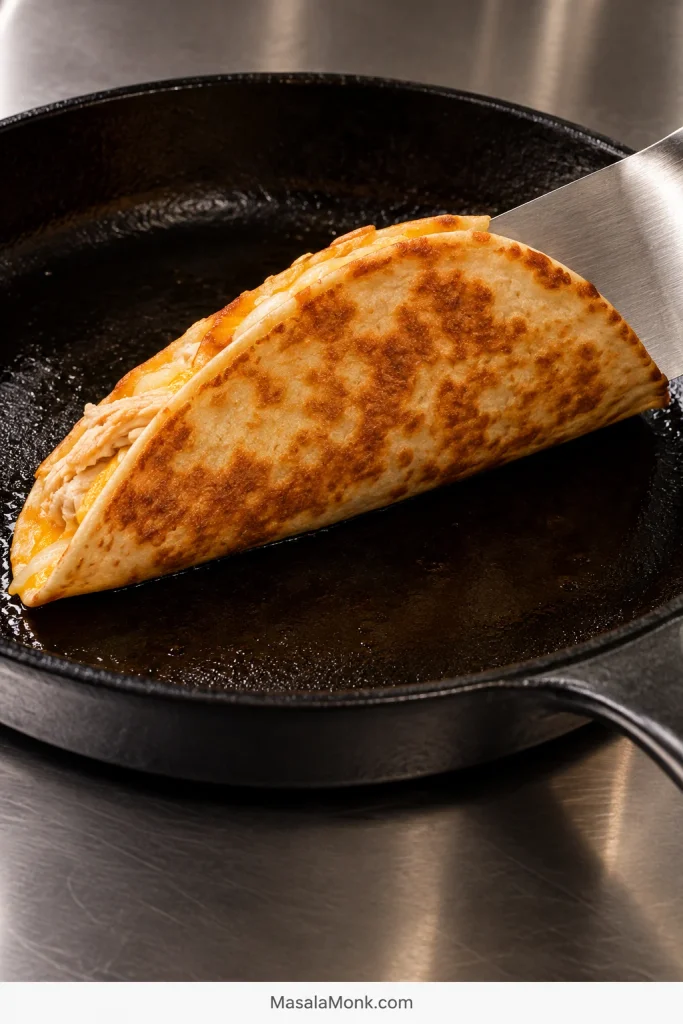
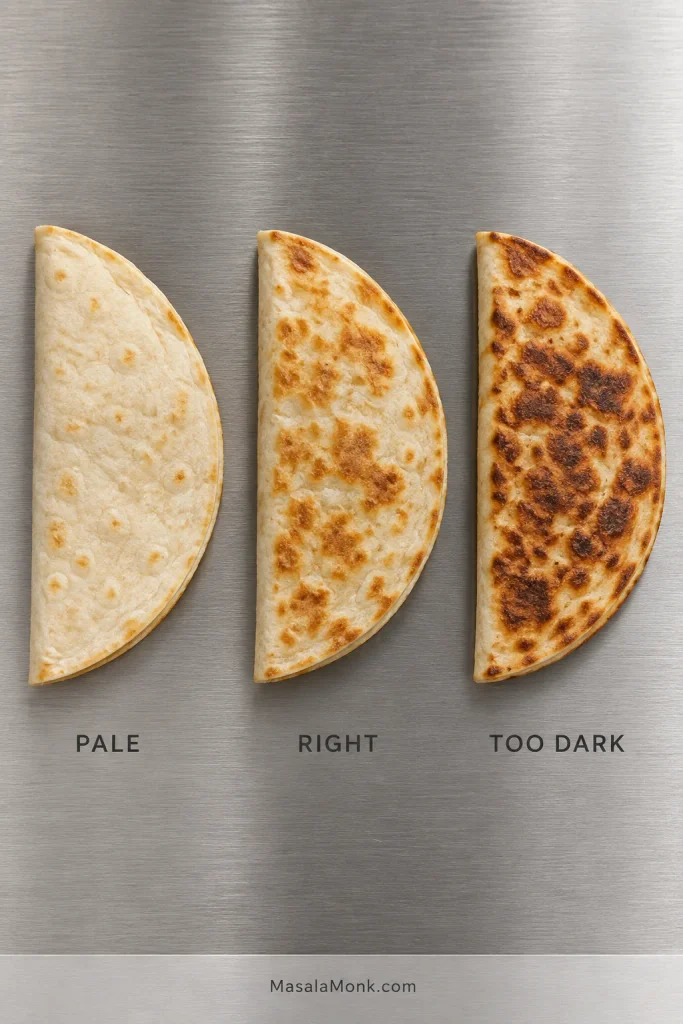
Cook the first side for 2–3 minutes. Lift an edge with the spatula. You want broad golden patches underneath while the cheese near the fold begins to soften and look glossy. By now the tortilla should smell properly toasted, not scorched.
Broad golden mottling matters more than perfect color. Some pale tortilla can remain when the first side is ready to flip.
Let the first quesadilla set the heat for the batch. It doesn’t have to be perfect. Dark tortilla with firm cheese? Turn the heat down. Still pale after several minutes? Nudge it up. The next three will be easier.
Flip and cook another 1–2 minutes, until the second side is golden and the cheese has melted. A little cheese escaping and crisping against the tortilla is one of the good bits; leave it there.
Rest for 1–2 minutes before cutting. Repeat with the remaining quesadillas, wiping dark cheese or seasoning out of the skillet when necessary.
Thin, lacy and amber is the good escaped-cheese edge. Wipe the skillet only when the residue turns dark or bitter.
How Much Chicken and Cheese Goes in One Quesadilla?
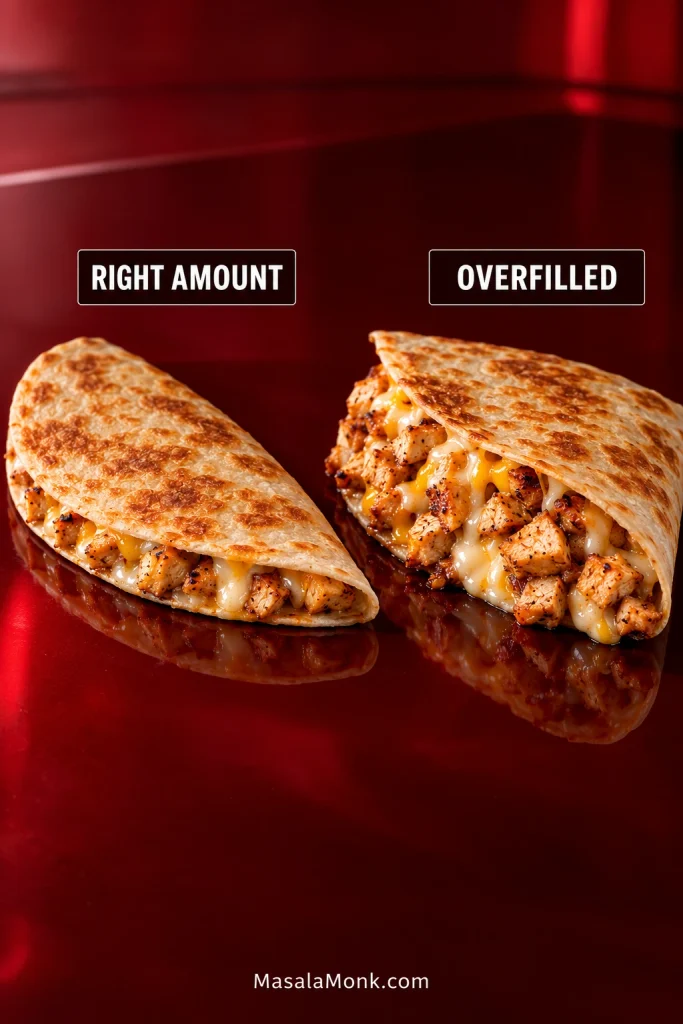
For a 10-inch / 25-cm tortilla, 80–85 g cooked chicken and 50 g cheese is a reliable starting point. A thick, overloaded center takes longer to heat and is harder to flip cleanly.
Aim for a thin, even half-moon of filling rather than a mound in the center.
Tortilla
Cooked chicken
Cheese
Extra filling
10 in / 25 cm
80–85 g / about 3 oz
50 g / 1.75 oz
Up to about 2 tbsp total
8 in / 20 cm
55–65 g / about 2 oz
35–40 g / about 1.25–1.4 oz
About 1 tbsp total
If the tortilla is difficult to fold or chicken is already falling out before it reaches the pan, take some filling back out.
Fold before cooking. If the tortilla settles naturally, the filling is manageable; if it springs open or spills, take some out.
Choosing the Chicken, Cheese and Tortillas
Chicken breast is quick and easy to cut small; thigh gives softer, richer bites and is a little harder to dry out. Shredded chicken spreads into a thin layer and catches more melted cheese, while chopped chicken feels meatier. Either works as long as the pieces are small enough for the folded tortilla to sit flat.
Whole breasts work too. This baked chicken breast method can be sliced or shredded after resting. Canned chicken works in a pinch; drain it very well and taste before seasoning because the salt varies from brand to brand.
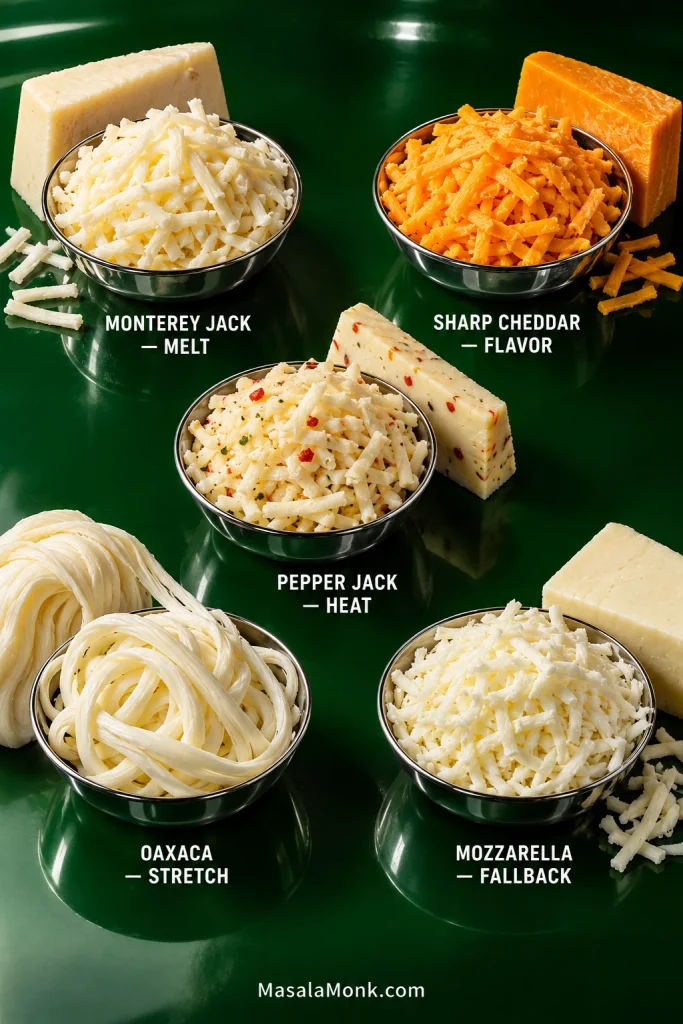
For chicken quesadillas, Monterey Jack and sharp cheddar are the best all-around combination here. Jack melts smoothly around the chicken, while cheddar gives the quesadilla a sharper, fuller flavor. Pepper Jack is the easy swap when you want more heat. Oaxaca is excellent for stretch, and low-moisture mozzarella with cheddar is a useful fallback rather than the first choice.
Freshly grated cheese melts a little more smoothly, but the bag in the fridge works perfectly well. A fresh 10-inch / 25-cm flour tortilla is the easiest size to handle here; smaller flour tortillas need less filling, while homemade corn tortillas work better as smaller quesadillas than as overloaded ones.
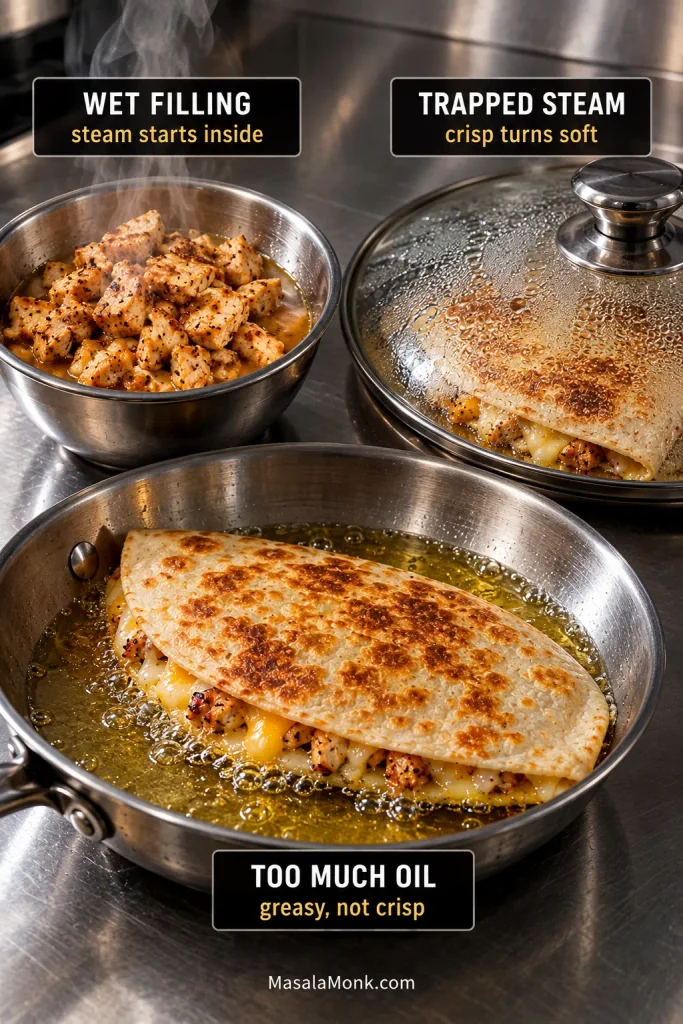
Why Chicken Quesadillas Go Soggy
Wet filling and trapped steam are the main reasons quesadillas turn soggy. Too much pan fat or badly matched heat can also keep the tortilla from crisping properly.
If the tortilla never crisps, suspect wet filling or excess oil. If it starts crisp and later softens, trapped steam is more likely.
Moisture matters most. Chicken can be juicy without sitting in liquid. Let reheating juices cook away and drain vegetables before they go inside. Leftover Slow Cooker Chicken Fajitas, for example, make an excellent filling once the loose cooking juices are left behind.
Watch the pan too. A thin sheen of oil is enough; nonstick may need less or none. Medium heat gives the cheese time to melt while the tortilla develops those toasted golden patches. You shouldn’t have to choose between a burnt outside and a cold center.
Steam does its damage after cooking. Stack hot quesadillas under foil or seal them in a container straight from the skillet and that crisp surface starts softening almost immediately. Give them some air until it’s time to eat.
Add-Ins Without Losing the Crispness
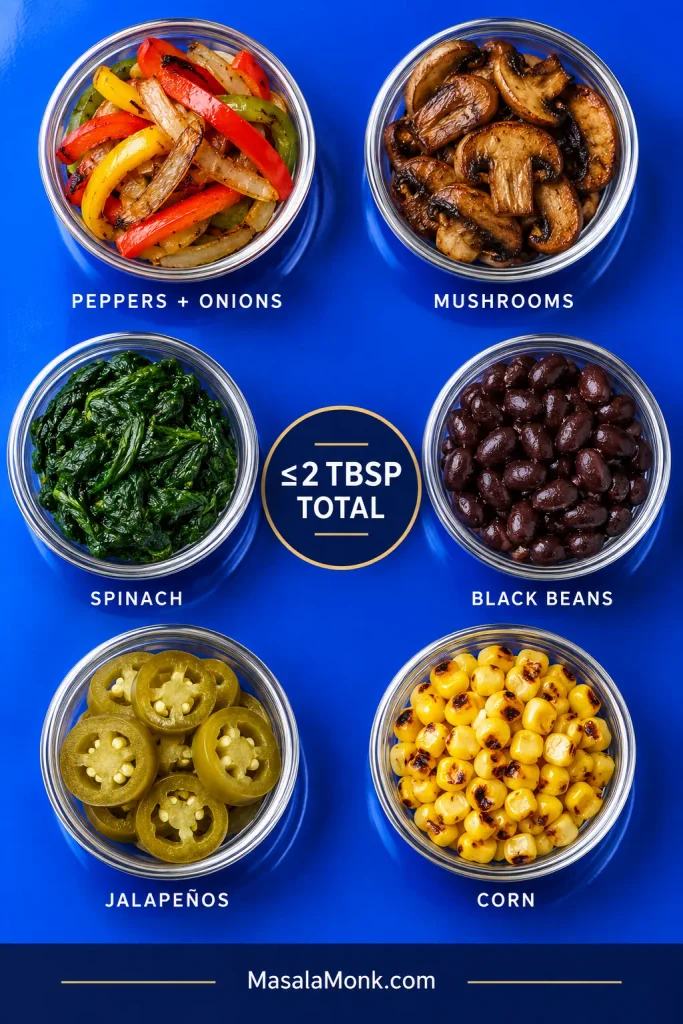
Chicken and cheese are already enough. If you add anything else to a 10-inch quesadilla, keep the extras to roughly 2 tablespoons total and get rid of excess moisture before they go inside.
Peppers and onions: sauté until tender and no longer wet.
Mushrooms: keep cooking until their released water has evaporated.
Spinach: wilt, cool and squeeze well.
Black beans: drain, rinse and dry.
Pickled jalapeños: drain before chopping.
Salsa: use a thick salsa sparingly, or leave it for dipping.
Prepare add-ins before measuring them; draining, browning or squeezing out water makes the 2-tablespoon limit much more meaningful.
Corn is better drained well or briefly charred. Add avocado after cooking or serve it alongside. Leftover Sheet Pan Chicken Fajitas also make a fuller filling; just leave the pan juices behind.
Fix My Quesadilla
Find the problem that looks most like yours:
What happened?
Likely cause
What to change
Dark tortilla, firm cheese
Pan too hot, filling too cold or quesadilla too thick
Lower the heat, warm cold chicken first or use less filling.
Pale and floppy
Too little heat or poor pan contact
Raise the heat slightly and make sure the tortilla sits flat.
Soggy straight from the pan
Wet filling
Cook or drain away loose liquid before assembly.
Crisp at first, then soft
Trapped steam
Don’t stack or tightly cover hot quesadillas.
Dry chicken
Overcooked meat or dry leftovers
Cook raw chicken to at least 165°F / 74°C in the largest pieces. Warm dry leftovers gently with a spoonful of water.
Bland filling
Chicken needed more seasoning
Fix the seasoning on the chicken before assembly rather than trying to repair the whole quesadilla later.
Greasy tortilla
Too much pan fat
Use only a thin film of oil.
Chicken falls out
Too much filling
Reduce the amount and keep cheese on both sides of the chicken.
Cheese runs out when sliced
Cut immediately from the skillet
Rest for 1–2 minutes first.
Tortilla cracks
Cold, dry or stale tortilla
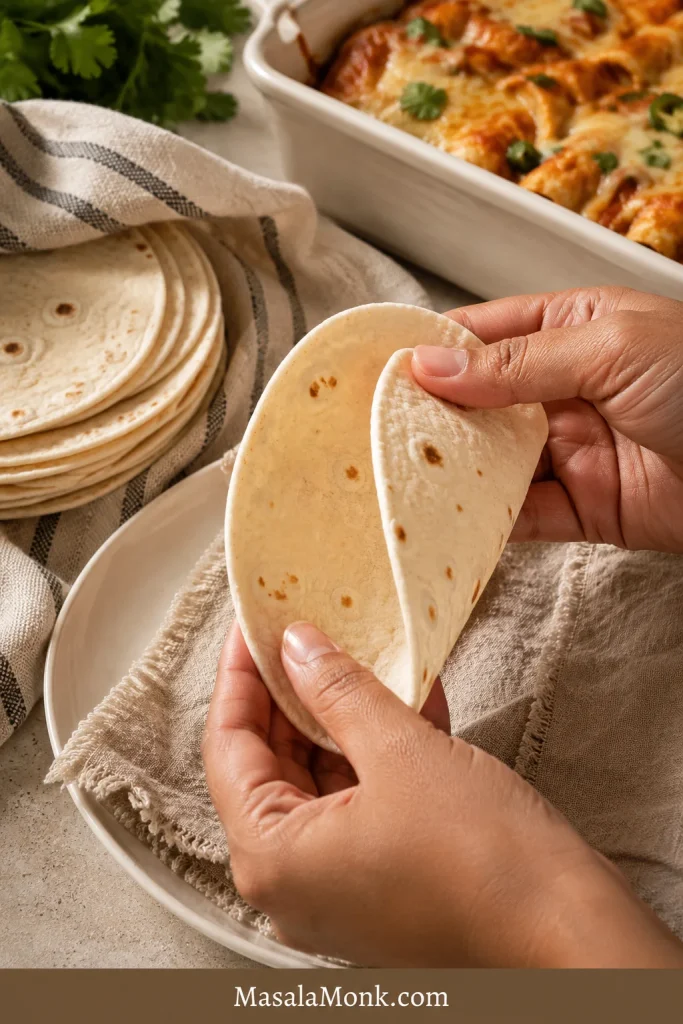
Warm it briefly or use a fresher tortilla.
Later batches taste burnt
Cheese or seasoning scorching in the skillet
Wipe away dark residue between batches.
The target is mottled gold, not uniform brown; chasing one even color can overcook the darkest spots.
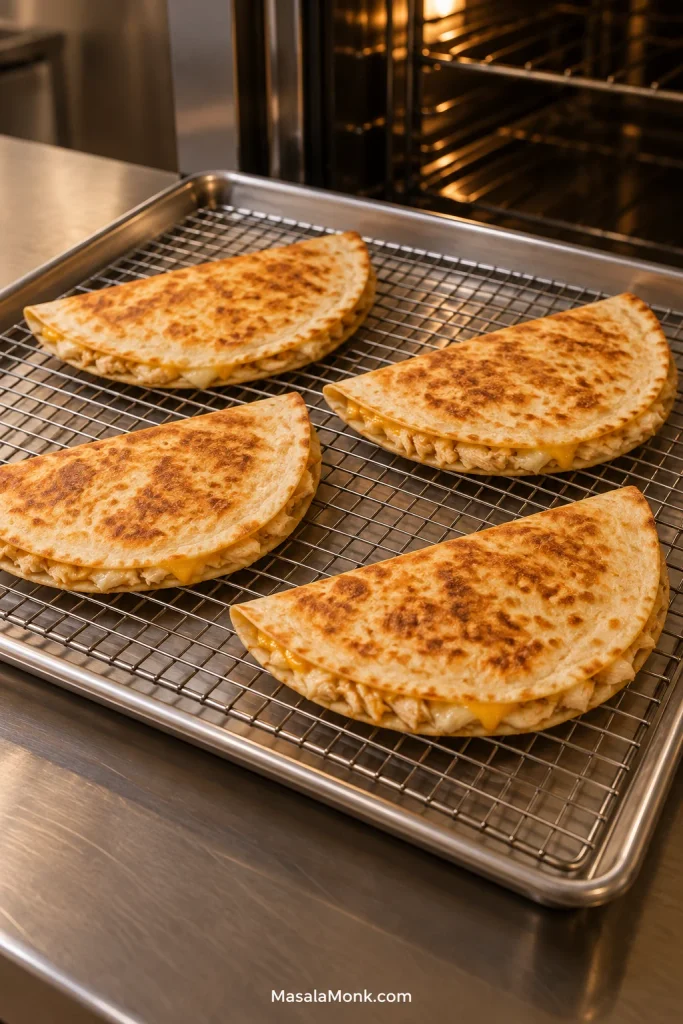
Cooking several for the table? Keep finished quesadillas in a single layer in a 200°F / 95°C oven, ideally on a wire rack over a baking sheet so steam can escape underneath. They are best eaten within 15–20 minutes. While the last one cooks, there is enough time to warm a quick side such as these Refried Beans From a Can.
A wire rack lets steam escape underneath, where condensation would otherwise soften the crust first.
Store and Freeze
For make-ahead cooking, keep the chicken and cheese separate and assemble fresh. Cooked quesadillas can cool briefly so they aren’t pumping steam into the container, then should be refrigerated promptly—and within two hours of cooking. USDA guidance gives cooked leftovers about 3–4 days in the refrigerator.
For freezing, refrigerate the quesadillas until cold first. Then freeze them in a single layer until firm and wrap individually or separate with parchment. Thaw frozen quesadillas overnight in the refrigerator before reheating.
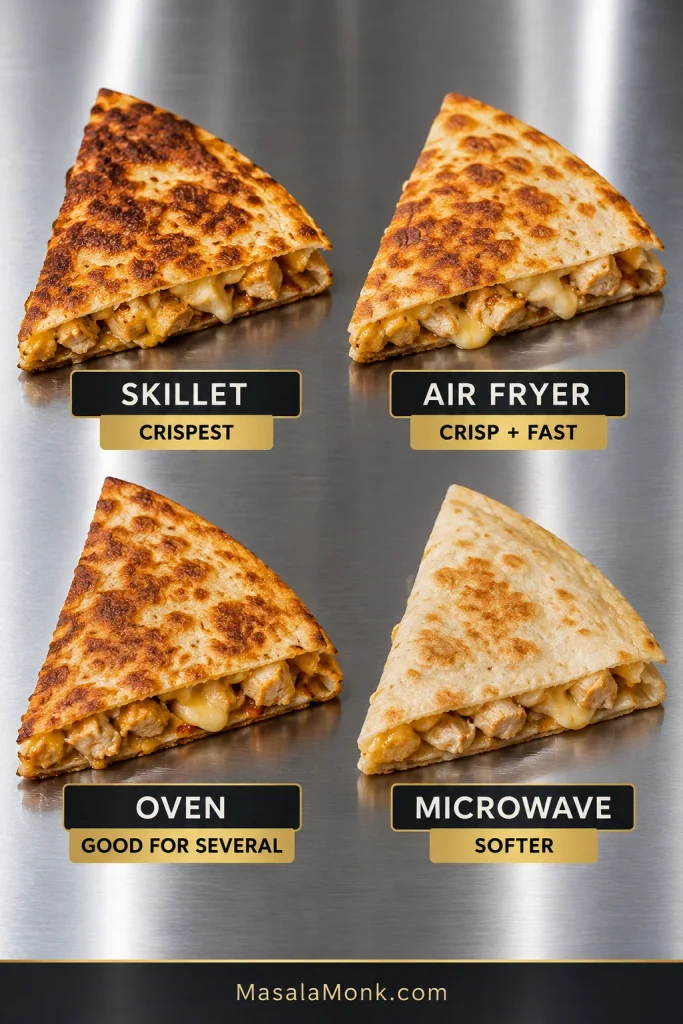
Reheat Chicken Quesadillas
For refrigerated leftovers:
Skillet: medium-low heat; start checking after 1–2 minutes per side. This gives the best chance of restoring the crisp tortilla.
Air fryer: 350°F / 175°C; start checking around 3 minutes.
Oven or toaster oven: 350°F / 175°C; start checking around 7–8 minutes.
Microwave: fastest, but soft. A brief microwave warm-up followed by a minute or two in a skillet works better.
Whichever method you use, reheat chicken leftovers thoroughly to 165°F / 74°C in the center.
What to Serve With Chicken Quesadillas
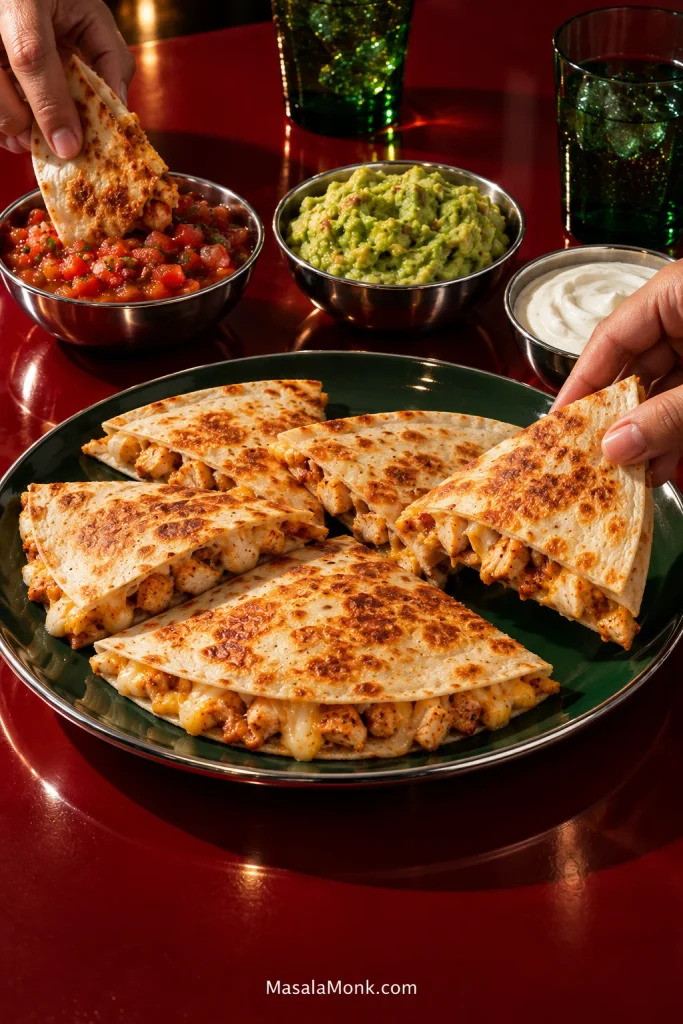
Something cool, fresh or acidic is all the hot cheese and toasted tortilla really need. Pico de gallo, fresh guacamole, sour cream, beans, corn salad or a crisp slaw all work well.
For more bite, dip the hot wedges into this roasted Salsa Verde. The cool, sharp salsa against melted cheese is a better finish than putting more wet filling inside the tortilla.
Quick Lime Sauce
Stir ½ cup / 120 g sour cream or thick Greek yogurt with 1 tbsp / 15 ml fresh lime juice and a pinch of salt. Add hot sauce, finely chopped pickled jalapeño or a little chipotle if you want some heat.
Give the quesadilla its short rest, then cut through it while the cheese is still soft. The edge should give a light crackle, the tortilla should be golden in broad patches, and the chicken should stay tucked inside instead of spilling across the board.
Get the salsa onto the table and eat it while the tortilla is still crisp.
A good taco casserole should still eat like tacos. You should get seasoned beef, tortilla, melted cheese and salsa in the same forkful without everything disappearing into one soft filling.
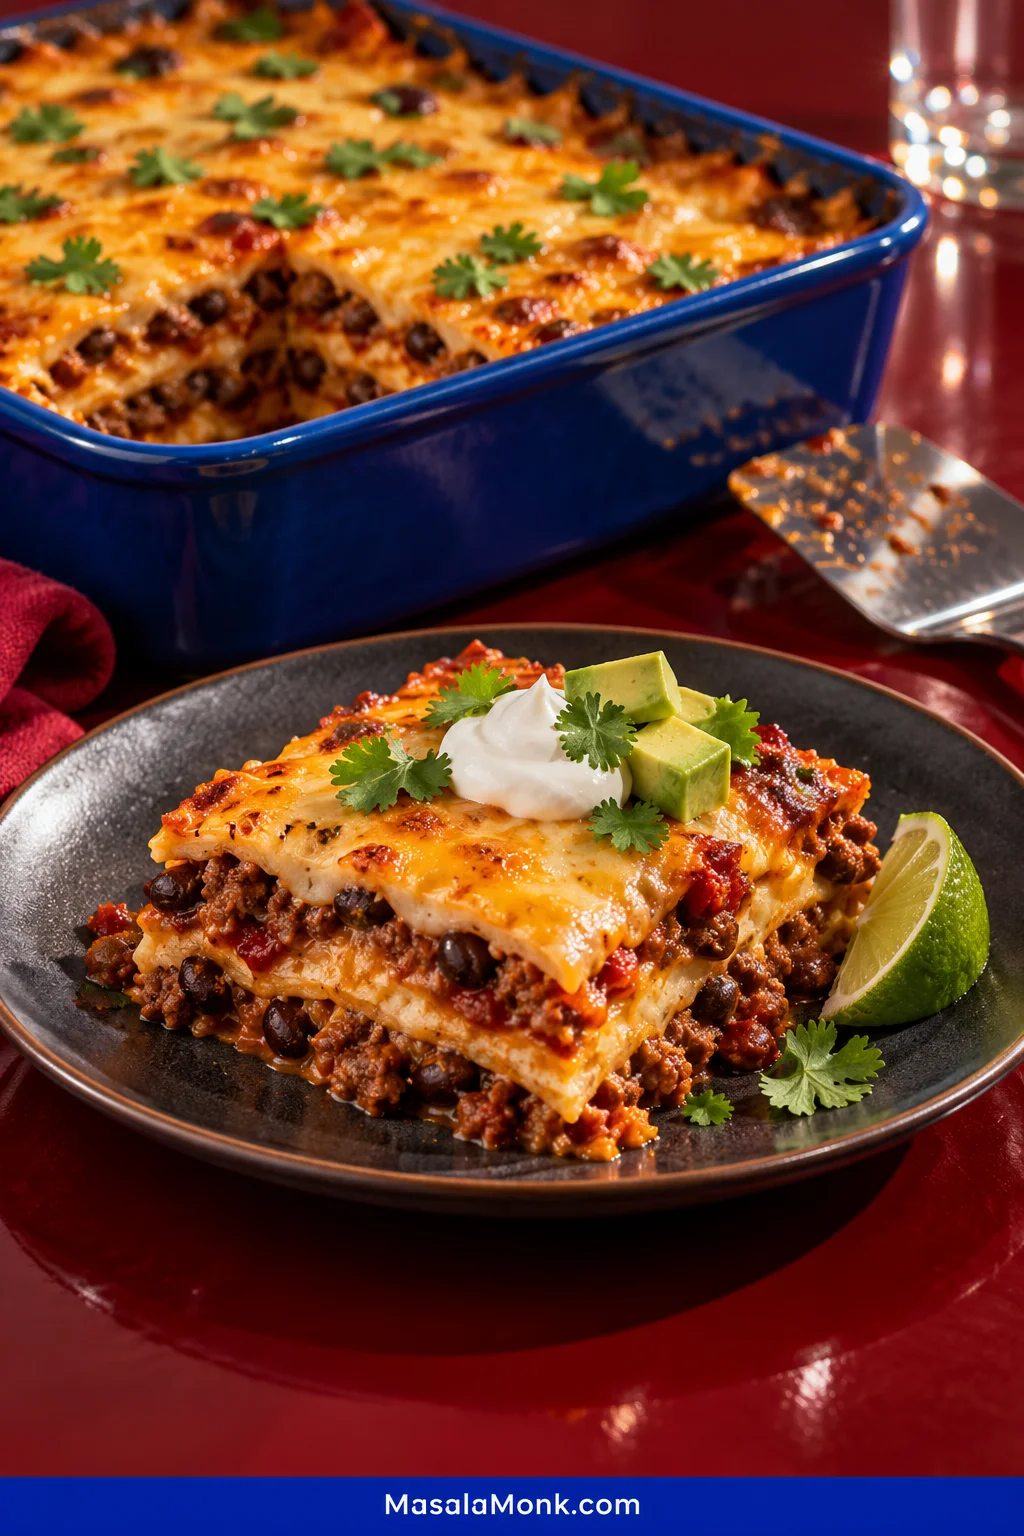
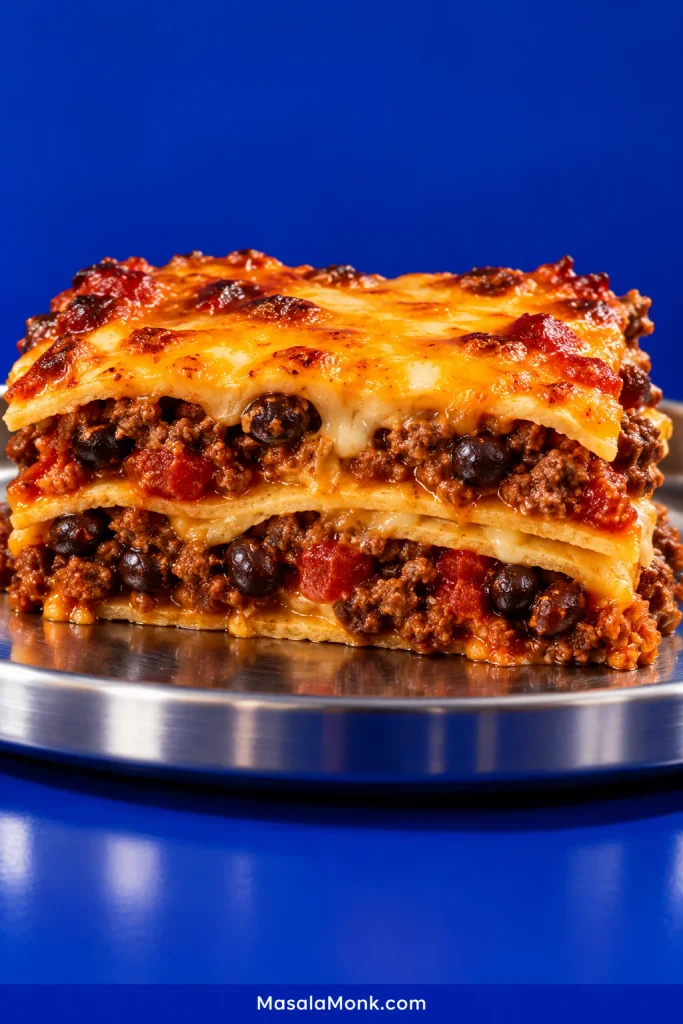
This is the layered tortilla version: ground beef and black beans stacked with tortillas and cheese in a 9×13-inch dish. Aim for fully melted cheese and visible layers; exposed tortilla edges may toast lightly.
Most of the judgment happens before the casserole reaches the oven. The beef and beans should be juicy and easy to spoon, but not swimming in salsa. Get the skillet right and the rest of the pan is forgiving.
Brown and season the beef, add black beans and thick salsa, and cook until the mixture is thick enough to scoop rather than pour. Build three layers of tortillas, beef-and-bean filling and cheese, then bake uncovered at 350°F / 175°C until the edges bubble and the cheese is fully melted.
Taco Casserole Recipe
Three layers of tortillas with seasoned beef, black beans and melted cheese, baked until bubbling around the edges.
PrepAbout 10–15 minutes
StovetopAbout 12–15 minutes
BakeAbout 20 minutes
Rest5–10 minutes
TotalAbout 50–60 minutes
Yield8 pieces; about 6–8 servings
Pan: 9×13 in / 23×33 cm, roughly 3 qt / 2.8 L.
Ingredients
1 lb / 16 oz / 454 g ground beef, preferably around 85/15 or 90/10
1 medium yellow or white onion, finely diced, about 1 cup / 130–150 g
2 tbsp + 1 tsp / about 19 g MasalaMonk homemade taco seasoning, plus more to taste, or store-bought taco seasoning intended for 1 lb / 454 g beef
16 oz / 454 g thick jarred salsa, mild, medium or hot
1 can black beans, 14–15 oz / 400–425 g before draining, drained and rinsed well
6 large flour tortillas, about 10 inches / 25 cm across
8 oz / 225 g shredded cheese, roughly 2 cups; cheddar, Monterey Jack, Colby Jack or a Mexican-style blend all work
For Serving
Sour cream or plain Greek yogurt
Diced tomato or fresh pico de gallo
Shredded lettuce
Avocado or guacamole
Chopped cilantro or sliced green onion
Lime wedges
Crushed tortilla chips, Fritos or Doritos, if you want extra crunch
Using our homemade taco seasoning? The Taco Seasoning for 1 lb Ground Beef recipe makes about 3 tbsp / 24 g. Start with 2 tbsp + 1 tsp here and keep the remainder nearby. Salsa and cheese bring their own salt, so taste before adding more.
Using a packet? Use the seasoning amount intended for 1 lb of beef, but don’t automatically add the water called for on the packet. The salsa provides the liquid here.
Method
1. Heat the Oven
Heat the oven to 350°F / 175°C. Lightly grease a 9×13-inch / 23×33-cm baking dish.
2. Brown the Beef
Heat a large skillet over medium-high heat. Add the beef and leave some of it against the hot pan long enough to pick up color before you start breaking it apart.
Cook until browned, leaving small crumbles. Add the onion and continue cooking until it softens and the beef reaches 160°F / 71°C.
Drain most of the rendered fat if a noticeable pool collects in the skillet. A light coating on the meat is fine.
3. Add the Seasoning, Salsa and Beans
Stir in the taco seasoning. Give it about 30 seconds in the hot beef and onion, just until the spices smell warmer and more fragrant.
Add the salsa and black beans. Lower the heat to medium and cook for about 4–6 minutes, stirring occasionally.
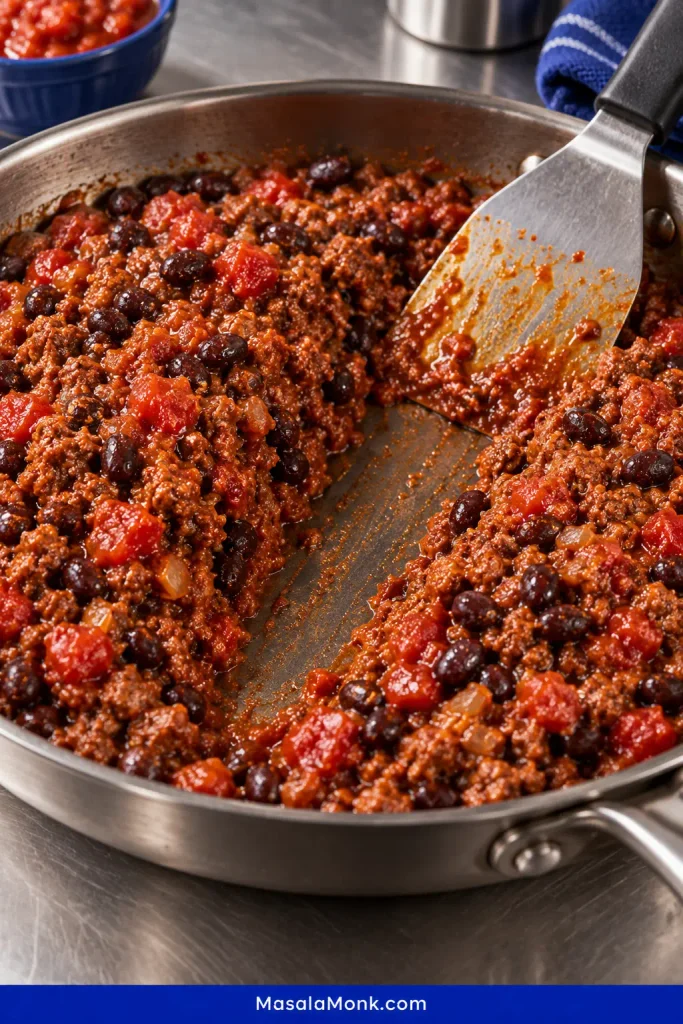
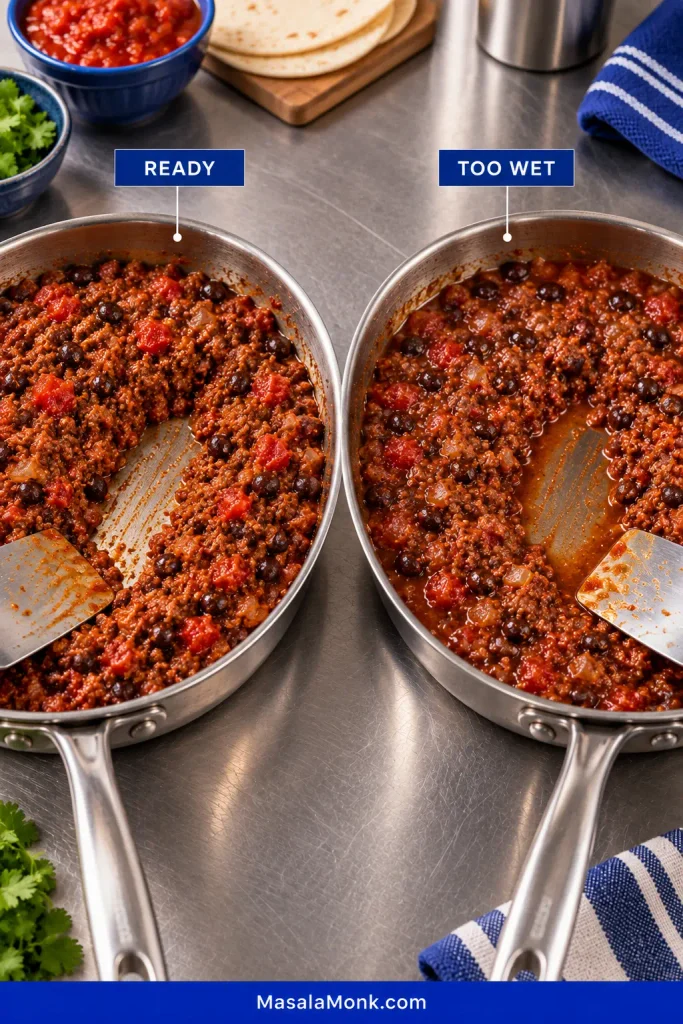
The beef and beans are ready when they slump from the spoon but do not run from it. Pull a spatula through the center of the skillet. The path should remain visible briefly before the mixture settles back.
Salsa can vary surprisingly much from jar to jar. That’s why this brief spatula channel is more useful than the clock: the filling is ready when loose liquid no longer rushes back in.
The meat should look glossy. Dry and crumbly means you’ve gone too far.
Taste before moving on. Add some of the reserved seasoning only if the beef needs it.
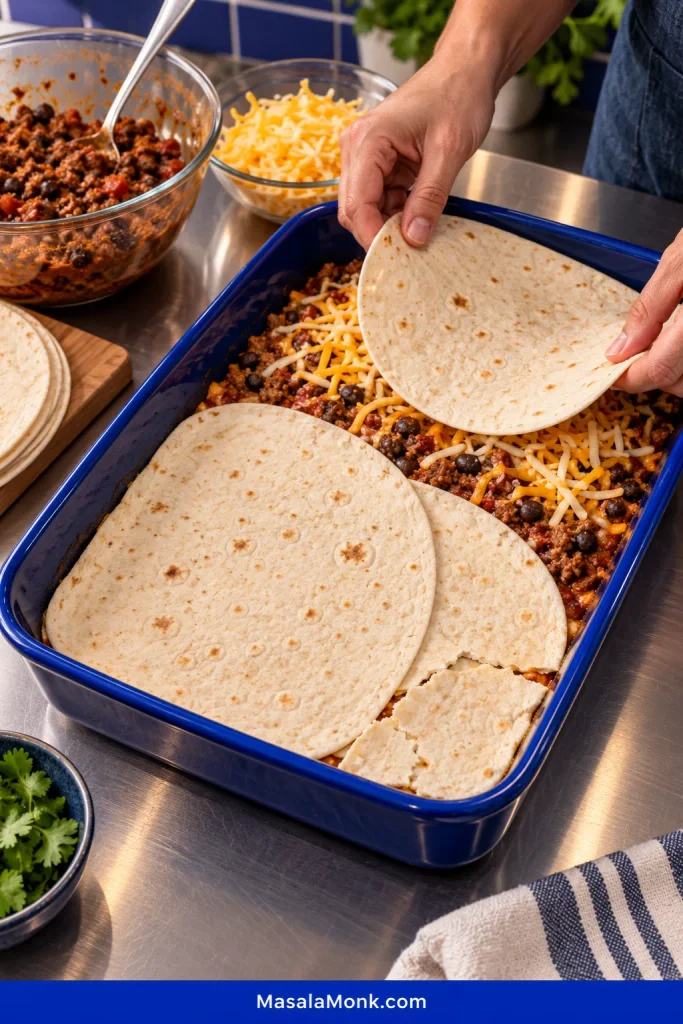
Lay 2 tortillas across the bottom of the dish, overlapping them through the middle. Let the rounded edges curve slightly up the sides. Don’t fuss over perfect coverage. If a large corner is bare, tear off a piece of tortilla, patch it and carry on.
Spread one-third of the beef and beans over the tortillas and add one-third of the cheese.
Add 2 more tortillas, another third of the meat and another third of the cheese.
Finish with the last 2 tortillas, the remaining beef and beans and the rest of the cheese.
The rough overlap disappears once the filling and cheese go on. What matters is avoiding large uncovered areas, not cutting tortillas into perfect rectangles.
Eyeballing the skillet into thirds before you start saves the final layer from getting whatever happens to be left.
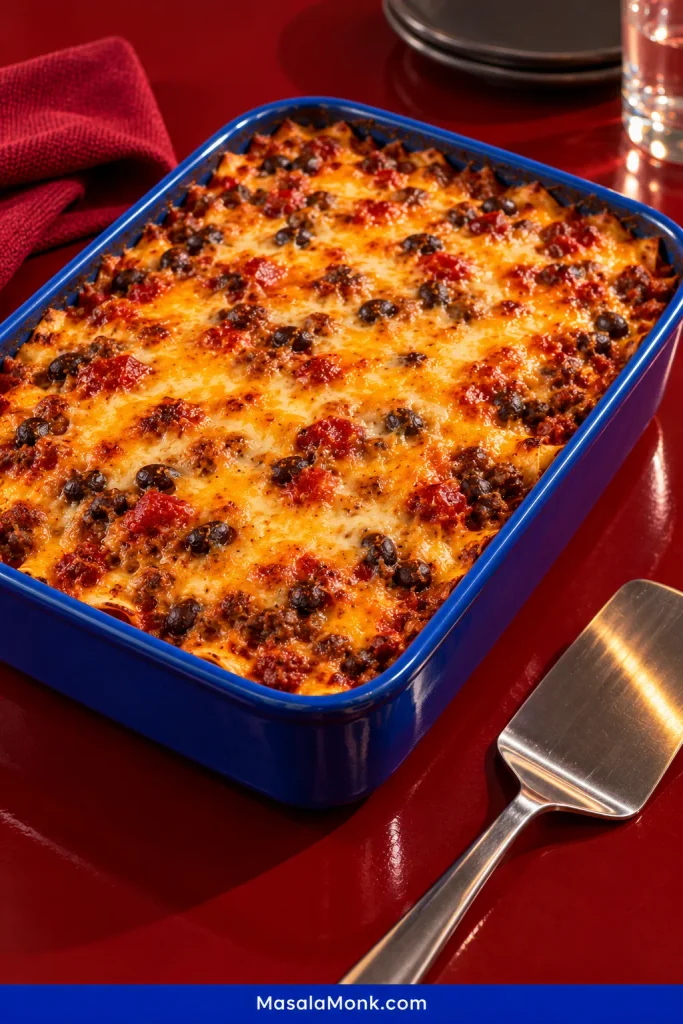
Bake uncovered for about 20 minutes, until several edges are bubbling and the cheese has melted completely. A few browned patches on top are a bonus; exposed tortilla edges may toast slightly.
6. Rest Before Cutting
Let the pan stand for 5–10 minutes. Five minutes works when everyone is ready to eat; closer to ten gives the cheese and meat more time to settle for cleaner pieces.
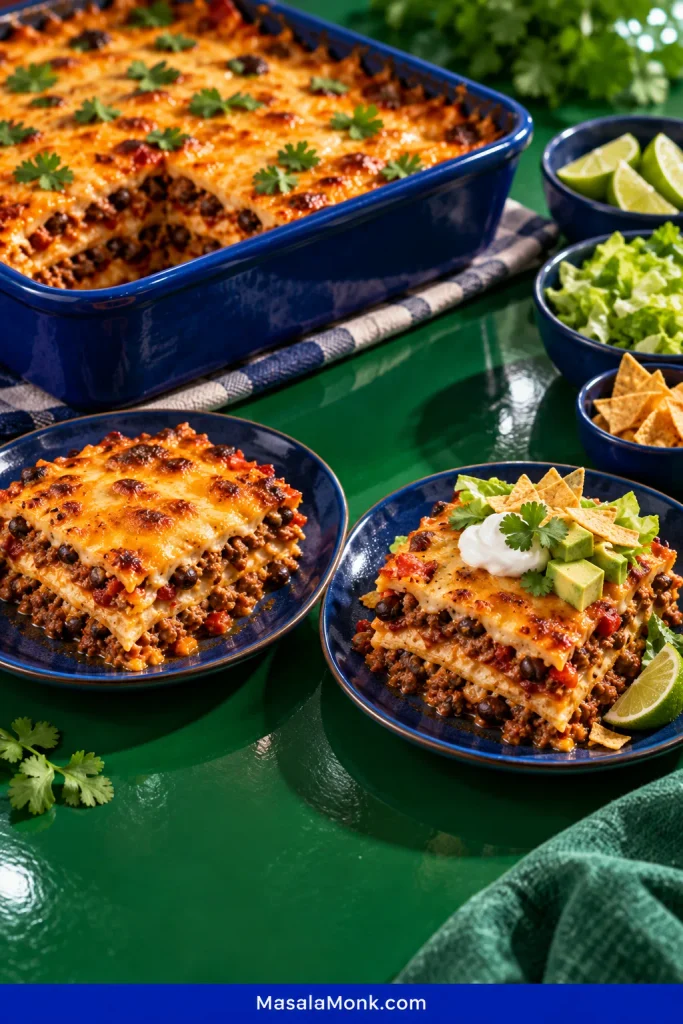
Cut into 8 squares and add the fresh toppings at the table.
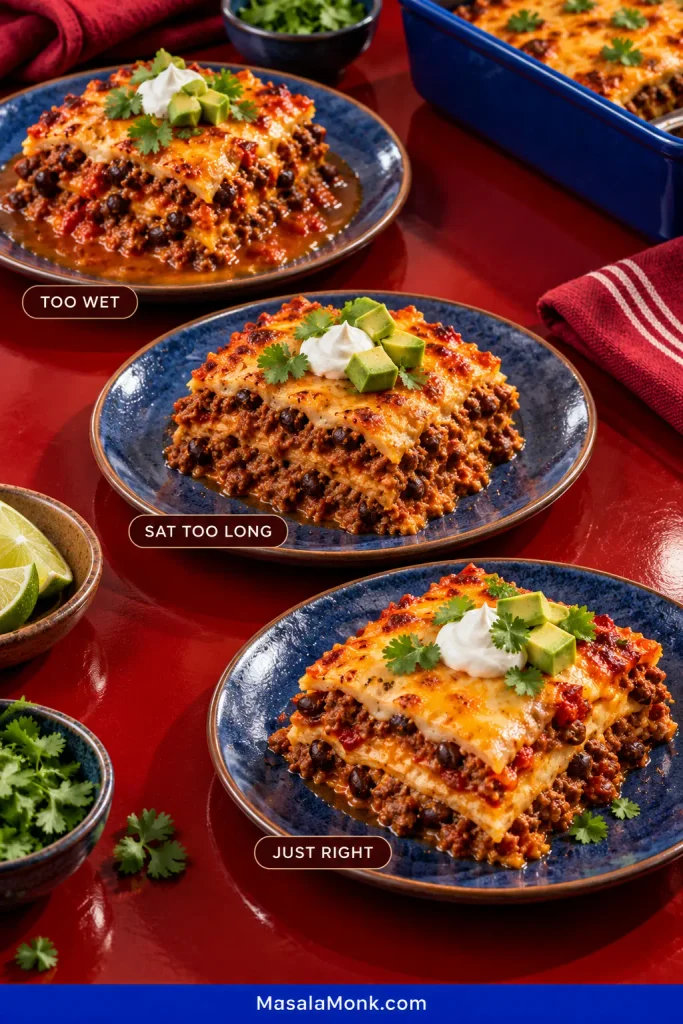
Visible tortilla layers are the proof that the filling stayed juicy without soaking the casserole.
Use thick salsa, drain the beans and any juicy add-ins well, and let loose liquid cook away before you start layering. Soft tortillas are part of the dish. A puddle around the first slice isn’t.
What matters is the liquid around the filling, not how glossy the beef looks. Extra salsa left in the skillet can soak the tortillas and collect around the first slice later.
Fresh pico usually needs more attention than a thick jarred salsa. Drain it well and simmer the beef longer, or keep the pico fresh and spoon it over the finished casserole instead.
The same principle applies to canned tomatoes, corn or vegetables that release water: deal with the excess before the mixture leaves the skillet.
Think saucy beef, not beef sitting in sauce. If liquid runs into a puddle when you tilt the skillet, give it another minute or two.
Corn vs Flour Tortillas
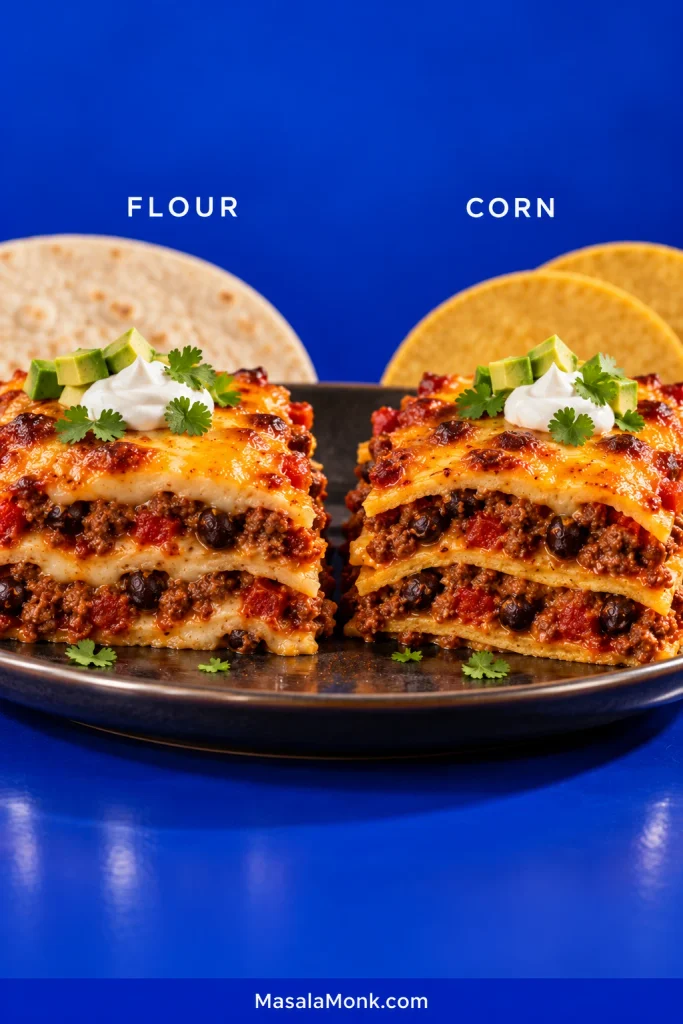
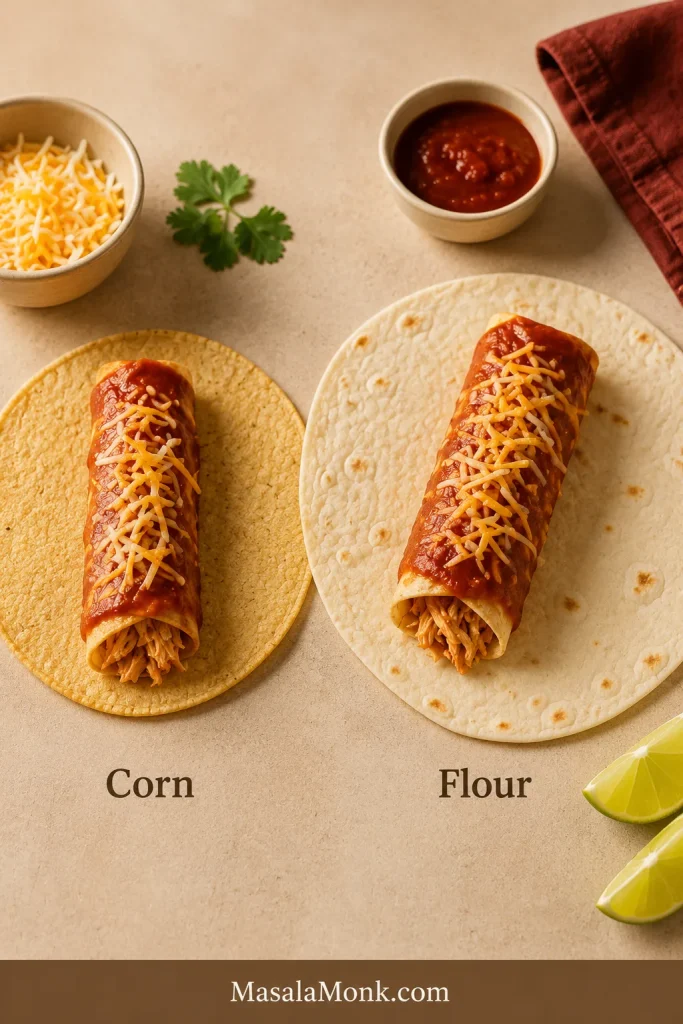
Flour tortillas give softer, more flexible layers; corn tortillas bring stronger corn flavor and usually remain more distinct between the beef and cheese.
Choose flour when you want the softest layers and the easiest fit in a 9×13 pan. Choose corn when stronger corn flavor and more noticeable tortilla layers matter more.
Corn tortillas may stay more noticeable between the layers, but they will not rescue an overly wet filling. The choice is mainly about tortilla texture and corn flavor.
Six large flour tortillas cover the pan easily. Corn tortillas are smaller, so you’ll need roughly 10–12, and warming them first helps them overlap without splitting.
Tortilla
What to expect
Large flour tortillas
A softer forkful and easy pan coverage
Small corn tortillas
More corn flavor and layers that stay more noticeable in each bite
Briefly griddled corn tortillas
A bit more resistance to the sauce, with an extra cooking step
A quick pass across a dry or lightly oiled skillet can give corn tortillas more structure. Stop while they’re pliable enough to overlap.
If you’re making them yourself, our Corn Tortilla Recipe covers masa hydration, pressing and how to keep cooked tortillas flexible.
Already Have Taco Meat? Start Here
Made taco meat yesterday? Use the amount cooked from about one pound of raw ground beef and skip the browning step.
A cup measurement isn’t especially reliable. Cooked ground beef changes volume depending on fat percentage, crumble size and how much sauce is already mixed through it.
Warm the meat with the beans, then add salsa gradually. You may not need the full jar if the leftovers are already saucy. Taste before adding more seasoning.
If those leftovers are headed back into individual tortillas instead, our Ground Beef Tacos Recipe is built for that job.
Taco Casserole Substitutions
You don’t need a different formula for every swap. The changes worth thinking about are the ones that affect moisture, salt or how quickly the meat dries out.
Change
What changes
Ground turkey or chicken
Both work, though lean poultry dries faster. Ground poultry should reach 165°F / 74°C.
Pinto beans
Use them just as you would black beans: drained and rinsed.
Up to 1 cup corn
Drain canned corn well, or thaw and dry frozen corn first.
Canned tomatoes or Rotel
Drain first, then cook until the extra liquid has reduced.
Refried beans aren’t a straight replacement for whole black beans; they make the layers much denser. For this version, I’d keep them on the side. Our Refried Beans from a Can recipe works well there.
Adjusting the Heat
A casserole can be plenty spicy and still taste flat. Before adding more chile, check whether it needs salt or acidity. Lime can do more for a dull bite than another spoonful of hot sauce.
For more heat, use hotter salsa, jalapeño, pepper Jack or hot sauce. Keeping some at the table makes dinner easier when people want different levels of spice. A spoonful of roasted salsa verde gives an individual serving a sharper, greener finish.
Pan Size, Half Batches and Double Batches
Full batch: 9×13-inch pan. Half batch: 8×8-inch pan. Double batch: two 9×13-inch pans.
For a half batch, keep the oven at 350°F and start checking around 15 minutes; a deeper or heavier dish may need closer to 20. For a double batch, two separate pans keep roughly the same layer depth and heat more predictably than one very deep casserole.
Make Taco Casserole Ahead
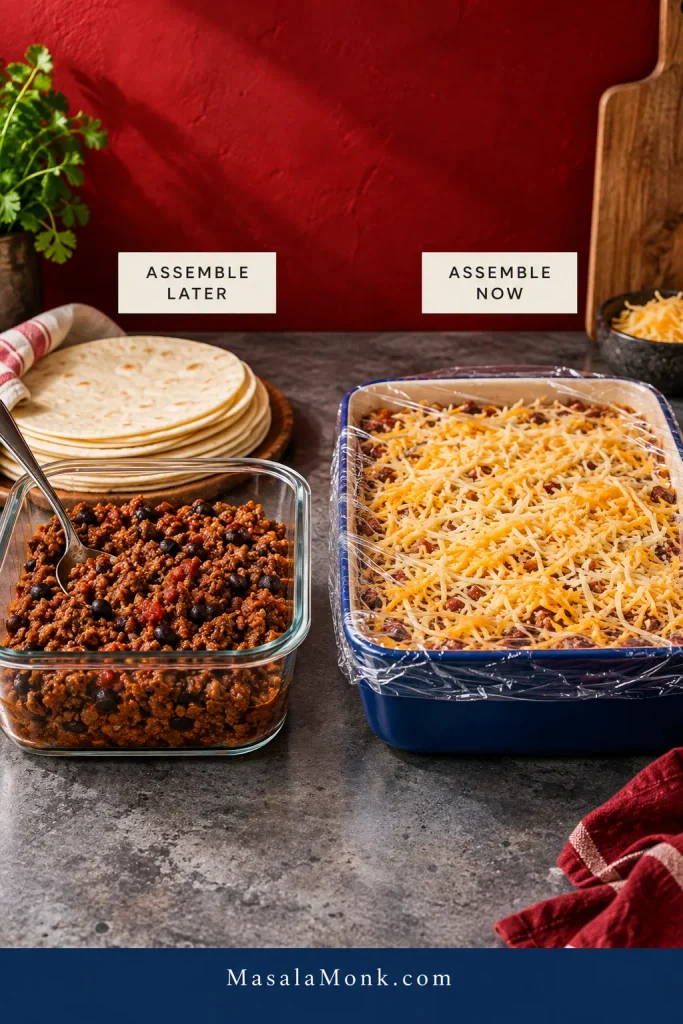
You can make taco casserole ahead, but there is a texture tradeoff. For firmer tortilla layers, cook the beef and beans up to 2 days ahead, cool them promptly and assemble the pan closer to baking.
The whole casserole can also be assembled up to 1 day ahead. It bakes well, but the tortillas will be softer after spending a night against the salsa.
An assembled-ahead pan trades some layer definition for convenience. Keeping the cooked filling separate preserves firmer tortillas without changing the recipe itself.
A refrigerator-cold casserole will take longer than a freshly assembled one. Bake at 350°F / 175°C until it is bubbling and hot through and the center reaches 165°F / 74°C.
Follow the bakeware manufacturer’s guidance before moving refrigerator-cold glass or ceramic into a hot oven.
Taco Casserole Toppings and Serving Ideas
The casserole itself is hot, rich and soft. Cool sour cream, sharp lime, avocado and a few crunchy chips change the whole bite once they meet the melted cheese and seasoned beef.
Use sliced avocado if that’s enough. For a fuller lime-onion-cilantro topping, add a spoonful of fresh guacamole.
Keep chips out of the oven if you want them crunchy. Twenty minutes under hot cheese and steam changes the deal.
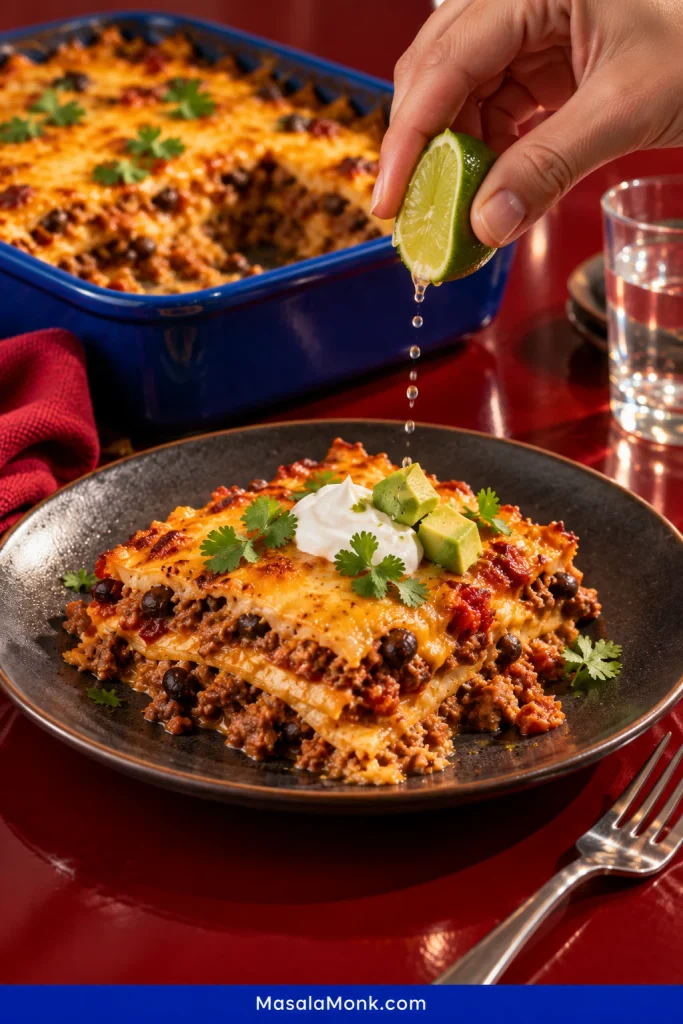
A squeeze of lime is especially useful on a hot first bite: the acidity cuts through the beef and melted cheese without making the casserole itself any heavier.
For the rest of the meal, contrast works better than piling on more richness. A crisp slaw, simple green salad, corn, or rice with plenty of lime all make more sense here than another heavy baked side.
Taco Casserole Troubleshooting
Most problems show up clearly once the first piece comes out. Use what the slice is doing to work backward to the cause.
Give the casserole its resting time before judging the first piece. After that, excess liquid, blurred tortilla layers or a clean, cohesive slice become useful clues rather than normal just-out-of-the-oven messiness.
Common Taco Casserole Problems and Fixes
What happened
Likely cause
What to do
Liquid gathers around the slice
The skillet mixture went into the dish too wet
Reduce it longer next time and use a thicker salsa.
Layers blur together but there isn’t a puddle
The assembled casserole sat too long before baking, so the tortillas absorbed more salsa
Assemble closer to baking when firmer tortilla layers matter.
First slice falls apart
It was cut while very hot
Give the pan 5–10 minutes before cutting. Expect the first piece to be the messiest one.
Casserole feels dry
The skillet reduced too far or the pan baked too long
Stop while the meat is glossy and pull the dish once the edges bubble and the cheese melts.
Beef feels pasty
It was broken very finely or simmered too long in salsa
Leave some small crumbles when browning and shorten the final simmer.
Casserole tastes too salty
Seasoning, salsa and cheese all contributed salt
Taste the skillet before adding more seasoning.
Hot enough but still bland
It may need salt or acidity rather than more chile
Check the salt and add lime at the table.
Chips turned soft
They baked in the steam
Add them after the casserole comes out.
Storage, Freezing and Reheating
How Long Does Taco Casserole Keep?
Refrigerate leftovers promptly and use them within 3–4 days. The tortillas will soften further overnight; that comes with storing a layered casserole.
Can You Freeze Taco Casserole?
Yes. For the best tortilla texture, cool individual portions, pack them airtight and use them within about 2–3 months. If texture matters more than convenience, freeze the cooked beef-and-bean mixture separately and assemble with fresh tortillas later.
How to Reheat Taco Casserole
Microwave: loosely cover an individual portion and reheat until the center reaches 165°F / 74°C.
Oven: cover several portions and reheat at 325–350°F / 165–175°C until the center reaches 165°F / 74°C. Uncover for the last few minutes if you want the cheese on top to dry slightly and melt again.
Add fresh toppings—lettuce, avocado, sour cream and chips—after reheating, not before.
Taco casserole is forgiving once what’s in the skillet is under control. The tortillas don’t have to line up perfectly, and the first square out of the dish may never look quite as tidy as the second.
Cut a generous piece while the cheese is soft, squeeze over a little lime and finish it at the table.
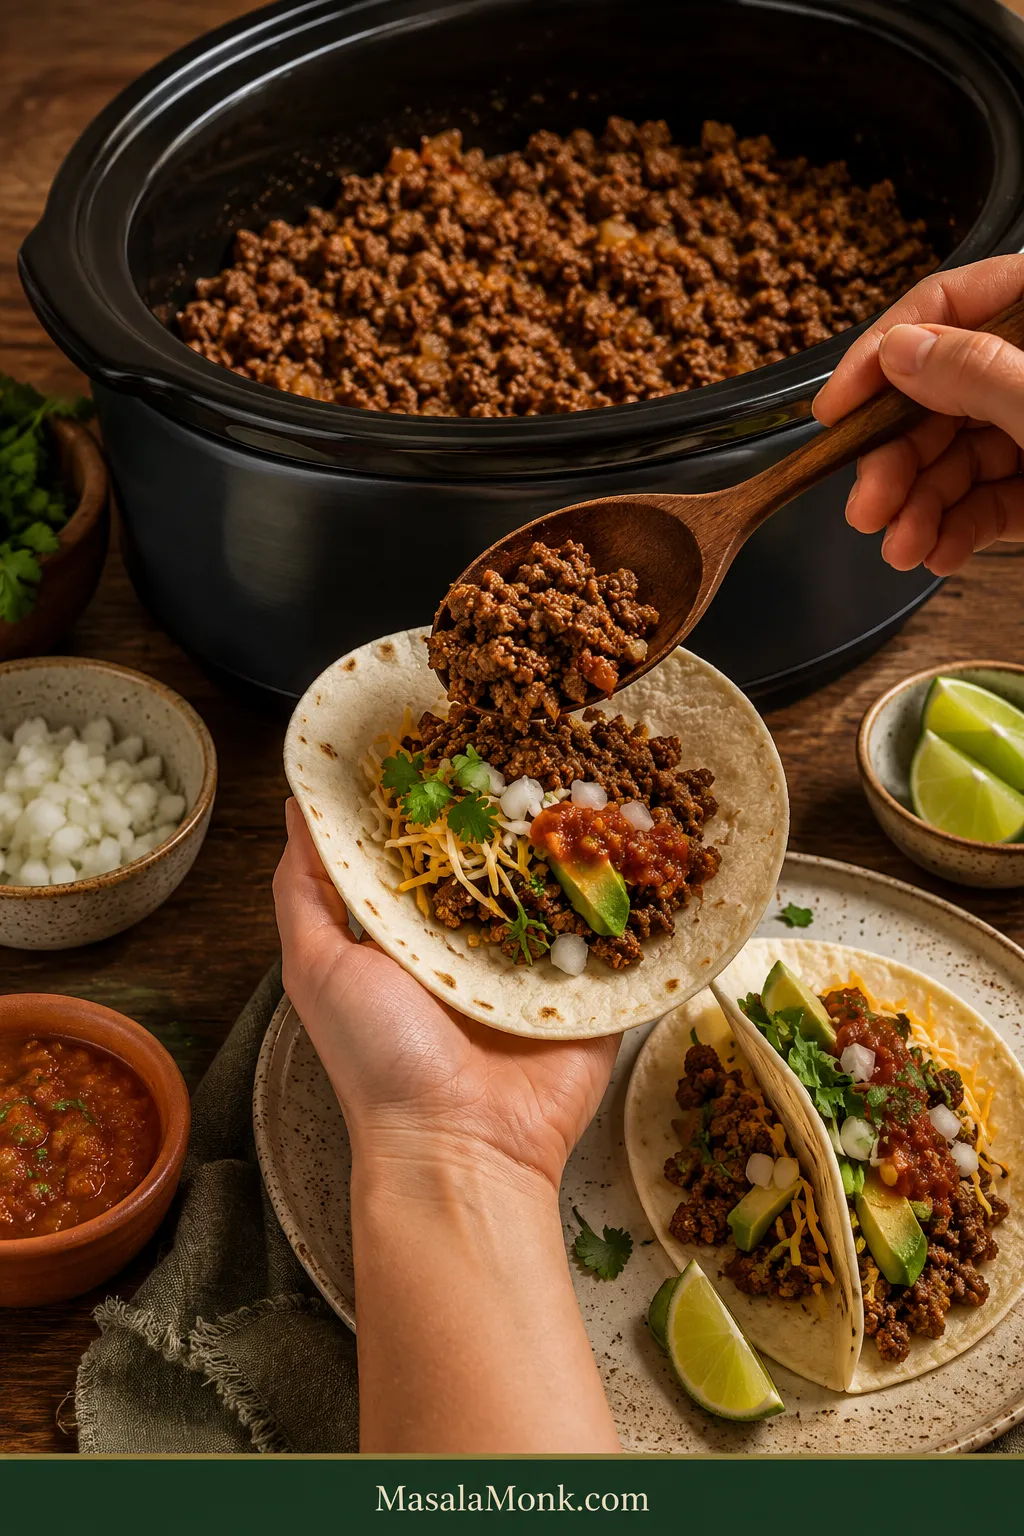
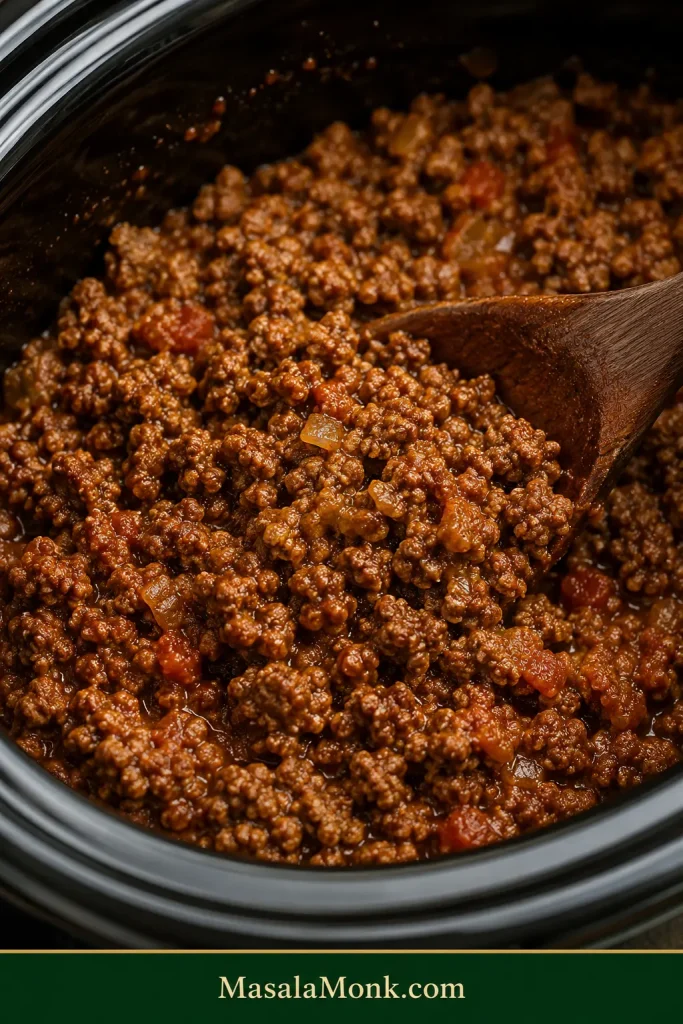
The best Crockpot taco meat has small, juicy beef crumbles coated in warm taco spices and tomato, ready to pile into soft tortillas while the cheese starts melting over the top.
And because the slow cooker does most of the work, the meat can be finished before everyone is ready to sit down. No standing over a skillet crumbling and stirring beef just as people start asking about dinner.
Ground beef has a few slow-cooker quirks. A dense block can stay clumpy, fatty beef can leave a slick of grease, thin salsa can make the filling watery, and extra hours do soft taco crumbles no favors. This method avoids most of those problems without turning an easy dinner into a project.
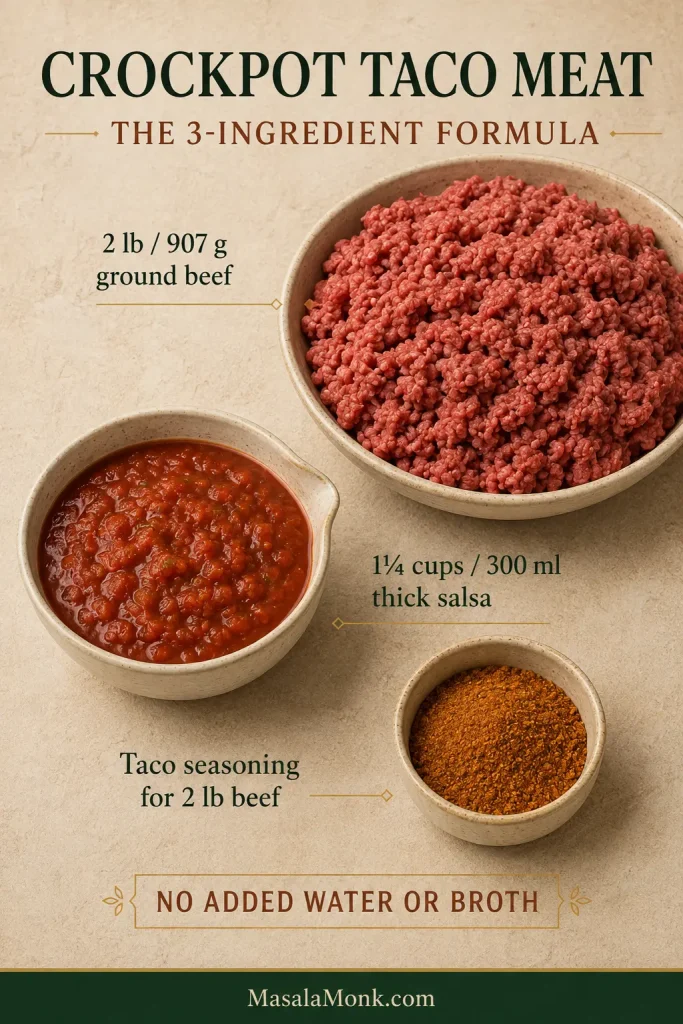
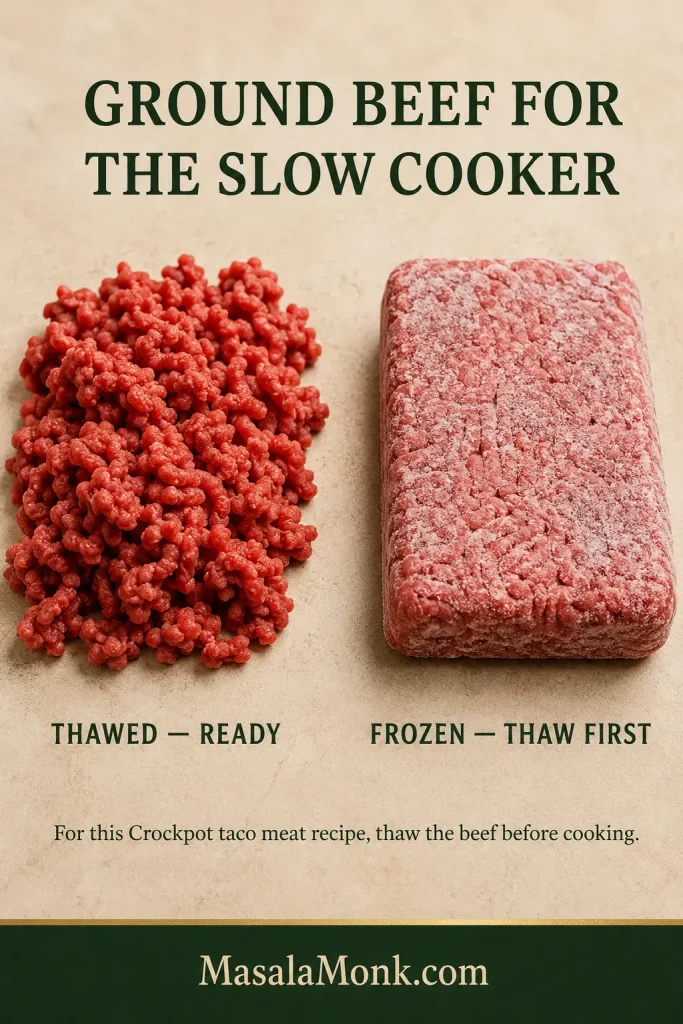
No browning or chopping is needed. For a 2-pound batch, combine 2 lb / 907 g raw, fully thawed lean ground beef with 1¼ cups / 300 ml thick salsa and taco seasoning.
Loosen the beef before cooking, then break it into the final crumble once it begins to set. Cook on HIGH for about 2½–3 hours or LOW for about 4–5 hours, starting your checks at the early end.
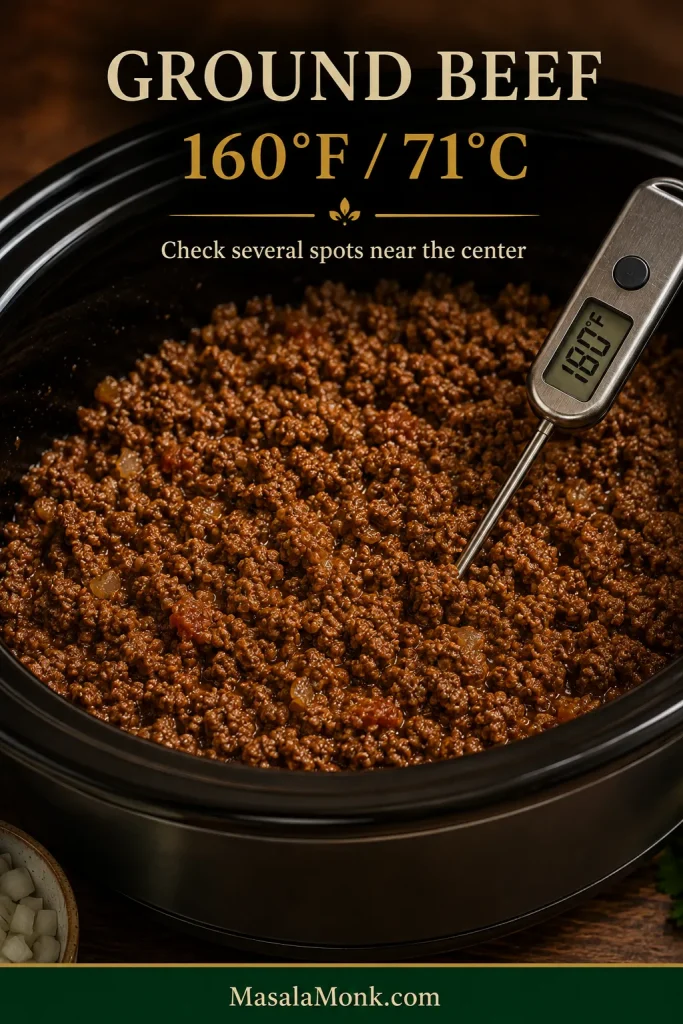
The beef is ready when it reaches at least 160°F / 71°C throughout and has the texture you want. Look for juicy, lightly glossy crumbles with very little free liquid underneath.
Added water or broth: none. Thick salsa already gives the beef the moisture it needs.
Prep: about 5 minutes with prepared taco seasoning or 10 minutes with homemade. Yield: about 8 dinner servings.
The 3-Ingredient Version
2 lb / 907 g raw, fully thawed 90/10 ground beef
1¼ cups / 300 ml thick salsa
Taco seasoning for 2 lb / 907 g beef
Using prepared taco seasoning? Use the amount your package recommends for 2 pounds of beef. If your brand’s packet is intended for 1 pound, that will usually mean two packets. Skip the packet’s stovetop water because the salsa supplies the cooking moisture here.
Thick salsa does double duty as flavor and cooking liquid, so this three-ingredient version needs no broth or packet water.
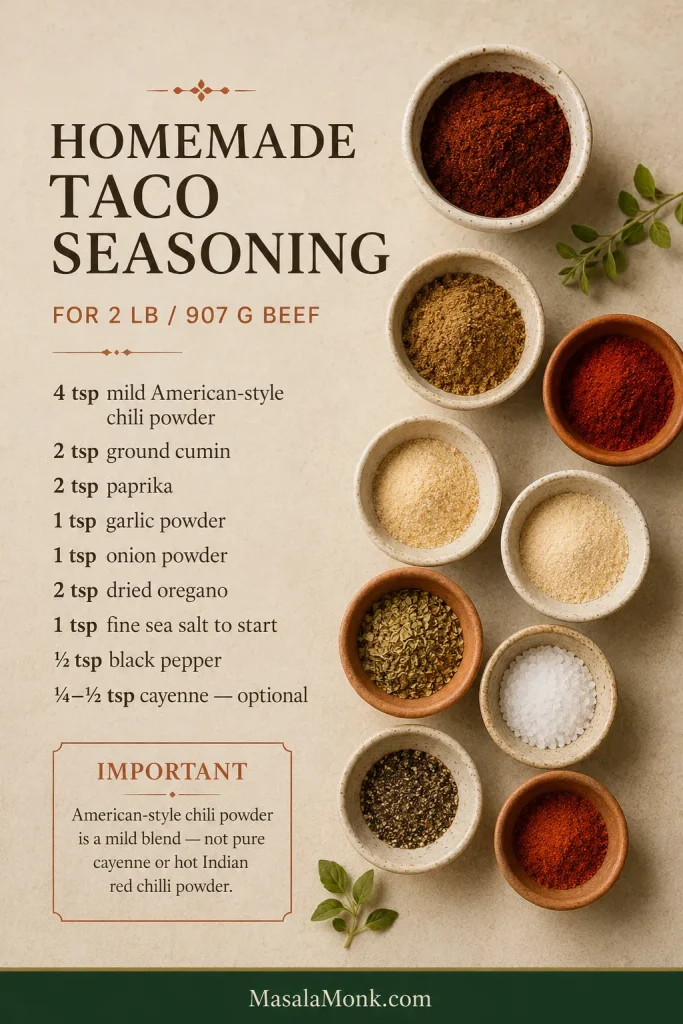
4 teaspoons mild American-style chili powder(not pure cayenne or hot Indian red chilli powder)
2 teaspoons ground cumin
2 teaspoons paprika
1 teaspoon garlic powder
1 teaspoon onion powder
2 teaspoons dried oregano
1 teaspoon fine sea salt to start, plus more if needed
½ teaspoon black pepper
¼–½ teaspoon cayenne, optional
In American taco recipes, “chili powder” usually means a relatively mild seasoning blend. Pure cayenne or a hot Indian chilli powder can be dramatically hotter, so use those much more cautiously.
Salsa can contribute plenty of sodium too. Starting with less salt gives you room to taste the cooked beef and adjust without discovering too late that the combination is overly salty.
Mix the spices before seasoning so cumin, paprika, oregano and salt distribute more evenly over the beef.
Instructions
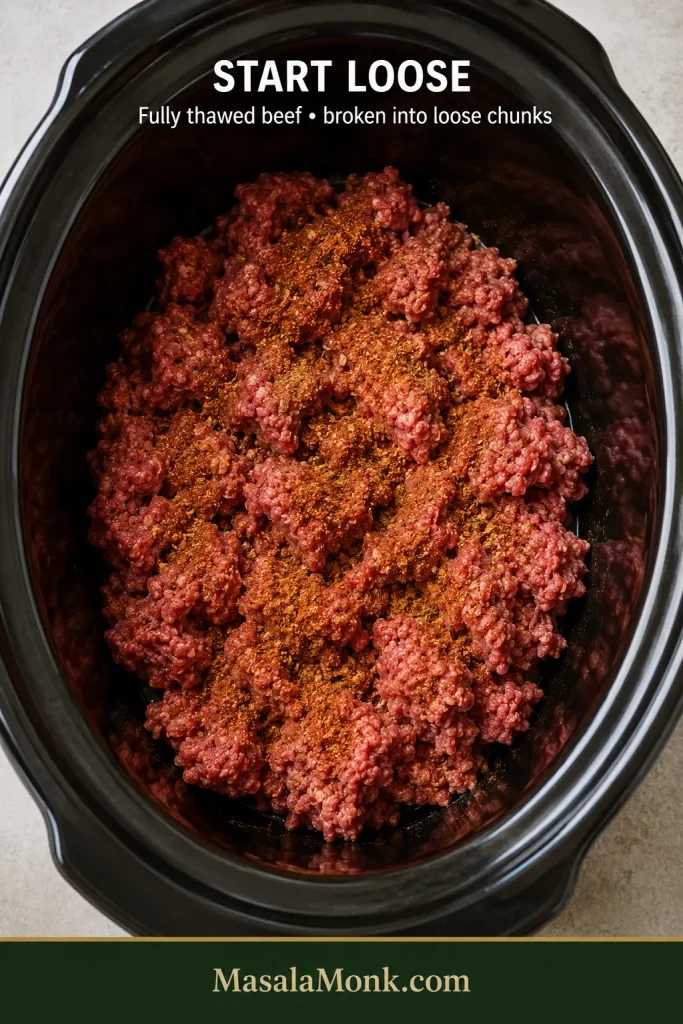
Loosen and season the beef. Put the thawed beef in the slow cooker and pull the dense block into loose chunks. Scatter the taco seasoning evenly over the meat.
Add the salsa. Spoon the thick salsa over the beef and stir lightly. Cover the slow cooker.
Cook. Cook on HIGH for about 2½–3 hours or LOW for about 4–5 hours. Begin checking at the early end because slow cookers vary, and deeper batches can take longer.
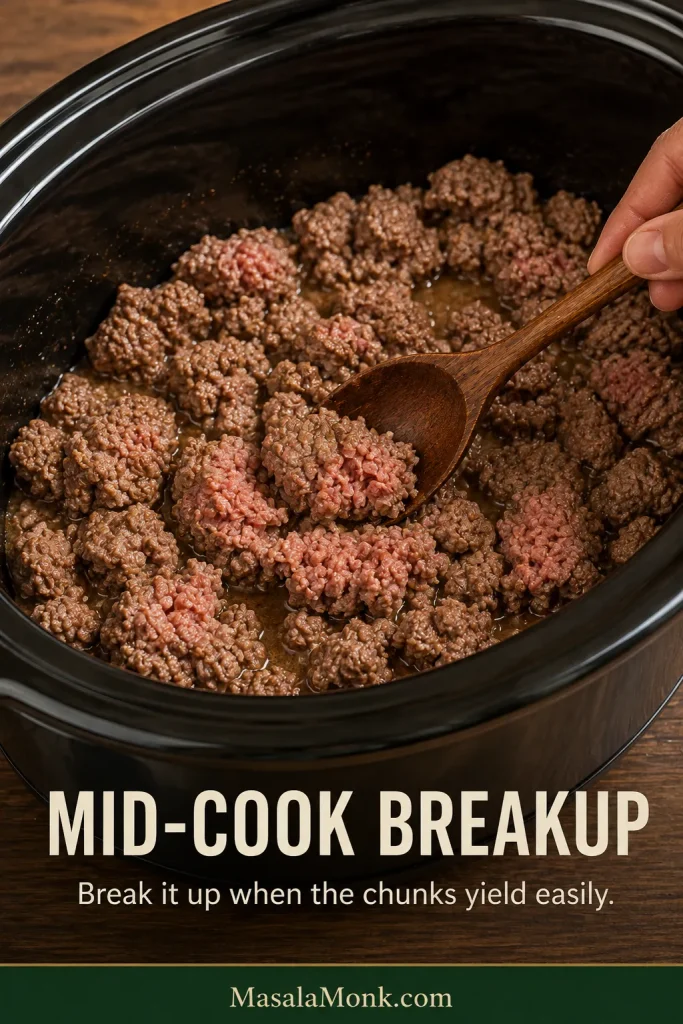
Make the crumble. Around the middle of the cooking window, start checking the beef. When the chunks have started to set and separate easily, use a wooden spoon, meat chopper or potato masher to break them into the size you like. Replace the lid and continue cooking.
Check doneness. Test several spots near the center. The beef should reach at least 160°F / 71°C throughout, with no dense raw pockets. Color alone is not a reliable doneness test.
Finish and serve. Stir well. Skim obvious grease or remove excess thin liquid only if needed, then taste and correct the salt or seasoning. If you add more dry seasoning, give it another 5–10 minutes of heat. Spoon into warm flour tortillas or soft homemade corn tortillas with cheese, onion, avocado, salsa, cilantro, jalapeños or lime.
Before You Serve
Food-safety note: if a spoon, masher or chopper touches undercooked beef, wash it or switch to a clean utensil before using it again with the fully cooked meat.
Cook’s note: can’t be there for the mid-cook breakup? Loosen the raw beef especially well at the beginning, then crumble it thoroughly once it is safely cooked. The pieces may be less uniform, but dinner still works.
When the beef is glossy, well seasoned and easy to scoop without liquid running around the crumbles, you’re done. Warm the tortillas and eat.
When the Crockpot Works Best—and When to Brown First
The Crockpot’s advantage here is timing, not tenderness. Ground beef does not need hours of slow cooking to become tender. The Crockpot cuts down the stove work, lets the meat be ready before you need it, and keeps it hot until everyone is ready to eat.
If browned edges and a faster stovetop dinner matter more, the skillet wins.
Mostly Hands-Off
Thawed raw beef goes directly into the Crockpot with salsa and seasoning.
Best for: ordinary dinner batches, minimal cleanup and softer taco crumbles.
Browned & Firmer
Brown and drain the beef in a skillet. Stir in the seasoning and enough salsa to leave it juicy rather than saucy, then transfer it to the Crockpot to stay hot for serving.
Best for: firmer pieces, deeper browned flavor or higher-fat beef.
Big Taco Bar
Cook and drain the beef in batches, then use one or more Crockpots to keep it hot for serving.
Best for: larger quantities where even cooking and easy draining matter more than dump-and-go convenience.
Prefer firmer, deeply browned stovetop crumbles? Our Ground Beef Tacos Recipe is built around that skillet texture and a much faster cook.
Which Ground Beef Works Best?
With skillet taco meat, excess fat can be poured off before the seasoning goes in. With the raw slow-cooker method, everything released by the beef stays in the pot until the end.
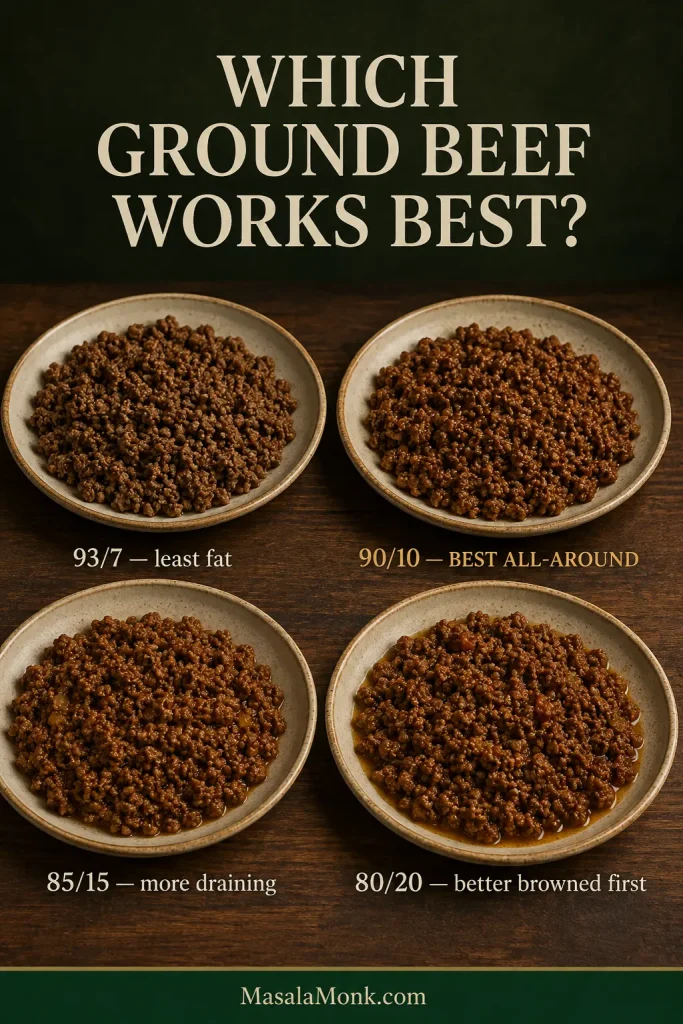
For this recipe, 90/10 hits the sweet spot: plenty of beefy flavor without leaving a large slick of fat underneath.
Ground beef
What to expect
Best use
93/7
Very little rendered fat; leaner, less rich result
Minimal draining
90/10
Good beef flavor with some fat to skim if needed
Best all-around choice
85/15
Richer, with more fat collecting at the bottom
Fine if you don’t mind draining some
80/20
Can leave a substantial grease layer
Better browned and drained first
Already have 85/15 in the refrigerator? Use it. Taco night does not require a special grocery run; just expect more fat at the end.
If your store labels it beef mince, use the same lean ratio and follow the recipe as written.
Why Salsa Consistency Matters
Salsa has a big say in how wet the taco meat becomes because it brings tomato, chile, aromatics, acidity, salt and moisture all at once.
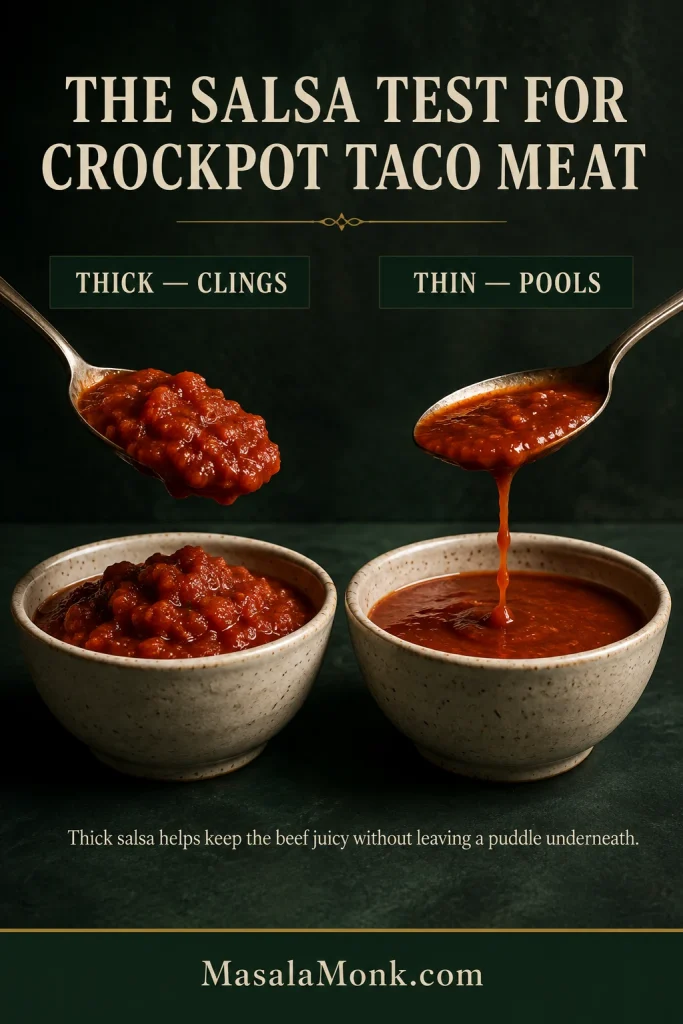
To keep the beef juicy without leaving a puddle underneath, choose a thick salsa that sits on a spoon instead of immediately running off it. Thick salsa clings to the crumbles; very thin restaurant-style or watery fresh salsa is more likely to pool around them.
Use the spoon, not the label. If salsa runs off immediately, start with less; if it holds a mound, the recipe amount is a better fit.
Thin salsa can still taste excellent. Start with less and add another spoonful after cooking if the beef needs it.
Chunky or smooth? Chunky salsa leaves visible pieces of tomato, onion and chile. A smoother salsa blends more completely into the beef and gives the filling a more uniform look. Mild, medium or hot is your call; consistency matters more to the slow-cooker method than heat level does.
For something brighter at the table, keep the finishing salsa separate. A spoonful of roasted salsa verde adds fresh acidity without making the beef wetter in the Crockpot.
Can Raw Ground Beef Go Straight Into the Slow Cooker?
Yes. Use fully thawed beef, loosen the dense block before cooking and check doneness with a food thermometer instead of relying on color.
USDA slow-cooker guidance recommends thawing meat before it goes into a slow cooker. Thawed ground beef also separates more evenly and is much easier to crumble. Read the USDA slow-cooker guidance.
What to Look for While the Beef Cooks
Start loose. Pull the raw beef into handful-size chunks before the lid goes on. They do not need to be tiny; opening up the dense block is what matters.
Expect moisture later. The pot may look surprisingly dry at first. Ground beef releases its own juices as it heats, and very little escapes from a covered slow cooker.
Break it when it yields easily. When the chunks separate with very little resistance, they are ready to crumble. Break them into the size you prefer and let the beef finish cooking.
Crush the chunks when they yield easily; if the spoon smears or drags through the meat, give them more time.
Don’t judge by color alone. Appearance can be misleading, so use the thermometer reading in the recipe as the final doneness check.
Check several dense spots near the center. 160°F / 71°C throughout is the target, not color alone.
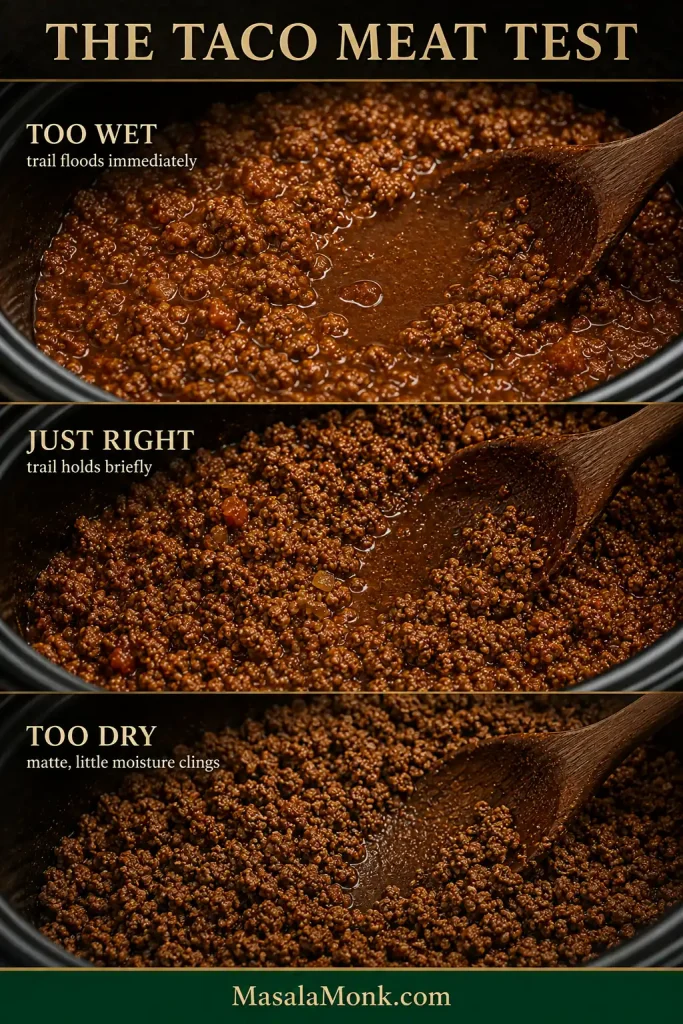
The Taco Meat Test: Too Wet, Just Right or Too Dry?
Drag a wooden spoon or spatula through the middle of the beef and watch what happens to the channel.
Use the trail after the finished taco meat has been stirred. A little juice is desirable—the speed at which the channel disappears tells you more than visible liquid alone.
Too Wet
Thin liquid immediately floods back in and the meat looks as though it is sitting in sauce.
What to do: spoon out excess liquid or leave the lid off briefly while the beef is hot.
Just Right
The crumbles look juicy and lightly glossy. The spoon trail stays visible for a moment before a thin sheen of flavorful cooking juice slowly settles back in.
Leave it alone. You’re there. A thin layer of juice at the bottom belongs with moist taco meat, and the filling should scoop neatly without soaking the tortilla underneath.
Too Dry
The beef looks matte and loose with very little moisture clinging to the crumbles.
What to do: stir in 1–2 tablespoons of salsa if the beef could use more flavor as well as moisture, or water if the seasoning is already where you want it. Heat briefly, then check again before adding more.
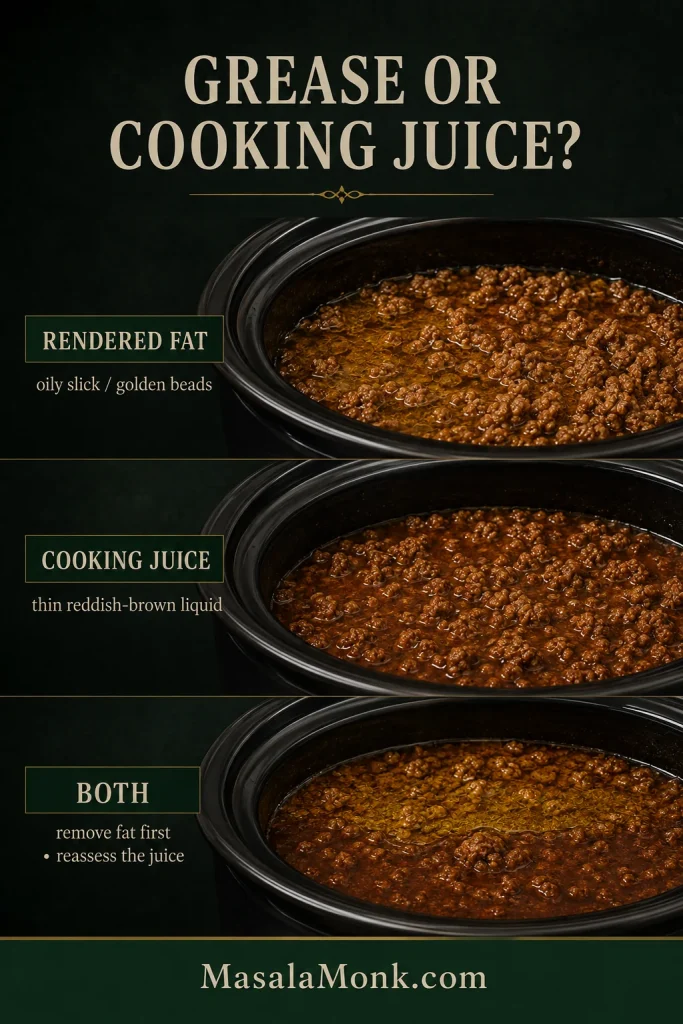
Is That Liquid Cooking Juice or Grease?
Oily slick or yellow-brown beads: mostly rendered beef fat. Skim or drain it.
Thin reddish-brown liquid: mostly beef juices and salsa moisture. Remove only what is excessive.
An oily layer over thinner liquid: remove the fat first, stir the beef, then decide whether the remaining juice actually needs reducing.
Draining every drop can leave good taco meat unnecessarily dry. Remove the fat you do not want, stir again and reassess.
If shiny oil floats over darker cooking juice, skim the top layer first, stir, then reassess. Draining everything can remove useful seasoned moisture with the fat.
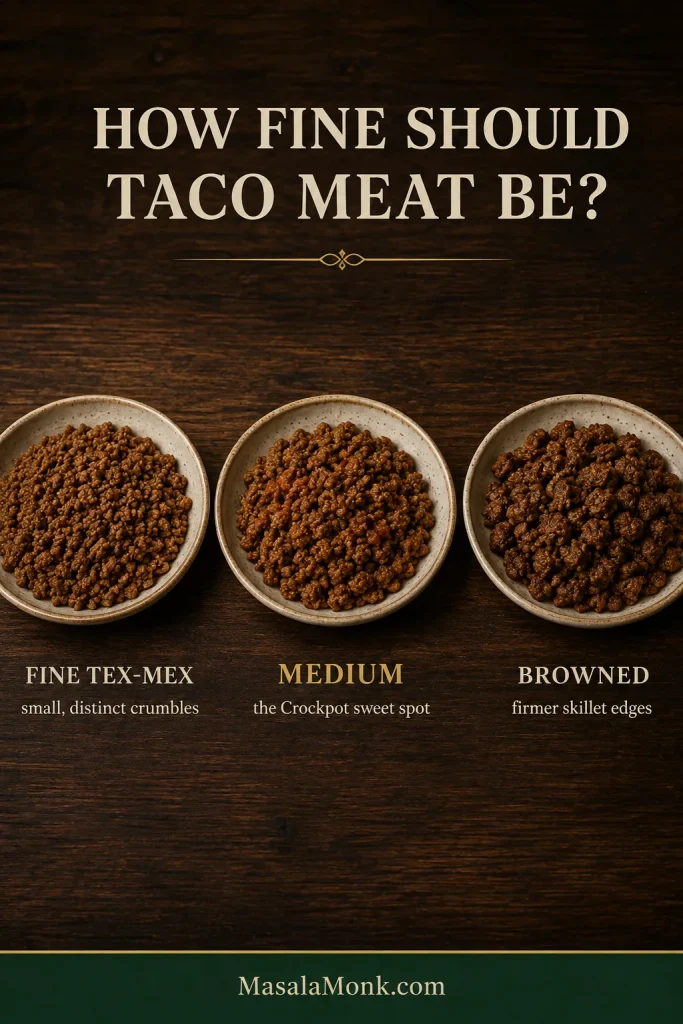
The Crockpot works well for fine and medium crumbles; deeply browned beef still belongs in a hot skillet. Choose the texture that fits the tacos you want tonight.
Use the guide as a stopping-point check: medium crumbles should still look unmistakably like ground beef rather than a uniform paste.
Fine Tex-Mex-style crumbles: use a potato masher or meat chopper and work the beef fairly fine. Stop while distinct small pieces remain. The meat should feel tender and meaty, not pasty.
Medium everyday crumbles: use a wooden spoon or sturdy spatula and stop earlier. This is what the main recipe aims for—tender, juicy and easy to scoop while still clearly feeling like ground beef.
Firm, browned crumbles: use a hot skillet for browned edges and a firmer bite. The Crockpot can then keep the cooked meat hot until everyone is ready.
Easy Variations
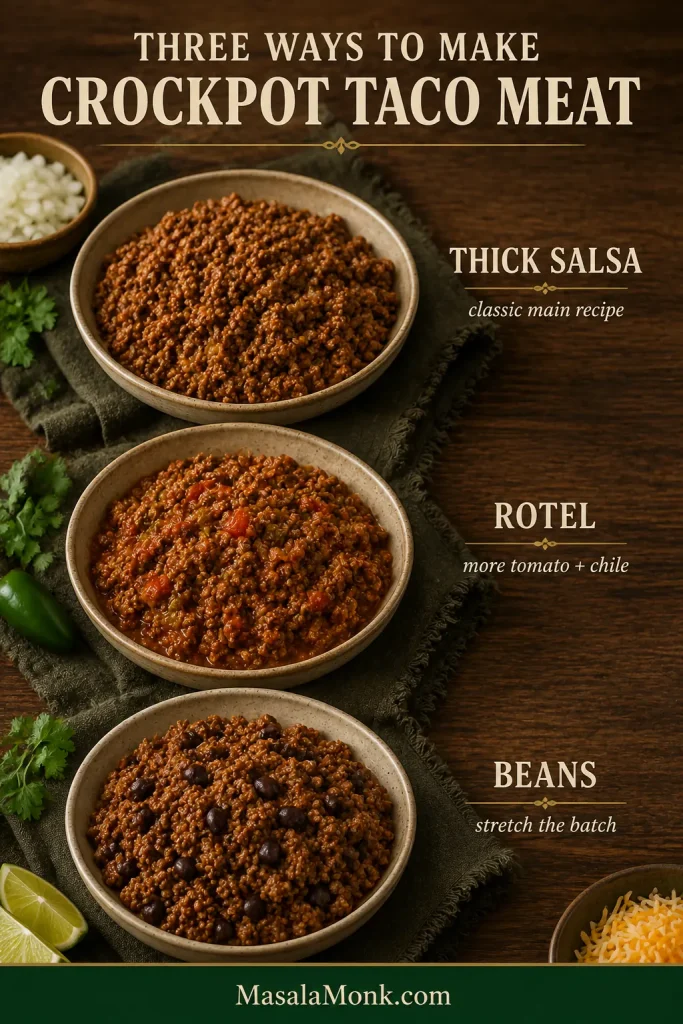
No-Salsa Version
For an intentionally smoother, saucier version without salsa, keep the 2 lb / 907 g ground beef and the same amount of taco seasoning. Replace the 1¼ cups / 300 ml salsa with 1 can plain tomato sauce, about 15 oz / 425 g.
Tomato sauces vary in saltiness, so hold back any extra salt until the beef is cooked and tasted. This version will not finish exactly like the thick-salsa recipe. If more sauce collects around the beef than you want, spoon off the excess or let the meat sit briefly uncovered while hot.
This skips salsa, not tomato. A completely tomato-free version needs a different moisture balance, so simply omitting the tomato is not a direct substitute.
Rotel Version
Replace the 1¼ cups / 300 ml salsa with 1 undrained 10-oz / 283 g can of Rotel. Keep the same homemade spice blend—or use enough packet seasoning for 2 pounds of beef. No added water is needed.
Rotel is thinner than the salsa used in the main recipe, so let the beef cook before deciding whether it needs anything else.
Stretch It With Beans
Drain and rinse a 15-oz / 425 g can of black beans or pinto beans, then stir them into the cooked beef for the final 20–30 minutes.
Whole beans stretch the batch without turning it into a completely different filling. Want the beans to become the meal instead of an add-in? That’s closer to our Crockpot chili.
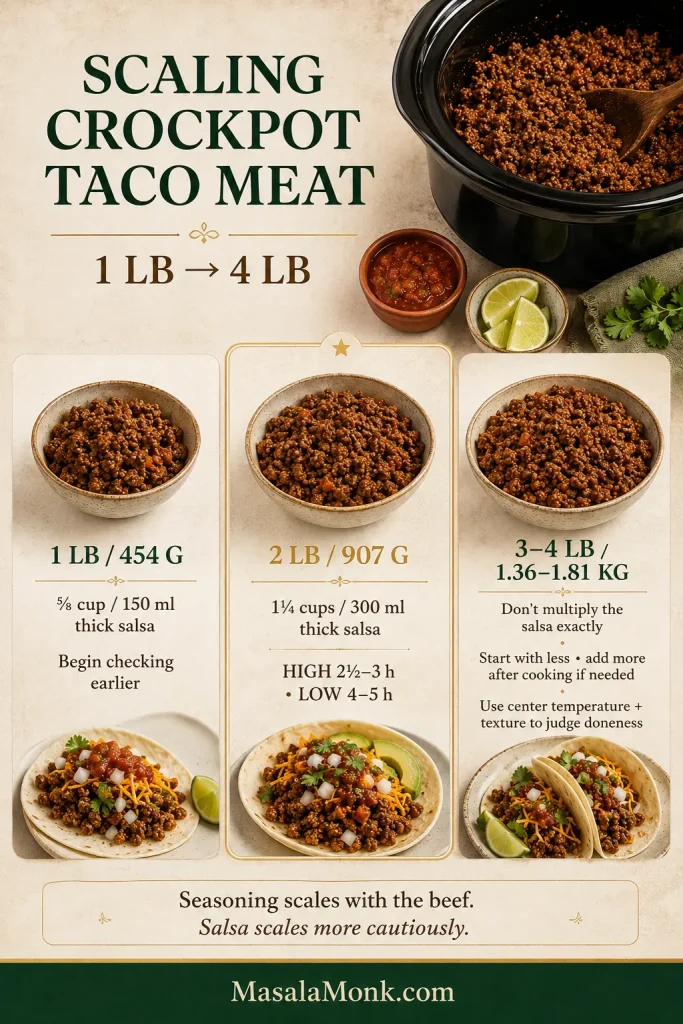
Scaling Crockpot Taco Meat: What Changes From 1 to 4 Pounds
Scale the taco seasoning with the amount of beef. Salsa is different: as the batch gets larger and sits deeper in the cooker, don’t increase the salsa in exact proportion to the beef. Start with less and add more after cooking if the meat needs it.
For 3–4 lb, leave room to correct upward: adding salsa later is easy; removing excess liquid is not.
Batch
Salsa guidance
What changes
1 lb / 454 g
⅝ cup / 150 ml thick salsa
Begin checking earlier; a smaller cooker is useful if available
2 lb / 907 g
1¼ cups / 300 ml thick salsa
Main recipe: HIGH 2½–3 h or LOW 4–5 h
3–4 lb / 1.36–1.81 kg
Don’t increase the salsa in exact proportion to the beef; start with less and add more after cooking if needed
Use a roomy cooker and rely on center temperature and texture rather than adding a fixed amount of extra cooking time
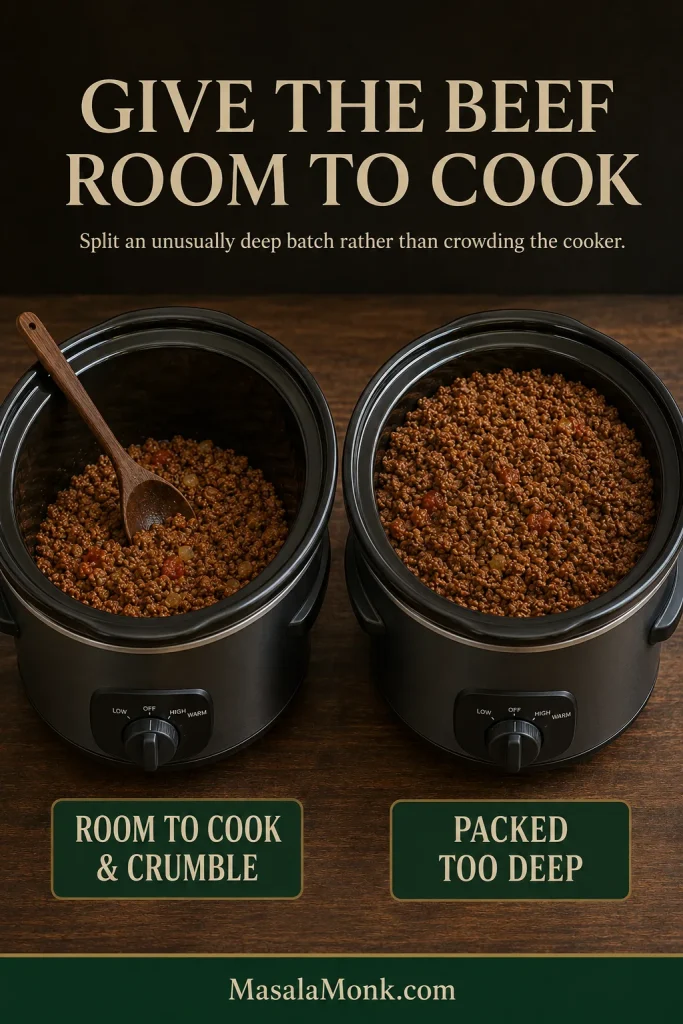
When the Cooker Gets Too Full
If the beef is packed unusually deep in your cooker, split the batch rather than crowding it in. The beef cooks more evenly and is easier to crumble that way. And when your cooker manual specifies a maximum fill level, follow it rather than packing the batch too deeply.
Remove excess thin liquid or briefly cook uncovered
Use thicker salsa and avoid adding extra liquid
Greasy
Skim or drain the rendered fat
Use 90/10 or 93/7 beef, or brown fattier beef first
Big clumps
Break the hot beef apart while it separates easily
Loosen the raw block and give it one mid-cook breakup
Mushy
Remove excess liquid and stop working the meat
Check sooner and stop at a larger crumble
Dry but sitting in liquid
Remove excess liquid first; taste the beef before adding any salsa
Check sooner and begin with thick salsa instead of extra liquid
Bland
Correct the salt and seasoning; if it is seasoned but still tastes flat, finish with lime for acidity
Scale the seasoning with the amount of beef
Too salty
Dilute with unseasoned cooked beef or beans
Hold back extra salt until the meat has been tasted
If the table solved your problem, you’re done. Two problems are especially easy to misread.
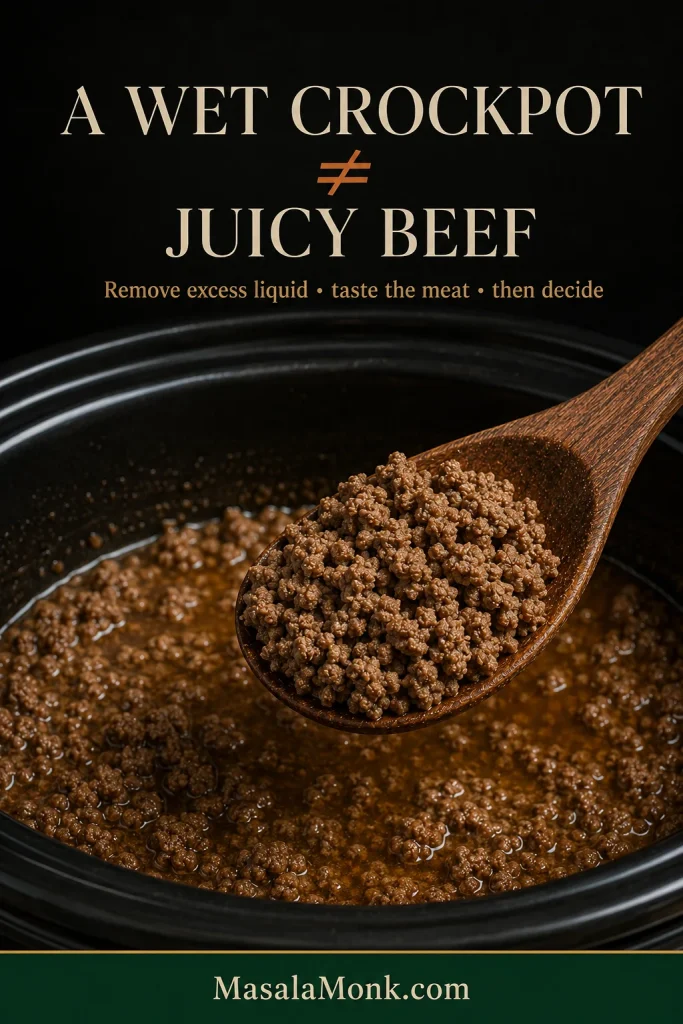
Why Is the Beef Dry When There Is Liquid in the Crockpot?
A wet Crockpot doesn’t necessarily mean juicy beef. You can have plenty of liquid around the meat while the crumbles themselves still taste dry.
The meat can continue losing moisture while sitting in released juices, fat or sauce.
Remove obvious excess liquid first and taste the meat. When extra cooking time is the real problem, pouring in a cup of broth only gives you dry-feeling beef in a wetter pot. A spoonful or two of salsa is plenty if the crumbles still need help.
Drain first, then taste. More salsa or broth will not fix overcooked, dry-feeling crumbles that are already sitting in plenty of liquid.
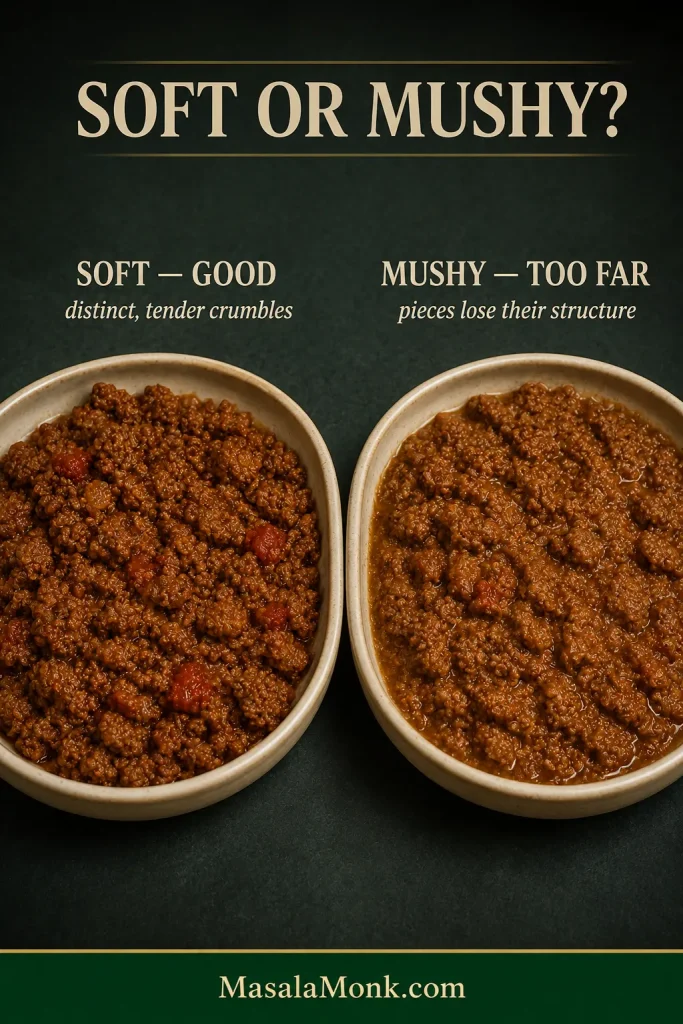
Is It Mushy—or Just Soft?
Slow-cooker taco meat is naturally softer than beef browned hard in a skillet. Tender crumbles that still hold their shape are exactly what many people want.
When the pieces lose that structure and become paste-like or waterlogged, they have moved into mushy territory. Prefer a firmer bite every time? Brown the beef first and let the Crockpot keep it hot instead.
Once the crumble size is right, stop working the meat aggressively; continued mashing can turn tender crumbles pasty.
For a family batch, that’s most of what can go wrong. Feeding a crowd changes the Crockpot’s job.
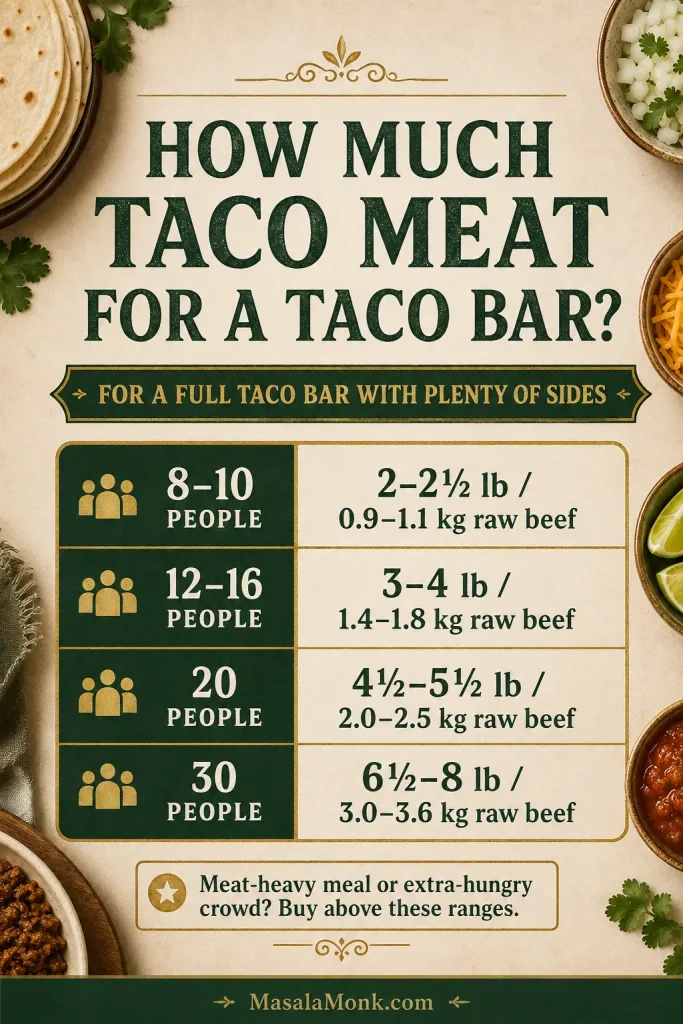
For a full taco bar with plenty of beans, cheese, vegetables, salsa and sides, plan roughly 2½–3 oz / 70–85 g cooked taco meat per person.
For a meat-heavy meal or an especially hungry crowd, move closer to 3½–4 oz / 100–115 g cooked meat per person.
The buying amounts here assume plenty of other fillings and sides. Buy above them when the meat is doing most of the work.
Crowd
Raw beef to buy
Best approach
8–10 people
about 2–2½ lb / 0.9–1.1 kg
The main slow-cooker method works well
12–16 people
about 3–4 lb / 1.4–1.8 kg
Use a roomy cooker or split the batch
20 people
about 4½–5½ lb / 2.0–2.5 kg
Cook in batches, then keep hot for serving
30 people
about 6½–8 lb / 3.0–3.6 kg
Cook in batches; two Crockpots can make serving easier
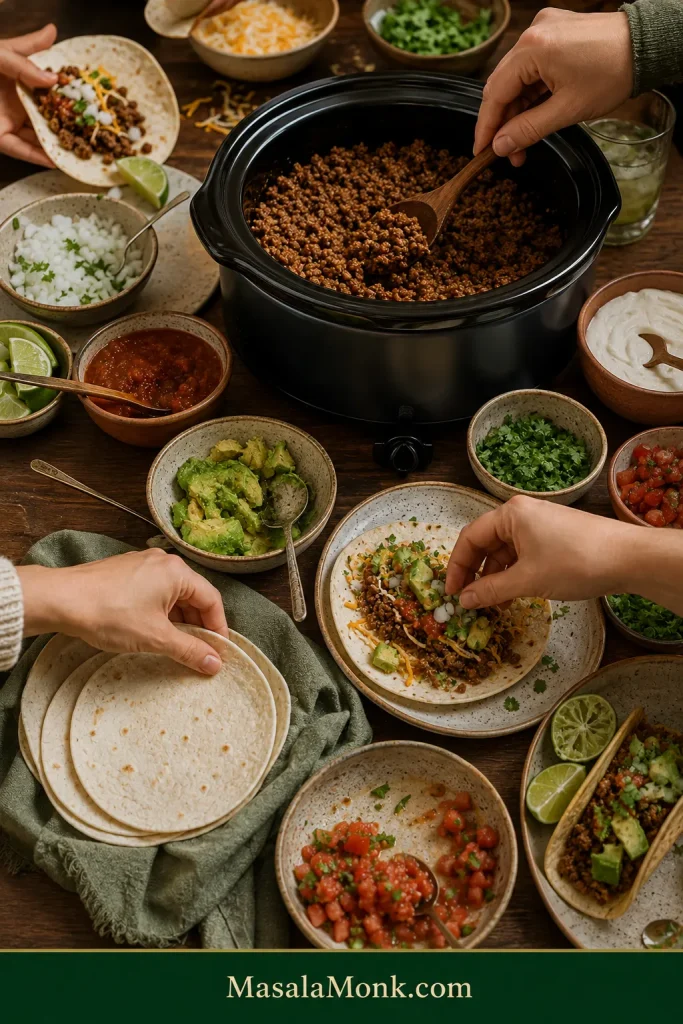
Why the Crockpot Works for a Taco Bar
A taco bar works because everyone builds exactly what they want while you only have one hot filling to keep track of. For a cold side that can be finished before people arrive, our 7 layer dip can be waiting in the refrigerator.
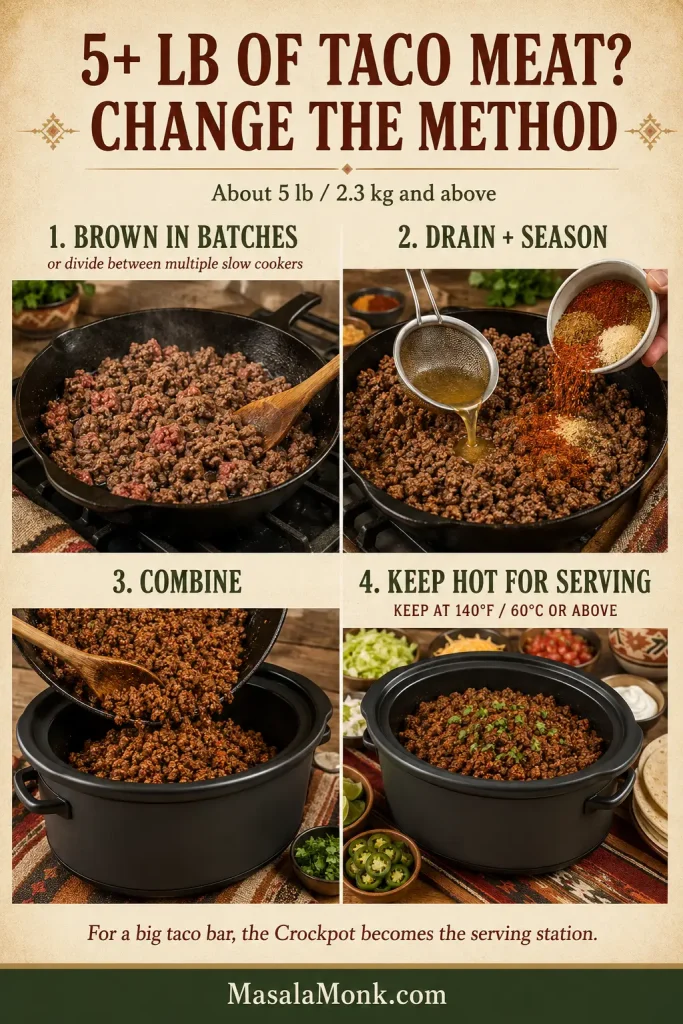
For 5 Pounds or More, Change the Method
At about 5 lb / 2.3 kg and above, stop treating the meat as one giant raw slow-cooker batch. Brown the beef in batches that fit comfortably in the skillet, or divide the raw beef between multiple slow cookers. Drain excess rendered fat, season each batch, then combine the cooked meat in the Crockpot and keep it hot for serving.
Working in smaller batches keeps the crumbles distinct, makes excess fat easier to drain and helps the seasoning coat the beef evenly. For a big taco bar, the Crockpot becomes the serving station: the meat stays hot while you actually get to enjoy the gathering instead of playing line cook.
Keeping Taco Meat Warm
Use WARM only after the meat is fully cooked and already hot. Keep hot food at 140°F / 60°C or above during serving and keep the lid on between rounds.
Quick storage guide: refrigerate cooked taco meat for 3–4 days, freeze it for about 3 months for best quality, and reheat leftovers to 165°F / 74°C.
Make It the Day Before
Cook the taco meat completely and get the moisture where you want it before storing. Divide a large batch into smaller, shallow containers and refrigerate it within 2 hours. If food is sitting outdoors above 90°F / 32°C, that window drops to 1 hour.
When serving leftovers again, reheat the meat to 165°F / 74°C before transferring it to a slow cooker on WARM.
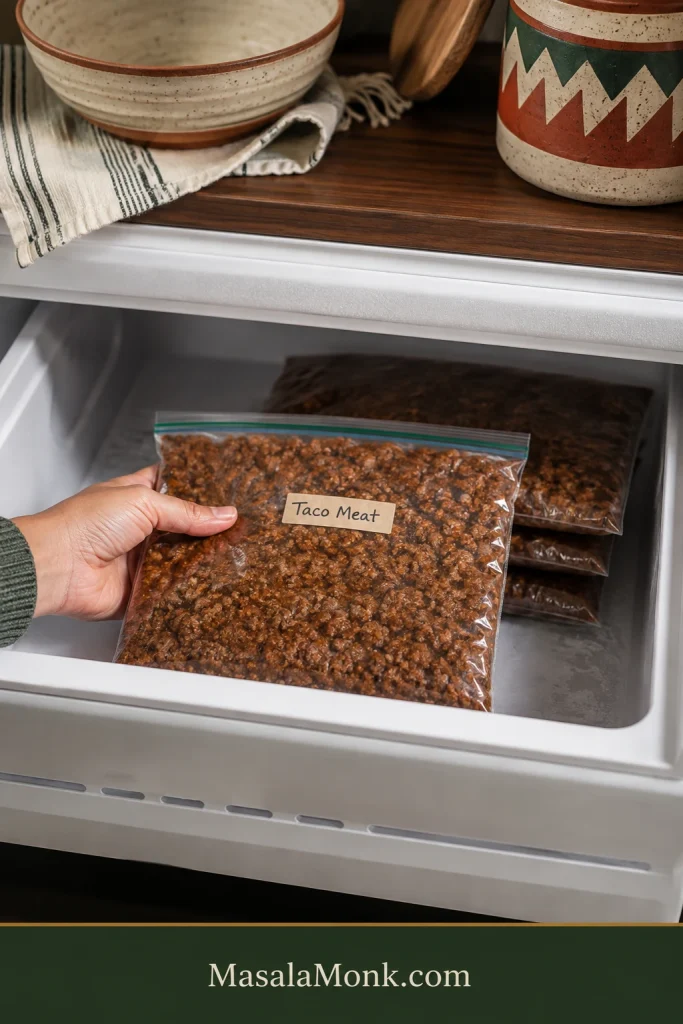
How to Freeze Taco Meat
Freeze the meat in amounts that match the way you actually eat it. A dinner-size package or larger family-size package is far more useful than one giant frozen block.
Flat freezer bags stack neatly and thaw faster. For the best eating quality, use the frozen taco meat within about 3 months.
Flatten portions before they freeze solid so they stack neatly and thaw faster than one thick block.
Reheat Without Turning It Into Soup
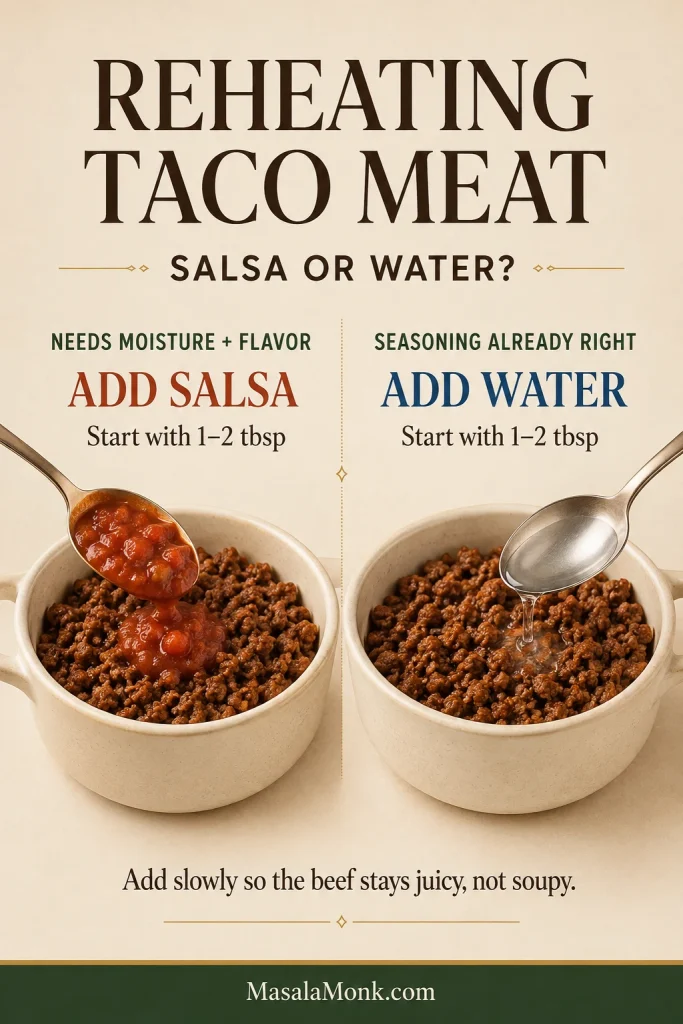
Cold taco meat often looks firmer and drier than it really is. Heat it first, then decide whether it needs anything.
Add salsa 1–2 tablespoons at a time if the meat could use more flavor as well as moisture, or use water if the seasoning is already where you want it. Add slowly so the beef stays juicy without becoming soupy.
Ways to Use the Leftovers
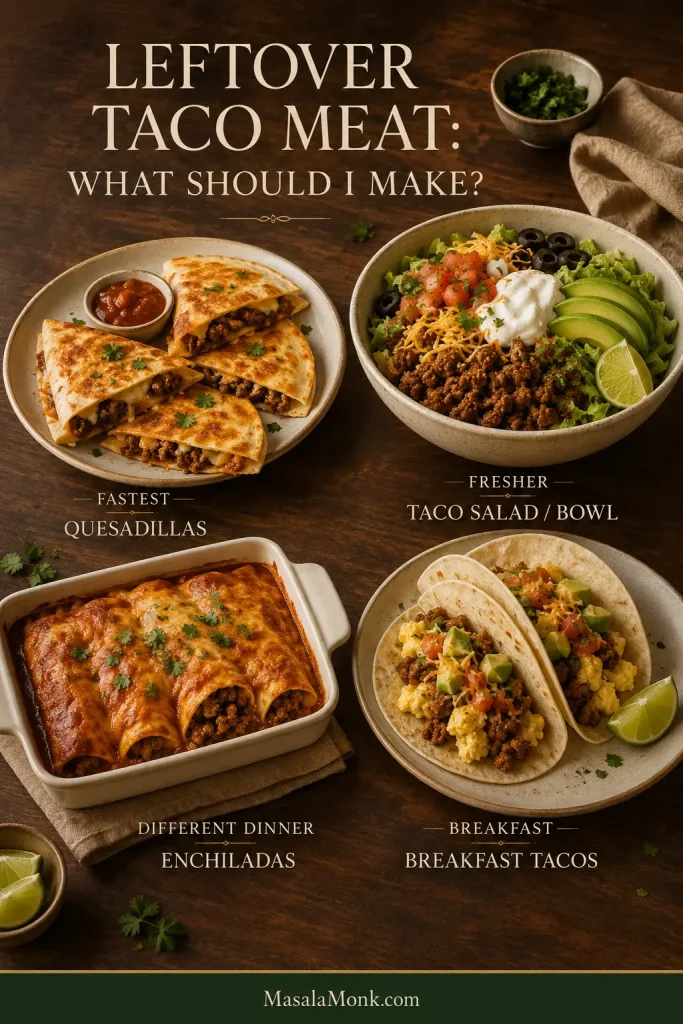
The nicest part of making 2 pounds is that tomorrow’s dinner is already halfway done.
Small leftovers disappear easily into breakfast tacos or quesadillas; larger portions are worth turning into enchiladas or taco bowls.
Need dinner fastest? Make quesadillas, another round of tacos or a tray of nachos.
Want something fresher? Spoon the beef over taco salad or build burrito bowls with crisp vegetables and salsa.
Want it to feel like a different dinner? Turn the meat into enchiladas or pile it onto loaded baked potatoes.
Saving a small portion for morning? Warm it for breakfast tacos with eggs, cheese or avocado.
Leftovers heading toward enchiladas? Pair the beef with our homemade red enchilada sauce and it feels like a completely different dinner.
Frequently Asked Questions
Can I Leave Taco Meat on LOW All Day?
This is not an 8–10 hour workday Crockpot recipe. Ground beef does not need the long tenderizing time of a tough roast. Start checking the standard batch around four hours on LOW; several extra hours can soften and dry the crumbles more than you want.
Can I Put Frozen Ground Beef in the Crockpot?
For this recipe, thaw it first. USDA slow-cooker guidance recommends thawing meat before slow cooking. Thawed beef separates much more easily, which makes it simpler to crumble and check for even doneness.
Can I Use Ground Turkey?
Yes. Expect a softer crumble, and don’t be surprised if the turkey releases more or less liquid depending on how lean it is. Because ground turkey is poultry, cook it to 165°F / 74°C, then drain excess liquid if needed.
How Long Can Taco Meat Stay on WARM?
For Crock-Pot-branded slow cookers, manufacturer guidance recommends no more than about 4 hours on WARM. Other brands may differ, so check your manual. Use WARM only for food that is already fully cooked and hot.
Taco Night Is Basically Handled
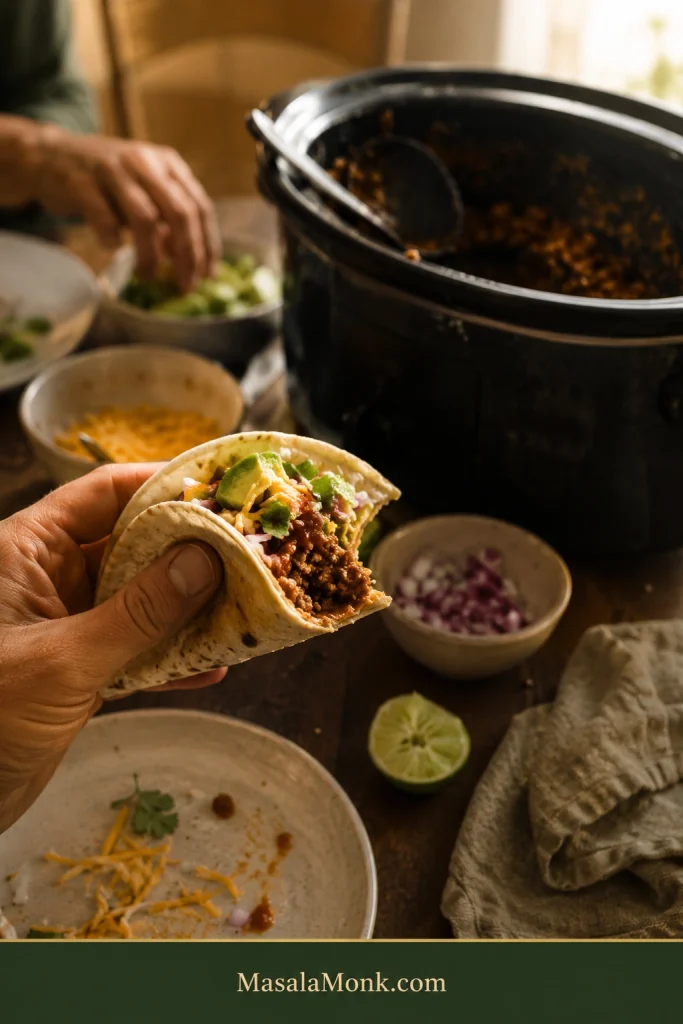
Once the beef has the crumble you like and just enough moisture to stay juicy, this is where the Crockpot earns its place: dinner can sit there ready while the tortillas warm and everyone finishes whatever they were doing.
Put out whatever cheese, onion, avocado, lettuce, salsa, jalapeños or lime you already have. Leave the Crockpot where everyone can reach it and let people build their tacos the way they want them.
The meat is hot, seasoned and waiting when everyone is finally ready to eat. That’s really the whole point.
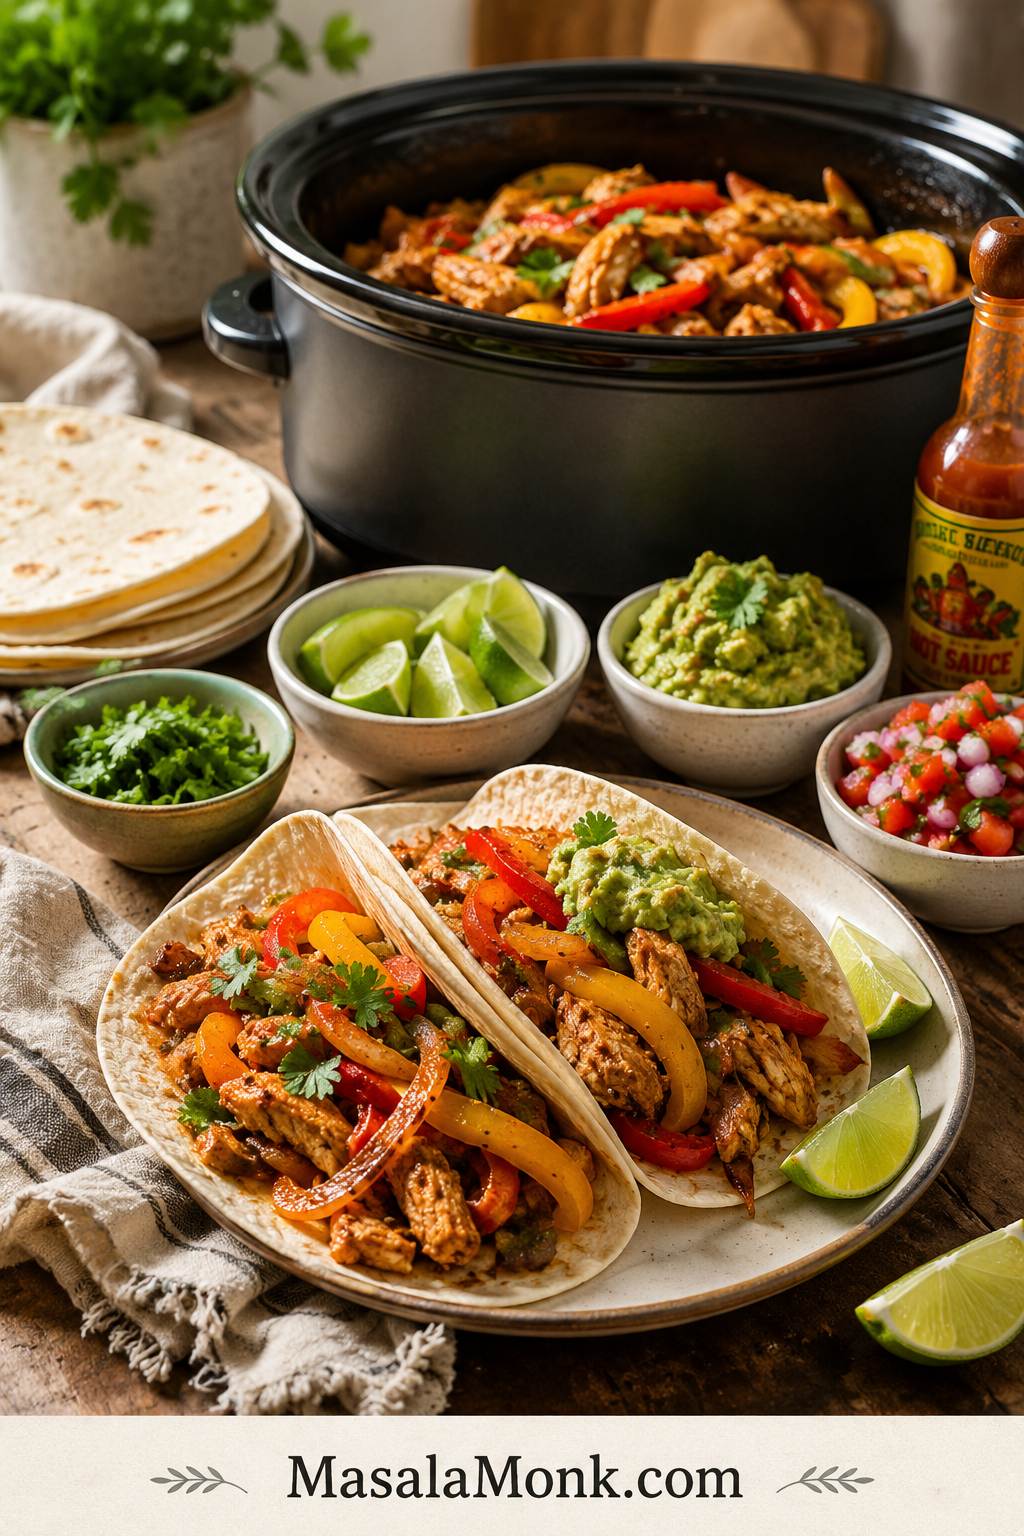
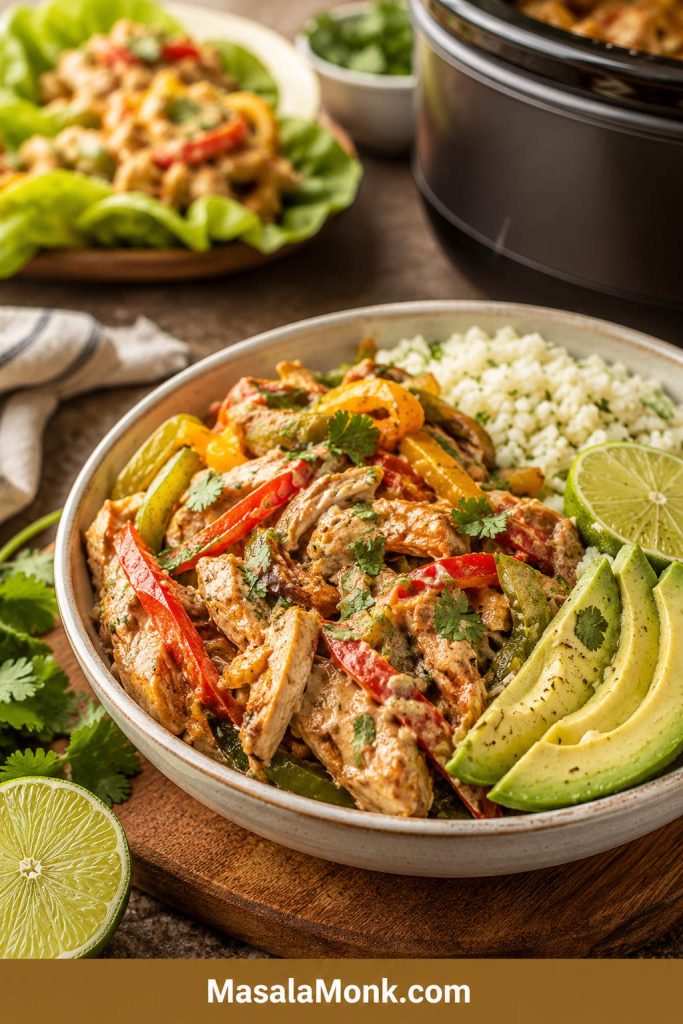
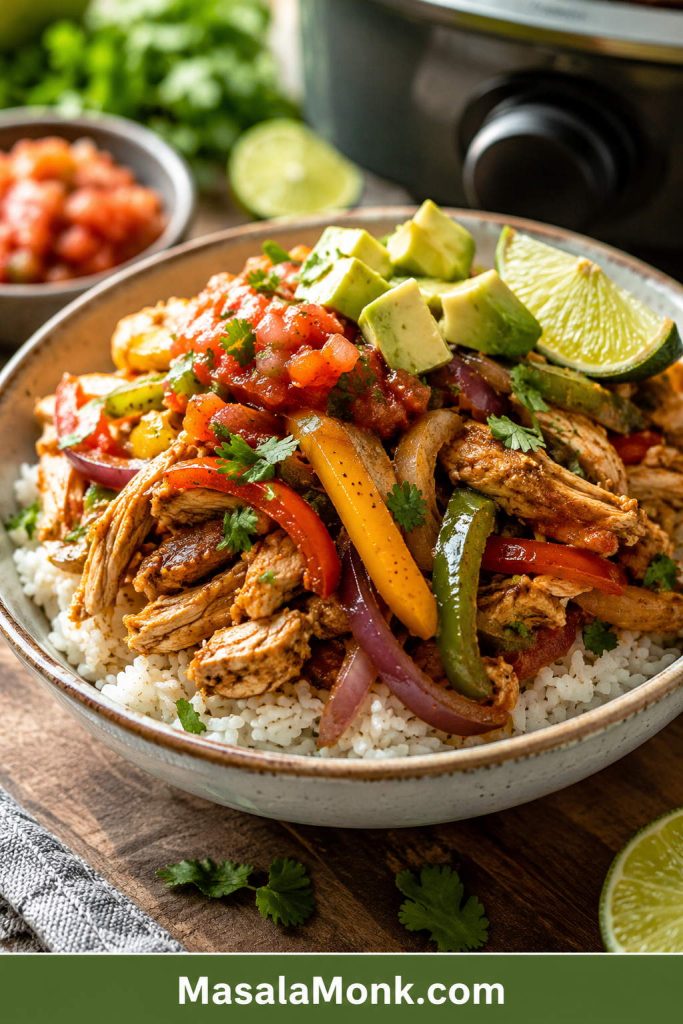
These slow cooker chicken fajitas are for the nights when you want the Crock Pot to handle dinner, but you still want the meal to feel fresh when everyone sits down. You get smoky, lime-bright chicken with sweet peppers and soft onions, ready to tuck into warm tortillas or spoon over rice.
The only tricky part is knowing what the slow cooker will do once the lid goes on. It traps moisture, so fajitas can become too wet, too soft, or a little flat if everything cooks together with too much liquid. This version keeps the method easy but gives you one simple rule to remember: less liquid, later peppers, lime at the end.
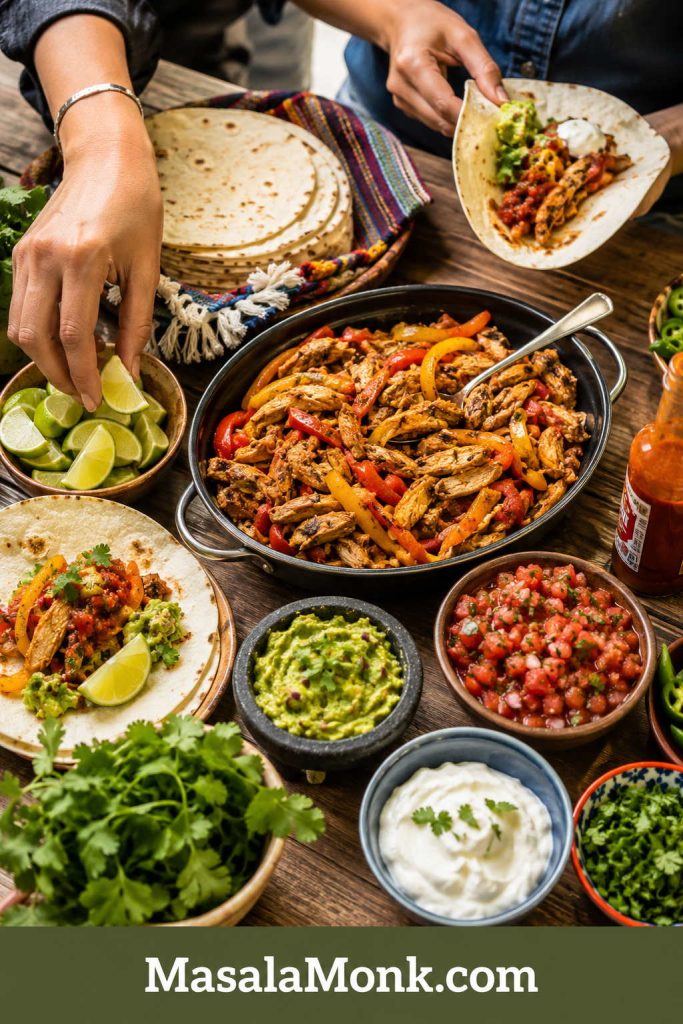
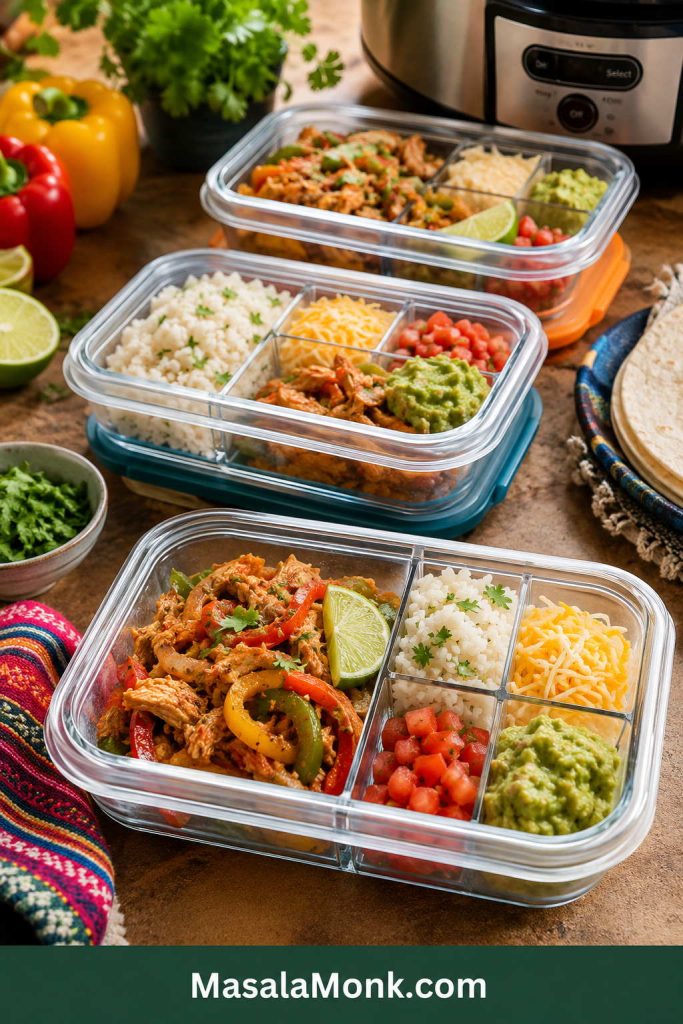
By the time you warm the tortillas and cut the lime, the chicken is tender, the peppers are sweet, the onions are soft, and dinner feels like more than something you simply left in the slow cooker. Use the cooked chicken and peppers for classic fajitas, tacos, bowls, quesadillas, nachos, or easy leftovers.
It will not have the same char as skillet or sheet pan fajitas, but it gives you an easy, reliable Crock Pot dinner with very little hands-on work.
Quick Answer: How to Make Slow Cooker Chicken Fajitas
To make slow cooker chicken fajitas, add boneless chicken breasts or thighs to a 5.5 to 6 quart slow cooker with sliced bell peppers, onion, garlic, fajita seasoning, and ¾ to 1 cup salsa, Rotel, or diced tomatoes. Cook on low for 4 to 6 hours or high for 2½ to 3½ hours, until the chicken reaches 165°F / 74°C. Slice or shred the chicken, return it with only enough juices to coat, finish with lime, and serve in tortillas, bowls, tacos, salads, or quesadillas.
The three keys are less liquid, later peppers, and lime at the end. For better texture, add only half the peppers and onions at the beginning. Add the rest during the last 30 to 60 minutes so they stay brighter, firmer, and less watery.
For the easiest version, add everything at the beginning and drain before serving. If you want better texture, save some peppers for the end, keep the filling glossy, and finish with lime. The rest of the guide helps you make it tighter for tortillas, saucier for bowls, or softer for shredded leftovers.
Start with Less Liquid
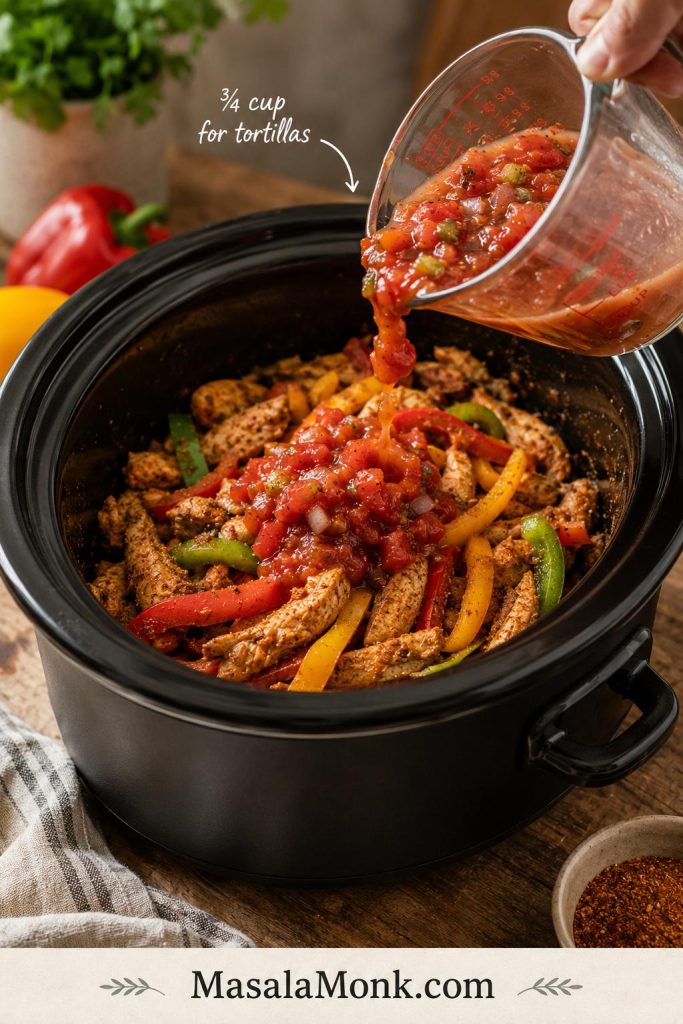
This is the first texture decision in slow cooker chicken fajitas: add enough salsa or Rotel to season the chicken, but not so much that the pot turns soupy.
First, control the liquid. For tortilla-style slow cooker chicken fajitas, about ¾ cup salsa or Rotel seasons the chicken without flooding the pot or making the filling hard to fold.
Slow Cooker Chicken Fajitas at a Glance
Slow cooker size
5.5 to 6 quart / 5.2 to 5.7 L
Fill level
Aim for about half to two-thirds full for even cooking
Chicken amount
2 lb / 900 g
Chicken to use
Breasts for slicing, thighs for juicier shredded fajitas
Description: Easy Crock Pot chicken fajitas with juicy chicken, sweet peppers, soft onions, smoky fajita seasoning, lime, and just enough salsa or Rotel to keep everything flavorful without turning watery.
Prep time: 10 to 15 minutes Cook time: 2½ to 3½ hours on high, or 4 to 6 hours on low Total time: About 2 hours 45 minutes to 6 hours 15 minutes Servings: 6 Yield: Enough chicken and peppers for 8 to 12 fajitas, depending on tortilla size Equipment: 5.5 to 6 quart / 5.2 to 5.7 L slow cooker, knife, cutting board, tongs, slotted spoon, instant-read thermometer
Ingredients
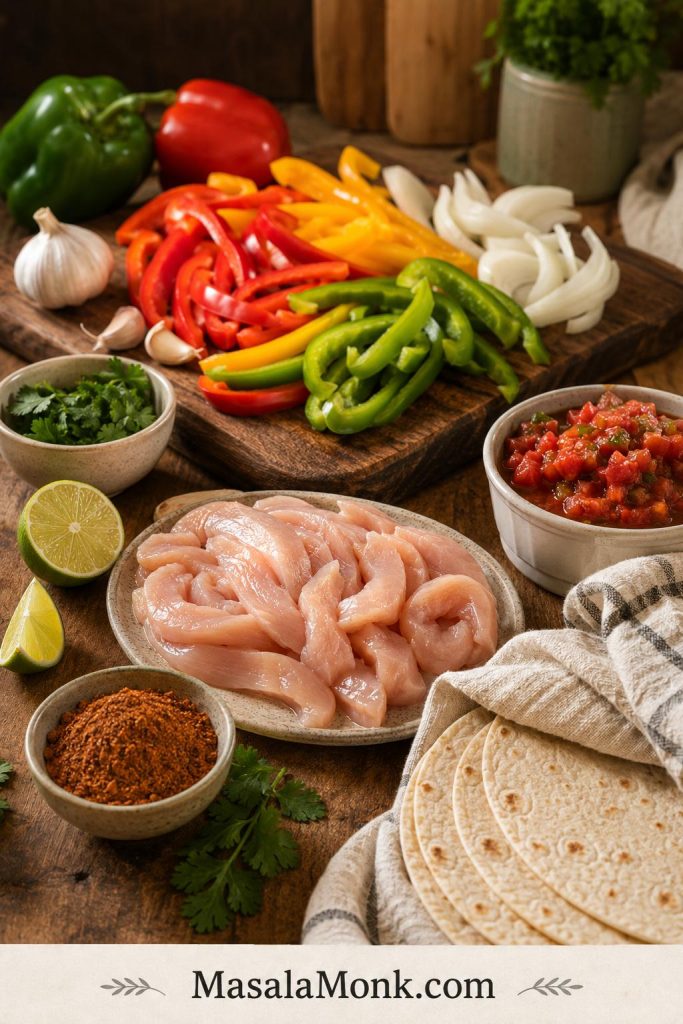
2 lb / 900 g boneless skinless chicken breasts or thighs
3 large bell peppers / 420 to 500 g, sliced, preferably mixed colors
1 large onion / 180 to 220 g, sliced
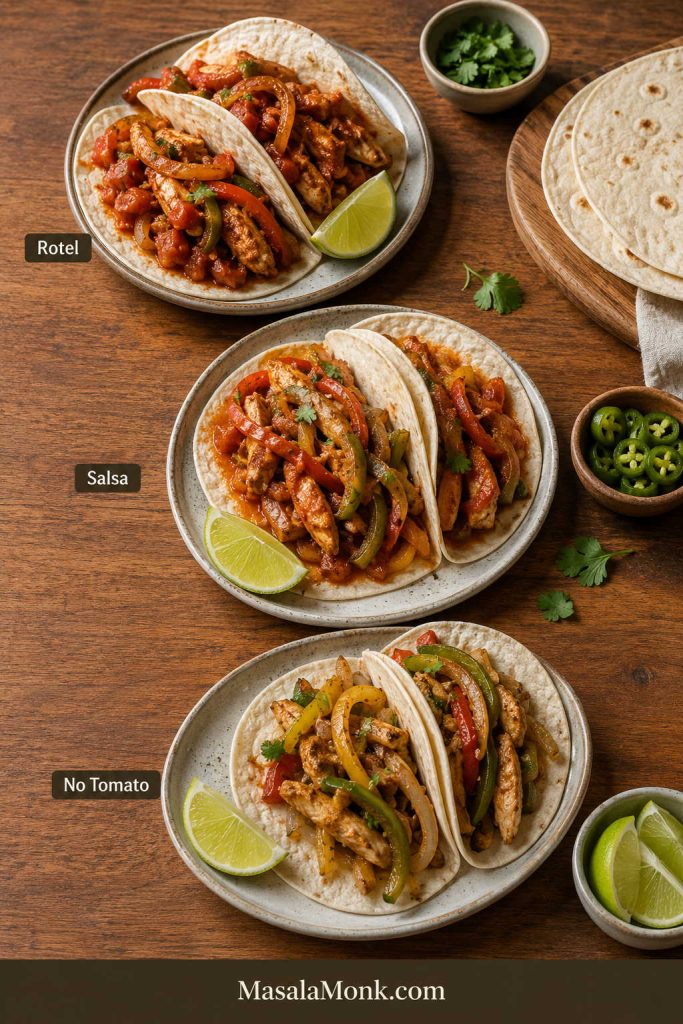
¾ to 1 cup / 180 to 240 ml salsa, Rotel, or diced tomatoes
3 to 4 garlic cloves / 12 to 16 g, minced
2½ to 3 tablespoons / 22 to 28 g fajita seasoning, homemade or store-bought
2 tablespoons / 30 ml fresh lime juice, plus extra lime wedges for serving
8 to 12 tortillas, flour or corn
Optional toppings: sour cream, avocado, guacamole, cilantro, shredded cheese, salsa, jalapeños, lettuce, or hot sauce
Use ¾ cup / 180 ml salsa or Rotel for thicker tortilla-friendly fajitas. For juicier bowls or meal prep, use closer to 1 cup / 240 ml.
Instructions
Slice the vegetables. Cut the bell peppers and onion into strips. Set aside about half of them to add near the end of cooking.
Layer the slow cooker. Add the first half of the peppers and onions to the bottom of the slow cooker. Place the chicken on top.
Add flavor. Sprinkle the chicken with fajita seasoning and garlic. Pour the salsa, Rotel, or diced tomatoes over the top. Do not add extra water.
Cook. Cover and cook on high for 2½ to 3½ hours or low for 4 to 6 hours, until the chicken reaches 165°F / 74°C. Very thick chicken breasts may need the longer end of the range.
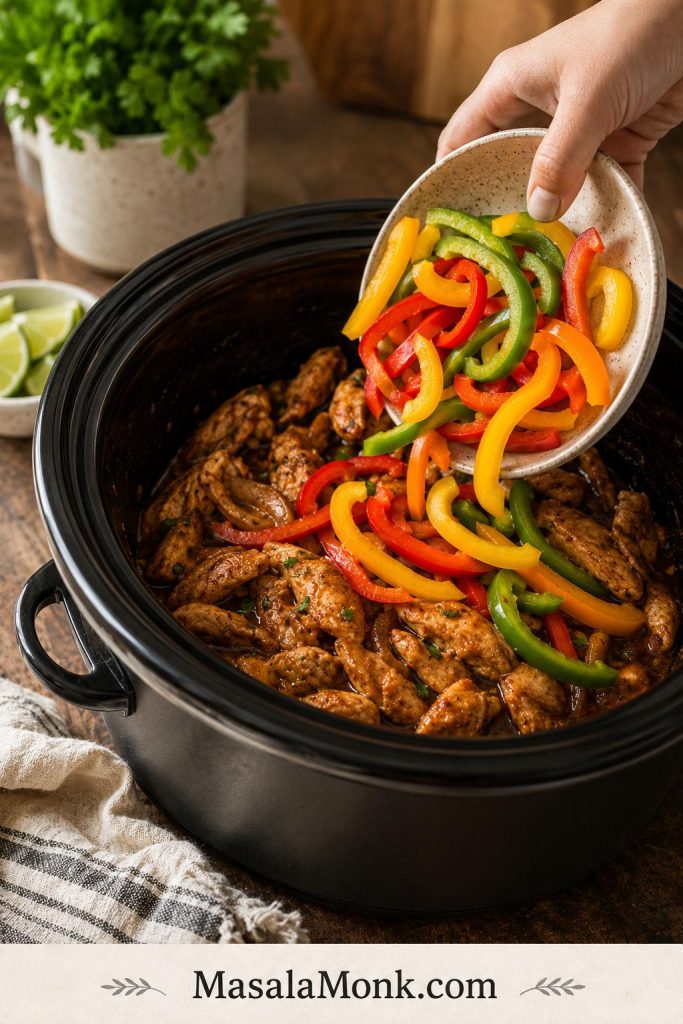
Add the remaining peppers. Stir in the reserved peppers and onions during the last 30 to 60 minutes. Use 30 minutes for firmer peppers and 60 minutes for softer peppers.
Slice or shred. Remove the chicken. Rest it for 5 minutes if slicing, or shred it with two forks. Shredded fajitas should pull apart easily. Sliced fajitas should cut cleanly after resting.
Adjust the juices. If there is a lot of liquid in the slow cooker, ladle some out. Return the chicken with only enough juices to coat the meat and vegetables.
Finish with lime. Stir in the lime juice. Taste and adjust salt, seasoning, or lime.
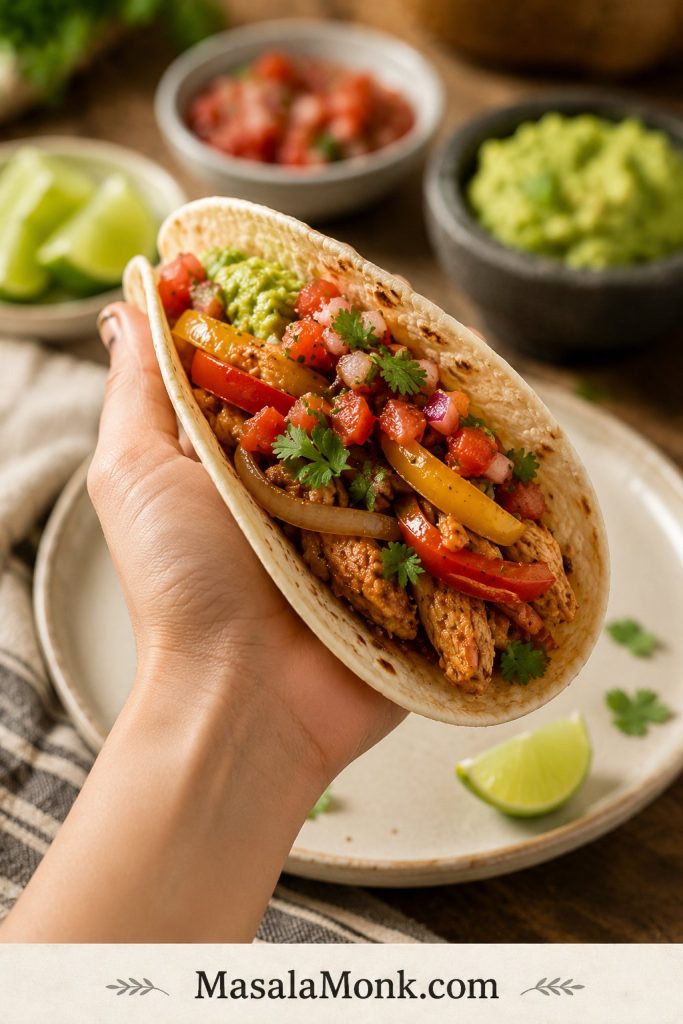
Serve. Fill warm tortillas with the chicken and peppers, or spoon them into bowls, quesadillas, or leftover meals.
Recipe Notes
Use ¾ cup / 180 ml salsa or Rotel for tortillas, or up to 1 cup / 240 ml for bowls.
Do not add extra water. The chicken, peppers, onions, and tomatoes release liquid as they cook.
Add half the peppers and onions late if you want better texture.
Thaw frozen chicken before using it in a slow cooker.
Finish with lime juice after cooking so the flavor stays fresh.
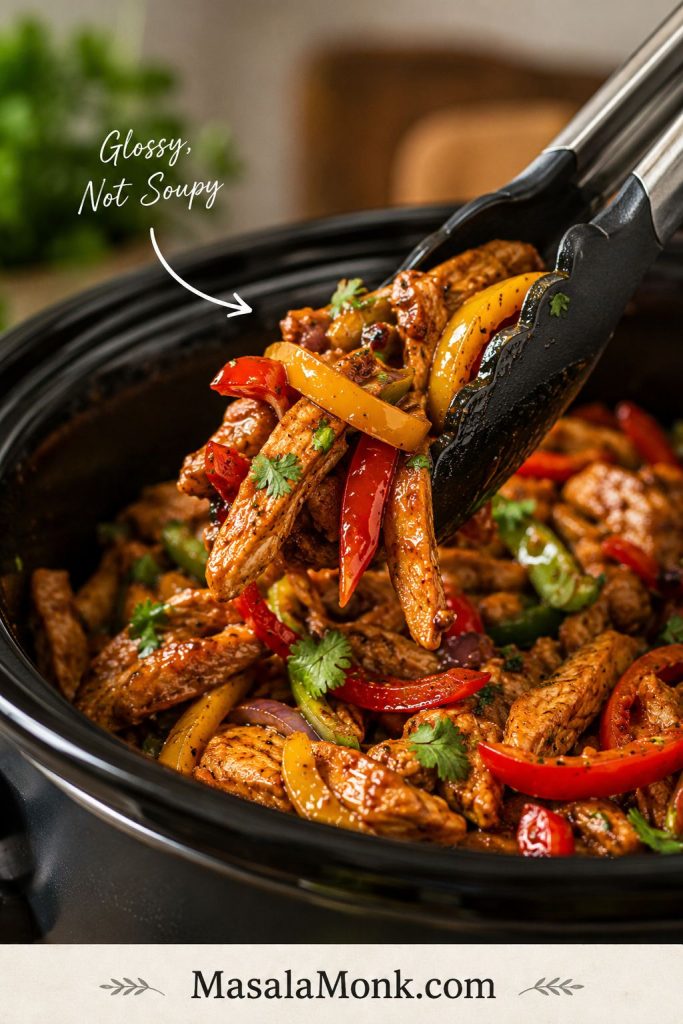
For tortillas, think glossy, not soupy. Drain or lift with tongs before filling tortillas.
This is the kind of recipe that earns its place on a weeknight because it does more than make one dinner. It helps when the day is long, the chicken is already in the fridge, and you need something that can turn into warm tortillas tonight and easy leftovers tomorrow.
Mostly hands-off. Once the slow cooker is loaded, dinner is already moving.
It works with shortcuts. Use homemade fajita seasoning, a packet, salsa, Rotel, or diced tomatoes.
It solves the usual slow-cooker problems. The filling stays glossy instead of watery.
It can be tight or saucy. Keep it neat for tortillas or leave it juicier for bowls.
It turns into more than fajitas. Use the same batch for tacos, bowls, quesadillas, and leftovers.
Once the basic method is set, you can decide whether you want a tighter tortilla filling, a saucier bowl, or soft shredded chicken for leftovers.
Why This Crock Pot Chicken Fajita Recipe Works
A slow cooker does not brown food, so the flavor has to come from seasoning, acidity, vegetables, and the way you manage the juices. That is why this recipe uses a controlled amount of salsa or Rotel, adds some peppers late, and finishes with lime instead of relying on char.
A lot of Crock Pot chicken fajita recipes are easy, but they make the same mistake: too much liquid, all the peppers added too early, and no clear plan for what to do with the juices at the end. The result can still taste good, but it often behaves more like wet shredded chicken than fajita filling.
Here, you still get the easy Crock Pot dinner, but the chicken stays juicy and the peppers do not all collapse into the sauce. A smaller amount of salsa or Rotel gives the meat enough moisture without drowning it. Some peppers and onions go in early to flavor the chicken, while the rest go in near the end so the finished chicken and peppers still have color and bite. Lime juice goes in after cooking, when it can wake up the smoky seasoning and sweet peppers instead of disappearing into the pot.
Controlled liquid keeps the chicken useful for tortillas.
Two-stage peppers give you flavor and better texture.
Chicken breasts or thighs both work depending on your goal.
Sliced or shredded chicken lets you choose classic fajita-style strips or easier pulled chicken.
Fresh lime at the end keeps the flavor lively.
Do Slow Cooker Fajitas Taste Like Skillet Fajitas?
Not exactly, and that is worth saying clearly. This is not the sizzling-pan version. It is the weeknight version: softer, juicier, easier, and still bright enough to feel fresh when the tortillas hit the table.
Expect soft, juicy fajita chicken with sweet peppers, smoky seasoning, and a fresh lime finish. It is not charred or sizzling, but it should taste bright, savory, and easy to fold into warm tortillas.
To make the slow-cooked version taste more fajita-like, add some peppers near the end, finish with fresh lime, avoid too much liquid, and use smoked paprika in the seasoning. For more roasted edges and oven-style flavor, try these sheet pan chicken fajitas. They give you the same chicken, peppers, and onion idea with more browning and less slow-cooker softness.
Ingredients You Need
The ingredient list is simple, but each part matters. Good slow cooker fajitas need enough seasoning to stand up to the long cook, enough moisture to keep the chicken juicy, and not so much liquid that the finished chicken and peppers become soupy.
Ingredient checkpoint: the chicken, peppers, onion, seasoning, salsa or Rotel, lime, tortillas, and toppings all support a different part of the final fajita texture.
Chicken, peppers, onion, seasoning, salsa or Rotel, lime, and tortillas each support a different part of the finished fajita texture.
Ingredient
What it does
Use
Chicken
Main protein
Breasts for leaner sliced fajitas; thighs for juicier shredded fajitas
Bell peppers
Sweetness, color, fajita flavor
Use mixed colors for better flavor and appearance
Onion
Savory sweetness
Yellow, white, or red onion all work
Fajita seasoning
Main flavor base
Homemade, packet fajita seasoning, or taco seasoning in a pinch
Salsa, Rotel, or tomatoes
Moisture and flavor
Use less for tortillas and more for bowls
Garlic
Depth and aroma
Fresh garlic is ideal; garlic powder works if needed
Lime juice
Freshness and balance
Add after cooking for the liveliest flavor
Tortillas and toppings
Turn the chicken and peppers into dinner
Use tortillas, rice, lettuce cups, or bowls
Chicken Breast vs Chicken Thighs
Choose chicken breasts if you want leaner pieces that can be sliced into strips. They cook well here, but they can dry out if they sit too long, so start checking closer to the shorter end of the timing range.
If chicken breast is your default cut and dry slow-cooker chicken is a recurring problem, this guide to crock pot chicken breast recipes goes deeper into timing, sauce, and keeping lean chicken useful for bowls, wraps, and leftovers.
Choose chicken thighs if you want the most forgiving version. They stay juicier, shred easily, and are especially good for tacos, bowls, and meal prep. If your slow cooker runs hot or dinner timing is unpredictable, thighs are usually easier to work with.
Both breasts and thighs should reach 165°F / 74°C before serving.
Homemade Fajita Seasoning, Packet Seasoning, or Taco Seasoning?
Use what fits the night. A packet of fajita seasoning is fast, easy, and completely acceptable for a weeknight slow cooker dinner. Homemade fajita seasoning gives you more control over salt, heat, smoke, and sweetness.
Taco seasoning also works in a pinch. It may taste a little more like taco chicken than fajitas, but the peppers, onions, lime, and smoked paprika help pull it back toward fajita flavor. If you use a packet, wait until the end before adding extra salt because many store-bought blends are already salty.
Simple Homemade Fajita Seasoning
Spice
Amount
Chili powder
1 tablespoon
Ground cumin
2 teaspoons
Smoked paprika
1 teaspoon
Garlic powder
1 teaspoon
Onion powder
1 teaspoon
Dried oregano
½ teaspoon
Ground coriander
½ teaspoon
Black pepper
½ teaspoon
Salt
1 to 1½ teaspoons
Cayenne pepper
⅛ to ¼ teaspoon, optional
This amount seasons about 2 lb / 900 g chicken. If your chili powder or store-bought seasoning already contains salt, reduce the added salt and adjust after cooking.
How to Make Slow Cooker Chicken Fajitas
The easiest method is to add everything at once and cook. That works, especially for shredded tacos and bowls. The better method is almost as easy: add some vegetables at the beginning and some near the end. That small move makes the dish feel more like fajitas and less like slow-cooker chicken stew.
Step 1: Slice the Peppers and Onion
Slice the bell peppers and onion into strips. Keep them similar in size so they cook evenly. Set aside about half of the peppers and onions if you want better texture in the finished fajitas.
Step 2: Build the First Layer
Add half the peppers and onions to the bottom of the slow cooker. This gives the chicken a flavorful base and helps season the cooking juices.
Step 3: Add Chicken, Garlic, Seasoning, and Salsa
Place the chicken on top of the vegetables. Sprinkle the fajita seasoning and garlic over the chicken, then add the salsa, Rotel, or diced tomatoes. Do not add extra water. In most slow cookers, the chicken, peppers, onions, and tomatoes release more liquid than you expect.
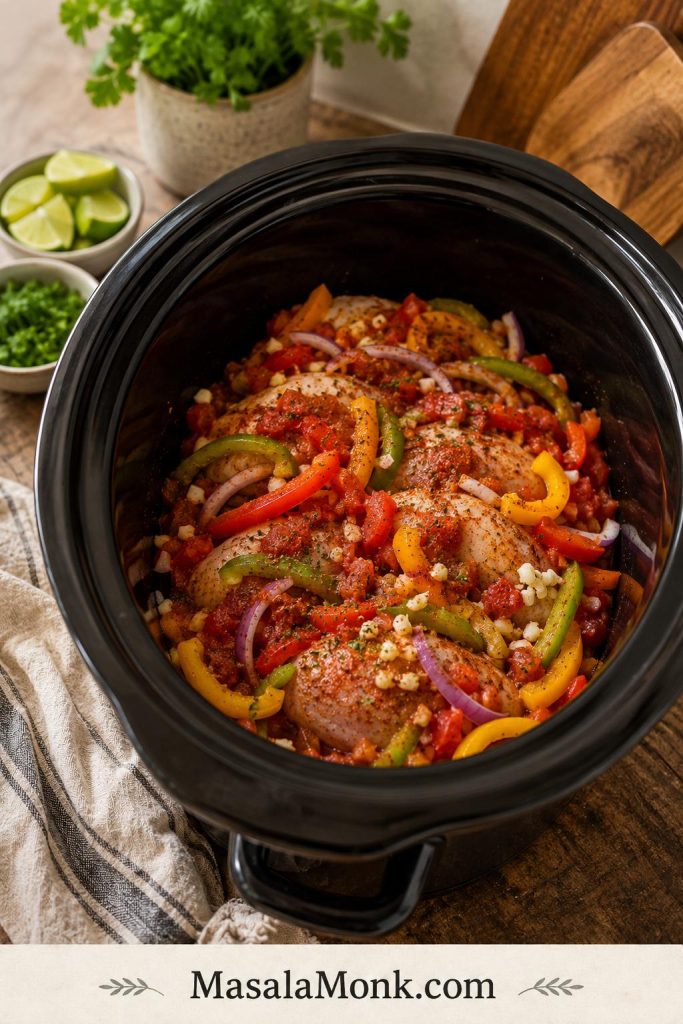
Before the lid goes on: the pot should look seasoned and lightly sauced, not flooded. That setup helps the chicken cook juicy without creating a watery tortilla filling later.
Before cooking, the pot should look coated, not drowned. That controlled start keeps the final fajita filling easier to serve.
Step 4: Cook Until the Chicken Is Done
Cook on high for 2½ to 3½ hours or low for 4 to 6 hours. Chicken breasts are usually best closer to the shorter end if you want slices that hold together. Thighs can handle a longer cook and are better for shredding.
Step 5: Add the Remaining Peppers and Onions
Add the reserved peppers and onions during the last 30 to 60 minutes. Use 30 minutes for more bite, or go closer to 60 minutes if you want them softer but still fresher than the vegetables that cooked from the beginning.
Step 6: Slice or Shred the Chicken
Once the chicken reaches 165°F / 74°C, remove it from the slow cooker. Rest it for a few minutes before slicing, or shred it with two forks if you want pulled chicken for tacos, bowls, or leftovers.
Step 7: Manage the Cooking Juices
If the slow cooker has a lot of liquid, ladle some out before returning the chicken. The finished chicken should look shiny and coated, with a little sauce clinging to the peppers, not a pool of liquid under every tortilla. You are not trying to make dry chicken. Instead, keep the chicken and peppers juicy enough to taste good but firm enough to pick up in a tortilla.
Step 8: Finish with Lime and Serve
Stir in fresh lime juice at the end. When the lime goes in, the whole pot should smell brighter. Taste and adjust salt, seasoning, or lime. Serve with warm tortillas, bowls, or whatever leftovers need rescuing tomorrow.
Slow Cooker Timing: Low vs High
Once the pot is set up, timing is the main thing to watch. The goal is not just cooked chicken. It is chicken that is done before it turns stringy.
Slow cookers are not all the same, and chicken breast can go from juicy to dry faster than people expect. Use the times below as a guide, then let temperature and texture decide when the chicken is done. Chicken should reach 165°F / 74°C. You can confirm poultry temperature guidance from FoodSafety.gov.
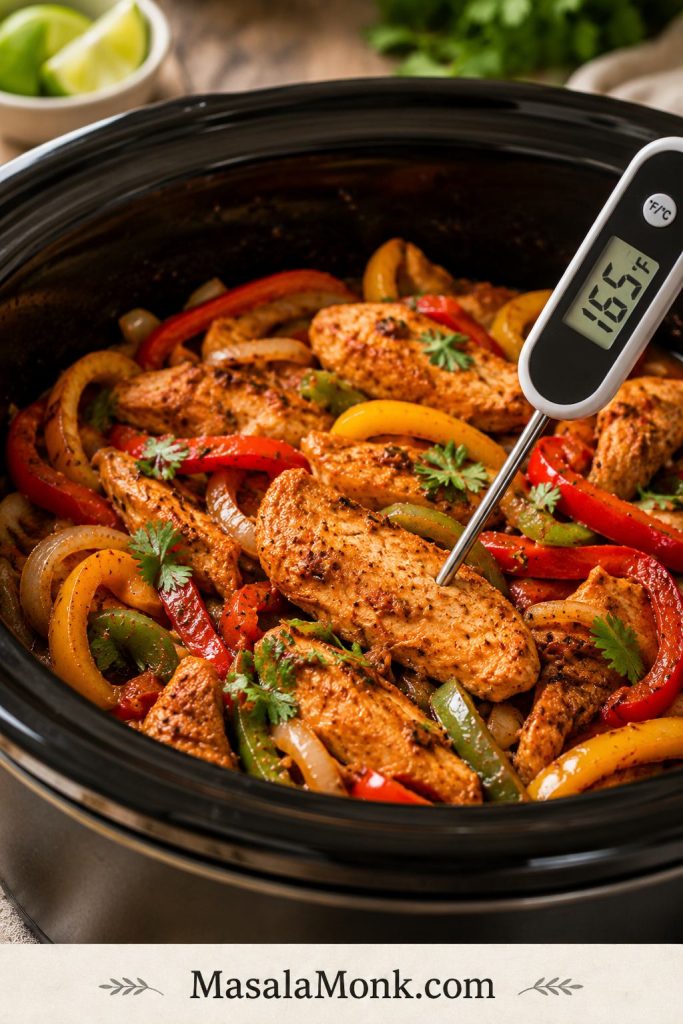
Temperature checkpoint: once the chicken reaches 165°F / 74°C, you can safely slice or shred it and then decide how much cooking juice to keep.
Use temperature, not just time. Once the chicken reaches 165°F / 74°C, you can safely slice, shred, and finish the filling.
Goal
Setting
Time
What to know
Sliced chicken fajitas
Low
4 to 5 hours
Helpful when you want the chicken to hold its shape
Shredded chicken fajitas
Low
5 to 6 hours
Works well for tacos, bowls, quesadillas, and meal prep
Faster dinner
High
2½ to 3½ hours
Useful, but check early to avoid dry chicken breast
Chicken thighs
Low
5 to 6 hours
Juicier and more forgiving than breasts
Holding after cooking
Warm
As short as possible
Long holding can make chicken breast dry or stringy
Very thick chicken breasts may need the longer end of the range. If the chicken is done before dinner, remove it from the slow cooker and keep it covered. Return it to the warm chicken and peppers closer to serving time so lean breast meat does not keep cooking while the vegetables sit in the hot pot.
How to Keep Slow Cooker Chicken Fajitas from Getting Watery
If there is one place slow cooker fajitas usually go wrong, it is the liquid. The chicken may taste good, but if it drips through the tortilla, dinner becomes messy fast.
Do not panic if the slow cooker looks juicy when you open the lid. That is normal. The trick is deciding how much of that liquid belongs in the final tortilla filling.
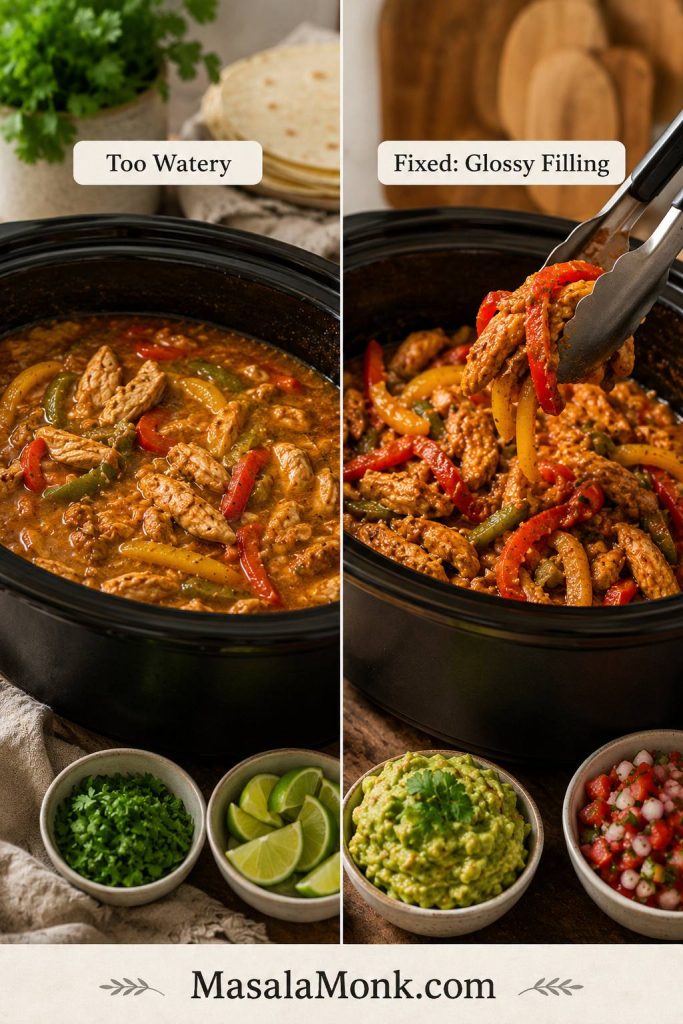
Look for Glossy, Not Soupy
This is the visual cue for tortilla fajitas. The chicken and peppers should be coated with seasoned juices, but the filling should not be loose enough to run through a warm tortilla.
This is the texture cue to remember: glossy, not soupy. The chicken and peppers should be coated with seasoned juices, but not swimming if they are going into tortillas.
If past slow-cooker chicken has turned out watery or bland, this is the part that changes it: start with less liquid, add some peppers later, and brighten the pot at the end. A few small choices make the difference between juicy and soggy. For tortillas, think glossy, not soupy. Bowls can stay a little juicier because rice, quinoa, or cauliflower rice can soak up the seasoned liquid.
Problem
Fix
Too much salsa, Rotel, or tomato
Use ¾ cup / 180 ml for 2 lb / 900 g chicken if serving in tortillas
Peppers release too much water
Add half the peppers near the end instead of all at the beginning
Chicken releases a lot of juice
Remove extra liquid before returning sliced or shredded chicken
Tortillas get soggy
Serve with tongs or a slotted spoon
The pot looks soupy
After the chicken reaches 165°F / 74°C, remove the lid or set it slightly ajar on high for 20 to 30 minutes to reduce excess liquid
You want bowl-style fajitas
Leave it a little juicier for rice, quinoa, or cauliflower rice
How to Fix Watery Fajitas
If the pot gave you more liquid than expected, treat it as a final adjustment instead of a failure. Drain, reduce, or lift the filling with tongs so the flavor stays concentrated.
If the pot looks watery, do not panic. Lift the chicken and peppers with tongs, drain or reduce the extra liquid, then add lime so the filling tastes bright instead of diluted.
Before serving, look at the bottom of the slow cooker. A little seasoned juice is fine. However, a pool of liquid means the chicken and peppers should be lifted with tongs, drained with a slotted spoon, or reduced briefly before they go into tortillas.
After the extra liquid is out of the way, the filling tastes more concentrated: smoky, bright, and juicy enough to fold into a tortilla without losing half of it on the plate.
Do not add water at the beginning unless your slow cooker is unusually dry. For most slow cookers, the chicken, vegetables, and salsa or tomatoes create enough moisture on their own.
Use the Tortilla Test Before Serving
Before the filling goes to the table, try one tortilla. If it folds neatly and tastes juicy without dripping, the texture is right for fajitas.
Then, use the tortilla test. The filling should be juicy enough to taste good, but controlled enough to fold into warm tortillas without soaking, tearing, or dripping everywhere.
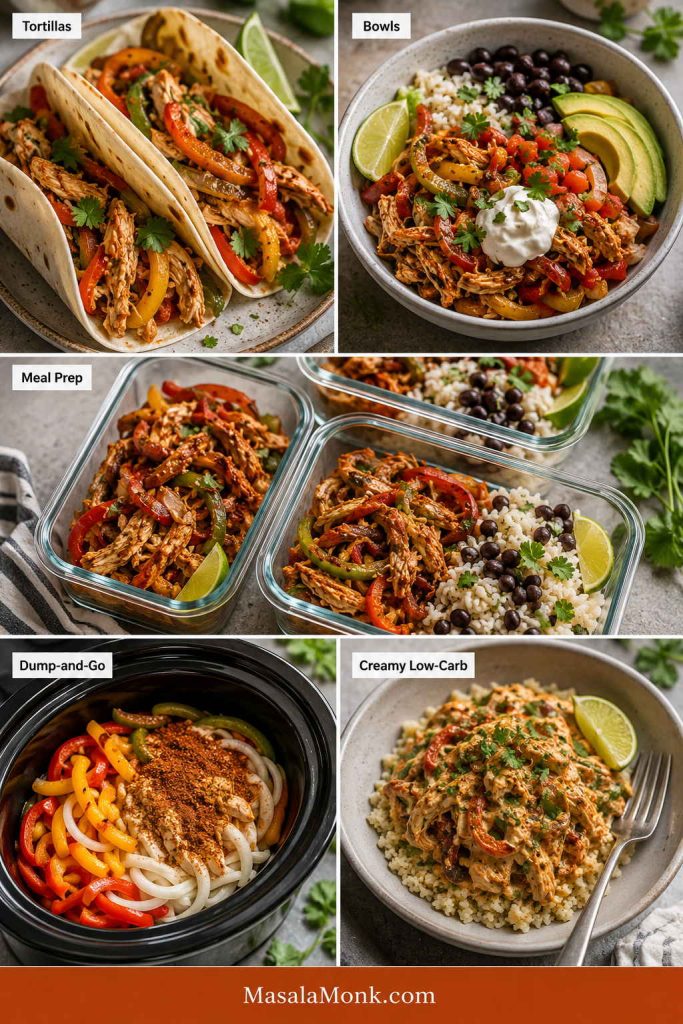
Choose Your Version: Tortillas, Bowls, Meal Prep, or Dump-and-Go
One pot can give you a few different dinners, depending on how much juice you leave behind. Choose the tighter version for tortillas, the juicier version for bowls, the shredded version for meal prep, and the late-pepper version when you want the freshest texture.
Use the visual guide: one batch can become tighter tortilla fajitas, juicier bowls, shredded meal prep, dump-and-go dinner, or creamy low-carb fajita chicken.
Once the chicken is cooked, choose the version that fits the meal. Keep it tighter for tortillas, saucier for rice bowls, shredded for meal prep, or creamy for a low-carb plate.
What you want
Liquid
Chicken
Peppers
Finish
Tortilla fajitas
¾ cup / 180 ml
Sliced or chunky
Half early, half late
Drain well, then add lime
Rice bowls
1 cup / 240 ml
Shredded or chunky
Early or half-late
Keep some juices
Meal prep
¾ to 1 cup / 180 to 240 ml
Shredded
Softer is fine
Pack toppings separately
Best texture
¾ cup / 180 ml
Sliced
Add some peppers late
Use lime and tongs
Dump-and-go
¾ to 1 cup / 180 to 240 ml
Shredded
All at the beginning
Drain before serving
Creamy low-carb
¾ cup / 180 ml
Shredded
Half-late
Add cream cheese at the end
After the juices are right and the lime goes in, the same batch can become warm tortillas tonight, rice bowls tomorrow, or easy leftovers for lunch.
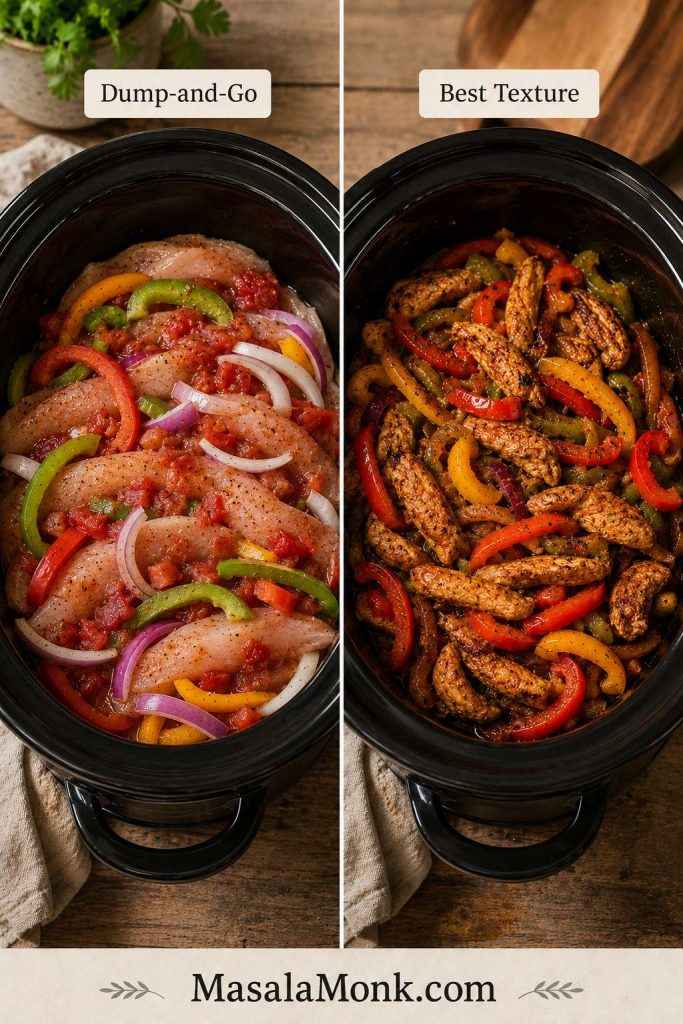
Dump-and-Go vs Best Texture
Both paths work. The fastest path is dump-and-go, while the best-texture version keeps some peppers back so the finished fajitas look brighter and eat less soft.
Dump-and-go is the easiest route, while the best-texture version saves some peppers for the end. That one timing change keeps Crock Pot chicken fajitas brighter and less mushy.
When to Add Peppers and Onions
Once you know whether you are making tortillas, bowls, or meal prep, the next choice is how fresh you want the peppers to feel.
Peppers are where slow cooker fajitas can either feel fresh or fall flat. If they cook for the full time, they become soft and saucy. That is fine for shredded chicken bowls or tacos, but it does not feel as much like classic fajitas.
For the best balance, use the half early, half late method. Early vegetables flavor the chicken. The late peppers should still look colorful and taste sweet, not faded into the sauce.
Add Some Peppers Late
Late peppers are the simplest way to make slow cooker fajitas feel more like fajitas. They add color, sweetness, and bite without requiring a separate skillet.
Add some peppers during the last 30 to 60 minutes when you want more color and bite. This keeps slow cooker fajitas lively without adding another pan to dinner.
If using frozen sliced peppers, add them late and expect a softer, juicier result. Fresh peppers give the best color and bite, but frozen peppers are still useful for quick bowls, tacos, and weeknight dinners.
When you add them
Result
Use when
At the beginning
Very soft peppers and onions
You want the easiest dump-and-go dinner
Halfway through
Balanced texture
You want a simple family dinner
Last 30 to 60 minutes
Brighter, firmer peppers
You want more fajita-like texture
Sauté separately
Most bite and closest skillet feel
You do not mind one extra pan
Half early, half late
Flavor plus texture
You want the most practical slow cooker method
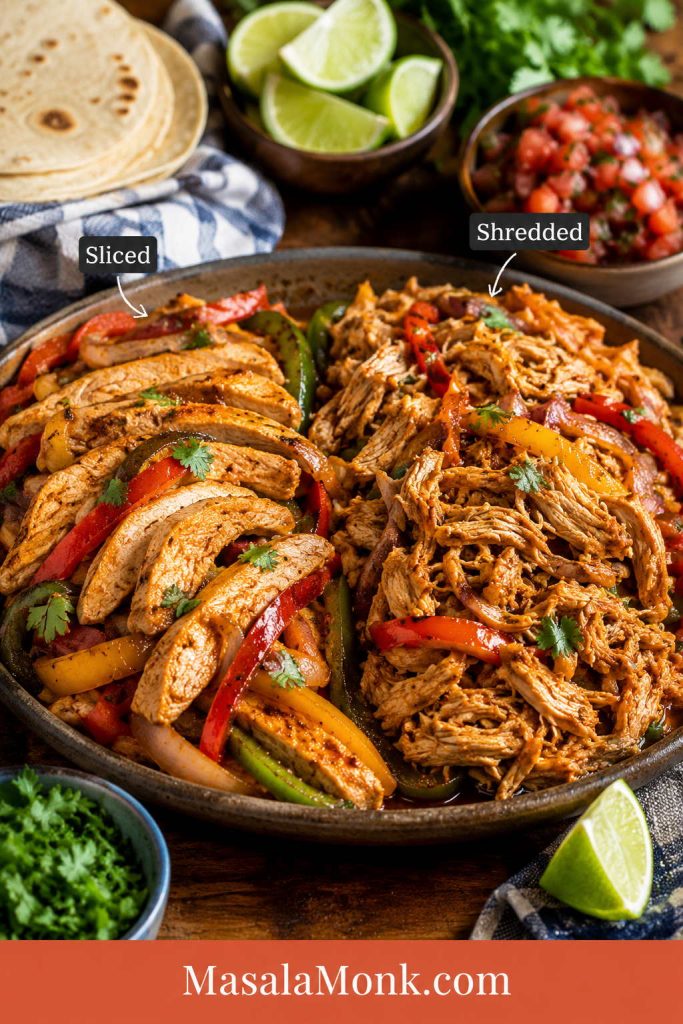
Shredded vs Sliced Slow Cooker Chicken Fajitas
Once the liquid is under control, the next choice is how you want to eat the chicken. Traditional fajitas usually use sliced meat, but Crock Pot chicken naturally becomes tender enough to shred. Neither option is wrong.
Shredded vs Sliced Chicken
Sliced chicken feels more classic in tortillas. Shredded chicken is easier for tacos, bowls, quesadillas, and leftovers, especially when the juices are controlled.
Slice the chicken for a more classic fajita feel, or shred it for bowls, tacos, quesadillas, and leftovers. Either way, return it with just enough juice to coat.
Style
Use for
How to do it
Sliced chicken fajitas
Classic tortillas
Cook just until done, rest 5 minutes, then slice across the grain
Shredded chicken fajitas
Tacos, bowls, quesadillas, leftovers
Cook until fork-tender, shred with two forks, toss with controlled juices
Chunky chicken fajitas
Rice bowls and salads
Cut cooked chicken into thick pieces and fold back into the peppers and onions
For the most classic fajita feel, slice the chicken and add some peppers late. The easiest meal prep option is shredded chicken with just enough juice to coat.
Troubleshooting Slow Cooker Chicken Fajitas
If the pot looks a little messy at the end, that is normal. Slow cooker fajitas usually need one final adjustment before they become dinner.
If the pot does not look the way you hoped, it is usually one of four easy fixes: too much liquid, peppers that cooked too long, chicken breast that stayed on heat too long, or a finish that needs lime and salt.
Quick Fixes for Common Slow Cooker Fajita Problems
Problem
Likely cause
Fix
The pot is watery
Too much salsa, Rotel, tomato, or trapped steam
Drain extra liquid, reduce it after the chicken is fully cooked, or use ¾ cup liquid next time
Peppers are mushy
All the peppers cooked from the beginning
Add half the peppers in the last 30 to 60 minutes
Chicken breast is dry
Cooked too long or held on warm too long
Check early, use thighs next time, and return chicken with some juices
Flavor tastes flat
Slow cooking muted the seasoning
Add lime juice, salt, smoked paprika, hot sauce, or fresh cilantro
Tortillas get soggy
The chicken and peppers are too wet when assembled
Use tongs or a slotted spoon and let liquid drip back into the cooker
Fajitas do not taste fajita-like
No char, soft peppers, or too much sauce
Add peppers late, sauté peppers separately, or use the sheet pan method next time
Chicken is too dry after chilling
It absorbed liquid in the fridge
Reheat with a spoonful of salsa, water, or reserved cooking liquid
Too loose for quesadillas
Too much cooking juice left in the meat
Drain well and reheat uncovered before adding to tortillas with cheese
From there, the fix is simple: drain a little, brighten with lime, or save the extra juice for bowls. Tortillas need a tighter filling. Quesadillas need the chicken drained well so the cheese and tortilla can crisp instead of steam.
Variations: Dump-and-Go, Rotel, No Tomato, and Creamy Low-Carb
Once the texture is handled, the flavor base can flex around what you have: Rotel, salsa, taco seasoning, no tomatoes, or a creamy finish.
You do not need the exact same jar, can, or seasoning blend every time. Use this section when you want the fastest version, a Rotel version, a no-tomato version, or a creamy low-carb fajita chicken.
Rotel, Salsa, or No Tomato
This choice changes both flavor and moisture. Tomato-based options add a red base, while the no-tomato version stays lighter and depends more on peppers, seasoning, garlic, and lime.
Rotel gives tomato-chile flavor, salsa keeps the recipe shortcut-friendly, and the no-tomato version stays lighter and less saucy. Choose the base based on flavor, moisture, and texture.
Variation
What changes
Best for
4-ingredient
Use chicken, peppers and onions, seasoning, and salsa or Rotel
Busiest nights
Rotel
Use one 10 oz / 285 g can; drain lightly if very juicy
Tomato-chile flavor
No tomato
Use seasoning, garlic, lime, peppers, onions, and a small splash of broth only if needed
Less watery fajitas
Cream cheese
Add 3 to 4 oz / 85 to 115 g cream cheese during the last 20 to 30 minutes
Bowls, lettuce cups, low-carb plates
Taco seasoning
Use a packet and adjust salt after cooking
Shortcut version
Salsa verde topping
Add after cooking or at the table
Brighter green flavor
Rotel is canned diced tomatoes with green chiles. If you do not have it, use diced tomatoes plus a little chopped green chile, mild salsa, or another tomato-chile blend you like.
No-tomato fajitas need a little extra lime, smoked paprika, garlic, and seasoning so the chicken does not taste flat. For creamy fajita chicken, use the lower amount of salsa or Rotel so the sauce does not become loose.
Creamy Low-Carb Fajita Chicken
Add cream cheese near the end so the sauce stays smooth and the peppers do not disappear into a heavy base. This version works especially well with cauliflower rice or lettuce cups.
For creamy low-carb fajita chicken, stir in cream cheese near the end instead of at the beginning. The sauce should turn smooth and glossy while peppers, lime, and avocado keep the bowl balanced.
A fast dump-and-go Crock Pot chicken fajitas version can be made with chicken, fajita seasoning, one can Rotel, peppers, onions, and lime. It will still work; just drain before serving if the pot looks juicy.
For a brighter green topping instead of more red salsa, a spoon of salsa verde works especially well with the chicken, peppers, lime, and tortillas.
Cook the rice separately. It is the safer, fluffier option because uncooked rice changes the liquid balance in this recipe and can turn mushy in the slow cooker. For reliable bowls, spoon the chicken, peppers, onions, and some of the juices over cooked rice instead.
Serve It Over Rice
Rice bowls are the place to keep a little more seasoned juice. The rice catches the sauce, while avocado, salsa, cilantro, and lime keep the bowl balanced.
Rice bowls can stay a little juicier because the rice absorbs the seasoned fajita juices.
If rice texture is where dinner usually goes wrong, this guide on how to cook rice covers stovetop, rice cooker, and Instant Pot timing so your bowl base stays fluffy instead of wet or gummy.
For meal prep, pack the rice and fajita chicken together only after both have cooled. Keep fresh toppings like lettuce, sour cream, avocado, and cilantro separate until serving.
Can You Use Frozen Chicken for Slow Cooker Fajitas?
No. Thaw the chicken first before using it in this recipe. Slow cookers heat gradually, and frozen chicken can take too long to move through unsafe temperatures. FoodSafety.gov’s slow-cooker guidance says frozen meat, poultry, or seafood should be thawed safely before adding it to the slow cooker.
Forgot to thaw? Use a pressure cooker method or cook the chicken separately from frozen with a faster method, then combine it with the peppers, seasoning, salsa, and lime after it is fully cooked. Check that the chicken reaches 165°F / 74°C before serving.
What to Serve with Slow Cooker Chicken Fajitas
Warm tortillas are the classic choice, but this chicken is flexible. One batch can become dinner tonight and a different lunch tomorrow.
Warm tortillas in a dry skillet for 20 to 30 seconds per side, or wrap a stack in foil and place it in a 250°F / 120°C oven until soft. Soft, warm tortillas fold better, hold the chicken more neatly, and make even a simple Crock Pot dinner feel fresher.
Put the tortillas, lime wedges, avocado, salsa, and hot sauce on the table and let everyone build their own. That is where this slow cooker dinner starts to feel fresh.
Table setup: set the chicken and peppers beside warm tortillas and fresh toppings so everyone can build the fajita they want.
Set out warm tortillas, glossy chicken, peppers, lime, salsa, guacamole, and hot sauce so everyone can build their own fajitas.
Serving idea
Why it fits
Flour or corn tortillas
Classic fajita dinner
Rice bowls
Easy meal prep and filling lunches
Cauliflower rice
Lower-carb bowl option
Lettuce cups
Lighter fajita wraps
Tacos
Family-friendly and easy to assemble
Quesadillas
One of the best uses for leftovers
Salad
High-protein lunch with avocado, lime, and crisp vegetables
Nachos
Casual snack or game-day style dinner
Pasta or pasta bake
Comfort-food variation
Casserole
Good for stretching leftovers into another family dinner
Best Toppings for Chicken Fajitas
Because the chicken is warm and saucy, the best toppings are the ones that wake it up: lime, cilantro, avocado, salsa, crunch, or heat.
Sour cream or Greek yogurt
Avocado or guacamole
Fresh cilantro
Lime wedges
Shredded lettuce
Cheese, shredded or crumbled
Salsa or pico de gallo
Pickled jalapeños
Hot sauce
Crushed tortilla chips for bowls or salads
For the creamy avocado route, this guacamole recipe is the easiest topping to put beside warm tortillas, salsa, lime, and fajita chicken.
If you like heat at the table, a thin vinegar-style hot sauce, jalapeño sauce, or smoky chile sauce can wake up the whole plate. This pepper sauce guide gives you several directions, from bright and sharp to smoky and fruity.
Storage, Freezing, and Reheating
Slow cooker chicken fajita filling stores well. Keep tortillas, rice, lettuce, and fresh toppings separate so they do not become soggy.
Pack It for Meal Prep
Cool the rice and chicken before packing, then keep wet or fresh toppings separate. That one step keeps fajita bowls from turning soggy in the fridge.
Cool the rice and fajita filling first, then add salsa, guacamole, cheese, and lime after reheating.
Storage method
How to do it
Fridge
Store cooked chicken and peppers in an airtight container for 3 to 4 days
Freezer
Freeze cooked chicken and vegetables for 2 to 3 months
Freezer tip
Freeze without tortillas or fresh toppings
Reheating
Reheat in a skillet or microwave until hot
Meal prep tip
Pack rice or tortillas separately and add toppings after reheating
To avoid sogginess
Drain extra liquid before packing tortillas, tacos, or wraps
If the chicken looks dry after refrigeration, reheat it with a spoonful of salsa, water, or reserved cooking liquid. When it looks too wet, reheat it uncovered in a skillet for a few minutes so some moisture evaporates.
Leftover fajita chicken can also become a baked dinner using the same shredded chicken-and-tortilla logic in this chicken enchilada casserole.
Slow Cooker Chicken Fajitas FAQ
How long do chicken fajitas take in the slow cooker?
Most chicken fajitas take 4 to 6 hours on low or 2½ to 3½ hours on high. Chicken breasts are usually better closer to the shorter end if you want slices. For shredded chicken, cook until the meat is fork-tender and reaches 165°F / 74°C.
Is low or high better for Crock Pot chicken fajitas?
Low is usually better for juicier chicken and more even cooking. High works when you need dinner faster, but chicken breast can dry out if it cooks too long. Start checking around 2½ hours on high, especially if the chicken pieces are not very thick.
Why are my slow cooker fajitas watery?
They are usually watery because a covered slow cooker traps steam while chicken, peppers, onions, salsa, and tomatoes release liquid. Use less salsa, add some peppers late, and drain before filling tortillas.
When should I add peppers and onions?
Add all the peppers and onions at the beginning for the easiest dump-and-go version. For better texture, add half at the beginning and half during the last 30 to 60 minutes so every pepper strip does not turn soft.
Should the chicken be shredded or sliced?
Either works. Sliced chicken feels more like classic fajitas. Shredded chicken is easier in the slow cooker and works well for tacos, rice bowls, quesadillas, nachos, and meal prep.
Can I use taco seasoning instead of fajita seasoning?
Yes. Taco seasoning works in a pinch. It may taste slightly more like taco chicken, but peppers, onions, smoked paprika, and lime help pull the flavor back toward fajitas.
Is Rotel good in Crock Pot fajitas?
Yes. Rotel adds tomatoes, green chiles, and flavor in one can. For 2 lb / 900 g chicken, one 10 oz / 285 g can works well. If the can is very juicy, drain a little first or remove excess liquid after cooking.
Can I make chicken fajitas without tomatoes?
Yes. Skip the salsa, Rotel, or diced tomatoes. Use chicken, peppers, onions, garlic, fajita seasoning, lime, and only a small splash of broth if your slow cooker needs moisture. Add extra lime, smoked paprika, garlic, or seasoning if the flavor tastes flat.
Can I use frozen chicken in the slow cooker?
For this recipe, thaw it first. Slow cookers heat gradually, and frozen chicken can take too long to cook safely. Use a pressure cooker or another faster method if you need to cook chicken from frozen, then check that it reaches 165°F / 74°C.
Can I add rice to the same slow cooker?
Cook rice separately and serve the fajita chicken over it. Uncooked rice changes the liquid ratio and can become mushy in this recipe. For meal prep, cool the rice and chicken before packing them together.
What can I make with leftover chicken fajitas?
Use leftovers in quesadillas, tacos, rice bowls, salads, nachos, or casseroles. Drain juicy chicken before adding it to tortillas or quesadillas. Reheat dry leftovers with a spoonful of salsa or cooking liquid.
Final Note
This slow cooker dinner works because it solves the hard part before dinner starts. Keep the filling glossy, add a handful of peppers late, squeeze in lime at the end, and the pot tastes brighter than a slow cooker dinner usually does.
That is the kind of dinner that feels easy before you eat it and useful again the next day.
If you make it, leave a comment with the version you chose: tighter tortilla fajitas, saucier bowls, dump-and-go, or creamy low-carb. That choice helps other readers decide which path to take.
You want chicken enchiladas that taste like a real dinner, not dry chicken wrapped in tortillas and hidden under cheese. This easy chicken enchilada recipe keeps the filling juicy, the sauce generous but controlled, and the tortillas soft enough to roll without turning the whole pan soggy.
It is the pan for nights when cooked chicken is already handled and you just need it to become dinner. Store-bought sauce, rotisserie chicken, and flour tortillas are not shortcuts to apologize for here. They are what make this a dinner you can actually cook tonight.
The best version gives you soft tortillas, juicy chicken, melted cheese, and saucy edges without a wet bottom. A simple trick makes that possible: the ½-½-1½ no-soggy sauce split, with a thin layer under the enchiladas, a little sauce in the chicken, and most of the sauce on top.
Easy chicken enchiladas are made by filling warm tortillas with shredded chicken, cheese, spices, and enchilada sauce, then rolling them into a 9×13-inch baking dish. Top with more sauce and cheese, then bake at 350°F / 175°C for 22–25 minutes, until the cheese is melted and the sauce bubbles around the edges.
For one family-size pan, use 3 cups / 375–425 g cooked shredded chicken, 2½ cups / 600 ml enchilada sauce, 8 medium tortillas or 10 small corn tortillas, and 2½ cups / about 285 g shredded cheese. Let the pan rest for 5–10 minutes before serving.
The shortcut version uses rotisserie chicken and store-bought sauce, so most of the work is filling, rolling, topping, and baking. To keep the pan saucy but not soggy, use ½ cup sauce underneath, ½ cup in the chicken, and 1½ cups on top.
Fastest chicken: rotisserie chicken.
Main sauce: red enchilada sauce.
Beginner-friendly tortilla: flour tortillas.
More classic texture: warmed corn tortillas.
Best texture clue: saucy edges, melted cheese, and tortillas that lift instead of collapse.
Serving Chicken Enchiladas
This plate shows the finished texture you are aiming for: saucy edges, melted cheese, and enough structure to serve with toppings instead of collapsing into the dish.
After baking, add cooling toppings like sour cream, lime, cilantro, or guacamole so each serving tastes rich, fresh, and balanced.
Make This Now If You Have
Rotisserie chicken, leftover chicken, or any cooked shredded chicken
Red enchilada sauce or green enchilada sauce
Flour or corn tortillas
A cheese that melts well
A 9×13-inch baking dish
About 45 minutes
You do not need homemade sauce, freshly cooked chicken, or perfect tortillas to make this work. The recipe is built around cooked chicken, ready sauce, and a few small choices that keep the pan from turning heavy or soggy.
This is the kind of pan that still works even if one tortilla tears, the sauce came from a can, and the chicken came from last night’s dinner. Choose flour tortillas if you are worried about cracking. Pick corn tortillas if you want a more classic enchilada bite.
Make the card version first. The sections after it are there for the moments that usually cause trouble: dry chicken, cracked tortillas, too much sauce underneath, and messy first servings.
Easy Chicken Enchilada Recipe Card
Start here for the classic version: red chicken enchiladas with shredded chicken, warm tortillas, enchilada sauce, and melty cheese.
Recipe Details
Prep time
15 minutes
Cook time
22–25 minutes
Rest time
5–10 minutes
Total time
45–50 minutes
Servings
4–6
Yield
8 medium enchiladas or 10 smaller corn-tortilla enchiladas
Oven temperature
350°F / 175°C
Baking dish
9×13-inch / 23×33 cm
Equipment
9×13-inch / 23×33 cm baking dish
Large mixing bowl
Measuring cups and spoons
Spoon or spatula
Skillet, microwave-safe plate, or clean towel for warming tortillas
Foil, optional
Ingredients
3 cups cooked shredded chicken / about 375–425 g
2½ cups red enchilada sauce / about 600 ml, divided
8 medium flour or corn tortillas, or 10 small 6-inch corn tortillas
2½ cups shredded cheese / about 285 g, divided
1 can diced green chiles / 4 oz / 113 g, optional but recommended
½ teaspoon ground cumin
½ teaspoon garlic powder
¼ teaspoon onion powder, or ¼ cup finely chopped onion
½ teaspoon salt, adjust depending on the sauce
¼ teaspoon black pepper
Oil or cooking spray, for the baking dish
For topping: chopped cilantro, sour cream, diced onion, avocado, guacamole, jalapeños, lime wedges, pico de gallo, or crumbled cotija.
The ½-½-1½ Sauce Split
½ cup / 120 ml sauce for the bottom of the baking dish
½ cup / 120 ml sauce mixed into the chicken filling
1½ cups / 360 ml sauce poured over the top
This is the no-soggy rhythm: a little underneath so nothing sticks, a little inside so the chicken stays moist, and most on top where it can bubble into the cheese.
Instructions
Preheat the oven. Heat the oven to 350°F / 175°C. Lightly grease a 9×13-inch / 23×33 cm baking dish.
Add the bottom sauce. Spread ½ cup / 120 ml enchilada sauce across the bottom. The dish should be coated, not flooded.
Make the filling. Mix the shredded chicken with ½ cup / 120 ml sauce, green chiles, cumin, garlic powder, onion powder, salt, pepper, and 1 cup / about 115 g shredded cheese.
Warm the tortillas. Heat them until flexible. Use a skillet, microwave them wrapped in a damp towel for 20–30 seconds, or briefly warm corn tortillas with a little oil.
Fill each tortilla. Spoon about ⅓ cup filling down the center of each medium tortilla. Use 2–3 tablespoons for small corn tortillas.
Roll and arrange. Work snugly, then place each enchilada seam-side down in the baking dish.
Add the top sauce and cheese. Pour the remaining 1½ cups / 360 ml sauce over the enchiladas. Sprinkle with the remaining 1½ cups / about 170 g cheese.
Bake. Leave the pan uncovered for 22–25 minutes, until the cheese melts, the sauce bubbles at the edges, and the center is hot.
Rest. Let the pan rest for 5–10 minutes before serving.
Finish. Add cilantro, sour cream, avocado, lime, jalapeños, or your favorite toppings.
Recipe Notes
Use 2½ cups chicken for lighter enchiladas or up to 4 cups for very full enchiladas.
If using small corn tortillas, use about 2–3 tablespoons filling per tortilla and expect about 10 smaller enchiladas.
When the chicken filling is steaming hot, let it cool for 3–5 minutes before rolling so the tortillas do not soften too quickly.
Bake uncovered for the best texture. Cover loosely for the first 15 minutes only if you prefer very soft enchiladas.
If your enchilada sauce is already salty, reduce the added salt in the filling.
Dry filling needs 1–2 extra tablespoons of sauce. Loose filling needs a little more chicken or cheese.
For an 8×8-inch / 20×20 cm pan, halve the recipe and bake until the sauce bubbles and the center is hot.
This recipe works because it fixes the three places chicken enchiladas usually go wrong: dry filling, cracked tortillas, and a soggy bottom.
Sauce, spices, green chiles, and cheese go into the chicken before rolling, so the filling tastes seasoned instead of plain. Warm tortillas bend instead of splitting, and the thin bottom sauce layer keeps the underside coated without turning mushy.
Most of the comfort lands on top, where the sauce and cheese bubble together. Give the pan a few minutes to rest, and the first serving has a much better chance of lifting cleanly.
The ½-½-1½ No-Soggy Sauce Split
Soggy enchiladas usually come from too much sauce underneath, watery filling, cold tortillas, very hot filling, or steam trapped in the pan for too long. Instead, aim for better placement, not less sauce.
The split is easy to remember: ½ cup underneath, ½ cup inside, 1½ cups on top.
In practice, the ½-½-1½ split means a little sauce underneath, a little in the filling, and most on top where it can bubble into the cheese.
Rule of thumb: light sauce underneath, moist chicken inside, generous sauce on top, warm tortillas, uncovered bake, and a short rest before serving.
Underneath: a thin sauce layer keeps the enchiladas from sticking without soaking the bottom.
Inside: a little sauce in the chicken keeps the filling juicy.
On top: most of the sauce bubbles into the cheese where it belongs.
Very hot filling: let it cool for a few minutes before rolling so trapped steam does not soften the tortillas too quickly.
Extra sauce: serve it warm at the table instead of drowning the baking dish.
Use a Thin Sauce Layer Underneath
A light base layer protects the rolls from sticking, but the bottom of the dish should still look shallow and controlled.
First, spread only a thin layer of enchilada sauce in the baking dish; this prevents sticking without turning the bottom soggy.
Do not chase perfect rolls here. Warm tortillas, seam-side down, sauce and cheese on top — that is enough. The first enchilada out of the pan is always the most likely to look a little rough, so let the dish sit while everyone grabs plates, sour cream, lime, and whatever toppings are already in the fridge.
These small choices make the difference between a pan that tastes good and a pan that serves cleanly.
A 10-minute rest gives cleaner servings than cutting into the pan immediately.
Flour tortillas are easiest for beginners, but corn tortillas give a more classic enchilada bite.
Extra sauce works better at the table than poured into the bottom of the dish.
Monterey Jack melts smoother than sharp cheddar alone.
A torn tortilla is not a failure; place it seam-side down and cover it with sauce and cheese.
The corner pieces usually get the best saucy edges.
If the first enchilada comes out messy, serve that one to the cook and let the rest settle another minute.
Choose Your Chicken Enchilada Path
Keep the red-sauce version as the base. From there, you can make the dish brighter, creamier, lighter, or skip the rolling entirely.
What you want
Best move
Classic easy chicken enchiladas
Use red enchilada sauce, shredded chicken, tortillas, and Monterey Jack or Mexican-blend cheese.
Fastest weeknight version
Use rotisserie chicken and store-bought enchilada sauce.
Green chicken enchiladas
Swap red sauce for green enchilada sauce or salsa verde.
Creamier enchiladas
Add sour cream, cream cheese, or a small amount of creamy sauce.
Milder family pan
Use mild sauce, Monterey Jack, and keep jalapeños or hot sauce for the table.
No rolling
Layer the same chicken, sauce, tortillas, and cheese as a casserole.
Less heavy version
Use chicken breast, corn tortillas, less cheese, and beans or vegetables.
Ingredients You Need
Because the ingredient list is short, the few choices you make matter: use chicken that is not watery, sauce you actually like, tortillas that bend, and cheese that melts.
Simple ingredients do the work here: cooked chicken, red enchilada sauce, tortillas, cheese, green chiles, and seasonings for a complete filling.
Chicken
Use cooked shredded chicken that is moist but not watery. Rotisserie chicken is the easiest choice, but leftover chicken, poached chicken breast, cooked thighs, or slow cooker shredded chicken all work.
If the chicken tastes good before rolling, the enchiladas will taste good after baking. Mix it with sauce, spices, green chiles, and cheese so every bite has flavor.
Enchilada Sauce
Pick a red enchilada sauce you would happily spoon over the finished pan, because it carries a lot of the flavor here. Store-bought sauce works well for a weeknight version; homemade sauce gives more depth if you already have it.
You will use 2½ cups / 600 ml sauce total. For extra-saucy servings, warm more sauce separately and add it at the table.
Using store-bought sauce? Warm it first and taste it before adding salt to the filling. When it tastes flat, add a pinch of cumin or garlic powder. If it tastes too sharp, stir in a small spoon of sour cream after warming. Want more heat? Add hot sauce, chipotle, or jalapeños at the table instead of making the whole pan spicy.
Tortillas
Corn tortillas taste more classic. Flour tortillas are softer and easier to roll. Both work, but cold tortillas crack and over-sauced tortillas get heavy.
Cheese
Cheese is not just topping here. It helps the filling hold together and gives the pan that melted, bubbling finish.
Monterey Jack: smoothest melt.
Mexican blend: easiest everyday option.
Cheddar-Jack: more flavor with good melt.
Oaxaca: mild, stretchy, excellent if available.
Cotija or queso fresco: better as a finishing topping than the main melting cheese.
Green Chiles
Diced green chiles are optional, but they make the filling taste more complete without adding much heat. They bring mild chile flavor, moisture, and a little brightness to the chicken.
Best Chicken for Chicken Enchiladas
Start with whatever cooked chicken you already have. The only real rule is that it should be cooked, shredded, and not watery.
For the fastest pan, rotisserie chicken gives you cooked, tender meat that shreds easily and soaks up sauce and spices.
Best for
Chicken choice
Fastest dinner
Rotisserie chicken
Juiciest filling
Cooked chicken thighs
Leanest version
Poached or cooked chicken breast
Meal prep
Slow cooker shredded chicken
Pantry emergency
Canned chicken, drained well
If you need a simple batch of shredded chicken before making enchiladas, the same basic method from Crock Pot Chicken Breast Recipes can be used here. Keep the chicken simply seasoned so the enchilada sauce still leads the flavor.
One medium rotisserie chicken usually gives about enough shredded meat for this recipe, depending on size. If you only have 2½ cups chicken, the enchiladas will still work. With closer to 4 cups, use large tortillas or make the filling a little fuller.
Only have canned chicken? Drain it very well, break it up gently, and season it with sauce, cumin, garlic powder, green chiles, and cheese before rolling. It will not taste as rich as rotisserie chicken, but it can still save dinner when the pantry is what you have.
Corn Tortillas vs Flour Tortillas
Tortillas are where many enchiladas go wrong. The filling can be perfect, the sauce can be good, and one cold tortilla can still split open before it reaches the pan.
Mini rule: do not use cold tortillas. Warm tortillas bend. Cold tortillas crack.
Warm Tortillas Before Rolling
Whether you choose corn or flour, warmth matters because a flexible tortilla rolls cleanly and is less likely to split at the center.
A quick warm-up makes tortillas flexible enough to roll cleanly, while cold tortillas are more likely to crack or tear.
Tortilla
Best for
Watch out for
Corn tortillas
Classic flavor and better enchilada texture
They can crack if cold or dry
Flour tortillas
Easy rolling and softer texture
They can become too soft if over-sauced
Small corn tortillas
Traditional-style smaller enchiladas
Use less filling so they do not tear
Large flour tortillas
Bigger, fuller enchiladas
Do not overstuff or the pan becomes heavy
For texture, corn tortillas give enchiladas a more classic bite, while flour tortillas are softer, larger, and easier for beginners to roll.
Once you pick the tortilla, check how much filling to use so the rolls close without tearing.
For corn tortillas, wrap them in a damp towel and microwave for 20–30 seconds, adding a few seconds more if they are still stiff. You can also heat them one by one in a skillet, or warm them quickly with a little oil.
Flour tortillas are more forgiving, but they still need sauce control. Keep the bottom layer thin and let most of the sauce sit on top, where it can bubble into the cheese instead of soaking the underside.
How Much Filling Goes in Each Tortilla?
Small corn tortilla: 2–3 tablespoons filling
Medium tortilla: about ⅓ cup filling
Large flour tortilla: ⅓–½ cup filling, depending on size
A good roll should close without strain. If you have to force it shut, use less filling.
Smaller tortillas need less filling and large flour tortillas can hold more; either way, each roll should close without strain.
Sauce Options and Easy Variations
Keep the same rolling and baking approach, then change the sauce, filling, or toppings to match the dinner you want. Pick the sauce based on what sounds good, not because one version is more correct.
Version
How to make it
Classic red chicken enchiladas
Use red enchilada sauce, shredded chicken, green chiles, and Monterey Jack or Mexican-blend cheese.
Green chicken enchiladas
Swap red sauce for green enchilada sauce or Salsa Verde. Finish with cilantro, lime, and sour cream.
White chicken enchiladas
Use a creamy white sauce with chicken broth, sour cream, green chiles, and cheese.
Sour cream chicken enchiladas
Stir ½ cup / 120 g sour cream into the filling, or spoon sour cream over the baked enchiladas.
Cream cheese chicken enchiladas
Add 4 oz / 113 g softened cream cheese for a gentle creamy version, or up to 8 oz / 226 g for a heavier pan.
Pantry creamy enchiladas
Stir ½–1 can condensed cream of chicken soup into the filling or sauce.
Mild chicken enchiladas
Use mild sauce, Monterey Jack, and keep spicy toppings at the table.
Spicy chicken enchiladas
Add pepper Jack, jalapeños, chipotle, cayenne, hot sauce, or spicy enchilada sauce.
Lighter chicken enchiladas
Use chicken breast, corn tortillas, a lighter cheese layer, and beans or vegetables to make the filling feel generous.
Red feels cozy, green feels brighter, and creamy versions feel softer and richer. The same basic recipe gives you a very different dinner depending on the sauce.
How to Make Chicken Enchiladas
The recipe card gives you the measurements. Think of this as your texture checklist while the pan comes together.
Mix a Moist, Not Soupy, Filling
The filling should look seasoned and cohesive before you roll it. If it looks dry, add a little sauce; if it drips, add more chicken or cheese.
Next, mix the shredded chicken with enough sauce, cheese, green chiles, and seasoning to make the filling juicy, but not loose or dripping.
Coat the dish lightly. The bottom should look sauced, not flooded.
Mix a filling that holds together. It should look moist and seasoned, not loose or dripping.
Warm the tortillas until bendable. A flexible tortilla rolls more cleanly.
Fill without forcing. If the tortilla strains to close, use less filling.
Place seam-side down. This hides rough edges and keeps the rolls in place.
Top generously, not deeply. The tortillas should be covered, but not swimming.
Bake until bubbling. The cheese should melt into the seams, and the sauce should thicken slightly at the edges.
Rest before serving. The sauce settles, and the first serving has a better chance of lifting cleanly.
Roll Enchiladas Seam-Side Down
A snug roll helps, but the real insurance is placing the rough edge underneath so the filling stays tucked in while the sauce heats.
Seam-side down keeps the filling tucked in place as the sauce and cheese bake around the rolls.
Add Sauce and Cheese on Top
Keep most of the sauce above the rolls, where it can thicken around the cheese instead of soaking the bottom of the pan.
Once the rolls are in the dish, cover them with red sauce and cheese while keeping the pan coated, not flooded.
Chicken enchiladas use cooked chicken, so you are not waiting for raw meat to cook through. You are looking for heat, bubbling sauce, melted cheese, and a pan that has had a few minutes to settle.
Look for bubbling red sauce around the edges and cheese melted into the seams with a few golden spots.
Sauce bubbles around the edges of the dish.
Cheese is fully melted on top and settling into the seams.
A knife inserted into the center comes out hot to the touch.
The tortillas look soft but not drowned.
You can hear a little bubbling at the edges when the dish comes out of the oven.
After resting, the first enchilada lifts out without falling apart completely.
The best bite is usually from the edge of the pan, where the sauce has thickened into the cheese. Spoon any saucy edges over the top of each serving.
Rest Before Serving for Cleaner Pieces
Resting is not just a waiting step. It gives the sauce and cheese time to settle so the first piece comes out cleaner.
A short rest helps the sauce settle, the cheese grip, and the first piece lift more cleanly from the pan.
What If I Only Have…
This is where the recipe gets flexible, because dinner rarely starts with a perfect fridge.
You only have
What to do
Flour tortillas
They are fine here. Keep the sauce layer underneath thin so they stay soft without turning heavy.
Corn tortillas
Warm them well before rolling. Use less filling if they are small.
Store-bought sauce
Use it. Taste before adding salt to the filling.
2 cups chicken
Make slightly lighter enchiladas, or add black beans, corn, sautéed peppers, or extra cheese.
No green chiles
Skip them, or add a little extra cumin, garlic, onion, or jalapeño.
Only cheddar
Use it, but mix with Monterey Jack next time for a smoother melt.
Taco seasoning
Use a small amount in place of the cumin, garlic powder, and onion powder. Taste before adding extra salt.
Dry filling needs sauce. Loose filling needs chicken or cheese. Cracking tortillas need warmth. Enchiladas are forgiving once the sauce and cheese settle in.
Want the Same Flavor Without Rolling?
If rolling tortillas feels like too much on a busy night, make the same chicken-sauce-cheese idea as a layered bake. This Chicken Enchilada Casserole Recipe gives you the flavor of chicken enchiladas without filling and rolling each tortilla.
The casserole version is also useful when your tortillas are tearing, when you need a scoopable dinner, or when you want enchilada flavor with less assembly.
What to Serve with Chicken Enchiladas
This is a rich, saucy, cheesy dish, so the best sides and toppings bring freshness, creaminess, crunch, or acidity.
Fresh: cilantro, lime wedges, pico de gallo, diced onion, simple green salad
For a spicy pan, cool the plate down with sour cream, avocado, or salad. With a milder pan, bring heat at the table with jalapeños, hot sauce, pickled onions, or lime.
Make Ahead, Storage, Freezing, and Reheating
Make Ahead
You can assemble chicken enchiladas up to 24 hours ahead. Cover the dish and refrigerate until ready to bake. For the best texture, keep a little sauce and cheese aside and add them just before baking.
If baking straight from the fridge, add 5–10 extra minutes to the bake time. The center should be hot, the cheese should be melted, and the sauce should bubble around the edges.
Storage
Store leftover chicken enchiladas in an airtight container in the fridge for 3–4 days. The tortillas will soften as they sit, but the flavor usually gets even better by the next day. For general leftover timing and safe reheating guidance, see the USDA leftovers guidance.
Freezing
Chicken enchiladas freeze well. You can freeze them unbaked or freeze baked leftovers. Wrap the dish tightly, or freeze individual portions in airtight containers for easier reheating. For best texture, use frozen portions within 2–3 months.
Thaw overnight in the fridge before baking or reheating for the cleanest texture. If baking from frozen, keep the dish covered at first so the center heats through, then uncover near the end so the top does not stay wet.
For another freezer-friendly tortilla meal, these Meal Prep Breakfast Burritos use similar moisture-control logic: keep wet toppings out, cool the filling, and reheat with texture in mind.
Reheating
Reheat a larger portion covered in a 350°F / 175°C oven until hot. Reheat individual portions in the microwave. If the enchiladas look dry, spoon a little extra sauce over the top before reheating.
Troubleshooting Chicken Enchiladas
A cracked tortilla or messy first serving does not ruin the pan. Enchiladas are forgiving once the sauce and cheese settle in.
When enchiladas crack, turn soggy, taste dry, or fall apart, the fix usually comes down to warmer tortillas, controlled sauce, moist filling, and rest time.
Why did my tortillas crack?
The tortillas were probably cold, dry, or overfilled. Warm them before rolling, and use less filling if you are working with small corn tortillas. If one tortilla tears, tuck it seam-side down and let the sauce and cheese cover the rough edges.
What makes chicken enchiladas soggy?
Usually too much sauce on the bottom, watery filling, cold tortillas, very hot filling, or a pan that was covered too long. Use the ½-½-1½ sauce split, let steaming filling settle briefly, bake uncovered, and rest before serving.
Why is the chicken dry?
The chicken may have been dry before it went into the filling, or it may not have been mixed with enough sauce. Stir sauce, green chiles, spices, and cheese into the chicken before rolling.
Why did the enchiladas fall apart?
They may have been overfilled, over-sauced, or served too soon after baking. If the first enchilada comes out messy, the pan probably needed a few more minutes to rest.
What if my filling tastes bland?
Add a little more salt, cumin, garlic powder, green chiles, or enchilada sauce before rolling. The filling should taste good on its own before it goes into the tortillas.
What if my enchiladas look dry after baking?
Spoon warm enchilada sauce over the top before serving. Next time, mix a little more sauce into the chicken filling and check that the top is fully covered before baking.
Why did the cheese get oily?
Some cheese blends release more oil when baked. Use Monterey Jack, a good Mexican blend, or a cheddar-Jack mix, and avoid overbaking once the cheese has melted.
Rotisserie chicken or cooked chicken breast — which is better?
Rotisserie chicken is fastest because it is already tender and seasoned. Cooked chicken breast works too; mix it well with sauce and spices so the filling does not taste plain.
Are corn or flour tortillas better for chicken enchiladas?
Corn tortillas are more classic and slightly firmer. Flour tortillas are softer and easier to roll. Both work if they are warm and not over-sauced.
How do you keep chicken enchiladas from getting soggy?
Use the ½-½-1½ sauce split: ½ cup under the enchiladas, ½ cup in the chicken, and 1½ cups on top. Warm the tortillas, avoid overfilling, bake uncovered, and rest before serving.
Should enchiladas be covered while baking?
Bake this pan uncovered unless you specifically want very soft enchiladas. For softer enchiladas, cover for the first 15 minutes, then uncover to finish.
Do tortillas have to be fried for enchiladas?
No, but corn tortillas benefit from a quick warm in a lightly oiled skillet. It makes them more flexible and helps them hold up better in sauce.
How much filling should go in each tortilla?
Use about ⅓ cup filling for medium tortillas, 2–3 tablespoons for small corn tortillas, and up to ½ cup for large flour tortillas.
What cheese melts best for chicken enchiladas?
Monterey Jack, Mexican blend, cheddar-Jack, and Oaxaca all melt well. Cotija and queso fresco are better as finishing toppings.
Is red or green enchilada sauce better with chicken?
Both are good. Red sauce tastes cozy and classic. Green sauce is brighter and tangier, especially with lime, cilantro, sour cream, and Monterey Jack.
How far ahead can chicken enchiladas be assembled?
Assemble them up to 24 hours ahead and keep them covered in the fridge. For the best texture, hold back some top sauce and cheese until just before baking.
Do chicken enchiladas freeze well?
Yes. Freeze them unbaked or freeze baked leftovers. Wrap tightly and reheat with a little extra sauce if they seem dry.
What is the difference between chicken enchiladas and chicken enchilada casserole?
Rolled enchiladas are filled and tucked seam-side down. Chicken enchilada casserole uses similar ingredients but layers them in a dish instead of rolling each tortilla.
Next Time You Want an Easy Tortilla Dinner
Once you have the tortillas out, it is easy to stay in that dinner lane. These Sheet Pan Chicken Fajitas keep the same weeknight rhythm: seasoned chicken, warm tortillas, and simple toppings.
For another tortilla meal, try this Breakfast Burrito Recipe. Need something quicker and lighter? The Shrimp Tacos Recipe keeps the same fresh-topping energy in a faster format.
Final Thought
Good chicken enchiladas do not need perfect tortillas, homemade sauce, or freshly cooked chicken. They need moist filling, warm tortillas, controlled sauce, and a few minutes of patience after baking.
Let the pan sit while the toppings hit the table, then spoon the saucy edges over each serving.
Do that, and the pan gives you what you came for: soft tortillas, juicy chicken, bubbling cheese, and saucy edges worth scooping from the dish.