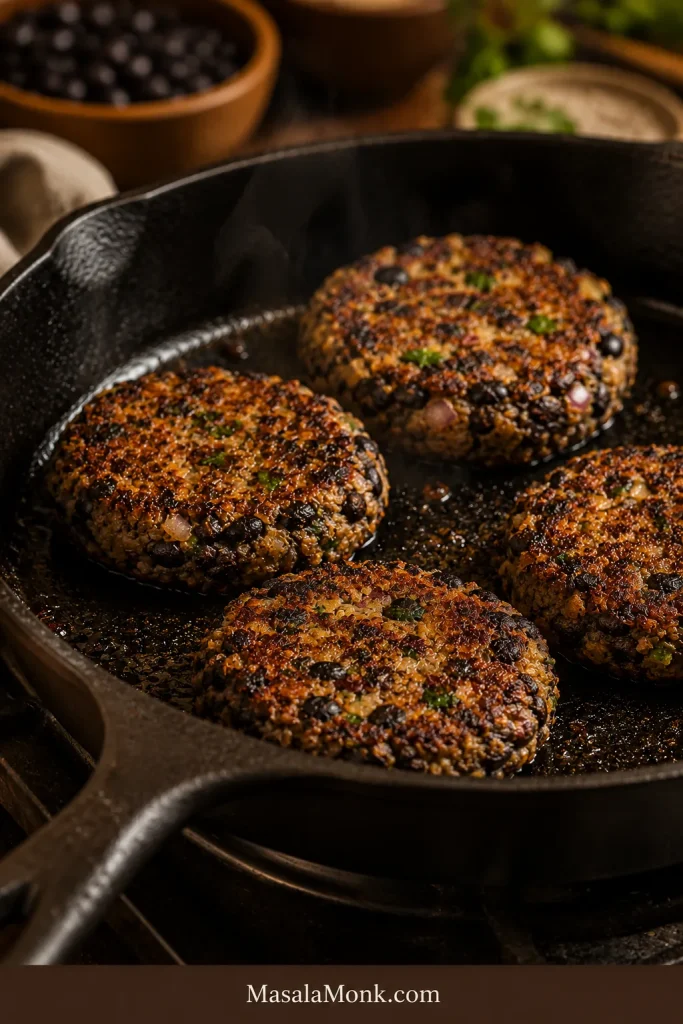
Black bean burgers are easy to love and surprisingly easy to mess up. The mixture can turn wet, the patties can crack in the pan, or the center can taste more like mashed beans than a real burger. What you want is a patty that lands on a bun without crumbling, browns at the edges, and feels hearty when you bite into it — not something you have to rescue with extra sauce.
This black bean burger recipe is built for that kind of confidence: crisp edges, smoky flavor, a tender middle, and patties that hold together without first-flip panic. It is the recipe for people tired of mushy, fragile bean burgers and ready for one that actually feels like dinner.
The main version uses canned black beans, egg, panko or oats, onion, garlic, and smoky spices. You will also find vegan, gluten-free, no-breadcrumb, oven, grill, and air fryer options, so the recipe works whether you want a classic veggie burger, a no-egg patty, or a meal-prep-friendly batch for the freezer.
Jump to: Quick Answer | Recipe | Choose Your Version | Binder Guide | Troubleshooting | Cooking Methods | FAQs
Quick Answer: How to Make Black Bean Burgers That Don’t Fall Apart
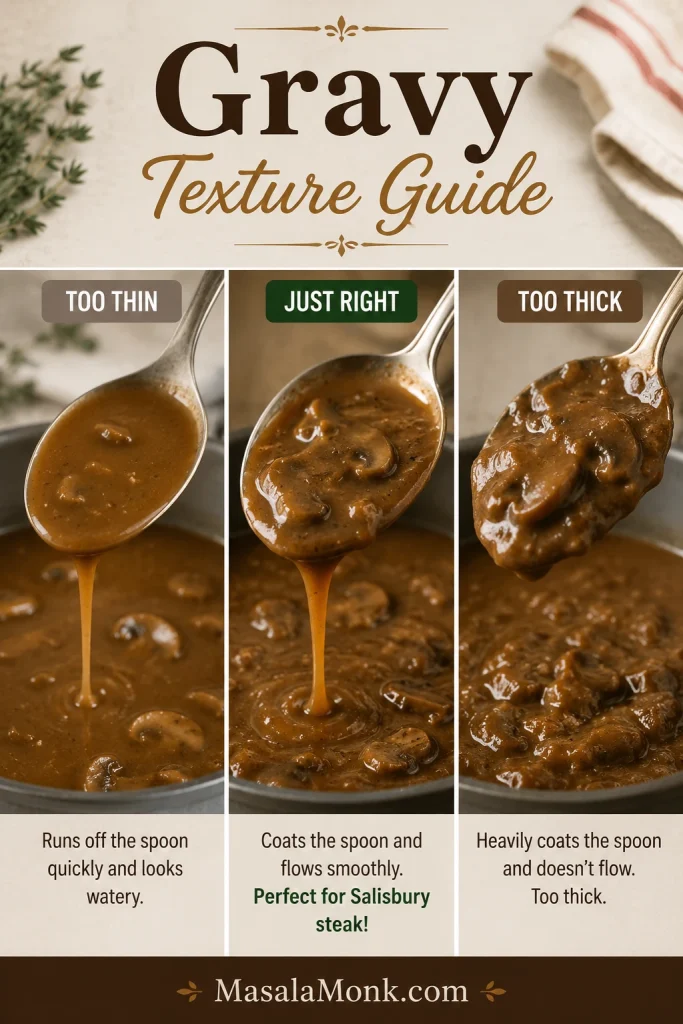
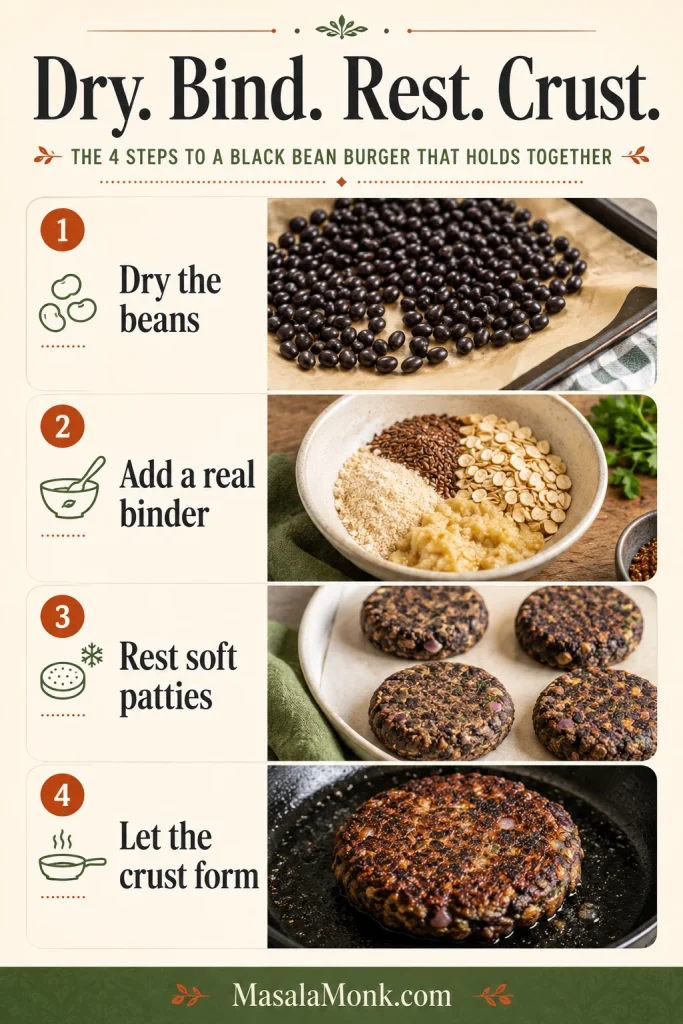
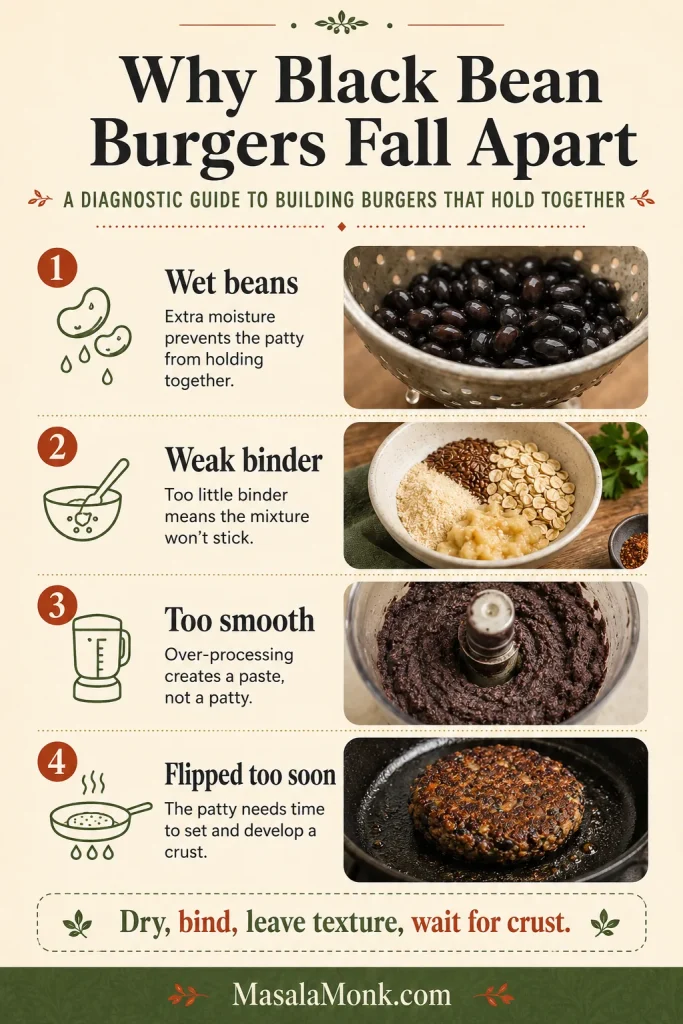
To make black bean burgers that do not fall apart, dry the beans first, mash only part of them, use a real binder, and cook the first side until a crust forms before flipping. Wet beans, raw watery vegetables, too little binder, and early flipping are the main reasons homemade black bean burgers turn mushy or break.
The simple rule is: dry, bind, rest, crust. That means drying the beans, binding the mixture, resting delicate patties, and letting the crust form before flipping.
- Dry the beans: bake drained beans briefly so the center does not turn pasty.
- Use a binder: egg plus panko, breadcrumbs, or oats is the easiest vegetarian option.
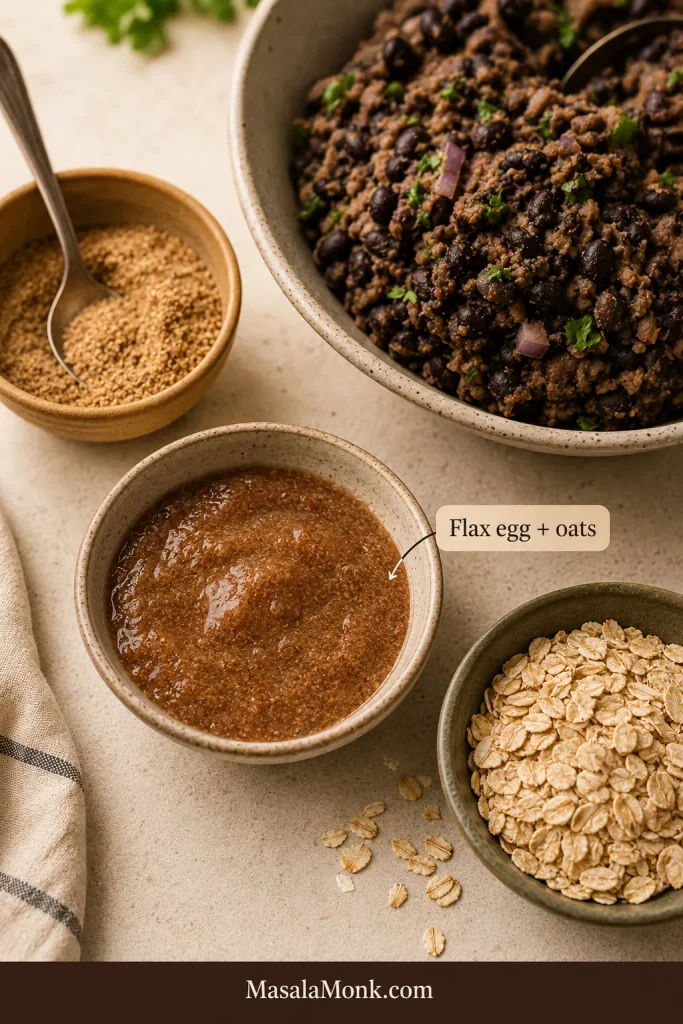
- Go egg-free with oats: flax egg plus oats or oat flour works well for vegan patties.
- Leave texture: mash enough to bind, but keep some visible bean pieces.
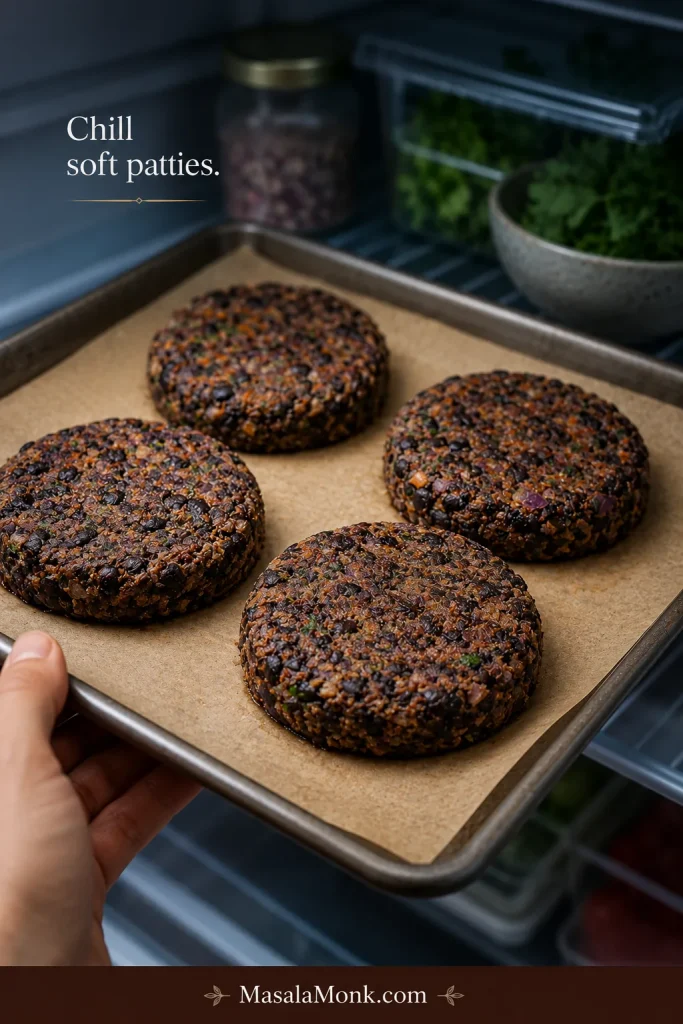
- Rest soft patties: a short chill makes delicate patties easier to move.
- Wait for the crust: if a patty feels stuck, it probably needs another minute before flipping.
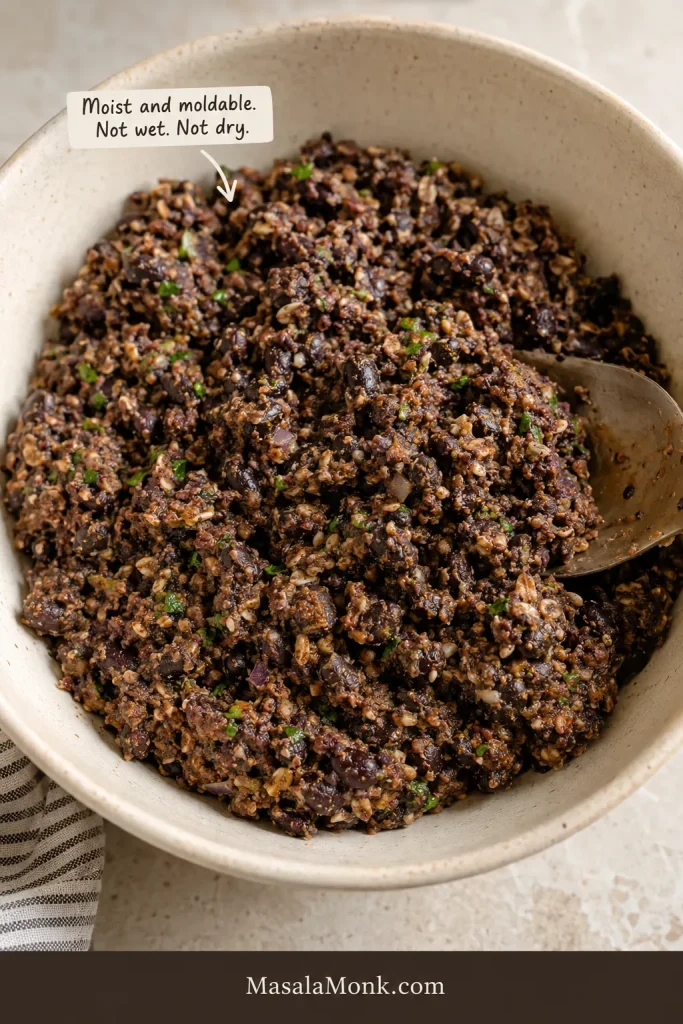
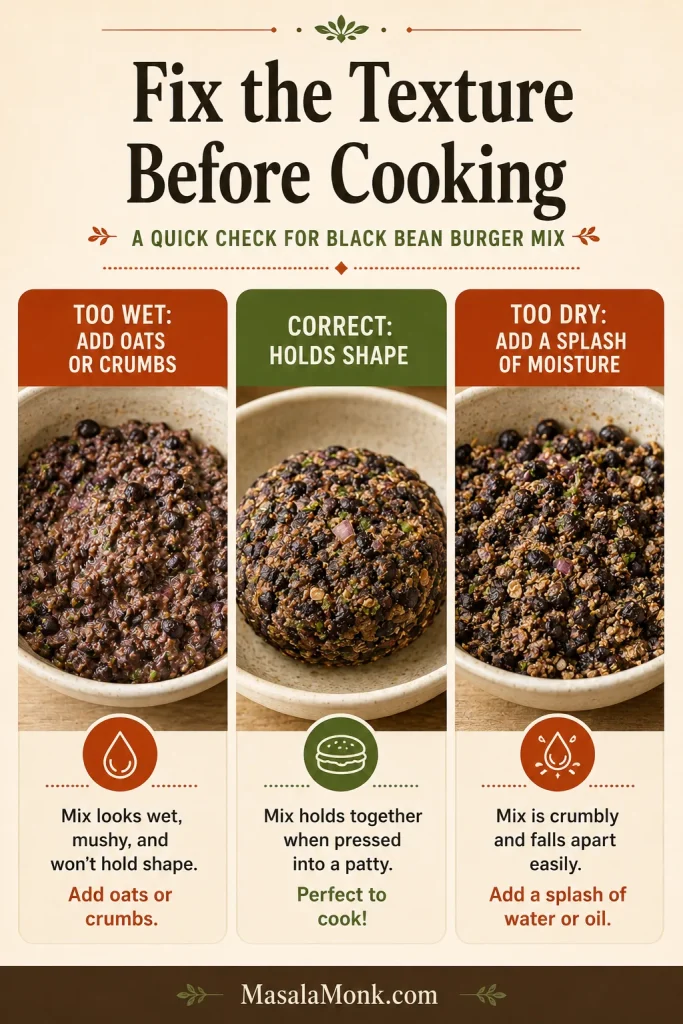
Even if this is your first homemade veggie burger, the cues below will help you fix the bean base before it ever touches the skillet. If it looks like bean dip, it is not ready to be a burger. A pressed handful that holds its shape means you are much closer to a clean flip.
Next: Recipe card | Choose your version | Fix the mixture
Black Bean Burgers at a Glance
| Yield | 6 medium patties |
| Beans | 2 cans / about 3 cups drained black beans |
| Main texture step | Dry the beans first |
| Default binder | Egg + panko, breadcrumbs, or oats |
| Vegan binder | Flax egg + oats or oat flour |
| Main method | Skillet, for crisp edges and control |
| Texture cue | Moist and moldable, not loose like dip |
Black Bean Burger Recipe Card
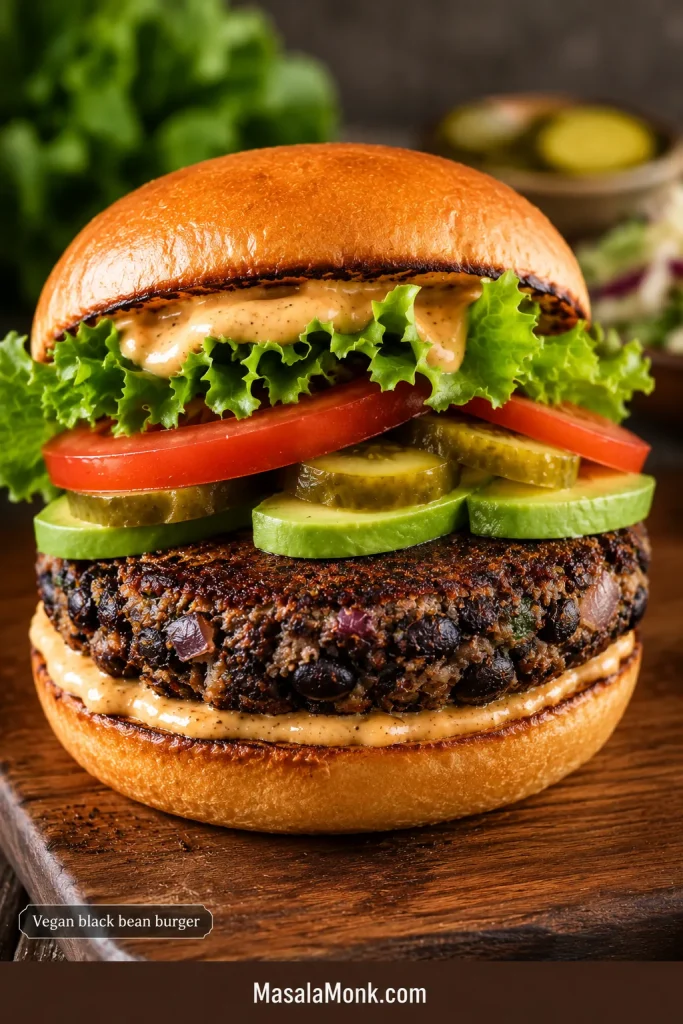
Smoky Black Bean Burgers That Hold Together
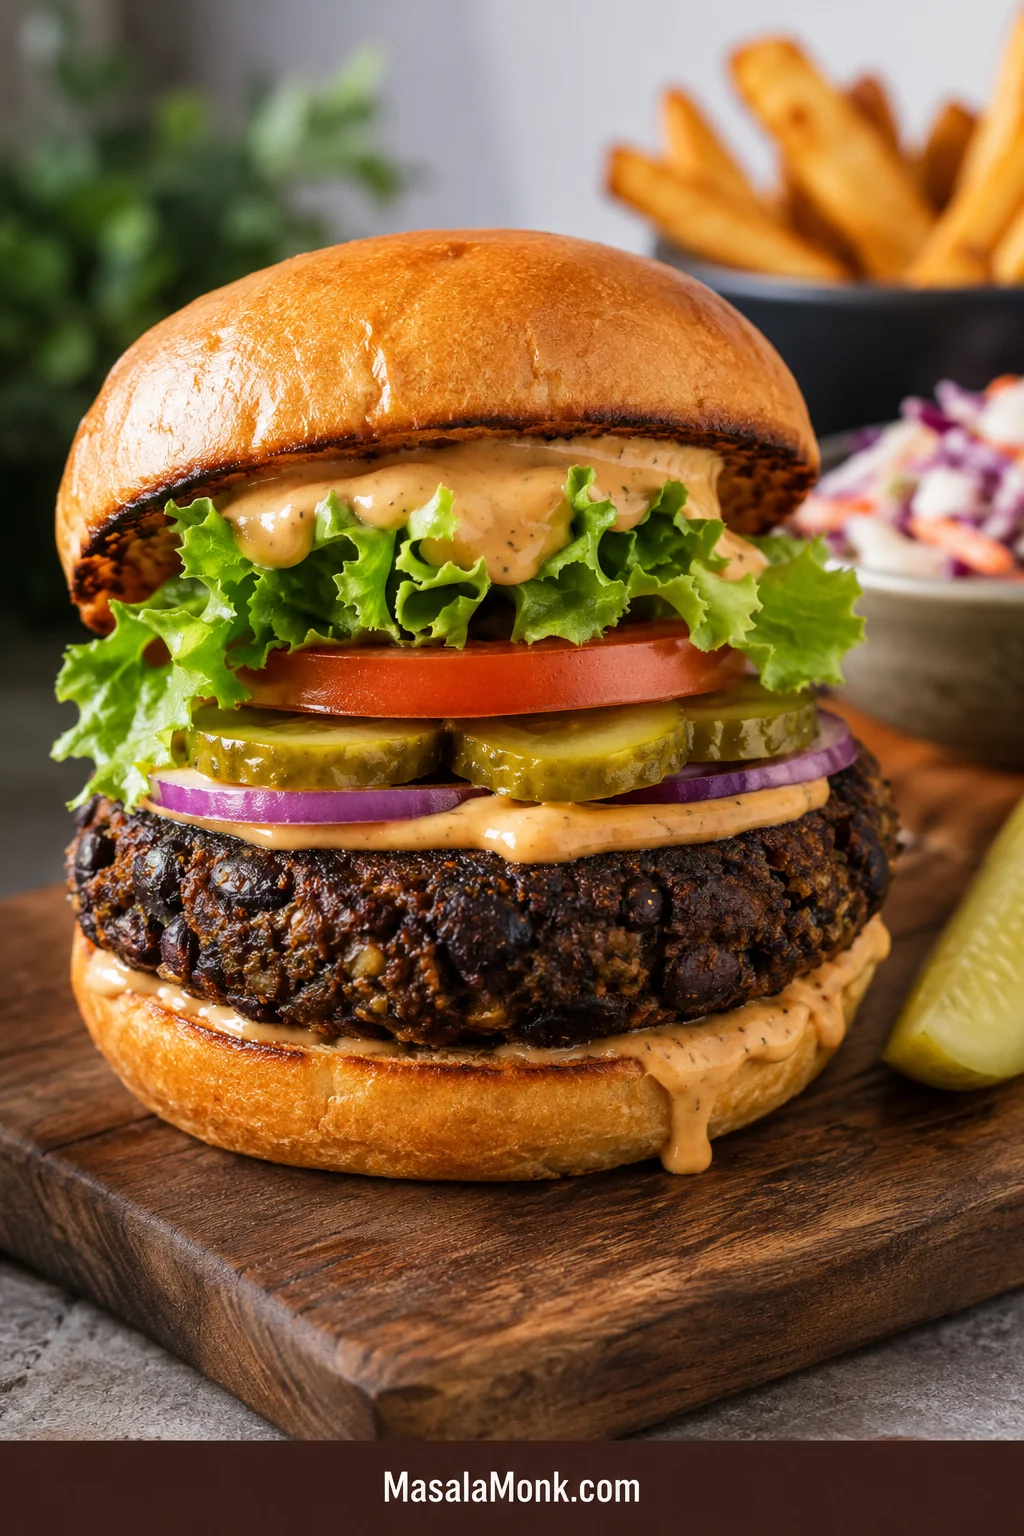
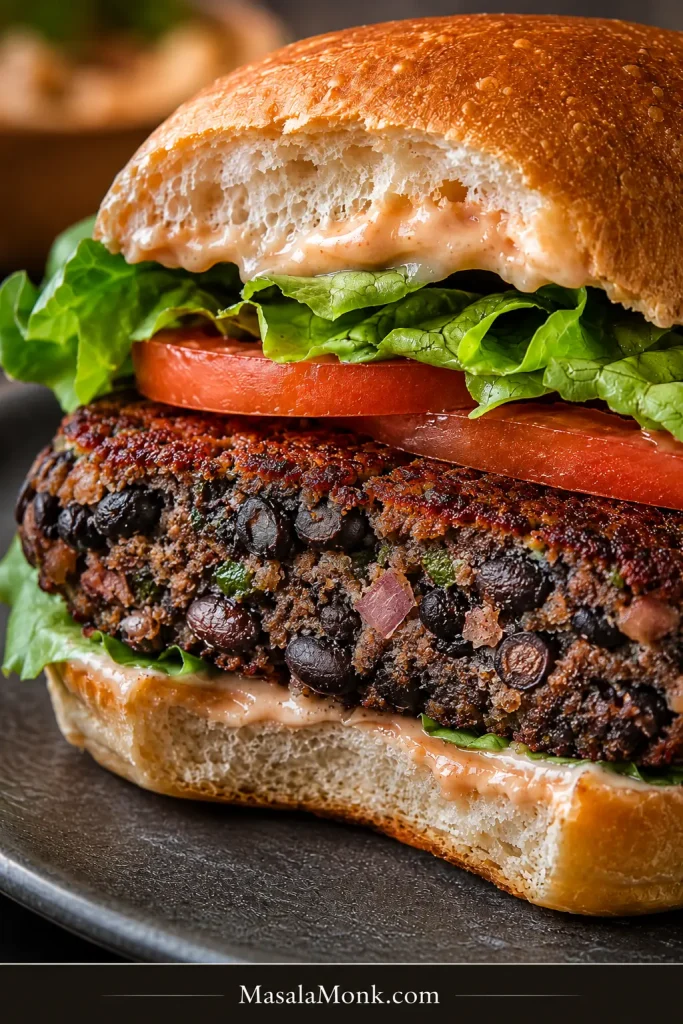
These black bean burgers are smoky, hearty, crisp-edged, and firm enough to flip. They are sturdy enough for a bun but still tender in the middle, with enough texture to feel satisfying instead of pasty.
The finished patty should have browned edges, a smoky garlic-cumin aroma, and a middle that feels hearty rather than mashed. Add a toasted bun, creamy sauce, something crunchy, and a little acidity, and it eats like a real burger.
| Prep Time | 15 minutes |
| Bean-Drying Time | 12–15 minutes |
| Patty Cook Time | 10 minutes for skillet |
| Total Time | About 40–45 minutes |
| Yield | 6 patties |
| Main Method | Skillet |
| Other Methods | Oven, grill, air fryer |
If you chill the patties before cooking, add 20–30 minutes of resting time. The wait is useful when the mixture feels soft, especially for vegan, oat-based, or grill-ready patties.
Fast path: For a quicker version, towel-dry the beans very well instead of baking them. The patties will be a little softer than the oven-dried version, but still workable if you use enough binder and let the first side brown before flipping.
Make-ahead path: Shape the patties up to 24 hours ahead and refrigerate them covered. This gives the binder time to settle and makes the patties easier to cook later.
Equipment
- Rimmed baking sheet
- Parchment paper
- Large mixing bowl
- Fork, potato masher, or food processor
- Cast-iron or nonstick skillet
- Thin spatula
- Optional: grill mat, foil, or air fryer basket
You do not need a food processor. A fork or potato masher gives you more control and makes it easier to leave some texture in the beans.
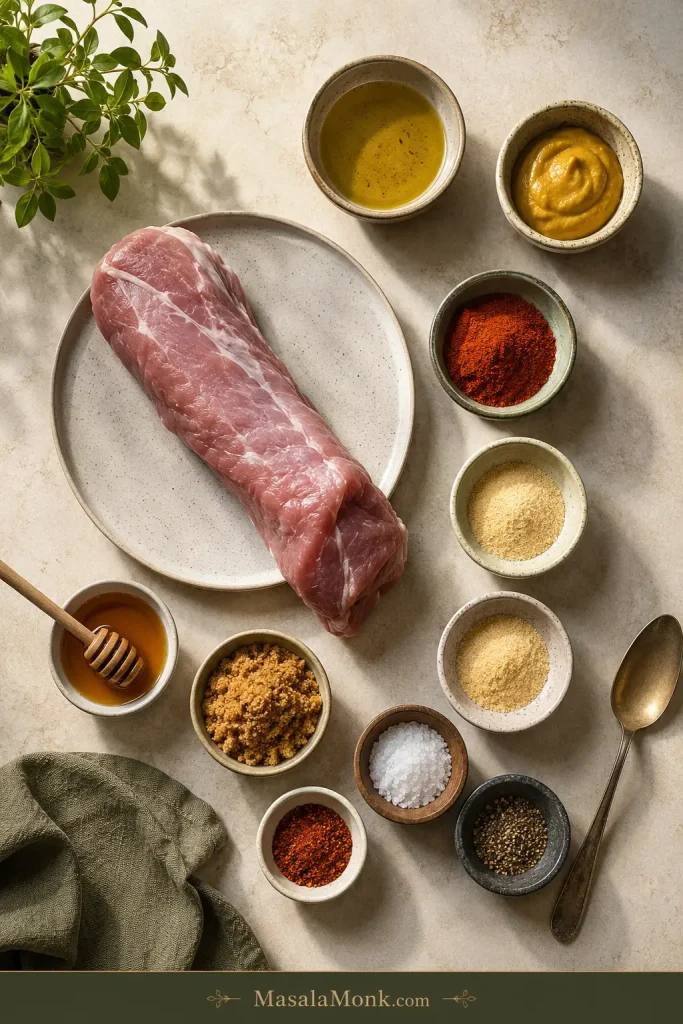
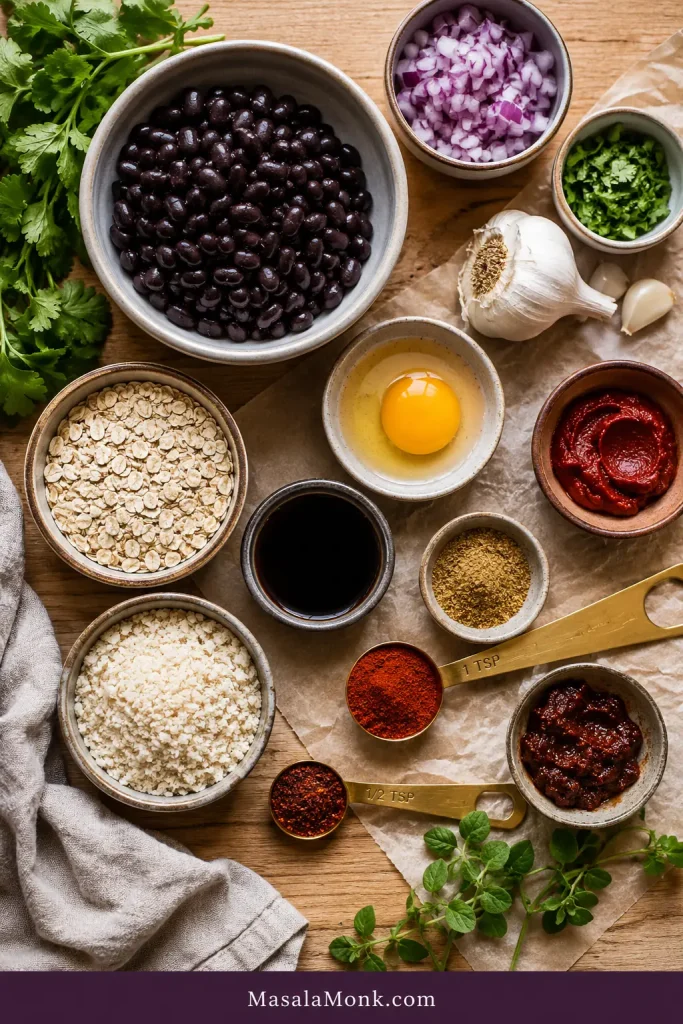
Ingredients
- 2 cans black beans, 15 oz / 425 g each, drained and rinsed, about 3 cups / 500–520 g drained beans
- 1 teaspoon oil, for cooking the onion
- ½ cup / 75 g finely chopped onion
- 2–3 garlic cloves, minced
- 1 large egg
- ¾ cup panko or breadcrumbs, about 45–55 g, or ¾ cup rolled oats, about 60 g
- 1 tablespoon tomato paste, ketchup, or barbecue sauce
- 1 tablespoon tamari, soy sauce, or vegan Worcestershire-style sauce for deeper burger-style flavor
- 1 teaspoon ground cumin
- 1 teaspoon smoked paprika
- ½ teaspoon chili powder
- ½ teaspoon fine salt, plus more to taste
- ¼ teaspoon black pepper
- 1–2 tablespoons chopped cilantro or parsley, optional
- 1 tablespoon chopped chipotle in adobo, optional for smoky heat
- 1–2 tablespoons oil, for cooking the patties
Using soy sauce or vegan Worcestershire-style sauce? Taste before adding extra salt because both can make the mixture saltier than expected.
With oat flour: Start with ½ cup / about 50 g oat flour instead of ¾ cup whole oats. Oat flour absorbs more quickly, so add more only when the mixture still feels loose.
Vegan Swap
Replace the egg with 1 flax egg. Mix 1 tablespoon ground flaxseed with 3 tablespoons water and let it thicken for 5–10 minutes. Use rolled oats or oat flour as the dry binder, and chill the shaped patties before cooking.
Instructions
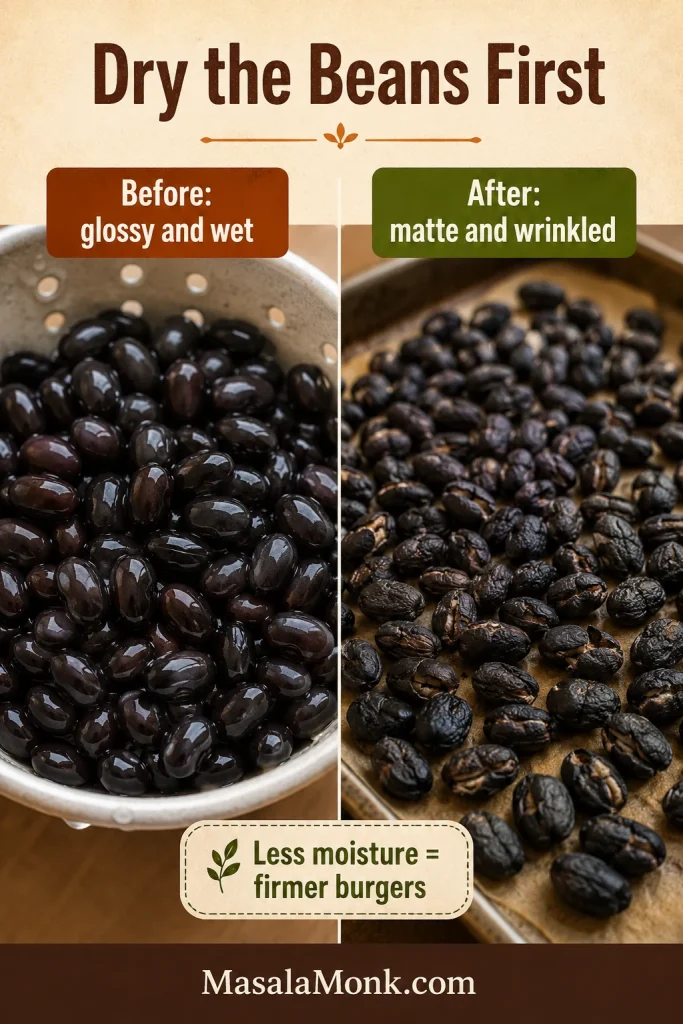
- Dry the beans. Heat the oven to 350°F / 175°C. Spread the drained and rinsed black beans on a parchment-lined baking sheet. Bake for 12–15 minutes, until the beans look matte and slightly wrinkled. Cool briefly.
- Cook the onion and garlic. Warm 1 teaspoon oil in a skillet. Soften the onion for 3–4 minutes, stir in the garlic for 30 seconds, then cool slightly.
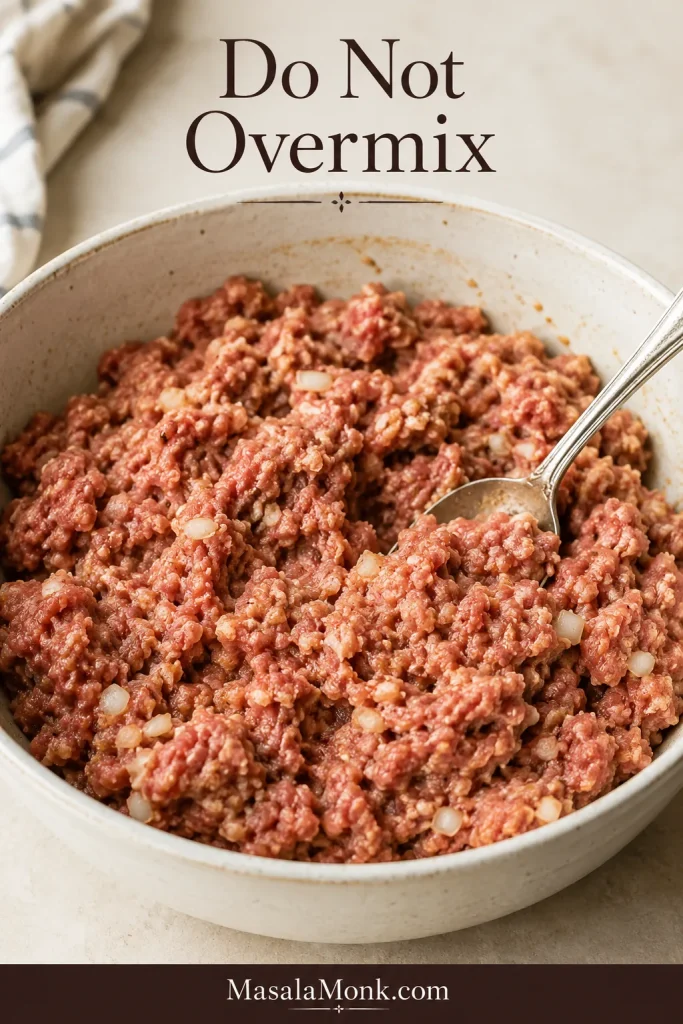
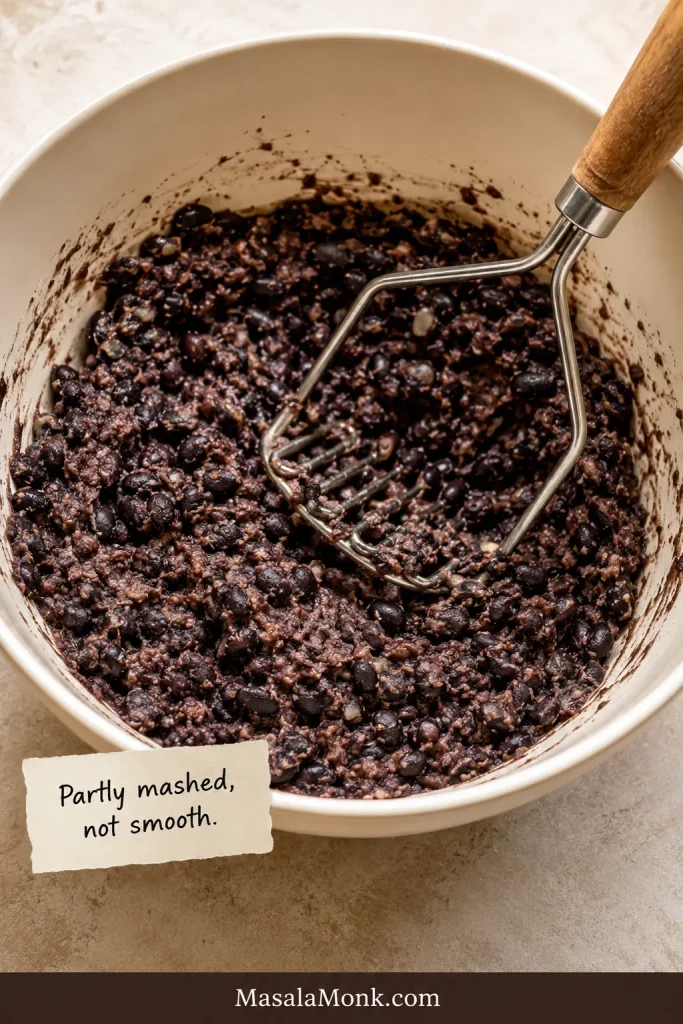
- Mash the beans. Transfer the beans to a large bowl. Mash with a fork or potato masher until partly mashed with some visible bean pieces.
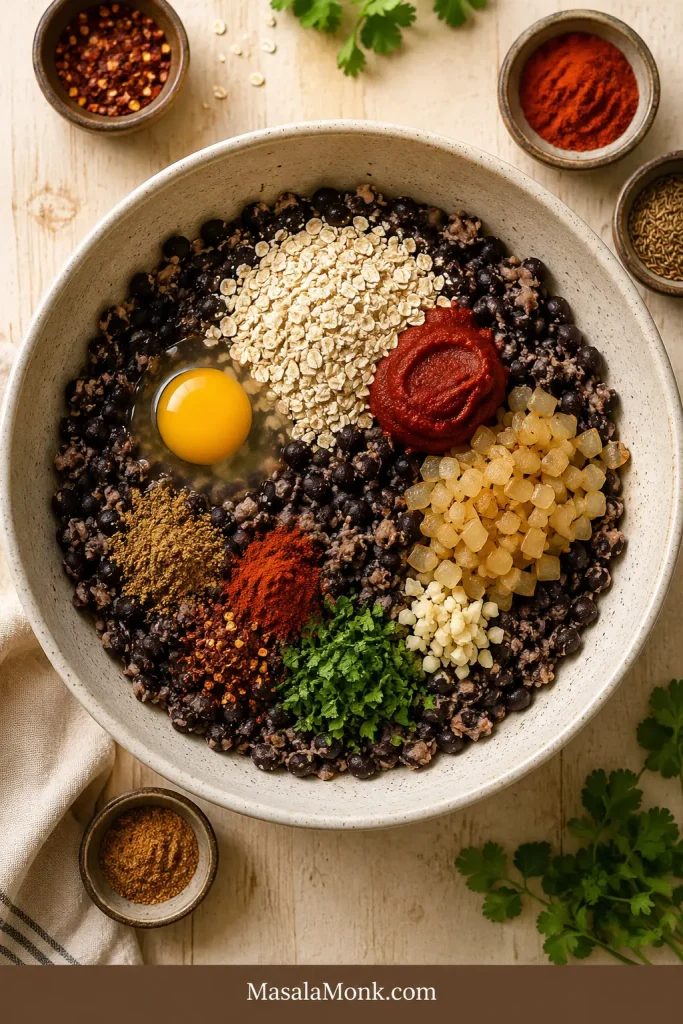
- Add binder and seasoning. Stir in the cooked onion and garlic, egg, panko, breadcrumbs, or oats, tomato paste, tamari or soy sauce, spices, herbs, and chipotle if using.
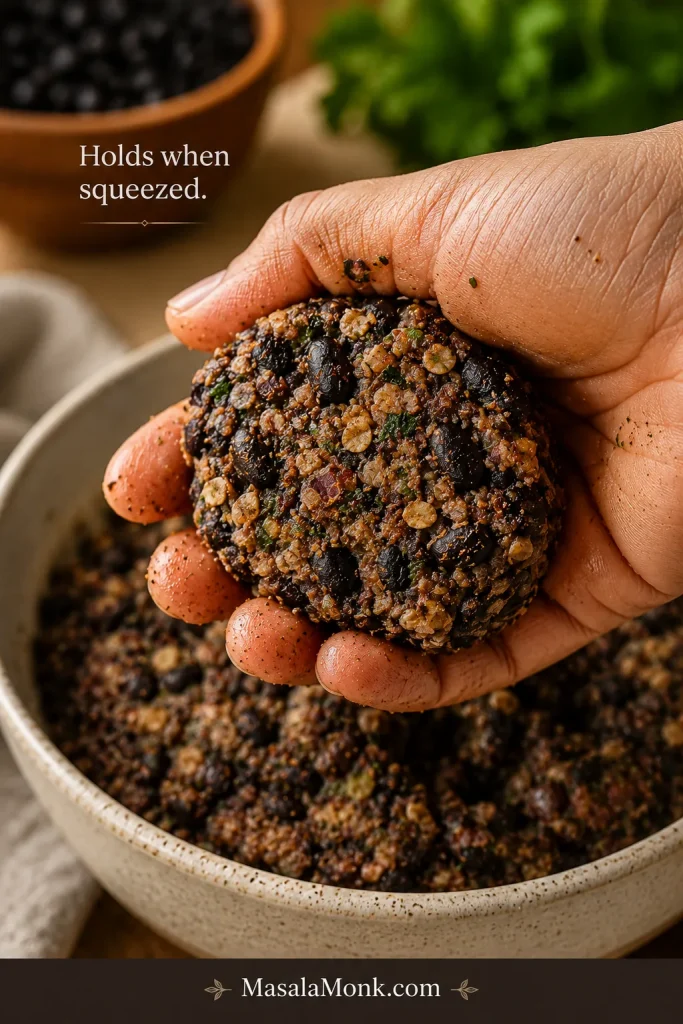
- Mix until moldable. Stir and press until the mix holds when squeezed.
- Adjust if needed. If the bowl feels wet, add oats or breadcrumbs 1 tablespoon at a time. If it feels dry, work in a teaspoon of sauce, water, or oil.
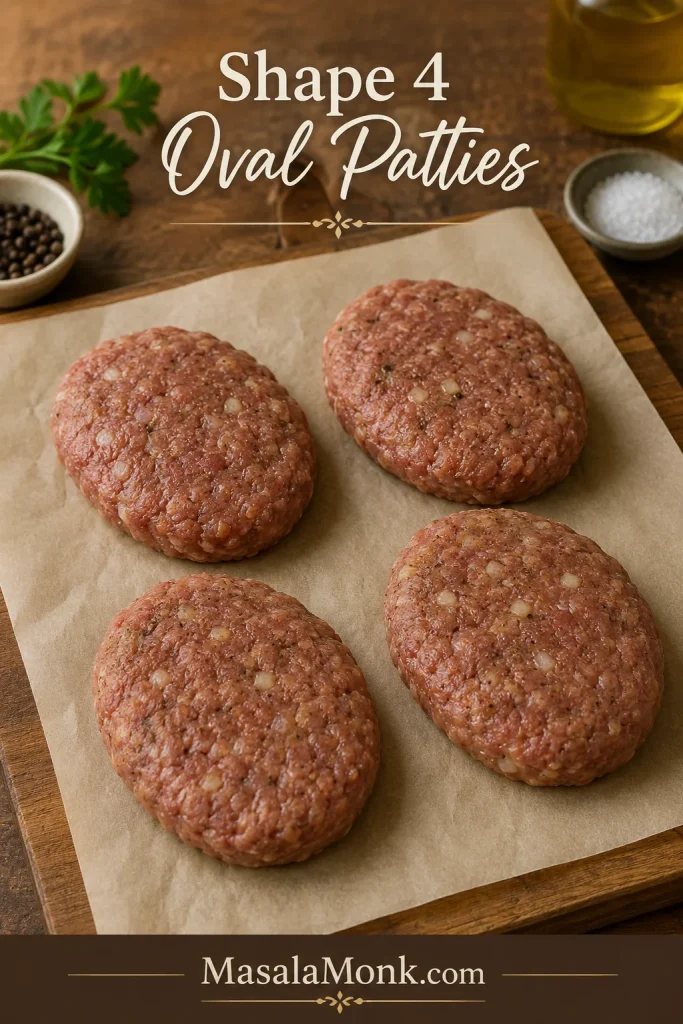
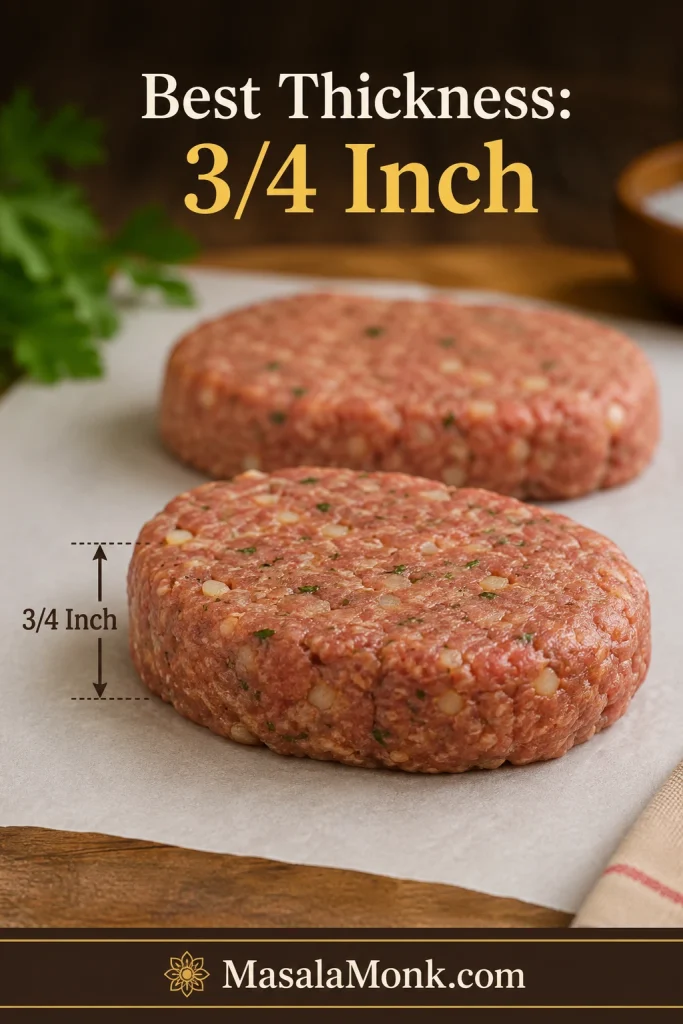
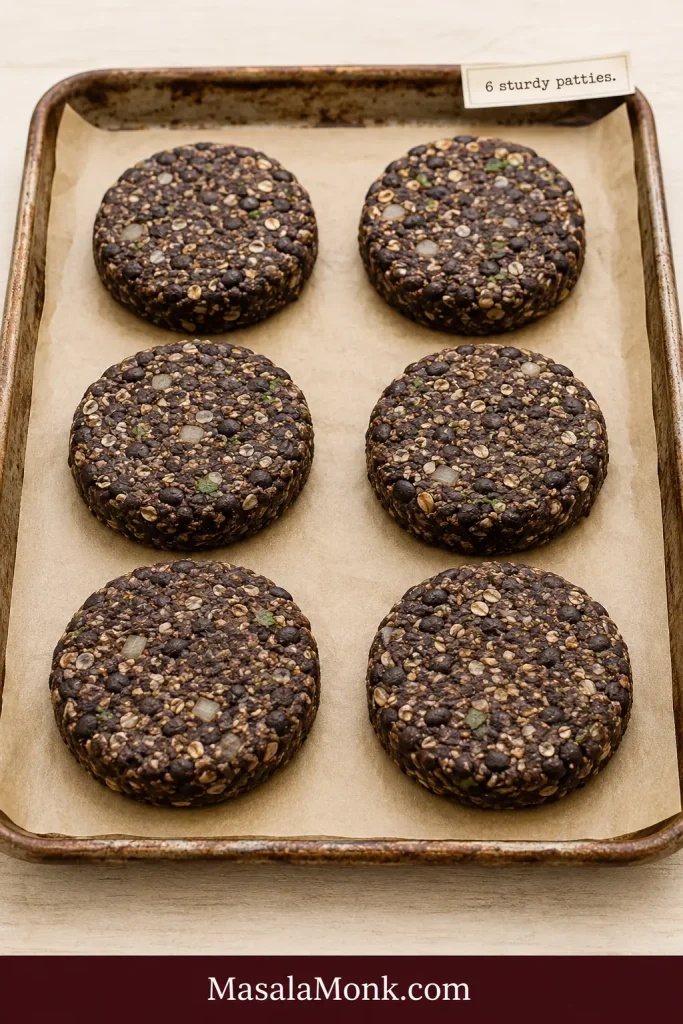
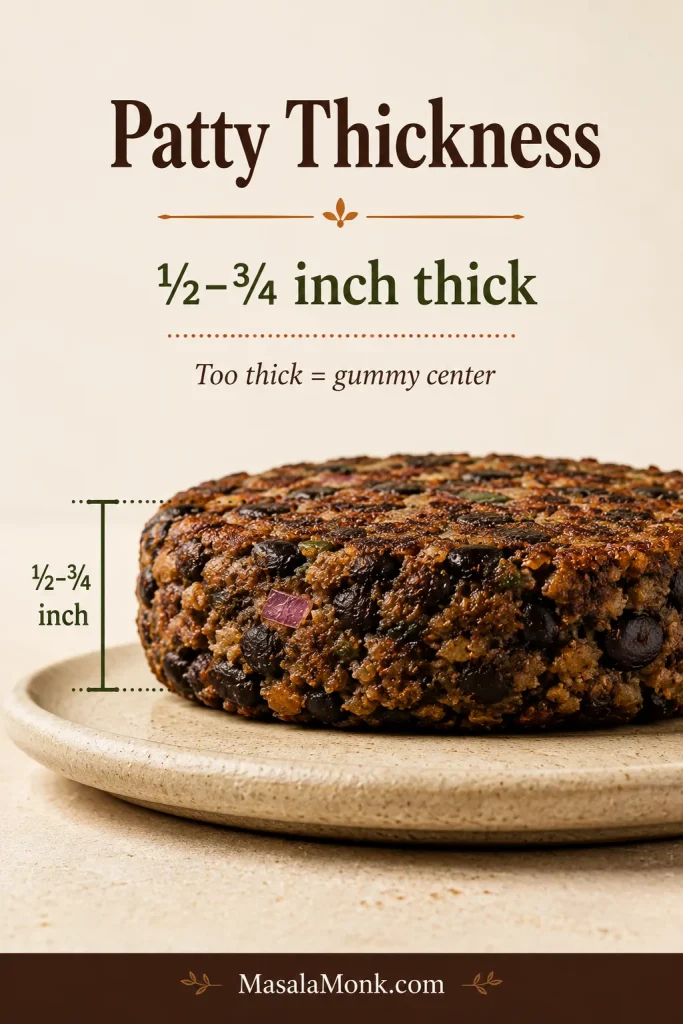
- Shape the patties. Divide the bean base into 6 patties, about ½ cup each. Shape them ½–¾ inch thick and press the edges smooth.
- Chill soft patties. Refrigerate for 20–30 minutes when the shaped burgers feel delicate. This helps vegan or grill-ready patties.
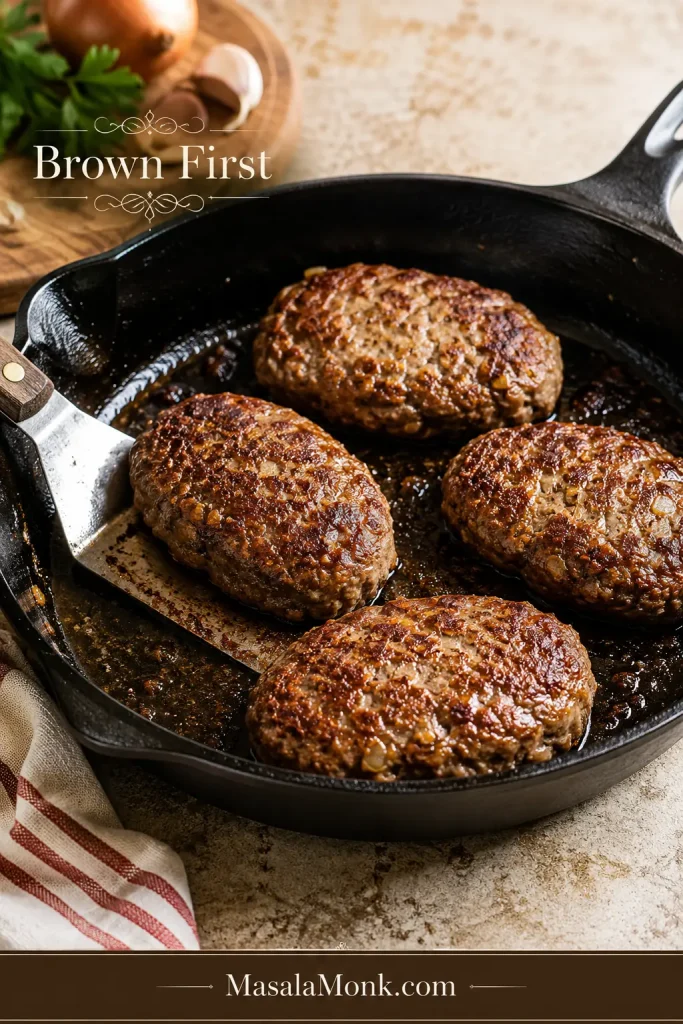
- Cook in a skillet. Heat 1 tablespoon oil over medium heat. Cook 4–5 minutes per side, flipping only after the first side browns and releases. Work in batches so each patty has room to brown.
- Serve. Build on toasted buns with lettuce, tomato, onion, avocado, pickles, chipotle mayo, garlic aioli, or salsa.
Keep going: Choose your version | Step-by-step method | Cooking methods
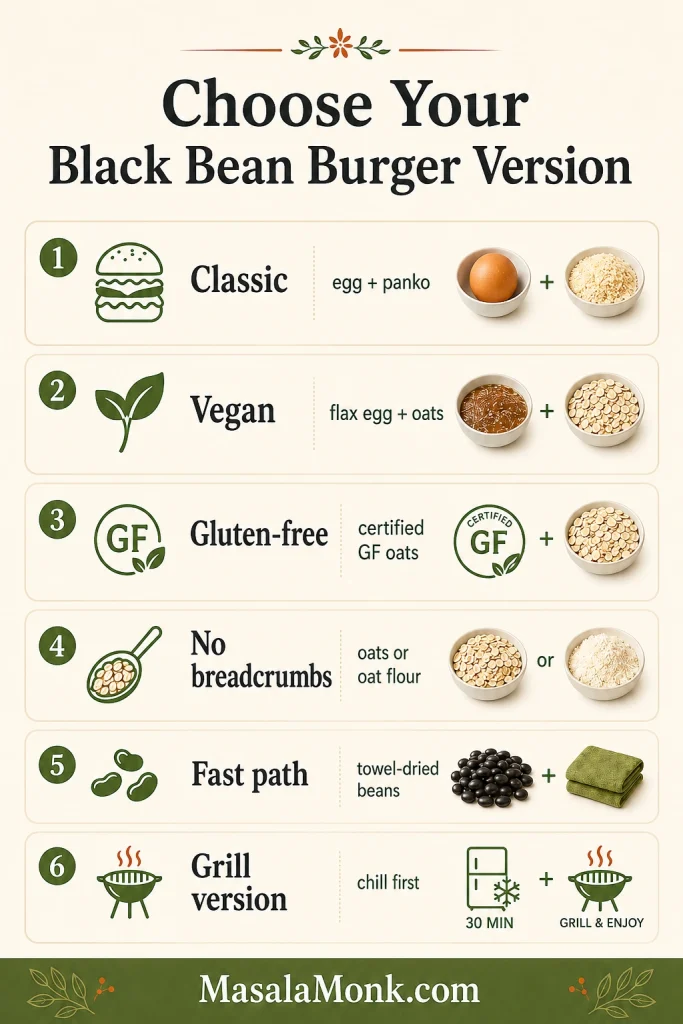
Choose Your Version
Use this quick table if you already know what kind of black bean burger you want. The base method stays the same, but the binder and resting time change depending on your goal.
| Choose This Version | Use This | What to Expect |
|---|---|---|
| Firmest classic patty | Egg + panko or breadcrumbs | Clean flipping, crisp edges, sturdy bun-ready texture |
| Vegan patty | Flax egg + oats | Softer before cooking, firmer after resting and browning |
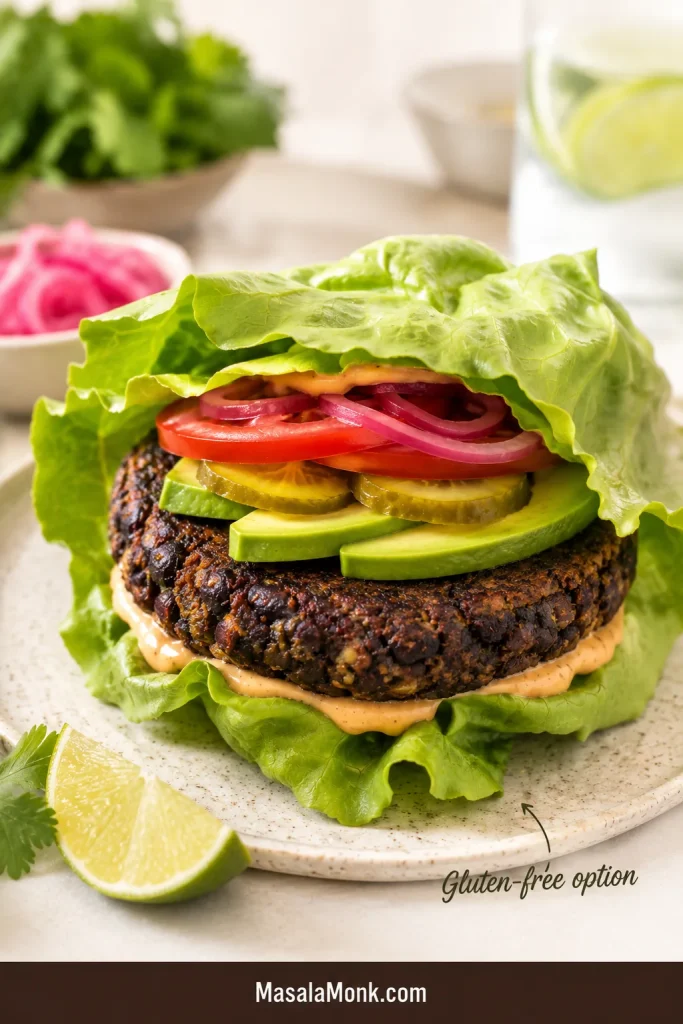
| Gluten-free patty | Certified gluten-free oats or oat flour | Good structure without panko or breadcrumbs |
| No-breadcrumb patty | Rolled oats, quick oats, or oat flour | Hearty texture with a little resting time |
| Fastest version | Very well towel-dried beans | Slightly softer, but still workable |
| Best texture | Oven-dried beans | Firmest patties and least mushy center |
| Grill version | Firm binder + chilled patties | Better handling on hot grates |
Next, use the visual cues below to check how the bean base should look and feel before it reaches the pan.
What Good Black Bean Burgers Should Look Like
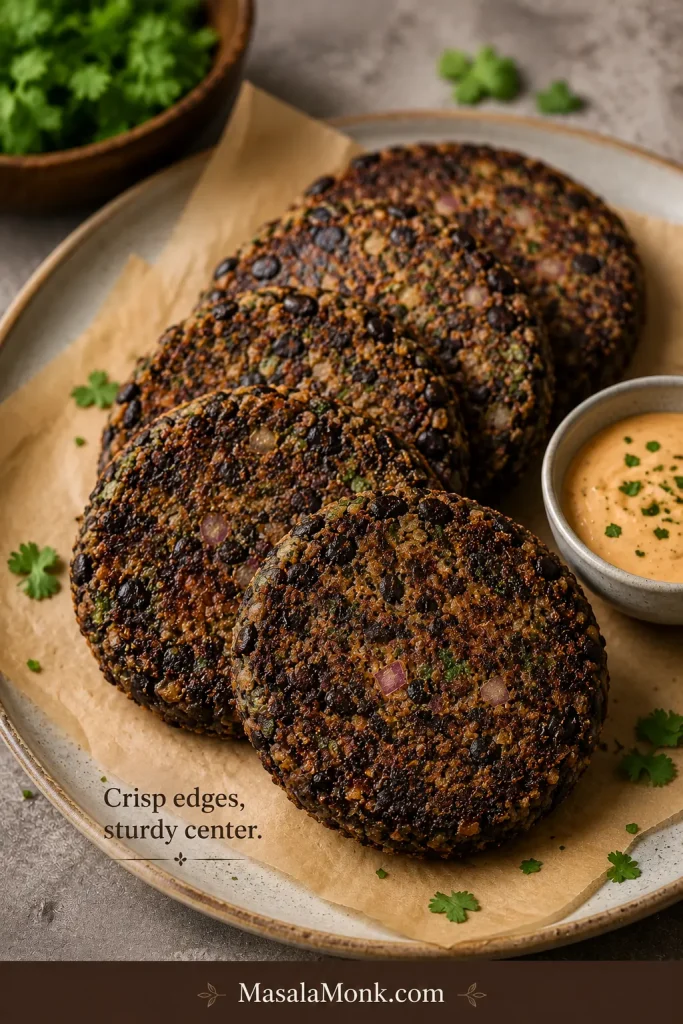
Good bean burgers are not perfectly smooth. They should look rustic, with some bean pieces still visible, a firm edge, and enough structure to lift with a spatula. A good black bean burger should be sturdy enough for a bun and tender enough to enjoy.
- After drying: the beans should look matte and slightly wrinkled, and a few may split open.
- After mashing: the bowl should have both mashed beans and visible bean pieces.
- Before shaping: a squeezed handful should hold together without oozing through your fingers.
- After shaping: each patty should hold its edge instead of slumping on the plate.
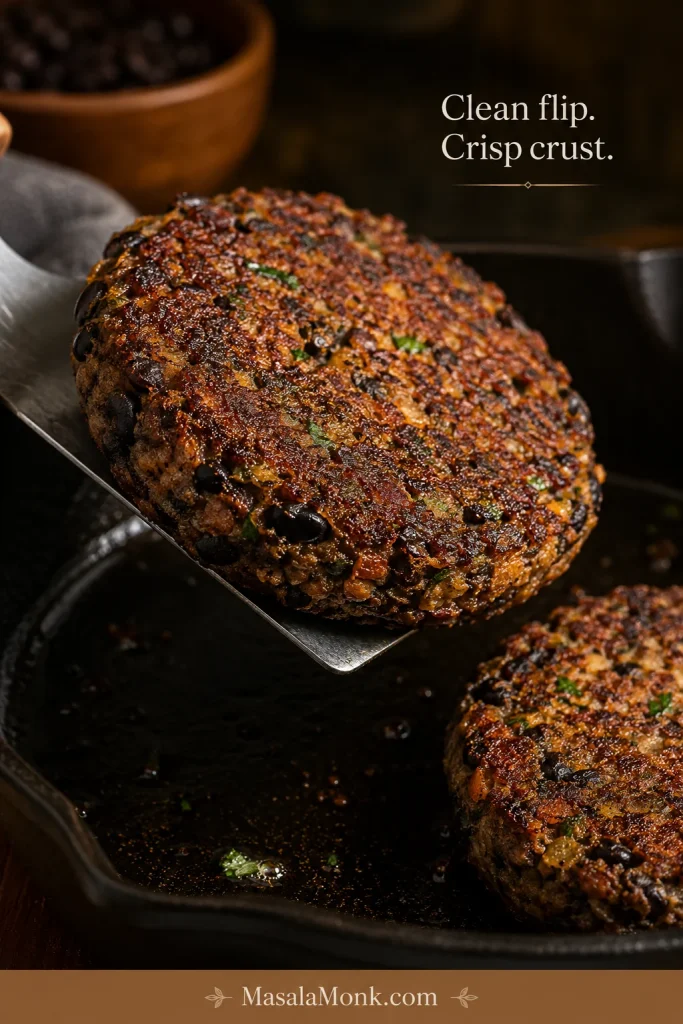
- In the pan: the first side should brown and release more easily once the crust sets.
- After cooking: the outside should be crisp-edged and the middle should be tender, not wet or gummy.
When the mixture looks like bean dip, it needs more dry binder and resting time. If it looks dusty or cracks at the edges, mash a little more or add a tiny splash of moisture. The same basic patty logic applies whether you are shaping beans or meat: control moisture, shape gently, and let the surface set. For a deeper look at patty structure, see this burger patty recipe.
Why This Black Bean Burger Recipe Works
Most black bean burgers fail because they treat beans like ground meat. Beans bring moisture, starch, and softness, so the method has to build structure before the patty ever hits the pan. This version does that with dried beans, cooked aromatics, partial mashing, and a binder that matches your diet.
| Control Point | What It Fixes |
|---|---|
| Drying the beans | Prevents pasty, wet centers |
| Cooking the onion | Removes raw sharpness and extra water |
| Partial mashing | Creates natural bean paste without losing bite |
| Binder | Absorbs moisture and helps the patty set |
| Chilling when needed | Makes delicate patties easier to move |
| Surface browning | Creates the crust needed for a clean flip |
Do not make the beans smoother. Make the structure smarter. A fully smooth mixture can cook up dense and gummy, while a barely mashed one can crumble. The sweet spot is enough mashed beans to bind, with enough whole pieces to make the burger satisfying.
Ingredients You’ll Need
This ingredient list is short, but a few choices matter more than others: dry beans, controlled onion, a real binder, and bold seasoning. A black bean burger should taste like dinner, not a compromise.
Black Beans
Canned black beans are the easiest choice. Drain, rinse, and dry them well before mixing. Home-cooked black beans also work, but they should be tender, well-drained, and not soupy.
Extra cooked beans do not have to sit around either; they can become a cozy bean stew later in the week.
Onion and Garlic
Onion and garlic give the patties a savory base. Cooking the onion first is worth the extra few minutes because raw onion can release water into the bean base and make the patties softer.
Egg or Flax Egg
Egg is the easiest binder for a vegetarian version because it helps the patty set as it cooks. For an egg-free version, use a flax egg or chia egg with oats.
Panko, Breadcrumbs, Oats, or Oat Flour
Panko and breadcrumbs give a lighter, firmer bite. Rolled oats are great for no-breadcrumb and gluten-free versions. Oat flour binds quickly when the patty mix feels soft, but too much can make the center dense.
Smoky Spices and Flavor Boosters
Cumin, smoked paprika, and chili powder make the burgers warm, smoky, and savory. Tomato paste, ketchup, barbecue sauce, tamari, soy sauce, or vegan Worcestershire-style sauce adds depth, so the burger does not taste like a plain bean patty.
Optional Texture Add-Ins
Chopped walnuts, cashews, sunflower seeds, corn, cooked quinoa, or cooked mushrooms can add bite. Keep add-ins modest because too many extras make the patties harder to bind.
Which Binder Should You Use?
There is no single correct binder. The right choice depends on whether you want the firmest vegetarian patty, a vegan version, or a gluten-free one. Your test is simple: press a handful together. It should hold its shape without oozing, slumping, or crumbling apart.
| Need | Binder | How to Use It |
|---|---|---|
| Firmest vegetarian patty | Egg + panko or breadcrumbs | Easiest option for clean flipping |
| Vegan black bean burger | Flax egg or chia egg + oats | Rest and chill so the oats can settle into the mixture |
| Gluten-free | Certified gluten-free oats or oat flour | Use oat flour when a firmer texture is needed |
| No breadcrumbs | Rolled oats, quick oats, or oat flour | Let the mixture rest before shaping |
| Grillable patties | Strong binder + chilling | Chill 30 minutes or freeze 15–20 minutes before grilling |
| Softer, richer patties | Avocado, mashed sweet potato, or a little mayo | Add extra oats or crumbs to balance moisture |
| More bite | Chopped nuts, seeds, quinoa, or corn | Use as add-ins, not the main binder |
In the main recipe, egg plus panko, breadcrumbs, or oats is the most reliable path. For vegan patties, use a flax egg and oats. To keep the burgers gluten-free, use certified gluten-free oats or oat flour and check the sauces you add.
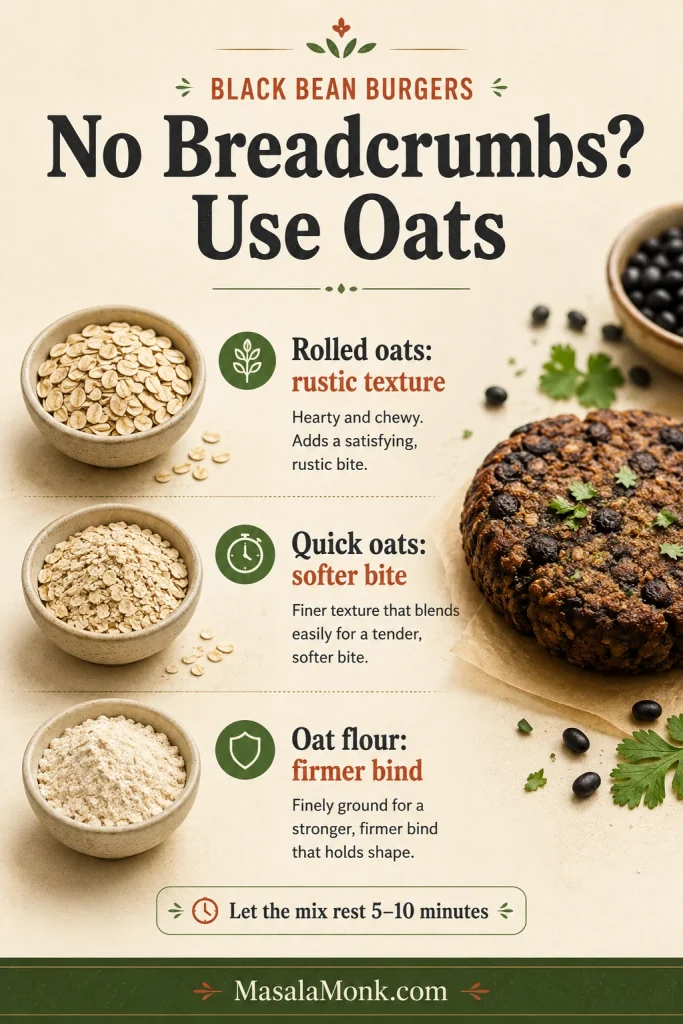
No Breadcrumbs? Use Oats This Way
Breadcrumbs are not required. If oats are what you have, they can do the job well — they just need a few minutes to absorb moisture. They are also useful for vegan and gluten-free versions when certified gluten-free oats are used.
Rolled oats give the most rustic texture. Quick oats blend in faster and make a softer patty. Oat flour binds the fastest and gives a firmer gluten-free patty, but too much can make the center dense.
Start with ¾ cup rolled oats or ½ cup oat flour for 2 cans of black beans. After mixing, let the patty mix rest for 5–10 minutes. Oats firm up as they absorb moisture, so a base that feels slightly soft at first may become easier to shape after resting.
Step-by-Step Method
The steps are simple, but the order matters. Dry the beans first, soften the aromatics, mash for texture, then add the binder and seasonings.
1. Dry the Black Beans
Heat the oven to 350°F / 175°C. Spread drained and rinsed black beans on a parchment-lined baking sheet. Bake for 12–15 minutes, until they look drier and slightly wrinkled. This one step makes the biggest difference in preventing a mushy center.
No oven available? Pat the beans very dry with a clean towel and let them sit uncovered while you prepare the rest of the ingredients. The oven method is stronger, but even towel-drying helps.
2. Cook the Onion and Garlic
Cook the chopped onion in a little oil for 3–4 minutes, then add garlic for 30 seconds. This softens the sharp flavor and cooks off extra moisture. Raw onion can make the bean base wetter than expected.
3. Mash the Beans
Mash the dried beans with a fork or potato masher. Stop when the bowl is partly mashed with some whole or half beans still visible. A food processor can be used, but pulse gently and avoid turning everything into a smooth paste.
4. Add the Binder and Seasonings
Add the egg, panko, breadcrumbs, or oats, cooked onion and garlic, tomato paste or ketchup, tamari or soy sauce, cumin, smoked paprika, chili powder, salt, pepper, and herbs. Stir until the mixture holds together when pressed.
5. Adjust the Texture
Aim for moist and moldable — closer to soft dough than bean dip. Add oats or breadcrumbs 1 tablespoon at a time when the bowl feels wet. Use a teaspoon of sauce, water, or oil when the base feels dry and cracks at the edges.
6. Shape the Patties
Divide the mixture into 6 patties. Aim for about ½ cup mixture per patty and keep them ½–¾ inch thick. Press the edges smooth so the shaped burgers do not crumble in the pan.
7. Chill When Needed
If the patties feel delicate, do not panic. Chill them for 20–30 minutes before cooking. Vegan, oat-based, and grill-ready patties benefit the most from this short rest.
8. Cook Until the Edges Are Crisp
Cook the patties in a lightly oiled skillet over medium heat for 4–5 minutes per side. If a patty feels stuck, do not force it. That usually means the crust has not finished forming. Give it another minute, then slide the spatula under slowly. The patties are done when both sides are browned, the center is hot, and the patty feels set when gently pressed.
Once the crust sets, the burger stops feeling delicate. It lifts cleanly, lands on the bun in one piece, and gives you that crisp-edge, smoky-middle bite that makes a bean burger feel like dinner instead of a backup plan.
Fix the Mixture Before You Cook
Most black bean burger problems can be fixed before the patties hit the pan. A soft mixture is not a failed mixture. It usually just needs a little more binder, a little more resting time, or a gentler hand when shaping.
Quick Texture Fixes
| Problem | Likely Reason | Fix |
|---|---|---|
| Mixture looks like bean dip | Too much moisture or over-processing | Add oats or breadcrumbs 1 tablespoon at a time and chill |
| Patties fall apart | Not enough binder or not enough mashing | Mash more beans, add binder, and rest the mixture |
| Patties slump on the plate | Mixture is too soft | Add oats or crumbs, then chill 20–30 minutes |
| Patties crack at the edges | Mixture is too dry | Mash more beans or add 1 teaspoon sauce, water, or oil |
| Patties stick to your hands | Mixture is moist but workable | Lightly wet or oil your hands while shaping |
| Too soft for the grill | Patties need more firmness | Chill 30 minutes or freeze 15–20 minutes and use foil or a grill mat |
| Patties stick to the pan | Flipped too early or surface too dry | Use a lightly oiled pan and wait for a crust before flipping |
| Center is gummy | Patties are too thick or mixture is too smooth | Shape thinner patties and leave more bean texture next time |
| Burgers taste bland | Beans need stronger seasoning | Add chipotle, smoked paprika, cumin, tamari, lime, hot sauce, or more salt |
Final Squeeze Test
The final test is simple: press a patty between your palms. When it holds its shape, keeps its edge, and does not feel loose, it is ready to cook.
After fixing the mix: Skillet, oven, grill, or air fryer | Recipe card
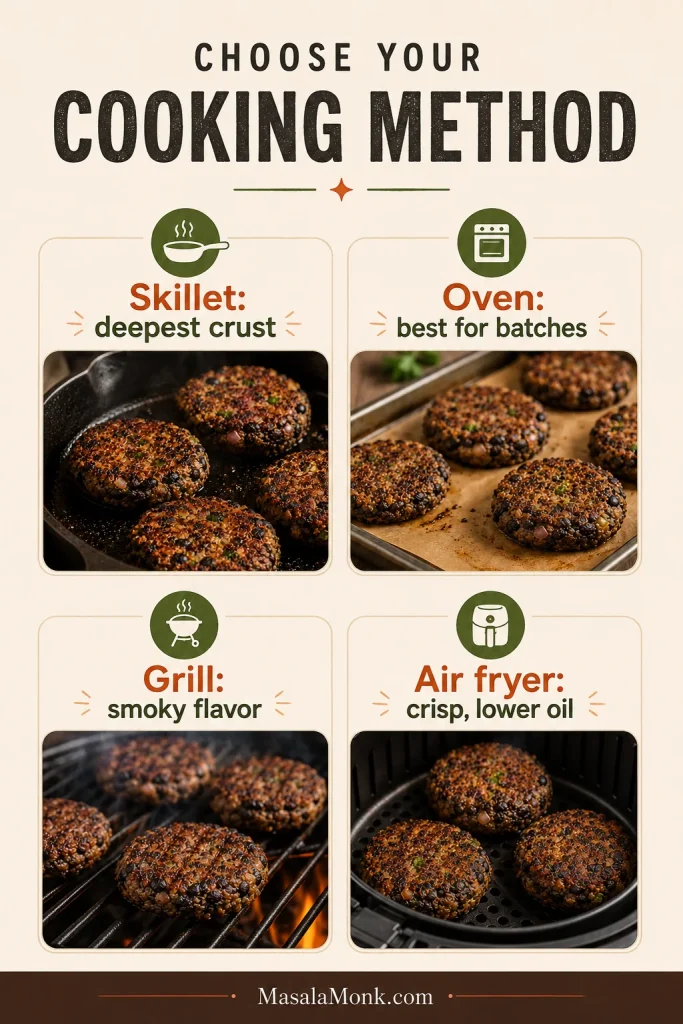
Choose Your Cooking Method: Skillet, Oven, Grill, or Air Fryer
Skillet cooking gives the deepest crust, but these patties can also be baked, grilled, or air fried. A firm patty gives you more freedom: once the mixture holds together, every cooking method becomes easier.
| Method | Temperature | Time | Good For | Key Tip |
|---|---|---|---|---|
| Skillet | Medium heat | 4–5 minutes per side | Deepest crust and flavor | Let the first side brown before turning |
| Oven | 375°F / 190°C | 10 minutes per side | Batch cooking | Raise the oven after drying the beans |
| Grill | Medium to medium-high | 5–7 minutes per side | Smoky flavor | Chill patties and oil the grates well |
| Air fryer | 380°F / 193°C | 10–12 minutes total | Crisp, lower-oil cooking | Flip halfway and keep patties about ½ inch thick |
Skillet Black Bean Burgers
Heat a thin layer of oil in a cast-iron or nonstick skillet over medium heat. Cook for 4–5 minutes per side. This is the easiest method for crisp edges and a tender center.
Baked Black Bean Burgers
After drying the beans at 350°F / 175°C, raise the oven to 375°F / 190°C. Place shaped patties on a parchment-lined baking sheet and brush or spray lightly with oil. Bake for 10 minutes, flip carefully, then bake another 10 minutes. Baked patties are convenient for batches, though the crust is gentler than skillet-cooked ones.

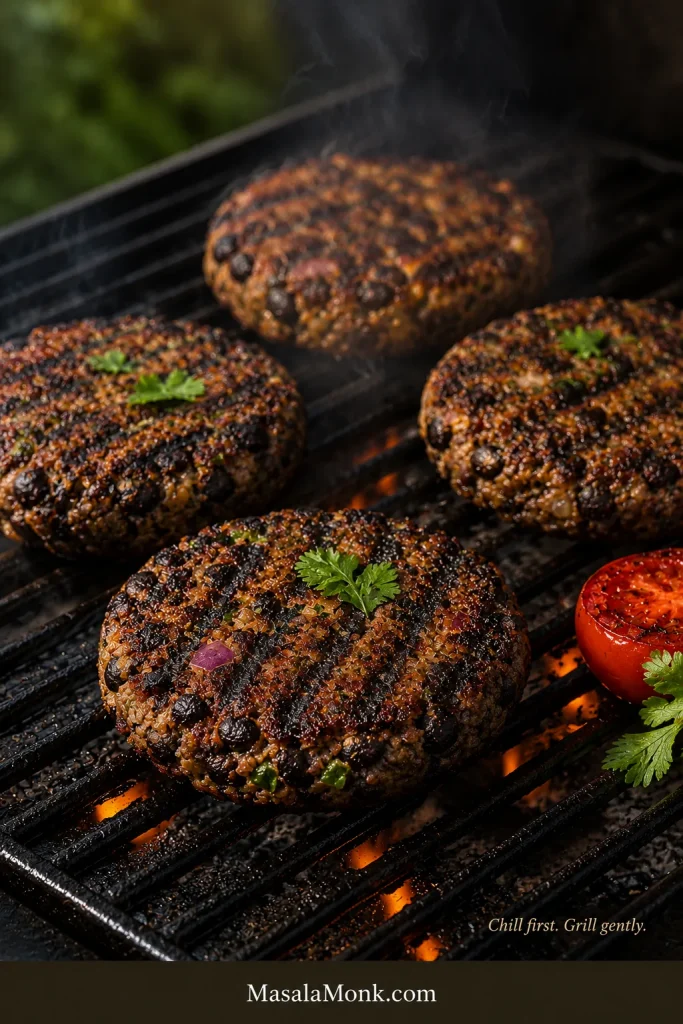
Grilled Black Bean Burgers
Treat grilling as the firm-patty method. Chill the patties for at least 30 minutes, oil the grates well, and cook over medium to medium-high heat for 5–7 minutes per side. Do not grill loose or freshly mixed patties. If they feel delicate in your hand, they will feel even more delicate on hot grates.
For the safest grill version, chill the patties until firm, brush both sides with oil, and use a grill mat or foil for the first try. Once you know how your mixture behaves, you can move them directly onto well-oiled grates.
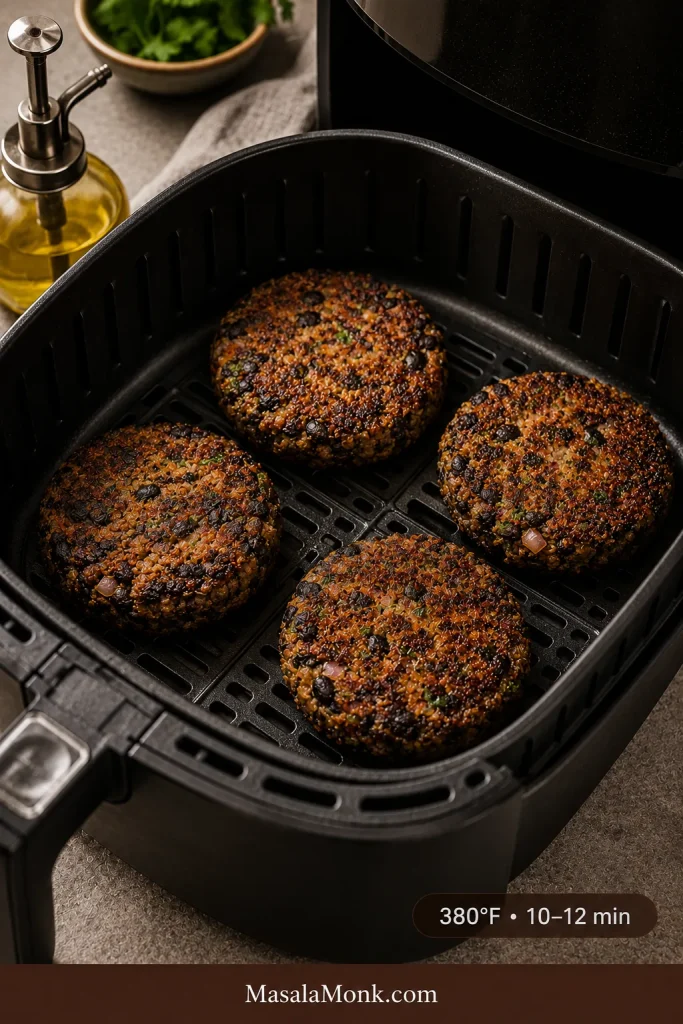
Air Fryer Black Bean Burgers
Preheat the air fryer to 380°F / 193°C. Lightly spray the patties and basket with oil. Cook for 10–12 minutes total, flipping halfway. Air fryer patties should be about ½ inch thick so the center heats through before the outside dries. The same thickness-and-flip logic applies to meat burgers too; this air fryer burgers guide is useful if you use your air fryer for burger nights often.
Making Them Vegan
For vegan black bean burgers, replace the egg with a flax egg or chia egg and use oats or oat flour as the dry binder. They may feel softer than egg-bound patties at first, but that does not mean they will fail. A short rest and a good crust make them much easier to handle.
How to Make a Flax Egg
- Mix 1 tablespoon ground flaxseed with 3 tablespoons water.
- Let it sit for 5–10 minutes until slightly thickened.
- Add it to the burger mixture in place of 1 egg.
Use tamari, soy sauce, or vegan Worcestershire-style sauce when keeping the recipe fully vegan. For a creamy egg-free topping, this eggless mayonnaise recipe is a useful sauce base.
Making Them Gluten-Free
Making the burgers gluten-free is mostly about the binder and sauces. Use certified gluten-free oats or oat flour instead of panko or breadcrumbs. Check labels on soy sauce, Worcestershire-style sauce, and barbecue sauce. Tamari is a useful gluten-free swap for soy sauce.
Gluten-free patties benefit from a short rest before cooking because oats and oat flour need a few minutes to absorb moisture.
Flavor Variations
Once the base mixture holds together, black bean burgers are easy to customize. Keep the same structure: beans, binder, seasoning, and a controlled amount of add-ins.
Spicy Black Bean Burger
Add chopped chipotle in adobo, jalapeño, extra chili powder, cayenne, or hot sauce for more heat. Serve with chipotle mayo, avocado, pickled onions, and lettuce. A little mango salsa adds sweet-bright contrast on top or on the side.
Sweet Potato Black Bean Burger
Mix in mashed roasted sweet potato for a softer, sweeter version. Because sweet potato brings extra moisture, balance it with a little more oats or breadcrumbs until the mixture feels sturdy again. This version pairs especially well with smoked paprika, cumin, lime, avocado, and cilantro.
Black Bean Quinoa Burger
Cooked and cooled quinoa adds chew without making the patty heavy. Keep the amount moderate; too much quinoa makes the mixture harder to hold together. It works especially well with garlic, cumin, smoked paprika, and a little lime.
Mushroom Black Bean Burger
Cook chopped mushrooms before adding them. Mushrooms add savory depth, but raw mushrooms release water and can make the patties soft. Sauté until their moisture cooks off, then cool before mixing.
Corn and Southwest Black Bean Burger
A small handful of corn, chopped cilantro, lime zest, cumin, smoked paprika, and chili powder gives the patties a Southwest-style feel. Keep the corn modest so the mixture still binds cleanly.
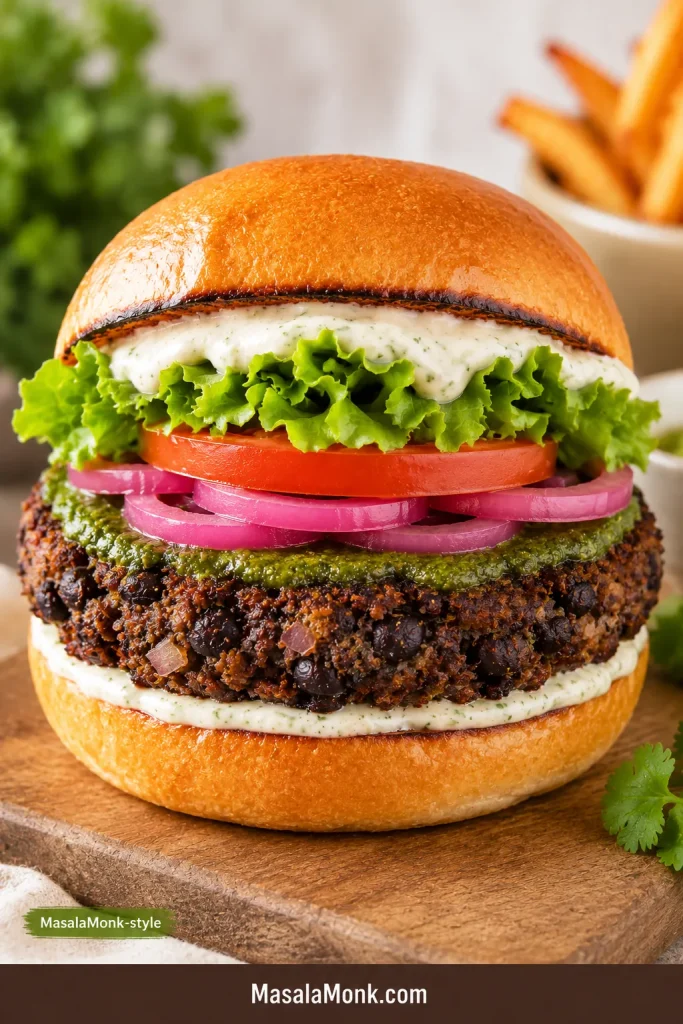
MasalaMonk-Style Black Bean Burger
Start with the smoky patty, then build the burger with green chutney, pickled onion, sliced tomato, lettuce, and a little yogurt-style sauce or egg-free mayo. The cumin, chili, herbs, and sharp onion make the burger brighter without turning it into a completely different recipe.
Mini Patties or Sliders
Shape smaller patties for sliders and reduce the cooking time by 1–2 minutes per side. Because mini patties dry faster, pull them once the edges are browned and the centers are hot.
Cheesy Black Bean Burger
For a vegetarian version, add a small amount of shredded cheese, feta, pepper jack, or cotija. Cheese adds salt, richness, and a little extra structure.
Toppings, Sauces, and Buns That Work Well
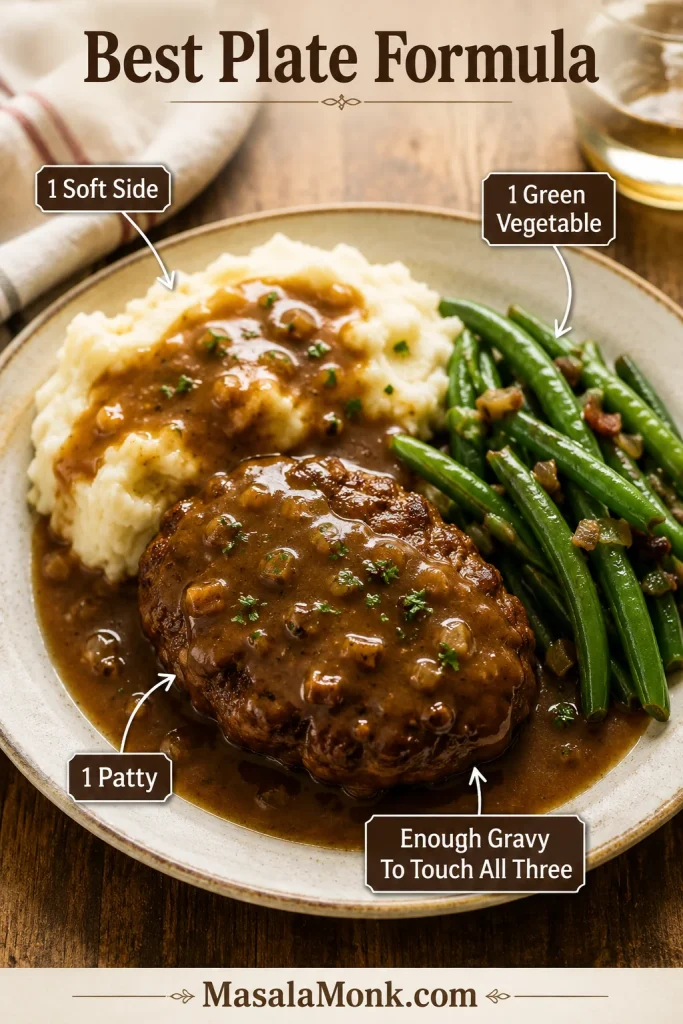
Because the patty is smoky and hearty, the toppings should bring contrast: creaminess, crunch, acidity, and freshness. The best bite has a warm smoky patty, cool lettuce, juicy tomato, creamy sauce, and a little sharpness from pickles, salsa, chutney, or onion.
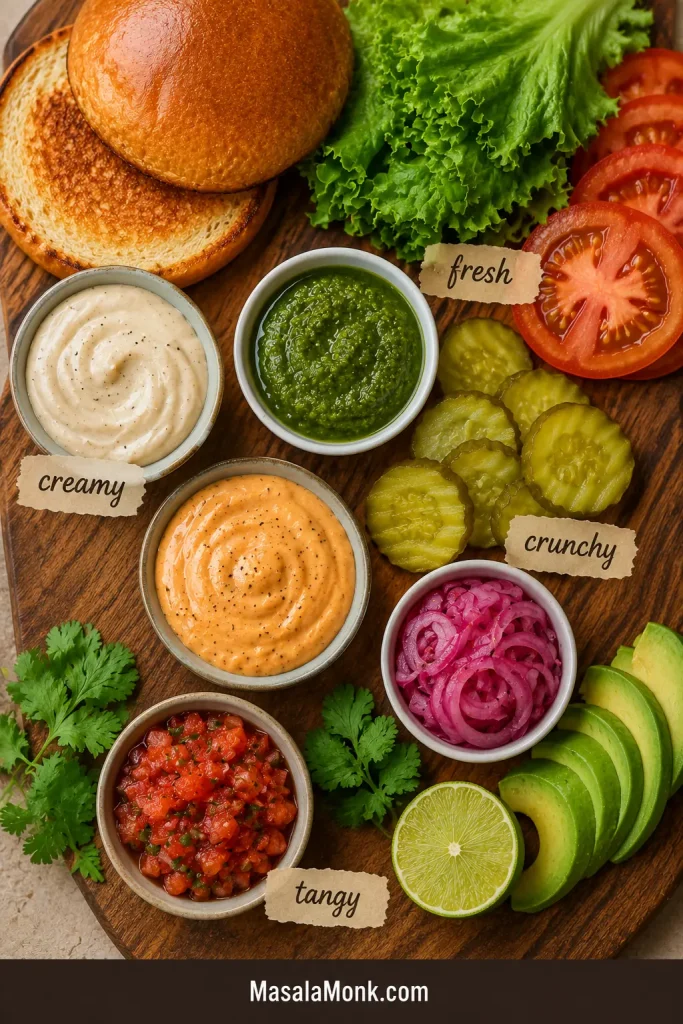
- Chipotle mayo
- Garlic aioli
- Avocado or guacamole
- Salsa or pico de gallo
- Pickled onions
- Lettuce
- Tomato
- Red onion
- Jalapeños
- Cabbage slaw
- Lime crema
- Barbecue sauce
- Vegan mayo
For sauce, go creamy or sharp. Garlic aioli adds creaminess without covering up the smoky bean flavor. For a brighter MasalaMonk-style twist, use green chutney with sliced onion, tomato, lettuce, and a little mayo or yogurt-style sauce.
Use toasted burger buns, brioche-style buns, whole wheat buns, or lettuce wraps. Toasting helps protect the bun from sauce and keeps the burger from feeling soft-on-soft.
What to Serve With Black Bean Burgers
Serve black bean burgers anywhere a regular burger would feel right. They work with classic sides, fresh salads, roasted vegetables, and bowl-style meals.
- French fries or sweet potato fries
- Simple green salad
- Cabbage slaw
- Corn salad
- Roasted vegetables
- Rice or quinoa bowls
- Lettuce wraps
- Pickles and chips
- Grilled vegetables
Pair the patties with crispy homemade French fries for a classic burger plate. If you want a colder side that cuts through the smoky burger, use this creamy coleslaw.
Roasted vegetables work better than another heavy starch for a lighter dinner plate. These roasted carrots bring sweetness, color, and browned edges without competing with the burger.
To add more protein, use cheese, a Greek-yogurt-style sauce, or serve the patty over a quinoa bowl. On a vegan plate, pair it with hummus, tofu slaw, extra beans, or a hearty salad.
Storage, Freezing, and Reheating
These patties are excellent for meal prep. They store well, freeze well, and reheat best when the crust gets a chance to crisp again.
Fridge
Cooked patties keep for 3–4 days in an airtight container in the refrigerator. Let them cool before storing so trapped steam does not soften the crust too much.
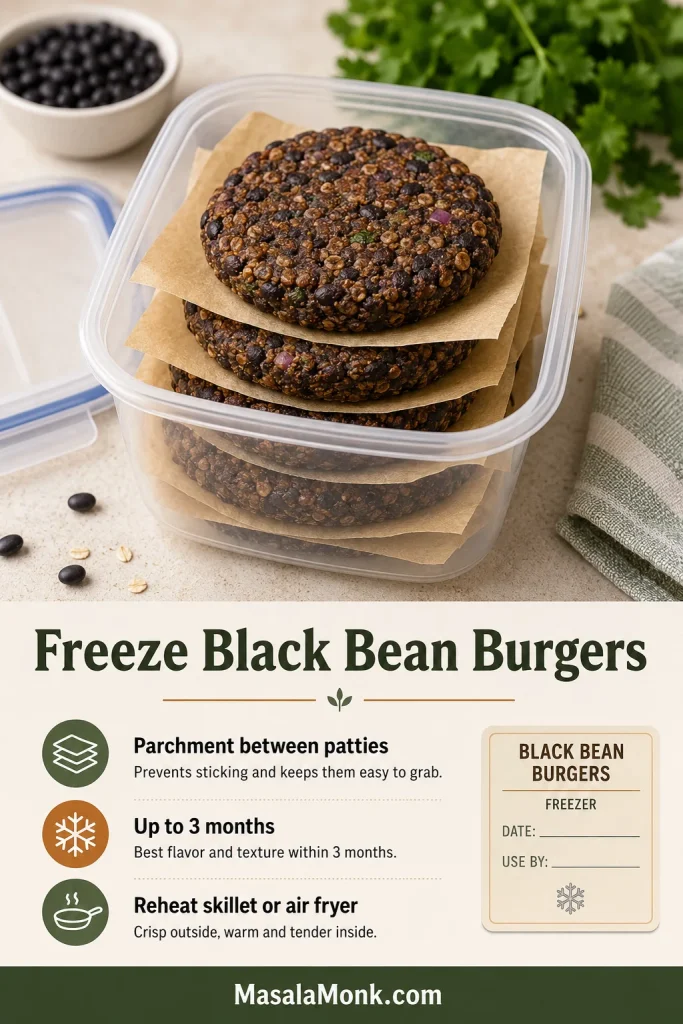
Freezer
Freeze shaped or cooked patties for up to 3 months. Place parchment between patties so they do not stick together, then store in a freezer-safe bag or container.
For general leftover safety, the USDA recommends using refrigerated leftovers within 3–4 days and freezing leftovers for longer storage. Their leftovers and food safety guide is helpful if you want broader storage guidance.
Reheating
Reheat the burgers in a skillet or air fryer for the best texture. A microwave works for speed, but it softens the crust. For frozen patties, start over medium-low heat so the center warms before the outside over-browns, then increase the heat briefly to crisp the edges.
Make-Ahead Patties
Shape the patties up to 24 hours ahead and refrigerate them covered. This helps the binder absorb moisture and makes the patties easier to cook.
Once you learn the feel of the mixture, black bean burgers stop being risky. You know when the beans are dry enough, when the patty is firm enough, and when the crust is ready to flip. That is the real win here: a smoky, satisfying veggie burger you can put on a bun without holding your breath.
Useful links: Recipe card | FAQs | Back to top
Frequently Asked Questions
Why are my black bean burgers mushy?
Usually because the beans, onion, or add-ins brought too much moisture, or because the beans were processed too smoothly. Dry the beans, cook watery vegetables first, leave some bean texture, and add oats or breadcrumbs if the mixture feels loose.
What keeps black bean burgers from falling apart?
A good binder, enough mashing, and proper browning keep the patties from falling apart. Egg and breadcrumbs work well for vegetarian patties, while flax egg and oats work well for vegan patties.
Do black bean burgers need egg?
No. Egg helps, but you can still make a sturdy patty without it. Use a flax egg or chia egg with oats or oat flour, then give the mixture a short rest before cooking.
What can replace breadcrumbs in black bean burgers?
Rolled oats, quick oats, oat flour, crushed crackers, or potato flakes can replace breadcrumbs. Cooked quinoa can add texture, but it works best with another binder because it does not absorb moisture as strongly as oats.
Can I make black bean burgers without a food processor?
A fork or potato masher works very well and gives you more control over the texture. Mash enough beans to bind the mixture, but leave some pieces for a heartier bite.
Are canned black beans okay for black bean burgers?
Canned beans work very well because they are already cooked and consistent. Drain and rinse them well, then dry them in the oven or with a towel before mixing.
Can I use dried black beans?
Dried beans are fine once they are fully cooked, tender, drained, and cooled. They should be soft enough to mash but not watery when they go into the burger mixture.
Are black bean burgers vegan?
Some are vegan, but many recipes use egg, cheese, mayonnaise, or Worcestershire sauce. This recipe can be made vegan with flax egg, oats, and vegan-friendly sauces.
Are black bean burgers gluten-free?
They can be gluten-free; the main things to watch are the binder and sauces. Use certified gluten-free oats or oat flour instead of breadcrumbs or panko, and check sauce labels when gluten is a concern.
Can black bean burgers be grilled?
Yes, but treat grilling as the firm-patty method. Chill the patties before grilling, oil the grates well, and flip carefully. Use foil, a grill mat, or a cast-iron griddle for delicate patties.
How do you make black bean burgers taste better?
Lean on bold seasoning and a little umami. Cumin, smoked paprika, chili powder, chipotle, tamari, tomato paste, lime, garlic, and onion all help the patties taste deeper and more satisfying.
How long do black bean burgers last in the fridge?
Cooked patties last 3–4 days in an airtight container in the refrigerator. Reheat them in a skillet or air fryer for the best texture.
Can black bean burgers be frozen?
Yes. Freeze shaped or cooked patties for up to 3 months. Place parchment between patties so they do not stick together, then thaw overnight or cook with a few extra minutes from frozen.
Are black bean burgers healthy?
These burgers can be a nourishing, filling option because black beans bring plant-based protein, fiber, complex carbohydrates, vitamins, and minerals. Harvard’s Nutrition Source has a helpful overview of legumes and pulses if you want more background. The overall nutrition still depends on the binder, oil, bun, cheese, sauce, and toppings you use.