Posted on Leave a comment

Black Bean Burger Recipe: Easy Patties That Don’t Fall Apart

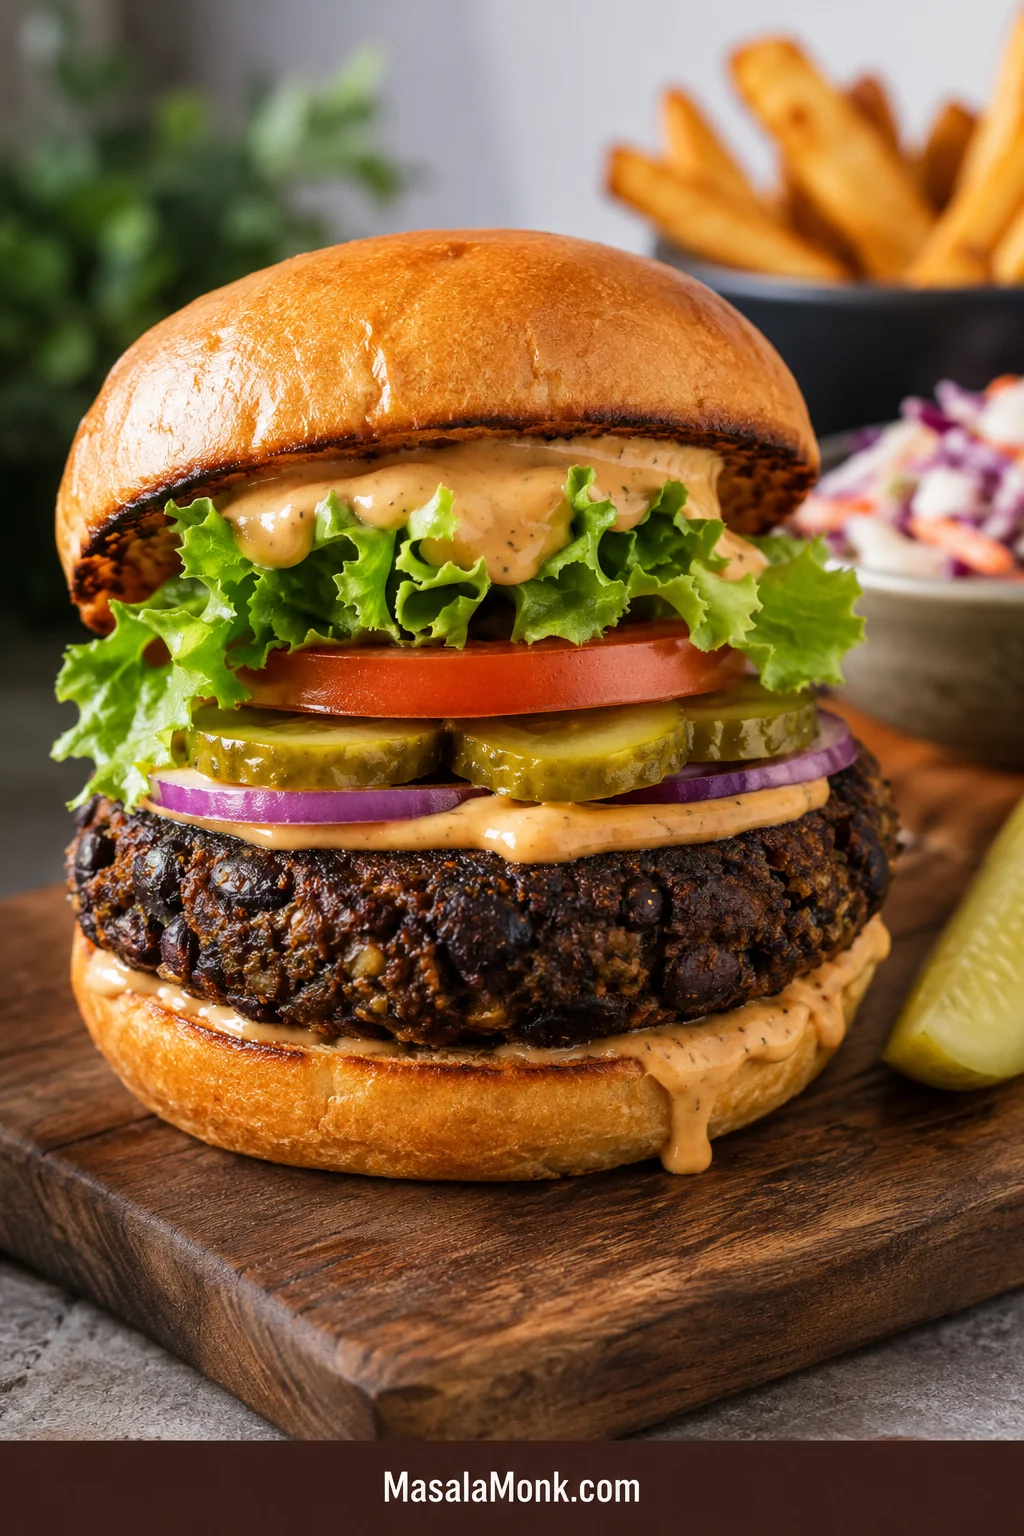
Tall black bean burger on a toasted bun with lettuce, tomato, pickles, creamy sauce, and a dark crisp-edged patty on a wooden board.

Black bean burgers are easy to love and surprisingly easy to mess up. The mixture can turn wet, the patties can crack in the pan, or the center can taste more like mashed beans than a real burger. What you want is a patty that lands on a bun without crumbling, browns at the edges, and feels hearty when you bite into it — not something you have to rescue with extra sauce.

This black bean burger recipe is built for that kind of confidence: crisp edges, smoky flavor, a tender middle, and patties that hold together without first-flip panic. It is the recipe for people tired of mushy, fragile bean burgers and ready for one that actually feels like dinner.

The main version uses canned black beans, egg, panko or oats, onion, garlic, and smoky spices. You will also find vegan, gluten-free, no-breadcrumb, oven, grill, and air fryer options, so the recipe works whether you want a classic veggie burger, a no-egg patty, or a meal-prep-friendly batch for the freezer.

Quick Answer: How to Make Black Bean Burgers That Don’t Fall Apart

To make black bean burgers that do not fall apart, dry the beans first, mash only part of them, use a real binder, and cook the first side until a crust forms before flipping. Wet beans, raw watery vegetables, too little binder, and early flipping are the main reasons homemade black bean burgers turn mushy or break.

The simple rule is: dry, bind, rest, crust. That means drying the beans, binding the mixture, resting delicate patties, and letting the crust form before flipping.

  • Dry the beans: bake drained beans briefly so the center does not turn pasty.
  • Use a binder: egg plus panko, breadcrumbs, or oats is the easiest vegetarian option.
  • Go egg-free with oats: flax egg plus oats or oat flour works well for vegan patties.
  • Leave texture: mash enough to bind, but keep some visible bean pieces.
  • Rest soft patties: a short chill makes delicate patties easier to move.
  • Wait for the crust: if a patty feels stuck, it probably needs another minute before flipping.

Even if this is your first homemade veggie burger, the cues below will help you fix the bean base before it ever touches the skillet. If it looks like bean dip, it is not ready to be a burger. A pressed handful that holds its shape means you are much closer to a clean flip.
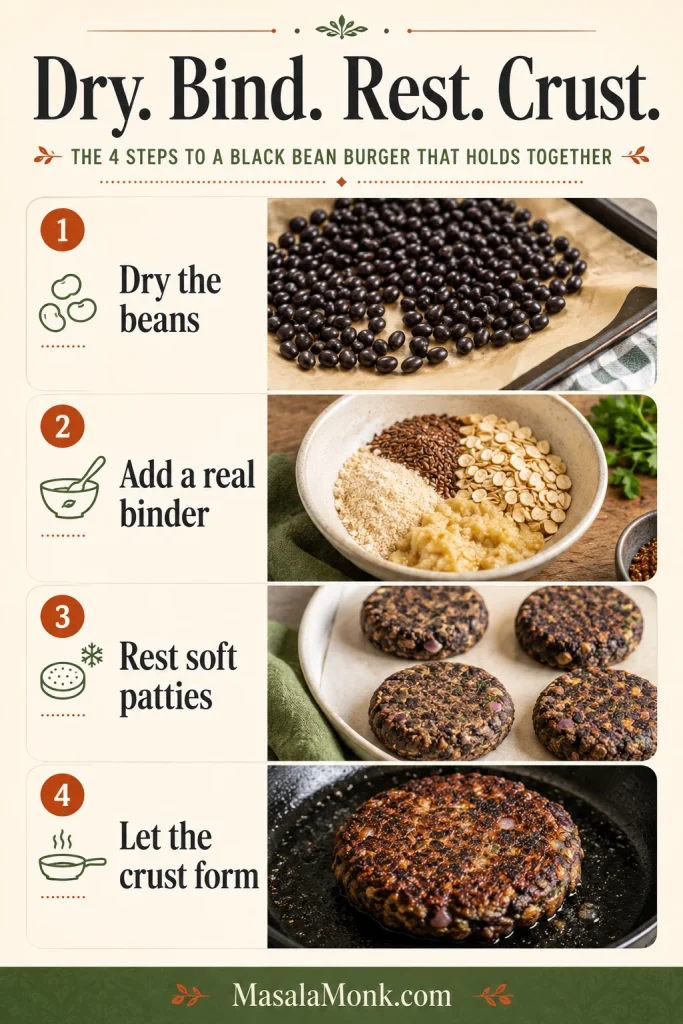
Vertical guide showing four steps for black bean burgers: dried beans, binder ingredients, resting patties, and a browned patty in a skillet.
Before cooking, follow the structure sequence: dry the beans, bind the mixture, rest soft patties, then let the crust set.

Black Bean Burgers at a Glance

Yield6 medium patties
Beans2 cans / about 3 cups drained black beans
Main texture stepDry the beans first
Default binderEgg + panko, breadcrumbs, or oats
Vegan binderFlax egg + oats or oat flour
Main methodSkillet, for crisp edges and control
Texture cueMoist and moldable, not loose like dip

Black Bean Burger Recipe Card

Smoky Black Bean Burgers That Hold Together

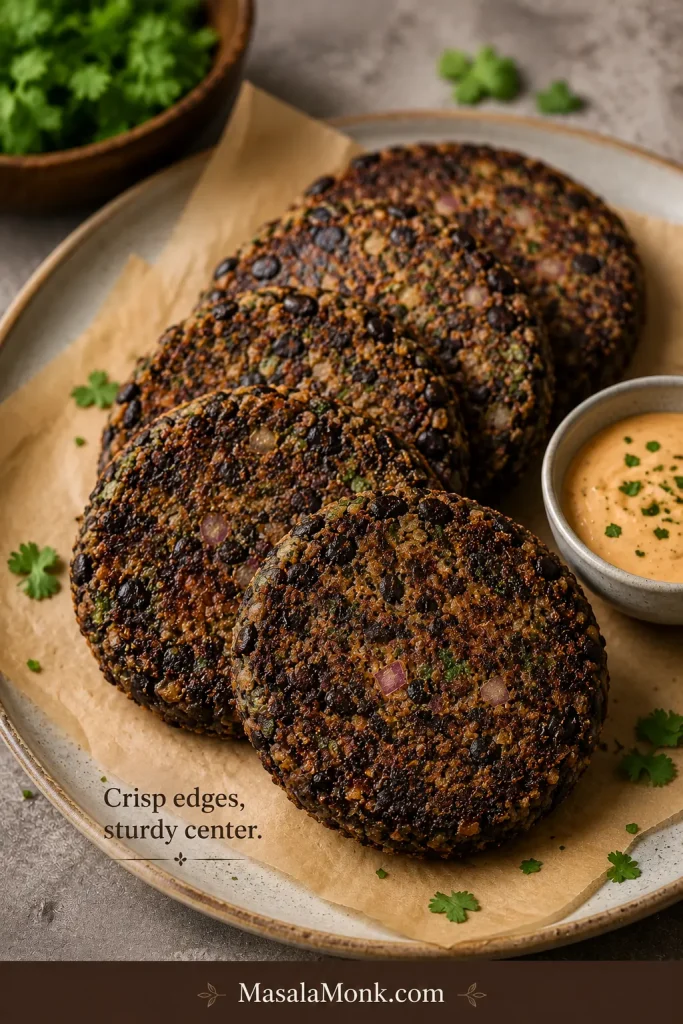
These black bean burgers are smoky, hearty, crisp-edged, and firm enough to flip. They are sturdy enough for a bun but still tender in the middle, with enough texture to feel satisfying instead of pasty.

The finished patty should have browned edges, a smoky garlic-cumin aroma, and a middle that feels hearty rather than mashed. Add a toasted bun, creamy sauce, something crunchy, and a little acidity, and it eats like a real burger.

Prep Time15 minutes
Bean-Drying Time12–15 minutes
Patty Cook Time10 minutes for skillet
Total TimeAbout 40–45 minutes
Yield6 patties
Main MethodSkillet
Other MethodsOven, grill, air fryer

If you chill the patties before cooking, add 20–30 minutes of resting time. The wait is useful when the mixture feels soft, especially for vegan, oat-based, or grill-ready patties.

Fast path: For a quicker version, towel-dry the beans very well instead of baking them. The patties will be a little softer than the oven-dried version, but still workable if you use enough binder and let the first side brown before flipping.

Make-ahead path: Shape the patties up to 24 hours ahead and refrigerate them covered. This gives the binder time to settle and makes the patties easier to cook later.

Equipment

  • Rimmed baking sheet
  • Parchment paper
  • Large mixing bowl
  • Fork, potato masher, or food processor
  • Cast-iron or nonstick skillet
  • Thin spatula
  • Optional: grill mat, foil, or air fryer basket

You do not need a food processor. A fork or potato masher gives you more control and makes it easier to leave some texture in the beans.

Ingredients

  • 2 cans black beans, 15 oz / 425 g each, drained and rinsed, about 3 cups / 500–520 g drained beans
  • 1 teaspoon oil, for cooking the onion
  • ½ cup / 75 g finely chopped onion
  • 2–3 garlic cloves, minced
  • 1 large egg
  • ¾ cup panko or breadcrumbs, about 45–55 g, or ¾ cup rolled oats, about 60 g
  • 1 tablespoon tomato paste, ketchup, or barbecue sauce
  • 1 tablespoon tamari, soy sauce, or vegan Worcestershire-style sauce for deeper burger-style flavor
  • 1 teaspoon ground cumin
  • 1 teaspoon smoked paprika
  • ½ teaspoon chili powder
  • ½ teaspoon fine salt, plus more to taste
  • ¼ teaspoon black pepper
  • 1–2 tablespoons chopped cilantro or parsley, optional
  • 1 tablespoon chopped chipotle in adobo, optional for smoky heat
  • 1–2 tablespoons oil, for cooking the patties

Using soy sauce or vegan Worcestershire-style sauce? Taste before adding extra salt because both can make the mixture saltier than expected.

With oat flour: Start with ½ cup / about 50 g oat flour instead of ¾ cup whole oats. Oat flour absorbs more quickly, so add more only when the mixture still feels loose.

Vegan Swap

Replace the egg with 1 flax egg. Mix 1 tablespoon ground flaxseed with 3 tablespoons water and let it thicken for 5–10 minutes. Use rolled oats or oat flour as the dry binder, and chill the shaped patties before cooking.

Instructions

  1. Dry the beans. Heat the oven to 350°F / 175°C. Spread the drained and rinsed black beans on a parchment-lined baking sheet. Bake for 12–15 minutes, until the beans look matte and slightly wrinkled. Cool briefly.
  2. Cook the onion and garlic. Warm 1 teaspoon oil in a skillet. Soften the onion for 3–4 minutes, stir in the garlic for 30 seconds, then cool slightly.
  3. Mash the beans. Transfer the beans to a large bowl. Mash with a fork or potato masher until partly mashed with some visible bean pieces.
  4. Add binder and seasoning. Stir in the cooked onion and garlic, egg, panko, breadcrumbs, or oats, tomato paste, tamari or soy sauce, spices, herbs, and chipotle if using.
  5. Mix until moldable. Stir and press until the mix holds when squeezed.
  6. Adjust if needed. If the bowl feels wet, add oats or breadcrumbs 1 tablespoon at a time. If it feels dry, work in a teaspoon of sauce, water, or oil.
  7. Shape the patties. Divide the bean base into 6 patties, about ½ cup each. Shape them ½–¾ inch thick and press the edges smooth.
  8. Chill soft patties. Refrigerate for 20–30 minutes when the shaped burgers feel delicate. This helps vegan or grill-ready patties.
  9. Cook in a skillet. Heat 1 tablespoon oil over medium heat. Cook 4–5 minutes per side, flipping only after the first side browns and releases. Work in batches so each patty has room to brown.
  10. Serve. Build on toasted buns with lettuce, tomato, onion, avocado, pickles, chipotle mayo, garlic aioli, or salsa.

Choose Your Version

Use this quick table if you already know what kind of black bean burger you want. The base method stays the same, but the binder and resting time change depending on your goal.

Choose This VersionUse ThisWhat to Expect
Firmest classic pattyEgg + panko or breadcrumbsClean flipping, crisp edges, sturdy bun-ready texture
Vegan pattyFlax egg + oatsSofter before cooking, firmer after resting and browning
Gluten-free pattyCertified gluten-free oats or oat flourGood structure without panko or breadcrumbs
No-breadcrumb pattyRolled oats, quick oats, or oat flourHearty texture with a little resting time
Fastest versionVery well towel-dried beansSlightly softer, but still workable
Best textureOven-dried beansFirmest patties and least mushy center
Grill versionFirm binder + chilled pattiesBetter handling on hot grates

Next, use the visual cues below to check how the bean base should look and feel before it reaches the pan.
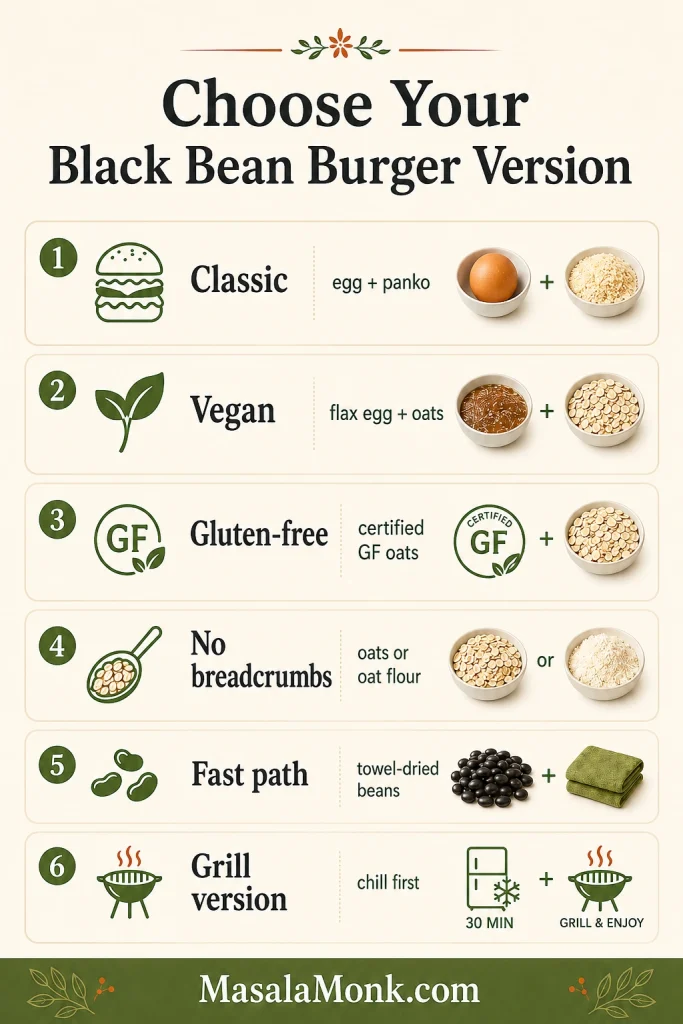
Vertical decision guide comparing classic, vegan, gluten-free, no-breadcrumb, fast, and grill versions of black bean burgers.
First choose the binder: egg and panko for firmness, flax and oats for vegan patties, and certified gluten-free oats when needed.

What Good Black Bean Burgers Should Look Like

Good bean burgers are not perfectly smooth. They should look rustic, with some bean pieces still visible, a firm edge, and enough structure to lift with a spatula. A good black bean burger should be sturdy enough for a bun and tender enough to enjoy.

  • After drying: the beans should look matte and slightly wrinkled, and a few may split open.
  • After mashing: the bowl should have both mashed beans and visible bean pieces.
  • Before shaping: a squeezed handful should hold together without oozing through your fingers.
  • After shaping: each patty should hold its edge instead of slumping on the plate.
  • In the pan: the first side should brown and release more easily once the crust sets.
  • After cooking: the outside should be crisp-edged and the middle should be tender, not wet or gummy.
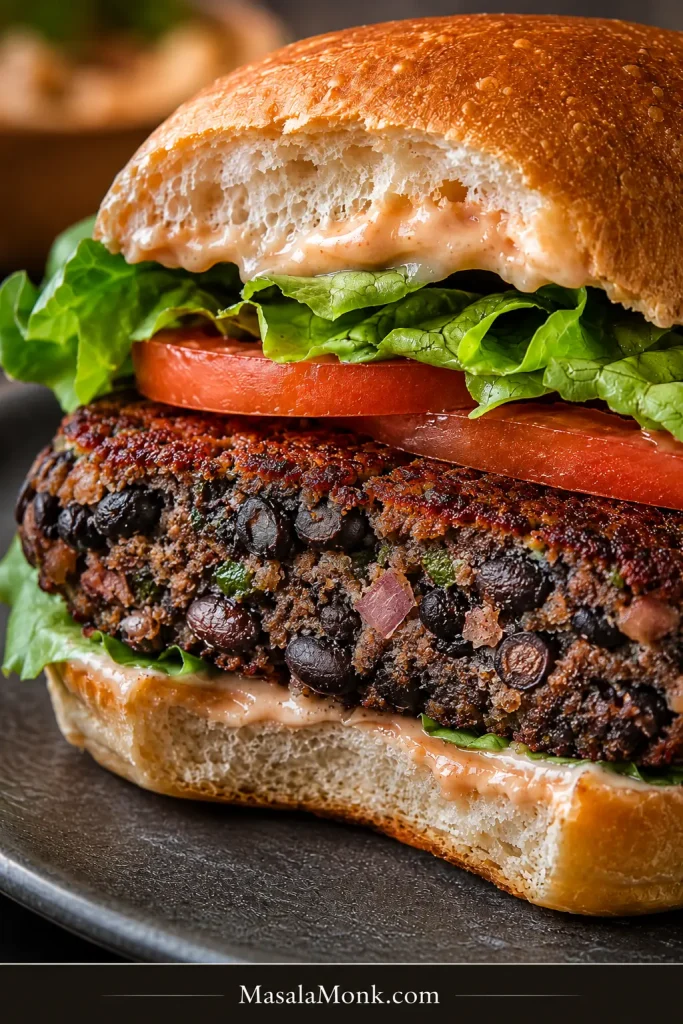
Close-up of a cut black bean burger showing a dark bean-filled interior, crisp browned edge, bun, lettuce, tomato, and sauce.
The best texture is tender inside but not pasty, with visible bean pieces and a browned exterior that gives each bite structure.

When the mixture looks like bean dip, it needs more dry binder and resting time. If it looks dusty or cracks at the edges, mash a little more or add a tiny splash of moisture. The same basic patty logic applies whether you are shaping beans or meat: control moisture, shape gently, and let the surface set. For a deeper look at patty structure, see this burger patty recipe.

Why This Black Bean Burger Recipe Works

Most black bean burgers fail because they treat beans like ground meat. Beans bring moisture, starch, and softness, so the method has to build structure before the patty ever hits the pan. This version does that with dried beans, cooked aromatics, partial mashing, and a binder that matches your diet.

Control PointWhat It Fixes
Drying the beansPrevents pasty, wet centers
Cooking the onionRemoves raw sharpness and extra water
Partial mashingCreates natural bean paste without losing bite
BinderAbsorbs moisture and helps the patty set
Chilling when neededMakes delicate patties easier to move
Surface browningCreates the crust needed for a clean flip

Do not make the beans smoother. Make the structure smarter. A fully smooth mixture can cook up dense and gummy, while a barely mashed one can crumble. The sweet spot is enough mashed beans to bind, with enough whole pieces to make the burger satisfying.

Ingredients You’ll Need

This ingredient list is short, but a few choices matter more than others: dry beans, controlled onion, a real binder, and bold seasoning. A black bean burger should taste like dinner, not a compromise.
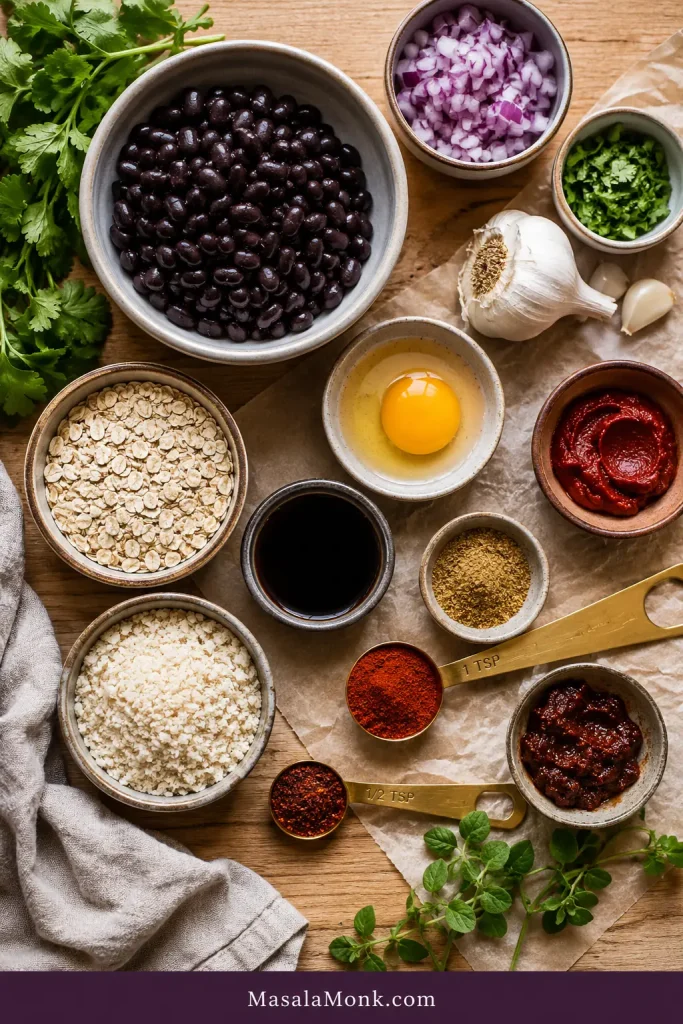
Ingredient board with black beans, onion, garlic, egg, oats, panko, tomato paste, tamari or soy sauce, spices, and herbs in small bowls.
Before shaping, build flavor into the bean base with onion, garlic, smoky spices, tomato paste, herbs, and tamari.

Black Beans

Canned black beans are the easiest choice. Drain, rinse, and dry them well before mixing. Home-cooked black beans also work, but they should be tender, well-drained, and not soupy.

Extra cooked beans do not have to sit around either; they can become a cozy bean stew later in the week.

Onion and Garlic

Onion and garlic give the patties a savory base. Cooking the onion first is worth the extra few minutes because raw onion can release water into the bean base and make the patties softer.

Egg or Flax Egg

Egg is the easiest binder for a vegetarian version because it helps the patty set as it cooks. For an egg-free version, use a flax egg or chia egg with oats.

Panko, Breadcrumbs, Oats, or Oat Flour

Panko and breadcrumbs give a lighter, firmer bite. Rolled oats are great for no-breadcrumb and gluten-free versions. Oat flour binds quickly when the patty mix feels soft, but too much can make the center dense.

Smoky Spices and Flavor Boosters

Cumin, smoked paprika, and chili powder make the burgers warm, smoky, and savory. Tomato paste, ketchup, barbecue sauce, tamari, soy sauce, or vegan Worcestershire-style sauce adds depth, so the burger does not taste like a plain bean patty.

Optional Texture Add-Ins

Chopped walnuts, cashews, sunflower seeds, corn, cooked quinoa, or cooked mushrooms can add bite. Keep add-ins modest because too many extras make the patties harder to bind.

Which Binder Should You Use?

There is no single correct binder. The right choice depends on whether you want the firmest vegetarian patty, a vegan version, or a gluten-free one. Your test is simple: press a handful together. It should hold its shape without oozing, slumping, or crumbling apart.
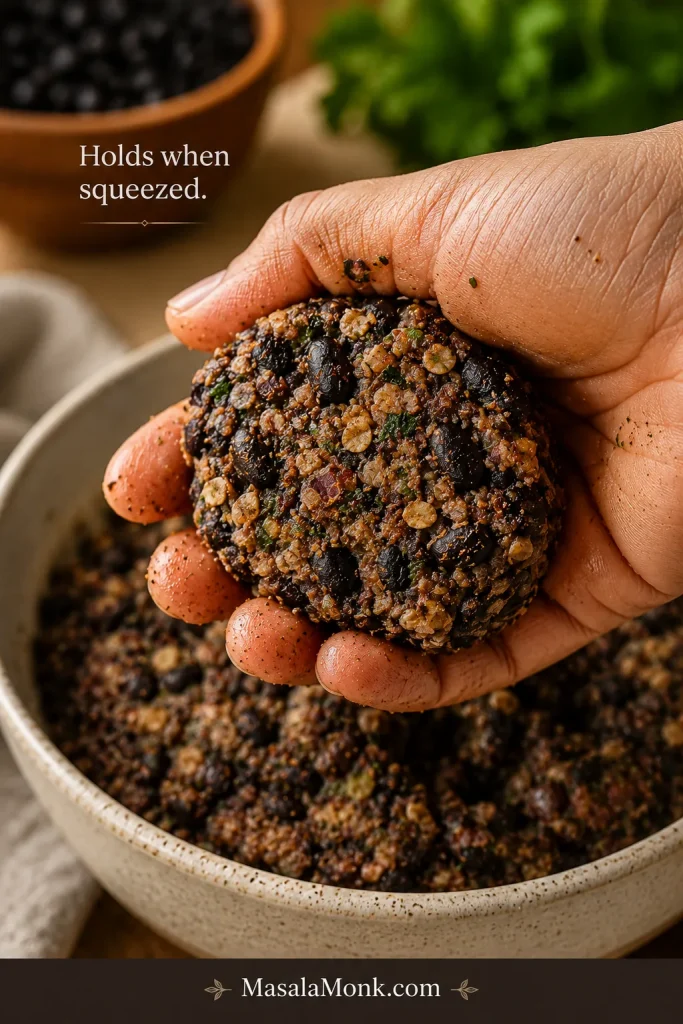
Hand squeezing black bean burger mixture into a firm clump with visible beans, oats, herbs, and spices.
Before shaping, squeeze a small handful. If it holds together without oozing or crumbling, the mixture is ready.
NeedBinderHow to Use It
Firmest vegetarian pattyEgg + panko or breadcrumbsEasiest option for clean flipping
Vegan black bean burgerFlax egg or chia egg + oatsRest and chill so the oats can settle into the mixture
Gluten-freeCertified gluten-free oats or oat flourUse oat flour when a firmer texture is needed
No breadcrumbsRolled oats, quick oats, or oat flourLet the mixture rest before shaping
Grillable pattiesStrong binder + chillingChill 30 minutes or freeze 15–20 minutes before grilling
Softer, richer pattiesAvocado, mashed sweet potato, or a little mayoAdd extra oats or crumbs to balance moisture
More biteChopped nuts, seeds, quinoa, or cornUse as add-ins, not the main binder

In the main recipe, egg plus panko, breadcrumbs, or oats is the most reliable path. For vegan patties, use a flax egg and oats. To keep the burgers gluten-free, use certified gluten-free oats or oat flour and check the sauces you add.

No Breadcrumbs? Use Oats This Way

Breadcrumbs are not required. If oats are what you have, they can do the job well — they just need a few minutes to absorb moisture. They are also useful for vegan and gluten-free versions when certified gluten-free oats are used.

Rolled oats give the most rustic texture. Quick oats blend in faster and make a softer patty. Oat flour binds the fastest and gives a firmer gluten-free patty, but too much can make the center dense.

Start with ¾ cup rolled oats or ½ cup oat flour for 2 cans of black beans. After mixing, let the patty mix rest for 5–10 minutes. Oats firm up as they absorb moisture, so a base that feels slightly soft at first may become easier to shape after resting.
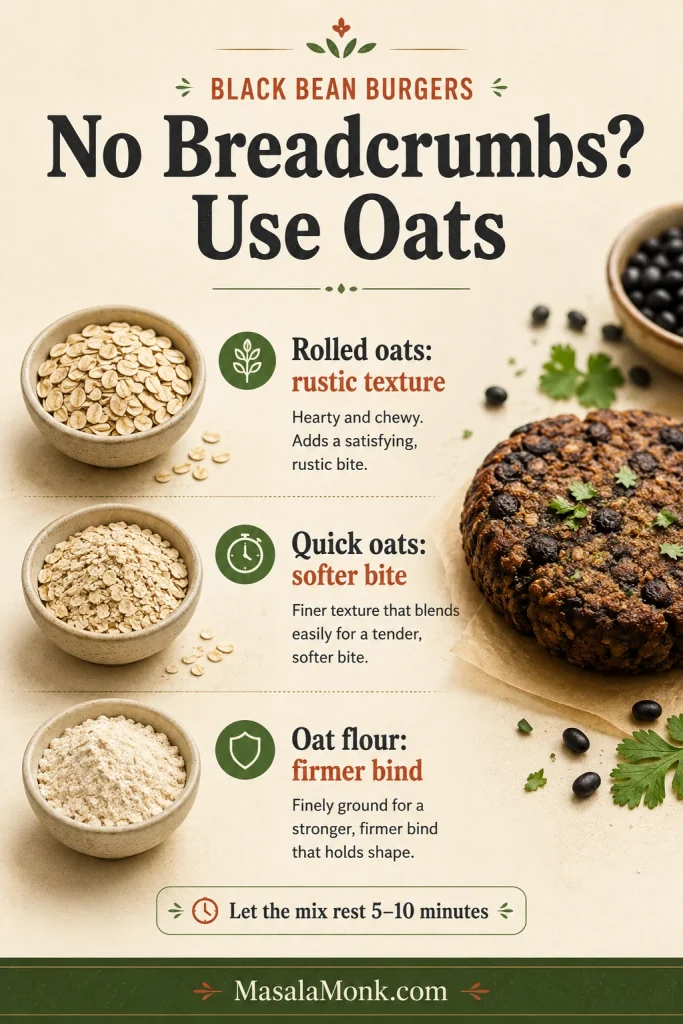
Vertical guide comparing rolled oats, quick oats, and oat flour as no-breadcrumb binders for black bean burgers.
No breadcrumbs? Use oats strategically: rolled oats add chew, quick oats blend in softly, and oat flour binds fastest.

Step-by-Step Method

The steps are simple, but the order matters. Dry the beans first, soften the aromatics, mash for texture, then add the binder and seasonings.

1. Dry the Black Beans

Heat the oven to 350°F / 175°C. Spread drained and rinsed black beans on a parchment-lined baking sheet. Bake for 12–15 minutes, until they look drier and slightly wrinkled. This one step makes the biggest difference in preventing a mushy center.

No oven available? Pat the beans very dry with a clean towel and let them sit uncovered while you prepare the rest of the ingredients. The oven method is stronger, but even towel-drying helps.
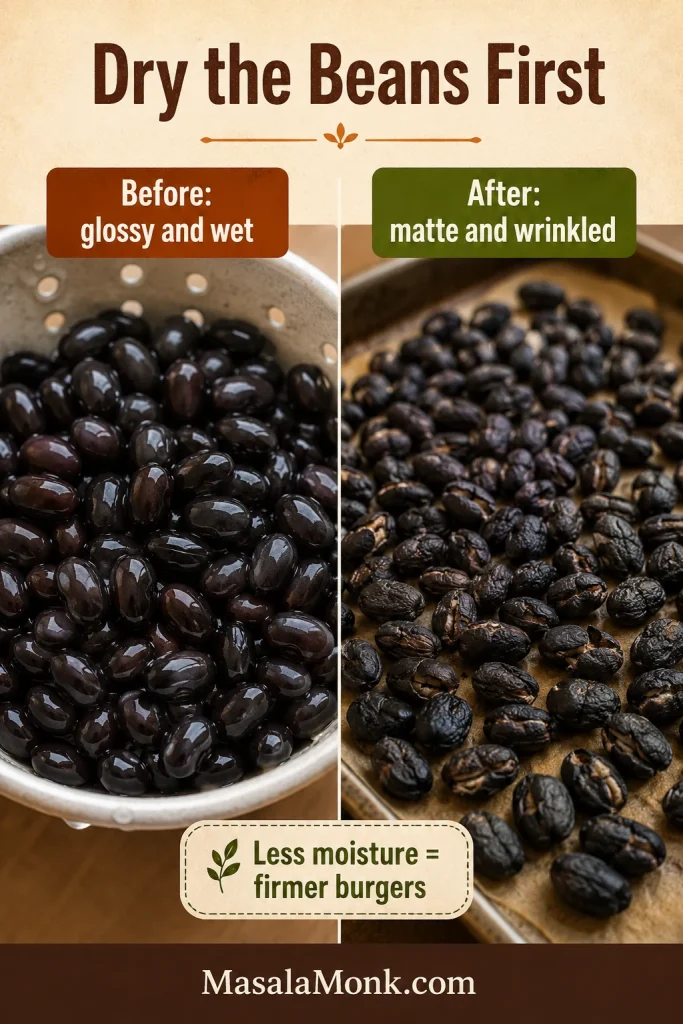
Split comparison showing glossy wet black beans before drying and matte wrinkled black beans after drying on parchment.
After drying, the beans look less glossy and hold less moisture. That small step helps the patties firm up in the pan.

2. Cook the Onion and Garlic

Cook the chopped onion in a little oil for 3–4 minutes, then add garlic for 30 seconds. This softens the sharp flavor and cooks off extra moisture. Raw onion can make the bean base wetter than expected.

3. Mash the Beans

Mash the dried beans with a fork or potato masher. Stop when the bowl is partly mashed with some whole or half beans still visible. A food processor can be used, but pulse gently and avoid turning everything into a smooth paste.
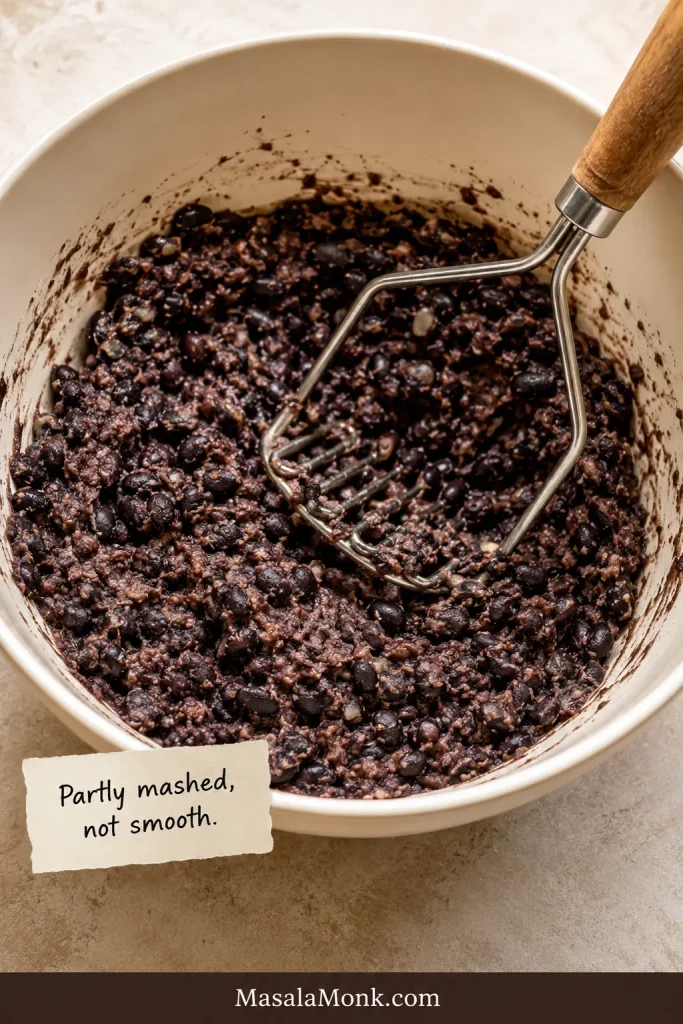
Bowl of partly mashed black beans with a fork or masher, showing some mashed beans and some whole bean pieces.
Stop mashing while some beans are still whole. The mix needs both paste for binding and pieces for texture.

4. Add the Binder and Seasonings

Add the egg, panko, breadcrumbs, or oats, cooked onion and garlic, tomato paste or ketchup, tamari or soy sauce, cumin, smoked paprika, chili powder, salt, pepper, and herbs. Stir until the mixture holds together when pressed.
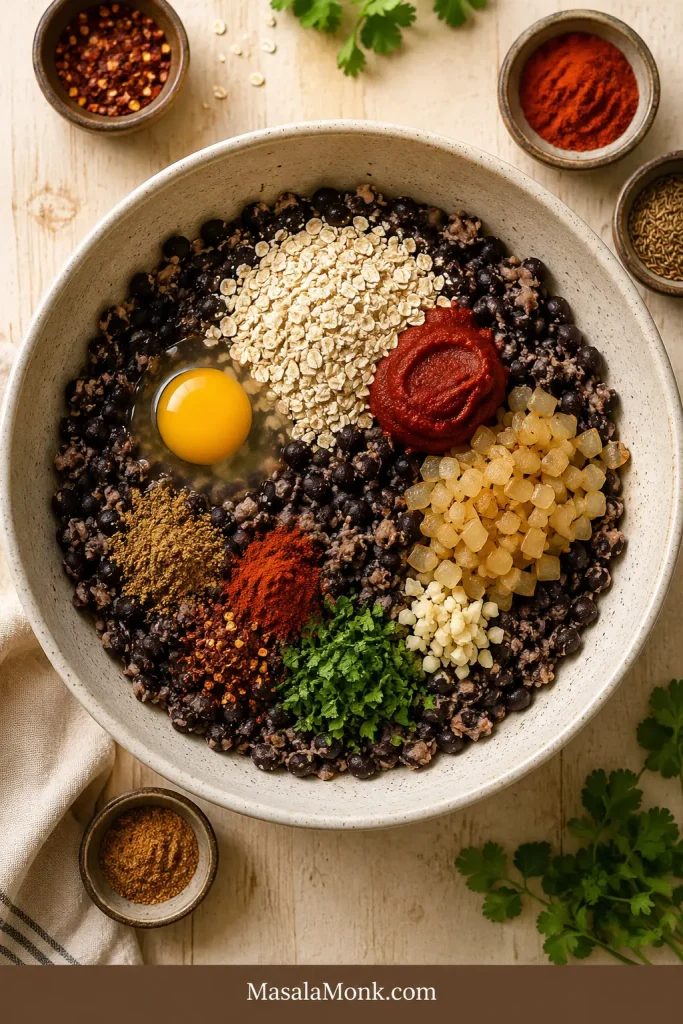
Bowl of mashed black beans topped with egg, oats or breadcrumbs, tomato paste, cooked onion, garlic, spices, and herbs before mixing.
Once the beans are partly mashed, the binder absorbs moisture and helps the patties hold together without becoming heavy.

5. Adjust the Texture

Aim for moist and moldable — closer to soft dough than bean dip. Add oats or breadcrumbs 1 tablespoon at a time when the bowl feels wet. Use a teaspoon of sauce, water, or oil when the base feels dry and cracks at the edges.
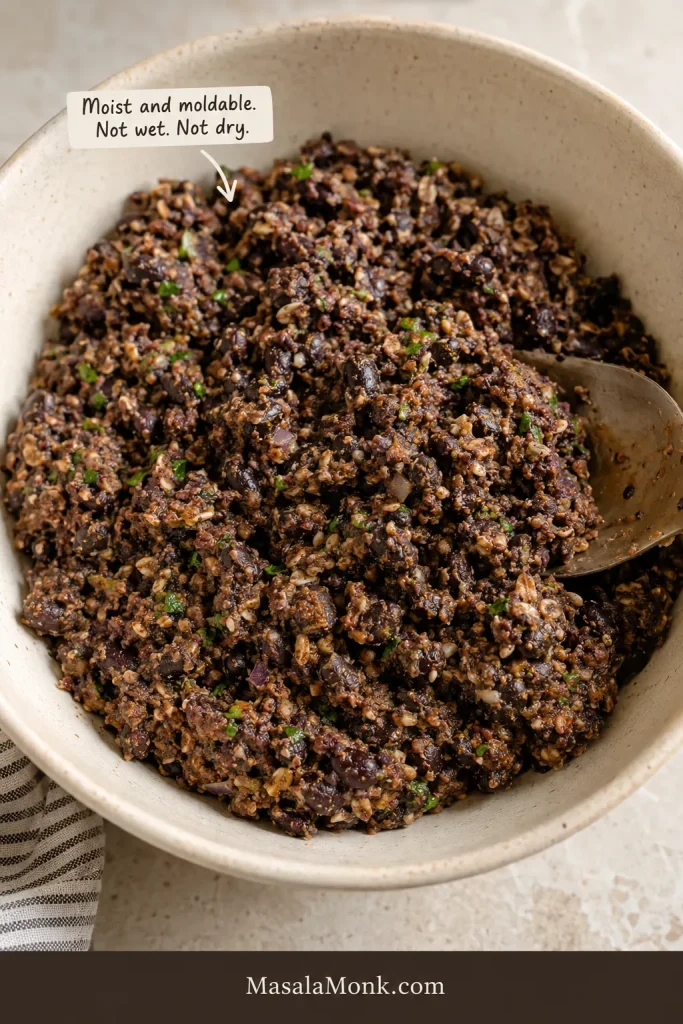
Bowl of chunky black bean burger mixture with visible black beans, oats, herbs, onion, and a spoon, labeled moist and moldable.
The ideal mix should be moist and moldable. It should scoop and press easily, not spread like dip or crumble like dry stuffing.

6. Shape the Patties

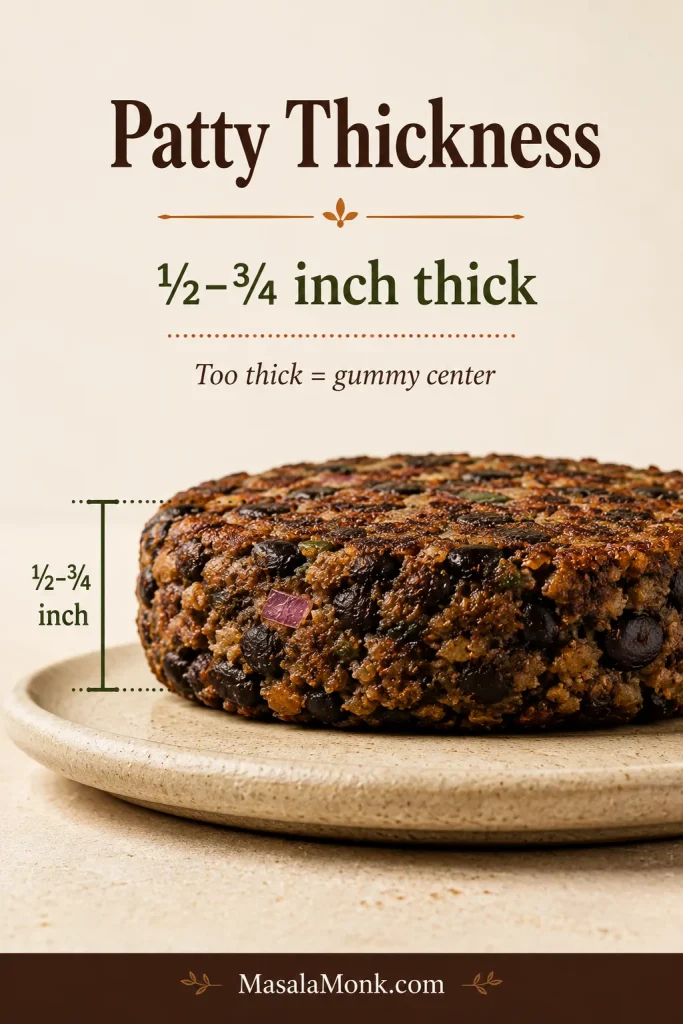
Divide the mixture into 6 patties. Aim for about ½ cup mixture per patty and keep them ½–¾ inch thick. Press the edges smooth so the shaped burgers do not crumble in the pan.
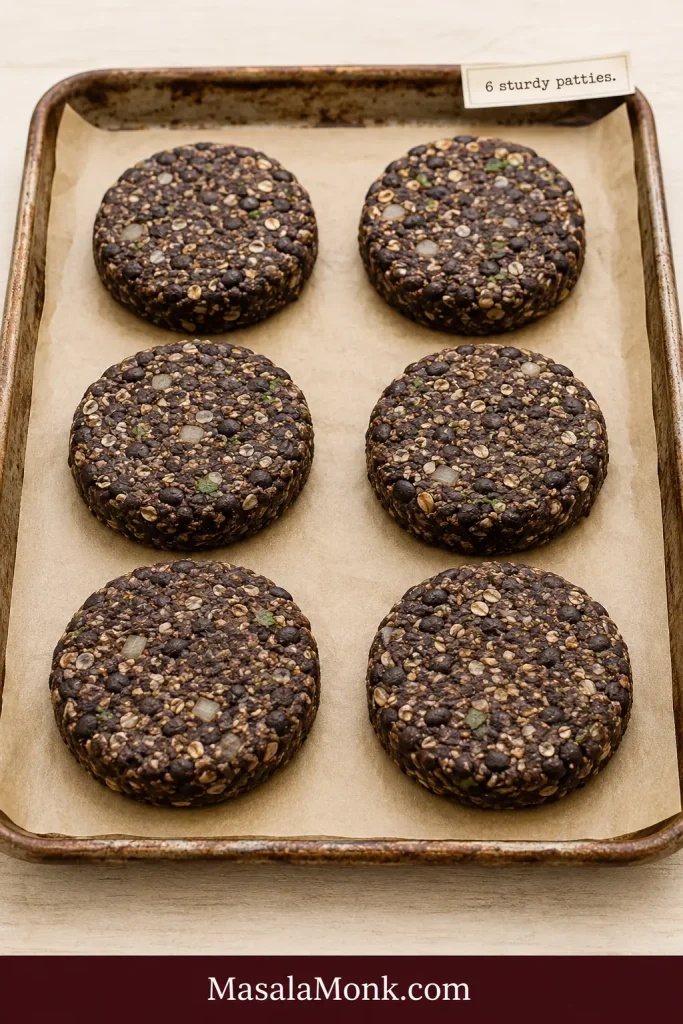
Six uncooked black bean burger patties on parchment paper on a baking tray, with visible beans, oats, herbs, and onion pieces.
After shaping, smooth the edges and keep the patties even. Clean edges help them cook and flip more reliably.
Side-view guide showing the thickness of a shaped black bean burger patty with a label for ½ to ¾ inch thickness.
Keep patties about ½ to ¾ inch thick. That size browns well without leaving the center gummy.

7. Chill When Needed

If the patties feel delicate, do not panic. Chill them for 20–30 minutes before cooking. Vegan, oat-based, and grill-ready patties benefit the most from this short rest.
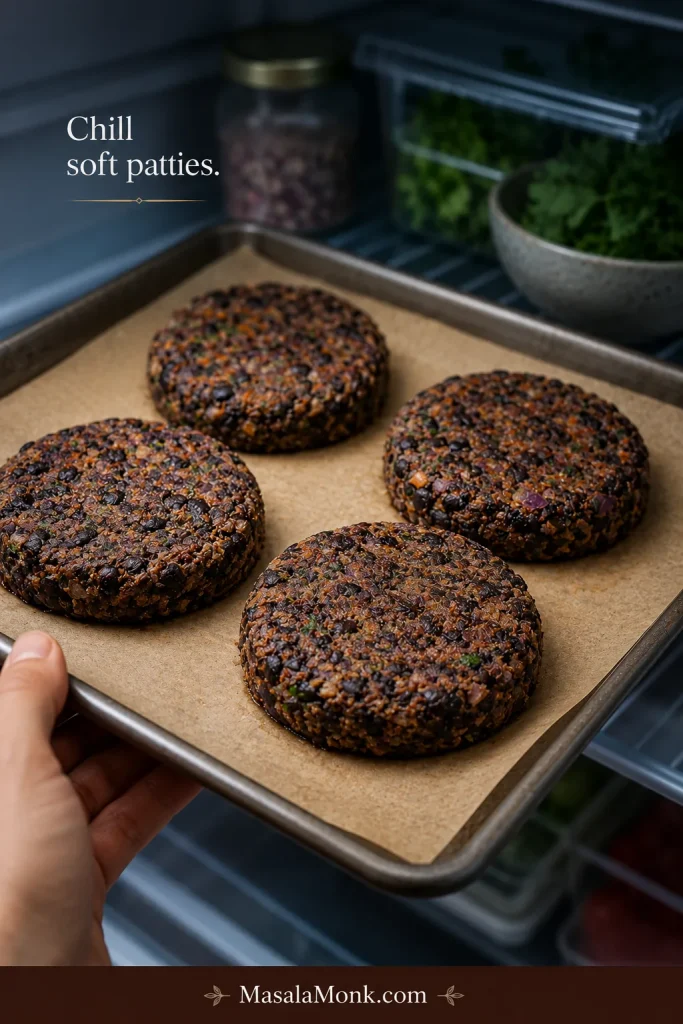
Parchment-lined tray of shaped black bean burger patties being chilled or removed from a refrigerator.
Chilling delicate patties before cooking gives the binder time to firm the mixture.

8. Cook Until the Edges Are Crisp

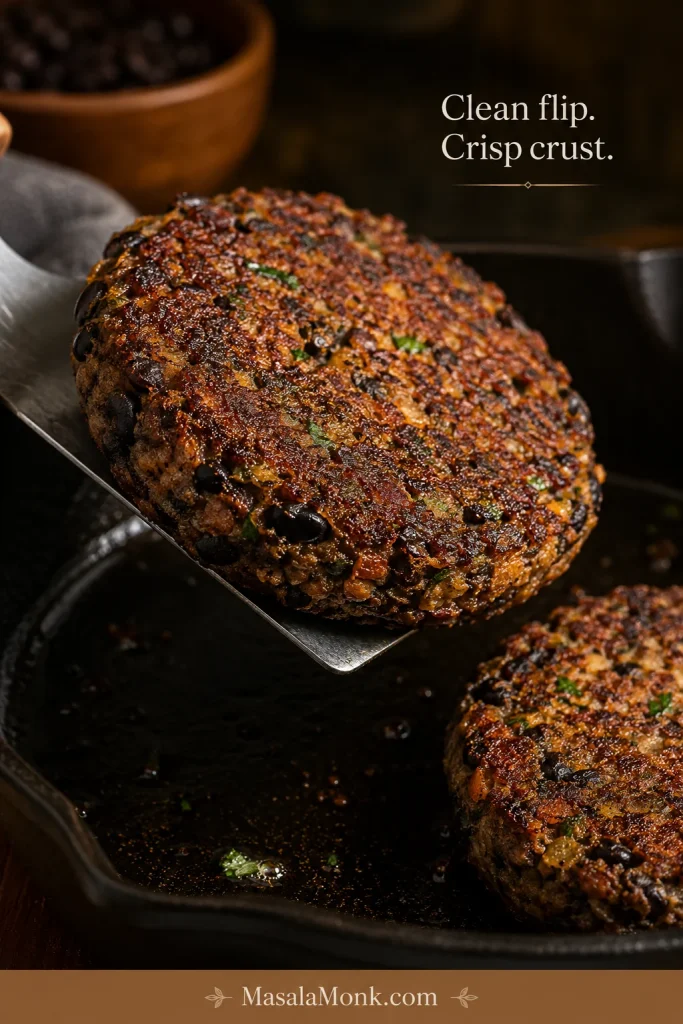
Cook the patties in a lightly oiled skillet over medium heat for 4–5 minutes per side. If a patty feels stuck, do not force it. That usually means the crust has not finished forming. Give it another minute, then slide the spatula under slowly. The patties are done when both sides are browned, the center is hot, and the patty feels set when gently pressed.

Once the crust sets, the burger stops feeling delicate. It lifts cleanly, lands on the bun in one piece, and gives you that crisp-edge, smoky-middle bite that makes a bean burger feel like dinner instead of a backup plan.
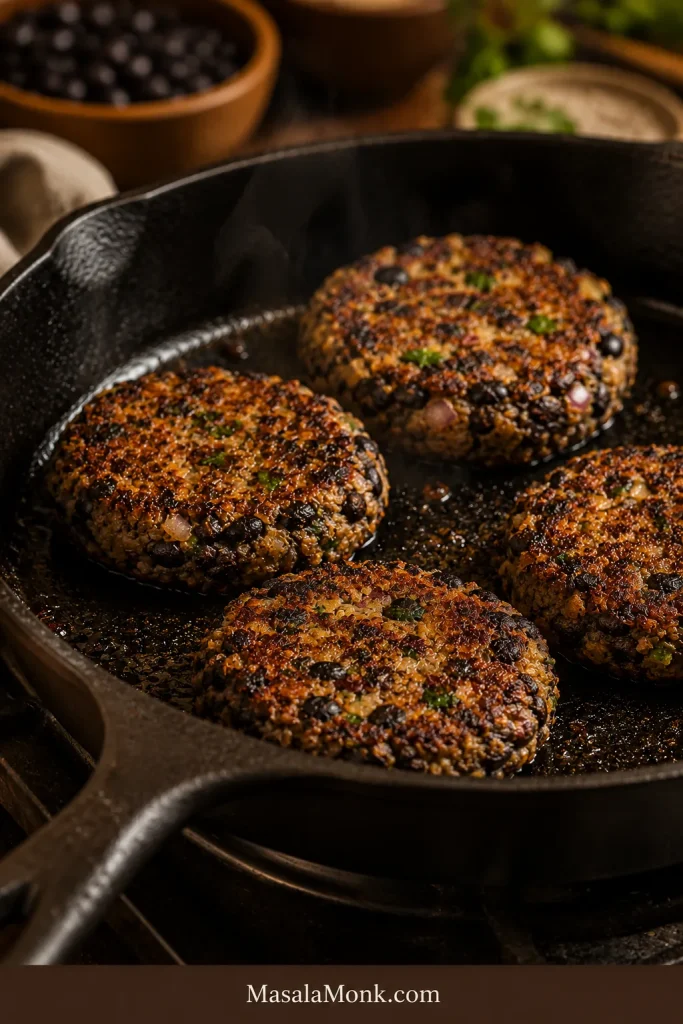
Several black bean burger patties browning in a cast iron skillet with crisp edges and an oil sheen.
For the deepest crust, cook in a skillet with space between patties. Crowding makes them steam instead of brown.
Black bean burger patty being lifted cleanly from a cast iron skillet with a metal spatula, showing a browned intact underside.
Once the first side browns, the patty releases more easily. Wait for that crust before flipping so the burger stays intact.
Stack or row of cooked black bean burger patties with browned edges, visible beans, herbs, and a small sauce bowl nearby.
Cooked patties should hold their shape for buns, bowls, wraps, or meal prep without turning soft again.

Fix the Mixture Before You Cook

Most black bean burger problems can be fixed before the patties hit the pan. A soft mixture is not a failed mixture. It usually just needs a little more binder, a little more resting time, or a gentler hand when shaping.
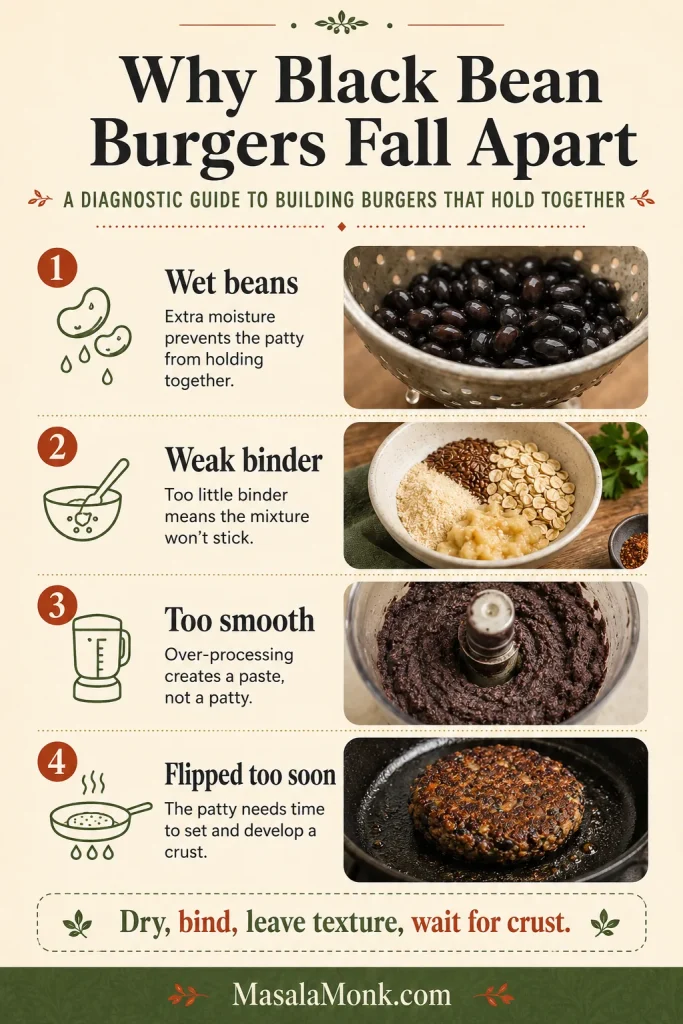
Vertical diagnostic guide listing four reasons black bean burgers fall apart: wet beans, weak binder, too smooth, and flipped too soon.
When patties break, check the cause first: wet beans, weak binder, over-smooth mash, or flipping before the crust sets.

Quick Texture Fixes

ProblemLikely ReasonFix
Mixture looks like bean dipToo much moisture or over-processingAdd oats or breadcrumbs 1 tablespoon at a time and chill
Patties fall apartNot enough binder or not enough mashingMash more beans, add binder, and rest the mixture
Patties slump on the plateMixture is too softAdd oats or crumbs, then chill 20–30 minutes
Patties crack at the edgesMixture is too dryMash more beans or add 1 teaspoon sauce, water, or oil
Patties stick to your handsMixture is moist but workableLightly wet or oil your hands while shaping
Too soft for the grillPatties need more firmnessChill 30 minutes or freeze 15–20 minutes and use foil or a grill mat
Patties stick to the panFlipped too early or surface too dryUse a lightly oiled pan and wait for a crust before flipping
Center is gummyPatties are too thick or mixture is too smoothShape thinner patties and leave more bean texture next time
Burgers taste blandBeans need stronger seasoningAdd chipotle, smoked paprika, cumin, tamari, lime, hot sauce, or more salt

Final Squeeze Test

The final test is simple: press a patty between your palms. When it holds its shape, keeps its edge, and does not feel loose, it is ready to cook.
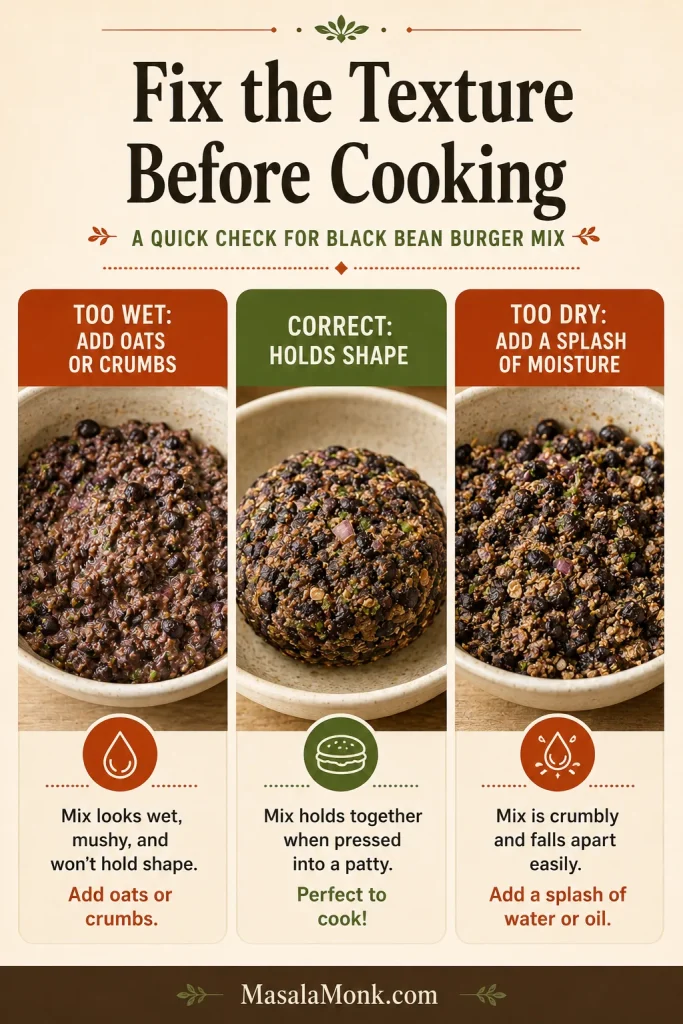
Three-panel guide showing black bean burger mixture that is too wet, correct, and too dry, with short fixing tips.
Fix texture before heat hits the pan: add oats if wet, add moisture if cracked, and shape only when it holds.

Choose Your Cooking Method: Skillet, Oven, Grill, or Air Fryer

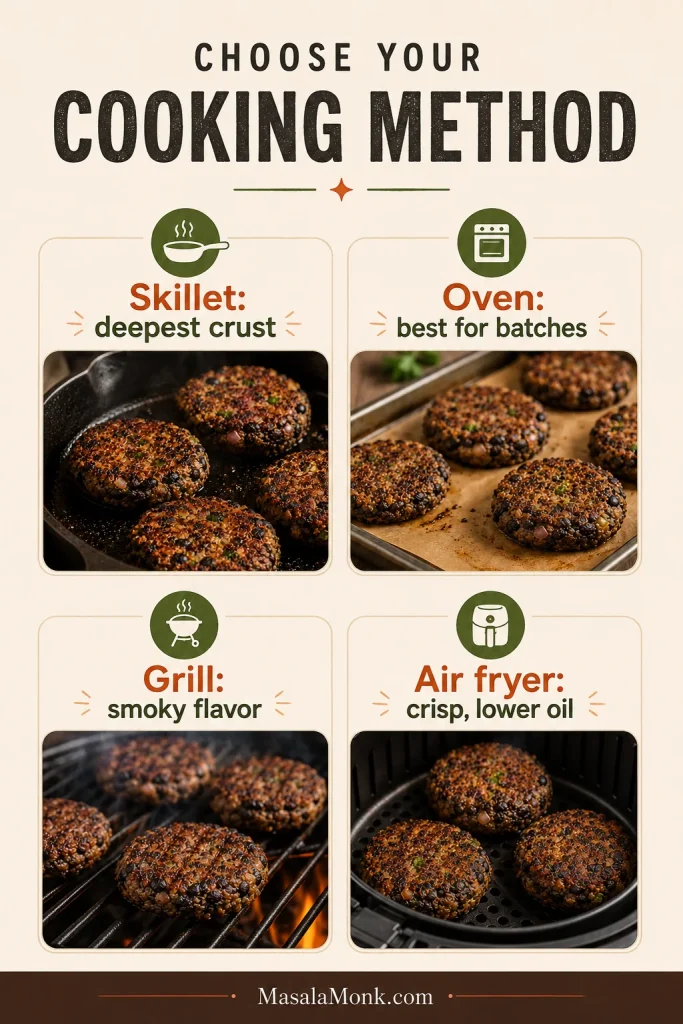
Skillet cooking gives the deepest crust, but these patties can also be baked, grilled, or air fried. A firm patty gives you more freedom: once the mixture holds together, every cooking method becomes easier.

MethodTemperatureTimeGood ForKey Tip
SkilletMedium heat4–5 minutes per sideDeepest crust and flavorLet the first side brown before turning
Oven375°F / 190°C10 minutes per sideBatch cookingRaise the oven after drying the beans
GrillMedium to medium-high5–7 minutes per sideSmoky flavorChill patties and oil the grates well
Air fryer380°F / 193°C10–12 minutes totalCrisp, lower-oil cookingFlip halfway and keep patties about ½ inch thick
Vertical cooking method guide comparing skillet, oven, grill, and air fryer methods for black bean burgers.
Choose the method by goal: skillet for crust, oven for batches, grill for smoke, and air fryer for crisp lower-oil cooking.

Skillet Black Bean Burgers

Heat a thin layer of oil in a cast-iron or nonstick skillet over medium heat. Cook for 4–5 minutes per side. This is the easiest method for crisp edges and a tender center.

Baked Black Bean Burgers

After drying the beans at 350°F / 175°C, raise the oven to 375°F / 190°C. Place shaped patties on a parchment-lined baking sheet and brush or spray lightly with oil. Bake for 10 minutes, flip carefully, then bake another 10 minutes. Baked patties are convenient for batches, though the crust is gentler than skillet-cooked ones.
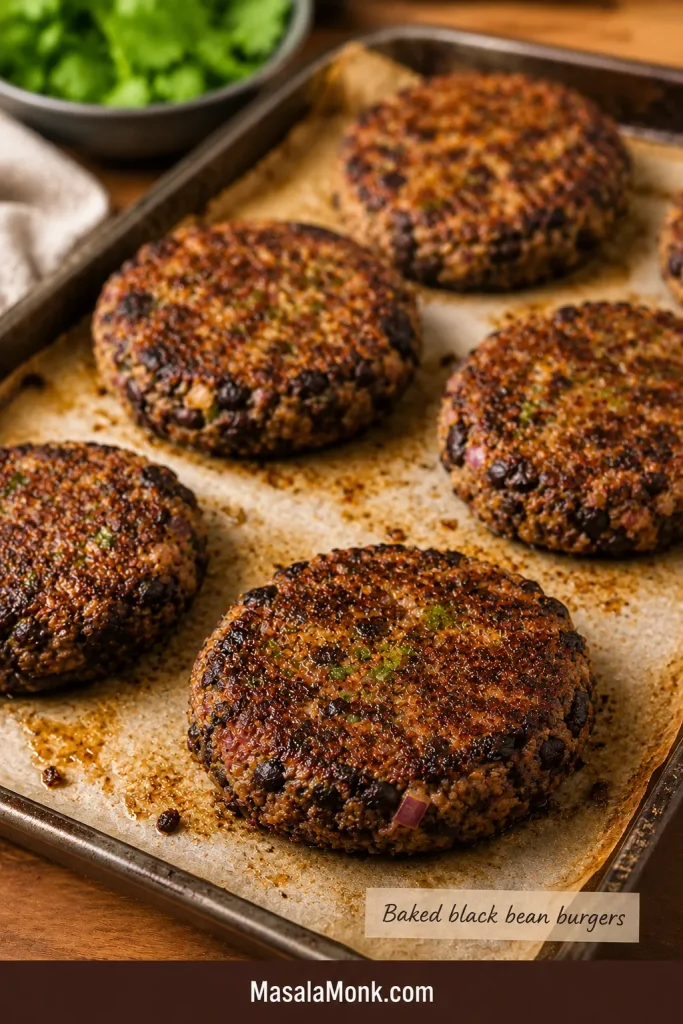
Black bean burger patties on a parchment-lined baking sheet with browned tops and a small label for baked black bean burgers.
For batch cooking, bake on parchment and brush lightly with oil so the tops brown without drying out.

Grilled Black Bean Burgers

Treat grilling as the firm-patty method. Chill the patties for at least 30 minutes, oil the grates well, and cook over medium to medium-high heat for 5–7 minutes per side. Do not grill loose or freshly mixed patties. If they feel delicate in your hand, they will feel even more delicate on hot grates.

For the safest grill version, chill the patties until firm, brush both sides with oil, and use a grill mat or foil for the first try. Once you know how your mixture behaves, you can move them directly onto well-oiled grates.
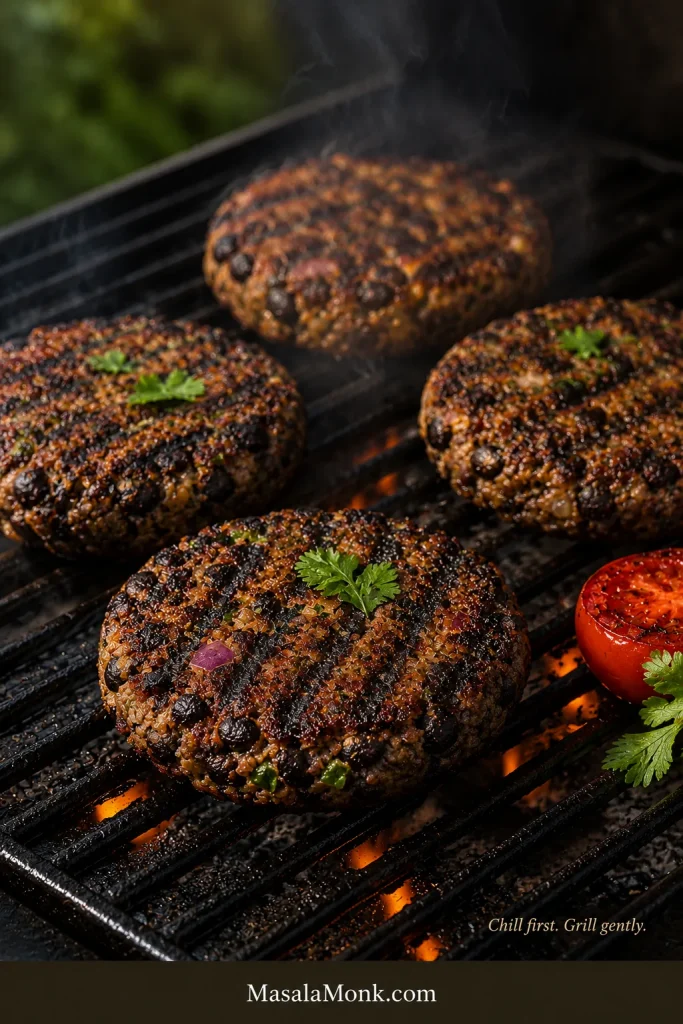
Black bean burger patties with light char marks cooking on a grill with smoke, herbs, and a grilled tomato nearby.
Grill only firm, chilled patties. Oiled grates, gentle heat, and patience help them stay intact over the fire.

Air Fryer Black Bean Burgers

Preheat the air fryer to 380°F / 193°C. Lightly spray the patties and basket with oil. Cook for 10–12 minutes total, flipping halfway. Air fryer patties should be about ½ inch thick so the center heats through before the outside dries. The same thickness-and-flip logic applies to meat burgers too; this air fryer burgers guide is useful if you use your air fryer for burger nights often.
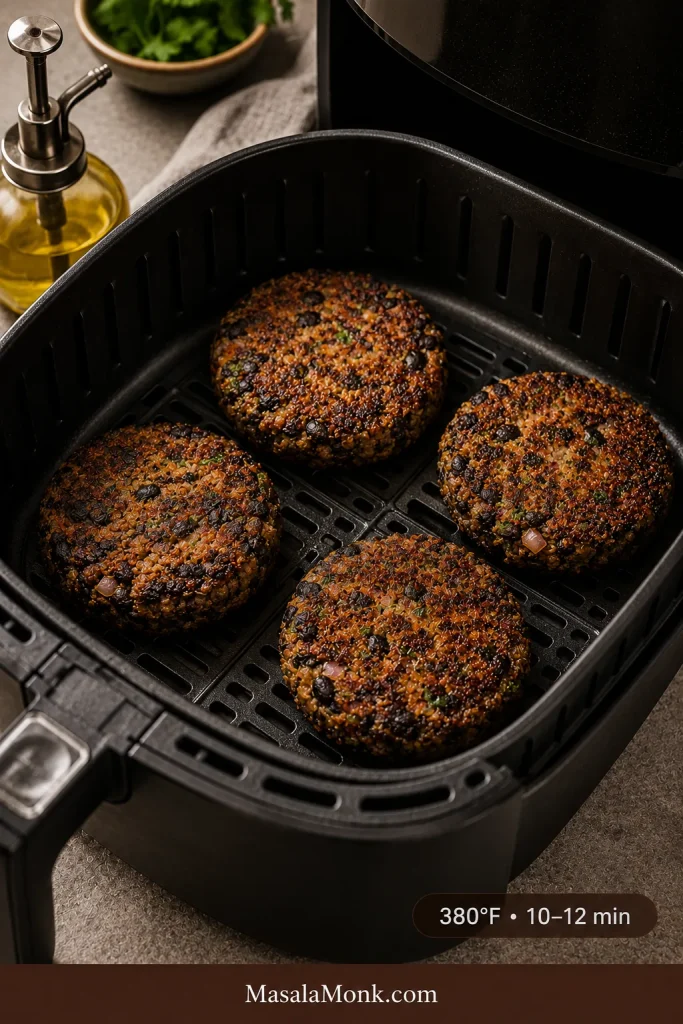
Four black bean burger patties in an air fryer basket with browned tops, an oil bottle nearby, and a 380°F 10 to 12 minute label.
In the air fryer, leave space around each patty so the edges crisp before the centers lose moisture.

Making Them Vegan

For vegan black bean burgers, replace the egg with a flax egg or chia egg and use oats or oat flour as the dry binder. They may feel softer than egg-bound patties at first, but that does not mean they will fail. A short rest and a good crust make them much easier to handle.
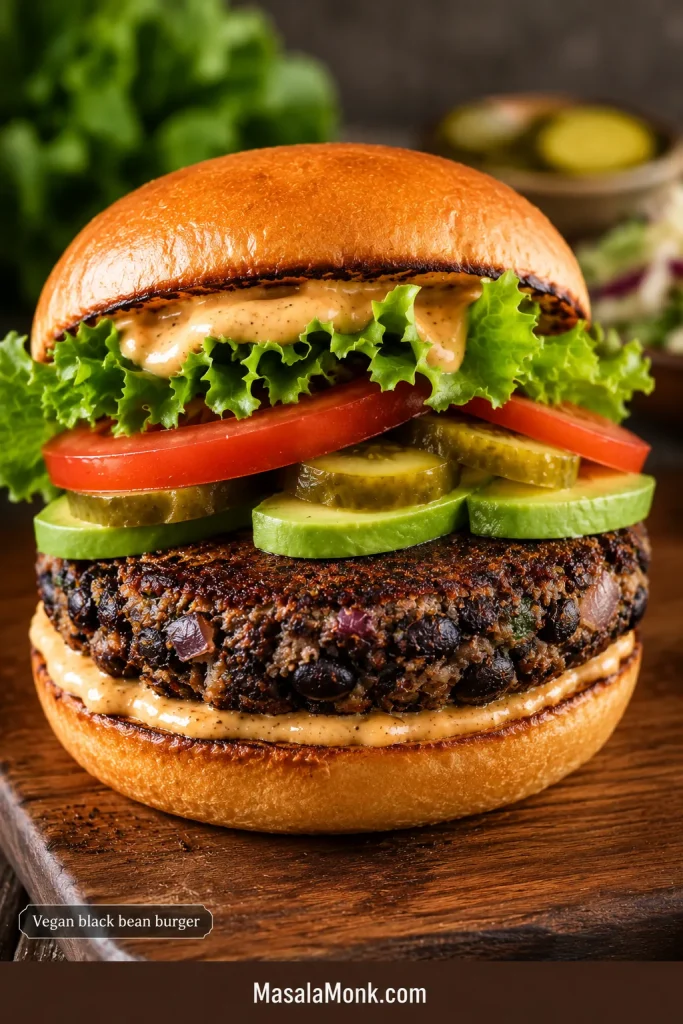
Vegan black bean burger on a bun with avocado, lettuce, tomato, pickles, sauce, and a dark black bean patty.
The vegan version should still feel hearty. Avocado, pickles, tomato, lettuce, and egg-free sauce add richness and freshness.

How to Make a Flax Egg

  • Mix 1 tablespoon ground flaxseed with 3 tablespoons water.
  • Let it sit for 5–10 minutes until slightly thickened.
  • Add it to the burger mixture in place of 1 egg.
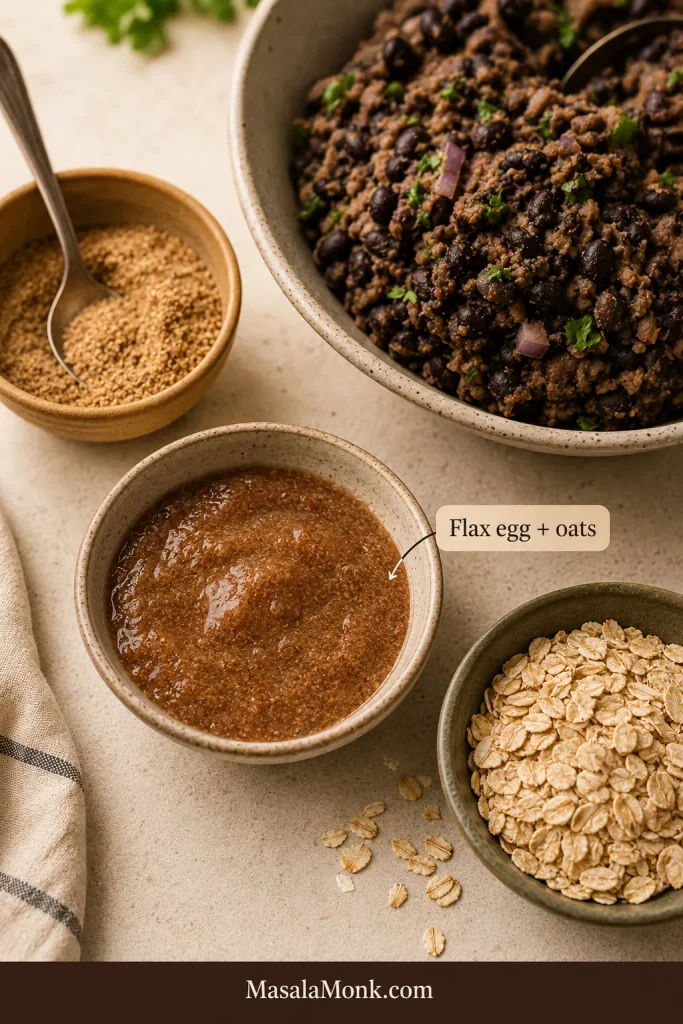
Small bowl of thickened flax egg beside rolled oats and a bowl of black bean burger mixture on a cream countertop.
For vegan patties, let the flax egg thicken first. Then it can help the oats and beans bind cleanly.

Use tamari, soy sauce, or vegan Worcestershire-style sauce when keeping the recipe fully vegan. For a creamy egg-free topping, this eggless mayonnaise recipe is a useful sauce base.

Making Them Gluten-Free

Making the burgers gluten-free is mostly about the binder and sauces. Use certified gluten-free oats or oat flour instead of panko or breadcrumbs. Check labels on soy sauce, Worcestershire-style sauce, and barbecue sauce. Tamari is a useful gluten-free swap for soy sauce.

Gluten-free patties benefit from a short rest before cooking because oats and oat flour need a few minutes to absorb moisture.
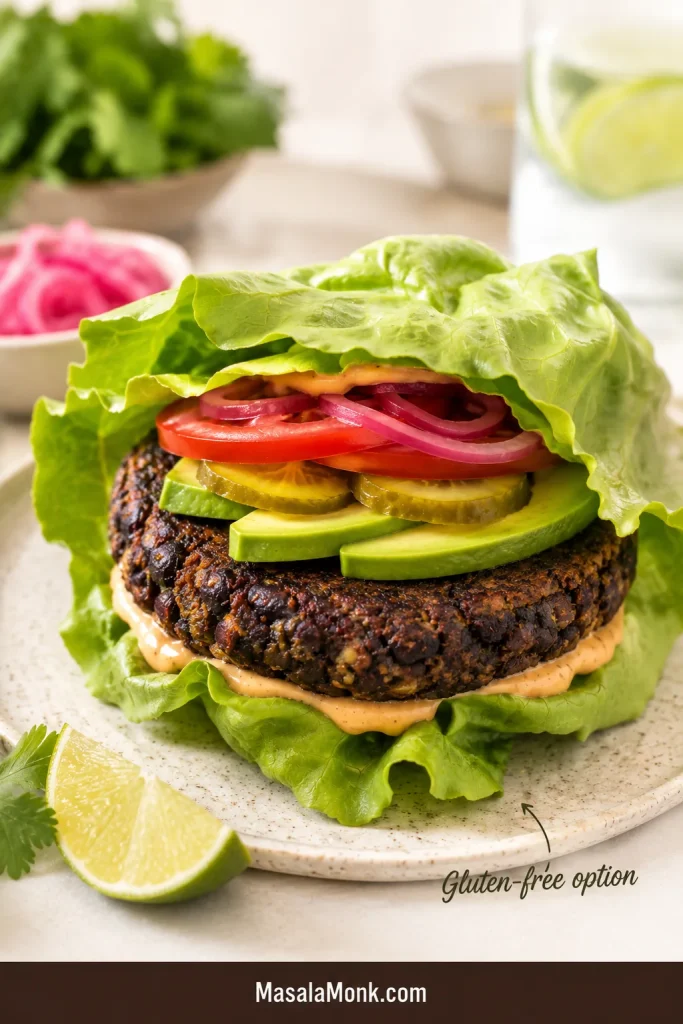
Black bean burger served in a large lettuce wrap with avocado, tomato, pickled onion, pickles, sauce, and lime on a plate.
For a gluten-free option, use a lettuce wrap to keep the bite fresh while the sturdy patty stays the focus.

Flavor Variations

Once the base mixture holds together, black bean burgers are easy to customize. Keep the same structure: beans, binder, seasoning, and a controlled amount of add-ins.

Spicy Black Bean Burger

Add chopped chipotle in adobo, jalapeño, extra chili powder, cayenne, or hot sauce for more heat. Serve with chipotle mayo, avocado, pickled onions, and lettuce. A little mango salsa adds sweet-bright contrast on top or on the side.

Sweet Potato Black Bean Burger

Mix in mashed roasted sweet potato for a softer, sweeter version. Because sweet potato brings extra moisture, balance it with a little more oats or breadcrumbs until the mixture feels sturdy again. This version pairs especially well with smoked paprika, cumin, lime, avocado, and cilantro.

Black Bean Quinoa Burger

Cooked and cooled quinoa adds chew without making the patty heavy. Keep the amount moderate; too much quinoa makes the mixture harder to hold together. It works especially well with garlic, cumin, smoked paprika, and a little lime.

Mushroom Black Bean Burger

Cook chopped mushrooms before adding them. Mushrooms add savory depth, but raw mushrooms release water and can make the patties soft. Sauté until their moisture cooks off, then cool before mixing.

Corn and Southwest Black Bean Burger

A small handful of corn, chopped cilantro, lime zest, cumin, smoked paprika, and chili powder gives the patties a Southwest-style feel. Keep the corn modest so the mixture still binds cleanly.

MasalaMonk-Style Black Bean Burger

Start with the smoky patty, then build the burger with green chutney, pickled onion, sliced tomato, lettuce, and a little yogurt-style sauce or egg-free mayo. The cumin, chili, herbs, and sharp onion make the burger brighter without turning it into a completely different recipe.
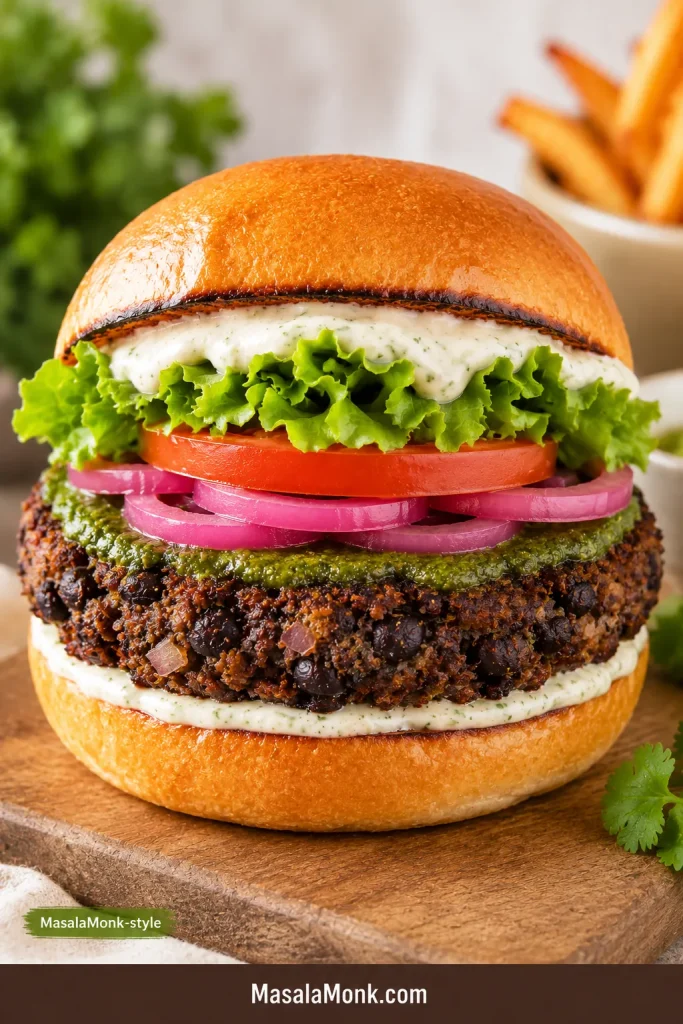
Black bean burger on a toasted bun with green chutney, pickled onions, tomato, lettuce, and creamy sauce on a wooden board.
For a brighter MasalaMonk-style burger, pair the smoky patty with green chutney, pickled onion, tomato, lettuce, and creamy sauce.

Mini Patties or Sliders

Shape smaller patties for sliders and reduce the cooking time by 1–2 minutes per side. Because mini patties dry faster, pull them once the edges are browned and the centers are hot.

Cheesy Black Bean Burger

For a vegetarian version, add a small amount of shredded cheese, feta, pepper jack, or cotija. Cheese adds salt, richness, and a little extra structure.

Toppings, Sauces, and Buns That Work Well

Because the patty is smoky and hearty, the toppings should bring contrast: creaminess, crunch, acidity, and freshness. The best bite has a warm smoky patty, cool lettuce, juicy tomato, creamy sauce, and a little sharpness from pickles, salsa, chutney, or onion.
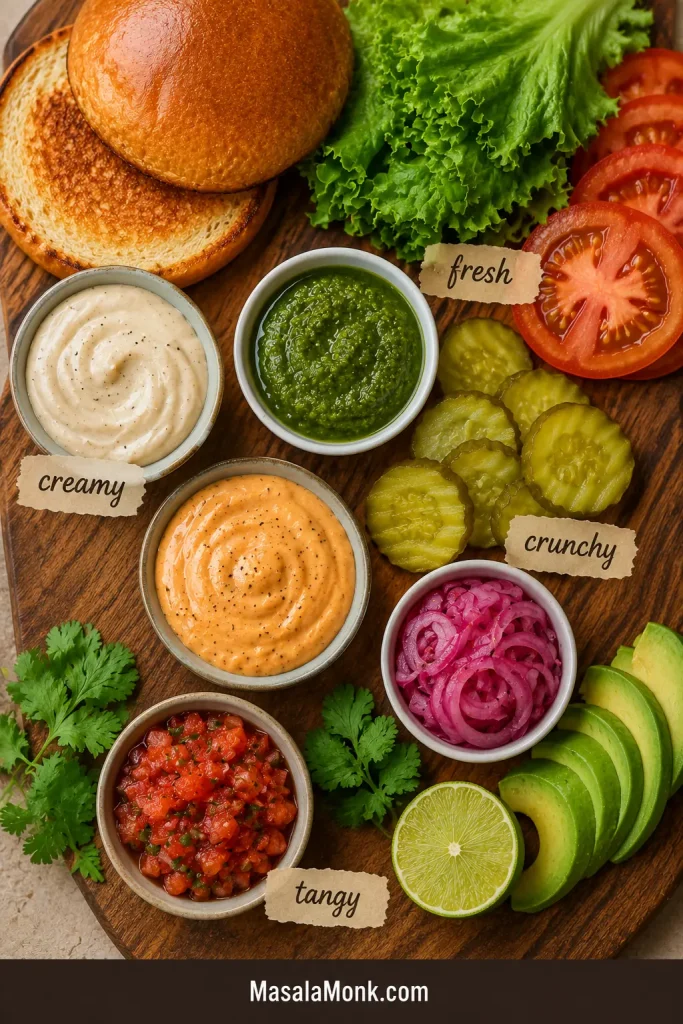
Toppings board with toasted buns, lettuce, tomato slices, pickles, pickled onions, avocado, salsa, green chutney, aioli, chipotle sauce, cilantro, and lime.
Build contrast with toppings: creamy sauce, crunchy pickles, fresh lettuce, tangy salsa, avocado, green chutney, and a toasted bun.
  • Chipotle mayo
  • Garlic aioli
  • Avocado or guacamole
  • Salsa or pico de gallo
  • Pickled onions
  • Lettuce
  • Tomato
  • Red onion
  • Jalapeños
  • Cabbage slaw
  • Lime crema
  • Barbecue sauce
  • Vegan mayo

For sauce, go creamy or sharp. Garlic aioli adds creaminess without covering up the smoky bean flavor. For a brighter MasalaMonk-style twist, use green chutney with sliced onion, tomato, lettuce, and a little mayo or yogurt-style sauce.

Use toasted burger buns, brioche-style buns, whole wheat buns, or lettuce wraps. Toasting helps protect the bun from sauce and keeps the burger from feeling soft-on-soft.

What to Serve With Black Bean Burgers

Serve black bean burgers anywhere a regular burger would feel right. They work with classic sides, fresh salads, roasted vegetables, and bowl-style meals.

  • French fries or sweet potato fries
  • Simple green salad
  • Cabbage slaw
  • Corn salad
  • Roasted vegetables
  • Rice or quinoa bowls
  • Lettuce wraps
  • Pickles and chips
  • Grilled vegetables

Pair the patties with crispy homemade French fries for a classic burger plate. If you want a colder side that cuts through the smoky burger, use this creamy coleslaw.

Roasted vegetables work better than another heavy starch for a lighter dinner plate. These roasted carrots bring sweetness, color, and browned edges without competing with the burger.

To add more protein, use cheese, a Greek-yogurt-style sauce, or serve the patty over a quinoa bowl. On a vegan plate, pair it with hummus, tofu slaw, extra beans, or a hearty salad.

Storage, Freezing, and Reheating

These patties are excellent for meal prep. They store well, freeze well, and reheat best when the crust gets a chance to crisp again.

Fridge

Cooked patties keep for 3–4 days in an airtight container in the refrigerator. Let them cool before storing so trapped steam does not soften the crust too much.

Freezer

Freeze shaped or cooked patties for up to 3 months. Place parchment between patties so they do not stick together, then store in a freezer-safe bag or container.
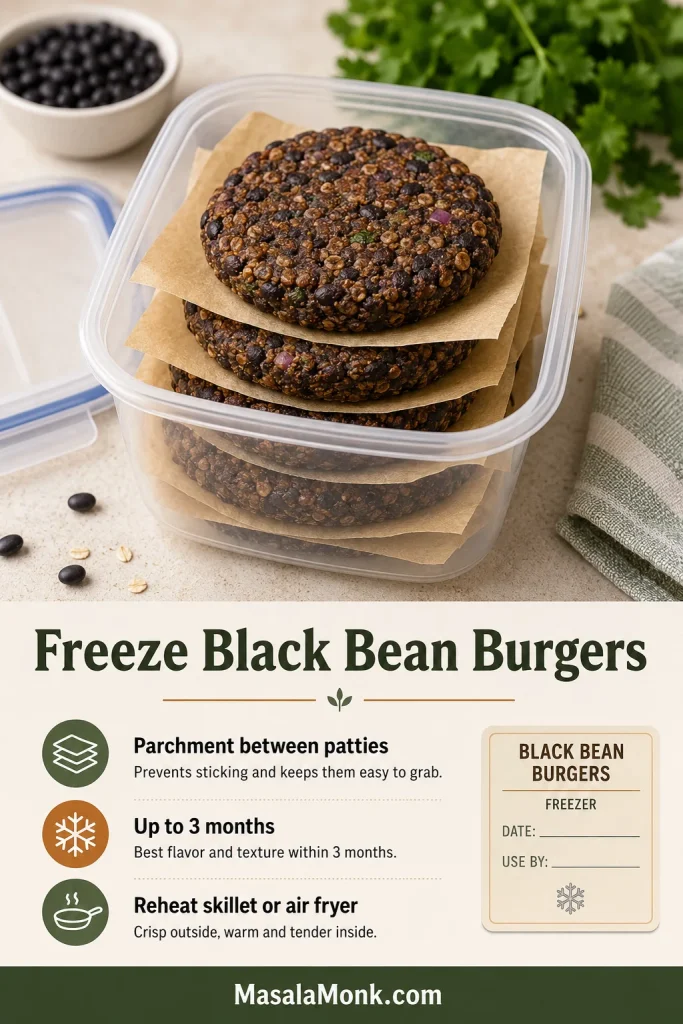
Black bean burger patties stacked in a freezer-safe container with parchment between each patty and a guide for freezing and reheating.
When freezing, place parchment between patties so they separate easily, then reheat in a skillet or air fryer to bring back the crust.

For general leftover safety, the USDA recommends using refrigerated leftovers within 3–4 days and freezing leftovers for longer storage. Their leftovers and food safety guide is helpful if you want broader storage guidance.

Reheating

Reheat the burgers in a skillet or air fryer for the best texture. A microwave works for speed, but it softens the crust. For frozen patties, start over medium-low heat so the center warms before the outside over-browns, then increase the heat briefly to crisp the edges.

Make-Ahead Patties

Shape the patties up to 24 hours ahead and refrigerate them covered. This helps the binder absorb moisture and makes the patties easier to cook.

Once you learn the feel of the mixture, black bean burgers stop being risky. You know when the beans are dry enough, when the patty is firm enough, and when the crust is ready to flip. That is the real win here: a smoky, satisfying veggie burger you can put on a bun without holding your breath.

Frequently Asked Questions

Why are my black bean burgers mushy?

Usually because the beans, onion, or add-ins brought too much moisture, or because the beans were processed too smoothly. Dry the beans, cook watery vegetables first, leave some bean texture, and add oats or breadcrumbs if the mixture feels loose.

What keeps black bean burgers from falling apart?

A good binder, enough mashing, and proper browning keep the patties from falling apart. Egg and breadcrumbs work well for vegetarian patties, while flax egg and oats work well for vegan patties.

Do black bean burgers need egg?

No. Egg helps, but you can still make a sturdy patty without it. Use a flax egg or chia egg with oats or oat flour, then give the mixture a short rest before cooking.

What can replace breadcrumbs in black bean burgers?

Rolled oats, quick oats, oat flour, crushed crackers, or potato flakes can replace breadcrumbs. Cooked quinoa can add texture, but it works best with another binder because it does not absorb moisture as strongly as oats.

Can I make black bean burgers without a food processor?

A fork or potato masher works very well and gives you more control over the texture. Mash enough beans to bind the mixture, but leave some pieces for a heartier bite.

Are canned black beans okay for black bean burgers?

Canned beans work very well because they are already cooked and consistent. Drain and rinse them well, then dry them in the oven or with a towel before mixing.

Can I use dried black beans?

Dried beans are fine once they are fully cooked, tender, drained, and cooled. They should be soft enough to mash but not watery when they go into the burger mixture.

Are black bean burgers vegan?

Some are vegan, but many recipes use egg, cheese, mayonnaise, or Worcestershire sauce. This recipe can be made vegan with flax egg, oats, and vegan-friendly sauces.

Are black bean burgers gluten-free?

They can be gluten-free; the main things to watch are the binder and sauces. Use certified gluten-free oats or oat flour instead of breadcrumbs or panko, and check sauce labels when gluten is a concern.

Can black bean burgers be grilled?

Yes, but treat grilling as the firm-patty method. Chill the patties before grilling, oil the grates well, and flip carefully. Use foil, a grill mat, or a cast-iron griddle for delicate patties.

How do you make black bean burgers taste better?

Lean on bold seasoning and a little umami. Cumin, smoked paprika, chili powder, chipotle, tamari, tomato paste, lime, garlic, and onion all help the patties taste deeper and more satisfying.

How long do black bean burgers last in the fridge?

Cooked patties last 3–4 days in an airtight container in the refrigerator. Reheat them in a skillet or air fryer for the best texture.

Can black bean burgers be frozen?

Yes. Freeze shaped or cooked patties for up to 3 months. Place parchment between patties so they do not stick together, then thaw overnight or cook with a few extra minutes from frozen.

Are black bean burgers healthy?

These burgers can be a nourishing, filling option because black beans bring plant-based protein, fiber, complex carbohydrates, vitamins, and minerals. Harvard’s Nutrition Source has a helpful overview of legumes and pulses if you want more background. The overall nutrition still depends on the binder, oil, bun, cheese, sauce, and toppings you use.
Posted on 7 Comments

Eggless Yorkshire Pudding (No Milk) Recipe

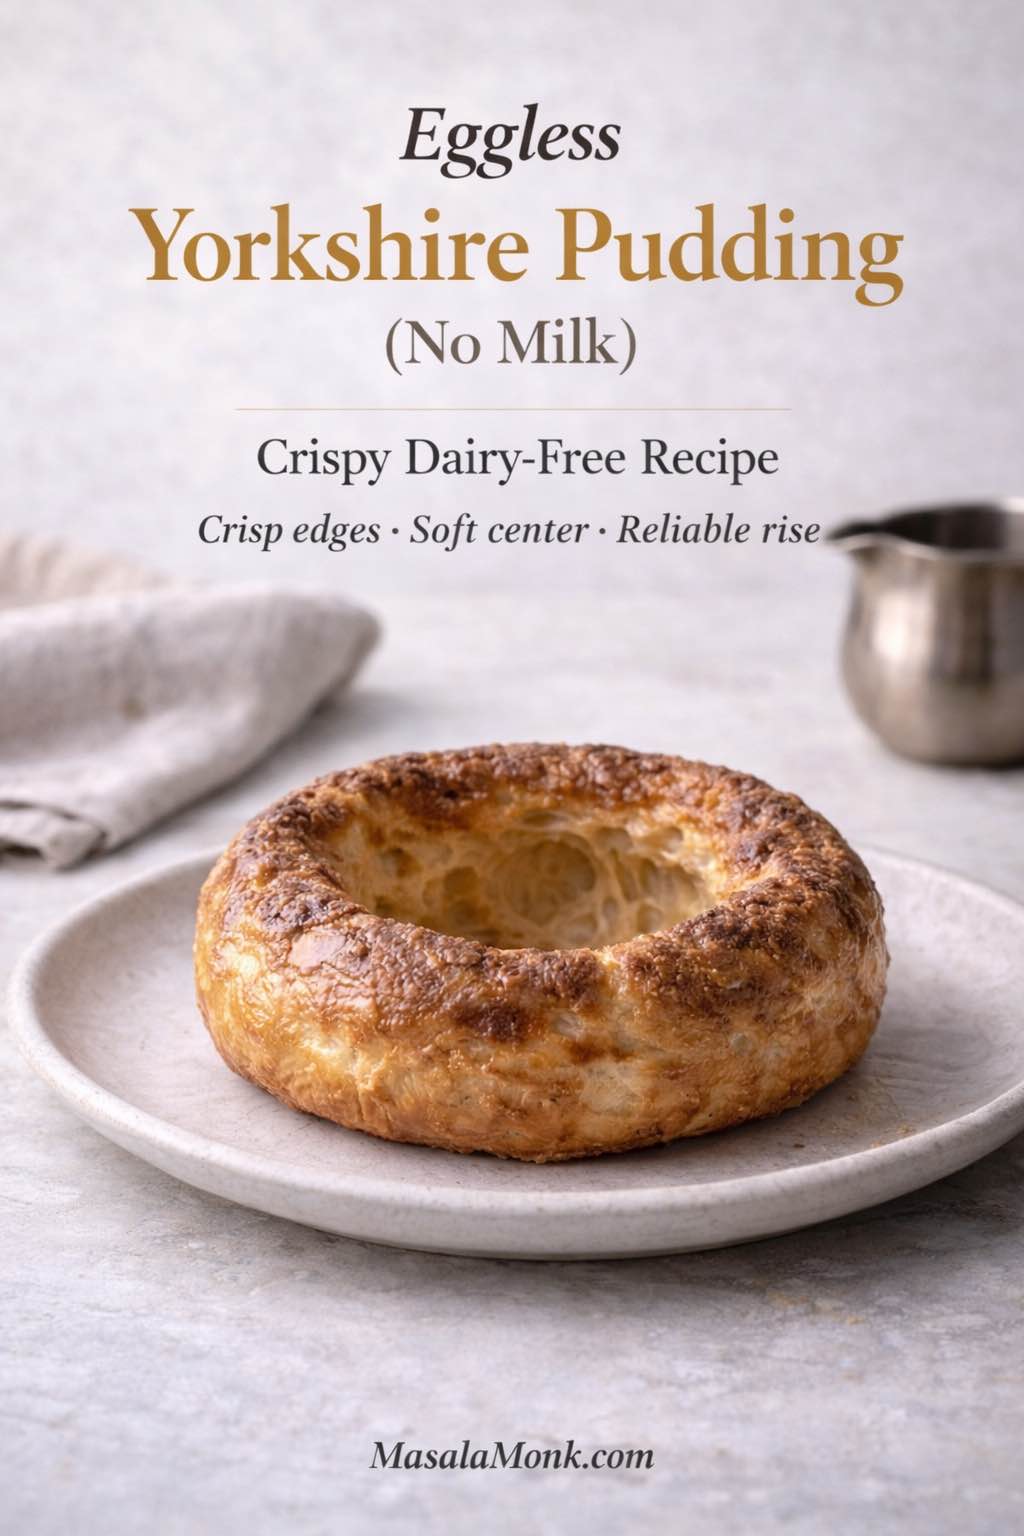
Eggless Yorkshire pudding made without milk on a plate, showing a golden, crisp rim and hollow center—dairy-free Yorkshire pudding recipe cover image.

Eggless Yorkshire pudding (no milk) can feel like a contradiction at first—after all, the traditional version depends on eggs for structure and milk for richness. Still, with the right batter consistency and a properly heated tin, you can bake dairy-free Yorkshire puddings that rise tall, turn crisp around the edges, and stay tender in the middle.

If you’re looking for a Yorkshire pudding recipe without eggs, a dairy free Yorkshire pudding recipe, or simply a reliable way to make Yorkshire pudding without milk for a roast dinner or party food, this method is built to be repeatable. It focuses on the same core principles used in the most successful egg-free approaches: a thin, rested batter poured into smoking-hot fat, then baked hot and undisturbed until deeply golden.

Along the way, you’ll see how to tweak the batter for no egg Yorkshire pudding variations, how to choose the best pan for Yorkshire pudding so the rise is consistent, and how to adapt the same base into mini Yorkshire puddings, giant Yorkshires, and stuffed Yorkshire pudding dinners that hold gravy, curry, or stew without collapsing.


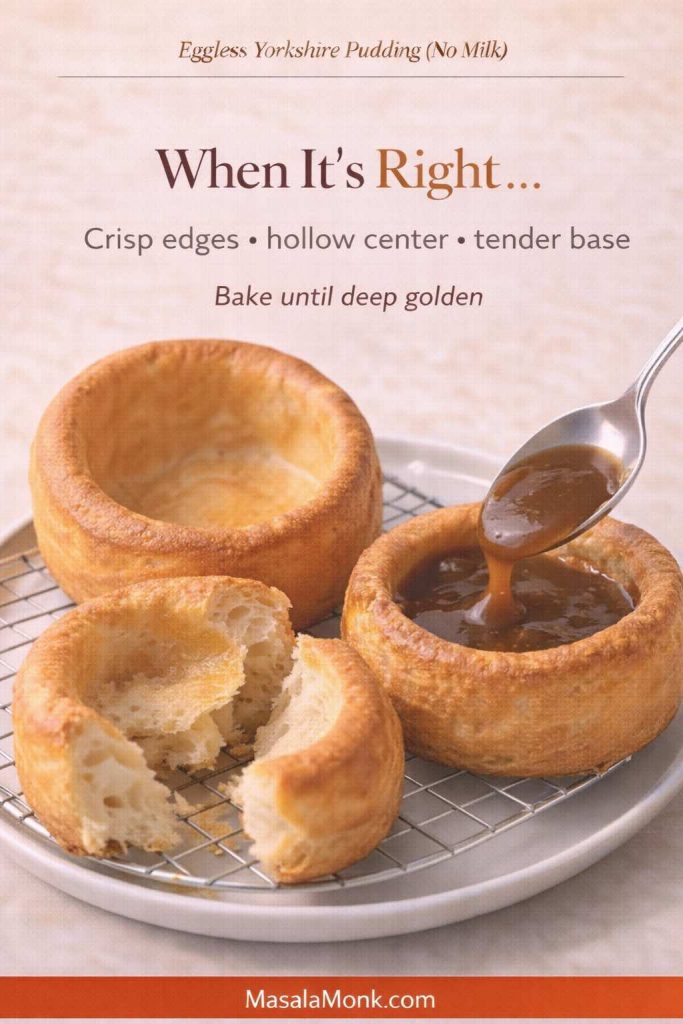
Eggless Yorkshire pudding (no milk): what it’s like when it’s right

When this works, you’ll get a Yorkshire pudding that looks like a popover: browned walls, a hollow center, and edges that shatter a little when you tear one open. The base will be slightly softer than an egg-based version, but still sturdy enough to hold a ladle of gravy or a spoonful of curry.

Three eggless Yorkshire puddings made without milk on a cooling rack: one whole with tall crisp walls, one torn open to show a hollow center, and one being filled with gravy; text overlay reads “When It’s Right… Crisp edges • hollow center • tender base” and “Bake until deep golden,” with MasalaMonk.com in the footer.
This is the goal. When eggless Yorkshire pudding (no milk) turns out right, you’ll see tall browned walls, a hollow center, and crisp edges that hold gravy without collapsing. Bake until deep golden—that extra color is what keeps dairy-free, egg-free Yorkshires crisp instead of soft.

Also, the flavor is clean and savory rather than “eggy.” If you want a hint of that classic aroma, you can add a tiny pinch of kala namak (black salt)—the same trick used in a lot of egg-free cooking, like in these plant-based breakfast ideas that use tofu as an egg stand-in. Here’s a helpful guide on that approach: plant-based breakfast ideas that use tofu instead of eggs.

Meanwhile, if you’re here because you specifically need a dairy free Yorkshire pudding recipe, the good news is that milk is the easier part to replace. The bigger challenge is structure, which is why you’ll see so much emphasis on heat, resting, and pan choice.

Also Read: Crock Pot Chicken Breast Recipes: 10 Easy Slow Cooker Dinners (Juicy Every Time)


Yorkshire pudding recipe without eggs: the foundation you can trust

This batter is built for two common needs: skipping eggs and skipping milk. If you landed here seeking a Yorkshire pudding recipe without eggs, a dairy-free Yorkshire pudding recipe, or simply Yorkshire pudding without milk that still rises, this is the base to start with. It’s also flexible enough that you can turn it into giant yorkshire pudding, miniature yorkshire puddings, or even a tray-baked yorkshire pudding in a roasting tin.

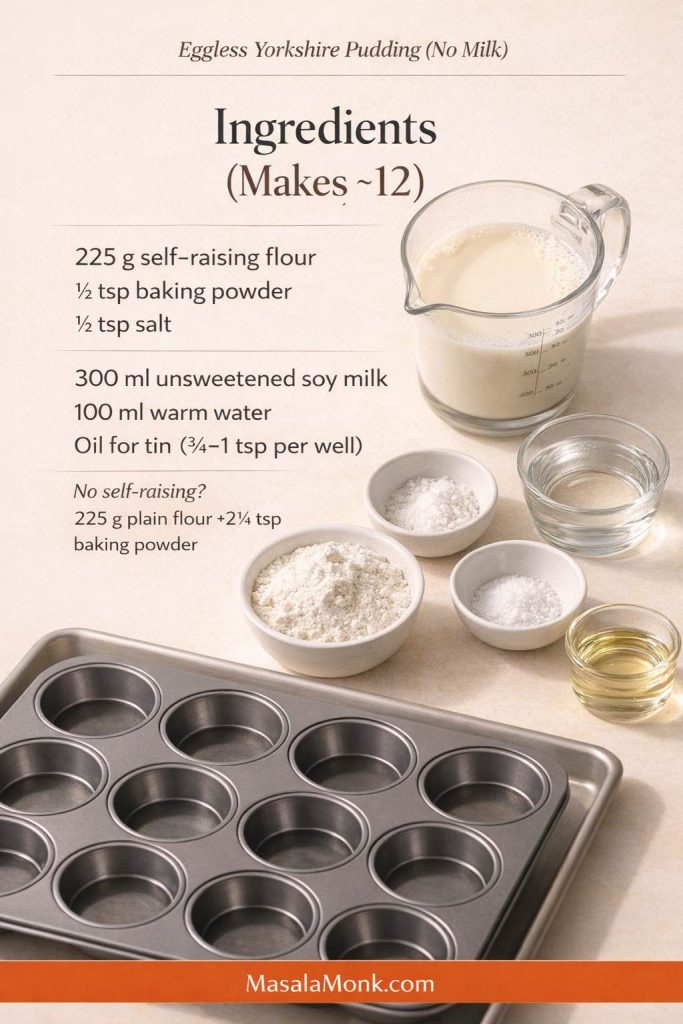
Ingredients (makes about 12 standard puddings)

  • 225 g self-raising flour
  • ½ tsp baking powder
  • ½ tsp fine salt
  • 300 ml unsweetened soy milk
  • 100 ml warm water
  • Neutral oil for the tin (about ¾–1 tsp per hole)

No self-raising flour? Use 225 g plain flour + 2¼ tsp baking powder (instead of ½ tsp) + the same salt.

Flat lay of ingredients for eggless Yorkshire pudding with no milk, including self-raising flour, baking powder, salt, unsweetened soy milk, warm water, and oil with a muffin tin, plus a note for substituting plain flour; MasalaMonk.com footer.
Quick ingredient check before you start: this eggless Yorkshire pudding (no milk) batter uses self-raising flour plus a little baking powder for lift, soy milk for reliable browning, warm water for steam, and hot oil in the tin for crisp edges. If you don’t have self-raising flour, the plain flour + baking powder swap keeps the recipe doable without changing the method.

If you only have plain flour, you can still make this work. Use all-purpose flour and increase baking powder to compensate, similar to the “no self-raising flour” workaround used in a popular vegan yorkshire method here: self-raising flour substitute notes for vegan Yorkshire puddings.

Soy milk is the most reliable milk swap for lift and browning. That said, if you’re avoiding soy or simply prefer homemade, these options are useful:


Yorkshire pudding without milk: why the batter has warm water

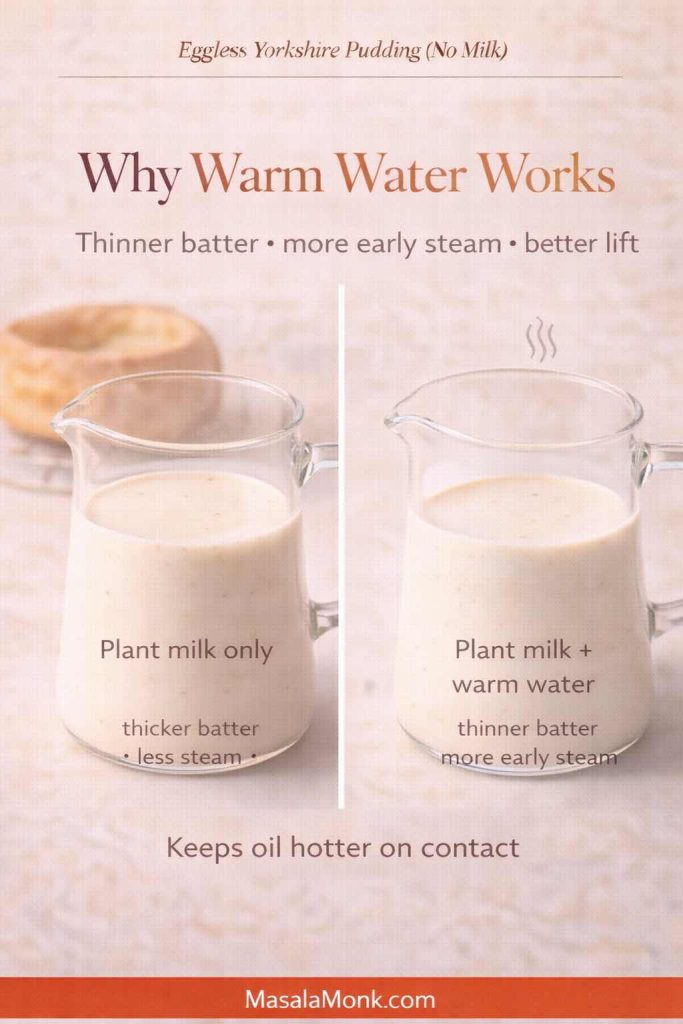
It’s tempting to pour in plant milk and call it a day, yet warm water has a quiet role here. First, it keeps the batter thin enough to climb. Second, it boosts early steam. Third, it helps the batter hit hot fat without cooling it too much.

Split-screen graphic for eggless Yorkshire pudding (no milk) comparing “plant milk only” batter versus “plant milk + warm water,” explaining that warm water makes a thinner batter, creates more early steam, improves lift, and keeps oil hotter on contact; MasalaMonk.com footer.
Warm water is the quiet advantage in Yorkshire pudding without milk. It keeps the batter thin enough to climb, creates more early steam for lift, and helps the batter hit the hot oil without cooling it down too much. The result is a better rise and crispier edges in eggless, dairy-free Yorkshires.

That combination matters because Yorkshire puddings rise like popovers. Heat sets the outside quickly while steam expands inside, pushing the batter upward. Without eggs, the rise depends on two things: steam expansion and fast-setting walls. Self-raising flour plus a touch of baking powder helps the batter set before it can slump, while a thin, rested batter makes it easier for steam to push upward. If you enjoy the deep explanation, this is a great technical read on what makes a popover-style rise happen: why hot fat and high heat matter for Yorkshire puddings and popovers.

Also Read: Mozzarella Sticks Recipe (Air Fryer, Oven, or Fried): String Cheese, Shredded Cheese, and Every Crunchy Variation


How to make Yorkshire pudding without eggs or milk

This is where things get satisfying. Once you bake a batch that rises, you’ll start trusting the process, because the rules are simple and repeatable.

1) Preheat the oven properly

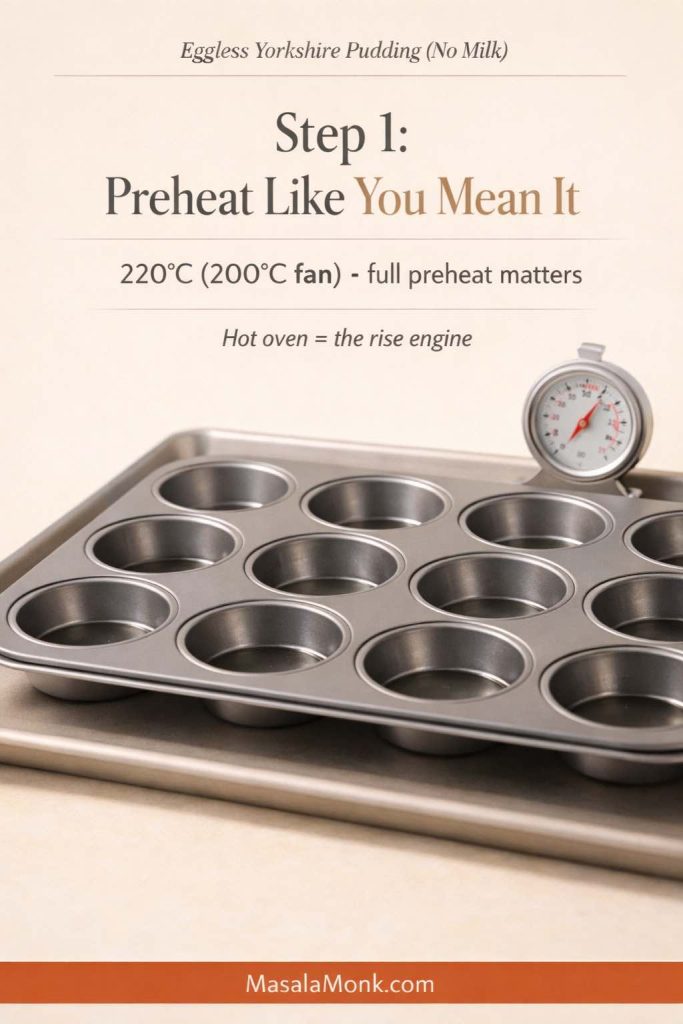
Set your oven to 220°C (or 200°C fan). Don’t rush this. A hot oven is not a suggestion here; it’s the engine.

Empty metal muffin tin on a baking tray beside an oven thermometer reading 220°C, labeled Step 1 for eggless Yorkshire pudding (no milk): fully preheat the oven because high heat drives the rise, with MasalaMonk.com in the footer.
Step 1 makes everything else work. For eggless Yorkshire pudding without milk, a fully preheated oven (220°C / 200°C fan) is the “rise engine.” If the oven isn’t truly hot before the batter hits the tin, the puddings set too slowly and turn out flatter and softer.

2) Make the batter, then rest it

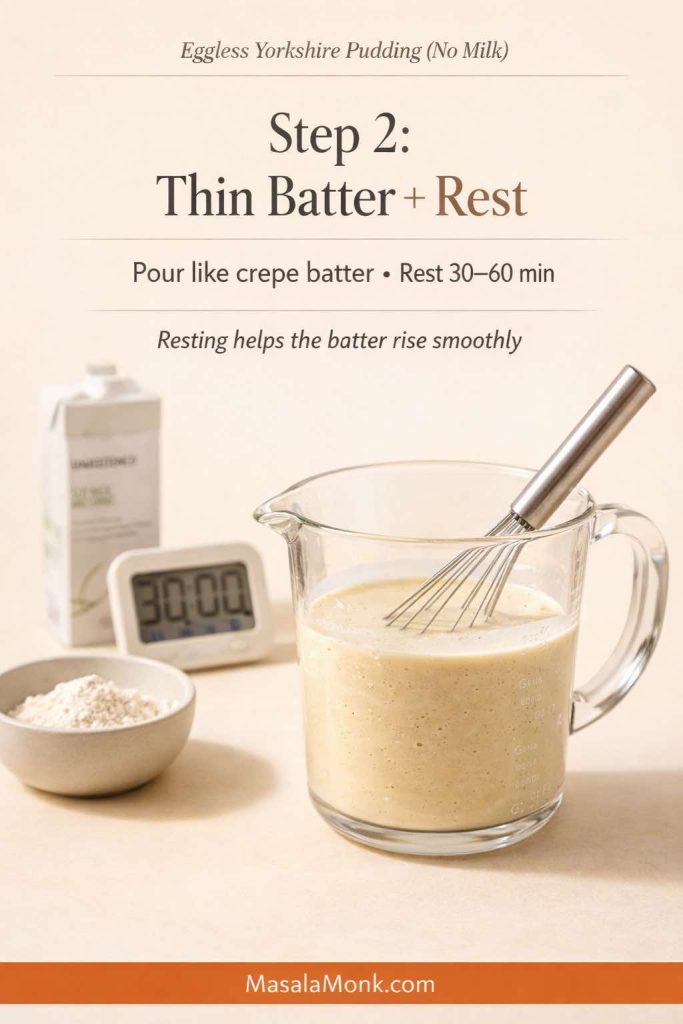
Whisk self-raising flour, baking powder, and salt in a bowl. Next, pour in soy milk and warm water, then whisk until smooth.

Glass measuring jug of thin Yorkshire pudding batter with a whisk and a timer, showing Step 2 for eggless Yorkshire pudding (no milk): pour like crepe batter and rest 30–60 minutes for a better rise, with MasalaMonk.com in the footer.
Step 2 sets the texture and the lift. Keep the eggless Yorkshire pudding batter thin (closer to crepe batter than pancake batter), then rest it for 30–60 minutes so the flour hydrates and the puddings rise more smoothly once the batter hits hot oil.

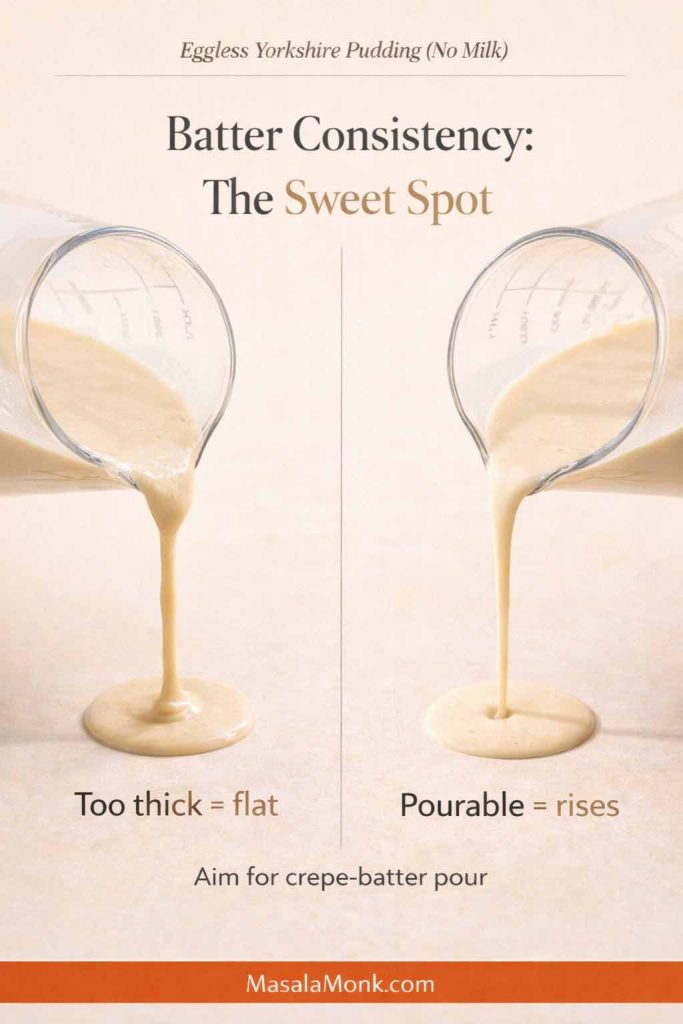
You’re aiming for a pourable batter that looks closer to crepe batter than pancake batter. If it feels thick, add a tablespoon of warm water and whisk again. If it looks thin but smooth, you’re in the right zone.

Split comparison of Yorkshire pudding batter consistency for an eggless no-milk recipe: left shows batter pouring thick with the note “too thick = flat,” right shows a thinner pourable batter with “pourable = rises,” plus “aim for crepe-batter pour” and a MasalaMonk.com footer.
Batter thickness is the silent deal-breaker. For eggless Yorkshire pudding without milk, you want a smooth, pourable batter that flows like crepe batter. If it pours thick like pancake batter, it sets too fast and can’t climb—thin it with a tablespoon of warm water and whisk again.

Now let it rest. Ten minutes is the minimum. Thirty minutes is better. An hour is often excellent, particularly if your kitchen is cool. Resting gives the flour time to hydrate, which improves how the batter behaves when it hits hot fat. If you’ve ever noticed how resting changes the texture of other batters, it’s a similar idea—this batter guide for fluffy idlis and crisp dosas captures the concept beautifully: why batter consistency and resting time change the final texture.

3) Heat the tin and oil until it’s fiercely hot

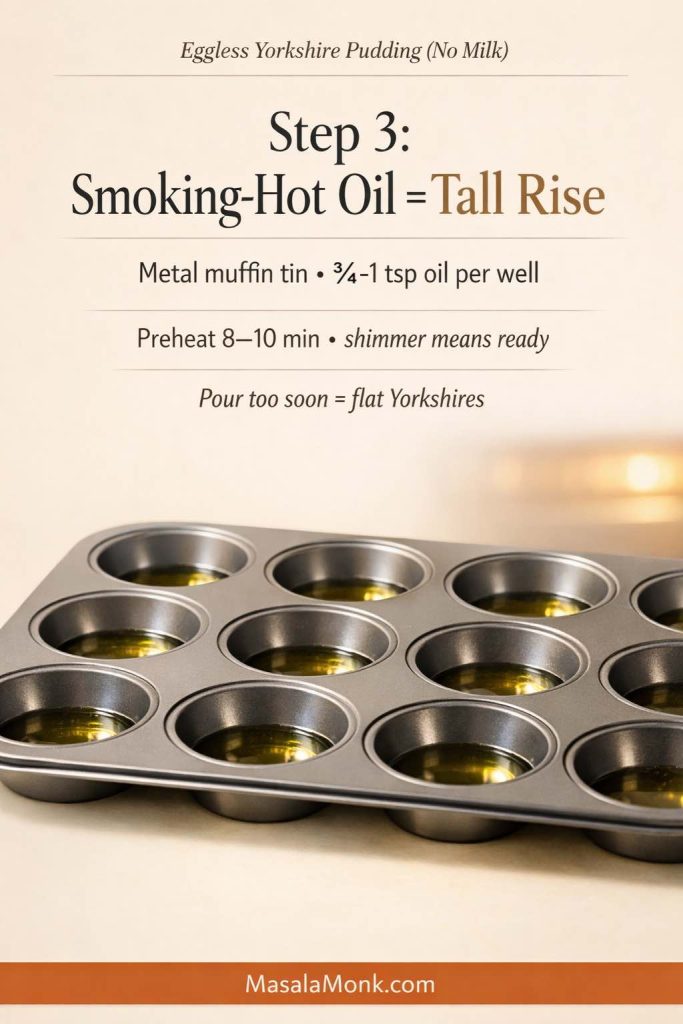
Use a metal muffin tin, ideally a standard 12-hole tin. Add about ¾–1 tsp neutral oil to each hole.

Slide the tin into the oven for 8–10 minutes, until the oil is shimmering and looks almost smoking.

Metal muffin tin filled with small pools of shimmering hot oil, shown as Step 3 for eggless Yorkshire pudding (no milk) with text overlay about preheating 8–10 minutes and a footer that reads MasalaMonk.com.
Step 3 is the whole game: preheat the muffin tin with oil until it shimmers (8–10 minutes). That heat is what creates tall, crisp eggless Yorkshire puddings—pour the batter quickly and avoid opening the oven early so the rise doesn’t collapse.

This is the moment that separates flat “muffin-like” results from true Yorkshire rise. In fact, the most consistent egg-free methods emphasize the same thing: deep metal wells and very hot fat. If you want a technique-focused walkthrough from a dedicated vegan approach, this guide breaks down the common failure points clearly: why vegan Yorkshire puddings fail and how to fix them.

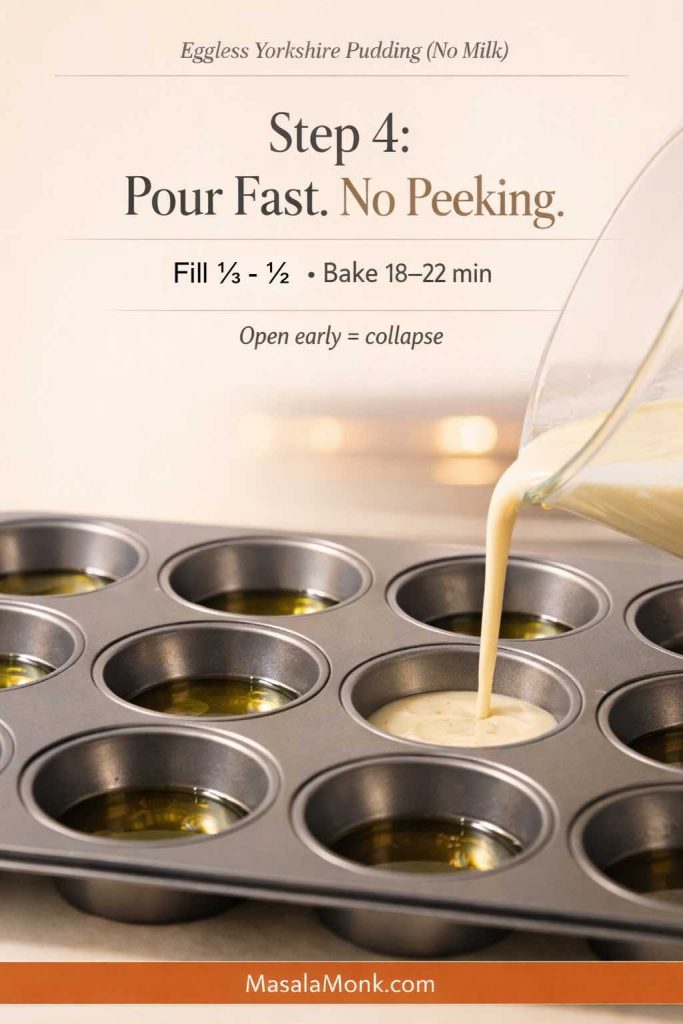
4) Pour quickly, then bake without opening the door

Pull the hot tin out carefully. Working quickly, pour batter into each hole—about one-third to one-half full.

Then return the tin to the oven immediately. Bake 18–22 minutes, until puffed and deeply golden.

Batter being poured from a jug into a hot oiled metal muffin tin for eggless Yorkshire pudding (no milk), labeled Step 4: pour fast, fill each well ⅓–½, and bake 18–22 minutes without opening the oven; MasalaMonk.com footer.
Step 4 is where eggless Yorkshires either rise or collapse. Pour the thin batter into the smoking-hot oil fast, fill each well only about one-third to one-half, then bake 18–22 minutes without opening the oven door. That steady heat is what sets crisp edges and a hollow center.

Resist the urge to check early. Opening the door drops heat, and that can collapse an egg-free rise. Instead, trust the timer for the first 18 minutes. After that, check once, quickly, and let them finish browning.

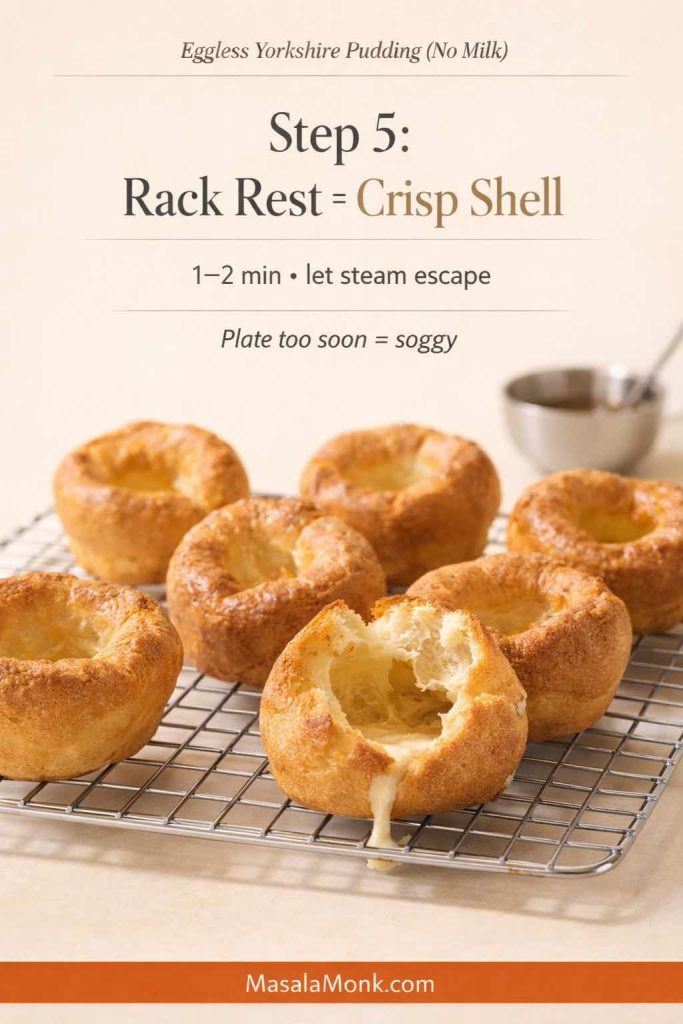
5) Let them set for crispness

Transfer the puddings to a rack for a minute or two. That tiny pause helps the shell stay crisp rather than steaming itself soft on a plate.

Eggless Yorkshire puddings cooling on a wire rack, with one torn open to show a hollow center; text overlay explains Step 5 for Yorkshire pudding without milk: rest 1–2 minutes so steam escapes and the shell stays crisp, with MasalaMonk.com in the footer.
Don’t skip the rack rest. Even perfect eggless Yorkshire puddings can turn soft if they steam on a plate. Let them sit on a wire rack for 1–2 minutes so moisture escapes—this keeps the edges crisp while the center stays tender and hollow.

Also Read: Sourdough Starter Recipe: Make, Feed, Store & Fix Your Starter (Beginner Guide)


Egg free Yorkshire pudding recipe: the choice of fat

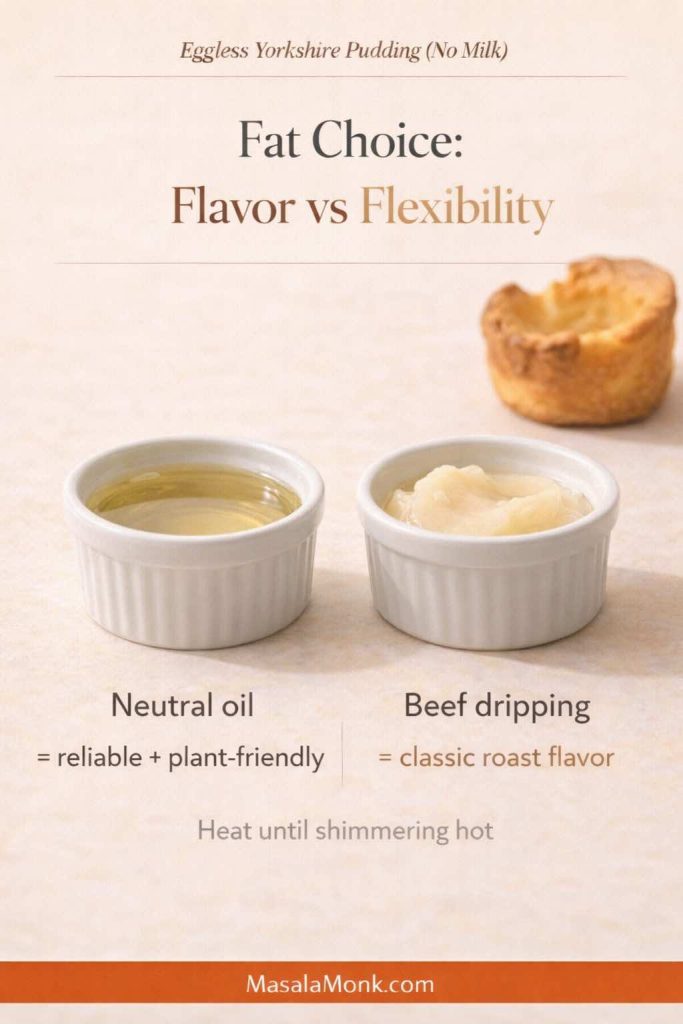
There’s a reason “beef dripping Yorkshire pudding” is a classic phrase: fat contributes flavor and crispness. However, if you’re making a dairy free yorkshire pudding or plant based yorkshire pudding, neutral oil is the easiest and most consistent.

Two ramekins labeled neutral oil and beef dripping shown as “Fat Choice: Flavor vs Flexibility” for eggless Yorkshire pudding (no milk), noting neutral oil is reliable and plant-friendly while beef dripping gives classic roast flavor, with a Yorkshire pudding blurred in the background and MasalaMonk.com in the footer.
Fat choice changes the flavor, not the method. Neutral oil is the most reliable option for eggless Yorkshire pudding without milk—easy, consistent, and plant-friendly. Beef dripping gives that classic roast-dinner taste; just heat it until shimmering hot before you pour in the batter for crisp edges and a better rise.

If you do eat beef, you can absolutely bake Yorkshire pudding in beef dripping using this same method. Still, for most kitchens, oil is simply more practical and keeps the recipe accessible.

If you’re curious about oils and smoke points, focus less on perfection and more on the simple rule: pick a neutral fat that can handle high heat.

Also Read: How to make No-Bake Banana Pudding: No Oven Required Recipe


Plant milk swaps for milk free Yorkshire pudding

Plant milks vary wildly. Some are thin, some are thick, some contain gums, and some brown more easily than others. Because of that, swapping milk can change the rise.

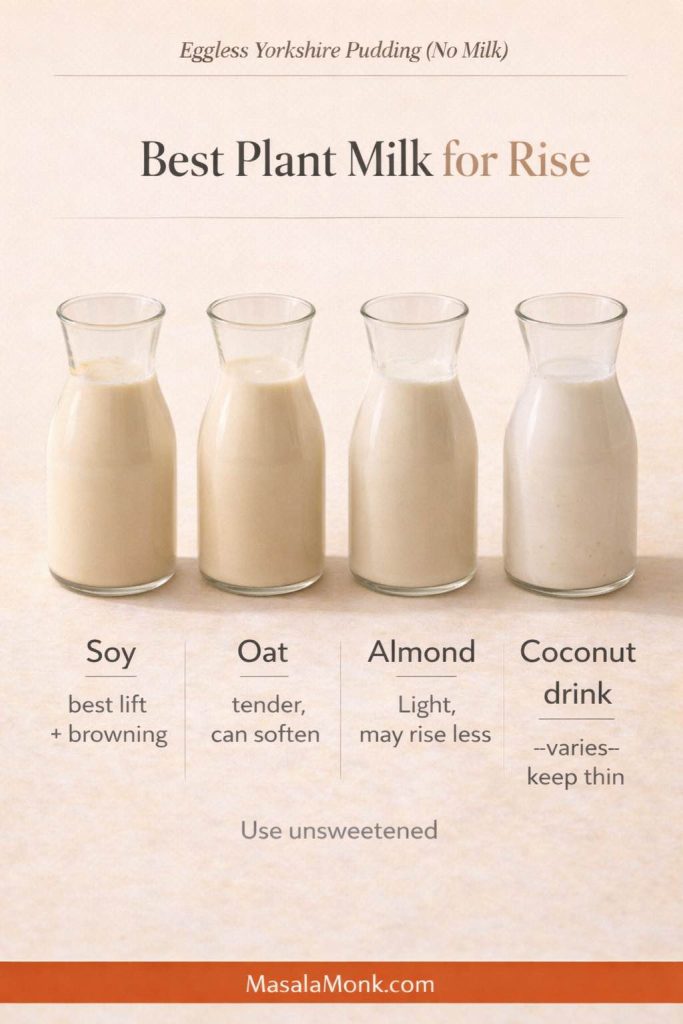
Comparison graphic titled “Best Plant Milk for Rise” for eggless Yorkshire pudding (no milk), showing four glass carafes labeled soy, oat, almond, and coconut drink with notes on lift and texture, plus “use unsweetened” and a MasalaMonk.com footer.
Not all plant milks bake the same. For Yorkshire pudding without milk, unsweetened soy milk tends to give the best rise and browning. Oat milk can be softer, almond milk is lighter (sometimes less dramatic lift), and coconut drink varies—so keep the batter thin and pourable.

Soy milk (best for consistency)

Unsweetened soy milk usually gives the most dependable lift and browning. It behaves closer to dairy milk in structure than many other plant milks.

Oat milk (tender, sometimes softer)

Oat milk can produce a gentler shell, especially if it’s thickened. If you’re using homemade, strain it well and keep it smooth. This version is designed specifically to avoid the gummy texture that can mess with batters: easy homemade oat milk that isn’t slimy.

Almond milk (lighter taste, sometimes less dramatic rise)

Almond milk works, particularly if you don’t mind a slightly softer set. If you make it at home, keep it simple and unsweetened: how to make almond milk at home.

Coconut milk (use thoughtfully)

This is where many dairy-free cooks get tripped up. Canned coconut milk is rich and heavy; it can make the batter thicker and reduce lift. Coconut milk beverage is lighter and behaves closer to other plant milks. If you’re unsure which you have, this explainer helps: coconut milk basics and how it differs by type.


Best pan for Yorkshire pudding: what matters more than brand

You’ll see endless discussion about the “best yorkshire pudding tin,” and brands do exist for everything from stainless steel yorkshire pudding tins to non stick yorkshire pudding trays. Still, before you get pulled into product debates, focus on the features that genuinely affect your bake.

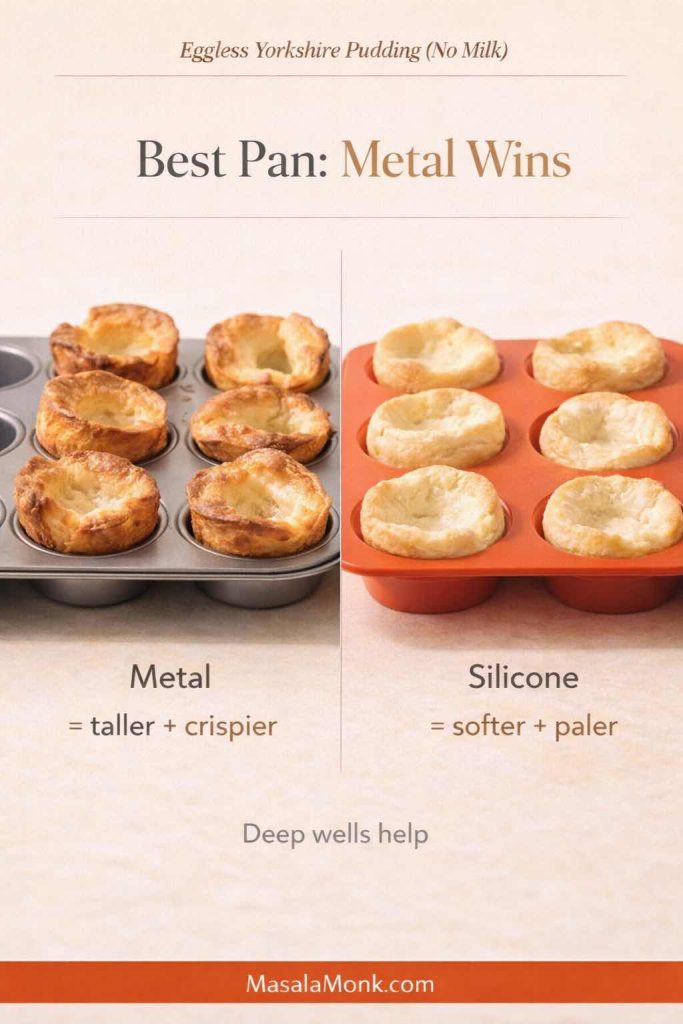
Metal beats silicone for lift

A metal tray heats quickly and transfers heat into the oil and batter fast. Silicone, on the other hand, is convenient but slower to heat, which often leads to pale, soft puddings. Silicone can still work, particularly for casual batches or smaller ovens, but it’s not ideal when you want tall crowns.

Side-by-side comparison of eggless Yorkshire puddings baked in a metal muffin tin versus a silicone tray: the metal pan batch is taller and crispier, while the silicone batch is paler and softer; text overlay says “Best Pan: Metal Wins” with MasalaMonk.com in the footer.
Pan choice changes the rise. For eggless Yorkshire pudding (no milk), a heavy metal tin heats faster and helps the batter climb into taller, crispier walls. Silicone trays can work, but they usually bake up paler and softer because they don’t transfer heat as aggressively.

Deep wells matter

A deep muffin pan or popover pan gives batter a vertical runway. That’s why popover pans and deeper yorkshire pudding trays often produce better rise than shallow tins.

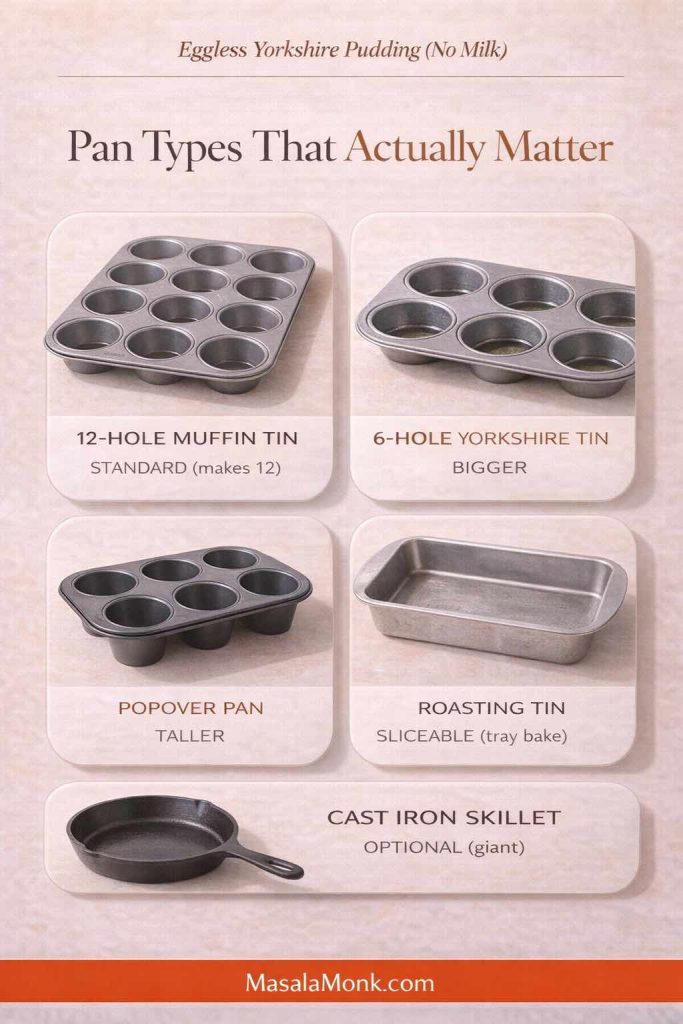
Infographic titled “Pan Types That Actually Matter” for eggless Yorkshire pudding (no milk), showing a 12-hole muffin tin, 6-hole Yorkshire tin, popover pan, roasting tin for tray-baked slices, and a cast iron skillet for a giant Yorkshire, with MasalaMonk.com in the footer.
Your pan choice changes the shape of your Yorkshire more than any brand name. A 12-hole muffin tin is the reliable everyday option, a 6-hole Yorkshire tin makes bigger puddings, a popover pan pushes extra height, a roasting tin gives a sliceable tray-bake, and a cast iron skillet is perfect for a giant Yorkshire you can cut into wedges.

Common tin types you’ll see (and what they’re good for)

  • A standard muffin tin (often 12 holes) is a great everyday choice.
  • A 6 hole Yorkshire pudding tin gives larger puddings with more dramatic size.
  • A 4 hole yorkshire pudding tin is perfect if you want oversized puddings without committing to a whole tray.
  • A popover pan is a strong option when you want extra height.
  • A roasting tin works for a large tray yorkshire pudding, especially if you like slicing and sharing.

As for materials, stainless steel yorkshire pudding trays and heavy-gauge non-stick tins both work well. Cast iron is also excellent, although it behaves differently: it holds heat for a long time, so you get strong crispness but less flexibility once it’s preheated.

If you own premium cookware like Le Creuset, you can use it; however, you don’t need it. A sturdy pan that heats evenly is enough.

Also Read: Chicken Adobo — Step-by-Step Recipe — Classic Filipino Adobong Manok


Cast iron Yorkshire pudding and giant Yorkshires

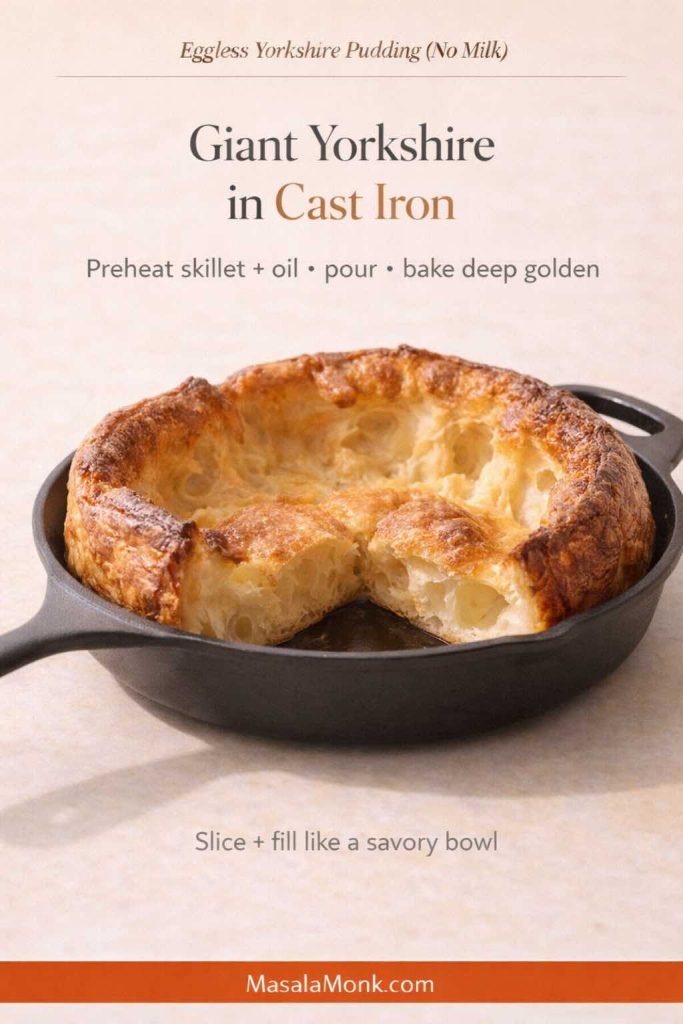
A cast iron Yorkshire pudding is the easiest way to make one big, dramatic Yorkshire that you can slice like bread. It bakes up with a bold rise, deeply browned edges, and a center that stays soft enough to soak up gravy.

Giant eggless Yorkshire pudding baked in a cast iron skillet with a slice removed to show the hollow center and crisp edges; text overlay reads “Giant Yorkshire in Cast Iron” with tips to preheat skillet and oil, pour batter, and bake deep golden; MasalaMonk.com footer.
Want one dramatic centerpiece instead of individual cups? A cast iron skillet makes a giant eggless Yorkshire pudding with deeply browned, crisp edges and a hollow center you can slice and fill like a savory bowl. Preheat the skillet and oil until shimmering hot, pour in the rested batter, then bake until deep golden for the best rise.

Start by heating your oven to 220°C (200°C fan). Put a cast iron skillet inside to preheat. Once the oven is hot, carefully remove the skillet, add 1–2 tablespoons of neutral oil, then return it to the oven for 8–10 minutes until the oil is shimmering hot. Pour in your rested batter and immediately put the skillet back into the oven. Bake until the Yorkshire is well-risen and a deep golden brown.

Giant Yorkshires work brilliantly as a centerpiece for roast dinners and for extra-large Yorkshire pudding meals. Slice into wedges and serve alongside gravy, or keep it whole and fill it like a savory bowl with saucy vegetables, beans, or stew.

Also Read: Sweetened Condensed Milk Fudge: 10 Easy Recipes


Mini Yorkshire puddings, miniature Yorkshires, and party food bites

Miniature yorkshire puddings are perfect for parties because they’re easy to fill and serve. Moreover, they feel special without requiring extra effort.

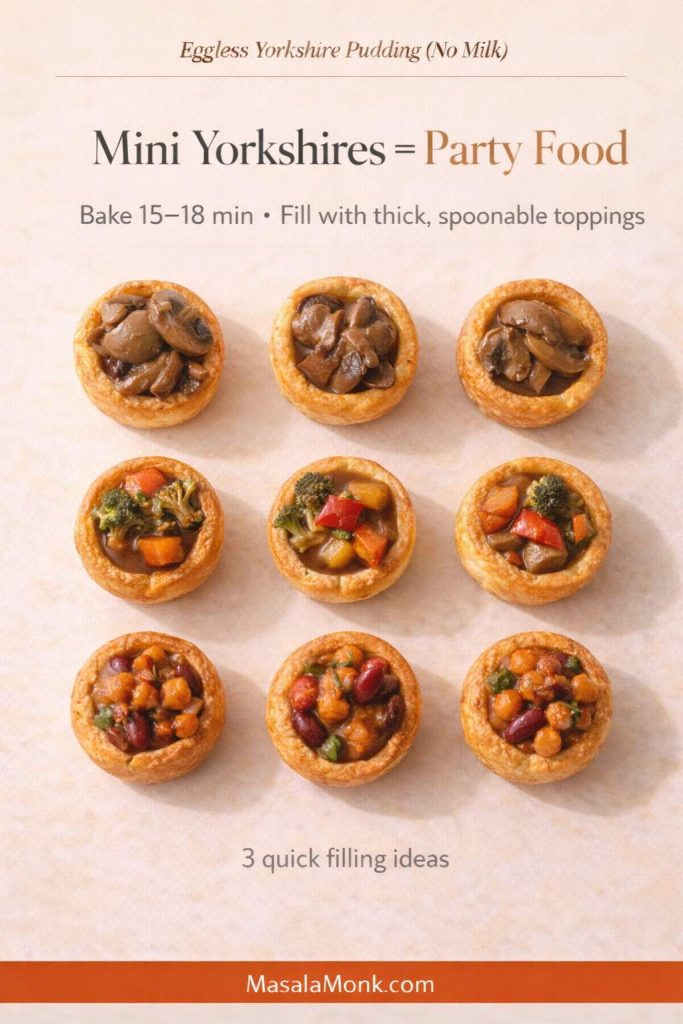
To make mini yorkshires, use the same batter, yet fill each well slightly less. Because the batter layer is thinner, they cook faster. Start checking at around 15–18 minutes.

From there, you can turn them into yorkshire pudding party food in dozens of ways:

Nine mini eggless Yorkshire puddings (no milk) arranged in a grid and filled with three toppings—mushroom-onion gravy, roasted vegetables in gravy, and a thick chickpea/bean curry—with text overlay “Mini Yorkshires = Party Food,” bake time 15–18 minutes, and MasalaMonk.com in the footer.
Mini Yorkshires are the easiest party upgrade. Bake mini eggless Yorkshire puddings (no milk) until deeply golden (about 15–18 minutes), then fill them with thick, spoonable toppings so they stay crisp—mushroom-onion gravy, roasted veg + gravy, or a thick chickpea/bean curry all work beautifully.
  • Fill with thick gravy and roasted vegetables
  • Add a spoon of saucy beans
  • Top with spiced mushrooms
  • Use them as a base for small bites at a holiday table

If you’re serving meat, mini roast beef and yorkshire puddings are a classic combination. If you’re vegetarian, you can do the same structure with roasted vegetables and onion gravy.

Also Read: Sourdough Recipe: 10 Easy Bread Bakes (Loaves, Rolls & Bagels)


Yorkshire pudding pies, stuffed Yorkshires, and “Yorkshire pudding pies” dinners

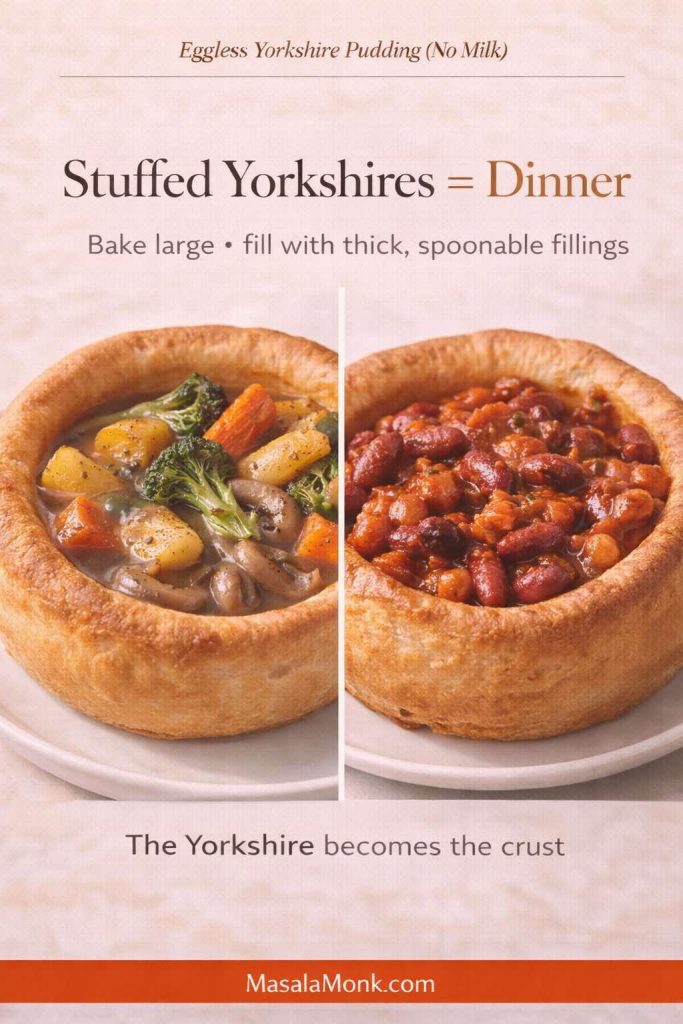
The phrase yorkshire pies can mean different things depending on who’s talking: sometimes it’s a roast dinner baked into a giant pudding, and sometimes it’s mini puddings stuffed like a canapé. Either way, the idea is the same: the Yorkshire becomes the crust.

Split image of two large stuffed eggless Yorkshire puddings (no milk): one filled with mushroom-onion gravy and roasted vegetables, the other filled with thick rajma/chickpea masala; text overlay says “Stuffed Yorkshires = Dinner” and “The Yorkshire becomes the crust,” with MasalaMonk.com in the footer.
Stuffed Yorkshires turn this recipe into a full meal. Bake larger eggless Yorkshire puddings (no milk), then fill with thick, spoonable fillings so they stay crisp—mushroom-onion gravy + roasted veg for roast-dinner vibes, or rajma/chickpea masala for a cozy curry-style dinner. Think of it like an edible bowl: the Yorkshire becomes the crust.

For a stuffed yorkshire pudding dinner, bake large puddings in a 6-hole tin, then fill them with:

  • roasted vegetables and gravy
  • mushrooms and onions
  • thick stews or bean-based sauces

For an easy, deeply satisfying option that pairs beautifully with the crisp edges of eggless yorkshires, try a spoonable curry. Rajma works especially well: Punjabi-style rajma curry. Likewise, a coconut-based stew creates a lighter but still comforting pairing: Kerala-style coconut vegetable stew.

You can also go the “Yorkshire pudding pies” route by baking a giant yorkshire pudding in a roasting tin, then piling on your filling and slicing it like a savory pie.

Also Read: Peanut Butter Fudge: Recipes & Guide (8 Methods + Easy Variations)


Vegetarian Yorkshire pudding and plant based Yorkshire pudding dinners

An eggless batter is already friendly for many vegetarian tables. Still, if you want a fully plant based Yorkshire pudding dinner, your fillings matter.

Instead of thinking “roast beef or nothing,” lean into what makes yorkshires great: they love sauce. They love savoriness. They love contrast.

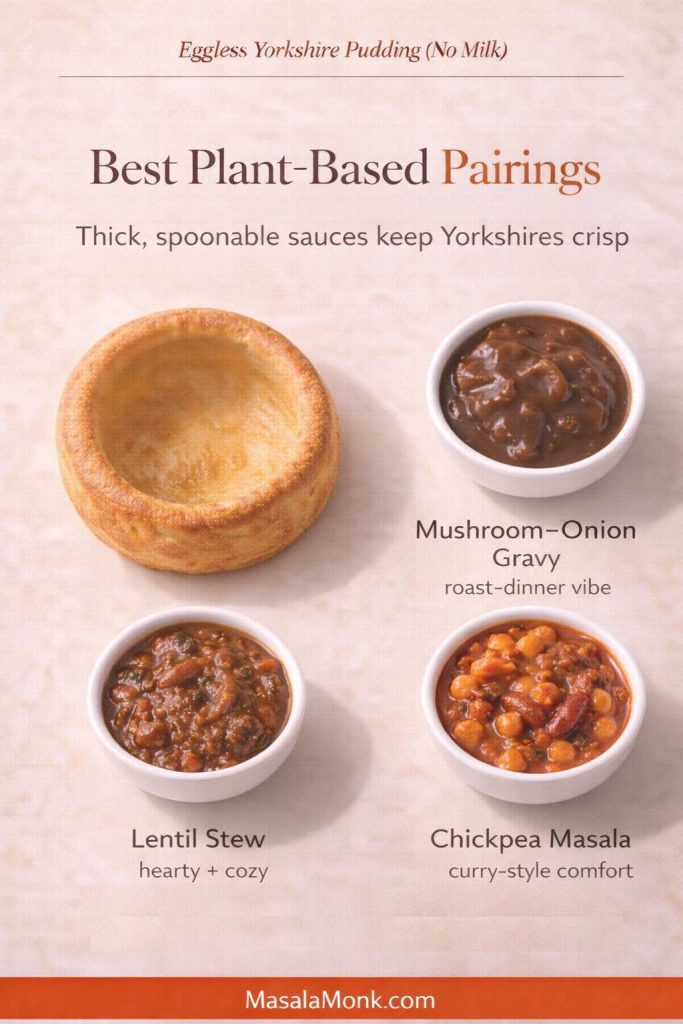
Infographic titled “Best Plant-Based Pairings” for eggless Yorkshire pudding (no milk), showing one plain Yorkshire pudding beside three bowls labeled mushroom–onion gravy, lentil stew, and chickpea masala, with the note “Thick, spoonable sauces keep Yorkshires crisp” and MasalaMonk.com in the footer.
Yorkshires love sauce—just keep it thick. For a plant-based dinner with eggless Yorkshire pudding (no milk), choose spoonable pairings that won’t steam the shell soft: mushroom–onion gravy for roast-dinner vibes, lentil stew for hearty comfort, or chickpea masala for a cozy curry-style meal.

A few plant-forward ideas:

  • Mushroom-onion gravy plus roasted carrots and potatoes
  • Lentil stew ladled into large yorkshires
  • Chickpea masala spooned into mini puddings for a snacky dinner

If you want inspiration for hearty, bowl-friendly soups, these collections can help you build a whole meal around your puddings: vegan lentil soup recipes and yellow moong dal vegan soups.


Eggless Yorkshire pudding with milk: a quick adaptation

Sometimes the need is narrower: eggs are the issue, but milk is fine. In that case, eggless Yorkshire pudding with milk is an easy variation.

Simply replace soy milk with dairy milk. Keep warm water because it helps maintain the thin batter and steam. The rest of the method stays the same: hot oil, hot oven, quick pour, no peeking.

This adaptation is particularly useful when you’re baking for someone with an egg allergy but not dairy intolerance.

Also Read: 10 Vegan Chocolate Cake Recipes (Easy, Moist, & Dairy-Free)


Lactose free Yorkshire pudding and dairy free Yorkshires: what changes, what doesn’t

Lactose free and dairy free sound similar, but they aren’t identical. Lactose-free dairy milk still behaves like dairy milk in baking, so it’s usually an easy swap. Dairy-free, by contrast, shifts you into plant milk territory, which is where thickness and additives can change the rise.

If you’re deciding which dairy alternatives to keep on hand, this overview can help you weigh options: dairy-free milk alternatives and how they differ.


Yorkshire pudding in an air fryer: possible, but choose your setup carefully

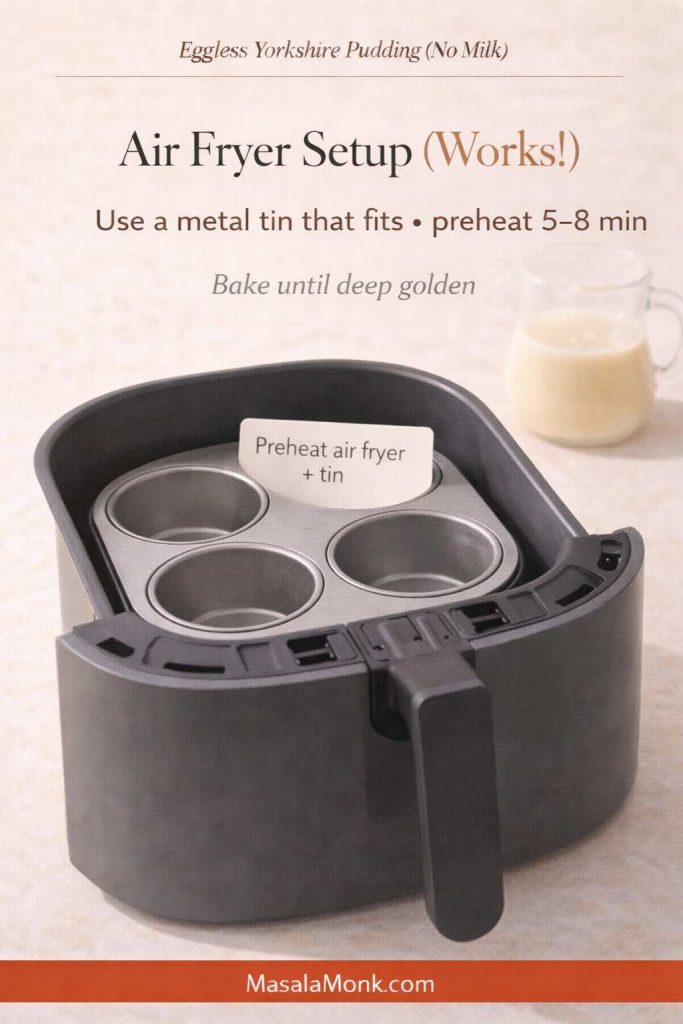
Air fryer yorkshire pudding is doable, but it’s fussier than oven-baked. The main challenge is heat stability: you need the oil hot and the cooking environment consistent, which can be harder in smaller baskets.

Air fryer setup for eggless Yorkshire pudding (no milk) showing a small metal muffin tin inside an air fryer basket with text overlay: “Use a metal tin that fits • preheat 5–8 min • bake until deep golden,” and MasalaMonk.com in the footer.
Air fryer Yorkshires can work—setup is everything. Use a metal tin that fits your basket and preheat both the air fryer and the tin before adding oil and batter. Then bake until deep golden (not just set), because eggless Yorkshire pudding without milk needs extra browning to stay crisp.

If you want to try it, use a metal tin that fits your air fryer basket and preheat both the machine and the tin. Keep the batter thin. Then cook until deeply browned, not just “set.” Pale egg-free yorkshires tend to turn soft quickly.

Appliances like Ninja are powerful, but even the best air fryer still behaves differently than a full oven. In other words, treat it as a variation, not the gold standard.

Also Read: Baked Ziti Recipe Collection: 15 Easy Variations


Yorkshire pudding tray talk: silicone, non-stick, stainless steel, and everything in between

If you’ve ever gone down the rabbit hole of yorkshire pudding trays, you’ve seen it all: 6 cup yorkshire pudding trays, 12 hole yorkshire pudding tins, ceramic yorkshire pudding trays, shallow yorkshire pudding tins, extra deep yorkshire pudding trays, disposable yorkshire pudding trays, even niche options marketed as air fryer yorkshire pudding trays.

Here’s the practical truth: a heavy, deep metal tin wins most of the time.

Non-stick can be helpful, particularly for easy release, but it isn’t essential if you use enough hot fat. Stainless steel tins heat well, too. Ceramic is slower to heat and tends to soften the crispness. Silicone is the most convenient but least punchy.

Brands exist everywhere—Tefal, MasterClass, and store lines from Argos, among others—yet your method matters more than a logo.

Also Read: Vegan Mayo Recipe Guide: 5 Plant-Based Mayonnaise


Golden, crisp, and not flat: troubleshooting eggless Yorkshire pudding

When egg-free yorkshires fail, they usually fail in predictable ways. Thankfully, the fixes are equally predictable.

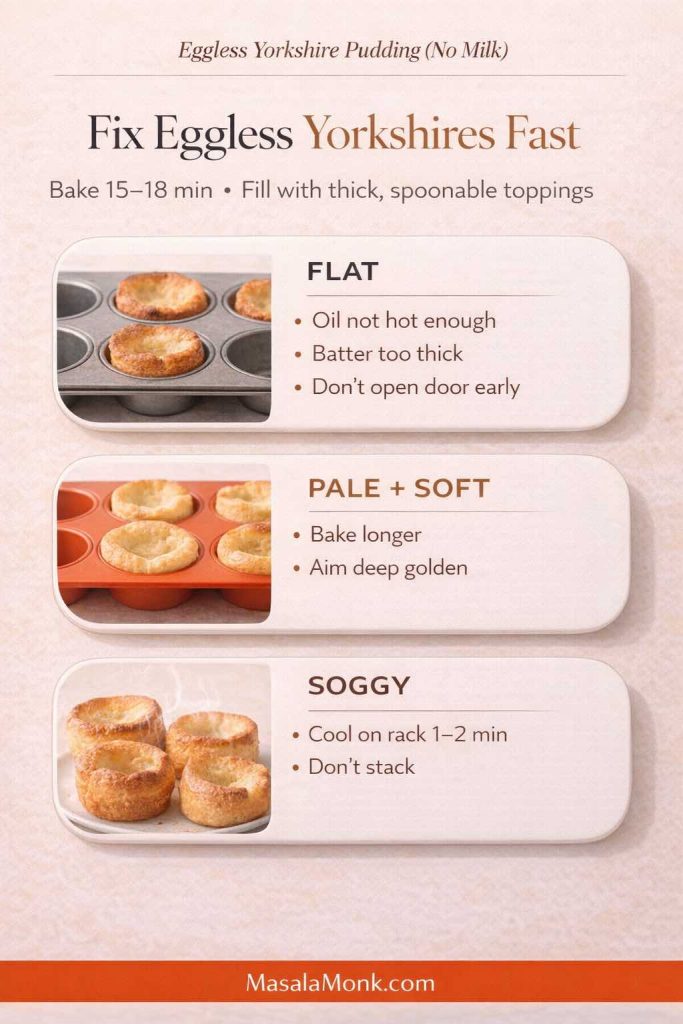
Troubleshooting infographic for eggless Yorkshire pudding (no milk) showing three problems—flat, pale + soft, and soggy—with fixes: heat oil more, keep batter thin, don’t open the oven early, bake longer to deep golden, and cool on a rack 1–2 minutes; MasalaMonk.com footer.
If your eggless Yorkshires didn’t behave, this is the fastest reset. Flat usually means the oil wasn’t hot enough, the batter was too thick, or the oven door was opened early. Pale + soft needs more bake time (deep golden = crisp). Soggy is almost always trapped steam—cool on a rack for 1–2 minutes and don’t stack.

When the puddings don’t rise

This is almost always one of the following:

The oil wasn’t hot enough.
It needs to be shimmering-hot before batter touches it.

The batter was too thick.
Thin it slightly with warm water. A thick batter sets too fast and can’t climb.

The pan didn’t heat properly.
Metal pans help. Deep wells help. Preheating helps.

The oven temperature was too low or unstable.
Give your oven time to fully preheat. Don’t open the door early.

If you want a detailed breakdown of common failure points from a technique-driven vegan approach, this guide is worth reading once: a detailed vegan Yorkshire pudding method with common fixes.

When they’re pale and soft

Browning is not just about looks. It’s about texture.

Bake longer. Aim for deeper color. Also, cool on a rack so steam escapes.

When they taste bland

Increase salt slightly. Also, consider a pinch of mustard powder, black pepper, or kala namak if you like that subtle savory “eggy” note.

Also Read: Potato Salad Recipe: Classic, Russian, German, Vegan & More


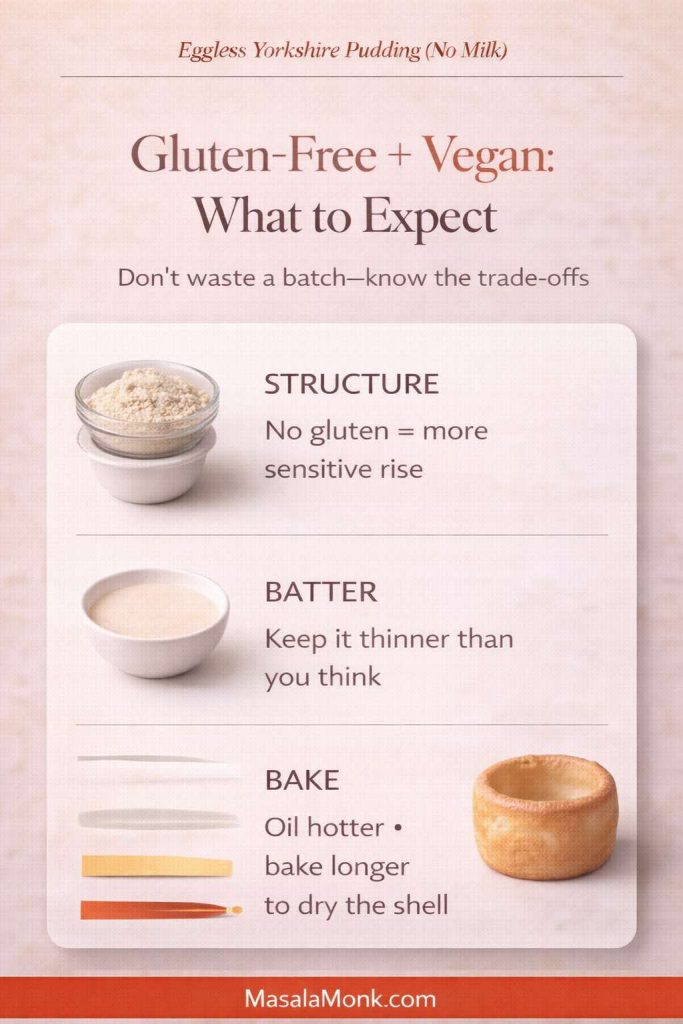
Vegan gluten free Yorkshire pudding recipe notes (if you need it)

Sometimes the ask is bigger: vegan and gluten free yorkshire pudding, gluten free vegan yorkshire puddings, or dairy and gluten free yorkshire pudding. The truth is that gluten-free versions can be done, but they’re more sensitive because structure shifts again.

Infographic titled “Gluten-Free + Vegan: What to Expect” for eggless Yorkshire pudding (no milk), with three cards: Structure (no gluten = more sensitive rise), Batter (keep it thinner than you think), and Bake (oil hotter, bake longer to dry the shell), plus MasalaMonk.com in the footer.
If you need gluten free vegan Yorkshire puddings, expect a more sensitive rise. Keep the batter thinner than you think, get the oil extra hot, and bake longer so the shell dries and stays crisp. This quick guide helps you adapt the eggless, no-milk method without guessing your way through a batch.

If you want to keep this post focused, you can treat gluten-free as a separate recipe later. Still, if you need a quick direction right now, most successful approaches use a blend of gluten-free flour plus starch, while keeping the batter thin and the oil extremely hot.

A useful example of the gluten-free plus vegan approach is here: a gluten-free vegan Yorkshire pudding method. Treat it as a reference, then adjust based on how your batter behaves.

Also Read: High Protein Overnight Oats | 5 Recipes (Low Calorie, Vegan, Bulking & More)


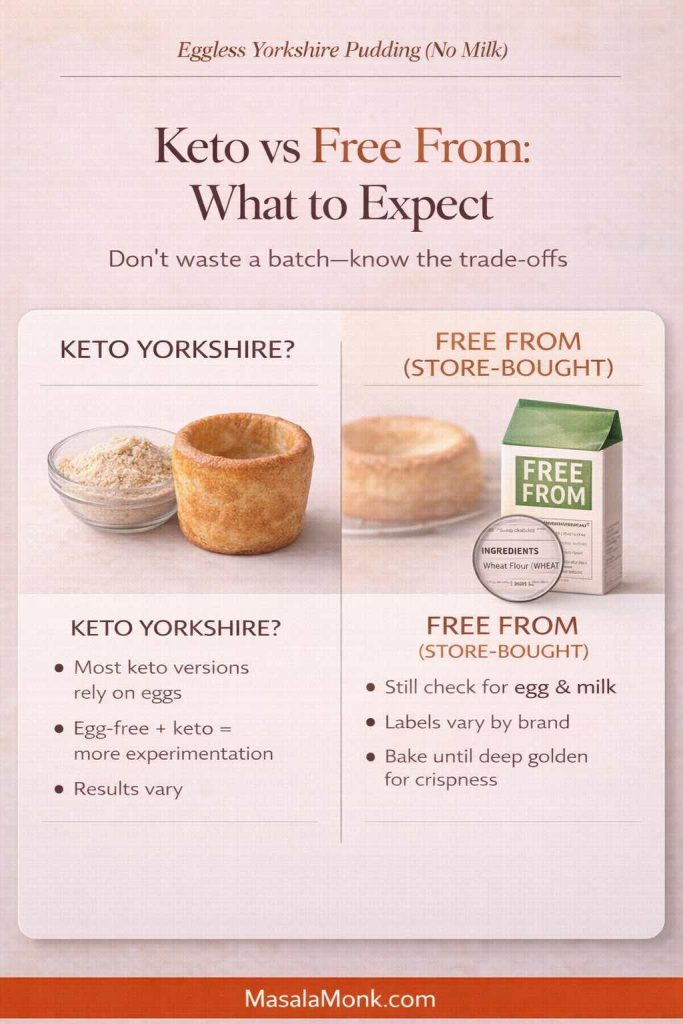
Keto Yorkshire pudding and “free from” variations

Keto yorkshire pudding is usually built around low-carb flours and often relies on eggs for structure, which doesn’t align with an eggless goal. If you want egg-free and keto together, you’ll likely be experimenting more, and results can vary.

Infographic titled “Keto vs Free From: What to Expect” for eggless Yorkshire pudding (no milk), comparing keto Yorkshire options (often egg-based and more experimental if egg-free) versus store-bought “free from” products (still check labels for egg and milk; bake until deep golden for crispness), with MasalaMonk.com in the footer.
Quick reality check before you bake: most keto Yorkshire pudding recipes rely on eggs for structure, so an egg-free keto version usually takes more experimenting and results can vary. Meanwhile, “free from” store-bought Yorkshires still need label-reading—egg and milk can show up in surprising places. If you want the most reliable crisp, dairy-free, eggless Yorkshire pudding, baking from scratch keeps everything in your control.

On the other hand, “free from Yorkshire puddings” often refers to store-bought options that avoid specific allergens. If you’re baking from scratch, you get more control and usually better texture.

Also Read: Keto pancakes that actually taste like pancakes


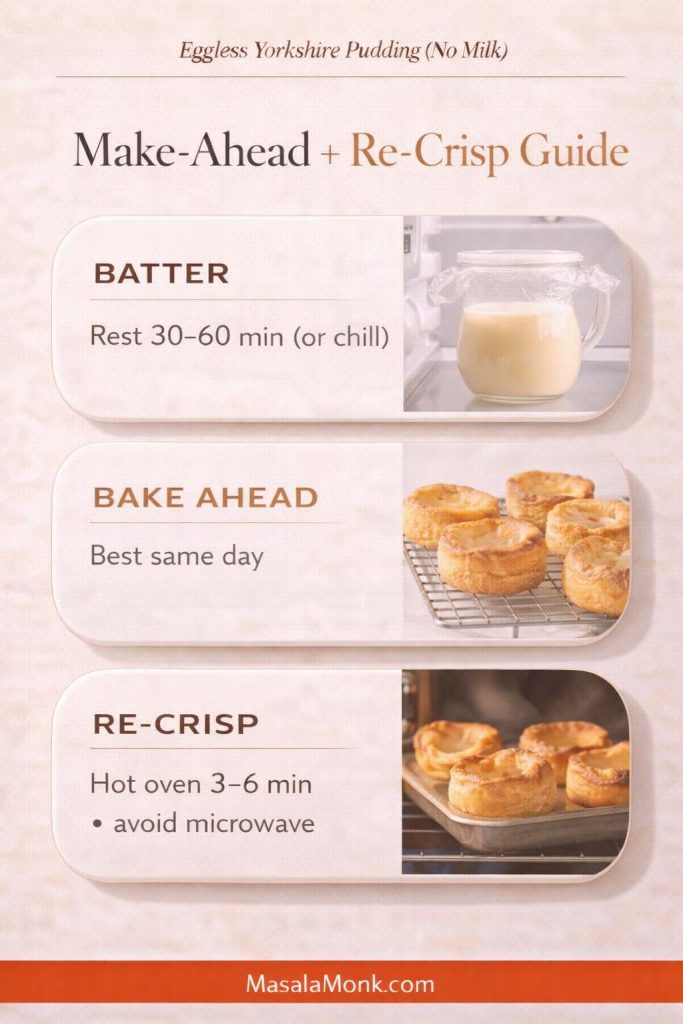
Make-ahead eggless Yorkshire puddings: batter, storage, and re-crisping

If you’re cooking for a holiday, a roast, or a crowd, make-ahead matters.

Make-ahead and re-crisp infographic for eggless Yorkshire pudding (no milk) with three steps: rest batter 30–60 minutes (or chill), bake ahead best same day, and re-crisp in a hot oven for 3–6 minutes while avoiding the microwave; MasalaMonk.com footer.
Holiday-friendly plan: Rest the eggless no-milk batter (30–60 minutes, or chill it), bake the Yorkshires earlier in the day, then re-crisp in a hot oven for 3–6 minutes right before serving. Skipping the microwave keeps the shell crisp instead of turning it soft.

Can you rest batter longer?

Yes. In fact, resting longer often improves consistency. Refrigerating batter for several hours can work too, although you’ll want to bring it closer to room temperature before pouring so it doesn’t chill the oil on contact.

Can you bake ahead?

You can, but they’re best fresh. Still, you can bake them earlier in the day and reheat in a hot oven to revive crispness. Keep them spread out rather than stacked so steam doesn’t soften them.

How to reheat

A hot oven for a few minutes usually brings back the shell. Avoid microwaving if you can; it tends to soften the structure.

Also Read: Béchamel Sauce for Lasagna: Classic, Vegan & Ricotta Sauce Recipe


Ready made Yorkshire pudding, frozen Yorkshires, and premade options

Sometimes you don’t want a project. Maybe you’re building a meal fast, or maybe you want a backup plan.

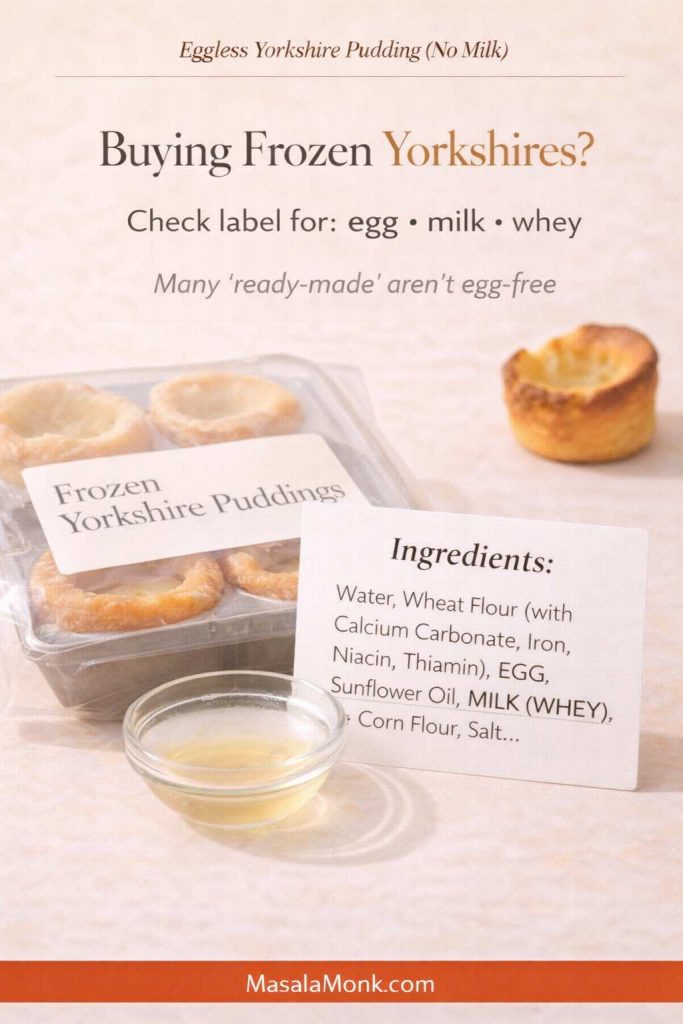
Ready made yorkshire pudding and frozen yorkshire pudding options exist in many places. In the UK, brands like Aunt Bessie’s are widely recognized, and supermarkets like Marks and Spencer, Sainsbury’s, Asda, and Ocado often carry variations—sometimes including giant yorkshire pudding trays or mini yorkshire puddings frozen. In the US, stores such as Whole Foods Market or Publix may stock British-style items seasonally or through specialty ranges, depending on location and time of year.

Those premade options can be handy, especially for a holiday table. Even so, if you’re after a true eggless yorkshire pudding, label-reading matters because many premade products still contain egg and milk.

Pinterest-style graphic for eggless Yorkshire pudding (no milk) showing a frozen Yorkshire puddings pack and an ingredient label card highlighting “EGG” and “MILK (WHEY),” with text advising to check labels for egg, milk, and whey; MasalaMonk.com in the footer.
Buying frozen Yorkshires as a shortcut? Check the label first. Many ready-made Yorkshire puddings still contain egg, milk, or whey—even when they look “simple.” If you need truly egg-free or dairy-free, scan the ingredients before you buy, or bake this no-milk eggless version so you control what’s inside.

If you do buy frozen puddings, crisp them well in a hot oven. Most of the disappointment people feel with store-bought yorkshires comes from under-baking and pale reheating.

Also Read: Vegan French Toast: 6 Easy Recipes (Pan, Air Fryer, GF & High-Protein)


Serving ideas that make these feel like a full meal

Yorkshire puddings love saucy foods. That’s true whether you’re doing a classic roast, a vegetarian dinner, or a plant-based spread.

Two of my favorite pairings for a dairy free yorkshire pudding dinner are:

If you want an external gravy reference that fits a traditional roast dinner mood, these are reliable:

Drinks that go beautifully with eggless Yorkshire puddings

Yorkshires are often served at dinner, yet they also work at brunch, as a snack board, or as part of a cozy winter spread. Drinks can set the mood in a way that feels effortless.

For a warm pairing, try:

If you’re hosting adults and want a “holiday table” drink, you can also lean into cocktails:


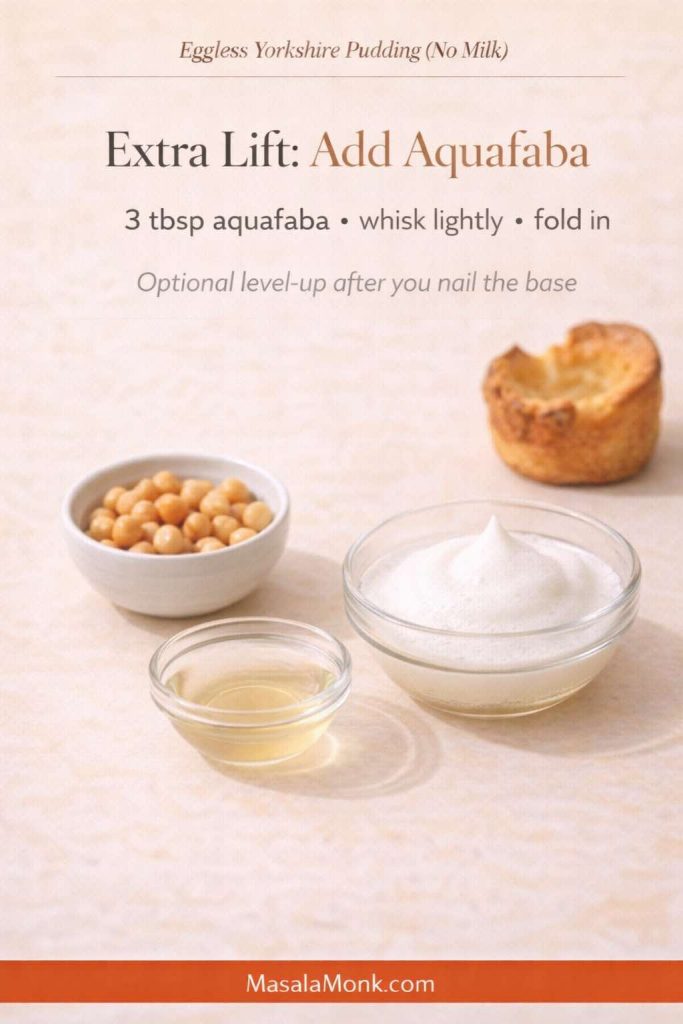
A slightly more advanced variation: extra lift with aquafaba

If you’ve baked the base version and want taller crowns, aquafaba can help. It’s the liquid from canned chickpeas, and it behaves surprisingly well in egg-free baking when paired with heat and a thin batter.

Infographic for eggless Yorkshire pudding (no milk) titled “Extra Lift: Add Aquafaba,” showing bowls of chickpeas, aquafaba liquid, and lightly whipped aquafaba with instructions “3 tbsp aquafaba • whisk lightly • fold in,” plus MasalaMonk.com in the footer.
Optional level-up for taller crowns: aquafaba (the liquid from canned chickpeas) can add extra lift to eggless Yorkshire pudding without milk. Whisk a small amount until lightly foamy, fold it into the rested batter, then bake exactly the same way—hot oil, quick pour, and no opening the oven early.

A detailed approach that many cooks follow is here: an aquafaba-based vegan Yorkshire pudding method for extra lift.

You don’t need aquafaba to succeed, though. Think of it as the “level up” variation once you’ve nailed the foundation.

Also Read: How to Cook Tortellini (Fresh, Frozen, Dried) + Easy Dinner Ideas


A gentle closing note (because this recipe is worth repeating)

Eggless yorkshire pudding can feel like a contradiction the first time you hear it. Nonetheless, once you understand what really drives the rise—hot fat, a thin rested batter, and steady oven heat—it stops feeling mysterious and starts feeling almost inevitable.

Bake a batch on a regular day first, when you’re not under pressure. Then, once you’ve seen them lift, you can confidently scale up for holidays, turn them into miniature yorkshire puddings for party food, bake a giant yorkshire pudding tray for a centerpiece dinner, or keep the batter ready for a quick comfort meal that doesn’t rely on eggs or dairy at all.

And if you’re experimenting, keep the method steady while you change one variable at a time. That way, every batch teaches you something useful—plus, you still get Yorkshire puddings at the end, which is rarely a bad outcome.

Also Read: 19 Essential Kitchen Tools That Make Cooking Easier

FAQs about No-Milk Eggless Yorkshire pudding

1) Can I make eggless Yorkshire pudding with no milk and still get a good rise?

Yes. Eggless Yorkshire pudding (no milk) rises when three things line up: a thin batter, very hot fat in the tin, and a fully preheated oven. When those are right, the batter lifts up the sides and sets into a crisp shell with a tender center.

2) What’s the difference between “dairy free Yorkshire pudding” and “lactose free Yorkshire pudding”?

Dairy-free means no dairy ingredients at all (no milk, no butter, no whey). Lactose-free can still use dairy milk that has had lactose removed. In practice, lactose-free behaves like regular milk in baking, whereas dairy-free relies on plant milk and can change browning and texture.

3) Which plant milk works best for Yorkshire pudding without milk?

Unsweetened soy milk is the most reliable for structure and browning. Oat milk can be softer depending on thickness, while almond milk usually tastes lighter but may rise a bit less. Whichever you choose, use unsweetened milk and keep the batter pourable.

4) Can I make eggless Yorkshire pudding with milk if I’m only avoiding eggs?

Absolutely. Use the same method, keep the batter thin, and swap the plant milk for regular milk. The heat and timing stay the same, so you still get crisp edges and a hollow center.

5) Why did my Yorkshire pudding without egg turn out flat?

Most flat egg-free Yorkshires come from one issue: the fat wasn’t hot enough when the batter went in. Another common cause is batter that’s too thick to climb. Finally, opening the oven too early can collapse the rise before the shell sets.

6) Why are my milk free Yorkshire puddings soggy?

Sogginess usually means they didn’t bake long enough to set a firm shell, or they steamed on a plate instead of cooling briefly on a rack. Also, overfilling the wells traps moisture and prevents crisp edges.

7) How long should I rest the batter for no egg Yorkshire pudding?

Rest at least 10 minutes. For steadier results, rest 30–60 minutes. Resting hydrates the flour and helps the batter expand more smoothly when it hits hot oil.

8) What pan is best for eggless Yorkshire puddings: muffin tin, popover pan, or Yorkshire pudding tin?

A metal muffin tin or popover pan gives the most consistent rise because it heats fast and creates strong oven spring. A 6 hole Yorkshire pudding tin makes larger puddings, though it may need extra baking time. Silicone trays are convenient, yet they often brown less and rise less because they don’t transfer heat as aggressively.

9) Can I use a cast iron Yorkshire pudding pan for a giant Yorkshire?

Yes. Cast iron holds heat extremely well, so it’s ideal for a giant Yorkshire pudding or an extra large Yorkshire pudding that you slice into wedges. Preheat the skillet with oil until shimmering hot, then pour the batter and bake until deeply golden.

10) What’s the best oil for Yorkshire puddings if I’m not using beef drippings?

Use a neutral high-heat oil such as sunflower, rapeseed/canola, or vegetable oil. The key is getting it hot enough before adding batter. For traditional flavor, beef dripping works, yet it won’t be suitable for vegan or plant based Yorkshire pudding.

11) Can I make Yorkshire pudding in beef dripping with an eggless batter?

Yes, the cooking method stays the same. The batter can be egg-free while the fat is beef dripping. Just remember it won’t be vegan or vegetarian.

12) Can I cook Yorkshire pudding in an air fryer?

You can, provided you use a metal tin that fits and you preheat both the air fryer and the tin well. Because air fryers vary, timing will differ; therefore, focus on deep browning for crispness rather than stopping as soon as they look set.

13) Is there a reliable gluten free vegan Yorkshire pudding option?

There are workable versions, but they’re more sensitive because gluten-free flour blends behave differently. A thinner batter, very hot oil, and a longer bake to dry the shell are especially important for gluten free vegan Yorkshire puddings.

14) How do I make mini Yorkshire puddings for party food?

Use the same batter, then fill each well slightly less than usual so they bake faster and stay crisp. Miniature Yorkshire puddings are perfect for fillings like gravy, mushrooms, or saucy vegetables.

15) What are “Yorkshire pudding pies” and “stuffed Yorkshire pudding” meals?

Yorkshire pudding pies usually mean a large Yorkshire baked in a tray or skillet and served with a generous filling, almost like a crust. Stuffed Yorkshire pudding is the same idea in individual form: bake larger puddings, then fill them with roast-style sides or thick, spoonable sauces.

16) Can I buy vegan Yorkshire pudding or pre made Yorkshire puddings instead?

In some places you’ll find ready made Yorkshire pudding, frozen Yorkshires, or pre made Yorkshire puddings. However, many contain egg or milk, so check ingredients carefully if you need egg free or dairy free.

17) How do I reheat eggless Yorkshire puddings so they stay crisp?

Reheat in a hot oven until the edges feel dry and crisp again. Avoid microwaving because it softens the shell. For best texture, reheat them spaced out so steam can escape.

18) How many Yorkshire puddings does this recipe make, and can I scale it?

A standard batch typically makes about 12 in a muffin tin of eggless yorkshire pudding, depending on how full you pour. You can scale up easily; nonetheless, bake in batches so the tin and oil stay properly hot for each round.

19) What’s the simplest “perfect eggless Yorkshire pudding mix” approach for beginners?

Keep it basic: self-raising flour, baking powder, salt, plant milk, warm water. Then focus on the method—rest the batter, heat the oil until shimmering, pour quickly, and bake without opening the oven early.

20) Can I make Yorkshire pudding for two people without wasting batter?

Yes. Make a smaller batch by halving the ingredients, or bake a full batch and reheat extras later. Even when scaled down, the method remains identical: thin batter, hot fat, and steady oven heat.

Posted on 6 Comments

Vegan Mayo Recipe Guide: 5 Plant-Based Mayonnaise

Vegan mayo promotional cover for MasalaMonk.com: a stacked vegan burger and a small bowl of glossy vegan mayonnaise on a matte ceramic plate, with a hand dipping a French fry into the sauce, set against a sage and terracotta colour-block background with the text “Vegan Mayo, Reinvented – 5 Creamy Bases, Zero Eggs”.

If you love the way mayonnaise turns simple ingredients into something rich and satisfying, learning a good vegan mayo recipe might honestly change how you cook. You still get that silky texture, the comforting tang, and the way it pulls burgers, salads, and sandwiches together. Yet now everything is entirely plant-based, adaptable to allergies, and open to endless flavour experiments. Whether you tend to call it vegan mayo, vegan mayonnaise or simply egg-free mayo, the idea is the same: a rich, creamy, completely plant-based spread that behaves like classic mayo but fits vegan, dairy-free and egg-free diets.

Although store-bought vegan mayo is easy to find, homemade versions give you far more control. You decide the base, the oil, the flavour, the thickness, and even the level of richness. You can create a classic-style vegan mayonnaise recipe that tastes like the kind you grew up with, or you can build lighter, high-protein, cashew-based or avocado-based versions that fit a more whole-food approach.

In this guide, you’ll walk through:

  • What vegan mayo actually is and how it compares to regular mayonnaise
  • A classic soy milk vegan mayo recipe that behaves just like traditional mayo
  • A vegan mayo recipe with aquafaba (chickpea liquid) that feels airy and eggless
  • A tofu vegan mayo recipe for high-protein, lower-fat spreads
  • A cashew vegan mayo recipe for rich, gourmet-style creaminess
  • An avocado-based vegan mayo recipe for fresh, whole-food fat
  • Over fifteen variations and ways to twist each recipe of vegan mayo into new flavours
  • Practical ideas for using these vegan mayo recipes in real meals
  • Honest talk on whether vegan mayo is healthier than regular mayo
  • Storage, safety, and how long homemade vegan mayonnaise really lasts
  • Smart substitutes for days when you want a creamy element but not mayo at all

Along the way, you’ll see places where vegan mayo naturally plugs into other MasalaMonk recipes – such as eggless mayo, potato salad variations, spinach dips, vegan Som Tam salad, Thai-style vegan bowls, tzatziki and pesto variations.

A rustic bowl of creamy plant-based vegan mayo beside traditional mayonnaise, surrounded by soy milk, tofu, avocado, chickpeas and lemon on a wooden table.

Vegan Mayo Recipe Basics: What Exactly Is Vegan Mayonnaise?

How Classic Mayonnaise Works

Before you look at any detailed vegan mayo recipes, it really helps to understand what mayonnaise actually is. At its core, traditional mayonnaise is an emulsion: a stable mixture of oil and water-based liquid that normally don’t want to mix.

Tall glass jar showing oil and liquid mayo separating while an immersion blender sits inside, with lemon, egg yolk and mustard nearby to illustrate how a mayonnaise emulsion forms.
Seeing the layers of oil and liquid before they blend makes the idea of an emulsion real, which helps when you later switch to vegan mayo and rely on plant proteins instead of egg to hold everything together.

In regular mayo, egg yolk acts as the emulsifier. It keeps tiny droplets of oil suspended in water, which is what gives you that thick, creamy sauce that clings to a spoon.

Vegan Mayo Ingredients: What’s Really in Veg Mayonnaise?

Most vegan mayo ingredients lists look a lot like the classic ingredients of mayonnaise, just with plant-based swaps. When people look for veg mayonnaise ingredients, what they’re really asking is how to recreate that familiar mix of oil, acid, emulsifier and seasoning using soy milk, aquafaba, tofu, cashew cream or avocado instead of eggs.

To put it another way, classic mayo is basically:

  • Oil
  • A water-based liquid (often from the egg itself)
  • Acid (like lemon juice or vinegar)
  • An emulsifier (egg yolk)
  • Seasonings (salt, mustard, sometimes a touch of sugar)

When all of these elements are in balance, the mixture turns glossy and stable. However, if the ratio shifts or the oil is added too fast, the emulsion can split and turn greasy or watery.

A top-down view of vegan mayo ingredients in small bowls, including soy milk, chickpea water, tofu, cashews, avocado, lemon, white vinegar, Dijon mustard and salt arranged on a wooden surface.
These are the main building blocks you’ll mix and match for different vegan mayonnaise recipes—swap the base between soy milk, aquafaba, tofu, cashews or avocado, then keep the acid, mustard and seasoning similar to get the texture you like.

How a Vegan Mayo Recipe Recreates the Emulsion

In a vegan mayonnaise recipe, the egg disappears completely. Even so, you still need something to do the emulsifying work. Instead of egg yolk, the structure comes from plant-based ingredients such as:

  • Proteins and lecithins in soy milk
  • Starches and proteins in aquafaba – the liquid from cooked or canned chickpeas
  • The soft protein and fat structure of silken tofu
  • The smooth fat and fibre mix of cashew cream
  • The natural oils and emulsifiers inside avocado

Because of this, a good vegan mayo recipe is not simply “regular mayo without eggs.” Rather, it becomes a fresh balance of:

  • Fat – usually oil, sometimes nuts or avocado
  • Water-based liquid – from soy milk, chickpea water, tofu or nuts
  • Acid – lemon juice, vinegar, or both
  • Emulsifying compounds – plant proteins, starches and natural lecithins
  • Seasonings – mustard, garlic, herbs, salt, pepper, and occasionally sugar

When these pieces work together, your sauce thickens and turns silky. If they drift out of balance, the mixture can separate or feel oily. Even then, vegan mayo is often easier to rescue than egg-based mayo, because you can simply blend the broken emulsion into a small amount of fresh base liquid and rebuild it.

Why Vegan Mayo Is Naturally Egg-Free and Dairy-Free

There’s also an important nutritional difference. Regular mayonnaise is technically dairy-free – it doesn’t contain milk – yet it does contain eggs and therefore cholesterol. As the breakdown on mayonnaise and whether it’s dairy from WebMD explains, most classic mayo is egg-based, not milk-based.

Vegan mayo, by contrast, relies only on plant ingredients. As a result, it is:

  • Naturally egg-free
  • Automatically cholesterol-free
  • Completely dairy-free
  • Often soy-optional, depending on which base you choose

In practice, that means a vegan mayonnaise recipe can slot easily into vegan, eggless and lactose-free diets, and even stand in for a more traditional vegetarian mayo wherever you’d usually use mayonnaise. If you need a soy free vegan mayo or a completely dairy and egg free mayo, the fix is simple: choose a base like aquafaba, cashew cream or avocado instead of soy milk. That way, your dairy free mayo recipe can be tweaked to suit soy-free, nut-free or multi-allergy households without losing the creamy, tangy feel.

Also Read: How to Make Eggless Mayo at Home (Egg Free Mayonnaise Recipe)


The Emulsion Blueprint Behind Every Vegan Mayo Recipe

Because recipes can sometimes feel overwhelming, it’s useful to build a mental blueprint first. You can think of almost every vegan mayo recipe as some variation of this formula:

Base liquid + Acid + Flavour + Oil = Vegan Mayo

Where:

  • The base liquid might be soy milk, aquafaba, blended tofu, or blended cashews.
  • The acid usually comes from lemon juice, white vinegar, apple cider vinegar, or rice vinegar.
  • The flavour comes from mustard, garlic, herbs, black pepper, nutritional yeast, or spices.
  • The oil is often a neutral vegetable oil (sunflower, canola, rice bran, grapeseed), or occasionally a mild olive oil.
A wooden board holding four glass bowls of base liquid, lemon wedges, chopped herbs and neutral oil in front of a jar of creamy vegan mayo, showing the simple formula behind vegan mayonnaise.
Seeing vegan mayo broken into base liquid, acid, flavour and oil makes it easier to swap soy milk for aquafaba, tofu, cashews or avocado and still end up with a thick, reliable vegan mayonnaise recipe.

You can also switch up the oil depending on what you keep in your kitchen. Some people enjoy using avocado oil because it gives a soft, buttery flavour, while others like the mild fruitiness of light olive oil. Both options blend into the emulsion easily, so you can make a batch with avocado oil or a gentle olive-oil version whenever you want something slightly more aromatic. Once you understand that, you suddenly realise you can adapt almost any recipe of vegan mayo to your own needs. For instance:

  • If soy is a problem, you simply use aquafaba or cashew cream as the base.
  • If you want to reduce fat, you switch some of the oil for silken tofu.
  • If you prefer whole-food fats, you choose cashews or avocado instead.

Because the structure is the same, you’re free to swap and experiment while still staying within the safe, stable emulsion framework.

Also Read: Upma Recipe: 10+ Easy Variations (Rava, Millet, Oats, Semiya & More)


Classic Soy Milk Vegan Mayo Recipe (Your Everyday Base)

Let’s start with the most familiar vegan mayo recipe – the soy milk version that behaves almost exactly like standard mayonnaise. This is the one to master first, because it’s an easy vegan mayo that many people end up treating as their best vegan mayo recipe: quick to blend, reliable, and neutral enough to work anywhere you’d use regular mayo.

If you don’t usually keep soy milk at home, you can make the same recipe with other plant milks too. Almond milk creates a slightly lighter version that still emulsifies well, and oat milk gives you a smooth, mellow flavour. Both work beautifully if you ever want to try a vegan mayo made with almond milk or an oat-milk version that stays completely dairy-free and egg-free. In fact you can make both Almond and Oat milk at home, do read our posts on How to make Almond Milk at Home & Easy Homemade Oats Milk with just One Ingredient- Non Slimy, at last.

Ingredients for the Classic Soy Milk Vegan Mayo

For about 1½ cups of mayonnaise:

  • ½ cup unsweetened soy milk
  • 1–2 tablespoons lemon juice or white vinegar
  • 1 teaspoon Dijon mustard or mild yellow mustard
  • ½–¾ teaspoon salt, plus more to taste
  • 1–2 teaspoons sugar (or a mild sweetener), optional but helpful for balance
  • 1–1¼ cups neutral oil (sunflower, canola, rice bran, or grapeseed)
  • 1 small clove garlic, smashed (optional)
  • A pinch of black pepper
Recipe card for a 5-minute soy milk vegan mayo showing a jar of creamy plant-based mayonnaise with metric ingredients, quick blender steps and a pro tip about using unsweetened room-temperature soy milk.
This card gives you the base ratio for a classic soy milk vegan mayo in ml and grams, so you can scale the recipe up or down, keep the texture consistent, and quickly see why unsweetened room-temperature soy milk is essential for a thick, stable emulsion.

Step-by-Step Vegan Mayonnaise with Soy Milk

First, make sure your soy milk and lemon juice are relatively close in temperature. They don’t need to be warm, however they shouldn’t be ice-cold if the oil is room temperature.

  1. Blend the soy milk base.
    Pour the soy milk, lemon juice, mustard, salt, sugar, garlic and pepper into a tall jar or blender jug. Then blend for 10–15 seconds. The mixture will look thin, yet you’ll notice it already feels slightly thicker than plain soy milk.
  2. Slowly add the oil.
    With the blender running on low, start to drizzle in the oil in a thin, steady stream. As you continue, the mixture will gradually lighten in colour. Eventually, it will suddenly thicken and cling to the sides of the container.
  3. Check thickness and adjust.
    Stop the blender and check the texture. If it is too thin, blend in a little more oil. If it’s thicker than you like, blend in a teaspoon or two of soy milk.
  4. Taste and refine.
    Dip in a spoon and taste. Perhaps it needs more acid; maybe it wants a little more salt. Keep adjusting in small increments until it tastes balanced.
  5. Chill before serving.
    Finally, transfer the soy milk vegan mayonnaise to a clean glass jar, seal it, and refrigerate for at least one hour. It will firm up slightly as it chills.

Because this is the most neutral vegan mayonnaise recipe, it’s your best starting point for sandwiches, burgers, salads and dips. If you want to explore egg-free yet not fully vegan mayo options with curd or condensed milk versions as well, you can cross-reference MasalaMonk’s detailed guide on how to make eggless mayo at home, which covers non-vegan but egg-free methods too.

Also Read: Double Chocolate Chip Cookies – Easy Recipe with 7 Variations


Aquafaba Vegan Mayo Recipe: Eggless, Light, and Zero-Waste

Next, let’s turn to aquafaba – the liquid from cooked or canned chickpeas. At first glance it looks like something you’d pour down the sink. Yet, as many home cooks have discovered, it behaves in surprisingly egg-like ways. It can whip into meringue, foam for cocktails, and emulsify sauces.

If you’d like a broader introduction, you can read about what aquafaba is and how it works on The Vegan Society, where they explain the science behind its foaming and binding properties in eggless recipes.

Ingredients for the Aquafaba Based Vegan Mayo

For around 1¼ cups of mayo:

  • ¼ cup aquafaba (from a can of chickpeas, ideally thickened slightly by gentle reduction)
  • 1–2 tablespoons lemon juice or apple cider vinegar
  • 1 teaspoon mustard
  • ½ teaspoon salt
  • 1–2 teaspoons sugar or maple syrup
  • 1 cup neutral oil
  • A pinch of black salt (kala namak), optional, for an “eggy” aroma
Recipe card for aquafaba vegan mayo showing a jar of creamy eggless mayonnaise with metric ingredients, quick blending steps and a pro tip about thickening chickpea water for better texture.
Using chickpea water instead of eggs gives you a light, eggless mayo that’s ideal for allergy-friendly cooking; this card shows the exact aquafaba-to-oil ratio and explains why reducing very thin aquafaba first makes the flavour cleaner and the texture fluffier.

Step-by-Step Recipe of Vegan Mayo Using Aquafaba

First, strain your chickpeas and catch the liquid. If it looks very thin, simmer it gently until it coats the back of a spoon, then let it cool fully.

  1. Blend the aquafaba base.
    Combine aquafaba, lemon juice, mustard, salt and sugar in a tall jar. Then blend until slightly frothy.
  2. Drizzle in the oil.
    With the blender running, add the oil in a thin stream. Eventually, the mixture will thicken and turn into a pale, fluffy vegan mayonnaise.
  3. Season and tweak.
    Taste carefully. If it feels a little beany, add a touch more acid and sugar. If you want that classic eggy note without any actual egg, sprinkle in a pinch of black salt.
  4. Chill and use.
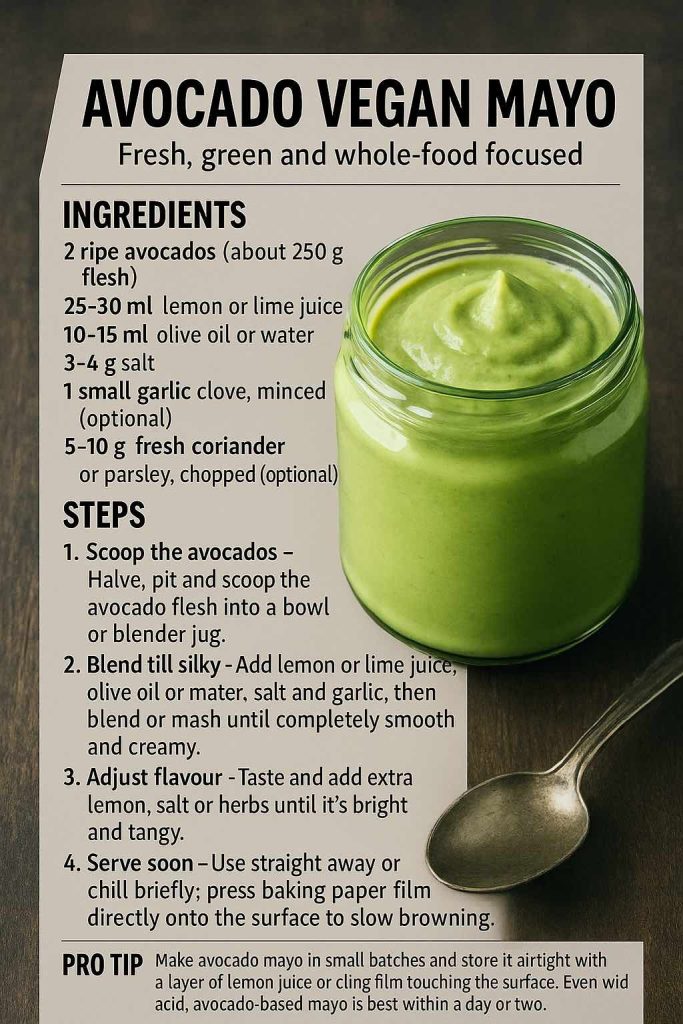
    Store in a jar in the fridge. It will often thicken a bit further as it cools.

Because this vegan mayo recipe with aquafaba is naturally egg-free, dairy-free and nut-free, it’s incredibly useful if you’re cooking for people with multiple allergies. Furthermore, it feels great to use an ingredient that many people treat as waste. You can also use the chickpeas themselves to make salads, patties, or hummus, so nothing is wasted.

Also Read: One-Pot Chicken Bacon Ranch Pasta (Easy & Creamy Recipe)


Tofu Vegan Mayo Recipe: High-Protein and Lower-Oil

After you’ve tried classic and aquafaba-based versions, you might start craving a vegan mayo recipe that feels a little lighter. In those moments, a tofu vegan mayonnaise recipe is a smart move. It still tastes creamy and satisfying, but the fat content usually ends up lower, which makes it a great base for a low fat vegan mayo recipe or a generally healthy vegan mayo you can use more regularly.

Ingredients for a Tofu Vegan Mayonnaise

For roughly 1½–2 cups:

  • 200 g silken tofu, drained
  • 2–3 tablespoons neutral oil or mild olive oil
  • 2–3 tablespoons lemon juice
  • 1–2 teaspoons mustard
  • 1 small clove garlic, optional
  • ½–¾ teaspoon salt
  • 1–2 teaspoons nutritional yeast, optional
  • A bit of plant milk or water if necessary
A tofu vegan mayo recipe card showing a jar of smooth high-protein mayo with metric ingredients, step-by-step blending instructions and a pro tip about draining silken tofu for a lower-oil creamy spread.
This tofu-based mayo is the one to reach for when you want a high-protein vegan mayo or a lighter, low-fat vegan mayo recipe for grain bowls, wraps and salads—the card spells out the tofu-to-acid ratio so you can tweak the texture without losing creaminess.

Step-by-Step Vegan Mayonnaise Recipe with Tofu

First, pat the tofu dry. It doesn’t need to be perfectly dry, although removing excess water helps your vegan mayo recipe thicken more reliably.

  1. Add everything to the blender.
    Combine tofu, oil, lemon juice, mustard, garlic, salt and nutritional yeast in a blender.
  2. Blend until fully smooth.
    Blitz until the mixture looks silky with no visible tofu pieces. If it’s extremely thick, add a tablespoon of plant milk or water and blend again.
  3. Taste and balance.
    Because tofu is neutral, it can handle plenty of acidity and salt. Adjust until it tastes bright, slightly tangy and savoury.
  4. Chill to firm.
    After chilling, tofu vegan mayo will set and feel somewhere between a dip and classic mayonnaise. For salad dressings, you can always thin it a bit later.

This style of vegan mayo recipe is ideal for wraps, grain bowls and salads where you want a creamy element that also contributes protein. For instance, you can use tofu mayo to dress a bowl similar to the Thai-style vegan bowl with peanut butter dressing, either mixing it into the peanut sauce or drizzling it alongside.

Also Read: Katsu Curry Rice (Japanese Recipe, with Chicken Cutlet)


Cashew Vegan Mayo Recipe: Rich, Tangy and Dairy-Free

If you enjoy sauces that feel indulgent, a cashew vegan mayo recipe may become your favourite. Soaked cashews blend into an ultra-smooth cream, which you can then season to resemble mayonnaise. The result is thick, tangy, and deeply satisfying.

Ingredients for a Cashew Vegan Mayonnaise Recipe

For around 1½ cups:

  • 1 cup raw cashews, soaked in hot water for 20–30 minutes
  • ½ cup water (plus more if needed)
  • 3 tablespoons lemon juice
  • 1 tablespoon apple cider vinegar or white vinegar
  • 1–2 tablespoons oil (optional but adds silkiness)
  • 1 teaspoon mustard
  • 1 teaspoon salt
  • ½ teaspoon garlic powder or 1 small clove garlic
A cashew vegan mayo recipe card with a jar of thick, creamy mayo on a wooden surface, listing metric ingredients, simple blending steps and a pro tip for soaking cashews to make a rich, soy-free mayonnaise.
This cashew-based mayo is the “gourmet” option in your vegan mayo toolkit—naturally soy-free, very creamy and perfect for roasted vegetables, grain bowls and sandwiches when you want a richer plant-based mayonnaise.

Step-by-Step Cashew Vegan Mayo Recipe

First, soak the cashews. That step softens them so they blend smooth.

  1. Drain and rinse the cashews.
    After soaking, drain off the hot water and rinse the cashews in cold water.
  2. Blend the cashew base.
    Add cashews, water, lemon juice, vinegar, oil, mustard, salt and garlic to a high-speed blender. Blend until absolutely smooth, scraping down sides as needed.
  3. Adjust thickness.
    If it looks too thick, add a splash of water and blend again. If it feels thin, add a couple of extra cashews (or chill it to see if it sets).
  4. Taste and refine.
    Cashews love acid and salt. Therefore, don’t hesitate to sharpen the flavour with another small squeeze of lemon or a pinch of salt.

This cashew-based vegan mayonnaise recipe is naturally soy-free, so it’s a great option when you’re avoiding soy but still want something rich and creamy. It’s excellent as a topping for roasted vegetables and as a dressing for crunchy salads. It pairs especially well with bold, spicy dishes such as the vegan Som Tam raw papaya salad, where a cool cashew mayo drizzle provides contrast.

Also Read: Green Bean Casserole Recipe Ideas (Classic, Cheesy, Dairy-Free & More)


Avocado Vegan Mayo Recipe: Fresh, Green and Whole-Food Focused

Beyond all these emulsions, there is another kind of vegan mayo recipe that relies on whole-food fat: avocado. While it doesn’t behave exactly like classic mayo, it offers incredible creaminess, beneficial fats, and a bright flavour that feels perfect in many plant-based meals.

Ingredients for an Avocado based Vegan Mayonnaise

For about 1 cup:

  • 2 ripe avocados
  • 2–3 tablespoons lemon or lime juice
  • 1–2 tablespoons olive oil or water
  • ½ teaspoon salt
  • 1 small clove garlic, minced (optional)
  • A handful of fresh coriander or parsley, chopped (optional)
A recipe card for avocado vegan mayo showing a jar of bright green creamy mayo with metric ingredients, simple blending steps and a pro tip on storing avocado-based mayonnaise to slow browning.
This avocado mayo card gives readers a whole-food vegan mayo option that skips bottled oil altogether, with exact avocado-to-acid ratios and storage tips so the sauce stays bright and green for tacos, burgers, wraps and grain bowls.

Step-by-Step Vegan Mayo Recipe with Avocado

First, choose avocados that give slightly when pressed. They should be ripe but not mushy.

  1. Scoop and mash.
    Halve the avocados, remove the pits, and scoop the flesh into a bowl. Mash with a fork until mostly smooth.
  2. Blend with flavour and acid.
    Add lemon or lime juice, olive oil or water, salt and garlic. Then blend with a small blender or whisk well until smooth and creamy.
  3. Adjust to taste.
    Because avocados vary, keep tasting. Perhaps you need more lemon to brighten things or more salt to pop the flavour. If you like herbs, stir in coriander or parsley.
  4. Use promptly.
    Avocado-based sauces brown over time, even with acid. Therefore, try to make only as much as you’ll use within a day or two and store it tightly covered in the fridge.

This avocado-focused vegan mayo recipe suits burgers, wraps, tacos, and grain bowls, especially where other ingredients are fresh and crisp. It works particularly well in meals that already lean towards guacamole-style flavours.

Also Read: Crispy Homemade French Fries From Fresh Potatoes (Recipe Plus Variations)


Vegan Mayonnaise Variations: 15+ Flavours from Any Base

Once you’re comfortable with at least one recipe of vegan mayo, you can start treating it as a blank canvas. With a few extra ingredients, you can transform a plain vegan mayo recipe into many distinct sauces. Below, assume you’re starting with 1 cup of any base vegan mayo (soy, aquafaba, tofu, cashew or avocado, as appropriate).

1. Garlic Vegan Mayonnaise (Aioli Style)

  • 1 cup vegan mayo
  • 1–2 cloves garlic, finely grated or mashed
  • 1 tablespoon lemon juice
  • 1 tablespoon chopped parsley
  • Salt and pepper

This garlic version works beautifully as a dip for fries, roasted potatoes, steamed vegetables and crusty bread.

A garlic herb vegan mayo recipe card in an aioli style, showing a jar of creamy herb-speckled mayo with ingredients, simple steps and a tip about grating the garlic finely and chilling the sauce so the flavour turns mellow.
This garlic herb vegan mayo card gives readers an easy aioli-style dip for fries, burgers, roasted vegetables and snack boards, with the garlic-to-herb ratios laid out so the sauce tastes bright and savoury instead of harsh or overpowering.

2. Herb and Dill Vegan Mayo Recipe

  • 1 cup vegan mayo
  • 2–3 tablespoons mixed fresh herbs (dill, parsley, chives, coriander)
  • 1 tablespoon lemon juice or white wine vinegar
  • ½ teaspoon garlic powder
  • Salt and pepper

This version is perfect for potato salads, pasta salads and sandwiches. You can also thin it with a bit of water to create a pourable dressing inspired by the ideas in MasalaMonk’s potato salad recipes.

3. Spicy Vegan Mayonnaise Recipe with Sriracha or Peri-Peri

  • 1 cup vegan mayo
  • 1–2 tablespoons sriracha, peri-peri, or other chilli sauce
  • ½ teaspoon smoked paprika
  • A squeeze of lime

This spicy mayo, especially when made with sriracha, is excellent on burgers, in wraps, or drizzled over roasted cauliflower and crispy tofu. It also doubles as a simple vegan spicy mayo for sushi, giving you a quick vegan sushi mayo drizzle for poke bowls, rolls and rice bowls.

A spicy vegan mayo for sushi recipe card showing a jar of creamy orange chilli mayo with metric ingredients, simple mixing steps and a pro tip about using a thicker vegan mayo base so the sauce clings to rolls, poke bowls and fries.
This variation card turns any of your base vegan mayo recipes into a quick spicy mayo for sushi, poke bowls, burgers or fries, with the sriracha-to-mayo ratio laid out so you can nudge the heat level up or down without losing that thick, clingy texture.

4. Curry Vegan Mayonnaise

  • 1 cup vegan mayo
  • 1–2 teaspoons curry powder or garam masala
  • ½ teaspoon garlic powder
  • 1 tablespoon lemon juice
  • Pinch of sugar

You can use this with chickpea salads, roasted vegetables, or baked wedges. It also tastes great spread inside sandwiches with roasted potatoes or cauliflower.

5. Tahini Vegan Mayo

  • ¾ cup vegan mayo
  • ¼ cup tahini
  • 2 tablespoons lemon juice
  • 1 clove garlic, grated
  • Cold water to thin

This Tahini-based vegan mayo recipe works wonderfully with falafel, roasted vegetables, and grain bowls. It can easily form the creamy heart of a Mediterranean-style bowl.

6. Chipotle-Style Vegan Mayo (Smoky Chipotle Version)

  • 1 cup vegan mayo
  • 1–2 teaspoons chipotle paste or smoked chilli paste
  • 1 teaspoon tomato paste
  • Lime juice to taste

This smoky chipotle version is the kind of vegan mayo that instantly lifts tacos, quesadillas, nachos and grilled vegetables, giving you a bold, warm flavour without any effort.

Recipe card for chipotle vegan mayo showing a jar of smoky orange plant-based mayo with ingredients, simple steps and a pro tip about letting the chipotle and lime flavours develop in the fridge for tacos, bowls and burgers.
This chipotle vegan mayo variation gives you a smoky, spicy sauce you can build from any of the base vegan mayonnaise recipes, with the chipotle-to-mayo ratio and resting time spelled out so it tastes bold without overpowering your tacos, burrito bowls or burgers.

7. Japanese-Style Vegan Mayo Recipe

  • 1 cup soy-based vegan mayo
  • 1–1½ tablespoons rice vinegar
  • 1 teaspoon sugar
  • A small pinch of mustard powder

This Japanese-style twist is smooth, slightly sweet and tangy. You can drizzle it over sushi bowls, shredded cabbage salads or crispy tofu.

8. Ranch-Style Vegan Mayo Recipe

  • ½ cup tofu or cashew mayo
  • ½ cup thick plant-based yogurt
  • 2 tablespoons chopped dill and parsley
  • 1 tablespoon lemon juice
  • Garlic powder, onion powder, salt and pepper

This ranch-style vegan mayo is ideal for dipping vegetables and chips, or for dressing crunchy salads.

A ranch-style vegan mayo recipe card from MasalaMonk showing a jar of creamy herb-flecked dip with ingredients, simple steps and a pro tip about using thick plant yogurt for a rich dairy-free dressing.
This ranch-style vegan mayo card shows exactly how to turn your base vegan mayonnaise into a creamy, dairy-free dip or salad dressing, with the mayo-to-yogurt ratio dialled in so it coats potatoes, pasta and crunchy vegetables without going thin or watery.

9. Lemon-Pepper Vegan Mayo Recipe

  • 1 cup vegan mayo
  • Zest of 1 lemon
  • 1–2 tablespoons lemon juice
  • ½ teaspoon coarsely ground black pepper

This version feels bright, clean and elegant. You can serve it with steamed vegetables, asparagus, or oven-baked potato wedges.

10. Green “Chimichurri” Vegan Mayo

  • ½ cup vegan mayo
  • ½ cup finely chopped fresh herbs (parsley, coriander, a little oregano)
  • Garlic, chilli flakes and lemon juice

This herb-heavy version is a great spread for sandwiches and burgers, especially when you want a punch of fresh green flavour.

11. Harissa Vegan Mayo Recipe

  • 1 cup vegan mayo
  • 1–2 tablespoons harissa paste
  • Lemon juice to taste

This North African-style twist goes beautifully with roasted carrots, chickpeas, couscous and grilled flatbreads.

12. Pesto Vegan Mayo Recipe

  • ¾ cup vegan mayo
  • ¼ cup pesto

This is a brilliant way to stretch pesto further and make it sandwich-friendly. For more ideas on flavour, you can look at MasalaMonk’s pesto recipe variations.

13. Sweet Chilli Vegan Mayo Recipe

  • 1 cup vegan mayo
  • 2–3 tablespoons sweet chilli sauce
  • 1 tablespoon lime juice

This rings all the right bells next to spring rolls, grilled corn, and vegetable fritters.

14. Mustard-Pickle “Burger Sauce” Vegan Mayo Recipe

  • ½ cup vegan mayo
  • 2 tablespoons mustard
  • 2 tablespoons ketchup
  • 1 tablespoon chopped pickles
  • 1 tablespoon pickle brine

This burger-style vegan mayo works incredibly well on plant-based patties such as the lentil patties that are better than meat.

15. Garlic-Herb Spinach Vegan Mayo

  • 1 cup vegan mayo
  • 2 cloves garlic, grated
  • 2 tablespoons chopped fresh spinach (squeezed dry)
  • 2 tablespoons parsley

This variation becomes a natural base for spinach dips. If you want more ideas around textures and mix-ins, you can explore MasalaMonk’s spinach dip recipes.


How to Use Your Vegan Mayo in Everyday Meals

Once you’ve made a few jars of sauce, the most important question becomes simple: where do you actually use them? Thankfully, vegan mayo recipes fit into everyday meals in more ways than you might expect.

Burgers, Wraps and Sandwiches

First, consider burgers and wraps. A thin layer of vegan mayonnaise on the bread not only adds flavour, but also helps create a barrier against moisture.

  • For burgers, use garlic or burger-sauce-style vegan mayo, then layer in patties, lettuce, tomatoes and onions.
  • For wraps, spread herb mayo inside, then add roasted vegetables, beans and greens.
  • For sandwiches, choose a milder vegan mayonnaise recipe and let ingredients such as tomato and cucumber shine.

Because the sauce is vegan, you can use it confidently alongside plant-based burger patties, grilled tofu or lentil patties without any clash of flavour.

Potato Salad, Coleslaw and “Creamy” Classics

Next, think about classic creamy salads. Vegan mayonnaise can replace regular mayo one-to-one in most recipes.

  • Toss boiled potato cubes in a herb-heavy vegan mayonnaise recipe, plus a little extra vinegar and mustard, to create a comforting potato salad.
  • Fold vegan mayo into shredded cabbage, carrots and onions to make coleslaw.
  • Mix tofu or aquafaba mayo into chickpea, bean or pasta salads for easy meal prep.

For quick lunches, you can also mash chickpeas with spring onions, herbs and a few spoonfuls of mayo to make an easy vegan tuna mayo–style filling. Using aquafaba or tofu-based mayo turns it into a high-protein chickpea tuna mayo that works beautifully in sandwiches and wraps.

Moreover, if you want deeper guidance and variations, MasalaMonk’s potato salad recipe collection walks through multiple styles – classic, Russian, German and vegan – that you can easily adapt by swapping in your favourite vegan mayo.

Bowls and Meal Prep

Beyond salads, vegan mayo recipes shine in meal-prep bowls.

  • Stir a spoonful of cashew or tofu mayo into a peanut dressing to make it feel extra silky for something like the Thai-style vegan bowl.
  • Toss grains like quinoa or brown rice with a little vegan mayo, lemon, and herbs for a creamy grain salad.
  • Use spicy mayo as a drizzle over roasted vegetables and beans to build quick dinner bowls.

Because the sauce keeps well for a few days, you can add it at the last moment, just before eating, so your grains and vegetables don’t get soggy.

Snack Boards and Dips

Vegan mayonnaise also works brilliantly as a base for dips on party boards.

  • Combine garlic mayo with chopped spinach and herbs for a warm or cold spinach dip.
  • Serve several flavoured vegan mayo recipes – such as garlic, spicy, and herb – in small bowls for dipping bread, chips and vegetable sticks.
  • Mix vegan mayo into creamy dips inspired by MasalaMonk’s spinach dip recipes, replacing sour cream or regular mayo where necessary.

Because you can vary the base (soy, tofu, cashew), the same flavour profile can feel lighter or richer depending on the occasion.

Mayo-Free Contrasts

While vegan mayonnaise recipes are versatile, they are not the only creamy element in your toolkit. On days when you want something lighter or sharper, you might reach for:

Those mayo-free sides balance rich, creamy dishes very nicely.


Is a Vegan Mayo Really Healthier Than Regular Mayo?

Now that you have a whole collection of recipes, it’s fair to ask whether a vegan mayo recipe is “healthier” than traditional mayonnaise. The answer isn’t as simple as yes or no.

Regular mayonnaise is usually made from oil, egg yolk and acid. It is high in fat and it contains cholesterol from the egg yolk, although it usually has no milk and is technically dairy-free. As WebMD’s overview explains, the presence of eggs makes it non-vegan but still dairy-free.

Vegan mayonnaise recipes remove the egg yolk entirely. They typically use a plant-based emulsifier like soy milk or aquafaba plus oil. Therefore:

  • They are free from cholesterol, since cholesterol comes only from animal products.
  • They may still be high in calories and fat if oil is the main ingredient.
  • They can be lighter when built around tofu, aquafaba with less oil, or avocado.

If you look at nutrition data for commercial vegan mayos, many sit in the range of 50–100 calories per tablespoon, almost all from fat. Healthline’s guide to mayonnaise substitutes notes that vegan versions often have a similar calorie count but no cholesterol and sometimes healthier fat profiles. That means a vegan mayo recipe isn’t automatically a “diet food”.

Even so, the healthiest versions tend to be the ones built on tofu, aquafaba or avocado, because they rely less on added oil and more on whole ingredients. Richer cashew-based batches often end up being the best-tasting ones for special meals, while the lighter options are ideal for everyday cooking.

How to make Vegan Mayo healthy or lighter?

That said, you can nudge things in a lighter direction if you want something closer to a low calorie vegan mayo, an almost fat free vegan mayo, or an oil free vegan mayo for everyday use. And if you ever need something even simpler—both low-oil and soy-free—you can combine aquafaba with a splash of lemon and a tiny amount of oil for a very light version that keeps the texture without relying on soy. You can make it much more aligned with your goals by:
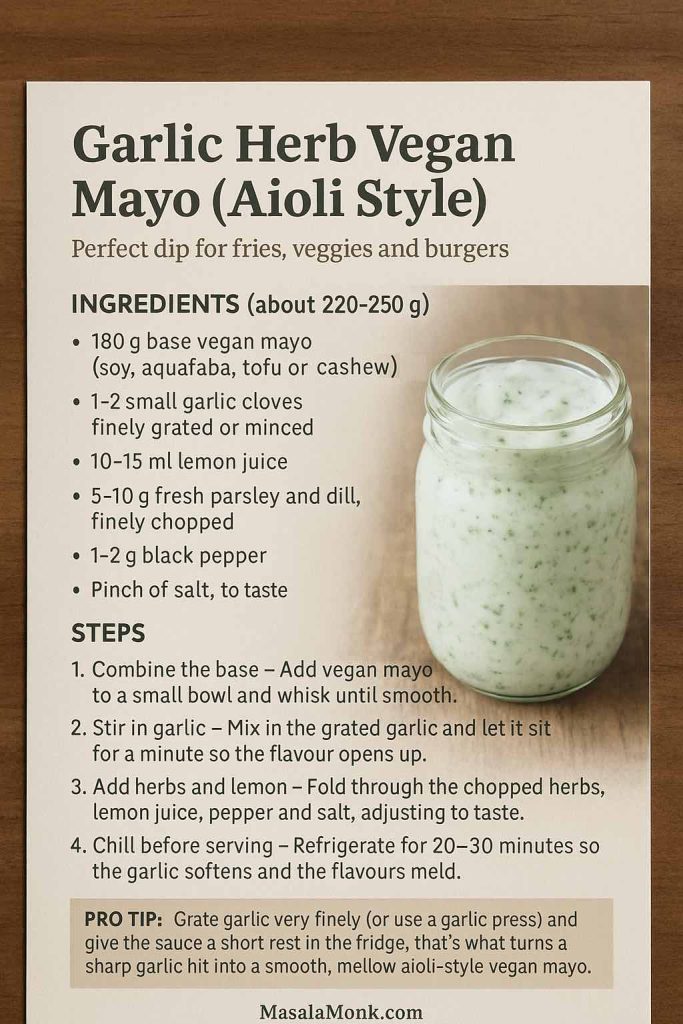
  • Choosing tofu or thick yogurt-style bases work well when you’re chasing a low fat vegan mayo recipe that still tastes rich.
  • Using aquafaba with just a splash of oil gets you close to an oil free vegan mayonnaise.
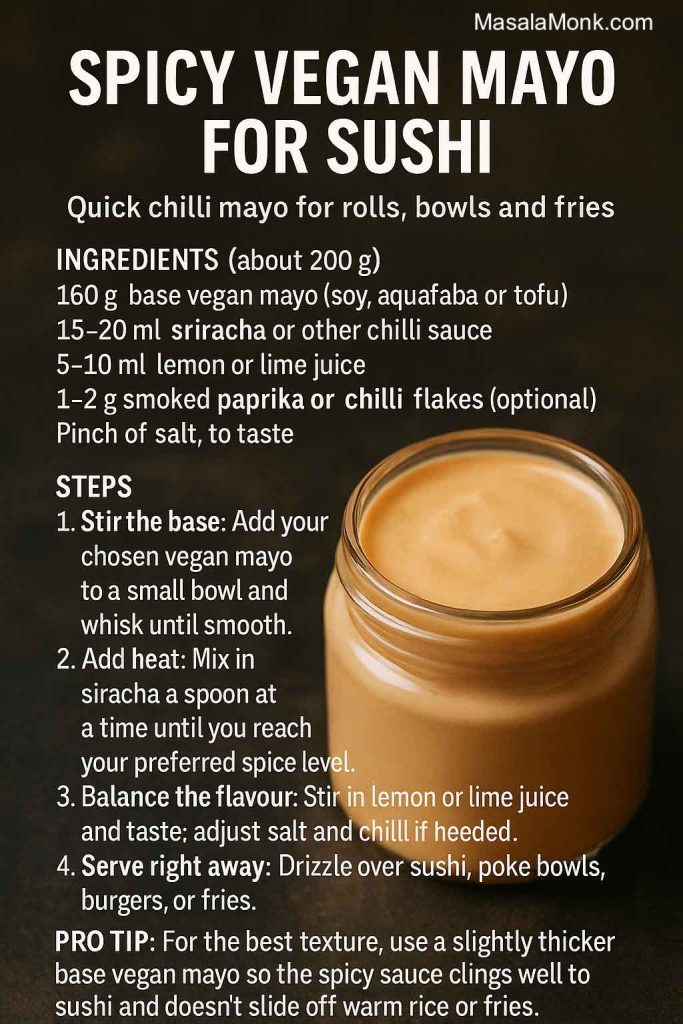
  • Treating full-oil or cashew versions can be treated as more indulgent options for burgers and special dinners
  • Using mayonnaise as a flavour boost rather than as the main component of the meal.

If you’re following a particular way of eating, you can also adapt the base. A high-fat, low-carb blend with avocado or oil works well as a keto vegan mayo (a true vegan mayo keto option), while avocado-oil, egg-free versions without sugar can double as a paleo vegan mayo or even a vegan mayo Whole30 style sauce when you stick to compliant ingredients.
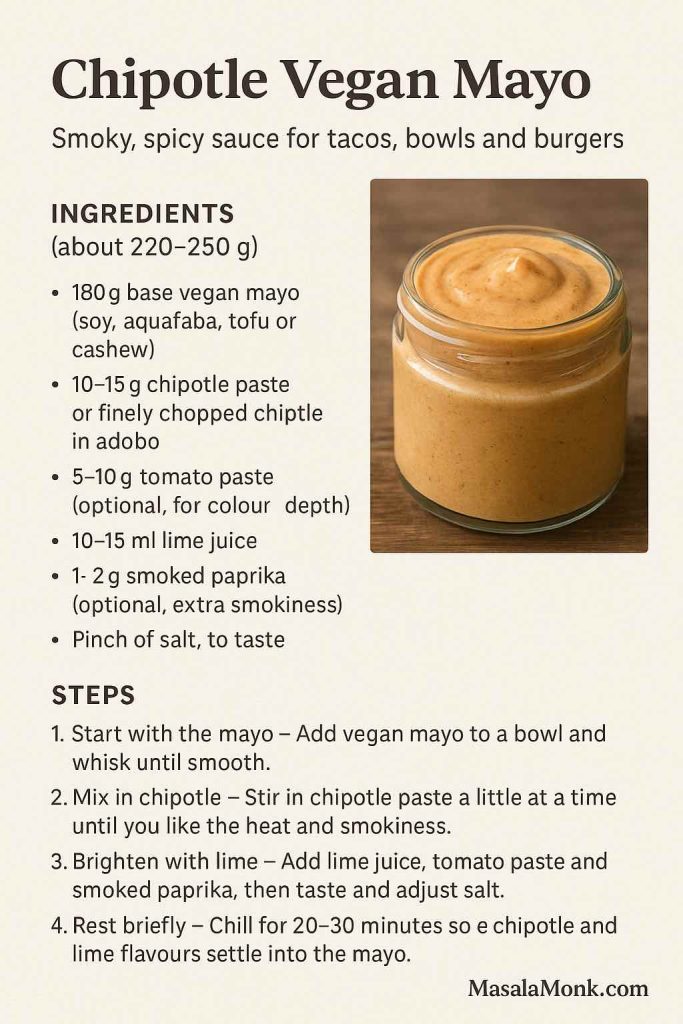
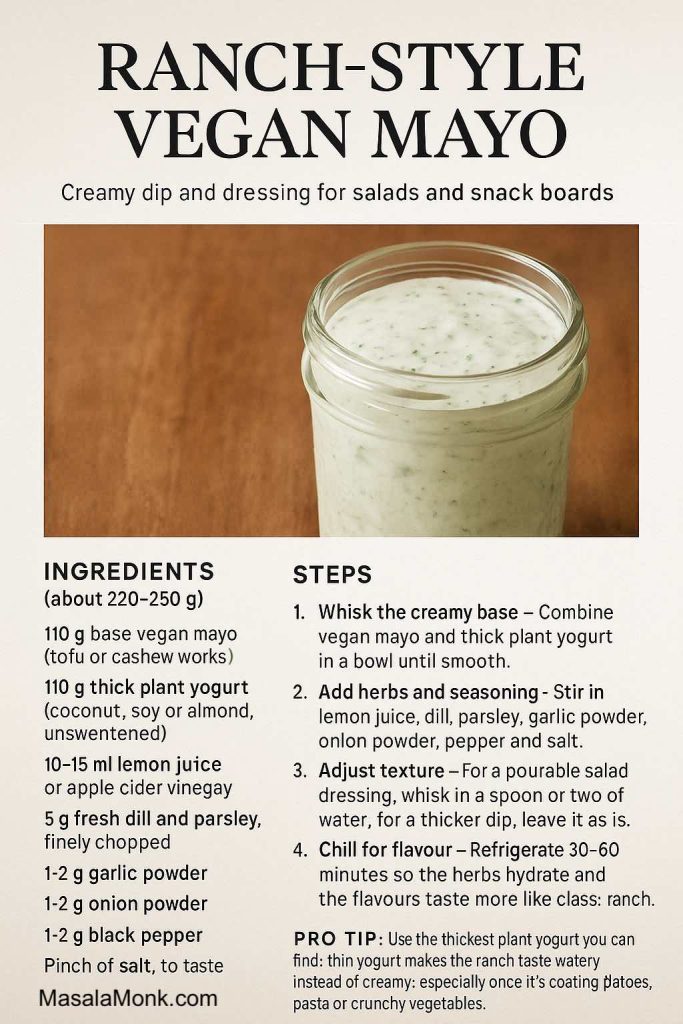
When you think about it that way, vegan mayo becomes one tool among many, rather than something you either avoid or overuse.

Also Read: What to Mix with Jim Beam: Best Mixers & Easy Cocktails


Storage, Safety and How Long Vegan Mayo Recipes Last

Even though these vegan mayo recipes are egg-free, they are still perishable. Because they contain water, plant proteins and sometimes fresh ingredients like garlic and herbs, they can spoil if left too long or stored badly.

“How Long Does Vegan Mayo Last?” storage graphic showing jars of soy, aquafaba, tofu, cashew and avocado mayo with fridge times and simple food safety tips about using clean spoons, keeping jars closed and discarding anything that smells off.
This fridge guide helps you see at a glance how long different homemade vegan mayo recipes really last—soy and aquafaba versions keep the longest, tofu and cashew sit in the middle, and avocado mayo is the one to enjoy within a day or two while it’s still fresh and bright.

How Long Is Vegan Mayo Good For in the Fridge?

Food safety advice for homemade mayonnaise made with eggs usually recommends using it within a few days if it’s kept refrigerated, since it can be a risk for food-borne illness if mishandled. In simple terms, if you’re wondering how long vegan mayo is good for or how long vegan mayo is good after opening, the answer is that it keeps surprisingly well when chilled, but it’s still a fresh, perishable sauce that deserves a bit of care.

Vegan mayo, missing raw egg, tends to be a little safer in that specific regard. However, it can still develop off flavours and microbial growth. Because of that, a cautious and practical guideline for your homemade vegan mayo recipes is:

  • 3–7 days in the refrigerator, in a tightly sealed jar
  • Shorter (3–4 days) for avocado-heavy or herb-heavy versions
  • Longer (up to a week) for plain soy or aquafaba-based versions using only dry spices

In addition, you should:

  • Always use a clean spoon to scoop mayo from the jar, never one that has touched other foods.
  • Keep jars in the coolest part of the fridge instead of the door.
  • Discard any mayo that smells sour, yeasty or odd, or that shows any sign of mould.

Because these sauces are relatively cheap and quick to blend up, it isn’t worth trying to “save” a jar that seems questionable.

Also Read: 10 Best Espresso Martini Recipe Variations (Bar-Tested)


When You Don’t Want Mayo: Creamy Vegan Alternatives

Even in a vegan mayo guide, there will be days when you’d rather skip mayonnaise completely. It’s useful then to have a go-to vegan replacement for mayo – a few creamy options that can act as a vegan mayo replacement in sandwiches, salads and bowls when you want the same comfort but a different flavour profile.

Infographic titled “Vegan Mayo Alternatives” showing hummus, mashed avocado, plant yogurt sauces, tahini dressings and herby pesto-style sauces as creamy vegan substitutes for mayo, with brief notes on when to use each.
This alternatives chart gives readers quick ideas for a vegan mayo substitute when they’d rather build creaminess from hummus, avocado, yogurt sauces, tahini or pesto, matching the spread to the dish instead of forcing mayonnaise into every recipe.

These options all work as easy replacements whenever you want a creamy spread or dressing without using mayonnaise at all.

For example:

  • Hummus delivers creaminess plus protein and fibre. It’s excellent on sandwiches, in wraps, and as a dip. Healthline’s list of mayonnaise substitutes highlights hummus as one of the best alternatives, especially when you want a more nutrient-dense spread.
  • Mashed avocado is perfect on toast or burgers. With a little lemon, salt and pepper, it often replaces mayonnaise completely in sandwiches.
  • Plant-based yogurt sauces bring tang and lightness. You can add garlic, herbs and spices to make them more complex.
  • Tahini dressings use sesame paste, lemon juice and water to produce a rich, nutty sauce. It behaves differently from mayo but plays a similar role in grain bowls and roasted vegetable dishes.
  • Tzatziki-style dips, like the variations in MasalaMonk’s Greek tzatziki master recipe, combine yogurt, cucumber and herbs to create a cooling, refreshing element that works beautifully with pita, grilled vegetables and salads.
  • Pesto-style sauces, such as those in the pesto recipe collection, give you intensely flavoured herb-based spreads that can stand in for mayonnaise in many sandwiches and bowls.

Having these alternatives in mind means you’re never forced to use mayo just because you want creaminess. Instead, you can match the sauce to the dish and your mood.

Also Read: Tres Leches – Mexican 3 Milk Cake Recipe


Bringing Your Vegan Mayo Recipe Collection Together

What You’ve Built So Far

By now, you’re holding far more than one vegan mayo recipe. In fact, you’ve built a small toolkit. You have:

  • A classic soy milk vegan mayonnaise recipe that behaves like the original
  • An aquafaba vegan mayo recipe that reuses chickpea liquid and stays eggless
  • A tofu vegan mayo recipe that leans high-protein and low-oil
  • A cashew vegan mayonnaise recipe that feels rich, tangy and gourmet
  • An avocado vegan mayo recipe that focuses on whole-food fats
Infographic titled “Which Vegan Mayo Base Should I Choose?” comparing soy milk mayo, aquafaba mayo, tofu mayo, cashew mayo and avocado mayo, with notes on which base is best for closest-to-regular flavour, egg-free and nut-free batches, higher protein, rich soy-free spreads or whole-food fats.
This comparison guide helps you quickly decide which vegan mayo base to use—soy for the closest classic flavour, aquafaba for egg-free and nut-free jars, tofu when you want higher protein and lower fat, cashew for rich soy-free spreads, and avocado when you’re chasing whole-food fats and fresh, same-day meals.

Beyond the bases, you’ve also created:

  • More than fifteen flavour variations you can apply to any recipe of vegan mayo
  • A clear picture of where vegan mayo recipes fit into real meals: burgers, wraps, salads, bowls, dips and snacks
  • A realistic sense of how vegan mayo compares nutritionally with regular mayo
  • Practical storage rules to keep your jars safe, fresh and tasty
  • Several non-mayo alternatives for days when you want creaminess from something else

At that point, it hardly matters whether you are looking for the best vegan mayonnaise, a simple vegan mayo for everyday sandwiches, or a detailed vegan mayonnaise recipe for a special occasion – you’ve built a set of bases and methods you can bend in whatever direction your week needs. Taken together, that’s not just one recipe – it’s an entire system you can lean on week after week.

Turning Your Vegan Mayo Recipes Into a Weekly Rhythm

From here, the easiest way to turn all of this from theory into daily cooking is to slide it into a simple rhythm. Instead of making vegan mayo at random, you can fold it into how you plan your meals.

For example, you might decide that each week you will:

  1. Choose one base – soy milk this week, tofu next week, cashew for a dinner party, or avocado when you want something especially fresh.
  2. Pick one or two flavours – perhaps garlic herb for everyday sandwiches, plus a spicy vegan mayo recipe for burgers, tacos or roasted potatoes.
  3. Plan two or three dishes around that batch – maybe lentil burgers with garlic mayo one night, a potato salad dressed with herb mayo the next, and a grain bowl finished with a drizzle of spicy vegan mayo later in the week.
  4. Make only as much as you’ll genuinely finish in a few days, then mix a fresh batch with a different twist the following week.

As you repeat this pattern, something subtle starts to happen. Gradually, you stop checking exact measurements for every vegan mayonnaise recipe. Instead, you begin to pour, taste, and adjust by instinct. You nudge the acid up when a sauce feels flat, ease the salt down when a dish already has salty elements, and tweak the thickness simply by feel.

Over time, vegan mayo stops feeling like a “special vegan product” you have to think about and starts behaving like what it truly is: a flexible, everyday, deeply useful part of how you cook – no eggs needed, and no stress attached.

Troubleshooting infographic titled “Fixing Split or Runny Vegan Mayo” from MasalaMonk, showing common problems like thin mayo, split emulsion, mayo not thickening and grainy tofu or cashew mayo, with simple fixes such as adding more oil, starting with fresh base liquid, matching temperatures and blending longer.
This quick troubleshooting sheet makes it easy to rescue a runny or split vegan mayo—whether the emulsion never thickened, curdled halfway or turned grainy with tofu or cashews, you can match the problem to a practical fix instead of throwing the whole batch away.

FAQs

1. What is a vegan mayo recipe?

A vegan mayo recipe is a method for making mayonnaise without eggs or dairy, using plant-based ingredients like soy milk, aquafaba, tofu, cashews or avocado. The basic vegan mayo ingredients are the same each time – a base liquid, oil, acid, seasoning and an emulsifier – but all of them come from plants. Instead of egg yolk, it relies on plant proteins and natural emulsifiers to thicken the sauce, so you still get a creamy, tangy spread that behaves very much like traditional mayonnaise.

2. How is vegan mayonnaise different from regular mayo?

Regular mayo uses egg yolks as the emulsifier, while vegan mayonnaise uses plant-based ingredients such as soy milk or aquafaba. As a result, vegan mayo is egg-free and usually cholesterol-free, yet it still has that familiar creamy texture. Even so, both versions can be rich in fat if they are oil-based.

3. Is vegan mayo healthier than regular mayonnaise?

Often, vegan mayo is free from cholesterol and may use healthier oils, which can be a plus for heart health. Even so, many vegan mayo recipes still contain a good amount of fat and calories, especially if they are oil-heavy. Therefore, the healthiest option is usually a lighter base like tofu, aquafaba, or avocado with moderate portions.

4. What ingredients do I need for a basic vegan mayo recipe?

Generally, you need a base liquid (such as unsweetened soy milk or aquafaba), a neutral oil, an acid like lemon juice or vinegar, mustard, salt and sometimes a touch of sugar. Those are the classic vegan mayo ingredients, and they mirror the usual ingredients of vegan mayonnaise, just without eggs. Together, they create a stable emulsion that tastes very close to classic mayo. Additionally, you can add garlic, herbs or spices for extra flavour.

5. Can I make vegan mayonnaise without soy?

Yes, you absolutely can make a soy free vegan mayo. Instead of soy milk, you can use aquafaba, cashew cream, silken tofu made from other legumes, or even avocado as the main base. All of these still emulsify beautifully when blended with oil and acid. Consequently, you get a vegan mayonnaise recipe that fits a soy-free diet without sacrificing texture or flavour.

6. How do I make an aquafaba vegan mayo recipe?

To make aquafaba mayo, you blend chickpea liquid with lemon juice, mustard, salt and a little sweetener until frothy. Then you gradually stream in oil while blending until the mixture thickens into a creamy vegan mayonnaise. Finally, you chill it so the texture sets and the flavours meld.

7. Why did my vegan mayo recipe split or stay runny?

Most of the time, vegan mayo splits because the oil was added too quickly or the ratio of oil to liquid was off. Sometimes, a big temperature difference between ingredients can also make the emulsion unstable. Instead of discarding it, you can often rescue it by starting with a spoon or two of fresh base liquid in a new jar and slowly blending the broken mixture into that.

8. How can I thicken a vegan mayo recipe that turned out too thin?

If your vegan mayonnaise recipe is too thin, you can blend in a little more oil slowly until it thickens. Alternatively, you can add more base ingredient, such as tofu or blended cashews, to give it more body. Afterwards, chilling the mayo in the fridge usually helps it firm up even more.

9. How long does homemade vegan mayonnaise last in the fridge?

Homemade vegan mayo is usually good for about 3–7 days in the fridge when stored in an airtight container. Shorter storage times make sense for avocado-based or fresh-herb-heavy versions, which spoil faster, while plain soy or aquafaba vegan mayo recipes can sometimes last closer to a week if handled carefully. In other words, if you’re wondering how long vegan mayo is good for after opening, treat it like any fresh sauce: keep it cold, use clean spoons only, and throw it out if the smell, taste or appearance seems off.

10. Can you freeze vegan mayo?

Freezing vegan mayo is not usually recommended, because the emulsion tends to break once it thaws. The texture often becomes grainy or watery, even if the flavour remains similar. Consequently, it’s better to make smaller batches of your favourite vegan mayonnaise recipe more frequently instead of freezing it.

11. Is vegan mayonnaise safe for people with egg allergies?

Yes, because a properly made vegan mayo recipe contains no egg at all, it is generally safe for people with egg allergies. Nevertheless, it is wise to check labels or recipe ingredients to make sure no egg-derived additives are used. In addition, cross-contamination in commercial kitchens can be an issue for very sensitive individuals.

12. Does vegan mayo taste like real mayonnaise?

A good vegan mayonnaise recipe can taste very close to regular mayo, especially when made with soy milk or aquafaba and seasoned well. Naturally, different bases bring slightly different flavours: tofu is neutral, cashews are a bit nutty, and avocado has its own distinct taste. Even so, once it’s inside a burger, salad or sandwich, most people find it just as satisfying.

13. What is the best oil to use for a vegan mayo recipe?

Neutral oils like sunflower, canola, rice bran or grapeseed work best because they let the other flavours shine. Occasionally, you can blend in a little light olive oil for aroma, although very strong olive oils may dominate the taste. Therefore, choosing a mild oil usually gives you the most versatile vegan mayonnaise recipe.

14. Can I make an oil-free vegan mayonnaise recipe?

Yes, you can create an oil-free vegan mayo recipe by relying on whole ingredients such as silken tofu, cashews or avocado instead of added oil. These ingredients provide natural fat and creaminess, so the sauce still feels rich. Of course, the texture may be slightly different from classic mayo, but many people enjoy the lighter feel.

15. How do I make a garlic vegan mayo recipe?

To make garlic mayo, you simply stir minced or grated garlic into a basic vegan mayo, along with a little extra lemon juice and perhaps some chopped herbs. Consequently, the flavour becomes bolder and more savoury, making it perfect for fries, burgers and roasted vegetables. For best results, let it sit for a while so the garlic softens and mellows.

16. Can I use vegan mayo in a potato salad recipe?

Absolutely, vegan mayo works beautifully in potato salad and other creamy salads. You just replace the regular mayonnaise with your chosen vegan mayo recipe in equal amounts, then adjust seasoning as needed. As a bonus, you can mix in herbs, mustard or pickles to match whatever style of potato salad you like.

17. How can I make a low-fat vegan mayo recipe?

To lower the fat content, you can use silken tofu or thick plant yogurt as most of the base and add only a small amount of oil. Alternatively, you can combine aquafaba with a modest splash of oil to keep calories in check. Over time, you can experiment with ratios until you find a lighter vegan mayonnaise recipe that still feels creamy enough.

18. Is vegan mayo gluten-free?

Most vegan mayo recipes are naturally gluten-free because they are based on oil, plant milks or legumes, plus acid and seasoning. Nonetheless, you should still check mustard, vinegars and any added flavourings in case they contain gluten or have been processed with gluten-containing ingredients. When in doubt, choosing certified gluten-free products keeps things safer.

19. How do I make a spicy vegan mayo recipe?

For a spicy vegan mayo recipe, you can mix chilli sauce, hot sauce, peri-peri, or sriracha into your base mayo. Additionally, you might add smoked paprika, cayenne pepper or chipotle paste for extra depth. Gradually increasing the heat lets you tailor the spice level to your own taste buds.

20. Can vegan mayo be used in baking?

Sometimes, vegan mayo can be used in baking to add moisture and richness, just like regular mayo in certain cake recipes. However, it’s best to choose a neutral-tasting vegan mayonnaise recipe so the flavour doesn’t overpower the dessert. As a guideline, start by replacing a portion of the fat or eggs in a recipe rather than all of them at once.

21. What is the difference between a vegan mayo recipe and an eggless mayo recipe?

An eggless mayo recipe may still include dairy products like milk or cream, while a vegan mayo recipe excludes all animal products completely. In other words, egg free mayonnaise isn’t always vegan, but vegan mayo is always both egg-free and dairy-free. As a result, vegan mayo is suitable for vegan and lactose-free diets, whereas eggless mayo might not be. Reading ingredient lists carefully helps you understand which category a recipe falls into.

22. How can I make a creamy vegan mayo recipe without nuts?

If you need a nut-free option, you can rely on soy milk, aquafaba or tofu as your base instead of cashews or other nuts. These ingredients still emulsify beautifully when blended with oil and acid. Therefore, you can enjoy a creamy vegan mayonnaise recipe that fits both nut-free and egg-free requirements.

23. Can I flavour vegan mayo with herbs and spices?

Yes, vegan mayo is a fantastic blank canvas for herbs and spices. You can fold in dill, parsley, coriander, basil, smoked paprika, curry powder, or garlic and onion powder to build any profile you like. Consequently, one basic vegan mayo recipe can become several different sauces without much extra work.

24. How do I make a lemon vegan mayo recipe for salads?

To make a lemon-focused vegan mayo recipe, you can increase the lemon juice, add some lemon zest, and keep the seasoning light and fresh. This style of mayo works particularly well on green salads, potato salads and grain bowls. In addition, you can thin it slightly with water or plant milk to turn it into a pourable dressing.

25. What equipment do I need for a vegan mayo recipe?

Usually, you just need a blender, immersion blender or small food processor, plus a tall jar or jug. You also need a measuring cup, a spoon, and a spatula for scraping the sides. Although you can whisk by hand, an electric tool makes the emulsion much easier and more consistent.

26. Can I make a vegan mayo recipe without mustard?

Yes, you can leave out mustard if you dislike it or are allergic, though the flavour and stability will change slightly. To compensate, you might add a bit more acid and salt, or a tiny pinch of garlic powder for complexity. Even without mustard, the vegan mayonnaise recipe can still work if the emulsion forms properly.

27. How can I make my vegan mayo recipe taste less “beany”?

If your aquafaba or tofu-based mayo tastes a bit beany, you can reduce that flavour by adding more lemon juice, a touch of sugar, and some garlic or herbs. Additionally, chilling the mayo overnight often softens any sharp notes. Over time, you can also experiment with different brands of chickpeas or tofu to find a milder base.

28. Is it possible to make a keto-friendly vegan mayo recipe?

Yes, it’s possible to create a keto-style vegan mayo recipe by focusing on high-fat, low-carb ingredients such as oil, avocado and certain nut or seed bases. However, you’ll want to avoid sugars and high-carb thickeners, using only low-carb flavourings instead. Consequently, you still get a rich, creamy sauce that fits within a keto framework.

29. Can I turn my vegan mayo into a dip or sauce for snacks?

Definitely, you can easily turn a plain vegan mayo recipe into a dip by adding garlic, herbs, roasted peppers, or caramelised onions. Then you can adjust the thickness: keep it thicker for dipping chips and veggies, or thin it slightly for drizzling over roasted potatoes and snack boards. In this way, one batch of vegan mayo can support several different snacks.

30. How do I know which vegan mayo recipe base is right for me?

Choosing a base depends on your taste, dietary needs and how you plan to use the mayo. If you want something closest to classic mayo, soy milk or aquafaba is a good starting point; if you prefer lighter or higher-protein options, tofu works well; if you enjoy richness, cashew or avocado is ideal. Eventually, trying each style once will show you which vegan mayonnaise recipe feels most at home in your own kitchen.

Posted on Leave a comment

Instant Pot Lentil Recipes for Effortless Weight Loss and Quick Meals

Instant Pot Lentil Recipes

In our fast-paced world, finding meals that are both healthy and convenient can be a struggle. For those aiming to shed pounds without sacrificing flavor or time, lentils cooked in an Instant Pot offer an ideal solution. These tiny legumes are nutritional powerhouses: high in protein, fiber-rich, and incredibly versatile. Whether you’re seeking hearty soups, spicy curries, or savory stews, the Instant Pot simplifies the process and delivers consistently delicious results.


Why Lentils Are a Smart Choice for Weight Loss

Lentils are a top-tier ingredient for anyone focused on healthful eating and weight management. Here’s why:

  • High in Protein: Keeps you full longer, curbs hunger pangs.
  • Rich in Fiber: Aids digestion, promotes satiety, and helps regulate blood sugar levels.
  • Low in Calories: You can eat a generous portion without overloading on calories.
  • Nutrient-Dense: Packed with iron, folate, magnesium, and B vitamins.
  • Budget-Friendly: A cost-effective protein source, ideal for batch cooking and meal prep.

Instant Pot: The Time-Saving Game Changer

The Instant Pot revolutionizes how we cook lentils. Traditional stovetop methods can take up to an hour and require constant supervision. With the Instant Pot:

  • Cook time is reduced to as little as 10-20 minutes.
  • Hands-off process: Set it and walk away.
  • Reliable texture every time—no mush, no undercooked centers.
  • Great for meal prepping: Cook in bulk and refrigerate or freeze.

5 Instant Pot Lentil Recipes You’ll Love

1. Moroccan-Inspired Lentils

Flavor Profile: Warm, spicy, and subtly sweet.

Ingredients:

  • Green or brown lentils
  • Diced sweet potato
  • Carrots, onions
  • Crushed tomatoes
  • Spices: cumin, cinnamon, paprika, ginger, cayenne
  • Lemon juice

How to Make: Add all ingredients to the Instant Pot. Cook on high pressure for 15 minutes, then let it naturally release for 10 minutes. Garnish with parsley and a squeeze of lemon.

Health Perks: Anti-inflammatory spices and fiber-rich vegetables support metabolism and digestion.


2. Classic French-Style Lentil Soup

Flavor Profile: Savory, aromatic, and comforting.

Ingredients:

  • Green or French lentils
  • Onion, garlic, carrot, celery
  • Fire-roasted tomatoes
  • Fresh thyme, bay leaves
  • Kale or spinach (added after cooking)

How to Make: Sauté aromatics using the Sauté function. Add lentils, tomatoes, broth, and spices. Cook on high pressure for 15 minutes and let release naturally. Stir in greens before serving.

Health Perks: A bowl full of vitamins, antioxidants, and fiber.


3. Smoky Vegan Lentils

Flavor Profile: Bold, rich, and slightly smoky.

Ingredients:

  • Brown lentils
  • Tomato paste, garlic, onion
  • Paprika, cumin, coriander
  • Liquid smoke or smoked paprika
  • Maple syrup (optional)

How to Make: Sauté aromatics and spices, then add lentils and broth. Cook for 10 minutes on high pressure, natural release. Serve over rice or baked sweet potatoes.

Health Perks: A hearty plant-based option with depth of flavor and minimal fat.


4. Hearty Lentil and Potato Stew

Flavor Profile: Thick, satisfying, and earthy.

Ingredients:

  • Green lentils
  • Diced potatoes, carrots, onions
  • Tomato paste, garlic
  • Vegetable broth, bay leaves, thyme

How to Make: Add everything to the pot and cook on high pressure for 12 minutes. Natural release. Use an immersion blender for a partially blended, thick texture.

Health Perks: Potatoes add volume without excessive calories; excellent for portion control.


5. Instant Pot Lentil Curry

Flavor Profile: Fragrant, spicy, and deeply savory.

Ingredients:

  • Red or brown lentils
  • Onion, garlic, ginger
  • Curry powder, turmeric, garam masala
  • Diced tomatoes
  • Coconut milk or light coconut milk

How to Make: Sauté aromatics and spices. Add remaining ingredients. Cook for 10 minutes on high pressure, quick release. Serve with brown rice or quinoa.

Health Perks: Anti-inflammatory spices, and a rich taste without added fats.


Tips for Weight-Loss Friendly Lentil Cooking

  1. Skip Heavy Oils: Use a non-stick pot insert or minimal olive oil for sautéing.
  2. Boost with Greens: Add spinach, kale, or collard greens at the end of cooking.
  3. Use Low-Sodium Broth: Controls salt while enhancing flavor.
  4. Portion Smart: Divide into containers to avoid overeating.
  5. Add Acidity: A dash of lemon juice or vinegar brightens flavor and supports digestion.

Batch Cooking & Storage Tips

  • Refrigeration: Keeps well for 4-5 days.
  • Freezing: Portion into containers or silicone trays; freeze for up to 3 months.
  • Reheating: Use stovetop or microwave with a splash of water or broth.
  • Repurposing: Use leftovers as filling for wraps, stuffing for bell peppers, or over baked potatoes.

Final Thoughts

With the Instant Pot, healthy eating doesn’t have to be complicated or time-consuming. These lentil-based meals are proof that nutritious, weight-loss-friendly food can also be comforting, flavorful, and easy to prepare. Whether you’re a busy professional, a student, or just someone trying to eat better, lentils are a humble yet powerful ally in your kitchen.

Try a few of these recipes this week—your taste buds (and waistline) will thank you.

FAQs

1. Can I use canned lentils in these Instant Pot recipes?
Answer: While canned lentils are pre-cooked and don’t require pressure cooking, they can be added at the end of the Instant Pot cycle. Reduce the cook time and liquid slightly to prevent overcooking.

2. What type of lentils works best in the Instant Pot?
Answer: Green and brown lentils hold their shape well and are ideal for soups and stews. Red lentils cook faster and break down, making them perfect for curries and thicker dishes.

3. How much water or broth should I use per cup of lentils?
Answer: A standard ratio is 1 cup of lentils to 2.5–3 cups of liquid, depending on how brothy or thick you want the final result.

4. Are these recipes suitable for freezing and reheating?
Answer: Yes! All recipes are freezer-friendly. Cool completely before freezing in airtight containers. Reheat with a splash of water or broth to refresh the texture.

5. How can I make the lentils taste less bland?
Answer: Spices, aromatics (like garlic, onion, and ginger), and acidic finishers (lemon juice, vinegar) dramatically enhance lentil flavor. Sautéing spices before pressure cooking boosts depth.

6. Can I add meat or other proteins to these recipes?
Answer: Absolutely. Chicken, turkey, or lean ground meat can be browned using the Sauté function first, then pressure cooked with the lentils. Adjust liquid and timing slightly as needed.

7. Are these lentil dishes gluten-free?
Answer: Yes, lentils are naturally gluten-free. Just ensure that broth and spices used are certified gluten-free to avoid cross-contamination.

8. How do I avoid mushy lentils in the Instant Pot?
Answer: Stick to recommended cooking times (usually 10–15 minutes under high pressure) and do a natural pressure release. For firmer texture, reduce cook time by 2–3 minutes.

9. What should I serve with these lentil meals?
Answer: Serve over brown rice, quinoa, cauliflower rice, or roasted veggies. You can also enjoy them with whole grain flatbread or in lettuce wraps for a low-carb option.

10. Can I make these recipes oil-free?
Answer: Yes! Use water or vegetable broth to sauté aromatics instead of oil. This keeps the meals lighter without compromising on flavor.

Posted on 4 Comments

How to make Mango Shake? Classic, Vegan & Sugar Free Options Inside

HOW TO MAKE MANGO SHAKE? CLASSIC, VEGAN & SUGAR-FREE OPTIONS INSIDE

Welcome to the season of sunshine and sweet indulgence!
As summer unfolds its golden warmth, there’s one fruit that becomes the star of every kitchen—the mighty mango. Whether you enjoy it sliced, pickled, juiced, or churned into desserts, mangoes are a tropical treasure that bring pure joy to our taste buds.

And what better way to enjoy them than with a glass of chilled Mango Shake—a drink so refreshing, it tastes like summer in a cup.

In this post, we’ll walk you through not just the classic mango shake, but also healthy alternatives, including vegan and sugar-free versions, so everyone can savor this golden delight. Let’s get blending!


🍹 Why Mango Shake?

Mango shakes aren’t just delicious—they’re also:

  • Nutrient-rich: High in Vitamin C, Vitamin A, and antioxidants.
  • Energizing: Perfect for post-workout recovery or as a breakfast smoothie.
  • Versatile: Easily customizable with milk substitutes, sweeteners, or even protein powder.
  • Kid-approved: Naturally sweet and creamy, it’s a favorite among children.

1️⃣ The Classic Mango Shake Recipe

Let’s start with the timeless version that many of us grew up sipping on during sweltering afternoons.

🛒 Ingredients:

  • 2 ripe mangoes (Alphonso or Kesar are best)
  • 1 cup chilled full-fat milk
  • 1–2 tbsp sugar (adjust to taste)
  • A few ice cubes
  • Optional garnish: chopped pistachios, almonds, or a scoop of vanilla ice cream

🧑‍🍳 Instructions:

  1. Prep the mangoes: Peel and cube them, removing the pit.
  2. Blend: Add mango chunks, milk, sugar, and ice cubes into a blender.
  3. Whizz until creamy and smooth.
  4. Pour & garnish: Serve immediately with nuts or ice cream for extra indulgence.

✅ Tips:

  • If your mangoes are very sweet, skip or reduce the sugar.
  • For a thicker shake, reduce the milk or use frozen mango chunks.

Fun Fact: Alphonso mangoes are often called the “King of Mangoes” in India for their rich flavor and buttery texture.


2️⃣ Vegan Mango Shake (Dairy-Free)

Whether you’re lactose-intolerant, plant-based, or simply want to try something different, this version is just as dreamy.

🛒 Ingredients:

  • 1 cup ripe mango cubes
  • 1 cup plant-based milk (coconut, almond, oat, or soy milk)
  • 1–2 tsp maple syrup or soaked dates (optional)
  • Ice cubes
  • A pinch of cardamom or vanilla extract (for extra flavor)

🧑‍🍳 Instructions:

  1. Add mango cubes and plant-based milk to a blender.
  2. Toss in your sweetener and ice.
  3. Blend until smooth and creamy.
  4. Serve chilled. Top with coconut flakes or chia seeds if desired.

✅ Pro Tips:

  • Coconut milk adds richness and a tropical twist.
  • Want it thicker? Add a frozen banana or avocado.

Health Note: Plant-based milks are often fortified with calcium and Vitamin D, making this a nutritious drink too.


3️⃣ Sugar-Free Mango Shake (Diabetic Friendly)

Trying to cut down on refined sugar? This version relies on the natural sweetness of mangoes, with optional natural sweeteners.

🛒 Ingredients:

  • 1 cup ripe mangoes
  • 1 cup milk (dairy or plant-based)
  • A few ice cubes
  • Optional: 2–3 soaked dates or a few drops of stevia

🧑‍🍳 Instructions:

  1. Blend mangoes with milk and ice.
  2. Add natural sweetener if needed and blend again.
  3. Serve cold, optionally topped with chopped mint for a fresh touch.

✅ Low-Carb Ideas:

  • Use unsweetened almond milk and avoid bananas or additional fruit.
  • Try adding cinnamon or ginger powder for flavor without sugar.

Pro Tip: Overripe mangoes are naturally sweeter—perfect for sugar-free recipes.


🌀 Bonus Variations to Try

Take your mango shake to the next level with these creative spins:

💪 Mango Protein Shake

  • Add 1 scoop of vanilla or unflavored protein powder.
  • Great post-workout drink.

🍨 Mango Lassi Twist

  • Add ½ cup yogurt, a pinch of salt, and a dash of cardamom for a classic Indian-style treat.

🍧 Mango Smoothie Bowl

  • Blend with less milk to keep it thick.
  • Top with berries, granola, and coconut shreds.

🌿 Mango-Turmeric Detox Shake

  • Add a pinch of turmeric and black pepper for anti-inflammatory benefits.

📦 Storage & Meal Prep

Can you store mango shake?

  • Yes, for up to 24 hours in an airtight jar in the fridge. Shake before serving.
  • For meal prep: Freeze mango chunks ahead of time and blend fresh when needed.

🥭 Final Thoughts: Blend, Sip, Smile

Mango shakes are more than just a summer beverage—they’re a nostalgic, mood-lifting treat that can be enjoyed by anyone, in any form. Whether you’re reaching for a classic dairy-based shake, going plant-based, or ditching sugar for a healthier choice, there’s a mango shake recipe here for you.

Don’t forget to experiment and share your unique twists in the comments. And remember—mango season doesn’t last forever. Make the most of it while you can!


📸 Share Your Mango Moment!

Tried one of these? Post your shake on Instagram and tag #MangoShakeMagic or drop a comment below with your favorite version.

🧐 FAQs – Mango Shake Edition

1. Can I use frozen mangoes for mango shake?

Absolutely! Frozen mango chunks are great for thicker, creamier shakes and help eliminate the need for ice. Just reduce the amount of liquid slightly to keep the consistency right.


2. What is the best type of mango for shakes?

Alphonso, Kesar, or Ataulfo mangoes are ideal due to their sweetness, smooth texture, and rich flavor. Avoid fibrous varieties like Haden unless you’re straining the shake.


3. Can I make mango shake ahead of time?

Yes, you can refrigerate mango shake for up to 24 hours in an airtight container. However, it may slightly separate, so shake or stir before serving. For best flavor and texture, consume fresh.


4. How do I make my mango shake thicker?

Use less milk, more mango, or frozen mango chunks. You can also add ingredients like banana, yogurt (for non-vegan versions), or soaked chia seeds for extra thickness.


5. Is mango shake healthy?

Yes, when made without added sugars or heavy ice creams. It’s rich in vitamins A and C, antioxidants, and fiber. Use plant-based milk and natural sweeteners for a healthier version.


6. Can diabetics drink mango shake?

In moderation. Use naturally sweet ripe mangoes and opt for a sugar-free version with almond or oat milk. Dates, stevia, or erythritol can be used sparingly as sweeteners.


7. Which plant-based milk is best for a vegan mango shake?

Coconut milk gives a rich, creamy tropical flavor. Almond, oat, and soy milks are also excellent, depending on your preference and dietary needs.


8. Can I add other fruits to mango shake?

Yes! Great additions include banana (for creaminess), pineapple (for a tropical twist), or berries (for a tangy contrast). Just ensure the flavor of mango remains dominant.


9. How can I turn mango shake into a smoothie bowl?

Use less liquid to keep the shake thick. Pour into a bowl and top with granola, fresh fruits, nuts, or seeds. This makes for a nutritious and Insta-worthy breakfast.


10. Can I add protein powder to mango shake?

Definitely! Vanilla or unflavored protein powders blend well with mango. Great for post-workout recovery or a high-protein breakfast. Adjust sweetness if your protein is sweetened.