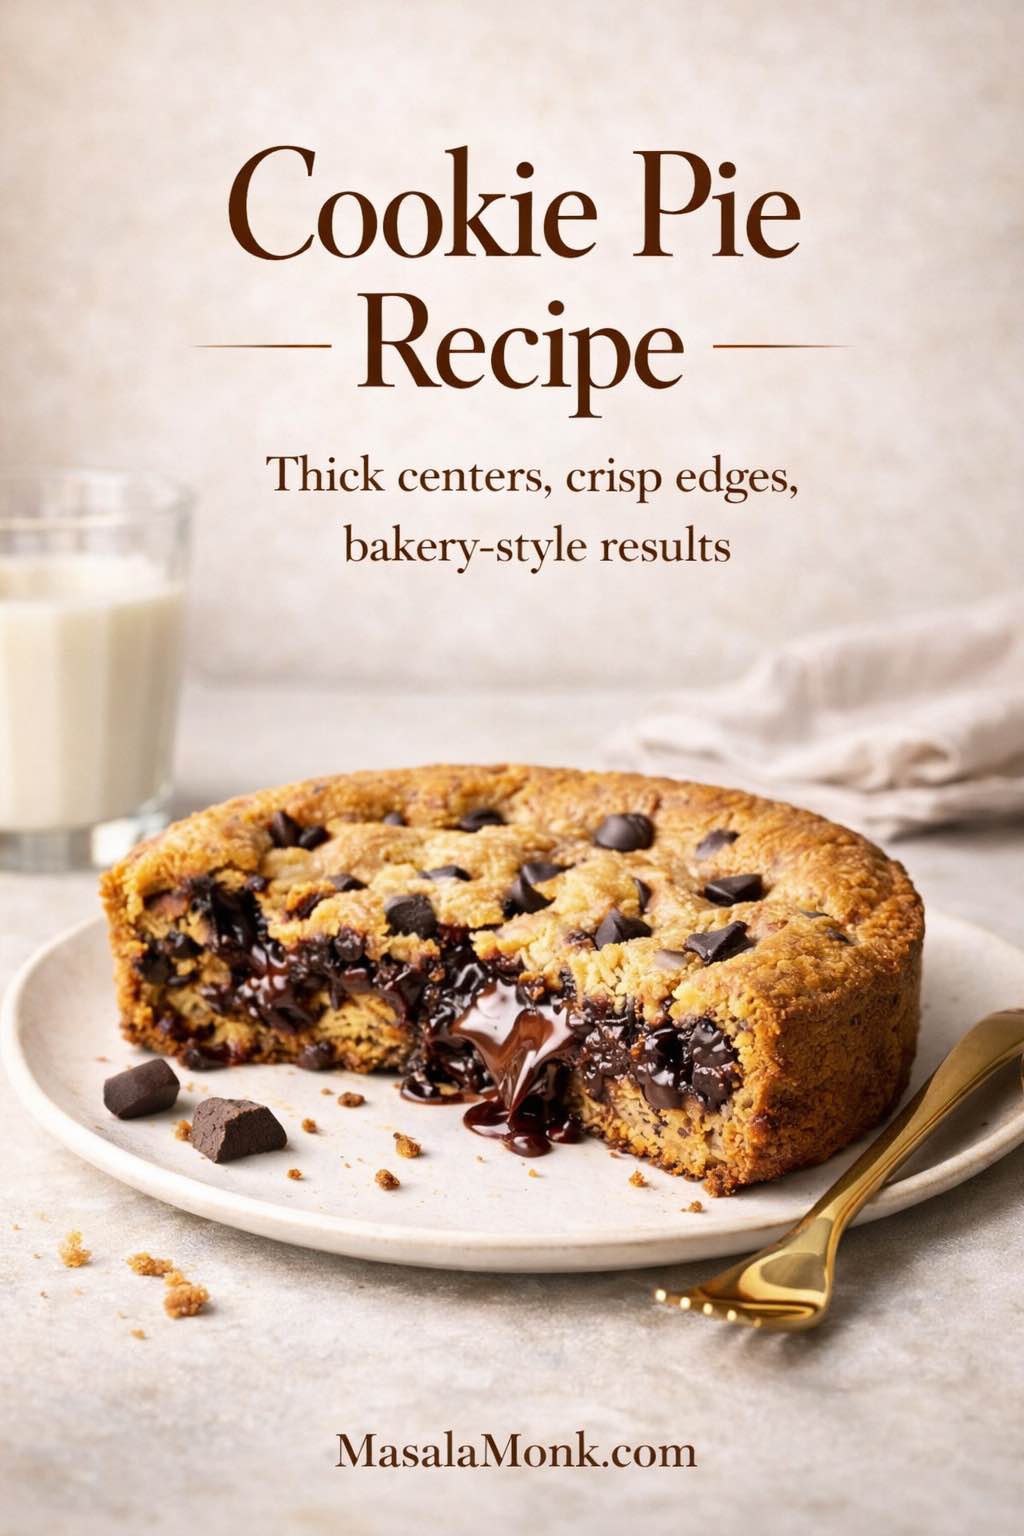
A truly great cookie pie recipe gives you something a regular cookie often cannot: crisp edges, a thick soft center, generous slices, and that unmistakable contrast between structure and richness. It has the comfort of cookie dough, the shape and drama of a pie, and the kind of richness that feels just right for birthdays, dinner parties, holidays, or simply a weekend when you want dessert to feel a little more special.
That balance is a large part of the dessert’s appeal. It feels more substantial than a tray of cookies, yet it is far less fussy than a layered cake or a plated dessert with multiple components. With the base recipe in hand, you can move from a classic chocolate chip cookie pie to a stuffed Biscoff cookie pie, a rich Nutella cookie pie, a dark brookie pie, a shareable giant cookie pie, or even mini cookie pies without relearning the whole category from scratch.
This guide is meant to help you bake well, not merely skim the idea. You will find the practical details that matter in a dessert like this: pan guidance, filling amounts, dough feel, chilling time, doneness cues, texture goals, variation strategy, storage, and the most common mistakes that throw the result off. If rich chocolate bakes are already part of your comfort zone, these double chocolate chip cookies are a natural next stop. Likewise, if alternative flour blends matter in your kitchen, this guide to keto flour for baking will be useful when you reach the gluten free section later on.
Quick Cookie Pie Recipe Snapshot
Before getting into the full method, here is the quick-glance view so you can see the shape of the bake at once.
Yield and Pan Size
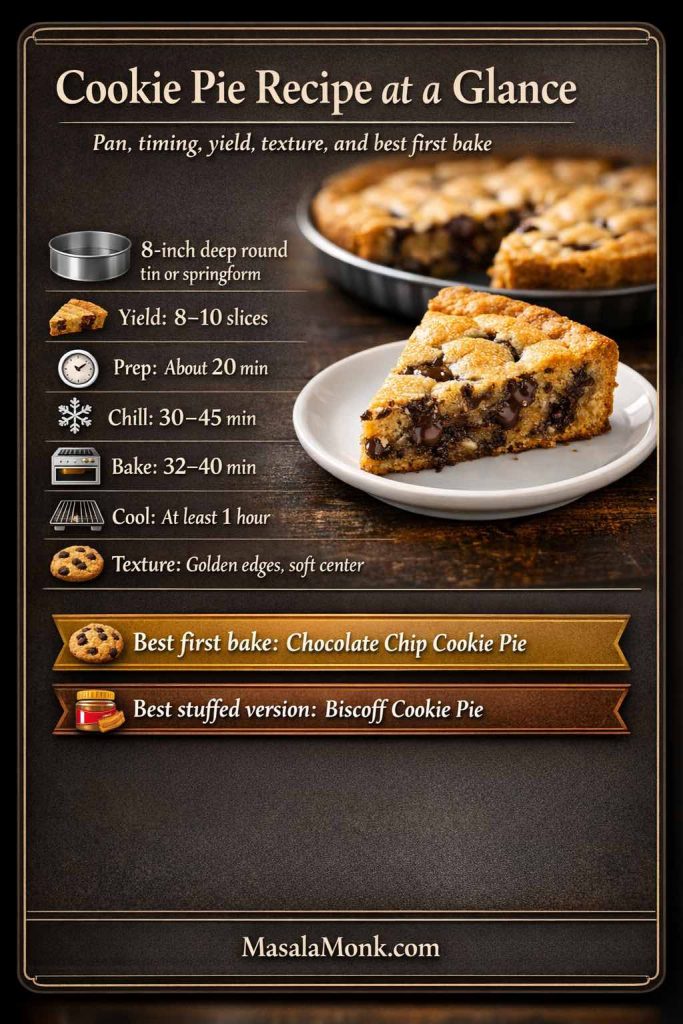
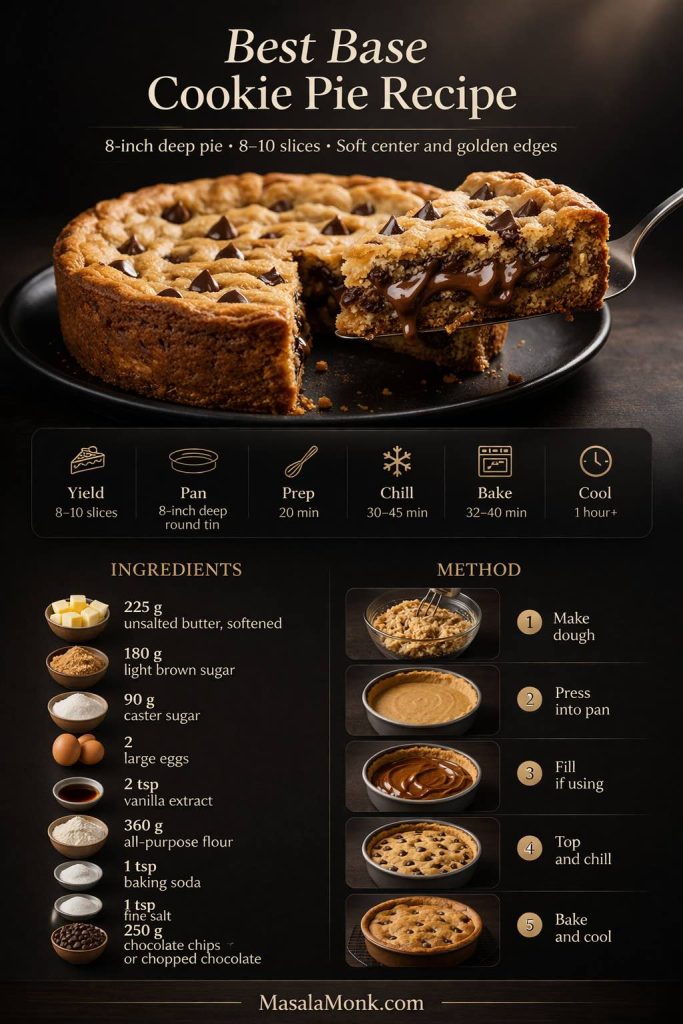
This base makes one deep 8-inch cookie pie, which usually gives you 8 to 10 slices depending on how generously you cut it. If you adapt the dough to a muffin tin, you can also turn it into about 10 to 12 mini cookie pies, although the exact number depends on the cavity size and how heavily you fill them.
For the main version, an 8-inch deep round cake tin or an 8-inch springform pan works best. Both give you enough depth for a properly soft center while still allowing the edges to brown cleanly. A shallower pan can still work, but the dessert will move closer to cookie cake territory and lose some of the thick, bakery-style feel that makes cookie pie so satisfying.
Timing, Bake Window, and Texture Goal
Plan for about 20 minutes of prep, 30 to 45 minutes of chilling, 32 to 40 minutes of baking, and at least 1 hour of cooling. In practice, that means a little over 2 hours from start to finish if you include the rest that allows the center to settle properly before slicing.
The texture target is simple, although it matters enormously: golden edges, a top that looks set rather than wet, and a center that still appears slightly softer than the outer ring. Once cooled, each slice should feel thick, rich, and tender without collapsing.
Best First Version to Bake
If this is your first time making cookie pie, start with Chocolate Chip Cookie Pie. It is the clearest version, the easiest to read in the oven, and the most forgiving in terms of structure and bake cues.
If a gooier, stuffed center is the main attraction, move next to Biscoff Cookie Pie. If your priority is darker, deeper chocolate, Brookie Pie is where the payoff becomes especially dramatic.
Also Read: Peach Cobbler with Canned Peaches (Dessert Recipe)
Why This Cookie Pie Recipe Works So Well
A strong cookie pie only becomes truly good when it balances three things at once: structure, softness, and flavor. The dough has to be strong enough to hold a thick center or a filling, yet still soft enough to feel richer and more indulgent than a standard cookie. At the same time, the dough itself has to feel complete in flavor. Otherwise, the dessert becomes overly dependent on the filling to carry the experience.
For that reason, this version leans on softened butter, brown sugar, enough flour for body, and a baking window that protects the middle from drying out. Brown sugar keeps the middle softer and more flavorful. Butter brings richness and helps the edges brown attractively. Flour gives the dough the strength it needs, although too much will quickly make the texture dull, heavy, or bready.
Just as importantly, this base is flexible. A plain chocolate chip cookie pie can use it almost exactly as written, while a stuffed Nutella cookie pie or Biscoff cookie pie only asks for a few handling changes rather than an entirely different formula. Once the structure makes sense, the whole category becomes much easier to navigate.
What Is Cookie Pie?
Cookie pie is a thick, sliceable dessert made by baking cookie dough in pie form. Sometimes that means a thick, deep dessert with a bottom shell, a filling, and a top layer of dough. At other times, it means a large, soft, pie-shaped cookie baked in a round tin and sliced at the table. Both styles sit comfortably under the cookie pie umbrella, although the texture and visual impact vary a little.
Part of its appeal is that it sits in a very pleasing middle ground. It is more substantial than ordinary cookies, less elaborate than cake, and easier to adapt than many classic desserts. As a result, it can feel just as natural at a celebration as it does on an ordinary evening when you simply want something warm, rich, and satisfying.
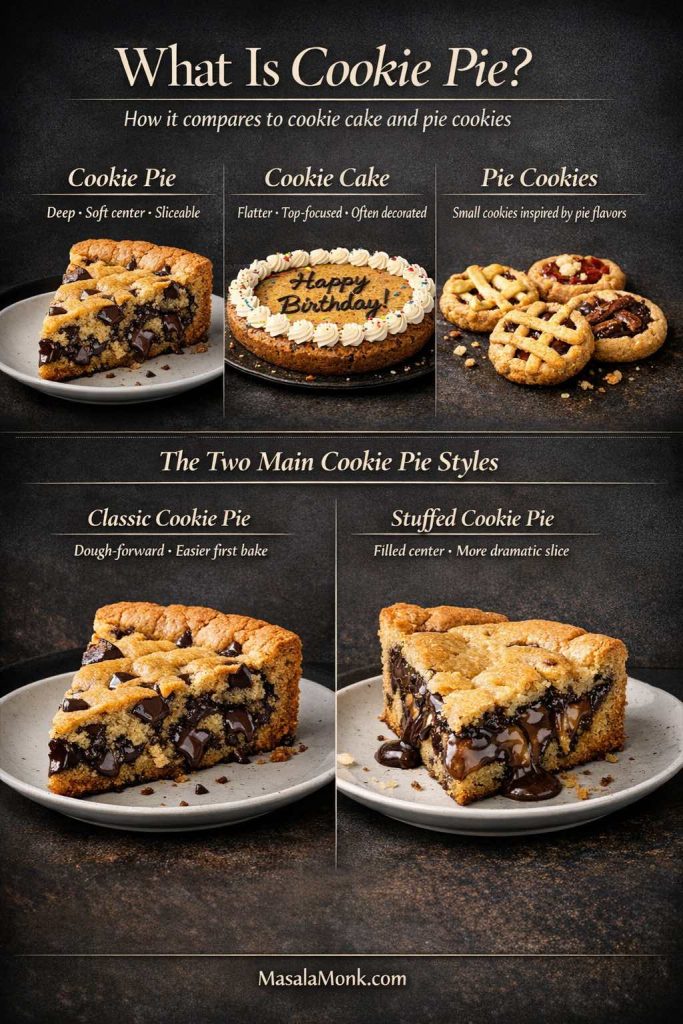
Cookie Pie vs Cookie Cake
A cookie cake is usually flatter and more focused on the top. Very often, it is decorated with frosting, writing, borders, or celebration-style details. Cookie pie, by contrast, is more interested in depth and internal texture. Even when the surface looks simple, the interior is where the payoff sits.
That is especially true in a giant cookie pie. Even though the format is large and shareable, the goal is still a soft center and thick slice rather than a broad flat cookie with decorations.
Cookie Pie vs Pie Cookies
These terms sound close, but they refer to different ideas. Pie cookies usually means cookies inspired by pie flavors, such as apple pie cookies or pecan pie cookies. A true cookie pie, on the other hand, is built from cookie dough and baked as one sliceable dessert.
That distinction matters because it changes both the method and the expectation. This guide is about the real cookie pie format: dough-forward, thick, sliceable, and centered on the texture of a rich baked middle.
The Two Main Cookie Pie Styles
Before you begin, it helps to separate the two main styles.
The first is the classic style, where the dough itself is the main event. Think of a deep chocolate chip cookie pie with a rich center and no dramatic stuffed filling. The second is the stuffed style, where the dough forms a shell and a separate middle goes inside. This is the route for Biscoff cookie pie, Nutella cookie pie, and some brownie-based versions.
Both are excellent, but they reward slightly different approaches. The classic version is easier to read and easier to learn on. The stuffed version offers a more dramatic slice, although it asks for better chilling, a more controlled filling border, and a little more patience.
Also Read: Avocado Chocolate Mousse Recipe
How to Choose the Best Cookie Pie Version for Your Needs
One of the nicest things about this dessert is that it suits very different dessert moods without requiring a completely new skill set. Even so, choosing the right version at the beginning makes the process smoother and the final result more satisfying.
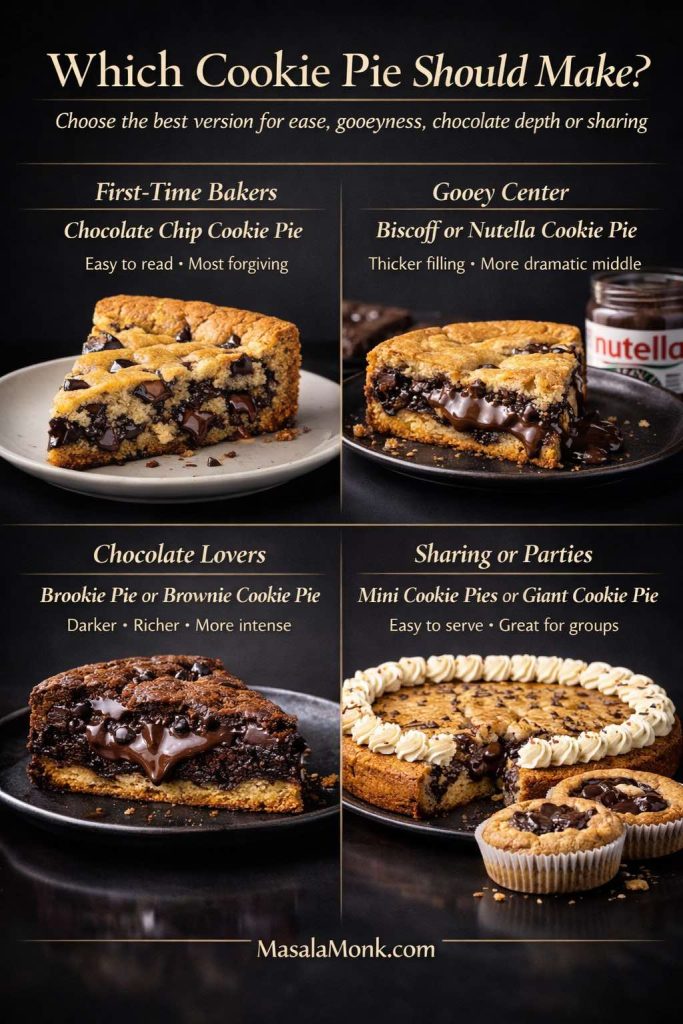
Best Cookie Pie for First-Time Bakers
For the easiest place to begin, bake Chocolate Chip Cookie Pie. It asks the least from the baker, needs no separate filling disc, and gives you the best feel for how the dough should behave. The doneness cues are also easier to read because you are not evaluating a stuffed center at the same time.
Best Cookie Pie for a Gooey Center
For a dramatic, visibly gooey middle, Biscoff Cookie Pie and Nutella Cookie Pie are the strongest options. “Both give you that dramatic cross-section where the center looks noticeably different from the shell.
Biscoff is slightly easier to control because it stays thicker when chilled. Nutella is softer and more molten, which can be wonderful, although it also means the structure needs a little more care.
Best Cookie Pie for Chocolate Lovers
For a deeper chocolate direction, you have two especially strong choices. Brookie Pie gives you the contrast of cookie and brownie in the same slice, which makes the texture more layered and the chocolate flavor more varied.
Brownie Cookie Pie, by comparison, pushes the whole dessert in one darker, denser direction. It feels more unified, more intense, and slightly more serious in flavor.
Best Cookie Pie for Sharing, Gifting, or Parties
When ease of serving matters most, go with Mini Cookie Pies or Giant Cookie Pie. Mini versions are ideal for dessert trays, edible gifts, and testing multiple fillings in one batch. Giant cookie pie, meanwhile, is excellent when you want a relaxed centerpiece dessert that still feels generous once it lands on the table.
Also Read: Falafel Recipe: Crispy Homemade, Air Fryer and Baked Falafel
Best Base Cookie Pie Recipe
This base holds the whole post together. Once this version works for you, the rest of the variations become much easier because you are adjusting a structure you already understand rather than improvising through a completely different dessert every time.
What makes this version dependable is that it aims for the texture most people actually want: lightly crisp edges, a tender-set middle, enough depth to feel generous when sliced, and enough strength to support fillings without turning dense or cakey.
At a Glance
- Yield: 1 deep 8-inch cookie pie, about 8 to 10 slices
- Best pan: 8-inch deep round cake tin or 8-inch springform pan
- Prep time: about 20 minutes
- Chill time: 30 to 45 minutes
- Bake time: 32 to 40 minutes
- Cooling time: at least 1 hour
- Texture goal: golden edges, set top, soft center
- Best first version: Chocolate Chip Cookie Pie
- Best stuffed version: Biscoff Cookie Pie
Yield, Pan, and Texture Expectations
This recipe makes one deep 8-inch cookie pie with 8 to 10 slices. The ideal result is a dessert that feels lightly crisp at the outer edge, tender within, and thick through the middle without ever tasting raw.
For the best result, use an 8-inch deep round tin or springform pan. A shallower pan can still work, but the pie will bake flatter and edge closer to cookie cake territory. A deeper pan gives the dough enough height to stay tender through the middle while still browning well around the edges.
Ingredients
You will need:
- 225 g unsalted butter, softened
- 180 g light brown sugar
- 90 g caster sugar
- 2 large eggs
- 2 teaspoons vanilla extract
- 360 g all-purpose flour
- 1 teaspoon baking soda
- 1 teaspoon fine salt
- 250 g chocolate chips or chopped chocolate
Optional, depending on the version:
- 180 to 220 g filling such as Biscoff or Nutella
- extra chocolate chunks for the top
- white chocolate chips
- chopped hazelnuts
- brownie filling
- cream cheese-style filling
Equipment
Keep the setup straightforward:
- large mixing bowl
- medium bowl
- hand mixer or stand mixer
- spatula
- digital scale
- 8-inch deep round tin or springform pan
- parchment paper
- cooling rack
A digital scale helps more than many bakers expect here, because even a modest excess of flour can make the center heavier and drier than intended.
Also Read: Mango Margarita Recipe (Frozen or On the Rocks)
Ingredient Notes That Matter Most
A few ingredients shape this dessert more noticeably than they would in an ordinary batch of cookies. Because the dough is thicker, deeper, and sometimes asked to hold a filling, small ingredient choices show up clearly in the final texture.
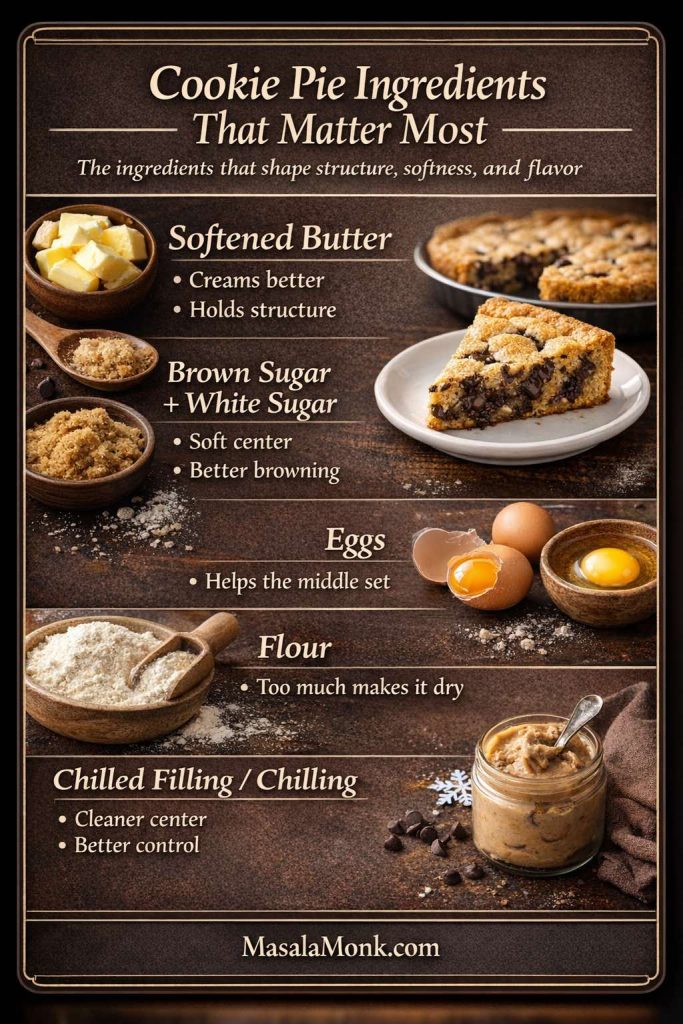
Butter
Use softened butter, not melted butter. Softened butter creams properly with the sugars and helps the dough keep its structure. Melted butter makes the mixture looser, greasier, and harder to control, especially in stuffed versions.
You want butter that yields when pressed but is not shiny or oily. If it is too cold, it will not cream well. If it is too warm, the dough will lose some of its shape before it ever reaches the oven.
Brown Sugar and White Sugar
Brown sugar is one of the main reasons the center stays soft and chewy. It brings moisture, depth, and that darker caramel-like cookie flavor that makes a thick slice feel rich rather than flat.
White sugar still matters. It sharpens the sweetness, supports browning, and helps the outer structure bake more cleanly. Using both gives you a much better balance than relying on only one.
Eggs
Eggs do more than bind the dough. They help the pie set through the center, support sliceability, and add richness. In a dessert like this, where the center needs to stay soft without collapsing, the eggs do a great deal of structural work.
That is why it is worth using large eggs as written. Smaller eggs can leave the dough a little tighter, while oversize eggs can soften it more than intended.
Flour
Flour provides the body that lets the pie stay thick without sinking. Even so, too much flour will quickly push the texture toward dry, dull, and overly bready.
For that reason, weighing the flour is one of the simplest ways to improve your result. If you want a reliable refresher, King Arthur’s guide on how to measure flour correctly is worth reading.
Baking Soda and Salt
Baking soda gives the dough lift and helps it bake with tenderness rather than staying heavy all the way through. Salt is just as important. In a rich dessert like this, it keeps the sweetness from tasting flat and gives the chocolate, brown sugar, and fillings more definition.
Chocolate
Chocolate is not just a mix-in here. It helps shape the eating experience of the whole slice. A mix of chopped chocolate and chips usually gives a better result than chips alone, because chopped chocolate melts into softer streaks while chips stay more distinct.
That contrast makes the finished pie feel more layered and more polished once sliced.
Fillings
Stuffed versions work best when the filling is thick and cold before assembly. Biscoff, Nutella, brownie filling, and cream cheese-style centers all behave better when chilled first. Warm or loose fillings are far more likely to spread into the shell and blur the middle.
Chilling
Chilling is not optional if clean structure is the goal. It firms the dough, helps the shell hold its shape, slows spreading, and makes stuffed versions noticeably easier to bake well.
In plain versions, chilling improves control. In stuffed versions, it often makes the difference between a distinct center and a muddy one.
Also Read: Sourdough Pizza Dough Recipe (Crispy Crust & Easy Pizza Base)
How to Make Cookie Pie Step by Step
The method is straightforward, but the feel of the dough matters just as much as the order of the steps does.
Step 1: Cream the Butter and Sugars
Beat the softened butter, brown sugar, and caster sugar together until the mixture looks creamy and slightly lighter. You do not need huge volume here. You are looking for smoothness, evenness, and a texture that no longer looks grainy or uneven.
Step 2: Add the Eggs and Vanilla
Add the eggs one at a time, mixing well after each addition. Then stir in the vanilla. At this stage, the mixture should still look thick and cohesive rather than loose or split.
Step 3: Mix the Dry Ingredients
In a separate bowl, whisk together the flour, baking soda, and salt. This may seem like a minor step, but it helps the leavening and seasoning distribute more evenly through the dough.
Step 4: Bring the Dough Together
Add the dry ingredients to the butter mixture and mix just until combined. Once the flour disappears, fold in the chocolate. The finished dough should feel thick and scoopable, not runny and not cake-like.
Step 5: Prepare the Pan
Line the base of the pan with parchment and lightly grease the sides. This small piece of preparation makes it much easier to release the finished pie without tearing the edges or losing the clean round shape.
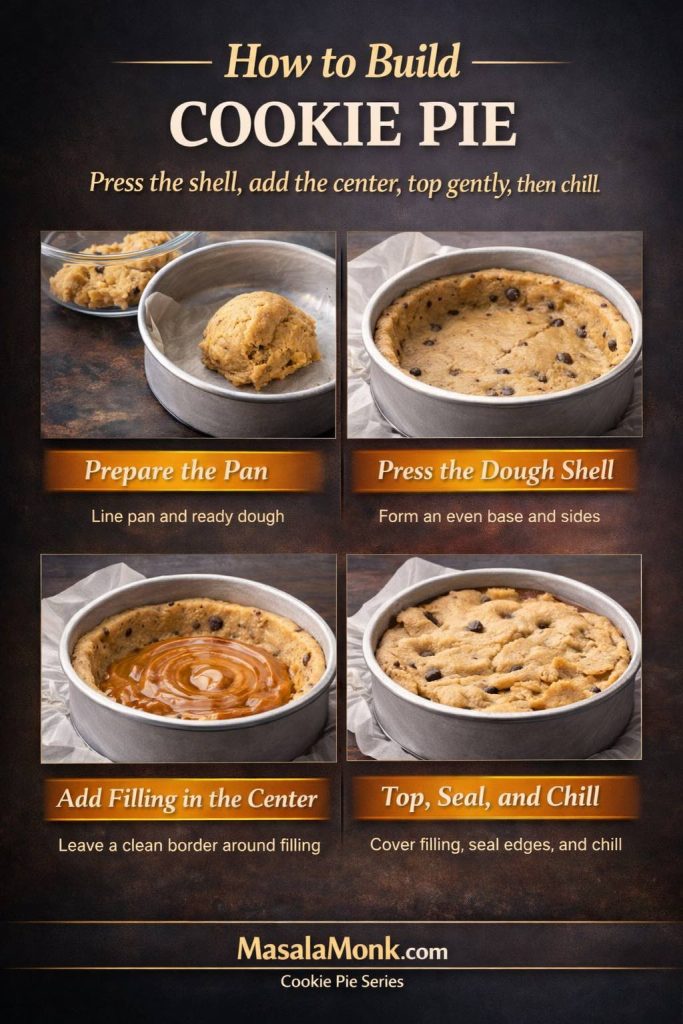
Step 6: Build the Shell
Divide the dough so that about 60 percent is used for the base and sides, while the remaining 40 percent becomes the top. Press the larger portion into the base and slightly up the sides of the pan, keeping the thickness as even as you can.
That evenness matters more than it may seem at first. If the shell is thick in some places and thin in others, the bake can turn uneven once the filling or top layer goes in.
Step 7: Add the Filling if Using
If you are making a stuffed version, place the filling in the center and leave a border of about 1.5 cm around the edge. This gap helps contain the middle and keeps the filling from leaking outward during baking.
As a guide, use around 180 to 200 g for Biscoff or Nutella, about 150 g for brownie filling, or around 180 g for a cream cheese-style center.
Step 8: Add the Top
Flatten the remaining dough in portions and place it over the center. Seal the edges gently. Do not mash the top down hard. You want it enclosed, but still loose enough to bake tenderly rather than compactly.
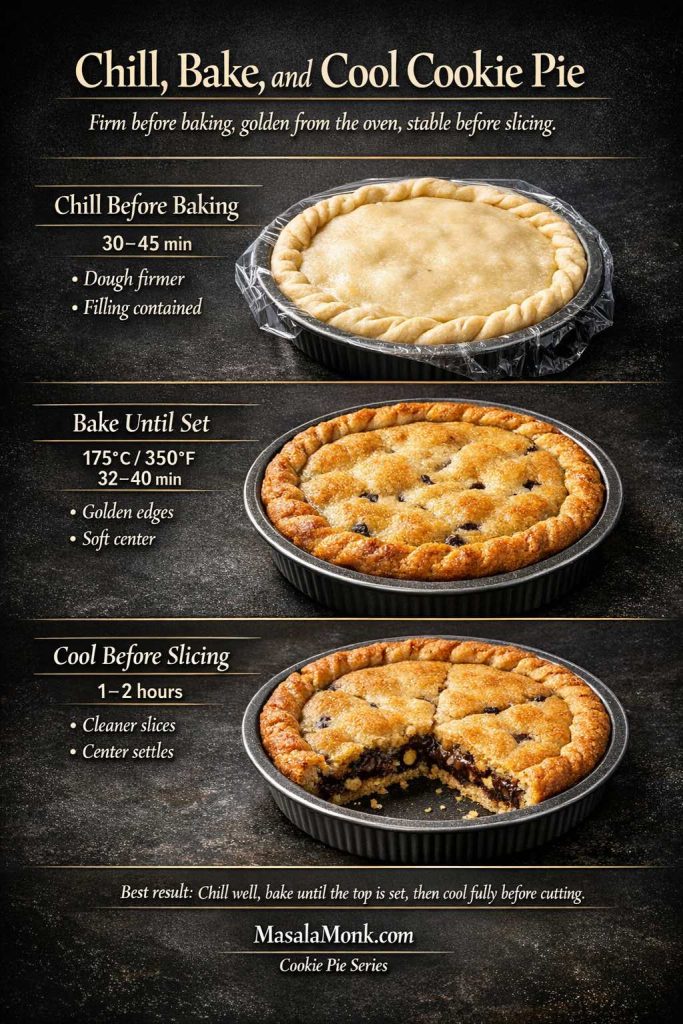
Step 9: Chill the Assembled Pie
Chill the pie for 30 to 45 minutes before baking. The dough should feel cooler, firmer, and less sticky at the surface. That is a better signal than the clock alone, because room temperature changes how quickly the pie firms up.
Step 10: Bake
Bake at 175°C / 350°F until the edges are golden and the top looks set. Most versions take 32 to 40 minutes in an 8-inch deep pan.
If the top browns too quickly while the center still needs time, loosely tent with foil and continue baking.
Step 11: Cool Properly
Let the pie cool in the pan for at least 1 hour before slicing. For the cleanest and most stable slices, cool it for closer to 2 hours. Warm slices will always be looser and messier, especially in filled versions, so do not judge the final texture too early.
Also Read: Balti Paneer Gravy (Restaurant-Style, Creamy + Bold Recipe)
How to Know When Cookie Pie Is Done
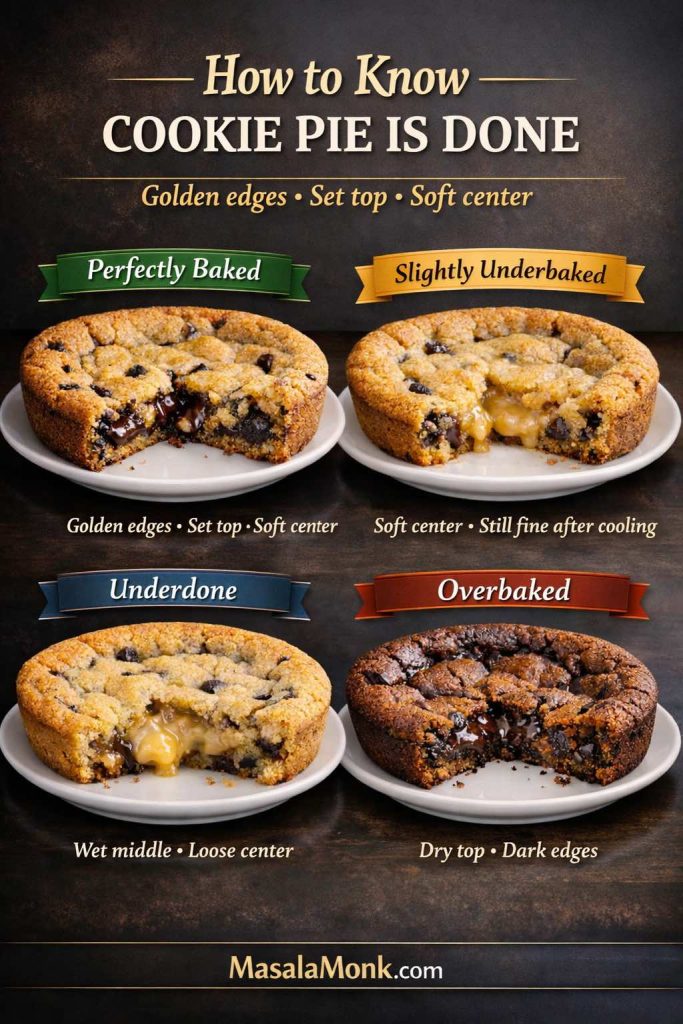
This is one of the most important parts of the entire bake, because the line between soft and underbaked can feel confusing at first. The aim is not a dry, fully firm middle straight from the oven. Instead, you want a pie that looks set around the edges and on top while the middle still looks a little more relaxed and finishes settling as it cools.
A good cookie pie should not look wet or liquid in the center. At the same time, it should not look hard and fully dry all the way across the surface. The best way to think about it is this: the pie should look baked rather than raw, while still staying tender through the middle.
Visual Signs to Trust
- the edges look set and lightly golden
- the top no longer looks glossy-wet
- the center still looks slightly softer than the outer ring
- the pie gives a little when nudged, but does not ripple like batter
- the whole surface looks settled rather than shiny and loose
Properly Baked
Look for edges that are clearly golden and set, a top that no longer looks wet, and a center that yields slightly when nudged but still holds its shape. The pie should continue setting as it cools.
Slightly Underbaked but Still Fine
If the middle feels looser than expected, yet the edges are done and the top is set, do not panic. Many cookie pies finish settling during cooling, especially when the filling or chocolate content is high.
Truly Underdone
If the center still looks glossy and loose, sinks dramatically, or spills like batter when sliced after proper cooling, it needed more baking time. Too much filling can also cause this.
Overbaked
If the top looks dry all over, the edges darken too far, and the middle loses its soft character after cooling, the pie has gone too far. It may still taste good, but it will lose the texture that makes cookie pie special.
Texture Guide
- Gooey: best for stuffed versions, very soft center, more dramatic slices
- Soft-set: ideal for classic chocolate chip cookie pie
- Fully set: firmer slices, easier for transport, less molten character
Most people are happiest somewhere between gooey and just set.
Also Read: Mojito Recipe (Classic) + Ratios, Pitcher, Mocktail & Easy Variations
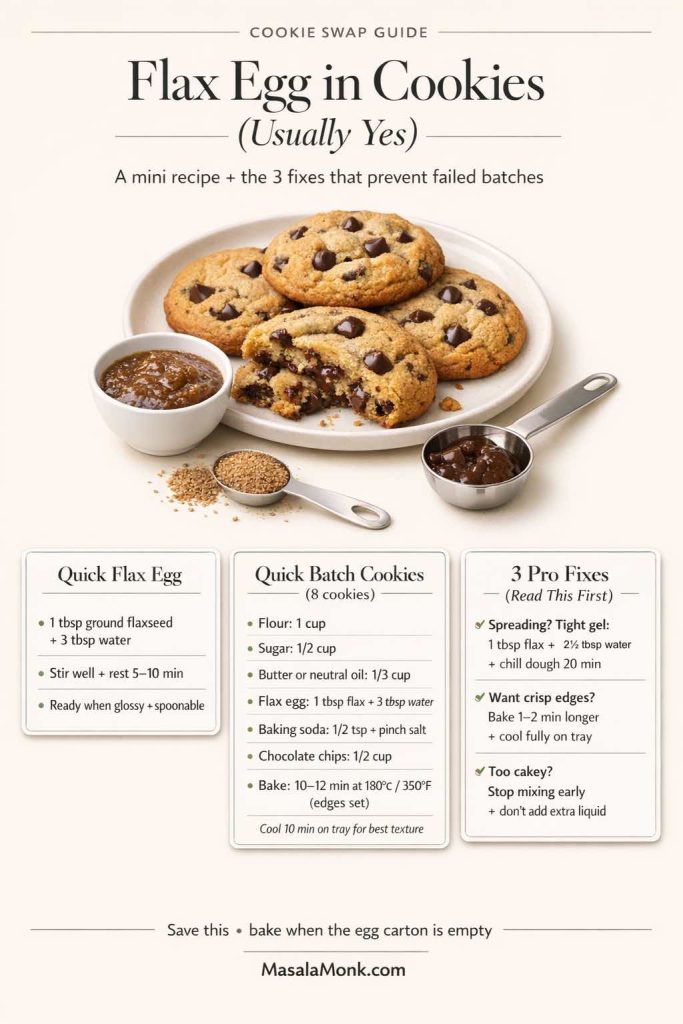
Chocolate Chip Cookie Pie
If you want the clearest and most reliable version of the whole format, chocolate chip cookie pie is it. This is the variation that most clearly shows what a great slice should feel like: thick, buttery, soft through the middle, and generous with chocolate without needing a separate stuffed filling to make its point.
Because it uses the base dough almost exactly as written, it is also the easiest place to build confidence. You are not judging an extra center, managing a filling border, or wondering whether the pie is done because of two different textures. You are simply learning how the dough bakes and what the pie should look like when it is ready to come out.
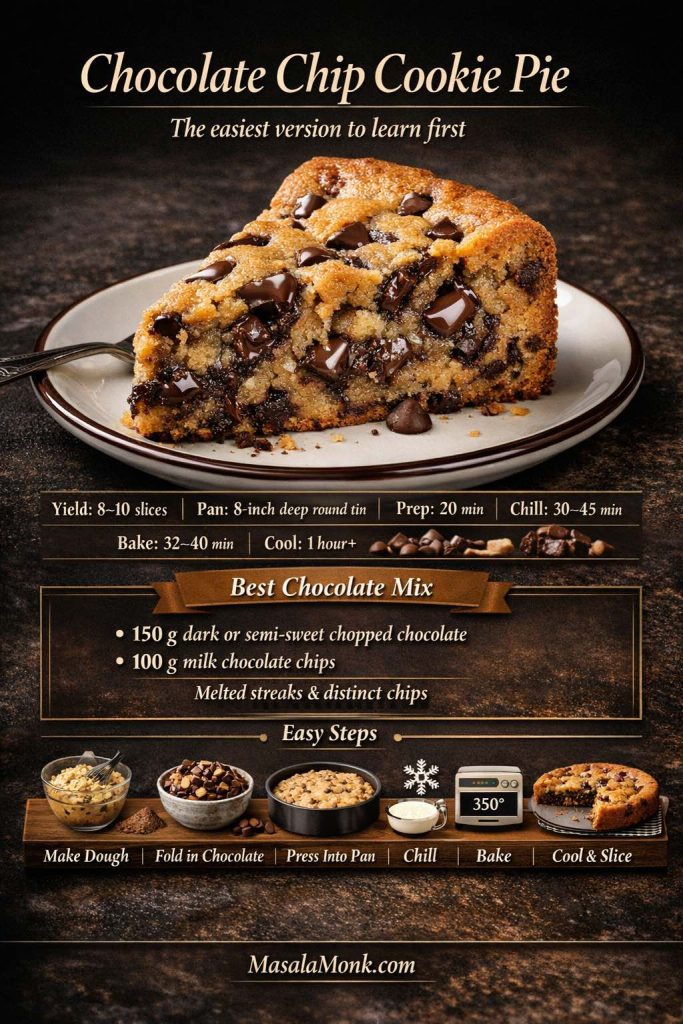
Best Chocolate Balance
A particularly good mix is 150 g dark or semi-sweet chopped chocolate plus 100 g milk chocolate chips. That combination gives you contrast in both sweetness and texture. Chopped dark chocolate melts into softer streaks, while the milk chocolate chips stay more distinct.
If you prefer, you can also lean toward dark and white chocolate for stronger visual contrast. Either way, using more than one kind of chocolate makes the final slice feel more layered.
Easiest Way to Get It Right
Do not overcomplicate this first version. Skip the filling, keep the dough thickness even, chill properly, and trust the soft-center bake cue. That is enough to give you a dependable result.
If you want to push the chocolate flavor slightly further without changing the structure, a drizzle of homemade chocolate syrup over a warm slice can be lovely.
Also Read: Paloma Recipe: 12 Paloma Cocktail Drinks
More Cookie Pie Variations Worth Baking
After the base clicks into place, the fun part begins. This is where the format starts showing how flexible it really is.
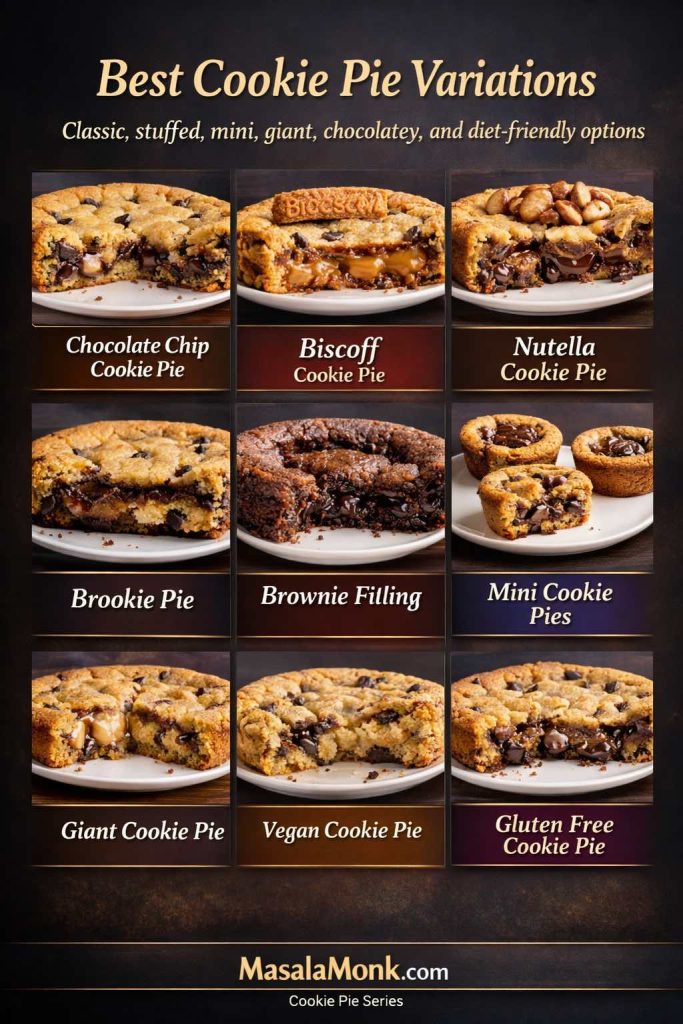
Biscoff Cookie Pie
Biscoff cookie pie is one of the best stuffed versions because the filling is flavorful, thick, and comparatively stable. Freeze or chill the Biscoff spread in a disc before assembly if you want the cleanest center and the most obvious stuffed effect in the final slice.
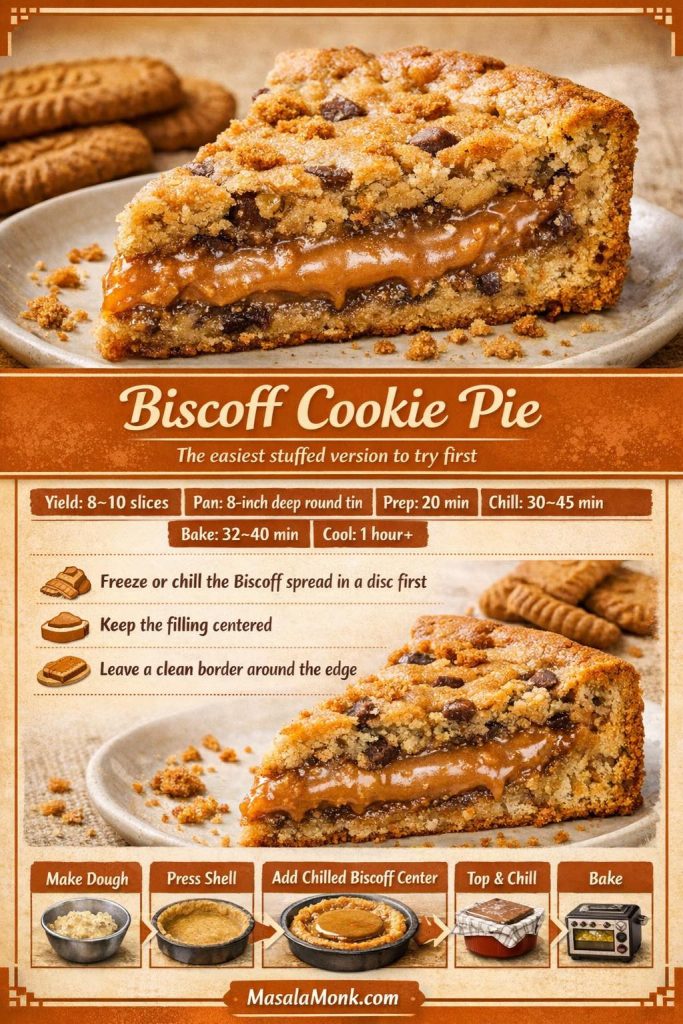
The overall result is caramelised, spiced, warm, and deeply indulgent. For a first filled version, this is usually the smartest one to choose.
Nutella Cookie Pie
Nutella cookie pie is looser and more dramatic. The hazelnut-chocolate center melts more easily than Biscoff, so chilling matters even more here.

For a richer finish, add a few chopped hazelnuts to the dough or scatter them over the top. Just keep the filling away from the edges, because Nutella is quick to travel once warm.
Brookie Pie
Brookie pie gives you the appeal of both desserts at once. Part of the pie stays firmly in the cookie world, while the center or one layer leans brownie. That contrast is what makes each slice especially memorable.
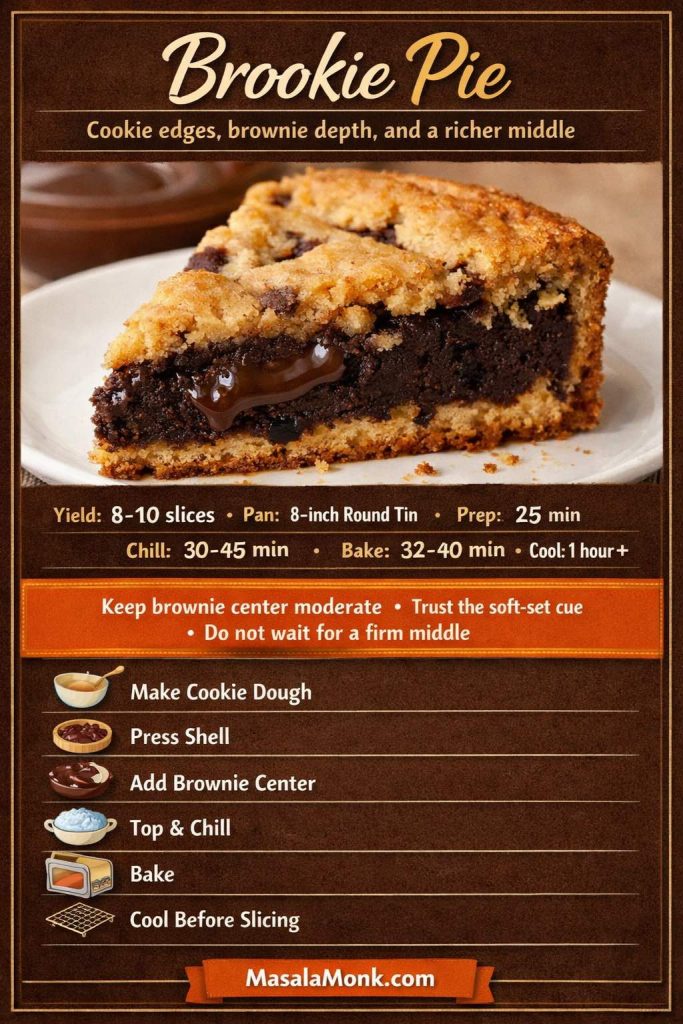
Because brownie filling is denser, this version benefits from careful baking. The edges can be done before the very middle looks fully ready, so trust the just-set cue rather than waiting for a completely firm middle.
Brownie Cookie Pie
Brownie cookie pie is darker and more unified than brookie pie. Instead of building contrast between two layers, it pushes the whole dessert in one deeper chocolate direction.
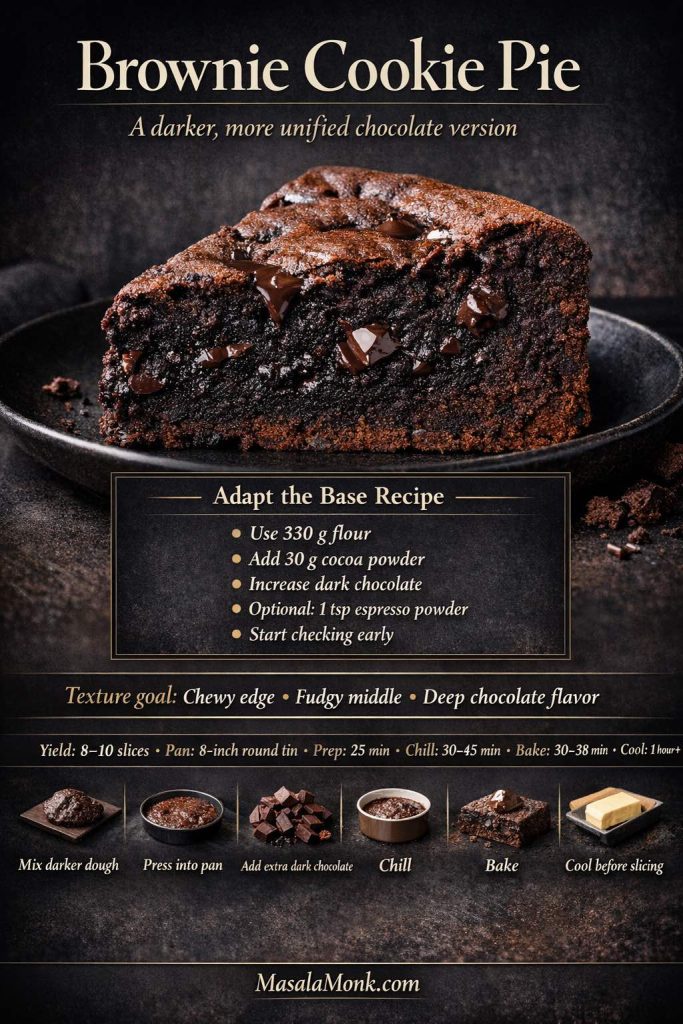
To adapt the base, reduce the flour slightly to about 330 g, add 30 g cocoa powder, increase the dark chocolate, and optionally include 1 teaspoon espresso powder. The finished pie should feel chewy at the edge and almost fudgy in the middle. Because cocoa-heavy dough dries out quickly once overbaked, start checking early.
Mini Cookie Pies
Mini cookie pies are one of the most practical adaptations in the entire format. Use a muffin tin, press dough into each cavity, add a spoonful of filling or extra chocolate, top with more dough, and chill briefly before baking.
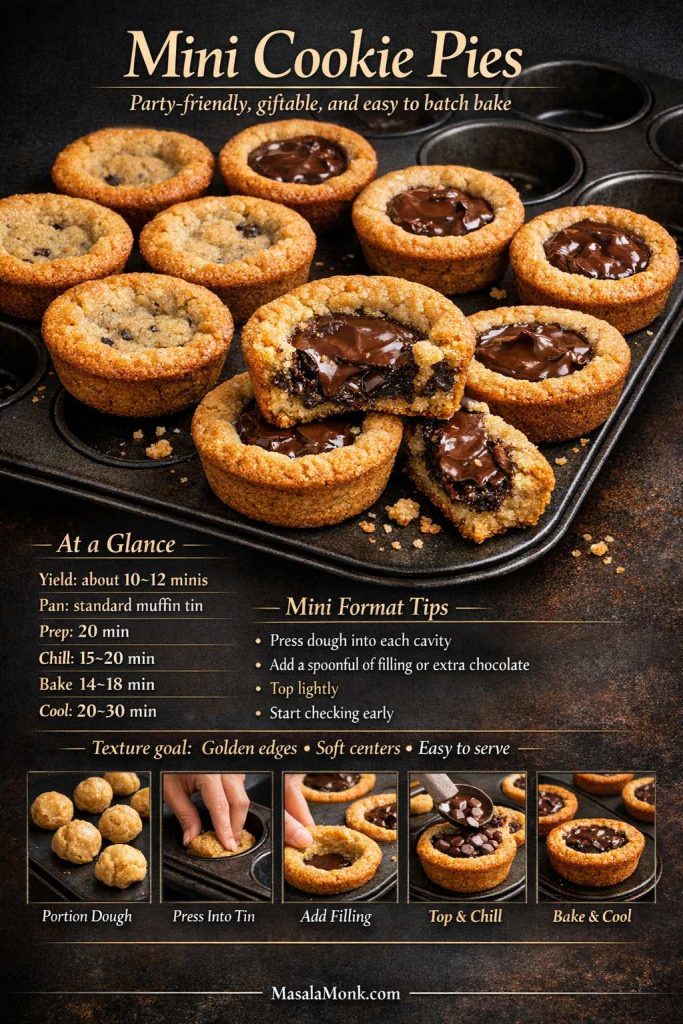
They usually bake in about 14 to 18 minutes, so start checking early. These are especially useful for parties, gifting, or trying several fillings from one batch. They also sit very nicely alongside softer desserts such as no-bake banana pudding if you are building a mixed dessert table.
Giant Cookie Pie
A giant cookie pie is ideal for a relaxed, shareable centrepiece dessert. Use a 9-inch or 10-inch round cake pan, but keep enough dough depth that the center still stays soft. If you spread the dough too thin, the dessert will drift toward cookie cake rather than a proper pie-style slice.

Chocolate chip works especially well here, although a light Nutella swirl or mixed chocolate chunks can also be lovely.
Vegan Cookie Pie
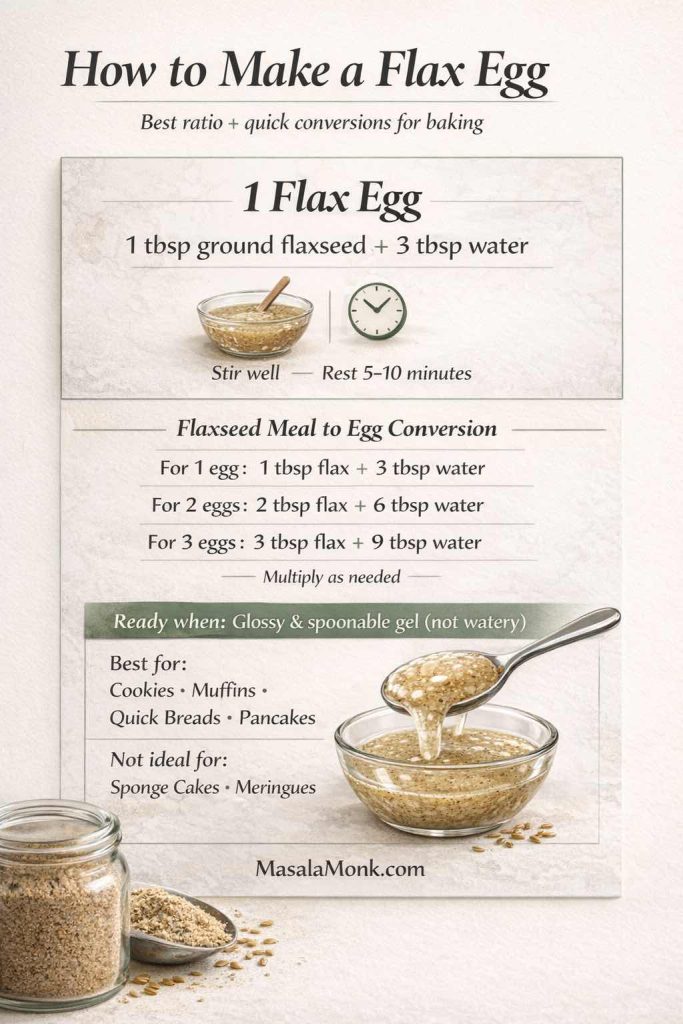
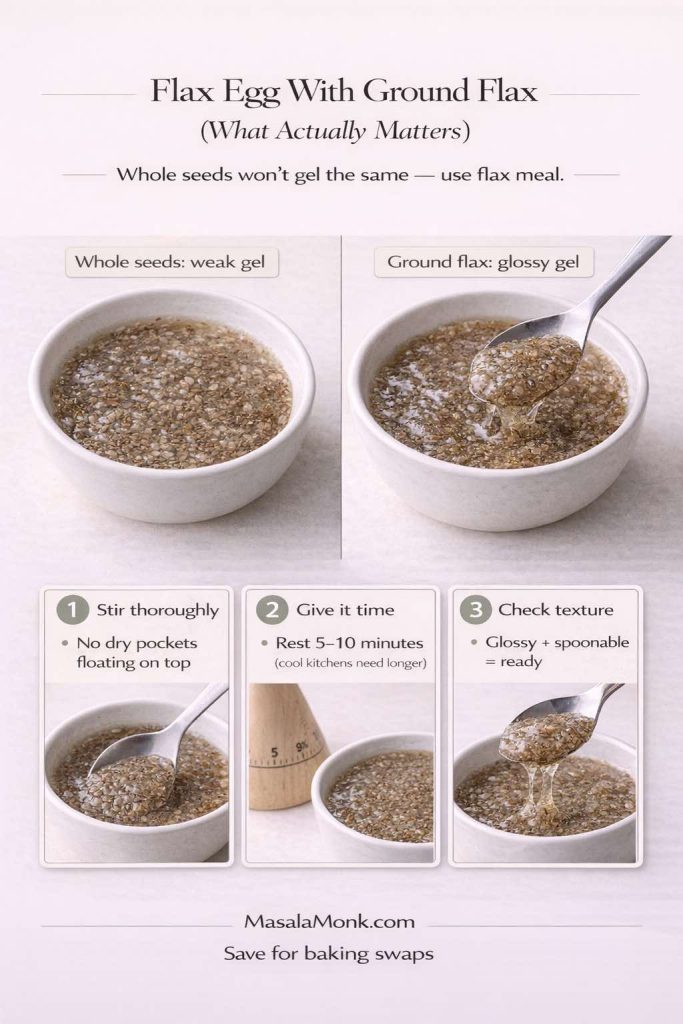
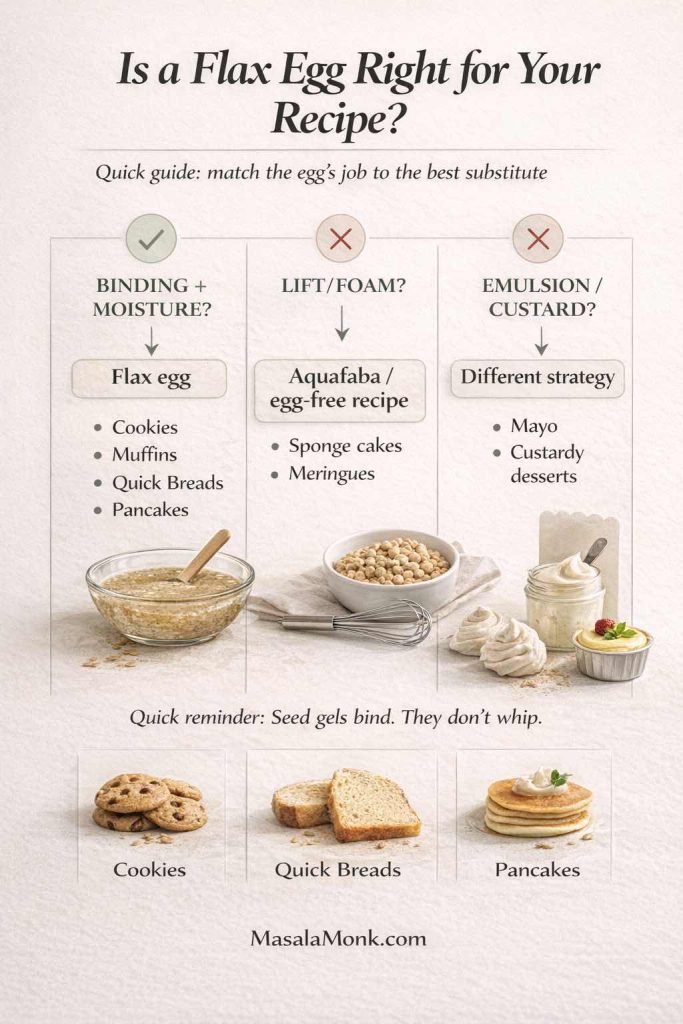
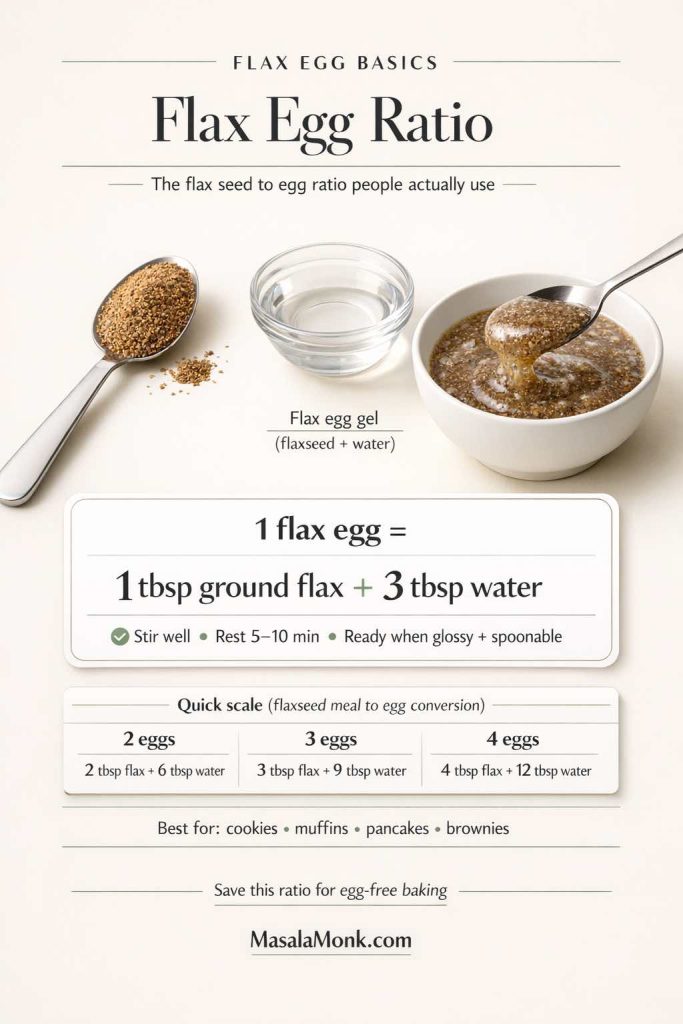
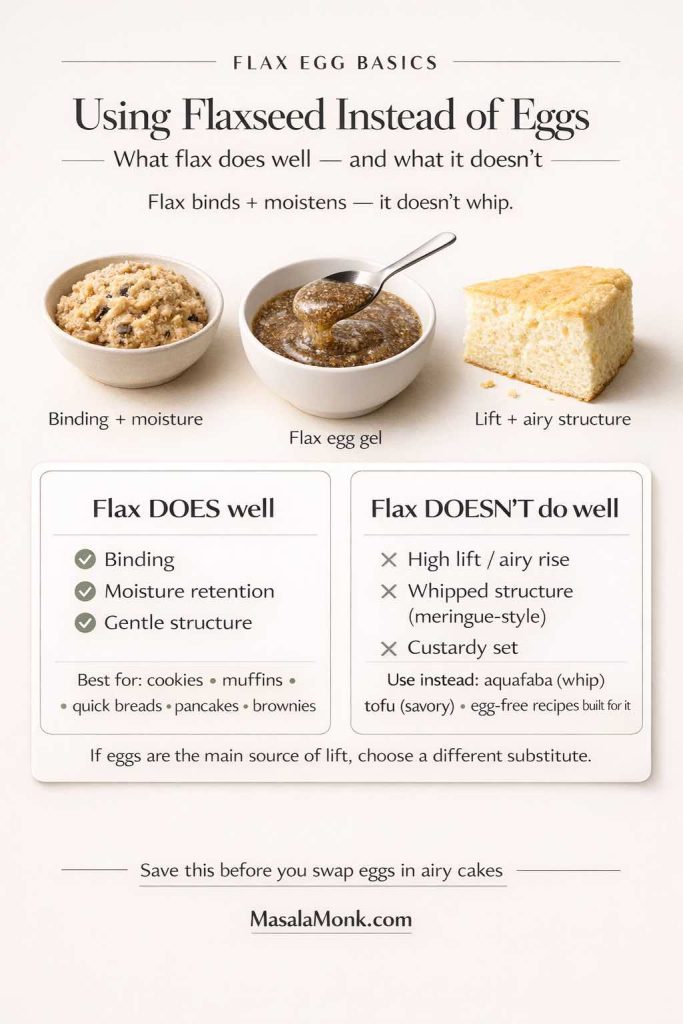
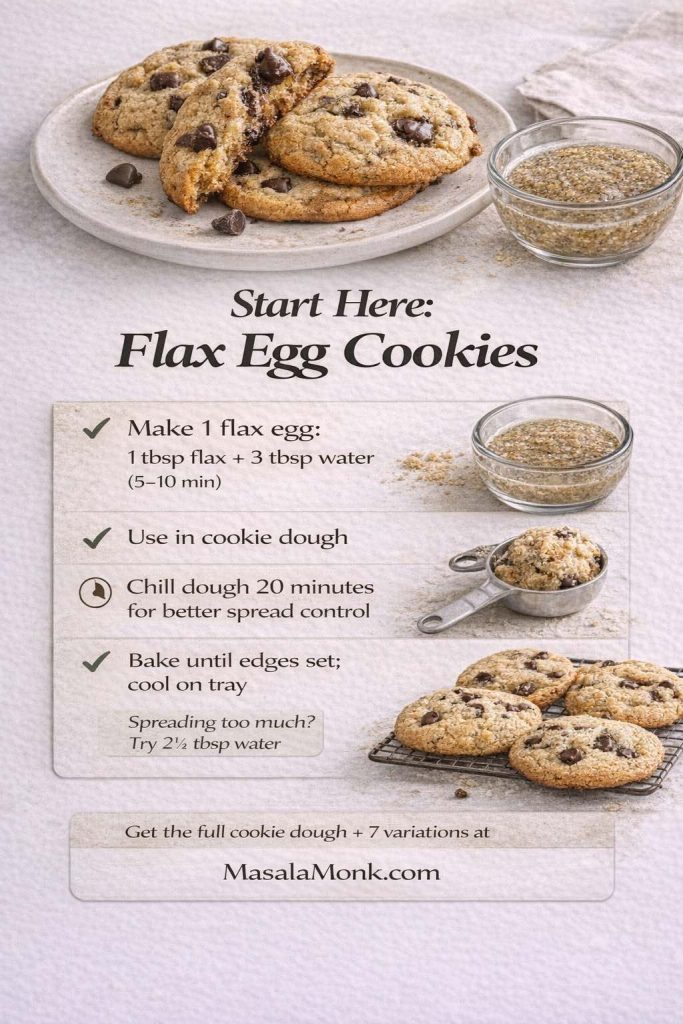
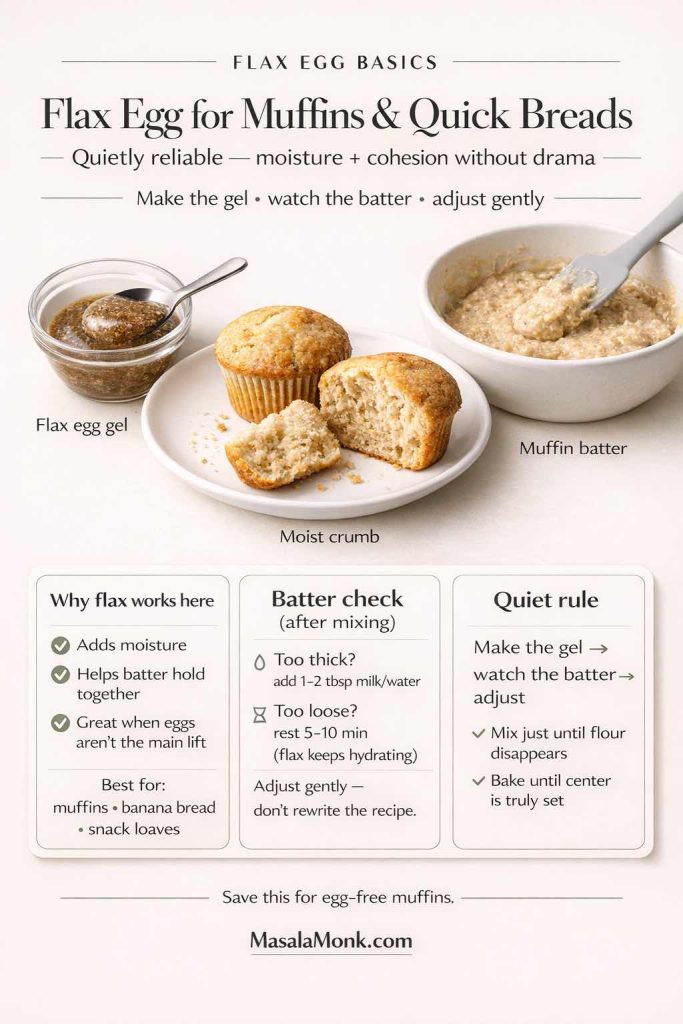
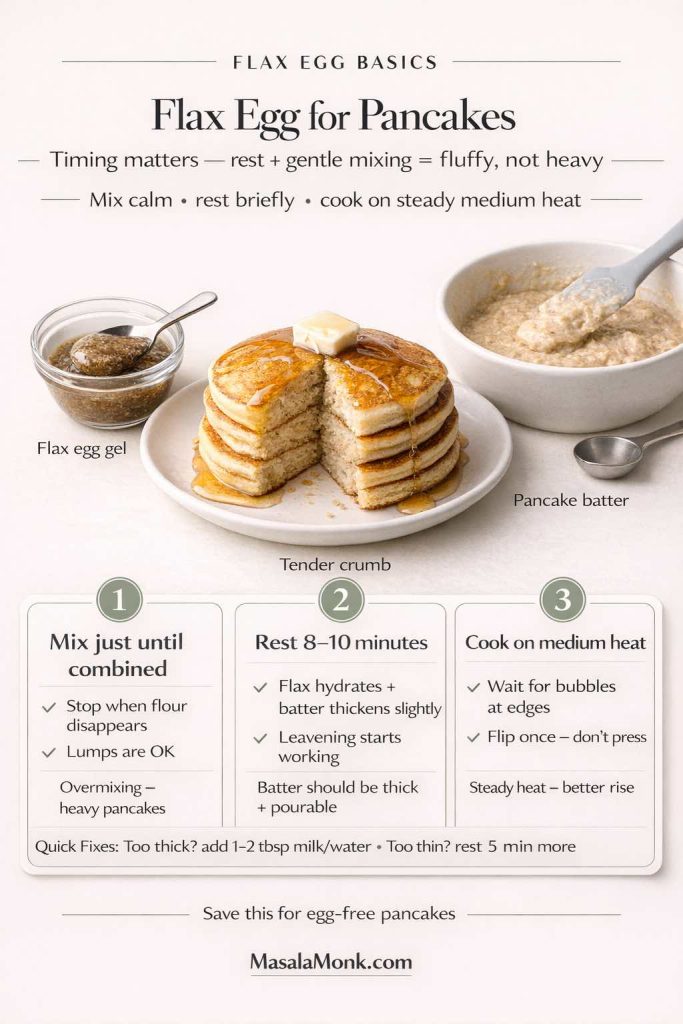
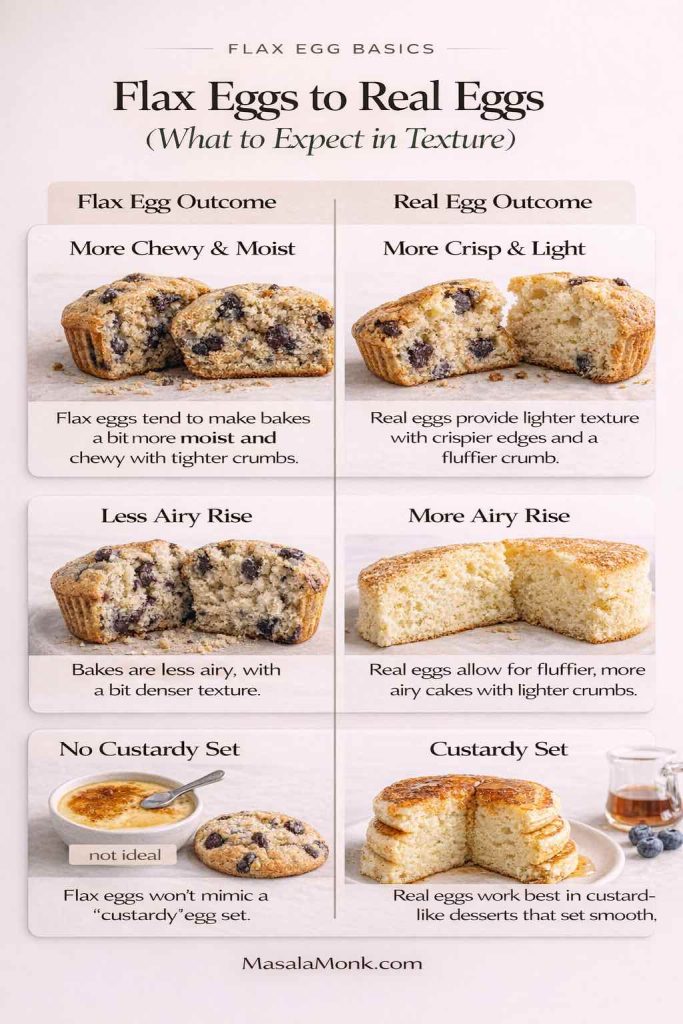
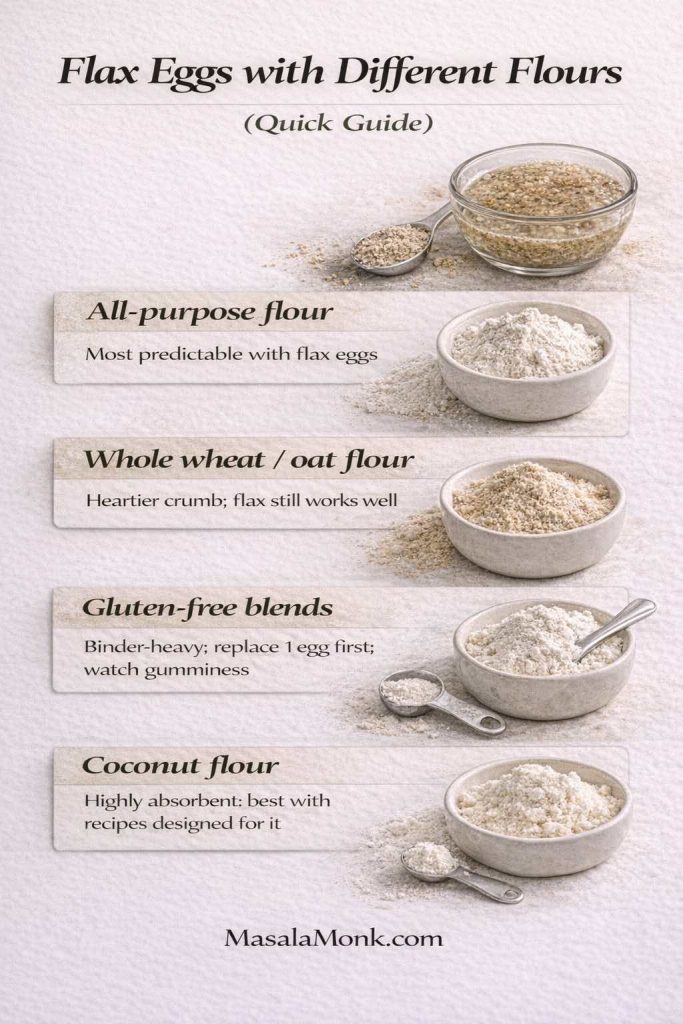
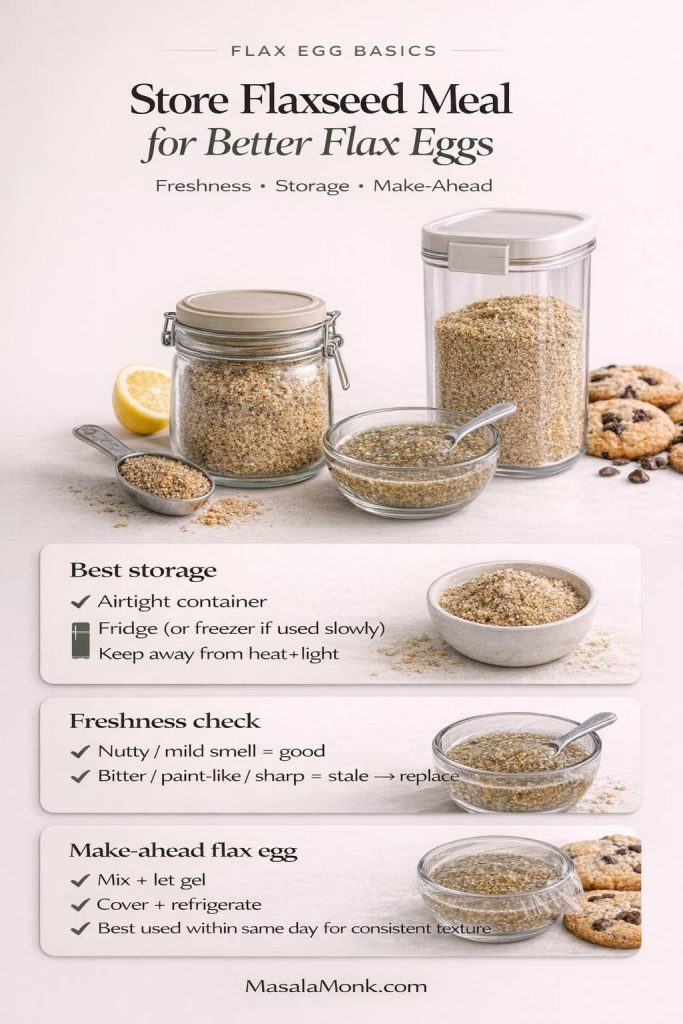
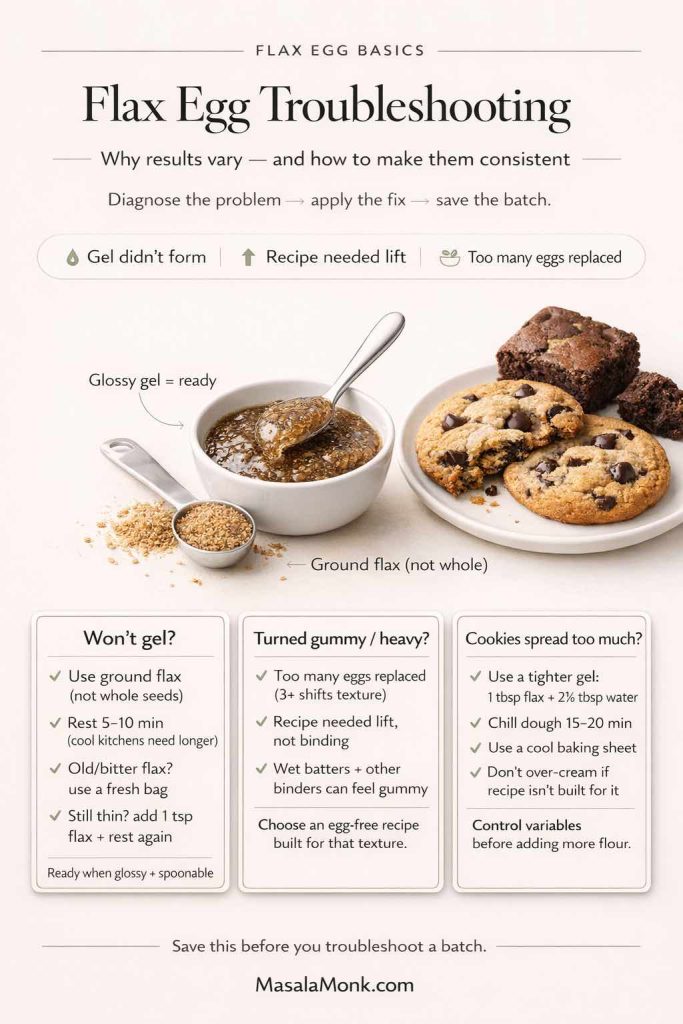
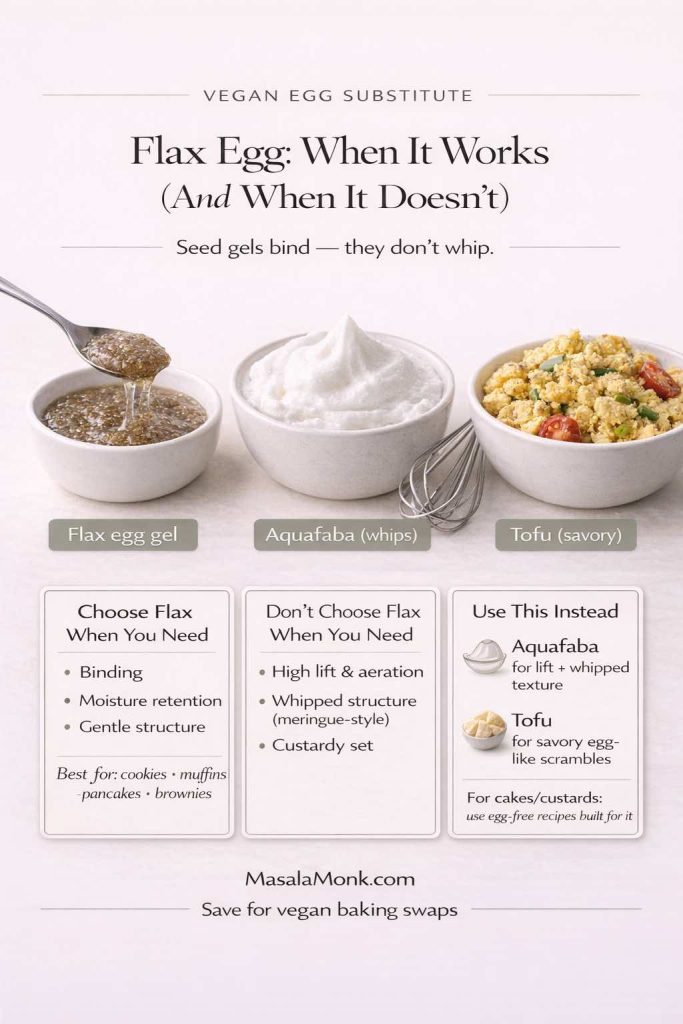
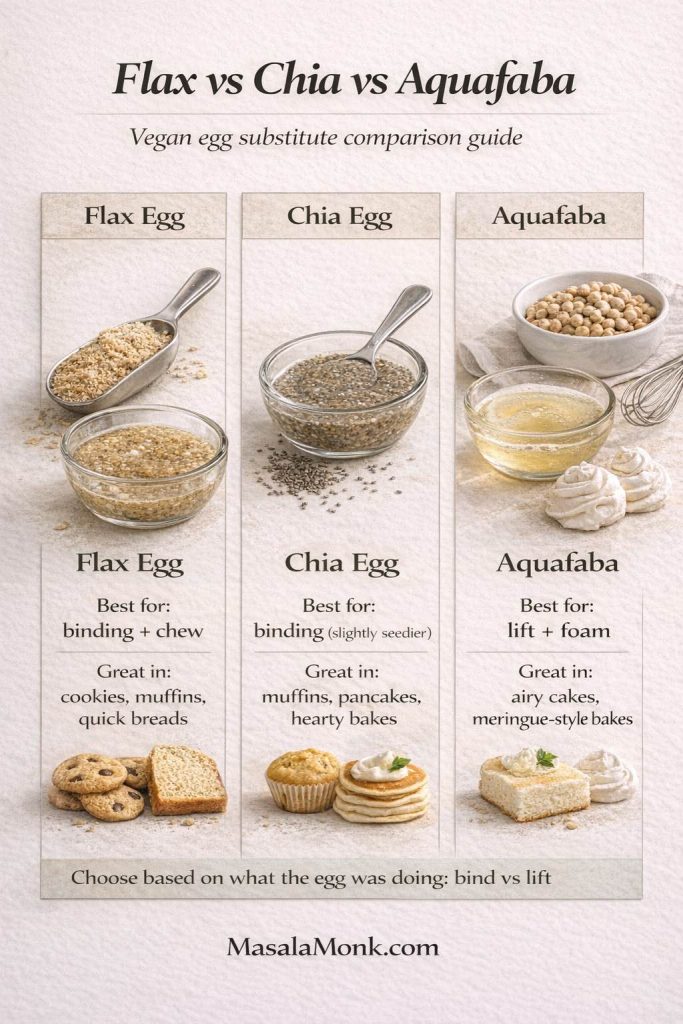
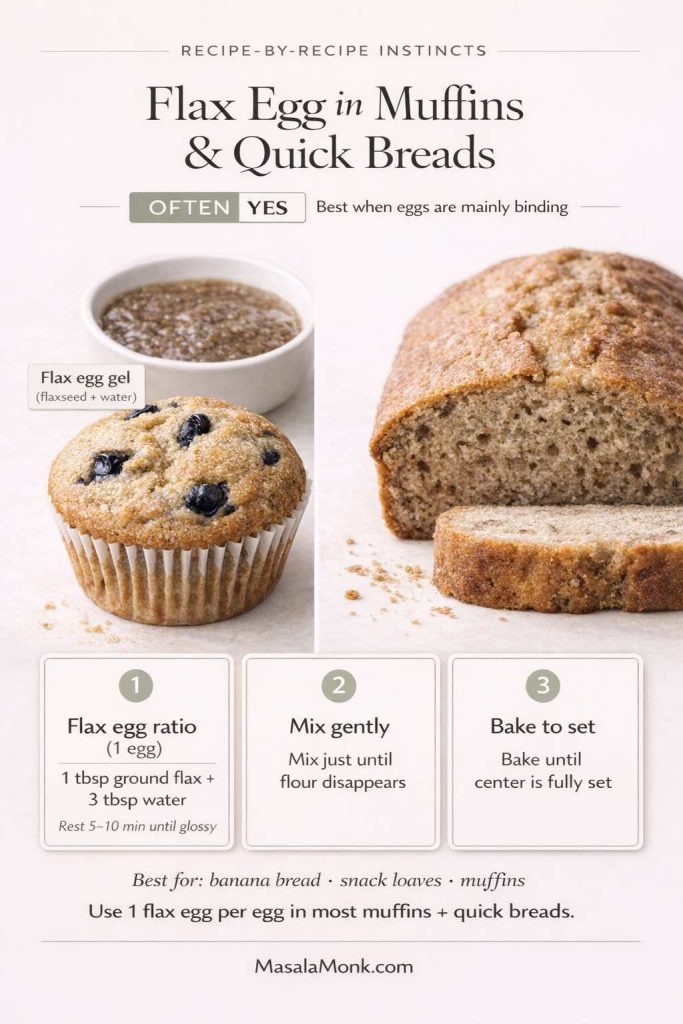
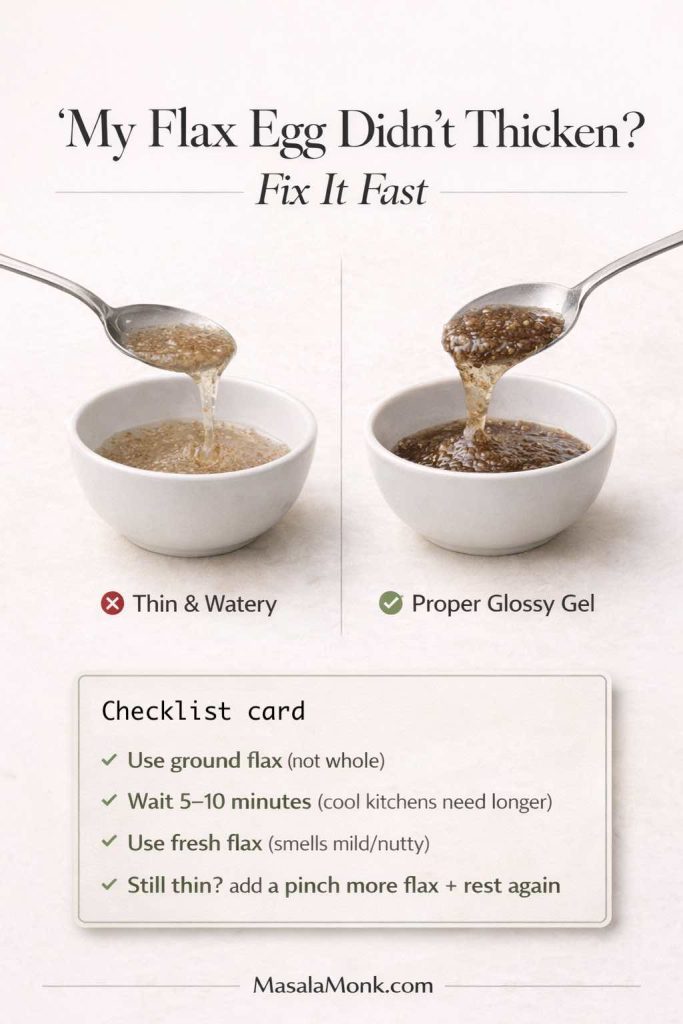
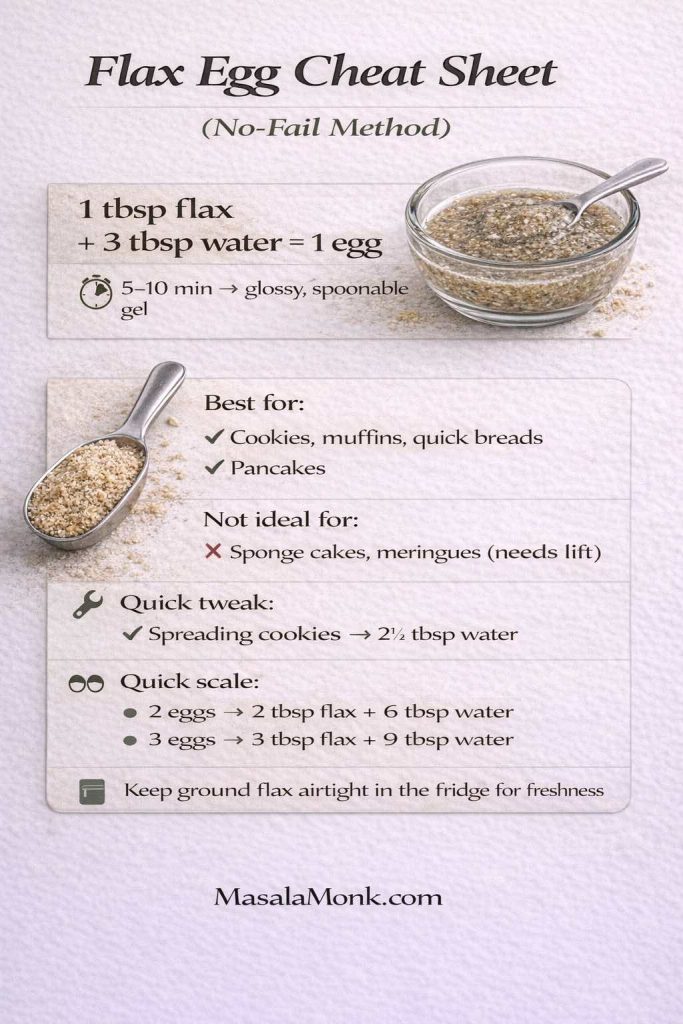
A vegan cookie pie works best with a firm plant-based baking block, flax eggs, and dairy-free chocolate. If you need a reference for the egg swap, this guide on how to make a flax egg is helpful.
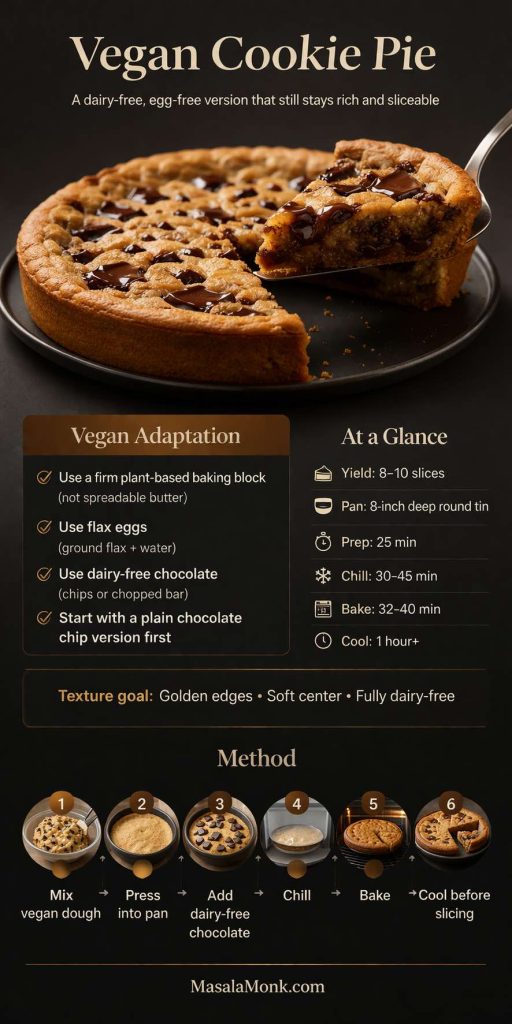
Start with a plain chocolate chip version before moving into heavier fillings. That makes the adapted dough easier to judge on its own.
Gluten Free Cookie Pie
A gluten free cookie pie is easiest with a dependable cup-for-cup baking blend and a lighter first filling, or no filling at all. Extra chilling also helps if the dough feels softer than usual.
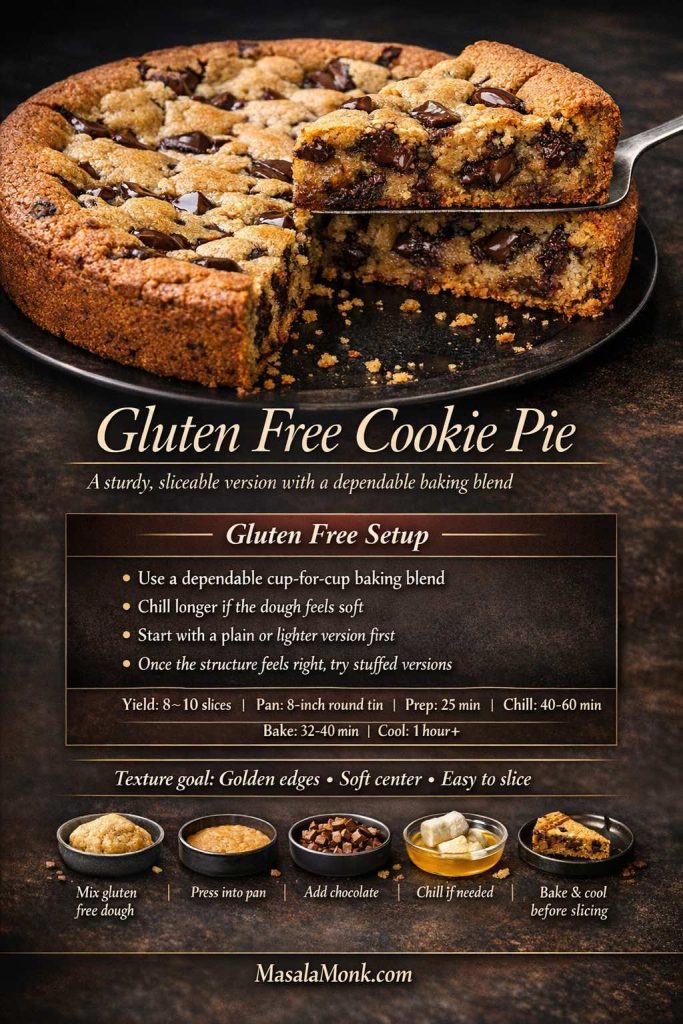
Once the structure feels dependable, stuffed versions become much easier to attempt with confidence.
Also Read: Air Fryer Donuts Recipe (2 Ways): Glazed Homemade Donuts + Biscuit Donuts
Best Cookie Pie Fillings and What Each One Does
Choose spread fillings when you want a gooey, bakery-style center, chunky mix-ins when you want easier structure, and brownie or cream cheese-style fillings only when you want a more dramatic texture shift.
That simple distinction makes the whole category easier to navigate. A strong dough can handle several fillings, but the best choice depends on how you want the slice to feel once cut.
Spread fillings such as Biscoff, Nutella, thick peanut butter, and chocolate hazelnut spread give you the most obvious stuffed-center effect. They are especially useful in deep cookie pies and mini versions, provided they are chilled first.
Chunkier mix-ins are easier to control. Dark chocolate chunks, milk chocolate chips, chopped hazelnuts, and a modest amount of biscuit crumbs work especially well in classic and giant versions because they add interest without changing the overall structure.
Then there are the more specific fillings, such as brownie mixture for brookie pie or a cream cheese-style center. These can be excellent, but they change the texture more dramatically, so they need a steadier hand and a little more restraint.
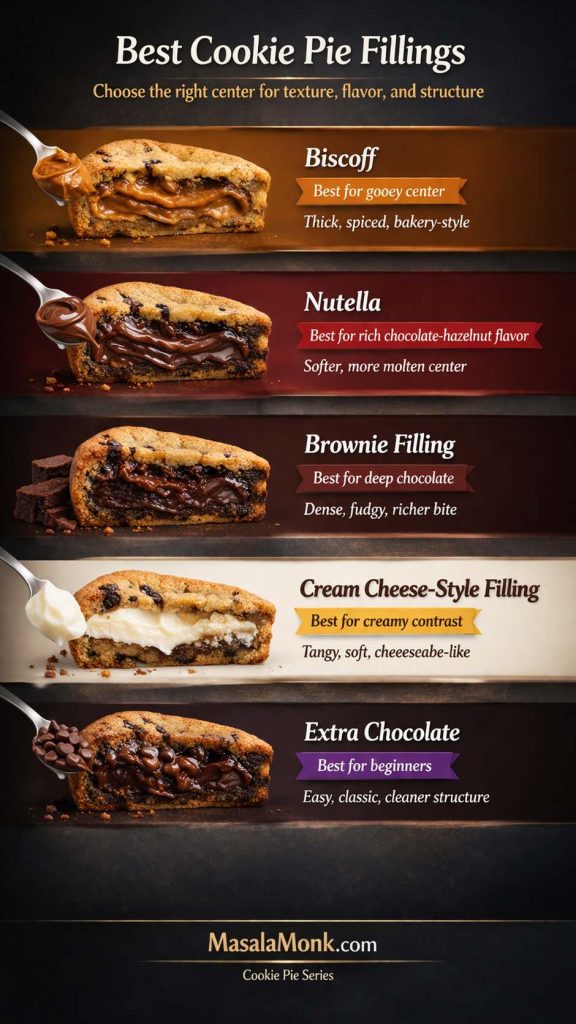
Biscoff
- Flavor payoff: caramelized, spiced, warm
- Texture behavior: thick and stable when chilled
- Difficulty: easier
- Best use: gooey center with reliable control
Nutella
- Flavor payoff: rich hazelnut chocolate
- Texture behavior: softer, melts faster
- Difficulty: moderate
- Best use: indulgent dessert-style center
Brownie Layer or Brownie Filling
- Flavor payoff: deep chocolate
- Texture behavior: dense and fudgy
- Difficulty: moderate
- Best use: brookie pie or brownie cookie pie
Cream Cheese-Style Filling
- Flavor payoff: creamy, tangy, balanced
- Texture behavior: softer and lighter
- Difficulty: moderate
- Best use: cheesecake-leaning variations
Extra Chocolate Only
- Flavor payoff: classic and dependable
- Texture behavior: no separate center, just richer dough throughout
- Difficulty: easiest
- Best use: beginner-friendly baking and cleaner slicing
A good rule is simple: if the filling feels loose at room temperature, it probably needs more chilling before it goes into the pie.
Also Read: Tapas Recipe With a Twist: 5 Indian-Inspired Small Plates
Tips Before You Bake Cookie Pie
A few habits make this dessert noticeably easier to get right. None of them are difficult, but together they improve the final result noticeably.
The Most Helpful Things to Remember
Keep these points in mind:
- use softened butter, not melted
- weigh the flour if possible
- start checking before you think you need to
- chill the assembled pie before baking
- use a deeper pan for stuffed versions
- keep the filling away from the edges
- do not overmix after adding flour
- do not overfill just because it looks tempting
- cool for 1 hour minimum, 2 hours for cleaner slices
- use a metal pan when you want better structure control
These are small decisions, yet together they make the difference between a pie that merely tastes good and one that slices, bakes, and cools the way it should.
Where Bakers Usually Go Wrong
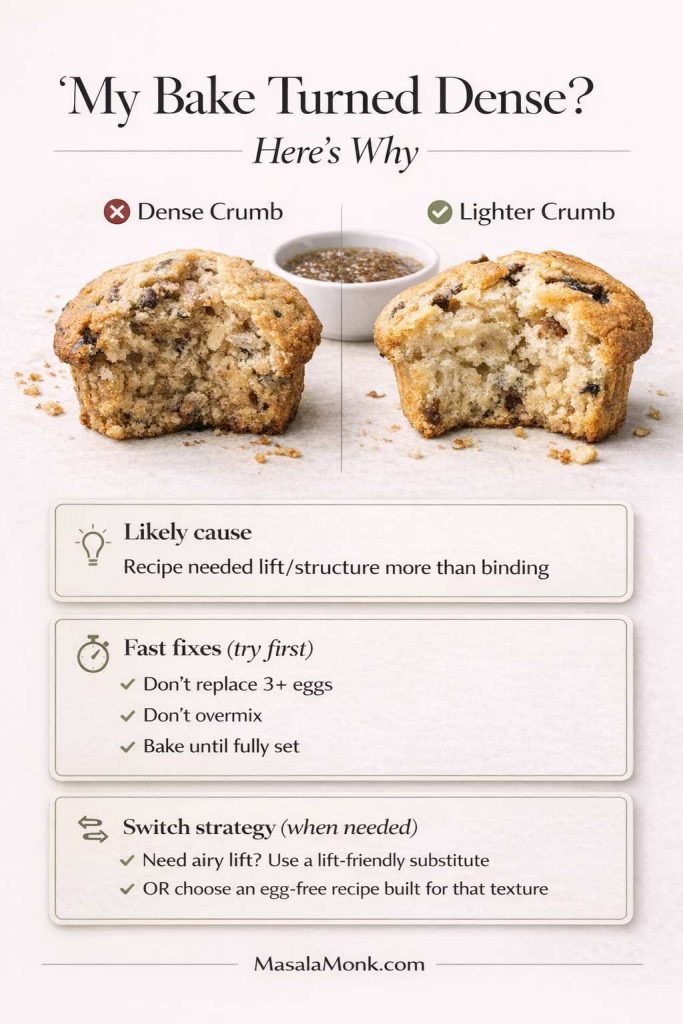
Most problems come from excess rather than lack. Too much enthusiasm with the filling makes the center unstable. Too much baking dries the pie. And then too much flour makes the crumb heavy.
By contrast, a slightly softer center is often correct and will settle as the pie cools.
Also Read: Air Fryer Salmon Recipe (Time, Temp, and Tips for Perfect Fillets)
Common Cookie Pie Mistakes and How to Fix Them
Even a strong method can go off track if the handling slips. Fortunately, most problems are easy to read once you know what caused them.
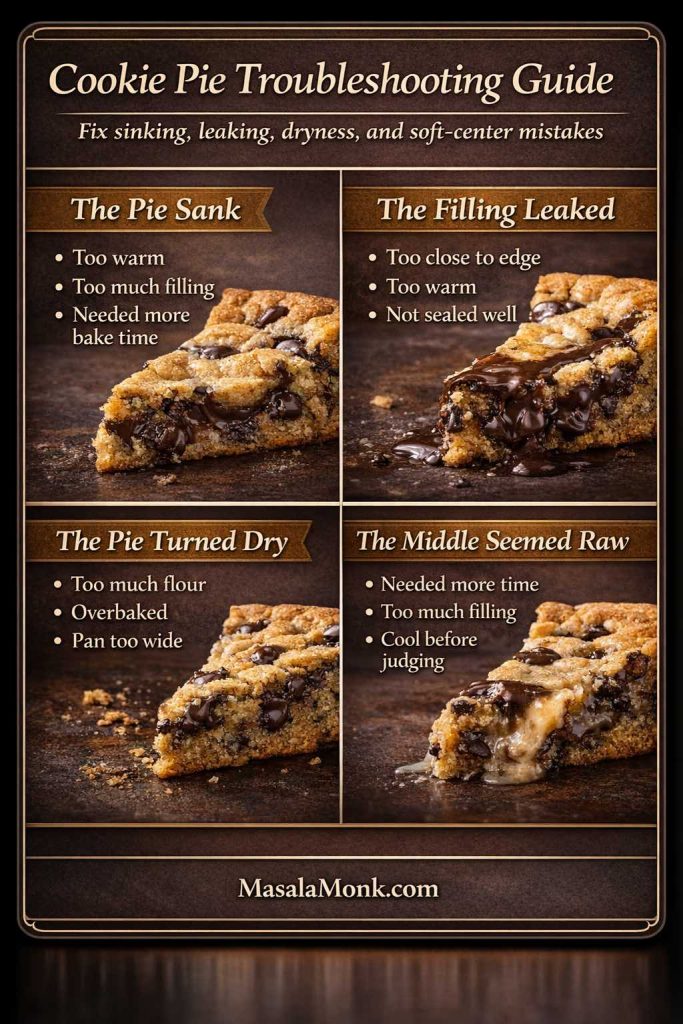
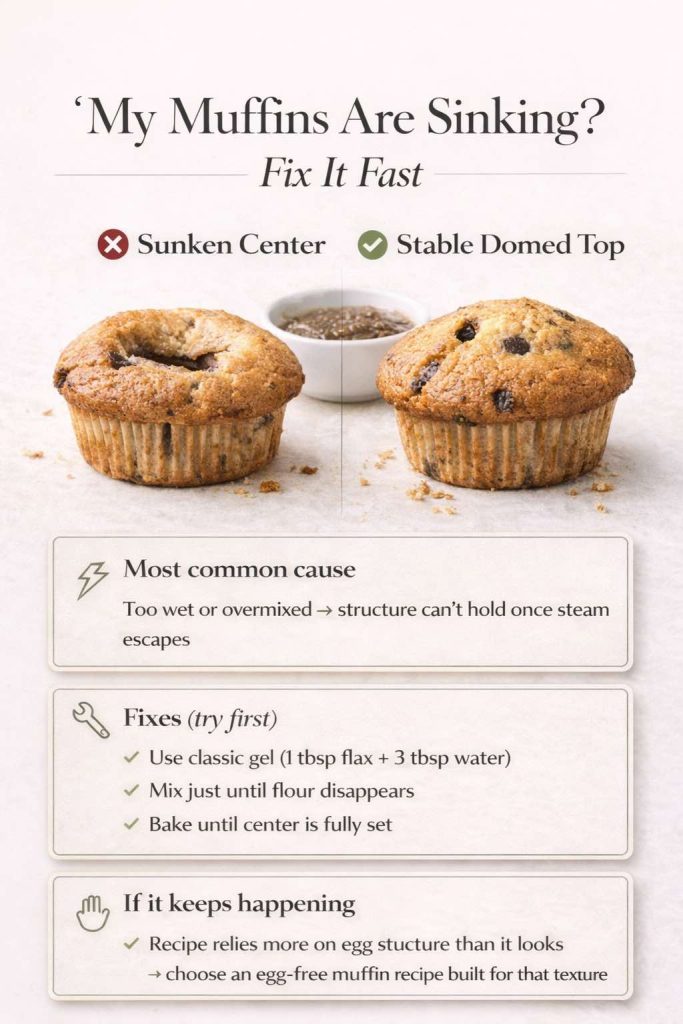
Sinking, Leaking, and Dryness
If the pie sinks heavily, the usual reasons are too much filling, not enough chilling, uneven shell thickness, or underbaking. If the filling leaks, it was probably too close to the edge, too warm, or not sealed well enough under the top dough. In both cases, the fix is usually simple: chill more, leave a cleaner border, and keep the shell more even.
If the pie turns out dry, the cause is usually too much flour, too much baking time, or a pan that spreads the dough too thin. In that case, weigh the flour, start checking earlier, and use a deeper pan next time.
The pie sank
This usually means the dough or filling was too warm, or the center needed a little longer in the oven. Chill more thoroughly and check doneness more carefully next time.
The filling leaked
This almost always comes down to one of three things: the filling sat too close to the edges, the filling was too warm, or the top was not sealed properly. Keep the center contained and leave a visible dough border around it.
The pie turned dry
This usually means it baked too long, the pan was too wide, or the flour was slightly heavy. Check earlier and keep the bake deeper rather than flatter whenever possible.
Raw Middle, Overbaked Minis, and Crumbly Gluten Free Versions
A tender center is not automatically raw. If the middle is clearly shiny and wet, it needs more time. If it is simply soft but structured, it may just need cooling.
Mini cookie pies, meanwhile, often overbake because bakers leave them in on full-pie timing. Start checking them around 14 minutes and let carryover heat do the rest.
For gluten free cookie pie, crumbliness usually comes from the flour blend, not enough chilling, or trying an ambitious filling too early. Start with the plain chocolate chip format first, then build outward when the dough starts to feel reliable.
The middle seemed raw
A proper center should be soft, but not liquid. If it stayed truly loose after cooling, it either needed more time or had too much filling for the size of pan.
The top browned too fast
Tent loosely with foil and keep baking. This is especially common in stuffed versions.
The dough was too soft to shape
Chill it briefly. Ten to fifteen minutes can make a surprising difference.
Mini cookie pies overbaked
Check them early. The smaller format gives you much less margin for error than a full-size pie.
Gluten free cookie pie crumbled
Use a better all-purpose blend, chill thoroughly, and do not slice before it has fully cooled.
Also Read: Masterclass in Chai: How to Make the Perfect Masala Chai (Recipe)
How to Make Cookie Pie Ahead of Time
One of the most practical things about cookie pie is how easily you can spread the work out. The dough can be made a day ahead and chilled. In fact, a short rest often improves both flavor and handling.
You can also assemble the pie ahead and refrigerate it before baking. If you do that, remember that a colder pie may need a little extra time in the oven. Stuffed pies can be frozen before baking as well, which often helps them hold their shape more neatly once the heat hits the filling.
That flexibility makes this dessert especially useful for parties, birthdays, and weekends when you want the dessert mostly ready before guests arrive.
Also Read: Pork Tenderloin in Oven (Juicy, Easy, 350°F or 400°F) Recipe
How to Store, Freeze, and Reheat Cookie Pie
Cookie pie stores well, which is one of the reasons it deserves a place in a regular baking rotation. Plain versions such as chocolate chip cookie pie, brownie cookie pie, and giant cookie pie can usually stay tightly covered at room temperature for up to 2 days, provided the filling is stable.
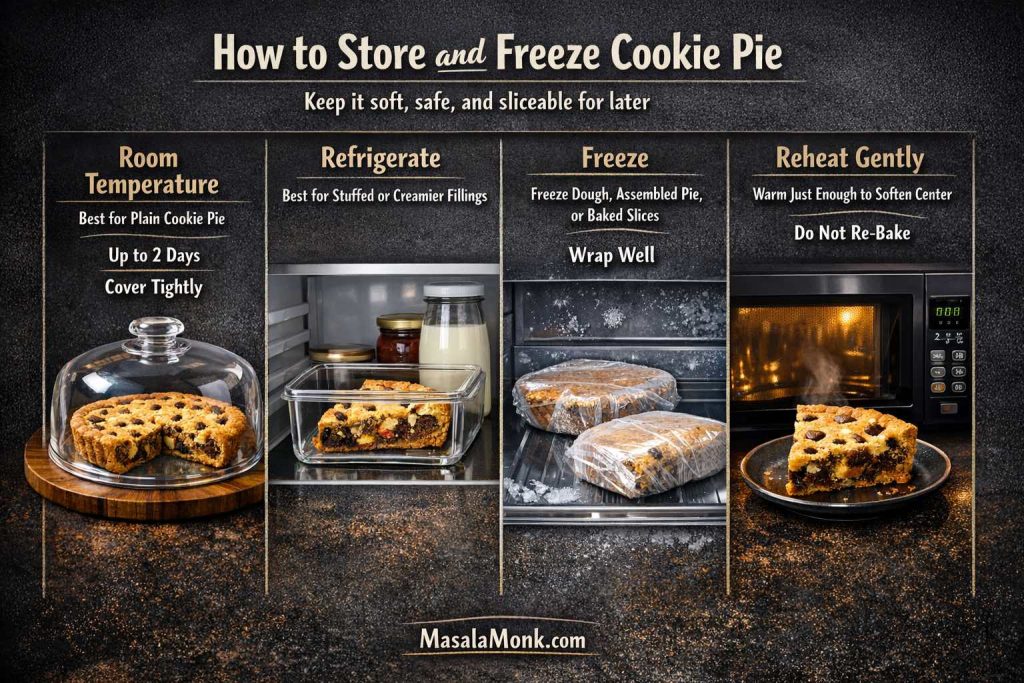
Stuffed versions such as Biscoff cookie pie, Nutella cookie pie, or anything with a cream cheese-style center are better kept in the fridge. Even then, they usually taste best once brought closer to room temperature or gently warmed before serving.
The dough can be frozen, the assembled unbaked pie can be frozen, and baked slices can be frozen too. When reheating, go gently. The aim is to warm the middle and bring back some of the chocolate melt, not rebake the dessert. For broader leftover guidance, Foodsafety.gov’s food safety guidance for leftovers is a practical reference.
Also Read: How to Make a Flax Egg (Recipe & Ratio for Vegan Baking)
What to Serve with Cookie Pie
Because cookie pie is rich, the best pairings are usually the ones that cool it down or bring in contrast. Vanilla ice cream is the obvious favorite for a reason, although softly whipped cream, cold milk, iced coffee, or even a latte can all work beautifully.
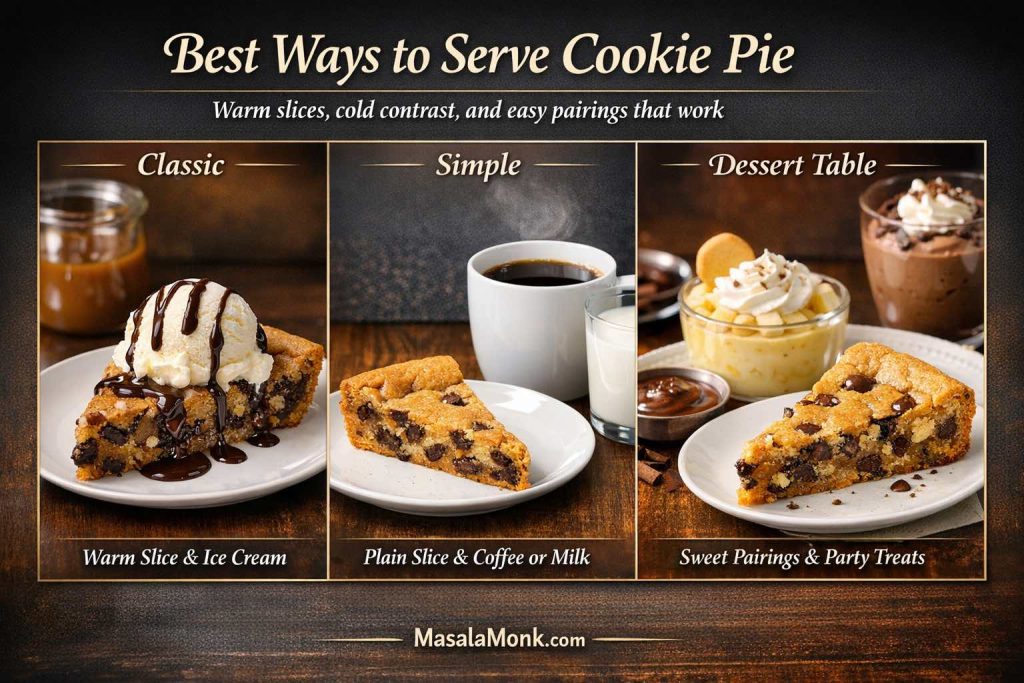
If you are building a fuller dessert table, it helps to pair it with something texturally different. No-bake banana pudding gives you a softer spoon dessert, while avocado chocolate mousse offers a colder, smoother chocolate contrast. For a more casual party setup, even a bright party punch with pineapple juice can balance the richness surprisingly well.
Which Cookie Pie Should You Bake First?
If you bake only one version first, make it Chocolate Chip Cookie Pie. It teaches you the structure most clearly, gives you the easiest bake cues to read, and makes every later variation easier to handle.
If you want the most obviously bakery-style stuffed result, bake Biscoff Cookie Pie. If deep chocolate is the whole point, choose Brookie Pie or Brownie Cookie Pie. For gifting and sharing, go with Mini Cookie Pies. For a centerpiece, bake a Giant Cookie Pie.
Meanwhile, if you are working around dietary needs, start with a simple Vegan Cookie Pie or Gluten Free Cookie Pie before moving into heavier filled versions. That way, you learn the behavior of the adapted dough first instead of managing too many variables at once.
Also Read: Croquettes Recipe: One Master Method + 10 Popular Variations
Final Thoughts on This Cookie Pie Recipe
The best part of learning one strong cookie pie method is that it gives you much more than a single dessert recipe. It gives you a format you can return to and reshape depending on the mood, the season, the occasion, or the ingredients already in your kitchen.
On one day, it can be a warm chocolate chip cookie pie served with melting vanilla ice cream. On another, it can become a thick Biscoff cookie pie, a softer Nutella cookie pie, a rich brookie pie, or a shareable giant cookie pie cut into generous wedges. When you know how the dough should feel, how the middle should look, and when the bake is done, the whole category opens up in a way that feels genuinely practical rather than overwhelming.
Also Read: Ravioli Recipe Reinvented: 5 Indian-Inspired Twists on the Italian Classic
FAQs
1. What is a cookie pie recipe?
A cookie pie recipe is a dessert made by baking cookie dough in pie form, usually in a deep round pan so the center stays thicker and softer than a standard cookie. Unlike a cookie cake, it is less focused on decoration and more focused on texture.
2. Is cookie pie the same as cookie cake?
Not exactly. A cookie pie is usually deeper, softer in the center, and more likely to include a filling or a thicker middle. A cookie cake, by comparison, is often flatter and more surface-focused.
3. What is the difference between cookie pie and pie cookies?
Pie cookies usually means cookies inspired by pie flavors, such as apple pie cookies or pecan pie cookies. Cookie pie, by contrast, is built from cookie dough and baked as one large dessert.
4. What is the best cookie pie version for beginners?
For most bakers, the easiest starting point is chocolate chip cookie pie. It gives you the clearest feel for how the dough should look, how the center should bake, and when the pie is ready to come out of the oven.
5. How do I know when cookie pie is done?
It is usually done when the edges are set, the top no longer looks wet, and the center still appears slightly soft. If the middle looks shiny, loose, or obviously raw, it needs more time.
6. Should cookie pie be gooey in the middle?
Yes, but only to a point. Ideally, the center should feel soft, rich, and slightly gooey after cooling. It should not be wet or underbaked.
7. What pan is best for cookie pie?
An 8-inch deep round cake tin or an 8-inch springform pan is usually the best choice. That depth helps the dessert keep its soft center without spreading too thin.
8. Can I make cookie pie in a pie dish?
Yes, you can. However, the result will usually be shallower than a deep-pan version, so the texture may feel closer to a thick cookie than a stuffed bakery-style slice.
9. Can I make mini cookie pies instead of one large pie?
Absolutely. Mini cookie pies are one of the easiest ways to turn the same base dough into something more party-friendly. A muffin tin usually works best.
10. How long do mini cookie pies take to bake?
Most mini cookie pies bake in about 14 to 18 minutes, depending on the tin, the dough depth, and whether they include filling.
11. What are the best cookie pie fillings?
If you want a bakery-style stuffed center, Biscoff and Nutella are excellent options. If you want a more classic result, mixed chocolate chunks, chips, or chopped nuts are often better choices. Brownie filling also works beautifully for brookie pie.
12. How much filling should I use?
Generally, around 180 to 200 grams of spread-style filling is enough for an 8-inch deep pie. That gives you a visible, rich center without overwhelming the structure.
13. Why did my cookie pie sink in the middle?
A little sinking is normal, especially in filled versions. A major collapse usually points to too much filling, not enough chilling, uneven dough thickness, or underbaking.
14. Why did my cookie pie turn out dry?
Usually, dryness comes from too much flour, too much baking time, or using a pan that spreads the dough too thin.
15. Why did the filling leak out?
Filling tends to leak when it is too close to the edge, too warm during assembly, or not properly sealed under the top layer of dough.
16. Can I freeze cookie pie dough?
Yes. You can freeze the dough before assembly, freeze shaped dough for mini cookie pies, or even freeze the fully assembled unbaked pie. Colder dough often gives you cleaner structure, especially in stuffed versions.