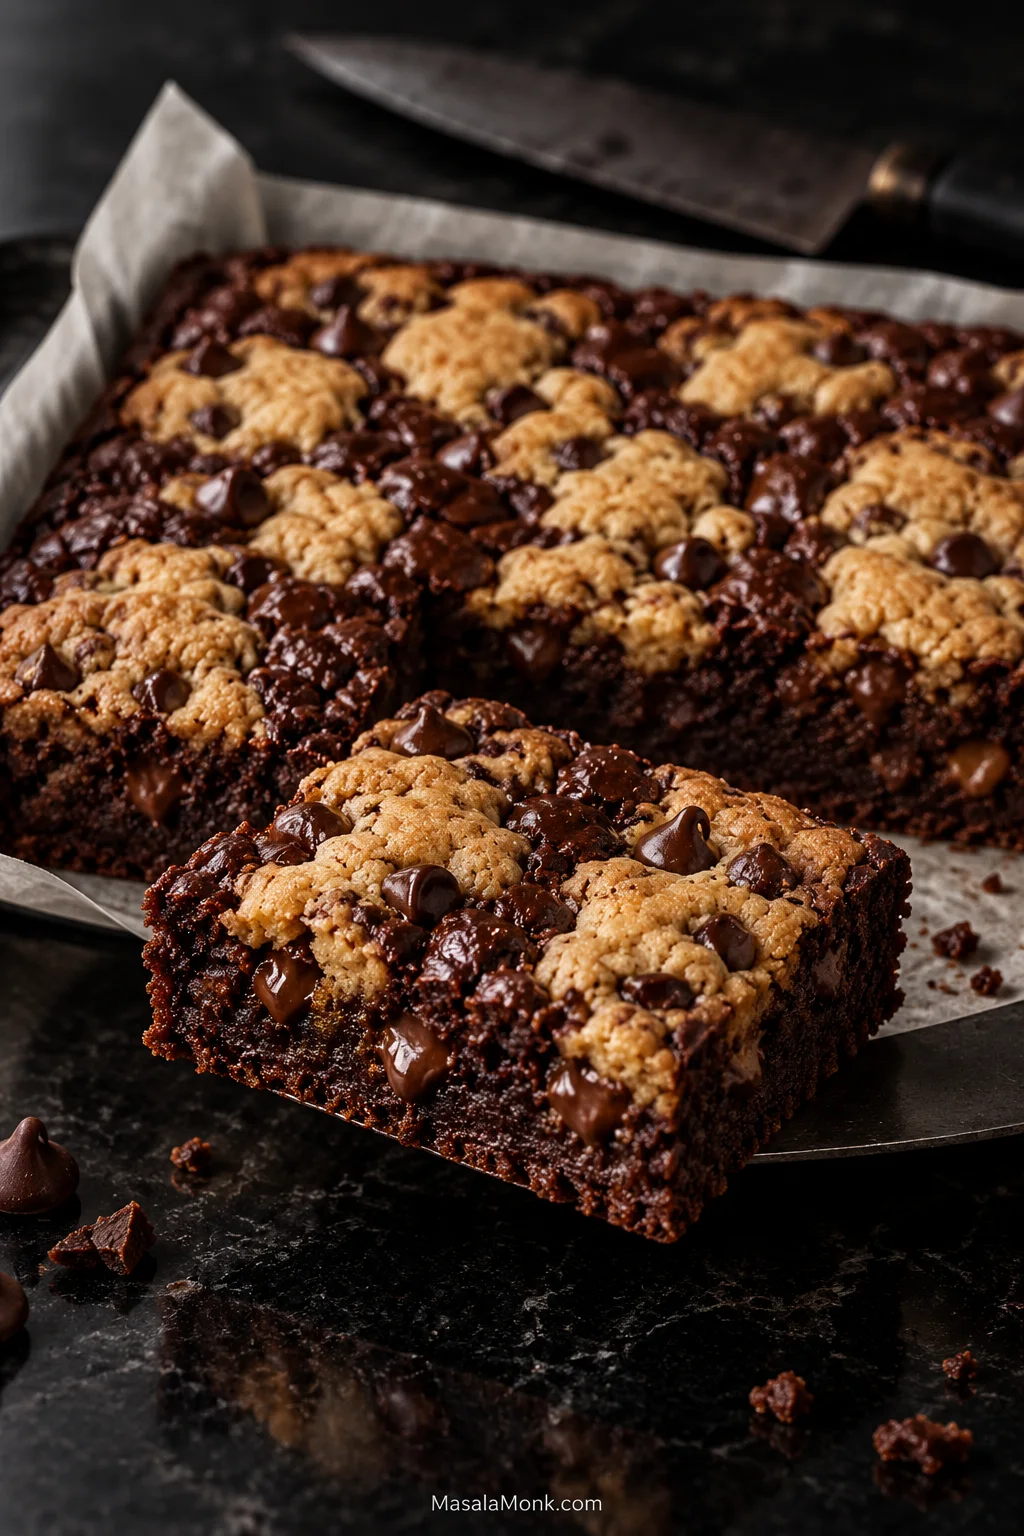
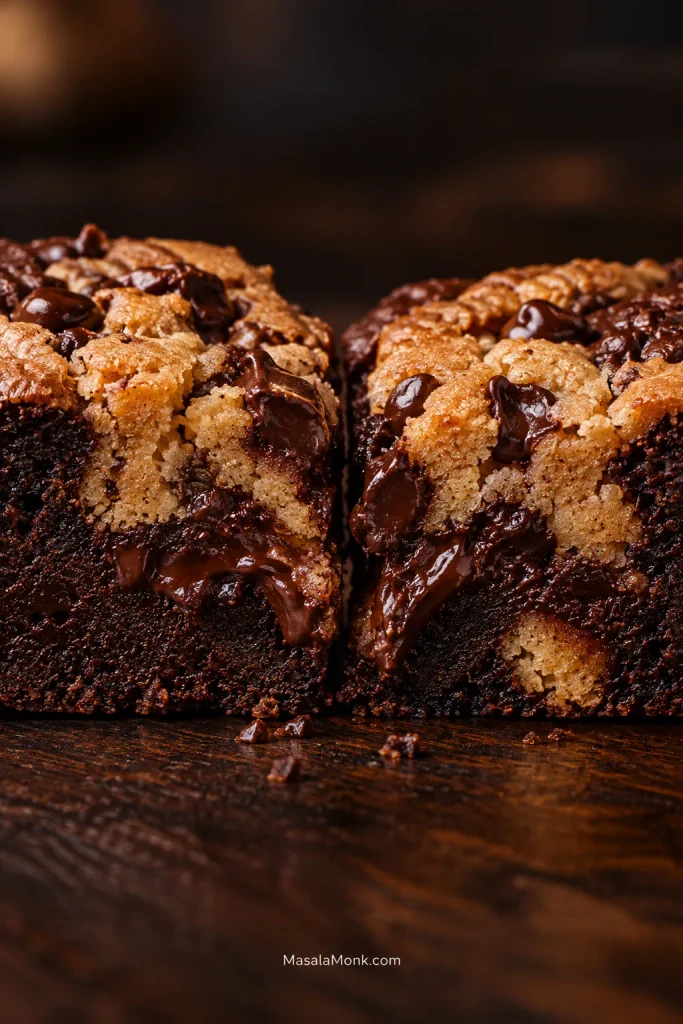
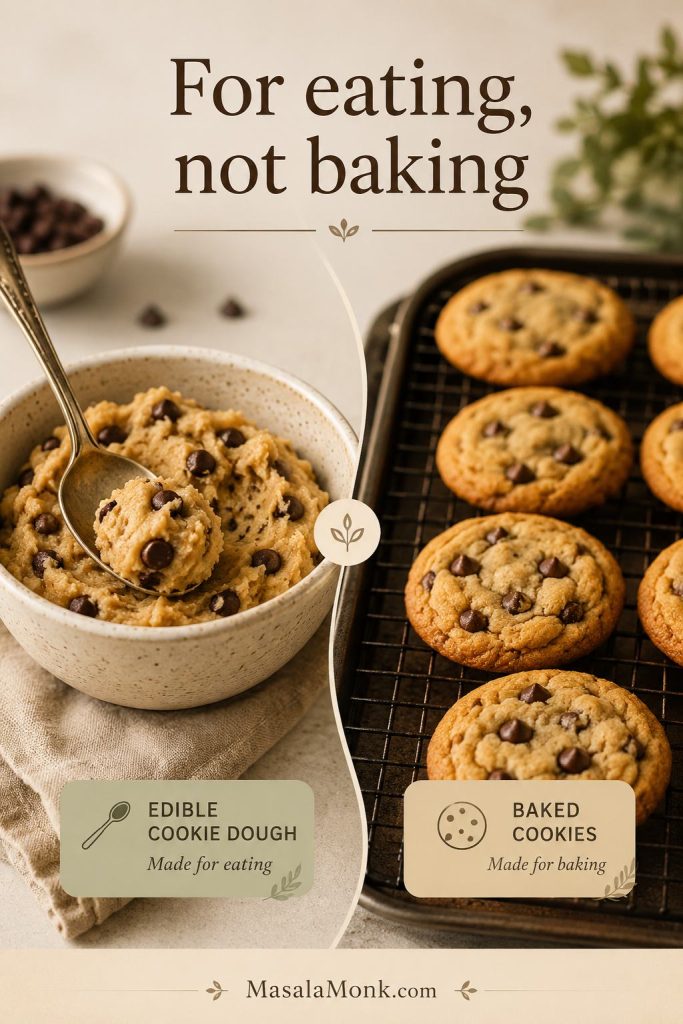
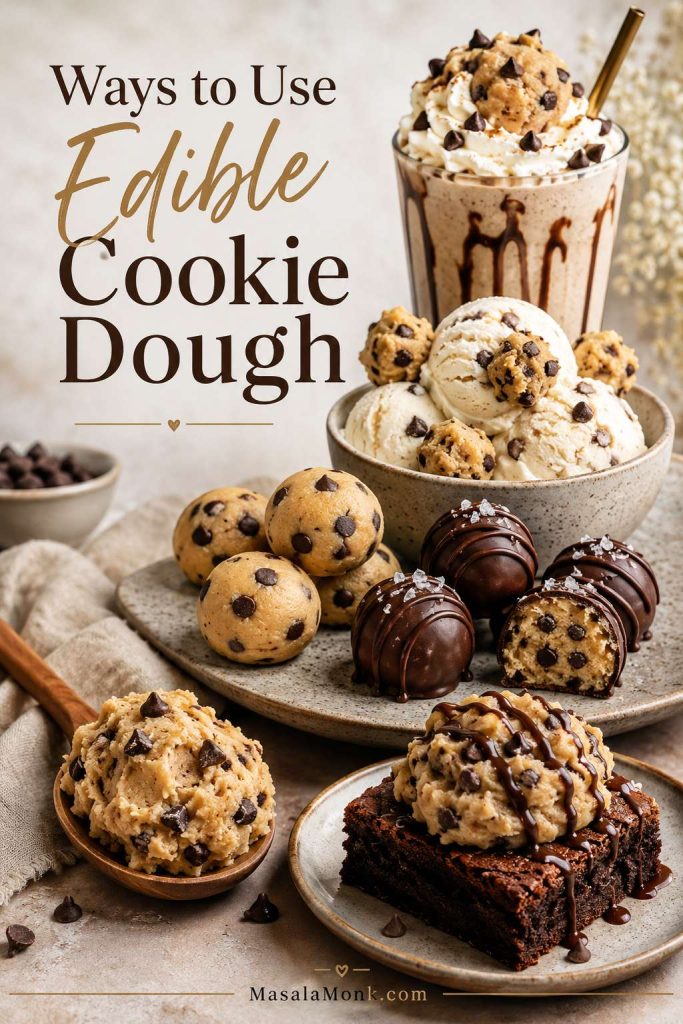
A good brookie should give you chewy chocolate chip cookie, dense fudgy brownie and melted chocolate in the same bite—not a finished cookie sitting over a brownie that is still raw underneath.
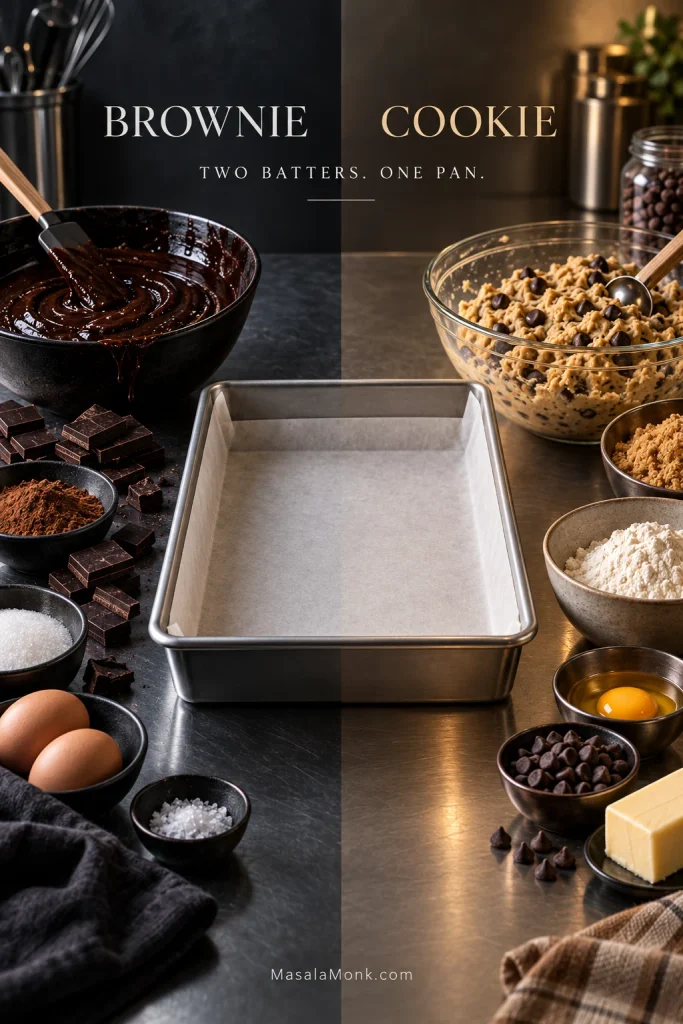
Brookies are brownie-cookie bars made by baking brownie batter and chocolate chip cookie dough together in one pan. The tricky part is getting both ready at the same time. This version keeps the brownie fairly shallow and scatters flattened cookie dough over the top, leaving dark brownie visible between the pieces.
Those open patches darken and turn glossy in the oven as the cookie picks up golden edges around them. The brownie should finish fudgy rather than fluid: soft while warm, dense after cooling, and sturdy enough to pick up without losing that moist center.
The Brookie Control Panel
Pan
9 × 13-inch (23 × 33 cm) light-colored metal pan
Oven
350°F / 175°C conventional / 160°C fan
Cookie coverage
20 flattened pieces with plenty of brownie still visible
Bake
Start checking around 28 minutes; expect about 30–36 minutes
Ready when
Cookie edges are lightly golden and brownie near the middle gives moist crumbs, not wet batter
Cooling
About 1 hour for fudgy squares; longer for especially neat cuts
Measure the brownie and cookie ingredients separately. Grams are the most dependable measure for flour, cocoa and chocolate; volume measures are included as a practical backup.
For the fudgy brownie
113 g (½ cup) unsalted butter, melted
40 mL (about 2 tablespoons + 2 teaspoons) neutral oil, such as sunflower or canola oil
200 g (1 cup) granulated sugar
50 g (¼ cup packed) light brown sugar
2 large eggs + 1 large egg yolk
2 teaspoons vanilla extract
50 g (about ½ cup + 1½ tablespoons) unsweetened cocoa powder
75 g (about ½ cup + 2 tablespoons) all-purpose flour (plain flour)
½ teaspoon fine salt
140 g (5 oz / about ¾ cup + 1 tablespoon) semisweet or bittersweet chocolate chips or chopped chocolate
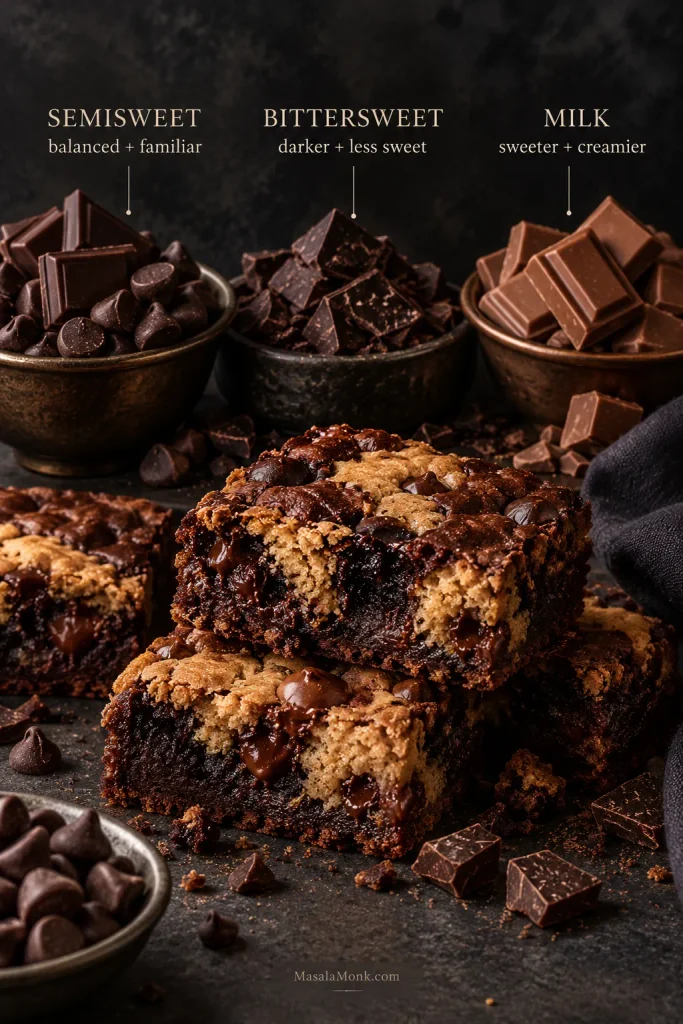
The modest amount of flour keeps the brownie dense. The extra yolk adds richness, and the oil helps it stay soft after cooling. Semisweet chocolate gives you a sweeter, more familiar bar; bittersweet takes the flavor darker and reins in some of the sweetness from the brownie and cookie together.
Use unsweetened cocoa powder, not drinking chocolate.
For the chewy chocolate chip cookie
85 g (6 tablespoons) unsalted butter, softened
100 g (½ cup packed) light brown sugar
50 g (¼ cup) granulated sugar
1 large egg
1 teaspoon vanilla extract
160 g (about 1⅓ cups) all-purpose flour (plain flour)
½ teaspoon baking soda / bicarbonate of soda
½ teaspoon fine salt
115 g (4 oz / about ⅔ cup) semisweet chocolate chips or chopped chocolate
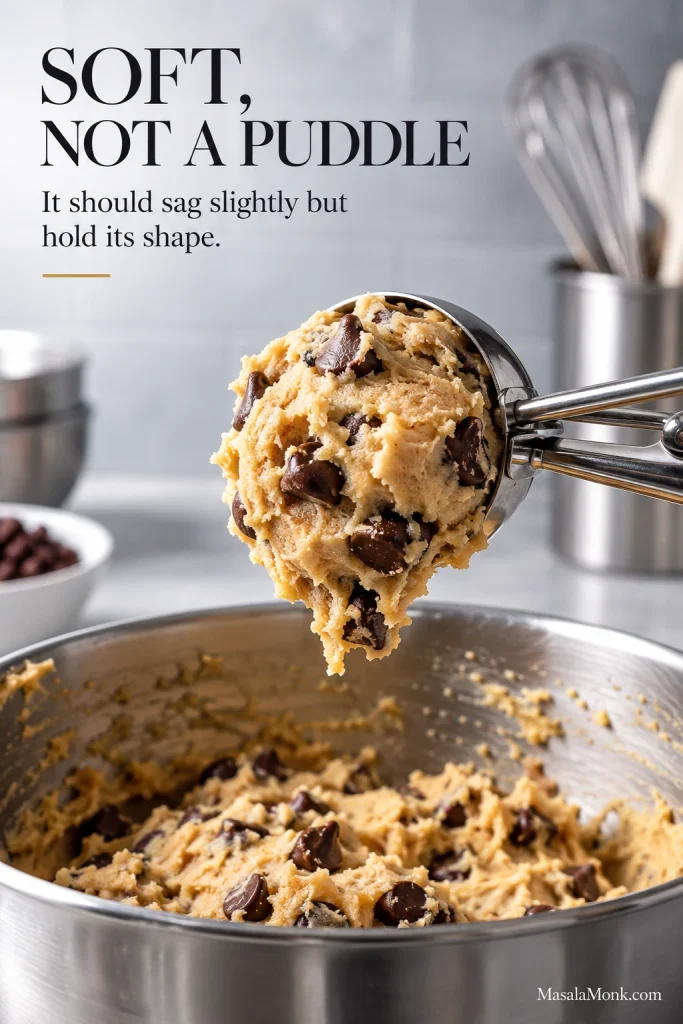
The two mixtures start differently: use melted butter in the brownie and softened butter in the cookie dough. The finished cookie dough should sag slightly when scooped but hold its shape rather than spreading immediately.
Brookies only become one dessert at assembly. Until then, the brownie needs to stay spreadable while the cookie dough needs enough body to portion and place—two textures heading toward the same finish line by different routes.
How to Make Brookies
1. Prepare the pan and oven
Heat the oven to 350°F / 175°C conventional / 160°C fan. Line a light-colored metal 9 × 13-inch (23 × 33 cm) pan with parchment, leaving enough overhang on two sides to lift out the cooled slab. Lightly grease any exposed sides.
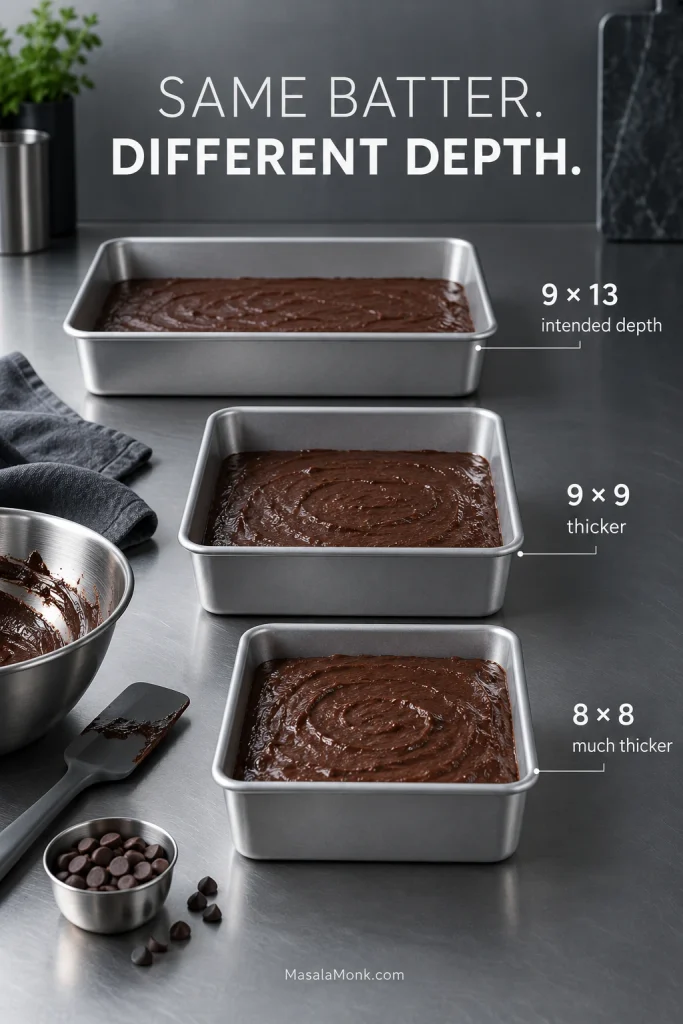
Use the stated pan size for this batch. In a smaller square pan, the brownie becomes much thicker and takes longer to set while the exposed cookie keeps browning.
2. Make the brownie batter
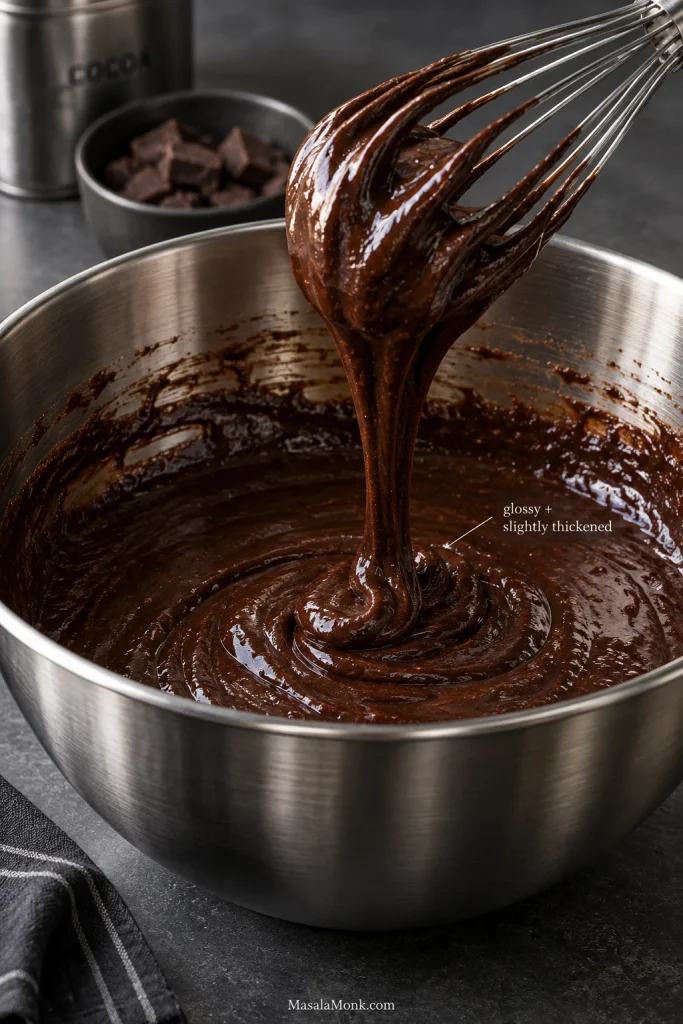
Whisk the melted butter, oil and both sugars until glossy and evenly combined. Add the eggs, extra yolk and vanilla and whisk vigorously for 60–90 seconds, until the mixture looks smoother and slightly thicker.
Use the sheen and the thick ribbon from the whisk as your checkpoint here. Once the dry ingredients go in, the goal changes from building the batter to folding only until the flour disappears.
Add the cocoa, flour and salt. Fold until the last dry streaks disappear, then fold in the chocolate. Stop there.
Spread the batter evenly through the pan, right into the corners. One thicker pocket can remain soft after the brownie around it is ready.
3. Make the cookie dough
Mix the softened butter with both sugars for 1–2 minutes, until creamy. A hand mixer is convenient, though a sturdy spoon or spatula works too. Mix in the egg and vanilla, followed by the flour, baking soda and salt. Fold in the chocolate as soon as the flour disappears.
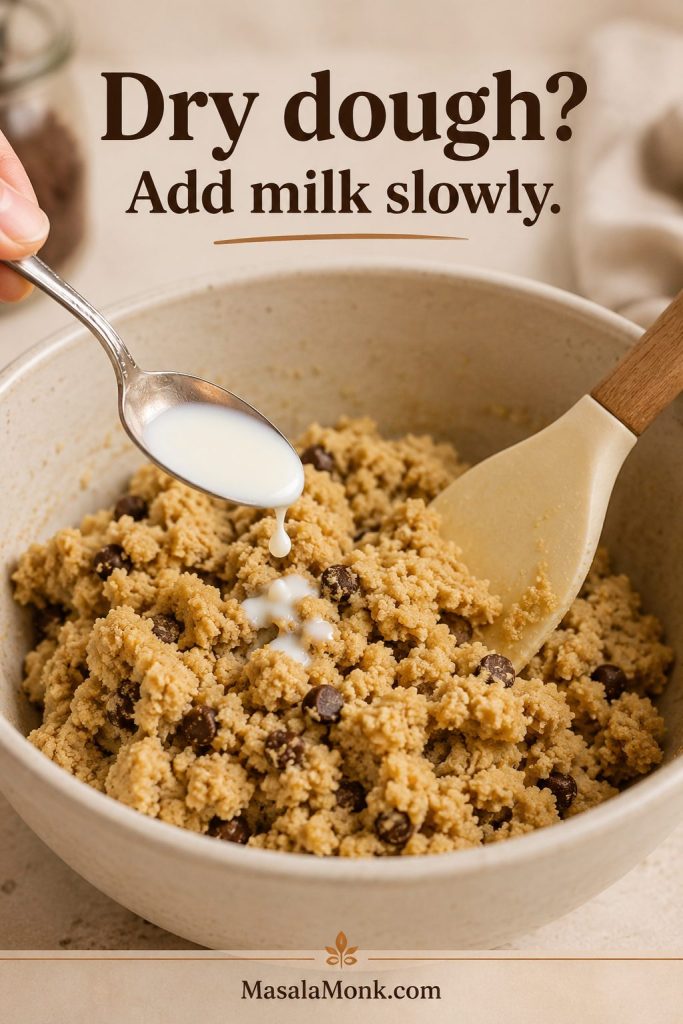
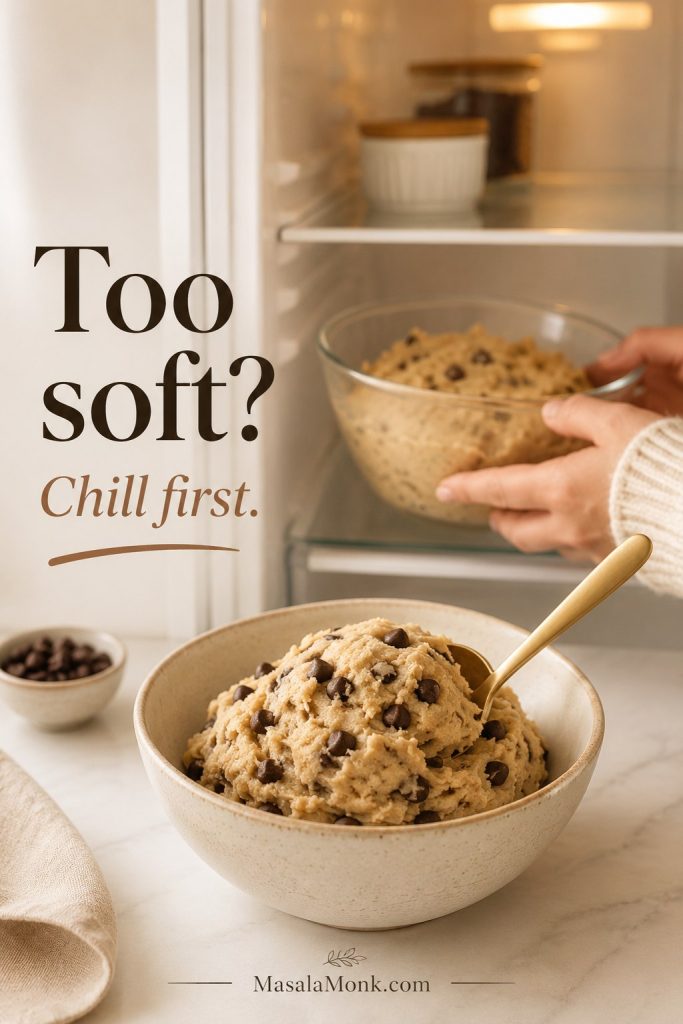
If a scoop of dough immediately slumps flat, refrigerate the bowl for about 10 minutes. You want soft dough, not a puddle.
Meanwhile, the dough needs enough structure to stay where you place it. A soft mound can spread into the brownie during baking; a loose dough can spread too far and close the gaps you deliberately left between the cookie pieces.
4. Add the cookie dough
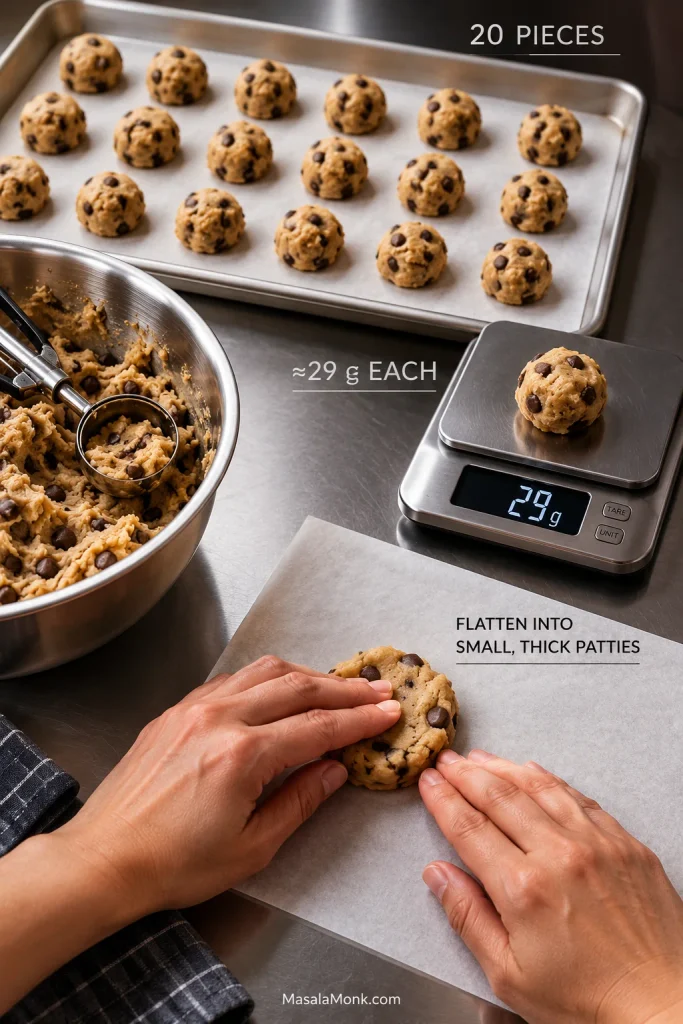
Divide the dough into 20 portions, about 28–30 g each, and flatten them into small, thick patties. They do not need to be identical.
Portioning before assembly keeps the cookie load distributed across the pan instead of concentrating it in a few heavy spots. Roughly 28–30 g per piece gives you a repeatable starting point without requiring perfectly identical patties.
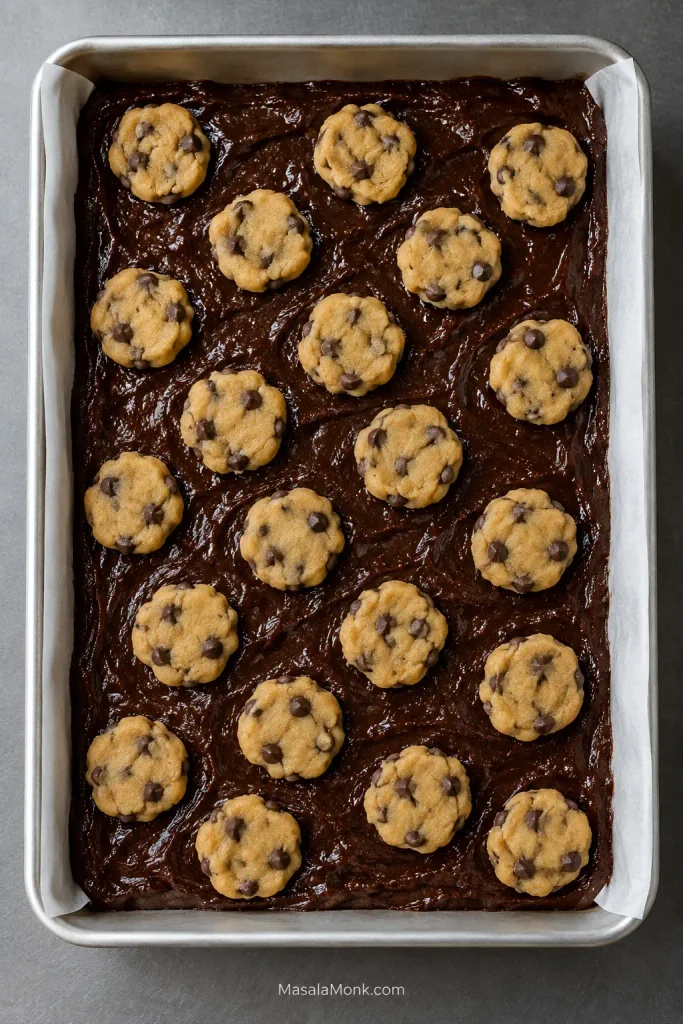
Scatter them across the brownie so cookie reaches every part of the pan while plenty of dark brownie remains visible.
Before baking, those dark channels of exposed brownie are doing useful work. They give you unobstructed places to watch the surface change, insert a tester and judge the brownie itself rather than relying on the cookie color above it.
The surface may look slightly unfinished. Leave it that way.
5. Bake
Bake on the center rack. Start checking at about 28 minutes; expect about 30–36 minutes in a light-colored metal pan.
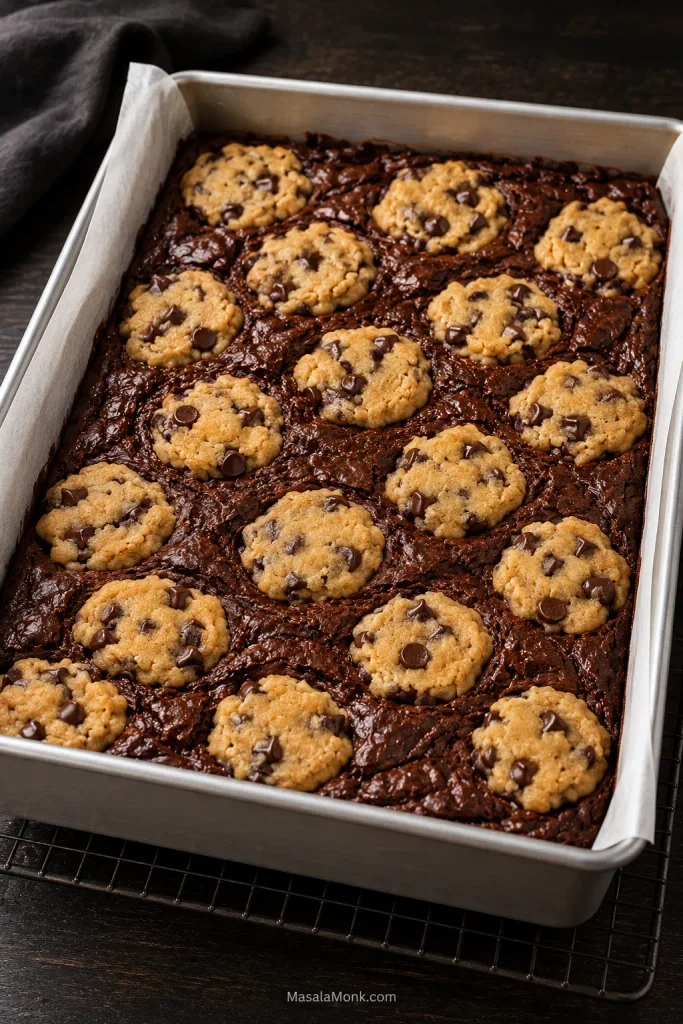
As the pan bakes, the pale cookie pieces spread and pick up color. Brownie showing between them turns darker and glossy; melted chocolate gathers along the places where the two meet.
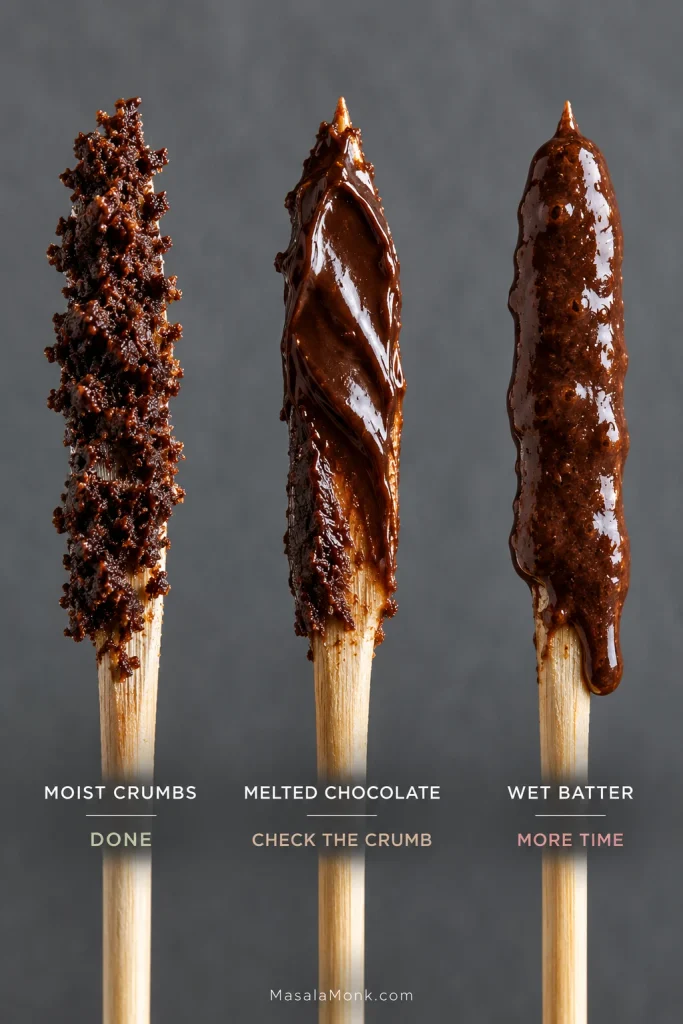
The cookie edges should look set and lightly golden, and the brownie between them should no longer look fluid. Push a tester into one of the brownie patches near the middle: you want moist crumbs, not wet batter. A small tremble is fine; a loose wave through the middle needs more time.
Compare this with the pre-bake pan: the cookie islands have widened, but the brownie windows have not disappeared. That mottled surface is more useful than waiting for the top to become one uniformly browned layer.
If the cookie already has enough color, lay foil loosely over the pan and keep baking. Leave the sides open so steam can escape, and rotate the pan late in the bake if one side of your oven consistently browns faster.
Set the pan on a wire rack. Straight from the oven, the chocolate is molten and the brownie is fragile; even a properly baked middle will look much softer than it does later. About an hour gives you fudgy squares that hold together well enough to pick up. Going in sooner is completely reasonable when what you want is a warm brookie and a fork.
How to Tell When Brookies Are Done
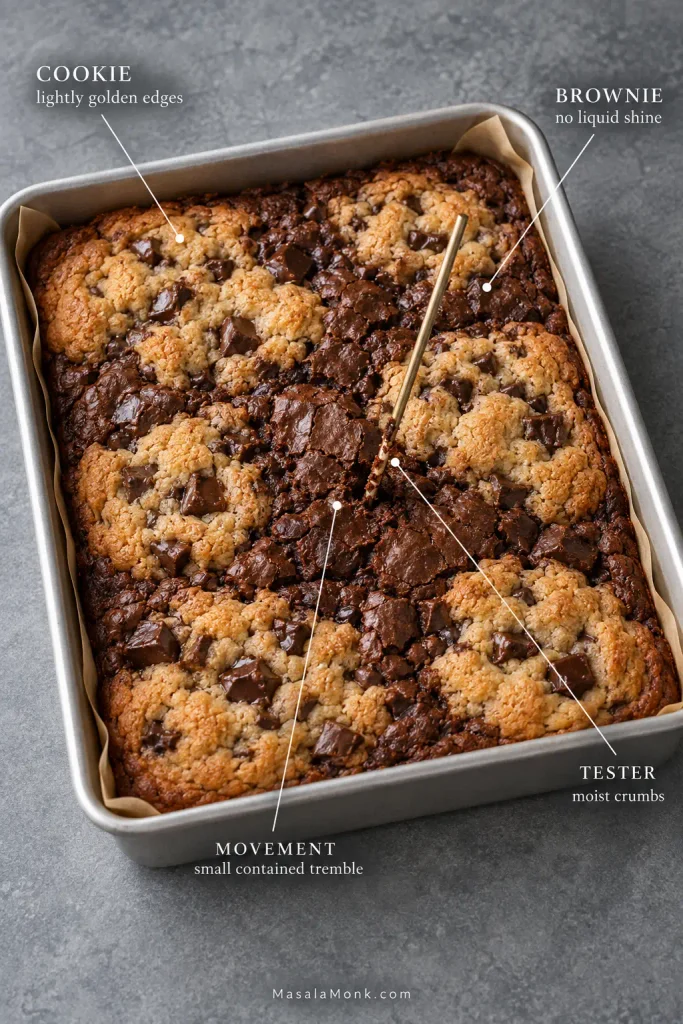
Brookies are done when the cookie edges are lightly golden, the brownie between them has lost its liquid shine, the middle gives only a small contained tremble, and a tester inserted into brownie brings up moist crumbs rather than wet batter.
Read the signals together rather than letting one overrule the others. Start with the surface, check how the center moves, then use a tester in an exposed brownie patch to confirm what the pan is already telling you.
The timer tells you when to start looking. The cookie and brownie tell you when to stop.
Cookie: the edges look set and lightly golden; the middle of each patch can remain soft.
Brownie: a little gloss is fine, but there should be no loose batter between the cookie pieces.
Movement: a contained tremble is fine. A loose wave through the middle needs more time.
Tester: use a brownie patch near the middle and avoid an obvious pool of melted chocolate.
Fudgy, gooey or actually raw?
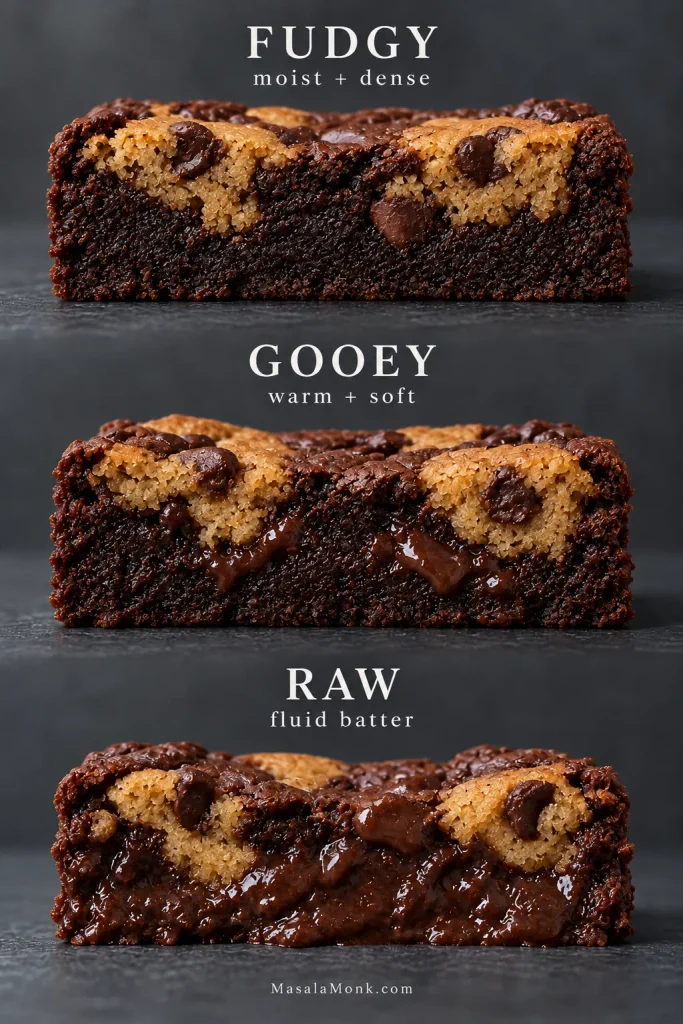
Fudgy brookies are moist and dense, but the brownie itself is baked. They may look very soft while hot and become properly sliceable as they cool.
Gooey brookies are softer when served warm: the brownie is very moist, melted chocolate runs through the crumb, and the bar is messy without behaving like batter.
Raw brookies are different. The brownie remains fluid, leaves obvious batter on the tester and can collapse or flow instead of firming up.
Cooling can firm a properly baked fudgy or gooey center, but it cannot turn fluid batter into crumb. If the middle still flows rather than holding structure, waiting longer on the counter is not the fix.
How to Read the Tester
Melted chocolate can smear across a tester or knife even when the brownie is baked. Look at the crumb around that chocolate before deciding the pan needs longer.
If your tester lands in melted chocolate, move a little and test an exposed brownie patch again. A second location is more useful than adding several unnecessary minutes simply because the first tester came out dark and glossy.
If your cookie repeatedly reaches the right color well before the brownie, the pan is the first thing worth examining.
What Pan Should You Use for Brookies?
Use a light-colored metal 9 × 13-inch (23 × 33 cm) pan for this recipe.
The same batch becomes much thicker in an 8 × 8 or 9 × 9-inch pan, which means the brownie needs more oven time underneath cookie dough already exposed directly to the heat.
Surface area drops faster than the side lengths suggest: a 9 × 13-inch pan gives 117 square inches, 9 × 9 gives 81, and 8 × 8 only 64. With the same batter, that makes the brownie substantially deeper in a square pan.
Very dark metal can brown the bottom and edges faster. Glass and ceramic may not follow the same timing either, so watch the brownie rather than assuming the clock transfers unchanged.
Thick square-pan brookies can be excellent. They just need a recipe developed for that deeper pan.
If the batch in front of you already has hard edges, a wet middle or one strangely soft patch, the pattern can usually tell you what happened.
Brookies Troubleshooting
Raw Centers
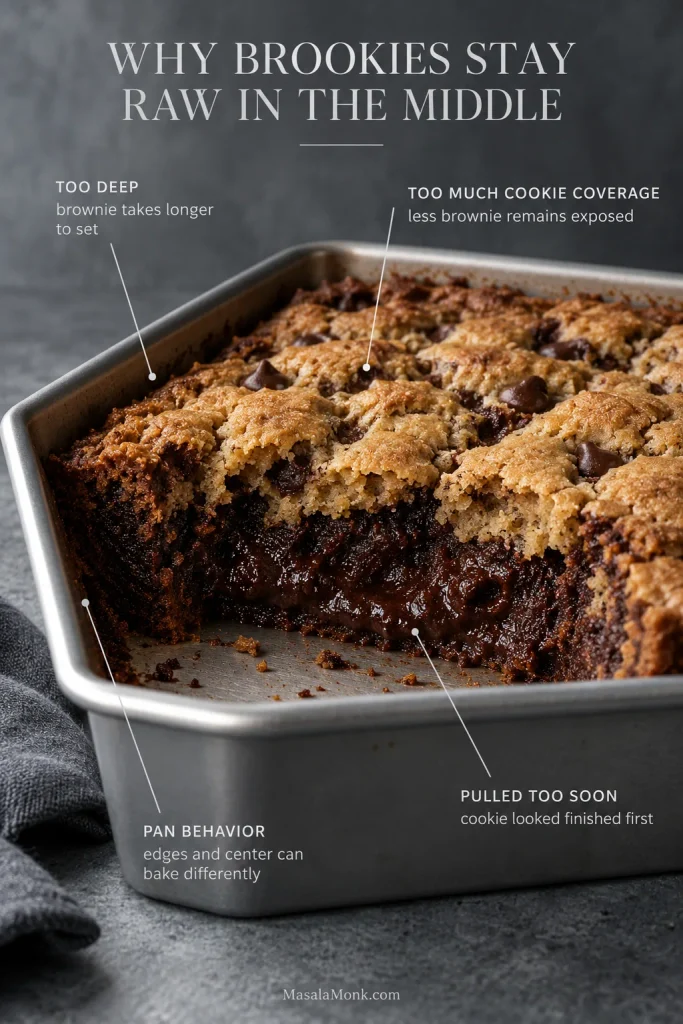
Why are my brookies raw in the middle?
The usual causes are too much brownie depth, very heavy cookie coverage, bakeware that leaves the middle lagging behind, or simply taking the pan out because the cookie looked finished first.
Golden cookie over wet brownie still needs more oven time. Cover the top loosely with foil and continue in short intervals.
The cookie is exposed directly to oven heat while the brownie center has to set underneath and between it. As a result, a golden top can arrive before a deep or heavily covered middle has finished baking.
The edges are hard but the middle is raw
This is frustrating because the pan can look completely finished around the outside. A thick brownie layer, dark or glass bakeware, or an oven running hot can all push the perimeter ahead.
Protect anything already browned and give the middle more time. If cakes and brownies behave this way in your oven too, check the actual oven temperature with a thermometer.
Uneven Baking
Only one part of the pan is underbaked
One soft patch usually means the batter was thicker there, a large cookie piece covered that spot, or the oven has a hot or cool area. The whole pan may not need more time.
Spread the brownie carefully into the corners next time, and rotate late in the bake if your oven has a familiar hot side.
Texture, Sinking and Cutting Problems
The cookie dough sank into the brownie
A little sinking is exactly what you want—the brownie and cookie should meet.
If the cookie dough almost disappears, it was probably very warm or divided into pieces that were too small. A short chill gives it more body.
They look raw as soon as I cut them
Warm brookies are supposed to be messy. An early slice can look alarmingly soft while the chocolate is molten.
Leave the rest of the slab alone for a while. A brownie that firms into a dense slice was still setting; one that continues to flow was underbaked.
The brownie is cakey, dry or crumbly
Start with the flour measurement and bake time. Extra flour and a few unnecessary minutes can move the brownie away from fudgy surprisingly quickly.
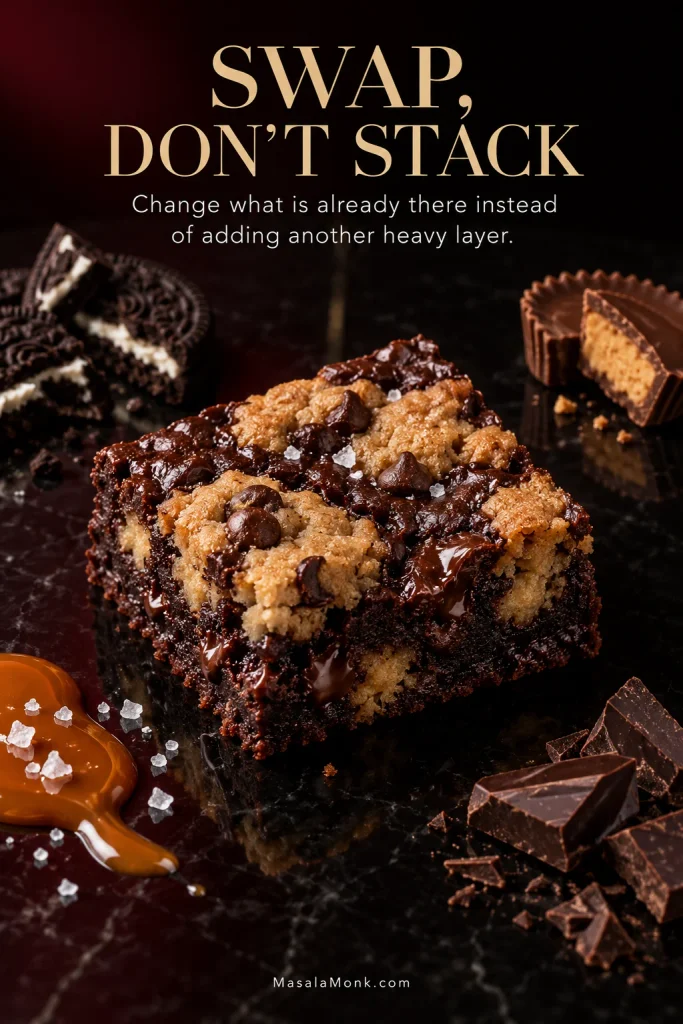
There is already plenty happening in this pan. The safest changes replace part of what is already there instead of adding another heavy layer: swap, do not stack.
For Brookie variations, think about structure before flavor: is the new ingredient replacing something already in the dough, or adding extra mass or moisture? A replacement usually preserves the original bake more predictably than another full layer.
Oreos or Peanut Butter Cups
Replace part of the chocolate in the cookie dough with chopped Oreos or peanut butter cups, keeping the overall quantity of chunky add-ins about the same. You still want the cookie dough to spread normally and leave brownie showing between the pieces.
Caramel and Flaky Salt
Caramel is easier to control after baking. Drizzle a little over the cooled slab and add flaky salt instead of putting a wet caramel layer through the middle before it goes into the oven.
Change the Chocolate
Bittersweet chocolate gives the bars a darker, less sweet finish; milk chocolate takes them in the other direction. Chopped chocolate mixed with chips gives you larger melted pockets alongside smaller pieces running through the crumb.
There are really two chocolate decisions here. Chocolate type changes sweetness and cocoa intensity, while chocolate form changes the pockets you bite into—chips tend to stay smaller, whereas chopped chocolate can melt into broader streaks.
Changes That Need Their Own Recipe
Brown butter changes more than flavor because some of its water disappears during browning. That affects the way cookie dough spreads, so it is not a casual one-for-one swap. Our brown butter chocolate chip cookies go deeper into the moisture loss and what it does to the dough.
Brownie mix and refrigerated cookie dough need their own quantities and timing too. Box sizes, fat levels and intended pan sizes vary enough that dropping random packaged products into this method would be guesswork.
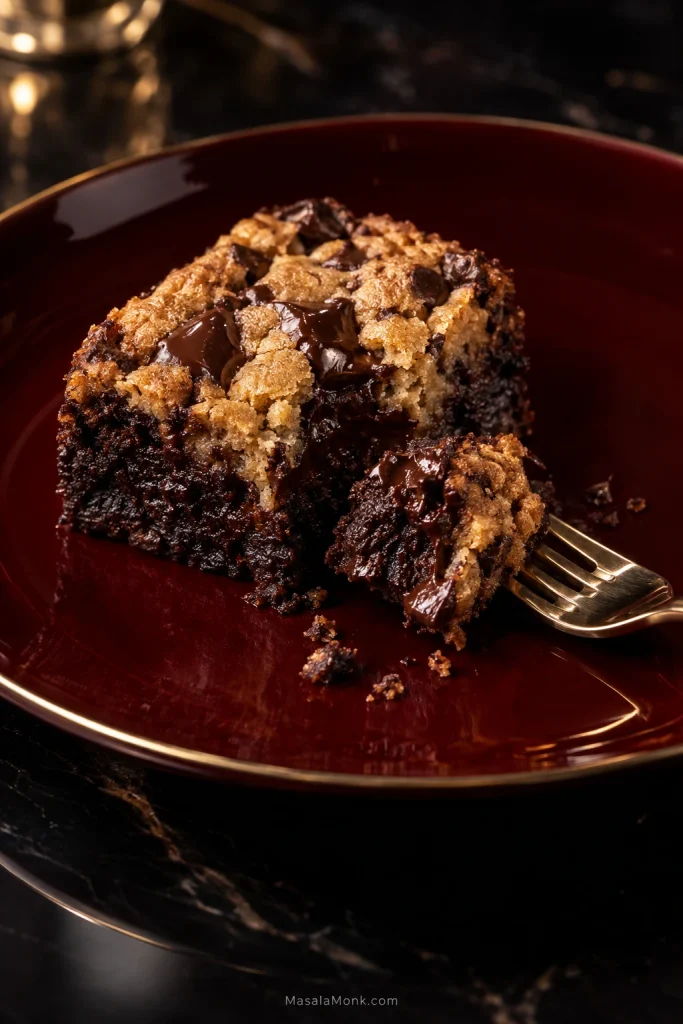
Give the pan about 30–45 minutes. The brownie will have started to firm, but the chocolate will still be soft and the middle deliberately messy. This is the fork version: tender cookie, brownie at its softest and melted chocolate running through the places where the two meet.
Warm serving is a texture choice, not a shortcut around doneness. Bake the Brookies fully first; the 30–45 minute rest simply catches them while the brownie is especially soft and the chocolate is still loose enough for a fork.
For neat fudgy squares
Wait about an hour, or until the slab feels stable enough to lift with the parchment. Move it to a board and cut with a large sharp knife.
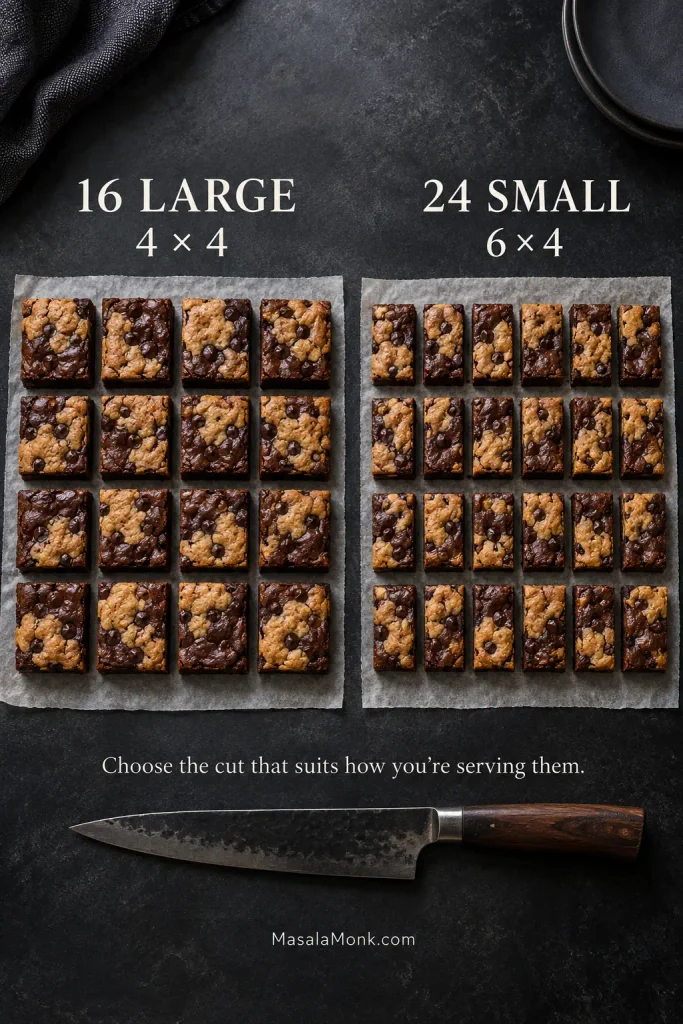
A little chocolate on the blade is perfectly normal. Cut into 16 larger squares for dessert portions or 24 smaller bars for sharing, wiping the knife between cuts when clean edges matter.
For serving, choose the grid before making the first cut: 4 × 4 gives 16 larger squares, while 6 × 4 gives 24 smaller pieces. Planning the pattern first also helps avoid narrow leftover strips at the edge.
For very clean cuts tomorrow
Cool the slab completely and chill it briefly before slicing. Bring the bars back toward room temperature before serving for a softer brownie and less-firm chocolate.
That also makes brookies easy to prepare a day ahead: bake the slab, let it cool, and save the cutting for when everything is firm and easy to handle.
Storage and freezing
Once the brookies are cool, keep them in an airtight container at room temperature for about 3–4 days. Refrigerated bars keep for roughly a week, though the brownie and chocolate both become firmer when cold.
For longer storage, wrap individual bars well and freeze them airtight for up to about 2 months. Thaw at room temperature.
At room temperature, the cookie stays chewy against a soft, fudgy brownie.
Cool enough to cut cleanly, the Brookie still keeps both textures visible: chewy cookie folded into fudgy brownie, with softened chocolate at the seam.
Warm a square just enough for the chocolate to loosen and the boundary between the two almost disappears again. Both are good—it simply depends whether you want a neat bar in your hand or the softer version that needs a fork.
These are the brownies for the person who does not want chocolate cake pretending to be a brownie. The knife should crack through a thin shiny top, the edges should have a little pull, and the center should stay dense, soft, and deeply chocolatey without tasting raw.
If you have ever pulled a pan from the oven and wondered whether the middle was still underbaked or already past fudgy, this recipe is for that exact moment. It is a no-guesswork brownie guide: one bowl, no mixer, clear batter cues, and a simple way to know when to stop baking.
The rule is this: pull the brownies before they look completely finished. A toothpick should show crumbs or a light chocolate smear — not wet batter, and not a completely dry stick. Cooling turns that soft center into a fudgy slice.
This homemade brownie recipe from scratch uses melted chocolate, cocoa powder, butter, sugar, eggs, and a small amount of flour to give you boxed-brownie comfort with deeper chocolate flavor, chewy edges, and fewer last-minute doubts at the oven.
Fudgy brownies come from more fat and chocolate, less flour, no leavening, gentle mixing after flour, and a bake that stops before the center looks fully done. Use an 8-inch / 20 cm light metal pan, bake at 350°F / 175°C, and start checking early. The best cue is crumbs clinging to the toothpick, not a clean, dry one.
Best pan
8-inch / 20 cm light metal square pan
Oven
350°F / 175°C, or about 160°C fan-forced
Texture goal
Thin crackly top, chewy edges, dense chocolate center
Best cue
Crumbs or a light smear on the toothpick, not wet batter
If this is your first time baking brownies from scratch, do not try to memorize every detail. Remember one thing: the right moment looks slightly early.
Use this close-up before you slice the pan. the middle should look compact and set, not loose like batter.
A properly baked fudgy brownie looks moist and compact inside; if it looks loose, shiny, or batter-like, it needs more time.
Fudgy Brownie Recipe Card
Fudgy Brownies
A from-scratch batch of brownies with a thin shiny crust, chewy edges, and a dense chocolate center that firms as it cools. The key is simple: stop before the toothpick comes out clean, then let the brownies cool before slicing.
Prep Time
15 minutes
Bake Time
27–31 minutes
Cooling Time
At least 1 hour
Active + Bake Time
About 45 minutes
Yield
16 brownies
Difficulty
Easy to moderate
Pan
8-inch / 20 cm square metal pan
Oven
350°F / 175°C conventional, or about 160°C fan-forced
Equipment
8-inch / 20 cm square metal baking pan
Parchment paper
Heatproof mixing bowl or saucepan
Whisk
Rubber spatula
Fine mesh sieve
Digital kitchen scale, recommended
Sharp knife for slicing
No mixer is needed. The batter comes together in one main bowl: melt, whisk, fold, bake.
Ingredients
Ingredient
Amount
Unsalted butter
170g / 6 oz / 12 tbsp
Semi-sweet or dark chocolate, chopped
100–113g / 3.5–4 oz
Granulated or caster sugar
250g / 1¼ cups
Large eggs
2 whole eggs + 1 egg yolk
Vanilla extract
2 tsp / 10ml
Unsweetened cocoa powder
50g / about ½ cup, spooned and leveled
All-purpose flour / maida
65g / ½ cup, spooned and leveled
Fine salt
½–¾ tsp
Chocolate chips or chopped chocolate
100–120g / 3.5–4.25 oz
Instant coffee or espresso powder, optional
½–1 tsp
Instructions
Prepare the pan. Preheat the oven to 350°F / 175°C. Line an 8-inch / 20 cm square metal pan with parchment paper, leaving overhang on two sides for lifting.
Melt the butter and chocolate. Add the butter and chopped chocolate to a heatproof bowl. Melt gently in short microwave bursts, stirring between each, or use a bowl over barely simmering water. Stir until smooth and glossy, then let it stand until warm, not hot.
Whisk in the sugar. Add the sugar while the chocolate-butter mixture is still warm. Whisk for 45–60 seconds. It may look slightly grainy at first, then heavier and shinier as you whisk.
Add the eggs, yolk, and vanilla. Whisk in the 2 whole eggs, extra yolk, and vanilla until the batter looks smoother, thicker, and glossier. You want shine and structure, not cake-like air.
Fold in the dry ingredients. Sift in the cocoa powder, flour, salt, and optional coffee powder. Fold gently just until the dry streaks disappear.
Add more chocolate. Fold in the chocolate chips or chopped chocolate. The batter should be thick, slow-moving, and glossy when it falls from the spatula.
Bake. Spread the batter evenly into the prepared pan. Bake for 27–31 minutes, checking from 24 minutes. Look for set edges, a dry-shiny top with fine cracks, and a middle that still looks a touch underfinished. Do not wait for a clean toothpick.
Cool before slicing. Let the brownies cool for at least 1 hour. The soft middle turns sliceable as it rests. For the cleanest squares, cool completely, chill for 30–60 minutes, and cut with a sharp knife.
Recipe Notes
For best texture, use grams for the flour and cocoa powder. Brownies are sensitive to small changes in dry ingredients. The King Arthur Baking ingredient weight chart is useful if you often convert cups to grams.
Use maida as the all-purpose flour if baking in India.
A light metal pan gives the most reliable texture. Glass and dark pans can change the timing.
Use baking chocolate or a good dark/semi-sweet chocolate bar, not filled chocolate candy. Compound chocolate can behave differently because it uses different fats.
Do not reduce the sugar heavily on the first bake. Sugar helps moisture, chew, and the delicate top crust.
If your oven runs hot or your pan is dark, start checking around 22–23 minutes. For an OTG, preheat fully and bake on the middle rack.
First-bake non-negotiables: keep the flour low, use granulated or caster sugar, include the melted chocolate, skip leaveners, and pull the brownies before they look fully done. Once you know the texture, you can experiment more safely.
Quick bake targets: bake 27–31 minutes, start checking at 24 minutes, and cool at least 1 hour before judging the final texture. For hot ovens or dark pans, start checking at 22–23 minutes.
If you are baking right now, the recipe card has everything you need. The rest of this guide helps you read the cues in the bowl, in the pan, and on the toothpick, especially that strange little moment when the brownies look slightly underdone but are actually ready.
A good brownie is a balancing act: enough structure to slice, enough fat to stay fudgy, and enough sugar to give that thin top crust. The flour stays low compared with the chocolate, cocoa, butter, and eggs, so the brownies set dense instead of fluffy.
A little extra flour, a wider pan, or two extra minutes in the oven can change the whole bite. That is why this recipe leans on visual cues instead of asking you to trust the timer alone.
The finished square should feel dense in your fingers, bend slightly before it breaks, and taste like soft chocolate rather than cake.
What Makes Brownies Fudgy?
Fudgy brownies come from more fat and chocolate, less flour, no leavening, gentle mixing after the flour, and a bake that stops while the center is still soft-set. The texture finishes as the brownies cool.
Low Flour Keeps the Center Dense
Flour gives structure, but extra flour quickly moves the texture toward cake. This recipe uses just enough to hold the squares together while keeping the crumb compact and tender.
Butter, Chocolate, and Cocoa Build the Flavor
Melted butter and chocolate create the rich base. Butter makes the chocolate taste full and rounded, while cocoa powder gives the flavor depth. Chocolate chips or chopped chocolate add soft pockets through the batch, especially when served slightly warm.
The Extra Egg Yolk Helps With Chew
The extra yolk adds richness without adding too much lift. It helps the center feel softer and gives the edges a little more pull.
Sugar Helps Moisture and Shine
Sugar is not only there for sweetness. It helps the batch stay moist and supports the thin shiny crust on top. These taste sweetest while warm; once the brownies cool and set, the salt, cocoa, and darker chocolate balance the sugar better.
No Baking Powder or Baking Soda
A brownie is not trying to rise like cake. That is the whole point. Skipping baking powder and baking soda keeps the texture dense, rich, and compact.
Fudgy vs Chewy vs Cakey Brownies
Brownie texture sits on a spectrum. Some batches are almost like chocolate fudge, some are chewy like a boxed mix, and some are light enough to feel like cake. This version sits between fudge and chew: dense through the center, with enough edge pull to make each square satisfying.
Brownie Style
Texture
What Creates It
Fudgy brownies
Dense, moist, rich center
More fat and chocolate, less flour, shorter bake
Chewy brownies
Set edges with a little pull
Sugar, eggs, egg yolk, and enough structure
Cakey brownies
Lighter, taller, more open crumb
More flour, more air, leavening, longer bake
A brownie can be both fudgy and chewy. If you came here looking for a chewy brownie recipe, this version still gives you edge chew without giving up the dense chocolate middle.
Start by choosing the texture you actually want. because small changes in flour, fat, mixing, and bake time push brownies in different directions.
Before changing the recipe, choose the texture you want: fudgy brownies bake dense, chewy brownies pull slightly, and cakey brownies rise lighter.
Ingredients That Shape the Texture
Once you understand the texture goal, the ingredient choices make more sense. Butter and chocolate bring richness, eggs help the brownies set, sugar helps shine and chew, and flour decides whether the brownie stays dense or drifts toward cake.
Before the ingredient notes get detailed. this visual shows why each item matters to the final brownie texture.
Every ingredient has a job: fat adds richness, sugar helps the crust, eggs bind the batter, and flour decides how firm the brownie crumb becomes.
Butter
Butter is what makes the chocolate taste round instead of sharp. Melt it with the chopped chocolate so the batter starts smooth and glossy. Unsalted butter gives the most control, but salted butter can work if you reduce the added salt slightly.
Chocolate
Use semi-sweet or dark baking chocolate for the melted base. If you want brownies that taste nostalgic and sweet, choose semi-sweet chocolate. For a darker, more grown-up batch, choose chocolate closer to 70%. If cocoa, cacao, and dark chocolate labels ever feel confusing, MasalaMonk’s cacao vs chocolate vs dark chocolate guide is a useful companion.
Sugar
Granulated sugar or caster sugar both work. Caster sugar dissolves more easily, which can help the top bake up shinier. Brown sugar gives a softer, more caramel-like result, but it can make the crust less crackly. If the sweetness worries you, go darker with the chocolate before you start cutting sugar.
Eggs and Extra Yolk
The whole eggs help the brownies set, while the extra yolk adds richness and softness without making the batter too airy. Whisk until the mixture looks glossy before adding the dry ingredients.
Cocoa Powder
Unsweetened cocoa powder deepens the chocolate flavor. Natural cocoa gives a classic brownie taste; Dutch-process cocoa usually gives a darker color and smoother flavor. Sifting matters more here than fussing over the cocoa. Since the batter already contains melted chocolate and butter, the cocoa blends into a rich base; sifting simply prevents dry pockets.
All-Purpose Flour or Maida
Use all-purpose flour or maida. This is the ingredient to measure most carefully. A packed half cup can push the texture toward cake, so use grams when possible. If using cups, spoon the flour into the cup and level it instead of scooping straight from the bag. Do not use self-rising flour here.
Salt
Salt sharpens the chocolate flavor and keeps the sweetness from feeling flat. Use ½ teaspoon for a softer balance or ¾ teaspoon for a deeper bakery-style flavor.
Chocolate Chips or Chopped Chocolate
Chocolate chips give you little set pockets of chocolate. Chopped chocolate melts more lazily into the batter, which is lovely if you want soft streaks when the brownie is still slightly warm.
Coffee or Espresso Powder
A little instant coffee or espresso powder is optional. It does not make the brownies taste like coffee when used lightly; it simply makes the chocolate taste deeper.
Cocoa Powder vs Melted Chocolate in Brownies
Brownies can be cocoa-based, melted-chocolate based, or both. Cocoa powder brings strong chocolate flavor and keeps the recipe pantry-friendly; melted chocolate brings richness and a softer, more fudge-like center. This recipe uses both, and the visual below makes that split easier to understand before you compare the methods.
Look at the role of each chocolate ingredient first. cocoa brings intensity, while melted chocolate helps the brownie set softer.
For a deeper chocolate brownie, use cocoa for intensity and melted chocolate for softness; together, they build flavor without making the crumb cakey.
Brownie Method
Best For
Result
Cocoa powder only
Simple pantry brownies
Deep cocoa flavor, slightly lighter body
Melted chocolate only
Rich dessert-style brownies
Softer, denser, more fudge-like
Cocoa + melted chocolate
Classic fudgy brownies
Rich, balanced, chocolatey, reliable
Cocoa + chocolate chips
Easy chocolate pockets
Extra texture and melted chocolate bits
A cocoa-only brownie can still be excellent, but this recipe is designed for the deeper flavor and softer set that come from cocoa powder and melted chocolate together. For this version, keep the melted chocolate. If you want a cocoa-only brownie, it is better to use a recipe built for that style.
How to Make Fudgy Brownies
Now that the texture pieces are clear, the method is mostly about keeping the batter glossy, folding gently, and stopping the bake at the right moment.
1. Prepare the Pan and Oven
Preheat the oven to 350°F / 175°C. Line an 8-inch / 20 cm square metal pan with parchment paper, leaving overhang on two sides. A light metal pan gives the most predictable edge-to-center contrast.
2. Melt the Butter and Chocolate
Melt the butter and chopped chocolate gently until smooth. The mixture should look glossy and fluid. Let it stand briefly before adding eggs; warm is good, hot is not.
This is the foundation stage: smooth, glossy chocolate and butter before sugar, eggs, cocoa, or flour change the batter.
Once the chocolate and butter look smooth and glossy, stop heating; overheating can dull the flavor and make the base separate.
3. Whisk in the Sugar
Add the sugar while the chocolate mixture is still warm and whisk for 45–60 seconds. It may still look a little grainy, but it should feel heavier and shinier. This helps the surface bake into a thin crust.
The shiny-top work starts here. while the chocolate mixture is still warm enough to help the sugar begin dissolving.
While the chocolate mixture is still warm, whisk in the sugar so it starts dissolving and helps form that shiny crackly brownie top.
4. Add the Eggs, Yolk, and Vanilla
Whisk in the eggs, extra yolk, and vanilla until the batter looks smoother and slightly thicker. You are not trying to whip in cake-like air; you are trying to make the mixture glossy and well combined.
Before adding dry ingredients, look for a cohesive glossy base. that shine tells you the eggs and chocolate mixture are properly combined.
After the eggs go in, the batter should turn smoother and glossier; that change tells you the base is properly combined.
5. Fold in the Cocoa, Flour, and Salt
Sift in the cocoa powder, flour, salt, and optional coffee powder. Fold with a spatula until the last dry streaks disappear. Stop there. Overmixing at this stage can make the texture tougher and more cake-like.
Once flour enters the bowl. switch from whisking to gentle folding so the batter stays dense and tender.
Sift first, then fold gently; this keeps cocoa pockets out of the batter and protects the dense, tender brownie bite.
6. Add Chocolate Chips or Chopped Chocolate
Fold in the chocolate chips or chopped chocolate. When you lift the spatula, the batter should fall slowly, not pour like cake batter.
Lift the spatula before filling the pan. the way the batter falls tells you whether it is thick enough for fudgy brownies.
When the batter falls in a slow heavy ribbon, it has the thickness you want for fudgy brownies, not a light cake-style pour.
7. Bake Until the Center Is Soft-Set
Spread the batter evenly into the prepared pan. Bake for 27–31 minutes, checking from 24 minutes. Look for set edges, a thin shiny top, and a center that still looks slightly underfinished. Wet batter means it needs more time. If the toothpick is dry, do not panic; the brownies will still be good, but next time you can pull them a few minutes earlier.
Level the batter from corner to corner so timing. pan material, and toothpick checks can do their job fairly.
Spread the batter into the corners and level the surface; uneven batter thickness can make the edges dry before the middle sets.
The hardest part is that the right moment can look a little wrong. That softness becomes the dense chocolate middle later, once the brownies have cooled.
Let the brownies cool for at least 1 hour. Warm brownies lie; cooled brownies tell the truth. For clean bakery-style squares, cool completely, chill briefly, then slice with a sharp knife.
How to Get the Shiny Crackly Top
The shiny crackly top comes from sugar, eggs, fat, and heat working together. It is not just decoration; it is a sign that the batter was mixed well before the flour went in and baked hot enough for the surface to set into a thin crust.
Use enough sugar. Heavy sugar reduction can make the top dull and the texture drier.
Whisk sugar while the chocolate mixture is warm. Warm fat helps the sugar begin dissolving.
Whisk the eggs until the batter looks glossy. The mixture should look thicker before the dry ingredients go in.
Choose caster sugar if you have it. It dissolves more easily than coarse granulated sugar.
Fold gently after flour. Once flour is added, more mixing will not improve the top.
Preheat the oven fully. A properly hot oven helps the surface set at the right time.
Read the surface first: set edges and a dry-shiny top mean it is time to check the inside instead of baking by color alone.
First check the surface: a dry-shiny top and set edges mean it is time to test the inside, not keep baking by color alone.
Do not chase perfection here. A shiny crust is lovely, but it is not the only sign of a good brownie. Even a slightly duller top can still hide a beautiful fudgy middle.
How to Tell When Fudgy Brownies Are Done
Fudgy brownies are done when the edges are set, the top looks dry and lightly crackled, and a toothpick near the center comes out with crumbs or a light chocolate smear rather than wet batter.
This is the most important part of the recipe, especially if you usually second-guess brownies at the oven. You are pulling them while they still look a little soft, then trusting the cooling time to finish the texture. Test near the center, or halfway between the edge and center if the brownies look very soft. Do not test only at the edge, because the edge sets first.
Use this toothpick guide before adding more oven time. the sweet spot is a few crumbs with a light chocolate smear.
For the brownie toothpick test, aim for crumbs with a light chocolate smear; wet batter is underdone, but a clean pick often means overbaked.
Toothpick Result
Texture Result
What to Do
Wet raw batter
Raw middle
Bake 2–3 minutes more and check again
Thick chocolate smear, no raw batter
Softer middle
Remove if you like a softer middle, then cool fully
Crumbs with a light smear
Classic fudgy brownie
Best default point to remove from the oven
Mostly crumbs, little smear
Firmer square
Good for cleaner packed brownies
Completely dry toothpick
Likely overbaked
Still edible; next time, check earlier
Do not cut the pan right away to check if it is done. Freshly baked brownies can look too soft while warm, then set into clean squares once cooled. If your first slice is messy, the batch probably needed more time to firm up, not a different recipe.
Gooey vs Fudgy vs Underbaked Brownies
This is where many brownie mistakes happen. A fudgy center can look soft when warm, but raw batter is different. Use the visual first, then the table when you are not sure whether to pull the brownies or give them a few more minutes.
When softness makes you second-guess the pan, compare structure first: set brownies hold shape, raw batter does not.
The easiest clue is structure: gooey and fudgy brownies still hold shape, while underbaked brownies collapse or smear like batter.
State
What It Looks Like
What To Do
Gooey
Soft, sticky, and rich, but not liquid
Cool fully or chill before slicing
Fudgy
Dense, moist, sliceable, with a soft-set center
Ideal for this recipe
Underbaked
Wet batter, unstable middle, or liquid streaks
Bake a few minutes longer
Overbaked
Dry interior, hard edges, clean toothpick
Serve warm with sauce or ice cream
If the center looks slightly underfinished but not wet, you are usually in the fudgy window. When it looks liquid, it needs more time. This is the moment when the edges chew, the top cracks, and the inside still eats like chocolate fudge.
Pan Size, Oven Temperature, and Bake Time Guide
Best Pan and Size
A light metal 8×8-inch pan is the safest choice for this recipe because it gives set edges without overcooking the middle.
Pan size changes texture quickly. A wider pan spreads the batter thinner and bakes faster. With a smaller pan, the squares are thicker and need more time.
If your timing feels inconsistent, check the pan material before blaming the recipe. heat transfer changes the edge-to-center balance.
If your brownies overbake at the edges, check the pan first; light metal is usually the best pan for even fudgy brownies.
Timing Changes by Pan and Oven
Pan or Oven Setup
What Happens
What to Do
8×8-inch / 20 cm light metal pan
Best default texture
Use the recipe as written
9×9-inch metal pan
Thinner brownies, faster bake
Start checking 3–5 minutes earlier
7×7-inch pan
Thicker brownies
Bake slightly longer and check the center carefully
8×8-inch glass pan
Slower heat transfer, softer edges
Expect timing differences and watch the center
Dark metal pan
Edges can bake faster
Check early and avoid overbaking
9×13-inch pan
Different thickness and timing
Use a properly scaled version instead of guessing
Fan-forced oven
Stronger heat movement
Use about 160°C and check early
OTG
Heat can vary by rack and rod setting
Preheat fully and bake on the middle rack
In an OTG. rack position matters because the top and bottom rods can heat the pan unevenly if it sits too high or too low.
For OTG brownies, the middle rack gives steadier heat so the top does not overcook before the inside reaches the right set.
If a 9×9-inch pan is all you have, the recipe will still work, but the squares will be thinner and less plush. Start checking early.
For extra-thick bakery-style brownies, do not simply overfill the pan or guess the bake time. Use a smaller pan only if you are ready to bake longer and check carefully near the center.
Time is a range, not a command. Your pan, oven, chocolate, and batter thickness all affect the final bake. The best square should feel dense in your fingers, not springy like cake.
Homemade Brownies With Boxed-Brownie Comfort
Boxed brownies are not the enemy. They train us to expect chew, shine, sweetness, and a predictable center. The real frustration is spending more time on homemade brownies and ending up with dry chocolate cake.
This recipe keeps those comforts — set edges, soft center, and a crackly top — but builds deeper flavor with real chocolate and cocoa powder. The trick is not to imitate the box exactly; it is to keep the comfort while learning the one cue the box cannot teach you: when to stop baking.
You get the comfort of the box, but with a darker, fuller chocolate bite. For another easy cut-and-share dessert, MasalaMonk’s sweetened condensed milk fudge leans more candy-like while still giving you neat chocolatey squares.
Why Brownies Turn Cakey, Dry, or Too Gooey
When a batch goes wrong, it is usually not mysterious. It is almost always flour, mixing, pan size, chocolate temperature, or a few extra minutes in the oven.
Common Brownie Problems and Fixes
Problem
Likely Reason
Fix Next Time
Brownies turned cakey
Too much flour, overmixing, leaveners, or overbaking
Measure flour carefully, fold gently, skip leaveners, and check earlier
Brownies are dry
Overbaked, pan too large, or too much flour
Pull the brownies before the toothpick is completely dry
Brownies are too soft
Underbaked or sliced while warm
Cool fully; bake a few minutes longer next time if the center was truly raw
No crackly top
Sugar was not whisked well or was reduced too much
Whisk sugar well into the warm mixture and avoid heavy sugar cuts
Brownies sank in the middle
Center was underbaked or the pan was moved too early
Bake until the edges are set and the center is soft-set
Hard edges
Overbaking, dark pan, or strong side heat
Use a light metal pan and start checking earlier
Brownies look oily
Chocolate mixture was too hot or batter did not emulsify smoothly
Let melted chocolate stand briefly and whisk eggs in well before adding flour
Top looks done but center is raw
Oven heat too high, dark pan, or pan too small
Use a light metal pan, test nearer the center, and lower the oven slightly next time if needed
Brownies crumble when cut
Cut too warm or flour/fat balance changed
Cool completely and chill briefly before slicing
Brownies taste too sweet
Chocolate was mild or salt/cocoa balance was low
Use darker chocolate, add salt, or add a little espresso powder instead of cutting sugar heavily
When in doubt, protect two things: the flour measurement and the bake time. Those details decide whether the finished squares stay dense and soft or drift into dry cake territory.
Even a batch that did not bake exactly as planned can usually be served well. Brownies are forgiving once you know how to use the texture you have.
If the center is liquid batter rather than soft brownie, return the pan to the oven for a few minutes if it is still warm. Once the pan has cooled, serve it only if the texture is set, not raw.
Problem After Baking
Save It Today
Too soft to slice
Cool fully, then chill 1–2 hours before cutting
Slightly underbaked but set
Serve chilled in small squares or warm as dessert bowls
Dry edges
Trim the edges and serve the softer center pieces
Overbaked batch
Warm slightly and serve with chocolate syrup, ice cream, or whipped cream
Messy cuts
Chill, wipe the knife between cuts, and cut smaller squares
Too sweet
Serve with unsweetened whipped cream, coffee, or a pinch of flaky salt
Before you write off the batch, match the fix to the problem you have. soft, dry, and overbaked brownies each need a different save.
If the batch is not perfect, adjust the serving: chill soft brownies, trim dry edges, or warm an overbaked piece with sauce.
A slightly imperfect batch is still dessert. Sometimes the save is not a new recipe; it is more chilling time, a sharper knife, or a scoop of ice cream.
Easy Brownie Variations
Once the base recipe works for you, use simple mix-ins and toppings. Keep the batter formula the same so the texture stays reliable.
Walnut brownies: fold in ¾ cup chopped toasted walnuts with the chocolate chips.
Double chocolate brownies: use both chocolate chips and chopped dark chocolate for extra pockets of melted chocolate. For a cookie version of that same deep chocolate mood, try these double chocolate chip cookies.
Espresso brownies: add 1 teaspoon instant espresso powder to deepen the chocolate flavor.
Sea salt brownies: sprinkle flaky salt on top just before baking or right after the brownies come out.
Orange chocolate brownies: rub a little fresh orange zest into the sugar before whisking it into the chocolate mixture.
Peanut butter swirl brownies: swirl a few spoonfuls of softened peanut butter into the top before baking. If that salty-sweet flavor is what you are craving, MasalaMonk’s peanut butter fudge guide is another easy square-cut dessert to try.
Avoid heavy wet toppings on the first try. Extra moisture changes the bake time and makes the center harder to judge.
Need Eggless Brownies?
Do not simply remove the eggs from this recipe. Eggs affect structure, shine, and the way the center sets. Without them, the batter needs a different balance of moisture and binding, usually from yogurt, curd, milk, or another tested substitute.
A proper eggless brownie needs its own formula, not just one missing ingredient. For general egg-substitute ratios in baking, MasalaMonk’s flax egg guide is useful, but brownies need more care than a simple one-for-one swap because the texture is so dependent on how the center sets.
How to Serve These as Hot Fudge Brownies
These brownies are excellent at room temperature, but they also make a rich hot fudge brownie dessert. Warm one square gently, place it in a bowl, add vanilla ice cream, and spoon over hot fudge sauce or MasalaMonk’s 3-minute homemade chocolate syrup. A pinch of flaky salt or chopped toasted nuts makes the chocolate taste even deeper.
Use this serving idea when a square tastes better warm than perfectly neat. sauce and ice cream turn softness into an advantage.
To make hot fudge brownies, warm the square gently first, then add ice cream and sauce so the dessert stays creamy, rich, and soft.
For chilled frosted brownies, let the pan cool completely, then spread a thin layer of chocolate cream cheese frosting over the top before slicing.
To serve it sizzling-style, warm the brownie and sauce separately, then bring them together in a heated skillet or dessert plate. The brownie should be warm and soft, not reheated so long that the edges dry out.
How to Store and Freeze Brownies
Room Temperature
Store brownies in an airtight container at room temperature for 3–4 days. Place parchment between layers if stacking them.
Refrigerator
Refrigerating makes the squares firmer and even fudgier. Chilled brownies become denser and almost truffle-like, which is why some people like them even better the next day. Bring them back to room temperature before serving if you want a softer bite.
Freezer
Freeze individual squares. Wrap each piece tightly, then place them in a freezer-safe container or bag. Thaw at room temperature, or warm gently for a softer dessert-style brownie.
Separate the squares before freezing so the brownies stay easy to pull apart. thaw, and serve later.
Before you freeze brownies, separate the squares with parchment; this prevents sticking and lets you thaw one fudgy piece at a time.
Make-Ahead Tip
This is one dessert that rewards patience. Bake the pan earlier in the day, chill briefly for clean cuts, then bring the squares back to room temperature before serving. They also travel well once fully cooled, which makes them easy for lunch boxes, potlucks, or gifting.
Serving Temperature
Warm: soft, melty, and messier; best for dessert bowls, ice cream, and hot fudge.
Room temperature: balanced, fudgy, and sliceable; best for everyday serving.
Chilled: firmest, neatest, and extra dense; best for clean squares and packed desserts.
Clean Cutting Tip
For neat squares, cool completely, chill briefly, and slice with a sharp knife. Wipe the blade between cuts so the edges stay clean. Warm serving gives softer edges; chilled brownies give neater squares.
Fudgy Brownie FAQs
Why did my brownies turn cakey instead of fudgy?
A cakey batch usually comes from too much flour, overmixing, leavening, or overbaking. Measure flour carefully, fold only until combined, skip baking powder and baking soda, and check earlier next time.
What cocoa powder works best for brownies?
Use unsweetened cocoa powder. Natural cocoa gives a classic brownie flavor, while Dutch-process cocoa gives a darker color and smoother chocolate taste. Either works in this recipe.
How soft should brownies be when they come out?
The center should be soft but not raw. If the toothpick comes out covered in wet batter, bake a little longer. When only crumbs and a light smear cling to it, the brownies are ready to cool.
Do brownies continue baking as they cool?
Yes. The center continues to set from residual heat after the brownies leave the oven. That is why they can look slightly soft at first but slice cleanly after cooling.
What pan is best for fudgy brownies?
A light metal 8-inch / 20 cm square pan is the best default. It gives reliable heat, set edges, and a soft middle. Glass pans can work, but they heat differently and may change the timing.
How do you cut clean brownie squares?
Cool completely, then chill for 30–60 minutes if needed. Lift the brownies out with the parchment overhang and cut with a sharp knife, wiping the blade between cuts.
Is melted chocolate necessary for fudgy brownies?
No, but it matters in this recipe. Cocoa-only brownies can also be fudgy, but this formula uses melted chocolate for a richer, softer center and a more dessert-like flavor. For this version, keep it. If you want a cocoa-only brownie, use a recipe built for that style.
Brown sugar or oil: are those swaps okay?
Brown sugar can make brownies softer and more caramel-like, but it may reduce the shiny crackly top. Oil can add moisture, but butter gives this recipe its rounded flavor and structure. Try the recipe as written before experimenting.
What makes the top of brownies crackly?
The crackly top comes from sugar, eggs, fat, and proper whisking. Whisk the sugar into the warm butter-chocolate mixture, then whisk the eggs in until the batter looks glossy before adding the flour.
Final Brownie Success Checklist
Look for batter that is thick, glossy, and slower than cake batter.
Fold only until the flour disappears; do not beat the batter heavily.
Use a light metal pan if possible.
Check for crumbs or a light chocolate smear on the toothpick, not wet batter and not a dry stick.
Cool the brownies before the first serious cut.
Wipe the knife between slices for clean edges.
Use this final visual check to keep the recipe simple at the oven: batter, pan, toothpick, and cooling time.
Before slicing, remember the winning cues: thick batter, a light metal pan, crumbs or a light smear on the toothpick, and enough cooling time.
The best fudgy brownies are a small exercise in stopping at the right moment. Stop mixing when the flour disappears. Pull the pan while the middle still looks a little underfinished. Hold back from cutting too soon. Give the brownies that little bit of patience, and you get the square people actually hope for: a thin crackly top, a soft chocolate middle, and edges that make every piece feel like the corner.
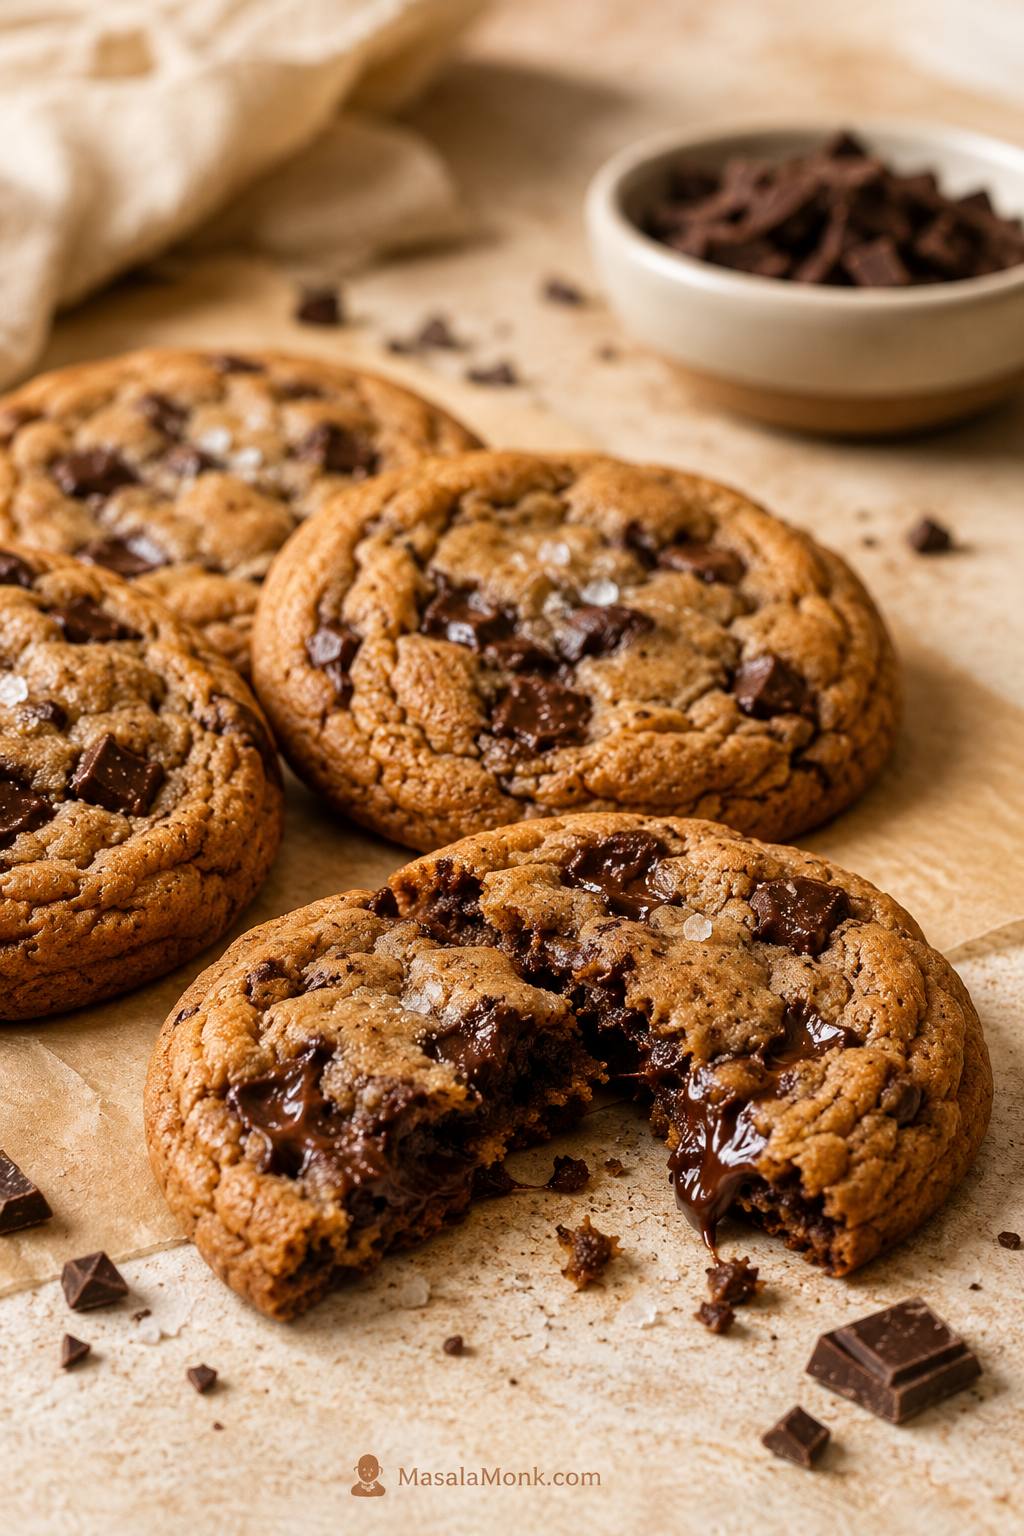
The first sign these brown butter chocolate chip cookies are going to be good is the smell: butter turning nutty in the pan, brown sugar and vanilla hitting that toasted base, then chopped chocolate folding into a dough that already tastes deeper than a regular cookie.
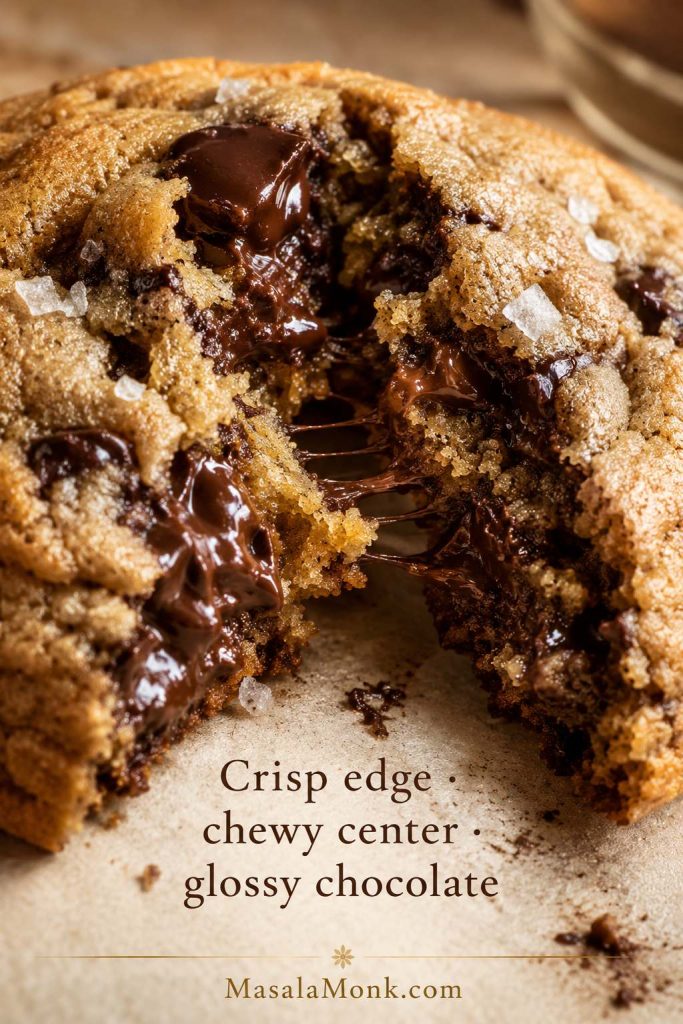
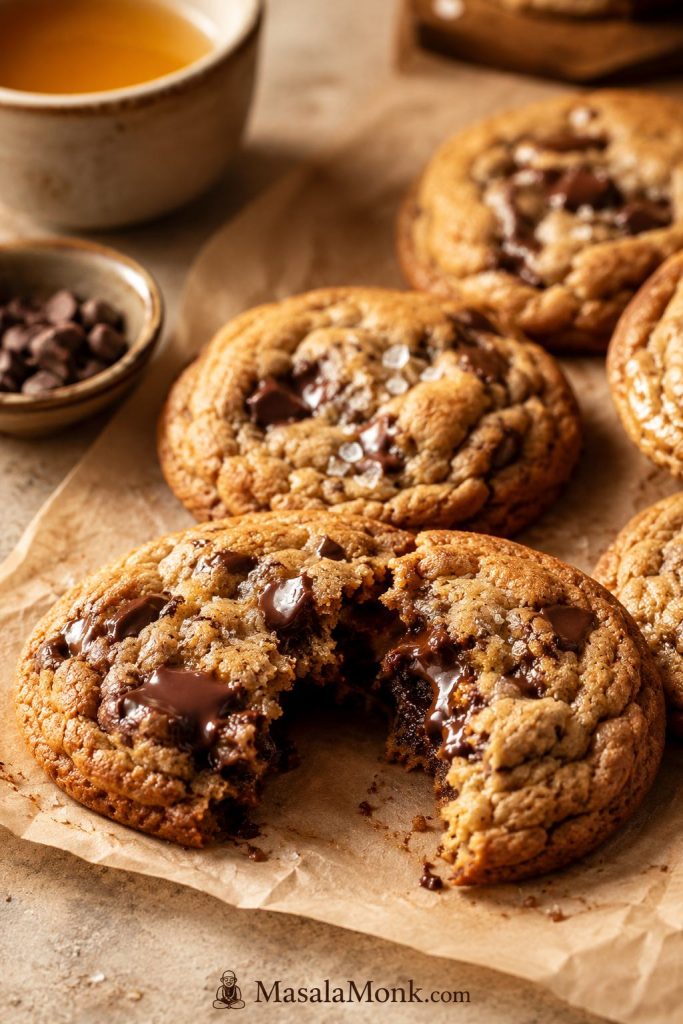
They bake with crisp edges, chewy centers, glossy chocolate pockets, and the kind of warm toasted flavor that makes a regular chocolate chip cookie taste a little plain by comparison.
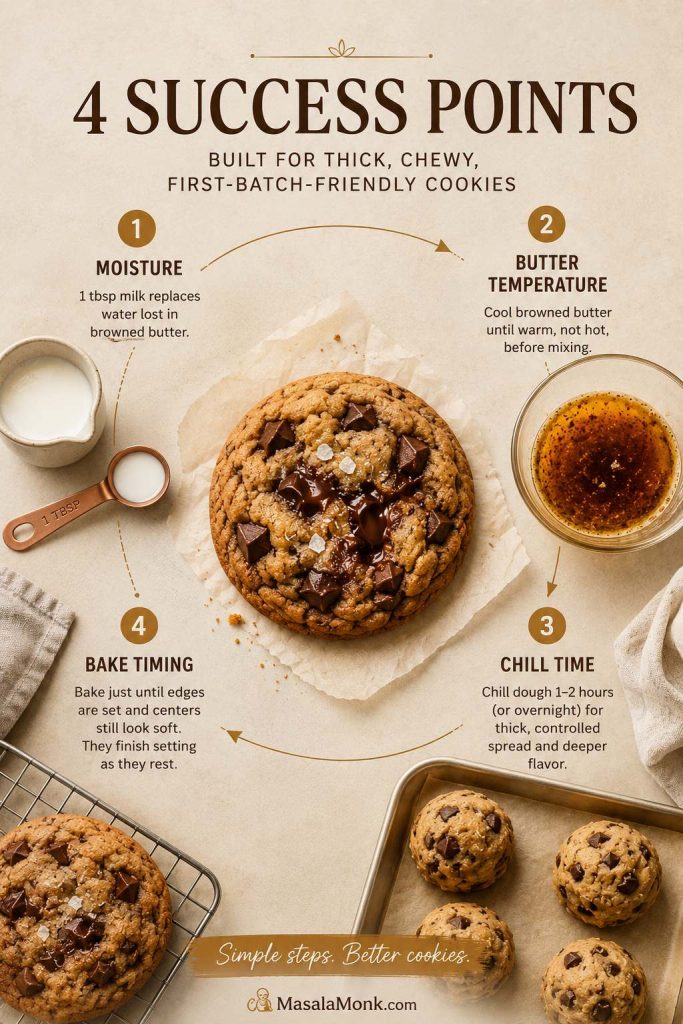
The trick is not only browning the butter. It is cooling it properly, adding back a little moisture, shaping the dough before chilling, and baking the cookies just until the centers still look soft. That is how you get the cookie most people hope for when they brown butter: crisp at the edge, chewy in the center, full of melted chocolate, and sturdy enough that it does not bake into a flat greasy puddle.
This is a first-batch-friendly brown butter cookie: deep toasted flavor, thick chewy centers, and enough small safeguards to keep the dough from turning flat, greasy, dry, or weak-flavored. If you have ever made brown butter cookies that tasted good but did not bake right, this guide is built to help.
A brown butter cookie should look just a little soft in the middle when it leaves the oven. Because it finishes setting as it cools, that slightly underdone look is what keeps the center bendy instead of dry.
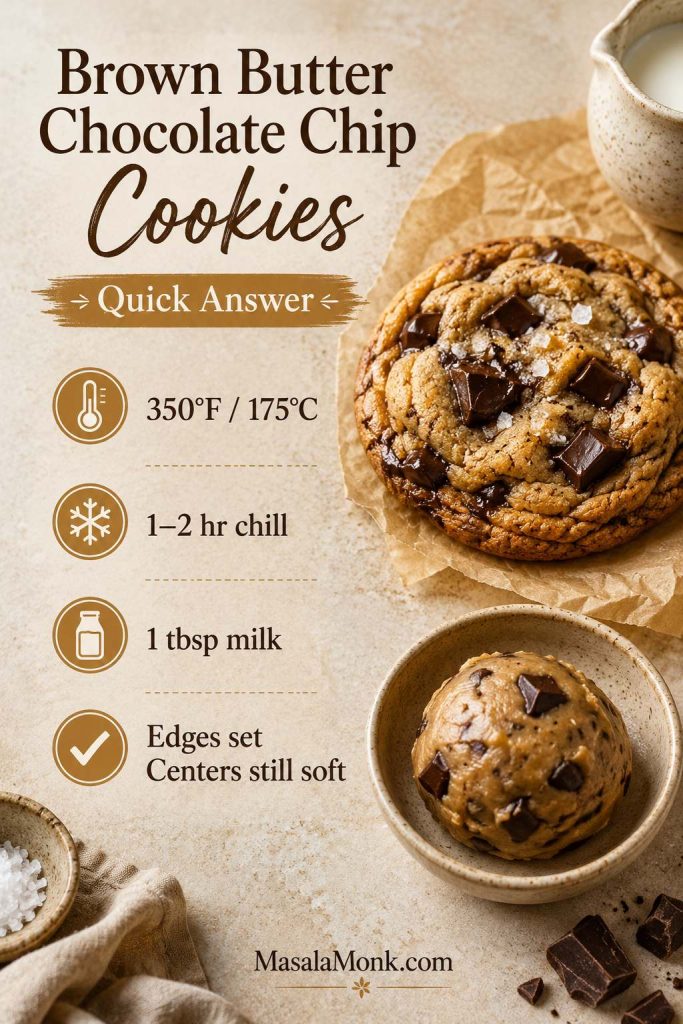
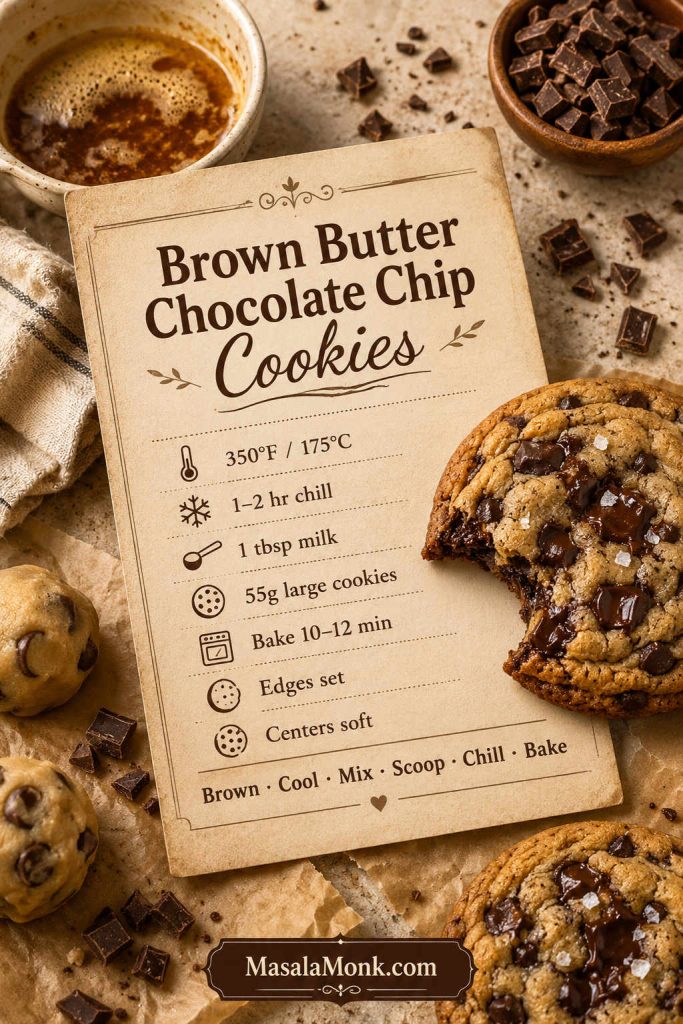
For chewy brown butter chocolate chip cookies that stay thick instead of flat, brown the butter until amber and nutty, then let it cool before adding the egg. Mix in 1 tablespoon milk, scoop before chilling, and bake at 350°F / 175°C until the edges are set but the centers still look slightly underdone.
Default oven temperature
350°F / 175°C for the most even first batch
Hotter option
375°F / 190°C for well-chilled dough and slightly thicker edges
Bake time
10 to 12 minutes for large cookies; 8 to 10 minutes for smaller cookies
Recommended chill time
1 to 2 hours after scooping
Dough size
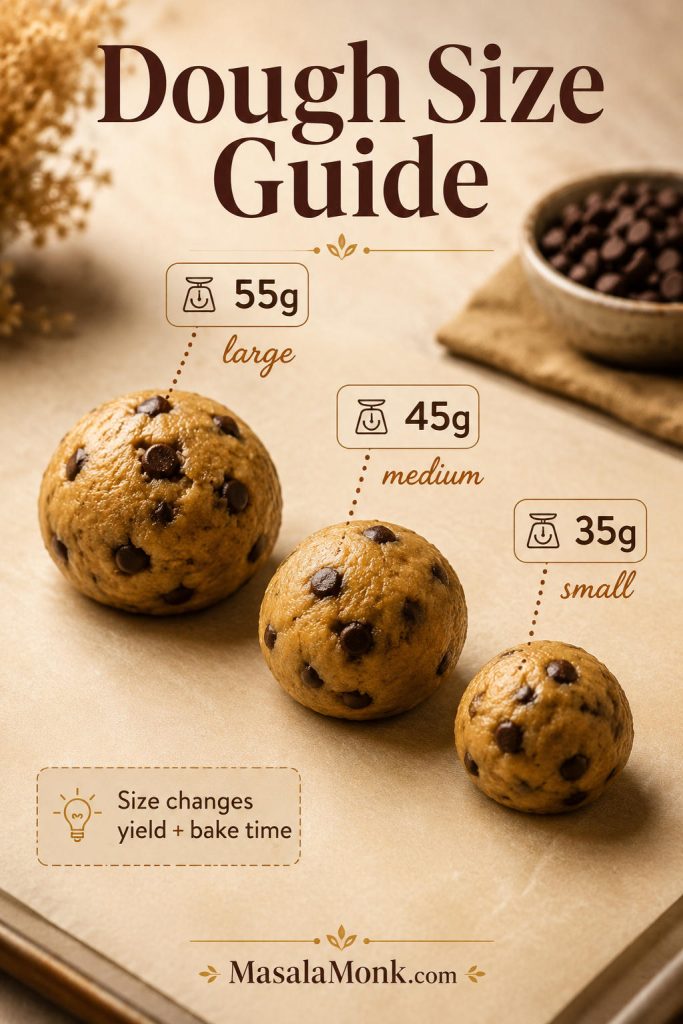
55g for large cookies, 45g for medium cookies, or 35g for smaller cookies
Yield
About 16 large, 20 to 22 medium, or 26 to 28 smaller cookies
A mix of chopped semi-sweet or dark chocolate and chocolate chips
What This First-Batch Setup Controls
The quick answer is really a control system: replace lost moisture, firm the shaped dough, and stop the bake while the middle can still finish on the tray. That is what keeps brown butter chocolate chip cookies thick instead of dry or flat.
For your first batch: skip the overnight chill and hotter oven. Use the 1 to 2 hour chill and 350°F / 175°C bake so you can learn the dough texture, spread, and doneness cues first.
If your main worry is spread, dryness, or greasy dough, jump to the troubleshooting guide before baking the full batch.
You do not need a mixer for this dough. A whisk, spatula, and a little patience while the butter cools are enough.
The goal is a cookie that feels generous without being messy: edges that hold, centers that bend, chocolate that stays glossy for a few minutes after baking, and enough toasted butter flavor that the dough smells caramel-like before it even reaches the oven.
Why This Recipe Works
This version is built around the four places brown butter cookies usually fail: moisture loss, butter temperature, dough chill, and bake timing. Brown butter tastes better after browning, but it also loses moisture. A splash of milk restores just enough liquid, the extra yolk keeps the centers rich, and chilling the shaped dough helps the cookies bake thick instead of spreading too fast.
Browned butter gives the cookies their nutty, caramel-like flavor.
Brown sugar and egg yolk keep the centers chewy and soft.
Milk replaces some of the moisture lost while browning butter.
Scooping before chilling makes the dough easier to handle and helps the cookies bake evenly.
Soft-center doneness keeps the final cookie chewy after it cools.
If a brown butter cookie fails, one of these four points is usually the reason. Moisture keeps it chewy, cooler butter prevents greasiness, chilling controls spread, and early pulling protects the soft center.
Why Brown Butter Makes Chocolate Chip Cookies Better
Brown butter is regular butter that has been cooked until the milk solids toast. Instead of tasting only creamy and buttery, it becomes nutty, caramel-like, and almost toffee-scented. In chocolate chip cookies, that flavor works beautifully with brown sugar, vanilla, chocolate, and a little salt.
That is why brown butter cookies often taste more layered than standard chocolate chip cookies. The flavor is not just sweet. It has a warm toasted edge, a deeper bakery smell, and a finish that makes the chocolate taste richer.
That is the reason brown butter is worth the extra few minutes. It gives the cookie a toasted, caramel-edged base before the chocolate even melts.
Brown butter changes the flavor before the dough even comes together. Its toasted milk solids add a caramel-like base that makes the chocolate taste richer without adding extra sugar.
The key idea: Brown butter is not just melted butter. It gives you deeper flavor; the moisture and texture adjustments come next.
The Brown Butter Problem: Moisture Loss
What Moisture Loss Does to the Dough
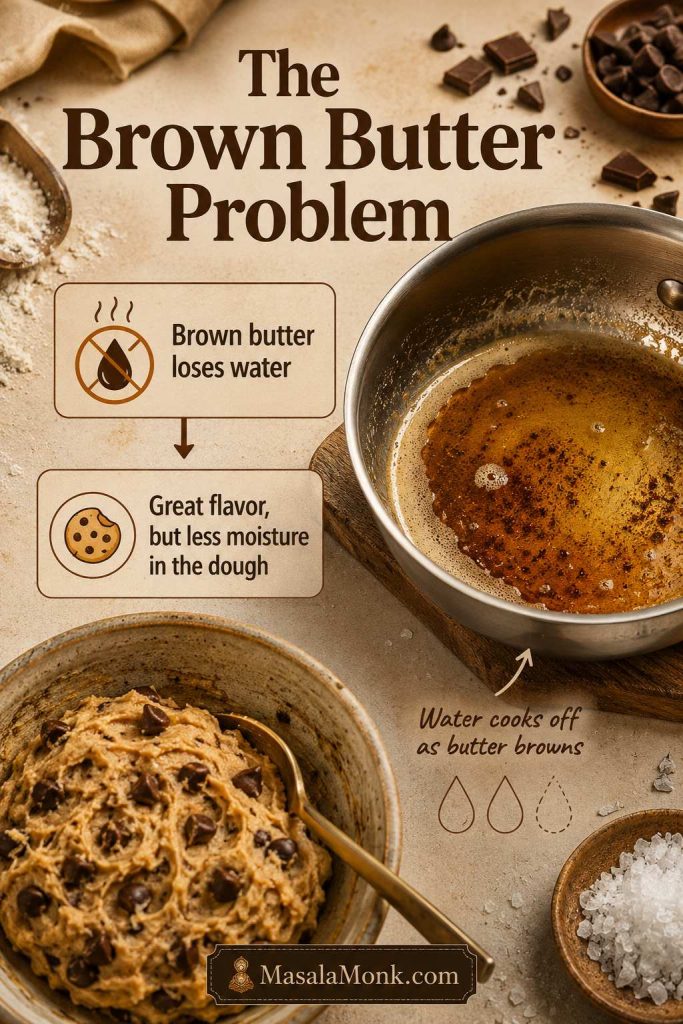
Brown butter gives you flavor with a catch: it brings toffee-like depth, but it takes water with it. This is the part that turns brown butter from a delicious risk into a reliable cookie dough.
The same heat that creates brown-butter flavor also drives off water. That is why this dough needs a measured moisture adjustment instead of treating browned butter like plain melted butter.
Add the Moisture Back Carefully
In this recipe, the butter is weighed before browning. After browning, you will have a little less liquid because water has cooked off. That is expected. The fix is to scrape every browned bit into the bowl, cool the butter, and add a small amount of milk to bring moisture back into the dough.
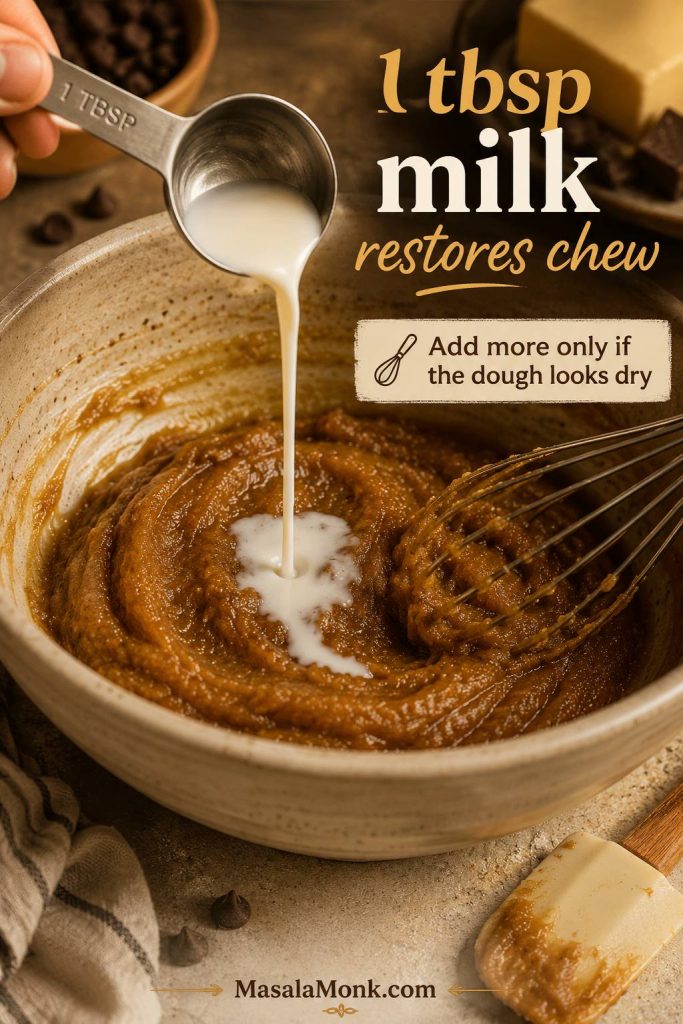
Use 1 tablespoon of milk by default. Keep up to 1 tablespoon more nearby and add it only if the butter cooked longer than usual or the dough does not come together after a short rest.
Add the first tablespoon of milk as part of the formula, not as a rescue afterthought. Then, if the dough still looks dry after resting, adjust with tiny splashes instead of pouring freely.
What goes wrong
Why it happens
How this recipe fixes it
Cookies spread too much
The butter was too warm, dough was not chilled, or the tray was hot
Cool the butter, scoop the dough, chill before baking, and use a cool tray
Cookies taste dry
Too much moisture evaporated or too much flour was used
Use 1 tablespoon milk by default, add more only if needed, and weigh flour
Dough feels greasy
The butter was still hot when mixed
Let the butter cool before adding the egg
Cookies are cakey
Too much flour, overmixing, or too much leavener
Weigh the flour and mix only until the dough comes together
Flavor is not nutty
The butter was only melted, not browned enough
Cook until amber specks form and the aroma turns toasted
What the Dough Should Feel Like
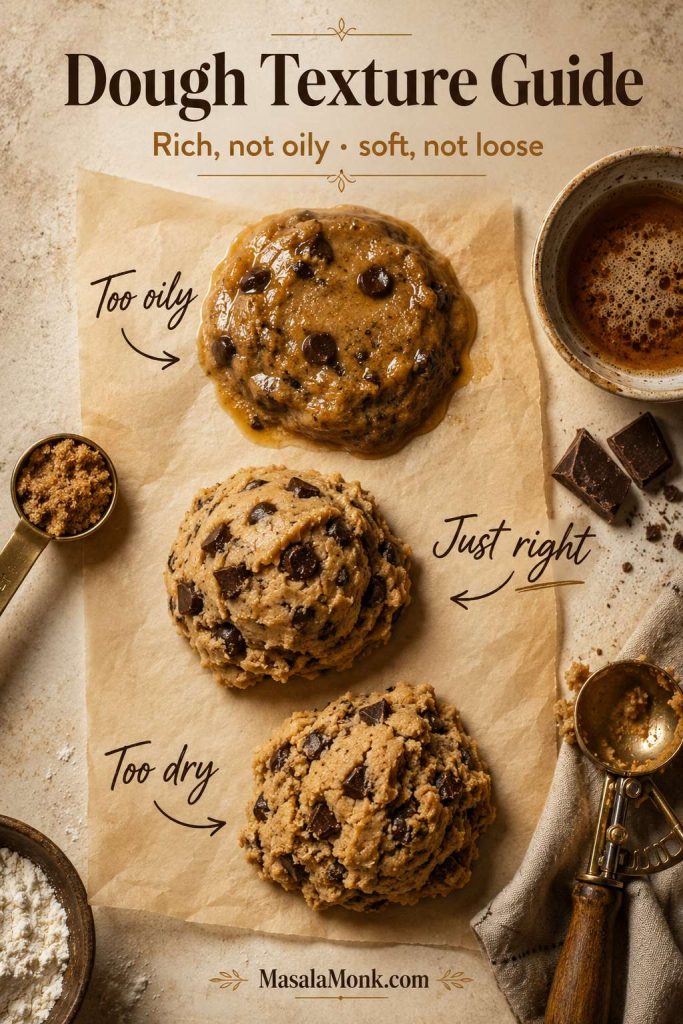
A good dough should feel rich, not oily; soft, not loose. It should scoop cleanly, hold its shape on the tray, and still feel tender enough that the centers will stay chewy after baking.
The dough should be thick enough to scoop but soft enough to press. Shiny dough usually needs time to cool, while crumbly dough usually needs a little more moisture.
You still get the nutty flavor, but the dough scoops cleaner, holds its shape, and bakes with more control.
Ingredients You Need
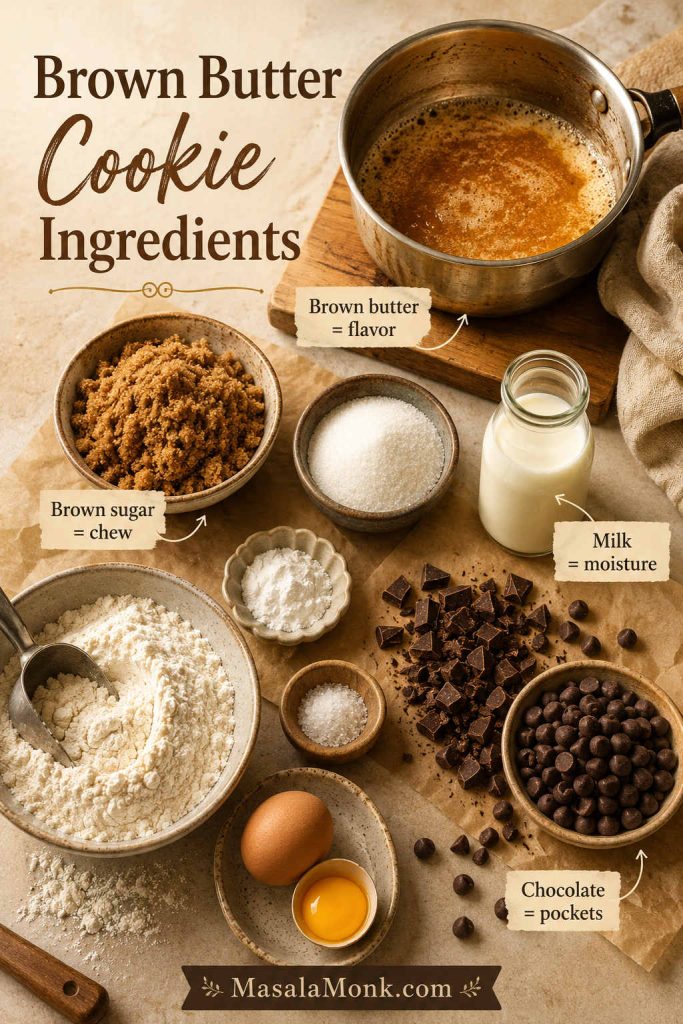
The ingredient list is simple, but the balance matters. The goal is not just a sweet cookie; it is a cookie where the toasted butter still comes through after the sugar, flour, and chocolate join the bowl.
Browned butter gives the dough its deep flavor, brown sugar keeps the center soft, white sugar encourages crisp edges, and the extra yolk adds the richness that makes the cookie feel bakery-style.
This ingredient balance is what separates chewy brown butter cookies from dry ones. Brown sugar and yolk add richness, milk restores moisture, and chocolate brings pockets without hiding the toasted butter.
Unsalted Butter
Use 170g / 6 oz / 3/4 cup unsalted butter, weighed before browning. Unsalted butter gives you better control over the final salt level, especially because these cookies also use chocolate and optional flaky salt on top.
Salted butter can work, but reduce the fine salt in the dough. If your salted butter is very salty, skip the flaky salt on the first test batch and add it only after tasting.
Brown Sugar and White Sugar
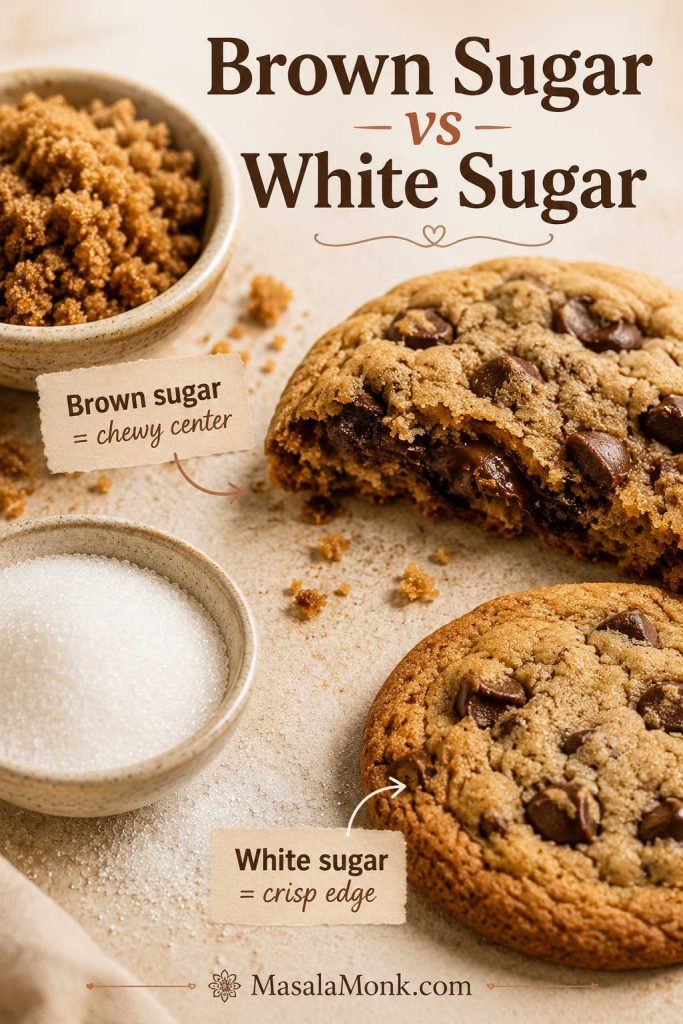
Brown sugar is the backbone of the chewy texture. It brings moisture, caramel notes, and a softer center. White sugar helps the edges crisp and encourages just enough spread.
Both sugars matter here. Brown sugar helps the middle stay soft and caramel-like, while white sugar gives the cookie enough edge crispness to balance the chewy center.
If you are out of brown sugar, this is one of the rare swaps worth skipping. This dough depends on brown sugar for chew, moisture, and caramel flavor, so a no-brown-sugar cookie needs a different balance.
Egg and Egg Yolk
One whole egg gives structure. One extra yolk gives richness, chew, and a softer center without adding too much extra liquid. It is one of the easiest ways to make the cookies feel bakery-style without using complicated ingredients.
Milk
Use 1 tablespoon / 15 ml milk by default. Keep up to 1 tablespoon / 15 ml more nearby and add it only if the dough looks dry after mixing. That small amount restores chew without making the dough loose.
For the full reason milk matters in brown butter cookie dough, see the moisture-loss explanation above.
All-Purpose Flour
Use 220g all-purpose flour, which is about 1 3/4 cups plus 1 tablespoon when spooned and leveled. Weighing is best because too much flour is one of the fastest ways to turn chewy cookies into cakey cookies. King Arthur Baking’s ingredient weight chart is a useful reference if you bake often and want more consistent cup-to-gram conversions.
Baking Soda and Baking Powder
Baking soda helps with browning, spread, and classic cookie chew. A small amount of baking powder gives a little lift so the cookies do not feel dense. Keep both amounts modest; too much leavener pushes the cookies toward cakey.
Chocolate
For dramatic melted pockets, chopped chocolate is the better choice. Chips are more predictable: they hold their shape, spread evenly through the dough, and give the cookies a familiar chocolate-chip look. For the easiest everyday batch, use a mix of both.
Semi-sweet chocolate is the safest choice. Dark chocolate makes the cookies more intense, while milk chocolate makes them sweeter and softer. Chopped chocolate makes the cookie feel more bakery-style because every bite gets both big melted pockets and tiny chocolate flecks. For a deeper chocolate dough rather than a brown-butter-forward dough, try our double chocolate chip cookies.
Equipment That Makes These Cookies Easier
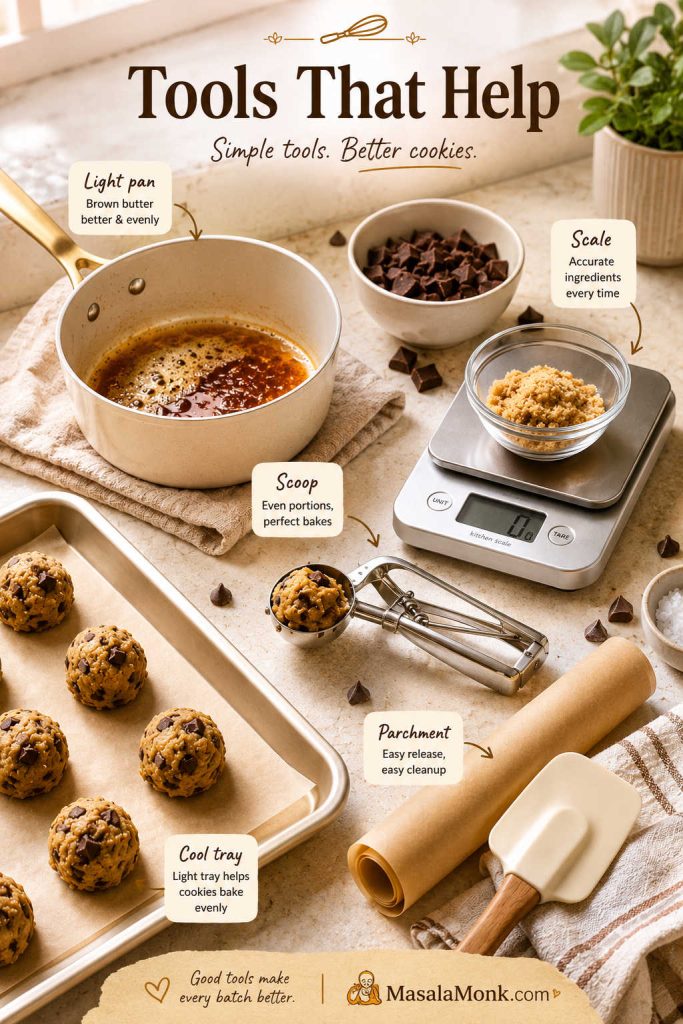
You do not need special equipment, but a few tools make the recipe more forgiving: a light-colored pan for seeing the butter brown, a digital scale for flour and dough portions, parchment for controlled spread, and a cool light-colored baking sheet for gentler bottoms.
The most useful tools are the ones that reduce guessing. A light pan shows butter color clearly, a scale keeps flour accurate, and a scoop makes every cookie bake at the same pace.
Light-colored skillet or saucepan: helps you see when the butter turns amber instead of burnt.
Digital scale: prevents too much flour and keeps cookie size consistent.
Cookie scoop or kitchen scale: makes it easier to portion 55g, 45g, or 35g cookies evenly.
Parchment paper and a cool baking sheet: help control spread and protect the bottoms.
Round cutter or glass: lets you scoot warm cookies into rounder shapes if they spread unevenly.
How to Brown Butter for Cookies
Browning butter is easy once you know what to watch for. Use color, smell, sound, and the little brown specks at the bottom of the pan.
Do not stop when the butter is simply melted. Wait for foam, amber specks, and a nutty smell; then remove the pan before those specks turn dark and bitter.
Step-by-Step Browning Cues
Cut the butter into pieces. Smaller pieces melt more evenly.
Use medium heat. Too much heat can burn the milk solids before the butter browns evenly.
Let it melt, foam, and crackle. The crackling sound is moisture cooking off.
Stir often. Scrape the bottom so the milk solids brown evenly.
Watch for amber specks. The butter should smell nutty and toasted, not bitter.
Remove from heat quickly. It keeps cooking from residual heat.
Scrape everything into the bowl. Do not leave the brown bits behind.
Cool before mixing. The butter should be liquid but no longer steaming before it meets the egg.
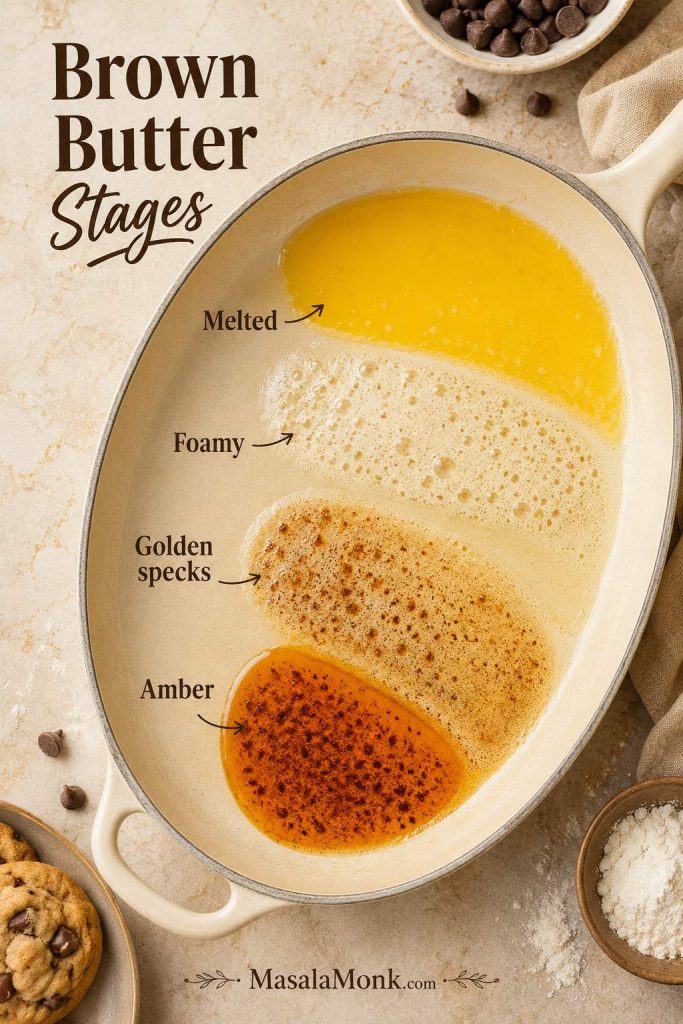
Stage
What you see
What to do
Melted butter
Yellow liquid, no brown specks
Keep cooking
Foamy butter
Foam and crackling sounds
Stir and watch closely
Golden specks
Light brown bits forming at the bottom
You are close
Amber brown butter
Brown specks, nutty smell, golden liquid
Remove from heat
Burnt butter
Black bits, sharp bitter smell
Start over for best flavor
Once you catch that amber stage a few times, it becomes familiar. The smell changes first, then the specks darken quickly, so stay close to the pan once the butter starts foaming.
Do not strain the brown butter. Those toasted brown bits are browned milk solids, and they carry much of the flavor.
The browned bits at the bottom of the pan are toasted milk solids, not burnt crumbs. Scraping them into the bowl gives the dough its strongest brown-butter flavor.
Once the butter reaches the amber stage, continue with the step-by-step method so it cools before the egg goes in.
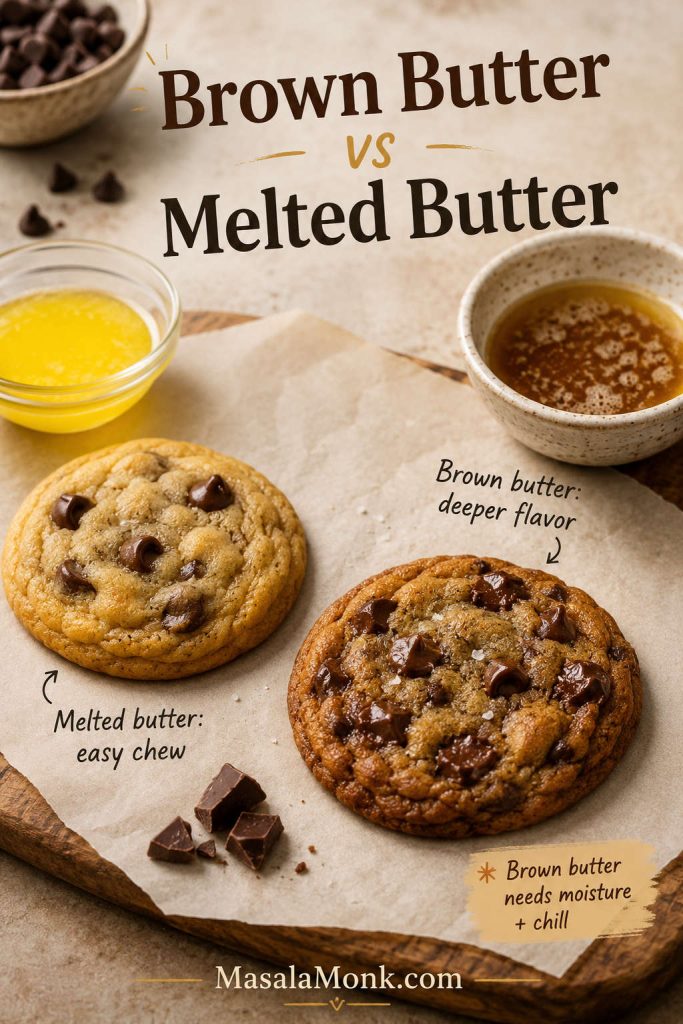
Brown Butter vs Melted Butter
Melted butter gives you easy, chewy cookies. Brown butter gives you something deeper: toasted milk solids, a nutty smell, and a flavor that leans caramel and toffee. The tradeoff is moisture. Because browned butter has cooked longer, this dough needs a little added milk and time to chill before baking.
Melted butter makes a fast chewy cookie, but brown butter adds toasted complexity. Because it behaves differently, the brown-butter version needs better control over moisture, temperature, and rest time.
If speed matters most, melted butter can be useful. If you want the cookie to taste more toasted, caramel-like, and bakery-style, brown butter is worth the extra few minutes.
How to Make Brown Butter Chocolate Chip Cookies
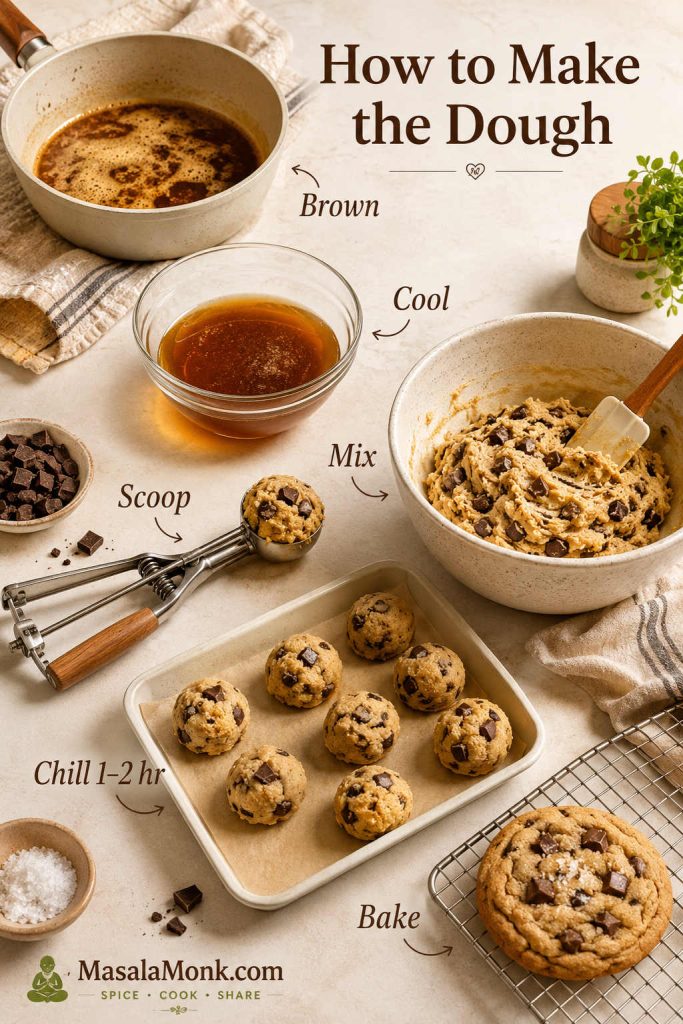
Once the butter is ready, the dough comes together without complicated mixing. The main workflow is simple: brown, cool, mix, scoop, chill, bake.
Once the butter is browned and cooled, the recipe becomes a simple flow: mix the dough, portion it while soft, chill the scoops, then bake from cold for better shape control.
1. Brown and Cool the Butter
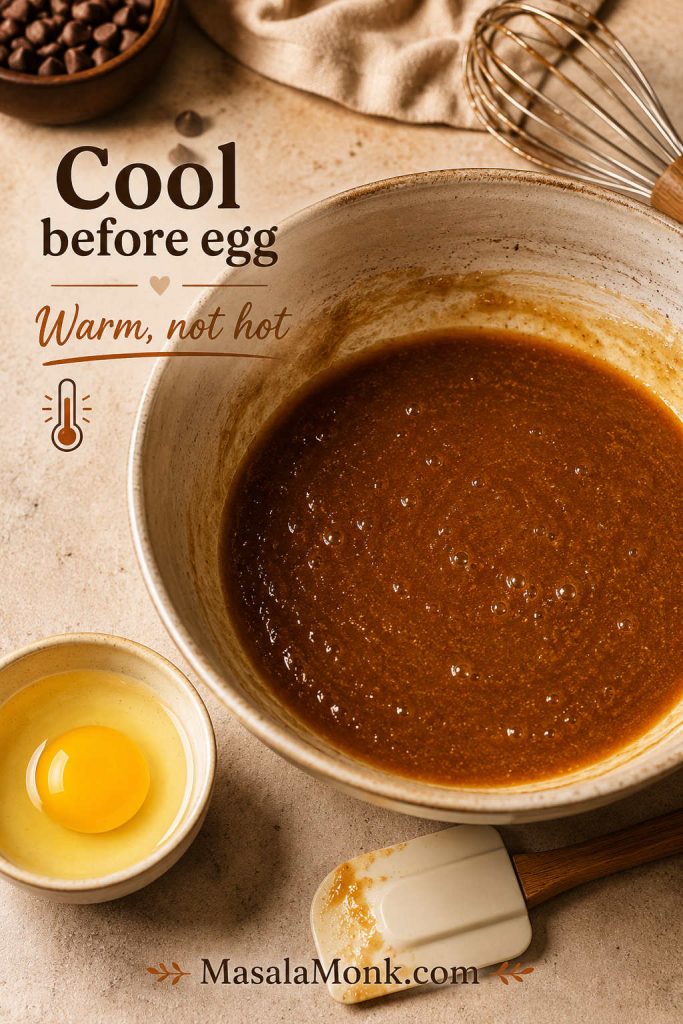
Brown the butter until amber specks form and the kitchen smells nutty. Pour it into a heat-safe mixing bowl, scraping in all the browned bits. Let it cool for 15 to 25 minutes, until liquid and warm, not hot.
The egg should meet warm butter, not hot butter. This small pause helps prevent greasy dough and keeps the mixture smooth before the flour goes in.
If the butter becomes completely solid, let it soften slightly before mixing. If it is still steaming, give it more time before adding the egg.
2. Whisk in the Sugars
Add the brown sugar and granulated sugar to the cooled butter. Whisk until the mixture looks glossy and thick. It does not need to become fluffy like creamed butter and sugar.
3. Add Egg, Yolk, Vanilla, and Milk
Add the whole egg, egg yolk, vanilla extract, and 1 tablespoon milk. Whisk until smooth. Hold back the extra tablespoon unless the finished dough looks dry later.
4. Mix the Dry Ingredients Separately
In another bowl, whisk together the flour, baking soda, baking powder, and fine salt. A quick separate whisk keeps the leaveners from landing in one bitter or puffy pocket.
5. Fold the Dough Together
Add the dry ingredients to the wet ingredients and fold just until a few flour streaks remain. Add the chocolate and fold again until combined.
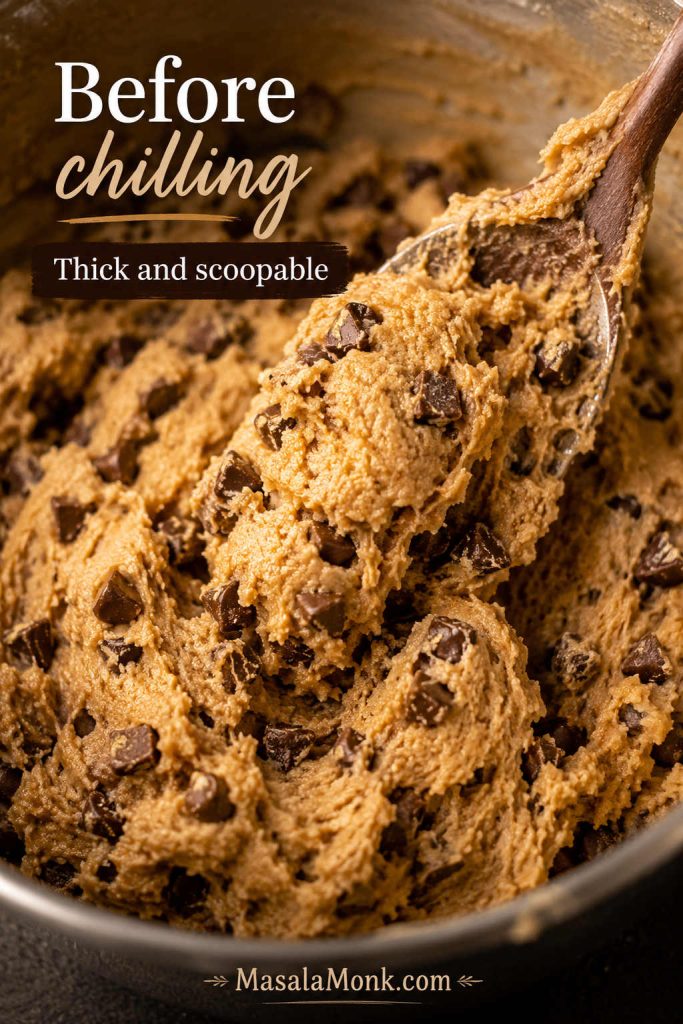
Aim for dough that is thick and scoopable: not shiny-loose, not dry-crumbly. If it looks too soft, rest it for 10 minutes before scooping. If it looks dry, add the extra milk a little at a time.
Before chilling, the dough should already look like cookie dough, not batter. If it holds a scoop and the chocolate stays suspended, it is ready for the refrigerator.
6. Scoop Before Chilling
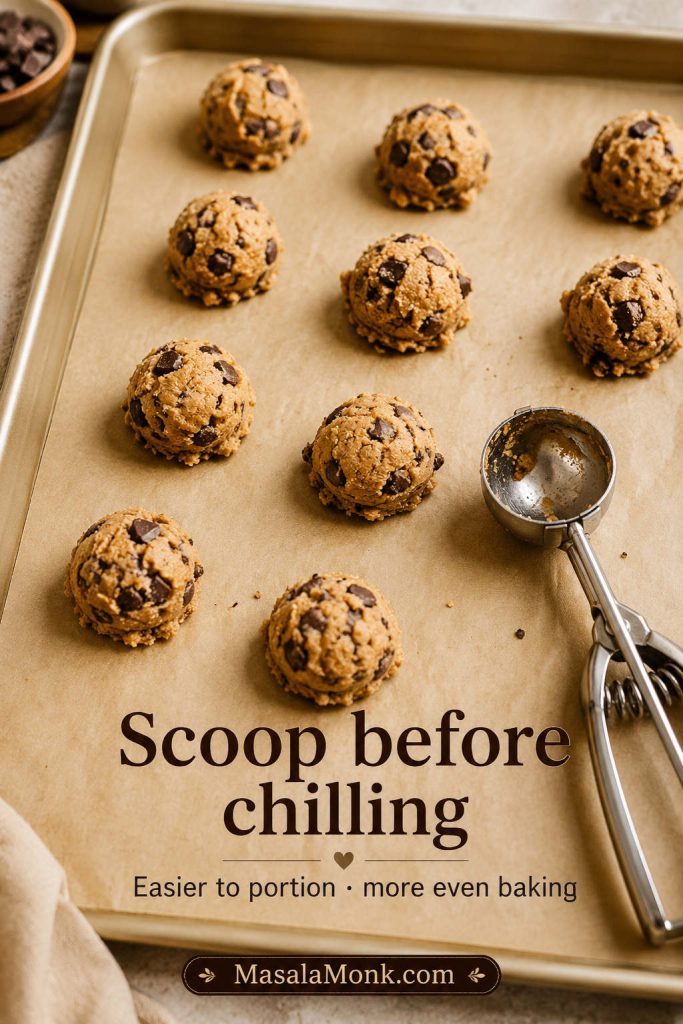
Scoop the dough before chilling. This is easier than trying to scoop a cold, firm bowl of dough later, and it helps the cookies bake more evenly.
Scooping first gives you even portions before the butter firms up. As a result, the chilled dough goes straight from tray to oven with less handling and more consistent spread.
Use 55g portions for about 16 large cookies, 45g portions for about 20 to 22 medium cookies, or 35g portions for about 26 to 28 smaller cookies. Place them on a lined tray, cover, and chill for 1 to 2 hours.
If you are deciding between no chill, 30 minutes, 1 to 2 hours, or overnight, use the chill time guide before baking.
Dough size changes more than yield. Larger portions stay softer in the middle, while smaller portions bake faster and give more crisp edge in each cookie.
7. Bake Until the Centers Look Soft
Heat the oven to 350°F / 175°C. Place the chilled portions on a parchment-lined baking sheet with room to spread. Bake 55g cookies for 10 to 12 minutes, 45g cookies for 9 to 11 minutes, or 35g cookies for 8 to 10 minutes. The edges should be set and the centers should still look slightly soft.
8. Shape and Finish While Warm
If the cookies spread unevenly, use a round cutter or glass to gently scoot them into shape while they are still hot. Finish with flaky salt if you like. Let the cookies rest on the baking sheet for 5 to 10 minutes before moving them to a rack.
At this point, the cookies should smell like toasted butter, vanilla, brown sugar, and chocolate. That is the moment the chill time starts to feel worth it.
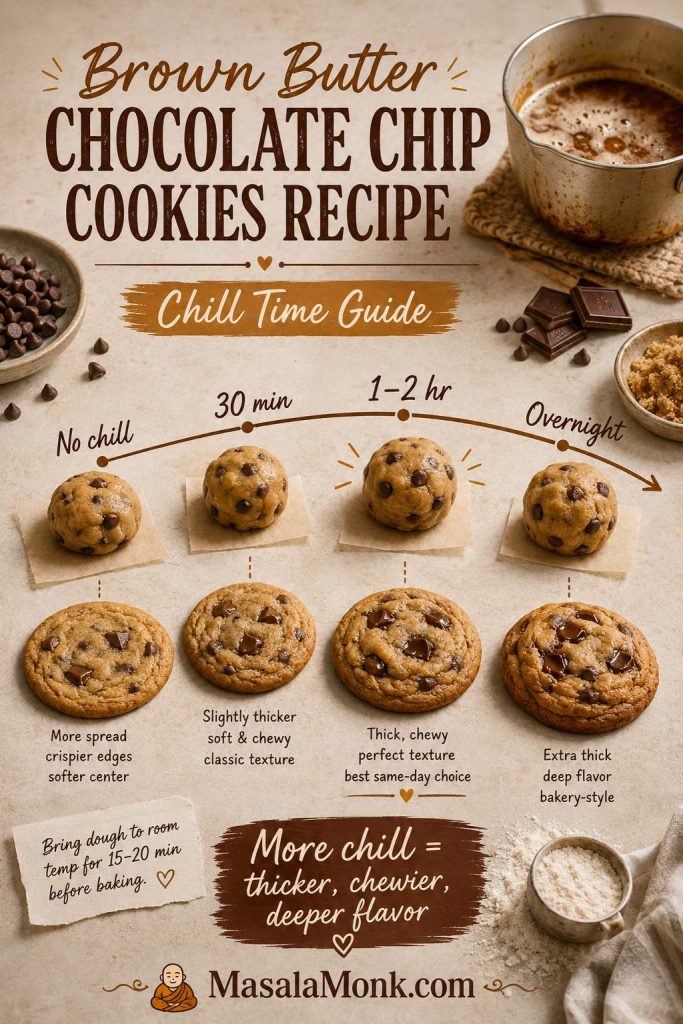
Chill Time Guide: No Chill vs 30 Minutes vs 2 Hours vs Overnight
Chill time is one of the biggest differences between an okay cookie and a great one. Chilling firms the butter, hydrates the flour, deepens flavor, and slows spread in the oven.
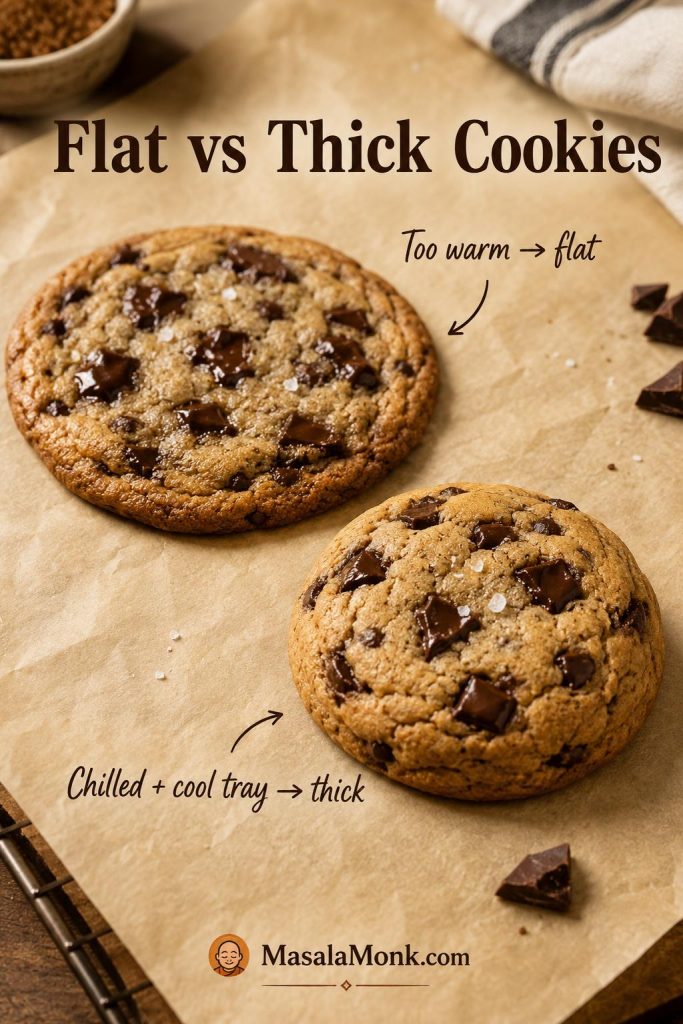
You can bake the dough without chilling, but the cookies will usually spread more, bake thinner, and have crispier edges. That is not automatically bad, but it is a different result.
If You Need to Bake Right Away
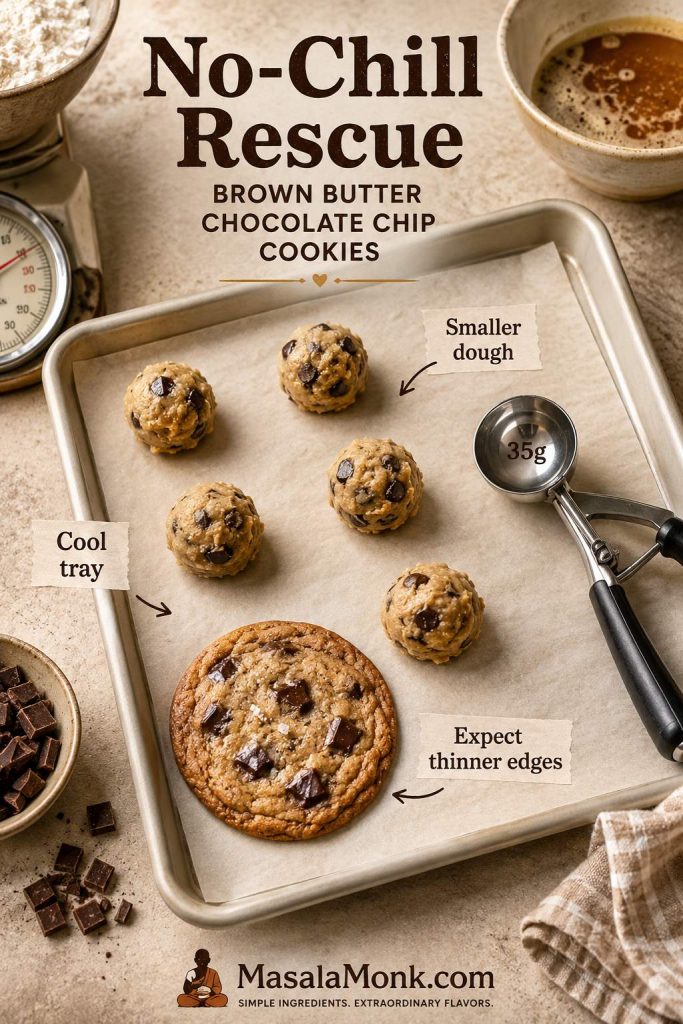
No-chill rescue: If you need to bake immediately, make smaller 35g portions and use a cool parchment-lined tray. The cookies will bake thinner with crispier edges, which can still be delicious. If the dough looks shiny, loose, or greasy, chill it for even 20 to 30 minutes first.
When you cannot chill the dough properly, go smaller and keep the tray cool. The cookies will spread more, but the smaller size keeps them from turning into oversized flat rounds.
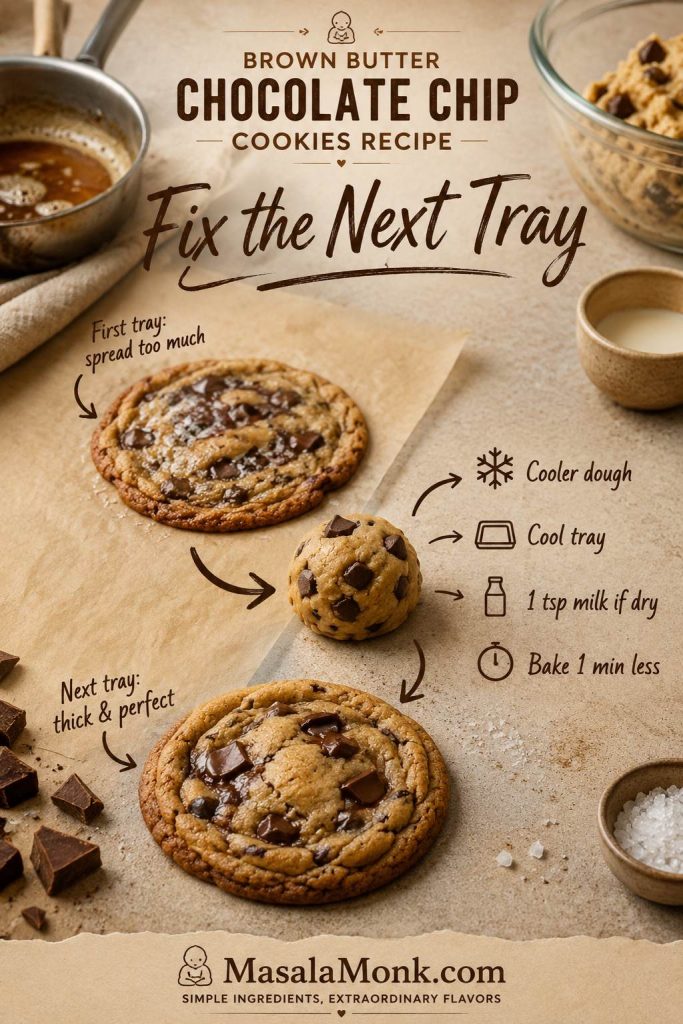
If the first tray still spreads more than expected, use the troubleshooting section to adjust the next tray before baking the rest.
Choose the Right Chill Time
Choose the chill time based on the cookie you want today: fast and crisp-edged, thicker and chewier, deeper-flavored, or ready to bake later.
Chill time is a texture choice, not just waiting. No chill gives thinner cookies, 30 minutes helps in a pinch, 1 to 2 hours is the best same-day default, and overnight deepens flavor.
Chill time
What happens
Best for
No chill
More spread, thinner cookies, crispier edges
Fast craving cookies
30 minutes
Some control, still slightly spread-prone
Same-day baking when short on time
1 to 2 hours
Thicker cookies, chewier centers, better flavor
Most reliable balance of flavor, texture, and same-day baking
Planning ahead; let the dough sit briefly before baking if very hard
Reliable same-day result: Chill the shaped dough for 1 to 2 hours. This gives you better texture without turning the recipe into a next-day project.
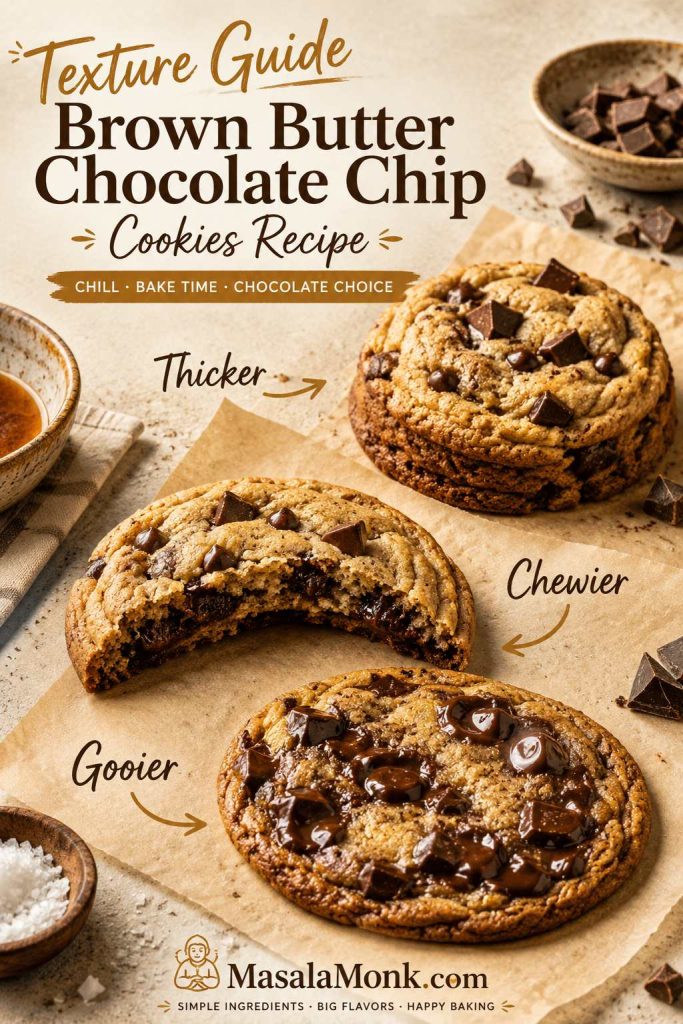
How to Get Thicker, Chewier, or Gooier Cookies
Start with the base recipe once, then adjust from a place of control. A longer chill, a shorter bake, or a different chocolate can shift the cookie without turning it into a new recipe.
Small changes create different cookie personalities. For thicker cookies, chill longer; for chewier cookies, pull them sooner; for gooier cookies, use more chopped chocolate or wafers.
How to Adjust the Texture
What you want
What to do
Why it works
Thicker cookies
Chill shaped dough for 2 hours and bake cold
Cold dough spreads more slowly
Chewier centers
Use the egg yolk, enough brown sugar, and avoid overbaking
Yolk and brown sugar keep the center soft
Crispier edges
Bake 1 minute longer or use slightly smaller portions
More edge exposure gives more crispness
Gooier chocolate pockets
Use chopped chocolate or wafers instead of chips alone
Flat pieces melt into larger pockets
More toasted-butter flavor
Brown until amber, scrape in every bit, and do not drown the dough in too much chocolate
The toasted milk solids carry the nutty flavor
Less spread
Cool butter fully, chill before baking, use parchment, and avoid hot trays
Warm fat spreads faster in the oven
More spread
Use a shorter chill or gently flatten the portions before baking
Flatter dough spreads sooner
Softer cookies
Pull the cookies when the centers still look soft
They finish setting on the hot baking sheet
You do not need to change everything at once. Try the base recipe first, then adjust one thing next time: chill longer for thickness, bake a minute less for softer centers, or switch to chopped chocolate for bigger melted pockets.
First batch tip: Make the base recipe as written before changing the flour. Later, you can replace 40g of the all-purpose flour with bread flour for more chew, or add 1 teaspoon cornstarch for a slightly softer, thicker cookie.
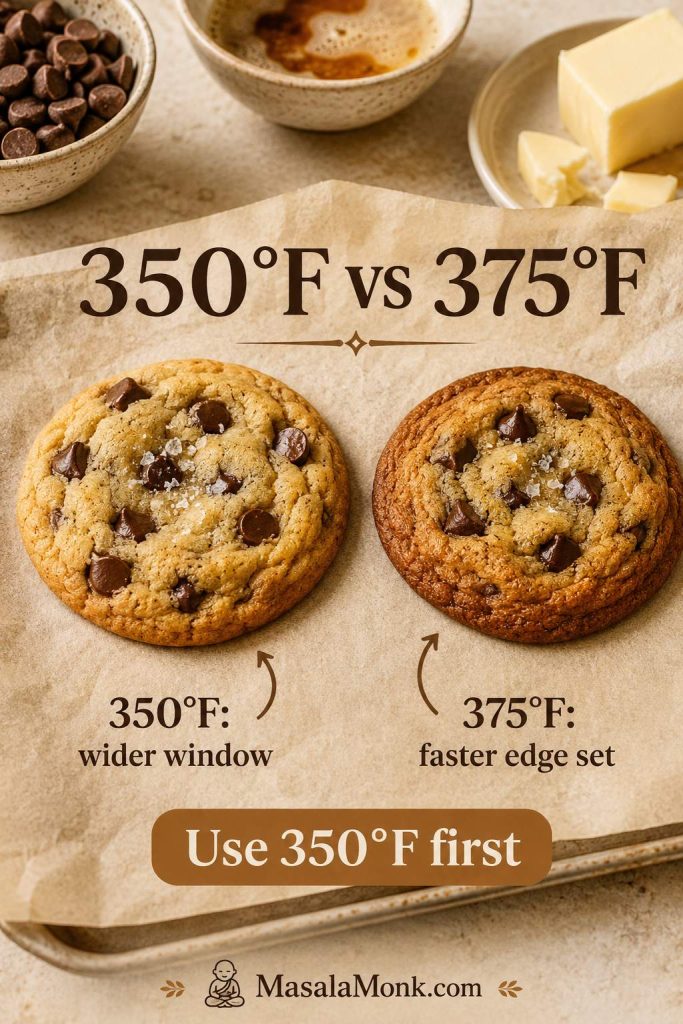
350°F vs 375°F for Brown Butter Cookies
Use 350°F / 175°C as the default because it gives first-time bakers a wider doneness window. The cookies have time to spread slightly, melt the chocolate, and set without over-browning the bottoms.
Use 350°F when you want a forgiving first tray. After you understand the dough, 375°F can give a quicker edge set and slightly deeper browning on well-chilled portions.
Temperature tip: Use 350°F / 175°C for the most even first batch. Use 375°F / 190°C only with well-chilled dough if you want slightly thicker edges and more browning.
If your oven uses round Celsius markings, 180°C is close enough for the default bake; just watch the first tray carefully. Once you know how your oven and trays behave, try 375°F / 190°C for a slightly taller, faster-setting cookie.
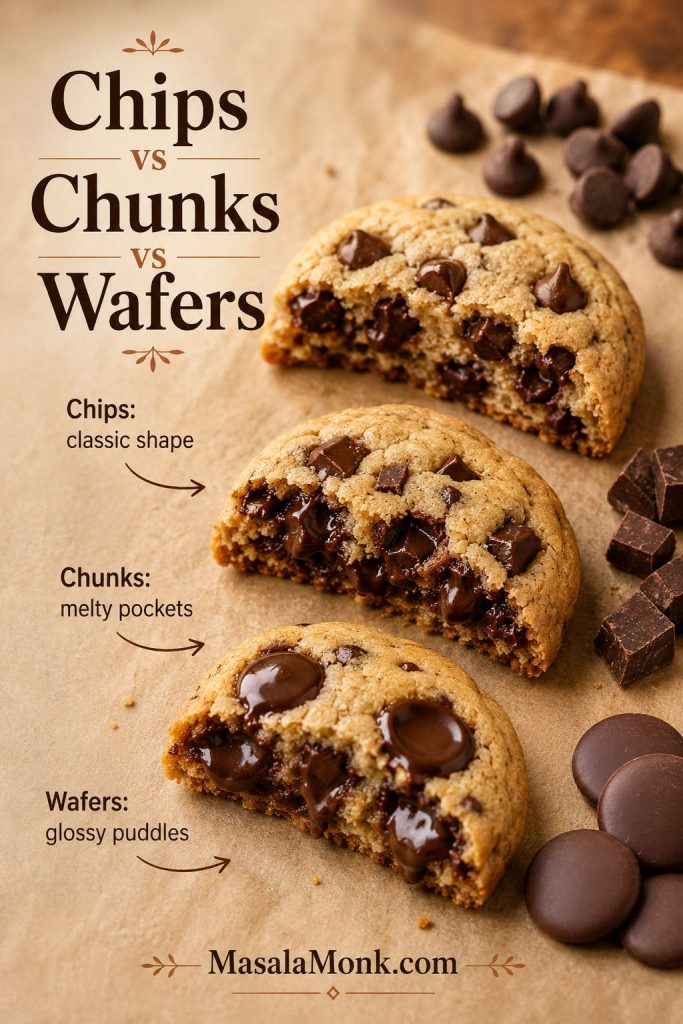
Chocolate Chips vs Chunks vs Wafers
The chocolate changes the personality of the cookie. The dough can be the same, but chips, chopped chocolate, and wafers melt differently.
Choose chocolate based on the bite you want. Chips give a classic cookie look, chunks create uneven melted pockets, and wafers make larger glossy pools of chocolate.
Chocolate type
What it gives
Best use
Chocolate chips
Classic look, neat pieces, less melting
Easy pantry cookies
Chopped chocolate
Melty pockets and tiny chocolate shards through the dough
Bakery-style cookies
Chocolate wafers or fèves
Large glossy puddles
Premium dramatic cookies
Mixed chips and chunks
Shape from chips, melt from chunks
Best everyday version
Chocolate chips are perfectly fine here. The cookies will still taste excellent; they will simply have fewer dramatic melted pockets than a chopped-chocolate batch.
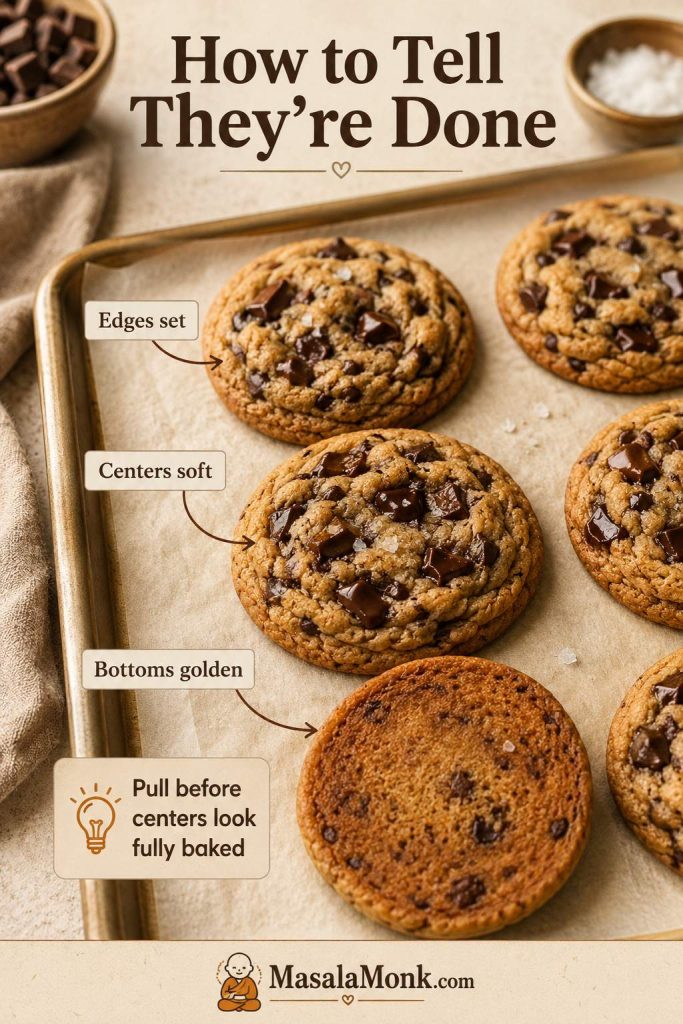
How to Know When the Cookies Are Done
The best cookie moment happens before the tray looks fully finished. If you wait until the centers look completely baked in the oven, the cookies are often overbaked after cooling.
The edges should look set and lightly golden.
The centers should still look soft and slightly puffed.
The tops should no longer look wet, but they should not look firm all the way through.
The bottoms should be golden, not dark brown.
The cookies should smell buttery, nutty, and chocolatey.
The center should not look finished when the cookies come out. If the edges are set and the bottoms are golden, the hot tray will finish the soft middle without drying it out.
Pull them when they still look a little too soft. The baking sheet finishes what the oven started.
Let the cookies rest on the hot baking sheet for 5 to 10 minutes, then move them to a rack. When the batch is right, the cookies settle into soft ripples, the centers still bend slightly, and the chocolate stays glossy enough that breaking one open feels like the reward for waiting through the chill time.
Soft ripples show that the cookies spread, settled, and set at the right pace. The best ones look relaxed on top but still hold together when lifted.
Good cookie rule: If the whole cookie looks completely done in the oven, it may taste overbaked after cooling.
Troubleshooting Brown Butter Cookies
Fix the Next Tray
If the first tray tells you something is off, adjust the next one before baking the whole batch. Most fixes are small: cooler dough, a cooler pan, 1 teaspoon more milk, or 1 minute less in the oven.
A good tray starts before the oven: cooled butter, shaped dough, cold portions, and a cool pan. Most problems come from one of those places.
Treat the first tray like a test batch. If the cookies spread, turn the next tray into the fix: colder dough, cooler metal, or a tiny moisture adjustment if the dough feels dry.
What to Change on the Next Tray
What you see
Likely cause
What to change on the next tray
Cookies spread too much
Dough was too warm, butter was too hot, dough was not chilled, or tray was hot
Cool the butter, chill the shaped dough, and bake on a cool parchment-lined tray
Cookies look greasy
Butter was still hot when mixed
Cool it before adding the egg
Cookies taste dry
Too much flour or too much moisture lost from the butter
Weigh the flour and use the milk adjustment
Cookies bake cakey
Too much flour, overmixing, or too much leavener
Mix gently and measure flour by weight
Cookies barely spread
Dough was over-chilled or flour was overmeasured
Let the shaped dough sit at room temperature for 10 minutes before baking
Brown butter tastes bitter
The milk solids burned
Use medium heat, stir often, and remove at amber brown
Brown-butter flavor feels weak
Butter was not browned deeply enough or brown bits were left in the pan
Cook until nutty and scrape every browned bit into the bowl
Chocolate burned on the bottom
Chocolate pieces sat directly against the hot tray
Fold chocolate evenly and bake on parchment
Cookies look pale
Oven runs cool or dough was too cold and underbaked
Add 1 minute bake time or test 375°F / 190°C with chilled dough
Use this comparison when your first tray spreads too much. A flatter cookie usually points to warm dough, hot butter, or a warm tray; a thicker cookie usually comes from colder portions and cooler metal.
Flat cookies are usually a temperature problem, not a total recipe failure. Chilled dough and a cool tray give the butter time to set before the cookie spreads too far.
Check the Dough Before Baking
Before baking, aim for dough that is thick and scoopable. Shiny-loose dough needs a short rest or a chill. Dry-crumbly dough needs milk, 1 teaspoon at a time, until it comes together.
Variations to Try
Once you have baked the base version once, the dough is easy to adapt. Start with small changes so the brown-butter flavor still comes through.
Start with the base dough, then change one flavor direction at a time. Toffee adds caramel crunch, espresso sharpens the chocolate, pecans add toastiness, and flaky salt makes the butter taste deeper.
Easy Variations That Work with This Dough
Brown Butter Toffee Chocolate Chip Cookies
Add 1/2 cup chopped toffee or toffee bits with the chocolate. Chill the dough well because toffee can make cookies spread and caramelize faster.
Brown Butter Chocolate Chunk Cookies
Use chopped dark or semi-sweet chocolate instead of chips for more melted pockets and a more dramatic bakery look.
Espresso Brown Butter Chocolate Chip Cookies
Add 1 teaspoon espresso powder to the dry ingredients. It deepens the chocolate and toasted-butter flavor without making the cookies taste strongly like coffee.
Brown Butter Pecan or Walnut Cookies
Add 1/2 cup toasted chopped pecans or walnuts. Toasting the nuts first helps them stand up to the browned butter.
Salted Brown Butter Chocolate Chip Cookies
Use salted butter and reduce the fine salt in the dough to 1/4 teaspoon. Finish with only a small pinch of flaky salt, or skip it if your chocolate is already salty.
Variations That Need More Adjustment
Brown Butter Oatmeal Chocolate Chip Cookies
Treat oatmeal as its own formula rather than a quick stir-in. Oats absorb moisture and change spread, so a proper oatmeal cookie needs a slightly different balance.
Gluten-Free Brown Butter Chocolate Chip Cookies
A good 1:1 gluten-free baking flour can work, but the spread and chew may change. Let the dough rest before baking so the flour can hydrate. For a cookie built specifically around gluten-free flour alternatives, start with our almond flour cookies instead.
Eggless Brown Butter Chocolate Chip Cookies
This recipe is not a simple eggless swap because the egg and yolk affect structure, chew, and moisture. If you are learning egg-free baking, our flax egg guide is useful background, but this cookie deserves its own tested eggless formula.
Storage and Freezing
These cookies are excellent warm, but they also store well if you protect them from drying out.
Form
How to store
Timing
Baked cookies
Airtight container at room temperature
3 to 4 days
Chilled shaped dough
Covered in the refrigerator
Up to 3 days
Frozen shaped dough
Freeze on a tray, then transfer to a freezer bag
2 to 3 months
Baking from frozen
Bake straight from frozen or thaw briefly
Add 1 to 2 minutes to bake time
Reheating
Microwave briefly or warm in a low oven
Just until the chocolate softens
If you are freezing shaped dough, use the recipe card for bake times and add 1 to 2 minutes when baking from frozen.
Freeze dough portions on a tray before bagging them so they keep their shape. Later, you can bake straight from frozen and add a minute or two for a fresh-cookie shortcut.
If you want a cookie-style dessert that bakes as one sliceable centerpiece instead, our cookie pie recipe is a better direction than pressing this chilled dough into a deep pan.
This is the kind of dough worth freezing because one warm cookie later still tastes like you made the whole batch from scratch. The kitchen gets the brown-butter-cookie smell again, and the chocolate softens like a fresh tray.
Serving Ideas
These cookies are best when the centers are still soft and the chocolate is a little melty. Serve them warm with milk, coffee, or a scoop of homemade mint chocolate chip ice cream for a simple cookie-and-ice-cream dessert.
A warm cookie and a small scoop of vanilla ice cream make the brown-butter flavor feel even richer. Serve it while the chocolate is still soft, but before the crisp edge disappears.
Once you understand the butter color, dough texture, and soft-center bake cue, the recipe becomes much less intimidating. The recipe below is written for a reliable first batch, not just a dramatic photo batch; start there, then use the texture notes later when you want the cookies thicker, softer, or more chocolate-heavy.
Brown Butter Chocolate Chip Cookies Recipe Card
Save this as the short memory cue for the recipe: brown the butter, cool it, add the milk, scoop before chilling, and judge the bake by set edges and soft centers rather than minutes alone.
These cookies bake with crisp edges, chewy centers, glossy chocolate pockets, and brown butter flavor you can actually taste. The method keeps the dough thick, controlled, and soft in the center instead of flat, greasy, or dry.
Prep Time
25 minutes
Chill Time
1 to 2 hours
Bake Time
8 to 12 minutes per tray
Total Time
About 1 hour 35 minutes to 2 hours 40 minutes, plus extra time for multiple trays
Yield: About 16 large cookies, 20 to 22 medium cookies, or 26 to 28 smaller cookies
Ingredients
170g / 6 oz / 3/4 cup unsalted butter, weighed before browning
165g / 3/4 cup packed brown sugar, light or dark
65g / 1/3 cup granulated sugar
1 large egg, room temperature if possible
1 large egg yolk
1 tablespoon / 15 ml milk, plus up to 1 tablespoon / 15 ml more only if the dough looks dry
2 teaspoons / 10 ml vanilla extract
220g all-purpose flour / about 1 3/4 cups plus 1 tablespoon, spooned and leveled
1/2 teaspoon baking soda
1/4 teaspoon baking powder
3/4 teaspoon fine salt
200 to 225g / 7 to 8 oz semi-sweet or dark chocolate, chopped, chips, or a mix
Flaky salt, optional, for finishing
Instructions
Brown and Mix the Dough
Brown the butter. Add butter to a light-colored skillet or saucepan over medium heat. Let it melt, foam, and crackle, stirring often. Continue cooking until amber brown specks form at the bottom and the butter smells nutty.
Cool the butter. Pour it into a large mixing bowl, scraping in all the browned bits. Cool for 15 to 25 minutes, until liquid and warm, not hot.
Add the sugars. Whisk the brown sugar and granulated sugar into the cooled butter until glossy and thick.
Add wet ingredients. Whisk in the egg, egg yolk, vanilla, and 1 tablespoon milk. Hold back the extra tablespoon unless the dough looks dry later.
Mix dry ingredients. In a separate bowl, whisk together flour, baking soda, baking powder, and fine salt.
Make the dough. Fold the dry ingredients into the wet ingredients until a few flour streaks remain. Add the chocolate and fold just until combined. If the dough looks dry after resting for a few minutes, add milk 1 teaspoon at a time.
Scoop, Chill, and Bake
Scoop. Scoop 55g portions for about 16 large cookies, 45g portions for about 20 to 22 medium cookies, or 35g portions for about 26 to 28 smaller cookies. Place on a lined tray.
Chill. Cover and chill the shaped dough for 1 to 2 hours. For overnight dough, let it sit at room temperature for 10 minutes before baking if very firm.
Preheat. Heat oven to 350°F / 175°C. Line baking sheets with parchment paper.
Bake. Arrange chilled portions on the baking sheet with room to spread. Bake 55g cookies for 10 to 12 minutes, 45g cookies for 9 to 11 minutes, or 35g cookies for 8 to 10 minutes, until the edges are set and the centers still look soft.
Shape and finish. If needed, scoot cookies into rounder shapes with a large round cutter or glass while warm. Sprinkle with flaky salt.
Cool. Rest cookies on the baking sheet for 5 to 10 minutes, then move to a rack.
Notes
Use 1 tablespoon milk by default. Add more only if the dough looks dry.
For thicker cookies, chill the shaped dough closer to 2 hours.
For faster cookies, chill for 30 minutes and expect a little more spread.
For no-chill cookies, use smaller 35g portions and a cool baking sheet.
If using salted butter, reduce the fine salt to 1/4 teaspoon.
If baking from frozen, add 1 to 2 minutes to the bake time.
For a hotter test batch, bake well-chilled dough at 375°F / 190°C and start checking early.
FAQs
Why did my cookies spread?
Usually, something was too warm: the butter, the tray, or the dough itself. Bake chilled portions on a cool parchment-lined tray for the most reliable shape.
Is brown butter the same as melted butter?
No. Brown butter starts as melted butter, but it is cooked longer until the milk solids toast and turn amber. That extra cooking gives the cookies their nutty, caramel-like flavor.
Should brown butter be hot or cooled before making cookie dough?
Cool it first. The butter should be liquid and warm, not hot, before you add the egg.
Do I have to chill the dough?
Yes, for the best texture. Even 30 minutes helps, but 1 to 2 hours gives the most reliable thick, chewy cookie.
What chocolate works best?
Use chopped semi-sweet or dark chocolate for dramatic melted pockets, and chips for a neater classic cookie. A mix gives you familiar chocolate-chip texture plus glossy puddles.
Can I use salted butter?
Yes. Use salted butter if that is what you have, but reduce the fine salt in the dough to about 1/4 teaspoon. Taste the first baked cookie before adding flaky salt to the rest.
Why add milk to brown butter cookie dough?
Browning butter cooks off some water while deepening the flavor. The milk gives a little moisture back, so the cookies stay chewy instead of turning dry or sandy.
Can I make these without brown sugar?
This specific dough depends on brown sugar for chew, moisture, and caramel flavor. A white-sugar-only version will spread and crisp differently, so it needs its own recipe balance.
Are these the same as brown butter toffee chocolate chip cookies?
Not exactly. Toffee is a variation of this base dough. It makes the cookies sweeter and more caramelized, so the dough benefits from a good chill before baking.
Why are my cookies cakey instead of chewy?
The most common reason is too much flour. The dough should be thick and scoopable, not stiff, dry, or crumbly. Weigh the flour if possible; if using cups, spoon it in and level it off instead of packing it down.
How do I freeze the cookie dough?
Scoop the dough, freeze the portions on a tray, then transfer them to a freezer bag. Bake from frozen and add 1 to 2 minutes to the bake time.
What changes for smaller cookies?
Use about 35g dough per cookie and start checking around 8 to 10 minutes. Smaller cookies bake faster and can overbake quickly.
Once you learn the butter color, dough texture, chill-time cue, and soft-center bake point, these cookies stop feeling fussy. You get nutty brown-butter flavor, chewy centers, glossy chocolate, and cookies that hold their shape instead of spreading into disappointment.
For another classic cookie, our peanut butter cookies are a good next bake when you want something simple, nostalgic, and deeply flavored in a different way.
This edible cookie dough recipe is for the spoonful you wanted before the cookies ever reached the oven: soft brown-sugar dough, creamy butter, vanilla, a little salt, and tiny chocolate chips in every bite. It tastes like classic chocolate chip cookie dough, but it is made for eating straight from the bowl — no baking tray, no waiting, no pretending you only wanted “one taste.”
The important difference is safety. This version skips raw eggs and treats flour as something that needs attention, not an ingredient to casually stir in raw. For the most cautious batch, use commercially heat-treated flour labeled ready-to-eat; if you use a home flour-heating method, the notes below explain the limits clearly.
Before You Start: Texture and Safety
The good news is that edible cookie dough does not need to be complicated. Once you understand the flour piece, the rest is simple: cream butter and sugar, add vanilla and salt, mix in the flour, then adjust the texture until it tastes like the middle of a chocolate chip cookie.
Once the base is right, you can keep it classic with mini chocolate chips, make a single-serving bowl, turn it into sugar cookie dough, add peanut butter, roll it into bites, or chill little pieces for ice cream. Start with the chocolate chip version first; it teaches you what the texture should feel like.
Before you start mixing, use the texture cue below as your visual target: the dough should look thick, creamy, and spoonable, not dry, runny, or frosting-soft.
For the smoothest result, the dough should look dense but not dry; in other words, it should stay on the spoon without turning crumbly, stiff, or frosting-soft.
If the craving is really for warm cookies from the oven, use a proper cookie recipe like MasalaMonk’s double chocolate chip cookies instead. This one is built for one job: cookie dough you can enjoy by the spoonful.
What You’ll Find in This Edible Cookie Dough Guide
Use the quick answer if you already know the basics, or go straight to the safety notes if you want to understand the flour and egg issue before mixing.
Quick Answer: How to Make This Edible Cookie Dough Recipe
To make this edible cookie dough recipe, start with ready-to-eat flour or handle the flour using the safety notes below. Let the flour cool completely, then sift it so the dough does not taste lumpy or floury. Cream softened butter with brown sugar and a little granulated sugar, mix in vanilla and salt, add the flour, loosen the dough with milk or cream, and fold in mini chocolate chips.
The texture should be soft and scoopable, like the center of chocolate chip cookie dough before baking. It should not be runny, greasy, sandy, or crumbly. If it feels too thick, add milk one teaspoon at a time. If it feels too soft, chill it for 15 to 20 minutes before serving.
Quick texture cue: the dough should hold on a spoon, but still press easily when you scoop it. If it cracks apart, it needs a little more milk. If it slumps like frosting, it needs chilling or a spoonful of sifted flour.
Edible Cookie Dough Recipe at a Glance
Best flour option: commercially heat-treated flour labeled ready-to-eat
Eggs: none
Texture: creamy, spoonable, and thick enough to hold on a spoon
Best chips: mini semisweet chocolate chips
Chill time: optional, 10–20 minutes if the dough feels soft
Storage: 4–5 days refrigerated, 1–2 months frozen
If you only remember the essentials, keep these in mind first: no eggs, ready-to-eat flour preferred, mini chips for a better bite, and short cold storage for the best texture.
Why This Edible Cookie Dough Works
A good edible cookie dough recipe should not taste like sweet flour paste. It should taste like the spoonful you wanted from a real chocolate chip cookie batch: buttery, brown-sugary, vanilla-scented, lightly salty, and soft enough to scoop.
No eggs: the dough is made for eating, not baking, so eggs are left out completely.
Better flour handling: ready-to-eat flour is the cleanest choice, and the home flour-heating note is explained honestly.
Brown sugar leads: it gives the deeper chocolate chip cookie flavor that plain white sugar cannot.
Softened butter, not melted: softened butter keeps the texture creamy instead of greasy or loose.
Mini chips: smaller chips spread through the dough better, so every spoonful tastes balanced.
Adjustable milk: flour behaves differently after heating, so milk is added slowly instead of dumped in all at once.
Is Edible Cookie Dough Safe to Eat?
The safety piece gets much less confusing once you remember one thing: regular cookie dough is meant to be baked, and this dough is not. A safer edible cookie dough recipe starts with no raw eggs and a better flour choice from the beginning.
According to the CDC, raw dough and batter should not be eaten because uncooked flour and raw eggs can contain germs that may cause food poisoning. Commercial edible dough products, the CDC notes, are made with heat-treated flour and pasteurized eggs or no eggs.
So, is this kind of dough safer than sneaking a spoonful from a regular cookie batch? Yes, when it is made without raw eggs and with ready-to-eat flour. The safest route is commercially heat-treated flour labeled ready-to-eat. Home flour-heating methods are common in recipes, but they are not the same as validated commercial heat-treatment.
Why This Recipe Has No Eggs
Eggs stay out because the bowl is not going into the oven. They help baked cookies with structure, richness, and spread, but raw or lightly cooked eggs can carry food-safety risks. Since this is a spoonable dessert, the simplest direction is to leave eggs out completely.
That also means the dough will not bake like regular cookie dough. It has no eggs for structure and no leavening for lift, so treat it as a no-bake dessert rather than a shortcut cookie recipe.
What to Know About Raw Flour
Flour is easy to overlook because it does not look like a risky ingredient. However, the FDA explains that most flour is a raw food and has not been treated to kill bacteria. Baking or cooking is what normally makes flour-containing doughs safe to eat.
That is why the flour choice matters here. If you can get commercially heat-treated flour labeled ready-to-eat, use it. It gives you the cleanest safety story and keeps the method simple.
That does not mean homemade edible cookie dough is off the table; it just means the flour step deserves a little honesty. Ready-to-eat flour is the strongest option. If you choose to heat flour yourself, treat that step as risk reduction rather than the same thing as commercially processed flour.
Commercially heat-treated ready-to-eat flour keeps the no-bake dough approach cleaner, especially because regular flour is normally made safer through baking or cooking.
About Heating Flour at Home
Many edible cookie dough recipes include a home flour-heating step, but this should be framed carefully. The most cautious choice is still commercially heat-treated flour labeled ready-to-eat. The FDA notes that home flour treatments may not reliably kill all bacteria or make raw flour safe to eat, so treat any home method as a recipe-blog risk-reduction step rather than a validated food-safety process.
For readers who still choose to follow a home flour-heating method, use an instant-read thermometer, spread the flour thinly, stir it during heating, check more than one spot, cool it completely, and sift before mixing.
If you heat flour at home, use the thermometer cue as a careful kitchen step, not a promise; the safest route is still flour processed for ready-to-eat use.
Oven Method Used by Many Recipe Blogs
Preheat the oven to 350°F / 175°C. Spread a little more flour than you need in a thin layer on a parchment-lined rimmed baking sheet. Bake for 7 to 10 minutes, stirring once or twice, until the flour reaches 165°F / 74°C when checked in multiple spots with an instant-read thermometer. Cool completely, sift, then measure or weigh the amount needed for the dough.
Microwave Method Used by Many Recipe Blogs
Place flour in a wide microwave-safe bowl. Microwave for 30 seconds, stir well, then continue in 15-second bursts, stirring and checking the temperature in more than one spot. Let it cool completely and sift before using.
Simple takeaway: use ready-to-eat flour if you can find it. If not, read the home-heating note carefully and understand that it is a common recipe-blog risk-reduction step, not the same as commercial heat treatment.
Ingredients for Edible Cookie Dough
The ingredient list stays close to classic chocolate chip cookie dough, but each item has a job. Since the dough is not baked, little details matter more than usual: softened butter works better than melted butter, mini chips are easier to eat than large chips, and milk should be added slowly.
Because this no-bake dough is eaten as-is, the ingredient balance matters more than usual: softened butter keeps it creamy, brown sugar adds depth, and milk helps fine-tune the consistency.
Ready-to-Eat or Properly Handled Flour
Flour gives the dough its familiar body. Use 1¼ cups / 150g commercially heat-treated all-purpose flour if you can find it. If you use a home flour-heating method, cool the flour completely, sift it, and then measure the final amount into the bowl.
Softened Butter
Use ½ cup / 113g / 4 oz unsalted butter, softened but not melted. Softened butter creams into the sugar and gives the dough a classic texture. Melted butter can make it greasy, loose, or frosting-like.
Brown Sugar and Granulated Sugar
Brown sugar gives the dough that deep chocolate chip cookie flavor. Granulated sugar adds familiar sweetness, but too much can make the texture gritty. This recipe uses mostly brown sugar with just a small amount of granulated sugar for balance.
Vanilla and Salt
Vanilla makes the dough taste like dessert instead of sweet butter and flour. Salt is just as important because it keeps the sweetness from feeling flat. Do not skip it, especially if you are using unsalted butter.
Milk or Cream
Milk or cream loosens the dough after the flour goes in. Start with 1 tablespoon and add more only if needed. Flour can absorb differently after heating, so the best amount is the one that gives you a scoopable texture.
Mini Chocolate Chips
Mini chocolate chips work better than large chips because this dough is eaten soft, not baked. They distribute evenly, so each spoonful has chocolate without turning the bowl into mostly hard chunks.
Optional Baking Soda for Flavor Only
A tiny pinch of baking soda can make the dough taste more like classic cookie dough, but it is optional. If you use it, add only ⅛ teaspoon. It is there for flavor, not because the dough should be baked.
Tools That Make the Texture Better
You can make this with a bowl and spatula, so do not let the tool list make the recipe feel fussy. A few extras simply make the result more reliable: an instant-read thermometer for the flour if you are using a home-heating method, a fine-mesh sieve for lumps, and a scale so the dough does not turn dry from too much flour.
Rimmed baking sheet
Parchment paper
Instant-read thermometer
Mixing bowl
Electric hand mixer or stand mixer
Rubber spatula
Fine-mesh sieve
Digital scale, strongly recommended
Small cookie scoop, optional
Airtight container for storage
A scale is especially useful because flour gets compacted easily. If you scoop too much into the bowl, the dough can turn dry, chalky, or too thick before you even start troubleshooting.
How to Make This Edible Cookie Dough Recipe
The method is easy, but the order makes a big difference. Handle the flour first, let it cool, then build the dough slowly. Warm flour and melted butter are two of the fastest ways to turn a good bowl of cookie dough into something greasy.
The method works best in sequence: prepare the flour first, cream the butter and sugars well, then mix, adjust, and fold in the chips once the texture already feels close.
Step 1: Prepare the Flour
If you are using commercially heat-treated flour, measure or weigh it and move on. If you are using a home flour-heating method, follow the note above, cool the flour completely, and sift it before mixing. Do not add warm flour to the butter mixture.
Step 2: Cream the Butter and Sugars
Add softened butter, brown sugar, and granulated sugar to a bowl. Beat until the mixture looks creamy, lighter, and slightly fluffy. You should still see a thick butter-sugar mixture, not melted butter pooling around the edges. This step helps soften the sugar crystals and gives the dough a smoother bite.
Step 3: Add Vanilla, Salt, and Flour
Mix in the vanilla and salt, then add the cooled, sifted flour. Add the flour gradually if you are mixing by hand. At first, the mixture may look a little thick; that is normal.
Step 4: Adjust the Texture
Add milk or cream one teaspoon at a time. Stir, pause, and check the texture before adding more. The dough should hold its shape on a spoon but still press easily when you scoop it. Stop before it starts looking like frosting.
Add milk slowly, then stir before deciding on more; the dough often softens after a few turns, so patience helps keep it thick and spoonable.
Step 5: Fold in Mini Chocolate Chips
Fold in the mini chocolate chips with a spatula. Taste and adjust with a tiny pinch of salt if it tastes too sweet, or a few extra drops of vanilla if it tastes flat.
Serving cue: this dough is best after a 10-minute rest. That short pause lets the sugar soften slightly and the flour hydrate, so each spoonful tastes smoother.
Spoon test: The dough should lift cleanly and still look creamy before you move to the recipe card.
The spoon test is one of the easiest checks in the whole recipe: if the dough lifts cleanly and still looks creamy, you are usually very close to the ideal finish.
Edible Cookie Dough Recipe Card
This edible cookie dough recipe is a classic chocolate chip version made without eggs and with a safer flour approach. It is designed for eating by the spoonful, rolling into bites, or folding into desserts.
YieldAbout 2½ cups
Servings12–16 small servings
Prep Time10 minutes
Total Time20–25 minutes
Ingredients
1¼ cups / 150g commercially heat-treated all-purpose flour, preferred; or flour handled using the home-heating note above, cooled completely and sifted
½ cup / 113g / 4 oz unsalted butter, softened
½ cup / 100–110g packed light brown sugar
2 tablespoons / 25g granulated sugar
1½ teaspoons / 7ml vanilla extract
½ teaspoon fine salt, or to taste
1–2 tablespoons / 15–30ml milk or cream, added as needed
¾ cup / 120–130g mini semisweet chocolate chips
Optional: ⅛ teaspoon baking soda, for classic cookie-dough flavor only
Method
Prepare the flour. Use commercially heat-treated flour if available. If using a home flour-heating method, follow the safety note above, cool the flour completely, sift it, then measure 150g for the recipe.
Cream the butter and sugars. In a mixing bowl, beat softened butter, brown sugar, and granulated sugar until creamy and slightly fluffy.
Add flavor. Mix in vanilla, salt, and optional baking soda if using.
Add flour. Add the cooled, sifted flour and mix until a thick dough forms.
Adjust texture. Add milk or cream 1 teaspoon at a time until the dough is soft and scoopable.
Add chocolate. Fold in mini chocolate chips. Let the dough rest for about 10 minutes before serving for the smoothest texture.
Notes
This dough is for eating as edible cookie dough, not for baking into cookies.
For the most cautious version, use commercially heat-treated flour labeled ready-to-eat.
If you choose to heat flour at home, use an instant-read thermometer, stir well, check multiple spots, cool completely, and sift before mixing.
If the dough is too dry, add milk 1 teaspoon at a time. If it is too sticky, chill it for 15–20 minutes.
Store refrigerated in an airtight container for 4–5 days, or freeze portions for 1–2 months.
Use the recipe card as your baseline, then adjust only the milk or chill time first; those two small changes usually fix the texture without changing the flavor.
Which Batch Size Should You Make?
Choose the batch based on the kind of cookie dough moment you want. The single-serve version is best for one quick craving, the for-two version is perfect for a small dessert, and the full edible cookie dough recipe works better when you want cookie dough bites, ice cream mix-ins, dessert cups, or a make-ahead treat in the fridge.
Batch size changes the experience as much as flavor does: a single serve suits one craving, a for-two version feels more dessert-like, while a full batch works better for bites or mix-ins.
Make This
Best For
Texture Tip
Single serve
One craving, no leftovers
Add milk slowly because small bowls loosen fast.
For two
Movie night, date night, small dessert
Rest 10 minutes before eating for a smoother bite.
The single-serve version is the bowl to make when you want cookie dough now and do not want leftovers calling your name from the fridge. Because the batch is small, measure the flour and milk carefully; a tiny extra splash can change the texture quickly.
Choose the single-serve bowl when you want cookie dough for one and nothing left over, but add milk carefully because small batches loosen faster than larger ones.
Single-Serve Formula
6 tablespoons / 48g ready-to-eat flour, preferred; or flour handled using the safety note above
2 tablespoons / 28g / 1 oz softened butter
2 tablespoons / 25–28g light brown sugar
1 tablespoon / 12g granulated sugar
¼–½ teaspoon vanilla extract
Small pinch of fine salt
½–1 tablespoon / 7–15ml milk or cream
2 tablespoons / 20–25g mini chocolate chips
Mix it the same way as the main batch: cream the softened butter and sugars, add vanilla and salt, stir in the flour, loosen with milk, and fold in the chips. If you want a firmer scoop, chill it for 10 minutes before eating.
Edible Cookie Dough for Two
This small-batch version makes enough for two dessert portions without leaving a full container in the fridge. That size works especially well for a movie night, date night, or quick no-bake dessert when you want something sweet without baking a tray of cookies.
This small batch is a practical middle ground: enough for a shared dessert, yet still easy to mix without committing to a full container in the fridge.
For-Two Formula
½ cup + 1 tablespoon / about 68g ready-to-eat flour, preferred; or flour handled using the safety note above
4 tablespoons / 56g / 2 oz softened butter
¼ cup / 50–55g light brown sugar
1½–2 tablespoons / 18–25g granulated sugar
½–1 teaspoon vanilla extract
⅛–¼ teaspoon fine salt
1–1½ tablespoons / 15–22ml milk or cream
¼ cup / 40–45g mini chocolate chips
Start with the lower amount of milk, then add more only if the mixture feels too thick. Small batches can go from crumbly to loose quickly, so adjust slowly and give the bowl a minute before adding another splash.
Edible Cookie Dough Variations
Once the base is right, the dough is easy to customize. Keep the same safety logic: no raw eggs, avoid regular raw flour, and adjust the texture slowly because different add-ins change how soft or thick the mixture feels.
Not sure where to start? Make the classic chocolate chip version first, then decide what you want more of next time: extra vanilla, more chocolate, a salty peanut butter edge, a firmer bite for rolling, or a lighter dairy-free version.
Once the base recipe feels right, use the variations to choose your next direction, whether that means sweeter, nuttier, dairy-free, higher-protein, or lower-carb.
If You Want…
Make This Variation
Small Adjustment
Classic chocolate chip flavor
Chocolate chip edible cookie dough
Use mostly brown sugar and mini chips.
A sweeter bakery-style bowl
Sugar cookie dough
Use more granulated sugar and add sprinkles at the end.
A richer, saltier bite
Peanut butter cookie dough
Add creamy peanut butter and reduce the milk slightly.
A firmer bite for rolling
Cookie dough bites
Chill before scooping or dipping.
A lighter dairy-free option
Vegan edible cookie dough
Use vegan butter, dairy-free milk, and dairy-free chips.
Chocolate Chip Edible Cookie Dough
Start here if you want the classic chocolate chip version. Brown sugar, vanilla, salt, softened butter, and mini chocolate chips give you the familiar cookie dough flavor without needing to bake anything.
Classic chocolate chip remains the best place to start, since brown sugar, vanilla, and mini chips come closest to the flavor most people expect from cookie dough.
For deeper chocolate flavor, add 1 to 2 tablespoons of cocoa powder and a splash more milk. For a chunkier bowl, use a mix of mini chips and finely chopped chocolate.
Edible Sugar Cookie Dough
Choose this variation when you want the vanilla-sprinkle side of cookie dough instead of the brown-sugar chocolate chip side. It tastes lighter, sweeter, and more bakery-style.
Use more granulated sugar and less brown sugar. You can replace the brown sugar with granulated sugar for a cleaner vanilla flavor, then add a tiny splash of almond extract if you like bakery-style sugar cookies. Sprinkles, white chocolate chips, and a little extra vanilla work well here. Add sprinkles at the end so they do not bleed too much color into the dough.
Peanut Butter Edible Cookie Dough
This is the richer, saltier variation — the one that tastes like peanut butter cookie dough met chocolate chip cookie dough in the same bowl. Mix ¼ cup creamy peanut butter into the butter and sugar mixture, then reduce the milk slightly. Peanut butter adds richness and salt, so taste before adding extra salt.
Meanwhile, the peanut butter version turns richer and slightly firmer, so it is a smart choice when you want a saltier edge and a more substantial bite.
Mini chocolate chips are great here, but chopped roasted peanuts also work if you want crunch. For a baked version of this flavor, MasalaMonk’s peanut butter cookies are the better route.
Gluten-Free Edible Cookie Dough
For a gluten-free version, use a gluten-free flour blend you already like in no-bake or raw-style applications. Different blends behave differently when they are not baked, so texture matters more than usual here.
If the dough tastes gummy, try a gum-free gluten-free blend next time. If it tastes grainy, let it rest for 10 to 15 minutes before serving. Almond flour can also work, but it gives a softer, nuttier dough rather than a classic all-purpose-flour texture.
Vegan and Dairy-Free Edible Cookie Dough
To make the dough vegan or dairy-free, use vegan butter, dairy-free milk, and dairy-free chocolate chips. The same method works, but the mixture may soften faster depending on the vegan butter you use.
The dairy-free version should still feel like dessert first: creamy, scoopable, and close to the original texture, just made with vegan butter, dairy-free milk, and dairy-free chips.
If you want a dairy-free frozen dessert to pair with cookie dough bites, MasalaMonk’s coconut ice cream is a natural next recipe.
Protein Edible Cookie Dough
The protein version goes in a different direction from the classic butter-and-brown-sugar dough, but it is useful when you want the cookie dough idea in a higher-protein snack. For a quick version, blend cottage cheese until completely smooth, then stir it with almond flour or oat flour, vanilla protein powder, a little maple syrup or sweetener, vanilla, salt, and mini chocolate chips.
Protein cookie dough goes in a different direction from the classic bowl; still, it can be useful when you want the same dessert idea in a more filling, snack-like version.
Chill it before eating so the texture firms up. If you like high-protein desserts, MasalaMonk’s protein ice cream goes deeper into protein powder, Greek yogurt, dairy-free, low-calorie, and sugar-free frozen dessert options.
Keto or Sugar-Free Edible Cookie Dough
Expect a nuttier, softer dough than the classic chocolate chip version. For a keto-style bowl, use almond flour instead of wheat flour, a low-carb sweetener instead of sugar, and sugar-free chocolate chips. Because almond flour has more fat and less starch than all-purpose flour, start with less added milk and adjust slowly.
Because almond flour behaves differently from all-purpose flour, keto edible cookie dough usually turns out softer and nuttier, with a flavor that feels less classic but still satisfying.
For another low-carb dessert direction, MasalaMonk’s keto hot chocolate is a good companion recipe.
How to Fix Edible Cookie Dough Texture
If your first spoonful is not perfect, do not panic. Edible cookie dough is one of the easiest desserts to adjust because nothing has been baked yet. Most texture problems come down to flour, butter temperature, or adding the milk too quickly.
The easiest way to fix the dough is to change only one thing at a time. Add milk slowly, chill before adding more flour, and taste again after a short rest.
Look at the texture before changing the recipe: crumbly dough needs slow moisture, loose dough needs chilling, and the best bowl sits somewhere in between.
Problem
Likely Cause
Fix
Dry or crumbly texture
Too much flour, packed flour, or not enough milk
Add milk or cream 1 teaspoon at a time until scoopable.
Sticky dough
Butter too warm or too much milk
Chill 15–20 minutes, or add 1 tablespoon sifted flour.
Gritty bite
Sugar has not softened into the butter enough
Cream the butter and sugars longer, or let the dough rest 10 minutes.
Floury flavor
Flour was overmeasured or not sifted after heating
Use grams, sift after heating, and add a little vanilla or salt to balance.
Overly sweet dough
Too much sugar or too many chips
Add a pinch of salt and 1–2 tablespoons flour.
Greasy or soupy texture
Butter was melted instead of softened
Chill, then stir. Next time, use softened butter.
Very firm after chilling
Butter hardened in the fridge
Let the dough sit at room temperature for 10–15 minutes before serving.
How to Fix Dry or Crumbly Dough
Start with a teaspoon of milk or cream, then stir before adding more. Small corrections work better here because dry dough can move from crumbly to loose surprisingly quickly.
If the dough turns dry or crumbly, fix it gradually rather than all at once; a teaspoon of milk or cream is usually enough to start bringing it back together.
How to Fix Sticky or Too-Soft Dough
Chill first so the butter firms up before you add more flour. After a short rest in the fridge, the same bowl often becomes scoopable without turning heavy or floury.
Chilling gives the butter time to firm up again; as a result, soft dough often becomes scoopable without needing extra flour.
Can You Bake Edible Cookie Dough?
No, this edible cookie dough is made for spooning, scooping, and rolling into bites — not for baking. It has no eggs and no leavening, so it will not behave like regular cookie dough in the oven. Instead of turning into chewy cookies, it may spread, turn greasy, stay dense, or bake up flat.
Edible cookie dough is made for spooning and scooping, not for baking; therefore, use a proper cookie recipe whenever the goal is warm cookies from the oven.
Think of this as a no-bake dessert, not a shortcut cookie dough. If the craving is really for warm cookies from the oven, use a recipe designed for baking, like MasalaMonk’s double chocolate chip cookies. If you want a roll-and-cut dough, MasalaMonk’s gingerbread cookies are a better example of dough built for shaping and baking.
Ways to Use Edible Cookie Dough
Eating it by the spoonful is the obvious answer, but this dough can do more. Because it is eggless and made with a safer flour approach, you can use it as a no-bake dessert component instead of treating it like leftover raw cookie dough.
Easy No-Bake Ways to Serve It
Eat it by the spoonful after a 10-minute rest for smoother texture.
Roll it into bites and chill until firm.
Dip the bites in melted chocolate and finish with flaky salt.
Fold chilled pieces into ice cream for homemade cookie dough ice cream.
Blend a spoonful into a milkshake for cookie dough flavor.
Use it as a brownie topping after brownies have cooled.
Layer it into dessert cups with whipped cream, chocolate sauce, or berries.
Press it into mini tart shells for a no-bake cookie dough dessert.
Beyond the spoonful, this dough can become bites, brownie topping, milkshake flavor, or ice cream mix-ins, so one batch can stretch into several no-bake dessert ideas.
Cookie Dough Ice Cream and Mix-In Safety
Ice cream note: only use dough made with ready-to-eat ingredients for ice cream mix-ins. Do not fold regular raw cookie dough into ice cream; the pieces should be made without raw eggs and with a safer flour approach.
Small chilled pieces are especially good folded into homemade ice cream. For a chocolate-chip frozen dessert direction, see MasalaMonk’s mint chocolate chip ice cream.
If you want another no-bake spoonable dessert, MasalaMonk’s avocado chocolate mousse gives you a chocolate-rich option with a completely different texture.
How to Store and Freeze Edible Cookie Dough
Because the dough contains butter and milk or cream, it should be stored cold. Do not leave it sitting out for long serving windows, especially in a warm kitchen.
Refrigerator: Store in an airtight container for 4–5 days.
Freezer: Freeze portioned balls or scoops for 1–2 months.
To serve from the fridge: Let it sit at room temperature for 10 minutes so the butter softens slightly.
To freeze neatly: Scoop into balls, freeze on a lined tray until firm, then transfer to a freezer-safe container.
Cold storage firms the butter, so let refrigerated scoops rest briefly before serving; meanwhile, freezing in portions makes later dessert bowls much easier.
If you are making cookie dough bites for a party, keep them chilled until close to serving time. For the best texture, portion them small enough that people can eat them in one or two bites.
Protein versions made with cottage cheese or yogurt should be treated as more perishable. Keep them refrigerated, use clean utensils, and aim to eat them within 2–3 days rather than keeping them as long as the classic butter-based version.
FAQs
Is this edible cookie dough recipe safe to eat?
Edible cookie dough is safest when it is made without raw eggs and with commercially heat-treated flour labeled ready-to-eat. Regular raw cookie dough is not meant to be eaten because it usually contains raw flour and raw eggs. Home flour-heating methods are common in recipes, but they are not the same as commercially validated heat treatment.
What is the safest flour for edible cookie dough?
The safest flour choice is commercially heat-treated flour labeled ready-to-eat. Regular all-purpose flour is raw and is normally made safe through baking or cooking, not by being stirred directly into a no-bake dessert.
Why does edible cookie dough need safer flour handling?
Most flour is raw and has not been treated to kill bacteria. Regular cookie dough becomes safer when baked, but edible cookie dough is not baked. That is why this recipe uses ready-to-eat flour guidance instead of asking you to stir plain raw flour into dessert.
How do I make edible cookie dough without eggs?
This recipe is eggless by design. Eggs are useful in baked cookies, but they are not needed here because the dough is made for spooning, not for going into the oven.
How does almond flour change the texture?
Almond flour makes a softer, nuttier dough and works best in keto, gluten-free, or vegan-style edible cookie dough. It will not taste exactly like classic chocolate chip cookie dough made with all-purpose flour, so start with less milk and adjust slowly.
How do I make this edible cookie dough recipe gluten-free?
Use a gluten-free flour blend you already like in no-bake applications, or use almond flour for a softer variation. If your gluten-free dough feels gummy, try a gum-free blend next time. If it feels grainy, let it rest for 10 to 15 minutes before eating.
How do I make a vegan version?
For a vegan version, use vegan butter, dairy-free milk, and dairy-free chocolate chips. The dough may soften more quickly depending on the vegan butter, so chill it if it feels too loose.
How do I make edible cookie dough for one?
For one serving, use 6 tablespoons / 48g ready-to-eat flour, preferred; or flour handled using the safety note above, plus 2 tablespoons softened butter, 2 tablespoons brown sugar, 1 tablespoon granulated sugar, vanilla, salt, ½ to 1 tablespoon milk, and 2 tablespoons mini chocolate chips. Mix, adjust the texture, and chill briefly if needed.
Why should this dough not be baked?
This dough is made for eating, not baking. It has no eggs and no leavening, so it can bake up flat, greasy, dense, or crumbly. Use a real cookie recipe if you want baked cookies.
How long does edible cookie dough last in the fridge?
Store edible cookie dough in an airtight container in the refrigerator for 4–5 days. Let it sit at room temperature for about 10 minutes before eating if it becomes too firm.
How should you freeze edible cookie dough?
Freezing works best when the dough is portioned first. Scoop it into small balls, freeze them on a lined tray until firm, then move them to a freezer-safe container. Use within 1–2 months for the best texture.
Once you have the base texture right, this edible cookie dough recipe becomes the kind of dessert you can make your own: extra vanilla, darker chocolate, sprinkles, peanut butter, or chilled bite-size scoops tucked into ice cream. Start with the classic chocolate chip version first, then let the next batch follow your craving.
Make a quick note of what you changed — more salt, less milk, extra chips, longer chill time. The best edible cookie dough is the one you can repeat exactly when the craving hits again.
If you want a gingerbread cookies recipe that rolls cleanly, holds its shape, and still stays soft enough to enjoy, this is the one to make. These cookies bake with soft centers, lightly crisp edges, deep molasses-and-spice flavor, and enough structure for gingerbread men and other cut-out shapes. In other words, you get the classic holiday look without ending up with dry, hard cookies.
The best gingerbread cookies are not just the ones that look neat on the tray. They also need dough that stays manageable, cut-outs that hold their edges, and a texture that still tastes good once the icing dries. This dough is built to give you that balance.
The dough chills well, handles easily once firm, and gives you a smooth surface for glaze or royal icing. So whether you want homemade gingerbread cookies for gifting, simple gingerbread man cookies for family baking, or soft gingerbread cookies for a holiday tray, this guide walks you through the method, decorating options, make-ahead timing, and the fixes that matter most.
These are soft gingerbread cookies made for cut-outs. They are tender enough to enjoy plain, yet firm enough to hold the shape of gingerbread men, stars, trees, and other holiday cookies without spreading into rounded blobs.
The dough is rich with molasses, brown sugar, ginger, and cinnamon, and it becomes much easier to handle after chilling. Once baked, the cookies stay fairly flat, so they work especially well for glaze, royal icing, or simple sugar decoration.
Yield: 24 medium cookies
Prep time: 25 minutes
Chill time: 1 hour
Bake time: 8 to 10 minutes per batch
Total time: about 1 hour 35 minutes
Texture: soft centers, lightly crisp edges
Best for: gingerbread men, cut-out cookies, and icing
Make-ahead friendly: yes
If you need a gingerbread cookies recipe that works for both decorating and eating, this one lands in the sweet spot. It gives you enough structure for clean cut-outs and enough tenderness to keep the cookies enjoyable after they cool.
This gingerbread cookies recipe works especially well when you want dough that rolls cleanly, keeps cut-out edges neat, stays soft in the center, and still handles decorating and make-ahead baking with less stress.
Gingerbread Cookies Recipe Card
Soft Gingerbread Cookies with clean cut-out edges, soft centers, lightly crisp edges, and classic molasses-spice flavor. This is the fast-scan version for baking day.
Best for: soft cut-outs, decorating, gifting, and make-ahead holiday baking
Before You Start Baking
Use regular unsulphured molasses, not blackstrap.
Weigh the flour if you can, or spoon and level it.
Chill the dough until firm before rolling.
Pull the cookies when the centers look matte and set, not dark brown.
Here is a soft gingerbread cookies recipe card that gives you the quick-save version: the key ingredients, short method, and a few tips that help the cookies stay soft in the center while keeping neat cut-out edges.
Ingredients
170 g unsalted butter, softened (3/4 cup)
150 g packed dark brown sugar (3/4 cup)
170 g unsulphured molasses (1/2 cup)
1 large egg
1 teaspoon vanilla extract
360 g all-purpose flour (3 cups)
1 teaspoon baking soda
1/2 teaspoon fine salt
1 tablespoon ground ginger
2 teaspoons ground cinnamon
1/4 teaspoon ground cloves
1/4 teaspoon ground nutmeg
1 to 2 teaspoons milk, only if the dough seems unusually dry
Method
Beat the softened butter and brown sugar until creamy and smooth, about 2 minutes.
Mix in the molasses, egg, and vanilla until fully combined.
Whisk together the flour, baking soda, salt, ginger, cinnamon, cloves, and nutmeg in a second bowl.
Add the dry ingredients to the wet mixture and stir just until a soft dough forms. Add 1 teaspoon of milk at a time only if the dough feels unusually dry.
Divide into 2 discs, wrap, and chill for at least 1 hour.
Heat the oven to 350°F / 175°C and line baking sheets with parchment paper.
Roll one disc at a time on a lightly floured surface. For softer cookies, aim for about 1/4 inch thick.
Cut shapes, transfer to the tray, and chill the tray briefly if the dough has softened.
Bake for 8 to 10 minutes, until the centers look matte and set and the edges feel lightly firm.
Cool on the tray for 5 minutes, then move to a wire rack and cool completely before decorating.
Ingredients for This Gingerbread Cookies Recipe
This ingredient list is simple, but each part has a job. The butter and brown sugar keep the cookies tender, the molasses gives classic depth and color, and the flour-to-fat balance keeps the dough sturdy enough for cut-out shapes once chilled.
This gingerbread cookies ingredient guide shows the key ingredients that shape the dough’s flavor, softness, and clean cut-out structure, from unsulphured molasses and dark brown sugar to the warm spice blend and careful flour balance.
170 g unsalted butter, softened (3/4 cup)
150 g packed dark brown sugar (3/4 cup)
170 g unsulphured molasses (1/2 cup)
1 large egg
1 teaspoon vanilla extract
360 g all-purpose flour (3 cups)
1 teaspoon baking soda
1/2 teaspoon fine salt
1 tablespoon ground ginger
2 teaspoons ground cinnamon
1/4 teaspoon ground cloves
1/4 teaspoon ground nutmeg
1 to 2 teaspoons milk, only if the dough seems unusually dry
Important: Use regular unsulphured molasses here, not blackstrap. In a gingerbread cookies recipe like this one, regular molasses gives you the best balance of sweetness, color, and classic gingerbread depth without dragging the flavor into bitterness.
If you can, weigh the flour. If not, spoon and level it rather than scooping straight from the bag. That one habit alone makes it much easier to avoid dry dough and hard cookies.
How to Make This Gingerbread Cookies Recipe Step by Step
The method is straightforward, but temperature and dough feel matter more than speed. So the goal is not to rush through the steps. Instead, mix until the dough comes together, chill it properly, and keep it cold enough that the cut-outs stay neat.
This step-by-step gingerbread cookie method shows exactly how the dough should look at each stage, so it is easier to mix, chill, roll, cut, and bake cookies that hold their shape and stay soft in the center.
In a large bowl, beat the softened butter and brown sugar until creamy and smooth, about 2 minutes. You want the mixture lightened and well combined, but not so whipped that it looks fluffy and airy.
Add the molasses, egg, and vanilla, then mix until fully combined. At this stage, the mixture will look glossy, rich, and a little loose, which is exactly what you want.
In a second bowl, whisk together the flour, baking soda, salt, ginger, cinnamon, cloves, and nutmeg.
Add the dry ingredients to the wet mixture and stir just until a soft dough forms. If the dough seems crumbly rather than soft, add 1 teaspoon of milk at a time until it comes together. The finished dough should feel soft and a little sticky before chilling, not dry and not stiff.
Divide the dough into 2 discs, wrap them well, and chill for at least 1 hour.
Once the dough is properly chilled, it becomes much easier to roll and cut cleanly. More than anything else, this gingerbread cookies recipe depends on cold dough rather than extra flour for sharp cut-outs. If it still feels sticky after chilling, return it to the fridge for 15 to 20 minutes instead of forcing in more flour.
Cold dough is what keeps a gingerbread cookies recipe like this one easy to roll, cut, and transfer. Once the dough is firm, the shapes stay cleaner on the tray and bake with sharper edges instead of softening into blurred outlines.
This is the stage where many bakers accidentally add too much flour. Cold gingerbread dough should feel firm and workable, not dry.
If the dough cracks hard as soon as you try to roll it, let it sit on the counter for 5 to 10 minutes and try again. Usually that means it is slightly too cold, not ruined. On the other hand, if it sticks to everything, it is usually too warm, not under-floured.
For even cleaner edges, you can also roll the dough between sheets of parchment, chill or briefly freeze it flat, and then cut shapes from the cold sheet. If you want a useful visual on that method, King Arthur explains it well here: how to help cut-out cookies hold their shape.
The sharpest gingerbread men usually come from colder dough, not more flour. Keep the dough firm, roll and cut it while cold, and give the tray a short chill if the shapes start softening before they go into the oven.
Heat the oven to 350°F / 175°C. Line baking sheets with parchment paper.
Roll one disc of dough at a time on a lightly floured surface. For softer cookies, roll to about 1/4 inch thick. For a firmer bite, roll a little thinner, around 1/8 to 3/16 inch.
Cut shapes and transfer them to the prepared baking sheets, spacing them about 1 to 2 inches apart. If the dough softens too much while you work, chill it again before baking. If the cut-outs feel especially soft, a quick 5 to 10 minute tray chill helps them hold sharper edges.
Bake for 8 to 10 minutes. A 3-inch gingerbread man rolled to 1/4 inch thick usually takes about 8 minutes for a softer result. A slightly thinner cookie often needs 9 to 10 minutes.
For softer gingerbread men and fuller cut-outs, stay close to 1/4 inch; go a little thinner only if you want a firmer bite, and pull the cookies once the centers look matte and set rather than waiting for deep browning.
The cookies are done when the centers look matte and set, the edges feel lightly firm, and the color is only a touch darker around the outer edge. Because they continue to firm up as they cool, do not wait for deep browning. When they are right, they should smell deeply spiced and look set without turning dark brown.
Let the cookies cool on the tray for 5 minutes, then move them to a wire rack. Cool completely before decorating.
Reroll scraps only after gathering them gently. If they have warmed up and turned sticky, chill them again before rolling so the second round stays easier to handle.
This gingerbread cookie thickness guide shows the tradeoff clearly: roll the dough about 1/4 inch thick for softer, fuller cookies, or go slightly thinner when you want a firmer bite and a flatter finished texture.
Why This Gingerbread Cookies Recipe Works
A really good gingerbread cookies recipe has to get three things right at once: flavor, texture, and handling. This one does. More importantly, it does so without making the dough fussy or the finished cookies dry, which is why it feels dependable from the first batch onward.
Soft gingerbread cookies without cakey puffiness
The butter, brown sugar, egg, and molasses keep the cookies tender, while the modest amount of baking soda keeps them from rising too much. That is what gives you a soft bite without thick, puffy shapes.
This is the texture you want from a good gingerbread cookies recipe: a tender center, lightly set edges, and enough structure for gingerbread men to stay neat without turning dry or cakey.
Why these gingerbread cookies hold their shape
Once chilled, the dough is firm enough to roll and cut neatly. As a result, hands, feet, stars, and tree points stay more defined in the oven instead of softening into rounded outlines.
Deep gingerbread flavor without bitterness
Molasses, ginger, and cinnamon do most of the heavy lifting, while clove and nutmeg stay in the background. The result is rich and classic, not bitter or overpowering.
Gingerbread cookies that decorate cleanly
Because the cookies bake relatively flat, the icing sits more neatly on top. As a result, both simple glaze and detailed royal icing are easier to manage, especially when you want gingerbread men that still look clear and readable after decorating.
Gingerbread Cookie Ingredient Notes That Matter
A few ingredient choices can make or break a gingerbread cookies recipe. In particular, the molasses, flour, butter texture, and spice balance affect both flavor and handling.
A few ingredient choices do more for gingerbread cookies than extra decorating ever will: the right molasses, brown sugar, flour measurement, softened butter, and spice balance are what keep the dough flavorful, softer, and easier to handle.
The best molasses for gingerbread cookies
Use regular unsulphured molasses. It gives the cookies their classic depth and color without pushing them into bitterness. If you want a quick breakdown of light, dark, and blackstrap molasses, King Arthur’s guide is genuinely useful: light, dark, and blackstrap molasses.
Brown sugar keeps soft gingerbread cookies tender
Brown sugar adds moisture and a warmer flavor. As a result, the cookies stay softer and taste fuller than they would with a more neutral sugar base.
Too much flour makes the cookies dry
Too much flour is one of the fastest ways to ruin the texture. If you can, weigh it. If not, spoon and level rather than scooping straight from the bag.
Softened butter gives the dough the right feel
Softened butter should cream smoothly with the sugar, not look greasy or melted. Otherwise, the dough becomes much harder to control once you start rolling and cutting, and the cookies are more likely to lose those cleaner edges.
Keep the spice balance warm, not harsh
Ginger and cinnamon should lead. Clove and nutmeg should stay in supporting roles. Otherwise, the whole dough can start tasting medicinal instead of festive.
Vanilla or orange zest can round things out
A little vanilla rounds out the spice. Orange zest can brighten the dough too, although it should stay in the background so the classic gingerbread flavor stays in charge.
Decorating Gingerbread Cookies and Easy Variations
Once the dough is working well, the next choice is simple: decorate the cookies more neatly or tweak the batch slightly for a softer, darker, or faster finish. This section keeps those adjustments practical so the dough stays reliable.
For softer gingerbread cookies
For a softer result, roll the dough closer to 1/4 inch thick and bake just until the centers are set. That gives you a fuller cookie with a more bakery-style feel.
For faster holiday cookies
Choose simpler cutters, skip detailed piping, and finish the cookies with a quick glaze or sanding sugar. Even so, the batch still looks festive and feels finished. This is the easiest route when you want holiday cookies that still look good without turning decorating into a separate project.
For a darker, more old fashioned gingerbread flavor
Lean a little harder on ginger and use dark brown sugar if you want the cookies to taste deeper and more old fashioned. Just keep the clove controlled so the flavor stays warm and balanced rather than harsh. Do not swap in blackstrap molasses here unless you specifically want a more bitter result.
Best icing for gingerbread cookies
Choose royal icing when: you want cleaner outlines, button details, faces, or cookies you can decorate more precisely.
Choose simple glaze when: you want a faster, easier finish for a holiday tray, gifting, or casual family baking.
How to decorate gingerbread cookies without making it fussy
Use royal icing when you want clean outlines, button details, smiles, and defined flooding. Use a simple glaze when you want faster cookies that still look finished. In both cases, decorate only once the cookies are completely cool, or the icing can turn patchy and slide.
Neat gingerbread cookies do not need complicated piping. Start with a simple outline, let it set briefly, then add a few dots, stripes, or buttons and choose royal icing or glaze based on how detailed you want the finish.
For the neatest beginner-friendly finish, start with three easy moves: outline the cookie first, let that line set briefly, then add dots, stripes, or a small flood rather than covering every inch. That keeps gingerbread men readable, faster to decorate, and less messy for family baking.
For a gingerbread cookies recipe like this one, a few clean outlines, dots, and smiles are enough to make the tray look festive without turning decorating into a fussy piping project.
Royal Icing vs Simple Glaze
Quick glaze: Stir 1 cup confectioners’ sugar with 1 1/2 to 2 teaspoons milk and a small splash of vanilla until thick but spreadable. Quick royal icing note: Use a thicker consistency for outlines, then thin it slightly with drops of water for flooding. If you plan to stack or gift the cookies, let royal icing dry fully for several hours or overnight first. If you want a useful visual guide to outline and flooding consistency, King Arthur’s cookie decorating guide is worth a look: cookie decorating guide.
A simple glaze is the better choice when you want an easier finish for a holiday tray, cookie box, or last-minute batch. It should be thick enough to coat the back of a spoon, but loose enough to spread without tearing the cookie surface. So if you want easy gingerbread cookies that still look festive, glaze is often the better call. Meanwhile, it keeps the decorating process much faster and less fussy.
Royal icing makes more sense when you want crisp outlines and button details, while simple glaze is the easier choice for a faster tray of gingerbread cookies that still looks polished and festive.
If you are putting together a holiday cookie tray, these double chocolate chip cookies are another easy homemade bake to pair with gingerbread.
Troubleshooting Gingerbread Cookies
Most gingerbread cookie problems come down to temperature, flour balance, thickness, or bake time. Once you spot the cause, the fix is usually simple. In fact, many common issues are solved by chilling longer, measuring more carefully, or pulling the cookies a little earlier.
When gingerbread cookies spread, crack, or bake up hard, the fix is usually simple: colder dough, lighter flour handling, a slightly thicker roll, and pulling the cookies once the centers look matte and set.
Why did my gingerbread cookies spread?
The dough was probably too warm, or the cut shapes sat out too long before baking. So chill the dough longer, work in smaller batches, and never bake on a still-warm sheet pan.
Why did they puff up too much?
Too much baking soda, dough rolled too thick, or over-creaming the butter and sugar can all cause extra puffing. Therefore, measure carefully and keep the mixing simple.
Why is my dough too sticky?
That usually means it needs more chill time. Because molasses-rich dough is often soft before chilling, this is one step you do not want to rush.
Why did the dough crack while rolling?
It is usually a little too cold or a little too dry. Let it sit for 5 to 10 minutes, then try again. On your next batch, make sure you are not over-measuring the flour.
Why did the cookies turn hard?
Overbaking and too much flour are the two most common reasons. Remember, too, that gingerbread cookies firm up more as they cool.
Why did my gingerbread men lose shape?
Warm dough, dull cutters, or too many rerolls usually cause blurred shapes. In many cases, chilling the cut cookies for 5 to 10 minutes before baking is enough to help.
Why is my icing too runny or too stiff?
Add more confectioners’ sugar if it runs everywhere. Add water a few drops at a time if it is too stiff to pipe or spread. After all, small changes go a long way with icing.
How to Store Gingerbread Cookies
This dough and the baked cookies both hold up well, which makes the recipe easy to split across a few days of holiday baking. Whether you want to prep the dough early, freeze cut-outs, or box up decorated cookies later, each stage stores well when handled the right way.
Gingerbread cookies are much easier to fit into holiday baking when you store each stage the right way: chill dough for short-term prep, freeze cut-outs for later baking, and pack decorated cookies only after the icing is fully dry and set.
Dough in the fridge: up to 2 days, tightly wrapped
Dough in the freezer: up to 2 months, well wrapped
Unbaked cut-outs in the freezer: freeze until firm, then bag and bake from cold with a little extra time if needed
Baked undecorated cookies: 4 to 5 days airtight at room temperature, or freeze for up to 2 months
Decorated cookies: store only after the icing is fully dry and set
How far ahead you can make gingerbread cookie dough
You can make the dough up to 2 days ahead and keep it wrapped in the refrigerator. If it gets very firm, let it sit out briefly before rolling. That way, it softens just enough to handle without turning sticky again.
How to freeze cut dough vs baked cookies
Freeze dough discs or freeze cut shapes on a tray first, then transfer them to a freezer bag. Baked cookies also freeze well, especially if they are undecorated. Thaw them at room temperature before decorating or serving so condensation does not spoil the finish.
Best container for decorated gingerbread cookies
Let the icing dry fully, then store the cookies in a rigid airtight container. If you need layers, separate them with parchment. A shallow tin or hard-sided box is usually safer than a soft bag once the cookies are decorated.
Once the icing is fully dry, gingerbread cookies are much easier to pack neatly in a rigid tin lined with parchment, which helps them travel better and keeps the finished details from smudging.
How to store homemade gingerbread cookies for gifting
Pack them only once the icing is dry and the cookies are fully cool. As a result, they stay neater, travel better, and look more polished when they reach the box or tray. In addition, they are less likely to smudge or stick together. For another festive edible gift idea, these easy festive Irish rum truffles are a natural holiday add-on too.
Serve gingerbread cookies with hot chocolate when you want the coziest cold-weather pairing: the warm drink softens the spice notes beautifully, and the simple decorated cookies still feel festive without turning the serving moment fussy.
Gingerbread Cookies Recipe FAQs
Are gingerbread cookies supposed to be soft or crisp?
They can be either, depending on the style. In this recipe, though, the goal is soft centers with lightly crisp edges. If you want them softer, roll a little thicker and pull them as soon as the centers look set. If you want them firmer, roll slightly thinner and bake a touch longer.
Do I need to chill cut gingerbread cookies before baking?
Not always, but it helps a lot when the dough has softened on the counter. If the cut-outs feel soft, sticky, or hard to transfer cleanly, chill them for 5 to 10 minutes before baking so the edges stay sharper.
Can I make gingerbread dough ahead of time?
Yes. In fact, gingerbread dough is one of the easiest cookie doughs to make ahead because chilling actually improves how it handles. A day or two in the fridge often makes rolling and cutting easier, not harder, as long as you let very firm dough sit briefly before rolling.
Can I freeze gingerbread cookies?
Yes. You can freeze the dough, unbaked cut-outs, or baked cookies. However, undecorated cookies usually freeze best if appearance matters most. Wrap them well, store them airtight, and let them come back to room temperature before decorating or serving so condensation does not ruin the finish.
What icing is best for gingerbread men?
Royal icing is best for detailed outlines, faces, buttons, and cleaner decorative lines. A simple glaze is better when you want a faster, easier finish. So the best choice really depends on whether you care more about precision or speed.
How thick should I roll gingerbread cookie dough?
About 1/4 inch is a strong starting point for softer cut-out cookies. Slightly thinner works if you want a firmer bite. If you are making gingerbread men for decorating, staying close to 1/4 inch usually gives the best balance of shape, softness, and sturdiness.
Can I decorate them the next day?
Yes. In many cases, decorating the next day is even easier because the cookies are fully cool and settled. That is especially helpful if you want cleaner royal icing lines or you are splitting the baking and decorating into two easier sessions.