Posted on Leave a comment

Chocolate Wafer Cookies for Icebox Cake: Best Substitutes and Homemade Recipe

Slice of chocolate wafer icebox cake with alternating dark cookie and cream layers on a glass plate beside a wafer and cake server.

Icebox cake is supposed to be the easy dessert: crisp chocolate cookies, whipped cream, and enough refrigerator time to turn the two into tender striped slices. Then an inherited recipe tells you to open one 9-ounce package of Famous Chocolate Wafers—a product that disappeared from store shelves.

The best chocolate wafer cookies for icebox cake have a surprisingly specific job. They cannot merely taste chocolatey. They need to start thin and crisp, take in moisture without collapsing into paste, and soften all the way through while leaving a clear dark line in every slice.

Choose a store-bought substitute or make the wafers below, then use our complete classic chocolate wafer icebox cake recipe for the whipped cream, assembly, chilling, clean slicing, and finished-cake storage.

Quick Answer: What Can Replace Chocolate Wafers in Icebox Cake?

  • Most practical mainstream option: Original Oreo Thins with lightly sweetened cream.
  • Closest plain structural match covered here: Dewey’s Brownie Crisp, when available.
  • Often the economical option: Chocolate Maria cookies.
  • Most control: homemade wafers rolled to about 3 mm—just under ⅛ inch.

Match the cookie’s job, not the missing brand name.

For a plain-wafer result, look for a cookie that is thin, completely crisp, reasonably flat, and uncoated. Match the weight and the way the cookies cover the pan before worrying about an old piece count.

Choose Your Chocolate Wafer Route

One cook needs a cake tonight; another is trying to recreate the birthday or holiday dessert they remember. Choose by the trade-off that matters least: added sweetness, cost, shape, availability, or time.

On a phone, swipe sideways to see all columns.

Your situationStart withPlan for
You need a mainstream shortcutOriginal Oreo ThinsA sweeter, cookies-and-cream-style slice
You want a plain, unfilled cookieDewey’s Brownie Crisp, when availableMany small cookies; match weight and pan coverage
You want an economical, easy-to-layer optionChocolate Maria cookiesA milder cocoa flavor; buy enough by weight
You are building in a loaf pan or baking dishChocolate graham crackersBroad rectangular layers and a clear graham flavor
You want control over flavor and thicknessHomemade wafersCool completely, then set aside the amount your old recipe needs
Choose by the result and trade-off that matter most to your cake.

Whichever route you choose, the goal is the same: enough cream contact to turn every crisp cookie into a tender stripe without erasing the layers.

Rectangular chocolate wafer icebox cake with one slice removed, showing many dark cookie and pale cream layers on a platter.
Regular wafer sizes leave fewer gaps, improving cream contact and producing cleaner slices across a loaf pan.

Homemade Chocolate Wafer Cookies for Icebox Cake

These are not thick chocolate refrigerator cookies. They are dark, dry, thin wafers built for one particular change: crisp enough to snap today, then tender enough to cut after a night between layers of cream. They may look plain when they leave the oven, but that clean snap gives the refrigerator exactly what it needs to create a tender striped slice.

Recipe note: The ingredient proportions and parchment-rolling method are adapted from King Arthur Baking’s chocolate wafers. The guidance here applies that dough specifically to icebox-cake thickness, old-package conversion, chilling, and troubleshooting.

For one old 9-ounce package, set aside 9 oz (255 g) of fully cooled wafers. Use enough to cover the intended layers; keep any extras for gaps, crumbs, or another dessert.

Stack of thin round homemade chocolate wafers on parchment, with one broken wafer showing its crisp edge.
Cool the wafers completely before stacking; trapped warmth can soften them before the cream ever does.

Recipe at a Glance

Prep timeAbout 30 minutes
Chilling30 minutes
Bake time14–17 minutes per batch
CoolingAbout 15–20 minutes, until completely cool
Total elapsed timeAbout 1½–2 hours, depending on tray capacity and whether scraps need another bake
Oven325°F (163°C)
ThicknessAbout 3 mm—just under ⅛ inch
Expected yieldRoughly 40 large rounds or 90 smaller squares; see the note below
For one old packageSet aside 9 oz (255 g) of fully cooled wafers

Yield note: The source recipe estimates about 40 rounds at 2½ inches or 90 smaller squares. Your count will change with thickness, cutter size, tray space, and rerolled scraps.

Equipment

Use a digital scale, medium mixing bowl, hand or stand mixer, rolling pin, parchment paper, and a 2½-inch (6.5 cm) cutter. You need at least two baking sheets, although three or four make the process smoother because the batch produces several trays and the wafers cool completely on the pans. A pizza wheel works well for squares; a separate cooling rack is unnecessary.

Useful extras include 3 mm rolling guides or spacer rings, a small offset spatula, and an oven thermometer.

Ingredients

  • 1 cup granulated sugar — 198 g
  • 8 tablespoons unsalted butter, softened — 113 g
  • Espresso powder, optional — 1 teaspoon
  • Fine table salt — ¾ teaspoon
  • Baking powder — ¼ teaspoon
  • 1 large egg
  • 1 teaspoon vanilla extract — 5 ml
  • 1½ cups all-purpose flour — 180 g
  • ¼ cup black cocoa powder — 21 g
  • ¼ cup Dutch-process cocoa powder — 21 g
Overhead arrangement of sugar, butter, egg, vanilla, flour, black cocoa, Dutch-process cocoa, espresso powder, salt, and baking powder.
Weigh the flour and cocoa powders; packed cups can make the wafers thicker and tougher.

Instructions

Mix, Roll, and Chill the Dough

  1. Make a smooth butter base. Beat the sugar, softened butter, optional espresso powder, salt, and baking powder on medium-low until smooth, about 1–2 minutes. The mixture only needs to look even; it does not need to become pale or fluffy.
  1. Add the egg and vanilla. Beat until the mixture is smooth, scraping the bowl so no streaks of butter remain.
  1. Mix in the flour and cocoa. Add the flour, black cocoa, and Dutch cocoa. Mix on low until no pale flour streaks remain and the dough looks evenly dark from edge to edge.
  1. Roll before chilling. Divide the dough in half, about 290 g per piece. Roll each piece between two sheets of parchment to about 3 mm—just under ⅛ inch—aiming for an 8 × 10-inch (20 × 25 cm) rectangle or a 10-inch (25 cm) oval.
Hands rolling dark chocolate wafer dough between parchment sheets with a wooden rolling pin and spacer rings.
Rotate the parchment packet as you roll; repeated pressure in one direction can leave the center thicker than the edges.
  1. Chill the sheets. Refrigerate the dough, still between parchment, for 30 minutes. Meanwhile, heat the oven to 325°F (163°C) with racks in the upper and lower thirds.
Dark chocolate wafer dough rolled on parchment to about 3 millimeters, with the upper parchment peeled back and a thickness guide at the edge.
Chilling firms the dough but cannot correct uneven thickness, so level the sheet first.

Cut, Bake, and Cool the Wafers

  1. Cut the wafers. Peel away the top sheet of parchment, leaving the chilled dough on the bottom sheet, then cut 2½-inch rounds. Arrange them at least ½ inch apart. For squares, score 1½- to 2-inch pieces directly on the parchment and leave them in place.
Chocolate wafer dough cut into rounds on one tray and scored into an intact grid of squares beside a pizza wheel.
Squares minimize rerolling; handle round-cookie scraps gently because repeated working can toughen the final wafers.
  1. Bake until dry and set. Bake two trays at a time for 14–17 minutes, rotating and switching their positions halfway through. The surface should look matte and the edges should feel set.
  1. Let the trays finish the job. If you made squares, retrace the cut lines immediately. Leave either shape on the baking sheets until completely cool; the clean snap develops as steam escapes.
Thin round chocolate wafers cooling on parchment-lined metal baking trays beside an offset spatula.
Let thin edges firm before lifting; hot wafers are fragile and do not yet show their final texture.
  1. Use every piece. Reroll scraps while the first trays bake, chilling the dough briefly if it becomes soft. Once everything is cool, set aside 9 oz (255 g) for one old package and save the remaining whole or broken wafers for another use.

Recipe Notes

  • Thickness decides the final cake. A ¼-inch (6 mm) refrigerator cookie is roughly twice as thick and may keep a hard center.
  • Judge crispness only when cool. The hot wafers are tender; their snap appears as they cool on the trays.
  • Espresso powder is optional. At this amount, it is intended to deepen the cocoa without making the wafers taste distinctly of coffee.
  • Save imperfect pieces. Broken wafers fill cake gaps, become crust crumbs, or add crunch to homemade mint chocolate chip ice cream.
Two hands snapping a cooled round chocolate wafer over a parchment-lined baking tray holding more wafers.
Test several cooled wafers when a tray baked unevenly; edge and center cookies may crisp at different times.

What Success Looks Like

Before assembly, a cooled wafer should look dry, snap cleanly, and taste dark but not aggressively bitter. After an overnight rest with cream, a thin knife should pass through the center without a crack. Each wafer should still leave a distinct chocolate stripe instead of dissolving into a gray-brown blur.

Clean slice of chocolate wafer icebox cake with even dark cookie stripes, pale cream layers, and a cake server behind it.
Slightly wavy stripes are fine; look for a tender center, visible dark layers, and cream that still holds.

Why the Homemade Wafers Work

Making the wafers yourself lets you control both their chocolate flavor and, crucially, their thickness. Rolled thin, cooled to a clean snap, and kept low in leavener, they hold together during assembly and soften evenly in the refrigerator.

  • Black and Dutch cocoa share the work: one supplies the near-black color; the other keeps the chocolate flavor round and familiar.
  • The dough uses a straightforward butter base: the thin roll and full tray cooling produce the crisp finish.
  • A small amount of baking powder limits puffing: the wafers stay flat enough to stack and soften evenly.
  • Parchment keeps the dough clean and even: no extra flour is worked into the sheet while rolling.
  • Tray cooling completes the texture: the fragile hot cookies firm as steam escapes.

Black Cocoa, Dutch Cocoa, and the Flavor You Want

Black cocoa gives the wafer its near-black color and a smooth, familiar note associated with Oreo-style shells. It contributes more color than deep cocoa flavor. Dutch-process cocoa supplies the rounder chocolate character that black cocoa can lack on its own.

The split keeps the cookie dark enough to draw sharp stripes through white cream without making color the only thing you taste. If the labels themselves feel confusing, our cacao, cocoa, and chocolate guide explains the broader terminology; for this dough, stay with the black-cocoa and Dutch-process choices given here.

Bowls of nearly black cocoa and reddish-brown Dutch-process cocoa with spoons and finished chocolate wafers between them.
Equal weights balance black cocoa’s near-black color with Dutch cocoa’s fuller chocolate flavor.

Can You Make the Wafers Without Black Cocoa?

Yes. Replace the 21 g black cocoa with 21 g additional Dutch-process cocoa. The wafers will be brown instead of nearly black and taste more like a traditional chocolate biscuit, while the thin roll and crisp finish still make them suitable for icebox cake.

Natural cocoa can work in a pinch, but the wafers will be lighter, tangier, and may behave somewhat differently. Replacing the black cocoa with additional Dutch-process cocoa stays closer to the intended color and rounded chocolate flavor.

Rolled Versus Slice-and-Bake Wafers

  • Rolled to about 3 mm: gives the most even thickness and the most dependable icebox-cake result.
  • A log sliced to about 3 mm: is faster and naturally round, but uneven slices and cracking are harder to avoid.
  • A log sliced to about 6 mm: is easier to handle but roughly twice the target thickness; save those cookies for snacking, sandwich cookies, or crumbs.

Rolling is the safer method because every part of the sheet can be checked against the same guide. Slice-and-bake works only when the slices are genuinely thin and even.

← Back to the homemade recipe · Compare store-bought substitutes · ↑ Back to the top

What Kind of Chocolate Cookie Works in Icebox Cake?

For this dessert, “wafer” means a thin, dry, crisp chocolate cookie—not a candy melt and not a layered wafer biscuit. It must be sturdy enough to spread with cream today and porous enough to become tender by tomorrow.

The 30-Second Package Test

  • Thin: ideally about 3 mm—just under ⅛ inch. Thick sandwich cookies soften much more slowly.
  • Crisp: look for thin, snappy, crisp, or crunchy—not soft-baked or chewy.
  • Mostly plain: a thin sandwich filling can work; a thick filling changes the cake substantially.
  • Uncoated: chocolate shells and glazes slow the moisture that needs to enter the cookie.
  • Flat: broad, even surfaces are easier to layer and soften more predictably.

At home, snap one before committing the package. It should break cleanly. A cookie that bends, feels cakey, or leaves a greasy coating on your fingers is less likely to form neat layers.

Annotated round chocolate wafer with callouts identifying its thin edge, crisp break, flat surface, dark cocoa color, and uncoated finish.
Perfectly smooth faces are unnecessary; broad, flat cream contact matters more.

What Works—and What Does Not

Swipe on mobile to view the full comparison.

Cookie styleUse it?Likely result
Thin, crisp, plain chocolate cookieYesThe closest route to classic cake-like layers
Thin chocolate sandwich cookieUsuallySoftens well but adds filling and sweetness
Chocolate Maria biscuit or graham crackerYes, as a variationEasy layers with a milder or graham-style flavor
Thick or soft-baked cookiePoor fitMay stay hard in the center or turn pasty
Coated, airy layered, or rolled wafer biscuitAvoidCoating or internal air gaps cause uneven softening
Candy-melting wafer or coating discNoIt is confectionery coating, not a baked cookie
Suitable thin cookies shown on the left and unsuitable candy discs, wafer rolls, layered wafers, soft cookies, and coated cookies on the right.
Inspect the cross-section and coating, not the word “wafer”; many products with that name are structurally wrong.

Fastest way to avoid the wrong product: if it sits beside candy melts or coating discs, it is not the wafer cookie your icebox cake needs.

Vanilla wafers can make a perfectly good but entirely different icebox cake. They are not a close replacement when dark chocolate stripes are the point.

Thickness, Crispness, Sweetness, and Pan Coverage

Thickness and crispness: Roll homemade dough to about 3 mm—just under ⅛ inch. A ¼-inch (6 mm) cookie is roughly twice as thick and often softens at the edges before the center is ready. Every cookie should begin fully crisp; humidity-softened wafers can lose definition too quickly.

Digital calipers comparing a 3-millimeter chocolate wafer with a thicker 6-millimeter cookie.
Check the edge and center of the sheet; dough can hide extra thickness in the middle.

Cool before judging: Homemade wafers can feel tender while hot. Let them cool completely before deciding whether the bake was long enough.

Sweetness and filling: Filled cookies bring sugar into every layer, so pair them with lightly sweetened cream. Plain wafers leave more room to sweeten the cream itself. Our homemade whipped cream recipe explains sugar levels and the peak stages to watch.

Shape and coverage: Rounds suit classic logs and circular stacks. Squares and rectangles reduce gaps in loaf pans and baking dishes, while broken pieces neatly fill edges and open spaces. Covering the layer matters more than recreating an old cookie count.

Read the finished texture

  • Crunchy center: the cookie is too thick, dense, coated, or has not chilled long enough.
  • Muddy layer: the cookie began soft or dissolved faster than the cream could set.
  • Vanishing stripe: the cookie was too fragile to remain distinct.
  • Clean knife and visible stripe: the cookie softened at the right rate.

What Happened to Nabisco Famous Chocolate Wafers?

Nabisco Famous Chocolate Wafers were discontinued in 2023 after generations of refrigerator-roll, pie-crust, cheesecake, and icebox-cake recipes had been written around them. The Washington Post’s replacement comparison documented both the discontinuation and the scramble for modern alternatives.

Canadian readers may remember Christie or Mr Christie chocolate wafers. Old Canadian retailer pages can remain searchable after a product disappears, so the familiar regional name alone does not confirm fresh stock or current production. Check the actual package, manufacturer, and date.

For many families, the goal is not to invent a new dessert. It is to recreate the birthday or holiday cake they remember without letting one discontinued package end the tradition.

What were Famous Chocolate Wafers like? Very thin, dry, crisp, dark but not candy-sweet, flat enough to spread with cream, and porous enough to soften while keeping a clean chocolate stripe. A modern replacement needs those same qualities, even if the cookie looks completely different.

The old box still gives us one useful number: 9 ounces (about 255 g) of thin chocolate cookies. Weight transfers more reliably than an old piece count because modern substitutes vary in size, thickness, and filling.

Should you buy an old package online?

Usually, no. A fresh cookie with the right structure is a better baking ingredient than an expensive discontinued package with uncertain heat, humidity, and storage history.

  • Look for a photograph of the actual sealed package, not only an archived product image.
  • Look for a readable best-before date and current ingredient label.
  • Identify the manufacturer and seller before trusting claims of a “revived” equivalent.

The box was convenient. The real standard is the finished slice: dark layers that soften cleanly without disappearing.

Best Store-Bought Chocolate Wafer Substitutes

Once you know the qualities that matter, the store-bought choice becomes simpler. Each option solves a different problem involving availability, sweetness, shape, or cost.

Four chocolate wafer substitute options arranged vertically: thin sandwich cookies, plain brownie crisps, chocolate Maria cookies, and homemade wafers.
Compare filling, thickness, cocoa strength, and diameter—not availability alone—because each changes sweetness, coverage, and softening.

Before buying: Package sizes, formulations, and availability were checked in August 2026 and can change. Read the current label, then compare thickness, filling, coating, and package weight before choosing. The product visuals are illustrative comparison guides rather than package photography or controlled test results.

Where to Buy Chocolate Wafer Cookies Now

Start in the ordinary cookie aisle, where Original Oreo Thins are a practical mainstream option in many US stores. Check Hispanic or international foods for chocolate Maria cookies and specialty-cookie shelves for thin cocoa snaps.

Shopping online? Search for thin chocolate cookies, chocolate cookie thins, chocolate snaps, or plain chocolate thins. The broader phrase “chocolate wafers” often returns candy melts and filled wafer bars, so check the filling, coating, thickness, and package weight before ordering.

  • Original Oreo Thins: the current US label lists 4 cookies as 29 g. Weigh out approximately 255 g and dry-fit one layer because the creme contributes to the total and the number needed depends on the pan.
  • Dewey’s Brownie Crisp: one 9-ounce box matches the old package weight, but the smaller cookies require more pieces to cover each layer.
  • Goya Chocolate Maria: one 7-ounce pack is about 198 g, roughly 57 g short. Buy two and use only what the pan needs.

Oreo Thins, Plain Shells, and Regular Oreos

Original chocolate Oreo Thins are thin, crisp, dark, and consistent. Their light creme filling softens into the whipped cream, creating a sweeter, more cookies-and-cream-like slice with a faint white line between the dark shells. Choose the original version unless another filling flavor is part of the plan.

Thin chocolate sandwich cookies beside whipped cream and a cut three-cookie stack showing dark shells and pale filling layers.
Taste one Oreo Thin with prepared cream before stacking; sweetness is easiest to correct at this stage.
RouteChoose it whenResult
Leave the fillingSpeed matters and you like a sweeter cakeEasy, cohesive, and clearly cookies-and-cream
Remove the fillingYou want more sweetness controlA plainer wafer effect, with extra work and some breakage

Most consumer Oreo packages include filling. For a plain-shell route, separate Original Oreo Thins at home and allow a few extras for shells that crack.

Side-by-side comparison of filled chocolate sandwich cookies and separated plain cookie shells, each used in a layered cream cake.
After removing the creme, weigh the shells and allow extras for breakage.

What about regular Oreos? Whole regular Oreos make a thicker, sweeter Oreo icebox cake and usually need a longer rest. Separated shells behave better, though they remain thicker than Oreo Thin shells and the old Famous Wafers.

Dewey’s Brownie Crisp: A Close Plain Structural Match

Dewey’s Brownie Crisp is thin, crisp, and unfilled. Among the products covered here, those qualities make it a close plain structural match when it is available.

The cookies are smaller than the discontinued wafers, so arrange enough pieces to cover every layer rather than chasing the old count. Their unfilled form may produce darker-looking layers than a sandwich cookie and will not add a separate line of creme.

Small thin plain chocolate brownie-crisp cookies arranged in groups, with one standing on edge and another broken open.
Smaller cookies create more seams, so dry-fit one layer before estimating the quantity.

Chocolate Maria Cookies: Economical and Easy to Layer

Flat, crisp, often economical, and easy to arrange, chocolate Maria cookies are a practical alternative. Their cocoa flavor is usually lighter and more biscuit-like than the discontinued wafers, so the finished cake has lighter chocolate stripes and a gentler biscuit flavor beside the cream.

These cookies are commonly sold in packages smaller than the old 9-ounce box. Check the current package guide above, buy enough to cover the planned layers, and let the pan determine how much you use.

Chocolate Maria-style round biscuits with a cut cream stack showing lighter brown cookie layers.
Broad rounds cover efficiently, and broken edges can fill narrow gaps without building thicker spots.

Chocolate Graham Crackers: A Natural Fit for Rectangular Cakes

Chocolate graham crackers are not a flavor replica, but their broad rectangular shape makes them easy to layer in loaf pans, square dishes, and 9 × 13-inch baking dishes. Expect fewer gaps, less fiddly arrangement, and a finished dessert that tastes unmistakably like chocolate graham crackers—delicious in its own right, but different from the old wafer cake.

Three-cookie cream stack shown before chilling and cut open after an overnight rest, revealing softened chocolate layers inside.
Use the exact cream and chill time planned for the cake; changing either can mislead the test.

How Long Do Replacement Cookies Need to Soften?

Thick or dense cookies take longer to soften, and deeper cakes usually need more time. Refrigerator temperature and the amount of cream can shift the finish too, so use these as starting checks rather than fixed guarantees.

  • Very thin plain wafers: begin checking after about 6–8 hours.
  • Thin filled sandwich cookies: plan on an overnight rest.
  • Flat biscuits and graham crackers: plan on an overnight rest.
  • Thicker cookies or regular sandwich cookies: allow closer to 12–24 hours.
  • Any unfamiliar cookie: run the three-cookie test before assembling the full cake.

The center decides: Let the clock guide you, then confirm readiness with a thin knife through the middle. The blade should pass through without meeting a hard cookie center, while the dark layers remain visible in the slice.

How to Convert and Adapt One Old 9-Ounce Package

One dependable number remains from the old box: 9 ounces (about 255 g). Begin with that weight, then dry-fit one cookie layer in the pan before whipping the cream. The test shows whether the cookies can cover the layer and where broken pieces will help.

Guide comparing Oreo Thins, Dewey’s Brownie Crisp, and chocolate Maria cookies beside a digital scale reading 255 grams.
The same package weight can cover a pan differently when filling, diameter, and shape change.

Dry-fit one complete layer after weighing the cookies. The same 255 g can cover a pan differently when filling, cookie diameter, and shape change.

Overhead view of a rectangular pan containing one dry layer of round chocolate wafers with broken pieces filling the edge gaps.
Photograph or count the test layer before removing it so final assembly moves quickly.

Coverage first, weight second, count last.

A filled sandwich cookie spends part of its weight on creme. Small cookies need more pieces to cover the pan, while broad rectangular crackers need fewer. Both the scale and the pan matter.

Rectangular pan covered with round chocolate wafers beside a bowl of wafers on a digital scale reading 255 grams.
Weighing one completed dry-fit layer gives a useful total estimate; keep a reserve for gaps, breakage, and uneven edges.

Old-Package Conversion Table

Swipe on mobile to view the full conversion table.

Old recipe wordingInitial guideCheck before assembly
1 package or box, 9 ozSet aside 255 g cookiesDry-fit a layer and confirm full coverage
2 packages, 9 oz eachSet aside about 510 g cookiesUse weight, not the old piece count
36 Famous WafersMatch the old recipe’s coverage and approximate weightModern cookie sizes can make 36 too many or too few
Original Oreo ThinsWeigh 255 g from the packageThe filling contributes part of that weight
One 7 oz (198 g) Maria-cookie packageIt is about 57 g shortBuy a second package and use only what the layers need
Homemade full batchSet aside 255 g after the wafers coolKeep the remaining whole and broken wafers

If you remove sandwich-cookie filling, weigh the shells after scraping. The unopened package includes filling you will discard, so its weight overstates the cookie left for the cake.

Running a little short does not mean the recipe is lost. Fill the final spaces with compatible pieces and let the finished slice—not an inherited cookie count—judge the replacement.

The old recipe assumed one predictable wafer. A modern substitute usually changes sweetness, thickness, size, or cocoa flavor. Adjust only what the new cookie changes.

What changedAdjust thisWhat to expect
Sweeter or filled cookieSweeten the cream less; taste one cookie with a spoonful of creamA balanced cake without an overly sugary finish
Thicker cookieSpread cream against both sides and allow more chilling timeA heavier, more cookie-forward slice
Smaller cookieUse more pieces to cover each layer and fill gaps with broken piecesA different count but the same cake shape
Milder cocoa flavorAccept the variation or finish with unsweetened cocoa or grated dark chocolateLighter stripes with a deliberate chocolate accent
Do not add a large amount of extra cream simply to force thick cookies to soften; the cake can slump before the centers are ready.

For the cream ratio, cake shapes, assembly, final chill, and slicing, continue with the chocolate wafer icebox cake recipe.

← Back to substitutes · Jump to the recipe · ↑ Back to the top

Troubleshooting Chocolate Wafer Cookies

Thin wafers leave less room for measuring and temperature errors than thick drop cookies, but the symptoms are usually clear. Start with what the dough or cooled wafer is doing, then change the most likely cause on the next tray. The visuals below are diagnostic guides; actual softening still varies with cookie thickness, cream consistency, pan depth, and refrigerator temperature.

Dough Problems

Dry and crumbly: Too much flour or cocoa is the most common cause, and cocoa brands vary in absorbency. Continue mixing and press a handful together before adding liquid. If it still falls apart, add milk ½ teaspoon at a time and stop as soon as the dough holds.

Sticky while rolling: Keep the dough between parchment and chill the sheet before peeling away the top layer. Repeated dusting with flour or cocoa changes the formula and dries later cookies.

Baking Problems

Puffing or bubbling: Excess aeration, too much leavener, warm dough, or uneven thickness are the usual causes. Mix the butter and sugar only until smooth and roll evenly. If cut wafers become soft or greasy while you reroll scraps, chill that tray briefly before baking.

Spreading: Use a cool baking sheet for each batch, keep the butter cool and pliable, and chill only trays whose cut dough has become soft or greasy. Measure the flour and any added liquid carefully.

Soft after cooling: Let the wafers cool completely before judging them. If they still bend, use that tray for crumbs and bake the next tray a little longer, checking within the 14–17-minute range. Dark cocoa makes overbrowning difficult to see, so extend the bake cautiously.

Bitter flavor: Too much black cocoa, packed cocoa measurements, overbaking, or missing salt and vanilla are the likely causes. Black cocoa contributes darkness and a distinctive flavor; a larger amount can make the wafer harsher.

Assembly and Chilling Problems

Breaking during assembly: Overbaking, an unevenly thin sheet, moving the wafers while warm, or pressing too firmly with the spatula can all cause breakage. Place a small spoonful of cream on each wafer and ease it outward with short, gentle strokes.

A crunchy cake center: The replacement is probably too thick, too dense, short on cream contact, or simply not chilled long enough. Return the cake to the refrigerator and test the middle again later.

Side-by-side icebox cake slices comparing wide thick cookie layers with narrow, evenly softened chocolate wafer layers.
A thicker cookie widens the stripe and slows the moisture path to the center.

Then check the cake itself: if the middle still resists after more chilling, use the dry center and softened edges as the deciding cues.

Landscape troubleshooting graphic showing an icebox cake slice with softened outer layers and a highlighted dry central cookie layer, alongside causes and fixes.
If 12–24 more hours do not soften the center, the cookie is probably too thick or insufficiently absorbent.

Muddy or disappearing layers: The cookies may have begun soft, the cream may be unusually loose, or the cookie may dissolve too readily. A suitable wafer begins crisp and softens without losing its identity completely.

Close-up of an over-softened chocolate wafer icebox cake with blurred dark layers mixing into the cream.
Serve an over-softened cake very cold; chilling can firm the cream but cannot restore dissolved stripes.

Jump to the recipe · Review the conversion guide · ↑ Back to the top

How to Store Dough and Baked Wafers

Cool baked wafers completely, then keep them in an airtight container at room temperature with parchment between fragile layers. Protect them from steam and humidity; for best texture, use them within several days or freeze them for longer storage. Room temperature is best for unassembled wafers because refrigerator humidity can soften the snap you worked to create.

Airtight container of round chocolate wafers separated by parchment, with bowls of broken wafer pieces and chocolate crumbs.
A rigid airtight container controls humidity while protecting thin wafers from bending and breakage.

For make-ahead dough, freeze flat rolled sheets between parchment, wrapped dough portions, or a carefully shaped log for a thin slice-and-bake variation. Thaw in the refrigerator until firm but cuttable.

Fully cooled baked wafers can also be frozen in a rigid airtight container with parchment between layers. Thaw them in the closed container so condensation collects on the container instead of the wafers, then check crispness before assembly.

If stored wafers lose their snap, save them for crumbs rather than putting softened cookies into the cake.

Save broken or extra wafers for cake gaps, ice cream, or chocolate crumbs. For a crust, follow the pan and butter guidance in our no-bake cheesecake recipe and add butter gradually because plain wafers do not contain sandwich filling.

Gluten-Free, Vegan, and Lower-Sugar Options

Dietary needs do not end the dessert, but they change which shortcut is safest. When the cake is needed soon, a commercially made thin chocolate cookie with the dietary certification you need is usually more dependable than rebuilding this precise wafer formula one ingredient at a time.

For a gluten-free cake, choose a clearly labelled thin chocolate cookie that begins fully crisp, check all nut, seed, coconut, and sesame warnings, and run the three-cookie overnight test before building the cake.

For a vegan cake, use a commercially made thin vegan chocolate cookie and a plant-based whipping cream you already trust. Replacing the butter and egg in the homemade formula requires a separately developed recipe.

For a lower-sugar version, start with plain unfilled cookies and reduce the sweetness of the cream. Large changes to the cookie sugar affect spread, crispness, browning, and dough handling.

For any unfamiliar dietary cookie, the small overnight test is the safest way to check whether it becomes tender without dissolving.

Frequently Asked Questions

Are Nabisco Famous Chocolate Wafers still made?

No. They were discontinued in 2023. Old recipes and archived retailer pages may still name them, but they are no longer a dependable store-bought ingredient.

Are Famous Chocolate Wafers back?

As of August 2026, the original Nabisco wafers had not returned. Some websites and marketplace listings use the familiar name or nostalgic package imagery, so check the named manufacturer, ingredient label, package date, and seller before assuming the original product is back.

What is the closest substitute for Famous Chocolate Wafers?

Dewey’s Brownie Crisp is the closest plain structural match covered here when available. Original Oreo Thins are easier to find, but their filling makes the cake sweeter and more Oreo-like.

Do I need to remove the filling from Oreo Thins?

No. Leave the filling in for the easiest route and sweeten the whipped cream lightly. Remove it when you want a plainer chocolate-wafer effect and more control over sweetness. If you scrape it out, weigh the shells afterward because the package weight includes the creme.

What if my replacement package is only 7 ounces?

A 7-ounce package weighs about 198 g, roughly 57 g short of the old 9-ounce box. Buy a second package and use only as much as the cake needs.

Can I use vanilla wafers?

Yes, but they create a vanilla icebox cake without the dark chocolate stripes. They are a different flavor route, not a close Famous Wafer replacement.

Are chocolate melting wafers the same as wafer cookies?

No. Melting wafers are chocolate or candy coating designed to liquefy. Icebox cake needs a thin, crisp baked cookie.

How long do replacement cookies need to soften?

Overnight is the safest general plan. Very thin plain wafers may be ready sooner, while thicker cookies or whole Oreos can need closer to 12–24 hours. Use the clock as a guide and confirm the center with a thin knife.

The Cookie Should Disappear Into the Cake—But Not Completely

A good chocolate wafer starts with a snap and ends with a fork. Today it should be dark, dry, and sturdy enough to spread. Tomorrow it should be tender all the way through, yet still draw a clean chocolate line across the slice.
Close-up of a chocolate wafer icebox cake slice with thin dark cookie stripes separated by pale cream layers.
A crisp wafer should soften into the cake while leaving a visible dark stripe and enough structure for a clean slice.

That is what an old family recipe was really preserving—not a particular cardboard box, but the quiet transformation that happens overnight and the familiar striped piece placed on the plate the next day.

If you use a replacement, leave a comment with the exact cookie, package weight, cake shape, whether you kept any filling, and how long the center needed to soften. Those details can help the next reader standing in the same cookie aisle.

← Back to the homemade wafer recipe · ↑ Back to the top

Posted on Leave a comment

Brown Butter Chocolate Chip Cookies Recipe

Brown butter chocolate chip cookies on parchment with rippled tops, crisp golden edges, chewy centers, and melted chocolate pockets.

The first sign these brown butter chocolate chip cookies are going to be good is the smell: butter turning nutty in the pan, brown sugar and vanilla hitting that toasted base, then chopped chocolate folding into a dough that already tastes deeper than a regular cookie.

They bake with crisp edges, chewy centers, glossy chocolate pockets, and the kind of warm toasted flavor that makes a regular chocolate chip cookie taste a little plain by comparison.

The trick is not only browning the butter. It is cooling it properly, adding back a little moisture, shaping the dough before chilling, and baking the cookies just until the centers still look soft. That is how you get the cookie most people hope for when they brown butter: crisp at the edge, chewy in the center, full of melted chocolate, and sturdy enough that it does not bake into a flat greasy puddle.

Close-up of a broken brown butter chocolate chip cookie showing a chewy center, crisp edge, glossy melted chocolate, and flaky salt.
A brown butter cookie should look just a little soft in the middle when it leaves the oven. Because it finishes setting as it cools, that slightly underdone look is what keeps the center bendy instead of dry.

Quick Answer: Brown Butter Chocolate Chip Cookies

Default oven temperature350°F / 175°C for the most even first batch
Hotter option375°F / 190°C for well-chilled dough and slightly thicker edges
Bake time10 to 12 minutes for large cookies; 8 to 10 minutes for smaller cookies
Recommended chill time1 to 2 hours after scooping
Dough size55g for large cookies, 45g for medium cookies, or 35g for smaller cookies
YieldAbout 16 large, 20 to 22 medium, or 26 to 28 smaller cookies
TextureCrisp edges, chewy centers, soft middle, glossy chocolate pockets
ChocolateA mix of chopped semi-sweet or dark chocolate and chocolate chips

What This First-Batch Setup Controls

Quick answer guide for brown butter chocolate chip cookies showing 350°F, 1 to 2 hours chill time, 1 tablespoon milk, set edges, and soft centers.
The quick answer is really a control system: replace lost moisture, firm the shaped dough, and stop the bake while the middle can still finish on the tray. That is what keeps brown butter chocolate chip cookies thick instead of dry or flat.
For your first batch: skip the overnight chill and hotter oven. Use the 1 to 2 hour chill and 350°F / 175°C bake so you can learn the dough texture, spread, and doneness cues first.

If your main worry is spread, dryness, or greasy dough, jump to the troubleshooting guide before baking the full batch.

You do not need a mixer for this dough. A whisk, spatula, and a little patience while the butter cools are enough.

The goal is a cookie that feels generous without being messy: edges that hold, centers that bend, chocolate that stays glossy for a few minutes after baking, and enough toasted butter flavor that the dough smells caramel-like before it even reaches the oven.

Why This Recipe Works

  • Browned butter gives the cookies their nutty, caramel-like flavor.
  • Brown sugar and egg yolk keep the centers chewy and soft.
  • Milk replaces some of the moisture lost while browning butter.
  • Scooping before chilling makes the dough easier to handle and helps the cookies bake evenly.
  • Soft-center doneness keeps the final cookie chewy after it cools.
Four-part brown butter cookie success guide showing moisture, butter temperature, chill time, and bake timing with dough and cookie examples.
If a brown butter cookie fails, one of these four points is usually the reason. Moisture keeps it chewy, cooler butter prevents greasiness, chilling controls spread, and early pulling protects the soft center.

Why Brown Butter Makes Chocolate Chip Cookies Better

Brown butter is regular butter that has been cooked until the milk solids toast. Instead of tasting only creamy and buttery, it becomes nutty, caramel-like, and almost toffee-scented. In chocolate chip cookies, that flavor works beautifully with brown sugar, vanilla, chocolate, and a little salt.

That is why brown butter cookies often taste more layered than standard chocolate chip cookies. The flavor is not just sweet. It has a warm toasted edge, a deeper bakery smell, and a finish that makes the chocolate taste richer.

That is the reason brown butter is worth the extra few minutes. It gives the cookie a toasted, caramel-edged base before the chocolate even melts.

Amber brown butter, brown sugar, chopped chocolate, and a baked cookie arranged to show how brown butter adds toasted flavor to cookies.
Brown butter changes the flavor before the dough even comes together. Its toasted milk solids add a caramel-like base that makes the chocolate taste richer without adding extra sugar.
The key idea: Brown butter is not just melted butter. It gives you deeper flavor; the moisture and texture adjustments come next.

The Brown Butter Problem: Moisture Loss

What Moisture Loss Does to the Dough

Brown butter gives you flavor with a catch: it brings toffee-like depth, but it takes water with it. This is the part that turns brown butter from a delicious risk into a reliable cookie dough.

Brown butter moisture-loss guide showing browned butter, cookie dough, and text explaining that brown butter loses water during cooking.
The same heat that creates brown-butter flavor also drives off water. That is why this dough needs a measured moisture adjustment instead of treating browned butter like plain melted butter.

Add the Moisture Back Carefully

In this recipe, the butter is weighed before browning. After browning, you will have a little less liquid because water has cooked off. That is expected. The fix is to scrape every browned bit into the bowl, cool the butter, and add a small amount of milk to bring moisture back into the dough.

One tablespoon of milk being added to a brown butter cookie dough mixture to help restore moisture.
Add the first tablespoon of milk as part of the formula, not as a rescue afterthought. Then, if the dough still looks dry after resting, adjust with tiny splashes instead of pouring freely.
What goes wrongWhy it happensHow this recipe fixes it
Cookies spread too muchThe butter was too warm, dough was not chilled, or the tray was hotCool the butter, scoop the dough, chill before baking, and use a cool tray
Cookies taste dryToo much moisture evaporated or too much flour was usedUse 1 tablespoon milk by default, add more only if needed, and weigh flour
Dough feels greasyThe butter was still hot when mixedLet the butter cool before adding the egg
Cookies are cakeyToo much flour, overmixing, or too much leavenerWeigh the flour and mix only until the dough comes together
Flavor is not nuttyThe butter was only melted, not browned enoughCook until amber specks form and the aroma turns toasted

What the Dough Should Feel Like

Brown butter cookie dough texture guide comparing dough that is too oily, just right, and too dry.
The dough should be thick enough to scoop but soft enough to press. Shiny dough usually needs time to cool, while crumbly dough usually needs a little more moisture.

You still get the nutty flavor, but the dough scoops cleaner, holds its shape, and bakes with more control.

Ingredients You Need

The ingredient list is simple, but the balance matters. The goal is not just a sweet cookie; it is a cookie where the toasted butter still comes through after the sugar, flour, and chocolate join the bowl.

Ingredients for brown butter chocolate chip cookies including browned butter, brown sugar, white sugar, milk, flour, egg, and chocolate.
This ingredient balance is what separates chewy brown butter cookies from dry ones. Brown sugar and yolk add richness, milk restores moisture, and chocolate brings pockets without hiding the toasted butter.

Unsalted Butter

Use 170g / 6 oz / 3/4 cup unsalted butter, weighed before browning. Unsalted butter gives you better control over the final salt level, especially because these cookies also use chocolate and optional flaky salt on top.

Salted butter can work, but reduce the fine salt in the dough. If your salted butter is very salty, skip the flaky salt on the first test batch and add it only after tasting.

Brown Sugar and White Sugar

Brown sugar is the backbone of the chewy texture. It brings moisture, caramel notes, and a softer center. White sugar helps the edges crisp and encourages just enough spread.

Brown sugar and white sugar comparison showing brown sugar for chewy cookie centers and white sugar for crisp cookie edges.
Both sugars matter here. Brown sugar helps the middle stay soft and caramel-like, while white sugar gives the cookie enough edge crispness to balance the chewy center.

If you are out of brown sugar, this is one of the rare swaps worth skipping. This dough depends on brown sugar for chew, moisture, and caramel flavor, so a no-brown-sugar cookie needs a different balance.

Egg and Egg Yolk

One whole egg gives structure. One extra yolk gives richness, chew, and a softer center without adding too much extra liquid. It is one of the easiest ways to make the cookies feel bakery-style without using complicated ingredients.

Milk

Use 1 tablespoon / 15 ml milk by default. Keep up to 1 tablespoon / 15 ml more nearby and add it only if the dough looks dry after mixing. That small amount restores chew without making the dough loose.

For the full reason milk matters in brown butter cookie dough, see the moisture-loss explanation above.

All-Purpose Flour

Use 220g all-purpose flour, which is about 1 3/4 cups plus 1 tablespoon when spooned and leveled. Weighing is best because too much flour is one of the fastest ways to turn chewy cookies into cakey cookies. King Arthur Baking’s ingredient weight chart is a useful reference if you bake often and want more consistent cup-to-gram conversions.

Baking Soda and Baking Powder

Baking soda helps with browning, spread, and classic cookie chew. A small amount of baking powder gives a little lift so the cookies do not feel dense. Keep both amounts modest; too much leavener pushes the cookies toward cakey.

Chocolate

For dramatic melted pockets, chopped chocolate is the better choice. Chips are more predictable: they hold their shape, spread evenly through the dough, and give the cookies a familiar chocolate-chip look. For the easiest everyday batch, use a mix of both.
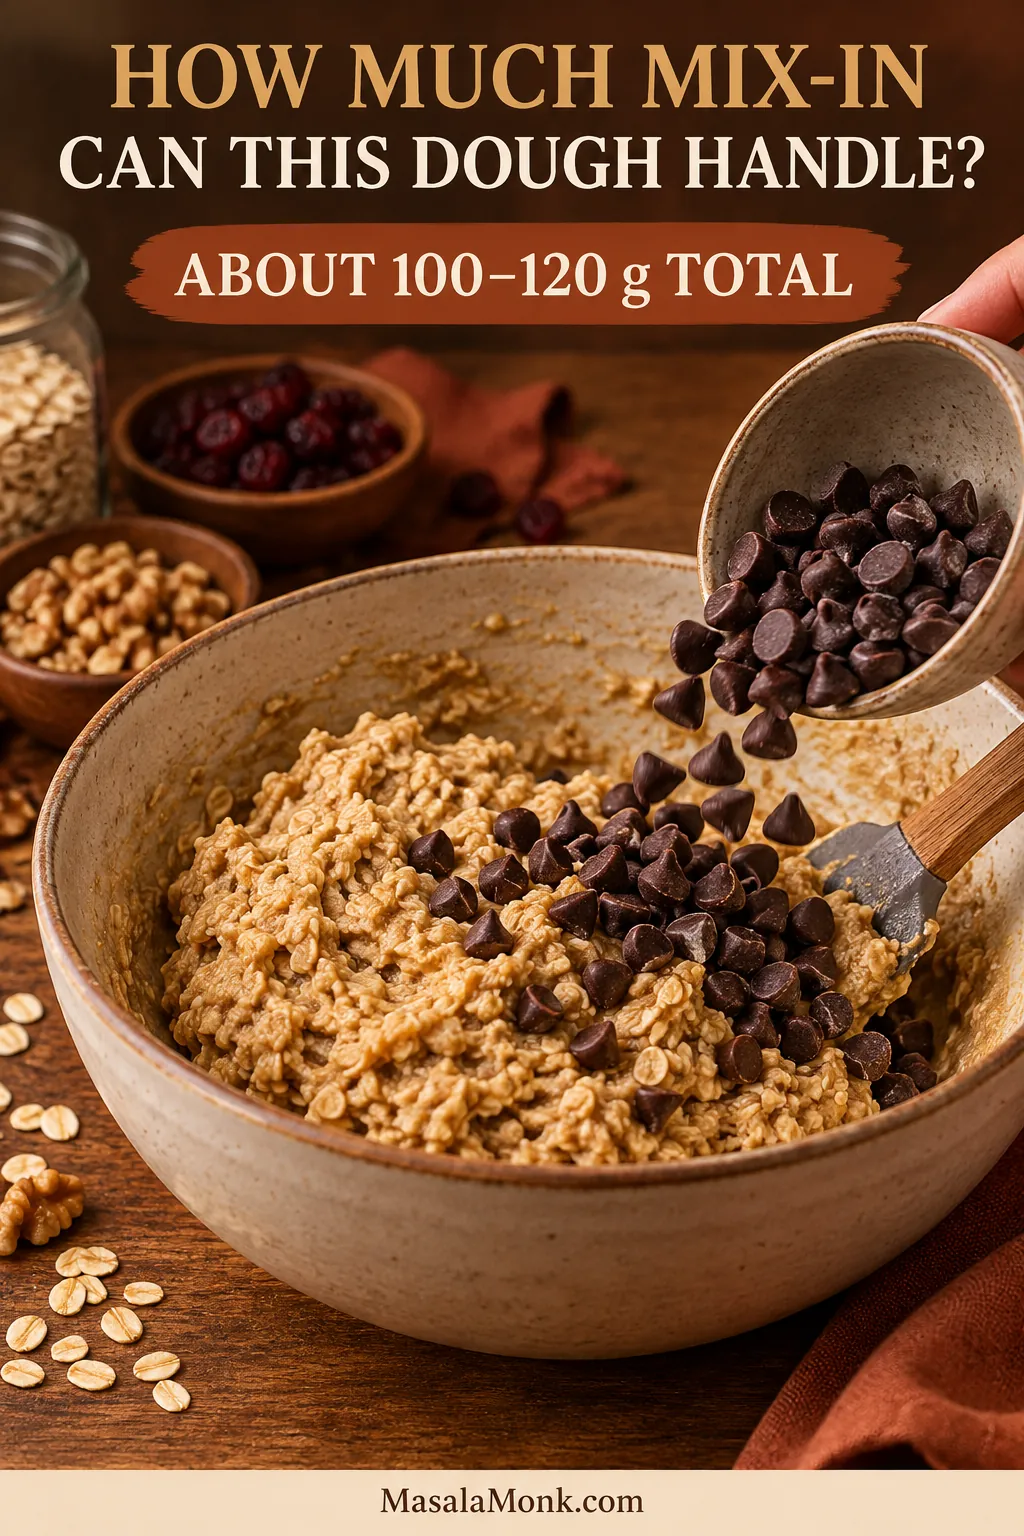
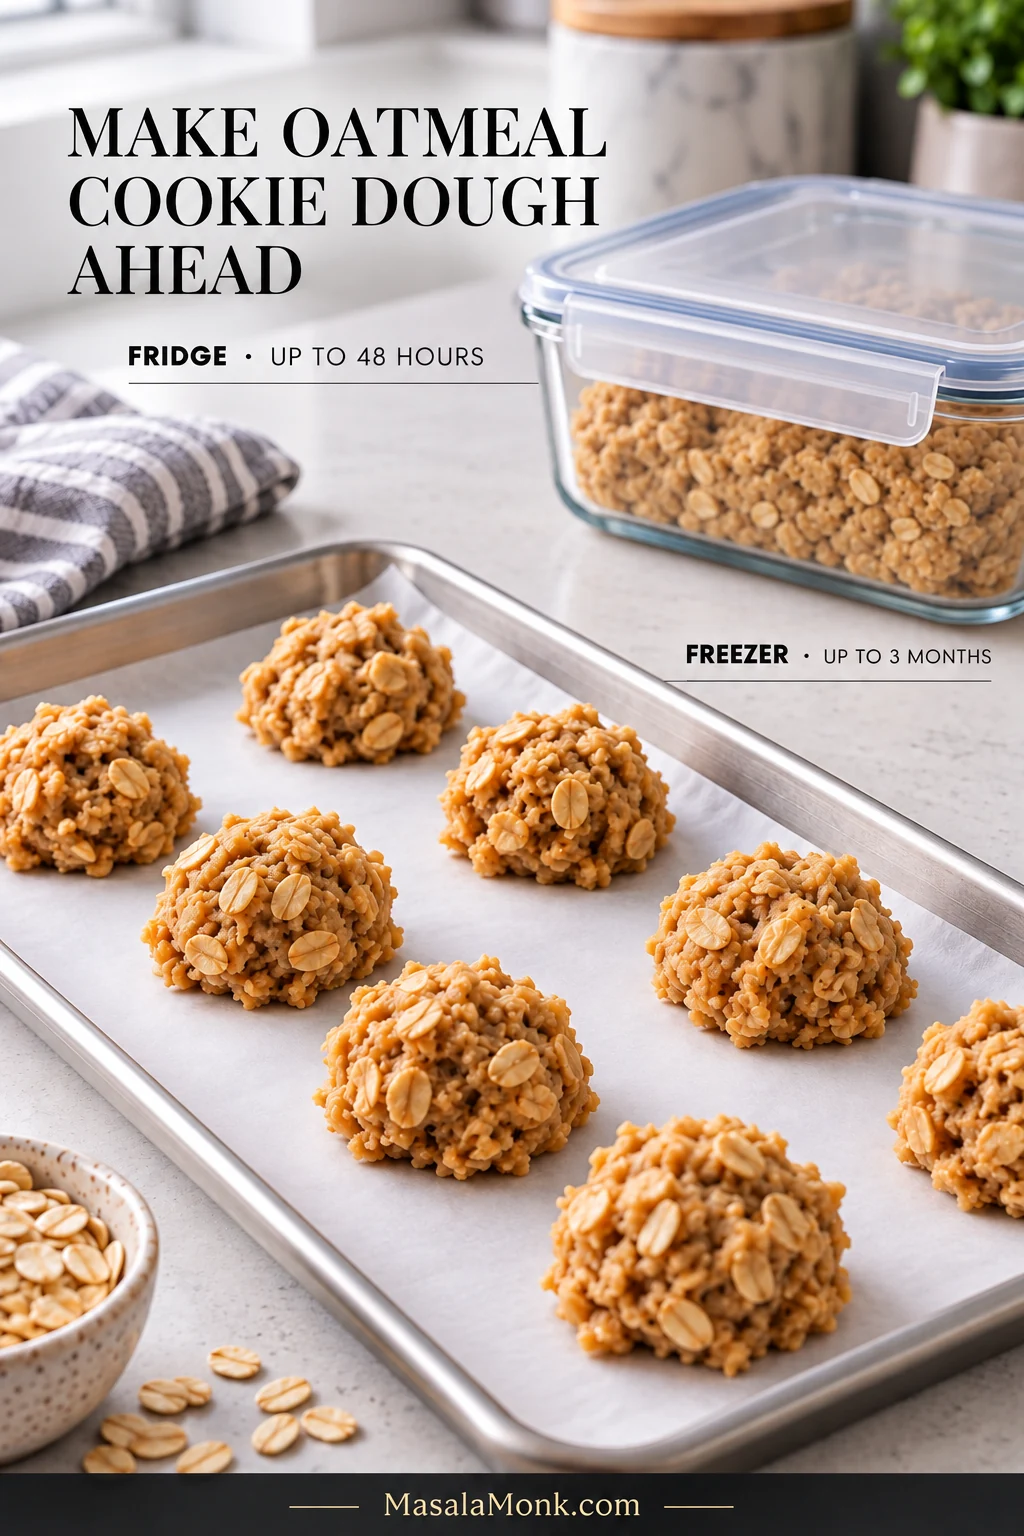
Semi-sweet chocolate is the safest choice. Dark chocolate makes the cookies more intense, while milk chocolate makes them sweeter and softer. Chopped chocolate makes the cookie feel more bakery-style because every bite gets both big melted pockets and tiny chocolate flecks. For a deeper chocolate dough rather than a brown-butter-forward dough, try our double chocolate chip cookies.

Equipment That Makes These Cookies Easier

Baking tools for brown butter chocolate chip cookies including a light pan, digital scale, cookie scoop, parchment, and a cool baking tray.
The most useful tools are the ones that reduce guessing. A light pan shows butter color clearly, a scale keeps flour accurate, and a scoop makes every cookie bake at the same pace.
  • Light-colored skillet or saucepan: helps you see when the butter turns amber instead of burnt.
  • Digital scale: prevents too much flour and keeps cookie size consistent.
  • Cookie scoop or kitchen scale: makes it easier to portion 55g, 45g, or 35g cookies evenly.
  • Parchment paper and a cool baking sheet: help control spread and protect the bottoms.
  • Round cutter or glass: lets you scoot warm cookies into rounder shapes if they spread unevenly.

How to Brown Butter for Cookies

Browning butter is easy once you know what to watch for. Use color, smell, sound, and the little brown specks at the bottom of the pan.

Brown butter stages guide showing melted butter, foamy butter, golden specks, and amber brown butter for cookie dough.
Do not stop when the butter is simply melted. Wait for foam, amber specks, and a nutty smell; then remove the pan before those specks turn dark and bitter.

Step-by-Step Browning Cues

  1. Cut the butter into pieces. Smaller pieces melt more evenly.
  2. Use medium heat. Too much heat can burn the milk solids before the butter browns evenly.
  3. Let it melt, foam, and crackle. The crackling sound is moisture cooking off.
  4. Stir often. Scrape the bottom so the milk solids brown evenly.
  5. Watch for amber specks. The butter should smell nutty and toasted, not bitter.
  6. Remove from heat quickly. It keeps cooking from residual heat.
  7. Scrape everything into the bowl. Do not leave the brown bits behind.
  8. Cool before mixing. The butter should be liquid but no longer steaming before it meets the egg.
StageWhat you seeWhat to do
Melted butterYellow liquid, no brown specksKeep cooking
Foamy butterFoam and crackling soundsStir and watch closely
Golden specksLight brown bits forming at the bottomYou are close
Amber brown butterBrown specks, nutty smell, golden liquidRemove from heat
Burnt butterBlack bits, sharp bitter smellStart over for best flavor

Once you catch that amber stage a few times, it becomes familiar. The smell changes first, then the specks darken quickly, so stay close to the pan once the butter starts foaming.

Do not strain the brown butter. Those toasted brown bits are browned milk solids, and they carry much of the flavor.
Brown butter being poured into a bowl with browned milk solids included and a note not to strain the browned bits.
The browned bits at the bottom of the pan are toasted milk solids, not burnt crumbs. Scraping them into the bowl gives the dough its strongest brown-butter flavor.

Once the butter reaches the amber stage, continue with the step-by-step method so it cools before the egg goes in.

Brown Butter vs Melted Butter

Melted butter gives you easy, chewy cookies. Brown butter gives you something deeper: toasted milk solids, a nutty smell, and a flavor that leans caramel and toffee. The tradeoff is moisture. Because browned butter has cooked longer, this dough needs a little added milk and time to chill before baking.

Melted butter cookie compared with brown butter cookie to show easy chew versus deeper toasted flavor.
Melted butter makes a fast chewy cookie, but brown butter adds toasted complexity. Because it behaves differently, the brown-butter version needs better control over moisture, temperature, and rest time.

If speed matters most, melted butter can be useful. If you want the cookie to taste more toasted, caramel-like, and bakery-style, brown butter is worth the extra few minutes.

How to Make Brown Butter Chocolate Chip Cookies

Brown butter cookie dough process showing brown, cool, mix, scoop, chill for 1 to 2 hours, and bake.
Once the butter is browned and cooled, the recipe becomes a simple flow: mix the dough, portion it while soft, chill the scoops, then bake from cold for better shape control.

1. Brown and Cool the Butter

Brown the butter until amber specks form and the kitchen smells nutty. Pour it into a heat-safe mixing bowl, scraping in all the browned bits. Let it cool for 15 to 25 minutes, until liquid and warm, not hot.

Browned butter mixture in a bowl with an egg nearby, showing that the butter should cool before the egg is added.
The egg should meet warm butter, not hot butter. This small pause helps prevent greasy dough and keeps the mixture smooth before the flour goes in.

If the butter becomes completely solid, let it soften slightly before mixing. If it is still steaming, give it more time before adding the egg.

2. Whisk in the Sugars

Add the brown sugar and granulated sugar to the cooled butter. Whisk until the mixture looks glossy and thick. It does not need to become fluffy like creamed butter and sugar.

3. Add Egg, Yolk, Vanilla, and Milk

Add the whole egg, egg yolk, vanilla extract, and 1 tablespoon milk. Whisk until smooth. Hold back the extra tablespoon unless the finished dough looks dry later.

4. Mix the Dry Ingredients Separately

In another bowl, whisk together the flour, baking soda, baking powder, and fine salt. A quick separate whisk keeps the leaveners from landing in one bitter or puffy pocket.

5. Fold the Dough Together

Add the dry ingredients to the wet ingredients and fold just until a few flour streaks remain. Add the chocolate and fold again until combined.

Aim for dough that is thick and scoopable: not shiny-loose, not dry-crumbly. If it looks too soft, rest it for 10 minutes before scooping. If it looks dry, add the extra milk a little at a time.

Thick brown butter chocolate chip cookie dough with chocolate pieces before chilling, shown with a spatula in the bowl.
Before chilling, the dough should already look like cookie dough, not batter. If it holds a scoop and the chocolate stays suspended, it is ready for the refrigerator.

6. Scoop Before Chilling

Scoop the dough before chilling. This is easier than trying to scoop a cold, firm bowl of dough later, and it helps the cookies bake more evenly.

Brown butter cookie dough scooped onto a parchment-lined baking tray before chilling.
Scooping first gives you even portions before the butter firms up. As a result, the chilled dough goes straight from tray to oven with less handling and more consistent spread.

If you are deciding between no chill, 30 minutes, 1 to 2 hours, or overnight, use the chill time guide before baking.

Brown butter cookie dough size guide showing 55 gram large, 45 gram medium, and 35 gram small portions.
Dough size changes more than yield. Larger portions stay softer in the middle, while smaller portions bake faster and give more crisp edge in each cookie.

7. Bake Until the Centers Look Soft

Heat the oven to 350°F / 175°C. Place the chilled portions on a parchment-lined baking sheet with room to spread. Bake 55g cookies for 10 to 12 minutes, 45g cookies for 9 to 11 minutes, or 35g cookies for 8 to 10 minutes. The edges should be set and the centers should still look slightly soft.

8. Shape and Finish While Warm

If the cookies spread unevenly, use a round cutter or glass to gently scoot them into shape while they are still hot. Finish with flaky salt if you like. Let the cookies rest on the baking sheet for 5 to 10 minutes before moving them to a rack.

At this point, the cookies should smell like toasted butter, vanilla, brown sugar, and chocolate. That is the moment the chill time starts to feel worth it.

Chill Time Guide: No Chill vs 30 Minutes vs 2 Hours vs Overnight

Chill time is one of the biggest differences between an okay cookie and a great one. Chilling firms the butter, hydrates the flour, deepens flavor, and slows spread in the oven.

You can bake the dough without chilling, but the cookies will usually spread more, bake thinner, and have crispier edges. That is not automatically bad, but it is a different result.

If You Need to Bake Right Away

No-chill brown butter cookie rescue showing smaller dough portions on a cool tray with a thinner baked cookie.
When you cannot chill the dough properly, go smaller and keep the tray cool. The cookies will spread more, but the smaller size keeps them from turning into oversized flat rounds.

If the first tray still spreads more than expected, use the troubleshooting section to adjust the next tray before baking the rest.

Choose the Right Chill Time

Choose the chill time based on the cookie you want today: fast and crisp-edged, thicker and chewier, deeper-flavored, or ready to bake later.

Chill time guide for brown butter cookie dough showing no chill, 30 minutes, 1 to 2 hours, and overnight options.
Chill time is a texture choice, not just waiting. No chill gives thinner cookies, 30 minutes helps in a pinch, 1 to 2 hours is the best same-day default, and overnight deepens flavor.
Chill timeWhat happensBest for
No chillMore spread, thinner cookies, crispier edgesFast craving cookies
30 minutesSome control, still slightly spread-proneSame-day baking when short on time
1 to 2 hoursThicker cookies, chewier centers, better flavorMost reliable balance of flavor, texture, and same-day baking
OvernightDeeper flavor, firmer dough, stronger bakery-style textureMake-ahead baking
More than 24 hoursVery firm dough and deeper flavorPlanning ahead; let the dough sit briefly before baking if very hard
Reliable same-day result: Chill the shaped dough for 1 to 2 hours. This gives you better texture without turning the recipe into a next-day project.

How to Get Thicker, Chewier, or Gooier Cookies

Start with the base recipe once, then adjust from a place of control. A longer chill, a shorter bake, or a different chocolate can shift the cookie without turning it into a new recipe.

Texture guide showing thicker, chewier, and gooier brown butter chocolate chip cookies with different centers and chocolate pockets.
Small changes create different cookie personalities. For thicker cookies, chill longer; for chewier cookies, pull them sooner; for gooier cookies, use more chopped chocolate or wafers.

How to Adjust the Texture

What you wantWhat to doWhy it works
Thicker cookiesChill shaped dough for 2 hours and bake coldCold dough spreads more slowly
Chewier centersUse the egg yolk, enough brown sugar, and avoid overbakingYolk and brown sugar keep the center soft
Crispier edgesBake 1 minute longer or use slightly smaller portionsMore edge exposure gives more crispness
Gooier chocolate pocketsUse chopped chocolate or wafers instead of chips aloneFlat pieces melt into larger pockets
More toasted-butter flavorBrown until amber, scrape in every bit, and do not drown the dough in too much chocolateThe toasted milk solids carry the nutty flavor
Less spreadCool butter fully, chill before baking, use parchment, and avoid hot traysWarm fat spreads faster in the oven
More spreadUse a shorter chill or gently flatten the portions before bakingFlatter dough spreads sooner
Softer cookiesPull the cookies when the centers still look softThey finish setting on the hot baking sheet

You do not need to change everything at once. Try the base recipe first, then adjust one thing next time: chill longer for thickness, bake a minute less for softer centers, or switch to chopped chocolate for bigger melted pockets.

For more control after choosing your texture, check the oven temperature guide and the doneness cues.

First batch tip: Make the base recipe as written before changing the flour. Later, you can replace 40g of the all-purpose flour with bread flour for more chew, or add 1 teaspoon cornstarch for a slightly softer, thicker cookie.

350°F vs 375°F for Brown Butter Cookies

Brown butter chocolate chip cookies compared at 350°F and 375°F, showing a wider bake window versus faster edge setting.
Use 350°F when you want a forgiving first tray. After you understand the dough, 375°F can give a quicker edge set and slightly deeper browning on well-chilled portions.
Temperature tip: Use 350°F / 175°C for the most even first batch. Use 375°F / 190°C only with well-chilled dough if you want slightly thicker edges and more browning.

If your oven uses round Celsius markings, 180°C is close enough for the default bake; just watch the first tray carefully. Once you know how your oven and trays behave, try 375°F / 190°C for a slightly taller, faster-setting cookie.

Chocolate Chips vs Chunks vs Wafers

The chocolate changes the personality of the cookie. The dough can be the same, but chips, chopped chocolate, and wafers melt differently.

Chocolate chips, chopped chocolate, and chocolate wafers compared in brown butter chocolate chip cookies.
Choose chocolate based on the bite you want. Chips give a classic cookie look, chunks create uneven melted pockets, and wafers make larger glossy pools of chocolate.
Chocolate typeWhat it givesBest use
Chocolate chipsClassic look, neat pieces, less meltingEasy pantry cookies
Chopped chocolateMelty pockets and tiny chocolate shards through the doughBakery-style cookies
Chocolate wafers or fèvesLarge glossy puddlesPremium dramatic cookies
Mixed chips and chunksShape from chips, melt from chunksBest everyday version

Chocolate chips are perfectly fine here. The cookies will still taste excellent; they will simply have fewer dramatic melted pockets than a chopped-chocolate batch.

How to Know When the Cookies Are Done

  • The edges should look set and lightly golden.
  • The centers should still look soft and slightly puffed.
  • The tops should no longer look wet, but they should not look firm all the way through.
  • The bottoms should be golden, not dark brown.
  • The cookies should smell buttery, nutty, and chocolatey.
Doneness guide for chocolate chip cookies showing set edges, soft centers, golden bottoms, and a reminder to pull before centers look fully baked.
The center should not look finished when the cookies come out. If the edges are set and the bottoms are golden, the hot tray will finish the soft middle without drying it out.

Pull them when they still look a little too soft. The baking sheet finishes what the oven started.

Let the cookies rest on the hot baking sheet for 5 to 10 minutes, then move them to a rack. When the batch is right, the cookies settle into soft ripples, the centers still bend slightly, and the chocolate stays glossy enough that breaking one open feels like the reward for waiting through the chill time.

Brown butter chocolate chip cookies with soft rippled tops, glossy melted chocolate, and a cracked chewy center.
Soft ripples show that the cookies spread, settled, and set at the right pace. The best ones look relaxed on top but still hold together when lifted.
Good cookie rule: If the whole cookie looks completely done in the oven, it may taste overbaked after cooling.

Troubleshooting Brown Butter Cookies

Fix the Next Tray

If the first tray tells you something is off, adjust the next one before baking the whole batch. Most fixes are small: cooler dough, a cooler pan, 1 teaspoon more milk, or 1 minute less in the oven.

A good tray starts before the oven: cooled butter, shaped dough, cold portions, and a cool pan. Most problems come from one of those places.

Troubleshooting guide showing a spread cookie, adjusted chilled dough, and a better next tray for brown butter chocolate chip cookies.
Treat the first tray like a test batch. If the cookies spread, turn the next tray into the fix: colder dough, cooler metal, or a tiny moisture adjustment if the dough feels dry.

What to Change on the Next Tray

What you seeLikely causeWhat to change on the next tray
Cookies spread too muchDough was too warm, butter was too hot, dough was not chilled, or tray was hotCool the butter, chill the shaped dough, and bake on a cool parchment-lined tray
Cookies look greasyButter was still hot when mixedCool it before adding the egg
Cookies taste dryToo much flour or too much moisture lost from the butterWeigh the flour and use the milk adjustment
Cookies bake cakeyToo much flour, overmixing, or too much leavenerMix gently and measure flour by weight
Cookies barely spreadDough was over-chilled or flour was overmeasuredLet the shaped dough sit at room temperature for 10 minutes before baking
Brown butter tastes bitterThe milk solids burnedUse medium heat, stir often, and remove at amber brown
Brown-butter flavor feels weakButter was not browned deeply enough or brown bits were left in the panCook until nutty and scrape every browned bit into the bowl
Chocolate burned on the bottomChocolate pieces sat directly against the hot trayFold chocolate evenly and bake on parchment
Cookies look paleOven runs cool or dough was too cold and underbakedAdd 1 minute bake time or test 375°F / 190°C with chilled dough

Use this comparison when your first tray spreads too much. A flatter cookie usually points to warm dough, hot butter, or a warm tray; a thicker cookie usually comes from colder portions and cooler metal.

Flat brown butter chocolate chip cookie compared with a thicker cookie, showing warm dough versus chilled dough on a cool tray.
Flat cookies are usually a temperature problem, not a total recipe failure. Chilled dough and a cool tray give the butter time to set before the cookie spreads too far.

Check the Dough Before Baking

Before baking, aim for dough that is thick and scoopable. Shiny-loose dough needs a short rest or a chill. Dry-crumbly dough needs milk, 1 teaspoon at a time, until it comes together.

Variations to Try

Brown butter cookie variations showing toffee, chocolate chunk, espresso, pecan, and salted cookies.
Start with the base dough, then change one flavor direction at a time. Toffee adds caramel crunch, espresso sharpens the chocolate, pecans add toastiness, and flaky salt makes the butter taste deeper.

Easy Variations That Work with This Dough

Brown Butter Toffee Chocolate Chip Cookies

Add 1/2 cup chopped toffee or toffee bits with the chocolate. Chill the dough well because toffee can make cookies spread and caramelize faster.

Brown Butter Chocolate Chunk Cookies

Use chopped dark or semi-sweet chocolate instead of chips for more melted pockets and a more dramatic bakery look.

Espresso Brown Butter Chocolate Chip Cookies

Add 1 teaspoon espresso powder to the dry ingredients. It deepens the chocolate and toasted-butter flavor without making the cookies taste strongly like coffee.

Brown Butter Pecan or Walnut Cookies

Add 1/2 cup toasted chopped pecans or walnuts. Toasting the nuts first helps them stand up to the browned butter.

Salted Brown Butter Chocolate Chip Cookies

Use salted butter and reduce the fine salt in the dough to 1/4 teaspoon. Finish with only a small pinch of flaky salt, or skip it if your chocolate is already salty.

Variations That Need More Adjustment

Brown Butter Oatmeal Chocolate Chip Cookies

Treat oatmeal as its own formula rather than a quick stir-in. Oats absorb moisture and change spread, so a proper oatmeal cookie needs a slightly different balance.

Gluten-Free Brown Butter Chocolate Chip Cookies

A good 1:1 gluten-free baking flour can work, but the spread and chew may change. Let the dough rest before baking so the flour can hydrate. For a cookie built specifically around gluten-free flour alternatives, start with our almond flour cookies instead.

Eggless Brown Butter Chocolate Chip Cookies

This recipe is not a simple eggless swap because the egg and yolk affect structure, chew, and moisture. If you are learning egg-free baking, our flax egg guide is useful background, but this cookie deserves its own tested eggless formula.

Storage and Freezing

FormHow to storeTiming
Baked cookiesAirtight container at room temperature3 to 4 days
Chilled shaped doughCovered in the refrigeratorUp to 3 days
Frozen shaped doughFreeze on a tray, then transfer to a freezer bag2 to 3 months
Baking from frozenBake straight from frozen or thaw brieflyAdd 1 to 2 minutes to bake time
ReheatingMicrowave briefly or warm in a low ovenJust until the chocolate softens

If you are freezing shaped dough, use the recipe card for bake times and add 1 to 2 minutes when baking from frozen.

Scooped brown butter cookie dough on a tray with a freezer storage bag, container, baked cookie, and bake-from-frozen instructions.
Freeze dough portions on a tray before bagging them so they keep their shape. Later, you can bake straight from frozen and add a minute or two for a fresh-cookie shortcut.

If you want a cookie-style dessert that bakes as one sliceable centerpiece instead, our cookie pie recipe is a better direction than pressing this chilled dough into a deep pan.

This is the kind of dough worth freezing because one warm cookie later still tastes like you made the whole batch from scratch. The kitchen gets the brown-butter-cookie smell again, and the chocolate softens like a fresh tray.

Serving Ideas

These cookies are best when the centers are still soft and the chocolate is a little melty. Serve them warm with milk, coffee, or a scoop of homemade mint chocolate chip ice cream for a simple cookie-and-ice-cream dessert.

Warm brown butter chocolate chip cookie served with vanilla ice cream, melted chocolate, milk, and more cookies in the background.
A warm cookie and a small scoop of vanilla ice cream make the brown-butter flavor feel even richer. Serve it while the chocolate is still soft, but before the crisp edge disappears.

Brown Butter Chocolate Chip Cookies Recipe Card

Brown butter chocolate chip cookies recipe card showing 350°F, 1 to 2 hours chill time, 1 tablespoon milk, 55 gram cookies, bake time, set edges, and soft centers.
Save this as the short memory cue for the recipe: brown the butter, cool it, add the milk, scoop before chilling, and judge the bake by set edges and soft centers rather than minutes alone.

These cookies bake with crisp edges, chewy centers, glossy chocolate pockets, and brown butter flavor you can actually taste. The method keeps the dough thick, controlled, and soft in the center instead of flat, greasy, or dry.

Prep Time 25 minutes
Chill Time 1 to 2 hours
Bake Time 8 to 12 minutes per tray
Total Time About 1 hour 35 minutes to 2 hours 40 minutes, plus extra time for multiple trays

Yield: About 16 large cookies, 20 to 22 medium cookies, or 26 to 28 smaller cookies

Ingredients

  • 170g / 6 oz / 3/4 cup unsalted butter, weighed before browning
  • 165g / 3/4 cup packed brown sugar, light or dark
  • 65g / 1/3 cup granulated sugar
  • 1 large egg, room temperature if possible
  • 1 large egg yolk
  • 1 tablespoon / 15 ml milk, plus up to 1 tablespoon / 15 ml more only if the dough looks dry
  • 2 teaspoons / 10 ml vanilla extract
  • 220g all-purpose flour / about 1 3/4 cups plus 1 tablespoon, spooned and leveled
  • 1/2 teaspoon baking soda
  • 1/4 teaspoon baking powder
  • 3/4 teaspoon fine salt
  • 200 to 225g / 7 to 8 oz semi-sweet or dark chocolate, chopped, chips, or a mix
  • Flaky salt, optional, for finishing

Instructions

Brown and Mix the Dough

  1. Brown the butter. Add butter to a light-colored skillet or saucepan over medium heat. Let it melt, foam, and crackle, stirring often. Continue cooking until amber brown specks form at the bottom and the butter smells nutty.
  2. Cool the butter. Pour it into a large mixing bowl, scraping in all the browned bits. Cool for 15 to 25 minutes, until liquid and warm, not hot.
  3. Add the sugars. Whisk the brown sugar and granulated sugar into the cooled butter until glossy and thick.
  4. Add wet ingredients. Whisk in the egg, egg yolk, vanilla, and 1 tablespoon milk. Hold back the extra tablespoon unless the dough looks dry later.
  5. Mix dry ingredients. In a separate bowl, whisk together flour, baking soda, baking powder, and fine salt.
  6. Make the dough. Fold the dry ingredients into the wet ingredients until a few flour streaks remain. Add the chocolate and fold just until combined. If the dough looks dry after resting for a few minutes, add milk 1 teaspoon at a time.

Scoop, Chill, and Bake

  1. Scoop. Scoop 55g portions for about 16 large cookies, 45g portions for about 20 to 22 medium cookies, or 35g portions for about 26 to 28 smaller cookies. Place on a lined tray.
  2. Chill. Cover and chill the shaped dough for 1 to 2 hours. For overnight dough, let it sit at room temperature for 10 minutes before baking if very firm.
  3. Preheat. Heat oven to 350°F / 175°C. Line baking sheets with parchment paper.
  4. Bake. Arrange chilled portions on the baking sheet with room to spread. Bake 55g cookies for 10 to 12 minutes, 45g cookies for 9 to 11 minutes, or 35g cookies for 8 to 10 minutes, until the edges are set and the centers still look soft.
  5. Shape and finish. If needed, scoot cookies into rounder shapes with a large round cutter or glass while warm. Sprinkle with flaky salt.
  6. Cool. Rest cookies on the baking sheet for 5 to 10 minutes, then move to a rack.

Notes

  • Use 1 tablespoon milk by default. Add more only if the dough looks dry.
  • For thicker cookies, chill the shaped dough closer to 2 hours.
  • For faster cookies, chill for 30 minutes and expect a little more spread.
  • For no-chill cookies, use smaller 35g portions and a cool baking sheet.
  • If using salted butter, reduce the fine salt to 1/4 teaspoon.
  • If baking from frozen, add 1 to 2 minutes to the bake time.
  • For a hotter test batch, bake well-chilled dough at 375°F / 190°C and start checking early.

FAQs

Why did my cookies spread?

Usually, something was too warm: the butter, the tray, or the dough itself. Bake chilled portions on a cool parchment-lined tray for the most reliable shape.

Is brown butter the same as melted butter?

No. Brown butter starts as melted butter, but it is cooked longer until the milk solids toast and turn amber. That extra cooking gives the cookies their nutty, caramel-like flavor.

Should brown butter be hot or cooled before making cookie dough?

Cool it first. The butter should be liquid and warm, not hot, before you add the egg.

Do I have to chill the dough?

Yes, for the best texture. Even 30 minutes helps, but 1 to 2 hours gives the most reliable thick, chewy cookie.

What chocolate works best?

Use chopped semi-sweet or dark chocolate for dramatic melted pockets, and chips for a neater classic cookie. A mix gives you familiar chocolate-chip texture plus glossy puddles.

Can I use salted butter?

Yes. Use salted butter if that is what you have, but reduce the fine salt in the dough to about 1/4 teaspoon. Taste the first baked cookie before adding flaky salt to the rest.

Why add milk to brown butter cookie dough?

Browning butter cooks off some water while deepening the flavor. The milk gives a little moisture back, so the cookies stay chewy instead of turning dry or sandy.

Can I make these without brown sugar?

This specific dough depends on brown sugar for chew, moisture, and caramel flavor. A white-sugar-only version will spread and crisp differently, so it needs its own recipe balance.

Can I eat this cookie dough raw?

No, this dough is meant to be baked. Regular cookie dough contains raw flour, and the FDA explains that raw flour is not treated to kill germs. For a safe no-bake chocolate-chip craving, use our edible cookie dough instead.

Are these the same as brown butter toffee chocolate chip cookies?

Not exactly. Toffee is a variation of this base dough. It makes the cookies sweeter and more caramelized, so the dough benefits from a good chill before baking.

Why are my cookies cakey instead of chewy?

The most common reason is too much flour. The dough should be thick and scoopable, not stiff, dry, or crumbly. Weigh the flour if possible; if using cups, spoon it in and level it off instead of packing it down.

How do I freeze the cookie dough?

Scoop the dough, freeze the portions on a tray, then transfer them to a freezer bag. Bake from frozen and add 1 to 2 minutes to the bake time.

What changes for smaller cookies?

Use about 35g dough per cookie and start checking around 8 to 10 minutes. Smaller cookies bake faster and can overbake quickly.

Once you learn the butter color, dough texture, chill-time cue, and soft-center bake point, these cookies stop feeling fussy. You get nutty brown-butter flavor, chewy centers, glossy chocolate, and cookies that hold their shape instead of spreading into disappointment.

For another classic cookie, our peanut butter cookies are a good next bake when you want something simple, nostalgic, and deeply flavored in a different way.

Back to top