

Cut-out sugar cookies have an annoying trade-off. Some doughs give you sharp stars, trees and hearts but bake into hard decorating biscuits. Others taste wonderfully buttery and soft, then spread enough in the oven to blur the shapes you carefully cut.
This is a roll-and-cut sugar cookie dough, not a scoop-and-drop cookie: it bakes into buttery, vanilla-rich cookies with soft centers, enough structure for decorating and clean cutter edges. Measure the flour accurately, keep the dough from getting too warm, roll it while pliable, cut it while firm and pull the cookies from the oven while the edges are still pale.
Keep the dough cool, not dry. If sugar cookie dough starts sticking while you cut it, chill it before adding more flour. Dough that handled well a few minutes ago has usually warmed up; extra flour can fix the stickiness while leaving you with a drier cookie later.
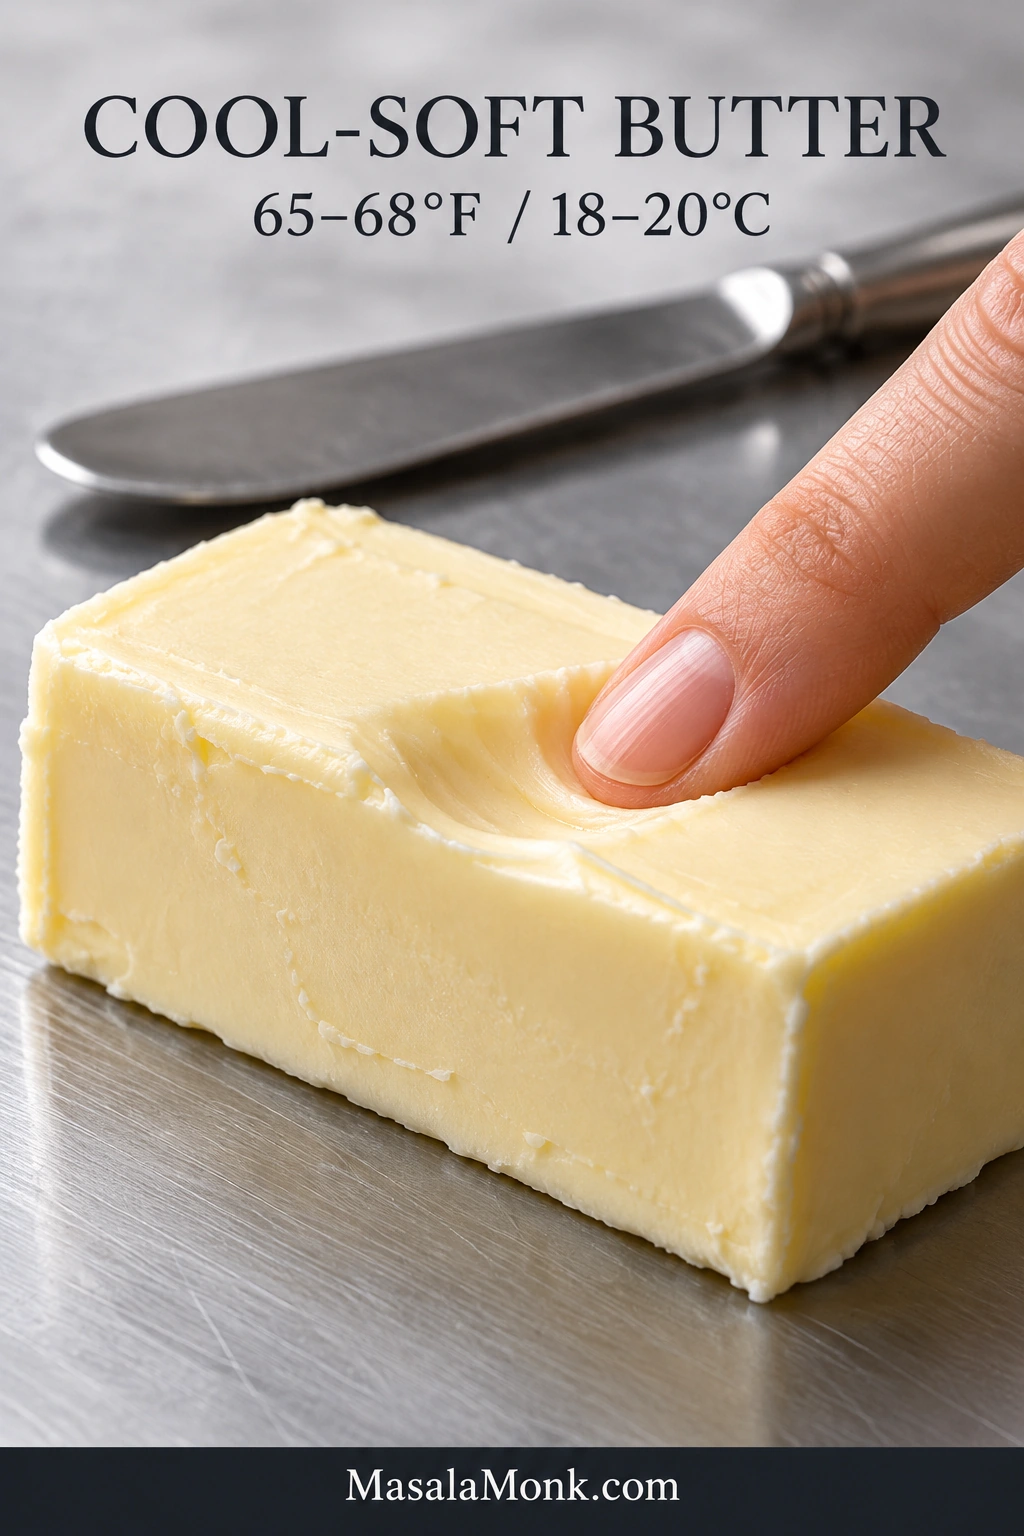
- Butter: soft enough to dent, but still slightly cool and matte.
- Mixed dough: smooth and pliable, without coating your fingers.
- Cut shapes: firm enough to lift without bending.
- Baked cookies: set on top with pale edges and a tender center.
Soft Cut-Out Sugar Cookies
This sugar cookie recipe makes buttery vanilla cut-outs with tender centers and clean cutter edges. The chill is deliberate: roll while the dough is easy to flatten, then chill it until firm before cutting. Start checking the oven before the edges begin to brown.
Equipment
- Digital kitchen scale
- Hand mixer, or stand mixer fitted with the paddle attachment
- Rolling pin
- Parchment paper
- Two light-colored metal baking sheets, if possible
- Cookie cutters
- Thin spatula for detailed shapes
- Wire cooling rack
¼-inch (6mm) rolling guides are handy if you have them. An oven thermometer is also useful when cookies routinely spread, brown much faster than expected or take unusually long to bake.
Ingredients
- 3 cups all-purpose flour (375g / 13.2 oz), preferably weighed
- ½ teaspoon baking powder (about 2g)
- ¾ teaspoon fine sea salt (about 4g)
- 1 cup unsalted butter (226g / 8 oz), cool-soft at about 65–68°F / 18–20°C
- 1 cup granulated sugar (200g / 7.1 oz)
- 1 large egg (about 50g without shell), not fridge-cold
- 1 large egg yolk (about 18g), not fridge-cold, for extra richness and tenderness
- 2 teaspoons pure vanilla extract (10ml)
- ¼ teaspoon almond extract (1.25ml), optional
What Cool-Soft Butter Looks Like
The butter should still feel slightly cool and hold its shape before creaming. Press it gently: your fingertip should leave a shallow dent without sliding through or leaving a greasy film.
Before You Start
- Weigh the flour if you can. It is the simplest way to keep the dough predictable without accidentally making the cookies dry.
- Clear space in the refrigerator. You will be chilling two flat sheets of rolled dough.
Food safety: Raw flour and raw egg can carry germs, so this dough is intended to be baked. The CDC’s guidance on raw dough explains the risk. For dough made specifically to eat unbaked, use the edible cookie dough recipe.
Instructions
Mix the Dough
- Mix the dry ingredients. Whisk the flour, baking powder and salt thoroughly.
- Cream the butter and sugar. Beat on medium speed for about 1½–2 minutes, until smooth and slightly lighter. There is no need to whip in lots of air.
- Add the egg, yolk and flavorings. Mix in the whole egg, egg yolk, vanilla and optional almond extract just until smooth. Scrape the bottom and sides of the bowl.
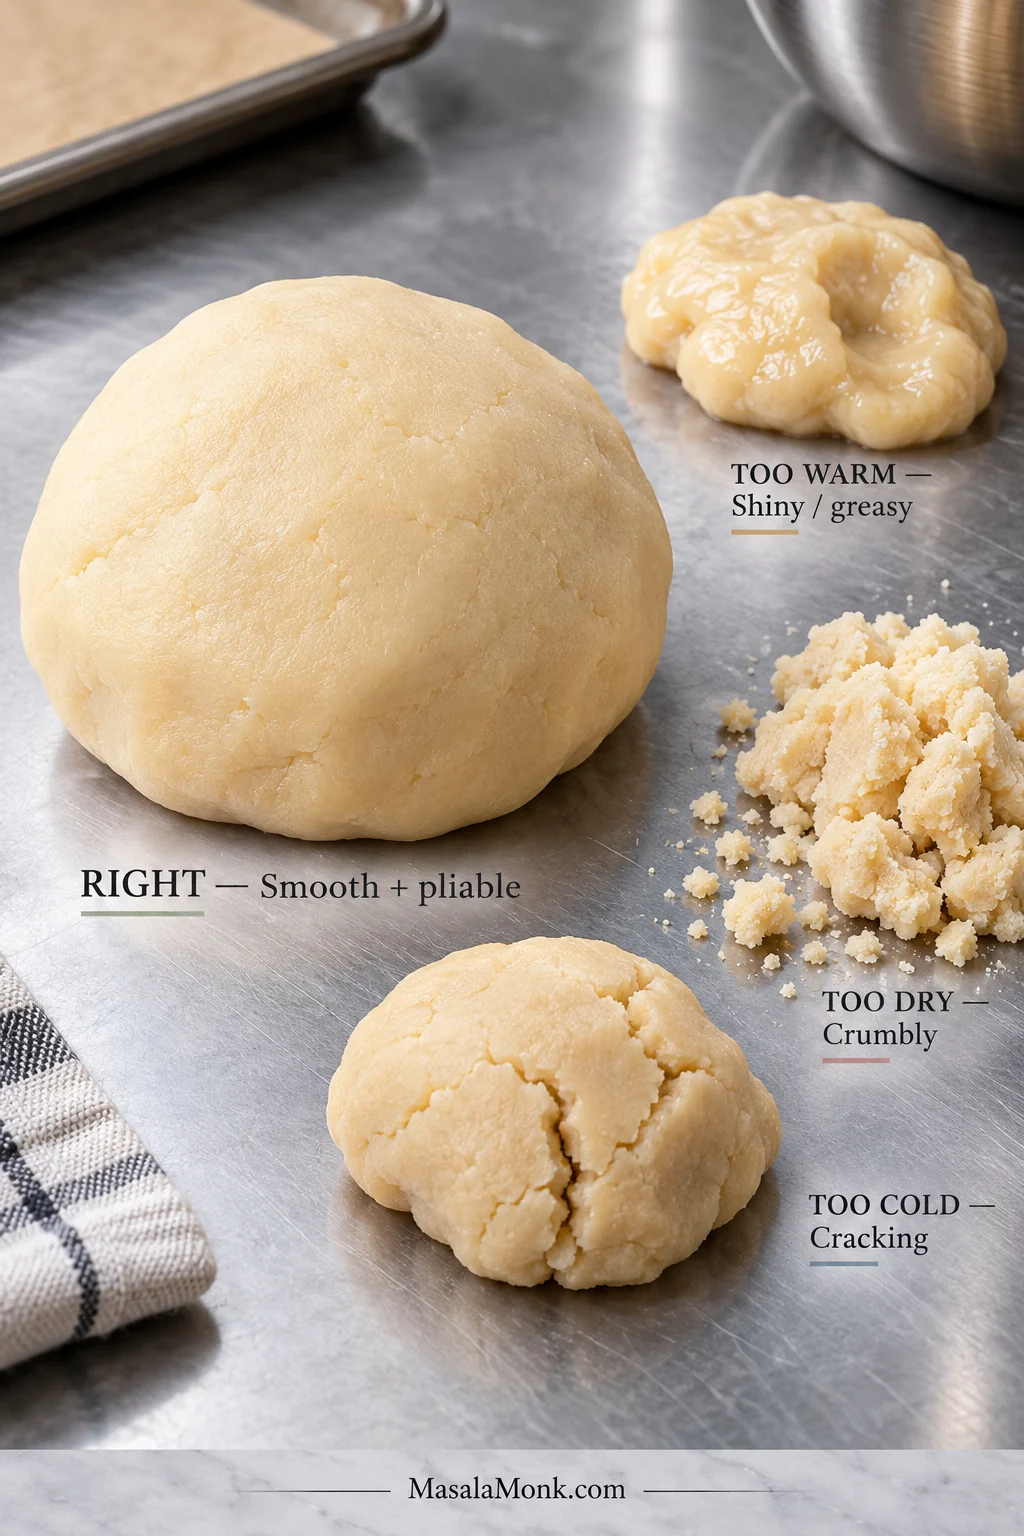
- Mix in the flour. Add the dry ingredients on low speed and stop once the flour disappears. The dough should feel soft, smooth and pliable, similar to soft Play-Doh. It should press together cleanly without leaving an oily coating on your fingertips.
Roll, Chill and Cut
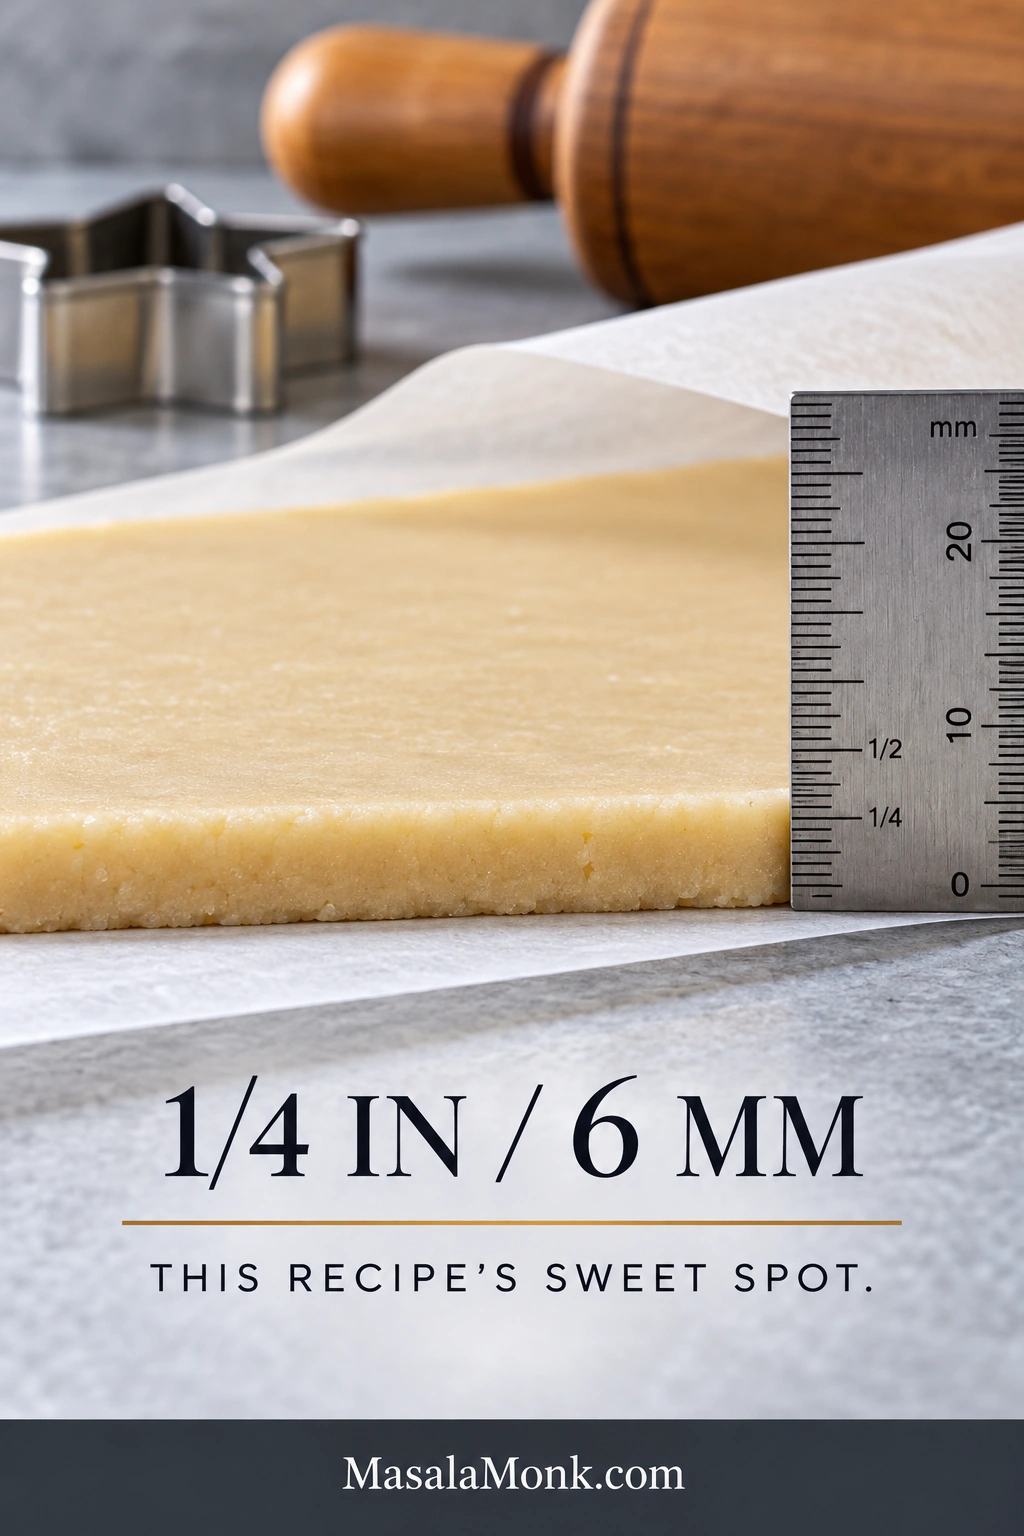
- Roll the dough straight away. Divide it in half. Place each portion between two sheets of parchment and roll evenly to ¼ inch (6mm). This keeps the dough from sticking without repeatedly dusting it with flour.
- Chill the sheets flat. Stack the parchment-covered dough on a flat tray and refrigerate for 45–60 minutes, or until firm enough to take a clean cutter impression. Toward the end of the chilling time, preheat the oven to 350°F (175°C) with a rack in the center.
- Rechill only when needed. Cookies that still feel firm and lift cleanly can go straight into the fully heated oven. When the shapes have softened, become tacky or started bending during transfer, chill the tray for 5–10 minutes.
Bake, Cool and Reroll
- Gather the scraps gently. Press them together instead of kneading. Reroll between parchment, and return the sheet to the refrigerator when the dough becomes soft. One or two rerolls give the best texture.
Watch the edges, not just the timer. For a softer cookie, take the tray out while the tops are set and the edges are still pale. Waiting for obvious browning gives you a firmer, crisper result after cooling.
Once cool, the cookie should have a clean, sturdy edge but still bite tenderly through the center, with butter and vanilla coming through clearly even before the icing goes on.

Most batches won’t need the troubleshooting below. Once you’ve felt the dough at the right temperature, the rest gets easier. If it suddenly turns sticky, the cut-outs start spreading or tray three behaves nothing like tray one, use these checks before changing the formula.
Rolling, Baking & Troubleshooting
Is the Dough Too Warm, Too Dry, or Just Too Cold?
Sticky after handling usually means the dough has warmed; crumbly straight from the mixer points more strongly toward too much flour; cracking only after chilling often means the dough is simply too cold.
| What you notice | What to do |
|---|---|
| Soft, smooth and easy to roll | Nothing. Roll it between parchment and chill. |
| It rolled well, then became sticky | The dough has probably warmed. Chill it before adding flour. |
| Very soft, shiny or greasy | The butter is too warm. Refrigerate the dough and check it again once cool. |
| Crumbly straight from the mixer | Check the flour measurement before adding any extra liquid. |
| Smooth before chilling, but cracking now | It may simply be too cold. Let it sit for 5–10 minutes. |
| Shapes bend while you lift them | The rolled dough has warmed. Chill it briefly before continuing. |
Cracking straight from the refrigerator doesn’t mean you’ve ruined the dough. Give it a few minutes before changing anything.
If the dough feels right but the baked shapes still blur, go to why sugar cookies spread and check the pan, oven and dough temperature together.
How Thick to Roll Sugar Cookies: ¼ Inch Is the Sweet Spot
For these cut-out sugar cookies, roll the dough ¼ inch / 6mm thick. That leaves enough depth for a tender center while keeping the shapes sturdy enough to transfer and decorate.
| Thickness | Result |
|---|---|
| ⅛ inch / 3mm | Thinner and crisper; small shapes bake very quickly |
| ¼ inch / 6mm | Soft center, sturdy shape and the bake time used in this recipe |
| ⅜ inch / about 10mm | Thicker and softer, with a longer bake and more variation between cutter shapes |
Even thickness matters. A thin point on a star can become firm while a thicker center is still setting. King Arthur Baking also recommends rolling cut-out dough between parchment instead of repeatedly adding flour, which can toughen the cookies.
When to Chill the Dough Again
Chill the rolled sheets for 45–60 minutes; rechill cut shapes for 5–10 minutes only if they soften while you’re working.
Rolling before chilling gives you soft dough when it is easiest to flatten and firm dough when it is easiest to cut. Once the shapes are on the tray, use how they feel instead of automatically adding another long refrigerator rest.
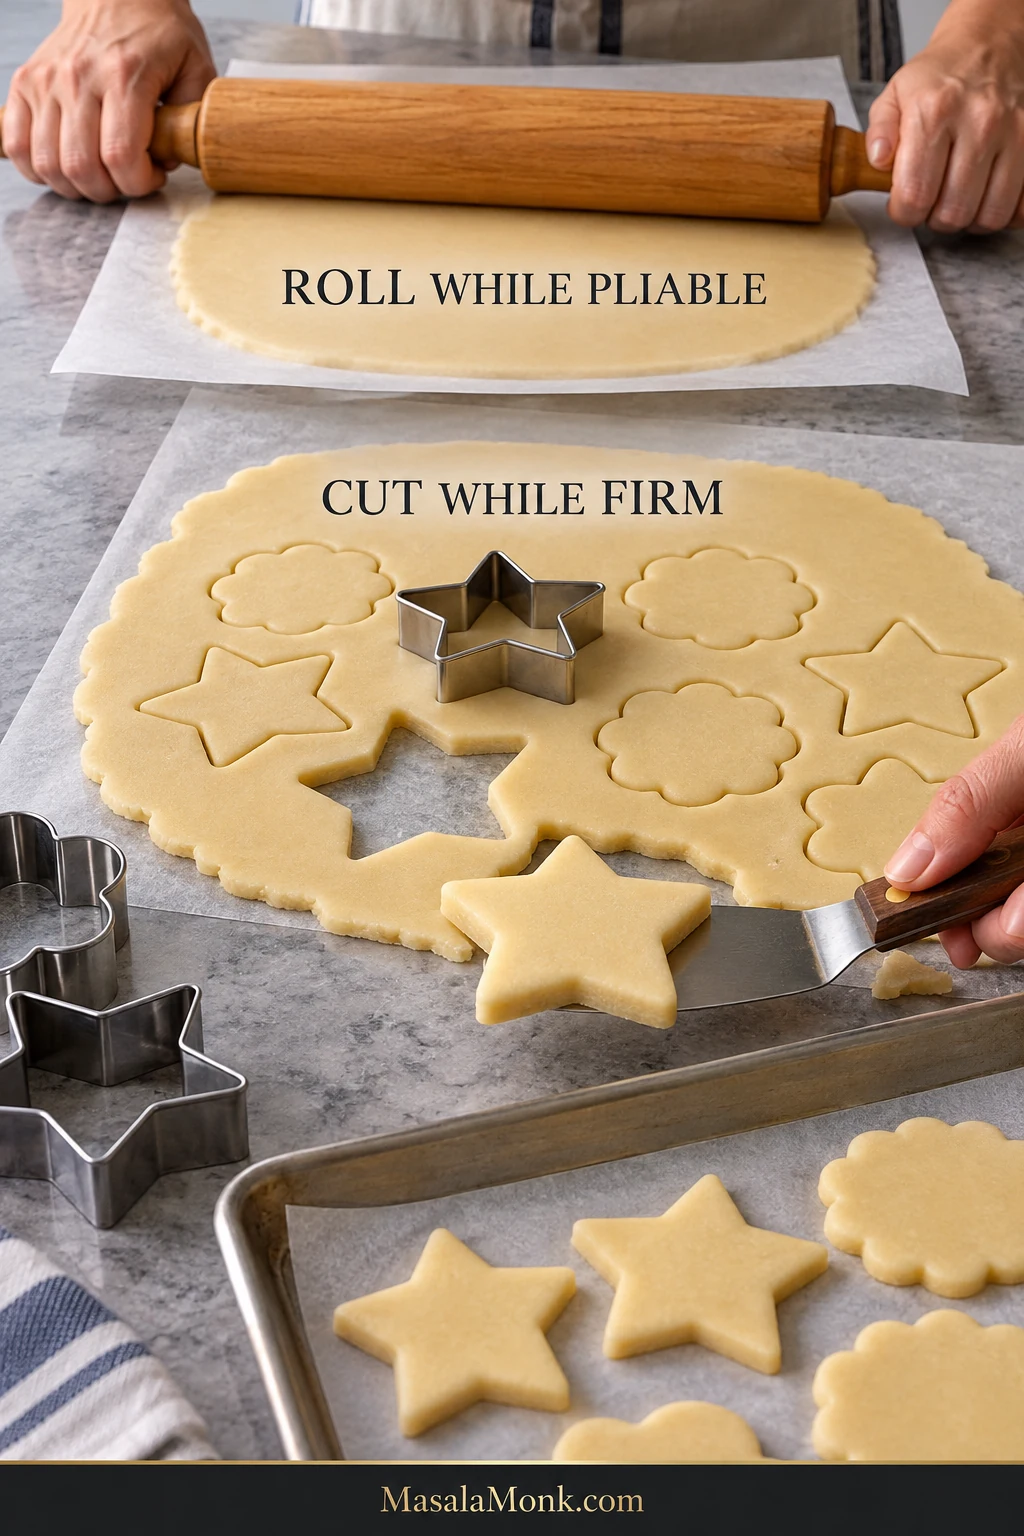
Still cool, firm and easy to lift? Bake them. If the dough is behaving, don’t fix it. Soft, tacky or starting to bend? Give the tray a few minutes in the refrigerator.
On a warm day, you’ll notice each sheet gets soft much faster on the counter. Keep the unused dough refrigerated and bring out one portion at a time.
Chilling cannot rescue dough made with nearly melted butter or too little flour, and it cannot compensate for an oven running cool.
How to Know Sugar Cookies Are Done: Pale Is the Point
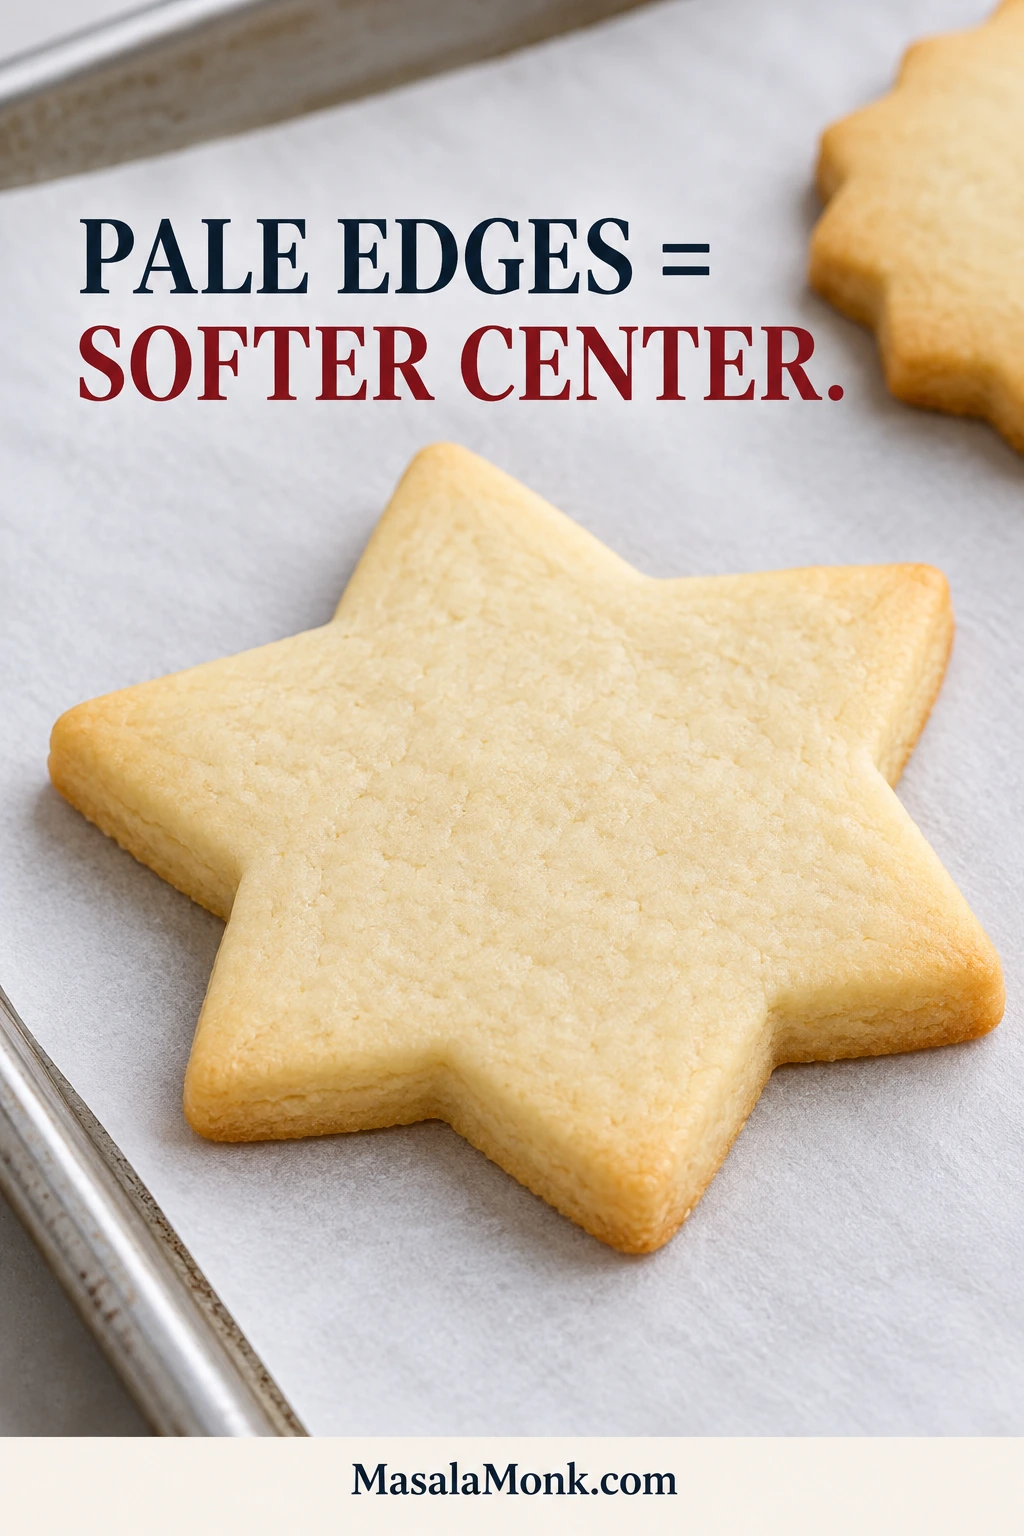
Sugar cookies are done when the tops look matte and the edges are set but still pale. At 350°F / 175°C, 3-inch / 7.5cm cookies rolled ¼ inch / 6mm thick usually reach that stage in about 9–11 minutes.
- Still underdone: the surface looks wet or glossy and the center is extremely fragile.
- Soft-cookie stage: the top is matte and set, the edges feel firm and the cookie is still pale.
- Moving toward crisp: the edges are clearly golden and the cookie already feels firm across most of its surface.
The cookies continue setting during their five-minute rest on the baking sheet. They can look a little softer than you expect when they first come out. When you’re unsure between another minute and taking them out, pale edges are usually the better bet for this recipe. With a convection or fan oven, start checking even earlier.
If Your Sugar Cookies Still Spread
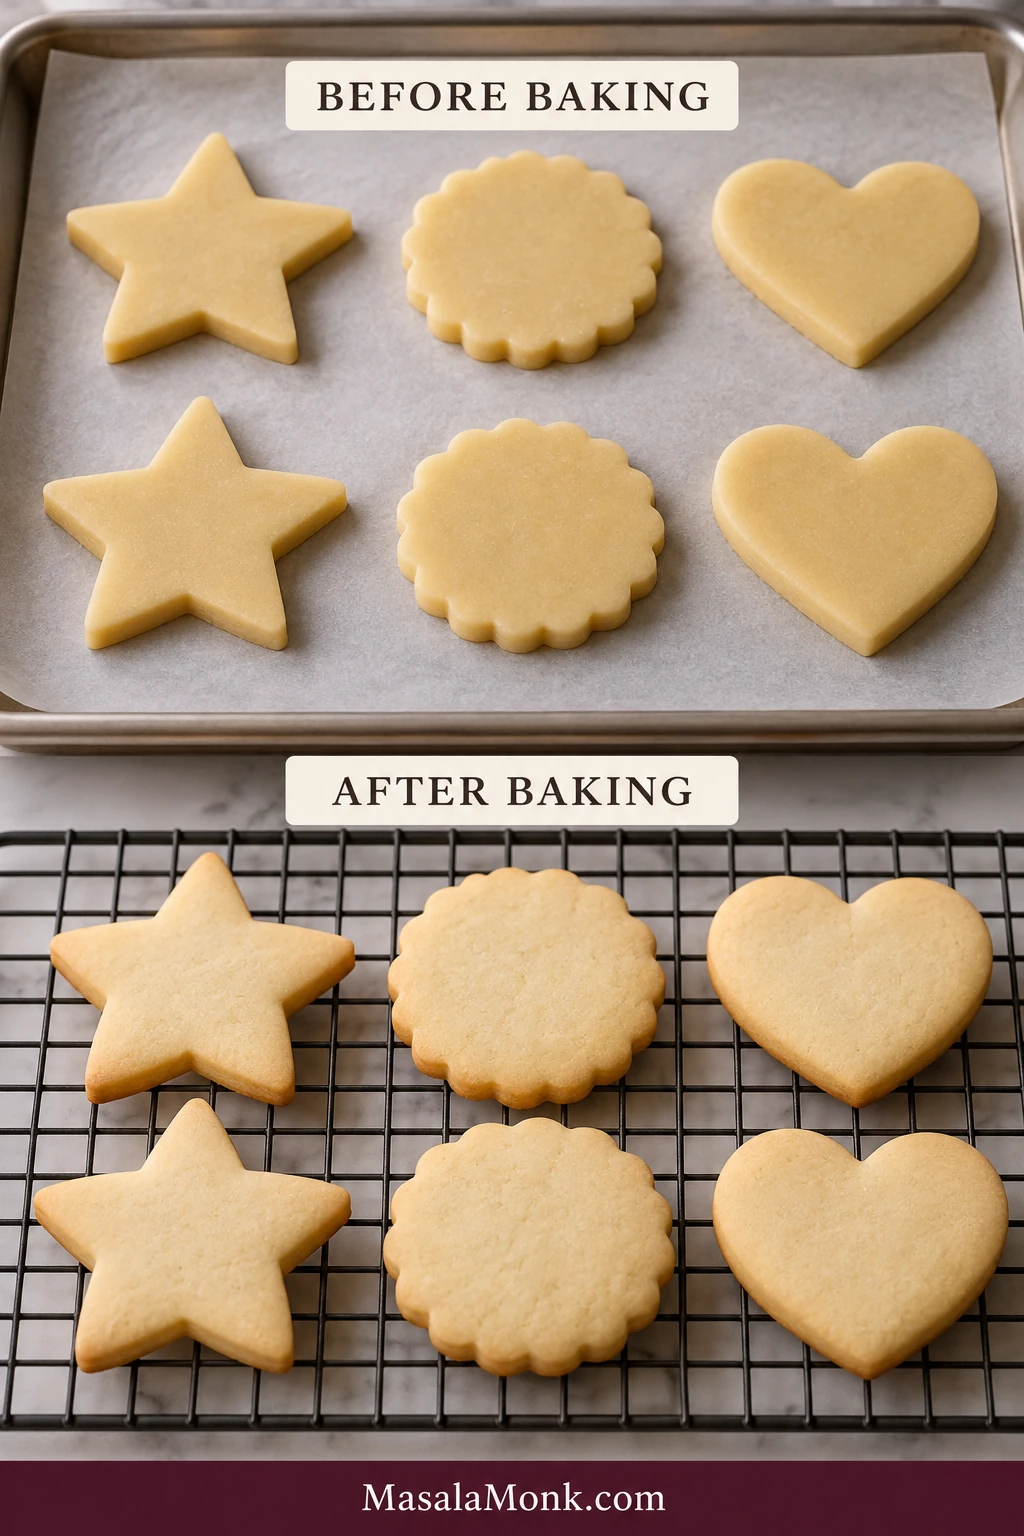
If cut-out sugar cookies spread, start with two common causes: too little flour and dough that’s too warm. Over-creaming, excess leavener, a warm or greased pan, or an oven running cool can also contribute.
A little softening around the edges is normal. If a star still looks like a star and the scallops still look like scallops, you’re in good shape. These are cookies, not machined parts.
- Check the flour. Too little leaves the dough without enough structure. Too much can stop spread at the cost of tenderness.
- Check the butter and dough temperature. Warm butter at the mixing stage or softened cut-outs on the tray both give the dough more opportunity to spread.
- Check the creaming and baking powder. Beat only until creamy and slightly lighter, and measure the leavener accurately.
- Check the pan. Use parchment on a completely cool, light-colored metal sheet. Do not grease it.
- Check the oven. An oven running cool gives the butter longer to melt before the cookie sets. An oven thermometer is useful when the other pieces all look right.
If the first tray holds its shape and only the later trays change, jump to why tray three can behave differently before altering the recipe.
What Went Wrong With My Sugar Cookies?
| Problem | First thing to check |
|---|---|
| Cookies puff more than expected | Start with the baking powder and creaming time. Too much leavener or too much incorporated air can make the cookies puff more than you want. |
| Small bubbles appear on top | Small bubbles can come from excess air worked into the dough during creaming or while gathering scraps. |
| Cookies become hard after cooling | Try pulling the next tray sooner, and check that the dough is still ¼ inch thick without extra flour creeping in during rerolls. |
| Fine cutter details warp before baking | The shapes have probably warmed. Cool them briefly and use a thin spatula to move intricate pieces. |
| Cookies hold their shape but taste bland | Check the salt and vanilla, and avoid adding unnecessary flour during rolling. |
Why Tray Three Can Behave Differently From Tray One
By the later trays, a few things have usually changed:
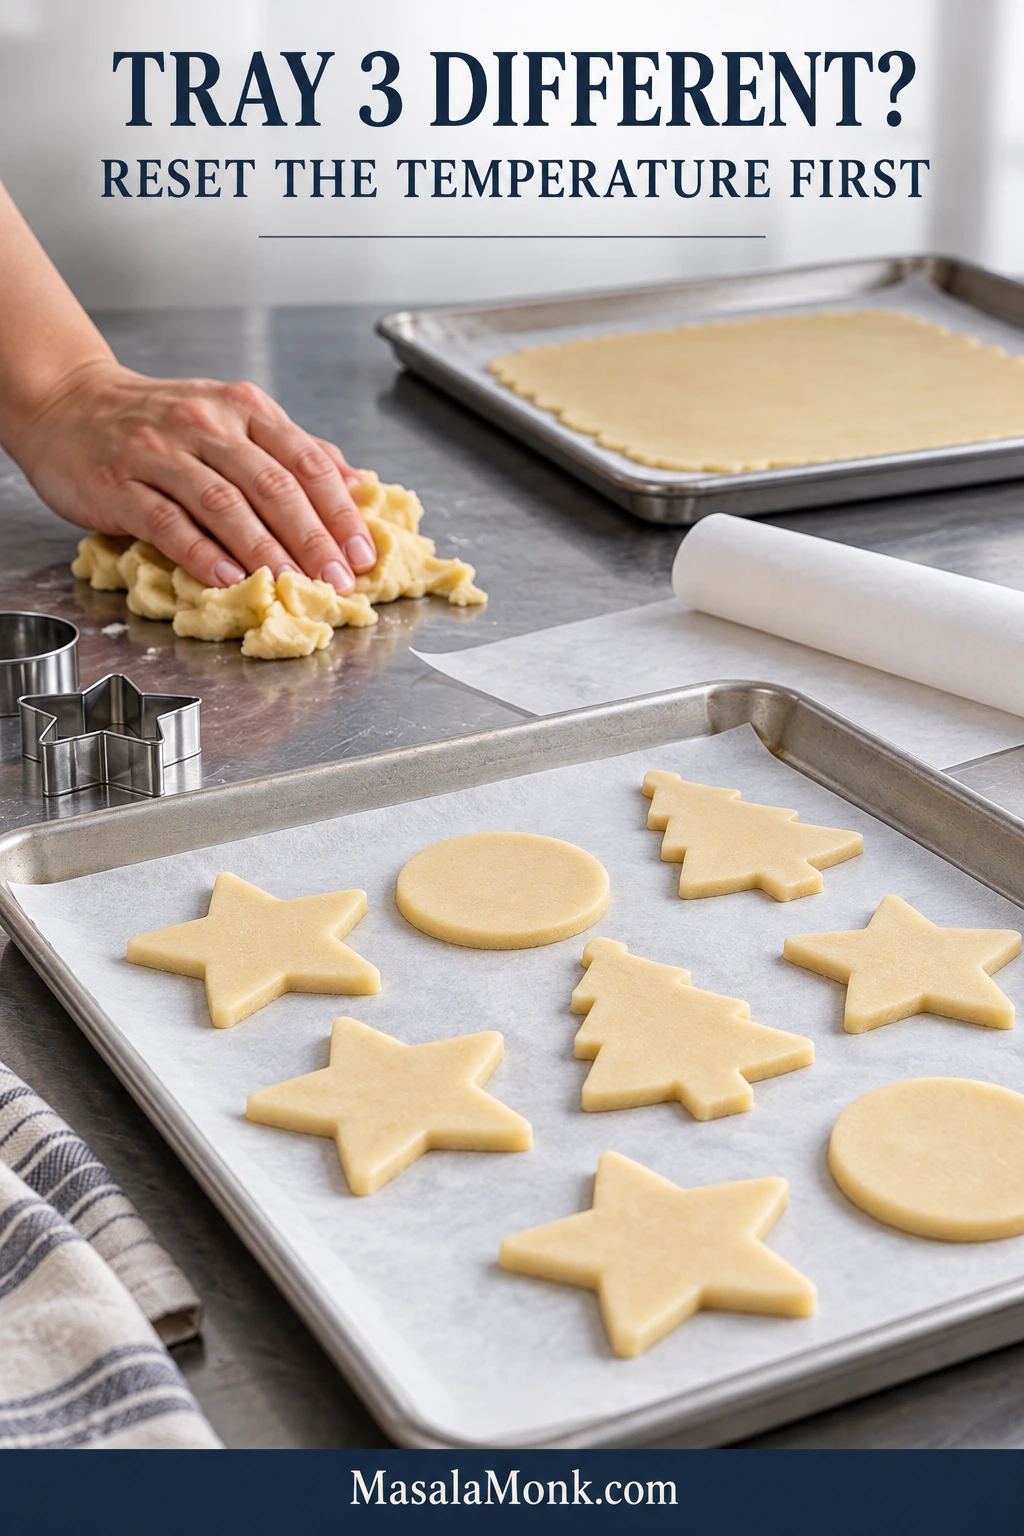
- Scraps have spent more time at room temperature.
- Rerolled dough has been handled more than the first sheet.
- Extra flour may have accumulated if the work surface was dusted.
- A reused baking sheet may still be warm.
Press scraps together gently, keep using parchment for rerolls and rotate between cool baking sheets. Too sticky after a few minutes of cutting? Back into the refrigerator.
Royal Icing, Glaze, or Buttercream?
Cool the cookies completely before decorating. Then use royal icing for fine detail and stackable cookies, glaze for an easy glossy finish, or buttercream when you want the softest, richest bite.

| If you want… | Use… |
|---|---|
| Fine piping, flooded designs and cookies that can be stacked once dry | Royal icing |
| A simple glossy coating | Sugar cookie glaze |
| A soft, creamy topping | Buttercream frosting |
| Color and crunch without icing afterward | Sanding sugar or sprinkles before baking |
| Buttery vanilla flavor on its own | Leave them plain |
And plain is a real option. A good cut-out sugar cookie should still be worth eating before anyone reaches for the icing bag.
Easy flavor changes: skip the almond extract for pure vanilla, or rub 2 teaspoons finely grated lemon or orange zest into the sugar before creaming.
For the molasses-and-spice version of a holiday cut-out, use the gingerbread cookies recipe. It is a different dough rather than a flavor swap for this one.
Almond flour also behaves differently from wheat flour, so these dough cues and ratios do not transfer neatly. Use the almond flour cookies instead of trying to convert this dough. Egg-free, gluten-free, vegan and butter-free cut-outs likewise work best with recipes designed for those changes.
If You’re Making Several Dozen
Christmas cookies, school decorating sessions and cookie exchanges usually mean more dough, more trays and more time for everything to warm up. For a big holiday batch, baking and decorating on separate days keeps the whole job easier.

- Double at most in a roomy stand mixer. With a hand mixer, smaller bowl, or anything beyond a double batch, mix separate batches so the dough combines evenly and doesn’t sit warm in one enormous mass.
- Keep rolled sheets refrigerated until you are ready to cut them.
- Rotate cool baking sheets. Raw cut-outs should never start on a tray that has just left the oven.
- Group similar cutter sizes. Tiny stars and large trees are unlikely to finish together.
A practical holiday schedule
| Day 1 | Mix, roll, chill, cut and bake |
|---|---|
| Day 2 | Decorate the completely cooled cookies |
| Day 3 | Package royal-iced or glazed cookies once fully set; keep buttercream-frosted cookies in a single layer |
Splitting the work across days? The next section covers make-ahead dough, frozen cut-outs and storage so you can stop at the stage that suits your schedule.
Make Ahead, Freeze & Store
You can stop at almost any stage and pick the job up later, whether you’re holding rolled dough, cut-out shapes or baked cookies.
Rolled Dough: Refrigerate Up to 2 Days or Freeze 1 Month
Roll the dough between parchment, cover the sheets well and refrigerate for up to 2 days. For longer make-ahead, wrap the rolled sheets well and freeze them for up to 1 month. Thaw in the refrigerator until firm but workable, then continue with cutting. Very cold sheets may need a few minutes at room temperature before the cutter goes through cleanly.
Cut-Out Shapes: Freeze and Bake Straight From Frozen
Freeze the shapes in a single layer until firm, then transfer them to an airtight freezer container with parchment between layers. Bake them straight from frozen. Start checking around the usual time and add a minute or two only if needed, using the pale, matte surface as the final cue.

Baked Sugar Cookies: Store 4–5 Days or Freeze 2–3 Months
Store completely cooled cookies airtight at room temperature for about 4–5 days, or freeze for up to 2–3 months. Parchment between layers helps protect detailed edges. Leaving the cookies exposed for hours will firm even an otherwise tender batch.
Decorated Cookies
Royal-iced or glazed cookies: let the finish dry or set completely before stacking. Freezing depends on the particular icing or glaze you used, so follow its storage guidance rather than assuming every finish freezes the same way. When freezing is suitable, thaw the sealed container completely before opening it to reduce condensation on the decoration.
Buttercream-frosted cookies: the frosting stays soft, so do not stack them directly. Store them in a single layer, or arrange them so the frosting cannot be crushed, and follow the storage guidance for the buttercream you used.
Roll while the dough is pliable, cut while it is firm and bake while the cookies are still pale. Clean cutter edges do not have to come at the cost of a soft, buttery cookie.








