No-bake cookies have a funny way of failing in opposite directions. One batch can still be sitting in shiny, sticky puddles half an hour later; another can start turning crumbly before you have finished dropping the last few onto the paper. Both problems usually begin in the same saucepan.
The ingredient list is short: cocoa, peanut butter, oats, butter, milk and sugar. The tricky part is the boil. Get that short stovetop window right and the mixture settles into the fudgy, chewy texture people remember from wax-paper-lined counters and old recipe boxes.
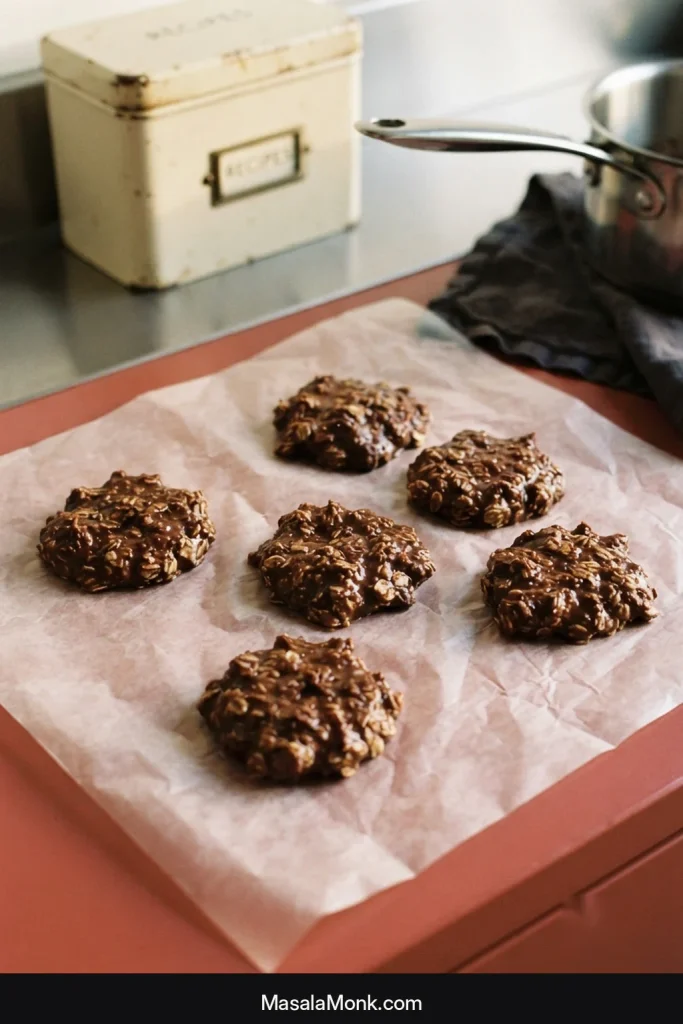
Once you know what that boil looks like, this no-bake cookies recipe becomes as easy as its reputation suggests: chocolatey, peanut-buttery, pleasantly chewy and firm enough to lift cleanly at room temperature—without ever turning on the oven.
The boil to watch
Don’t start timing at the first bubbles around the rim. Wait until the entire surface reaches a full rolling boil. Using a thermometer? For this recipe, aim for about 230°F / 110°C before any high-altitude adjustment.
Classic Chocolate Peanut Butter No-Bake Cookies
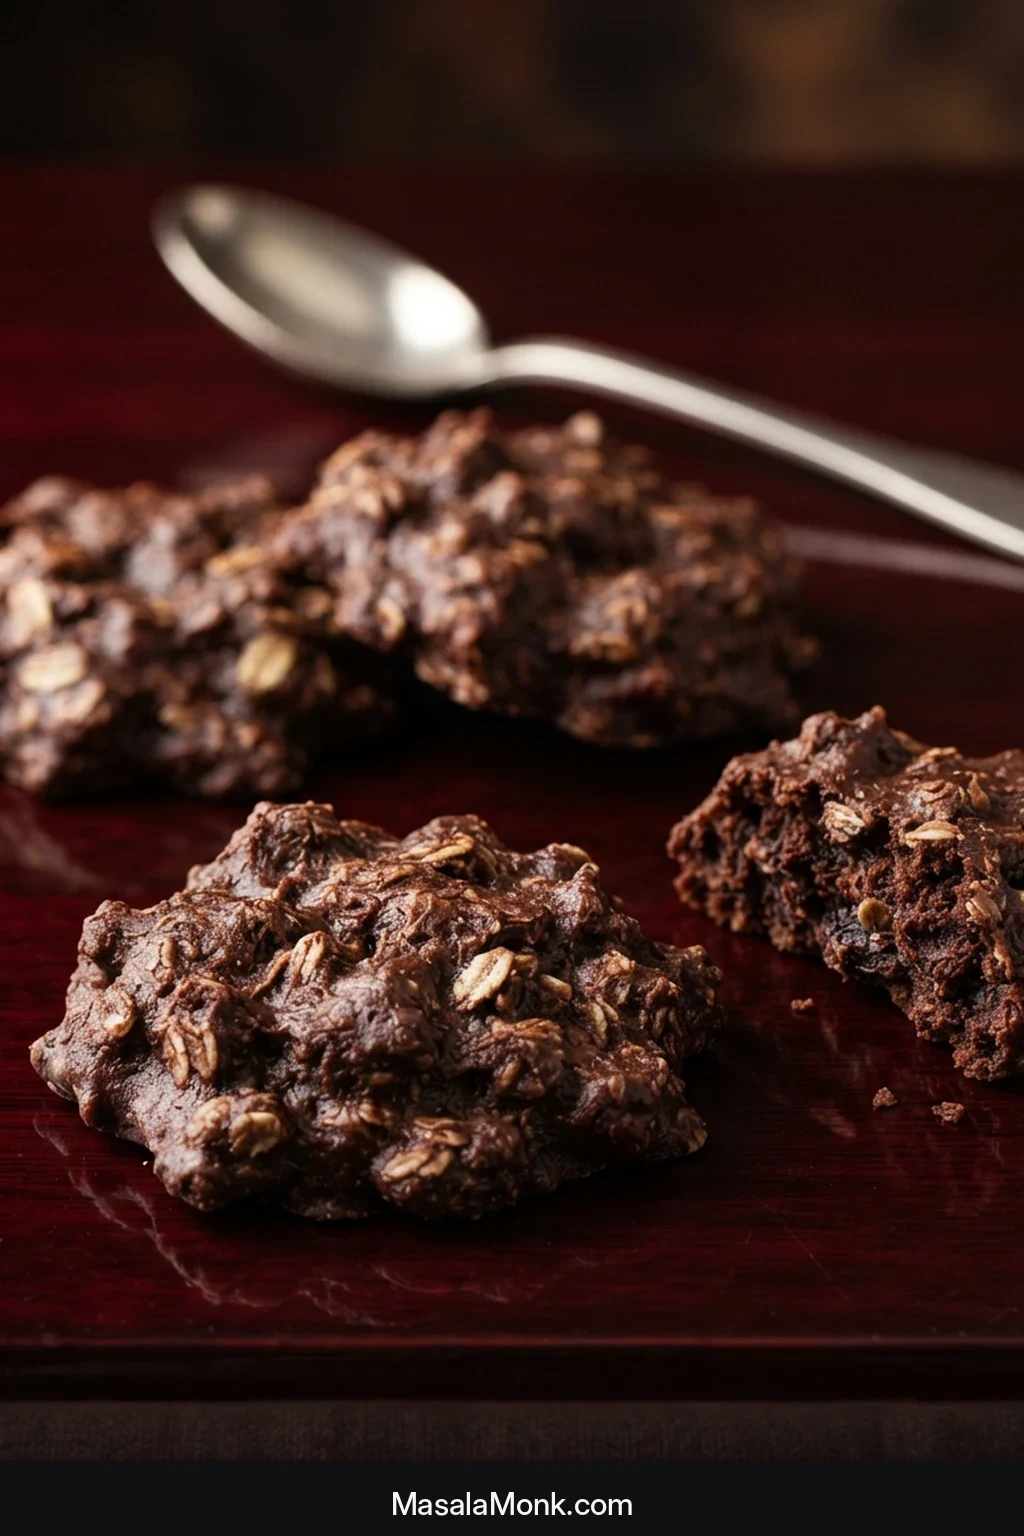
These are the classic stovetop chocolate-peanut-butter oatmeal no-bakes: fudgy through the middle, pleasantly chewy and sturdy enough to lift cleanly from the paper once set.
What you’ll need
A 3- to 4-quart / 2.8- to 3.8-liter saucepan, a sturdy spoon or silicone spatula, two trays lined with parchment or wax paper, and a cookie scoop or two spoons. A kitchen scale is especially useful for the oats. If you want to cook by temperature, use a clip-on candy thermometer or a fast instant-read thermometer.
Ingredients
- ½ cup unsalted butter — 113 g / 4 oz
- 1½ cups granulated sugar — 300 g / 10.6 oz
- ½ cup whole milk — 120 ml / 4 fl oz
- ¼ cup unsweetened cocoa powder — about 21 g / 0.75 oz
- ¾ cup creamy no-stir peanut butter — about 200 g / 7.1 oz
- 1 teaspoon vanilla extract — 5 ml
- ¼ teaspoon fine salt — about 1.5 g
- 2½ cups quick-cooking oats — 250 g / 8.8 oz; weighing is strongly recommended because oat density varies by brand
Instructions
- Start the chocolate mixture. Put the butter, sugar, milk and cocoa in the saucepan. Cook over medium heat, stirring as the butter melts, until the mixture is smooth and beginning to bubble.
- Wait for a full rolling boil. A ring of small bubbles around the edge is too early. Keep heating until the whole surface is actively bubbling, including the center.
- Add the peanut butter and oats. Remove the saucepan from the heat. Stir in the peanut butter until smooth, then add the vanilla and salt. Fold in the oats just until every flake is coated.
Cooking with children? Measuring the oats and lining the trays are good helping jobs. An adult should handle the boiling sugar mixture; hot syrup sticks to skin and can cause a serious burn.
A few recipe notes
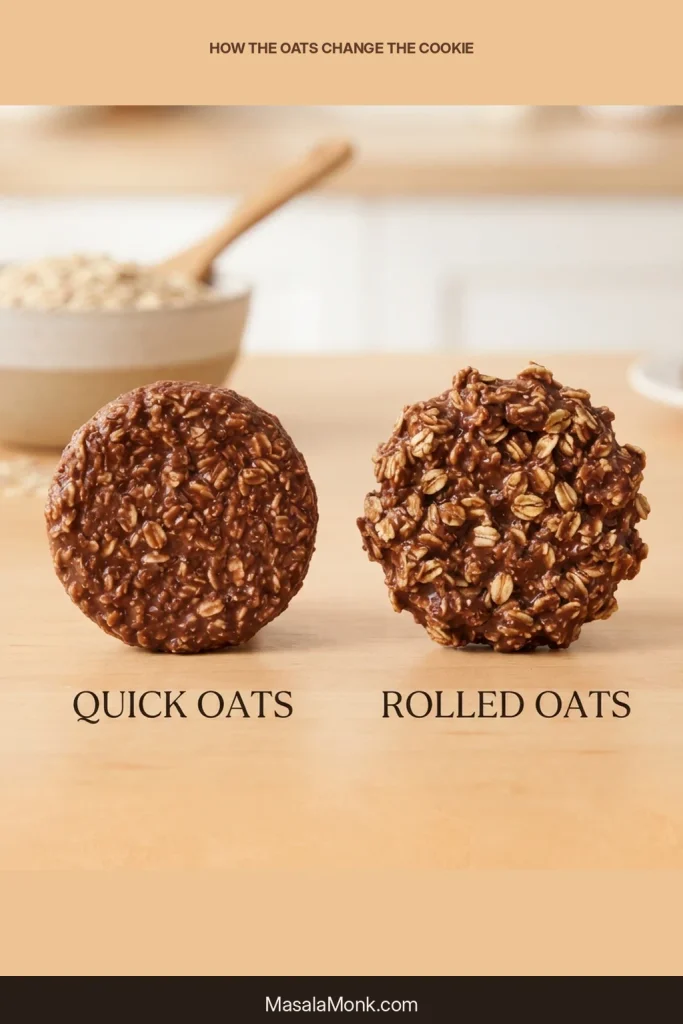
- Quick oats give these cookies a softer, more cohesive texture. Old-fashioned oats make them rougher and chewier.
- Use unsweetened baking cocoa, not hot cocoa mix or drinking chocolate.
- Creamy no-stir peanut butter gives the most predictable texture. Very oily natural peanut butter can leave the cookies softer or greasy underneath.
- Keep the sugar close to the recipe amount. It helps the cooked cocoa syrup firm as it cools.
What properly set no-bake cookies look like
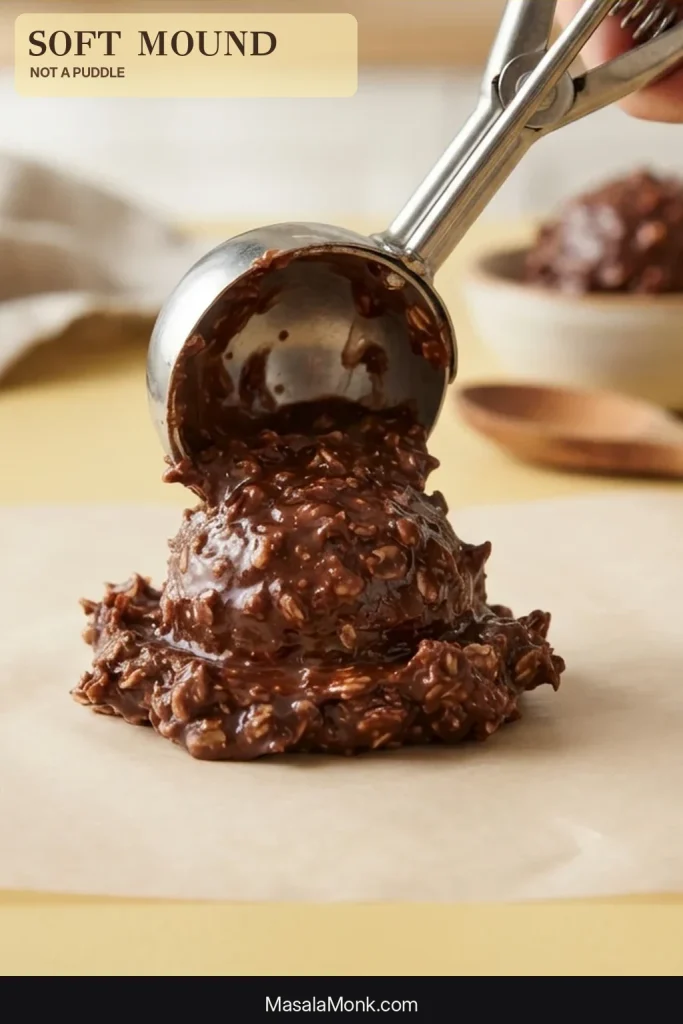
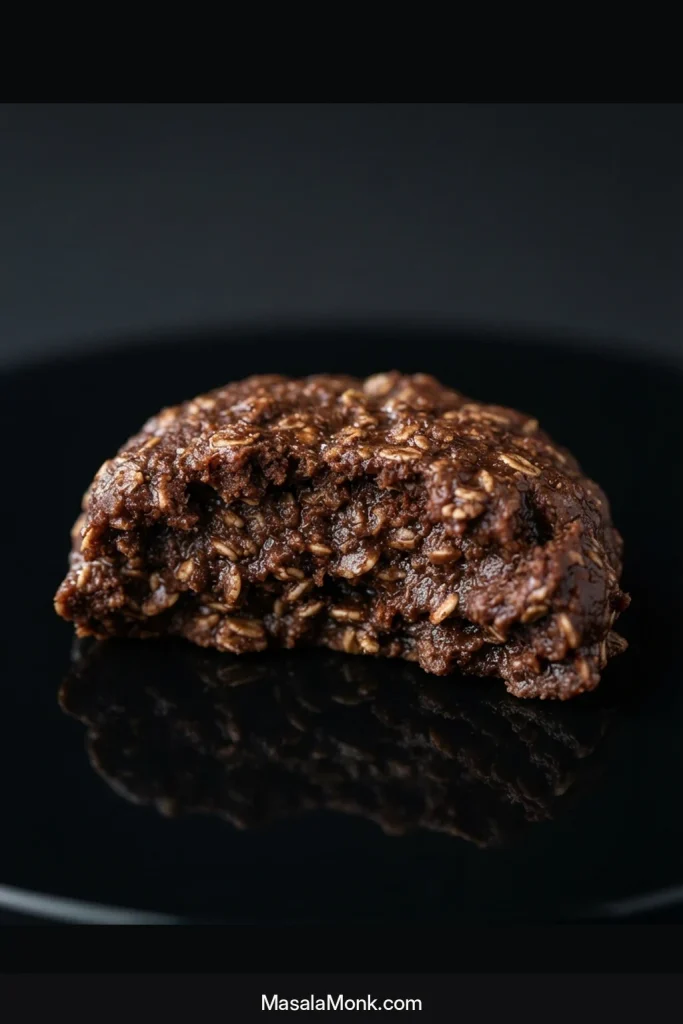
Before you portion the whole batch, watch what one scoopful does on the paper. The mixture should leave the scoop as one soft mass and relax gradually rather than immediately flowing outward.
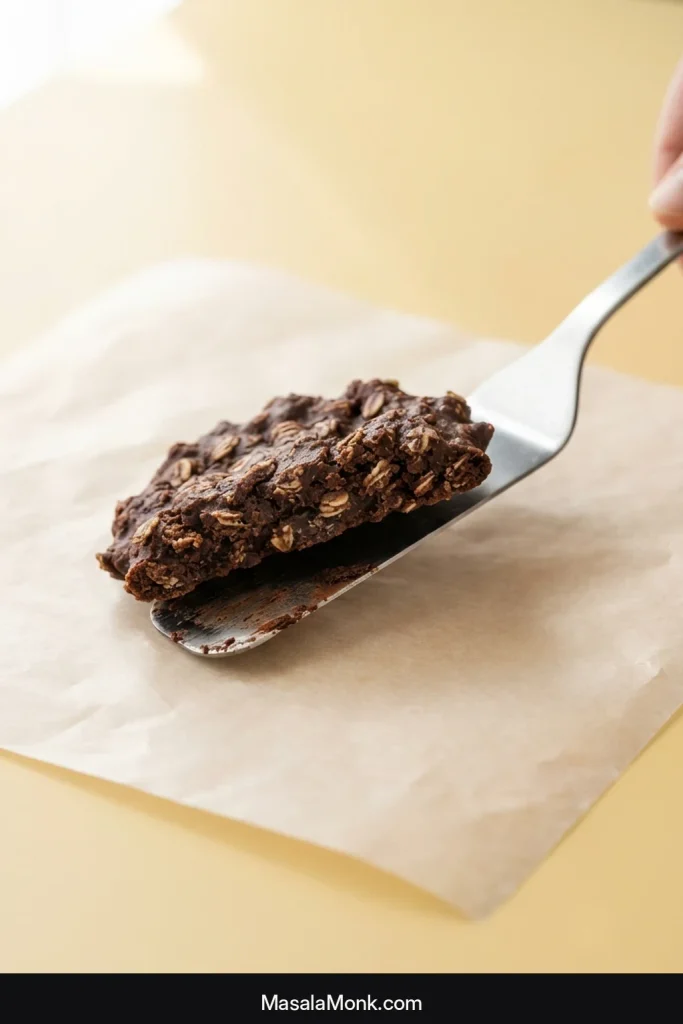
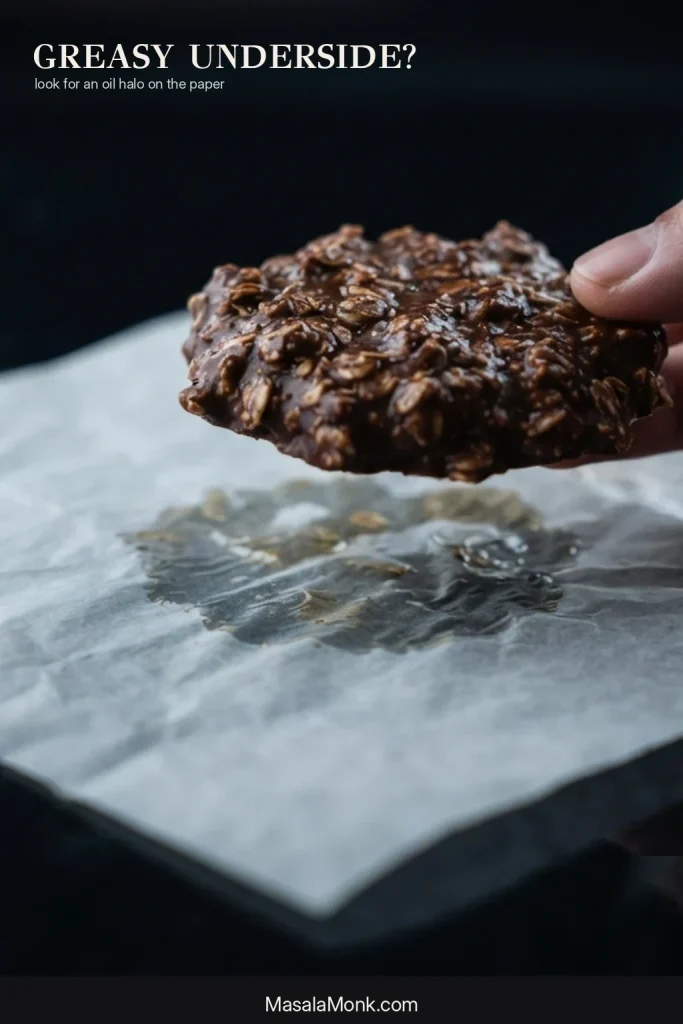
Once the cookies have cooled, the underside gives you another useful check. A properly set cookie should come away as one piece without leaving a wet smear behind, while the center can still stay tender.
Need more help?
Making them now? The recipe above is all you need. If a batch went wrong—or you’re deciding which oats, peanut butter or substitutions make sense—the sections below go deeper.
Get the boil right
Choose the ingredients
After the batch
Why “boil for one minute” causes so much trouble
“Boil for one minute” sounds perfectly precise until two cooks start counting that minute at completely different stages. Small bubbles creeping around the edge of the saucepan are not the same thing as a rolling boil across the center.
Watch the middle of the saucepan as the mixture comes up to temperature. The useful starting point is when active bubbles are moving across the whole surface, not merely collecting around the perimeter.
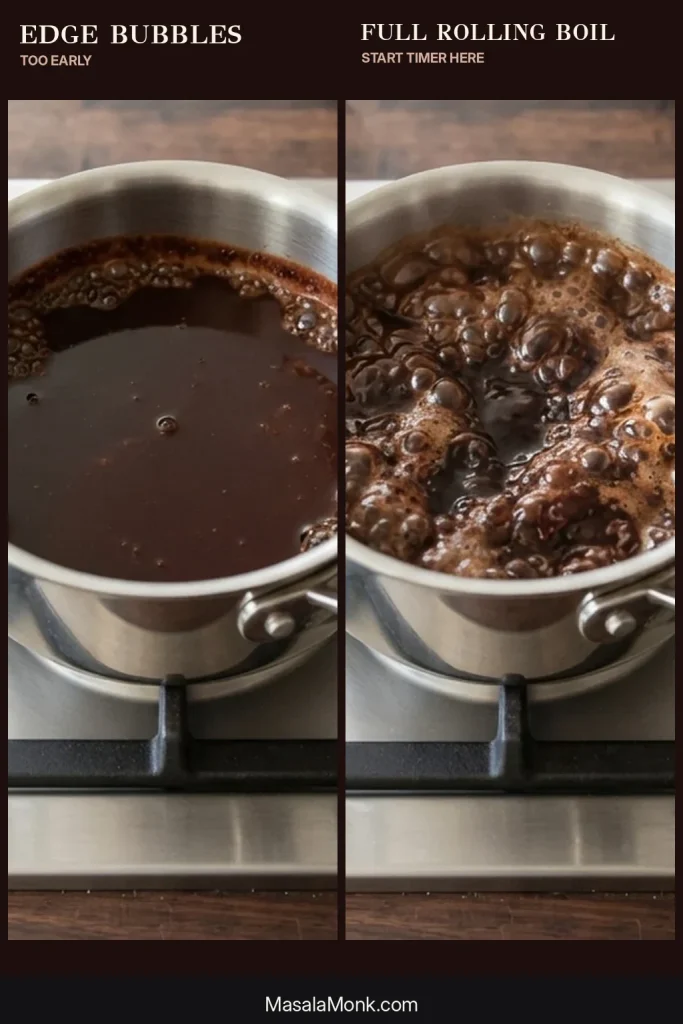
No-bake cookies are closer to oats held together by a simple cooked fudge than to ordinary cookie dough. As the syrup boils, water cooks away and the mixture becomes concentrated enough to firm as it cools. That’s why recognizing the start of the real boil matters more than watching the clock from the first bubble.
A thermometer removes some of that ambiguity. For this formula, about 230°F / 110°C is the target before any high-altitude adjustment. Measure the syrup itself rather than the hot metal underneath it.
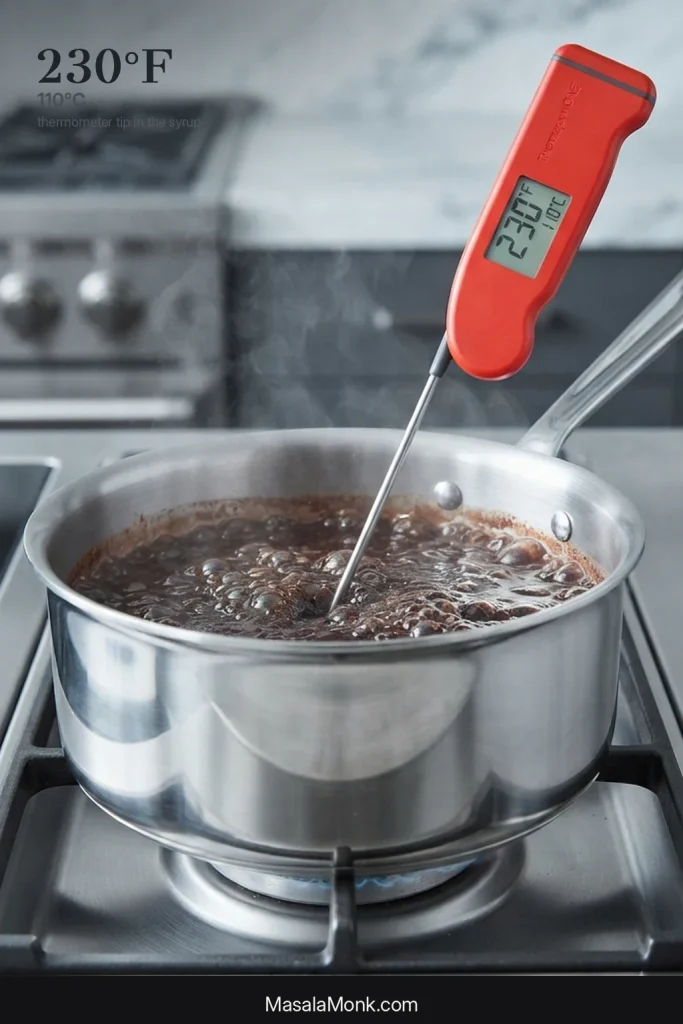
Pull the syrup off too early and the dropped cookies can remain glossy and wet. Let it go too far and the oat mixture begins thickening before you are ready for it.
Boiling longer is not extra insurance. Once enough water has cooked away, more time over the heat simply pushes the batch toward dry and crumbly.
When the syrup lands in that middle window, the cookies set around the edges while the centers stay tender and fudge-like, with peanut butter rounding out the cocoa and the oats giving each bite some chew.
Jump to troubleshooting by what you see.
Quick oats vs. old-fashioned oats
Yes, old-fashioned rolled oats work; they make a rougher, chewier cookie. Quick oats give the softer, more cohesive texture used here. If substituting rolled oats, use the same 250 g / 8.8 oz by weight; the cup measure can differ because the flakes are larger.
| Oat | What changes |
|---|---|
| Quick-cooking oats | Smaller, thinner flakes take up the hot cocoa mixture quickly, giving the cookies a softer, more cohesive texture. |
| Old-fashioned rolled oats | The flakes remain more obvious, giving the cookies a rougher surface and a noticeably chewier bite. |
| Very thick rolled oats | They can still feel firm by the time the chocolate around them has already set. |
| Instant oatmeal packets | Use plain quick oats instead. Instant packets often contain extra sugar, flavorings or differently processed oats. |
| Steel-cut oats | They need far more liquid and cooking time than this recipe provides. |
If you need these cookies to be gluten-free, choose oats specifically labeled gluten-free and check the other packaged ingredients too. Oats can pick up gluten through cross-contact during growing, transport or processing; the FDA explains the U.S. gluten-free labeling rules and cross-contact issue.
Still staring at two nearly identical oat canisters? Our guide to rolled, quick, instant and steel-cut oats shows how the different types are made and why they behave differently.
One reason people are so certain about which oats are “right” is that family versions really do differ. If the no-bakes you remember were soft and fudgy with the oats almost disappearing into the chocolate, quick oats are probably closer. If you remember distinctly chewing through the flakes, rolled oats may be the version you’re trying to recreate.
Chosen your oats? Return to the recipe.
Ingredient swaps that actually matter
Natural and Dutch-process cocoa both work here. Peanut butter and sugar are less flexible, and changing the butter or milk can shift the way the batch sets.
Creamy no-stir peanut butter is the easiest choice because the oil stays evenly mixed. If a natural peanut butter has a layer of oil floating on top, stir it back in completely before measuring. A very loose, oily jar can leave the cookies softer or greasy underneath.
Natural cocoa gives a slightly brighter chocolate flavor; Dutch-process cocoa is usually darker and smoother. Either works here because there is no baking soda or baking powder whose reaction depends on the cocoa’s acidity.
Sugar is less flexible. Do not simply halve it: sugar helps the cookies firm as well as making them sweet. Brown sugar brings molasses and extra moisture, so it is not a neutral replacement.
If you’re trying to avoid refined sugar altogether, our date-sweetened oat cookies are built around that goal rather than asking this cooked syrup to behave differently.
Whole milk gives the most predictable result, and 2% is a close substitute. Unsweetened oat, soy or almond milk can also work, although differences in fat and water content may give you a slightly different set. If you’re substituting the milk, avoid changing several other ingredients in the same batch—it becomes much harder to tell what affected the texture.
Can you make no-bake cookies without peanut butter?
Yes—but don’t simply leave the peanut butter out of this batch. Chocolate-oatmeal no-bakes without peanut butter do exist, but they are formulated differently.
Here, peanut butter does more than add flavor. It makes up a substantial part of what thickens and holds the cookie together. Peanut-butter-free recipes adjust some combination of butter, sugar, milk, cocoa and oats so everything can still firm properly.
The same caution applies to sunflower-seed butter and other allergy-friendly spreads. Seed butters can work, but they do not all behave exactly like peanut butter. If avoiding peanuts is essential, use a recipe written around the replacement rather than relying on a straight 1:1 swap.
Troubleshooting by what you see
Start with what you can see in the pan and on the tray.
Before they have set
| What you see | Likely cause / what to do |
|---|---|
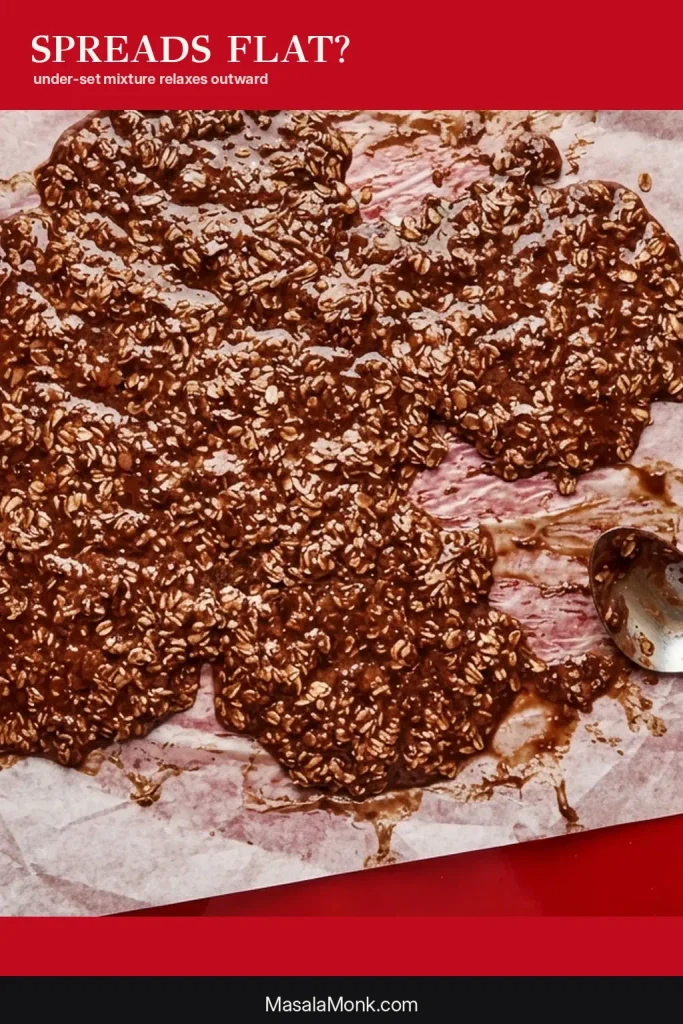
| The scoopful immediately melts into a flat puddle | Likely undercooked. Let the cookies cool completely; chill them if they still won’t hold. On the next batch, start timing only at the full rolling boil. |
| The last few cookies are almost impossible to scoop | The syrup may have cooked too far or the mixture sat too long. Portion what remains quickly; have the trays and scoop ready before the next batch boils. |
| A slick of oil appears underneath | Usually separated peanut butter. Thoroughly remix natural peanut butter before measuring, or use a creamy no-stir style. |
| The chocolate has firmed but the oats still seem hard | The rolled oats may be particularly thick. The cookies will simply be chewier; use quick oats or thinner rolled oats for a softer result. |
A wide, glossy puddle is the clearest early visual warning that the mixture is not holding enough structure. Let the current batch cool before judging it completely, but if each scoop immediately runs outward, pay particular attention to when you started the boil timer on the next batch.
After they cool
| What happened | Likely cause / what to do |
|---|---|
| They still look wet and shiny twenty minutes later | Probably undercooked. Let them cool completely; refrigerate them if they still won’t hold. On the next batch, start timing only when the whole surface reaches a full rolling boil. |
| They stay sticky or tacky | The syrup may have come off the heat too soon. Oily peanut butter, extra liquid or humid weather can also leave the surface softer. |
| They crumble when you pick them up | The syrup probably cooked too far, or too many oats went in. A badly dry batch is difficult to reverse; the rescue ideas below are more useful than adding liquid back. |
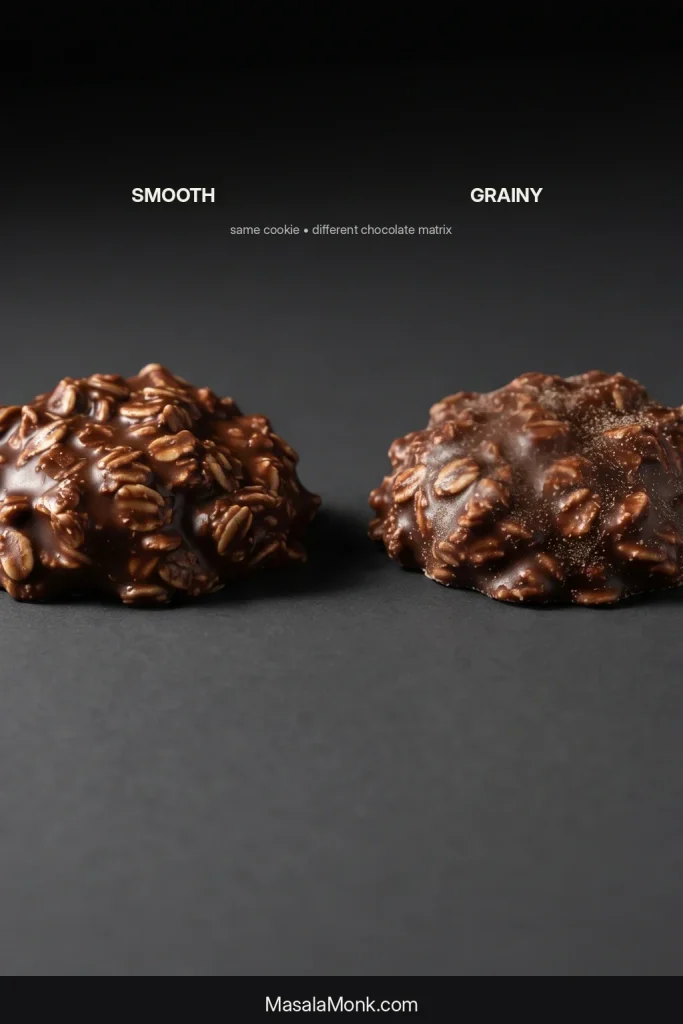
| They feel gritty or grainy | The sugar may not have dissolved smoothly, or the syrup may have crystallized unevenly during cooking. Stir until smooth before the full boil, then avoid unnecessary stirring. |
| They hold together only when cold | Keep this batch refrigerated if you like the texture. For a room-temperature set, make sure the syrup reaches the proper boil before it comes off the heat. |
| Every batch seems slightly different | Weigh the oats, use the same kind of peanut butter and start timing at a true rolling boil. A thermometer removes another variable. |
If the cookies feel grainy, look closely at the chocolate between the oat flakes. Fine crystals can give that matrix a noticeably different texture from the smoother chocolate of a well-dissolved batch.
Can you save a failed batch?
If they are still soft, don’t throw them out yet. Let the cookies cool completely first, then chill one as a test. A cold cookie does not mean the syrup hit the right point, but it can still turn an under-set batch into something perfectly enjoyable.
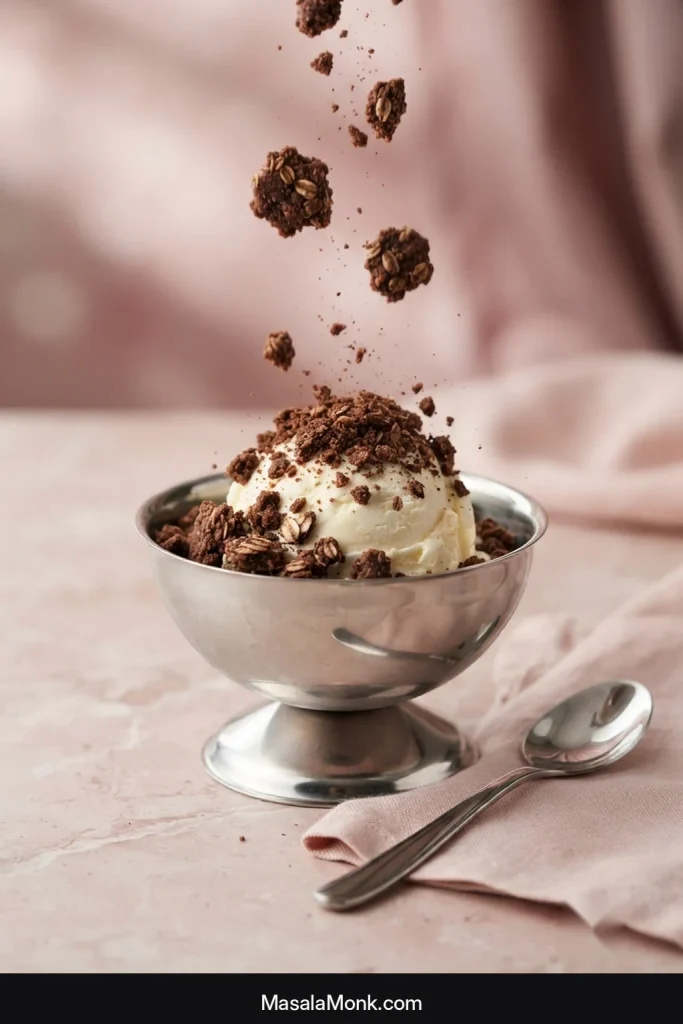
Dry, crumbly cookies are harder to repair reliably. Instead of repeatedly adding liquid to the whole batch, crumble them over ice cream, pudding or yogurt. They may have missed the cookie stage, but chocolate, peanut butter and oats still make a very good topping.
Trying another batch? Return to the recipe.
Humid weather
Humidity can slow setting and leave the surface tacky. Don’t compensate by boiling the syrup longer; use the same 230°F / 110°C target for this recipe, or the usual roughly one minute from a full rolling boil, then let the cookies cool fully and store them airtight.
High altitude
At high altitude, lower the finishing temperature by the same number of degrees that your local water boiling point falls below 212°F / 100°C. For example, if water boils at 202°F where you live—10°F below the sea-level boiling point—lower this recipe’s 230°F target to about 220°F. Colorado State University Extension explains the adjustment in more detail.
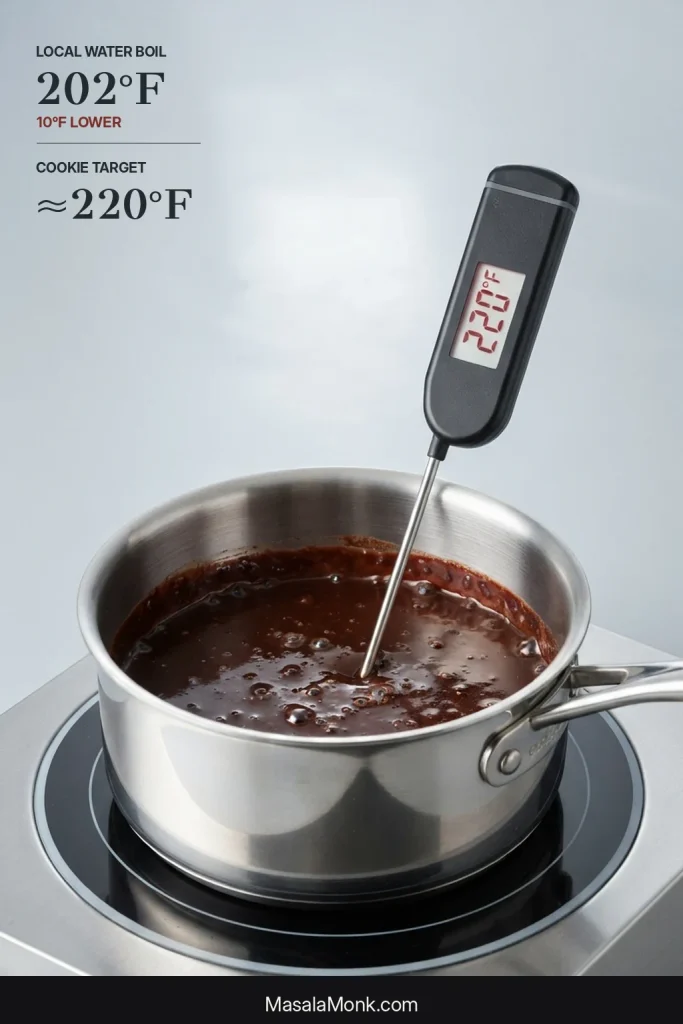
Finished with the adjustment? Return to the cooking step.
How to store and freeze no-bake cookies
Room temperature: Keep fully set cookies in an airtight container for up to about 5 days in a cool, dry room. Put parchment or wax paper between layers if they tend to stick.
Refrigerator: Keep them airtight for up to about 1 week. Chilled cookies will be firmer, so give them a few minutes at room temperature if you prefer a softer bite.
Freezer: Freeze the cookies in a well-sealed container with parchment between layers for up to about 2 months. Let them thaw while still covered, either in the refrigerator or at cool room temperature, so condensation is less likely to settle directly on the surface.
A few more no-bake cookie questions
Can I double the batch?
Two normal batches are easier to control than one enormous one. A larger volume takes longer to heat and cool, and twice as much cookie mixture is waiting in the saucepan while you scoop. With such a short working window, bigger is not necessarily easier.
Do I need a thermometer?
No. Plenty of cooks make no-bakes with nothing more than a saucepan and a clock. A thermometer simply gives you another reference when your burner, saucepan or idea of a rolling boil differs from somebody else’s.
Are preacher cookies the same as no-bake cookies?
Often, yes. “Preacher cookies,” “cowpies” or “cow patties,” boiled cookies, chocolate oatmeal no-bakes and simply “no-bakes” are names used for closely related stovetop cookies. Family versions differ: some use peanut butter, some add coconut or nuts, and some skip peanut butter completely.
Can I use wax paper instead of parchment?
Yes. Wax paper works well because these cookies are never going into the oven. It is also the surface many older family versions were dropped onto and left to cool.