
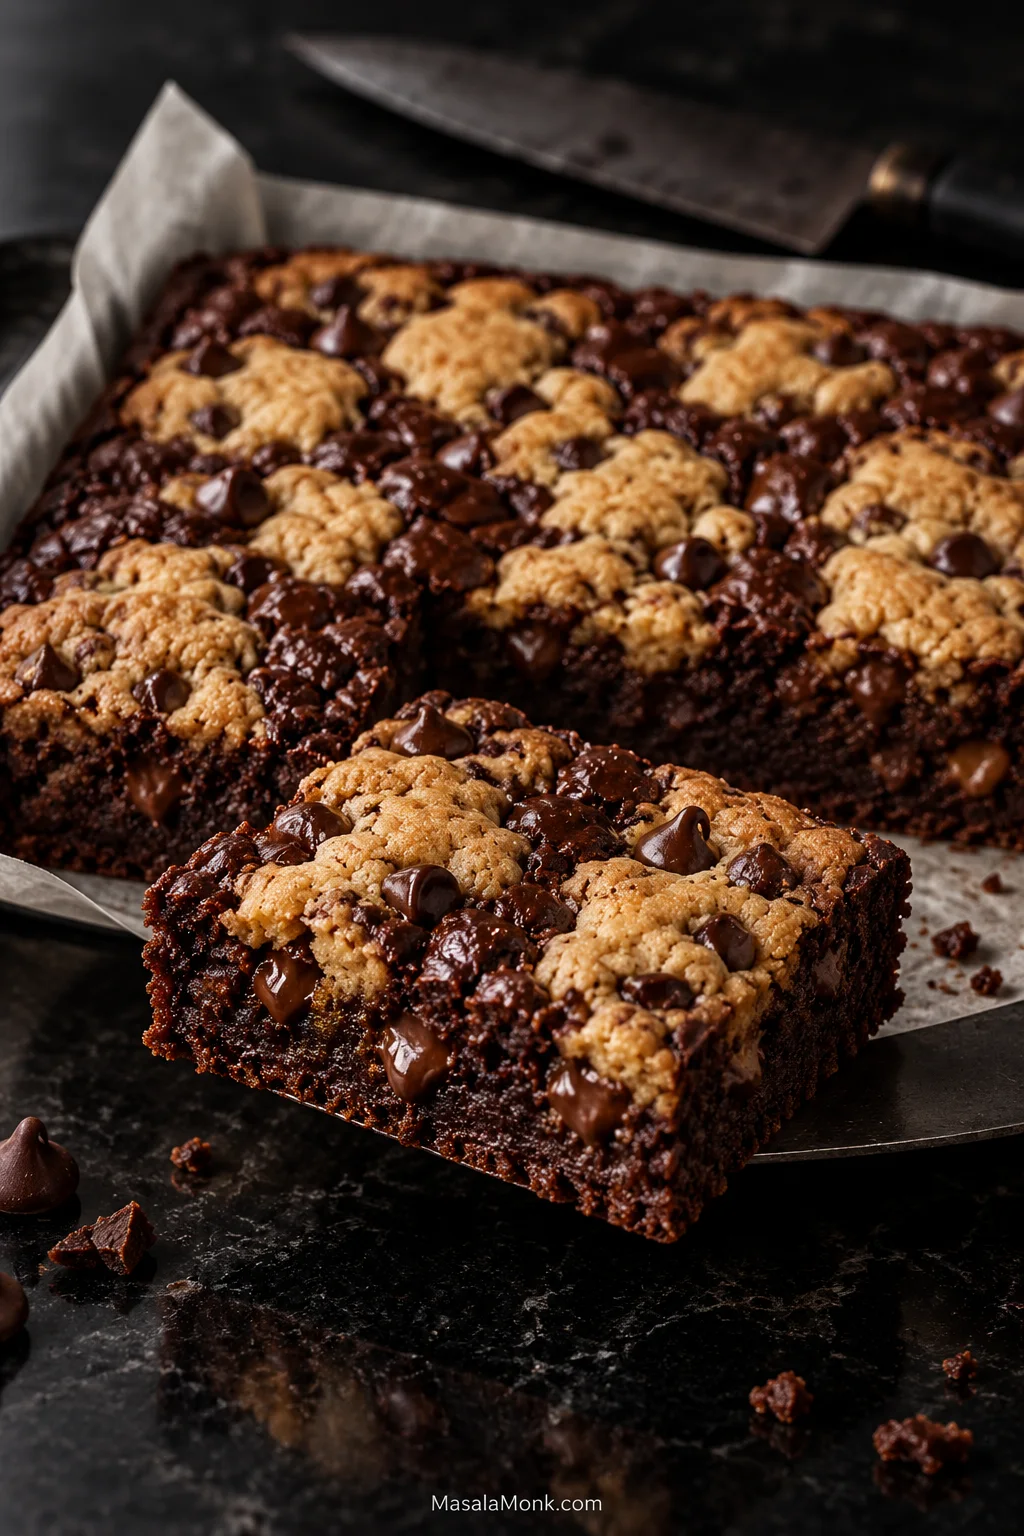
A good brookie should give you chewy chocolate chip cookie, dense fudgy brownie and melted chocolate in the same bite—not a finished cookie sitting over a brownie that is still raw underneath.
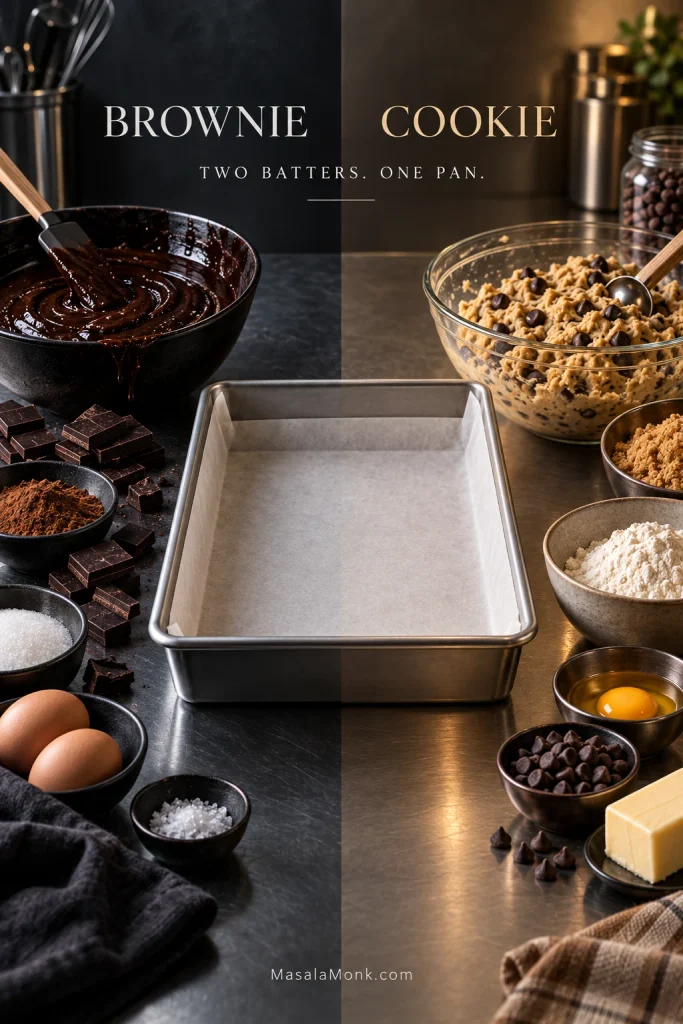
Brookies are brownie-cookie bars made by baking brownie batter and chocolate chip cookie dough together in one pan. The tricky part is getting both ready at the same time. This version keeps the brownie fairly shallow and scatters flattened cookie dough over the top, leaving dark brownie visible between the pieces.
Those open patches darken and turn glossy in the oven as the cookie picks up golden edges around them. The brownie should finish fudgy rather than fluid: soft while warm, dense after cooling, and sturdy enough to pick up without losing that moist center.
The Brookie Control Panel
| Pan | 9 × 13-inch (23 × 33 cm) light-colored metal pan |
|---|---|
| Oven | 350°F / 175°C conventional / 160°C fan |
| Cookie coverage | 20 flattened pieces with plenty of brownie still visible |
| Bake | Start checking around 28 minutes; expect about 30–36 minutes |
| Ready when | Cookie edges are lightly golden and brownie near the middle gives moist crumbs, not wet batter |
| Cooling | About 1 hour for fudgy squares; longer for especially neat cuts |
| Cut into | 16 larger squares or 24 smaller bars |
Contents
- Ingredients
- How to Make Brookies
- How to Tell When Brookies Are Done
- Choosing the Right Pan
- Troubleshooting
- Flavor Changes
- Cooling, Cutting, Storing & Freezing
Ingredients
Measure the brownie and cookie ingredients separately. Grams are the most dependable measure for flour, cocoa and chocolate; volume measures are included as a practical backup.
For the fudgy brownie
- 113 g (½ cup) unsalted butter, melted
- 40 mL (about 2 tablespoons + 2 teaspoons) neutral oil, such as sunflower or canola oil
- 200 g (1 cup) granulated sugar
- 50 g (¼ cup packed) light brown sugar
- 2 large eggs + 1 large egg yolk
- 2 teaspoons vanilla extract
- 50 g (about ½ cup + 1½ tablespoons) unsweetened cocoa powder
- 75 g (about ½ cup + 2 tablespoons) all-purpose flour (plain flour)
- ½ teaspoon fine salt
- 140 g (5 oz / about ¾ cup + 1 tablespoon) semisweet or bittersweet chocolate chips or chopped chocolate
The modest amount of flour keeps the brownie dense. The extra yolk adds richness, and the oil helps it stay soft after cooling. Semisweet chocolate gives you a sweeter, more familiar bar; bittersweet takes the flavor darker and reins in some of the sweetness from the brownie and cookie together.
Use unsweetened cocoa powder, not drinking chocolate.
For the chewy chocolate chip cookie
- 85 g (6 tablespoons) unsalted butter, softened
- 100 g (½ cup packed) light brown sugar
- 50 g (¼ cup) granulated sugar
- 1 large egg
- 1 teaspoon vanilla extract
- 160 g (about 1⅓ cups) all-purpose flour (plain flour)
- ½ teaspoon baking soda / bicarbonate of soda
- ½ teaspoon fine salt
- 115 g (4 oz / about ⅔ cup) semisweet chocolate chips or chopped chocolate
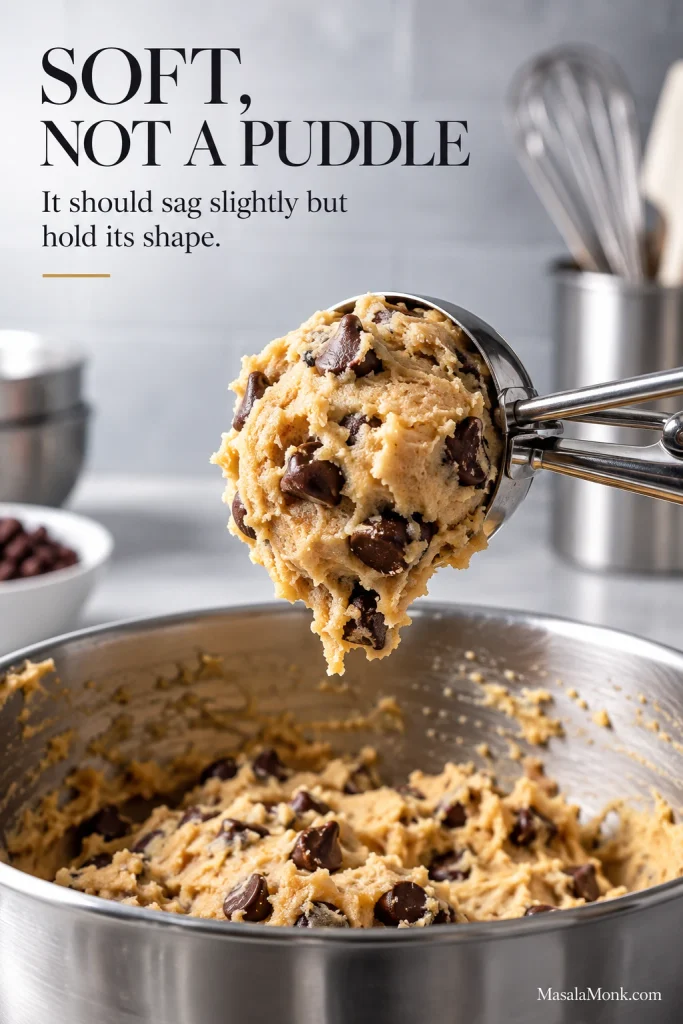
The two mixtures start differently: use melted butter in the brownie and softened butter in the cookie dough. The finished cookie dough should sag slightly when scooped but hold its shape rather than spreading immediately.
How to Make Brookies
1. Prepare the pan and oven
Heat the oven to 350°F / 175°C conventional / 160°C fan. Line a light-colored metal 9 × 13-inch (23 × 33 cm) pan with parchment, leaving enough overhang on two sides to lift out the cooled slab. Lightly grease any exposed sides.
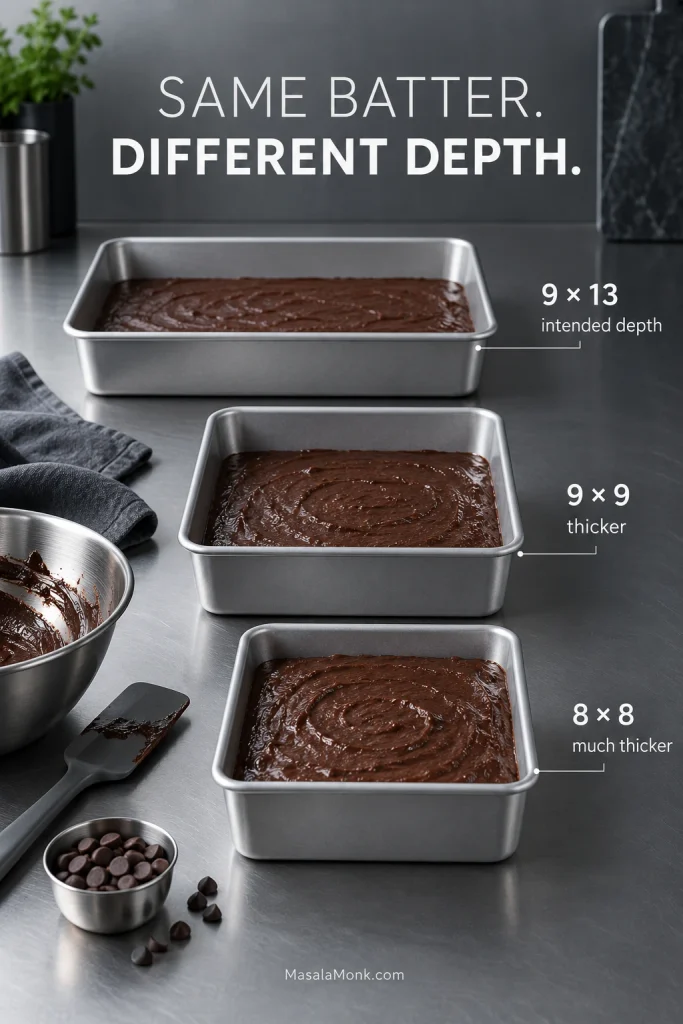
Use the stated pan size for this batch. In a smaller square pan, the brownie becomes much thicker and takes longer to set while the exposed cookie keeps browning.
2. Make the brownie batter
Whisk the melted butter, oil and both sugars until glossy and evenly combined. Add the eggs, extra yolk and vanilla and whisk vigorously for 60–90 seconds, until the mixture looks smoother and slightly thicker.
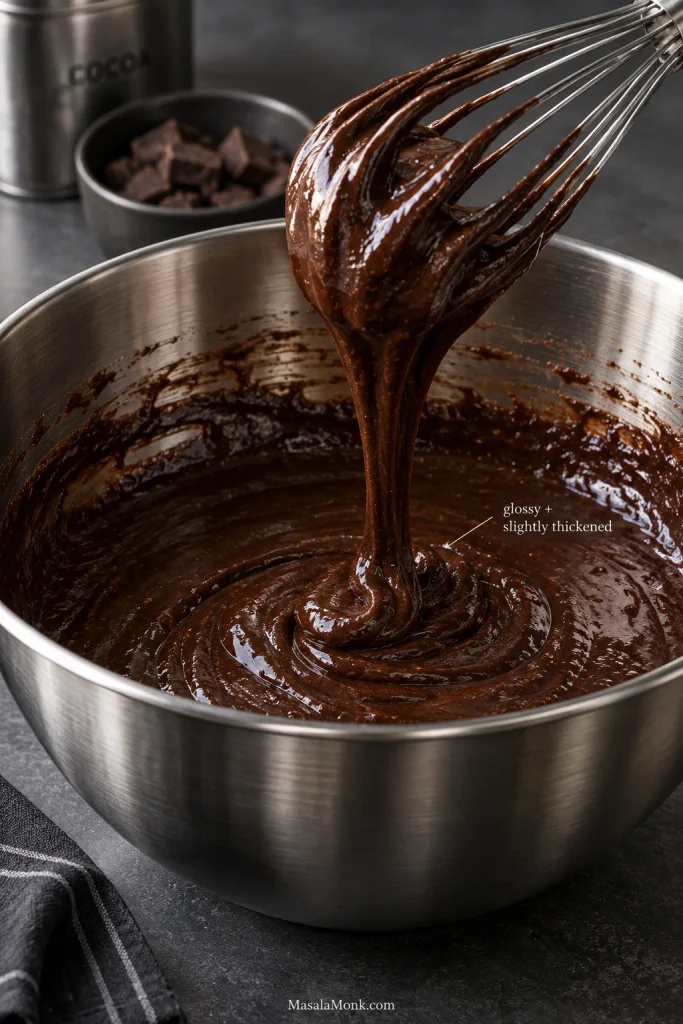
Add the cocoa, flour and salt. Fold until the last dry streaks disappear, then fold in the chocolate. Stop there.
Spread the batter evenly through the pan, right into the corners. One thicker pocket can remain soft after the brownie around it is ready.
3. Make the cookie dough
Mix the softened butter with both sugars for 1–2 minutes, until creamy. A hand mixer is convenient, though a sturdy spoon or spatula works too. Mix in the egg and vanilla, followed by the flour, baking soda and salt. Fold in the chocolate as soon as the flour disappears.
If a scoop of dough immediately slumps flat, refrigerate the bowl for about 10 minutes. You want soft dough, not a puddle.
4. Add the cookie dough
Divide the dough into 20 portions, about 28–30 g each, and flatten them into small, thick patties. They do not need to be identical.
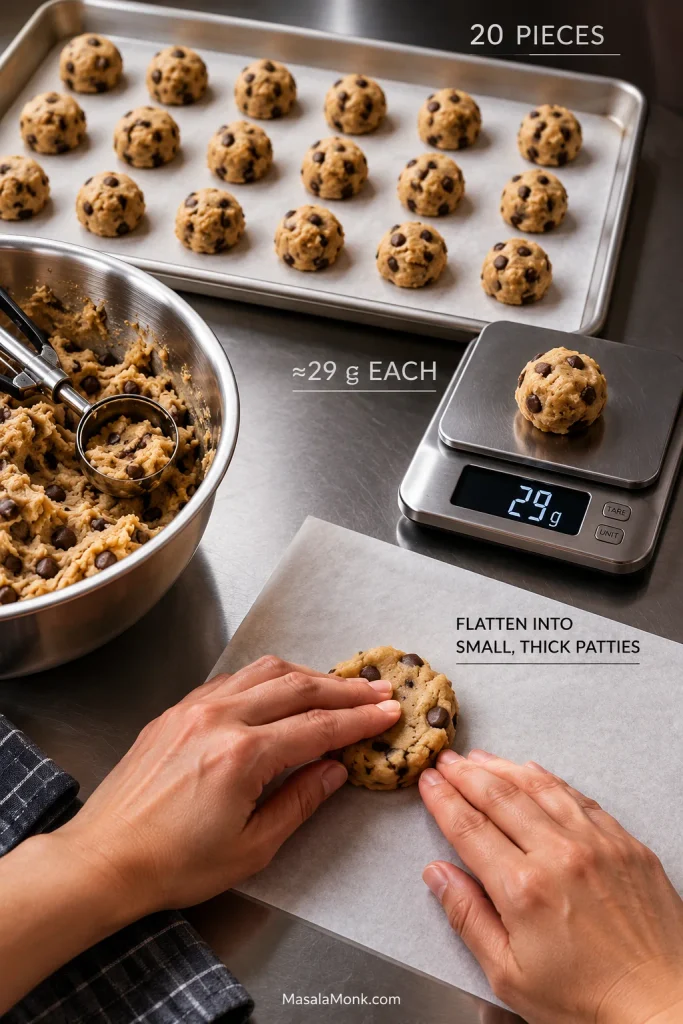
Scatter them across the brownie so cookie reaches every part of the pan while plenty of dark brownie remains visible.
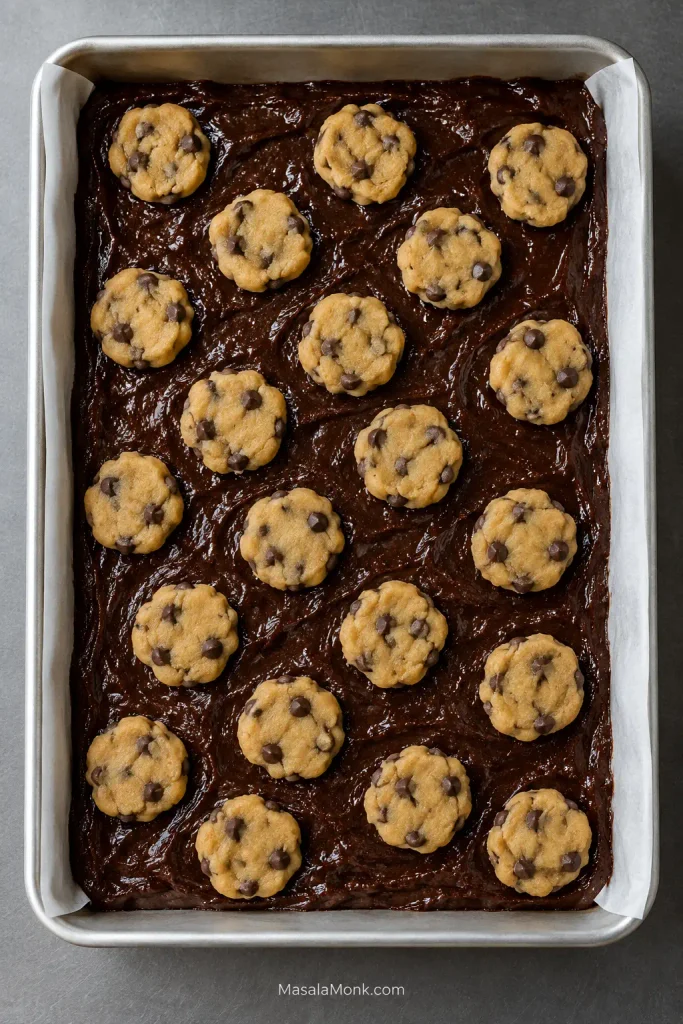
The surface may look slightly unfinished. Leave it that way.
5. Bake
Bake on the center rack. Start checking at about 28 minutes; expect about 30–36 minutes in a light-colored metal pan.
As the pan bakes, the pale cookie pieces spread and pick up color. Brownie showing between them turns darker and glossy; melted chocolate gathers along the places where the two meet.
The cookie edges should look set and lightly golden, and the brownie between them should no longer look fluid. Push a tester into one of the brownie patches near the middle: you want moist crumbs, not wet batter. A small tremble is fine; a loose wave through the middle needs more time.
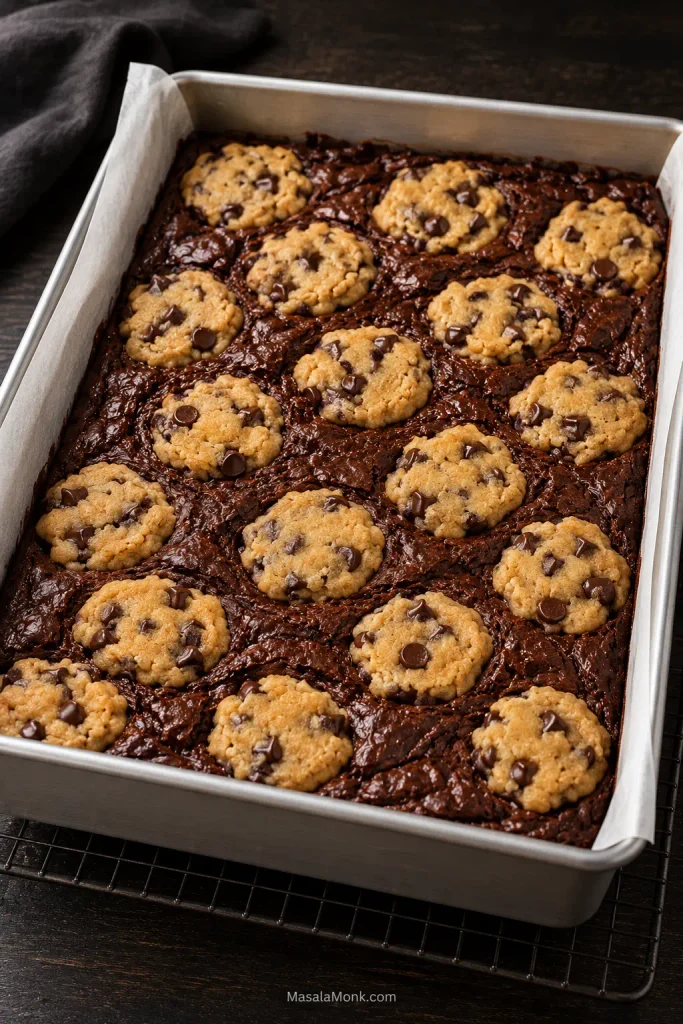
If the cookie already has enough color, lay foil loosely over the pan and keep baking. Leave the sides open so steam can escape, and rotate the pan late in the bake if one side of your oven consistently browns faster.
If the center is hard to read, use the full Brookies doneness guide before taking the pan out.
6. Cool before cutting
Set the pan on a wire rack. Straight from the oven, the chocolate is molten and the brownie is fragile; even a properly baked middle will look much softer than it does later. About an hour gives you fudgy squares that hold together well enough to pick up. Going in sooner is completely reasonable when what you want is a warm brookie and a fork.
How to Tell When Brookies Are Done
Brookies are done when the cookie edges are lightly golden, the brownie between them has lost its liquid shine, the middle gives only a small contained tremble, and a tester inserted into brownie brings up moist crumbs rather than wet batter.
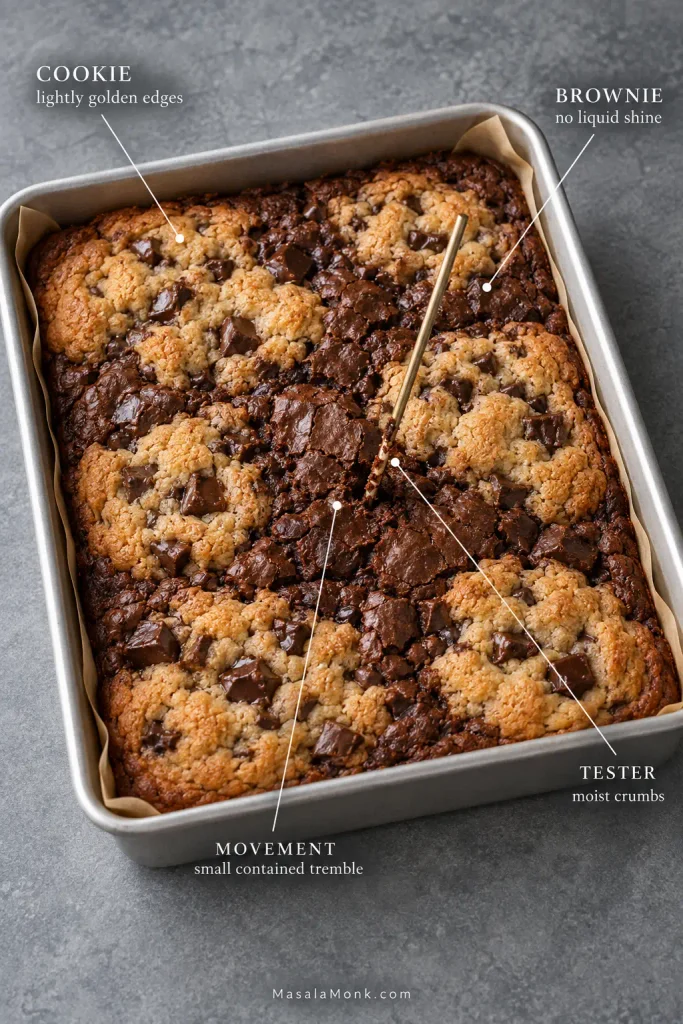
The timer tells you when to start looking. The cookie and brownie tell you when to stop.
- Cookie: the edges look set and lightly golden; the middle of each patch can remain soft.
- Brownie: a little gloss is fine, but there should be no loose batter between the cookie pieces.
- Movement: a contained tremble is fine. A loose wave through the middle needs more time.
- Tester: use a brownie patch near the middle and avoid an obvious pool of melted chocolate.
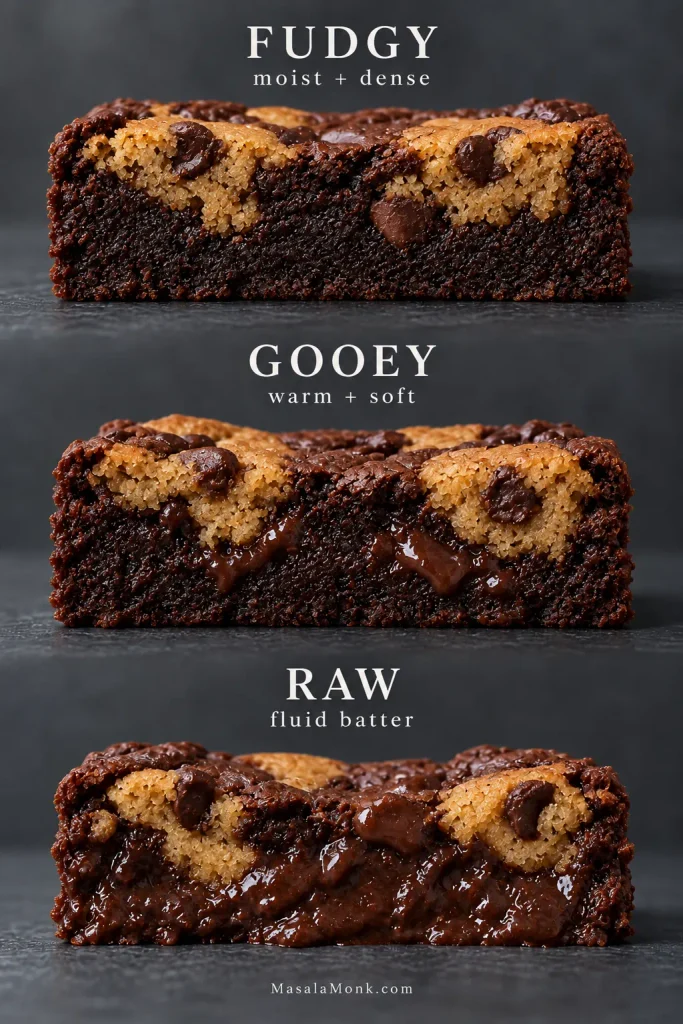
Fudgy, gooey or actually raw?
Fudgy brookies are moist and dense, but the brownie itself is baked. They may look very soft while hot and become properly sliceable as they cool.
Gooey brookies are softer when served warm: the brownie is very moist, melted chocolate runs through the crumb, and the bar is messy without behaving like batter.
Raw brookies are different. The brownie remains fluid, leaves obvious batter on the tester and can collapse or flow instead of firming up.
How to Read the Tester
Melted chocolate can smear across a tester or knife even when the brownie is baked. Look at the crumb around that chocolate before deciding the pan needs longer.
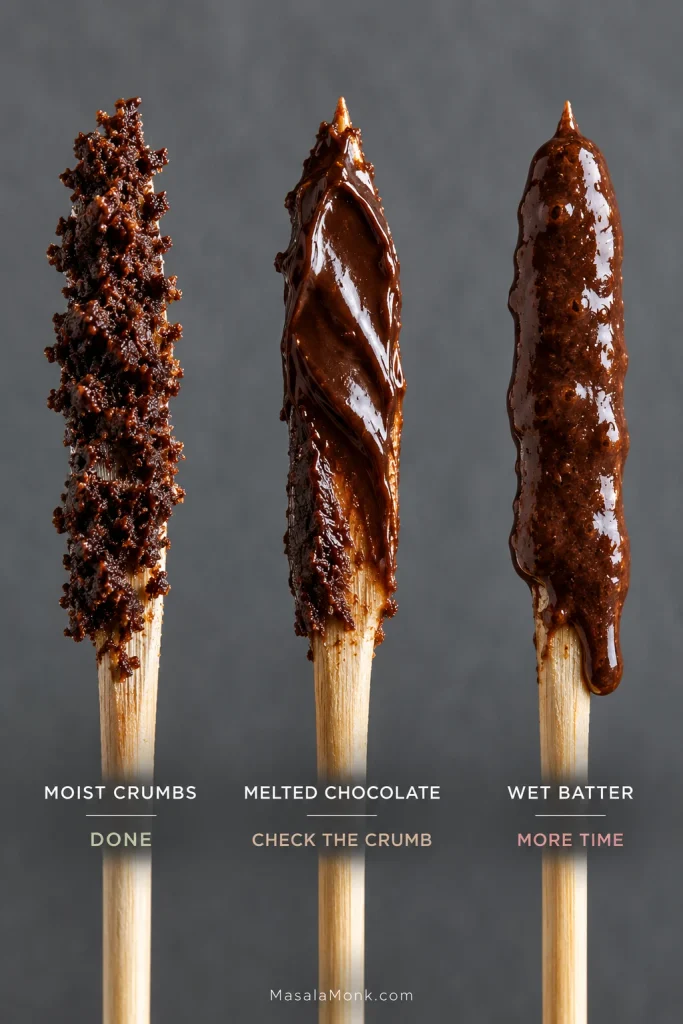
If a second brownie-patch test still shows wet batter, go straight to raw-middle troubleshooting.
For a deeper look at that sometimes-frustrating line between fudgy and underbaked, see our fudgy brownie recipe and doneness guide.
If your cookie repeatedly reaches the right color well before the brownie, the pan is the first thing worth examining.
What Pan Should You Use for Brookies?
Use a light-colored metal 9 × 13-inch (23 × 33 cm) pan for this recipe.
The same batch becomes much thicker in an 8 × 8 or 9 × 9-inch pan, which means the brownie needs more oven time underneath cookie dough already exposed directly to the heat.
Very dark metal can brown the bottom and edges faster. Glass and ceramic may not follow the same timing either, so watch the brownie rather than assuming the clock transfers unchanged.
For the deeper baking science behind those differences, King Arthur has a useful guide to glass, metal and stoneware pans.
Thick square-pan brookies can be excellent. They just need a recipe developed for that deeper pan.
If the batch in front of you already has hard edges, a wet middle or one strangely soft patch, the pattern can usually tell you what happened.
Brookies Troubleshooting
Raw Centers
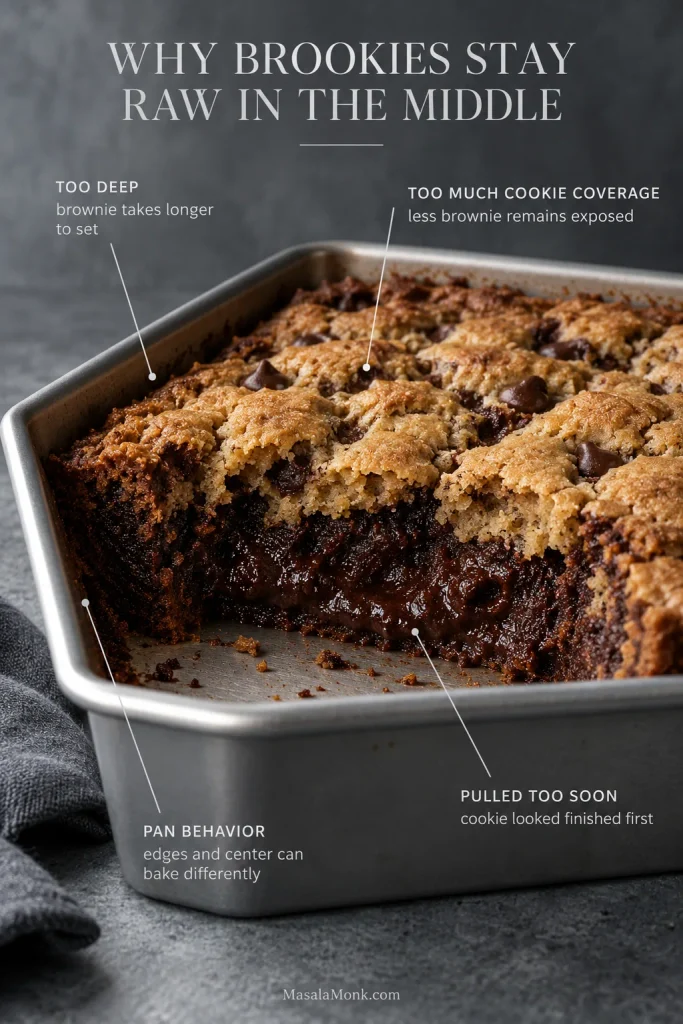
Why are my brookies raw in the middle?
The usual causes are too much brownie depth, very heavy cookie coverage, bakeware that leaves the middle lagging behind, or simply taking the pan out because the cookie looked finished first.
Golden cookie over wet brownie still needs more oven time. Cover the top loosely with foil and continue in short intervals.
The edges are hard but the middle is raw
This is frustrating because the pan can look completely finished around the outside. A thick brownie layer, dark or glass bakeware, or an oven running hot can all push the perimeter ahead.
Protect anything already browned and give the middle more time. If cakes and brownies behave this way in your oven too, check the actual oven temperature with a thermometer.
Uneven Baking
Only one part of the pan is underbaked
One soft patch usually means the batter was thicker there, a large cookie piece covered that spot, or the oven has a hot or cool area. The whole pan may not need more time.
Spread the brownie carefully into the corners next time, and rotate late in the bake if your oven has a familiar hot side.
Texture, Sinking and Cutting Problems
The cookie dough sank into the brownie
A little sinking is exactly what you want—the brownie and cookie should meet.
If the cookie dough almost disappears, it was probably very warm or divided into pieces that were too small. A short chill gives it more body.
They look raw as soon as I cut them
Warm brookies are supposed to be messy. An early slice can look alarmingly soft while the chocolate is molten.
Leave the rest of the slab alone for a while. A brownie that firms into a dense slice was still setting; one that continues to flow was underbaked.
The brownie is cakey, dry or crumbly
Start with the flour measurement and bake time. Extra flour and a few unnecessary minutes can move the brownie away from fudgy surprisingly quickly.
Once you have identified the problem, return to the method or back to the contents.
Flavor Changes That Won’t Overload the Bake
There is already plenty happening in this pan. The safest changes replace part of what is already there instead of adding another heavy layer: swap, do not stack.
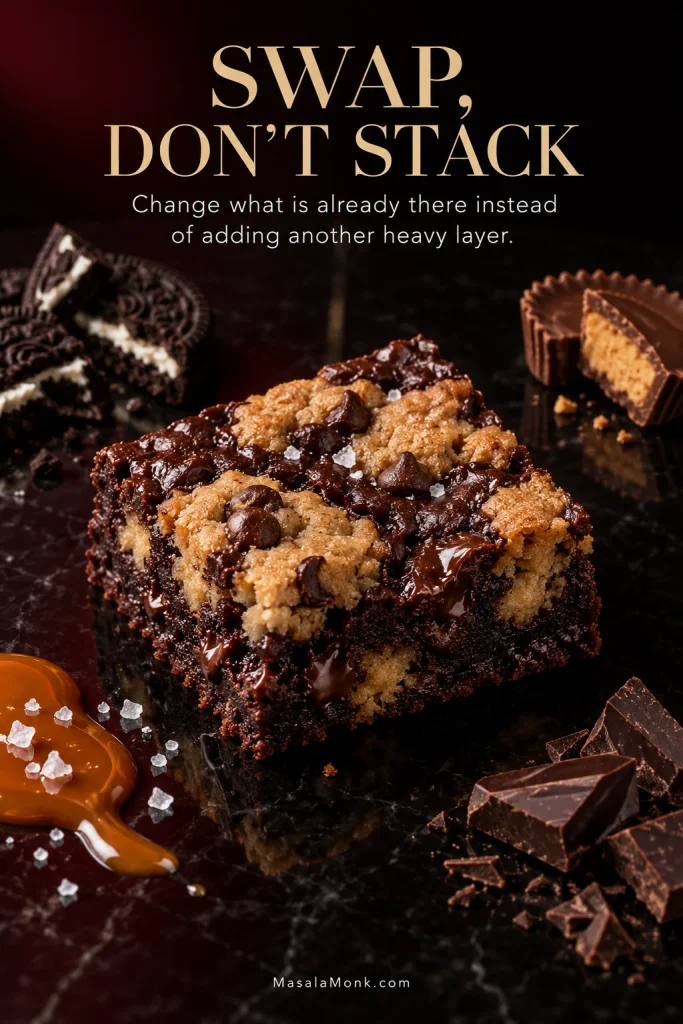
Oreos or Peanut Butter Cups
Replace part of the chocolate in the cookie dough with chopped Oreos or peanut butter cups, keeping the overall quantity of chunky add-ins about the same. You still want the cookie dough to spread normally and leave brownie showing between the pieces.
Caramel and Flaky Salt
Caramel is easier to control after baking. Drizzle a little over the cooled slab and add flaky salt instead of putting a wet caramel layer through the middle before it goes into the oven.
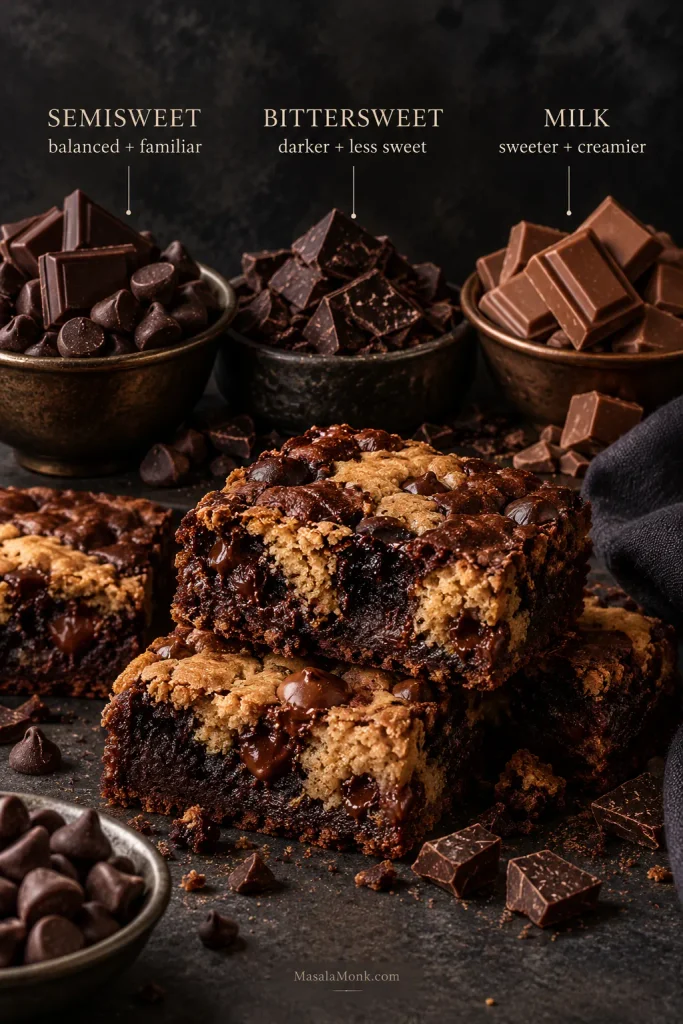
Change the Chocolate
Bittersweet chocolate gives the bars a darker, less sweet finish; milk chocolate takes them in the other direction. Chopped chocolate mixed with chips gives you larger melted pockets alongside smaller pieces running through the crumb.
Changes That Need Their Own Recipe
Brown butter changes more than flavor because some of its water disappears during browning. That affects the way cookie dough spreads, so it is not a casual one-for-one swap. Our brown butter chocolate chip cookies go deeper into the moisture loss and what it does to the dough.
Brownie mix and refrigerated cookie dough need their own quantities and timing too. Box sizes, fat levels and intended pan sizes vary enough that dropping random packaged products into this method would be guesswork.
For a different shape altogether, the Brookie Pie variation in our cookie pie recipe turns the same brownie-cookie idea into a deeper dessert for slicing and sharing.
Cooling, Cutting, Storing & Freezing Brookies
For warm dessert tonight
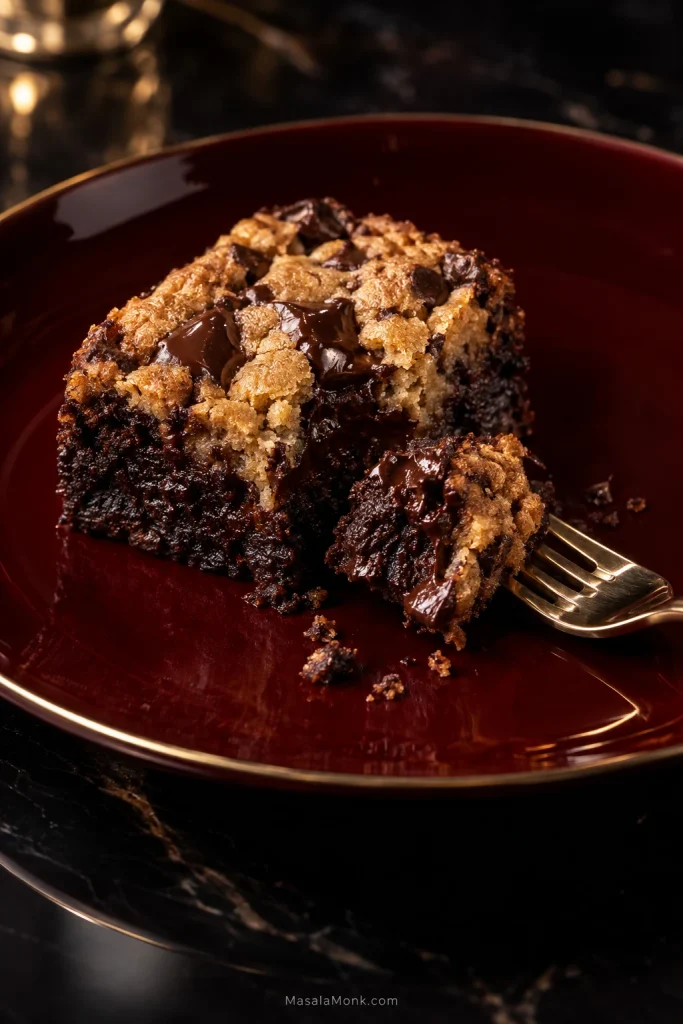
Give the pan about 30–45 minutes. The brownie will have started to firm, but the chocolate will still be soft and the middle deliberately messy. This is the fork version: tender cookie, brownie at its softest and melted chocolate running through the places where the two meet.
For neat fudgy squares
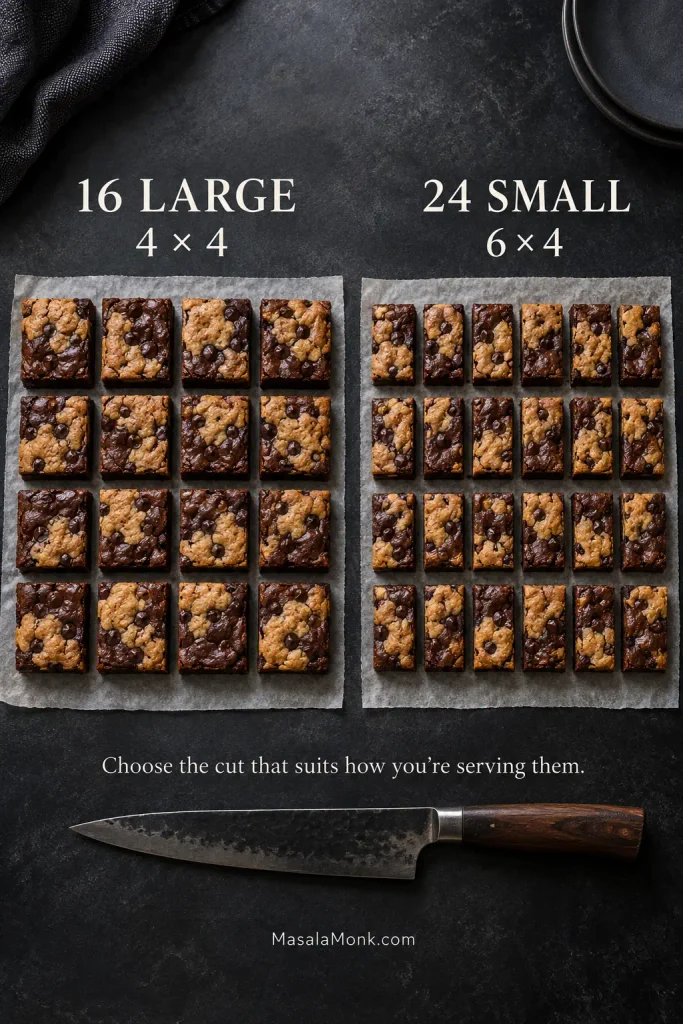
Wait about an hour, or until the slab feels stable enough to lift with the parchment. Move it to a board and cut with a large sharp knife.
A little chocolate on the blade is perfectly normal. Cut into 16 larger squares for dessert portions or 24 smaller bars for sharing, wiping the knife between cuts when clean edges matter.
For very clean cuts tomorrow
Cool the slab completely and chill it briefly before slicing. Bring the bars back toward room temperature before serving for a softer brownie and less-firm chocolate.
That also makes brookies easy to prepare a day ahead: bake the slab, let it cool, and save the cutting for when everything is firm and easy to handle.
Storage and freezing
Once the brookies are cool, keep them in an airtight container at room temperature for about 3–4 days. Refrigerated bars keep for roughly a week, though the brownie and chocolate both become firmer when cold.
For longer storage, wrap individual bars well and freeze them airtight for up to about 2 months. Thaw at room temperature.
At room temperature, the cookie stays chewy against a soft, fudgy brownie.
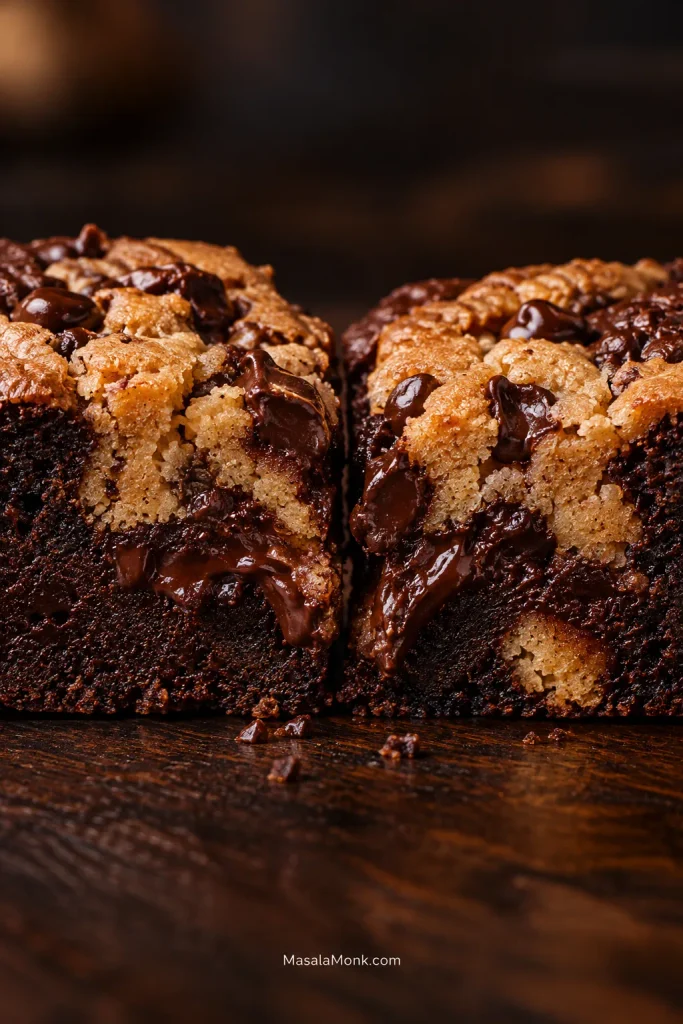
Warm a square just enough for the chocolate to loosen and the boundary between the two almost disappears again. Both are good—it simply depends whether you want a neat bar in your hand or the softer version that needs a fork.








