
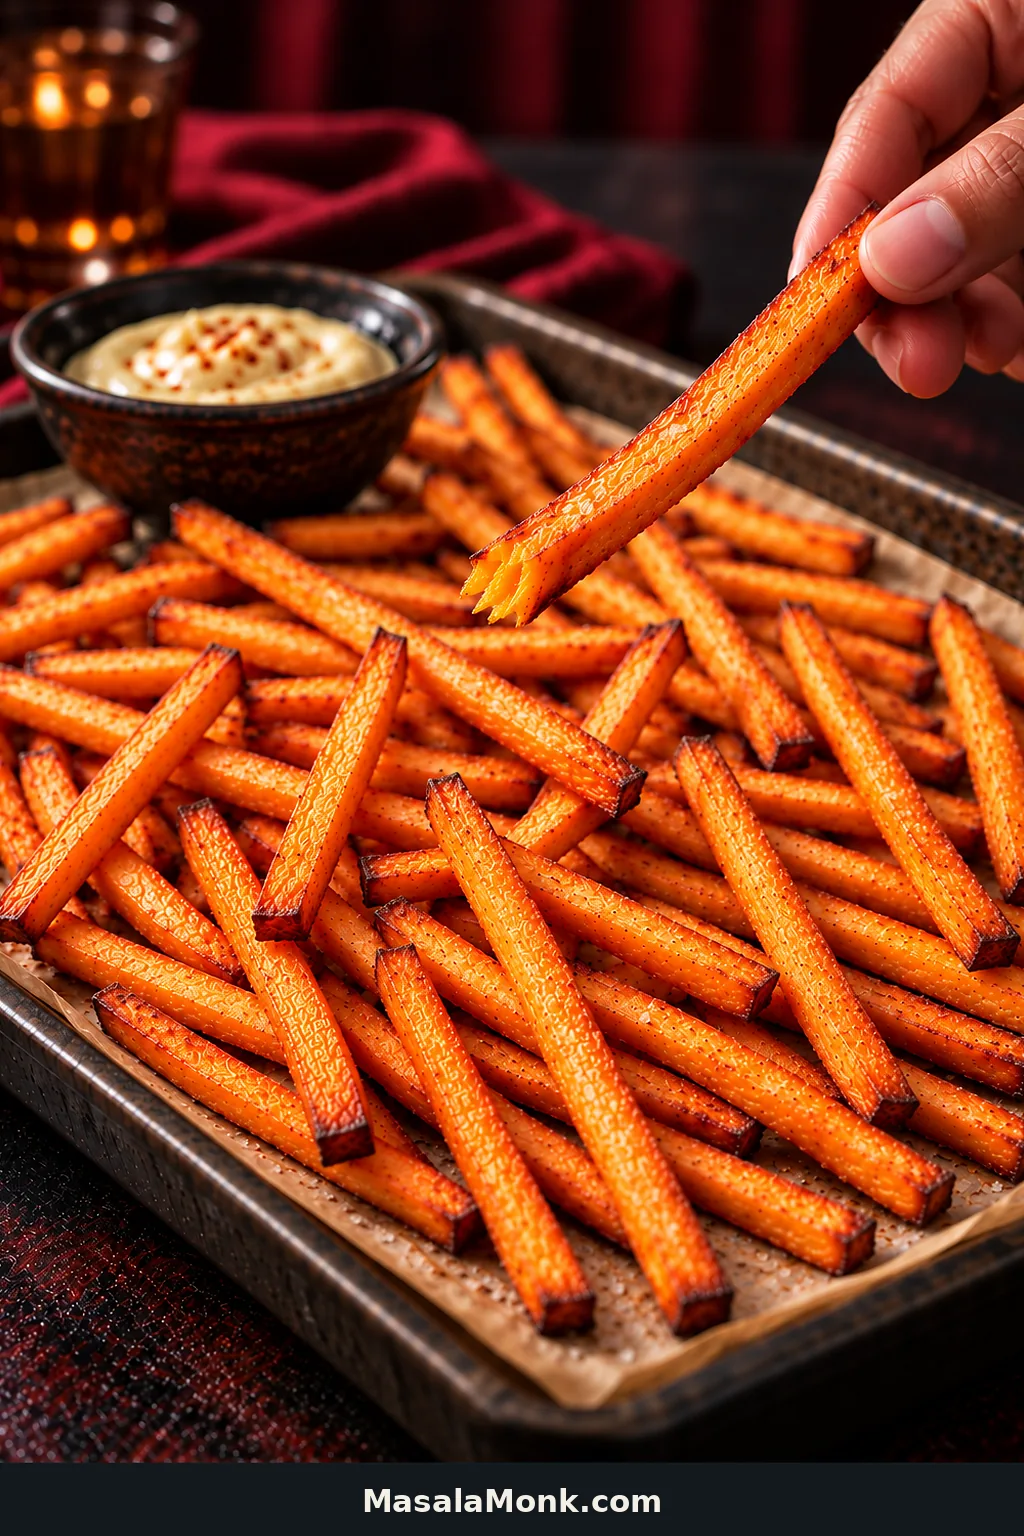
Pick up a sweet potato fry while it’s still hot: browned and caramelized around the edges, lightly crisp outside, with a tender, sweet center.
The frustrating tray looks very different. Thin tips darken while thicker pieces stay floppy. Some fries brown beautifully on top but remain pale where they touched their neighbors. Leave them in longer and the middle can start drying out without the outside getting much better.
Brown is not the same as crisp.
If that sounds like your last batch, more oven time probably wasn’t the whole answer. The method is simpler than it sounds: cut the potatoes evenly, dry them well, use a light cornstarch coating and give them room across two pans.
You don’t need to soak the potatoes or crank the oven unusually high. And because these are baked rather than deep-fried, expect a lighter, more delicate crispness than a restaurant fry.
Jump to the baked sweet potato fries recipe ↓
Before the Tray Goes In
Cut: ¼ inch / 6 mm thick
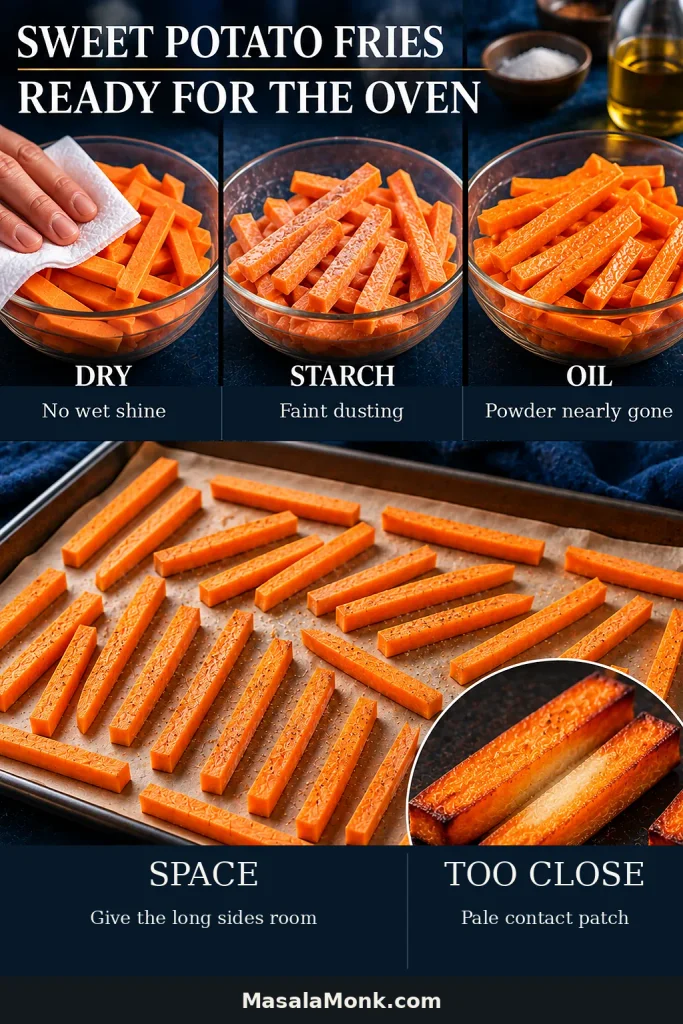
Before coating: no wet shine on the cut sides
Cornstarch: faint dusting before oil; no obvious white patches afterward
Oil: a thin sheen, with none pooling on the pan
Space: two large pans, with visible parchment around most fries
Oven: 425°F / 220°C conventional; about 400°F / 205°C convection unless your oven converts the temperature automatically
Done: browned in patches, surface no longer shiny, tender inside
Baked Sweet Potato Fries Recipe
Prep Time: 15 minutes
Cook Time: 35 minutes
Total Time: 50 minutes
Yield: 4 side servings
Oven: 425°F / 220°C
Equipment
- Sharp chef’s knife
- Cutting board
- Large mixing bowl
- Clean kitchen towels or paper towels
- 2 large rimmed half-sheet pans, about 18 × 13 inches / 46 × 33 cm
- Parchment paper
- Thin spatula or turner
Ingredients
- 2 lb / 907 g orange-fleshed sweet potatoes
- 1 tablespoon (8 g) cornstarch
- 2 tablespoons (30 ml) olive, avocado or neutral oil
- ½ teaspoon fine salt, plus more to taste
Optional finishing seasonings include smoked or sweet paprika, garlic powder, black pepper, cayenne and finely grated Parmesan.
1. Cut the Sweet Potatoes Evenly
Heat the oven to 425°F / 220°C. Set racks in the upper and lower thirds and line both pans with parchment.
Using convection? Use about 400°F / 205°C and check a few minutes earlier. Some ovens automatically lower the temperature when convection is selected. If yours does, enter 425°F / 220°C and let the oven make the adjustment for you.
Remove the skin for a smoother, more uniform fry, or scrub the sweet potatoes thoroughly and leave it on if you like the texture.
Raw sweet potatoes can be awkward to cut, so give yourself a stable starting point. Trim the ends and slice a thin piece from one side so the potato sits securely on the board. Cut it into planks, then into sticks about ¼ inch / 6 mm thick.
Some fries will be shorter than others. That’s fine. Consistent thickness matters much more than identical length. Trim very skinny tapered ends or keep them to one side so you can pull them from the oven sooner.
2. Dry the Cut Sides Well
Spread the cut fries over clean towels and pat them thoroughly, turning them as you work. Don’t stop while the cut sides still look wet or shiny. Once that shine is gone, they’re ready for the cornstarch.
3. Add Cornstarch, Then Oil
Put the fries in a large bowl, sprinkle over the cornstarch and toss until they carry a faint, even dusting. Add the oil and toss again. The powdery look should mostly disappear, leaving a thin sheen and no obvious white patches.
4. Spread Them Across Two Pans
Divide the fries between the pans in a single layer. Leave visible parchment around most pieces. A few touching tips are fine; long sides pressed together are where trouble starts.
Only one large pan? Use two batches instead of squeezing everything together.
5. Bake the First Side
Give the first side about 20 minutes. Take a look through the oven door around 15 minutes, especially if some fries are thinner than the rest.
Leave them alone while the first side browns. Moving the fries repeatedly makes it harder for the underside to develop good color.
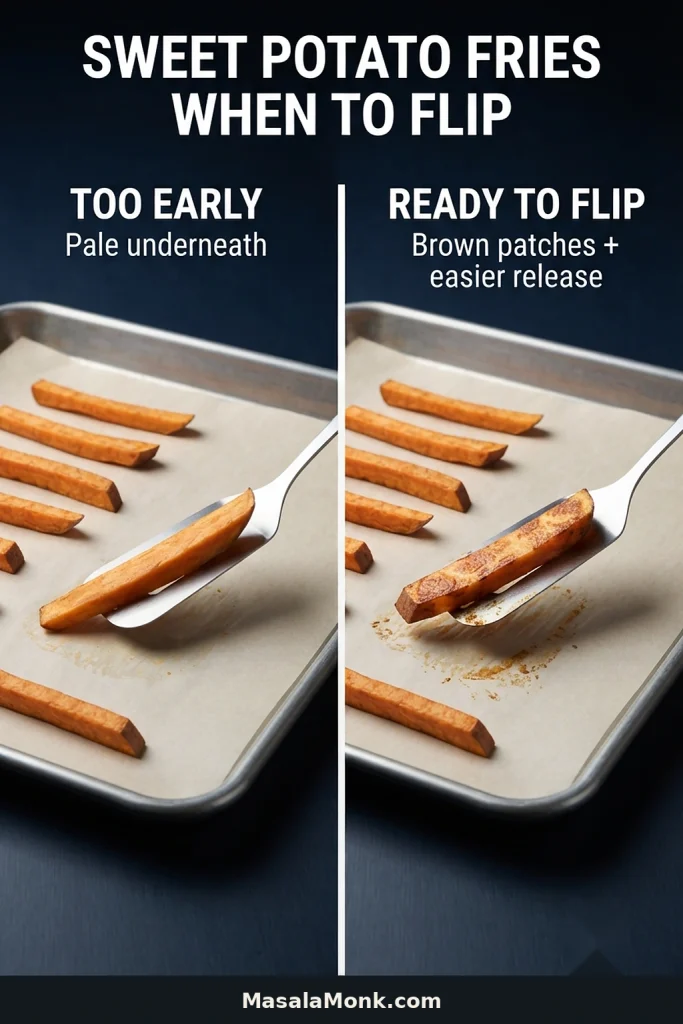
Turn over one of the thicker pieces before flipping the batch. You want definite golden-brown patches underneath and easier release from the parchment.
Look at the underside before you look at the clock. Still pale and firmly stuck? Give it another couple of minutes before trying again.
6. Flip, Rotate and Swap
Turn the fries, putting a paler side down when you can. Rotate both pans from front to back and swap their rack positions.
7. Finish by Sight
Bake for another 10–15 minutes. Begin checking at 10 minutes. Smaller pieces may be ready first; take them out and let the thicker ones catch up.
The fries are ready when several sides have browned, the surface looks set rather than glossy and the centers are tender. Season immediately with the salt, taste, then add more if needed. Add any other finishing seasonings while the fries are hot.
Serve promptly. The darkest corners should taste almost caramelized against the salt, while the middle stays tender and distinctly sweet.
What Done Looks Like
Too early: pale, glossy and floppy.
Ready: browned across several surfaces, with a set exterior and a tender center.
Too far: very dark and shriveled, with the center starting to dry out.
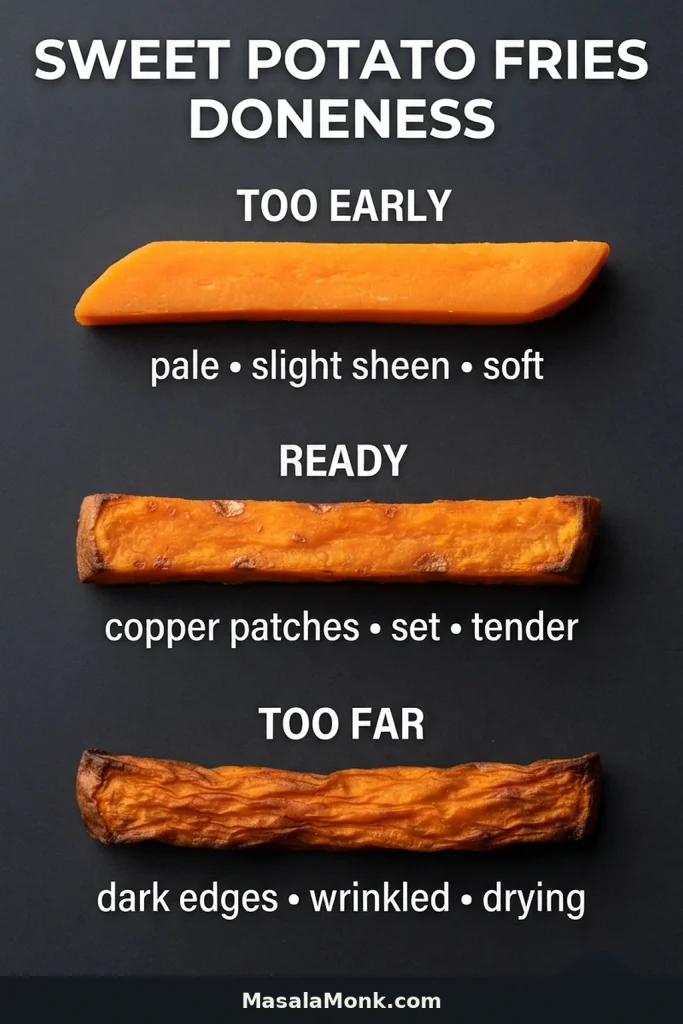
A few fries will be darker than others. Homemade fries don’t need to match.
Why Brown Doesn’t Always Mean Crisp
Sweet potato fries can turn brown before they become crisp because their natural sugars color quickly. If they’re already brown but still soft, more heat isn’t automatically the answer.
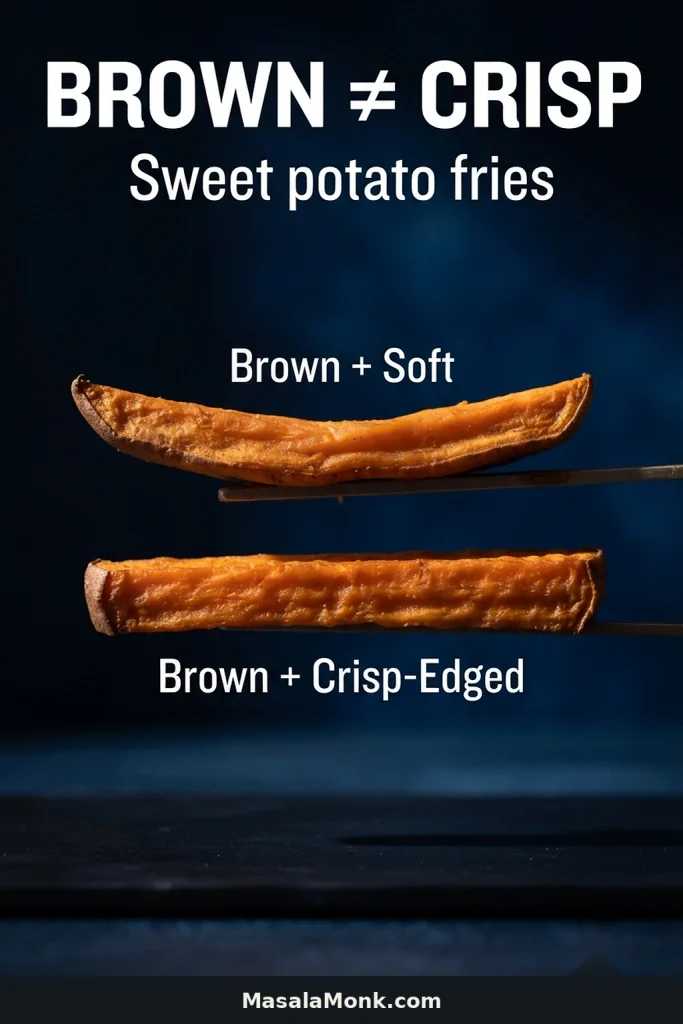
Sweet potatoes don’t behave quite like the Russets commonly used for homemade French fries. Push the heat too far and skinny ends can burn before the rest of the fry improves.
More time has a limit too. Once the middle starts drying out, the fries turn leathery instead of getting crisper. If the color is already there, look back at the setup before chasing a darker shade. Start with the cut.
Why a ¼-Inch Cut Works
Thickness changes how quickly the outside browns relative to the center. Around ¼ inch / 6 mm gives you a useful middle ground.
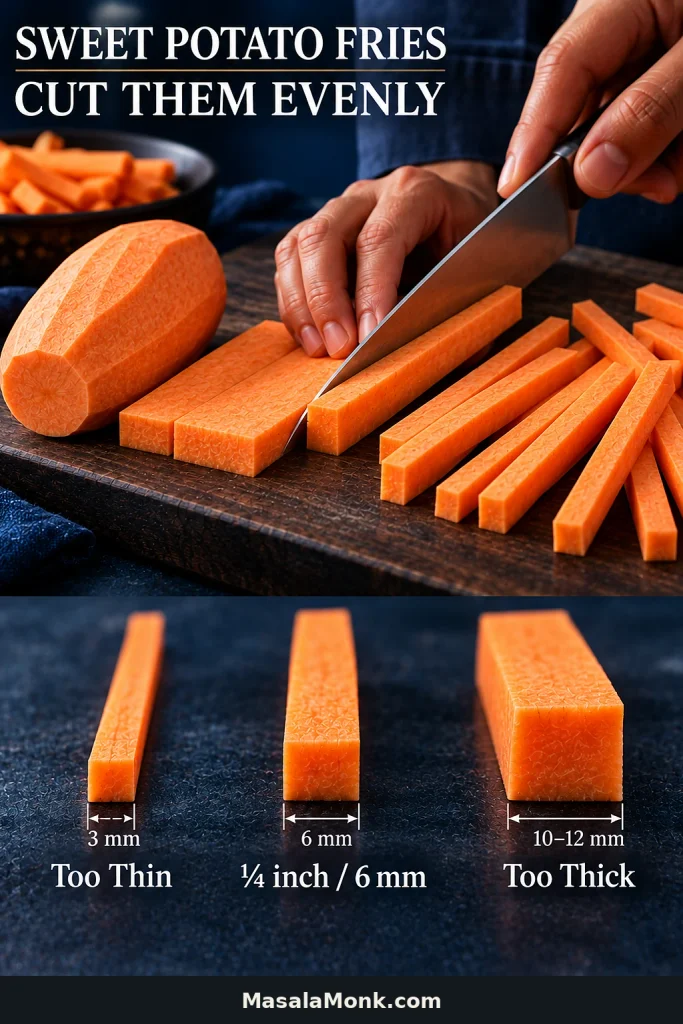
| Cut | What Usually Happens |
|---|---|
| Very thin | Tips and edges can scorch before the rest finishes. |
| ¼ inch / 6 mm | Browns well while keeping a tender center. |
| Thick | A thicker center with less browned exterior. |
You do not need machine-cut fries. A few short pieces, crooked edges and odd ends are part of making them at home. Watch for pieces that taper sharply from thick to thin. The skinny end can blacken while the thick end is still underdone—the same fry is trying to cook at two different speeds.
Do Sweet Potato Fries Need to Soak?
No. You can skip the soak for this method.
Once the fries are cut, you can go straight to drying and coating. If you’re soaking them—or holding cut potatoes in water ahead of time—drain them well and dry the surfaces thoroughly before the cornstarch goes on.
Cornstarch Should Almost Disappear
For 2 lb / 907 g sweet potatoes, 1 tablespoon / 8 g cornstarch is enough. After the oil goes in, the coating should be almost invisible.
A perfectly white coating isn’t the goal. Obvious white patches after the oil goes in mean the starch is heavier than it needs to be. Sticky beige clumps tell you something different: there was probably still water on the potatoes when the cornstarch hit them.
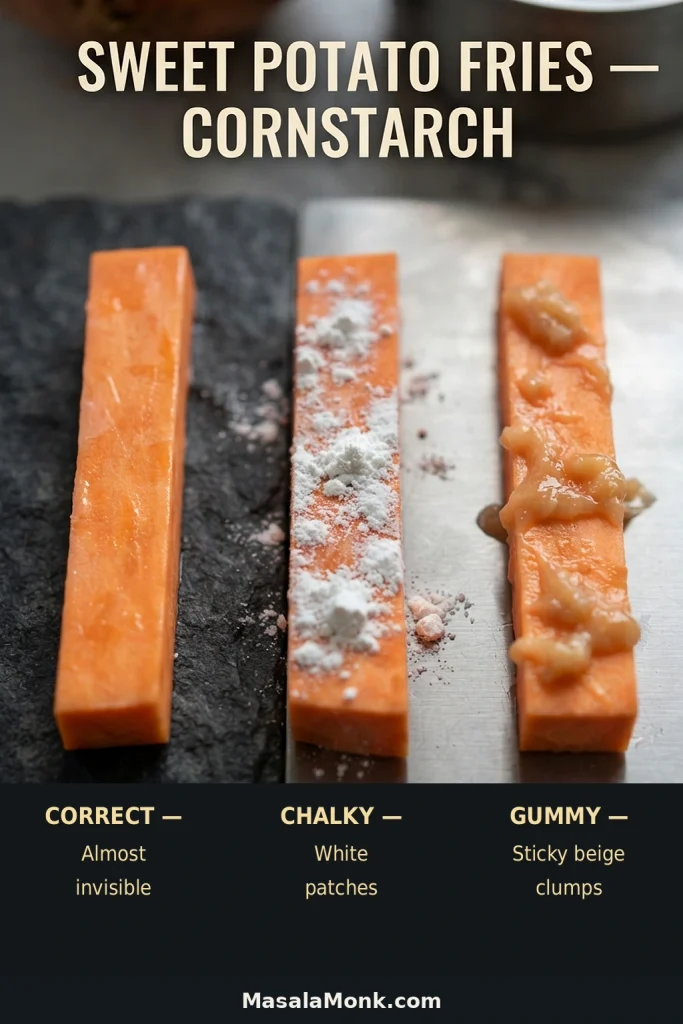
This is only a thin starch film. Battered fries use a much more substantial coating and produce a different kind of crust.
Can You Make Them Without Cornstarch?
Yes. Keep the same cut, oil and spacing. The fries will still brown and develop crisp edges, but the outside will be closer to a well-roasted sweet potato than the lightly coated version above.
Why Sweet Potato Fries Aren’t Crispy: Read the Tray
If you’ve followed sweet potato fry recipes before and still pulled out a tray of soft orange sticks, the baking time may not have been the real problem.
“Not crispy” isn’t one problem. A pale, floppy fry failed differently from one that is beautifully brown but still soft. Chalky white fries are telling you something else again.
Start with what you can see on the tray.
Match the Symptom to the Fix
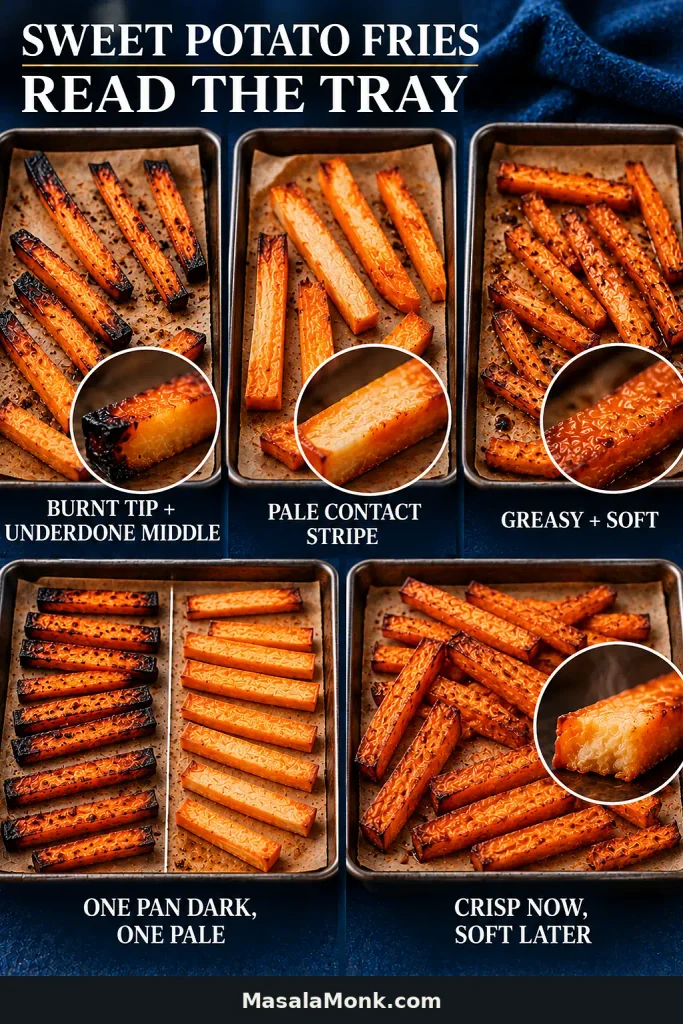
| What You See | Check First | Try Next |
|---|---|---|
| Pale + floppy | Moisture, spacing, browning | Dry more thoroughly, leave more space and confirm the underside is browning. |
| Brown + soft | Cut, coating, spacing | Fix the setup before adding more oven time. |
| Burnt tips + underdone centers | Uneven or tapered cuts | Avoid sharply tapered pieces and keep the sticks close to ¼ inch / 6 mm thick. |
| White + chalky | Too much or uneven cornstarch | Use a lighter, more even dusting. |
| Sticky or gummy patches | Water before cornstarch | Dry the cut surfaces more thoroughly before coating. |
| Greasy + soft | Oil and spacing | Measure the oil and spread the fries out. |
| One pan dark, one pale | Rack position or oven hot spots | Rotate the pans and swap rack positions. |
| Crisp at first, soft later | Trapped steam | Keep them uncovered and serve promptly. |
| Dry + leathery | Overbaking | Stop earlier; more time will not fix the original problem. |
| Firmly stuck + pale | Browning and release | Give the first side another couple of minutes before forcing it loose. |
Crisp at First, Soft Later
Some softening is normal as moisture from the hot center works its way outward. Pile the fries into a deep bowl or cover them and that steam gets trapped around them.
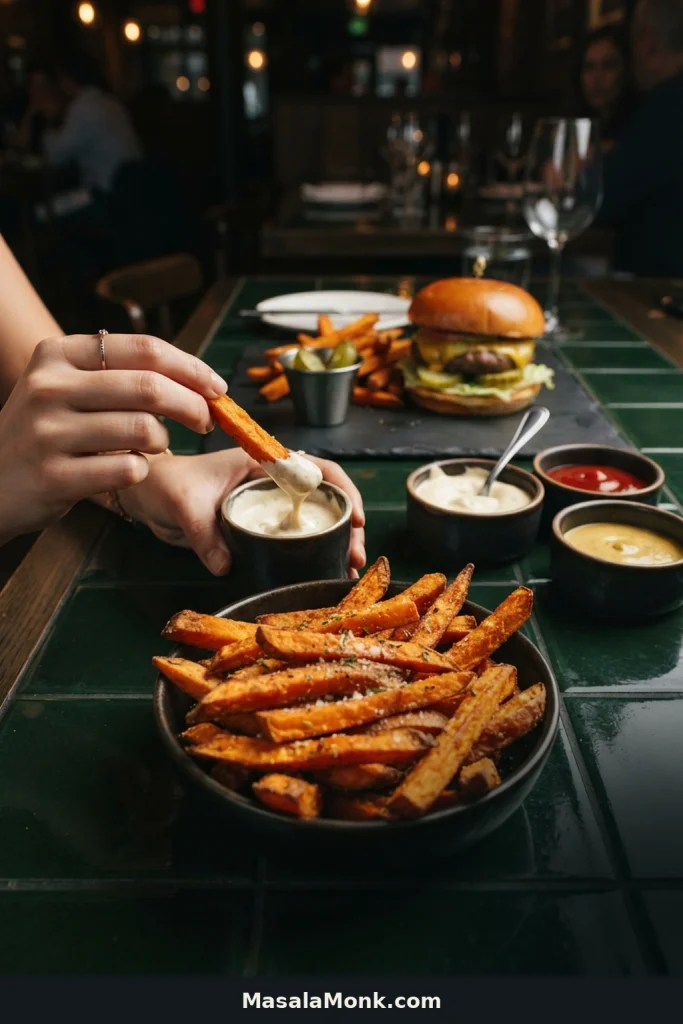
Keep them spread out until serving and put wet sauces alongside. A cool, thick garlic aioli gives you the creamy contrast without soaking the whole tray.
← Back to the recipe · ↑ Back to top
Season Sweet Potato Fries After Baking
The base fries bake without paprika, garlic powder or Parmesan so those flavors can go on afterward instead of darkening before the potatoes are ready. Salt the fries as soon as they leave the oven, then add anything else while they’re still hot.
Smoked paprika, garlic powder and black pepper make an easy smoky version; add a little cayenne or chile powder for more heat. For garlic-Parmesan fries, toss with garlic powder, black pepper and finely grated Parmesan, which catches especially well on the browned edges.

What to Serve with Sweet Potato Fries
Sweet potato fries are especially good with something salty, tangy or spicy to push against their sweetness. A hot fry dragged through a cool dip is hard to improve on. The fries also make an easy side for a homemade burger patty with sharp pickles or mustard.
For dipping, homemade ketchup is the classic. Want something creamier? Stir ¼ cup / 60 ml mayonnaise with 1–2 teaspoons Sriracha or another hot sauce and a squeeze of lime. A thicker honey mustard works particularly well if you want tang without much heat.
Keep the sauce alongside instead of pouring it over the tray so the fries stay crisp longer.
Make Ahead, Store & Reheat
Cut Ahead
You can prepare cut sweet potatoes up to 24 hours ahead. Keep them submerged in cold water in a covered container in the refrigerator.
Drain them before cooking and dry the cut surfaces thoroughly. The water is useful for holding the potatoes; you just don’t want it following them into the cornstarch bowl.
Store Leftovers
Refrigerate leftover fries promptly and use them within 3–4 days, in line with USDA leftover-storage guidance. They will soften in the refrigerator, but an oven or toaster oven can firm the outside up again.
Reheat Sweet Potato Fries
Spread the fries in a single layer and reheat at 400°F / 205°C until hot and the outside has firmed up again, usually around 5–10 minutes. A toaster oven works well for a small portion.
Microwaving gets them hot, but it won’t bring the crisp edges back.
After one tray, you’ll know more than a timer can tell you: whether your cuts are even, where your oven browns fastest and what a properly browned underside looks like.
Then get the fries to the table while they’re hot. The crispest edges won’t wait around forever.








