Posted on Leave a comment

Easy Garlic Aioli Recipe: Garlic Mayo, Traditional Aioli & Uses

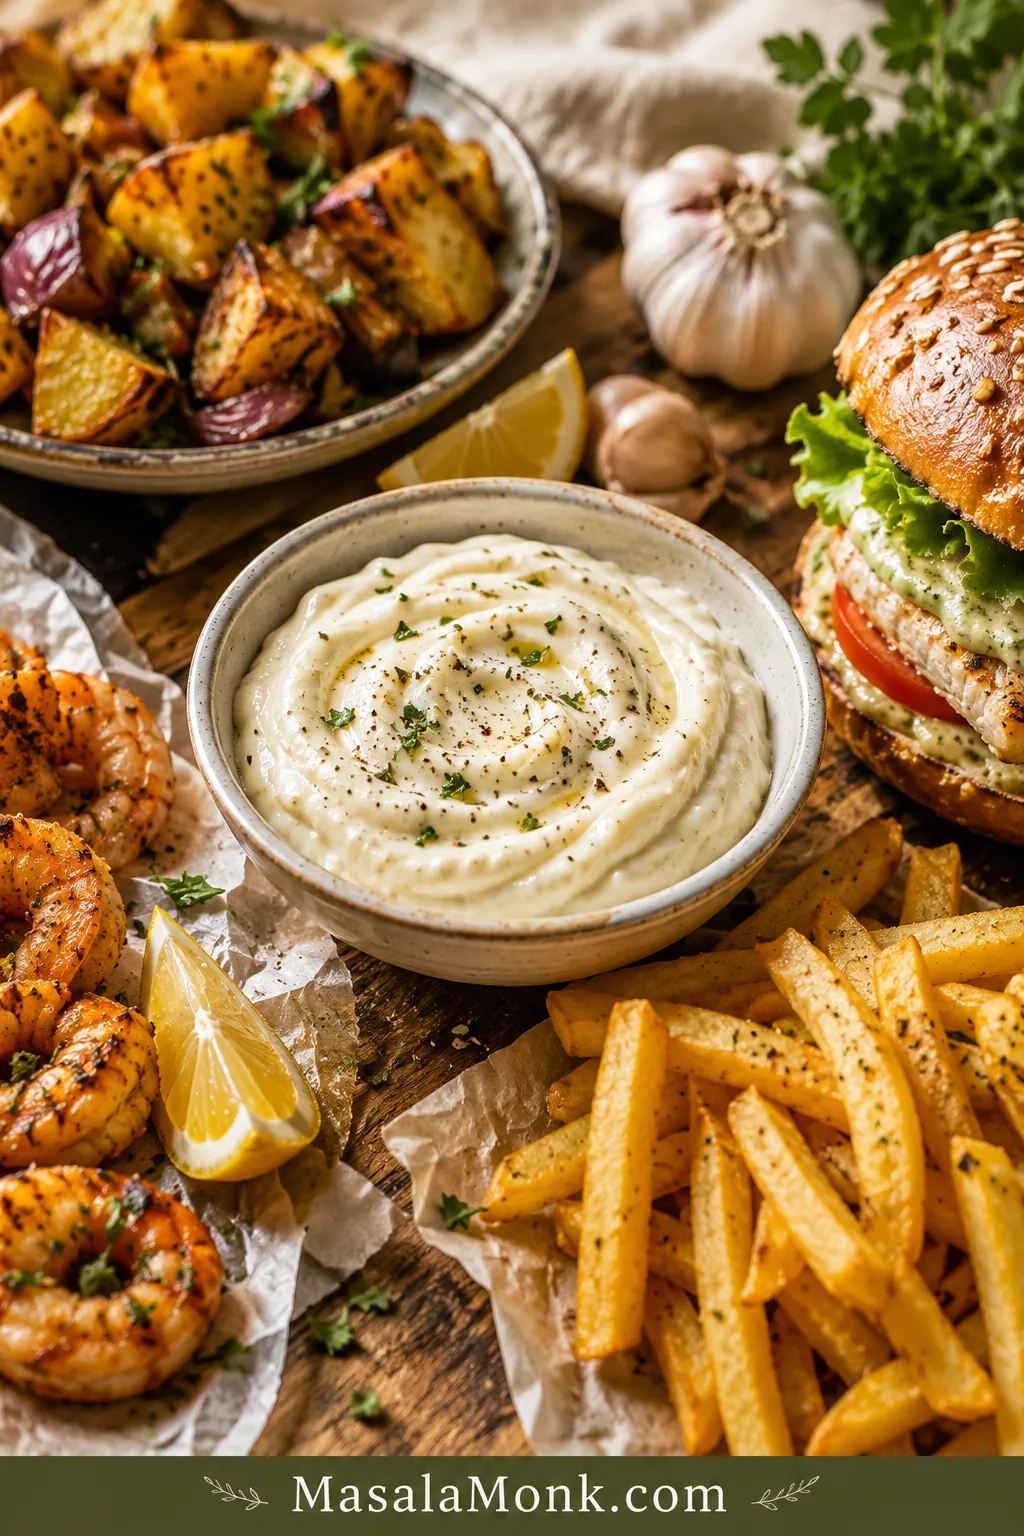
Bowl of creamy garlic aioli served with fries, a burger, shrimp, lemon wedges, roasted vegetables, and garlic on a wooden table.

You want a creamy garlic sauce for fries, burgers, sandwiches, seafood, or roasted vegetables, and then the internet immediately turns it into an argument: traditional garlic and oil, garlic mayo, or the restaurant version that calls itself “real.” The useful answer is simpler. The word can mean different things depending on the kitchen, so this recipe gives you the easy creamy version first, then shows you the traditional version too.

This easy garlic aioli recipe starts with mayonnaise, fresh garlic, lemon juice, Dijon mustard, and salt, but what you really get is the cool, creamy dip you want beside hot fries, the garlicky swipe that makes a burger taste finished, and the lemony sauce that wakes up seafood. For the older, sharper, more classic style, there is also a traditional garlic-and-oil method later in the post.

No need to shame either style. Mayo aioli is fast, stable, and weeknight-friendly; traditional aioli is sharper, more technical, and more olive-oil-forward. Choose the one that fits the food, then adjust from there.

The aioli rule is simple: it should taste bright first, garlicky second, and creamy all the way through.

Make It Now · Full Recipe · Which Version? · Garlic Control · Traditional Aioli · Vegan & Eggless · Flavor Variations · What to Serve It With · Troubleshooting

Make It Now

Need the sauce now? Mix this version first, then use the rest of the post only if you want to adjust the garlic, make it vegan, try a flavor variation, or go traditional from scratch.

Fast Garlic Aioli Ratio

Fast ratio: ¾ cup mayo + 3 grated garlic cloves + 1 tablespoon lemon juice + ½ teaspoon Dijon mustard + ¼ teaspoon salt.

Rest 10 minutes, then taste. Brighten with lemon if it feels heavy, soften the bite with more mayo if the garlic is too sharp, and add salt if it tastes flat.
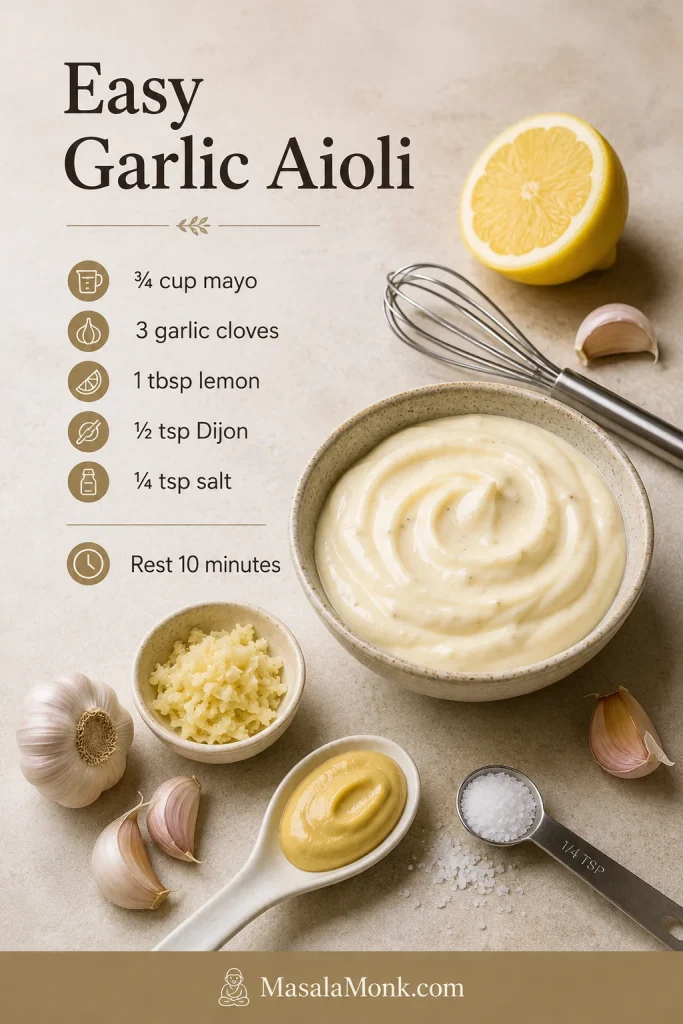
Recipe ratio card showing mayonnaise, grated garlic, lemon, Dijon mustard, salt, and a whisk on a light stone surface.
Start with mayo, garlic, lemon, Dijon, and salt, then let the sauce rest briefly. That short pause helps the garlic aioli taste smoother and more balanced.

Using it for fries? Go a little bolder. On sandwiches, keep it smoother and milder. With seafood, let lemon lead before the garlic takes over. A small bowl of this can make plain fries, leftover chicken, roasted vegetables, or a simple sandwich feel intentional.

Need a different path? Jump to garlic control, vegan and eggless options, flavor variations, or traditional aioli.

Quick Answer: What Is Aioli?

Aioli is a garlic sauce. Traditionally, it is garlic and oil emulsified with salt and sometimes lemon. In modern recipe use, garlic aioli often means a creamy sauce made by stirring garlic, lemon, and seasonings into mayonnaise.

Both meanings are common. Traditional aioli tastes sharper and more olive-oil-forward; mayo aioli tastes creamier, milder, and more familiar. For fries, burgers, sandwiches, seafood, roasted vegetables, and party dips, the easy mayo version is the best place to start.

Most fixes are simple: acid lifts, mayo softens, salt sharpens, rest settles, and roasted garlic mellows.

Still deciding which style fits your food? The version guide makes that choice easier.

Which Aioli Version Should You Make?

Use this as a decision guide, not a rulebook. For everyday fries, burgers, and sandwiches, the mayo version is the easiest answer. When garlic and oil should be the star, choose traditional aioli. Egg-free, vegan, smoky, spicy, and mellow paths are there when the table needs them.

Choose thisWhen you wantBest with
Easy garlic aioli with mayoFast, creamy, reliable garlic sauceFries, burgers, sandwiches, seafood, wraps
Traditional aioliSharper garlic-and-oil flavorArtichokes, grilled vegetables, roasted potatoes, seafood
Vegan mayo aioliFast egg-free creamy dipFries, sandwiches, wraps, party platters
Soy-milk or aquafaba aioliPlant-based sauce from scratchBowls, vegetables, vegan sandwiches
Roasted garlic aioliSweeter, softer garlicSandwiches, potatoes, grilled cheese, vegetables
Chipotle or sriracha aioliSmoky or spicy heatTacos, burgers, fries, shrimp
Lemon-dill aioliBrighter seafood finishSalmon, crab cakes, shrimp, fish tacos

Easy Garlic Aioli Recipe

Start with this version. It gives you the creamy garlic sauce people expect with fries, burgers, sandwiches, and seafood, but with enough lemon and garlic control to keep it from tasting heavy or harsh. This is the one to make when the fries are already hot and you just need a dip that tastes intentional.

Perfect technique is not the point here. Good garlic, enough lemon, and a few minutes of patience matter more. The first bite should feel cool and creamy, then bright with lemon, then warm with garlic.

Here is the key move: let grated garlic sit with lemon juice and salt before you whisk in the mayonnaise. During that short rest, the raw edge softens and the flavor spreads through the bowl. After 10 minutes, the garlic should taste rounder but still present. If it tastes perfect immediately after mixing, remember that it may taste stronger later.

Start with 3 cloves for balance, 5 for a bolder dip, or roasted garlic for something sweeter and softer. If your cloves are very large, begin with 2 to 3 and add more after tasting.

Recipe Details

  • Prep time: 5 to 8 minutes
  • Garlic rest: 10 to 15 minutes
  • Optional chill: 20 to 30 minutes
  • Total time: 15 to 20 minutes without chilling; about 40 minutes with optional chill
  • Yield: scant 1 cup
  • Servings: 12 to 16 tablespoons
  • Equipment: small bowl, whisk or spoon, microplane or garlic press, optional fine mesh strainer

Garlic Aioli Ingredients
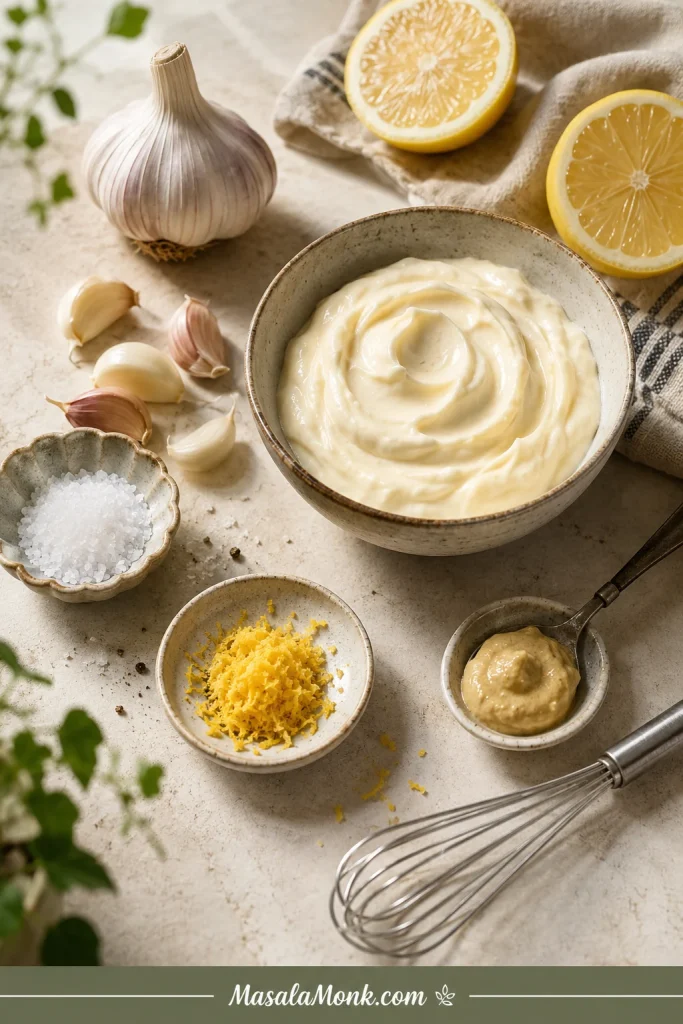
Ingredients for garlic aioli including mayonnaise, garlic cloves, lemon halves, Dijon mustard, salt, pepper, and a small whisk.
In a short ingredient list, every flavor has a job: garlic brings heat, lemon lifts the mayo, Dijon adds depth, and salt pulls the aioli together.
IngredientUS amountMetric amount
Mayonnaise¾ cupabout 180 ml / 165 to 170 g
Fresh garlic, grated or pressed3 to 5 small-to-medium clovesabout 9 to 15 g
Fresh lemon juice1 tablespoon, plus more to taste15 ml
Dijon mustard½ teaspoon, optional2.5 ml
Fine salt¼ teaspoon to startabout 1.5 g
Black pepper⅛ teaspoona small pinch
Lemon zest½ teaspoon, optionaloptional
Olive oil1 teaspoon, optional5 ml

Method

Step 1: Grate or press the garlic

Grate, press, or very finely paste the garlic. Smoother garlic makes a smoother sauce and gives the finished aioli a cleaner bite.
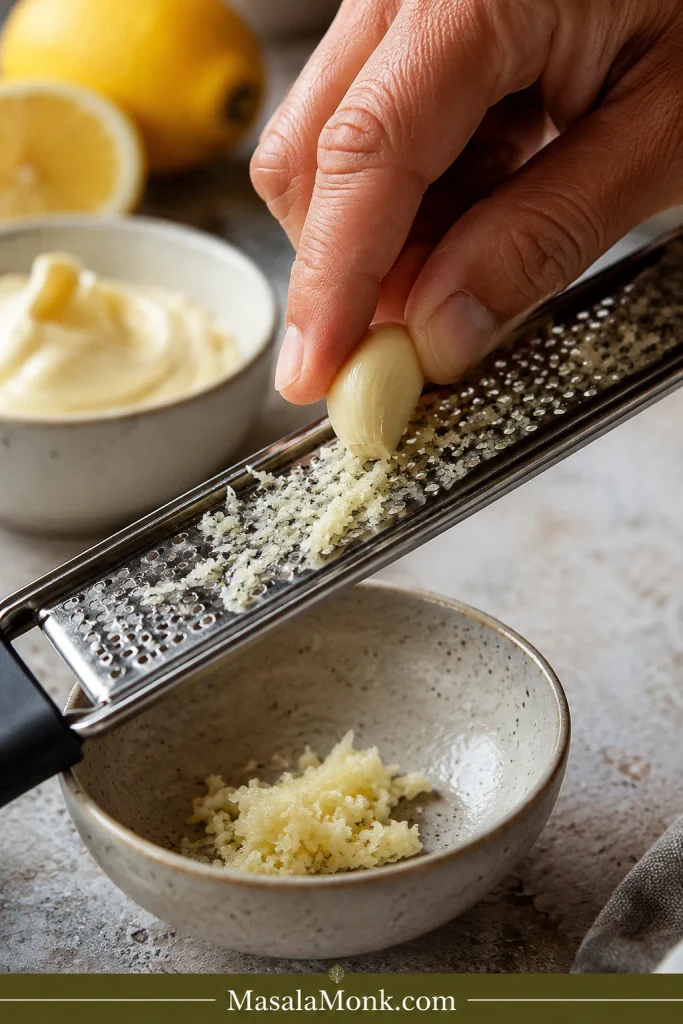
Hand grating a peeled garlic clove on a microplane over a small bowl with lemon and mayonnaise nearby.
Grated garlic blends more evenly than chopped garlic. As a result, the sauce tastes bold without leaving harsh little pieces in the finished aioli.

Step 2: Mix the garlic, lemon, Dijon, and salt

Add the garlic, lemon juice, Dijon mustard, and salt to a small bowl. This is where the raw garlic starts turning into a balanced sauce base.

Step 3: Rest the garlic mixture

Let the mixture rest for 10 to 15 minutes so the lemon can soften the raw bite before the mayonnaise goes in.
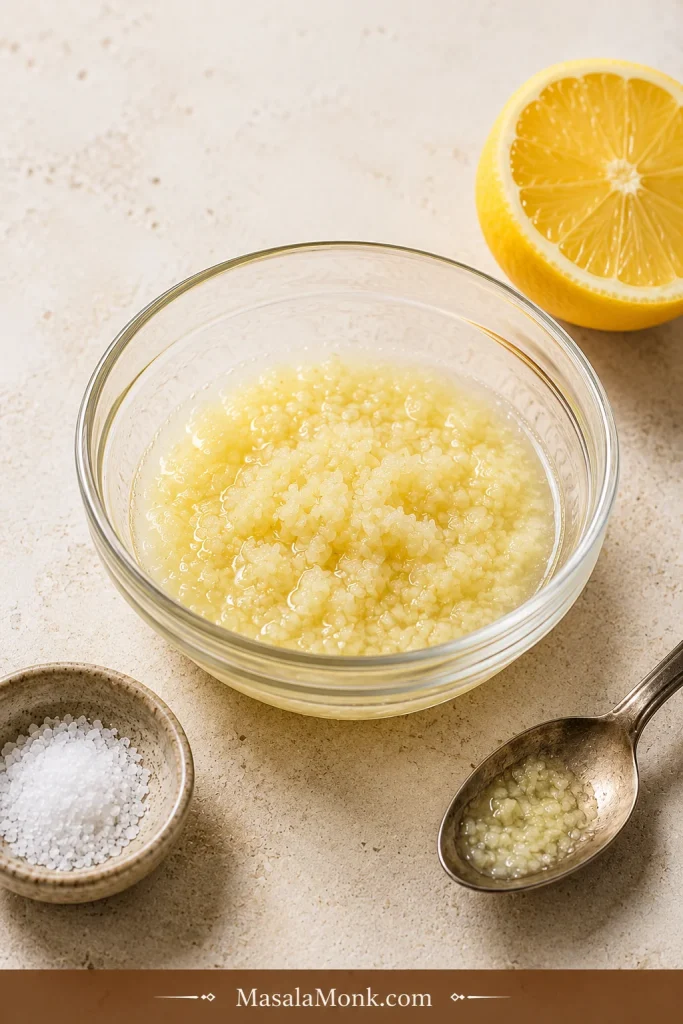
Grated garlic resting in lemon juice and salt in a small bowl with a lemon half, spoon, and salt dish nearby.
Before the mayo goes in, lemon juice and salt soften the raw garlic edge. This step is small, but it makes the finished garlic aioli taste cleaner.

Step 4: Whisk in the mayonnaise

Whisk in the mayonnaise until the dip looks smooth and creamy. Scrape the sides of the bowl so the garlic and lemon flavor spreads evenly.
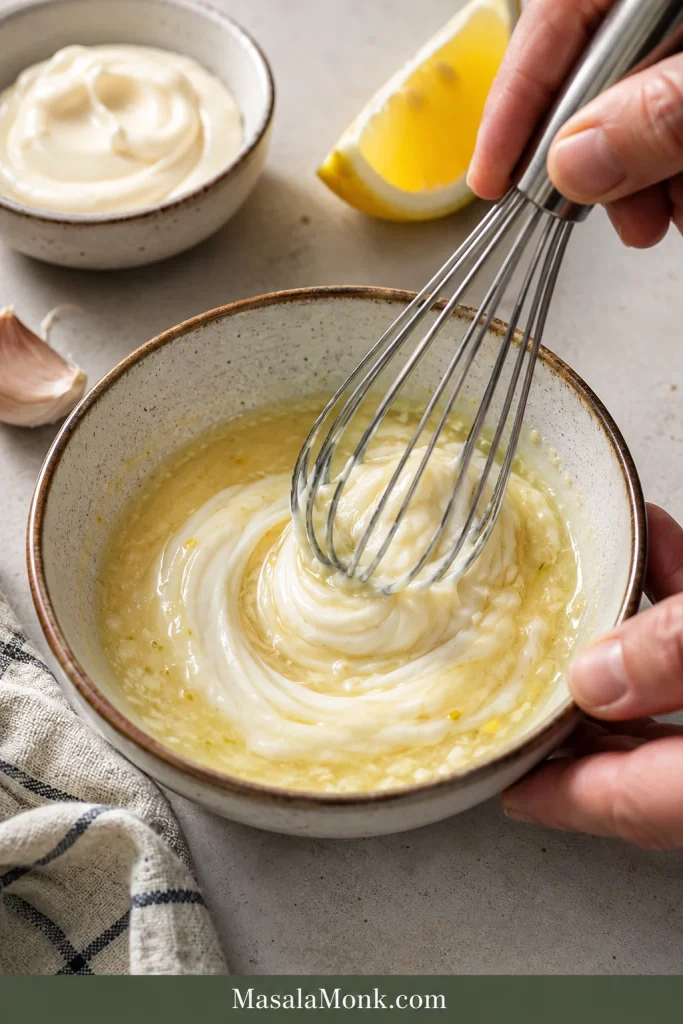
Mayonnaise being whisked into a garlic and lemon mixture in a bowl with garlic cloves and lemon nearby.
Whisk the mayo into the rested garlic mixture until the sauce looks smooth and glossy. Then taste again, because garlic and lemon settle as they mix.

Finished Garlic Aioli Texture

Before you chill or serve it, check the texture. The sauce should look creamy and thick enough to hold its shape on a spoon.
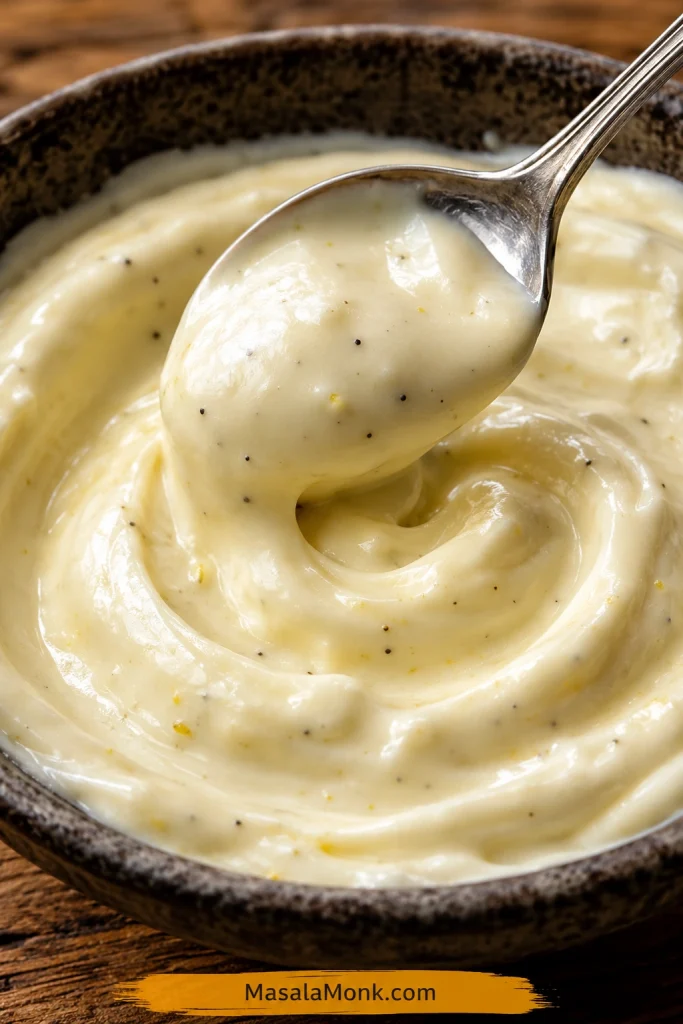
Close-up of creamy garlic aioli in a bowl with a spoon showing thick, glossy texture and small pepper flecks.
A good aioli should hold a spoon trail, yet still spread easily. That middle texture is why it works for fries, sandwiches, burgers, and bowls.

Step 5: Taste and adjust

Taste after resting. Brighten with more lemon, round it out with more mayo, or sharpen the flavor with another pinch of salt.

Step 6: Chill or serve

Serve right away, or chill for 20 to 30 minutes for a thicker, rounder texture.

Chilled Garlic Aioli Texture

After chilling, the dip will thicken slightly and usually taste less sharp. If you are making it ahead, err slightly mild on the garlic and adjust again before serving.
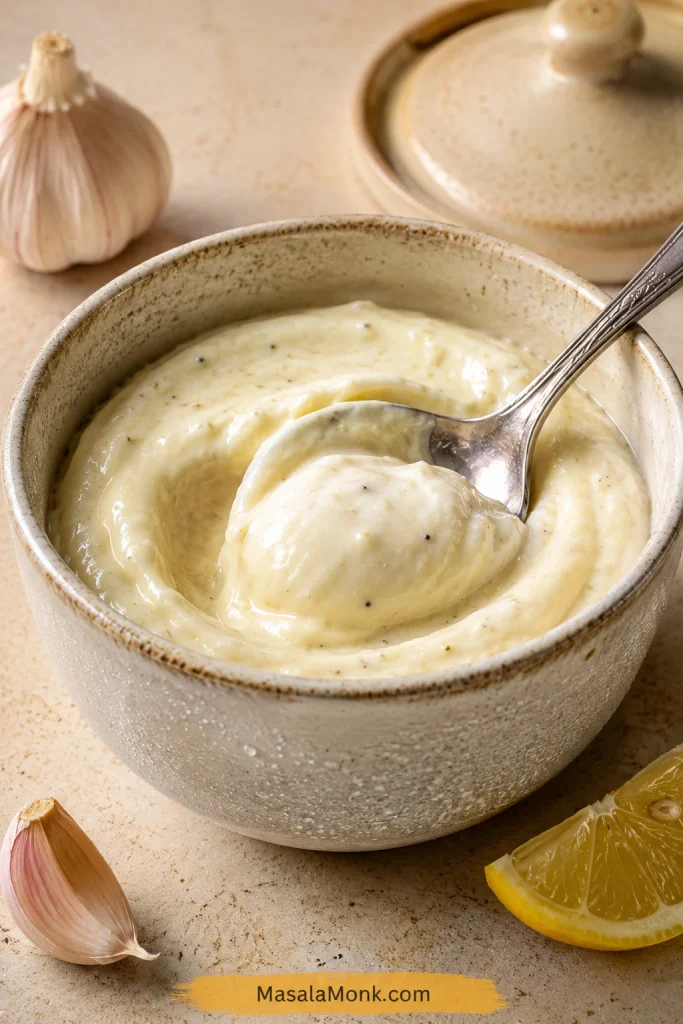
Chilled garlic aioli in a bowl with a spoon groove showing thicker texture, with garlic and lemon nearby.
Chilling thickens the sauce and rounds off some of the garlic bite. Before serving, stir it once and adjust with lemon or salt if needed.

To make it milder and extra smooth, strain the garlic-lemon mixture before whisking the flavored lemon juice into the mayonnaise. You will still get garlic flavor, but without little garlic pieces or a strong raw bite.

Taste and Adjust

Taste after the 10-minute rest, not before. Garlic gets louder as it sits, so a sauce that feels gentle at first can become bolder by the time it reaches the table. Serving guests? Start with 3 cloves and build up only after tasting.

  • Sharp garlic bite: soften it with more mayo or a longer rest.
  • Heavy finish: wake it up with lemon juice a few drops at a time.
  • Sour edge: round it out with another spoonful of mayo.
  • Flat flavor: season with salt, Dijon, or a tiny bit more garlic.
  • Thick texture: loosen with water or lemon juice ½ teaspoon at a time.
  • Mild flavor: add more grated garlic or lemon zest.

How to Adjust Garlic Aioli

Use small changes and taste between each one. A little lemon, mayo, salt, or rest can change the whole bowl.
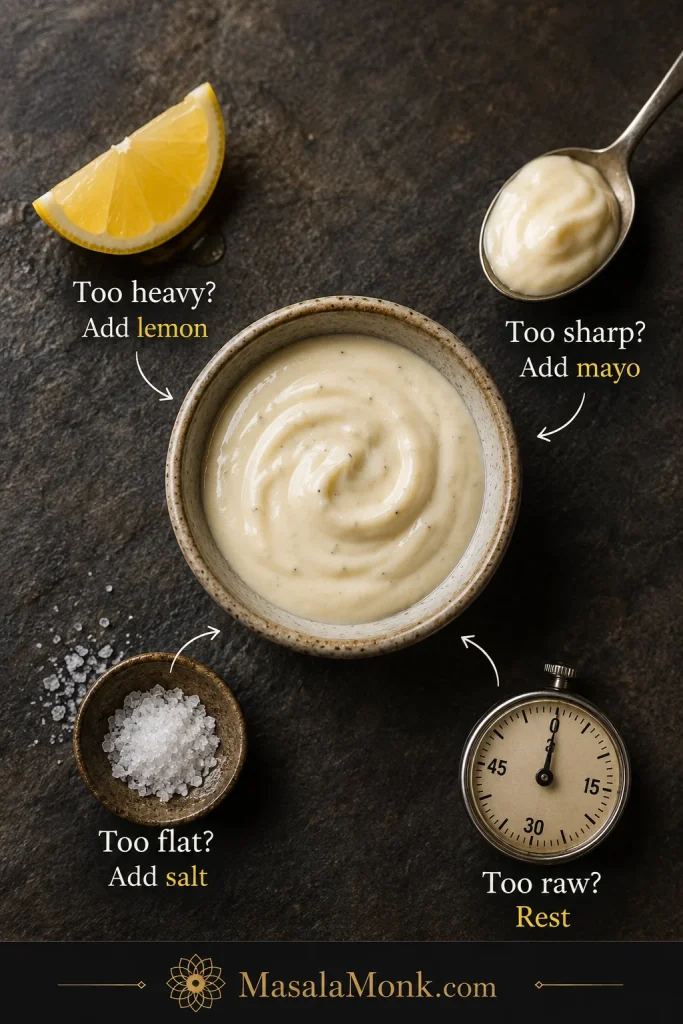
Garlic aioli adjustment guide with a bowl of aioli, lemon wedge, spoonful of mayonnaise, salt, and simple fix labels.
Fix the flavor by changing one thing at a time: lemon for lift, mayo for softness, salt for focus, and rest for a calmer raw garlic bite.

Maximum garlic is not the goal. You want a dip bright enough to cut through rich food, creamy enough to cling, and garlicky enough that it has a reason to exist.

How to Control the Garlic Bite

This sauce is simple, but garlic decides whether it tastes balanced, bold, sweet, sharp, or too aggressive. Garlic is the one ingredient here that can make the sauce sing or take over the room, so choose the style that fits how you plan to serve it.

Raw, Roasted, Grated, or Pasted Garlic

Different garlic prep changes the same aioli base quickly, so pick the garlic style before adding more cloves.
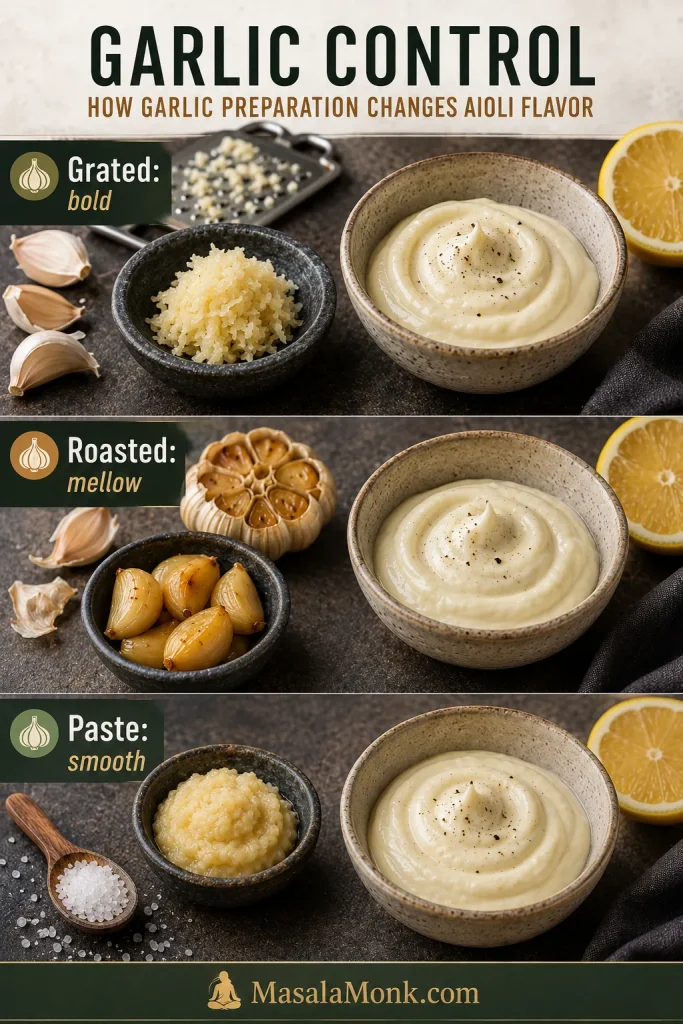
Garlic control comparison with grated garlic, roasted garlic, garlic paste with salt, and small bowls of aioli.
The garlic choice controls the mood of the sauce. Use grated garlic for punch, roasted garlic for sweetness, and garlic paste for a smoother aioli.

Mild vs Bold Garlic Aioli

Start mild for people, bold for potatoes. Fries and roasted potatoes can handle strong garlic. Sandwiches, burgers, wraps, and fish tacos usually need a gentler spread. Serving a shared dipping bowl? Keep the base gentle and put hot sauce, chili crisp, extra lemon, or grated garlic on the side. If you want a brighter herb-driven dip instead of a creamy garlic one, MasalaMonk’s green chutney recipe gives you that cilantro-mint-lime direction.
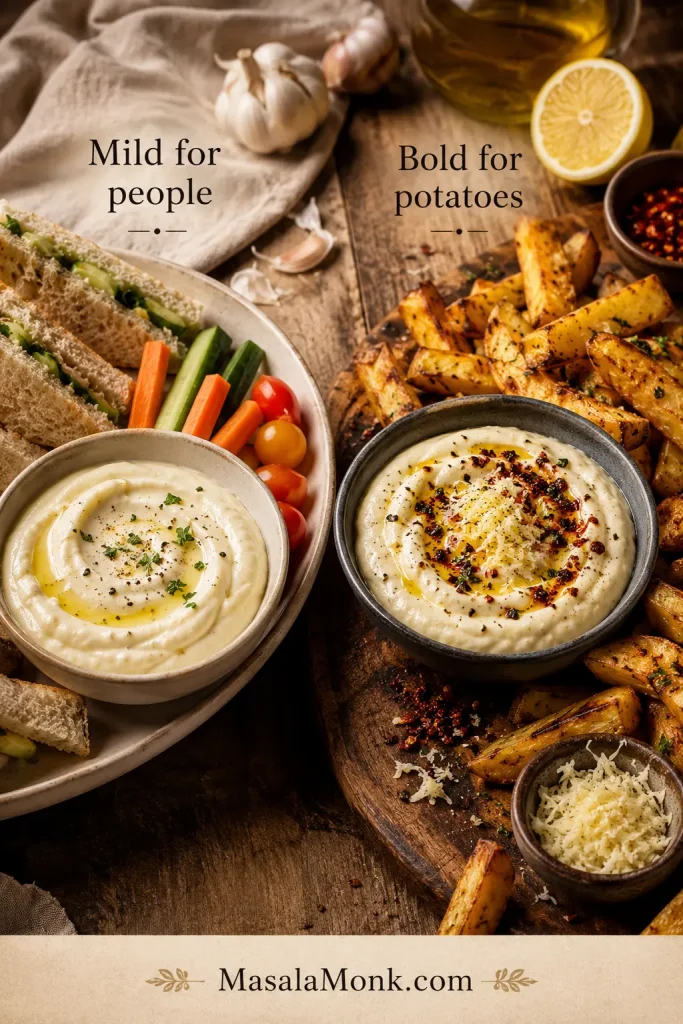
Two serving areas showing mild garlic aioli with sandwiches and vegetables and bold garlic aioli with fries and roasted potatoes.
For a shared table, keep the first bowl mild. After that, make a bolder aioli for fries, potatoes, or grilled food that can handle extra garlic.
  • Balanced sauce: start with 3 garlic cloves.
  • Bolder dip: use 5 cloves and grate them finely.
  • Mellow flavor: rest raw garlic in lemon juice for 10 to 15 minutes.
  • Smooth garlic taste: strain the garlic-lemon mixture before adding mayo.
  • Sweeter sauce: use roasted garlic instead of raw garlic.
  • Seafood version: let lemon and herbs lead before raw garlic power.

Why This Aioli Works

This aioli works because it treats garlic like a powerful ingredient, not just a flavoring. Freshly cut garlic can be hot, sharp, and harsh. Lemon and salt tame that raw edge before the mayo goes in, so the final dip tastes like one smooth sauce instead of mayonnaise with garlic stirred through it.

Dijon mustard fills the gap between sharp and creamy. You should not taste mustard first; you should just notice that the sauce feels finished. A short chill thickens the dip and gives the flavors time to settle.

  • Lemon rest: softens raw garlic and spreads the flavor.
  • Mayo base: gives stable body without building an emulsion from scratch.
  • Dijon and salt: make the dip taste complete instead of just creamy.

Ingredient Notes and Smart Swaps

With only a few ingredients, there is nowhere for tired garlic or bland mayo to hide. The base gives creaminess, the garlic gives identity, the lemon gives lift, and the salt pulls the whole thing together.

Mayonnaise

Choose a mayonnaise you already like. This is not the place for a mayo you tolerate but never enjoy; the base flavor follows you into every bite. Full-fat mayo gives the richest garlic aioli and the best dipping texture. Light mayo works, though the result may taste tangier and less full. To build the base from scratch, start with MasalaMonk’s homemade mayo recipe, then add garlic, lemon, Dijon, and salt.

Garlic

Fresh garlic gives the cleanest flavor, but the way you prepare it changes the result. The same three cloves can taste mellow, sharp, or almost spicy depending on how you cut them. Grated garlic tastes strongest and blends smoothly. Pressed garlic is easy and punchy. Minced garlic gives a more rustic texture. Roasted garlic turns the sauce sweeter and softer. Garlic powder works in an emergency, but it will not taste as fresh.

Roasted Garlic Aioli

Roasted garlic makes aioli sweeter and rounder, but it can also make the sauce feel less bright. After adding it, taste for lemon again before deciding the sauce is finished.
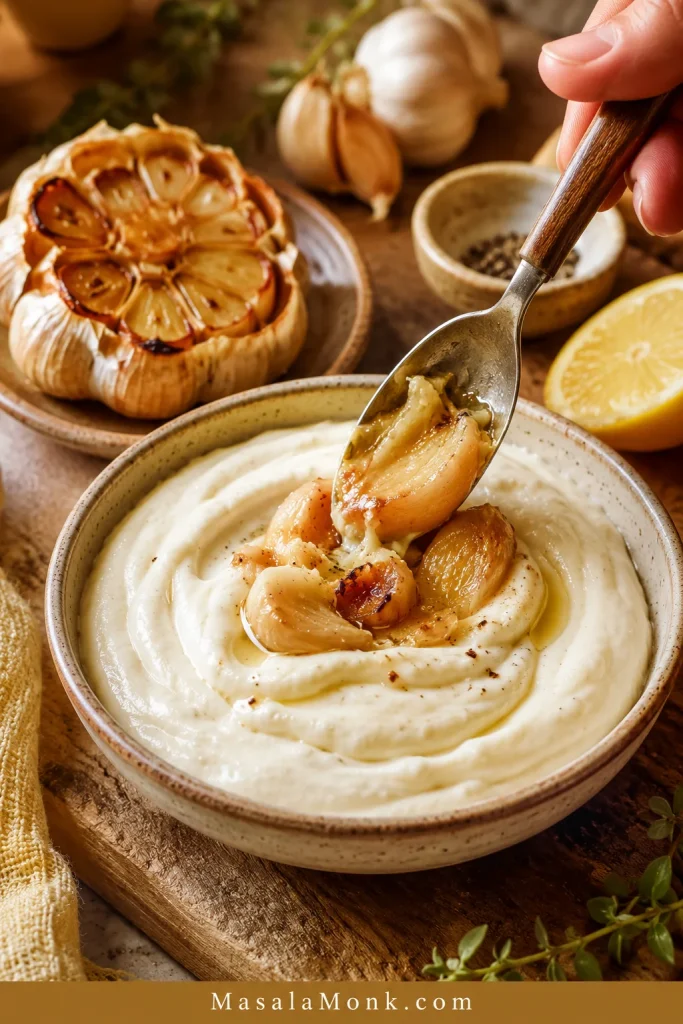
Roasted garlic cloves being added to a bowl of creamy aioli with a roasted garlic bulb, lemon, and garlic nearby.
Roasted garlic aioli tastes sweeter, softer, and less sharp than the raw version. To keep it lively, finish with enough lemon to balance the richness.
Garlic formBest forFlavor result
Grated garlicClassic garlic aioliStrong, smooth, bold
Pressed garlicQuick aioliPunchy and easy
Minced garlicRustic dipChunkier, less smooth
Roasted garlicSandwiches, potatoes, vegetablesSweet, mellow, less sharp
Garlic powderEmergency shortcutMilder, less fresh

Lemon Juice

Fresh lemon juice is best because it tastes bright without becoming harsh. The lemon should lift the sauce, not turn it sour. Vinegar can work when lemon is not available, but start with less because vinegar can make the sauce sharper.

Dijon Mustard

Dijon mustard is optional, but useful. It adds depth and helps the sauce taste more complete. Use just enough to support the garlic and lemon. The dip should not taste like mustard unless you are making a mustard variation.

Olive Oil

A teaspoon of olive oil adds a little restaurant-style richness. A heavy pour can make the dip greasy, especially when the mayonnaise is already rich. Keep it small unless you are making the traditional garlic-and-oil version.

Small-Batch Garlic Aioli

Need enough for one burger, one sandwich, one small plate of fries, or one snack bowl? Mix ¼ cup mayo, ¼ to ½ teaspoon grated or pressed garlic, 1 teaspoon lemon juice, a tiny dab of Dijon, salt, and pepper. Let it sit for 5 to 10 minutes before tasting.
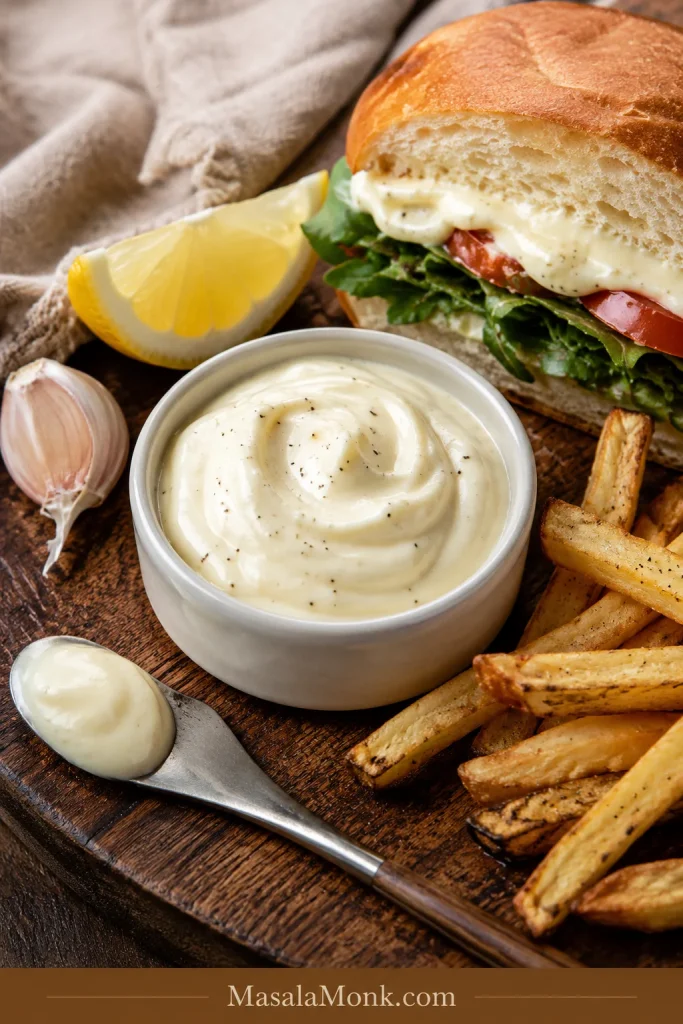
Small bowl of garlic aioli served with a sandwich half, fries, lemon wedge, garlic clove, and spoon on a wooden board.
Make a small batch when you only need aioli for one sandwich, one burger, or one plate of fries. It gives you fresh flavor without leftover sauce sitting around.

This is useful for a quick sandwich spread, a breakfast sandwich, a grilled cheese upgrade, or a dipping sauce when leftovers are not needed.

Using Store-Bought Mayo

Store-bought mayo is the fastest path to restaurant-style garlic aioli. Use the same base ratio from the main recipe, then adjust after the 10-minute rest: more garlic for a bolder dip, lemon for lift, or another spoonful of mayo if the bite feels too sharp.
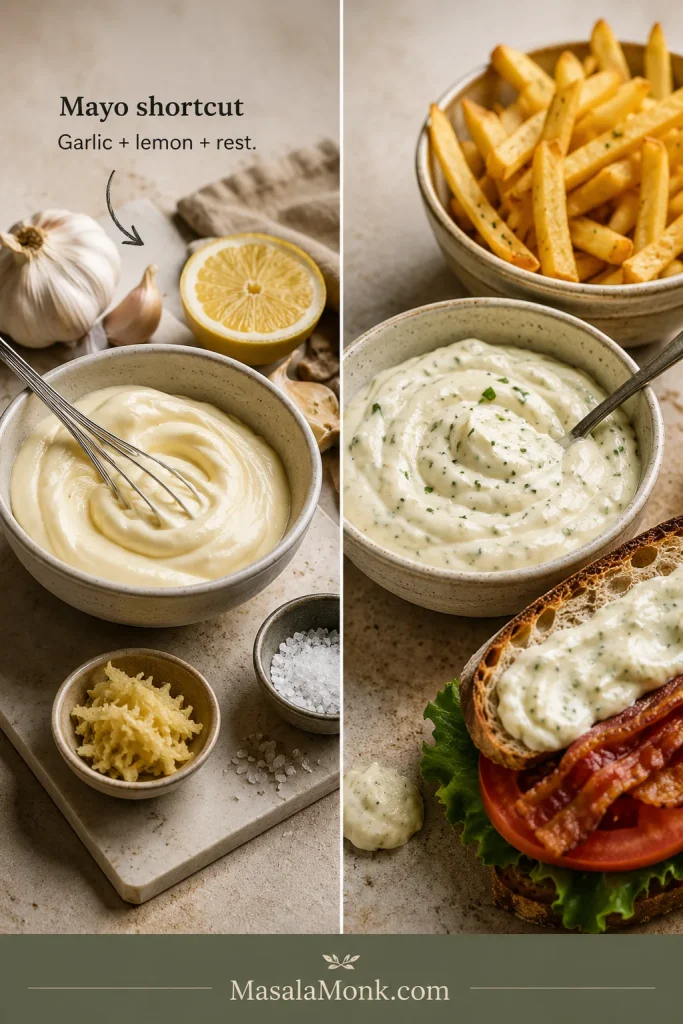
Split scene showing plain mayonnaise with garlic and lemon on one side and finished garlic aioli with fries and a sandwich on the other.
Store-bought mayo is only the starting point. Fresh garlic, lemon, salt, and a little resting time turn it into a brighter garlic aioli.

This is the easiest way to upgrade a sandwich, burger, wrap, or dipping platter without buying a separate bottle of aioli.

Traditional Aioli from Scratch

Choose traditional aioli when you want garlic and oil to be the star: sharper, richer, more Mediterranean, and more technique-driven. Choose the mayo version when you want a fast, stable dip or spread for everyday food.

The classic version is not simply garlic mayonnaise. At its most basic, it is garlic and oil emulsified into a thick sauce, often with salt and lemon juice. Some home versions use egg yolk to make the emulsion more stable and easier to whisk.

The garlic-and-oil path is less forgiving because you are building the sauce, not seasoning an already-stable base. Its flavor is sharper, more garlicky, more olive-oil-forward, and less creamy than the easy mayo path. It works beautifully with grilled vegetables, artichokes, seafood, roasted potatoes, or a Mediterranean-style plate.

This is the version to make when you want the sauce to feel like part of a Mediterranean platter, not just a creamy dip on the side.

Traditional Aioli Mortar and Pestle

The mortar-and-pestle method makes the garlic and oil feel more direct than the mayo shortcut, so expect a sharper and more rustic sauce.
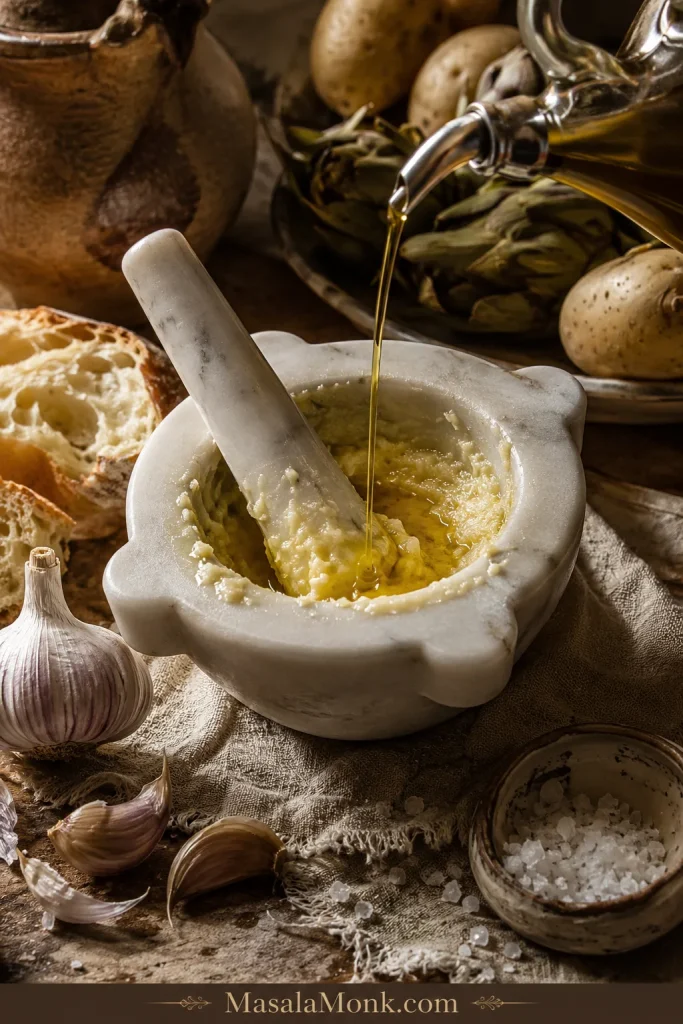
Traditional aioli being made in a mortar and pestle with garlic paste, coarse salt, olive oil, bread, potatoes, and artichokes nearby.
Traditional aioli is sharper and more olive-oil-forward because it begins with garlic, salt, and oil instead of prepared mayonnaise.

If you enjoy sauce technique, the same patience with fat, acid, and emulsion shows up in MasalaMonk’s béarnaise sauce recipe, though that sauce uses butter and egg yolk instead of garlic and oil.

Easier Traditional-Style Aioli with Egg Yolk

This is not the oldest purist version, but it is the easiest traditional-style path for most home cooks. The egg yolk helps the garlic and oil emulsify into a thicker, glossier sauce.
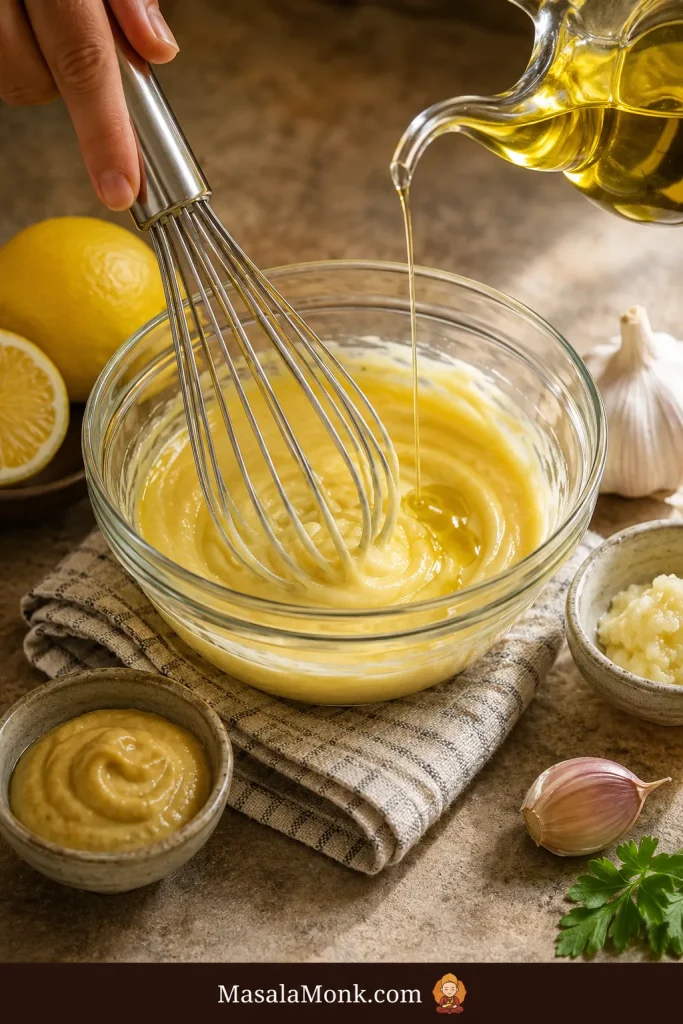
Egg yolk aioli mixture being whisked in a glass bowl while olive oil is poured in a thin stream, with garlic and lemon nearby.
Egg yolk gives traditional-style aioli more stability, but patience still matters. Add the oil slowly until the mixture turns thick, glossy, and emulsified.

Egg-Yolk Aioli Ingredients

IngredientUS amountMetric amount
Garlic2 clovesabout 6 g
Salt¼ teaspoonabout 1.5 g
Egg yolk1 largeabout 18 g
Lemon juice1 to 2 teaspoons5 to 10 ml
Dijon mustard½ teaspoon, optional2.5 ml
Mild extra-virgin olive oil¼ cup60 ml
Neutral oil3 tablespoons45 ml
WaterA few drops as neededAs needed

If raw egg is a concern, anyone avoiding it — including children, pregnant people, older adults, or immunocompromised guests — should choose the mayo-based version, vegan mayo version, or no-egg path.

Method

  1. Mash or grate the garlic with salt until it forms a paste. A mortar and pestle is traditional, but a microplane and bowl also work.
  2. Whisk in the egg yolk, lemon juice, and Dijon mustard if using.
  3. Start adding the oil drop by drop while whisking constantly. Do not rush the first few tablespoons.
  4. Once the mixture thickens and looks glossy, add the remaining oil in a very thin stream.
  5. When the sauce gets too thick, whisk in a few drops of water or lemon juice.
  6. Taste and adjust with salt, lemon, or a few more drops of oil.

The first oil addition is the most important part. Too much oil too quickly can split the emulsion. A damp kitchen towel wrapped into a ring under the bowl helps keep it steady while you whisk. Using a measuring cup with a spout also makes slow pouring easier.

The sauce should turn glossy and thicker as the oil goes in. If it starts looking loose or greasy, stop adding oil and whisk until it tightens before continuing.

No-Egg Traditional Aioli

To make no-egg traditional aioli, mash 3 to 4 garlic cloves with a generous pinch of salt until you have a sticky paste. Add mild olive oil very slowly, drop by drop at first, while grinding or whisking constantly. As the paste tightens, use a few drops of lemon juice or water to loosen it and help the sauce come together.

This older-style method is sharper and more garlic-forward than the egg-yolk path. It may look thicker, rougher, or less glossy than mayo aioli, especially on the first try. That is normal. If it refuses to thicken, turn it into a rustic garlic oil dip instead of forcing it; it will still be delicious with bread, potatoes, grilled vegetables, or seafood.
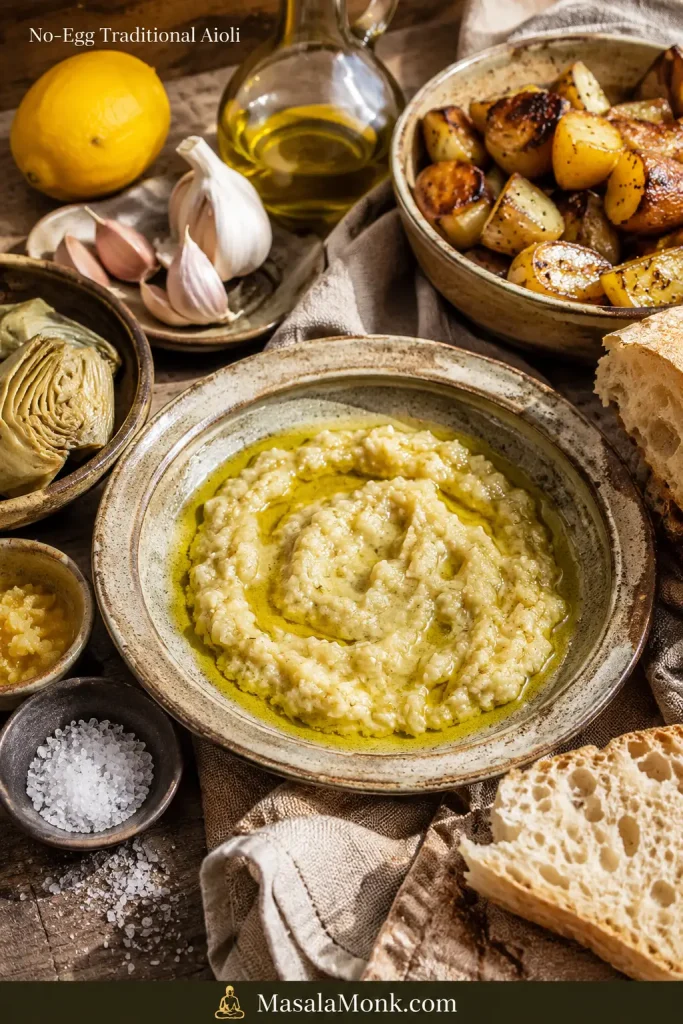
Rustic no-egg traditional aioli in a shallow bowl with olive oil, bread slices, roasted potatoes, artichokes, lemon, garlic, and salt.
No-egg traditional aioli can stay looser and more rustic than the mayo version. Serve it like a garlicky olive-oil dip with bread, potatoes, or artichokes.

For a milder classic sauce, use a mix of mild olive oil and neutral oil. Strong extra-virgin olive oil can taste bitter or peppery, especially when blended aggressively. With an immersion blender, blend the neutral oil first and stir in the olive oil by hand at the end.

Back to top · Jump to recipe

Vegan, Eggless, No-Mayo, and Lighter Options

Choose this section when regular mayo does not fit the people at your table. You can still make a creamy garlic dip, a sharper no-mayo sauce, or a lighter bowl drizzle without losing the main garlic-lemon idea.

These versions are about hospitality, not compromise. Regular mayonnaise usually contains egg. Vegan mayo is egg-free. Greek yogurt is lighter, but it is not dairy-free. Traditional egg-yolk aioli contains raw egg, while no-egg traditional aioli and vegan versions avoid egg entirely. For a dedicated egg-free creamy base, use MasalaMonk’s eggless mayonnaise recipe and follow the same garlic-lemon balance.

Best Eggless Aioli Base to Use

If you are using vegan mayo, follow the same fast aioli ratio and swap the base. If you want no mayo at all, use the traditional aioli section as your starting point.

Four-panel guide showing vegan mayo, soy milk, aquafaba, and cashews with small bowls of vegan or eggless aioli.
Vegan aioli changes depending on the base. Vegan mayo gives the closest shortcut texture, while soy milk, aquafaba, and cashews create different eggless styles.
  • Closest to the main recipe: vegan mayo.
  • From-scratch vegan emulsion: unsweetened soy milk.
  • Creamy bowl sauce: cashews.
  • No-egg traditional path: garlic, salt, oil, and patience.

Use this table to pick the right base, not to make every version.

Vegan Aioli Base Ratios

OptionQuick ratioBest use
Vegan mayo shortcut¾ cup vegan mayo + 3 garlic cloves + 1 tbsp lemon + saltFast vegan dip or spread
Soy-milk vegan aioli½ cup unsweetened soy milk + 1 cup oil + garlic + lemon or vinegar + saltFrom-scratch vegan emulsion
Aquafaba aioli3 tbsp aquafaba + ½ to ¾ cup neutral oil + garlic + lemon or vinegar + mustardEggless aioli-style sauce
Cashew aioli-style sauce1 cup soaked cashews + ½ to ¾ cup water + garlic + lemon + saltCreamy vegan bowl sauce
Lightened garlic aioli½ cup Greek yogurt + ¼ cup mayo + garlic + lemon + Dijon + saltLighter dip for vegetables, chicken, potatoes, wraps, and bowls
No-mayo traditional aioliGarlic paste + salt + slow olive oil + lemon or waterSharper traditional-style sauce

Plain unsweetened soy milk matters here. Sweetened or flavored plant milk will pull the sauce in the wrong direction before the garlic even has a chance. Vegan mayo tastes closest to the main recipe. Soy milk and aquafaba behave more like emulsions. Cashew aioli is creamy and bowl-friendly, but less like classic aioli.

The Greek yogurt version is tangier and less rich than classic garlic aioli. It works especially well as a dip or bowl sauce. For another cool, garlicky yogurt-based sauce, MasalaMonk’s Greek tzatziki sauce recipe is a better fit when you want cucumber, dill, and a lighter Mediterranean finish.

Back to top · Jump to recipe

Aioli Flavor Variations

Once the base tastes right, the variations should feel easy, not like twelve new recipes. You are giving the same sauce a new mood: smoky for tacos, lemony for seafood, mustardy for burgers, herby for vegetables, spicy for fries.

Best Aioli Variations to Start With
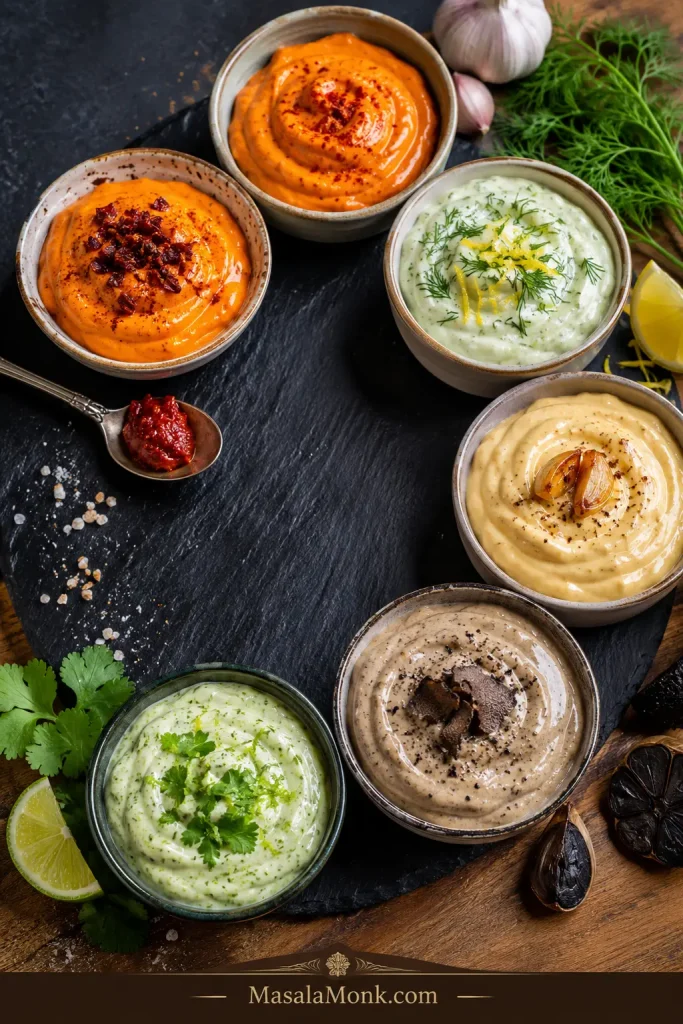
Six bowls of aioli variations on a dark board, including orange spicy aioli, lemon-dill aioli, roasted garlic aioli, dark garlic aioli, and herb aioli.
Once the base aioli is balanced, flavor variations are easy. Chipotle, sriracha, lemon-dill, roasted garlic, black garlic, and herb versions each fit different meals.

If you only try three, make chipotle aioli for tacos and fries, lemon-dill aioli for seafood, and roasted garlic aioli for sandwiches and potatoes. Those three cover smoky, bright, and mellow.

Aioli Variation Ratios

VariationAdd to 1 cup baseGood with
Chipotle aioli1 tbsp adobo or 1 to 2 tsp chipotle powder + 1 tbsp limeTacos, burgers, fries
Sriracha aioli2 tbsp sriracha + 1 tbsp limeShrimp, chicken, fries
Spicy aioli1 to 2 tsp hot sauce, chili paste, or chili crispWraps, sandwiches, fries
Dill aioli1 to 2 tbsp fresh dill + ½ tsp lemon zestSalmon, crab cakes, potatoes
Lemon garlic aioli½ to 1 tsp lemon zest + 1 tsp lemon juiceSeafood, asparagus, chicken
Black garlic aioli3 to 5 mashed black garlic clovesBurgers, fries, roasted vegetables
Mustard aioli1 to 2 tbsp Dijon or whole-grain mustardSandwiches, burgers, potatoes
Truffle aioli¼ to ½ tsp truffle oil or 1 to 2 tsp truffle pasteFries, burgers, mushrooms
Cilantro lime aioli2 tbsp cilantro + 1 tbsp lime + ½ tsp lime zestFish tacos, grain bowls, wraps
Roasted garlic aioli1 to 2 tbsp roasted garlic pastePotatoes, sandwiches, vegetables
Salsa aioli¼ cup well-drained salsa + 1 tsp limeTacos, nachos, burgers
Calabrian chili aioli1 to 2 tbsp chopped Calabrian chilies or paste + lemonSandwiches, fries, grilled vegetables

Chipotle and sriracha both get stronger after a short rest, so begin with less heat and build from there. For fruitier heat, borrow the sweet-hot idea from MasalaMonk’s mango habanero sauce recipe and add it lightly to the aioli base.

Drain salsa first so salsa aioli does not turn watery. If you already have a bright mango salsa, drain it well before folding a spoonful into aioli. For truffle aioli, use a light hand; too much can overpower the garlic and lemon.

Once you pick a flavor, the serving chart will help match it to fries, burgers, seafood, vegetables, or bowls.

What Tastes Best with Aioli?

Start with the food in front of you. Fries want a thick, bold aioli that clings to the crispy edges. Burgers want a smooth spread that does not fight the meat. Seafood wants lemon first, garlic second. Roasted vegetables can handle deeper flavors like black garlic, roasted garlic, herbs, or chili.

What to Serve with Garlic Aioli

Wooden board with garlic aioli, fries, slider, shrimp, croquettes, roasted vegetables, potato wedges, sandwich pieces, lemon, and herbs.
Use garlic aioli wherever food needs creaminess, brightness, and a little bite. Fries, sliders, shrimp, potatoes, roasted vegetables, and sandwiches all work well.

Best Aioli Pairings by Food

Use this as a flavor-matching chart, not a rulebook.

FoodServe withWhy it works
French friesGarlic, truffle, spicyClings to salty fries and cuts through the crunch
Sweet potato friesChipotle, srirachaBalances sweetness with smoke or heat
BurgersGarlic, mustard, chipotleAdds the creamy layer that makes the burger feel finished
Fish tacosChipotle, cilantro limeBrings creaminess, acid, and fresh heat
SalmonLemon dillCuts through rich fish without hiding it
ShrimpLemon garlic, srirachaGives cool brightness against sweet shrimp
Crab cakesLemon dillAdds a creamy seafood-friendly finish
ArtichokesTraditional, lemonTurns each leaf into a rich, garlicky bite
Chicken sandwichGarlic, spicyTurns a dry sandwich into a finished one
Grilled cheeseGarlic, roasted garlicAdds savory depth without needing another filling
Breakfast sandwichGarlic herbWorks with eggs, cheese, and toasted bread
BLTRoasted garlicSoft garlic plays well with tomato and bacon
Roasted vegetablesBlack garlic, herbAdds depth to sweet, browned edges
Potato saladGarlic aioli mixed with mayo or yogurtMakes creamy salads taste brighter and less flat
Deviled eggsGarlic aioli in place of some mayoDeepens the filling without making it heavy
Grain bowlsVegan, cilantro limeTurns grains and vegetables into a real meal

Garlic Aioli for Fries

Classic garlic aioli is the safest first batch for fries because it is thick, creamy, and bold enough to cling to crisp edges.
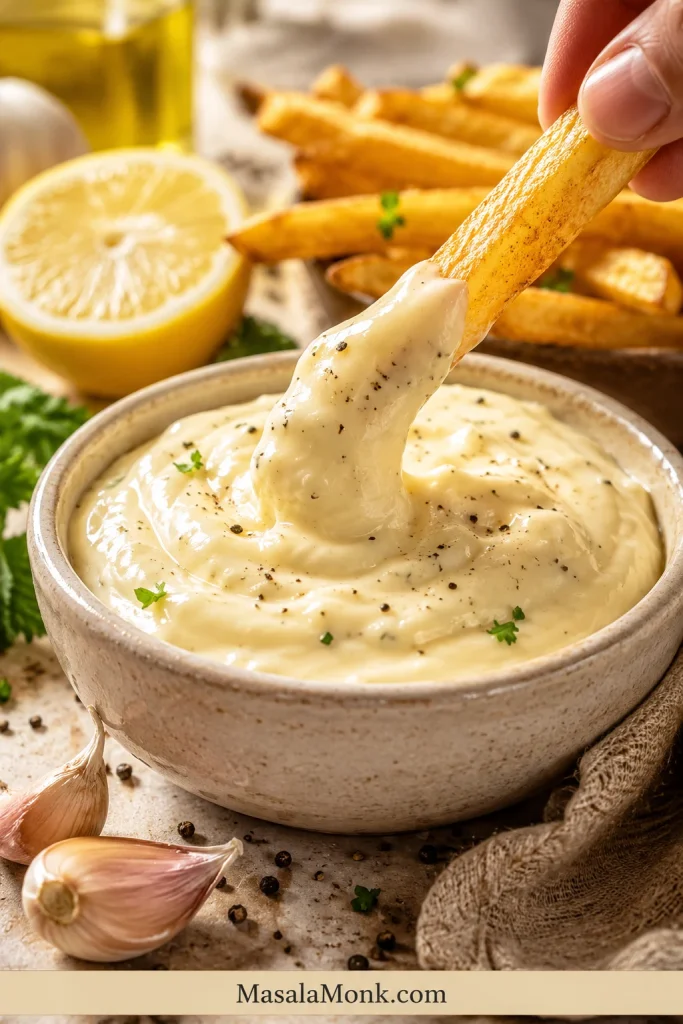
Hand dipping a golden French fry into thick creamy garlic aioli with lemon, garlic, pepper, and more fries in the background.
Fries need a thicker aioli so the sauce catches on crisp edges instead of sliding off. Keep it creamy, spoonable, and bright.

Garlic Aioli for Burgers

For burgers, a thick garlic, mustard, or chipotle version works especially well with a simple burger patty recipe.
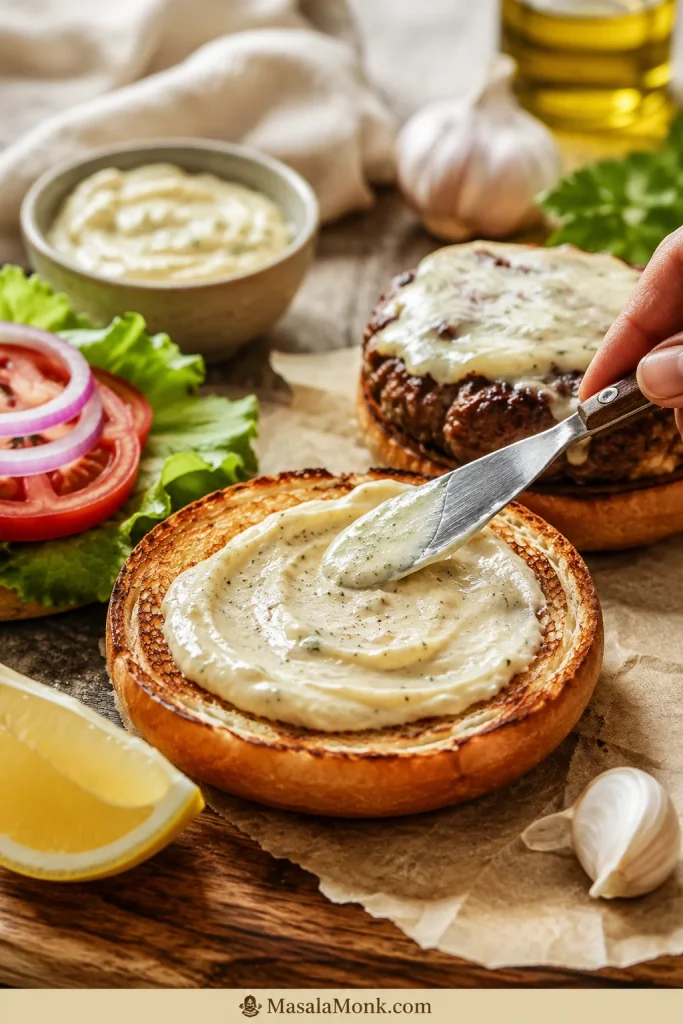
Garlic aioli being spread with a knife on a toasted burger bun with a burger patty, lettuce, tomato, onion, lemon, and garlic nearby.
On burgers, aioli should be a thin, even spread. That way, it adds garlic flavor and moisture without covering up the patty or toppings.

Use the same base with crispy homemade French fries, roasted potatoes, burgers, grilled chicken, or sandwiches.

Chicken and seafood both love this sauce, but in different ways. On chicken, use it as the creamy layer in one of these chicken sandwich recipes, especially with spicy, roasted garlic, or mustard variations. For tacos, the chipotle and cilantro-lime versions fit naturally with MasalaMonk’s shrimp tacos recipe.

Seafood usually wants the lemony side of aioli. Lemon dill aioli is a natural dip for salmon croquettes. Fried fish can go either way: aioli gives you the garlicky option, while MasalaMonk’s tartar sauce recipe gives you the classic pickle-caper direction.

Dip, Spread, or Drizzle

The same sauce can work as a dip, spread, or drizzle with small texture changes. Fries need enough thickness to drag through crispy edges. Seafood tastes better when lemon arrives before the garlic. Sandwiches need a smooth spread, not a garlic bomb.
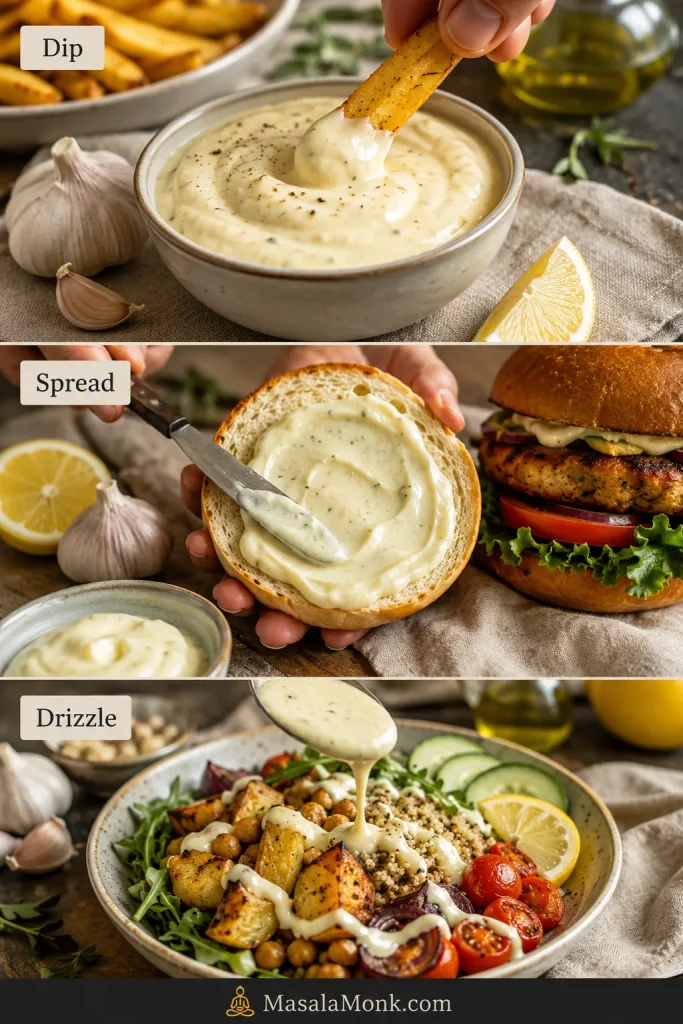
Three-panel guide showing garlic aioli used as a fry dip, spread on bread, and drizzled over a vegetable and grain bowl.
One sauce can become a dip, spread, or drizzle with small texture changes. Keep it thick for fries, smooth for buns, and looser for bowls or vegetables.
  • Dip: use the aioli as written and chill it before serving.
  • Sandwich spread: keep it thick, smooth, and not too garlicky.
  • Drizzle: add water or lemon juice ½ teaspoon at a time.
  • Bowl sauce: loosen with lemon juice, water, or yogurt.
  • Burger sauce: keep it thick and add mustard, chipotle, black garlic, or roasted garlic.

Thin aioli slowly. A little liquid changes the texture quickly. If the sauce looks loose after thinning, stop adding liquid and let it chill before fixing again. When the creamy version gets too loose, stir in more mayonnaise. With traditional aioli, add more oil only when the emulsion is stable. For a lighter dipping plate, thick garlic aioli works with crunchy vegetables or MasalaMonk’s crispy zucchini chips.

Need to reset the base? Go back to the main garlic aioli recipe. If the texture has already gone too far, use the troubleshooting table.

How to Store Aioli Without Losing Freshness

A short rest improves the flavor, but storage depends on the base. Aioli should still taste fresh, cold, and awake — not like something forgotten at the back of the fridge. Mayo-based garlic aioli is easiest to make ahead. Traditional raw egg aioli is more delicate. No-egg traditional aioli tastes best fresh.

Best Storage Window by Version

VersionStorage guidance
Mayo-based garlic aioliBest within 2 to 4 days for fresh garlic flavor; some versions may keep up to about a week if handled cleanly and kept cold
Homemade raw egg/yolk aioliUse pasteurized eggs when available; refrigerate and use within 3 to 4 days
No-egg traditional aioliBest fresh; use within 24 hours for best texture
Vegan soy-milk aioliRefrigerate airtight for 4 to 7 days
Cashew-style vegan aioliRefrigerate for about 1 week; re-blend if needed
Mayo or egg emulsionDo not freeze when texture matters

Keep aioli refrigerated until serving. Stir before using because garlic, lemon, and oil can settle slightly. At parties, keep the main container cold and refill a smaller bowl as needed; the sauce tastes better that way, and it is safer.

As a general safety habit, do not leave aioli at room temperature for more than 2 hours, and shorten that window when the room is very warm. FoodSafety.gov explains the 2-hour rule for perishable foods. Freezing is not recommended for mayo-based or egg-based aioli because the emulsion can break when thawed. Cashew-style vegan aioli handles freezing better, but the texture may still need a quick blend after thawing.

Troubleshooting Aioli

Most aioli problems are fixable. Decide what is wrong first: sharp garlic, flat flavor, loose texture, or a broken emulsion. Then fix only that problem. Mayo-based aioli is forgiving; the traditional garlic-and-oil path needs slower oil, steadier whisking, and more patience.

Aioli Troubleshooting Guide
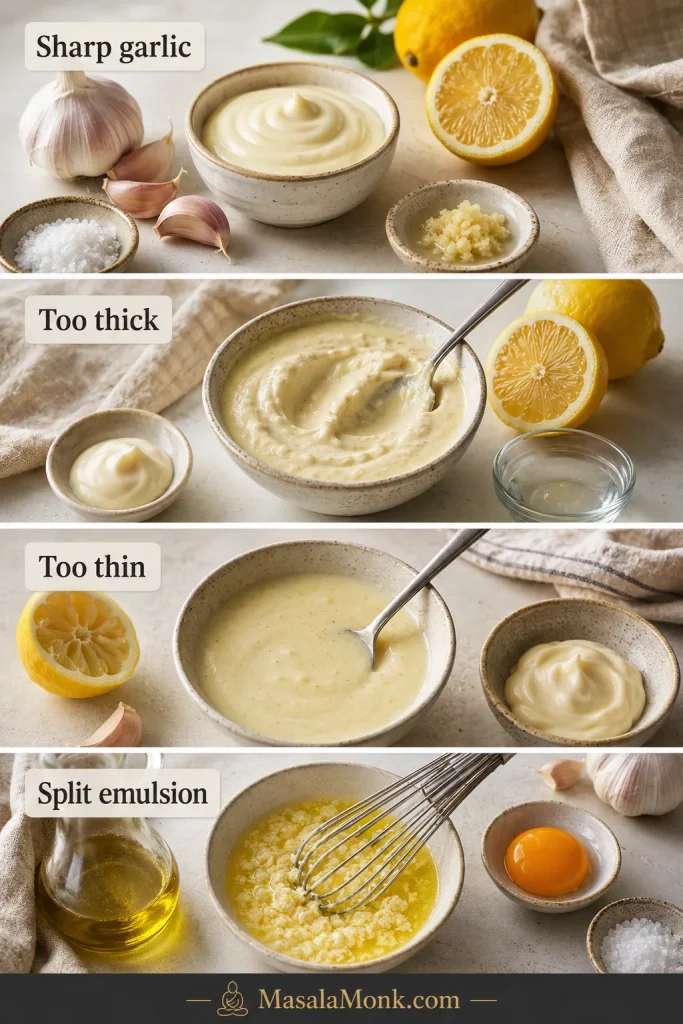
Four-panel aioli troubleshooting guide showing sharp garlic ingredients, thick aioli, thin aioli, and a split emulsion with whisk and egg yolk.
Troubleshoot aioli by naming the problem first. Sharp garlic, thick sauce, thin sauce, and a split emulsion each need a different fix.

Quick Fixes for Common Aioli Problems

ProblemFix
Sharp garlic biteRest longer, add more mayo, use roasted garlic next time, or strain the garlic-lemon mixture
Flat flavorAdd salt, lemon juice, Dijon, or a tiny bit more garlic
Salt pushed too farAdd more mayo, yogurt, or a small splash of lemon when it also tastes heavy
Texture too thickAdd lemon juice or water a few drops at a time
Texture too thinAdd more mayo for the creamy version; for traditional aioli, keep emulsifying slowly
Traditional aioli splitStop adding oil, whisk hard, or start with a new yolk and slowly whisk the broken sauce into it
Olive oil tastes bitterUse milder olive oil or blend with neutral oil; avoid high-speed blending with strong extra-virgin olive oil
Bitter even without olive oilCheck for old garlic, sprouted garlic, too much raw garlic, or too much lemon pith/zest
Vegan aioli will not thickenUse unsweetened soy milk, keep oil and milk at a similar temperature, and blend in a narrow cup
Garlic chunks are unpleasantGrate, press, paste, or strain the garlic before mixing

When traditional aioli breaks, do not throw it away immediately. Start with a fresh egg yolk in a clean bowl, then slowly whisk the broken sauce into the yolk as if it were the oil. Add it gradually and stop when the texture begins to loosen too much.

Back to top · Jump to recipe

FAQs

Is aioli just garlic mayonnaise?

Traditional aioli is not garlic mayonnaise. It is a garlic-and-oil emulsion. Many modern garlic aioli recipes use mayonnaise as a shortcut because it is fast, creamy, stable, and familiar.

What is the difference between aioli and mayo?

Traditional aioli is built around garlic and oil, while mayonnaise is usually made from oil, egg yolk, and acid. Mayo-based garlic aioli combines mayonnaise with garlic, lemon, and seasonings to create a quick modern version. Real Simple has a useful explainer on aioli vs mayo.

How do you turn mayo into aioli?

Stir grated garlic, lemon juice, Dijon mustard, salt, and pepper into mayonnaise, then let it rest for 10 to 15 minutes. Start with ¾ cup mayo, 3 garlic cloves, 1 tablespoon lemon juice, ½ teaspoon Dijon, and ¼ teaspoon salt.

How much garlic should you use in aioli?

Use 3 small-to-medium cloves for balanced garlic aioli, 5 cloves for a bold dip, and 1 to 2 cloves for a milder sandwich spread. Resting the garlic in lemon juice helps soften the raw bite.

Do you need egg to make aioli?

No. Some traditional methods use only garlic and oil. Many from-scratch home versions use egg yolk because it helps the sauce emulsify more easily. Vegan aioli can be made with vegan mayo, soy milk, aquafaba, or cashews.

Can you make aioli without mayo?

Yes. Make traditional aioli by emulsifying garlic with oil, salt, and lemon, with or without egg yolk. Vegan no-mayo versions can use soy milk, aquafaba, or cashews as the base.

How long does homemade aioli last?

Mayo-based garlic aioli is best within 2 to 4 days for fresh garlic flavor, though some versions may keep longer when refrigerated and handled cleanly. Traditional raw egg aioli is best used within 3 to 4 days. No-egg traditional aioli tastes best fresh.

Why did my traditional aioli split?

Traditional aioli usually splits when oil is added too quickly or the emulsion is not stable yet. Add oil drop by drop at the beginning, whisk constantly, and repair a broken sauce by slowly whisking it into a fresh yolk.

Why does aioli taste bitter?

Bitterness can come from strong olive oil, high-speed blending, old or sprouted garlic, too much raw garlic, or lemon pith. Choose milder oil, fresh garlic, and a smaller garlic amount for a smoother sauce.

How do you make garlic aioli less strong?

Use fewer cloves, rest the garlic in lemon juice, add more mayo, or strain the garlic out. Roasted garlic gives the mildest, sweetest result, especially for sandwiches or shared dipping bowls.

What is the best aioli for fries?

Classic garlic aioli is the safest first choice for fries because it is thick, creamy, and bold enough to cling. For sweet potato fries or loaded fries, chipotle, sriracha, truffle, or spicy aioli works especially well.

Make the mayo version once, then pay attention to the bite: more lemon for seafood, more garlic for fries, roasted garlic for sandwiches, herbs for vegetables, heat for tacos. Once you learn that balance, aioli stops being a recipe you look up and becomes the sauce you know how to make.
Posted on Leave a comment

Battered Fries Recipe

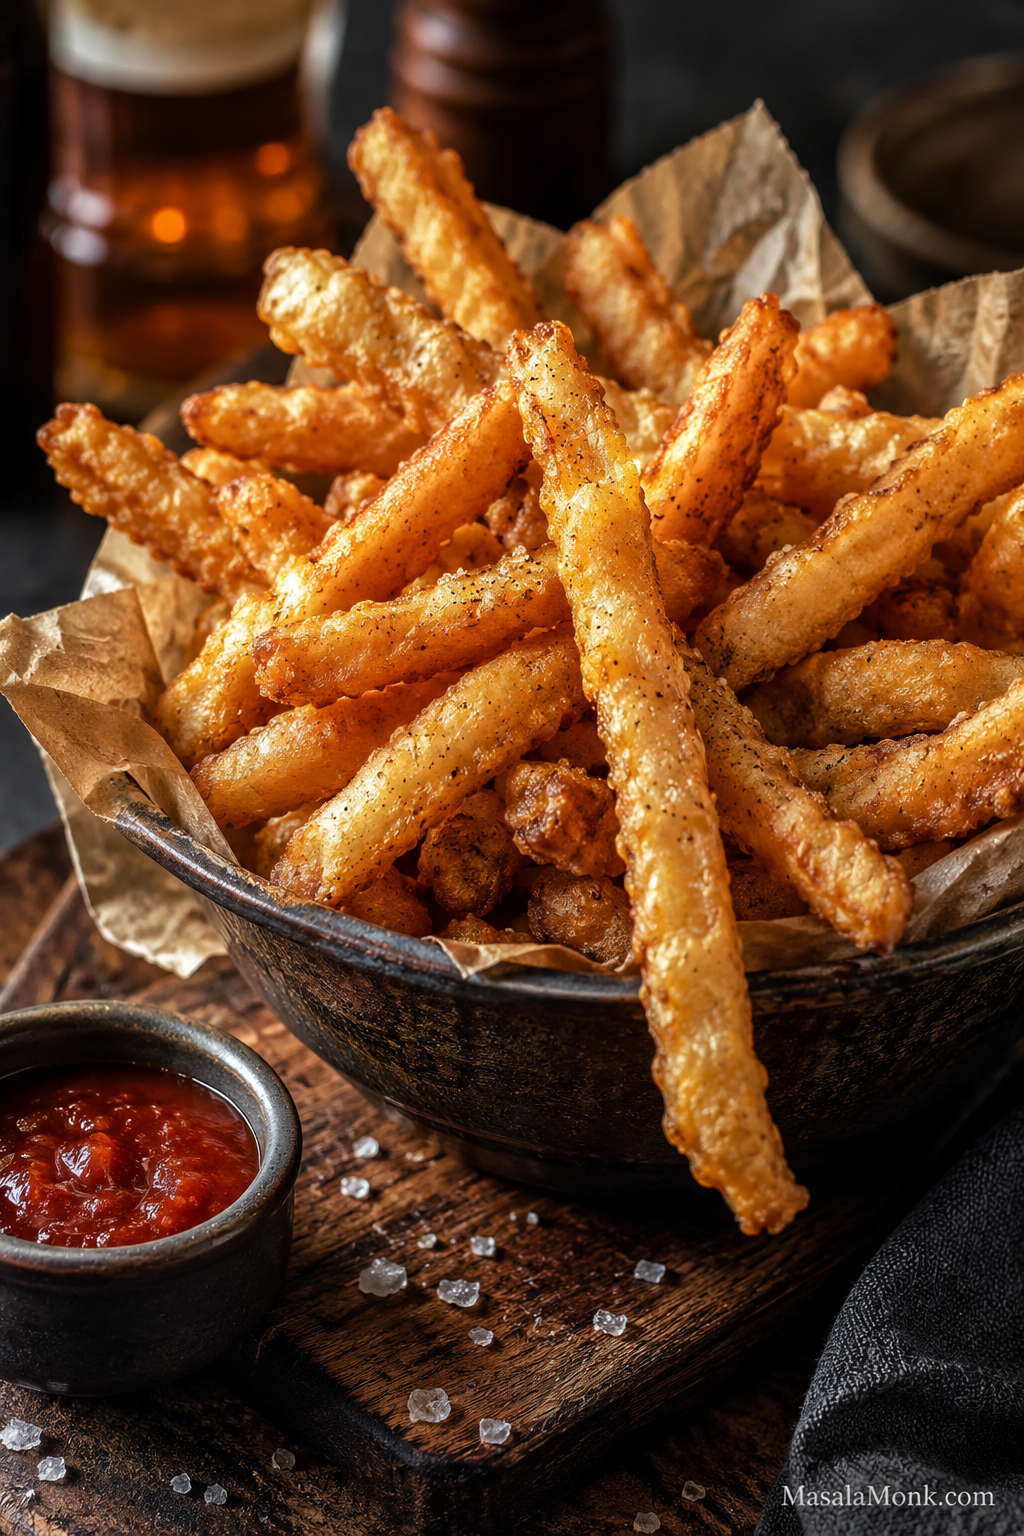
Golden battered fries in a bowl with a craggy crisp coating and dipping sauce on the side.

This battered fries recipe gives you golden, craggy fries with a crisp seasoned coating and fluffy potato centers. The batter clings lightly to each fry, so you get real crunch without a thick, cakey, doughy shell.

Depending on where you live, you may know them as battered fries, battered french fries, batter-dipped fries, or battered chips. This battered fries recipe starts with a no-beer batter, then gives you a pub-style beer batter option, thicker battered chips, air fryer notes, frozen-fries tips, exact frying temperatures, and fixes for soggy fries or batter that falls off.

The goal here is not a heavy potato fritter. These fries should still taste like proper fries first: hot, fluffy, salty, and potato-forward, with just enough seasoned coating to make the outside extra crisp. Once you understand the batter thickness and oil temperature, the recipe is much easier than it looks.

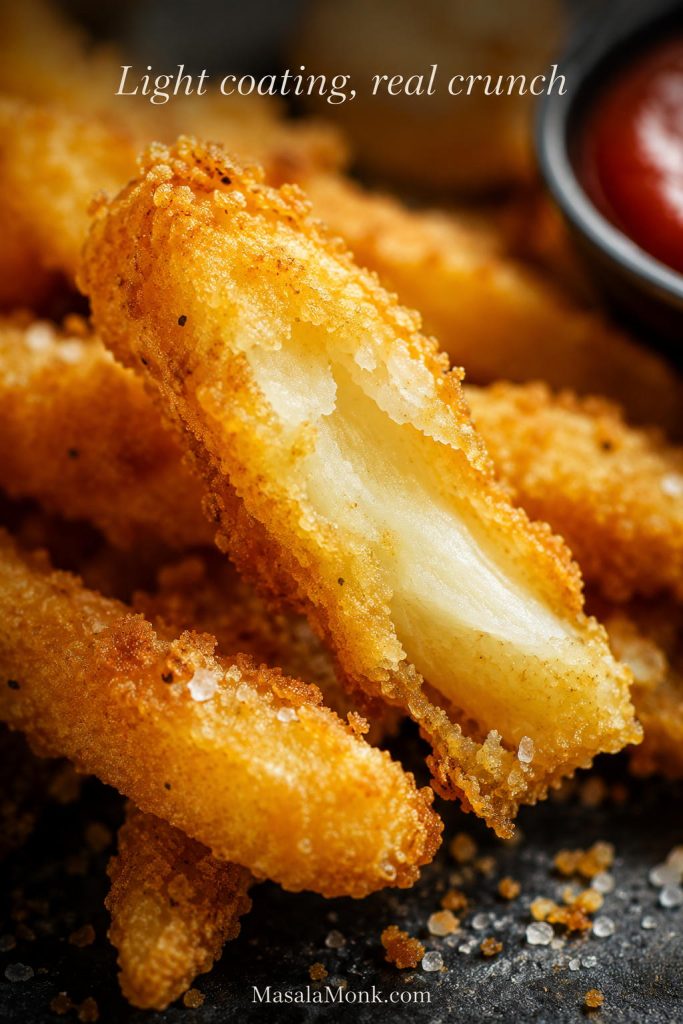
Close-up of battered fries showing a crisp golden coating and a fluffy potato center.
Aim for a crust like this: thin, craggy, and crisp, because a heavy shell can make battered fries taste more doughy than potato-rich.

Quick Answer: How to Make Battered Fries

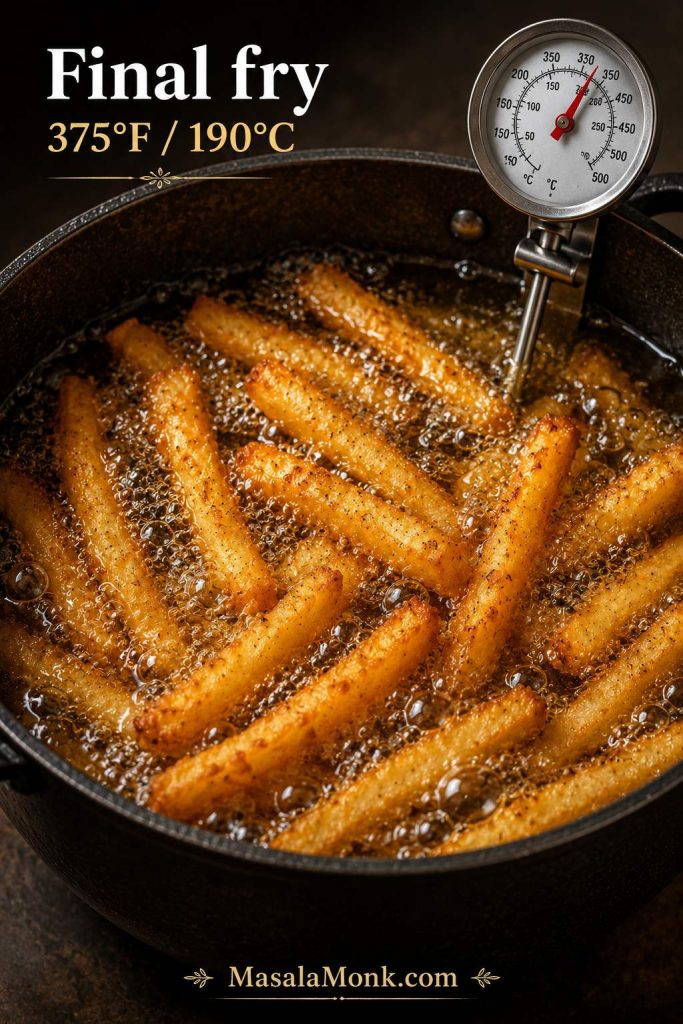
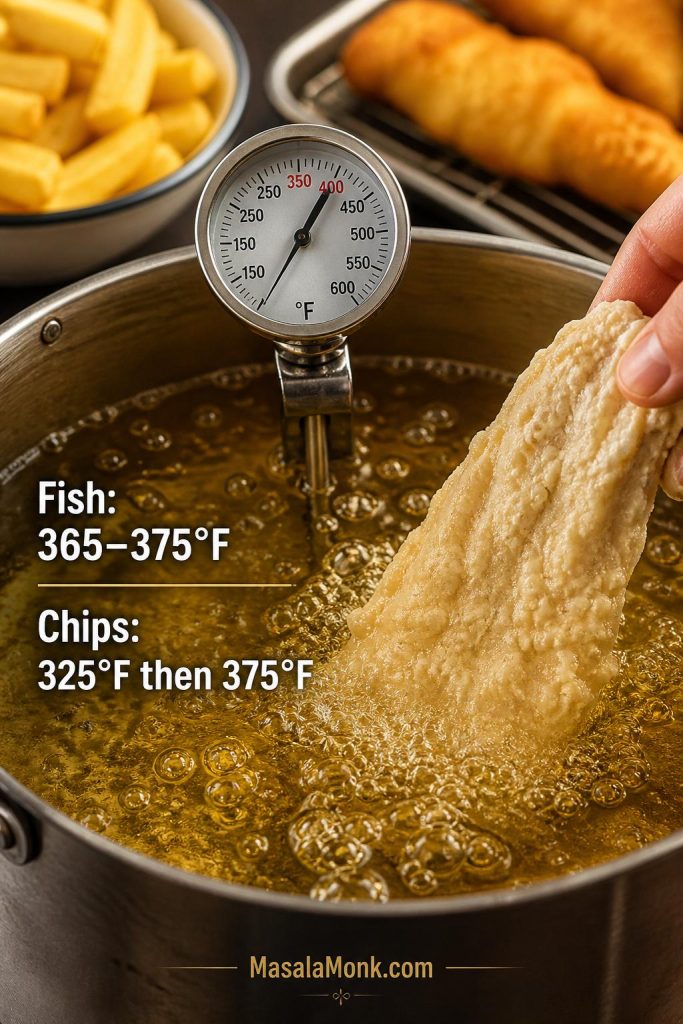
To make battered fries, cut starchy potatoes into fries, soak them in cold water, dry them very well, coat them in a light seasoned batter, and fry until golden. For the best texture, first-fry the potatoes at 325°F / 165°C until pale and partly cooked, then dip them in batter and fry again at 375°F / 190°C until crisp.

The batter should be thin enough to drip slowly but thick enough to cling. A mix of flour, cornstarch or potato starch, baking powder, seasoning, and ice-cold sparkling water gives you crisp battered fries without beer. For beer battered fries, use cold lager or pilsner instead of sparkling water.

Serve them as soon as possible after frying. Battered fries lose crunch when they sit covered, stacked, or trapped in steam.

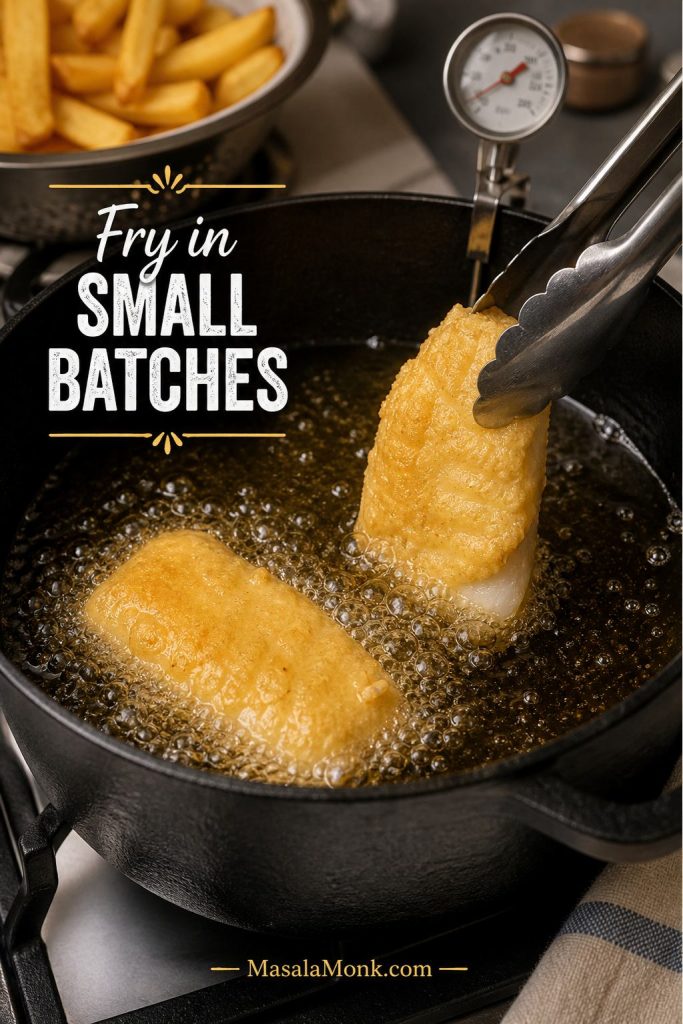
Best texture shortcut: dry the potatoes thoroughly, dust them lightly with flour, cornstarch, or potato starch before dipping, and fry in small batches so the oil stays hot.

If battered fries have turned soggy or the coating has slipped off before, do not worry. The drying, dusting, and double-fry steps below are there to fix exactly those problems.

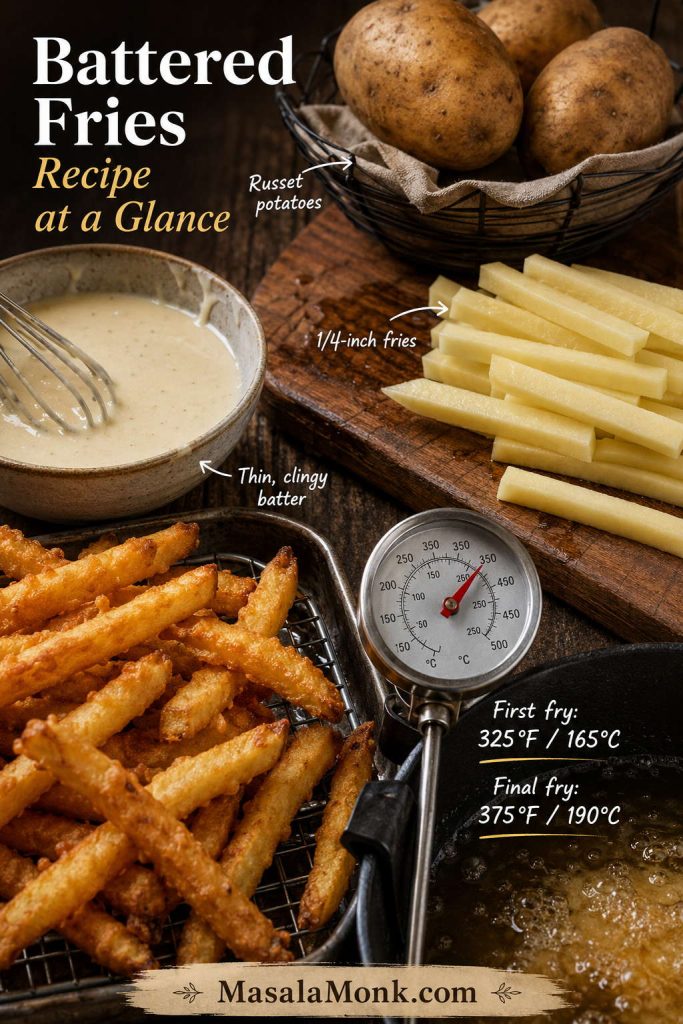
Battered Fries Recipe at a Glance

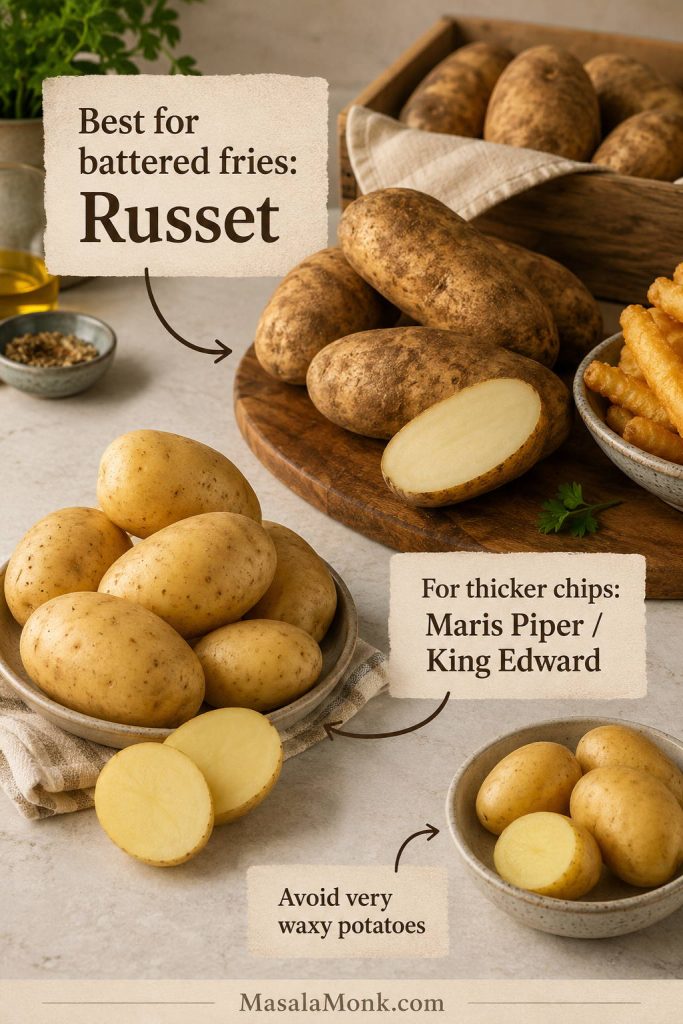
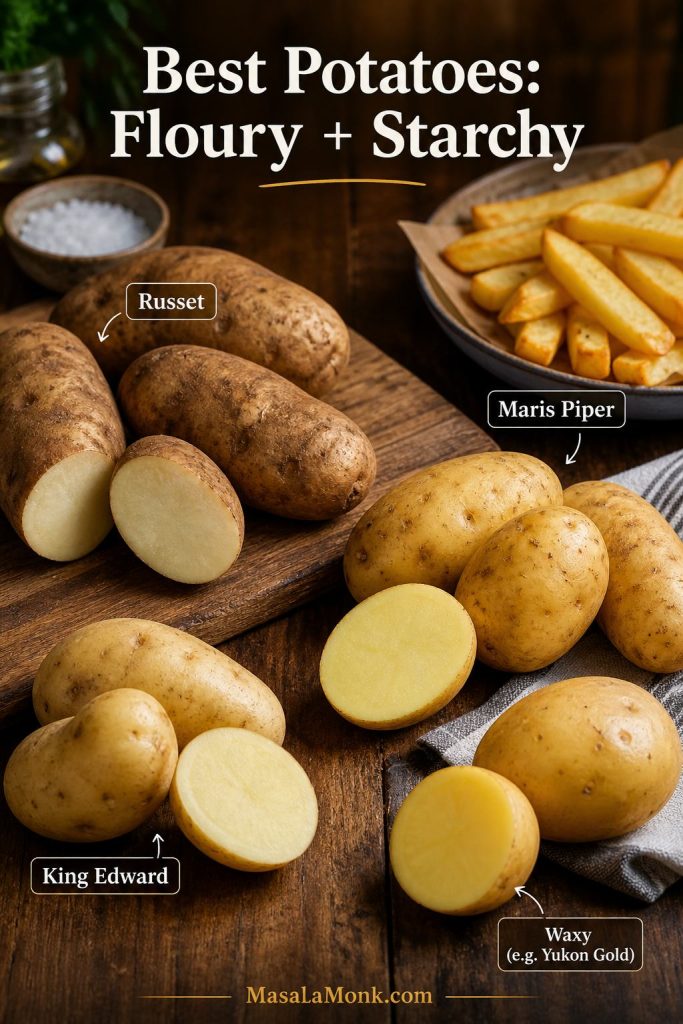
Potato choice Russet potatoes for battered fries; Maris Piper or King Edward for thicker battered chips.
Cut size ¼-inch fries for crisp battered french fries; ½-inch pieces for battered chips.
Batter texture Thin enough to drip slowly, thick enough to cling lightly.
Main liquid Ice-cold sparkling water, seltzer, or club soda for no-beer battered fries; cold lager or pilsner for beer battered fries.
Frying method For this battered fries recipe, first fry at 325°F / 165°C, then batter and final fry at 375°F / 190°C.
Success tip Dry the potatoes very well before battering.
Battered fries guide showing russet potatoes, quarter-inch fries, thin batter, and first and final fry temperatures.
If you want the quick version first, remember the four anchors of a good battered fries recipe: starchy potatoes, thin cuts, cold batter, and two controlled fry temperatures.
Ready to cook? Go straight to the step-by-step method or the recipe card.

What Are Battered Fries?

Battered fries are french fries coated in a seasoned batter before frying. The coating fries into a crisp, rough shell around the potato, giving you more crunch and seasoning than regular fries.

They are sometimes called battered french fries, batter-dipped fries, coated fries, or battered chips. The exact name changes by region, but the idea is the same: potato inside, crisp coating outside, and plenty of surface texture for salt, vinegar, ketchup, aioli, ranch, or cheese sauce.

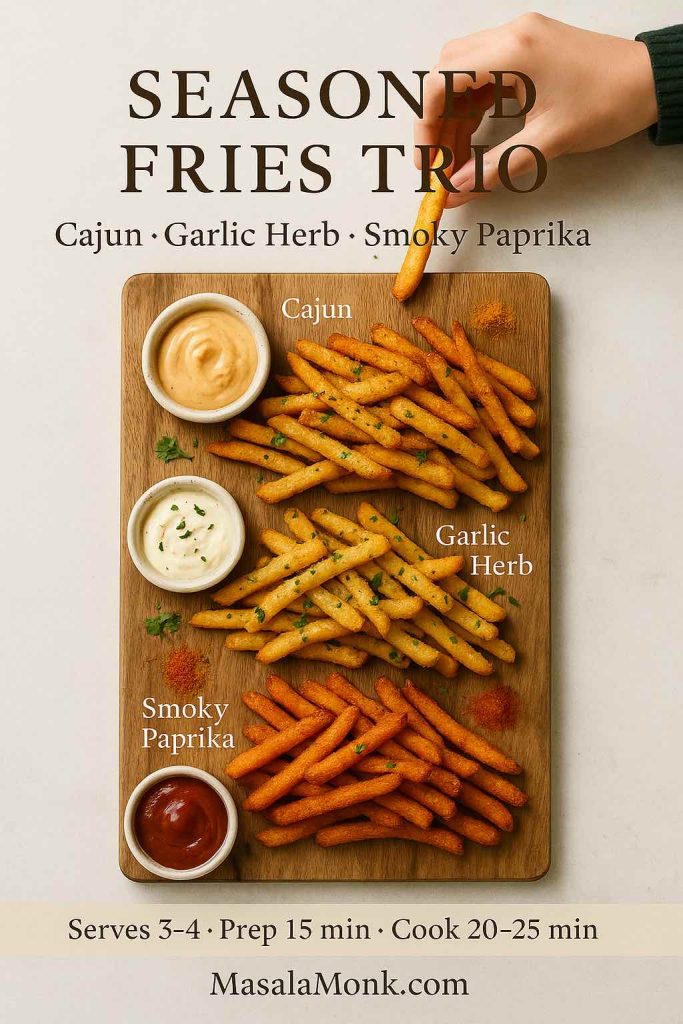
For the classic unbattered version, start with MasalaMonk’s crispy homemade French fries guide; once you want a rougher, crunchier coating, come back to this battered version.

Why This Battered Fries Recipe Works

The crispness comes from a few small choices working together. Starchy potatoes give you fluffy centers. Soaking removes excess surface starch. Drying helps the batter cling. Cornstarch or potato starch keeps the coating crisp, baking powder lightens it, and cold carbonation helps the batter fry up airy instead of heavy.

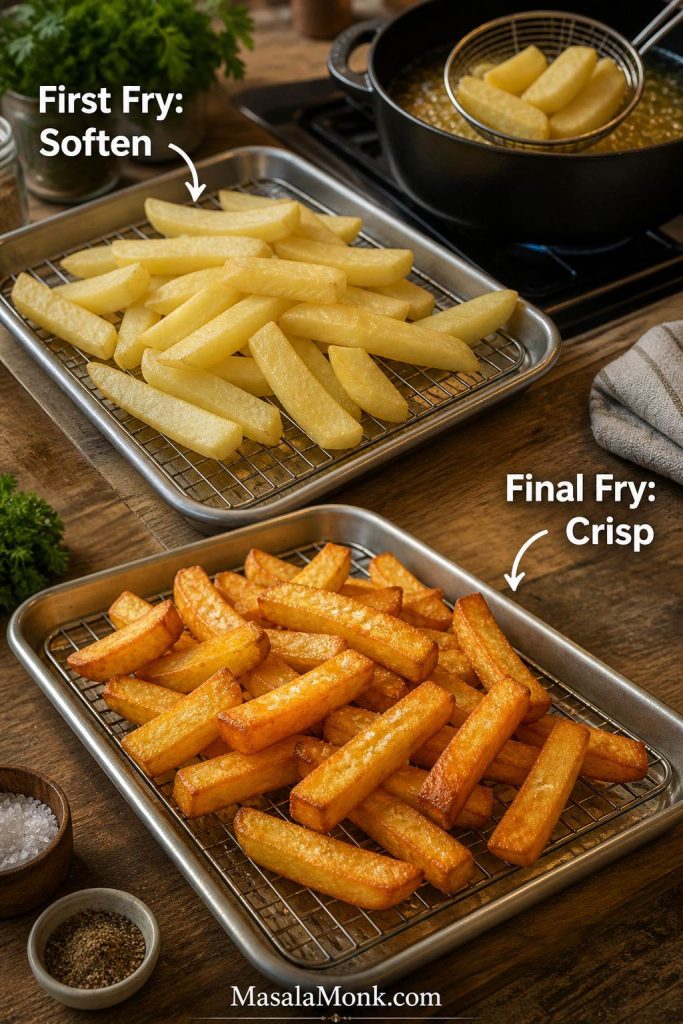
Most importantly, the double-fry method makes the biggest difference. The first fry cooks the potato through before the batter goes on, while the second fry crisps the coating quickly. As a result, the outside turns golden without leaving the center hard or undercooked.

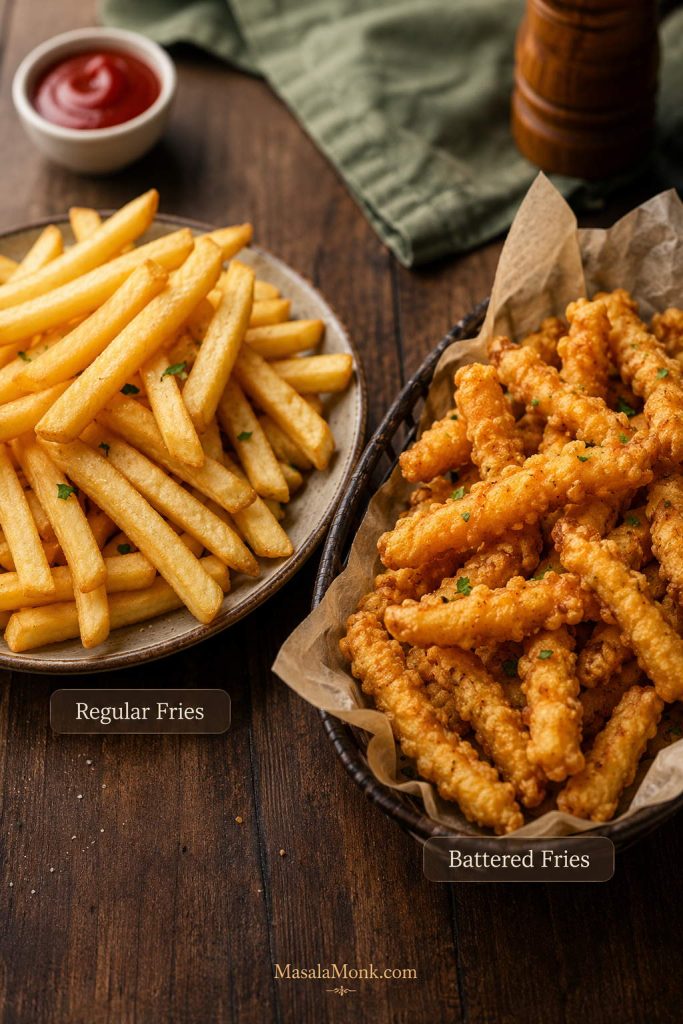
Battered Fries vs Regular Fries

Regular fries are usually fried plain, sometimes after soaking, blanching, or double-frying. Battered fries get an extra coating before frying, so the outside is more rugged, crunchy, and seasoned.

Type Texture How It Is Made Best For
Regular fries Crisp outside, fluffy inside Fried without batter Classic fries, burgers, everyday sides
Battered fries Craggy, crisp, seasoned shell Dipped in seasoned batter before frying Pub-style fries, dipping sauces, fish and chips sides
Coated fries Lightly crisp, less batter-heavy Tossed in starch or dry coating Air fryer versions and lighter coatings
Beer battered fries Light, crisp, pub-style coating Made with cold beer in the batter Fish and chips, fried seafood, party snacks
Regular fries and battered fries shown side by side to compare smooth fries with craggy coated fries.
Regular fries give you a cleaner bite, whereas battered fries add a rougher seasoned surface that catches more salt, sauces, and spice.

You may also see breaded fries or coated fries. Those usually use a dry flour, starch, or breadcrumb-style coating rather than a loose wet batter. They can be easier for baking or air frying, but they do not give quite the same pub-style battered shell.

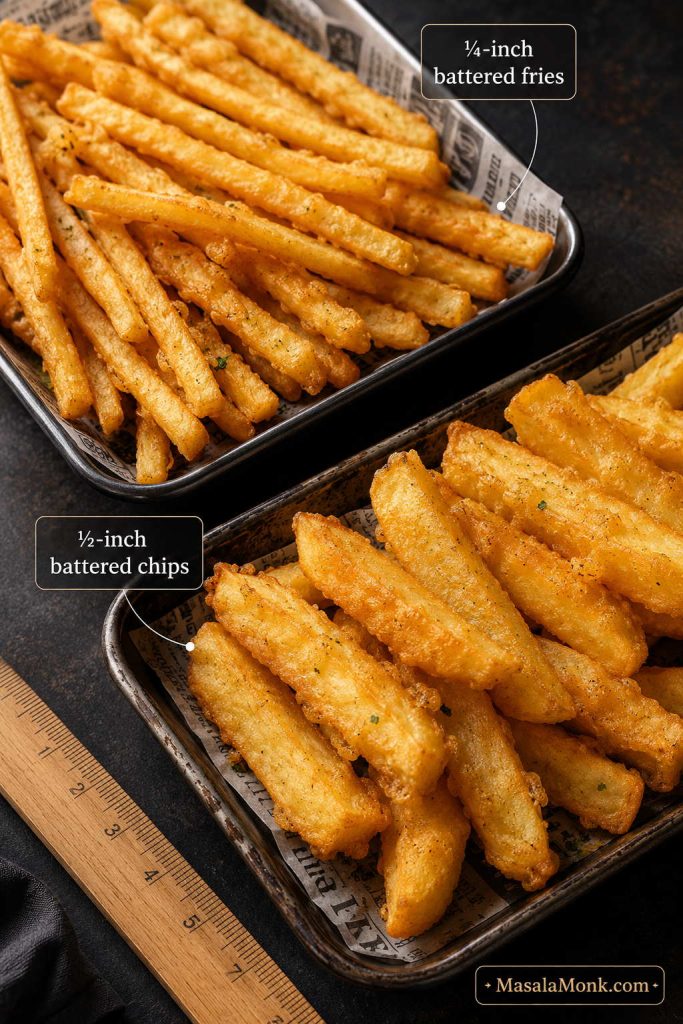
Battered Fries vs Battered Chips

Battered fries and battered chips are close cousins. In the United States, battered fries usually means battered french fries. In the United Kingdom and some other places, chips often means thicker-cut fried potatoes, so battered chips are usually chunkier than American fries.

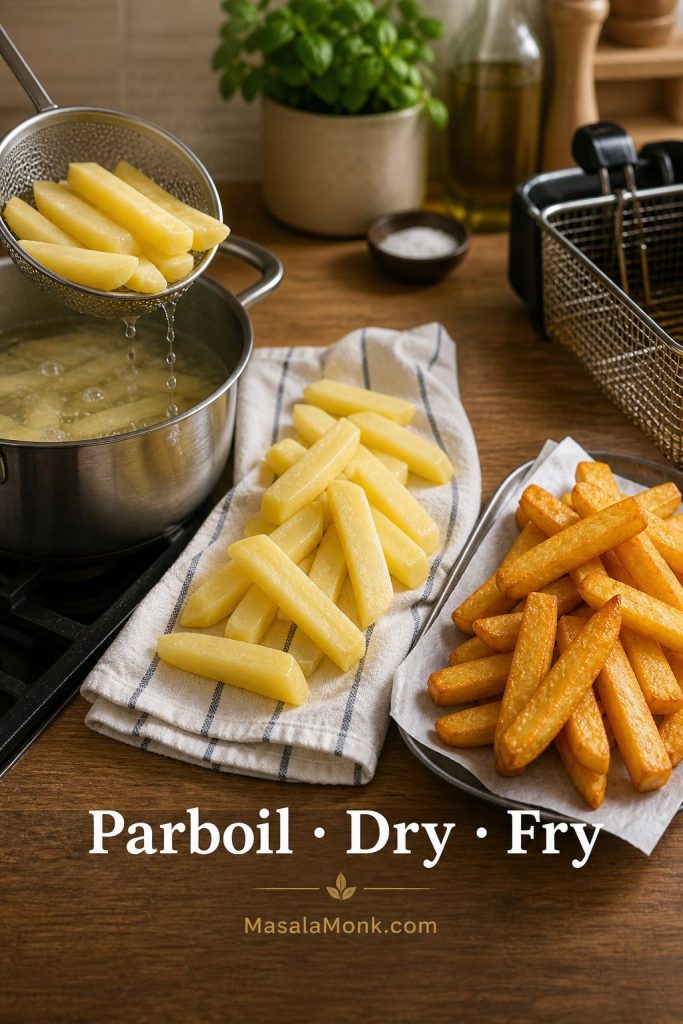
For thin or medium battered french fries, cut the potatoes about ¼ inch thick. For battered chips, cut them closer to ½ inch thick and cook the potato before battering, either by parboiling or first-frying. That way, the inside turns tender before the coating gets too dark.

Thin battered fries and thicker battered chips shown with cut-size labels.
Thin battered fries cook fast, but battered chips need a thicker-cut strategy, so the inside turns tender before the outside gets too dark.
Making thicker chips instead of fries? Jump to the battered chips method.

Ingredients for This Battered Fries Recipe

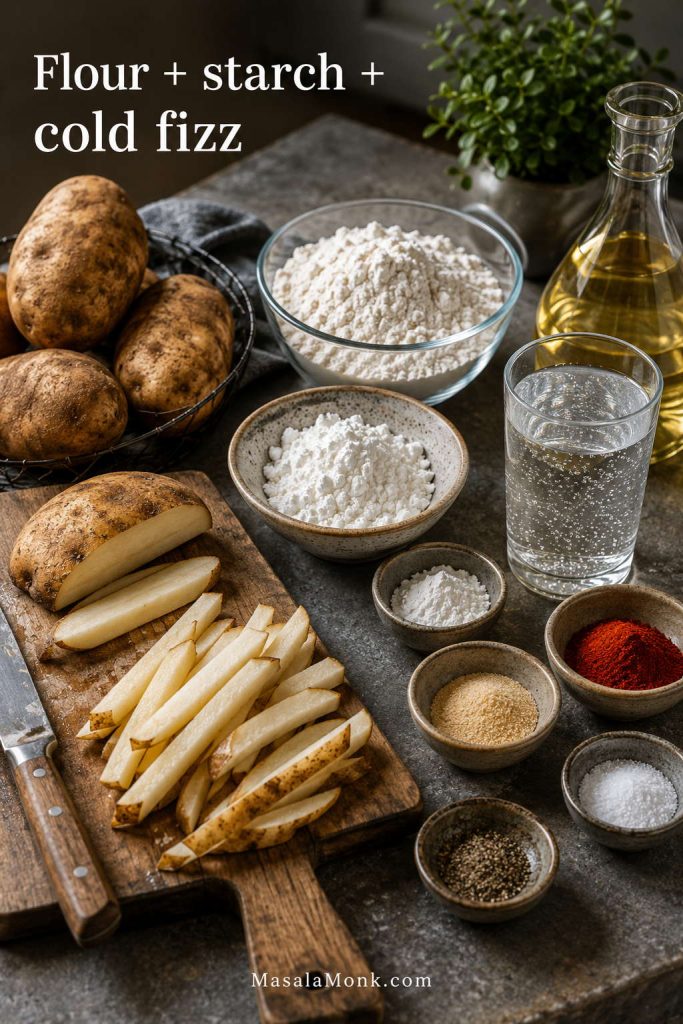
The main battered fries recipe uses a no-beer batter, so it works even if you do not want to cook with alcohol. A beer batter version is included below as an easy variation.

Ingredients for battered fries including potatoes, flour, starch, baking powder, seasonings, sparkling water, and oil.
Flour builds structure, starch sharpens the crunch, and cold fizz lightens the batter, so each ingredient has a clear job in the final texture.

Potatoes

  • 2 lb / 900g russet potatoes — best for fluffy centers and crisp edges.
  • Maris Piper or King Edward potatoes — good UK options for thicker battered chips.

Batter

  • 1 cup / 120g all-purpose flour — gives the batter structure.
  • ⅓ cup / 40g cornstarch or potato starch — helps the coating fry crisp instead of heavy. Potato starch gives a slightly more delicate, crackly finish; cornstarch is easier to find and still works well.
  • 1 tsp baking powder — lightens the batter.
  • 1 tsp fine salt — seasons the coating from the inside.
  • 1 tsp paprika — adds color and mild flavor.
  • ¾ tsp garlic powder — gives savory depth.
  • ½ tsp onion powder — rounds out the seasoning.
  • ¼ tsp black pepper — adds gentle heat.
  • ⅛–¼ tsp cayenne, optional — for a little kick.
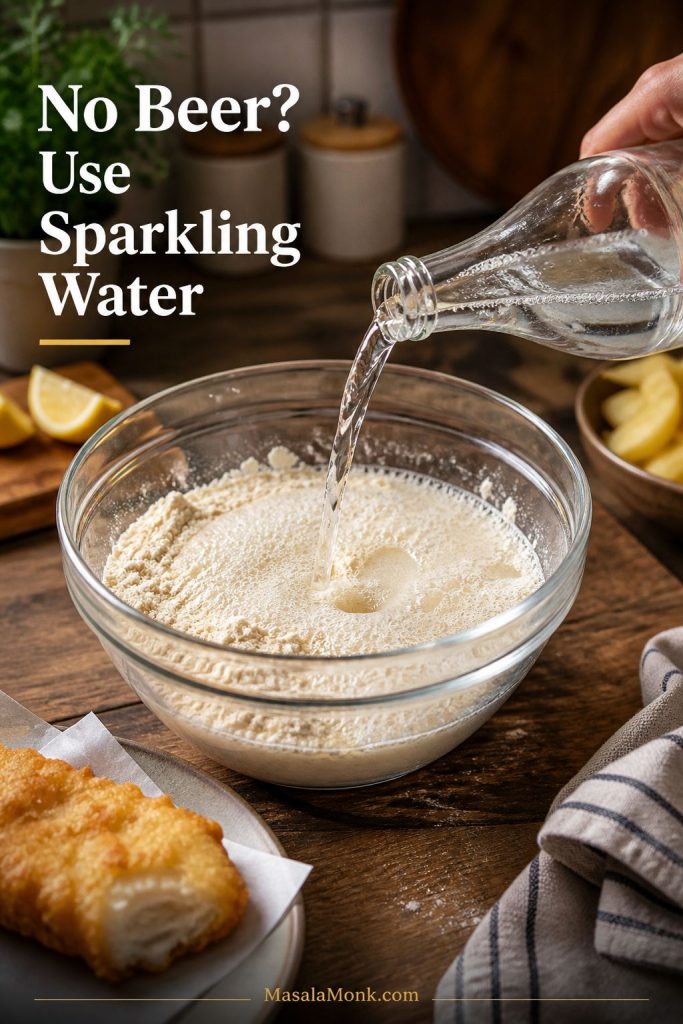
  • ¾ cup / 180ml ice-cold sparkling water, seltzer, or club soda, plus 1–3 tbsp more as needed — keeps the batter light and crisp without beer.

Because some seasoning blends are already salty, reduce the fine salt in the batter slightly and season the finished fries to taste.

For Frying

  • Neutral oil for deep frying — vegetable, canola, sunflower, peanut, or another high-heat frying oil.
Why sparkling water? Cold carbonation gives the batter lift without beer. Sparkling water, seltzer, or club soda all work. For beer battered fries, use cold lager or pilsner in place of the water.
Got everything ready? Check the batter thickness guide before mixing, or head to the step-by-step method.

Best Potatoes for Battered Fries

Starchy potatoes are best because they cook up fluffy inside and crisp well outside. In the US, use russet potatoes. For battered chips, especially UK-style chips, Maris Piper or King Edward potatoes are good choices.

Avoid very waxy potatoes if your goal is a fluffy center. Waxy potatoes hold their shape well, but they do not give the same classic fry texture.

For more potato-prep detail, the Idaho Potato Commission’s French fry guidance is a useful reference for russets, soaking, blanching, and batch size.

Potato guide showing russet potatoes for battered fries and Maris Piper or King Edward potatoes for thicker chips.
Russets work best for battered fries because their starchy texture stays fluffy, while Maris Piper or King Edward are especially useful for thicker battered chips.
Cut Best Use Texture
¼-inch fries Battered french fries Crisp coating, faster cooking, classic fry shape
⅜-inch fries Pub-style battered fries More potato inside, still crisp outside
½-inch chips Battered chips Thicker, softer center, best with parboiling or first-frying

Equipment You Need

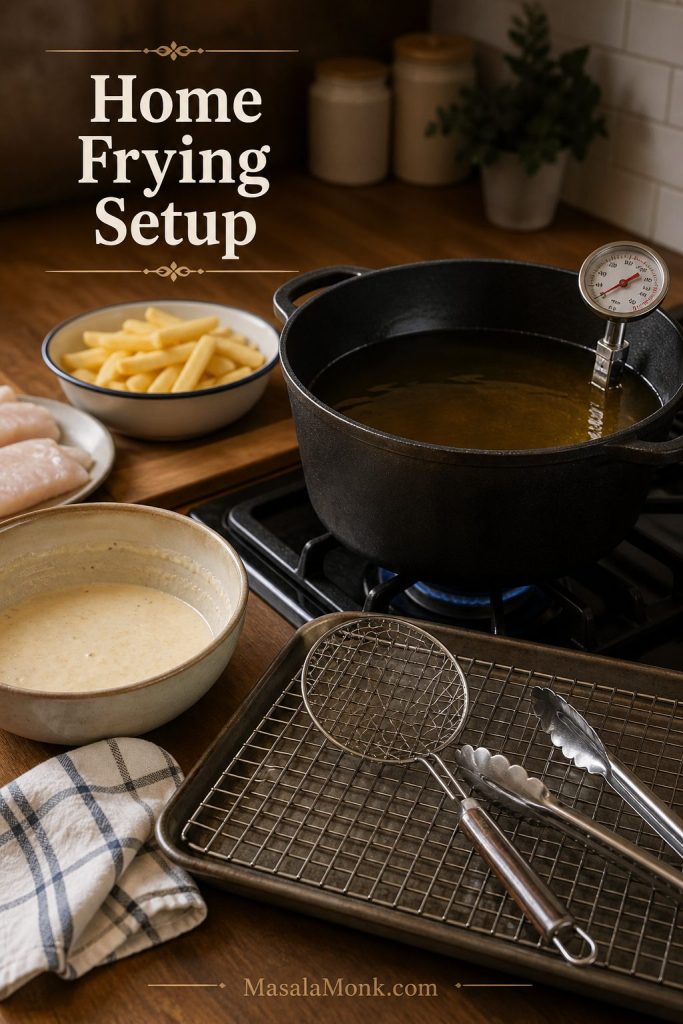
You do not need restaurant equipment, but a few tools make battered fries much easier and safer.

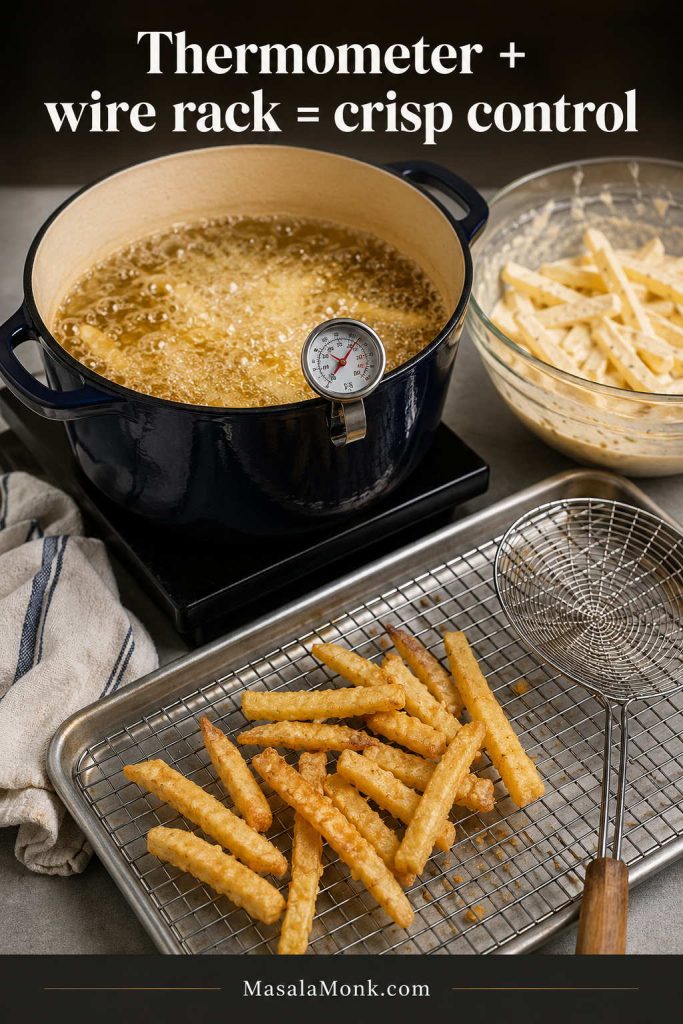
  • Heavy-bottomed pot, Dutch oven, or deep fryer — choose something deep enough to leave several inches of headroom above the oil.
  • Oil or candy thermometer — the easiest way to keep the oil at the right temperature.
  • Large bowl — for soaking the potatoes.
  • Clean kitchen towels or paper towels — for drying the fries thoroughly.
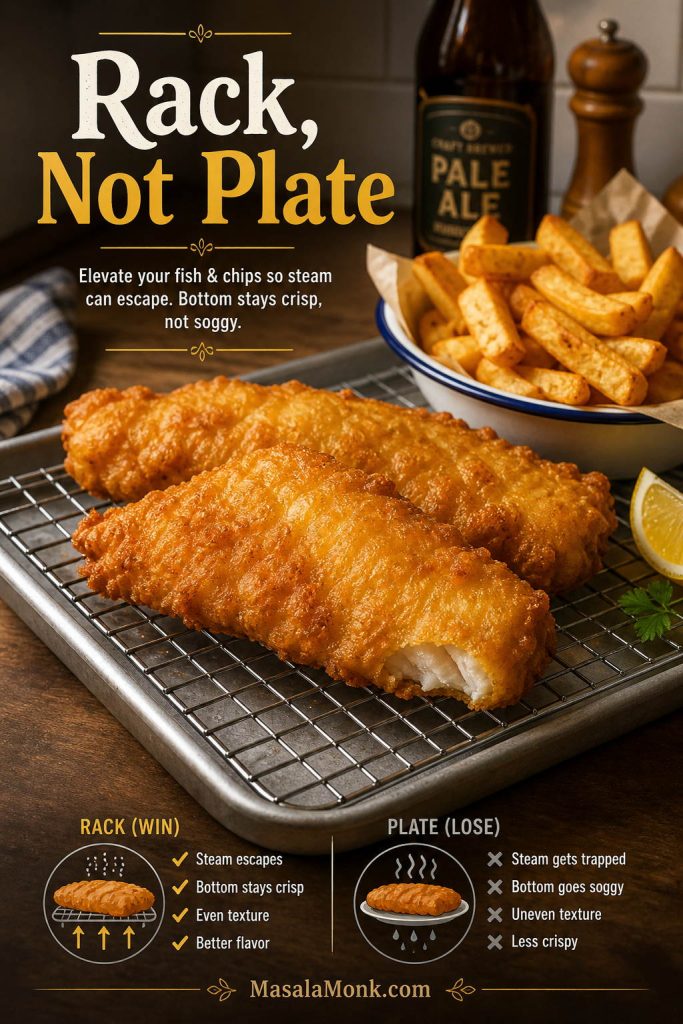
  • Wire rack over a sheet pan — better than piling hot fries on paper towels, which can trap steam.
  • Spider skimmer, slotted spoon, or tongs — for lowering and lifting fries safely.
Frying setup for battered fries with a deep pot, thermometer, wire rack, skimmer, towel, and batter bowl.
You do not need restaurant gear; instead, focus on a thermometer and wire rack, because they help control both oil temperature and steam.
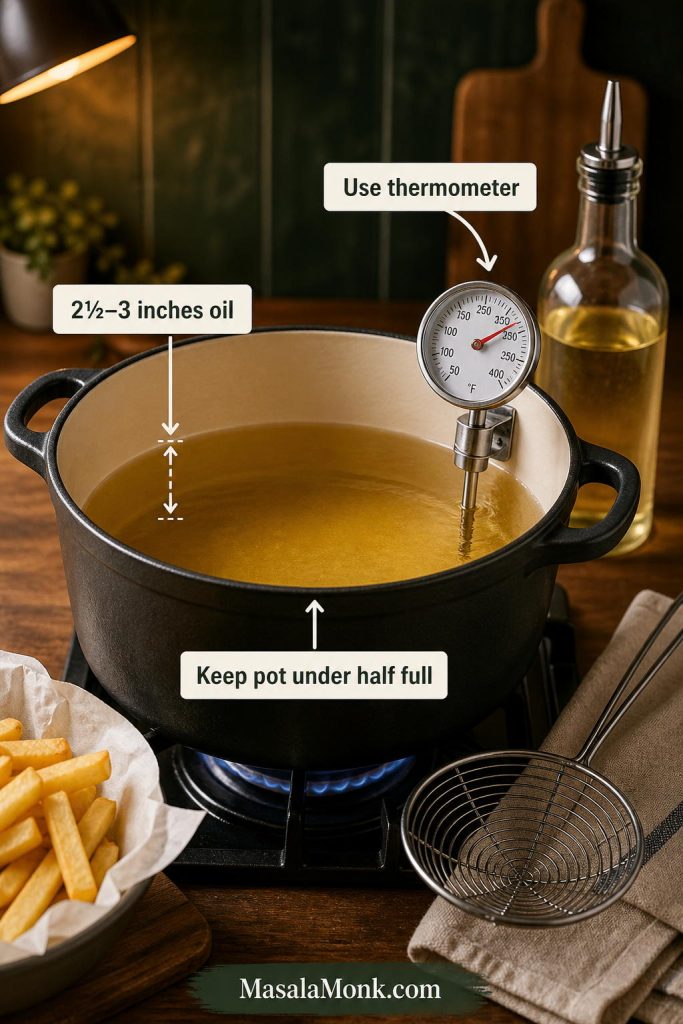
Deep-frying safety: never fill the pot more than halfway with oil. Add fries carefully, fry in small batches, and keep water away from hot oil. For more technical frying guidance, Oklahoma State University Extension explains why oil temperature, batch size, and recovery time matter during deep-fat frying.

Best Oil for Battered Fries

Use a neutral, high-heat oil such as vegetable, canola, sunflower, or peanut oil. You want enough oil for the fries to move freely, usually about 2½–3 inches in a deep, heavy pot, but the pot should never be more than halfway full.

Deep pot with frying oil, thermometer, and oil-depth labels for making battered fries safely.
Neutral oil works best, but the real secret is control: enough depth for even frying, yet enough empty space in the pot for safe bubbling.

Oil temperature matters more than the exact oil brand. If the oil is too cool, the fries absorb oil and turn greasy. If it is too hot, the coating browns before the potato inside is tender. A thermometer is the easiest way to stay in control.

As a practical rule, fry only enough potatoes to cover the surface of the oil loosely, with space between pieces. If the oil stops bubbling actively or drops far below the target temperature, the batch is too large.

The Best Batter Thickness for Fries

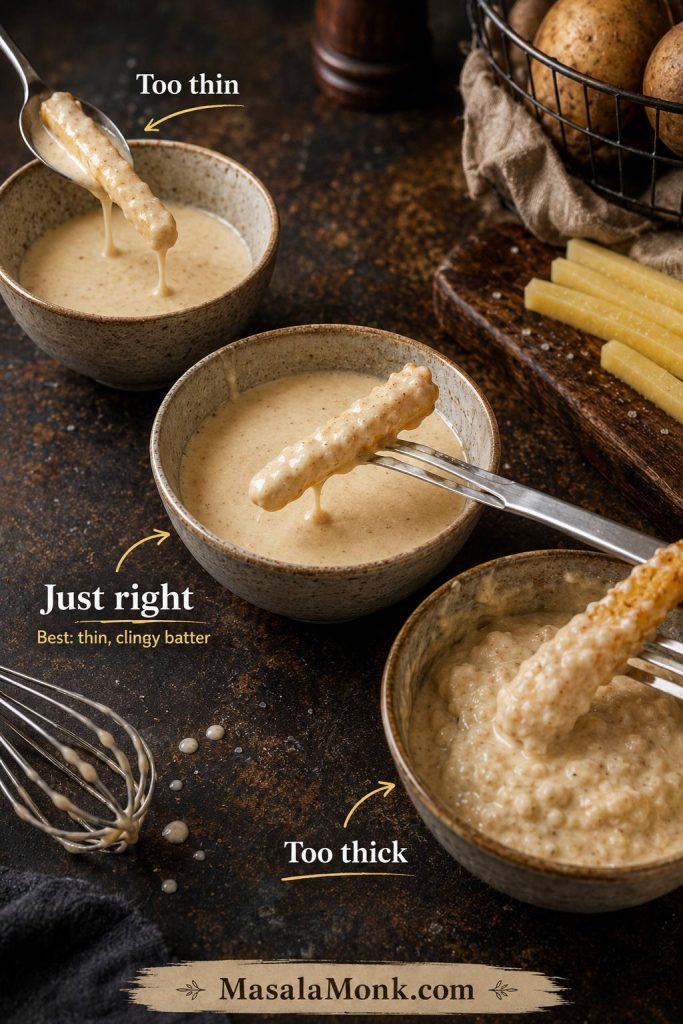
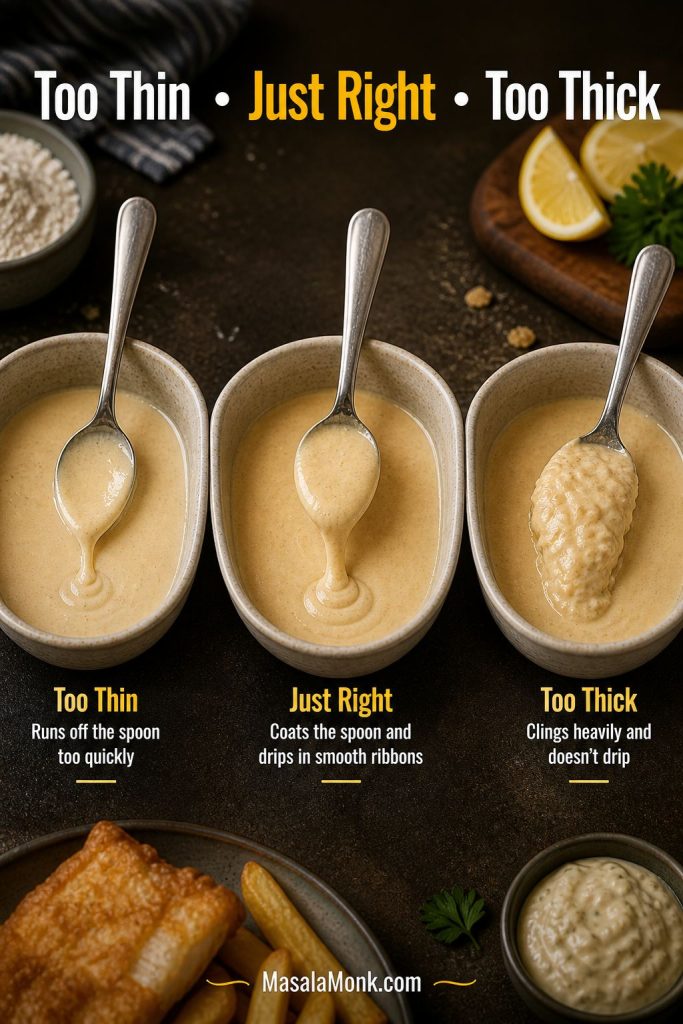
For this battered fries recipe, the batter should coat each fry in a thin layer, drip slowly, and still show the shape of the potato underneath. Think pourable gravy or thin pancake batter, not paste. If it runs off like water, it is too thin. However, if it sits on the fry in thick ridges, it is too heavy and can turn cakey.

Three bowls of batter showing too thin, just right, and too thick textures for battered fries.
Batter consistency changes everything: too thin slides off, too thick turns cakey, and the sweet spot drips slowly while still clinging.
Batter Texture What Happens How to Fix It
Too thin Runs off the fries and leaves bare spots Add flour 1 tbsp at a time
Just right Clings lightly and drips slowly Use immediately while cold
Too thick Turns cakey, clumpy, or doughy Add cold sparkling water, club soda, or beer 1 tbsp at a time
If your coating keeps sliding off, go to how to make batter stick or the troubleshooting table.

How to Make Batter Stick to Fries

If the batter keeps sliding off, the answer is usually not to make it much thicker. In fact, batter that is too thick can turn heavy and slide off in clumps. The better approach is dry potatoes, a light dusting, and hot oil.

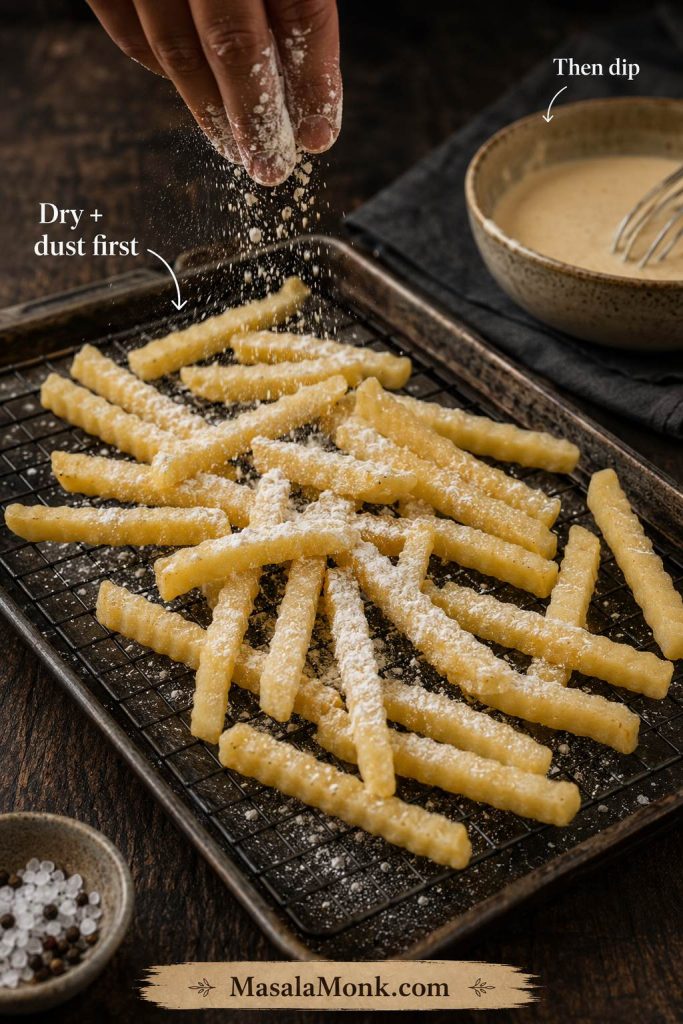
Fries being dusted with flour or starch before dipping into batter.
If batter keeps slipping off, dry the fries well and dust them lightly first, because grip matters more than a thicker batter does.
  • Dry the potatoes completely: surface moisture makes batter slip and oil splatter.
  • Use a light dusting first: a thin coat of flour, cornstarch, or potato starch gives the batter something to grip.
  • Keep the batter cold: cold batter fries up lighter and clings better.
  • Let excess batter drip off: too much batter creates clumps instead of a crisp shell.
  • Add fries one by one: this stops them from sticking together in the oil.
  • Keep the oil hot: if the oil is too cool, the coating absorbs oil before it sets.

How to Make This Battered Fries Recipe

The best method for this battered fries recipe is simple once you understand the order: soak, dry, first-fry, batter, final-fry. The first fry cooks the potato inside, while the second fry crisps the coating.

1. Cut and Soak the Potatoes

Peel the potatoes if you prefer a smoother fry, or leave the skins on for a more rustic texture. Cut into ¼-inch fries for battered french fries or thicker pieces for battered chips.

Place the cut potatoes in cold water for at least 30 minutes. For better texture, soak for 1–2 hours. Soaking helps remove excess surface starch, which can make fries brown unevenly or stick together. For a firmer fry, add 1 tbsp vinegar to the soaking water.

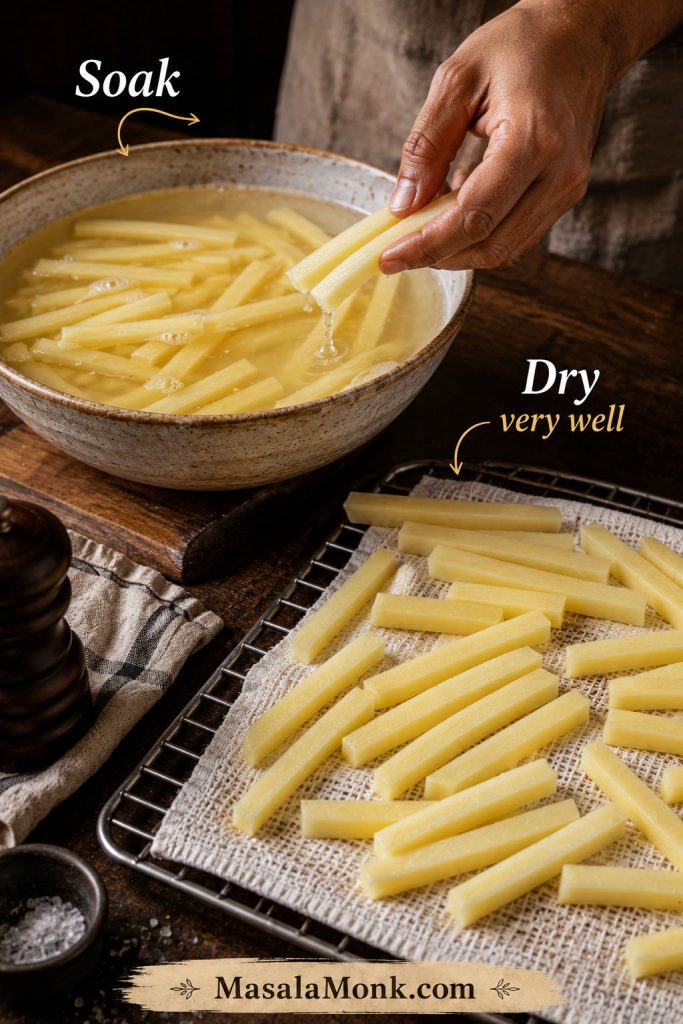
2. Dry the Fries Very Well

Drain the potatoes and spread them on clean kitchen towels. Pat them very dry. This step matters more than it looks: wet potatoes are one of the main reasons batter slips off, oil splatters, or fries turn soggy.

Cut potatoes soaking in water and drying on a towel before being battered and fried.
Soaking helps remove excess surface starch; however, drying is just as important, since wet fries splatter and resist a clean coating.

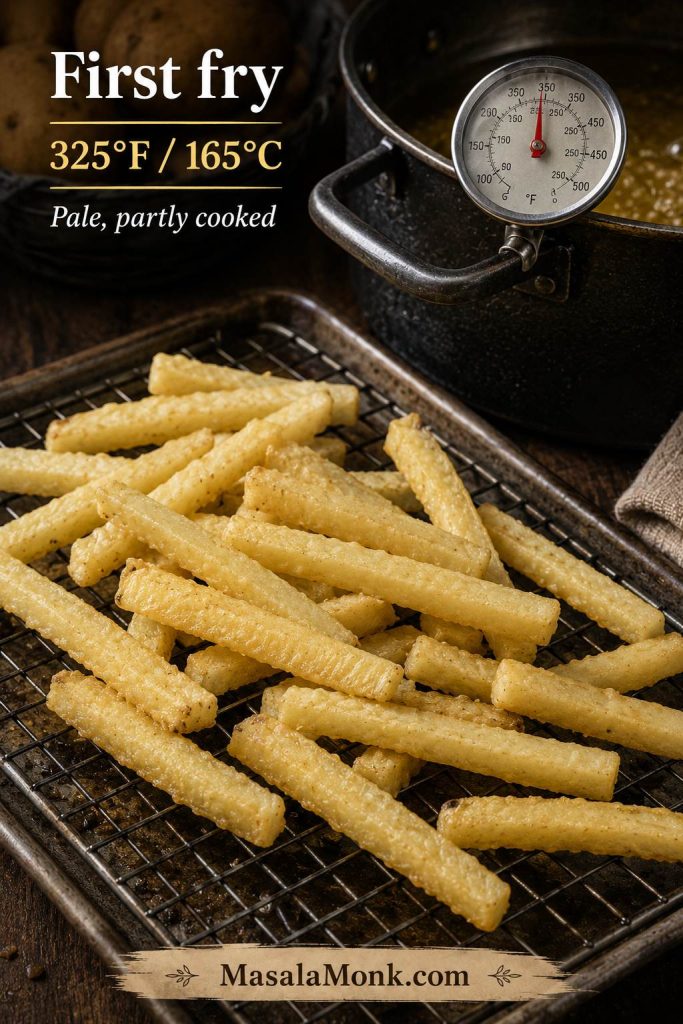
3. First-Fry the Potatoes

Heat oil in a heavy pot or deep fryer to 325°F / 165°C. Fry the dried potatoes in small batches for 4–5 minutes, just until they are pale and partly cooked. They should not be deeply browned yet.

Pale first-fried potatoes resting on a wire rack beside a pot and thermometer.
The first fry should leave the potatoes pale and partly cooked, so the second fry can focus on crisping the batter instead of finishing the center.

Transfer the first-fried potatoes to a wire rack. Do not pile them into a bowl, or they will steam and soften.

4. Mix the Batter

In a bowl, whisk together the flour, cornstarch or potato starch, baking powder, salt, paprika, garlic powder, onion powder, black pepper, and cayenne if using. Slowly whisk in the ice-cold sparkling water, seltzer, or club soda until the batter is smooth but still thin enough to drip slowly.

Do not overmix. A few tiny lumps are fine, and the batter should stay cold. Once the sparkling water, club soda, or beer is mixed in, the bubbles slowly fade, so mix the batter close to the final fry instead of letting it sit while the oil heats.

5. Dust, Dip, and Fry

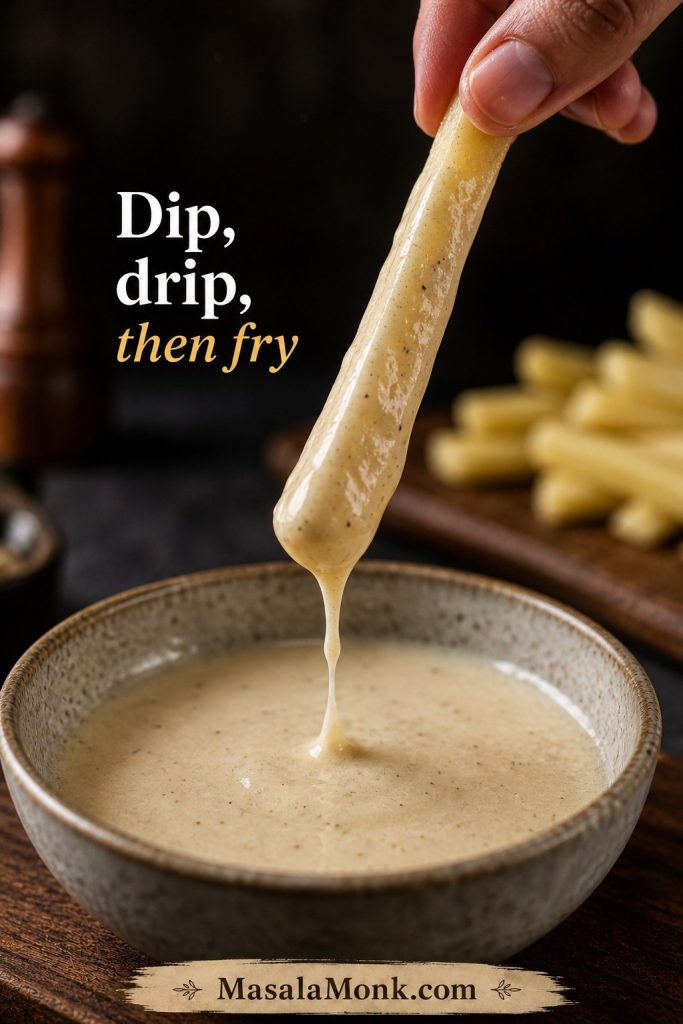
Raise the oil temperature to 375°F / 190°C. Lightly dust the first-fried potatoes with flour, cornstarch, or potato starch. Dip a few fries into the batter, then hold them over the bowl or set them briefly on a wire rack so the excess batter can drip away. If you see a thick clump, smooth it lightly before the fry goes into the oil. Carefully lower the fries into the hot oil one by one.

A potato fry lifted from batter with excess batter dripping back into the bowl.
Let the extra batter drip back into the bowl for a moment, because a lighter coating fries crisper and tastes less heavy.

When you are unsure about the batter thickness, fry one test fry first. It is the easiest way to save the whole batch. A coating that slides off needs a slightly thicker batter or a more careful dusting. A heavy, bready coating means the batter needs another tablespoon of cold sparkling water, club soda, or beer.

Fry in small batches for 2–4 minutes, until the coating is golden, crisp, and craggy. The bubbling should slow slightly, and the fries may float freely near the surface. Let the oil return to 375°F / 190°C between batches so the fries stay crisp instead of greasy.

Battered fries frying in bubbling hot oil with a thermometer showing final fry temperature.
During the final fry, small batches help the oil recover faster, and that usually means less grease and better crunch.

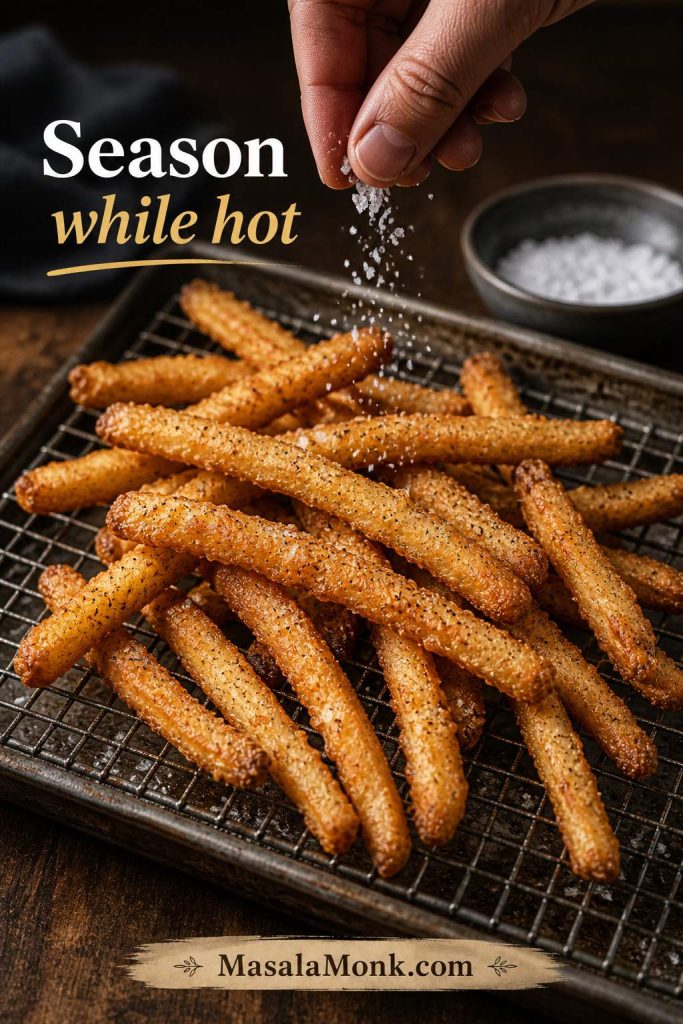
6. Season While Hot

Move the battered fries to a wire rack and season immediately with salt. If you want flavored fries, add Cajun seasoning, garlic salt, smoked paprika salt, or chili-lime seasoning while the coating is still hot.

Freshly fried battered fries being salted on a wire rack while still hot.
Season the fries right away, because the hot craggy surface catches salt and spice far better than fries that have already cooled.
Want the shorter method? Go to the quick single-fry version. Want a pub-style version? Go to beer battered fries.

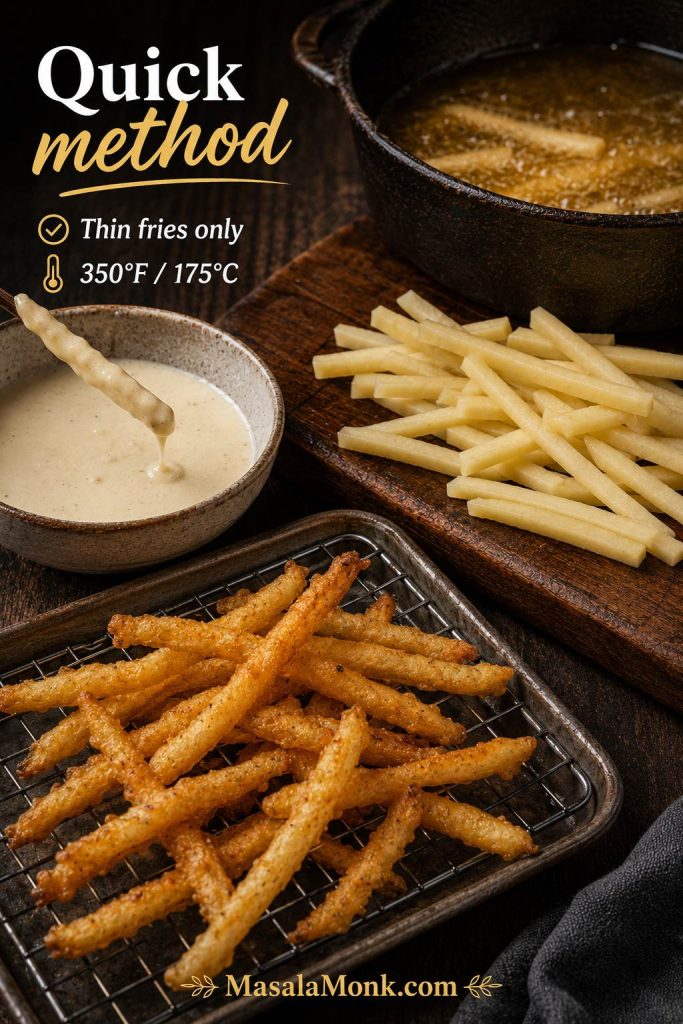
Quick Single-Fry Battered Fries

The double-fry method gives this battered fries recipe the crispest, most reliable result. However, when you want a faster batch, the single-fry method still works well as long as the potatoes are cut thin and dried thoroughly.

  1. Cut, soak, and dry the potatoes very well.
  2. Heat oil to 350°F / 175°C.
  3. Dip the raw dried fries into the batter in small handfuls.
  4. Let excess batter drip off.
  5. Fry for 7–10 minutes, turning occasionally, until golden and cooked through.
  6. Drain on a wire rack and season while hot.
Thin battered fries being made with a quick single-fry method at 350 degrees Fahrenheit.
The single-fry shortcut works best for thinner fries; for thicker cuts, the double-fry method is usually more reliable.

This method is easier, but the coating may brown before thicker fries are fully tender inside. For thicker battered chips or the crispiest battered french fries, use the double-fry method above.

Beer Battered Fries Variation

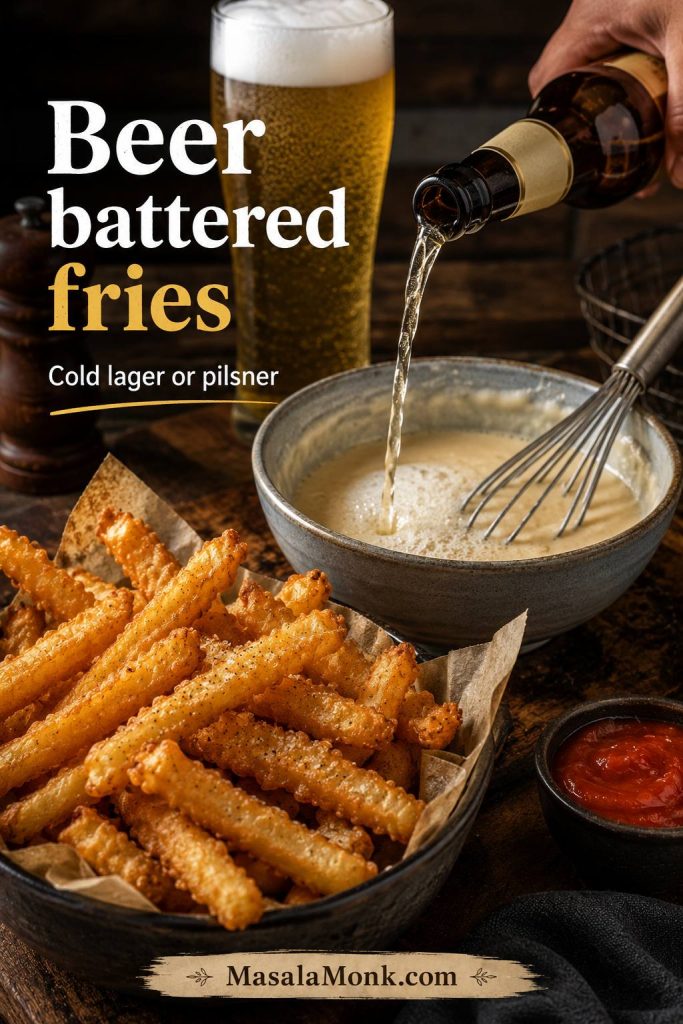
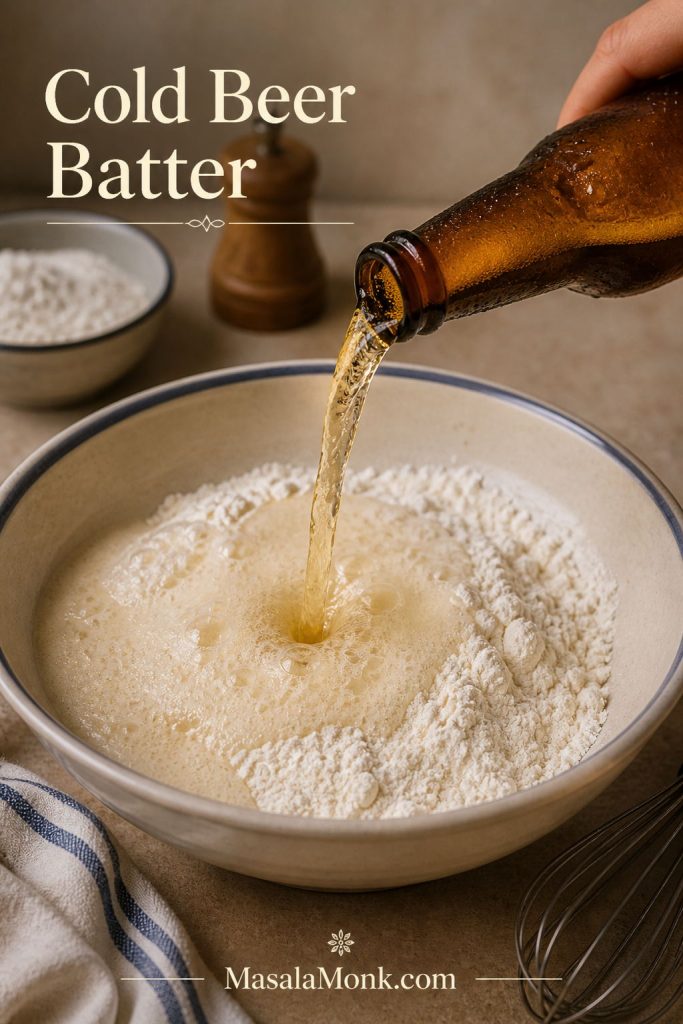
To turn this battered fries recipe into beer battered fries, replace the sparkling water with ¾ cup / 180ml ice-cold lager or pilsner. Then, add a little more beer, 1 tablespoon at a time, if the batter is too thick.

Beer being poured into batter with golden beer battered fries served nearby.
Beer battered fries get a pub-style edge from cold lager or pilsner, yet the batter still needs to stay thin and cold for the best finish.

Lager, pilsner, or light beer works best because the flavor stays clean and the carbonation helps the batter fry crisp. Very bitter IPAs, heavy stouts, and sweet flavored beers can overpower the potatoes, so use them only if you specifically want that flavor in the coating.

Beer batter tip: keep the beer cold and the coating thin. Warm beer or thick batter can make beer battered fries heavy instead of crisp.
Using beer? Follow the same recipe card, replacing the sparkling water with cold lager or pilsner.

No-Egg and Gluten-Free Battered Fries

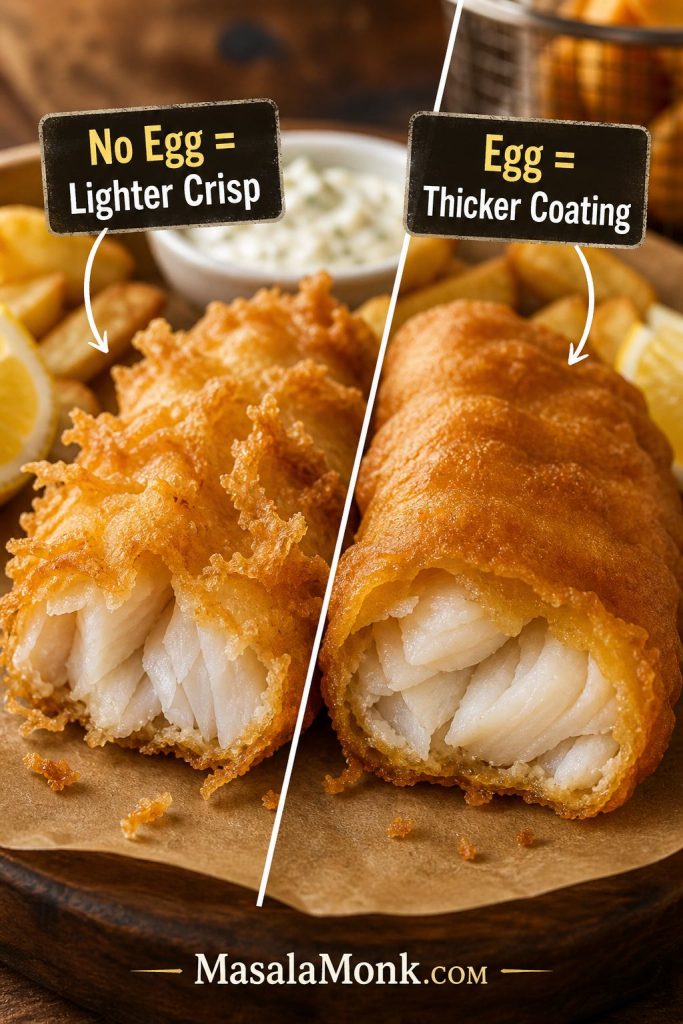
This battered fries recipe is already made without egg. The batter gets its lightness from baking powder and cold sparkling water instead.

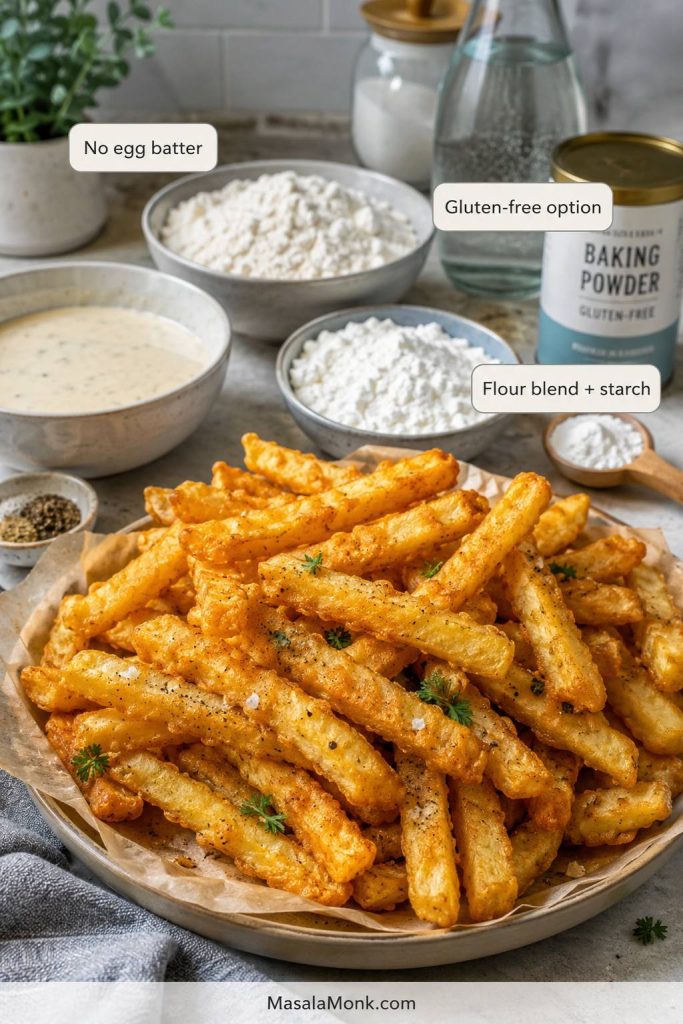
Gluten-free and no-egg battered fries with flour blend, starch, baking powder, sparkling water, and finished fries.
This version proves that battered fries do not need egg, and with the right flour-starch balance, a gluten-free batter can still fry crisp.

For gluten-free battered fries, replace the all-purpose flour with a gluten-free all-purpose flour blend or use a mix of rice flour and cornstarch. Keep the batter thin and cold, and fry a small test piece first so you can adjust the thickness before coating the whole batch.

If you are cooking for someone who needs strict gluten-free food, also check the baking powder, seasonings, and any dipping sauces for gluten-containing additives or cross-contact warnings.

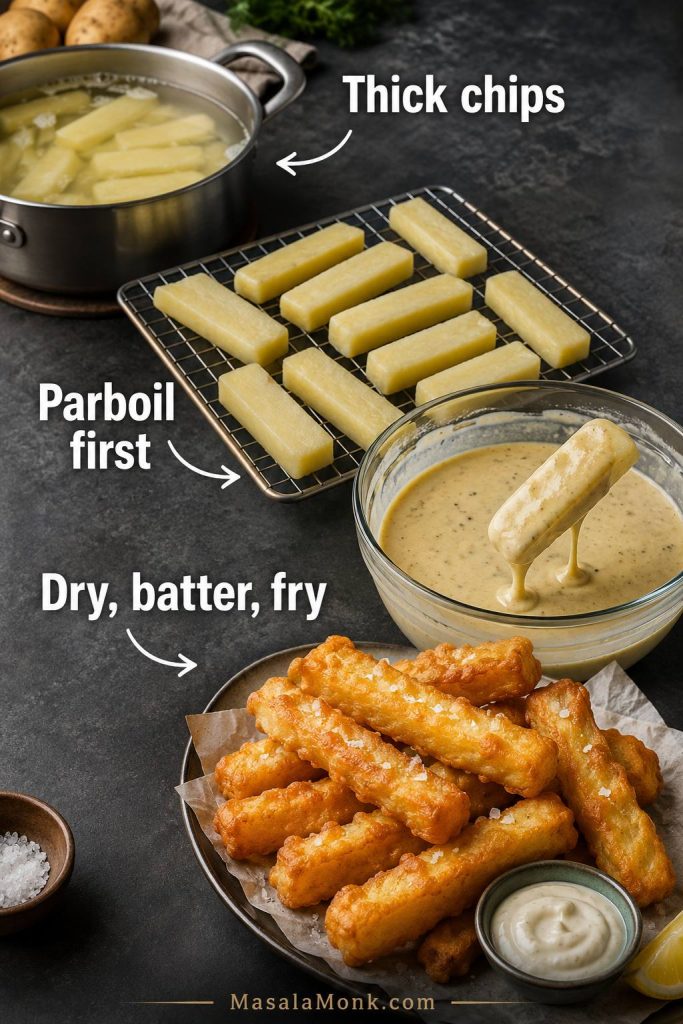
How to Make Battered Chips

Battered chips are usually thicker than battered french fries, so they need a slightly different method. Use russet, Maris Piper, or King Edward potatoes and cut them about ½ inch thick.

  1. Cut the potatoes into thick chips.
  2. Parboil for 5–7 minutes, just until the edges begin to soften.
  3. Drain and dry on a wire rack until the surface moisture is gone.
  4. Dust lightly with flour, cornstarch, or potato starch.
  5. Dip in a slightly thicker batter.
  6. Fry at 180°C / 356°F for about 5–7 minutes, depending on thickness, until golden and crisp.
Thick battered chips shown with parboiling, drying, battering, and frying steps.
Because battered chips are thicker than battered french fries, parboiling first helps the potato soften before the coating turns deeply golden.

For a UK-style golden battered chips look, add a pinch of turmeric to the batter. Some regional orange chips use food coloring, but it is optional and not needed for a good crisp coating.

Lager gives battered chips a classic pub-style flavor, but sparkling water or club soda works if you want a no-beer version. Keep the batter slightly thicker than the battered-fries batter so it grips the larger chips, but do not make it paste-like.
Air Fryer Battered Fries: What Works

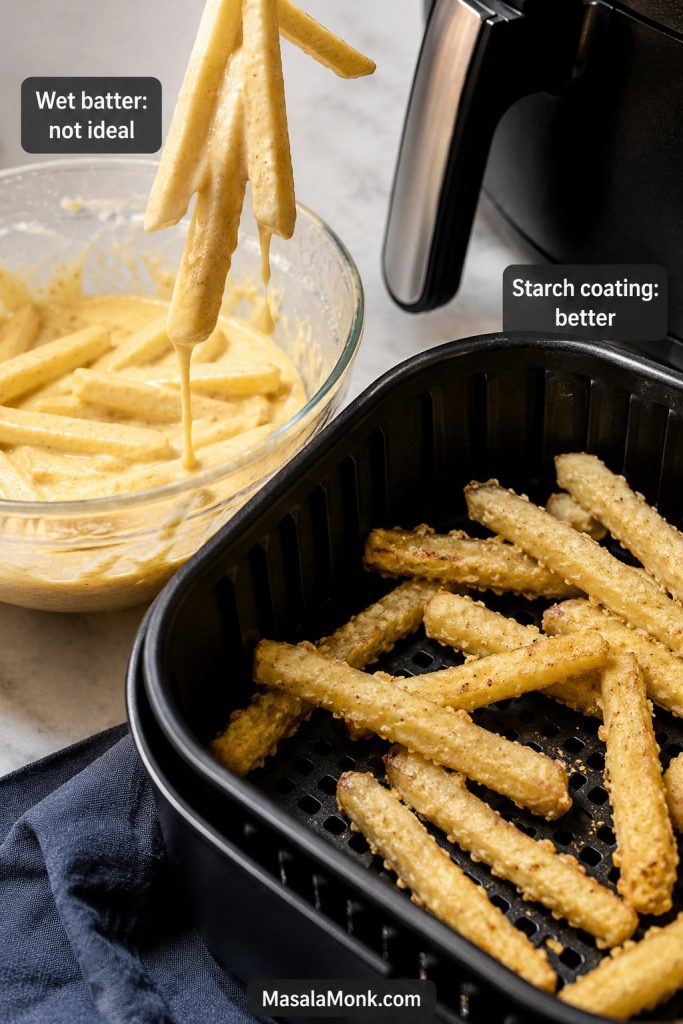
This battered fries recipe is best deep-fried because hot oil sets the wet batter immediately. In an air fryer, loose wet batter can drip before it crisps, which makes the fries patchy or messy.

So, if you came here hoping to pour wet batter over fries and air fry them, the honest answer is: it is not the best method. That does not mean you are out of options, though. You will get better results with a starch coating that behaves more like a crisp shell.

Wet battered fries compared with starch-coated fries in an air fryer basket.
Air fryer battered fries work better with a starch coating than a loose wet batter, so adjust the method rather than forcing the deep-fry version.

For air fryer battered fries, use a clingy starch coating instead of a loose batter. Toss the potatoes with a cornstarch slurry or a dry flour-cornstarch coating, spray generously with oil, and air fry in a single layer at 375°F / 190°C for about 14–20 minutes, flipping and spraying again halfway through.

However, when the real goal is crisp potato texture with less oil, MasalaMonk’s air fryer hash browns guide is a better air fryer potato starting point because it focuses on thin layers, moisture control, shaking, and crisp edges.

Best answer: deep frying gives the most authentic battered fries. The air fryer is better for coated fries than loose wet-battered fries.

How to Batter Frozen Fries

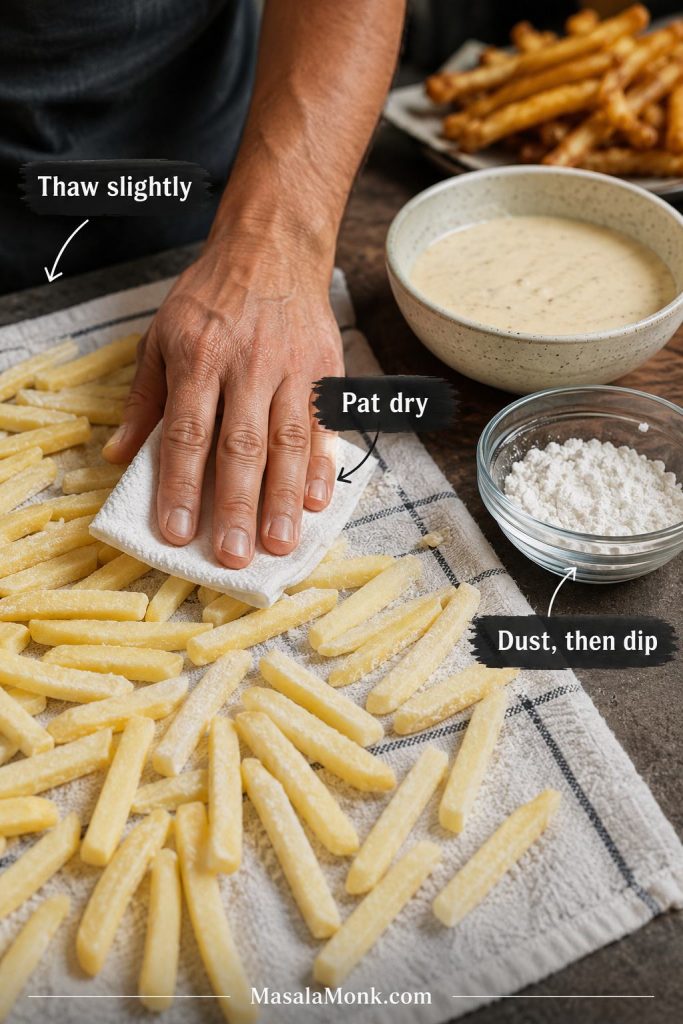
You can batter frozen fries, but fresh-cut or first-fried homemade potatoes work better. Frozen fries already contain surface moisture and may already have a light coating, so the batter may not cling as evenly.

If you want to use frozen fries, do not batter them while icy. Let them thaw slightly, pat them very dry, dust lightly with cornstarch, potato starch, or flour, then dip them in a slightly thicker batter. Fry in small batches so the oil temperature does not drop too much.

Frozen fries being thawed slightly, patted dry, dusted with starch, and prepared for battering.
Frozen fries can still work, but only after a little thawing, careful drying, and a light dusting, otherwise the batter may cling unevenly.

Make-Ahead Battered Fries

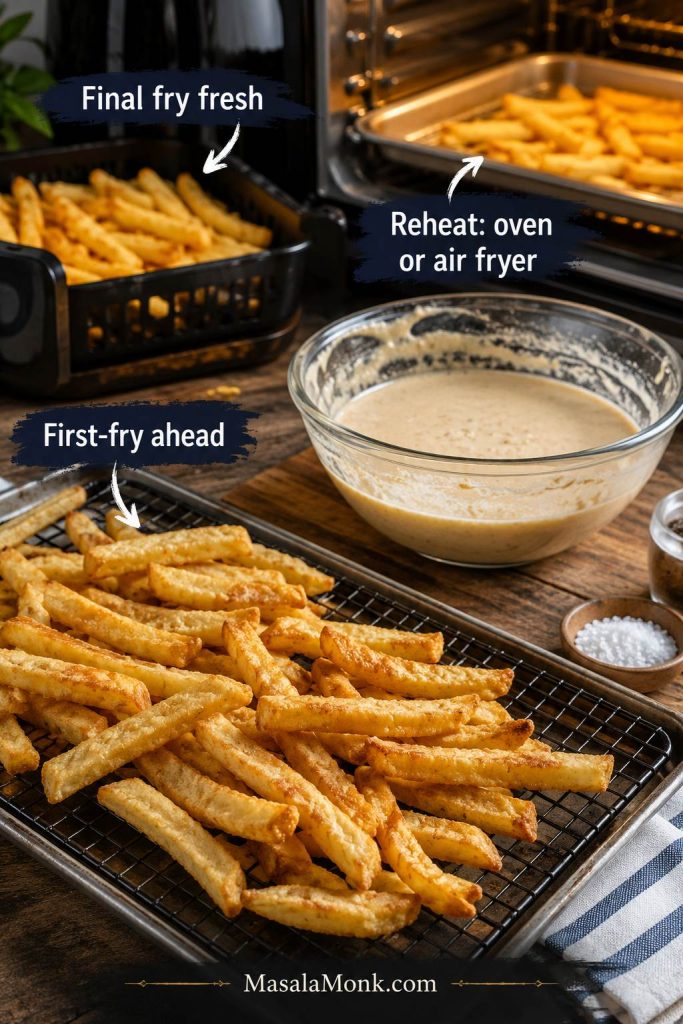
This battered fries recipe is best right after frying, but you can still make hosting easier. Cut, soak, dry, and first-fry the potatoes earlier in the day, then let them cool on a wire rack. When you are ready to serve, make the batter fresh, dip the fries, and do the final fry.

Make-ahead battered fries setup with first-fried fries, fresh batter, oven reheating, and air fryer reheating cues.
For easier hosting, first-fry the potatoes ahead of time; then, once you are ready to serve, batter and finish-fry them fresh.

Do not batter the fries far in advance. The coating will soften as it sits. If you need to hold cooked battered fries for a short time, keep them on a wire rack in a low oven so steam does not collect underneath.
Store leftover battered fries in the fridge in a shallow container once fully cooled. They are best reheated within 1–2 days, because the coating softens the longer it sits.

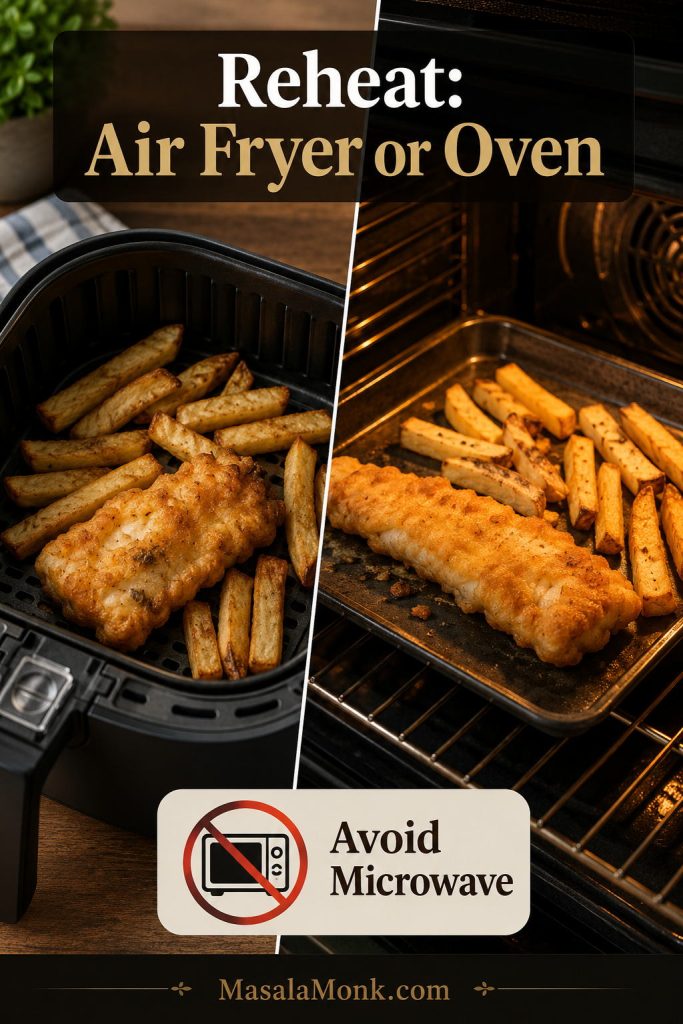
To reheat leftovers, use a hot oven or air fryer until the coating crisps again. Avoid microwaving, which makes the batter soft.

Battered Fries Variations

Cajun Battered Fries

Add Cajun seasoning to the batter and sprinkle a little more over the fries as soon as they come out of the oil. This is one of the easiest ways to make seasoned battered french fries with a little heat.

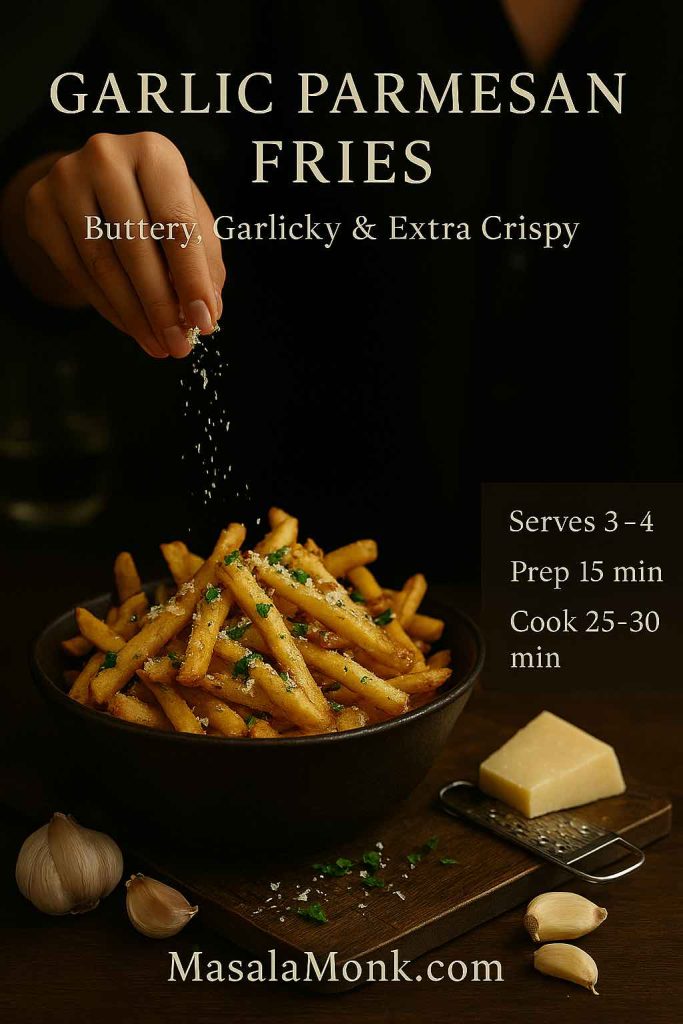
Garlic Parmesan Battered Fries

Season the hot fries with garlic salt, black pepper, and finely grated parmesan-style cheese. Add parsley if you want a more restaurant-style finish.

Spicy Battered Fries

Add cayenne, chili powder, or smoked paprika to the batter. Serve with spicy mayo, ranch, or a cooling garlic dip.

Battered Sweet Potato Fries

Sweet potatoes can be battered, but they have more moisture and a softer texture than russets. Cut them a little thicker, dry them well, and use a light coating. Expect a softer center and a slightly sweeter flavor.

Double Battered Fries

Double battered fries have an extra-heavy coating. They can be very crunchy, but they can also turn thick and doughy if the batter is not thin enough. For most batches, one light coating gives the best balance of potato and crunch.

Troubleshooting Battered Fries

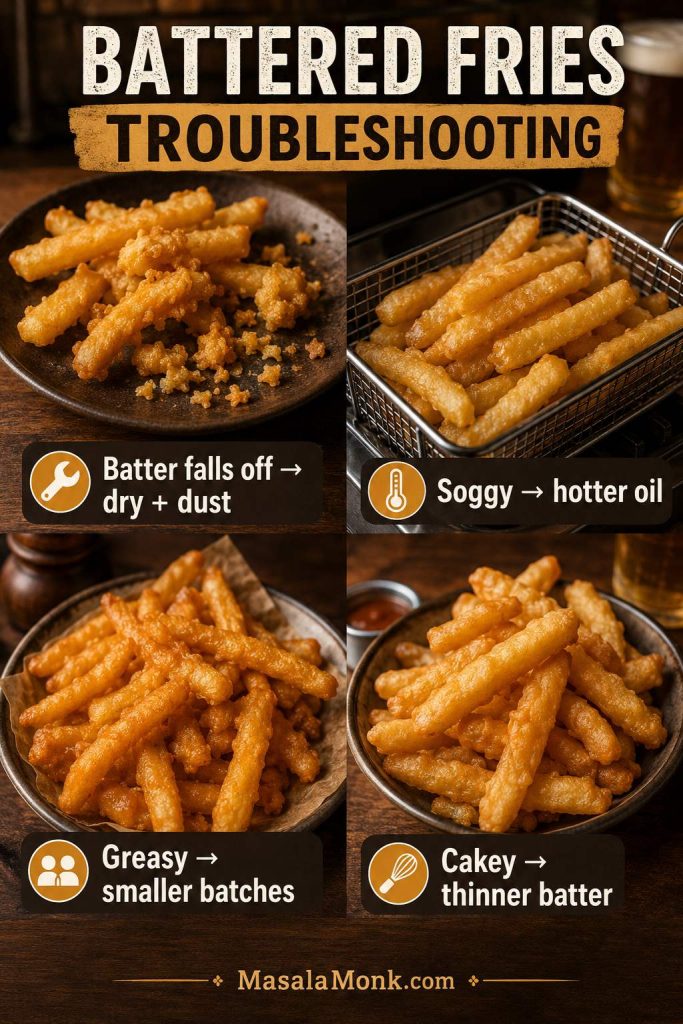
If this battered fries recipe did not come out crisp, the problem is usually moisture, batter thickness, oil temperature, or overcrowding. Fortunately, small changes make a big difference with battered potatoes.

Troubleshooting board for battered fries showing fixes for batter falling off, soggy fries, greasy fries, and cakey coating.
When battered fries go wrong, the problem is usually moisture, oil temperature, overcrowding, or batter thickness — and each one has a fix.
Problem Likely Cause Fix
Batter falls off Fries are wet, batter is too thin, or potatoes were not dusted Dry thoroughly, dust with flour/cornstarch/potato starch, and thicken the batter slightly
Fries are soggy Oil is too cool, pan is overcrowded, or batter is too thick Use a thermometer, fry in small batches, and thin the batter
Fries are greasy Oil temperature dropped too low Let the oil return to temperature between batches
Coating is cakey Batter is too thick Add cold sparkling water, club soda, or beer 1 tbsp at a time
Potatoes are hard inside Fries are too thick or skipped the first cook Use the double-fry method or parboil thick chips first
Fries stick together Too many fries added at once Add fries one by one and separate them early in frying
Batter clumps Too much batter stayed on the fries Let excess batter drip off before frying

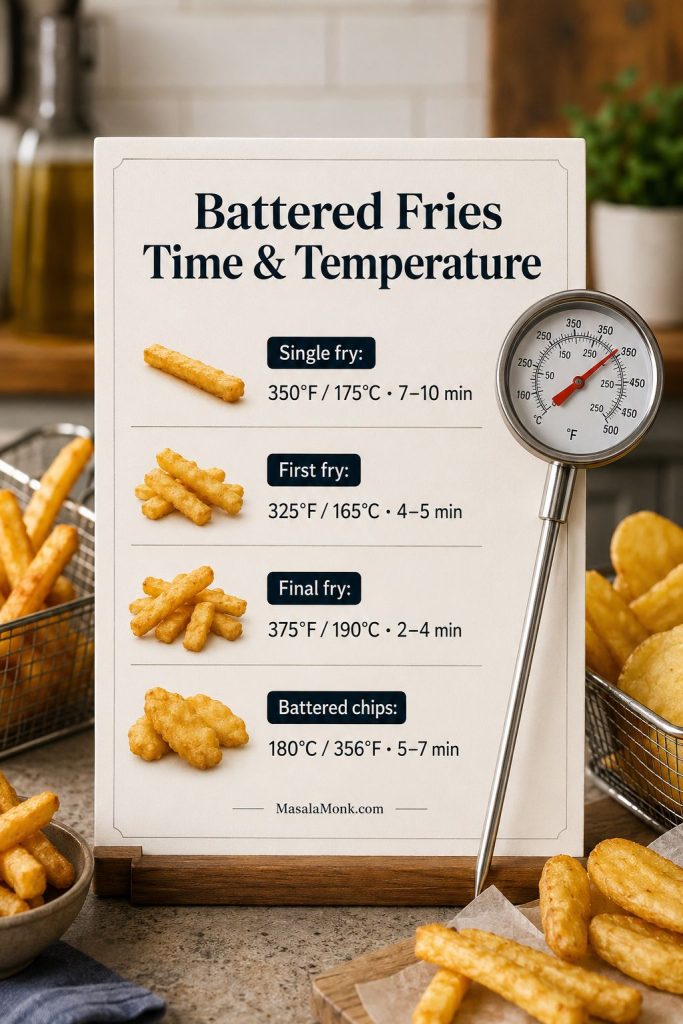
Battered Fries Time and Temperature Guide

Use this chart as a quick reference for oil temperature, cook time, and method choice.

Time and temperature guide for battered fries with single fry, first fry, final fry, and battered chips temperatures.
Use this guide as a quick check when switching between single-fry battered fries, double-fried fries, beer batter, and thicker battered chips.
Method Potato Cut Prep Temperature Cook Time
Quick single-fry battered fries ¼-inch fries Soak + dry 350°F / 175°C 7–10 min
Best double-fry battered fries ¼-inch fries First fry, then batter 325°F then 375°F / 165°C then 190°C 4–5 min + 2–4 min
Beer battered fries ¼-inch fries Double fry preferred 325°F then 375°F / 165°C then 190°C 4–5 min + 2–4 min
Battered chips ½-inch chips Parboil + dry + dust 180°C / 356°F 5–7 min after parboiling, depending on thickness
Air fryer coated fries ¼–½-inch fries Starch slurry or dry coating 375°F / 190°C 14–20 min

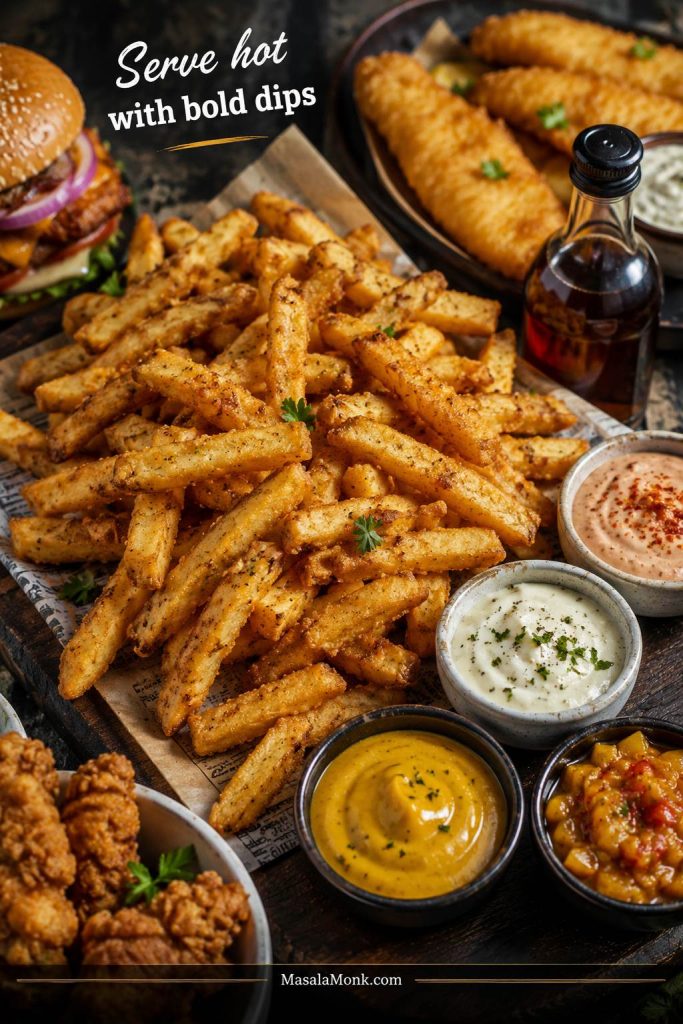
What to Serve with Battered Fries

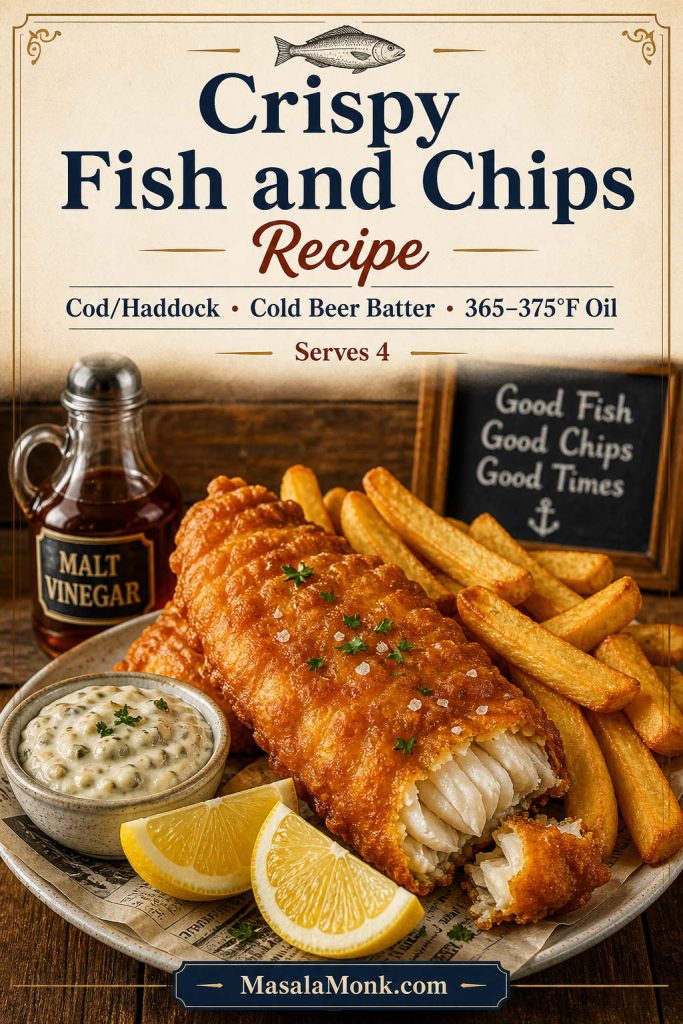
This battered fries recipe is best served hot, while the coating is still crisp. For the most obvious pairing, serve the fries with MasalaMonk’s fish and chips recipe. The crisp coating also works well with burgers, chicken tenders, fried shrimp, and creamy or tangy dips.

Battered fries served with dipping sauces, fish, burger, chicken, malt vinegar, and bold dips.
Battered fries love bold pairings, so creamy dips, sharp vinegar notes, and crisp fried sides all make especially good matches.
  • Burgers and sandwiches
  • Fried chicken or chicken tenders
  • Fried shrimp or calamari
  • Onion rings
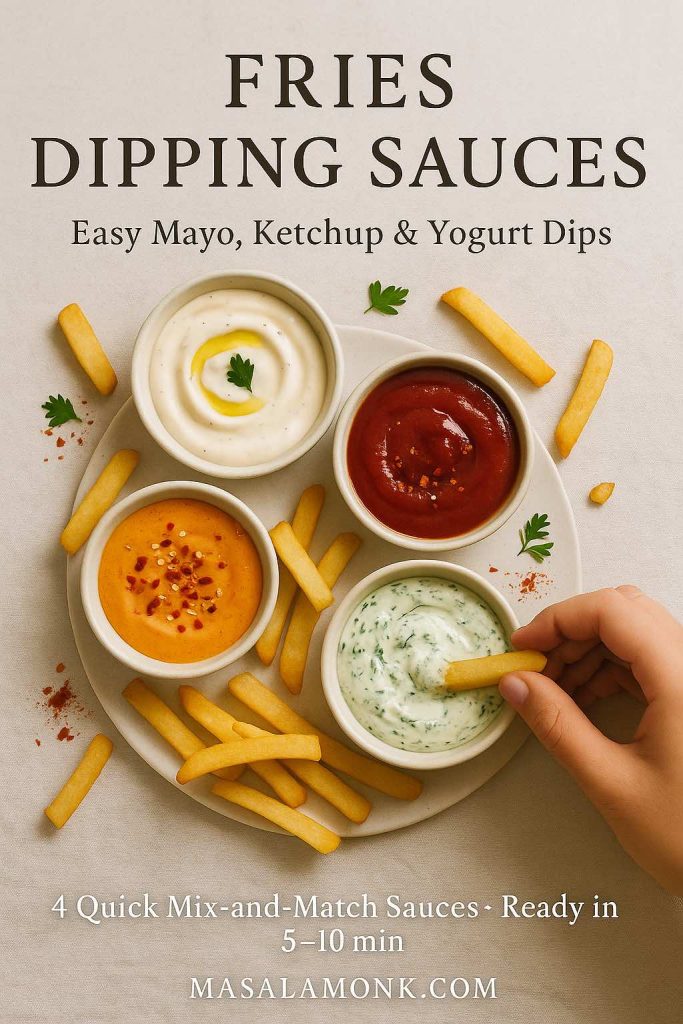
  • Garlic aioli
  • Spicy mayo
  • Ranch dressing
  • Cheese sauce
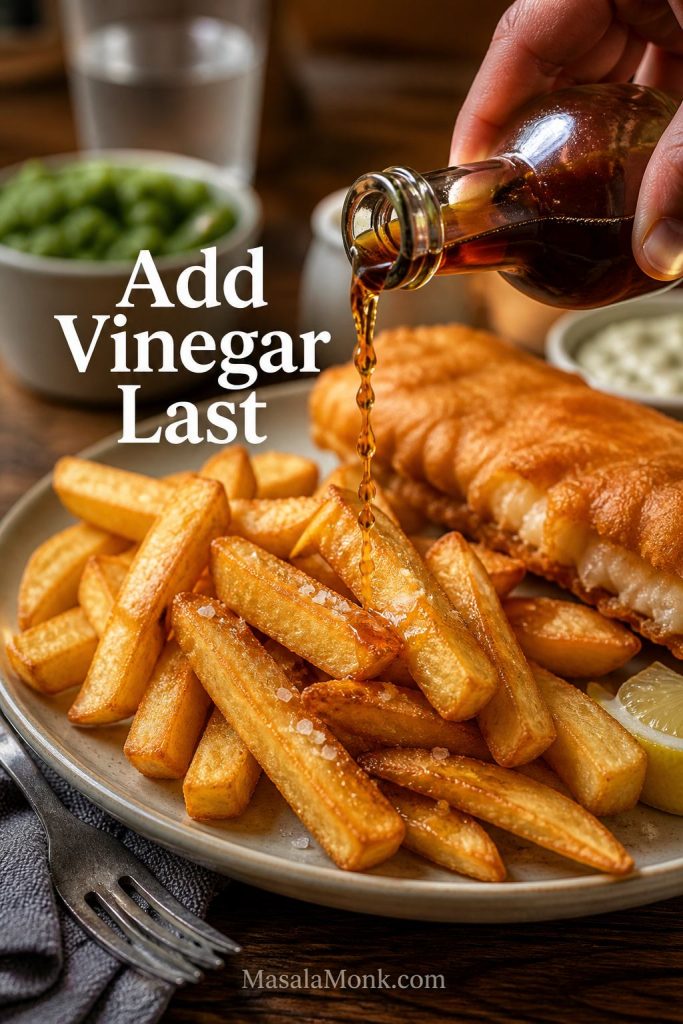
  • Malt vinegar and salt

For a sweet-tangy dip that works surprisingly well with fries, try mango mustard sauce. Keep it thick for dipping so it clings to the crisp coating instead of running off.

If you want something sharper and more pickle-like, amba sauce is another bold option for fries, wedges, and roasted potatoes.

Ready to make them? The full measured battered fries recipe is below.
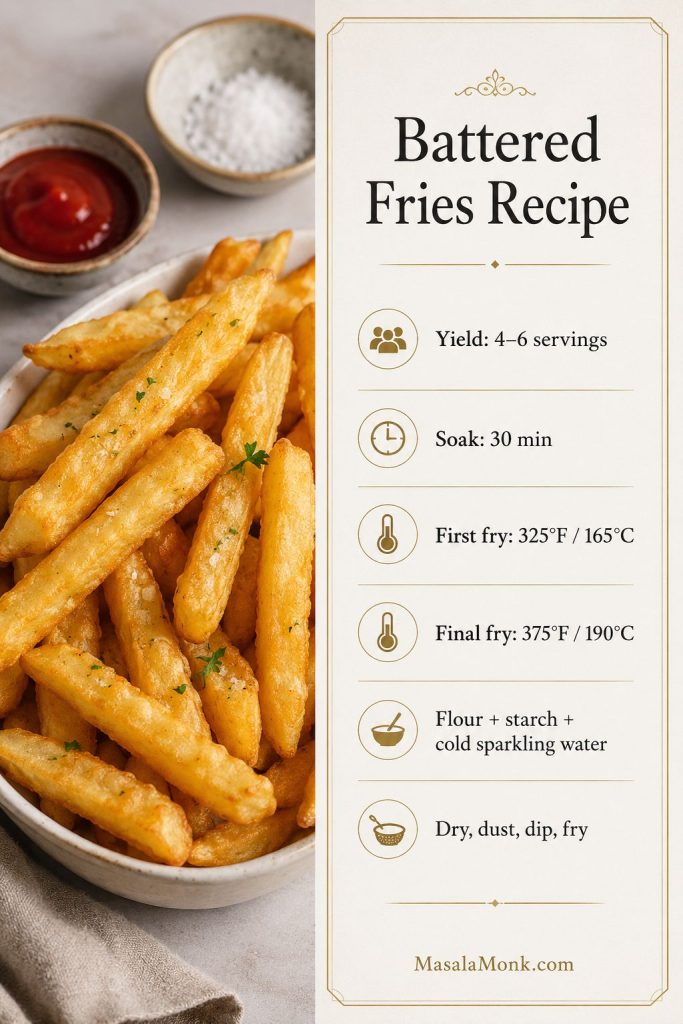
Saveable battered fries recipe card with yield, soak time, fry temperatures, batter ingredients, and method summary.
Once the method clicks, this saveable battered fries recipe card makes the timing, temperatures, and batter basics easy to revisit.

Battered Fries Recipe

This battered fries recipe cooks up golden outside with fluffy potato centers inside. The coating is seasoned but light, so the potato still comes through. The main version uses a no-beer batter made with flour, cornstarch or potato starch, baking powder, seasoning, and ice-cold sparkling water, seltzer, or club soda. For a pub-style finish, use the beer batter variation below.

Prep Time20 minutes
Soak Time30 minutes
Cook Time25 minutes
Total Time1 hour 15 minutes
Yield4–6 servings
MethodDeep frying
CategorySide dish / snack
DietVegetarian

Ingredients

For the Potatoes

  • 2 lb / 900g russet potatoes, cut into ¼-inch fries
  • Cold water, for soaking
  • 1 tbsp vinegar, optional
  • Neutral oil, for deep frying

For the Batter

  • 1 cup / 120g all-purpose flour
  • ⅓ cup / 40g cornstarch or potato starch
  • 1 tsp baking powder
  • 1 tsp fine salt, plus more for finishing
  • 1 tsp paprika
  • ¾ tsp garlic powder
  • ½ tsp onion powder
  • ¼ tsp black pepper
  • ⅛–¼ tsp cayenne, optional
  • ¾ cup / 180ml ice-cold sparkling water, seltzer, or club soda, plus 1–3 tbsp more as needed

Instructions

  1. Cut the potatoes: Cut the potatoes into ¼-inch fries. For thicker battered chips, cut them closer to ½ inch thick.
  2. Soak: Place the cut potatoes in cold water for at least 30 minutes, or 1–2 hours for better texture. Add 1 tbsp vinegar if using.
  3. Dry thoroughly: Drain the potatoes and dry them very well with clean kitchen towels. Surface moisture will make the batter slip and can cause oil splatter.
  4. First fry: Heat oil to 325°F / 165°C. Fry the potatoes in small batches for 4–5 minutes, until pale and partly cooked. Drain on a wire rack.
  5. Make the batter: Whisk together flour, cornstarch or potato starch, baking powder, salt, paprika, garlic powder, onion powder, pepper, and cayenne. Whisk in ice-cold sparkling water, seltzer, or club soda until the batter is thin but clingy. Do not make the batter too far ahead.
  6. Heat for final fry: Raise the oil to 375°F / 190°C.
  7. Dust and dip: Lightly dust the first-fried potatoes with flour, cornstarch, or potato starch. Dip into the batter and let excess drip off over the bowl or briefly on a wire rack.
  8. Final fry: Fry in small batches for 2–4 minutes, until golden and crisp. The bubbling should slow slightly, and the fries may float freely near the surface. Add the fries one by one so they do not stick together.
  9. Season: Transfer to a wire rack and season immediately with salt. Serve hot.

Beer Battered Fries Variation

Replace the sparkling water, seltzer, or club soda with ¾ cup / 180ml ice-cold lager or pilsner. Add more beer 1 tbsp at a time if the batter is too thick. Keep the batter cold and thin for the crispest beer battered fries.

Notes

  • This battered fries recipe works best when the batter is mixed close to frying time, while the liquid is still cold and bubbly.
  • The batter should coat the fries lightly and drip slowly. Thick batter makes cakey fries.
  • You may not need every drop of batter. A light coating is better than forcing thick batter onto every fry.
  • Potato starch gives a slightly more delicate, crackly coating; cornstarch is easier to find and still works well.
  • Longer soaking, up to 1–2 hours, improves texture but is optional.
  • Use a thermometer for the oil. Cool oil makes greasy fries.
  • Use a deep, heavy pot and leave several inches of headroom so the oil does not bubble over.
  • Drain on a wire rack instead of piling fries on paper towels.
  • Do not cover hot battered fries. Steam softens the crisp coating quickly.
  • For battered chips, cut thicker, parboil 5–7 minutes, dry well, dust, batter, and fry at 180°C / 356°F.
  • For make-ahead prep, cut, soak, dry, and first-fry the potatoes earlier, then batter and final-fry just before serving.

FAQs About Battered Fries

Are battered fries the same as battered chips?

They are similar, but battered chips are usually thicker. In the US, battered fries usually means battered french fries. In the UK, chips are thicker fried potatoes, so battered chips often need parboiling or first-cooking before battering.

Are battered fries the same as coated fries?

Not always. Battered fries are usually dipped in a wet batter before frying. Coated fries may use a lighter dry coating or starch coating instead. Both can be crisp, but battered fries usually have a more noticeable craggy shell.

What is battered fries batter made of?

Battered fries batter is usually made with flour, cornstarch or potato starch, baking powder, salt, seasonings, and a cold fizzy liquid such as sparkling water, club soda, or beer. The batter should be thin and cold so it fries crisp instead of turning thick and cakey.

What makes this battered fries recipe crisp?

The crisp texture comes from dry potatoes, a thin cold batter, cornstarch or potato starch, baking powder, and hot oil. The double-fry method also helps because the potato cooks first, then the batter crisps quickly in the final fry.

Should you cook the fries before battering them?

For the best battered fries, first-fry the potatoes at 325°F / 165°C until partly cooked, then batter them and fry again at 375°F / 190°C. Thin fries can be battered raw and single-fried, but the double-fry method is more reliable.

What can you use instead of beer in battered fries?

Ice-cold sparkling water, seltzer, or club soda works well instead of beer. The carbonation helps keep the batter light and crisp without adding beer flavor.

What kind of beer works best for beer battered fries?

Cold lager, pilsner, or light beer works best because the flavor stays clean and the carbonation helps the coating fry crisp. Very bitter or heavy beers can overpower the potatoes.

Is pancake batter good for battered fries?

Pancake batter is not ideal because it can fry up sweet, thick, and cakey. A better battered fries recipe uses flour, starch, baking powder, seasoning, and cold sparkling water or beer for a lighter, crispier coating.

Why does the batter fall off fries?

Batter usually falls off when the fries are too wet, the batter is too thin, or the potatoes were not dusted before dipping. Dry the potatoes very well, dust lightly with flour, cornstarch, or potato starch, and make sure the batter clings instead of running off.

Why are battered fries soggy?

Soggy battered fries usually come from cool oil, overcrowding, wet potatoes, or batter that is too thick. Fry in small batches, keep the oil hot, dry the potatoes well, and use a thin coating.

Do battered fries work in an air fryer?

Wet battered fries are better deep-fried because hot oil sets the batter quickly and evenly. In an air fryer, loose batter can drip before it sets. For air fryer fries, use a starch slurry or dry flour-cornstarch coating and spray well with oil.

Do baked battered fries work?

Wet-battered fries do not bake as well as they fry because the batter needs fast heat to set. For baked fries, use a dry starch coating instead of a loose wet batter, spread the fries in one layer, and use enough oil to help the coating crisp.

How do you batter frozen fries?

Frozen fries work best when they are thawed slightly, patted very dry, dusted with flour, cornstarch, or potato starch, then dipped in a slightly thicker batter before frying. The coating may not cling as evenly as it does on fresh-cut or first-fried potatoes.

How do you keep battered fries crispy?

Serve them right away, drain them on a wire rack, and avoid covering them while hot. If you need to hold them briefly, keep them on a rack in a low oven so steam does not soften the coating.

What is the best way to reheat battered fries?

A hot oven or air fryer is the best way to reheat battered fries because dry heat helps the coating crisp again. Microwaving is not recommended because it softens the batter.

What oil is best for battered fries?

Use a neutral high-heat oil such as vegetable, canola, sunflower, or peanut oil. Avoid low-smoke-point oils for deep frying.

Once you get the batter thickness and oil temperature right, these battered fries are easy to repeat. Start with the no-beer version first, then try the beer batter, battered chips, or Cajun variation when you want a more pub-style batch. Serve them hot, keep the coating light, and do not be surprised if they disappear fast.

Posted on 4 Comments

Fish and Chips Recipe: Crispy Beer Batter, Best Fish, Sauce, and Air Fryer Option

Plate of crispy beer-battered fish with thick golden chips, tartar sauce, lemon wedges, and malt vinegar.

This fish and chips recipe is built for the plate everyone actually wants: crisp beer-battered cod or haddock, thick golden chips, tartar sauce, malt vinegar, optional curry sauce, and no soggy coating sliding off the fish.

The method is classic, but the instructions are practical for a home kitchen. You will dry the fish properly, mix the batter cold, keep the oil in the right temperature range, and time the chips so the whole plate lands hot instead of one part waiting while the other goes soft.

Use the fried version as the main recipe. Then use the no-beer batter, air fryer, baked, and gluten-free notes when you want a different route without pretending every method gives the exact same chip-shop crunch.

Close-up of a broken piece of beer-battered white fish showing crisp golden coating and flaky fish inside.
The coating should break cleanly while the fish stays moist and flaky inside. If both happen together, your batter thickness and oil temperature are working.

Quick Answer: How to Make This Fish and Chips Recipe

To make crispy fish and chips, use firm white fish like cod or haddock, pat the fish very dry, dust it lightly with flour, dip it in cold beer batter, and fry it in hot oil at about 365°F to 375°F / 185°C to 190°C. Meanwhile, cut floury potatoes into thick chips, rinse or soak them, dry them well, and fry until crisp and golden.

At a glance: Serves 4. Use 1½ lb / 680 g cod or haddock, 2 lb / 900 g floury potatoes, very cold beer batter, and oil at 365°F to 375°F / 185°C to 190°C for the fish. Mix the batter only when you are ready to fry.
Fish and chips prep setup with cod or haddock, potatoes, cold batter ingredients, and frying temperature notes.
Before frying, set up the essentials first: firm white fish, floury potatoes, cold batter ingredients, and a thermometer so the oil stays in the crisp zone.

Serve everything immediately with tartar sauce, malt vinegar, lemon wedges, and optional curry sauce. Fish is best checked with a thermometer and should reach 145°F / 63°C, or be opaque and flaky.

Need the exact method? Jump to the recipe card, or check the batter guide and oil temperature table first.

Why This Fish and Chips Recipe Works

A great plate of fish and chips is not about a complicated ingredient list. Instead, it comes down to moisture control, cold batter, hot oil, and good timing.

White fish fillets being patted dry with a towel before dusting and battering.
Surface moisture is one of the biggest reasons batter slips. Patting the fish dry first gives the dusting flour something to grip.
  • Dry fish holds batter better. Moisture on the surface makes batter slide off, so the fish is patted dry before seasoning and dusting.
  • A light flour dusting gives the batter grip. The coating clings instead of peeling away in the oil.
  • Cold beer or sparkling water makes a lighter batter. Cold carbonated liquid helps the batter puff quickly when it hits hot oil.
  • Rice flour, cornflour, or cornstarch improves crispness. A little starch lightens the coating and helps avoid a heavy, doughy crust.
  • Baking powder gives lift. It helps the batter puff instead of lying flat against the fish.
  • A thermometer protects the texture. Oil that is too cool makes greasy fish; oil that is too hot browns the batter before the fish cooks.
  • A wire rack keeps the underside crisp. Draining fried fish on a plate traps steam underneath.
Do this, not that: Dry the fish instead of battering it wet. Use cold beer or sparkling water instead of warm liquid. Fry in small batches instead of crowding the pot. Drain on a rack instead of a plate. Salt the chips while hot instead of after they cool.

Fish and Chips Recipe Ingredients

The ingredients are simple, but each one affects the final crunch: firm white fish, floury potatoes, very cold liquid, starch, baking powder, and clean high-heat oil.

Ingredients for homemade fish and chips including white fish, potatoes, flour, starch, cold beer, lemon, tartar sauce, and malt vinegar.
The ingredient list is simple, but each choice affects texture: firm fish for clean flakes, floury potatoes for better chips, and starch for a lighter coating.

Fish

  • Cod or haddock: Cod is the easiest all-purpose choice. However, haddock gives a more classic British-style fish and chips flavor.
  • Salt and black pepper: Season the fish directly before battering.
  • Rice flour, cornflour/cornstarch, or all-purpose flour: This is used for dusting the fish so the batter clings.

Beer Batter

  • All-purpose flour: Gives the batter structure.
  • Rice flour, cornflour, or cornstarch: Keeps the coating lighter and crisper.
  • Baking powder: Adds lift.
  • Fine salt: Seasons the batter.
  • Very cold lager or pale beer: Adds carbonation and lightness.
  • Optional turmeric or paprika: Adds a warmer golden color and mild flavor.

Chips

  • Russet potatoes, Maris Piper, or another floury potato: These give a fluffy inside and crisp outside.
  • Neutral oil: Use sunflower, canola, vegetable, or peanut oil.
  • Salt: Add it immediately after frying.
  • Optional malt vinegar: A small amount in the chip water can help the potatoes hold together before frying.

Serving Sauces and Sides

  • Tartar sauce
  • Malt vinegar
  • Lemon wedges
  • Chip-shop-style curry sauce
  • Mushy peas
  • Pickles or coleslaw

Best Fish for Fish and Chips

The best fish for fish and chips is a firm white fish that stays moist inside while the batter crisps outside. Cod and haddock are the two most common choices, although they are not the only options.

Comparison of white fish portions labeled cod, haddock, pollock, hake, and halibut for fish and chips.
Cod is mild and beginner-friendly, while haddock gives a more classic chip-shop flavor. Either way, choose firm white fish that can hold its shape in hot oil.
Fish Best For Notes
Cod Easiest first choice Mild, flaky, widely available, and very beginner-friendly.
Haddock Classic British-style fish and chips Slightly stronger flavor than cod and excellent in beer batter.
Pollock Budget-friendly batches Good texture when battered and fried, usually more affordable.
Hake A softer, delicate version Works well, but handle gently because it can be more delicate.
Halibut Premium fish and chips Firm, thick, and excellent, but more expensive.
Whiting or ling Traditional-style alternatives Good options where available, especially for thinner fillets.

For the main version, cod is the safest first choice. However, haddock is better when you want a more classic pub-style flavor. The same fish also works beautifully in Baja-style fish tacos, where it is paired with slaw, lime crema, and a lighter taco-style build.

Can You Use Frozen Fish?

Yes, frozen cod or haddock can work well, but thaw it completely and pat it very dry before seasoning. Frozen fish releases extra moisture as it thaws, and that moisture can make the batter slide off or turn soft in the oil.

Frozen or thawed cod being dried before battering for fish and chips.
Frozen fish can work, but it needs extra care. Thaw it fully, then dry it well so the batter does not loosen as it fries.

Fish thickness cue: Aim for pieces that are thick enough to stay moist, but not so thick that the batter browns before the center cooks.

Fish thickness guide showing white fish portions that are too thin, ideal thickness, and too thick for fish and chips.
Fish that is too thin dries quickly, while very thick pieces can brown outside before cooking through. Moderate thickness gives the batter and fish time to finish together.
Best thickness: Aim for fish pieces about ¾ to 1¼ inches / 2 to 3 cm thick. Very thick fish can brown outside before cooking through, while very thin fish can dry out quickly.

Once you’ve chosen your fish, move to the fish and chips batter guide or go straight to how to make fish and chips step by step.

Fish and Chips Batter

The batter should shatter lightly when you bite into it, not sit on the fish like a thick doughy coat. You are looking for a mixture that feels loose but not watery — closer to thin pancake batter or double cream than a heavy fritter mix.

It should coat the back of a spoon, then drip off in ribbons. If it runs off like water, it is too thin. If it clings in a heavy layer, it is too thick.

Batter texture cue: The batter should coat the spoon and drip in slow ribbons before you dip the fish.

Spoon lifting fish and chips batter from a bowl with batter dripping in ribbons.
The right fish batter should coat the spoon and fall in slow ribbons. If it runs off or clumps heavily, adjust before dipping the fish.

Beer Batter for Fish and Chips

Cold beer being poured into flour and starch mixture to make beer batter for fish and chips.
Cold beer adds bubbles and lightness to the batter. Mix it just before frying so the batter stays cold, active, and ready to puff in the oil.

For the main version, use cold lager or pale beer. The beer should be chilled, and the batter should be mixed just before frying. Do not overmix it; a few tiny lumps are fine.

A good basic beer batter for fish and chips uses:

  • ¾ cup / 95 g all-purpose flour
  • ¼ cup / 40 g rice flour, cornflour, or cornstarch
  • 1¼ teaspoons baking powder
  • ½ teaspoon fine salt
  • 1 cup / 240 ml very cold lager or pale beer

Lighter beers give the cleanest flavor and the most classic golden color. Save stout or porter for a darker, more bitter batter.

Fish and Chips Batter Without Beer

Sparkling water being poured into batter ingredients for a no-beer fish and chips batter.
Sparkling water or club soda is the best no-beer swap because it still brings carbonation. Keep it ice-cold so the coating fries lighter and crisper.

To make fish and chips batter without beer, use the same dry ingredients and replace the beer with 1 cup / 240 ml ice-cold sparkling water or club soda. Then add an extra ¼ teaspoon baking powder to help the batter puff.

The no-beer version tastes less malty, but it can still fry up crisp if the liquid is ice-cold and the oil is hot.

Should Fish and Chips Batter Have Egg?

Comparison of fried fish batter made without egg and with egg, showing a lighter crisp coating and a thicker coating.
Egg makes fish batter sturdier, but it can also make the coating heavier. For classic crispy fish and chips, the lighter egg-free version is the better first choice.

For the crispiest classic fish and chips batter, skip the egg. Egg can make the coating richer and sturdier, but it also pushes the batter toward a heavier, chewier, more cakey texture. This recipe uses flour, rice flour or cornstarch, baking powder, salt, and very cold beer or sparkling water for a lighter crisp shell.

If you prefer a thicker, more old-fashioned coating, you can add 1 beaten egg, but start with 2 to 3 tablespoons less beer or sparkling water and thin the batter only if needed. For a crisp pub-style finish, the egg-free batter is the better first choice.

Optional Extra-Crisp Batter Upgrade

For an extra-crisp batter, replace 2 to 4 tablespoons / 30 to 60 ml of the beer with vodka. This is optional, not required. The standard beer batter already works well for a home kitchen.

How to Fix Batter Thickness Before Frying

Three spoons of fish batter showing too thin, just right, and too thick consistencies.
Batter texture is easier to judge by sight than by mixing time. Aim for a smooth coating that clings lightly, then drips slowly.
Batter Problem What It Looks Like Fix
Too thin Runs straight off the fish and leaves bare patches. Add flour or rice flour 1 tablespoon at a time.
Just right Coats the fish and drips slowly in ribbons. Use immediately while cold.
Too thick Clings in a heavy, doughy layer. Add cold beer or sparkling water 1 tablespoon at a time.

Batter ready? Check the oil temperature and frying timing before you fry, or use the troubleshooting table if your batter feels too thick, thin, or loose.

Equipment You’ll Need

You do not need a restaurant fryer for homemade fish and chips, but the right setup makes a big difference. A heavy pot, thermometer, and wire rack will do more for crispness than extra batter ever will.

Home frying setup with a heavy pot, thermometer, wire rack, tray, skimmer, towel, and batter bowl.
A heavy pot, thermometer, and wire rack are the real crispness tools. Control the oil first, then drain the fish where steam can escape.
Equipment Why It Helps
Dutch oven, deep heavy pot, wok, or deep fryer Holds heat better and gives the fish enough room to fry.
Deep-fry thermometer Keeps the oil in the crisp zone instead of guessing.
Wire rack and rimmed baking sheet Lets steam escape so the underside of the fish stays crisp.
Spider skimmer or tongs Makes lowering and removing fish safer.
Mixing bowls Useful for dredging flour, batter, and sauces.
Kitchen towels or paper towels Dry fish and potatoes before frying.
Kitchen scale Gives better accuracy for flour and fish weight.
Instant-read thermometer Confirms the fish has reached 145°F / 63°C.

How to Make Fish and Chips Step by Step

This homemade version works best when you cook in the right order. Prepare the sauce first, start the chips next, mix the batter only when the oil is ready, then fry the fish and finish the chips close to serving.

Beer-battered fish being lowered into hot oil with bubbles forming around the coating.
Small batches protect the oil temperature. As a result, the batter sets quickly instead of absorbing oil and turning greasy.
  1. Make the sauce first. Tartar sauce and curry sauce can sit while you fry.
  2. Cut the potatoes. Slice them into thick chips about ½ to ⅝ inch / 1.2 to 1.5 cm thick.
  3. Rinse or soak the chips. This removes excess starch.
  4. Dry the chips very well. Wet potatoes splatter and soften in the oil.
  5. Pat the fish dry. This is one of the most important steps.
  6. Season the fish. Use salt and black pepper before dusting.
  7. First-fry or par-cook the chips. This softens the inside before the final crisping step.
  8. Mix the cold batter. Do this just before frying the fish.
  9. Dust the fish with flour or starch. Use rice flour, cornflour, cornstarch, or plain flour.
  10. Dip the fish in batter. Let excess batter drip off.
  11. Fry the fish. Cook until deeply golden, crisp, and flaky inside.
  12. Finish the chips. Fry or final-fry them hot until crisp and golden.
  13. Serve immediately. Add salt, tartar sauce, malt vinegar, lemon, and curry sauce if using.

How to Make Crispy Chips for Fish and Chips

The chips need to earn their place on the plate: crisp-edged, fluffy inside, salted while hot, and sturdy enough for malt vinegar or curry sauce.

Best Potatoes for Fish and Chips

Comparison of potatoes for fish and chips, including floury or starchy potatoes and waxy potatoes.
Floury potatoes make chips with fluffy centers and crisp edges. Waxy potatoes can still fry, but they usually taste denser.

The best potatoes for fish and chips are floury or starchy potatoes because they cook up fluffy inside and crisp outside. Use russet potatoes in the U.S., Maris Piper or King Edward in the U.K., or another floury potato where you live. Waxy potatoes can work, but they usually make denser chips with less fluffy centers.

There are two good ways to handle the potatoes: double-fry them, or parboil them first and then fry. You do not have to do both unless you want the extra step.

Option 1: Double-Fry Chips

Double-fried chips showing pale first-fried chips and golden final-fried chips.
The first fry cooks the potato through; the second fry builds the golden edge. That is why double-fried chips hold up better with vinegar or curry sauce.
  • Cut chips about ½ to ⅝ inch / 1.2 to 1.5 cm thick.
  • Rinse or soak until the water is mostly clear.
  • Dry the chips very well before frying.
  • First-fry at 325°F / 160°C until softened but pale.
  • Rest briefly, then final-fry at 375°F / 190°C until golden.
  • Salt immediately after frying.

Option 2: Parboil, Dry, Then Fry

Thick-cut chips being parboiled, dried, and fried for fish and chips.
Parboiling helps chips turn fluffy inside, but drying is the step that makes frying work. Wet potatoes soften and splatter instead of crisping.
  • Cut the potatoes into thick chips.
  • Simmer in salted water with 1 teaspoon malt vinegar for 8 to 10 minutes, until just tender at the edges but not falling apart.
  • Drain carefully and dry very well.
  • Chill if you have time, then fry once at 375°F / 190°C until crisp and golden.
  • Salt immediately after frying.

For a deeper potato-only guide with double-fry timing, air fryer fries, oven fries, cuts, coatings, and seasoning ideas, use MasalaMonk’s crispy homemade French fries guide alongside this fish and chips recipe.

To time the chips with the fish, use the serve everything hot sequence before starting the final fry.

Best Oil Temperature for Fish and Chips

Oil temperature is where homemade fish and chips usually succeed or fail. Too cool, and the batter drinks oil. Too hot, and the coating browns before the fish turns flaky inside.

Frying thermometer in hot oil with fish and chips nearby for fish and chips temperature control.
Oil temperature decides whether fish batter crisps or turns greasy. Let the oil recover between batches rather than rushing the next piece in.
Item Temperature Time
First-fry chips 325°F / 160°C 3 to 5 minutes
Final-fry chips 375°F / 190°C 2 to 4 minutes
Fry fish 365°F to 375°F / 185°C to 190°C 4 to 6 minutes for 5 to 6 oz pieces
Fish doneness 145°F / 63°C internal temperature Until opaque and flaky

Start the oil slightly hotter than your minimum target because the temperature drops when cold battered fish goes in. Then fry in small batches and let the oil recover between batches.

Vinegar timing cue: Add malt vinegar at the table or right before eating so the chips keep their crisp edges longer.

Vinegar timing: Add malt vinegar at the table or right before eating. If the fish or chips sit too long after vinegar is added, the crisp coating softens quickly.
Malt vinegar being poured over thick chips beside crispy battered fish.
Malt vinegar gives fish and chips their sharp finish. However, add it right before eating so the chips stay crisp longer.

If your oil temperature keeps dropping or the coating turns greasy, jump to common fish and chips fixes.

How to Serve Fish and Chips Hot at the Same Time

The danger zone is not the frying itself; it is letting one part of the meal sit while the other finishes. Fish and chips should land on the plate hot, crisp, and uncovered, with the chips salted while they are still fresh from the oil.

Crispy battered fish draining on a wire rack over a tray with chips nearby.
A wire rack keeps fried fish crisp underneath because steam can escape. By contrast, a plate traps moisture and softens the coating.

Use this order:

  1. Make tartar sauce and curry sauce first.
  2. Cut, rinse, and dry the chips.
  3. Pat the fish dry and portion it.
  4. First-fry or par-cook the chips.
  5. Heat the oil for fish.
  6. Mix the cold batter right before frying.
  7. Fry the fish and drain it on a wire rack.
  8. Final-fry or finish the chips while the fish rests briefly.
  9. Salt the chips and serve everything immediately.

If needed, keep cooked chips warm in a low oven around 250°F / 120°C while you finish the fish. However, do not cover fried fish tightly or it will steam and soften.

Ready to cook? Use the full recipe card below, and keep the oil temperature table handy while frying.

Saveable fish and chips recipe card with crispy battered fish, chips, tartar sauce, lemon, and recipe notes.
Keep the main method simple: dry the fish, mix the batter cold, fry in hot oil, then drain on a rack before serving.

Crispy Fish and Chips Recipe

This homemade fish and chips recipe uses cod or haddock, a cold beer batter, thick-cut chips, and a clear frying method so the fish turns crisp outside and flaky inside. It also includes no-beer, air fryer, baked, and gluten-free notes.

Servings4
Prep Time30 minutes
Cook Time30 minutes
Total Time1 hour
Best texture targets: Fry fish at 365°F to 375°F / 185°C to 190°C, keep the batter ice cold, cut fish into 5 to 6 oz pieces, and drain on a wire rack instead of a plate.

Ingredients

Fish

  • 1½ lb / 680 g cod or haddock fillets, cut into 4 large pieces or 6 to 8 smaller pieces
  • ½ teaspoon fine salt
  • ¼ teaspoon black pepper
  • ¼ cup / 40 g rice flour, cornflour, cornstarch, or all-purpose flour, for dusting

Chips

  • 2 lb / 900 g russet potatoes, Maris Piper, or other floury potatoes
  • 1 teaspoon malt vinegar, optional for parboiling
  • Fine salt, to taste
  • 1½ to 2 litres neutral high-heat oil, or enough for 2 to 3 inches / 5 to 7 cm depth

Beer Batter

  • ¾ cup / 95 g all-purpose flour
  • ¼ cup / 40 g rice flour, cornflour, or cornstarch
  • 1¼ teaspoons baking powder
  • ½ teaspoon fine salt
  • ¼ teaspoon turmeric, optional for color
  • ½ teaspoon paprika, optional
  • 1 cup / 240 ml very cold lager or pale beer

Serving Sauces and Sides

  • Tartar sauce
  • Malt vinegar
  • Lemon wedges
  • Curry sauce, optional
  • Mushy peas, optional

Instructions

Prep the Sauces, Chips, and Fish

  1. Start with the sauces. Prepare tartar sauce and curry sauce, if using, before anything comes out of the oil.
  2. Cut the chips. Peel if desired, then cut the potatoes into thick chips, about ½ to ⅝ inch / 1.2 to 1.5 cm wide.
  3. Rinse or soak. Rinse until the water is mostly clear, or soak in cold water for 20 to 30 minutes.
  4. Dry well. Drain and dry the potatoes thoroughly with a clean kitchen towel.
  5. Prepare the fish. Pat the fish very dry, then season with salt and black pepper.

Cook the Chips

  1. Choose your chip method. For double-fried chips, first-fry at 325°F / 160°C until softened, then final-fry at 375°F / 190°C until crisp. Alternatively, parboil with 1 teaspoon malt vinegar for 8 to 10 minutes, until just tender at the edges, dry very well, then fry once at 375°F / 190°C until crisp and golden.
  2. Heat the oil safely. Keep the pot no more than halfway to two-thirds full. Use 325°F / 160°C for the first fry, or 375°F / 190°C for the parboil-and-fry method.
  3. Cook the chips. Use your chosen method, transfer to a rack or tray, and salt while hot.

Mix the Batter and Fry the Fish

  1. Raise the oil temperature for fish. Aim for 365°F to 375°F / 185°C to 190°C.
  2. Mix the batter just before frying. Whisk together the flour, rice flour or cornstarch, baking powder, salt, turmeric, and paprika. Add the cold beer and whisk briefly. Do not overmix; a few small lumps are fine.
  3. Dust the fish. Coat each piece lightly in rice flour, cornflour, cornstarch, or plain flour, then shake off the excess.
  4. Batter the fish. Dip the fish into the batter and let the excess drip off in ribbons.
  5. Fry the fish. Fry for 4 to 6 minutes for 5 to 6 oz pieces, turning once after the batter has set. The coating should be deep golden, crisp at the edges, and firm enough that it does not dent easily when lifted from the oil; the fish inside should be opaque, flaky, and 145°F / 63°C if checked with a thermometer.
  6. Drain properly. Move the fish to a wire rack set over a baking sheet. Do not stack or cover tightly.

Finish and Serve

  1. Finish the chips if needed. If you double-fried them, do the final fry now at 375°F / 190°C for 2 to 4 minutes. If you used the parboil method and already fried once, briefly refresh in hot oil only if needed.
  2. Serve hot. Salt the chips immediately and serve this fish and chips recipe with tartar sauce, malt vinegar, lemon wedges, and curry sauce if using.

No-Beer Batter Note

Replace the beer with 1 cup / 240 ml ice-cold sparkling water or club soda. Add an extra ¼ teaspoon baking powder. The batter will be lighter and less malty but still crisp.

Egg Note

For the crispiest coating, skip the egg. If you prefer a thicker, sturdier batter, add 1 beaten egg but start with 2 to 3 tablespoons less beer or sparkling water.

Frozen Fish Note

Frozen cod or haddock can work, but thaw it completely and pat it very dry before seasoning, dusting, and battering.

Air Fryer Note

For air fryer fish and chips, do not use wet beer batter. Use a flour, egg, and panko coating instead. Air fry at 375°F to 400°F / 190°C to 200°C for about 10 to 12 minutes, flipping halfway.

Baked Note

For baked fish and chips, use a panko coating and bake in a 400°F / 200°C oven. Bake the chips first, then add the coated fish and bake until crisp and flaky.

Gluten-Free Note

Use a gluten-free flour blend, rice flour or cornstarch, gluten-free baking powder, and gluten-free beer or club soda. Start with 1 cup / 240 ml liquid, then add 1 to 3 tablespoons more only if needed. Dust the fish with rice flour before battering.

Storage Note

This fish and chips recipe is best fresh. Refrigerate leftovers up to 2 days and reheat in an oven or air fryer. Avoid microwaving if you want the coating to stay crisp.

Fish and Chips Sauce: Tartar Sauce, Curry Sauce, and Vinegar

Fish and chips need contrast: creamy tartar sauce, sharp malt vinegar, lemon for brightness, and curry sauce if you want that proper chip-shop comfort-food finish.

Fish and chips served with tartar sauce, curry sauce, malt vinegar, lemon, and mushy peas.
Sauces complete the plate: tartar sauce adds creaminess, lemon adds brightness, malt vinegar cuts the fried coating, and curry sauce brings chip-shop comfort.

Tartar Sauce for Fish and Chips

For a quick tartar sauce, stir together:

  • ½ cup mayonnaise
  • 2 tablespoons finely chopped cornichons or pickles
  • 1 teaspoon chopped capers
  • 1 tablespoon lemon juice
  • 1 tablespoon chopped parsley or dill
  • ½ teaspoon Dijon mustard, optional
  • Black pepper, to taste

If you want to make the creamy base from scratch, start with this homemade mayonnaise guide, then fold in pickles, capers, lemon, herbs, and mustard for tartar sauce.

Curry Sauce for Fish and Chips

For a simple chip-shop-style curry sauce, use:

  • 1 tablespoon butter or neutral oil
  • ¼ small onion, finely chopped
  • 1 small garlic clove, grated or minced
  • ½ teaspoon grated ginger, optional
  • 1½ teaspoons mild curry powder
  • ¼ teaspoon turmeric
  • ¾ cup stock
  • 1 teaspoon malt vinegar
  • 1 teaspoon cornstarch mixed with 1 tablespoon water
  • Salt, pepper, and a small pinch of sugar, to taste

First, soften the onion in butter or oil. Next, add the garlic, ginger, curry powder, and turmeric, then stir in the stock. After that, simmer for a few minutes, add the cornstarch slurry, and cook until glossy and pourable. Finally, finish with malt vinegar and adjust salt, pepper, and sweetness.

This does not need to be fiery. A good fish and chips curry sauce should be warm, savory, lightly sweet, and loose enough to spoon over chips.

Quick Mushy Peas

For a quick green-pea version, simmer 2 cups peas with 1 tablespoon butter, a pinch of salt, black pepper, and 1 to 2 tablespoons water until hot. Mash roughly with lemon juice and chopped mint or parsley. Keep them chunky rather than completely smooth so they feel like a proper side, not a puree.

Bowl of chunky mushy peas with butter and lemon served beside fish and chips.
Quick mushy peas add freshness and color beside fried fish. For better texture, keep them chunky instead of turning them into a smooth puree.

Other Serving Ideas

  • Malt vinegar
  • Lemon wedges
  • Garlic mayo or aioli
  • Ketchup for a family-friendly plate
  • Coleslaw
  • Pickled onions or gherkins

Sauces sorted? Go back to the full fish and chips recipe or see what to serve with fish and chips.

Air Fryer Fish and Chips

For air fryer fish and chips, switch from wet beer batter to a panko coating. Wet batter needs hot oil to set instantly; in an air fryer, it drips before it crisps.

Panko-coated fish and chips in an air fryer basket for air fryer fish and chips.
Air fryer fish and chips need panko or breadcrumbs because wet batter drips before it sets. It is a different method, not a direct deep-fried copy.

Instead, use a breadcrumb or panko coating:

  1. Pat cod or haddock dry and cut into pieces.
  2. Season flour with salt, pepper, paprika, and garlic powder.
  3. Dip fish in flour, then beaten egg, then panko breadcrumbs.
  4. Spray lightly with oil.
  5. Air fry at 375°F to 400°F / 190°C to 200°C for about 10 to 12 minutes, flipping halfway, until the coating is crisp and the fish is opaque, flaky, and 145°F / 63°C inside.
  6. Cook air fryer chips separately or start them first so they finish around the same time.
Air fryer rule: Use panko or breadcrumbs, not wet beer batter, for the cleanest result. Also, keep fish in a single layer and do not block airflow with heavy parchment or foil.

If air-fried food often turns pale, soft, or uneven in your kitchen, check these common air fryer mistakes before adjusting the fish recipe itself.

Want the classic fried version instead? Go back to the beer batter guide. Having air fryer issues? Check the fixes section.

Baked Fish and Chips

Baked fish and chips works best as its own version: panko-coated fish, a hot oven, a lightly oiled tray, and chips or wedges that crisp while the fish cooks. It will not mimic deep-fried beer batter, but it can still be a very good weeknight version.

Panko-coated baked fish with oven chips or potato wedges on a sheet pan.
Baked fish and chips work best with panko, a hot oven, and space on the tray. Instead of imitating beer batter, this version gives you a crisp weeknight alternative.

Use this method:

  1. Heat the oven to 400°F / 200°C.
  2. Cut potatoes into wedges or thick fries, toss lightly with oil and salt, and bake until partly tender.
  3. Coat the fish in flour, egg, and panko breadcrumbs.
  4. Place fish on a lightly oiled rack or lined tray.
  5. Bake until the coating is crisp and the fish is opaque, flaky, and 145°F / 63°C inside.

For better browning, spray or brush the coated fish lightly with oil before baking.

Gluten-Free Fish and Chips

For a gluten-free version of this fish and chips recipe, build the batter around rice flour, cornstarch, gluten-free flour, and cold carbonated liquid.

Gluten-free fish and chips batter setup with flour blend, rice flour or cornstarch, liquid, and fried fish.
Gluten-free batter varies by flour blend, so start with less liquid and loosen slowly. The goal is still a ribbon-like batter that coats the fish.

Use:

  • 1 cup gluten-free flour blend
  • ¼ cup white rice flour or cornstarch
  • 1 teaspoon baking powder
  • ½ to 1 teaspoon salt
  • Paprika, garlic powder, or black pepper, optional
  • 1 cup / 240 ml gluten-free beer or club soda, plus 1 to 3 tablespoons more only if needed

Start with 1 cup / 240 ml liquid, then add more only until the batter coats the back of a spoon and drips off in ribbons. Gluten-free flour blends vary, so the texture matters more than the exact final tablespoon count.

Before battering, dust the fish with rice flour. Then fry in small batches at about 375°F / 190°C, knowing the oil will drop once the fish goes in.

Also, check that your baking powder, sauces, and serving sides are gluten-free.

How to Fix Common Fish and Chips Recipe Problems

Most fish and chips problems come from moisture, batter thickness, or oil temperature. Before changing the whole recipe, use this table to identify the likely issue.

Troubleshooting guide for fish and chips showing batter falling off, soggy coating, greasy fish, and limp chips.
Most fish and chips problems trace back to moisture, batter thickness, oil temperature, or crowding. Once you find the cause, the fix is usually simple.
Problem Likely Cause Fix
Batter falls off Fish was too wet or not dusted first. Pat fish very dry and dust lightly with flour or rice flour before battering.
Batter is soggy Oil was too cool or the pot was crowded. Fry fewer pieces and keep oil above 350°F / 175°C.
Fish is greasy Oil temperature dropped too much. Let the oil recover between batches.
Batter browns too fast Oil was too hot. Lower heat slightly and use pieces that are not too thick.
Fish is undercooked Pieces were too thick or oil was too hot outside. Cut fish into thinner portions and check for 145°F / 63°C inside.
Batter is too thick Too much flour or not enough liquid. Add cold beer or sparkling water 1 tablespoon at a time.
Batter is too thin Too much liquid. Add flour or rice flour 1 tablespoon at a time.
Chips are limp Potatoes were wet or only fried once. Dry thoroughly and double-fry, or parboil, dry, and fry.
Fish tastes bland Only the batter was seasoned. Season the fish, the dredge, and the batter lightly.

Soggy vs crispy cue: If the coating turns pale, greasy, or soft, check moisture, oil temperature, batch size, and draining method first.

Side-by-side comparison of soggy fish and chips and crispy golden fish and chips.
Crispy fish and chips need hot oil, small batches, and proper draining. Otherwise, the coating can turn pale, greasy, or soft before serving.

What to Serve with Fish and Chips

Classic fish and chips can be served simply with tartar sauce, malt vinegar, lemon, and salt. To make the plate fuller, add mushy peas, coleslaw, pickles, or curry sauce.

A cold cucumber salad recipe works especially well on the side because it is crisp, tangy, and quick enough to make while the potatoes soak.

When you want a bolder version with masala batter, chutney dips, and chaat-style chips, try MasalaMonk’s Indian twists on fish and chips. Keep this classic version as the base, then use that guide for a spicier variation.

Storage and Reheating

Fish and chips are best eaten fresh. Over time, the batter softens, especially if the fish is stacked or covered while hot.

Fish and chips being reheated in an air fryer and oven with a reminder to avoid the microwave.
Reheat leftovers in an air fryer or oven when you want some crispness back. The microwave is faster, but it makes the batter and chips soft.
  • Fridge: Store leftover fish and chips in separate airtight containers for up to 2 days.
  • Air fryer reheating: Reheat at 350°F / 175°C for 4 to 6 minutes, or until hot and crisp.
  • Oven reheating: Reheat on a wire rack at 375°F / 190°C until hot.
  • Avoid the microwave: It makes the batter and chips soft.

Leftover cooked fish or extra potatoes can also be folded into patties or a croquettes recipe, especially when the pieces are still flavorful but no longer crisp enough to serve as fish and chips.

Fish and Chips Recipe FAQs

What is the best fish for fish and chips?

Cod is the easiest all-purpose fish for fish and chips because it is mild, flaky, and widely available. Haddock is the classic British-style choice with a slightly stronger flavor. Pollock, hake, halibut, whiting, and ling can also work.

Is cod or haddock better for fish and chips?

Cod is milder and easier to find, while haddock has a more traditional fish-and-chip-shop flavor. Use cod for the easiest first batch and haddock when you want a more classic taste.

How do you make fish and chips batter crispy?

To make this fish and chips recipe crisp, use very cold beer or sparkling water, add rice flour or cornstarch to the batter, avoid overmixing, pat the fish dry, dust it before battering, and fry at the correct oil temperature.

Can I make fish and chips batter without beer?

Yes. Replace the beer with ice-cold sparkling water or club soda and add an extra ¼ teaspoon baking powder. The batter will be lighter and less malty but still crisp.

Should fish and chips batter have egg?

For a lighter crisp coating, skip the egg. Egg makes the batter richer and sturdier, but it can also make the coating heavier or more cakey. If you add one, reduce the beer or sparkling water slightly and thin only if needed.

What beer is best for fish batter?

A cold lager or pale ale is best for fish batter. Avoid very dark beers for the main recipe because they can make the batter taste heavier and look darker.

Can I use frozen fish for fish and chips?

Yes, but thaw it completely and pat it very dry before seasoning and battering. Extra surface moisture can make the batter slide off or turn soft.

Why is my fish batter soggy?

Soggy batter usually means the oil was too cool, the pot was crowded, or the fish was too wet before battering. Keep the oil hot, fry in small batches, and dry the fish well.

Why does batter fall off fish?

Batter falls off when the fish is wet or not dusted first. Pat the fish dry and coat it lightly in flour, rice flour, cornflour, or cornstarch before dipping it in batter.

Can I make fish and chips in an air fryer?

Yes, but use a breadcrumb or panko coating instead of wet beer batter. Wet batter can drip in an air fryer before it sets.

Can I bake fish and chips instead of frying?

Yes. Baked fish and chips work best with panko-coated fish and oven-baked potato wedges or chips. It will be lighter than deep-fried fish and chips, but not exactly the same texture.

What sauce goes with fish and chips?

Tartar sauce, malt vinegar, lemon, curry sauce, mushy peas, garlic mayo, ketchup, and coleslaw all work well with fish and chips.

Is fish and chips the same as fish and fries?

In British-style fish and chips, “chips” usually means thicker fried potatoes. In the U.S., the same dish is sometimes described as fish and fries, especially when served with thinner fries.

Can I make gluten-free fish and chips?

Yes. Use a gluten-free flour blend, rice flour or cornstarch, gluten-free beer or club soda, and gluten-free baking powder. Also check sauces and sides for hidden gluten.

What temperature should oil be for fish and chips?

For the fish, aim for 365°F to 375°F / 185°C to 190°C. Do not let the oil fall below 350°F / 175°C, or the batter can turn greasy.

How do I reheat fish and chips?

Reheat fish and chips in an air fryer at 350°F / 175°C for 4 to 6 minutes, or in an oven at 375°F / 190°C until hot and crisp. Avoid the microwave if you want the batter to stay crisp.

Posted on 16 Comments

Crispy Homemade French Fries From Fresh Potatoes (Recipe Plus Variations)

Woman frying crispy homemade French fries in a pan on the stove, lifting golden fries from hot oil for a MasalaMonk recipe guide.

There’s a special kind of joy in biting into crispy homemade french fries that you made yourself. The outside is shatteringly crisp, the inside is fluffy and hot, and you can taste actual potato instead of just salt and grease. Once you learn how to do diy french fries at home, it becomes hard to go back to limp, lukewarm fast-food versions.

In this guide, we’ll walk through:

  • A straightforward french fries ingredients and procedure section you can follow every time
  • The best way to cook fries using a classic double-fry method
  • Easier options like oven fries at 425°F and air fryer frozen french fries
  • Fun variations: seasoned fries, garlic parmesan french fries, chili cheese french fries, truffle fries, and more
  • Smarter choices for healthy potato fries, from oil selection to veggie alternatives

The aim is simple: by the end, you’ll be able to make perfect french fries in several styles, whether you’re cooking for movie night, a party tray of loaded fries, or just a snack for one.

Also Read: Simple Bloody Mary Recipe – Classic, Bloody Maria, Virgin & More


Why Bother Making Crispy French Fries at Home?

At first glance, buying a bag of frozen fries or grabbing a portion from a takeaway seems easier. However, at home french fries come with a few big advantages.

To begin with, you control the ingredients. You choose the potatoes, the oil, and the salt level. You can keep things minimal for a simple fries recipe, or go wild with flavors like cajun french fries or cheese french fries. When you’re in charge, “quality fries” actually means something.

Moreover, you get to decide how indulgent you want your fries to be. Potatoes themselves are not villains. According to Potatoes USA’s nutrition overview, a medium potato has around 110 calories, zero fat, and offers vitamin C, potassium, and fiber when you keep some peel on. Deep frying adds fat and energy, of course, but with homemade fries, you can:

  • Use better oils
  • Fry at the right temperatures
  • Or choose oven fries potatoes and air fryer french fries most of the time

A typical restaurant portion of fries can be high in fat and sodium. Overviews like Verywell Fit’s french fries nutrition facts break down just how quickly calories add up when fries are cooked in old oil and then heavily salted. Making real potato fries at home lets you adjust all of that.

Finally, the flavor is simply better. Fresh potato fries have a clean, sweet, potato-forward taste that frozen fries rarely match. Once you’ve had real french fried potatoes straight from your own kitchen, it’s hard not to feel a tiny bit smug.

Also Read: Homemade Hot Chocolate with Cocoa Powder Recipe


Best Potatoes for Crispy Homemade French Fries

The heart of any good potato french fries recipe is, unsurprisingly, the potato. Not all varieties behave the same in hot oil or a hot oven, so it’s worth thinking about the type you buy.

Starchy vs “gold” potatoes

For classic crispy fries with fluffy interiors, starchy potatoes are ideal:

  • Russet / Idaho potatoes: High starch and low moisture. These are perfect for french fries from russet potatoes if you want that restaurant-style contrast between crisp outside and soft inside.
  • Yukon Gold and other yellow potatoes: Slightly waxier, with more moisture, but very creamy. These are excellent for gold potato fries or yukon gold french fries when you want a rich, buttery interior and deep golden exterior.

Side-by-side comparisons, like this piece on Russet vs Yukon Gold, point out that Russets crisp up more dramatically than yellows because of their starch and lower moisture, whereas Yukon Golds keep their shape and feel denser and creamier. That matches what you’ll see in your pan: Russets are your friend for the crispiest french fries, while golds are great when you lean toward golden potato french fries that feel more substantial.

In short:

  • For extra crispy french fries or skinny fries → choose Russet/Idaho.
  • For rich, slightly softer thick cut fries or steak fries → try Yukon Gold or another yellow potato.

You can mix them too, especially if you like serving a variety of textures on one platter.

Also Read: Mimosa Recipe: 10 Easy Versions from Classic to Caramel Apple


Oils, Heat, and Tools for Homemade French Fries that are Crispy

Once you’ve got your potatoes sorted, the next question is: what do you fry them in, and how?

Oils that work well for fries

When you’re deep-frying, you want oils that can handle high temperatures and stay reasonably stable:

  • Refined peanut or sunflower oil
  • Canola or rapeseed oil
  • Rice bran oil
  • High-oleic vegetable blends
  • Light or refined olive oil (for fries in olive oil, not extra virgin)

Articles on the healthiest oils for cooking and frying highlight avocado, refined olive, peanut, and similar oils because they combine decent smoke points with more monounsaturated fats. They’re not magic health potions, but they’re a smarter choice than repeatedly overheated, low-quality oils.

For full-on indulgence, some people love beef tallow fries or duck fat french fries. Both fats give incredible flavor, but they are obviously richer and make the most sense for occasional “wow” dinners. On the other end of the spectrum, you can choose very light oil coatings in the oven or air fryer for healthier french fries.

Helpful tools (and what you can skip)

You do not need a dedicated “french fry fryer” to make excellent fries. You can absolutely make french fries at home using basic tools:

  • A heavy pot or deep frying pan
  • A thermometer (to manage that best way to fry fries temperature window)
  • A large bowl for soaking
  • A colander or sieve
  • A clean towel for drying
  • A wire rack and tray for draining cooked fries

A dedicated fryer can make things more convenient if you make home made fries often, but it’s not a requirement. A sharp knife is also plenty for cut fries, although a mandoline or fry cutter can be fun if you often crave french fries shoestring, crinkle cut french fries, or thick cut french fries.

Also Read: French 75 Cocktail Recipe: 7 Easy Variations


Ingredients for Classic French Fries

The nice part about a simple french fries recipe is how short the shopping list is. Here’s a good base for four people.

Core ingredients

  • 1 kg (about 2.2 lb) potatoes (Russet for crispiest; Yukon Gold for creamier)
  • Oil for frying (enough to fill your pot 5–7 cm / 2–3 inches deep)
  • 2–3 teaspoons fine salt

That’s your essential french fries ingredients list: nothing fancy, just the basics that define fresh french fries.

Optional extras for crunch and flavor in Crispy Homemade French Fries

If you’d like to push things toward the crunchy fries recipe end of the spectrum or turn out seasoned fries, keep these on hand:

  • Cornstarch or rice flour (for french fries with crispy coating)
  • Garlic powder, onion powder, smoked paprika, chili powder (for seasoned french fries or cajun french fries)
  • Grated Parmesan, cheddar, or other cheese (for parmesan french fries or cheesy french fries)
  • Truffle oil and fresh parsley (for truffle french fries recipe)
  • Fresh garlic and butter or olive oil (for garlic french fries recipe)

With these extras, the same basic batch of fries can become restaurant style fries, garlic parmesan fries, or loaded french fries without much extra effort.

Also Read: Tres Leches – Mexican 3 Milk Cake Recipe


Step-by-Step Crispy Homemade French Fries (Stovetop)

Let’s start with the classic version: crispy homemade french fries cooked in oil on the stove. This method gives you extra crispy fries if you follow the temperatures and timing closely.

Recipe card showing classic crispy homemade French fries on a plate with ketchup and text for serves, prep time, and cook time.
Classic crispy homemade French fries – a MasalaMonk recipe card with serving size and cook times, perfect for pinning or saving for later.

Step 1: Cut and soak the potatoes

First, scrub your potatoes well. You can peel them if you prefer, but leaving the skins on makes more rustic real potato fries and adds a touch of fiber.

Cut the potatoes into sticks about 8–10 mm thick. For skinny french fries or french fries shoestring, go thinner; for steak fries or thick cut fries, cut chunky batons or wedges.

As soon as you cut them, drop the sticks into a big bowl of cold water. This rinses away surface starch and stops oxidation. Swish them around, then drain and refill with fresh cold water. If you like, add a spoonful of vinegar or lemon juice; it can help them hold their structure during cooking.

Soaking for 20–30 minutes helps prevent the outside from turning gummy and gives you a better chance at truly crispy french fries rather than soggy ones. Once you’re done soaking, drain the potatoes thoroughly and spread them out on a clean towel. Pat them dry until they feel matte. Water on the surface is the enemy here: it lowers oil temperature and encourages splattering.

Step 2: First fry (par-cooking)

Heat your oil to around 150–160°C (300–320°F). At this stage, the goal is to cook the potatoes through without browning them much. For deep frying, a two-stage cook—first at a lower temperature, then at a higher one—is key to combining a fluffy interior with crisp exterior.

Working in small batches, gently lower the dried potato sticks into the hot oil. Fry for about 4–6 minutes. They should turn from opaque to slightly translucent and feel tender if you poke them with a knife, but they should not yet be golden.

Lift them out with a slotted spoon and place them on a rack set over a tray. Repeat with the remaining batches. At this point, you have par-cooked fries: soft, pale, and flexible. You can pause here, cool them, and even refrigerate for several hours if you want to fry just before serving. That’s how many restaurant style french fries are prepped.

Step 3: Second fry (crisping and coloring)

For the second fry, raise the oil temperature to 185–190°C (365–375°F). That hotter environment is where you’ll develop the golden crust that makes crispiest french fries such a pleasure.

Again in small batches, slide the par-cooked fries back into the oil. Fry for 2–4 minutes, until they’re uniformly golden, with little blistered areas and crisp edges. Keep an eye on their color; you’re aiming for golden potato french fries, not dark brown or burnt ones.

There’s a health reason for that, too. When starchy foods like potatoes are fried or baked at high heat, they can form acrylamide, a compound that health agencies monitor. The US FDA’s guidance on acrylamide in foods suggests aiming for light golden colors and avoiding burnt bits whenever possible. The National Institute of Environmental Health Sciences also notes that french fries and similar foods can be significant acrylamide sources when heavily browned. So, aim for gold, not mahogany.

Once the fries are ready, lift them onto the rack or a paper-towel-lined tray. Immediately sprinkle them with salt while they’re still sizzling, so the crystals cling. If you like seasoned fries, this is the moment to toss with paprika, garlic powder, or any spice mix you enjoy.

And just like that, you’ve completed the core french fries procedure: cut, soak, dry, par-fry, then finish hot.

Also Read: High Protein Overnight Oats | 5 Recipes (Low Calorie, Vegan, Bulking & More)


Slightly Smarter, Still Crispy: Health Notes and Oil Choices

Even though fried fries recipes are not exactly health food, you can still make better choices without losing all pleasure.

First, use fresh or properly filtered oil and avoid letting it smoke. Overheated, repeatedly reused oil isn’t just unpleasant in flavor; it can contribute to off flavors and degraded fats. A thermometer makes it much easier to maintain that best way to fry french fries temperature range, whether you’re in a pot or a countertop fryer.

Second, consider how often you go for fully deep-fried crispy french fries versus lighter versions. You might save deep-fried extra crispy french fries for weekends, while turning to oven fries or air fryer homemade fries on busy weeknights.

Third, balance your plate. Fries alongside grilled chicken, salad, or roast vegetables feel different from fries plus more fried items. That’s where side dishes and smarter recipes around your fries come in—and we’ll circle back to those in a bit.

Also Read: 10 High Calorie Protein Shakes & Smoothie Recipes for Healthy Weight Gain


Oven Fries at 425°F: Baked, Seasoned, and Easy

When you’d rather not deal with a pot of hot oil, oven fries 425°F are a great compromise. They won’t be identical to deep-fried fries, yet you can get delicious baked seasoned fries with crisp edges and tender middles.

Recipe card showing a tray of oven-baked seasoned fries at 425 degrees, held with an oven mitt, with serving size and baking time details.
Oven-baked fries at 425°F – crispy seasoned fries with less oil, with prep and bake times highlighted so you can see the whole MasalaMonk method at a glance.

Basic oven fries method

  1. Preheat your oven to 220°C / 425°F.
  2. Cut your potatoes into wedges or sticks, just as before.
  3. In a bowl, toss them with 1–2 tablespoons of oil—this can be olive, avocado, or any neutral oil you like.
  4. Season generously with salt, pepper, and any spices you enjoy: garlic powder, smoked paprika, dried thyme, or a ready-made seasoning blend.
  5. Spread the fries out in a single layer on a baking sheet, leaving a bit of space between pieces. Crowding leads to steaming rather than crisping.
  6. Bake for about 20–25 minutes, turning once halfway through, until the edges are golden brown and the fries are tender inside.

At this point, you’ve made seasoned oven fries that work beautifully with the same sauces and toppings you’d use for deep-fried versions. They’re particularly nice as a side to oven-baked mains or as part of a lighter tray meal.

If you’re planning a party spread that doesn’t revolve solely around fries, you can point guests toward other potato-centric snacks too. A collection like MasalaMonk’s potato appetizers fits naturally alongside oven fries on a buffet table, giving people more variety while still leaning into that potato comfort.

Also Read: How to Cook Perfect Rice Every Time (Recipe)


Air Fryer Fries: Crispy Homemade French Fries With Less Oil

Next, let’s move to fries airfryer style. Air fryers circulate very hot air around food, using far less oil than deep frying. Comparative work on deep-fried vs air-fried potatoes has shown that air-fried samples can have dramatically less fat and slightly fewer calories per serving, which makes them a handy tool when you’d like healthier french fries more often.

Recipe card showing air fryer French fries made from fresh-cut potatoes, with seasoning sprinkled over the basket and serving and cook times displayed.
Air fryer French fries made from fresh-cut potatoes – a MasalaMonk recipe card that highlights how to get crispy fries with less oil, plus prep and air-fry times at a glance.

Fresh potato fries in the air fryer

For easy french fries recipe done in the air fryer:

  1. Cut your potatoes into sticks and soak them as you would for deep frying.
  2. Drain and dry thoroughly.
  3. Toss with 1–2 teaspoons of oil, salt, and seasonings.
  4. Place them in the air fryer basket in a loose, even layer.
  5. Cook at 190°C / 375°F for 15–20 minutes, shaking every 5 minutes so they brown evenly.
  6. For extra crispy french fries, finish with a final 3–5 minutes at 200°C / 400°F.

This method gives you healthy potato fries that still feel indulgent. They’re especially good as skinny fries, where the higher surface area means lots of crunchy bits.

Frozen Crispy Homemade French Fries in the air fryer

For those nights when you want the best frozen fries for air fryer with minimal fuss:

  1. Preheat the air fryer to 200°C / 400°F.
  2. Tip frozen shoestring fries, straight cut fries, frozen waffle fries, or other shapes into the basket. Try not to overstack them.
  3. Air fry for 10–18 minutes depending on thickness, shaking halfway through.
  4. Season as soon as they come out of the basket.

Most brands are already partially fried in oil, so you often don’t need extra. However, a light spray of oil can help paler brands crisp a little better. This technique works well if you want to focus your kitchen time on main dishes but still end up with crispy fries recipe results.

If you’re fond of multitasking with your air fryer, ideas like air fryer hard-boiled eggs fit nicely into the same workflow. You might prepare homemade fries for dinner and a batch of eggs for breakfast with very little extra effort.

Also Read: Béchamel Sauce for Lasagna: Classic, Vegan & Ricotta Sauce Recipe


Playing With Shapes: Shoestring, Thick Cut, Steak, and Crinkle

Once you have a reliable french fries recipe, the next step is having fun with shapes. Different cuts give you different textures and cooking times.

Skinny and shoestring fries

Thin skinny fries or french fries shoestring are all about extreme crispness:

  • Cut the potatoes into matchsticks.
  • Soak, dry, and fry exactly as for the classic recipe.
  • Shorten the par-fry to keep them from overcooking, and watch carefully during the second fry—they go from golden to too dark very quickly.

Shoestring fries are fantastic when you’re making loaded french fries recipe variations like chile-topped fries, because so many edges catch sauce and cheese.

Thick cut fries and steak fries

On the opposite end, thick cut french fries and steak fries are all about a soft, potato-y center:

  • Cut the potatoes into chunky batons or wedges.
  • Lengthen the par-fry slightly or start them in the oven with a bit of water in the pan, then finish in hot oil or under the broiler.
  • Because there’s more potato in each piece, they stay creamy inside even when the exterior is thoroughly crisp.

Thick cut fries shine alongside robust dishes: grilled steak, roasted chicken, or as part of a plate with gravy and vegetables.

Crinkle cut and waffle fries

For crinkle cut french fries, fries crinkle cut, or french fries crinkle, you’ll need a crinkle cutter or a mandoline that makes ridges. The technique stays the same—soak, dry, par-fry, then crisp—but the ridges create extra surface area. That means more crunch, and it also means they hold onto seasonings and sauces really well.

Similarly, frozen waffle fries from the store become great canvases for fancy fries toppings. Their lattice structure acts like a little basket for cheese, carne asada, or creamy sauces.

Also Read: Peanut Butter Cookies (Classic Recipe & 3 Variations)


Veggie Fries: Sweet Potato, Yuca, Jicama, and Rutabaga

While classic french fries from white potatoes are iconic, you can also explore veggie french fries when you’re craving variety or want to shift the nutrition profile a bit.

Sweet potato fries

Sweet potato french fries deserve their own shout-out. They bake and air fry beautifully, and they pair well with both sweet and savory seasonings, from cinnamon and chili to garlic and smoked paprika. You can even make crinkle cut sweet potato fries for added texture.

Sweet potatoes tend to be softer and more prone to burning at high heat, so a light coating of cornstarch and oil, plus slightly lower temperatures, often work best. For more detail on how sweet potatoes differ nutritionally from white potatoes, you might enjoy MasalaMonk’s sweet potato nutrition breakdown and their piece on the potato debate: white vs sweet. Those articles go into fiber, vitamins, and even blood sugar considerations in a way that helps you decide when to reach for which.

Recipe card showing crispy spiced sweet potato fries in a round tray with dipping sauce, lime, and sweet potato pieces, plus serving and cook time details.
Crispy, spiced sweet potato fries with a creamy dip – a MasalaMonk recipe card that highlights this naturally sweet, oven or air-fried alternative, complete with prep and cook times.

Yuca, jicama, and rutabaga fries

Beyond sweet potatoes, you can experiment with:

  • Yuca french fries: dense, starchy, and very satisfying. They need peeling and careful boiling before frying, but the final texture is almost creamy.
  • Jicama french fries: lower in carbs, with a fresh crunch and a subtle sweetness. These are typically best baked or air fried with strong seasonings.
  • Rutabaga french fries: slightly earthy and sweet, good roasted until caramelized and then tossed with spices.

These alternatives work well when you want healthy potato fries style sides on repeat without always using white potatoes. They’re also fun for guests who’ve never tried such variations.

Also Read: Chicken Alfredo Pasta, 5 Ways (Classic to Cajun, Veg, 15-Minute Jar, Healthy)

Four glasses lined up on a board, each filled with a different veggie fry—sweet potato, yuca, jicama and rutabaga—with a hand picking up one fry and dipping sauces blurred in the background.
Veggie fries medley: sweet potato, yuca, jicama and rutabaga, for nights when you want all the crunch of fries with a little extra colour and variety on the MasalaMonk table.

Seasoned, Spiced, and Coated Fries

Once you’ve mastered the basics, it’s time to play with seasoned fries, homemade seasoned french fries, and light coatings for texture.

Basic seasoned Crispy Homemade French Fries

For a straightforward seasoned fries recipe, start with fresh, hot fries and toss them with:

  • Fine salt
  • Garlic powder
  • Onion powder
  • Smoked paprika
  • A pinch of black pepper or chili powder

This base mix instantly transforms simple french fries into something closer to best seasoned fries, and you can adjust the heat level to taste.

Top-down view of a wooden board with three piles of seasoned fries labeled Cajun, Garlic Herb and Smoky Paprika, each with a matching dipping sauce and a hand picking up a fry.
Seasoned fries three ways – Cajun, garlic herb and smoky paprika – so you can turn one batch of MasalaMonk fries into a full flavour tasting board.

Cajun and herby variations

To steer your fries toward cajun french fries, blend:

  • Paprika
  • Cayenne
  • Garlic powder
  • Oregano
  • Thyme
  • A bit of brown sugar and black pepper

Toss this through hot fries and you’ll have spicy, deeply flavored seasoned homemade fries that go especially well with tangy dips like tzatziki or yogurt-based sauces.

Alternatively, if you’d rather lean into herbs, use rosemary, thyme, cracked black pepper, and flaky salt. These herby seasoned french fries feel more rustic and pair beautifully with roast meats and vegetables.

Crispy coatings for Homemade French Fries

If you want french fries with crispy coating without turning them into full battered french fries, a light dusting of starch can help. After soaking and drying, toss the raw potato sticks in a spoonful of cornstarch or rice flour, shake off the excess, and then fry as usual. The coating makes subtle bubbles and ridges on the surface, giving you extra crispy fries that stay crunchy a little longer.

Also Read: Crock Pot Lasagna Soup (Easy Base + Cozy Slow-Cooker Recipes)


Cheesy, Loaded, and Fancy Fries

Now comes the most playful part: turning a bowl of fries into a full meal or an irresistible shareable plate.

Garlic parmesan fries

To create garlic parmesan french fries, start with a batch of hot, freshly fried fries.

  1. In a small pan, gently warm a bit of butter or olive oil with minced garlic until fragrant, not browned.
  2. Toss the hot fries with this garlic mixture.
  3. Add a handful of grated Parmesan and chopped parsley.
  4. Season with salt and pepper as needed.

This same approach also works for simple parmesan french fries if you skip the garlic or for sweet french fries if you play with honey and chili flakes instead.

Recipe card showing garlic parmesan fries in a bowl with cheese being sprinkled on top, surrounded by garlic cloves and a parmesan wedge, plus serving and cook time details.
Buttery, garlicky parmesan fries piled high in a bowl – a MasalaMonk recipe card that highlights this extra-crispy variation, complete with prep and cook times for easy reference.

Chili cheese and carne asada fries

For fully loaded chili cheese french fries, layer:

  • A bed of crispy fries
  • A ladle of hot chili (vegetarian or meaty)
  • Grated cheddar or Monterey Jack
  • Jalapeños, scallions, maybe a drizzle of sour cream

Slide the whole thing under the broiler for a minute until the cheese melts. Suddenly, your crispy fries have become serious comfort food.

Recipe card showing chili cheese loaded fries in a cast iron skillet, topped with chili, melted cheese, jalapeños and sour cream, with serving and bake time details
Chili cheese loaded fries served in a cast iron skillet – a MasalaMonk recipe card for the ultimate comfort fry platter, complete with prep and bake times for easy game-night planning.

Similarly, carne asada french fries combine:

  • Fries
  • Chopped grilled steak
  • Pico de gallo or salsa
  • Guacamole
  • Sour cream or crema
  • Fresh coriander

They’re messy, delicious, and perfect for sharing.

Carne asada fries on a rectangular tray topped with grilled steak strips, guacamole, salsa, sour cream and cilantro, with hands squeezing lime and reaching for a fry.
Carne asada fries loaded with steak, salsa, guacamole and sour cream – a MasalaMonk feast that turns a simple tray of fries into a full-on meal.

Truffle and “fancy” fries

When you want fancy fries without too much effort, truffle french fries recipe style toppings make a big impression.

  • Toss hot fries with a little truffle oil (a few drops go a long way).
  • Add grated Parmesan and parsley.
  • Season with salt and cracked pepper.

Because truffle oil can dominate, it’s best used with neutral, simply salted fries rather than heavily seasoned ones.

If you’d like more ideas for dips and cheesy sides that pair well with loaded fries, MasalaMonk’s spinach dip collection and their buffalo chicken dip recipes offer plenty of inspiration. Both kinds of dip are excellent alongside loaded french fries or even spooned over the top.

Tall metal cup filled with truffle fries topped with parmesan and herbs, served on a dark plate with aioli, styled like an elegant restaurant snack.
Skinny truffle fries finished with parmesan, herbs and a side of aioli – a simple MasalaMonk twist that turns fries into a wine-bar style treat.

Sauces and Dips for Crispy Homemade French Fries

Good fries deserve good sauces. Beyond ketchup, you can easily mix and match flavors for your own french fry dip recipe collection.

Creamy dips

For creamy dipping sauce for french fries, try ideas like:

  • A simple garlic mayonnaise with lemon juice
  • A smoky paprika mayo
  • A yogurt-based dip with herbs and garlic

These work especially well with seasoned fries and cajun fries, where the spices already bring a lot of personality.

If you want to branch out further, the cool, garlicky punch of tzatziki is a great contrast to hot fries. A guide like MasalaMonk’s Greek tzatziki sauce recipes shows how versatile that sauce can be across different herbs and add-ins, and every version is happy to share a plate with crispy fries.

Four quick fries dipping sauces – garlic mayo, smoky ketchup, spicy mayo and herb yogurt – so you can switch up the flavour of every MasalaMonk fries night in minutes.

Cheesy and baked dips for Crispy Homemade French Fries

Meanwhile, cheesy dips make perfect companions to french fries loaded with toppings. Spinach and artichoke dip, hot cheese dips, or buffalo chicken dip can all sit in the center of a platter surrounded by straight cut french fries, curly french fries, or crinkle cut fries for dipping.

Because fries and rich dips can be quite substantial, you may find it useful to round out your menu with lighter but still indulgent favorites. Dishes like classic deviled eggs with variations or high-protein snacks and breakfasts, such as overnight oats recipes, help keep things balanced over the course of a day, even if dinner is definitely in “treat” territory.


What to Serve With Crispy Homemade French Fries

Rather than thinking of fries as an afterthought, you can build entire meals around them in a way that feels intentional and satisfying.

Classic comfort plates

On one hand, there’s the timeless pairing of chicken and french fries:

  • Grilled or fried chicken
  • Homemade fries (deep-fried, oven-baked, or air fried)
  • Coleslaw or a fresh salad

You can also swap chicken pieces for sandwiches. A platter of fries next to juicy sandwiches from a range like MasalaMonk’s chicken sandwich recipe collection makes a complete, crowd-pleasing spread.

For full comfort food mode, consider serving fries alongside creamy classics:

Those casseroles and bakes give you vegetables and dairy in forms people love, while the fries bring crunch and a salty edge to balance the creaminess.

Party spreads and grazing boards

For parties or movie nights, a fries-centric board can be a huge hit. You might:

  • Offer multiple shapes: thick cut fries, skinny fries, crinkle cut fries
  • Provide several seasonings: plain salted, cajun, garlic herb
  • Add bowls of dips: tzatziki, spinach dip, buffalo chicken dip, ketchup, mustard-based sauces

Alongside that, including a few extra nibbles from potato-focused ideas like MasalaMonk’s potato appetizers roundup keeps everyone happy without making fries the sole attraction.


Leftovers, Crispy Homemade French Fries, and Casseroles

Every now and then, you might find yourself with cooked fries left over. They won’t be as crisp the next day, but they are far from useless.

Turning fries into home fries

One option is to make a sort of shortcut home fries recipe:

  1. Chop leftover fries into bite-sized pieces.
  2. Heat a skillet with a spoon of oil or butter.
  3. Add onions or peppers if you like, then the chopped fries.
  4. Cook over medium-high heat until the edges crisp and the pieces heat through.
  5. Season again and serve with eggs for breakfast.

These cooking home fries from leftover fries are especially good with runny yolks or as part of a brunch plate.

Cast iron skillet filled with breakfast home fries made from chopped leftover fries, peppers and three fried eggs, served with coffee, toast and salsa
Turn last night’s fries into this cosy breakfast home fries skillet, topped with sunny-side eggs and peppers for an easy MasalaMonk-style brunch.

Casseroles with Crispy Homemade French Fries

Another route is to layer leftover fries into a bake:

  • Assemble a cheeseburger casserole with french fries: fries on the bottom, cooked ground meat or meat alternative, cheese, and pickles or onions, then bake until bubbly.
  • Create a riff on shepherd’s pie using fries as a topping instead of mashed potatoes.

These dishes aren’t traditional, but they’re a fun way to avoid waste and to reimagine fries in a new context.

Also Read: Coconut Water Cocktails: 10 Easy, Refreshing Drinks


Bringing It All Together

To sum everything up, making french fries at home doesn’t need to be complicated. You start with good potatoes, a sensible approach to oil and heat, and a simple french fries recipe that you can repeat without thinking too hard. From there, the world opens up: you can lean toward healthy potato fries most days, then indulge in deep-fried extra crispy french fries when the mood hits.

You’ve seen how to:

  • Choose between Russet and Yukon Gold for the best french fry potato
  • Use soaking, drying, and double frying to achieve reliably crispy homemade french fries
  • Swap in oven fries, air fryer fries, or veggie french fries like sweet potato, yuca, jicama, and rutabaga
  • Turn plain fries into seasoned fries, garlic parmesan fries, chili cheese fries, carne asada fries, and truffle fries
  • Build full meals and snack boards around fries with dips, casseroles, sandwiches, and brunch ideas

Whether you keep it simple with a plate of lightly salted fresh french fries, or go all out with a giant platter of loaded french fries recipe piled high with cheese and toppings, you now have the tools to make them taste the way you want, every time you crave them.

Also Read: Cottage Cheese Lasagna Recipe | Chicken, Spinach, & Ricotta

FAQs about Crispy Homemade French Fries

1. What is the best potato for crispy homemade french fries?

For truly crispy homemade french fries, starchy potatoes work best. Russet or Idaho potatoes are usually considered the best french fry potato because they have a high starch, low moisture content that turns fluffy inside and crisp outside after frying. Yukon Gold or other “gold” potatoes also make excellent golden potato french fries, although they come out a little creamier and denser. If you prefer extra crunch and light interiors, reach for Russets; if you like a richer bite, go for Yukon Golds.


2. How do I keep fries crispy and not soggy?

To keep fries crunchy instead of limp, several small steps matter. Dry the potatoes thoroughly after soaking so you’re not dropping water into the oil. Then, cook them twice: a gentle first fry to cook the potato through, followed by a hotter second fry that creates the crisp crust. Avoid crowding the pan, since too many fries at once will cool the oil and make everything greasy. Salt and season fresh french fries right after the second fry while they are still hot, and serve them soon so the crust stays crisp.


3. Why do recipes tell me to soak potatoes before frying?

Soaking sliced potatoes in cold water helps pull out surface starch, which can otherwise form a gummy coating and prevent crispy fries from developing. A soak of 20–30 minutes is usually enough for a simple french fries recipe. After soaking, draining and drying thoroughly is just as important. When excess starch and moisture are removed, the fries brown more evenly and stay crisp longer, which is essential for the crispiest french fries.


4. Can I make crispy homemade french fries without a deep fryer?

Yes, you absolutely can make homemade fries without a dedicated fryer. A deep, heavy pot or a sturdy frying pan works fine as long as you use enough oil to submerge the potatoes and maintain consistent heat. A thermometer helps you hit the right temperature range. In addition, you can make oven fries and air fryer fries with just a thin coating of oil if you’d rather skip deep-frying altogether. The technique changes slightly, yet you still end up with easy french fries that taste fantastic.


5. What is the best way to fry french fries for perfect results?

A classic double-fry method is often considered the best way to fry french fries. First, fry the potatoes at a lower temperature so they cook through without much color. Then, after a short rest, fry them again at higher heat so the outside turns crisp and golden. During both steps, keep the oil temperature steady and avoid crowding the pan. Using this approach, even a beginner can turn out perfect french fries from a straightforward easy french fries recipe.


6. How hot should the oil be for french fries?

For the first fry, aim for oil around 150–160°C (300–320°F). This lets the interior of the potato cook gently without the outside browning too quickly. For the second fry, raise the temperature to about 185–190°C (365–375°F). At this higher heat, the surface dries out and browns into a crisp shell. Keeping the oil in this range is one of the main secrets behind extra crispy french fries and prevents the fries from soaking up too much oil.


7. Can I make french fries without oil?

You can make french fries without oil in the strict sense by baking or air frying plain potato sticks, though they will taste more like roasted potatoes than true fries. More realistically, very small amounts of oil—just enough to lightly coat the potatoes—create healthy potato fries that still feel indulgent. Oven-baked oven fries 425 and air-fried potatoes both work well with only a teaspoon or two of oil per serving, especially when you add bold seasonings.


8. Are homemade fries healthier than fast food fries?

While fries are still an occasional treat, homemade fries can be a better option than many fast-food versions. You decide the portion size, which oil to use, and how much salt to add. You can also make french fries from fresh potatoes instead of relying on heavily processed products. If you alternate deep-fried batches with oven fries or air fryer homemade fries, and you pair them with protein and vegetables, french fry meals can fit more comfortably into a balanced way of eating.


9. What’s the difference between shoestring, thick cut, steak fries, and crinkle cut?

All these names refer mainly to shape and thickness. Shoestring fries and skinny fries are very thin and cook quickly, giving you lots of crunchy texture. Thick cut fries and steak fries are chunkier sticks or wedges with a soft, fluffy center. Crinkle cut french fries have wavy ridges that increase surface area and help hold onto sauce and seasoning. You can use the same basic french fries recipe for each style; just adjust cooking time so the inside cooks before the outside browns too much.


10. How do I make seasoned fries at home?

To make a seasoned fries recipe at home, start with freshly cooked, hot fries. Immediately toss them with salt, then add your favorite flavors. A simple mix might include garlic powder, onion powder, smoked paprika, and black pepper. For cajun french fries, you can add cayenne, oregano, and thyme. If you prefer herby seasoned homemade fries, try rosemary, thyme, or mixed Italian herbs. Because you apply the spices while the fries are hot, they cling well and create deeply flavorful seasoned french fries.


11. How can I make fries extra crispy with a coating?

For french fries with crispy coating, a light starch layer helps. After soaking and drying the potatoes, toss them in a spoonful of cornstarch or rice flour until just lightly dusted. Shake off the excess, then fry using the usual two-step method. The starch forms tiny bubbles and ridges on the surface, leading to extra crispy fries. You still get the flavor of real potato fries, but with a more pronounced crunch that holds up better under sauces and toppings.


12. Can I make french fries in the air fryer from frozen?

Yes, air fryer frozen french fries are one of the easiest weeknight options. Place frozen fries in air fryer—whether they are shoestring, waffle, or steak-cut—in a single layer, set the temperature around 200°C / 400°F, and cook until they’re crisp and hot, shaking the basket once or twice. Many people look for the best frozen fries for air fryer because par-fried frozen fries crisp quickly and take well to extra seasonings. With this method, you still get satisfying crunch without using much additional oil.


13. Can I microwave french fries?

You can microwave fries, yet they rarely come out crisp. Microwave french fries tend to steam rather than brown, so they soften instead of staying crunchy. If you want to use the microwave, you can briefly pre-cook thick wedges or steak fries, then finish them in a hot oven, pan, or air fryer to reintroduce crispness. For reheating leftovers, a skillet or air fryer generally gives better results than the microwave alone.


14. How do I reheat leftover fries so they don’t turn floppy?

To revive fries, spread them in a single layer in a hot pan with a thin film of oil, or place them in a preheated air fryer basket. Heat until the outside becomes crisp again and the centers are warmed through. This method works for frozen fried potatoes, french fries and chips, or leftover home made fries from the day before. Reheating on a baking sheet in a hot oven also helps, though it may take slightly longer to recapture the original crunch.


15. How can I make fries healthier without losing too much flavor?

If you want healthier french fries without giving them up entirely, there are several strategies. Bake or air fry potato sticks with just a small amount of oil instead of deep-frying. Switch between white potatoes and alternatives like sweet potato french fries, yuca french fries, jicama french fries, or rutabaga french fries for more variety in fiber and nutrients. Additionally, serve your crispy homemade french fries as a side with lean protein, salads, or vegetable-rich dishes rather than pairing them only with other heavy foods.


16. What sauces go well with homemade fries?

Although ketchup is classic, homemade fries welcome a wide range of sauces. Garlic mayonnaise, mustard-based dips, smoky paprika mayo, yogurt-and-herb sauces, and spicy chili dips all pair beautifully with crispy fries. Cheese-based sauces turn simple fries into french fries loaded with flavor, while lighter dips like tzatziki give a refreshing contrast. By keeping a few favorite sauces on hand, you can turn one basic easy fries recipe into many different experiences just by changing what you serve alongside.