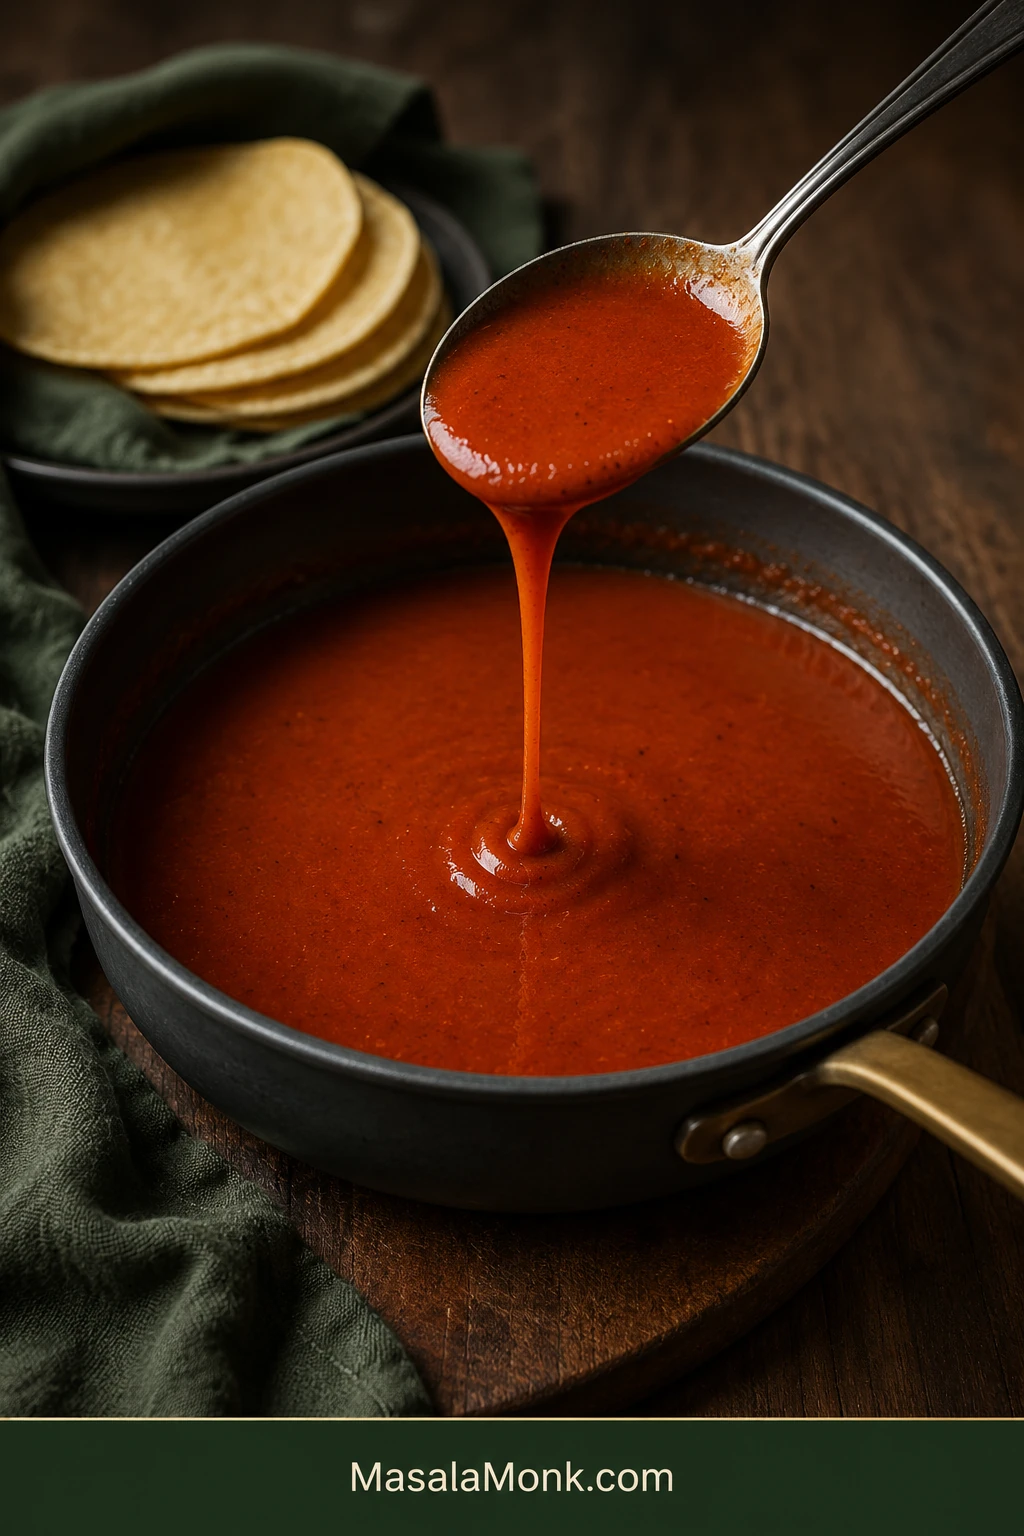
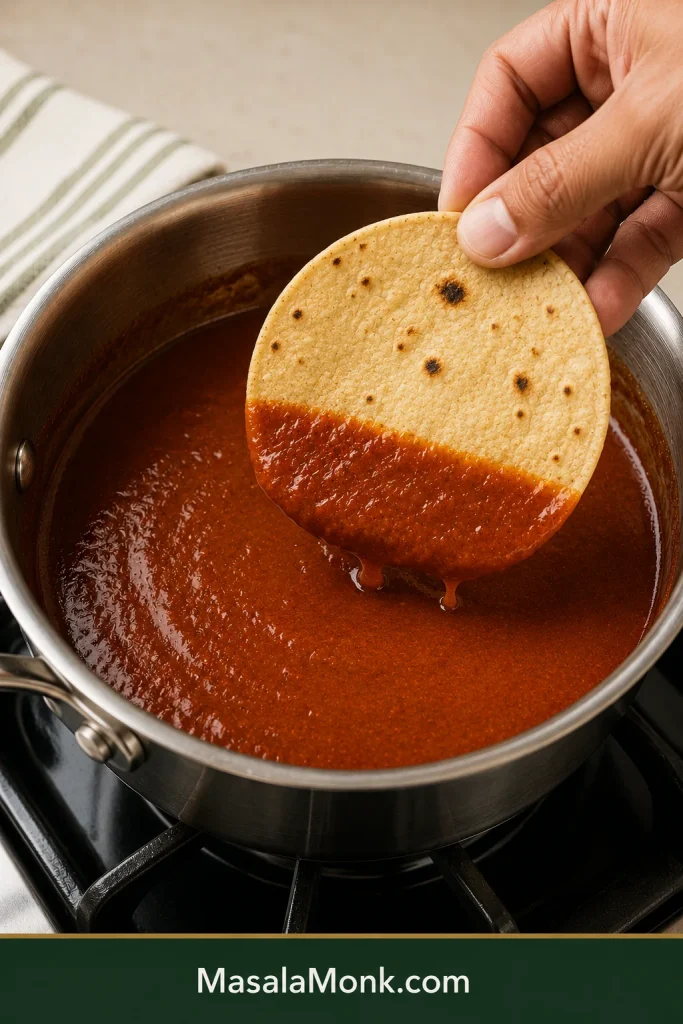
A good red enchilada sauce should pour in a smooth red ribbon, cling lightly to a tortilla, and taste of warm chile before the tomato underneath rounds everything out. Savory and flowing, it needs enough body to coat without becoming heavy.
And it does not need to turn dinner into a project. In about 15 minutes, one saucepan and one whisk give you about 2 cups, with no blender, strainer or dried-chile prep.
If you know what kind of chili powder you are using and what ready sauce looks like, you are most of the way there. After that, the sauce is pretty forgiving.
Four things matter most: keep the roux light, warm the spices only until fragrant, whisk the first splash of broth completely smooth, and take the pan off while the sauce still flows easily. Salt and a little apple cider vinegar bring the finished sauce into balance.
Whole-dried-chile sauces and darker Tex-Mex chili gravy follow different methods. This is the quick pantry-style red sauce for enchilada night.
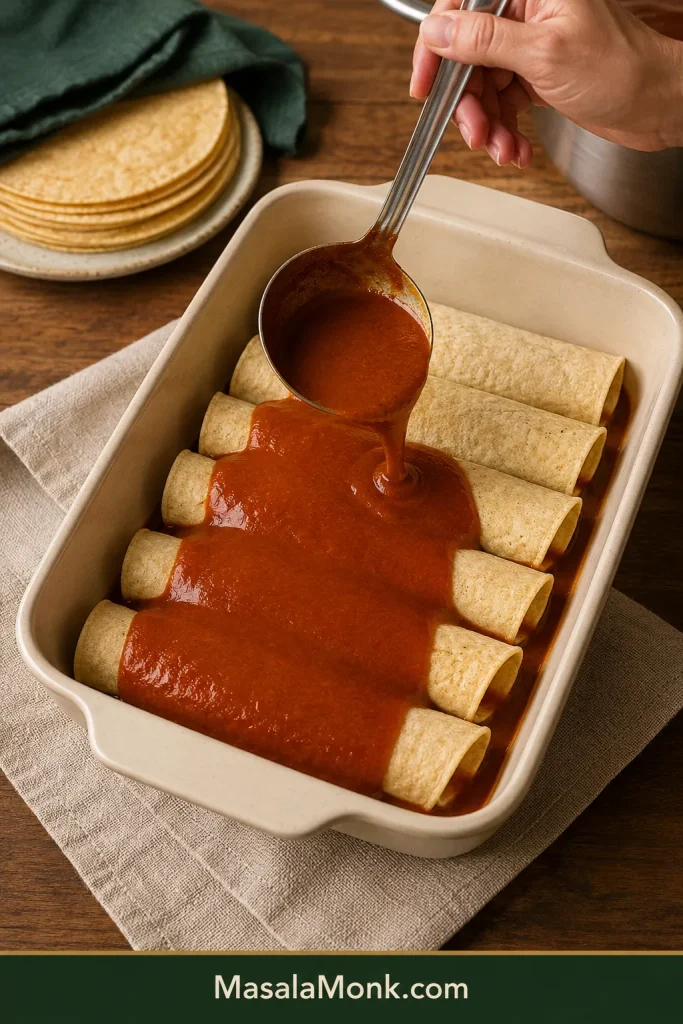
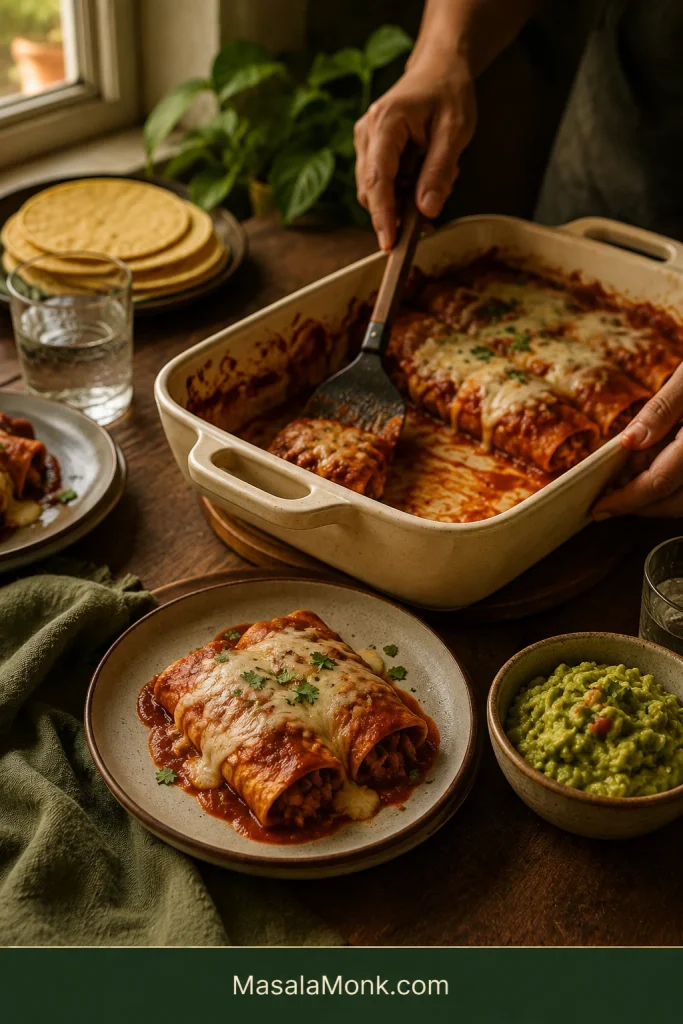
Keep the rolls visible beneath the sauce; generous coverage should not turn the dish into a pool.
How to make red enchilada sauce
Makes: about 2 cups · Time: about 15 minutes · Equipment: 2-quart (about 2-liter) or larger saucepan and whisk
Ingredients
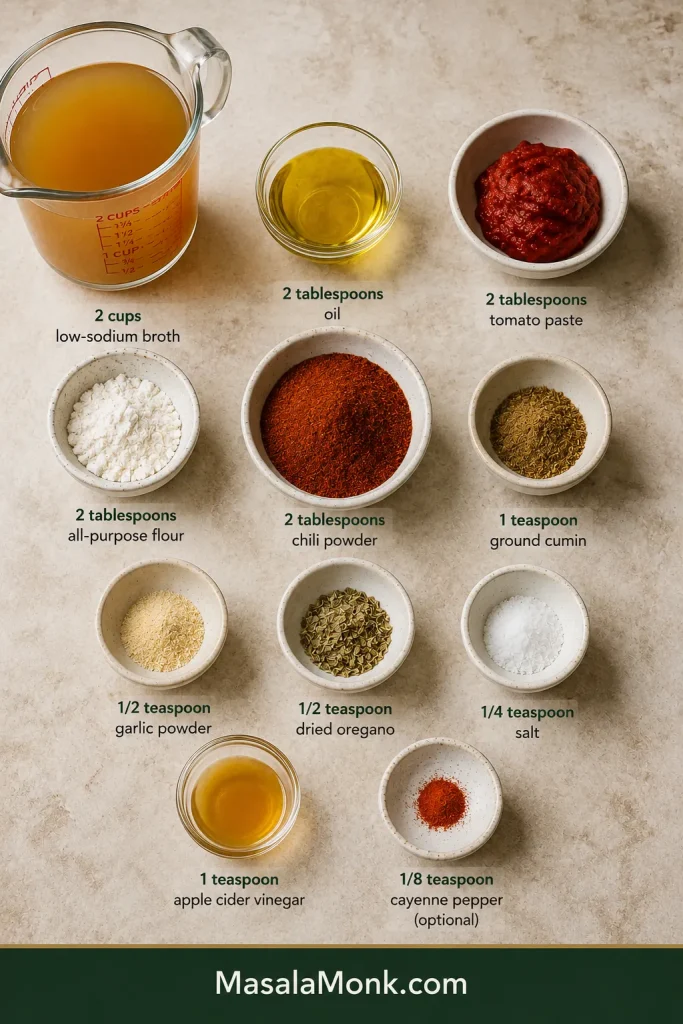
2 tablespoons (30 mL) neutral oil or mild olive oil
2 tablespoons (about 16 g) all-purpose flour
2 tablespoons American-style chili powder — preferably a mild blend; if the brand is unfamiliar, use 1 tablespoon for your first batch
1 teaspoon ground cumin
½ teaspoon garlic powder
½ teaspoon dried Mexican oregano or regular dried oregano
2 tablespoons (about 32 g) tomato paste
2 cups (480 mL) low-sodium chicken or vegetable broth
¼ teaspoon fine salt, then more to taste
1 teaspoon (5 mL) apple cider vinegar
⅛ teaspoon cayenne, optional, for extra heat
Measure first; once the pan is hot, the roux and spice bloom move quickly.
Get everything ready. Measure the broth and keep it beside the stove. Stir together the chili powder, cumin, garlic powder and oregano. Once those spices hit the hot pan, the broth needs to follow quickly.
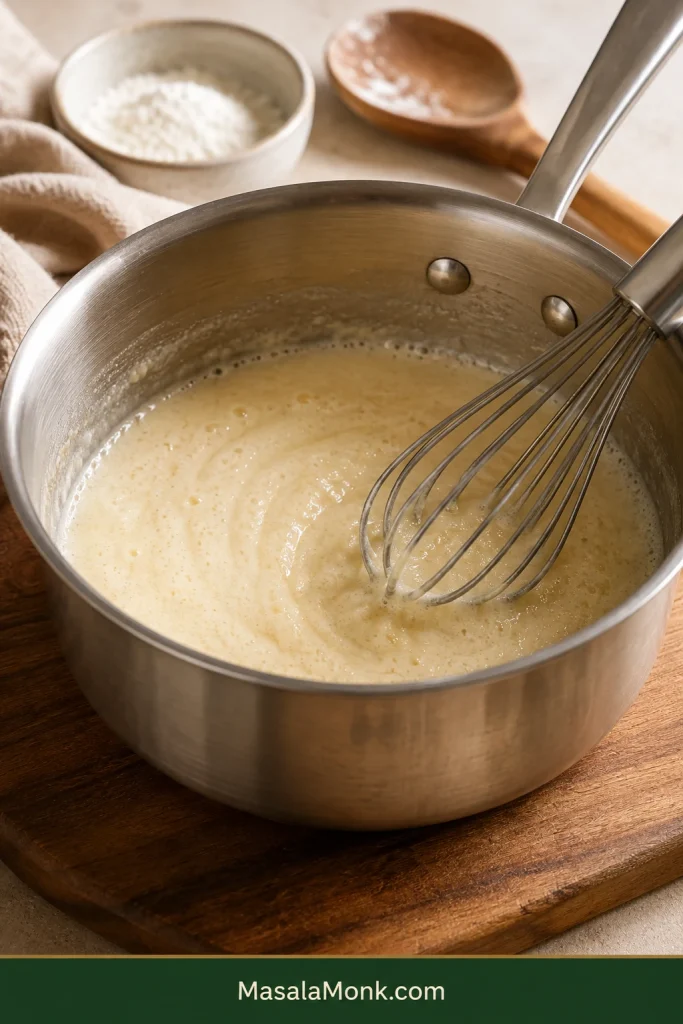
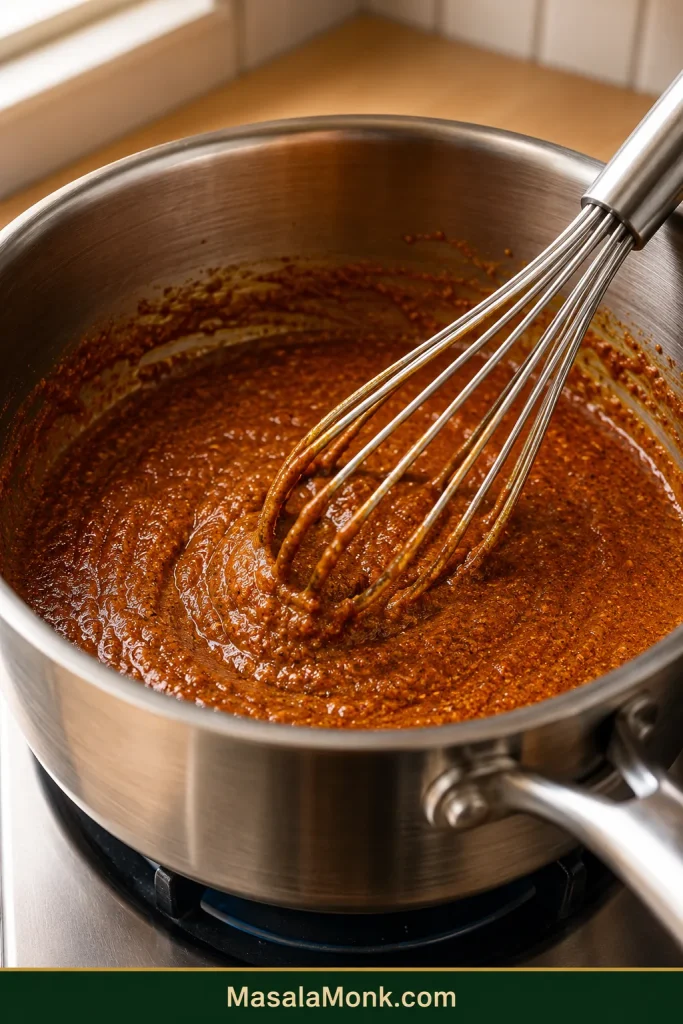
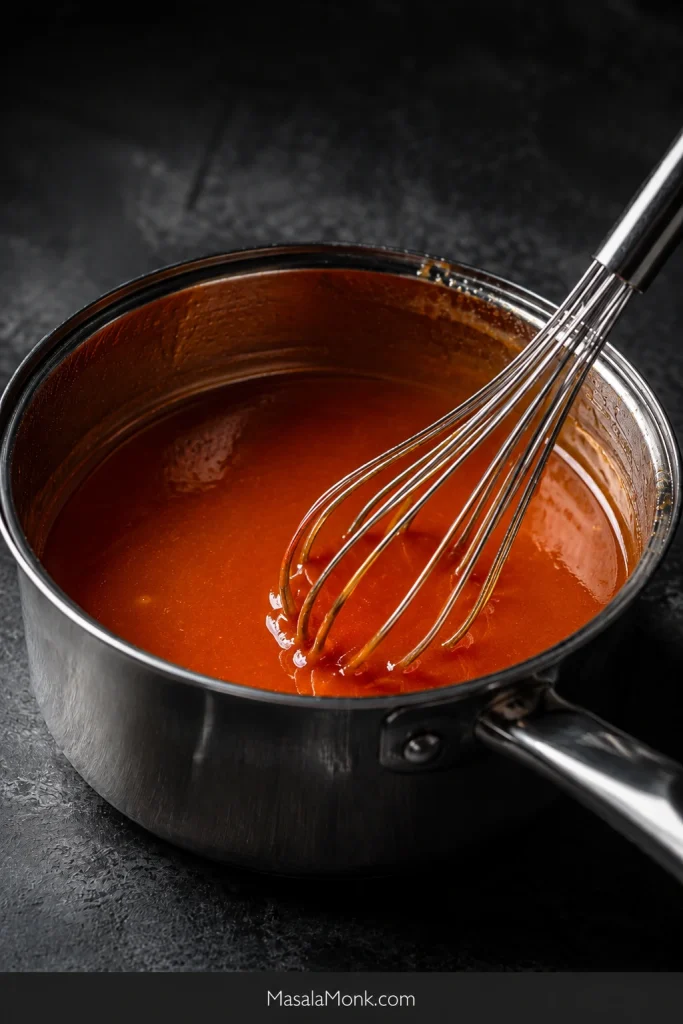
Cook the flour. Warm the oil over medium heat. Whisk in the flour and cook for about 1 minute. It should bubble gently and lose its raw-flour smell without becoming dark brown.
Keep the roux pale so the chile and tomato stay in front.
Wake up the spices. Whisk in the seasonings for about 15–20 seconds. Warm chile and cumin should become fragrant almost immediately. That aroma is your cue to keep moving.
Glossy is right; dry or scorched patches mean the pan is too hot.
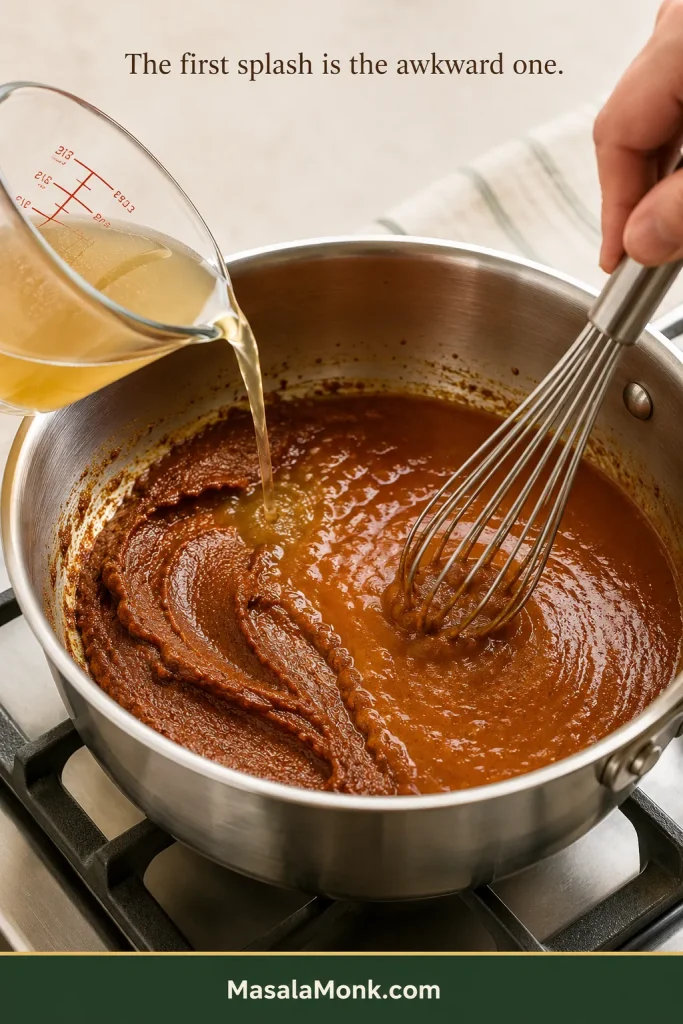
Make the first splash count. Add ¼ cup (60 mL) broth and whisk until completely smooth. The first splash is the awkward one; when that is lump-free, the rest becomes easy.
Whisk the first splash completely smooth before adding the rest.
Add the remaining broth and tomato paste. Pour in the rest of the broth while whisking, then whisk in the tomato paste until no streaks remain.
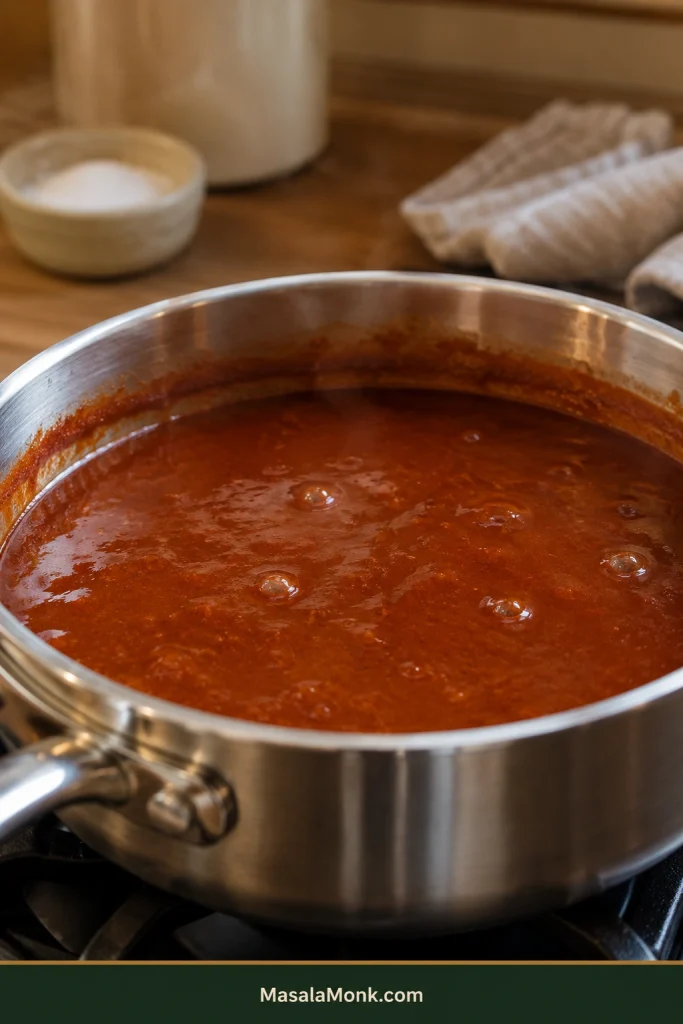
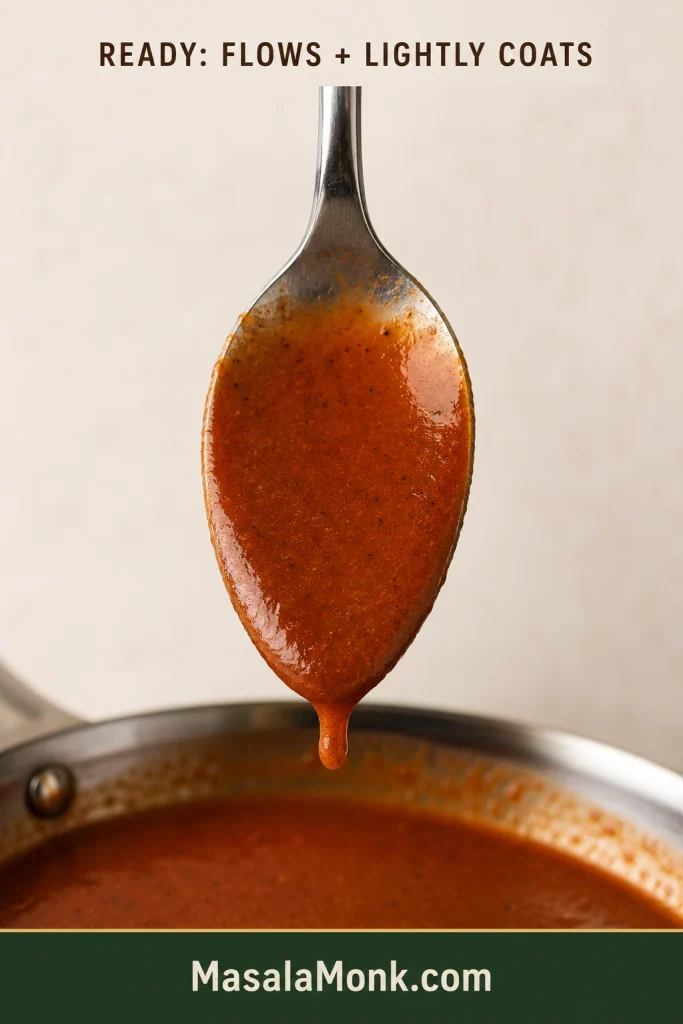
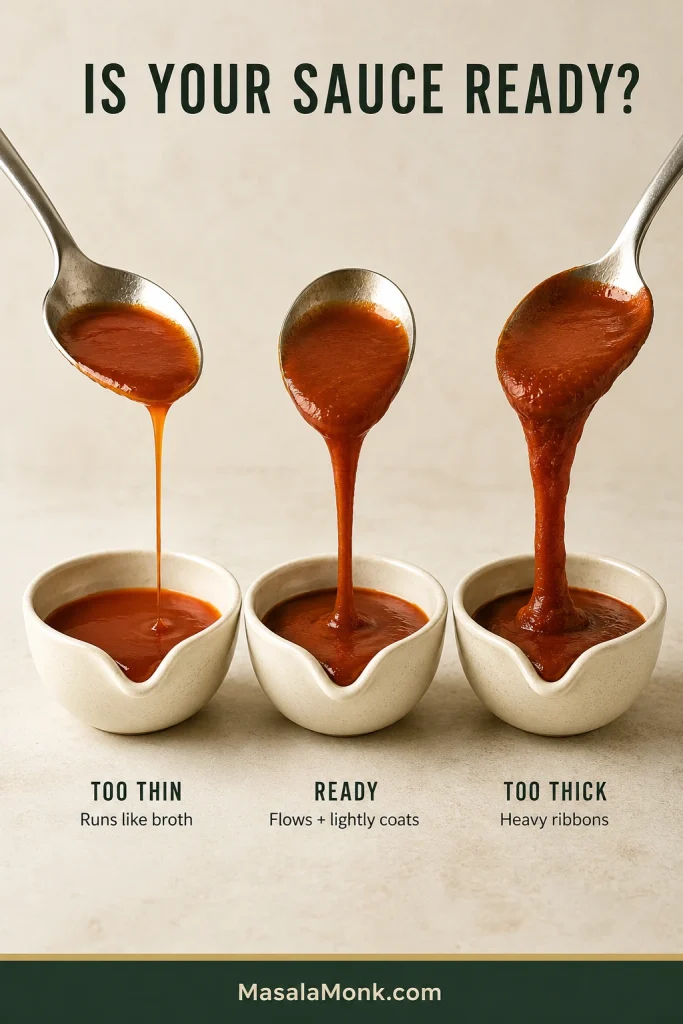
Simmer until it coats but still pours. Bring the sauce to a gentle simmer and cook for roughly 2–5 minutes. Saucepan width and burner strength matter more here than the clock. Stop when it flows easily from a spoon but leaves a thin red film behind. Err slightly loose; the sauce thickens as it stands.
A few lazy bubbles are enough; a hard simmer reduces faster.
Finish the sauce. Stir in the vinegar and ¼ teaspoon salt. Taste before adding more salt or heat. The vinegar should make the sauce taste brighter, not vinegary. Add cayenne only when you want more fire.
How do you know when enchilada sauce is ready?
Enchilada sauce is ready when it pours freely, leaves a thin coating on a spoon and clings lightly to a tortilla.
Tilt the spoon after coating it: ready sauce begins sliding again instead of holding its shape like gravy or dropping in a heavy lump.
Taste it too. You should get warm, earthy chile, savory broth and tomato underneath, with brightness at the end keeping everything lively. No single flavor should dominate.
Drag the edge of a tortilla through the saucepan. The sauce should hang on instead of running straight off. Spoon it over a warm tortilla and that deep, savory chile aroma should arrive immediately—the sauce is there to make the filling and cheese taste richer, not simply wetter.
For a more practical test, look for a thin veil on the tortilla; a thick opaque layer suggests the sauce could use a little loosening before assembly.
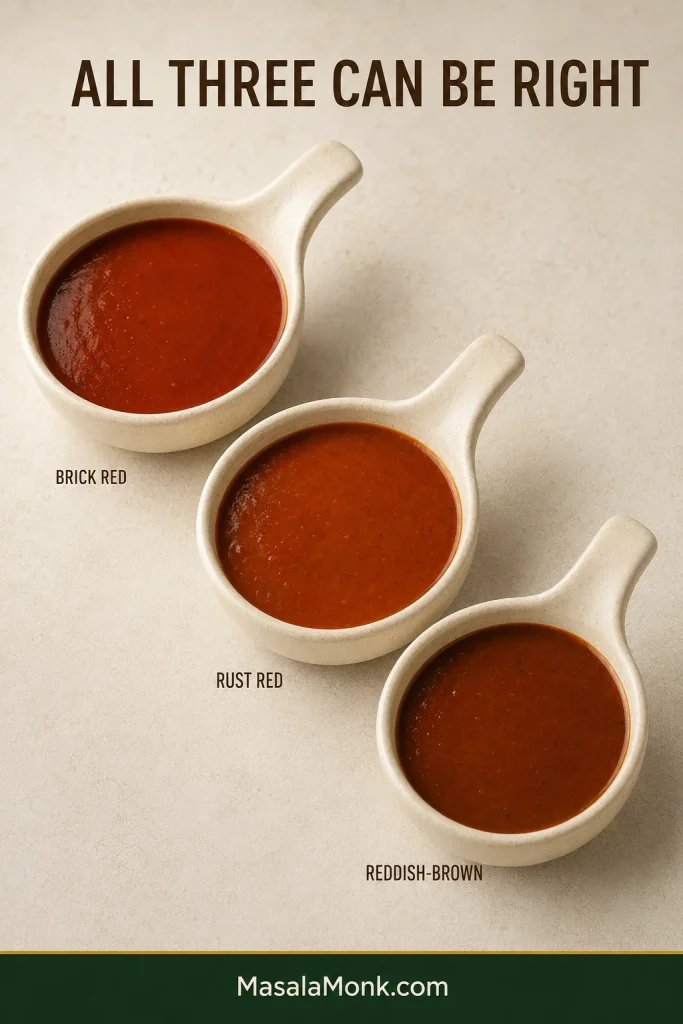
If your sauce comes out brick red, rust red or reddish-brown, that can still be exactly right. Chili powders vary considerably in color, so trust the texture and taste instead of trying to match one particular shade.
If the sauce looks browner than expected, resist correcting the color with extra chili powder; flavor and flow are the better tests.
What if the enchilada sauce is too thin or too thick?
What you see
Next move
Runs almost like broth
Simmer another minute and check again.
Pours freely and leaves a light coating
Take it off the heat.
Falls in heavy ribbons or sits like gravy
Whisk in broth or water 1 tablespoon (15 mL) at a time.
When the spoon test feels ambiguous, judge the fall rather than the surface: movement separates thin, ready and over-thick sauce more clearly than gloss does.
Most consistency problems are easy to correct. Burnt chile is the stubborn one, which is why the brief spice bloom matters more than chasing an exact number of seconds.
If the chile tastes good and the sauce coats the spoon, you have already done the important part.
This red enchilada sauce is made with chili powder, oil, flour, broth, tomato paste, cumin, garlic, oregano, salt and vinegar.
Chile drives the flavor and color. The roux is deliberately light—just enough to help the sauce cling to a tortilla while keeping it fluid. Broth and tomato paste build the base; cumin, garlic and oregano round it out, and salt and vinegar bring everything into balance.
Nothing here needs to shout. The ingredients should taste like they have settled into one sauce rather than arriving one at a time.
Most of them are straightforward. Chili powder is the exception.
Which chili powder should you use?
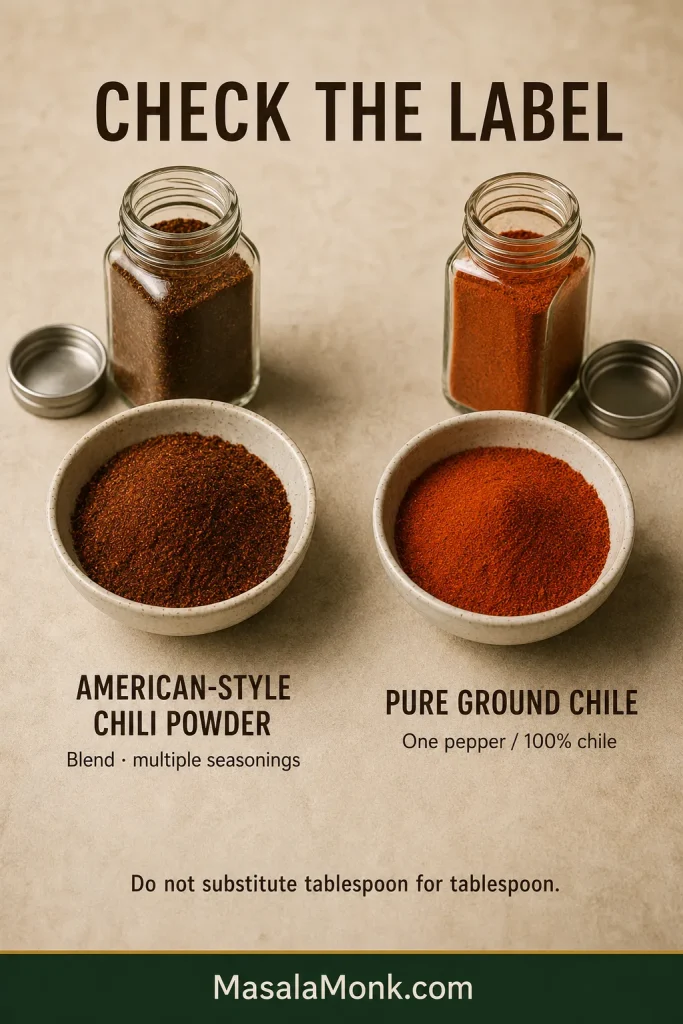
For this recipe, use American-style chili powder—a seasoning blend—not cayenne or the same volume of pure ground chile.
This is where recipes written in different countries can go spectacularly sideways. In the US and Canada, “chili powder” commonly means a fairly mild blend containing ground chile or paprika along with seasonings such as cumin, garlic and oregano. A tablespoon or two does not necessarily make a dish fiercely hot.
Elsewhere, a jar labelled “chilli powder” may contain only ground hot chile. If the ingredient list says 100% ground chile, cayenne, or names one hot pepper as the only ingredient, treat it as pure chile rather than the bulk seasoning used here.
Before measuring, trust the ingredient list more than the words on the front: a single-pepper powder should not be dosed like the American-style chili-powder blend used here.
Cayenne and hot Indian red chile powder are better added by the pinch.
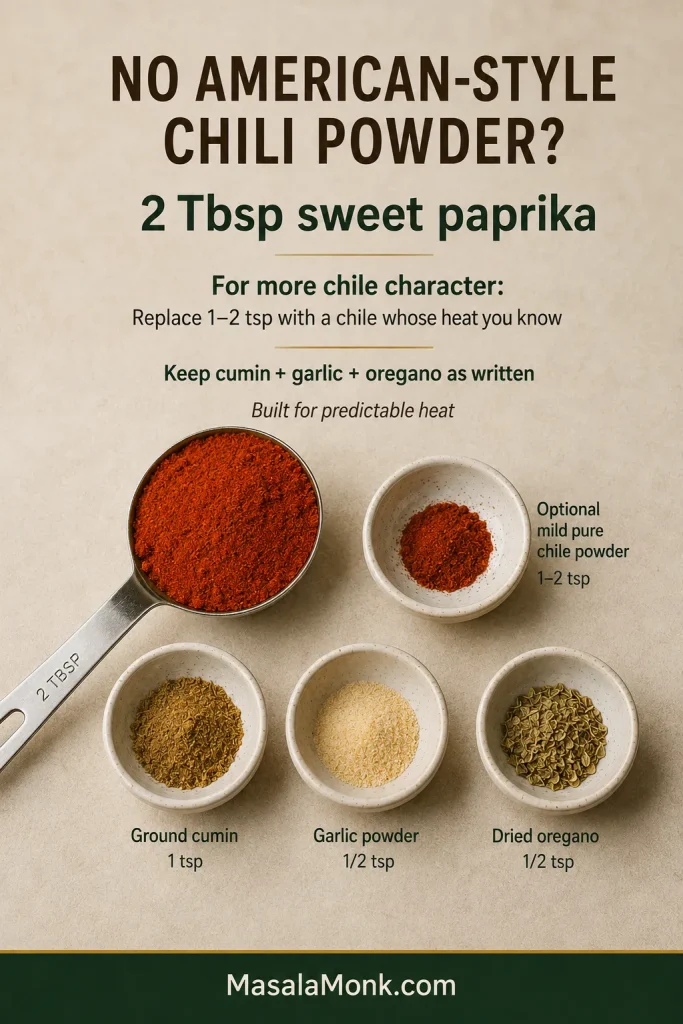
No American-style chili powder?
For the gentlest fallback, use 2 tablespoons sweet paprika as the bulk red seasoning.
For more chile character, replace 1 or 2 teaspoons of that paprika with a ground chile whose heat you already know—such as ancho powder or a familiar Kashmiri chile powder. Keep the cumin, garlic and oregano in the main recipe as written.
If the American blend is unavailable, sweet paprika can provide the seasoning volume and color, while a much smaller amount of familiar mild chile supplies character.
It will not taste exactly like every American chili-powder blend; the point of this fallback is predictable heat.
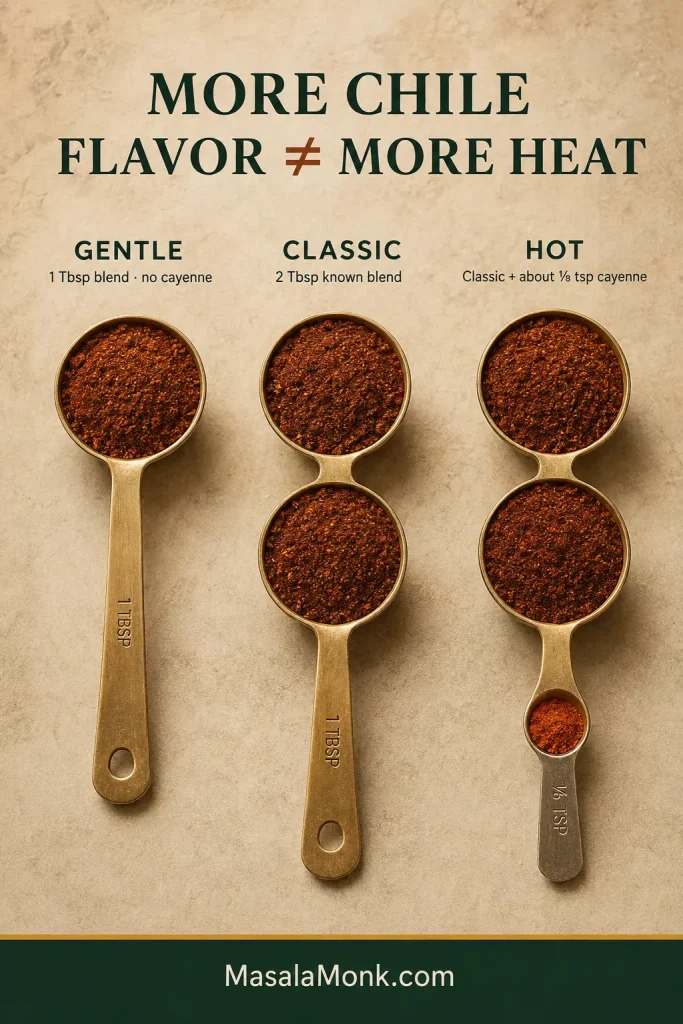
Choose your heat: gentle, classic or hot
More chile flavor does not have to mean more heat. Let the base carry the chile character; use cayenne or another hot chile when you actually want more fire.
Unfamiliar blend or heat-sensitive eaters: use 1 tablespoon American-style chili powder and no cayenne. For the first batch, stop there. Once you know the blend, use the full 2 tablespoons next time.
Classic: use the full 2 tablespoons once you know that amount gives you the heat you want.
Hot: make the classic version, then stir in about ⅛ teaspoon cayenne after simmering. Taste before adding another pinch.
A little cayenne can raise the heat dramatically without changing the base seasoning.
Everyone seems to have a different definition of “medium.” Keeping the main batch comfortable and passing extra pepper sauce at the table is often easier than making the whole pan hot.
Still unsure what your jar contains? McCormick’s chili powder guide explains the difference between American chili seasoning and straight ground chile.
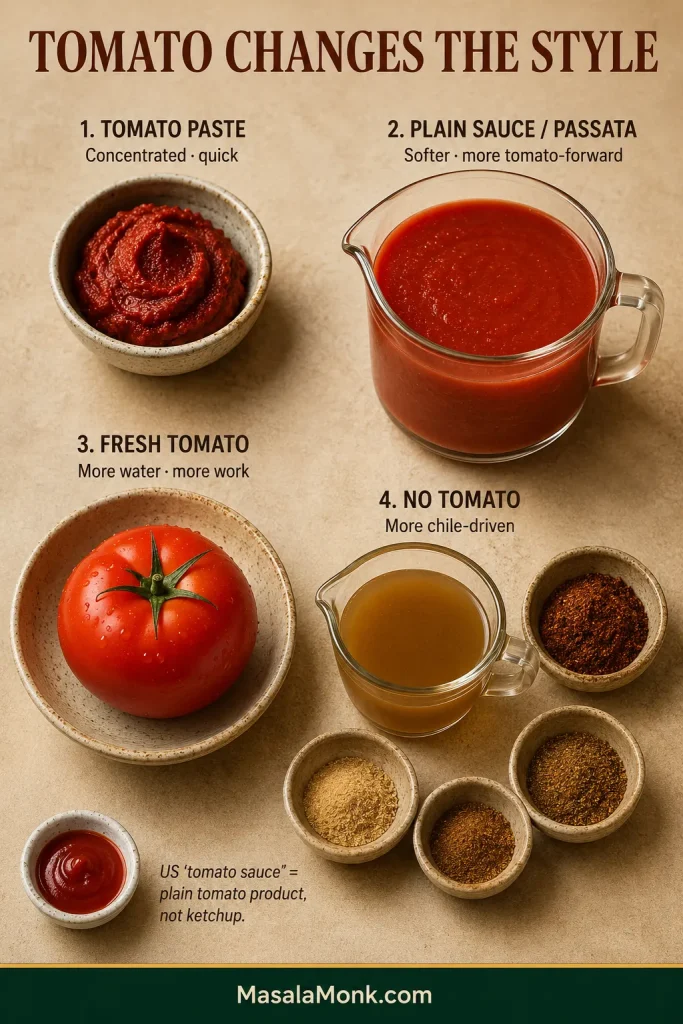
Tomato paste, tomato sauce or no tomato?
Tomato is a style choice, not a requirement in every red enchilada sauce. Some sauces contain none at all, while others use tomato as a major part of the base.
Tomato choice
What it gives you
Tomato paste
Concentrated depth and body with very little extra liquid
US canned tomato sauce / plain passata
A softer, more tomato-forward sauce with more liquid
Fresh tomatoes
Fresh flavor but variable water; usually more cooking and often blending
No tomato
A sauce driven more directly by chile and broth
Tomato paste adds concentrated depth with little liquid; passata or fresh tomato needs more reduction.
Two tablespoons of tomato paste give this version depth and body while keeping the cooking time short. The chile still arrives first; tomato fills in behind it instead of becoming the main event.
American “tomato sauce” is not ketchup
In an American ingredient list, canned tomato sauce generally means a smooth, fairly plain tomato product. Plain passata or strained tomatoes are much closer equivalents in places where that style of canned sauce is uncommon. Ketchup and seasoned pasta sauce bring much more sweetness, salt and seasoning.
Want a green tomatillo sauce instead? Our salsa verde recipe is the better fit.
Red enchilada sauce troubleshooting
Most batches that look a little wrong are still dinner. Find the closest problem, make one adjustment, then taste again before changing anything else.
Problem
First thing to do
Much too spicy
Add broth and tomato paste, then simmer briefly. For extreme heat, use the rescue below.
Simmer gently; loosen with broth if the sauce also feels heavy.
Grainy or gritty
Simmer and whisk. Strain or blend briefly if coarse spice particles remain distracting.
Too tomato-forward
Check the salt first. Extra tomato changes the balance; a large amount of raw chili powder will not restore it.
Too salty
Loosen with unsalted broth or water.
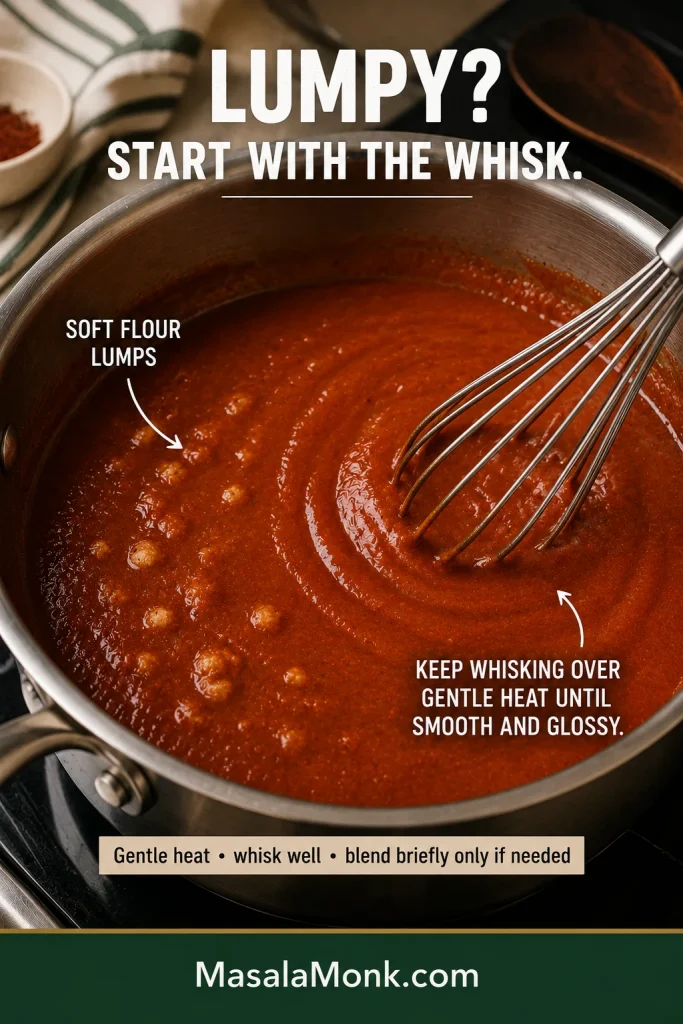
How to fix lumpy enchilada sauce
Start with vigorous whisking over gentle heat. If the sauce is also heavy, loosen it with a small splash of broth before reaching for a blender; soft flour pockets often smooth out once the sauce can move freely.
If a lump softens and smears beneath the whisk, it is probably a flour pocket; hard or gritty particles suggest a different problem than simple roux lumping.
The sauce is painfully spicy. Is it salvageable?
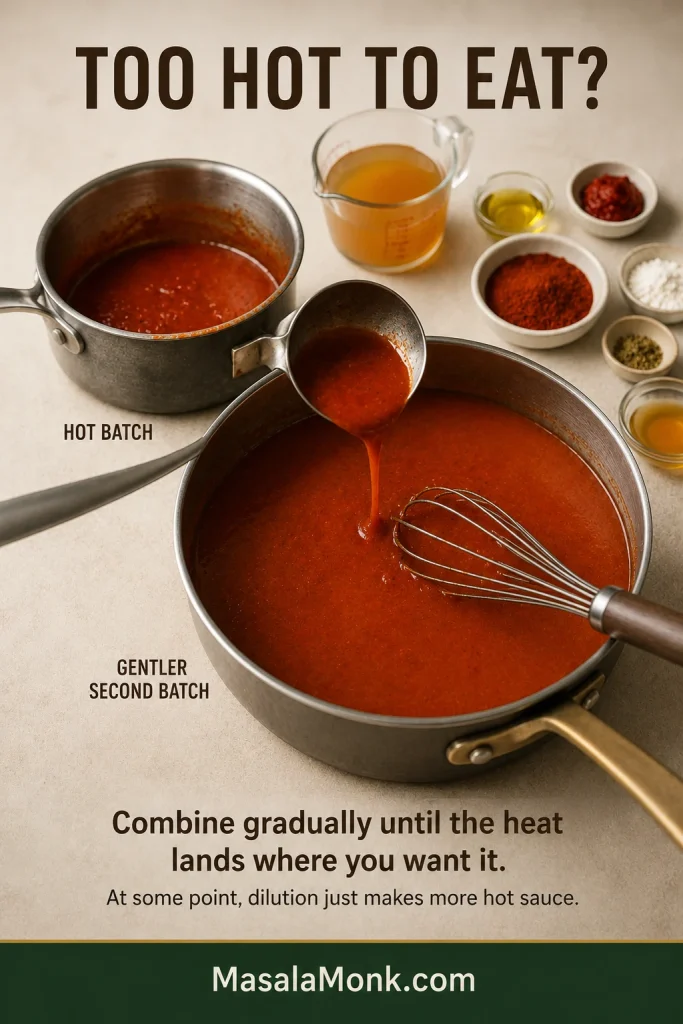
A sauce that is merely hotter than planned can usually take more broth and tomato paste; simmer briefly after adding them so the tomato paste blends back into the sauce. Once tablespoons of genuinely hot chile have gone into the pan, though, dilution has limits. At some point you are simply making more hot sauce.
A second batch made without the offending hot chile is often the cleaner rescue. Stir the fiery sauce into it gradually until the heat lands somewhere you actually want to eat.
Add the fiery sauce a little at a time rather than combining both pans at once; once the heat overshoots again, the rescue gets harder.
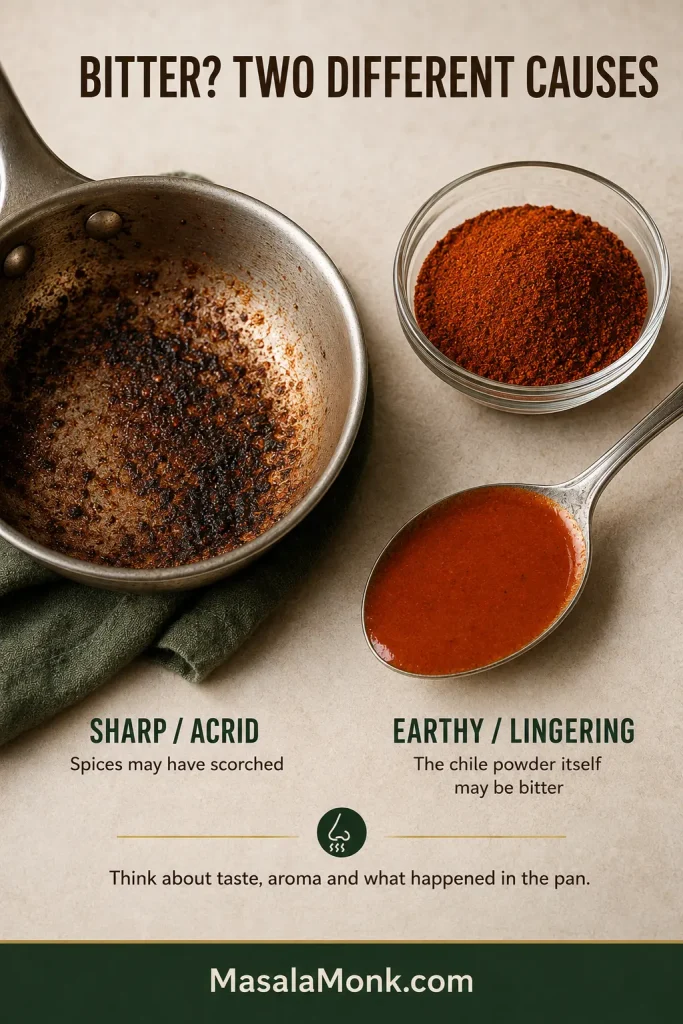
Why does enchilada sauce sometimes taste bitter?
Burnt bitterness usually tastes sharp and acrid, and you may remember the spices darkening quickly or smelling harsh in the pan. That points back to the spice bloom.
A more earthy, lingering bitterness can come from the chile powder itself. If nothing scorched but you still dislike the bitter edge, changing the chili powder next time may help more than changing your technique.
Use both memory and aroma here: a harsh smell during the spice bloom is stronger evidence of scorching than the final sauce color alone.
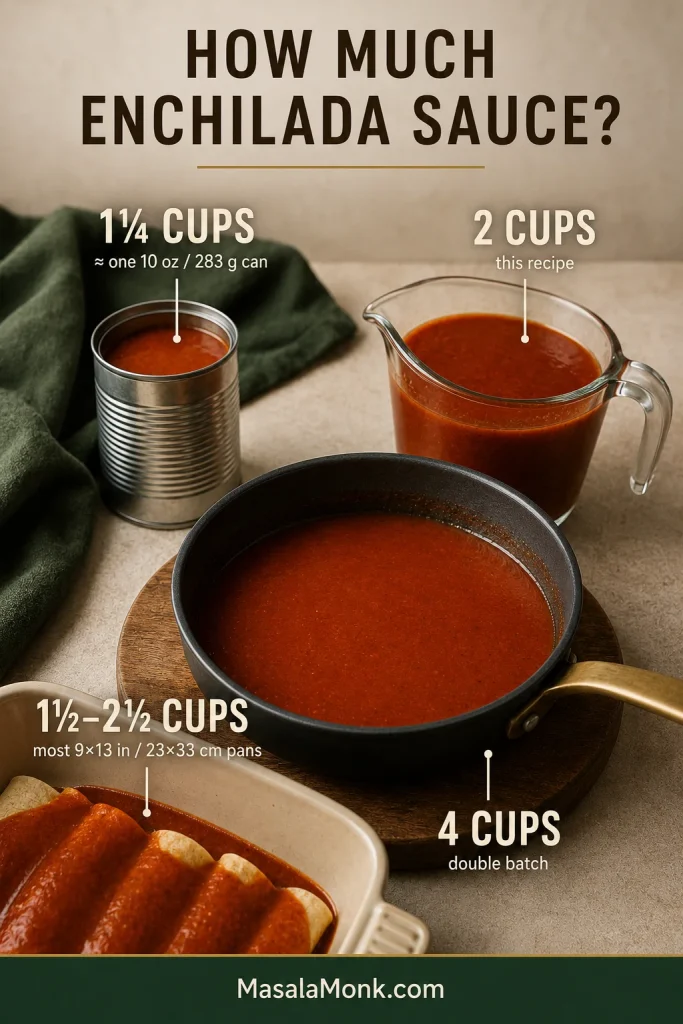
Use about 1¼ cups of homemade sauce in place of one standard 10-ounce (283 g) can of enchilada sauce. Brands vary in thickness, so a small difference in volume rarely matters in most recipes.
This 2-cup batch replaces roughly 1½ standard cans.
Treat these amounts as working anchors rather than rigid rules; sauce thickness and where you use it can shift the total a little.
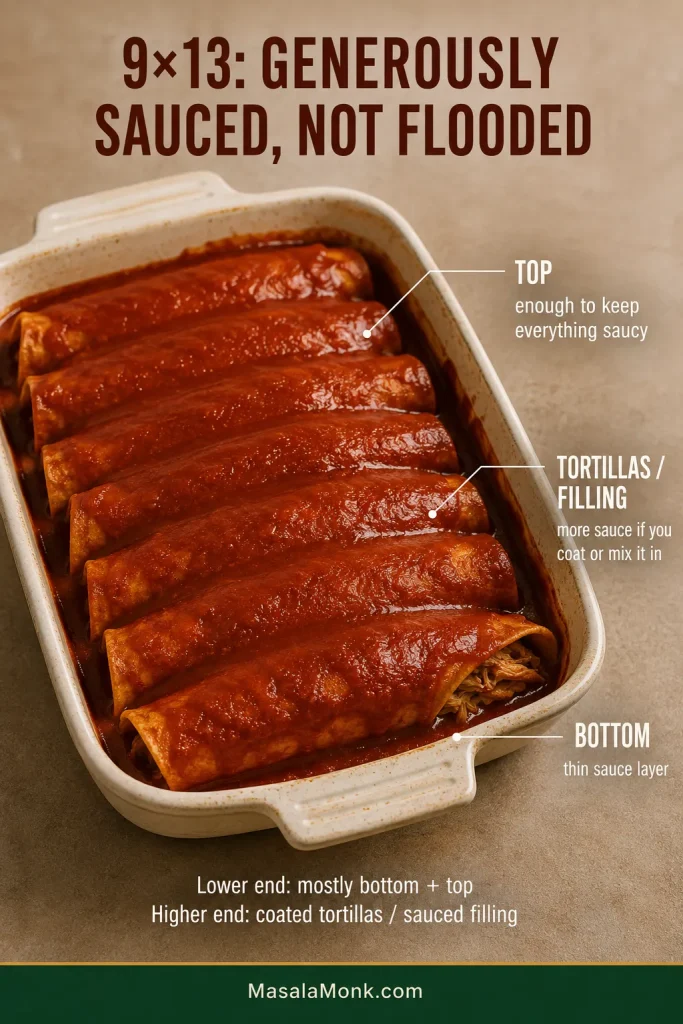
How much sauce for a 9×13-inch pan?
For most 9×13-inch (23×33 cm) enchilada pans, 1½–2½ cups is a useful range.
Sauce mainly underneath and over the top puts you near the lower end. Coat each tortilla generously or add sauce to the filling and you will use more.
Aim for generously sauced tortillas that still hold their shape. Tortilla preparation matters too, but flooding the pan can push the finished texture toward mushy instead of saucy.
Look at the pan as well as the measuring cup: shallow pooling is useful; deep pooling is a warning sign.
Our easy chicken enchiladas show how sauce can be distributed across the bottom, filling and top without leaving the finished pan swimming.
Need more? Make 1½ batches for about 3 cups, or double everything for about 4 cups. A larger saucepan makes a doubled batch much easier to whisk.
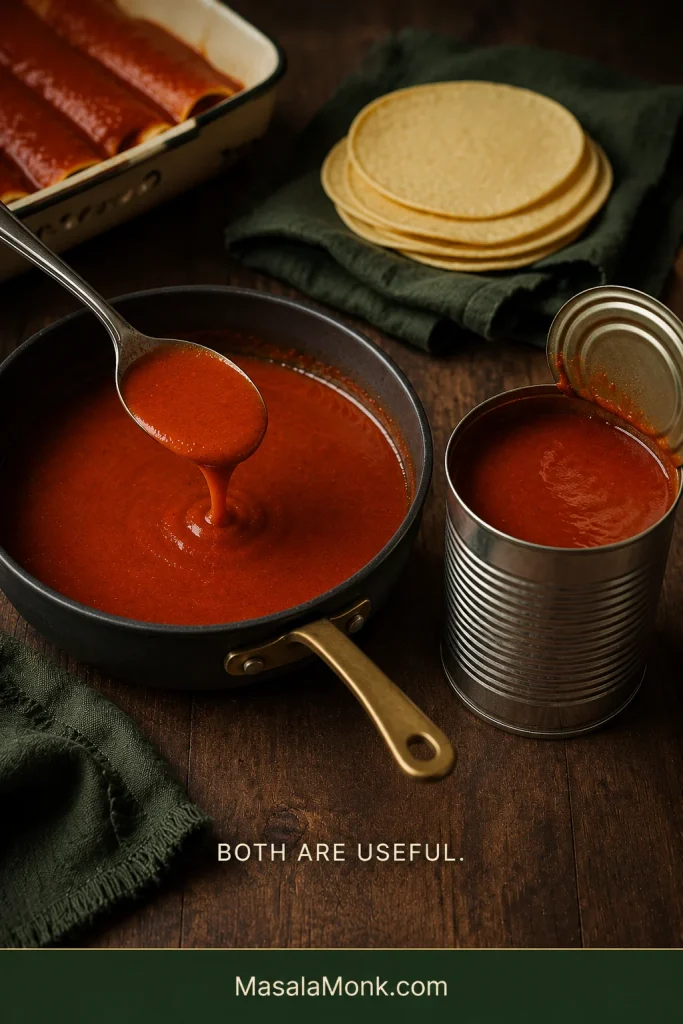
Already have a can? Use it.
Some nights, opening the can is exactly the right decision.
Homemade gives you control; canned sauce gives you dinner faster. Both are useful.
Warm canned sauce first; its thickness may tell you more than the label about what it needs.
Warm canned sauce before deciding what it needs. Broth can loosen a heavy sauce. Cumin or oregano can deepen one that tastes flat. A few drops of lime or vinegar can wake up a dull batch.
That is all “better than canned” needs to mean here.
Swaps and substitutions
Chicken or vegetable broth both work; use vegetable broth for a vegetarian or vegan sauce. Water works in a pinch, though you will want to pay closer attention to seasoning at the end. Neutral oil and mild olive oil both work too.
Gluten-free and flourless options
A cup-for-cup or 1:1 gluten-free flour blend designed to replace wheat flour is the closest swap for the roux. Different blends thicken differently, so trust the spoon test; the exact cooking time may vary. Need it strictly gluten-free? Check the broth and packaged spice-blend labels too.
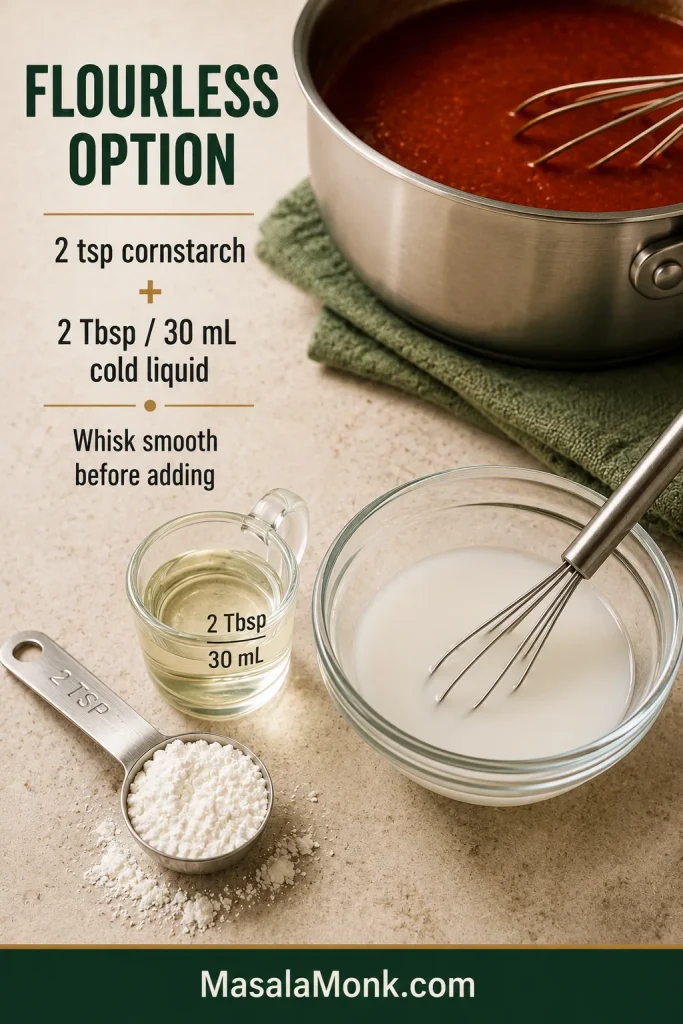
For a flourless sauce, skip the flour and initial roux. Briefly warm the spices in the oil, then add the broth and tomato paste. Start with 2 teaspoons cornstarch mixed with 2 tablespoons (30 mL) cold broth or water. Whisk the slurry into the simmering sauce, cook for about a minute and check the consistency before adding more.
Mix cornstarch with cold liquid first; dry starch added straight to the hot pan is far more likely to clump.
Using tomato sauce instead? Tomato sauce brings much more water, so it changes both the flavor and thickness. For best results, use a sauce formulated around tomato sauce or passata.
Want to use whole dried chiles? If you want the deeper character of guajillo, ancho or other whole dried chiles, start with a sauce designed for them. They need their own soaking or toasting, blending and sometimes straining method.
Even half a cup is worth keeping. Once it is in the fridge, think of it less as leftover sauce and more as a head start on the next meal.
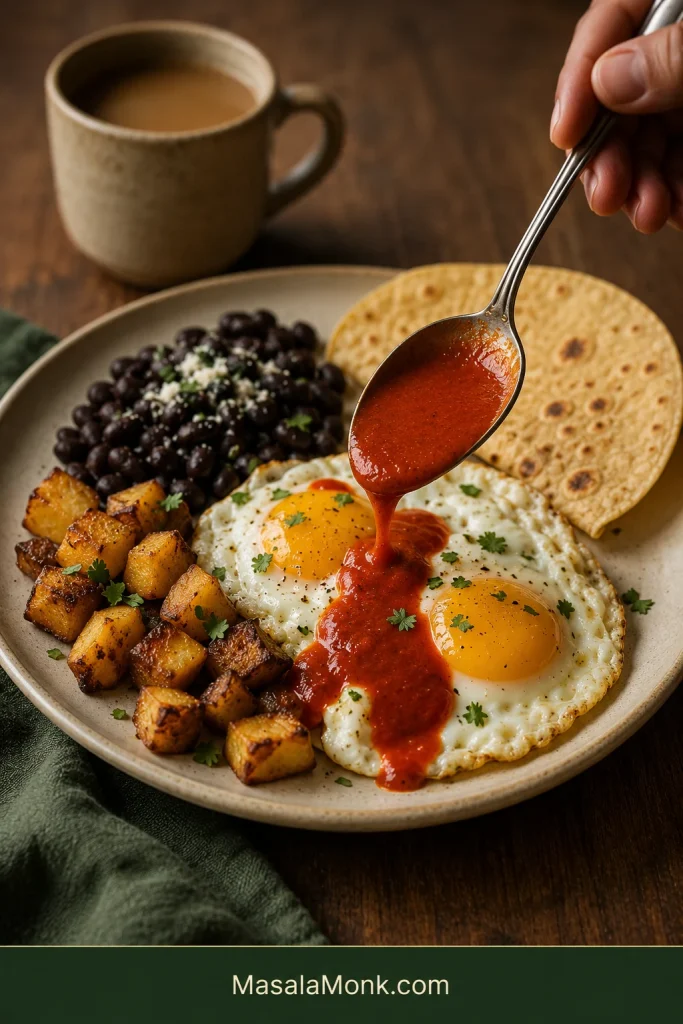
About ½ cup: spoon it over eggs, breakfast potatoes or beans, or add it after reheating one of our breakfast burritos.
About 1 cup: make a small batch of chilaquiles, stir it into rice or beans, or use it for a small tray of cheese enchiladas.
A full batch: use it for rolled chicken, beef, cheese or vegetable enchiladas.
About 3 cups: scaled-up batches work well for layered dishes; our chicken enchilada casserole is a good example.
Even a small leftover spoonful can carry eggs, potatoes or beans into another meal.
At the table, the enchiladas do not need a dozen competing sides. Something cool such as fresh guacamole is plenty against warm chile and melted cheese.
Storage, freezing and make-ahead
Refrigerator: Cool the sauce, transfer it to a covered container and refrigerate promptly. Plan to use it within 4 days. It will look thicker straight from the refrigerator; a splash of broth and gentle heat will loosen it again.
Make-ahead: Prepare the sauce ahead, cool and refrigerate it, then warm gently before assembling the enchiladas. Add a splash of broth if it has thickened.
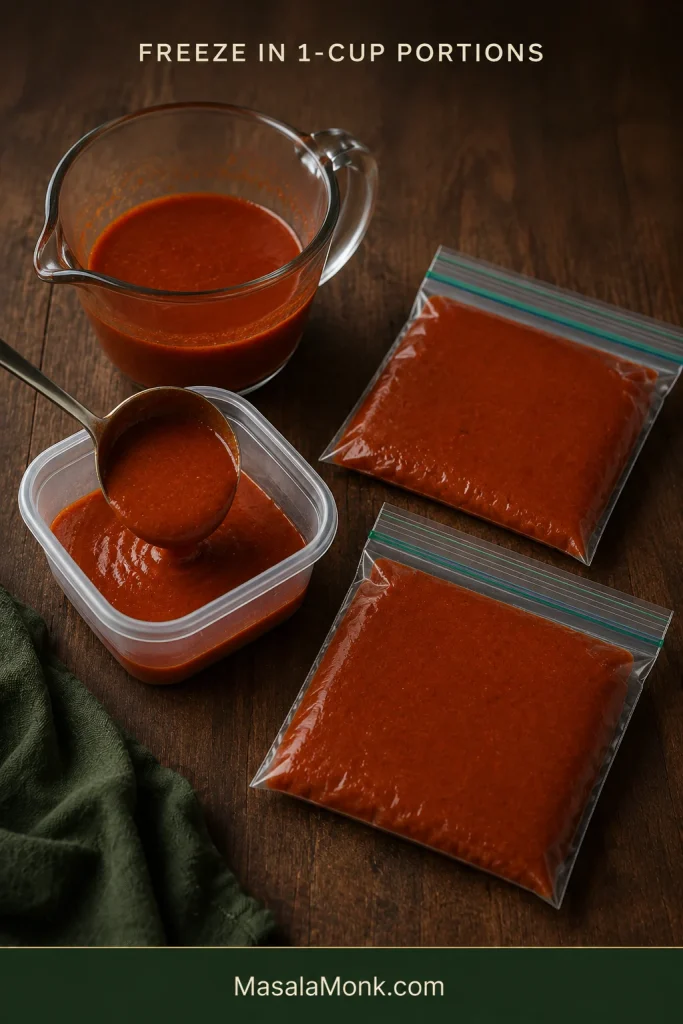
Freezer: Freeze cooled sauce in tightly sealed freezer-safe containers or bags. One-cup portions are especially handy. For best quality, aim to use it within about 3 months.
Flat one-cup portions stack neatly and thaw faster when the next meal needs only a little sauce.
Thawing and reheating: Thaw in the refrigerator, then warm over low to medium-low heat. A flour-thickened sauce can look slightly uneven after freezing. Gentle heat and a whisk usually bring it back together; add broth if it needs loosening.
Can this sauce be canned for shelf storage?
This roux-thickened recipe was made for the refrigerator and freezer, not shelf-stable home canning. For pantry storage, use a preservation recipe specifically developed and tested for canning. The National Center for Home Food Preservation explains why acidity, ingredient proportions and thickeners matter in tested tomato-and-chile preservation recipes.
If you make it, tell us which chili powder you used and how the heat landed—brand and country are especially useful here.
The first batch teaches you your chili powder—how strong it tastes, how much heat it carries and what you would change next time. After that, it becomes the kind of saucepan recipe you start making by feel.
Give the flour its minute, let the spices wake up, whisk the broth smooth, and take the pan off while the sauce still flows.
Then it is just enchilada night.
The best finish is when the sauce supports the tortillas, filling and cheese—and then disappears into dinner.
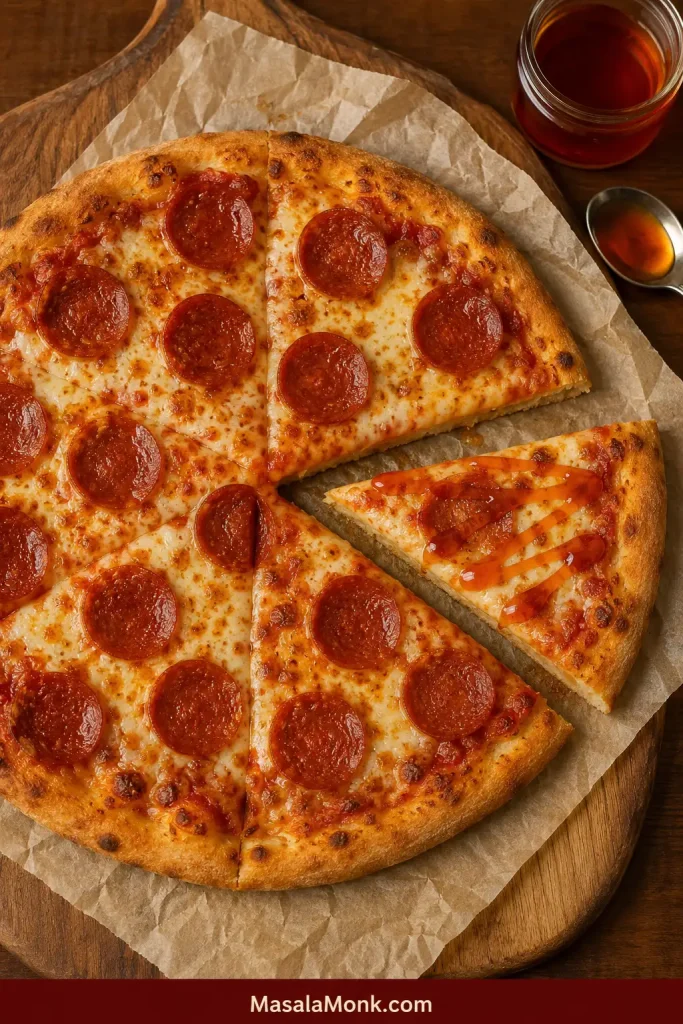
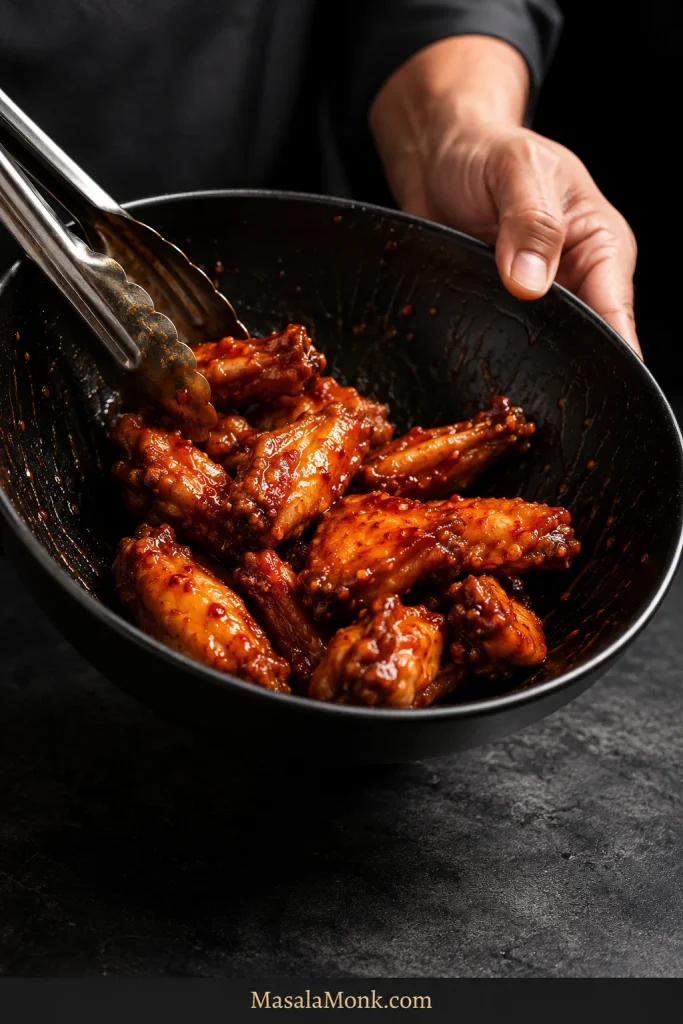
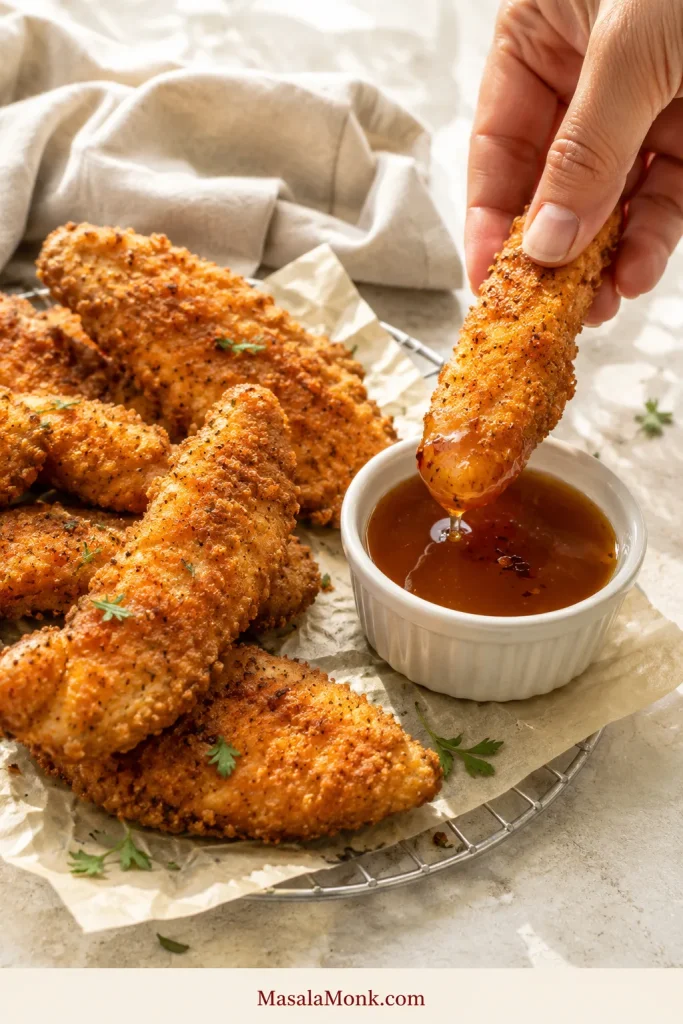
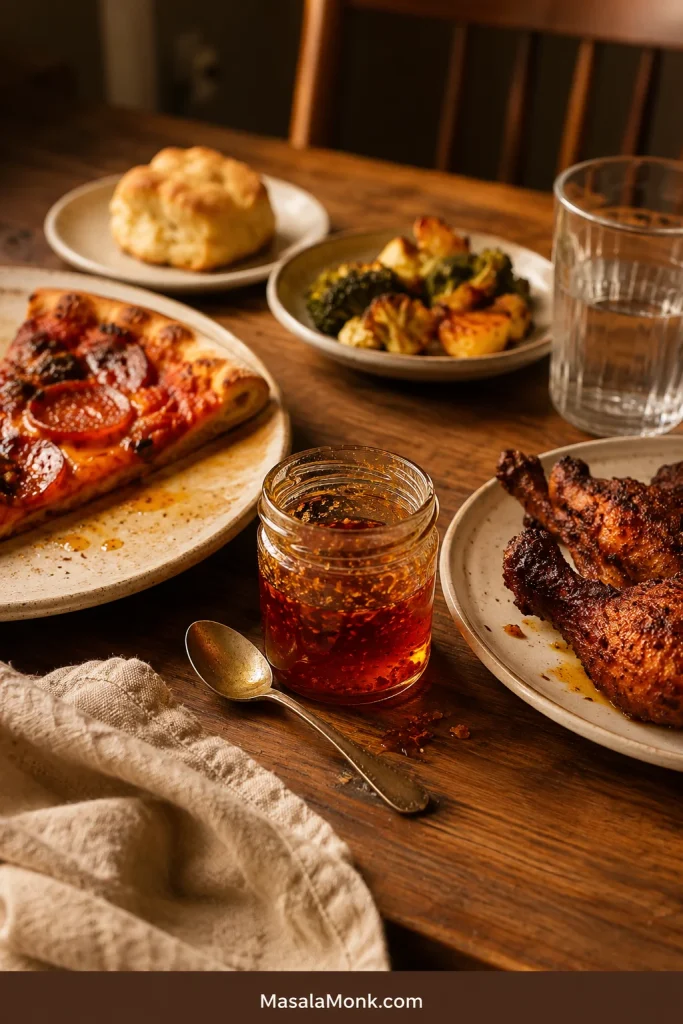
Hot honey sauce is what you make when plain honey feels too sweet, ordinary hot sauce feels too sharp and the food in front of you needs both. It gives pizza a glossy finishing drizzle, wakes up chicken tenders, clings to crisp wings and turns a warm biscuit into something worth slowing down for.
In its simplest form, hot honey is a two-ingredient, no-cook mixture of honey and hot sauce. A small pinch of salt can sharpen the balance when the sauce needs it. Whisk everything together in about two minutes and use it immediately.
You can also infuse honey with dried chilli for a clearer pepper flavour or add butter for a richer glaze. They share the same name, but they do different jobs: one drizzles, one tastes clearly of dried chilli and one stays where it lands.
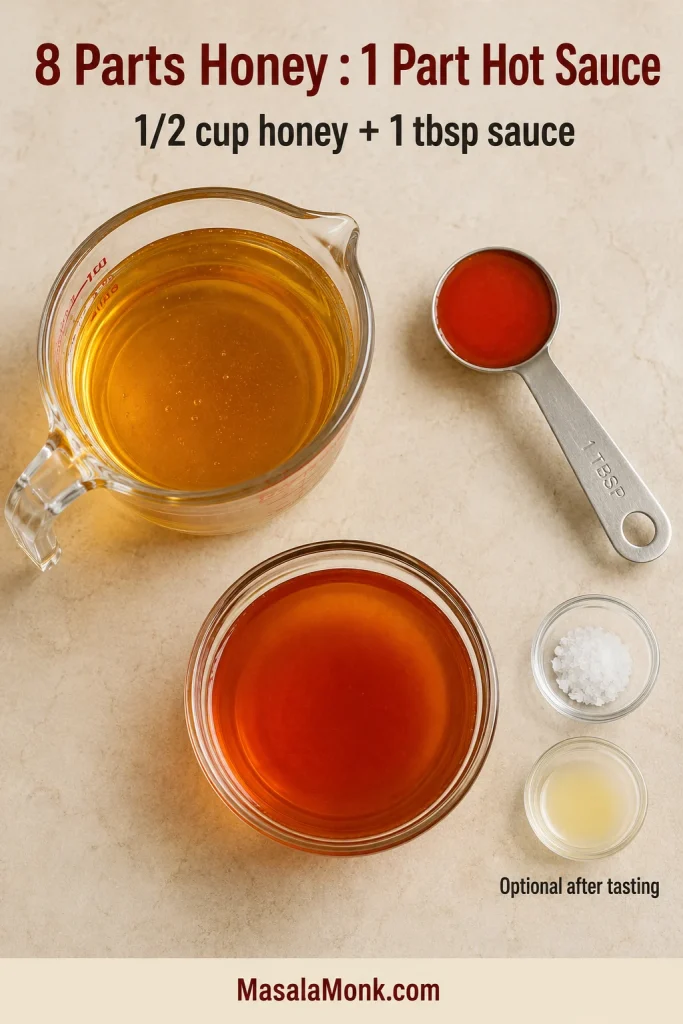
Start with an 8:1 ratio of honey to thin cayenne-style hot sauce: ½ cup / 170 g honey to 1 tablespoon / 15 ml hot sauce for the full batch. Add one small pinch of salt only if the sauce needs it.
Cayenne raises the heat without adding more liquid. If the sweetness feels heavy, stir in a little vinegar or lemon juice. Honey and hot sauce may already be enough.
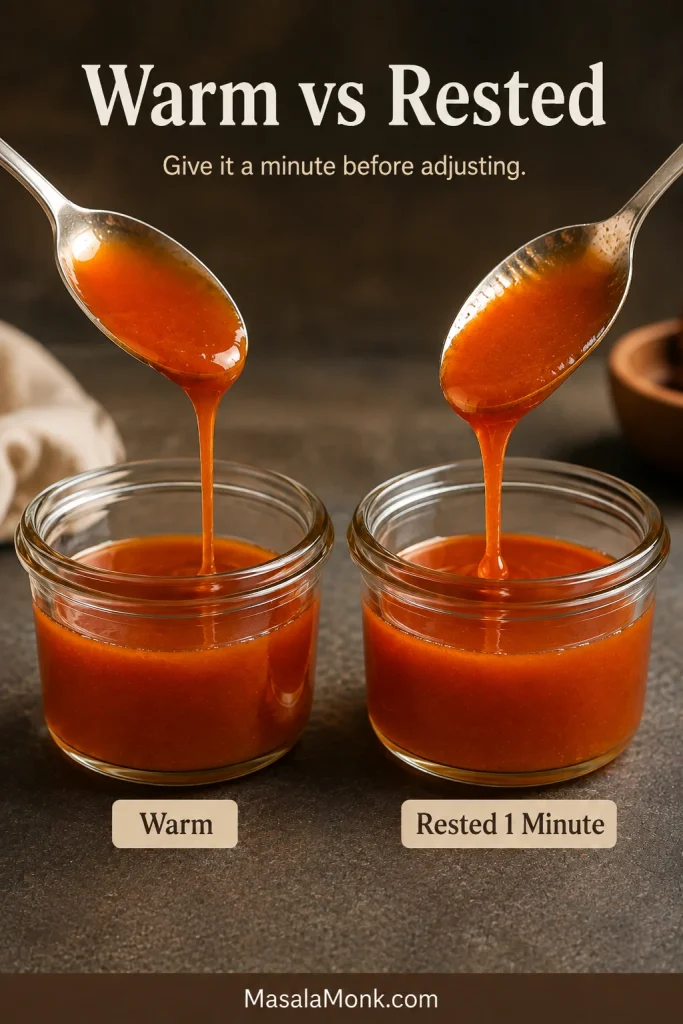
Warm hot honey always looks looser. Give it a minute before deciding that it needs more honey.
Scale the 8:1 ratio easily: 8 teaspoons honey to 1 teaspoon thin hot sauce makes a small test batch.
Choose Your Hot Honey Sauce
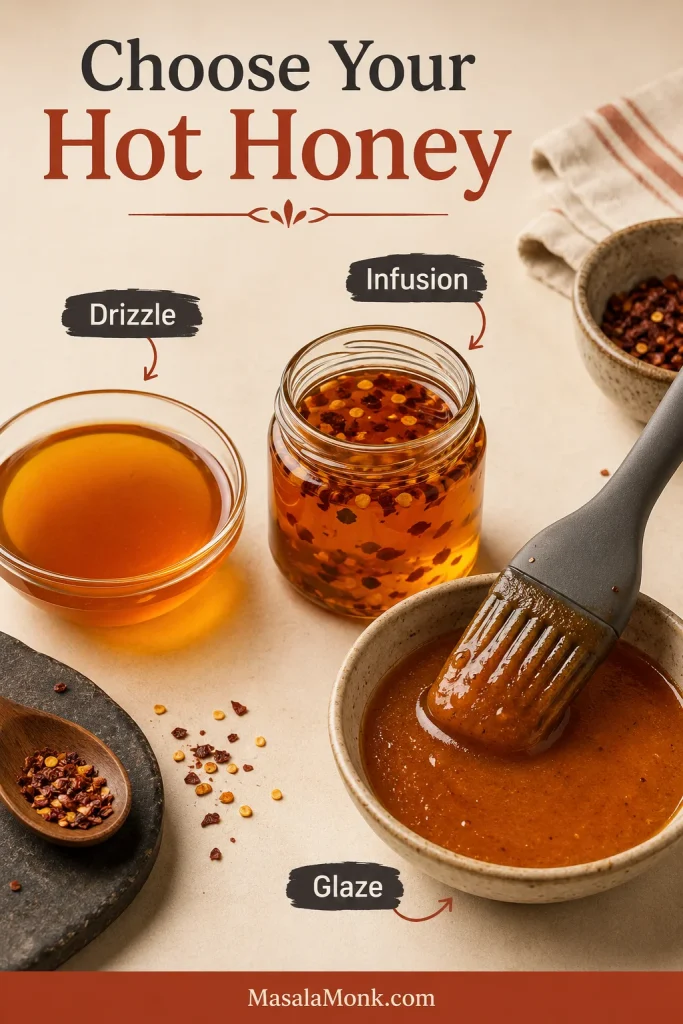
The no-cook sauce is the everyday choice. For a more distinct pepper flavour, use the dried-chilli infusion. Butter turns hot honey into a glaze that coats wings, chicken or salmon.
Swipe or scroll sideways to see the full table.
Method
Consistency
Hands-on
Total
Best for
Quick hot honey sauce
Smooth and pourable
2 minutes
2 minutes
Pizza, chicken, sandwiches and dipping
Chilli-infused hot honey
Clear, glossy and lightly textured
About 5 minutes
About 10–20 minutes
Pizza, biscuits, cheese and fried foods
Buttery hot honey glaze
Rich, glossy and clingy
About 5 minutes
About 5–7 minutes
Wings, tenders, salmon and vegetables
Choose by how the sauce should behave: smooth hot honey drizzles, butter glaze clings, and dried-chilli infusion leaves visible chilli in the sauce.
Make this first
Quick No-Cook Hot Honey Sauce Recipe
This is the default sauce: honey-led, clearly spicy and fluid enough to drizzle while still leaving a light coating on chicken, bread or pizza crust.
Time 2 minutes
Yield About 9 tbsp / 135 ml
Serving size 1 tbsp / 15 ml
Texture Glossy and pourable
Ingredients
Core ingredients
½ cup runny honey — 4 fl oz / 120 ml; about 6 oz / 170 g by weight
1 tablespoon thin, medium-heat cayenne-style hot sauce — ½ fl oz / 15 ml
Optional after tasting
One small pinch fine salt — useful when the hot sauce is not already salty
Up to 1 teaspoon apple cider vinegar or lemon juice — added ¼ teaspoon at a time
⅛–¼ teaspoon cayenne pepper for extra heat
Method
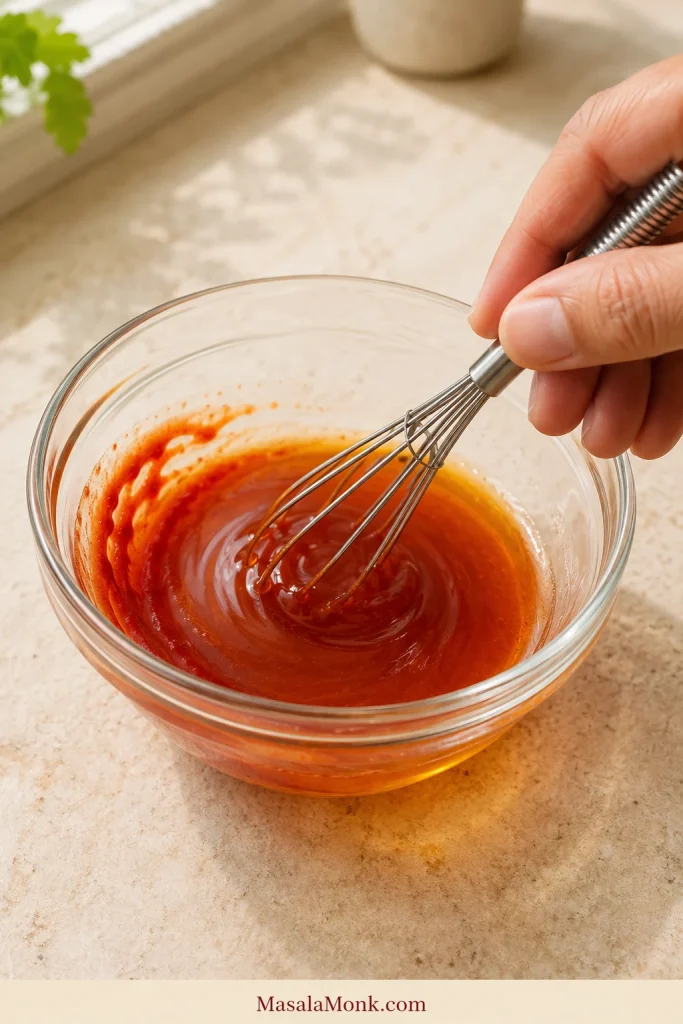
Whisk. Combine the honey and hot sauce in a small bowl until the colour is even and no red streaks remain. Stir in the salt if needed.
Taste. The honey should come through first, then give way to the hot sauce’s tang and chilli warmth.
Adjust only if needed. Cayenne makes it hotter. Vinegar or lemon juice lightens sweetness that lingers too heavily.
Sweep the whisk around the bowl edge before stopping; concentrated hot sauce can hide along the rim.
For a finer drizzle: warm the sauce over low heat for 30–60 seconds or microwave it in a microwave-safe bowl for 10 seconds at a time. Stop as soon as the honey loosens. It does not need to bubble.
That is it—no simmering, steeping or special chilli required.
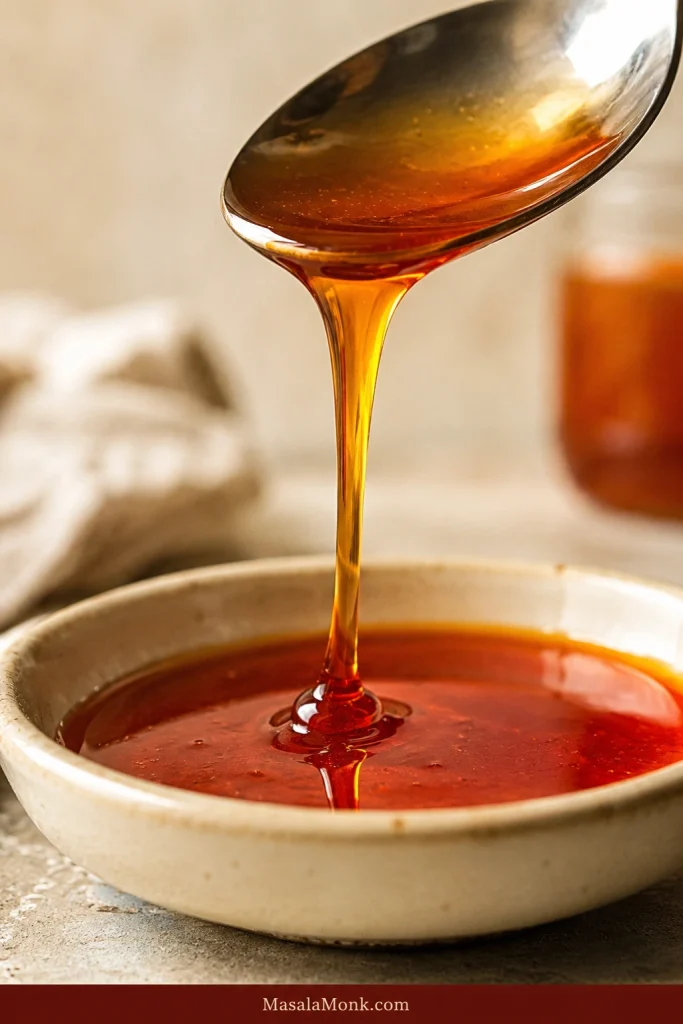
What success looks like: the sauce falls from a spoon in a smooth ribbon and leaves a light glossy film behind. Honey should arrive first and chilli should follow. If the first taste already works, leave it alone.
A good drizzle stays continuous for a moment, letting you draw thin lines instead of blobs.
Recipe Notes
Taste your hot sauce first: cayenne sauce, Sriracha and concentrated habanero sauce will not produce the same flavour or flow.
Sauce crisp food last: the longer fried food sits under honey, the softer its coating becomes.
How to Use Hot Honey Sauce
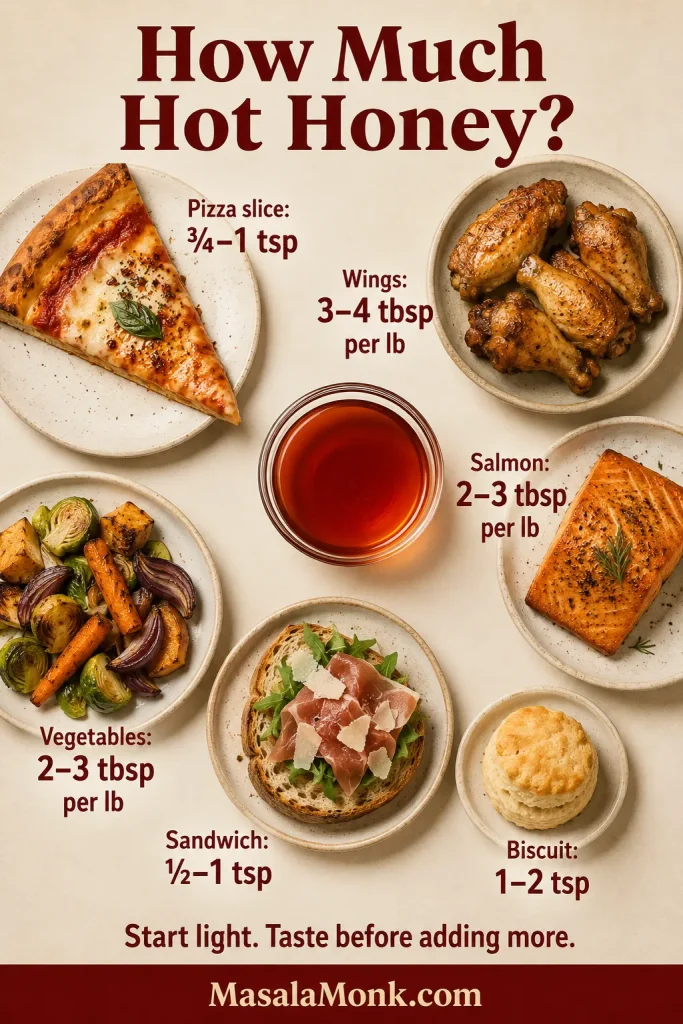
A light coating is usually enough. Taste the food before pouring on more.
Brown first; glaze late. Crisp food gets the sauce shortly before serving.
Swipe or scroll sideways to see the full table.
Food
Starting amount
When to add it
12-inch pizza
2–3 tbsp / 30–45 ml
Immediately after baking
One pizza slice
¾–1 tsp / 4–5 ml
After baking
1 lb / 450 g wings
3–4 tbsp / 45–60 ml
Toss after cooking
1 lb / 450 g tenders
3–4 tbsp / 45–60 ml
Toss or drizzle shortly before serving
1 lb / 450 g salmon
2–3 tbsp / 30–45 ml
Brush on near the end
1 lb / 450 g vegetables
2–3 tbsp / 30–45 ml
Add near the end or after roasting
Four sandwiches
2–4 tsp / 10–20 ml
Drizzle during assembly
Biscuits or cornbread
1–2 tsp per serving
Add at the table
Use the guide as a starting range; even distribution often gives enough sweet heat without more sauce.
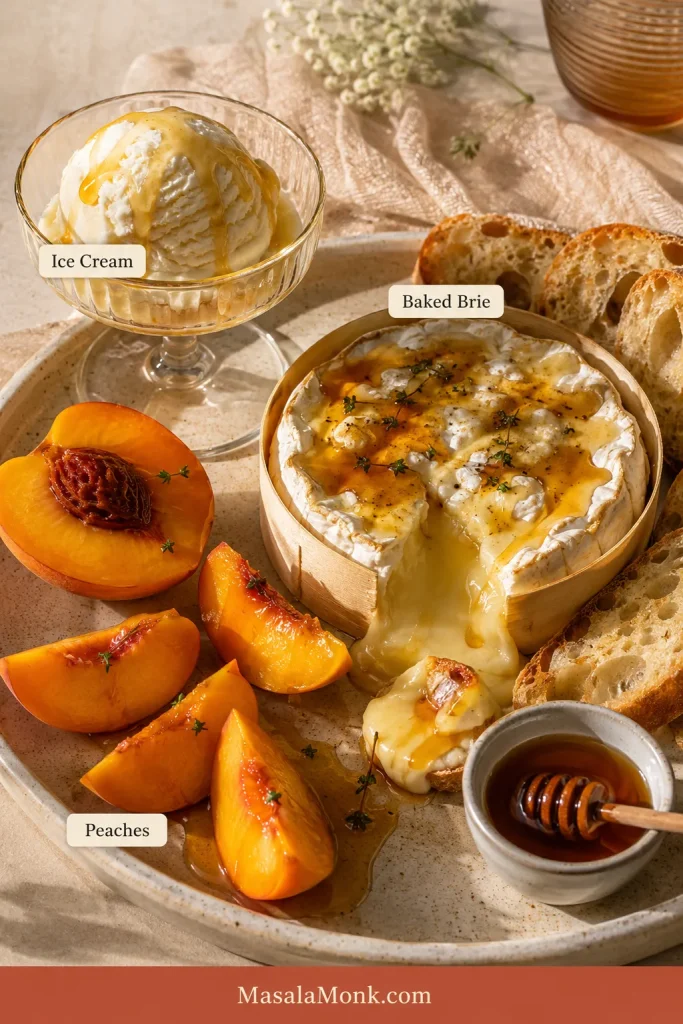
For a sweeter contrast, try a teaspoon over vanilla ice cream, baked brie or ripe peaches. Cold dairy softens the heat; warm cheese and fruit brighten the sweetness.
For desserts, drizzle at the table so the contrast stays distinct against cold dairy, warm cheese or fruit.
Hot Honey for Pizza
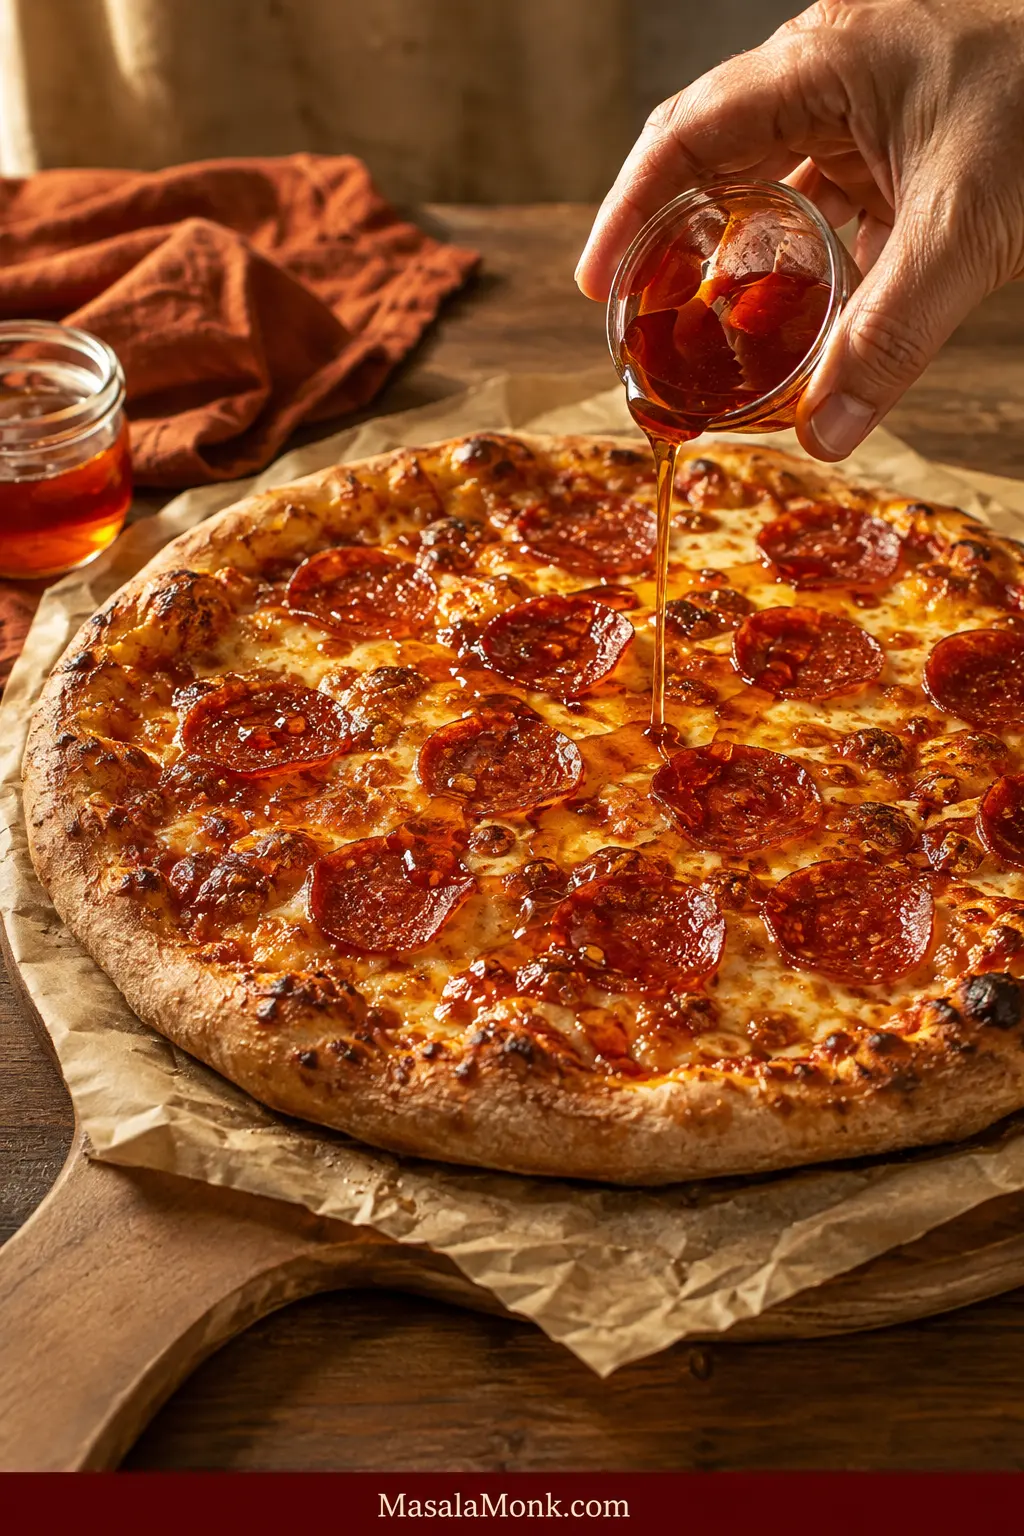
Hot honey belongs on the pizza after it leaves the oven. Residual heat loosens the drizzle without baking it into the cheese.
Not sure whether it belongs there? Drizzle one slice first. The cheese tastes richer, salty toppings become sharper and the crust suddenly feels worth dipping. Then decide whether the rest needs it.
Test a slice with representative toppings; extra cheese, cured meat or pickles can change how much heat the pizza needs.
Choose the base from these pizza sauce recipes, then finish with a light drizzle. Too much makes the centre wet and sweet.
Hot Honey for Wings and Chicken Tenders
Cook the chicken until crisp, then add the sauce shortly before serving.
Use a wide bowl and toss rather than stir so a smaller amount coats the wings evenly.
Dip one edge to keep sauce and crunch in the same bite; a full dunk softens more coating.
Crisp food should not sit in sauce while everyone slowly finds their way to the table.
Hot Honey Glaze for Salmon
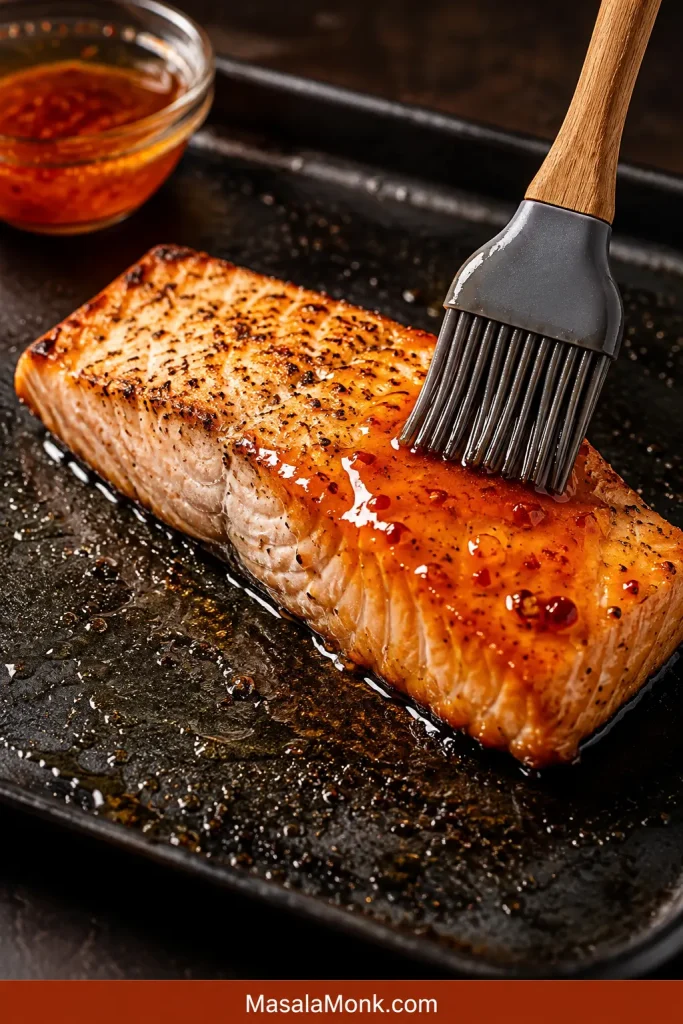
Brush the glaze on once the salmon is nearly opaque and beginning to flake. In this honey garlic salmon, the fish browns before the honey sauce enters the pan.
Brush salmon with a thin film, not a puddle; it clings evenly and is easy to build.
Hot Honey on Sandwiches
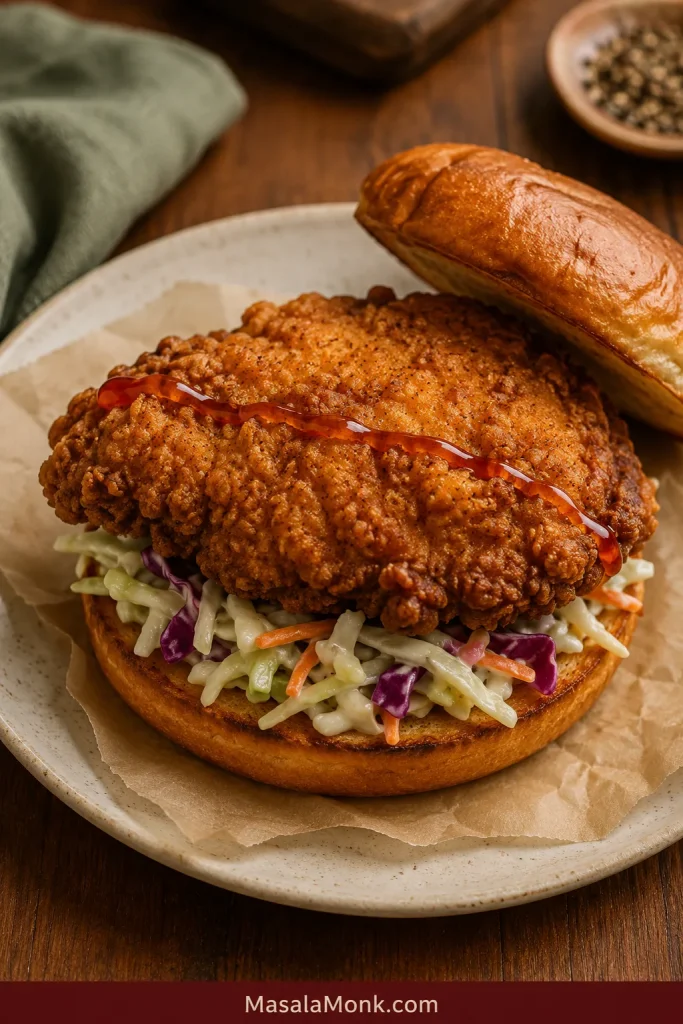
Usually, a thin line across the filling is enough. A heavier pour sinks into the bread and dulls the contrast between crisp, creamy and salty ingredients.
Put hot honey on the filling rather than the bun so the bread stays drier and the chicken stays crisp.
It works particularly well on the crispy, Buffalo and BBQ options in these chicken sandwich recipes.
Hot Honey on Roasted Vegetables
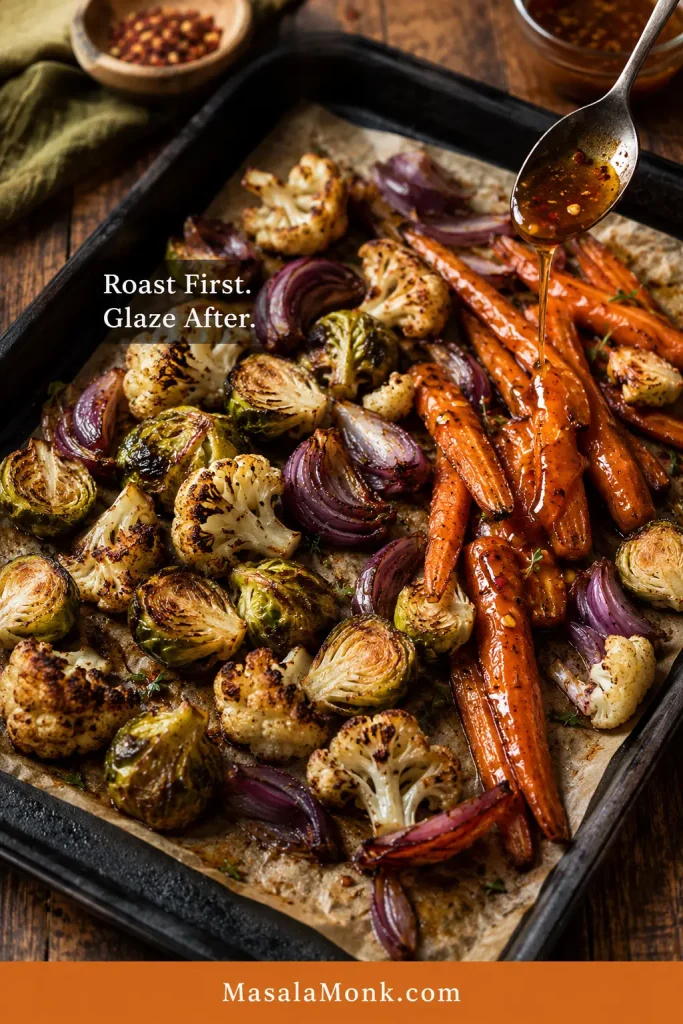
Carrots, sweet potatoes, cauliflower, Brussels sprouts and squash all take hot honey well. Let them brown and become tender before adding it.
These oven roasted carrots show the timing clearly: the vegetables should look roasted before they look glazed.
Toss roasted vegetables while the tray is still hot; residual heat helps a little hot honey spread farther.
The bottle changes more than the heat. It can make the sauce sharper, thinner or thicker, sweeter, saltier or more garlicky before you add anything else.
Best Honey for Hot Honey
Ordinary runny honey is the easiest choice. Mild clover or a light, gently flavoured wildflower honey lets the chilli stand out. Darker honey brings more character.
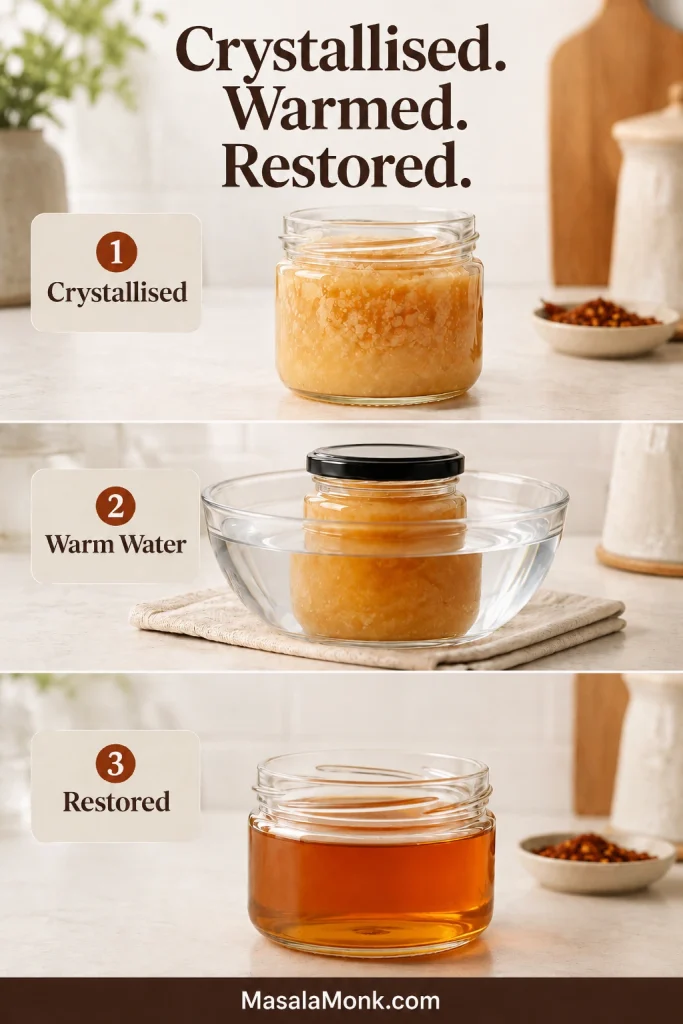
Partially crystallised honey is still fine. Set the tightly closed, heat-safe glass jar in warm—not boiling—water, or heat the measured honey briefly over low heat. Once it flows freely, use it.
Choose the Right Hot Sauce
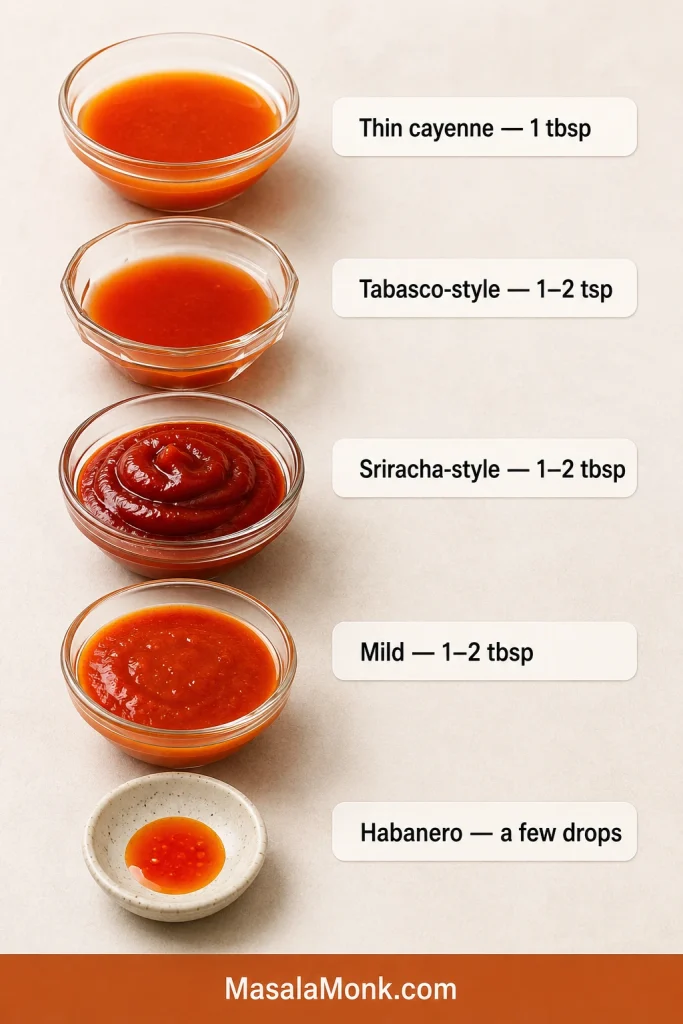
This recipe is written for a thin, medium-heat cayenne sauce—the familiar kind that pours easily from the bottle.
Swipe or scroll sideways to see the full table.
Hot-sauce style
Start with
Effect on the hot honey
Thin cayenne-style sauce
1 tbsp / 15 ml
Moderate acidity and easy pourability
Tabasco-style sauce
1–2 tsp / 5–10 ml
Sharper, thinner and more concentrated
Sriracha
1–2 tbsp / 15–30 ml
Thicker, sweeter and more garlicky
Mild hot sauce
1–2 tbsp / 15–30 ml
More tang before strong heat develops
Habanero or super-hot sauce
A few drops
Strong heat without noticeably thinning the honey
Watch viscosity as well as heat; a thick sauce can alter the drizzle more than a hotter sauce used by the drop.
Fruit-based sauces make the mixture sweeter and more aromatic. Habanero sauces bring sharper, faster heat. The pepper sauce guide compares those styles in more detail.
Cayenne and Dried Chilli Flakes
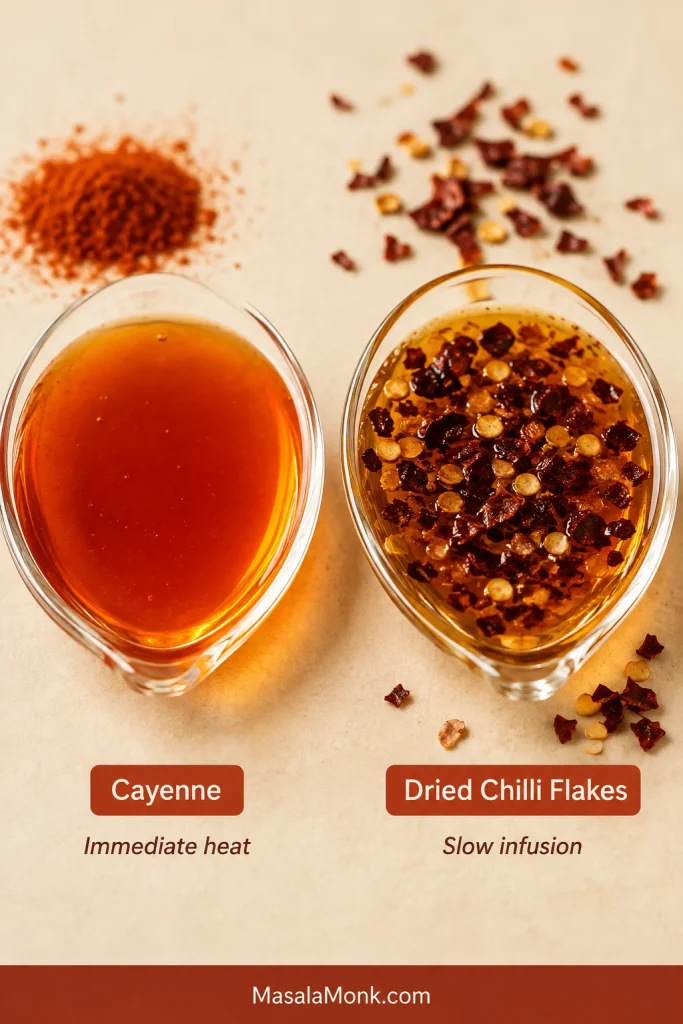
Cayenne gives immediate heat without adding liquid. It is useful when the flavour is right but the sauce needs more fire.
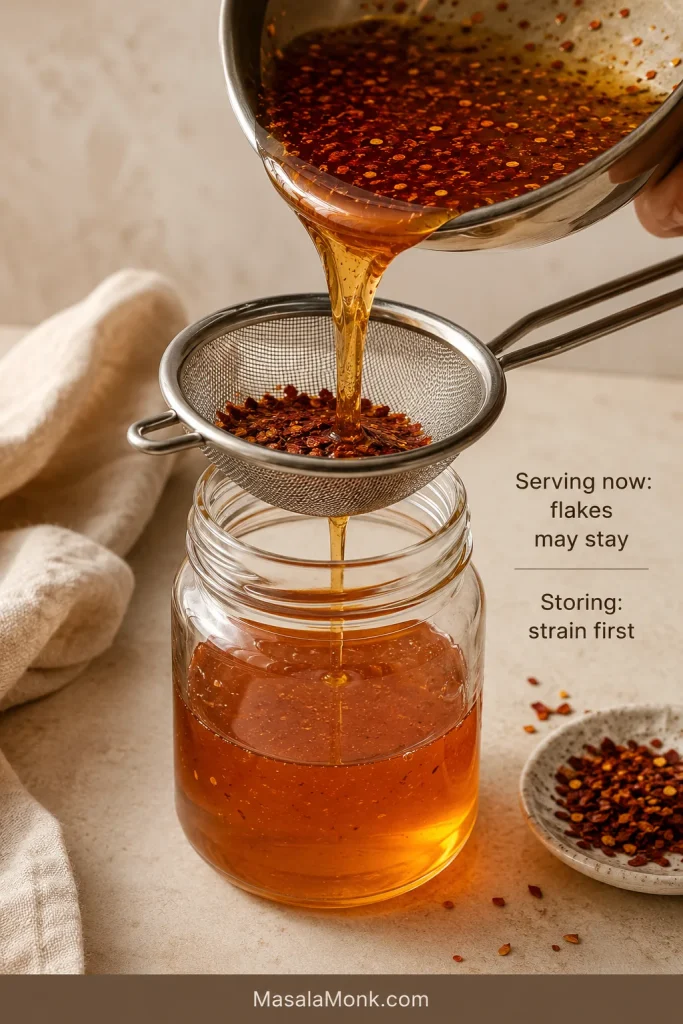
Dried chilli flakes release their warmth more slowly. Leave them in if you are serving the hot honey soon and want the heat to keep building. Strain them out before bottling or storing.
Cayenne keeps hot honey smooth; dried chilli adds visible texture and slower-building heat.
Oregon State University Extension’s infused-honey safety guidance explains handling, straining, storage and spoilage signs for honey infused with fully dried ingredients.
Acid, salt and butter: bottled hot sauce may already bring all the acidity the honey needs, so taste before adding more. A small pinch of salt clears away some of the syrupy sweetness. Butter changes the job completely, turning the drizzle into a glaze that stays on the food.
How Spicy Should Hot Honey Be?
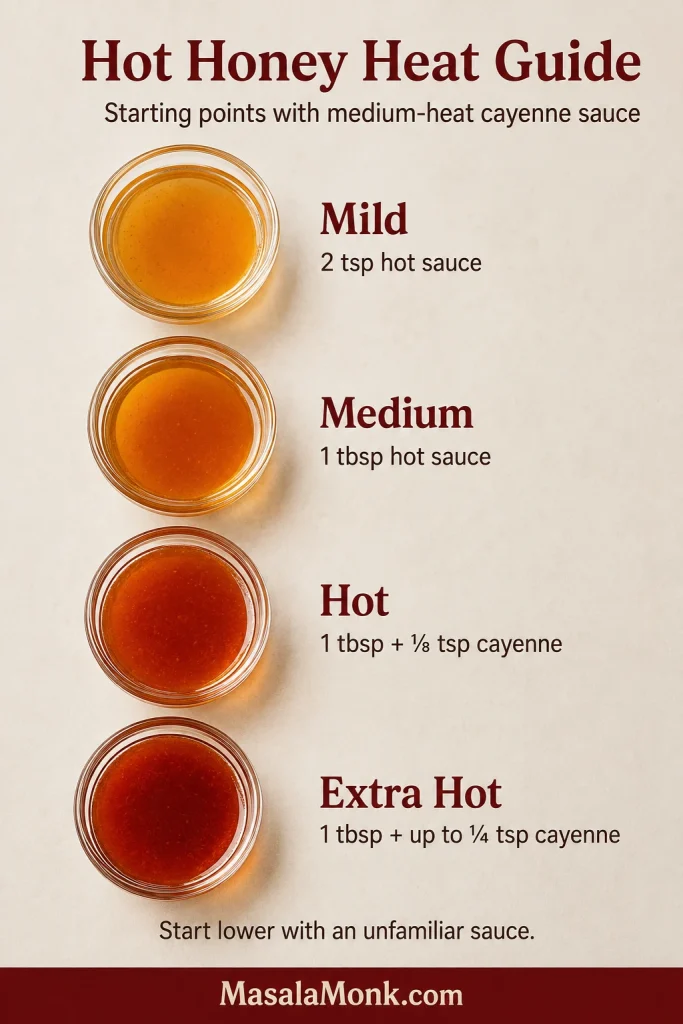
The amounts below are starting points using a medium-heat cayenne-style hot sauce. They are not universal heat ratings; begin lower with an unfamiliar sauce or cayenne powder.
Swipe or scroll sideways to see the full table.
Heat level
Cayenne-style hot sauce
Cayenne powder
What to expect
Mild
2 tsp / 10 ml
None
Mostly honey with a warm finish
Medium
1 tbsp / 15 ml
None
Clear chilli warmth after the sweetness
Hot
1 tbsp / 15 ml
⅛ tsp
Stronger heat without changing the flow
Extra hot
1 tbsp / 15 ml
Up to ¼ tsp
Strong, lingering heat
Change one variable at a time: hot sauce affects acidity and flow, while cayenne mostly raises heat.
A spoonful tasted alone feels much hotter than the same amount spread across dinner.
For dipping, stir hot honey into Dijon or mayonnaise. When you need a coating rather than a pour, use the butter glaze.
To adjust the consistency: let a thin-looking sauce cool before changing it. More honey will thicken it. If it is too thick, warmth may be all it needs. When the flavour is already right, thin only the portion you plan to serve with a few drops of warm water.
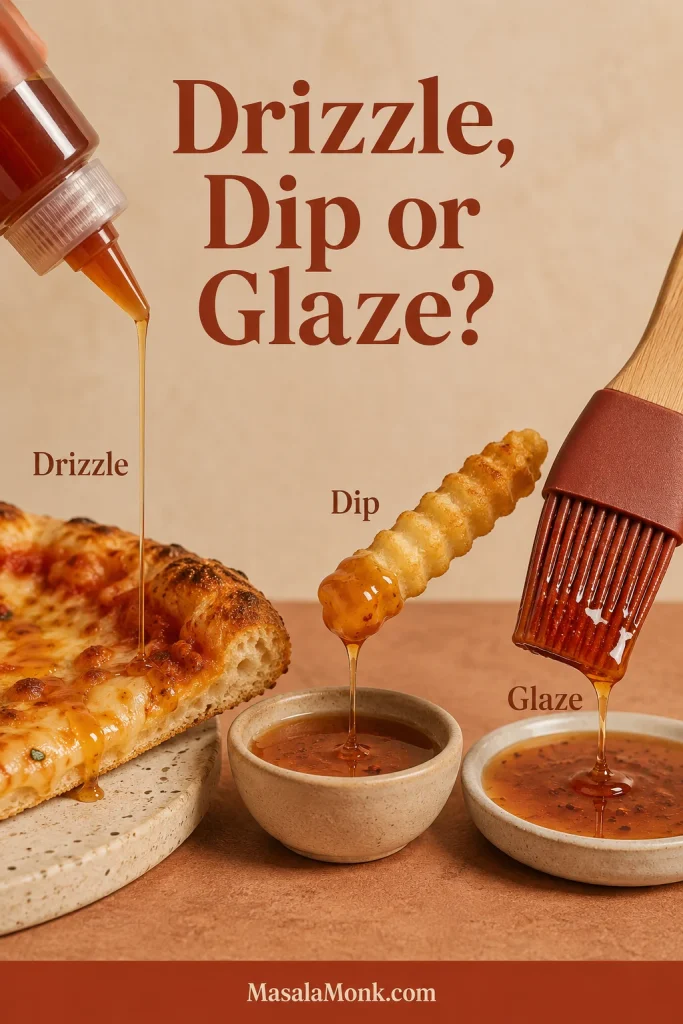
Drizzle is a last-second accent, dip stays separate until the bite, and glaze is meant to cling.
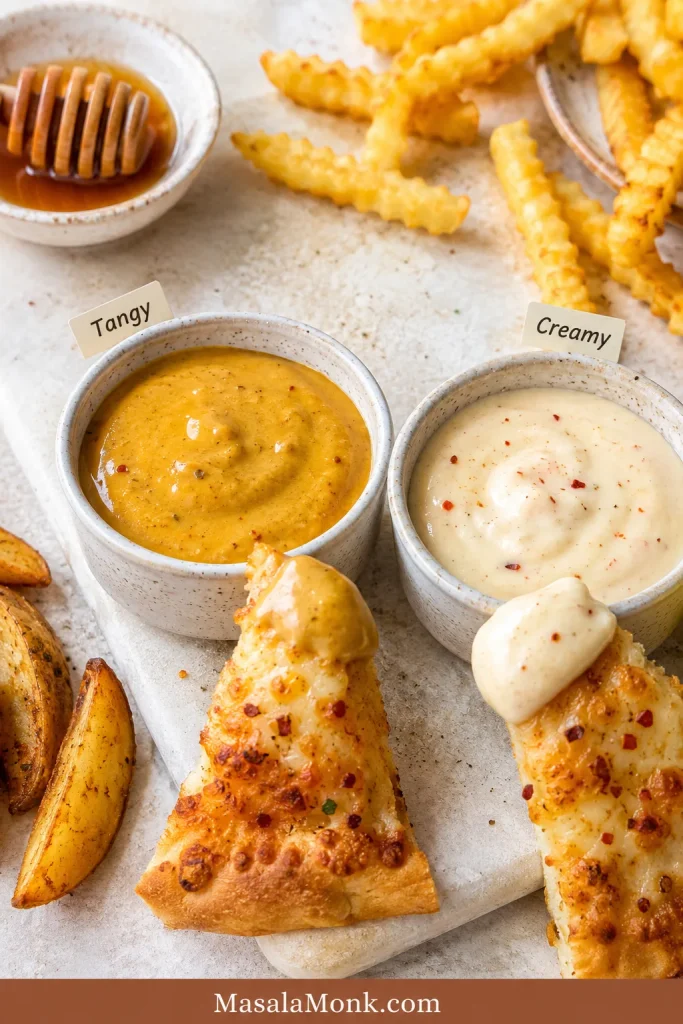
Hot Honey Dipping Sauce
Tangy mustard dip: mix 2 tablespoons Dijon mustard with 1 tablespoon hot honey. Stir in more hot honey for a sweeter dip.
Creamy hot honey dip: mix ¼ cup / 60 g mayonnaise with 1–2 tablespoons hot honey.
Mustard adds tang; a creamy hot honey dip softens the edge of heavily seasoned fried food.
Choose the infusion when you want the dried chilli itself to come through. Butter is better when the sauce needs to stay on a wing instead of running into the bowl.
Classic Chilli-Infused Hot Honey
½ cup honey — 4 fl oz / 120 ml; about 6 oz / 170 g by weight
½–1 teaspoon fully dried red pepper flakes
One small pinch fine salt, optional
½ teaspoon apple cider vinegar, optional for immediate use
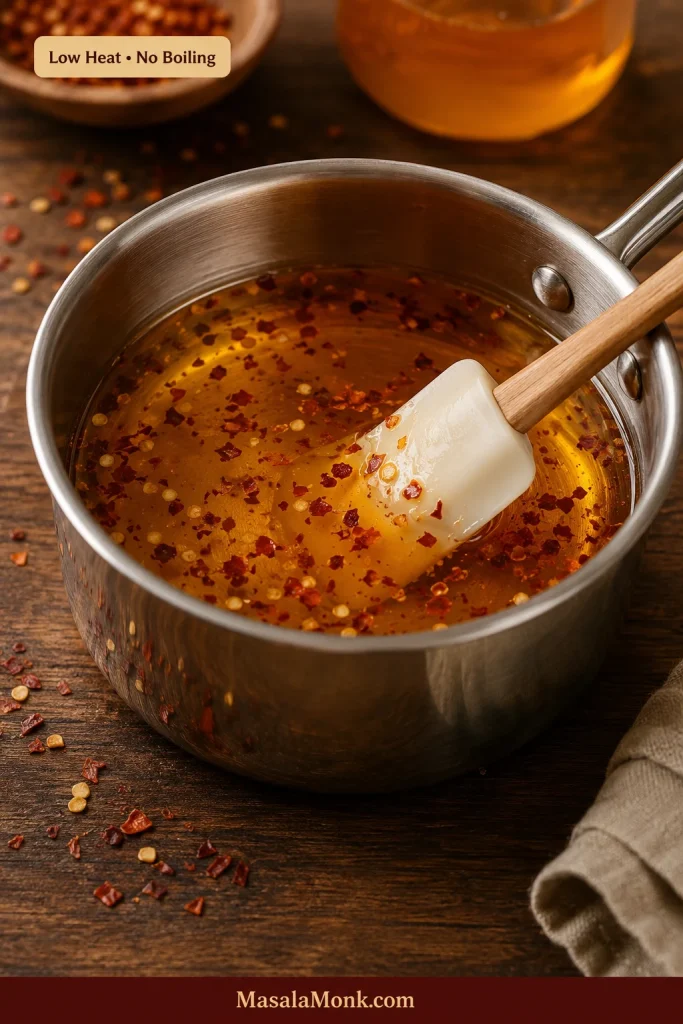
Combine the honey and dried chilli flakes in a small saucepan.
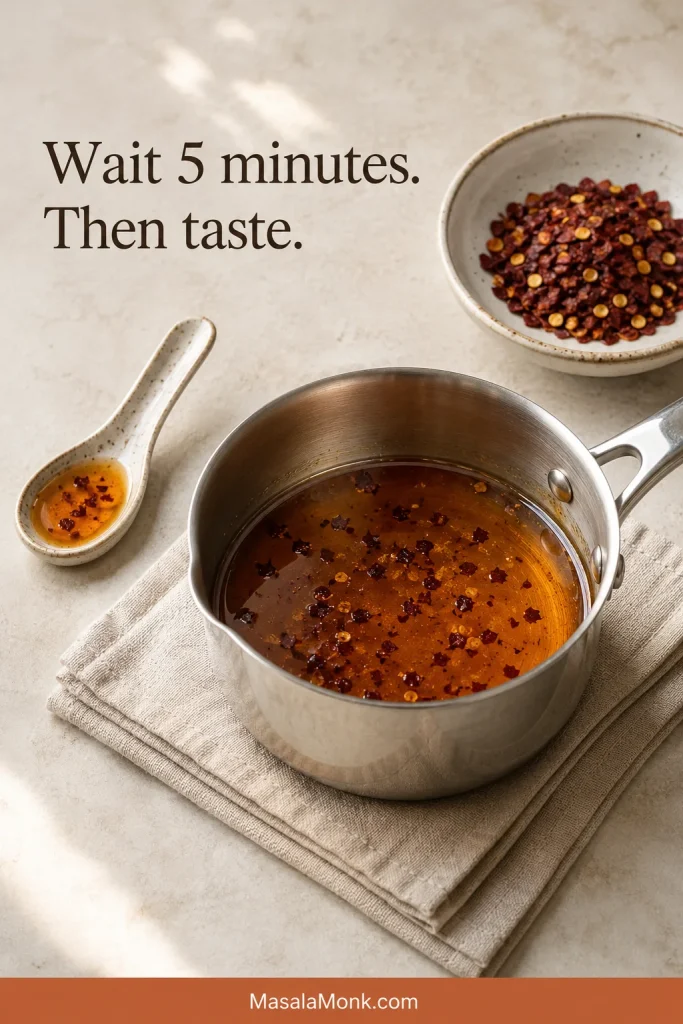
Warm over low heat for 3–4 minutes, stirring often. The honey should loosen and smell like warm chilli—not caramel.
Remove it from the heat. Use it immediately for gentle warmth or leave it for 5–15 minutes for more chilli flavour.
Stir in the salt. For a sauce being served now, vinegar can lighten sweetness that still feels heavy.
Strain for a smooth drizzle.
Watch the surface: looser honey and easy stirring are enough. Active bubbling means the infusion is too hot.
The chilli may taste quiet at first. Give it a few minutes before adding more; a gentle infusion can become fierce while it rests.
After resting, stir before tasting again; settled flakes can make one spoonful much hotter than the batch.
Serving now or storing? Flakes may remain in a batch being served immediately, but strain them out before bottling or storing.
Let the sieve drain naturally rather than pressing the flakes; fewer fine solids make a cleaner pour.
Warm glaze can look alarmingly loose. Give it a minute. Glossy streaks in the tossing bowl are fine; a pool beneath the wings means you used too much or the glaze needs another spoonful of honey.
After resting, look for cling rather than stiffness: the glaze should coat the spoon but still move when tilted.
Make the plain sauce first. Change it only if the food calls for something more specific.
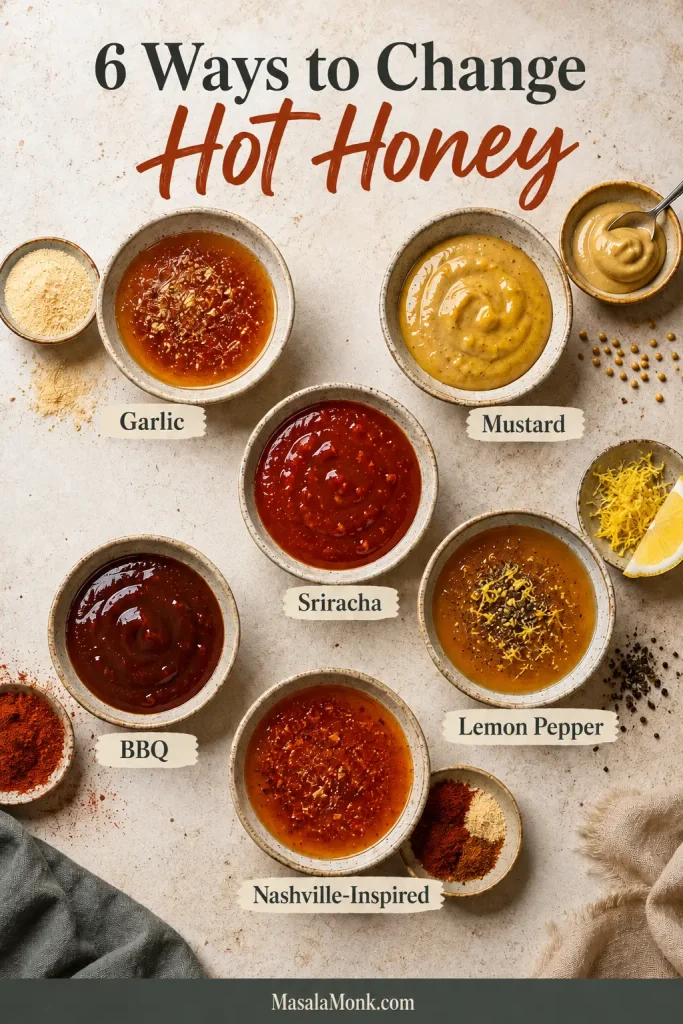
Try one flavour family at a time; garlic, mustard or BBQ should still taste like hot honey.
Garlic hot honey: stir in ¼ teaspoon garlic powder. It works particularly well on chicken and honey garlic pork chops.
Hot honey mustard: mix 2 tablespoons Dijon with 1–2 tablespoons hot honey.
Honey-Sriracha: replace the cayenne-style sauce with 1–2 tablespoons Sriracha for a thicker, sweeter and more garlicky sauce.
Hot honey BBQ: stir 2–3 tablespoons hot honey into ½ cup BBQ sauce. Brush it over chicken or pork near the end of cooking.
Lemon pepper: add ½ teaspoon finely grated lemon zest and ¼ teaspoon coarse black pepper. It is especially good on lemon pepper chicken wings.
Nashville-inspired: add ⅛ teaspoon each cayenne and smoked paprika, plus a small pinch of garlic powder.
How to Fix Hot Honey Sauce
Hot honey is forgiving. Most batches are one small adjustment from balance, so judge the flavour first and the consistency second.
Fix one problem at a time: make a small correction, stir, then retaste. Multiple changes are harder to judge.
Swipe or scroll sideways to see the full table.
What happened
Why
What to do
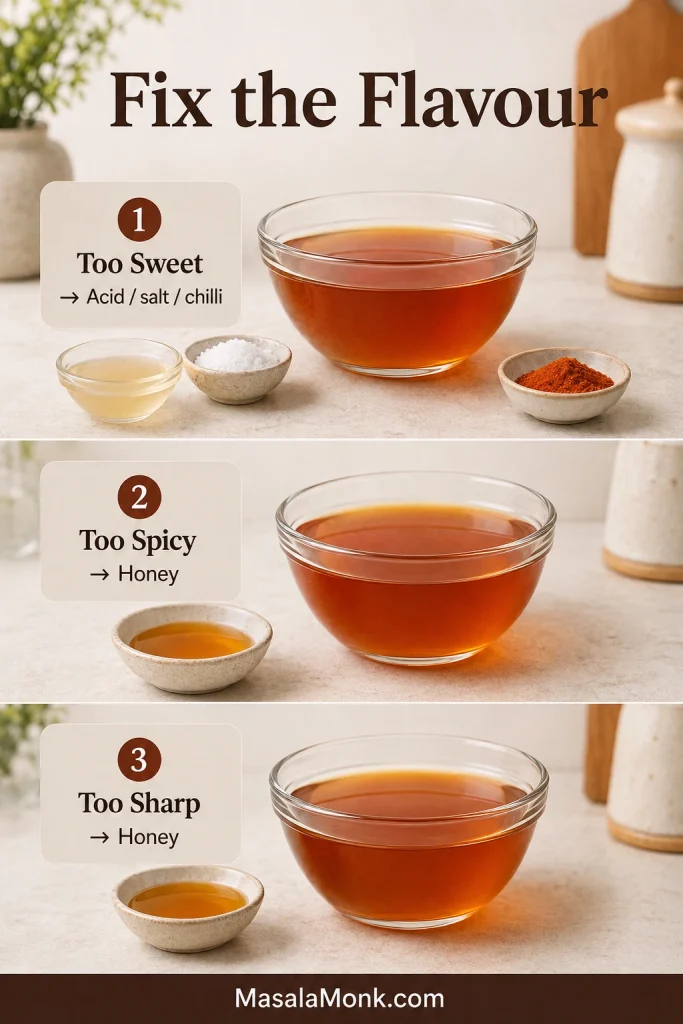
Too sweet
It needs brightness, salt or heat
Stir in a little vinegar, salt or chilli
Too spicy
Too much chilli or a long infusion
Add honey and remove any chilli solids
Too acidic
The hot sauce or vinegar is too sharp
Add honey
Too thin
It is still warm or contains too much liquid
Cool first, then add honey if needed
Too thick while cool
The honey is cold or the ratio needs adjusting
Warm gently; thin only the serving portion if needed
Hard or chewy after cooking
It was heated too far
Rewarm and loosen the serving portion with a little liquid
Scorched or bitter
The honey overheated
Start again; burnt honey cannot be repaired
Butter separated
The glaze became too hot
Remove from the heat and whisk firmly
Wings became soggy
Too much sauce or too much waiting
Use less and toss immediately before serving
Gets hotter in storage
Chilli solids remain in the jar
Strain them out or dilute the sauce with honey
Grainy or crystallised
Natural honey crystallisation
Warm in a water bath or short microwave bursts
How to Store and Reheat Hot Honey Sauce
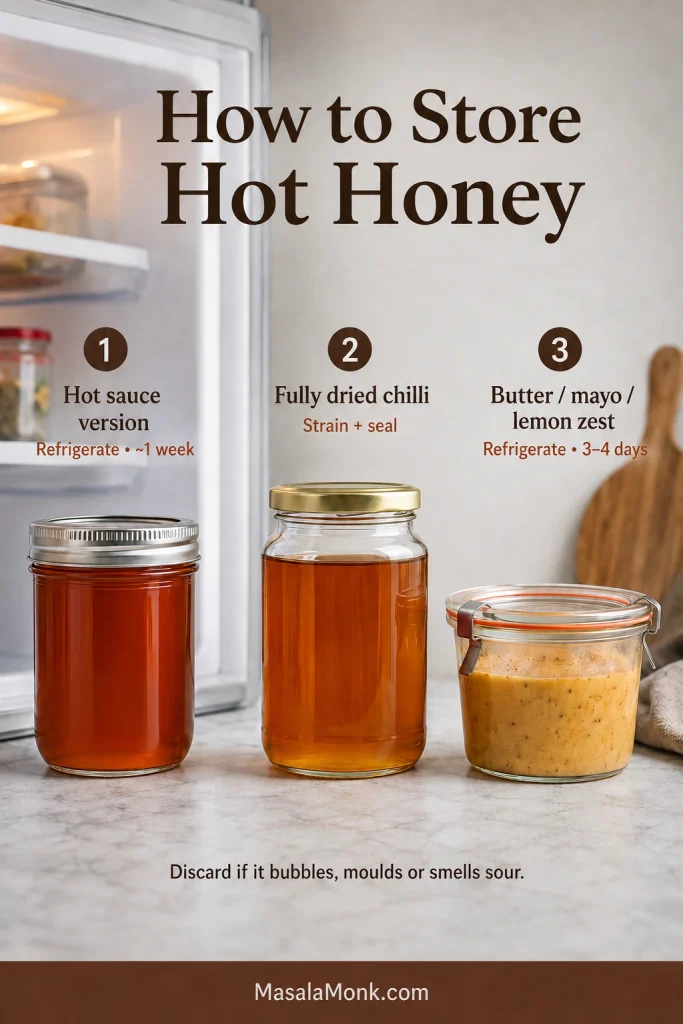
Bottled-hot-sauce version: refrigerate it and use it within about one week for the best flavour and texture. This is a cautious home-kitchen window because bottled sauces vary in acidity and moisture.
Fully dried-chilli infusion: strain it into a clean, tightly sealed food-grade container before storing. Keep moisture out. Refrigerate the batch if vinegar has been added.
Butter glaze, mayonnaise dip or lemon-zest variation: refrigerate promptly and use within 3–4 days.
Label the jar with the version you made; storage changes with butter, mayonnaise, lemon zest or dried-chilli infusion.
Discard any batch that develops bubbling, mould or an alcoholic or sour smell.
To loosen cold hot honey, microwave it in a microwave-safe container with any metal lid removed, in 10-second bursts. Set a tightly closed, heat-safe glass jar in warm—not boiling—water as another option. Butter glaze can be rewarmed over the lowest heat. Stop as soon as the sauce flows again.
The simplest version is honey and hot sauce, with a small pinch of salt only if the balance needs it.
Can You Make Hot Honey With Regular Hot Sauce?
Yes. A thin cayenne-style hot sauce is the easiest choice; use less if the bottle is unusually hot or sharp.
Do You Need to Cook Hot Honey?
No. Whisk the bottled-hot-sauce version together cold; heat only to loosen thick honey or infuse dried chilli.
Can You Make Hot Honey Without Vinegar?
Yes. Skip it when the hot sauce already gives the mixture enough brightness.
Can I Use Cayenne Instead of Chilli Flakes?
Yes. Cayenne gives immediate, even heat; chilli flakes create a slower infusion and visible texture.
Does Homemade Hot Honey Need Refrigeration?
Refrigerate the bottled-hot-sauce version in this recipe. Fully dried-chilli infusions have separate storage guidance, while butter glaze, mayonnaise dip and lemon-zest versions should remain refrigerated.
Why Did My Hot Honey Harden or Crystallise?
Honey naturally crystallises, and a cooked sauce can also stiffen if heated too long. Warm it gently until it flows again. If it smells scorched or tastes bitter, start over.
Crystals often appear at the sides or bottom first. Stop warming once the graininess has dissolved throughout.
A Small Jar That Solves Dinner
The jar looks almost too simple for how often it solves dinner. Then it lands on hot pizza or crisp chicken, the honey turns glossy and the chilli arrives a second later.
Keep the jar on the table and let everyone add their own; the right amount is personal.
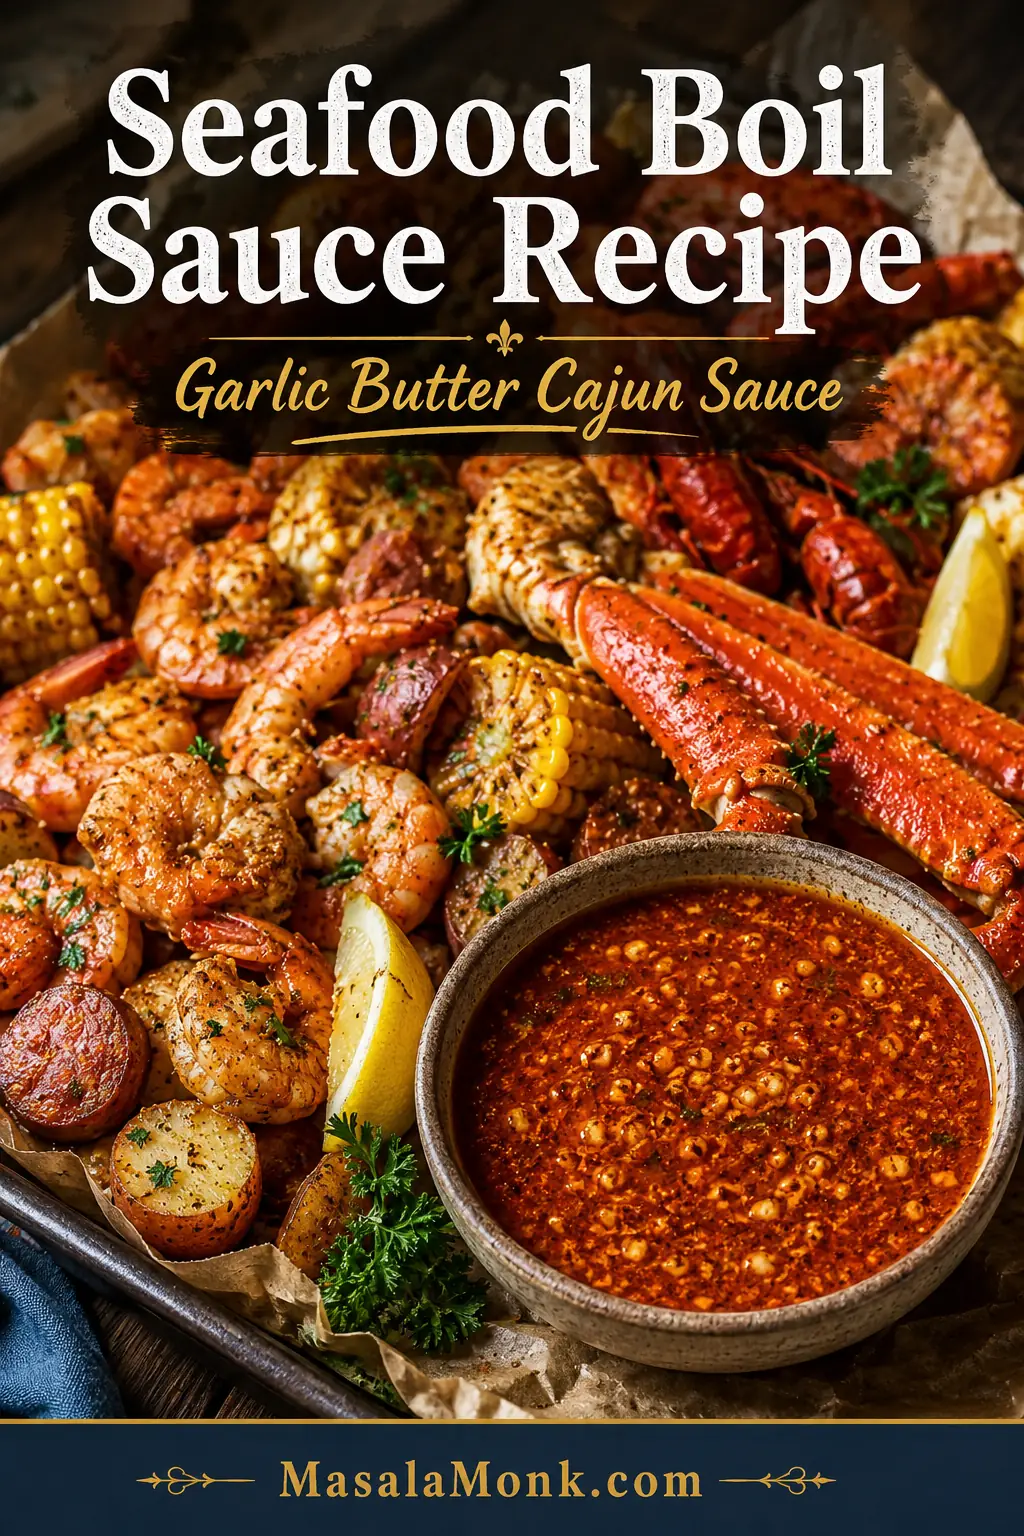
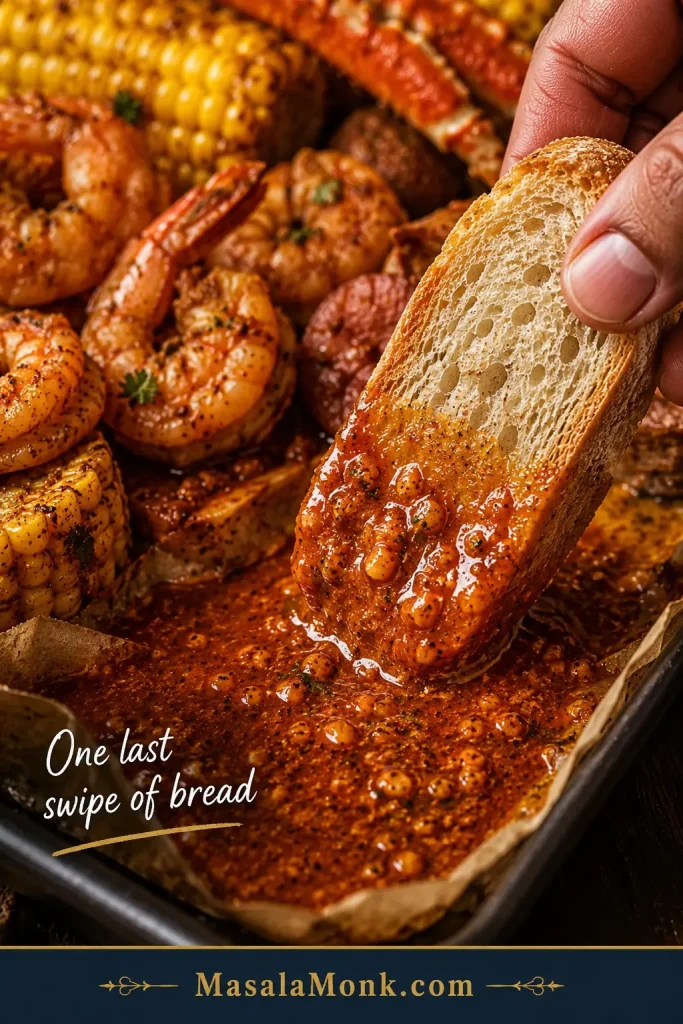
A great seafood boil sauce should do more than taste buttery. It should cling to crab legs, gloss over shrimp, soak into corn and potatoes, and leave enough garlicky Cajun butter at the bottom of the tray for one last swipe of bread.
This is the sauce that turns a pile of boiled seafood into the messy, glossy, pass-the-napkins kind of meal. It is rich, garlicky, smoky, lemony, a little spicy, and easy to adjust for dipping, pouring, tossing, or serving on the side.
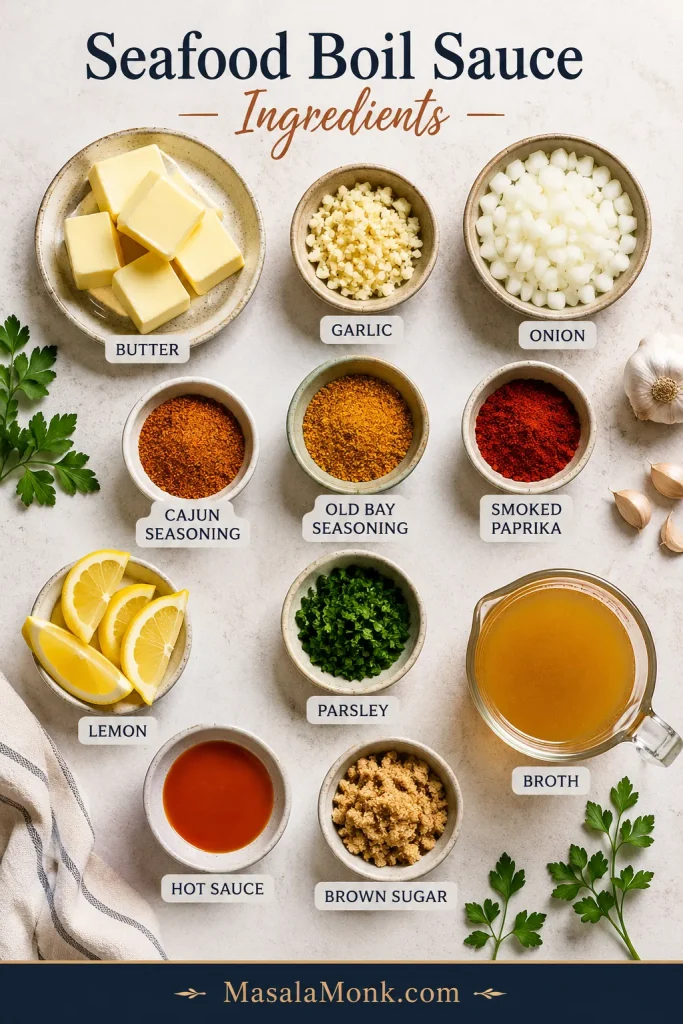
The goal is not just heat or butter. The goal is a sauce that tastes bold but still lets the seafood taste like seafood. The base is simple — butter, garlic, Cajun seasoning, Old Bay, smoked paprika, lemon, and a splash of broth or reserved seafood boil liquid — but the control is what makes it work.
Seafood boil sauce is a bold garlic butter sauce made with butter, garlic, Cajun seasoning, Old Bay seasoning, lemon juice, paprika, and a little heat. It should taste rich first, then garlicky and smoky, with enough lemon to make every bite of shrimp, crab, corn, and potatoes feel bright instead of heavy.
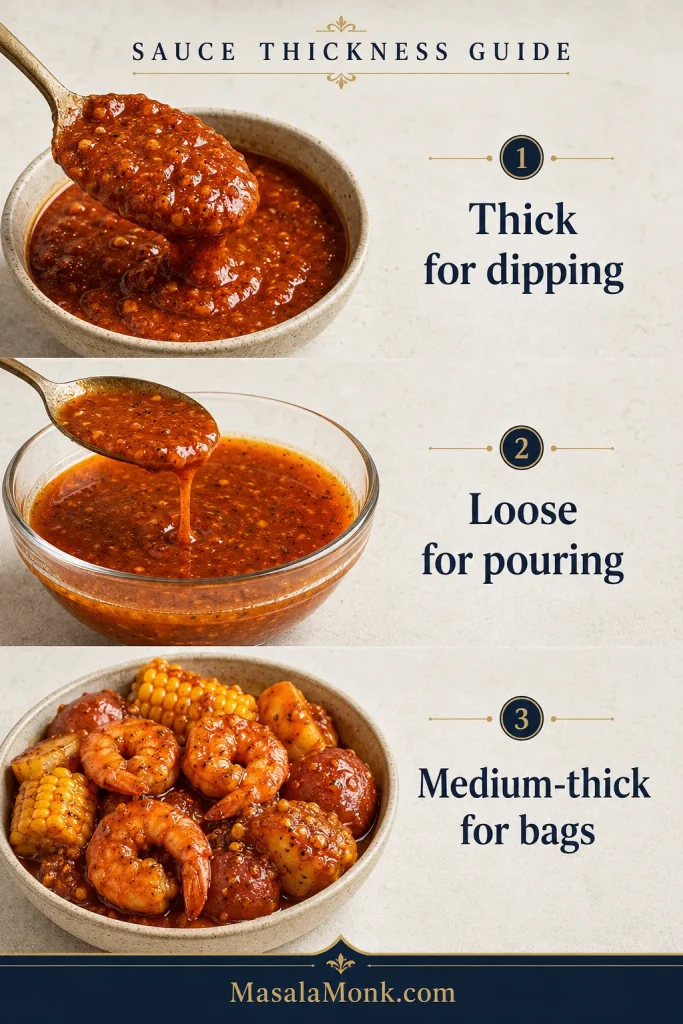
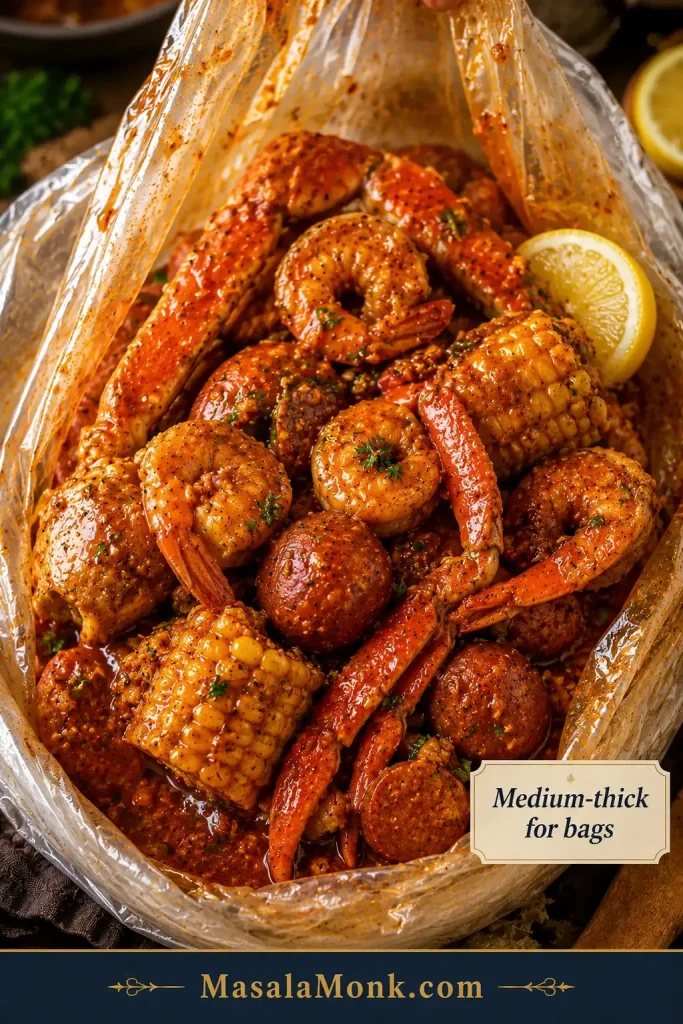
For a thick dipping sauce, use less liquid. For a pour-over sauce, add more broth, seafood stock, or reserved seafood boil liquid. For a seafood boil bag sauce, keep it medium-thick so it coats shrimp, crab, crawfish, corn, potatoes, and sausage without becoming watery.
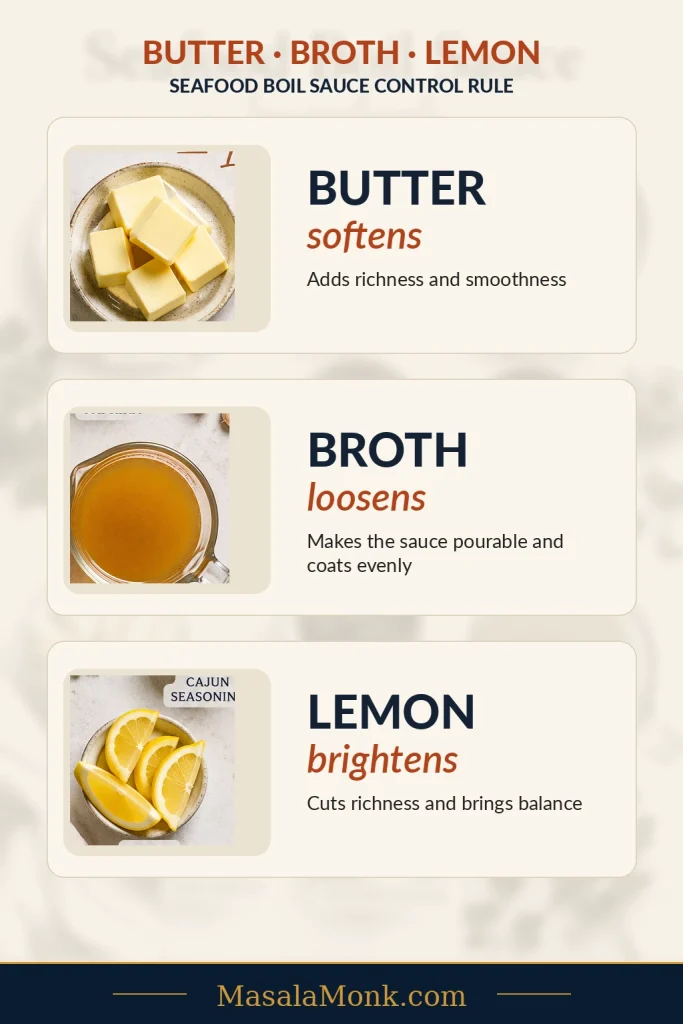
Butter-Broth-Lemon Rule
Use the butter-broth-lemon rule: butter softens, broth loosens, and lemon brightens. Choose your sauce style first — thick and buttery for crab-leg dipping, loose and glossy for shrimp and corn, or medium-thick for seafood boil bags. The recipe below starts in the middle so you can adjust either way.
When the sauce needs a fix, this is the fastest rule to remember: butter softens, broth loosens, and lemon brightens.
The best version is bold, glossy, and adjustable: rich enough for crab, bright enough for shrimp, loose enough for corn and potatoes, and balanced enough that it does not hide the seafood.
Make It Now: Seafood Boil Sauce Recipe
This is the main garlic butter Cajun seafood boil sauce. It makes about 2 cups / 480 ml, enough for about 2½–3 lb / 1.1–1.35 kg seafood as a light-to-generous pour-over sauce, depending on how much corn, potatoes, sausage, and eggs are on the tray.
You only need one pan, low heat, and about 20 minutes. Melt the butter, soften the aromatics, bloom the spices, loosen with broth, then finish with lemon.
Prep time: 10 minutes Cook time: 12 minutes Total time: 22 minutes Yield: About 2 cups / 480 ml sauce Serves: 4–6 as pour-over sauce, 8–10 as dipping sauce because dipping uses less per person Equipment: Large skillet or medium saucepan, whisk, measuring spoons, microplane or garlic press
Scaling: Double the sauce for a large tray or seafood boil bag. Keep the heat low and use a wider pan so the garlic and spices cook evenly.
Before you pour: Taste the sauce with one shrimp, potato, or piece of corn. The salt order is simple: season first, loosen second, salt last.
Optional heat: Add ¼–½ teaspoon cayenne or red pepper flakes if you want a spicier Cajun butter sauce.
Salt note: Do not add extra salt until the sauce is finished and tasted. Cajun seasoning, Old Bay, broth, and reserved boil liquid can all bring salt.
Measurement note: Gram weights for seasoning blends are approximate because Cajun seasoning and seafood seasonings vary by brand. Use the spoon measures first, then adjust after tasting.
Instructions
Melt the butter in a large skillet or medium saucepan over low to medium-low heat.
Add the finely minced onion and cook for 3–4 minutes, until softened and glossy but not browned.
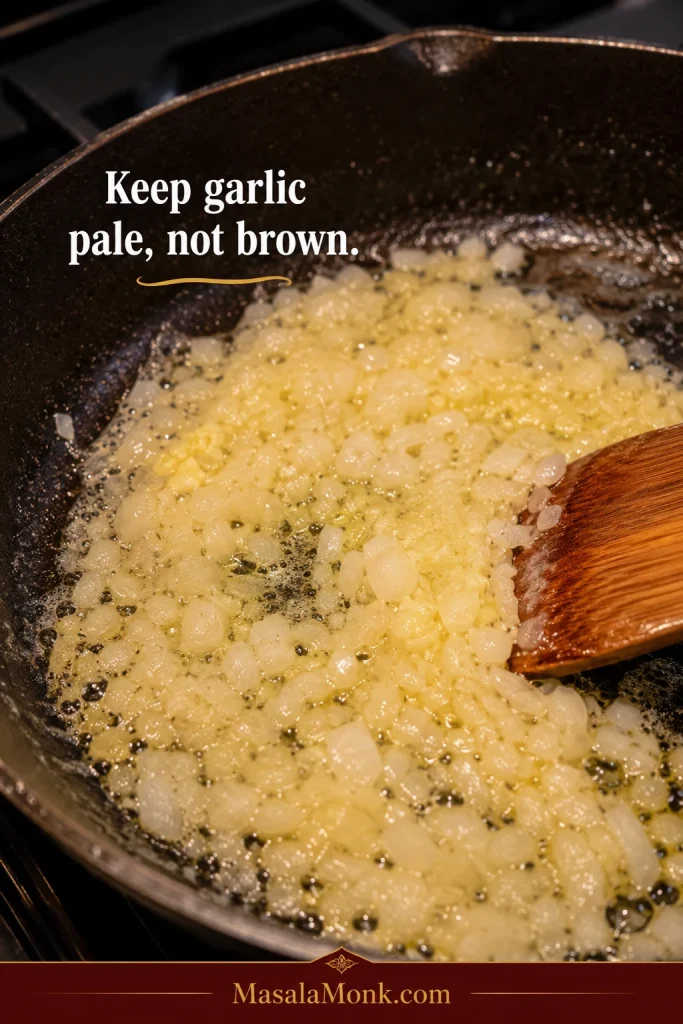
Add the garlic and cook for 60–90 seconds, just until fragrant. Keep it pale, not brown.
Stir in the Cajun seasoning, Old Bay, smoked paprika, onion powder, brown sugar, and optional cayenne or red pepper flakes.
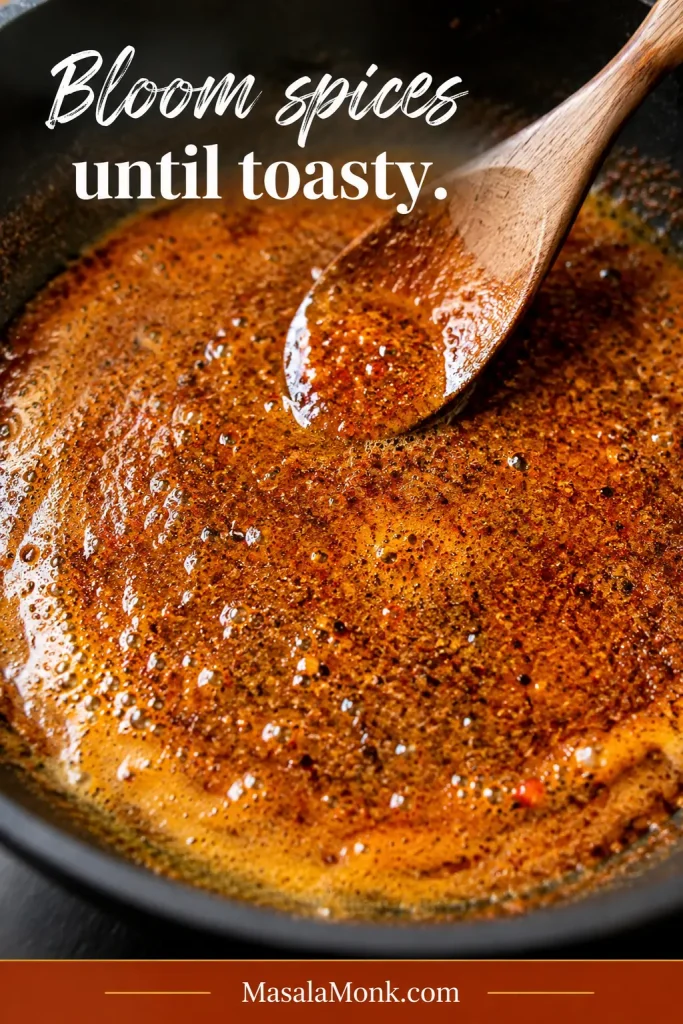
Cook the spices in the butter for 30–60 seconds, until the butter smells toasty and the spices look absorbed into the butter, not sandy on the surface.
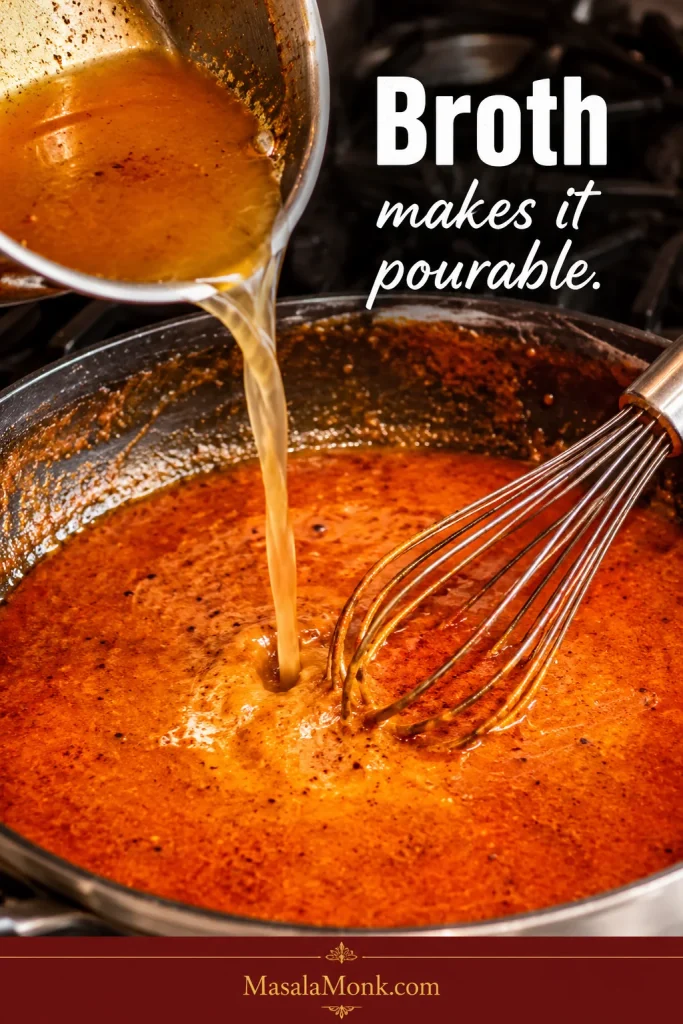
Slowly whisk in the reserved boil liquid, stock, or broth.
Let the sauce gently simmer for 3–5 minutes, stirring often, until glossy and spoonable.
Turn off the heat. Stir in the lemon juice, lemon zest, hot sauce, and parsley.
Taste and adjust. Add more lemon for brightness, broth for a looser sauce, butter for richness, or hot sauce for more heat.
Taste with one shrimp, potato, or piece of corn before coating the full seafood tray.
Serve warm as a dipping sauce, pour-over sauce, or seafood boil bag sauce.
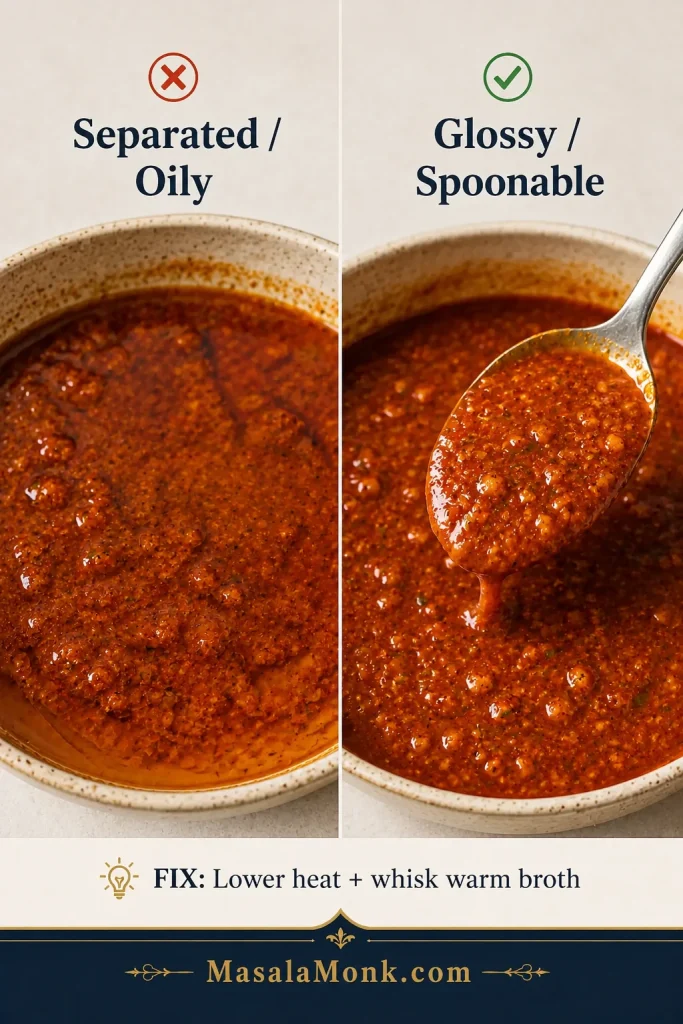
Important: Keep the sauce at a gentle simmer and it stays glossy. A hard boil can make the butter separate and the garlic taste harsh.
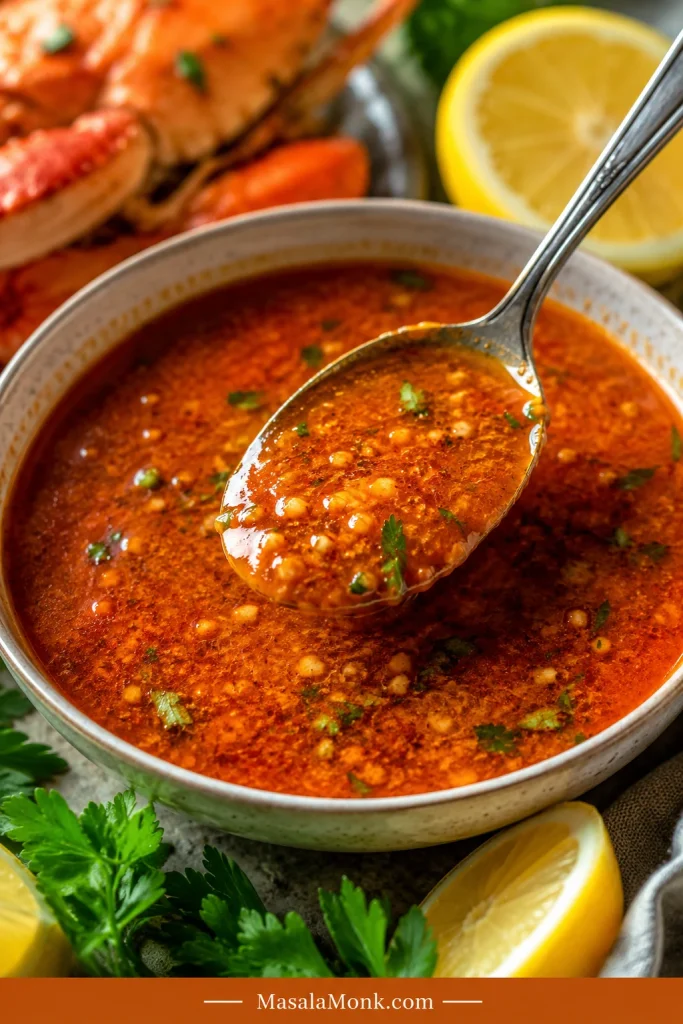
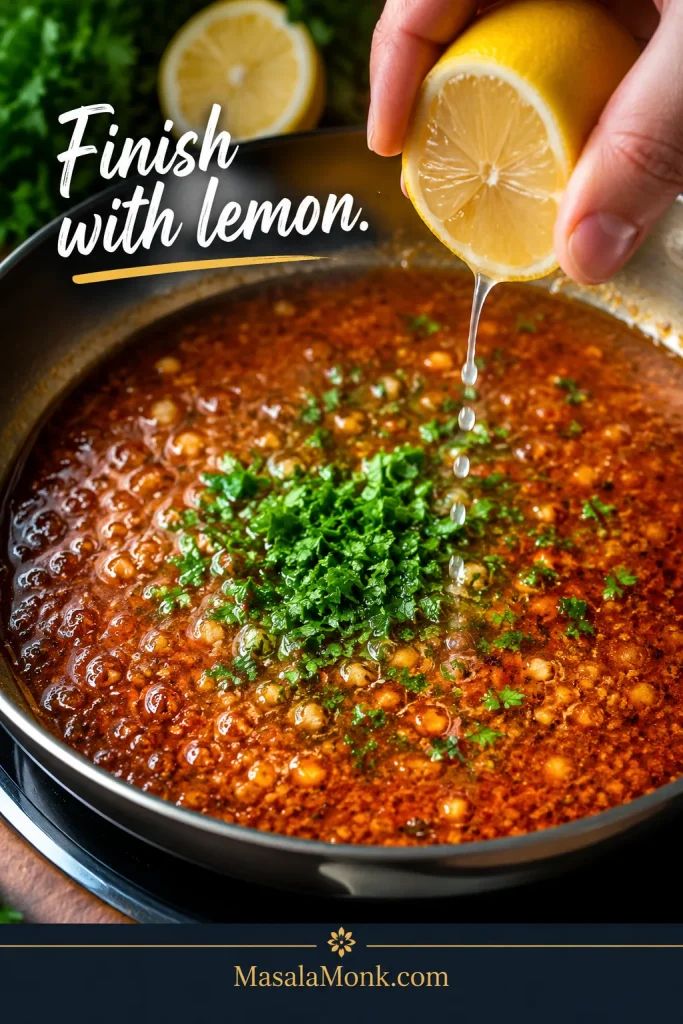
The sauce should look bold before it tastes aggressive: red-orange, glossy, garlicky, and loose enough to spoon over the tray without drowning the seafood.
Seafood Boil Sauce Success Cues
Use these cues while cooking. They matter more than the clock.
The finished sauce should look glossy and spoonable, with visible spice and garlic but no greasy separation.
Cue
What You Want
Garlic
Fragrant and pale, not brown
Onion
Soft, glossy, and slightly translucent
Spices
Toasty and buttery, not dry or sandy
Sauce texture
Glossy and spoonable, not broken or greasy
Salt
Bold and savory, not sharp or harsh
Heat
Warm Cajun spice first, extra fire only if you want it
Lemon
Bright enough to cut the butter
Finished sauce
Buttery, garlicky, smoky, lemony, and easy to drizzle
When the sauce hits these cues, it tastes big without tasting heavy — rich enough for crab, bright enough for shrimp, and loose enough to find its way into the corn and potatoes.
Adjust, Fix and Serve the Sauce
Use the rest of this guide to choose the right texture, adjust the flavor, fix common problems, and store leftovers safely.
This is where the sauce becomes yours. Some people want a thick bowl of butter for crab legs; others want a loose, glossy sauce that runs into the corn and potatoes. The same base can do both.
Thickness decides the job, so keep it thicker for dipping, looser for pouring, and medium-thick for bags.
Use
Texture
How to Adjust
Dipping sauce
Thick, buttery, clingy
Use ¼ cup / 60 ml liquid and simmer slightly longer.
Pour-over sauce
Glossy, loose, spoonable
Use ½ cup / 120 ml liquid.
Seafood boil bag sauce
Medium-thick, coating sauce
Use ½–¾ cup / 120–180 ml liquid.
Big tray sauce
Looser and more spreadable
Use ¾–1 cup / 180–240 ml liquid.
Crab leg dipping sauce
Rich and buttery
Keep it thicker and serve lemon wedges on the side.
Crab people usually want the thick bowl. Shrimp, corn, and potatoes usually want the loose spoon-over version. If your table is divided, make the base sauce medium-thick, then loosen half for pouring and keep half rich for dipping.
Think of the broth or boil liquid like a volume knob. Add a little for a thick dip. Add more for a sauce that covers a whole tray.
How Much Seafood Boil Sauce Do You Need?
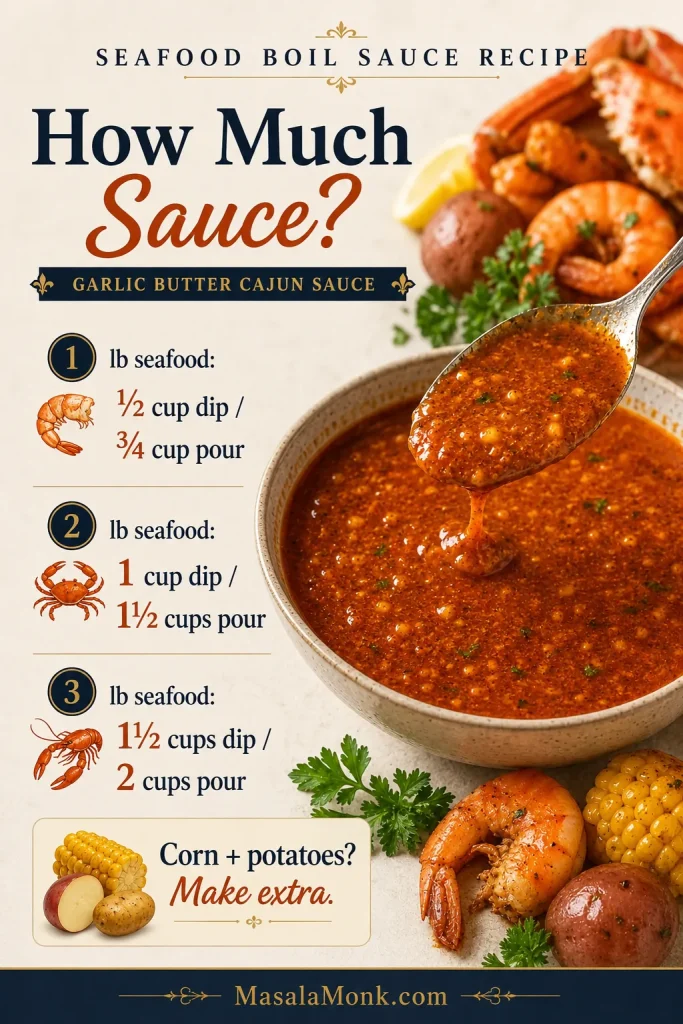
The only sad seafood boil sauce is the one that runs out too early. If the tray has corn and potatoes, make extra. They absorb sauce faster than the seafood does.
Corn and potatoes always change the math, so make extra when the tray has more than just shrimp or crab.
By Seafood Weight
Seafood Amount
Dipping Sauce
Pour-Over Sauce
1 lb / 450 g seafood
½ cup / 120 ml
¾ cup / 180 ml
2 lb / 900 g seafood
1 cup / 240 ml
1½ cups / 360 ml
3 lb / 1.35 kg seafood
1½ cups / 360 ml
2–2¼ cups / 480–540 ml
5 lb / 2.25 kg seafood
2½ cups / 600 ml
3–4 cups / 720–960 ml
Party tray
Make extra
Serve extra on the side
By Number of People
People
Sauce for Dipping
Sauce for Pouring/Tossing
2 people
½–¾ cup / 120–180 ml
1 cup / 240 ml
4 people
1–1½ cups / 240–360 ml
2 cups / 480 ml
6 people
1½–2 cups / 360–480 ml
3 cups / 720 ml
8 people
2–3 cups / 480–720 ml
4 cups / 960 ml
This recipe makes about 2 cups / 480 ml sauce. That is enough for about 2½–3 lb / 1.1–1.35 kg seafood as a pour-over sauce, or more if you are mainly serving it for dipping.
Extra sauce never feels like a mistake at a seafood boil. Running out does.
Once you know how thick the sauce should be and how much to make, the next step is understanding why the balance works.
Why This Seafood Boil Sauce Works
The flavor works because it balances richness, garlic, heat, salt, sweetness, and acidity.
Butter gives the sauce body. Garlic makes it bold and fragrant. Cajun seasoning brings peppery heat and Southern-style depth. Old Bay adds the classic seafood-boil flavor many people expect with crab, shrimp, and crawfish. Smoked paprika gives the butter sauce its warm red-orange color. Lemon keeps it from feeling heavy.
The small amount of brown sugar is not there to make the sauce sweet. It rounds out salt and spice, especially if your seasoning blend is intense. A little broth or reserved boil liquid turns plain melted butter into something glossy, spoonable, and better connected to the seafood.
When it is right, the sauce should taste buttery first, then garlicky, smoky, salty-spicy, and finally bright from lemon.
The method matters too. Garlic needs gentle heat, spices taste better when they bloom briefly in butter, and lemon tastes brighter when added near the end.
That balance is why the sauce can be bold enough for sausage and potatoes but still bright enough for shrimp, crab, and lobster.
Ingredients You Need
The recipe card gives you the amounts. This section explains what each ingredient does and how to adjust if your seasoning blend is stronger, smokier, hotter, or saltier than expected.
Every ingredient earns its place here, because Cajun seasoning, Old Bay, garlic, lemon, and broth all help the sauce stay bold without getting heavy.
Butter
Unsalted butter gives you the best control because seafood boil seasonings can be salty. If you only have salted butter, make the sauce first, then taste before adding anything salty at the end.
For a richer party-style version, whisk in 2–4 extra tablespoons of butter after the sauce simmers.
Garlic
Fresh garlic gives this Cajun butter sauce its best flavor. Minced garlic gives a rustic texture; grated garlic or garlic paste makes the sauce smoother and more restaurant-style.
Keep the garlic pale and fragrant. Dark brown garlic can taste bitter.
Onion
Onion is optional, but it gives the sauce body and natural sweetness. Mince it very finely so it melts into the butter, or grate it for a smoother finish.
Cajun Seasoning
Cajun seasoning gives the sauce its bold, peppery, spicy base. Different brands vary a lot, so taste yours before you add extra heat or salt.
Old Bay Seasoning
Old Bay gives the sauce that classic seafood flavor. It works especially well with shrimp, crab legs, crawfish, potatoes, and corn.
No Old Bay in the pantry? You can still make a good boil sauce with Cajun seasoning, smoked paprika, garlic powder, onion powder, and a small pinch of celery salt or celery seed.
Smoked Paprika
Smoked paprika adds color, warmth, and a gentle smoky note. It helps create the deep red-orange look people associate with Cajun seafood butter.
Brown Sugar
Brown sugar is optional but useful. It rounds out salt, spice, and heat without making the sauce taste sweet, and it helps create a slightly glossy finish.
Broth, Seafood Stock, or Reserved Boil Liquid
This is what changes the sauce from a thick buttery dip into something you can spoon over a whole tray. Reserved boil liquid, stock, or broth loosens the sauce so it pours instead of sitting like straight melted butter.
Reserved boil liquid gives the strongest seafood-boil flavor because it already carries seasoning from the pot. If it tastes very salty, use half boil liquid and half low-sodium broth or water.
Lemon Juice and Lemon Zest
Lemon cuts through the butter and brightens the whole sauce. Add lemon juice near the end so it tastes fresh. Lemon zest is optional, but it makes the sauce smell brighter.
Hot Sauce, Cayenne, or Red Pepper Flakes
Hot sauce gives smoother heat. Cayenne adds stronger fire. Red pepper flakes bring visible spicy texture. Add heat slowly because it is much easier to make the sauce spicier than it is to calm it down.
Equipment
Large skillet or medium saucepan
Whisk
Measuring cups and spoons
Microplane, garlic press, or sharp knife
Heatproof spatula or spoon
Optional immersion blender for a smoother sauce
A skillet gives the spices room to bloom and lets the sauce reduce slightly; a medium saucepan works well for smaller batches or easier pouring.
How to Make It Glossy, Not Greasy
The recipe card above has the short version. These details help if you want a smoother, glossier, more controlled sauce.
Spoonable Sauce Texture
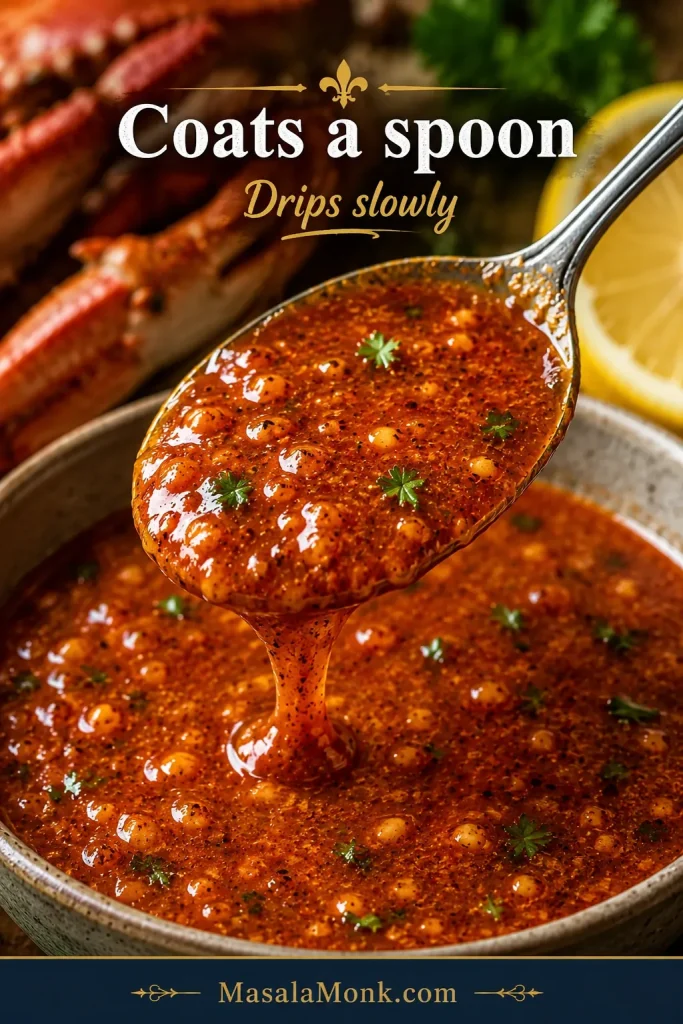
Before you pour the sauce over seafood, check the spoon. A glossy sauce should coat it lightly, then drip back slowly instead of running like water or sitting like straight melted butter.
If it coats the spoon and drips slowly, the sauce is in the right place: clingy enough for seafood, but not oily or thin.
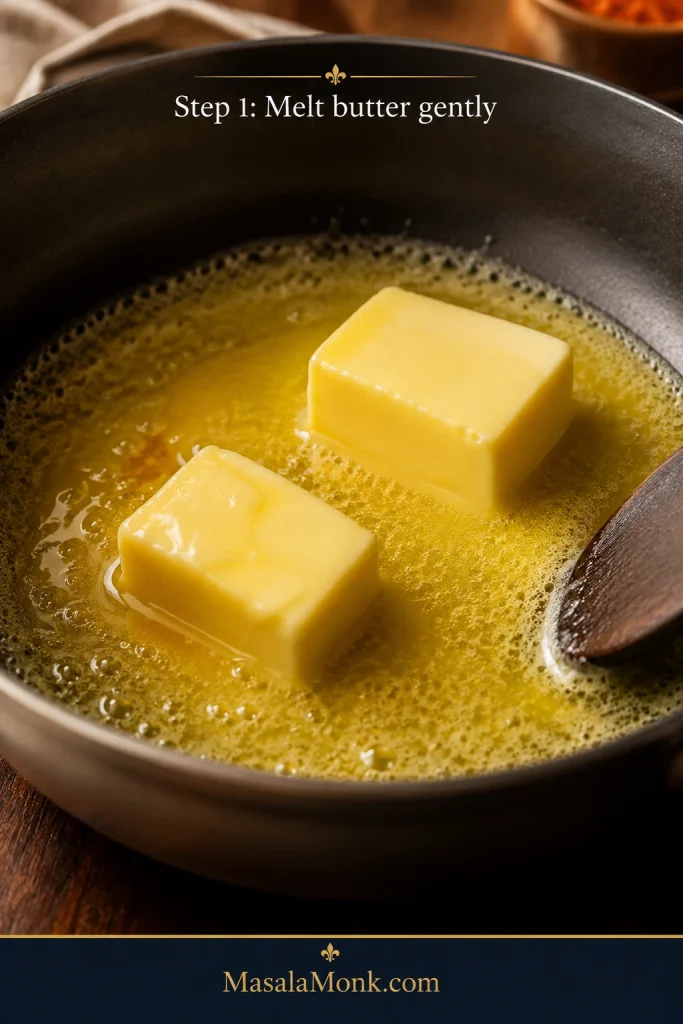
1. Melt the Butter Gently
Melt the butter over low to medium-low heat. Starting gently keeps the butter from separating and gives the garlic time to flavor the sauce without burning.
Start low and gentle, because butter should melt slowly before the garlic and spices go in.
2. Soften the Onion and Garlic
Cook the onion until soft and glossy, then add the garlic for 60–90 seconds. The garlic should smell fragrant but stay pale.
Once the onion softens and the garlic stays pale, the base turns sweeter and the sauce stays out of bitter territory.
3. Bloom the Seasonings
Stir the Cajun seasoning, Old Bay, smoked paprika, onion powder, brown sugar, and optional heat into the butter. Cook briefly until the butter turns red-orange and the spices look absorbed, not dry or dusty.
Blooming the spices in butter is what gives seafood boil sauce its deep red-orange color and that toasty Cajun flavor.
4. Loosen and Finish
Whisk in the broth or reserved boil liquid slowly, then simmer gently until glossy. Turn off the heat before adding lemon juice, lemon zest, hot sauce, and parsley.
As soon as the broth goes in, the sauce loosens into a glossy pour-over texture that works better for shrimp, crab, and vegetables.
Finish With Lemon and Parsley
After the sauce is glossy, take it off the heat before adding lemon and parsley. That small timing choice keeps the seafood boil sauce brighter and fresher.
Lemon and parsley go in at the end, because that final bright note keeps the sauce fresh instead of flat.
5. Test Before You Pour
Dip one shrimp, one potato, or one piece of corn into the sauce before coating the full tray. Fix the sauce in the pan, not after it has already coated three pounds of seafood.
Do You Add Seafood Boil Sauce Before or After Cooking?
This is a finishing sauce, not the cooking liquid. Let the boil season and cook the seafood, then let the garlic butter sauce coat it.
Add this garlic butter Cajun sauce after the seafood is cooked and drained. The sauce is for pouring, tossing, bagging, or dipping after cooking.
If you are unsure whether the seafood itself is fully cooked, FoodSafety.gov’s safe minimum internal temperatures chart is a useful reference for fish and shellfish.
The best method is simple: cook the seafood, drain it well, taste the sauce, then spoon or toss the warm sauce over the hot seafood. Keep extra sauce on the side for dipping crab, shrimp, corn, and potatoes.
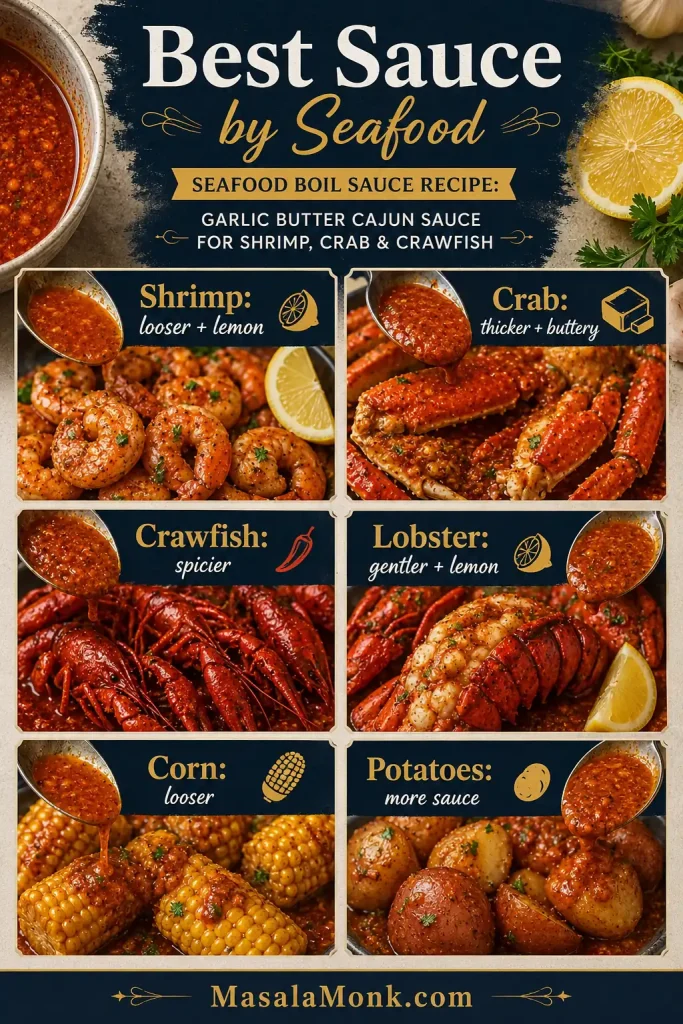
Best Sauce for Shrimp, Crab, Crawfish and More
The same base works across the tray, but each seafood and side likes a slightly different sauce texture.
Shrimp usually wants a looser, lemon-bright sauce, while crab does better with a thicker, buttery finish that stays on the meat.
Food
Best Sauce Style
Adjustment
Shrimp
Pour-over or toss
Add slightly more lemon and keep the sauce looser.
Crab legs
Dipping sauce
Keep it thicker, buttery, and rich.
Crawfish
Spicy Cajun sauce
Add extra Cajun seasoning, paprika, or hot sauce.
Lobster tails
Garlic lemon butter
Use less Cajun, more lemon and parsley.
Mussels and clams
Loose pour-over sauce
Add more broth so it reaches the shells.
Corn
Pour-over sauce
Make it looser so it soaks into the kernels.
Potatoes
Pour-over sauce
Add enough broth so the sauce coats well.
Sausage
Smoky spicy sauce
Smoked paprika and Cajun seasoning work well.
Boiled eggs
Medium-thick sauce
Spoon sauce over just before serving.
For Shrimp
Shrimp tastes best with a sauce that is garlicky, lemony, and not too heavy. Keep the texture slightly loose so the shrimp stays juicy.
For another shrimp dinner built around garlic, butter, and lemon, this shrimp scampi recipe keeps the same bright butter-sauce idea in a pasta-friendly direction.
For Crab Legs
Crab legs are perfect for a thicker dipping sauce. Keep it buttery and clingy, then serve extra lemon on the side so each bite can be brightened at the table.
For Crawfish
Crawfish can handle stronger heat. Add extra Cajun seasoning, hot sauce, cayenne, or red pepper flakes if you want a spicy crawfish boil sauce.
For Lobster
Lobster is sweeter and more delicate than crawfish or sausage, so go easier on the Cajun seasoning. More garlic, lemon, parsley, and butter usually works better than extra heat.
For a lobster meal that stays buttery but much simpler, this lobster roll recipe covers both the warm buttered Connecticut style and the cool Maine-style version.
For Corn and Potatoes
Corn and potatoes need a looser sauce. Add more broth or reserved boil liquid so the sauce can soak in instead of sitting on top.
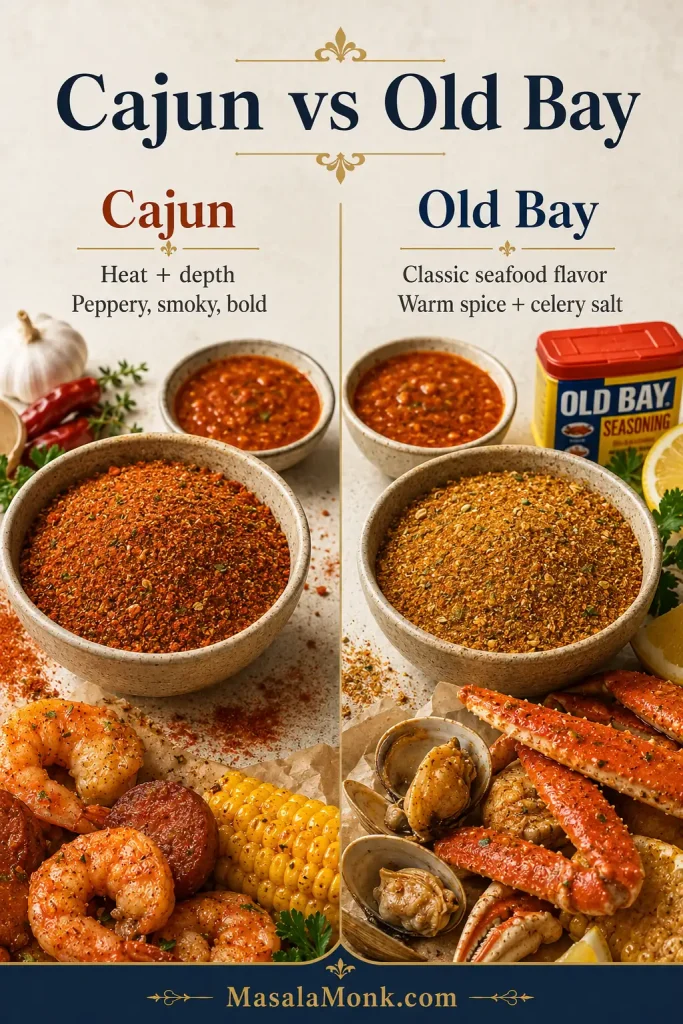
Cajun vs Old Bay Seafood Boil Sauce
Cajun seasoning and Old Bay are both common in seafood boil sauce, but they do different jobs. Think of Cajun seasoning as the heat and depth, and Old Bay as the classic seafood-boil note. Together they make the sauce taste fuller, but together they can also make it salty fast.
Do not increase Cajun seasoning and Old Bay heavily at the same time unless you know both blends are low-salt.
Cajun seasoning brings heat and depth, while Old Bay brings that classic seafood flavor, so the two work best when the salt stays under control.
For more Cajun flavor: Increase Cajun seasoning slightly, add smoked paprika, and finish with hot sauce.
For more Old Bay flavor: Increase Old Bay, reduce Cajun, and keep the lemon bright.
For a less salty sauce: Use unsalted butter, low-sodium broth, less Old Bay, and more lemon.
If you have no Old Bay: Use Cajun seasoning, smoked paprika, garlic powder, onion powder, and a tiny pinch of celery salt or celery seed.
If you have no Cajun seasoning: Use Old Bay, smoked paprika, garlic powder, onion powder, black pepper, and cayenne.
Seafood Boil Sauce Variations
Think of the recipe as one base sauce with two kinds of choices: texture choices for how you serve it, and flavor choices for how spicy, garlicky, or Old Bay-forward you want it.
Want the Sauce…
Do This
More garlicky
Use 10–12 cloves garlic or grated garlic.
More Cajun
Add extra Cajun seasoning and smoked paprika.
More Old Bay
Increase Old Bay and reduce Cajun seasoning.
Mild
Skip cayenne, use mild Cajun seasoning, add more broth and lemon.
Spicy
Add cayenne, hot sauce, red pepper flakes, or spicy Cajun seasoning.
Thicker for dipping
Use ¼ cup / 60 ml liquid.
Looser for a tray
Use ¾–1 cup / 180–240 ml liquid.
Restaurant-style sauce
Use grated onion, extra paprika, brown sugar, less liquid, and optional blending.
Garlic Butter Seafood Boil Sauce
A stronger garlic butter version starts with 10 cloves of garlic and slightly less Cajun seasoning. Keep the lemon juice strong and add parsley at the end. This version is excellent for crab legs, lobster tails, and shrimp.
Spicy Seafood Boil Sauce
For a spicier sauce, add cayenne, red pepper flakes, hot sauce, spicy Cajun seasoning, or hot paprika. Add heat slowly and taste after simmering before adding more.
Mild Seafood Boil Sauce
The mild version uses mild Cajun seasoning, slightly less Old Bay, no cayenne, and extra broth and lemon. It is better for kids, mild eaters, lobster, and anyone who wants buttery garlic flavor without too much heat.
Old Bay Seafood Boil Sauce
An Old Bay-forward sauce works best when Old Bay increases to 1 tablespoon and Cajun seasoning drops to 1 teaspoon. Keep the butter, garlic, lemon, and parsley the same.
Lemon Pepper Seafood Boil Sauce
Add 1–2 teaspoons lemon pepper seasoning and increase the lemon zest. Reduce extra salt because lemon pepper blends can be salty. This version works beautifully with shrimp, lobster, and crab.
Creamy Seafood Boil Sauce
A creamy version needs only 2–4 tablespoons of cream at the end over low heat. This makes the sauce richer and softer, but it is less traditional than garlic butter Cajun sauce.
Restaurant-Style Sauce Adjustments
This is the part that makes the tray look like something people want to gather around. Restaurant-style seafood boils feel different because the sauce arrives hot, glossy, and clingy. It coats the shells, runs into the potatoes, stains the corn, and still leaves enough at the bottom for dipping.
For redder color, add a little more smoked paprika.
For deeper flavor, bloom the spices a little longer over low heat.
For a clingier sauce, use less broth.
For smoother texture, use grated garlic and grated onion.
For a glossy finish, add 1–2 teaspoons brown sugar.
For a smooth restaurant-style sauce, blend briefly with an immersion blender.
Taste Adjustment Ladder
This is the part where the sauce stops being a formula and starts tasting like yours. Most fixes come back to the butter-broth-lemon rule: butter softens, broth loosens, and lemon brightens.
If the Sauce Tastes…
Add This
Too salty
Unsalted butter first, then warm broth, then lemon.
Too buttery or heavy
Lemon juice first, then a splash of broth.
Too thin
Simmer a few minutes longer.
Too thick
Warm broth, seafood stock, or reserved boil liquid.
Too spicy
Butter and broth, then a tiny pinch of brown sugar if needed.
Too flat
Lemon first, then Cajun seasoning or Old Bay.
Too sharp
A small knob of butter or a tiny pinch of brown sugar.
Not garlicky enough
A small amount of garlic powder, or gently cooked grated garlic.
Not smoky enough
A little more smoked paprika.
Make one adjustment at a time, then taste again. This keeps the sauce from swinging too far in the other direction.
Quick 2-Minute Seafood Boil Sauce
When the seafood is already cooked and you just need something buttery fast, this shortcut version gets you there.
Ingredient
Amount
Melted butter
½ cup / 113 g
Old Bay or Cajun seasoning
1–2 teaspoons
Garlic powder or 1 minced garlic clove
½ teaspoon garlic powder or 1 clove
Lemon juice
1 tablespoon / 15 ml
Hot sauce
Optional, to taste
This quick version is not as deep or layered as the full sauce, but it works well as a fast seafood dipping sauce when the seafood is already cooked. For better flavor, warm everything together gently for 1–2 minutes instead of just stirring it cold.
When you want a cold, creamy seafood dip instead of warm butter, this homemade tartar sauce recipe fits that lane better.
Substitutions and Swaps
The base is forgiving. Missing one ingredient does not ruin the sauce; it just changes which direction you lean.
Missing Ingredient
Use Instead
No Old Bay
Cajun seasoning + smoked paprika + pinch of celery salt or celery seed
No Cajun seasoning
Old Bay + smoked paprika + garlic powder + onion powder + cayenne
No seafood boil liquid
Seafood stock, low-sodium chicken broth, vegetable broth, beer, or water with lemon
No fresh garlic
Garlic paste or garlic powder
No onion
Skip it, or use ½ teaspoon onion powder
Not enough butter
Use part butter and part olive oil. If using no butter, use vegan butter or olive oil, but expect a lighter sauce.
No lemon
Lime juice or a small splash of vinegar
No brown sugar
Honey, maple syrup, or skip it
No parsley
Chives, green onion, or skip it
If you are using store-bought seafood boil seasoning packets, start with less seasoning than you think you need. Packets can be very salty. Use unsalted butter, taste before adding salt, and loosen the sauce with broth or lemon juice if it tastes too intense.
How to Toss and Serve It Restaurant-Style
This is the point where the sauce becomes the meal. The crab legs get glossy, the shrimp pick up the garlic butter, the corn turns red-orange in the grooves, and the potatoes catch everything the seafood leaves behind.
A restaurant-style finish is not about making the sauce complicated. It is about timing, texture, and serving it while everything is still hot and glossy.
Restaurant-Style Seafood Boil Sauce Finish
Use the sauce while it is warm and glossy, then coat the seafood in layers so the tray looks generous without turning watery.
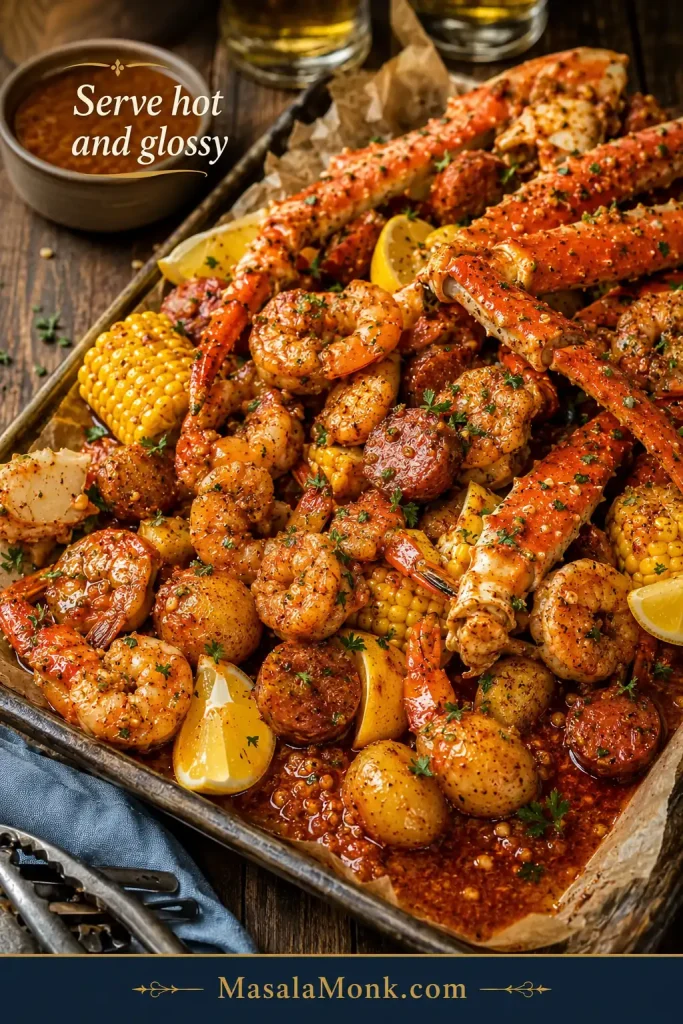
A great seafood boil tray looks glossy and generous, with enough sauce to coat the seafood and leave some behind for dipping.
Warm the seafood before saucing. Cold seafood makes butter firm up quickly.
Drain the seafood well so water does not dilute the sauce.
Toss or spoon in layers instead of dumping all the sauce at once.
Keep extra sauce warm on the side for dipping.
Add parsley and lemon at the end so the tray looks and tastes fresh.
Serve immediately. Garlic butter sauce is at its best while warm and glossy.
Seafood Boil Bag Sauce
For seafood boil bag sauce: use the medium-thick texture. Add cooked seafood and warm sauce to the bag, seal carefully, and toss until everything is coated. The sauce should move when tossed, coat the shells red-orange, and leave a little buttery pool at the bottom for dipping. If it is too watery, it will pool instead of clinging to shrimp, crab, corn, and potatoes.
Medium-thick is the sweet spot for seafood boil bags, because the sauce needs to move when tossed and still coat every shell.
Common Mistakes to Avoid
Most sauce problems are easier to fix in the pan than on the tray. Use this as a quick check before the sauce goes over the seafood.
Starting too salty: Use unsalted butter when you can, and taste before adding any extra salt.
Using heat that is too high: Low to medium-low heat keeps the garlic pale and the butter glossy.
Skipping the taste test: Try the sauce with one shrimp, potato, or piece of corn before coating the full tray.
Pouring sauce over watery seafood: Drain the seafood well so the sauce stays bold instead of diluted.
Using one texture for every purpose: Dipping, pouring, and seafood boil bags all need slightly different thickness.
Troubleshooting Seafood Boil Sauce
Butter sauces can go sideways quickly, but you usually do not need to start over. Catch the problem while the sauce is still in the pan, and the fix is usually simple.
When the sauce looks oily or split, lower the heat and whisk in warm broth, because glossy always wins over greasy.
Problem
Likely Cause
Fix
Too salty
Salted butter, salty Cajun seasoning, too much Old Bay
Add unsalted butter, broth, lemon juice, or a little brown sugar.
Too spicy
Too much cayenne, hot sauce, or spicy Cajun seasoning
Add butter, broth, lemon, or a little sweetness.
Too oily
Too much butter, not enough liquid
Whisk in warm broth slowly.
Too thin
Too much broth or boil liquid
Simmer uncovered for a few minutes.
Sauce separated
Heat too high or liquid added too fast
Lower the heat and whisk in warm liquid gradually.
Bitter garlic
Garlic browned or burned
Cook garlic gently for only 60–90 seconds.
Grainy spices
Spices were not bloomed or too much dry seasoning was added
Bloom spices in butter and loosen with broth.
Not flavorful enough
Too much liquid or weak seasoning
Add Cajun seasoning, Old Bay, lemon, garlic, or hot sauce slowly.
How to Fix Salty Seafood Boil Sauce
Do not add water first. Water can make the sauce thinner without fixing the flavor. Instead, add unsalted butter, warm broth, lemon juice, or a small pinch of brown sugar. If you are serving the sauce with a full seafood boil, extra potatoes and corn can also help absorb some of the salty flavor on the tray.
How to Fix Separated Seafood Boil Sauce
Lower the heat. Whisk in 1–2 tablespoons of warm broth at a time until the sauce looks glossy again. If it still looks broken, use an immersion blender for a few seconds.
How to Make It Thicker
Simmer it uncovered for a few minutes. You can also use less broth next time or add a little more butter. For a thicker dipping sauce, start with only ¼ cup / 60 ml liquid.
How to Make It Thinner
Whisk in warm broth, seafood stock, reserved boil liquid, or water with lemon juice. Add a little at a time until the sauce pours the way you want.
How to Store and Reheat the Sauce
Do not worry if the sauce turns solid in the fridge. That is just the butter doing what butter does. The texture comes back when the sauce is reheated and whisked.
Refrigerating
Store unused sauce in an airtight container in the refrigerator for 4–5 days.
If the sauce has touched seafood, shells, fingers, or a shared dipping bowl, treat it like a seafood leftover. Cool it quickly, refrigerate it promptly, and use it within 1–2 days for best quality.
For clean, unused sauce, reheat gently in a saucepan over low heat, stirring often. Add a splash of broth, water, or reserved boil liquid if the sauce is too thick.
For sauce that has touched seafood or leftovers, reheat until steaming hot, ideally to 165°F / 74°C, then whisk to bring the texture back. A food thermometer is the safest way to check.
You can also microwave clean unused sauce in short bursts, stirring every 15–20 seconds. If reheating sauce with seafood leftovers, stir well and make sure the food is steaming hot throughout before serving.
Freezing
Freeze unused seafood boil sauce for up to 2–3 months. Thaw overnight in the refrigerator, then reheat gently over low heat. If the sauce separates slightly, whisk in warm broth or blend briefly with an immersion blender.
What to Serve With Seafood Boil Sauce
The best use is still the simplest: hot seafood, warm sauce, extra napkins, and something starchy to catch the butter.
For a full crispy seafood comfort plate instead of a boil, this fish and chips recipe pairs fried fish with tartar sauce, curry sauce, vinegar, and lemon.
For a full seafood boil tray, serve some sauce poured over the seafood and extra sauce on the side for dipping. For a cleaner dinner, serve the sauce in small bowls and let everyone dip shrimp, crab, corn, potatoes, and bread as they eat.
Frequently Asked Questions
What is seafood boil sauce made of?
It is usually made with butter, garlic, Cajun seasoning, Old Bay seasoning, lemon juice, paprika, hot sauce, and broth or reserved seafood boil liquid. Some versions also include onion, brown sugar, parsley, cayenne, or lemon pepper.
Is seafood boil sauce the same as garlic butter sauce?
It is a type of garlic butter sauce, but it is usually more seasoned. Basic garlic butter may only have butter, garlic, lemon, and herbs. Seafood boil sauce usually adds Cajun seasoning, Old Bay, paprika, heat, and sometimes broth or boil liquid.
Is this a Blove’s-style seafood boil sauce?
This is not a Blove’s copycat sauce. Blove’s-style seafood boil sauces are usually heavier, sweeter, and more spice-loaded, often with extra butter, garlic, hot sauce, Worcestershire, ginger, lemon pepper, and a larger seasoning mix. This version is a balanced Cajun garlic butter seafood boil sauce made for dipping, pouring, and tossing without hiding the flavor of the seafood.
Do you put seafood boil sauce in the pot?
No. It is better to add the sauce after the seafood is cooked and drained. This is a finishing sauce, not the cooking liquid.
What sauce goes with shrimp boil?
Garlic butter Cajun sauce is one of the best sauces for shrimp boil. Use a slightly looser sauce with lemon juice so the shrimp stays bright and juicy instead of feeling too heavy.
What sauce is best for crab boil?
A thick garlic butter seafood sauce is best for crab boil because it clings well to crab meat. Keep it buttery, garlicky, and slightly lemony, with Old Bay or Cajun seasoning for classic seafood flavor.
Is this good as a dipping sauce?
It is excellent as a dipping sauce. Reduce the liquid to about ¼ cup / 60 ml and simmer the sauce a little longer. This keeps it thick, buttery, and clingy.
Does it work as a pour-over sauce?
It works well as a pour-over sauce. Use about ½ cup / 120 ml broth or reserved boil liquid, then add more if you want it loose enough to cover a big tray of shrimp, crab, crawfish, corn, potatoes, and sausage.
How do I make it thicker?
Use less liquid or simmer the sauce uncovered for a few minutes. For a thick dipping sauce, start with ¼ cup / 60 ml liquid instead of ½ cup / 120 ml.
How do I make it less salty?
Add unsalted butter, warm broth, lemon juice, or a small pinch of brown sugar. If serving with a full seafood boil, potatoes and corn can also help absorb some of the salty flavor.
Can I make seafood boil sauce without Old Bay?
You can. Use Cajun seasoning, smoked paprika, garlic powder, onion powder, black pepper, and a tiny pinch of celery salt or celery seed if you have it. The flavor will be slightly different, but still good.
Can I make seafood boil sauce without Cajun seasoning?
You can. Use Old Bay, smoked paprika, garlic powder, onion powder, black pepper, and a little cayenne or hot sauce for heat.
Why did it separate?
The heat may have been too high, or the liquid may have been added too quickly. Keep the sauce at a gentle simmer and whisk in broth gradually. If it separates, lower the heat and whisk in a little warm liquid.
How much sauce do I need for a seafood boil?
For dipping, plan on about ½ cup / 120 ml sauce per 1 lb / 450 g seafood. For pouring over a seafood boil tray, plan on about ¾ cup / 180 ml per 1 lb / 450 g seafood. Make extra if you are serving corn, potatoes, sausage, and eggs because they absorb sauce.
Did You Make This Seafood Boil Sauce?
Once you make this sauce once, it stops feeling like an add-on. It becomes the thing that pulls the whole seafood boil together: the shrimp, the crab, the corn, the potatoes, the sausage, the bread at the end, and everyone reaching back for one more dip.
The final swipe of bread is the payoff, because the best seafood boil sauce always leaves one more bite at the bottom of the tray.
Taste it while it is warm, adjust it until it feels balanced, then pour it over the tray and serve extra on the side. That is the moment the meal comes together.
Did you make it thick for dipping, loose for pouring, or extra spicy for crawfish? Leave a rating and a comment with your seafood mix, sauce thickness, and heat level so other readers can adjust their own seafood boil sauce with confidence.
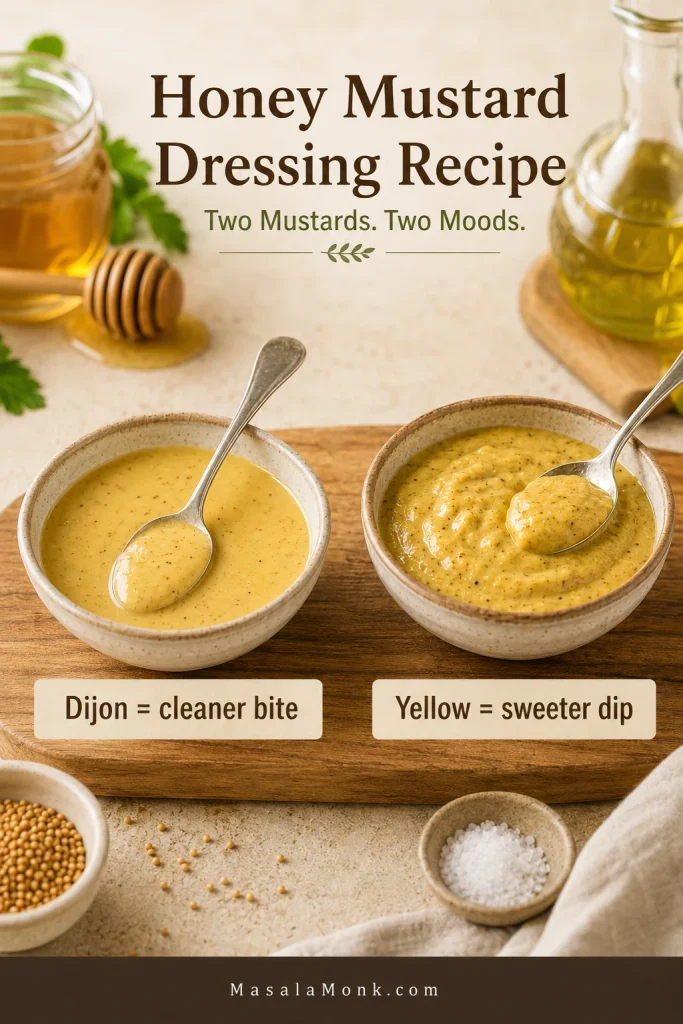
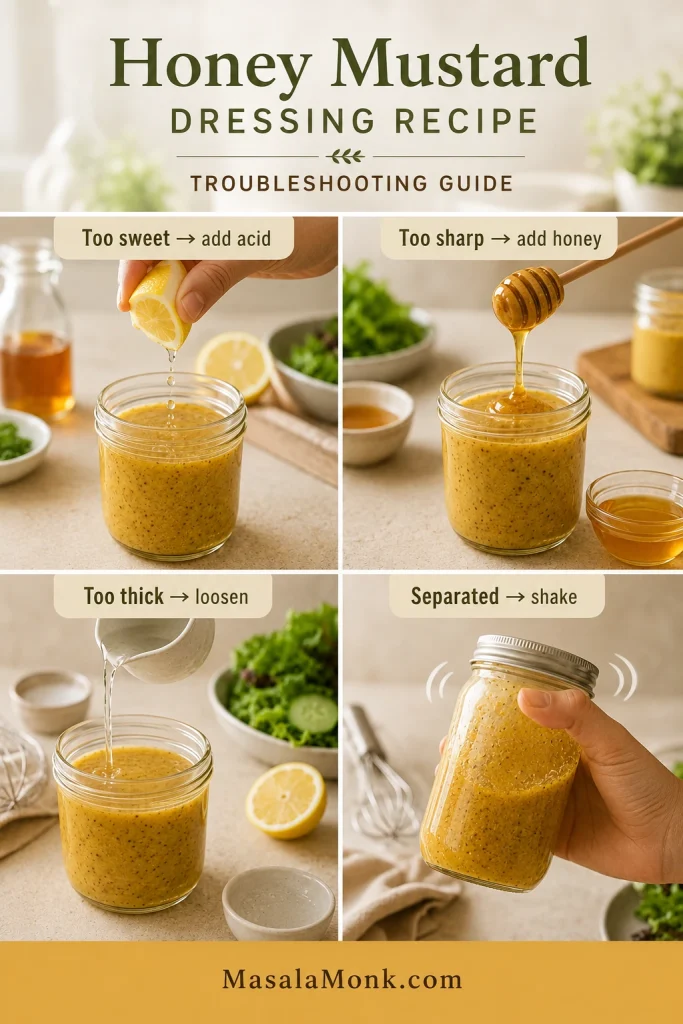
A good honey mustard dressing should taste bright before it tastes sweet. It should cling lightly to salad leaves, drizzle smoothly over grain bowls, and still have enough punch for chicken, roasted vegetables, salmon, ham, wraps, or sandwiches. Too much honey makes it taste like bottled yellow sugar; too much vinegar leaves it sharp and thin. The best batch tastes lively, not sugary.
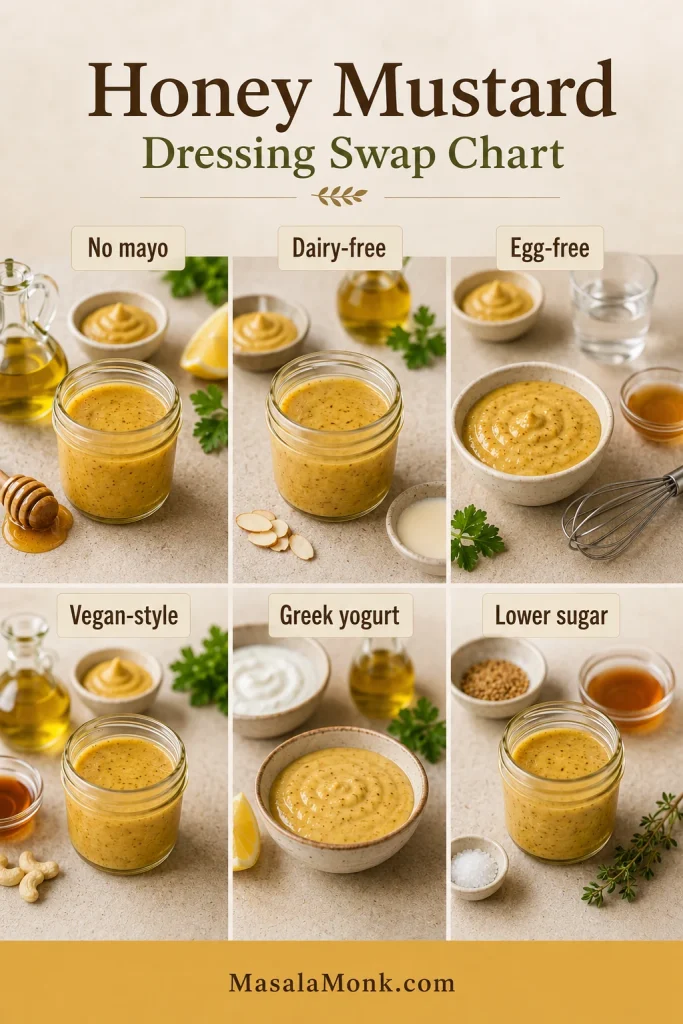
This honey mustard dressing recipe starts with a simple no-mayo Dijon base: mustard, honey, apple cider vinegar, olive oil, salt, and pepper. It takes about five minutes, uses pantry ingredients, and gives you a clean dressing you can turn into a creamy sauce, a thicker dip, or a lighter vinaigrette.
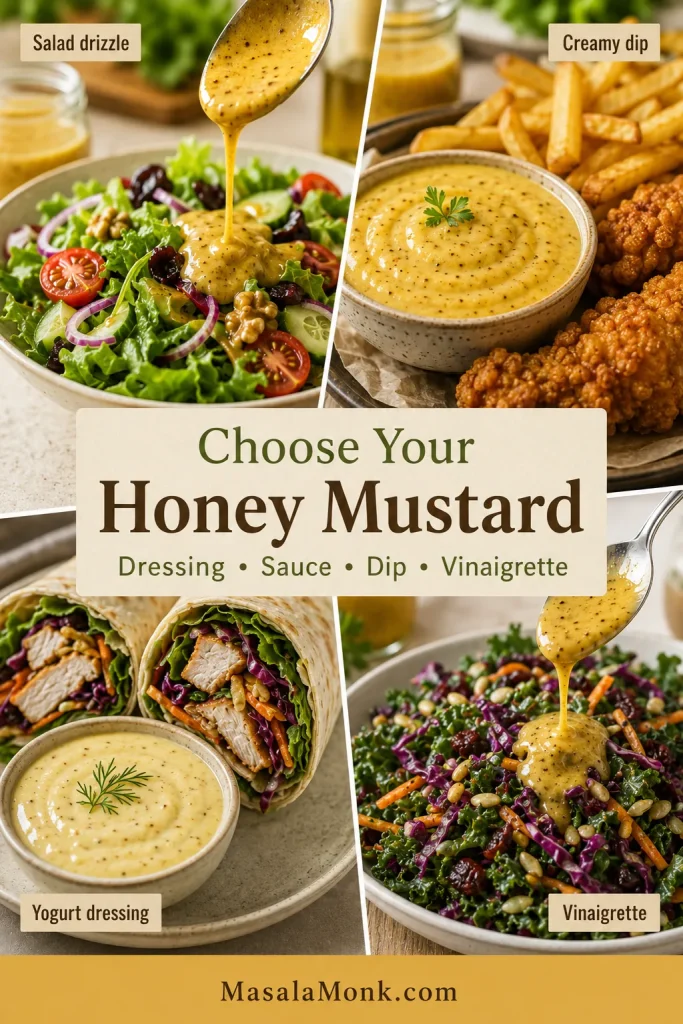
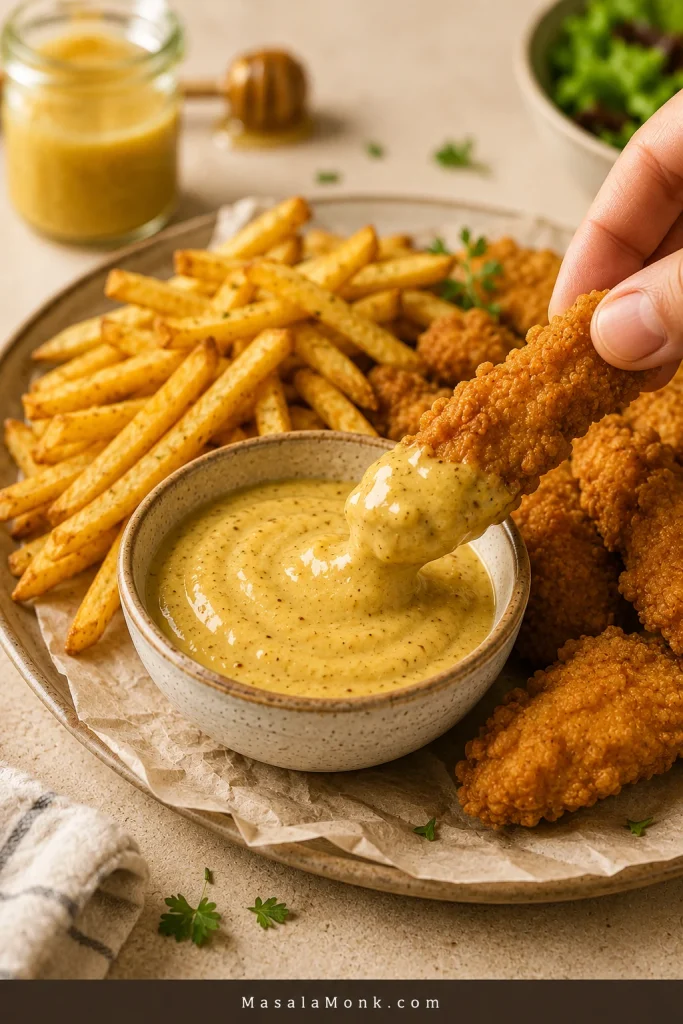
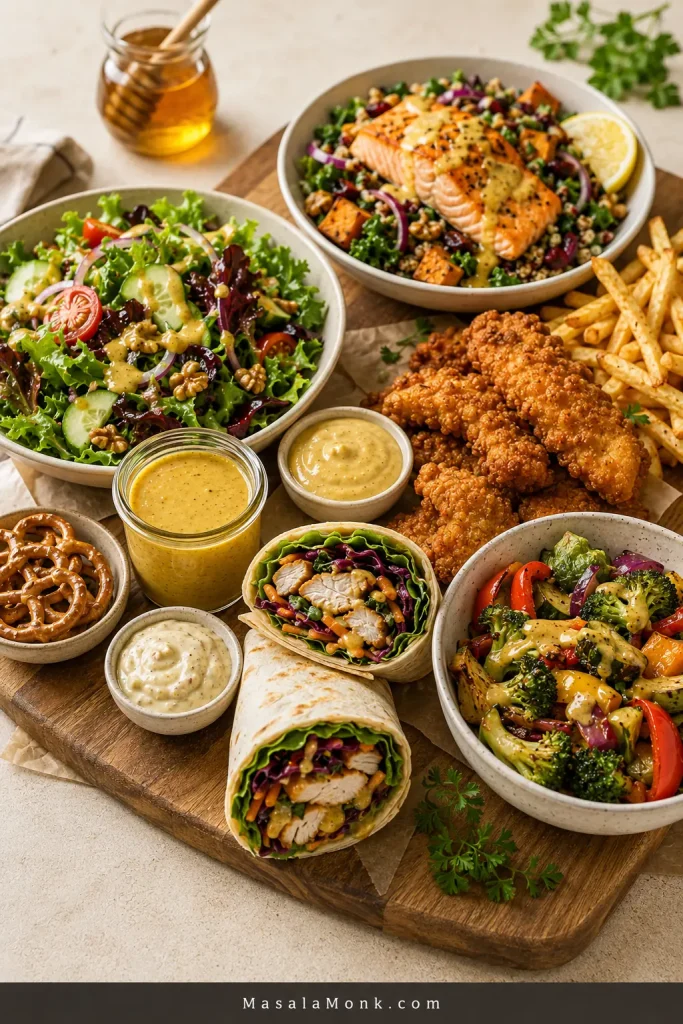
The little trick is knowing what your plate actually needs, because the dressing you want for greens is not always the one you want for fries. For salads, start with the no-mayo dressing. When chicken tenders, fries, nuggets, burgers, or sandwiches are involved, make the creamy mayo sauce.
It is the kind of quick jar that rescues plain greens, leftover chicken, roasted vegetables, and rushed lunches without making anything feel heavy.
Quick Answer: How Do You Make Honey Mustard Dressing?
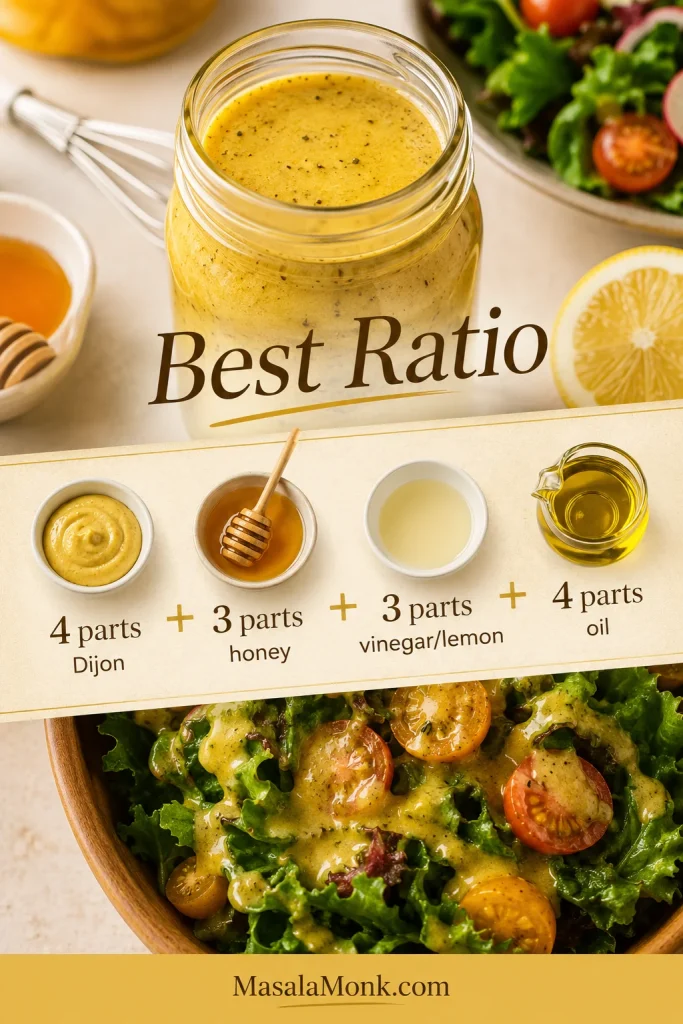
To make honey mustard dressing, whisk Dijon mustard, honey, apple cider vinegar or lemon juice, olive oil, salt, and black pepper until smooth. For the main 1-cup batch, use ¼ cup Dijon mustard, 3 tablespoons honey, 3 tablespoons vinegar or lemon juice, and ¼ cup olive oil. Add 1–2 tablespoons water at the end only if the dressing needs loosening.
Best honey mustard dressing ratio: 4 parts Dijon mustard, 3 parts honey, 3 parts vinegar or lemon juice, and 4 parts oil. For a sweeter, bolder dressing, use equal parts mustard, honey, vinegar, and oil.
Start with the 4:3:3:4 honey mustard dressing ratio, then adjust the jar with more vinegar for brightness, more honey for sweetness, or a pinch of salt when the flavor tastes flat.
The flavor should be tangy first, lightly sweet second, with a clean Dijon bite and enough body to coat greens without feeling heavy. Taste before serving; a tiny splash or pinch is usually enough.
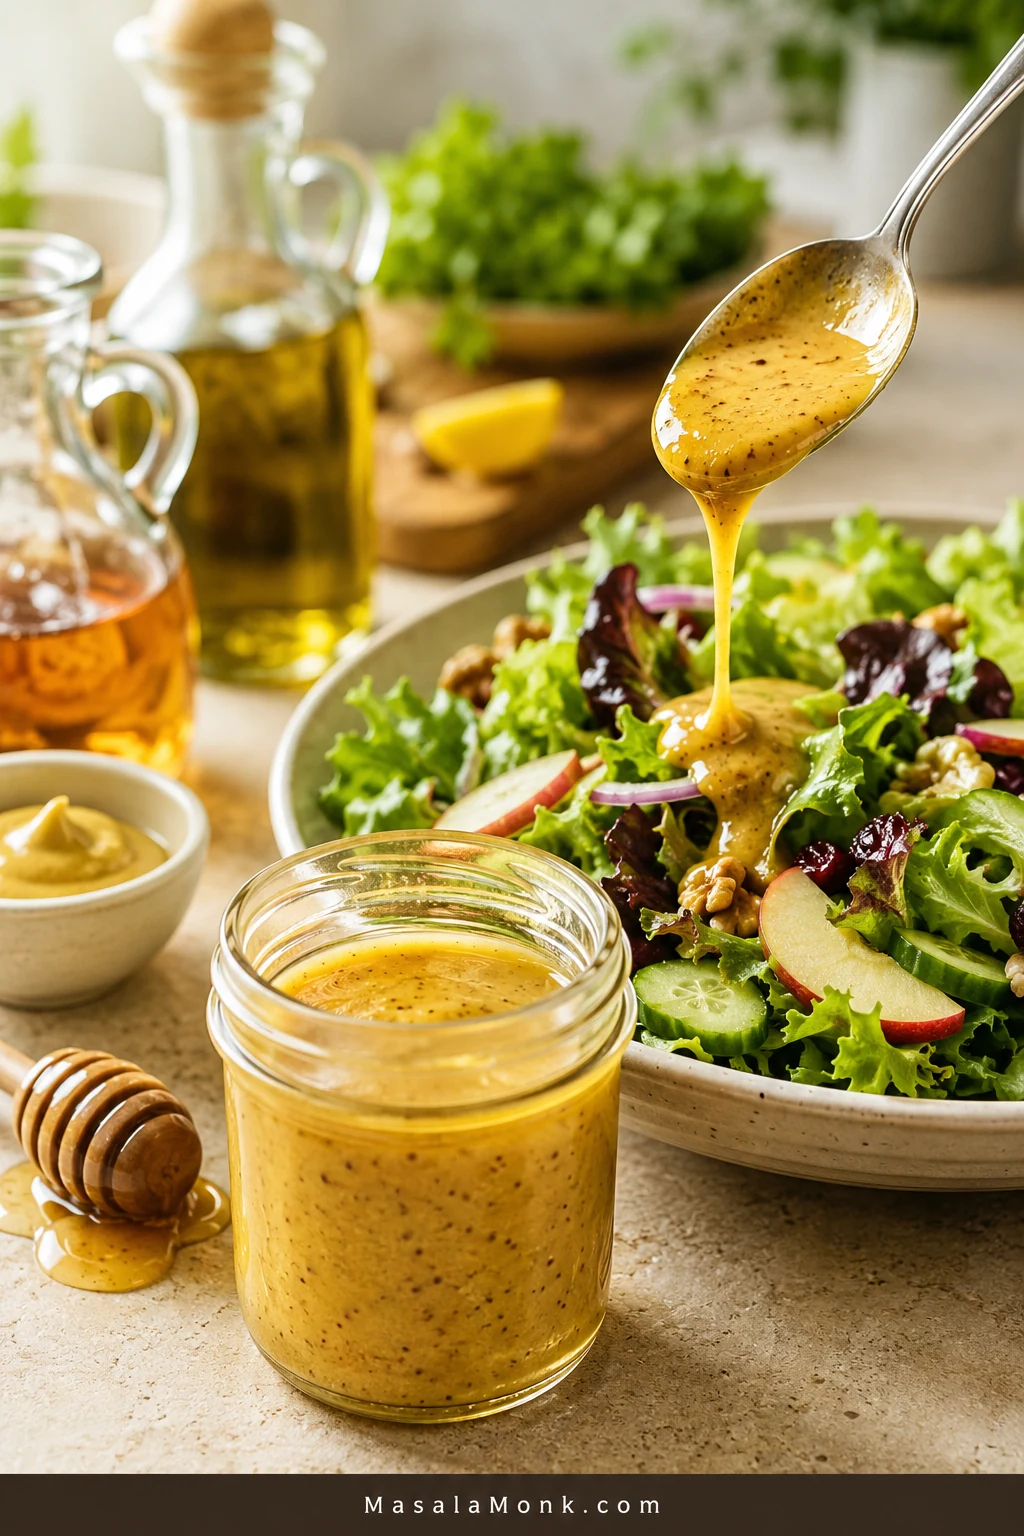
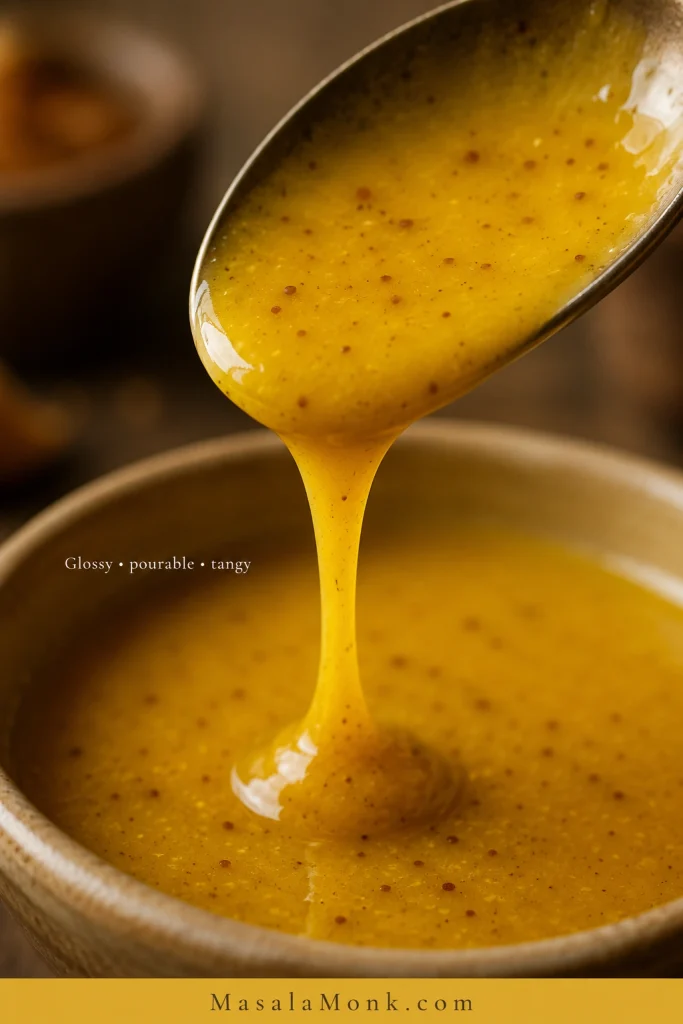
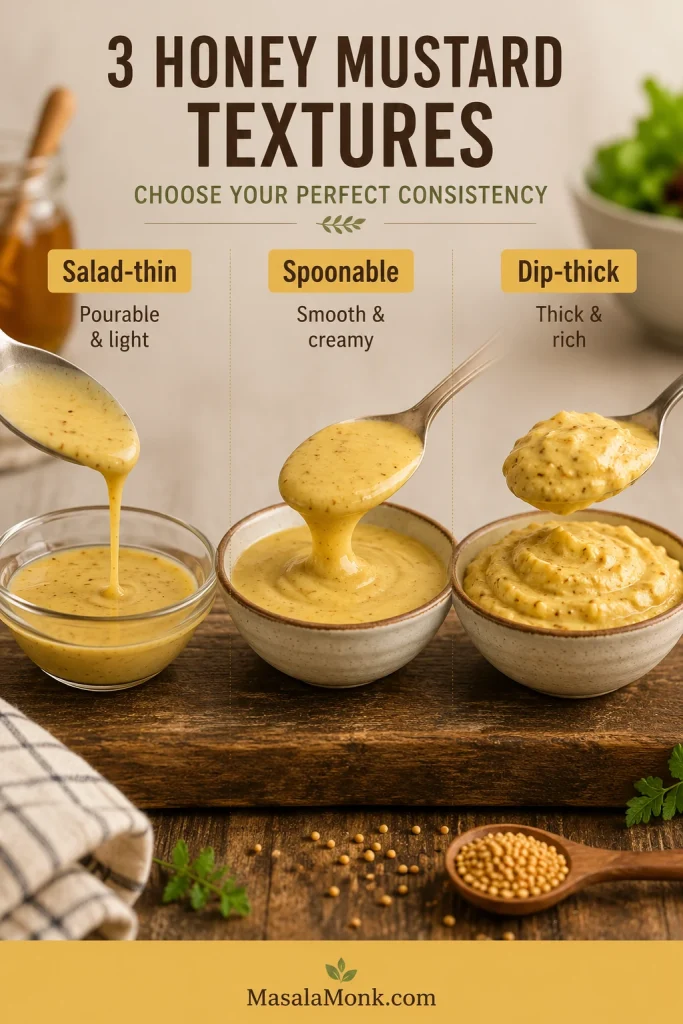
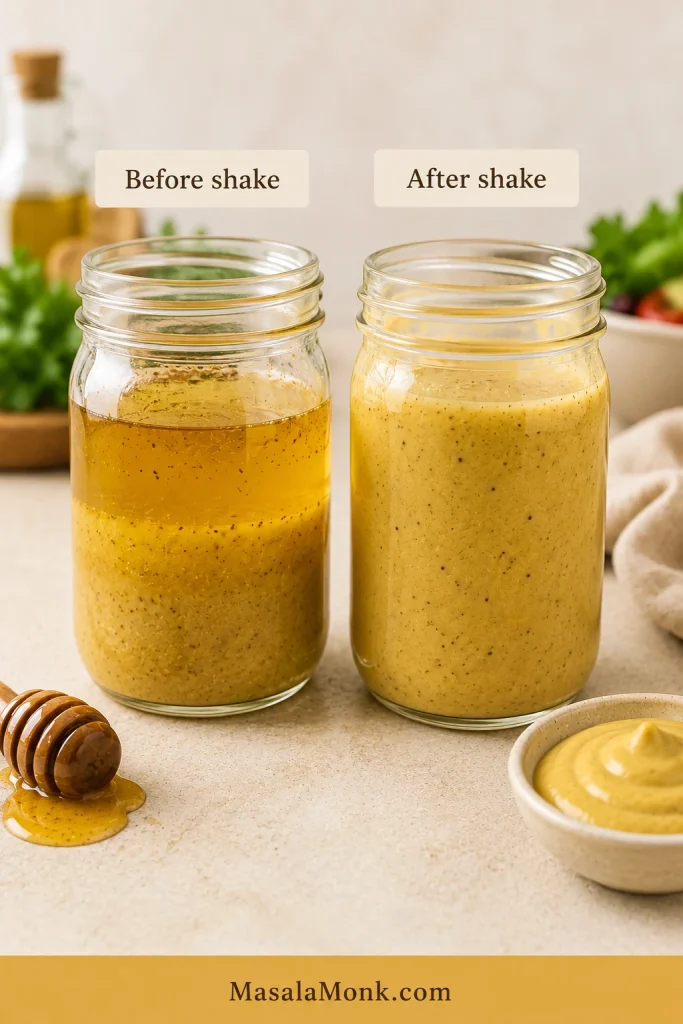
Texture cue: The finished dressing should fall in a glossy ribbon, not sit like a thick dip.
Look for a glossy ribbon when the dressing falls from the spoon; if it holds thick peaks instead, you have moved from salad dressing toward honey mustard dip.
5-Minute Honey Mustard Dressing Recipe
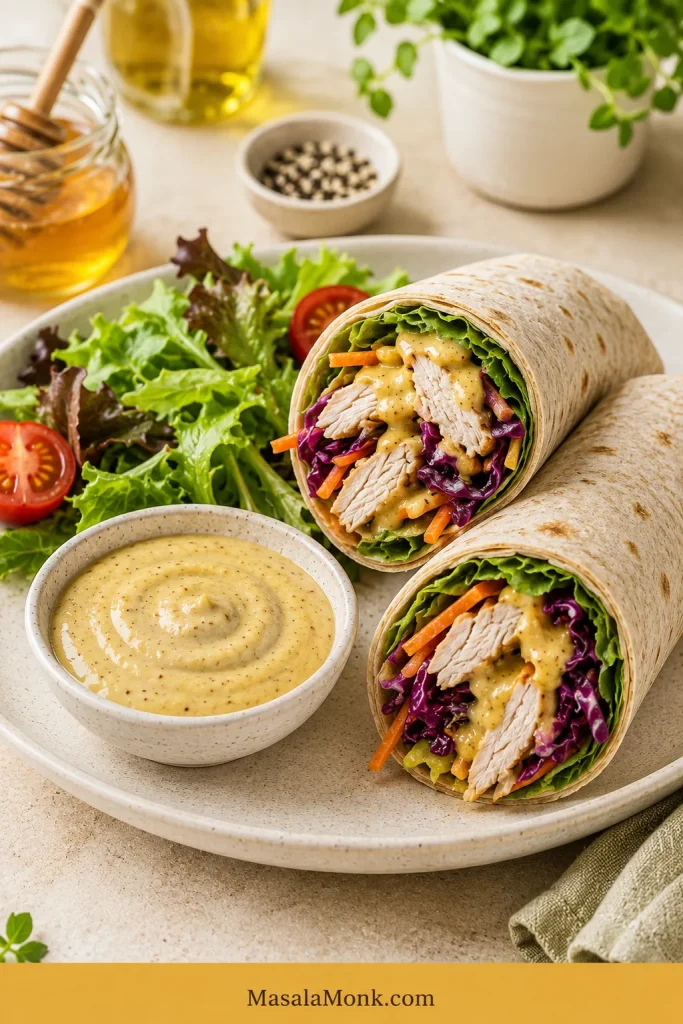
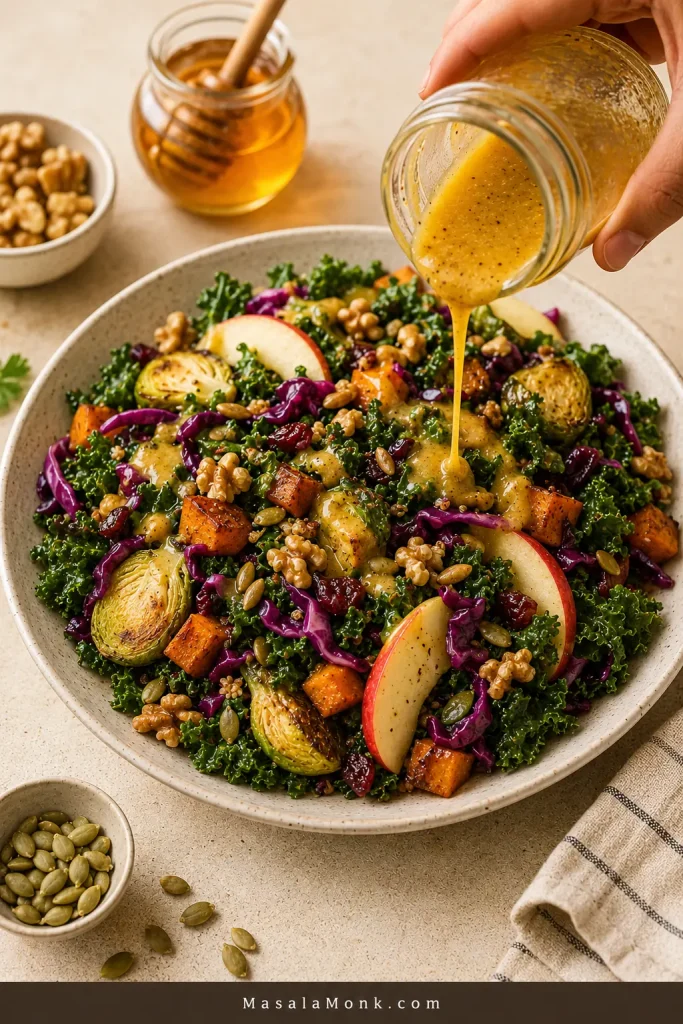
This is the main no-mayo dressing: glossy, zippy, lightly sweet, and loose enough to drizzle. Use it on salads, roasted vegetables, grain bowls, chicken, salmon, ham, wraps, or any meal-prep bowl that needs a quick sweet-tangy finish.
Prep Time 5 minutes
Cook Time 0 minutes
Total Time 5 minutes
Yield About 1 cup / 240 ml
Servings 7–8 servings
Serving Size About 2 tbsp / 30 ml
Equipment
Small bowl or clean jar with lid
Small whisk or fork
Measuring spoons and cups
Optional: small blender or immersion blender for a more blended dressing
Ingredients
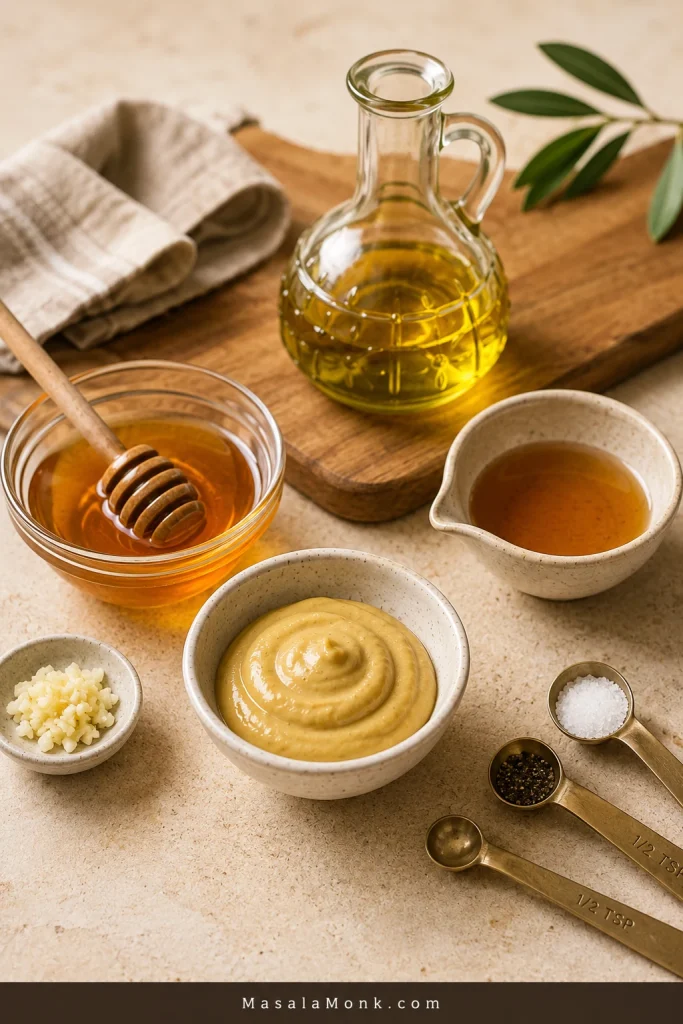
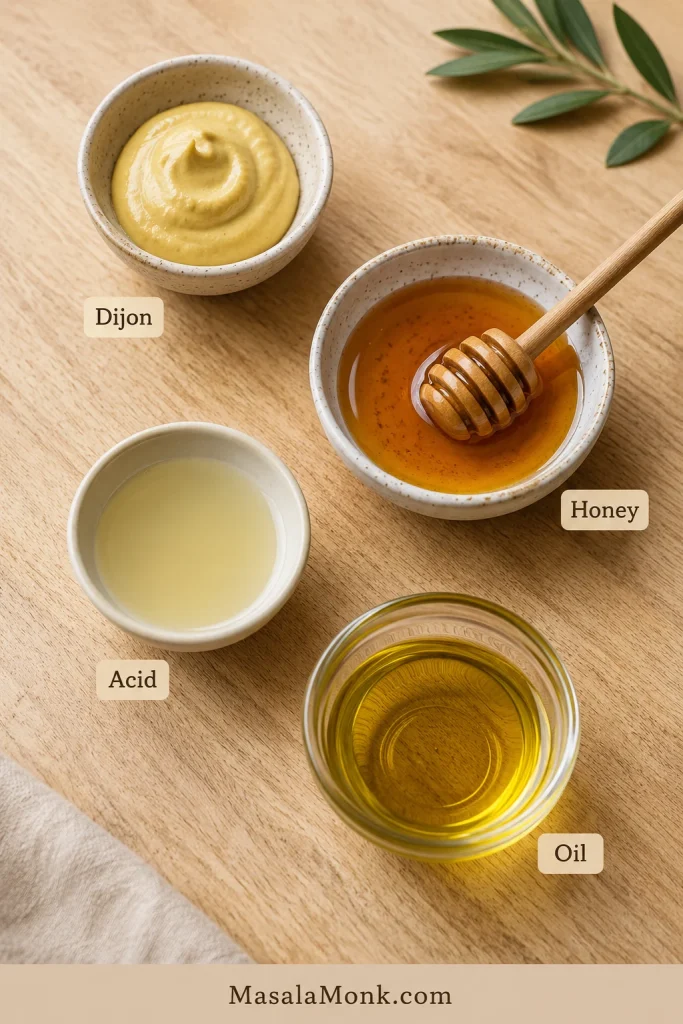
Because homemade honey mustard dressing uses only a few pantry ingredients, each one shows up clearly: Dijon adds bite, honey rounds it out, acid brightens it, and oil gives it body.
¼ cup Dijon mustard, about 60 ml / 60–65 g
3 tablespoons honey, about 45 ml / 60–65 g
3 tablespoons apple cider vinegar, or 2 tablespoons apple cider vinegar plus 1 tablespoon fresh lemon juice, about 45 ml total
¼ cup extra-virgin olive oil, about 60 ml
1–2 tablespoons cool water, only as needed to loosen
¼ teaspoon fine salt, plus more to taste
¼ teaspoon black pepper
Optional: 1 small grated garlic clove or ¼ teaspoon garlic powder
Instructions
Add the Dijon mustard, honey, vinegar or vinegar-lemon mix, salt, pepper, and garlic to a small bowl or jar.
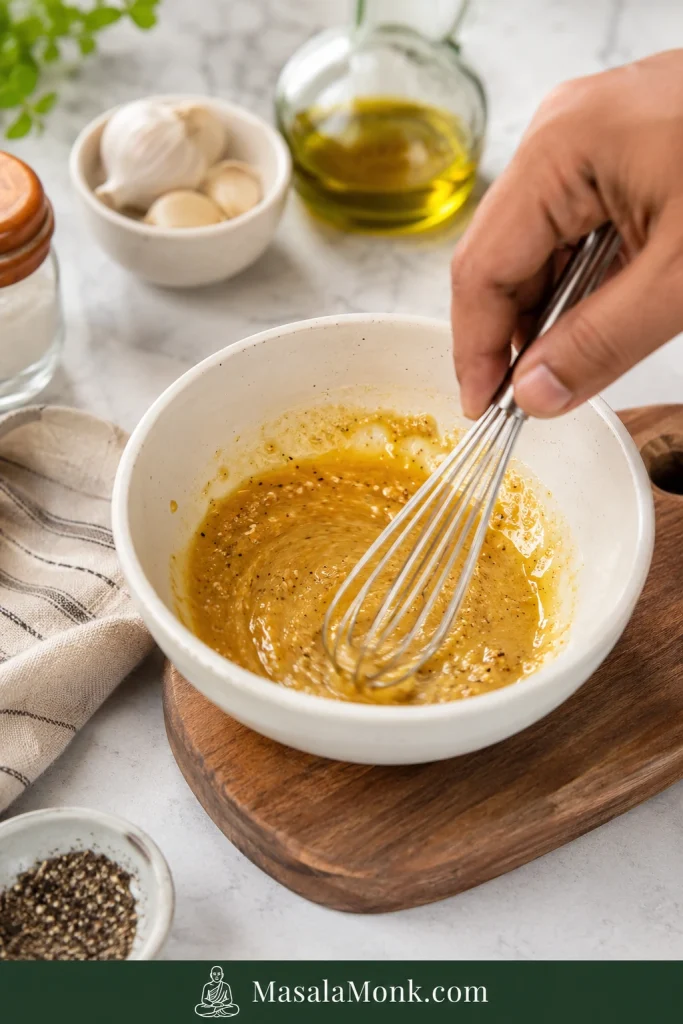
Whisk until the mustard and honey look smooth and evenly mixed.
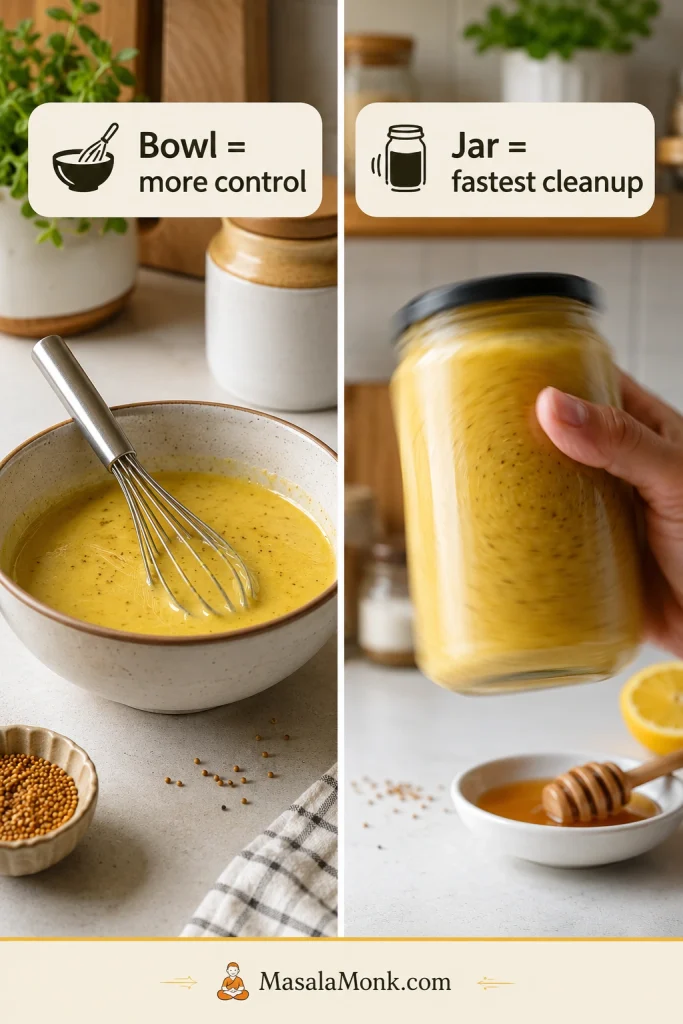
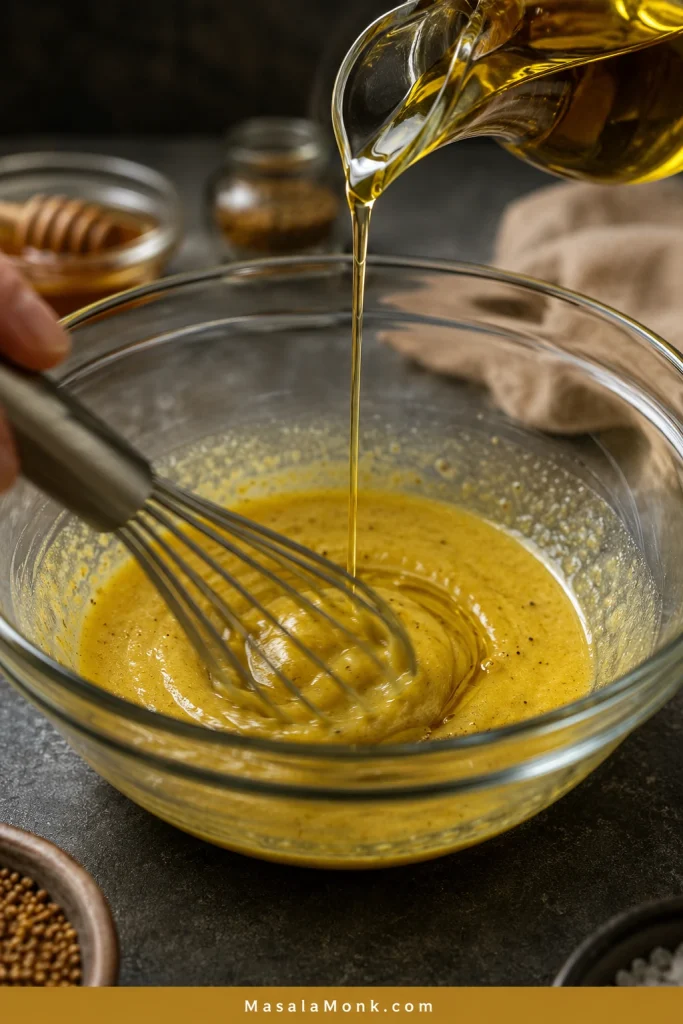
Slowly whisk in the olive oil until the dressing turns glossy and pourable. For the jar method, add the oil with everything else, close the lid tightly, and shake hard for 15–20 seconds.
Taste the dressing. Add more honey for sweetness, more vinegar or lemon juice for zip, or a small pinch of salt when the flavor tastes flat.
If the dressing feels too thick, loosen it with 1–2 tablespoons water.
Use right away or refrigerate in an airtight jar. Shake or whisk again before serving.
Recipe Notes
Use 2 tablespoons honey for a sharper salad dressing.
Use up to 4 tablespoons honey for a sweeter sauce-style dressing.
Strong olive oil can dominate the dressing. Light olive oil, avocado oil, or a neutral oil gives a milder result.
For meal prep, garlic powder keeps the flavor smoother and more predictable than fresh garlic.
Separation after chilling is normal. Shake the jar hard before using.
Strip it down and honey mustard dressing is just four things: mustard for bite, honey for roundness, acid for brightness, and oil for body. Salt and pepper are the difference between “fine” and “finished,” but the core flavor comes from those four ingredients.
Dijon mustard: use it for the cleanest salad-style flavor.
Honey: use more for dipping sauce and less for sharper greens.
Apple cider vinegar or lemon juice: use it to keep the dressing bright.
Olive oil: use enough to help the dressing cling instead of running off.
At its simplest, 4-ingredient honey mustard dressing is mustard for bite, honey for roundness, acid for brightness, and oil for a smooth drizzle.
For a quick small batch, whisk 2 tablespoons Dijon mustard, 1 tablespoon honey, 2 tablespoons apple cider vinegar or lemon juice, and 2 tablespoons olive oil. Add salt and pepper to taste. This makes enough for one large salad or two smaller side salads.
Honey Mustard Dressing Ratio
Once you know the ratio, the recipe becomes less of a rule and more of a dial. You can make the same jar sweeter, sharper, thicker, thinner, creamier, or lighter without starting over.
Style
Easy Ratio
Use It For
Everyday dressing
4 parts mustard : 3 parts honey : 3 parts vinegar : 4 parts oil
Everyday salads and bowls
Equal-parts dressing
1 part mustard : 1 part honey : 1 part vinegar : 1 part oil
Sweeter, bolder dressing
Sharper salad dressing
More vinegar or lemon, less honey
Greens, slaws, roasted vegetables
Creamy sauce
Mayo or yogurt base + mustard + honey + acid
Chicken, fries, sandwiches
Vinaigrette
More oil and vinegar, no creamy base
Spinach, kale, cabbage, grain bowls
Texture cue: Salad dressing should drizzle, sauce should spoon, and dip should hold onto crispy food.
Texture changes the job of the recipe: salad-thin dressing coats greens, spoonable sauce works for bowls and sandwiches, and dip-thick honey mustard belongs with crispy food.
Easy memory trick: too sweet needs acid, too punchy needs honey, and flat almost always needs salt before anything else.
Not sure whether the batch should be thin, spoonable, or dip-thick? Go to the style guide.
Should You Make Dressing, Sauce, Dip, or Vinaigrette?
This is where honey mustard changes personality. Thin it and it belongs on greens. Make it creamy and suddenly it is the sauce everyone reaches for beside fries or chicken.
Do not force a salad dressing to behave like a dip. If fries, nuggets, or chicken tenders are involved, give the bowl a creamy base.
Match the honey mustard style to the food: keep it pourable for salads, make it creamy for dipping, use yogurt for a lighter sauce, or thin it into vinaigrette for sturdy greens.
The Plate Needs…
Make This
Texture
Best For
A clean salad dressing
No-mayo Dijon dressing
Pourable
Green salads, bowls, roasted vegetables
A classic dip
Creamy mayo sauce
Thick and smooth
Chicken tenders, fries, nuggets, pretzels
A lighter creamy dressing
Greek yogurt dressing
Creamy and tangy
Wraps, lunch bowls, chicken salads
A sharper vinaigrette
Oil-vinegar dressing
Light and glossy
Slaws, spinach, kale, grain bowls
A sandwich sauce
Dijon + yellow mustard + mayo
Medium-thick
Ham, turkey, burgers, wraps
Good rule: salads need a dressing that drizzles; fries and chicken need a sauce that stays put.
Make the no-mayo dressing first when you are unsure. Once you taste that base, it is easy to make the next batch richer, sharper, sweeter, or thick enough for dipping without guesswork.
Ingredients and Substitutions
Because the ingredient list is short, the jar changes fast. A bold mustard can make it bite, a floral honey can push it sweeter, and a strong olive oil can take over if you are not expecting it. Taste the base before adding more salt, honey, or vinegar.
Dijon mustard is the safest starting point because it blends easily and gives the dressing a clean mustard bite without turning harsh. Yellow mustard works too, but it tastes brighter and sweeter, so it is better in creamy dips and sandwich-style sauces.
Honey softens the mustard and vinegar so the dressing tastes rounded instead of biting. Use 2 tablespoons for a sharper salad dressing, 3 for the balanced batch, and 4 when you want it sweeter and more sauce-like.
Apple cider vinegar gives the dressing a rounder tang. Lemon juice makes it brighter and more awake. Use either one, or mix them when you want both depth and freshness.
Olive oil gives the dressing enough body to cling to leaves instead of running straight to the bottom of the bowl. Extra-virgin olive oil adds flavor; light olive oil, avocado oil, or a neutral oil keeps the dressing milder.
Salt, pepper, and garlic finish the jar. When the dressing tastes dull, salt is usually the quiet fix. Garlic is optional, but garlic powder is easier for meal prep because it stays smoother and gentler after a day or two in the fridge.
Bowl Method vs Jar Method
The order matters more than the effort. Mix the mustard, honey, vinegar, salt, and pepper first, then add the oil. This gives the dressing a smoother texture and makes it easier to adjust before serving.
The bowl method is best when you want to fine-tune flavor and thickness; the jar method wins when you need a quick dressing that stores neatly.
Bowl Method
Whisk the Dijon mustard, honey, vinegar or vinegar-lemon mix, salt, pepper, and garlic together first.
Drizzle in the olive oil slowly while whisking.
Keep whisking until the dressing looks smooth and lightly thickened.
Taste before serving and adjust one thing at a time.
Method cue: Mix the flavor base before adding oil.
First, build flavor before texture: whisking mustard, honey, vinegar, salt, and pepper together makes the dressing easier to balance before the oil goes in.
Emulsion cue: Add oil slowly for a smoother dressing.
Next, the slow oil pour is what turns the mixture glossy, helping homemade honey mustard dressing cling to leaves instead of separating right away.
Jar Method
Add all ingredients to a clean jar.
Close the lid tightly.
Shake hard for 15–20 seconds, until the dressing looks glossy and combined.
Refrigerate in the same jar and shake again before using.
Why mustard helps: Dijon helps the oil and vinegar hold together long enough to coat greens evenly. If the dressing separates later, nothing is wrong; just shake it again.
You do not need mayo for a good honey mustard dressing. The oil-vinegar base is usually better for salads because it stays lighter, brighter, and easier to drizzle.
Use the small-batch formula below when you want just enough for one salad, one wrap night, or a quick bowl.
Small-Batch No-Mayo Formula
2 tablespoons Dijon mustard / 30 ml
1 tablespoon honey / 15 ml / about 20 g
2 tablespoons apple cider vinegar or lemon juice / 30 ml
2 tablespoons olive oil / 30 ml
Salt and black pepper, to taste
This makes enough for one large salad or two smaller side salads. Taste it with a lettuce leaf, cucumber slice, or piece of chicken before adjusting; a spoonful can taste stronger than it will taste on food.
Creamy Honey Mustard Dressing
Use the creamy version when honey mustard needs to sit beside crispy food, not disappear into greens. Mayo gives it the thicker, smoother body you want for chicken tenders, fries, nuggets, burgers, wraps, and sandwiches. Thin it slightly when you want a spoonable salad dressing.
For fries, nuggets, and chicken tenders, make creamy honey mustard sauce thick enough to stay on the food instead of sliding off like salad dressing.
Creamy Mayo Honey Mustard
½ cup mayonnaise / 120 ml / about 110–115 g
2 tablespoons Dijon mustard / 30 ml
1 tablespoon yellow mustard / 15 ml
2–3 tablespoons honey / 30–45 ml / about 40–60 g
1–2 teaspoons lemon juice or apple cider vinegar / 5–10 ml
Salt and pepper, to taste
Whisk everything together until silky. Two tablespoons honey keeps it tangier; three makes it sweeter and more dip-like. Add a teaspoon or two of water only when you want it loose enough to drizzle instead of scoop.
Already making homemade mayo? This is one of the easiest ways to turn it into a quick dipping sauce.
Use Greek yogurt when you want the creamy feel of a dip but still want something fresh enough for lunch bowls, wraps, and chicken salads. It is the one to make when mayo feels too heavy but the no-mayo dressing feels too thin.
Greek yogurt honey mustard dressing gives wraps and lunch bowls a creamy feel while keeping the flavor brighter and lighter than a mayo-based dip.
½ cup Greek yogurt / 120 ml / about 125 g
2 tablespoons Dijon mustard / 30 ml
2–3 tablespoons honey / 30–45 ml / about 40–60 g
1 tablespoon lemon juice or apple cider vinegar / 15 ml
1 tablespoon olive oil / 15 ml, optional for a smoother texture
Salt and pepper, to taste
Yogurt dressing is naturally tangier than mayo-based sauce, so taste before adding extra vinegar. Thin a thick batch with water, lemon juice, or a little olive oil.
This tangy, creamy dressing also works well in a chicken salad sandwich, especially when the filling needs creaminess without feeling too heavy.
Honey Mustard Vinaigrette
Make the vinaigrette when the salad needs brightness more than richness. It is especially good with sturdy greens, cabbage, apples, nuts, roasted vegetables, and grain bowls because it cuts through heavier ingredients instead of coating them like a dip.
For kale, cabbage, apples, nuts, and roasted vegetables, honey mustard vinaigrette works better than a thick sauce because the extra acid keeps hearty ingredients lively.
⅓ cup to ½ cup olive oil / 80–120 ml
3 tablespoons apple cider vinegar, white wine vinegar, or white balsamic vinegar / 45 ml
2 tablespoons Dijon mustard / 30 ml
2–3 tablespoons honey / 30–45 ml / about 40–60 g
Salt and black pepper, to taste
Shake everything in a jar until combined. Vinaigrettes naturally separate as they sit, so give the jar another hard shake before pouring. If the olive oil firms up in the fridge, let the jar sit at room temperature for 10–15 minutes, then shake again.
This lighter dressing is especially good when the salad has cabbage, apples, nuts, roasted vegetables, or anything that needs a sweet-tangy spark. Use it on a crunchy chickpea salad, cabbage slaw, kale salad, or roasted vegetable bowl. It can also replace the creamier dressing in a coleslaw recipe when the bowl needs more tang and less richness.
For the main dressing, Dijon is the best all-purpose choice because it blends smoothly, tastes clean, and has enough bite to stand up to honey without turning harsh.
Dijon mustard: best for the main dressing and vinaigrette.
Yellow mustard: brighter, sweeter, and more classic for creamy dip or sandwich sauce.
Whole grain mustard: rustic and textured, especially good with roasted vegetables or grain bowls.
Spicy brown mustard: bolder and better for pork, ham, and sandwiches.
Half Dijon + half yellow: a good middle path for creamy honey mustard sauce.
Only yellow mustard in the fridge? Start with less honey and taste as you go, because yellow mustard already has a sweeter, brighter flavor than Dijon.
Dijon mustard gives honey mustard dressing a cleaner bite, while yellow mustard tastes sweeter and works especially well in creamy dipping sauces.
Healthy and Dietary Options
Begin with the no-mayo dressing when you want something lighter, then adjust from there. The same basic jar can become dairy-free, egg-free, lower-sugar, lower-oil, or creamy with Greek yogurt.
Once the no-mayo honey mustard base is balanced, it becomes easy to steer the recipe toward dairy-free, egg-free, vegan-style, Greek yogurt, or lower-sugar versions.
No mayo: use the Dijon, honey, vinegar, and oil base.
Dairy-free: the main no-mayo dressing is dairy-free as written.
Lighter creamy dressing: use Greek yogurt instead of mayo.
Vegan-style: honey is not vegan, so use maple syrup or agave instead.
Lightened-up: reduce some oil and honey, then loosen the dressing with vinegar, lemon juice, or water so it still drizzles well.
Lower sugar: use less honey, then add a little extra mustard and acid so the dressing still tastes complete.
Do not remove all the sweetness unless you are replacing it with something else. Mustard and vinegar need a little sweetness to taste rounded instead of harsh.
How to Fix Honey Mustard Dressing
This dressing is easy to fix because nothing is cooked. Taste it, change one thing, then taste again. Most batches need one small adjustment, not a fresh start.
Most honey mustard dressing problems need one small fix: add acid if it is too sweet, honey if it is too sharp, liquid if it is too thick, or shake if it separates.
Problem
What to Do
Overly sweet
Add vinegar or lemon juice, 1 teaspoon at a time.
Sharp or sour
Add honey, mayo, or Greek yogurt.
Too thick
Add water, vinegar, lemon juice, or oil, 1 teaspoon at a time.
Runny or thin
Add Dijon mustard, mayo, Greek yogurt, or a little more honey.
Mustard-heavy
Add honey or a creamy base.
Oily-tasting
Add more Dijon and a splash of vinegar or lemon juice.
Flat flavor
Add a pinch of salt first, then adjust acid if needed.
Separated dressing
Shake hard in a jar or whisk again.
Firm olive oil
Let the jar sit for 10–15 minutes, then shake.
Unsure what is missing? Add salt first. A tiny pinch often makes the honey, mustard, and vinegar taste like one dressing instead of three separate ingredients.
Think of this as the jar you pull out when dinner is already cooked but the plate still needs a little lift. The salad-style dressing is bright and pourable, while the creamy sauce works better as a dip.
One batch can work across the whole meal: drizzle no-mayo honey mustard dressing over salads and bowls, then use the creamy version for fries, chicken, wraps, and pretzels.
Green salads with lettuce, spinach, arugula, kale, or cabbage
Grain bowls with rice, quinoa, roasted vegetables, or grilled chicken
Chicken tenders, nuggets, grilled chicken, or chicken wraps
Salmon, shrimp, or simple seafood bowls
Ham, turkey sandwiches, burgers, and wraps
Roasted potatoes, carrots, broccoli, Brussels sprouts, or sweet potatoes
Fries, pretzels, and snack plates when you make the creamy dip
Slaws and pasta salads when you want something sweet and tangy
At dinner, spoon it over sliced baked chicken breast when the plate needs a quick lift. The creamy sauce belongs in wraps, burgers, and chicken sandwich recipes, where a loose vinaigrette would disappear.
In bowls, drizzle it over rice, greens, cucumbers, roasted vegetables, or a simple salmon bowl. Delicate greens work best with the no-mayo dressing. Hearty salads with cabbage, kale, apples, nuts, or roasted vegetables are especially good with the vinaigrette.
How to Store Homemade Honey Mustard Dressing
Keep the dressing in a clean airtight jar in the fridge. It may look a little separated the next day. That is normal; it just needs a shake.
Storage cue: If the dressing separates after chilling, it is usually normal oil-and-vinegar separation, not a failed batch.
Finally, separated dressing is not ruined; once the chilled oil and mustard base loosen slightly, a firm shake brings the jar back to a smooth, glossy texture.
Style
Best Storage Time
Notes
No-mayo dressing
7–10 days
Shake before using.
Creamy mayo sauce
5–7 days
Keep refrigerated and use a clean spoon.
Greek yogurt dressing
5–7 days or by yogurt expiry
May thicken as it sits.
Vinaigrette
About 1 week
Olive oil may firm up in the fridge.
Do not freeze creamy honey mustard dressing. Mayo and yogurt can split after thawing. The no-mayo dressing is so quick that it is better to make a fresh batch when you need it.
Not always. Salad-style honey mustard dressing is often made without mayo using mustard, honey, vinegar or lemon juice, and oil. Creamy honey mustard sauce usually adds mayo or Greek yogurt.
How do I make honey mustard dressing without mayo?
Use Dijon mustard, honey, vinegar or lemon juice, olive oil, salt, and pepper. It will be lighter and more pourable than a mayo-based sauce, which makes it better for salads, slaws, roasted vegetables, and grain bowls.
What is honey mustard dressing made of?
Honey mustard dressing is usually made with mustard, honey, vinegar or lemon juice, oil, salt, and pepper. Creamy sauces add mayonnaise or Greek yogurt. A simple 4-ingredient batch uses Dijon mustard, honey, vinegar or lemon juice, and olive oil.
Is honey mustard dressing dairy-free?
The main no-mayo dressing is dairy-free as written because it uses mustard, honey, vinegar or lemon juice, and oil. Greek yogurt dressing is not dairy-free unless you use a dairy-free yogurt.
Can I use maple syrup instead of honey?
Yes. Maple syrup or agave can replace honey if you want a vegan-style mustard dressing. Start with the same amount, then taste and adjust because maple syrup tastes different from honey.
Is honey mustard dressing the same as honey mustard sauce?
They overlap, but texture is the difference. Dressing is usually thinner and pourable for salads. Sauce is thicker and often contains mayo or yogurt, so it works better as a dip or sandwich spread.
Dijon or yellow mustard: which one works better?
Dijon gives a cleaner, more balanced dressing. Yellow mustard tastes brighter and sweeter, which is why it works well in creamy dipping sauces. A mix of Dijon and yellow mustard is a good choice for sandwich-style honey mustard.
What can I use instead of vinegar?
Lemon juice is the easiest substitute. It gives the dressing a fresh, lifted flavor. Apple cider vinegar gives it a deeper tang, and a mix of both works well.
How long does homemade honey mustard dressing last?
The no-mayo dressing is best within 7–10 days in the fridge. Mayo and Greek yogurt sauces are best within 5–7 days. Store everything in a clean airtight jar and shake before using.
Why did my dressing separate?
Oil and vinegar naturally separate over time. Shake the dressing hard in a jar or whisk it again before serving. For a smoother texture, whisk the oil in slowly or blend the dressing briefly.
How do I make it creamy?
Whisk in mayonnaise for a classic dipping sauce, or Greek yogurt for a tangier, lighter version. Thin with lemon juice, vinegar, or water when you want it pourable.
Can honey mustard dressing be used as a marinade?
Yes, the no-mayo dressing can work as a quick marinade for chicken, salmon, pork, or vegetables. Avoid mayo or yogurt sauces for marinating. Do not reuse marinade that has touched raw meat unless it has been boiled thoroughly. Cook poultry to a safe minimum internal temperature of 165°F / 74°C. For dipping, make a separate fresh batch.
A Five-Minute Dressing You Can Use All Week
Once you make this once, you stop needing the bottle. The base is simple enough for a weekday salad, but flexible enough to become a dip, sauce, or vinaigrette depending on what is on the plate.
Keep it pourable for greens, make it creamy for dipping, or add a little extra acid when a bowl needs lift. After a batch or two, you will know when it needs more honey, more vinegar, a pinch of salt, or just a good shake.
You want a creamy garlic sauce for fries, burgers, sandwiches, seafood, or roasted vegetables, and then the internet immediately turns it into an argument: traditional garlic and oil, garlic mayo, or the restaurant version that calls itself “real.” The useful answer is simpler. The word can mean different things depending on the kitchen, so this recipe gives you the easy creamy version first, then shows you the traditional version too.
This easy garlic aioli recipe starts with mayonnaise, fresh garlic, lemon juice, Dijon mustard, and salt, but what you really get is the cool, creamy dip you want beside hot fries, the garlicky swipe that makes a burger taste finished, and the lemony sauce that wakes up seafood. For the older, sharper, more classic style, there is also a traditional garlic-and-oil method later in the post.
No need to shame either style. Mayo aioli is fast, stable, and weeknight-friendly; traditional aioli is sharper, more technical, and more olive-oil-forward. Choose the one that fits the food, then adjust from there.
The aioli rule is simple: it should taste bright first, garlicky second, and creamy all the way through.
Need the sauce now? Mix this version first, then use the rest of the post only if you want to adjust the garlic, make it vegan, try a flavor variation, or go traditional from scratch.
Fast Garlic Aioli Ratio
Fast ratio: ¾ cup mayo + 3 grated garlic cloves + 1 tablespoon lemon juice + ½ teaspoon Dijon mustard + ¼ teaspoon salt.
Rest 10 minutes, then taste. Brighten with lemon if it feels heavy, soften the bite with more mayo if the garlic is too sharp, and add salt if it tastes flat.
Start with mayo, garlic, lemon, Dijon, and salt, then let the sauce rest briefly. That short pause helps the garlic aioli taste smoother and more balanced.
Using it for fries? Go a little bolder. On sandwiches, keep it smoother and milder. With seafood, let lemon lead before the garlic takes over. A small bowl of this can make plain fries, leftover chicken, roasted vegetables, or a simple sandwich feel intentional.
Aioli is a garlic sauce. Traditionally, it is garlic and oil emulsified with salt and sometimes lemon. In modern recipe use, garlic aioli often means a creamy sauce made by stirring garlic, lemon, and seasonings into mayonnaise.
Both meanings are common. Traditional aioli tastes sharper and more olive-oil-forward; mayo aioli tastes creamier, milder, and more familiar. For fries, burgers, sandwiches, seafood, roasted vegetables, and party dips, the easy mayo version is the best place to start.
Most fixes are simple: acid lifts, mayo softens, salt sharpens, rest settles, and roasted garlic mellows.
Still deciding which style fits your food? The version guide makes that choice easier.
Which Aioli Version Should You Make?
Use this as a decision guide, not a rulebook. For everyday fries, burgers, and sandwiches, the mayo version is the easiest answer. When garlic and oil should be the star, choose traditional aioli. Egg-free, vegan, smoky, spicy, and mellow paths are there when the table needs them.
Start with this version. It gives you the creamy garlic sauce people expect with fries, burgers, sandwiches, and seafood, but with enough lemon and garlic control to keep it from tasting heavy or harsh. This is the one to make when the fries are already hot and you just need a dip that tastes intentional.
Perfect technique is not the point here. Good garlic, enough lemon, and a few minutes of patience matter more. The first bite should feel cool and creamy, then bright with lemon, then warm with garlic.
Here is the key move: let grated garlic sit with lemon juice and salt before you whisk in the mayonnaise. During that short rest, the raw edge softens and the flavor spreads through the bowl. After 10 minutes, the garlic should taste rounder but still present. If it tastes perfect immediately after mixing, remember that it may taste stronger later.
Start with 3 cloves for balance, 5 for a bolder dip, or roasted garlic for something sweeter and softer. If your cloves are very large, begin with 2 to 3 and add more after tasting.
Recipe Details
Prep time: 5 to 8 minutes
Garlic rest: 10 to 15 minutes
Optional chill: 20 to 30 minutes
Total time: 15 to 20 minutes without chilling; about 40 minutes with optional chill
Yield: scant 1 cup
Servings: 12 to 16 tablespoons
Equipment: small bowl, whisk or spoon, microplane or garlic press, optional fine mesh strainer
Garlic Aioli Ingredients
In a short ingredient list, every flavor has a job: garlic brings heat, lemon lifts the mayo, Dijon adds depth, and salt pulls the aioli together.
Ingredient
US amount
Metric amount
Mayonnaise
¾ cup
about 180 ml / 165 to 170 g
Fresh garlic, grated or pressed
3 to 5 small-to-medium cloves
about 9 to 15 g
Fresh lemon juice
1 tablespoon, plus more to taste
15 ml
Dijon mustard
½ teaspoon, optional
2.5 ml
Fine salt
¼ teaspoon to start
about 1.5 g
Black pepper
⅛ teaspoon
a small pinch
Lemon zest
½ teaspoon, optional
optional
Olive oil
1 teaspoon, optional
5 ml
Method
Step 1: Grate or press the garlic
Grate, press, or very finely paste the garlic. Smoother garlic makes a smoother sauce and gives the finished aioli a cleaner bite.
Grated garlic blends more evenly than chopped garlic. As a result, the sauce tastes bold without leaving harsh little pieces in the finished aioli.
Step 2: Mix the garlic, lemon, Dijon, and salt
Add the garlic, lemon juice, Dijon mustard, and salt to a small bowl. This is where the raw garlic starts turning into a balanced sauce base.
Step 3: Rest the garlic mixture
Let the mixture rest for 10 to 15 minutes so the lemon can soften the raw bite before the mayonnaise goes in.
Before the mayo goes in, lemon juice and salt soften the raw garlic edge. This step is small, but it makes the finished garlic aioli taste cleaner.
Step 4: Whisk in the mayonnaise
Whisk in the mayonnaise until the dip looks smooth and creamy. Scrape the sides of the bowl so the garlic and lemon flavor spreads evenly.
Whisk the mayo into the rested garlic mixture until the sauce looks smooth and glossy. Then taste again, because garlic and lemon settle as they mix.
Finished Garlic Aioli Texture
Before you chill or serve it, check the texture. The sauce should look creamy and thick enough to hold its shape on a spoon.
A good aioli should hold a spoon trail, yet still spread easily. That middle texture is why it works for fries, sandwiches, burgers, and bowls.
Step 5: Taste and adjust
Taste after resting. Brighten with more lemon, round it out with more mayo, or sharpen the flavor with another pinch of salt.
Step 6: Chill or serve
Serve right away, or chill for 20 to 30 minutes for a thicker, rounder texture.
Chilled Garlic Aioli Texture
After chilling, the dip will thicken slightly and usually taste less sharp. If you are making it ahead, err slightly mild on the garlic and adjust again before serving.
Chilling thickens the sauce and rounds off some of the garlic bite. Before serving, stir it once and adjust with lemon or salt if needed.
To make it milder and extra smooth, strain the garlic-lemon mixture before whisking the flavored lemon juice into the mayonnaise. You will still get garlic flavor, but without little garlic pieces or a strong raw bite.
Taste and Adjust
Taste after the 10-minute rest, not before. Garlic gets louder as it sits, so a sauce that feels gentle at first can become bolder by the time it reaches the table. Serving guests? Start with 3 cloves and build up only after tasting.
Sharp garlic bite: soften it with more mayo or a longer rest.
Heavy finish: wake it up with lemon juice a few drops at a time.
Sour edge: round it out with another spoonful of mayo.
Flat flavor: season with salt, Dijon, or a tiny bit more garlic.
Thick texture: loosen with water or lemon juice ½ teaspoon at a time.
Mild flavor: add more grated garlic or lemon zest.
How to Adjust Garlic Aioli
Use small changes and taste between each one. A little lemon, mayo, salt, or rest can change the whole bowl.
Fix the flavor by changing one thing at a time: lemon for lift, mayo for softness, salt for focus, and rest for a calmer raw garlic bite.
Maximum garlic is not the goal. You want a dip bright enough to cut through rich food, creamy enough to cling, and garlicky enough that it has a reason to exist.
How to Control the Garlic Bite
This sauce is simple, but garlic decides whether it tastes balanced, bold, sweet, sharp, or too aggressive. Garlic is the one ingredient here that can make the sauce sing or take over the room, so choose the style that fits how you plan to serve it.
Raw, Roasted, Grated, or Pasted Garlic
Different garlic prep changes the same aioli base quickly, so pick the garlic style before adding more cloves.
The garlic choice controls the mood of the sauce. Use grated garlic for punch, roasted garlic for sweetness, and garlic paste for a smoother aioli.
Mild vs Bold Garlic Aioli
Start mild for people, bold for potatoes. Fries and roasted potatoes can handle strong garlic. Sandwiches, burgers, wraps, and fish tacos usually need a gentler spread. Serving a shared dipping bowl? Keep the base gentle and put hot sauce, chili crisp, extra lemon, or grated garlic on the side. If you want a brighter herb-driven dip instead of a creamy garlic one, MasalaMonk’s green chutney recipe gives you that cilantro-mint-lime direction.
For a shared table, keep the first bowl mild. After that, make a bolder aioli for fries, potatoes, or grilled food that can handle extra garlic.
Balanced sauce: start with 3 garlic cloves.
Bolder dip: use 5 cloves and grate them finely.
Mellow flavor: rest raw garlic in lemon juice for 10 to 15 minutes.
Smooth garlic taste: strain the garlic-lemon mixture before adding mayo.
Sweeter sauce: use roasted garlic instead of raw garlic.
Seafood version: let lemon and herbs lead before raw garlic power.
Why This Aioli Works
This aioli works because it treats garlic like a powerful ingredient, not just a flavoring. Freshly cut garlic can be hot, sharp, and harsh. Lemon and salt tame that raw edge before the mayo goes in, so the final dip tastes like one smooth sauce instead of mayonnaise with garlic stirred through it.
Dijon mustard fills the gap between sharp and creamy. You should not taste mustard first; you should just notice that the sauce feels finished. A short chill thickens the dip and gives the flavors time to settle.
Lemon rest: softens raw garlic and spreads the flavor.
Mayo base: gives stable body without building an emulsion from scratch.
Dijon and salt: make the dip taste complete instead of just creamy.
Ingredient Notes and Smart Swaps
With only a few ingredients, there is nowhere for tired garlic or bland mayo to hide. The base gives creaminess, the garlic gives identity, the lemon gives lift, and the salt pulls the whole thing together.
Mayonnaise
Choose a mayonnaise you already like. This is not the place for a mayo you tolerate but never enjoy; the base flavor follows you into every bite. Full-fat mayo gives the richest garlic aioli and the best dipping texture. Light mayo works, though the result may taste tangier and less full. To build the base from scratch, start with MasalaMonk’s homemade mayo recipe, then add garlic, lemon, Dijon, and salt.
Garlic
Fresh garlic gives the cleanest flavor, but the way you prepare it changes the result. The same three cloves can taste mellow, sharp, or almost spicy depending on how you cut them. Grated garlic tastes strongest and blends smoothly. Pressed garlic is easy and punchy. Minced garlic gives a more rustic texture. Roasted garlic turns the sauce sweeter and softer. Garlic powder works in an emergency, but it will not taste as fresh.
Roasted Garlic Aioli
Roasted garlic makes aioli sweeter and rounder, but it can also make the sauce feel less bright. After adding it, taste for lemon again before deciding the sauce is finished.
Roasted garlic aioli tastes sweeter, softer, and less sharp than the raw version. To keep it lively, finish with enough lemon to balance the richness.
Garlic form
Best for
Flavor result
Grated garlic
Classic garlic aioli
Strong, smooth, bold
Pressed garlic
Quick aioli
Punchy and easy
Minced garlic
Rustic dip
Chunkier, less smooth
Roasted garlic
Sandwiches, potatoes, vegetables
Sweet, mellow, less sharp
Garlic powder
Emergency shortcut
Milder, less fresh
Lemon Juice
Fresh lemon juice is best because it tastes bright without becoming harsh. The lemon should lift the sauce, not turn it sour. Vinegar can work when lemon is not available, but start with less because vinegar can make the sauce sharper.
Dijon Mustard
Dijon mustard is optional, but useful. It adds depth and helps the sauce taste more complete. Use just enough to support the garlic and lemon. The dip should not taste like mustard unless you are making a mustard variation.
Olive Oil
A teaspoon of olive oil adds a little restaurant-style richness. A heavy pour can make the dip greasy, especially when the mayonnaise is already rich. Keep it small unless you are making the traditional garlic-and-oil version.
Small-Batch Garlic Aioli
Need enough for one burger, one sandwich, one small plate of fries, or one snack bowl? Mix ¼ cup mayo, ¼ to ½ teaspoon grated or pressed garlic, 1 teaspoon lemon juice, a tiny dab of Dijon, salt, and pepper. Let it sit for 5 to 10 minutes before tasting.
Make a small batch when you only need aioli for one sandwich, one burger, or one plate of fries. It gives you fresh flavor without leftover sauce sitting around.
This is useful for a quick sandwich spread, a breakfast sandwich, a grilled cheese upgrade, or a dipping sauce when leftovers are not needed.
Using Store-Bought Mayo
Store-bought mayo is the fastest path to restaurant-style garlic aioli. Use the same base ratio from the main recipe, then adjust after the 10-minute rest: more garlic for a bolder dip, lemon for lift, or another spoonful of mayo if the bite feels too sharp.
Store-bought mayo is only the starting point. Fresh garlic, lemon, salt, and a little resting time turn it into a brighter garlic aioli.
This is the easiest way to upgrade a sandwich, burger, wrap, or dipping platter without buying a separate bottle of aioli.
Traditional Aioli from Scratch
Choose traditional aioli when you want garlic and oil to be the star: sharper, richer, more Mediterranean, and more technique-driven. Choose the mayo version when you want a fast, stable dip or spread for everyday food.
The classic version is not simply garlic mayonnaise. At its most basic, it is garlic and oil emulsified into a thick sauce, often with salt and lemon juice. Some home versions use egg yolk to make the emulsion more stable and easier to whisk.
The garlic-and-oil path is less forgiving because you are building the sauce, not seasoning an already-stable base. Its flavor is sharper, more garlicky, more olive-oil-forward, and less creamy than the easy mayo path. It works beautifully with grilled vegetables, artichokes, seafood, roasted potatoes, or a Mediterranean-style plate.
This is the version to make when you want the sauce to feel like part of a Mediterranean platter, not just a creamy dip on the side.
Traditional Aioli Mortar and Pestle
The mortar-and-pestle method makes the garlic and oil feel more direct than the mayo shortcut, so expect a sharper and more rustic sauce.
Traditional aioli is sharper and more olive-oil-forward because it begins with garlic, salt, and oil instead of prepared mayonnaise.
If you enjoy sauce technique, the same patience with fat, acid, and emulsion shows up in MasalaMonk’s béarnaise sauce recipe, though that sauce uses butter and egg yolk instead of garlic and oil.
Easier Traditional-Style Aioli with Egg Yolk
This is not the oldest purist version, but it is the easiest traditional-style path for most home cooks. The egg yolk helps the garlic and oil emulsify into a thicker, glossier sauce.
Egg yolk gives traditional-style aioli more stability, but patience still matters. Add the oil slowly until the mixture turns thick, glossy, and emulsified.
Egg-Yolk Aioli Ingredients
Ingredient
US amount
Metric amount
Garlic
2 cloves
about 6 g
Salt
¼ teaspoon
about 1.5 g
Egg yolk
1 large
about 18 g
Lemon juice
1 to 2 teaspoons
5 to 10 ml
Dijon mustard
½ teaspoon, optional
2.5 ml
Mild extra-virgin olive oil
¼ cup
60 ml
Neutral oil
3 tablespoons
45 ml
Water
A few drops as needed
As needed
If raw egg is a concern, anyone avoiding it — including children, pregnant people, older adults, or immunocompromised guests — should choose the mayo-based version, vegan mayo version, or no-egg path.
Method
Mash or grate the garlic with salt until it forms a paste. A mortar and pestle is traditional, but a microplane and bowl also work.
Whisk in the egg yolk, lemon juice, and Dijon mustard if using.
Start adding the oil drop by drop while whisking constantly. Do not rush the first few tablespoons.
Once the mixture thickens and looks glossy, add the remaining oil in a very thin stream.
When the sauce gets too thick, whisk in a few drops of water or lemon juice.
Taste and adjust with salt, lemon, or a few more drops of oil.
The first oil addition is the most important part. Too much oil too quickly can split the emulsion. A damp kitchen towel wrapped into a ring under the bowl helps keep it steady while you whisk. Using a measuring cup with a spout also makes slow pouring easier.
The sauce should turn glossy and thicker as the oil goes in. If it starts looking loose or greasy, stop adding oil and whisk until it tightens before continuing.
No-Egg Traditional Aioli
To make no-egg traditional aioli, mash 3 to 4 garlic cloves with a generous pinch of salt until you have a sticky paste. Add mild olive oil very slowly, drop by drop at first, while grinding or whisking constantly. As the paste tightens, use a few drops of lemon juice or water to loosen it and help the sauce come together.
This older-style method is sharper and more garlic-forward than the egg-yolk path. It may look thicker, rougher, or less glossy than mayo aioli, especially on the first try. That is normal. If it refuses to thicken, turn it into a rustic garlic oil dip instead of forcing it; it will still be delicious with bread, potatoes, grilled vegetables, or seafood.
No-egg traditional aioli can stay looser and more rustic than the mayo version. Serve it like a garlicky olive-oil dip with bread, potatoes, or artichokes.
For a milder classic sauce, use a mix of mild olive oil and neutral oil. Strong extra-virgin olive oil can taste bitter or peppery, especially when blended aggressively. With an immersion blender, blend the neutral oil first and stir in the olive oil by hand at the end.
Choose this section when regular mayo does not fit the people at your table. You can still make a creamy garlic dip, a sharper no-mayo sauce, or a lighter bowl drizzle without losing the main garlic-lemon idea.
These versions are about hospitality, not compromise. Regular mayonnaise usually contains egg. Vegan mayo is egg-free. Greek yogurt is lighter, but it is not dairy-free. Traditional egg-yolk aioli contains raw egg, while no-egg traditional aioli and vegan versions avoid egg entirely. For a dedicated egg-free creamy base, use MasalaMonk’s eggless mayonnaise recipe and follow the same garlic-lemon balance.
Best Eggless Aioli Base to Use
If you are using vegan mayo, follow the same fast aioli ratio and swap the base. If you want no mayo at all, use the traditional aioli section as your starting point.
Vegan aioli changes depending on the base. Vegan mayo gives the closest shortcut texture, while soy milk, aquafaba, and cashews create different eggless styles.
No-egg traditional path: garlic, salt, oil, and patience.
Use this table to pick the right base, not to make every version.
Vegan Aioli Base Ratios
Option
Quick ratio
Best use
Vegan mayo shortcut
¾ cup vegan mayo + 3 garlic cloves + 1 tbsp lemon + salt
Fast vegan dip or spread
Soy-milk vegan aioli
½ cup unsweetened soy milk + 1 cup oil + garlic + lemon or vinegar + salt
From-scratch vegan emulsion
Aquafaba aioli
3 tbsp aquafaba + ½ to ¾ cup neutral oil + garlic + lemon or vinegar + mustard
Eggless aioli-style sauce
Cashew aioli-style sauce
1 cup soaked cashews + ½ to ¾ cup water + garlic + lemon + salt
Creamy vegan bowl sauce
Lightened garlic aioli
½ cup Greek yogurt + ¼ cup mayo + garlic + lemon + Dijon + salt
Lighter dip for vegetables, chicken, potatoes, wraps, and bowls
No-mayo traditional aioli
Garlic paste + salt + slow olive oil + lemon or water
Sharper traditional-style sauce
Plain unsweetened soy milk matters here. Sweetened or flavored plant milk will pull the sauce in the wrong direction before the garlic even has a chance. Vegan mayo tastes closest to the main recipe. Soy milk and aquafaba behave more like emulsions. Cashew aioli is creamy and bowl-friendly, but less like classic aioli.
The Greek yogurt version is tangier and less rich than classic garlic aioli. It works especially well as a dip or bowl sauce. For another cool, garlicky yogurt-based sauce, MasalaMonk’s Greek tzatziki sauce recipe is a better fit when you want cucumber, dill, and a lighter Mediterranean finish.
Once the base tastes right, the variations should feel easy, not like twelve new recipes. You are giving the same sauce a new mood: smoky for tacos, lemony for seafood, mustardy for burgers, herby for vegetables, spicy for fries.
Best Aioli Variations to Start With
Once the base aioli is balanced, flavor variations are easy. Chipotle, sriracha, lemon-dill, roasted garlic, black garlic, and herb versions each fit different meals.
If you only try three, make chipotle aioli for tacos and fries, lemon-dill aioli for seafood, and roasted garlic aioli for sandwiches and potatoes. Those three cover smoky, bright, and mellow.
Aioli Variation Ratios
Variation
Add to 1 cup base
Good with
Chipotle aioli
1 tbsp adobo or 1 to 2 tsp chipotle powder + 1 tbsp lime
Tacos, burgers, fries
Sriracha aioli
2 tbsp sriracha + 1 tbsp lime
Shrimp, chicken, fries
Spicy aioli
1 to 2 tsp hot sauce, chili paste, or chili crisp
Wraps, sandwiches, fries
Dill aioli
1 to 2 tbsp fresh dill + ½ tsp lemon zest
Salmon, crab cakes, potatoes
Lemon garlic aioli
½ to 1 tsp lemon zest + 1 tsp lemon juice
Seafood, asparagus, chicken
Black garlic aioli
3 to 5 mashed black garlic cloves
Burgers, fries, roasted vegetables
Mustard aioli
1 to 2 tbsp Dijon or whole-grain mustard
Sandwiches, burgers, potatoes
Truffle aioli
¼ to ½ tsp truffle oil or 1 to 2 tsp truffle paste
Fries, burgers, mushrooms
Cilantro lime aioli
2 tbsp cilantro + 1 tbsp lime + ½ tsp lime zest
Fish tacos, grain bowls, wraps
Roasted garlic aioli
1 to 2 tbsp roasted garlic paste
Potatoes, sandwiches, vegetables
Salsa aioli
¼ cup well-drained salsa + 1 tsp lime
Tacos, nachos, burgers
Calabrian chili aioli
1 to 2 tbsp chopped Calabrian chilies or paste + lemon
Sandwiches, fries, grilled vegetables
Chipotle and sriracha both get stronger after a short rest, so begin with less heat and build from there. For fruitier heat, borrow the sweet-hot idea from MasalaMonk’s mango habanero sauce recipe and add it lightly to the aioli base.
Drain salsa first so salsa aioli does not turn watery. If you already have a bright mango salsa, drain it well before folding a spoonful into aioli. For truffle aioli, use a light hand; too much can overpower the garlic and lemon.
Once you pick a flavor, the serving chart will help match it to fries, burgers, seafood, vegetables, or bowls.
What Tastes Best with Aioli?
Start with the food in front of you. Fries want a thick, bold aioli that clings to the crispy edges. Burgers want a smooth spread that does not fight the meat. Seafood wants lemon first, garlic second. Roasted vegetables can handle deeper flavors like black garlic, roasted garlic, herbs, or chili.
What to Serve with Garlic Aioli
Use garlic aioli wherever food needs creaminess, brightness, and a little bite. Fries, sliders, shrimp, potatoes, roasted vegetables, and sandwiches all work well.
Best Aioli Pairings by Food
Use this as a flavor-matching chart, not a rulebook.
Food
Serve with
Why it works
French fries
Garlic, truffle, spicy
Clings to salty fries and cuts through the crunch
Sweet potato fries
Chipotle, sriracha
Balances sweetness with smoke or heat
Burgers
Garlic, mustard, chipotle
Adds the creamy layer that makes the burger feel finished
Fish tacos
Chipotle, cilantro lime
Brings creaminess, acid, and fresh heat
Salmon
Lemon dill
Cuts through rich fish without hiding it
Shrimp
Lemon garlic, sriracha
Gives cool brightness against sweet shrimp
Crab cakes
Lemon dill
Adds a creamy seafood-friendly finish
Artichokes
Traditional, lemon
Turns each leaf into a rich, garlicky bite
Chicken sandwich
Garlic, spicy
Turns a dry sandwich into a finished one
Grilled cheese
Garlic, roasted garlic
Adds savory depth without needing another filling
Breakfast sandwich
Garlic herb
Works with eggs, cheese, and toasted bread
BLT
Roasted garlic
Soft garlic plays well with tomato and bacon
Roasted vegetables
Black garlic, herb
Adds depth to sweet, browned edges
Potato salad
Garlic aioli mixed with mayo or yogurt
Makes creamy salads taste brighter and less flat
Deviled eggs
Garlic aioli in place of some mayo
Deepens the filling without making it heavy
Grain bowls
Vegan, cilantro lime
Turns grains and vegetables into a real meal
Garlic Aioli for Fries
Classic garlic aioli is the safest first batch for fries because it is thick, creamy, and bold enough to cling to crisp edges.
Fries need a thicker aioli so the sauce catches on crisp edges instead of sliding off. Keep it creamy, spoonable, and bright.
Garlic Aioli for Burgers
For burgers, a thick garlic, mustard, or chipotle version works especially well with a simple burger patty recipe.
On burgers, aioli should be a thin, even spread. That way, it adds garlic flavor and moisture without covering up the patty or toppings.
Chicken and seafood both love this sauce, but in different ways. On chicken, use it as the creamy layer in one of these chicken sandwich recipes, especially with spicy, roasted garlic, or mustard variations. For tacos, the chipotle and cilantro-lime versions fit naturally with MasalaMonk’s shrimp tacos recipe.
Seafood usually wants the lemony side of aioli. Lemon dill aioli is a natural dip for salmon croquettes. Fried fish can go either way: aioli gives you the garlicky option, while MasalaMonk’s tartar sauce recipe gives you the classic pickle-caper direction.
Dip, Spread, or Drizzle
The same sauce can work as a dip, spread, or drizzle with small texture changes. Fries need enough thickness to drag through crispy edges. Seafood tastes better when lemon arrives before the garlic. Sandwiches need a smooth spread, not a garlic bomb.
One sauce can become a dip, spread, or drizzle with small texture changes. Keep it thick for fries, smooth for buns, and looser for bowls or vegetables.
Dip: use the aioli as written and chill it before serving.
Sandwich spread: keep it thick, smooth, and not too garlicky.
Drizzle: add water or lemon juice ½ teaspoon at a time.
Bowl sauce: loosen with lemon juice, water, or yogurt.
Burger sauce: keep it thick and add mustard, chipotle, black garlic, or roasted garlic.
Thin aioli slowly. A little liquid changes the texture quickly. If the sauce looks loose after thinning, stop adding liquid and let it chill before fixing again. When the creamy version gets too loose, stir in more mayonnaise. With traditional aioli, add more oil only when the emulsion is stable. For a lighter dipping plate, thick garlic aioli works with crunchy vegetables or MasalaMonk’s crispy zucchini chips.
A short rest improves the flavor, but storage depends on the base. Aioli should still taste fresh, cold, and awake — not like something forgotten at the back of the fridge. Mayo-based garlic aioli is easiest to make ahead. Traditional raw egg aioli is more delicate. No-egg traditional aioli tastes best fresh.
Best Storage Window by Version
Version
Storage guidance
Mayo-based garlic aioli
Best within 2 to 4 days for fresh garlic flavor; some versions may keep up to about a week if handled cleanly and kept cold
Homemade raw egg/yolk aioli
Use pasteurized eggs when available; refrigerate and use within 3 to 4 days
No-egg traditional aioli
Best fresh; use within 24 hours for best texture
Vegan soy-milk aioli
Refrigerate airtight for 4 to 7 days
Cashew-style vegan aioli
Refrigerate for about 1 week; re-blend if needed
Mayo or egg emulsion
Do not freeze when texture matters
Keep aioli refrigerated until serving. Stir before using because garlic, lemon, and oil can settle slightly. At parties, keep the main container cold and refill a smaller bowl as needed; the sauce tastes better that way, and it is safer.
As a general safety habit, do not leave aioli at room temperature for more than 2 hours, and shorten that window when the room is very warm. FoodSafety.gov explains the 2-hour rule for perishable foods. Freezing is not recommended for mayo-based or egg-based aioli because the emulsion can break when thawed. Cashew-style vegan aioli handles freezing better, but the texture may still need a quick blend after thawing.
Troubleshooting Aioli
Most aioli problems are fixable. Decide what is wrong first: sharp garlic, flat flavor, loose texture, or a broken emulsion. Then fix only that problem. Mayo-based aioli is forgiving; the traditional garlic-and-oil path needs slower oil, steadier whisking, and more patience.
Aioli Troubleshooting Guide
Troubleshoot aioli by naming the problem first. Sharp garlic, thick sauce, thin sauce, and a split emulsion each need a different fix.
Quick Fixes for Common Aioli Problems
Problem
Fix
Sharp garlic bite
Rest longer, add more mayo, use roasted garlic next time, or strain the garlic-lemon mixture
Flat flavor
Add salt, lemon juice, Dijon, or a tiny bit more garlic
Salt pushed too far
Add more mayo, yogurt, or a small splash of lemon when it also tastes heavy
Texture too thick
Add lemon juice or water a few drops at a time
Texture too thin
Add more mayo for the creamy version; for traditional aioli, keep emulsifying slowly
Traditional aioli split
Stop adding oil, whisk hard, or start with a new yolk and slowly whisk the broken sauce into it
Olive oil tastes bitter
Use milder olive oil or blend with neutral oil; avoid high-speed blending with strong extra-virgin olive oil
Bitter even without olive oil
Check for old garlic, sprouted garlic, too much raw garlic, or too much lemon pith/zest
Vegan aioli will not thicken
Use unsweetened soy milk, keep oil and milk at a similar temperature, and blend in a narrow cup
Garlic chunks are unpleasant
Grate, press, paste, or strain the garlic before mixing
When traditional aioli breaks, do not throw it away immediately. Start with a fresh egg yolk in a clean bowl, then slowly whisk the broken sauce into the yolk as if it were the oil. Add it gradually and stop when the texture begins to loosen too much.
Traditional aioli is not garlic mayonnaise. It is a garlic-and-oil emulsion. Many modern garlic aioli recipes use mayonnaise as a shortcut because it is fast, creamy, stable, and familiar.
What is the difference between aioli and mayo?
Traditional aioli is built around garlic and oil, while mayonnaise is usually made from oil, egg yolk, and acid. Mayo-based garlic aioli combines mayonnaise with garlic, lemon, and seasonings to create a quick modern version. Real Simple has a useful explainer on aioli vs mayo.
How do you turn mayo into aioli?
Stir grated garlic, lemon juice, Dijon mustard, salt, and pepper into mayonnaise, then let it rest for 10 to 15 minutes. Start with ¾ cup mayo, 3 garlic cloves, 1 tablespoon lemon juice, ½ teaspoon Dijon, and ¼ teaspoon salt.
How much garlic should you use in aioli?
Use 3 small-to-medium cloves for balanced garlic aioli, 5 cloves for a bold dip, and 1 to 2 cloves for a milder sandwich spread. Resting the garlic in lemon juice helps soften the raw bite.
Do you need egg to make aioli?
No. Some traditional methods use only garlic and oil. Many from-scratch home versions use egg yolk because it helps the sauce emulsify more easily. Vegan aioli can be made with vegan mayo, soy milk, aquafaba, or cashews.
Can you make aioli without mayo?
Yes. Make traditional aioli by emulsifying garlic with oil, salt, and lemon, with or without egg yolk. Vegan no-mayo versions can use soy milk, aquafaba, or cashews as the base.
How long does homemade aioli last?
Mayo-based garlic aioli is best within 2 to 4 days for fresh garlic flavor, though some versions may keep longer when refrigerated and handled cleanly. Traditional raw egg aioli is best used within 3 to 4 days. No-egg traditional aioli tastes best fresh.
Why did my traditional aioli split?
Traditional aioli usually splits when oil is added too quickly or the emulsion is not stable yet. Add oil drop by drop at the beginning, whisk constantly, and repair a broken sauce by slowly whisking it into a fresh yolk.
Why does aioli taste bitter?
Bitterness can come from strong olive oil, high-speed blending, old or sprouted garlic, too much raw garlic, or lemon pith. Choose milder oil, fresh garlic, and a smaller garlic amount for a smoother sauce.
How do you make garlic aioli less strong?
Use fewer cloves, rest the garlic in lemon juice, add more mayo, or strain the garlic out. Roasted garlic gives the mildest, sweetest result, especially for sandwiches or shared dipping bowls.
What is the best aioli for fries?
Classic garlic aioli is the safest first choice for fries because it is thick, creamy, and bold enough to cling. For sweet potato fries or loaded fries, chipotle, sriracha, truffle, or spicy aioli works especially well.
Make the mayo version once, then pay attention to the bite: more lemon for seafood, more garlic for fries, roasted garlic for sandwiches, herbs for vegetables, heat for tacos. Once you learn that balance, aioli stops being a recipe you look up and becomes the sauce you know how to make.