Posted on — Leave a comment

Seafood Gumbo Recipe: Rich, Savory & Loaded with Shrimp and Crab

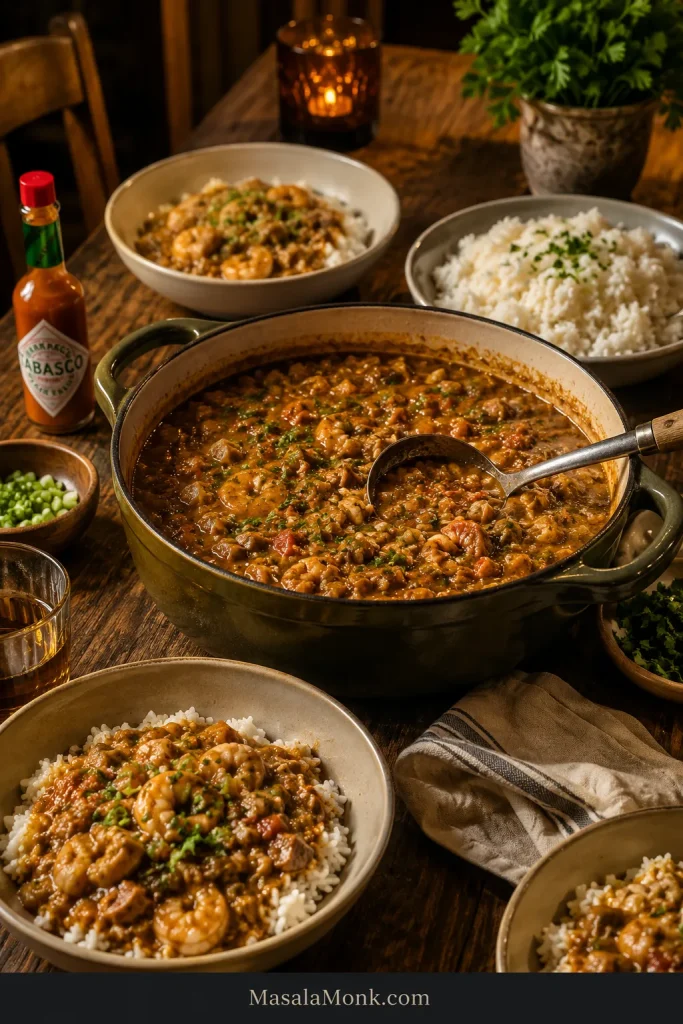
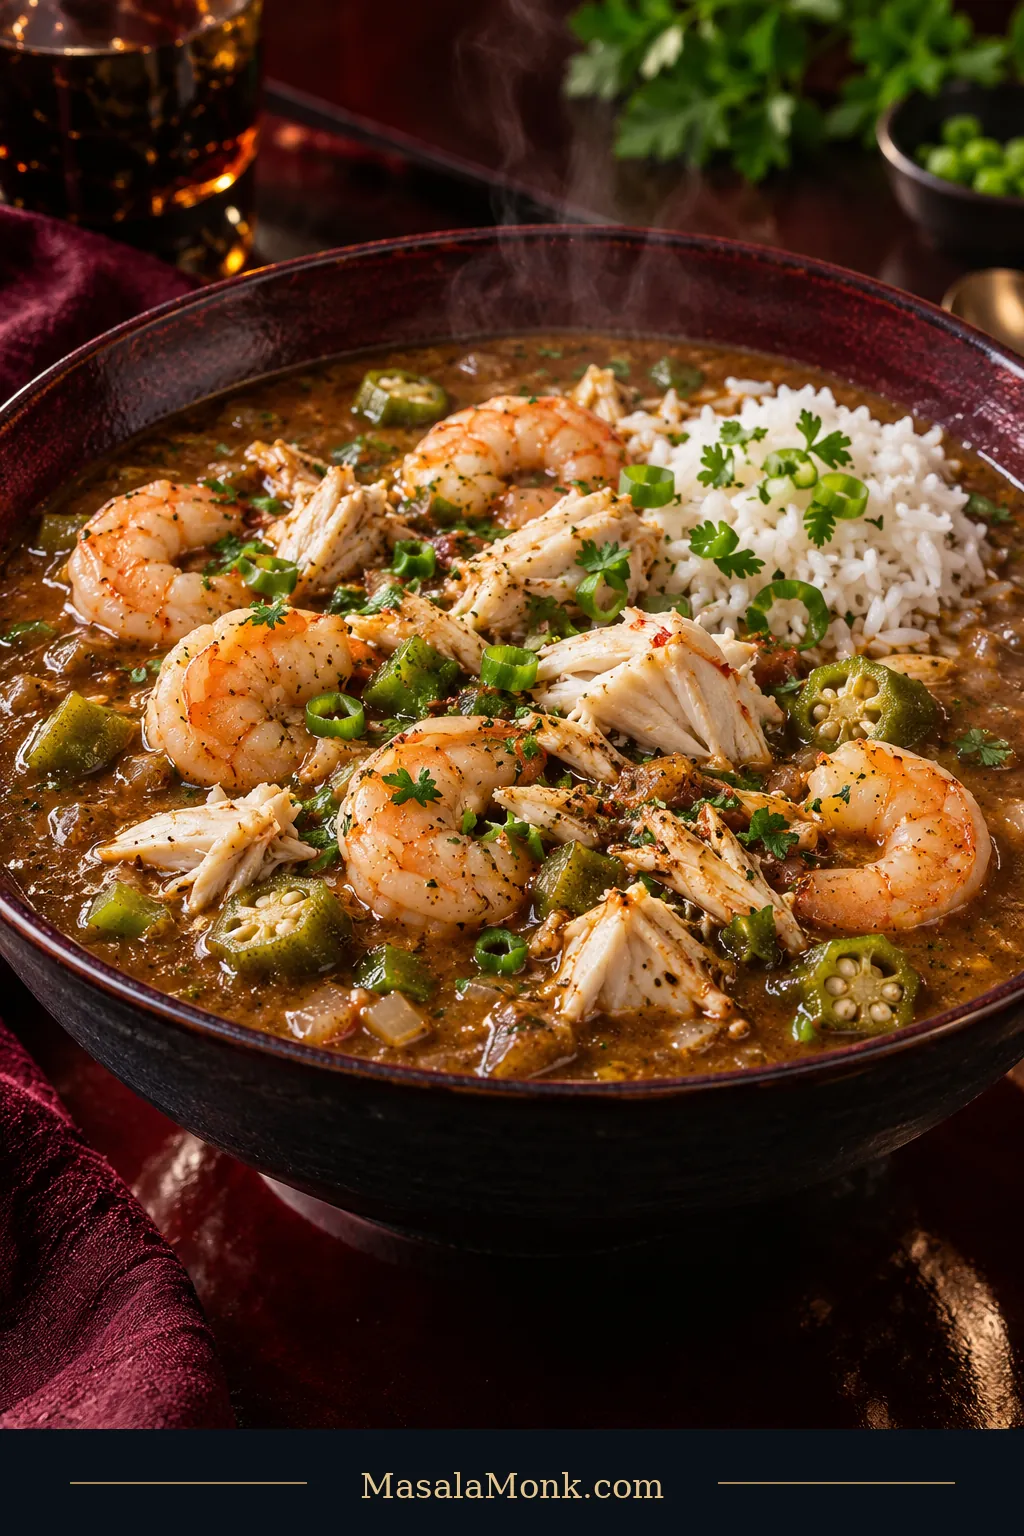
A dark ceramic bowl of deep-brown seafood gumbo with cooked shrimp, pale lump crabmeat, okra, and a modest mound of white rice, garnished with green onion and parsley.

Seafood gumbo gets expensive at exactly the point when you have the least room for improvisation. By the time good shrimp and crab go into the pot, the roux should taste right, the broth should have body, and the seasoning should be almost where you want it.

This Louisiana-style seafood gumbo starts with a brown roux, the onion-celery-bell-pepper trinity, shellfish stock and okra. Most of the cooking happens before the shrimp ever sees the pot, so the broth can become deep and savory without sacrificing the seafood at the end.

In the bowl, this seafood gumbo has a rich but fluid broth, tender shrimp, pieces of sweet crab, soft okra and enough heat to wake everything up without overpowering the shellfish.

Final Check Before the Seafood

Give the roux a quick look and smell, then taste the stock and base. If the roux still looks or smells off, or the stock or base needs work, the shrimp can wait a few more minutes in the refrigerator.

  • Roux: deep brown, smooth and toasted, with no scorched smell or black flecks.
  • Stock: clearly shellfish-rich and savory, with enough flavor to carry through the finished broth.
  • Gumbo base: seasoned and flowing, with enough body to leave a light coating on a spoon.
  • Seafood: shrimp cooks only until opaque and tender; delicate lump crab goes in at the very end.
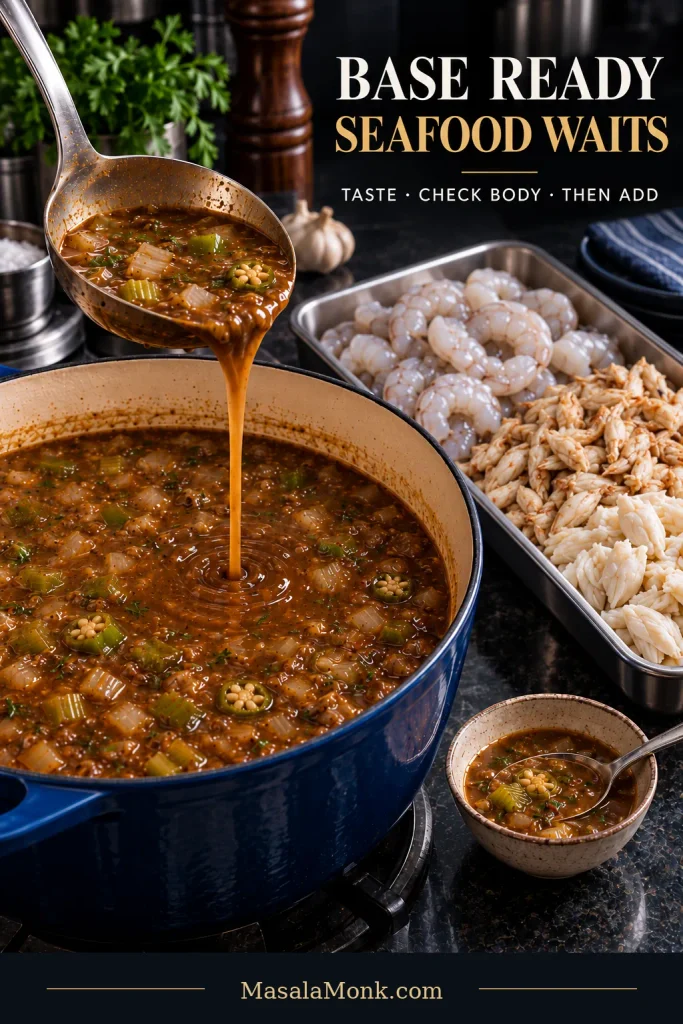
A ladle pours brown gumbo base into a Dutch oven while raw peeled shrimp and separate portions of picked claw and lump crabmeat wait on a metal tray beside the pot.
For seafood gumbo, this is the last easy moment to correct the base. Once the quick-cooking shrimp and delicate lump crab enter, a long corrective simmer can do more harm than good.

Seafood Gumbo Recipe

Shrimp and Crab Seafood Gumbo

A deep-brown seafood gumbo with shrimp, claw and lump crabmeat, okra and savory seafood stock. Most of the seasoning and consistency work happens before the seafood enters, helping the shrimp stay tender and the lump crab remain in recognizable pieces.

  • Serves: about 8
  • Prep time: about 30 minutes
  • Cook time: about 1 hour 45 minutes–2 hours
  • Total: about 2¼–2½ hours
  • Pot: 7- to 8-quart heavy Dutch oven or stockpot
  • Roux target: deep milk-chocolate to coffee brown

Stock choice: you need 7 cups / 1.65 L total shrimp or seafood stock for the gumbo. Use unsalted homemade shrimp stock, low-sodium purchased seafood stock or a combination. If making shrimp-shell stock, start it first; its short simmer can run while you chop the vegetables and prepare the okra. For the flavor check and top-up decision, see the quick shrimp-stock guide.

Equipment

  • 7- to 8-quart heavy-bottomed Dutch oven or stockpot
  • 10- to 12-inch skillet for the okra
  • Medium saucepan, about 3 quarts, if making shrimp-shell stock
  • Sturdy wooden spoon or heatproof spatula
  • Fine-mesh strainer if making shrimp-shell stock
  • Ladle
Optional Quick Shrimp-Shell Stock
  • Shells reserved from the shrimp used in the gumbo
  • 1 teaspoon vegetable, canola or other neutral oil
  • 6 cups / about 1.4 L water
  • A small handful of clean onion, celery or green-onion trimmings, optional
  • 1 bay leaf, optional
Okra
  • 10 oz / 285 g sliced okra, fresh or frozen
  • 1 tablespoon / 15 ml vegetable, canola or other neutral oil
Roux and Gumbo Base
  • ½ cup / 4 fl oz / 120 ml vegetable or canola oil
  • ¾ cup / about 90 g all-purpose flour
  • 2 cups / about 300 g chopped yellow onion
  • 1 cup / about 150 g chopped green bell pepper
  • 1 cup / about 120 g chopped celery
  • 4 garlic cloves / about 15 g, minced
  • 7 cups / 1.65 L shrimp or seafood stock total—unsalted homemade, low-sodium purchased or a combination
  • Up to 1 additional cup / 8 fl oz / 240 ml unsalted stock or water for consistency adjustments
  • 1 tablespoon salt-free or low-sodium Cajun or Creole seasoning
  • 1 teaspoon dried thyme
  • 2 bay leaves
  • 1 tablespoon / 15 ml Worcestershire sauce
  • ½ teaspoon freshly ground black pepper
  • ¼ teaspoon cayenne pepper, plus more if wanted
  • Kosher salt, as needed
Seafood
  • 1½ lb / 24 oz / 680 g raw peeled 21/25 shrimp, deveined and tails removed
  • 8 oz / 225 g cooked claw crabmeat, picked over for shell and cartilage
  • 8 oz / 225 g cooked lump crabmeat, picked over for shell and cartilage
  • Optional: 8 oz / 225 g shucked oysters, with their packing liquid (“oyster liquor”) strained and reserved

Shrimp size: 21/25 means roughly 21–25 shrimp per pound.

If making the shrimp-shell stock: buy shell-on shrimp and peel and devein them yourself, reserving the shells. Buy enough to finish with about 1½ lb / 680 g peeled shrimp for the gumbo.

To Finish and Serve
  • ½ cup sliced green onions
  • ¼ cup chopped flat-leaf parsley
  • 1–2 teaspoons filé powder (ground sassafras leaves), optional
  • Hot sauce, to taste
  • 3–4 cups hot cooked long-grain white rice, plus more if wanted

Seafood Gumbo Ingredients: What Goes Into Each Stage

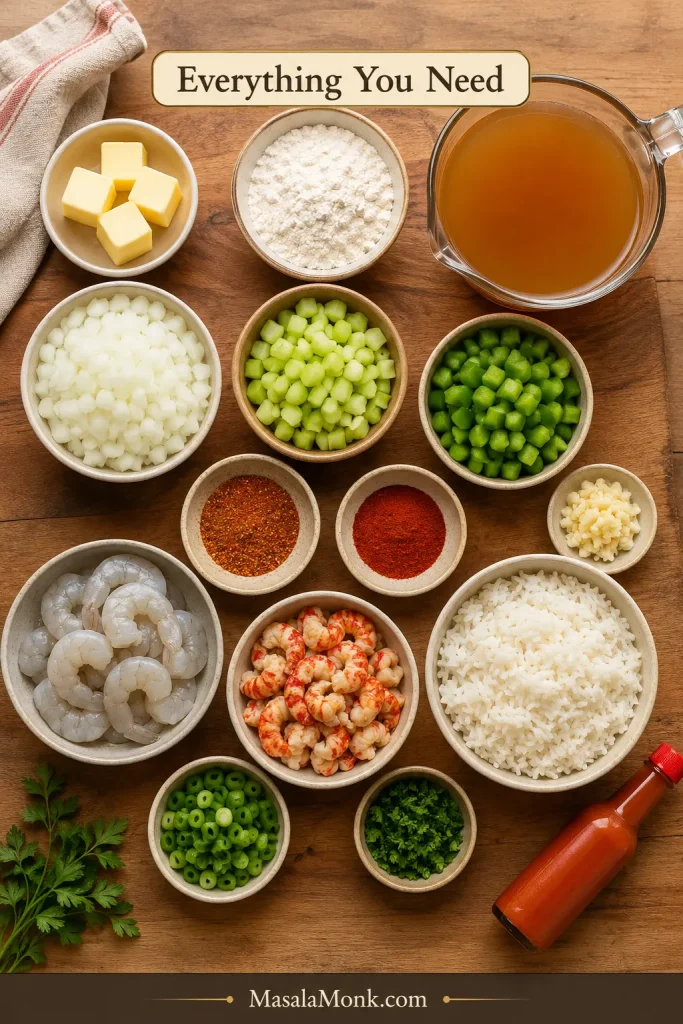
Before heating the roux, group the ingredients by when they enter the pot: the roux ingredients and chopped trinity first, stock and okra during the long simmer, and the shrimp and crab near the end. This overview helps you organize the work without stopping to measure or chop once the roux is darkening.
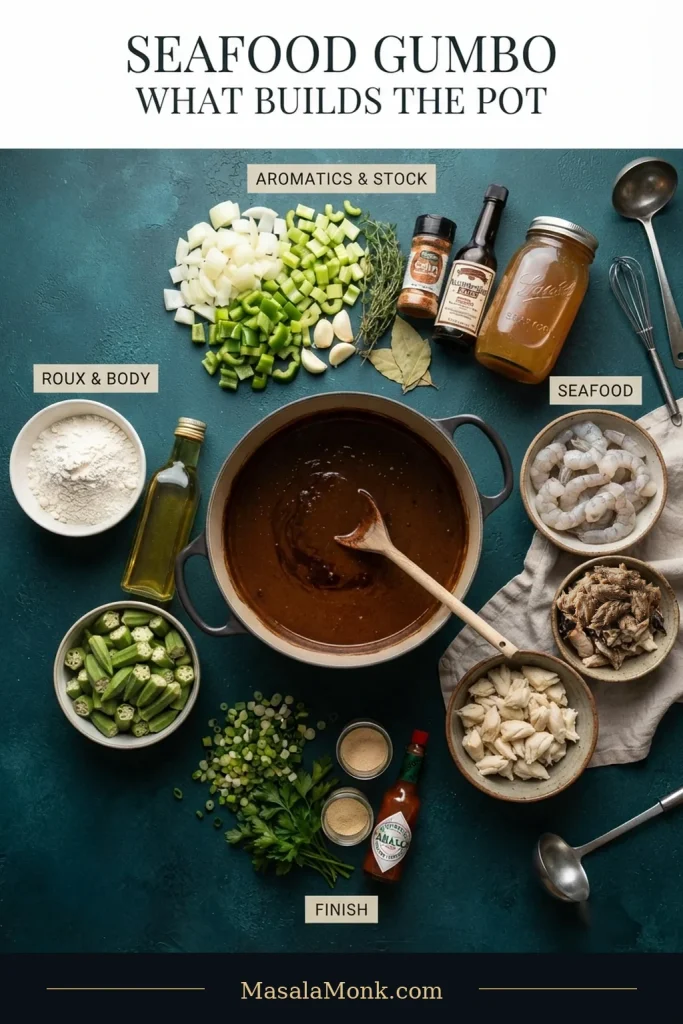
An overhead seafood-gumbo ingredient arrangement around a central pot, with flour and oil, chopped onion, green bell pepper and celery, stock, raw shrimp, claw and lump crabmeat, okra, herbs, and finishing ingredients grouped around it.
Keep the two crab meats separate during prep: claw can go in with the shrimp, while the larger lump pieces wait for the short finish. That separation prevents an easy timing mix-up.

Optional Quick Shrimp-Shell Stock

Using purchased seafood stock? Skip straight to the main instructions.

  1. Heat 1 teaspoon oil in a medium saucepan over medium heat. Add the shrimp shells and cook for 2–3 minutes, stirring, until they turn pink and smell distinctly shrimpy.
  2. Add 6 cups / 1.4 L water, plus the vegetable trimmings and bay leaf if using. Bring to a gentle simmer and cook for 15–20 minutes.
  3. Strain through a fine-mesh sieve without pressing sediment through, then taste and measure the stock. Bring it to 7 cups / 1.65 L total: use water if it already tastes full and shrimp-rich, or low-sodium seafood stock if it still tastes light. Keep up to 1 additional cup of unsalted stock or water nearby for later consistency adjustments.

Instructions

Build the Base
  1. Get everything ready. Chop the onion, bell pepper and celery; mince the garlic; measure the flour, oil, stock and seasonings; and pick through both kinds of crabmeat. Keep the lump crab separate.
  2. Cook the okra. Heat 1 tablespoon / 15 ml oil in a wide skillet over medium to medium-high heat. Cook for 10–12 minutes, stirring regularly, until tender, lightly browned in places and much less stringy. Set aside.
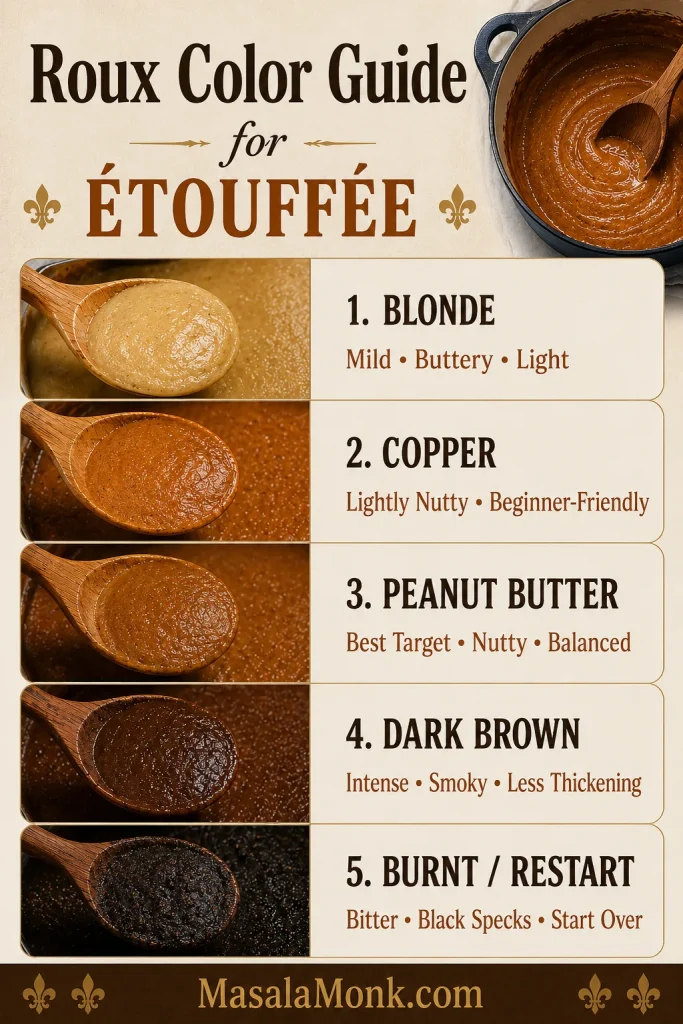
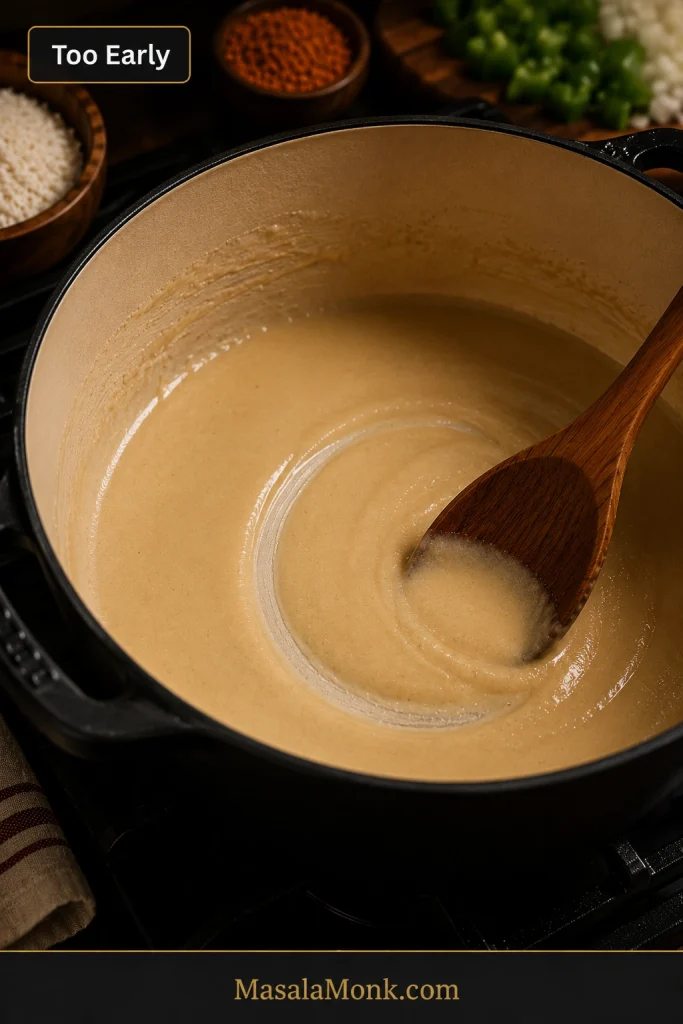
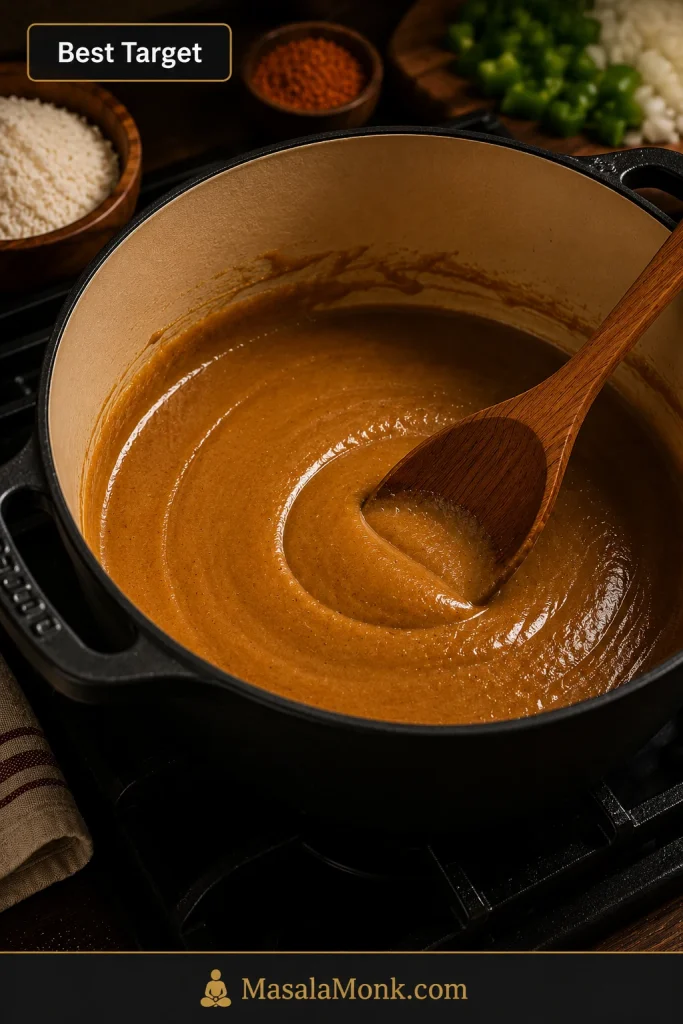
  3. Make the roux. Heat ½ cup / 120 ml oil in the Dutch oven over medium heat and stir in the flour until smooth. Stir regularly at first, then almost constantly once the color begins to deepen. Scrape the bottom and corners until the roux reaches a deep milk-chocolate to coffee-brown shade, usually about 20–30 minutes. Lower the heat whenever it starts moving faster than you can comfortably control it.
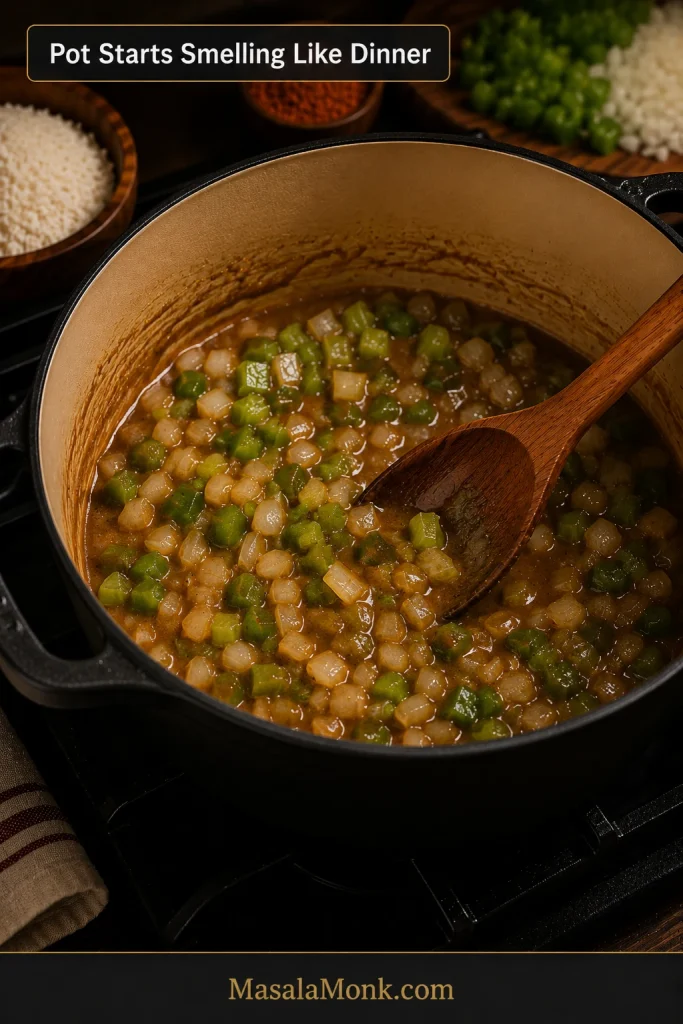
  4. Add the trinity. Stir in the onion, green bell pepper and celery—the Louisiana “trinity.” The mixture will tighten dramatically when the vegetables hit the roux; that is normal. Cook for 5–7 minutes until softened, then add the garlic for 30–60 seconds.
  5. Add the stock gradually. Stir in about 1 cup / 240 ml stock first and work it into a smooth sauce. Add the rest gradually, using 7 cups / 1.65 L total at this stage. Keep the extra unsalted stock or water nearby. Once the liquid is smooth, the most nerve-racking part is behind you.
  6. Simmer the base. Add the cooked okra, Cajun or Creole seasoning, thyme, bay leaves, Worcestershire sauce, black pepper and cayenne. If using oysters, add the strained oyster liquor now. Bring to a gentle simmer and cook for 45–60 minutes, stirring occasionally.
Check the Base and Finish
  1. Taste the broth. It should be savory and rounded, with seafood flavor you can clearly taste. Add salt until the broth is almost where you want it; crabmeat and oyster liquor can add more later.
  2. Look at the thickness. Ladle some up. It should pour easily while leaving a light coating on the spoon. Simmer uncovered for another 5–10 minutes if it is thin. If it is thicker than you like, add extra unsalted stock or water ¼ cup / 60 ml at a time.
  3. Add the shrimp and claw crab. Keep the gumbo at a gentle simmer, then add the raw shrimp and cooked claw crabmeat. If using oysters, add them now as well. Cook for about 2–3 minutes.
  4. Fold in the lump crab. Add it gently and continue only until the shrimp are opaque and just firm and any oysters are opaque and firm, with their edges beginning to curl, usually another 1–2 minutes.
  5. Finish off heat. Remove the bay leaves and stir in the green onions and parsley. Add filé powder now if using, or offer it at the table. Here it is a light off-heat finish, not a required second thickener. Taste once the crab is hot and make the final salt and heat adjustment.
  6. Serve promptly. Portion the warm long-grain white rice into bowls, then ladle the gumbo around or over it. Put hot sauce on the table for anyone who wants more heat.

Recipe Notes

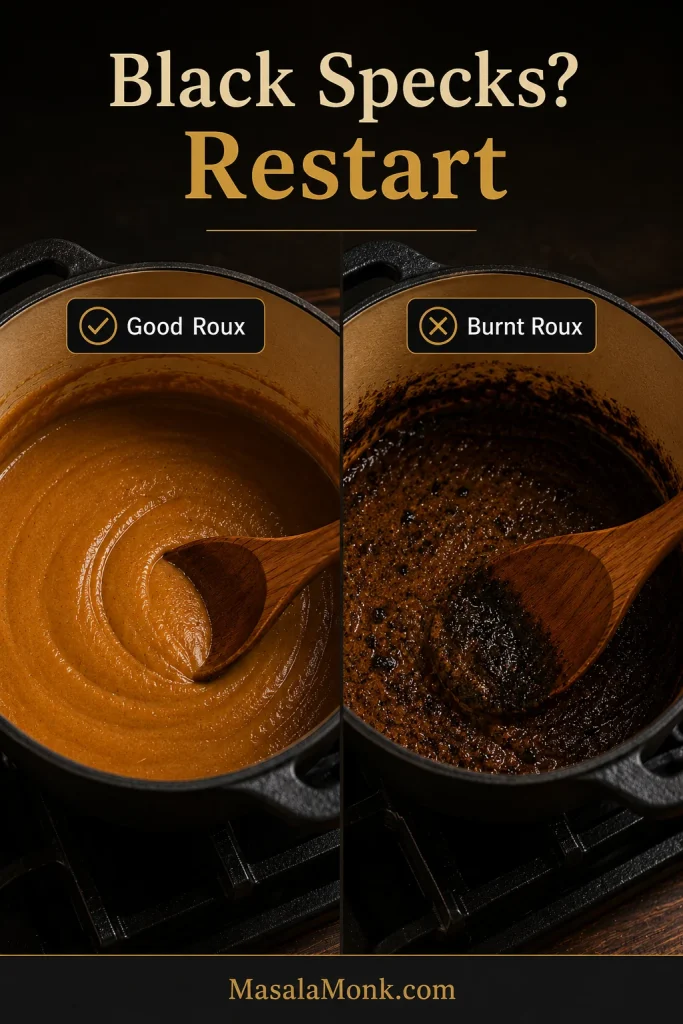
  • Roux: if the roux develops persistent black flecks or smells sharply burnt, restart. It is frustrating, but beginning again is faster than spending another hour trying to hide burnt flour.
  • Frozen shrimp: raw frozen shrimp work well. Thaw completely, drain and make sure they are deveined.
  • Crab: the claw meat is already cooked, so it only needs to heat through. Lump crab waits until the end so the larger pieces survive.
  • Salt: stock, seasoning blends, Worcestershire, crabmeat and oyster liquor all vary in sodium. If your Cajun or Creole blend is salty, start conservatively and wait until the seafood is hot before making the final salt adjustment.
  • Make ahead: for the best seafood texture, refrigerate the finished base before adding the quick-cooking seafood. Reheat the base, then add the shrimp, picked crab, oysters or crawfish according to their normal timing.

Need help with one stage? Jump to the roux color guide, okra texture guide, or troubleshooting table.

Research basis: This recipe synthesizes established Louisiana seafood-gumbo methods and published chef techniques. MasalaMonk has not independently kitchen-tested this exact version.

The recipe above is enough to cook from. What follows is for the points where gumbo stops being about measurements and starts asking you to judge what is happening in the pot.

Build the Base: Stock, Roux, Okra & Body

The base has three jobs: deeply toasted flavor from the roux, clear shellfish flavor from the stock, and enough body to carry the seafood without becoming heavy.

Quick Shrimp-Shell Stock

If you make the shell stock above, judge it by flavor rather than color.

Don’t assume a dark stock is automatically a strong one. Too few shells for the amount of water can produce plenty of color with little depth, while lots of heads and shells reduced too aggressively can turn heavy or almost bitter.

A spoonful should taste distinctly shrimp-rich and savory without taking over your palate. When it already has that concentration, water is enough to bring it to volume; when it still tastes light, low-sodium seafood stock is the better top-up.
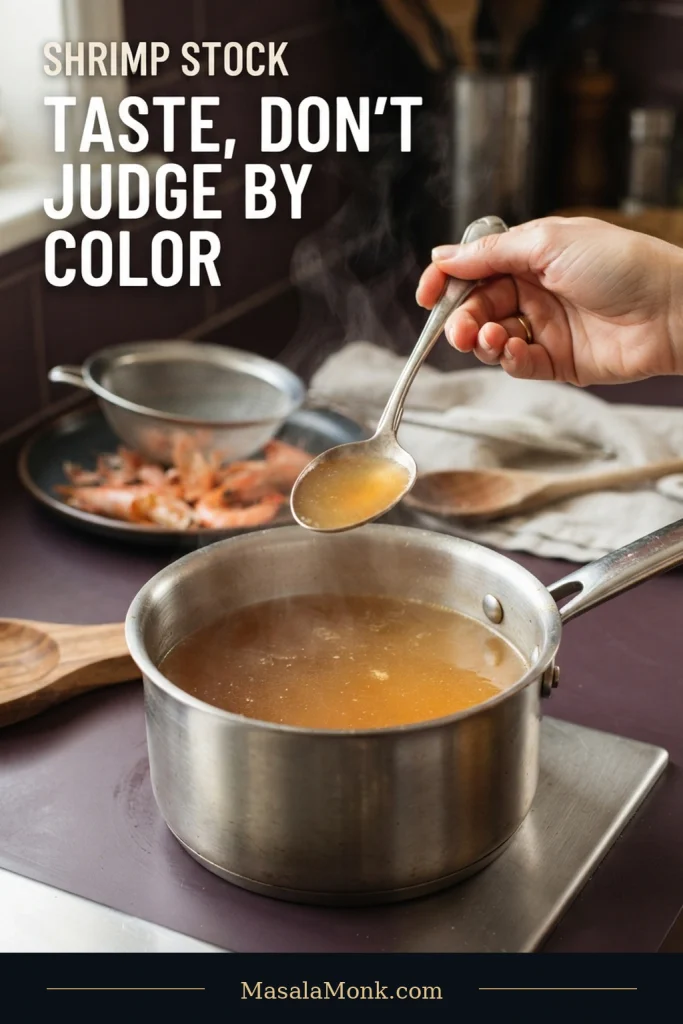
A tasting spoon holding amber shrimp stock above a stainless-steel saucepan, with a fine-mesh strainer and cooked shrimp shells in the background.
Stock color can vary with the shells and simmering time. Taste a spoonful before deciding whether to bring it to volume with water or strengthen it with low-sodium seafood stock.

How Dark Should a Seafood Gumbo Roux Be?

For this pot, stop in the deep milk-chocolate to coffee-brown range. You want plenty of toasted flavor while leaving room for sweet shrimp and crab.

As the roux gets darker, you gain roasted flavor and give up some thickening power. The darkest possible roux isn’t automatically the right one for every gumbo.

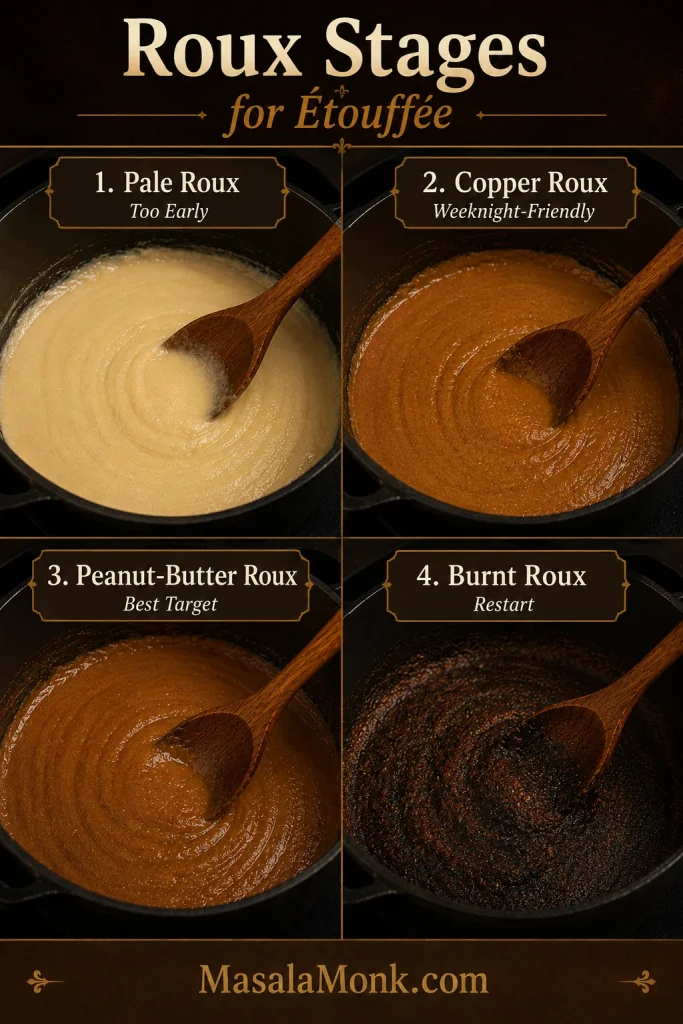
Stay close once it moves past peanut-butter brown. The raw-flour smell fades, the aroma turns nutty and toasted, and the color can deepen surprisingly fast. Twenty to thirty minutes is a useful planning range, but the pot and burner decide the actual clock.

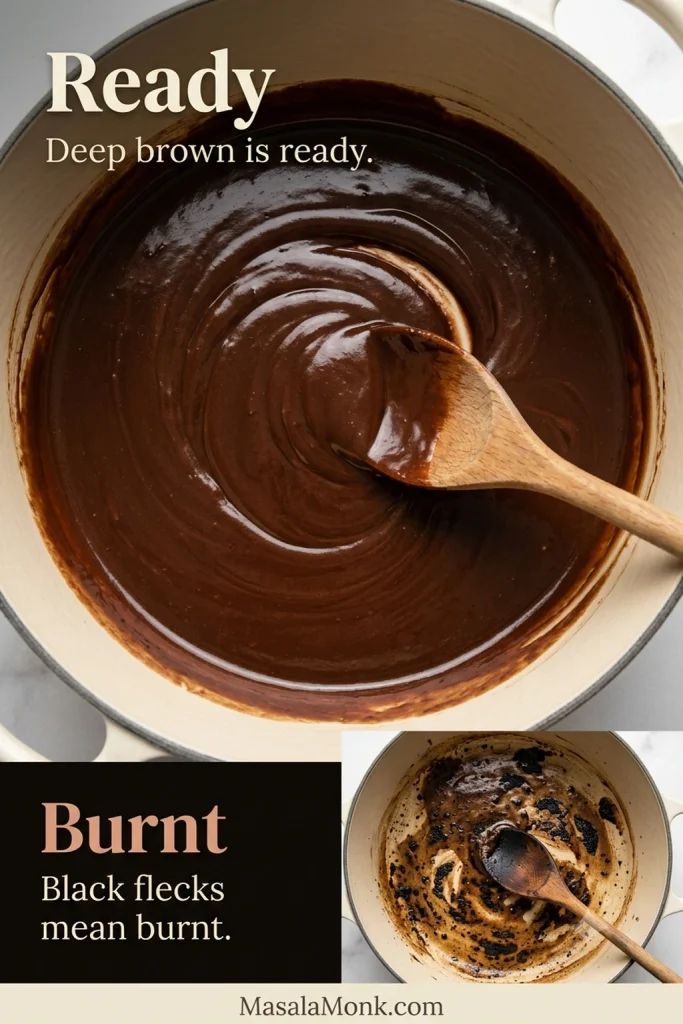
If the roux starts moving faster than you can comfortably control it, turn the heat down. Persistent black flecks or a sharply scorched smell mean it is time to begin again.

There is no prize for taking the roux one shade darker than you actually enjoy.
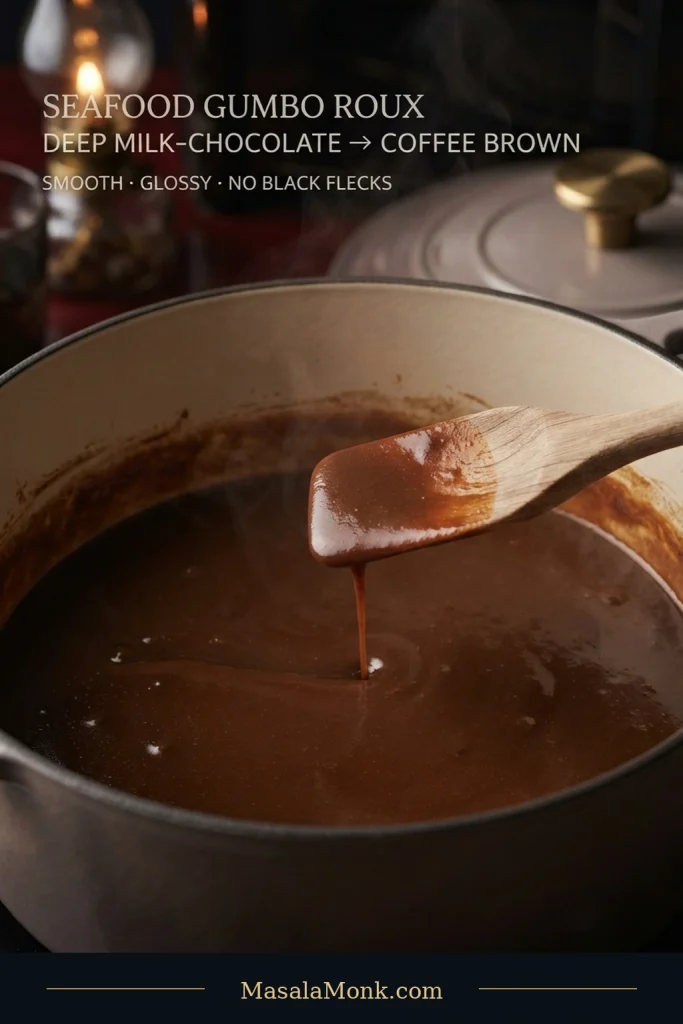
Smooth, glossy deep-brown roux in a light-interior pot, with a wooden spatula lifting a thin stream back into the mixture.
The light pot interior makes the shade easier to judge. A spatula track that starts closing also shows that the hot roux is mobile, rather than sitting on the utensil like paste.

Louisiana seafood gumbo comes in a wide range of roux shades, seafood combinations and thickening traditions. Explore Louisiana’s gumbo guide offers a useful overview of that regional range.

When the Trinity Hits the Roux

This is the moment the vegetables meet the hot roux. Expect the mixture to tighten into a dense paste before any stock is added; that change is normal.
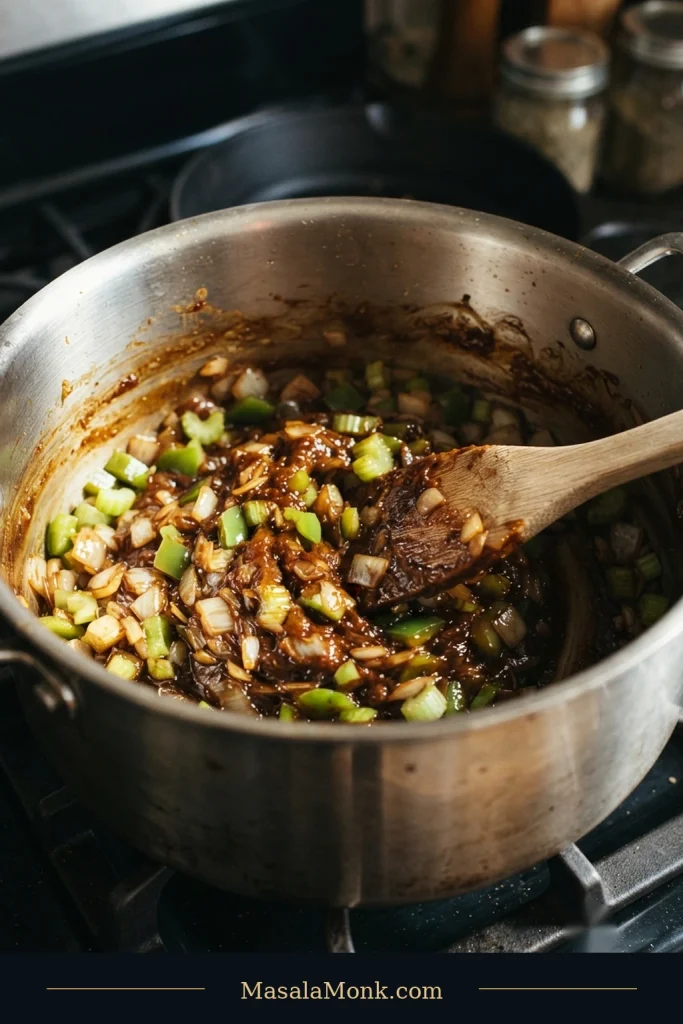
Chopped yellow onion, green bell pepper, and celery being stirred into glossy dark-brown roux in a heavy pot with a wooden spatula.
Watch the bottom and corners as the mixture tightens. Those areas can catch first, so keep the spoon moving until the vegetables soften and the stock is ready to loosen the roux.

Work the First Stock Into the Roux

Start with about 1 cup / 240 ml of stock and keep stirring until the thick mixture becomes a smooth sauce. Only then add the remaining stock in stages.
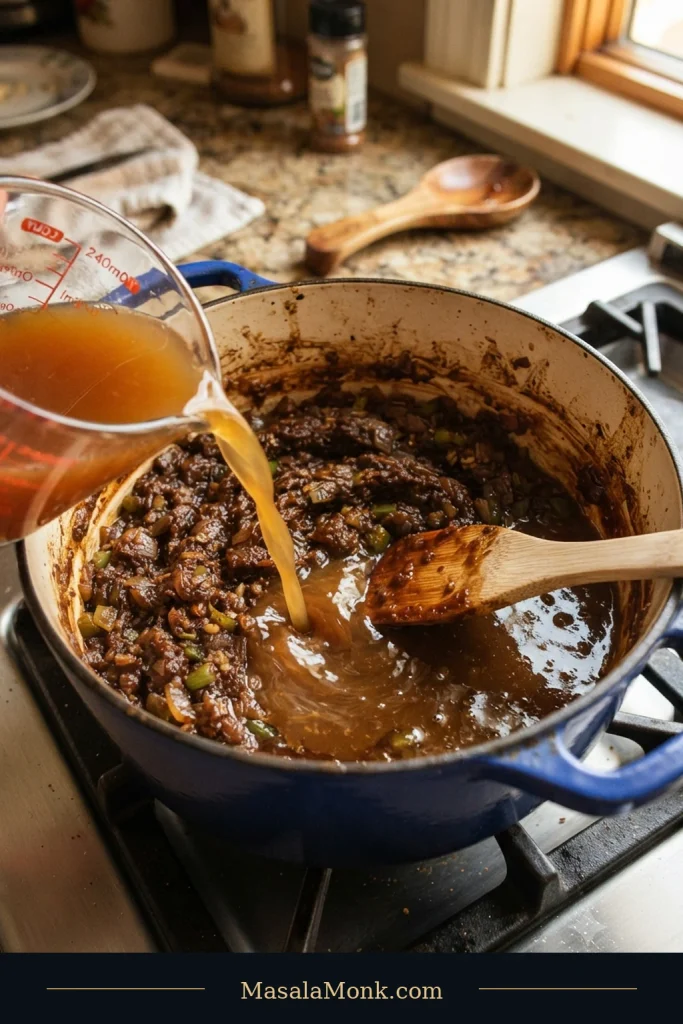
Amber seafood stock pouring from a glass measuring jug into a thick brown roux-and-vegetable mixture while a wooden spatula works through the pot.
Keep working the mixture until no dry-looking roux pockets remain and it becomes a smooth, glossy sauce. Add the next portion of stock only after the first is incorporated.

Okra Without the Ropey Texture

Okra is useful in seafood gumbo, but it isn’t mandatory. It adds vegetal flavor and extra body, and cooking it separately helps tame the ropey texture that puts many people off.

At first the sliced okra looks wet and increasingly stringy. Keep going. The strands diminish, the pieces soften and a few edges begin to brown. That’s the point to stop.
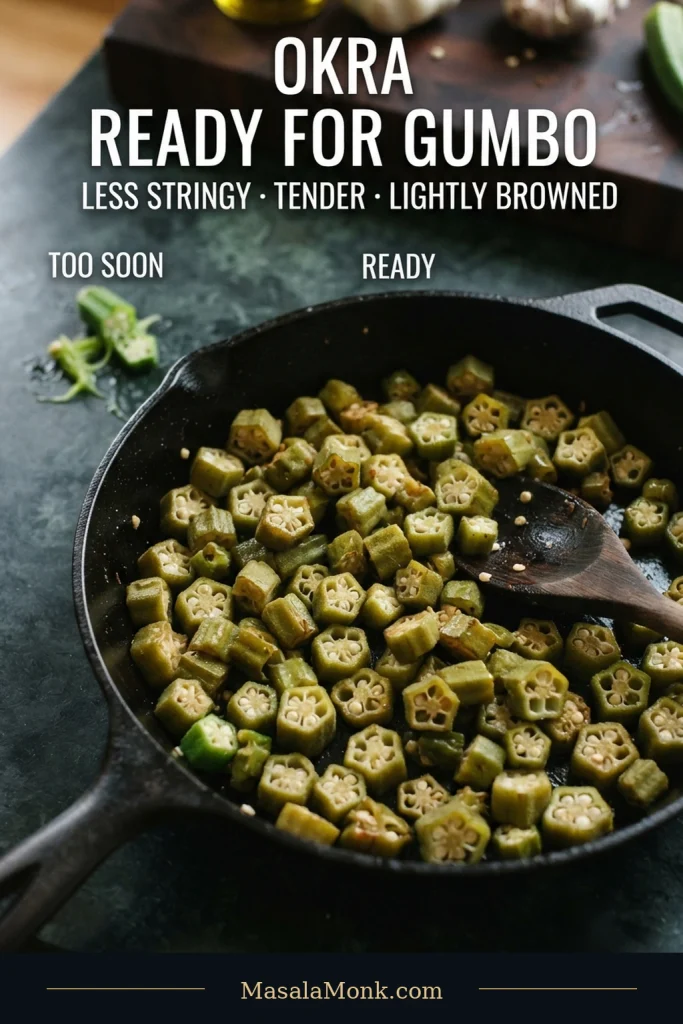
Sliced okra at two cooking stages in a dark skillet, with brighter wet slices and visible strands beside softer olive-green slices with light browning.
The skillet gives okra direct contact with heat before it joins the broth. Frozen slices can release more water, so their surfaces may need extra time to dry out before they are ready.

Fresh and frozen both work. Frozen okra may need a little longer while its surface moisture evaporates.

You can also roast or smother the okra; the skillet simply lets you watch the change happen.

If okra isn’t for you, leave it out. The gumbo will have a different body. A little filé powder off heat can add an earthy sassafras note and some additional body, but in this recipe it is a light finish rather than a required second thickener. If you leave the okra out, use the base-tasting and consistency check to decide whether the broth needs any adjustment.

Taste and Adjust the Base

After 45–60 minutes of gentle simmering, the broth should already be enjoyable by itself. The vegetables will have softened into the broth, the roux should no longer taste separately floury, and the pot should smell like one finished base rather than stock plus seasoning.

A flat-tasting gumbo often needs salt before it needs another spoonful of seasoning. Cajun and Creole blends vary enormously in sodium, so adding more can quickly push the whole pot too far.

If the broth tastes too intense, loosen it with a little unsalted stock or water. By contrast, a weak broth needs a little more uncovered simmering so the flavor can concentrate.

Ladle some up and watch how it falls. It should pour, not plop like gravy, while still leaving a light coating on the spoon. A splash of unsalted stock or water loosens an overly thick pot; a few more minutes uncovered will build body when it is still too loose.
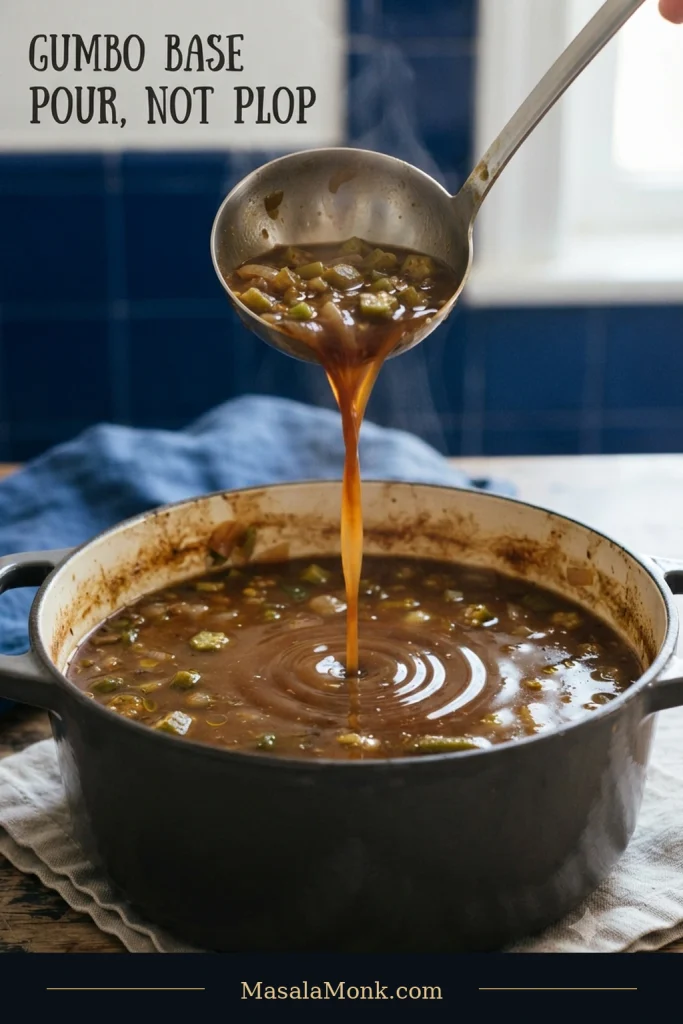
A stainless-steel ladle pours a continuous stream of brown gumbo base into a pot, creating low ripples on the liquid surface.
Watch the landing point: the stream should merge into the broth, not sit as a raised ring. Correcting the base here is easier than trying to reduce it after delicate seafood is in the pot.

If You Prefer a Tomato-Based Gumbo

Tomatoes stay out of the core recipe so the toasted roux, seafood stock and shellfish come through distinctly. For a tomato-based variation, add 1 cup / 240 ml crushed tomatoes and initially hold back 1 cup / 240 ml of the stock. After the base has simmered, add as much of that held-back stock as needed to reach the same flowing consistency.

If what you’re after is a substantially thicker roux-and-seafood sauce, our Cajun Étouffée is the better template.

When the broth tastes deep and pours cleanly from the ladle, the slow part is finished. From here, the pace changes quickly.

Back to top ↑ · Jump to recipe

Choosing Shrimp, Crab & Other Seafood

Shrimp and crab are enough to make a complete seafood gumbo. Claw meat brings a stronger, more pronounced crab flavor; lump crab gives you the large delicate pieces worth finding in the bowl.

Start With Good Shrimp

Raw shrimp around 21/25 count are large enough to stay juicy and recognizable without turning each spoonful into one oversized shrimp. The tails come off because this is a spoon dish.

Frozen raw shrimp work well too. Thaw them completely, drain them and check the backs even when the package says “peeled.” Peeled doesn’t always mean deveined.
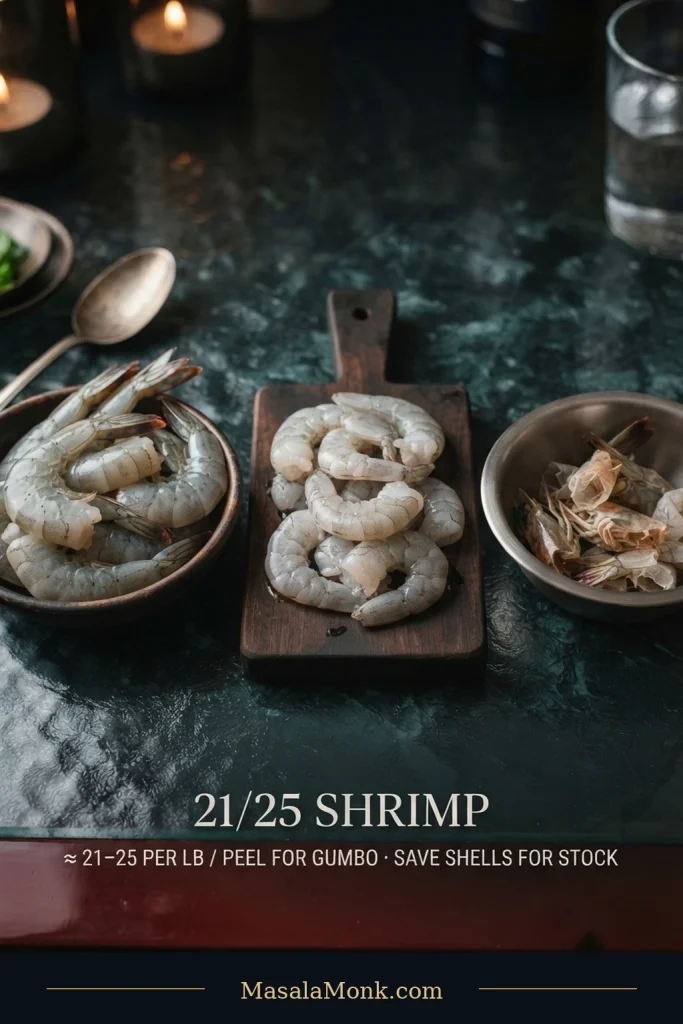
Raw shell-on shrimp, peeled raw shrimp with their tails removed, and a small bowl of empty shrimp shells arranged separately on a teal work surface.
The 21/25 count means roughly 21–25 shrimp per pound. Because the recipe calls for 1½ lb / 680 g of peeled meat, buy enough shell-on shrimp to reach that usable amount and save the shells for stock.

Claw Crab for Flavor, Lump Crab for Pieces

Claw meat is darker, stronger and usually less expensive than lump crab. Because it is already cooked, it only needs to heat through. Its stronger flavor makes it a good partner to the milder, more delicate lump meat.

Lump crab costs more because you’re paying for those large, delicate pieces. Fold it in near the end and leave it alone as much as possible. The point of buying lump crab is to still find lump crab in the bowl.
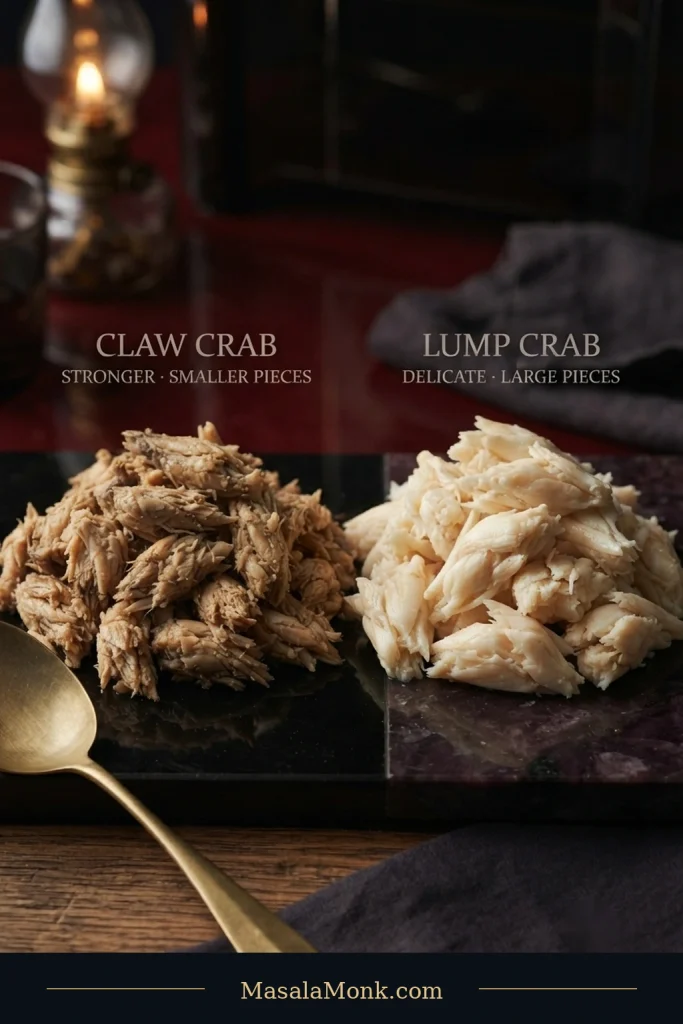
Two portions of cooked crabmeat on a dark surface: smaller darker flakes of claw crab on the left and larger pale clusters of lump crab on the right.
Keep the two crabmeats in separate bowls during prep. The smaller claw flakes can warm through with the shrimp, while the large lump pieces wait until the final minutes.

Check Picked Crab for Shell

Before cooking, spread all of the crabmeat across a pale plate and run your fingertips through it. Tiny pieces of shell and cartilage are much easier to spot there than in a dark bowl of gumbo.
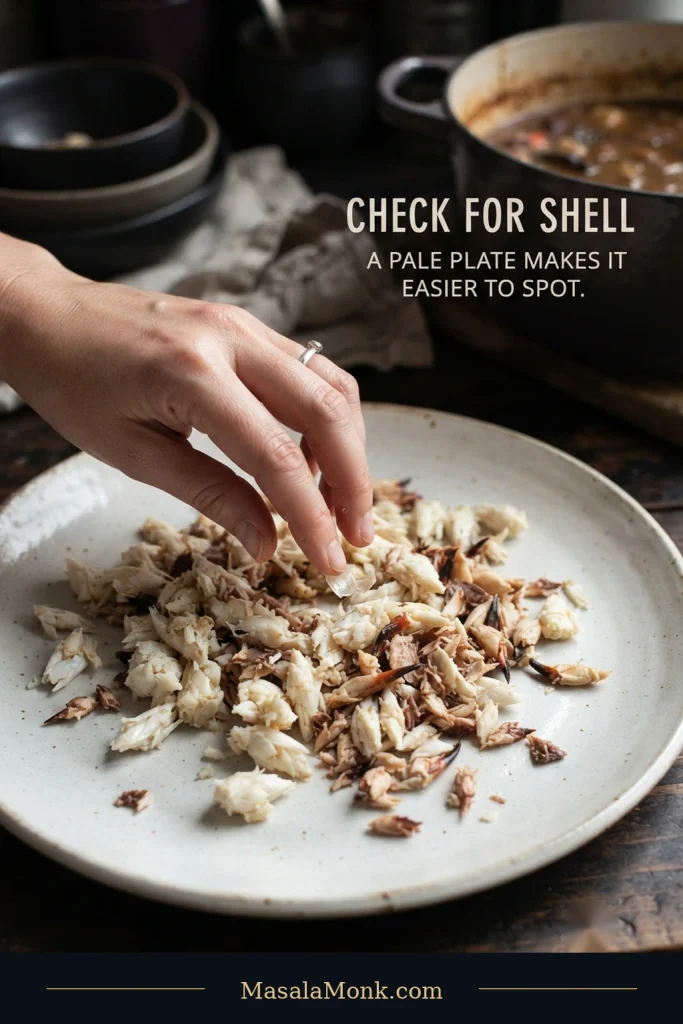
Picked crabmeat spread across a pale plate while a hand checks the pieces for a small shell or cartilage fragment.
Check picked crab before it reaches the pot. A small shell fragment can be mistaken for grit once it disappears into the dark broth, sending you toward the wrong fix.

Optional Seafood Options

You don’t need to empty the seafood counter into the pot. Add oysters when you want more briny richness, crawfish for their sweeter tail meat, or whole blue crabs when you want more crab flavor and don’t mind shells and claws at the table. For the timing that protects the shrimp and picked crab, jump to the seafood finishing window.
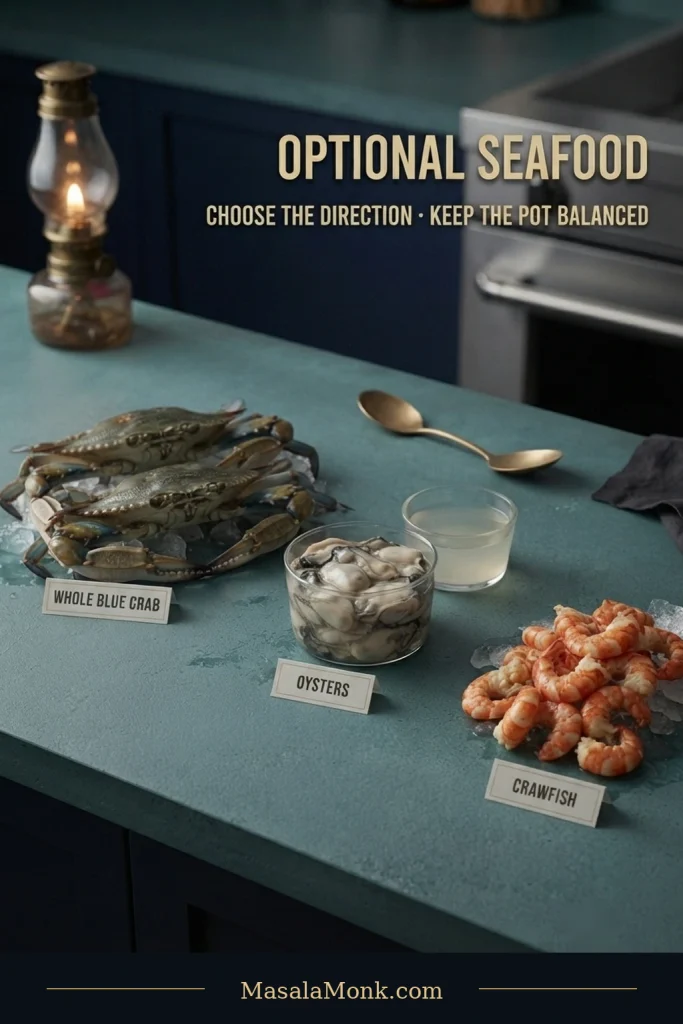
Whole blue crabs, shucked oysters with a small vessel of oyster liquor, and peeled cooked crawfish tails arranged as optional seafood additions.
Whole crabs simmer with the base; strained oyster liquor goes in earlier than the oyster meat; cooked crawfish tails need only a brief warm-through at the end.

What About Whole Crabs?

Whole cleaned blue crabs can add excellent flavor while the gumbo simmers. They also mean claws and shells at the table. Some people consider that part of the meal; others would rather eat gumbo entirely with a spoon.

If whole gumbo crabs are easy to find, add 1–2 cleaned blue crabs once the stock is incorporated and let them simmer with the base. Remove them before adding the picked seafood, or leave them in for serving if you want the hands-on experience. Picked crab alone keeps this recipe completely spoon-friendly.

Want the shell cracking, potatoes and corn to be the whole experience? Try our Cajun Seafood Boil.

Adding Oysters or Crawfish

Oysters add a deeper briny note. Strain their liquor into the simmering base and hold the oyster meat until the seafood finish.

For a crawfish version, replace about 8 oz / 225 g of the shrimp or claw crab with 8 oz / 225 g cooked crawfish tails. Fold the crawfish in near the end, just long enough to heat through.

More seafood does not automatically make better seafood gumbo. It is more satisfying when you can still recognize the shrimp and crab in each spoonful.

Andouille changes the picture completely, bringing smoke, fat and extra salt. For that darker, meatier style, see our Chicken & Andouille Gumbo.

Back to top ↑ · Check the finishing window

Know When the Seafood Is Done

For 21/25 shrimp, expect roughly 3–5 minutes total in gently simmering gumbo. Cooked claw crab only needs warming, and delicate lump crab belongs in the final minute or two.

After all the slow cooking, two hours of gumbo-making suddenly becomes a four-minute finish. Stay close to the stove.
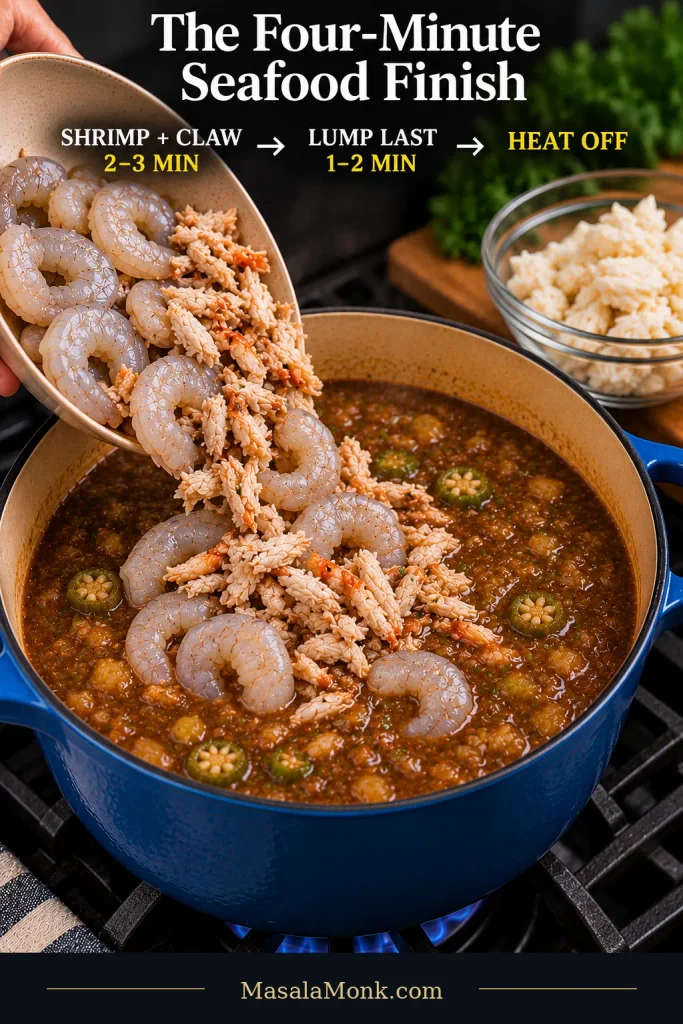
Raw peeled shrimp and picked claw crab being added to a pot of gumbo, with a separate bowl of lump crab and an on-image sequence for shrimp and claw first, lump last, and heat off.
The base of seafood gumbo should already taste finished before this stage. During the brief finish, the goal is tender shrimp and warmed crab, not another round of reducing or seasoning the broth.

Fold in the Lump Crab Gently

By this point, the base is ready and the shrimp are nearly done. Fold just enough to distribute the crab; vigorous stirring can break the larger pieces before they reach the bowls.
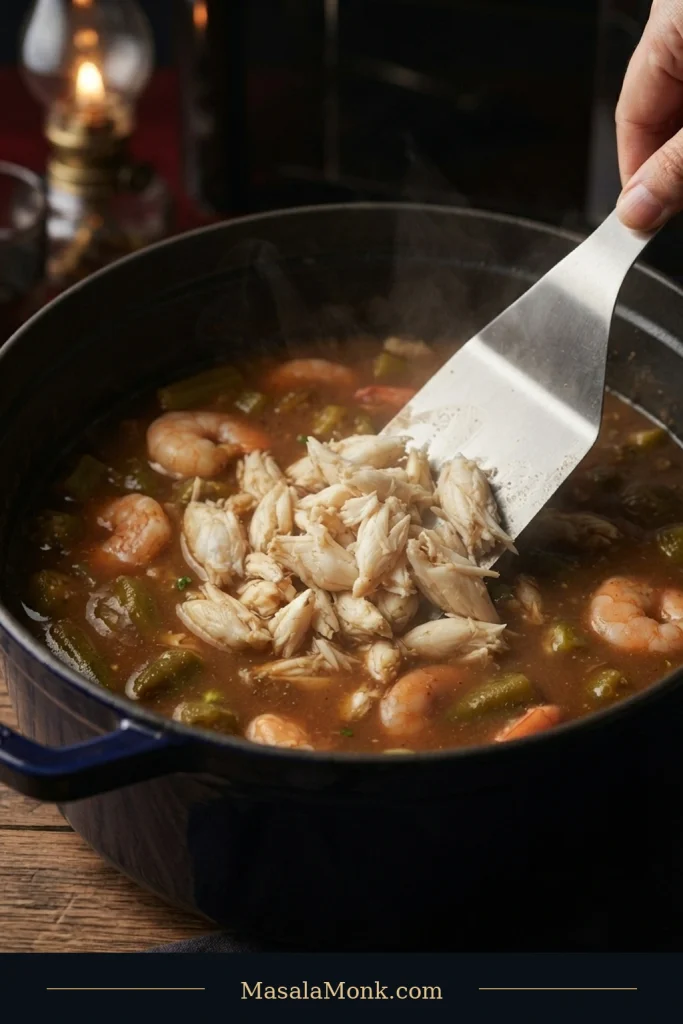
Large pale pieces of lump crabmeat being gently folded into brown seafood gumbo with cooked shrimp using a broad spatula.
Use a broad utensil to turn the crab through the broth rather than stirring in fast circles. The aim is to distribute the pieces while keeping the larger clusters intact.

Look for shrimp flesh that has turned opaque all the way through and feels just firm. The shrimp will curl as they cook, but shape alone isn’t a reliable doneness test.

If you added oysters, watch them rather than the clock. They’re ready when they are opaque and firm and their edges begin to curl.

Turn off the heat before adding filé powder. Boiling filé can give the broth an unpleasant stringy texture.

One last taste matters because crabmeat and oyster liquor can shift the salt. Make any final adjustment gently; if the broth tastes right, leave it alone.

In the finished bowl, the broth should flow around the rice, the shrimp should remain tender, the lump crab should still be recognizable, and the okra should feel soft and integrated.

What the Finished Pot Should Look Like

Check the whole pot, not only the most photogenic part of the surface. Shrimp, crab and okra should be spread through the broth, with enough liquid between the pieces to ladle a balanced serving.
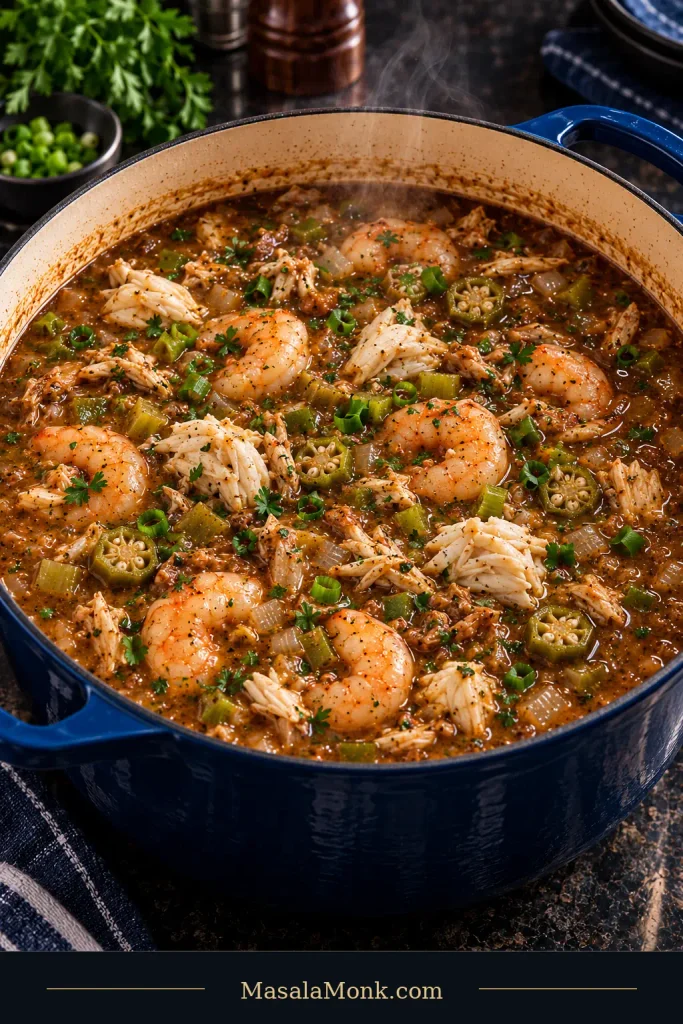
A blue Dutch oven filled with finished brown seafood gumbo, showing peeled cooked shrimp, pale lump crabmeat, smaller pieces of claw crab, okra, and softened vegetables in the broth.
A finished seafood gumbo should have broth visible between the seafood, with some pieces partly submerged. That distribution makes it easier to serve balanced bowls instead of a crowded layer of toppings.

A Balanced Spoonful

Lift a spoonful with broth as well as seafood. The liquid should bring the shrimp, crab and okra together in one bite rather than letting the solids pile up without enough gumbo around them.
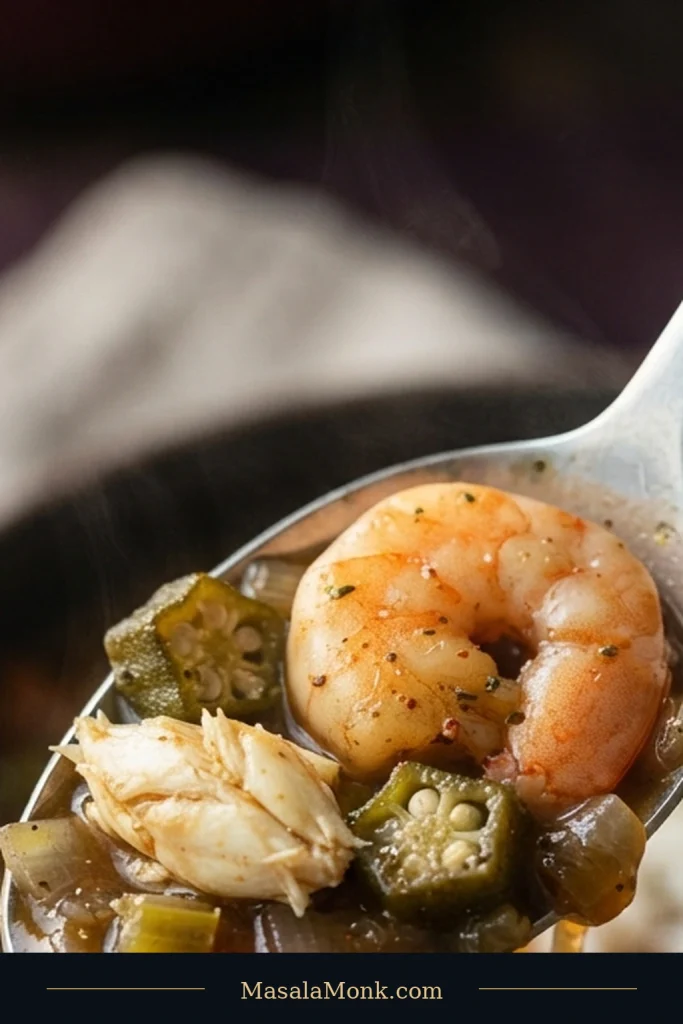
A spoonful of seafood gumbo showing a cooked shrimp, a pale piece of lump crab, soft okra, and glossy brown broth above a blurred bowl.
Use the spoonful as a final texture check: the broth should cling lightly to the seafood while still running back off the spoon. A solid mound of ingredients would hide whether the base is balanced.

If yours looks and tastes like that, you’re finished. When something still seems off, identify the problem before changing anything else; the troubleshooting guide separates base problems from issues that appear after the seafood goes in.

Back to top ↑ · Jump to recipe

Fix My Seafood Gumbo

Some gumbo problems are easy to correct now. Others are mostly lessons for the next pot.
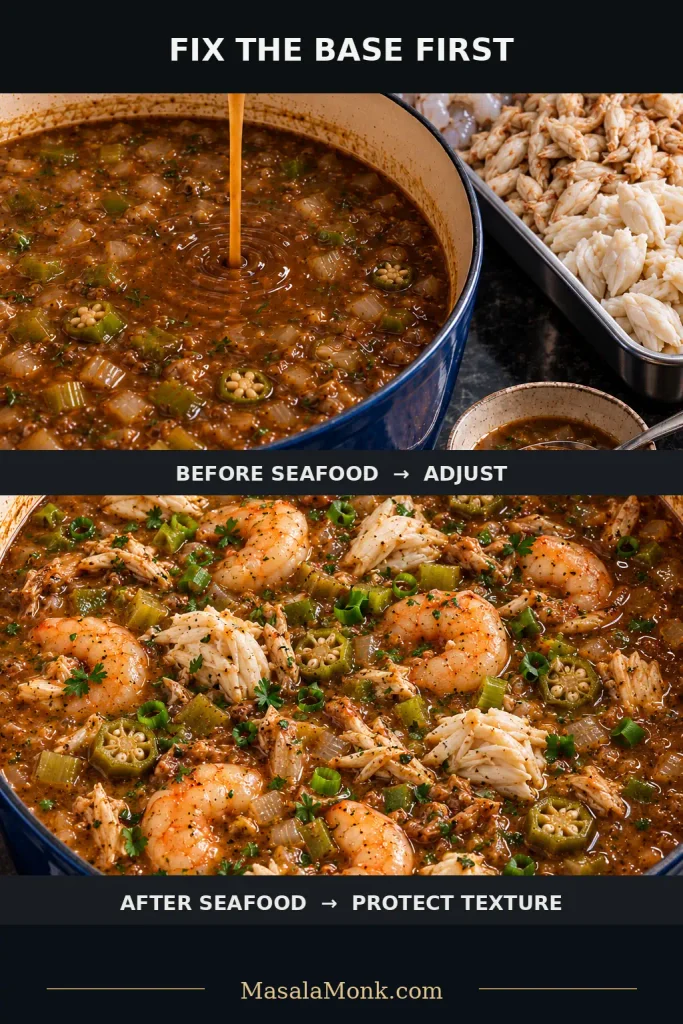
A two-stage seafood-gumbo visual contrasts the brown base before seafood is added with finished gumbo containing cooked shrimp and crab.
Start troubleshooting by asking when the problem appeared. If the base tasted right before seafood went in, check the seafood handling or possible shell fragments before changing the roux or stock.

Problems to Fix Before the Seafood

What You NoticeLikely CauseWhat to Do
Roux smells burned or has black flecksThe flour has scorchedRestart the roux. The bitterness will stay in the pot.
Gumbo is too thinToo much liquid, a dark roux with less thickening power, or not enough reductionSimmer uncovered for 5–10 minutes and look again.
Gumbo is too thickToo much reduction or too little liquidAdd unsalted stock or water ¼ cup / 60 ml at a time.
Flavor is weakThe stock was dilute or the broth needs more reductionReduce the base and taste the salt. Extra shrimp will not fix weak broth.
Seafood flavor is overpoweringThe shellfish stock is too concentrated or too many seafoods are competingAdd unsalted stock or water gradually, then taste again.
It is too saltyStock, seasoning and Worcestershire have stacked upDilute with unsalted stock or water before adding the seafood.
Oil is floating on topSome free fat has separated while simmeringSkim obvious excess. A little surface oil is not a disaster.
Okra is still very ropeyIt needs more cookingGive the base more simmering time. Next time, take the okra a little farther in the skillet.
Roux tastes too roastedIt went darker than you enjoyExtra stock can soften the intensity somewhat. Stop at a lighter brown next time.
The base is lumpy or grittyLumps can form when liquid is incorporated into the roux too quickly; grit usually points to shell-stock sedimentWork the first stock into the roux gradually, and strain homemade shell stock through a fine sieve.

After the Seafood Goes In

ProblemWhat HappenedWhat You Can Do
Shrimp are rubberyThey cooked too longOvercooked shrimp will not become tender again. Add them later next time.
Gumbo is still too thinThe broth needed more reduction before the seafood was addedIf practical, lift out the seafood with a slotted spoon, reduce the broth briefly, then return the seafood only long enough to warm through.
Gumbo tastes too saltyThe crab or oyster liquor pushed an already-seasoned broth too farAdd small amounts of unsalted stock or water. Avoid a long corrective simmer with the seafood still in the pot.
Lump crab disappearedIt went in too early or was stirred too muchFold it in during the last minute or two next time and leave it alone once distributed.
Gumbo suddenly feels gritty after the seafoodA small piece of crab shell or cartilage probably made it throughIf the base was smooth beforehand, check the crabmeat before assuming the roux or stock caused it.
Filé made the gumbo stringyIt was boiled after the filé went inAdd filé after the heat is off or let everyone add it to individual bowls.

Review the base-building guide · Plan the next batch

Make the Base Ahead, Not the Seafood

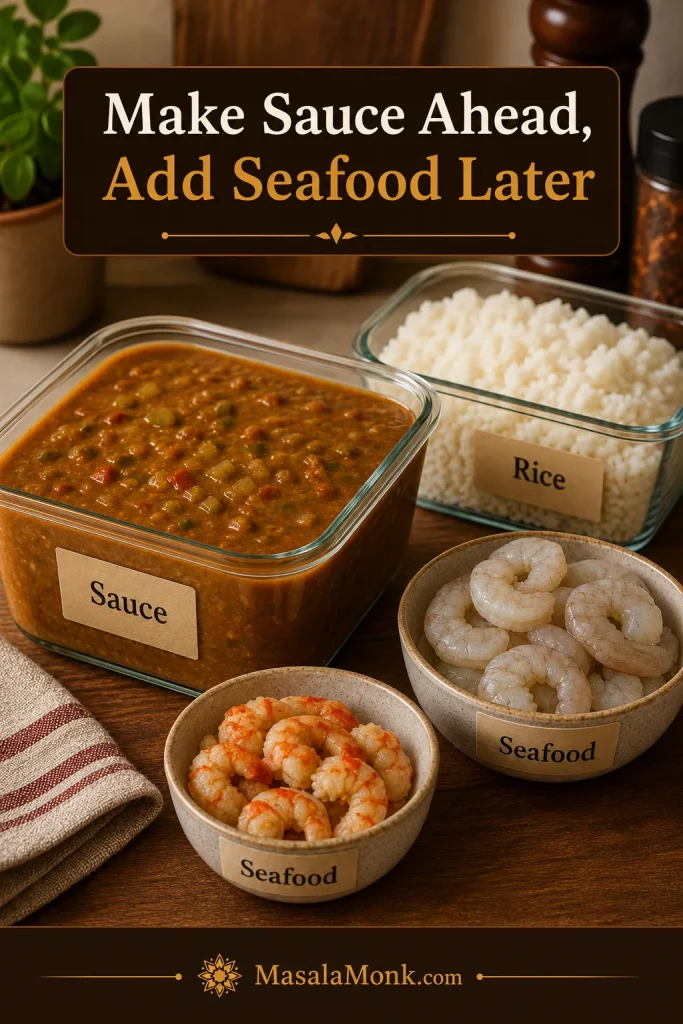
Yes—you can make seafood gumbo ahead. Cook and refrigerate the finished base before the quick-cooking seafood goes in. Reheat the base, then add the shrimp, picked crab, oysters or crawfish according to their normal timing.
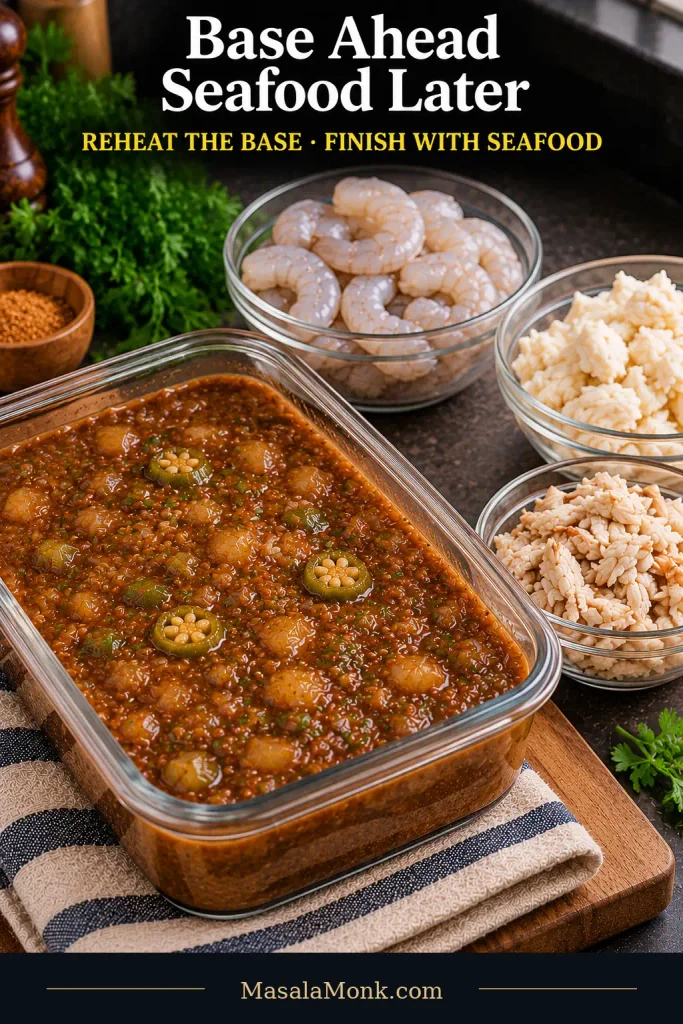
A shallow glass container of brown seafood-gumbo base with softened vegetables sits beside separate portions of raw peeled shrimp, picked claw crab, and pale lump crabmeat.
For make-ahead seafood gumbo, divide the base into shallow containers so it cools more quickly than a full Dutch oven. Keep the seafood separate until the base is reheated and ready for the short finish.

The base can benefit from an overnight rest. Shrimp does not benefit from being cooked twice.

Cool, Store and Reheat It Safely

A Dutch oven full of gumbo holds heat for a long time. Divide leftovers into shallow containers so they cool more quickly.

Refrigerate perishable leftovers within 2 hours—or within 1 hour if the food is sitting in temperatures above 90°F / 32°C—and generally use refrigerated leftovers within 3–4 days. USDA guidance recommends reheating leftovers to 165°F / 74°C. See the USDA leftovers and food-safety guidance.

Warm individual portions when practical. Repeatedly heating and cooling the whole pot is hard on both food safety and seafood texture.

Keep the rice separate too. It keeps drinking up broth while it sits, so storing it on its own helps tomorrow’s gumbo still look like gumbo rather than a pot of swollen rice.

Freezing Works Best Before the Seafood

Fully cooked seafood gumbo can be frozen, but the seafood holds up better when you freeze the base alone. Thaw and reheat the base, thin it with a little unsalted stock or water if needed, then add the quick-cooking seafood according to its normal timing. If the reheated base seems too thick or too thin, use the base consistency check before adding the seafood.

Seafood Gumbo FAQs

Can I use cooked shrimp instead of raw shrimp?

Yes, but add cooked shrimp at the very end. Let the gumbo finish cooking first, then fold in the shrimp and warm them gently for a minute or two. A long simmer will make already-cooked shrimp tough.

What if I can only find one kind of crabmeat?

Use about 1 lb / 450 g total crabmeat. Claw meat gives the strongest crab flavor. Lump gives you the largest recognizable pieces, while backfin is a useful middle ground with smaller flakes and body meat. If all of your crab is delicate lump meat, add it near the end.

Can I double seafood gumbo?

Yes, although two normal-size pots are often easier to control than one enormous batch. Roux darkens less predictably in a very large pot, and the seafood still needs only a few minutes at the end—the cooking time does not double just because the ingredient quantities do.

Can I make this without a flour roux?

Some gumbos lean more heavily on okra or other traditional thickeners. This one is built around a flour-and-oil roux, so simply leaving out the flour would change the broth enough that you would need a different recipe.

What to Serve With Seafood Gumbo

Once the gumbo reaches the table, keep the rest simple.

Long-grain white rice is the main partner. For eight servings, 3–4 cups cooked rice gives everyone a modest scoop while leaving plenty of gumbo around it. If you need the rice method too, use our guide to cooking fluffy long-grain white rice.

A scoop of classic potato salad gives you a cool, creamy contrast beside the hot gumbo. For a fresher option, serve a sharp cucumber salad or simply dressed greens.

French bread is useful for catching the last of the broth. Keep hot sauce on the table so everyone can choose their own heat.
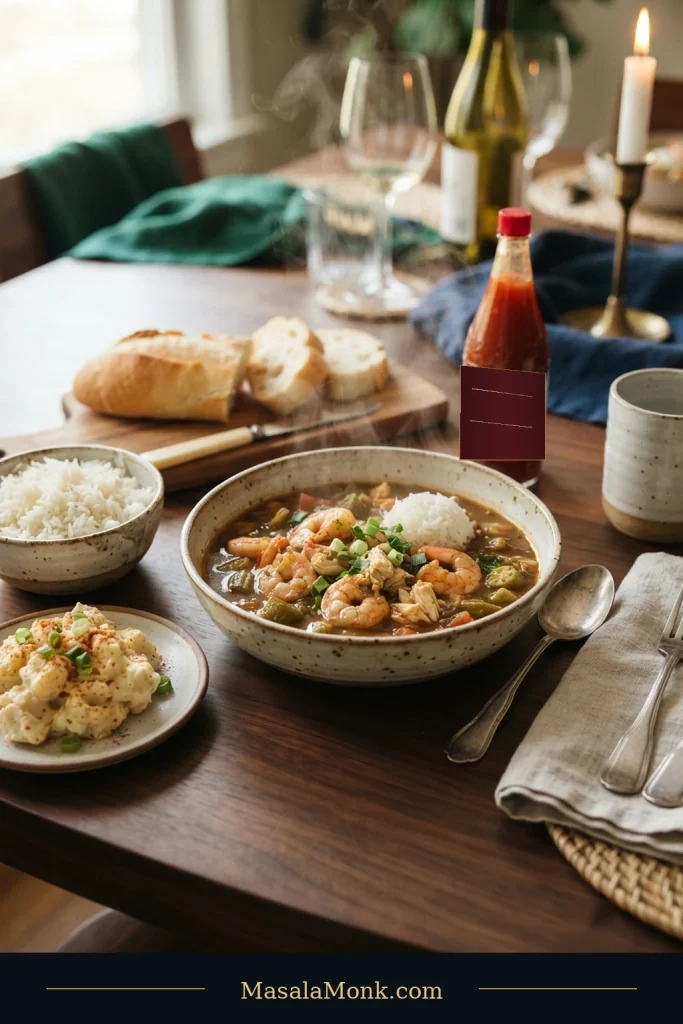
A bowl of brown seafood gumbo with shrimp, crab, okra, and rice on a dark wooden table with French bread, potato salad, hot sauce, and extra rice.
Keep the bowl broth-led with a modest scoop of rice, then leave extra rice on the table for anyone who wants more. That makes it easier to enjoy the seafood and broth together without filling the bowl with rice first.

Set the rice in the bowl, ladle the gumbo around it, and serve while the shrimp are tender, the lump crab is still in pieces and the broth is hot enough to perfume the whole bowl.

Back to top ↑ · Jump to the recipe card

Posted on — Leave a comment

Jambalaya Recipe: Smoky, Savory & Easy

Dutch oven of Creole jambalaya with long-grain rice, browned andouille, chicken thigh pieces and tail-off shrimp as a serving spoon lifts a portion.

Good jambalaya should spoon up moist but not soupy, with seasoned rice that still looks like rice, browned andouille, tender chicken, and shrimp that stays plump rather than disappearing into the pot.

The best spoonfuls are not all identical. One catches a smoky piece of sausage, another a shrimp, another mostly rice that has absorbed the chicken, peppers, celery, tomato, and browned bits from the bottom of the Dutch oven. It is generous food—the kind of dinner that makes sense in one big pot in the middle of the table.

Jambalaya is a Louisiana one-pot rice dish in which the rice cooks with seasoned meat, vegetables, and stock. This Creole-style jambalaya recipe adds tomatoes, chicken thighs, smoked andouille, and shrimp, then finishes the covered Dutch oven at 350°F / 175°C for steadier rice cooking.

The part that makes people nervous is usually the rice. Too much water can leave it soft and pasty; too little steam gives you hard centers. Direct stovetop heat can also cook the bottom faster than the top, especially in a wide Dutch oven.

Close-up spoonful of jambalaya showing distinct long-grain rice, a cooked shrimp, browned andouille and a small piece of chicken.
Up close, grain structure tells the story: even where sausage juices and tomato coat the rice, individual long-grain kernels should remain easy to identify.

It is still an easy jambalaya: one Dutch oven, no roux, and no separate pot of rice. Much of the work that decides the final texture happens before the lid goes on—brown the meat properly, cook excess water out of the vegetables, measure the stock, and bring the whole surface to a simmer.

Before You Cover the Pot

The sausage and chicken should have real brown color. Meanwhile, the onion, green bell pepper, and celery—the Louisiana trinity—should be soft and glossy, with no watery puddle underneath. You want enough rendered fat to coat the base, but no greasy pool.

Before the lid goes on, the jambalaya should be actively simmering across the pot—not bubbling only in the center. Give everything one last thorough stir, cover tightly, and let steady heat and trapped steam take over.

Jambalaya Recipe

Smoky chicken, andouille and shrimp jambalaya with a tomato-seasoned Creole base and tender long-grain rice. Brown everything on the stovetop, then finish the covered Dutch oven at 350°F / 175°C.

Prep
About 25 minutes

Cook
About 45–55 minutes

Rest
8–10 minutes

Total
About 1 hour 20–30 minutes

Serves
6 generously

Equipment

  • 5½–6 qt / 5.2–5.7 L heavy Dutch oven with a tight-fitting, oven-safe lid
  • Fine-mesh sieve
  • Chef’s knife and cutting board
  • Flat-edged wooden spoon or heat-safe spatula
  • Liquid measuring cup
  • Instant-read thermometer for the chicken

Ingredients

Chicken, Sausage & Shrimp

  • 12 oz / 340 g fully cooked smoked andouille sausage, sliced into roughly ¼-inch / 6-mm rounds
  • 1 lb / 454 g boneless skinless chicken thighs, cut into roughly ¾–1 inch / 2–2.5-cm pieces
  • 12 oz / 340 g large raw shrimp, peeled and deveined, with tails removed; 21/25 or 26/30 count per pound works well
  • 1 tablespoon / 15 ml neutral oil, only as needed for browning

Trinity, Tomato & Rice

  • 1 medium yellow onion, about 6–7 oz / 170–200 g, diced
  • 1 medium green bell pepper, about 5 oz / 140 g, diced
  • 2 celery ribs, about 3½–4 oz / 100–115 g, diced
  • 4 garlic cloves, finely minced
  • 1 tablespoon / 15 ml tomato paste
  • 1 can (14.5 oz / 411 g) diced tomatoes, drained well
  • 1½ cups / about 280 g regular long-grain or extra-long-grain white rice
  • 2¼ cups / 530 ml low-sodium chicken stock
  • ¼ cup / 60 ml additional chicken stock, kept hot for the first rice check if needed

Seasoning & Finish

  • ¾ teaspoon fine sea salt, about 4 g, divided, plus more after cooking if needed
  • ¾ teaspoon freshly ground black pepper, divided
  • 2 teaspoons sweet paprika
  • 1 teaspoon dried thyme
  • ½ teaspoon dried oregano
  • ¼ teaspoon cayenne pepper, a moderate starting point; use less if your andouille is already spicy
  • 1 bay leaf
  • 2 scallions, thinly sliced
  • ¼ cup chopped flat-leaf parsley
  • Louisiana-style hot sauce, for serving

Before you start cooking, check that the shrimp is peeled, the rice is well drained, the tomatoes are drained, and the extra ¼ cup / 60 ml stock is set aside from the main 2¼ cups / 530 ml. Those small preparations make the later rice decisions much easier.

Ingredients for chicken, andouille and shrimp jambalaya arranged with long-grain rice, trinity vegetables, drained tomatoes, stock, herbs and spices.
Long-grain rice gives jambalaya its structure; the Louisiana trinity, tomato, seasonings and proteins build flavor and contrast around it without overwhelming the rice.

Instructions

Brown the Meat

  1. Preheat and rinse. Heat the oven to 350°F / 175°C. Rinse the rice under cool water until the runoff is much less cloudy, then leave it in a fine-mesh sieve to drain thoroughly. Keep the extra ¼ cup / 60 ml stock hot for later.
  2. Season the chicken. Toss the chicken thigh pieces with ¼ teaspoon salt and ¼ teaspoon black pepper.
  3. Brown the andouille. Heat the Dutch oven over medium-high heat. Add a little neutral oil only if the sausage is very lean. Cook for about 3–4 minutes, turning as the cut faces deepen from orange-red toward mahogany at the edges. When a cut face has browned properly, it should release more easily from the pot. Transfer the sausage to a plate.
Thin slices of smoked andouille browning in a Dutch oven, with mahogany seared surfaces and brown fond beginning to form underneath.
Those mahogany bits beneath the andouille are concentrated flavor; once the trinity enters, its moisture helps lift that fond into the jambalaya base.
  1. Brown the chicken. Add the chicken in an uncrowded layer. Work in two batches if necessary. Cook for about 4–5 minutes, turning to color more than one side. It does not need to be cooked through yet. Transfer it to the sausage plate.
  2. Spoon off excess fat. Leave roughly 1–2 tablespoons / 15–30 ml in the Dutch oven. If the sausage gave you a deep greasy pool, remove some of it. Keep the browned bits (fond) stuck to the base.
Golden rendered fat being spooned from a Dutch oven while chestnut-brown fond remains attached to the bottom.
Tilt the pot and the difference becomes visible: amber fat moves, while flavorful fond stays attached. Spoon away the excess fat and preserve those browned bits.

Build the Base

  1. Cook the trinity until soft and no longer watery. Lower the heat to medium. Add the onion, bell pepper, and celery and cook for about 6–8 minutes, scraping up the fond as you stir. At first the vegetables will hiss and bubble in the water they release. Keep going until the wet bubbling settles, most of that loose water is gone, and the vegetables look soft and glossy. Stir in the garlic and cook for about 30 seconds.
Softened onion, green bell pepper and celery in a Dutch oven, with a spoon leaving a clear path through the glossy vegetables.
Watch the spoon path rather than only the clock: when it stays visible, most vegetable water has cooked off and the later stock measurement becomes more dependable.
  1. Add the tomato and spices. Stir in the tomato paste and cook for about 1 minute, until its raw bright-red color deepens toward brick red. Add the paprika, thyme, oregano, cayenne, and remaining ½ teaspoon black pepper. Stir for 20–30 seconds, then add the drained diced tomatoes. Cook another 1–2 minutes, until tomato juice is no longer pooling around the vegetables.
Tomato paste cooked to a deep brick-red color and scraped through softened onion, bell pepper and celery in a Dutch oven.
For the Creole jambalaya base, the paste should cling in dark brick-red streaks rather than sit as a wet red puddle; that concentrated texture signals the next stage.
  1. Add the rice. Stir in the thoroughly drained rice for 1–2 minutes, until the grains are coated in the tomato-spice mixture. They do not need to brown.

Cook the Rice

  1. Add the stock and return the meat. Pour in 2¼ cups / 530 ml low-sodium chicken stock. Add the bay leaf and remaining ½ teaspoon salt. Return the chicken, sausage, and any juices from the plate. Stir thoroughly so the rice and meat are spread evenly through the Dutch oven.
  2. Bring the whole surface to a simmer. Wait until bubbles are breaking in several parts of the Dutch oven, including beyond the center. Give everything one last thorough stir, level the rice, then cover tightly.
Chicken and andouille jambalaya base with long-grain rice simmering across the full surface of a Dutch oven before it is covered.
Watch the edges: center bubbles usually appear first, but perimeter activity shows that the whole jambalaya rice bed is hot enough to cover.
  1. Bake for 20 minutes. Transfer the covered Dutch oven immediately to the 350°F / 175°C oven. The hardest part may be leaving it alone now. Keep the lid closed and the rice unstirred during this first cooking stage.

Check the Rice

  1. Check the rice in two places. Taste a few grains from nearer the center and a few from closer to an edge. Don’t trust one lucky spoonful.
    • Firm + plenty of liquid: cover and bake another 3–5 minutes, then check again before adding the shrimp.
    • Firm + nearly dry: drizzle 2 tablespoons / 30 ml hot reserved stock around the edges, cover, and check again shortly. If it is still firm and nearly dry, add the remaining 2 tablespoons / 30 ml reserve and continue covered in short intervals.
    • Nearly tender: move on to the shrimp.
Nearly cooked jambalaya rice being sampled from the center and edge of a Dutch oven to compare doneness in two areas.
Read the center and edge samples together: when both are firm, the remaining moisture decides whether the rice needs more covered time or a small stock correction.

Add the Shrimp, Rest & Finish

  1. Add the shrimp when the rice is nearly tender. Scatter them over the jambalaya and gently nestle them just into the hot rice. Cover and return to the oven. Start checking after about 4–5 minutes; large shrimp often need about 5–7 minutes in total. They are ready when the flesh is pearly or white and opaque. The chicken should reach 165°F / 74°C.
A raw peeled tail-off shrimp being added to nearly tender chicken and andouille jambalaya in a Dutch oven.
Because the shrimp goes in late, it needs only the jambalaya’s final cooking window to turn opaque and tender without tightening through the entire rice cook.
  1. Rest for 8–10 minutes. Take the Dutch oven out of the oven and leave it covered. If the grains are tender and the surface only looks a little glossy, give the rest a chance before deciding anything needs fixing.
  2. Fold gently and serve. Remove the bay leaf. Fold the jambalaya from the edges toward the center just enough to spread the chicken, sausage, and shrimp back through the rice. Stir in the scallions and parsley, taste for salt, and put hot sauce on the table.

Recipe Notes

  • Rice: these measurements assume regular long-grain or extra-long-grain white rice. Other rice types need their own liquid amounts and cooking times.
  • Tomatoes: drain them well so an especially juicy can doesn’t throw off the amount of water in the pot.
  • Andouille: the timings here assume fully cooked smoked andouille. If the package says raw, uncooked, or “cook before eating,” follow its safe-cooking directions rather than treating it as the ready-to-eat sausage used here.
  • Salt: andouille and chicken stock can both be salty. If either tastes heavily seasoned, begin with less added salt and correct the jambalaya at the end.
  • Food safety: chicken should reach 165°F / 74°C; shrimp should be pearly or white and opaque. See the FoodSafety.gov safe-temperature chart.

About this recipe: This is a research-led recipe built from established jambalaya methods and recurring rice problems reported by home cooks. MasalaMonk has not independently kitchen-tested this exact formula. The process images are illustrative visual guides to the cooking states described in this research-led recipe; they are not photographs from an independent MasalaMonk kitchen test.

Cooking now? 20-Minute Check · Troubleshooting · Back to top

Jambalaya Cooking Guide

Red or Brown? What Kind of Jambalaya Are We Making?

Creole or red jambalaya generally includes tomatoes; Cajun or brown jambalaya generally does not. Brown versions also tend to lean more heavily on browned meat and fond for their color and depth.

Creole / RedCajun / Brown
TomatoCommonUsually omitted
Typical colorRed-brownBrown
This recipeYesNo
Creole red jambalaya beside brown Cajun-style jambalaya, showing the tomato-based red version and the darker browned version.
The red/brown split changes more than color: tomato brings acidity and extra water to Creole jambalaya, while brown versions lean harder on fond for depth.

Louisiana families have their own ways of making jambalaya, so red-versus-brown is better treated as a map than a set of kitchen laws. For a broader Louisiana view of those traditions, 64 Parishes is worth reading.

Here, the tomatoes are intentional. Removing them changes both the flavor and the water available to the rice, so a brown Cajun jambalaya deserves its own recipe, not merely this one with the tomatoes removed.

For another Louisiana dish where the rice stays separate, see our Cajun Étouffée. Its roux-thickened seafood sauce is spooned over rice instead of cooking the raw grains in the same pot.

Browning the Meat & Cooking the Trinity

Much of the savory depth is decided before the rice enters the Dutch oven. Browning the andouille and chicken creates flavor on the meat, but just as importantly, it leaves fond behind for the vegetables to pick up.

Irregular boneless chicken thigh pieces browning in a Dutch oven with patchy golden-brown surfaces and browned fond beneath them.
Patchy browning is enough: keeping space between chicken-thigh pieces builds fond, whereas crowding them traps steam and gives the jambalaya a flatter savory base.

Brown fond is worth keeping; dry black specks with a harsh burnt smell are not. Likewise, rendered sausage fat should leave a light film rather than a deep oily pool. If either the fond or fat is getting away from you, correct it before the trinity goes in.

The trinity then does two jobs at once: onion, bell pepper, and celery build the vegetable base while their released moisture loosens those browned bits. As that water cooks away, the noisy wet bubbling settles and the vegetables turn glossy.

The same trinity-and-smoked-sausage foundation appears in our Red Beans and Rice, although there the beans provide the creamy body and the rice is cooked separately.

Rice, Tomatoes & Liquid Work Together

Best rice for this method: regular long-grain or extra-long-grain white rice. It cooks into tender grains that absorb the seasoned stock while still holding their shape.

Jambalaya does not have one magic water-to-rice ratio. Tomatoes bring water. So do onions, peppers, and celery. Rice varieties absorb stock at different rates, lids vary in how well they trap steam, and direct burner heat behaves differently from a covered oven.

Start with the measured stock and keep the small hot reserve separate. Reach for it only when the rice is still firm and the Dutch oven has become nearly dry.

Rinse and Drain the Rice Well

Rinse until the runoff is much less cloudy, then drain the rice well so rinse water does not quietly become part of the stock in the pot. The grains should end up tender through the center without turning sticky or creamy.

Why Drain the Tomatoes?

A 14.5-ounce can can hold very different amounts of juice depending on the brand and cut. Draining the tomatoes keeps one especially juicy can from throwing off the amount of water in the pot.

Soft canned diced tomatoes draining in a fine-mesh sieve over a bowl of collected reddish tomato liquid.
The liquid collected beneath the sieve would otherwise join the jambalaya hydration; draining preserves the tomato solids while removing an unpredictable amount of extra water.

You can also keep the tomato juice and cook it down before adding the stock. Here, draining is simpler to repeat. By the time the rice goes in, the base should already smell deeply savory, with tomato behind the smoked sausage and peppers rather than sitting on top of them.

Parboiled Rice & Other Rice Swaps

Parboiled rice is forgiving in jambalaya because it holds its shape well and resists turning mushy. If you use it, though, don’t assume the long-grain liquid and timing here will carry over unchanged.

Regular long-grain white rice and slightly golden parboiled long-grain rice displayed side by side for comparison.
Raw parboiled rice looks slightly more translucent and golden than regular long-grain rice; that processing also changes how stubbornly the grains hold their shape during cooking.
  • Brown rice: needs substantially more cooking time and its own amount of liquid.
  • Jasmine, basmati or short-grain rice: none is a direct swap for the rice used here; both the liquid and cooking time will change.
  • Instant or quick rice: unsuitable for this method.

The 20-Minute Check

Twenty minutes is when to look, not a deadline the rice has to obey. Pots, ovens, and rice brands do not all move at exactly the same speed. Taste a few grains from more than one area before deciding what happens next.

Underdone jambalaya rice with distinct firm grains and visible free cooking liquid between the rice, chicken and andouille.
Look for free liquid between the grains rather than shine on their surfaces: firm + wet jambalaya rice already has moisture and primarily needs more covered cooking time.
What You FindNext Move
Almost tender with a little moistureAdd the shrimp and continue.
Firm with plenty of liquidCover and bake another 3–5 minutes, then check again before adding the shrimp.
Firm and nearly dryAdd 2 tbsp / 30 ml hot reserved stock, cover, and check again shortly. If it is still firm and nearly dry, use the remaining 2 tbsp / 30 ml reserve.
Nearly tender with obvious liquid poolingKeep it covered and bake another 2–3 minutes before adding the shrimp, then check again. Add the shrimp once the excess liquid has largely disappeared and the rice is still just shy of tender.
Tender and only glossyAdd the shrimp now. Do not add stock or try to dry the rice out. Cook only until the shrimp are done, then give the jambalaya its covered rest.
Bottom tender but top still hardKeep the pot covered and continue gently in the oven. If there is still moisture, give it more covered time. If the pot is also nearly dry, add 2 tbsp / 30 ml hot reserved stock first.

Firm Rice, Dry Pot: Add Stock Carefully

If the grains are still firm and the Dutch oven is nearly dry, use the reserved stock in small measured additions rather than pouring in a large splash. Start with 2 tablespoons / 30 ml, cover, and reassess before deciding whether the remaining reserve is needed.

A small 30 ml measure of hot chicken stock being poured around the edge of firm, nearly dry jambalaya rice.
The 30 ml measure is intentionally small: it creates enough additional steam to finish firm rice without turning a nearly dry jambalaya back into a wet one.

What Finished Jambalaya Should Feel Like

Finished jambalaya should be moist and juicy with tender, distinct grains—never soupy, creamy, or bone-dry.

Close-up of tender jambalaya rice with distinct elongated grains, a light surface sheen and no standing broth.
Gloss should sit on the grain surfaces, while pooled liquid sits between them; once the rice is tender, that distinction prevents unnecessary extra cooking.

A spoonful should hold together loosely, but the individual grains should remain distinct. They should be tender through the center, with no broth flooding back into the space when you draw a spoon through the Dutch oven.

Serving spoon dragged through finished jambalaya, leaving a clear channel in the tender rice without broth flowing back into the space.
After the covered rest, the spoon channel should stay open because excess moisture has moved into the rice instead of remaining free around the finished jambalaya.

A lightly glossy surface is fine. Actual broth pooling around fully tender grains is another matter. Mushy rice has gone further still: the grains begin to split, smear, or lose their shape.

When it lands correctly, the payoff is easy to see. The rice has absorbed the seasoned stock without disappearing into it, the sausage still has some chew, the chicken stays tender, and the shrimp feels like part of the dish rather than something scattered on top at the end.

Close-up of cooked tail-off shrimp in jambalaya, with pearly opaque flesh, coral-pink surfaces and a gentle C-shaped curve.
Look for moist, pearly opaque flesh rather than a dry, tightened texture; shrimp needs only the final cooking window here because it goes in after the rice is nearly tender.

The tomato should sit in the background. The first impression ought to be smoky, savory rice and browned meat, with pepper, celery, herbs, and tomato underneath.

Fix My Jambalaya

A first check that looks off doesn’t necessarily mean dinner is lost. Most jambalaya texture problems come down to moisture or heat, and the pattern usually tells you which one.

Three bowls compare glossy jambalaya rice with distinct grains, wet jambalaya with pooled liquid, and mushy jambalaya with broken grains.
These are three different outcomes, not three degrees of one problem: glossy needs no correction, wet retains free liquid, and mushy jambalaya rice has begun losing grain structure.

Match the Problem to the Fix

ProblemWhy It Happened & What to Change
Mushy or smearing riceToo much liquid, overcooking, or repeated stirring can break the grains down. Drain the tomatoes and rinsed rice well, cook excess vegetable water away, and leave the covered rice unstirred.
Crunchy rice throughoutThe rice probably needed more liquid, steam, or time. Bring the whole Dutch oven to an active simmer before covering and make sure the lid seals tightly.
Bottom cooked, top hardHeat was probably concentrated underneath the pot or steam escaped. A heavy Dutch oven and the covered oven finish help even things out.
Tender rice with liquid poolingMore water entered the pot than the rice could absorb. Tomato juice, wet rinsed rice, and water released by the vegetables all count—not only the measured stock.
Greasy finishToo much rendered sausage or chicken fat remained after browning. Leave enough to cook the vegetables, but spoon off a deep oily pool.
Scorched bottomThe heat underneath the Dutch oven was too concentrated. Establish the simmer on the stove, then let the oven handle the longer rice cook.
Pale or flat flavorThe meat probably needed more browning, or the jambalaya needed a little more salt at the end. Develop color first; extra spice powder cannot replace fond.
Too salty or too hotAndouille, stock, salt, and cayenne can pile on top of one another. Treat savory seasoning, salt, and chile heat as separate decisions.

What About Crispy Rice on the Bottom?

A little browned rice can happen around the base of the Dutch oven, but a deliberately crisp bottom is not the target here. By contrast, a thick burnt layer usually means the heat underneath the pot was too concentrated.

Underside of jambalaya rice showing golden-brown toasted grains beside a smaller patch of blackened scorched rice in the same Dutch oven.
Color alone is not the whole test: chestnut browning can be harmless, while brittle black patches plus a burnt smell point to genuinely scorched jambalaya rice.

Back to recipe card · 20-Minute Check · Back to top

Seasoning, Heat & Swaps

Protein swaps are easier than rice swaps because they don’t usually change how much liquid the rice needs.

  • Skip the shrimp: leave it out and finish once the chicken is cooked and the rice is tender.
  • Use chicken breast: cut it into similar pieces, but keep the first browning brief so the lean meat does not dry out later.
  • No andouille: use another fully cooked robust smoked sausage. Kielbasa works, although the flavor will be milder.

Slow cooker and pressure-cooker versions need their own liquid and timing. Don’t transfer these Dutch-oven measurements unchanged.

Control the Heat Separately

Deep seasoning does not require aggressive chile heat. Keep the paprika, thyme, oregano, garlic, and black pepper even if you reduce the cayenne. These are starting points, and spicy andouille may mean you want less.

  • Gentler: about ⅛ teaspoon cayenne
  • Moderate: about ¼ teaspoon cayenne
  • Hotter: about ½ teaspoon cayenne, with hot sauce available at the table

Adding Okra

Okra is optional here. If you want it, add about 1 cup sliced okra once the trinity has started softening and let it cook before the garlic and tomato go in. Give the extra vegetable water time to cook away before adding the rice.

Fresh sliced okra being added to softened onion, green bell pepper and celery in a Dutch oven before the jambalaya rice is added.
Adding okra here protects the later rice calculation: its first burst of vegetable water can evaporate before the measured stock and grains go in.

Cooking Jambalaya for a Crowd

Jambalaya earns its place at parties because one generous Dutch oven can feed a table without needing a dozen separate components. But making a larger batch is not quite as simple as multiplying every number by two.

The ingredients double. The pot physics do not.

Twice as much food creates a deeper layer of rice. It also means more vegetables releasing water and much more cold meat for the Dutch oven to bring back to a simmer. Move to a bigger pot and its outer edges may sit beyond the hottest part of your burner.

For most home kitchens, two ordinary batches are safer than one very deep double batch. If you do scale up, give the rice more room instead of packing twice the ingredients into the same 6-quart Dutch oven.

Two normally filled Dutch ovens of jambalaya beside one deeper overloaded pot, comparing shallow normal batches with an overfilled batch.
When scaling jambalaya for a crowd, depth matters as much as quantity: doubling everything in one pot increases the distance heat and steam must travel through the rice.

Leftover Jambalaya Without Wrecking the Rice

Refrigerate leftovers within 2 hours—or within 1 hour if the food is sitting in temperatures above 90°F / 32°C—preferably in shallow, covered containers, and use them within 3–4 days.

Cooked jambalaya divided among wide shallow glass storage containers, with one container covered and others open for cooling.
Wide, shallow containers release heat more efficiently than one deep tub, so dividing leftover jambalaya before refrigeration helps the center cool more quickly.

For reheating, add a small splash of stock or water only if the rice seems dry, cover, and warm gently until the food reaches 165°F / 74°C. Once the shrimp is hot, continuing to cook it only makes it tougher.

Jambalaya can be frozen, but the texture changes. The rice tends to soften and the shrimp loses some tenderness after thawing. If you freeze it, aim to use it within about 3 months for better quality.

What Can Be Prepared Ahead?

Dice the trinity, slice the andouille, cut the chicken, peel the shrimp, and measure the dry spices up to 1 day ahead. Keep the raw chicken and shrimp covered, refrigerated, and separate from the vegetables.

Leave the rice for the main cook. Its texture is easier to control when the cooking and resting stages happen in one continuous run.

What to Serve With Jambalaya

Jambalaya already gives you rice, meat, seafood, and vegetables, so sides work best when they bring freshness or contrast instead of another heavy centerpiece.

Family-style table with a Dutch oven of chicken, andouille and shrimp jambalaya being served alongside slaw, green beans and cornbread.
For sides with jambalaya, change the texture of the meal: crisp slaw or green vegetables cut through smoky sausage, while bread keeps the table simple and generous.
  • Collard or mustard greens for a savory green side
  • Green Beans Almondine for crisp beans, toasted almonds, and a little lemon beside the smoky rice
  • Roasted or sautéed okra if you want okra without adding more vegetables to the jambalaya itself
  • A crisp green salad or slaw for something cool and fresh
  • Crusty French bread or cornbread for an easy crowd-friendly accompaniment

If you’re building a New Orleans-style meal rather than an ordinary weeknight dinner, warm New Orleans-style Beignets make a natural finish with plenty of powdered sugar.

Jambalaya and Gumbo Cook the Rice Differently

In jambalaya, raw rice cooks inside the seasoned pot and absorbs its liquid. Gumbo is a stew whose rice is cooked separately and served with it.

Creole jambalaya with rice cooked into the dish beside dark chicken and sausage gumbo served with a separate bowl of white rice.
This is why the rice behaves differently in the two dishes: jambalaya depends on hydration inside the pot, while gumbo can be adjusted as a stew before separate rice is served with it.

They build body differently too. Our Chicken & Andouille Gumbo centers a dark roux and a silky, flowing stew; jambalaya depends much more on getting the rice, stock, and steam right.

Give the jambalaya its full quiet rest under the lid, then fold it gently and scatter over the scallions and parsley. Bring the Dutch oven to the table while the rice is still steaming and the shrimp is tender.

Back to recipe card · Troubleshooting · Back to top

Posted on — Leave a comment

Gumbo Recipe: Rich, Hearty & Full of Flavor

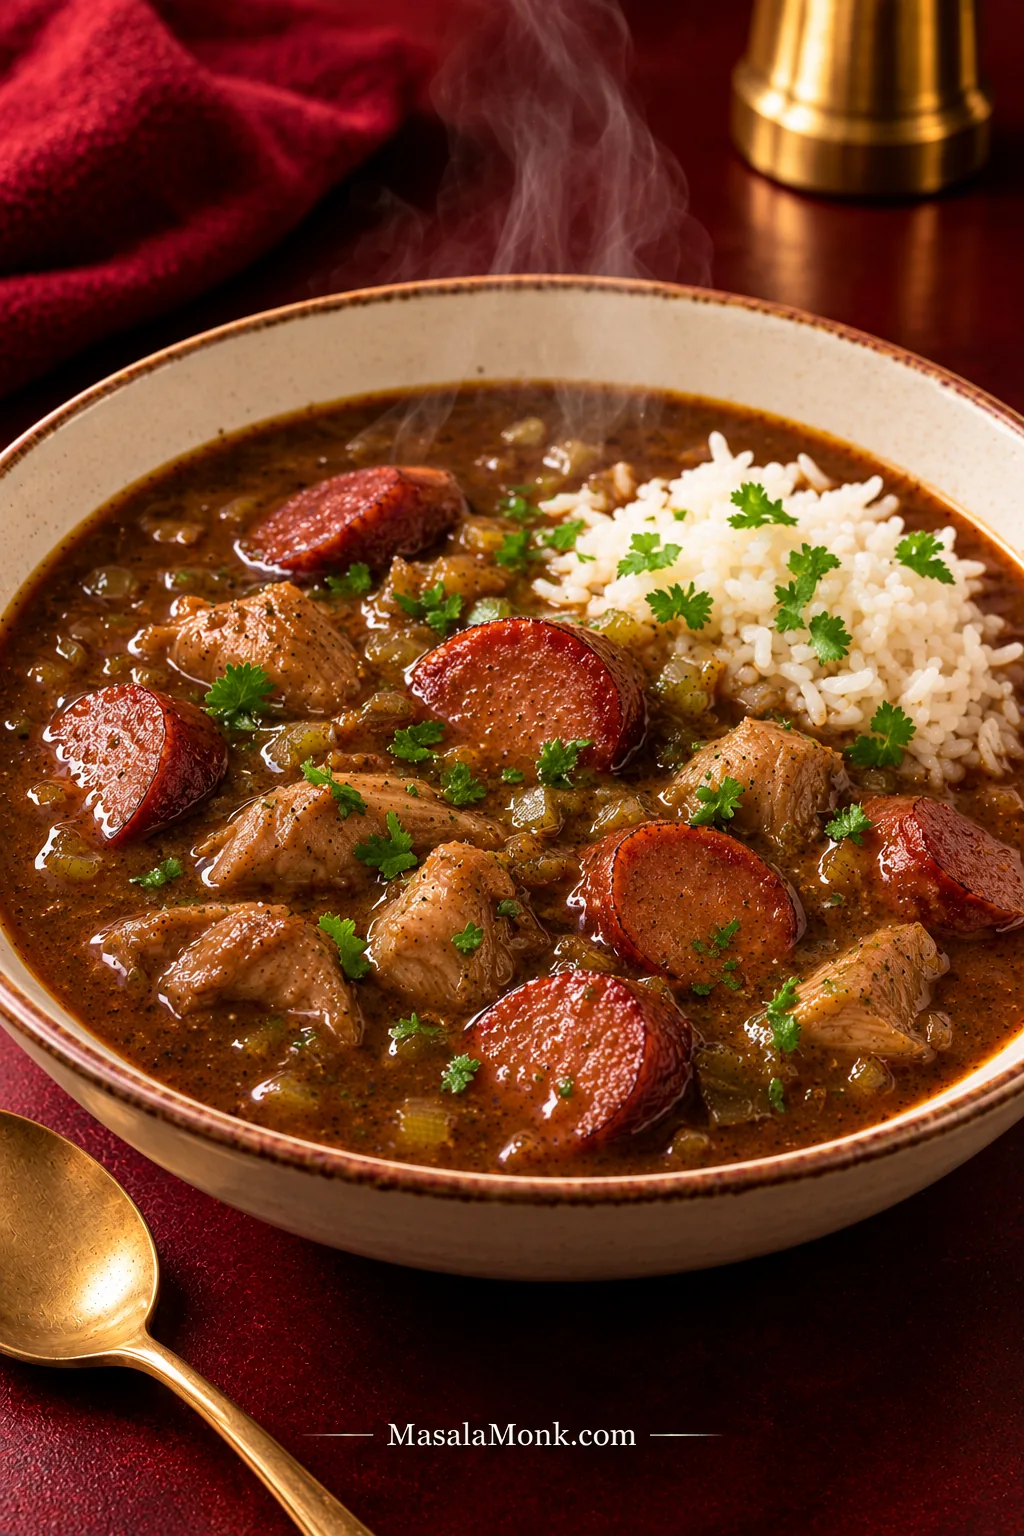
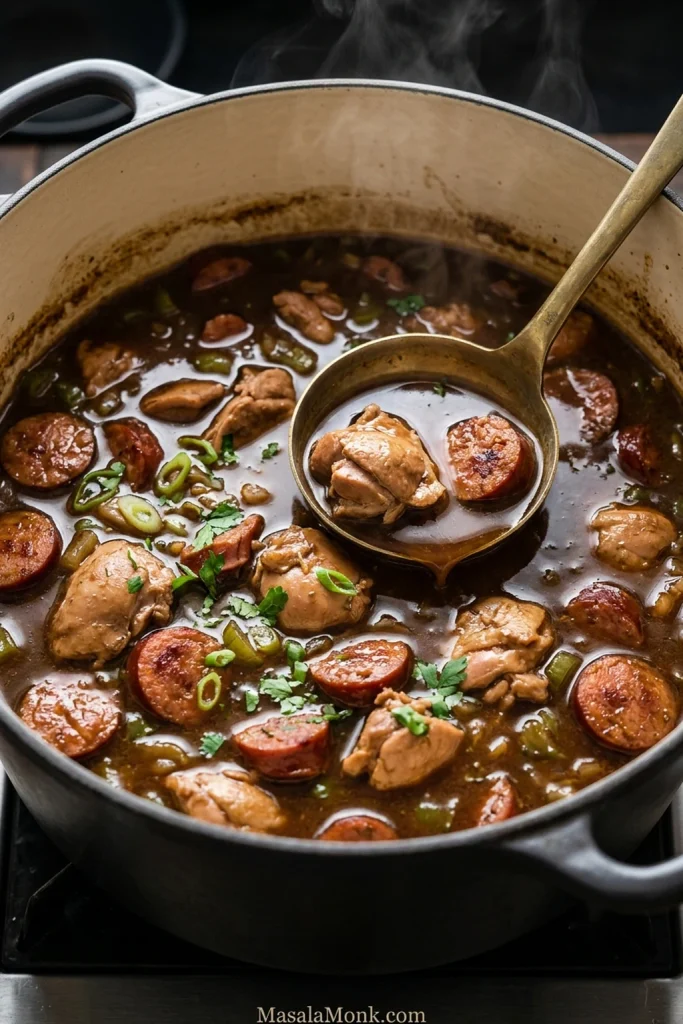
Bowl of dark chicken and andouille gumbo with tender chicken pieces, sliced smoked sausage, white rice, scallions and parsley.

A really good gumbo smells deeply toasted before you even taste it, with dark roux, browned andouille, onion, celery and green bell pepper rising in the steam. The broth should cling lightly to the chicken and sausage, then slip easily around the rice, with tender chicken and andouille that keeps some bite.

This gumbo recipe is a Cajun-leaning chicken and andouille version built around a deep brown roux, onion, celery, green bell pepper and chicken stock. It stays tomato-free, while okra and filé powder remain optional.

If the roux is the part that makes you nervous, remember one thing: use the clock to plan, but let the roux tell you when it is ready. Watch the color. Smell the change from raw flour to deeply toasted flour. And once it gets properly brown, stay with the pot.

Before You Start the Roux

A 6- to 8-quart (5.7- to 7.6-liter) heavy-bottomed pot gives you enough room to stir safely. A light-colored interior also makes the roux easier to read as it darkens.

One safety point matters: dark roux is extremely hot. When the vegetables go in, they can spit and steam hard, so use a long spoon or spatula and keep your face and hands back from the pot.

Gumbo Recipe: Rich, Hearty & Full of Flavor

A dark-roux chicken and andouille gumbo with tender thighs, browned sausage and a rich broth that stays silky and flowing.

Servings
8

Prep Time
30 minutes

Cook Time
About 2 hours 15 minutes

Rest Time
10 minutes

Total Time
About 2 hours 55 minutes

Most of the hands-on work is front-loaded. Once the gumbo reaches a gentle simmer, the pace slows considerably.

Equipment

  • 6- to 8-quart (5.7- to 7.6-liter) heavy-bottomed Dutch oven or pot
  • Flat-edged wooden spoon or heat-resistant spatula
  • Whisk
  • Ladle

Ingredients

Chicken and andouille

  • 1 lb (454 g) andouille sausage, cut into roughly ½-inch (1.25-cm) rounds or half-moons
  • 1½ lb (680 g) boneless, skinless chicken thighs, cut into roughly 1½-inch (4-cm) pieces
  • ¾ tsp (about 4 g) fine sea salt, divided, plus more if needed
  • 1 tsp freshly ground black pepper, divided

Dark roux

  • ¾ cup (90 g) all-purpose flour
  • ¾ cup (180 ml) neutral high-heat oil, such as avocado, canola, peanut or vegetable oil

Trinity and aromatics

  • 1 large yellow onion, diced — about 10 oz (280–300 g)
  • 1 large green bell pepper, diced — about 6 oz (170–180 g)
  • 3 celery ribs, diced — about 5 to 6 oz (150–170 g)
  • 5 garlic cloves, finely minced — about 20 g

Broth and seasoning

  • 6 cups (1.42 L) low-sodium chicken stock, warmed
  • Up to 1 additional cup (240 ml) warm chicken stock, kept in reserve
  • 1 tsp sweet paprika
  • 1 tsp dried thyme
  • ¼ tsp cayenne pepper, or up to ½ tsp for more heat
  • 2 bay leaves
  • 1 tbsp (15 ml) Worcestershire sauce

To finish and serve

  • 4 scallions, thinly sliced
  • ¼ cup (15 g) chopped flat-leaf parsley
  • Hot sauce, to taste
  • 3 to 4 cups cooked long-grain white rice
  • Filé powder, optional, for finishing or serving

Instructions

Prepare and Brown the Andouille

  1. Prepare everything first. Dice the onion, bell pepper and celery, mince the garlic, and slice the sausage. Measure the flour, oil, stock and seasonings. Cut the chicken into roughly 1½-inch (4-cm) pieces and return it to the refrigerator until Step 8. Keep the onion, bell pepper and celery beside the stove and the stock warm.
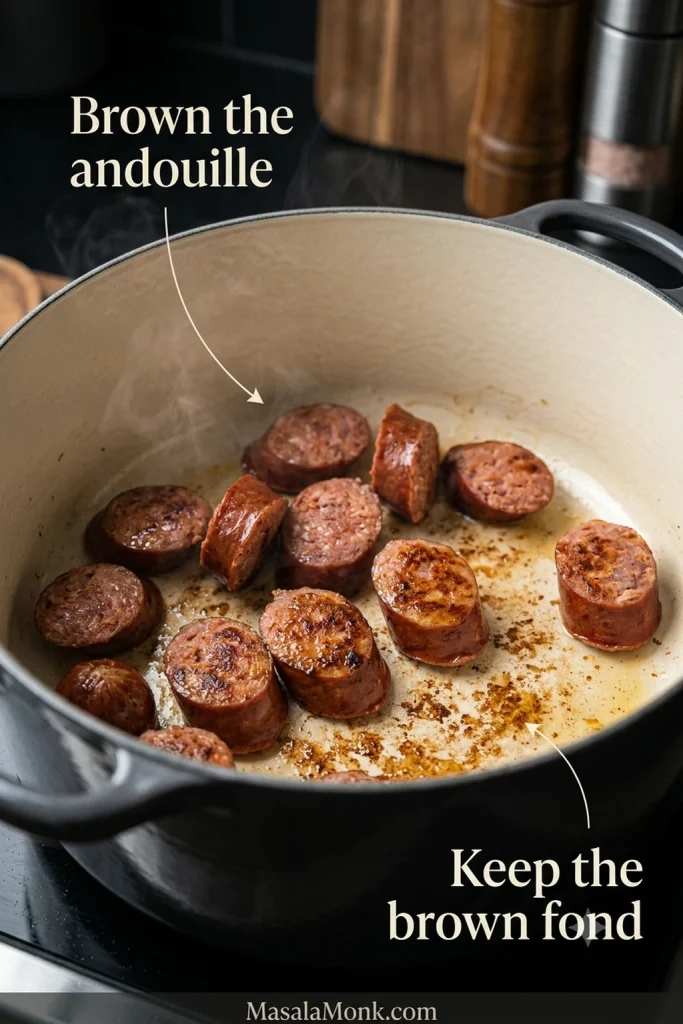
  2. Brown the andouille. Heat the pot over medium heat. Add the sausage and cook for 5 to 7 minutes, turning occasionally, until the cut faces develop deep brown patches and some fat renders out. Transfer the sausage to a bowl.
Andouille sausage browning in a light enameled Dutch oven with rendered fat and caramelized brown fond on the bottom.
Here is an easy way to tell fond from excess fat: the flavorful brown fond stays stuck to the pot, while rendered sausage fat pools and moves. Keep the browned residue for flavor, but drain the loose fat before making the roux.
  1. Drain the excess fat. Pour or spoon off the loose rendered fat. Leave light-to-medium brown fond if it is not scorched, but wipe away anything very dark or black. Add the measured ¾ cup (180 ml) neutral oil for the roux.

Make the Dark Roux

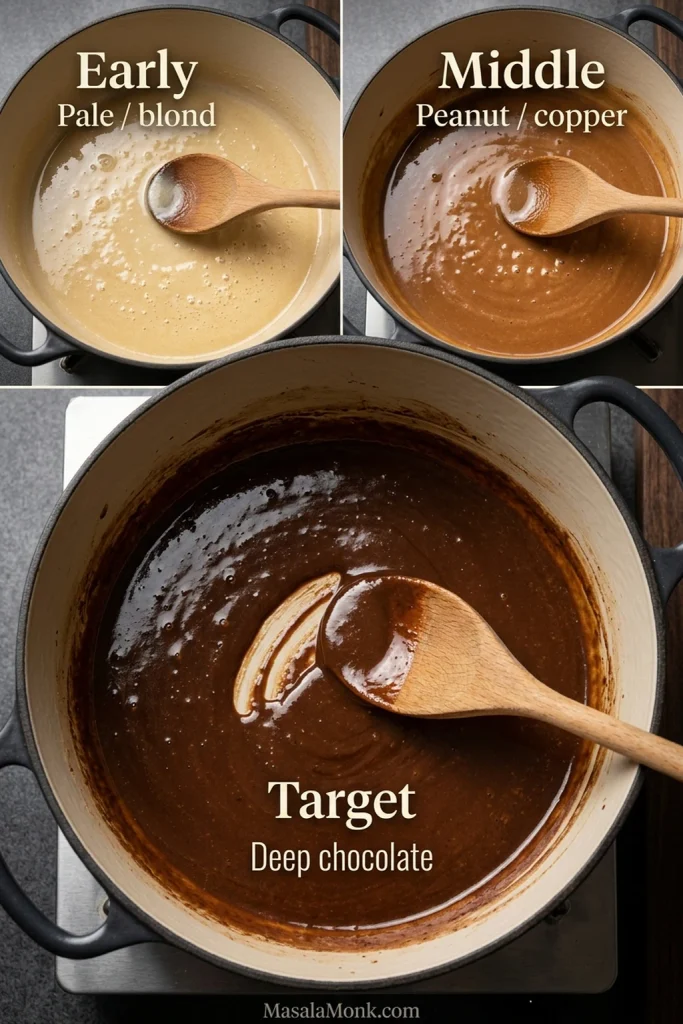
  1. Make the roux. Keep the heat at medium and gradually stir in the flour until smooth. During the pale stages, stir very frequently and keep scraping the entire bottom of the pot. Once the roux reaches peanut-butter brown, stay with it and stir continuously as it passes through copper and milk chocolate toward deep chocolate. This may take roughly 30 to 45 minutes on a moderate burner. For a visual comparison, see the dark roux stages. Color and aroma decide when it is ready. If it smells sharply scorched or develops burnt black flecks, start again.
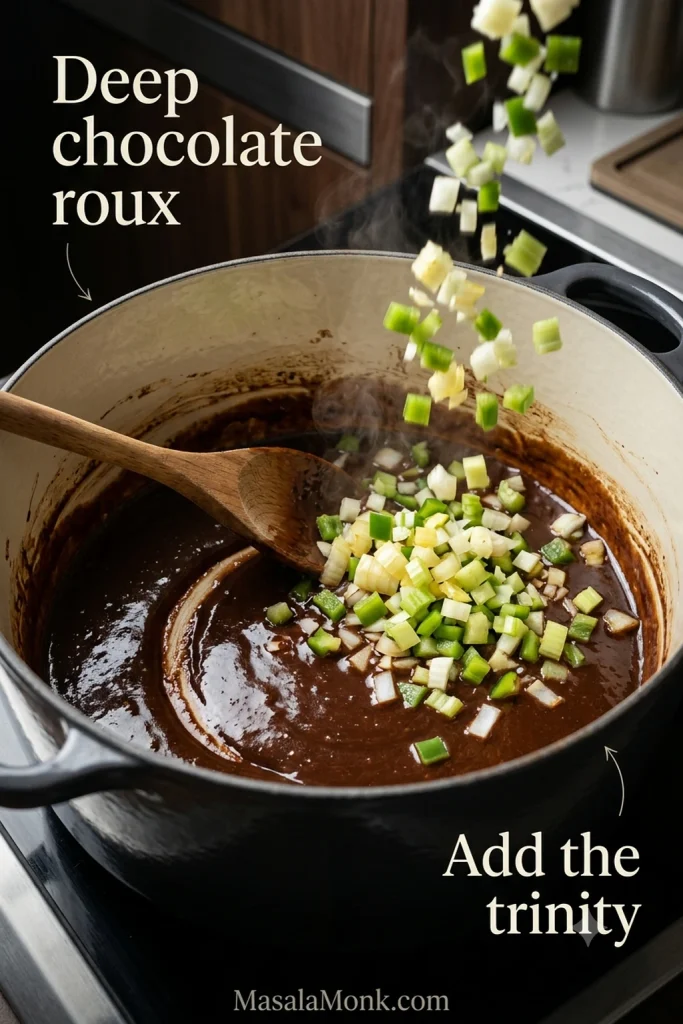
  2. Add the trinity. As soon as the roux reaches deep chocolate, carefully stir in the onion, green bell pepper and celery, keeping your hands and face back from the pot. The vegetables will hiss and steam, and the smell changes almost immediately from toasted flour to onion, pepper and celery. Cook for 6 to 8 minutes, stirring frequently, until the onion looks glossy and softened around the edges. The celery and pepper do not need to disappear. Add the garlic and cook for another 30 to 60 seconds. Once the vegetables are in, the most nerve-racking part is behind you.
Diced onion, green bell pepper and celery being stirred into glossy deep chocolate-brown roux in a light enameled Dutch oven.
The roux may appear lighter as soon as the trinity goes in because the vegetables release moisture and cool the mixture. That change is normal, so once the roux has reached deep chocolate, do not try to cook it back to the same darkness.

Loosen the Roux and Build the Broth

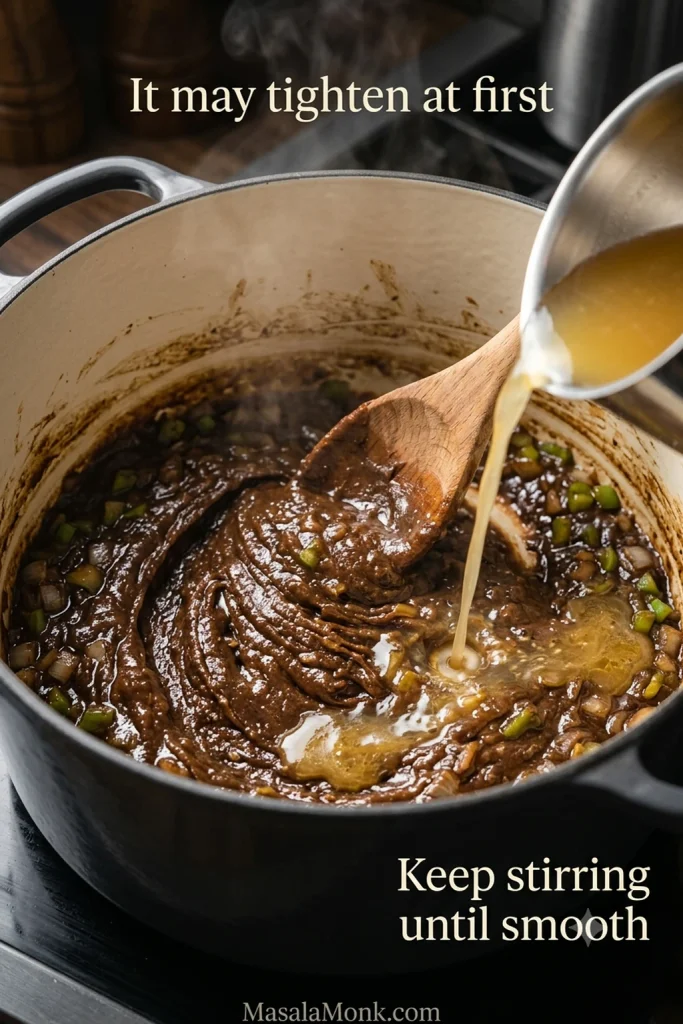
  1. Loosen the roux. Carefully add about 1 cup (240 ml) warm stock. The roux may tighten into a very thick paste at first; that is normal. Keep stirring or whisking until completely smooth. Add a second cup of stock and smooth it out again before moving on.
Chicken stock being poured into thick dark roux and softened vegetables while a wooden spoon stirs the mixture smooth.
At the first stock addition, look for a smooth, shiny paste rather than a thin broth. The important checkpoint is that the gumbo roux becomes cohesive and lump-free before you add more liquid.
  1. Build the broth. Stir in the paprika, thyme, cayenne, Worcestershire sauce and bay leaves. Gradually add the remaining 4 cups (950 ml) of the starting stock. Keep the additional 1 cup (240 ml) of stock aside for later adjustments. Once the stock is smooth, the pot becomes much more forgiving.

Simmer and Check the Consistency

  1. Add the chicken and sausage. Take the chicken from the refrigerator and season it with ¼ teaspoon of the measured salt and ½ teaspoon black pepper. Add it to the hot broth along with the browned andouille and any juices collected in the sausage bowl. Bring the gumbo to a simmer, then lower the heat until the surface bubbles gently.
  2. Simmer. Cook uncovered for 60 to 75 minutes, stirring occasionally and scraping the bottom of the pot. Skim away any obvious pool of excess surface fat. The chicken should become very tender; some pieces may soften and break slightly around the edges. As the gumbo cooks, the broth should become rounder and more integrated, rather than tasting separately of stock, roux and seasoning. If you use a thermometer, the thickest chicken pieces should reach at least 165°F (74°C).
  3. Check the consistency. The broth should lightly coat the meat but still move freely from the ladle. When the gumbo is too thick, add reserved warm stock ¼ cup (60 ml) at a time. If it still seems thin, give it another 10 to 15 minutes uncovered before changing anything else. Do not worry if it looks looser than gravy; a dark-roux gumbo should still flow. The gumbo consistency guide shows the finished texture to aim for.

Finish and Serve

  1. Finish the seasoning. Remove the bay leaves. Add some or all of the remaining ½ teaspoon salt and ½ teaspoon black pepper, tasting between additions. Before reaching for more cayenne, taste for roasted depth from the roux, smoke from the sausage and enough salt to make both come through. A salty andouille may mean you need very little extra salt. Add more cayenne or hot sauce only if you want more heat. Stir in the scallions and parsley.
  2. Rest and serve. Let the gumbo stand for 10 minutes, then skim any last obvious excess fat. Ladle it into bowls with roughly ⅓ to ½ cup cooked white rice per serving. If you need the rice method too, use our guide to cook fluffy long-grain white rice. Offer hot sauce and filé powder at the table if you like.
Finished chicken and sausage gumbo in a Dutch oven with dark broth, tender chicken, andouille and softened vegetables.
Check the gumbo before rice enters the picture: after a ladle passes through the pot, the broth should settle back around the chicken and andouille instead of leaving a thick channel behind. That is a useful whole-pot test for the final texture.

Recipe Notes

Sausage and salt: Andouille varies considerably in sodium, so make the final salt adjustment only after the gumbo has simmered.

Optional okra: Sauté 8 to 12 oz (225–340 g) sliced okra separately for 10 to 15 minutes; add it during the final 20 to 30 minutes of simmering. See how okra fits this version.

Optional filé: Offer it at the table, or stir it into the gumbo only after the pot comes off the boil. For the timing and amount, see how to use filé powder.

Rotisserie or other already-cooked chicken: Add it only during the final 10 to 15 minutes so it heats through without drying out.

Longer simmer: Another 30 to 60 minutes at a very gentle simmer is fine if you prefer a longer-cooked gumbo. Watch the liquid level and use some of the reserved stock if needed. The chicken will become softer and may break apart more.

About this recipe: This version draws on established Louisiana gumbo methods, chef recipes and recurring problems reported by home cooks. MasalaMonk has not independently kitchen-tested this exact formulation.


Gumbo Guide: Roux, Texture and Key Choices

What Kind of Gumbo Is This?

Gumbo changes from kitchen to kitchen across Louisiana, so there isn’t one ingredient list that makes every pot “correct.” Okra, filé, tomatoes and proteins all vary with the region, household and style of gumbo; Louisiana’s own gumbo traditions reflect that variety.

This one leans Cajun: chicken and sausage gumbo with andouille, a dark flour-and-oil roux, onion, celery and green bell pepper, and chicken stock.

Dark Roux for Gumbo

Aim for a deep chocolate-brown roux: dark, deeply toasted and fragrant, but never black or acrid.

Your stove and pot decide the pace more than another recipe’s timer does. Color and smell are the better guides.

What Dark Roux Looks and Smells Like

  • Early: pale, then blond; the raw-flour smell gradually disappears.
  • Middle: peanut-butter brown to copper; the aroma becomes clearly toasted and nutty.
  • Target: milk chocolate to deep chocolate; roasted, fragrant and dark without smelling scorched.
Three stages of flour-and-oil roux shown in light enameled pots: pale blond, peanut-to-copper brown and deep chocolate brown.
When judging dark roux color, look at the thin sweep left by the spoon against the pale enamel. A deep pool naturally appears darker, while that thinner film makes the shift from blond to copper to deep chocolate much easier to judge accurately.

The final color changes happen much faster than the early ones, so the distance between copper, chocolate and scorched can shrink to a matter of minutes.

Why Dark Roux Behaves Differently

The darker flour gets, the more deeply toasted it tastes and the less strongly it thickens. A dark gumbo can taste remarkably rich while still pouring easily from the ladle.

A heavy Dutch oven also holds heat after you turn the burner down. Keep the diced onion, celery and green bell pepper close so they can go in as soon as the roux reaches the right color and quickly cool the mixture.

Burnt roux is not subtle. If it smells harsh or acrid, trust your nose. Obvious black scorched flecks are another sign it has gone too far. Start over instead of carrying that bitterness into the chicken, sausage and stock.

Smooth glossy deep brown roux beside a smaller example of burnt roux with black scorched flecks and patches.
Scorching often shows up locally before the entire roux looks ruined. An evenly dark, glossy gumbo roux is very different from isolated black specks or scorched patches that remain visible as you stir.

How Thick Should Gumbo Be?

The finished gumbo should be silky and flowing—richer than broth, but noticeably looser than gravy.

A dark roux gives up some of its thickening power as the flour toasts, so a deeply flavored gumbo can remain surprisingly fluid. That is not a failure. The broth should lightly coat the chicken and sausage, then move around the rice when you tilt the bowl.
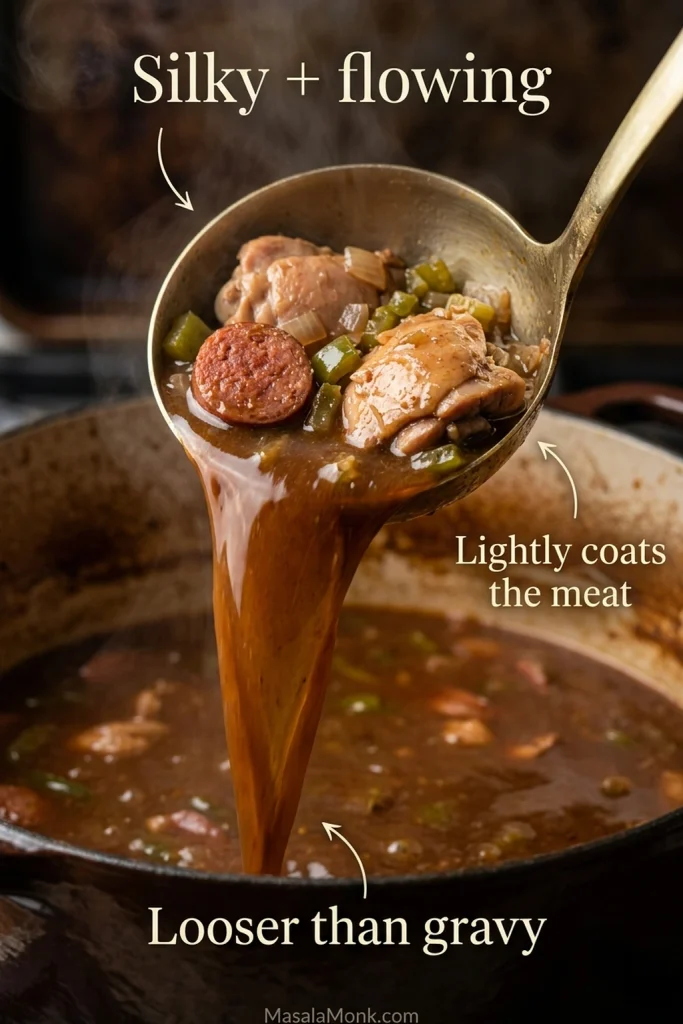
Ladle holding chicken, andouille and dark gumbo broth as the broth flows back into a Dutch oven.
A properly finished gumbo leaves a thin glossy coating on the ladle, then runs back into the pot in a fluid stream. If it falls in heavy blobs or sits on the ladle like sauce, the broth has moved closer to gravy than gumbo.

Other roux options

Jarred roux: perfectly legitimate. Some products are warmed directly in the pot before the vegetables go in; others are whisked into hot liquid. Brands vary, so follow the amount and incorporation method on the jar instead of replacing homemade roux cup-for-cup.

Very fast roux: experienced cooks can take roux dark over high heat in a fraction of the time. The margin for error becomes tiny. Moderate heat gives a first-time cook much more room to react.

The Ingredient Choices That Matter

Chicken thighs stay tender more reliably than breast through a long, gentle simmer. Andouille brings smoke, garlic, spice and a coarse structure that can stay distinct after an hour in the broth.

Onion, green bell pepper and celery form the trinity and soften into the roux to build the gumbo’s aromatic base. The same trinity also flavors our Louisiana red beans and rice, where creamy beans provide the body instead of roux.

Andouille and Worcestershire sauce already bring salt to the pot, which is why low-sodium chicken stock gives you more control at the end. Paprika, thyme, black pepper and a modest amount of cayenne support the dark roux without burying it. A Cajun seasoning blend can work too, but check its sodium before deciding how much additional salt the pot needs.

Dark roux, diced onion, green bell pepper and celery, chicken thigh pieces, andouille, chicken stock and seasonings arranged around finished gumbo.
Think of gumbo ingredients by the job they perform: roux controls roasted depth and body, the trinity builds aroma, chicken and andouille add substance and smoke, and stock controls concentration. That framework makes substitutions easier to judge than a simple ingredient list does.

Okra, filé and tomatoes cause more gumbo debate than this pot needs. All three belong in some gumbos; here’s how they fit this one.

Okra Is Optional Here

Okra belongs in plenty of excellent gumbos, but this one does not depend on it. Sautéing 8 to 12 oz (225 to 340 g) of sliced okra separately for about 10 to 15 minutes cooks away much of the ropy texture and lets the pieces begin to brown. Add it to the gumbo for the final 20 to 30 minutes.

Filé Powder

Filé is ground sassafras leaf with an earthy, herbal flavor. In this pot, it works best as a finishing choice rather than something boiled into the broth.

Add it after the gumbo comes off the heat, or let everyone sprinkle a small pinch to about ¼ teaspoon into individual bowls. Avoid a hard boil afterward.

Chicken and andouille gumbo with sliced and sautéed okra shown separately beside a small bowl of filé powder.
Okra and filé powder are separate choices because they change gumbo in different ways. Okra alters the pot as it cooks, while filé lets you adjust aroma and body at the finish—especially useful when different people want different bowls.

Why There Are No Tomatoes in This Pot

Tomatoes appear in many Creole and New Orleans-style gumbos. Plenty of Cajun chicken-and-sausage versions leave them out. Here, the dark roux, chicken, andouille and stock are enough, so tomatoes stay on the shelf.

Substitutions That Work

  • No andouille: choose a firm, coarse-textured smoked sausage rather than a soft sausage that may turn mealy during the simmer.
  • Cajun seasoning blend: start with about 2 teaspoons of a low-salt blend in place of the paprika, thyme and cayenne, then adjust after simmering.
  • Seafood: do not swap shrimp, oysters or crabmeat directly into this chicken timing. Delicate shellfish needs a different cooking sequence, with shrimp, oysters or crab added much later. If shellfish is what you’re after but you want a shorter roux-based dish, our Cajun étouffée recipe uses a much shorter seafood cooking window.

Fix My Gumbo

Find the symptom closest to what is happening in your pot, then make one correction at a time. Changing several things together can make it harder to tell what actually helped.

Roux and Stock Problems

What you notice What to do
Burnt smell or black flecks Start over. Burnt flour will carry its bitterness through the finished gumbo.
Roux isn’t getting darker Increase the heat slightly and keep stirring. Very low heat can leave you stuck at peanut-butter brown for a long time.
Roux is darkening too fast Lower the heat immediately and keep stirring. The pot will stay hot for a while even after you turn the burner down.
Roux tightens when stock goes in That first tightening is normal. Keep stirring or whisking until completely smooth before adding more stock.

Consistency, Fat and Seasoning

What you notice What to do
Gumbo is too thin Finish the full simmer first. If it still needs more body, simmer uncovered for another 10 to 15 minutes.
Gumbo is too thick Add warm reserved stock about ¼ cup (60 ml) at a time until it flows easily again.
Heavy oil layer Skim it off. Next time, drain more of the rendered sausage fat before starting the roux.
Bitter flavor A dark roux tastes deeply roasted. Harsh, acrid bitterness is different and usually points to scorching.
Hot but still flat More cayenne will not fix it. Check the salt, stock strength and reduction first.
Too salty Add unsalted stock a little at a time, tasting after each addition. Accept a slightly thinner gumbo before reducing aggressively and concentrating the salt again. Unsalted rice also helps balance the bowl.
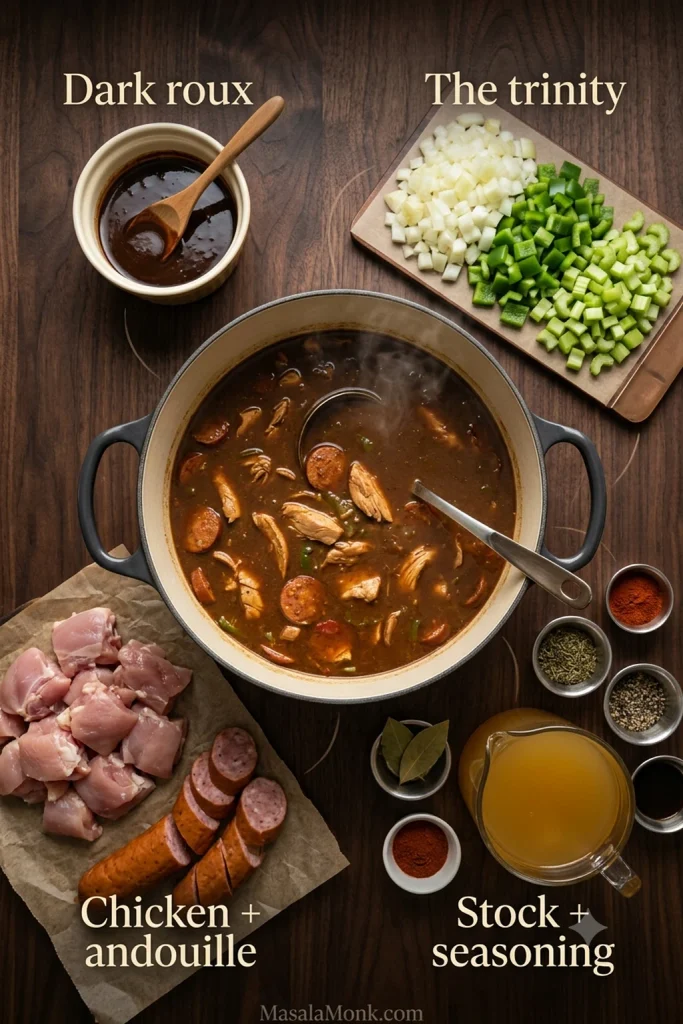
Ingredient and Meat Problems

What you notice What to do
Okra is very slimy Next time, cook the sliced okra separately until much of that ropy, slimy texture has cooked away before adding it to the pot.
Filé turned stringy or too thick Use less next time and avoid hard boiling after it goes in. Serving it at the table gives you much more control.
Chicken is dry Keep the gumbo at a gentle simmer, not a hard boil. Thighs are forgiving, but aggressive heat can still tighten them. Add already-cooked chicken only near the end.
Sausage is greasy or mushy Choose a firmer, coarse-textured smoked sausage and brown it first so some of the fat renders out.

What to Serve With Gumbo

Keep the rice modest enough that gumbo remains the main event. About ⅓ to ½ cup cooked long-grain white rice per serving gives every spoonful some rice without burying the broth and meat underneath it.

Potato Salad with Gumbo

A cool, mustard-forward potato salad is especially associated with parts of Cajun and Acadiana cooking. Some people keep it beside the bowl; others put a scoop straight into the gumbo.

The combination makes sense as soon as you taste it: cool creamy potato and mustardy acidity against a hot, dark bowl of gumbo.

Bowl of chicken and andouille gumbo with white rice beside a separate bowl of creamy mustard-colored potato salad.
Serving potato salad beside gumbo preserves the contrast that makes the pairing interesting: the potatoes stay cool and creamy while the broth stays hot. Then you can alternate bites or add a little potato to the bowl without committing the whole serving.

At the Table

Set out hot sauce and filé so everyone can adjust their own bowl. French bread works well too, or add a wedge of savory Southern cornbread for a crisp edge and tender crumb to drag through the last of the broth.
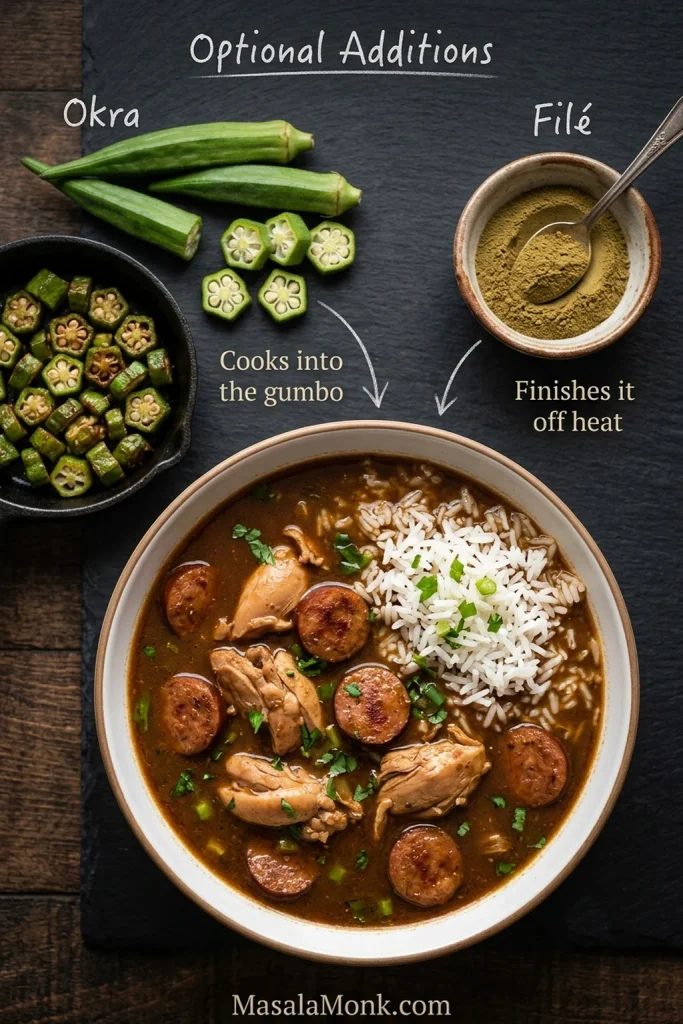
Chicken and andouille gumbo with rice surrounded by hot sauce, filé powder, bread, cornbread and a separate bowl of white rice.
What to serve with gumbo works best when each accompaniment has a job: rice absorbs broth, bread catches it, hot sauce adjusts heat, and filé changes the finish. You rarely need every option in the same bowl.
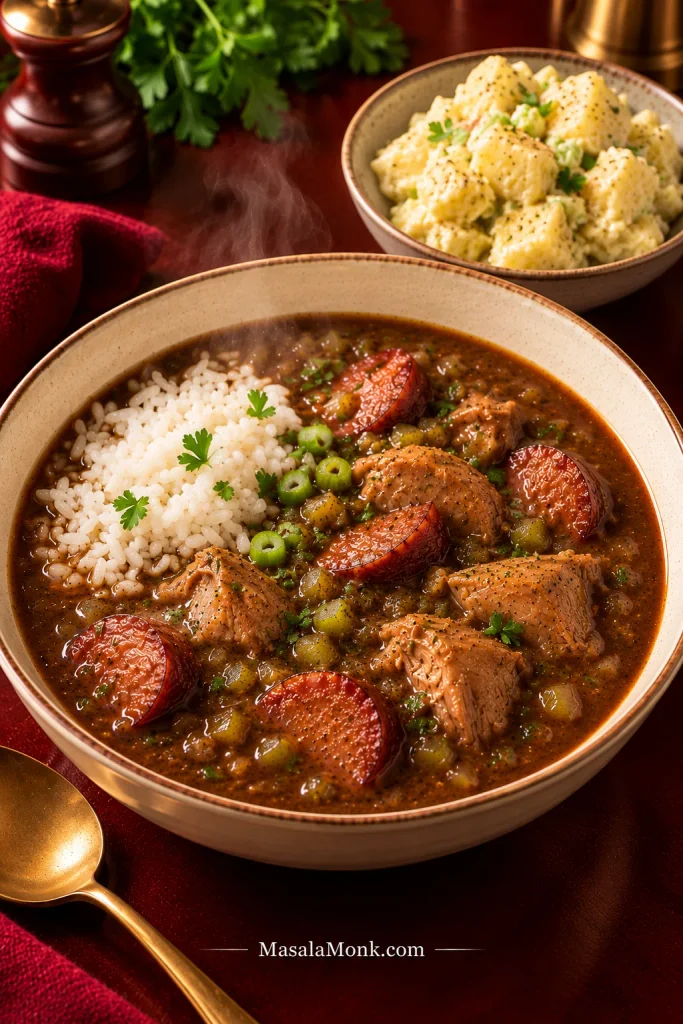
In the finished bowl, the roux should come through as roasted depth rather than flour, while the andouille still brings smoke and bite. The scallions and parsley should bring a fresher edge to the dark broth rather than disappearing into it.

Make Ahead, Store and Reheat Gumbo

Gumbo is especially good made ahead. After a night in the refrigerator, the roux, stock and sausage often taste more integrated.

For leftovers, divide the gumbo into shallow containers and refrigerate it within 2 hours rather than leaving a full Dutch oven on the counter until it cools completely. Keep the rice separately. Refrigerated gumbo is best used within 3 to 4 days.

Clear glass container of chicken and andouille gumbo beside a separate container of white rice, with a reheated bowl of gumbo in the background.
For make-ahead gumbo, separate containers give you control at reheating time. Rice keeps absorbing liquid as it sits, while gumbo may thicken slightly when chilled; storing them apart lets you correct each texture independently.

Reheat gently on the stovetop, stirring occasionally, until steaming hot throughout. If using a thermometer, leftovers should reach 165°F (74°C). Add a splash of stock or water if the gumbo has thickened in the refrigerator.

Freeze gumbo without the rice in airtight portions for about 2 to 3 months for best quality. Thaw in the refrigerator and reheat gently.

Once you know what a properly dark roux looks and smells like, the whole pot becomes much calmer to cook.

Posted on — Leave a comment

Cajun Étouffée Recipe

Cajun étouffée with shrimp and crawfish served over white rice in a shallow cream bowl

A great Cajun étouffée recipe lands on the table as hot rice, tender shrimp or crawfish, and glossy sauce that settles into every grain. It should smell like toasted roux, sweet bell pepper, garlic, seafood, and a little vinegar heat before the first spoonful even reaches the bowl.
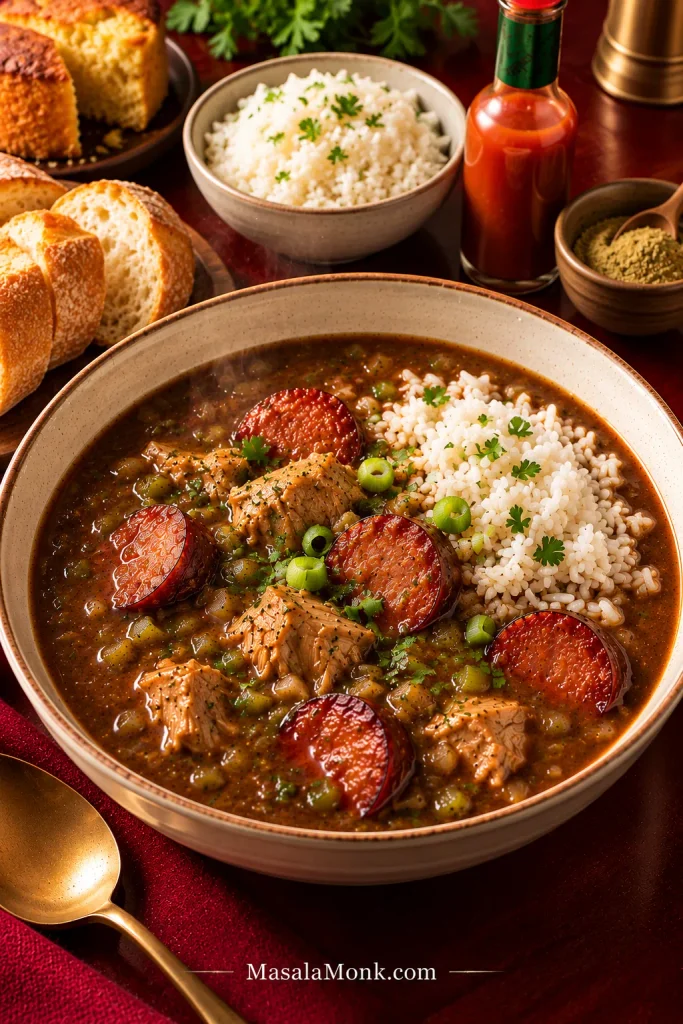
You can make this with shrimp, crawfish, or a mix of both without changing the base method. Once the vegetables are chopped and the rice is started, the rest is one steady stovetop pot: roux, holy trinity, sauce, seafood, herbs, and hot rice waiting.
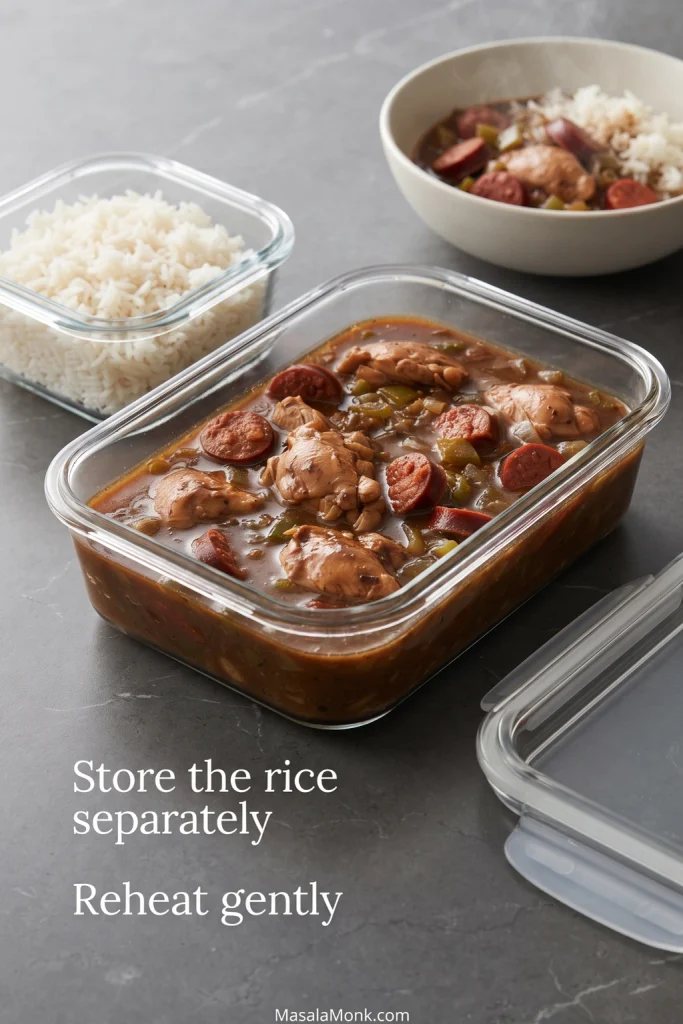
The rhythm is simple: trust the roux, taste the sauce, then add the seafood. That order gives you deep flavor without rubbery shrimp, tough crawfish, or a thin sauce that disappears into the rice.

You do not need to guess your way through the roux, the sauce texture, or the seafood timing. This guide also covers frozen crawfish tails, salty Cajun seasoning, prepared roux, boxed étouffée base, cream soup shortcuts, tomato options, and the common fixes that save the pot before dinner gets stressful.

Quick Answer: What Is Cajun Étouffée?

Cajun étouffée is a thick, seasoned Louisiana-style dish made with a roux, onion, celery, green bell pepper, stock, Cajun seasoning, and seafood such as crawfish or shrimp. It is served over white rice and eats more like a rich seafood gravy than a soup.

The word étouffée means “smothered,” and that is exactly how the dish should land on the plate: shrimp or crawfish smothered in a savory sauce that clings to every spoonful of rice. This version keeps the main pot roux-forward and no-tomato, with an easy tomato option if you prefer a brighter Creole-style sauce.

The final bowl should look rich and spoonable, with seafood and rice held together by a sauce that is thicker than broth.

Cajun étouffée with shrimp and crawfish served over white rice in a shallow cream bowl
A strong Cajun étouffée looks glossy and spoonable; as it settles, the sauce should hug the rice instead of flooding the bowl.

Make It Now

Ready to cook? Use this as the quick roadmap, then follow the recipe card for exact amounts. Nothing here needs to be rushed; once your prep is done, the recipe is mostly steady stirring, simmering, tasting, and finishing.

  1. Chop the onion, celery, bell pepper, garlic, green onions, and parsley.
  2. Start the rice early so it is hot when the étouffée is ready.
  3. Warm the stock and cook the roux until it turns copper to peanut-butter brown.
  4. Stir in the holy trinity, garlic, seasoning, stock, Worcestershire sauce, and a splash of hot sauce.
  5. Simmer until the base tastes rounded and thick enough to spoon over rice.
  6. Finish with your chosen seafood, add the final herbs, rest briefly, and serve.

The checkpoint that saves the pot: the sauce should taste good before the seafood goes in.

Use the quick flow to keep the method calm: roux, trinity, sauce, seafood, herbs, and rice.

Six-step visual guide showing trinity, roux, sauce, seafood, herbs, and rice for Cajun étouffée
Start with roux, build flavor with trinity, loosen the sauce with stock, then finish seafood gently before serving over rice.

Cajun Étouffée at a Glance

Main styleRoux-based Cajun-style étouffée, no tomato by default
Best seafoodShrimp, crawfish tails, or a mix of both
Servings6
Total timeAbout 1 hour 5 minutes
Roux targetCopper to peanut-butter brown
Sauce textureGlossy, spoonable, thick enough to hug rice
Serve withLong-grain white rice, fresh herbs, and table hot sauce
Best quick pathMake a light roux instead of relying only on canned soup or boxed mix
Biggest success cueLet the base taste complete, then finish with seafood

Cajun Étouffée Recipe Card

This stovetop recipe makes a roux-based Cajun étouffée with shrimp, crawfish tails, or both. The method stays the same; the main change is when each type of seafood goes into the finished sauce.

Keep the rice hot and the seafood cold until the sauce is ready. That little bit of timing is what makes the bowl feel generous instead of rushed.

Recipe Snapshot

Prep time20 minutes
Cook time45 minutes
Total time1 hour 5 minutes
Servings6
MethodStovetop
CuisineCajun / Louisiana-style
Main equipmentDutch oven, heavy-bottomed pot, or deep heavy skillet

Ingredients

Before cooking, notice how each ingredient has a job: roux for body, trinity for sweetness, stock for sauce, and seafood for the finish.

Cajun étouffée ingredients arranged with seafood, rice, vegetables, stock, herbs, seasoning, flour, and fat
Even with a full ingredient board, the real flavor builders are roux, holy trinity, stock, seafood, and a fresh finish.
  • ½ cup unsalted butter, 113 g, or 120 ml neutral oil
  • All-purpose flour, ½ cup, about 60–65 g
  • 1½ cups finely chopped yellow onion, about 225 g
  • 1 cup finely chopped green bell pepper, about 150 g
  • ¾ cup finely chopped celery, about 100 g
  • 4–6 garlic cloves, minced, about 15–25 g
  • 2½–3 cups warm seafood stock, shrimp stock, crawfish stock, or chicken stock, plus more as needed, 600–720 ml
  • 2–3 teaspoons salted Cajun seasoning, or 1½–2 tablespoons salt-free Cajun seasoning
  • 1 teaspoon paprika or smoked paprika
  • ½ teaspoon dried thyme
  • 2 bay leaves
  • ¼–½ teaspoon cayenne pepper, optional
  • 1 tablespoon Worcestershire sauce, 15 ml
  • Hot sauce, 1–2 tablespoons, 15–30 ml, plus more for serving
  • 2 lb total peeled shrimp, crawfish tails, or a mix, about 900 g
  • ½ cup sliced green onions
  • ¼ cup chopped parsley
  • Salt and black pepper, to taste
  • 4–6 cups cooked long-grain white rice, for serving

Ingredient Notes for Salt, Seafood, and Rice

Salt note: If your Cajun seasoning already contains salt, do not add extra salt until the sauce has simmered and you have tasted it. Stock, hot sauce, boxed bases, and cream soup can all add salt too. Salt-free Cajun blends can usually be used more generously because they bring spice without adding as much sodium.

Seafood note: Use 2 lb total seafood, not 2 lb shrimp plus 2 lb crawfish. If using a mix, combine the shrimp and crawfish together to reach about 2 lb / 900 g total.

Pick the seafood before you start, because shrimp and crawfish can share the same sauce but need different finishing care.

Three bowls showing shrimp, crawfish tails, and mixed seafood for Cajun étouffée
Whether you use shrimp, crawfish tails, or both, keep the seafood amount steady so the étouffée stays balanced.

Rice note: Use 6 cups cooked rice for generous bowls, or 4 cups for lighter servings. Start the rice before the seafood goes in so everything reaches the table hot.

Equipment

  • Dutch oven or heavy-bottomed pot, important for steady roux heat
  • Deep heavy skillet, if it gives you enough room to stir safely
  • Wooden spoon or heat-safe spatula
  • Whisk
  • Small saucepan for warming stock
  • Cutting board and sharp knife
  • Measuring cups and spoons
  • Rice cooker or rice pot

Roux can scorch quickly in thin cookware. A heavy pot gives you more control as the flour moves from pale to nutty brown. Patience beats speed here; burnt roux is not worth saving.

Steady cookware protects the roux, giving flour time to brown evenly instead of scorching in one hot spot.

Heavy Dutch oven with flour, fat, and wooden spoon set up for making Cajun étouffée roux
A heavy pot spreads heat more evenly, which gives the roux time to brown slowly instead of scorching in hot spots.

Instructions

Prep and Roux

  1. Prep first. Chop the onion, bell pepper, celery, garlic, green onions, and parsley before you start. Cook the rice or set it going. Thaw and drain frozen shrimp or crawfish. Pat shrimp dry if it is very wet.
  2. Warm the stock. Keep the stock warm in a small saucepan over low heat. It should be warm, not boiling.
  3. Make the roux. Melt the butter, warm the oil, or heat a butter-oil mix in a Dutch oven or heavy-bottomed pot over medium heat. Add the flour and stir constantly for 8–15 minutes, lowering the heat if needed, until the roux turns copper to peanut-butter brown and smells nutty. If the roux starts darkening faster than you can comfortably stir, lower the heat before you panic; roux forgives patience better than speed.

Build the Sauce

  1. Add the holy trinity. Stir in the onion, green bell pepper, and celery. Cook for 6–8 minutes, stirring often, until the vegetables soften and the roux clings to them.
  2. Add garlic and seasoning. Stir in the garlic, Cajun seasoning, paprika, thyme, bay leaves, and cayenne if using. Cook for 30–60 seconds, just until fragrant.
  3. Build the sauce. Slowly whisk in 2½ cups warm stock, adding it gradually so the sauce stays smooth. The first splash may make the roux seize and thicken; keep whisking and it will loosen as the rest of the stock goes in. Stir in Worcestershire sauce and hot sauce. Bring to a gentle simmer.
  4. Simmer until rounded. Reduce the heat to medium-low and simmer for 15–20 minutes, stirring occasionally, until the sauce thickens and tastes complete. Add more warm stock if it becomes too thick.

Add Seafood and Serve

  1. Finish with seafood. Raw shrimp cooks gently in 3–5 minutes, just until opaque and lightly curled. Cooked crawfish tails should be stirred in and heated gently for 3–5 minutes. If using both, add shrimp first, then stir in crawfish during the final 2–3 minutes. Already-cooked shrimp only needs the final 1–2 minutes to warm through.
  2. Season and brighten. Remove the bay leaves. Stir in most of the green onions and parsley. Taste and adjust with salt, black pepper, Cajun seasoning, a splash of acidity, or a little more stock.
  3. Rest and serve. Turn off the heat and let the étouffée rest for 5 minutes. Spoon over hot white rice so the sauce pools around the grains, then finish with fresh herbs and extra hot sauce at the table.

Recipe Notes

Seasoning, Stock, and Roux Notes

  • Seasoning: If your Cajun seasoning is salty, start with less and add more only after the sauce has simmered.
  • Stock: Low-sodium stock is safest if your Cajun seasoning, hot sauce, or boxed base is already salty. Chicken stock works when seafood stock is unavailable; a small splash of bottled clam juice adds deeper seafood flavor if you like that taste.
  • Flour and roux: Spoon and level the flour if measuring by cup; a packed ½ cup can make the sauce thicker. A peanut-butter roux gives the best balance of flavor and thickening for this recipe.

Seafood, Heat, and Make-Ahead Notes

  • Shrimp: Medium, large, or medium-large shrimp work best. Peeled shrimp are easiest for spooning over rice. Shrimp is done when opaque and lightly curled, not tightly coiled into hard rings.
  • Cooked shrimp: Add cooked shrimp only in the final 1–2 minutes so it warms without turning rubbery.
  • Food safety: Shrimp, lobster, crab, and scallops should cook until the flesh is pearly or white and opaque, as noted by FoodSafety.gov.
  • Crawfish: Crawfish tails are often already cooked, so they only need gentle heating. For frozen crawfish tails, thaw and drain excess liquid. Do not rinse away flavorful crawfish fat or juices unless they smell muddy, overly fishy, or unpleasant.
  • Heat: Use a vinegar-forward Louisiana-style hot sauce if you want brightness, or keep the pot mild and let people add heat at the table. For more spice, add cayenne near the end so you can control it.
  • Resting and make-ahead: The sauce thickens as it sits. Loosen with warm stock or water if needed. Best make-ahead results come from preparing the sauce first and adding the seafood during reheating.

Half-Batch Note

To make a smaller pot, use 1 lb / 450 g total seafood, ¼ cup butter or oil, ¼ cup flour, and about 1½–2 cups stock. Keep the same method, but start checking the sauce thickness sooner because a smaller batch reduces faster. Begin with the lower amount of Cajun seasoning, especially if your blend contains salt.

Need help while cooking? Jump to Success Cues, Roux Guide, Troubleshooting, or Serving Tips.

Success Cues

The recipe card gives you the steps. These cues help you know when each stage is actually working. Once the pot is on the stove, smell, color, texture, and the way the sauce moves matter more than the exact minute on the clock.

Roux smells nutty, not raw

Smell is the first real sign. The roux stops smelling like raw flour and starts smelling warm, buttery, and nutty. Its color should move from pale flour to copper or peanut-butter brown. A sharp, scorched, or bitter smell means it is better to restart before adding the vegetables.

Vegetables soften into the base

When the onion, celery, and bell pepper hit the roux, the pot should start smelling like dinner. The vegetables cool the roux slightly, then soften into it until the base tastes sweet, savory, and rounded instead of sharp or raw.

The base tastes complete

This is the biggest checkpoint. Once the base tastes like dinner, the seafood only has to show up. It should already taste seasoned, rounded, and spoonable before shrimp or crawfish is added.

At this point, the base should carry the flavor on its own; seafood is only the final gentle finish.

Glossy Cajun étouffée sauce in a pot before shrimp or crawfish is added
Taste the sauce at this stage; once it feels rounded and spoonable, the seafood can cook quickly at the end.

Shrimp stays tender, crawfish warms gently

Shrimp should turn opaque and curl softly. Crawfish tails should be warmed through, not boiled hard. The pot should bubble softly after the seafood is added, not roll like a hard boil.

Raw shrimp belongs in the finished sauce, not in a long simmer, so the timing stays short and gentle.

Raw peeled shrimp added to finished Cajun étouffée sauce in a dark pot
Add raw shrimp only after the sauce is ready, so it cooks gently instead of turning rubbery.

Soft curl is the shrimp signal; take the pot off hard heat before tender shrimp turns into tight rings.

Opaque shrimp softly curled in Cajun étouffée sauce with herbs
Shrimp is done when it turns opaque and curls softly; tight rings usually mean it cooked too long.

Gentle warming protects crawfish tails, especially when they are already cooked before they reach the sauce.

Crawfish tails warmed in Cajun étouffée sauce on a wooden spoon
Crawfish tails are often already cooked, so warm them gently in the sauce instead of boiling them hard.

The rice catches a gravy, not a broth

When you spoon étouffée over rice, the sauce should settle into the grains instead of sliding away like broth or sitting on top like paste. The rice should catch a gravy, not chase a broth.

This is the bowl test: rice should hold sauce between the grains, not sit under a watery layer.

Close-up of Cajun étouffée sauce settling into white rice with seafood
Good étouffée gravy settles between the rice grains, which keeps each spoonful saucy without turning the bowl watery.

What the Finished Étouffée Should Look Like

CueWhat to look for
AromaToasted roux, softened onion, bell pepper, garlic, seafood, and a little vinegar heat
ColorGolden brown to light brown, not pale beige and not burnt dark
TextureThick gravy that moves slowly from the spoon and spreads gently over rice
SeafoodShrimp softly curled and opaque; crawfish warmed through, not boiled hard
RiceSauce settling around the grains, not watery puddles at the bottom of the bowl

Use the checklist as the final pass before serving, especially if the sauce looked uncertain earlier.

Finished étouffée checklist showing toasted roux aroma, golden color, spoonable texture, tender seafood, and rice
Check the pot from several angles: aroma, color, sauce body, seafood tenderness, and how well the rice holds the gravy.

Still checking the pot? Use the Roux Guide if the base looks too light or too dark, or go to Troubleshooting if the sauce feels thin, thick, salty, or floury.

Why This Cajun Étouffée Works

This pot works because the flavor is built before the seafood goes in. The roux turns nutty, the trinity softens, the seasoning settles into the stock, and the seafood only needs a short, gentle finish.

  • Roux builds body and flavor. It thickens the sauce and gives the dish that warm, toasted smell that makes the whole pot feel deeper.
  • The holy trinity makes the base taste complete. Onion, celery, and green bell pepper soften into the roux before the liquid is added.
  • Warm stock keeps the sauce smooth. Adding it slowly helps prevent lumps and gives you control over the final texture.
  • Seafood is treated gently. Shrimp and crawfish stay tender because they only need a short finish.
  • Tomato stays optional. The main recipe stays roux-forward, while a small tomato option gives you a brighter Creole-style variation.
  • Shortcuts have a place. Cream soup, boxed mix, prepared roux, and étouffée base can help on busy nights, but the from-scratch roux method gives the best flavor and control.

Choose Your Version: Shrimp, Crawfish, or Both

Before you worry about spice level, choose the seafood that makes sense for your kitchen. Crawfish gives étouffée its classic Louisiana feel, shrimp makes the recipe easier to shop for, and using both turns the pot into a fuller seafood dinner.

VersionUse it whenHow to cook it
Crawfish étoufféeYou have crawfish tails and want the most classic seafood flavorAdd thawed crawfish tails at the end and heat gently for 3–5 minutes
Shrimp étoufféeYou want the easiest seafood version with ingredients that are easier to findAdd raw peeled shrimp at the end and cook 3–5 minutes until opaque
Shrimp and crawfish étoufféeYou want a bigger seafood dinner with more texture and flavorAdd shrimp first, then stir in crawfish during the final 2–3 minutes
Chicken étoufféeYou want the same sauce structure without seafoodUse cooked chicken or simmer small pieces until fully cooked and tender

Compare the versions before cooking so the pot matches your seafood, shopping, and serving plan.

Three finished bowls comparing shrimp étouffée, crawfish étouffée, and mixed seafood étouffée
The roux-based sauce stays the same, but shrimp cooks quickly while crawfish tails only need gentle warming.

Seafood Timing Notes

Good crawfish tails are worth using when you can get them. Otherwise, shrimp is not a compromise; it is a strong version of the dish on its own. Thaw frozen shrimp fully and pat it dry so extra water does not thin the pot. For another shrimp dinner where timing matters, this shrimp scampi also keeps the shrimp tender by cooking it quickly in a finished sauce.

Chosen your seafood? Return to the Recipe Card, or review Success Cues for shrimp and crawfish timing.

Ingredients You Need for Cajun Étouffée

Once the roux is under control, the rest of the ingredient list is simple. Each piece has a job, and the timing matters more than using a long list of extras.

Roux: butter or oil plus flour

The roux gives the sauce its body and toasted depth. Butter tastes richer; oil is more forgiving. Nervous about scorching? Use half butter and half oil so you get flavor with a little more stability.

The holy trinity

Onion, celery, and green bell pepper form the Cajun holy trinity. Green bell pepper gives the most classic flavor, but red or yellow bell pepper works when that is what you have. Chop the vegetables finely so the finished dish feels smooth and spoonable instead of chunky.

The Cajun holy trinity belongs in the ingredient notes because it shapes the sweetness and depth of the sauce.

Chopped onion, celery, green bell pepper, and garlic arranged on a wooden board
Onion, celery, and green bell pepper form the Cajun holy trinity; garlic joins later so it does not burn.

Garlic and Cajun seasoning

Garlic adds depth, but it burns quickly, so add it after the onion, celery, and bell pepper have softened. Cajun seasoning varies a lot by brand. Some blends are mostly spice; others are very salty. Start with less if your seasoning contains salt, then adjust after the sauce simmers.

Salted seasoning, salted stock, hot sauce, and boxed bases can stack quickly. Wait until the sauce has simmered, then taste and adjust. Rice will soften saltiness on the plate, but it is much easier to add salt than remove it.

Stock

Seafood stock or shrimp stock gives the deepest flavor, but chicken stock works well for a home version. Choose low-sodium stock when your Cajun seasoning is salted. Warm stock blends into the roux more smoothly. For another seafood recipe where the base makes or breaks the final flavor, this lobster bisque uses the same idea: build the base first so the seafood tastes richer without overcooking.

Shrimp or crawfish

Use peeled raw shrimp, thawed crawfish tails, or a mix. Shrimp cooks quickly, crawfish tails are often already cooked, and both do best with gentle heat.

Green onions, parsley, and hot sauce

Green onions and parsley cut through the richness right at the end, so the bowl tastes bright instead of heavy. Hot sauce brings acidity as well as heat. Add some to the pot, then keep more on the table for anyone who wants a brighter final kick.

What Is Étouffée Sauce Made Of?

Think of étouffée sauce as a roux-thickened seafood gravy: not soup, not paste, and not a loose pan sauce. It should move slowly from the spoon, coat the seafood, and settle into hot rice.

The roux gives body, the trinity gives sweetness and depth, stock loosens everything into a spoonable base, and Cajun seasoning, Worcestershire sauce, hot sauce, green onions, and parsley finish the flavor. Crawfish tail juices, when they smell clean and sweet, can add extra seafood depth near the end.

Stiff sauce needs warm stock. Watery sauce needs a few uncovered minutes before the seafood is added. The goal is simple: thick enough to coat the back of a spoon, soft enough to flow around rice.

Texture matters most here: étouffée sauce should behave like seafood gravy, not broth or paste.

Spoonful of Cajun étouffée with thick sauce, white rice, shrimp, and crawfish
This is the texture to aim for: thick seafood gravy that clings to rice, yet still feels loose enough to spoon.

Check the spoon before serving; a slow coating means the sauce has enough body without turning pasty.

Thick Cajun étouffée sauce coating a wooden spoon with a slow drip
Use the spoon test before serving: the sauce should coat the spoon, then move slowly back into the pot.

If you love Cajun-style seafood sauces in general, this seafood boil sauce is useful for a different kind of seafood dinner. It is more buttery and pourable than étouffée, but it works with many of the same shrimp, crab, crawfish, garlic, and Cajun seasoning flavors.

Roux Color Guide for Étouffée

The roux is the only part of this recipe that asks for your full attention, but it does not ask you to rush. You do not need a restaurant-speed roux here. A steady, slower roux is easier to control and still gives you the nutty flavor this dish needs.

Watch Color Before Time

Stir steadily, control the heat, and watch the color more than the clock. Do not judge the pot too early; the roux changes slowly at first, then deepens faster as it gets darker.

Start the roux guide with color, because the stages tell you more than the clock on the stove.

Roux stage guide showing pale, copper, peanut-butter, and burnt roux for Cajun étouffée
Roux moves from pale to nutty to deep brown quickly, so watch the color closely and restart if black specks appear.

The times below are estimates. Color and smell matter more than minutes, especially if your pot runs hot or your stove is uneven. For this Cajun étouffée recipe, aim for a peanut-butter-colored roux. It gives the sauce a nutty flavor without taking as long as a very dark gumbo-style roux.

Roux Colors at a Glance

Roux colorApproximate timeFlavorBest use
Blonde3–5 minutesMild, buttery, lightly cookedFastest version, but less Cajun depth
Copper6–8 minutesLightly nutty and beginner-friendlyGood weeknight étouffée
Peanut butter8–15 minutesNutty, rounded, deeper flavorBest balance for this recipe
Dark brown18–25+ minutesMore intense, slightly smokyAdvanced version; thickens less and burns more easily
Burnt with black specksAny time if heat is too highBitterDiscard and restart

The color guide turns roux judgment into a visual check instead of a guessing game.

Roux color guide for étouffée showing blonde, copper, peanut butter, dark brown, and burnt stages
Use this roux color guide to judge whether your base is still mild, ready for étouffée, or too far gone.

This early roux stage explains why color matters before the sauce gets its deeper Cajun flavor.

Pale roux in a Dutch oven with a wooden spoon showing an early cooking stage
Pale roux can thicken the sauce, but it has not developed the nutty flavor Cajun étouffée needs.

Aim for this peanut-butter shade when you want toasted flavor without losing too much thickening power.

Peanut-butter-colored roux in a heavy pot with a wooden spoon trail
Peanut-butter roux gives Cajun étouffée its best middle ground: warm color, toasted flavor, and enough body for the sauce.

When to Restart the Roux

As the roux darkens, lower the heat if it starts moving too fast. Black specks or a sharp burnt aroma mean it is time to restart. Burnt roux will make the whole pot taste bitter.

Restarting is better than saving burnt roux, because scorched flavor will travel through the whole sauce.

Comparison of good roux and burnt roux with black specks
Burnt roux will turn the whole pot bitter, so restart when you see black specks or smell scorching.

Roux ready? Continue to How to Make Cajun Étouffée, or use Troubleshooting if the pot smells burnt, tastes floury, or feels too thick.

How to Make Cajun Étouffée

The recipe card gives the exact steps. This walkthrough is here for the cooking cues: what should be ready, what should smell right, and when the pot is safe for seafood.

1. Prep everything before the roux

Once the roux starts cooking, your attention belongs to the pot. Chop the vegetables, mince the garlic, slice the herbs, warm the stock, cook the rice, and thaw the seafood before you turn on the stove.

2. Cook the roux slowly

Melt the butter, warm the oil, or heat a butter-oil mix, then add the flour and stir constantly over medium heat. The roux will move from pale to blonde, then copper, then peanut-butter brown. Darkening too quickly is your cue to lower the heat and keep stirring.

3. Add onion, celery, and bell pepper

When the roux reaches the color you want, stir in the holy trinity. The vegetables cool the roux slightly, then turn sweet and savory as they soften into the base. This is the moment the pot starts smelling like dinner.

Once the trinity hits the roux, the pot shifts from toasted flour to a sweet, savory Cajun base.

Chopped onion, celery, and green bell pepper stirred into brown roux in a Dutch oven
When the trinity hits the roux, it cools the pot slightly while building a sweet, savory Cajun base.

4. Build the sauce with warm stock

After the garlic blooms, the first splash of stock will make the roux seize and thicken. Keep whisking. It loosens as the rest of the stock goes in and turns into a smooth, spoonable base.

Warm stock and steady whisking turn the roux from tight and thick into a smooth sauce.

Warm stock being whisked into a roux base for Cajun étouffée sauce
The first splash of stock may tighten the roux, but steady whisking turns it into a smooth étouffée sauce.

5. Simmer until the base tastes complete

Let the sauce simmer until the floury edge has cooked away and the seasoning tastes balanced. The pot should already taste like dinner before the seafood arrives.

6. Finish with shrimp or crawfish

Raw shrimp only needs a few minutes. Crawfish tails are often already cooked and only need to be heated through. Treat the seafood like the finish, not the simmer.

7. Rest, garnish, and serve

Let the pot rest for a few minutes so the sauce settles and thickens slightly. Spoon it over hot white rice so the gravy pools around the grains, then serve with fresh herbs and extra hot sauce at the table.

Troubleshooting: Fix Thin, Thick, Salty, Bland, Spicy, or Floury Étouffée

Do not panic if the sauce looks wrong at first. Étouffée can look too thick, too thin, or too dark for a minute before it comes together. Most problems are easier to fix before the seafood goes in, so taste and adjust while the shrimp or crawfish is still safely waiting.

Check Texture Before Seafood

Étouffée should be thicker than soup but softer than paste. It should spoon easily over rice, coat the seafood, and settle into the grains without disappearing completely.

Diagnose the sauce before adding seafood by comparing thin, spoonable, and overly thick textures.

Three-panel guide comparing thin, just-right, and too-thick Cajun étouffée sauce textures
The ideal étouffée sauce sits between watery and pasty: spoonable, glossy, and thick enough to coat rice.

Common Étouffée Fixes

ProblemWhat it meansHow to fix it
Too thinUsually too much liquid or not enough simmeringSimmer uncovered for a few more minutes before adding seafood
Too thickThe roux absorbed more liquid than expectedAdd warm stock a splash at a time
Floury tasteRoux was undercooked or sauce needs more timeSimmer the sauce longer before adding seafood
Too saltySeasoning blend, stock, hot sauce, or boxed base was saltyAdd unsalted stock, a little butter, and serve with plain rice
Too spicyOften too much cayenne, hot sauce, or spicy Cajun seasoningAdd unsalted stock, a little butter, and serve with extra plain rice
BlandNeeds more spice, acid, or finishing flavorAdd Cajun seasoning, hot sauce, Worcestershire, green onion, or cayenne
Burnt rouxRoux scorched before vegetables were addedRestart the roux; burnt flavor will not cook out
Rubbery shrimpShrimp cooked too long or boiled too hardAdd shrimp only at the end and cook just until opaque
Watery seafood flavorFrozen seafood released too much liquidThaw, drain, and pat dry before adding; simmer the sauce first so it has body

After the detailed fixes, this guide works as a quick save-the-pot reminder for common étouffée problems.

Troubleshooting guide for Cajun étouffée with fixes for thin, thick, floury, salty, spicy, and rubbery shrimp issues
Fix sauce problems early; once shrimp or crawfish goes in, there is less time to correct thickness, salt, or floury flavor.

Pot fixed? Return to the Recipe Card, check Serving Ideas, or use Shortcut Options if you are adjusting a faster version.

Cajun vs Creole Étouffée: Tomato or No Tomato?

Tomato is where étouffée opinions can get loud, so this recipe keeps the choice simple. This version keeps tomato out of the main pot for a roux-forward Cajun-style flavor. Some home cooks add tomato, especially in Creole-leaning or family-style versions, so the option is included below.

For a brighter sauce, add 1 tablespoon tomato paste with the garlic and spices, or stir in ½ cup diced tomato when you add the stock. Tomato changes the flavor, but it can still make a delicious pot.

The tomato choice belongs here because roux-forward Cajun-style and brighter Creole-leaning bowls can both be delicious.

Side-by-side étouffée bowls showing a no-tomato version and a tomato-option version
No tomato keeps the étouffée roux-forward, while a small tomato option adds a brighter Creole-style note.

Skip the tomato if you came here for a roux-forward bowl. Add a little if you like a softer, brighter sauce. Like many Louisiana-style dishes, every kitchen has its own opinion.

Étouffée Sauce, Base, Mix, and Cream Soup Shortcuts

Some nights, you want the roux. On other nights, you want dinner faster. Both are real kitchens. Shortcut étouffée works best when you add freshness back: sautéed trinity, garlic, herbs, a splash of hot sauce, and gentle seafood timing.

The goal is not to pretend a shortcut tastes exactly the same as a from-scratch roux. Instead, make it balanced, creamy or saucy in the right way, and worth spooning over rice.

ShortcutMain riskBest fix
Prepared or jarred rouxToo intense or too darkAdd gradually and taste before adding more seasoning
Boxed étouffée mix or baseToo salty or flatUse less seasoning and add sautéed trinity, garlic, herbs, and hot sauce
Cream soupToo heavy, thick, or saltyThin with stock and finish with fresh herbs and gentle seafood timing
Light rouxLess depthUse good stock, Cajun seasoning, Worcestershire sauce, and a little acidity

For shortcut methods, keep the focus on salt control, sauce thickness, fresh trinity, and gentle seafood timing.

Shortcut étouffée guide showing prepared roux, boxed base, cream soup, and light roux fixes
Shortcut étouffée tastes more homemade when you control salt, loosen heavy bases with stock, and add fresh trinity.

Using prepared or jarred roux

Prepared roux can save time if you want roux flavor without standing over the pot as long. Follow the jar’s or package’s guidance as your baseline, then add gradually rather than all at once. Build the sauce with sautéed onion, celery, bell pepper, garlic, warm stock, and seasoning. Taste before adding more Cajun seasoning because prepared roux can vary in intensity.

Using étouffée mix or base

Boxed étouffée mix or jarred base can be useful when you want dinner fast. Most mixes already contain seasoning, thickener, and salt, so taste before adding more Cajun seasoning. Add shrimp or crawfish near the end instead of boiling it hard for the whole cooking time.

To make a mix taste more homemade, sauté onion, celery, bell pepper, and garlic in a little butter before adding the mix and liquid. Finish with fresh herbs, a splash of hot sauce, and a small knob of butter.

Using cream of mushroom, cream of shrimp, or cream of celery soup

Many home cooks make a creamy shortcut étouffée with condensed soup. If this is the version you grew up with, it deserves a place too. Cream of mushroom, cream of shrimp, cream of celery, and golden mushroom soup all create an easy, comforting sauce. It will not taste exactly like a roux-based Cajun étouffée, but it can still be a cozy family-style dinner.

Cream soup shortcuts work best when stock loosens the base and seafood stays gently cooked.

Cream soup shortcut setup for étouffée with stock, trinity, seafood, herbs, and creamy sauce
When using cream soup, loosen the base with stock first, then finish with seafood gently so the sauce stays spoonable.

Condensed soup needs a lighter hand with salt and seasoning. Start with about ½ can of water or stock per can of condensed soup, then loosen the sauce more only if needed. Cream soup versions can become salty quickly, especially when combined with Cajun seasoning and table hot sauce.

For a full dinner built around the same condensed-soup comfort idea, this cream of mushroom chicken shows how much the soup-to-liquid ratio matters when you want the sauce creamy instead of watery.

The fastest from-scratch shortcut

If you have 5–8 minutes, make a light roux instead of relying only on soup or mix. Even a copper-colored roux gives the sauce more flavor and better texture than a fully instant version.

Using a shortcut tonight? Keep Troubleshooting nearby, then return to the Recipe Card for seafood timing.

What to Serve With Cajun Étouffée

Cajun étouffée is usually served over white rice, and for good reason. The rice catches the sauce, softens the heat, and turns the dish into a full meal. If rice is the part that usually lets you down, this guide on how to cook perfect rice will help you get fluffy grains before the étouffée is ready.

A shallow bowl works best here: rice in the center, sauce ladled around it, herbs on top, and table hot sauce close by. It feels generous without needing many sides.

Serving gets easier when rice is mounded first and the étouffée is ladled around it.

Cajun étouffée plated with rice in the center and sauce spooned around it
For a cleaner bowl, mound the rice first, then ladle the étouffée around it so the gravy pools neatly.
  • Long-grain white rice: the classic, clean choice.
  • Green onions and parsley: a fresh finish for a rich sauce.
  • Hot sauce: serve on the side so everyone controls the heat.
  • Cornbread: good for soaking up extra sauce.
  • Simple green salad: balances the richness.
  • Roasted okra or sautéed greens: adds a Southern-style vegetable side.
  • Red beans and rice: better as a separate meal or part of a larger Cajun/Creole spread rather than something you need on the same plate.
  • Cajun seafood boil: a natural next recipe if you are building a bigger seafood spread around shrimp, crawfish, crab, or potatoes.

Finish with herbs and a sharp splash of hot sauce.

Make-Ahead, Storage, Freezing, and Reheating

Étouffée is a good make-ahead dish when the sauce and seafood are handled separately. Prepare the sauce ahead, then add the seafood when you reheat and serve.

Make ahead

Make the sauce through the simmering step, then cool and refrigerate it. When ready to serve, warm it gently, add a splash of stock if needed, and finish with shrimp, crawfish tails, or both.

Storage works best when the sauce is made ahead and seafood is saved for reheating.

Make-ahead étouffée sauce stored separately from seafood and rice
For better make-ahead texture, store the sauce separately; then add seafood during reheating so it stays tender.

Refrigerating leftovers

Store leftovers in an airtight container in the refrigerator for up to 3 days. Keep rice separate if possible so the sauce does not become too thick and starchy.

If you have extra cooked rice but not enough étouffée for another full bowl, turn the rice into a separate dinner like this shrimp fried rice instead of stretching the sauce too thin.

Freezing

You can freeze étouffée, but seafood texture may change after thawing. The best method is to freeze the sauce without seafood, then add fresh shrimp or crawfish when reheating. Leftovers with seafood already in the sauce should be cooled quickly, frozen in a sealed container, and reheated gently.

Reheating

Reheat on low heat, stirring often. Add a splash of stock or water to loosen the sauce. Avoid boiling leftovers hard because shrimp and crawfish can toughen.

Variations

Shrimp étouffée

Use 2 lb total peeled and deveined raw shrimp. Add it near the end and cook gently until opaque and softly curled.

Crawfish étouffée

Use 2 lb total thawed crawfish tails. Already cooked crawfish should be warmed gently instead of boiled hard.

Seafood étouffée

Use a mix of shrimp and crawfish, or add a little crabmeat at the end. Delicate seafood stays best when it is added late.

Chicken étouffée

Use bite-size cooked chicken or small pieces of boneless chicken thighs. Simmer until the chicken is fully cooked and tender, then finish with fresh herbs.

Gluten-free étouffée

Use a gluten-free all-purpose flour blend or rice flour for the roux. The texture may be slightly different, so add stock gradually and adjust the sauce as it thickens.

Vegetarian mushroom étouffée

Use mushrooms instead of seafood and vegetable stock instead of seafood or chicken stock. Brown the mushrooms first so they bring depth to the sauce instead of watering it down.

Extra spicy Cajun étouffée

Add more cayenne, diced jalapeño, or extra hot sauce at the table. Build spice gradually because Cajun seasoning and hot sauce can also add salt.

Creamy shortcut étouffée

Use condensed cream of mushroom, cream of shrimp, or cream of celery soup as part of the sauce base. Keep the seasoning lighter, thin with stock, and add seafood at the end.

Cajun Étouffée FAQs

How do you pronounce étouffée?

Étouffée is usually pronounced ay-too-FAY or eh-too-FAY. The word comes from French and means “smothered.”

Is shrimp okay instead of crawfish?

Yes. Use raw peeled shrimp and add it during the final 3–5 minutes so it stays tender. Shrimp is easier to find than crawfish and works very well in Cajun étouffée.

Are crawfish tails already cooked?

Many packaged crawfish tails are already cooked. Check the package, but in most cases they only need to be warmed through in the sauce for a few minutes.

How should frozen crawfish tails be handled?

Thaw frozen crawfish tails first, then drain excess liquid. Do not automatically rinse them, especially if the package has flavorful crawfish fat or juices. Muddy or overly fishy liquid should be drained more aggressively, with stock doing more of the flavor work.

What roux color is best for étouffée?

Peanut-butter brown is the best balance for this recipe. It gives the sauce nutty flavor without requiring a very dark roux. A lighter copper roux also works for an easier weeknight version.

Does Cajun étouffée need tomatoes?

No. This version does not use tomato by default. A little tomato paste or diced tomato gives the sauce a brighter Creole-style feel. Tomato changes the flavor, but it can still make a delicious pot.

Should étouffée be thick?

Yes, but not pasty. Étouffée should be thicker than soup and thin enough to spoon over rice. A thick sauce needs warm stock; a thin one needs a few more uncovered minutes.

Why does my étouffée taste floury?

The roux may not have cooked long enough, or the sauce may need more simmering time. Cook the roux until it smells nutty, then simmer the sauce until the floury taste disappears.

How do I keep shrimp from overcooking?

Build and simmer the sauce first, then add shrimp at the end. Shrimp usually needs only 3–5 minutes in a gentle simmer. Remove the pot from heat as soon as the shrimp is opaque and tender.

Cream of mushroom soup in étouffée: yes or no?

Yes, if you want a creamy home-style shortcut. Cream of mushroom soup is not the same as a roux-based Cajun étouffée, but it can be useful for a fast, comforting version. Use less salt because condensed soup and Cajun seasoning can become salty together.

Gumbo vs étouffée: what is the difference?

Gumbo is usually more soup-like and often served as a stew with rice, while étouffée is thicker and more sauce-like. Étouffée should cling to the seafood and rice rather than feel like broth. For a deeper comparison, Southern Living has a helpful étouffée vs gumbo explainer.

Make-ahead étouffée: what works best?

Best texture comes from making the sauce ahead and adding the seafood when reheating. This keeps shrimp and crawfish from becoming tough.

Need the essentials again? Jump back to the Recipe Card, Roux Guide, Troubleshooting, or Top.

Final Spoonful

Once you know what the roux should smell like, how the sauce should move, and when the seafood should go in, Cajun étouffée stops feeling intimidating. It becomes what it should be: glossy, spicy, seafood-rich comfort poured over hot rice, finished with herbs and one more sharp splash of hot sauce.

The finished-pot target is simple: glossy sauce, hot rice, fresh herbs, and enough Cajun étouffée for the table.

Dutch oven of Cajun étouffée served at a table with rice, bowls, herbs, ladle, and hot sauce
Once the sauce is glossy and the rice is hot, étouffée becomes the kind of pot people gather around.

Every kitchen has an opinion on tomato, cream soup, crawfish, shrimp, or how dark the roux should be — and that is part of why étouffée is so fun to cook. If your family has a version, it probably has a reason behind it. Learn the base method, adjust the pot to your table, keep the rice hot, and serve it while the sauce is still glossy.

Posted on — Leave a comment

Seafood Boil Sauce Recipe: Garlic Butter Cajun Sauce for Shrimp, Crab & Crawfish

A tray of shrimp, crab legs, corn, baby potatoes, sausage, lemon wedges, parsley, and red-orange garlic butter Cajun seafood boil sauce.

A great seafood boil sauce should do more than taste buttery. It should cling to crab legs, gloss over shrimp, soak into corn and potatoes, and leave enough garlicky Cajun butter at the bottom of the tray for one last swipe of bread.

This is the sauce that turns a pile of boiled seafood into the messy, glossy, pass-the-napkins kind of meal. It is rich, garlicky, smoky, lemony, a little spicy, and easy to adjust for dipping, pouring, tossing, or serving on the side.

The goal is not just heat or butter. The goal is a sauce that tastes bold but still lets the seafood taste like seafood. The base is simple — butter, garlic, Cajun seasoning, Old Bay, smoked paprika, lemon, and a splash of broth or reserved seafood boil liquid — but the control is what makes it work.

Quick Answer: What Is Seafood Boil Sauce?

Seafood boil sauce is a bold garlic butter sauce made with butter, garlic, Cajun seasoning, Old Bay seasoning, lemon juice, paprika, and a little heat. It should taste rich first, then garlicky and smoky, with enough lemon to make every bite of shrimp, crab, corn, and potatoes feel bright instead of heavy.

For a thick dipping sauce, use less liquid. For a pour-over sauce, add more broth, seafood stock, or reserved seafood boil liquid. For a seafood boil bag sauce, keep it medium-thick so it coats shrimp, crab, crawfish, corn, potatoes, and sausage without becoming watery.

Butter-Broth-Lemon Rule

Use the butter-broth-lemon rule: butter softens, broth loosens, and lemon brightens. Choose your sauce style first — thick and buttery for crab-leg dipping, loose and glossy for shrimp and corn, or medium-thick for seafood boil bags. The recipe below starts in the middle so you can adjust either way.

Butter, broth, and lemon showing the butter-broth-lemon rule for seafood boil sauce.
When the sauce needs a fix, this is the fastest rule to remember: butter softens, broth loosens, and lemon brightens.

The best version is bold, glossy, and adjustable: rich enough for crab, bright enough for shrimp, loose enough for corn and potatoes, and balanced enough that it does not hide the seafood.

Make It Now: Seafood Boil Sauce Recipe

This is the main garlic butter Cajun seafood boil sauce. It makes about 2 cups / 480 ml, enough for about 2½–3 lb / 1.1–1.35 kg seafood as a light-to-generous pour-over sauce, depending on how much corn, potatoes, sausage, and eggs are on the tray.

You only need one pan, low heat, and about 20 minutes. Melt the butter, soften the aromatics, bloom the spices, loosen with broth, then finish with lemon.

Prep time: 10 minutes
Cook time: 12 minutes
Total time: 22 minutes
Yield: About 2 cups / 480 ml sauce
Serves: 4–6 as pour-over sauce, 8–10 as dipping sauce because dipping uses less per person
Equipment: Large skillet or medium saucepan, whisk, measuring spoons, microplane or garlic press

Scaling: Double the sauce for a large tray or seafood boil bag. Keep the heat low and use a wider pan so the garlic and spices cook evenly.

Before you pour: Taste the sauce with one shrimp, potato, or piece of corn. The salt order is simple: season first, loosen second, salt last.

Ingredients

IngredientUS MeasureMetric
Unsalted butter1 cup / 2 sticks / 8 oz226 g
Garlic, minced or grated8–10 cloves30–40 g
Yellow onion, very finely minced½ small onion / about ⅓ cup50–60 g
Cajun seasoning1½ tablespoons12–15 g
Old Bay seasoning2 teaspoons5–6 g
Smoked paprika1 tablespoon6–7 g
Onion powder1 teaspoon2–3 g
Brown sugar1–2 teaspoons4–8 g
Hot sauce1–2 teaspoons5–10 ml
Reserved seafood boil liquid, seafood stock, low-sodium chicken broth, or vegetable broth½ cup120 ml
Lemon juice2 tablespoons30 ml
Lemon zest1 teaspoonOptional
Fresh parsley, chopped2 tablespoons6–8 g

Optional heat: Add ¼–½ teaspoon cayenne or red pepper flakes if you want a spicier Cajun butter sauce.

Salt note: Do not add extra salt until the sauce is finished and tasted. Cajun seasoning, Old Bay, broth, and reserved boil liquid can all bring salt.

Measurement note: Gram weights for seasoning blends are approximate because Cajun seasoning and seafood seasonings vary by brand. Use the spoon measures first, then adjust after tasting.

Instructions

  1. Melt the butter in a large skillet or medium saucepan over low to medium-low heat.
  2. Add the finely minced onion and cook for 3–4 minutes, until softened and glossy but not browned.
  3. Add the garlic and cook for 60–90 seconds, just until fragrant. Keep it pale, not brown.
  4. Stir in the Cajun seasoning, Old Bay, smoked paprika, onion powder, brown sugar, and optional cayenne or red pepper flakes.
  5. Cook the spices in the butter for 30–60 seconds, until the butter smells toasty and the spices look absorbed into the butter, not sandy on the surface.
  6. Slowly whisk in the reserved boil liquid, stock, or broth.
  7. Let the sauce gently simmer for 3–5 minutes, stirring often, until glossy and spoonable.
  8. Turn off the heat. Stir in the lemon juice, lemon zest, hot sauce, and parsley.
  9. Taste and adjust. Add more lemon for brightness, broth for a looser sauce, butter for richness, or hot sauce for more heat.
  10. Taste with one shrimp, potato, or piece of corn before coating the full seafood tray.
  11. Serve warm as a dipping sauce, pour-over sauce, or seafood boil bag sauce.

Important: Keep the sauce at a gentle simmer and it stays glossy. A hard boil can make the butter separate and the garlic taste harsh.

The sauce should look bold before it tastes aggressive: red-orange, glossy, garlicky, and loose enough to spoon over the tray without drowning the seafood.

Seafood Boil Sauce Success Cues

Use these cues while cooking. They matter more than the clock.

A close-up bowl of red-orange garlic butter Cajun seafood boil sauce with parsley, garlic, and lemon.
The finished sauce should look glossy and spoonable, with visible spice and garlic but no greasy separation.
CueWhat You Want
GarlicFragrant and pale, not brown
OnionSoft, glossy, and slightly translucent
SpicesToasty and buttery, not dry or sandy
Sauce textureGlossy and spoonable, not broken or greasy
SaltBold and savory, not sharp or harsh
HeatWarm Cajun spice first, extra fire only if you want it
LemonBright enough to cut the butter
Finished sauceButtery, garlicky, smoky, lemony, and easy to drizzle

When the sauce hits these cues, it tastes big without tasting heavy — rich enough for crab, bright enough for shrimp, and loose enough to find its way into the corn and potatoes.

Adjust, Fix and Serve the Sauce

Use the rest of this guide to choose the right texture, adjust the flavor, fix common problems, and store leftovers safely.

Dipping Sauce vs Pour-Over Sauce

This is where the sauce becomes yours. Some people want a thick bowl of butter for crab legs; others want a loose, glossy sauce that runs into the corn and potatoes. The same base can do both.

Seafood boil sauce thickness guide showing thick dipping sauce, loose pour-over sauce, and medium-thick bag sauce.
Thickness decides the job, so keep it thicker for dipping, looser for pouring, and medium-thick for bags.
UseTextureHow to Adjust
Dipping sauceThick, buttery, clingyUse ¼ cup / 60 ml liquid and simmer slightly longer.
Pour-over sauceGlossy, loose, spoonableUse ½ cup / 120 ml liquid.
Seafood boil bag sauceMedium-thick, coating sauceUse ½–¾ cup / 120–180 ml liquid.
Big tray sauceLooser and more spreadableUse ¾–1 cup / 180–240 ml liquid.
Crab leg dipping sauceRich and butteryKeep it thicker and serve lemon wedges on the side.

Crab people usually want the thick bowl. Shrimp, corn, and potatoes usually want the loose spoon-over version. If your table is divided, make the base sauce medium-thick, then loosen half for pouring and keep half rich for dipping.

Think of the broth or boil liquid like a volume knob. Add a little for a thick dip. Add more for a sauce that covers a whole tray.

How Much Seafood Boil Sauce Do You Need?

The only sad seafood boil sauce is the one that runs out too early. If the tray has corn and potatoes, make extra. They absorb sauce faster than the seafood does.

Guide showing how much seafood boil sauce to make by pounds of seafood.
Corn and potatoes always change the math, so make extra when the tray has more than just shrimp or crab.

By Seafood Weight

Seafood AmountDipping SaucePour-Over Sauce
1 lb / 450 g seafood½ cup / 120 ml¾ cup / 180 ml
2 lb / 900 g seafood1 cup / 240 ml1½ cups / 360 ml
3 lb / 1.35 kg seafood1½ cups / 360 ml2–2¼ cups / 480–540 ml
5 lb / 2.25 kg seafood2½ cups / 600 ml3–4 cups / 720–960 ml
Party trayMake extraServe extra on the side

By Number of People

PeopleSauce for DippingSauce for Pouring/Tossing
2 people½–¾ cup / 120–180 ml1 cup / 240 ml
4 people1–1½ cups / 240–360 ml2 cups / 480 ml
6 people1½–2 cups / 360–480 ml3 cups / 720 ml
8 people2–3 cups / 480–720 ml4 cups / 960 ml

This recipe makes about 2 cups / 480 ml sauce. That is enough for about 2½–3 lb / 1.1–1.35 kg seafood as a pour-over sauce, or more if you are mainly serving it for dipping.

Extra sauce never feels like a mistake at a seafood boil. Running out does.

Once you know how thick the sauce should be and how much to make, the next step is understanding why the balance works.

Why This Seafood Boil Sauce Works

The flavor works because it balances richness, garlic, heat, salt, sweetness, and acidity.

Butter gives the sauce body. Garlic makes it bold and fragrant. Cajun seasoning brings peppery heat and Southern-style depth. Old Bay adds the classic seafood-boil flavor many people expect with crab, shrimp, and crawfish. Smoked paprika gives the butter sauce its warm red-orange color. Lemon keeps it from feeling heavy.

The small amount of brown sugar is not there to make the sauce sweet. It rounds out salt and spice, especially if your seasoning blend is intense. A little broth or reserved boil liquid turns plain melted butter into something glossy, spoonable, and better connected to the seafood.

When it is right, the sauce should taste buttery first, then garlicky, smoky, salty-spicy, and finally bright from lemon.

The method matters too. Garlic needs gentle heat, spices taste better when they bloom briefly in butter, and lemon tastes brighter when added near the end.

That balance is why the sauce can be bold enough for sausage and potatoes but still bright enough for shrimp, crab, and lobster.

Ingredients You Need

The recipe card gives you the amounts. This section explains what each ingredient does and how to adjust if your seasoning blend is stronger, smokier, hotter, or saltier than expected.

Ingredients for seafood boil sauce including butter, garlic, Cajun seasoning, Old Bay, lemon, parsley, and broth.
Every ingredient earns its place here, because Cajun seasoning, Old Bay, garlic, lemon, and broth all help the sauce stay bold without getting heavy.

Butter

Unsalted butter gives you the best control because seafood boil seasonings can be salty. If you only have salted butter, make the sauce first, then taste before adding anything salty at the end.

For a richer party-style version, whisk in 2–4 extra tablespoons of butter after the sauce simmers.

Garlic

Fresh garlic gives this Cajun butter sauce its best flavor. Minced garlic gives a rustic texture; grated garlic or garlic paste makes the sauce smoother and more restaurant-style.

Keep the garlic pale and fragrant. Dark brown garlic can taste bitter.

Onion

Onion is optional, but it gives the sauce body and natural sweetness. Mince it very finely so it melts into the butter, or grate it for a smoother finish.

Cajun Seasoning

Cajun seasoning gives the sauce its bold, peppery, spicy base. Different brands vary a lot, so taste yours before you add extra heat or salt.

Old Bay Seasoning

Old Bay gives the sauce that classic seafood flavor. It works especially well with shrimp, crab legs, crawfish, potatoes, and corn.

No Old Bay in the pantry? You can still make a good boil sauce with Cajun seasoning, smoked paprika, garlic powder, onion powder, and a small pinch of celery salt or celery seed.

Smoked Paprika

Smoked paprika adds color, warmth, and a gentle smoky note. It helps create the deep red-orange look people associate with Cajun seafood butter.

Brown Sugar

Brown sugar is optional but useful. It rounds out salt, spice, and heat without making the sauce taste sweet, and it helps create a slightly glossy finish.

Broth, Seafood Stock, or Reserved Boil Liquid

This is what changes the sauce from a thick buttery dip into something you can spoon over a whole tray. Reserved boil liquid, stock, or broth loosens the sauce so it pours instead of sitting like straight melted butter.

Reserved boil liquid gives the strongest seafood-boil flavor because it already carries seasoning from the pot. If it tastes very salty, use half boil liquid and half low-sodium broth or water.

Lemon Juice and Lemon Zest

Lemon cuts through the butter and brightens the whole sauce. Add lemon juice near the end so it tastes fresh. Lemon zest is optional, but it makes the sauce smell brighter.

Hot Sauce, Cayenne, or Red Pepper Flakes

Hot sauce gives smoother heat. Cayenne adds stronger fire. Red pepper flakes bring visible spicy texture. Add heat slowly because it is much easier to make the sauce spicier than it is to calm it down.

Equipment

  • Large skillet or medium saucepan
  • Whisk
  • Measuring cups and spoons
  • Microplane, garlic press, or sharp knife
  • Heatproof spatula or spoon
  • Optional immersion blender for a smoother sauce

A skillet gives the spices room to bloom and lets the sauce reduce slightly; a medium saucepan works well for smaller batches or easier pouring.

How to Make It Glossy, Not Greasy

The recipe card above has the short version. These details help if you want a smoother, glossier, more controlled sauce.

Spoonable Sauce Texture

Before you pour the sauce over seafood, check the spoon. A glossy sauce should coat it lightly, then drip back slowly instead of running like water or sitting like straight melted butter.

Seafood boil sauce coating a spoon and dripping slowly back into the bowl.

If it coats the spoon and drips slowly, the sauce is in the right place: clingy enough for seafood, but not oily or thin.

1. Melt the Butter Gently

Melt the butter over low to medium-low heat. Starting gently keeps the butter from separating and gives the garlic time to flavor the sauce without burning.

Butter melting in a skillet for seafood boil sauce.
Start low and gentle, because butter should melt slowly before the garlic and spices go in.

2. Soften the Onion and Garlic

Cook the onion until soft and glossy, then add the garlic for 60–90 seconds. The garlic should smell fragrant but stay pale.

Garlic and onion cooking gently in melted butter for seafood boil sauce.
Once the onion softens and the garlic stays pale, the base turns sweeter and the sauce stays out of bitter territory.

3. Bloom the Seasonings

Stir the Cajun seasoning, Old Bay, smoked paprika, onion powder, brown sugar, and optional heat into the butter. Cook briefly until the butter turns red-orange and the spices look absorbed, not dry or dusty.

Cajun seasoning, Old Bay, and smoked paprika blooming in melted butter.
Blooming the spices in butter is what gives seafood boil sauce its deep red-orange color and that toasty Cajun flavor.

4. Loosen and Finish

Whisk in the broth or reserved boil liquid slowly, then simmer gently until glossy. Turn off the heat before adding lemon juice, lemon zest, hot sauce, and parsley.

Broth being whisked into Cajun garlic butter seafood boil sauce.
As soon as the broth goes in, the sauce loosens into a glossy pour-over texture that works better for shrimp, crab, and vegetables.

Finish With Lemon and Parsley

After the sauce is glossy, take it off the heat before adding lemon and parsley. That small timing choice keeps the seafood boil sauce brighter and fresher.

Lemon juice and parsley being added to seafood boil sauce.
Lemon and parsley go in at the end, because that final bright note keeps the sauce fresh instead of flat.

5. Test Before You Pour

Dip one shrimp, one potato, or one piece of corn into the sauce before coating the full tray. Fix the sauce in the pan, not after it has already coated three pounds of seafood.

Do You Add Seafood Boil Sauce Before or After Cooking?

This is a finishing sauce, not the cooking liquid. Let the boil season and cook the seafood, then let the garlic butter sauce coat it.

Add this garlic butter Cajun sauce after the seafood is cooked and drained. The sauce is for pouring, tossing, bagging, or dipping after cooking.

If you are unsure whether the seafood itself is fully cooked, FoodSafety.gov’s safe minimum internal temperatures chart is a useful reference for fish and shellfish.

The best method is simple: cook the seafood, drain it well, taste the sauce, then spoon or toss the warm sauce over the hot seafood. Keep extra sauce on the side for dipping crab, shrimp, corn, and potatoes.

Best Sauce for Shrimp, Crab, Crawfish and More

The same base works across the tray, but each seafood and side likes a slightly different sauce texture.

Guide showing the best seafood boil sauce texture for shrimp, crab, crawfish, lobster, corn, and potatoes.
Shrimp usually wants a looser, lemon-bright sauce, while crab does better with a thicker, buttery finish that stays on the meat.
FoodBest Sauce StyleAdjustment
ShrimpPour-over or tossAdd slightly more lemon and keep the sauce looser.
Crab legsDipping sauceKeep it thicker, buttery, and rich.
CrawfishSpicy Cajun sauceAdd extra Cajun seasoning, paprika, or hot sauce.
Lobster tailsGarlic lemon butterUse less Cajun, more lemon and parsley.
Mussels and clamsLoose pour-over sauceAdd more broth so it reaches the shells.
CornPour-over sauceMake it looser so it soaks into the kernels.
PotatoesPour-over sauceAdd enough broth so the sauce coats well.
SausageSmoky spicy sauceSmoked paprika and Cajun seasoning work well.
Boiled eggsMedium-thick sauceSpoon sauce over just before serving.

For Shrimp

Shrimp tastes best with a sauce that is garlicky, lemony, and not too heavy. Keep the texture slightly loose so the shrimp stays juicy.

For another shrimp dinner built around garlic, butter, and lemon, this shrimp scampi recipe keeps the same bright butter-sauce idea in a pasta-friendly direction.

For Crab Legs

Crab legs are perfect for a thicker dipping sauce. Keep it buttery and clingy, then serve extra lemon on the side so each bite can be brightened at the table.

For Crawfish

Crawfish can handle stronger heat. Add extra Cajun seasoning, hot sauce, cayenne, or red pepper flakes if you want a spicy crawfish boil sauce.

For Lobster

Lobster is sweeter and more delicate than crawfish or sausage, so go easier on the Cajun seasoning. More garlic, lemon, parsley, and butter usually works better than extra heat.

For a lobster meal that stays buttery but much simpler, this lobster roll recipe covers both the warm buttered Connecticut style and the cool Maine-style version.

For Corn and Potatoes

Corn and potatoes need a looser sauce. Add more broth or reserved boil liquid so the sauce can soak in instead of sitting on top.

Cajun vs Old Bay Seafood Boil Sauce

Cajun seasoning and Old Bay are both common in seafood boil sauce, but they do different jobs. Think of Cajun seasoning as the heat and depth, and Old Bay as the classic seafood-boil note. Together they make the sauce taste fuller, but together they can also make it salty fast.

Do not increase Cajun seasoning and Old Bay heavily at the same time unless you know both blends are low-salt.

Cajun versus Old Bay seafood boil sauce guide.
Cajun seasoning brings heat and depth, while Old Bay brings that classic seafood flavor, so the two work best when the salt stays under control.
  • For more Cajun flavor: Increase Cajun seasoning slightly, add smoked paprika, and finish with hot sauce.
  • For more Old Bay flavor: Increase Old Bay, reduce Cajun, and keep the lemon bright.
  • For a less salty sauce: Use unsalted butter, low-sodium broth, less Old Bay, and more lemon.
  • If you have no Old Bay: Use Cajun seasoning, smoked paprika, garlic powder, onion powder, and a tiny pinch of celery salt or celery seed.
  • If you have no Cajun seasoning: Use Old Bay, smoked paprika, garlic powder, onion powder, black pepper, and cayenne.

Seafood Boil Sauce Variations

Think of the recipe as one base sauce with two kinds of choices: texture choices for how you serve it, and flavor choices for how spicy, garlicky, or Old Bay-forward you want it.

Want the Sauce…Do This
More garlickyUse 10–12 cloves garlic or grated garlic.
More CajunAdd extra Cajun seasoning and smoked paprika.
More Old BayIncrease Old Bay and reduce Cajun seasoning.
MildSkip cayenne, use mild Cajun seasoning, add more broth and lemon.
SpicyAdd cayenne, hot sauce, red pepper flakes, or spicy Cajun seasoning.
Thicker for dippingUse ¼ cup / 60 ml liquid.
Looser for a trayUse ¾–1 cup / 180–240 ml liquid.
Restaurant-style sauceUse grated onion, extra paprika, brown sugar, less liquid, and optional blending.

Garlic Butter Seafood Boil Sauce

A stronger garlic butter version starts with 10 cloves of garlic and slightly less Cajun seasoning. Keep the lemon juice strong and add parsley at the end. This version is excellent for crab legs, lobster tails, and shrimp.

Spicy Seafood Boil Sauce

For a spicier sauce, add cayenne, red pepper flakes, hot sauce, spicy Cajun seasoning, or hot paprika. Add heat slowly and taste after simmering before adding more.

Mild Seafood Boil Sauce

The mild version uses mild Cajun seasoning, slightly less Old Bay, no cayenne, and extra broth and lemon. It is better for kids, mild eaters, lobster, and anyone who wants buttery garlic flavor without too much heat.

Old Bay Seafood Boil Sauce

An Old Bay-forward sauce works best when Old Bay increases to 1 tablespoon and Cajun seasoning drops to 1 teaspoon. Keep the butter, garlic, lemon, and parsley the same.

Lemon Pepper Seafood Boil Sauce

Add 1–2 teaspoons lemon pepper seasoning and increase the lemon zest. Reduce extra salt because lemon pepper blends can be salty. This version works beautifully with shrimp, lobster, and crab.

Creamy Seafood Boil Sauce

A creamy version needs only 2–4 tablespoons of cream at the end over low heat. This makes the sauce richer and softer, but it is less traditional than garlic butter Cajun sauce.

Restaurant-Style Sauce Adjustments

This is the part that makes the tray look like something people want to gather around. Restaurant-style seafood boils feel different because the sauce arrives hot, glossy, and clingy. It coats the shells, runs into the potatoes, stains the corn, and still leaves enough at the bottom for dipping.

  • For redder color, add a little more smoked paprika.
  • For deeper flavor, bloom the spices a little longer over low heat.
  • For a clingier sauce, use less broth.
  • For smoother texture, use grated garlic and grated onion.
  • For a glossy finish, add 1–2 teaspoons brown sugar.
  • For a smooth restaurant-style sauce, blend briefly with an immersion blender.

Taste Adjustment Ladder

This is the part where the sauce stops being a formula and starts tasting like yours. Most fixes come back to the butter-broth-lemon rule: butter softens, broth loosens, and lemon brightens.

If the Sauce Tastes…Add This
Too saltyUnsalted butter first, then warm broth, then lemon.
Too buttery or heavyLemon juice first, then a splash of broth.
Too thinSimmer a few minutes longer.
Too thickWarm broth, seafood stock, or reserved boil liquid.
Too spicyButter and broth, then a tiny pinch of brown sugar if needed.
Too flatLemon first, then Cajun seasoning or Old Bay.
Too sharpA small knob of butter or a tiny pinch of brown sugar.
Not garlicky enoughA small amount of garlic powder, or gently cooked grated garlic.
Not smoky enoughA little more smoked paprika.

Make one adjustment at a time, then taste again. This keeps the sauce from swinging too far in the other direction.

Quick 2-Minute Seafood Boil Sauce

When the seafood is already cooked and you just need something buttery fast, this shortcut version gets you there.

IngredientAmount
Melted butter½ cup / 113 g
Old Bay or Cajun seasoning1–2 teaspoons
Garlic powder or 1 minced garlic clove½ teaspoon garlic powder or 1 clove
Lemon juice1 tablespoon / 15 ml
Hot sauceOptional, to taste

This quick version is not as deep or layered as the full sauce, but it works well as a fast seafood dipping sauce when the seafood is already cooked. For better flavor, warm everything together gently for 1–2 minutes instead of just stirring it cold.

When you want a cold, creamy seafood dip instead of warm butter, this homemade tartar sauce recipe fits that lane better.

Substitutions and Swaps

The base is forgiving. Missing one ingredient does not ruin the sauce; it just changes which direction you lean.

Missing IngredientUse Instead
No Old BayCajun seasoning + smoked paprika + pinch of celery salt or celery seed
No Cajun seasoningOld Bay + smoked paprika + garlic powder + onion powder + cayenne
No seafood boil liquidSeafood stock, low-sodium chicken broth, vegetable broth, beer, or water with lemon
No fresh garlicGarlic paste or garlic powder
No onionSkip it, or use ½ teaspoon onion powder
Not enough butterUse part butter and part olive oil. If using no butter, use vegan butter or olive oil, but expect a lighter sauce.
No lemonLime juice or a small splash of vinegar
No brown sugarHoney, maple syrup, or skip it
No parsleyChives, green onion, or skip it

If you are using store-bought seafood boil seasoning packets, start with less seasoning than you think you need. Packets can be very salty. Use unsalted butter, taste before adding salt, and loosen the sauce with broth or lemon juice if it tastes too intense.

How to Toss and Serve It Restaurant-Style

This is the point where the sauce becomes the meal. The crab legs get glossy, the shrimp pick up the garlic butter, the corn turns red-orange in the grooves, and the potatoes catch everything the seafood leaves behind.

A restaurant-style finish is not about making the sauce complicated. It is about timing, texture, and serving it while everything is still hot and glossy.

Restaurant-Style Seafood Boil Sauce Finish

Use the sauce while it is warm and glossy, then coat the seafood in layers so the tray looks generous without turning watery.

Restaurant-style seafood boil tray with shrimp, crab, corn, potatoes, sausage, and glossy garlic butter sauce.
A great seafood boil tray looks glossy and generous, with enough sauce to coat the seafood and leave some behind for dipping.
  • Warm the seafood before saucing. Cold seafood makes butter firm up quickly.
  • Drain the seafood well so water does not dilute the sauce.
  • Toss or spoon in layers instead of dumping all the sauce at once.
  • Keep extra sauce warm on the side for dipping.
  • Add parsley and lemon at the end so the tray looks and tastes fresh.
  • Serve immediately. Garlic butter sauce is at its best while warm and glossy.

Seafood Boil Bag Sauce

For seafood boil bag sauce: use the medium-thick texture. Add cooked seafood and warm sauce to the bag, seal carefully, and toss until everything is coated. The sauce should move when tossed, coat the shells red-orange, and leave a little buttery pool at the bottom for dipping. If it is too watery, it will pool instead of clinging to shrimp, crab, corn, and potatoes.

Seafood boil bag with shrimp, crab, corn, and potatoes coated in red-orange garlic butter sauce.
Medium-thick is the sweet spot for seafood boil bags, because the sauce needs to move when tossed and still coat every shell.

Common Mistakes to Avoid

Most sauce problems are easier to fix in the pan than on the tray. Use this as a quick check before the sauce goes over the seafood.

  • Starting too salty: Use unsalted butter when you can, and taste before adding any extra salt.
  • Using heat that is too high: Low to medium-low heat keeps the garlic pale and the butter glossy.
  • Skipping the taste test: Try the sauce with one shrimp, potato, or piece of corn before coating the full tray.
  • Pouring sauce over watery seafood: Drain the seafood well so the sauce stays bold instead of diluted.
  • Using one texture for every purpose: Dipping, pouring, and seafood boil bags all need slightly different thickness.

Troubleshooting Seafood Boil Sauce

Butter sauces can go sideways quickly, but you usually do not need to start over. Catch the problem while the sauce is still in the pan, and the fix is usually simple.

Comparison of separated oily seafood boil sauce and glossy spoonable seafood boil sauce.
When the sauce looks oily or split, lower the heat and whisk in warm broth, because glossy always wins over greasy.
ProblemLikely CauseFix
Too saltySalted butter, salty Cajun seasoning, too much Old BayAdd unsalted butter, broth, lemon juice, or a little brown sugar.
Too spicyToo much cayenne, hot sauce, or spicy Cajun seasoningAdd butter, broth, lemon, or a little sweetness.
Too oilyToo much butter, not enough liquidWhisk in warm broth slowly.
Too thinToo much broth or boil liquidSimmer uncovered for a few minutes.
Sauce separatedHeat too high or liquid added too fastLower the heat and whisk in warm liquid gradually.
Bitter garlicGarlic browned or burnedCook garlic gently for only 60–90 seconds.
Grainy spicesSpices were not bloomed or too much dry seasoning was addedBloom spices in butter and loosen with broth.
Not flavorful enoughToo much liquid or weak seasoningAdd Cajun seasoning, Old Bay, lemon, garlic, or hot sauce slowly.

How to Fix Salty Seafood Boil Sauce

Do not add water first. Water can make the sauce thinner without fixing the flavor. Instead, add unsalted butter, warm broth, lemon juice, or a small pinch of brown sugar. If you are serving the sauce with a full seafood boil, extra potatoes and corn can also help absorb some of the salty flavor on the tray.

How to Fix Separated Seafood Boil Sauce

Lower the heat. Whisk in 1–2 tablespoons of warm broth at a time until the sauce looks glossy again. If it still looks broken, use an immersion blender for a few seconds.

How to Make It Thicker

Simmer it uncovered for a few minutes. You can also use less broth next time or add a little more butter. For a thicker dipping sauce, start with only ¼ cup / 60 ml liquid.

How to Make It Thinner

Whisk in warm broth, seafood stock, reserved boil liquid, or water with lemon juice. Add a little at a time until the sauce pours the way you want.

How to Store and Reheat the Sauce

Do not worry if the sauce turns solid in the fridge. That is just the butter doing what butter does. The texture comes back when the sauce is reheated and whisked.

Refrigerating

Store unused sauce in an airtight container in the refrigerator for 4–5 days.

If the sauce has touched seafood, shells, fingers, or a shared dipping bowl, treat it like a seafood leftover. Cool it quickly, refrigerate it promptly, and use it within 1–2 days for best quality.

For broader leftover safety, the USDA’s leftovers and food safety guide is a useful reference.

Reheating

For clean, unused sauce, reheat gently in a saucepan over low heat, stirring often. Add a splash of broth, water, or reserved boil liquid if the sauce is too thick.

For sauce that has touched seafood or leftovers, reheat until steaming hot, ideally to 165°F / 74°C, then whisk to bring the texture back. A food thermometer is the safest way to check.

You can also microwave clean unused sauce in short bursts, stirring every 15–20 seconds. If reheating sauce with seafood leftovers, stir well and make sure the food is steaming hot throughout before serving.

Freezing

Freeze unused seafood boil sauce for up to 2–3 months. Thaw overnight in the refrigerator, then reheat gently over low heat. If the sauce separates slightly, whisk in warm broth or blend briefly with an immersion blender.

What to Serve With Seafood Boil Sauce

The best use is still the simplest: hot seafood, warm sauce, extra napkins, and something starchy to catch the butter.

Classic Seafood Boil Uses

  • Shrimp
  • Crab legs
  • Crawfish
  • Lobster tails
  • Mussels
  • Clams
  • Corn on the cob
  • Baby potatoes
  • Smoked sausage
  • Boiled eggs

Other Good Uses

  • Garlic bread
  • Rice
  • Roasted potatoes
  • Grilled corn
  • Roasted vegetables
  • Grilled fish
  • Pan-seared scallops
  • Salmon
  • Lemon wedges on the side

For other seafood dinners, this baked haddock recipe keeps the butter-and-lemon idea gentler, while this honey garlic salmon recipe goes sticky, sweet, and skillet-style.

For a full crispy seafood comfort plate instead of a boil, this fish and chips recipe pairs fried fish with tartar sauce, curry sauce, vinegar, and lemon.

For a full seafood boil tray, serve some sauce poured over the seafood and extra sauce on the side for dipping. For a cleaner dinner, serve the sauce in small bowls and let everyone dip shrimp, crab, corn, potatoes, and bread as they eat.

Frequently Asked Questions

What is seafood boil sauce made of?

It is usually made with butter, garlic, Cajun seasoning, Old Bay seasoning, lemon juice, paprika, hot sauce, and broth or reserved seafood boil liquid. Some versions also include onion, brown sugar, parsley, cayenne, or lemon pepper.

Is seafood boil sauce the same as garlic butter sauce?

It is a type of garlic butter sauce, but it is usually more seasoned. Basic garlic butter may only have butter, garlic, lemon, and herbs. Seafood boil sauce usually adds Cajun seasoning, Old Bay, paprika, heat, and sometimes broth or boil liquid.

Is this a Blove’s-style seafood boil sauce?

This is not a Blove’s copycat sauce. Blove’s-style seafood boil sauces are usually heavier, sweeter, and more spice-loaded, often with extra butter, garlic, hot sauce, Worcestershire, ginger, lemon pepper, and a larger seasoning mix. This version is a balanced Cajun garlic butter seafood boil sauce made for dipping, pouring, and tossing without hiding the flavor of the seafood.

Do you put seafood boil sauce in the pot?

No. It is better to add the sauce after the seafood is cooked and drained. This is a finishing sauce, not the cooking liquid.

What sauce goes with shrimp boil?

Garlic butter Cajun sauce is one of the best sauces for shrimp boil. Use a slightly looser sauce with lemon juice so the shrimp stays bright and juicy instead of feeling too heavy.

What sauce is best for crab boil?

A thick garlic butter seafood sauce is best for crab boil because it clings well to crab meat. Keep it buttery, garlicky, and slightly lemony, with Old Bay or Cajun seasoning for classic seafood flavor.

Is this good as a dipping sauce?

It is excellent as a dipping sauce. Reduce the liquid to about ¼ cup / 60 ml and simmer the sauce a little longer. This keeps it thick, buttery, and clingy.

Does it work as a pour-over sauce?

It works well as a pour-over sauce. Use about ½ cup / 120 ml broth or reserved boil liquid, then add more if you want it loose enough to cover a big tray of shrimp, crab, crawfish, corn, potatoes, and sausage.

How do I make it thicker?

Use less liquid or simmer the sauce uncovered for a few minutes. For a thick dipping sauce, start with ¼ cup / 60 ml liquid instead of ½ cup / 120 ml.

How do I make it less salty?

Add unsalted butter, warm broth, lemon juice, or a small pinch of brown sugar. If serving with a full seafood boil, potatoes and corn can also help absorb some of the salty flavor.

Can I make seafood boil sauce without Old Bay?

You can. Use Cajun seasoning, smoked paprika, garlic powder, onion powder, black pepper, and a tiny pinch of celery salt or celery seed if you have it. The flavor will be slightly different, but still good.

Can I make seafood boil sauce without Cajun seasoning?

You can. Use Old Bay, smoked paprika, garlic powder, onion powder, black pepper, and a little cayenne or hot sauce for heat.

Why did it separate?

The heat may have been too high, or the liquid may have been added too quickly. Keep the sauce at a gentle simmer and whisk in broth gradually. If it separates, lower the heat and whisk in a little warm liquid.

How much sauce do I need for a seafood boil?

For dipping, plan on about ½ cup / 120 ml sauce per 1 lb / 450 g seafood. For pouring over a seafood boil tray, plan on about ¾ cup / 180 ml per 1 lb / 450 g seafood. Make extra if you are serving corn, potatoes, sausage, and eggs because they absorb sauce.

Did You Make This Seafood Boil Sauce?

Once you make this sauce once, it stops feeling like an add-on. It becomes the thing that pulls the whole seafood boil together: the shrimp, the crab, the corn, the potatoes, the sausage, the bread at the end, and everyone reaching back for one more dip.

A piece of bread dipped into leftover garlic butter seafood boil sauce.
The final swipe of bread is the payoff, because the best seafood boil sauce always leaves one more bite at the bottom of the tray.

Taste it while it is warm, adjust it until it feels balanced, then pour it over the tray and serve extra on the side. That is the moment the meal comes together.

Did you make it thick for dipping, loose for pouring, or extra spicy for crawfish? Leave a rating and a comment with your seafood mix, sauce thickness, and heat level so other readers can adjust their own seafood boil sauce with confidence.