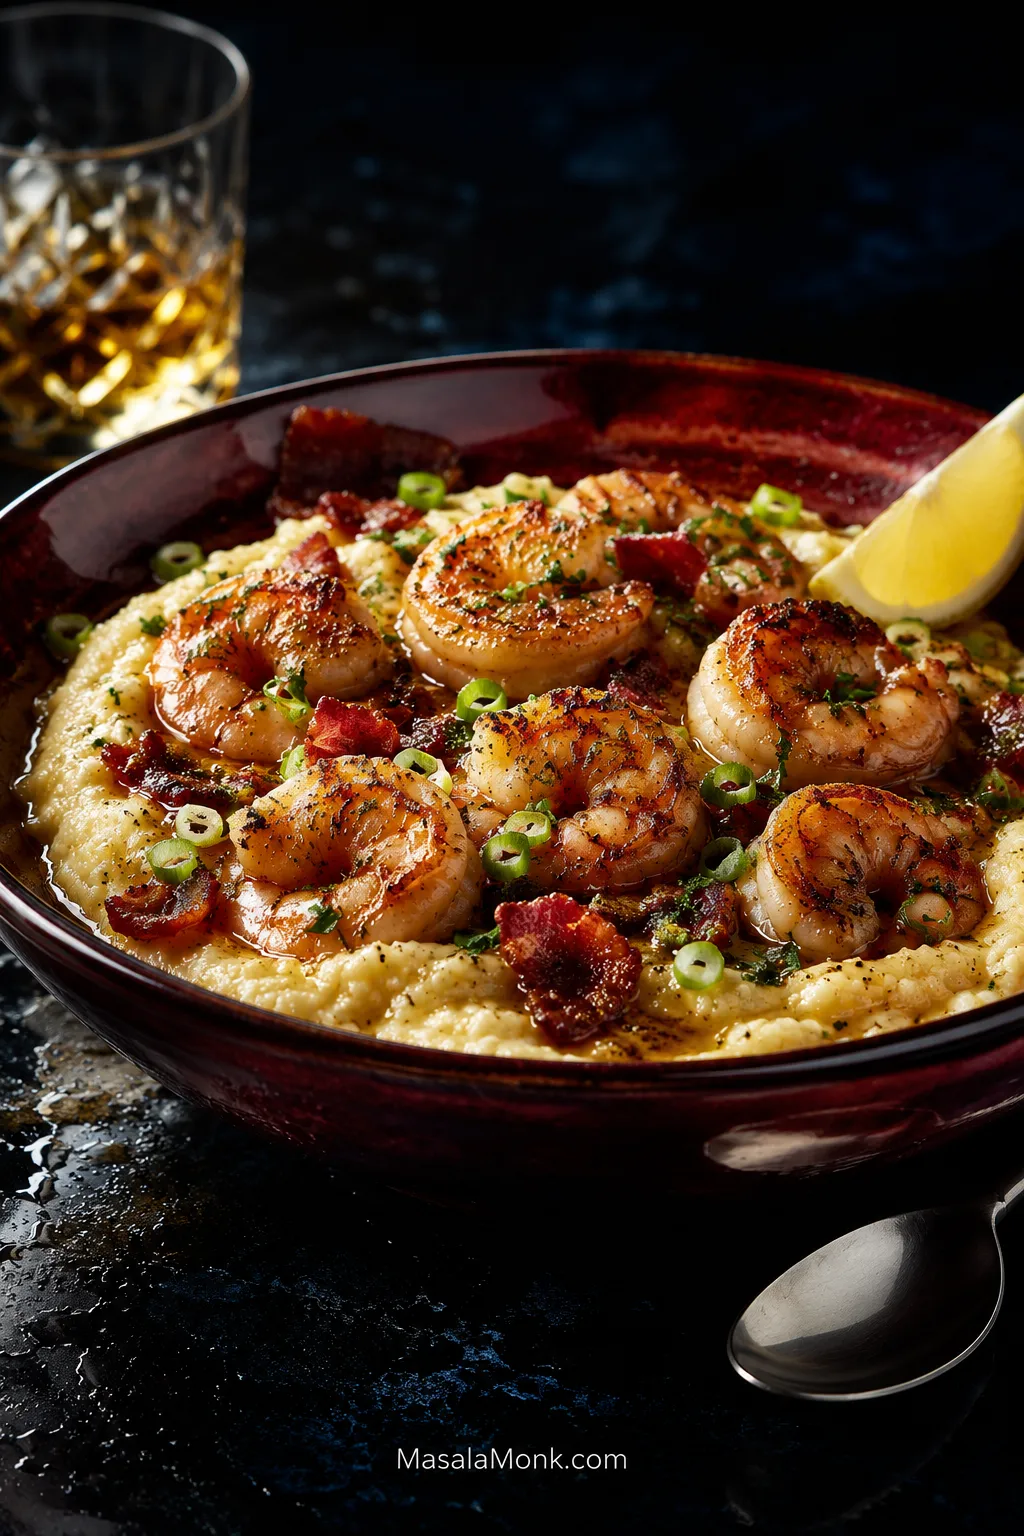
A really good bowl of shrimp and grits comes together on the spoon: creamy grits with clear corn flavor, a plump shrimp, glossy gravy slipping into the surface and, every few bites, crisp bacon. Fresh lemon cuts through the butter and cheese just enough to make you want another bite.
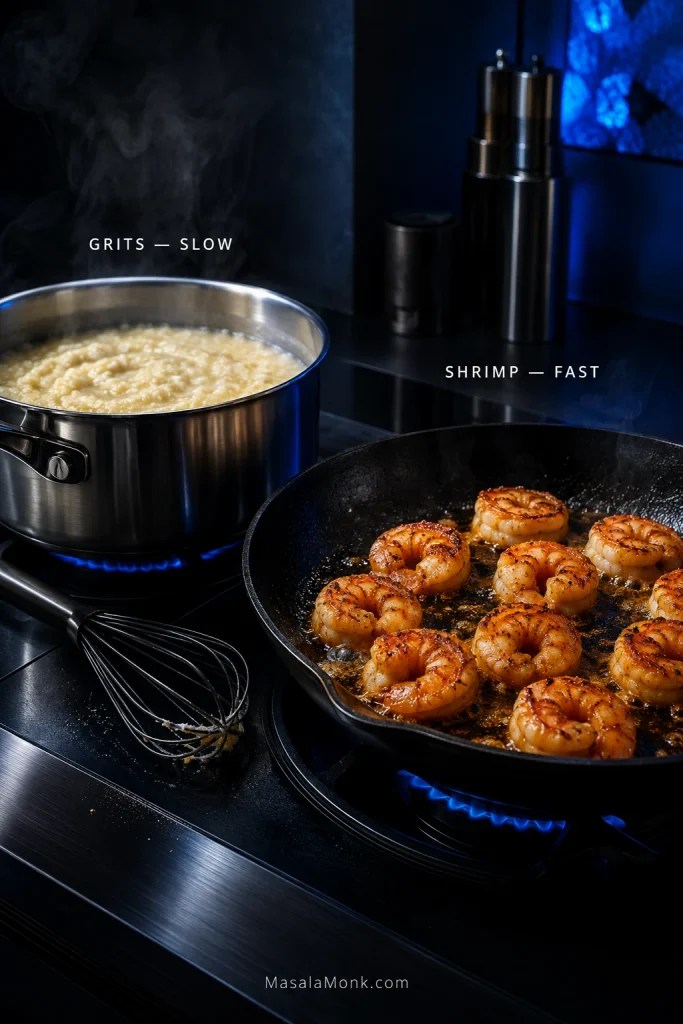
The trick is that grits and shrimp run on opposite clocks. Grits need patience, liquid and time. Shrimp need a hot skillet and a quick exit. The gravy happens in between, picking up the browned, smoky flavor left in the pan and carrying it into the grits.
This recipe leans into the richer modern Southern style—sharp cheddar, bacon and a light bacon-garlic gravy—but none of those additions gets to bury the foundation. The grits should still taste distinctly of corn. The shrimp should still taste like shrimp.
Grits First. Shrimp Last. Gravy in Between.
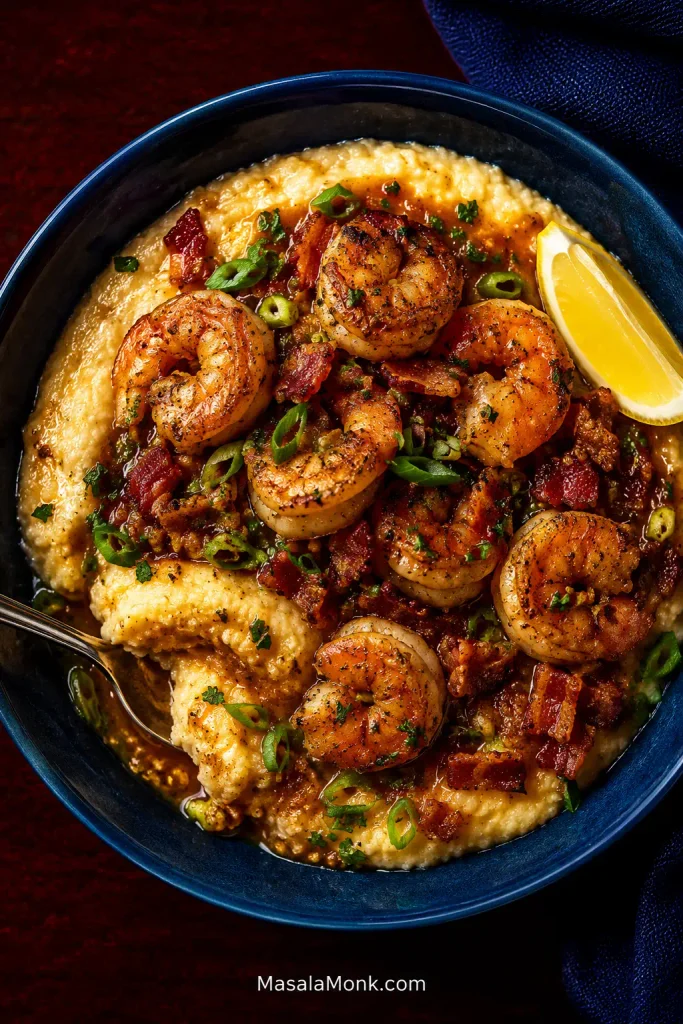
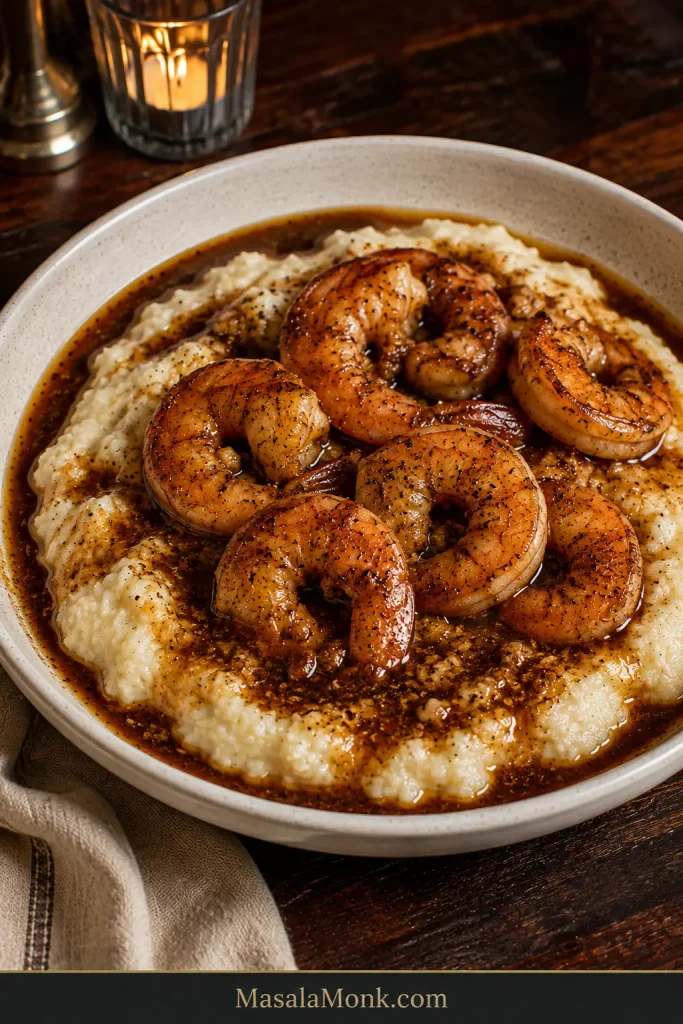
Serve the grits loose enough to spread gently rather than sit in a stiff mound. Keep the shrimp plump, and let the gravy lightly coat them and streak into the grits instead of pooling around the bowl.
Need the faster route? Use quick grits according to their package liquid ratio and timing, then finish them with the same butter, cream and cheddar. The shrimp and gravy stay the same, bringing dinner closer to about 30–35 minutes.
Let the grits take their time; meanwhile, save the shrimp for the final hot-pan minutes so both reach the bowl at their best.
The Two-Pan Plan
In the grits pot
In the skillet
Start the grits
Prep the shrimp, bacon, garlic, scallions and gravy ingredients
Grits gently simmer
Crisp the bacon
Grits approach tenderness
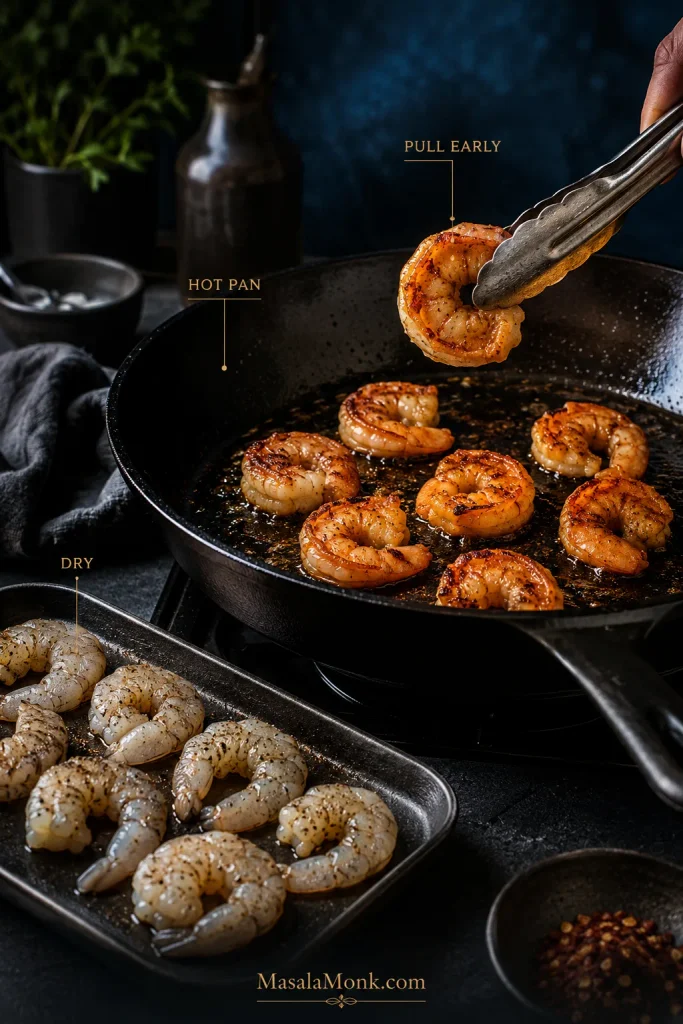
Sear the shrimp in two batches and remove them
Grits finish cooking
Make the pan gravy
Add butter, cream and cheddar
Return the shrimp for only 30–60 seconds
Loosen the grits one last time
Add lemon and herbs, then serve
Shrimp and Grits Recipe
Creamy sharp-cheddar grits topped with seasoned shrimp, crisp bacon and a light Southern-style pan gravy with garlic, lemon and scallions.
Prep: 15 minutes Cook: about 40 minutes Total: about 55 minutes Serves: 4 generously
Heat level: warmly seasoned rather than fiery. Choose a mild Cajun or Creole blend if you prefer less heat; extra hot sauce can stay at the table.
You’ll need: a medium heavy-bottomed saucepan, a 12-inch / 30 cm skillet and a whisk.
Before you start: read through Steps 3–7 once. The grits give you some breathing room at the beginning; once the bacon and shrimp hit the skillet, dinner moves quickly.
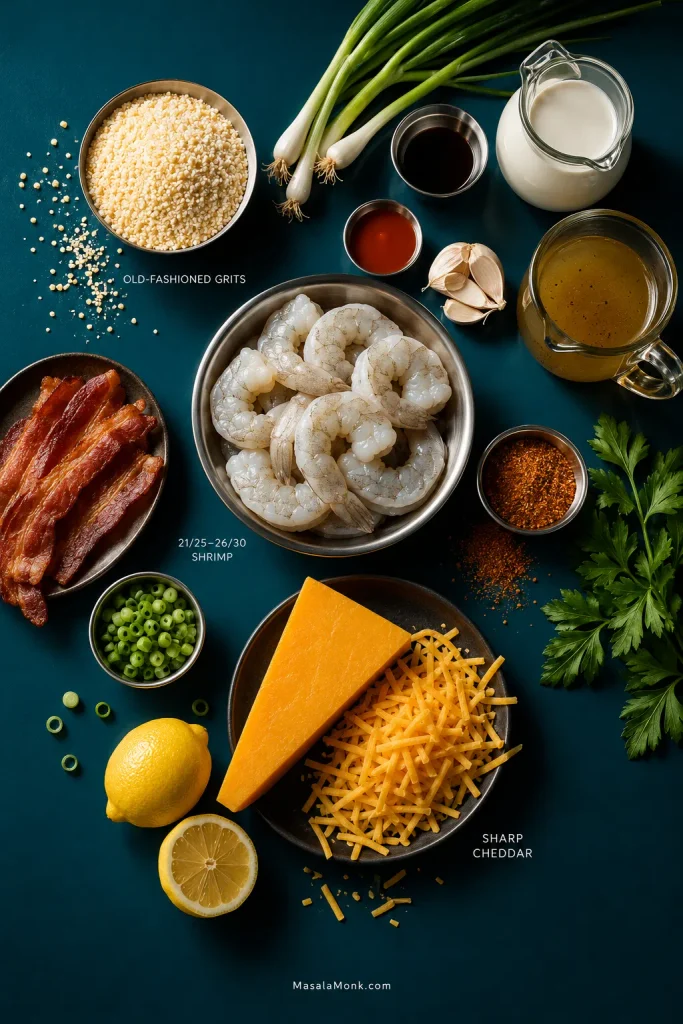
Old-fashioned grits, 21/25–26/30 shrimp and sharp cheddar do most of the structural work, while bacon, lemon and gravy build around them.
For the Creamy Cheddar Grits
1 cup old-fashioned grits — about 165 g; not quick or instant
3 cups water — 720 ml
1 cup low-sodium chicken broth — 240 ml
About 1.5 g salt — roughly ½ teaspoon Diamond Crystal kosher, a scant ⅓ teaspoon Morton coarse kosher, or ¼ teaspoon fine/table salt, plus more to taste
2 tablespoons unsalted butter — 28 g
⅓ cup heavy cream — 80 ml
4 oz sharp cheddar, freshly grated — 113 g
Freshly ground black pepper, to taste
Up to 1 cup additional hot water or chicken broth — 240 ml, only as needed
For the Shrimp and Pan Gravy
1¼ lb raw shrimp — about 570 g, preferably 21/25 or 26/30 count, peeled, deveined and tails removed
1½ teaspoons Cajun or Creole seasoning, preferably a lower-salt blend
Freshly ground black pepper, to taste
4 oz bacon — 113 g, chopped
1–2 teaspoons olive oil, only if needed for the skillet
4 scallions, sliced, white/pale-green and dark-green parts separated
3 garlic cloves, finely minced
1 tablespoon all-purpose flour — about 8 g
¾ cup low-sodium chicken broth — 180 ml
¼ cup additional low-sodium chicken broth — 60 ml, held back for adjusting the gravy
2 teaspoons Worcestershire sauce — 10 ml
1 teaspoon hot sauce — 5 ml, plus up to 1 teaspoon more to taste and extra for serving
1 tablespoon fresh lemon juice — 15 ml
2 tablespoons chopped flat-leaf parsley
Lemon wedges, for serving
1. Start the Grits
Bring the water, chicken broth and salt to a boil in the saucepan.
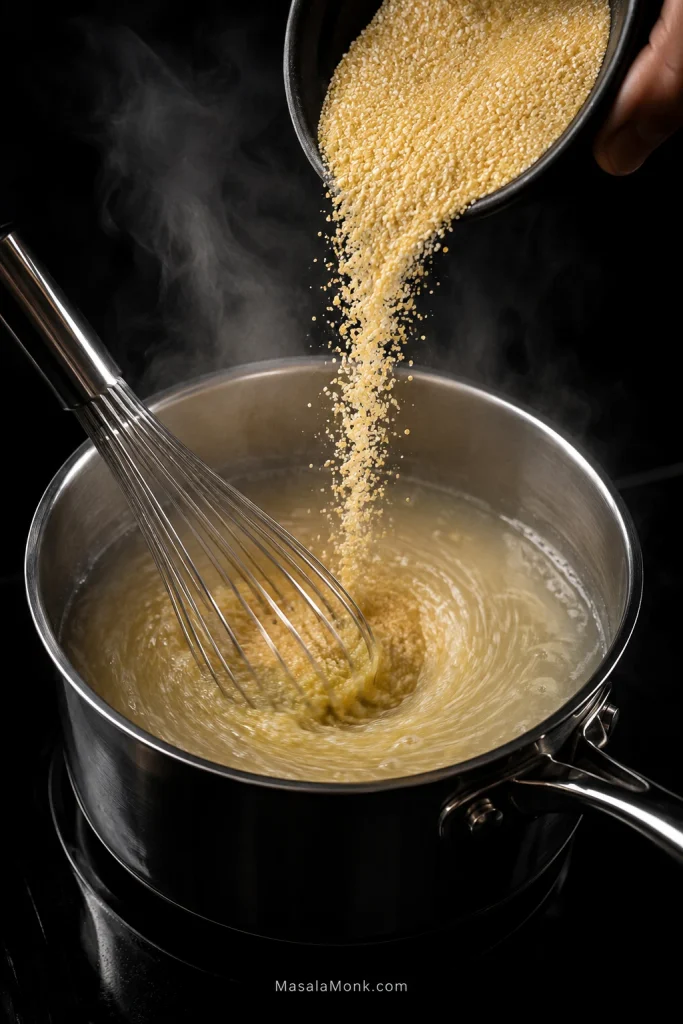
Pour in the grits in a slow, steady stream while whisking. Lower the heat to a gentle simmer once they are incorporated.
A thin, steady pour while whisking keeps the grains separated early, which is far easier than breaking up cooked clumps later.
Cook, stirring regularly and scraping the bottom and sides, until the grains are tender. Package timing is a sensible place to start; many old-fashioned grits fall somewhere around 15–25 minutes, but brands and grinds vary. If yours need another ten minutes, give them another ten minutes.
Taste a grain. It can have some corn texture, but there should be no dry, hard or sandy center. A pot may look thick before the corn is ready. Add more hot water or broth ¼ cup / 60 ml at a time and keep cooking.
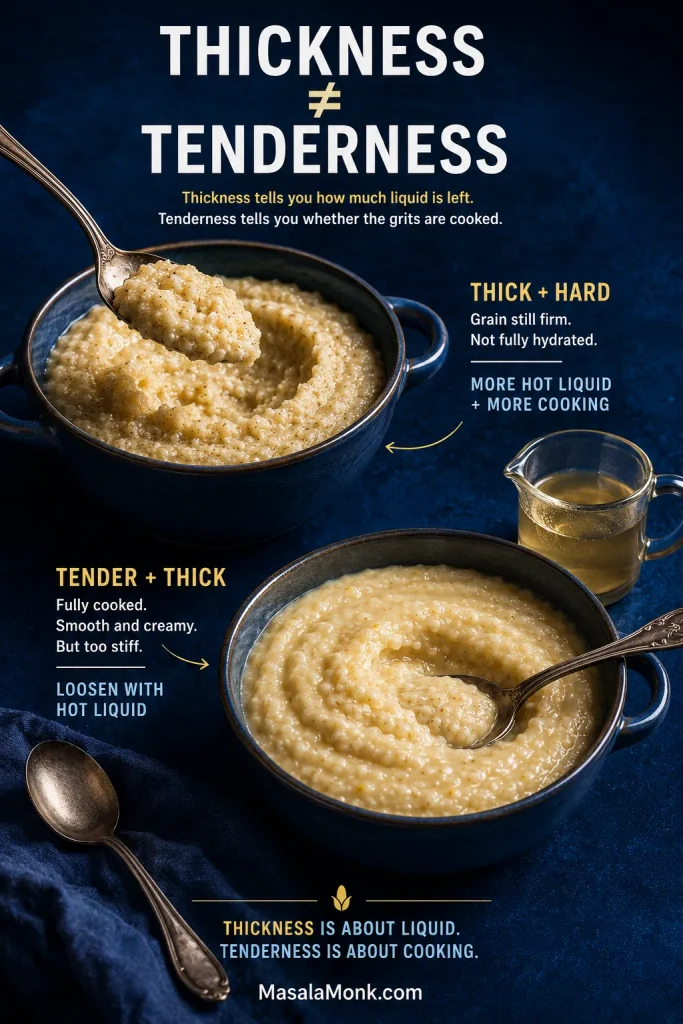
Thickness tells you how much liquid is left. Tenderness tells you whether the grits are cooked. If that distinction still feels fuzzy, see how to tell when grits are done.
2. Prep While the Grits Cook
Pat the shrimp very dry. Slice the scallions, mince the garlic, chop the bacon, measure the flour and broth, and juice the lemon. Put the Worcestershire and hot sauce beside the stove.
Shrimp have no interest in waiting around while you look for the Worcestershire.
3. Crisp the Bacon
Cook the bacon over medium heat until its fat has rendered and the pieces are deeply browned at the edges. They should be crisp enough to hold their own against the soft grits later.
Transfer the bacon to a plate with a slotted spoon. Spoon off excess fat, leaving about 2 tablespoons in the skillet for the shrimp; if your bacon rendered less, add a little olive oil to make up the difference.
The bacon has done its job in the pan. Keep the pieces out of the gravy and save them for the bowls.
4. Sear the Shrimp in Two Batches
Toss the dry shrimp with the Cajun or Creole seasoning and black pepper. Check the seasoning label before adding extra salt; many blends already contain plenty.
Raise the skillet to medium-high. Divide the shrimp roughly in half and cook them in two batches so the pan stays hot enough to brown them.
For each batch, cook about 1–2 minutes on the first side, then roughly 1 minute on the second. The surface should turn pink and mostly opaque while the thickest centers can remain just shy of finished. Add a teaspoon of olive oil before the second batch only if the skillet has become dry.
Move each batch to a plate as soon as it is ready. The shrimp will get their final few seconds in the gravy.
Dry shrimp and open pan space let surface moisture escape quickly, so browning happens before the centers overcook.
Current federal food-safety guidance for shrimp uses a visual doneness cue: cook until the flesh is pearly or white and opaque. The brief return to the gravy will take the centers there.
5. Make the Pan Gravy
Look at the fat left in the skillet after the shrimp come out. You want roughly 1 tablespoon. Spoon off obvious excess; add a little olive oil if the pan is nearly dry. Reduce the heat to medium, add the white and pale-green scallion pieces and cook for 30–60 seconds. Add the garlic, then stir in the flour about 20–30 seconds later.
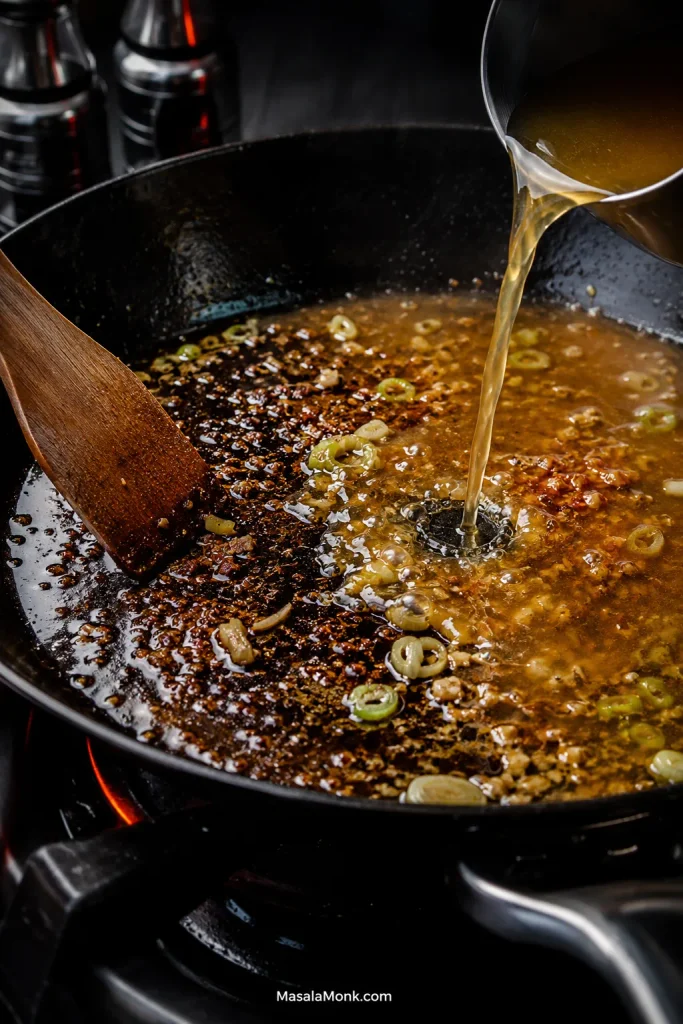
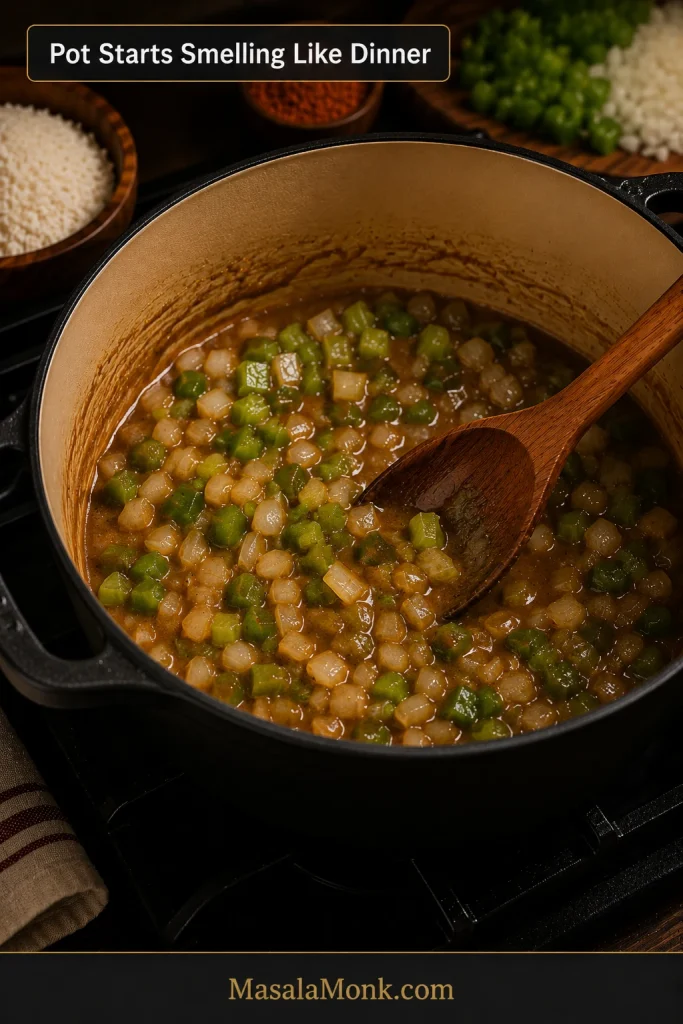
Cook the flour for about 1 minute, then gradually whisk in ¾ cup / 180 ml chicken broth, scraping up the browned bacon-and-shrimp bits. This is when the skillet starts smelling like the dish you came here to make. Stir in the Worcestershire and 1 teaspoon hot sauce.
Deglazing lifts the bacon-and-shrimp fond into the gravy, concentrating savory flavor without turning the sauce heavy.
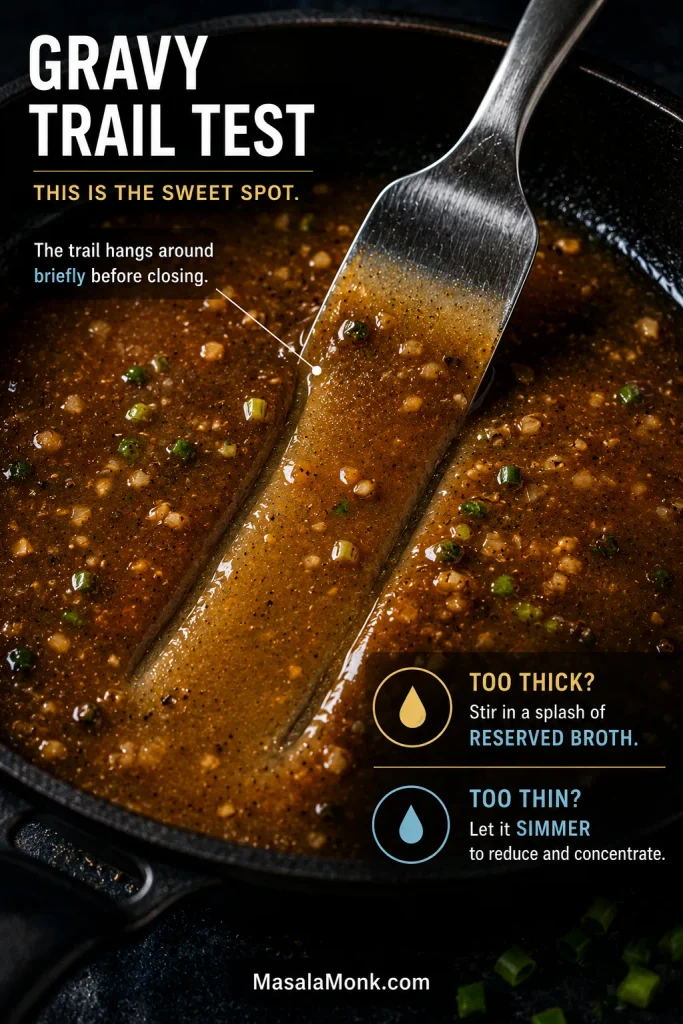
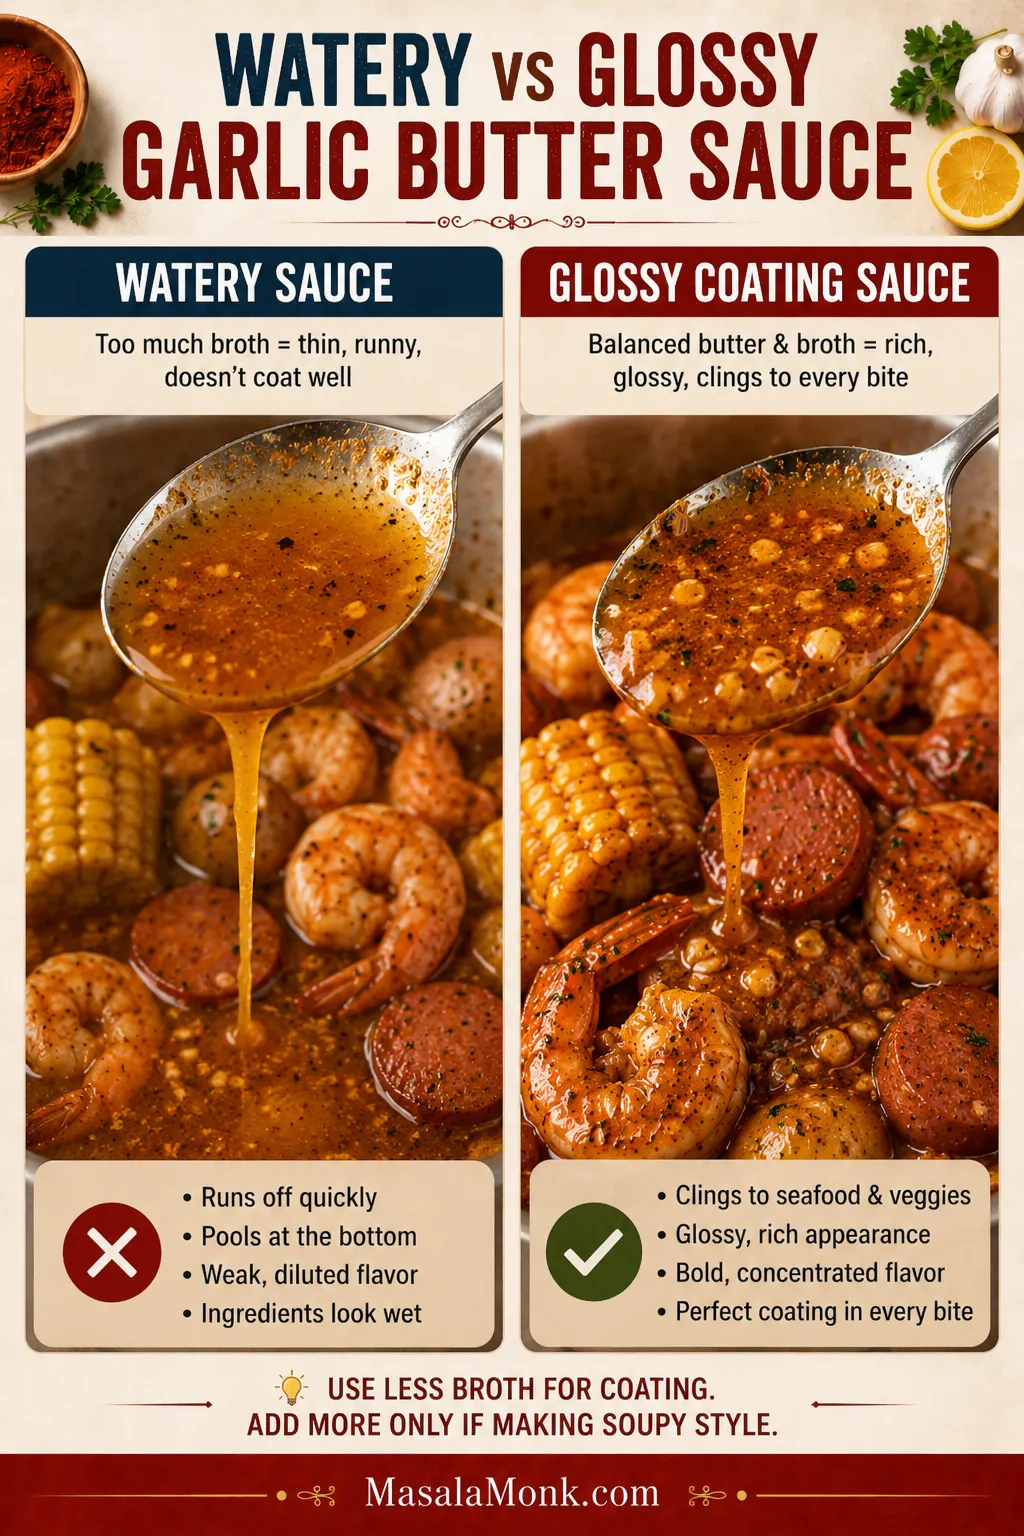
Simmer until the gravy turns glossy and lightly coats a spoon. Drag a spatula through the skillet; the trail should hang around briefly before closing. Add reserved broth a tablespoon or two at a time if the sauce gets too thick. If it is loose, leave the shrimp out and simmer a little longer. If the consistency is still off, see the gravy troubleshooting guide.
6. Finish the Cheddar Grits
Once the corn itself is tender, turn the heat very low or take the pot off the burner. Stir in the butter and cream, then the cheddar.
Give everything 30–60 seconds to melt together before deciding the pot is too thick. The butter and cream loosen the grits first; the cheese then gives them a little more body.
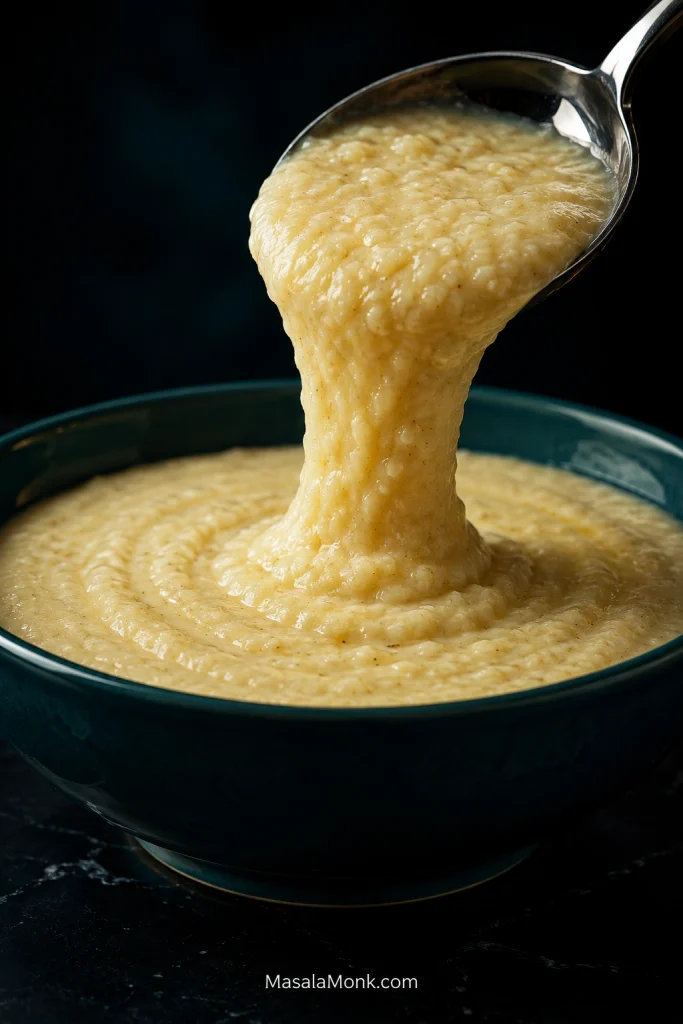
Scoop up some grits. They should fall slowly and spread after they land. Add hot water or broth a splash at a time if they have become too stiff.
A soft ribbon that relaxes after landing is the visual cue for creamy grits that will stay spoonable at the table.
Taste now, then add salt and black pepper only if the pot needs them.
7. Finish the Shrimp
Return the shrimp and any juices from their plate to the skillet. Toss for only 30–60 seconds, until the centers are opaque and the shrimp are hot.
Turn off the heat. Add the lemon juice, most of the parsley and most of the dark-green scallion tops.
Taste the gravy. Salt, Worcestershire, lemon and hot sauce do different jobs. If everything tastes rich but dull, try lemon first.
8. Build the Bowls
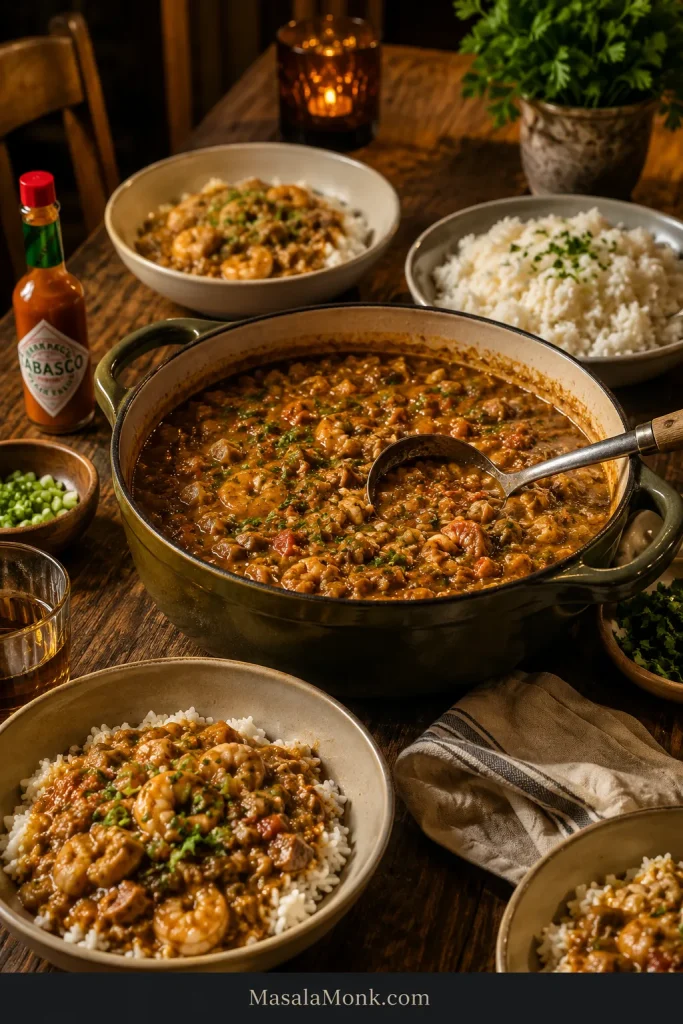
Spoon the grits into warm shallow bowls. Add the shrimp and enough gravy to coat them and run lightly into the grits. Scatter over the bacon, remaining scallion greens and parsley.
Use enough gravy to gloss the shrimp and streak the grits; keeping the bacon on top preserves the crunch.
Put lemon wedges and hot sauce on the table and serve immediately.
Recipe Notes
Frozen or precooked shrimp: raw frozen shrimp work well once completely thawed and dried. Already-cooked shrimp should skip the sear and go into the finished gravy only long enough to heat through.
Different grits: quick grits use their package ratio and timing, then get the same butter, cream and cheddar finish. Stone-ground grits vary much more by mill; follow the producer’s directions and keep extra hot liquid nearby. See Choosing the Right Grits for the differences.
No bacon: start the skillet with 1 tablespoon butter plus 1 tablespoon olive oil.
Salt: bacon, cheese, seasoning, broth, Worcestershire and hot sauce all contribute sodium, so begin conservatively and adjust at the end.
Gravy: the extra ¼ cup broth is there in case the sauce needs loosening. Plenty of skillets will not need all of it. For the reasoning behind the sauce, see How the Shrimp and Grits Gravy Works.
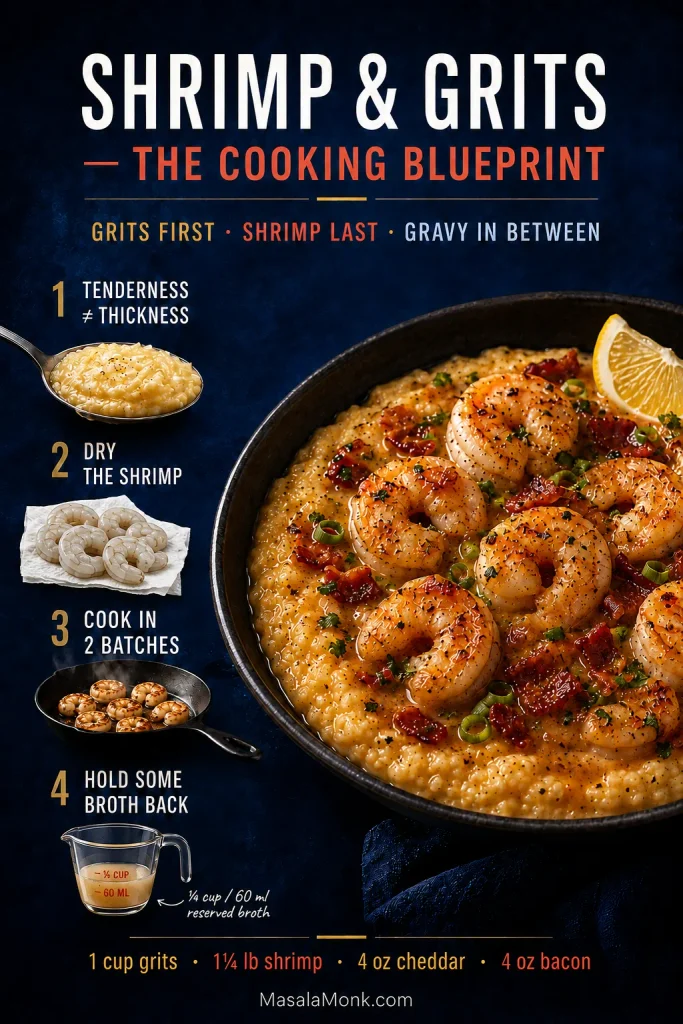
Before the deeper guide: this blueprint condenses the whole recipe into the checkpoints worth remembering.
Use this shrimp and grits blueprint as a final workflow check: tender grits, dry shrimp, two batches, reserved broth, then assemble.
Choosing the Right Grits for Shrimp and Grits
Grits are ground corn cooked with liquid until soft enough to spoon. Grind changes texture and cooking time; the corn itself, freshness and milling method have a great deal to do with flavor.
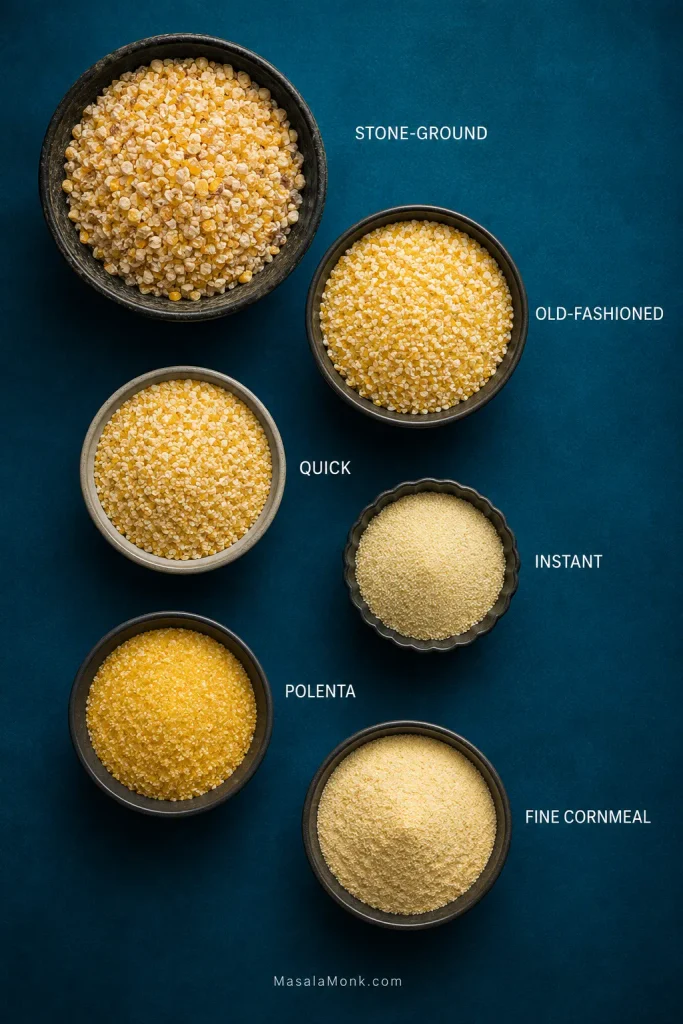
For the deepest corn flavor, good stone-ground grits are hard to beat. Old-fashioned grits are the default here because they still taste distinctly of corn while being easier to find and much easier to fit into a weeknight dinner.
Type
What to expect
Best fit
Stone-ground
Pronounced corn character, more texture, longest and most variable cook
When corn flavor is the priority
Old-fashioned
Good corn flavor, creamy texture, manageable timing
Main recipe
Quick
Finer and softer, with a much shorter cook
Fastest good shortcut
Instant
Very soft texture and mild corn flavor
Convenience first
Polenta
A close relative with its own grind and cooking directions
Can work in a pinch
Fine cornmeal
Much finer than grits
Not a direct substitute
The bowls show the visible grind spectrum—from coarser grits to fine cornmeal—so related corn products are easier to tell apart.
White or yellow? Either works. A fresh, flavorful bag of grits is a more important choice than the color of the corn.
If the bag in your cupboard is fine cornmeal, give it another job—something like Southern cornbread—instead of expecting it to cook like grits.
Stone-Ground Grits Follow the Mill
Stone-ground products vary dramatically. Some mills use a straightforward simmer; others recommend longer cooking, soaking, rinsing or skimming away floating chaff first. Follow the directions on the bag you are actually using and keep hot water nearby.
Some stone-ground grits soften fairly quickly. Others settle in for the better part of an hour. Let them.
Extra cheese can make undercooked grits richer. It cannot finish cooking the corn.
How to Tell When Grits Are Done
Taste first. Properly cooked grits can still have character; the grain should yield instead of crunching around a dry center.
Once the grains are tender, consistency is easy to change. Add hot liquid until the grits fall slowly and spread after serving.
Both pots can look thick. Hard grits still need liquid and cooking; tender grits only need loosening.
Raw fresh and raw frozen shrimp both work. Frozen shrimp simply need to be fully thawed and thoroughly dried before they see the skillet.
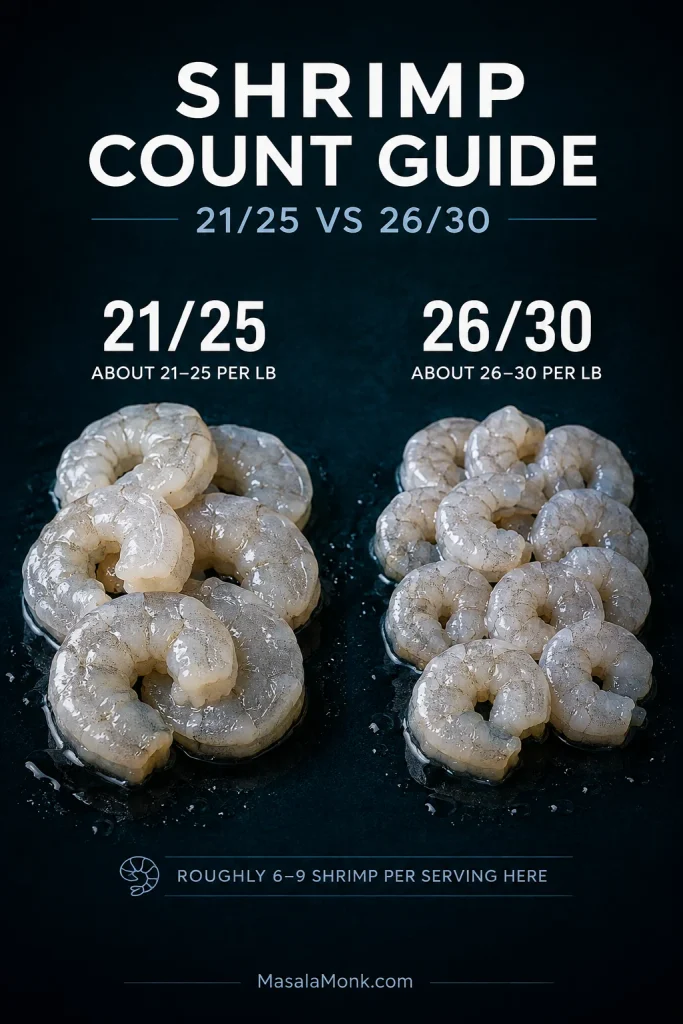
Ignore supermarket adjectives and look for the count. 21/25 or 26/30 gives you substantial shrimp that brown nicely but still show up repeatedly as you eat the bowl. With 1¼ pounds for four people, expect roughly 6–9 shrimp per serving.
21/25 shrimp give fewer, meatier bites; 26/30 shrimp spread more pieces through the bowl while still feeling substantial.
A bowl of grits should be spoon food from first bite to last, so tails-off is the default. The same dry-shrimp, hot-pan, short-cook approach works beautifully in shrimp scampi.
Sharp cheddar works especially well because its tang survives the cream, bacon and gravy without wiping out the corn underneath. White cheddar behaves similarly. Gouda makes the flavor rounder; smoked Gouda shifts the bowl much further toward smoke.
How the Shrimp and Grits Gravy Works
There is no single gravy that defines every bowl of shrimp and grits. Some versions rely on bacon drippings, shrimp juices, butter and lemon. Others bring in flour, tomatoes, cream, sausage, tasso or a substantial roux.
This recipe uses a lighter bacon-garlic pan gravy. Flour gives the broth enough body to cling to the shrimp, Worcestershire reinforces the browned flavor from the skillet, and lemon sharpens the finish.
Start with ¾ cup broth and keep the final ¼ cup beside the stove. Skillet size, heat and evaporation decide how much you actually need.
For a visual check, drag a spatula through the gravy: a trail that lingers briefly before closing means the sauce is ready to coat.
A trail that stays open briefly signals coating gravy; instant closure means reduce longer, while a stubborn trail needs reserved broth.
Using shell-on shrimp? Simmer the shells for about 10 minutes in the 1 cup / 240 ml chicken broth intended for the gravy, then strain. Top the infused broth back up to 1 cup / 240 ml with water or additional broth to replace what evaporated. Measure ¾ cup for the skillet and keep the final ¼ cup in reserve.
Shrimp and Grits Troubleshooting
Similar-looking failures can need very different fixes. Diagnose first.
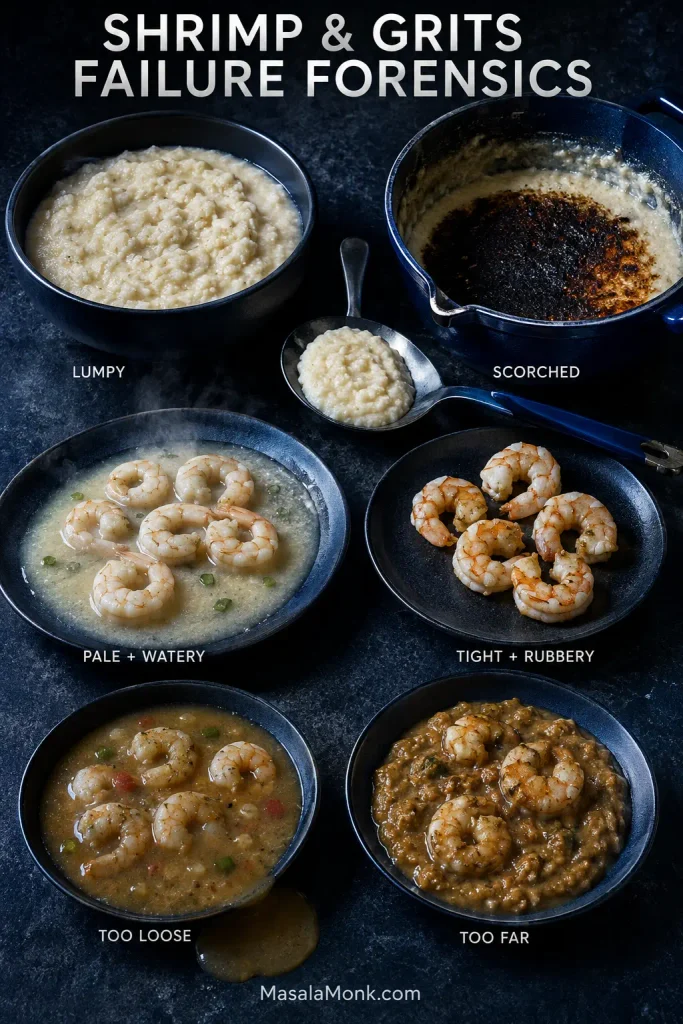
Match the visual symptom to the component first; the fixes below are deliberately different for grits, shrimp and gravy.
My Grits Are Wrong
Thick but still hard: The corn is undercooked. Add hot liquid and keep cooking.
Tender but too thick: Cooking is finished. Loosen with hot water or broth.
Too loose: Simmer uncovered for a few minutes. They will also thicken slightly as they sit.
Lumpy: Whisk while the grits are still loose; stubborn set lumps may not disappear completely. Next time, pour the grits in gradually while whisking.
Scorched: Transfer the good portion to a clean saucepan and leave the burnt layer behind. Do not scrape it up.
Oily or stringy after cheese: The pot was probably too hot when the cheese went in.
My Shrimp Are Wrong
Pale and watery: Usually too much surface moisture, too little heat or too many shrimp in the pan.
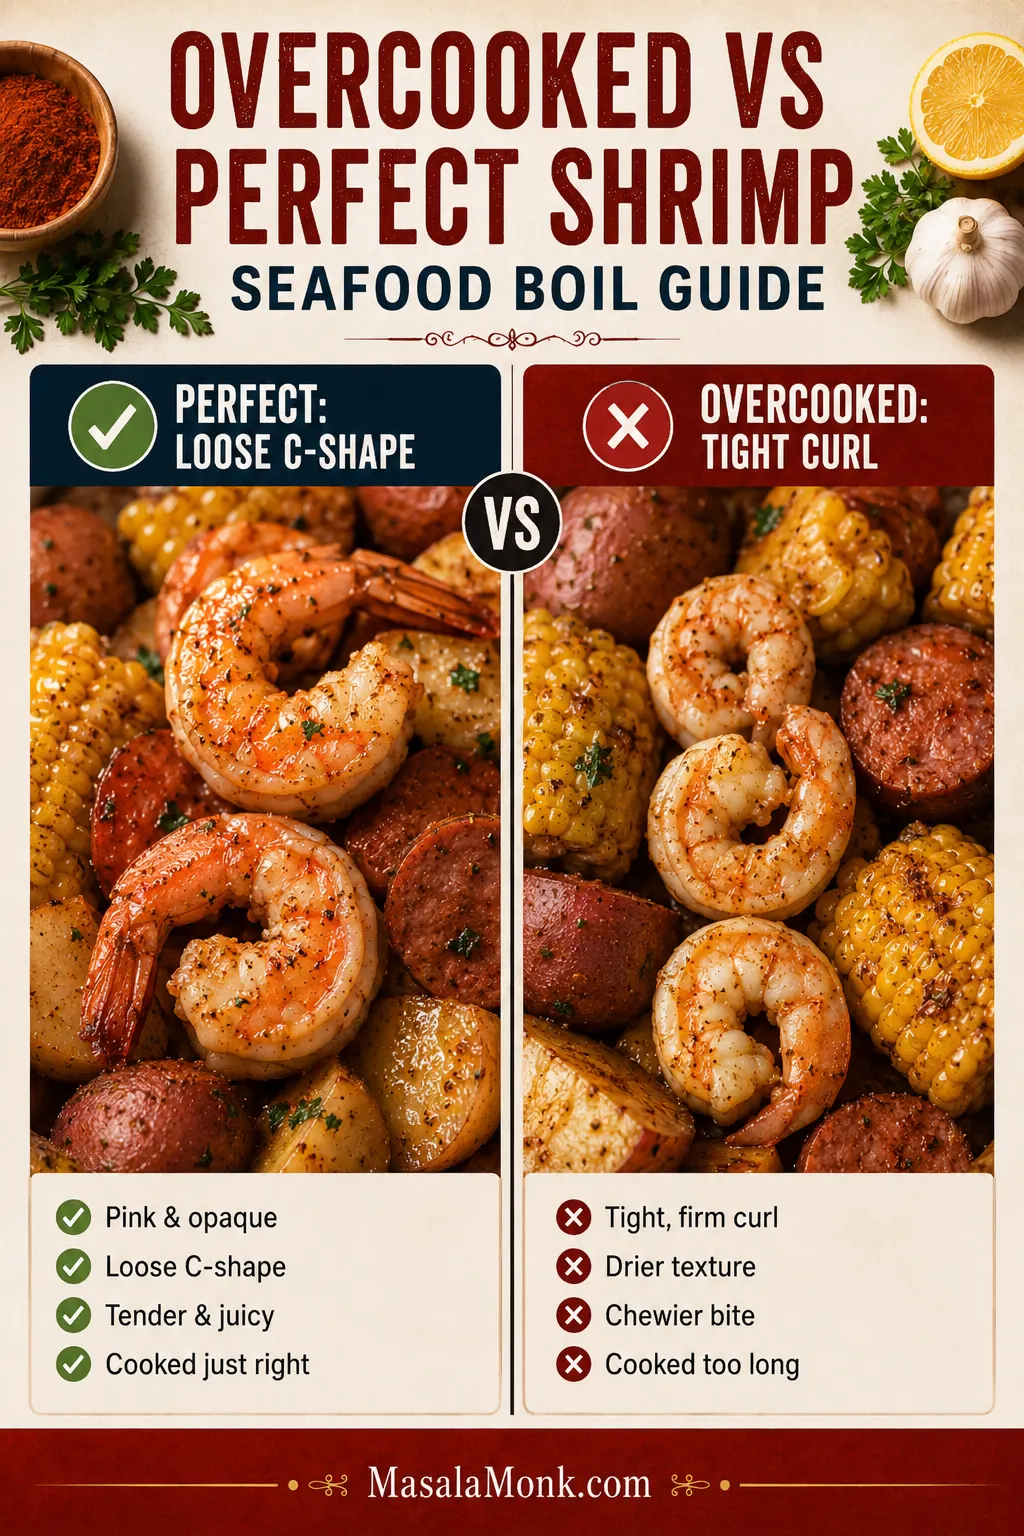
Rubbery or tightly curled: They overcooked. Once shrimp are tough, you cannot uncook them. Get them off the heat sooner next time.
My Gravy Is Wrong
Too thin: Keep the shrimp out and reduce the sauce first.
Too thick: Add reserved broth slowly.
Lumpy: Whisk well; strain if stubborn lumps remain.
Flat: Taste for salt, savory depth and brightness before reaching for more seasoning blend.
Heavy: Try lemon before more cream or cheese.
Too salty: Stop adding salty ingredients and dilute with unsalted liquid if the sauce can tolerate it.
Andouille: replace the bacon with 4–6 oz / 113–170 g sliced andouille. Brown it first, remove it, and return it near the end. Add a little butter or olive oil if the sausage leaves too little fat for the shrimp.
No cheese: fully cooked grits are still delicious finished with butter and a little cream or milk.
A little lighter: reduce the bacon, use whole milk instead of cream and pull back the cheddar.
Gluten-free: check the packaged ingredients and replace the all-purpose flour with the same amount of a 1:1 gluten-free all-purpose flour blend.
Lowcountry Roots, Modern Southern Shrimp and Grits
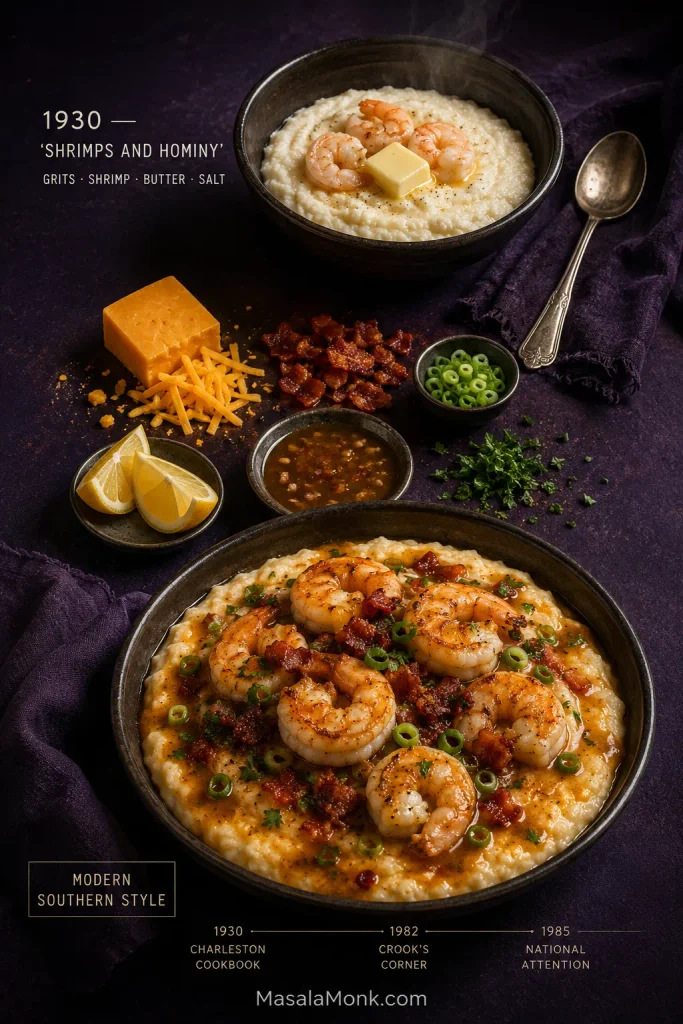
One of the most memorable early records appears in the 1930 cookbook Two Hundred Years of Charleston Cooking. The Local Palate identifies the cook credited with “Shrimps and Hominy” as William Deas, the cookbook author’s African American butler. He was said to be 78 and to have eaten the dish every morning during shrimp season for as long as he could remember.
The old recipe was startlingly spare: hot grits, shrimp, butter and salt. Cheese, bacon, sausage, tomatoes, cream and elaborate gravies all came later.
The 1930 “Shrimps and Hominy” record shows a much sparer bowl; later Southern versions layered in cheese, bacon and gravy.
Bill Neal and Gene Hamer opened Crook’s Corner in Chapel Hill in 1982 and began serving shrimp and grits for dinner. Craig Claiborne’s 1985 New York Times article helped carry the dish far beyond its regional breakfast associations.
Here, the modern additions are cheddar grits, bacon and pan gravy, with Cajun or Creole seasoning bringing warmth. For a Louisiana dish where roux and regional seasoning move much closer to the center, Cajun étouffée makes a useful contrast.
Make-Ahead, Storage and Reheating
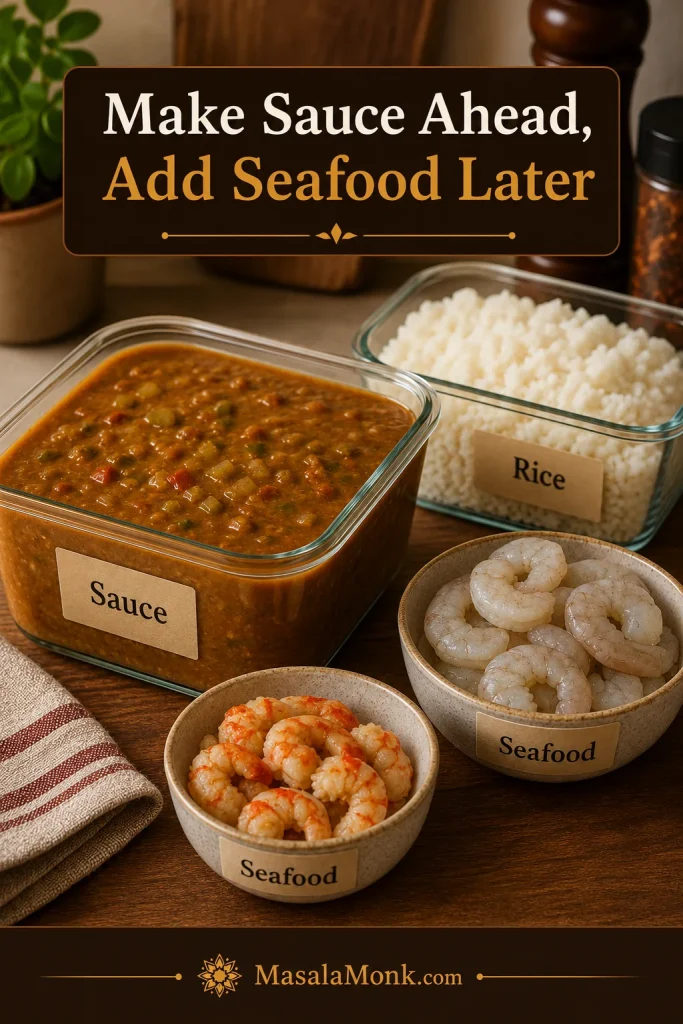
Peel the shrimp, chop the bacon and aromatics, grate the cheddar and measure the broth ahead if that makes dinner easier. Cook the shrimp close to serving.
Storing Leftovers
When possible, refrigerate the grits separately from the shrimp and gravy in airtight containers. Use the leftovers within about 3 days.
Reheating the Grits
Cold grits become firm. Warm them over low heat with a splash of water, broth or milk, stirring until creamy again.
Reheating the Shrimp and Gravy
Use gentle heat so the shrimp spend as little extra time cooking as possible, but reheat leftovers thoroughly. Current federal guidance calls for leftovers to reach 165°F / 74°C.
What to Serve With Shrimp and Grits
A rich bowl likes contrast around it. You do not need a long menu.
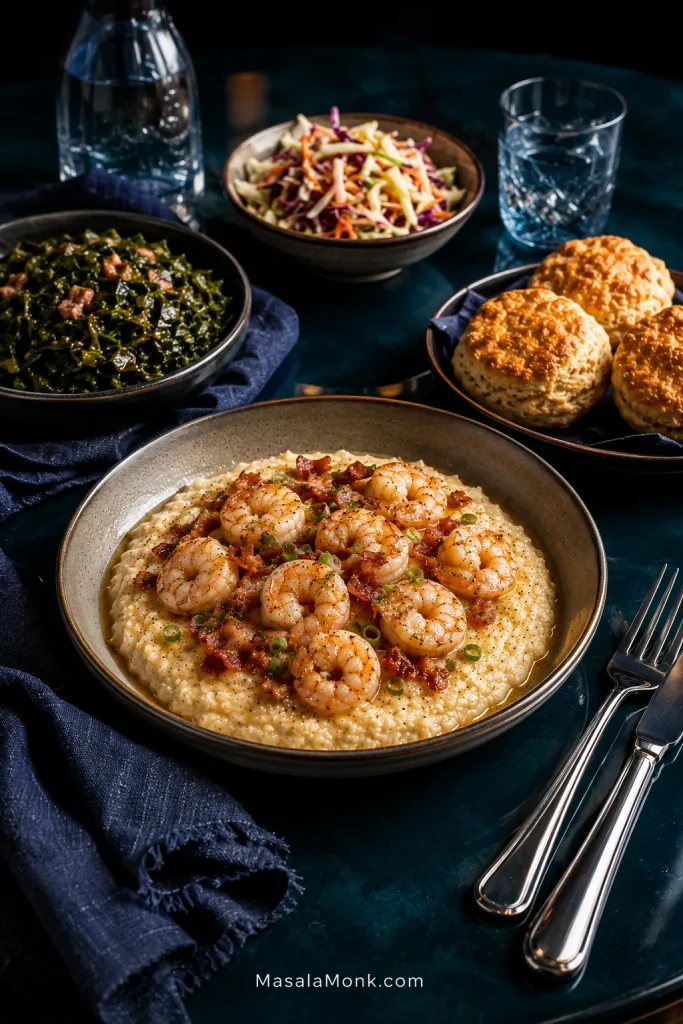
Fresh contrast: crunchy coleslaw, ripe tomatoes or a green salad with a sharp vinaigrette.
Green and savory: collard greens, green beans or roasted asparagus.
Because the bowl already brings starch, richness and sauce, crisp acidity, savory greens and warm biscuits create the most useful contrast.
This version works naturally for brunch or dinner. For an appetizer, use a small cup of grits and one or two shrimp per person.
If you make it, tell us which grits you used—old-fashioned, stone-ground or quick—and whether your gravy needed any of the reserved broth. Those two details vary quite a bit from one kitchen to another.
Then eat it hot. The spoonful worth chasing has corn, a plump shrimp, a little pan gravy and a piece of crisp bacon all at once.
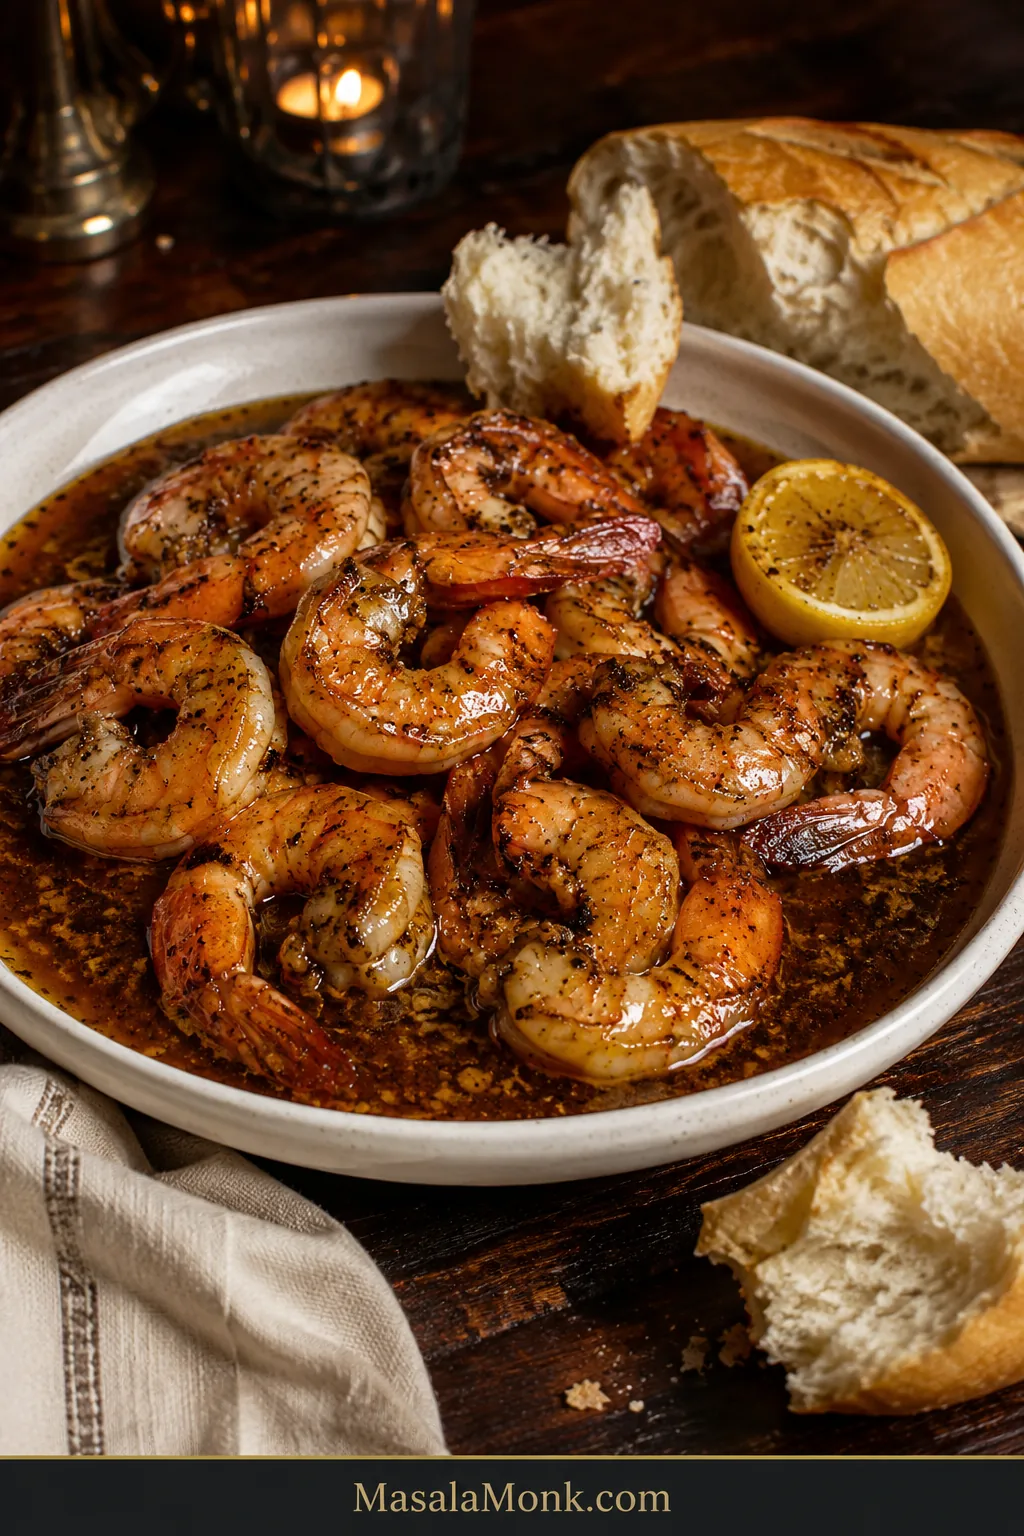
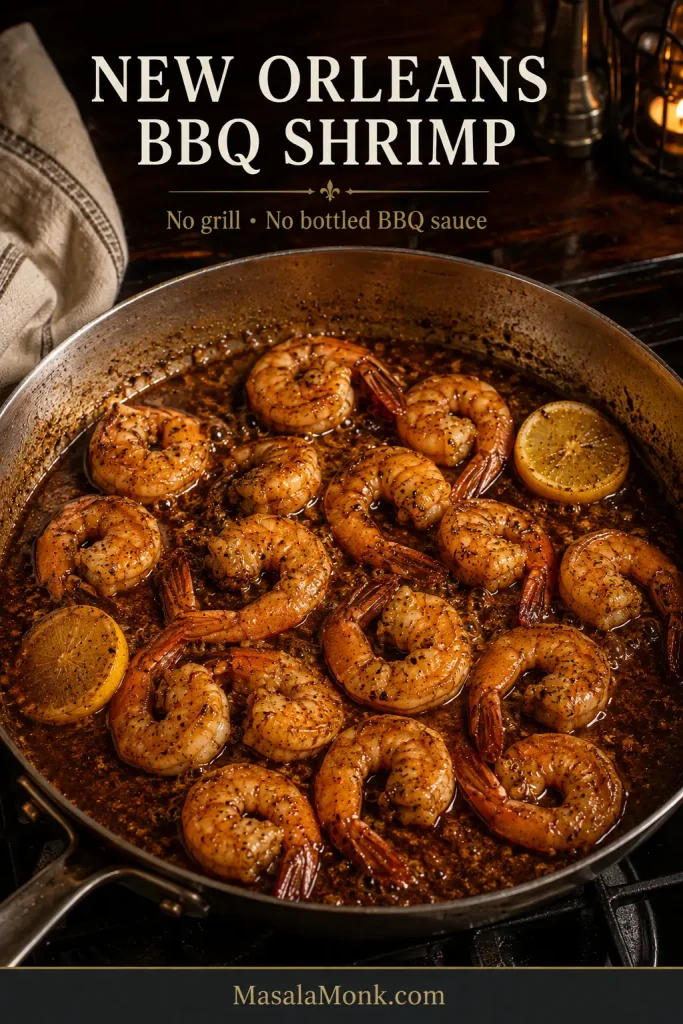
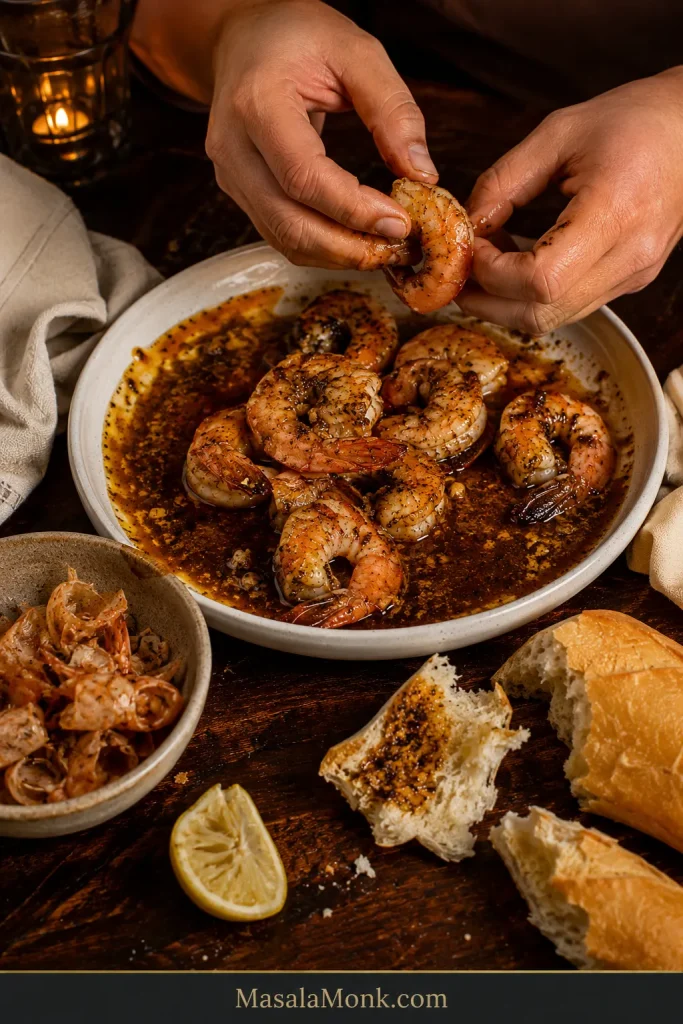
New Orleans BBQ shrimp arrives at the table with its own plan for the evening: plump shrimp, cracked black pepper, lemon, garlic and enough silky butter sauce to make warm French bread feel less like a side and more like essential equipment.
Worcestershire, garlic, rosemary, lemon and black pepper simmer down around the shrimp before cold butter finishes the concentrated pan juices. The result is savory, bright, deeply peppered and richly buttery.
The cooking moves quickly, but it isn’t difficult. Salt intensifies as the liquid reduces, shrimp toughen if they linger too long, and the butter finish needs gentle heat. Get those moments right and you have juicy shrimp, bold black pepper and a sauce worth reaching across the table for.
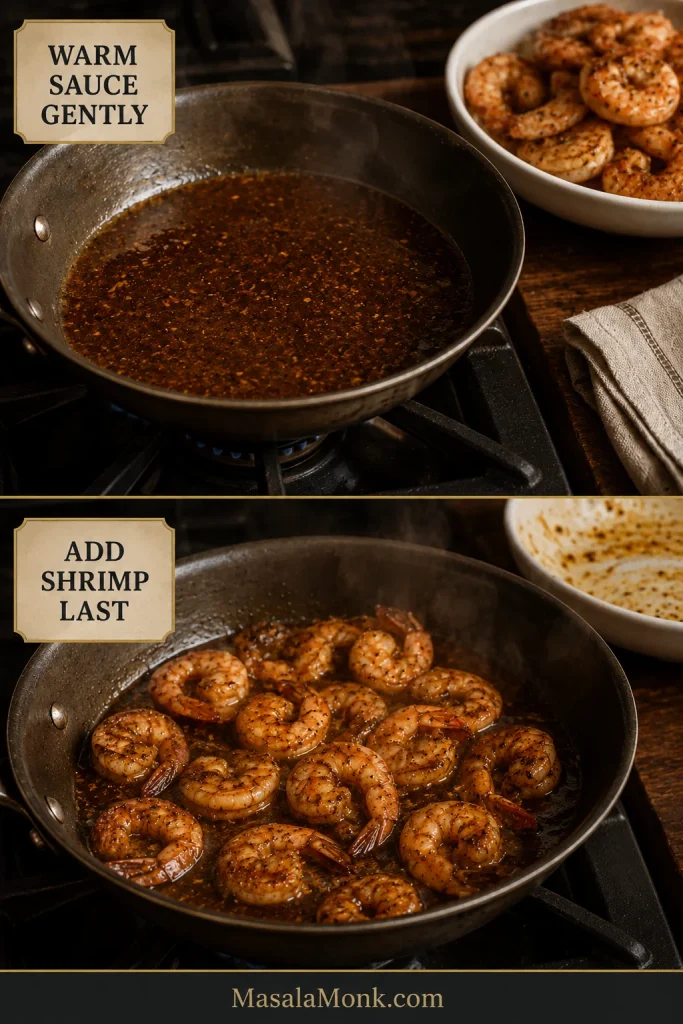
New Orleans BBQ shrimp is jumbo shrimp cooked in a buttery Worcestershire sauce with black pepper, lemon and garlic—no grill or bottled barbecue sauce involved. For this version, use 1½ lb / 680 g raw 16/20 shrimp. Reduce the seasoned liquid first, cook the shrimp until almost done, move them to a bowl, then finish the pan with cold unsalted butter before returning the shrimp briefly.
Hold the salt. Worcestershire, hot sauce and seasoning may already provide enough.
Pull the shrimp slightly early. The thickest part finishes during the final toss.
Use gentle heat for the butter. Add it gradually so the sauce turns smooth and unified.
The sauce can wait; the shrimp can’t.
New Orleans BBQ Shrimp Recipe
Juicy jumbo shrimp in a buttery, garlicky, boldly peppery Worcestershire sauce made for warm French bread.
Prep
10–15 minutes
Cook
10–15 minutes, plus 2–4 minutes if batching
Total
About 25–30 minutes; up to 35 minutes with batches
Yield
2 generous mains or 4 appetizers
Shrimp
1½ lb / 680 g 16/20 shrimp, roughly 24–30
Pan
12–14-inch / 30–35-cm heavy skillet or sauté pan
Heat
Boldly peppery; chile heat adjustable
Finished Sauce
Silky, pepper-flecked and fluid enough for dipping bread
Ingredients
1½ lb / 680 g raw 16/20 shrimp, preferably headless easy-peel shell-on; thawed if frozen
8 oz / 225 g cold unsalted butter, cut into small pieces
5 tbsp / 75 ml Worcestershire sauce
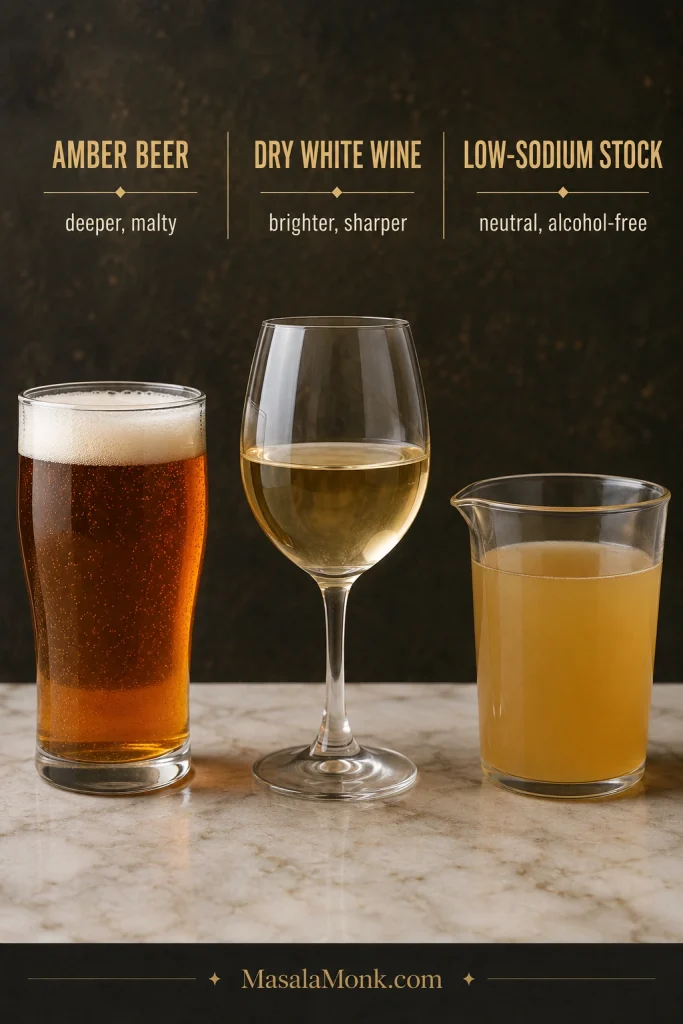
¼ cup / 60 ml amber lager or mild amber ale, dry white wine, or unsalted/low-sodium shrimp or chicken stock
1–2 lemons, for 2 tbsp / 30 ml fresh juice plus wedges for serving
4 medium garlic cloves, finely minced or grated
2 tsp coarsely cracked black pepper
2 tsp finely ground black pepper; use 1 tsp for a gentler pepper bite
1 tsp sweet paprika
½ tsp dried thyme
¼ tsp dried oregano
¼ tsp cayenne pepper, or less for mild heat
1 tsp finely chopped fresh rosemary
1–2 tsp Louisiana-style hot sauce, to taste
Kosher salt, only if needed after tasting the finished sauce
1 small French loaf or baguette, warmed and torn or sliced for serving
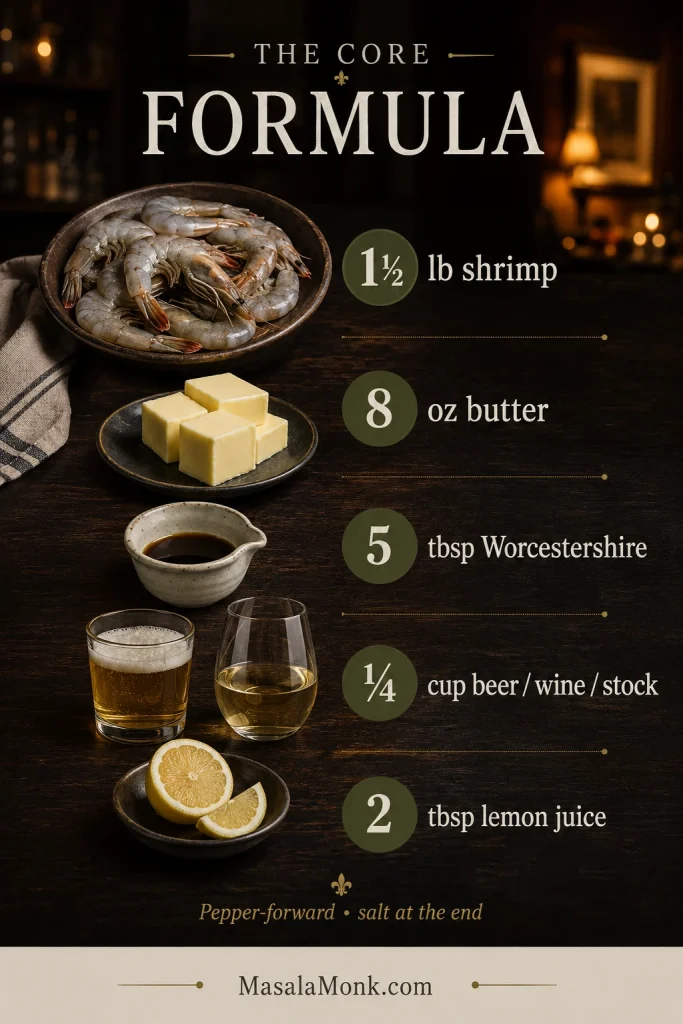
The core ratio keeps the sauce rich, balanced and fluid enough to reduce before the final butter finish.
About the butter: the amount is intentional. Halving only the butter leaves the Worcestershire much sharper and can make the finished sauce taste noticeably saltier, so keep the ratio as written on your first batch.
Before the Pan Gets Hot
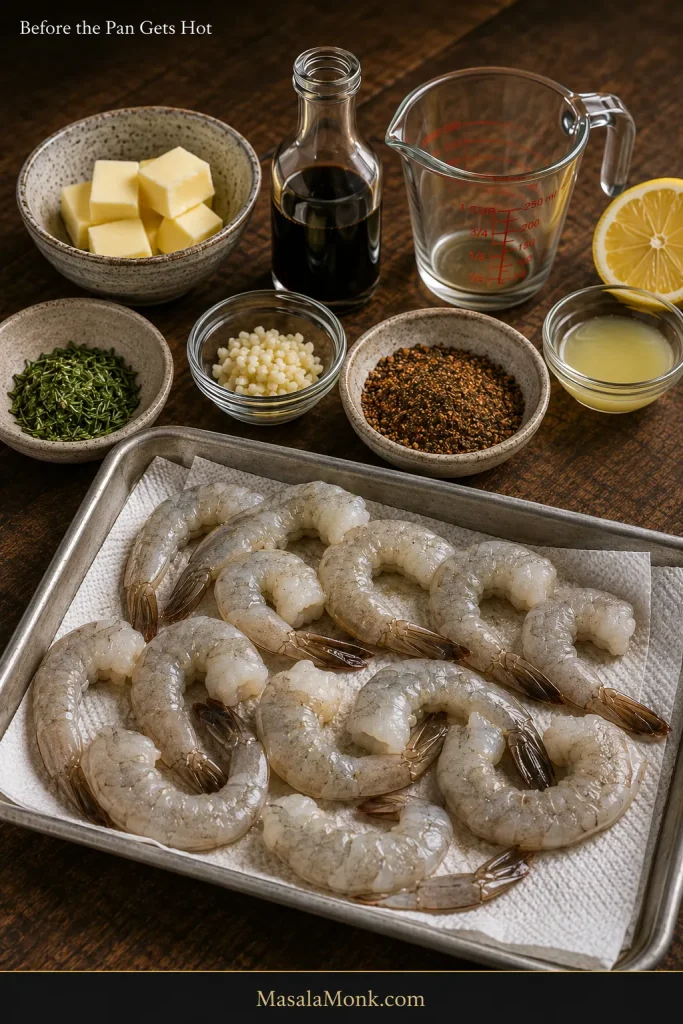
Measure the Worcestershire and cooking liquid, juice the lemon, chop the garlic and rosemary, measure the dry spices, and cut the butter into small pieces. Keep the butter cold.
Frozen shrimp should be completely thawed, drained and patted dry. Once the Worcestershire mixture starts reducing, the rest moves quickly.
Before the pan gets hot, dry shrimp solve the moisture problem while measured ingredients solve the timing problem. Both matter once this fast sauce starts moving.
1. Mix the Seasoning
Combine the cracked black pepper, ground black pepper, paprika, thyme, oregano and cayenne. Set the mixture beside the stove.
Leave the separate salt for later. Taste the finished sauce before deciding whether it needs any.
2. Build the Sauce Base
Set the skillet over medium heat and add 1 tbsp / 14 g of the butter.
When it foams, add the garlic and rosemary. Cook for 20–30 seconds, just until fragrant.
Add the Worcestershire, beer, wine or stock, lemon juice, hot sauce and dry seasoning mixture. Stir and bring the liquid to a lively simmer.
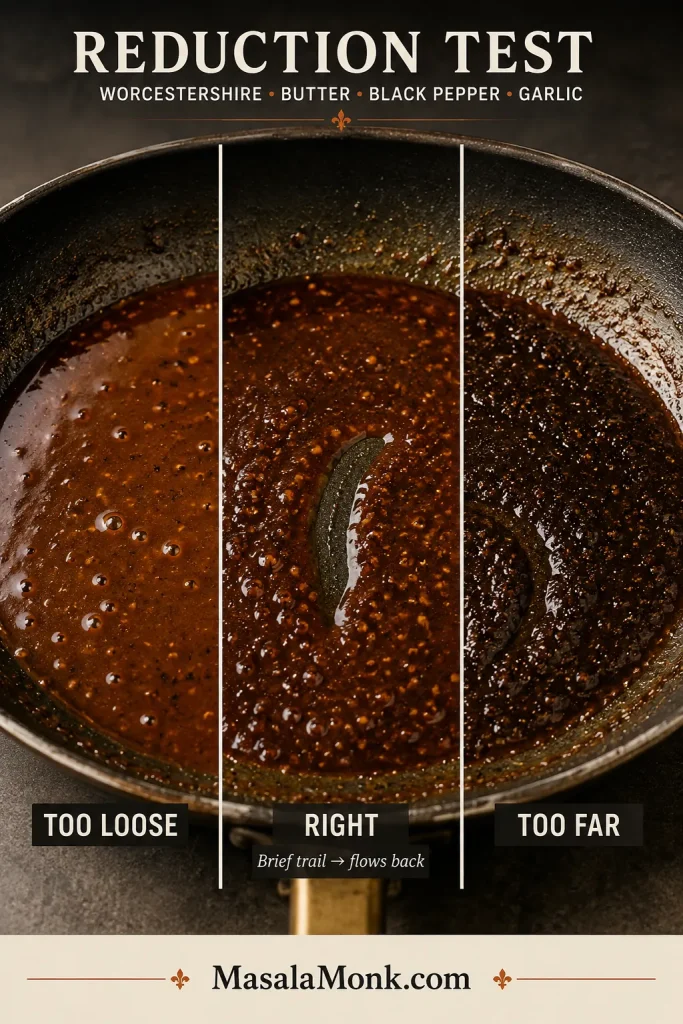
Reduce for roughly 3–5 minutes. About one-quarter to one-third of the initial liquid should evaporate. Draw a spoon or spatula through the pan: the liquid should leave a brief trail, then flow back into place. Stop before it turns thick or sticky.
Stop earlier than a finished sauce might suggest. The right pre-shrimp reduction still flows because shrimp juices and cold butter will change its concentration again later.
3. Cook the Shrimp
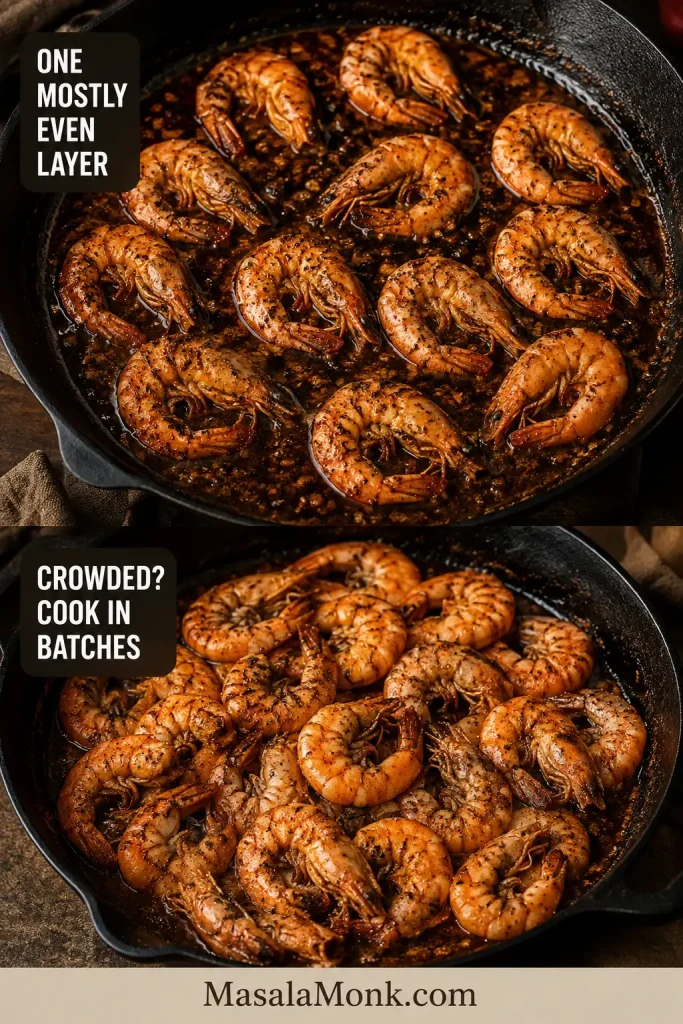
Add the shrimp in one mostly even layer. If a 12-inch skillet feels crowded, cook half at a time.
Leave visible space between shrimp; crowding traps steam and makes both doneness and sauce concentration harder to judge.
Cook for about 1–2 minutes on the first side, then turn. Continue until the shrimp are mostly pearly and opaque, with the thickest part just shy of done. They should be starting to feel springy.
Transfer them to a bowl. Smaller shrimp may reach that point sooner, so pull those first.
Cooking two batches? Check the liquid before the second batch. If it has tightened noticeably, stir in 1–2 tbsp / 15–30 ml unsalted stock or water so it moves freely again.
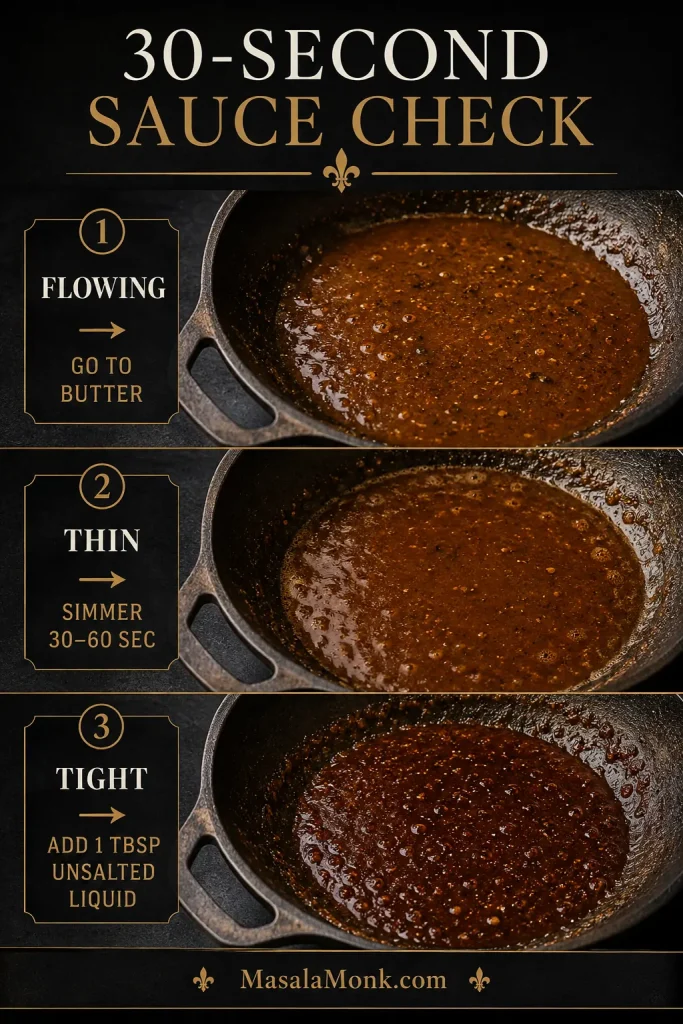
4. Take a 30-Second Sauce Check
With the shrimp resting in the bowl, look at what remains in the skillet.
Concentrated and flowing: move on to the butter.
Thin from shrimp juices: simmer for another 30–60 seconds.
Very dark or tight: stir in 1 tbsp / 15 ml unsalted stock or water.
Once the shrimp come out, read the pan again. Their juices may have loosened the reduction, so the sauce you have now matters more than how it looked a minute earlier.
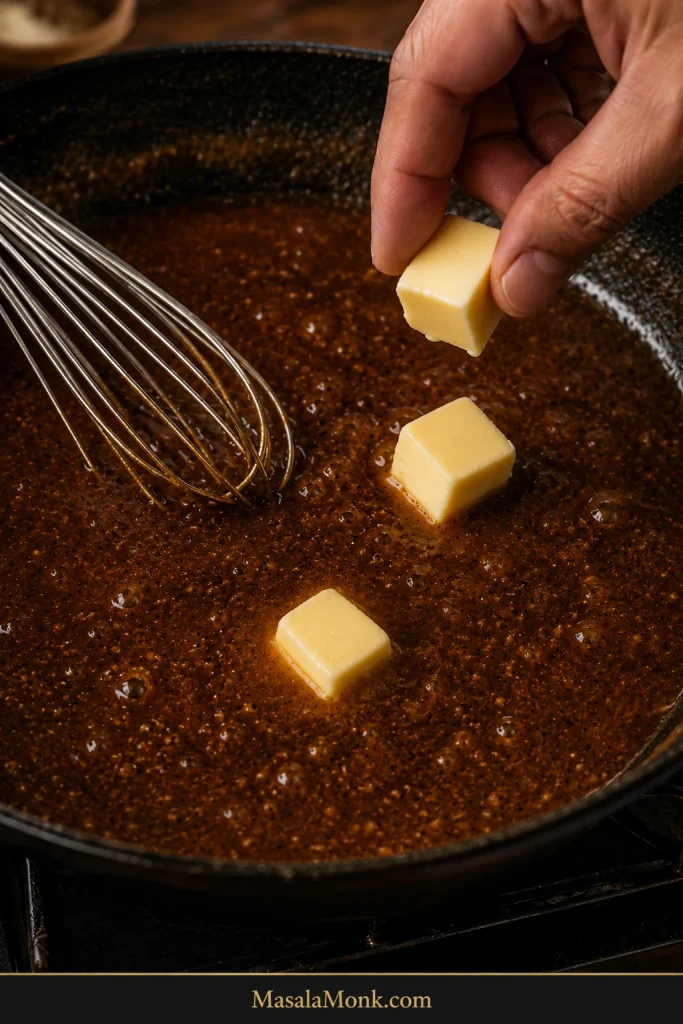
5. Finish With Cold Butter
Turn the heat low. If the liquid is still boiling hard, slide the skillet off the burner for 20–30 seconds.
Add the remaining cold butter a few pieces at a time, stirring or whisking steadily. Let each addition disappear before adding more.
At this stage, temperature matters more than speed. Gentle heat gives the cold butter time to join the Worcestershire reduction instead of separating into an oily layer.
The reduced liquid will briefly look streaky, then become smooth and unified. It should lightly coat a spoon and flow back into the skillet.
“Emulsion” sounds fussier than it is here. Cold butter, gentle heat and steady stirring do most of the work.
6. Finish the Shrimp and Taste
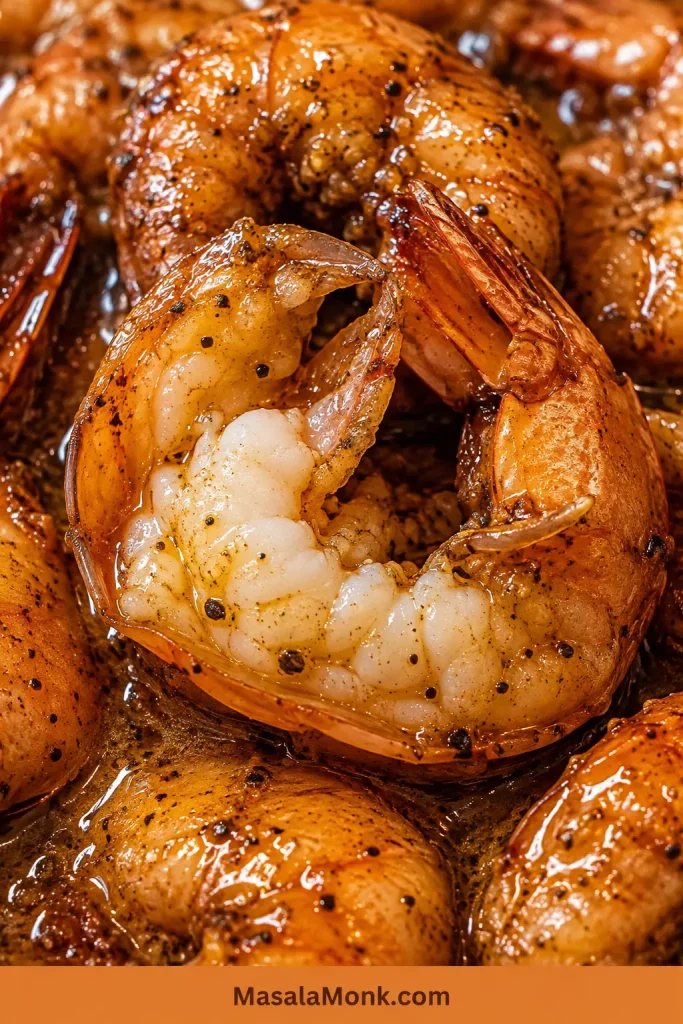
Return the shrimp and any juices from the bowl. Toss over very low heat just until the thickest pieces finish cooking and everything is coated—usually about 20–30 seconds. Turn off the heat immediately.
Press one gently. It should give a little and spring back, with tender flesh beneath the surface. A hard, tight texture means the shrimp have gone too far.
Taste the sauce. Add salt only if it genuinely needs it. A squeeze of lemon brings brightness; another dash of hot sauce raises the chile heat without muting the black pepper.
Serve immediately in shallow bowls with warm French bread, lemon wedges and plenty of napkins.
Scaling to 3 lb / 1.36 kg: two complete batches are easier to control than one crowded pan. A genuinely wide sauté pan can handle a larger batch, but evaporation changes with pan size, so watch how the sauce moves instead of simply doubling the cooking time.
The inside tells you more than the curl: properly cooked shrimp still look plump and moist beneath the shell, rather than tight, shrunken or chalky.
New Orleans BBQ shrimp is a richly sauced shrimp dish built around butter, black pepper, Worcestershire and lemon. Garlic, herbs, hot sauce and beer, wine or stock may join the skillet depending on the cook and the version.
Why Is It Called BBQ Shrimp If It Isn’t Barbecued?
No one explanation for the name is definitive. A common theory is that “barbecue” refers to the dish’s reddish-brown color and intensely seasoned sauce, not to grilling. Whatever the original reasoning, BBQ shrimp became the New Orleans name for this buttery, pepper-forward preparation.
Here, “BBQ” means the saucy New Orleans preparation—not grilling.
Pascal’s Manale is closely associated with the dish’s origin. From there, restaurant and home versions moved in many directions, changing the balance of butter, Worcestershire, pepper, beer, stock and herbs.
Whatever the version, there’s usually plenty of sauce. You want enough left in the bowl for bread after the last shrimp is gone. If direct heat over a grill is what you were looking for, grilled shrimp follows a different cooking path.
Why the Famous New Orleans Versions Taste Different
Sometimes what you’re chasing is not New Orleans BBQ shrimp in general. It is the bowl you remember from one restaurant, one trip or one table.
Maybe that sauce stained the bread with Worcestershire and black pepper. Maybe your favorite was so buttery it almost seemed creamy. Another version may have tasted noticeably malty from beer or brighter from lemon.
Well-known versions show just how wide the style can be.
Version or Reference Point
What Stands Out
Pascal’s Manale tradition
The restaurant most closely associated with the dish’s origin; recreations of the style vary considerably.
Mr. B’s Bistro
Exceptionally rich in butter and Worcestershire, with plenty of black pepper and a cold-butter finish.
Paul Prudhomme
Published versions use much more seasoning, stock and beer, with far less Worcestershire than Mr. B’s style.
Emeril Lagasse versions
Some published versions build a more elaborate concentrated shrimp base and may include cream along with butter.
The published Mr. B’s Bistro BBQ shrimp recipe, for example, uses substantially more butter and Worcestershire than the skillet here. That doesn’t make one version the correction of another; it helps explain why two bowls carrying the same name can taste surprisingly different.
What to Expect From This Version
This one leads with black pepper, followed by Worcestershire, butter and lemon. The sauce has enough body to cling to the shrimp but stays fluid for bread, without the cream used in some other versions.
The sauce-first method lets you get the liquid where you want it before the shrimp and butter change what you’re seeing in the pan.
Is New Orleans BBQ Shrimp Cajun or Creole?
New Orleans BBQ shrimp belongs first to New Orleans. It is commonly associated with the city’s Creole cooking tradition, while modern recipes may use products labelled either Cajun or Creole seasoning.
The two Louisiana traditions have different histories and geographic roots, even though they influence one another. For this skillet, the useful question is what the seasoning actually contains—especially how much salt it brings.
Which Shrimp Should You Buy?
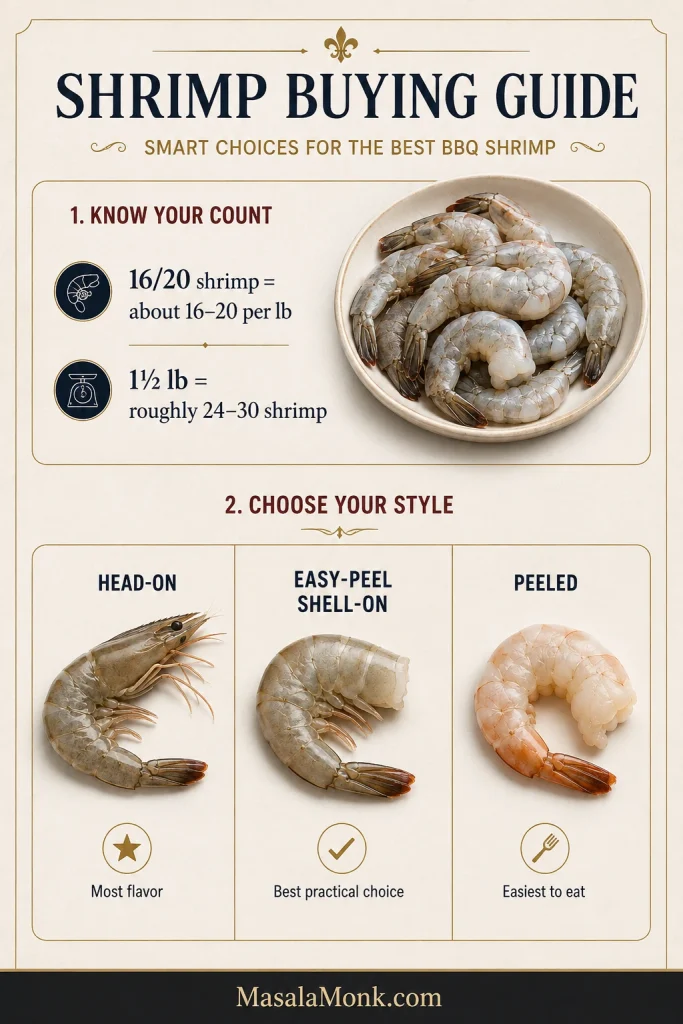
The count printed on the package tells you more than loose labels such as “large” or “jumbo.” Look for 16/20 shrimp, meaning there are approximately 16 to 20 shrimp per pound.
For 1½ lb / 680 g, that works out to roughly 24 to 30 substantial shrimp. They are large enough to give you some breathing room during the fast cook while remaining easy to find in many supermarkets.
What You Buy
Why Choose It?
What Changes?
Head-on, shell-on
Most flavor from the heads and shells; classic peel-at-the-table experience
Messier and harder to source outside Gulf regions
Headless, easy-peel, shell-on
Best practical choice for most home cooks
Very good flavor and moisture protection with easier cleaning and peeling
Peeled
Easiest at the table, especially over grits or rice
Cooks faster and contributes less shell flavor
For most cooks, 16/20 easy-peel shell-on shrimp balance generous size, flavor and easier eating.
Head-On Shrimp Are an Upgrade, Not an Entrance Exam
Good head-on shrimp are worth using when they’re readily available. Their heads and shells add another layer of seafood richness as they cook.
They aren’t required. Headless shell-on shrimp make an excellent skillet, and raw easy-peel shrimp are often the sweet spot for cooks shopping far from Louisiana or the Gulf Coast.
If peeling buttery shrimp at the table sounds fun, choose shell-on. If it sounds annoying, use peeled shrimp and enjoy your dinner. Start checking peeled shrimp earlier because they cook faster.
Deveining and Frozen Shrimp
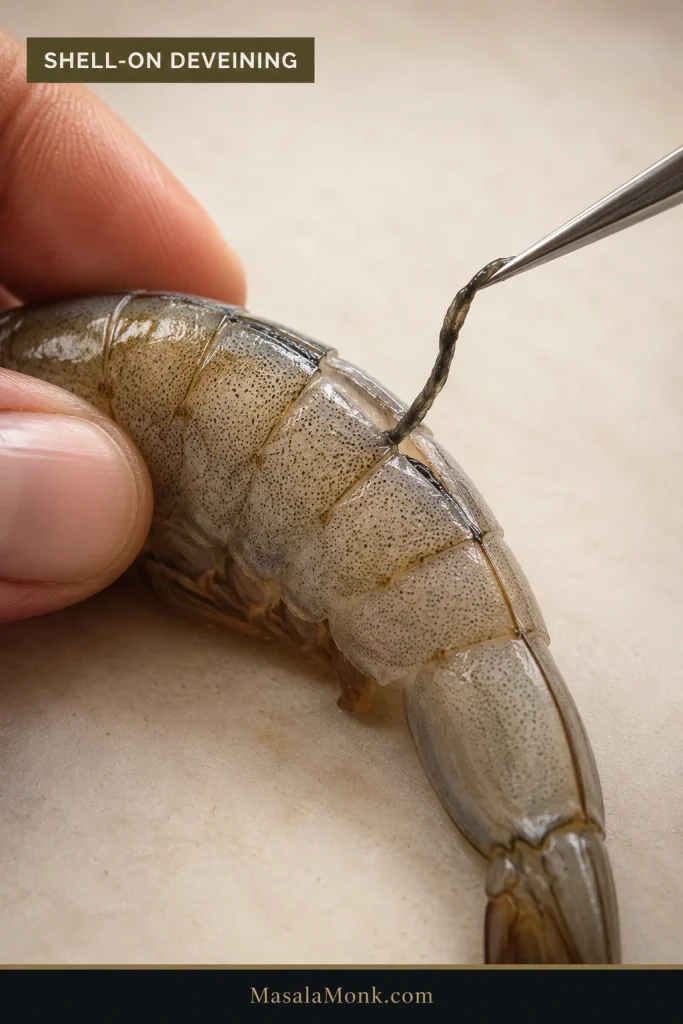
Easy-peel shrimp already have a slit along the back, so you can open it gently and lift out the vein with the tip of a small knife, skewer or toothpick. For intact shells, make a shallow cut along the back first and leave the rest of the shell in place.
A shallow slit gives enough access to devein while leaving most of the shell intact.
Raw frozen shrimp are also a perfectly practical choice. Frozen doesn’t automatically mean soggy; excess surface water is the problem. Thaw them fully, drain well and pat them dry so they don’t flood and cool the skillet.
New Orleans BBQ shrimp sauce starts with butter, Worcestershire, lemon, black pepper and garlic, often with herbs, hot sauce and beer, wine or stock. Once it reaches the skillet, the balance shifts as water cooks away and every savory, salty and acidic note becomes more concentrated.
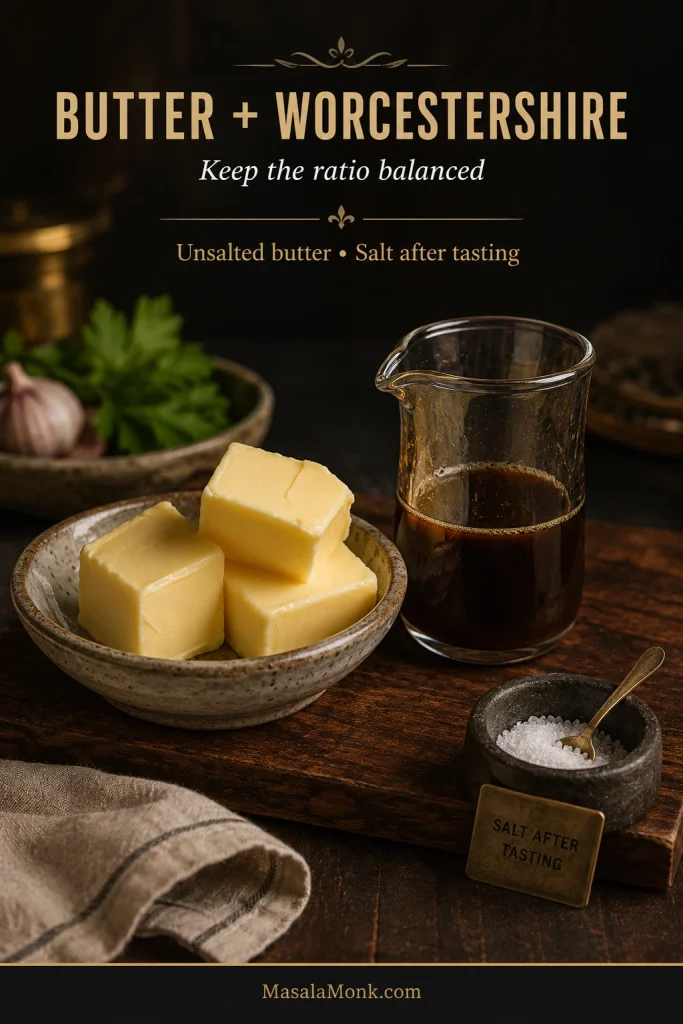
Butter, Worcestershire + Salt
Worcestershire gives the sauce its deep savory tang. Butter softens its sharper edges and gives the pan enough richness to coat both shrimp and bread. That Worcestershire backbone is also what separates this dish from a simpler garlic-lemon butter skillet such as shrimp scampi.
Butter is part of the seasoning balance, not just extra richness. Cutting the butter aggressively while keeping all 5 tablespoons / 75 ml Worcestershire leaves the finished sauce much sharper.
Salt deserves the same attention. Worcestershire, hot sauce and packaged seasoning may already contain plenty, and every minute of reduction concentrates what’s there. Unsalted butter and a final taste check leave room to adjust at the end.
Unsalted butter preserves room to adjust after Worcestershire and hot sauce have concentrated.
That balance matters once dinner starts. The sauce should be bold enough to season every shrimp while still leaving you eager to drag another piece of bread through the bowl.
Can you make New Orleans BBQ shrimp without Worcestershire? You can make excellent buttered shrimp, but the flavor moves away from this particular style. Worcestershire brings salt, acidity, sweetness and fermented savoriness all at once, so there isn’t a simple equal-volume substitute that behaves exactly the same way.
Black Pepper + Seasoning
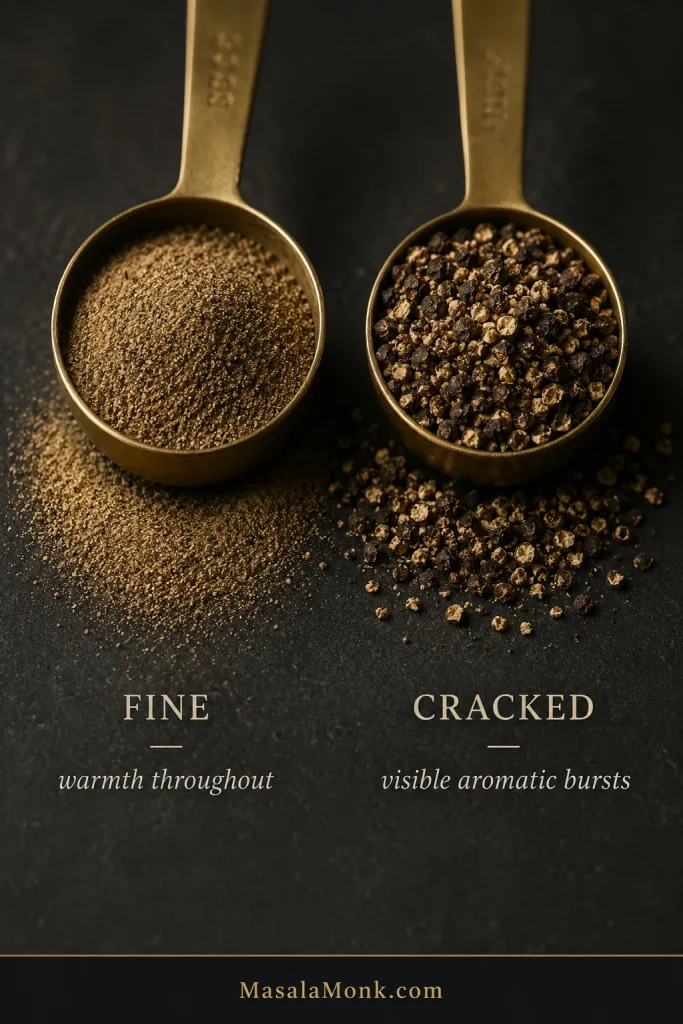
Black pepper is one of the flavors that makes this dish recognizable. Fine pepper disappears into the liquid and spreads its warmth throughout. Coarsely cracked pepper stays visible and delivers aromatic bursts as you eat.
Use both: fine pepper seasons the sauce; cracked pepper stays distinct.
Cayenne and Louisiana hot sauce control most of the chile heat, so a strongly black-peppered skillet doesn’t have to be painfully hot.
Commercial Cajun and Creole blends vary widely, especially in sodium. Here, paprika, thyme, oregano and cayenne are measured separately for predictable seasoning. If you prefer a packaged blend, use about 2 teaspoons in place of those four spices and check the label before adding salt.
Lemon, Garlic, Rosemary + Hot Sauce
Lemon keeps the richness lively, garlic deepens the savory side, and rosemary adds a restrained herbal note. Louisiana-style hot sauce is easiest to adjust at the end, once you know how much heat the cayenne and black pepper have already brought.
Rosemary belongs in the background. You want to notice that something herbal is there, not feel as though the shrimp landed under a rosemary bush.
Beer, Wine or Stock?
Use ¼ cup / 60 ml and choose the direction you want the sauce to take.
Amber lager or mild amber ale: deeper and lightly malty.
Dry white wine: brighter, with a sharper edge.
Unsalted or low-sodium stock: more neutral, alcohol-free and especially easy to control for salt.
Keep the volume at ¼ cup; change the liquid to change the direction.
Skip very bitter IPAs, which can dominate after reduction. For wine, use a dry bottle such as Sauvignon Blanc or Pinot Grigio and avoid salted “cooking wine.”
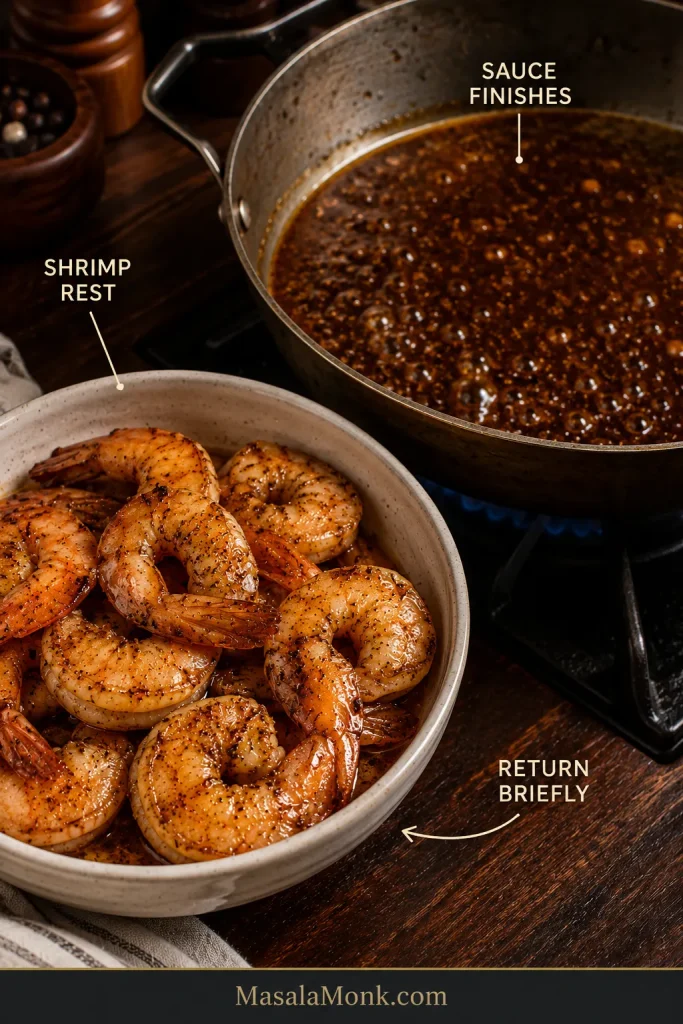
Shrimp often reach their pull point before the sauce is ready. That’s why they leave the skillet while their centers still have a final touch of cooking left.
Let the sauce reduce to the right point, build the butter finish, then bring the shrimp back briefly. That short rest is how they reach the table juicy and tender even though the sauce gets a few extra minutes to come together.
Removing the shrimp buys the sauce extra time without overcooking the shrimp.
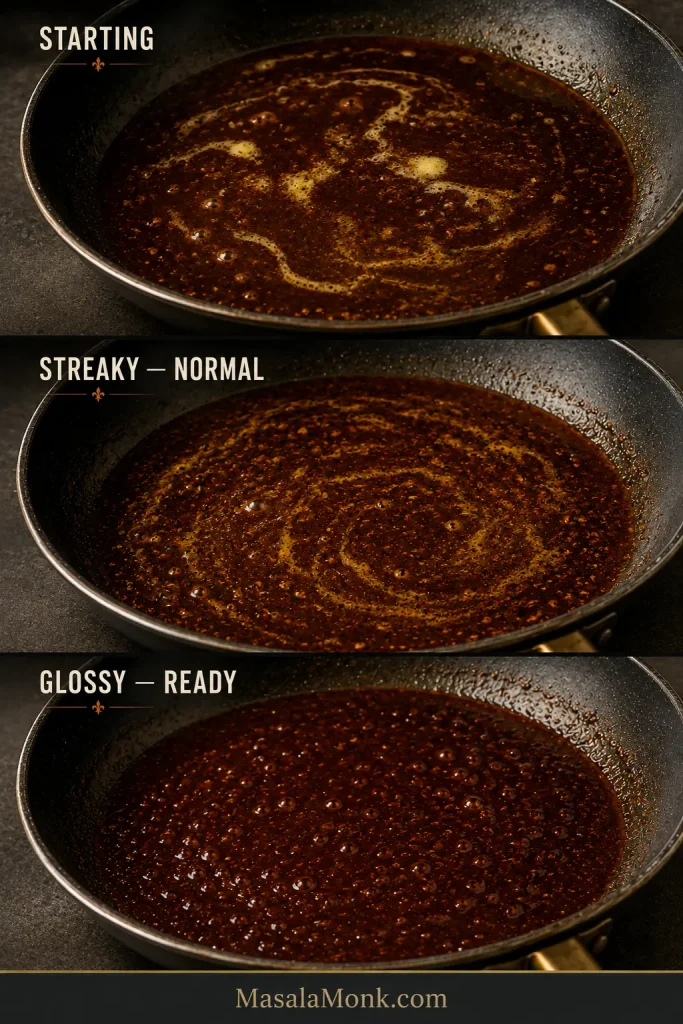
The numbered recipe gives you the timing; these visual cues show what the sauce should actually look like.
Before the shrimp: the liquid has darkened and leaves a brief trail behind the spatula, but still flows easily across the pan.
After the shrimp: check again. Shrimp juices may have thinned it; extra pan time may have tightened it. Adjust it before the butter goes in.
During the butter: brief streakiness is normal at first. Keep stirring gently until the sauce becomes smooth and cohesive.
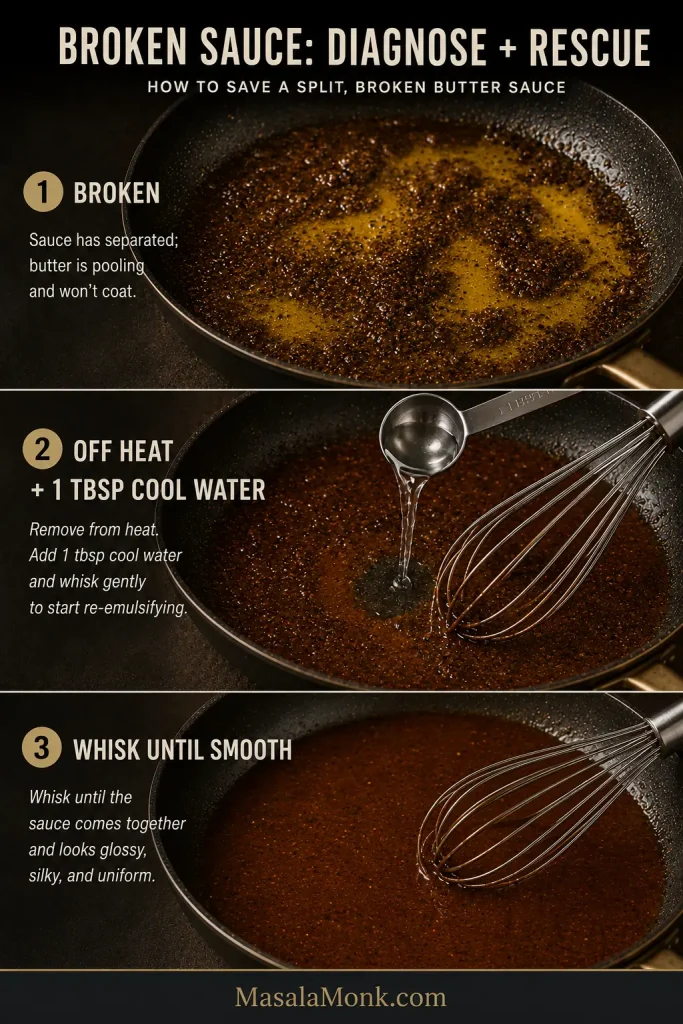
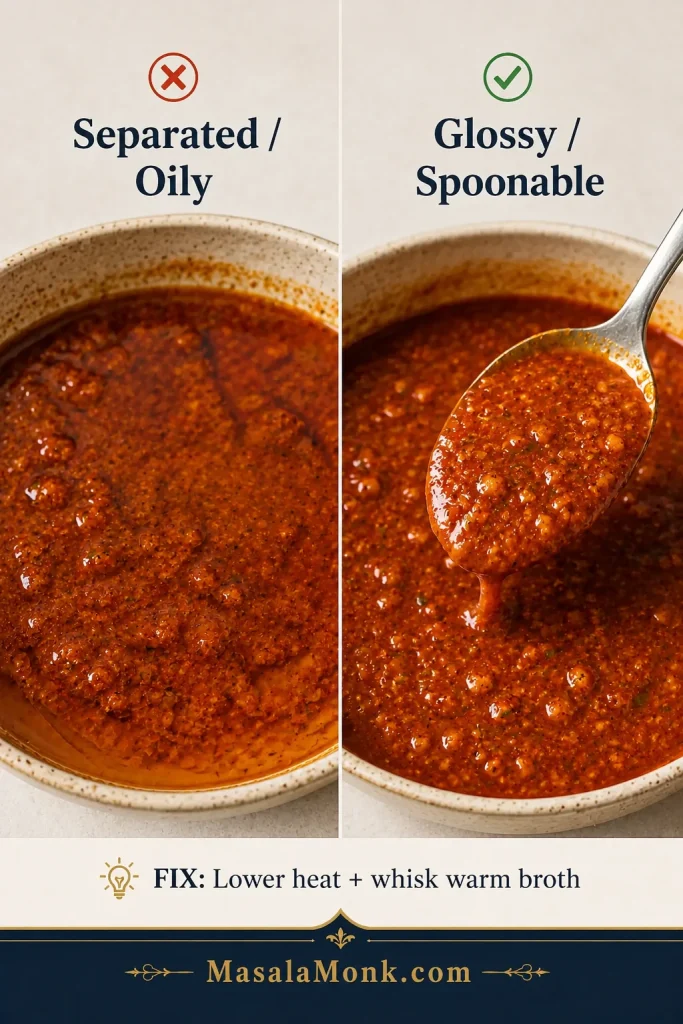
If it breaks: clear yellow butter begins pooling separately from the darker liquid. Stop the heat and use the rescue below.
Streaky doesn’t automatically mean broken. Keep the heat gentle and watch for the moment the separate golden streaks become one glossy, freely moving butter emulsion.
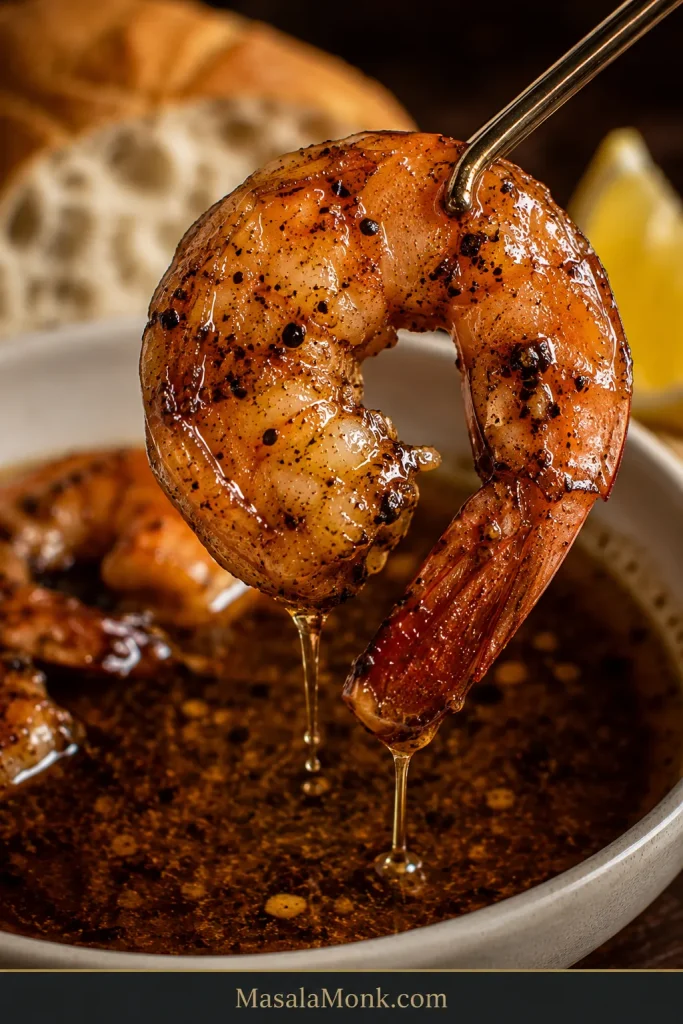
When it comes together properly, the sauce coats the shrimp and then slips back into the bottom of the bowl instead of sitting heavily on top.
The clock gets you close; the pan tells you when to stop.
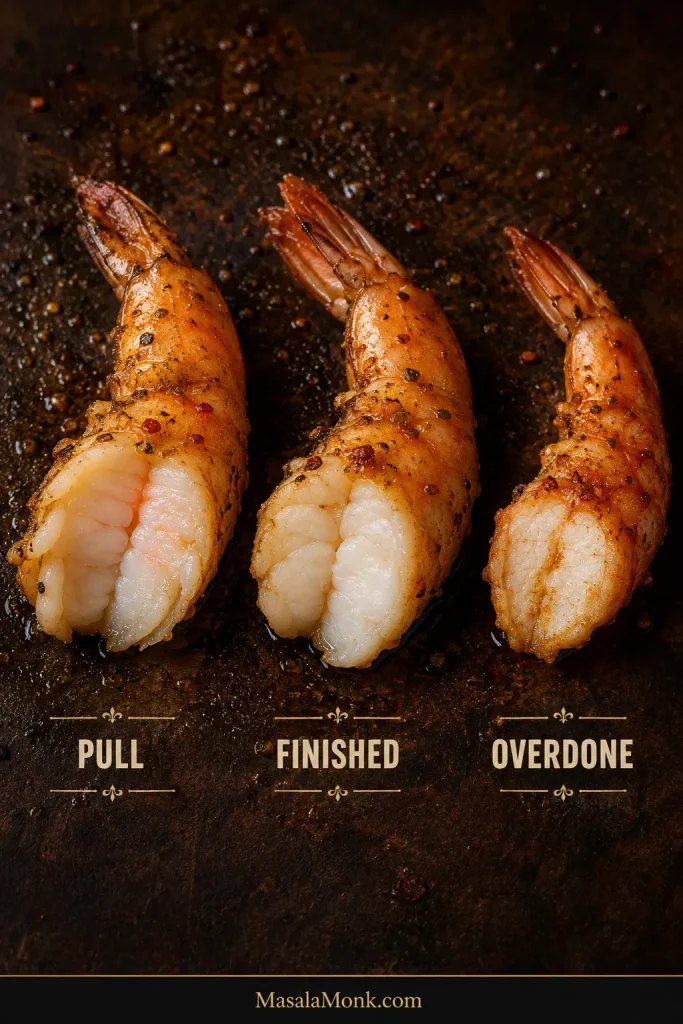
Pull: mostly pearly and opaque; the thickest center still needs its final touch of cooking.
Finished: pearly and opaque through the thickest part, with a gentle spring when pressed.
Overdone: hard or rubbery, often with a much tighter curl.
Still unsure? Take one of the largest shrimp out and peel it or cut through the thickest part. The center should be almost opaque at the pull point and completely opaque after the final toss.
When curl and color are ambiguous, check the thickest center: opaque, plump and still juicy.
That physical check is more useful here than repeatedly poking shell-on shrimp with a thermometer.
Oven versions are common, but the stovetop suits this recipe better. A skillet lets you watch the sauce reduce, pull the shrimp at the right moment and lower the heat immediately for the cold-butter finish.
Pan depth, oven temperature, shell status and sauce volume all change the timing. That’s why this particular version is better kept on the stovetop than given one catch-all baking time.
Troubleshooting: Fix the Sauce or Shrimp
Most problems show themselves before the skillet reaches the table. Match the symptom below, make the best correction you can, and use the cause to improve the next batch.
Sauce Balance Problems
The sauce is a little too salty
What probably happened: a salty seasoning blend brought in too much salt, or the sauce reduced farther than intended.
Fix it now: take the pan off the heat and add unsalted stock or water 1 tbsp / 15 ml at a time, tasting between additions.
If it is aggressively salty: there is no perfect tablespoon-sized rescue. More unsalted liquid and butter can dilute the salt, but you’ll also create more sauce and may need to rebalance the other flavors.
Next time: leave separate salt until the butter is in and you’ve tasted the finished sauce.
The sauce tastes harsh or overwhelmingly of Worcestershire
What probably happened: the cooking liquid reduced too far.
Fix it now: add unsalted stock or water gradually until the Worcestershire no longer tastes so harsh. Taste again before deciding whether the sauce needs more butter.
Next time: stop the first reduction while the liquid still runs easily across the skillet.
Sauce Texture Problems
The sauce is watery
What probably happened: the base needed more reduction, or wet shrimp released additional water.
Fix it now: keep the shrimp in their bowl and simmer the liquid briefly before finishing with butter.
Next time: dry thawed shrimp thoroughly and judge the reduction by how it moves in the pan.
The butter sauce looks oily or split
What probably happened: the pan was too hot or the butter went in too quickly.
Fix it now: remove the skillet from the heat and whisk in 1 tbsp / 15 ml cool water. Add another teaspoon or two only if needed.
Next time: keep the heat gentle and add the cold butter gradually.
Cool water isn’t meant to dilute the sauce—it gives separated fat and liquid another chance to come together. First, however, get the skillet off the heat.
Shrimp Timing Problems
The shrimp are ready before the sauce
Nothing’s gone wrong. Move the shrimp to the bowl and finish the sauce without them.
The final return to the skillet is enough to finish their centers and coat them.
The shrimp are rubbery
What probably happened: they cooked too long.
Fix it now: overcooked shrimp can’t be made tender again.
Next time: remove them slightly earlier and let the short final toss finish the center.
Heat and Final Flavor Problems
The dish is hotter than you wanted
What probably happened: too much cayenne, hot sauce or a particularly hot seasoning blend.
Fix it now: if the sauce isn’t already loose, a splash of unsalted liquid and a little more butter can soften the chile heat.
Next time: keep the black pepper bold and reduce the cayenne or hot sauce.
It tastes flat even though it is salty enough
What probably happened: the pan needs acidity or fresh pepper.
Fix it now: try a small squeeze of lemon or freshly cracked black pepper before reaching for more salt.
Next time: taste salt, acidity and pepper as separate parts of the final balance.
Once the pan is back in balance, stop tinkering and get it to the table. This dish is at its best while the shrimp are still juicy and the butter sauce is warm enough to run into the bread.
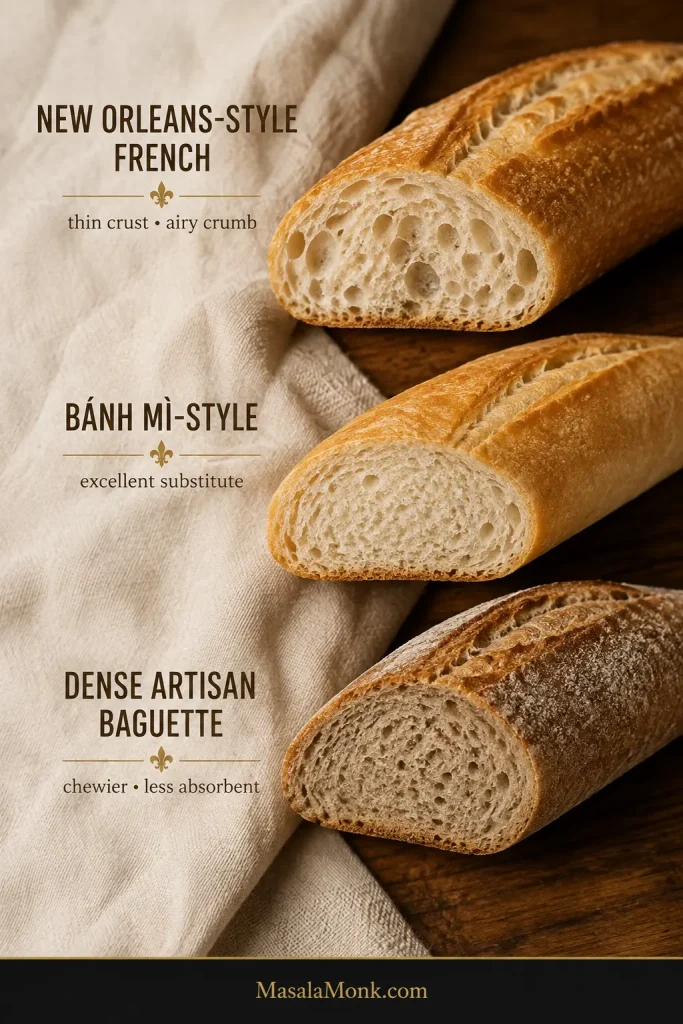
Warm French bread is the first choice because the sauce is intentionally plentiful.
Look for a loaf with a thin crust and light, airy interior. A true New Orleans-style French loaf is ideal when available. Vietnamese bánh mì-style loaves are excellent substitutes because their relatively delicate crust and fluffy crumb soak up sauce more easily than a dense artisan baguette.
For dipping, choose the loaf with the lightest, airiest crumb.
A light supermarket baguette works too. For a richer homemade option—not a traditional substitute for New Orleans French bread—homemade garlic bread is very good at making sure little sauce survives the meal.
Grits or Rice
Creamy grits turn the shrimp into a substantial Southern main course. Peeled shrimp are much easier to manage over a bowl of grits; shell-on shrimp suit a meal built around peeling and dipping.
For shrimp and grits, peeled shrimp make eating easier while the grits catch the sauce.
Plain white rice gives the buttery cooking juices somewhere else to land and makes the whole meal easier to eat with a fork.
Something Cool and Crisp
A fresh, acidic side gives the butter and pepper some contrast. A cucumber salad with vinegar, dill and onion can chill while you cook and is especially useful when the shrimp are the rich centerpiece of the meal.
Yes, It’s Supposed to Be a Little Messy
Shell-on shrimp call for napkins before the skillet reaches the table. Serve them in shallow bowls, put another bowl nearby for discarded shells and let everyone peel with their hands.
Set out a shell bowl, napkins and torn bread before everyone starts peeling.
The sauce on your fingers, bread dragged through the bottom of the bowl and that final lemony, peppery mouthful are part of the experience. If that hands-on peel-and-dip style of dinner is what you enjoy, a Cajun seafood boil takes the same communal instinct to a much bigger scale.
Storage and Reheating
Refrigerate leftovers promptly—within 2 hours of cooking, or within 1 hour if they’ve been sitting in temperatures above 90°F / 32°C.
For the best texture, eat the shrimp within a day or two. Properly refrigerated leftovers can be kept for 3–4 days.
For reheating, separate the cold shrimp from the sauce when practical. Warm the sauce gently over low heat, adding a teaspoon or two of water if it has tightened in the refrigerator. Return the shrimp only long enough to heat the leftovers through to 165°F / 74°C.
Sauce first. Shrimp last.
A hard simmer or long microwave blast is far more likely to give you rubbery shrimp and a broken butter sauce. Refrigeration also treats the dish better than freezing, which works against both the shrimp texture and the emulsion.
You can see the difference before the first bite. The shrimp are plump and tender, with an easy spring when pressed. Cracked pepper is still visible across the shells. The sauce moves freely around them with a slight sheen. The lemon still comes through clearly against all that butter and black pepper.
At the finish, look for cling and run together: the BBQ shrimp sauce should coat the shell, then fall back into the bowl rather than hanging like a sticky glaze.
Then the bread goes in.
All the careful reduction, timing and butter work leads to something very simple: juicy shrimp and enough garlicky, peppery sauce that nobody wants to leave the last spoonful behind.
If you make it, tell us which shrimp you used—head-on, easy-peel or peeled—and whether you chose beer, wine or stock. If something behaved differently in your skillet, mention that too. Those little details are often the ones that help the next cook most.
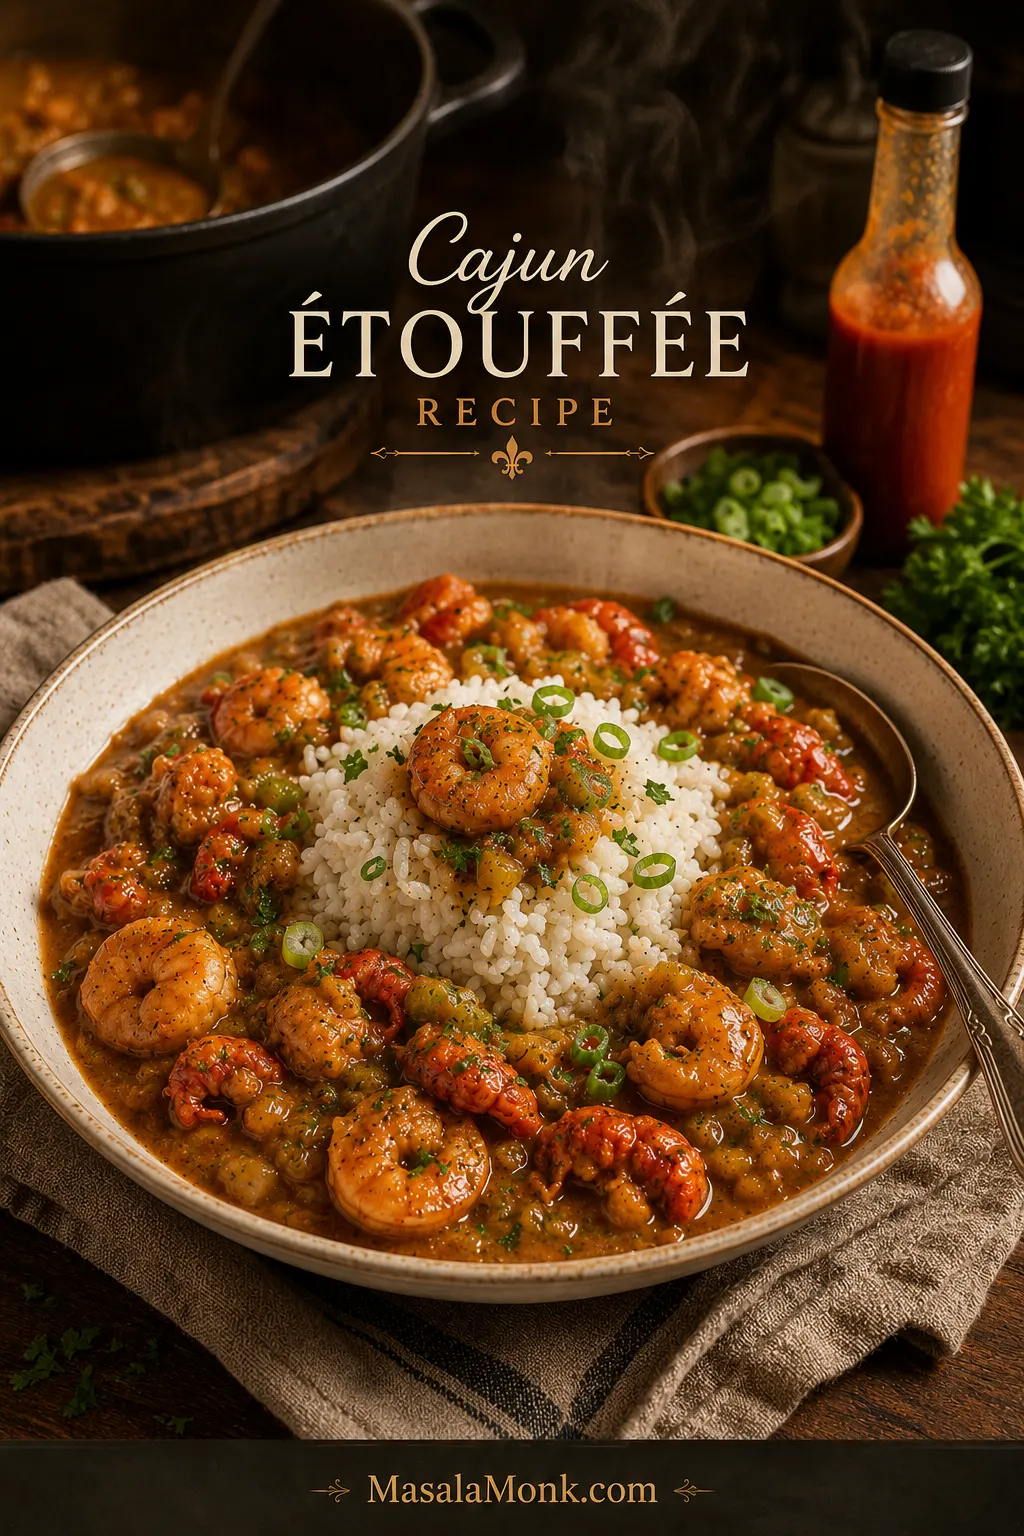
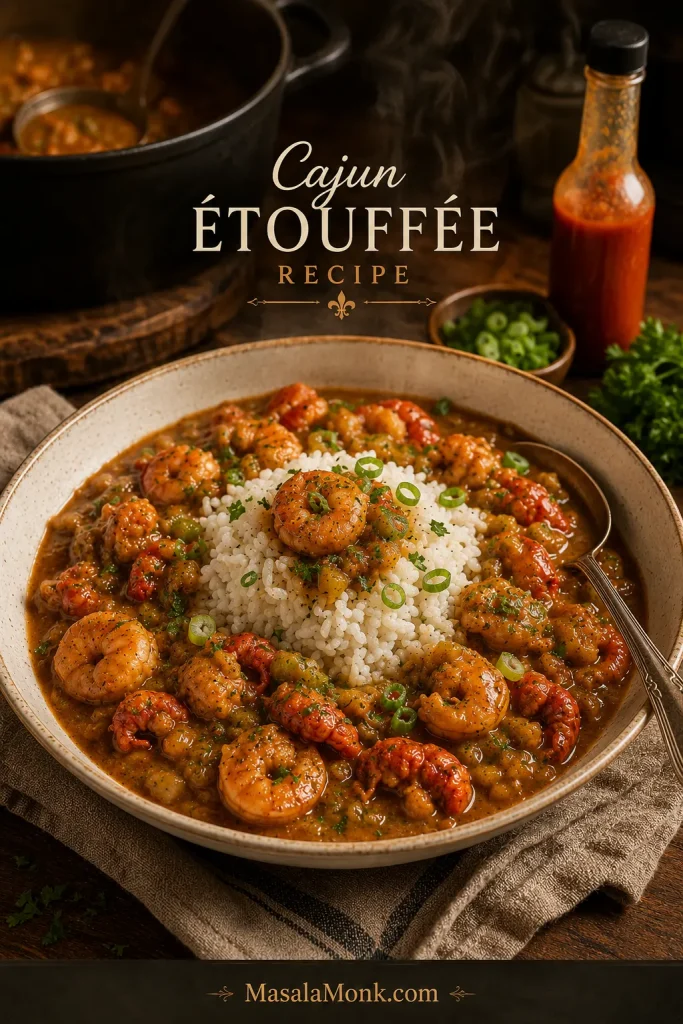
A great Cajun étouffée recipe lands on the table as hot rice, tender shrimp or crawfish, and glossy sauce that settles into every grain. It should smell like toasted roux, sweet bell pepper, garlic, seafood, and a little vinegar heat before the first spoonful even reaches the bowl.
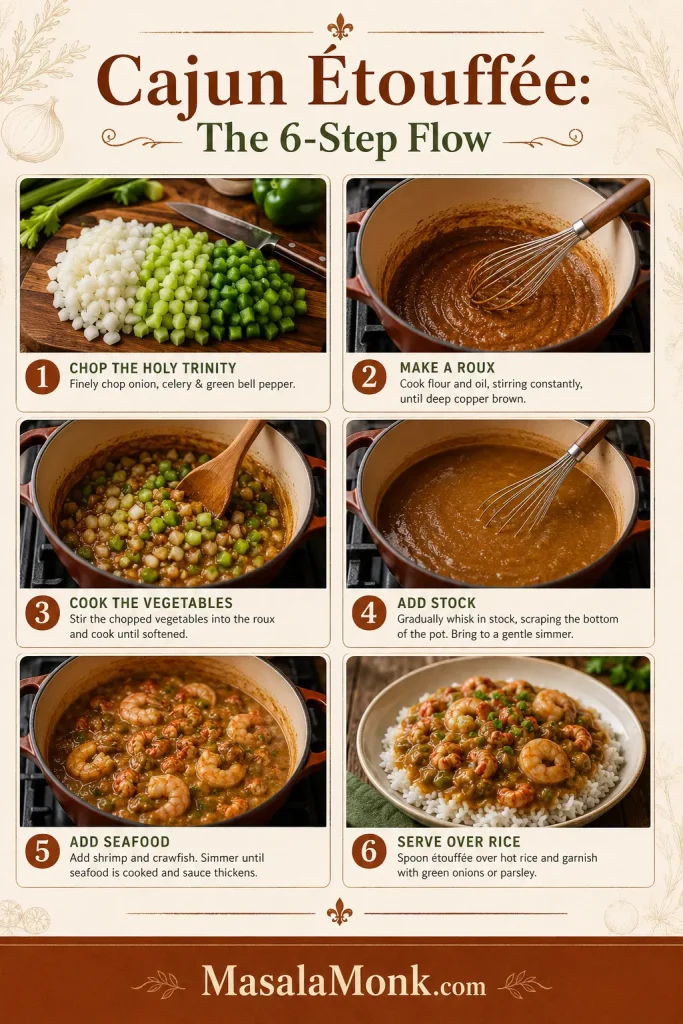
You can make this with shrimp, crawfish, or a mix of both without changing the base method. Once the vegetables are chopped and the rice is started, the rest is one steady stovetop pot: roux, holy trinity, sauce, seafood, herbs, and hot rice waiting.
The rhythm is simple: trust the roux, taste the sauce, then add the seafood. That order gives you deep flavor without rubbery shrimp, tough crawfish, or a thin sauce that disappears into the rice.
You do not need to guess your way through the roux, the sauce texture, or the seafood timing. This guide also covers frozen crawfish tails, salty Cajun seasoning, prepared roux, boxed étouffée base, cream soup shortcuts, tomato options, and the common fixes that save the pot before dinner gets stressful.
Cajun étouffée is a thick, seasoned Louisiana-style dish made with a roux, onion, celery, green bell pepper, stock, Cajun seasoning, and seafood such as crawfish or shrimp. It is served over white rice and eats more like a rich seafood gravy than a soup.
The word étouffée means “smothered,” and that is exactly how the dish should land on the plate: shrimp or crawfish smothered in a savory sauce that clings to every spoonful of rice. This version keeps the main pot roux-forward and no-tomato, with an easy tomato option if you prefer a brighter Creole-style sauce.
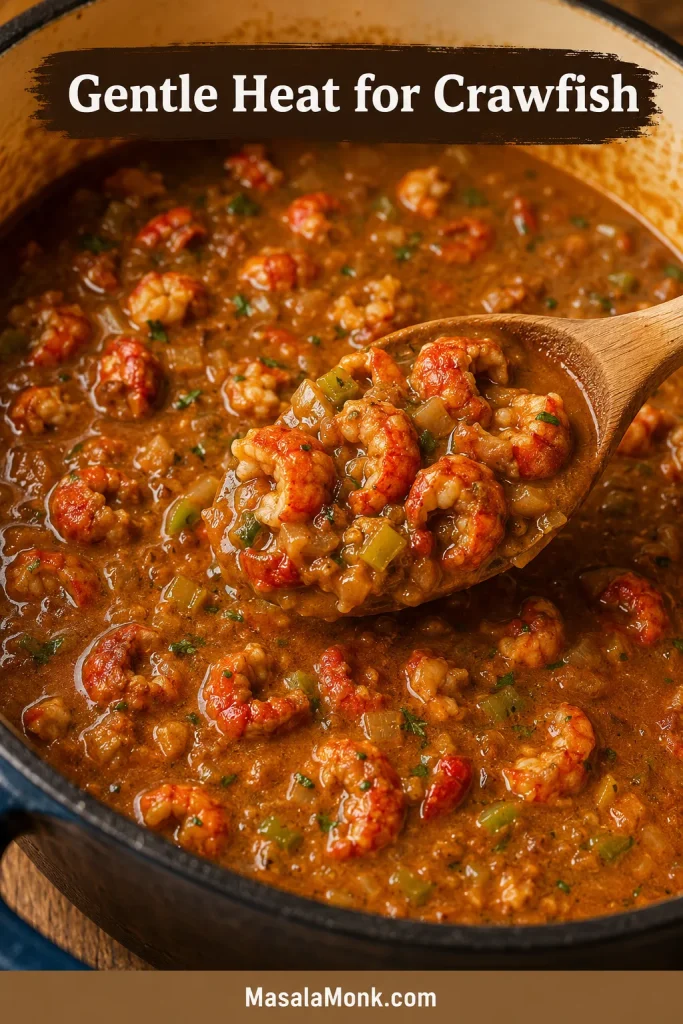
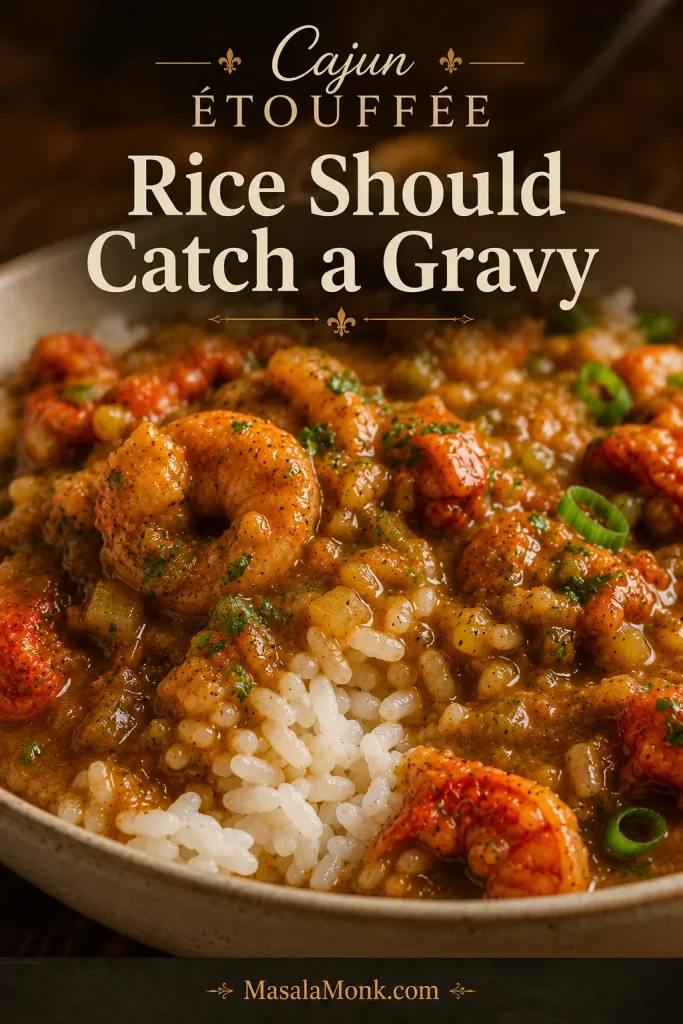
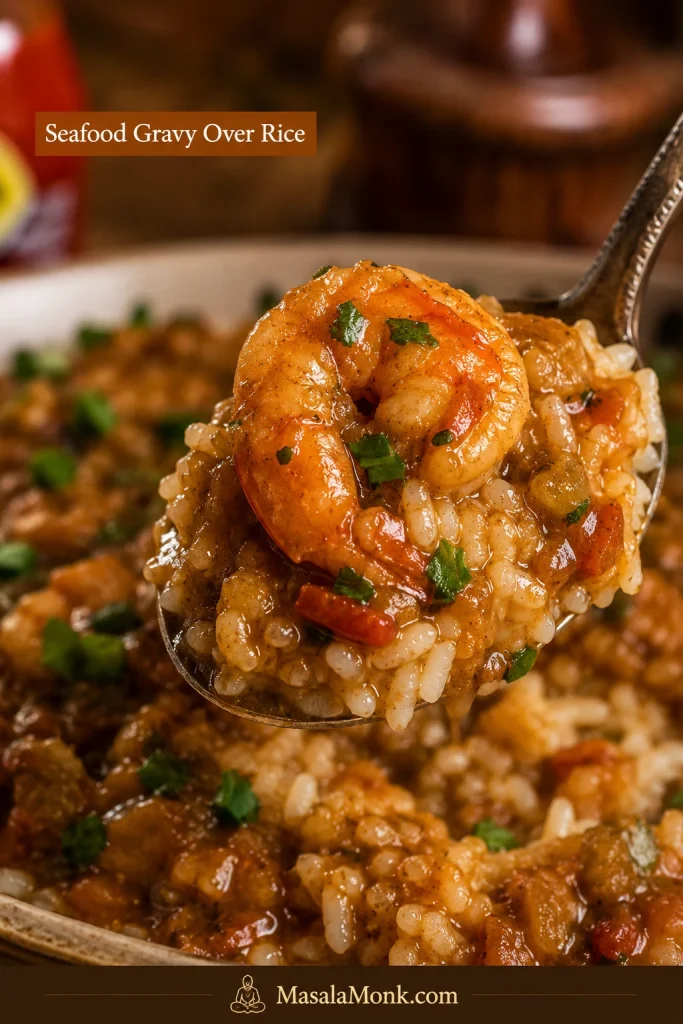
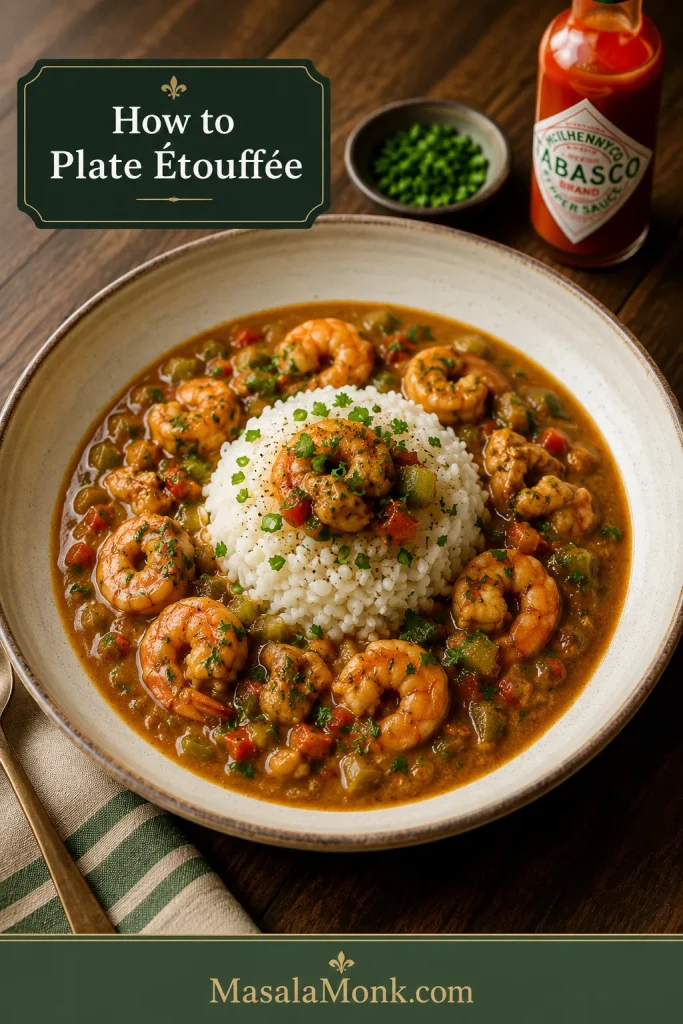
The final bowl should look rich and spoonable, with seafood and rice held together by a sauce that is thicker than broth.
A strong Cajun étouffée looks glossy and spoonable; as it settles, the sauce should hug the rice instead of flooding the bowl.
Make It Now
Ready to cook? Use this as the quick roadmap, then follow the recipe card for exact amounts. Nothing here needs to be rushed; once your prep is done, the recipe is mostly steady stirring, simmering, tasting, and finishing.
Chop the onion, celery, bell pepper, garlic, green onions, and parsley.
Start the rice early so it is hot when the étouffée is ready.
Warm the stock and cook the roux until it turns copper to peanut-butter brown.
Stir in the holy trinity, garlic, seasoning, stock, Worcestershire sauce, and a splash of hot sauce.
Simmer until the base tastes rounded and thick enough to spoon over rice.
Finish with your chosen seafood, add the final herbs, rest briefly, and serve.
The checkpoint that saves the pot: the sauce should taste good before the seafood goes in.
Use the quick flow to keep the method calm: roux, trinity, sauce, seafood, herbs, and rice.
Start with roux, build flavor with trinity, loosen the sauce with stock, then finish seafood gently before serving over rice.
Cajun Étouffée at a Glance
Main style
Roux-based Cajun-style étouffée, no tomato by default
Best seafood
Shrimp, crawfish tails, or a mix of both
Servings
6
Total time
About 1 hour 5 minutes
Roux target
Copper to peanut-butter brown
Sauce texture
Glossy, spoonable, thick enough to hug rice
Serve with
Long-grain white rice, fresh herbs, and table hot sauce
Best quick path
Make a light roux instead of relying only on canned soup or boxed mix
Biggest success cue
Let the base taste complete, then finish with seafood
Cajun Étouffée Recipe Card
This stovetop recipe makes a roux-based Cajun étouffée with shrimp, crawfish tails, or both. The method stays the same; the main change is when each type of seafood goes into the finished sauce.
Keep the rice hot and the seafood cold until the sauce is ready. That little bit of timing is what makes the bowl feel generous instead of rushed.
Recipe Snapshot
Prep time
20 minutes
Cook time
45 minutes
Total time
1 hour 5 minutes
Servings
6
Method
Stovetop
Cuisine
Cajun / Louisiana-style
Main equipment
Dutch oven, heavy-bottomed pot, or deep heavy skillet
Ingredients
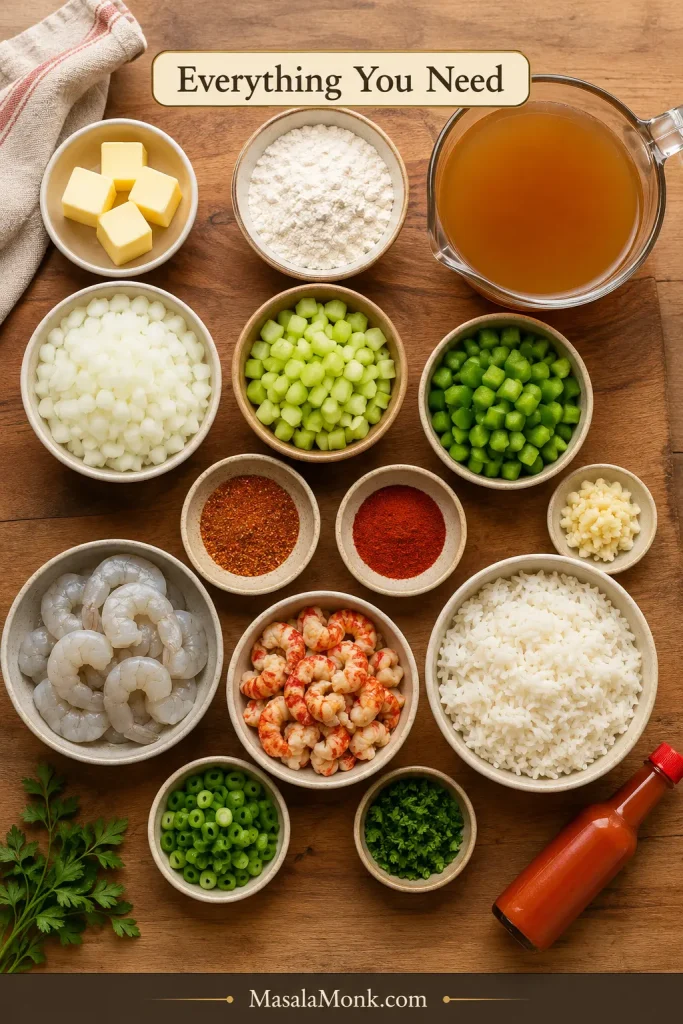
Before cooking, notice how each ingredient has a job: roux for body, trinity for sweetness, stock for sauce, and seafood for the finish.
Even with a full ingredient board, the real flavor builders are roux, holy trinity, stock, seafood, and a fresh finish.
½ cup unsalted butter, 113 g, or 120 ml neutral oil
All-purpose flour, ½ cup, about 60–65 g
1½ cups finely chopped yellow onion, about 225 g
1 cup finely chopped green bell pepper, about 150 g
¾ cup finely chopped celery, about 100 g
4–6 garlic cloves, minced, about 15–25 g
2½–3 cups warm seafood stock, shrimp stock, crawfish stock, or chicken stock, plus more as needed, 600–720 ml
Hot sauce, 1–2 tablespoons, 15–30 ml, plus more for serving
2 lb total peeled shrimp, crawfish tails, or a mix, about 900 g
½ cup sliced green onions
¼ cup chopped parsley
Salt and black pepper, to taste
4–6 cups cooked long-grain white rice, for serving
Ingredient Notes for Salt, Seafood, and Rice
Salt note: If your Cajun seasoning already contains salt, do not add extra salt until the sauce has simmered and you have tasted it. Stock, hot sauce, boxed bases, and cream soup can all add salt too. Salt-free Cajun blends can usually be used more generously because they bring spice without adding as much sodium.
Seafood note: Use 2 lb total seafood, not 2 lb shrimp plus 2 lb crawfish. If using a mix, combine the shrimp and crawfish together to reach about 2 lb / 900 g total.
Pick the seafood before you start, because shrimp and crawfish can share the same sauce but need different finishing care.
Whether you use shrimp, crawfish tails, or both, keep the seafood amount steady so the étouffée stays balanced.
Rice note: Use 6 cups cooked rice for generous bowls, or 4 cups for lighter servings. Start the rice before the seafood goes in so everything reaches the table hot.
Equipment
Dutch oven or heavy-bottomed pot, important for steady roux heat
Deep heavy skillet, if it gives you enough room to stir safely
Wooden spoon or heat-safe spatula
Whisk
Small saucepan for warming stock
Cutting board and sharp knife
Measuring cups and spoons
Rice cooker or rice pot
Roux can scorch quickly in thin cookware. A heavy pot gives you more control as the flour moves from pale to nutty brown. Patience beats speed here; burnt roux is not worth saving.
Steady cookware protects the roux, giving flour time to brown evenly instead of scorching in one hot spot.
A heavy pot spreads heat more evenly, which gives the roux time to brown slowly instead of scorching in hot spots.
Instructions
Prep and Roux
Prep first. Chop the onion, bell pepper, celery, garlic, green onions, and parsley before you start. Cook the rice or set it going. Thaw and drain frozen shrimp or crawfish. Pat shrimp dry if it is very wet.
Warm the stock. Keep the stock warm in a small saucepan over low heat. It should be warm, not boiling.
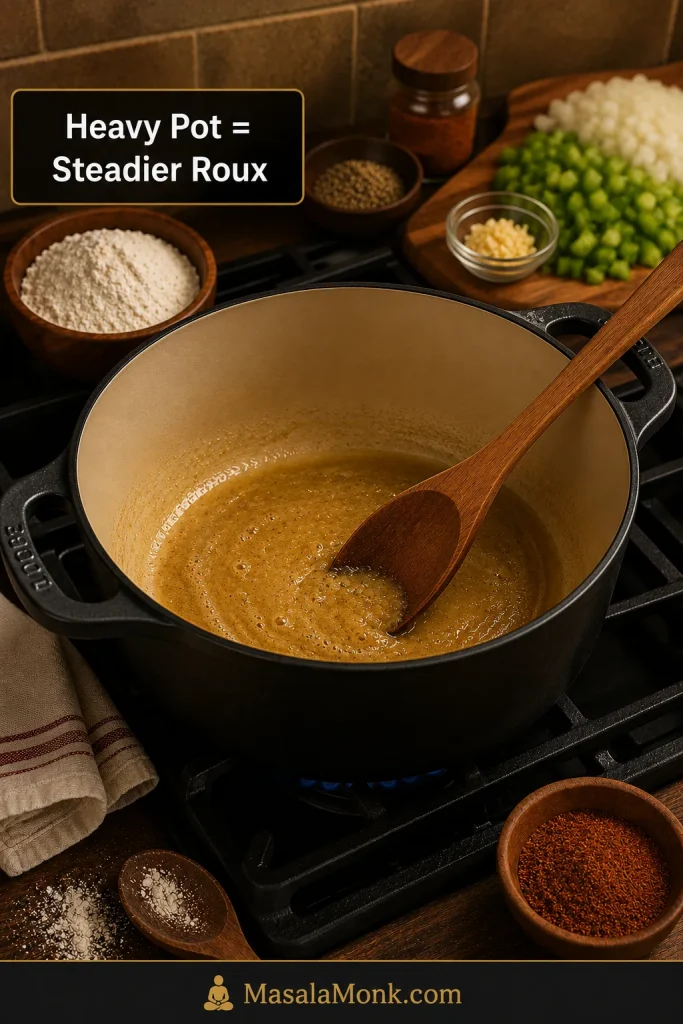
Make the roux. Melt the butter, warm the oil, or heat a butter-oil mix in a Dutch oven or heavy-bottomed pot over medium heat. Add the flour and stir constantly for 8–15 minutes, lowering the heat if needed, until the roux turns copper to peanut-butter brown and smells nutty. If the roux starts darkening faster than you can comfortably stir, lower the heat before you panic; roux forgives patience better than speed.
Build the Sauce
Add the holy trinity. Stir in the onion, green bell pepper, and celery. Cook for 6–8 minutes, stirring often, until the vegetables soften and the roux clings to them.
Add garlic and seasoning. Stir in the garlic, Cajun seasoning, paprika, thyme, bay leaves, and cayenne if using. Cook for 30–60 seconds, just until fragrant.
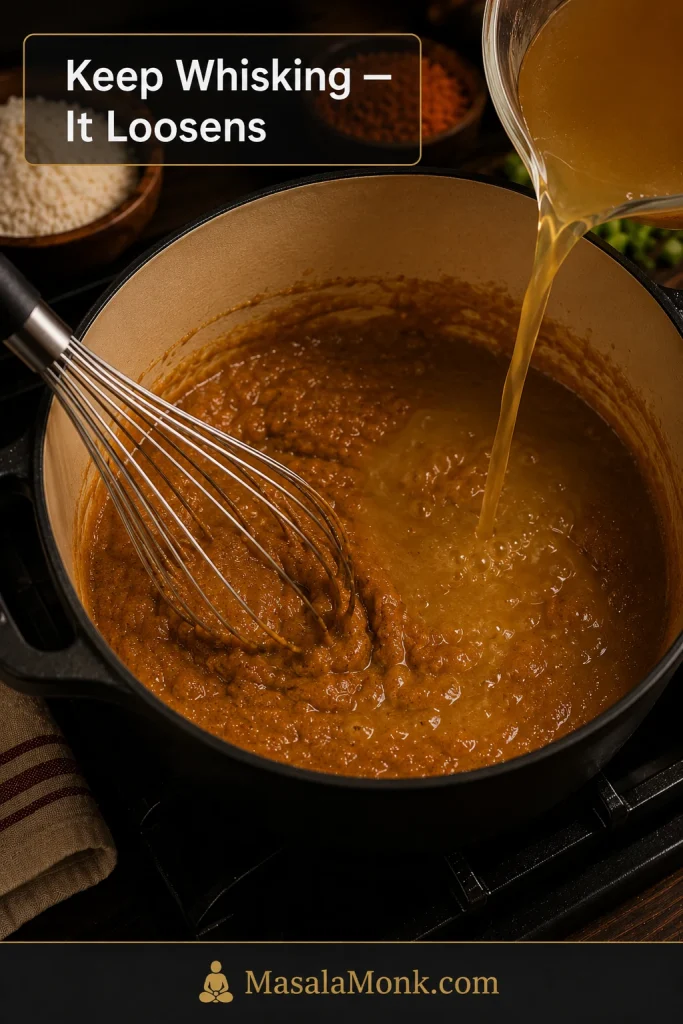
Build the sauce. Slowly whisk in 2½ cups warm stock, adding it gradually so the sauce stays smooth. The first splash may make the roux seize and thicken; keep whisking and it will loosen as the rest of the stock goes in. Stir in Worcestershire sauce and hot sauce. Bring to a gentle simmer.
Simmer until rounded. Reduce the heat to medium-low and simmer for 15–20 minutes, stirring occasionally, until the sauce thickens and tastes complete. Add more warm stock if it becomes too thick.
Add Seafood and Serve
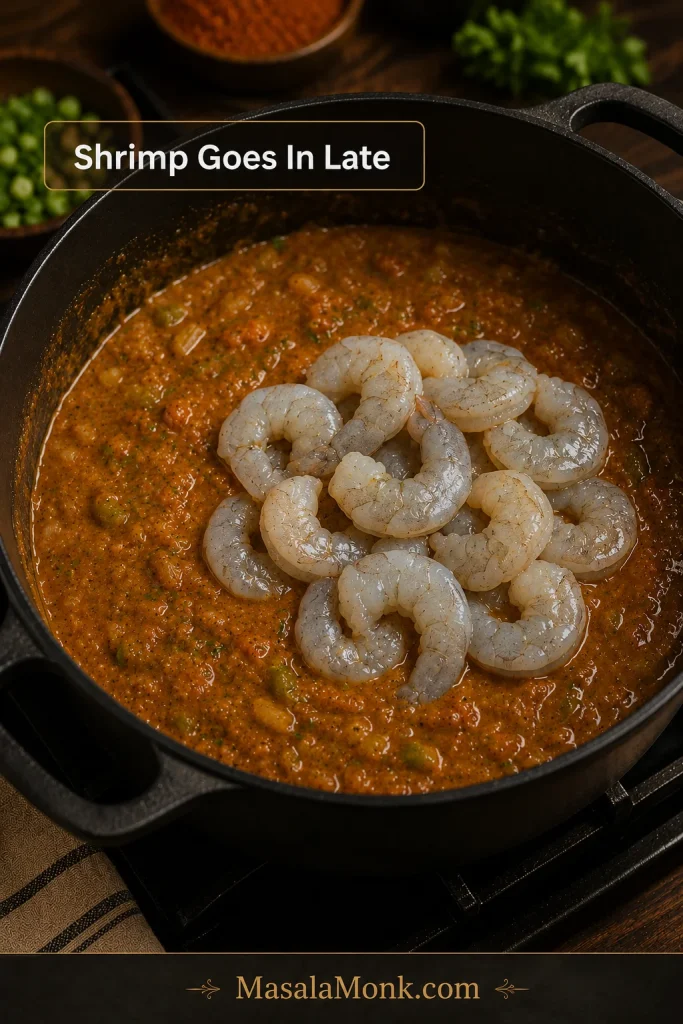
Finish with seafood. Raw shrimp cooks gently in 3–5 minutes, just until opaque and lightly curled. Cooked crawfish tails should be stirred in and heated gently for 3–5 minutes. If using both, add shrimp first, then stir in crawfish during the final 2–3 minutes. Already-cooked shrimp only needs the final 1–2 minutes to warm through.
Season and brighten. Remove the bay leaves. Stir in most of the green onions and parsley. Taste and adjust with salt, black pepper, Cajun seasoning, a splash of acidity, or a little more stock.
Rest and serve. Turn off the heat and let the étouffée rest for 5 minutes. Spoon over hot white rice so the sauce pools around the grains, then finish with fresh herbs and extra hot sauce at the table.
Recipe Notes
Seasoning, Stock, and Roux Notes
Seasoning: If your Cajun seasoning is salty, start with less and add more only after the sauce has simmered.
Stock: Low-sodium stock is safest if your Cajun seasoning, hot sauce, or boxed base is already salty. Chicken stock works when seafood stock is unavailable; a small splash of bottled clam juice adds deeper seafood flavor if you like that taste.
Flour and roux: Spoon and level the flour if measuring by cup; a packed ½ cup can make the sauce thicker. A peanut-butter roux gives the best balance of flavor and thickening for this recipe.
Seafood, Heat, and Make-Ahead Notes
Shrimp: Medium, large, or medium-large shrimp work best. Peeled shrimp are easiest for spooning over rice. Shrimp is done when opaque and lightly curled, not tightly coiled into hard rings.
Cooked shrimp: Add cooked shrimp only in the final 1–2 minutes so it warms without turning rubbery.
Food safety: Shrimp, lobster, crab, and scallops should cook until the flesh is pearly or white and opaque, as noted by FoodSafety.gov.
Crawfish: Crawfish tails are often already cooked, so they only need gentle heating. For frozen crawfish tails, thaw and drain excess liquid. Do not rinse away flavorful crawfish fat or juices unless they smell muddy, overly fishy, or unpleasant.
Heat: Use a vinegar-forward Louisiana-style hot sauce if you want brightness, or keep the pot mild and let people add heat at the table. For more spice, add cayenne near the end so you can control it.
Resting and make-ahead: The sauce thickens as it sits. Loosen with warm stock or water if needed. Best make-ahead results come from preparing the sauce first and adding the seafood during reheating.
Half-Batch Note
To make a smaller pot, use 1 lb / 450 g total seafood, ¼ cup butter or oil, ¼ cup flour, and about 1½–2 cups stock. Keep the same method, but start checking the sauce thickness sooner because a smaller batch reduces faster. Begin with the lower amount of Cajun seasoning, especially if your blend contains salt.
The recipe card gives you the steps. These cues help you know when each stage is actually working. Once the pot is on the stove, smell, color, texture, and the way the sauce moves matter more than the exact minute on the clock.
Roux smells nutty, not raw
Smell is the first real sign. The roux stops smelling like raw flour and starts smelling warm, buttery, and nutty. Its color should move from pale flour to copper or peanut-butter brown. A sharp, scorched, or bitter smell means it is better to restart before adding the vegetables.
Vegetables soften into the base
When the onion, celery, and bell pepper hit the roux, the pot should start smelling like dinner. The vegetables cool the roux slightly, then soften into it until the base tastes sweet, savory, and rounded instead of sharp or raw.
The base tastes complete
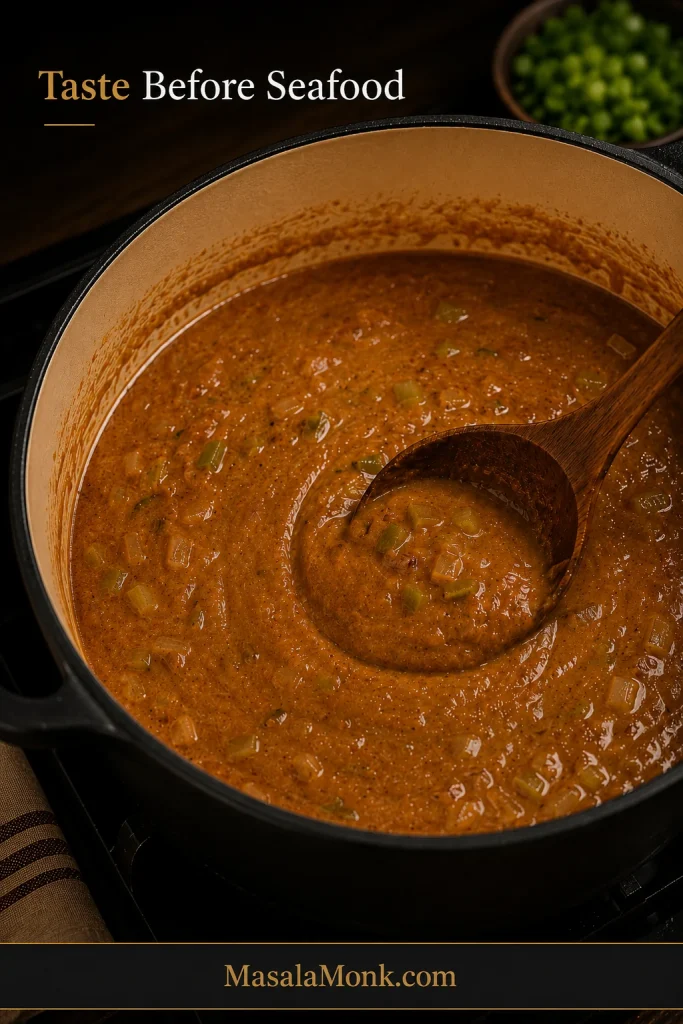
This is the biggest checkpoint. Once the base tastes like dinner, the seafood only has to show up. It should already taste seasoned, rounded, and spoonable before shrimp or crawfish is added.
At this point, the base should carry the flavor on its own; seafood is only the final gentle finish.
Taste the sauce at this stage; once it feels rounded and spoonable, the seafood can cook quickly at the end.
Shrimp stays tender, crawfish warms gently
Shrimp should turn opaque and curl softly. Crawfish tails should be warmed through, not boiled hard. The pot should bubble softly after the seafood is added, not roll like a hard boil.
Raw shrimp belongs in the finished sauce, not in a long simmer, so the timing stays short and gentle.
Add raw shrimp only after the sauce is ready, so it cooks gently instead of turning rubbery.
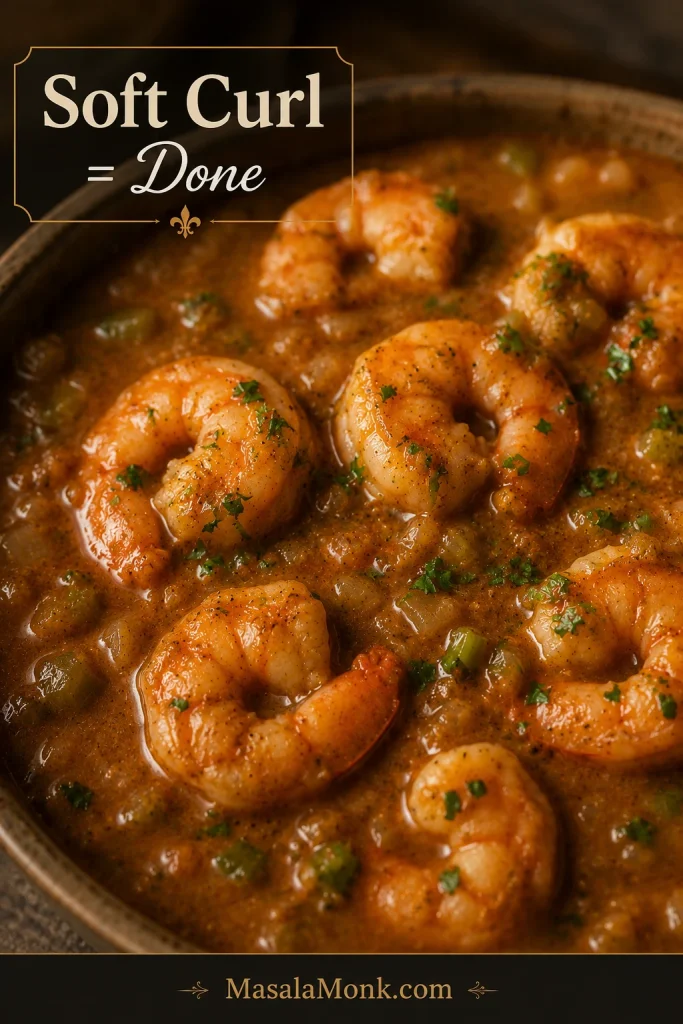
Soft curl is the shrimp signal; take the pot off hard heat before tender shrimp turns into tight rings.
Shrimp is done when it turns opaque and curls softly; tight rings usually mean it cooked too long.
Gentle warming protects crawfish tails, especially when they are already cooked before they reach the sauce.
Crawfish tails are often already cooked, so warm them gently in the sauce instead of boiling them hard.
The rice catches a gravy, not a broth
When you spoon étouffée over rice, the sauce should settle into the grains instead of sliding away like broth or sitting on top like paste. The rice should catch a gravy, not chase a broth.
This is the bowl test: rice should hold sauce between the grains, not sit under a watery layer.
Good étouffée gravy settles between the rice grains, which keeps each spoonful saucy without turning the bowl watery.
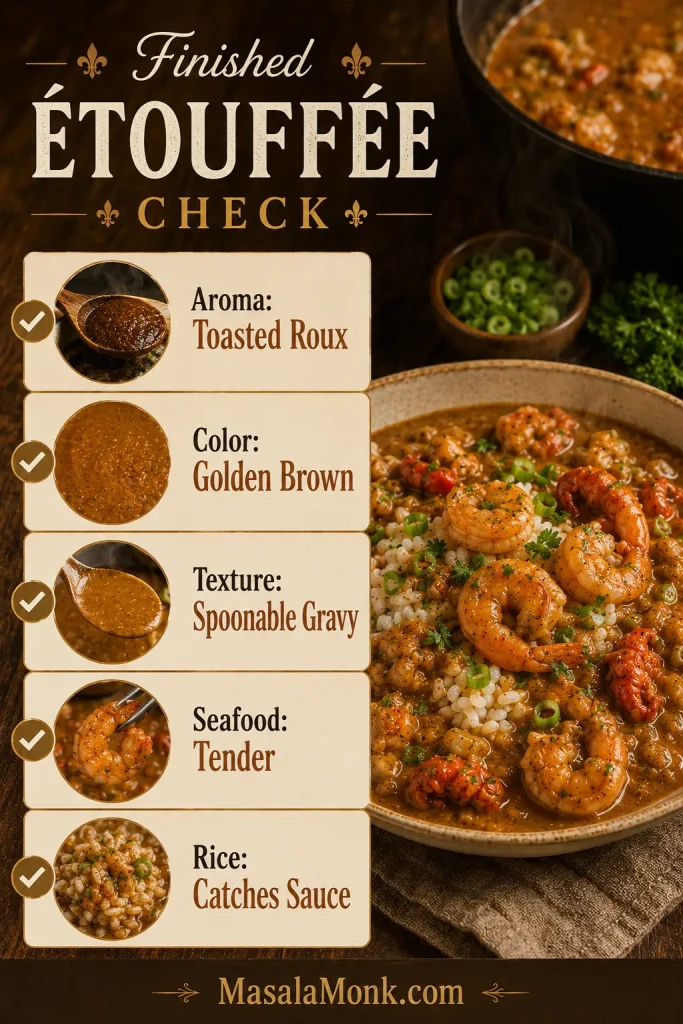
What the Finished Étouffée Should Look Like
Cue
What to look for
Aroma
Toasted roux, softened onion, bell pepper, garlic, seafood, and a little vinegar heat
Color
Golden brown to light brown, not pale beige and not burnt dark
Texture
Thick gravy that moves slowly from the spoon and spreads gently over rice
Seafood
Shrimp softly curled and opaque; crawfish warmed through, not boiled hard
Rice
Sauce settling around the grains, not watery puddles at the bottom of the bowl
Use the checklist as the final pass before serving, especially if the sauce looked uncertain earlier.
Check the pot from several angles: aroma, color, sauce body, seafood tenderness, and how well the rice holds the gravy.
Still checking the pot? Use the Roux Guide if the base looks too light or too dark, or go to Troubleshooting if the sauce feels thin, thick, salty, or floury.
Why This Cajun Étouffée Works
This pot works because the flavor is built before the seafood goes in. The roux turns nutty, the trinity softens, the seasoning settles into the stock, and the seafood only needs a short, gentle finish.
Roux builds body and flavor. It thickens the sauce and gives the dish that warm, toasted smell that makes the whole pot feel deeper.
The holy trinity makes the base taste complete. Onion, celery, and green bell pepper soften into the roux before the liquid is added.
Warm stock keeps the sauce smooth. Adding it slowly helps prevent lumps and gives you control over the final texture.
Seafood is treated gently. Shrimp and crawfish stay tender because they only need a short finish.
Tomato stays optional. The main recipe stays roux-forward, while a small tomato option gives you a brighter Creole-style variation.
Shortcuts have a place. Cream soup, boxed mix, prepared roux, and étouffée base can help on busy nights, but the from-scratch roux method gives the best flavor and control.
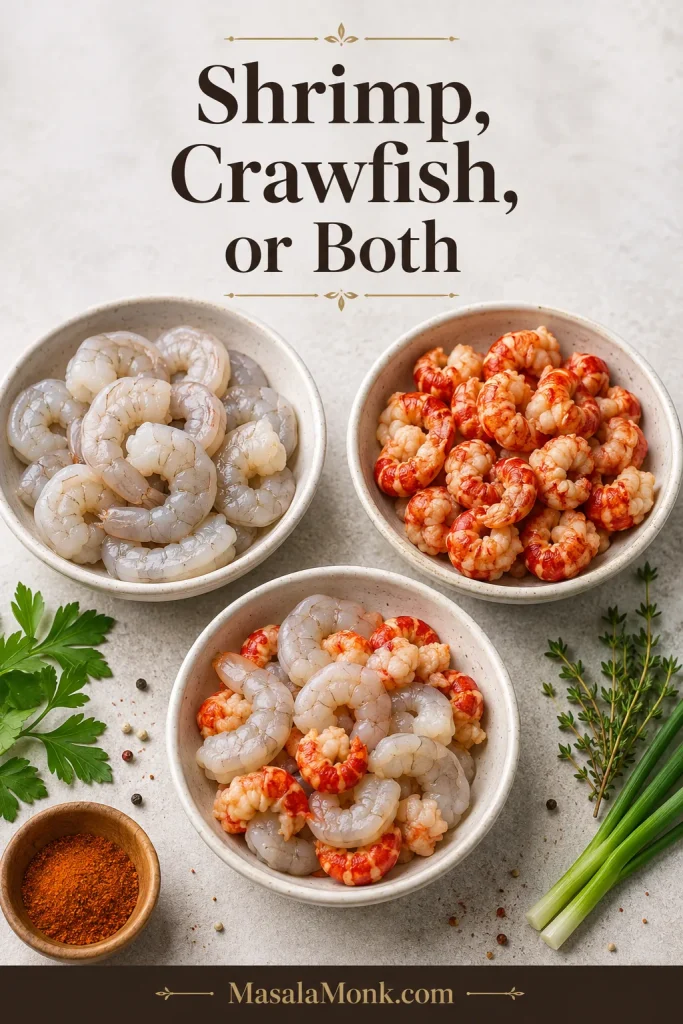
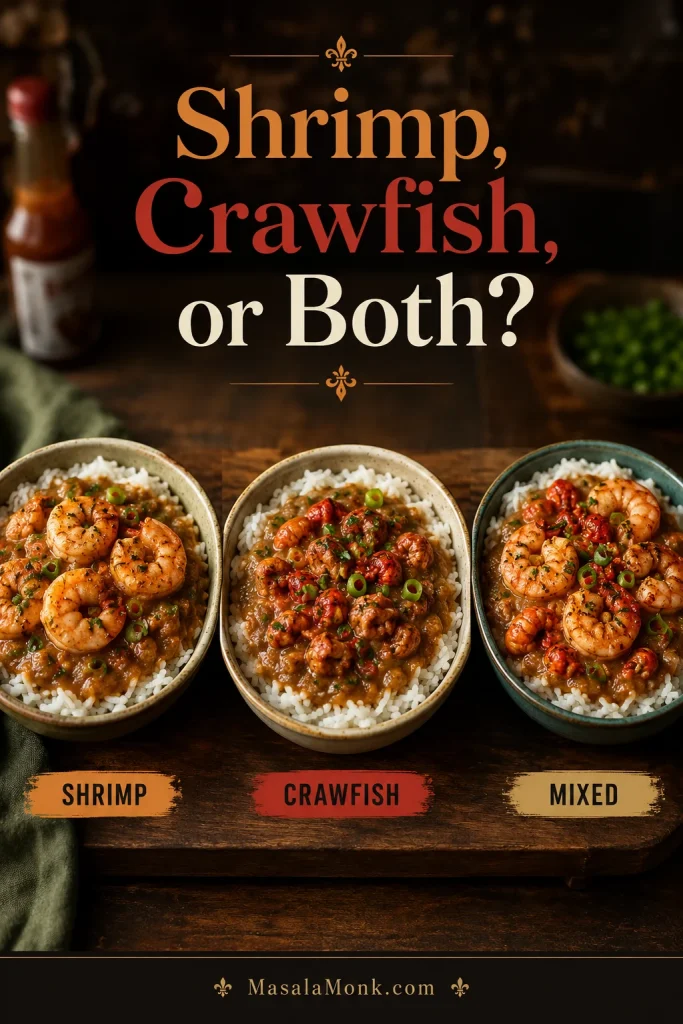
Choose Your Version: Shrimp, Crawfish, or Both
Before you worry about spice level, choose the seafood that makes sense for your kitchen. Crawfish gives étouffée its classic Louisiana feel, shrimp makes the recipe easier to shop for, and using both turns the pot into a fuller seafood dinner.
Version
Use it when
How to cook it
Crawfish étouffée
You have crawfish tails and want the most classic seafood flavor
Add thawed crawfish tails at the end and heat gently for 3–5 minutes
Shrimp étouffée
You want the easiest seafood version with ingredients that are easier to find
Add raw peeled shrimp at the end and cook 3–5 minutes until opaque
Shrimp and crawfish étouffée
You want a bigger seafood dinner with more texture and flavor
Add shrimp first, then stir in crawfish during the final 2–3 minutes
Chicken étouffée
You want the same sauce structure without seafood
Use cooked chicken or simmer small pieces until fully cooked and tender
Compare the versions before cooking so the pot matches your seafood, shopping, and serving plan.
The roux-based sauce stays the same, but shrimp cooks quickly while crawfish tails only need gentle warming.
Seafood Timing Notes
Good crawfish tails are worth using when you can get them. Otherwise, shrimp is not a compromise; it is a strong version of the dish on its own. Thaw frozen shrimp fully and pat it dry so extra water does not thin the pot. For another shrimp dinner where timing matters, this shrimp scampi also keeps the shrimp tender by cooking it quickly in a finished sauce.
Chosen your seafood? Return to the Recipe Card, or review Success Cues for shrimp and crawfish timing.
Ingredients You Need for Cajun Étouffée
Once the roux is under control, the rest of the ingredient list is simple. Each piece has a job, and the timing matters more than using a long list of extras.
Roux: butter or oil plus flour
The roux gives the sauce its body and toasted depth. Butter tastes richer; oil is more forgiving. Nervous about scorching? Use half butter and half oil so you get flavor with a little more stability.
The holy trinity
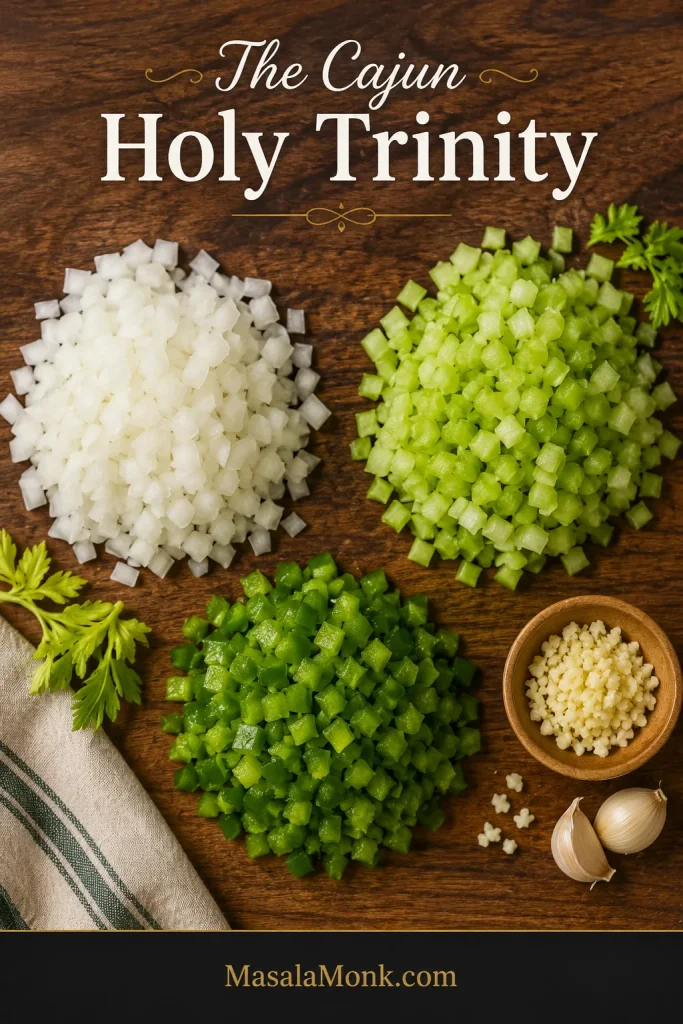
Onion, celery, and green bell pepper form the Cajun holy trinity. Green bell pepper gives the most classic flavor, but red or yellow bell pepper works when that is what you have. Chop the vegetables finely so the finished dish feels smooth and spoonable instead of chunky.
The Cajun holy trinity belongs in the ingredient notes because it shapes the sweetness and depth of the sauce.
Onion, celery, and green bell pepper form the Cajun holy trinity; garlic joins later so it does not burn.
Garlic and Cajun seasoning
Garlic adds depth, but it burns quickly, so add it after the onion, celery, and bell pepper have softened. Cajun seasoning varies a lot by brand. Some blends are mostly spice; others are very salty. Start with less if your seasoning contains salt, then adjust after the sauce simmers.
Salted seasoning, salted stock, hot sauce, and boxed bases can stack quickly. Wait until the sauce has simmered, then taste and adjust. Rice will soften saltiness on the plate, but it is much easier to add salt than remove it.
Stock
Seafood stock or shrimp stock gives the deepest flavor, but chicken stock works well for a home version. Choose low-sodium stock when your Cajun seasoning is salted. Warm stock blends into the roux more smoothly. For another seafood recipe where the base makes or breaks the final flavor, this lobster bisque uses the same idea: build the base first so the seafood tastes richer without overcooking.
Shrimp or crawfish
Use peeled raw shrimp, thawed crawfish tails, or a mix. Shrimp cooks quickly, crawfish tails are often already cooked, and both do best with gentle heat.
Green onions, parsley, and hot sauce
Green onions and parsley cut through the richness right at the end, so the bowl tastes bright instead of heavy. Hot sauce brings acidity as well as heat. Add some to the pot, then keep more on the table for anyone who wants a brighter final kick.
What Is Étouffée Sauce Made Of?
Think of étouffée sauce as a roux-thickened seafood gravy: not soup, not paste, and not a loose pan sauce. It should move slowly from the spoon, coat the seafood, and settle into hot rice.
The roux gives body, the trinity gives sweetness and depth, stock loosens everything into a spoonable base, and Cajun seasoning, Worcestershire sauce, hot sauce, green onions, and parsley finish the flavor. Crawfish tail juices, when they smell clean and sweet, can add extra seafood depth near the end.
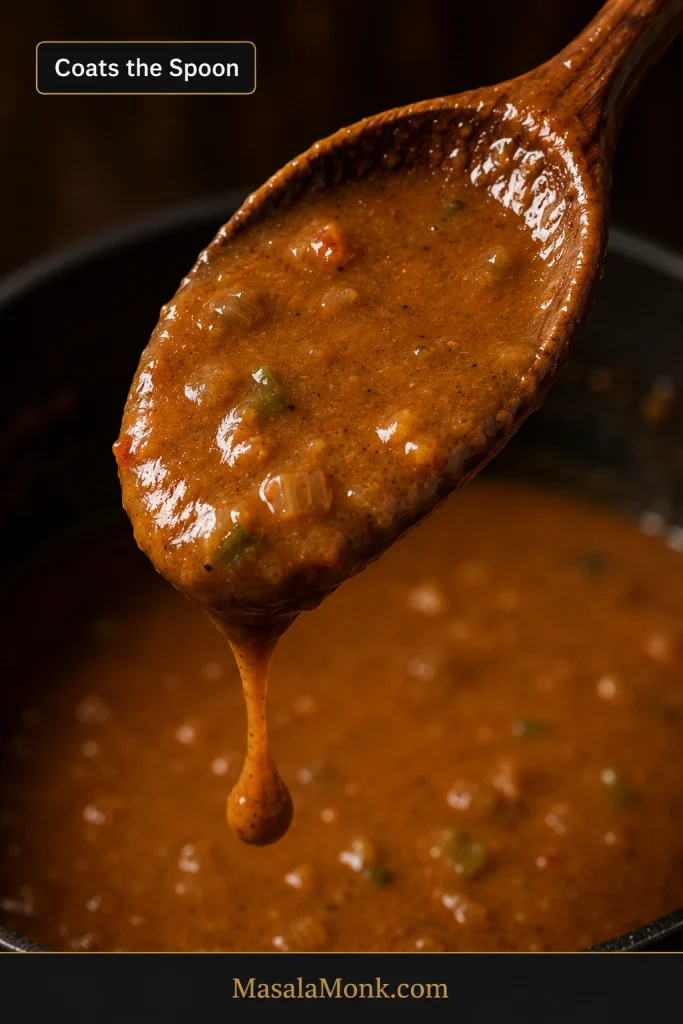
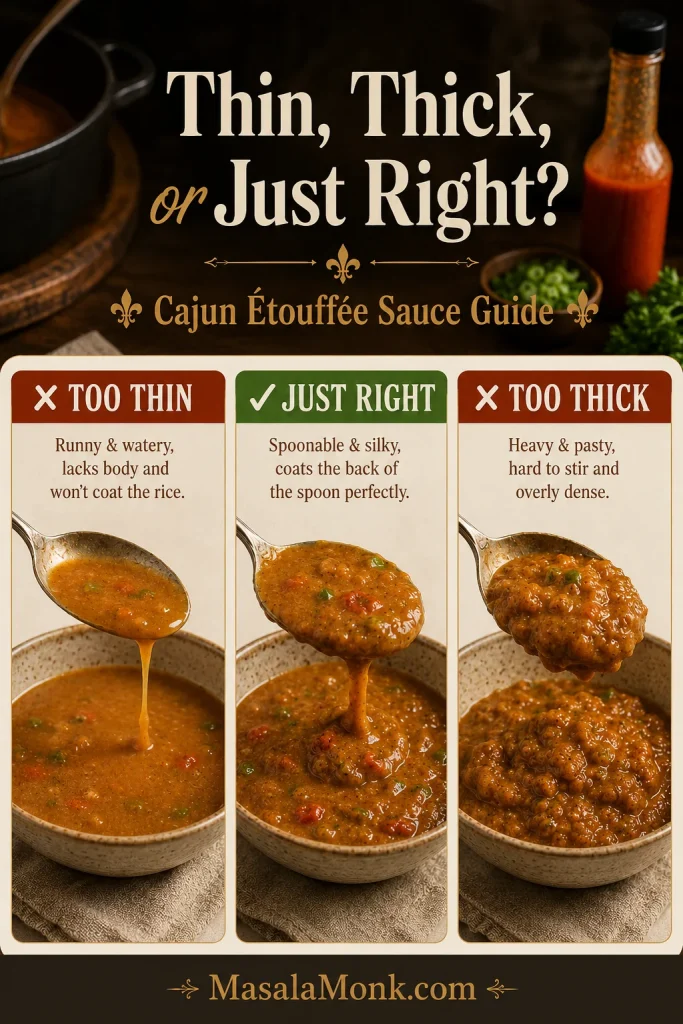
Stiff sauce needs warm stock. Watery sauce needs a few uncovered minutes before the seafood is added. The goal is simple: thick enough to coat the back of a spoon, soft enough to flow around rice.
Texture matters most here: étouffée sauce should behave like seafood gravy, not broth or paste.
This is the texture to aim for: thick seafood gravy that clings to rice, yet still feels loose enough to spoon.
Check the spoon before serving; a slow coating means the sauce has enough body without turning pasty.
Use the spoon test before serving: the sauce should coat the spoon, then move slowly back into the pot.
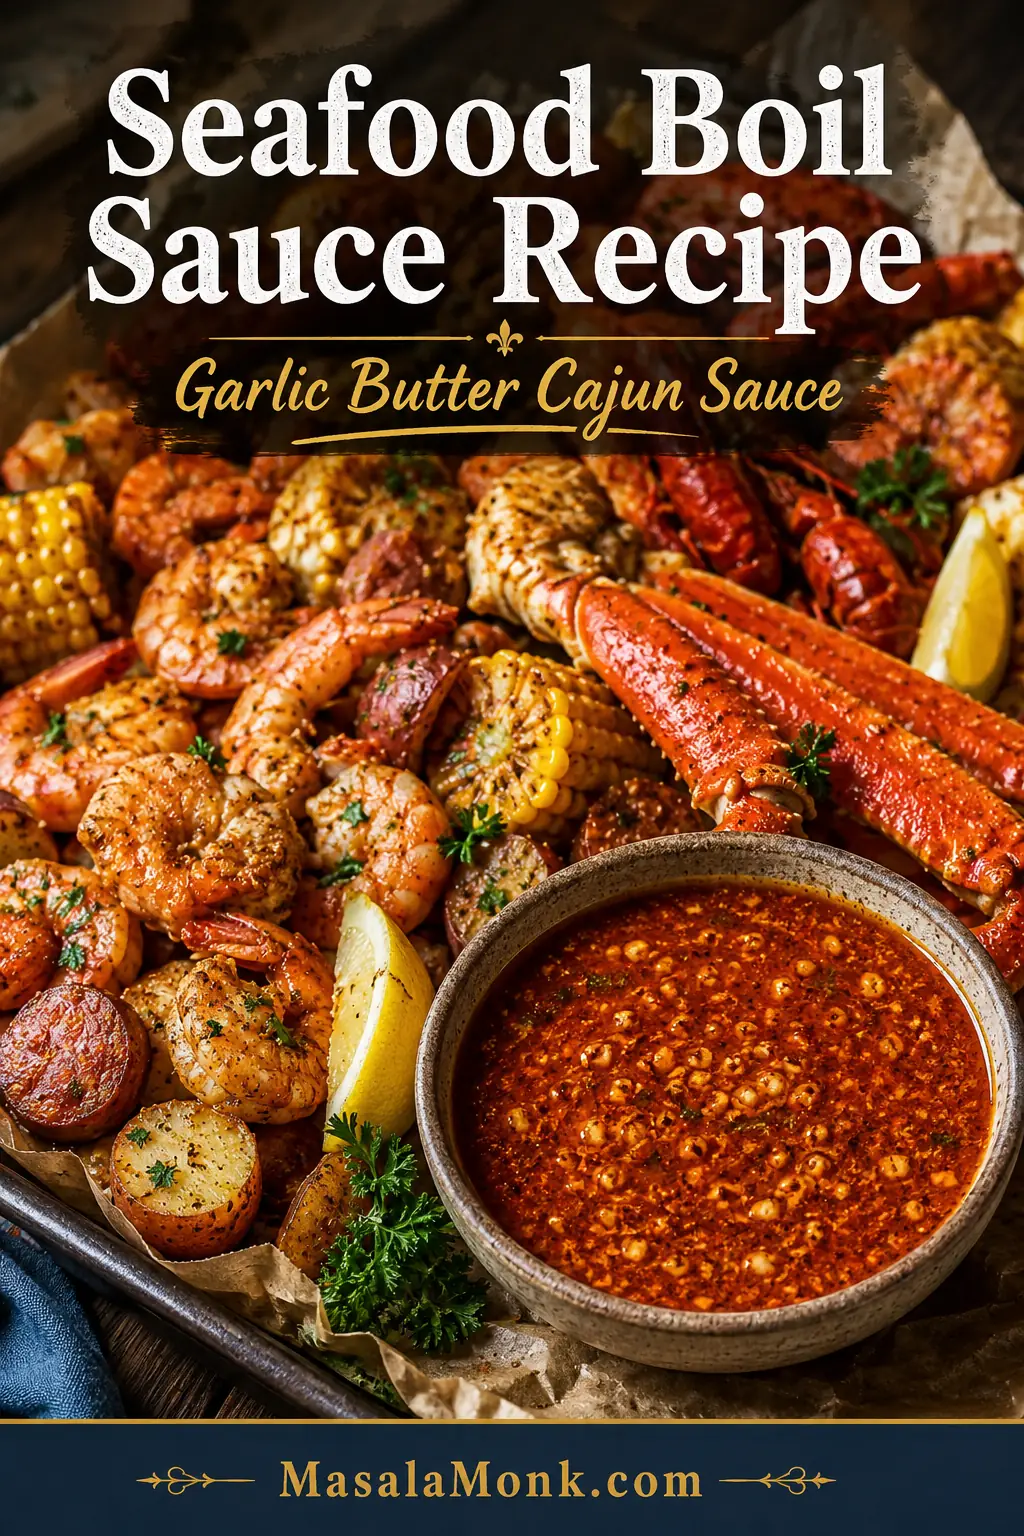
If you love Cajun-style seafood sauces in general, this seafood boil sauce is useful for a different kind of seafood dinner. It is more buttery and pourable than étouffée, but it works with many of the same shrimp, crab, crawfish, garlic, and Cajun seasoning flavors.
Roux Color Guide for Étouffée
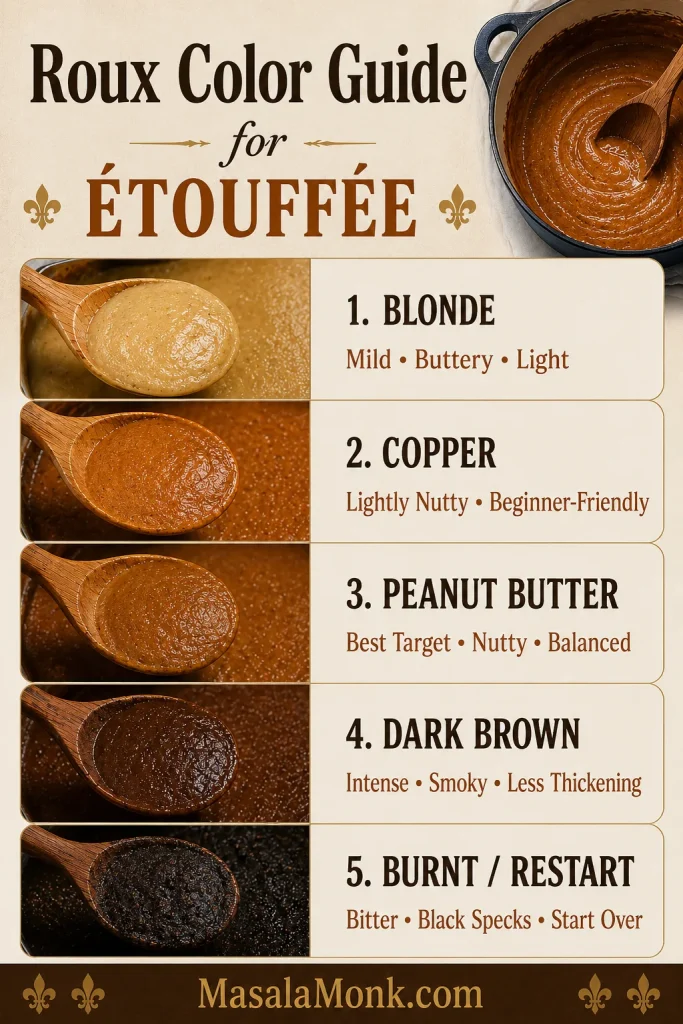
The roux is the only part of this recipe that asks for your full attention, but it does not ask you to rush. You do not need a restaurant-speed roux here. A steady, slower roux is easier to control and still gives you the nutty flavor this dish needs.
Watch Color Before Time
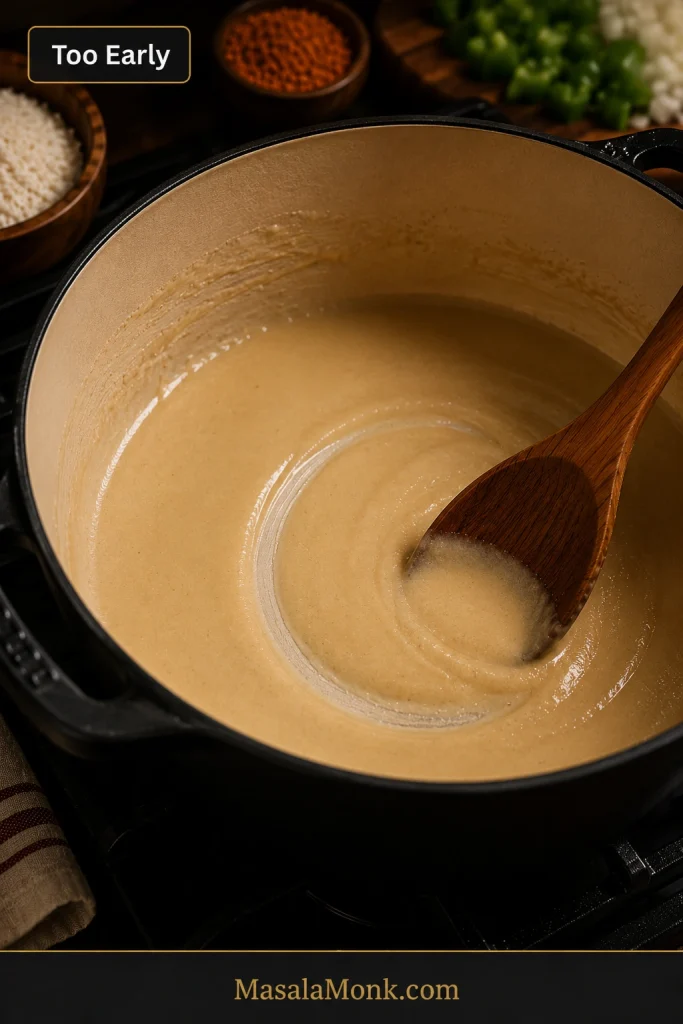
Stir steadily, control the heat, and watch the color more than the clock. Do not judge the pot too early; the roux changes slowly at first, then deepens faster as it gets darker.
Start the roux guide with color, because the stages tell you more than the clock on the stove.
Roux moves from pale to nutty to deep brown quickly, so watch the color closely and restart if black specks appear.
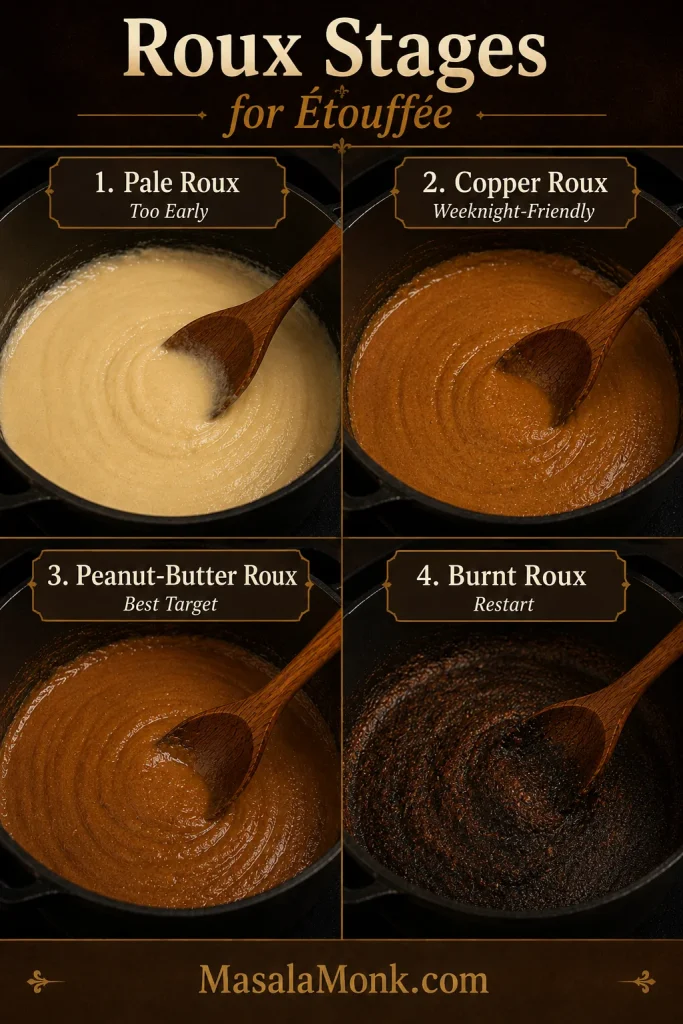
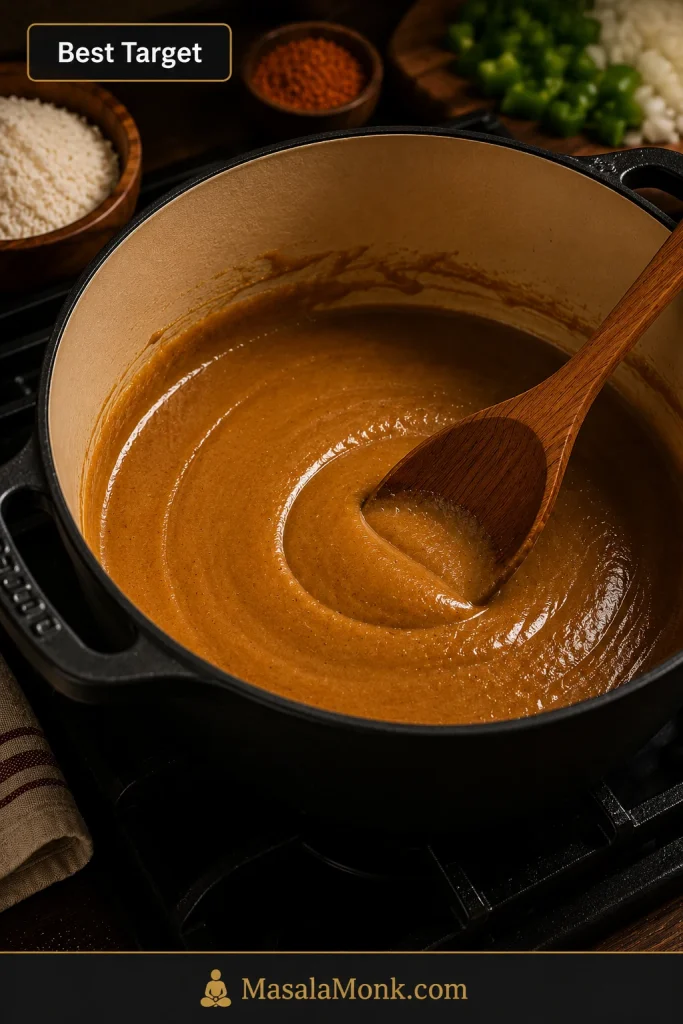
The times below are estimates. Color and smell matter more than minutes, especially if your pot runs hot or your stove is uneven. For this Cajun étouffée recipe, aim for a peanut-butter-colored roux. It gives the sauce a nutty flavor without taking as long as a very dark gumbo-style roux.
Roux Colors at a Glance
Roux color
Approximate time
Flavor
Best use
Blonde
3–5 minutes
Mild, buttery, lightly cooked
Fastest version, but less Cajun depth
Copper
6–8 minutes
Lightly nutty and beginner-friendly
Good weeknight étouffée
Peanut butter
8–15 minutes
Nutty, rounded, deeper flavor
Best balance for this recipe
Dark brown
18–25+ minutes
More intense, slightly smoky
Advanced version; thickens less and burns more easily
Burnt with black specks
Any time if heat is too high
Bitter
Discard and restart
The color guide turns roux judgment into a visual check instead of a guessing game.
Use this roux color guide to judge whether your base is still mild, ready for étouffée, or too far gone.
This early roux stage explains why color matters before the sauce gets its deeper Cajun flavor.
Pale roux can thicken the sauce, but it has not developed the nutty flavor Cajun étouffée needs.
Aim for this peanut-butter shade when you want toasted flavor without losing too much thickening power.
Peanut-butter roux gives Cajun étouffée its best middle ground: warm color, toasted flavor, and enough body for the sauce.
When to Restart the Roux
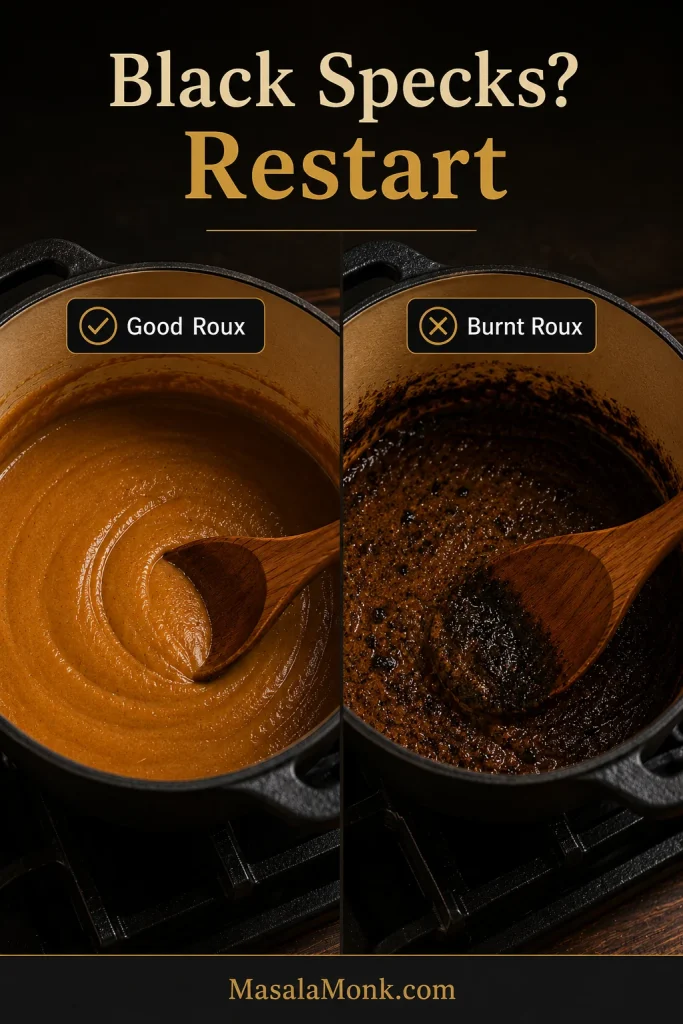
As the roux darkens, lower the heat if it starts moving too fast. Black specks or a sharp burnt aroma mean it is time to restart. Burnt roux will make the whole pot taste bitter.
Restarting is better than saving burnt roux, because scorched flavor will travel through the whole sauce.
Burnt roux will turn the whole pot bitter, so restart when you see black specks or smell scorching.
The recipe card gives the exact steps. This walkthrough is here for the cooking cues: what should be ready, what should smell right, and when the pot is safe for seafood.
1. Prep everything before the roux
Once the roux starts cooking, your attention belongs to the pot. Chop the vegetables, mince the garlic, slice the herbs, warm the stock, cook the rice, and thaw the seafood before you turn on the stove.
2. Cook the roux slowly
Melt the butter, warm the oil, or heat a butter-oil mix, then add the flour and stir constantly over medium heat. The roux will move from pale to blonde, then copper, then peanut-butter brown. Darkening too quickly is your cue to lower the heat and keep stirring.
3. Add onion, celery, and bell pepper
When the roux reaches the color you want, stir in the holy trinity. The vegetables cool the roux slightly, then turn sweet and savory as they soften into the base. This is the moment the pot starts smelling like dinner.
Once the trinity hits the roux, the pot shifts from toasted flour to a sweet, savory Cajun base.
When the trinity hits the roux, it cools the pot slightly while building a sweet, savory Cajun base.
4. Build the sauce with warm stock
After the garlic blooms, the first splash of stock will make the roux seize and thicken. Keep whisking. It loosens as the rest of the stock goes in and turns into a smooth, spoonable base.
Warm stock and steady whisking turn the roux from tight and thick into a smooth sauce.
The first splash of stock may tighten the roux, but steady whisking turns it into a smooth étouffée sauce.
5. Simmer until the base tastes complete
Let the sauce simmer until the floury edge has cooked away and the seasoning tastes balanced. The pot should already taste like dinner before the seafood arrives.
6. Finish with shrimp or crawfish
Raw shrimp only needs a few minutes. Crawfish tails are often already cooked and only need to be heated through. Treat the seafood like the finish, not the simmer.
7. Rest, garnish, and serve
Let the pot rest for a few minutes so the sauce settles and thickens slightly. Spoon it over hot white rice so the gravy pools around the grains, then serve with fresh herbs and extra hot sauce at the table.
Troubleshooting: Fix Thin, Thick, Salty, Bland, Spicy, or Floury Étouffée
Do not panic if the sauce looks wrong at first. Étouffée can look too thick, too thin, or too dark for a minute before it comes together. Most problems are easier to fix before the seafood goes in, so taste and adjust while the shrimp or crawfish is still safely waiting.
Check Texture Before Seafood
Étouffée should be thicker than soup but softer than paste. It should spoon easily over rice, coat the seafood, and settle into the grains without disappearing completely.
Diagnose the sauce before adding seafood by comparing thin, spoonable, and overly thick textures.
The ideal étouffée sauce sits between watery and pasty: spoonable, glossy, and thick enough to coat rice.
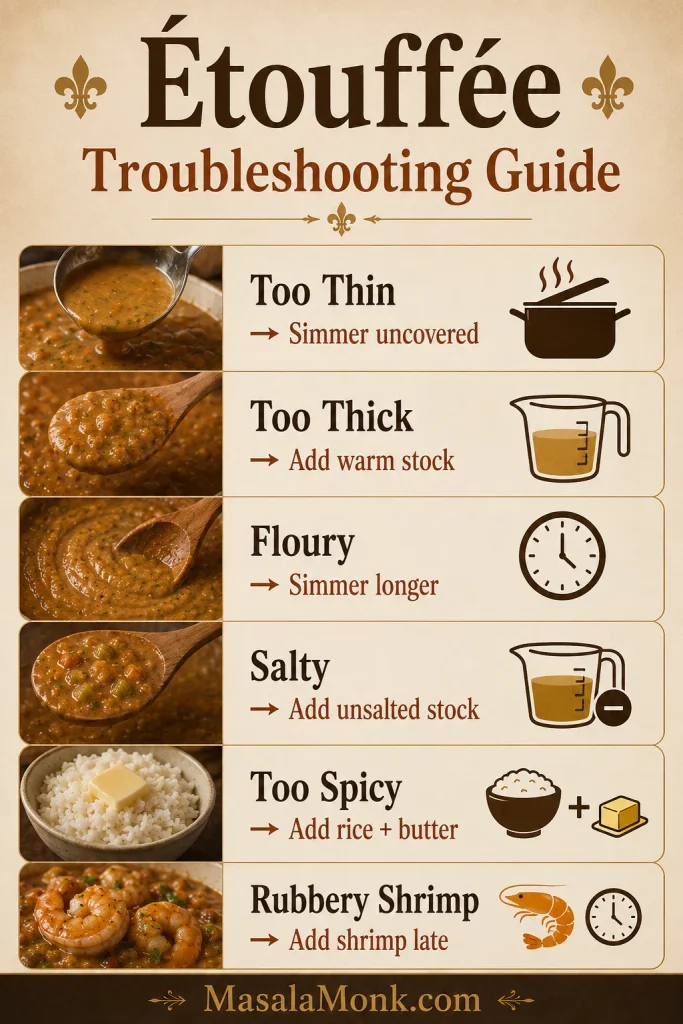
Common Étouffée Fixes
Problem
What it means
How to fix it
Too thin
Usually too much liquid or not enough simmering
Simmer uncovered for a few more minutes before adding seafood
Too thick
The roux absorbed more liquid than expected
Add warm stock a splash at a time
Floury taste
Roux was undercooked or sauce needs more time
Simmer the sauce longer before adding seafood
Too salty
Seasoning blend, stock, hot sauce, or boxed base was salty
Add unsalted stock, a little butter, and serve with plain rice
Too spicy
Often too much cayenne, hot sauce, or spicy Cajun seasoning
Add unsalted stock, a little butter, and serve with extra plain rice
Bland
Needs more spice, acid, or finishing flavor
Add Cajun seasoning, hot sauce, Worcestershire, green onion, or cayenne
Burnt roux
Roux scorched before vegetables were added
Restart the roux; burnt flavor will not cook out
Rubbery shrimp
Shrimp cooked too long or boiled too hard
Add shrimp only at the end and cook just until opaque
Watery seafood flavor
Frozen seafood released too much liquid
Thaw, drain, and pat dry before adding; simmer the sauce first so it has body
After the detailed fixes, this guide works as a quick save-the-pot reminder for common étouffée problems.
Fix sauce problems early; once shrimp or crawfish goes in, there is less time to correct thickness, salt, or floury flavor.
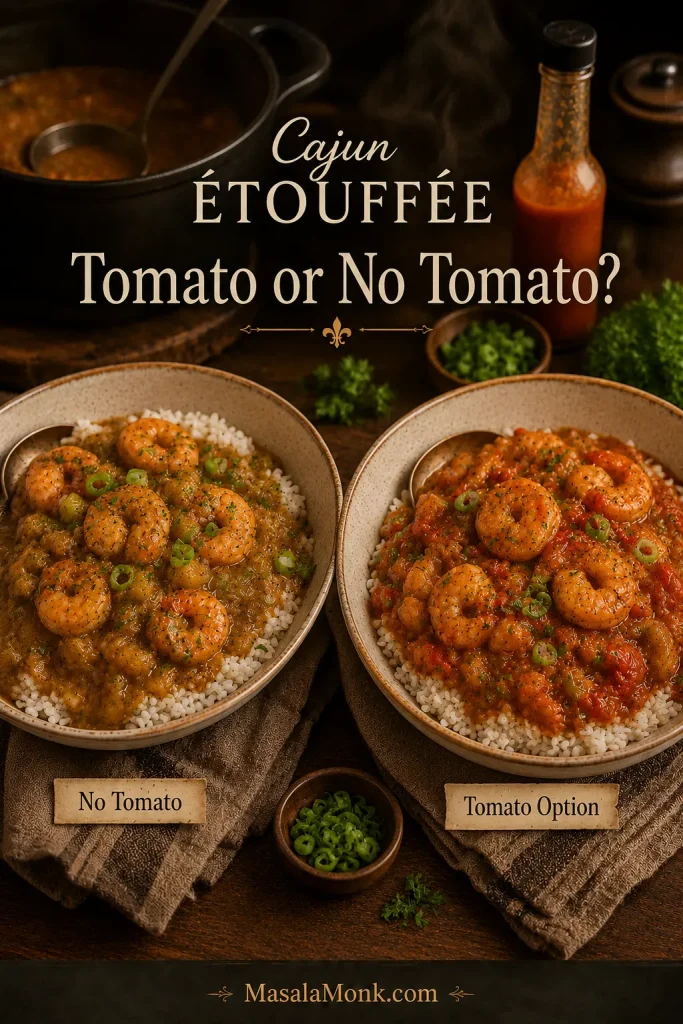
Tomato is where étouffée opinions can get loud, so this recipe keeps the choice simple. This version keeps tomato out of the main pot for a roux-forward Cajun-style flavor. Some home cooks add tomato, especially in Creole-leaning or family-style versions, so the option is included below.
For a brighter sauce, add 1 tablespoon tomato paste with the garlic and spices, or stir in ½ cup diced tomato when you add the stock. Tomato changes the flavor, but it can still make a delicious pot.
The tomato choice belongs here because roux-forward Cajun-style and brighter Creole-leaning bowls can both be delicious.
No tomato keeps the étouffée roux-forward, while a small tomato option adds a brighter Creole-style note.
Skip the tomato if you came here for a roux-forward bowl. Add a little if you like a softer, brighter sauce. Like many Louisiana-style dishes, every kitchen has its own opinion.
Étouffée Sauce, Base, Mix, and Cream Soup Shortcuts
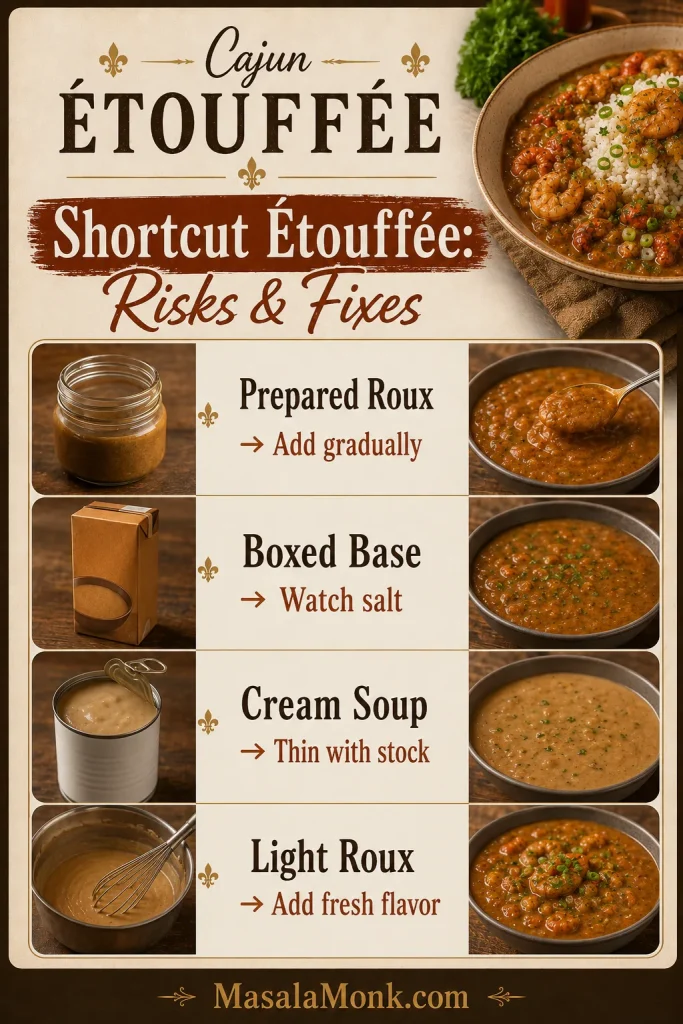
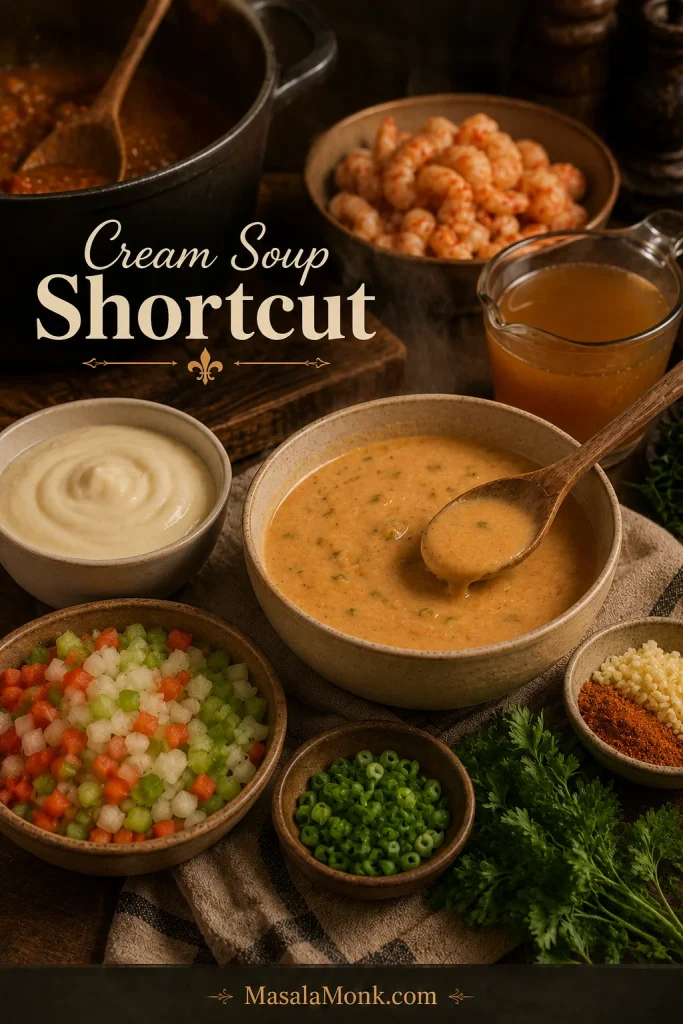
Some nights, you want the roux. On other nights, you want dinner faster. Both are real kitchens. Shortcut étouffée works best when you add freshness back: sautéed trinity, garlic, herbs, a splash of hot sauce, and gentle seafood timing.
The goal is not to pretend a shortcut tastes exactly the same as a from-scratch roux. Instead, make it balanced, creamy or saucy in the right way, and worth spooning over rice.
Shortcut
Main risk
Best fix
Prepared or jarred roux
Too intense or too dark
Add gradually and taste before adding more seasoning
Boxed étouffée mix or base
Too salty or flat
Use less seasoning and add sautéed trinity, garlic, herbs, and hot sauce
Cream soup
Too heavy, thick, or salty
Thin with stock and finish with fresh herbs and gentle seafood timing
Light roux
Less depth
Use good stock, Cajun seasoning, Worcestershire sauce, and a little acidity
For shortcut methods, keep the focus on salt control, sauce thickness, fresh trinity, and gentle seafood timing.
Shortcut étouffée tastes more homemade when you control salt, loosen heavy bases with stock, and add fresh trinity.
Using prepared or jarred roux
Prepared roux can save time if you want roux flavor without standing over the pot as long. Follow the jar’s or package’s guidance as your baseline, then add gradually rather than all at once. Build the sauce with sautéed onion, celery, bell pepper, garlic, warm stock, and seasoning. Taste before adding more Cajun seasoning because prepared roux can vary in intensity.
Using étouffée mix or base
Boxed étouffée mix or jarred base can be useful when you want dinner fast. Most mixes already contain seasoning, thickener, and salt, so taste before adding more Cajun seasoning. Add shrimp or crawfish near the end instead of boiling it hard for the whole cooking time.
To make a mix taste more homemade, sauté onion, celery, bell pepper, and garlic in a little butter before adding the mix and liquid. Finish with fresh herbs, a splash of hot sauce, and a small knob of butter.
Using cream of mushroom, cream of shrimp, or cream of celery soup
Many home cooks make a creamy shortcut étouffée with condensed soup. If this is the version you grew up with, it deserves a place too. Cream of mushroom, cream of shrimp, cream of celery, and golden mushroom soup all create an easy, comforting sauce. It will not taste exactly like a roux-based Cajun étouffée, but it can still be a cozy family-style dinner.
Cream soup shortcuts work best when stock loosens the base and seafood stays gently cooked.
When using cream soup, loosen the base with stock first, then finish with seafood gently so the sauce stays spoonable.
Condensed soup needs a lighter hand with salt and seasoning. Start with about ½ can of water or stock per can of condensed soup, then loosen the sauce more only if needed. Cream soup versions can become salty quickly, especially when combined with Cajun seasoning and table hot sauce.
For a full dinner built around the same condensed-soup comfort idea, this cream of mushroom chicken shows how much the soup-to-liquid ratio matters when you want the sauce creamy instead of watery.
The fastest from-scratch shortcut
If you have 5–8 minutes, make a light roux instead of relying only on soup or mix. Even a copper-colored roux gives the sauce more flavor and better texture than a fully instant version.
Using a shortcut tonight? Keep Troubleshooting nearby, then return to the Recipe Card for seafood timing.
What to Serve With Cajun Étouffée
Cajun étouffée is usually served over white rice, and for good reason. The rice catches the sauce, softens the heat, and turns the dish into a full meal. If rice is the part that usually lets you down, this guide on how to cook perfect rice will help you get fluffy grains before the étouffée is ready.
A shallow bowl works best here: rice in the center, sauce ladled around it, herbs on top, and table hot sauce close by. It feels generous without needing many sides.
Serving gets easier when rice is mounded first and the étouffée is ladled around it.
For a cleaner bowl, mound the rice first, then ladle the étouffée around it so the gravy pools neatly.
Long-grain white rice: the classic, clean choice.
Green onions and parsley: a fresh finish for a rich sauce.
Hot sauce: serve on the side so everyone controls the heat.
Cornbread: good for soaking up extra sauce.
Simple green salad: balances the richness.
Roasted okra or sautéed greens: adds a Southern-style vegetable side.
Red beans and rice: better as a separate meal or part of a larger Cajun/Creole spread rather than something you need on the same plate.
Cajun seafood boil: a natural next recipe if you are building a bigger seafood spread around shrimp, crawfish, crab, or potatoes.
Finish with herbs and a sharp splash of hot sauce.
Make-Ahead, Storage, Freezing, and Reheating
Étouffée is a good make-ahead dish when the sauce and seafood are handled separately. Prepare the sauce ahead, then add the seafood when you reheat and serve.
Make ahead
Make the sauce through the simmering step, then cool and refrigerate it. When ready to serve, warm it gently, add a splash of stock if needed, and finish with shrimp, crawfish tails, or both.
Storage works best when the sauce is made ahead and seafood is saved for reheating.
For better make-ahead texture, store the sauce separately; then add seafood during reheating so it stays tender.
Refrigerating leftovers
Store leftovers in an airtight container in the refrigerator for up to 3 days. Keep rice separate if possible so the sauce does not become too thick and starchy.
If you have extra cooked rice but not enough étouffée for another full bowl, turn the rice into a separate dinner like this shrimp fried rice instead of stretching the sauce too thin.
Freezing
You can freeze étouffée, but seafood texture may change after thawing. The best method is to freeze the sauce without seafood, then add fresh shrimp or crawfish when reheating. Leftovers with seafood already in the sauce should be cooled quickly, frozen in a sealed container, and reheated gently.
Reheating
Reheat on low heat, stirring often. Add a splash of stock or water to loosen the sauce. Avoid boiling leftovers hard because shrimp and crawfish can toughen.
Variations
Shrimp étouffée
Use 2 lb total peeled and deveined raw shrimp. Add it near the end and cook gently until opaque and softly curled.
Crawfish étouffée
Use 2 lb total thawed crawfish tails. Already cooked crawfish should be warmed gently instead of boiled hard.
Seafood étouffée
Use a mix of shrimp and crawfish, or add a little crabmeat at the end. Delicate seafood stays best when it is added late.
Chicken étouffée
Use bite-size cooked chicken or small pieces of boneless chicken thighs. Simmer until the chicken is fully cooked and tender, then finish with fresh herbs.
Gluten-free étouffée
Use a gluten-free all-purpose flour blend or rice flour for the roux. The texture may be slightly different, so add stock gradually and adjust the sauce as it thickens.
Vegetarian mushroom étouffée
Use mushrooms instead of seafood and vegetable stock instead of seafood or chicken stock. Brown the mushrooms first so they bring depth to the sauce instead of watering it down.
Extra spicy Cajun étouffée
Add more cayenne, diced jalapeño, or extra hot sauce at the table. Build spice gradually because Cajun seasoning and hot sauce can also add salt.
Creamy shortcut étouffée
Use condensed cream of mushroom, cream of shrimp, or cream of celery soup as part of the sauce base. Keep the seasoning lighter, thin with stock, and add seafood at the end.
Cajun Étouffée FAQs
How do you pronounce étouffée?
Étouffée is usually pronounced ay-too-FAY or eh-too-FAY. The word comes from French and means “smothered.”
Is shrimp okay instead of crawfish?
Yes. Use raw peeled shrimp and add it during the final 3–5 minutes so it stays tender. Shrimp is easier to find than crawfish and works very well in Cajun étouffée.
Are crawfish tails already cooked?
Many packaged crawfish tails are already cooked. Check the package, but in most cases they only need to be warmed through in the sauce for a few minutes.
How should frozen crawfish tails be handled?
Thaw frozen crawfish tails first, then drain excess liquid. Do not automatically rinse them, especially if the package has flavorful crawfish fat or juices. Muddy or overly fishy liquid should be drained more aggressively, with stock doing more of the flavor work.
What roux color is best for étouffée?
Peanut-butter brown is the best balance for this recipe. It gives the sauce nutty flavor without requiring a very dark roux. A lighter copper roux also works for an easier weeknight version.
Does Cajun étouffée need tomatoes?
No. This version does not use tomato by default. A little tomato paste or diced tomato gives the sauce a brighter Creole-style feel. Tomato changes the flavor, but it can still make a delicious pot.
Should étouffée be thick?
Yes, but not pasty. Étouffée should be thicker than soup and thin enough to spoon over rice. A thick sauce needs warm stock; a thin one needs a few more uncovered minutes.
Why does my étouffée taste floury?
The roux may not have cooked long enough, or the sauce may need more simmering time. Cook the roux until it smells nutty, then simmer the sauce until the floury taste disappears.
How do I keep shrimp from overcooking?
Build and simmer the sauce first, then add shrimp at the end. Shrimp usually needs only 3–5 minutes in a gentle simmer. Remove the pot from heat as soon as the shrimp is opaque and tender.
Cream of mushroom soup in étouffée: yes or no?
Yes, if you want a creamy home-style shortcut. Cream of mushroom soup is not the same as a roux-based Cajun étouffée, but it can be useful for a fast, comforting version. Use less salt because condensed soup and Cajun seasoning can become salty together.
Gumbo vs étouffée: what is the difference?
Gumbo is usually more soup-like and often served as a stew with rice, while étouffée is thicker and more sauce-like. Étouffée should cling to the seafood and rice rather than feel like broth. For a deeper comparison, Southern Living has a helpful étouffée vs gumbo explainer.
Make-ahead étouffée: what works best?
Best texture comes from making the sauce ahead and adding the seafood when reheating. This keeps shrimp and crawfish from becoming tough.
Once you know what the roux should smell like, how the sauce should move, and when the seafood should go in, Cajun étouffée stops feeling intimidating. It becomes what it should be: glossy, spicy, seafood-rich comfort poured over hot rice, finished with herbs and one more sharp splash of hot sauce.
The finished-pot target is simple: glossy sauce, hot rice, fresh herbs, and enough Cajun étouffée for the table.
Once the sauce is glossy and the rice is hot, étouffée becomes the kind of pot people gather around.
Every kitchen has an opinion on tomato, cream soup, crawfish, shrimp, or how dark the roux should be — and that is part of why étouffée is so fun to cook. If your family has a version, it probably has a reason behind it. Learn the base method, adjust the pot to your table, keep the rice hot, and serve it while the sauce is still glossy.
A great seafood boil sauce should do more than taste buttery. It should cling to crab legs, gloss over shrimp, soak into corn and potatoes, and leave enough garlicky Cajun butter at the bottom of the tray for one last swipe of bread.
This is the sauce that turns a pile of boiled seafood into the messy, glossy, pass-the-napkins kind of meal. It is rich, garlicky, smoky, lemony, a little spicy, and easy to adjust for dipping, pouring, tossing, or serving on the side.
The goal is not just heat or butter. The goal is a sauce that tastes bold but still lets the seafood taste like seafood. The base is simple — butter, garlic, Cajun seasoning, Old Bay, smoked paprika, lemon, and a splash of broth or reserved seafood boil liquid — but the control is what makes it work.
Seafood boil sauce is a bold garlic butter sauce made with butter, garlic, Cajun seasoning, Old Bay seasoning, lemon juice, paprika, and a little heat. It should taste rich first, then garlicky and smoky, with enough lemon to make every bite of shrimp, crab, corn, and potatoes feel bright instead of heavy.
For a thick dipping sauce, use less liquid. For a pour-over sauce, add more broth, seafood stock, or reserved seafood boil liquid. For a seafood boil bag sauce, keep it medium-thick so it coats shrimp, crab, crawfish, corn, potatoes, and sausage without becoming watery.
Butter-Broth-Lemon Rule
Use the butter-broth-lemon rule: butter softens, broth loosens, and lemon brightens. Choose your sauce style first — thick and buttery for crab-leg dipping, loose and glossy for shrimp and corn, or medium-thick for seafood boil bags. The recipe below starts in the middle so you can adjust either way.
When the sauce needs a fix, this is the fastest rule to remember: butter softens, broth loosens, and lemon brightens.
The best version is bold, glossy, and adjustable: rich enough for crab, bright enough for shrimp, loose enough for corn and potatoes, and balanced enough that it does not hide the seafood.
Make It Now: Seafood Boil Sauce Recipe
This is the main garlic butter Cajun seafood boil sauce. It makes about 2 cups / 480 ml, enough for about 2½–3 lb / 1.1–1.35 kg seafood as a light-to-generous pour-over sauce, depending on how much corn, potatoes, sausage, and eggs are on the tray.
You only need one pan, low heat, and about 20 minutes. Melt the butter, soften the aromatics, bloom the spices, loosen with broth, then finish with lemon.
Prep time: 10 minutes Cook time: 12 minutes Total time: 22 minutes Yield: About 2 cups / 480 ml sauce Serves: 4–6 as pour-over sauce, 8–10 as dipping sauce because dipping uses less per person Equipment: Large skillet or medium saucepan, whisk, measuring spoons, microplane or garlic press
Scaling: Double the sauce for a large tray or seafood boil bag. Keep the heat low and use a wider pan so the garlic and spices cook evenly.
Before you pour: Taste the sauce with one shrimp, potato, or piece of corn. The salt order is simple: season first, loosen second, salt last.
Optional heat: Add ¼–½ teaspoon cayenne or red pepper flakes if you want a spicier Cajun butter sauce.
Salt note: Do not add extra salt until the sauce is finished and tasted. Cajun seasoning, Old Bay, broth, and reserved boil liquid can all bring salt.
Measurement note: Gram weights for seasoning blends are approximate because Cajun seasoning and seafood seasonings vary by brand. Use the spoon measures first, then adjust after tasting.
Instructions
Melt the butter in a large skillet or medium saucepan over low to medium-low heat.
Add the finely minced onion and cook for 3–4 minutes, until softened and glossy but not browned.
Add the garlic and cook for 60–90 seconds, just until fragrant. Keep it pale, not brown.
Stir in the Cajun seasoning, Old Bay, smoked paprika, onion powder, brown sugar, and optional cayenne or red pepper flakes.
Cook the spices in the butter for 30–60 seconds, until the butter smells toasty and the spices look absorbed into the butter, not sandy on the surface.
Slowly whisk in the reserved boil liquid, stock, or broth.
Let the sauce gently simmer for 3–5 minutes, stirring often, until glossy and spoonable.
Turn off the heat. Stir in the lemon juice, lemon zest, hot sauce, and parsley.
Taste and adjust. Add more lemon for brightness, broth for a looser sauce, butter for richness, or hot sauce for more heat.
Taste with one shrimp, potato, or piece of corn before coating the full seafood tray.
Serve warm as a dipping sauce, pour-over sauce, or seafood boil bag sauce.
Important: Keep the sauce at a gentle simmer and it stays glossy. A hard boil can make the butter separate and the garlic taste harsh.
The sauce should look bold before it tastes aggressive: red-orange, glossy, garlicky, and loose enough to spoon over the tray without drowning the seafood.
Seafood Boil Sauce Success Cues
Use these cues while cooking. They matter more than the clock.
The finished sauce should look glossy and spoonable, with visible spice and garlic but no greasy separation.
Cue
What You Want
Garlic
Fragrant and pale, not brown
Onion
Soft, glossy, and slightly translucent
Spices
Toasty and buttery, not dry or sandy
Sauce texture
Glossy and spoonable, not broken or greasy
Salt
Bold and savory, not sharp or harsh
Heat
Warm Cajun spice first, extra fire only if you want it
Lemon
Bright enough to cut the butter
Finished sauce
Buttery, garlicky, smoky, lemony, and easy to drizzle
When the sauce hits these cues, it tastes big without tasting heavy — rich enough for crab, bright enough for shrimp, and loose enough to find its way into the corn and potatoes.
Adjust, Fix and Serve the Sauce
Use the rest of this guide to choose the right texture, adjust the flavor, fix common problems, and store leftovers safely.
This is where the sauce becomes yours. Some people want a thick bowl of butter for crab legs; others want a loose, glossy sauce that runs into the corn and potatoes. The same base can do both.
Thickness decides the job, so keep it thicker for dipping, looser for pouring, and medium-thick for bags.
Use
Texture
How to Adjust
Dipping sauce
Thick, buttery, clingy
Use ¼ cup / 60 ml liquid and simmer slightly longer.
Pour-over sauce
Glossy, loose, spoonable
Use ½ cup / 120 ml liquid.
Seafood boil bag sauce
Medium-thick, coating sauce
Use ½–¾ cup / 120–180 ml liquid.
Big tray sauce
Looser and more spreadable
Use ¾–1 cup / 180–240 ml liquid.
Crab leg dipping sauce
Rich and buttery
Keep it thicker and serve lemon wedges on the side.
Crab people usually want the thick bowl. Shrimp, corn, and potatoes usually want the loose spoon-over version. If your table is divided, make the base sauce medium-thick, then loosen half for pouring and keep half rich for dipping.
Think of the broth or boil liquid like a volume knob. Add a little for a thick dip. Add more for a sauce that covers a whole tray.
How Much Seafood Boil Sauce Do You Need?
The only sad seafood boil sauce is the one that runs out too early. If the tray has corn and potatoes, make extra. They absorb sauce faster than the seafood does.
Corn and potatoes always change the math, so make extra when the tray has more than just shrimp or crab.
By Seafood Weight
Seafood Amount
Dipping Sauce
Pour-Over Sauce
1 lb / 450 g seafood
½ cup / 120 ml
¾ cup / 180 ml
2 lb / 900 g seafood
1 cup / 240 ml
1½ cups / 360 ml
3 lb / 1.35 kg seafood
1½ cups / 360 ml
2–2¼ cups / 480–540 ml
5 lb / 2.25 kg seafood
2½ cups / 600 ml
3–4 cups / 720–960 ml
Party tray
Make extra
Serve extra on the side
By Number of People
People
Sauce for Dipping
Sauce for Pouring/Tossing
2 people
½–¾ cup / 120–180 ml
1 cup / 240 ml
4 people
1–1½ cups / 240–360 ml
2 cups / 480 ml
6 people
1½–2 cups / 360–480 ml
3 cups / 720 ml
8 people
2–3 cups / 480–720 ml
4 cups / 960 ml
This recipe makes about 2 cups / 480 ml sauce. That is enough for about 2½–3 lb / 1.1–1.35 kg seafood as a pour-over sauce, or more if you are mainly serving it for dipping.
Extra sauce never feels like a mistake at a seafood boil. Running out does.
Once you know how thick the sauce should be and how much to make, the next step is understanding why the balance works.
Why This Seafood Boil Sauce Works
The flavor works because it balances richness, garlic, heat, salt, sweetness, and acidity.
Butter gives the sauce body. Garlic makes it bold and fragrant. Cajun seasoning brings peppery heat and Southern-style depth. Old Bay adds the classic seafood-boil flavor many people expect with crab, shrimp, and crawfish. Smoked paprika gives the butter sauce its warm red-orange color. Lemon keeps it from feeling heavy.
The small amount of brown sugar is not there to make the sauce sweet. It rounds out salt and spice, especially if your seasoning blend is intense. A little broth or reserved boil liquid turns plain melted butter into something glossy, spoonable, and better connected to the seafood.
When it is right, the sauce should taste buttery first, then garlicky, smoky, salty-spicy, and finally bright from lemon.
The method matters too. Garlic needs gentle heat, spices taste better when they bloom briefly in butter, and lemon tastes brighter when added near the end.
That balance is why the sauce can be bold enough for sausage and potatoes but still bright enough for shrimp, crab, and lobster.
Ingredients You Need
The recipe card gives you the amounts. This section explains what each ingredient does and how to adjust if your seasoning blend is stronger, smokier, hotter, or saltier than expected.
Every ingredient earns its place here, because Cajun seasoning, Old Bay, garlic, lemon, and broth all help the sauce stay bold without getting heavy.
Butter
Unsalted butter gives you the best control because seafood boil seasonings can be salty. If you only have salted butter, make the sauce first, then taste before adding anything salty at the end.
For a richer party-style version, whisk in 2–4 extra tablespoons of butter after the sauce simmers.
Garlic
Fresh garlic gives this Cajun butter sauce its best flavor. Minced garlic gives a rustic texture; grated garlic or garlic paste makes the sauce smoother and more restaurant-style.
Keep the garlic pale and fragrant. Dark brown garlic can taste bitter.
Onion
Onion is optional, but it gives the sauce body and natural sweetness. Mince it very finely so it melts into the butter, or grate it for a smoother finish.
Cajun Seasoning
Cajun seasoning gives the sauce its bold, peppery, spicy base. Different brands vary a lot, so taste yours before you add extra heat or salt.
Old Bay Seasoning
Old Bay gives the sauce that classic seafood flavor. It works especially well with shrimp, crab legs, crawfish, potatoes, and corn.
No Old Bay in the pantry? You can still make a good boil sauce with Cajun seasoning, smoked paprika, garlic powder, onion powder, and a small pinch of celery salt or celery seed.
Smoked Paprika
Smoked paprika adds color, warmth, and a gentle smoky note. It helps create the deep red-orange look people associate with Cajun seafood butter.
Brown Sugar
Brown sugar is optional but useful. It rounds out salt, spice, and heat without making the sauce taste sweet, and it helps create a slightly glossy finish.
Broth, Seafood Stock, or Reserved Boil Liquid
This is what changes the sauce from a thick buttery dip into something you can spoon over a whole tray. Reserved boil liquid, stock, or broth loosens the sauce so it pours instead of sitting like straight melted butter.
Reserved boil liquid gives the strongest seafood-boil flavor because it already carries seasoning from the pot. If it tastes very salty, use half boil liquid and half low-sodium broth or water.
Lemon Juice and Lemon Zest
Lemon cuts through the butter and brightens the whole sauce. Add lemon juice near the end so it tastes fresh. Lemon zest is optional, but it makes the sauce smell brighter.
Hot Sauce, Cayenne, or Red Pepper Flakes
Hot sauce gives smoother heat. Cayenne adds stronger fire. Red pepper flakes bring visible spicy texture. Add heat slowly because it is much easier to make the sauce spicier than it is to calm it down.
Equipment
Large skillet or medium saucepan
Whisk
Measuring cups and spoons
Microplane, garlic press, or sharp knife
Heatproof spatula or spoon
Optional immersion blender for a smoother sauce
A skillet gives the spices room to bloom and lets the sauce reduce slightly; a medium saucepan works well for smaller batches or easier pouring.
How to Make It Glossy, Not Greasy
The recipe card above has the short version. These details help if you want a smoother, glossier, more controlled sauce.
Spoonable Sauce Texture
Before you pour the sauce over seafood, check the spoon. A glossy sauce should coat it lightly, then drip back slowly instead of running like water or sitting like straight melted butter.
If it coats the spoon and drips slowly, the sauce is in the right place: clingy enough for seafood, but not oily or thin.
1. Melt the Butter Gently
Melt the butter over low to medium-low heat. Starting gently keeps the butter from separating and gives the garlic time to flavor the sauce without burning.
Start low and gentle, because butter should melt slowly before the garlic and spices go in.
2. Soften the Onion and Garlic
Cook the onion until soft and glossy, then add the garlic for 60–90 seconds. The garlic should smell fragrant but stay pale.
Once the onion softens and the garlic stays pale, the base turns sweeter and the sauce stays out of bitter territory.
3. Bloom the Seasonings
Stir the Cajun seasoning, Old Bay, smoked paprika, onion powder, brown sugar, and optional heat into the butter. Cook briefly until the butter turns red-orange and the spices look absorbed, not dry or dusty.
Blooming the spices in butter is what gives seafood boil sauce its deep red-orange color and that toasty Cajun flavor.
4. Loosen and Finish
Whisk in the broth or reserved boil liquid slowly, then simmer gently until glossy. Turn off the heat before adding lemon juice, lemon zest, hot sauce, and parsley.
As soon as the broth goes in, the sauce loosens into a glossy pour-over texture that works better for shrimp, crab, and vegetables.
Finish With Lemon and Parsley
After the sauce is glossy, take it off the heat before adding lemon and parsley. That small timing choice keeps the seafood boil sauce brighter and fresher.
Lemon and parsley go in at the end, because that final bright note keeps the sauce fresh instead of flat.
5. Test Before You Pour
Dip one shrimp, one potato, or one piece of corn into the sauce before coating the full tray. Fix the sauce in the pan, not after it has already coated three pounds of seafood.
Do You Add Seafood Boil Sauce Before or After Cooking?
This is a finishing sauce, not the cooking liquid. Let the boil season and cook the seafood, then let the garlic butter sauce coat it.
Add this garlic butter Cajun sauce after the seafood is cooked and drained. The sauce is for pouring, tossing, bagging, or dipping after cooking.
If you are unsure whether the seafood itself is fully cooked, FoodSafety.gov’s safe minimum internal temperatures chart is a useful reference for fish and shellfish.
The best method is simple: cook the seafood, drain it well, taste the sauce, then spoon or toss the warm sauce over the hot seafood. Keep extra sauce on the side for dipping crab, shrimp, corn, and potatoes.
Best Sauce for Shrimp, Crab, Crawfish and More
The same base works across the tray, but each seafood and side likes a slightly different sauce texture.
Shrimp usually wants a looser, lemon-bright sauce, while crab does better with a thicker, buttery finish that stays on the meat.
Food
Best Sauce Style
Adjustment
Shrimp
Pour-over or toss
Add slightly more lemon and keep the sauce looser.
Crab legs
Dipping sauce
Keep it thicker, buttery, and rich.
Crawfish
Spicy Cajun sauce
Add extra Cajun seasoning, paprika, or hot sauce.
Lobster tails
Garlic lemon butter
Use less Cajun, more lemon and parsley.
Mussels and clams
Loose pour-over sauce
Add more broth so it reaches the shells.
Corn
Pour-over sauce
Make it looser so it soaks into the kernels.
Potatoes
Pour-over sauce
Add enough broth so the sauce coats well.
Sausage
Smoky spicy sauce
Smoked paprika and Cajun seasoning work well.
Boiled eggs
Medium-thick sauce
Spoon sauce over just before serving.
For Shrimp
Shrimp tastes best with a sauce that is garlicky, lemony, and not too heavy. Keep the texture slightly loose so the shrimp stays juicy.
For another shrimp dinner built around garlic, butter, and lemon, this shrimp scampi recipe keeps the same bright butter-sauce idea in a pasta-friendly direction.
For Crab Legs
Crab legs are perfect for a thicker dipping sauce. Keep it buttery and clingy, then serve extra lemon on the side so each bite can be brightened at the table.
For Crawfish
Crawfish can handle stronger heat. Add extra Cajun seasoning, hot sauce, cayenne, or red pepper flakes if you want a spicy crawfish boil sauce.
For Lobster
Lobster is sweeter and more delicate than crawfish or sausage, so go easier on the Cajun seasoning. More garlic, lemon, parsley, and butter usually works better than extra heat.
For a lobster meal that stays buttery but much simpler, this lobster roll recipe covers both the warm buttered Connecticut style and the cool Maine-style version.
For Corn and Potatoes
Corn and potatoes need a looser sauce. Add more broth or reserved boil liquid so the sauce can soak in instead of sitting on top.
Cajun vs Old Bay Seafood Boil Sauce
Cajun seasoning and Old Bay are both common in seafood boil sauce, but they do different jobs. Think of Cajun seasoning as the heat and depth, and Old Bay as the classic seafood-boil note. Together they make the sauce taste fuller, but together they can also make it salty fast.
Do not increase Cajun seasoning and Old Bay heavily at the same time unless you know both blends are low-salt.
Cajun seasoning brings heat and depth, while Old Bay brings that classic seafood flavor, so the two work best when the salt stays under control.
For more Cajun flavor: Increase Cajun seasoning slightly, add smoked paprika, and finish with hot sauce.
For more Old Bay flavor: Increase Old Bay, reduce Cajun, and keep the lemon bright.
For a less salty sauce: Use unsalted butter, low-sodium broth, less Old Bay, and more lemon.
If you have no Old Bay: Use Cajun seasoning, smoked paprika, garlic powder, onion powder, and a tiny pinch of celery salt or celery seed.
If you have no Cajun seasoning: Use Old Bay, smoked paprika, garlic powder, onion powder, black pepper, and cayenne.
Seafood Boil Sauce Variations
Think of the recipe as one base sauce with two kinds of choices: texture choices for how you serve it, and flavor choices for how spicy, garlicky, or Old Bay-forward you want it.
Want the Sauce…
Do This
More garlicky
Use 10–12 cloves garlic or grated garlic.
More Cajun
Add extra Cajun seasoning and smoked paprika.
More Old Bay
Increase Old Bay and reduce Cajun seasoning.
Mild
Skip cayenne, use mild Cajun seasoning, add more broth and lemon.
Spicy
Add cayenne, hot sauce, red pepper flakes, or spicy Cajun seasoning.
Thicker for dipping
Use ¼ cup / 60 ml liquid.
Looser for a tray
Use ¾–1 cup / 180–240 ml liquid.
Restaurant-style sauce
Use grated onion, extra paprika, brown sugar, less liquid, and optional blending.
Garlic Butter Seafood Boil Sauce
A stronger garlic butter version starts with 10 cloves of garlic and slightly less Cajun seasoning. Keep the lemon juice strong and add parsley at the end. This version is excellent for crab legs, lobster tails, and shrimp.
Spicy Seafood Boil Sauce
For a spicier sauce, add cayenne, red pepper flakes, hot sauce, spicy Cajun seasoning, or hot paprika. Add heat slowly and taste after simmering before adding more.
Mild Seafood Boil Sauce
The mild version uses mild Cajun seasoning, slightly less Old Bay, no cayenne, and extra broth and lemon. It is better for kids, mild eaters, lobster, and anyone who wants buttery garlic flavor without too much heat.
Old Bay Seafood Boil Sauce
An Old Bay-forward sauce works best when Old Bay increases to 1 tablespoon and Cajun seasoning drops to 1 teaspoon. Keep the butter, garlic, lemon, and parsley the same.
Lemon Pepper Seafood Boil Sauce
Add 1–2 teaspoons lemon pepper seasoning and increase the lemon zest. Reduce extra salt because lemon pepper blends can be salty. This version works beautifully with shrimp, lobster, and crab.
Creamy Seafood Boil Sauce
A creamy version needs only 2–4 tablespoons of cream at the end over low heat. This makes the sauce richer and softer, but it is less traditional than garlic butter Cajun sauce.
Restaurant-Style Sauce Adjustments
This is the part that makes the tray look like something people want to gather around. Restaurant-style seafood boils feel different because the sauce arrives hot, glossy, and clingy. It coats the shells, runs into the potatoes, stains the corn, and still leaves enough at the bottom for dipping.
For redder color, add a little more smoked paprika.
For deeper flavor, bloom the spices a little longer over low heat.
For a clingier sauce, use less broth.
For smoother texture, use grated garlic and grated onion.
For a glossy finish, add 1–2 teaspoons brown sugar.
For a smooth restaurant-style sauce, blend briefly with an immersion blender.
Taste Adjustment Ladder
This is the part where the sauce stops being a formula and starts tasting like yours. Most fixes come back to the butter-broth-lemon rule: butter softens, broth loosens, and lemon brightens.
If the Sauce Tastes…
Add This
Too salty
Unsalted butter first, then warm broth, then lemon.
Too buttery or heavy
Lemon juice first, then a splash of broth.
Too thin
Simmer a few minutes longer.
Too thick
Warm broth, seafood stock, or reserved boil liquid.
Too spicy
Butter and broth, then a tiny pinch of brown sugar if needed.
Too flat
Lemon first, then Cajun seasoning or Old Bay.
Too sharp
A small knob of butter or a tiny pinch of brown sugar.
Not garlicky enough
A small amount of garlic powder, or gently cooked grated garlic.
Not smoky enough
A little more smoked paprika.
Make one adjustment at a time, then taste again. This keeps the sauce from swinging too far in the other direction.
Quick 2-Minute Seafood Boil Sauce
When the seafood is already cooked and you just need something buttery fast, this shortcut version gets you there.
Ingredient
Amount
Melted butter
½ cup / 113 g
Old Bay or Cajun seasoning
1–2 teaspoons
Garlic powder or 1 minced garlic clove
½ teaspoon garlic powder or 1 clove
Lemon juice
1 tablespoon / 15 ml
Hot sauce
Optional, to taste
This quick version is not as deep or layered as the full sauce, but it works well as a fast seafood dipping sauce when the seafood is already cooked. For better flavor, warm everything together gently for 1–2 minutes instead of just stirring it cold.
When you want a cold, creamy seafood dip instead of warm butter, this homemade tartar sauce recipe fits that lane better.
Substitutions and Swaps
The base is forgiving. Missing one ingredient does not ruin the sauce; it just changes which direction you lean.
Missing Ingredient
Use Instead
No Old Bay
Cajun seasoning + smoked paprika + pinch of celery salt or celery seed
No Cajun seasoning
Old Bay + smoked paprika + garlic powder + onion powder + cayenne
No seafood boil liquid
Seafood stock, low-sodium chicken broth, vegetable broth, beer, or water with lemon
No fresh garlic
Garlic paste or garlic powder
No onion
Skip it, or use ½ teaspoon onion powder
Not enough butter
Use part butter and part olive oil. If using no butter, use vegan butter or olive oil, but expect a lighter sauce.
No lemon
Lime juice or a small splash of vinegar
No brown sugar
Honey, maple syrup, or skip it
No parsley
Chives, green onion, or skip it
If you are using store-bought seafood boil seasoning packets, start with less seasoning than you think you need. Packets can be very salty. Use unsalted butter, taste before adding salt, and loosen the sauce with broth or lemon juice if it tastes too intense.
How to Toss and Serve It Restaurant-Style
This is the point where the sauce becomes the meal. The crab legs get glossy, the shrimp pick up the garlic butter, the corn turns red-orange in the grooves, and the potatoes catch everything the seafood leaves behind.
A restaurant-style finish is not about making the sauce complicated. It is about timing, texture, and serving it while everything is still hot and glossy.
Restaurant-Style Seafood Boil Sauce Finish
Use the sauce while it is warm and glossy, then coat the seafood in layers so the tray looks generous without turning watery.
A great seafood boil tray looks glossy and generous, with enough sauce to coat the seafood and leave some behind for dipping.
Warm the seafood before saucing. Cold seafood makes butter firm up quickly.
Drain the seafood well so water does not dilute the sauce.
Toss or spoon in layers instead of dumping all the sauce at once.
Keep extra sauce warm on the side for dipping.
Add parsley and lemon at the end so the tray looks and tastes fresh.
Serve immediately. Garlic butter sauce is at its best while warm and glossy.
Seafood Boil Bag Sauce
For seafood boil bag sauce: use the medium-thick texture. Add cooked seafood and warm sauce to the bag, seal carefully, and toss until everything is coated. The sauce should move when tossed, coat the shells red-orange, and leave a little buttery pool at the bottom for dipping. If it is too watery, it will pool instead of clinging to shrimp, crab, corn, and potatoes.
Medium-thick is the sweet spot for seafood boil bags, because the sauce needs to move when tossed and still coat every shell.
Common Mistakes to Avoid
Most sauce problems are easier to fix in the pan than on the tray. Use this as a quick check before the sauce goes over the seafood.
Starting too salty: Use unsalted butter when you can, and taste before adding any extra salt.
Using heat that is too high: Low to medium-low heat keeps the garlic pale and the butter glossy.
Skipping the taste test: Try the sauce with one shrimp, potato, or piece of corn before coating the full tray.
Pouring sauce over watery seafood: Drain the seafood well so the sauce stays bold instead of diluted.
Using one texture for every purpose: Dipping, pouring, and seafood boil bags all need slightly different thickness.
Troubleshooting Seafood Boil Sauce
Butter sauces can go sideways quickly, but you usually do not need to start over. Catch the problem while the sauce is still in the pan, and the fix is usually simple.
When the sauce looks oily or split, lower the heat and whisk in warm broth, because glossy always wins over greasy.
Problem
Likely Cause
Fix
Too salty
Salted butter, salty Cajun seasoning, too much Old Bay
Add unsalted butter, broth, lemon juice, or a little brown sugar.
Too spicy
Too much cayenne, hot sauce, or spicy Cajun seasoning
Add butter, broth, lemon, or a little sweetness.
Too oily
Too much butter, not enough liquid
Whisk in warm broth slowly.
Too thin
Too much broth or boil liquid
Simmer uncovered for a few minutes.
Sauce separated
Heat too high or liquid added too fast
Lower the heat and whisk in warm liquid gradually.
Bitter garlic
Garlic browned or burned
Cook garlic gently for only 60–90 seconds.
Grainy spices
Spices were not bloomed or too much dry seasoning was added
Bloom spices in butter and loosen with broth.
Not flavorful enough
Too much liquid or weak seasoning
Add Cajun seasoning, Old Bay, lemon, garlic, or hot sauce slowly.
How to Fix Salty Seafood Boil Sauce
Do not add water first. Water can make the sauce thinner without fixing the flavor. Instead, add unsalted butter, warm broth, lemon juice, or a small pinch of brown sugar. If you are serving the sauce with a full seafood boil, extra potatoes and corn can also help absorb some of the salty flavor on the tray.
How to Fix Separated Seafood Boil Sauce
Lower the heat. Whisk in 1–2 tablespoons of warm broth at a time until the sauce looks glossy again. If it still looks broken, use an immersion blender for a few seconds.
How to Make It Thicker
Simmer it uncovered for a few minutes. You can also use less broth next time or add a little more butter. For a thicker dipping sauce, start with only ¼ cup / 60 ml liquid.
How to Make It Thinner
Whisk in warm broth, seafood stock, reserved boil liquid, or water with lemon juice. Add a little at a time until the sauce pours the way you want.
How to Store and Reheat the Sauce
Do not worry if the sauce turns solid in the fridge. That is just the butter doing what butter does. The texture comes back when the sauce is reheated and whisked.
Refrigerating
Store unused sauce in an airtight container in the refrigerator for 4–5 days.
If the sauce has touched seafood, shells, fingers, or a shared dipping bowl, treat it like a seafood leftover. Cool it quickly, refrigerate it promptly, and use it within 1–2 days for best quality.
For clean, unused sauce, reheat gently in a saucepan over low heat, stirring often. Add a splash of broth, water, or reserved boil liquid if the sauce is too thick.
For sauce that has touched seafood or leftovers, reheat until steaming hot, ideally to 165°F / 74°C, then whisk to bring the texture back. A food thermometer is the safest way to check.
You can also microwave clean unused sauce in short bursts, stirring every 15–20 seconds. If reheating sauce with seafood leftovers, stir well and make sure the food is steaming hot throughout before serving.
Freezing
Freeze unused seafood boil sauce for up to 2–3 months. Thaw overnight in the refrigerator, then reheat gently over low heat. If the sauce separates slightly, whisk in warm broth or blend briefly with an immersion blender.
What to Serve With Seafood Boil Sauce
The best use is still the simplest: hot seafood, warm sauce, extra napkins, and something starchy to catch the butter.
For a full crispy seafood comfort plate instead of a boil, this fish and chips recipe pairs fried fish with tartar sauce, curry sauce, vinegar, and lemon.
For a full seafood boil tray, serve some sauce poured over the seafood and extra sauce on the side for dipping. For a cleaner dinner, serve the sauce in small bowls and let everyone dip shrimp, crab, corn, potatoes, and bread as they eat.
Frequently Asked Questions
What is seafood boil sauce made of?
It is usually made with butter, garlic, Cajun seasoning, Old Bay seasoning, lemon juice, paprika, hot sauce, and broth or reserved seafood boil liquid. Some versions also include onion, brown sugar, parsley, cayenne, or lemon pepper.
Is seafood boil sauce the same as garlic butter sauce?
It is a type of garlic butter sauce, but it is usually more seasoned. Basic garlic butter may only have butter, garlic, lemon, and herbs. Seafood boil sauce usually adds Cajun seasoning, Old Bay, paprika, heat, and sometimes broth or boil liquid.
Is this a Blove’s-style seafood boil sauce?
This is not a Blove’s copycat sauce. Blove’s-style seafood boil sauces are usually heavier, sweeter, and more spice-loaded, often with extra butter, garlic, hot sauce, Worcestershire, ginger, lemon pepper, and a larger seasoning mix. This version is a balanced Cajun garlic butter seafood boil sauce made for dipping, pouring, and tossing without hiding the flavor of the seafood.
Do you put seafood boil sauce in the pot?
No. It is better to add the sauce after the seafood is cooked and drained. This is a finishing sauce, not the cooking liquid.
What sauce goes with shrimp boil?
Garlic butter Cajun sauce is one of the best sauces for shrimp boil. Use a slightly looser sauce with lemon juice so the shrimp stays bright and juicy instead of feeling too heavy.
What sauce is best for crab boil?
A thick garlic butter seafood sauce is best for crab boil because it clings well to crab meat. Keep it buttery, garlicky, and slightly lemony, with Old Bay or Cajun seasoning for classic seafood flavor.
Is this good as a dipping sauce?
It is excellent as a dipping sauce. Reduce the liquid to about ¼ cup / 60 ml and simmer the sauce a little longer. This keeps it thick, buttery, and clingy.
Does it work as a pour-over sauce?
It works well as a pour-over sauce. Use about ½ cup / 120 ml broth or reserved boil liquid, then add more if you want it loose enough to cover a big tray of shrimp, crab, crawfish, corn, potatoes, and sausage.
How do I make it thicker?
Use less liquid or simmer the sauce uncovered for a few minutes. For a thick dipping sauce, start with ¼ cup / 60 ml liquid instead of ½ cup / 120 ml.
How do I make it less salty?
Add unsalted butter, warm broth, lemon juice, or a small pinch of brown sugar. If serving with a full seafood boil, potatoes and corn can also help absorb some of the salty flavor.
Can I make seafood boil sauce without Old Bay?
You can. Use Cajun seasoning, smoked paprika, garlic powder, onion powder, black pepper, and a tiny pinch of celery salt or celery seed if you have it. The flavor will be slightly different, but still good.
Can I make seafood boil sauce without Cajun seasoning?
You can. Use Old Bay, smoked paprika, garlic powder, onion powder, black pepper, and a little cayenne or hot sauce for heat.
Why did it separate?
The heat may have been too high, or the liquid may have been added too quickly. Keep the sauce at a gentle simmer and whisk in broth gradually. If it separates, lower the heat and whisk in a little warm liquid.
How much sauce do I need for a seafood boil?
For dipping, plan on about ½ cup / 120 ml sauce per 1 lb / 450 g seafood. For pouring over a seafood boil tray, plan on about ¾ cup / 180 ml per 1 lb / 450 g seafood. Make extra if you are serving corn, potatoes, sausage, and eggs because they absorb sauce.
Did You Make This Seafood Boil Sauce?
Once you make this sauce once, it stops feeling like an add-on. It becomes the thing that pulls the whole seafood boil together: the shrimp, the crab, the corn, the potatoes, the sausage, the bread at the end, and everyone reaching back for one more dip.
The final swipe of bread is the payoff, because the best seafood boil sauce always leaves one more bite at the bottom of the tray.
Taste it while it is warm, adjust it until it feels balanced, then pour it over the tray and serve extra on the side. That is the moment the meal comes together.
Did you make it thick for dipping, loose for pouring, or extra spicy for crawfish? Leave a rating and a comment with your seafood mix, sauce thickness, and heat level so other readers can adjust their own seafood boil sauce with confidence.
A Cajun seafood boil is the kind of dinner that turns the table into the event: sweet shrimp, juicy crab legs, smoky sausage, corn, potatoes, lemon, garlic, Cajun seasoning, and a glossy garlic butter sauce that gets into every shell, every potato, and every bite of corn.
Timing is the part that makes people nervous. Seafood is expensive, shrimp overcooks fast, crab legs are often already cooked, and potatoes need a head start if you want them seasoned all the way through.
This recipe keeps the feast feeling big, but the method stays calm: build a bold broth, add everything in the right order, save a little broth for the sauce, then finish the whole tray with Cajun garlic butter.
This recipe works as your main home-kitchen seafood boil: shrimp or prawns, crab legs, smoked sausage, corn, potatoes, Cajun seasoning, and garlic butter sauce. Crawfish, lobster tails, mussels, and clams can join the pot, but they are not required for a saucy, satisfying boil.
Quick Answer: How Do You Make a Cajun Seafood Boil?
A Cajun seafood boil is made by simmering potatoes, sausage, corn, crab legs, and shrimp in a seasoned Cajun broth, then finishing everything with garlic butter sauce. Cook the ingredients in stages: potatoes first, sausage next, corn and crab after that, and shrimp last. Reserve some broth for the butter sauce before draining.
A 6-serving home version uses a 10 to 12 quart / 9.5 to 11.4 L pot, about 4 quarts / 3.8 L total liquid, 2 lb / 900 g crab legs, 1.5 to 2 lb / 680 to 900 g shrimp, 12 to 14 oz / 340 to 400 g sausage, 1.5 lb / 680 g baby potatoes, and 4 to 6 ears of corn.
Simple rule: potatoes early, shrimp last, sauce at the end. That one order keeps the potatoes flavorful, the crab sweet, and the shrimp tender instead of rubbery.
Even if this is your first seafood boil, you do not have to manage everything at once. Prep first, cook in stages, and keep the shrimp for the very end. The pot builds flavor; the sauce delivers it.
Best first-time path: make the classic shrimp-and-crab version, use the normal coating sauce, keep the heat medium, and skip a long soak. This gives you a full, saucy tray without overcomplicating the pot.
Meanwhile, this is where seafood boil turns into a meal people gather around, because the tray, the sauce bowls, and the shells all belong at the table.
Cajun Seafood Boil Recipe Card
Cajun Seafood Boil With Garlic Butter Sauce
A bold home-kitchen Cajun seafood boil with shrimp, crab legs, smoked sausage, corn, potatoes, lemon, garlic, Cajun seasoning, and buttery garlic sauce. The ingredients move in stages so the potatoes absorb the broth, the crab heats gently, and the shrimp stays tender.
Notice how the butter clings to the shells and corn instead of pooling away; that glossy coat is what makes each bite feel richer.
Prep Time
20 minutes
Cook Time
35 minutes
Total Time
55 minutes, plus 5 to 10 minutes if soaking
Servings
6
Method
Stovetop
Pot Size
10 to 12 quart / 9.5 to 11.4 L stockpot
Best Cue
Shrimp just cooked; potatoes tender; crab heated through
Seafood Boil Ingredients
4 quarts / 3.8 L total liquid: water, or mostly water plus 12 oz / 355 ml beer
1 large onion, quartered
1 to 2 heads garlic, halved crosswise
2 lemons, halved, plus extra wedges for serving
2 to 3 bay leaves
1/4 cup Cajun seasoning to start, up to 1/2 cup only if your blend is low-salt or salt-free
1 to 2 tablespoons Old Bay or seafood seasoning, optional
1.5 lb / 680 g baby potatoes
12 to 14 oz / 340 to 400 g andouille or smoked sausage, sliced into thick rounds
4 to 6 ears corn, cut into halves or thirds
2 lb / 900 g snow crab legs or crab clusters, usually precooked
1.5 to 2 lb / 680 to 900 g jumbo raw shrimp or prawns, easy-peel or deveined shell-on if possible
Salt, only if needed after tasting the broth
Fresh parsley, for serving
Why the seasoning amount looks large: this seasons the water, potatoes, corn, shells, and seafood, not just the surface of the shrimp. Start with 1/4 cup if your blend contains salt.
Optional Add-Ins
1 to 2 lb / 450 to 900 g cooked or properly prepared crawfish; for live crawfish, use crawfish-specific cleaning and cooking guidance
2 to 3 lobster tails
1 lb / 450 g mussels or clams, cleaned
4 to 6 peeled hard-boiled eggs, warm or room-temperature, added after draining
Cajun Garlic Butter Sauce
1 cup / 227 g unsalted butter
6 to 8 garlic cloves, finely minced
1 tablespoon Cajun seasoning
1 teaspoon smoked paprika
1 to 2 tablespoons lemon juice
1/4 to 1/2 cup / 60 to 120 ml reserved seafood boil broth
1 to 2 teaspoons hot sauce, optional
2 tablespoons chopped parsley
Method
Prep everything first. Cut the corn, slice the sausage, halve the lemons and garlic, rinse the seafood, and thaw frozen seafood if needed.
Build the broth. Add the liquid, onion, garlic, lemons, bay leaves, 1/4 cup Cajun seasoning, and optional Old Bay to a large stockpot. Bring to a rolling boil and simmer for 5 to 10 minutes, until it smells garlicky, lemony, and spicy.
Taste the broth. It should be bold, but not harsh or unpleasantly salty. Add more seasoning only if needed.
Add the potatoes and cook for 8 to 12 minutes, then add the sausage and cook for 5 minutes.
Reduce the heat slightly if the pot is violently boiling. Add corn and crab legs; cook for 4 to 7 minutes, just until the corn is tender and the crab is heated through.
Add lobster tails, mussels, or clams if using. Cook for 4 to 6 minutes, until lobster is opaque and mussels or clams have opened.
Add shrimp last. Cook for 3 to 5 minutes, just until pink, opaque, and curled into a loose C-shape. For smaller shrimp, turn off the heat and let the covered pot finish them gently.
Reserve 1 cup / 240 ml seasoned broth, then drain the boil carefully.
Make the sauce. Melt butter, cook garlic briefly, then stir in Cajun seasoning, paprika, lemon juice, reserved broth, hot sauce if using, and parsley.
Transfer everything to a large tray or serving platter. Add boiled eggs now if using. Spoon the Cajun garlic butter over the crab joints, corn, potatoes, shrimp, sausage, and eggs, or serve extra on the side for dipping.
Salt note: Cajun seasoning, Old Bay, seafood boil seasoning, and crab boil blends can all contain salt. Start lower if your blend is salty, taste the broth before adding seafood, and adjust slowly.
Success cues:
Potatoes: tender, but not splitting apart.
Corn: bright, juicy, and tender when pierced.
Crab: steaming hot and fragrant.
Lobster: opaque and firm, not tight.
Mussels/clams: opened after cooking; discard closed ones.
Shrimp: pink and curled into a loose C-shape.
Sauce: shiny, spoonable, and coating instead of watery.
After the cook, this is the quickest way to check your timing: loose shrimp, tender potatoes, hot crab, and sauce that still looks rich.
What this recipe is built to prevent: bland potatoes, overcooked shrimp, cold crab, salty broth, watery sauce, and a crowded pot. The timing is staged so the sturdy ingredients get flavor first and the delicate seafood stays tender.
Just as important as the method itself, this recipe is built to help you avoid the mistakes that make a boil feel flat or overdone.
Do not aim for a perfect-looking tray. Aim for hot crab, tender shrimp, juicy corn, potatoes that taste seasoned inside, and enough finishing butter that people start passing bowls around.
Why This Seafood Boil Works
The broth builds flavor first. Garlic, lemon, onion, bay leaves, and Cajun seasoning get time to season the water before the potatoes go in.
The pot moves in waves. Potatoes and sausage can handle time; shrimp cannot, so the delicate seafood waits.
The heat stays steady. A strong boil builds the broth and cooks the potatoes, but seafood does better with a lively simmer or controlled boil.
The sauce finishes the feast. Reserved broth ties the garlic butter back to the pot, so it tastes like the boil instead of a separate topping.
Make this when you need a messy weekend seafood dinner, a casual birthday tray, a game-day spread, or a restaurant-style boil at home without a giant pot. This is a hands-on dinner, not a quiet plated one: shells cracking, corn turning glossy, potatoes disappearing first, and sauce bowls being passed around the table.
Choose Your Seafood Boil Version
Before you shop, decide what kind of tray you are making. The method stays the same, but this helps you choose the right seafood, sauce level, and pot plan.
Version
Best for
How to adjust
Classic shrimp and crab
The all-purpose family-style tray
Use the recipe as written
Shrimp-only
Fastest, easiest, most budget-friendly version
Skip crab and use 2.5 to 3 lb / 1.1 to 1.4 kg shrimp
Crab-heavy
A special-occasion platter
Use more crab legs and slightly less shrimp
Extra saucy
Restaurant-style garlic butter lovers
Use the larger butter sauce option
No giant pot
Apartment kitchens or smaller stockpots
Make a half batch or cook in rounds
Quick Decision Guide
If this is your situation
Do this
First seafood boil
Shrimp + precooked crab, normal sauce, no long soak
Small kitchen
Half batch or cook in rounds
Mixed spice crowd
Medium broth, hotter sauce on the side
Budget version
Shrimp-only with sausage, corn, and potatoes
Special occasion
Crab-heavy or add lobster tails
Nervous about shrimp
Add shrimp off heat and cover
Once you choose the version, the rest becomes easier: buy the right seafood, give the pot enough room, and let the sauce make the whole platter feel generous.
Once you choose the version you want, shopping gets easier too: shrimp-only is fastest, classic shrimp-and-crab is the all-purpose move, and lobster is the upgrade.
Before you shop: for the easiest version, buy raw jumbo shrimp, precooked snow crab legs, smoked sausage, baby potatoes, corn, lemons, garlic, unsalted butter, and one Cajun seasoning you like. Avoid precooked shrimp for the main boil when possible; when that is all you have, add it off heat at the very end just to warm through. Large crab clusters may need a little less total seafood or a two-pot plan.
More help below: ingredients, pot size, seafood per person, seasoning guide, cook order, setup checklist, sauce, no-giant-pot options, storage, troubleshooting, and FAQs.
How This Home Seafood Boil Works
This version is built for a normal home kitchen, not a huge outdoor crawfish pot. Shrimp and crab legs are the default because they are easy to find, quick to cook, and generous on the tray. Crawfish, lobster, mussels, clams, and eggs are optional add-ins, not requirements.
The promise is a bold, saucy seafood platter without special equipment. You season the broth, cook in stages, keep the seafood gentle, and finish everything with Cajun butter.
Ingredients You Need
Ingredients break naturally into four groups: seafood, vegetables, sausage, and sauce. For the lowest-stress first boil, buy raw shell-on shrimp and precooked crab legs. That combination gives you the seafood boil feeling without making the timing complicated.
Before the pot starts, gather everything first so the boil can move in stages and the seafood never has to wait too long at the end.
Shrimp or Prawns
Jumbo shrimp or large prawns work best. Easy-peel or deveined shell-on shrimp are ideal because they hold their texture better, bring more flavor to the broth, and are easier to eat at the table. Peeled shrimp work too, but they cook faster, so add them right at the end.
The best cue is color and shape. Shrimp should be pink, opaque, and curled into a loose C-shape. A tight curl and bouncy texture usually mean they have gone too far. Since shrimp keeps cooking from carryover heat while you drain, sauce, and serve, it waits until the end.
If your shrimp are still frozen and you need a separate no-thaw method for another night, this frozen shrimp in air fryer guide is useful for timing, size cues, and checking whether the shrimp is raw or already cooked.
If this is your first boil, raw shrimp and precooked crab are the easiest pairing because they keep the timing simple and predictable.
Crab Legs or Crab Clusters
Snow crab legs are the easiest way to make the tray feel generous without making the cooking harder. They are sweet, easy to crack open at the table, and usually sold already cooked, which means you are mostly warming them through.
King crab legs work too, but they are larger, pricier, and need more room in the pot. Very large clusters are easier to manage in a 12-quart pot or in two rounds.
Still-icy crab legs need a head start. Add them before the corn or give them a few extra minutes before the shrimp goes in, so you do not end up choosing between cold crab and overcooked shrimp.
Raw crab needs proper cooking time. Precooked crab needs gentle reheating so the meat stays sweet instead of dry.
Crawfish, Lobster, Mussels, or Clams
Crawfish is classic in many Louisiana-style boils, but this recipe is written mainly around shrimp and crab. Add crawfish, lobster tails, mussels, or clams only when you know whether they are fresh, frozen, raw, or precooked.
For mussels and clams, discard any that stay open after a firm tap before cooking, and discard any that stay closed after cooking.
Smoked Sausage or Andouille
Andouille gives the most classic smoky Cajun-style flavor, but any good smoked sausage can work. Cut it into thick rounds so it stays juicy. As it simmers, the sausage releases smoky flavor into the broth, and the potatoes and corn pick that up.
Corn and Potatoes
Baby potatoes are ideal because they hold their shape and soak up the Cajun broth. If your potatoes are larger, cut them in half. They are ready when a knife slides in with light resistance, not when they are breaking apart.
Corn adds sweetness and gives you those buttery, spicy bites that make the tray feel complete. The potatoes are often the sleeper hit; give them enough time in the broth and they taste seasoned all the way through.
Onion, Garlic, Lemon, and Bay Leaves
These aromatics turn seasoned water into a proper boil broth. Garlic gives depth, lemon brightens the seafood, onion adds sweetness, and bay leaves bring a gentle savory background note.
When the steam smells like lemon, garlic, bay, and pepper, the pot is ready for the potatoes.
What Size Pot Do You Need for a Cajun Seafood Boil?
A 10 to 12 quart / 9.5 to 11.4 L stockpot is the best home-kitchen size for this recipe. You need enough space for liquid, potatoes, corn, sausage, crab legs, shrimp, and bubbling room.
Keep the pot no more than about two-thirds full once everything is inside. A crowded pot makes the cook nervous; a roomy pot makes the tray better.
Batch size
Suggested pot size
Best for
2 to 3 people
6 to 7 qt / 5.7 to 6.6 L
Shrimp, sausage, corn, potatoes
4 to 6 people
10 to 12 qt / 9.5 to 11.4 L
Shrimp and crab legs
6 to 8 people
16 qt / about 15 L
A fuller boil with extra shellfish
8+ people
20 to 30 qt / 19 to 28 L
Party-size seafood boil or crawfish boil
A smaller pot does not mean a smaller dinner. Cook in smarter rounds and let the finishing sauce make everything feel like one big tray. You do not need outdoor equipment for this version. The tray is what makes it feel abundant, not the size of the pot.
In practice, a roomy pot is easier to manage, so match the pot to the batch instead of forcing everything into one tight space.
The difference is simple: a crowded pot fights the cook, while a roomy pot keeps the boil moving and the ingredients easier to handle.
How Much Seafood Per Person?
Shell-on seafood looks generous on the tray, but the shells also count toward the weight. A pound of crab legs or shell-on shrimp does not mean a pound of edible meat.
Appetite
Seafood per person
Good for
Light meal
1/2 lb / 225 g shell-on seafood
Smaller servings with plenty of sides
Normal seafood boil
3/4 lb / 340 g shell-on seafood
Most home boils
Big feast
1 lb / 450 g shell-on seafood
Hungry guests or seafood-heavy meals
A good 6-person mix is about 2 lb / 900 g crab legs plus 1.5 to 2 lb / 680 to 900 g shrimp. Add crawfish, lobster, mussels, or clams by reducing the shrimp or crab slightly, not by overfilling the pot.
Since shell-on seafood includes shell weight, this quick guide helps you plan portions with enough room for a proper feast.
Cajun Seasoning vs Seafood Boil Seasoning vs Old Bay
Seasoning can turn too salty here. Cajun seasoning, seafood boil seasoning, Old Bay, crab boil packets, and liquid crab boil are not always interchangeable in equal amounts.
Seasoning
What it usually tastes like
How to use it here
Cajun seasoning
Paprika, garlic, onion, pepper, herbs, cayenne; salt level varies
Main seasoning base
Seafood boil seasoning
Often stronger and saltier; made for large pots of water
Use carefully and taste the broth
Old Bay
Celery salt-forward seafood seasoning with warm spices
Good as a supporting seasoning
Creole seasoning
Similar to Cajun seasoning, often herbier and sometimes milder
Can replace Cajun seasoning if needed
Liquid crab boil
Very concentrated, spicy, and aromatic
Use only a small amount if you know the product
Seasoning the water should smell exciting; it should not make you wince. Choose one main seasoning base, then build slowly. A salt-free Cajun blend may need more salt. A salted Cajun blend plus Old Bay or seafood boil seasoning may not need any extra salt.
Because seasoning blends do not all carry the same salt level, it helps to compare them before the seafood ever touches the pot.
Before adding the seafood: taste a spoonful of the broth. It should taste stronger than soup because it has to season potatoes, corn, shells, and seafood, but it should not taste harsh or unpleasantly salty.
Quick Homemade Cajun Seafood Boil Seasoning
For a quick salt-aware blend, keep the seasoning unsalted at first when using Old Bay, seafood boil seasoning, or salted stock.
If you prefer to mix your own, this blend keeps the Cajun flavor bold while still letting you control the salt and heat.
2 tablespoons paprika
1 tablespoon smoked paprika
1 tablespoon garlic powder
1 tablespoon onion powder
2 teaspoons black pepper
1 teaspoon dried oregano
1 teaspoon dried thyme
1/2 to 2 teaspoons cayenne pepper, to taste
Optional salt, only if you are not using salty seasoning elsewhere
This homemade blend works well as the Cajun seasoning base. Start with 1/4 cup in the boil broth, taste, then add more if needed. For the butter sauce, use 1 tablespoon of the blend, then adjust heat with hot sauce or cayenne.
Big Seafood Boil Mistakes to Avoid
Most seafood boil problems start before the tray ever reaches the table. Keep these habits in mind and the whole recipe becomes easier.
Add in stages, not all at once. Potatoes need time, but shrimp does not.
Build seasoning slowly. Cajun seasoning, Old Bay, crab boil, and seafood boil blends can all bring salt.
Give the pot room. Crowding drops the temperature, slows cooking, and makes stirring difficult.
Steady the boil. Use a strong boil for the broth and potatoes, then a gentler boil once seafood goes in.
Keep shrimp gentle. Add it last and stop when it is no longer translucent and has curled loosely.
Save some broth. A little seasoned broth makes the butter taste connected to the boil.
Reheat gently later. Reboiling cooked seafood usually makes it tough.
Think of the pot in waves. The sturdy things go first, the delicate things wait, and the spicy butter brings everyone together at the end.
Cajun Seafood Boil Cook Order Chart
This is the part that saves the seafood. The pot should feel organized, not rushed: potatoes first, shrimp last, and everything else in between.
The cook order is what protects the seafood: broth first, potatoes next, then sausage, corn, crab, and shrimp only at the end.
Use the chart, then trust the cues. The minutes help you plan, but the best seafood boil is still cooked by watching the pot.
Step
Add
Time
What to watch for
1
Water or water-beer mix, onion, garlic, lemon, bay leaves, seasoning
Boil 5 to 10 min
Broth smells bold, garlicky, lemony, and fragrant
2
Baby potatoes
8 to 12 min
Knife slides in with light resistance
3
Sausage
5 min
Smoky aroma begins seasoning the broth
4
Corn and precooked crab legs
4 to 7 min
Corn bright and juicy; crab steaming hot
5
Lobster tails, mussels, or clams, if using
4 to 6 min
Lobster opaque; mussels/clams opened
6
Shrimp or prawns
3 to 5 min
Pink, opaque, and curled into a loose C-shape
7
Drain, reserve broth, toss with sauce
5 min
Everything glossy, hot, and coated
Small or peeled shrimp are easier to overcook. Turn off the heat before adding them, cover the pot, and let them cook gently in the residual heat for more control.
Should You Soak Seafood Boil Before Draining?
A short soak can help seafood, potatoes, corn, and sausage absorb more flavor from the broth. The risk is shrimp sitting too long in very hot liquid.
For this home version, the safest default is to cook the shrimp until just done, reserve broth, drain, and finish with garlic butter sauce.
For deeper boil flavor, use a controlled short soak. Turn off the heat once the shrimp is nearly done and let the bubbling settle for a minute. If the broth is still very hot and active, add a handful of ice or a splash of cold water, cover the pot, and let everything sit for 5 to 10 minutes. Then reserve broth, drain, and sauce.
Best soak rule: short soak for shrimp-heavy boils, longer soak only if the pot is mostly crab, crawfish, potatoes, corn, and sausage. Avoid hot-soaking small peeled shrimp for a long time.
Set Up Before You Drain
Seafood boils move fast at the end. Set the table before you drain the pot so the tray can go out hot, glossy, and ready to eat.
Before the drain-and-toss moment, set out the tray, tools, napkins, and lemon wedges so the finish feels calm instead of rushed.
You need
Why it helps
Large tray, sheet pan, or paper-lined table
Gives the boil room to spread out
Spider strainer or tongs
Helps lift seafood without breaking it
Crab crackers or kitchen shears
Makes crab easier to eat
Shell bowl
Keeps the table usable
Napkins or wet towels
Seafood boils are messy
Extra lemon and warm butter
Lets people finish their own bites
How to Make Cajun Seafood Boil
1. Prep Everything Before You Start
Once the pot is hot, things move quickly. Cut the corn into halves or thirds, slice the sausage, halve the lemons, cut the garlic heads across the middle, rinse the seafood, and thaw frozen seafood if needed.
Check your seafood before it goes near the pot. Precooked crab legs need gentle heating. Raw lobster needs enough time to turn opaque. Peeled shrimp cook faster than shell-on shrimp. Mussels and clams should be cleaned and checked carefully.
Add the water or water-beer mix, onion, garlic, lemons, bay leaves, Cajun seasoning, and optional Old Bay to your stockpot. Bring it to a rolling boil, then let it boil for 5 to 10 minutes before adding the main ingredients.
Start with the broth, because garlic, lemon, onion, and Cajun seasoning do the real flavor-building before anything else goes in.
This short simmer wakes up the garlic, lemon, onion, bay leaves, and spices. The broth should smell garlicky, lemony, and spicy before the potatoes go in.
3. Add the Potatoes First
Add the baby potatoes and cook for 8 to 12 minutes. They should be starting to soften but not falling apart. Larger potatoes should be halved so they cook more evenly.
Potatoes need the earliest start, and that extra simmer time is what lets them taste seasoned all the way through.
Give this step its time. A knife should slide in with light resistance. When the potatoes get enough time in the broth, they become the bites people keep stealing from the tray.
4. Add the Sausage
Add the sliced sausage and cook for about 5 minutes. The broth should start smelling smoky and savory. Taste again here and adjust carefully if needed.
Next, the sausage adds smoke while the corn brings sweetness, and the broth keeps building flavor at every stage.
5. Add the Corn and Crab Legs
Add the corn and crab legs. Cook for 4 to 7 minutes, depending on size. Most frozen crab legs are already cooked, so you are heating them through rather than cooking them aggressively.
Once the crab goes in, the boil starts to feel like a feast, but the pot still needs space so everything stays tender.
Large crab clusters may need a little extra time. Smaller clusters should stay on the shorter side so they remain sweet and tender. If the pot looks angry instead of lively, lower the heat slightly before the delicate seafood goes in.
6. Add Optional Lobster, Mussels, or Clams
Lobster tails, mussels, and clams should go in after the crab has started heating. Lobster tails usually need about 4 to 6 minutes, depending on size. Mussels and clams are done when they open.
Discard any mussels or clams that do not open after cooking. Do not force them open and eat them.
7. Add the Shrimp Last
Shrimp should be the final ingredient. Add it to the hot broth and cook for 3 to 5 minutes, just until pink, opaque, and gently curled. Large shell-on shrimp can handle a few minutes of simmering. Smaller peeled shrimp should be cooked more gently.
Shrimp only needs a few minutes, so it should always go in last if you want it tender instead of tight and rubbery.
For extra control, turn off the heat, add the shrimp, cover the pot, and let the residual heat cook them. This is especially helpful for small shrimp or nervous first-time boils.
8. Reserve Broth, Drain, and Sauce
Scoop out 1 cup / 240 ml of the seasoned broth before draining. Use some of it in the garlic butter sauce. Drain the boil carefully, then transfer everything to a large tray, sheet pan, or paper-lined table.
Save the broth before draining, because that seasoned liquid is what makes the sauce taste like part of the boil.
Pour the Cajun butter over the tray and toss gently, or serve the dip on the side. Spoon extra over the crab joints, corn, potatoes, shrimp, sausage, and boiled eggs if using.
Cajun Garlic Butter Sauce
The broth gives the boil its backbone, but the butter sauce is what people remember. It catches in the crab shells, glosses the shrimp, and turns the potatoes and corn into the bites people keep reaching for.
The sauce is not just decoration here. It is the final seasoning layer, the dip, and the thing that makes the potatoes and corn disappear first.
This sauce starts simple—butter, garlic, Cajun seasoning, paprika, lemon, parsley, hot sauce, and reserved broth—and still finishes the whole dish.
A good sauce should run off a spoon in a smooth stream and leave a buttery coating behind.
If it looks thin and watery, simmer briefly or add more butter. If it feels heavy or salty, loosen it with unsalted broth or water and brighten it with lemon.
A proper Cajun butter sauce should coat the spoon first; if it runs off too quickly, it still needs a little more body.
For a coated tray, use the normal sauce. For sauce bowls and extra dipping, double it.
Normal Coating Sauce
This amount is enough to coat a 6-serving seafood tray without drowning it.
Ingredient
Amount
Unsalted butter
1 cup / 227 g
Garlic
6 to 8 cloves, minced
Cajun seasoning
1 tablespoon
Smoked paprika
1 teaspoon
Lemon juice
1 to 2 tablespoons
Reserved boil broth
1/4 to 1/2 cup / 60 to 120 ml
Hot sauce
Optional, to taste
Parsley
2 tablespoons, chopped
Extra Saucy Restaurant-Style Version
Use this version for a very buttery platter with plenty of dipping sauce.
Ingredient
Amount
Unsalted butter
2 cups / 454 g
Garlic
8 to 10 cloves, minced
Cajun seasoning
2 tablespoons
Old Bay or seafood seasoning
1 tablespoon, optional
Reserved boil broth
1/2 to 1 cup / 120 to 240 ml
Lemon juice
2 tablespoons
Hot sauce
Optional, to taste
Brown sugar
Optional pinch, for balance
Parsley
1/4 cup, chopped
How to Make the Sauce
Melt the butter in a saucepan over medium-low heat. Add the garlic and cook for 30 to 60 seconds, just until fragrant. Keep the garlic pale; deeply browned garlic can make the sauce bitter.
As the sauce simmers, keep the heat gentle so the butter stays rich and the garlic turns fragrant without burning.
Stir in Cajun seasoning, smoked paprika, lemon juice, and a little reserved broth. Add hot sauce for more heat. Simmer gently for 1 to 2 minutes, then stir in parsley. The sauce should coat the spoon before it coats the tray.
Taste the reserved broth before adding it to the sauce. If the broth is very salty, use water or unsalted stock instead. A flat sauce needs lemon; an intense sauce needs more butter or broth.
Coating Sauce vs Dipping Sauce
A coating sauce uses less broth so the butter clings to the seafood, corn, and potatoes. For a dipping sauce, add a little more broth so it stays loose and spoonable. You can also split it: toss half with the boil and serve the rest in small bowls at the table.
For the saucy restaurant-style finish, do not pour all the butter in one spot. Pour slowly, toss gently, and let it run into the crab joints, between the corn pieces, across the potatoes, and around the shrimp.
When the sauce goes over the tray, pour slowly so it reaches the crab joints, potatoes, corn, and shrimp instead of sitting in one spot.
If garlic butter shrimp is the part of the tray you love most, this shrimp scampi recipe gives you the same lemon-garlic-butter comfort in a quicker pasta-friendly format.
Make-Ahead and Leftover Sauce
You can make the butter sauce 2 to 3 days ahead. Store it in the refrigerator, then rewarm it gently over low heat. Add a splash of reserved broth, stock, or water if it thickens too much.
Leftover sauce is worth saving. Spoon it over shrimp, crab legs, lobster tails, corn, potatoes, garlic bread, roasted vegetables, rice, or pasta. Freeze extra sauce in small portions for an easy Cajun butter finish another day.
That extra bowl is also excellent with torn pieces of homemade garlic bread, especially when you need something simple to catch the spicy, lemony butter.
No Giant Pot? Here Are Your Options
The classic version can be huge, but a normal kitchen can still make a satisfying batch. The tray does not care whether everything cooked in one pot. The sauce makes it feel united.
Option 1: Split the Recipe Between Two Pots
If you have two medium stockpots, divide the broth, potatoes, corn, sausage, and seafood between them. Keep the timing the same, but watch each pot separately. This is the easiest way to make the full recipe without overcrowding one pot.
Option 2: Make a Half Batch
For 2 to 3 people, cut the recipe in half and use a 6 to 7 quart / 5.7 to 6.6 L Dutch oven or stockpot. A shrimp-and-crab version works especially well for a smaller batch.
For a quieter seafood dinner with no big pot at all, this baked haddock recipe follows the same gentle-cooking idea: season well, avoid overcooking, and let the fish stay tender.
Option 3: Boil First, Sauce Later
If your pot is too small for everything at once, cook the potatoes and corn first, remove them, then cook the seafood separately. Combine everything on a tray and pour the hot Cajun garlic butter sauce over the top. You still get the same messy, saucy feeling without needing a massive pot.
If you are cooking in a smaller kitchen, this is the easiest workaround: boil in rounds, then combine everything on the tray and finish with sauce.
What About a Seafood Boil Bag?
For a seafood boil bag, use this same seasoning and sauce logic, but treat it as a separate oven-bag method: cooked potatoes and corn, raw shrimp added late, and sauce sealed in or tossed after cooking. This stovetop version gives more classic broth flavor because everything cooks in seasoned liquid.
Seafood Swaps and Variations
Use the seafood that is fresh, available, and reasonably priced where you live. The pot does not need to look exactly like anyone else’s; it just needs to be timed well and sauced generously.
If you do not have
Use this instead
Crawfish
Shrimp, prawns, crab legs, or lobster tails
Snow crab
King crab, blue crab, local crab, or extra shrimp
Andouille
Smoked sausage, chicken sausage, or chorizo-style sausage
Old Bay
A little extra Cajun seasoning, celery salt, paprika, garlic powder, and black pepper
Mussels or clams
Skip them or add more shrimp and crab
Lemon
Lime in a pinch
Beer
More water, seafood stock, chicken stock, or vegetable stock
Boiled eggs
Skip them or add peeled hard-boiled eggs after draining
Shrimp-Only Cajun Seafood Boil
For an easier version, skip the crab and use 2.5 to 3 lb / 1.1 to 1.4 kg large shell-on shrimp. Keep the potatoes, corn, sausage, and garlic butter sauce. Add the shrimp at the very end so it does not overcook.
For another quick shrimp dinner where timing matters just as much, these shrimp tacos use the same idea: cook the shrimp hot and fast, then build the fresh parts around it.
Crab-Lovers Seafood Boil
Use 3 to 4 lb / 1.4 to 1.8 kg crab legs and reduce the shrimp slightly. Since crab legs are usually precooked, focus on heating them gently and coating them well with Cajun butter.
Crawfish-Style Boil
If crawfish is available, add it with or shortly before the shrimp, depending on whether it is fresh, frozen, raw, or precooked. Crawfish boils often use stronger seafood boil seasoning, so be extra careful with salt and spice levels.
If crawfish is already cooked, treat it more like crab and warm it gently. If it is raw or live, use crawfish-specific cleaning and cooking guidance rather than relying on the shrimp timing in this recipe. This recipe can borrow crawfish-boil flavors, but it is not a full live-crawfish boil tutorial.
Lobster Tail Upgrade
Add 2 to 3 lobster tails for a more special-occasion boil. Cut the shells slightly so the seasoning and butter can reach the meat. Lobster tails usually need only a few minutes and should be opaque, not tough.
If you end up with extra cooked lobster meat, save it for a buttery lobster roll instead of reheating it hard in the pot again.
Boiled Egg Add-In
Boiled eggs are optional, but they are great on a restaurant-style seafood tray. Add peeled hard-boiled eggs after draining and spoon Cajun butter over them. They do not need to boil with the seafood; they just need the sauce.
How Spicy Should Cajun Seafood Boil Be?
The boil should be bold, but it does not have to be painfully hot. Keep the broth flavorful and serve extra heat in the butter sauce or hot sauce on the side.
Mild: use less cayenne, skip hot sauce, and rely on paprika, garlic, lemon, and herbs.
Medium: use regular Cajun seasoning and a small amount of hot sauce in the butter.
Spicy: add cayenne, hot sauce, or crushed red pepper to the sauce.
Extra spicy: add more cayenne or a very small amount of liquid crab boil if you know its strength.
Family-style: keep the pot medium and serve spicy garlic butter separately.
For a mixed group, keep the pot medium and let people add heat at the table. It is easier to make one bowl of sauce hotter than to rescue potatoes, corn, and shrimp that are too spicy for some people to enjoy.
What to Serve With Cajun Seafood Boil
The tray already has protein, potatoes, corn, and sauce, so sides can stay simple. Think fresh, crisp, buttery, or bread-based sides that balance the spice and soak up the sauce.
A cold, crunchy side helps balance the butter and spice. This coleslaw recipe is the cleanest fit when you need something creamy, tangy, and crisp beside the seafood tray.
Garlic bread or crusty bread for soaking up sauce
Coleslaw or a crisp cabbage salad
Green salad with lemony dressing
Extra lemon wedges
Pickles or quick-pickled onions
Steamed rice, if you need to stretch the meal
Cold drinks, iced tea, lemonade, or beer
To make the meal feel heartier and more Louisiana-style, red beans and rice makes more sense than adding another heavy seafood dish beside it.
For serving, spread the drained boil on a large tray, sheet pan, or paper-lined table. Spoon the garlic butter sauce over everything while it is hot. Keep extra sauce in bowls for dipping crab, shrimp, corn, and potatoes.
Some people like the tray coated, while others prefer extra sauce for dipping; either way, the butter should stay warm and glossy.
A good seafood boil table needs a shell bowl, a few napkins, and lemon nearby, because the best trays are delicious and a little messy.
Bring the tray to the table while it is hot, saucy, and just cooked. The first crack of crab, the lemon squeezed over the shrimp, and the butter running into the corn are the whole point.
The best part is that everyone has to slow down a little: crack crab, peel shrimp, pass lemon, steal another potato, and reach for the sauce again.
Storage and Reheating
This meal is best served fresh, but leftovers can still be good if you reheat them gently. The main rule is simple: do not reboil cooked seafood. Reboiling usually makes shrimp tough and crab dry.
How to Store Leftovers
Let leftovers cool, then transfer them to airtight containers.
Refrigerate for up to 2 days.
Store extra garlic butter sauce separately if possible.
Remove seafood from shells before storing if you want easier reheating.
Do not leave cooked seafood sitting out for long.
Leftovers are where texture and safety both matter. For general leftover safety, the USDA’s leftovers and food safety guide is a useful reference. For this seafood boil, the shorter 2-day window is best for quality and texture.
Best Way to Reheat Seafood Boil
For the best texture, reheat leftovers in a covered skillet over low heat with a spoonful of butter, broth, or sauce. Warm just until heated through. A covered oven-safe dish at low heat also works for larger portions.
The microwave works in a pinch, but use short bursts and low or medium power if possible. Shrimp can go from warm to rubbery quickly.
If you shell extra shrimp before storing, turn it into shrimp fried rice the next day instead of reheating the whole tray again.
Can You Freeze Seafood Boil?
You can freeze cooked seafood, but the texture may change, especially for shrimp and potatoes. Extra sauce freezes better than the full boil, so save that separately when possible.
Troubleshooting Cajun Seafood Boil
If something feels off, do not panic. Most seafood boil problems come down to timing, salt, or heat, and all three are easier to fix when you catch them early.
Why Is My Shrimp Rubbery?
The shrimp was probably added too early, boiled too hard, or cooked too long. Add shrimp last and stop when it is pink, opaque, and gently curled. Smaller shrimp are safer with residual heat than a rolling boil.
If the shrimp looks too tight, it likely stayed in the pot too long; the better cue is a loose C-shape with a pink, opaque finish.
Why Are My Potatoes Bland?
The broth may not have been seasoned enough before the potatoes went in, or the potatoes did not spend enough time in the seasoned liquid. Potatoes need a head start so they can absorb flavor from the Cajun broth.
Why Is My Seafood Boil Too Salty?
Salt usually builds up when salted Cajun seasoning, Old Bay, seafood boil seasoning, and extra salt are all used together. Stop adding seasoning.
If the seafood is already cooked, lift it out before fixing the broth. Dilute with unsalted water or stock, taste again, and use unsalted butter and lemon in the sauce to soften the salt.
Why Is My Garlic Butter Sauce Watery?
Too much reserved broth was added. Simmer the sauce gently for a minute or add more butter to bring back richness. For a thicker coating, use less broth and spoon it over the seafood while hot.
A good coating sauce should look rich and spoonable, while a watery version usually means the broth went a little too far.
Why Did My Garlic Butter Sauce Break?
The heat was probably too high, or too much broth was added too quickly. Keep the butter over medium-low heat and stir in broth gradually. Even if the sauce separates slightly, it will still taste good spooned over the seafood.
Can I Use Frozen Seafood?
Yes. Thaw shrimp and lobster tails before cooking when possible so they cook evenly. Precooked frozen crab legs usually only need to be heated through. Frozen seafood added straight to the pot will drop the broth temperature and may change the timing.
Can I Make Seafood Boil Ahead?
You can prep the vegetables, cut the sausage, clean the seafood, and make the butter sauce ahead. For the best texture, cook the seafood close to serving time. The tray is much better freshly cooked than reheated for a crowd.
FAQs About Cajun Seafood Boil
What seafood is best for a Cajun seafood boil?
Shrimp and crab legs are the easiest home combination. Crawfish, lobster tails, mussels, and clams also work if you know whether they are raw, frozen, fresh, or precooked.
What seasoning do you use for Cajun seafood boil?
Use Cajun seasoning as the main flavor base. A little Old Bay or seafood boil seasoning can help, but check salt levels first. The broth should taste bold, not sharp or salty.
Is Cajun seasoning the same as seafood boil seasoning?
Not exactly. Cajun seasoning is usually a spice blend with paprika, garlic, onion, herbs, pepper, and cayenne. Seafood boil seasoning is often stronger and saltier because it seasons a large pot of water.
How much Cajun seasoning should I use?
For this 6-serving recipe, start with 1/4 cup. Use up to 1/2 cup only if your blend is low-salt or salt-free. Taste the broth before adding seafood.
Should I use salted or unsalted butter?
Use unsalted butter if possible. The broth and seasonings already bring salt, so unsalted butter gives you room to adjust the final sauce.
Do I need beer in a seafood boil?
No. Beer adds depth, but water works. Seafood stock, chicken stock, or vegetable stock can make the broth taste fuller.
What order do you add seafood boil ingredients?
Start with seasoned broth, then add potatoes, sausage, corn and crab, optional lobster or shellfish, and shrimp last. Think sturdy to delicate.
How long should shrimp cook in a seafood boil?
Large shrimp usually need 3 to 5 minutes. They are done when pink, opaque, and gently curled. Smaller shrimp can finish off heat in the covered pot.
Do crab legs need to be cooked or just reheated?
Most frozen crab legs sold at grocery stores are already cooked, so they only need reheating. Raw crab needs proper cooking time.
Should I thaw frozen shrimp before seafood boil?
Yes, thaw shrimp when possible. Thawed shrimp cook more evenly and are easier to time. Frozen shrimp drops the broth temperature and may cook unevenly.
Can I use precooked shrimp?
Yes, but raw shrimp is better for the main boil. Add precooked shrimp off heat at the very end and let the covered pot warm it gently.
What sausage works best?
Andouille is classic, but any smoky sausage that holds its shape can work.
How do you make Cajun garlic butter sauce?
Melt unsalted butter over medium-low heat, cook minced garlic briefly, then stir in Cajun seasoning, smoked paprika, lemon juice, a little reserved broth, hot sauce, and parsley.
How do I make seafood boil less spicy?
Use less cayenne, skip hot sauce, and choose a mild Cajun seasoning. Keep the broth medium and serve hotter butter on the side.
What can I use instead of crawfish?
Shrimp and crab legs are the easiest substitute. Lobster tails, mussels, or clams can make the tray feel fuller.
Can I add boiled eggs to seafood boil?
Yes. Add peeled hard-boiled eggs after draining and spoon Cajun garlic butter over them. They do not need to boil with the seafood.
Can I make seafood boil in a bag?
Yes, but treat it as a different method. Use cooked potatoes and corn, add raw shrimp late, and use Cajun butter as the finishing sauce. The stovetop version gives more broth flavor.
How do you keep seafood boil warm for serving?
Keep the drained seafood, potatoes, corn, and sausage on a warm tray loosely covered with foil. Hold extra butter warm separately and spoon it over right before serving.
How do you make seafood boil without a large pot?
Make a half batch, split the recipe between two pots, or cook in rounds and combine everything on a tray with hot Cajun butter.
How do you reheat seafood boil leftovers?
Reheat gently in a covered skillet with a little butter, broth, or sauce. Warm just until hot so the seafood does not cook a second time.
Final Tips for the Best Cajun Seafood Boil
The secret to a good Cajun seafood boil is calm control: bold broth, patient potatoes, gentle seafood, and butter sauce at the end. Keep extra lemon nearby, adapt the seafood based on what is available, and avoid overcrowding the pot just to make the tray look bigger.
Do not worry about making it look perfect. A seafood boil is supposed to look abundant, saucy, and a little chaotic. That is part of the fun.
When everything comes together, you get the kind of meal people lean into: crab shells cracking, shrimp dipped in spicy butter, corn dripping with sauce, potatoes soaked with Cajun broth, and a table that feels full before anyone even takes the first bite.
If you make it, tell me what went into your tray and what you changed: shrimp and crab, lobster tails, extra sausage, more spice, less spice, no giant pot, boiled eggs, or the full feast. Those details help the next reader plan their own boil.