
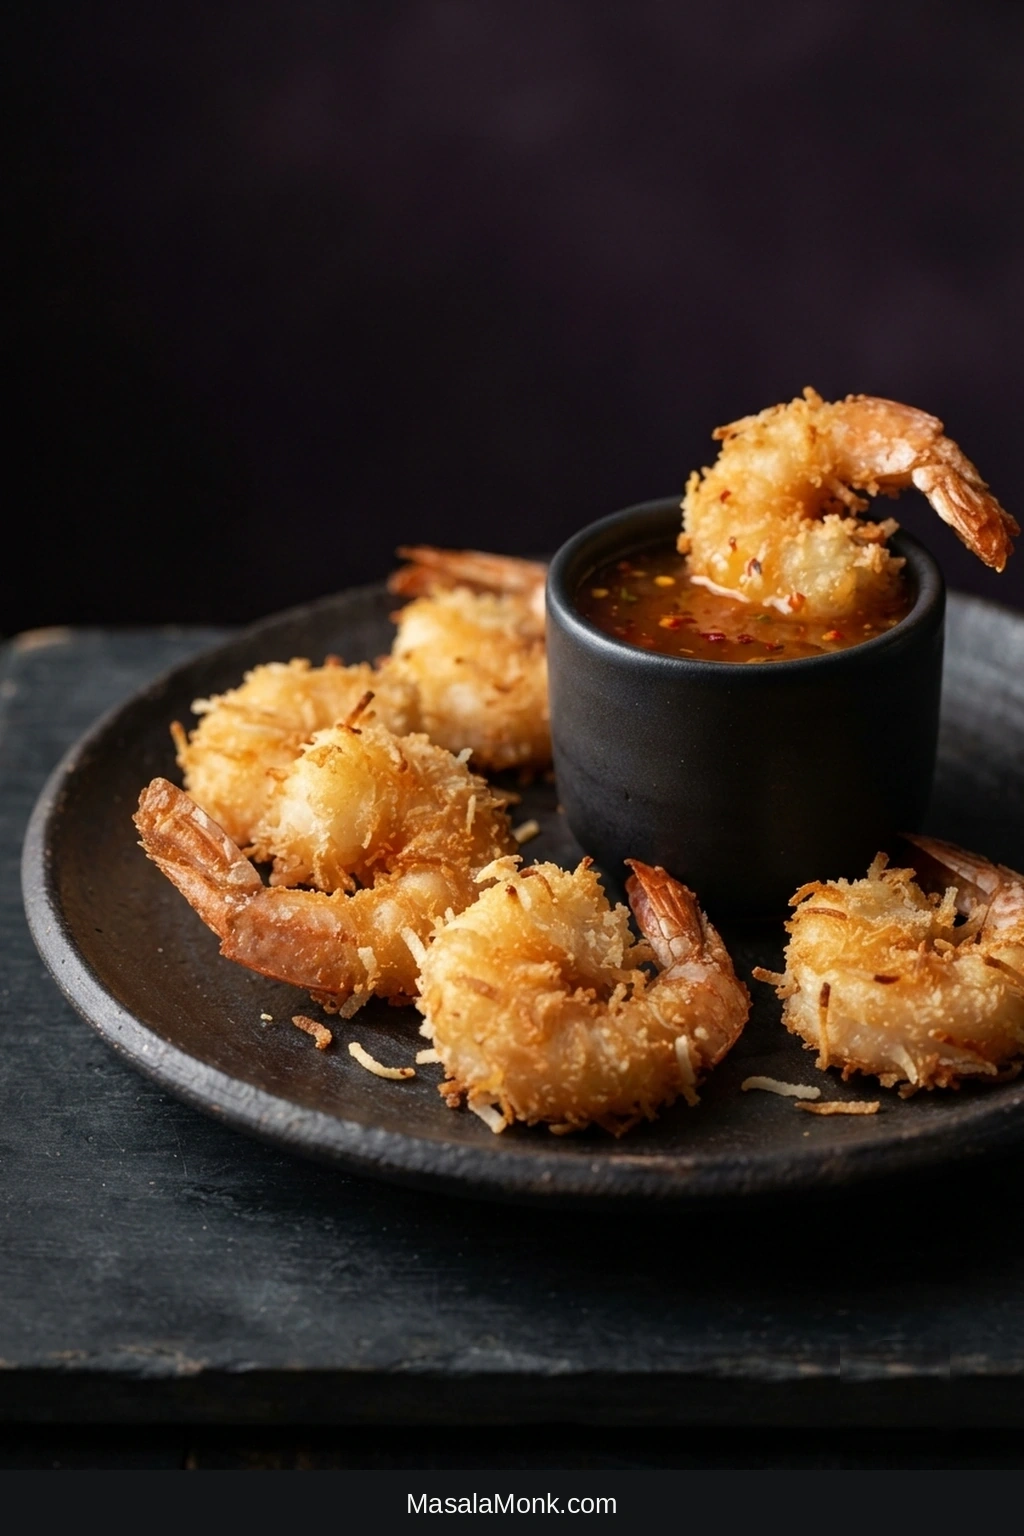
Good coconut shrimp crunches before you reach the shrimp. The coconut catches deep gold around the edges, panko keeps the coating light, and the shrimp underneath stays juicy. Dip one into something fruity, lime-bright and just spicy enough, and the sweetness of the coconut finally has something to push against.
The tricky part is timing. Shrimp cooks in minutes, and coconut can go from pale to dark just as quickly. Moisture makes the breading slip, a heavy egg layer can turn it chewy, and cool oil leaves the crust greasy.
This coconut shrimp recipe keeps the process manageable: dry the shrimp well, build a thin coating, give it a few minutes to settle, then fry at a controlled temperature. About ¼ inch / 6 mm of oil in a skillet is enough. Meanwhile, the apricot-chili dipping sauce comes together while the breaded shrimp rests.
If you remember two things: get the shrimp really dry and let the oil get properly hot before frying. Those two details prevent a surprising number of coconut-shrimp problems.
Crispy Coconut Shrimp with Dipping Sauce
Crisp coconut-panko shrimp, shallow-fried without a deep fryer, with a bright apricot-chili-lime dipping sauce.
Equipment
You need:
- 12-inch / 30 cm heavy skillet or sauté pan
- 3 wide shallow bowls or pie plates
- Large plate, tray or rimmed sheet pan for the breaded shrimp
- Tongs
- Paper towels
Very helpful:
- Instant-read or frying thermometer
- Wire rack that fits over a rimmed sheet pan
- Small fine-mesh strainer or slotted spoon
For the Coconut Shrimp
- 1 lb / 16 oz / 454 g raw 21/25-count shrimp, peeled and deveined, tails on if desired
- ¾ tsp fine salt, divided
- ⅓ cup / 42 g all-purpose flour
- ¼ cup / 32 g cornstarch
- ½ tsp garlic powder
- ¼ tsp freshly ground black pepper
- ⅛ tsp cayenne pepper, optional
- 2 large eggs
- 1 cup / about 85 g sweetened shredded coconut
- 1 cup / about 60 g panko breadcrumbs
- Neutral frying oil (canola, vegetable, peanut or refined avocado), enough for ¼ inch / 6 mm depth—usually 1½–2 cups / 360–480 ml
- Lime wedges, for serving
For the Dipping Sauce
- ¼ cup / about 80 g apricot preserves
- ¼ cup / 60 ml sweet chili sauce
- 1½ tbsp / 22 ml fresh lime juice, plus more to taste
- 1 tsp / 5 ml soy sauce
Instructions
Prepare and Bread the Shrimp
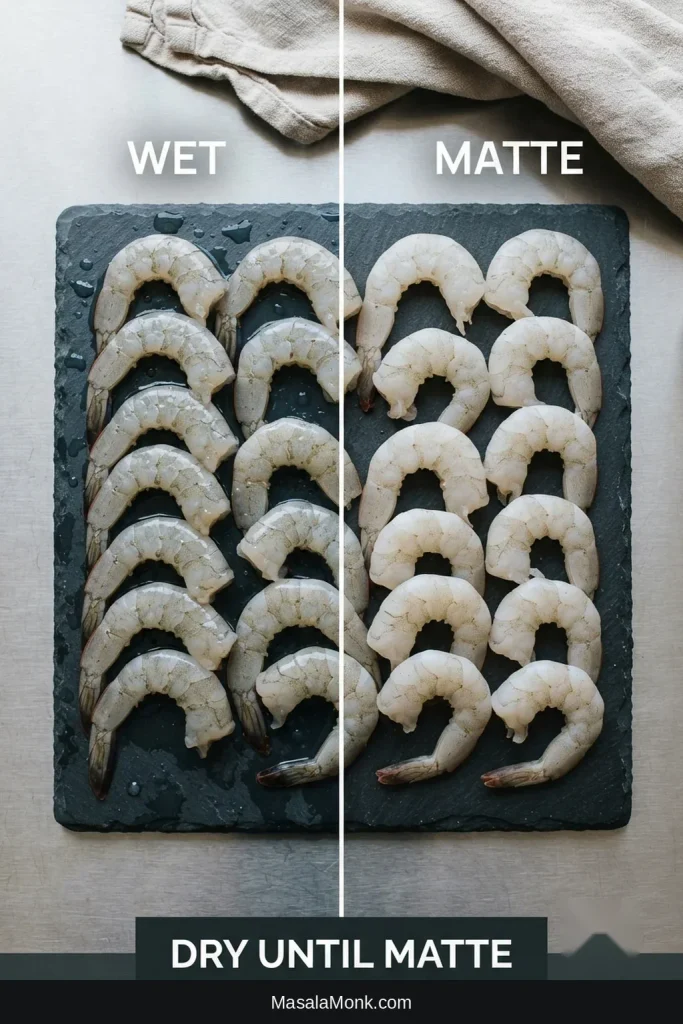
- Dry and season the shrimp. If frozen, thaw completely and drain. Spread the shrimp over paper towels, cover with another layer and press firmly. Check the deveining cut and the area near the tail for trapped water. The surface should look matte, with no visible beads of moisture. Season evenly with ¼ tsp salt.
- Set up the breading line. Arrange three bowls in order. In the first, combine the flour, cornstarch, remaining ½ tsp salt, garlic powder, black pepper and optional cayenne. Beat the eggs in the second.
- Mix the coconut coating. Combine the coconut and panko in the third bowl. If the coconut strands are very long, give them a few quick chops. Stop while you still have small shreds; do not grind them into powder.
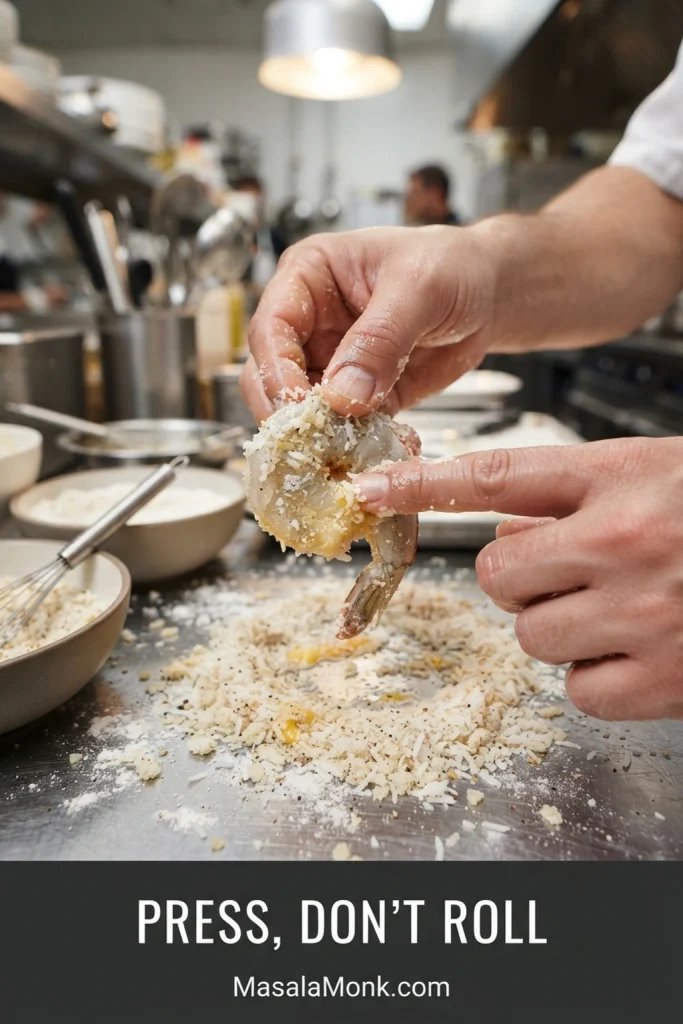
- Bread the shrimp. Coat each shrimp lightly in the flour mixture and shake away the loose excess. Dip it into the egg and let the extra drip back into the bowl. Do not just roll the shrimp through the crumbs—press them on. Cover both sides and fill any obvious bare patches, then spread the shrimp across the plate or tray without overlapping.
- Let the coating settle. Leave the breaded shrimp for about 10 minutes. Make the dipping sauce and start heating the oil during this time.
Mix the Sauce and Heat the Oil
- Mix the sauce. Stir together the apricot preserves, sweet chili sauce, lime juice and soy sauce. Taste it. Very sweet preserves may need another squeeze of lime.
- Heat the oil. Add enough neutral oil to reach about ¼ inch / 6 mm deep in the skillet. Bring it to about 350°F / 175°C.
Fry, Rack and Serve
- Fry. Add about 6–8 shrimp per batch, depending on their size and your pan, leaving visible space between them. You should hear a steady sizzle as they hit the oil. Cook for roughly 1½–2 minutes on the first side, then turn gently and cook for another 1½–2 minutes. Look for a deep-golden coating and shrimp that is opaque through the thickest part and gently curled.
- Rack and repeat. Transfer the cooked shrimp to a wire rack. No rack? Use a paper-towel-lined plate instead. Remove noticeably dark coconut crumbs from the oil, let the temperature recover, then continue with the next batch.
- Serve. Bring the shrimp to the table while the crust is still hot and crisp, with dipping sauce and lime wedges alongside.
Recipe Notes
- Frozen shrimp: raw frozen shrimp work very well. Thaw fully and dry especially thoroughly before breading.
- Precooked shrimp: not recommended. They can become rubbery before the coconut has enough time to brown.
- Less sweet: replace up to half of the sweetened coconut with unsweetened shredded coconut.
- Gluten-free: replace the ⅓ cup all-purpose flour with ⅓ cup rice flour or a 1:1 gluten-free flour blend, while keeping the existing cornstarch. Use certified gluten-free panko and certified gluten-free tamari instead of soy sauce, and check the sweet chili sauce label because brands vary.
- Extra breading: you may have a little flour or coconut-panko mixture left. That is intentional so the last shrimp can still be coated properly. Discard breading mixtures that have contacted raw shrimp or egg.
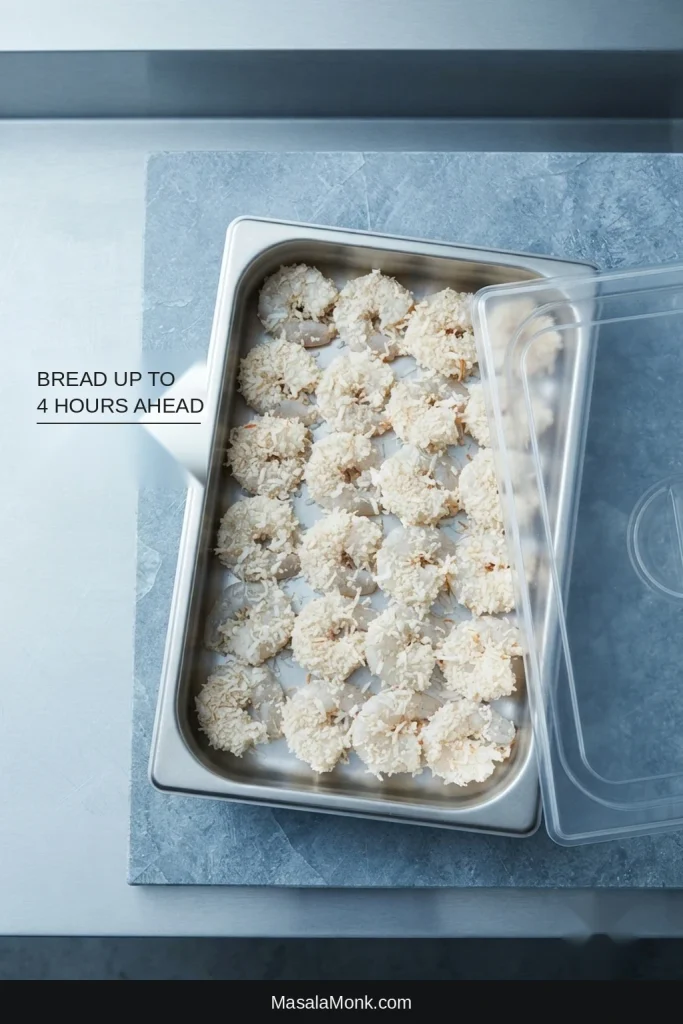
- Make ahead: bread the raw shrimp up to 4 hours ahead, spread them in a single layer, cover and refrigerate. Fry close to serving.
Coconut shrimp guide
Build the Crust
Control the Fry
The Crust Has to Stick Before It Can Crisp
If the coconut coating keeps falling off, start with the shrimp itself: it is usually still too wet, or the flour-cornstarch and egg layers are heavier than they need to be.
A few stray coconut crumbs in the skillet are normal. Half the breading floating around the shrimp is not.
Dry Enough Means the Shrimp Looks Matte
Thawed shrimp can look drained while still holding water along the back and near the tail. That moisture turns to steam under the breading. Press the shrimp firmly between paper towels until the surface no longer looks slick.
Keep the Layers Thin
The flour-cornstarch layer should look dusty rather than thick. Too much egg leaves a wetter layer underneath the coconut, so give the excess a moment to fall back into the bowl before pressing on the crumbs. A huge shaggy coat is not the goal; even coverage holds better and cooks more cleanly.
Why Add Panko?
Coconut toasts beautifully, but it has a natural chew. Panko keeps the coating lighter and gives the finished crust a cleaner crunch.
Sweetened or unsweetened? Sweetened shredded coconut gives the familiar toasted restaurant-style finish; unsweetened coconut makes it less sweet and a little drier. Extra-long strands are worth chopping shorter because the exposed ends tend to darken first and break away more easily.
Give the Coating a Few Minutes to Settle
Once the last shrimp is breaded, leave the tray alone for about 10 minutes. That short pause helps the pressed coating grip before frying. Mix the sauce and bring the oil up to temperature while it rests, so your attention can stay on the skillet once frying begins.
Getting the Frying Time Right
The coconut should be deep golden just as the shrimp turns opaque. Both happen quickly, so shrimp size and oil temperature matter more than an exact number of minutes.
21/25-Count Shrimp Are Easy to Control
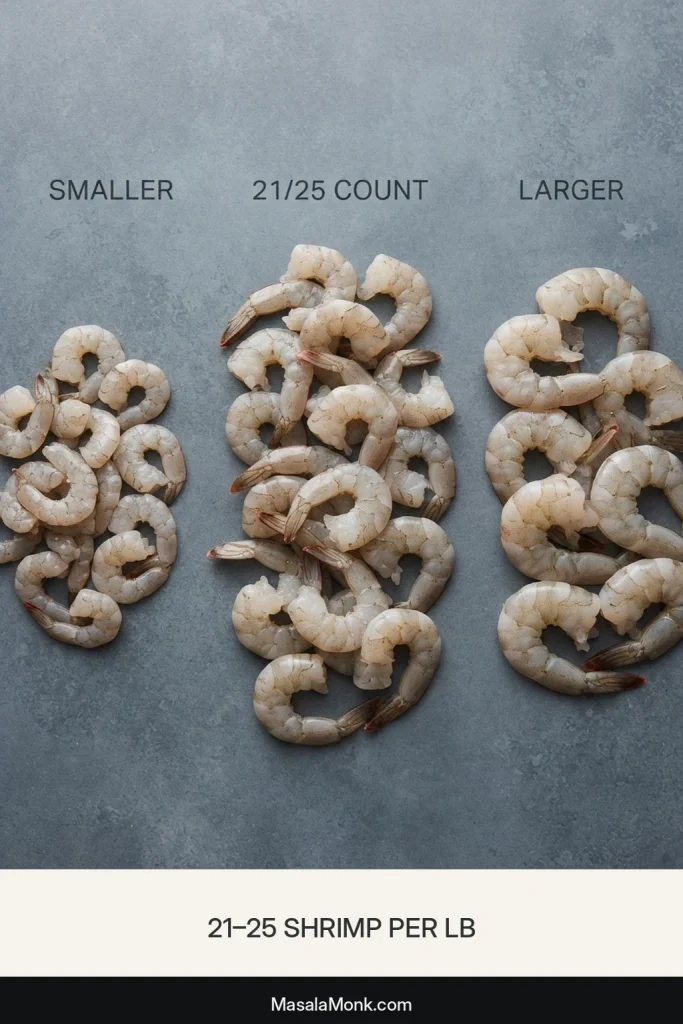
Shrimp counts are more useful than names such as “large” or “jumbo,” which vary by store. A 21/25 count means 21 to 25 shrimp per pound: large enough to stay juicy without making the coconut wait too long for the center to cook.
Very small shrimp are less forgiving because they can overcook before the coconut develops enough color. Large raw prawns in the 21/25 range work the same way. Bigger 16/20 shrimp or prawns work too; very thick pieces can be lightly butterflied along the back for a broader, more even shape.
Tails are optional: leave them on for easier breading, turning and finger-food serving, or remove them for easier eating.
Start Around 350°F
Heat the oil to about 350°F / 175°C before the first shrimp goes in. Cold shrimp will pull the temperature down, so give each piece some room and let the oil recover between batches.
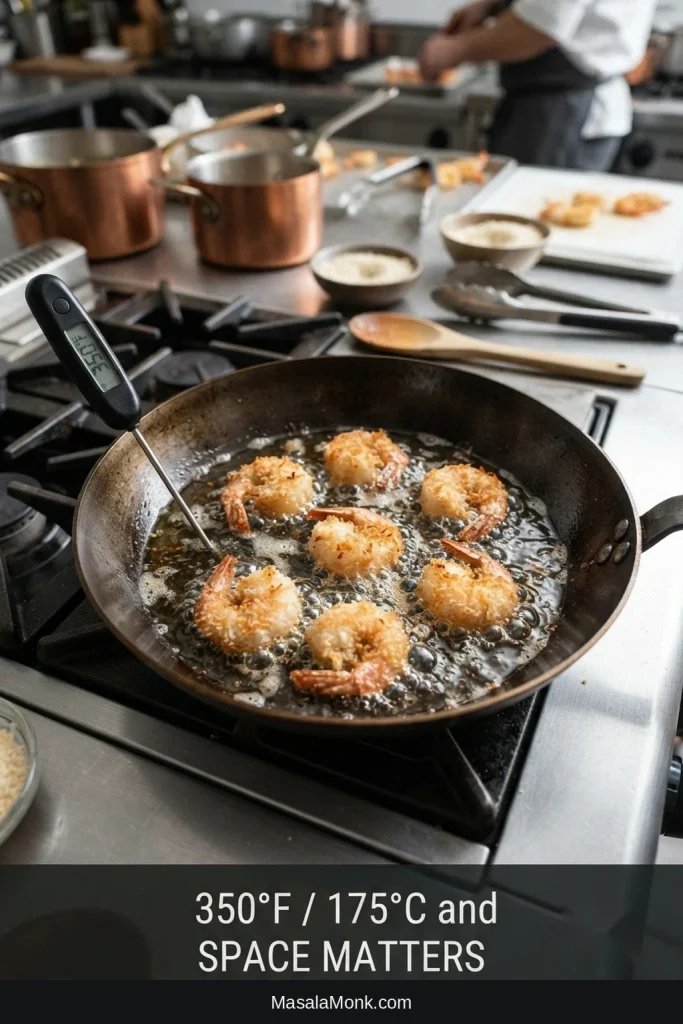
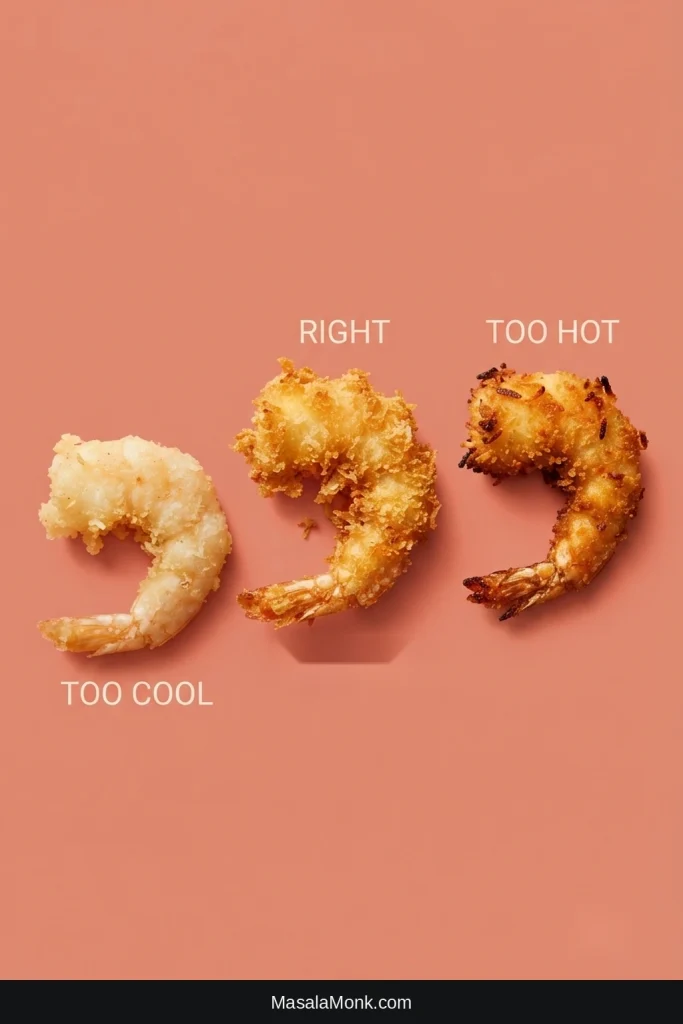
Read the First Batch
Watch that first batch closely. Coconut turning dark almost immediately means the pan is too hot; pale breading that starts looking oily means it has cooled too far. You want a lively, steady sizzle—not a quiet pan and not violently smoking oil.
Your first batch does not need to be the prettiest one. Use it to learn how quickly the pan is browning the coconut.
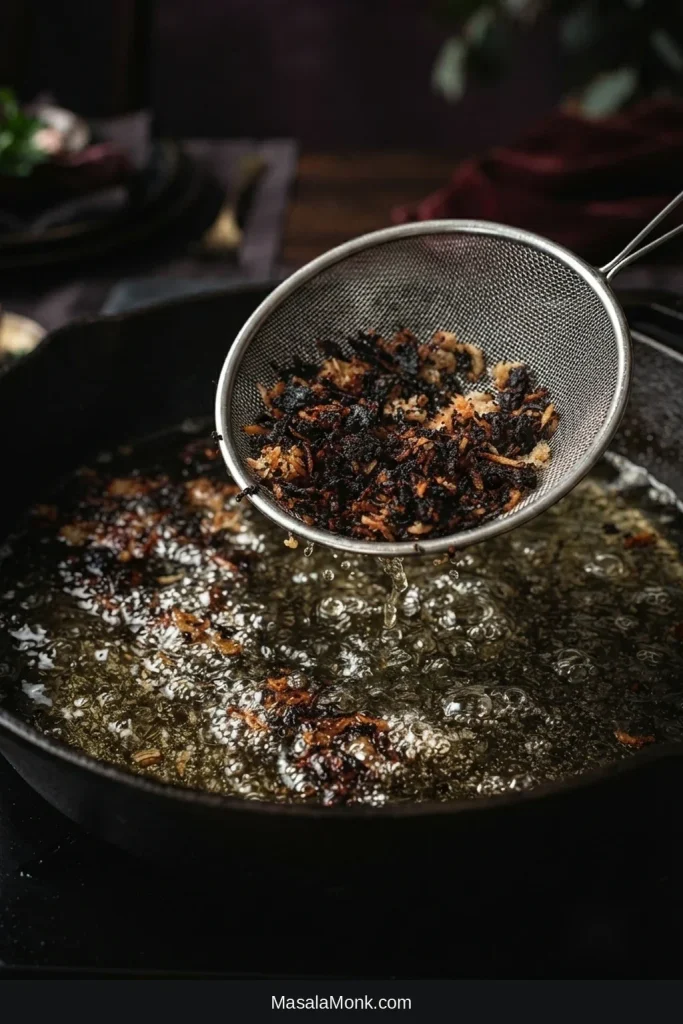
Clear the Oil Between Batches
Coconut and panko crumbs that escape into the skillet keep cooking after the shrimp comes out. Skim out the dark ones before the next batch so they do not burn and turn bitter.
The same basics—dry food, properly hot oil and enough room in the pan—matter in fish and chips too.
How to Tell When Coconut Shrimp Is Done
About 1½–2 minutes per side is a useful starting point for 21/25 shrimp, but the shrimp itself gets the final say.
Look for a deep-golden crust and a thickest section that has turned opaque while the shrimp remains gently curled. A tight, firm little ring usually means it has gone farther than necessary. Color alone is unreliable because some raw shrimp varieties are naturally pink.
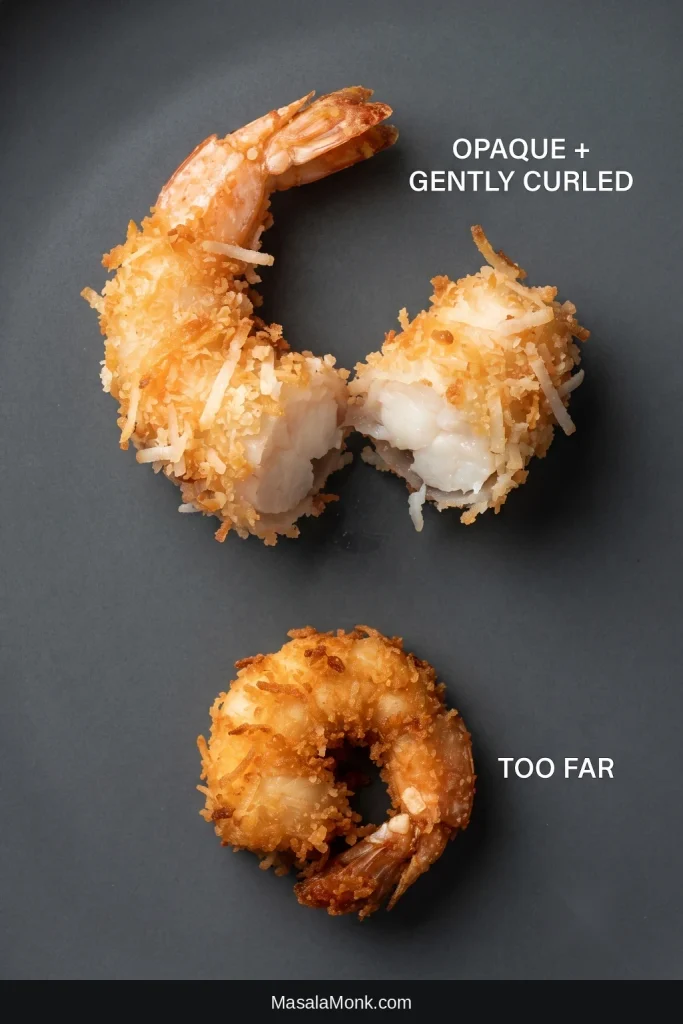
Taste the first shrimp. Let it cool for a minute and break into it. Its crust should feel crisp rather than leathery, while the center should still look moist. If it is right, keep going. Should the coconut be darker than you wanted, lower the heat before the next batch.
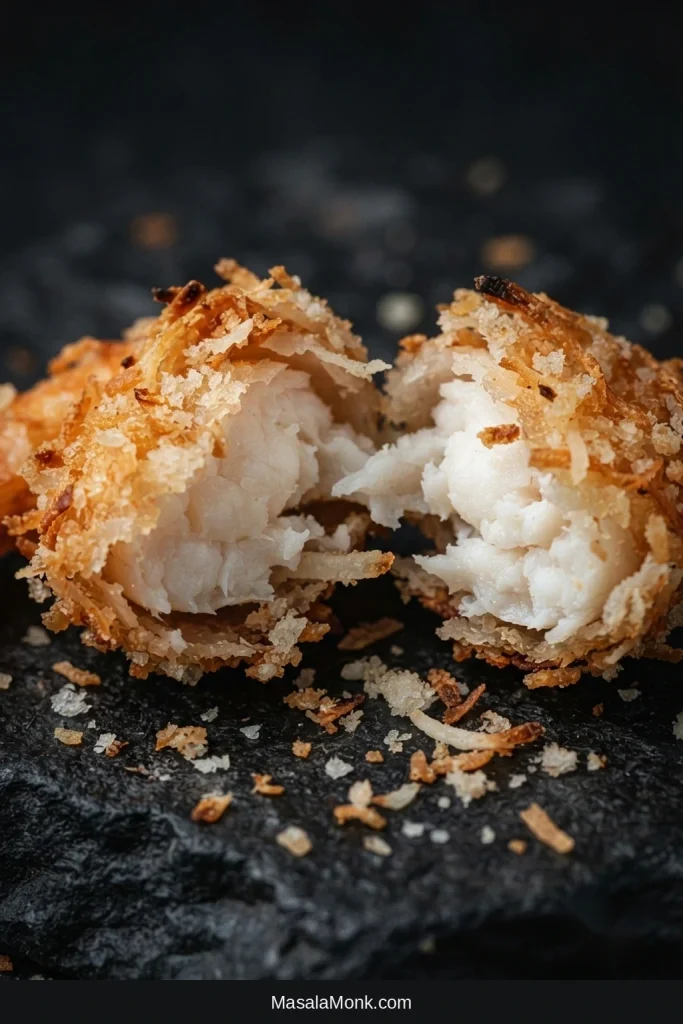
FoodSafety.gov uses the same cue for shrimp: the flesh should be pearly or white and opaque.
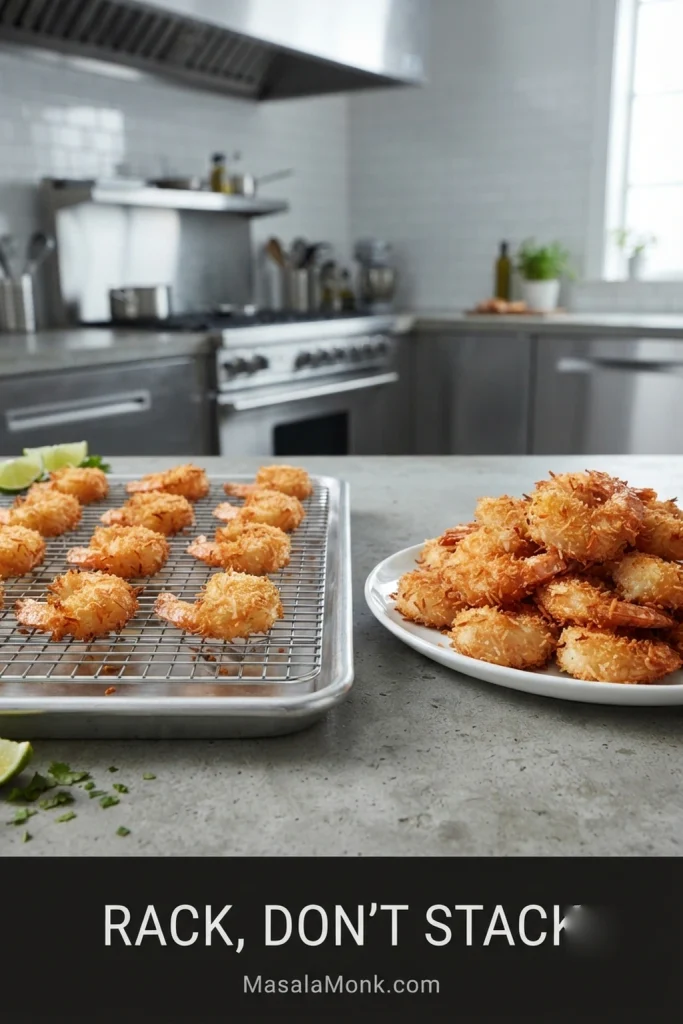
Move finished shrimp to a wire rack when you have one; air underneath helps preserve the crust. Keep the batches spaced apart and uncovered. A very low oven can hold the rack briefly, but coconut shrimp is best served soon after frying.
Coconut Shrimp Dipping Sauce: Bright, Fruity & Not Too Sweet
Stir together ¼ cup / about 80 g apricot preserves, ¼ cup / 60 ml sweet chili sauce, 1½ tbsp / 22 ml fresh lime juice and 1 tsp / 5 ml soy sauce. The dipping sauce should brighten the shrimp, not sweeten it twice.
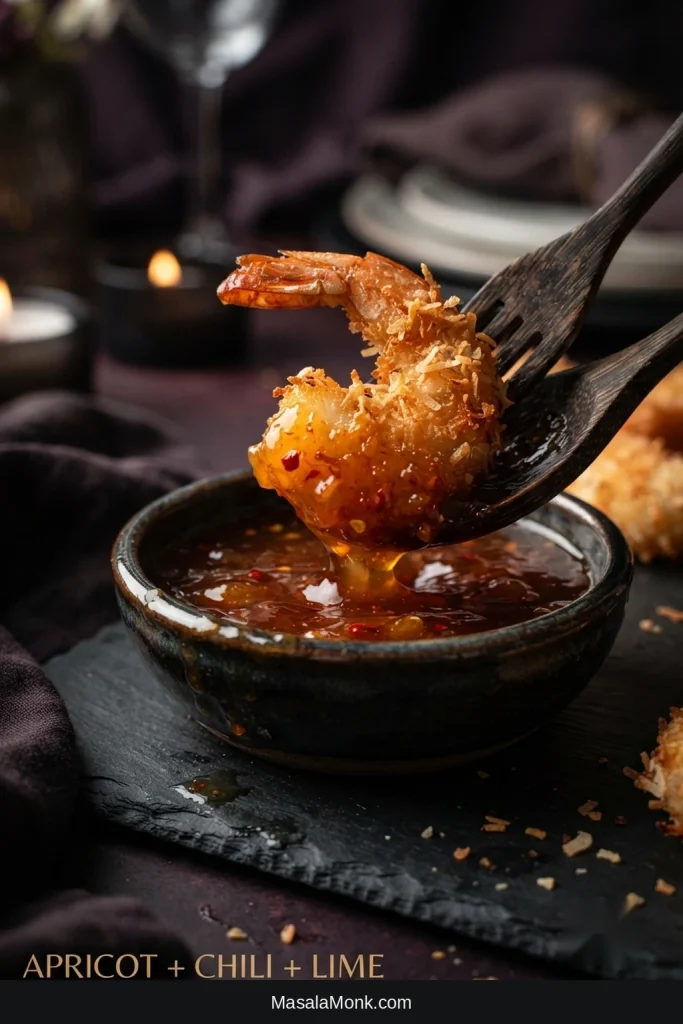
Apricot preserves bring fruit, sweet chili sauce brings sweet heat, fresh lime cuts through the sweetness, and soy adds a salty, savory edge. Preserves vary, so taste before serving: an especially sweet jar wants more lime, while a tart one may want another spoonful of preserve or sweet chili sauce.
For something fresh and chunky, mango salsa gives you the same fruit-and-lime contrast with cool, juicy texture beside the hot coconut crust.
If a restaurant version is what you remember: Red Lobster serves its Parrot Isle Coconut Shrimp with piña colada sauce, while Outback serves Gold Coast Coconut Shrimp with Creole marmalade. This apricot-chili-lime sauce lands brighter and less creamy than either.
If Your Coconut Shrimp Isn’t Coming Out Right
The symptom usually points straight at the problem. Use this as a quick check rather than starting the recipe over in your head.
| Problem | Quick fix |
|---|---|
| Coating falls off | Shrimp too wet or breading layers too heavy. Dry until matte, keep the flour-cornstarch and egg layers thin, then press the crumbs on firmly. |
| Pale and greasy | Oil too cool. Fry smaller batches and let the oil recover before adding more shrimp. |
| Coconut darkens too quickly | Oil too hot. Lower the heat and skim out already-dark crumbs before continuing. |
| Golden but chewy | Egg layer too heavy or the coating packed on too thick. Let excess egg drip well, then press on an even coat rather than a thick shaggy one. |
| Rubbery shrimp | Overcooked or started precooked. Use raw shrimp and stop once the center is opaque and tender. |
| Later batches taste bitter | Burnt coconut is accumulating in the oil. Skim dark crumbs between batches. |
| Crust softens while waiting | Steam is trapped around the shrimp. Keep them uncovered and spaced apart, preferably on a rack. |
| Too sweet | The coconut and sauce are stacking sweetness. Add more lime and swap up to half of the sweetened coconut for unsweetened next time. |
Air Fryer & Baked Coconut Shrimp
Coconut Shrimp in an Air Fryer
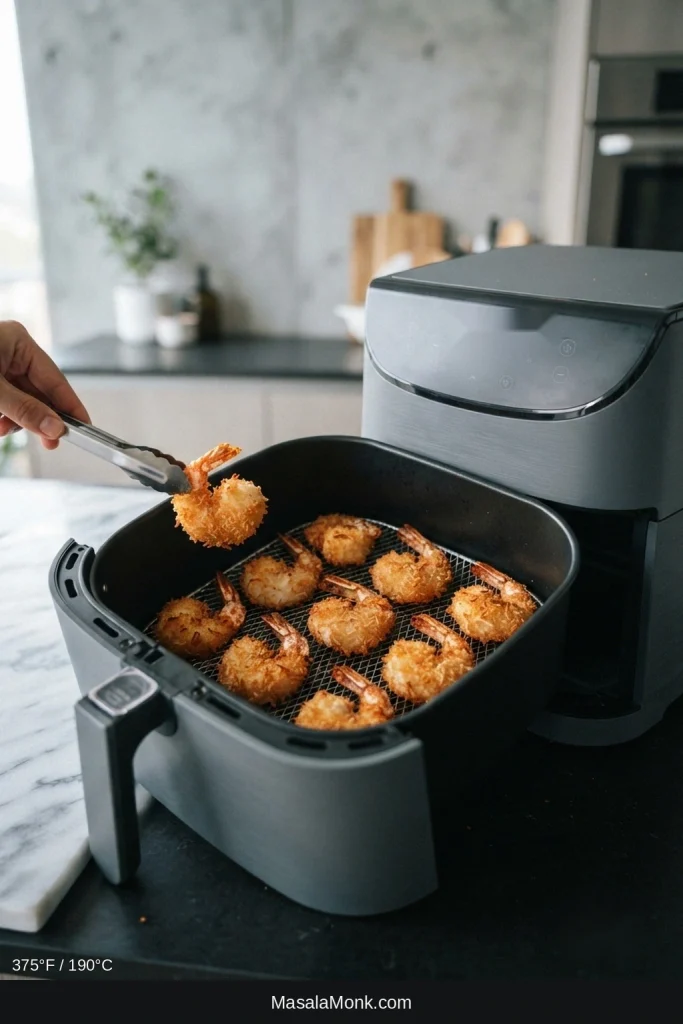
Air frying is the closest low-oil alternative to shallow frying: the coating can still turn crisp and golden, but a light mist of oil helps it brown before the shrimp overcooks.
- Bread the shrimp as in the main recipe and let the coating sit for about 10 minutes.
- Preheat the air fryer to 375°F / 190°C.
- Lightly oil the basket and arrange the shrimp with space between them.
- Mist the coconut-panko coating lightly with neutral oil.
- Cook for about 3–4 minutes, turn gently, then mist any visibly dry patches on the second side.
- Begin checking at about 6 minutes total. Depending on shrimp size and the air fryer, expect roughly 6–10 minutes overall. Stop when the crust is golden and the shrimp is opaque through the thickest part.
Starting with frozen-solid shrimp? Thaw them for this breaded recipe so the coating can stick to a dry surface. For plain shrimp cooked directly from frozen, use the size-based timings in our frozen shrimp in the air fryer guide.
Air fryers vary. If the shrimp is done before the breading has enough color, use the pre-toasting step in the baked method below next time rather than cooking the shrimp longer.
Baked Coconut Shrimp
Baking works, but getting enough color before the shrimp overcooks is harder. Pre-toasting the coconut-panko mixture gives the crust a head start.
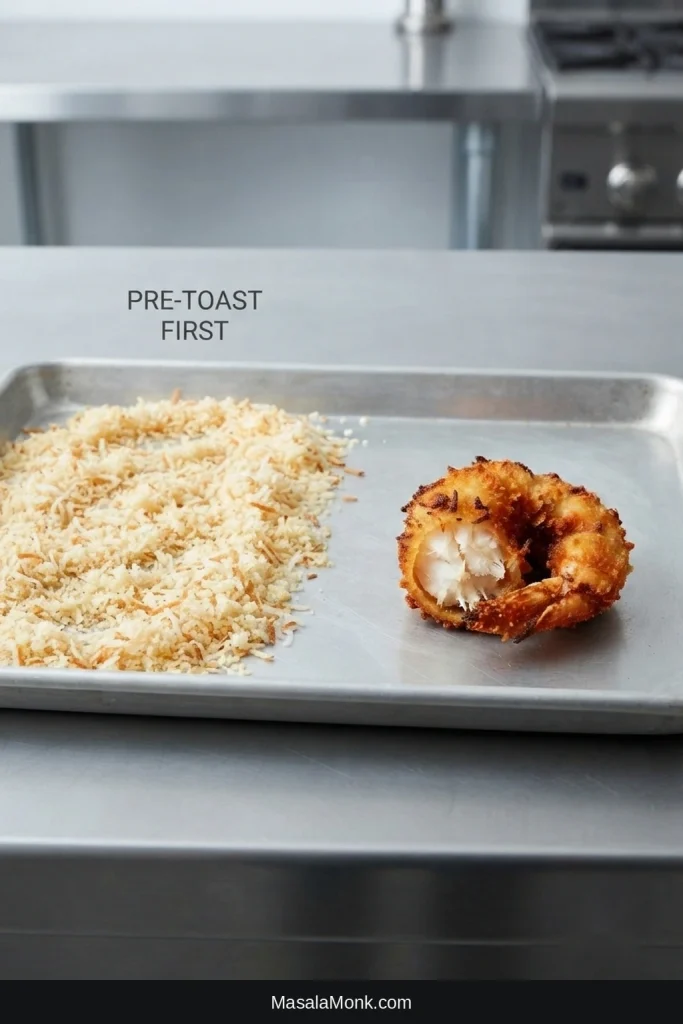
Spread the coconut and panko on a sheet pan and toast at 325°F / 165°C. Start checking at 3–4 minutes, stir once or twice, and stop when the mixture is lightly golden. Sweetened coconut can color quickly. Let it cool completely.
Once cool, bread the shrimp as in the main recipe, then let the coating sit for about 10 minutes while the oven heats to 425°F / 220°C.
- Set a lightly greased wire rack over a rimmed sheet pan. No rack? Use a parchment-lined sheet pan and turn the shrimp once during baking.
- Arrange the breaded shrimp without overlapping and mist the tops lightly with oil.
- Bake for roughly 7–10 minutes, checking early for smaller shrimp.
- If the shrimp is ready but the crust needs more color, use a very brief broiler finish and watch it closely.
Don’t keep baking cooked shrimp just for color. Pre-toast the coating or use a brief broiler finish; extra oven time only makes the shrimp firmer.
Make Ahead, Store & Reheat Coconut Shrimp
Bread Ahead, Fry Near Serving
You can bread the shrimp up to 4 hours ahead and keep them covered and refrigerated without overlapping. Make the dipping sauce—and a cold side such as coleslaw—ahead too. When it is time to eat, frying is the only real last-minute job.
Storing and Reheating Leftovers
Refrigerate leftover coconut shrimp promptly—within 2 hours of cooking, or within 1 hour when the surrounding temperature is above 90°F / 32°C. Use refrigerated coconut shrimp within 3–4 days.
For the best texture, reheat in an air fryer at about 350°F / 175°C for 3–5 minutes, checking early because the shrimp is already cooked. A hot oven is the next-best option. USDA leftover guidance recommends reheating leftovers to 165°F / 74°C. See USDA leftover and food-safety guidance.
A microwave will heat the shrimp, but it softens the crust quickly. Use it when convenience matters more than texture.
Once chilled, pack the leftover shrimp airtight and freeze for up to 3 months for best quality. Reheat in an air fryer or hot oven; the crust will not be quite as delicate as a fresh batch, but it can regain a good amount of crunch.
What to Serve with Coconut Shrimp
As an appetizer, coconut shrimp needs little beyond dipping sauce and lime. For dinner, the easiest plate is hot shrimp, jasmine rice and something cold and sharp on the side.
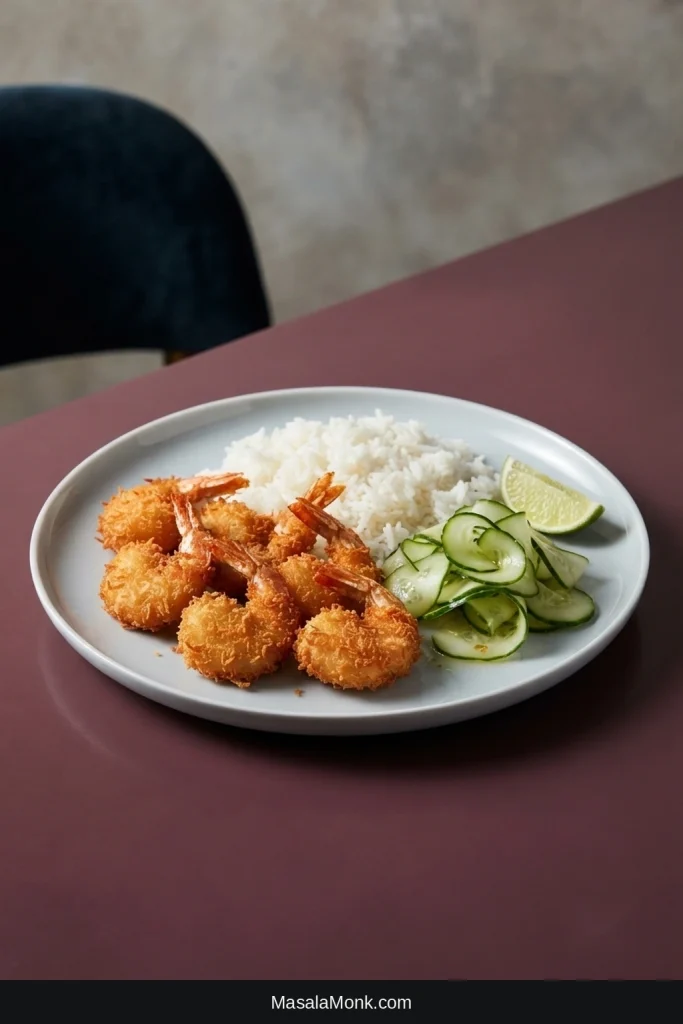
Jasmine rice works especially well here; the guide includes the ratio and method if you’re making it alongside the shrimp. Slaw, cucumber salad or simply dressed greens all work well against the sweet fried crust.
The same sweet-crisp-acidic combination works well in tortillas. Add the shrimp to warm tortillas with cabbage, avocado and plenty of lime, using the dipping sauce lightly so the crust stays crisp. For a complete slaw-and-tortilla setup, use our shrimp tacos recipe as the starting point.
Have the sauce, lime and sides ready before the first batch goes into the oil. Coconut shrimp is at its best in those first few minutes, when the coconut smells toasted, the crust still crackles and the shrimp underneath is juicy.








