Crab rangoon is the kind of appetizer that disappears before anyone admits how many they have eaten. The wrapper cracks first, the warm cream cheese filling follows, and everyone reaches past the dipping sauce for one more.
At home, though, the same little wonton can become surprisingly frustrating. One overfilled piece opens in the oil. A wet filling slips through a seam. Air-fryer corners turn dark while the middle stays pale. Or the wrapper comes out crisp but almost empty.
Here, you can match the filling to the version you remember, keep the seams closed, and choose the kind of crunch that works for your kitchen.
The rule that keeps everything under control is simple: thick filling, modest portions, clean seams. Drain the crab, chill the filling until it holds its shape, and leave enough bare wrapper around it to push out the air and close every edge.
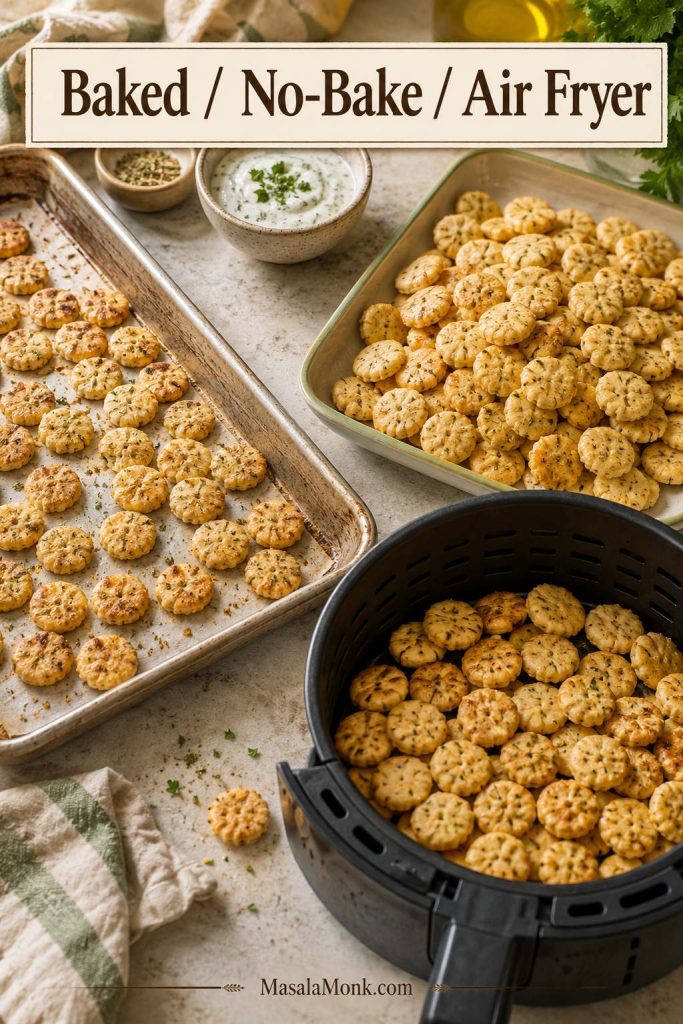
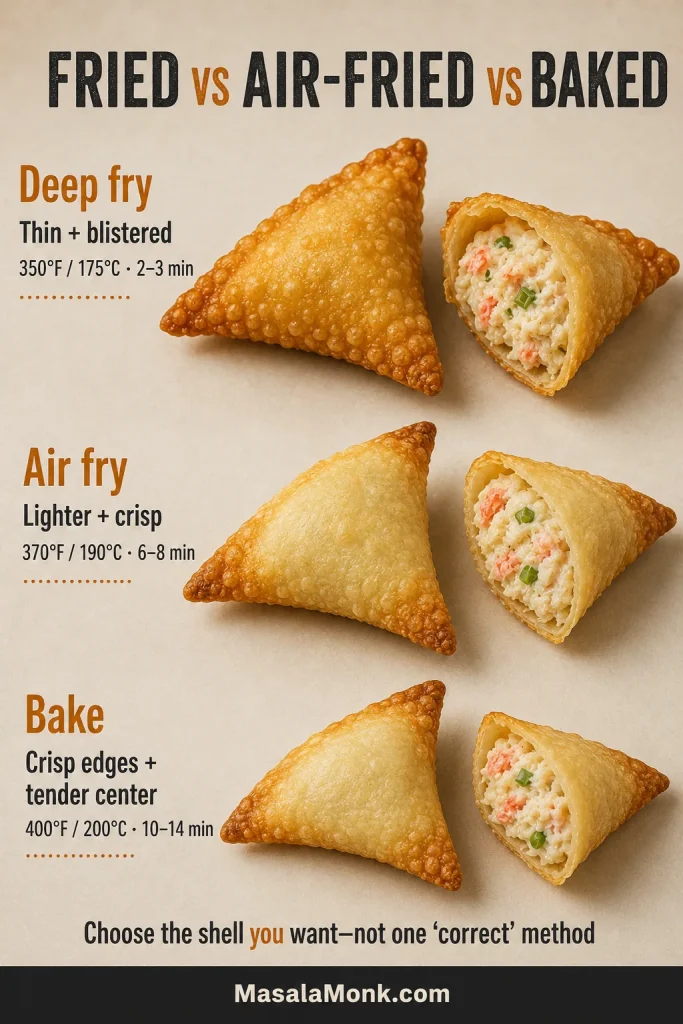
Deep frying gives you the thinnest, most blistered restaurant-style shell. The air fryer produces crisp batches with less oil. Baking lets you cook more pieces at once without standing over a pot. Each method gives you a different kind of crunch.
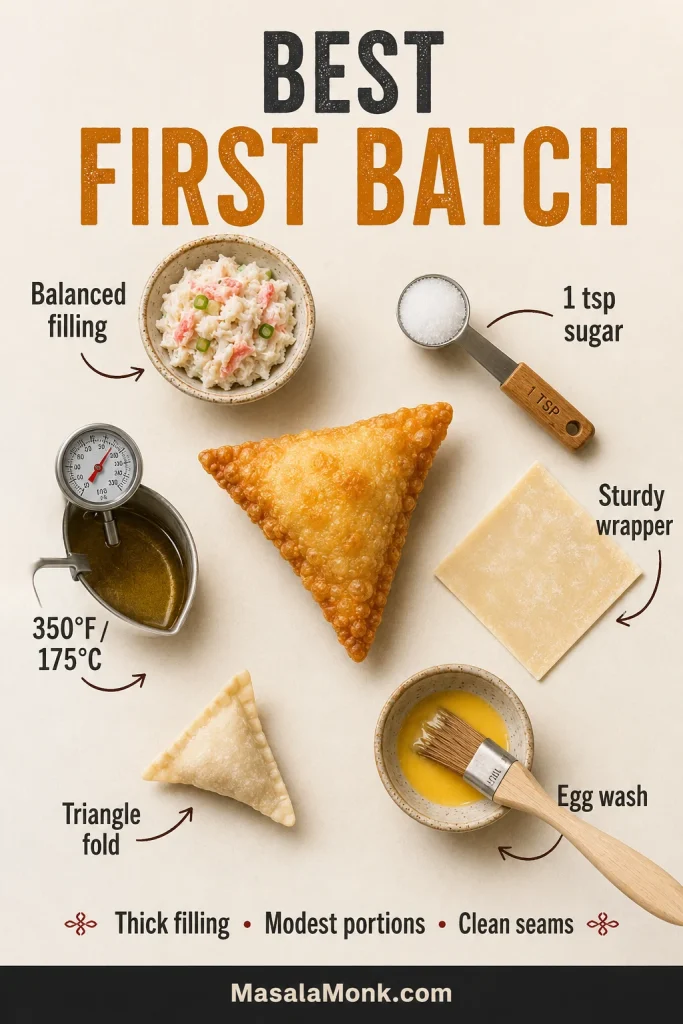
Best First Batch
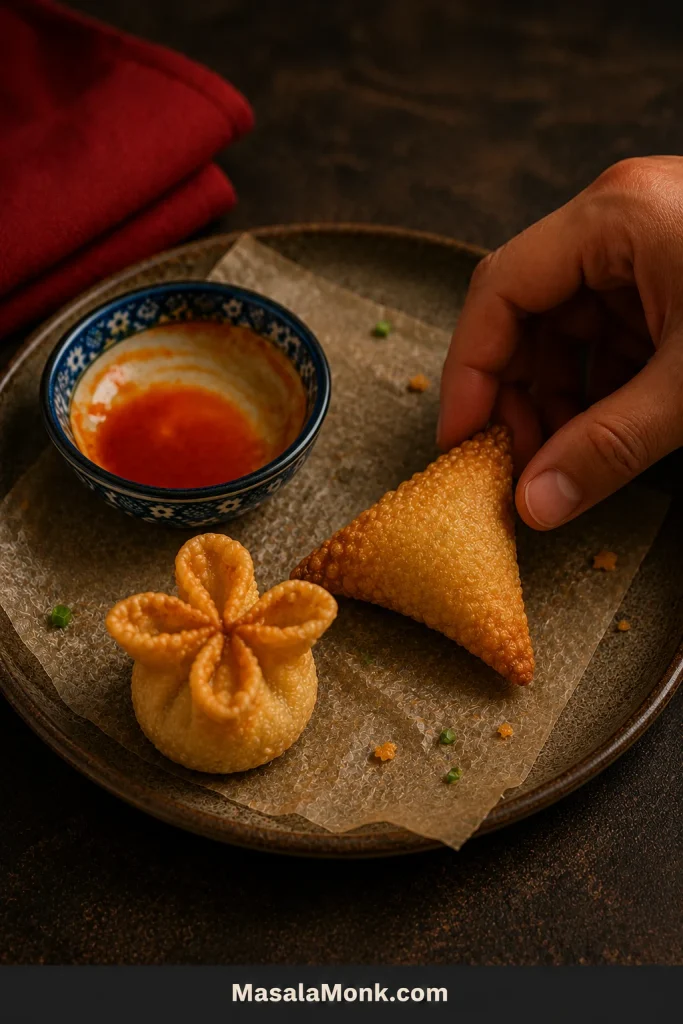
For a dependable restaurant-style first batch, use the balanced imitation-crab filling with 1 teaspoon sugar, sturdy square wonton wrappers, triangle folds, egg wash, and deep frying at 350°F / 175°C.
Keep each portion modest, press out the air before sealing, and cook one test rangoon before continuing. That first piece will tell you whether the remaining batch needs a little less filling, a firmer seam, or a shorter cooking time.
Crab Rangoon Recipe
Crispy crab and cream cheese wontons, with complete instructions for deep frying, air frying, or baking.
Mix, chill, fold, then cook. The filling and sauce come together quickly. Most of the hands-on time is folding, and the first few wrappers are the slowest.
| Hands-on preparation and folding | About 50–60 minutes |
|---|---|
| Chilling | 20–30 minutes, while the sauce and setup are completed |
| Deep-frying the full batch | About 20–30 minutes |
| Resting before serving | 3–5 minutes |
| Total elapsed time | About 1 hour 25 minutes–1 hour 55 minutes |
| Yield | About 30–35 rangoons with 3½-inch wrappers, or 36–40 smaller rangoons with thin 3-inch wrappers |
| Servings | 8 servings as written; roughly 8–10 with other appetizers, or 5–7 as the main hot appetizer |
This is a party-size batch of roughly 30–40 rangoons. A half batch makes approximately 15–20 pieces—enough for about four people with other appetizers, or two to three people when these are the main hot appetizer.
For a half batch, halve the filling, sauce, and wrapper quantity, but keep the same frying-oil depth and temperature. You can still use one egg for the wash, or use plain water for simple triangle folds.
Equipment
- All methods: mixing bowl, spatula, measuring teaspoons or a small scoop, lined tray, small bowl for egg wash, and a clean towel for covering the wrappers
- Deep frying: heavy pot, frying thermometer, slotted spoon or spider strainer, and wire rack
- Air frying: air fryer and oil mister or pastry brush
- Baking: rimmed sheet pans, parchment, and oil mister or pastry brush
Ingredients
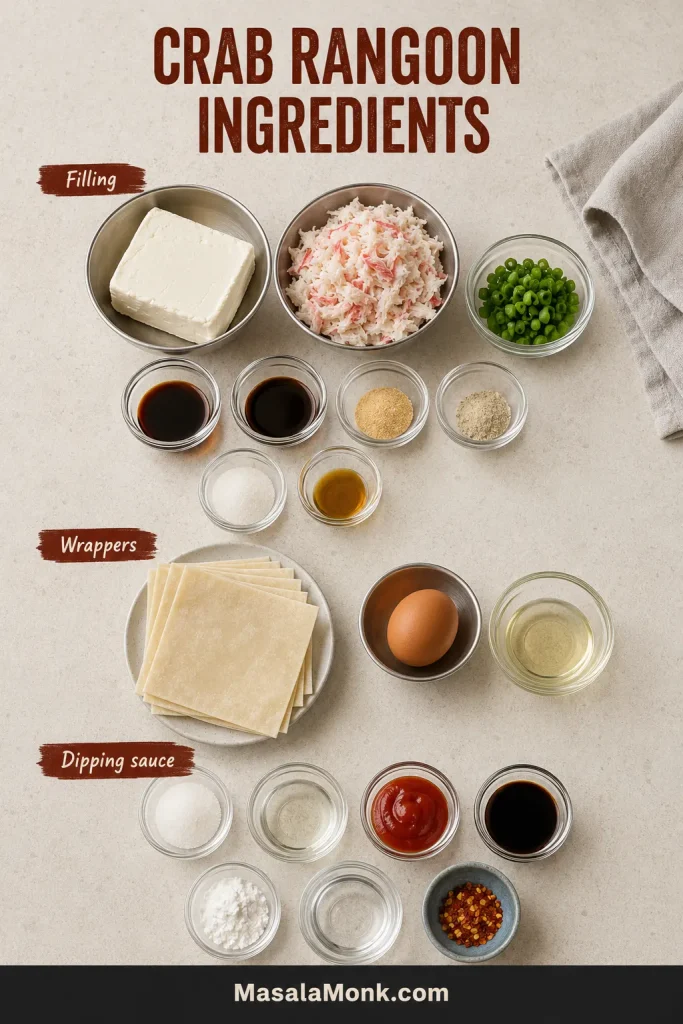
Crab and Cream Cheese Filling
| Ingredient | US amount | Metric amount |
|---|---|---|
| Full-fat block cream cheese, softened but not warm | 8 oz | 227 g |
| Ready-to-eat imitation crab, recommended for the first batch; or cooked lump or well-drained canned crab | 6 oz | 170 g |
| Medium scallions, very finely chopped | 2 medium | About 18–20 g |
| Low-sodium soy sauce | 1 tsp | 5 ml |
| Worcestershire sauce | 1 tsp | 5 ml |
| Garlic powder | ½ tsp | About 1.5 g |
| White pepper or finely ground black pepper | ¼ tsp | About 0.5 g |
| Granulated sugar—1 tsp for the recommended first batch; use 0–1 tsp to taste | 1 tsp | 4 g |
| Toasted sesame oil, optional | ¼ tsp | 1 ml |
| Fine salt | Small pinch, only if needed | — |
For Wrapping and Cooking
- One 40–50-count package square wonton wrappers, approximately 3–3½ inches / 7.5–9 cm wide
- 1 large egg mixed with 1 teaspoon water, or plain water for simple triangle folds; you may not need all the egg wash
- For deep frying: neutral high-heat oil, approximately 1½–2 inches / 4–5 cm deep
- For air frying or baking: enough neutral oil to mist or brush every exposed part of the wrapper lightly
Package counts vary, and a few extra wrappers are useful in case some tear, dry out, or stick together.
Quick Red-Orange Sweet-and-Sour Sauce
| Ingredient | US amount | Metric amount |
|---|---|---|
| Granulated sugar | ⅓ cup | 67 g |
| Water | ¼ cup | 60 ml |
| Unseasoned rice vinegar or white vinegar | 3 tbsp | 45 ml |
| Ketchup | 1 tbsp | 15 g |
| Low-sodium soy sauce | 1 tsp | 5 ml |
| Cornstarch | 2 tsp | About 5–6 g |
| Cold water for the slurry | 1 tbsp | 15 ml |
| Chili flakes, optional | Small pinch | — |
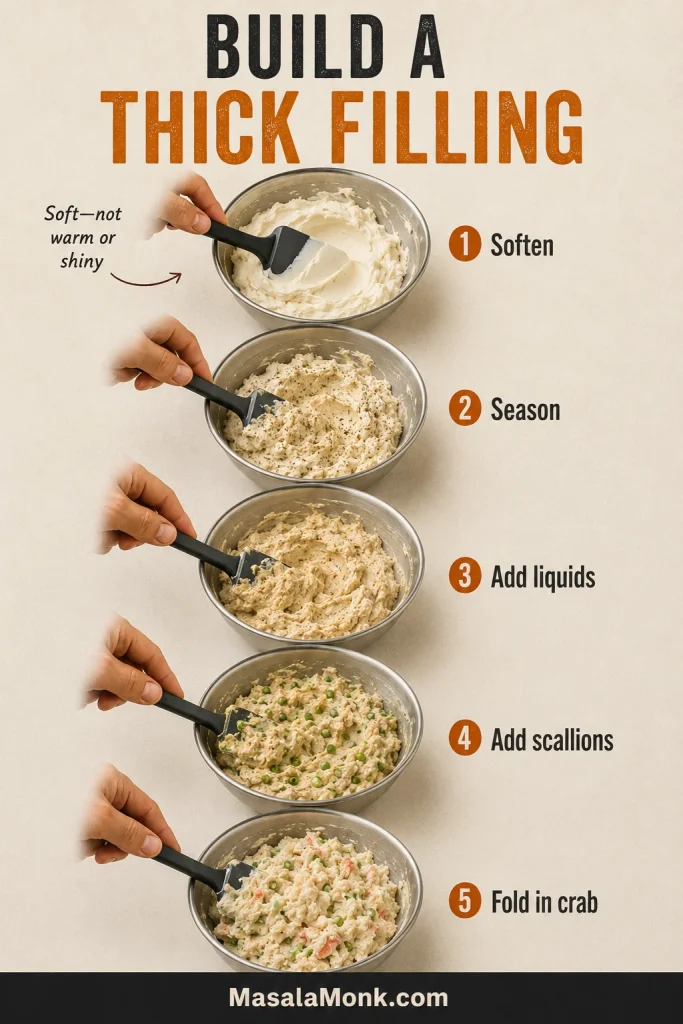
Make and Chill the Filling
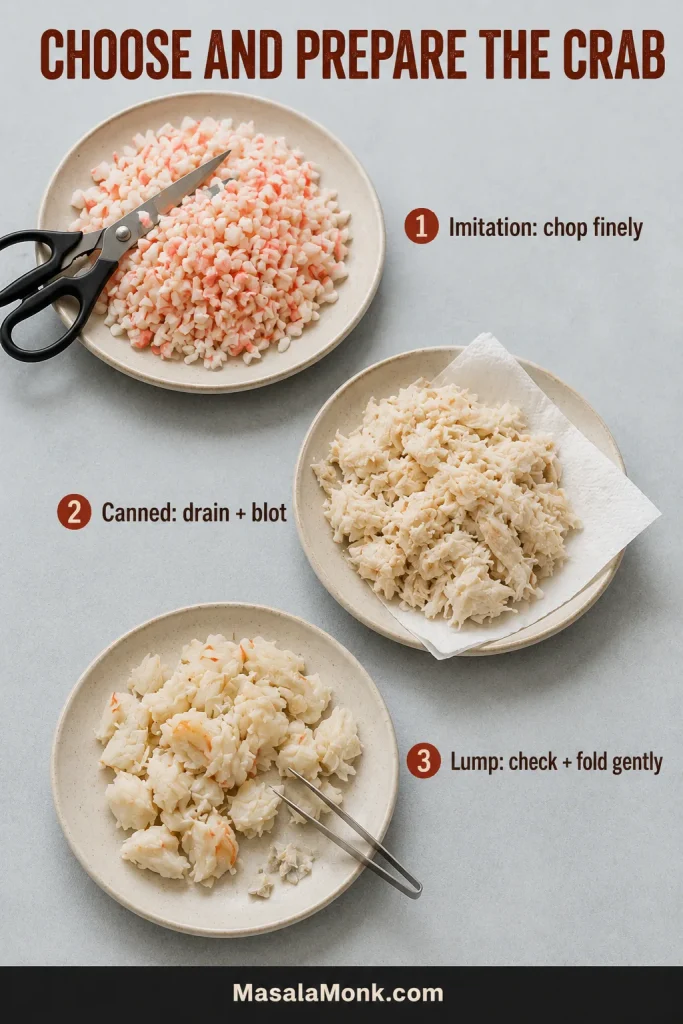
- Finely chop imitation crab. For canned or lump crab, drain thoroughly, blot away visible moisture, and check carefully for shell fragments. Thaw previously frozen cooked crab completely before drying it.
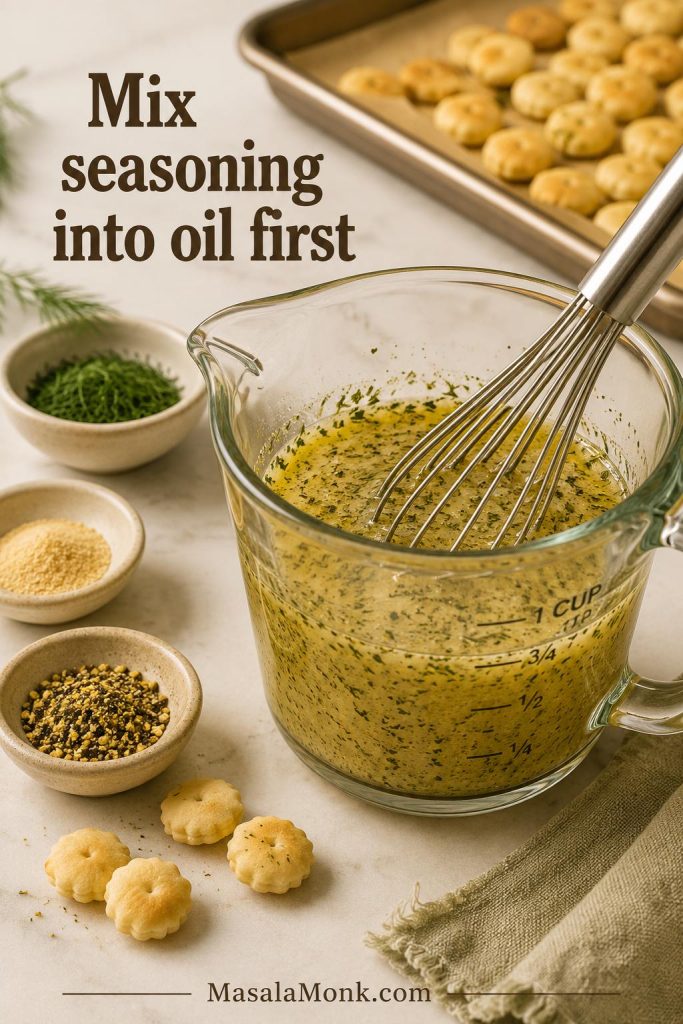
- Mix the softened cream cheese, garlic powder, pepper, and the sugar, if using, until smooth.
- Add the soy sauce, Worcestershire sauce, and optional sesame oil.
- Stir in the scallions, then fold in the crab gently so the mixture stays thick and some crab texture remains.
- Taste and add a small pinch of salt only when needed.
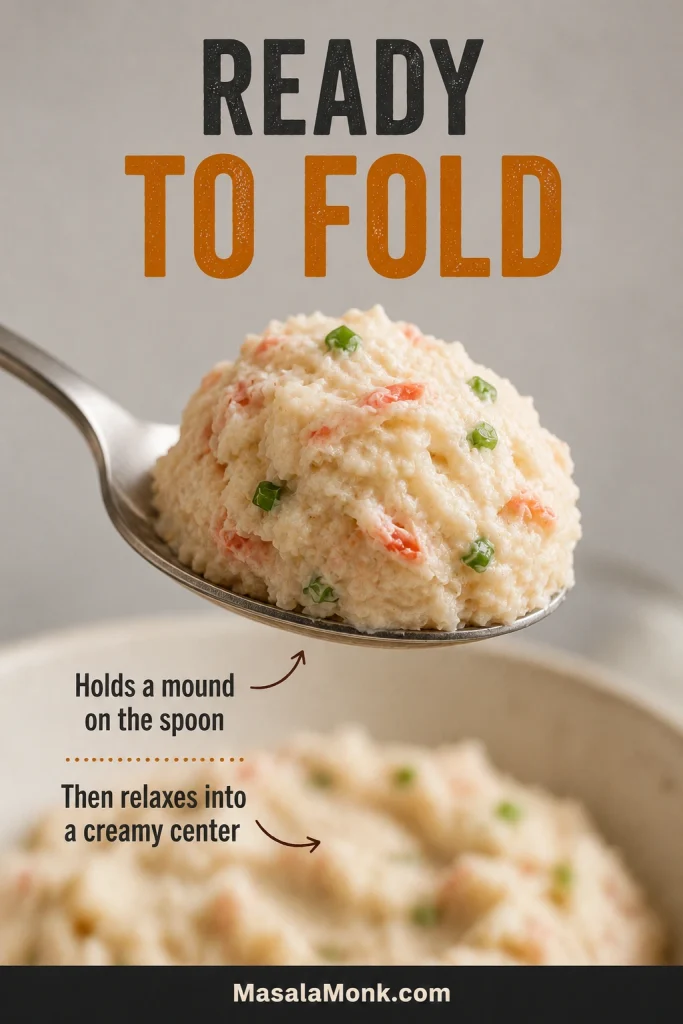
- Cover and refrigerate for 20–30 minutes. Properly chilled filling holds a rounded scoop on the spoon.
Use cooked crab or ready-to-eat imitation crab. These short cooking methods crisp the wrapper and warm the filling; they are not intended to cook raw seafood safely.
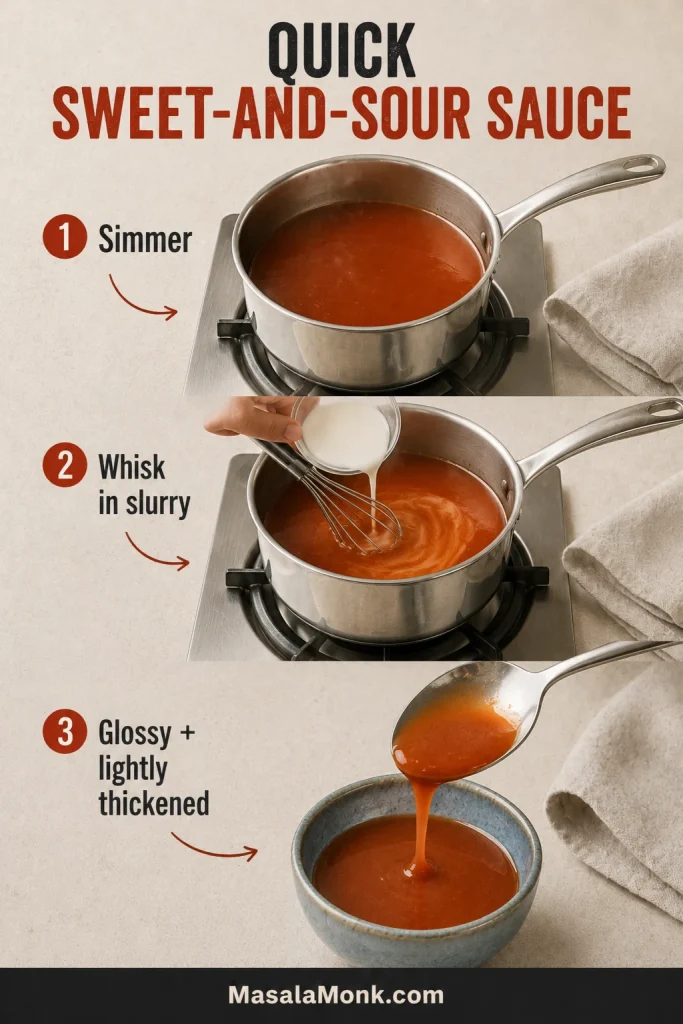
Make the Sweet-and-Sour Sauce
- Simmer the sugar, ¼ cup water, vinegar, ketchup, soy sauce, and optional chili flakes until the sugar dissolves.
- Mix the cornstarch with 1 tablespoon cold water, then whisk the slurry into the saucepan.
- Cook for 30–60 seconds, until glossy and lightly thickened. Thin the cooled sauce with warm water, 1 teaspoon at a time, if needed.
Fill and Fold
- Line a tray with parchment. Keep the wrapper stack covered and remove only four to six at a time.
- Add about 2 level teaspoons, or 10–12 g, to a thin 3-inch wrapper. Use about 2 rounded teaspoons, or 12–14 g, in a sturdy 3½-inch wrapper.
- Lightly moisten the edge with egg wash or water.
- Fold into a triangle or four-corner purse.
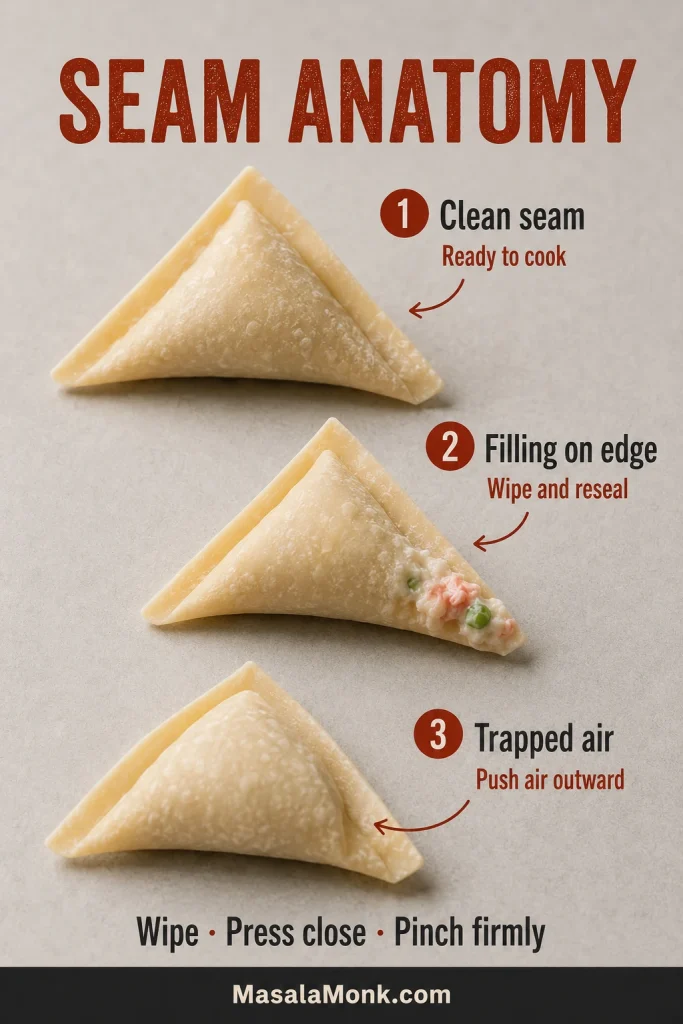
- Press the wrapper close around the filling, push out trapped air, and close every seam firmly.
- Run a fingertip along the seam. It should feel smooth and uninterrupted, with no soft air pocket beside the filling.
- Return each finished rangoon to the lined tray and keep it covered while you continue folding.
Deep-Fry
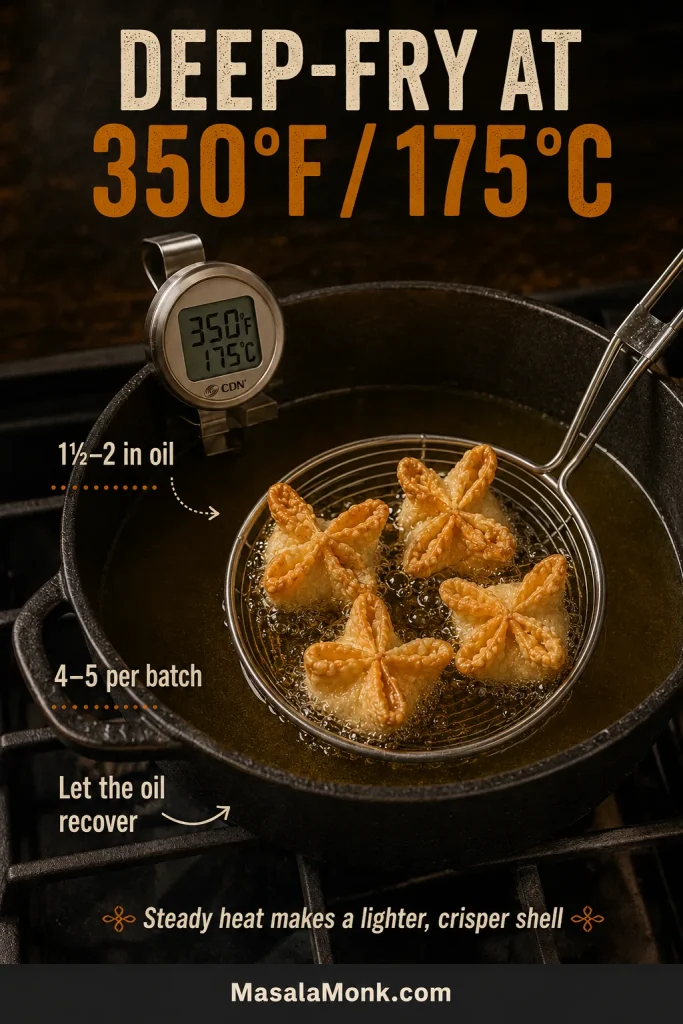
- Pour enough oil into a heavy pot to reach 1½–2 inches / 4–5 cm deep. Do not fill the pot more than halfway.
- Heat the oil to 350°F / 175°C.
- Lower four or five rangoons gently into the oil.
- Fry for approximately 2–3 minutes, turning only when needed for even color.
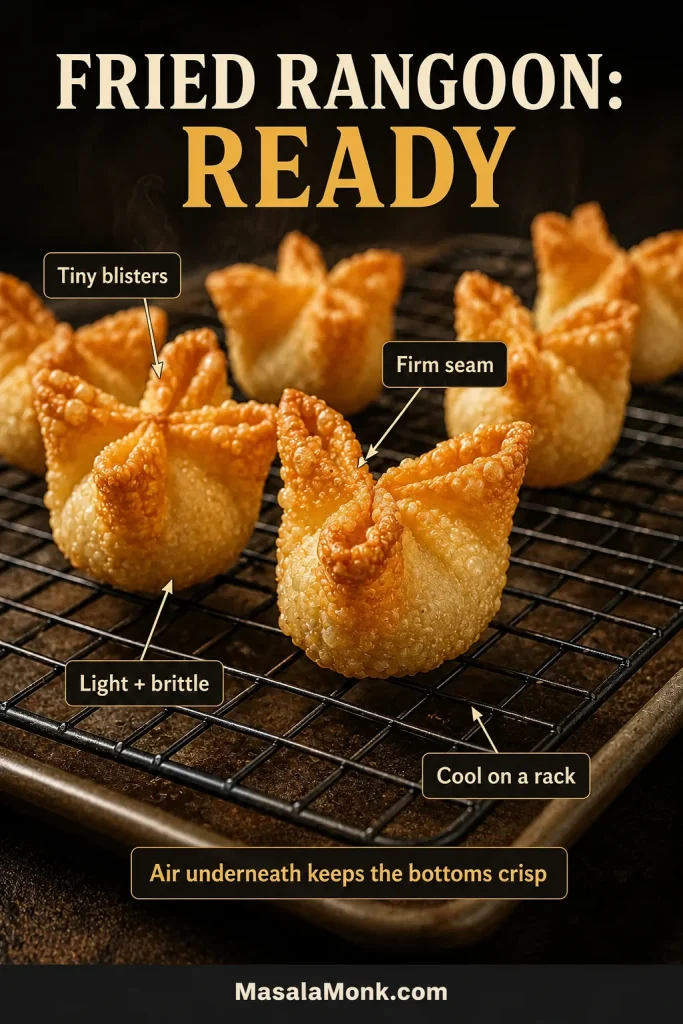
- Remove them when the wrappers are evenly golden, tiny blisters cover the flat sides, and the seams feel firm.
- Drain on a wire rack and let the oil return to 350°F / 175°C before the next batch.
Air Fry
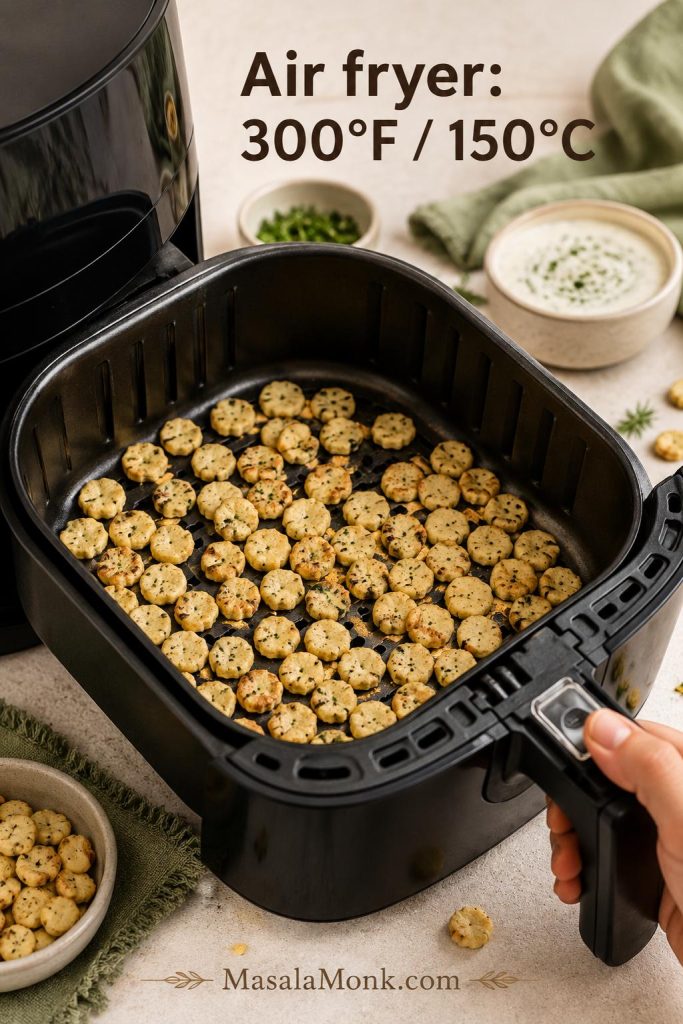
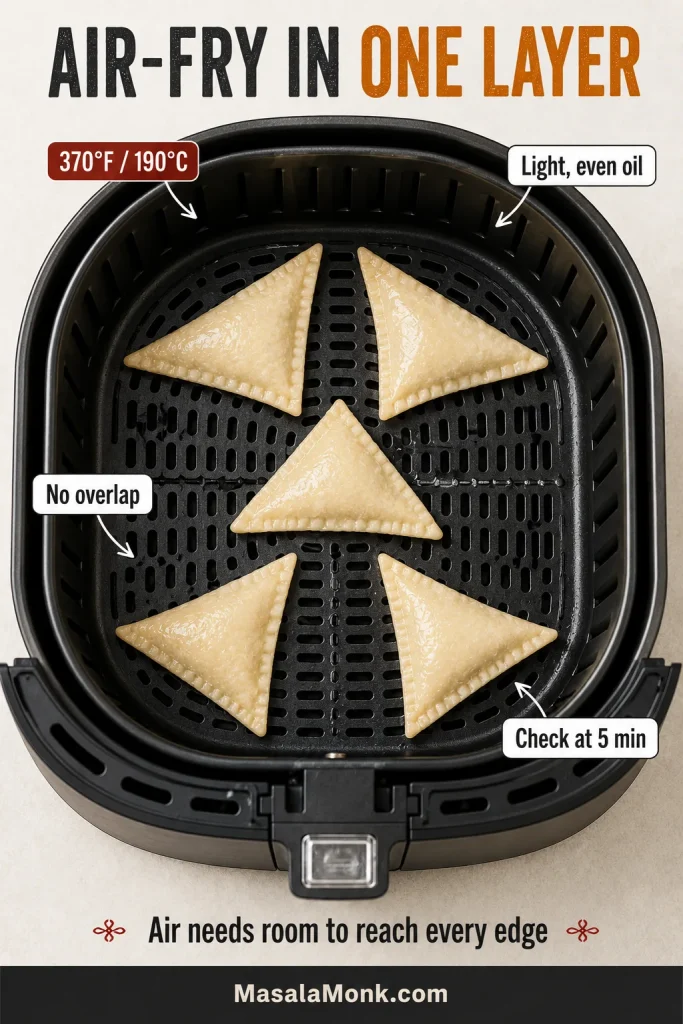
- Preheat the air fryer to 370°F / 190°C for about 3 minutes, unless the manufacturer advises otherwise.
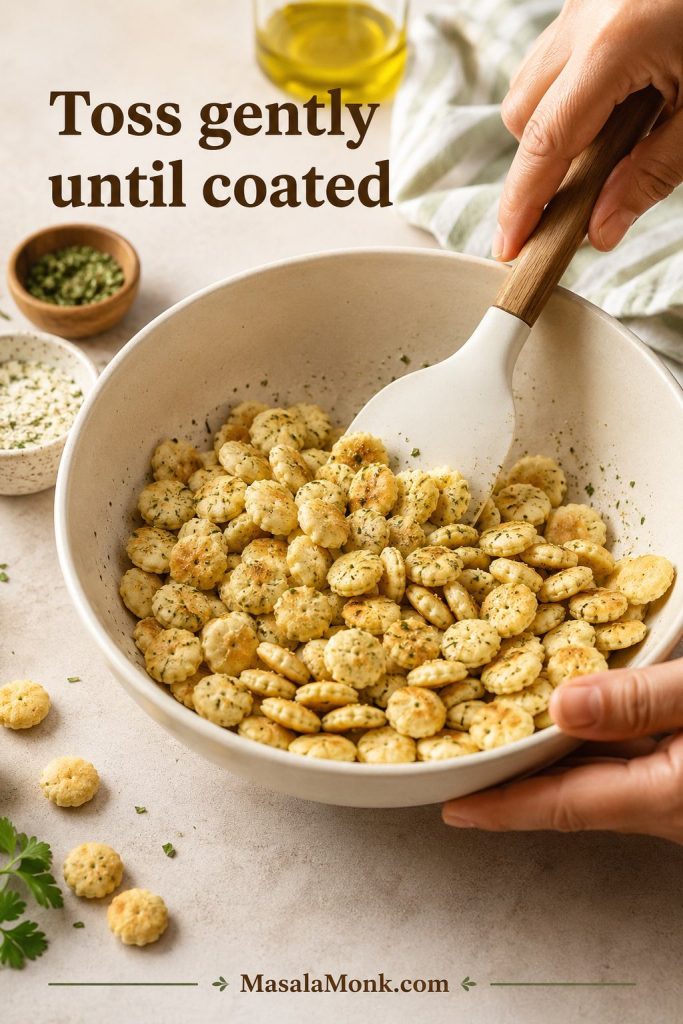
- Coat every exposed part of the wrapper lightly with oil.
- Arrange the rangoons in one uncrowded layer.
- Air fry for 6–8 minutes, beginning to check at 5 minutes.
- Tap the center panel gently with the tongs. It should feel dry and sound crisp, even when the wrapper remains lighter than a fried one.
- Purse shapes usually do not need flipping. Turn flat triangles once only when their undersides remain noticeably pale.
Bake
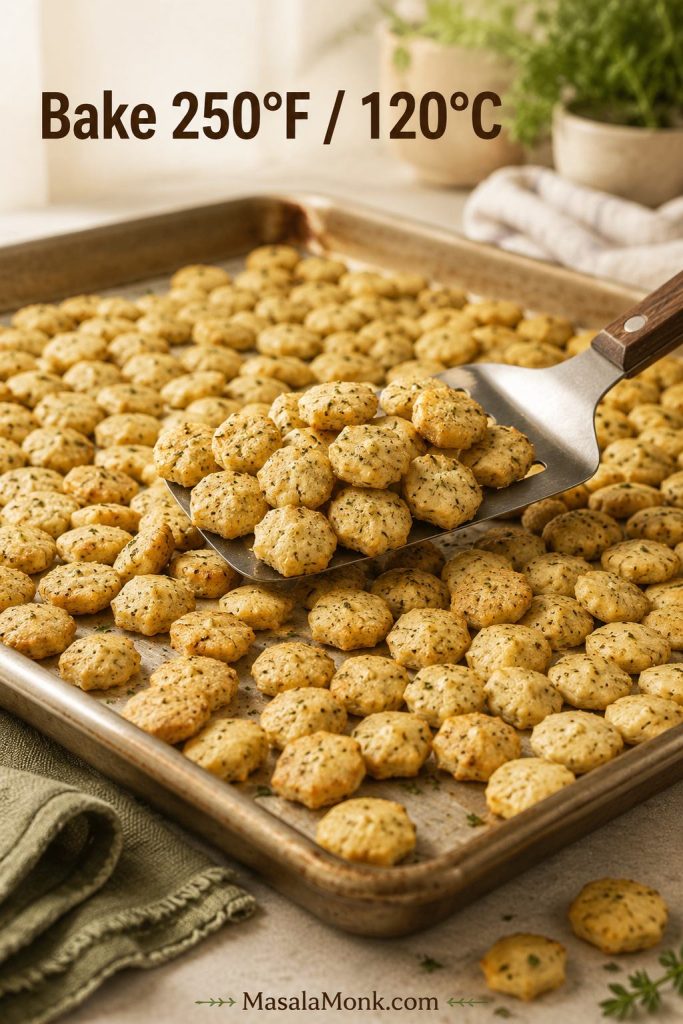
- Heat the oven to 400°F / 200°C. Line one or two rimmed baking sheets with parchment.
- Spray or brush every exposed part of the wrapper lightly with oil.
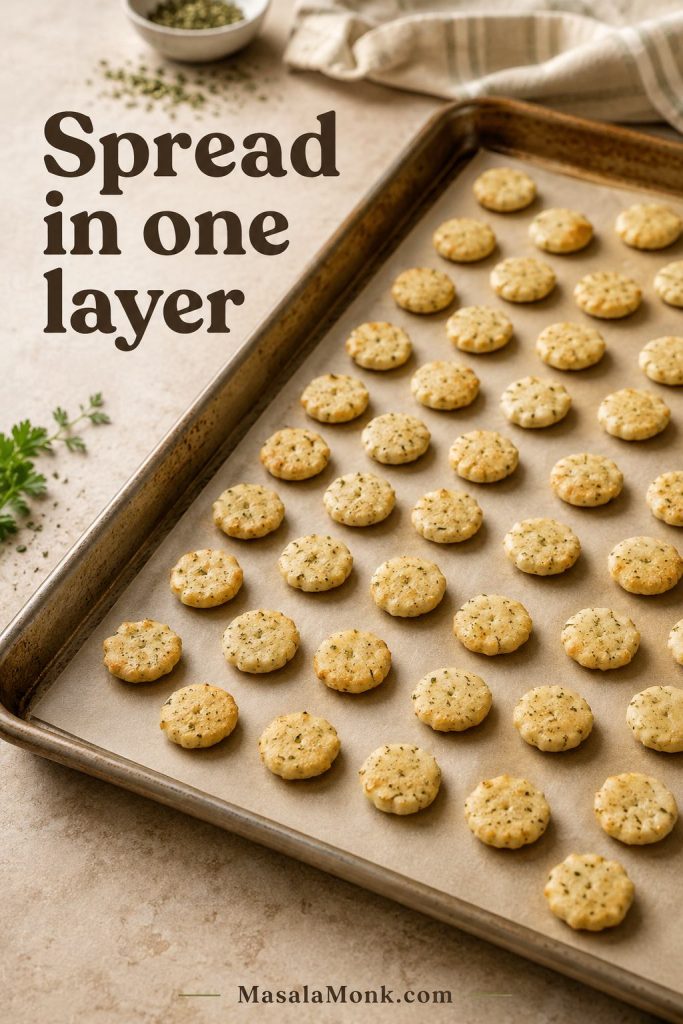
- Arrange the rangoons in one layer with at least 1 inch / 2.5 cm between them.
- Bake for 10–14 minutes, rotating the tray after about 7 minutes.
- When using two trays, switch their positions and turn them front to back.
- Remove them when the edges snap, the wrapper around the center feels firm, and no floury-looking patches remain.
Before eating: Let the rangoons rest for 3–5 minutes. The crisp shell cools before the creamy center does.
Allergen note: This recipe may contain milk, wheat, egg, soy, fish, crustacean shellfish, sesame, or peanut, depending on the packaged ingredients and cooking oil used. See the detailed allergen guidance below.
Once the first rangoon cracks cleanly and stays full, the rest of the batch becomes mostly repetition rather than guesswork. The guide below helps you choose a different filling, understand the wrappers, compare methods, or solve anything the test piece revealed.

Guide contents
Choose and Prepare the Filling
Maybe the version you remember came in a paper takeout bag beside egg rolls, with a tiny cup of bright-red sauce. Maybe the center was almost entirely creamy, or full enough that you could see the crab when you broke it open. There is no single version everyone is trying to recreate.
For many people, crab rangoon is less about one official formula than a particular balance of sweetness, creaminess, and crackle attached to a familiar meal.
Crab rangoon is a Chinese-American restaurant appetizer rather than a traditional Chinese dish, which helps explain why fillings vary so widely.
Choose Your Crab Rangoon Filling
| If you want… | Use this filling | Recommended crab |
|---|---|---|
| Sweet takeout or buffet-style | 8 oz cream cheese + 4–5 oz crab + 1–1½ tsp sugar | Imitation crab |
| Balanced and creamy | 8 oz cream cheese + 6 oz crab + 0–1 tsp sugar | Imitation, canned, or lump crab |
| More distinct crab flavor | 8 oz cream cheese + 8 oz crab; omit sugar | Lump or well-drained canned crab |
Because the total amount of filling changes, the sweet version makes slightly fewer rangoons and the crab-forward version slightly more. Wrapper size and portioning still have the greatest effect on yield.
Smooth takeout-style center: Finely chopped imitation crab blends into the cream cheese, while 1–1½ teaspoons of sugar recreates the gentle sweetness found at many takeout restaurants. Add ⅛–¼ teaspoon MSG (monosodium glutamate) for a slightly deeper savory note.
Balanced and creamy: The filling stays creamy while the crab remains noticeable. Omit the sugar for a savory center, or add up to 1 teaspoon for gentle sweetness.
More crab in every bite: Omit the sugar, drain the crab especially well, and fold it in at the end so some flakes remain visible.
To add a little crunch, fold in 2 tablespoons finely diced, thoroughly drained water chestnuts.
Ingredients and Why They Matter
This filling does not need a long ingredient list. Moisture and texture matter more than piling in extra seasoning.
Full-fat block cream cheese gives the filling its most stable texture. Soften it until a spatula moves through it easily, but stop before it becomes warm, shiny, or runny. Spreadable tubs and whipped cream cheese may contain more moisture or air, while reduced-fat cream cheese generally produces a softer filling.
Imitation crab gives the mild, lightly sweet flavor many people associate with takeout crab rangoon. Lump crab provides the clearest seafood flavor and more visible flakes. Canned crab is convenient and crab-forward, but it must be drained thoroughly and checked for shell fragments.
Scallions add freshness without much moisture. Garlic powder adds flavor without introducing liquid, while soy sauce and Worcestershire sauce bring salt, savoriness, and tang in small enough amounts to keep the mixture thick.
What Should the Filling Look Like?
A properly chilled filling should hold its mound on the spoon, then relax into a creamy pocket once heated. It should not run, release visible liquid, or spread across the wrapper before you begin folding.
- Too soft but not watery: refrigerate for another 15–20 minutes.
- Visibly wet: chill the filling, spoon away any liquid that gathers, and avoid adding more liquid seasoning. If it still slumps after chilling, use slightly smaller portions and choose triangle folds.
- Too stiff: let it stand at room temperature for a few minutes.
- Long crab strands remain: break them up gently with kitchen scissors or the edge of a spatula.
- Large cream cheese lumps remain: let the filling stand for about five minutes, then press the remaining lumps gently against the bowl with a spatula. Avoid vigorous beating once the crab has been added.
Check allergens and packaged ingredients
- Wheat: standard wonton wrappers and most conventional soy sauces
- Milk: cream cheese
- Egg: egg wash and some imitation-crab products
- Soy: soy sauce and some imitation-crab products
- Fish: imitation crab and some Worcestershire sauces
- Crustacean shellfish: real crab, crab extract, and some imitation-crab products
- Sesame: optional sesame oil
- Peanut: only when peanut oil is chosen for frying
Check every packaged ingredient, consider cross-contact in shared cooking oil, and follow the FDA guidance on reading complete ingredient and allergen information.
Wrappers, Portions, and Folding
The wrapper is doing more than holding the filling. Its size determines how much you can add without asking the seam to stretch.
Wonton wrappers are usually sold refrigerated near tofu, fresh noodles, or produce, and may be stocked in the freezer section of Asian supermarkets. Frozen wrappers should thaw completely in their sealed package in the refrigerator before you separate the stack.
- Standard supermarket wonton wrapper: the most manageable all-purpose choice
- Thin Hong Kong-style wrapper: delicate and deeply blistered, but easier to tear or overfill
- Thicker wonton wrapper: sturdier and easier to handle, with a slightly chewier shell
Egg-roll wrappers can be cut into squares, while spring-roll sheets and rice paper behave differently. MasalaMonk’s crispy vegetable spring roll guide explains those alternatives in more detail.
How Much Filling Goes in Each Wrapper?
A properly filled wrapper should feel plump but relaxed, never stretched tightly over the filling. Leave enough clean space around the mound to release trapped air and close the seam.
- Thin 3-inch / 7.5 cm wrapper: about 2 level teaspoons, or 10–12 g
- Sturdy 3½-inch / 9 cm wrapper: about 2 rounded teaspoons, or 12–14 g
- Four-corner purse: stay near the lower end of the range
- Broad triangle: a sturdy larger wrapper can usually hold the higher end

Which Fold Works Best?
| Fold | Main advantage | Works especially well for | Main risk |
|---|---|---|---|
| Triangle | Easiest and strongest seal | Beginners, air frying, and baking | Slightly flatter filling pocket |
| Four-corner purse | Classic shape and fuller center | Deep frying | More seams and faster-browning points |
How to Fold and Seal Them
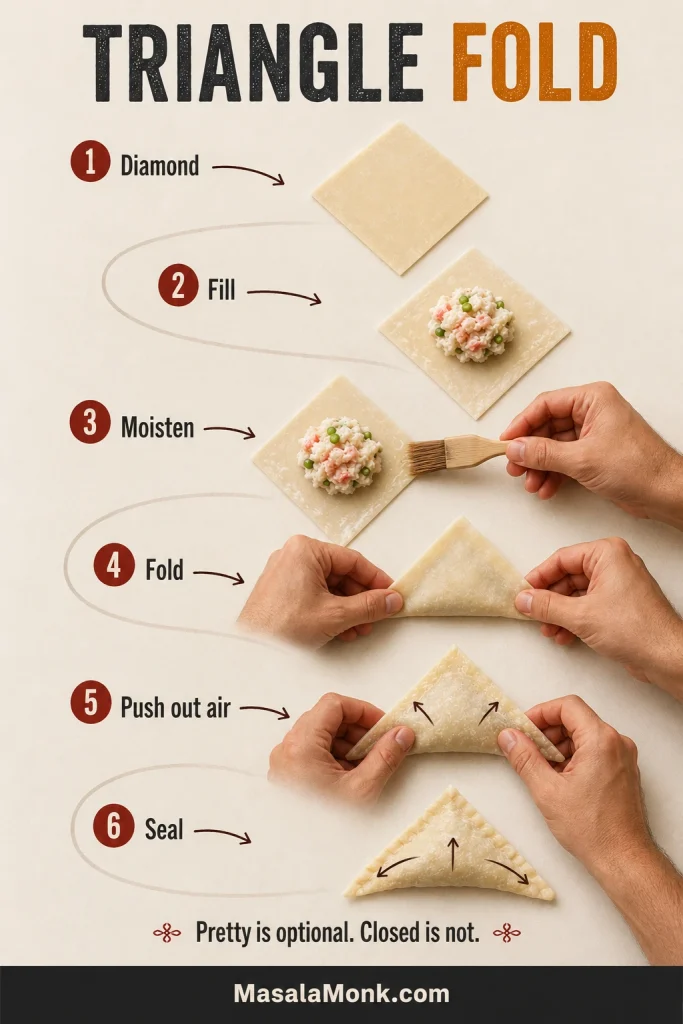
Pretty folds are optional. Closed folds are not. The first one may look awkward; it only needs to stay sealed. Once the portion and motion feel familiar, the tray usually fills much faster.
Triangle Fold
- Place the wrapper like a diamond with one point facing you.
- Add the measured filling to the center.
- Brush a thin film of water or egg wash around the edges.
- Bring the bottom point to the top point.
- Press close to the filling and push air toward the open edges.
- Seal from the center toward each corner.
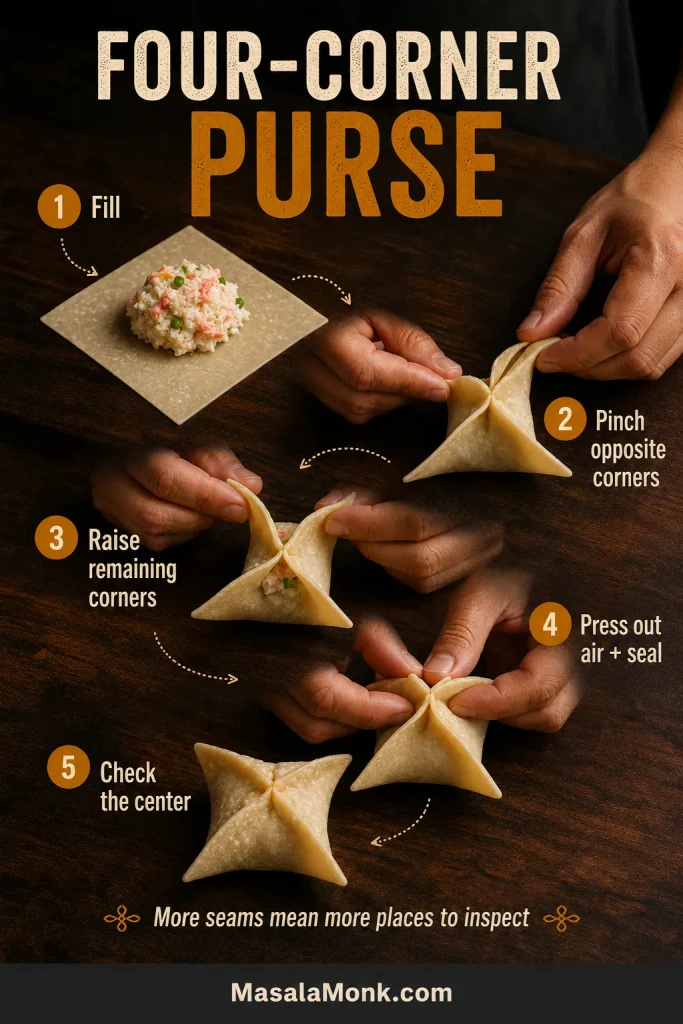
Four-Corner Purse
- Add the measured filling to the center.
- Brush a thin film of egg wash around the border.
- Bring two opposite corners together and pinch.
- Bring the remaining corners to the center.
- Press the wrapper close around the filling to remove air.
- Seal the four diagonal seams from the center outward.
- Check the point where all four seams meet.
Water is usually enough for fresh wrappers and simple triangles. Egg wash provides extra grip for purse folds and deep frying. Use only a thin film; a soaked edge becomes slippery.
Back to the recipe · Compare cooking methods · Troubleshoot sealing
Compare the Three Cooking Methods
The filling stays the same. What changes now is the shell you want around it and the number of pieces you need to cook at once.
| Method | Result | Full-batch time | Works especially well for |
|---|---|---|---|
| Deep fry | Thinnest, most blistered, and evenly crisp | About 20–30 minutes | Restaurant-style texture; triangles or purses |
| Air fry | Crisp, lighter shell with faster-browning points | About 25–55 minutes; allow roughly 35–55 minutes with a five-piece basket | Smaller lower-oil batches; triangles |
| Bake | Crisp edges with a more tender center | 10–14 minutes when two trays bake together, or 20–28 minutes in two rounds | Larger batches; triangles |
Deep-Fried Crab Rangoon
Deep frying produces the thinnest shell and the most even blistering because the hot oil reaches the seams, points, and flat sides at the same time. Triangle folds are easy to manage, while four-corner purses give the familiar restaurant shape.
The oil temperature matters more than chasing an exact shade of gold. When the oil falls too far below 350°F / 175°C, the wrappers absorb more fat before they become crisp. Let the pot recover between batches rather than adding more pieces to save a minute.
Properly fried wrappers should feel light and brittle rather than thick or oily. Look for tiny blisters, firm seams, and even color before the points become dark.
Frying Safety
- Use a stable, heavy pot and do not fill it more than halfway with oil.
- Keep water, damp wrappers, wet utensils, children, and pets away from the cooking area.
- Lower the rangoons gently, remove any leaking piece promptly, and keep pot handles turned away from the edge of the stove.
- Drain the cooked rangoons on a wire rack so steam does not soften the bottoms.
Air Fryer Crab Rangoon
For the air fryer, the triangle is the more forgiving shape. It has fewer seams and fewer exposed points competing with the hot circulating air. Purse-shaped rangoons still work, but their tips may crisp before the wrapper around the center.
A lighter shell is not a failed shell. A pale air-fried wrapper can still crack cleanly when you bite it. Trust the dry, crisp texture rather than waiting for the deep color produced by frying.
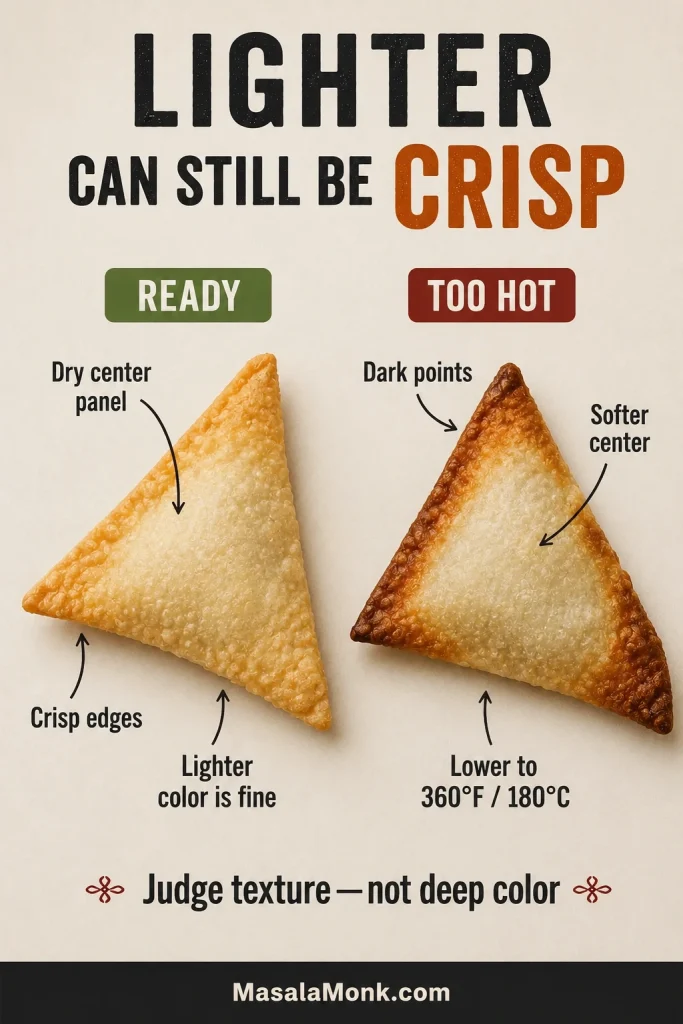
When the tips darken too quickly, lower the setting to 360°F / 180°C. The extra minute or two gives the center panel time to crisp without hardening the points.
Baked Crab Rangoon
On a sheet pan, triangles sit steadily and expose more wrapper to the heat. Baking is also the most practical option when you want to cook a large batch without standing over oil.
The wrapper around the center stays slightly more tender than the edges. That is part of the baked texture, not a sign that the batch failed. Look for crisp points, firm seams, and no dry floury patches.
Uneven oil coverage is the usual reason baked wrappers stay pale or leathery. Mist or brush any dry-looking areas and return the tray to the oven briefly rather than continuing until the points become hard.

Which Dipping Sauce Do You Remember?
The sauce is often the part people remember most clearly and name least accurately. The red or orange dip may be sweet-and-sour, duck sauce, sweet chili, or plum sauce.
| Sauce | Appearance | Flavor |
|---|---|---|
| Clear bright-red restaurant sauce | Thin, translucent, glossy | Simple vinegar-and-sugar sweet-and-sour |
| Red-orange sweet-and-sour | Glossy and slightly opaque | Tangy, sweet, lightly tomato- or fruit-based |
| Duck or apricot sauce | Orange and jam-like | Fruity and mild |
| Sweet chili sauce | Red with visible chili pieces | Sweet with gentle heat |
| Plum sauce | Darker and thicker | Fruitier and less sharply acidic |
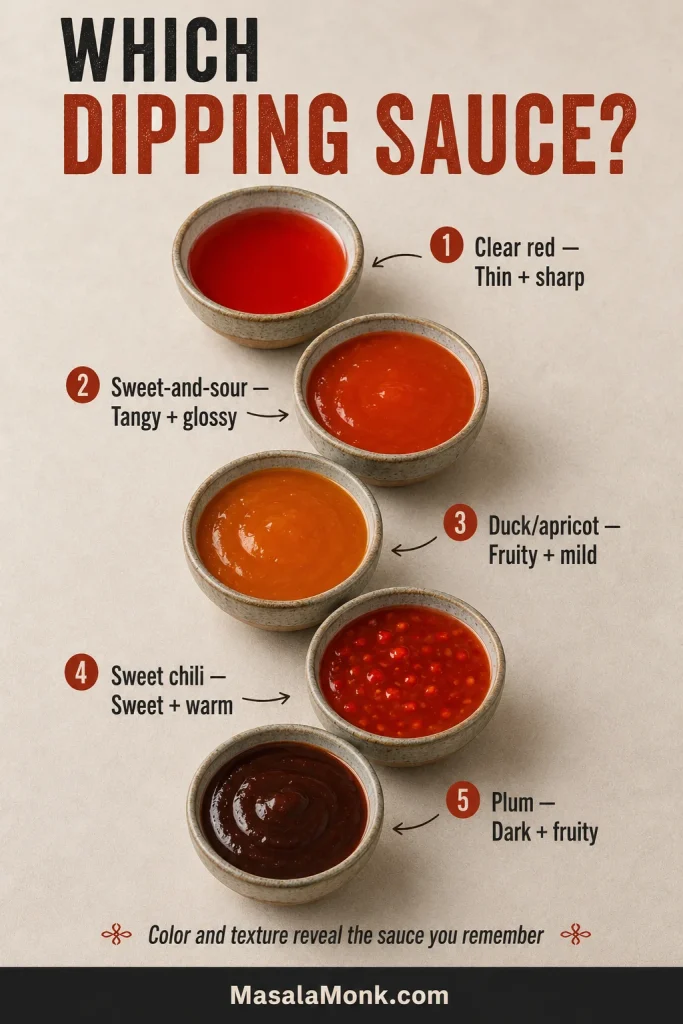
The sauce included in the recipe is glossy, red-orange, and sweet-and-sour. Its vinegar cuts through the rich cream cheese and crisp wrapper. Duck or plum sauce provides a softer fruit contrast, while sweet chili adds gentle heat.

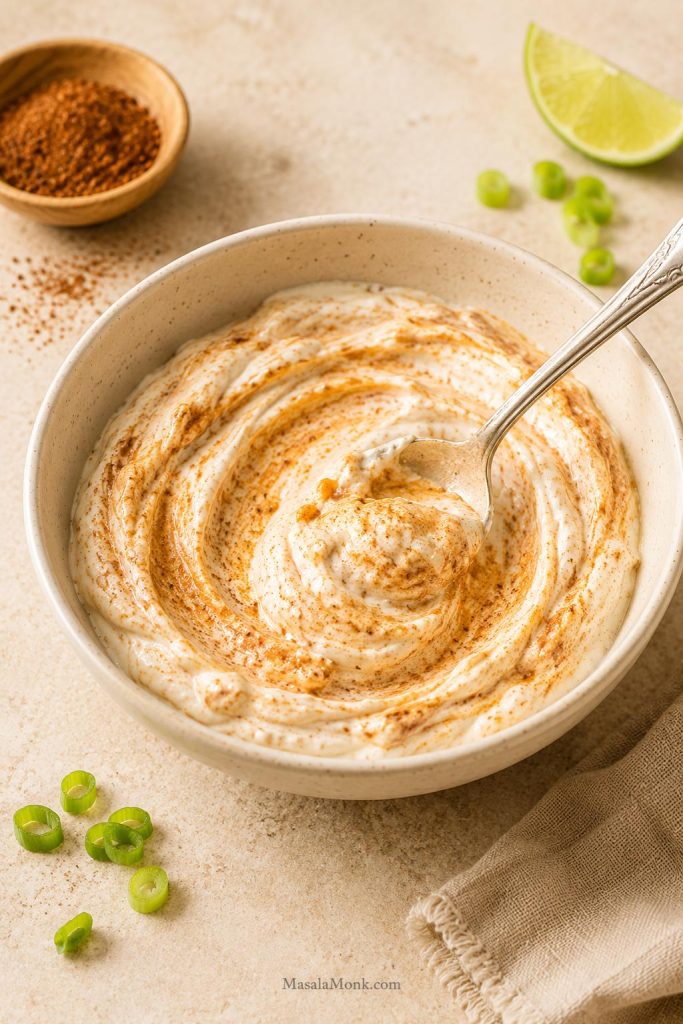
For guests who prefer a less tangy dip, homemade yum yum sauce gives the platter a cool, creamy alternative.
Troubleshooting: What to Do Now
A few imperfect rangoons do not mean the batch is lost. Start with the symptom you can see. Most batches need one adjustment, not a complete restart.
Most problems lead back to thick filling, modest portions, or clean seams. The tables below separate issues you can catch before cooking from the ones that appear after the wrappers hit the heat.
Jump to: Before cooking · After cooking · Reheat softened leftovers
Before Cooking

| What you see | What to do now |
|---|---|
| Filling is watery | The crab may have carried too much moisture, or the filling may be warm. Chill it for 15–20 minutes, spoon away visible liquid, and avoid adding more liquid seasoning. If it still slumps, use smaller portions and triangle folds. |
| Long crab strands remain | Break them up gently in the mixed filling with kitchen scissors or the edge of a spatula. |
| Cream cheese remains lumpy | Let the filling stand for about five minutes, then press the remaining lumps gently against the bowl with a spatula. Avoid vigorous beating once the crab has been added. |
| Seam will not stick | Wipe the border clean, let it dry briefly, lightly moisten it again, and pinch. |
| Wrapper cracked | Patch a small crack with a dampened scrap of wrapper. Discard badly split pieces. |
| Air remains around the filling | Press the wrapper closer to the mound and push the air toward the open edge before sealing. |
Most sealing problems are easier to correct before the first batch cooks. Once the rangoons hit the heat, color, texture, and leakage become the useful clues.
After Cooking
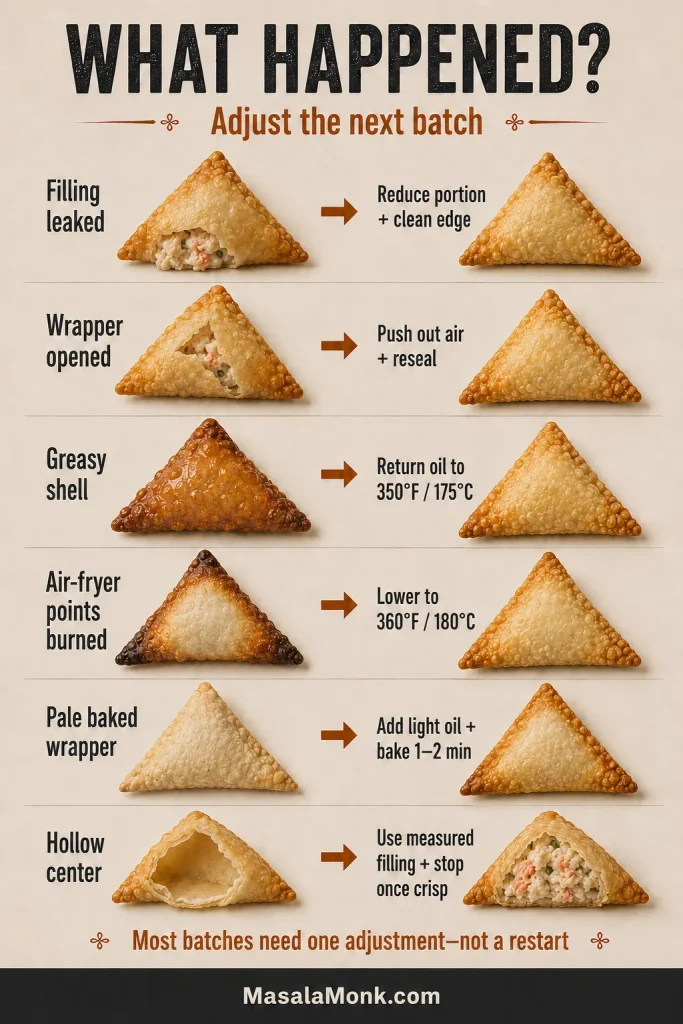
| What happened | What to do now |
|---|---|
| Filling leaked out | The portion may be too large, the filling too wet, or the border dirty. Reduce the remaining portions, clean each edge, and reseal. |
| Wrapper opened | Press the remaining wrappers close to the filling, push the air outward, and pinch every seam again. |
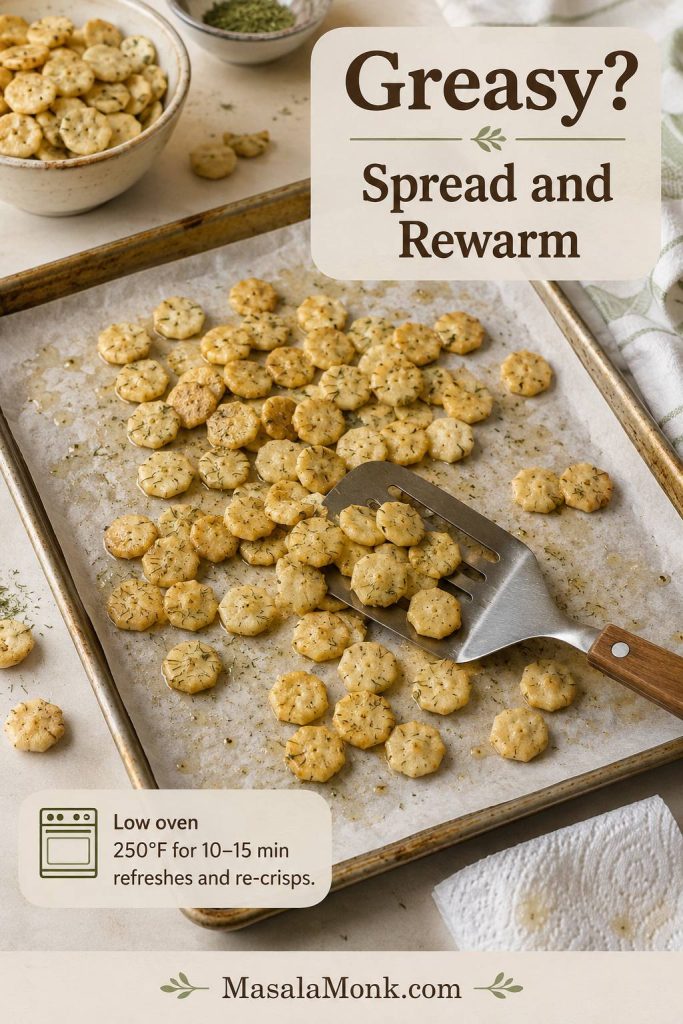
| Fried rangoons are greasy | Bring the oil back to 350°F / 175°C and cook smaller batches. |
| Outside browned too quickly | Lower the heat, let the oil or appliance temperature settle, and check the next batch sooner. |
| Air-fryer points burned | Reduce the setting to 360°F / 180°C and add 1–2 minutes if the center panel still needs crisping. |
| Baked wrappers stayed pale | Brush or mist the dry areas lightly and bake for another 1–2 minutes. |
| Bottom stayed soft | Return the pieces in one layer for 1–2 minutes, then cool them on a rack. |
| Center feels hollow | Use the measured portion, press the wrapper close around it, inspect every seam, and stop cooking once the shell is crisp. |
| Cooked rangoons softened | Re-crisp at 350°F / 175°C in the air fryer for 2–3 minutes or at 375°F / 190°C in the oven for 4–6 minutes. |
Party Timeline and Quantities
The goal is to serve crisp rangoons—not spend the whole party trapped beside the stove. Smaller fresh batches stay crisper than one large pile slowly steaming itself soft.
To reduce last-minute cooking, let a make-ahead cheese ball cover the cold-appetizer slot while the rangoons come out in smaller fresh batches.
How Many Crab Rangoons Per Person?
Plan on 3–4 rangoons per person when several appetizers are available, or 5–6 when they are the main hot appetizer. Count the recipe as 8 servings; in practice, one balanced batch usually serves about 8–10 with other appetizers or 5–7 when these are the main hot appetizer.

For a larger group, double the filling, but open and fill the second package of wrappers only when needed so the unused stack stays supple.
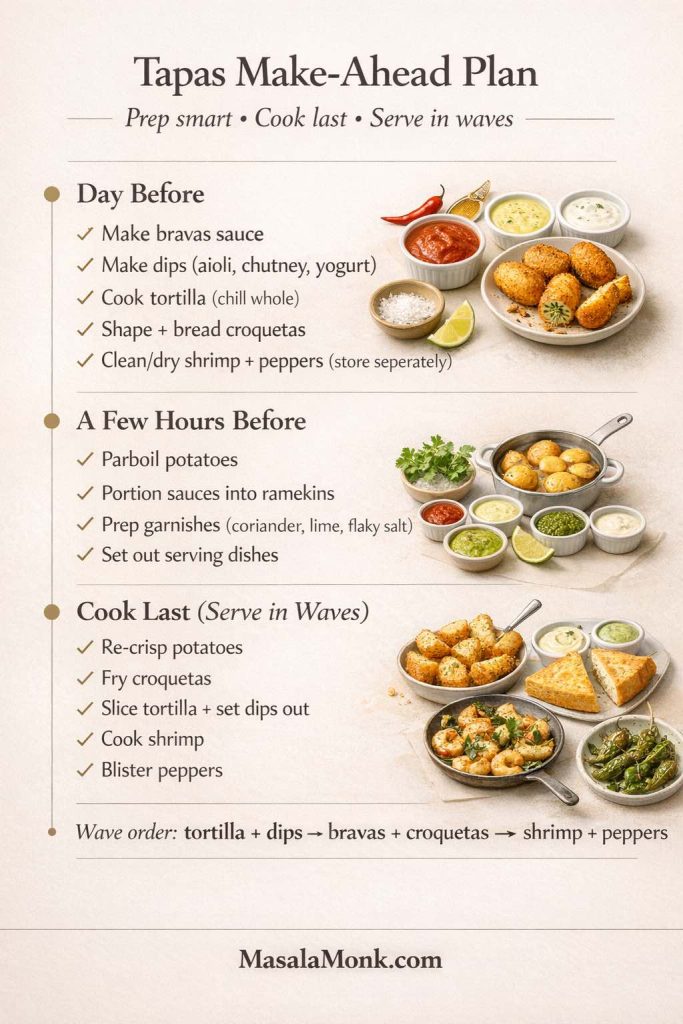
Make-Ahead Crab Rangoon Timeline
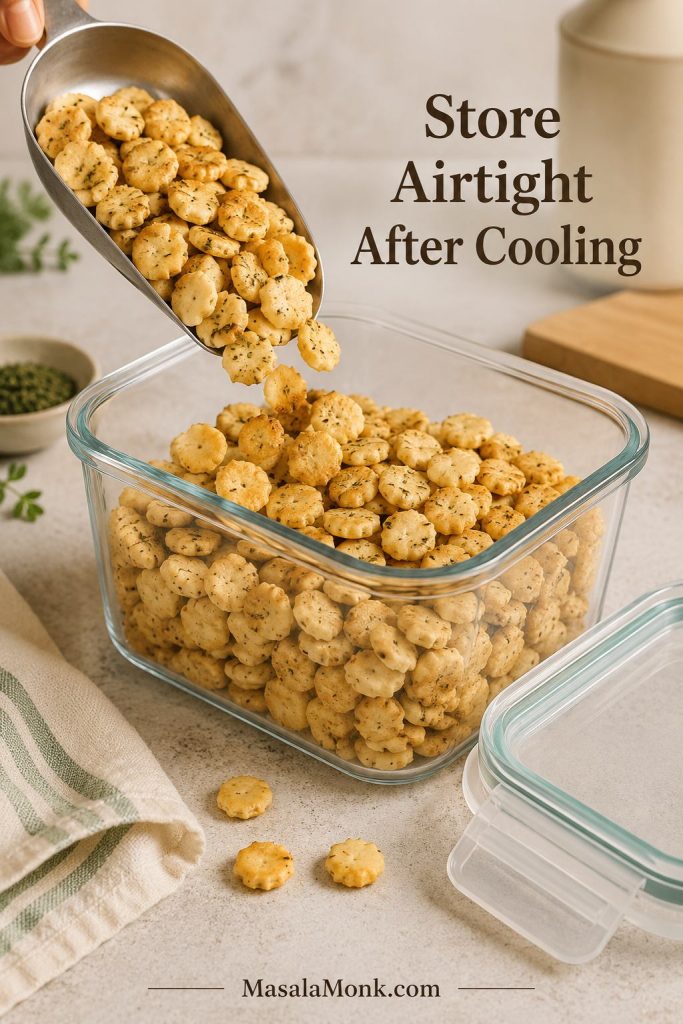
Up to 24 hours ahead: Prepare the filling and store it in an airtight container in the refrigerator. Make the dipping sauce and refrigerate it separately.
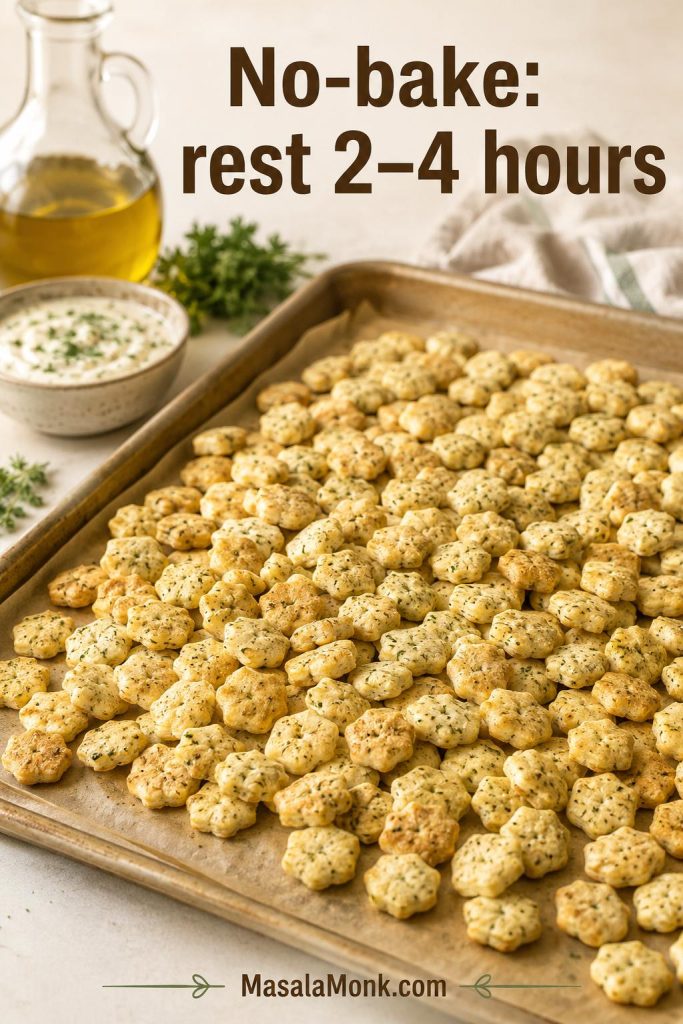
For the best wrapper texture, up to four hours ahead: Fold the rangoons, arrange them on parchment-lined trays, cover them carefully so the wrappers do not dry out, and keep them refrigerated until cooking.
For overnight or longer preparation: Freeze the assembled rangoons rather than refrigerating them.
Before guests arrive: Set out wire racks, sheet pans, dipping bowls, and serving platters. Take the sauce out of the refrigerator early enough to lose its deep chill, or warm it gently if preferred. Heat the oil, oven, or air fryer shortly before cooking.
During service: Cook the first batch before everyone is waiting at the platter. After that, smaller fresh batches can arrive while people are already eating. Hold finished rangoons uncovered on a wire rack in a 200°F / 95°C oven for no more than about 15 minutes.

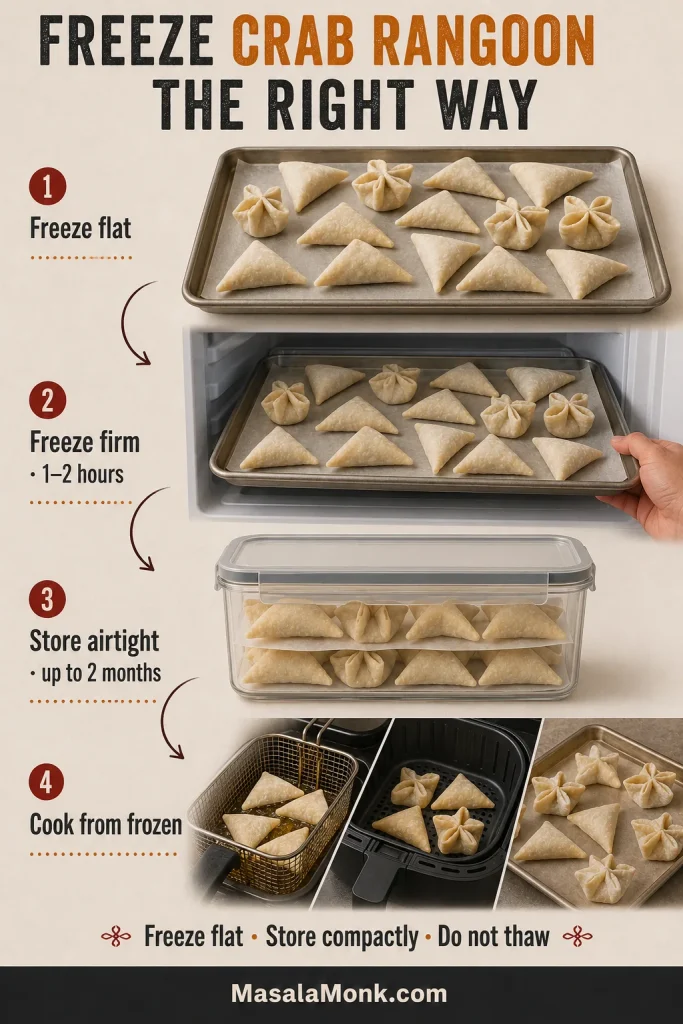
Freeze and Cook From Frozen
Once frozen solid, the rangoons can be stored compactly and cooked whenever needed. Keep them frozen until they go directly into the oil, air fryer, or oven.
- Arrange the uncooked rangoons in one layer on a parchment-lined tray.
- Freeze until firm, usually 1–2 hours.
- Transfer them to an airtight freezer container or freezer bag.
- Separate layers with parchment to protect the seams and points.
- Use within two months for the best wrapper quality.
Do not thaw before cooking. Condensation can soften the wrappers and weaken the seams.
When deep frying frozen rangoons: Brush away visible ice crystals, lower them into the oil carefully, and cook smaller batches because frozen pieces lower the oil temperature more sharply.
| Method | Timing from frozen | Look for |
|---|---|---|
| Deep fry at 350°F / 175°C | 3–4 minutes | Evenly golden wrapper and firm seams |
| Air fry at 370°F / 190°C | Check at 8 minutes; usually 8–12 minutes | Dry center panel and crisp points; the shell may remain lighter than a fried rangoon |
| Bake at 400°F / 200°C | Check at 14 minutes; usually 14–18 minutes | Crisp edges and a firm center |
Cook one frozen rangoon first because wrapper thickness, fold shape, filling amount, freezer temperature, and appliance performance all affect the timing.
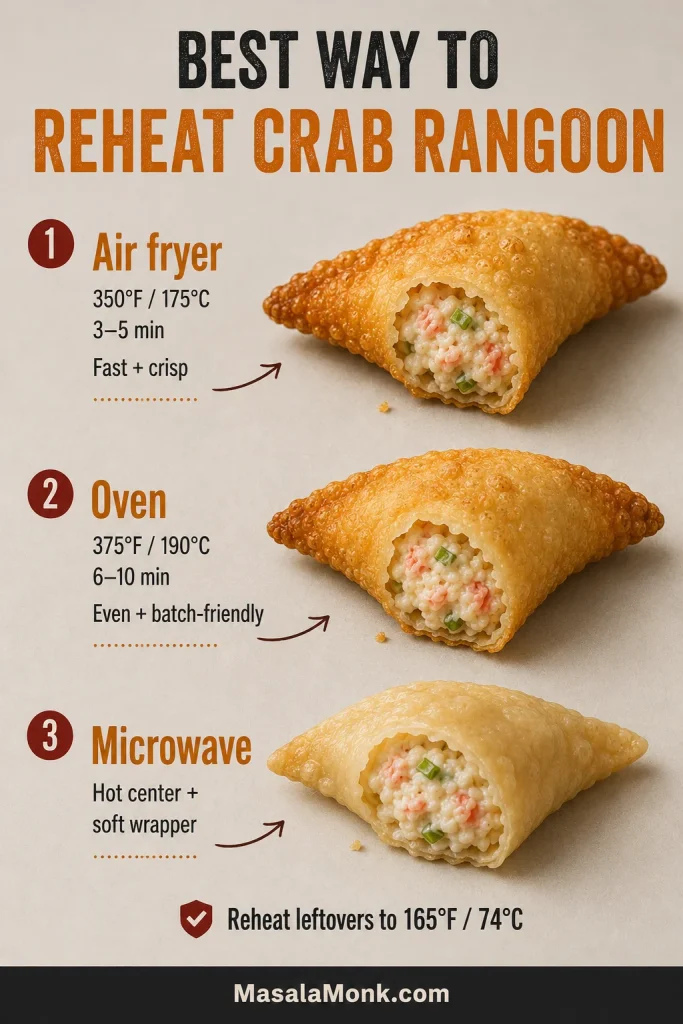
Storage and Reheating
Freshly cooked rangoons have the most delicate shell, but dry heat restores enough crunch to make leftovers worth saving.
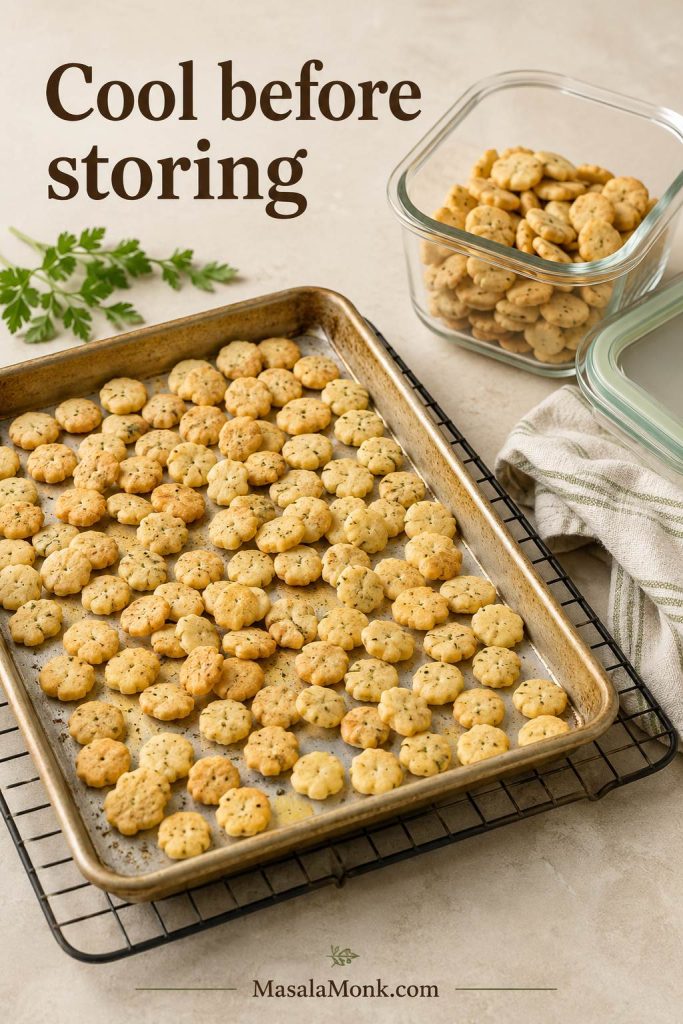
Refrigerate cooked crab rangoon within two hours. Once the heaviest steam has subsided, arrange the pieces in a shallow container and refrigerate promptly. Cover the container once the rangoons have cooled.
Use refrigerated leftovers within 3–4 days, but reheat and eat them within two days for the best wrapper texture. The USDA leftovers guide recommends reheating leftovers to 165°F / 74°C.
- Air fryer: 350°F / 175°C for 3–5 minutes
- Oven: 375°F / 190°C for 6–10 minutes
- Microwave: the filling becomes hot, but the wrapper remains soft
What to serve with them · Back to top
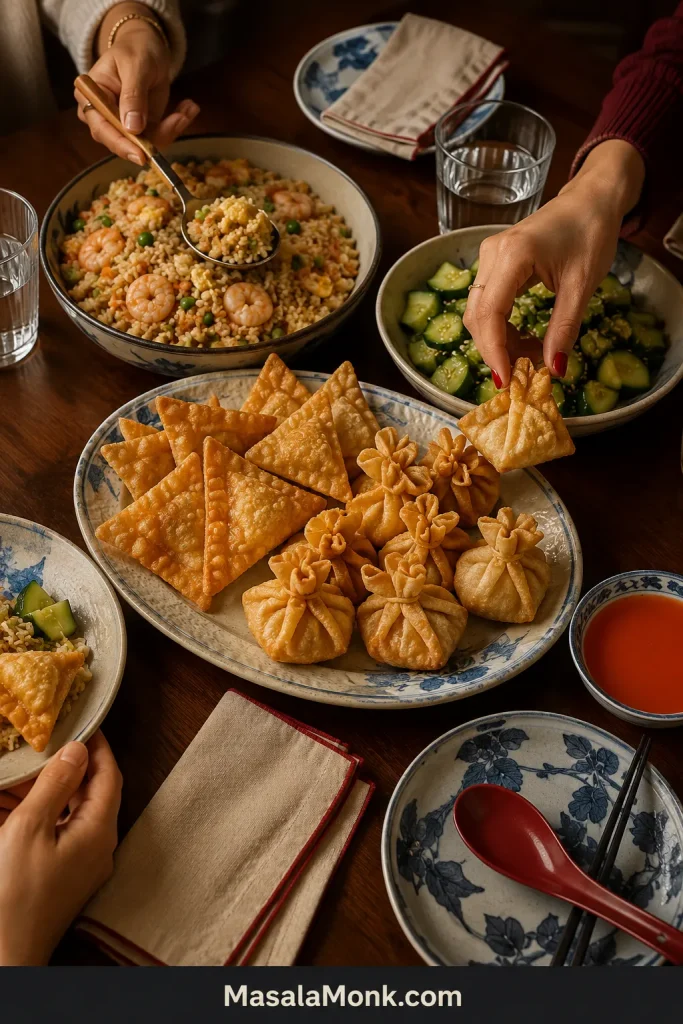
What to Serve With It
Pair the rich, creamy rangoons with one substantial dish and one sharp or vegetable-led side. That gives the meal contrast without turning the table into a list of competing fried foods.
- Takeout-style dinner: shrimp fried rice with a cool cucumber salad
- Noodle dinner: lo mein or chow mein with stir-fried vegetables
- Lighter spread: hot-and-sour soup with lettuce cups or smashed cucumber salad
The cucumber salad is especially useful between rich bites: rice vinegar, sesame, garlic, and chili reset the palate before the next rangoon.
For another Chinese-American takeout classic, try MasalaMonk’s Egg Foo Young with brown gravy.
Frequently Asked Questions
Is crab rangoon made with real crab?
It can be made with real crab, canned crab, imitation crab, or a mixture. Imitation crab often gives the mild, lightly sweet flavor associated with takeout crab rangoon.
Is crab rangoon supposed to be sweet?
Some takeout and buffet versions are gently sweet, while others are savory. The filling guide includes exact sugar ranges for sweet, balanced, and crab-forward versions.
Can crab rangoon be made gluten-free?
It requires dedicated gluten-free wrappers and individually checked sauces, imitation crab, and seasonings. Standard wonton wrappers contain wheat, and packaged ingredients vary by brand.
Why does crab rangoon keep opening?
Too much filling, trapped air, or filling on the sealing edge are the usual causes. See the troubleshooting section for the correction that matches what happened.
What is the red sauce served with crab rangoon?
It is usually a sweet-and-sour sauce, although some restaurants serve duck sauce, plum sauce, or sweet chili sauce. The dipping-sauce guide can help identify the version you remember.
The last two pieces rarely stay on the platter for long.
The Rule to Remember
Thick filling, modest portions, clean seams.
Drain the crab, chill the filling until it holds a mound, and push out trapped air before sealing. Those three decisions do more for the finished rangoon than an elaborate fold or a longer ingredient list.
After the short rest, the shell should crack cleanly around a warm, creamy center—and the person who said they only wanted one may already be reaching for another.
Which version are you making: sweet and creamy, balanced, or packed with real crab?