Posted on — Leave a comment

Refried Beans Recipe: Easy Homemade Refried Beans From Pinto Beans

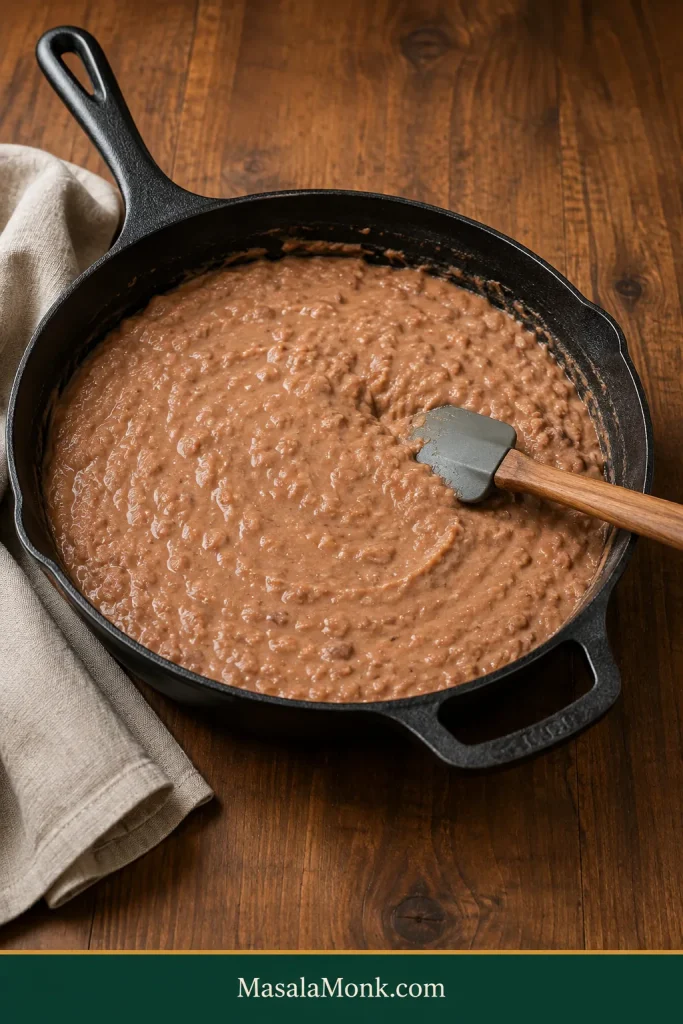
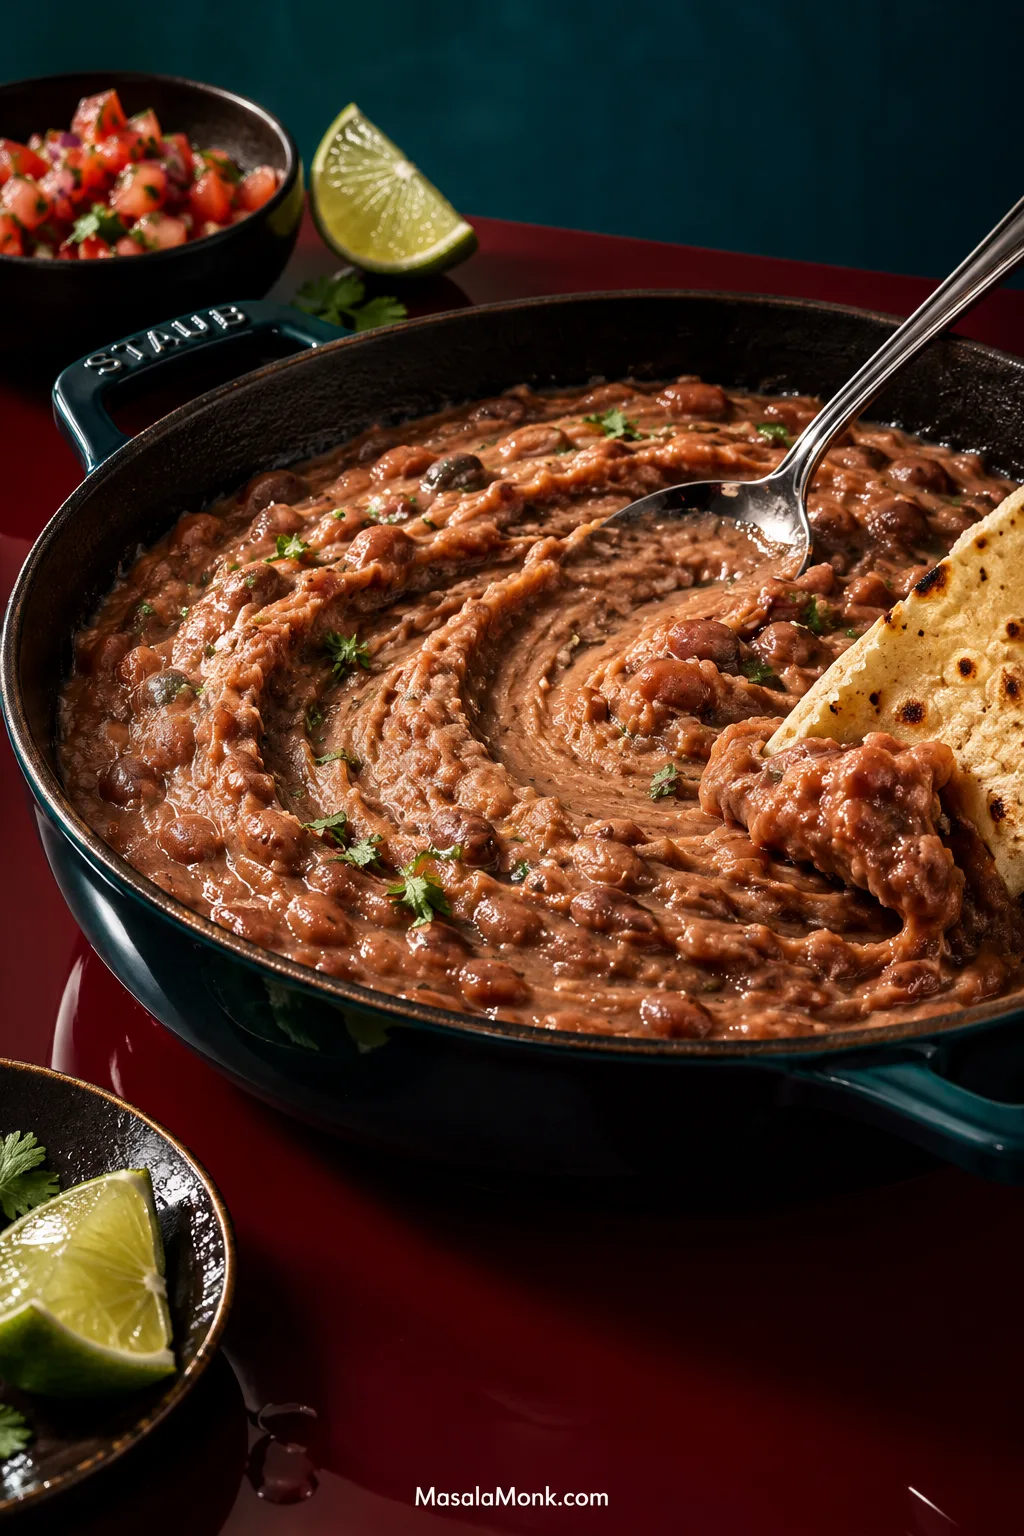
Creamy refried pinto beans in a dark skillet with a spoon trail through the surface and a warm tortilla beside them on a petrol-blue and oxblood set.

A skillet of whole pinto beans does not look much like refried beans at first. Then the beans hit warm fat and softened onion, the masher breaks them open, and the liquid in the pan turns glossy as their starch thickens it. Within minutes, you have creamy beans with enough body for a spoon to leave a trail through them, but enough liquid to stay soft on the plate.

How far you take them depends on dinner. Leave them loose and silky for a side dish. Give them a few more minutes for tacos and burritos. Cook them down farther for tostadas or molletes, where you need a spread that stays put instead of soaking the base. At the right point, a warm tortilla drags through them easily and the beans spread rather than sit in a stiff mound.

This refried beans recipe works from two starting points: whole canned pintos for the fast route, or dried pintos cooked until completely tender. Once either one reaches the skillet, the same basic method takes over.

Refried Beans Recipe

20–25-Minute Canned-Pinto Route: Soften ½ cup onion in 2 tablespoons lard or neutral oil, stir in 2 minced garlic cloves, then add two cans of whole pinto beans with ½ cup bean liquid, water, or unsalted broth. Mash, simmer gently until creamy and still slightly loose, then season to taste.

If your can already contains prepared refried beans rather than whole pintos, use our refried beans from a can guide instead. Those beans have already been mashed and cooked into their final form, so they need a different kind of help.

Refried beans can be frustrating because the ingredient list is so short. When a homemade batch turns stiff, gritty, or strangely flat, it can feel as though some restaurant secret is missing. Usually the bigger differences are simpler: fully tender beans, enough fat, enough liquid, and reading what the pan is doing.

The same beans can be soft and spoonable one minute, then dense enough to stand on a spoon after a little more cooking. That stopping point matters more than another shake of cumin.

Onion, garlic, cooked pintos, fat, and bean broth or water are the foundation. Add liquid gradually until the beans move the way you want.

Easy Homemade Refried Beans From Pinto Beans

Whole pinto beans mashed and refried with onion, fat, and enough liquid to stay creamy. Keep them loose for a plated side or reduce them farther for tacos, burritos, and tostadas.

Prep
8–10 minutes

Cook
12–15 minutes

Total
20–25 minutes

Yield
About 2½–3 cups

Serves
About 5–6 as a side

The final yield shifts a little depending on how loose or thick you leave the beans.

Ingredients
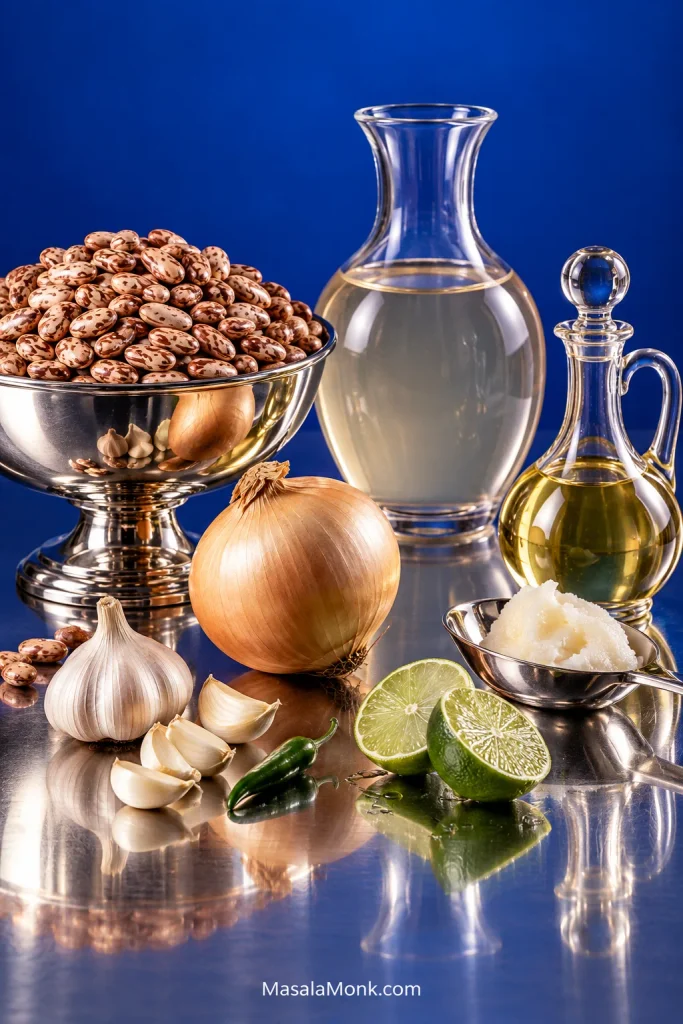
Whole pinto beans, onion, garlic, cooking fat, bean broth, and cut lime arranged on a cobalt-blue background with polished metal vessels.
A short ingredient list leaves more room for each component to matter: onion builds the base, fat carries richness, and bean liquid controls how the finished mash moves.
  • 2 cans whole pinto beans, 15 oz (425 g) each
  • 2 tbsp (30 ml) lard, avocado oil, or another neutral cooking oil
  • ½ cup (about 75 g) white or yellow onion, finely diced
  • 2 garlic cloves, finely minced
  • ½ cup (120 ml) reserved bean liquid, water, or unsalted broth to start
  • Up to another ½ cup (120 ml) bean liquid, water, or unsalted broth, as needed
  • ¼ tsp fine salt, only if needed, plus more to taste
  • 1–2 tsp (5–10 ml) fresh lime juice, optional

Optional Tex-Mex seasoning: ½ tsp ground cumin plus ¼ tsp Mexican oregano. Add them with the garlic.

How to Make Refried Beans From Canned Pinto Beans
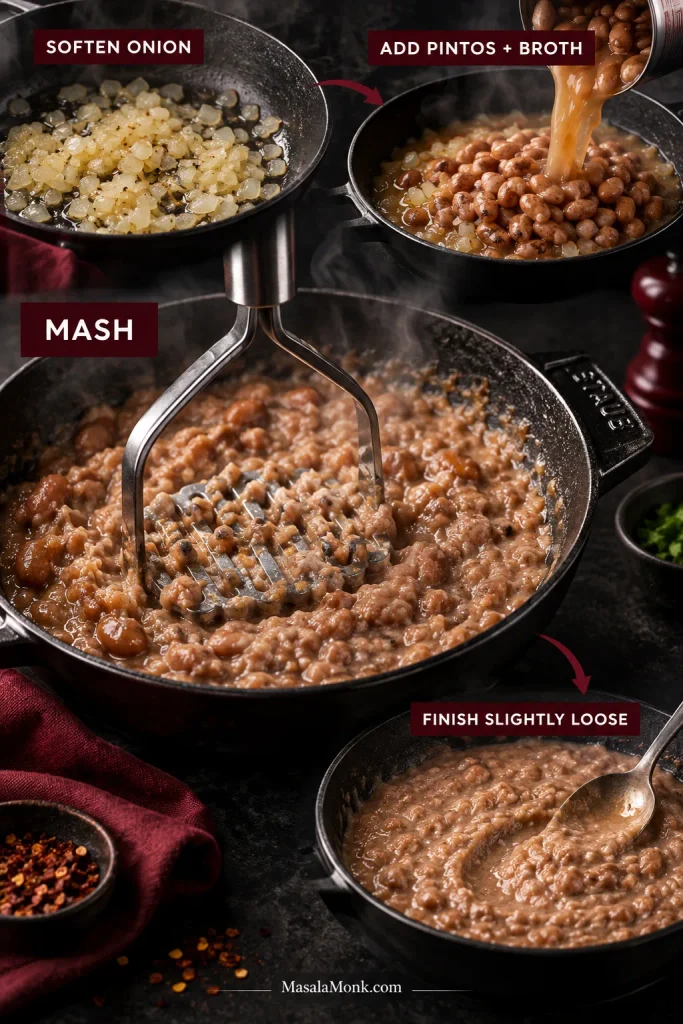
Four-stage process showing softened onion, whole pinto beans with broth, beans being mashed, and finished creamy refried beans.
Because the pintos are already cooked, the skillet is really doing two jobs: building flavor and moving the beans toward the texture you want.

Build the Flavor Base

  1. Drain the beans over a bowl. Taste the reserved liquid. Keep it unless very salty, metallic, or strongly canned; otherwise rinse the beans and use water or unsalted broth.
  2. Soften the onion. Heat the lard or oil over medium heat. Cook the onion for 4–6 minutes, until the sharpness mellows and the pieces are soft enough to disappear into the mash.
  3. Add the garlic. Stir in the garlic and, if using them, the cumin and oregano. Cook for about 30 seconds, just until fragrant.
  4. Add the beans carefully. Lower the heat if the fat is very hot, then add the drained beans close to the surface of the skillet. Wet beans can spit when they meet hot fat.
  5. Add ½ cup (120 ml) reserved bean liquid, water, or broth. Simmer for 1–2 minutes. Beans that still resist the masher need another 3–5 minutes with a splash more before mashing.

Mash and Finish

  1. Mash the beans. Leave some pieces intact for a rustic texture, or keep going until most have broken down.
  2. Turn the heat down to medium-low. Let the mash bubble gently for another 3–5 minutes. Add more bean broth or water only when needed, working 1–2 tbsp (15–30 ml) at a time.
  3. Taste before salting. Canned bean liquid or regular broth may already have seasoned the pan. Add lime if the beans taste rich but flat.
  4. Turn off the heat while the beans still look a touch loose. They keep thickening after the flame is off. A pan that looks right over the heat can feel stiff five minutes later.

Recipe Notes

  • For the richest savory flavor: use lard. Increase it to 3 tbsp (45 ml) for a richer batch.
  • Vegetarian or vegan: avocado oil or another neutral vegetable oil works well. Olive oil adds more flavor of its own.
  • Very smooth beans: mash first, then use an immersion blender briefly while the mixture is loose enough to move freely.
  • Small batch: use one 15 oz (425 g) can and halve the remaining ingredients.
  • Starting from dry: cook about 8 oz (225 g) dried pintos until completely creamy inside, reserve some broth, then measure roughly 3 cups cooked beans into the recipe.
  • Using unsalted home-cooked beans: expect to need more salt than the canned version. Season gradually after mashing; the ¼ teaspoon above is not a target for completely unsalted beans.

Equipment

A 10- to 12-inch (25- to 30-cm) skillet and potato masher do the main work. For a small batch, a sturdy fork works; an immersion blender is optional when you want an especially smooth finish.

Mash. Loosen gradually. Stop early.

Once the beans are mashed, add broth or water a splash at a time until they move the way you want. Gentle frying does the rest.

What the Pan Should Look Like

The clock gets you close; the skillet tells you where you actually are.
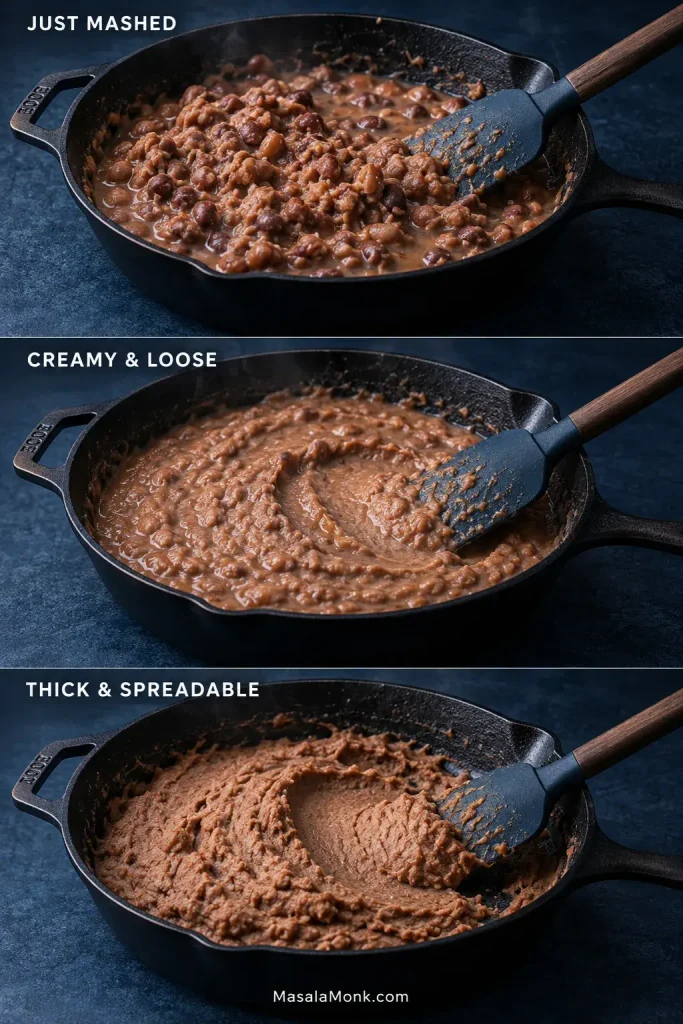
Three views of the same skillet showing refried beans just mashed, creamy and loose, and thick and spreadable.
The same pan can move from chunky to silky to spreadable in minutes; the surface changes before the clock does.

Just Mashed

The beans are broken but still noticeably chunky. Some liquid may sit around them, and a spoonful does not quite hold together yet.

A loose-looking skillet at this point is normal. Give it a few minutes before changing anything.

Creamy & Loose

The mixture looks cohesive and glossy. Pull a spatula through the skillet and the trail stays visible briefly before the edges slowly soften back into place.

Stir it and the mash should move as one soft mass—neither sloshing like soup nor sitting stiffly like mashed potatoes.

Thick & Spreadable

The spatula trail stays open much longer. A spoonful holds a soft mound and spreads where you push it instead of flowing back across the skillet.

For a deeper fried flavor, let a very thin film catch lightly on the skillet, then scrape it back into the mash. The aroma turns toastier and nuttier almost immediately; get it up before that edge becomes bitter.

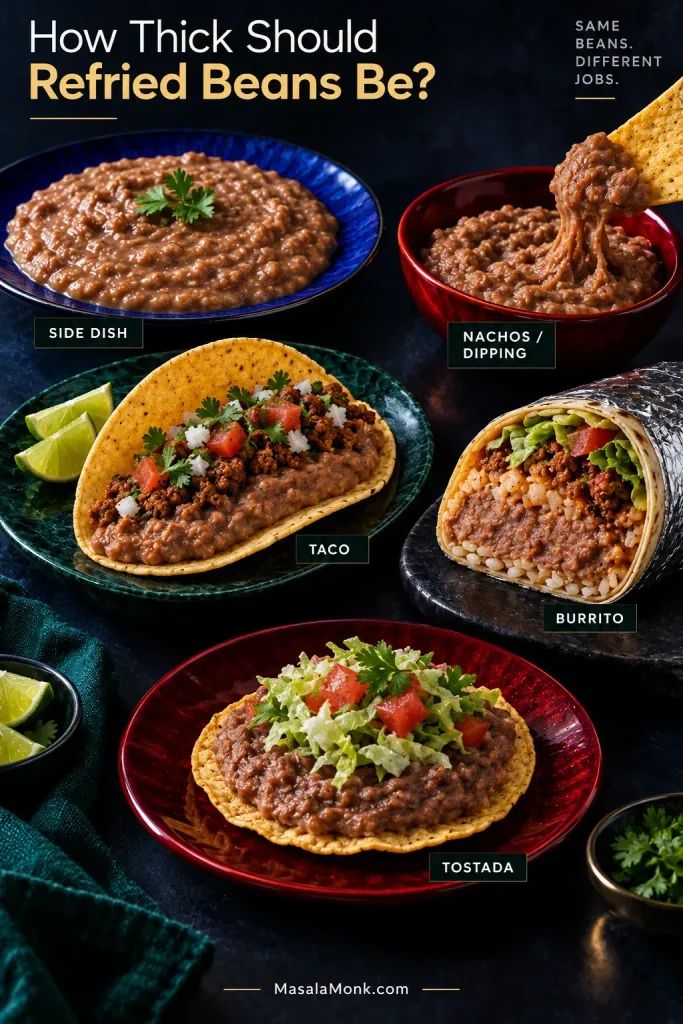
How Thick Should Refried Beans Be?

Thick enough for what? Side-dish beans should be loose and spoonable. A burrito needs enough body that the filling stays inside the tortilla, while a tostada needs a spread that will not soften the crisp base underneath.

What You Are MakingStop WhenTexture
Side-dish beansA spoon trail slowly relaxes backLoose, creamy and spoonable
Nachos or dippingThe beans still move readily when stirredCreamy enough to scoop easily
TacosThe beans hold on a spoon but still spread readilyMedium-thick
BurritosThe trail holds and the beans no longer flowThick enough to stay inside the tortilla
Tostadas or molletesThe beans hold a stable spreadThick enough to protect the crisp base
Make-ahead beansSlightly looser than you want to serve themThey’ll firm more as they chill
Five serving examples showing loose refried beans as a side dish, scoopable beans for nachos, medium-thick beans in a taco, thicker beans in a burrito, and a stable spread on a tostada.
Think of thickness as a job rather than a single ideal: the more the beans need to stay put, the farther you take the pan.

For ground beef tacos, the middle texture is especially forgiving: the beans spread beneath the meat but stay inside the tortilla.

Soft Restaurant-Style Refried Beans

Very smooth restaurant-style beans begin with completely tender pintos. Mash them thoroughly—or briefly use an immersion blender—then add enough bean broth that the beans relax across the plate instead of sitting in a stiff mound. Take the skillet off the heat earlier than you would for burrito or tostada beans.

Lard gives the deepest savory richness. Tender beans, released starch, broth, and that looser stopping point create the texture; dairy is optional rather than necessary.
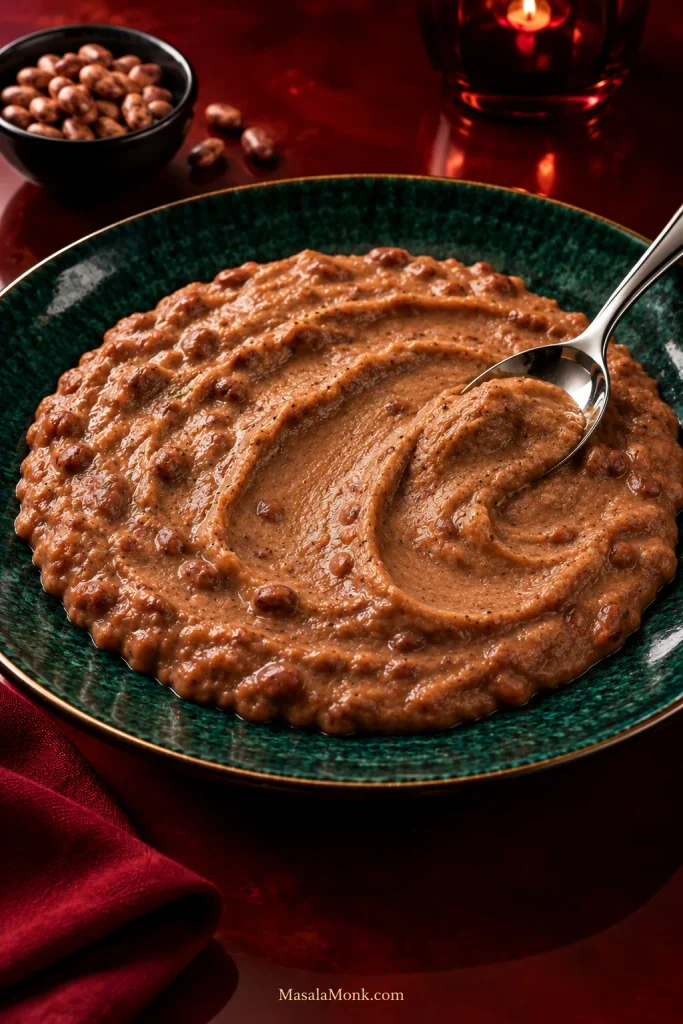
Very smooth refried pinto beans spread across a deep green glazed plate with a spoon on a dark red surface.
A silky restaurant-style finish starts before the blender or masher: if the pinto beans are not completely tender, no amount of smoothing will make the center creamy.

Starting With Dried Pinto Beans?

Using canned beans? Skip ahead to seasoning.

Soaking shortens the wait, but tenderness decides when dried pintos are ready for the skillet. For smooth refried beans, the centers need to become completely creamy before frying and mashing.

Sort through 8 oz (225 g) dried pintos, discard any stones or badly damaged beans, and rinse them well. Once cooked, you’ll need roughly 3 cups. Any extra can go into another meal, including a simple bean stew.

Do You Need to Soak Pinto Beans?

No. An 8- to 12-hour soak can shorten the cooking time and help pintos cook more evenly, but unsoaked beans work too.

After an overnight soak, drain and rinse the beans, then cook them in fresh water. Forgot to soak them? Keep going—unsoaked beans simply need longer.

Cook Them Until the Centers Are Creamy

Put the pintos in a roomy saucepan or Dutch oven and cover them with fresh water by roughly 2–3 inches (5–7.5 cm). Onion, garlic, or a bay leaf can flavor the pot if you like.

Bring the water to a boil, then reduce it to a gentle simmer. Keep the pintos comfortably submerged and top up with hot water as needed.

Start checking soaked pintos after about 1 hour. Many finish within 1–2 hours; unsoaked beans commonly need closer to 2–3 hours. Old beans can take longer, so tenderness matters more than the clock.

Take one out, let it cool for a few seconds, then crush it between your fingers or press it against the side of the pot with a spoon. It should give way easily and feel creamy all the way through, with no pale, chalky center.
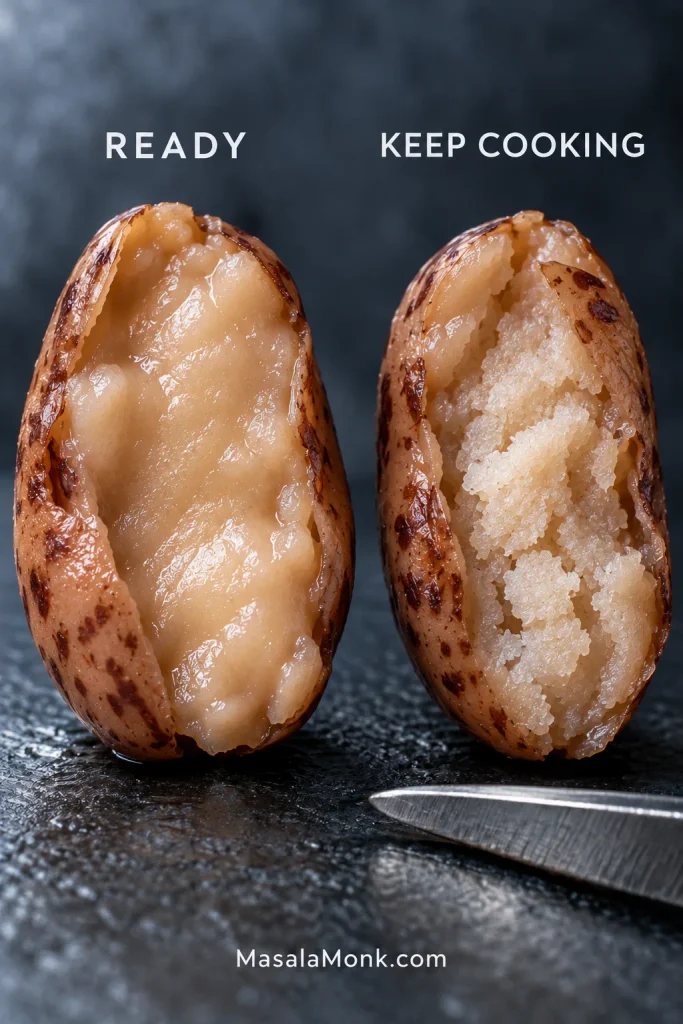
Two split pinto beans in close-up, one with a smooth creamy center labeled ready and one with a pale grainy center labeled keep cooking.
Before draining dried pinto beans, split one open; the center tells you more about readiness than the clock does.

A potato masher can change their shape; it can’t turn a chalky center creamy. Keep cooking until the pintos are genuinely soft.

Before draining them, save plenty of the bean broth. It already carries bean flavor and released starch, so reach for it first when the mash needs loosening later. Remove any bay leaf or large aromatics, then measure about 3 cups cooked pintos for the skillet.

When Dried Beans Refuse to Soften

Dry beans do not read recipe clocks. An old bag of pintos may take much longer than a fresher one, and very hard water can slow softening too. Strongly acidic ingredients such as tomatoes or vinegar are best saved until the beans are tender.

If the beans stay stubbornly firm, don’t assume salt is the culprit. Check bean age, very hard water, acidic ingredients, water level, and whether the pot has maintained a steady simmer.
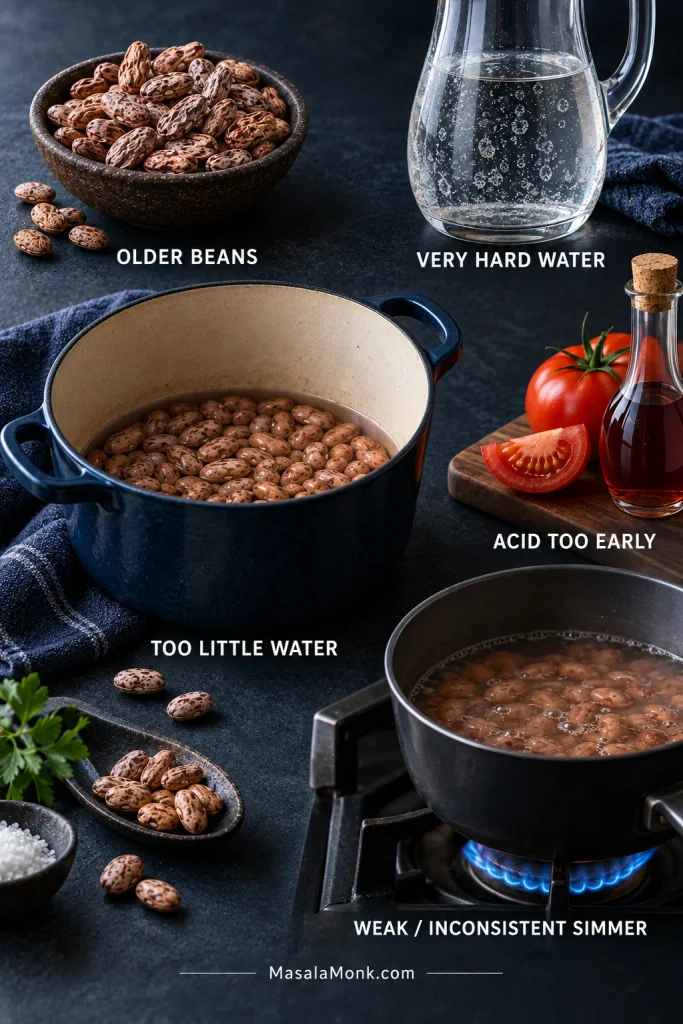
Diagnostic board showing older dried pinto beans, hard-water cues, acidic ingredients added early, a pot with too little water, and a weak simmer.
Dried pinto beans do not all soften on the same schedule, so stubborn beans are a cue to check age, water, acidity, and simmer before changing course.

Where hard water repeatedly causes trouble, cooking with softer or distilled water can help. North Dakota State University’s dry-bean guidance also discusses hard water and delaying acidic ingredients until the beans are tender.

How to Season Refried Beans

Once the beans are genuinely tender, seasoning gets much simpler. Onion, fat, and salt do most of the work. Garlic can join them; cumin, oregano, fresh chile, and lime take the beans in different directions rather than fixing a weak base.

Choose the Fat

Lard gives the deepest savory flavor. Two tablespoons (30 ml) is enough for the base recipe; 3 tablespoons (45 ml) makes the richness more pronounced.

Keeping the beans vegetarian or vegan is simple: use avocado oil or another mild vegetable oil. Olive oil is more noticeable, while bacon drippings take the pan somewhere smokier.

Does This Pan Need More Liquid or More Fat?

Dry-looking beans don’t automatically need more fat. Stiff or crumbly beans usually need liquid. Beans that are already soft and moist but taste thin may need more fat.
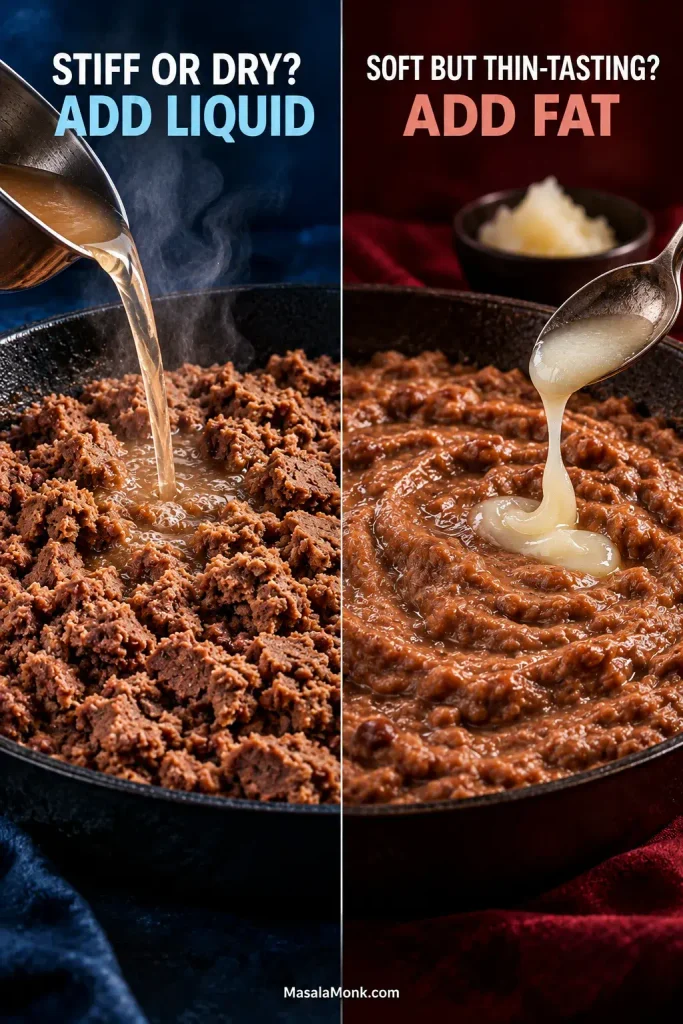
Split comparison showing stiff refried beans being loosened with liquid on the left and soft refried beans receiving a small amount of fat on the right.
Look at the bean texture first, then taste: moisture controls movement, while fat changes richness.

Spice, Heat and Brightness

For a Tex-Mex batch, use ½ tsp ground cumin and ¼ tsp Mexican oregano with the garlic. More cumin isn’t automatically the answer to bland beans; salt and properly softened onion matter first.

Fresh heat comes from ½–1 small jalapeño or serrano cooked with the onion. About ½–1 tsp finely chopped chipotle in adobo brings smoke instead.

Or leave the skillet mild and put the heat on the table. Roasted salsa verde brings tomatillo acidity and green-chile heat without changing the whole batch.

Well-salted beans that still taste heavy usually need brightness. Add 1–2 tsp (5–10 ml) lime juice; the next bite should feel livelier rather than overtly citrusy.

If the Canned Beans Are Salty

Drain and rinse them, then use water or unsalted broth in the skillet. Regular broth, bacon drippings, bouillon, cheese, and extra salt can pile up quickly.

For a lower-sodium batch, wait until the beans have reduced before deciding whether they need salt at all.

Why Mexican Refried Beans Vary

Those choices—bean variety, fat, aromatics, chile, and final consistency—change from one kitchen to the next. Refried beans are easiest to understand as another life for beans that are already cooked. In Mexican cooking, pot beans—frijoles de la olla—can be eaten as they are and later become frijoles refritos when they’re cooked with fat and mashed.

Canned whole pintos simply arrive with that first cooking stage already done.

Pintos are common in many northern and border traditions; black beans and numerous other varieties appear across regional Mexican cooking.

Two households can put noticeably different beans on the table and both be making something completely familiar to them. There does not have to be one universal seasoning list or one correct finished texture.

If Your Refried Beans Look Wrong

Most batches are easy to rescue. Watery? Simmer uncovered. Too thick? Add hot liquid a tablespoon at a time. Gritty? Cook longer. Bland? Check the salt first. Greasy? More cooked beans are the most useful fix.
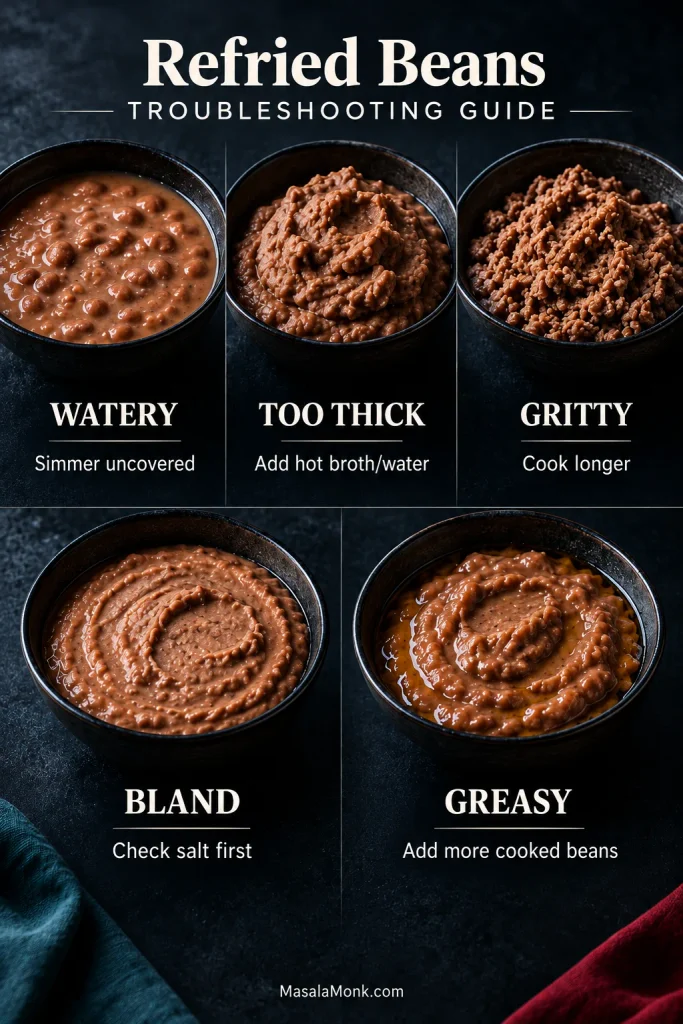
Five refried-bean states showing watery beans, overly thick beans, gritty beans, bland beans, and greasy beans, with a short corrective action for each.
Fix the first problem you can identify, then taste again; otherwise a texture mistake can easily turn into a salt, fat, or seasoning mistake too.
The beans are too loose or soupy

Give them time. Simmer uncovered over gentle heat and stir regularly. Excess water usually cooks away on its own.

The beans are too thick or paste-like

Stir in hot bean broth or water 1–2 tbsp (15–30 ml) at a time. Pause after each addition; the beans need a moment to loosen.

The beans are gritty

Tiny gritty pieces usually mean some of the beans need more cooking. Give them more liquid and more time, then mash again.

The beans taste bland

Check the salt first. If that’s right, taste for richness, fully softened onion, chile heat, or brightness from lime.

The beans are too salty

The strongest fix is more unsalted cooked beans. A looser batch can also take unsalted water or broth, but boiling all of that liquid away simply concentrates the salt again. Plain rice, tortillas, avocado, or other unsalted foods can make a mildly oversalted serving easier to balance on the plate.

When Texture Isn’t the Whole Problem

The beans are soft and moist but still taste thin

This is where more fat helps. Stir in a little lard or oil, let it disappear into the hot mash, then taste again.

The beans look greasy

If the pan is genuinely greasy, broth will not fix the ratio. Add more cooked beans. A small splash of broth can help a slightly oily mash come together, but genuinely excessive fat needs more cooked beans.

They were perfect in the skillet but stiffened on the plate

They went a little too far. Stir in hot broth or water now. Next time, stop while the beans still look slightly softer than you want to eat them.

Heat and Handling Problems

The onion is still crunchy

For the next batch, dice it finely and let it soften fully before the beans go in. Properly cooked onion should disappear into the mash rather than announce itself in every bite.

The bottom of the skillet is scorching

Reduce the heat and add a splash of hot broth or water. Mashed beans expose much more surface to the skillet than whole beans do, so they scorch quickly.

The beans splatter when they hit the fat

Add the wet beans close to the surface of the skillet after lowering the heat briefly. Keep your hands and face back from the first burst of steam and fat.

Leftovers Get Thicker—Here’s How to Bring Them Back

Refried beans keep about 3–4 days in the refrigerator and freeze well for about 3 months. They firm considerably when cold, so reheating usually begins with a splash of water or bean broth.

Refrigerate the beans promptly: cool them, cover, and refrigerate. That firmer next-day texture is handy inside a breakfast burrito, where the filling needs to stay where you spread it.

When freezing: portion the cooled beans into smaller containers or freezer bags rather than one large block. They’ll be easier to thaw and reheat.

To reheat: warm them over medium-low heat on the stove and add water or bean broth 1–2 tbsp (15–30 ml) at a time. In the microwave, cover loosely, heat in short bursts, stir, and add a splash between rounds as needed.
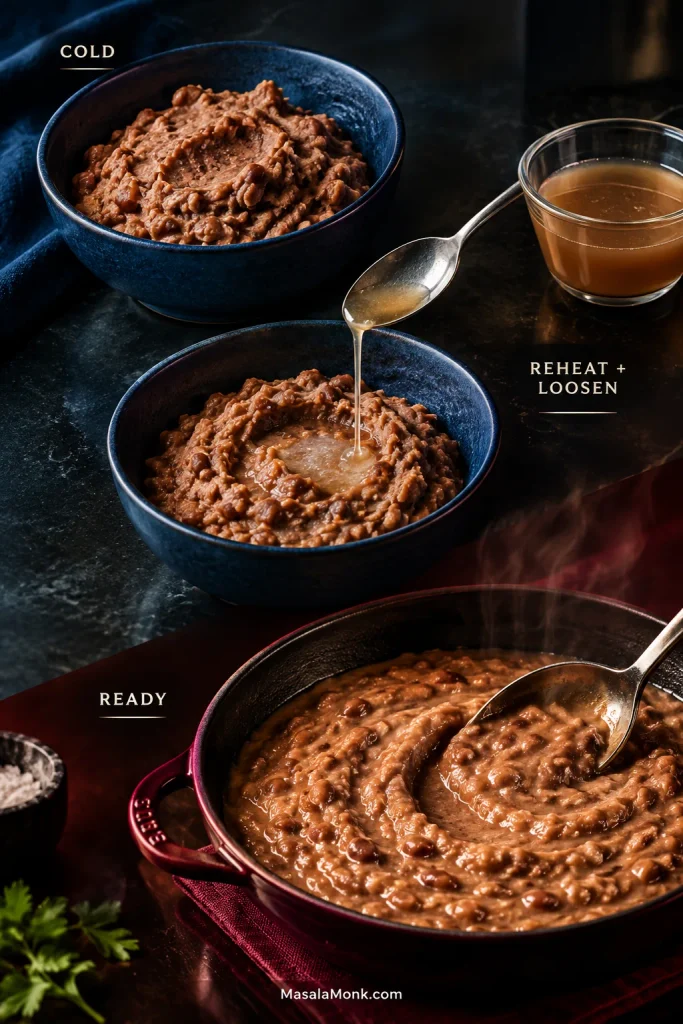
Three-stage image showing cold stiff refried beans, broth being added during reheating, and warm glossy beans steaming in a skillet.
Start with less liquid than you think you need, then add more only after the beans warm through; they loosen gradually and can thicken again as they cool.

The USDA recommends reheating leftovers to 165°F (74°C). Its leftovers and food-safety guidance also covers cooling and refrigeration.

What to Serve With Refried Beans

Spoon them onto a plate next to warm rice and eggs, tuck them beside enchiladas or grilled meat, or bring them to the table with tortillas and something sharp and fresh. Salsa, crisp cabbage, radish, chopped onion, cool avocado, cilantro, and lime all wake up a rich scoop of beans.

A thicker batch works just as well inside quesadillas and burritos. Spread it across warm corn tortillas, or layer it onto a tostada before adding salsa, avocado, cheese, cabbage, or whatever else dinner calls for.

And dinner can be much simpler than that: warm tortillas, a soft scoop of beans, salsa, and something cool or crisp on top.
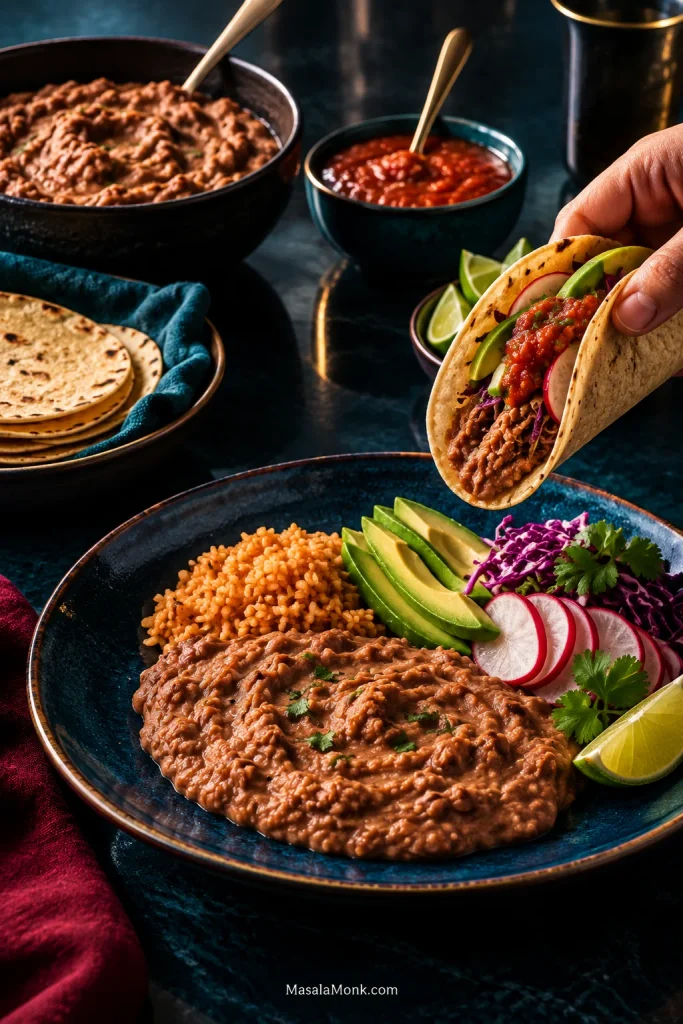
Dinner scene with refried beans, warm tortillas, salsa, avocado, cabbage, radishes, lime, and a hand holding a filled taco.
Warm tortillas, bright salsa, avocado, lime, and something crisp give creamy beans the contrast that makes a simple dinner feel complete.

For a party, a thick batch makes a sturdy base for an easy 7 layer dip. The beans stay underneath the toppings instead of traveling across the plate with the first scoop.

Frequently Asked Questions

1. What are the best beans for refried beans?

Pinto beans are an easy all-purpose choice because they soften well and mash readily. Black beans and many other varieties also appear in regional Mexican cooking.

2. Can you make refried beans from canned pinto beans?

Yes. Whole canned pintos are the fastest route in this refried beans recipe: cook them with onion and fat, mash, then add enough broth or water to reach the texture your meal needs.

3. Should you drain and rinse canned pinto beans?

Drain them over a bowl first. Keep the liquid unless it is very salty, metallic, or strongly canned; otherwise rinse the beans and use water or unsalted broth.

4. Do refried beans need lard?

No. Lard gives the deepest savory flavor, while neutral oil makes an excellent vegetarian or vegan version.

5. Can you freeze refried beans?

Yes. Freeze cooled beans in practical portions, then thaw and reheat them with a splash of water or bean broth.

6. Does “refried” mean the beans are fried twice?

Not necessarily. Spanish refreír can mean to fry again, but it can also mean to fry something thoroughly or very well. In frijoles refritos, the name does not require the beans to go through two separate frying stages.

Once You Know What to Look For

Once you can recognize a fully tender bean, a mash that needs another splash of broth, and a skillet that’s one minute from becoming too stiff, the measurements stop doing all the work.

Mash. Loosen gradually. Stop early. Once that rhythm makes sense, the recipe stops feeling like a formula; you can look at the pan and know what it needs.
Posted on — Leave a comment

Refried Beans Recipe From a Can: Creamy, Restaurant-Style & Easy

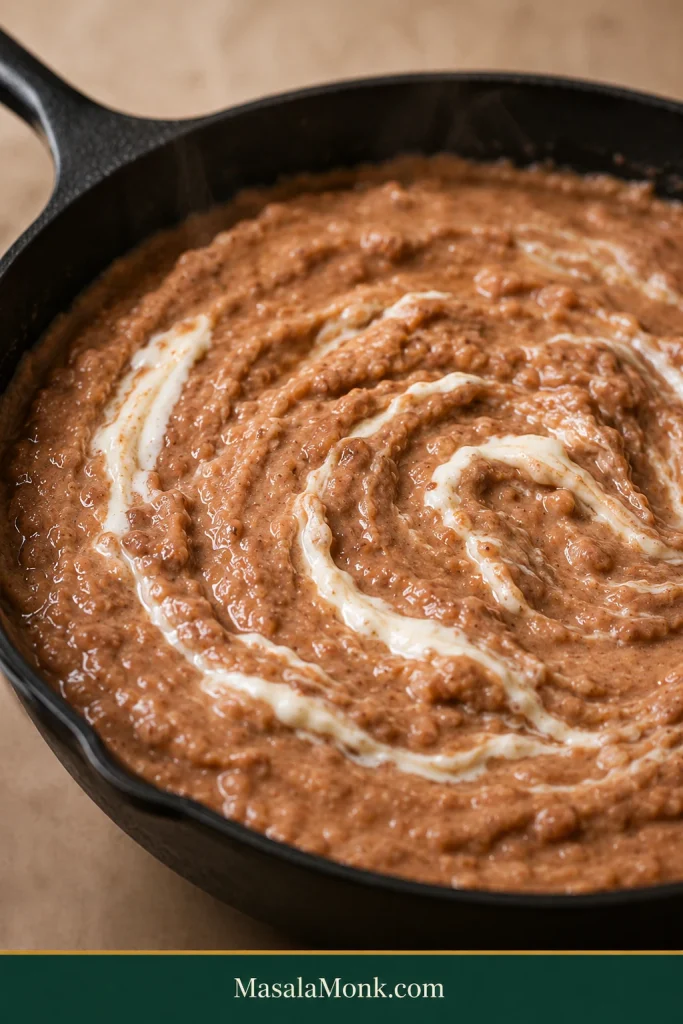
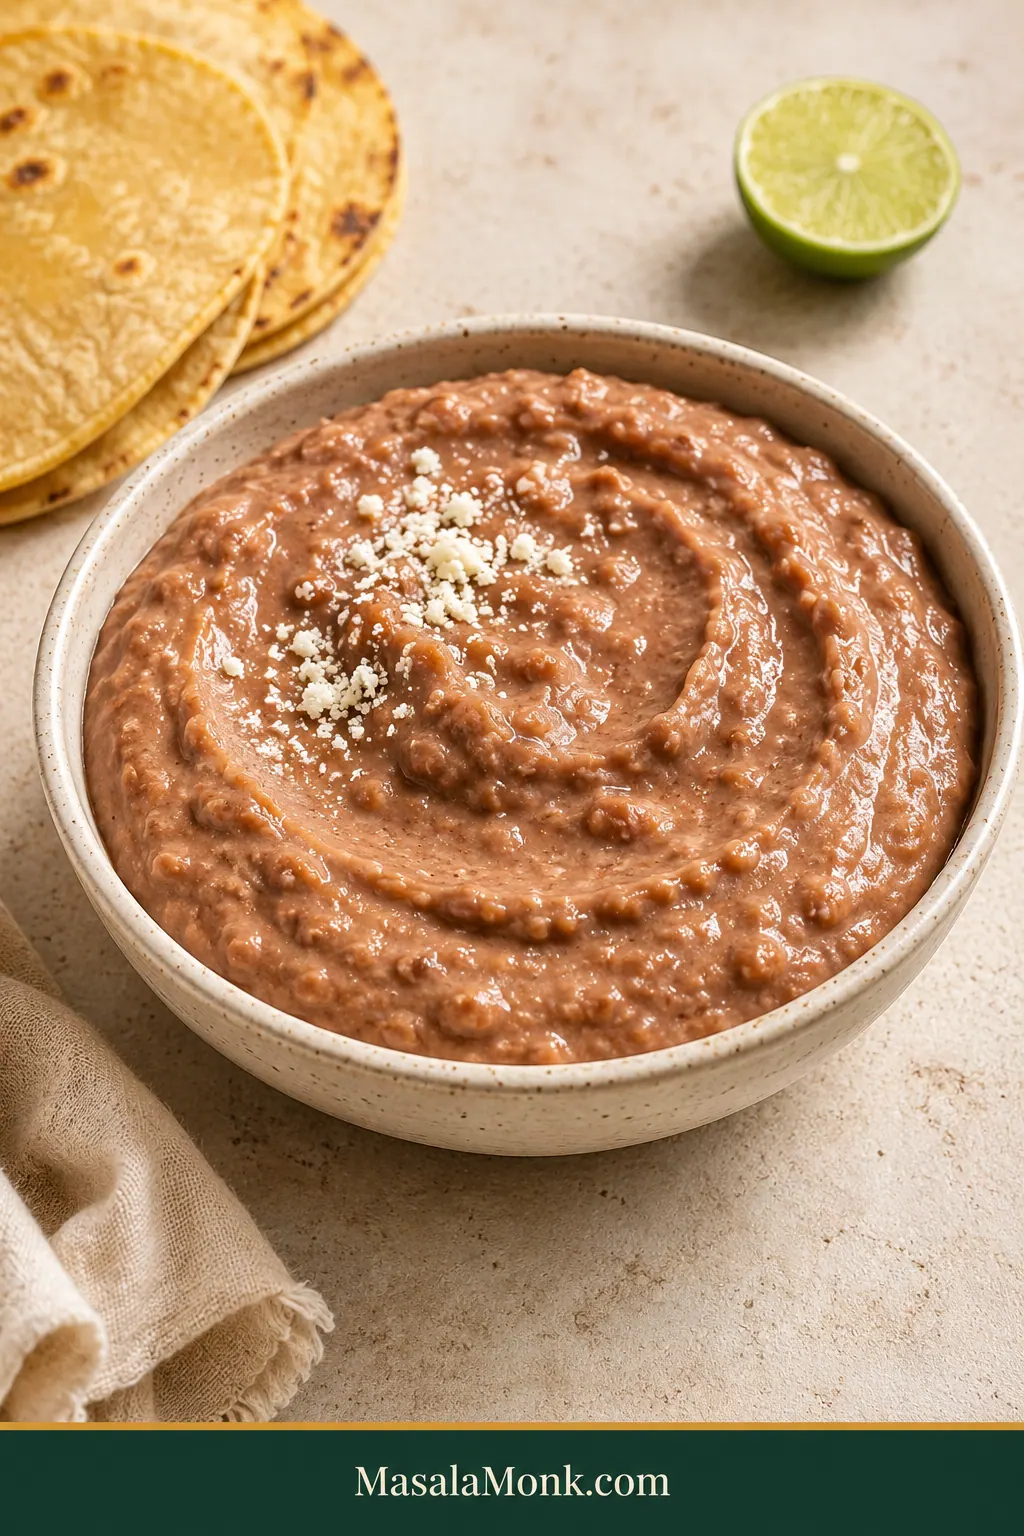
Creamy brown refried beans with a soft spoon swirl in a speckled ceramic bowl beside warm tortillas and lime.

A can of refried beans is convenient, but straight from the can it can be dense enough to keep the ridges of the tin, bland enough to disappear beside the rest of dinner, or stiff enough to feel more like paste than a creamy side.

This easy refried beans recipe from a can fixes that in about 10 minutes with one small pan. The goal isn’t to bury the beans under sour cream and seasoning. It’s to loosen them, wake up the flavor, and add the richness they need to become soft and spoonable.

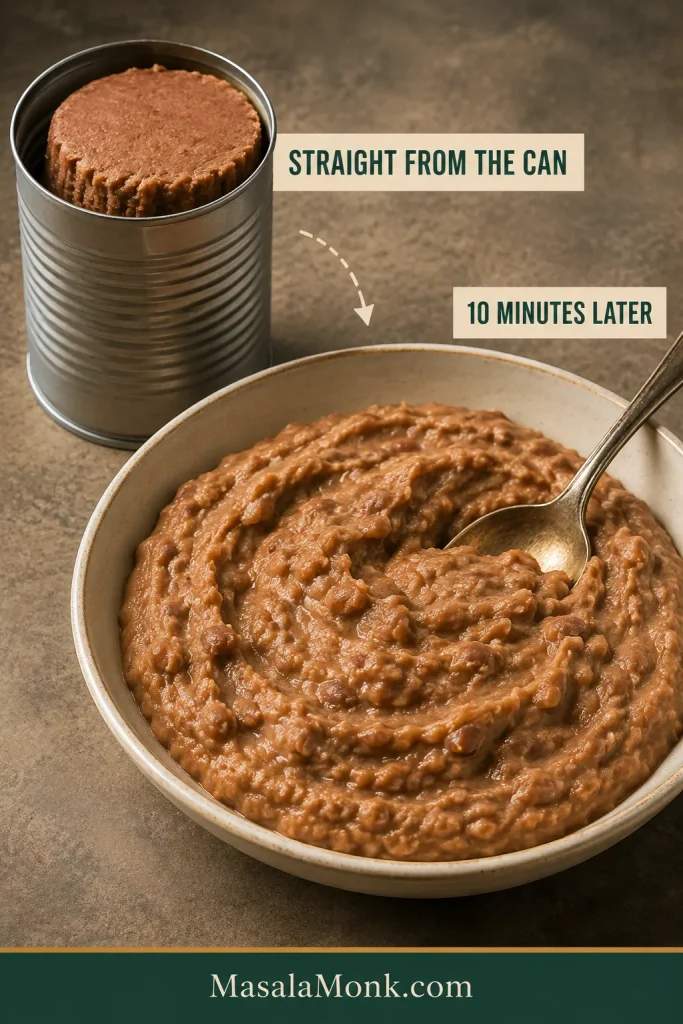
Ten minutes later, those same dense beans can be steamy, lightly glossy, and ready to settle beside tacos instead of sitting on the plate in one stiff mound.

Before-and-after view of stiff canned refried beans holding their shape and creamy finished beans in a serving bowl.
Straight-from-the-can refried beans can look hopelessly dense; judge the consistency after they are hot, not immediately after opening.

The rule to remember: loosen slowly. Salt last.

The Short Version

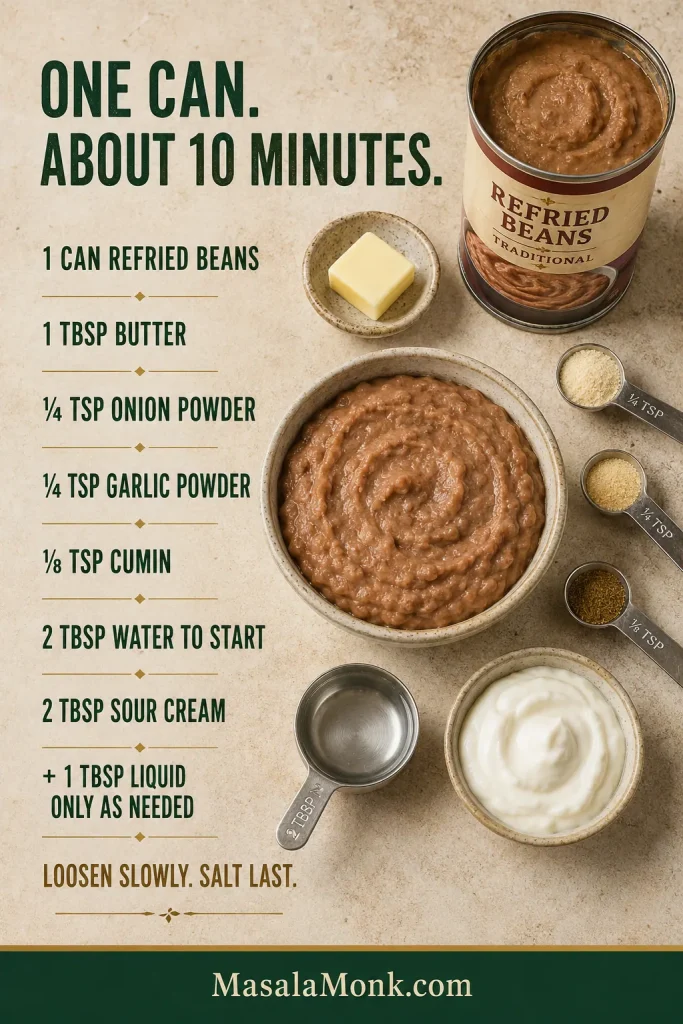
To make canned refried beans better, warm them with fat and seasoning, loosen gradually with water or broth, then stir in sour cream and taste before adding salt. For one 15–16 oz can, start with 2 tablespoons (30 mL) liquid and stop cooking while the beans are still a touch softer than you want on the plate.

Don’t want to think about the options? Use butter, water, and the base seasonings exactly as written below. Everything else is there only if you want to change the flavor or texture.

One-can refried beans formula showing butter, onion powder, garlic powder, cumin, water, sour cream, and their measured amounts.
One can, measured fat and seasoning, 2 tablespoons liquid to start, then sour cream—small additions keep the texture under control.

Yes, canned refried beans are already cooked. The can has done the slow part; you’re reheating the beans while improving their texture and flavor.

You usually don’t drain them. Hold back an obvious puddle of watery liquid, though, and add only what the texture needs.
Whole pinto beans sitting in liquid? That’s a different starting point; use the quick whole-pinto guide farther down the page.

Refried Beans Recipe From a Can

Soft, creamy, restaurant-style refried beans made from one ordinary can in about 10 minutes.

Prep2 minutes
Cook7–8 minutes
TotalAbout 10 minutes
ServesAbout 4 as a side

Equipment

  • Small saucepan or 8–10 inch skillet
  • Silicone spatula or wooden spoon
  • Measuring spoons
  • Whisk, optional for a smoother texture

Base Ingredients

  • 1 can prepared refried pinto beans, 15–16 oz (425–454 g)
  • 1 tablespoon (15 mL) butter — or lard, bacon fat, or neutral oil
  • ¼ teaspoon each onion powder and garlic powder
  • ⅛ teaspoon ground cumin, or a generous pinch
  • 2 tablespoons (30 mL) water — or unsalted chicken/vegetable broth, plus more as needed
  • 2 tablespoons (about 30 g) sour cream

Optional Finish

  • ½–1 teaspoon hot sauce
  • Fine salt, if needed after tasting
  • ½ teaspoon lime juice or pickled-jalapeño brine, if the beans taste flat
  • Monterey Jack, Oaxaca, Cotija, or queso fresco, to taste

Instructions

  1. Warm the fat and seasonings. Heat your chosen fat over medium heat. Reduce to medium-low, add the onion powder, garlic powder, and cumin, and stir for 10–15 seconds, just until fragrant. Don’t let the spices darken.
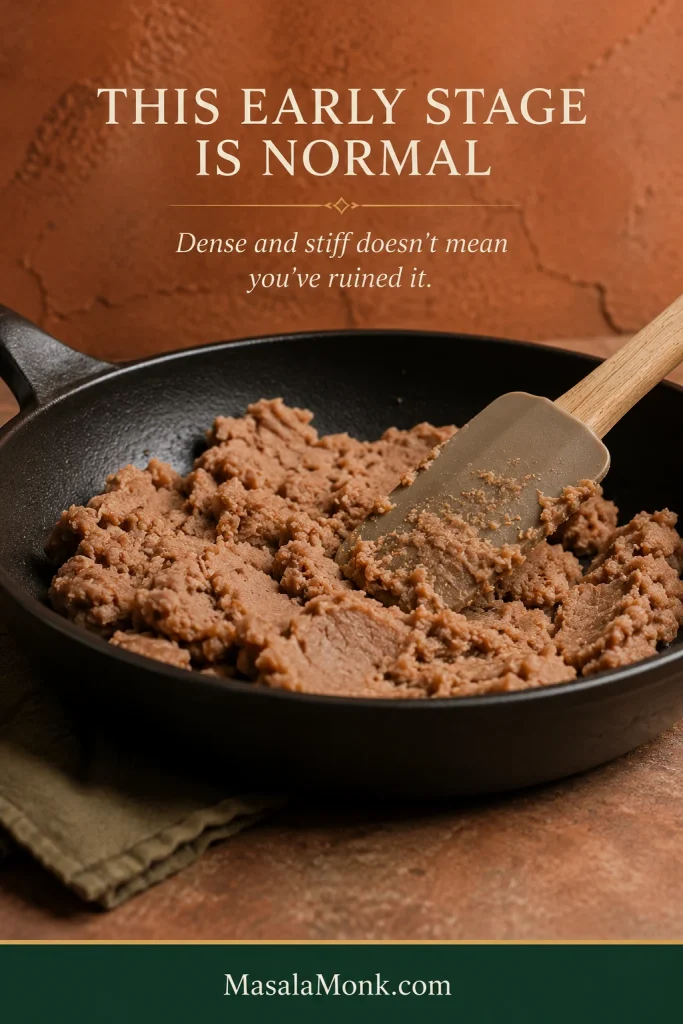
  2. Add the beans and first liquid. Scrape in the refried beans and stir for about 1 minute. Add 2 tablespoons (30 mL) water or unsalted broth and cook for another 2–3 minutes, scraping the bottom and corners. A stiff canned mass may look a little hopeless at first; it should soon soften and fold over itself more easily.
  3. Adjust the consistency. Still stiff? Add another 1 tablespoon (15 mL) liquid, stir well, and give the pan a moment before adding more. A particularly dense can may need another tablespoon after that.
  4. Make them creamy. Stir in the sour cream and cook gently for 1–2 minutes. The surface should look soft and lightly glossy, without a dry crust or pools of oil.
  5. Check the texture. Drag the spatula through the middle. For a creamy side, the trail should remain visible briefly while the edges slowly relax inward. Leave the beans thicker for burritos and tostadas, or loosen them further for a softer Tex-Mex-style plate.
  6. Taste and serve. Add hot sauce if you want it, then taste before salting. Beans that are salty enough but taste heavy or flat may benefit from the optional lime juice or jalapeño brine. Remove from the heat while they’re slightly softer than your final target, then spoon into a serving bowl while hot and creamy.

Recipe Notes

  • For a smoother texture, a whisk is usually enough. Prepared refried beans are already mashed, and whisking can make the texture more uniform without turning them into purée.
  • Vegetarian? Check the can because some traditional refried beans contain lard. Choose a lard-free can; butter, sour cream, and cheese can otherwise remain as written.
  • Vegan? Start with a lard-free can, use neutral oil and vegetable broth, omit or replace the sour cream, and choose dairy-free toppings instead of cheese.
  • For cheese: melt Monterey Jack or Oaxaca over the hot beans, or scatter Cotija or queso fresco over the top.

If you’re cooking right now, the recipe above is enough. It makes an easy side for juicy ground beef tacos. The rest of this guide is for a can that behaves strangely, the butter-versus-lard question, or that moment when you’re staring at the pan wondering whether the texture is actually right.

Dense canned refried beans in a dark skillet being pressed and folded with a spatula before they loosen.
Work the first liquid through before adding more; dense canned beans often loosen once the pan is hot.
Explore the Refried Beans Guide

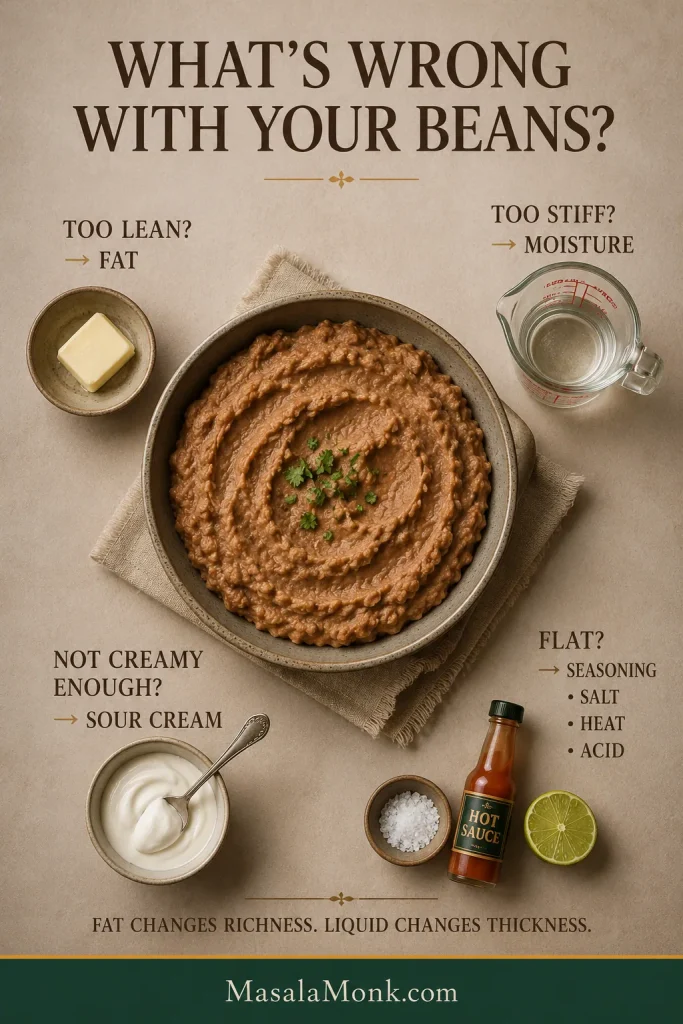
How to Make Canned Refried Beans Taste Better

Start by identifying the problem instead of adding everything at once.

  • Too lean? Fat gives the beans more richness.
  • Too stiff? They need moisture.
  • Not creamy enough? A modest amount of sour cream can soften the texture.
  • Flat-tasting? Seasoning, salt, heat, or acidity may be missing.
Refried bean diagnostic guide connecting lean beans with fat, stiff beans with moisture, low creaminess with sour cream, and flat flavor with seasoning or acid.
Fix the right problem: richness, moisture, creaminess, and flavor each need a different adjustment.

Get Creamy Without Making Them Heavy

That keeps you from fixing the wrong thing. Stiff beans don’t automatically need more butter, and adding broth won’t make already-loose beans more flavorful. Once the consistency is right, too much sour cream can start hiding the pinto-bean flavor.

Small ribbons of white sour cream being folded into warm mashed refried beans in a black skillet.
Add sour cream after the beans are nearly loose enough; it adds creaminess and tang, not the main thinning moisture.

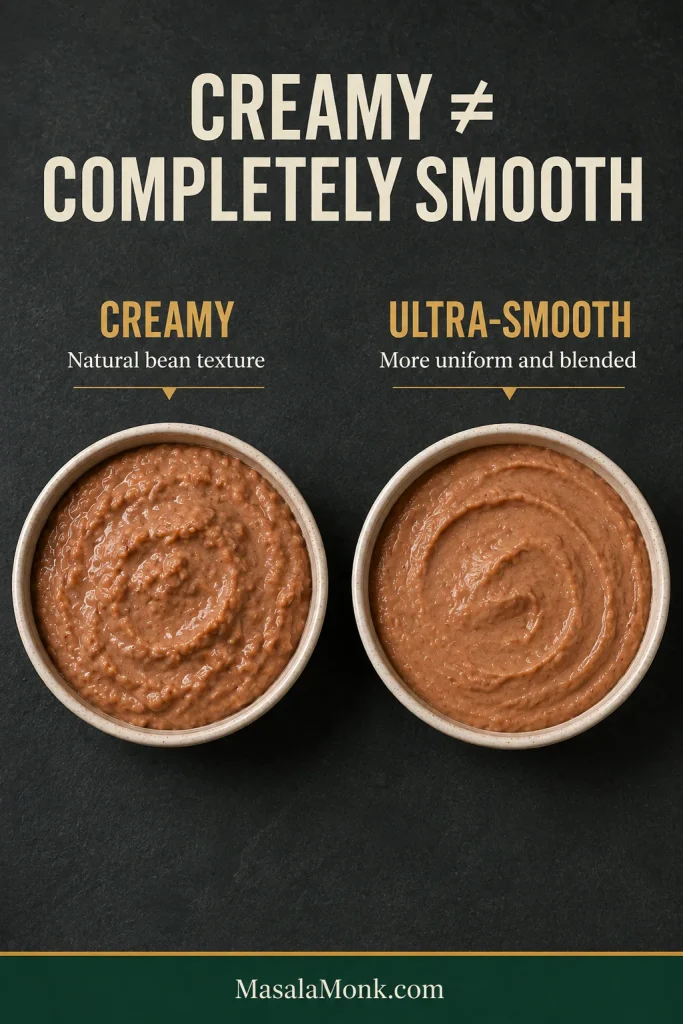
Creamy and smooth aren’t the same thing.

Creaminess comes from the mashed beans having enough moisture and a little richness. Smoothness is about how fine and uniform the bean texture is. Properly loosened beans can feel creamy while retaining some natural texture.

Two bowls compare creamy refried beans with visible natural texture and a finer, more uniformly blended version.
Creamy can still have natural bean texture; use a whisk for finer beans and blend only for an ultra-smooth finish.

How to Season One Can

For one 15–16 oz can, start with ¼ teaspoon onion powder, ¼ teaspoon garlic powder, and ⅛ teaspoon cumin. The small amount of cumin is deliberate: it should sit in the background while the pinto beans remain the main flavor.

Powdered onion and garlic also keep the texture even. Fresh onion can be delicious, but it leaves more noticeable texture. Hot sauce is optional; keeping the pan mild and serving roasted tomatillo salsa verde at the table gives everyone control over the heat.

For a little more savory depth, add a small amount of chicken or vegetable bouillon or a tiny pinch of MSG. Neither is necessary, and both can add quite a bit of salt, so go cautiously and taste before adjusting anything else.

Butter, Lard, Bacon Fat or Oil?

The best fat is mainly a flavor decision. Moisture still does most of the work of changing the consistency, so choose the fat for the kind of richness you want.

Fat What it brings Best for
Butter Mild, familiar richness Easy everyday default
Lard Richer savory character Savory depth without bacon smoke
Bacon fat Stronger pork flavor and smoke When a smoky note suits the meal
Neutral oil Body with little added flavor Letting the bean flavor lead

Do You Need Lard?

No. Lard can add savory richness, but butter or oil can still give you soft, creamy refried beans. The final consistency depends much more on moisture, gentle heat, and stopping at the right moment.

Clean rendered pork fat left from slow-cooker pork carnitas can work nicely here too. Leave dark or scorched drippings behind.

The can itself matters as well. Traditional, vegetarian, fat-free, and reduced-fat beans can start with very different levels of richness. A batch that already looks oily as it warms may need less added fat than a leaner one.

Fat changes flavor and richness, but it won’t loosen a thick batch. For that, you need moisture.

Water, Broth or Milk?

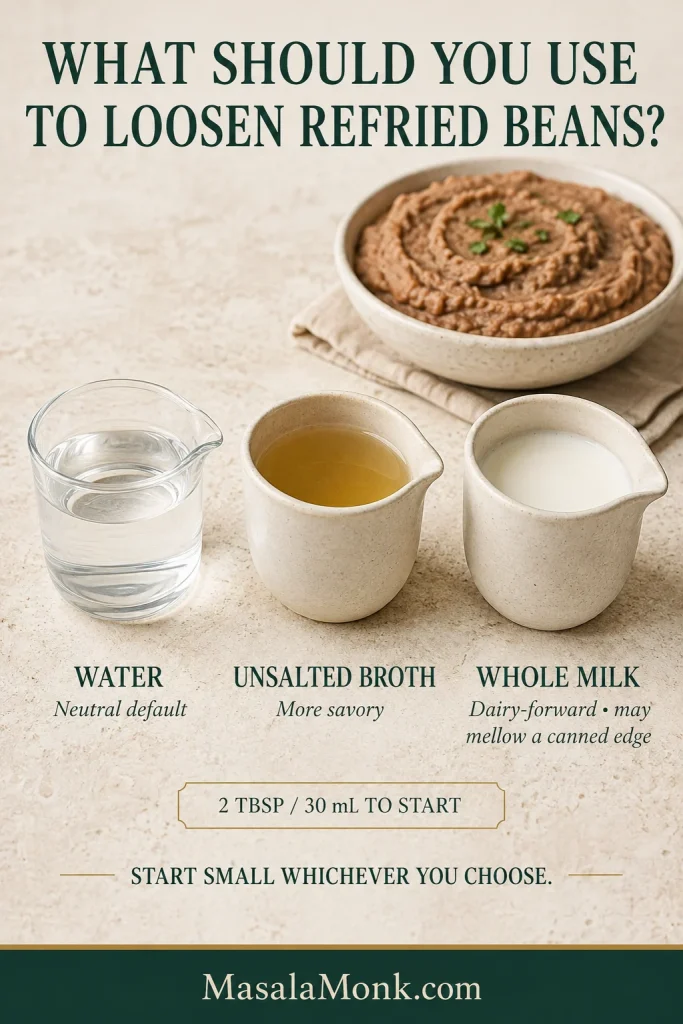
Water is the neutral default, unsalted broth adds savory flavor, and whole milk gives you a softer, more dairy-forward variation.

Liquid What it changes Use it when
Water Loosens without adding flavor or salt The beans mainly need a better consistency
Unsalted broth Adds moisture plus savory flavor The beans taste a little flat as well as thick
Whole milk Adds mild dairy richness and can soften a canned-tasting edge You deliberately want a softer, dairy-forward result
Three small vessels of clear water, golden unsalted broth, and white whole milk beside a bowl of refried beans.
Water loosens neutrally, broth adds savory depth, and whole milk adds dairy richness and can mellow a canned-tasting edge.

Jalapeño brine is different. Treat it as a final flavor adjustment, not the main thinning liquid. It brings acid, chile, and salt together, so about ½ teaspoon is a sensible place to start when the consistency is already right but the flavor feels heavy.

Whatever liquid you choose, begin cautiously.

How Much Liquid Should You Add?

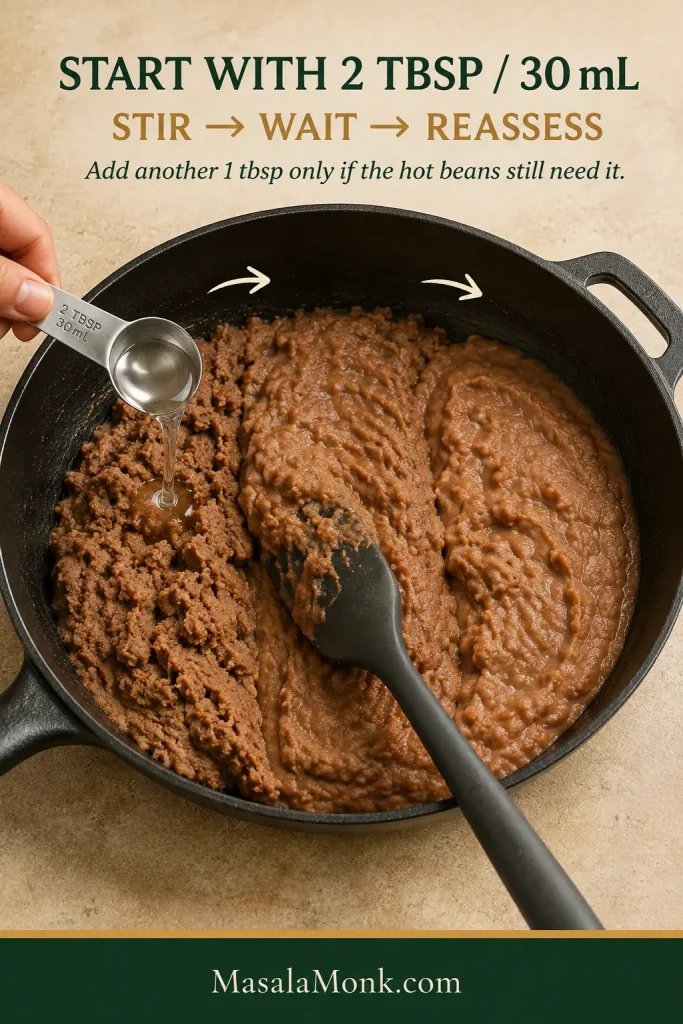
Start with 2 tablespoons (30 mL) liquid for one 15–16 oz can, then add another 1 tablespoon (15 mL) only if the hot beans still feel stiff.

A particularly dense can may need another tablespoon. Stop as soon as the mixture begins moving the way you want it to.

Why start small?

You can loosen thick beans quickly. Too much liquid means waiting for that moisture to cook back out.

Measured liquid being added to refried beans with guidance to start with 2 tablespoons, stir, wait, and reassess.
Start with 2 tablespoons, stir, wait, then reassess—one extra spoonful can noticeably change a one-can batch.

The final number matters less than what happens when you drag a spatula through the pan.

Get the Texture Right: The Spatula Trail Test

Restaurant-style isn’t one exact thickness. Some Tex-Mex restaurants serve refried beans very smooth and fairly loose; others bring a thicker, more substantial scoop to the table.

Finished creamy refried beans across a dark skillet with a shallow spatula track and no visible water or oil separation.

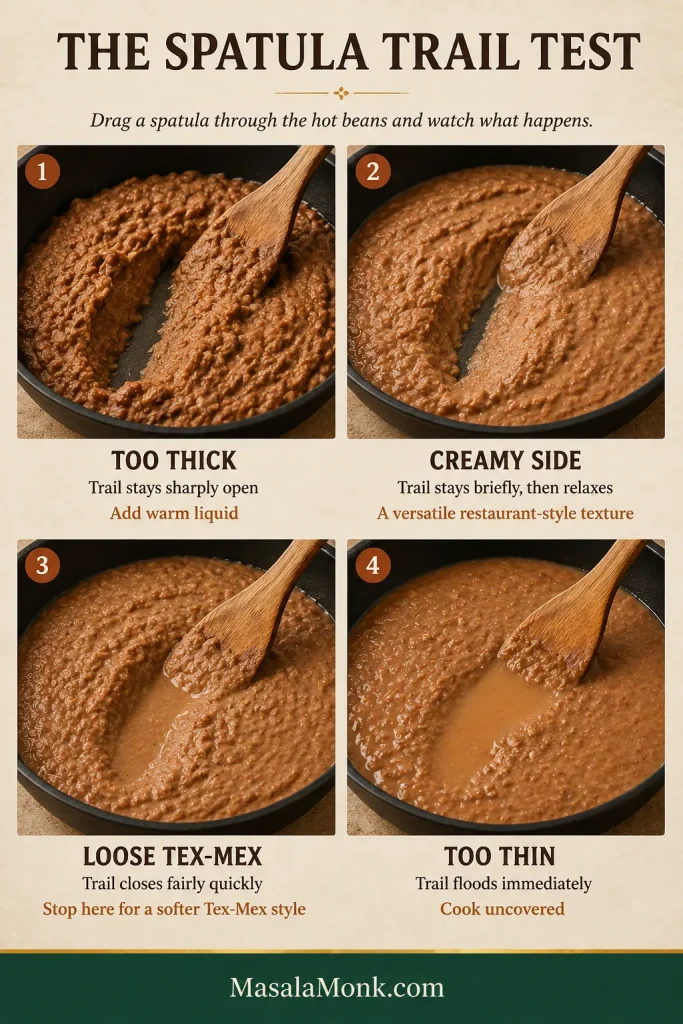
Drag your spatula through the middle of the pan and watch the trail.

Four refried bean textures show a spatula trail staying open when too thick, relaxing when creamy, closing faster when loose, and flooding when too thin.
Test the beans while hot: the trail’s speed of closing tells you whether they are thick, creamy, loose, or watery.
What you see Texture What to do
The trail stays sharply open and the beans sit in two stiff banks Too thick Add some warm liquid and stir again
The trail stays visible briefly, then the edges slowly relax inward Creamy side A versatile restaurant-style consistency
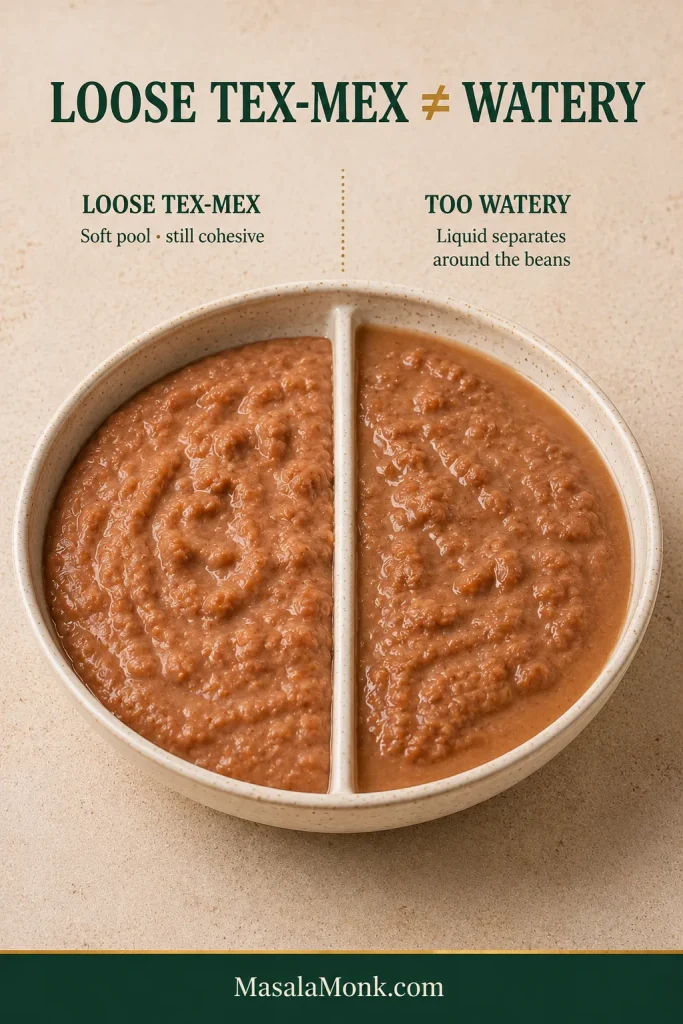
The trail closes fairly quickly and the beans settle into a low, soft pool without watery separation Loose Tex-Mex style Stop here if this is the restaurant texture you prefer
The trail floods shut immediately or a watery moat forms around the beans Too thin Cook uncovered over medium-low heat

How to Know When Refried Beans Are Done

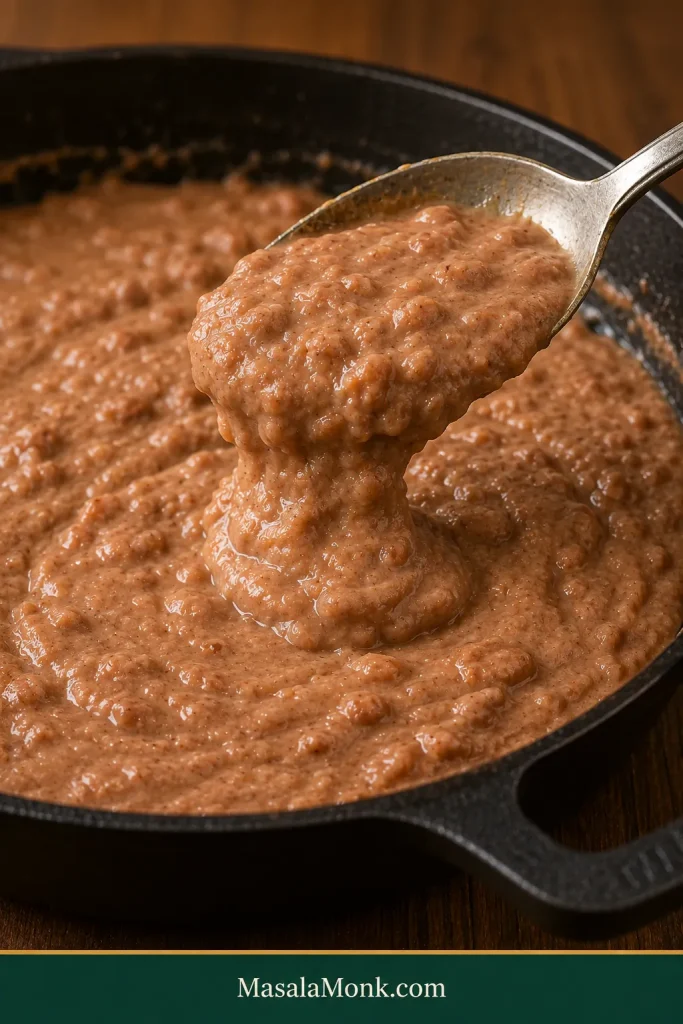
At the table, the beans should look soft and lightly glossy, fall slowly from the spoon, and settle without standing in a rigid mound or spreading like soup. When the trail looks right, you’re done; don’t keep cooking just because the clock has another minute on it.

Spoon held close above a skillet as creamy refried beans fall back in a short, thick, soft fold.
Creamy refried beans should cling briefly, then fall back in a heavy, soft fold—not drip or stay rigid.

For an ultra-smooth Tex-Mex texture, adjust the moisture first and then give the beans a few short pulses with an immersion blender. Stop when obvious bean pieces disappear. Blend too long and the mixture can turn pasty and overprocessed.

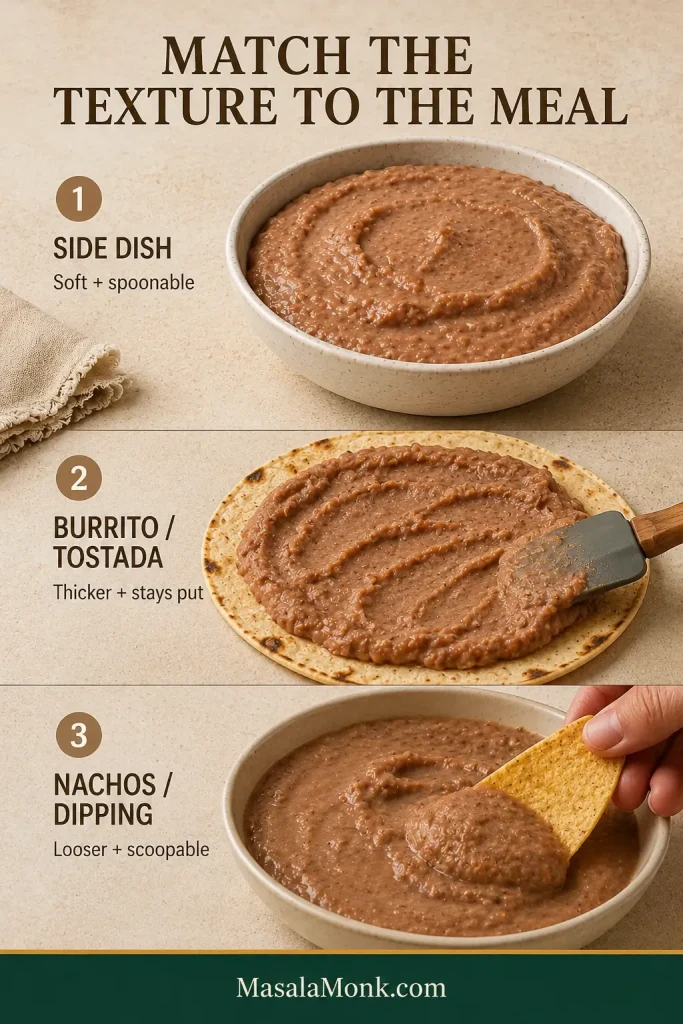
Match the Texture to the Meal

  • As a side: soft enough to settle gently on the plate.
  • For burritos, tacos, and tostadas: thicker so the beans stay where you spread them.
  • For nachos or dipping: looser so they remain easy to scoop as they cool.
Three examples show soft refried beans as a side, thicker beans spread on a tortilla, and looser beans scooped with a tortilla chip.
Match texture to the job: softer for a side, thicker for filling, looser for dipping.

A fresh homemade corn tortilla wants beans with enough body to spread without running toward the edge. Beside saucy chicken enchiladas, a softer consistency usually makes more sense.

And if what you really want is a cold, scoopable bean layer with sour cream, guacamole, salsa, and cheese, our 7 layer dip recipe builds the beans for that job.

↑ Back to Recipe Short Version

Troubleshooting Canned Refried Beans

Match the fix to the problem. Most batches don’t need another ingredient so much as the right adjustment.

Problem Fast fix
Too thick Loosen gradually with warm water or unsalted broth
Too thin Cook uncovered over medium-low heat until the excess moisture evaporates
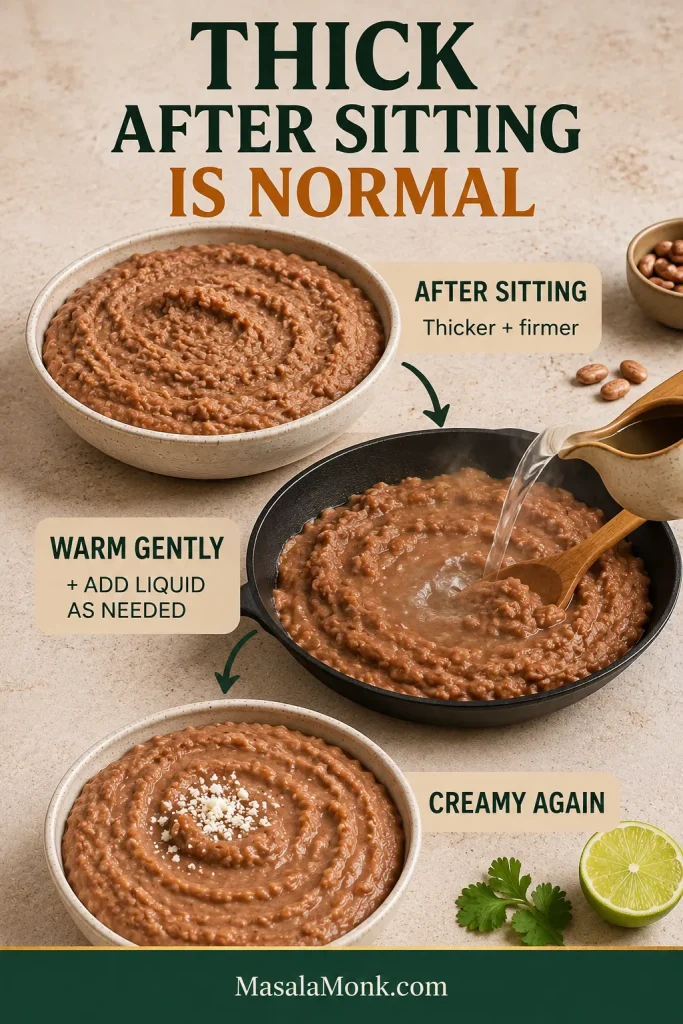
Stiff after sitting Stir in warm liquid until the creamy consistency returns
Bland Taste for seasoning, salt, heat, or brightness before deciding what to add
Tastes canned or slightly metallic A small splash of whole milk can mellow the edge; warm gently and taste again
Too salty Avoid any further salty ingredients; for a badly oversalted batch, mix in lower-sodium or unsalted beans if available
Too tangy Stop adding acid and mix in more plain refried beans if available
Greasy Spoon off pooled fat; if the beans are also stiff, loosen with water instead of adding more fat
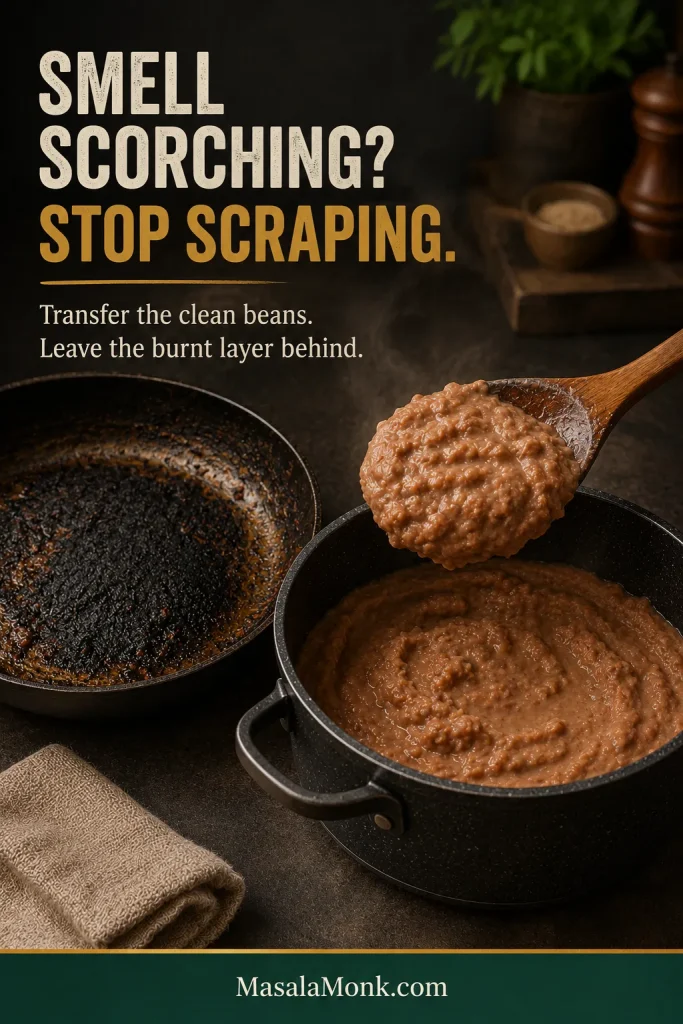
Burnt Transfer the unburnt portion immediately without scraping the scorched layer
Splattering Lower the heat and stir carefully

Too Thick, Too Thin or Stiff After Sitting?

Thick, thin, and stiff-after-sitting beans are really three versions of the same consistency problem. Add moisture when the mixture won’t relax; let excess moisture evaporate when it floods; and expect the beans to tighten somewhat as they cool. A splash of warm water or broth usually brings a batch that sat too long straight back.

Comparison of cohesive loose Tex-Mex refried beans and overly thin beans with visible liquid separated around the edge.
Loose beans stay cohesive; visible water separating around the edges means they have crossed into too thin.

Bland? Figure Out What’s Missing

“Bland” doesn’t automatically mean “needs more salt.” Salty enough but still flat? A touch more onion or garlic seasoning may help. A heavy-tasting batch may need a few drops of lime juice or jalapeño brine instead. Keep cumin in the background so the final spoonful still tastes first and foremost like pinto beans.

Burnt or Bitter? Get Them Out of That Pan

Smell scorching? Stop scraping and transfer the unburnt beans into a clean saucepan, leaving the dark layer behind. Mild bitterness can sometimes be softened after the rescue, but deeply scorched flavor is difficult to disguise. Bacon fat should also be clean rendered fat, not blackened drippings carrying burnt pieces.

Clean refried beans are transferred into a fresh pan while a dark scorched layer remains untouched in the original pan.
Transfer clean beans before scraping the scorched bottom; once burnt residue mixes in, bitterness spreads fast.

↑ Back to Recipe Short Version

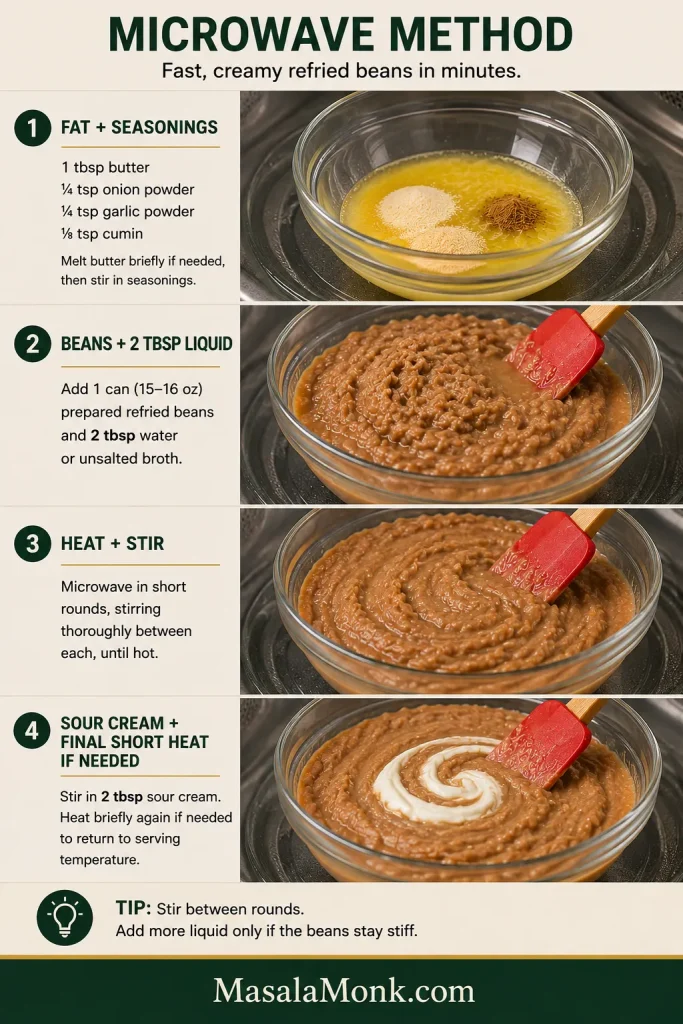
Microwave Method

To microwave canned refried beans, heat them in short intervals, stirring between each, and add more liquid only when they remain thick. The stovetop gives you finer control, but if tacos are already hitting the table, the microwave route is perfectly respectable.

  1. Start the flavor. Put 1 tablespoon butter—or your chosen alternative—in a large microwave-safe bowl. Melt briefly if necessary, then stir in the onion powder, garlic powder, and cumin.
  2. Add the beans. Mix in the canned refried beans and 2 tablespoons (30 mL) water or broth. Cover loosely so steam can escape while splatters stay contained.
  3. Heat and stir. Microwave in short rounds, stirring thoroughly between each, until hot. Use another splash of liquid only when the texture still feels stiff.
  4. Add the sour cream and serve. Stir in the sour cream, then give the beans one final short heating round if needed to return them to serving temperature. Taste and adjust with hot sauce, acid, or salt.
Four-step microwave refried beans guide showing seasonings and butter, prepared beans with liquid, stirring after heating, and sour cream added near the end.
Short microwave rounds plus thorough stirring give you repeated chances to adjust thickness without overcooking the beans.

Use a bowl larger than seems necessary. Thick bean mixtures have a talent for popping just when you think they won’t.

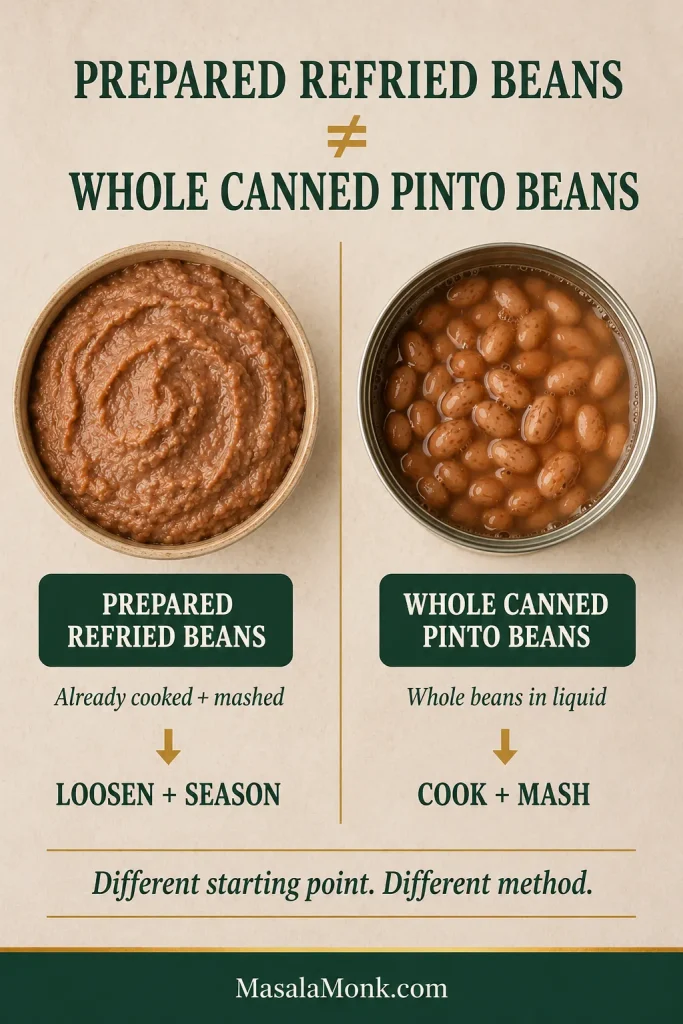
What If You Have Whole Canned Pinto Beans?

You can absolutely turn whole canned pintos into quick refried beans, but the route is different. Reserve some of the can liquid. Warm your fat and seasonings, add the whole beans with enough liquid to keep them moist, then mash and adjust until creamy.

Prepared refried beans have already been cooked and mashed. That’s why the liquid and sour-cream amounts in the recipe above shouldn’t simply be transferred to a can of whole pintos.

Prepared mashed refried beans are compared with intact canned pinto beans sitting in liquid, with their different cooking methods labeled.
Prepared refried beans need loosening; whole canned pintos still need seasoning, heating, mashing, and texture adjustment.

Scaling for a Crowd

The recipe scales well for a larger taco night — perhaps alongside sheet-pan chicken fajitas — but consistency doesn’t scale perfectly by arithmetic.

For 2–3 cans, scale the fat and sour cream with the beans. Start a little conservatively with the dry seasonings, taste once everything is hot, and hold back some of the liquid until you can see how the batch moves. Let the Spatula Trail Test decide the final consistency.

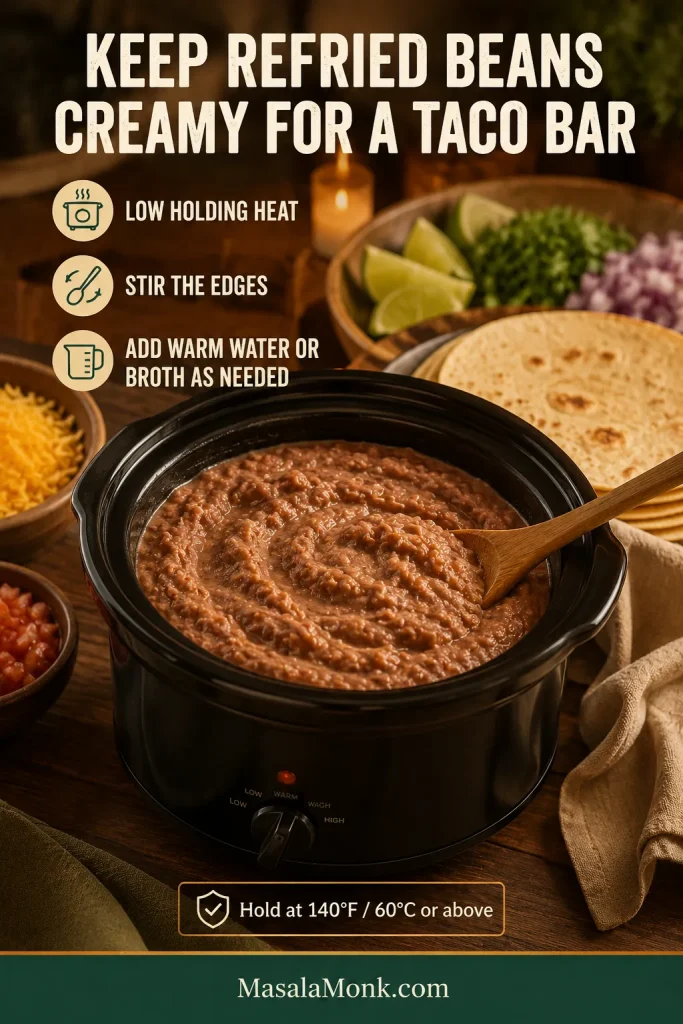
Keeping Them Creamy for a Taco Bar

Transfer the beans to a covered slow cooker or other suitable hot-holding vessel and use low holding heat. Stir periodically, especially when the edges start thickening, and add warm water or unsalted broth as needed.

If the beans will stay out for a while, keep them at 140°F (60°C) or above; that’s the USDA hot-holding recommendation.

Creamy refried beans in a slow cooker at a taco bar with tortillas and toppings arranged nearby.
Keep warm liquid beside the slow cooker so thickening taco-bar beans can be loosened in small, controlled additions.

Storage, Freezing and Reheating

Refrigerate leftovers within 2 hours, use them within 3–4 days, and reheat to 165°F (74°C). The USDA has the full leftovers and reheating guidance.

Cold refried beans can look dramatically thicker than they did when freshly cooked. That’s expected; reheating is usually as much about restoring lost moisture as making the beans hot again.

Firm refried beans after sitting are reheated with added liquid and shown again after returning to a softer creamy consistency.
Reheat first, then judge thickness; cold refried beans often look much denser than they will once hot.

How to Reheat Refried Beans

Stovetop: warm over low to medium-low heat, stirring in water or unsalted broth until the soft, spoonable consistency returns.

Microwave: cover loosely and heat in short intervals, stirring between rounds. A batch that’s hot but still dense needs moisture, not another spoonful of fat.
Can You Freeze Them?

Yes. Cool the beans, portion them into airtight freezer-safe containers, and freeze. For best quality, aim to use frozen leftovers within about 3–4 months. Thaw in the refrigerator, then reheat gently with enough water or broth to restore the texture.
Once loosened again, leftovers are handy for freezer-friendly breakfast burritos. Just make sure the filling isn’t watery before it goes into the tortilla.

What to Serve With Refried Beans

These beans are happiest anywhere you want something warm and mellow beside brighter, spicier, or crunchier food.

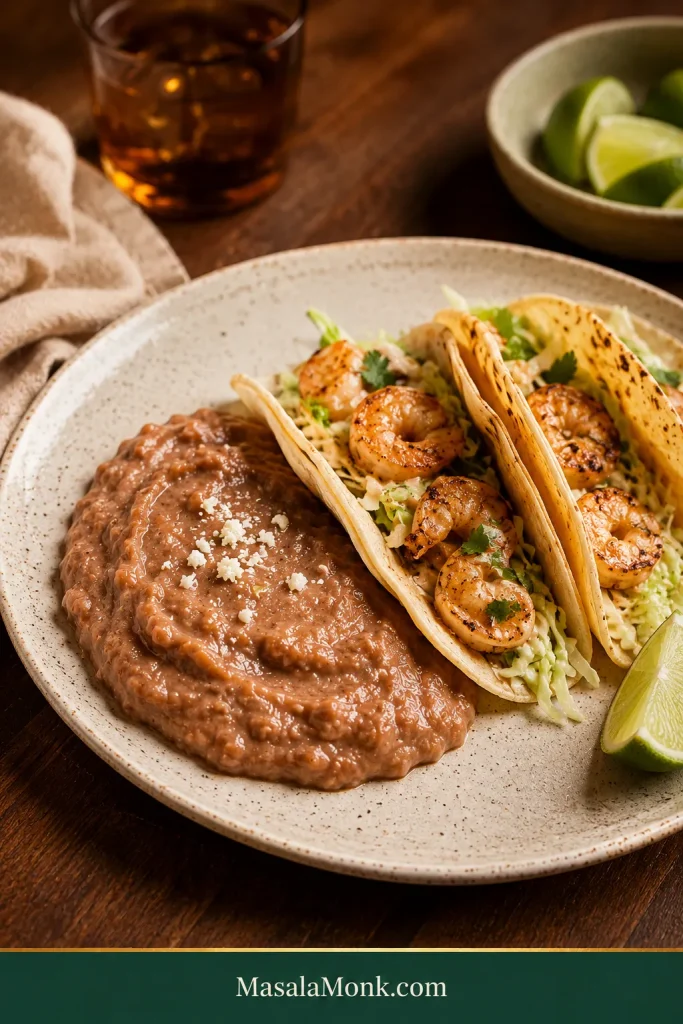
Keep them simple beside shrimp tacos with lime slaw, where the creamy beans give the fresh toppings somewhere soft to land. Mango salsa offers a fruitier contrast with lime, chile, and freshness.

Creamy refried beans served beside shrimp tacos with cabbage slaw and lime wedges on a neutral ceramic plate.
Creamy refried beans make a mellow, comforting side for bright shrimp tacos and lime slaw.

They’re equally at home beside Mexican-style rice and eggs, or tucked into burritos, tostadas, quesadillas, nachos, and taco bowls.

Once You Know What the Pan Needs, This Gets Easy

Once you know what to look for, canned refried beans stop feeling like a compromise. They become the kind of ten-minute side you can fix while the tortillas warm, spoon onto the plate, and actually look forward to eating.

Next time, you probably won’t need this whole guide. Loosen slowly. Salt last. Trust what the pan is showing you.

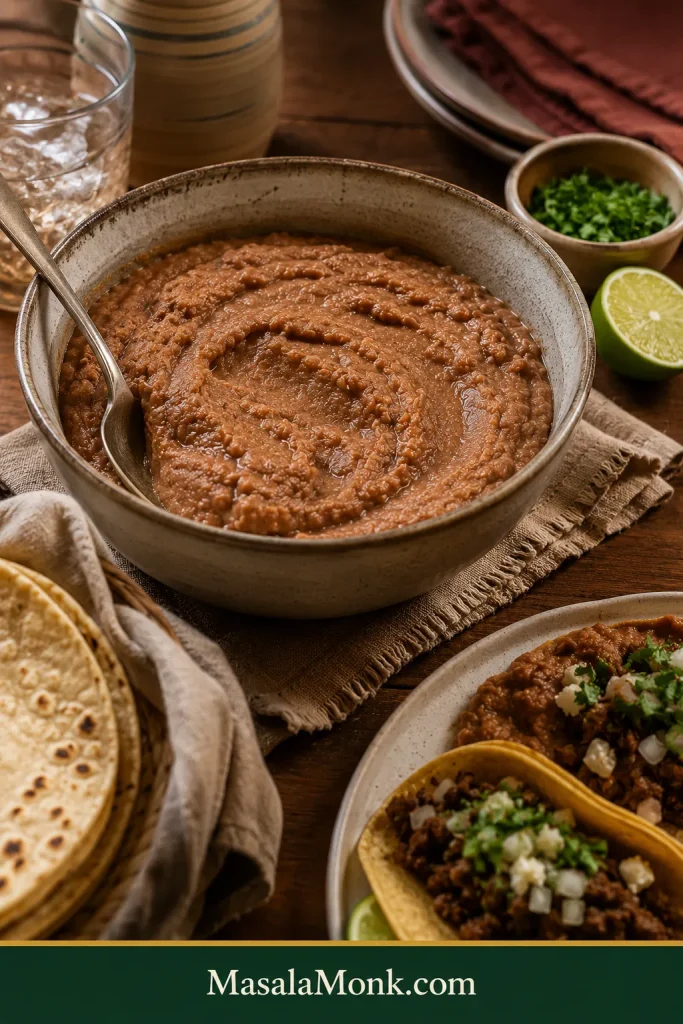
Large communal bowl of creamy refried beans with a serving spoon, tortillas, lime, and taco dinner dishes on a warm wooden table.
Warm, creamy refried beans from one ordinary can—ready for the rest of dinner.

If you make them, tell us which brand you started with, which fat you used, and whether your can needed more than the first 2 tablespoons of liquid. That real-world variation can help the next person opening the same can.

↑ Back to Recipe Short Version

Posted on — Leave a comment

Easy 7 Layer Dip Recipe

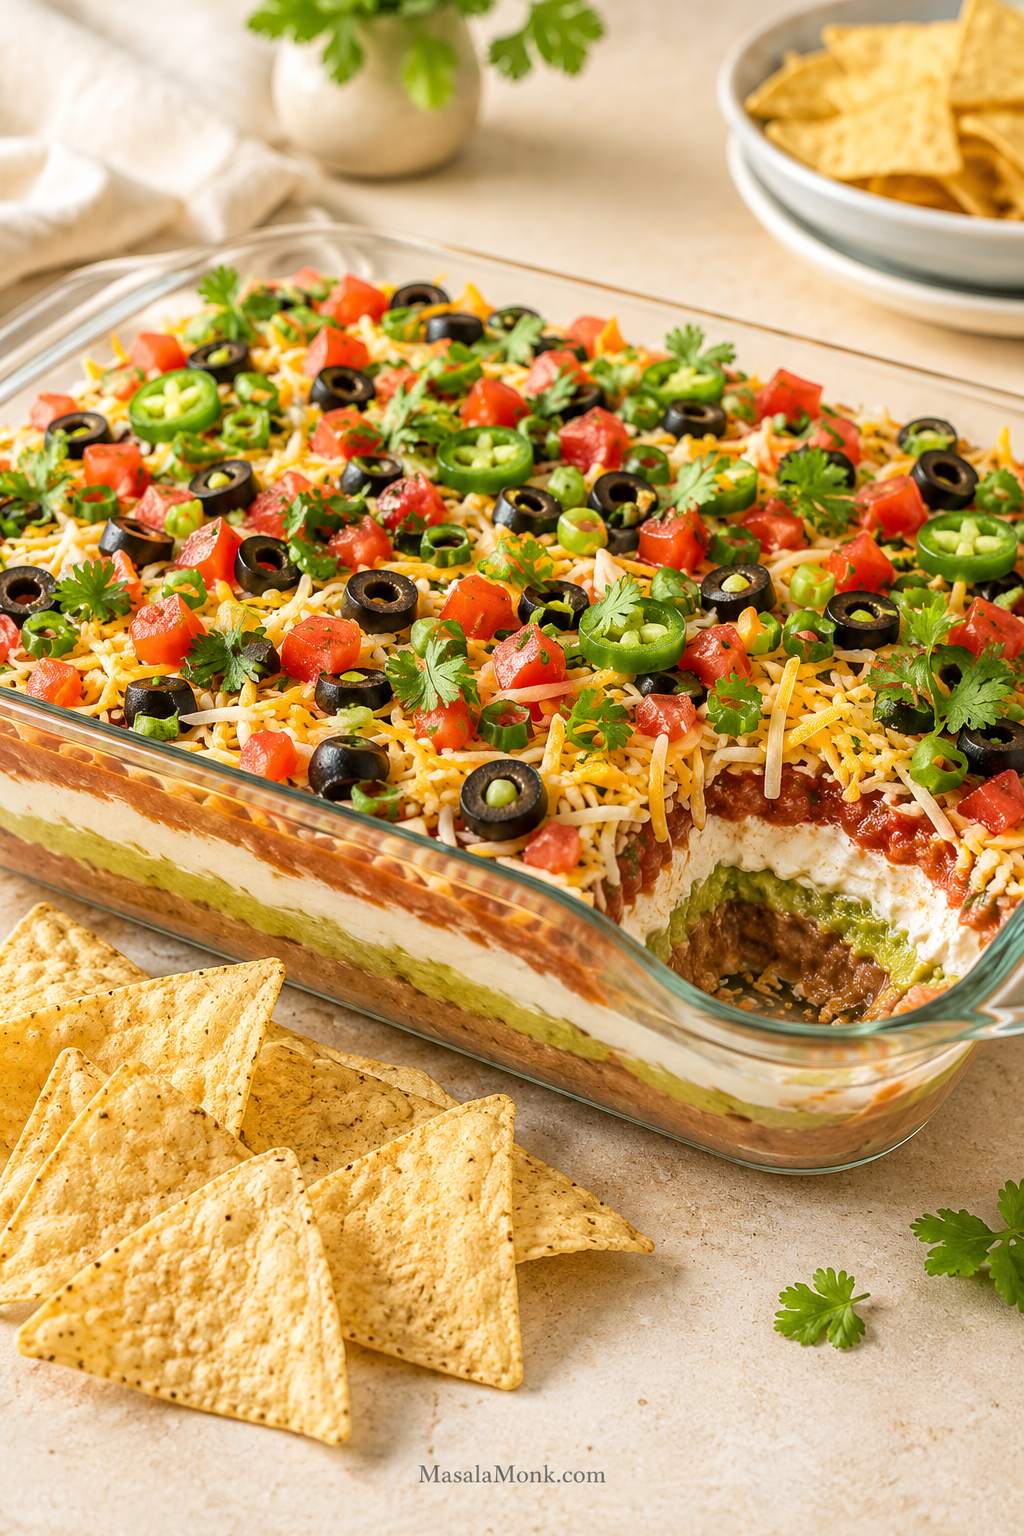
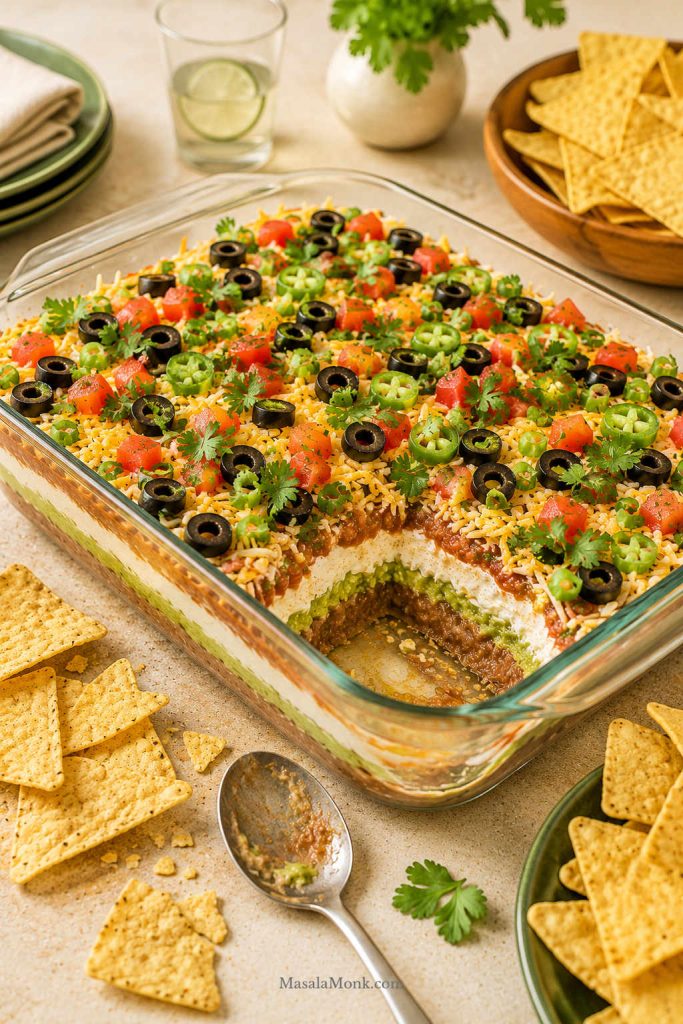
Finished 7 layer dip in a clear 9x13 glass dish with visible layers, colorful toppings, tortilla chips, and one corner lightly scooped.

This is the kind of 7 layer dip recipe people hover around at gatherings: cool, creamy, salty, fresh, and loaded enough that every chip gets a little bit of everything. The best versions look colorful when they land on the table and still taste good after the first few scoops.

This one keeps that appetizer-table magic while fixing the usual problems: stiff beans, loose salsa, browning avocado, broken chips, and layers that collapse too quickly. Instead of baking, it stays cold and no-bake, with seasoned refried beans, fresh avocado, taco-seasoned sour cream, drained salsa or pico, shredded cheese, tomatoes, olives, green onions, and jalapeños layered into a 9×13-inch dish.

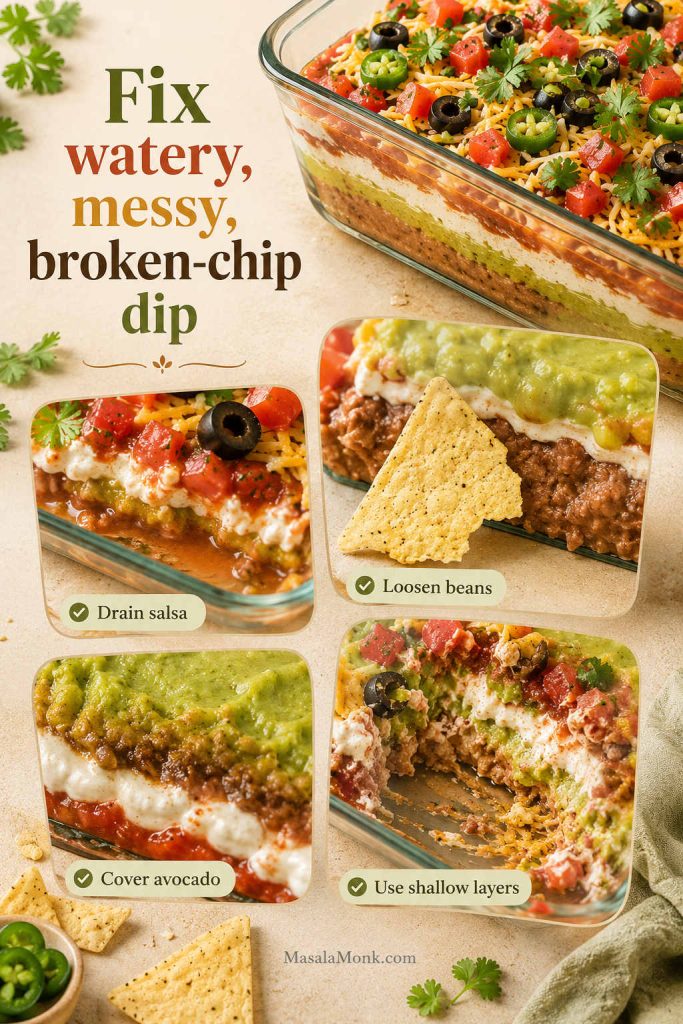
The trick is not a secret ingredient. Most 7 layer dips are easy; this one is built around the parts that usually go wrong. The beans need to scoop cleanly, the avocado needs protection, the salsa should brighten without leaking, and the layers should be thin enough that the first scoop does not ruin the whole dish.

That is the difference between a dip people nibble at and a dip people keep “evening out” with one more chip until the corner of the dish is mysteriously gone.

Quick Answer: The Best 7 Layer Dip Recipe

This cold, no-bake 7 layer dip recipe is built in a 9×13-inch dish with seasoned refried beans on the bottom, then guacamole, taco-seasoned sour cream, drained salsa or pico de gallo, shredded cheese, diced tomatoes, and a final topping layer of olives, green onions, jalapeños, and cilantro.

The best layer order is the one that keeps the dip sturdy, fresh, and easy to scoop: heavy beans first, avocado protected in the middle, creamy sour cream above it, drained salsa for brightness, cheese for structure, and fresh toppings on top. If you have time, chill the dish for about 30 minutes so the layers settle before serving.

For exact amounts, jump to the recipe card. If you want the visual test first, see what a clean scoop should look like.

What a Clean Scoop Should Look Like

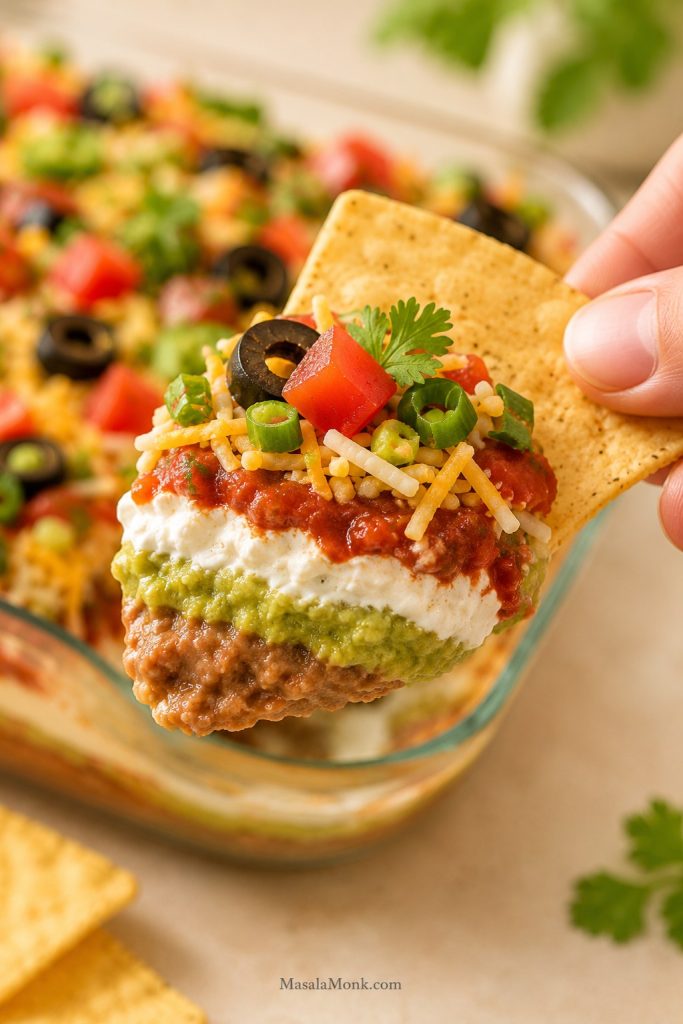
A good scoop should pick up beans, avocado, sour cream, salsa, cheese, and toppings together without pulling the whole dish apart. If the first scoop collapses the corner, the layers are usually too thick, too cold, or too loose.

Tortilla chip lifting a clean scoop of 7 layer dip with refried beans, guacamole, sour cream, salsa, cheese, tomatoes, olives, and green onions.
A good scoop should catch beans, avocado, sour cream, salsa, cheese, and toppings together; if it drags the whole dish apart, the layers are probably too thick or too cold.

7 Layer Dip at a Glance

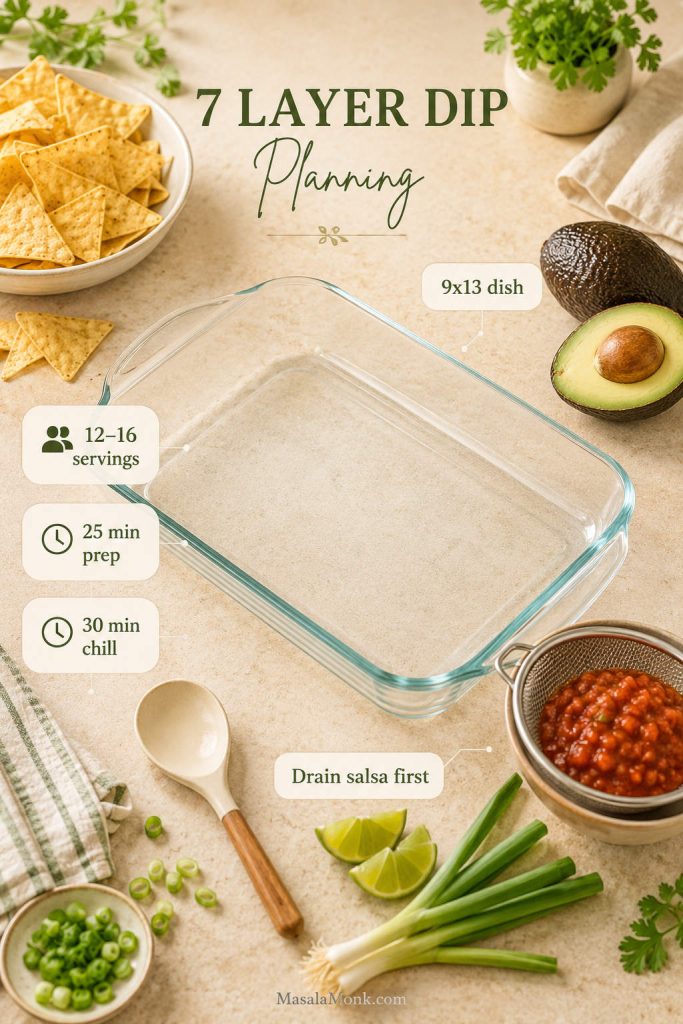
7 layer dip planning scene with a 9x13 dish, tortilla chips, avocados, salsa strainer, timer, and labels for servings, prep time, chill time, and draining salsa.
Before layering, check the dish size, serving count, chill time, and salsa-draining step so the dip is easier to serve when guests arrive.
Recipe type Cold, no-bake layered taco dip
Best dish 9×13-inch / about 23×33 cm glass or ceramic dish
Servings 12–16 appetizer servings
Main base 2 cans refried beans + 3 medium-large avocados
Prep time 25 minutes
Chill time 30 minutes recommended, optional if serving right away
Serve temperature Cold or lightly chilled
Best chips Sturdy tortilla chips or scoop-style chips
Make-ahead window Best assembled the same day; components can be prepped 1 day ahead
Biggest mistake Using loose salsa or pico without draining it first

What Is 7 Layer Dip?

7 layer dip is a cold layered Tex-Mex-style appetizer made with beans, avocado or guacamole, sour cream, salsa, cheese, and fresh toppings. It is usually served with tortilla chips and shows up at game days, potlucks, tailgates, movie nights, and casual parties because it is easy to make and easy to share.

The names often overlap. Some people call it seven layer dip, 7 layer taco dip, layered taco dip, Mexican layer dip, or layered bean dip. Although the exact toppings can change from kitchen to kitchen, the goal is always the same: a colorful, scoopable dish with a sturdy base, creamy middle layers, bright salsa, cheese, and fresh toppings.

If you are building a cold appetizer table, this dip also works well beside a make-ahead cheese ball recipe. Both can be chilled ahead, served with sturdy dippers, and set out when guests arrive.

Why This 7 Layer Dip Recipe Works

The goal is not just seven layers; it is seven layers that taste good together. The bean layer should be savory, the avocado should be bright, the sour cream should be tangy, the salsa should wake everything up, and the toppings should make each scoop feel fresh instead of heavy.

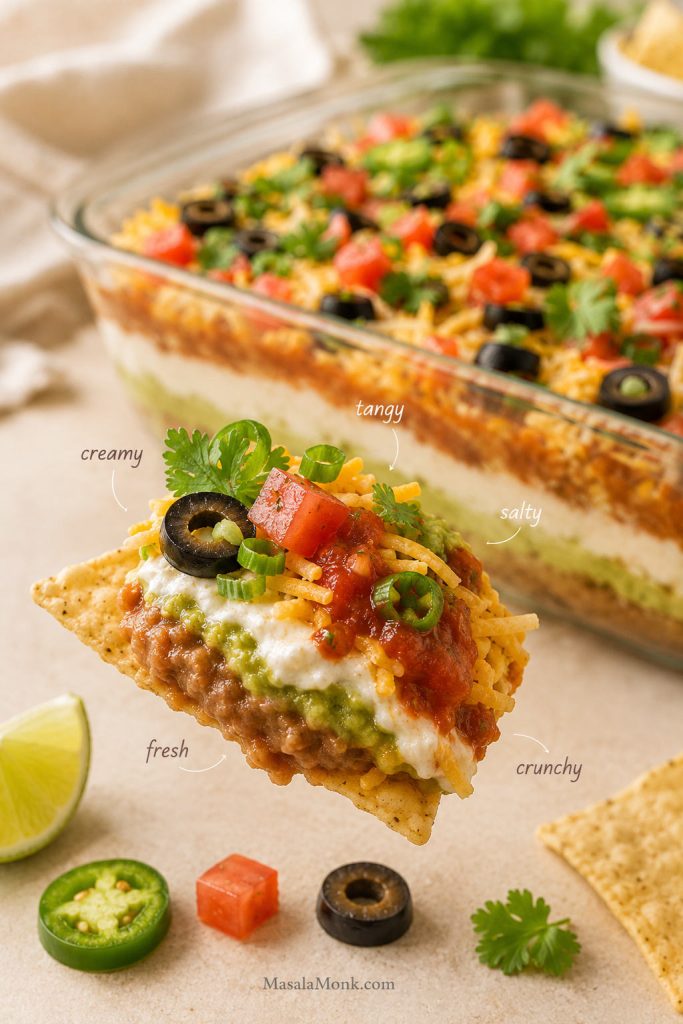
The best bite should be creamy from the beans and avocado, tangy from the sour cream and salsa, salty from the cheese and olives, and fresh from the tomatoes, green onions, cilantro, and jalapeños.

Flavorful bean base

The refried beans are loosened and seasoned before spreading, so they taste better and stay soft enough for chips to scoop through.

Fresh avocado middle

The avocado layer adds cool, creamy freshness. Covering it with sour cream helps slow browning and keeps the middle from drying out.

Bright but balanced salsa

Drained salsa or pico brings tangy tomato flavor without taking over the whole bite or sinking into the creamy layers.

Clean serving-dish structure

A 9×13-inch dish gives the layers room to spread, keeps the dip easier to scoop, and makes enough for a real appetizer table.

Loaded tortilla chip with 7 layer dip and small callouts for creamy, tangy, salty, fresh, and crunchy flavors.
The best bite is balanced: creamy beans and avocado, tangy salsa and sour cream, salty cheese and olives, plus fresh toppings for crunch and brightness.

7 Layer Dip Ingredients

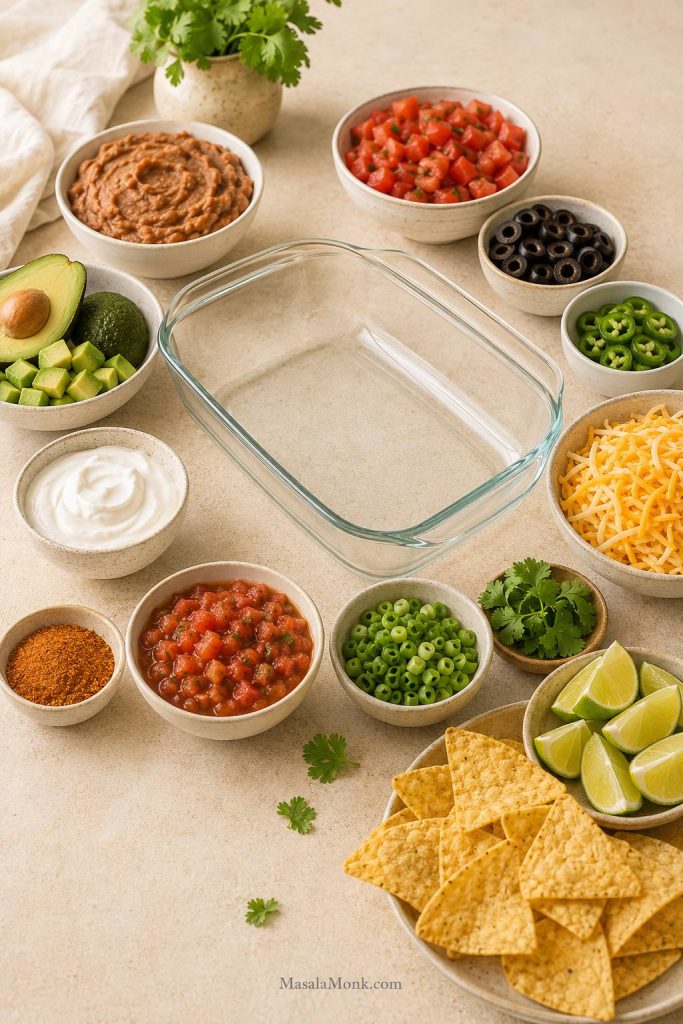
Ingredients for 7 layer dip arranged on a light surface, including refried beans, avocados, sour cream, taco seasoning, salsa, cheese, tomatoes, olives, green onions, jalapeños, lime, cilantro, and tortilla chips.
Simple ingredients work harder when the creamy layers are seasoned first, because plain beans or sour cream can make the finished dip taste flat.

This dip only works if the bean layer, avocado layer, and sour cream layer each taste good before they go into the dish. So, season the creamy layers first, then build the dish. That way every bite tastes balanced instead of just like plain beans, sour cream, and jarred salsa stacked together.

1. Refried Beans

Use two cans of refried beans for a full 9×13-inch dish. Pinto refried beans give the most classic flavor, while black refried beans taste a little earthier. If you are serving vegetarian guests, check the label because some refried beans are made with lard.

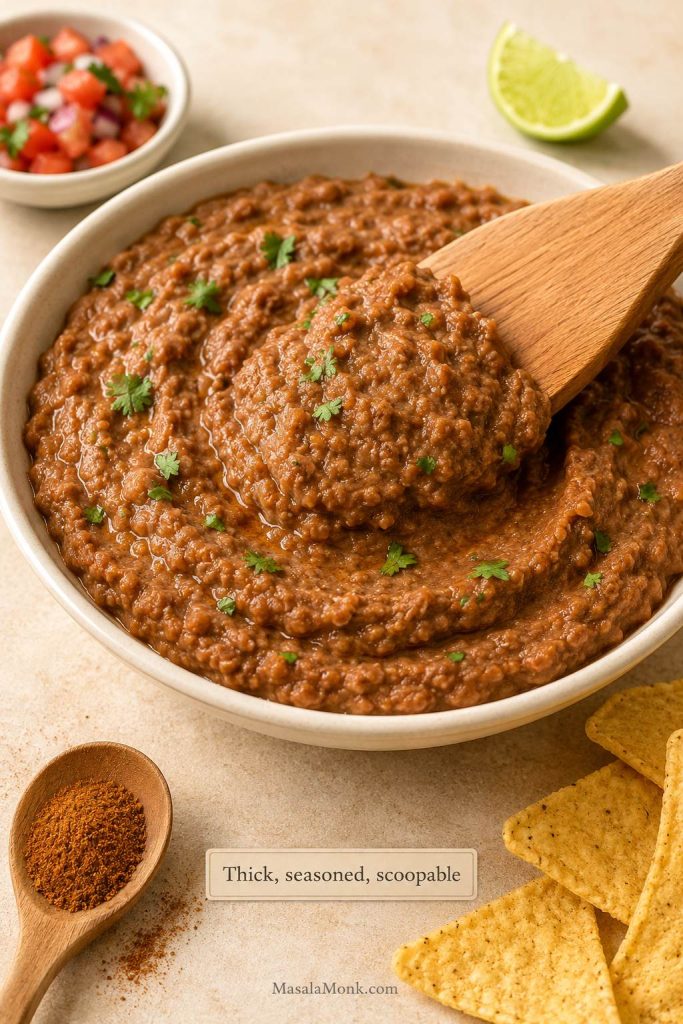
Plain canned beans can be stiff when cold, so stir them with a little salsa, cumin, chili powder, garlic powder, lime juice, and salt before spreading. You want a base that is thick enough to hold the layers but soft enough for a tortilla chip to scoop through.

Seasoned refried beans in a bowl with a spatula showing thick scoopable texture, plus salsa, lime, chips, and seasoning nearby.
A sturdy refried bean base holds the dip together, but the texture still needs to be soft enough for chips to scoop cleanly.

2. Guacamole or Mashed Avocado

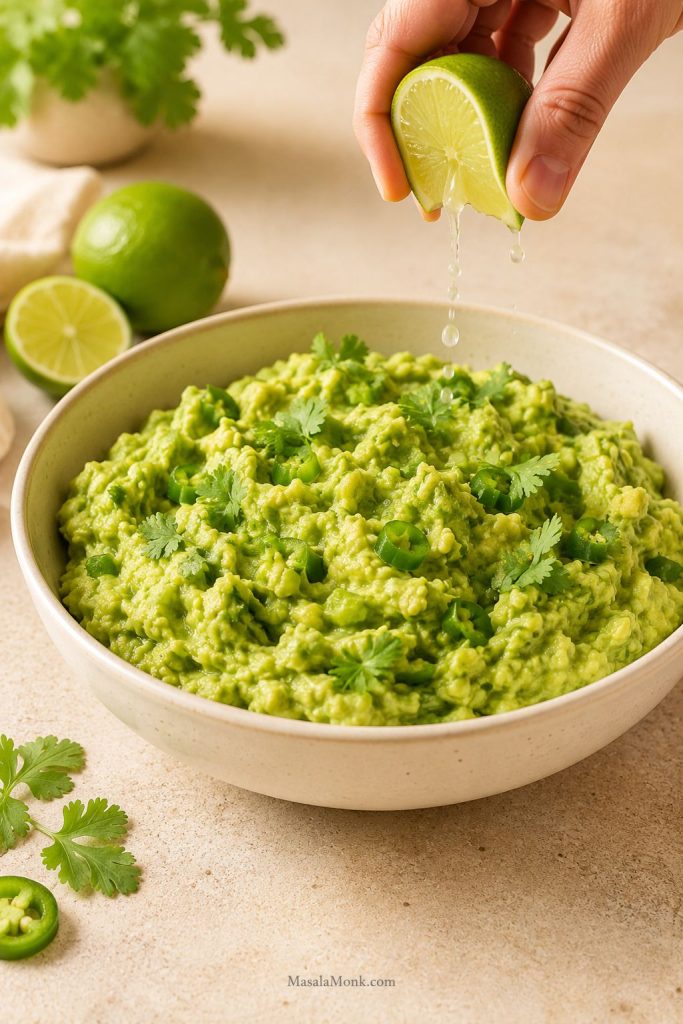
Fresh avocado gives the dip a cool, creamy middle. Mash ripe avocados with lime juice, salt, cilantro, and jalapeño if you like heat. Keep it slightly chunky for a fresher texture, or mash it smoother for cleaner layers.

Store-bought guacamole works too when you need a faster party dip. Choose a thicker guacamole, taste it first, and brighten it with lime juice, cilantro, or a little salt if it tastes flat.

Bowl of fresh mashed avocado with lime, cilantro, jalapeño, and a hand mixing the guacamole layer for 7 layer dip.
Lime, cilantro, and salt brighten the avocado layer, while a slightly chunky texture keeps the dip fresh instead of heavy.

3. Sour Cream and Taco Seasoning

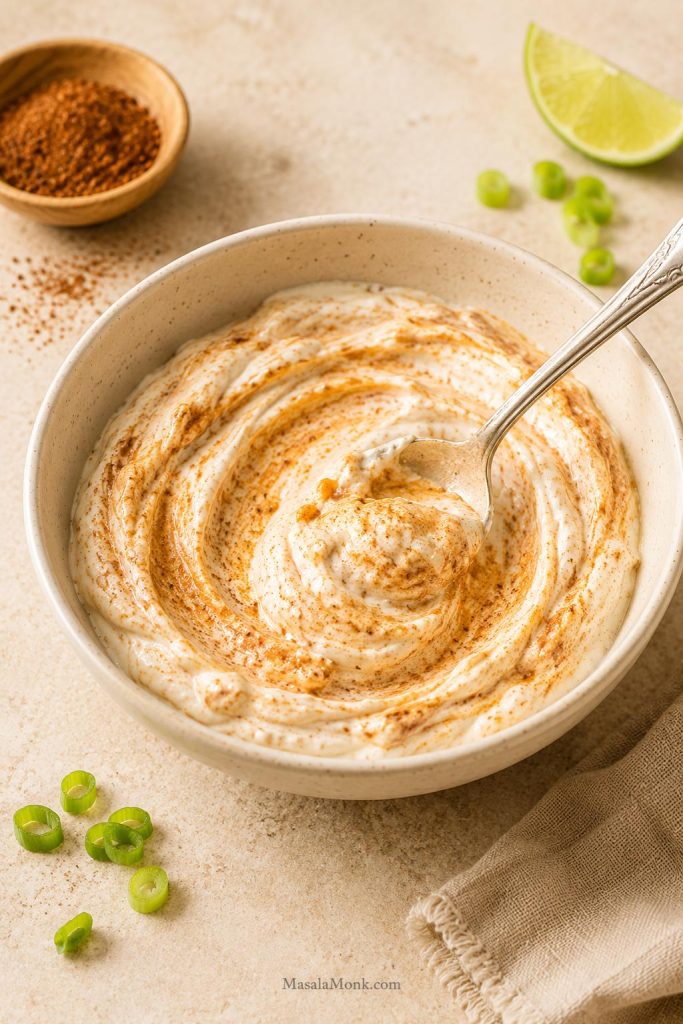
Sour cream mixed with taco seasoning creates the creamy taco-dip layer. Use enough seasoning to give it flavor, but do not overdo it because salsa, chips, cheese, and olives also bring salt.

A taco seasoning packet works well here. Start with less than the full packet if your chips, cheese, salsa, and olives are already salty, then add more to taste.

Bowl of sour cream being mixed with taco seasoning for the creamy layer of 7 layer dip.
Taco seasoning turns plain sour cream into a flavorful middle layer; however, add it gradually if your chips, cheese, salsa, and olives are already salty.

For a thicker texture, beat 4 oz / 113 g softened cream cheese into the sour cream before spreading. Cream cheese is optional. A small amount makes the layer richer and more stable; however, too much can make the dip feel heavy instead of fresh.

4. Salsa or Pico de Gallo

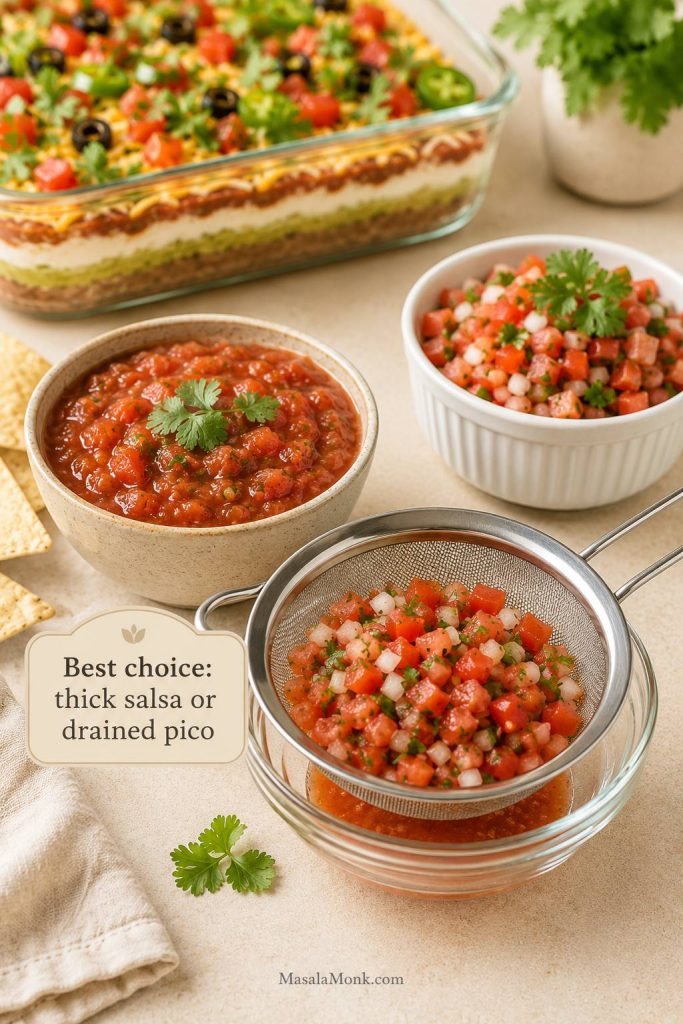
The best salsa for 7 layer dip is thick, chunky salsa or well-drained pico de gallo. Although pico tastes fresh and bright, tomatoes release liquid as they sit. Avoid thin restaurant-style salsa unless you strain it first, because it can leak into the sour cream and make the dip watery.

Chunky salsa, drained pico de gallo, and thin salsa in a fine-mesh strainer with text saying thick salsa or drained pico is best.
Thick salsa or drained pico gives 7 layer dip bright tomato flavor without letting excess liquid sink into the sour cream layer.

Most importantly, the salsa layer should brighten the dip, not take over the whole bite. If you want a brighter salsa bowl on the side, this mango salsa recipe gives the table something fresh, juicy, and chip-friendly without weighing down the creamy layers.

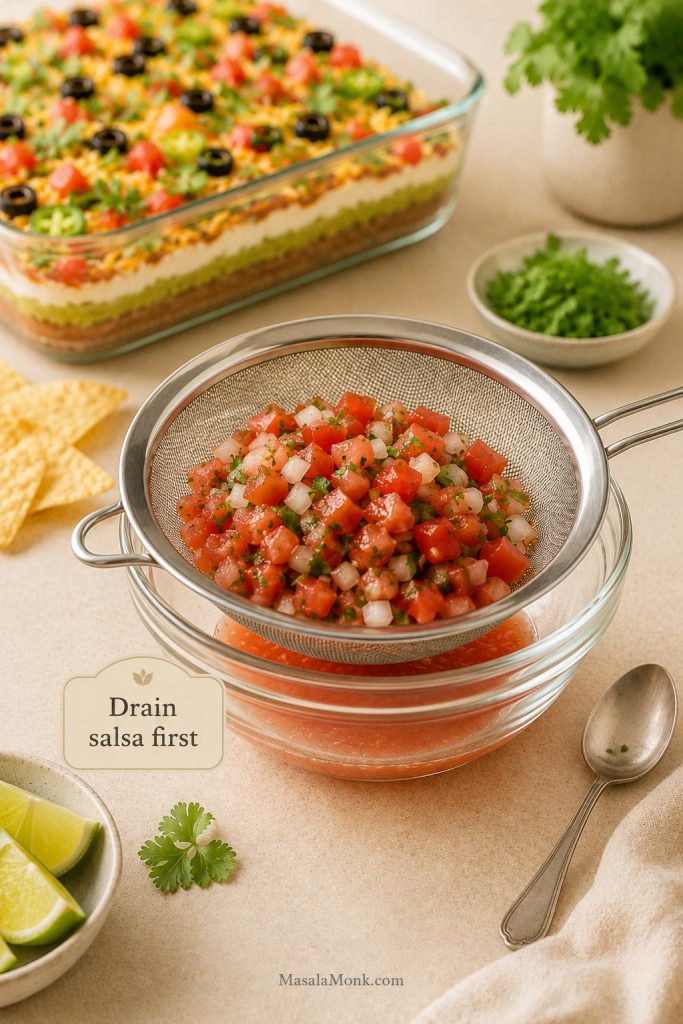
Place the salsa or pico in a fine-mesh strainer before layering. If it leaves a puddle in the bowl, it will leave a puddle in the dish.

For the full moisture-control guide, use the no-watery dip section.

5. Shredded Cheese

Cheddar gives sharper flavor, Monterey Jack tastes milder and creamier, pepper jack adds heat, and a Mexican cheese blend is the easiest all-purpose option. Freshly shredded cheese tastes best, but pre-shredded cheese works when you need a fast appetizer dish.

The cheese also helps separate the salsa from the fresh toppings, which keeps the top looking cleaner.

6 and 7. Fresh Toppings

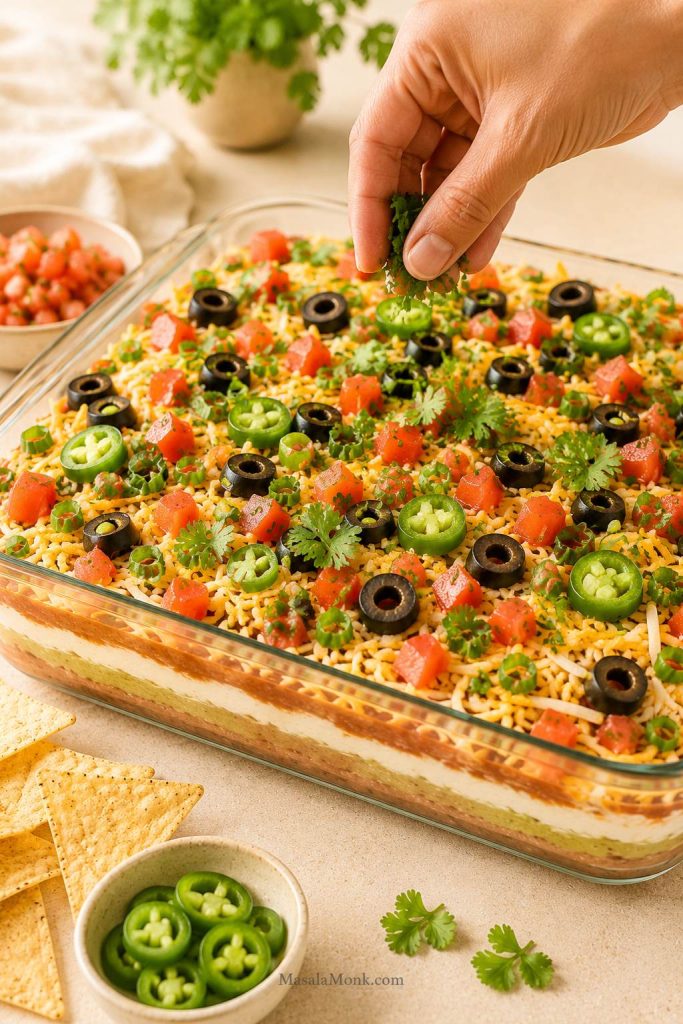
Finish with diced Roma tomatoes, black olives, green onions, cilantro, and jalapeños. Roma tomatoes are useful because they are meatier and less juicy than many slicing tomatoes. If your tomatoes are especially wet, seed them or blot them before adding them to the top.

Fresh toppings being added to 7 layer dip, including shredded cheese, diced tomatoes, sliced black olives, green onions, cilantro, and jalapeños.
Fresh toppings add color and crunch, although juicy tomatoes and delicate herbs are best added thoughtfully when making the dip ahead.

Best 7 Layer Dip Layer Order

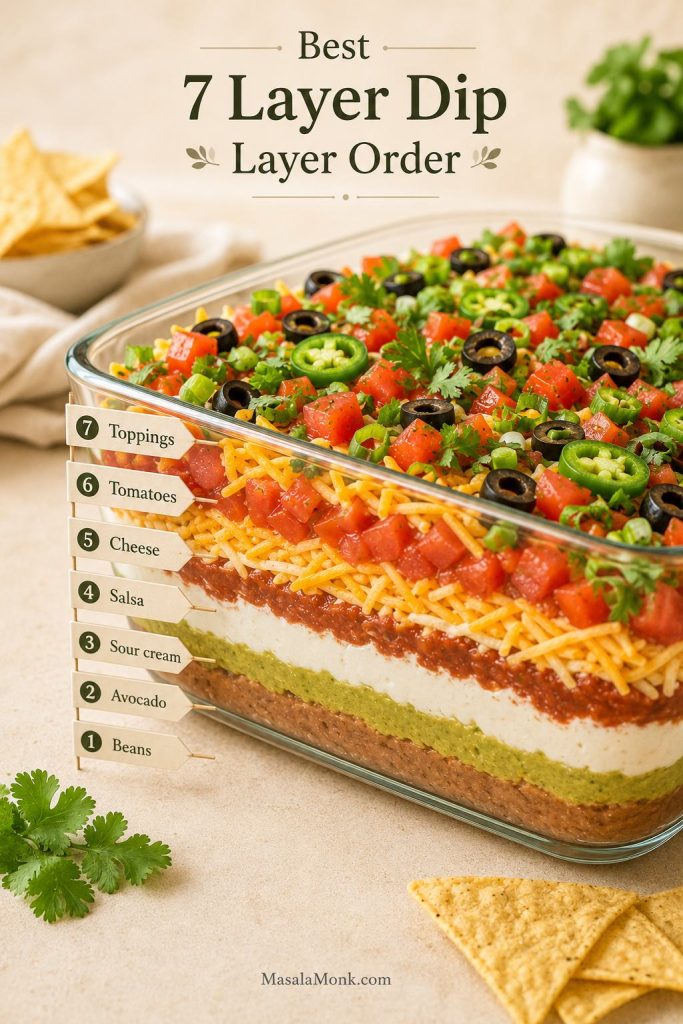
Side view of 7 layer dip in a glass dish with labeled layers for beans, avocado, sour cream, salsa, cheese, tomatoes, and toppings.
The best 7 layer dip layer order keeps heavy beans on the bottom, protects avocado in the middle, and leaves fresh toppings on top.

There are several common layer orders, and many of them work. In some versions, cheese goes earlier; in others, salsa sits on top or lettuce becomes one of the layers. For this 7 layer dip recipe, I like the order below because it keeps the heaviest layer on the bottom, protects the avocado, controls excess liquid, and leaves the top fresh and colorful.

The best order for 7 layer dip is:

  1. Seasoned refried beans
  2. Guacamole or mashed avocado
  3. Taco-seasoned sour cream
  4. Drained salsa or pico de gallo
  5. Shredded cheese
  6. Diced tomatoes
  7. Olives, green onions, jalapeños, and cilantro

The point is not to build the tallest dip. The point is to build layers thin enough that a normal chip can reach more than one flavor before it breaks.

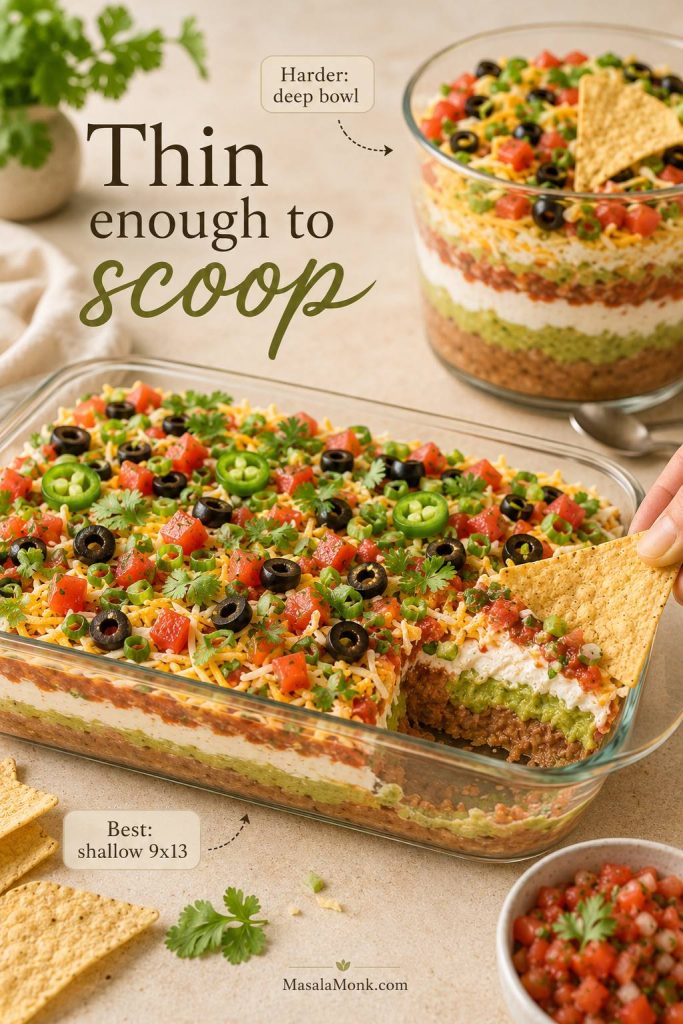
Why Thin Layers Scoop Better

Thin layers help a chip reach more than one flavor without snapping. They also make the first scoop cleaner because the dip spreads across the dish instead of stacking too high in one deep spot.

Shallow 9x13 dish of 7 layer dip being scooped cleanly, compared with a deeper bowl that is harder to scoop from.
A normal chip should reach more than one flavor before it breaks; that is why thinner, even layers beat a tall, heavy stack.

This order works because the beans create the sturdy base, the avocado stays tucked into the middle, the sour cream spreads gently over it, and the salsa is managed before the cheese and toppings go on. As a result, the top stays bright while the bottom stays strong enough for scooping.

Layer-order tip: Spread each layer gently all the way to the edges. That makes the dip look cleaner from the side, gives every scoop a bit of every layer, and helps protect the avocado from air.

Equipment You’ll Need

A 9×13-inch dish, a fine-mesh strainer, a few mixing bowls, and a spatula are the only tools that really matter. The strainer keeps salsa from watering down the dip, while the spatula helps spread the soft layers without dragging them into each other.

  • 9×13-inch / 23×33 cm glass or ceramic dish: best for a crowd and visible layers.
  • Fine-mesh strainer: for draining salsa or pico.
  • Mixing bowls: for the beans, avocado, and sour cream.
  • Fork or potato masher: for mashing avocado.
  • Silicone spatula or offset spatula: for spreading soft layers gently.
  • Knife and cutting board: for tomatoes, green onions, jalapeños, and herbs.
  • Plastic wrap: for covering the dish tightly if making it ahead.

How to Make 7 Layer Dip

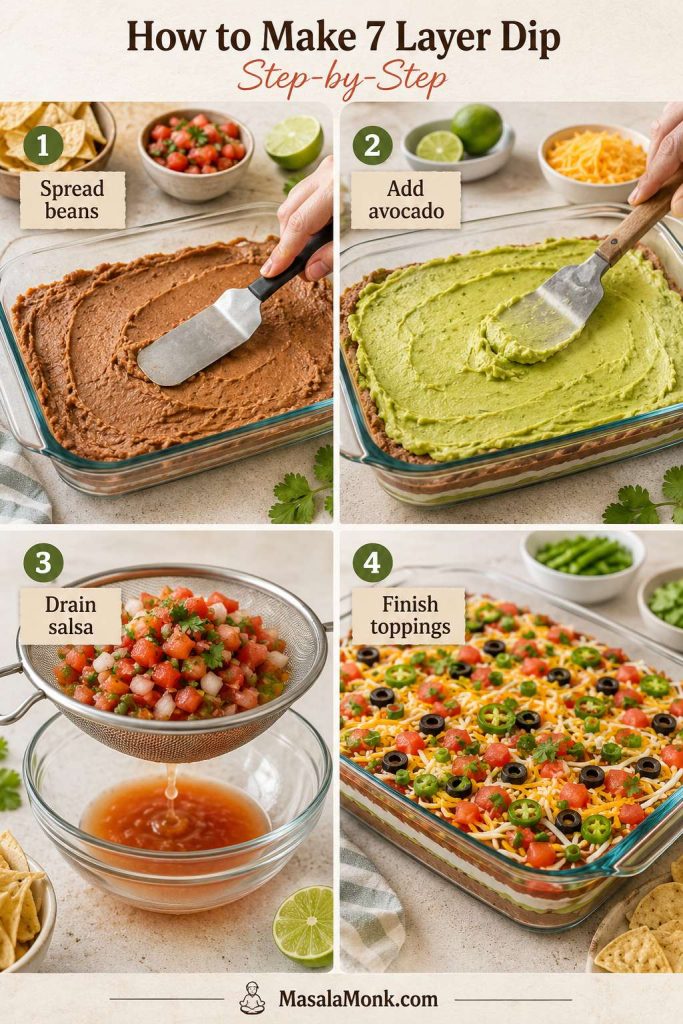
The method is simple, but the small details matter: season each creamy layer, spread gently, drain the salsa, and chill the dish briefly if you have time.

Four-step 7 layer dip guide showing beans spread in a dish, avocado added, salsa drained in a strainer, and toppings finished on the dip.
Build the dip in the right order: spread the beans, add avocado, drain the salsa, and finish with toppings for cleaner layers.

Step 1: Season and Loosen the Beans

Stir the refried beans with salsa, cumin, chili powder, garlic powder, lime juice, and salt. If the beans still feel too stiff, add another spoonful of salsa or a small spoonful of sour cream. The goal is thick and scoopable, not runny.

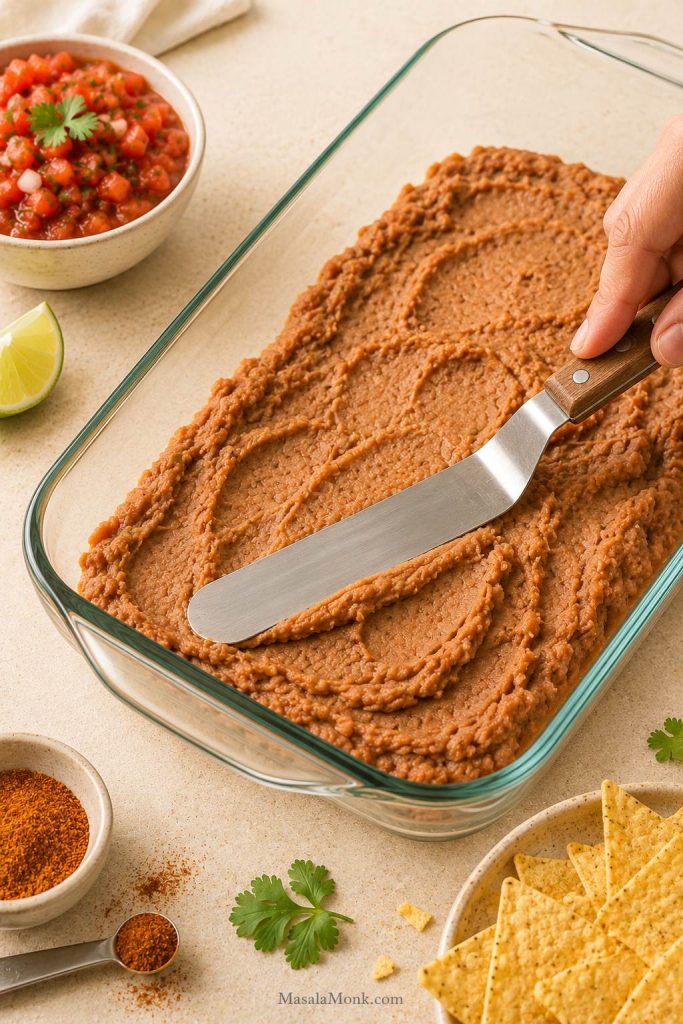
Spread the beans edge to edge in the bottom of the dish, including the corners. This gives every scoop a sturdy base and keeps the first chip from pulling up toppings with no beans underneath.

Spatula spreading seasoned refried beans into the corner of a clear 9x13 dish for the base layer of 7 layer dip.
Spreading beans into the corners gives every scoop a base, so early chips do not pull up toppings without the refried bean layer underneath.

Step 2: Make the Avocado Layer

Mash the avocados with lime juice, cilantro, jalapeño, and salt. Taste before layering; bland avocado makes the whole dish feel flat.

Then, dollop the avocado over the bean layer first and spread it gently. Do not press too hard, or you will drag the beans underneath.

Step 3: Mix the Sour Cream Layer

Stir sour cream with taco seasoning until smooth. If using cream cheese, make sure it is fully softened, then beat it with the sour cream before adding the seasoning so there are no lumps.

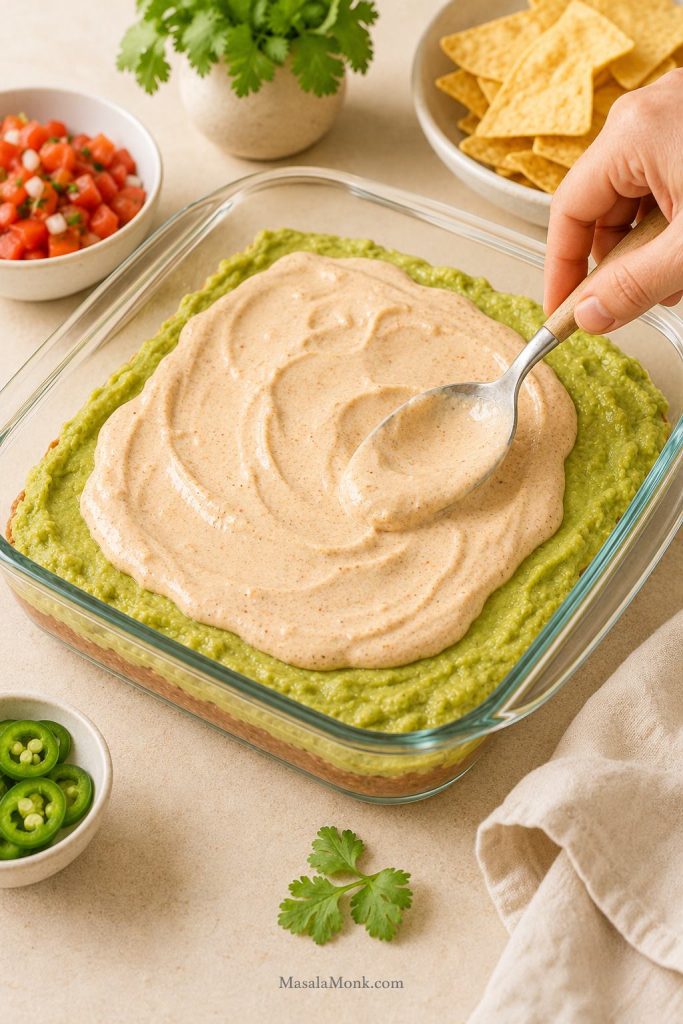
Next, dollop the sour cream mixture across the avocado and spread it gently to the edges. Try to cover the avocado completely; this helps slow browning and gives the dip a clean creamy middle.

Taco-seasoned sour cream being spread over the avocado layer in a glass dish to cover the green layer.
Covering avocado with sour cream helps slow browning and keeps the middle layer creamy through chilling and serving.

Step 4: Drain the Salsa or Pico

Place the salsa or pico in a fine-mesh strainer and drain for 5 to 10 minutes if it looks loose. You do not need to squeeze it dry; you just want to remove the liquid that would otherwise run into the sour cream.

Chunky salsa draining in a fine-mesh strainer over a glass bowl with visible liquid below and text saying drain salsa first.
If salsa releases liquid in the strainer, it would have released that liquid into the dip, so drain it before layering.

After that, spread the drained salsa in a thin, even layer. Too much can overpower the creamy layers and make them slide around, so use less if your salsa is very juicy.

Step 5: Add Cheese and Fresh Toppings

Sprinkle the cheese evenly over the salsa, then add diced tomatoes, olives, green onions, cilantro, and jalapeños. If the dip is being made several hours ahead, save the most delicate herbs and a few extra green onions for just before serving so the top looks fresh.

Step 6: Chill Briefly and Serve

Chill the dish for about 30 minutes if you have time. This helps the layers settle and makes the dip easier to scoop. If it has been refrigerated for several hours, let it sit for about 10 minutes before serving so the bean layer softens slightly.

Finally, serve with sturdy tortilla chips, scoop-style chips, or crunchy vegetables. The first scoop should cut through the layers without turning the whole dish into a landslide.

Planning for a party? The make-ahead section explains what to prep the day before and what to add right before serving.

Easy 7 Layer Dip Recipe

This easy 7 layer dip recipe is built for clean scooping: seasoned refried beans, guacamole, taco sour cream, drained salsa, cheese, tomatoes, olives, green onions, and jalapeños layered in a 9×13-inch dish. It is cold, creamy, colorful, crowd-friendly, and made to stay fresher and cleaner on the appetizer table.

Prep time:
25 minutes
Chill time:
30 minutes optional
Total time:
25–55 minutes
Yield:
12–16 servings
Dish:
9×13-inch / 23×33 cm dish
Serve:
Cold or lightly chilled

Ingredients

Bean layer

  • 2 cans refried beans, 15–16 oz each / 850–900 g total
  • ⅓ cup salsa / 80 ml, drained if loose
  • 1 teaspoon ground cumin / 2–3 g
  • ½ teaspoon chili powder / 1–2 g
  • ½ teaspoon garlic powder / about 1.5 g, optional
  • 1 tablespoon lime juice / 15 ml, optional
  • Salt, to taste

Guacamole layer

  • 3 medium-large ripe avocados / about 400–500 g avocado flesh
  • 2 tablespoons lime juice / 30 ml
  • ¼ cup chopped cilantro / 10–15 g
  • 1 small jalapeño, finely chopped, optional
  • Salt, to taste

Sour cream layer

  • 1½ cups sour cream / about 360 g
  • 2 tablespoons taco seasoning / about 18–20 g
  • Optional for a thicker texture: 4 oz cream cheese / 113 g, softened

Salsa layer

  • 1½ cups chunky salsa or pico de gallo / 360 ml, drained well
  • Use 1 cup / 240 ml if your salsa is very wet

Cheese and toppings

  • 1½–2 cups shredded cheddar, Monterey Jack, pepper jack, or Mexican cheese blend / 170–225 g
  • 1 cup diced Roma tomatoes / 150–180 g, seeded if juicy
  • ½ cup sliced black olives / about 60–75 g, drained
  • ⅓ cup sliced green onions / 25–35 g
  • Optional: chopped cilantro, pickled jalapeños, diced fresh jalapeño

For serving

  • Sturdy tortilla chips or scoop-style chips

Instructions

  1. Season the beans. In a bowl, stir the refried beans with salsa, cumin, chili powder, garlic powder, lime juice, and salt until thick but scoopable.
  2. Spread the base. Spread the bean layer evenly in a 9×13-inch dish, going all the way to the edges and corners.
  3. Make the avocado layer. Mash the avocados with lime juice, cilantro, jalapeño, and salt. Taste and adjust with more lime or salt if needed.
  4. Add the avocado. Dollop the avocado over the beans, then spread gently so you do not pull up the layer underneath.
  5. Mix the sour cream layer. Stir sour cream with taco seasoning until smooth. For a thicker texture, beat softened cream cheese into the sour cream before adding the seasoning.
  6. Cover the avocado. Dollop the sour cream layer over the avocado and spread it gently to the edges.
  7. Drain the salsa. Spoon salsa or pico into a fine-mesh strainer and drain for 5–10 minutes if it is loose or watery.
  8. Add the salsa and cheese. Spread the drained salsa in a thin layer, then sprinkle evenly with cheese.
  9. Finish the top. Add tomatoes, olives, green onions, cilantro, and jalapeños.
  10. Chill and serve. Chill for 30 minutes if possible. Serve cold or lightly chilled with sturdy tortilla chips.

Notes

  • Drain the salsa or pico well. This is the main fix for a loose, soggy dip.
  • Dollop each soft layer across the dish before spreading it gently for cleaner layers.
  • Halve the recipe for a smaller 8×8-inch dish.
  • Assemble the dip the same day you serve it for the best texture.
  • Cream cheese is optional. It makes the sour cream layer thicker but is not required.
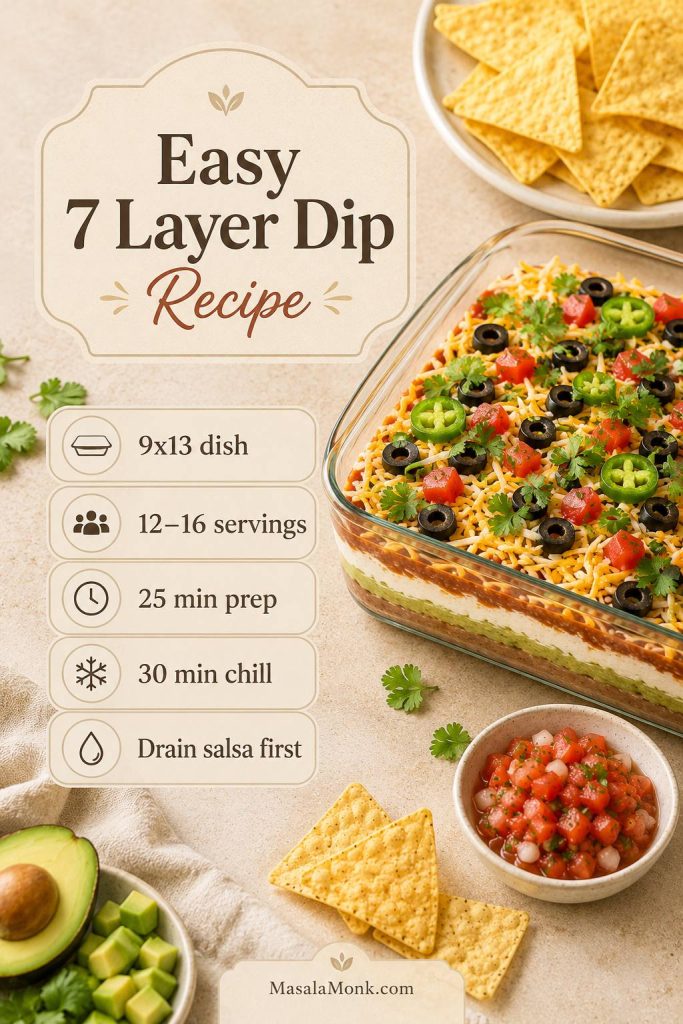
Saveable easy 7 layer dip recipe card with a finished dip, tortilla chips, and text for 9x13 dish, servings, prep time, chill time, and draining salsa first.
Keep the core details handy: use a 9×13 dish, plan for 12 to 16 servings, chill briefly if possible, and drain salsa first.

Can You Make 7 Layer Dip Ahead?

You can make this 7 layer dip recipe ahead, but the real test is how it looks when guests arrive: bright avocado, clean creamy layers, no salsa leaking at the edges, and a top that still looks like you just finished it.

For guests, assemble the dip a few hours before serving, cover it tightly, and keep it chilled. However, if it is just for casual snacking or leftovers, overnight assembly is fine; just expect softer layers and a little avocado darkening.

The cleanest make-ahead plan is to prep the parts separately one day ahead. Mix the beans, stir together the sour cream layer, shred the cheese, slice the olives, chop the green onions, and drain the salsa. Then mash the avocado and assemble the full dish closer to serving time.

Make-ahead timing Best approach Why it works
30 minutes ahead Fully assemble and chill Best balance of fresh flavor and settled layers
2–6 hours ahead Fully assemble, cover tightly, refrigerate Great for guests if salsa is drained well
1 day ahead Prep components separately; assemble later Keeps toppings fresher and avocado brighter
Overnight fully assembled Possible, but not ideal Avocado can darken and salsa can release moisture

Easy Party Timeline

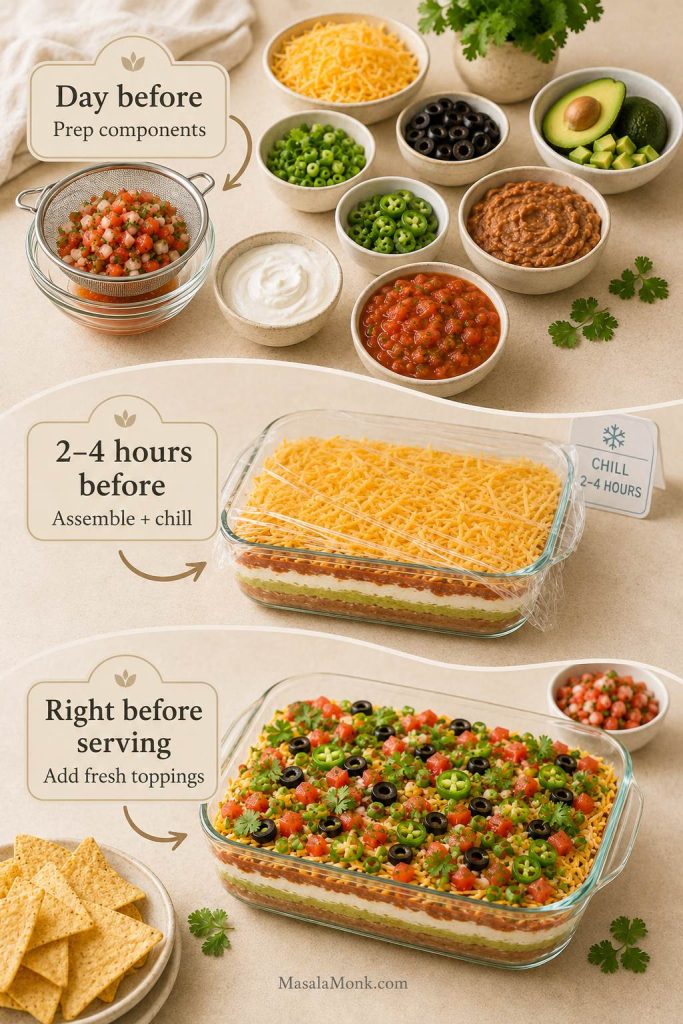
Make-ahead timeline for 7 layer dip showing day-before component prep, 2 to 4 hour assembly and chilling, and fresh toppings added before serving.
For the freshest make-ahead 7 layer dip, prep sturdy components early, assemble a few hours before serving, and add delicate toppings last.
  • The day before: mix the bean layer, mix the sour cream layer, shred cheese, chop sturdy toppings, and drain olives.
  • 2–4 hours before serving: mash the avocado, drain the salsa, assemble the dip, cover, and refrigerate.
  • Right before serving: add extra cilantro, green onions, jalapeños, or a few fresh tomatoes to brighten the top.

If you need to assemble the whole dish the night before, drain the salsa very well, seed juicy tomatoes, spread each layer to the edges, and press plastic wrap close to the surface before refrigerating. Then, add delicate toppings like cilantro and extra green onions right before serving so the top still looks fresh.

Best hosting move: Keep the full dish chilled until guests arrive. If the gathering is long, set out part of the dip and refill from the refrigerator instead of letting the whole dish sit out for hours.

For leftovers and food-safety timing, see how to store leftover 7 layer dip.

How to Keep 7 Layer Dip from Getting Watery

If a 7 layer dip looks perfect when you assemble it and then turns soupy around the edges, salsa is usually the first suspect. The fix is not more cheese or thicker sour cream. Instead, drain the salsa or pico before it ever touches the creamy layers.

If you remember only one thing before assembling the dip, make it this: drain the salsa first.

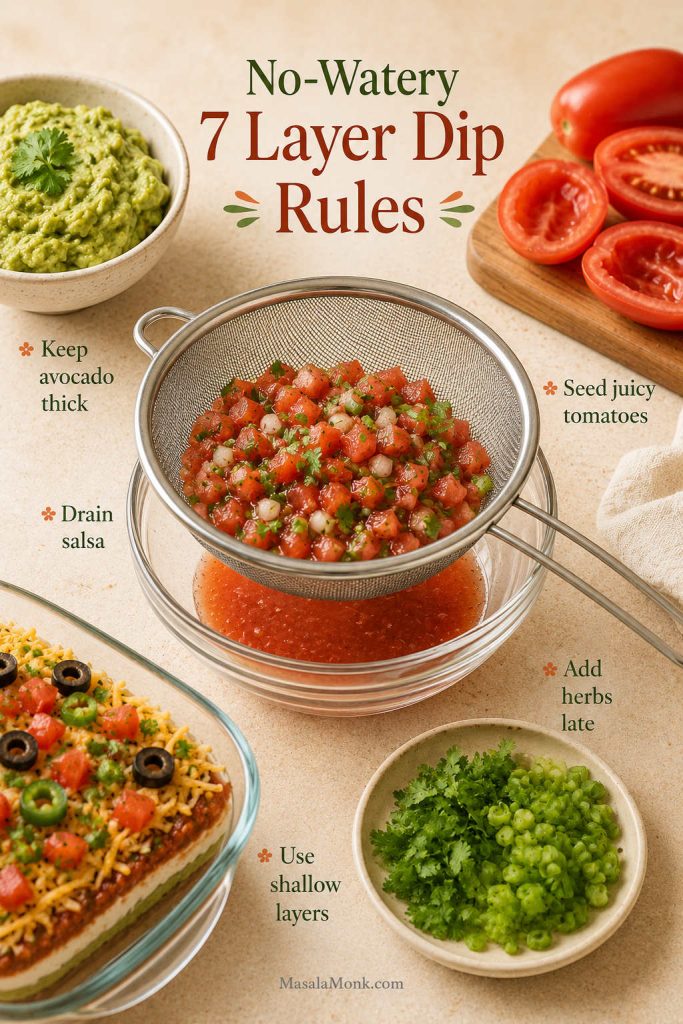
No-Watery-Dip Rules

Spoon salsa or pico into a fine-mesh strainer and let the loose liquid run off. If your salsa is especially juicy, use less of it, choose a thicker chunky salsa, or add only enough to create a thin flavorful layer. The salsa should brighten the dip, not turn it into a tomato-heavy puddle.

No-watery-dip rules: Drain salsa or pico, use Roma tomatoes or seed juicy tomatoes, keep the avocado layer thick, add delicate toppings late, and avoid making the layers so deep that chips have to dig through them.
No-watery 7 layer dip rules board with salsa draining in a strainer, thick guacamole, seeded tomatoes, fresh herbs, and shallow dip layers.
Watery dip is usually preventable: drain salsa, seed juicy tomatoes, keep avocado thick, add herbs late, and avoid overly deep layers.

Common Watery Dip Problems and Fixes

Problem What causes it Best fix
Liquid pools around the edges Salsa or pico was added straight from the jar or bowl Drain it in a fine-mesh strainer before layering
Tomatoes make the top soggy Very juicy tomatoes or unseeded tomatoes Use Roma tomatoes, seed them, or blot them lightly
The layers loosen after chilling Too many fresh watery toppings were added too early Add herbs, green onions, and extra tomatoes closer to serving
The avocado layer softens too much The avocados were overmixed or too much liquid was added Use just enough lime for flavor and keep the avocado layer thick
Lettuce turns limp Lettuce was layered too far ahead Use lettuce only for same-day serving, or save it for taco salad

Do Not Ignore the Bean Layer

The bean layer matters too. If the beans are too stiff, guests press harder with chips, which breaks the layers and makes the dish messy. If the beans are too loose, the base loses structure. Aim for thick, spreadable, and chip-friendly.

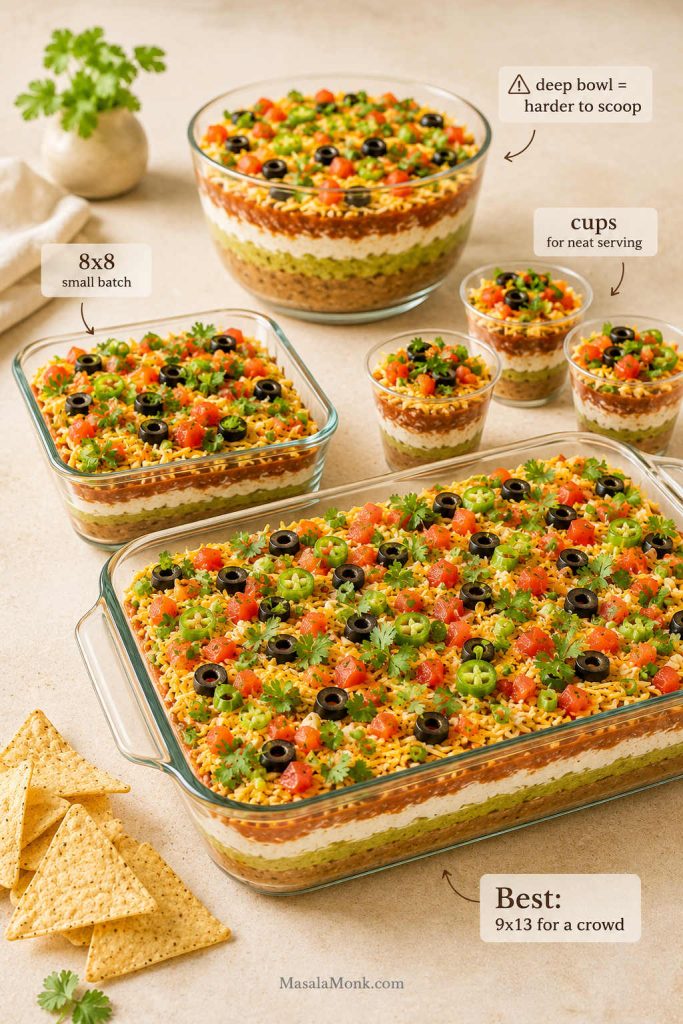
Best Dish Size for 7 Layer Dip

Comparison of 7 layer dip serving sizes with a 9x13 dish, 8x8 dish, individual cups, and a deep bowl labeled harder to scoop.
For a crowd, a shallow 9×13 dish gives the layers room and makes serving easier than a deep bowl.

A 9×13-inch / 23×33 cm glass or ceramic dish is the best choice for this 7 layer dip recipe because it gives you enough surface area for even layers, easy scooping, and a crowd-friendly amount of dip. A clear dish also shows off the layers from the side, which makes it look more impressive without any extra fuss.

The best serving dish is not just the prettiest one; it is the one that lets a chip reach more than one layer at a time. Although a deep bowl may show off the layers, a shallower dish is usually easier to eat from.

Dish or serving style Best for Watch out for
9×13-inch dish Parties, potlucks, game day, large family gatherings Use enough toppings so the surface does not look sparse
8×8-inch dish Small batch, family snack, casual dinner side Halve the recipe so the layers do not get too thick
Shallow platter Pretty presentation and easy scooping Layers spread thinner and can look messier faster
Deep trifle bowl Dramatic visible layers Harder to dip cleanly; better with a serving spoon
Individual cups or jars Office parties, kids, tailgates, no double-dipping More prep work, but very neat to serve

How to Make a Smaller 8×8 7 Layer Dip

For an 8×8-inch dish, halve the recipe. Use 1 can of refried beans, 1 to 2 avocados, about ¾ cup sour cream, ¾ cup drained salsa, ¾ to 1 cup cheese, and a lighter handful of toppings. Keep the same layer order; only reduce the quantities.

How to Make 7 Layer Dip Cups

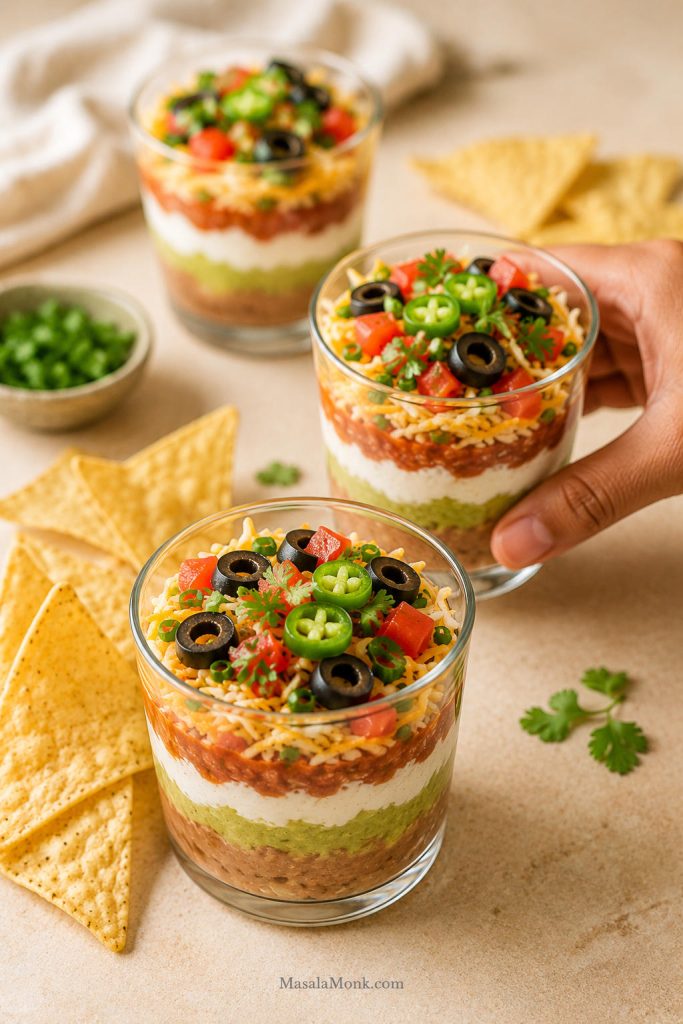
For individual cups, use small clear cups or jars and add a spoonful of each layer in the same order: beans, guacamole, sour cream, drained salsa, cheese, tomatoes, and toppings. This works well when you want a cleaner appetizer table or when guests need an easy grab-and-go serving.

Individual 7 layer dip cups in clear glasses with visible beans, avocado, sour cream, salsa, cheese, tomatoes, olives, jalapeños, cilantro, and tortilla chips.
Individual 7 layer dip cups take more prep, but they make portions neat, visible, and easy for guests to grab.

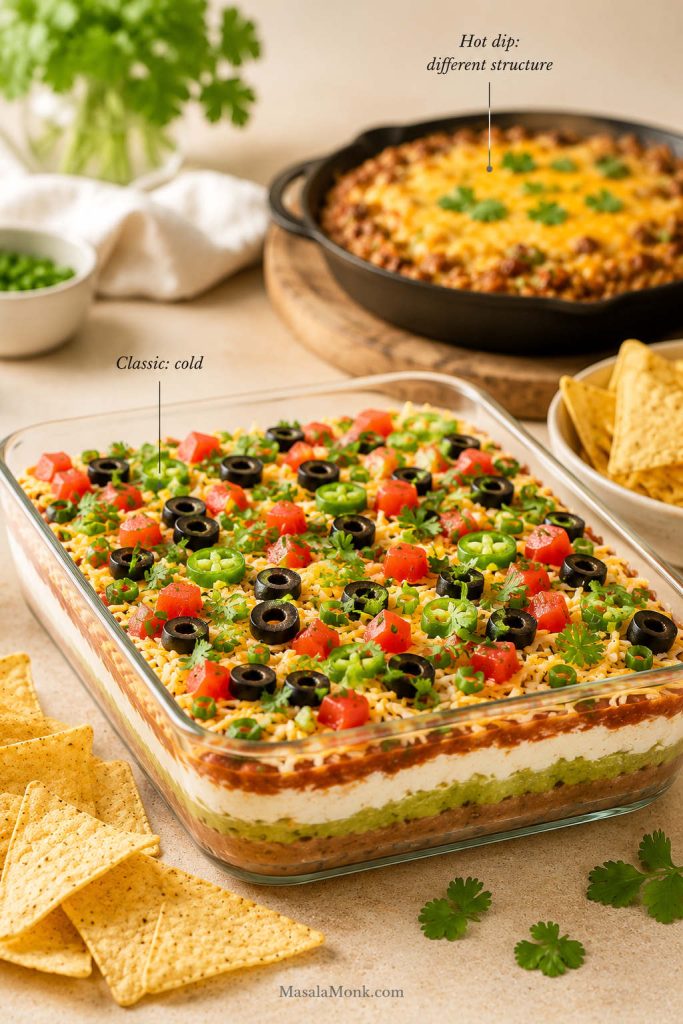
Is 7 Layer Dip Served Hot or Cold?

The classic version is served cold or lightly chilled. Beans, guacamole, sour cream, salsa, cheese, and toppings are layered into a no-bake dip and served with tortilla chips. That cold, creamy, crunchy contrast is part of why it works so well as a shared appetizer.

If you want a hot dip, use a baked taco dip structure instead. Warm versions usually need a different base, especially if you add ground beef, melty cheese, or more cream cheese. For this dish, keep it cold and focus on clean layers, managed moisture, and sturdy chips.

Cold 7 layer dip in a clear glass dish compared with a warm skillet taco dip in the background, with labels for classic cold and hot dip different structure.
Classic 7 layer dip is served cold or lightly chilled, while hot taco dip needs a different structure with warm fillings and melted cheese.

For a game-day spread, keep this dip cold and pair it with something hot and crisp, like air fryer chicken wings. The contrast works well: cool creamy layers, crunchy chips, and hot wings that bring the heat.

What to Serve with 7 Layer Dip

Best Chips and Dippers

Sturdy tortilla chips are the best choice because they can handle the bean layer without breaking. Scoop-style chips are especially useful because they pick up more of the layers at once. Thin restaurant-style chips taste great, but they can snap if the dip is very cold or the beans were not softened before spreading.

For a full 9×13 dish, plan on one 10–13 oz / 280–370 g bag of sturdy tortilla chips for every 6 to 8 people, and more if this is one of the main snacks on the table. Because every scoop tastes a little different — creamy, salty, tangy, fresh, and crunchy all at once — it usually disappears in uneven corners first, with everyone going back for the bite that has the most cheese, salsa, and avocado.

For a party where this is one of several appetizers, plan about ⅓ to ½ cup dip per person. Once it becomes the main snack on the table, expect people to eat more because every scoop tastes a little different.

Party Appetizer Pairings

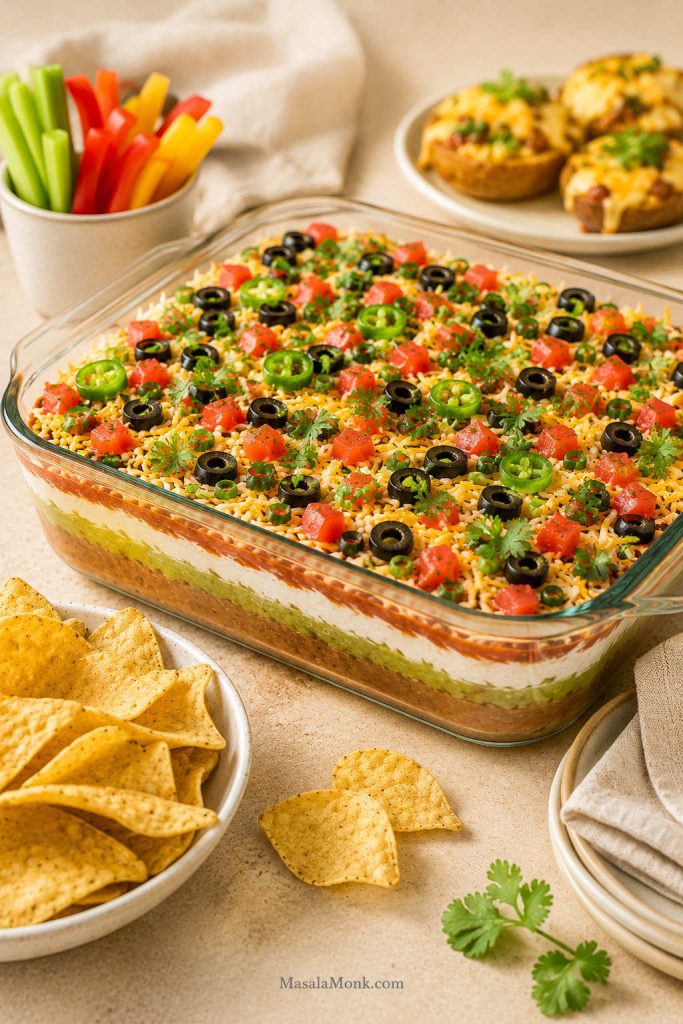
Party appetizer spread with 7 layer dip, tortilla chips, sliced vegetables, small plates, napkins, and a warm appetizer in the background.
Sturdy tortilla chips are the main dipper, while crisp vegetables and one warm appetizer can round out the party table without crowding the dip.

You can also serve 7 layer dip with mini tostadas, pita chips, crunchy lettuce cups, bell pepper strips, cucumber rounds, celery sticks, or carrot sticks. For a bigger appetizer spread, it fits naturally next to creamy favorites like buffalo chicken dip and spinach dip.

For something warm and crisp beside the cold dip, a tray of potato appetizers works well with the same chips-and-dips mood: salty, crunchy, easy to share, and friendly for a mixed crowd. Deciding between a cold layered dip and a warm baked version? See hot vs cold 7 layer dip.

Chip tip: If the dip is very cold from the refrigerator, let it sit for 10 minutes before serving. The layers will still be chilled, but the beans will be easier to scoop.

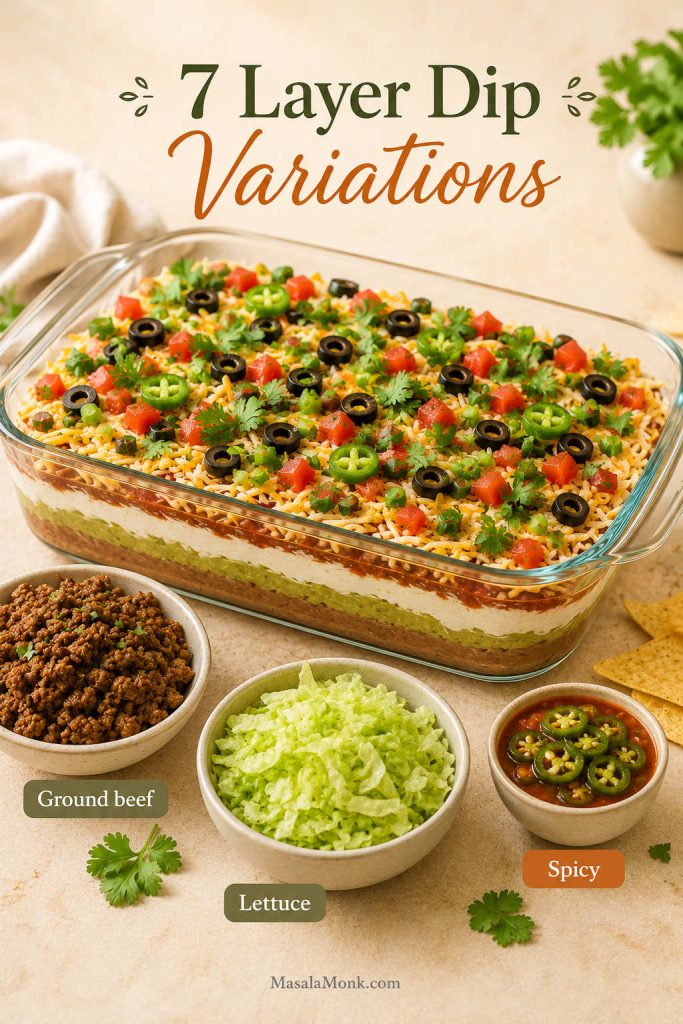
7 Layer Dip Variations

This is where 7 layer dip gets personal. Some people want olives, some want no olives, some want lettuce, some want ground beef, and some want the classic cold layers exactly as they are. Use the structure here as the base, then adjust the toppings without losing the clean scoop.

7 layer dip variation scene with a main dip and bowls of ground beef, shredded lettuce, and spicy jalapeño salsa.
Once the base structure is solid, you can add ground beef, lettuce, or jalapeño heat without losing the layered scoop.

7 Layer Dip with Ground Beef

For a heartier taco-night version, add cooked, well-drained, cooled taco-seasoned ground beef above the bean layer. Do not add hot beef to a cold dip because it can loosen the sour cream and avocado. Keeping the beef cooled and well-drained gives you taco flavor without making the layers greasy or soupy.

7 Layer Dip with Cream Cheese

This is the richer party version: beat 4 oz / 113 g softened cream cheese into the sour cream before adding taco seasoning. It makes the creamy layer thicker and more stable, but keep the amount modest so the dip still tastes fresh rather than heavy.

7 Layer Dip with Lettuce

Lettuce only belongs in this dip when it is heading to the table soon. It adds taco-salad crunch, but it wilts quickly once it sits against salsa and sour cream. Add it near the top and serve the dish the same day.

Spicy 7 Layer Dip

To add heat without making the dip watery, use hot salsa sparingly, mix diced jalapeño into the avocado, swap in pepper jack cheese, or finish with pickled jalapeños. For another creamy-spicy bite on the side, these baked jalapeño poppers fit the same party mood.

Vegetarian 7 Layer Dip

This recipe is vegetarian as written if your refried beans are vegetarian. Some canned refried beans contain lard, so check the label if that matters for your guests. Black refried beans or pinto refried beans both work well.

Lighter 7 Layer Dip

For a lighter version, use Greek yogurt in place of some or all of the sour cream, use a little less cheese, and add more fresh toppings. Keep the bean and avocado layers flavorful so the dip still tastes satisfying instead of like a reduced version of the original.

Troubleshooting 7 Layer Dip

If a layered dip goes wrong, it usually shows up fast: a watery edge, a broken chip, a smeared top, or one scoop that pulls half the dish with it. However, most of these are not disasters. They are small texture issues you can prevent before the dish reaches the table.

Troubleshooting board for 7 layer dip showing watery salsa, a broken chip, browning avocado, messy layers, and fix labels for draining salsa, loosening beans, covering avocado, and using shallow layers.
When 7 layer dip turns messy, the cause is usually excess liquid, stiff beans, exposed avocado, or layers built too deep.

Moisture and Texture Fixes

Problem Why it happened How to fix it
The dip is watery Salsa, pico, tomatoes, or lettuce released too much liquid Drain salsa and pico, seed juicy tomatoes, and add delicate toppings closer to serving
The beans are too stiff Refried beans were spread straight from the can or chilled too hard Mix beans with salsa, lime juice, or a spoonful of sour cream until scoopable
Chips keep breaking The dip is too dense, too cold, or served in a deep dish Loosen the beans slightly, use a shallower dish, and serve with sturdy chips
Every scoop destroys the layers Layers are too thick, the dish is too deep, or the dip is too cold Use a 9×13 dish, spread thinner even layers, and let the dip sit 10 minutes before serving
The guacamole is browning The avocado layer had too much air exposure Use lime juice, cover the avocado with sour cream, and press plastic wrap close to the surface when chilling

Flavor and Serving Fixes

Problem Why it happened How to fix it
The layers look messy Each layer was spread too aggressively from one spot Dollop each soft layer across the dish first, then spread gently with an offset spatula or spoon
The dip tastes flat The beans or avocado were not seasoned enough Season the bean layer and avocado layer separately before assembly
The top looks dull after chilling Fresh herbs and green onions sat too long in the fridge Add cilantro, green onions, and extra jalapeños just before serving
The dip feels too salty Taco seasoning, cheese, olives, and chips all added salt Use less taco seasoning next time and balance with more avocado, sour cream, or fresh tomato

How to Store Leftover 7 Layer Dip

Cover leftovers from this 7 layer dip recipe tightly and refrigerate them as soon as the party is over. The dip is best within 1 to 2 days. The flavor will still be good the next day, but the layers may soften, the salsa may bleed into the creamy layers, and the avocado may darken slightly.

Do not freeze it. Sour cream, avocado, salsa, and fresh toppings do not thaw cleanly, so the texture will turn watery and grainy. Instead, if the leftovers look messy but still smell fresh and have been stored safely, scoop them into tacos, burrito bowls, quesadillas, or nachos rather than trying to serve them as a neat layered dip again.

Because this dip contains dairy and avocado, keep it chilled until serving and do not let it sit out for hours. The FDA recommends refrigerating perishable foods within 2 hours, or within 1 hour when the temperature is above 90°F / 32°C. A refrigerator should be kept at 40°F / 4°C or below. You can read the FDA’s safe food handling guidance here: Safe Food Handling.

Storage tip: For a long game day or gathering, serve a smaller portion first and keep the rest covered in the refrigerator for refills.

FAQs About 7 Layer Dip

What are the seven layers in 7 layer dip?

A classic version usually has refried beans, guacamole, sour cream, salsa, cheese, tomatoes, and toppings such as olives, green onions, jalapeños, or cilantro. The toppings can vary, but the best versions balance creamy, fresh, salty, and crunchy layers.

Which layer goes first?

Start with refried beans because they are the heaviest layer and create the base. Loosen and season them first, then spread them all the way to the corners so every scoop has structure.

What is the best layer order?

For most gatherings, use beans, guacamole, taco-seasoned sour cream, drained salsa or pico, cheese, tomatoes, and toppings. That order keeps the base sturdy, protects the avocado, and controls extra liquid. For the full explanation, see the best layer order section.

How many people does a 9×13 dish serve?

A 9×13 dish serves about 12 to 16 people as an appetizer. If it is one of several snacks, it can stretch further. If it is the main dip on the table, expect larger servings.

How much 7 layer dip should I plan per person?

For a party with several appetizers, plan about ⅓ to ½ cup dip per person. If this is the main snack with chips, plan more because people tend to come back for extra scoops.

How far ahead should I make it?

For guests, make this 7 layer dip recipe 30 minutes to 6 hours before serving. You can prep most components one day ahead, but full overnight assembly is not ideal because salsa can release liquid and avocado can darken. For timing details, see the make-ahead section.

Why did my dip get watery?

Usually, the culprit is loose salsa, pico de gallo, juicy tomatoes, or lettuce. Drain salsa before layering, use Roma tomatoes, seed or blot juicy tomatoes, and add delicate toppings closer to serving. For the full fix, see how to keep 7 layer dip from getting watery.

What salsa is best for 7 layer dip?

Thick, chunky salsa or well-drained pico de gallo works best. Thin restaurant-style salsa can taste good, but it should be strained first so it does not leak into the sour cream layer.

Can I use store-bought guacamole?

Yes. Store-bought guacamole is fine for a faster version. Choose a thick guacamole, taste it first, and add lime juice, cilantro, or salt if it needs more brightness.

Is it supposed to be hot or cold?

Serve it cold or lightly chilled. Hot taco dip is a separate style and usually needs a different structure with cooked meat, melted cheese, or a baked base.

Should lettuce go in it?

Use lettuce only when serving the dip soon after assembly. It adds crunch, but it wilts quickly once it sits against salsa and sour cream.

Do I need taco seasoning?

Taco seasoning gives the sour cream layer more flavor, and a packet works well. Start with less than the full packet if your chips, cheese, salsa, and olives are already salty, then add more to taste.

What can I use instead of sour cream?

Plain Greek yogurt is the easiest substitute. It tastes tangier and slightly lighter, but it works well with taco seasoning. You can also use half Greek yogurt and half sour cream.

What chips are best?

Sturdy tortilla chips or scoop-style chips are best because they can cut through the bean layer without snapping. If the dip has been refrigerated for several hours, let it sit for about 10 minutes so the beans soften slightly before serving. For more serving ideas, see what to serve with 7 layer dip.

How long can it sit out?

Do not leave it out for more than 2 hours, or more than 1 hour in hot weather above 90°F / 32°C. For long gatherings, set out a smaller amount and keep the rest refrigerated.

What is the difference between 7 layer dip and taco dip?

7 layer dip is a type of taco dip with distinct visible layers. Taco dip can be simpler, creamier, baked, meatier, or mixed together rather than layered. In everyday cooking, the names often overlap.

Is it the same as Mexican layer dip?

They are usually very similar. Mexican layer dip is a broader name that may include fewer or more than seven layers, while 7 layer dip specifically suggests a seven-part layered appetizer with beans, creamy layers, salsa, cheese, and toppings.

Final Tips for the Best 7 Layer Dip

The best 7 layer dip recipe is not complicated. It just needs care in the places that matter: seasoned beans, drained salsa, protected avocado, a 9×13 dish for a crowd, sturdy chips for scooping, and enough fresh toppings to make the dish look bright and generous.

When those pieces are in place, the dip does exactly what a great party appetizer should do. It looks colorful when it hits the table, scoops cleanly through the first rush, tastes creamy and fresh in the same bite, and keeps people coming back long after they said they were done snacking.

Are you team olives, team no olives, team lettuce, team ground beef, or classic cold layers only? Tell me which version disappears fastest at your table.

Final serving of 7 layer dip in a clear 9x13 dish with one corner scooped, tortilla chips around the dish, and colorful toppings still visible.
When the layers are built well, the dip can still look colorful, inviting, and easy to scoop after the first rush of chips.

Back to top