Posted on Leave a comment

Refried Beans Recipe From a Can: Creamy, Restaurant-Style & Easy

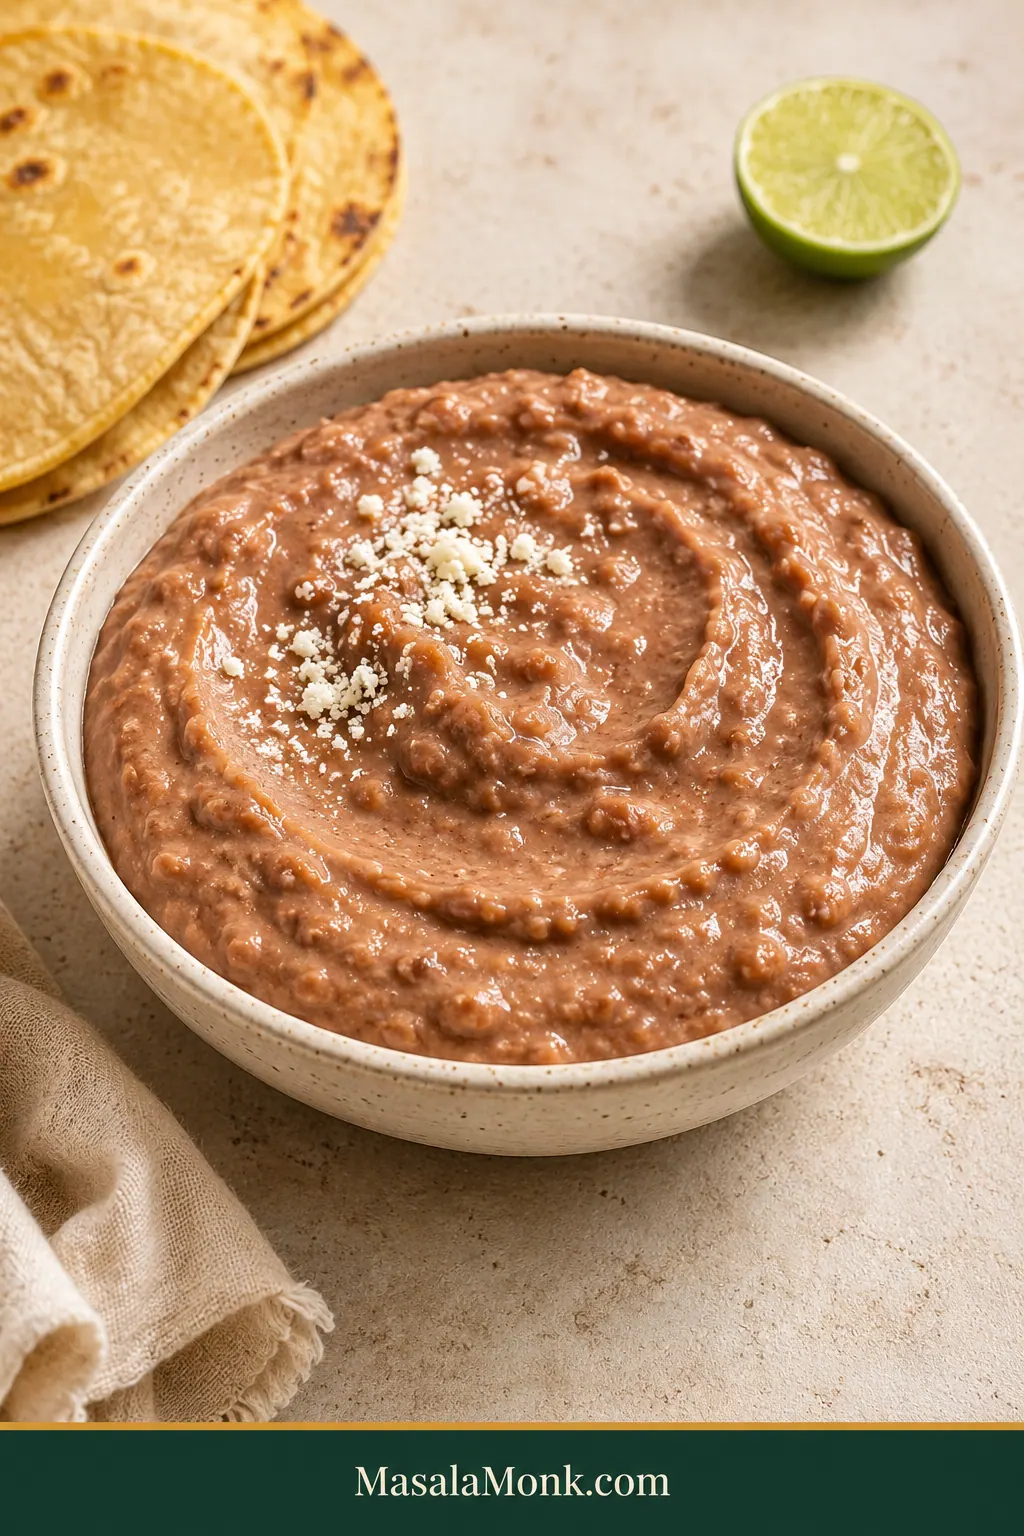
Creamy brown refried beans with a soft spoon swirl in a speckled ceramic bowl beside warm tortillas and lime.

A can of refried beans is convenient, but straight from the can it can be dense enough to keep the ridges of the tin, bland enough to disappear beside the rest of dinner, or stiff enough to feel more like paste than a creamy side.

This easy refried beans recipe from a can fixes that in about 10 minutes with one small pan. The goal isn’t to bury the beans under sour cream and seasoning. It’s to loosen them, wake up the flavor, and add the richness they need to become soft and spoonable.

Ten minutes later, those same dense beans can be steamy, lightly glossy, and ready to settle beside tacos instead of sitting on the plate in one stiff mound.
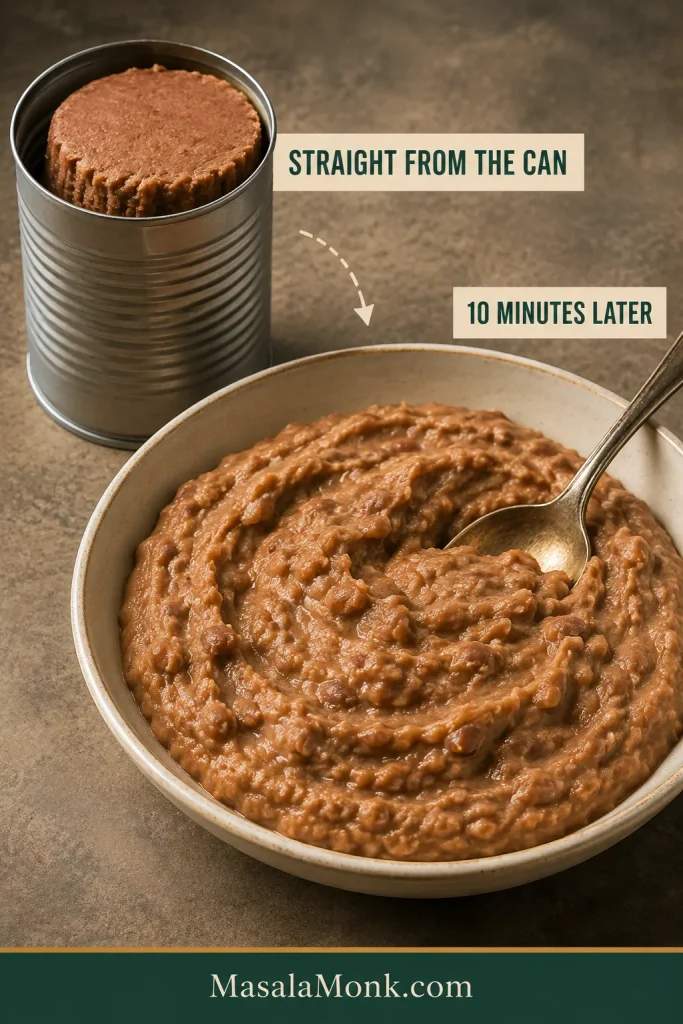
Before-and-after view of stiff canned refried beans holding their shape and creamy finished beans in a serving bowl.
Straight-from-the-can refried beans can look hopelessly dense; judge the consistency after they are hot, not immediately after opening.

The rule to remember: loosen slowly. Salt last.

The Short Version

To make canned refried beans better, warm them with fat and seasoning, loosen gradually with water or broth, then stir in sour cream and taste before adding salt. For one 15–16 oz can, start with 2 tablespoons (30 mL) liquid and stop cooking while the beans are still a touch softer than you want on the plate.

Don’t want to think about the options? Use butter, water, and the base seasonings exactly as written below. Everything else is there only if you want to change the flavor or texture.
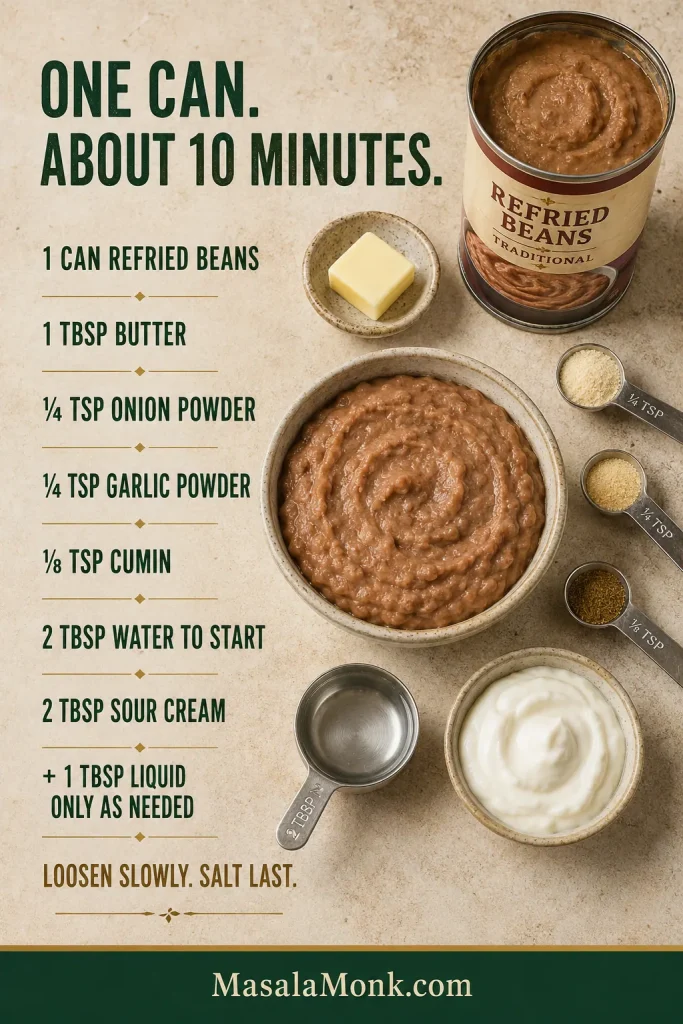
One-can refried beans formula showing butter, onion powder, garlic powder, cumin, water, sour cream, and their measured amounts.
One can, measured fat and seasoning, 2 tablespoons liquid to start, then sour cream—small additions keep the texture under control.

Yes, canned refried beans are already cooked. The can has done the slow part; you’re reheating the beans while improving their texture and flavor.

You usually don’t drain them. Hold back an obvious puddle of watery liquid, though, and add only what the texture needs.

Whole pinto beans sitting in liquid? That’s a different starting point; use the quick whole-pinto guide farther down the page.

Refried Beans Recipe From a Can

Soft, creamy, restaurant-style refried beans made from one ordinary can in about 10 minutes.

Prep2 minutes
Cook7–8 minutes
TotalAbout 10 minutes
ServesAbout 4 as a side

Equipment

  • Small saucepan or 8–10 inch skillet
  • Silicone spatula or wooden spoon
  • Measuring spoons
  • Whisk, optional for a smoother texture

Base Ingredients

  • 1 can prepared refried pinto beans, 15–16 oz (425–454 g)
  • 1 tablespoon (15 mL) butter — or lard, bacon fat, or neutral oil
  • ¼ teaspoon each onion powder and garlic powder
  • ⅛ teaspoon ground cumin, or a generous pinch
  • 2 tablespoons (30 mL) water — or unsalted chicken/vegetable broth, plus more as needed
  • 2 tablespoons (about 30 g) sour cream

Optional Finish

  • ½–1 teaspoon hot sauce
  • Fine salt, if needed after tasting
  • ½ teaspoon lime juice or pickled-jalapeño brine, if the beans taste flat
  • Monterey Jack, Oaxaca, Cotija, or queso fresco, to taste

Instructions

  1. Warm the fat and seasonings. Heat your chosen fat over medium heat. Reduce to medium-low, add the onion powder, garlic powder, and cumin, and stir for 10–15 seconds, just until fragrant. Don’t let the spices darken.
  2. Add the beans and first liquid. Scrape in the refried beans and stir for about 1 minute. Add 2 tablespoons (30 mL) water or unsalted broth and cook for another 2–3 minutes, scraping the bottom and corners. A stiff canned mass may look a little hopeless at first; it should soon soften and fold over itself more easily.
  3. Adjust the consistency. Still stiff? Add another 1 tablespoon (15 mL) liquid, stir well, and give the pan a moment before adding more. A particularly dense can may need another tablespoon after that.
  4. Make them creamy. Stir in the sour cream and cook gently for 1–2 minutes. The surface should look soft and lightly glossy, without a dry crust or pools of oil.
  5. Check the texture. Drag the spatula through the middle. For a creamy side, the trail should remain visible briefly while the edges slowly relax inward. Leave the beans thicker for burritos and tostadas, or loosen them further for a softer Tex-Mex-style plate.
  6. Taste and serve. Add hot sauce if you want it, then taste before salting. Beans that are salty enough but taste heavy or flat may benefit from the optional lime juice or jalapeño brine. Remove from the heat while they’re slightly softer than your final target, then spoon into a serving bowl while hot and creamy.

Recipe Notes

  • For a smoother texture, a whisk is usually enough. Prepared refried beans are already mashed, and whisking can make the texture more uniform without turning them into purée.
  • Vegetarian? Check the can because some traditional refried beans contain lard. Choose a lard-free can; butter, sour cream, and cheese can otherwise remain as written.
  • Vegan? Start with a lard-free can, use neutral oil and vegetable broth, omit or replace the sour cream, and choose dairy-free toppings instead of cheese.
  • For cheese: melt Monterey Jack or Oaxaca over the hot beans, or scatter Cotija or queso fresco over the top.

If you’re cooking right now, the recipe above is enough. It makes an easy side for juicy ground beef tacos. The rest of this guide is for a can that behaves strangely, the butter-versus-lard question, or that moment when you’re staring at the pan wondering whether the texture is actually right.

Dense canned refried beans in a dark skillet being pressed and folded with a spatula before they loosen.
Work the first liquid through before adding more; dense canned beans often loosen once the pan is hot.
Explore the Refried Beans Guide

How to Make Canned Refried Beans Taste Better

Start by identifying the problem instead of adding everything at once.

  • Too lean? Fat gives the beans more richness.
  • Too stiff? They need moisture.
  • Not creamy enough? A modest amount of sour cream can soften the texture.
  • Flat-tasting? Seasoning, salt, heat, or acidity may be missing.

Refried bean diagnostic guide connecting lean beans with fat, stiff beans with moisture, low creaminess with sour cream, and flat flavor with seasoning or acid.
Fix the right problem: richness, moisture, creaminess, and flavor each need a different adjustment.

Get Creamy Without Making Them Heavy

That keeps you from fixing the wrong thing. Stiff beans don’t automatically need more butter, and adding broth won’t make already-loose beans more flavorful. Once the consistency is right, too much sour cream can start hiding the pinto-bean flavor.
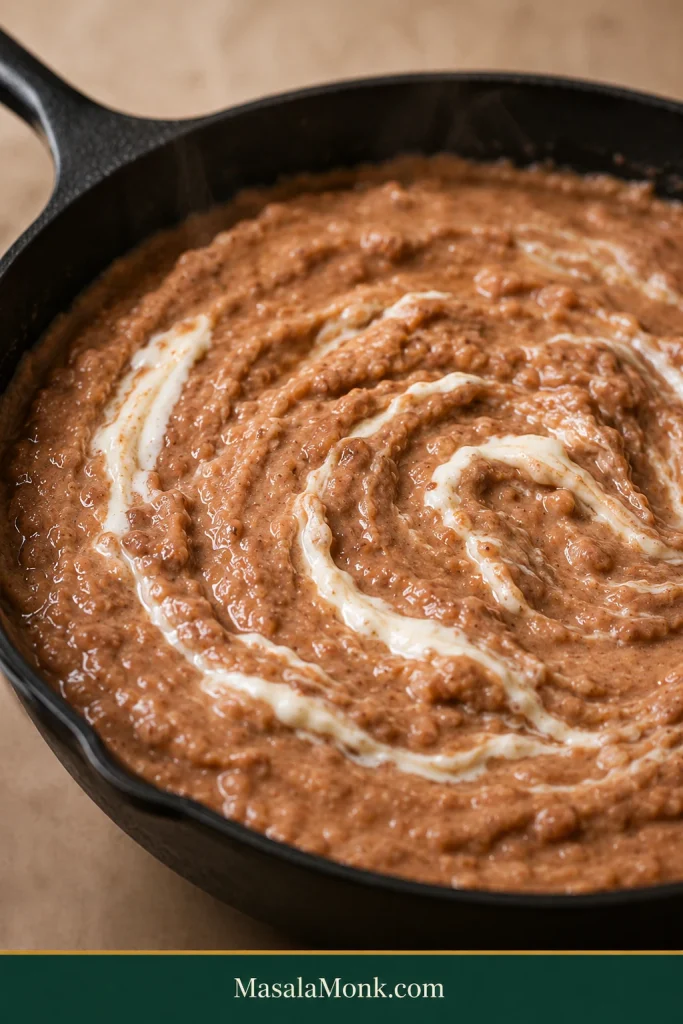
Small ribbons of white sour cream being folded into warm mashed refried beans in a black skillet.
Add sour cream after the beans are nearly loose enough; it adds creaminess and tang, not the main thinning moisture.

Creamy and smooth aren’t the same thing.

Creaminess comes from the mashed beans having enough moisture and a little richness. Smoothness is about how fine and uniform the bean texture is. Properly loosened beans can feel creamy while retaining some natural texture.
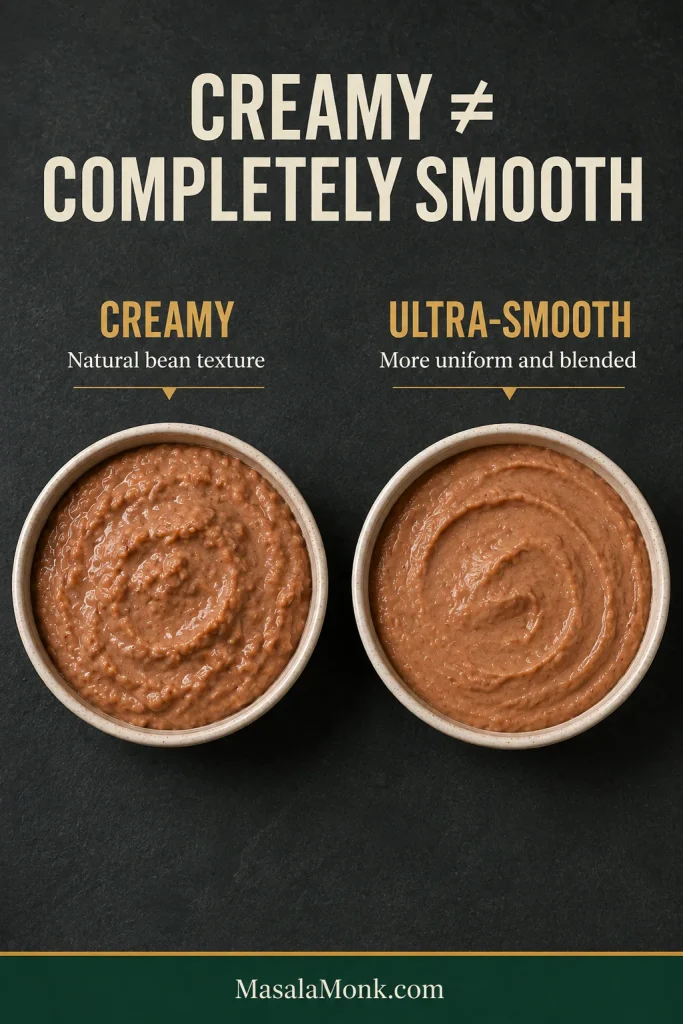
Two bowls compare creamy refried beans with visible natural texture and a finer, more uniformly blended version.
Creamy can still have natural bean texture; use a whisk for finer beans and blend only for an ultra-smooth finish.

How to Season One Can

For one 15–16 oz can, start with ¼ teaspoon onion powder, ¼ teaspoon garlic powder, and ⅛ teaspoon cumin. The small amount of cumin is deliberate: it should sit in the background while the pinto beans remain the main flavor.

Powdered onion and garlic also keep the texture even. Fresh onion can be delicious, but it leaves more noticeable texture. Hot sauce is optional; keeping the pan mild and serving roasted tomatillo salsa verde at the table gives everyone control over the heat.

For a little more savory depth, add a small amount of chicken or vegetable bouillon or a tiny pinch of MSG. Neither is necessary, and both can add quite a bit of salt, so go cautiously and taste before adjusting anything else.

Butter, Lard, Bacon Fat or Oil?

The best fat is mainly a flavor decision. Moisture still does most of the work of changing the consistency, so choose the fat for the kind of richness you want.

Fat What it brings Best for
Butter Mild, familiar richness Easy everyday default
Lard Richer savory character Savory depth without bacon smoke
Bacon fat Stronger pork flavor and smoke When a smoky note suits the meal
Neutral oil Body with little added flavor Letting the bean flavor lead

Do You Need Lard?

No. Lard can add savory richness, but butter or oil can still give you soft, creamy refried beans. The final consistency depends much more on moisture, gentle heat, and stopping at the right moment.

Clean rendered pork fat left from slow-cooker pork carnitas can work nicely here too. Leave dark or scorched drippings behind.

The can itself matters as well. Traditional, vegetarian, fat-free, and reduced-fat beans can start with very different levels of richness. A batch that already looks oily as it warms may need less added fat than a leaner one.

Fat changes flavor and richness, but it won’t loosen a thick batch. For that, you need moisture.

Water, Broth or Milk?

Water is the neutral default, unsalted broth adds savory flavor, and whole milk gives you a softer, more dairy-forward variation.

Liquid What it changes Use it when
Water Loosens without adding flavor or salt The beans mainly need a better consistency
Unsalted broth Adds moisture plus savory flavor The beans taste a little flat as well as thick
Whole milk Adds mild dairy richness and can soften a canned-tasting edge You deliberately want a softer, dairy-forward result
Three small vessels of clear water, golden unsalted broth, and white whole milk beside a bowl of refried beans.
Water loosens neutrally, broth adds savory depth, and whole milk adds dairy richness and can mellow a canned-tasting edge.

Jalapeño brine is different. Treat it as a final flavor adjustment, not the main thinning liquid. It brings acid, chile, and salt together, so about ½ teaspoon is a sensible place to start when the consistency is already right but the flavor feels heavy.

Whatever liquid you choose, begin cautiously.

How Much Liquid Should You Add?

Start with 2 tablespoons (30 mL) liquid for one 15–16 oz can, then add another 1 tablespoon (15 mL) only if the hot beans still feel stiff.

A particularly dense can may need another tablespoon. Stop as soon as the mixture begins moving the way you want it to.

Why start small?

You can loosen thick beans quickly. Too much liquid means waiting for that moisture to cook back out.
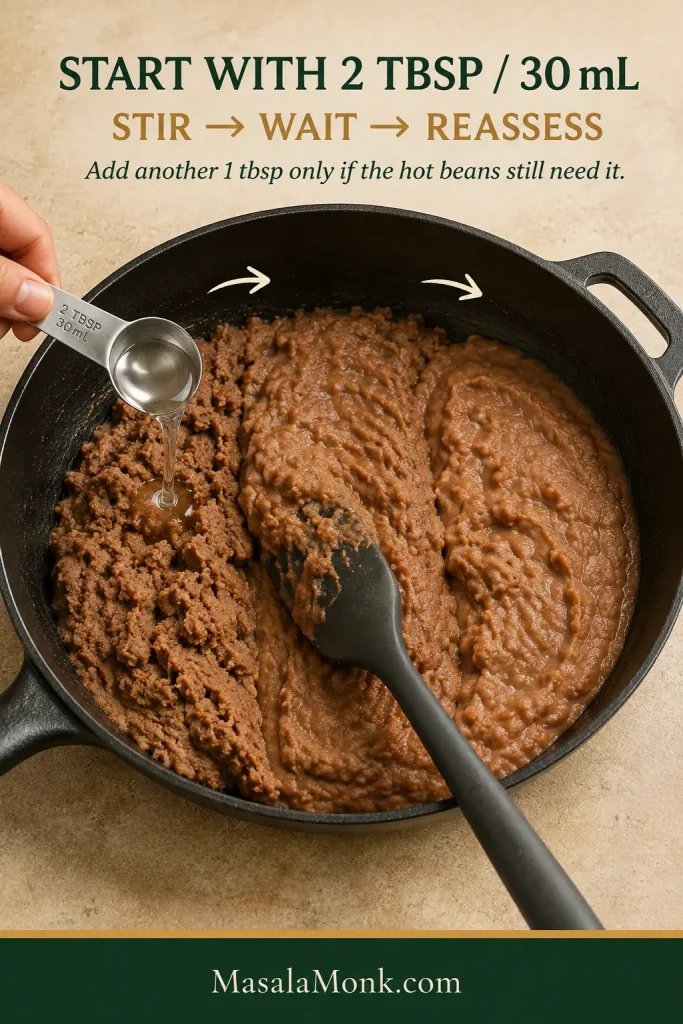
Measured liquid being added to refried beans with guidance to start with 2 tablespoons, stir, wait, and reassess.
Start with 2 tablespoons, stir, wait, then reassess—one extra spoonful can noticeably change a one-can batch.

The final number matters less than what happens when you drag a spatula through the pan.

Get the Texture Right: The Spatula Trail Test

Restaurant-style isn’t one exact thickness. Some Tex-Mex restaurants serve refried beans very smooth and fairly loose; others bring a thicker, more substantial scoop to the table.
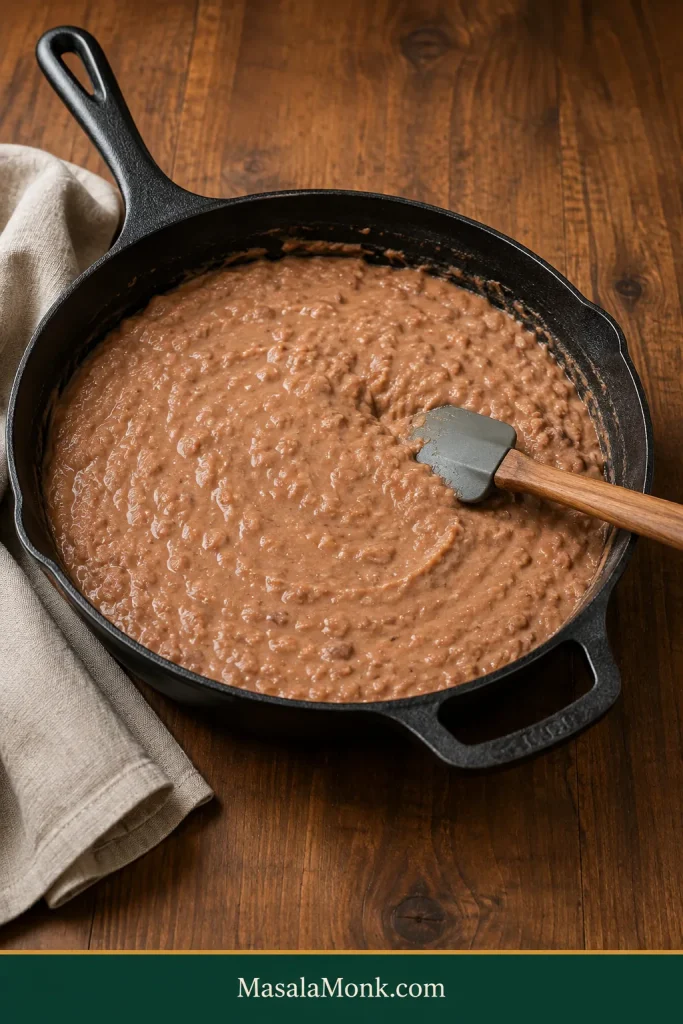
Finished creamy refried beans across a dark skillet with a shallow spatula track and no visible water or oil separation.

Drag your spatula through the middle of the pan and watch the trail.
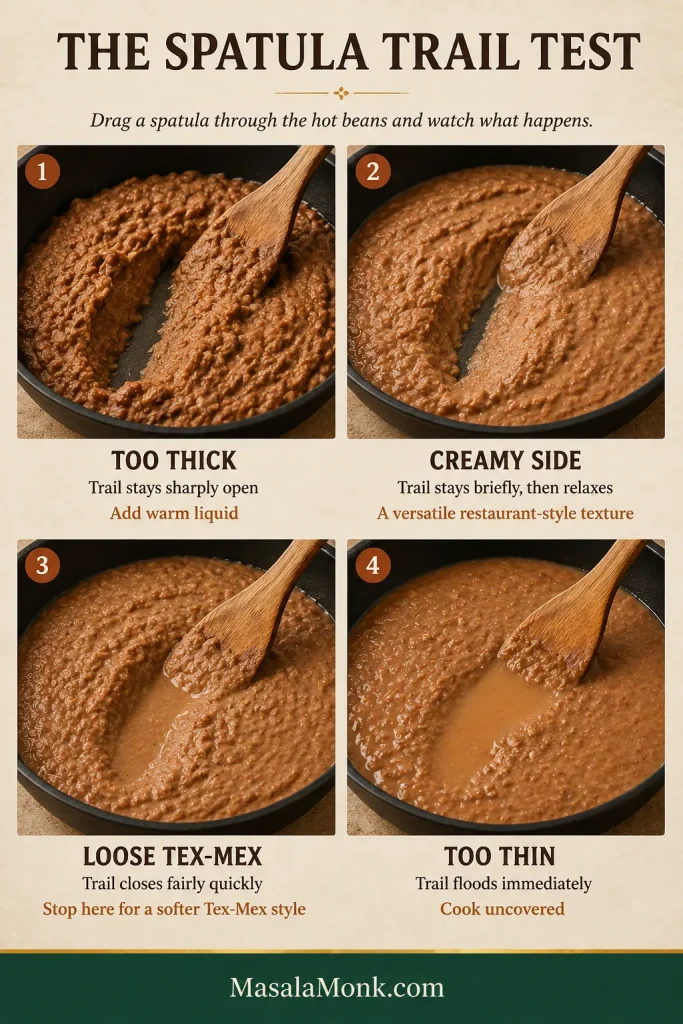
Four refried bean textures show a spatula trail staying open when too thick, relaxing when creamy, closing faster when loose, and flooding when too thin.
Test the beans while hot: the trail’s speed of closing tells you whether they are thick, creamy, loose, or watery.
What you see Texture What to do
The trail stays sharply open and the beans sit in two stiff banks Too thick Add some warm liquid and stir again
The trail stays visible briefly, then the edges slowly relax inward Creamy side A versatile restaurant-style consistency
The trail closes fairly quickly and the beans settle into a low, soft pool without watery separation Loose Tex-Mex style Stop here if this is the restaurant texture you prefer
The trail floods shut immediately or a watery moat forms around the beans Too thin Cook uncovered over medium-low heat

How to Know When Refried Beans Are Done

At the table, the beans should look soft and lightly glossy, fall slowly from the spoon, and settle without standing in a rigid mound or spreading like soup. When the trail looks right, you’re done; don’t keep cooking just because the clock has another minute on it.
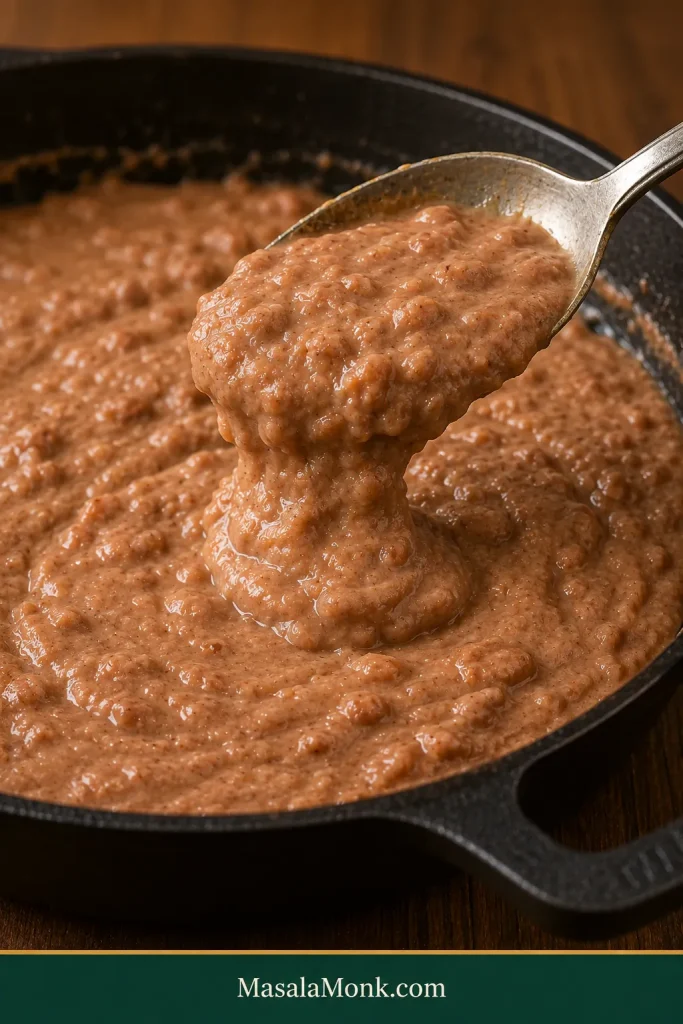
Spoon held close above a skillet as creamy refried beans fall back in a short, thick, soft fold.
Creamy refried beans should cling briefly, then fall back in a heavy, soft fold—not drip or stay rigid.

For an ultra-smooth Tex-Mex texture, adjust the moisture first and then give the beans a few short pulses with an immersion blender. Stop when obvious bean pieces disappear. Blend too long and the mixture can turn pasty and overprocessed.

Match the Texture to the Meal

  • As a side: soft enough to settle gently on the plate.
  • For burritos, tacos, and tostadas: thicker so the beans stay where you spread them.
  • For nachos or dipping: looser so they remain easy to scoop as they cool.
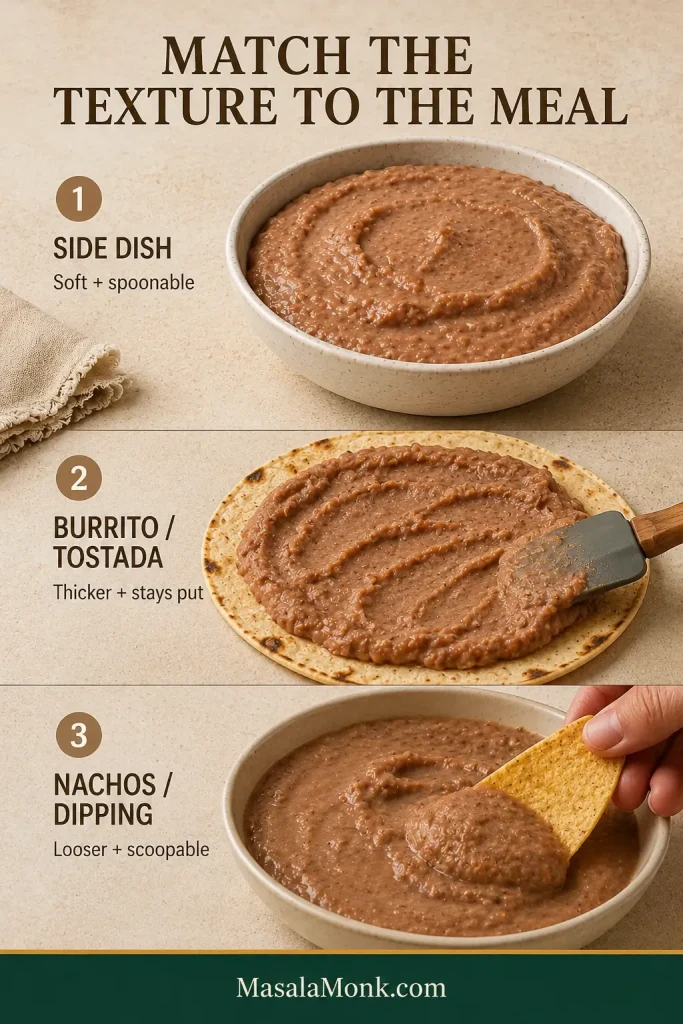
Three examples show soft refried beans as a side, thicker beans spread on a tortilla, and looser beans scooped with a tortilla chip.
Match texture to the job: softer for a side, thicker for filling, looser for dipping.

A fresh homemade corn tortilla wants beans with enough body to spread without running toward the edge. Beside saucy chicken enchiladas, a softer consistency usually makes more sense.

And if what you really want is a cold, scoopable bean layer with sour cream, guacamole, salsa, and cheese, our 7 layer dip recipe builds the beans for that job.

↑ Back to Recipe Short Version

Troubleshooting Canned Refried Beans

Match the fix to the problem. Most batches don’t need another ingredient so much as the right adjustment.

Problem Fast fix
Too thick Loosen gradually with warm water or unsalted broth
Too thin Cook uncovered over medium-low heat until the excess moisture evaporates
Stiff after sitting Stir in warm liquid until the creamy consistency returns
Bland Taste for seasoning, salt, heat, or brightness before deciding what to add
Tastes canned or slightly metallic A small splash of whole milk can mellow the edge; warm gently and taste again
Too salty Avoid any further salty ingredients; for a badly oversalted batch, mix in lower-sodium or unsalted beans if available
Too tangy Stop adding acid and mix in more plain refried beans if available
Greasy Spoon off pooled fat; if the beans are also stiff, loosen with water instead of adding more fat
Burnt Transfer the unburnt portion immediately without scraping the scorched layer
Splattering Lower the heat and stir carefully

Too Thick, Too Thin or Stiff After Sitting?

Thick, thin, and stiff-after-sitting beans are really three versions of the same consistency problem. Add moisture when the mixture won’t relax; let excess moisture evaporate when it floods; and expect the beans to tighten somewhat as they cool. A splash of warm water or broth usually brings a batch that sat too long straight back.
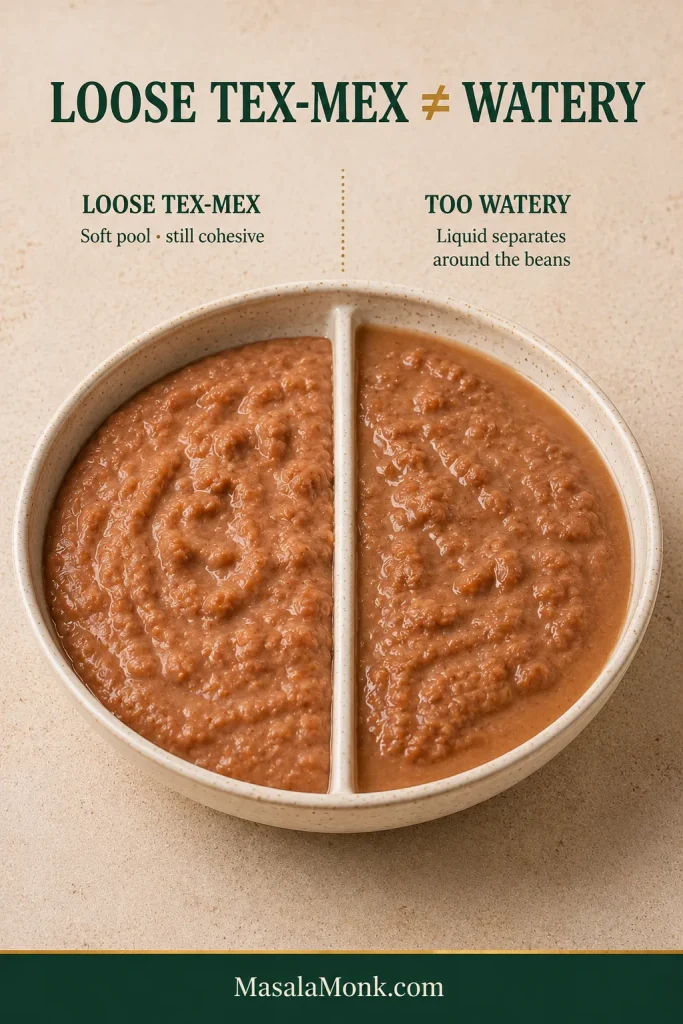
Comparison of cohesive loose Tex-Mex refried beans and overly thin beans with visible liquid separated around the edge.
Loose beans stay cohesive; visible water separating around the edges means they have crossed into too thin.

Bland? Figure Out What’s Missing

“Bland” doesn’t automatically mean “needs more salt.” Salty enough but still flat? A touch more onion or garlic seasoning may help. A heavy-tasting batch may need a few drops of lime juice or jalapeño brine instead. Keep cumin in the background so the final spoonful still tastes first and foremost like pinto beans.

Burnt or Bitter? Get Them Out of That Pan

Smell scorching? Stop scraping and transfer the unburnt beans into a clean saucepan, leaving the dark layer behind. Mild bitterness can sometimes be softened after the rescue, but deeply scorched flavor is difficult to disguise. Bacon fat should also be clean rendered fat, not blackened drippings carrying burnt pieces.

Clean refried beans are transferred into a fresh pan while a dark scorched layer remains untouched in the original pan.
Transfer clean beans before scraping the scorched bottom; once burnt residue mixes in, bitterness spreads fast.

↑ Back to Recipe Short Version

Microwave Method

To microwave canned refried beans, heat them in short intervals, stirring between each, and add more liquid only when they remain thick. The stovetop gives you finer control, but if tacos are already hitting the table, the microwave route is perfectly respectable.

  1. Start the flavor. Put 1 tablespoon butter—or your chosen alternative—in a large microwave-safe bowl. Melt briefly if necessary, then stir in the onion powder, garlic powder, and cumin.
  2. Add the beans. Mix in the canned refried beans and 2 tablespoons (30 mL) water or broth. Cover loosely so steam can escape while splatters stay contained.
  3. Heat and stir. Microwave in short rounds, stirring thoroughly between each, until hot. Use another splash of liquid only when the texture still feels stiff.
  4. Add the sour cream and serve. Stir in the sour cream, then give the beans one final short heating round if needed to return them to serving temperature. Taste and adjust with hot sauce, acid, or salt.
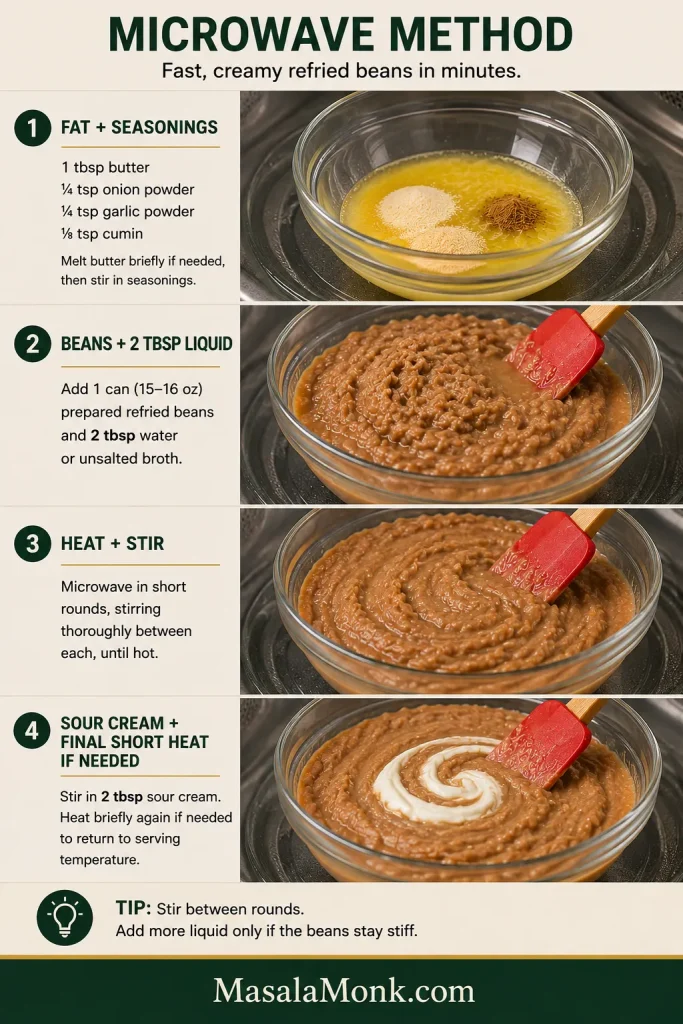
Four-step microwave refried beans guide showing seasonings and butter, prepared beans with liquid, stirring after heating, and sour cream added near the end.
Short microwave rounds plus thorough stirring give you repeated chances to adjust thickness without overcooking the beans.

Use a bowl larger than seems necessary. Thick bean mixtures have a talent for popping just when you think they won’t.

What If You Have Whole Canned Pinto Beans?

You can absolutely turn whole canned pintos into quick refried beans, but the route is different. Reserve some of the can liquid. Warm your fat and seasonings, add the whole beans with enough liquid to keep them moist, then mash and adjust until creamy.

Prepared refried beans have already been cooked and mashed. That’s why the liquid and sour-cream amounts in the recipe above shouldn’t simply be transferred to a can of whole pintos.
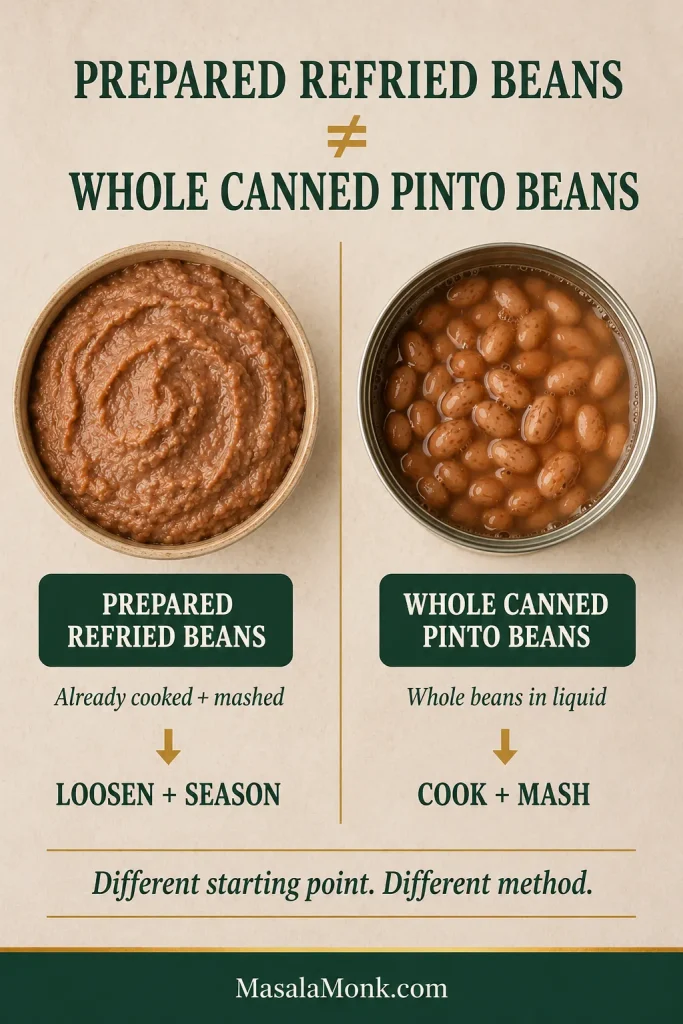
Prepared mashed refried beans are compared with intact canned pinto beans sitting in liquid, with their different cooking methods labeled.
Prepared refried beans need loosening; whole canned pintos still need seasoning, heating, mashing, and texture adjustment.

Scaling for a Crowd

The recipe scales well for a larger taco night — perhaps alongside sheet-pan chicken fajitas — but consistency doesn’t scale perfectly by arithmetic.

For 2–3 cans, scale the fat and sour cream with the beans. Start a little conservatively with the dry seasonings, taste once everything is hot, and hold back some of the liquid until you can see how the batch moves. Let the Spatula Trail Test decide the final consistency.

Keeping Them Creamy for a Taco Bar

Transfer the beans to a covered slow cooker or other suitable hot-holding vessel and use low holding heat. Stir periodically, especially when the edges start thickening, and add warm water or unsalted broth as needed.

If the beans will stay out for a while, keep them at 140°F (60°C) or above; that’s the USDA hot-holding recommendation.
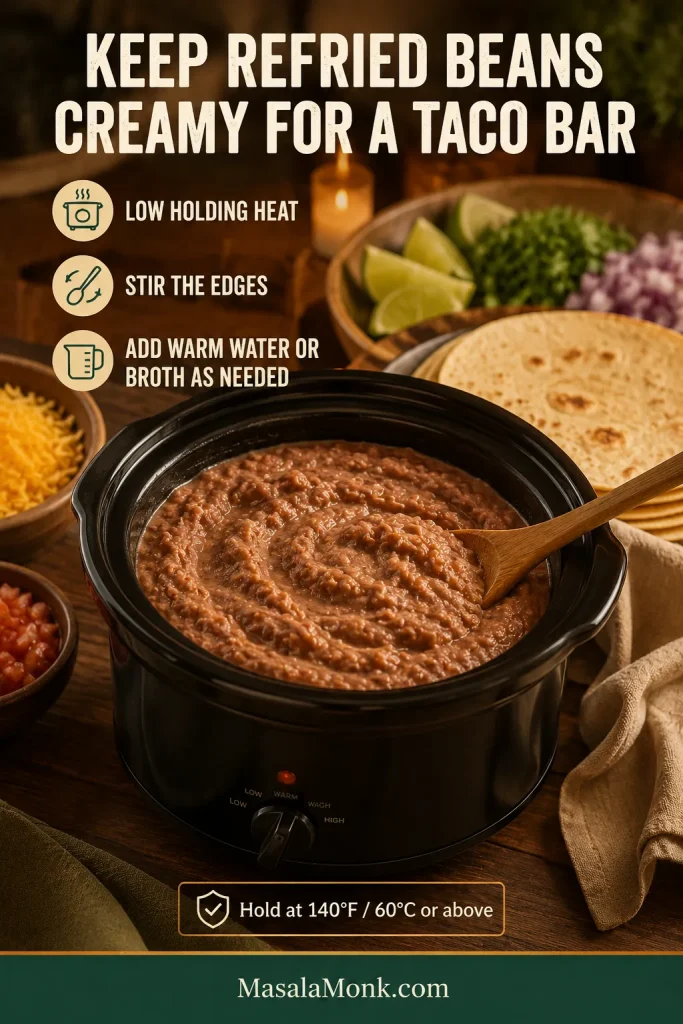
Creamy refried beans in a slow cooker at a taco bar with tortillas and toppings arranged nearby.
Keep warm liquid beside the slow cooker so thickening taco-bar beans can be loosened in small, controlled additions.

Storage, Freezing and Reheating

Refrigerate leftovers within 2 hours, use them within 3–4 days, and reheat to 165°F (74°C). The USDA has the full leftovers and reheating guidance.

Cold refried beans can look dramatically thicker than they did when freshly cooked. That’s expected; reheating is usually as much about restoring lost moisture as making the beans hot again.

Firm refried beans after sitting are reheated with added liquid and shown again after returning to a softer creamy consistency.
Reheat first, then judge thickness; cold refried beans often look much denser than they will once hot.

How to Reheat Refried Beans

Stovetop: warm over low to medium-low heat, stirring in water or unsalted broth until the soft, spoonable consistency returns.

Microwave: cover loosely and heat in short intervals, stirring between rounds. A batch that’s hot but still dense needs moisture, not another spoonful of fat.

Can You Freeze Them?

Yes. Cool the beans, portion them into airtight freezer-safe containers, and freeze. For best quality, aim to use frozen leftovers within about 3–4 months. Thaw in the refrigerator, then reheat gently with enough water or broth to restore the texture.

Once loosened again, leftovers are handy for freezer-friendly breakfast burritos. Just make sure the filling isn’t watery before it goes into the tortilla.

What to Serve With Refried Beans

These beans are happiest anywhere you want something warm and mellow beside brighter, spicier, or crunchier food.

Keep them simple beside shrimp tacos with lime slaw, where the creamy beans give the fresh toppings somewhere soft to land. Mango salsa offers a fruitier contrast with lime, chile, and freshness.
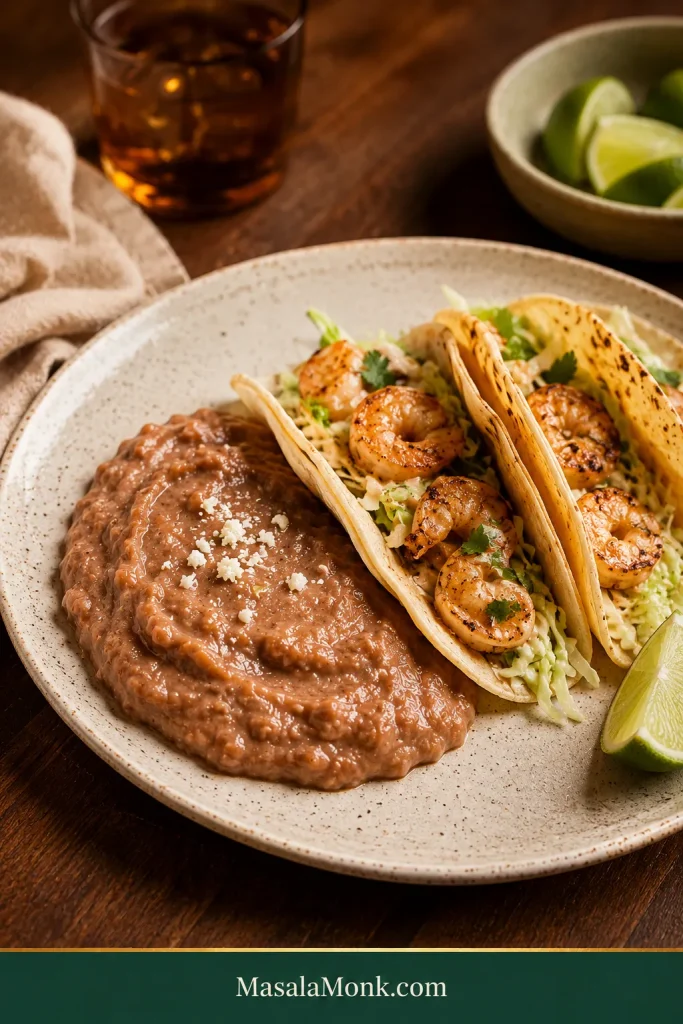
Creamy refried beans served beside shrimp tacos with cabbage slaw and lime wedges on a neutral ceramic plate.
Creamy refried beans make a mellow, comforting side for bright shrimp tacos and lime slaw.

They’re equally at home beside Mexican-style rice and eggs, or tucked into burritos, tostadas, quesadillas, nachos, and taco bowls.

Once You Know What the Pan Needs, This Gets Easy

Once you know what to look for, canned refried beans stop feeling like a compromise. They become the kind of ten-minute side you can fix while the tortillas warm, spoon onto the plate, and actually look forward to eating.

Next time, you probably won’t need this whole guide. Loosen slowly. Salt last. Trust what the pan is showing you.
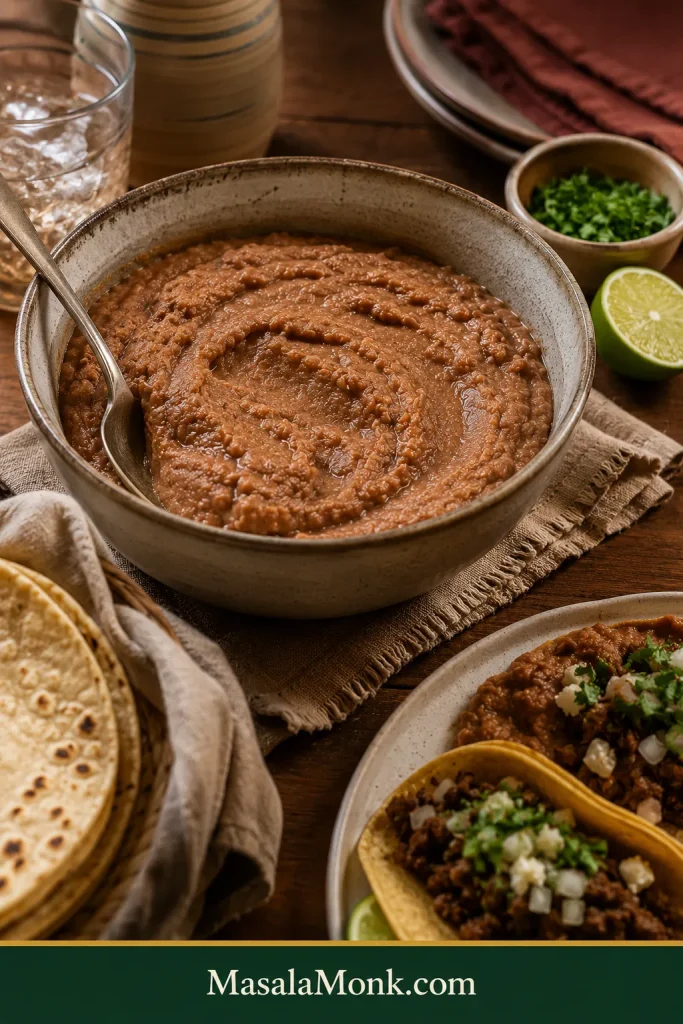
Large communal bowl of creamy refried beans with a serving spoon, tortillas, lime, and taco dinner dishes on a warm wooden table.
Warm, creamy refried beans from one ordinary can—ready for the rest of dinner.

If you make them, tell us which brand you started with, which fat you used, and whether your can needed more than the first 2 tablespoons of liquid. That real-world variation can help the next person opening the same can.
↑ Back to Recipe Short Version

Posted on Leave a comment

Bean Stew Recipe with Canned or Cooked Beans: Thick, Hearty & Flexible

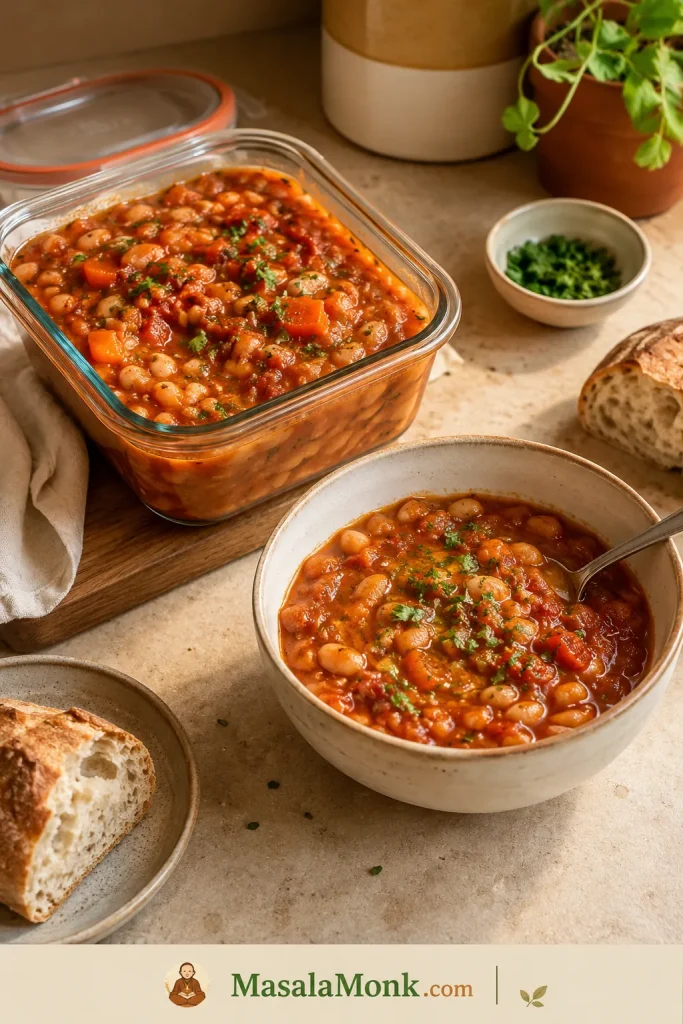
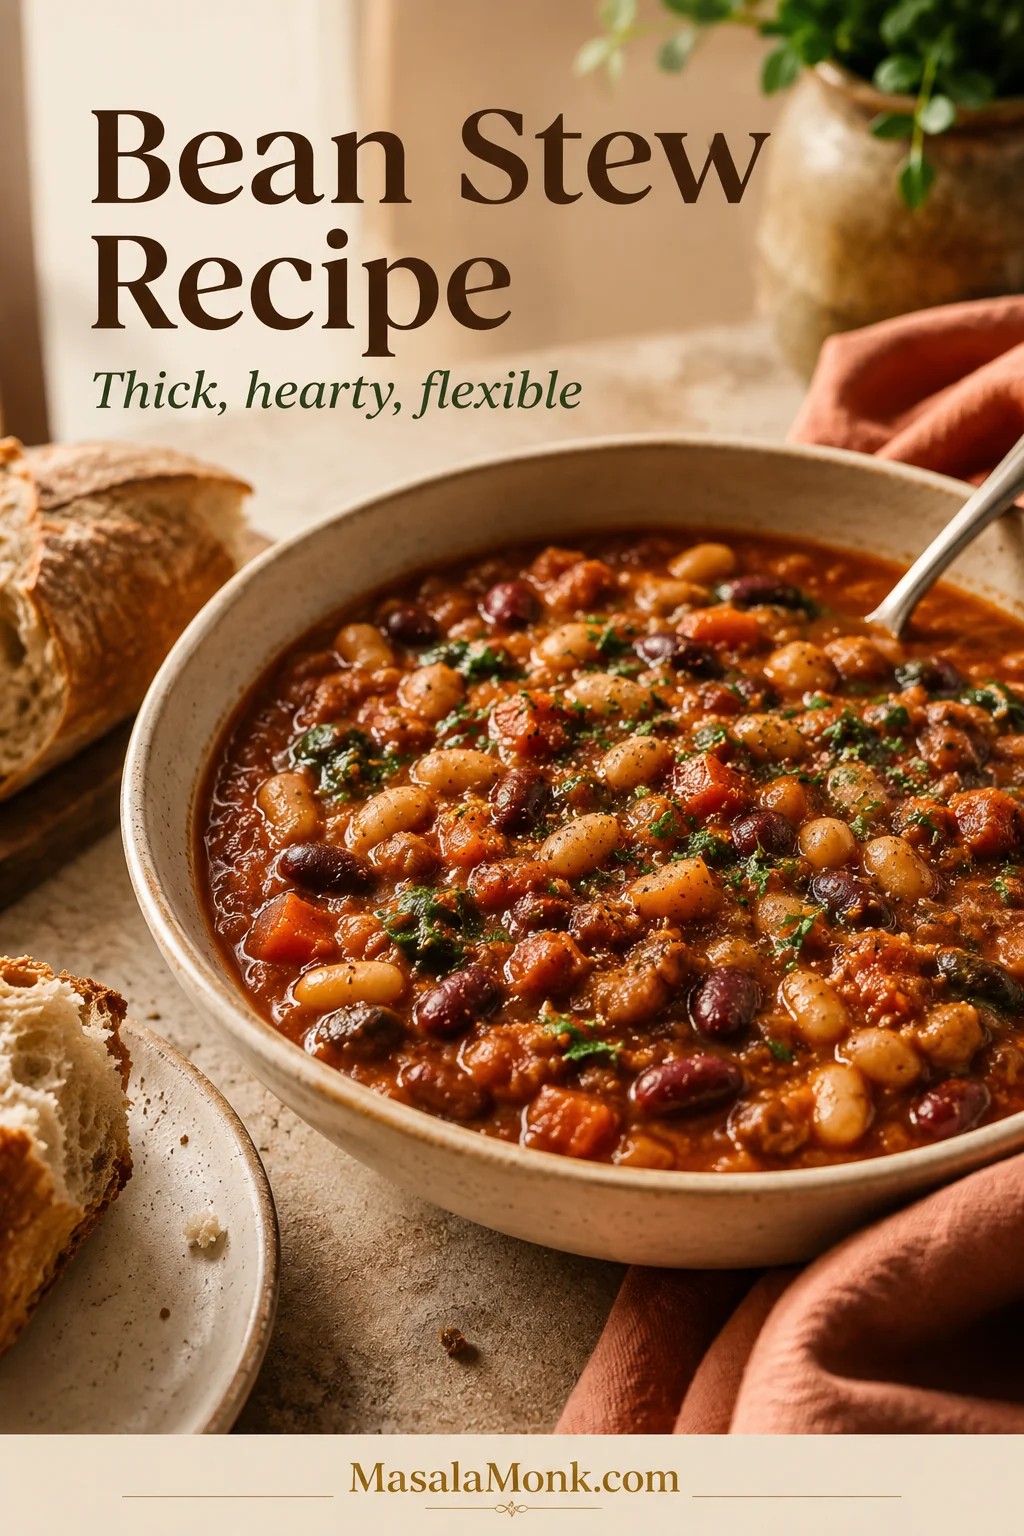
A bowl of thick tomato-based bean stew with mixed beans, carrots, greens, herbs, a spoon, and crusty bread beside it. The image includes the text “Bean Stew Recipe” and “Thick, hearty, flexible.”

This bean stew turns three cans of beans into a thick, hearty one-pot dinner in about 50 minutes. Onion, carrot, celery, garlic, tomato paste, tomatoes, broth, and a small mash of beans cook down into a glossy tomato-bean sauce that is scoopable instead of thin.

It is especially useful on the nights when the pantry is not empty, just awkward: a few cans of beans, one onion, the last carrot in the drawer, and enough broth to pull everything together. Because the beans carry most of the meal, rice, bread, potatoes, or polenta can stretch the pot into more servings without making it feel like less dinner.

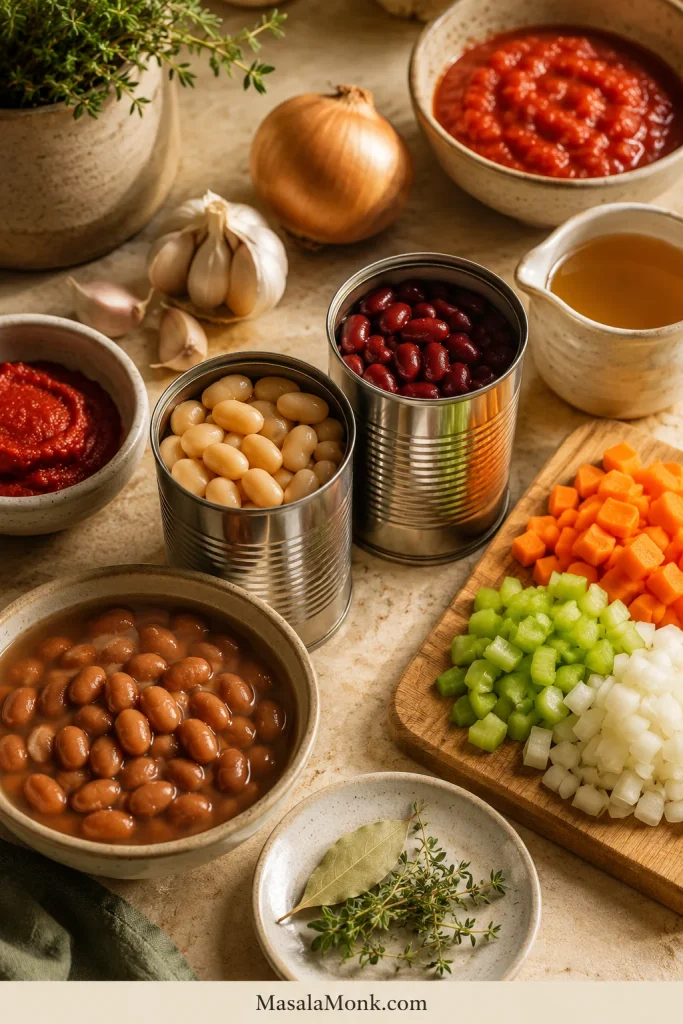
Ingredients for bean stew arranged on a kitchen counter, including beans, onion, carrot, celery, garlic, tomato paste, crushed tomatoes, broth, herbs, and bay leaf.
The base is simple: beans, aromatics, tomato paste, tomatoes, broth, herbs, and a bay leaf.

The main recipe is tomato-based, gently smoky, full of soft-edged beans and sweet vegetables, and finished with lemon juice or vinegar so the final bowl tastes lively instead of heavy.

Most bean stew recipes ask you to choose one bean or one flavor direction first. This one gives you one base method for almost any cooked beans: cannellini beans, butter beans, black beans, pinto beans, chickpeas, kidney beans, or mixed pantry beans.

Quick Answer: What Is Bean Stew?

Bean stew is a hearty one-pot meal made with cooked beans, aromatics, tomatoes or broth, herbs, vegetables, and optional meat. It has less liquid than bean soup, so it sits on rice, clings to bread, and feels more like a full dinner. It is also less narrowly seasoned than chili, which usually has a stronger chili powder, pepper, and spice profile.

For the easiest version, use three cans of beans, a savory tomato base, and 1½–2 cups of broth. Simmer until the sauce reduces, mash a small portion of the beans into the pot, stir in greens if you like, and finish with lemon juice, vinegar, herbs, or olive oil. The bowl should be spoonable, glossy, and filling without cream.

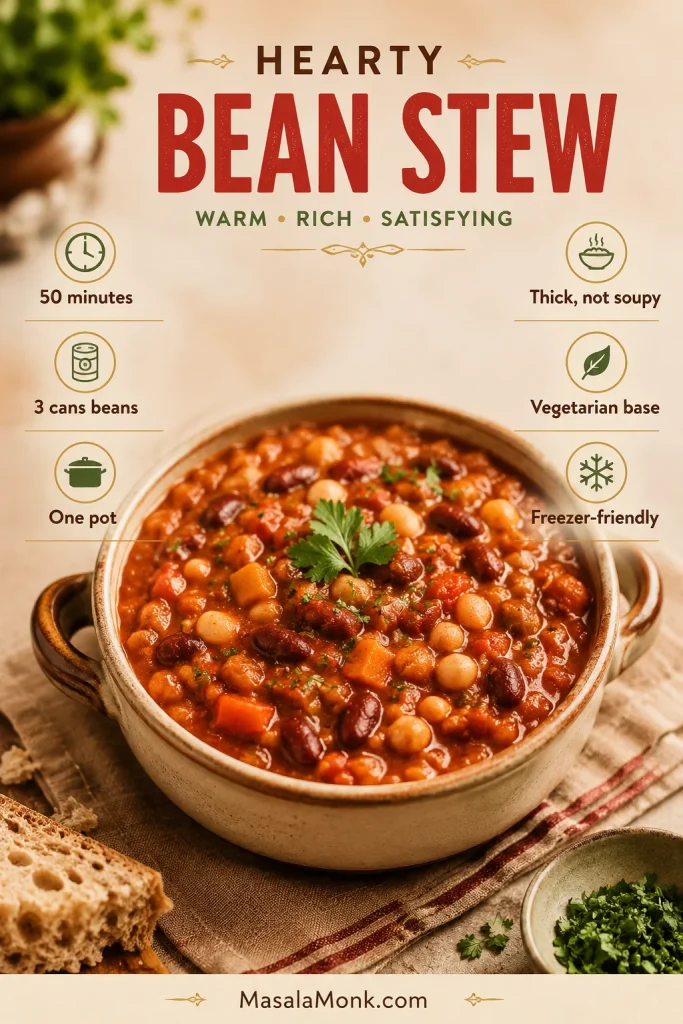
A guide-style image for hearty bean stew showing a bowl of stew with callouts for 50 minutes, 3 cans beans, one pot, thick not soupy, vegetarian base, and freezer-friendly.
This visual summary shows the promise of the recipe: one pot, three cans of beans, a thick spoonable texture, and leftovers that still feel useful the next day.

The exact measurements are in the recipe card, and the thickening cues below show when to reduce, mash, or loosen the pot.

Recipe Snapshot

Main methodStovetop, one pot
Prep time15 minutes
Cook time35–40 minutes
Total time50–55 minutes
Servings6 bowls, or 8 smaller servings with rice/bread
Stretch-it sideRice, bread, potatoes, polenta, or another sauce-catching base
Best beansCannellini, butter beans, black beans, pinto beans, kidney beans, chickpeas, navy beans, Great Northern beans, or mixed beans
Easiest optionCanned beans
Budget optionDried beans, cooked separately first
Finished textureGlossy tomato-bean sauce that clings to the spoon
DietVegetarian base; vegan-friendly; meat-flexible
Freezer-friendlyYes

Before You Start: Beans and Ratio

This stew works best with cooked, starchy beans that can simmer, soften at the edges, and help thicken the sauce. Sweet baked beans, refried beans, and green beans behave differently, so they are better treated as separate recipes or add-ins. Green beans can be added as a vegetable, but they will not make this kind of cooked-bean stew on their own.

The Simple Ratio Behind a Good Pot

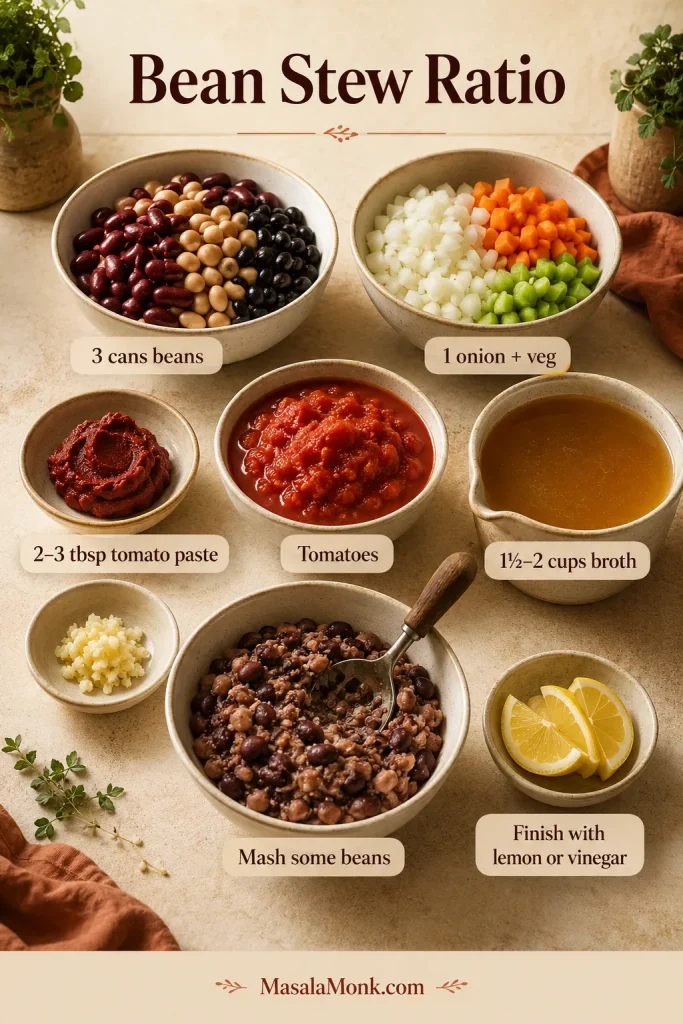
Once you know this ratio, you can make a good bean stew without needing the same cans twice. It is the kind of formula that saves dinner when the pantry looks random but not empty.

  • 3 cans cooked beans, 14–15 oz / 400–425 g each, or about 4½ cups cooked beans
  • 1 large onion plus carrot, celery, and garlic
  • 2–3 tbsp / 30–45 g tomato paste
  • 1 can crushed tomatoes, 28 oz / 800 g, or 14 oz / 400 g for a lighter tomato version
  • 1½–2 cups / 360–480 ml broth, added gradually
  • 10–15 minutes uncovered simmering to reduce the liquid
  • ½–1 cup mashed beans to thicken naturally
  • 1 tbsp / 15 ml lemon juice or vinegar to finish
A bean stew ratio guide with bowls of beans, chopped vegetables, tomato paste, tomatoes, broth, mashed beans, and lemon wedges, each labeled with the recipe ratio.
This bean stew ratio is the saveable formula: beans for body, vegetables for sweetness, tomato paste for depth, broth for looseness, and mashed beans for a thicker finish.

The stew may look thick before it has simmered, but wait 10–15 minutes before adding more broth. Beans release starch, tomatoes loosen, and vegetables soften as they cook. It is easier to loosen a thick pot than to rescue one that started too watery.

Why This Works with Almost Any Beans

The base recipe works because it does not ask every bean to behave the same way. Creamy beans help the sauce; firmer beans stay visible; mixed beans give you contrast. Start with cooked beans, keep the broth controlled, use tomato paste for depth, and mash a small portion of beans for body.

Choose Your Path

Start with the row that matches your pantry today; the main recipe is complete as written.

  • Canned or cooked beans: Follow the main recipe. Drain canned beans first, then simmer until the sauce tightens around the beans.
  • Dried beans: Cook them until tender first, then use about 4½ cups cooked beans.
  • Different bean styles: Use rosemary and lemon for white beans, lime and cumin for black beans, and herbs or vinegar for mixed beans.
  • Meat or slow cooker version: Brown meat first if using it. For slow cooker stew, use cooked/canned beans and less broth.

Cooking dried beans instead of opening cans? Check the canned vs dried bean notes before the pot starts so the beans are already tender when they meet the tomato base.

Ingredients, Swaps, and What Each One Does

The ingredients are simple, but the base matters. Let the onion, carrot, celery, garlic, and tomato paste smell sweet, savory, and cooked before the beans go in; that is what makes canned beans taste like a real stew instead of beans stirred into tomato sauce.

Main Ingredients

  • Olive oil: Softens the vegetables and gives the stew a rounder finish. Use less if adding sausage or chorizo.
  • Onion, carrot, and celery: The flavor base. Cook them until sweet-smelling and softened.
  • Garlic: Adds savory depth. Add it after the vegetables soften so it does not burn.
  • Tomato paste: Makes the stew taste deeper and more slow-cooked.
  • Smoked paprika, oregano or thyme, bay leaf, and pepper: A flexible seasoning base that works with many beans.
  • Crushed tomatoes: Create the main sauce. The full 28 oz / 800 g gives a tomato-rich pot. Use 14 oz / 400 g if you want the beans and broth to lead.
  • Broth: Low-sodium vegetable broth keeps the base vegetarian and easier to season.
  • Beans: Use three cans drained and rinsed, or about 4½ cups cooked beans.
  • Greens: Spinach, kale, chard, or collards add color. Use closer to 60 g for spinach and closer to 100 g for chopped kale, chard, or sturdier greens.
  • Lemon juice, vinegar, or balsamic: Adds a fresh lift after simmering.

Pantry Swaps

The recipe can still work if you are missing celery, using a smaller can of tomatoes, or trying to stretch two cans of beans into dinner.

If you are missingUse instead
CeleryExtra carrot, bell pepper, leek, fennel, or skip it.
CarrotSweet potato, squash, bell pepper, or extra onion.
Tomato pasteSimmer the tomatoes longer, or add a very small splash of soy sauce for depth if it fits your version.
Crushed tomatoesPassata, diced tomatoes, tomato sauce, or 14 oz / 400 g tomatoes plus more broth for a lighter stew.
BrothWater plus bouillon, or water with extra herbs, pepper, and olive oil.
Fresh herbsDried herbs in the base, then lemon or vinegar at the end.
GreensFrozen spinach, chopped cabbage, kale, chard, collards, or skip them.
Third can of beansAdd diced potato, cooked lentils, rice, extra vegetables, or use the small-batch notes below.

Salt tip: Start with ¾ tsp fine salt if using regular broth, salted canned beans, sausage, chorizo, parmesan, bouillon, or salty toppings. Use up to 1½ tsp only when your broth and beans are low-sodium or unsalted. Taste again after the stew reduces.

How to Cook It

The recipe is simple, but the pot tells you a few things as it cooks: the tomato paste should smell deeper, the sauce should slow down, and the spoon should come up with beans, not broth.

1. Soften the Vegetables

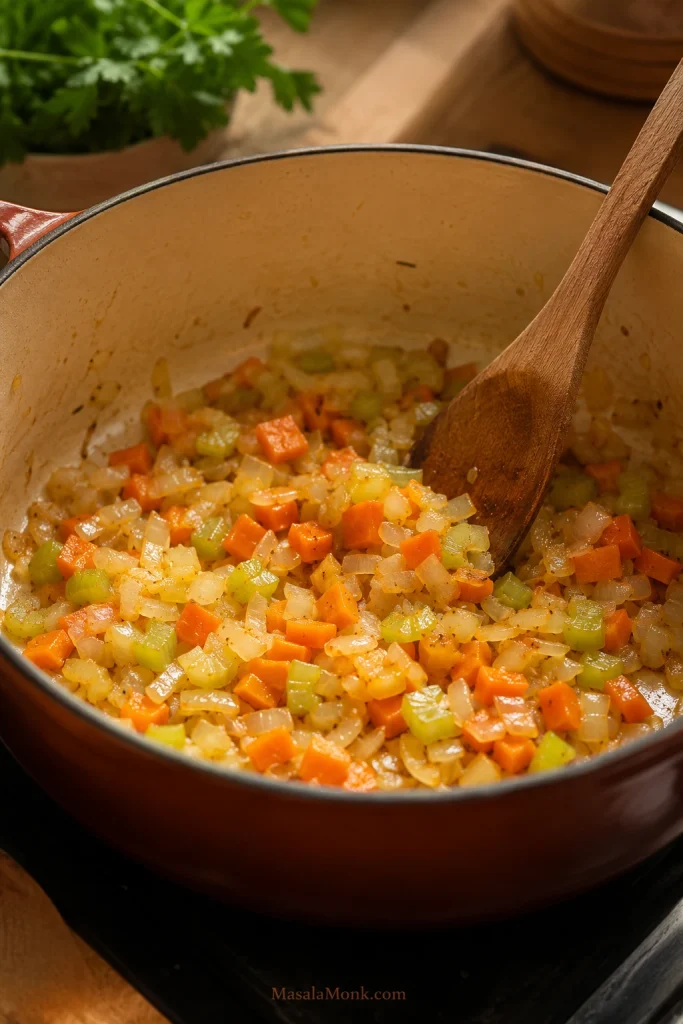
Heat olive oil in a large Dutch oven or heavy-bottomed pot over medium heat. Add onion, carrot, celery, and a pinch of salt. Cook for 7–10 minutes, stirring occasionally, until the onion looks translucent, the carrot has started to soften, and the pot smells sweet rather than raw.

Onion, carrot, and celery softening in olive oil inside an enameled Dutch oven with a wooden spoon.
First, soften the onion, carrot, and celery until glossy and sweet-smelling so the stew starts with a real cooked base, not just beans in tomato sauce.

2. Cook the Garlic, Tomato Paste, and Spices

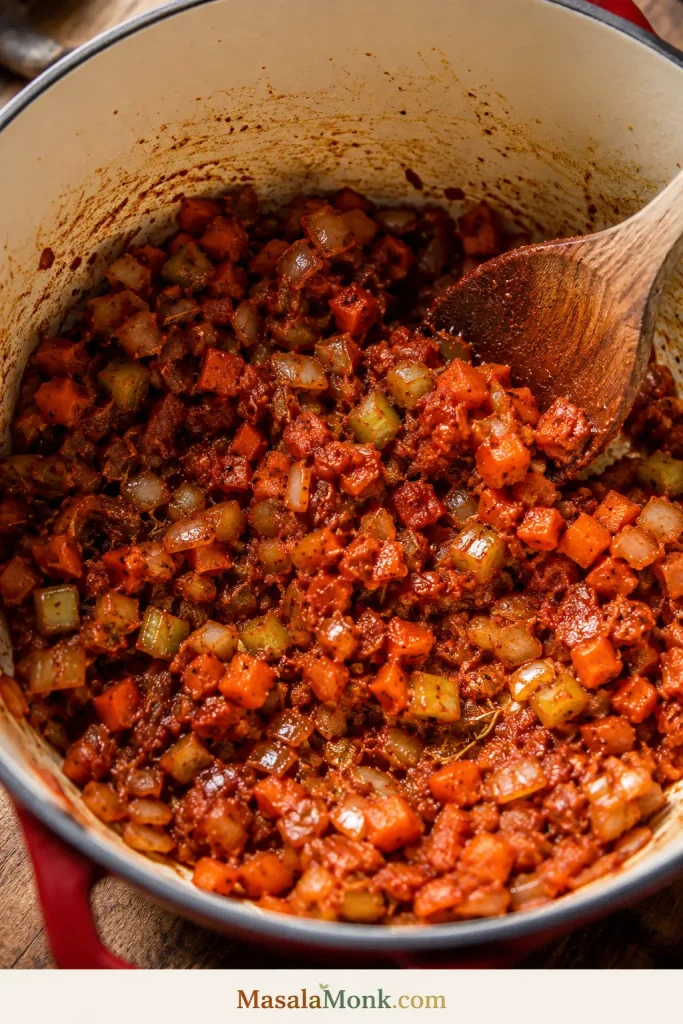
Add garlic, tomato paste, smoked paprika, oregano or thyme, cumin if using, chili flakes if using, and black pepper. Stir for 1–2 minutes. The tomato paste should darken slightly and coat the vegetables. This is the step that makes the stew taste slow-cooked even when the beans came from cans.

Softened onion, carrot, and celery coated with cooked tomato paste, garlic, herbs, and spices inside a Dutch oven, with a wooden spoon in the pot.
Next, let the tomato paste darken slightly with the garlic, herbs, and spices; that small step gives canned or cooked beans a deeper stew flavor.

3. Add Tomatoes, Broth, Beans, and Bay Leaf

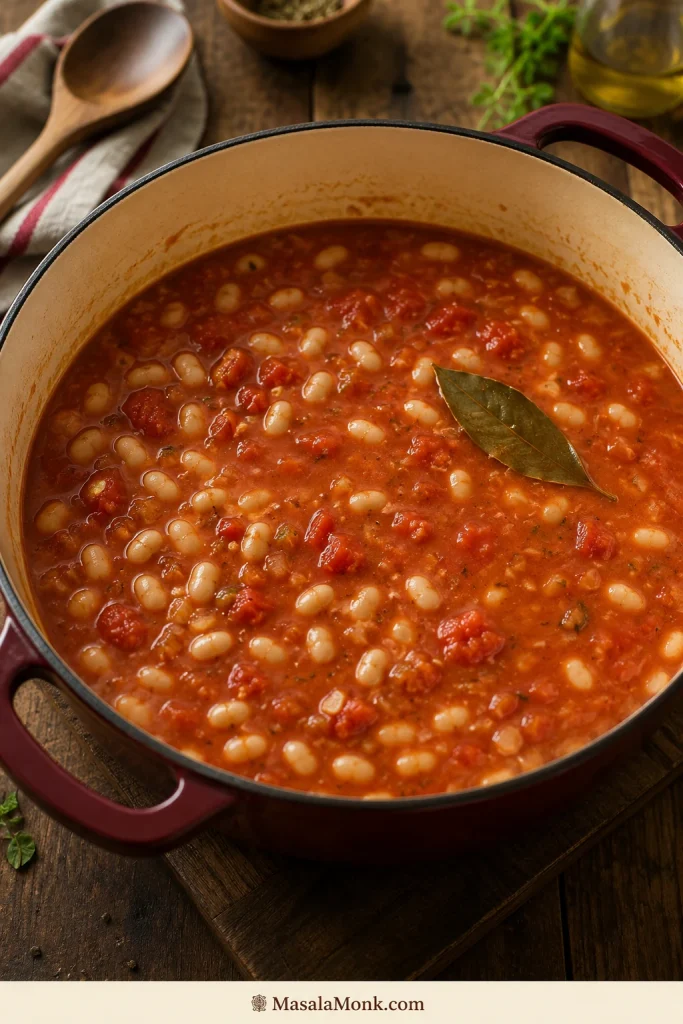
Add crushed tomatoes, 1½ cups / 360 ml broth, drained beans, and bay leaf. Stir well and scrape the bottom of the pot. If the mixture is too thick to bubble gently, add another ½ cup / 120 ml broth. Hold back extra liquid until the stew has simmered for at least 10 minutes.

Beans, crushed tomatoes, broth, and a bay leaf combined in a Dutch oven at the early simmer stage of bean stew.
After the beans, tomatoes, broth, and bay leaf go in, the pot should look a little loose; simmering uncovered is what turns it into stew.

At this stage, a loose-looking pot is normal; the thickening cues below explain when to wait, reduce, mash, or add more liquid.

4. Simmer Covered

Bring the pot to a gentle boil, then reduce the heat and cover. Simmer for 15–20 minutes. The beans should absorb the garlic-tomato flavor, and the vegetables should become fully tender.

5. Simmer Uncovered

Remove the lid and simmer for 10–15 minutes more. Stir occasionally so the bottom does not catch. The bubbles should slow down, the sauce should look glossier, and a spoon should leave a brief trail through the stew before the sauce flows back. If you plan to serve it over rice, keep it slightly saucier.

6. Mash a Small Portion of the Beans

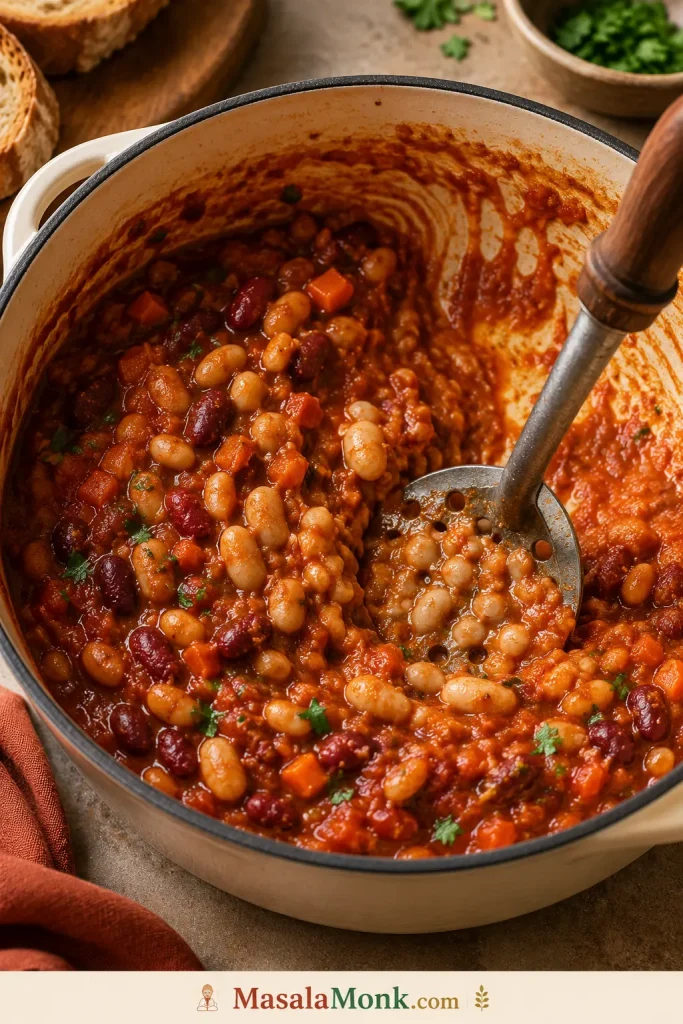
Mash ½–1 cup of beans against the side of the pot with a spoon, ladle, or potato masher. Do not puree the stew. You want enough broken beans to make the sauce creamy while most beans stay whole. Chickpeas will stay firmer than white beans, so mash a little more if using mostly chickpeas.

A potato masher pressing some beans into thick tomato bean stew inside a Dutch oven, with many whole beans still visible.
Instead of adding cream or flour, mash a small portion of the beans into the sauce while leaving plenty of whole beans for texture.

When the stew stays thinner than you want after mashing, use the troubleshooting table before adding extra ingredients.

7. Add Greens and Finish

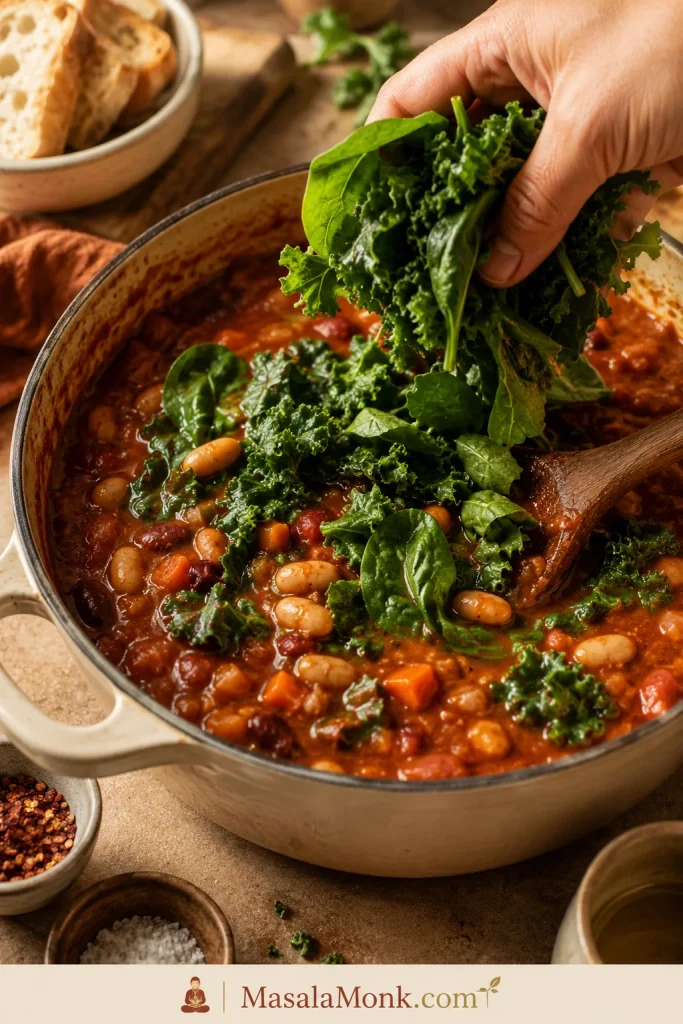
Stir in spinach, kale, chard, or other greens. Spinach needs 2–3 minutes; kale and chard may need 4–5 minutes. Turn off the heat, remove the bay leaf, then stir in lemon juice, vinegar, or balsamic. If the stew tastes dull even after salt, it probably needs acid, not more spices.

A hand adding fresh spinach and kale to a pot of thick tomato bean stew while a wooden spoon rests in the pot.
Toward the end, fold in spinach, kale, or chard so the greens soften into the hot stew while still adding freshness and color.

8. Rest Before Serving

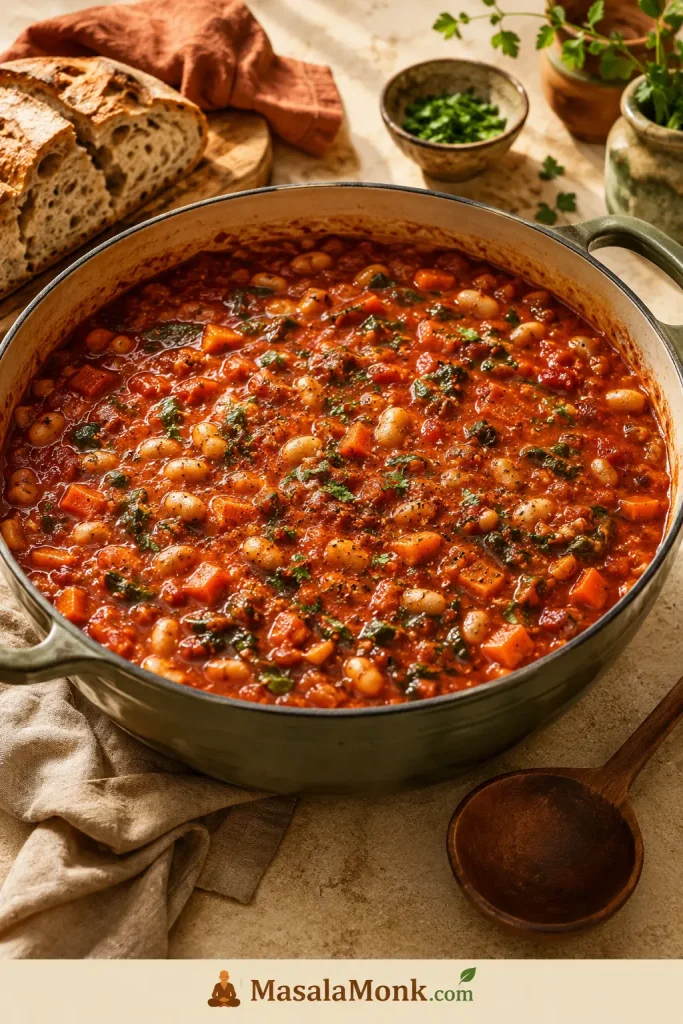
Let the stew rest for 10 minutes before serving. The beans settle, the sauce tightens, and the bowl becomes more balanced. If it gets too thick, loosen it with broth or water ¼ cup / 60 ml at a time.

Finished bean stew in a Dutch oven with white beans, carrots, tomatoes, greens, herbs, and a thick red sauce, with bread and a wooden spoon nearby.
After resting, the stew should look settled and glossy in the pot before it ever reaches the bowl.

How to Keep It Thick, Not Soupy

If the stew looks too loose at first, give it a few minutes uncovered before adding fixes.

  • Start with less broth. For three cans of beans, begin with 1½ cups / 360 ml broth and add more only if needed.
  • Wait before adding liquid. Tomatoes loosen and beans release starch as they simmer.
  • Simmer uncovered near the end. This reduces extra liquid and concentrates flavor.
  • Mash some beans. Breaking down ½–1 cup beans thickens the sauce naturally.
  • Use tomato paste. Cooked tomato paste adds body and depth.
  • Choose creamy beans. Cannellini, butter beans, pinto beans, and white beans make a thicker pot.
  • Blend a small amount. You can blend 1 cup of stew and stir it back in, but do not blend the whole pot unless you want a bean puree.
  • Rest before serving. The stew thickens slightly as it cools.

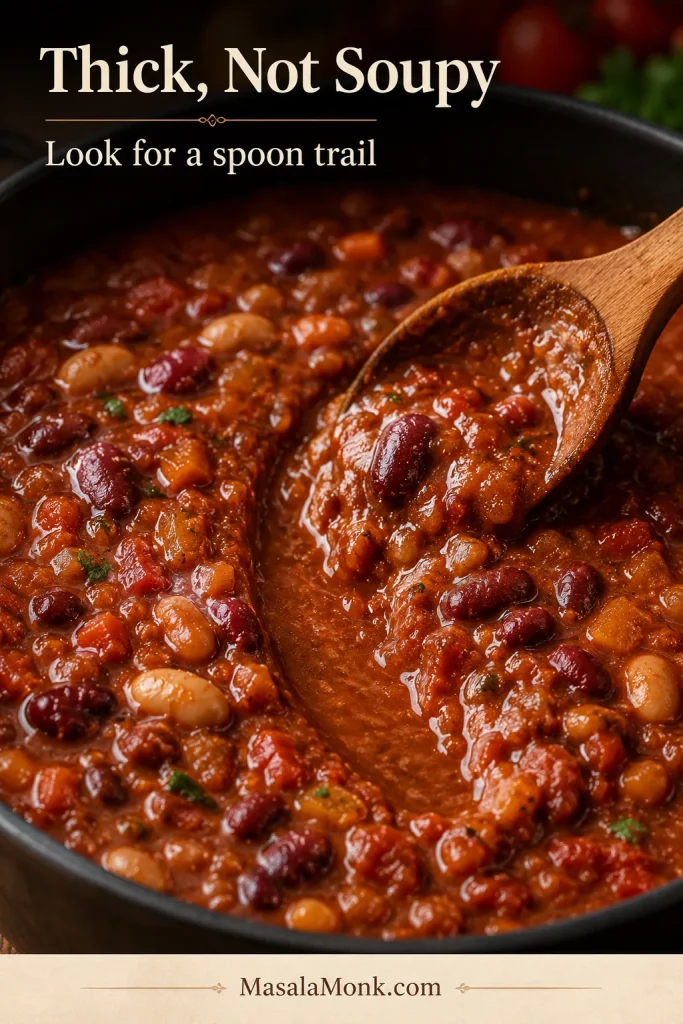
Texture cue: after the uncovered simmer, a spoon should leave a short trail through the stew before the sauce slowly flows back. The stew should sit on rice instead of flooding it, and bread should be able to drag through the sauce.

Close-up of thick tomato bean stew with a wooden spoon creating a visible trail through the sauce. The image includes the text “Thick, Not Soupy” and “Look for a spoon trail.”
The best texture cue is the spoon trail: when the sauce clings to the beans and slowly settles back, the stew is thick enough without becoming dry.

Recipe Card

Thick and Hearty Bean Stew

This thick bean stew turns canned or cooked beans into a hearty tomato-based dinner with garlic, herbs, soft vegetables, greens, and a bright lemon or vinegar finish. Mash a small amount of beans into the pot so the sauce turns glossy and spoonable without cream.

Prep Time
15 minutes
Cook Time
35–40 minutes
Total Time
50–55 minutes
Servings
6 bowls

Equipment

  • Large Dutch oven or heavy-bottomed pot, 5–6 quart / 5–6 liter
  • Wooden spoon
  • Measuring cups and spoons
  • Can opener
  • Potato masher or ladle, optional

Ingredients

  • 2 tbsp / 30 ml olive oil
  • 1 large onion, diced, about 150–180 g
  • 2 medium carrots, diced, about 160–200 g
  • 2 celery ribs, diced, about 100 g
  • 4 garlic cloves, minced, about 12–16 g
  • 2–3 tbsp / 30–45 g tomato paste
  • Smoked paprika, 1 tsp
  • Dried oregano or thyme, 1 tsp
  • ½ tsp ground cumin, optional
  • ¼–½ tsp chili flakes, optional
  • Bay leaf, 1
  • Crushed tomatoes, 1 can, 28 oz / 800 g
  • Low-sodium vegetable broth, 1½–2 cups / 360–480 ml, plus more as needed
  • 3 cans beans, 14–15 oz / 400–425 g each, drained and rinsed; about 4½ cups cooked beans
  • 2 cups / 60–100 g spinach, kale, chard, or other greens
  • 1 tbsp / 15 ml lemon juice, red wine vinegar, or balsamic vinegar
  • 2–3 tbsp chopped fresh parsley or basil
  • ¾ tsp fine salt to start, plus more to taste; use up to 1½ tsp if using low-sodium broth and unsalted beans
  • ½ tsp black pepper
  • Extra olive oil for serving, optional

Instructions

  1. Soften the vegetables. Heat olive oil in a large Dutch oven or heavy pot over medium heat. Add onion, carrot, celery, and a pinch of salt. Cook for 7–10 minutes, stirring occasionally, until softened and sweet-smelling.
  2. Add garlic and tomato paste. Stir in garlic, tomato paste, smoked paprika, oregano or thyme, cumin if using, chili flakes if using, and black pepper. Cook for 1–2 minutes, stirring often, until the tomato paste darkens slightly.
  3. Add tomatoes, broth, beans, and bay leaf. Add crushed tomatoes, 1½ cups / 360 ml broth, the drained beans, and bay leaf. Stir well. If the stew looks too thick to simmer, add another ½ cup / 120 ml broth.
  4. Simmer covered. Bring to a gentle boil, reduce heat, cover, and simmer for 15–20 minutes.
  5. Simmer uncovered. Remove the lid and simmer for 10–15 minutes, stirring occasionally, until the liquid reduces and clings to the beans.
  6. Mash some beans. Mash ½–1 cup of beans into the sauce with a spoon, ladle, or potato masher. Keep most beans whole.
  7. Add greens. Stir in spinach, kale, or chard. Cook for 2–5 minutes, depending on the green, until tender.
  8. Finish the stew. Remove the bay leaf. Stir in lemon juice, vinegar, or balsamic, plus fresh herbs. Taste and adjust salt, pepper, and balance.
  9. Rest and serve. Let the stew rest for 10 minutes before serving. Add broth or water ¼ cup / 60 ml at a time if it becomes too thick.

Notes

  • Taste after simmering before adding more salt; broth reduces and canned beans vary.
  • For a thicker stew, start with 1½ cups / 360 ml broth and mash more beans near the end.
  • Prefer a looser stew? Use the full 2 cups / 480 ml broth and add more as needed.
  • For a lighter, less tomato-heavy version, use 14 oz / 400 g crushed tomatoes and add broth only as needed.
  • If using cooked dried beans, some good-tasting bean cooking liquid can replace part of the broth.
  • If using kidney beans, use canned kidney beans or dried kidney beans that have already been properly cooked.
  • For sausage, brown 12–16 oz / 340–450 g sausage first and reduce the olive oil.
  • For a vegan version, use vegetable broth and finish with olive oil, lemon, and herbs.

Best Beans for Stew

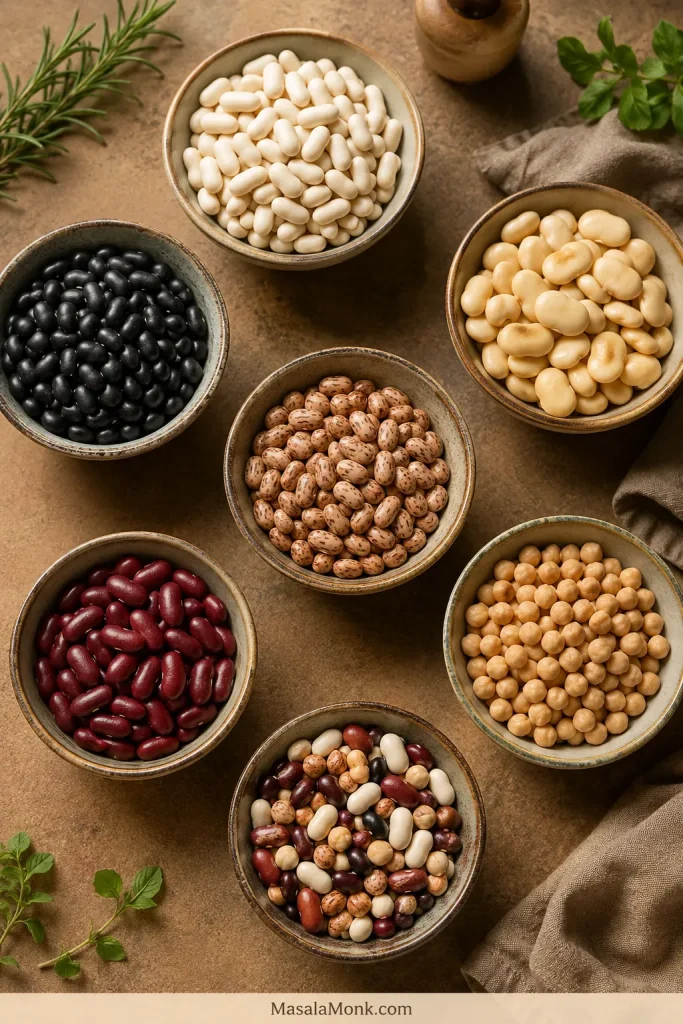
The bean mix changes the whole bowl: creamy beans soften the sauce, firmer beans stay visible, and mixed beans make the stew feel more like a pantry dinner than a planned recipe.

Several bowls of different beans for stew, including white beans, butter beans, black beans, pinto beans, kidney beans, chickpeas, and mixed beans.
Different beans bring different texture: creamy white beans, butter beans, chickpeas, kidney beans, black beans, pinto beans, or a mixed-bean blend can all work here.
BeanBest forTextureNotes
Cannellini beansWhite bean stew, Tuscan-style stewCreamy but holds shapeBest all-purpose choice for the main version.
Butter beansThick, soft, comforting stewLarge, tender, butteryExcellent with tomatoes, smoked paprika, rosemary, mushrooms, or chorizo.
Great Northern or navy beansWhite bean stewSmall to medium, creamyBest when you want the stew creamy and gentle.
Black beansSmoky or Latin-style stewEarthy and creamy-firmUse cumin, smoked paprika, chili, lime, cilantro, and rice.
Pinto beansMexican-style or pantry stewSoft and creamyThey break down nicely and help thicken the sauce.
Kidney beansMixed bean stew, beef bean stewFirmUse canned or properly cooked kidney beans.
Chickpeas / garbanzo beansMediterranean, Spanish, or Moroccan-style stewNutty and firmGood with tomato, cumin, coriander, paprika, greens, and lemon.
Mixed beansBudget stew, pantry cleanout stewVariedMash some creamy beans into the sauce to bring the textures together.

Once you know which beans you are using, the variation table below shows how to season white beans, black beans, chickpeas, butter beans, and mixed pantry beans.

If you were looking for a green bean side dish instead of a cooked-bean stew, MasalaMonk’s green bean casserole recipe is the better place to start.

Canned vs Dried Beans

For speed, canned beans get dinner on the table faster; dried beans give you more control, economy, and often excellent texture. Once they simmer with the garlic-tomato base, canned beans still taste like they belong.

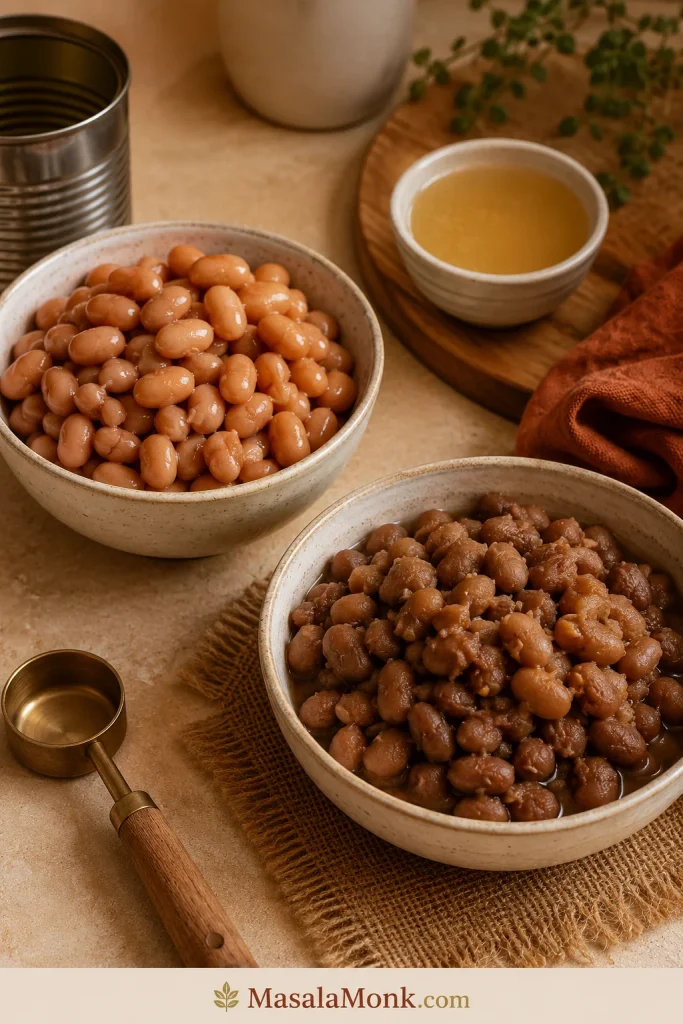
Two bowls of beans on a kitchen counter, one with smooth drained canned beans and one with cooked dried beans, with a small bowl of bean cooking liquid and an unlabeled can nearby.
Use the comparison as a measuring cue: 3 cans of beans usually give about 4½ cups cooked / about 720 g drained beans, while about 1½ cups dried beans can replace them after cooking.

For this recipe, 3 cans of beans, 14–15 oz / 400–425 g each, gives about 4½ cups cooked beans once drained, or roughly 720 g drained beans. To replace them with dried beans, start with about 1½ cups dried beans, cook them until tender, then measure about 4½ cups cooked beans for the stew. The exact yield varies by bean type, size, and age.

If your cooked dried-bean liquid tastes good and is not overly salty, use some of it in place of broth. It adds body and keeps the stew even more budget-friendly.

Very old dried beans may take much longer to soften or stay firm even after extended cooking. When cooking dried beans, keep tomatoes, lemon juice, and vinegar out until the beans are tender. Acidic ingredients can slow softening.

Planning to use the slow cooker? Read the slow cooker notes before using dried beans, especially kidney beans.

Kidney bean note: Canned kidney beans are the easiest choice here. If starting with dried kidney beans, cook them properly before adding them to stew, especially before slow cooking. For food-safety details, see the FDA’s guidance on kidney bean toxins and Utah State University Extension’s guide to storing and cooking dry beans.

Variations

Think of these as directions for the next pot, not decisions you need to make before the first one. The main recipe is complete as written; choose only the path that matches what you have today.

For a hands-off version, use the slow cooker and Instant Pot notes after the flavor ideas.

Vegetarian or Vegan Bean Stew, Plus Meat Add-Ins

Vegetarian or vegan bean stew: The main recipe is vegetarian with vegetable broth. For a fully vegan pot, skip parmesan, yogurt, sour cream, and other dairy toppings; olive oil, mushrooms, smoked paprika, nutritional yeast, lemon, and herbs can still make the finish rich and lively.

Sausage: Brown 12–16 oz / 340–450 g sausage in the pot for 5–7 minutes before adding the vegetables. Spoon off excess fat, reduce the olive oil to 1 tablespoon / 15 ml, and build the stew in the same pot. White beans, butter beans, and pinto beans work especially well. For a more sausage-forward slow-cooker dinner, MasalaMonk’s slow cooker sausage casserole recipe follows that comfort-food direction more fully.

Chorizo: Use 4–6 oz / 115–170 g chorizo. Cured Spanish-style chorizo should be sliced or diced and gently rendered. Fresh Mexican-style chorizo should be cooked until browned and crumbly. Reduce the added oil and taste before adding more salt.

Chicken: Cooked shredded chicken is the simplest route. Stir in 2 cups / 280–320 g during the last 10 minutes of simmering. For raw chicken, use boneless thighs or breasts cut into large pieces, simmer until cooked through, then shred and return to the pot.

Beef: Beef turns this into a longer-cooked stew, not a 50-minute variation. Brown 1 lb / 450 g stew beef first, then simmer it with tomatoes and broth until mostly tender before adding canned beans. Depending on the cut, this may take 1½–2 hours.

Best Bean Mixes and Flavor Versions

This is where the recipe becomes useful for real pantry cooking: two half-used cans can make a better stew than one perfect bean. Keep the same method, then change the herbs, spices, finish, and side.

Version or mixChange these ingredientsFinish withServe with
Cannellini + butter beansUse mostly white beans with rosemary, thyme, and greens.Lemon, olive oil, parsleyBread or sautéed greens
Black beans + pinto beansUse cumin, chili, smoked paprika, and less Italian herb.Lime, cilantro, avocadoRice
Chickpeas + cannelliniUse cumin, coriander, paprika, tomato, and greens.Lemon, parsley, yogurt if desiredFlatbread or couscous
Butter beans + mushrooms or chorizoUse smoked paprika, rosemary, mushrooms, or rendered chorizo.Vinegar, parsley, black pepperPotatoes or bread
Mixed pantry cansUse any cooked beans and mash the creamier ones into the sauce.Vinegar, herbs, olive oilRice or bread

If you want chickpeas in a fresher, no-cook direction instead, MasalaMonk’s chickpea salad recipe turns canned chickpeas into a bright lemony lunch or side.

Fresh Tomato, No-Tomato, and Small-Batch Notes

Fresh tomato version: Fresh tomatoes work, but they need more time to cook down than canned tomatoes. Use them when they are ripe and flavorful, simmer longer, and expect a slightly looser, brighter sauce. MasalaMonk’s guide to tomato sauce from fresh tomatoes shows how reduction changes both texture and flavor.

Lighter no-tomato version: Skip the crushed tomatoes and tomato paste. Use 2½–3 cups / 600–720 ml broth, white beans, rosemary or thyme, garlic, greens, and lemon. Mash about 1 cup of beans into the pot so the broth becomes creamy.

Small batch with 2 cans of beans: Use 1 tbsp / 15 ml olive oil, 1 small onion, 1 carrot, 1 celery rib, 2 garlic cloves, 1½ tbsp / about 22 g tomato paste, 14 oz / 400 g tomatoes, ¾–1 cup / 180–240 ml broth, and 2 cans of beans. This makes about 3–4 bowls.

Adding Beans to Another Stew

Already have a pot of stew going? Use cooked or canned beans. Raw dried beans should not be added to an existing stew unless the recipe was designed for that timing.

  • Canned or cooked beans: Add during the final 15–20 minutes.
  • Delicate white beans or butter beans: Add later if you want them to stay whole.
  • Kidney, black, or pinto beans: Add a little earlier if you want them to absorb more flavor.
  • To thicken another stew: Mash some beans into the liquid.

Slow Cooker and Instant Pot Notes

The stovetop gives the best control over thickness. Choose the slow cooker for convenience, not the glossiest texture, and use the Instant Pot when speed matters more than deep reduction.

Slow Cooker

The slow cooker version will usually be softer and less glossy than the stovetop version, but it is excellent for a hands-off, make-ahead dinner. Use canned beans or beans that have already been safely cooked, and sauté the onion, carrot, celery, garlic, tomato paste, and spices first if you can.

  1. Sauté the vegetables, garlic, tomato paste, and spices in a skillet or in the slow cooker insert if it has a sauté function.
  2. Add tomatoes, cooked/canned beans, bay leaf, herbs, and 1¼–1½ cups / 300–360 ml broth.
  3. Cook on high for 3–4 hours or low for 5–6 hours. Timing depends on bean type and how soft you want the stew.
  4. Add greens near the end.
  5. Mash some beans after cooking. If the stew is still thin, transfer to a pot and simmer uncovered for a few minutes.

Slow cooker kidney bean warning: Do not cook raw dried kidney beans from scratch in the slow cooker. Use canned kidney beans or dried kidney beans that have already been boiled and cooked properly.

Instant Pot with Canned Beans

The Instant Pot is best when you want speed, not deep reduction. The sauté step and final simmer are what keep it from tasting flat. This version works best with cooked or canned beans unless you are following a bean-specific dried-bean pressure-cooking method.

  1. Use the sauté function to soften the onion, carrot, celery, garlic, tomato paste, and spices.
  2. Deglaze thoroughly with a splash of broth, scraping until the bottom feels smooth before adding beans and tomatoes.
  3. Add drained beans, 1 cup / 240 ml broth, bay leaf, and crushed tomatoes on top.
  4. Pressure cook for 5 minutes.
  5. Let the pressure release naturally for 10 minutes, then release the remaining pressure.
  6. Mash some beans after cooking. If the stew is thin, use sauté mode for a few minutes to reduce it.
  7. Add greens, lemon or vinegar, and herbs after pressure cooking.

What to Serve with Bean Stew

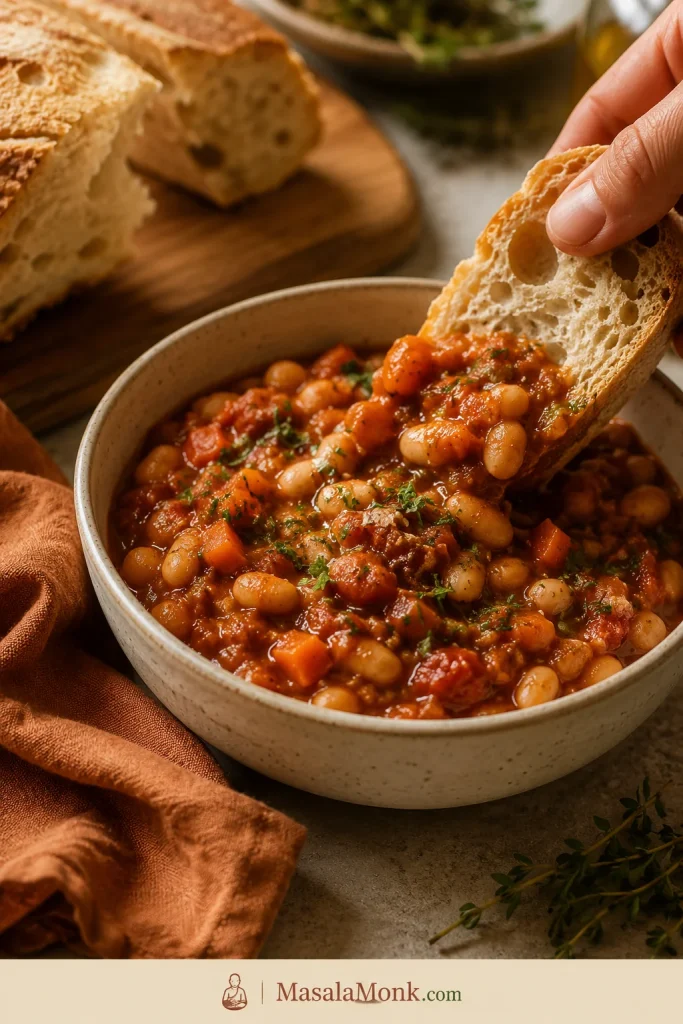
The best sides are the ones that catch the sauce: rice, bread, potatoes, polenta, or anything sturdy enough for a thick spoonful. Serve it thick enough for bread, or just saucy enough to settle into rice. A final drizzle of olive oil and a squeeze of lemon can make the bowl feel richer, brighter, and more intentional than the ingredient list suggests.

A hand dipping a piece of crusty bread into a bowl of thick tomato bean stew with white beans, carrots, herbs, and a warm linen beside it.
Serve the stew with crusty bread when you want the sauce to be part of the meal; one scoop should catch beans, herbs, and tomato base together.

To Make It More Filling

  • Crusty bread or garlic bread
  • Steamed rice
  • Polenta
  • Cornbread
  • Baked potatoes
  • Quinoa, bulgur, or couscous
  • Buttered toast

A pot of plain rice is one of the easiest ways to stretch the stew. MasalaMonk’s guide on how to cook rice covers stovetop, rice cooker, and Instant Pot methods so the base comes out right before you spoon the stew over it.

A bowl of white rice topped with tomato bean stew, carrots, herbs, and a lemon wedge, with a spoon resting in the bowl.
For a bigger dinner, spoon the bean stew over rice; the rice catches the tomato sauce and stretches the pot without making the meal feel thin.

The storage section explains why extra stew is worth planning for: it thickens overnight and loosens easily when reheated gently.

To Add Freshness

Because the stew is rich and hearty, the best toppings either brighten it, cool it, or add contrast.

  • Lemon or lime wedges
  • Fresh parsley, basil, cilantro, or dill
  • Pickled onions
  • Green salad
  • Sautéed greens
  • Avocado for black bean versions
  • Yogurt or sour cream, if not vegan

For another bean-and-rice dinner with a Louisiana-style flavor base, MasalaMonk’s red beans and rice recipe is a heartier, smokier route.

Make-Ahead, Storage, Freezing, and Reheating

Bean stew thickens and deepens as it rests, which means tomorrow’s bowl may taste even better than tonight’s. The leftovers are part of the reward here; the beans keep soaking up flavor as they sit. If you are making it ahead, keep it slightly looser than you want. It will thicken as it cools and again in the fridge.

A glass storage container filled with leftover tomato bean stew beside a reheated bowl of the same stew, with bread, herbs, and a spoon on a kitchen counter.
Leftover bean stew usually thickens as it rests; store it in glass if you can, then loosen it with a splash of broth or water when reheating.
  • Make ahead: Make the stew 1–2 days ahead if you want the flavor to settle.
  • Refrigerator: Store in an airtight container for 4–5 days.
  • Freezer: Freeze for up to 3 months.
  • Greens: If freezing, consider adding fresh greens after reheating rather than before freezing.
  • Reheating: Warm on the stovetop over low-medium heat with a splash of broth or water.
  • Brighten after reheating: Add lemon juice, herbs, or olive oil at the end.

The troubleshooting table below covers reheated stew that turns too thick, too loose, or flat-tasting.

Mistakes That Make It Watery or Bland

Most disappointing bean stews fail in the same few ways: too much liquid, not enough base flavor, or no fresh finish. Fix those, and the pot usually comes back.

  • Adding too much broth at the start. Begin with less, simmer, then adjust.
  • Skipping the vegetables. Beans need onion, garlic, herbs, and seasoning to taste like dinner.
  • Not cooking the tomato paste. Raw tomato paste can taste sharp and flat.
  • Adding tomatoes or vinegar before dried beans are tender. Acidic ingredients can slow softening.
  • Forgetting the fresh finish. A small splash of vinegar or lemon at the end keeps the stew from tasting heavy.
  • Ignoring salt from broth, canned beans, sausage, or chorizo. Taste before adding the full amount of salt.

Troubleshooting

Most bean stew problems are fixable because beans are forgiving. When the pot is watery, give it time uncovered. Flat flavor usually needs salt first, then a small splash of vinegar or lemon juice. A too-thick pot should be loosened slowly and tasted again.

ProblemFix nowFix next time
Too waterySimmer uncovered and mash ½–1 cup beans into the sauce.Start with less broth and add more only after simmering.
Too thickAdd broth or water ¼ cup / 60 ml at a time.Reduce for less time or use the full 2 cups / 480 ml broth.
Bland beansAdd salt first, then a small splash of vinegar or lemon juice, herbs, olive oil, or chili.Season the vegetables and cook the tomato paste properly.
Flat flavorAdd a small splash of vinegar or lemon juice, fresh herbs, black pepper, or olive oil.Do not skip the final balance.
Too acidicAdd more beans, a splash of broth, olive oil, or a small pinch of sugar.Use fewer tomatoes or cook tomato paste longer.
Bitter tomato pasteAdd tomatoes, broth, and beans to soften the flavor.Cook tomato paste until darkened, but do not let it burn.
Firm beansSimmer longer with extra broth until tender.Use canned beans or cook dried beans fully before adding.
Too saltyAdd unsalted beans, potato, tomatoes, or low-sodium broth.Use low-sodium broth and season gradually.
Thin slow cooker versionMash beans at the end or transfer to a pot and simmer uncovered.Use less broth in the slow cooker.

FAQs

What beans are best for bean stew?

Cannellini beans and butter beans are the easiest all-purpose choices for bean stew because they turn creamy without disappearing. Black beans make it smoky, chickpeas keep it firmer, pinto beans help thicken the sauce, and mixed beans are best when you want to use what is already open.

Is bean stew the same as bean soup?

No. Bean stew is thicker than bean soup. Soup has more broth and a looser texture, while this stew is reduced, spoonable, and sturdy enough to serve with bread, rice, polenta, or potatoes as a full meal.

How is bean stew different from chili?

Bean stew is usually less chili-spice focused than chili. This version leans on aromatics, tomatoes, herbs, beans, and a flexible finish rather than a heavy chili-powder base.

Can I use canned beans for bean stew?

Yes, canned beans work very well for bean stew. Drain and rinse three 14–15 oz cans, then simmer them in the tomato base until the sauce clings to the beans.

Should I drain canned beans?

Usually, yes. Draining and rinsing gives you more control over salt and texture. If the can liquid tastes clean and you want extra body, add a small splash, but do not use it as the main liquid.

Can I use dried beans?

Yes, dried beans work well if they are cooked until tender first. Use about 4½ cups cooked beans to replace three cans; the stew should be where they absorb flavor, not where they struggle to soften.

How do I thicken bean stew?

To thicken bean stew, simmer uncovered and mash ½–1 cup of beans into the sauce. Starting with less broth and cooking the tomato paste properly also helps the finished bowl become glossy and scoopable.

Can I make bean stew without tomatoes?

Yes, bean stew can be made without tomatoes. Use broth as the base, add extra aromatics and herbs, mash more beans for body, and finish with olive oil and a little acidity so it still tastes complete.

Can this bean stew be vegan?

Yes, this bean stew can be vegan. Use vegetable broth, skip dairy toppings, and finish with olive oil, herbs, mushrooms, or nutritional yeast for extra richness.

Can I make bean stew in a slow cooker?

Yes, bean stew can be made in a slow cooker with canned beans or beans that have already been cooked. Use less broth than the stovetop version, and expect a softer, less glossy stew that is still excellent for a hands-off dinner.

Does bean stew freeze well?

Yes, bean stew freezes well for up to 3 months. It usually looks thicker after thawing, so reheat it gently with a splash of broth or water, then brighten it at the end so it tastes fresh again.

What should I serve with bean stew?

Serve bean stew with crusty bread, rice, polenta, cornbread, baked potatoes, quinoa, couscous, or a green salad. Bread is best when the stew is extra thick; rice is best when you want to stretch the pot into more servings.

Final Thoughts

A good bean stew is not fancy food. It is the kind of recipe that makes three cans of beans, one onion, and the last carrot in the drawer feel like dinner for tonight and lunch tomorrow.

Once the method clicks, you stop needing one exact bean. Try white beans and rosemary when you want something soft and cozy. Go with black beans, cumin, and lime when you want a smoky bowl over rice. Choose chickpeas with paprika and lemon, butter beans with chorizo, or mixed beans when the pantry needs clearing out.

If you make this with a different bean mix, leave a comment with the exact cans or cooked beans you used and what you served it with — especially if you tried black beans, butter beans, chickpeas, or a mixed pantry batch. It helps the next person staring at the same random cans.

Back to top