Posted on Leave a comment

Chana Masala Recipe: Authentic Punjabi Chickpea Curry

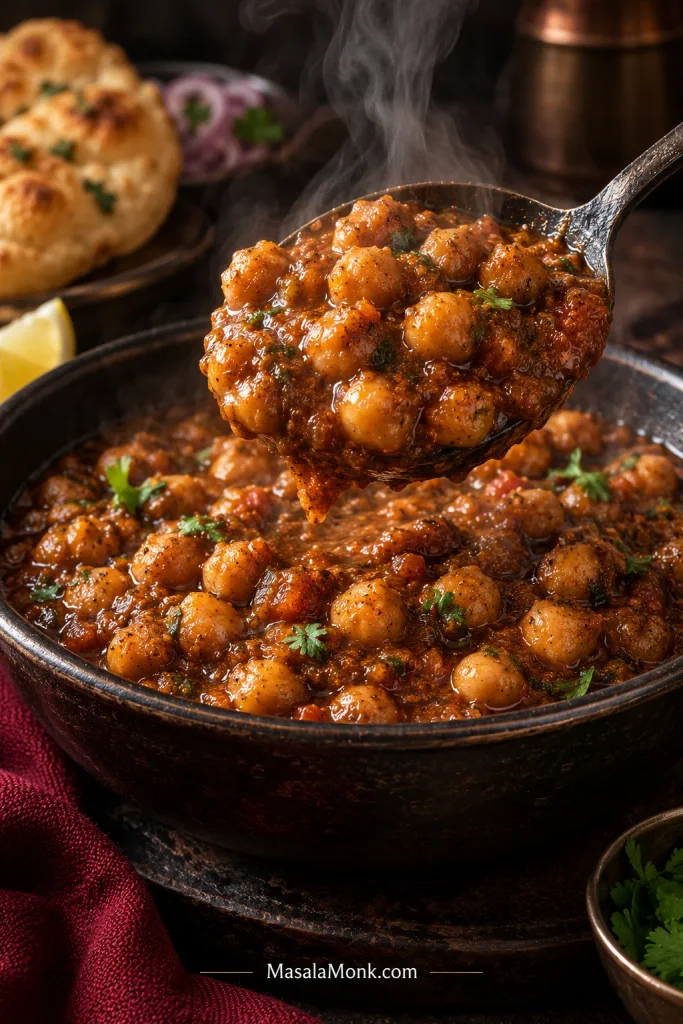
Punjabi-style chana masala with plump chickpeas coated in thick reddish-brown onion-tomato gravy, lightly garnished with coriander.

Lift one chickpea through the gravy and you can tell pretty quickly whether a pot of chana masala has worked. It should yield easily when you bite it. The gravy should come with it instead of sliding back into the bowl. On the first taste, it should be savoury and warmly spiced, with the tang arriving afterwards rather than taking over.

A torn piece of roti should come back coated. With rice, the gravy should settle between the grains instead of leaving the chickpeas sitting in thin tomato liquid. Those small things matter more than whether the curry is exactly the same shade of brown as the chole you remember from a restaurant.

Chana masala is a North Indian chickpea curry made with white chickpeas in a spiced onion-tomato gravy. This chana masala recipe takes a Punjabi-style, gravy-based approach, using kabuli chana—also called garbanzo beans—and enough simmering time for the chickpeas and masala to stop tasting separate.

There is no single formula followed by every Punjabi household, dhaba or restaurant. Some versions are darker, some drier, some smoother, and the souring may come from tomato, amchur (dry mango powder), anardana (ground dried pomegranate seeds) or a combination. A few things really matter; once those are right, the final heat, tang, richness and colour are yours.

Choose Your Chana Masala Route

Best control over textureDried chickpeas
Dinner tonight, no soak2 cans · about 45–50 minutes
Least cleanup after soakingOne-pot Instant Pot
Table of Contents

Cook It Right

Adjust, Fix & Serve

Three Things to Get Right

Three physical cues matter more than perfect timing.

  1. Chickpea: it crushes easily, with no hard or chalky centre.
  2. Masala: the onion-tomato base is concentrated and no longer smells raw.
  3. Gravy: it coats the chickpeas instead of collecting as thin liquid underneath.
Three chana masala cooking cues showing a tender chickpea being crushed, concentrated onion-tomato masala, and roti lifting chickpeas coated in thick gravy.
Think of crush, concentrate and cling as three checkpoints: tenderness comes first, flavour develops in the masala, and the finished gravy proves whether the two have come together.

Those are the parts worth being fussy about. A little thicker for bread, a little looser for rice, more tang, less chilli, darker chickpeas or a richer finish can all move according to the bowl you actually like eating.

Chana Masala Recipe

Serves4
Active timeAbout 35–45 minutes
Soaking8–12 hours
Total after soakingAbout 1½–2 hours, depending on chickpea age and pressure release
Quick canned versionAbout 45–50 minutes
DietVegan as written; gluten-free if your spice blend is gluten-free

Using canned chickpeas? Use the ingredient list below, replacing the dried chickpeas with 2 standard cans. Skip Phase 1 completely—including the salt used to cook dried chickpeas—then make the masala as written. The canned-chickpea section gives the shorter simmer and final salt guidance.

Equipment: for dried chickpeas, use a stovetop pressure cooker, Instant Pot or heavy saucepan for open-pot cooking. You will also need a heavy kadai, sauté pan or Dutch oven for the masala. A blender and small pan for tempering are optional.

Ingredients

For the chickpeas

  • 200 g / 7 oz / about 1 cup dried kabuli chana
  • 900 ml–1 litre / about 4 cups water, for soaking, or enough to cover generously
  • 600 ml / about 2½ cups fresh water, as a starting point for pressure cooking
  • ½ tsp fine salt

For the masala

  • 30 ml / 2 tbsp neutral oil
  • 1 tsp cumin seeds
  • 1 bay leaf
  • Optional: 1 black cardamom pod, lightly cracked
  • 140–150 g / 5 oz / about 1 cup finely chopped onion
  • 10 g fresh ginger, finely grated
  • 10 g garlic, minced or crushed
  • 1–2 green chillies, finely chopped
  • 225–250 g / 8–9 oz / about 1¼ cups chopped or puréed fresh tomatoes
  • ½ tsp turmeric
  • ½–1 tsp Kashmiri or degi chilli powder, for colour and gentle heat
  • 10 g homemade Chana Masala Powder
  • ½ tsp fine salt, then more to taste

No scale for the spice blend? If you calibrated a teaspoon when making our homemade blend, use that jar-specific conversion for 10 g. Otherwise, weighing is more reliable because different grind sizes pack differently into a spoon.

Using a commercial chana or chole masala instead? Start with the amount suggested on its label and taste before adding extra salt or souring. Commercial blends can differ considerably in heat, salt and tang.

No Chana Masala Powder?

For the main four-serving recipe, start with 1 tsp garam masala + 1 tsp ground coriander + ½ tsp ground cumin + ½ tsp amchur, with ¼ tsp ground anardana if you have it. Keep the turmeric and chilli already listed in the recipe, then adjust the salt and tang at the end. It will not taste identical to the complete blend, but it is a practical fallback that lets you finish the curry. The Chana Masala Powder guide explains the full blend and how the flavours fit together.

Measured ground-spice substitute using garam masala, coriander, cumin, amchur and optional anardana in polished measuring spoons.
This measured fallback rebuilds the essential warm, earthy and tangy structure of chana masala powder; however, the finished curry still benefits from tasting before any extra acid or salt.

To finish

  • 1 tsp kasuri methi (dried fenugreek leaves), crushed between your palms
  • 2–3 tbsp chopped fresh coriander/cilantro
  • Optional: ¼–½ tsp amchur
  • Optional: 1–2 tsp lemon juice

The extra acid is deliberately optional. The homemade blend already contains anardana and amchur, and the tomatoes bring acidity of their own. Finish the curry first and taste before adding more.

The ingredient list is only half the story. The difference between a thin tomato chickpea curry and a gravy that tastes fully integrated is mostly built through onion browning, tomato reduction and the final simmer.

Method

Phase 1: Cook the Chickpeas

  1. Soak. Rinse the chickpeas, cover generously with water and refrigerate for 8–12 hours or overnight. Drain and rinse again.
  2. Pressure cook.
    Instant Pot: start with 20 minutes on High Pressure, then let the pressure release naturally. Do not use Quick Release for the chickpeas.
    Stovetop pressure cooker: cook for roughly 15–20 minutes at pressure, followed by natural release.
    Use about 600 ml / 2½ cups fresh water and ½ teaspoon salt for either method.
  3. Check one. Press a chickpea between your fingers or against the back of a spoon. It needs to crush completely without a chalky centre. Older chickpeas may need another 5–10 minutes under pressure; fresher ones may already be exactly where you want them. Reserve the cooking liquid.

Phase 2: Build the Bhuna Masala

  1. Temper the whole spices. Heat the oil over medium heat. Add cumin, bay leaf and optional black cardamom. Let them sizzle for 20–30 seconds, just until fragrant.
  2. Brown the onion. Cook for about 8–12 minutes, stirring regularly. Look for soft onion with clear golden colour, especially around the edges, and a sweeter aroma than the onion you started with.
  3. Add ginger, garlic and chilli. Cook for another 1–2 minutes. The sharp raw smell will soften and the pan will start smelling warmer and more savoury.
  4. Reduce the tomatoes. Add the tomatoes and remaining ½ teaspoon salt. Cook for roughly 10–15 minutes, longer when they are especially juicy. The mixture is ready when it has become thick and glossy and the raw tomato smell has gone; depending on the pan and tomatoes, a little oil may also begin showing around the edges.
  5. Add the ground spices. Lower the heat and stir in turmeric, Kashmiri/degi chilli and the 10 g chana masala powder for 20–30 seconds. Add a spoonful of water if the pan looks dry.

Phase 3: Simmer and Finish

  1. Add the chickpeas. Pour in about 250–300 ml / 1–1¼ cups reserved cooking liquid with the cooked chickpeas. Start there; loosen the curry later if needed.
  2. Simmer for 20–30 minutes. Keep it gentle and stir occasionally. This is where the pot changes most: the chickpeas stop tasting like plain beans wearing sauce, and the masala begins to carry through the whole bite.
  3. Mash a few chickpeas. Press 2–4 tablespoons worth against the side of the pan and stir them back in. Give the starch a minute or two to work into the gravy naturally.
  4. Finish by taste. Remove the bay leaf and black cardamom. Stir the crushed kasuri methi into the hot curry, then add the coriander. Taste a chickpea as well as the gravy. Taste for salt first, then decide whether the pot needs any extra tang or heat.
  5. Rest for 5–10 minutes. The gravy tightens slightly as it sits. Add a little hot cooking liquid if you want it looser for rice.

Canned shortcut One-pot Instant Pot Troubleshooting

The recipe above gives you the sequence. The next few sections look more closely at the stages where ingredients and timing vary most, starting with the chickpeas.

Getting the Chickpeas Really Tender

Dried chickpeas do not all behave alike. Bean age, storage and soaking can shift the pressure time considerably, which is why 20 minutes is a starting point rather than a promise. If yours takes longer, let it.

Three chickpea textures showing a hard bean with a chalky centre, a properly cooked chickpea that crushes easily, and an over-soft mushy chickpea.
A timer cannot show the centre of a chickpea. Split or crush one instead: chalkiness means keep cooking, while a creamy centre that yields cleanly is the useful target.

Acid also matters. Tomato, lemon, tamarind and other acidic ingredients can slow softening, so get the beans where they need to be before building the sourness. The University of Nebraska–Lincoln’s dry-bean guidance gives the same general advice.

Cooking Chickpeas Without a Pressure Cooker

Put the soaked chickpeas in a heavy saucepan, cover generously with fresh water and add the ½ teaspoon salt from the chickpea ingredients. Bring to a boil, lower the heat and simmer for roughly 60–90 minutes, topping up with hot water when needed. Older chickpeas can take longer.

Do not chase the clock on this one. If the centre is still firm, keep cooking.

If the Chickpeas Refuse to Soften

Longer cooking is the preferred first fix. Baking soda is sometimes used for stubborn chickpeas, but it is not necessary for this recipe; too much can make the beans mushy and leave an alkaline taste.

Chana masala does not require chickpeas taken quite as soft as hummus, but a firm centre is still a firm centre. A beautiful masala cannot rescue a bean that is still dry and chalky inside.

Quick Chana Masala With Canned Chickpeas

For a same-evening version with no soaking or pressure cooking, use 2 standard 15 oz / 425 g cans of chickpeas. Most give roughly 480–500 g drained chickpeas altogether, although the drained weight on the label is the best number to use when one is provided.

Canned chana masala shortcut showing two cans of chickpeas, drained chickpeas in a metal sieve, and a pan of finished chickpea curry with quantity guidance.
The shortcut is the chickpea-cooking stage, not the flavour-building: canned chickpeas save the soak and pressure time, while onion browning, tomato reduction and the final simmer still matter.

For this route, use the full masala ingredient quantities from the main recipe, replacing the dried chickpeas with the two cans. Skip Phase 1 completely and begin with Phase 2: Build the Bhuna Masala.

Drain and rinse the chickpeas, then press one before it goes into the curry. Some canned chickpeas are already soft enough; others remain surprisingly firm. If one is firm or chalky, simmer the chickpeas in plain water until they crush easily before introducing the acidic tomato masala.

Skip the ½ teaspoon salt used for cooking dried chickpeas. Start with up to the ½ teaspoon salt listed with the masala, using less if your chickpeas or commercial spice blend are already salty; finish by taste.

Finish the Canned Version

Cook the onion-tomato masala through Phase 2, then add the drained chickpeas with enough fresh water to create a medium-thick gravy. Simmer for at least 10–15 minutes; give it closer to 20 minutes when you have time and want the chickpeas and gravy more fully integrated. Mash a few chickpeas, then finish with kasuri methi, coriander and any extra tang the curry actually needs.

Using just 1 standard can? Halve the recipe approximately and use 5 g chana masala powder. One can commonly yields around 240–250 g drained chickpeas.

The easy rule is: 200 g dried chickpeas or 2 cans for the main recipe = 10 g powder; 1 can = 5 g.

Instant Pot Chana Masala

For the standard Instant Pot route, follow Phase 1 of the main recipe. Start the soaked chickpeas at 20 minutes on High Pressure, allow a natural release, then check one before deciding whether they need more time.

For more bhuna depth, build the masala separately and combine it with the tender chickpeas for the final simmer. If washing another pan feels unnecessary tonight, the one-pot method below keeps everything in the cooker and trades a little bhuna depth for easier cleanup.

One-Pot Instant Pot Chana Masala

This route still uses soaked chickpeas. Use the full ingredient quantities from the main recipe; follow the order and timings below instead of the main method.

One-pot Instant Pot chana masala sequence showing deglazed aromatics, soaked chickpeas pressure-cooked until tender, tomato added afterward, and spice blend added during the final Sauté.
The crucial one-pot rule is sequence rather than speed: tenderise the chickpeas before tomato and the full chana masala blend, then use Sauté to rebuild concentration.

The One-Pot Sequence

  1. On Sauté, temper the cumin, bay leaf and optional black cardamom. Brown the onion, then cook the ginger, garlic and green chilli.
  2. Use a splash of the 600 ml / 2½ cups fresh cooking water to scrape the base of the inner pot clean, then add the rest with the soaked chickpeas, ½ teaspoon salt, turmeric and Kashmiri/degi chilli. Hold back the tomatoes and chana masala powder until the chickpeas are tender so their acidic ingredients do not interfere with softening.
  3. Pressure cook for 20 minutes on High and let the pressure release naturally. Do not Quick Release the chickpeas. Check one; if the centre is still firm, give the cooker another 5 minutes at pressure and release naturally again.
  4. Once tender, remove excess cooking liquid so roughly 250–300 ml / 1–1¼ cups remains with the chickpeas.
  5. Switch back to Sauté and add the tomatoes and remaining ½ teaspoon salt. Cook until the tomato loses its raw edge and the mixture reduces around the chickpeas.
  6. Stir in the full 10 g chana masala powder and simmer for another 5–10 minutes, stirring often. Mash a few chickpeas. Remove the bay leaf and black cardamom, then finish with kasuri methi, coriander and any extra acidity the curry needs.

Because the tomato is reducing in a wetter pot, this version tastes a little fresher and less deeply bhuna than the separate-pan method. Let Sauté mode do enough work at the end.

How to Know When the Masala Is Ready

The masala is ready when it has changed from loose and raw-smelling to concentrated and savoury; oil may appear at the edges, but it does not have to.

Bhuna masala readiness guide showing onions from pale to golden to deeper brown, tomato masala reducing from loose to concentrated, and two ready masalas with different amounts of visible oil.
Read the board as a sequence: onion colour builds sweetness, tomato reduction removes rawness, and visible oil is only an optional final clue—not the endpoint by itself.

A recipe can give you 10 or 12 minutes for the tomatoes, but tomatoes do not read timers. A juicy batch in a narrow pan can stay loose considerably longer than a drier batch spread across a wide sauté pan.

How Far to Cook the Onion

For this gravy, clearly golden is enough. Take the onion further and you get more roasted sweetness and a deeper-looking curry; stop while it is merely soft and the whole dish stays lighter.

What the Tomato Stage Is Actually Doing

Reduction removes excess water and concentrates the onion, tomato, ginger and garlic into a base that can cling to the chickpeas later. As it cooks, the sharp smell of fresh tomato softens and the warmer smell of browned onion and spice begins to take over. This is the point where the pan starts smelling less like separate ingredients and more like dinner.

Visible oil at the edges is useful when it happens, but it is not the only proof of readiness. Loss of the raw tomato smell and the change from loose to concentrated matter more.

Undercook this stage and the finished curry can stay tomato-forward even when the spice quantities are correct. Push it too hard in a dry pan and the ground spices can turn bitter.

Very juicy tomatoes may need another five minutes. Let them have it.

Ground Spices Need Only Brief Heat

The homemade chana masala powder has already been roasted before grinding. A brief 20–30 seconds in the cooked tomato base is enough to wake it up. When the pan looks dry, add a spoonful of water rather than trying to fry the powder harder.

The Final Simmer Is Part of the Recipe

Pressure cooking makes the chickpea tender. The final simmer makes it taste like chana masala.

The starchy cooking liquid, mashed chickpeas and reduced masala begin behaving like one gravy during these final 20–30 minutes. What started as beans, tomato and spices becomes a curry in which each bite carries all three.

Drag a spoon through the pan near the end. When the gravy is ready, it closes slowly behind the spoon and leaves a light coating without looking stodgy.

Chana masala shown before and after the final simmer, with a spoon dragged through thick finished gravy to demonstrate a slowly closing trail.
The spoon trail should close slowly, not stay carved into the pan. If it remains sharply open, the gravy is already moving toward too thick.

Taste a chickpea, not just the sauce. A good-looking gravy can still be hiding a bean that needs another pinch of salt.

If a chickpea crushes easily, the gravy clings and the curry tastes integrated rather than raw or tomato-forward, the essential work is done. Everything from here is preference.

← Back to recipe Troubleshooting Serving

Restaurant-Style Chana Masala: What to Change

Once the chickpeas are tender and the gravy has the body you want, “restaurant-style” becomes less about correctness and more about which quality you want to emphasize: colour, smoothness, body or richness.

For darker chickpeas, add 1 plain black tea bag or 2–3 dried amla (Indian gooseberry) pieces while pressure cooking the main 200 g dried-chickpea recipe, then remove them afterwards.

Dark vs Deep: Colour Is Not Flavour

Dark is a colour; deep is a flavour. Tea or amla changes the first. More savoury depth comes from taking the onion further, fully reducing the tomatoes and giving the finished curry enough time to simmer.

Side-by-side chana masala comparison showing a darker curry with tea and amla cues and a deeper-flavoured curry with browned onion and reduced tomato masala.
Tea or amla can change the shade before the gravy has gained enough body; therefore, judge depth by aroma, concentration and cling rather than darkness alone.

For a silkier gravy, remove the bay leaf and black cardamom and blend the cooked onion-tomato masala before adding the chickpeas. More body comes from mashing a few extra chickpeas and reducing the curry uncovered.

For a ginger tadka—a quick aromatic finish of ginger fried in fat—cook thin ginger juliennes in about 1 teaspoon ghee until fragrant and just beginning to colour, then spoon them over the curry. Neutral oil works for a vegan finish. A little coriander-mint green chutney alongside brings a fresh, sharp contrast.

Restaurant-style chana masala guide showing tea or amla for darker colour, blending for a silkier gravy, mashing for more body, deeper browning and reduction, and ginger tadka for aroma.
Treat these restaurant-style adjustments as independent switches. You might want darker chickpeas but a rustic gravy, or a silkier sauce without changing the colour at all.

Troubleshooting Your Chana Masala

Correct the most obvious problem first and taste again before changing something else. Several rushed fixes at once can turn one solvable problem into a completely different curry.

Quick Fixes by Symptom

  • Hard or chalky chickpeas: keep cooking them. Add hot water if needed and leave the gravy adjustments until the beans themselves are tender; the tender-chickpea section shows what to look for.
  • Raw tomato dominates: simmer uncovered so the tomato can reduce and lose that fresh, sharp edge.
  • Too sour: stop adding acid. The pot already contains tomato plus the amchur and anardana in the spice blend. More cooked chickpeas are the cleanest correction when available; otherwise loosen with a little unsalted cooking liquid and simmer again.
  • Thin gravy pooling beneath the chickpeas: mash a few chickpeas into the sauce and reduce uncovered. Give the starch a few minutes before deciding it has not worked; the final-simmer section shows the spoon-trail cue.
  • Too thick: loosen with hot reserved cooking liquid a little at a time. The curry thickens further as it cools.
  • Bitter: scorched spices can make the whole curry bitter. If the bottom of the pan has scorched but the curry above it still tastes clean, transfer the unburnt portion to a fresh pan without scraping up the burnt layer.
  • Too spicy: add more chickpeas or unsalted liquid/base. Large amounts of sugar tend to leave the curry both hot and oddly sweet.
  • Dark but still weak: more tea will not help. Check the salt, then simmer uncovered a little longer so the gravy concentrates. Next time, use the masala-readiness cues to take the onion and tomato further before combining.
Chana masala troubleshooting guide covering hard chickpeas, raw tomato flavour, excess sourness, thin or thick gravy, scorching, excess heat, and dark but weak curry.
Use this board as a fork in the road, not a checklist: texture problems usually need more cooking or liquid control, while weak flavour often needs salt or concentration.

If Plenty of Spice Still Tastes Bland

Chana masala can taste bland despite plenty of spice when the salt is low or the onion, tomato and final simmer have not developed enough flavour.

Start with salt. Under-salted chickpeas make cumin, coriander, chilli and the rest of the masala all seem quieter than they really are.

What looks like too little spice is often incomplete cooking. An onion stopped too pale, tomato left too watery or curry taken off the heat too soon can all taste underpowered despite plenty of ground masala. Another ten minutes of simmering may do more than another spoonful of powder.

Chana masala flavour diagnostic showing salt, pale versus browned onion, loose versus reduced tomato masala, and briefly versus fully simmered curry.
This diagnostic order helps prevent over-spicing: correct salt and concentration first, because both can make the cumin, coriander and chilli already in the pot taste much louder.

← Back to recipe Serving ideas Storage & reheating ↑ Back to top

Useful Substitutions

Fresh tomatoes: plain canned crushed tomatoes or passata can stand in at roughly the same weight. Cook them to the same concentrated endpoint. Tomato paste is much more concentrated and should not replace the tomatoes gram-for-gram.

Oil and ghee: neutral oil keeps the main recipe vegan. Ghee gives the curry a rounder, buttery finish when dairy is welcome.

Extra amchur: lemon, a little tamarind or anardana can all provide acidity, but taste first—the tomatoes and homemade spice blend may already have given the curry enough.

No chana masala powder: use the measured garam-masala fallback given with the ingredients above. It will not duplicate the complete blend exactly, but it makes a very workable curry; the Chana Masala Powder guide has the full formula.

What to Serve With Chana Masala

Keep the gravy thick for bhatura or poori, medium-thick for roti or paratha, and slightly looser for rice. All three can be right; they simply ask different things from the gravy.

Chana masala served with poori or bhatura, roti or paratha, and basmati rice, showing thicker gravy for breads and slightly looser gravy for rice.
Serving several accompaniments at once? Keep the main chana masala medium-thick, then loosen only the portion headed for rice instead of compromising the gravy for bread.

With bhatura or poori, a torn piece should lift a thick swipe of gravy and a few chickpeas with it instead of the sauce running straight back onto the plate. With rice, loosen the curry just enough for the gravy to settle between the grains.

Plain basmati is enough, though jeera rice is especially good with the warm cumin and tang in the curry; our rice cooking guide covers both stovetop and pressure-cooker methods.

Sliced onion, coriander, green chilli, lemon and a little pickle all work around the bowl. The contrast of hot, thick chana with cold crisp onion is particularly good. If dairy is on the table, palak raita brings cool curd, spinach and cumin alongside a hotter batch.

Give the curry a few minutes to settle before ladling it out, then eat it while the kasuri methi, coriander and any ginger tadka are still fragrant.

Make Ahead, Store and Reheat

Chana masala often tastes more settled the next day, while chickpea starch makes the chilled gravy noticeably thicker.

Chana masala storage guide showing shallow refrigerated containers, freezer storage, reheated curry, and cooked chickpeas stored with some cooking liquid for make-ahead preparation.
Reheat first, then decide whether to add water. Thinning cold chana masala is easy to overdo because chickpea starch loosens again as the curry gets hot.
  • Refrigerate: divide the curry into shallow containers and refrigerate within 2 hours, or within 1 hour if the temperature is above 90°F / 32°C; use within about 3–4 days.
  • Freeze: portion into airtight containers and use within about 2–3 months for best quality.
  • Reheat: begin warming the curry gently. As it loosens, decide whether it actually needs more liquid; if so, add hot water or reserved cooking liquid a little at a time. Heat until steaming hot throughout. The USDA’s leftovers guidance recommends reheating leftovers to 165°F / 74°C.

Making It Ahead for Guests

Cook the chickpeas in advance and refrigerate them with some of their cooking liquid. Build the masala later, combine the two and finish the final simmer closer to serving. It keeps the slowest part of the job out of the way while letting the curry arrive at the table freshly finished rather than simply reheated.

Doubling the Recipe

Double the ingredients only when your cooker has enough room. Chickpeas expand and foam during pressure cooking, so follow your cooker’s limit for legumes and other expanding foods. Instant Pot’s guidance says these foods should not go above the 1/2 mark. A larger pan of finished curry also needs more time to reduce; the pressure time itself does not automatically double.

← Back to recipe FAQs ↑ Back to top

Chana Masala and Chole: What’s the Difference?

Chana masala is often used as the broader term, while Punjabi chole often refers to a darker, more robustly seasoned chickpea preparation—but the names overlap considerably in everyday use.

The boundary is not rigid. Families, cities and restaurants do not all draw the line in exactly the same place, so two noticeably different bowls can both be sold as chana masala or chole without either necessarily being mislabeled.

This is a gravy-based Punjabi-style chana masala rather than a Pindi chole or Amritsari chole preparation. Those styles use different methods and flavour balances.

Frequently Asked Questions

1. Does chana masala need black tea?

No. Black tea is optional and mainly darkens the chickpeas. Chana masala does not require it; the Dark vs Deep section explains what tea changes and what actually builds flavour.

2. Can I make chana masala without onion and garlic?

Yes, but expect a lighter, sharper gravy because the onion in this version provides body and sweetness as well as flavour. Ginger, chilli, tomato and the spice blend can still make a good curry without onion and garlic, but it will not have quite the same texture or depth as this Punjabi-style version.

3. How spicy should chana masala be?

It can be hot, but chilli should not overwhelm the earthy chickpeas, warm spices and tang. Kashmiri or degi chilli gives colour and relatively gentle warmth; increase the green chilli or use a hotter chilli powder for a hotter bowl.


The Last Spoonful

Partially eaten bowl of chana masala with basmati rice, torn roti and red onion while a spoon lifts several chickpeas coated in thick gravy.

When the last spoonful lifts chickpeas and gravy together instead of leaving one behind, the pot has done what it needed to do. Eat it hot with roti, rice, poori or bhatura. The technique has a few rules; the personality of the curry is yours.
← Recipe card ↑ Back to top

Posted on Leave a comment

Chana Masala Powder Recipe: Homemade Chole Masala Blend

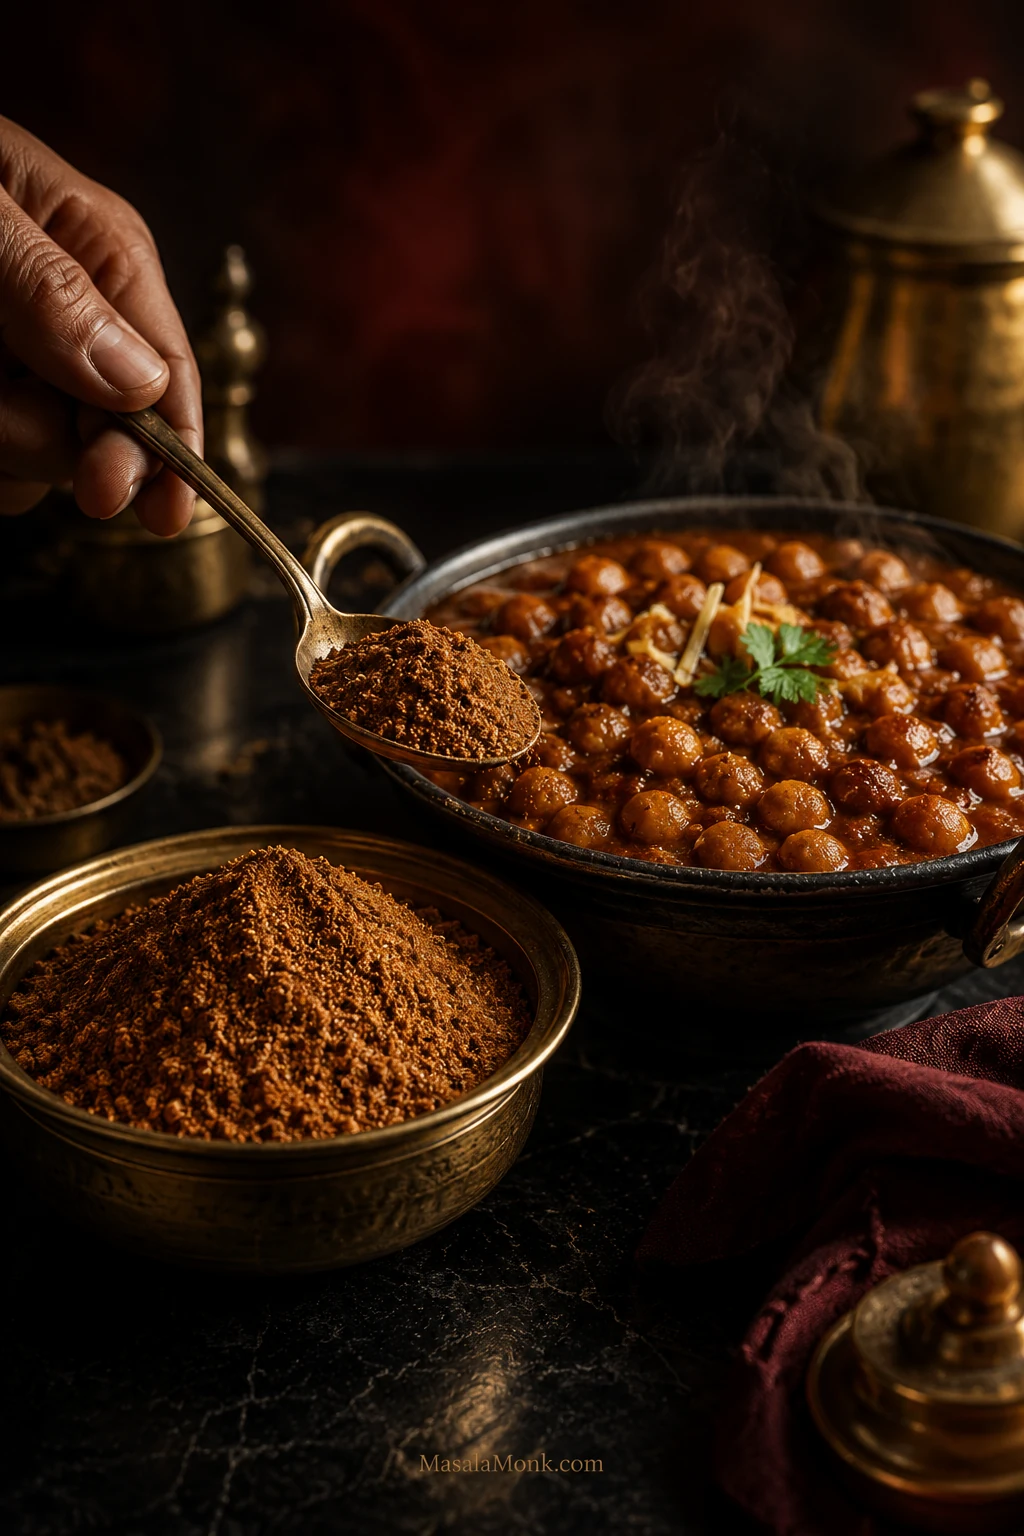
Bowl of rust-brown homemade chana masala powder beside steaming chole, with a spoon carrying the spice blend toward the curry.

Your chole can smell wonderfully spicy and still taste strangely flat. Maybe the first spoonful is mostly tomato and chickpea, then the chilli arrives afterwards. Or perhaps it is plenty hot but somehow doesn’t taste like the chole you were trying to make.

If you’ve already reached for more cumin, another spoonful of garam masala or a hotter chilli, you probably don’t need a mystery ingredient. The balance between the spices you already have matters more.

This homemade chana masala powder recipe, also called chole masala powder, is built for the common “hot but flat” problem. Coriander and cumin get the longer toast, quicker aromatics join later, and amchur stays out of the pan so the blend keeps its depth without letting one note take over.

The result is earthy, tangy and warmly aromatic without letting chilli dominate. Heat is only one dial. Once you separate it from tang, earthiness and aroma, a disappointing pot becomes much easier to understand.

Homemade Chana Masala Powder Recipe

Making the powder is straightforward. Keep the pan gentle and the spices moving; aroma matters more than chasing a darker colour.

  • MakesAbout 90 g / 3.2 oz
  • Active timeAbout 15–20 minutes
  • Cooling10–15 minutes
  • TotalAbout 25–35 minutes
  • Chilli heatMild–medium with Kashmiri/Byadgi chillies
  • Peak aromaBest within 2–3 months

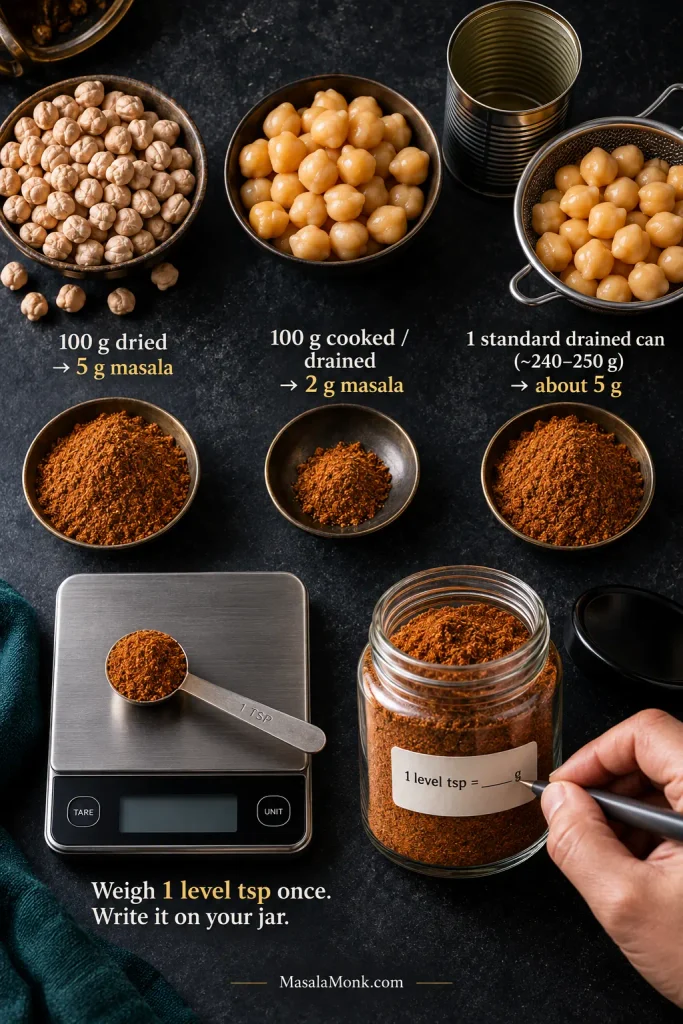
Starting dose: about 5 g per 100 g dried chickpeas, or around 2 g per 100 g cooked or drained chickpeas.

Ingredients

Use the gram weights when you can. Spoon and count measures are rough guides, but chillies, cinnamon sticks, cardamom pods and dried leaves don’t come in standard sizes.

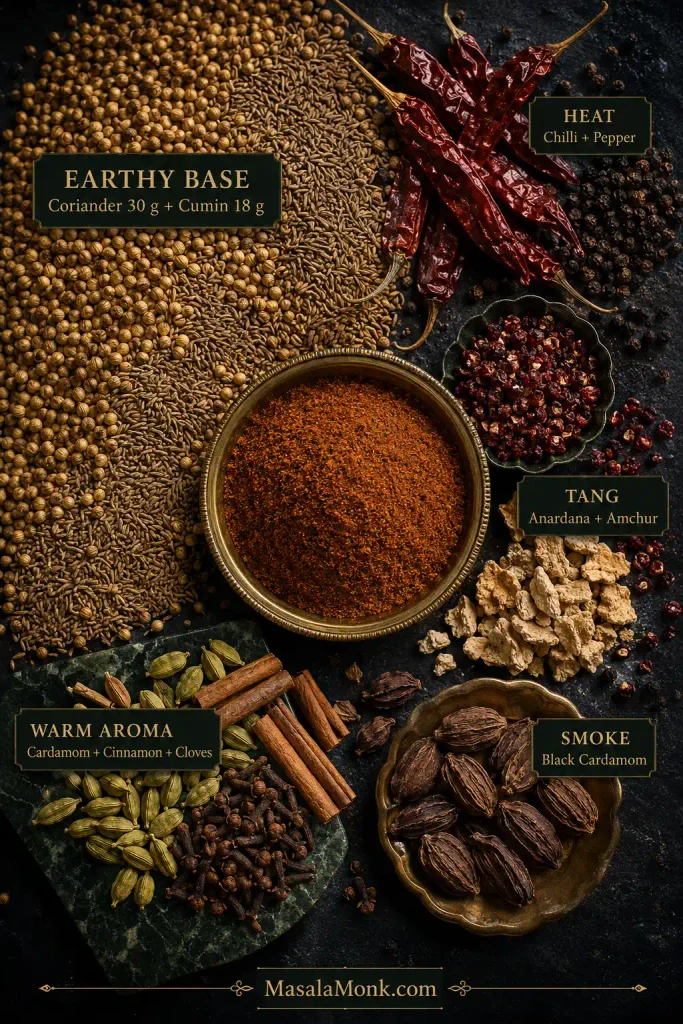
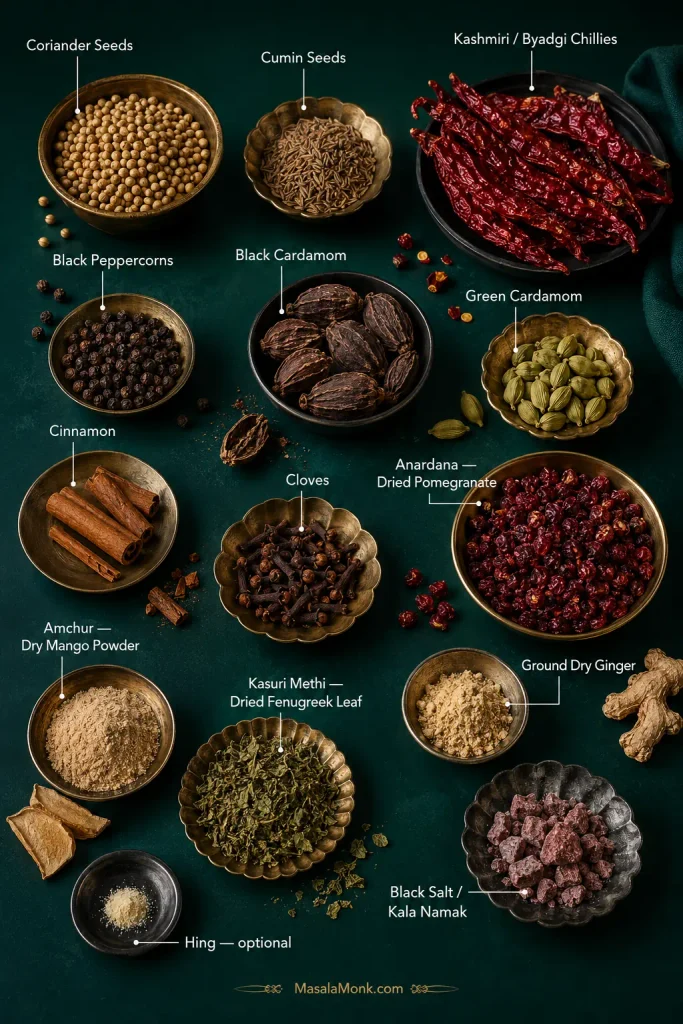
Overhead arrangement of coriander, cumin, dried red chillies, peppercorns, cardamom, cinnamon, cloves, anardana, amchur, kasuri methi, dry ginger, black salt and hing.
A visual guide to the whole blend: identify the less familiar ingredients here, then use the gram-weighted list below for the actual formula.
  • 30 g coriander seeds — about 6 tablespoons
  • 18 g cumin seeds — about 3 tablespoons
  • 8 g Kashmiri or Byadgi dried red chillies, stems removed — roughly 6–10 depending on sizeA hotter chilli needs a smaller amount.
  • 4 g black peppercorns — about 1½ teaspoons
  • 2 g black cardamom — roughly 1–2 large pods or about 2 smaller podsUse the weight if yours are unusually large.
  • 1 g green cardamom — roughly 5 pods
  • 3 g cinnamon — roughly one moderate 2-inch / 5-cm pieceA thin curl and a thick cassia stick can weigh very differently.
  • 2 g cloves — about 1 teaspoon
  • 10 g dried anardana / dried pomegranate seeds — roughly 1–1½ tablespoons
  • 6 g amchur / dry mango powder — about 2½–3 teaspoons
  • 2 g kasuri methi / dried fenugreek leaves — about 1–2 tablespoons, loosely crumbledThis is dried fenugreek leaf, not fenugreek seed.
  • 2 g ground dry ginger — about 1 teaspoon
  • 2 g black salt / kala namak — about ⅓ teaspoon
  • Optional: a tiny pinch of ordinary compounded hing / asafoetida, added after grindingAvoiding gluten? Check the label; some compounded asafoetida contains wheat flour.

Before You Start

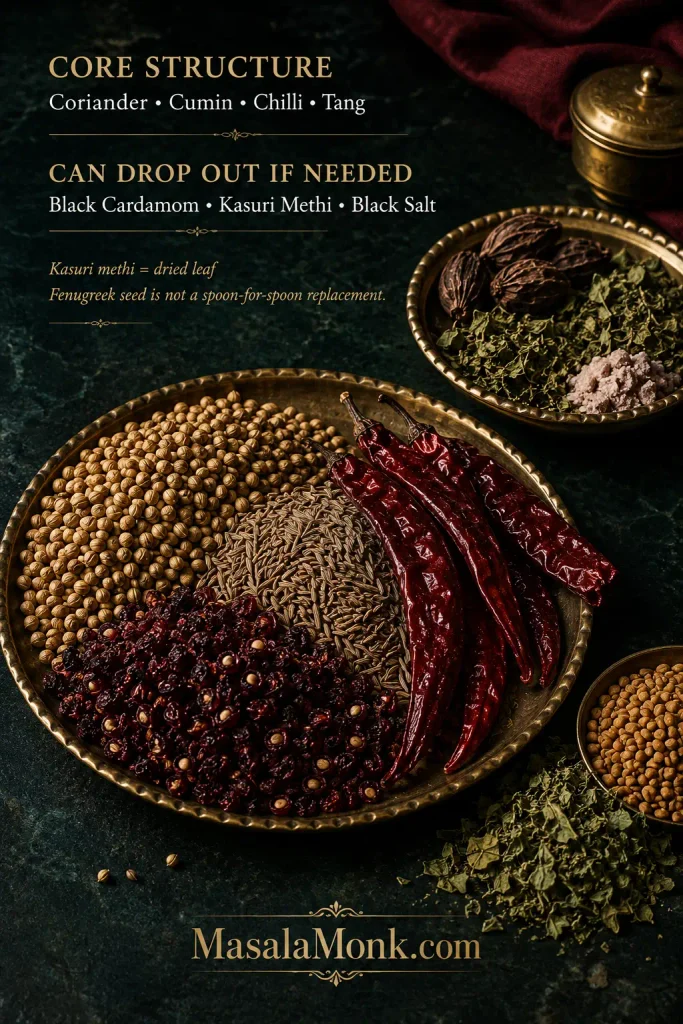
Don’t have every last spice? Keep going. The heart of the blend is coriander, cumin, chilli and tang. Black cardamom, kasuri methi and black salt can drop out when necessary and you’ll still have a perfectly workable chole masala. See what you can leave out and what not to substitute.

Turmeric and regular cooking salt are left out deliberately. Both are easier to adjust in the finished chole.

You’ll need a dry skillet or kadai, a cooling plate, a spice grinder or mixer grinder, and a dry airtight jar. A fine sieve helps when cinnamon or anardana refuses to grind cleanly.

Method

For this blend, don’t chase dark colour in the pan. Some chole formulas deliberately roast their spices more deeply, but this recipe uses a gentler roast. For darker Pindi- or chole-bhature-style chickpeas, build the colour while cooking the chickpeas—some methods use dried amla (Indian gooseberry) or black tea—instead of scorching this powder.

Roast the Spices in Stages

  1. Measure everything first. Check the coriander, cumin and anardana for grit, stones or damaged pieces, especially if the spices were bought loose. Remove the chilli stems and keep a cool plate beside the stove.
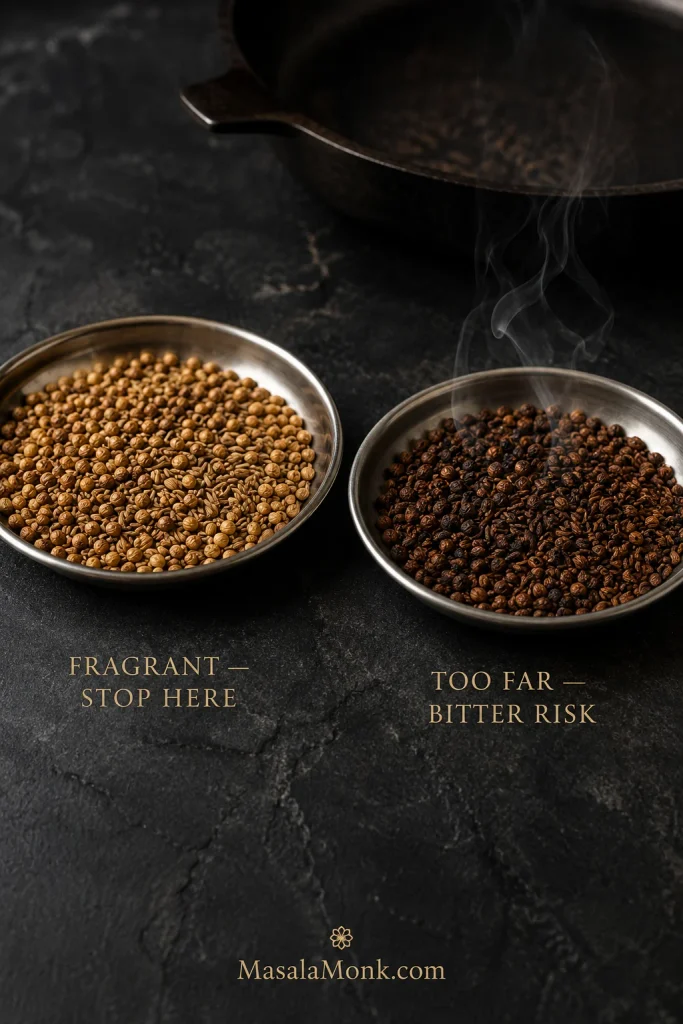
  1. Heat a dry skillet over low to medium-low heat. Add the coriander and cumin and stir or shake the pan frequently for about 3–4 minutes. They should smell clearly fragrant before they change much colour. Smoke or very dark cumin means the pan is too hot.
Two steel dishes compare lightly toasted coriander and cumin with much darker over-roasted spices, with smoke rising from the darker side.
Take coriander and cumin off the flame a little earlier than your eyes may suggest. Their stored heat keeps working after they leave the pan, so a fragrant, gently deepened roast gives you more margin than waiting for dramatic browning.
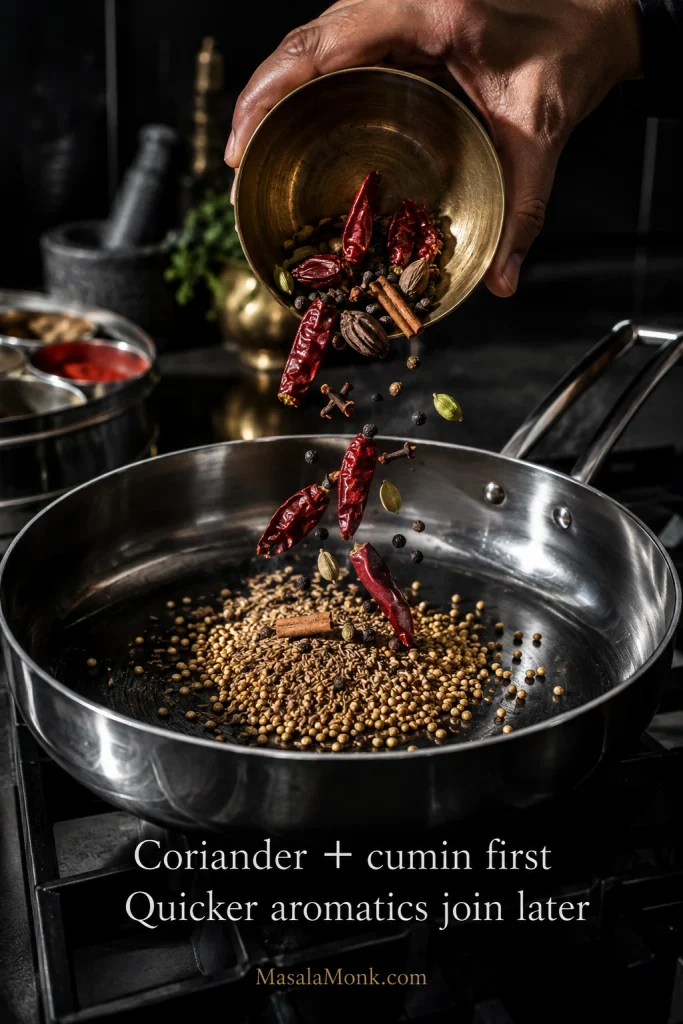
  1. Add the chillies, pepper, black cardamom, green cardamom, cinnamon and cloves. Stir continuously for another 1–2 minutes. The chillies should feel drier and may puff slightly. Once the aroma becomes vivid, tip everything onto the cool plate.
Hand adding dried chillies, peppercorns, cardamom, cinnamon and cloves to a pan that already contains coriander and cumin seeds.
Different spices reach their aromatic peak at different speeds. Coriander and cumin can take the head start; meanwhile, bringing chillies, pepper and the warmer aromatics in later gives them enough heat to bloom without making scorched notes part of the blend.
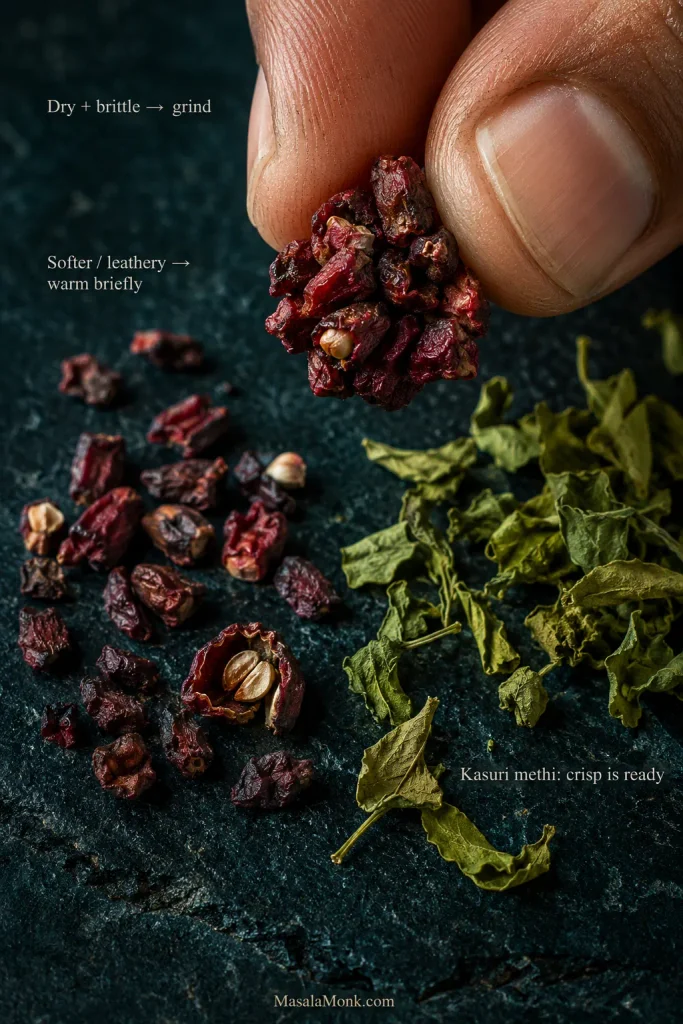
  1. Check the anardana and kasuri methi. Very dry, brittle anardana can go straight to the grinder. Softer or leathery seeds benefit from a brief warming over low heat so they grind more cleanly. Crisp kasuri methi can go in as-is; softer leaves only need a few seconds of gentle heat. Cool anything you warmed.
Close view of dried pomegranate arils held between fingers beside loose anardana and crisp dried kasuri methi leaves.
Clean grinding is the goal. Already-brittle anardana and crisp kasuri methi need no extra roasting just for colour.

Cool, Grind and Jar the Blend

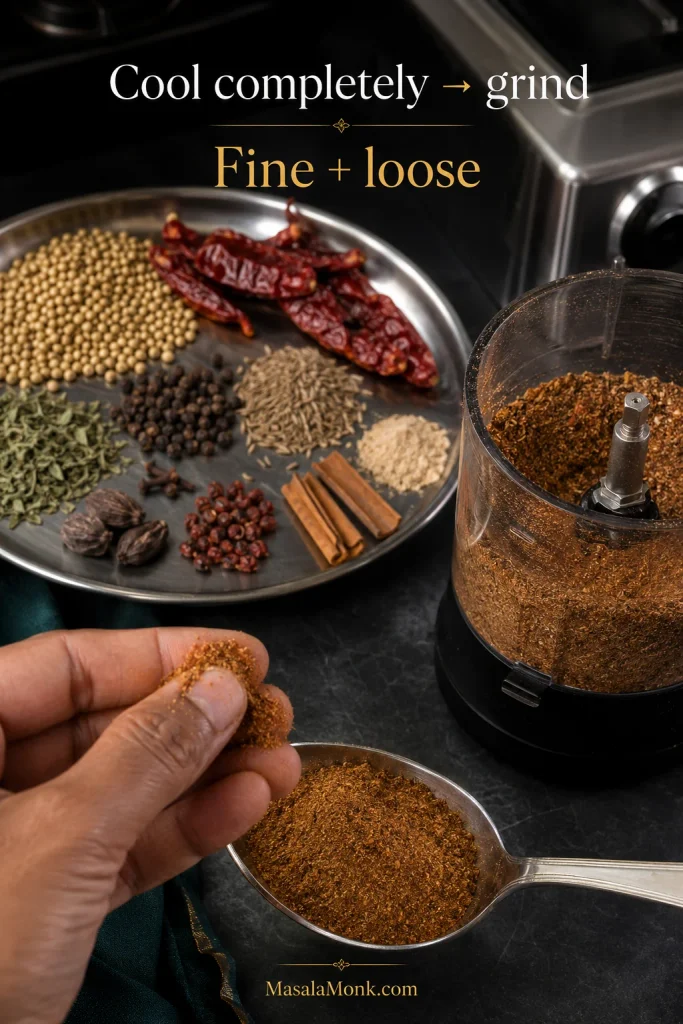
  1. Let everything cool completely, usually 10–15 minutes. There shouldn’t be obvious warmth left when you pick up the spices.
  2. Pulse the cooled whole spices until fairly fine. Add the amchur, dry ginger, black salt, cooled kasuri methi and optional hing, then pulse again just until evenly mixed. A noticeably hot grinder needs a break before you continue.
  3. Rub a little powder between your fingers. It should feel fine and loose, never damp or pasty. Tiny flecks are fine; obvious cinnamon or pomegranate pieces need another grind. Let the dust settle for a few seconds before opening the grinder. With hotter chillies, keep your face back, avoid touching your eyes and wash your hands well after handling them; good ventilation helps.
Roasted whole spices beside a grinder, with fingers rubbing a pinch of finely ground chana masala powder over a spoon.
If only a few pieces refuse to grind finely, sieve them out and regrind those fragments rather than repeatedly heating the entire batch. That keeps the finished powder fine while reducing unnecessary grinder heat.
  1. Transfer the completely cool powder to a clean airtight jar. Smell it before you close the lid. Coriander and cumin should come first, followed by fruity anardana, pepper and chilli. Cloves and black cardamom should remain in the background.
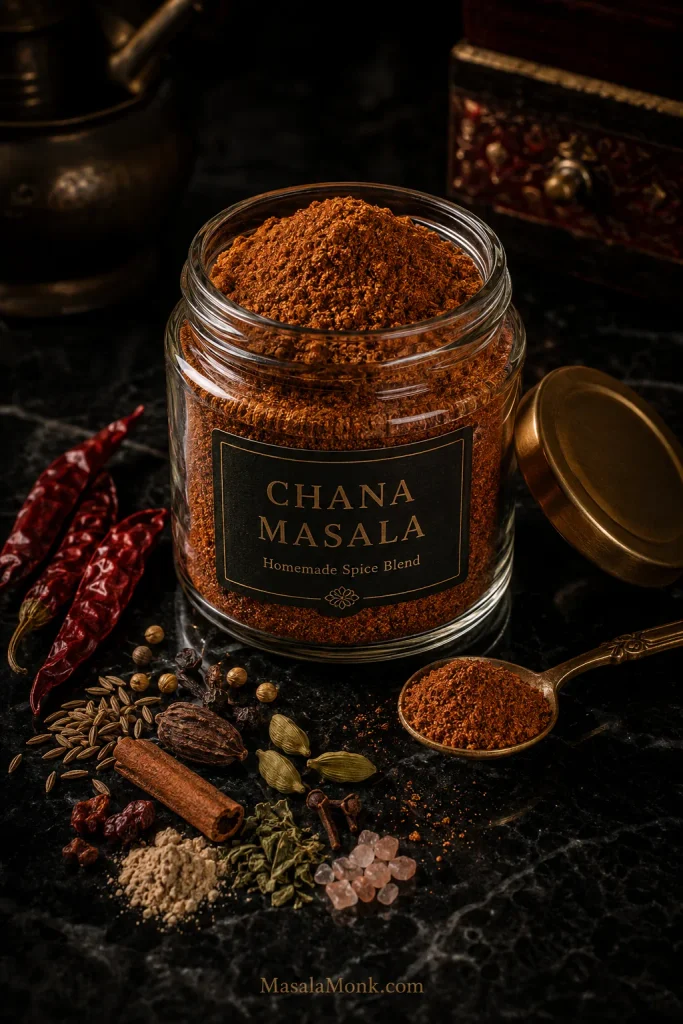
Clear glass jar filled with homemade chana masala powder, labeled Chana Masala Homemade Spice Blend, with a spoon and whole spices nearby.
Give the finished jar one last smell before you put it away. If a small aromatic ingredient such as clove or black cardamom is shouting over the coriander-cumin base, it is easier to rebalance the powder now than after it has seasoned an entire pot.

How Much Chana Masala Powder Should You Use?

Starting Dosage by Chickpea Weight

One recipe tells you to use a couple of teaspoons; another seems to want tablespoons. Both can make sense when the powders themselves aren’t equally concentrated.

For this homemade masala, start with 5 g for every 100 g dried chickpeas, or roughly 2 g for every 100 g cooked or drained chickpeas.

The blend is not your pot’s total salt adjustment. Season the finished chole separately, especially when using canned chickpeas or a packet spice blend.

ChickpeasStart with this blend
Starting with dried chickpeas
100 g / 3.5 oz driedAbout 5 g
200 g / 7 oz dried, roughly 1 cupAbout 10 g
250 g / 8.8 oz driedAbout 12–13 g
Starting with cooked or canned chickpeas
400 g / 14 oz cookedAbout 8 g
About 3 cups cooked, roughly 450–500 gAbout 9–10 g
1 standard 15-oz / 425-g can, about 240–250 g after drainingAbout 5 g
2 standard cans, about 480–500 g drainedAbout 10 g

Calibrate Your Teaspoon

No scale beside the stove? Weigh one level teaspoon from your finished batch once and write that weight on the jar. Grind fineness changes density, so your own teaspoon conversion is more reliable than a universal spoon measure.

Dosage guide showing dried chickpeas, cooked chickpeas and drained canned chickpeas with measured masala, plus a level teaspoon on a digital scale.
Write your calibrated teaspoon weight on the jar, then recheck it after a major grind or formula change. A finer powder can pack more densely into the same spoon.

Let the first dose simmer into the gravy before deciding it is weak. If the pot really needs salt, a direct adjustment to tang, or a few more minutes of reducing, fix that directly instead of using extra masala as a catch-all.

Using a packet? Follow that packet first. Commercial chole masalas vary enormously in salt, chilli, acidity and concentration, so the table above belongs to this homemade blend. See why packet and homemade measurements don’t transfer directly.

When to Add the Powder

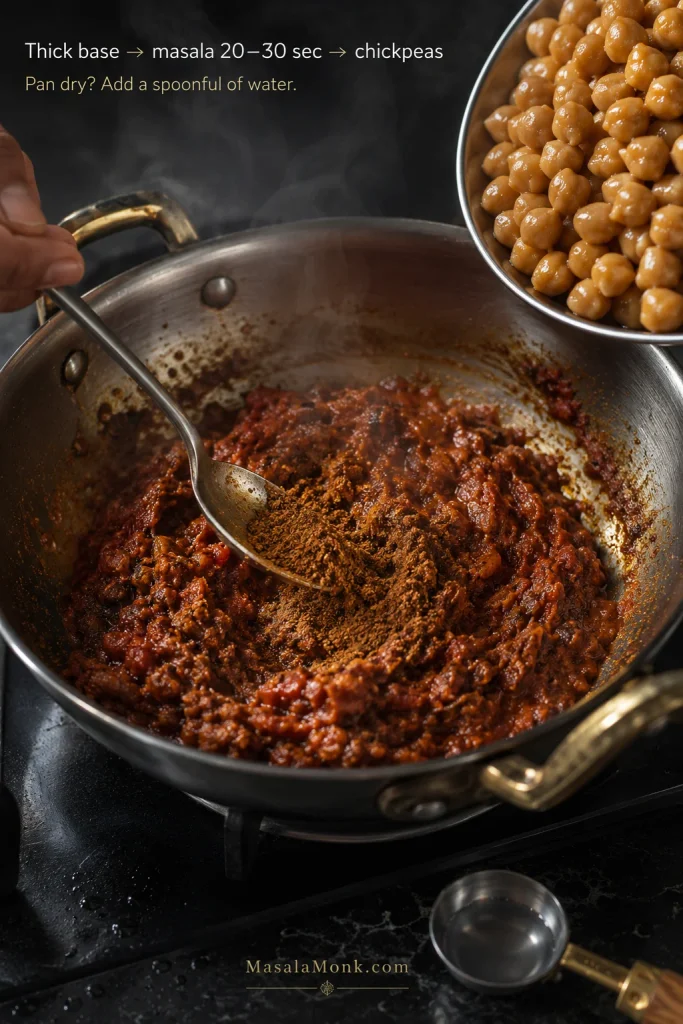
Cook the onion-tomato base until it is thick and no longer smells raw. Lower the heat, stir in most of the masala and give it about 20–30 seconds. A dry pan needs a spoonful of water before the spices catch. Add the chickpeas and cooking liquid straight afterwards.

When the chole tastes balanced but the aroma seems quiet, a small finishing dose works better than another long cook.

Spoon stirring chana masala powder into a thick cooked onion-tomato base, with chickpeas ready to be added and a small measure of water nearby.
A brief bloom is enough: keep the reduced base moving and get the chickpeas in before the ground spices scorch.

Made the Powder? Here’s Dinner

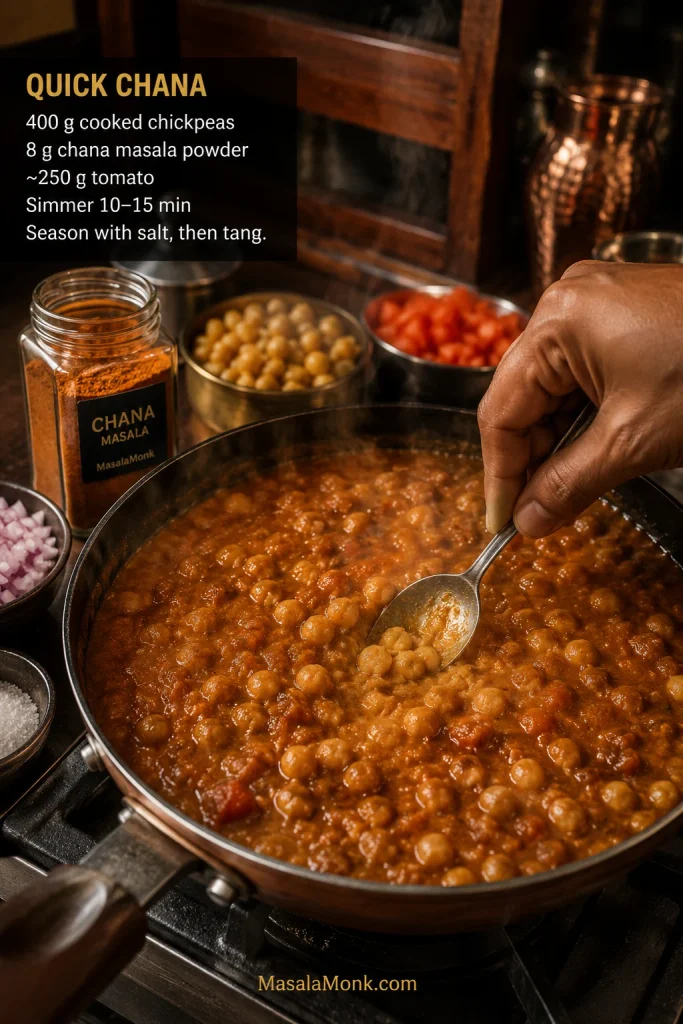
For an easy everyday chana, soften and lightly brown 1 medium chopped onion, about 120–140 g, in 1–2 tablespoons oil or ghee. Add about 1 teaspoon each of grated ginger and garlic, if using, then about 250 g chopped or puréed tomato. Cook until the tomato has reduced into a thick base.

Lower the heat and stir in 8 g of this chana masala powder for 400 g / 14 oz fully tender cooked chickpeas. Give it 20–30 seconds, adding a spoonful of water when the pan looks dry, then add the chickpeas and enough water or cooking liquid for the consistency you like.

Steaming pan of quick chana being lightly mashed with a spoon, with cooked chickpeas, chopped tomato, onion and a chana masala jar nearby.
Mash only a small portion of the chickpeas while the curry simmers. The released starch gives the gravy extra body, so it coats the remaining whole chickpeas more naturally without needing flour, cream or an unnecessarily long reduction.

Finish the Chole

Simmer for 10–15 minutes and mash a small spoonful of chickpeas into the gravy for body. Season with salt, then taste for tang. Only after those are right should you decide whether the pot needs another little dose of masala.

What are you aiming for? Tender chickpeas coated in gravy that clings instead of pooling around them. The first bite should taste savoury and tangy, and the chilli should warm the finish instead of arriving afterwards as a separate blast.

Large spoon lifting steaming chickpeas coated in thick reddish-brown gravy from a dark bowl of chole.
Do not use colour alone as your doneness test. Chole can legitimately finish lighter or darker depending on the method; instead, pay closer attention to whether the chickpeas are fully tender and whether the gravy moves with them rather than separating around them.

That is enough for a dependable everyday chana. The rest of the guide is about understanding the blend and changing it when you want something different.

What Is Chana Masala Powder?

Chana masala powder and chole masala powder usually refer to the same broad family of spice blends made for chickpeas. There is no single fixed formula.

This version leaves onion and garlic for the curry base instead of putting them into the stored powder; some commercial chana masalas include dried garlic.

Chana masala powder is also not besan or chickpea flour. “Chana powder” can sometimes mean ground chickpeas or gram flour; here we’re talking about a spice mixture.

The easiest way to remember the blend is by the job each group does. Coriander and cumin form the earthy base. Chilli and pepper control heat. Anardana and amchur bring tang. Cardamom, cinnamon and cloves supply warm aroma, while black cardamom adds smoke. Most of the salt stays in the curry.

Overhead spice arrangement showing coriander and cumin as the largest group, with separate chilli, tangy spices, warm aromatics and black cardamom around a bowl of chana masala powder.
Use the flavour map when a batch feels “hot but flat”: identify the missing dimension first instead of adding more chilli by reflex.

How the Blend Is Balanced

The 30 g coriander to 18 g cumin ratio keeps coriander in front. It brings a fresh, citrusy earthiness; cumin takes the flavour deeper. Together they give the masala enough body to settle into the gravy instead of leaving only warm spice on top.

Chilli and pepper have different jobs too. Kashmiri or Byadgi chilli carries colour and a broad warmth; pepper catches up later with a sharper heat.

Cardamom, cinnamon and cloves should remain in the background.

Why Chole Masala Recipes Look So Different

Compare five good recipes and you may find five convincing formulas. Some nearly match coriander and cumin. Others lean much harder on coriander. One uses amchur, another anardana, while plenty use both. Kasuri methi, black salt, turmeric, fennel, ajwain, mace and nutmeg come and go.

The grind changes as well. A coarse masala can feel pleasantly rustic; a finer one disappears more easily into gravy and is easier to dose consistently.

Punjabi chole isn’t one rigid template. Pindi and Amritsari styles alone can differ noticeably in method, gravy and seasoning, and family versions move again. One family’s spice tin may smell smokier, another’s fruitier with anardana, and both can taste immediately like chole.

Adjusting the Tang: Anardana and Amchur

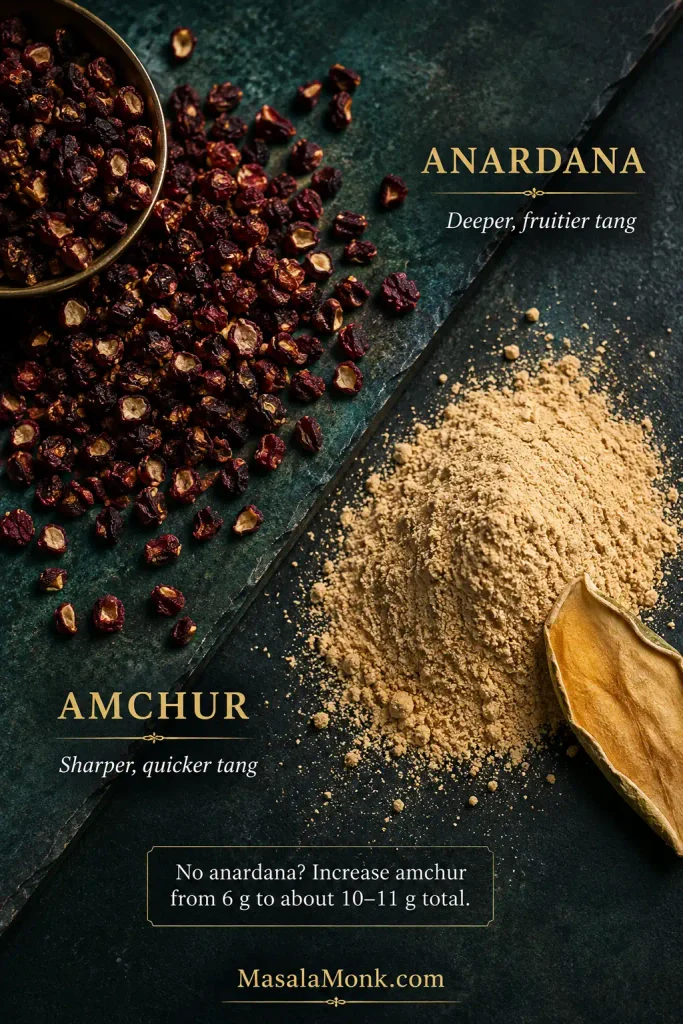
Tang is one of the biggest reasons two chole masalas can taste so different. Anardana and amchur aren’t identical: anardana gives a deeper, fruitier tang, while amchur is sharper and hits sooner on the tongue.

This recipe uses 10 g anardana with 6 g amchur so the tang has both depth and lift.

Small dried burgundy anardana seeds beside pale amchur powder on a dark green surface, with a piece of dried mango nearby.
More amchur can replace the acidity of missing anardana, but it will not recreate its fruitiness. Judge the substitute by balance, not by trying to make the two taste identical.

Out of anardana? Skip the 10 g anardana and increase the amchur from 6 g to about 10–11 g total. The blend will taste sharper and less fruity. No amchur? Leave it out and let the anardana carry the dry tang, then finish the cooked chole with lemon if it needs more lift.

Count the sour ingredients already in the pot. Tomato, anardana, amchur, lemon, tamarind and acids in some packet masalas can pile up faster than you expect.

Chana Masala Powder vs Garam Masala

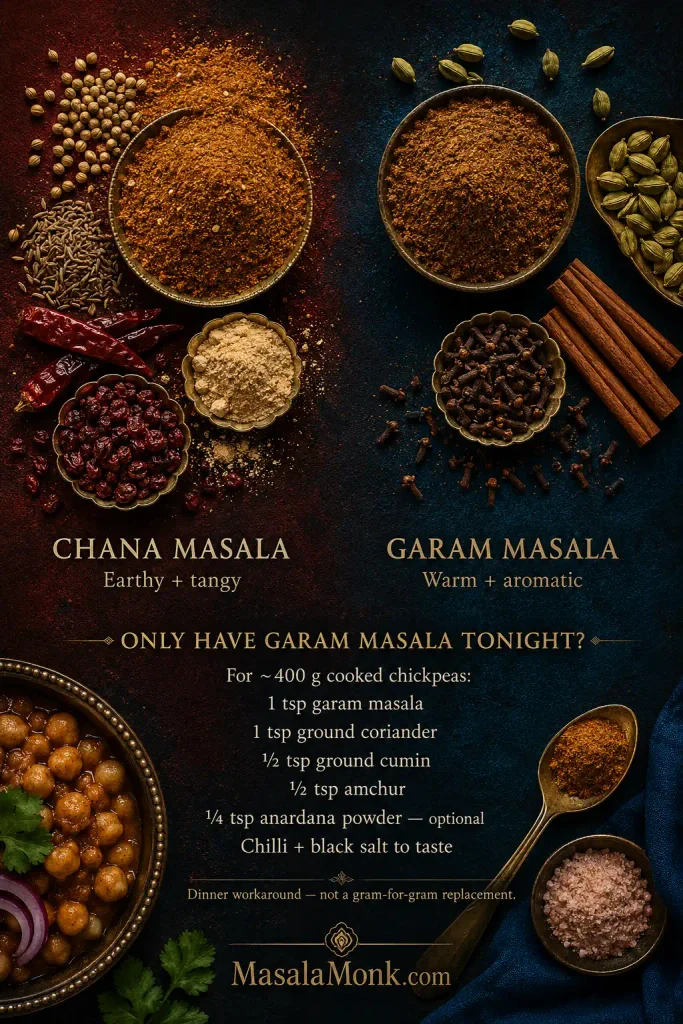
Garam masala can stand in for chana masala powder in a pinch, but it usually needs help from coriander, cumin and something tangy.

The two blends share several warm spices. Garam masala generally leans much more towards aroma, while chole masala usually has a clearer coriander-cumin base and often gets part of its character from anardana or amchur. Chickpeas seasoned only with garam masala can smell wonderful yet miss the earthy, tangy flavour you were chasing.

Our homemade garam masala makes that contrast easy to see ingredient by ingredient.

A Garam Masala Workaround

For about 400 g cooked chickpeas, start with:

  • 1 teaspoon garam masala
  • 1 teaspoon ground coriander
  • ½ teaspoon ground cumin
  • ½ teaspoon amchur
  • ¼ teaspoon anardana powder, optional
  • chilli and black salt to taste

Think of this as a dinner workaround, not a gram-for-gram copy of the blend above. Simmer it into the gravy before deciding whether it needs more; the result will depend on the garam masala you started with. Making dinner now? Jump back to the quick chana method.

Overhead comparison of chana masala with coriander, cumin, chilli and souring spices beside garam masala with green cardamom, cinnamon and cloves.
If the workaround smells fragrant but the chickpeas still taste flat, rebuild the missing earthy and tangy structure instead of piling on more warm spice.

Using Ground Spices Instead of Whole

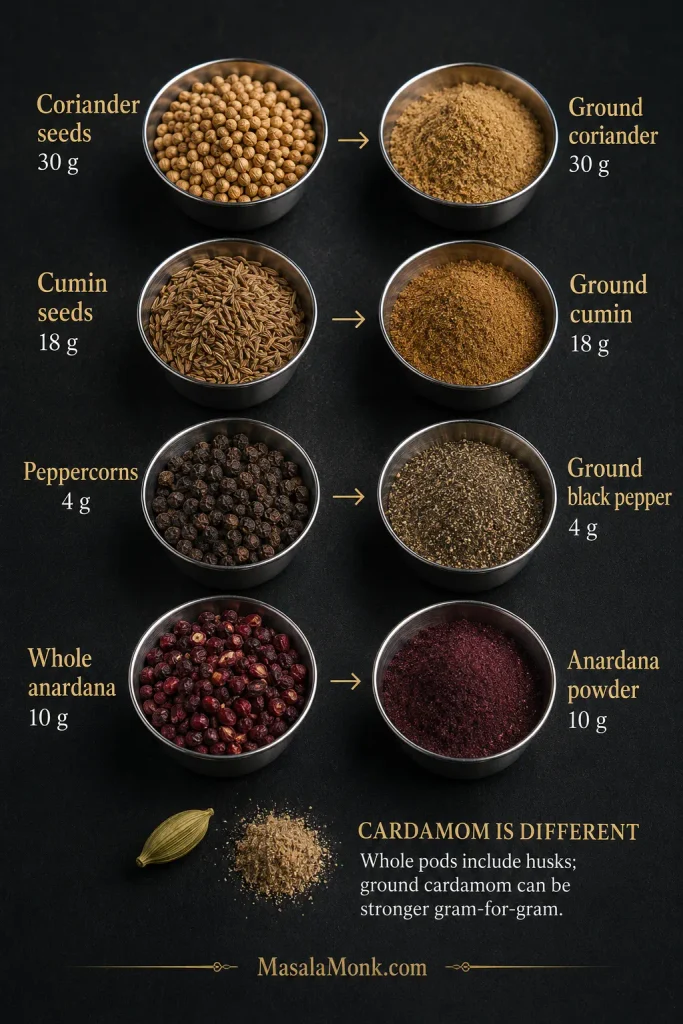
For coriander, cumin, pepper and anardana, approximately equal weight is a sensible starting point. Pre-ground spices vary in freshness and strength, so equal weight does not promise identical flavour.

  • 30 g coriander seeds → about 30 g ground coriander
  • 18 g cumin seeds → about 18 g ground cumin
  • 4 g peppercorns → about 4 g ground black pepper
  • 10 g whole anardana → about 10 g anardana powder
Four pairs compare whole coriander, cumin, peppercorns and anardana with equal-weight ground versions, while cardamom is shown separately as an exception.
Once spices are pre-ground, freshness can matter more than the arithmetic. Equal weight is a starting point, but an old jar may contribute far less aroma than a fresh grind at the same weight.

Pre-ground coriander, cumin and pepper don’t need the same dry-roasting treatment as whole spices. Mix them in unheated when finishing the blend, or toss them for a few seconds in the pan’s residual warmth after taking it off the stove. They scorch quickly.

Old ground cumin or coriander is a different problem. A jar that has been open for months may smell much quieter even at the same weight. Judge the cooked chole before automatically adding more.

Cardamom is the exception to the easy weight swap. Whole pods include husks; ground cardamom may contain mostly seed and can be much stronger gram-for-gram.

What You Can Leave Out

Black cardamom adds a distinctive low smoky note, but the masala works without it. Don’t compensate with extra green cardamom; that takes the blend in a sweeter, more floral direction.

Kasuri methi can go too. Fenugreek seed is much more bitter, so don’t replace the leaf spoon-for-spoon with seed.

No black salt? Salt the finished chole normally.

Large tray of coriander, cumin, dried red chillies and anardana beside a smaller dish containing black cardamom, kasuri methi and black salt.
When an accent ingredient is missing, omission is often cleaner than forced substitution. Protect the earthy, hot and tangy foundation first; then decide which smoky, herbal or mineral accents can disappear.

Tune the Next Batch

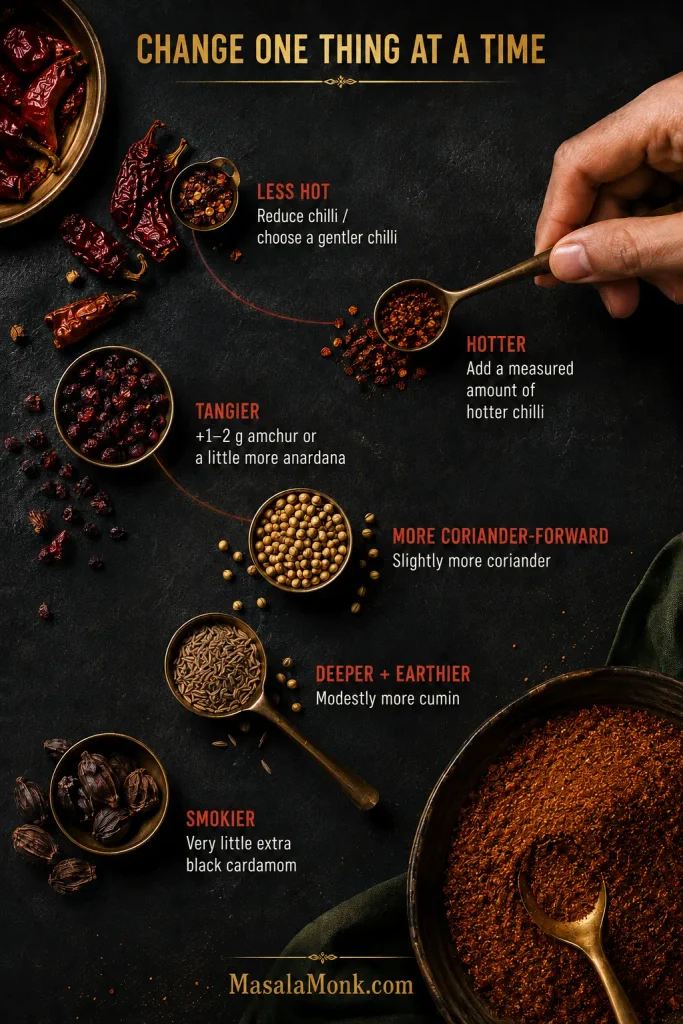
Changing one part of the blend changes one part of the flavour. More chilli makes the next batch hotter; it doesn’t make it tangier or more aromatic. Change one thing at a time so you know which adjustment actually improved the blend.

When you make the next batch, small changes are enough:

  • Less hot: reduce the chilli or choose a gentler variety.
  • Hotter: keep Kashmiri/Byadgi chilli for colour and add a measured amount of something hotter.
  • Tangier: add another 1–2 g amchur or a little more anardana.
  • More coriander-forward: increase the coriander slightly.
  • Deeper and earthier: increase the cumin modestly.
  • Smokier: add very little black cardamom at a time.
Overhead spice guide showing separate chilli, anardana, coriander, cumin and black cardamom adjustments while a hand moves one unmarked spoon of chilli.
Keep the main formula steady, change one lever, and jot the change on the jar. That turns the next batch into useful feedback instead of guesswork.

A jar that smells more perfumed than appetising already has plenty going on. Check the cloves, cinnamon and cardamom before reaching for more chilli.

Trying to repair this batch rather than change the next one? Go to the powder troubleshooting section.

Homemade vs Packet Chana Masala

Homemade gives you control over chilli, tang and salt. A packet gives you consistency—and sometimes that consistency is exactly what you’re trying to reproduce.

A packet can be part of the flavour memory too.

Shan Chana Masala shows why packet and homemade measurements don’t transfer neatly. Its ingredient list starts with salt and includes dried garlic, and its directions call for 25 g mix with 250 g dried chickpeas. This entire homemade recipe contains only 2 g black salt. Equal spoonfuls clearly aren’t equivalent.

Use the packet’s own directions as your first guide. Draining and rinsing canned chickpeas also gives you more control over salt before the gravy reduces.

If a packet gives you exactly the chole you like, use it. Homemade matters when you want to choose the balance yourself.

My Chana Masala Powder Tastes Wrong

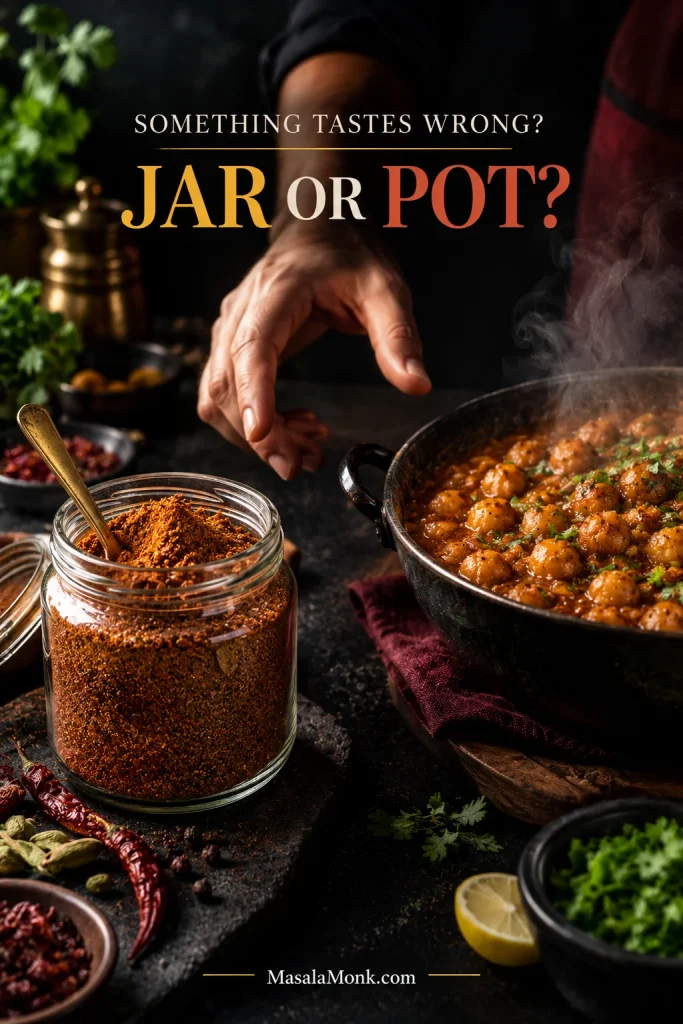
First decide whether the problem is in the jar or in the pot. Taste a tiny pinch of the powder and notice what arrives first: chilli, clove, tang, smoke—or almost nothing. The jar itself can tell you a lot.

Hand hovering between an open jar of chana masala powder and a steaming pan of chole beneath the words “Something tastes wrong? Jar or pot?”
A fast diagnostic question is: would this flaw follow the powder into every pot? If yes, investigate the jar. Otherwise, look harder at cooking variables such as chickpea tenderness, reduction, salt and final acidity before adding another spoonful of masala.

Match the Symptom to the Fix

When a batch needs diluting, make a small fresh portion built mainly around coriander and cumin. Leave out whichever ingredient is dominating, then mix the fresh portion into the original powder gradually, tasting as you go.

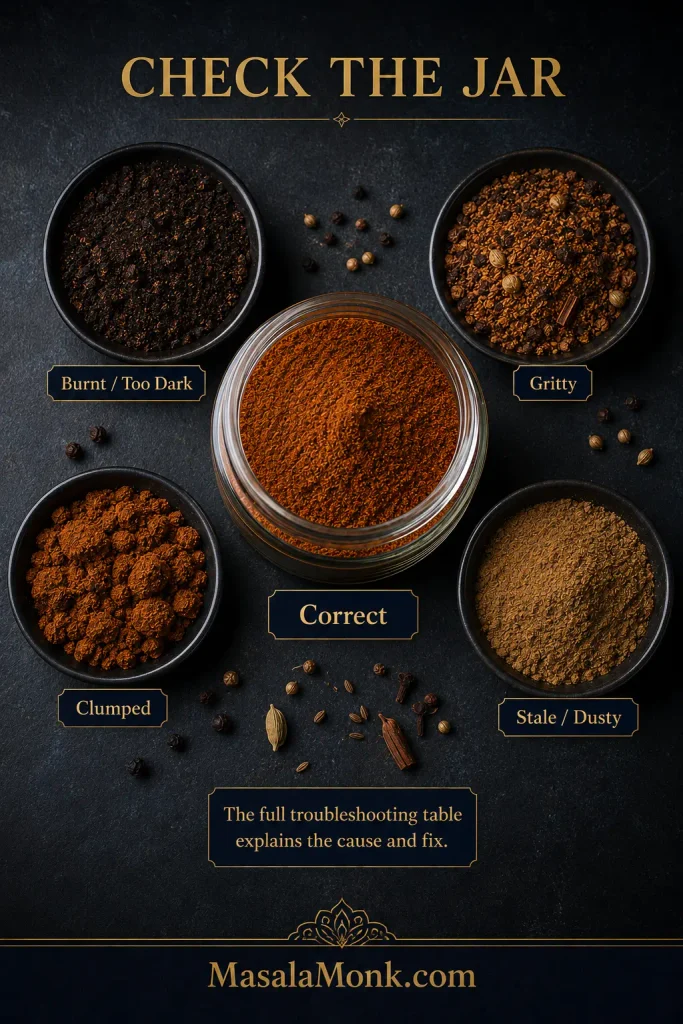
Overhead comparison of correct chana masala powder with separate burnt, gritty, clumped and faded stale-looking spice samples.
Use appearance to decide what to investigate first: darkening, clumps and coarse fragments each point somewhere different. Heat, tang and aromatic balance still need your nose and palate.
ProblemLikely causeTry this
BitterScorched spices, overheated pepper or a hot grinderBurnt: discard. Mild bitterness: add the fresh coriander-cumin-heavy portion gradually.
Hot but flatChilli is too far ahead of the earthy base or tangAdd a chilli-free coriander-cumin-heavy portion, then reassess the tang.
Too tangyToo much anardana or amchurAdd fresh coriander-cumin-heavy masala with no extra souring ingredients.
Too smokyBlack cardamom dominatesAdd the fresh portion with no extra black cardamom. More chilli won’t hide the smoke.
Perfumed or medicinalClove, cinnamon or cardamom is too strongAdd fresh coriander-cumin-heavy masala with no extra clove, cinnamon or cardamom.
Flat or dustyOld spices or prolonged hot grindingA fresh batch will help more than doubling stale powder in the curry.
GrittyAnardana, cinnamon or cardamom husk hasn’t ground finelySieve and regrind the coarse pieces.
ClumpyMoisture, warm powder, a wet spoon or steamFix the storage problem; discard if you see clear signs of spoilage.

Before You Blame the Masala, Check the Chole

And sometimes there is nothing wrong with the jar at all. A perfectly good masala cannot rescue chickpeas that are chalky in the centre or gravy that hasn’t reduced enough.

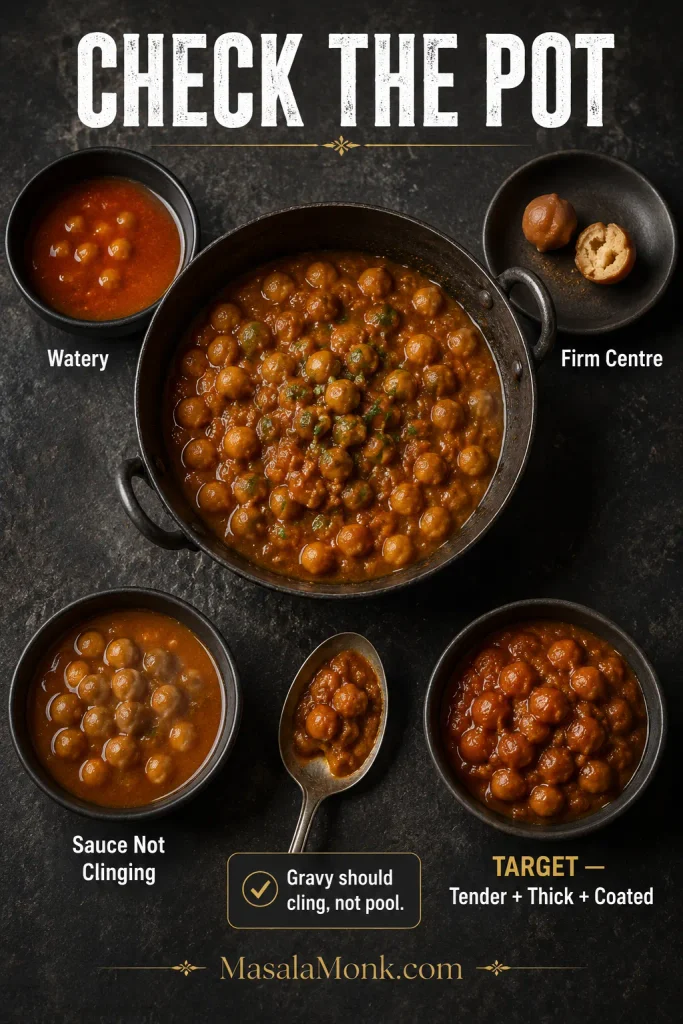
Overhead chole troubleshooting display comparing watery gravy, a split firm chickpea, sauce that does not cling and thick gravy coating tender chickpeas.
Fix the curry’s physical state before chasing seasoning. A spice blend cannot soften an undercooked chickpea, and extra masala will not rescue watery gravy; once texture and concentration are right, seasoning becomes much easier to judge.
Your chole is…More masala?Check first
Bland overallMaybeSalt and gravy concentration
Hot but one-noteUsually noTang, warm-spice balance and salt
WateryNoReduce the gravy; mash a few chickpeas if useful
Chickpeas are firmNoCook them until fully tender
Beans taste separate from the sauceNoSimmer longer; mash a small portion into the gravy
Too tangyNoCount tomato, amchur, anardana, lemon, tamarind and packet acidity together
Bitter or oddly soapyNoCheck scorched aromatics or masala, excess hing, and too much baking soda/alkalinity
Too saltyNoPacket masala, chickpea brine and added cooking salt
Balanced, but aroma is quietA littleAdd a small finishing dose

Press one chickpea between your fingers. A properly tender centre should crush easily instead of feeling chalky or springing back.

If the gravy tastes weak at first but leaves a strong spice aftertaste, it often needs time more than another spoonful. Once the sauce clings and the chickpeas are tender, the seasoning becomes much easier to judge.

If the curry’s texture and seasoning seem right but the powder itself tastes wrong, check the jar instead.

How to Store Chana Masala Powder

For the liveliest aroma, aim to use the powder within about 2–3 months. That is a freshness target, not a hard spoilage deadline. A dry blend kept clean and properly stored may remain usable longer, but coriander, chilli and cardamom gradually lose their lift.

Keep it in an airtight jar in a cool, dark cupboard away from the stove. Jar the powder only when it is completely cool, use a dry spoon, don’t hold the open container over a steaming pan, and date the jar when you make it.

Cook chole only occasionally? Halve the recipe. The full batch seasons roughly 9–11 batches made with about 400–500 g / 14–18 oz cooked chickpeas each, so a half batch is more likely to stay aromatic right to the bottom.

The masala also works with kala chana, aloo chana, pindi chole, chole bhature and other drier chickpea preparations. Start a little lighter when there is less gravy to absorb the tang and spice.

Doubling the recipe? Roast and grind it in two batches so neither the pan nor the grinder is crowded.


Once You Know the Balance

The recipe gives you a dependable place to begin. After a few pots, the useful part isn’t remembering every gram. It’s knowing what you want more of—and what to leave alone.

Then make the chole you remember, the one your family makes, the restaurant bowl you’ve been chasing, or simply the bowl you want tonight.

Posted on Leave a comment

Bean Stew Recipe with Canned or Cooked Beans: Thick, Hearty & Flexible

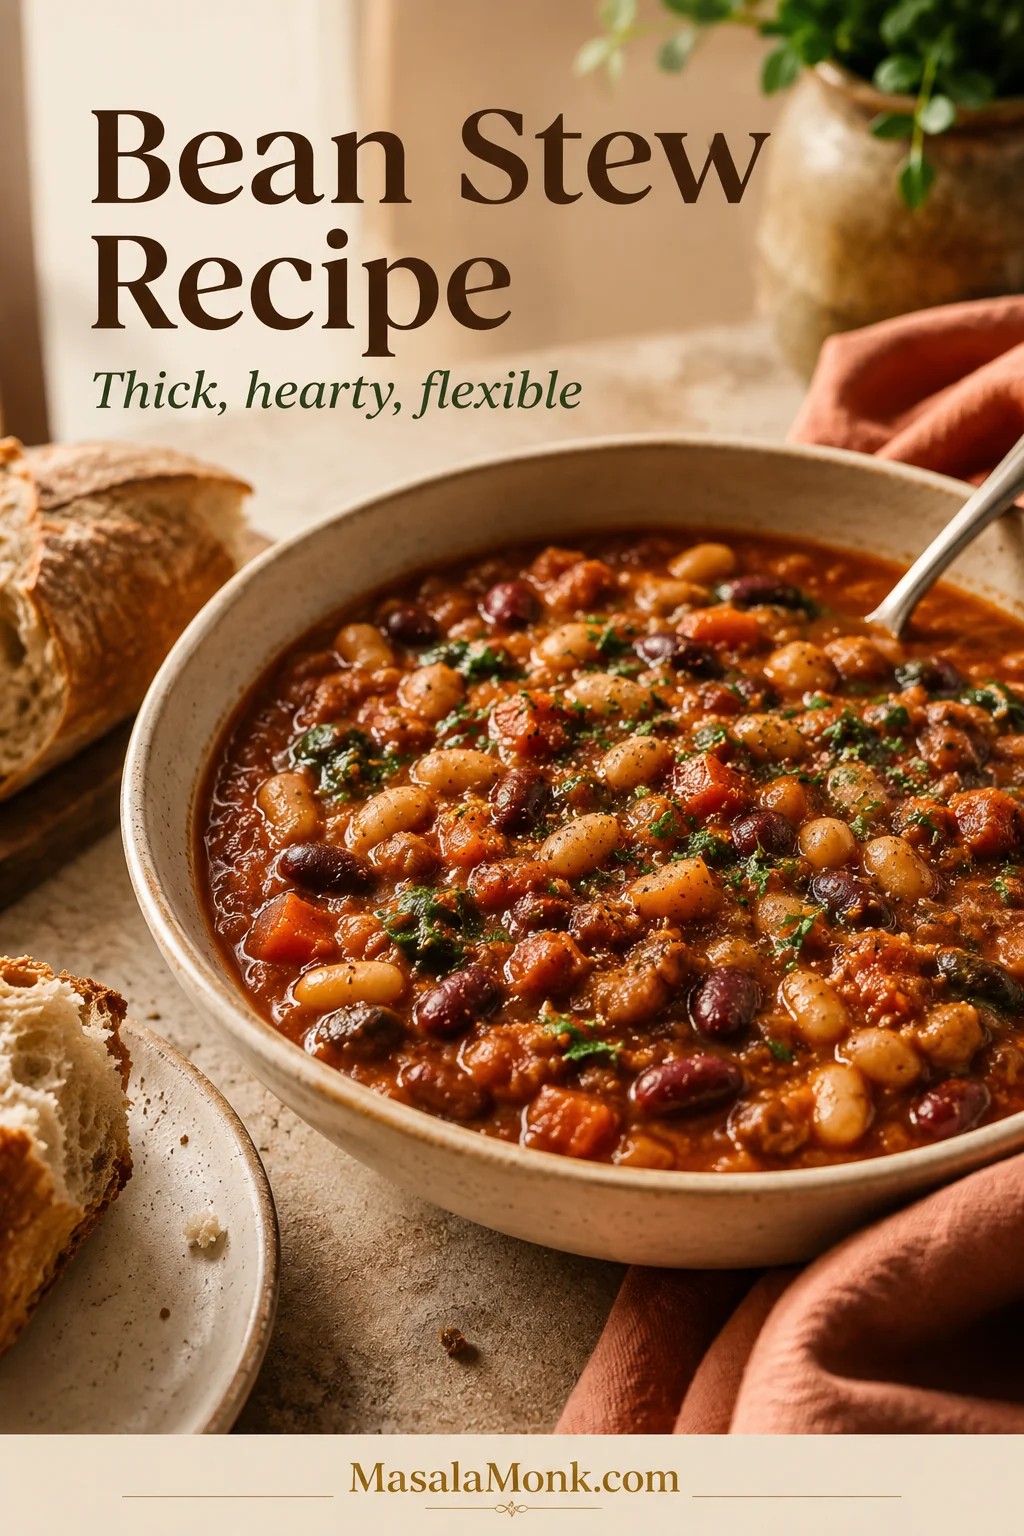
A bowl of thick tomato-based bean stew with mixed beans, carrots, greens, herbs, a spoon, and crusty bread beside it. The image includes the text “Bean Stew Recipe” and “Thick, hearty, flexible.”

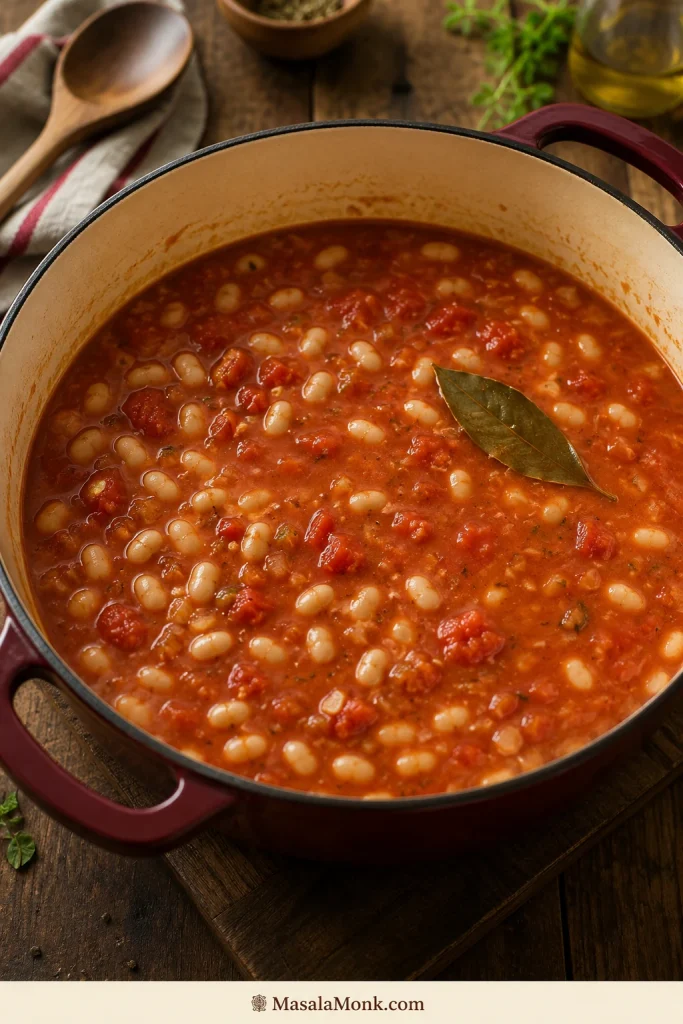
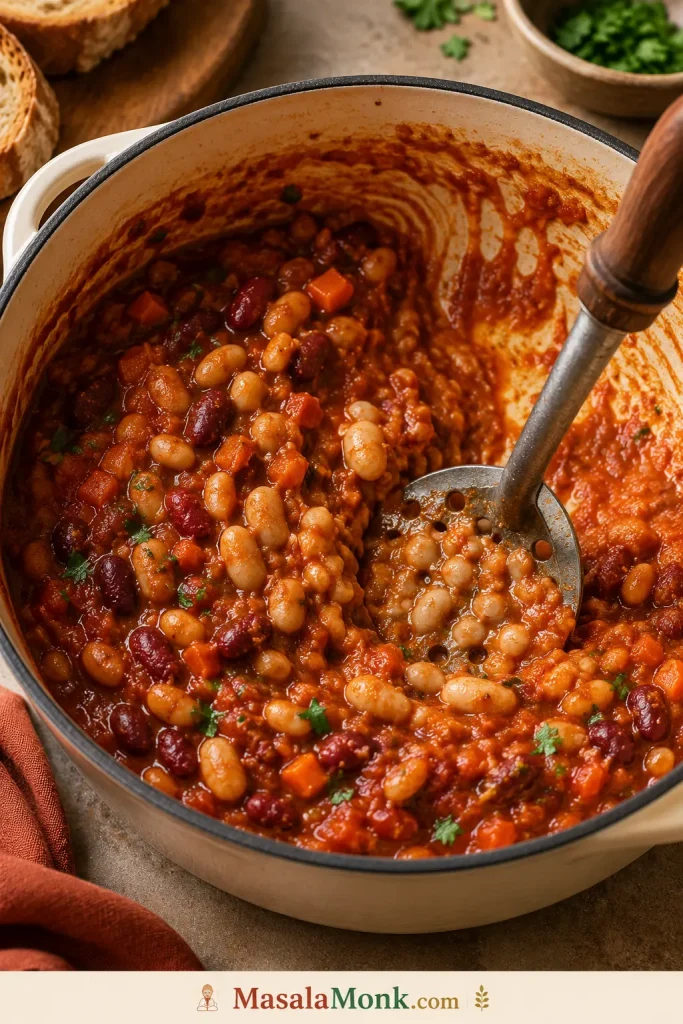
This bean stew turns three cans of beans into a thick, hearty one-pot dinner in about 50 minutes. Onion, carrot, celery, garlic, tomato paste, tomatoes, broth, and a small mash of beans cook down into a glossy tomato-bean sauce that is scoopable instead of thin.

It is especially useful on the nights when the pantry is not empty, just awkward: a few cans of beans, one onion, the last carrot in the drawer, and enough broth to pull everything together. Because the beans carry most of the meal, rice, bread, potatoes, or polenta can stretch the pot into more servings without making it feel like less dinner.

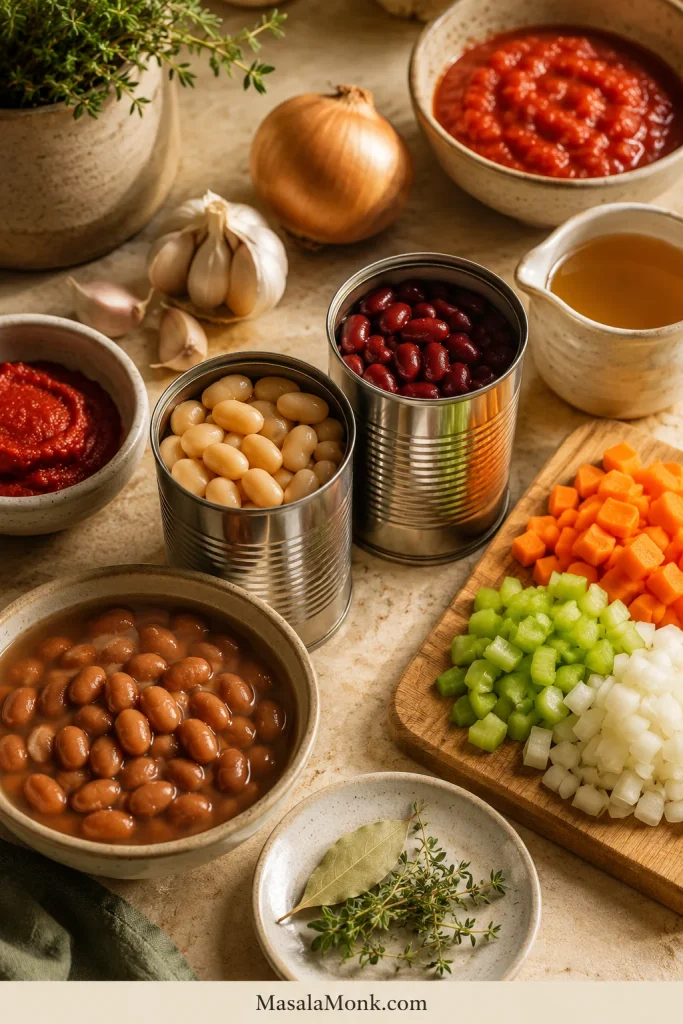
Ingredients for bean stew arranged on a kitchen counter, including beans, onion, carrot, celery, garlic, tomato paste, crushed tomatoes, broth, herbs, and bay leaf.
The base is simple: beans, aromatics, tomato paste, tomatoes, broth, herbs, and a bay leaf.

The main recipe is tomato-based, gently smoky, full of soft-edged beans and sweet vegetables, and finished with lemon juice or vinegar so the final bowl tastes lively instead of heavy.

Most bean stew recipes ask you to choose one bean or one flavor direction first. This one gives you one base method for almost any cooked beans: cannellini beans, butter beans, black beans, pinto beans, chickpeas, kidney beans, or mixed pantry beans.

Quick Answer: What Is Bean Stew?

Bean stew is a hearty one-pot meal made with cooked beans, aromatics, tomatoes or broth, herbs, vegetables, and optional meat. It has less liquid than bean soup, so it sits on rice, clings to bread, and feels more like a full dinner. It is also less narrowly seasoned than chili, which usually has a stronger chili powder, pepper, and spice profile.

For the easiest version, use three cans of beans, a savory tomato base, and 1½–2 cups of broth. Simmer until the sauce reduces, mash a small portion of the beans into the pot, stir in greens if you like, and finish with lemon juice, vinegar, herbs, or olive oil. The bowl should be spoonable, glossy, and filling without cream.

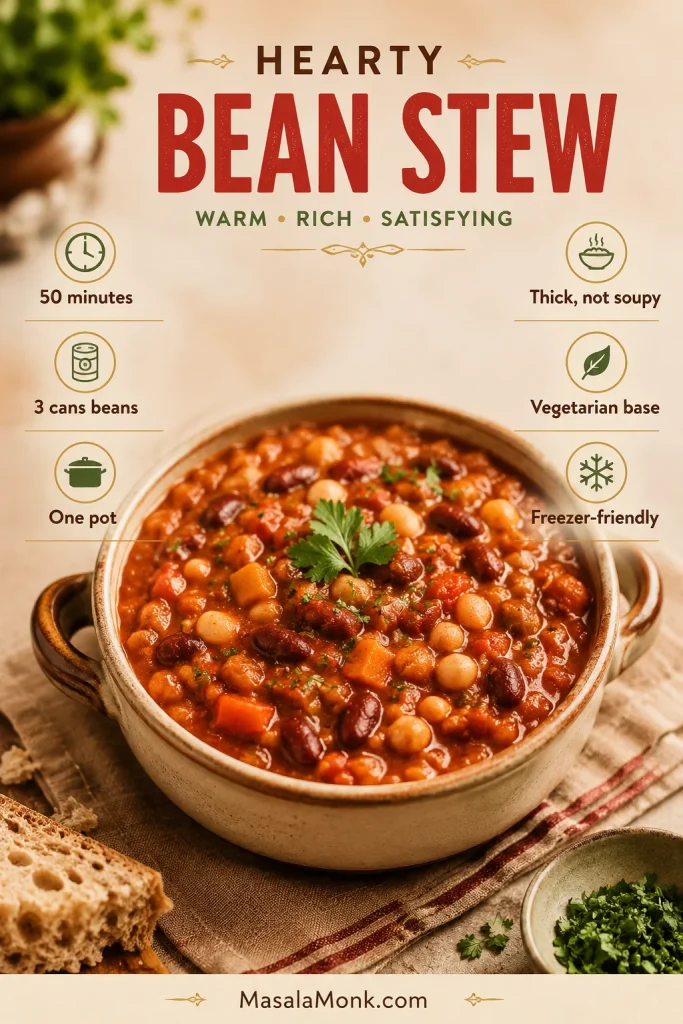
A guide-style image for hearty bean stew showing a bowl of stew with callouts for 50 minutes, 3 cans beans, one pot, thick not soupy, vegetarian base, and freezer-friendly.
This visual summary shows the promise of the recipe: one pot, three cans of beans, a thick spoonable texture, and leftovers that still feel useful the next day.

The exact measurements are in the recipe card, and the thickening cues below show when to reduce, mash, or loosen the pot.

Recipe Snapshot

Main methodStovetop, one pot
Prep time15 minutes
Cook time35–40 minutes
Total time50–55 minutes
Servings6 bowls, or 8 smaller servings with rice/bread
Stretch-it sideRice, bread, potatoes, polenta, or another sauce-catching base
Best beansCannellini, butter beans, black beans, pinto beans, kidney beans, chickpeas, navy beans, Great Northern beans, or mixed beans
Easiest optionCanned beans
Budget optionDried beans, cooked separately first
Finished textureGlossy tomato-bean sauce that clings to the spoon
DietVegetarian base; vegan-friendly; meat-flexible
Freezer-friendlyYes

Before You Start: Beans and Ratio

This stew works best with cooked, starchy beans that can simmer, soften at the edges, and help thicken the sauce. Sweet baked beans, refried beans, and green beans behave differently, so they are better treated as separate recipes or add-ins. Green beans can be added as a vegetable, but they will not make this kind of cooked-bean stew on their own.

The Simple Ratio Behind a Good Pot

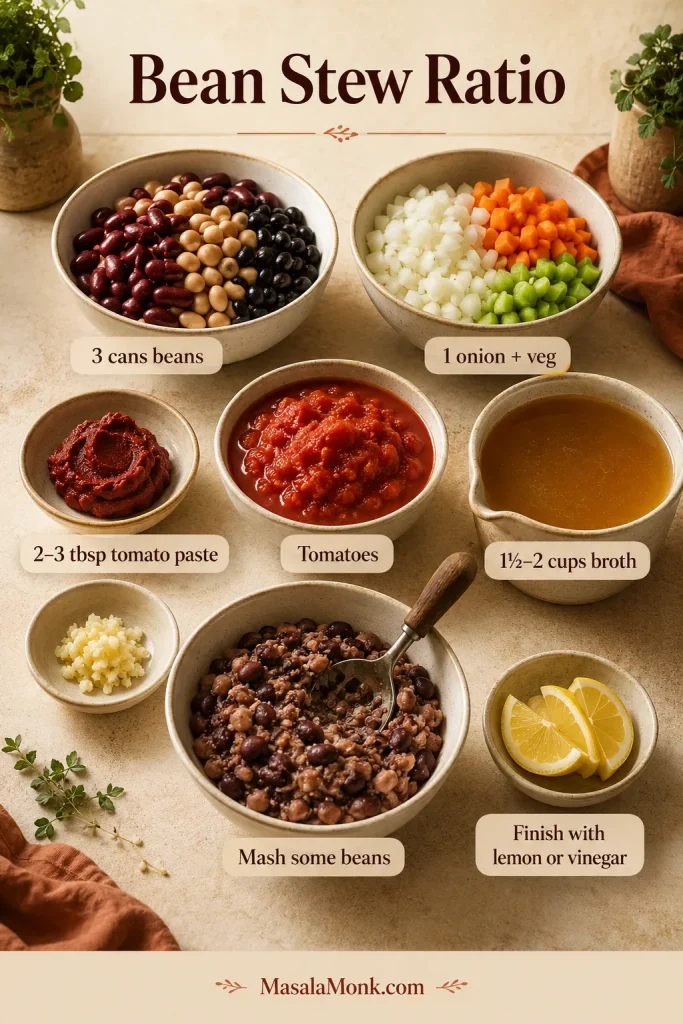
Once you know this ratio, you can make a good bean stew without needing the same cans twice. It is the kind of formula that saves dinner when the pantry looks random but not empty.

  • 3 cans cooked beans, 14–15 oz / 400–425 g each, or about 4½ cups cooked beans
  • 1 large onion plus carrot, celery, and garlic
  • 2–3 tbsp / 30–45 g tomato paste
  • 1 can crushed tomatoes, 28 oz / 800 g, or 14 oz / 400 g for a lighter tomato version
  • 1½–2 cups / 360–480 ml broth, added gradually
  • 10–15 minutes uncovered simmering to reduce the liquid
  • ½–1 cup mashed beans to thicken naturally
  • 1 tbsp / 15 ml lemon juice or vinegar to finish
A bean stew ratio guide with bowls of beans, chopped vegetables, tomato paste, tomatoes, broth, mashed beans, and lemon wedges, each labeled with the recipe ratio.
This bean stew ratio is the saveable formula: beans for body, vegetables for sweetness, tomato paste for depth, broth for looseness, and mashed beans for a thicker finish.

The stew may look thick before it has simmered, but wait 10–15 minutes before adding more broth. Beans release starch, tomatoes loosen, and vegetables soften as they cook. It is easier to loosen a thick pot than to rescue one that started too watery.

Why This Works with Almost Any Beans

The base recipe works because it does not ask every bean to behave the same way. Creamy beans help the sauce; firmer beans stay visible; mixed beans give you contrast. Start with cooked beans, keep the broth controlled, use tomato paste for depth, and mash a small portion of beans for body.

Choose Your Path

Start with the row that matches your pantry today; the main recipe is complete as written.

  • Canned or cooked beans: Follow the main recipe. Drain canned beans first, then simmer until the sauce tightens around the beans.
  • Dried beans: Cook them until tender first, then use about 4½ cups cooked beans.
  • Different bean styles: Use rosemary and lemon for white beans, lime and cumin for black beans, and herbs or vinegar for mixed beans.
  • Meat or slow cooker version: Brown meat first if using it. For slow cooker stew, use cooked/canned beans and less broth.

Cooking dried beans instead of opening cans? Check the canned vs dried bean notes before the pot starts so the beans are already tender when they meet the tomato base.

Ingredients, Swaps, and What Each One Does

The ingredients are simple, but the base matters. Let the onion, carrot, celery, garlic, and tomato paste smell sweet, savory, and cooked before the beans go in; that is what makes canned beans taste like a real stew instead of beans stirred into tomato sauce.

Main Ingredients

  • Olive oil: Softens the vegetables and gives the stew a rounder finish. Use less if adding sausage or chorizo.
  • Onion, carrot, and celery: The flavor base. Cook them until sweet-smelling and softened.
  • Garlic: Adds savory depth. Add it after the vegetables soften so it does not burn.
  • Tomato paste: Makes the stew taste deeper and more slow-cooked.
  • Smoked paprika, oregano or thyme, bay leaf, and pepper: A flexible seasoning base that works with many beans.
  • Crushed tomatoes: Create the main sauce. The full 28 oz / 800 g gives a tomato-rich pot. Use 14 oz / 400 g if you want the beans and broth to lead.
  • Broth: Low-sodium vegetable broth keeps the base vegetarian and easier to season.
  • Beans: Use three cans drained and rinsed, or about 4½ cups cooked beans.
  • Greens: Spinach, kale, chard, or collards add color. Use closer to 60 g for spinach and closer to 100 g for chopped kale, chard, or sturdier greens.
  • Lemon juice, vinegar, or balsamic: Adds a fresh lift after simmering.

Pantry Swaps

The recipe can still work if you are missing celery, using a smaller can of tomatoes, or trying to stretch two cans of beans into dinner.

If you are missingUse instead
CeleryExtra carrot, bell pepper, leek, fennel, or skip it.
CarrotSweet potato, squash, bell pepper, or extra onion.
Tomato pasteSimmer the tomatoes longer, or add a very small splash of soy sauce for depth if it fits your version.
Crushed tomatoesPassata, diced tomatoes, tomato sauce, or 14 oz / 400 g tomatoes plus more broth for a lighter stew.
BrothWater plus bouillon, or water with extra herbs, pepper, and olive oil.
Fresh herbsDried herbs in the base, then lemon or vinegar at the end.
GreensFrozen spinach, chopped cabbage, kale, chard, collards, or skip them.
Third can of beansAdd diced potato, cooked lentils, rice, extra vegetables, or use the small-batch notes below.

Salt tip: Start with ¾ tsp fine salt if using regular broth, salted canned beans, sausage, chorizo, parmesan, bouillon, or salty toppings. Use up to 1½ tsp only when your broth and beans are low-sodium or unsalted. Taste again after the stew reduces.

How to Cook It

The recipe is simple, but the pot tells you a few things as it cooks: the tomato paste should smell deeper, the sauce should slow down, and the spoon should come up with beans, not broth.

1. Soften the Vegetables

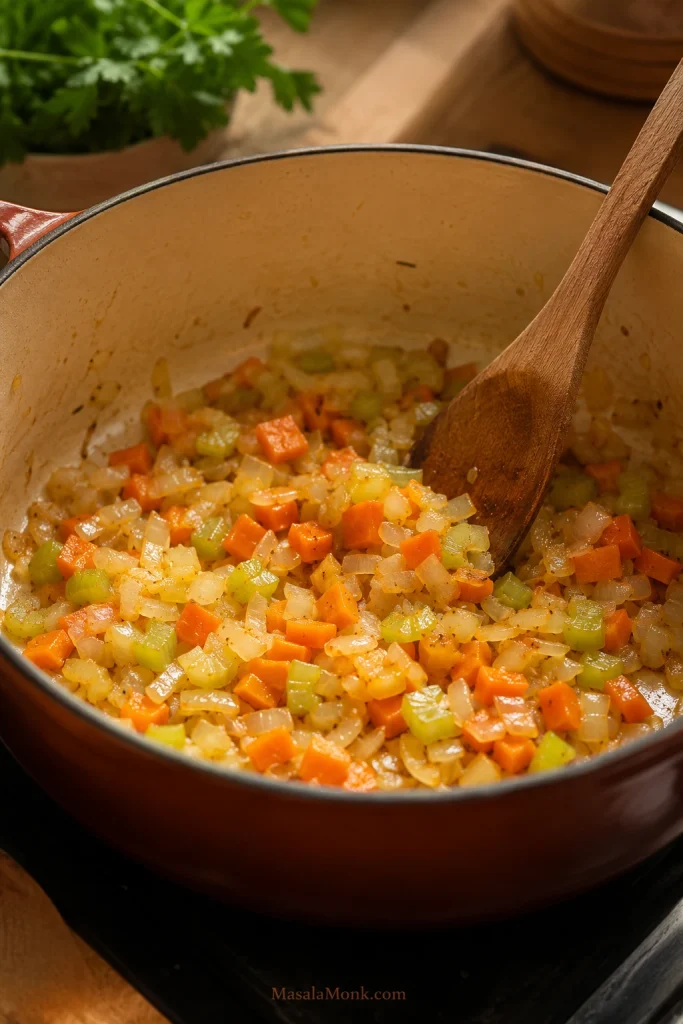
Heat olive oil in a large Dutch oven or heavy-bottomed pot over medium heat. Add onion, carrot, celery, and a pinch of salt. Cook for 7–10 minutes, stirring occasionally, until the onion looks translucent, the carrot has started to soften, and the pot smells sweet rather than raw.

Onion, carrot, and celery softening in olive oil inside an enameled Dutch oven with a wooden spoon.
First, soften the onion, carrot, and celery until glossy and sweet-smelling so the stew starts with a real cooked base, not just beans in tomato sauce.

2. Cook the Garlic, Tomato Paste, and Spices

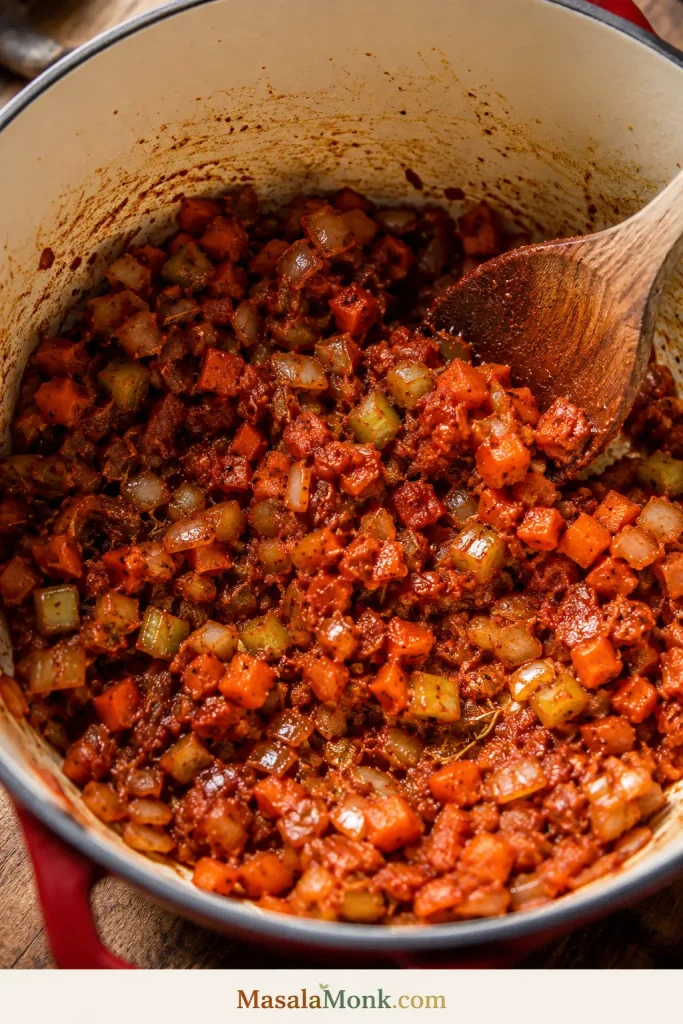
Add garlic, tomato paste, smoked paprika, oregano or thyme, cumin if using, chili flakes if using, and black pepper. Stir for 1–2 minutes. The tomato paste should darken slightly and coat the vegetables. This is the step that makes the stew taste slow-cooked even when the beans came from cans.

Softened onion, carrot, and celery coated with cooked tomato paste, garlic, herbs, and spices inside a Dutch oven, with a wooden spoon in the pot.
Next, let the tomato paste darken slightly with the garlic, herbs, and spices; that small step gives canned or cooked beans a deeper stew flavor.

3. Add Tomatoes, Broth, Beans, and Bay Leaf

Add crushed tomatoes, 1½ cups / 360 ml broth, drained beans, and bay leaf. Stir well and scrape the bottom of the pot. If the mixture is too thick to bubble gently, add another ½ cup / 120 ml broth. Hold back extra liquid until the stew has simmered for at least 10 minutes.

Beans, crushed tomatoes, broth, and a bay leaf combined in a Dutch oven at the early simmer stage of bean stew.
After the beans, tomatoes, broth, and bay leaf go in, the pot should look a little loose; simmering uncovered is what turns it into stew.

At this stage, a loose-looking pot is normal; the thickening cues below explain when to wait, reduce, mash, or add more liquid.

4. Simmer Covered

Bring the pot to a gentle boil, then reduce the heat and cover. Simmer for 15–20 minutes. The beans should absorb the garlic-tomato flavor, and the vegetables should become fully tender.

5. Simmer Uncovered

Remove the lid and simmer for 10–15 minutes more. Stir occasionally so the bottom does not catch. The bubbles should slow down, the sauce should look glossier, and a spoon should leave a brief trail through the stew before the sauce flows back. If you plan to serve it over rice, keep it slightly saucier.

6. Mash a Small Portion of the Beans

Mash ½–1 cup of beans against the side of the pot with a spoon, ladle, or potato masher. Do not puree the stew. You want enough broken beans to make the sauce creamy while most beans stay whole. Chickpeas will stay firmer than white beans, so mash a little more if using mostly chickpeas.

A potato masher pressing some beans into thick tomato bean stew inside a Dutch oven, with many whole beans still visible.
Instead of adding cream or flour, mash a small portion of the beans into the sauce while leaving plenty of whole beans for texture.

When the stew stays thinner than you want after mashing, use the troubleshooting table before adding extra ingredients.

7. Add Greens and Finish

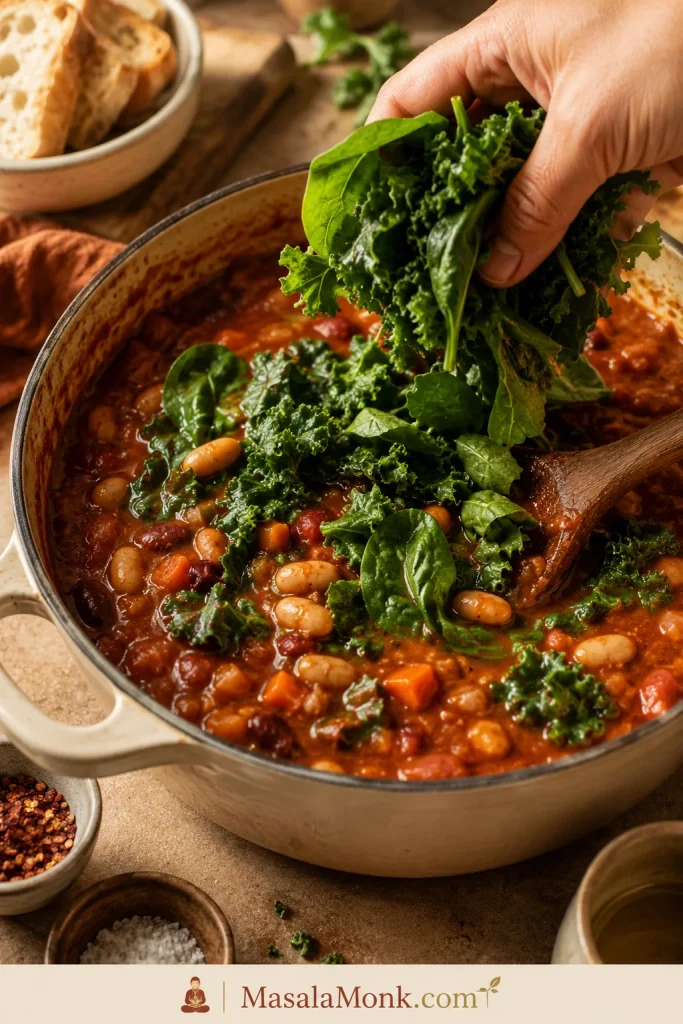
Stir in spinach, kale, chard, or other greens. Spinach needs 2–3 minutes; kale and chard may need 4–5 minutes. Turn off the heat, remove the bay leaf, then stir in lemon juice, vinegar, or balsamic. If the stew tastes dull even after salt, it probably needs acid, not more spices.

A hand adding fresh spinach and kale to a pot of thick tomato bean stew while a wooden spoon rests in the pot.
Toward the end, fold in spinach, kale, or chard so the greens soften into the hot stew while still adding freshness and color.

8. Rest Before Serving

Let the stew rest for 10 minutes before serving. The beans settle, the sauce tightens, and the bowl becomes more balanced. If it gets too thick, loosen it with broth or water ¼ cup / 60 ml at a time.

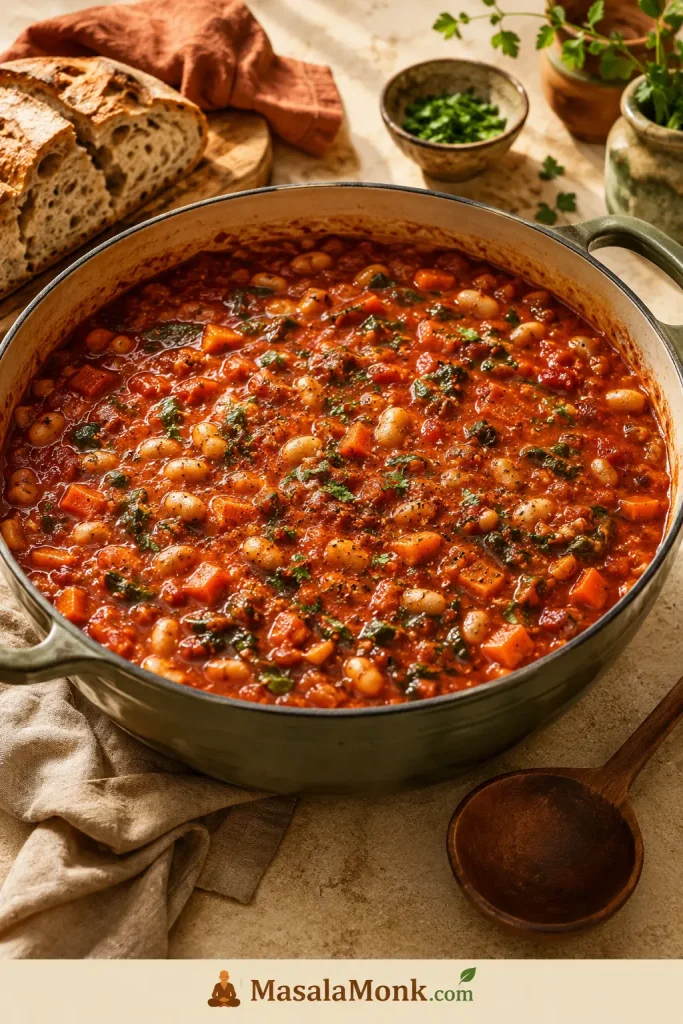
Finished bean stew in a Dutch oven with white beans, carrots, tomatoes, greens, herbs, and a thick red sauce, with bread and a wooden spoon nearby.
After resting, the stew should look settled and glossy in the pot before it ever reaches the bowl.

How to Keep It Thick, Not Soupy

If the stew looks too loose at first, give it a few minutes uncovered before adding fixes.

  • Start with less broth. For three cans of beans, begin with 1½ cups / 360 ml broth and add more only if needed.
  • Wait before adding liquid. Tomatoes loosen and beans release starch as they simmer.
  • Simmer uncovered near the end. This reduces extra liquid and concentrates flavor.
  • Mash some beans. Breaking down ½–1 cup beans thickens the sauce naturally.
  • Use tomato paste. Cooked tomato paste adds body and depth.
  • Choose creamy beans. Cannellini, butter beans, pinto beans, and white beans make a thicker pot.
  • Blend a small amount. You can blend 1 cup of stew and stir it back in, but do not blend the whole pot unless you want a bean puree.
  • Rest before serving. The stew thickens slightly as it cools.

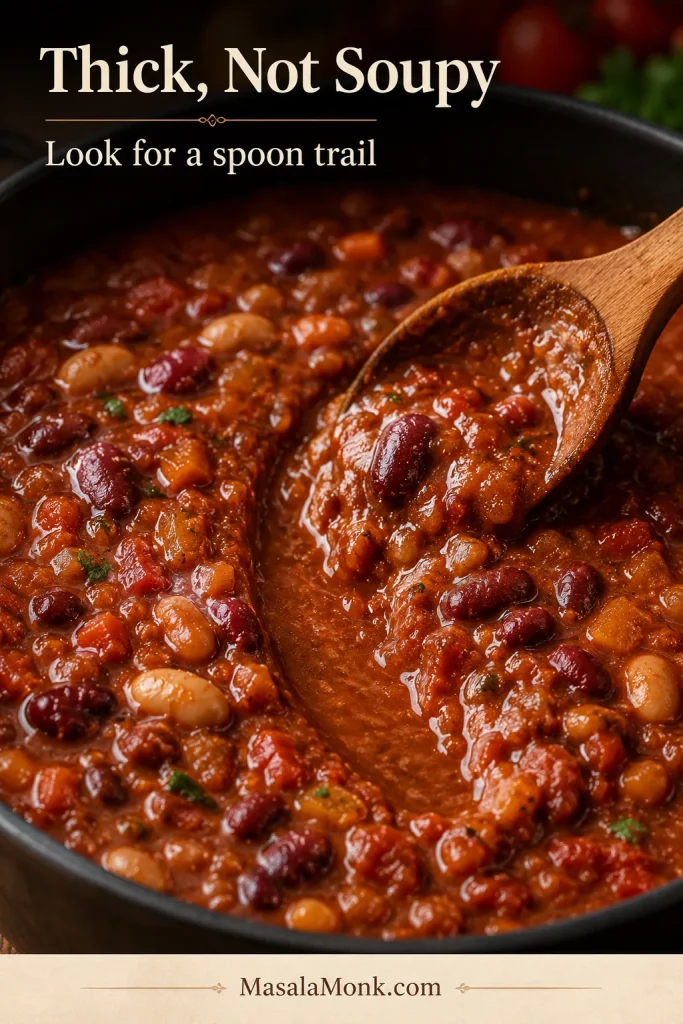
Texture cue: after the uncovered simmer, a spoon should leave a short trail through the stew before the sauce slowly flows back. The stew should sit on rice instead of flooding it, and bread should be able to drag through the sauce.

Close-up of thick tomato bean stew with a wooden spoon creating a visible trail through the sauce. The image includes the text “Thick, Not Soupy” and “Look for a spoon trail.”
The best texture cue is the spoon trail: when the sauce clings to the beans and slowly settles back, the stew is thick enough without becoming dry.

Recipe Card

Thick and Hearty Bean Stew

This thick bean stew turns canned or cooked beans into a hearty tomato-based dinner with garlic, herbs, soft vegetables, greens, and a bright lemon or vinegar finish. Mash a small amount of beans into the pot so the sauce turns glossy and spoonable without cream.

Prep Time
15 minutes
Cook Time
35–40 minutes
Total Time
50–55 minutes
Servings
6 bowls

Equipment

  • Large Dutch oven or heavy-bottomed pot, 5–6 quart / 5–6 liter
  • Wooden spoon
  • Measuring cups and spoons
  • Can opener
  • Potato masher or ladle, optional

Ingredients

  • 2 tbsp / 30 ml olive oil
  • 1 large onion, diced, about 150–180 g
  • 2 medium carrots, diced, about 160–200 g
  • 2 celery ribs, diced, about 100 g
  • 4 garlic cloves, minced, about 12–16 g
  • 2–3 tbsp / 30–45 g tomato paste
  • Smoked paprika, 1 tsp
  • Dried oregano or thyme, 1 tsp
  • ½ tsp ground cumin, optional
  • ¼–½ tsp chili flakes, optional
  • Bay leaf, 1
  • Crushed tomatoes, 1 can, 28 oz / 800 g
  • Low-sodium vegetable broth, 1½–2 cups / 360–480 ml, plus more as needed
  • 3 cans beans, 14–15 oz / 400–425 g each, drained and rinsed; about 4½ cups cooked beans
  • 2 cups / 60–100 g spinach, kale, chard, or other greens
  • 1 tbsp / 15 ml lemon juice, red wine vinegar, or balsamic vinegar
  • 2–3 tbsp chopped fresh parsley or basil
  • ¾ tsp fine salt to start, plus more to taste; use up to 1½ tsp if using low-sodium broth and unsalted beans
  • ½ tsp black pepper
  • Extra olive oil for serving, optional

Instructions

  1. Soften the vegetables. Heat olive oil in a large Dutch oven or heavy pot over medium heat. Add onion, carrot, celery, and a pinch of salt. Cook for 7–10 minutes, stirring occasionally, until softened and sweet-smelling.
  2. Add garlic and tomato paste. Stir in garlic, tomato paste, smoked paprika, oregano or thyme, cumin if using, chili flakes if using, and black pepper. Cook for 1–2 minutes, stirring often, until the tomato paste darkens slightly.
  3. Add tomatoes, broth, beans, and bay leaf. Add crushed tomatoes, 1½ cups / 360 ml broth, the drained beans, and bay leaf. Stir well. If the stew looks too thick to simmer, add another ½ cup / 120 ml broth.
  4. Simmer covered. Bring to a gentle boil, reduce heat, cover, and simmer for 15–20 minutes.
  5. Simmer uncovered. Remove the lid and simmer for 10–15 minutes, stirring occasionally, until the liquid reduces and clings to the beans.
  6. Mash some beans. Mash ½–1 cup of beans into the sauce with a spoon, ladle, or potato masher. Keep most beans whole.
  7. Add greens. Stir in spinach, kale, or chard. Cook for 2–5 minutes, depending on the green, until tender.
  8. Finish the stew. Remove the bay leaf. Stir in lemon juice, vinegar, or balsamic, plus fresh herbs. Taste and adjust salt, pepper, and balance.
  9. Rest and serve. Let the stew rest for 10 minutes before serving. Add broth or water ¼ cup / 60 ml at a time if it becomes too thick.

Notes

  • Taste after simmering before adding more salt; broth reduces and canned beans vary.
  • For a thicker stew, start with 1½ cups / 360 ml broth and mash more beans near the end.
  • Prefer a looser stew? Use the full 2 cups / 480 ml broth and add more as needed.
  • For a lighter, less tomato-heavy version, use 14 oz / 400 g crushed tomatoes and add broth only as needed.
  • If using cooked dried beans, some good-tasting bean cooking liquid can replace part of the broth.
  • If using kidney beans, use canned kidney beans or dried kidney beans that have already been properly cooked.
  • For sausage, brown 12–16 oz / 340–450 g sausage first and reduce the olive oil.
  • For a vegan version, use vegetable broth and finish with olive oil, lemon, and herbs.

Best Beans for Stew

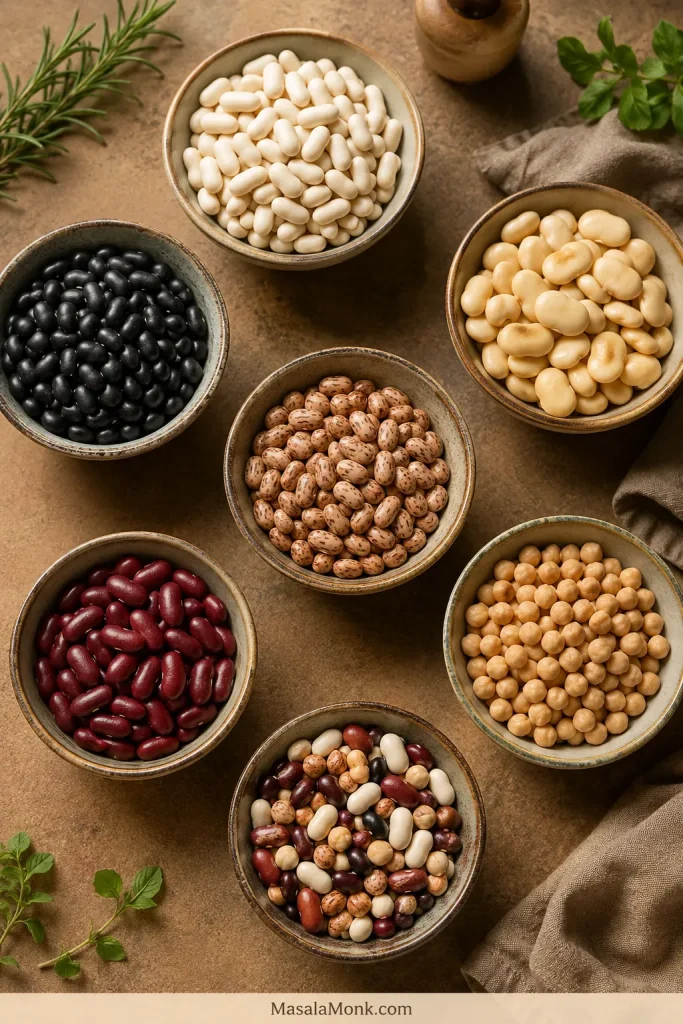
The bean mix changes the whole bowl: creamy beans soften the sauce, firmer beans stay visible, and mixed beans make the stew feel more like a pantry dinner than a planned recipe.

Several bowls of different beans for stew, including white beans, butter beans, black beans, pinto beans, kidney beans, chickpeas, and mixed beans.
Different beans bring different texture: creamy white beans, butter beans, chickpeas, kidney beans, black beans, pinto beans, or a mixed-bean blend can all work here.
BeanBest forTextureNotes
Cannellini beansWhite bean stew, Tuscan-style stewCreamy but holds shapeBest all-purpose choice for the main version.
Butter beansThick, soft, comforting stewLarge, tender, butteryExcellent with tomatoes, smoked paprika, rosemary, mushrooms, or chorizo.
Great Northern or navy beansWhite bean stewSmall to medium, creamyBest when you want the stew creamy and gentle.
Black beansSmoky or Latin-style stewEarthy and creamy-firmUse cumin, smoked paprika, chili, lime, cilantro, and rice.
Pinto beansMexican-style or pantry stewSoft and creamyThey break down nicely and help thicken the sauce.
Kidney beansMixed bean stew, beef bean stewFirmUse canned or properly cooked kidney beans.
Chickpeas / garbanzo beansMediterranean, Spanish, or Moroccan-style stewNutty and firmGood with tomato, cumin, coriander, paprika, greens, and lemon.
Mixed beansBudget stew, pantry cleanout stewVariedMash some creamy beans into the sauce to bring the textures together.

Once you know which beans you are using, the variation table below shows how to season white beans, black beans, chickpeas, butter beans, and mixed pantry beans.

If you were looking for a green bean side dish instead of a cooked-bean stew, MasalaMonk’s green bean casserole recipe is the better place to start.

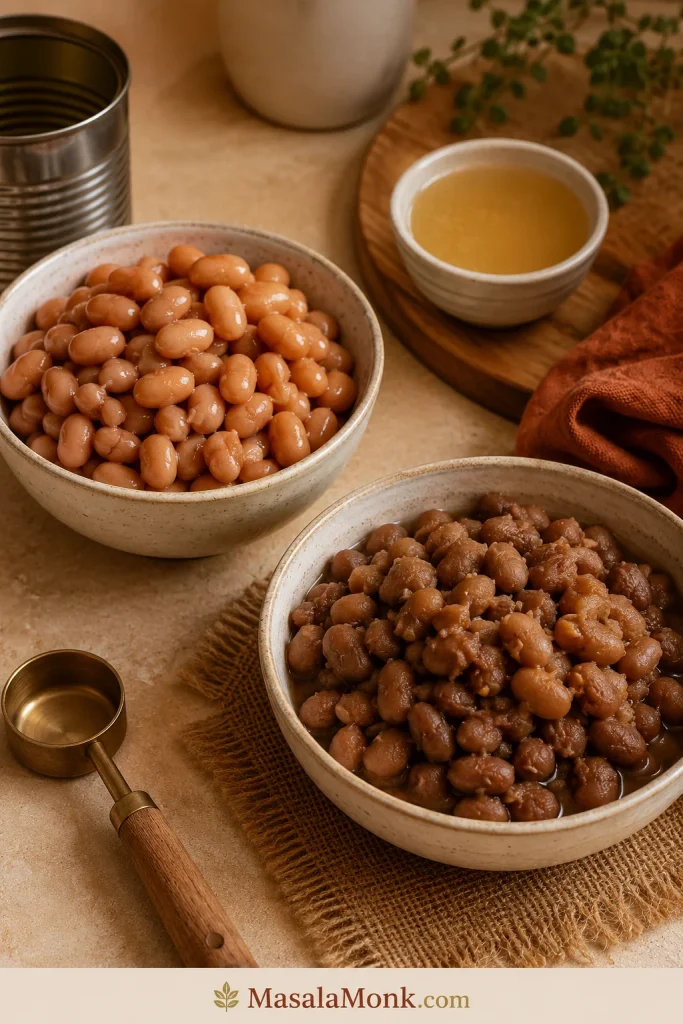
Canned vs Dried Beans

For speed, canned beans get dinner on the table faster; dried beans give you more control, economy, and often excellent texture. Once they simmer with the garlic-tomato base, canned beans still taste like they belong.

Two bowls of beans on a kitchen counter, one with smooth drained canned beans and one with cooked dried beans, with a small bowl of bean cooking liquid and an unlabeled can nearby.
Use the comparison as a measuring cue: 3 cans of beans usually give about 4½ cups cooked / about 720 g drained beans, while about 1½ cups dried beans can replace them after cooking.

For this recipe, 3 cans of beans, 14–15 oz / 400–425 g each, gives about 4½ cups cooked beans once drained, or roughly 720 g drained beans. To replace them with dried beans, start with about 1½ cups dried beans, cook them until tender, then measure about 4½ cups cooked beans for the stew. The exact yield varies by bean type, size, and age.

If your cooked dried-bean liquid tastes good and is not overly salty, use some of it in place of broth. It adds body and keeps the stew even more budget-friendly.

Very old dried beans may take much longer to soften or stay firm even after extended cooking. When cooking dried beans, keep tomatoes, lemon juice, and vinegar out until the beans are tender. Acidic ingredients can slow softening.

Planning to use the slow cooker? Read the slow cooker notes before using dried beans, especially kidney beans.

Kidney bean note: Canned kidney beans are the easiest choice here. If starting with dried kidney beans, cook them properly before adding them to stew, especially before slow cooking. For food-safety details, see the FDA’s guidance on kidney bean toxins and Utah State University Extension’s guide to storing and cooking dry beans.

Variations

Think of these as directions for the next pot, not decisions you need to make before the first one. The main recipe is complete as written; choose only the path that matches what you have today.

For a hands-off version, use the slow cooker and Instant Pot notes after the flavor ideas.

Vegetarian or Vegan Bean Stew, Plus Meat Add-Ins

Vegetarian or vegan bean stew: The main recipe is vegetarian with vegetable broth. For a fully vegan pot, skip parmesan, yogurt, sour cream, and other dairy toppings; olive oil, mushrooms, smoked paprika, nutritional yeast, lemon, and herbs can still make the finish rich and lively.

Sausage: Brown 12–16 oz / 340–450 g sausage in the pot for 5–7 minutes before adding the vegetables. Spoon off excess fat, reduce the olive oil to 1 tablespoon / 15 ml, and build the stew in the same pot. White beans, butter beans, and pinto beans work especially well. For a more sausage-forward slow-cooker dinner, MasalaMonk’s slow cooker sausage casserole recipe follows that comfort-food direction more fully.

Chorizo: Use 4–6 oz / 115–170 g chorizo. Cured Spanish-style chorizo should be sliced or diced and gently rendered. Fresh Mexican-style chorizo should be cooked until browned and crumbly. Reduce the added oil and taste before adding more salt.

Chicken: Cooked shredded chicken is the simplest route. Stir in 2 cups / 280–320 g during the last 10 minutes of simmering. For raw chicken, use boneless thighs or breasts cut into large pieces, simmer until cooked through, then shred and return to the pot.

Beef: Beef turns this into a longer-cooked stew, not a 50-minute variation. Brown 1 lb / 450 g stew beef first, then simmer it with tomatoes and broth until mostly tender before adding canned beans. Depending on the cut, this may take 1½–2 hours.
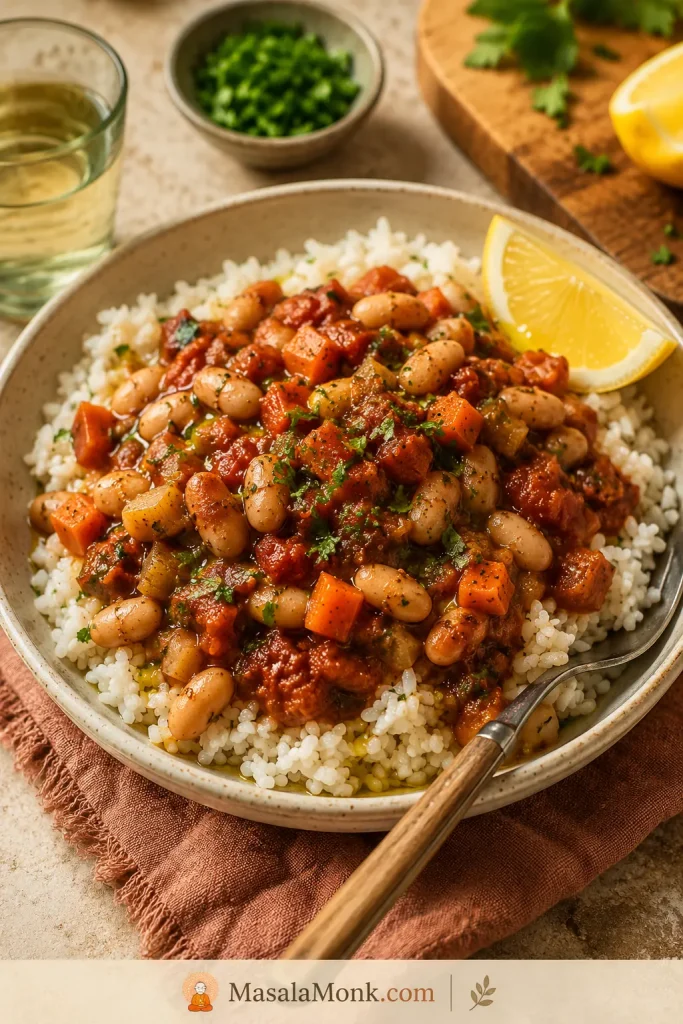
Best Bean Mixes and Flavor Versions

This is where the recipe becomes useful for real pantry cooking: two half-used cans can make a better stew than one perfect bean. Keep the same method, then change the herbs, spices, finish, and side.

Version or mixChange these ingredientsFinish withServe with
Cannellini + butter beansUse mostly white beans with rosemary, thyme, and greens.Lemon, olive oil, parsleyBread or sautéed greens
Black beans + pinto beansUse cumin, chili, smoked paprika, and less Italian herb.Lime, cilantro, avocadoRice
Chickpeas + cannelliniUse cumin, coriander, paprika, tomato, and greens.Lemon, parsley, yogurt if desiredFlatbread or couscous
Butter beans + mushrooms or chorizoUse smoked paprika, rosemary, mushrooms, or rendered chorizo.Vinegar, parsley, black pepperPotatoes or bread
Mixed pantry cansUse any cooked beans and mash the creamier ones into the sauce.Vinegar, herbs, olive oilRice or bread

If you want chickpeas in a fresher, no-cook direction instead, MasalaMonk’s chickpea salad recipe turns canned chickpeas into a bright lemony lunch or side.

Fresh Tomato, No-Tomato, and Small-Batch Notes

Fresh tomato version: Fresh tomatoes work, but they need more time to cook down than canned tomatoes. Use them when they are ripe and flavorful, simmer longer, and expect a slightly looser, brighter sauce. MasalaMonk’s guide to tomato sauce from fresh tomatoes shows how reduction changes both texture and flavor.

Lighter no-tomato version: Skip the crushed tomatoes and tomato paste. Use 2½–3 cups / 600–720 ml broth, white beans, rosemary or thyme, garlic, greens, and lemon. Mash about 1 cup of beans into the pot so the broth becomes creamy.

Small batch with 2 cans of beans: Use 1 tbsp / 15 ml olive oil, 1 small onion, 1 carrot, 1 celery rib, 2 garlic cloves, 1½ tbsp / about 22 g tomato paste, 14 oz / 400 g tomatoes, ¾–1 cup / 180–240 ml broth, and 2 cans of beans. This makes about 3–4 bowls.

Adding Beans to Another Stew

Already have a pot of stew going? Use cooked or canned beans. Raw dried beans should not be added to an existing stew unless the recipe was designed for that timing.

  • Canned or cooked beans: Add during the final 15–20 minutes.
  • Delicate white beans or butter beans: Add later if you want them to stay whole.
  • Kidney, black, or pinto beans: Add a little earlier if you want them to absorb more flavor.
  • To thicken another stew: Mash some beans into the liquid.

Slow Cooker and Instant Pot Notes

The stovetop gives the best control over thickness. Choose the slow cooker for convenience, not the glossiest texture, and use the Instant Pot when speed matters more than deep reduction.

Slow Cooker

The slow cooker version will usually be softer and less glossy than the stovetop version, but it is excellent for a hands-off, make-ahead dinner. Use canned beans or beans that have already been safely cooked, and sauté the onion, carrot, celery, garlic, tomato paste, and spices first if you can.

  1. Sauté the vegetables, garlic, tomato paste, and spices in a skillet or in the slow cooker insert if it has a sauté function.
  2. Add tomatoes, cooked/canned beans, bay leaf, herbs, and 1¼–1½ cups / 300–360 ml broth.
  3. Cook on high for 3–4 hours or low for 5–6 hours. Timing depends on bean type and how soft you want the stew.
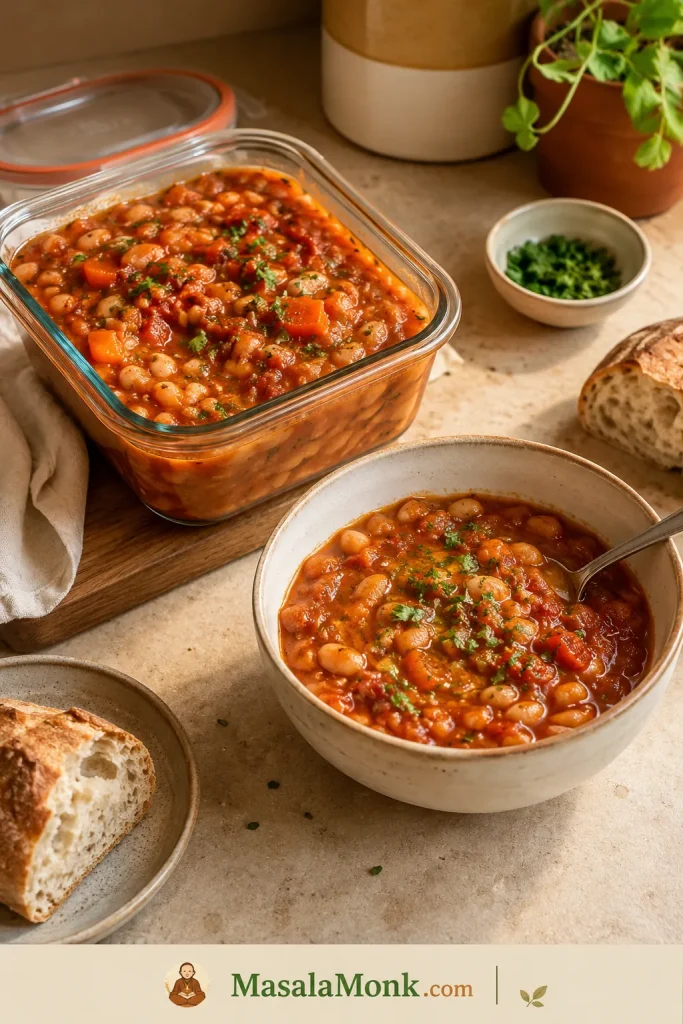
  4. Add greens near the end.
  5. Mash some beans after cooking. If the stew is still thin, transfer to a pot and simmer uncovered for a few minutes.

Slow cooker kidney bean warning: Do not cook raw dried kidney beans from scratch in the slow cooker. Use canned kidney beans or dried kidney beans that have already been boiled and cooked properly.

Instant Pot with Canned Beans

The Instant Pot is best when you want speed, not deep reduction. The sauté step and final simmer are what keep it from tasting flat. This version works best with cooked or canned beans unless you are following a bean-specific dried-bean pressure-cooking method.

  1. Use the sauté function to soften the onion, carrot, celery, garlic, tomato paste, and spices.
  2. Deglaze thoroughly with a splash of broth, scraping until the bottom feels smooth before adding beans and tomatoes.
  3. Add drained beans, 1 cup / 240 ml broth, bay leaf, and crushed tomatoes on top.
  4. Pressure cook for 5 minutes.
  5. Let the pressure release naturally for 10 minutes, then release the remaining pressure.
  6. Mash some beans after cooking. If the stew is thin, use sauté mode for a few minutes to reduce it.
  7. Add greens, lemon or vinegar, and herbs after pressure cooking.

What to Serve with Bean Stew

The best sides are the ones that catch the sauce: rice, bread, potatoes, polenta, or anything sturdy enough for a thick spoonful. Serve it thick enough for bread, or just saucy enough to settle into rice. A final drizzle of olive oil and a squeeze of lemon can make the bowl feel richer, brighter, and more intentional than the ingredient list suggests.

A hand dipping a piece of crusty bread into a bowl of thick tomato bean stew with white beans, carrots, herbs, and a warm linen beside it.
Serve the stew with crusty bread when you want the sauce to be part of the meal; one scoop should catch beans, herbs, and tomato base together.

To Make It More Filling

  • Crusty bread or garlic bread
  • Steamed rice
  • Polenta
  • Cornbread
  • Baked potatoes
  • Quinoa, bulgur, or couscous
  • Buttered toast

A pot of plain rice is one of the easiest ways to stretch the stew. MasalaMonk’s guide on how to cook rice covers stovetop, rice cooker, and Instant Pot methods so the base comes out right before you spoon the stew over it.

A bowl of white rice topped with tomato bean stew, carrots, herbs, and a lemon wedge, with a spoon resting in the bowl.
For a bigger dinner, spoon the bean stew over rice; the rice catches the tomato sauce and stretches the pot without making the meal feel thin.

The storage section explains why extra stew is worth planning for: it thickens overnight and loosens easily when reheated gently.

To Add Freshness

Because the stew is rich and hearty, the best toppings either brighten it, cool it, or add contrast.

  • Lemon or lime wedges
  • Fresh parsley, basil, cilantro, or dill
  • Pickled onions
  • Green salad
  • Sautéed greens
  • Avocado for black bean versions
  • Yogurt or sour cream, if not vegan

For another bean-and-rice dinner with a Louisiana-style flavor base, MasalaMonk’s red beans and rice recipe is a heartier, smokier route.

Make-Ahead, Storage, Freezing, and Reheating

Bean stew thickens and deepens as it rests, which means tomorrow’s bowl may taste even better than tonight’s. The leftovers are part of the reward here; the beans keep soaking up flavor as they sit. If you are making it ahead, keep it slightly looser than you want. It will thicken as it cools and again in the fridge.

A glass storage container filled with leftover tomato bean stew beside a reheated bowl of the same stew, with bread, herbs, and a spoon on a kitchen counter.
Leftover bean stew usually thickens as it rests; store it in glass if you can, then loosen it with a splash of broth or water when reheating.
  • Make ahead: Make the stew 1–2 days ahead if you want the flavor to settle.
  • Refrigerator: Store in an airtight container for 4–5 days.
  • Freezer: Freeze for up to 3 months.
  • Greens: If freezing, consider adding fresh greens after reheating rather than before freezing.
  • Reheating: Warm on the stovetop over low-medium heat with a splash of broth or water.
  • Brighten after reheating: Add lemon juice, herbs, or olive oil at the end.

The troubleshooting table below covers reheated stew that turns too thick, too loose, or flat-tasting.

Mistakes That Make It Watery or Bland

Most disappointing bean stews fail in the same few ways: too much liquid, not enough base flavor, or no fresh finish. Fix those, and the pot usually comes back.

  • Adding too much broth at the start. Begin with less, simmer, then adjust.
  • Skipping the vegetables. Beans need onion, garlic, herbs, and seasoning to taste like dinner.
  • Not cooking the tomato paste. Raw tomato paste can taste sharp and flat.
  • Adding tomatoes or vinegar before dried beans are tender. Acidic ingredients can slow softening.
  • Forgetting the fresh finish. A small splash of vinegar or lemon at the end keeps the stew from tasting heavy.
  • Ignoring salt from broth, canned beans, sausage, or chorizo. Taste before adding the full amount of salt.

Troubleshooting

Most bean stew problems are fixable because beans are forgiving. When the pot is watery, give it time uncovered. Flat flavor usually needs salt first, then a small splash of vinegar or lemon juice. A too-thick pot should be loosened slowly and tasted again.

ProblemFix nowFix next time
Too waterySimmer uncovered and mash ½–1 cup beans into the sauce.Start with less broth and add more only after simmering.
Too thickAdd broth or water ¼ cup / 60 ml at a time.Reduce for less time or use the full 2 cups / 480 ml broth.
Bland beansAdd salt first, then a small splash of vinegar or lemon juice, herbs, olive oil, or chili.Season the vegetables and cook the tomato paste properly.
Flat flavorAdd a small splash of vinegar or lemon juice, fresh herbs, black pepper, or olive oil.Do not skip the final balance.
Too acidicAdd more beans, a splash of broth, olive oil, or a small pinch of sugar.Use fewer tomatoes or cook tomato paste longer.
Bitter tomato pasteAdd tomatoes, broth, and beans to soften the flavor.Cook tomato paste until darkened, but do not let it burn.
Firm beansSimmer longer with extra broth until tender.Use canned beans or cook dried beans fully before adding.
Too saltyAdd unsalted beans, potato, tomatoes, or low-sodium broth.Use low-sodium broth and season gradually.
Thin slow cooker versionMash beans at the end or transfer to a pot and simmer uncovered.Use less broth in the slow cooker.

FAQs

What beans are best for bean stew?

Cannellini beans and butter beans are the easiest all-purpose choices for bean stew because they turn creamy without disappearing. Black beans make it smoky, chickpeas keep it firmer, pinto beans help thicken the sauce, and mixed beans are best when you want to use what is already open.

Is bean stew the same as bean soup?

No. Bean stew is thicker than bean soup. Soup has more broth and a looser texture, while this stew is reduced, spoonable, and sturdy enough to serve with bread, rice, polenta, or potatoes as a full meal.

How is bean stew different from chili?

Bean stew is usually less chili-spice focused than chili. This version leans on aromatics, tomatoes, herbs, beans, and a flexible finish rather than a heavy chili-powder base.

Can I use canned beans for bean stew?

Yes, canned beans work very well for bean stew. Drain and rinse three 14–15 oz cans, then simmer them in the tomato base until the sauce clings to the beans.

Should I drain canned beans?

Usually, yes. Draining and rinsing gives you more control over salt and texture. If the can liquid tastes clean and you want extra body, add a small splash, but do not use it as the main liquid.

Can I use dried beans?

Yes, dried beans work well if they are cooked until tender first. Use about 4½ cups cooked beans to replace three cans; the stew should be where they absorb flavor, not where they struggle to soften.

How do I thicken bean stew?

To thicken bean stew, simmer uncovered and mash ½–1 cup of beans into the sauce. Starting with less broth and cooking the tomato paste properly also helps the finished bowl become glossy and scoopable.

Can I make bean stew without tomatoes?

Yes, bean stew can be made without tomatoes. Use broth as the base, add extra aromatics and herbs, mash more beans for body, and finish with olive oil and a little acidity so it still tastes complete.

Can this bean stew be vegan?

Yes, this bean stew can be vegan. Use vegetable broth, skip dairy toppings, and finish with olive oil, herbs, mushrooms, or nutritional yeast for extra richness.

Can I make bean stew in a slow cooker?

Yes, bean stew can be made in a slow cooker with canned beans or beans that have already been cooked. Use less broth than the stovetop version, and expect a softer, less glossy stew that is still excellent for a hands-off dinner.

Does bean stew freeze well?

Yes, bean stew freezes well for up to 3 months. It usually looks thicker after thawing, so reheat it gently with a splash of broth or water, then brighten it at the end so it tastes fresh again.

What should I serve with bean stew?

Serve bean stew with crusty bread, rice, polenta, cornbread, baked potatoes, quinoa, couscous, or a green salad. Bread is best when the stew is extra thick; rice is best when you want to stretch the pot into more servings.

Final Thoughts

A good bean stew is not fancy food. It is the kind of recipe that makes three cans of beans, one onion, and the last carrot in the drawer feel like dinner for tonight and lunch tomorrow.

Once the method clicks, you stop needing one exact bean. Try white beans and rosemary when you want something soft and cozy. Go with black beans, cumin, and lime when you want a smoky bowl over rice. Choose chickpeas with paprika and lemon, butter beans with chorizo, or mixed beans when the pantry needs clearing out.

If you make this with a different bean mix, leave a comment with the exact cans or cooked beans you used and what you served it with — especially if you tried black beans, butter beans, chickpeas, or a mixed pantry batch. It helps the next person staring at the same random cans.

Back to top

Posted on 1 Comment

‘Quinoa’ Instead of ‘Chicken’: 5 High Protein Plant-Based Meal Prep Ideas

QUINOA INSTEAD OF CHICKEN

Ditching meat doesn’t mean sacrificing protein. Meet quinoa — your new plant-based powerhouse.


🧭 Why Replace Chicken with Quinoa?

When we think of high-protein meals, chicken breast often dominates the conversation. But for those seeking a plant-based, sustainable, and gut-friendly alternative, quinoa is the underrated hero. While not as protein-dense by weight (cooked chicken has ~31g per 100g vs. quinoa’s ~4.4g), quinoa is a complete protein, offers complex carbs, and has an unbeatable ability to pair with other proteins for a balanced meal.

What makes quinoa ideal for meal prep?

  • Stays fluffy even after refrigeration or freezing
  • Cooks in 15–20 minutes
  • Versatile: works in savory bowls, salads, and even breakfast
  • Naturally gluten-free, fiber-rich, and easily digestible

🥗 The Protein Strategy: Quinoa + “Companions”

Quinoa alone isn’t enough to hit 25–35g of protein per meal. But combined with legumes, tofu, tempeh, seeds, or nut-based sauces, it becomes the perfect foundation for high-protein meals.

Let’s dig into five meal prep-friendly ideas that prove plant-based doesn’t mean protein-poor.


1. 🌮 Quinoa & Black Bean Southwest Bowl

Total Protein: ~22g per serving
Prep Time: 30 min
Serves: 4

Ingredients:

  • 1 cup dry quinoa
  • 1½ cups cooked black beans
  • 1 cup corn kernels (fresh or frozen)
  • 1 red bell pepper, diced
  • 1 avocado, sliced
  • 2 tbsp nutritional yeast
  • Optional: vegan cheese, hot sauce

Dressing:

  • Juice of 2 limes
  • 1 tbsp olive oil
  • 1 tsp cumin
  • Salt, pepper, chili flakes to taste

Method:

  1. Cook quinoa in vegetable broth for flavor.
  2. In a large bowl, mix quinoa, beans, corn, pepper.
  3. Add dressing, toss well, and top with avocado.
  4. Store in airtight containers. Add avocado fresh each day if preferred.
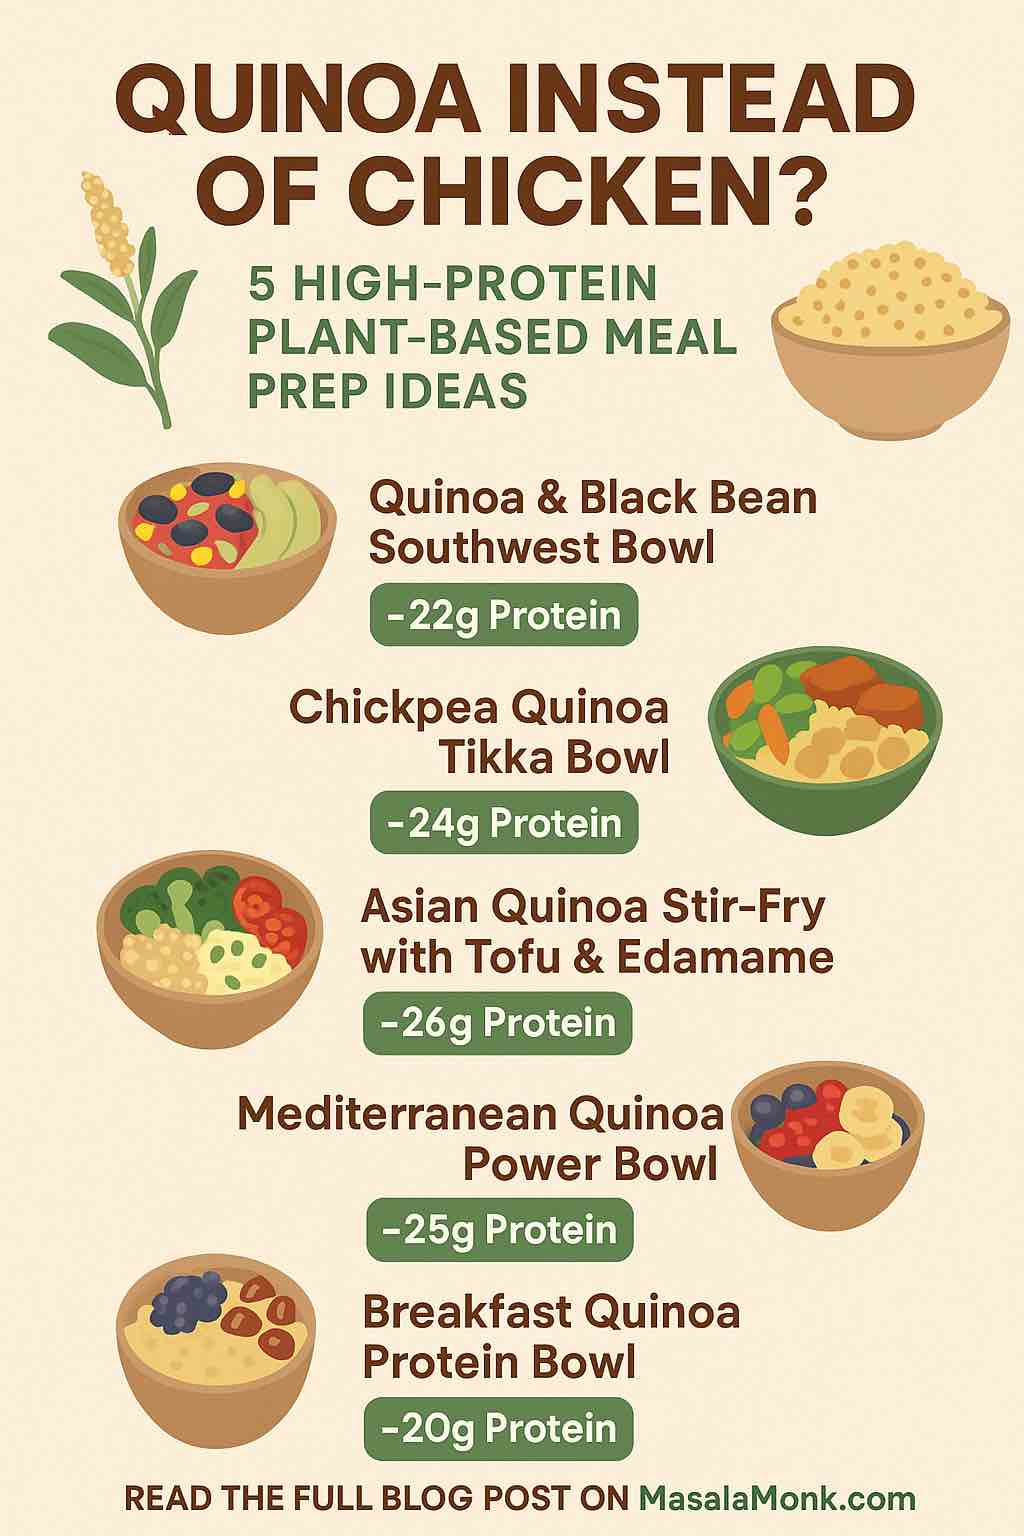
Make it Extra: Add pan-seared tempeh or grilled tofu to hit 30g+ protein.


2. 🍛 Chickpea Quinoa Tikka Bowl

Total Protein: ~24g
Prep Time: 35 min
Serves: 4

Ingredients:

  • 1 cup quinoa
  • 1½ cups cooked chickpeas
  • 1 small onion, diced
  • 2 garlic cloves
  • 1 tbsp ginger, minced
  • 2 tbsp tomato paste
  • 1 tbsp garam masala
  • ½ tsp turmeric
  • 1 can light coconut milk

Method:

  1. Cook quinoa and set aside.
  2. In a pan, sauté onions, garlic, ginger.
  3. Add tomato paste and spices, cook until aromatic.
  4. Add chickpeas and coconut milk. Simmer for 10 minutes.
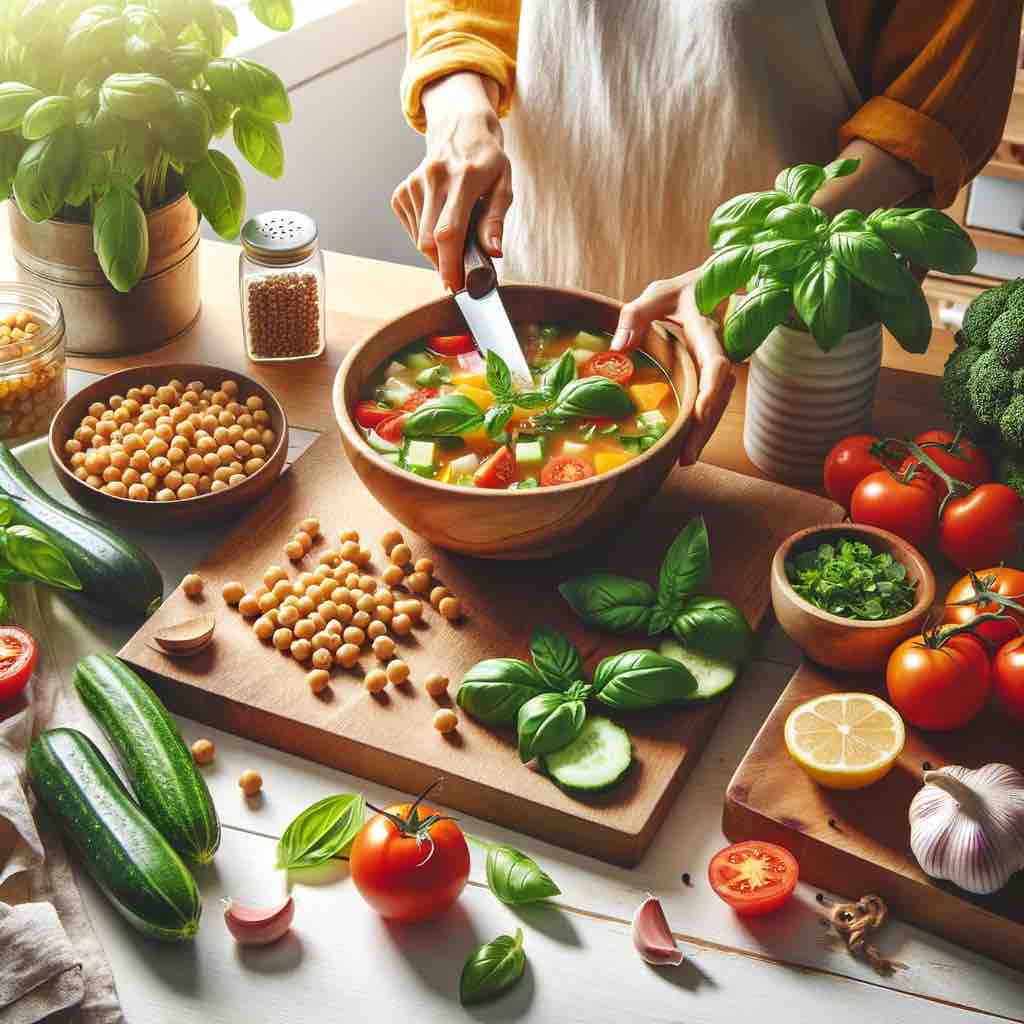
  5. Serve over quinoa.

Meal Prep Tip: Freeze the curry separately and defrost as needed. Serve with greens or roasted cauliflower for texture.


3. 🥦 Asian Quinoa Stir-Fry with Tofu & Edamame

Total Protein: ~26g
Prep Time: 25 min
Serves: 4

Ingredients:

  • 1 cup quinoa
  • 1 block extra-firm tofu, cubed
  • 1 cup shelled edamame
  • 1 cup broccoli florets
  • 2 carrots, julienned
  • 1 tbsp sesame oil
  • 2 tbsp tamari or soy sauce
  • 1 tbsp rice vinegar
  • 1 tsp garlic powder

Method:

  1. Cook quinoa and steam veggies lightly.
  2. Pan-fry tofu until golden and crisp.
  3. Toss all ingredients together in a large skillet with sauces.
  4. Portion into containers with sesame seeds on top.

Flavor Hack: Add crushed peanuts or sriracha tahini for extra bite and bonus protein.


4. 🧆 Mediterranean Quinoa Power Bowl

Total Protein: ~25g
Prep Time: 30 min
Serves: 4

Ingredients:

  • 1 cup quinoa
  • 1 cup cooked lentils
  • ½ cup hummus
  • ½ cucumber, diced
  • Cherry tomatoes
  • Kalamata olives
  • Red onion
  • 2 tbsp pumpkin seeds
  • Lemon-tahini dressing

Method:

  1. Assemble quinoa base and layer lentils and veggies.
  2. Top with hummus and drizzle dressing.
  3. Add seeds before sealing containers.

Eat Cold: This is a no-reheat option. Keeps beautifully in the fridge for up to 4 days.


5. 🥣 Breakfast Quinoa Protein Bowl

Total Protein: ~20g
Prep Time: 10 min
Overnight chill: Yes
Serves: 2

Ingredients:

  • 1 cup cooked quinoa (cooled)
  • 1 tbsp chia seeds
  • 1 tbsp almond butter
  • 1 tbsp hemp seeds
  • ¾ cup unsweetened soy milk
  • ½ tsp cinnamon
  • Berries and banana slices to top

Method:

  1. Mix everything in a jar or container.
  2. Let sit overnight.
  3. Top with fruits and a dash of maple syrup before eating.

Tip: Use a protein-rich plant milk (like soy or pea-based) for a better amino acid profile.


🧠 Nutrition Hacks: Boost Protein in Every Bite

Add-InProtein (per serving)How to Use
Hemp seeds (3 tbsp)~10gTop any bowl or stir into dressing
Pumpkin seeds (¼ cup)~8gAdd crunch to salads
Nutritional yeast~5g (2 tbsp)Mix into sauces, soups, or dressings
Tempeh (100g)~19gGrill and layer into any bowl
Edamame (½ cup)~9gWorks in stir-fries and salads

📦 Meal Prep Strategy: From Sunday to Friday

✅ Do This on Prep Day:

  • Cook 3–4 cups of quinoa (makes ~9 cups cooked)
  • Roast a sheet tray of tofu, tempeh, and seasonal vegetables
  • Make 2 dressings: one tahini-based, one citrusy
  • Portion bowls with protein, starch, and veg separately if possible
  • Pack sauces in small jars to prevent sogginess

🧊 Storage Tips:

  • Quinoa keeps 5–6 days in the fridge
  • Most dressings stay fresh 7 days
  • Chickpea or lentil curries can freeze for up to 2 months
  • Keep leafy greens separate if possible

🌟 Final Thoughts

Quinoa may not dethrone chicken on pure protein quantity alone, but it wins when paired well, especially for those prioritizing plant-based variety, digestive health, and meal prep convenience.

By combining smart ingredients and a bit of prep, you can hit your protein goals without a single piece of meat — and enjoy every bite doing it.

🔍 10 Frequently Asked Questions (FAQs)

1. Is quinoa enough to meet my protein needs without meat?

Answer: On its own, quinoa provides about 8g of protein per cup. While that’s less than chicken, it’s a complete protein, and when combined with legumes, seeds, tofu, or tempeh, it can easily help you reach 20–35g of protein per meal — comparable to meat-based dishes.


2. Can I freeze quinoa-based meal prep bowls?

Answer: Yes. Cooked quinoa freezes very well. For best texture, freeze quinoa and sauces separately, and avoid freezing fresh vegetables or avocado. Reheat gently to maintain flavor and texture.


3. How long does cooked quinoa last in the fridge?

Answer: Properly stored in an airtight container, cooked quinoa lasts up to 6 days in the fridge. It’s ideal for batch cooking once a week.


4. What’s the best way to season quinoa?

Answer: Cook quinoa in vegetable broth instead of water, and add herbs, garlic powder, or a bay leaf to infuse flavor. Drizzle with lemon juice or mix in dressings right before serving.


5. Can I eat quinoa for breakfast and still get protein?

Answer: Absolutely. A quinoa breakfast bowl with almond butter, chia seeds, hemp seeds, and soy milk can offer 20g+ protein. It’s also a good gluten-free alternative to oats.


6. Is quinoa better than brown rice nutritionally?

Answer: Quinoa is higher in protein and contains all 9 essential amino acids, making it a better protein source. It also has more fiber, magnesium, and iron compared to brown rice.


7. What type of quinoa should I use for meal prep?

Answer: White quinoa is the most neutral in flavor and softest in texture, making it great for bowls. Red or black quinoa is firmer and works well in salads. All types have similar nutrition.


8. What are good plant-based protein add-ons to quinoa?

Answer: Top choices include chickpeas, lentils, tofu, tempeh, edamame, hemp seeds, and pumpkin seeds. Combining multiple sources helps you hit your amino acid and protein targets.


9. Can kids or athletes use quinoa-based meal preps?

Answer: Yes. Quinoa is easy to digest, gluten-free, and great for energy and recovery. For athletes, combine it with lentils and a healthy fat (like tahini or avocado) for sustained fuel.


10. Does quinoa cause bloating or digestion issues?

Answer: Quinoa is generally easy to digest. However, rinsing it before cooking removes saponins, which can cause mild irritation or bitterness. Always rinse thoroughly for best results.

Posted on 2 Comments

5 Vegan Protein Rich Chickpea Soups for Pregnant Women


Introduction

Pregnancy is a beautiful journey of growth and nurturing life. During this time, it’s essential to focus on foods that offer both flavor and nutrition. In this expanded blog post, we explore five chickpea-based soup recipes, each a blend of delicious taste and health benefits. Chickpeas, a vegan protein powerhouse, are combined with the aromatic and healthful spices of turmeric and basil to create soups that are perfect for expectant mothers.

Chickpeas, Turmeric, and Basil: A Nutritional Symphony

Chickpeas are not only rich in protein but also high in fiber, iron, and folate, making them an excellent food choice for pregnancy. Turmeric, with its curcumin content, offers anti-inflammatory benefits, and basil brings a wealth of antioxidants and essential vitamins to these dishes.

1. Creamy Turmeric Chickpea Soup

  • Ingredients: 2 cups chickpeas (soaked overnight if using dried), 1 large onion, 3 cloves garlic, 2 carrots, 1 teaspoon ground turmeric, 1 can coconut milk, 6 cups vegetable broth, juice of 1 lemon, salt, black pepper.
  • Preparation: Begin by sautéing the onion, garlic, and carrots until they’re soft and fragrant. Stir in the turmeric, coating the vegetables evenly. Add the chickpeas, followed by the broth and coconut milk. Let it simmer for about 30 minutes until the chickpeas are tender. Blend the soup for a smooth texture and finish with a squeeze of fresh lemon juice for a citrusy zing.
  • Nutritional Note: This soup is a comforting, protein-rich dish that’s easy on the digestive system. The lemon juice not only adds flavor but also enhances iron absorption from the chickpeas.
  • Your Twist: Consider adding a pinch of ginger or cumin for extra warmth and depth. What unique additions did you try? Share your culinary experiments and thoughts in the comments or on social media with the hashtag #CreamyTurmericChickpeaSoup.

2. Basil Chickpea Minestrone

  • Ingredients: 2 cups chickpeas, a variety of vegetables like zucchini, bell peppers, and carrots, 1 onion, 2 cloves garlic, 1 can diced tomatoes, 6 cups vegetable broth, 2 teaspoons dried basil, your choice of small pasta, salt, and pepper.
  • Preparation: Start by sautéing the onion and garlic, then add the harder vegetables (like carrots and bell peppers) and cook until slightly softened. Mix in the chickpeas and tomatoes, followed by the broth. Bring the soup to a simmer and add the pasta and dried basil. Cook until the pasta is al dente.
  • Cooking Tip: For a heartier minestrone, you can add a handful of kale or spinach in the last few minutes of cooking.
  • Share Your Creation: Did you opt for classic vegetables or try something unique like sweet potato or squash? Share your minestrone photos and recipes on social media using #BasilChickpeaMinestrone and inspire fellow moms-to-be with your creations.

3. Spiced Chickpea and Vegetable Soup

  • Ingredients: 2 cups cooked chickpeas, 1 onion, 2 cloves garlic, 1 each of red and yellow bell pepper, 1 zucchini, 1 teaspoon turmeric, 1 teaspoon cumin, 6 cups vegetable broth, a handful of fresh basil leaves, salt, and pepper.
  • Preparation: Begin by cooking the onions and garlic until translucent. Add chopped bell peppers and zucchini, cooking until they start to soften. Stir in the turmeric and cumin, coating the vegetables. Add the chickpeas and broth, and let the soup simmer for about 20 minutes. Before serving, tear in some fresh basil leaves for a burst of flavor.
  • Nutritional Insight: This soup is packed with vitamins and antioxidants from the variety of vegetables used. The addition of turmeric and cumin not only adds flavor but also boosts the soup’s anti-inflammatory and digestive properties.
  • Discussion: What vegetables did you find worked best in this soup? Did you stick with the recipe or add your own twist? Let’s share our experiences and tips in the comments below!

4. Lemon Basil Chickpea Stew

  • Ingredients: 2 cups chickpeas, 1 onion, 3 cloves garlic, 2 diced tomatoes, 6 cups vegetable broth, a bunch of fresh basil, zest of 1 lemon, 2 cups fresh spinach, olive oil, salt, and pepper.
  • Preparation: In a large pot, sauté the onion and garlic in olive oil. Add the tomatoes and cook until they begin to break down. Stir in the chickpeas and pour in the broth. Let the stew simmer for 15 minutes. Add the spinach and cook until wilted. Finish the stew with fresh basil and lemon zest.
  • Your Turn: How did the lemon zest work for you? Did it bring the refreshing twist you hoped for? Feel free to post your feedback and any variations you tried in the comments section or on social media with #LemonBasilChickpeaStew.

5. Moroccan Chickpea and Lentil Soup

  • Ingredients: 1 cup chickpeas, 1 cup lentils, 1 onion, 2 cloves garlic, 2 carrots, 1 teaspoon turmeric, 1 teaspoon cumin, 1 teaspoon paprika, 6 cups vegetable broth, fresh cilantro, a squeeze of lemon juice.
  • Preparation: Cook the onion and garlic until softened. Add the chopped carrots and spices, stirring well. Pour in the broth, then add the chickpeas and lentils. Simmer the soup until the lentils are tender. Garnish with fresh cilantro and a squeeze of lemon juice.
  • Flavor Exploration: Moroccan cuisine is known for its rich and complex flavors. Don’t hesitate to add a pinch of cinnamon or a sprinkle of chili flakes for an extra kick. Share your version of this Moroccan-inspired soup with us using #MoroccanChickpeaLentilSoup.

Conclusion

These five chickpea soup recipes offer a delightful mix of flavors and nutrients, perfect for nourishing both the mother and the growing baby. Each recipe invites you to explore and add your own personal touch. As you try these soups, share your thoughts, experiences, and variations. Let’s celebrate the joy of healthy, flavorful cooking during pregnancy!

10 FAQs for “5 Nutritious Chickpea Soups for Pregnant Women: Vegan and Rich in Turmeric and Basil”

  1. Can I use canned chickpeas instead of dried? Yes, canned chickpeas are a convenient option. Just rinse them before use to remove excess sodium.
  2. Is it safe to consume turmeric during pregnancy? Turmeric is generally safe in culinary amounts during pregnancy, but it’s always best to consult your healthcare provider, especially if you have any health concerns.
  3. Can I freeze these soups for later use? Absolutely! Most of these soups freeze well. Just let the soup cool before freezing and reheat thoroughly before serving.
  4. What are the benefits of basil during pregnancy? Basil is high in essential nutrients like vitamin K and iron, which are beneficial for both mother and baby.
  5. How can I increase the protein content in these soups? To increase protein, you can add extra chickpeas, some tofu, or a scoop of plant-based protein powder.
  6. Are these soups gluten-free? Yes, these recipes are naturally gluten-free, as long as you ensure all your ingredients, especially broth and any added sauces, are gluten-free.
  7. Can I substitute spinach for other greens? Certainly! Kale, collard greens, or Swiss chard are great alternatives to spinach and can be used based on your preference.
  8. What can I use instead of coconut milk in the Creamy Turmeric Chickpea Soup? Almond milk or oat milk can be used as alternatives, although they will give a lighter consistency than coconut milk.
  9. How can I make these soups more kid-friendly? To make these soups more appealing to children, consider reducing the spices, adding more carrots or sweet vegetables, and serving with fun-shaped pasta.
  10. Can I add grains like rice or quinoa to these soups? Yes, adding grains like rice or quinoa can turn these soups into hearty meals. Just adjust the amount of broth as needed to achieve your desired consistency.

Blog Tags

Pregnancy Nutrition, Vegan Soups, Chickpea Recipes, Turmeric and Basil, High Protein