
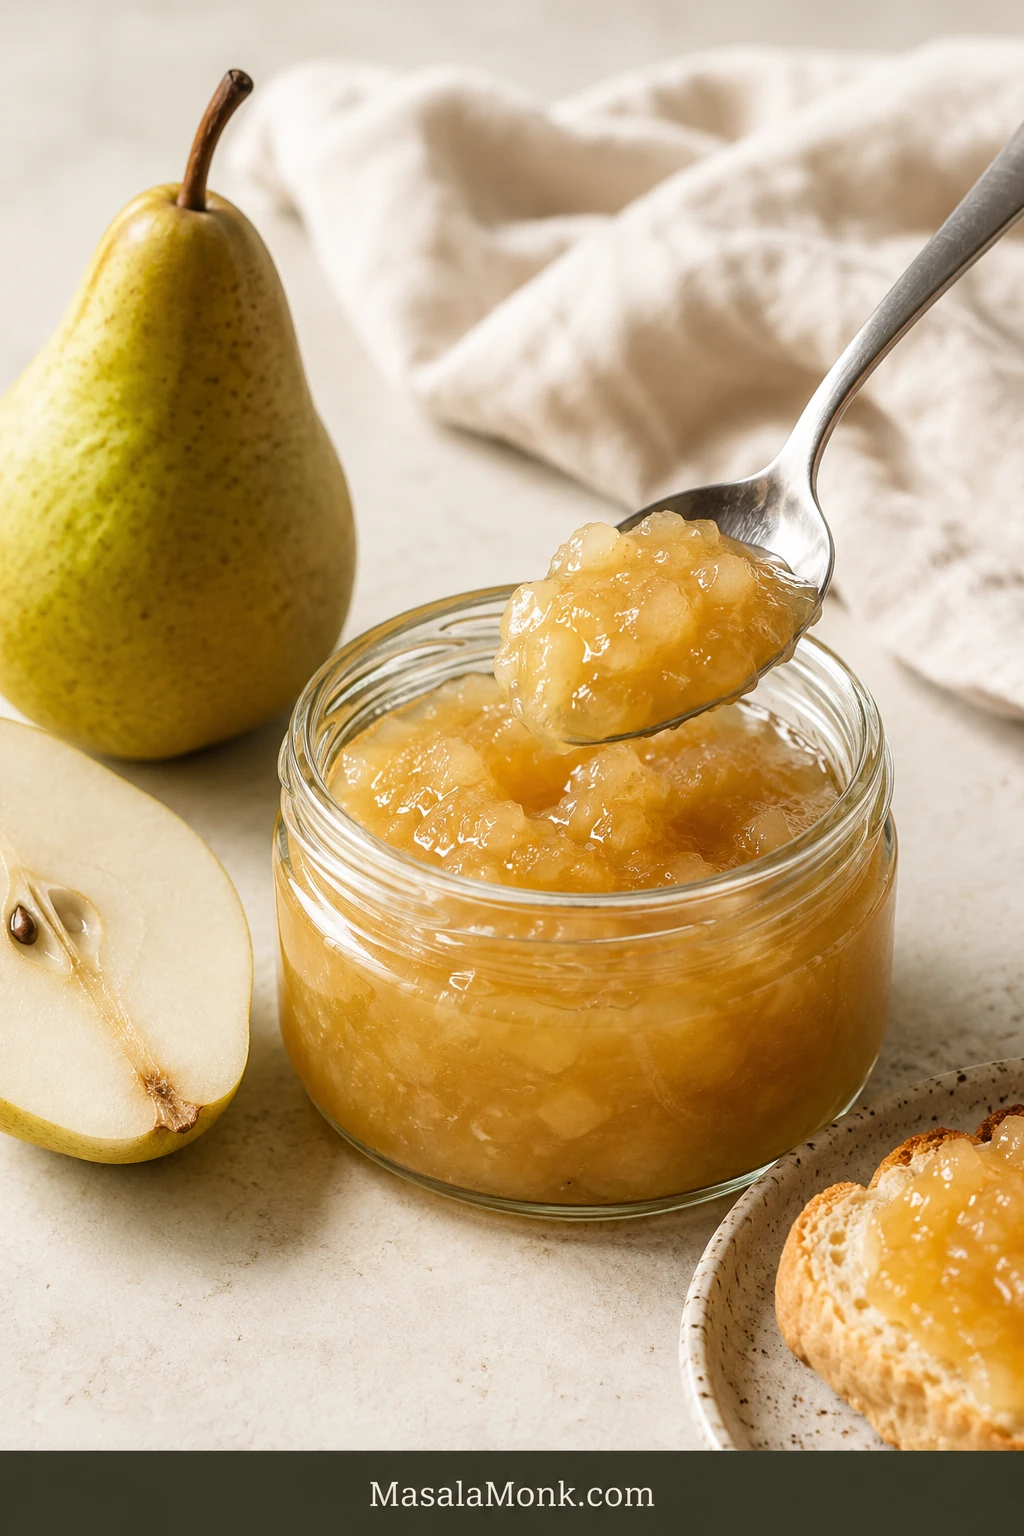
Pear jam is a quieter preserve than berry jam or marmalade. Its pleasure is in the fragrance: soft, almost floral sweetness concentrated into a pale-gold spread with enough lemon to keep it bright.
This pear jam recipe is made for that brief window when ripe pears smell wonderful but are beginning to soften faster than you can eat them. The jam sets softly, making it easy to spread across toast, spoon over yogurt or serve with warm English scones and salty cheese.
You need only three core ingredients: prepared pears, sugar and lemon juice. Weigh the pears after trimming, cook them in a broad pan and judge the finish from a cooled spoonful instead of relying on a fixed cooking time.
Pear Jam Ratio, Time and Yield
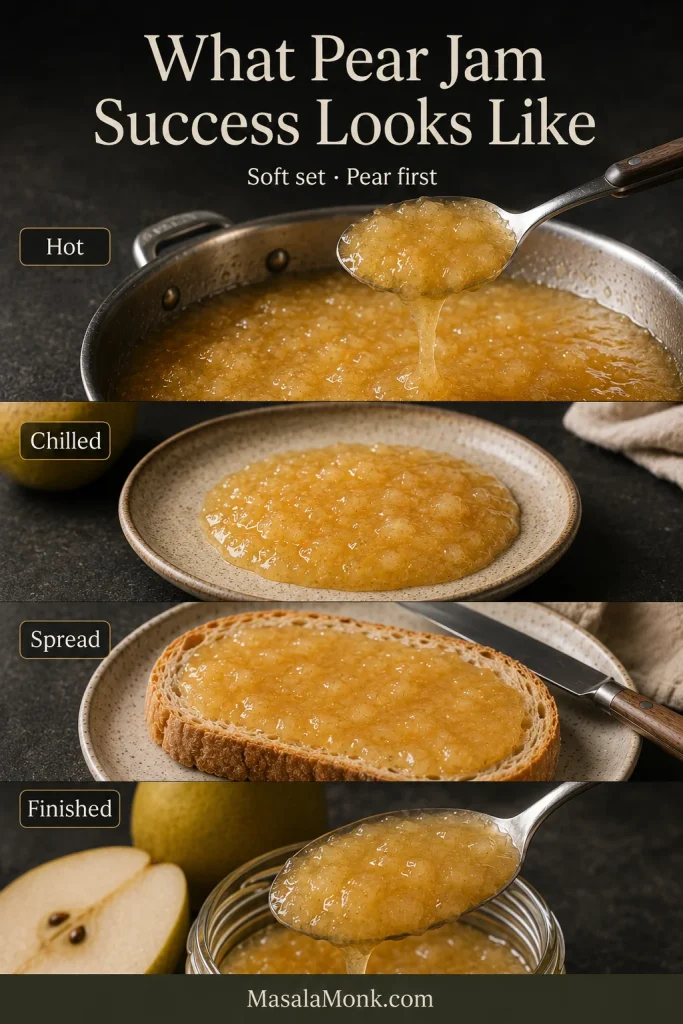
For one small batch, use 1 kg / 2 lb 3 oz peeled and cored pears, 400 g / 14 oz granulated sugar and 45 ml / 3 tablespoons fresh lemon juice. Cook larger quantities as separate batches so the fruit stays shallow in the pan.
Soften the pears, mash or blend them to the texture you like, then boil in a broad pan until a cooled teaspoon gathers and leaves a visible path when pushed. Stovetop cooking usually takes about 25–40 minutes, depending on the fruit and the shape of the pan.
The recipe makes approximately 2½–3 cups / 600–700 ml, or about three small jars. Store the finished jam in the refrigerator or freezer; it is not pantry-safe as written.
What Success Looks Like
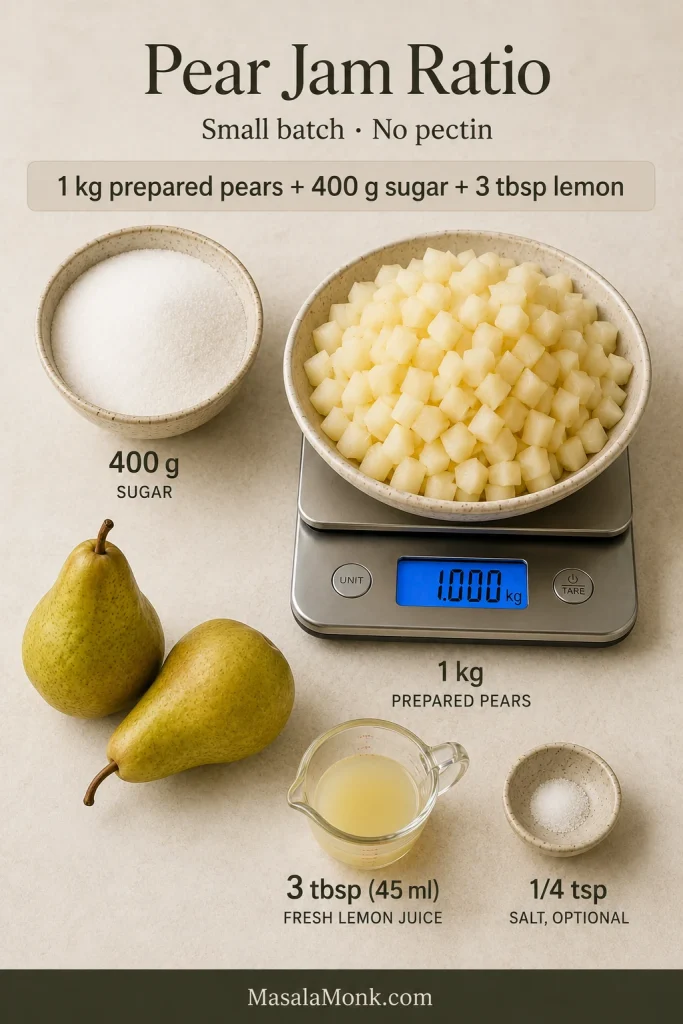
- While hot: glossy, pale gold to honey-coloured, and still fairly loose
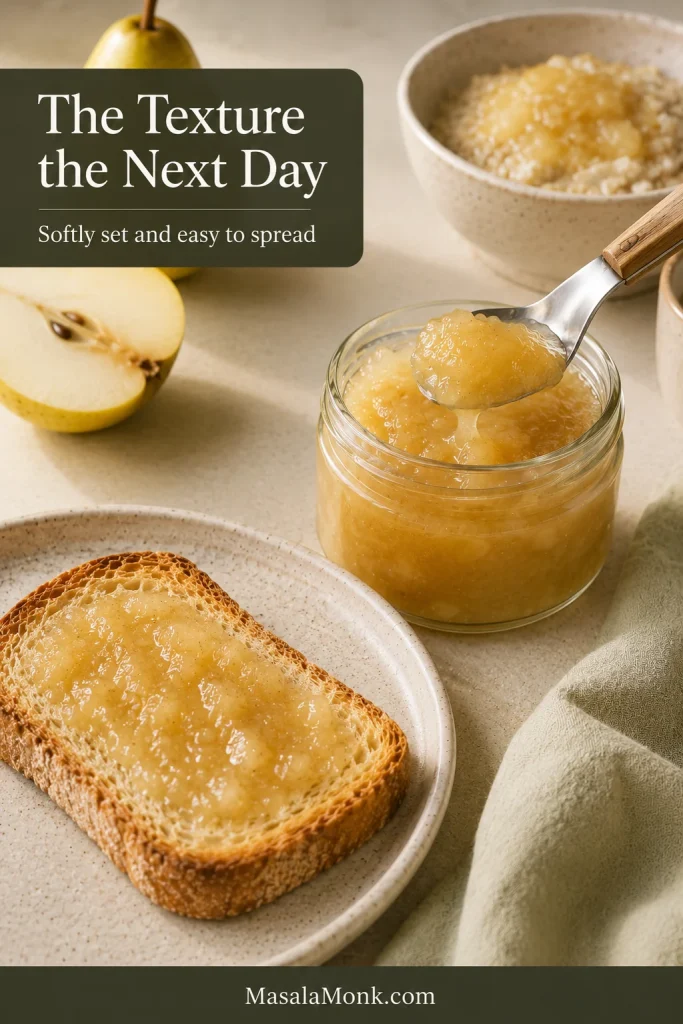
- After chilling: softly mounded and easy to spoon
- On bread: spreadable without running straight off
- In flavour: pear first, with lemon adding brightness
Weigh after trimming. Keep the batch shallow. Trust the cooled sample.
This is a no-pectin refrigerator jam. Packaged pectin is the better route when you want a firmer set or a shorter cooking time. For shelf-stable jars, follow the tested canning recipe in the storage section rather than adapting this lower-sugar method.
Easy Small-Batch Pear Jam Recipe Without Pectin
This version keeps the pear flavour clear and finishes with a soft refrigerator set. You do not need a canning setup or a precise thermometer endpoint; the cooled-plate test guides the finish.
| Prep time | About 20 minutes |
| Optional resting time | 1–4 hours |
| Cook time | About 25–40 minutes |
| Yield | About 2½–3 cups / 600–700 ml |
| Jar estimate | About three small jars in total |
| Storage | Refrigerator or freezer |
Ingredients
- 1 kg / 2 lb 3 oz peeled, cored and diced pears
- 400 g / 14 oz granulated sugar, about 2 level US cups
- 45 ml / 3 tablespoons fresh lemon juice
- ¼ teaspoon fine salt, optional
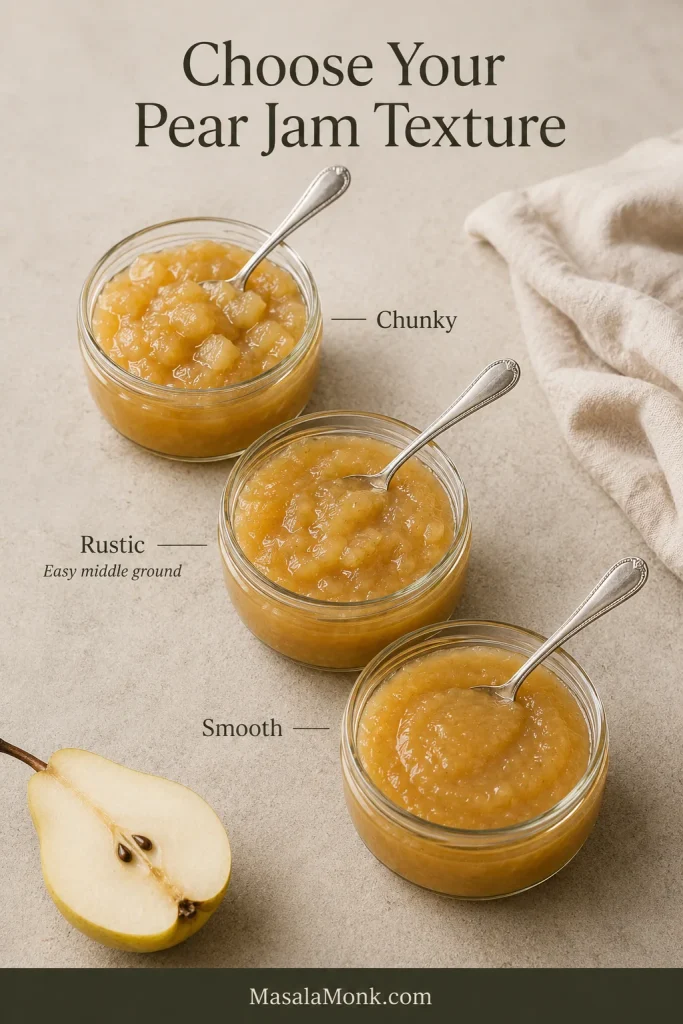
Choose Your Texture
- Chunky: mash about half the pears
- Rustic and spreadable: mash most of the fruit
- Smooth: blend briefly after the pears soften
Not sure? Mash most of the pears. The result will still look homemade but will spread easily.
Method
Prepare and Soften the Pears
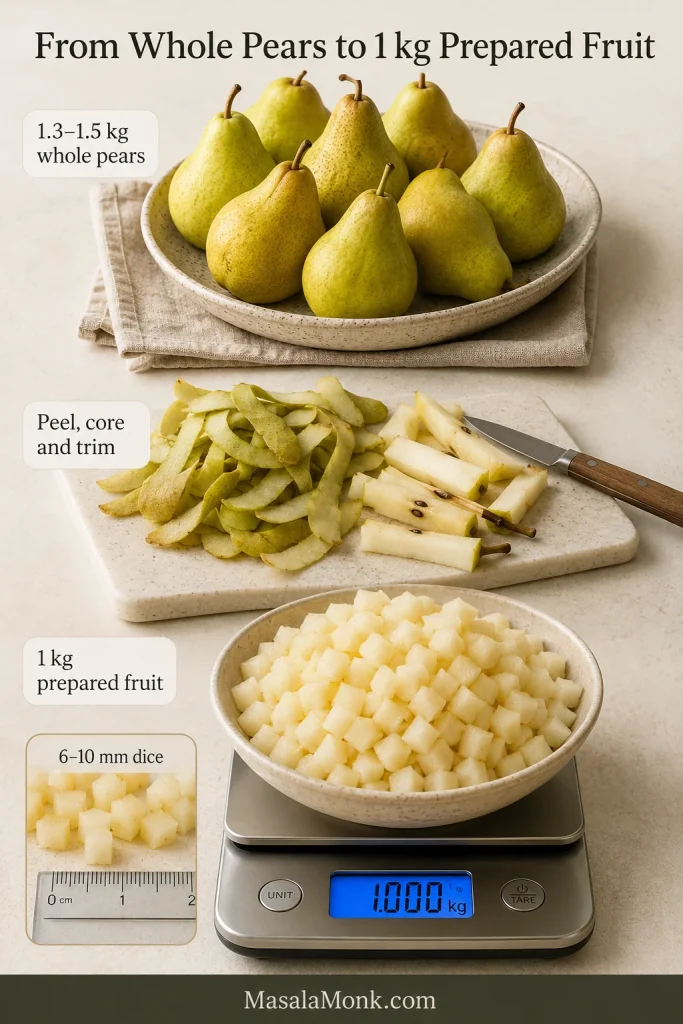
- Prepare and weigh the pears. Put two small plates in the freezer. Peel, quarter and core the pears, trim away damaged flesh and cut the fruit into 6–10 mm / ¼–⅜ inch pieces. Weigh exactly 1 kg after preparation.
- Add the sugar and lemon. Combine the pears, sugar, lemon juice and optional salt in a non-reactive bowl. Stir until every piece is coated.
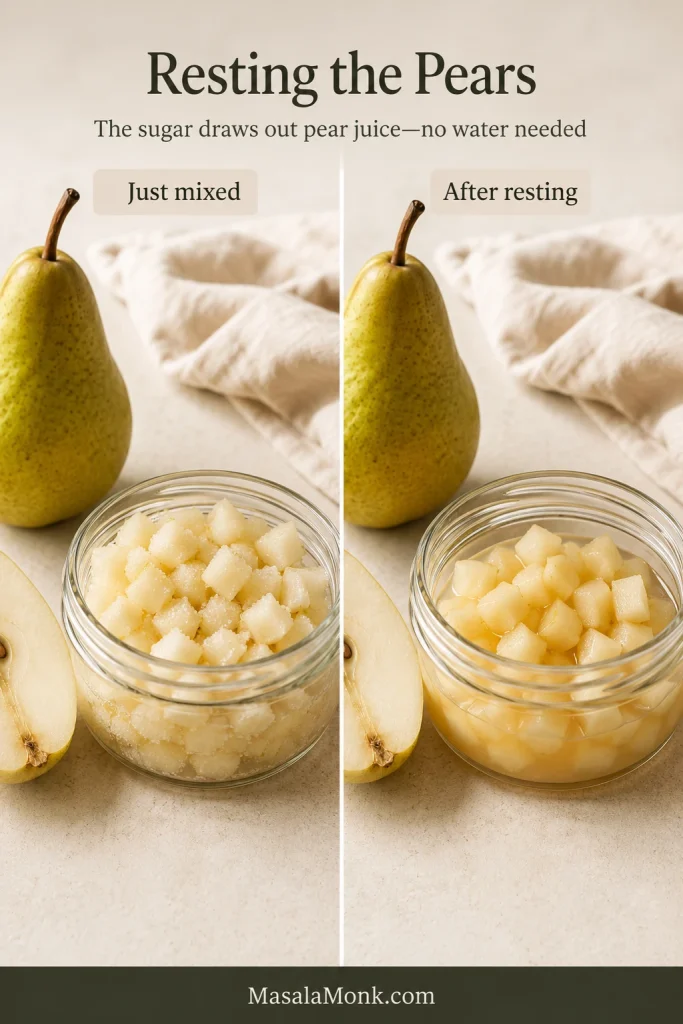
- Rest if time allows. Cover and leave for 1 hour at cool room temperature, or refrigerate for up to 4 hours. A shallow pool of pear syrup should collect in the bowl. Skip the rest when time is short.
- Soften the pears. Transfer the fruit and all its syrup to a wide, heavy-bottomed pan. Cook over medium-low heat for 10–15 minutes, stirring regularly, until the sugar has dissolved and a pear piece crushes easily against the side.
- Choose the texture. Mash thoroughly for a smooth jam, mash most of the pears for a rustic spread, or leave more pieces intact for a chunky finish.
Reduce, Test and Fill
Once the fruit crushes easily, finish the batch in three stages: reduction, set testing and careful filling.
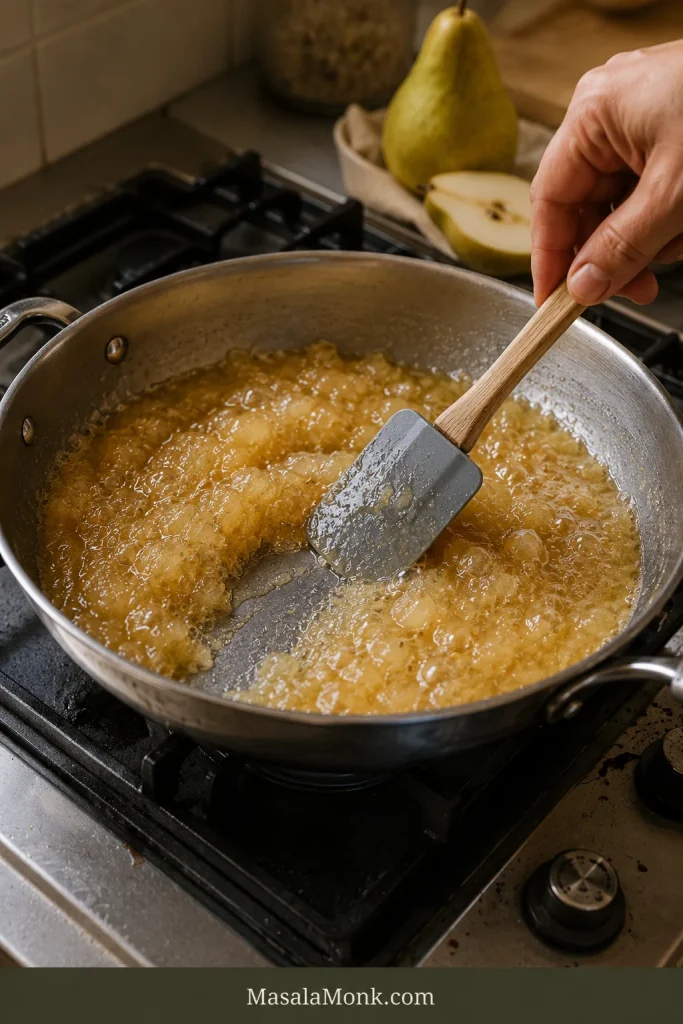
- Boil and reduce. Increase the heat to medium or medium-high. Cook uncovered at an active boil for approximately 15–25 minutes. Stir more frequently as the jam thickens, scraping across the base and into the corners.
- Test the set. When the bubbles become larger and slower, move the pan away from the heat. Place a teaspoon of jam on a chilled plate, wait 30–60 seconds and push it with a fingertip. The sample should gather and leave a visible path. If it runs back together like syrup, boil for another 2–3 minutes and test again.
- Warm the jars. While the jam finishes, fill clean, heat-safe jars with hot water. Empty and dry them just before filling so the glass is warm when the hot jam goes in.
- Rest and fill. Let the pan stand for 5 minutes, stir gently and skim any foam that remains. The jam should look glossy and range from pale gold to honey-coloured. A distinctly dark caramel smell suggests it has cooked too far. Ladle the jam into the warm jars and fit the lids.
For refrigerator storage: Let the jars cool only until they are safe to handle, then refrigerate them. Do not leave them at room temperature for more than two hours.
For freezing: Use freezer-safe jars or containers and leave ½ inch of headspace for expansion.
Recipe Notes
- Warm jam looks looser than expected. By the next day, it should settle into a soft mound that gives easily under a knife.
- A lid may pull down as the jar cools, but that does not make this refrigerator recipe pantry-safe.
Need More Help With Your Batch?
- Choosing and Preparing Pears
- Reading the Pan
- Testing the Set
- Troubleshooting
- Pectin and Less Sugar
- Storage and Pantry-Safe Options
The Best Pears for Jam
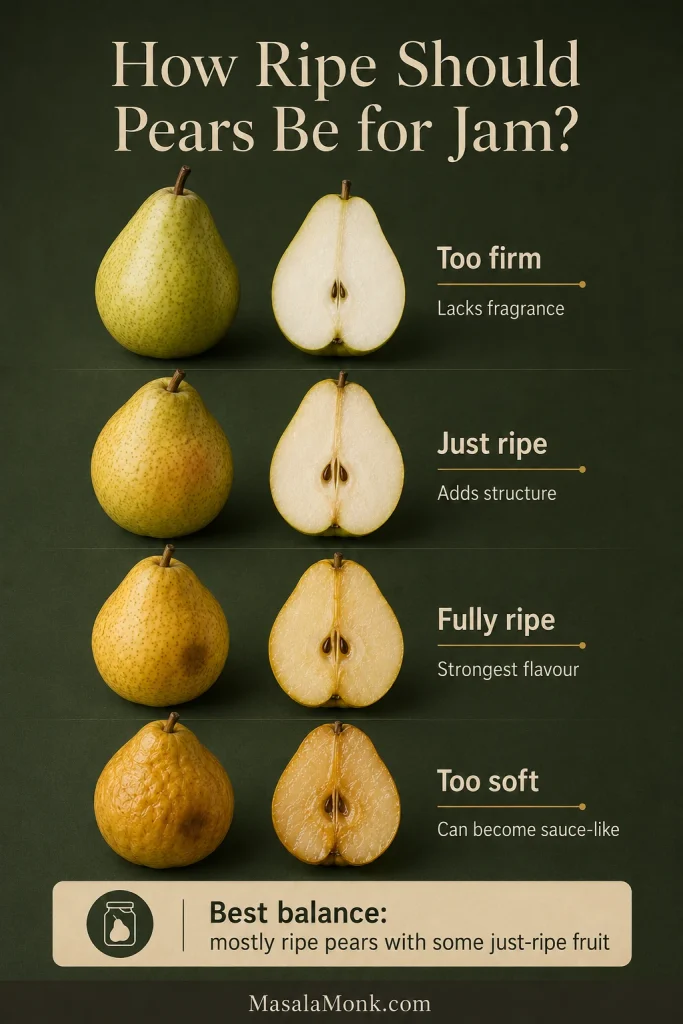
Choose pears that smell ripe and yield slightly near the neck but still hold their shape when cut. Green-hard fruit lacks the aroma you want, while pears that are collapsing throughout can produce something closer to pear sauce.
For a balance of aroma and structure, use mostly ripe pears with a smaller amount of firmer, just-ripe fruit. Ripe pears bring the strongest flavour; firmer pieces give the finished jam more body.
Pear flavour becomes warmer and more concentrated as it cooks, while lemon helps it remain distinct.
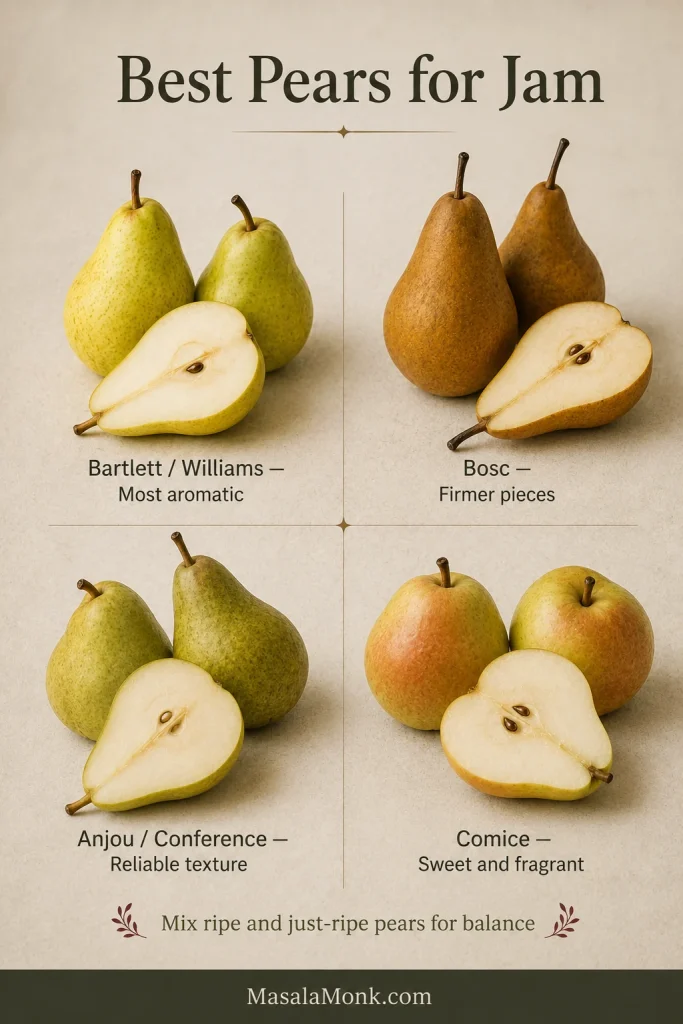
Which Pear Varieties Work Best?
| Pear | Best use |
|---|---|
| Bartlett or Williams | Highly aromatic base that softens quickly |
| Bosc | Firmer pieces with a warm, honeyed flavour |
| Anjou or Conference | Reliable all-purpose texture and mild sweetness |
| Comice | Very sweet and fragrant; combine with firmer fruit |
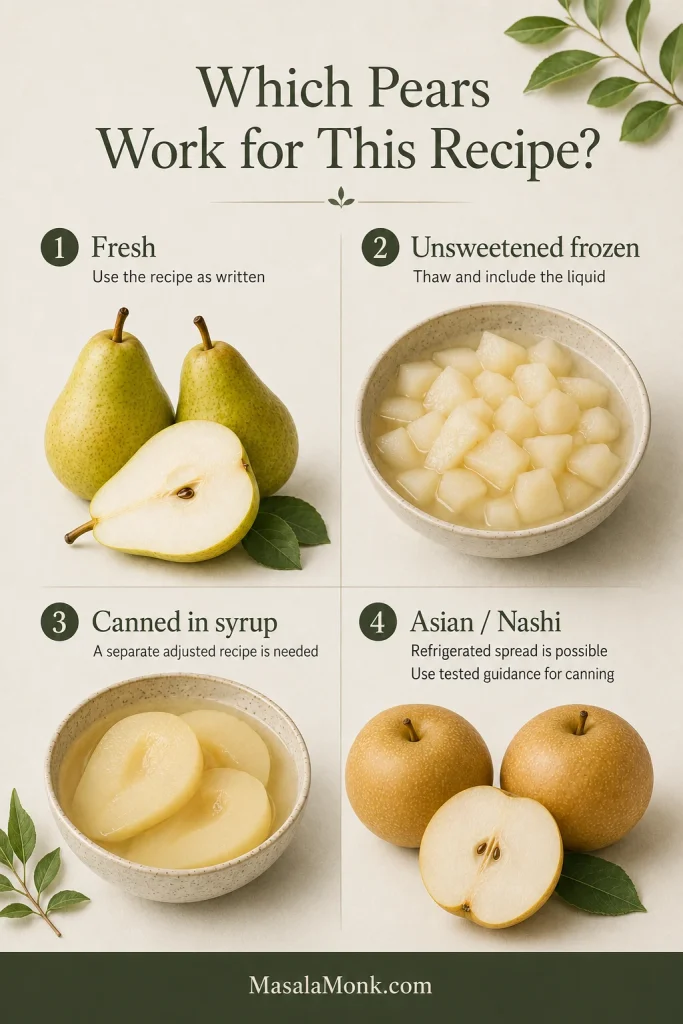
Can You Use Very Ripe, Frozen or Canned Pears?
Very ripe pears: Use them if they show no mould, fermentation or other spoilage. They bring plenty of aroma but less structure, so combine them with some firmer fruit and begin checking the jam earlier.
Frozen pears: If you freeze your own, peel, core and weigh 1 kg before freezing. For purchased unsweetened frozen pears, thaw first and weigh the fruit together with its released liquid. Thawed pears work best in a smoother jam and may need a little longer to reduce.
Canned pears: This recipe is written for fresh or properly weighed frozen pears. Syrup-packed fruit changes the sugar ratio and cooking time, so an adjusted canned-pear version is not included here.
Asian or Nashi pears: They can make a refrigerated spread, but pantry preservation requires instructions written for their acidity. Follow the National Center for Home Food Preservation guidance for Asian pears when canning them.
Ready to make the jam? Return to the recipe · Jump to the method · Back to top
Ingredients and Equipment
Preparing and Weighing Pears
Weigh the pears after peeling, coring and trimming. Depending on their size and how much must be discarded, allow roughly 1.3–1.5 kg / 2¾–3⅓ lb whole pears to produce 1 kg prepared fruit.
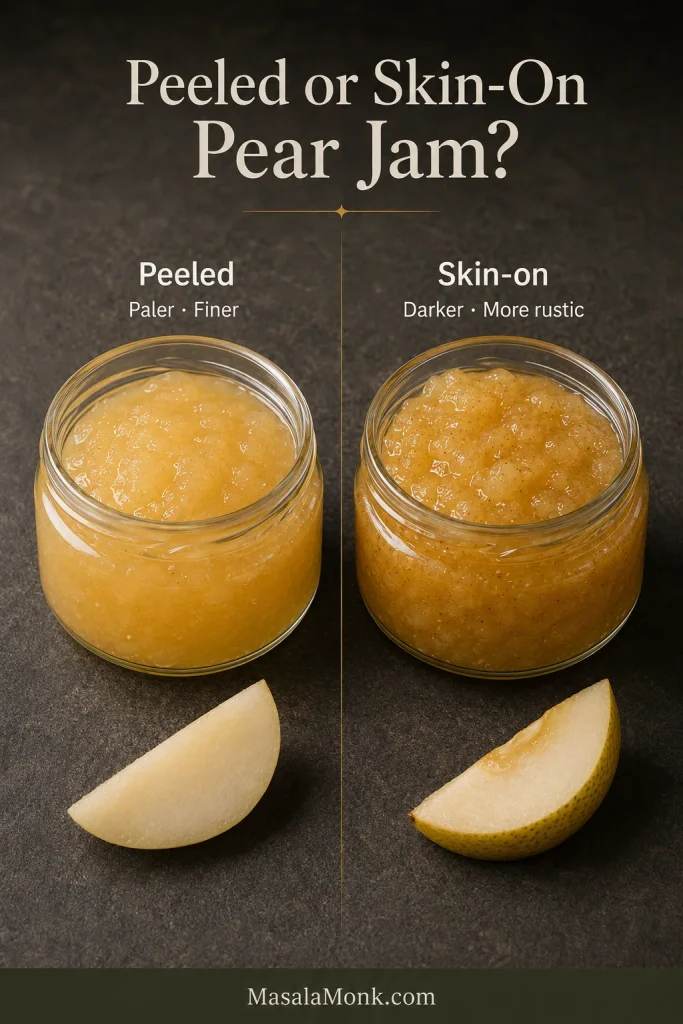
You may leave some or all of the skin on for a darker, more rustic jar. Still weigh 1 kg after removing the cores and damaged areas. Peeling remains the default because it gives the spread a paler colour and finer texture.
Sugar, Lemon and Salt for Pear Jam
If you reduce the sugar, expect a looser spread and a smaller yield. In this version, sugar also draws juice from the pears and gives the finished jam body.
The recipe uses 400 g sugar for 1 kg prepared pears—40% of the fruit weight. It produces a spoonable refrigerator jam; traditional higher-sugar recipes generally set more firmly.
For a firm jam with substantially less sugar, use a low/no-sugar pectin recipe written for the exact product.
Lemon balances the sweetness, slows visible browning and supports the soft set. A small pinch of salt softens the sweetness and makes the pear taste more distinct.
Best Pan and Tools for Pear Jam
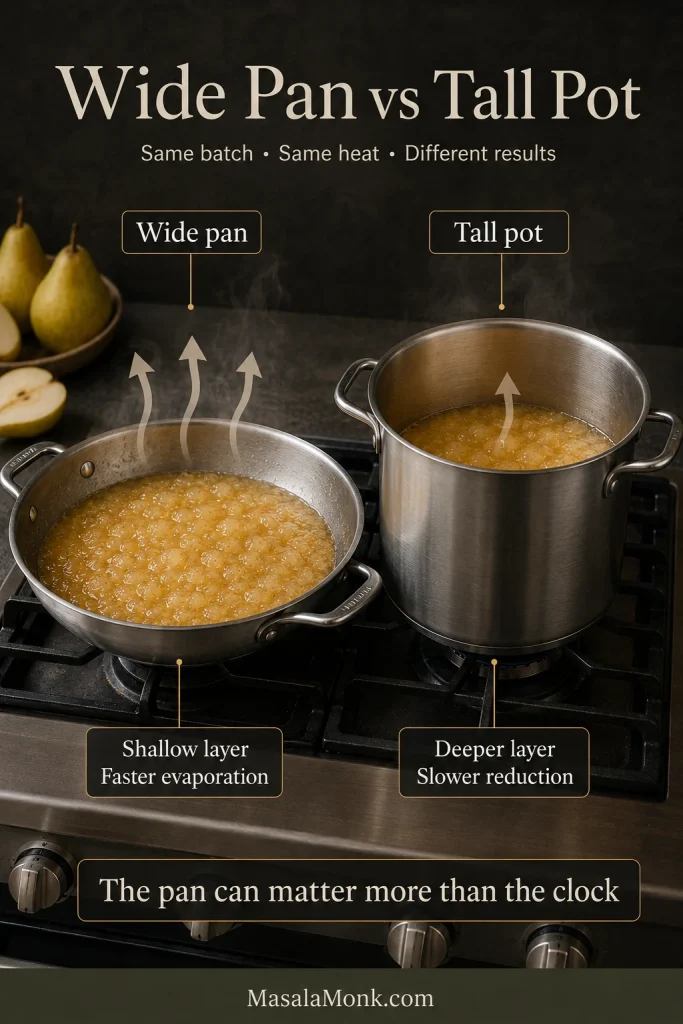
If your jam is taking far longer than expected, the pan may matter more than the pears. A broad surface releases steam quickly; a tall stockpot holds the same mixture in a deeper layer and slows evaporation.
- Digital kitchen scale: for accurate fruit and sugar measurements
- Wide, heavy-bottomed pan: approximately 4–6 litres for this batch
- Silicone spatula or wooden spoon: for scraping the full base
- Potato masher: for a rustic finish
- Immersion blender: optional for a smoother jam
- Two chilled plates: for checking the cooled texture
- Clean, heat-safe jars or refrigerator containers: warmed before filling
What to Watch in the Pan
When the Pears Are Ready to Mash
The pieces should look translucent around the edges and crush easily against the side of the pan. As they soften, the raw-fruit smell becomes warmer and fuller—the first moment the pan begins to smell like pear jam instead of chopped pears.
Blending the pears too early can make the mixture watery. Let the pieces soften until they crush easily before reaching for the blender.
When to Begin Testing
At first, the bubbling is quick and watery. As the pear juice concentrates, the bubbles become larger and slower, the spoon drags slightly and a line scraped across the base remains visible for a moment.
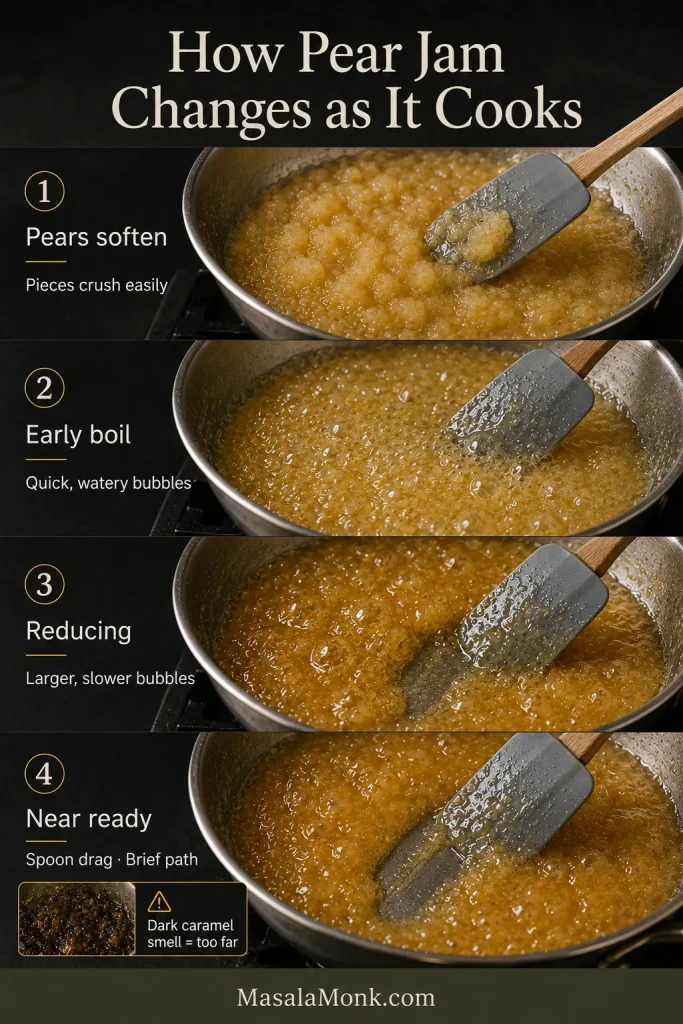
The colour may stay pale gold or deepen toward honey, depending on the variety and cooking time. Near the end, the sound often becomes heavier before the jam looks dramatically thicker. That is the moment to begin checking cooled samples.
Very high heat before the pears soften can catch the sugar on the base. Continuing to boil after the jam is ready darkens the colour and dulls the fruit.
A jar that finishes a little looser or firmer than planned can still be delicious. Texture is easier to repurpose than flavour.
How to Test the Set
This is the uncertain moment in the recipe because the jam often looks looser than the finished jar will be.
Pears do not announce the setting point dramatically. The bubbles simply slow, the spoon feels heavier and a cooled drop finally stays where you push it.
The Chilled-Plate Test
- Move the pan away from the heat.
- Place a teaspoon of jam on a chilled plate.
- Wait 30–60 seconds.
- Push the edge with a fingertip.
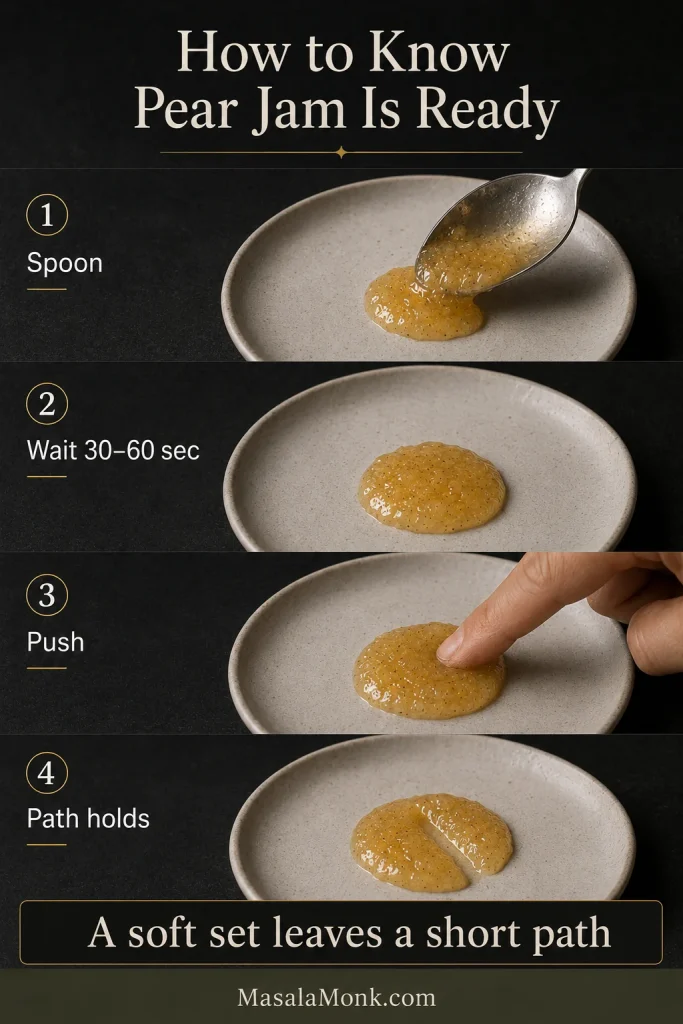
A watery sample runs straight back together. When ready, it gathers and leaves a short path. You may see a faint wrinkle at the edge, but do not wait for a dramatic one.
The same cooled-sample principle appears in this orange marmalade recipe, where stopping at the first soft set helps prevent an overly stiff preserve.
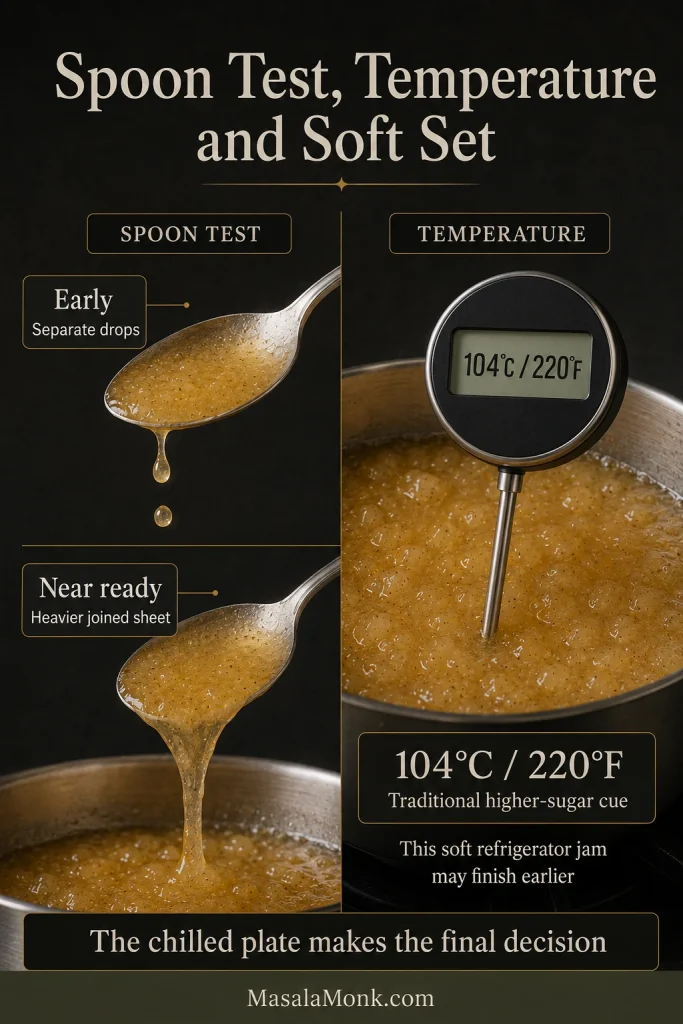
Early in cooking, the liquid falls from a cool spoon in quick separate drops. Near the endpoint, those drops become heavier, begin to join and fall from the edge in a short sheet.
Traditional higher-sugar jams without packaged pectin are often cooked toward approximately 104°C / 220°F at sea level. This lower-sugar refrigerator jam may be ready earlier, so treat the chilled plate as the deciding test.
Pear Jam Troubleshooting
Differences in pear ripeness usually change the cooking time more than they ruin the batch. Let the jam chill overnight before deciding that something has gone wrong.
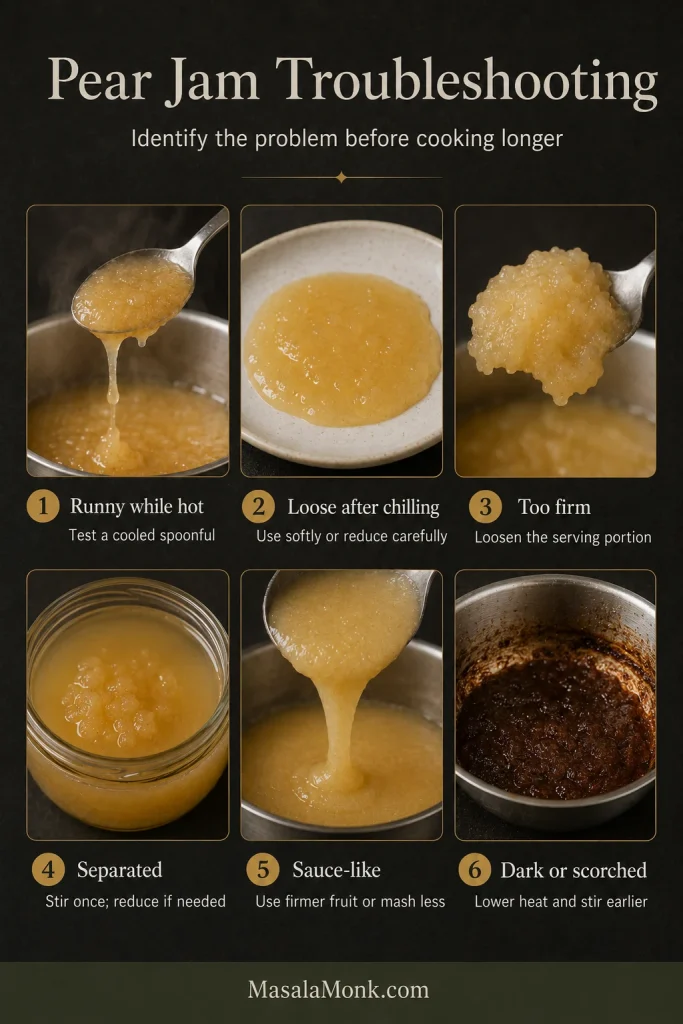
| Problem | What to do |
|---|---|
| Runny while hot | Check a cooled teaspoon before cooking longer. Hot jam naturally appears loose. |
| Still runny the next day | Use it as a soft spread, or return a measured amount to a broad pan and reduce it carefully. |
| Separation after chilling | Stir the jar once. Persistent separation suggests the jam needed a little more reduction. |
| Overly firm set | Warm only the amount you plan to serve with a teaspoon or two of water or lemon juice. |
| Sauce-like texture | Firmer pears and a lighter mash leave more recognisable fruit in the jar. |
| Crunchy sugar crystals | Let all visible sugar dissolve before bringing the mixture to an active boil. |
| Fine pear-like grit | Pears naturally contain stone cells. Blend more thoroughly or choose a smoother-textured variety. |
| Tough fruit pieces | Soften the fruit until each piece crushes easily before mashing or blending. |
| Weak pear flavour | More aromatic pears and enough lemon give a mild batch greater definition. |
| Dark or scorched jam | A broad, heavy pan and more frequent stirring near the end reduce the risk of scorching. |
| Unusually long cooking time | A narrow pan, deep layer of fruit or unusually juicy pears can slow evaporation. |
Sugar Crystals, Natural Pear Grit or Tough Fruit?
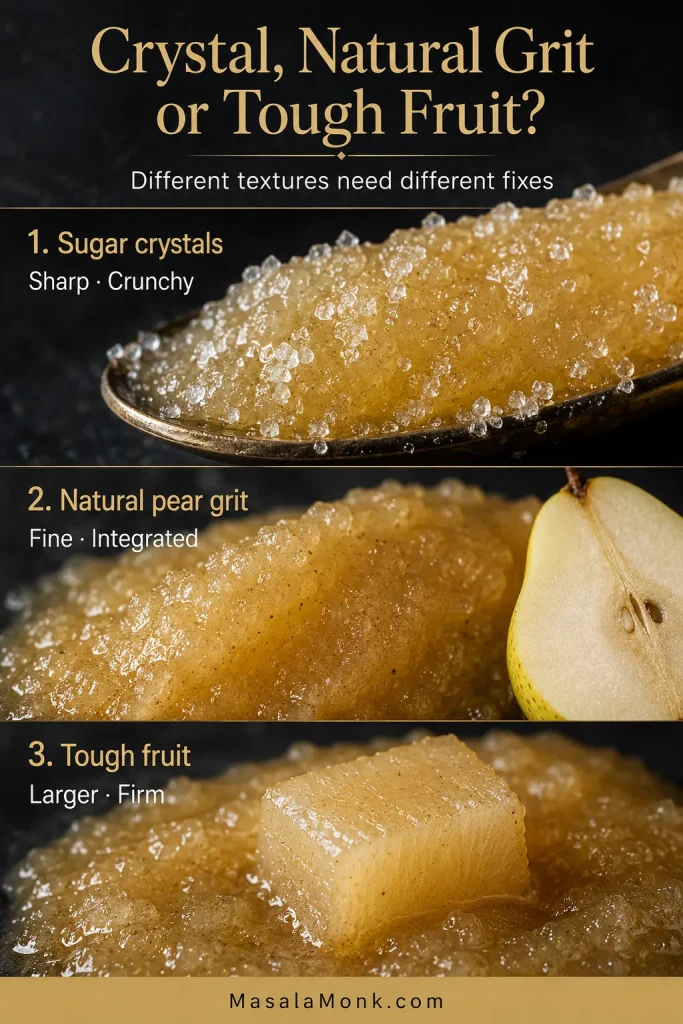
A loose batch that tastes good is not a failed batch. Spoon it over oatmeal, yogurt or ice cream, use it as a breakfast syrup, or warm it into a glaze.
Cornstarch makes a starch-thickened fruit filling, not a conventional jam. It belongs in recipes such as this cherry pie filling, where the thickened fruit needs to stay inside a pie.
Texture can be corrected or repurposed. Pears cooked past their fresh flavour are harder to rescue.
Choose what to do next: See pectin options · Store the jam safely · Back to the recipe
When to Use Pectin for Pear Jam
Choose the no-pectin method for a soft refrigerator jam. Use packaged pectin when a firmer set, shorter cooking time or substantially lower sugar matters more.
- Regular powdered or liquid pectin: follow the pear-jam recipe written for the exact product, including its sugar quantity and mixing order.
- Low/no-sugar pectin: choose this when less sugar and a firmer gel are both important.
- Freezer-jam pectin: use it for the separate, usually uncooked or briefly heated preparation described on the packet.
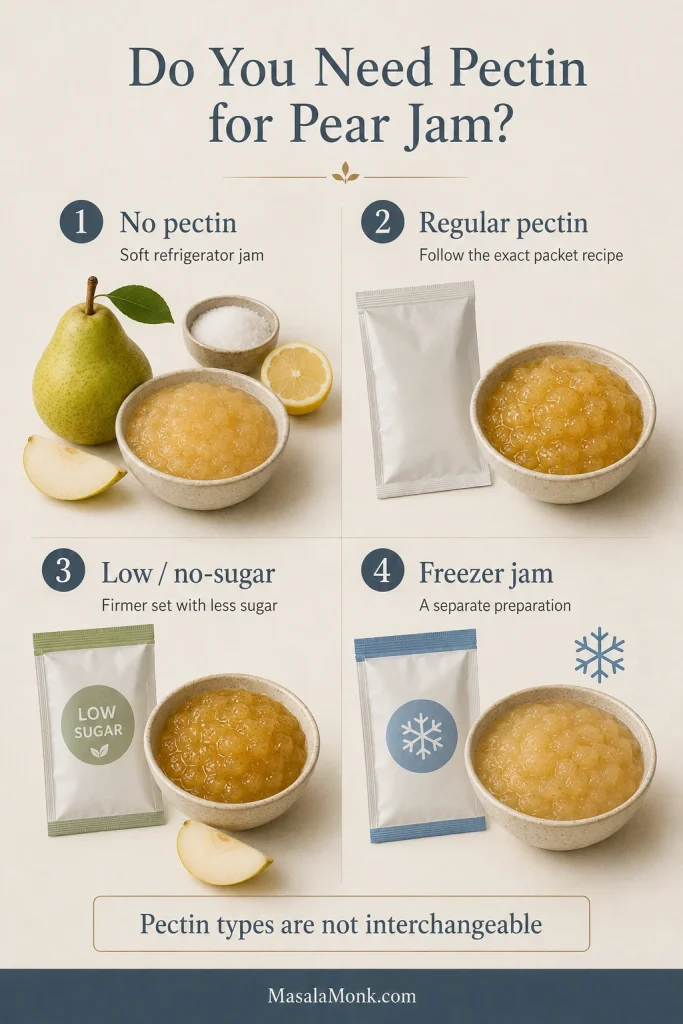
Honey and maple syrup add liquid as well as sweetness. They work best in recipes developed around those sweeteners, not as direct cup-for-cup replacements.
Pear Jam Storage: Refrigerator, Freezer and Pantry-Safe Options
Choose the Right Storage Route
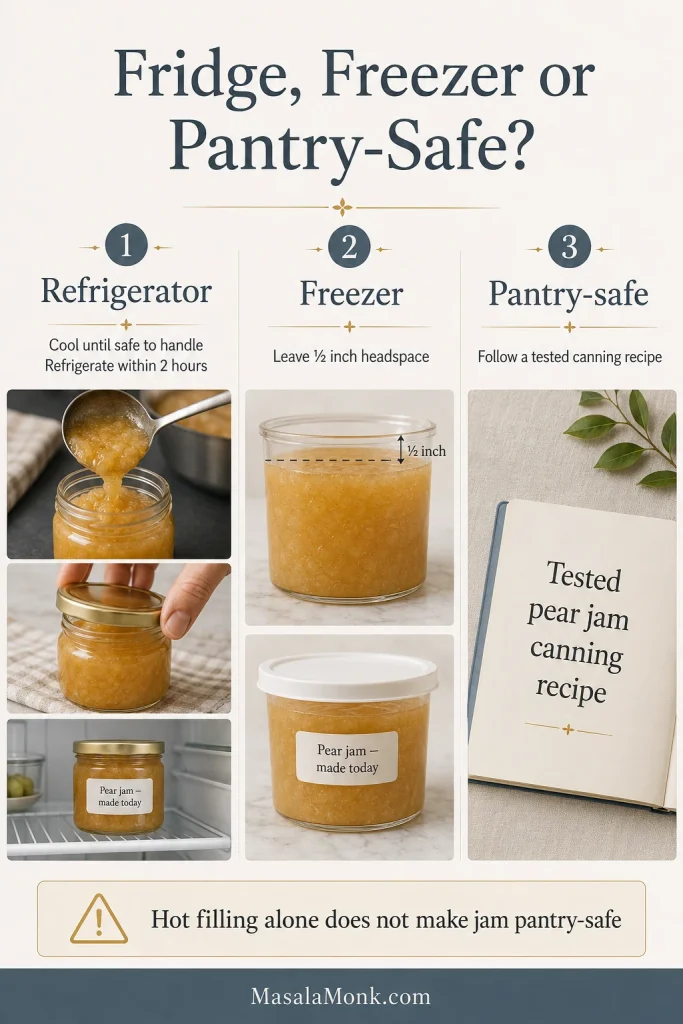
Refrigerator
Fit the lids after filling, let the jars cool only until they are safe to handle, then refrigerate them. Keep the jam at 4°C / 40°F or colder and use it within about three weeks for best quality. Return the jar to the refrigerator after serving and use a clean spoon each time.
Discard the contents if you notice mould, active bubbling, fermentation or an alcoholic or yeasty smell.
Freezer
Use freezer-safe jars or containers and leave approximately ½ inch of room for expansion. Freeze for up to one year for best quality and thaw overnight in the refrigerator.
Freezing this cooked jam is different from making classic freezer jam, which is generally uncooked or briefly heated and uses a freezer-jam pectin formula.
Pantry-Safe Canning
For pantry storage, change recipes instead of trying to convert this one. Follow one tested canning method from beginning to end, including its fruit, sugar, acid, jar size, headspace, processing time and altitude adjustment.
For a tested shelf-stable option, follow Bernardin’s no-added-pectin pear jam exactly as written. Its higher-sugar, long-boil method is separate from the refrigerated version on this page.
A hot-filled lid may appear to seal as it cools. Pantry storage still requires the boiling-water process specified in the tested recipe.
Ginger, Vanilla and Other Variations
Pear is delicate, so one measured flavouring usually works better than several competing spices.
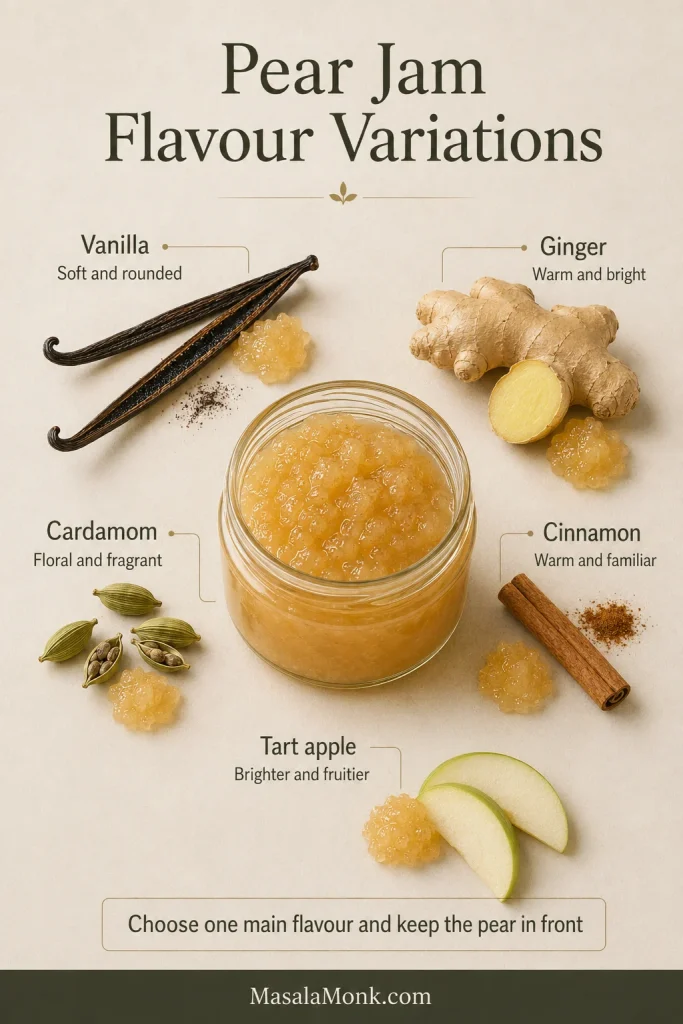
Ginger: Add 10–15 g finely grated fresh ginger, approximately 2–3 teaspoons, with the pears and sugar. It gives the jam a clean warmth that works particularly well with cheese.
Vanilla: Stir in 1 teaspoon vanilla extract after taking the pan off the heat. It softens the lemon’s edge and gives the pear a fuller, more dessert-like flavour.
Cinnamon: Add one small cinnamon stick during cooking and remove it before filling the jars, or use ¼ teaspoon ground cinnamon. More can make the jar taste closer to pie filling than pear jam.
Cardamom: Add ¼ teaspoon finely ground cardamom with the sugar. Its floral, lightly citrusy warmth is especially good with brie, goat cheese and salty crackers.
Apple and pear: Replace up to one-third of the pears with a tart cooking apple for a tangier, fuller-bodied refrigerator spread. Use a separately tested recipe when the jars are intended for pantry storage.
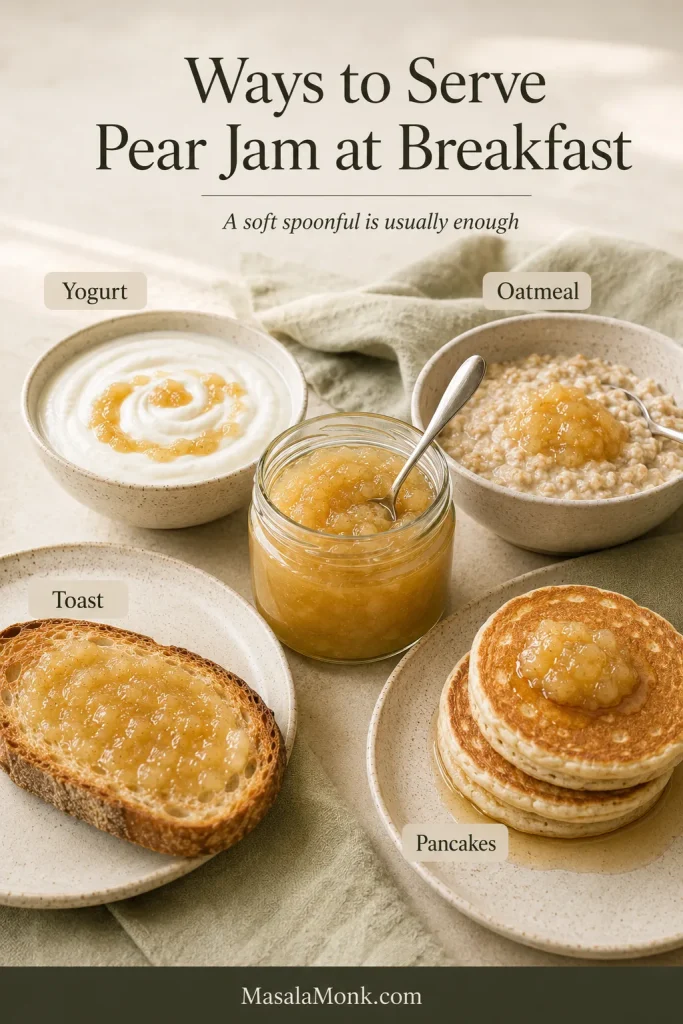
More Than Toast
For breakfast: Spoon the jam over creamy overnight oats, warm porridge, yogurt, pancakes or French toast.
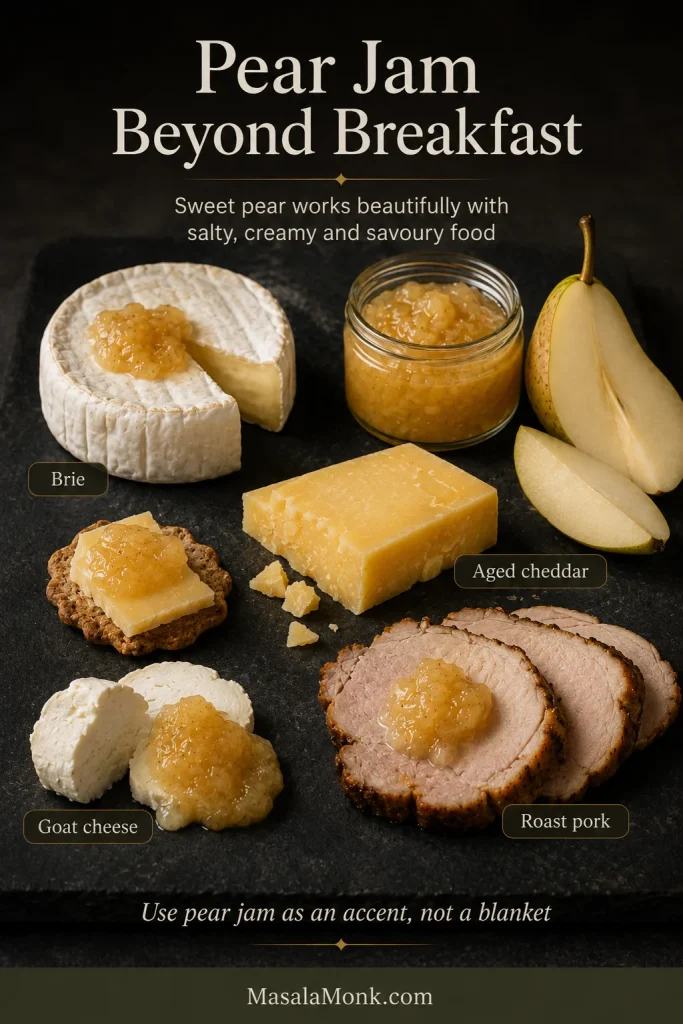
Pear Jam With Cheese and Savoury Food
With cheese: Serve it beside warm baked brie, goat cheese, blue cheese or mature cheddar.
In baking: Spread it between sponge-cake layers, spoon it into thumbprint cookies or swirl it through cheesecake and rice pudding.
As a glaze: Warm it with a splash of lemon juice and brush it over roasted carrots, baked apples, roast pork, chicken or glazed ham.
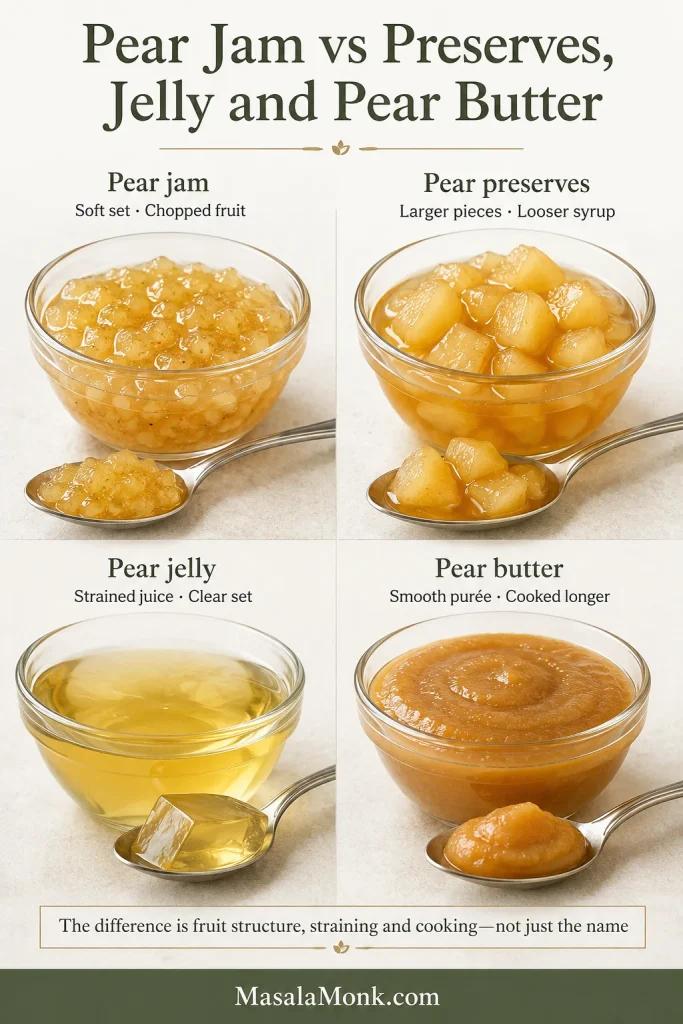
Jam, Preserves, Jelly and Pear Butter
The difference lies in how much fruit remains visible and whether the pears are chopped, strained or puréed.
| Preserve | What makes it different |
|---|---|
| Pear jam | Chopped, mashed or briefly blended fruit with an even, spreadable texture |
| Pear preserves | Larger slices or pieces that remain recognisable in thick syrup |
| Pear jelly | Extracted and strained juice cooked into a clear, smooth gel |
| Pear butter | Fully puréed fruit cooked until dense and concentrated instead of gelled |
This pineapple jam and preserves guide shows how changing the fruit preparation creates either a smoother jam or a chunkier preserve.
Frequently Asked Questions
Do pears need packaged pectin?
No. Ripe pears can make a spoonable refrigerator jam without packaged pectin. Use commercial pectin when you want a firmer or faster-setting result.
Do pears need to be peeled for jam?
No. Leaving some or all of the skin creates a darker, more rustic texture. Peeling gives the jam a paler colour and smoother finish.
How many whole pears make 1 kg of prepared fruit?
Allow approximately 1.3–1.5 kg / 2¾–3⅓ lb whole pears. The exact amount depends on their size, variety and how much must be removed during peeling and coring.
Can brown sugar be used?
Yes, but it will darken the jam and add caramel or molasses notes. Keep granulated sugar as the majority when you want the pale colour and delicate pear flavour to remain dominant.
Can the lemon juice be omitted?
For this version, keep the lemon juice. It balances the sweetness, slows browning and supports the soft set. A lemon-free jam needs a different recipe.
Why does pear jam sometimes feel slightly gritty?
Pears naturally contain tiny stone cells that can create a fine gritty sensation. This is different from crunchy sugar crystals. Blending more thoroughly or choosing a smoother-textured variety can reduce it.
Can the recipe be doubled?
Cook doubled quantities as two separate batches. A larger amount sits deeper in the pan, so water escapes more slowly and the pears may overcook before the jam thickens.
Can pear jam be frozen or canned?
For freezing, leave ½ inch of expansion space and thaw the jar in the refrigerator. For pantry canning, use the separate tested recipe linked in the storage section.
The finished jam should still taste clearly of pear. Stop when the cooled sample holds its path; that small pause protects both the soft set and the fruit’s delicate flavour.
Which pears are on your counter—and are you keeping the jam chunky or blending it smooth?








