Posted on Leave a comment

Pear Jam Recipe: Easy Small-Batch Jam Without Pectin

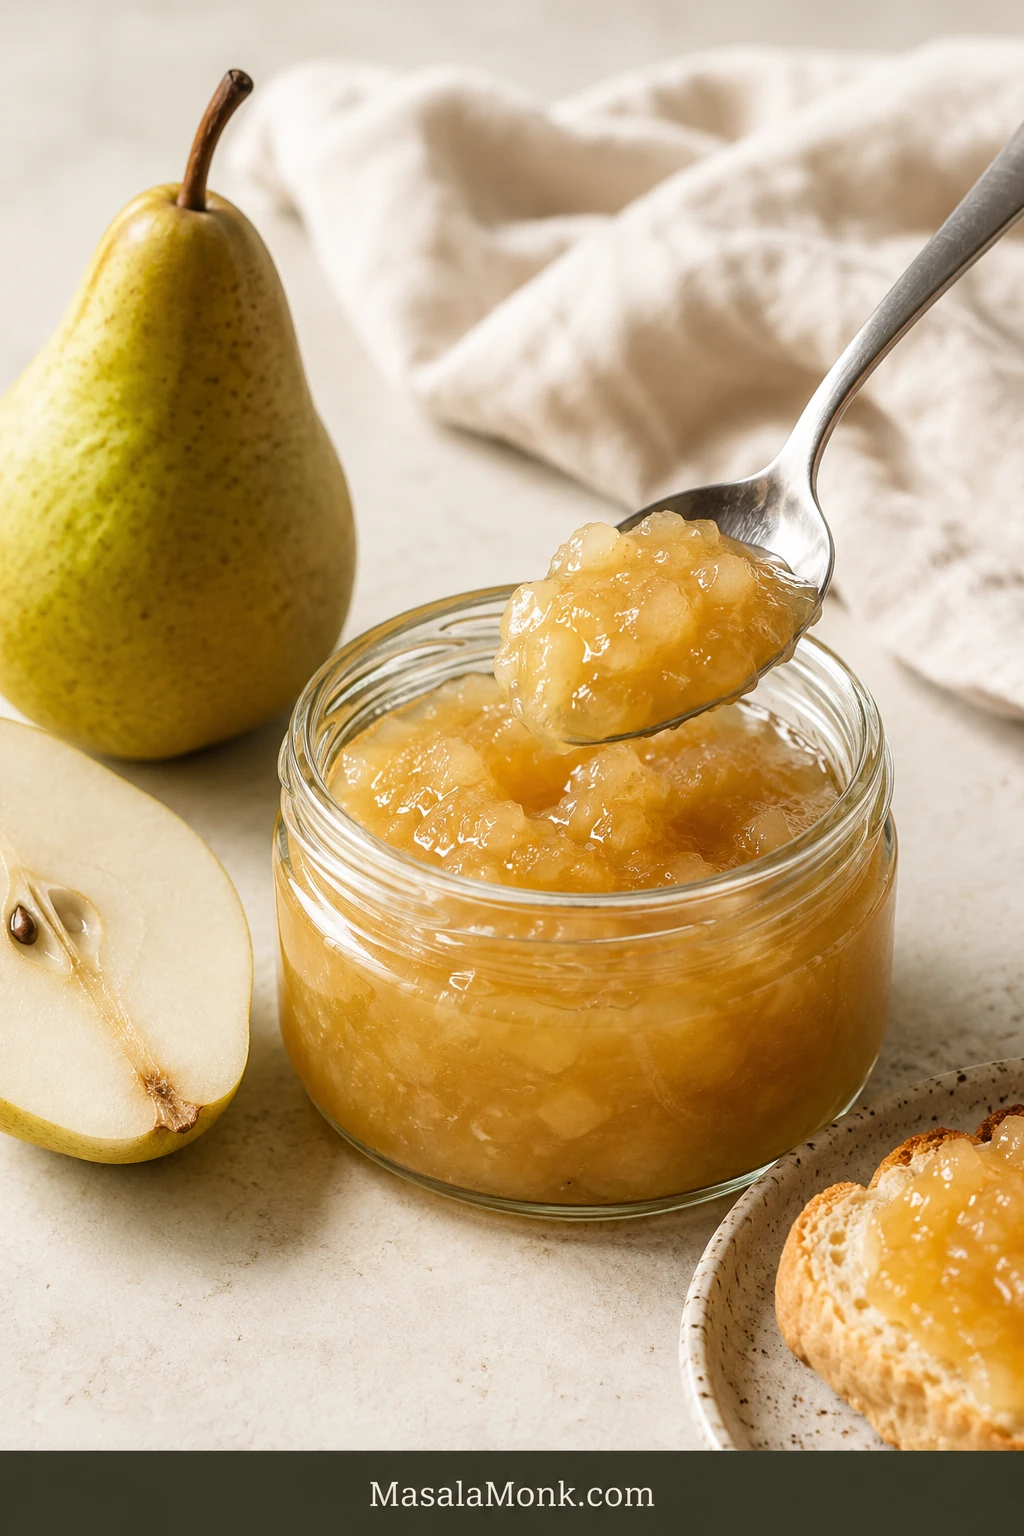
Open jar of pale-gold pear jam beside toast, fresh pears and a spoon on a softly lit breakfast table.

Pear jam is a quieter preserve than berry jam or marmalade. Its pleasure is in the fragrance: soft, almost floral sweetness concentrated into a pale-gold spread with enough lemon to keep it bright.

This pear jam recipe is made for that brief window when ripe pears smell wonderful but are beginning to soften faster than you can eat them. The jam sets softly, making it easy to spread across toast, spoon over yogurt or serve with warm English scones and salty cheese.

You need only three core ingredients: prepared pears, sugar and lemon juice. Weigh the pears after trimming, cook them in a broad pan and judge the finish from a cooled spoonful instead of relying on a fixed cooking time.

Pear Jam Ratio, Time and Yield

For one small batch, use 1 kg / 2 lb 3 oz peeled and cored pears, 400 g / 14 oz granulated sugar and 45 ml / 3 tablespoons fresh lemon juice. Cook larger quantities as separate batches so the fruit stays shallow in the pan.

Soften the pears, mash or blend them to the texture you like, then boil in a broad pan until a cooled teaspoon gathers and leaves a visible path when pushed. Stovetop cooking usually takes about 25–40 minutes, depending on the fruit and the shape of the pan.

The recipe makes approximately 2½–3 cups / 600–700 ml, or about three small jars. Store the finished jam in the refrigerator or freezer; it is not pantry-safe as written.
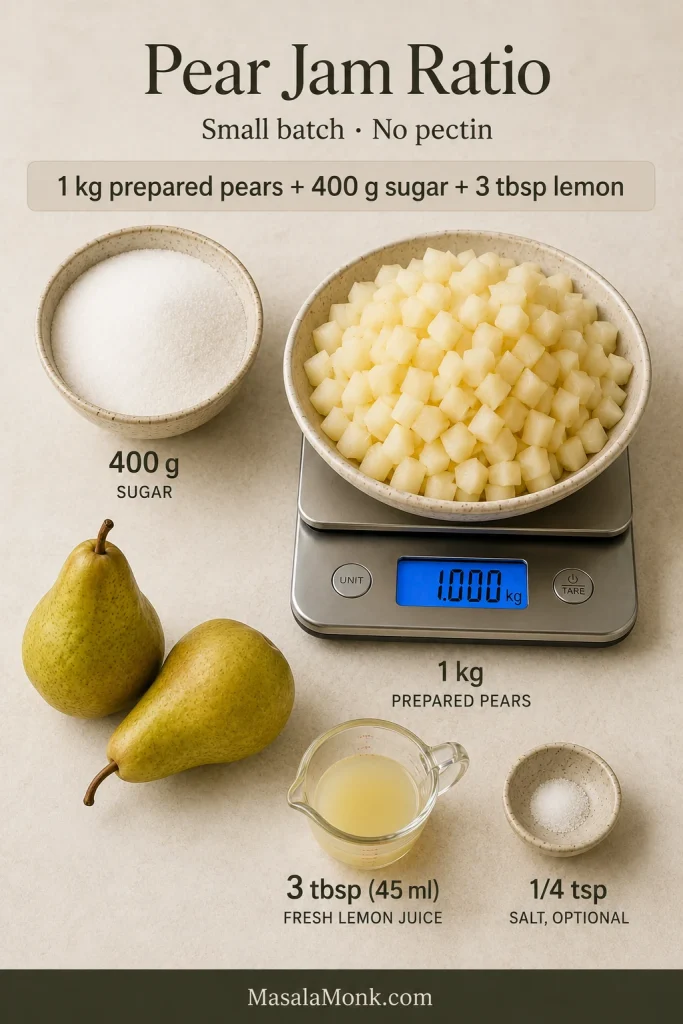
One kilogram of prepared diced pears on a digital scale beside sugar, lemon juice, salt and whole pears.
Weigh pears after peeling and coring; otherwise, discarded fruit can shift the sugar ratio and final consistency.

What Success Looks Like

  • While hot: glossy, pale gold to honey-coloured, and still fairly loose
  • After chilling: softly mounded and easy to spoon
  • On bread: spreadable without running straight off
  • In flavour: pear first, with lemon adding brightness

Weigh after trimming. Keep the batch shallow. Trust the cooled sample.
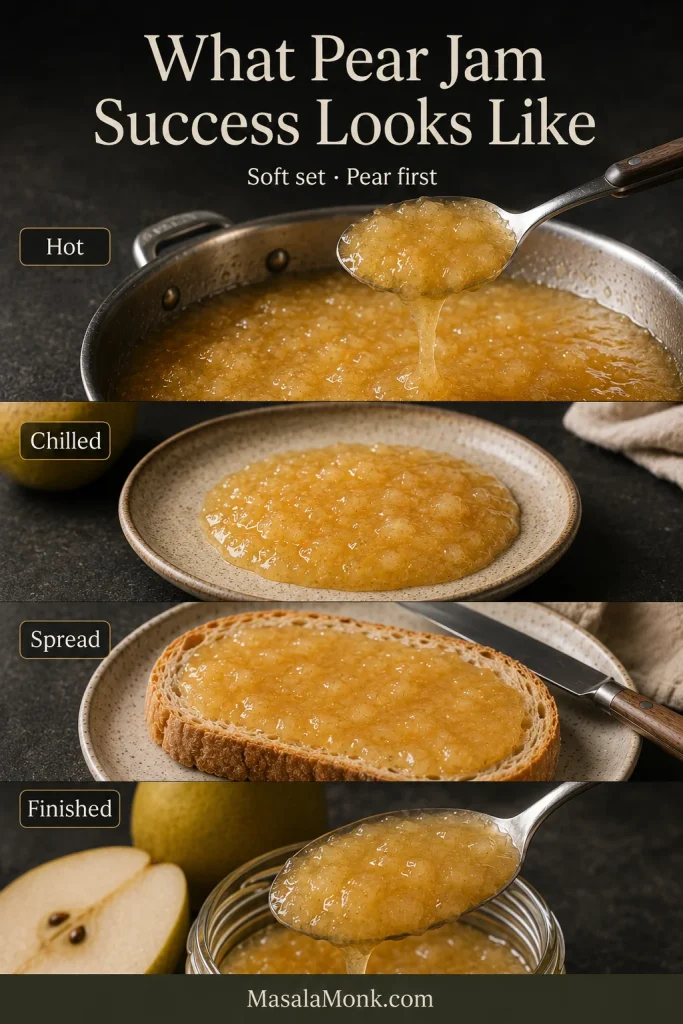
Four views show hot pear jam dripping from a spoon, a chilled sample, jam spread on bread and finished jam in a jar.
Hot jam firms as it cools; waiting for it to look set in the pan usually causes overcooking.

This is a no-pectin refrigerator jam. Packaged pectin is the better route when you want a firmer set or a shorter cooking time. For shelf-stable jars, follow the tested canning recipe in the storage section rather than adapting this lower-sugar method.

Easy Small-Batch Pear Jam Recipe Without Pectin

This version keeps the pear flavour clear and finishes with a soft refrigerator set. You do not need a canning setup or a precise thermometer endpoint; the cooled-plate test guides the finish.

Prep timeAbout 20 minutes
Optional resting time1–4 hours
Cook timeAbout 25–40 minutes
YieldAbout 2½–3 cups / 600–700 ml
Jar estimateAbout three small jars in total
StorageRefrigerator or freezer

Ingredients

  • 1 kg / 2 lb 3 oz peeled, cored and diced pears
  • 400 g / 14 oz granulated sugar, about 2 level US cups
  • 45 ml / 3 tablespoons fresh lemon juice
  • ¼ teaspoon fine salt, optional

Choose Your Texture

  • Chunky: mash about half the pears
  • Rustic and spreadable: mash most of the fruit
  • Smooth: blend briefly after the pears soften

Not sure? Mash most of the pears. The result will still look homemade but will spread easily.
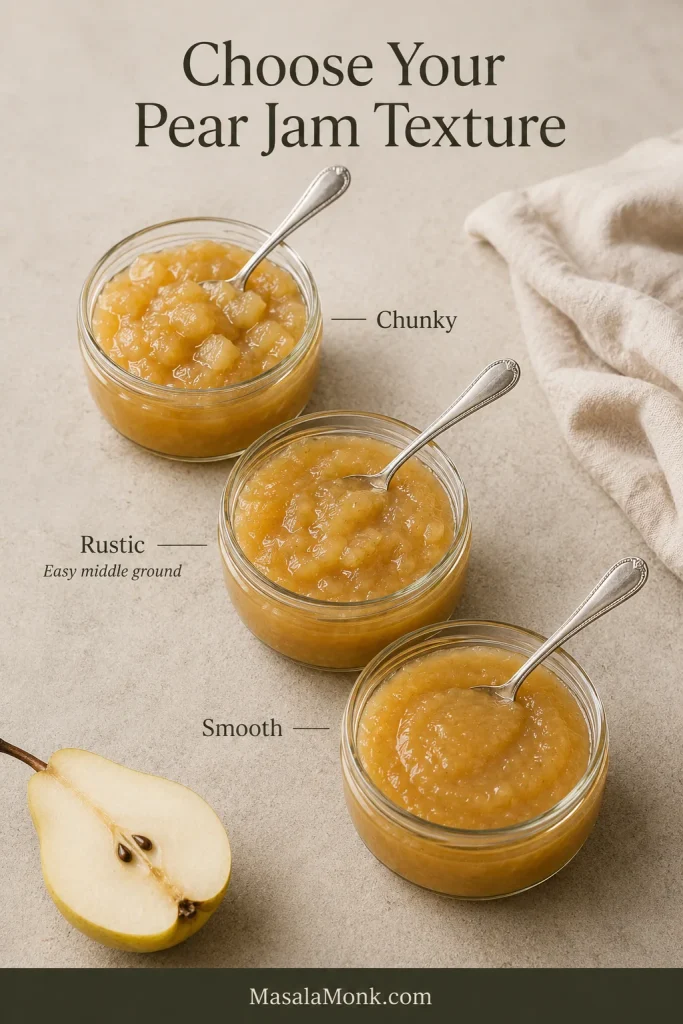
Three pear jam samples show finely mashed, rustic and chunky textures side by side.
Mash fully for smooth jam, partly for rustic texture, or lightly to keep larger pear pieces.

Method

Prepare and Soften the Pears

  1. Prepare and weigh the pears. Put two small plates in the freezer. Peel, quarter and core the pears, trim away damaged flesh and cut the fruit into 6–10 mm / ¼–⅜ inch pieces. Weigh exactly 1 kg after preparation.
  2. Add the sugar and lemon. Combine the pears, sugar, lemon juice and optional salt in a non-reactive bowl. Stir until every piece is coated.
  3. Rest if time allows. Cover and leave for 1 hour at cool room temperature, or refrigerate for up to 4 hours. A shallow pool of pear syrup should collect in the bowl. Skip the rest when time is short.
  4. Soften the pears. Transfer the fruit and all its syrup to a wide, heavy-bottomed pan. Cook over medium-low heat for 10–15 minutes, stirring regularly, until the sugar has dissolved and a pear piece crushes easily against the side.
  5. Choose the texture. Mash thoroughly for a smooth jam, mash most of the pears for a rustic spread, or leave more pieces intact for a chunky finish.

Reduce, Test and Fill

Once the fruit crushes easily, finish the batch in three stages: reduction, set testing and careful filling.
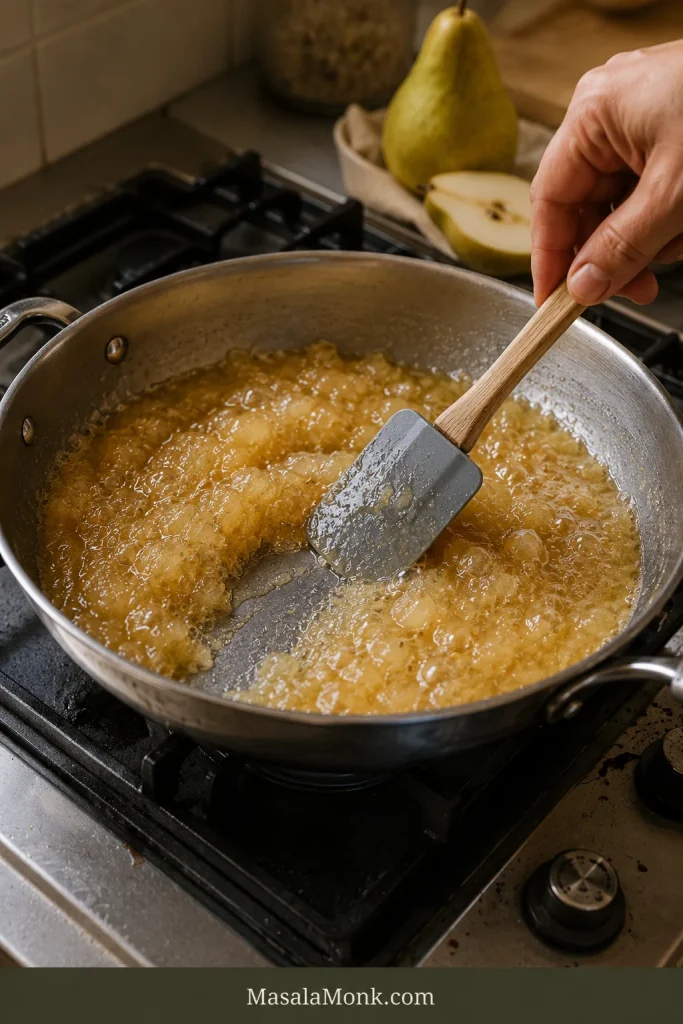
Pale-gold pear mixture bubbling in a wide stainless-steel pan while a wooden spatula stirs through the fruit.
Keep the simmer active, then lower the heat as the mixture thickens and needs more frequent stirring.
  1. Boil and reduce. Increase the heat to medium or medium-high. Cook uncovered at an active boil for approximately 15–25 minutes. Stir more frequently as the jam thickens, scraping across the base and into the corners.
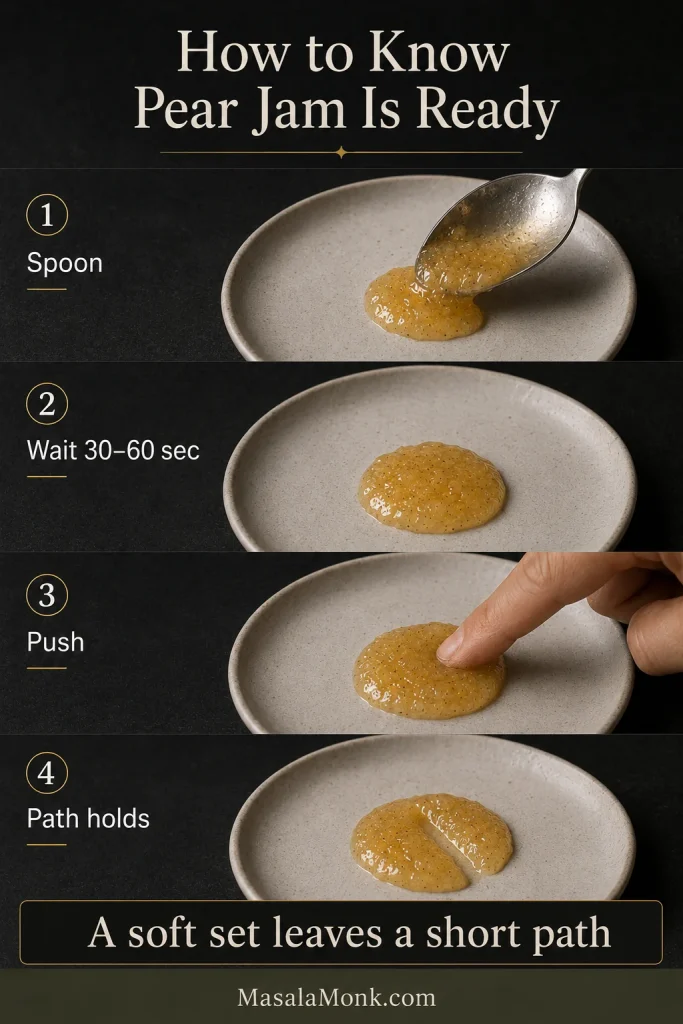
  2. Test the set. When the bubbles become larger and slower, move the pan away from the heat. Place a teaspoon of jam on a chilled plate, wait 30–60 seconds and push it with a fingertip. The sample should gather and leave a visible path. If it runs back together like syrup, boil for another 2–3 minutes and test again.
  3. Warm the jars. While the jam finishes, fill clean, heat-safe jars with hot water. Empty and dry them just before filling so the glass is warm when the hot jam goes in.
  4. Rest and fill. Let the pan stand for 5 minutes, stir gently and skim any foam that remains. The jam should look glossy and range from pale gold to honey-coloured. A distinctly dark caramel smell suggests it has cooked too far. Ladle the jam into the warm jars and fit the lids.

For refrigerator storage: Let the jars cool only until they are safe to handle, then refrigerate them. Do not leave them at room temperature for more than two hours.

For freezing: Use freezer-safe jars or containers and leave ½ inch of headspace for expansion.

Recipe Notes

  • Warm jam looks looser than expected. By the next day, it should settle into a soft mound that gives easily under a knife.
  • A lid may pull down as the jar cools, but that does not make this refrigerator recipe pantry-safe.
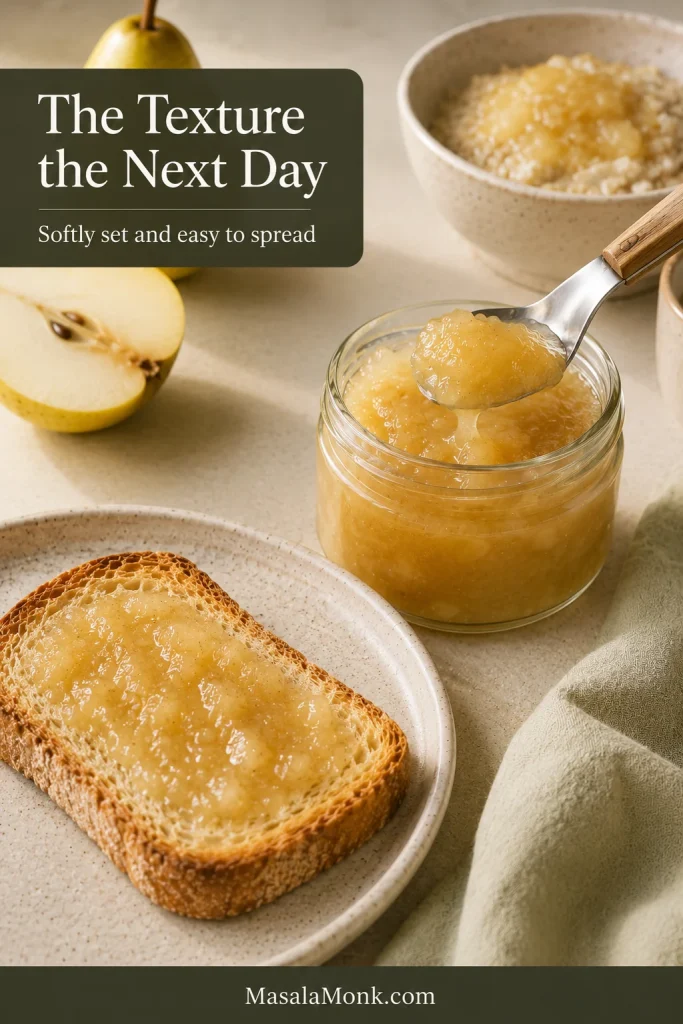
Soft pear jam lifted from an open jar beside a thin layer spread on toast and fresh pears.
A loose-looking jar may set perfectly overnight, so judge the final texture only after thorough chilling.

Need More Help With Your Batch?

The Best Pears for Jam

Choose pears that smell ripe and yield slightly near the neck but still hold their shape when cut. Green-hard fruit lacks the aroma you want, while pears that are collapsing throughout can produce something closer to pear sauce.

For a balance of aroma and structure, use mostly ripe pears with a smaller amount of firmer, just-ripe fruit. Ripe pears bring the strongest flavour; firmer pieces give the finished jam more body.
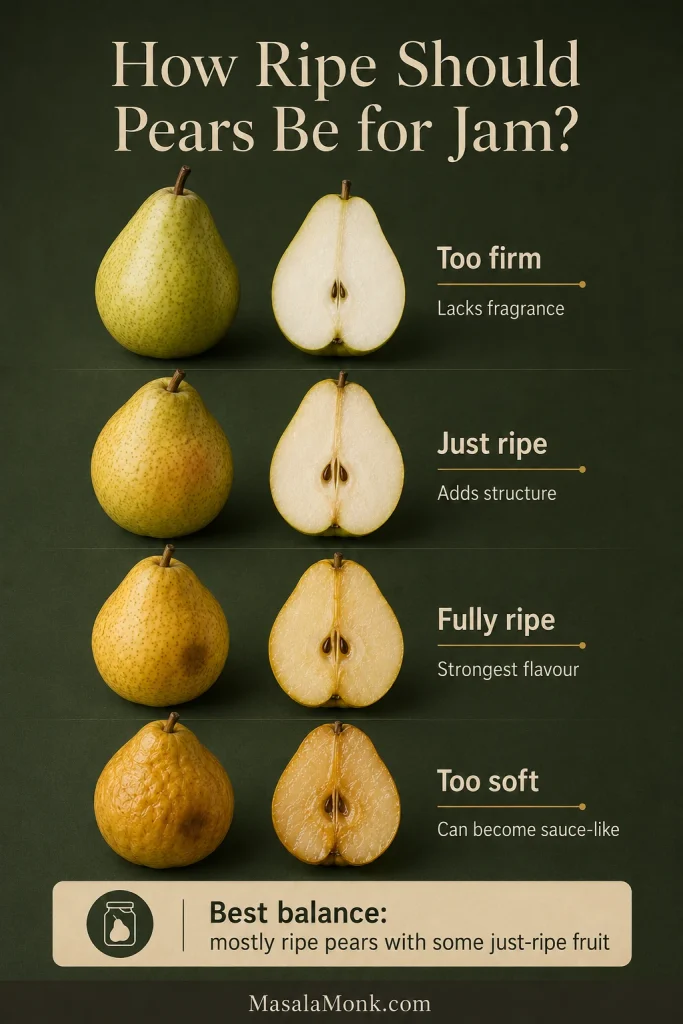
Whole and cut pears compare fruit that is too firm, just ripe, fully ripe and very soft.
Blend fully ripe pears with just-ripe fruit for aroma and structure; very soft pears can turn sauce-like.

Pear flavour becomes warmer and more concentrated as it cooks, while lemon helps it remain distinct.

Which Pear Varieties Work Best?

PearBest use
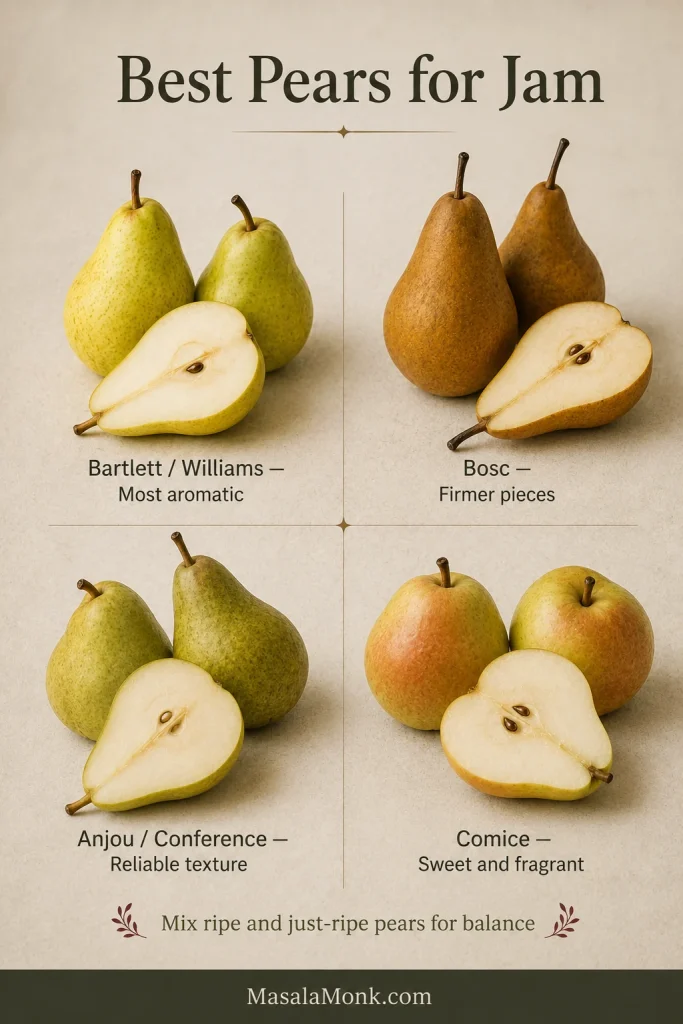
Bartlett or WilliamsHighly aromatic base that softens quickly
BoscFirmer pieces with a warm, honeyed flavour
Anjou or ConferenceReliable all-purpose texture and mild sweetness
ComiceVery sweet and fragrant; combine with firmer fruit
Bartlett, Bosc, Anjou or Conference, and Comice pears shown whole and cut with identifying texture notes.
Bartlett or Williams pears add aroma; firmer Bosc, Anjou or Conference pears retain visible fruit pieces.

Can You Use Very Ripe, Frozen or Canned Pears?

Very ripe pears: Use them if they show no mould, fermentation or other spoilage. They bring plenty of aroma but less structure, so combine them with some firmer fruit and begin checking the jam earlier.

Frozen pears: If you freeze your own, peel, core and weigh 1 kg before freezing. For purchased unsweetened frozen pears, thaw first and weigh the fruit together with its released liquid. Thawed pears work best in a smoother jam and may need a little longer to reduce.

Canned pears: This recipe is written for fresh or properly weighed frozen pears. Syrup-packed fruit changes the sugar ratio and cooking time, so an adjusted canned-pear version is not included here.

Asian or Nashi pears: They can make a refrigerated spread, but pantry preservation requires instructions written for their acidity. Follow the National Center for Home Food Preservation guidance for Asian pears when canning them.
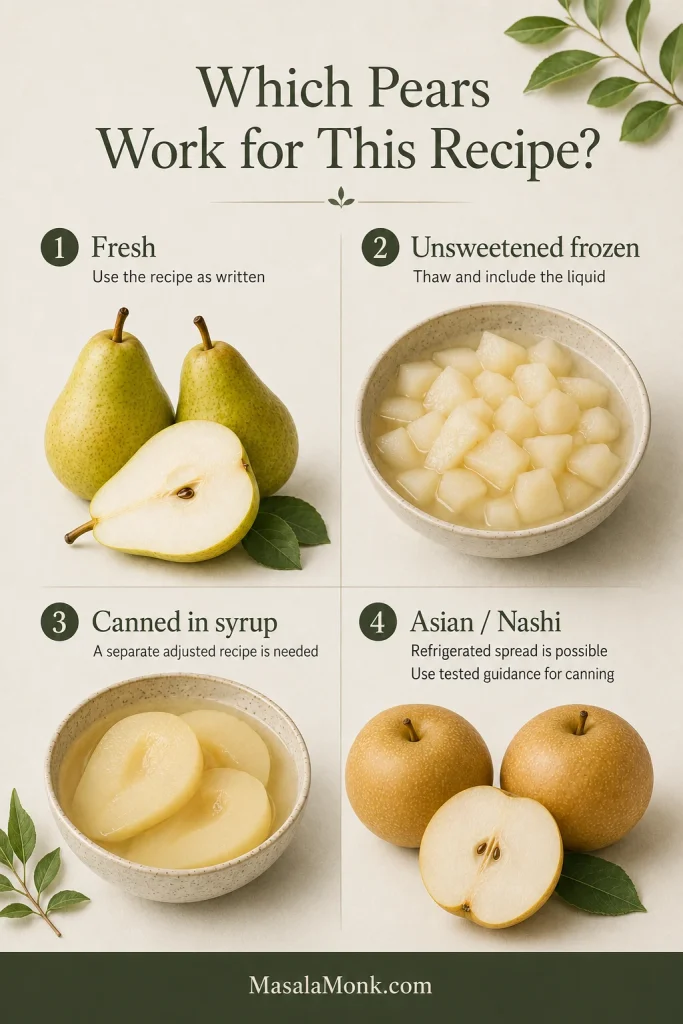
Four sections show fresh European pears, thawed frozen pieces, canned pears in syrup and round Asian pears.
Fresh and unsweetened frozen pears suit this formula; canned and Asian pears need separate guidance.

Ready to make the jam? Return to the recipe · Jump to the method · Back to top

Ingredients and Equipment

Preparing and Weighing Pears

Weigh the pears after peeling, coring and trimming. Depending on their size and how much must be discarded, allow roughly 1.3–1.5 kg / 2¾–3⅓ lb whole pears to produce 1 kg prepared fruit.
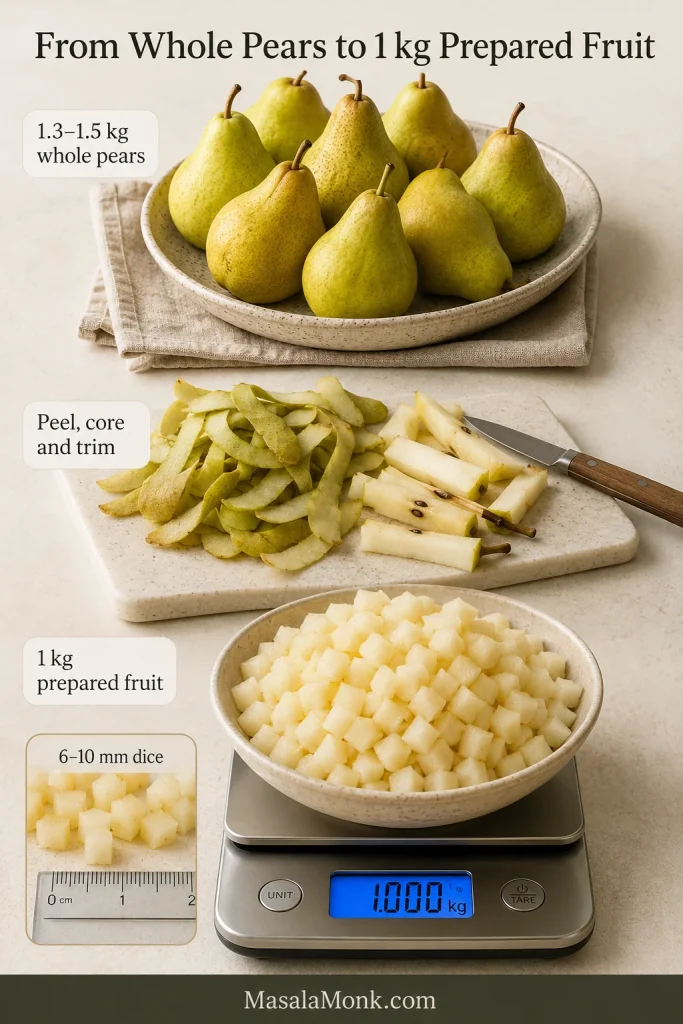
Whole pears, peeled halves, removed cores and evenly diced pear pieces arranged in preparation stages.
Uniform 6–10 mm pieces soften evenly, preventing some chunks from dissolving while others remain firm.

You may leave some or all of the skin on for a darker, more rustic jar. Still weigh 1 kg after removing the cores and damaged areas. Peeling remains the default because it gives the spread a paler colour and finer texture.
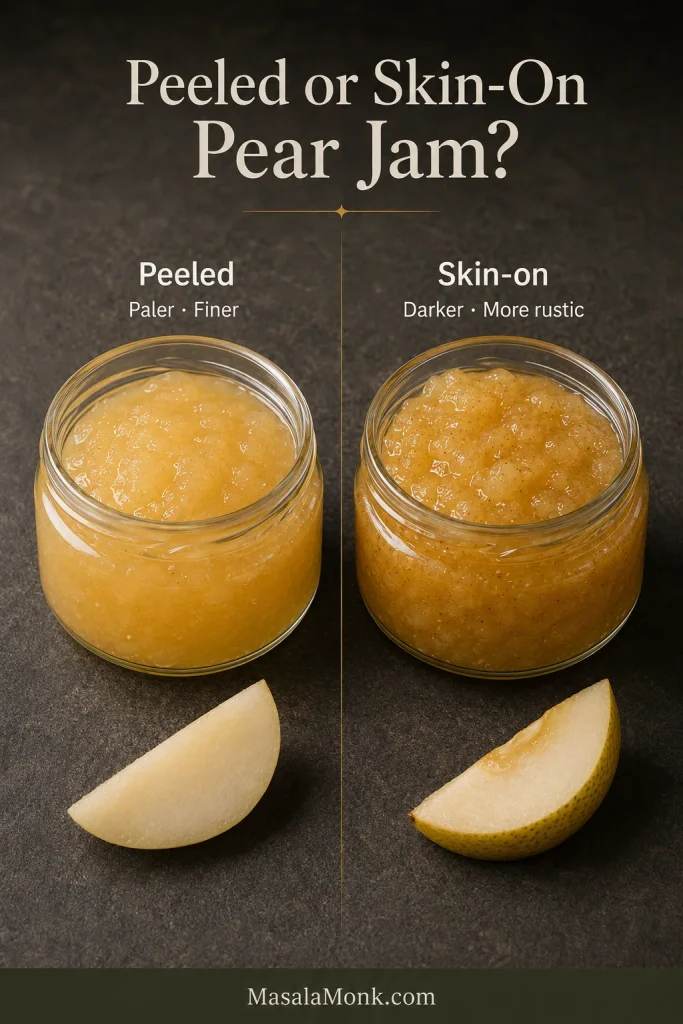
Matching jars compare pale peeled-pear jam with darker skin-on pear jam containing small peel flecks.
Peeling gives a paler, finer spread; clean pear skins add colour, fibre and rustic texture.

Sugar, Lemon and Salt for Pear Jam

If you reduce the sugar, expect a looser spread and a smaller yield. In this version, sugar also draws juice from the pears and gives the finished jam body.
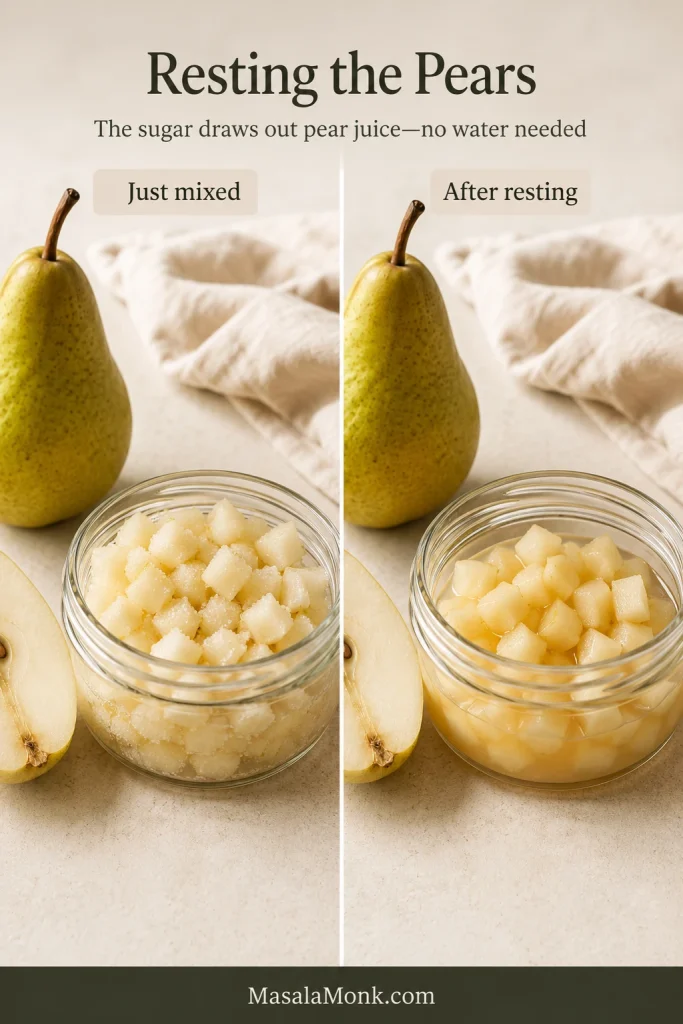
Freshly sugared diced pears beside rested pears surrounded by syrup released from the fruit.
Resting draws out pear juice, helping the sugar dissolve and reducing early sticking in the pan.

The recipe uses 400 g sugar for 1 kg prepared pears—40% of the fruit weight. It produces a spoonable refrigerator jam; traditional higher-sugar recipes generally set more firmly.

For a firm jam with substantially less sugar, use a low/no-sugar pectin recipe written for the exact product.

Lemon balances the sweetness, slows visible browning and supports the soft set. A small pinch of salt softens the sweetness and makes the pear taste more distinct.

Best Pan and Tools for Pear Jam

If your jam is taking far longer than expected, the pan may matter more than the pears. A broad surface releases steam quickly; a tall stockpot holds the same mixture in a deeper layer and slows evaporation.
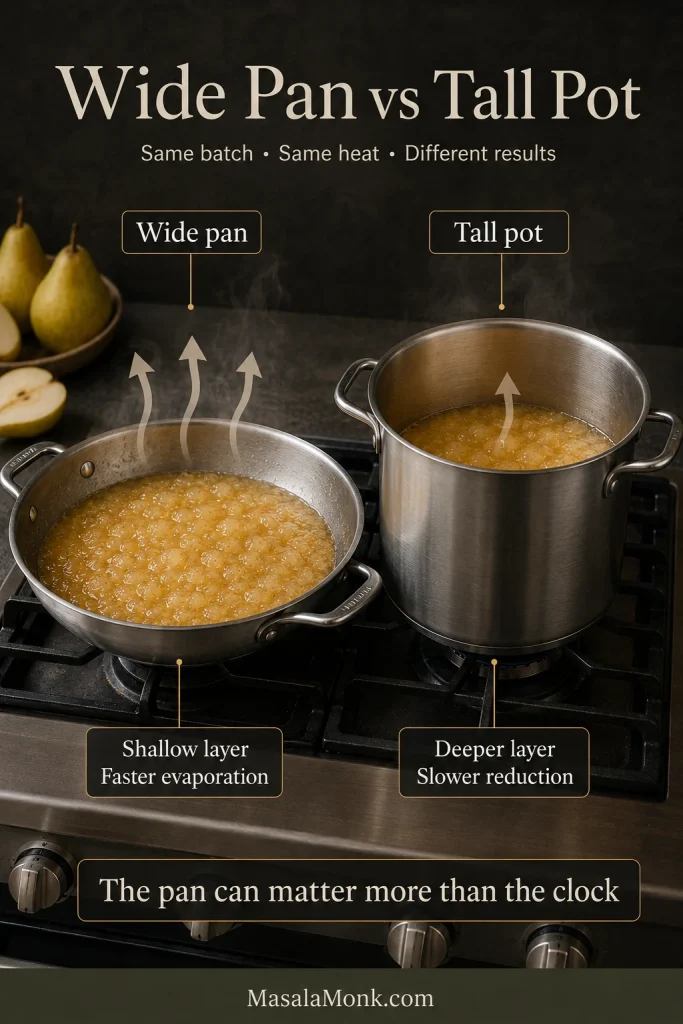
Equal pear mixtures cook in a wide shallow pan and a tall narrow pot, with arrows comparing evaporation.
A wide pan evaporates faster; the same batch reduces more slowly in a deeper, narrower pot.
  • Digital kitchen scale: for accurate fruit and sugar measurements
  • Wide, heavy-bottomed pan: approximately 4–6 litres for this batch
  • Silicone spatula or wooden spoon: for scraping the full base
  • Potato masher: for a rustic finish
  • Immersion blender: optional for a smoother jam
  • Two chilled plates: for checking the cooled texture
  • Clean, heat-safe jars or refrigerator containers: warmed before filling

What to Watch in the Pan

When the Pears Are Ready to Mash

The pieces should look translucent around the edges and crush easily against the side of the pan. As they soften, the raw-fruit smell becomes warmer and fuller—the first moment the pan begins to smell like pear jam instead of chopped pears.

Blending the pears too early can make the mixture watery. Let the pieces soften until they crush easily before reaching for the blender.

When to Begin Testing

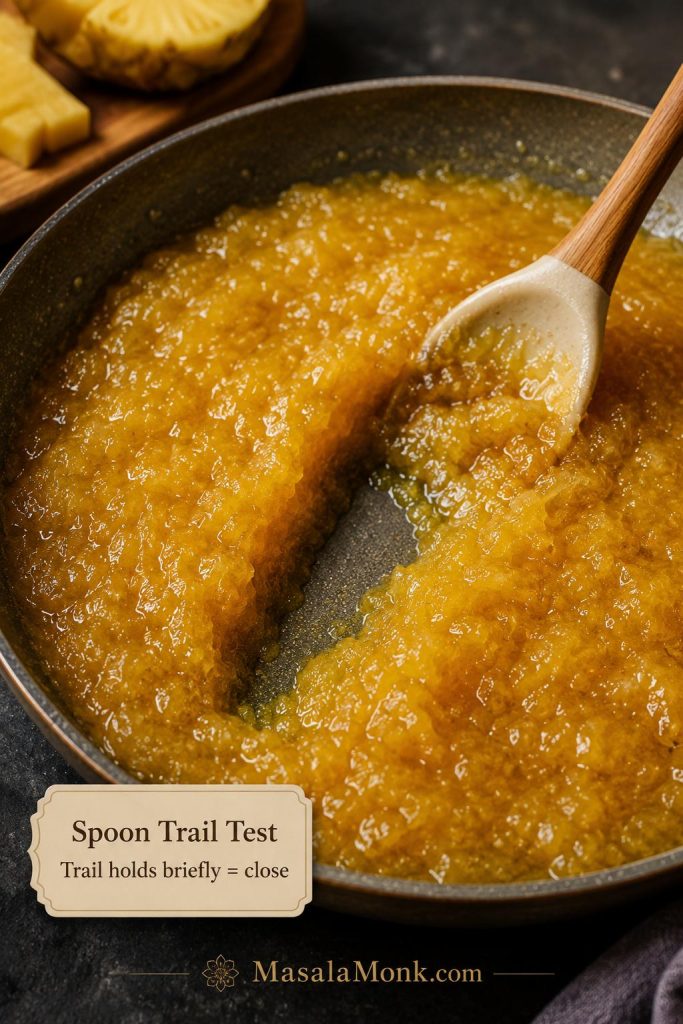
At first, the bubbling is quick and watery. As the pear juice concentrates, the bubbles become larger and slower, the spoon drags slightly and a line scraped across the base remains visible for a moment.
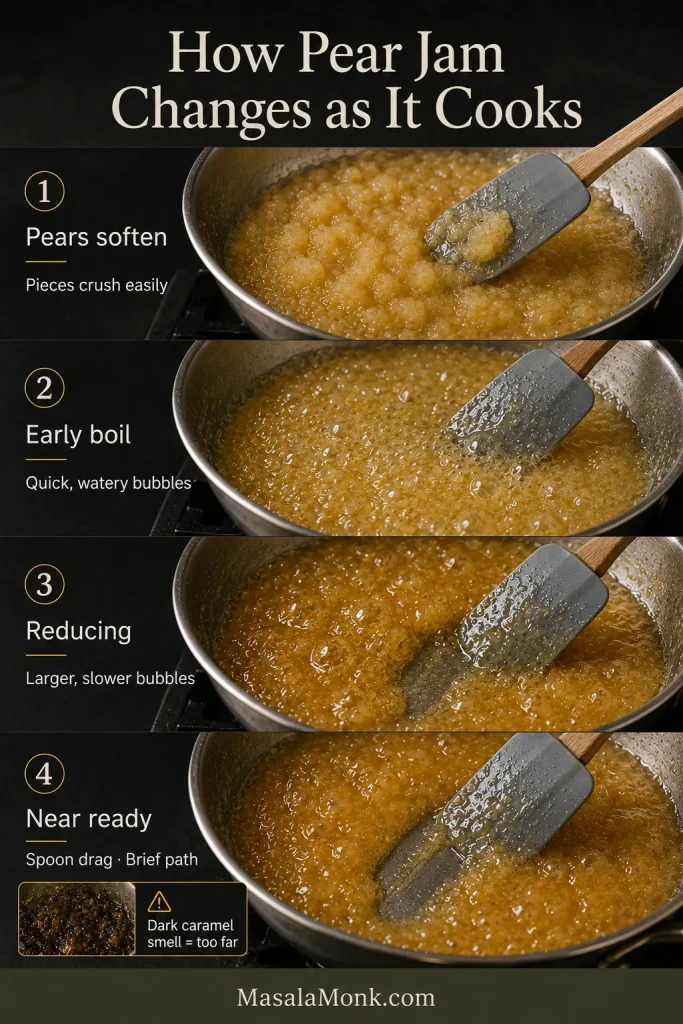
Four stages show diced pears softening, a watery boil, larger bubbles and near-ready jam leaving a brief spoon path.
Fresh pear aroma should remain clear; a dark caramel smell means the reduction has gone too far.

The colour may stay pale gold or deepen toward honey, depending on the variety and cooking time. Near the end, the sound often becomes heavier before the jam looks dramatically thicker. That is the moment to begin checking cooled samples.

Very high heat before the pears soften can catch the sugar on the base. Continuing to boil after the jam is ready darkens the colour and dulls the fruit.

A jar that finishes a little looser or firmer than planned can still be delicious. Texture is easier to repurpose than flavour.

How to Test the Set

This is the uncertain moment in the recipe because the jam often looks looser than the finished jar will be.

Pears do not announce the setting point dramatically. The bubbles simply slow, the spoon feels heavier and a cooled drop finally stays where you push it.

The Chilled-Plate Test

  1. Move the pan away from the heat.
  2. Place a teaspoon of jam on a chilled plate.
  3. Wait 30–60 seconds.
  4. Push the edge with a fingertip.
Pear jam is spooned onto a cold plate, cooled, pushed with a fingertip and shown leaving a short narrow track.
Move the pan off the heat while testing, or the batch may overcook as the sample cools.

A watery sample runs straight back together. When ready, it gathers and leaves a short path. You may see a faint wrinkle at the edge, but do not wait for a dramatic one.

The same cooled-sample principle appears in this orange marmalade recipe, where stopping at the first soft set helps prevent an overly stiff preserve.

Early in cooking, the liquid falls from a cool spoon in quick separate drops. Near the endpoint, those drops become heavier, begin to join and fall from the edge in a short sheet.

Traditional higher-sugar jams without packaged pectin are often cooked toward approximately 104°C / 220°F at sea level. This lower-sugar refrigerator jam may be ready earlier, so treat the chilled plate as the deciding test.
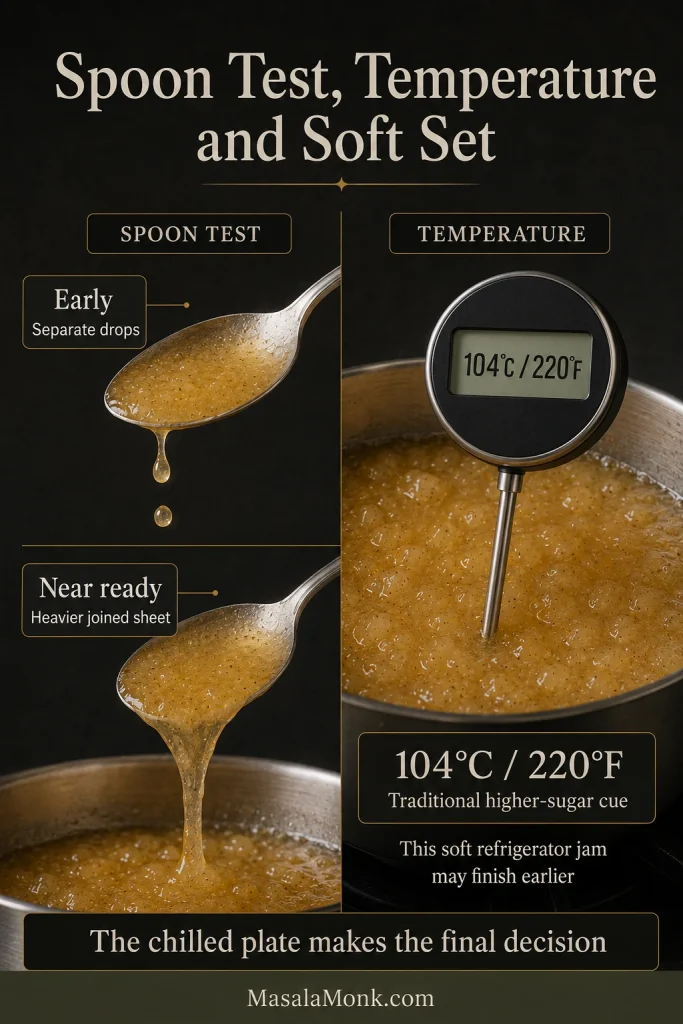
Thin jam falls as separate drops, thicker jam forms a joined sheet, and a thermometer reads 104°C or 220°F.
Temperature and spoon behaviour support the decision, but the cooled sample determines the final set.

Pear Jam Troubleshooting

Differences in pear ripeness usually change the cooking time more than they ruin the batch. Let the jam chill overnight before deciding that something has gone wrong.
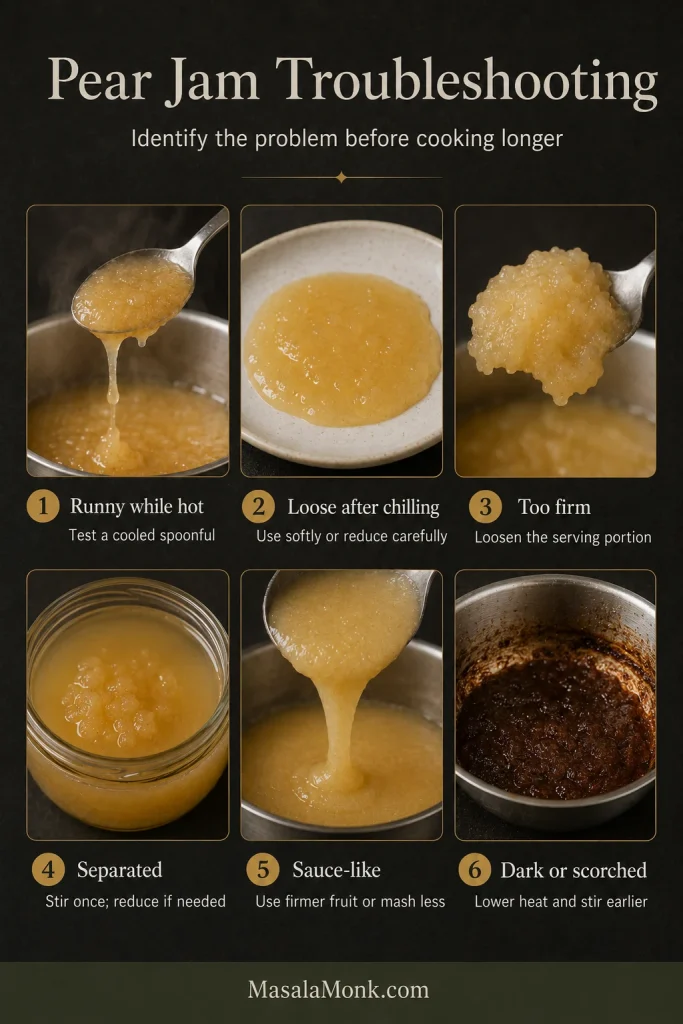
Six panels compare runny hot jam, loose chilled jam, firm jam, separation, sauce-like texture and scorching.
Hot looseness is normal; decide whether the batch needs more cooking only after testing a cooled sample.
ProblemWhat to do
Runny while hotCheck a cooled teaspoon before cooking longer. Hot jam naturally appears loose.
Still runny the next dayUse it as a soft spread, or return a measured amount to a broad pan and reduce it carefully.
Separation after chillingStir the jar once. Persistent separation suggests the jam needed a little more reduction.
Overly firm setWarm only the amount you plan to serve with a teaspoon or two of water or lemon juice.
Sauce-like textureFirmer pears and a lighter mash leave more recognisable fruit in the jar.
Crunchy sugar crystalsLet all visible sugar dissolve before bringing the mixture to an active boil.
Fine pear-like gritPears naturally contain stone cells. Blend more thoroughly or choose a smoother-textured variety.
Tough fruit piecesSoften the fruit until each piece crushes easily before mashing or blending.
Weak pear flavourMore aromatic pears and enough lemon give a mild batch greater definition.
Dark or scorched jamA broad, heavy pan and more frequent stirring near the end reduce the risk of scorching.
Unusually long cooking timeA narrow pan, deep layer of fruit or unusually juicy pears can slow evaporation.

Sugar Crystals, Natural Pear Grit or Tough Fruit?
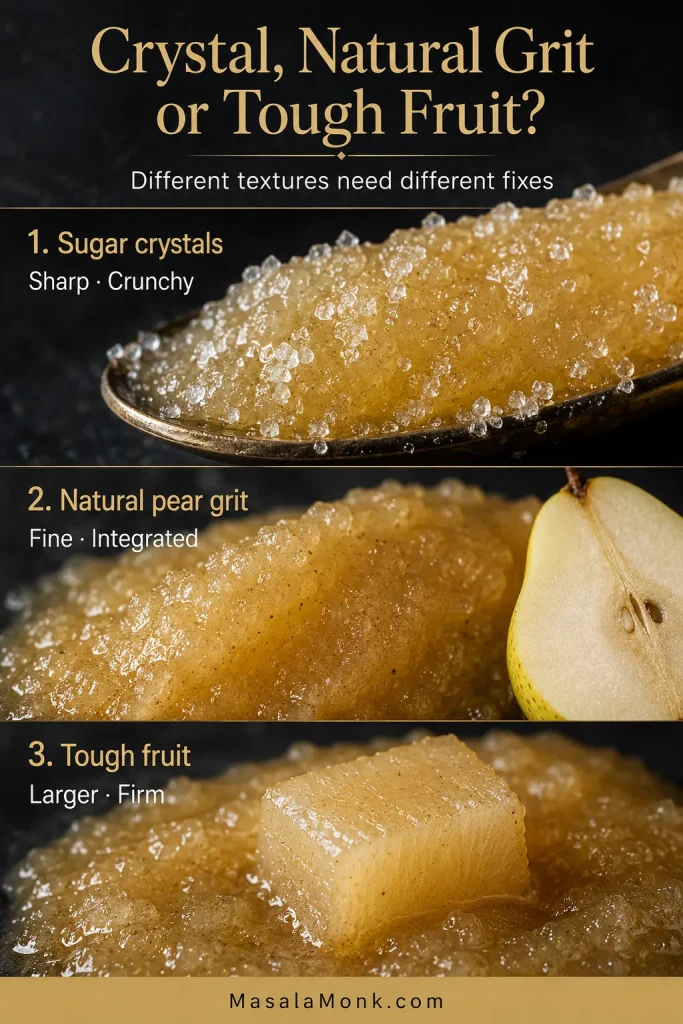
Close views compare angular sugar crystals, fine grain in pear flesh and a firm under-softened pear cube.
Reflective grains suggest sugar crystals; fine matte grit may be natural, while larger firm pieces are under-softened fruit.

A loose batch that tastes good is not a failed batch. Spoon it over oatmeal, yogurt or ice cream, use it as a breakfast syrup, or warm it into a glaze.

Cornstarch makes a starch-thickened fruit filling, not a conventional jam. It belongs in recipes such as this cherry pie filling, where the thickened fruit needs to stay inside a pie.

Texture can be corrected or repurposed. Pears cooked past their fresh flavour are harder to rescue.

Choose what to do next: See pectin options · Store the jam safely · Back to the recipe

When to Use Pectin for Pear Jam

Choose the no-pectin method for a soft refrigerator jam. Use packaged pectin when a firmer set, shorter cooking time or substantially lower sugar matters more.

  • Regular powdered or liquid pectin: follow the pear-jam recipe written for the exact product, including its sugar quantity and mixing order.
  • Low/no-sugar pectin: choose this when less sugar and a firmer gel are both important.
  • Freezer-jam pectin: use it for the separate, usually uncooked or briefly heated preparation described on the packet.
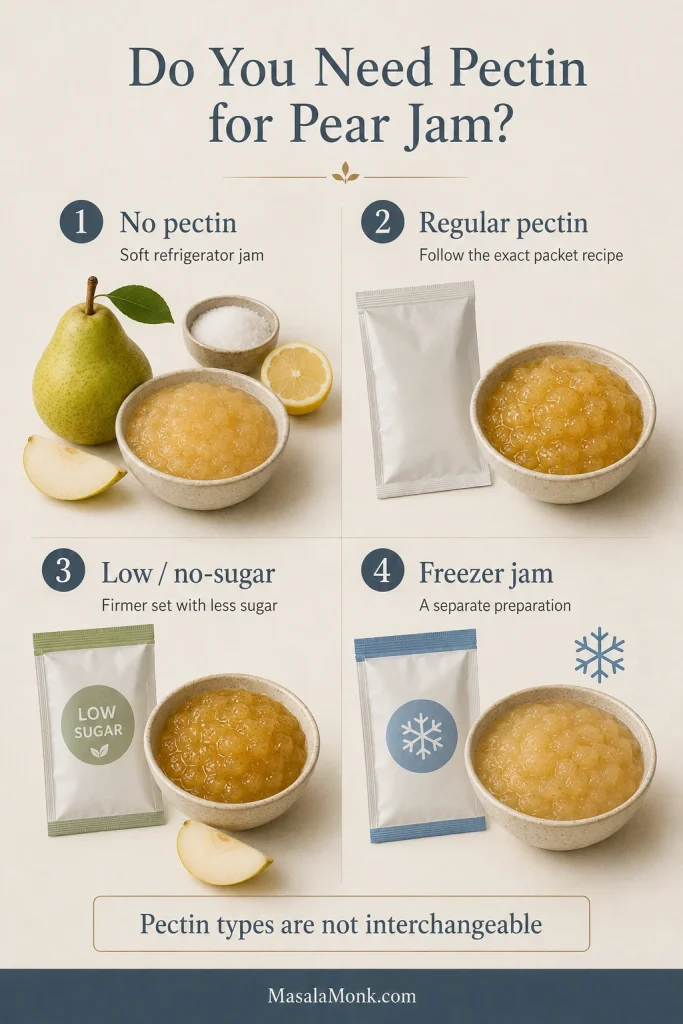
Four sections compare no-pectin jam with regular, low-sugar and freezer-jam pectin routes.
Changing pectin also changes sugar, acid and method, so follow the packet’s complete formula.

Honey and maple syrup add liquid as well as sweetness. They work best in recipes developed around those sweeteners, not as direct cup-for-cup replacements.

Pear Jam Storage: Refrigerator, Freezer and Pantry-Safe Options

Choose the Right Storage Route
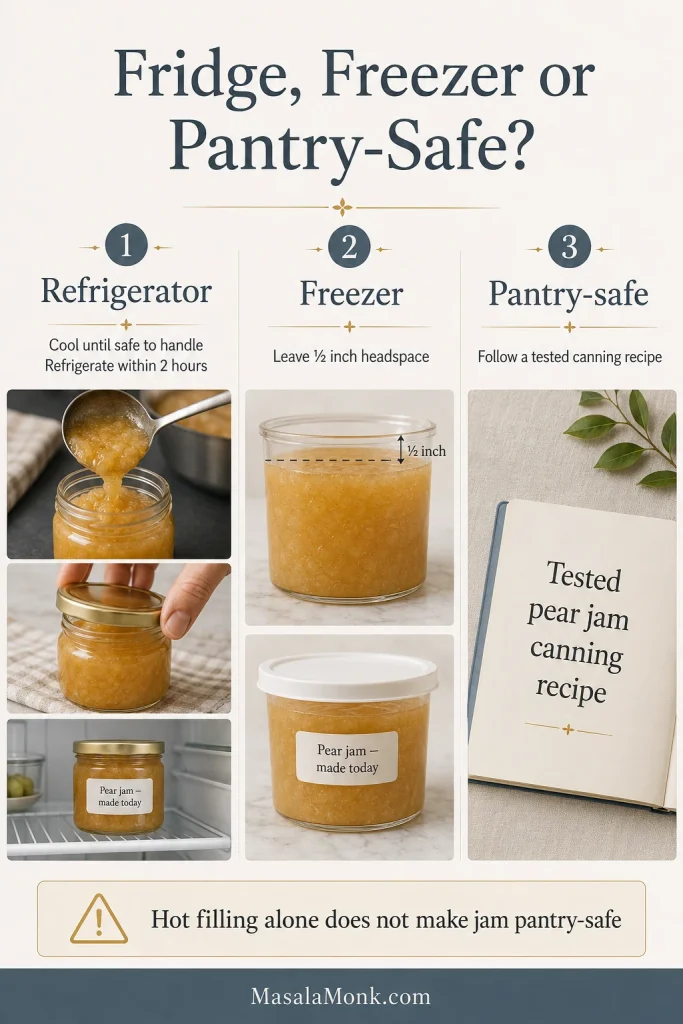
Three storage routes show refrigerated pear jam, a freezer container with headspace and a tested canning-recipe reference.
A pulled-down lid does not prove shelf safety; pantry storage needs a separately tested canning recipe.

Refrigerator

Fit the lids after filling, let the jars cool only until they are safe to handle, then refrigerate them. Keep the jam at 4°C / 40°F or colder and use it within about three weeks for best quality. Return the jar to the refrigerator after serving and use a clean spoon each time.

Discard the contents if you notice mould, active bubbling, fermentation or an alcoholic or yeasty smell.

Freezer

Use freezer-safe jars or containers and leave approximately ½ inch of room for expansion. Freeze for up to one year for best quality and thaw overnight in the refrigerator.

Freezing this cooked jam is different from making classic freezer jam, which is generally uncooked or briefly heated and uses a freezer-jam pectin formula.

Pantry-Safe Canning

For pantry storage, change recipes instead of trying to convert this one. Follow one tested canning method from beginning to end, including its fruit, sugar, acid, jar size, headspace, processing time and altitude adjustment.

For a tested shelf-stable option, follow Bernardin’s no-added-pectin pear jam exactly as written. Its higher-sugar, long-boil method is separate from the refrigerated version on this page.

A hot-filled lid may appear to seal as it cools. Pantry storage still requires the boiling-water process specified in the tested recipe.

Ginger, Vanilla and Other Variations

Pear is delicate, so one measured flavouring usually works better than several competing spices.
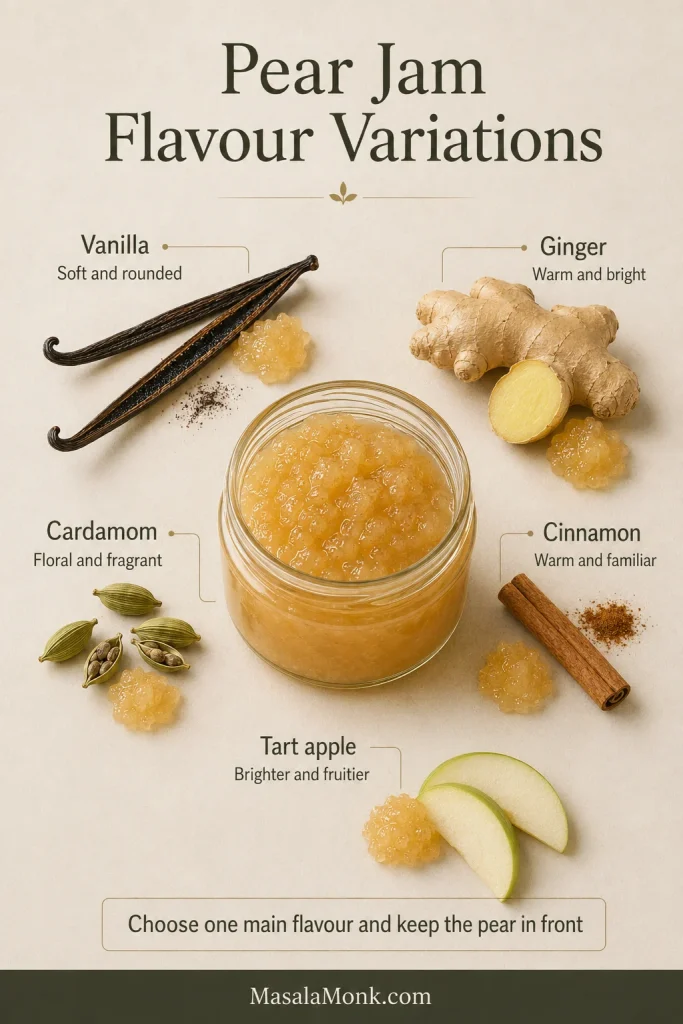
Pear jam surrounded by vanilla, ginger, cardamom, cinnamon and tart apple, showing five flavour variation options.
Vanilla, ginger, cardamom, cinnamon and tart apple each complement pear differently; choose one main flavour so the fruit stays recognisable.

Ginger: Add 10–15 g finely grated fresh ginger, approximately 2–3 teaspoons, with the pears and sugar. It gives the jam a clean warmth that works particularly well with cheese.

Vanilla: Stir in 1 teaspoon vanilla extract after taking the pan off the heat. It softens the lemon’s edge and gives the pear a fuller, more dessert-like flavour.

Cinnamon: Add one small cinnamon stick during cooking and remove it before filling the jars, or use ¼ teaspoon ground cinnamon. More can make the jar taste closer to pie filling than pear jam.

Cardamom: Add ¼ teaspoon finely ground cardamom with the sugar. Its floral, lightly citrusy warmth is especially good with brie, goat cheese and salty crackers.

Apple and pear: Replace up to one-third of the pears with a tart cooking apple for a tangier, fuller-bodied refrigerator spread. Use a separately tested recipe when the jars are intended for pantry storage.

More Than Toast

For breakfast: Spoon the jam over creamy overnight oats, warm porridge, yogurt, pancakes or French toast.
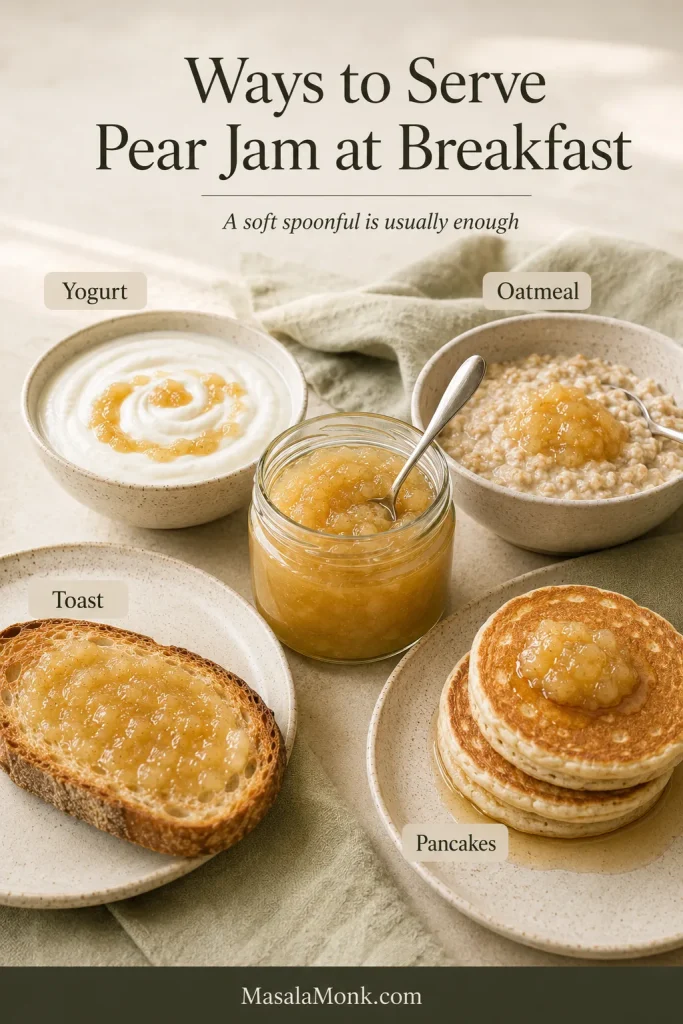
Pear jam served with yogurt, oatmeal, toast and pancakes around an open jar on a light breakfast table.
Beyond toast, a spoonful of pear jam can brighten yogurt, oatmeal or pancakes without overwhelming them.

Pear Jam With Cheese and Savoury Food

With cheese: Serve it beside warm baked brie, goat cheese, blue cheese or mature cheddar.
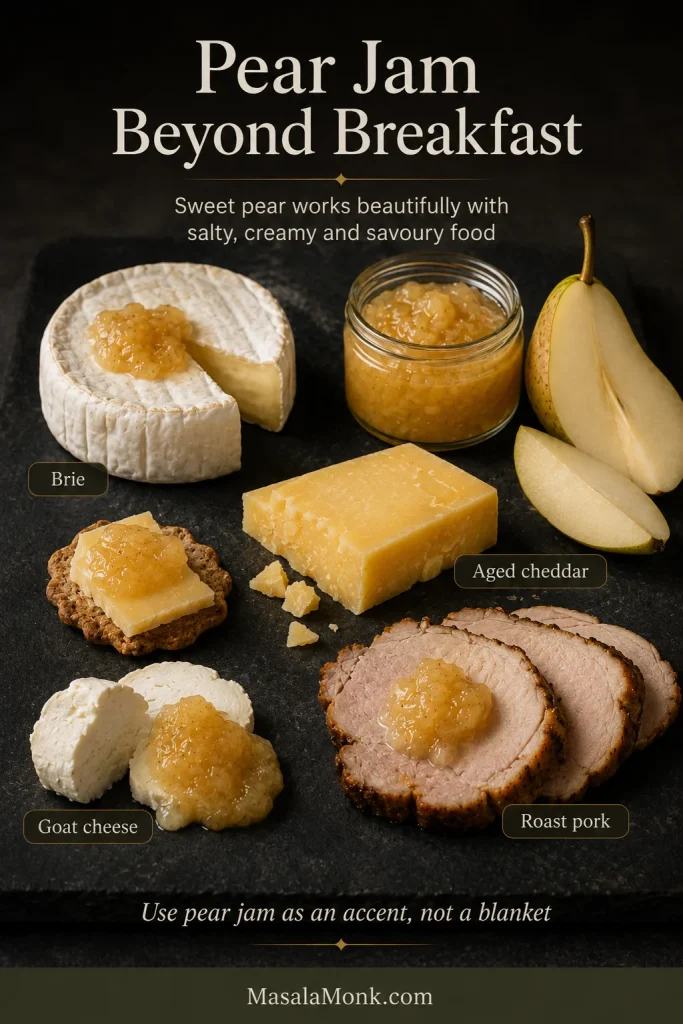
Pear jam paired with Brie, aged cheddar, goat cheese, sliced roast pork and fresh pear on a dark board.
Pear jam suits Brie, goat cheese, aged cheddar and roast pork best as a restrained sweet accent.

In baking: Spread it between sponge-cake layers, spoon it into thumbprint cookies or swirl it through cheesecake and rice pudding.

As a glaze: Warm it with a splash of lemon juice and brush it over roasted carrots, baked apples, roast pork, chicken or glazed ham.

Jam, Preserves, Jelly and Pear Butter

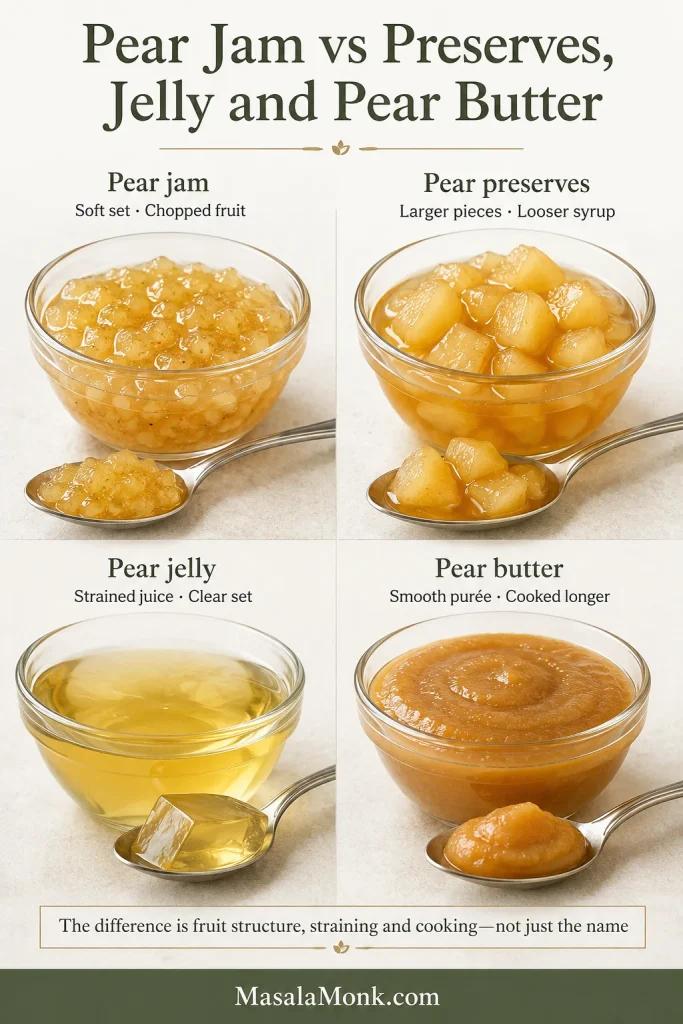
The difference lies in how much fruit remains visible and whether the pears are chopped, strained or puréed.

PreserveWhat makes it different
Pear jamChopped, mashed or briefly blended fruit with an even, spreadable texture
Pear preservesLarger slices or pieces that remain recognisable in thick syrup
Pear jellyExtracted and strained juice cooked into a clear, smooth gel
Pear butterFully puréed fruit cooked until dense and concentrated instead of gelled
Four glass bowls compare pear jam, preserves with large fruit pieces, clear pear jelly and smooth pear butter.
Jam uses chopped fruit, preserves keep larger pieces, jelly uses juice, and pear butter is smooth purée.

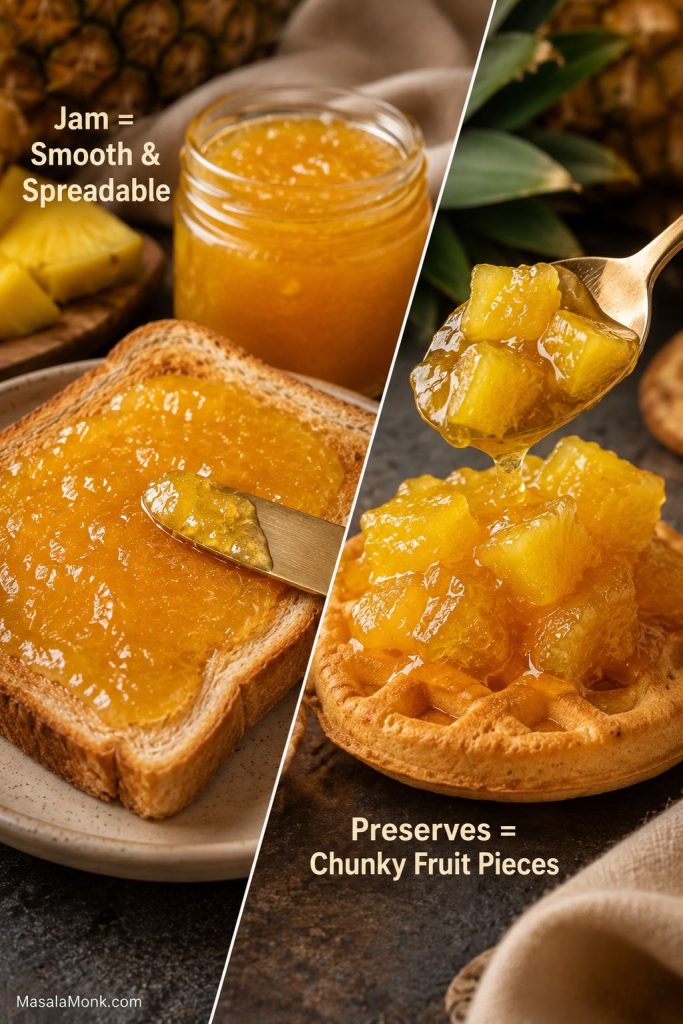
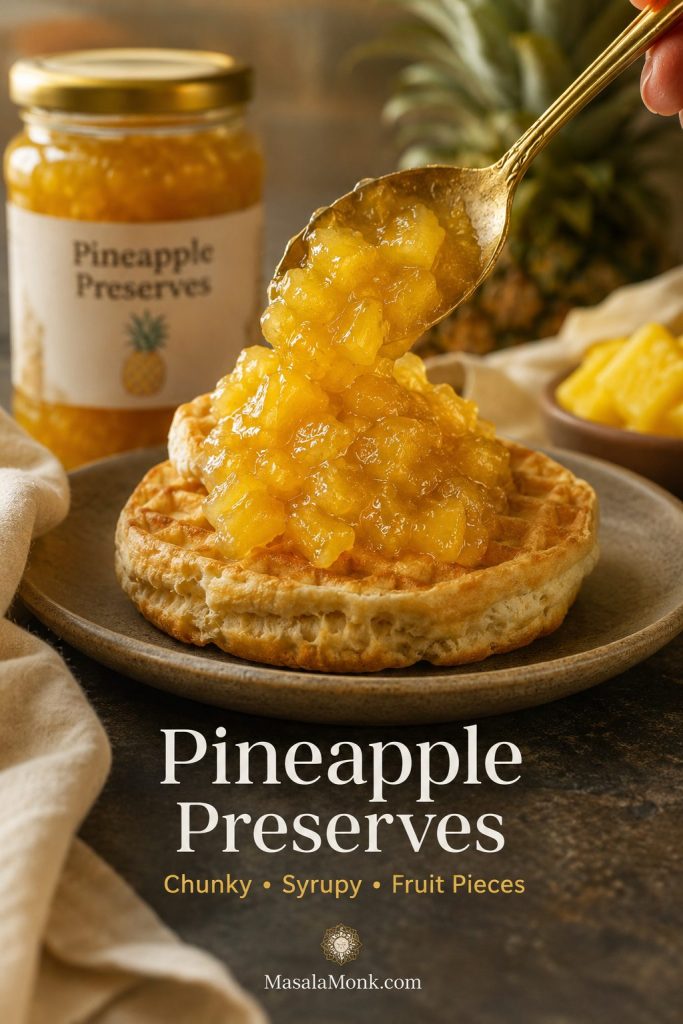
This pineapple jam and preserves guide shows how changing the fruit preparation creates either a smoother jam or a chunkier preserve.

Frequently Asked Questions

Do pears need packaged pectin?

No. Ripe pears can make a spoonable refrigerator jam without packaged pectin. Use commercial pectin when you want a firmer or faster-setting result.

Do pears need to be peeled for jam?

No. Leaving some or all of the skin creates a darker, more rustic texture. Peeling gives the jam a paler colour and smoother finish.

How many whole pears make 1 kg of prepared fruit?

Allow approximately 1.3–1.5 kg / 2¾–3⅓ lb whole pears. The exact amount depends on their size, variety and how much must be removed during peeling and coring.

Can brown sugar be used?

Yes, but it will darken the jam and add caramel or molasses notes. Keep granulated sugar as the majority when you want the pale colour and delicate pear flavour to remain dominant.

Can the lemon juice be omitted?

For this version, keep the lemon juice. It balances the sweetness, slows browning and supports the soft set. A lemon-free jam needs a different recipe.

Why does pear jam sometimes feel slightly gritty?

Pears naturally contain tiny stone cells that can create a fine gritty sensation. This is different from crunchy sugar crystals. Blending more thoroughly or choosing a smoother-textured variety can reduce it.

Can the recipe be doubled?

Cook doubled quantities as two separate batches. A larger amount sits deeper in the pan, so water escapes more slowly and the pears may overcook before the jam thickens.

Can pear jam be frozen or canned?

For freezing, leave ½ inch of expansion space and thaw the jar in the refrigerator. For pantry canning, use the separate tested recipe linked in the storage section.

The finished jam should still taste clearly of pear. Stop when the cooled sample holds its path; that small pause protects both the soft set and the fruit’s delicate flavour.

Which pears are on your counter—and are you keeping the jam chunky or blending it smooth?
Back to the recipe · Back to the set test · Back to top

Posted on Leave a comment

Cherry Jam Recipe That Sets

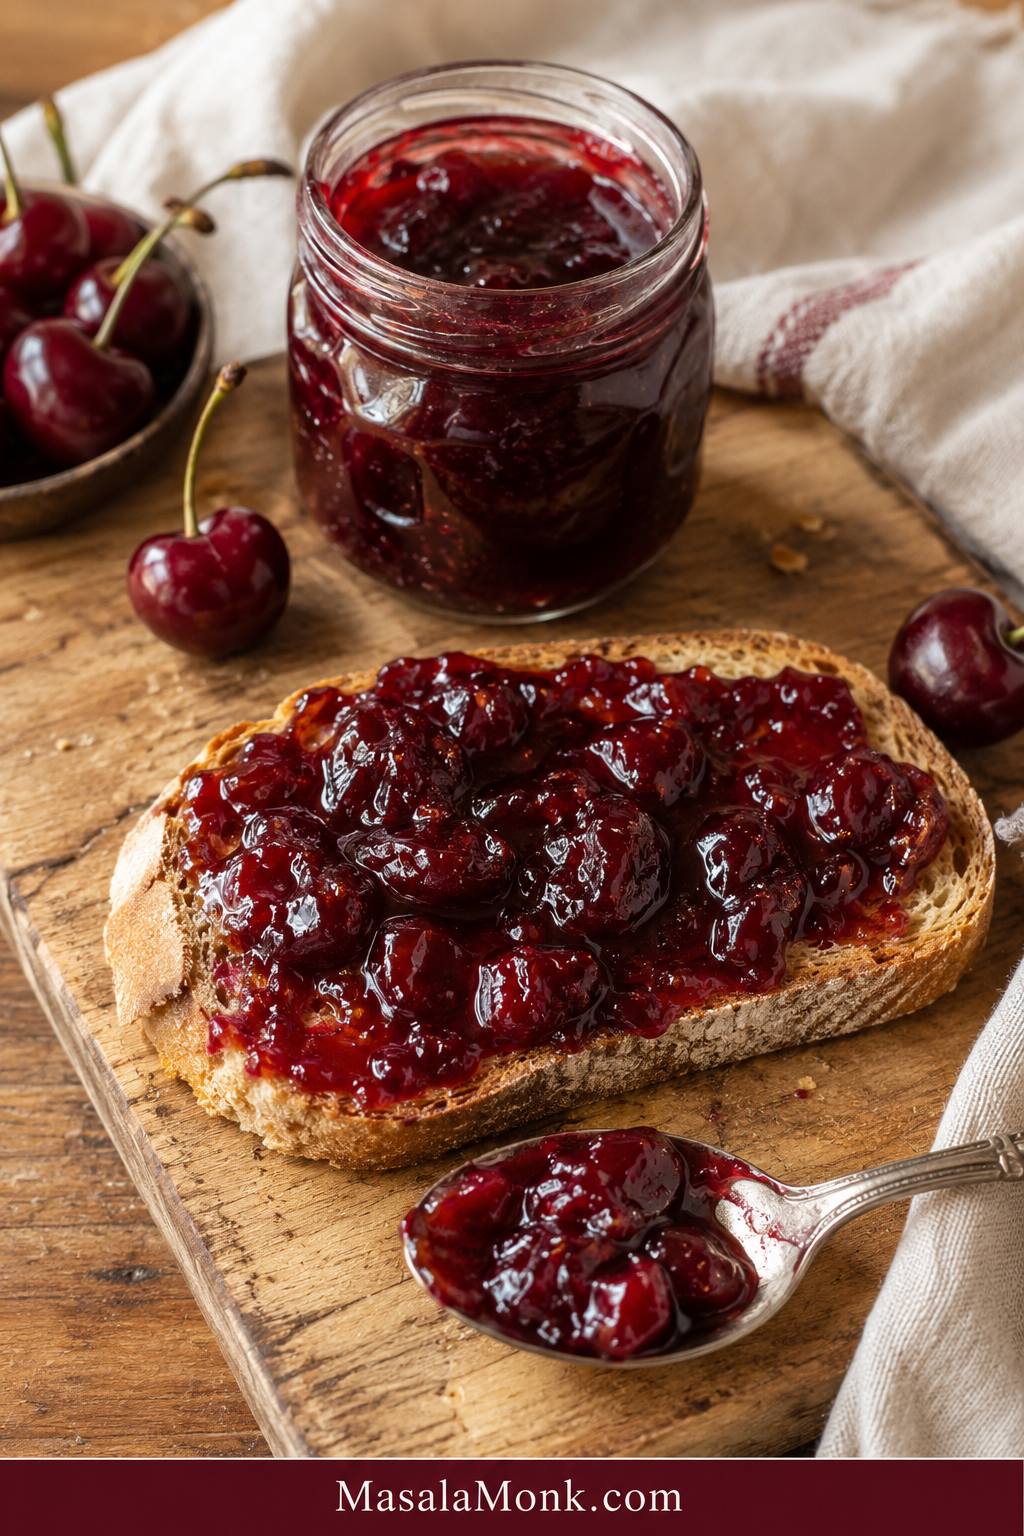
Glossy homemade cherry jam with visible cherry pieces spread on toast beside an open jar and spoon.

Cherry jam is one of those recipes that feels easy until the pot starts asking questions. Is it thick enough? Will it set after cooling? Should you add pectin? Can frozen cherries work? What if you want less sugar? And if the jar is going into the pantry, is the recipe actually safe for canning?
This cherry jam recipe is built to answer those questions before they ruin a batch. The main method is a small-batch, no-pectin cherry jam for the refrigerator or freezer: glossy, spoonable, fruit-forward, and bright enough to taste like cherries instead of cooked sugar.

Once you know what ready jam looks and feels like, the whole process becomes much calmer. The bubbles get heavier, the spoon leaves a little trail, the fruit looks glossy, and the jam starts moving more slowly in the pan. That is the moment you are looking for.

The goal is not a stiff, factory-style jam. The goal is a soft, beautiful cherry spread that tastes fresh, sets enough to spoon and spread, and does not leave you guessing. This recipe is flexible where a refrigerator jam can be flexible, and strict where safety needs it.

Jump to Recipe · Make It Now · Set Tests · Fix Runny Jam · Canning Notes

Quick Answer: How Do You Make Cherry Jam That Sets?

To make a simple cherry jam without pectin, combine 500 g / about 3 cups pitted cherries, 200 g / about 1 cup sugar, and 2 tablespoons / 30 ml lemon juice in a wide pan. Cook until the cherries soften and the syrup turns glossy, then use the Glossy-and-Wrinkle Method: cook until the bubbles look slow and shiny, then confirm the set with a cold plate wrinkle test.

The jam usually reaches this stage around 220°F / 104–105°C. Temperature helps, but the cold plate test tells you how the jam will behave once cooled.

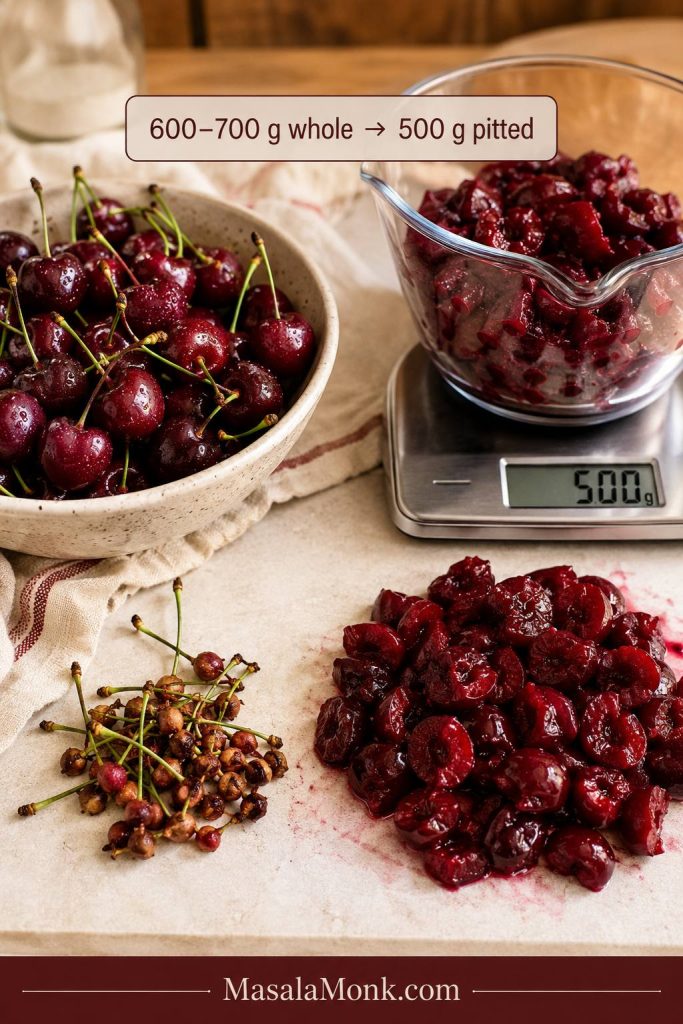
You will usually need about 600–700 g / 1 1/3–1 1/2 lb whole cherries to get around 500 g / about 3 cups pitted cherries, depending on cherry size and pit weight.

This gives you a soft-to-medium set cherry jam for the refrigerator or freezer. It should be thick enough to spread on toast, but still soft enough to spoon over pancakes, yogurt, cheesecake, ice cream, or rice pudding.

Storage note: Keep this no-pectin version chilled or frozen. Pantry jars need a canning-tested cherry jam recipe with proper processing.

Make It Now

If you are standing in front of a bowl of cherries and just want jam today, start here. Use 500 g pitted cherries, 200 g sugar, and 2 tablespoons lemon juice. Cook in a wide pan until the jam looks glossy, thickened, and heavy-bubbled, then confirm the wrinkle on a cold plate. Cool, cover, and refrigerate.

The rest of the guide is there for the moments when the pot starts looking confusing: frozen cherries releasing extra juice, sugar changes, pectin questions, loose jam, texture choices, or pantry storage.

Cherry Jam Recipe Card: No-Pectin Cherry Jam

This is the small batch to make when you want cherry jam today without turning the kitchen into a full canning project. It cooks on the stovetop, uses no boxed pectin, and sets into a soft, glossy spread once chilled.

Keep the heat lively but not wild. You want steady bubbling, not angry splattering. Near the end, slow down and test instead of rushing the jar.

Prep time15 minutes
Cook time25–35 minutes
Total time40–50 minutes
YieldAbout 1 1/2 cups / 360 ml
MethodStovetop
StorageRefrigerator 2–3 weeks or freezer up to 3 months

Ingredients

  • 500 g / about 3 cups pitted cherries, fresh or thawed frozen, chopped or halved
  • 200 g / about 1 cup granulated sugar
  • 2 tablespoons / 30 ml lemon juice
  • 1 small pinch salt, optional
  • 1/8 to 1/4 teaspoon almond extract, optional
  • 1 teaspoon vanilla extract, optional
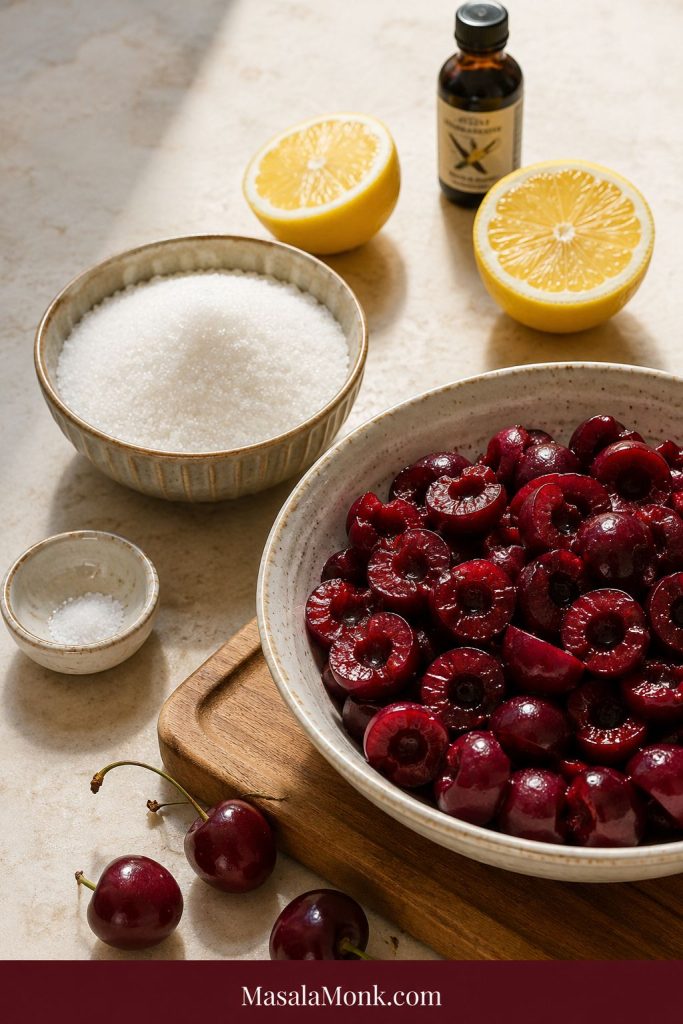
Pitted cherries in a bowl with sugar, lemon halves, salt, and a small flavoring bottle on a light surface.
Cherries give the jam body, sugar helps it thicken, and lemon juice adds the brightness and acidity a no-pectin batch needs.

Whole cherry note: Buy about 600–700 g / 1 1/3–1 1/2 lb whole cherries to get around 500 g / about 3 cups pitted cherries. The exact yield depends on cherry size, pit weight, and how much you trim.

Instructions

  1. Prepare the cherries. Pit the cherries and chop them roughly. Chop smaller for smoother jam or leave some halves for a chunkier preserve-style texture.
  2. Combine. Add cherries, sugar, lemon juice, and salt to a wide heavy-bottomed pan. Stir well.
  3. Rest briefly. Let the cherries sit for 15–30 minutes if you have time. This draws out juice and helps the sugar dissolve.
  4. Heat gently. Cook over medium heat until the sugar dissolves and the cherries release more liquid.
  5. Mash for texture. Use a potato masher or spoon to break down the fruit lightly. For smoother jam, mash more; for chunkier jam, leave more pieces intact.
  6. Boil and reduce. Increase the heat to medium-high and cook, stirring often, until the bubbles become slower, glossier, and heavier.
  7. Test the set. Aim for about 220°F / 104–105°C, then check with a cold plate test. If the cooled sample wrinkles gently and does not run like syrup, it is ready.
  8. Finish the flavor. Turn off the heat. Stir in almond extract or vanilla, if using. Start small, especially with almond extract.
  9. Jar and cool. Rest the jam for 5 minutes, spoon into clean jars, cool, cover, and refrigerate. For longer storage, freeze in freezer-safe containers with a little headspace.

What Success Looks Like

The finished jam should be glossy, deep red, spoonable, and slightly loose while warm. It should not look stiff in the pan. Once cooled, it should thicken into a soft spread that holds on toast but still falls easily from a spoon.

It helps to test on a cold plate even when the thermometer says 220°F, because cherry batches vary. If the spoon trail closes immediately, keep cooking. If it pauses for a second before filling in, you are close.

And if it cools softer than you hoped, you have not wasted the cherries. Reboil it for a thicker set, or use it as a cherry sauce over breakfast and desserts. A loose cherry jar can still be wonderful.

Need visual help before you jar? Jump to Set Tests · check if it is runny or just hot

Why You’ll Love This Cherry Jam

The best part is the first cooled spoonful: deep red, glossy, sweet-tart, and still tasting like cherries. This small batch is not for a huge pantry project. It is for toast tomorrow, yogurt tonight, cheesecake on the weekend, and the quiet satisfaction of saving good cherries before they disappear.

  • Simple ingredients: cherries, sugar, lemon, and optional flavoring.
  • Fresh or frozen cherries both work.
  • A soft, glossy, spreadable set without boxed pectin.
  • Visual cues show when the jam is ready, so you are not relying only on a timer.
  • The small-batch method keeps the process manageable.
  • Clear help is included for loose jam, frozen cherries, pectin, sugar changes, and canning boundaries.
  • Use it as jam, dessert topping, breakfast swirl, cake filling, or cheese board spooning sauce.

In This Guide

The recipe above is the simple path. The guide below is grouped by what you need in the moment.

Make the jam: Why It Works · Ingredients · Equipment · Step-by-Step Cues

Choose your method: Fresh, Frozen, or Canned · Sweet vs Sour · Method Choice · Pectin vs No Pectin · Scaling · Low Sugar

Fix the set: Set Tests · Runny or Just Hot? · Fix Runny Jam · Canning Notes

Use and store: Texture · Adjustments · Variations · Uses · Storage · Mistakes · FAQs · Final Thoughts

Why This Cherry Jam Works

This recipe works because it asks you to watch the jam, not just the timer. Some cherries are juicy, some are firm, some are sweet, and frozen cherries often release more liquid than fresh ones. The clock helps, but the pan tells the truth.

  • A wide pan helps water evaporate. More surface area means the jam thickens faster and tastes fresher.
  • Sugar builds body. It sweetens the fruit, but it also helps with shine, texture, and set.
  • Lemon juice keeps the flavor awake. Sweet cherries especially need acidity so the finished spread does not taste flat.
  • Small batches are easier to control. The fruit cooks down faster and is less likely to set unevenly.
  • Set tests prevent guessing. A thermometer, cold plate, spoon trail, and cooled texture matter more than the exact minute count.

No-pectin jam gives a concentrated, cooked-fruit flavor because it thickens by reduction. Pectin-set jam usually cooks faster and can keep a fresher fruit note, but the texture and sugar formula are more exact.

The same texture-first thinking also helps in a fig jam recipe, where the fruit thickens into a rustic spread instead of a clear jelly.

Ingredients for Cherry Jam

Cherry jam is simple, but it is not random. Each ingredient has a job: cherries bring the fruit, sugar helps the texture and shine, lemon keeps the flavor bright, and a small pinch of salt makes the sweetness taste rounder.

Cherries

Fresh cherries give the best texture, but frozen cherries are often easier and work very well. Sweet cherries make a deep, mellow jam. Sour cherries make a brighter, tangier batch. If using frozen fruit, thaw and drain it first so the extra juice does not stretch the cooking time too far.

Whole Cherries to Pitted Cherries

This yield check is useful before you cook, because cherries lose weight to pits, stems, and trimming.

Whole cherries, pitted chopped cherries, cherry pits, stems, and a kitchen scale showing 500 grams.
Before pitting, plan for the weight loss: 600–700 g whole cherries usually gives about 500 g pitted fruit for one small batch.

Bing and other dark sweet cherries make a rich, dark red jam. Rainier cherries can work too, but the color will be lighter and the flavor softer. Sour cherries, tart cherries, pie cherries, and Morello cherries make a brighter spread with more tang and may need slightly more sugar depending on taste. For a broader look at the fruit itself, this guide to the benefits of cherries explains sweet and tart cherries in a more general way.

Sugar

Sugar is not only a sweetener. In jam, it helps the mixture thicken, shine, and hold a spreadable texture. You can reduce it slightly for a softer refrigerated batch, but do not heavily cut sugar in any recipe you plan to can.

Lemon Juice

Lemon juice gives the jam brightness and balance. It is especially important with sweet cherries, which can taste heavy once cooked. For a fridge batch, fresh lemon juice is fine. For canning, follow the tested recipe exactly, especially if it asks for bottled lemon juice.

If you enjoy citrusy preserves, the peel-and-acid balance in this orange marmalade recipe is a useful next read.

Salt, Almond, and Vanilla

A small pinch of salt is optional, but useful. It should not make the jam salty; it simply helps the cherry flavor taste fuller. Almond extract gives a classic cherry-almond note, but it can take over quickly, so start with 1/8 teaspoon. Vanilla is gentler and gives the jam a rounder finish.

Equipment You Need

For refrigerator cherry jam, the most important tool is a wide heavy-bottomed pan. It helps extra cherry juice evaporate before the fruit tastes overcooked.

  • Cherry pitter, sturdy straw, or chopstick
  • Wide heavy-bottomed pan
  • Wooden spoon or silicone spatula
  • Potato masher
  • Thermometer, optional but helpful
  • Two chilled plates for set testing
  • Clean jars or freezer-safe containers

No cherry pitter? Push a sturdy straw or chopstick through the stem end and pop the pit out over a bowl. It is slower than a pitter, but it works well for a small batch.

For shelf-stable canning, use a canning-tested recipe and proper water-bath equipment, not just clean storage jars.

How to Make Cherry Jam Step by Step: What to Watch For

Once the cherries are in the pan, the recipe becomes less about exact minutes and more about watching the fruit change. The recipe card gives the practical steps. This section slows them down so you know what to look for.

1. Pit and Chop the Cherries

Remove every pit before cooking. Then chop the cherries roughly. Smaller pieces give a smoother jam that spreads easily. Larger pieces give a chunkier preserve-style texture with visible fruit.

2. Mix With Sugar and Lemon, Then Rest

Add the cherries, sugar, lemon juice, and optional salt to a wide pan. Stir until the cherries are coated. If you have time, let the mixture sit for 15–30 minutes so the fruit releases juice and the sugar begins to dissolve.

Pitted cherries mixed with sugar and lemon juice in a bowl with red syrup pooling around a spoon.
After resting with sugar and lemon, the cherries release ruby syrup, so the fruit softens more evenly when cooking begins.

3. Start Gently

Cook over medium heat at first. This lets the sugar dissolve without catching on the bottom. Stir often, especially once the mixture starts to bubble and the kitchen begins to smell like warm cherries.

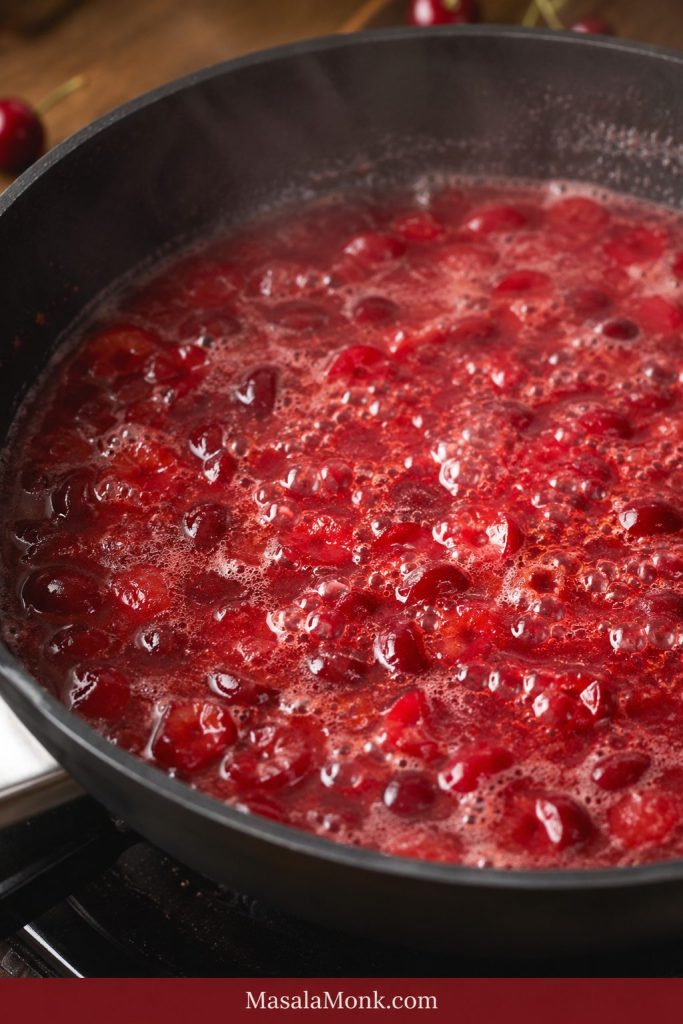
Cherry mixture boiling in a dark pan with thin red liquid, small bubbles, steam, and visible fruit pieces.
At first, the mixture may look thin, foamy, and watery; however, that loose boil is normal before the syrup concentrates.

4. Mash for Texture

When the cherries soften, use a potato masher or spoon to break them down lightly. You do not have to turn them into puree. For a smoother jam, mash more; for a chunkier preserve-style texture, leave some larger fruit pieces.

5. Boil Until Glossy

Increase the heat and let the jam bubble steadily. At first, the bubbles will look thin and watery. As moisture evaporates, they become slower, glossier, and heavier. Stir more often near the end because the sugar is more concentrated. The jam should smell fruity and bright, not caramelized.

A little foam is normal while the jam boils. Stir through it, then skim near the end only if you want a clearer-looking jar.

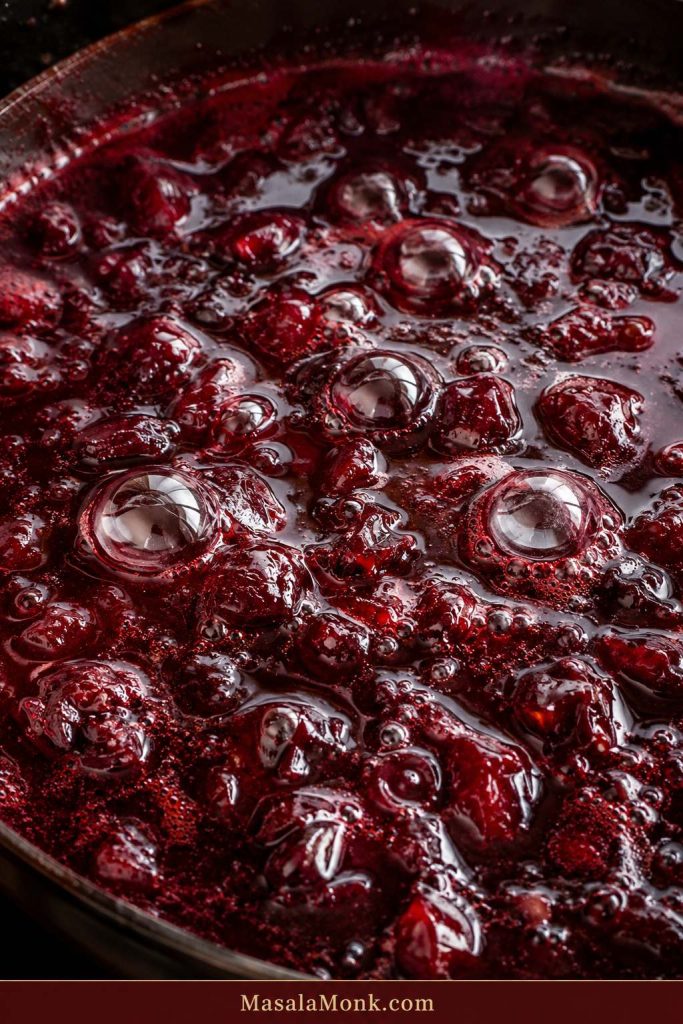
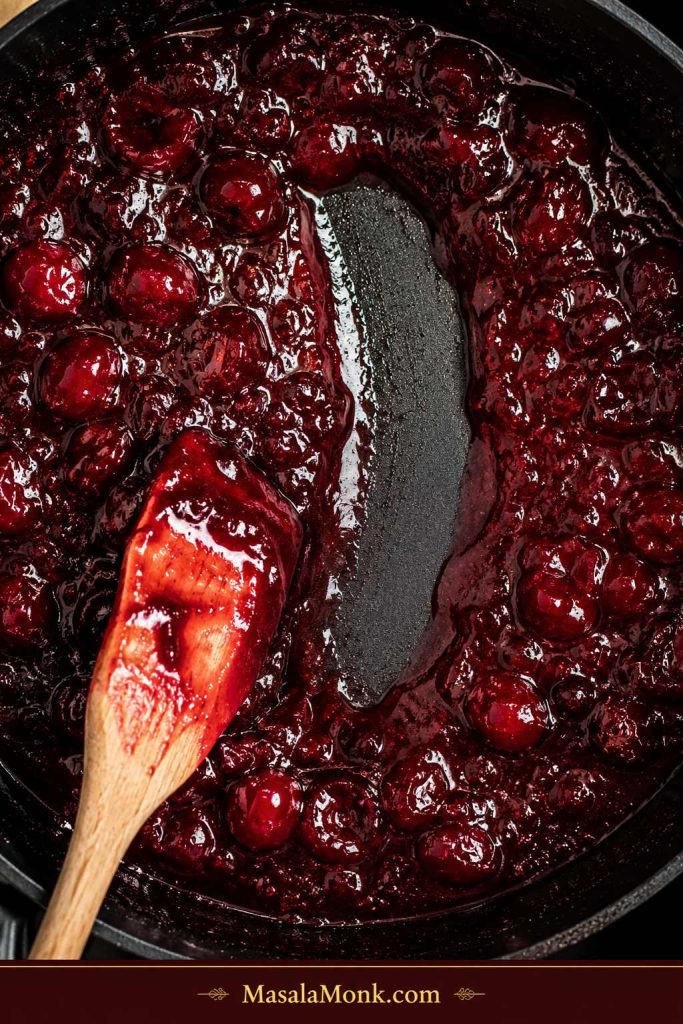
Close-up of thick dark ruby cherry jam bubbling in a pan with shiny syrup and pieces of cherry.
As moisture cooks off, the bubbles slow down and turn glossy, giving you the first clear sign that the jam is close.

6. Test Before You Jar

Do not judge the jam only while it is hot. Hot jam always looks looser than cooled jam. Use a thermometer, cold plate, spoon test, or pan trail test before you stop cooking.

Once the jam starts looking glossy, stop watching the clock and start watching the texture.

Spoon pulled through thick cherry jam in a dark pan, leaving a clear trail through the jam.
Next, pull a spoon through the pan; if the trail pauses before closing, the texture is ready for the cold plate test.

7. Finish the Flavor

Once the set is right, turn off the heat before adding almond extract or vanilla. Starting with a small amount keeps the cherry flavor in charge.

8. Jar and Cool

Let the jam settle for a few minutes, then spoon it into clean jars. Cool it before covering tightly, then refrigerate or freeze according to the storage notes.

Before you stop cooking: use the set tests · see the cold plate test

Fresh, Frozen, or Canned Cherries: What Works Best?

Frozen cherries work well for jam if you thaw, drain, and add back only enough juice to keep the pan from drying out. Fresh and canned cherries can work too, but they need different handling.

Fresh vs Frozen Cherries for Jam

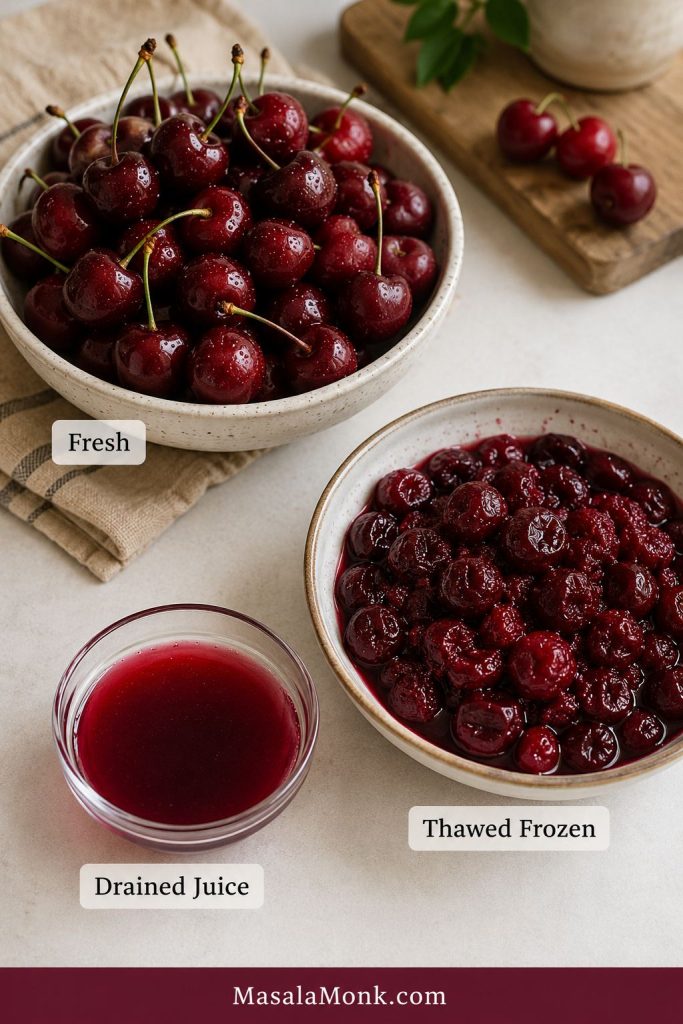
This visual comparison helps explain why thawed frozen cherries often need drainage before they go into the pan.

Fresh cherries, thawed frozen cherries, and a small bowl of drained red cherry juice arranged with labels.
Frozen cherries work well, but thawing and draining them first prevents extra juice from stretching the cooking time.
Cherry typeHow to use itWhat to watch
Fresh cherriesPit, chop, and macerate with sugar and lemonBest texture and cleanest fruit flavor
Frozen cherriesThaw, drain, reserve the juice, then cookThey release more water, so cooking may take longer
Canned cherriesDrain well before cookingTexture is softer and flavor depends on syrup or packing liquid
Sour cherriesTaste before adjusting sugar and lemonBright, tart, excellent for jam
Sweet cherriesUse lemon juice for balanceCan taste flat if cooked without enough acidity

How to Make Cherry Jam From Frozen Cherries

Thaw the cherries first, then drain them well. Start the jam with the drained fruit, sugar, and lemon juice. Keep the reserved juice nearby and add back only a splash if the pan looks dry. If you add all the thawed juice at once, the jam may take much longer to thicken.

Frozen cherries are not a problem. They simply bring more water to the pan, so the fix is patience and drainage, not panic. If you are using frozen cherries, notice how much juice they release after thawing; that one detail explains a lot about cook time and final set.

For another quick fridge-friendly fruit spread, this strawberry and apple preserve keeps the same simple, small-batch spirit.

Canned cherry note: Use plain canned cherries packed in juice, water, or syrup, and drain them well. Do not use cherry pie filling as a direct substitute. Pie filling already has sugar, starch or thickener, and flavoring, so it cooks and sets differently from plain cherries.

If frozen cherries made the jam look loose: compare warm vs cooled texture · see the reboil fix

Sweet Cherry Jam vs Sour Cherry Jam

Sweet cherry jam and sour cherry jam have different personalities. Sweet cherries give a dark, mellow, rounded result. Sour cherries, tart cherries, pie cherries, and Morello cherries give a brighter batch with sharper fruit flavor.

If you are using sweet cherries, lemon juice is important because it keeps the jam from tasting heavy. If you are using sour cherries, taste the fruit first. Some need a little more sugar, while others are tart in a way that makes the finished jar more exciting.

Which Cherry Jam Method Should You Use?

The easiest way to avoid confusion is to choose the goal before choosing the method. A fridge jar can be flexible. A pantry jar needs rules.

  • Jam today: use the no-pectin refrigerator recipe.
  • Firmer classic jam: use a pectin method.
  • Less sugar: choose low/no-sugar pectin or a reduced-sugar method.
  • Pantry jars: use a canning-tested recipe.
  • Quick topping: stop softer and use it as cherry sauce.

This is not meant to scare you away from canning. It is meant to keep the two projects separate: a quick cherry jam for the fridge today, and a tested pantry-safe recipe when you want jars for the shelf.

Cherry Jam With Pectin or Without Pectin?

You do not need pectin for soft-set refrigerator cherry jam, but pectin is useful when you want a firmer set, a lower-sugar structure, or a canning-safe formula. Pectin is not cheating; it is just a different kind of jam.

Think of pectin as a different route, not a shortcut. No-pectin jam gives you a soft, reduced-fruit spread. Pectin gives you more structure and predictability, especially when sugar or pantry storage matters.

Pectin types are not casual swaps. Powdered pectin, liquid pectin, and low/no-sugar pectin are built for different methods, and each one has its own sugar, acid, and boiling expectations.

MethodBest forWhat to expect
No pectinSimple small-batch refrigerator or freezer jamSoft, concentrated, fruit-forward
Powdered pectinFirmer jam and many canning formulasMore predictable, but method matters
Liquid pectinSpecific jelly, jam, or freezer jam recipesNot a direct swap for powdered pectin
Low/no-sugar pectinReduced-sugar jamBest route when sugar is reduced heavily

Because cherries are naturally lower in pectin, a no-pectin batch sets mainly by reduction. The water cooks off, the sugar concentrates, the lemon sharpens the flavor, and the mixture thickens into a soft spread as it cools.

What Changes When You Use Pectin?

A classic pectin cherry jam is more exact than this flexible fridge recipe. It usually starts with prepared cherries, lemon juice, and a setting aid. The mixture is brought to a full rolling boil, sugar is added, and then the jam returns to a hard boil for the time stated in the tested recipe or package instructions.

For shelf-stable jars, follow a tested canning source rather than improvising. The National Center for Home Food Preservation’s cherry jam with pectin method uses prepared cherries, powdered pectin, sugar, hot jars, 1/4 inch headspace, and boiling-water processing with altitude guidance.

Changing sugar or storing jars on the shelf? read the low-sugar notes · check the canning boundary

Can You Scale This Cherry Jam Recipe?

The easiest ratio for a small no-pectin cherry jam is about 5 parts pitted cherries to 2 parts sugar by weight, plus enough lemon juice to brighten the fruit and help the mixture behave in the pan.

Batch sizePitted cherriesSugarLemon juiceNotes
Very small test batch250 g / about 1 1/2 cups100 g / about 1/2 cup1 tbsp / 15 mlGood for testing sweetness and set
Standard small batch500 g / about 3 cups200 g / about 1 cup2 tbsp / 30 mlBest starting point for this recipe
Double batch1 kg / about 6 cups400 g / about 2 cups4 tbsp / 60 mlBetter made as two separate batches

For best results, do not begin with the double batch. This jam sets more predictably when the fruit cooks down quickly in a wide pan. Two smaller batches are easier than one overloaded pot.

Choose Your Cherry Jam Texture

Now that the method is clear, texture is the fun part. You can make this jam smoother, chunkier, looser, or thicker depending on how you plan to use it.

  • Smoother jam: chop the cherries small and mash them well as they cook.
  • Chunky jam: leave some cherry halves or larger pieces so the fruit stays visible.
  • Sauce-like topping: stop a little softer and use it over pancakes, yogurt, ice cream, or rice pudding.
  • Preserve-style jar: mash less and let some fruit pieces stay large enough to spoon.
  • Cake filling: cook a little thicker and always confirm the set on a cold plate.

Can You Use This Cherry Jam as Cake Filling?

Yes, but cook it slightly thicker than a spooning sauce and let it cool completely before using. For layer cakes, spread a thin barrier of frosting around the edge of the cake layer before adding jam so it does not slide out. If the jam is very loose, use it as a topping instead of a filling.

Substitutions and Adjustments

Flavor has room to play. Set and storage are less casual. Before you adjust sugar, acid, or pectin, decide where the jar is going to live: refrigerator, freezer, or pantry.

  • Less sugar: works in a modest way for a softer refrigerated jam, but the set will be looser.
  • Honey or maple syrup: possible in small amounts for fridge jam, but the texture and flavor will change.
  • Lime instead of lemon: fine for flavor in a fridge batch, but follow canning-tested recipes exactly for pantry jars.
  • Vanilla or almond: add after cooking, and start small so the cherry flavor stays clear.
  • Double batch: not recommended for your first try. Make two small batches for better control.

How to Know Cherry Jam Is Set

This is the moment most homemade jam goes wrong: the jam looks too loose while it is hot, so you keep boiling, and then it cools into something sticky and overcooked. Cherry jam should leave the pan looking glossy and slightly softer than your final goal.

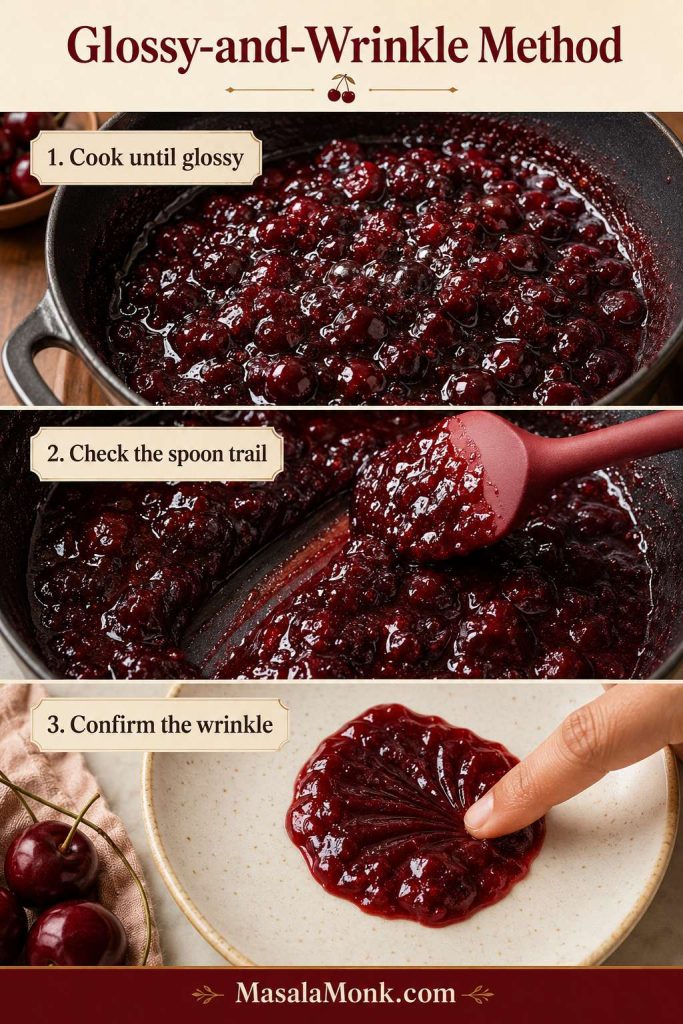
The easiest way to remember it is the Glossy-and-Wrinkle Method: cook until the bubbles turn slow and glossy, then confirm the set with the cold plate wrinkle test.

If you only remember one thing, remember this: hot jam lies. It moves more freely in the pan than it will after cooling. Give it a proper test before deciding it needs more time.

Glossy-and-Wrinkle Method

This three-part cue keeps the process practical: look for glossy bubbles, check the spoon trail, then confirm the set with a chilled plate.

Three-step cherry jam method board showing glossy bubbles, a spoon trail, and jam wrinkling on a plate.
For a reliable no-pectin set, follow the Glossy-and-Wrinkle Method: glossy bubbles, spoon trail, then a cold plate wrinkle.

You Are Close When…

  • The bubbles look slower, heavier, and glossier.
  • The jam looks shiny instead of watery.
  • A spoon trail pauses before closing.
  • A cold plate sample wrinkles gently when pushed.
  • The smell is fruity and bright, not caramelized.

The goal is not to boil the jam into submission. Once it is glossy, heavy-bubbled, and passing the cold plate test, stop.

Set testHow to do itWhat you want
Thermometer testCook until the jam reaches about 220°F / 104–105°CJam is near the setting stage
Cold plate testDrop jam on a chilled plate, wait, then push itThe surface wrinkles slightly and does not run like syrup
Spoon testLift a spoon and let the jam fall backIt falls in thicker drops or sheets instead of thin drips
Pan trail testDrag a spatula through the jamThe trail briefly holds before filling in

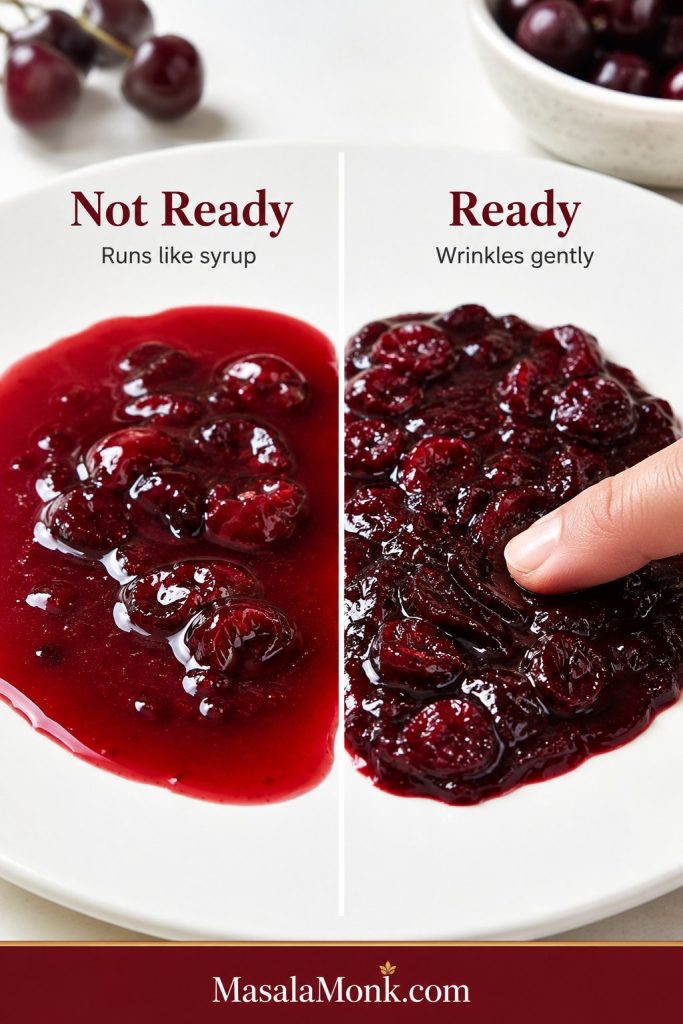
Cold Plate Test: Not Ready vs Ready

Use this test after the bubbles turn glossy, because a cooled sample shows the final texture more honestly than the hot pan.

Split comparison of cherry jam on a white plate, with runny jam labeled Not Ready and wrinkled jam labeled Ready.
Finally, the cold plate test gives the clearest answer: syrupy jam needs more time, while a gentle wrinkle means it is ready.

For the cold plate test, keep two small plates in the freezer before you start cooking. When the jam looks close, spoon a little onto a chilled plate, wait 30–60 seconds, then push it. A gentle wrinkle means it is ready. When the sample runs quickly, cook for a few more minutes and test again.

When your first batch sets softer than expected, write down the cook time and texture. The second batch is usually much easier because you already know how your pan and cherries behave.

Still not sure? compare warm and cooled jam · fix a truly runny batch

Is It Actually Runny, or Just Hot?

Before fixing cherry jam, let it cool completely. Warm jam can look thin even when it is going to set. After cooling, check the texture with a spoon.

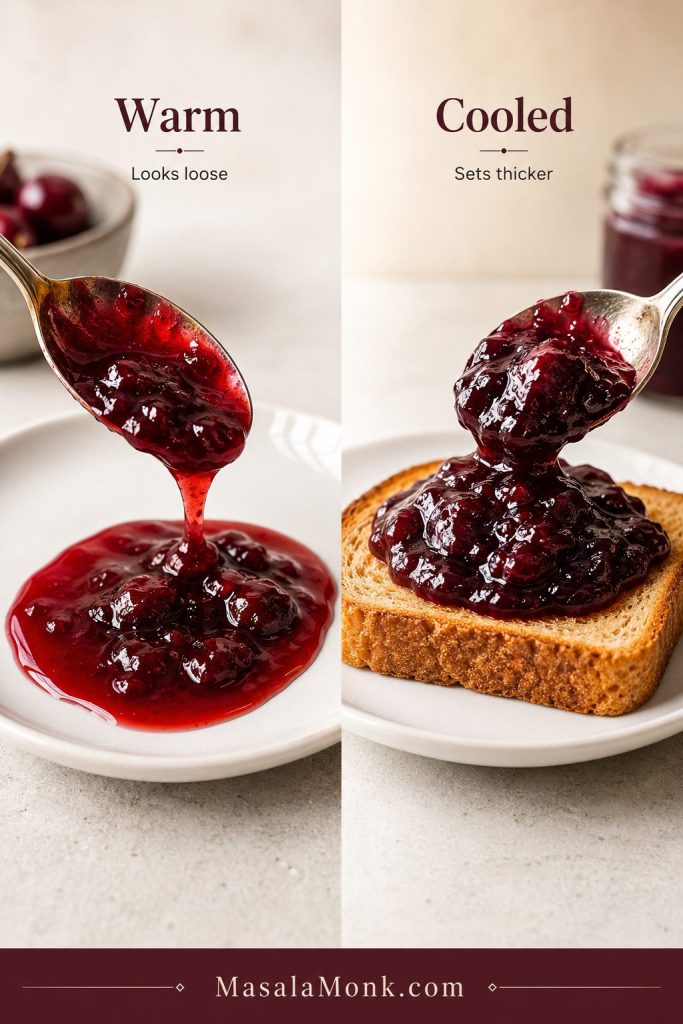
Warm Jam vs Cooled Jam

This is the check that prevents overcooking: judge a cooled spoonful, not the bubbling jam in the pan.

Side-by-side comparison of warm cherry jam dripping from a spoon and cooled cherry jam holding thicker on toast.
Hot jam always looks looser than the finished set, so judge the texture only after a cooled spoonful has thickened.
  • Runs like syrup: it probably needs more cooking.
  • Slowly slides from the spoon: it may be a soft-set jam, not a failed batch.
  • Holds softly on toast: it is set enough for fridge jam.
  • Feels sticky or chewy: it may be overcooked.

Most jam panic happens too early, while the jar is still warm. A soft set is not a mistake. It is the style of this jam.

Why Your Cherry Jam Did Not Set

Cherry jam is usually runny because it was undercooked, made with too much liquid, cooked in too large a batch, reduced too heavily in sugar, or made with the wrong pectin method. Most of the time, the jar is not ruined.

Runny, Soft-Set, or Overcooked?

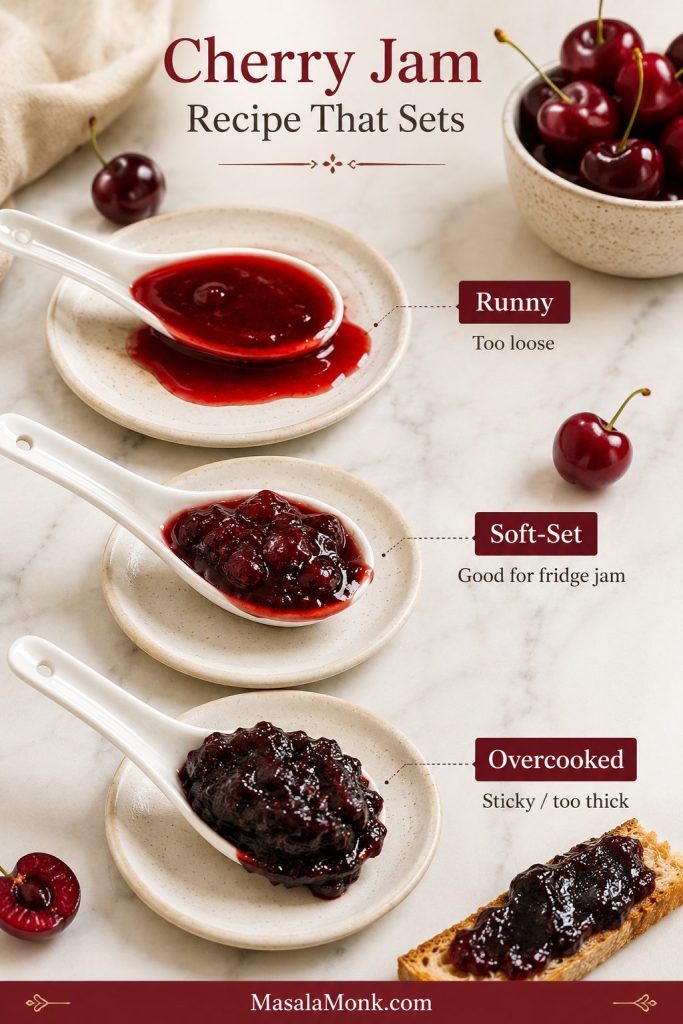
A visual texture check helps you decide whether the batch needs more cooking, has reached a soft fridge set, or went too far.

Three labeled cherry jam samples showing runny jam, soft-set jam, and overcooked jam on white spoons.
Soft-set jam should be glossy and spoonable; by contrast, runny jam spreads too fast and overcooked jam turns stiff.
ProblemLikely causeWhat to do nowNext time
Very runnyToo much liquid or undercookingReturn to a wide pan and simmer longerDrain frozen cherries and test the set
Syrupy after coolingDid not reach setting stageReboil and use cold plate testCook to texture, not only time
Weak set with pectinWrong pectin method or old pectinFollow the pectin brand’s remake instructionsUse fresh pectin and exact boil timing
Loose low-sugar jamToo much sugar reductionUse as sauce or remake with low-sugar pectinUse pectin made for reduced sugar
Too thickOvercookingLoosen warm jam with a little hot water or lemon juiceStop when glossy and softly set
Flat flavorNot enough acidAdd lemon juice a teaspoon at a timeUse enough lemon with sweet cherries

How to Fix Runny Cherry Jam

Let the jam cool completely before you fix it. If you used pectin, wait up to 24 hours because some pectin jams continue to set after jarring. If it is still too loose, choose the fix based on the style you made.

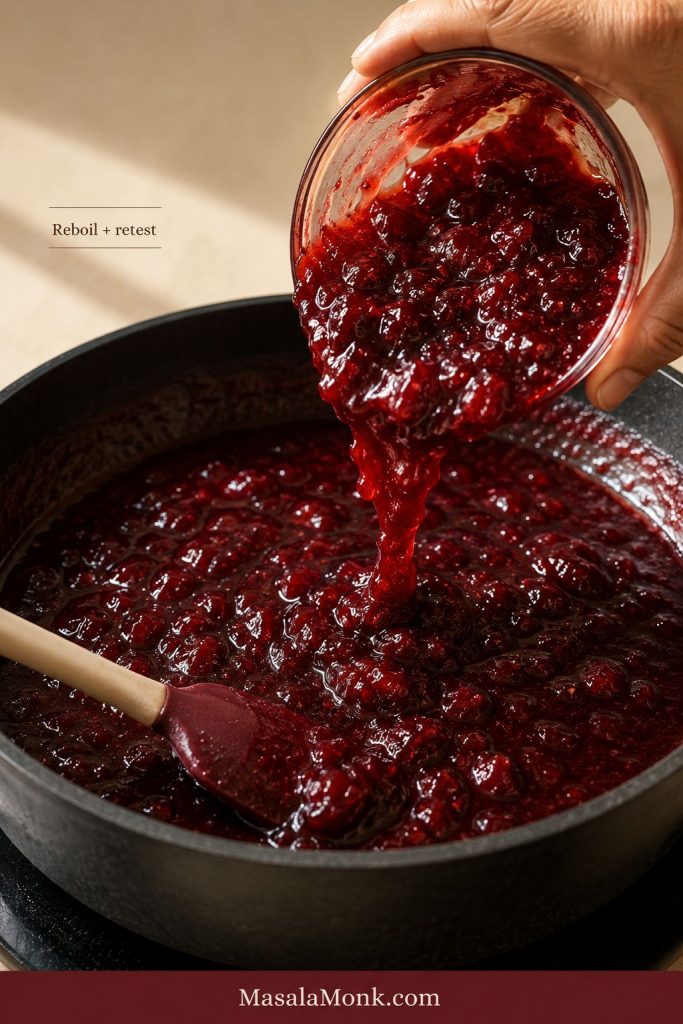
For No-Pectin Cherry Jam: Reboil and Retest

Use a wide pan so extra water can evaporate quickly without flattening the cherry flavor.

Runny cherry jam being poured from a jar into a wide dark pan with a spatula for reboiling.
If the cooled batch is truly too loose, pour it back into a wide pan, simmer briefly, and retest before the fruit overcooks.
  1. Pour the loose jam back into a wide pan.
  2. Bring it to a steady boil over medium-high heat.
  3. Cook for a few minutes, stirring often.
  4. Test on a chilled plate.
  5. Stop when the jam wrinkles slightly or sheets from the spoon.

Do not boil it endlessly. A longer boil is not always better; sometimes it just cooks away the fresh cherry flavor.

For Pectin Cherry Jam

If you used packaged pectin, follow that pectin brand’s remake instructions. Pectin formulas vary, and adding more pectin without the correct sugar, acid, and boiling method can make the texture gummy or uneven.

For Jam That Will Not Set Firmly

Use it as cherry sauce. This is not a failure if the flavor is good. A loose cherry jam can be better than stiff jam on pancakes, yogurt, ice cream, cheesecake, waffles, oatmeal, and desserts.

Once the texture is right: return to the recipe card · see ways to use cherry jam

Can You Can This Cherry Jam?

The main no-pectin recipe in this post is written for the refrigerator or freezer. It is not a shelf-stable canning recipe.

This does not mean canning is difficult. It only means pantry storage needs a recipe built for pantry storage. The recipe card version is flexible because it stays cold; a pantry recipe has to be exact because it is stored at room temperature.

The difference is the whole formula: sugar level, acid, jar size, headspace, processing time, and altitude. For shelf-stable jars, use a canning-tested cherry jam recipe and follow the exact instructions. The National Center for Home Food Preservation’s cherry jam with pectin method is a better reference point for pantry jars than a flexible fridge-jam recipe.

Fridge Jam vs Pantry Canning

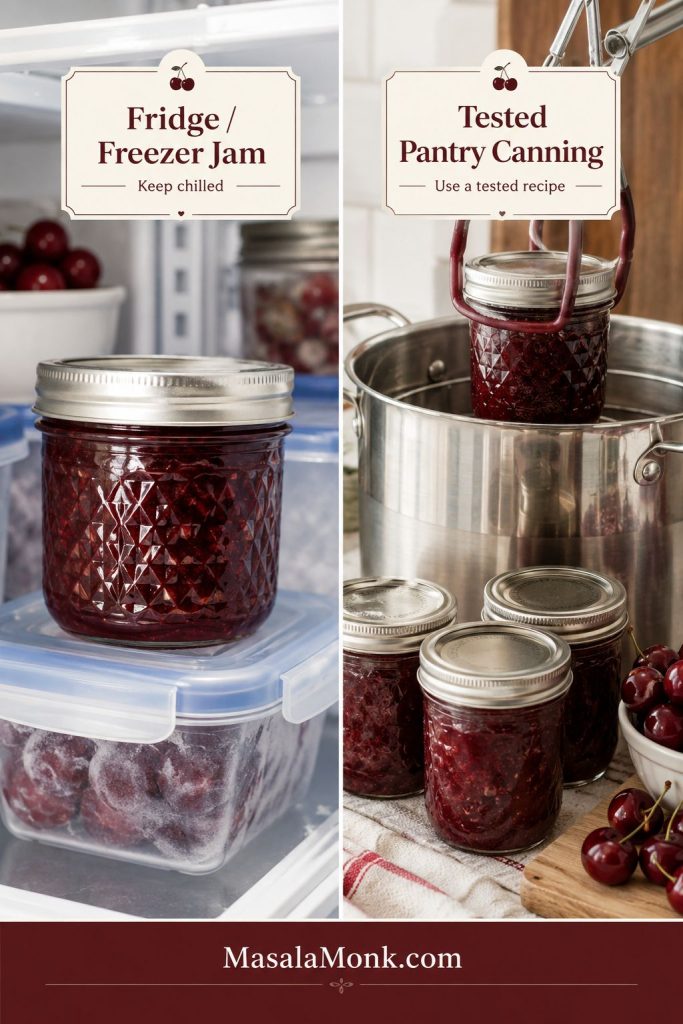
The safest way to think about storage is simple: chilled jars can stay flexible, but pantry jars need a tested process.

Split image showing cherry jam stored in a refrigerator on one side and jars processed in a water-bath canner on the other.
For safe storage, keep this small-batch jam in the fridge or freezer; shelf-stable jars need a tested canning recipe.

What Changes for Canned Cherry Jam?

  • The recipe usually uses pectin for a reliable set.
  • The sugar level is part of the pantry-safe formula, not just a taste choice.
  • Jam jars need correct headspace, often 1/4 inch / about 6 mm.
  • Filled jars need boiling-water processing for the correct time.
  • Processing time may change with altitude.
  • Jar inversion is not a substitute for proper water-bath processing.
  • Low-sugar canning needs a reduced-sugar canning route or low/no-sugar pectin system.

Think of this as two different goals: a chilled homemade jar today, or a pantry-safe jar for later. Make the recipe card version when you want a quick homemade spread. Use a water-bath canning route when you want pantry jars.

Keeping this as a chilled batch? jump to storage · see serving ideas

Can You Make Low Sugar Cherry Jam?

Low sugar cherry jam can be lovely, especially when the cherries are flavorful. Just do not treat sugar like decoration. Sugar does more than sweeten the fruit; it helps the jam set, shine, and store properly.

Reducing sugar for a fridge jar is a taste choice. Reducing sugar for a pantry jar is a preservation change. That is why low-sugar cherry jam should not come from cutting sugar from a regular recipe at the end.

For a softer refrigerated batch, you can reduce sugar modestly and accept a looser finish. For a more reliable low-sugar set, use pectin designed for low-sugar or no-sugar jam and follow that pectin’s instructions. Oregon State University Extension explains why reduced-sugar fruit spreads need different handling here: Low-Sugar Jams and Jellies.

  • Slightly less sweet fridge jam: reduce sugar modestly and expect a softer set.
  • Firm low-sugar jam: use low/no-sugar pectin.
  • Sugar-free jam: use a tested sugar-free pectin method.
  • Low-sugar canned jam: use a canning-safe recipe designed for reduced sugar.

Cherry Freezer Jam Is Different

Freezer jam is its own style, not just cooked jam stored cold. It often uses fresh crushed fruit, sugar, and pectin, then sets in the fridge or freezer without water-bath processing. It is fresh-tasting and easy, but it still belongs in the freezer or refrigerator, not the pantry.

Cherry Jam, Jelly, Preserves, Compote, and Chia Jam

If you are comparing cherry jam with jelly, preserves, compote, or chia jam, here is the quick difference.

NameWhat it meansTexture
Cherry jamChopped or crushed cherries cooked with sugarSpreadable with fruit texture
Cherry preservesLarger cherry pieces in syrupy jamChunkier and fruitier
Cherry jellyStrained cherry juice set with sugar and pectinClear and smooth
Cherry compoteFruit cooked briefly with sugar or syrupLoose sauce
Cherry chia jamQuick fridge spread thickened with chia seedsSoft and seedy

If you want fruit pieces, make cherry jam or preserves. If you want a clear, smooth spread, cherry jelly is the better recipe. If you only need a quick topping, compote or chia jam may be enough.

Cherry Jam Flavor Variations

Plain cherry jam is the best first batch because it teaches you the set and sweetness. After that, small flavor changes can make the same base recipe feel completely different.

  • Vanilla cherry jam: add 1 teaspoon vanilla extract after cooking.
  • Cherry almond jam: add 1/8 to 1/4 teaspoon almond extract at the end.
  • Amaretto cherry jam: stir in a small splash of amaretto after cooking for a dessert-style jam.
  • Black forest cherry jam: pair cherry jam with chocolate desserts instead of adding too much cocoa to the jar.
  • Lemon cherry jam: add lemon zest for a brighter finish.
  • Jalapeño cherry jam: add finely chopped jalapeño for a sweet-savory cheese board jam.
  • Mixed berry cherry jam: replace part of the cherries with raspberries, strawberries, or blueberries.
  • Rhubarb cherry jam: add tart rhubarb for a sharper preserve.

When adding extracts, start small. Cherry jam has a delicate fruit flavor, and almond or alcohol-based flavors can take over quickly. If you want the chocolate-cherry direction, pair the jam with chocolate cream cheese frosting instead of adding too much cocoa to the jar.

How to Use Cherry Jam

A spoonful of cherry jam can make a plain breakfast feel like something you planned. It is especially good anywhere you want a dark, sweet-tart spoonful against something creamy, buttery, or crisp.

Serving Ideas for Cherry Jam

The best uses pair the jam with creamy, buttery, or lightly crisp foods so the cherry flavor stays bright.

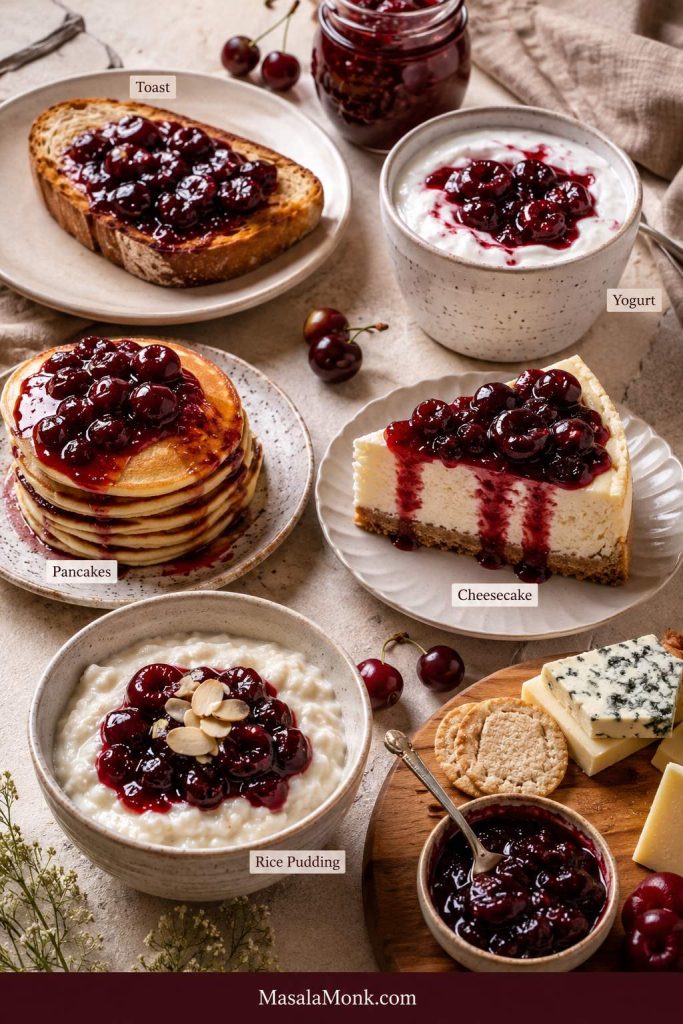
Cherry jam served with toast, yogurt, pancakes, cheesecake, rice pudding, and a small cheese board.
Once set, the jam adds a bright fruit finish to toast, yogurt, pancakes, cheesecake, rice pudding, and cheese boards.
  • Spread on toast, sourdough, biscuits, croissants, or English muffins.
  • Spoon over protein-rich cherry pancakes for a double-cherry breakfast.
  • Swirl a spoonful into overnight oats for a cherry-yogurt breakfast jar.
  • Spoon it over a no bake cheesecake for an easy cherry cheesecake topping.
  • Spread between cake layers with whipped cream, buttercream, or cream cheese frosting.
  • Fill thumbprint cookies, sandwich cookies, hand pies, or pastries.
  • Serve with brie, cream cheese, goat cheese, or a cheese board.
  • Warm slightly and brush over chicken, pork, or ham as a glaze.
  • Spoon a loose batch over rice pudding with cooked rice, vanilla ice cream, or pound cake.

How to Store Cherry Jam

Once the jar is cool, the storage choice matters more than the jar itself. A refrigerated jam, freezer jam, and properly canned jam should not be treated the same way.

Storage methodHow longNotes
Refrigerator2–3 weeksBest for the no-pectin recipe in this post
FreezerUp to 3 monthsUse freezer-safe containers and leave headspace
Properly canned jarsFollow tested canning guidanceOnly for correctly processed shelf-stable recipes
Opened canned jarRefrigerate after openingUse as you would regular jam

Always use clean utensils when scooping jam from the jar. If jam smells fermented, grows mold, becomes fizzy, or looks unusual, discard it.

Common Cherry Jam Mistakes to Avoid

Most cherry jam problems come from the same few moments: too much liquid, not enough testing, too much heat, or treating a fridge jar like a pantry jar. Watch for these and the whole batch becomes much easier to control.

  • Using a deep narrow pot. A wide pan helps extra water evaporate faster.
  • Skipping lemon juice with sweet cherries. Sweet cherries need acidity for a brighter flavor.
  • Adding all the thawed frozen cherry juice. Too much liquid makes the jam take longer to set.
  • Using cherry pie filling as the fruit. Pie filling already contains sugar and thickeners, so it is not the same as plain cherries.
  • Reducing sugar randomly. Sugar affects texture, shine, set, and storage.
  • Doubling the batch without adjusting technique. Larger batches take longer to reach the setting stage.
  • Boiling too long. Overcooked jam can become sticky, dull, and too firm.
  • Judging set while hot. Jam thickens as it cools.
  • Using expired pectin. Old pectin can lead to a weak set.
  • Swapping pectin types without checking the method. Powdered, liquid, and low/no-sugar pectin behave differently.
  • Treating cold-storage jam like pantry jam. Fridge and freezer jams stay chilled; shelf-stable jars need a canning-tested method.

Cherry Jam Recipe FAQ

Why is my cherry jam runny?

Cherry jam is usually runny because it was undercooked, made with too much liquid, cooked in too large a batch, reduced too heavily in sugar, or made with the wrong pectin method. Let the jam cool fully before deciding it failed, because jam thickens as it cools.

Does cherry jam need pectin?

No. Cherry jam does not need pectin for a soft refrigerator set, but pectin helps when you want a firmer jam, reduced-sugar structure, or pantry-safe canning recipe. For the no-pectin version here, cook the fruit down properly and test it on a cold plate.

What cherries are best for jam?

Sweet cherries make a deep, mellow jam, while sour cherries make a brighter and tangier jam. Bing cherries, dark sweet cherries, tart cherries, pie cherries, and Morello cherries can all work. Rainier cherries are fine too, but the jam will be lighter in color and softer in flavor.

How many cherries do I need for this recipe?

You need 500 g / about 3 cups pitted cherries for this recipe. Start with about 600–700 g / 1 1/3–1 1/2 lb whole cherries to allow for the pits and stems.

Do frozen cherries work for cherry jam?

Yes. Frozen cherries work well for cherry jam if you thaw and drain them first, then add back only a splash of reserved juice if the pan looks dry. They often release more liquid than fresh cherries, so the jam may take a little longer to thicken.

Can I make cherry jam with canned cherries?

Yes, but use plain canned cherries and drain them well before cooking. Cherries packed in syrup, juice, or water can work, but cherry pie filling is not a direct substitute because it already contains sugar, thickeners, and flavoring.

How much sugar do I need for cherry jam?

For the no-pectin fridge jam in this post, use 200 g / about 1 cup sugar for 500 g / about 3 cups pitted cherries. That gives a balanced soft-to-medium set. Less sugar can work for a softer fridge jam, but the texture will be looser. Pectin canning recipes often use more sugar because the sugar level is part of the formula.

Is lemon juice necessary in cherry jam?

Lemon juice is strongly recommended, especially with sweet cherries. It brightens the flavor and helps the jam set better. Without lemon, sweet cherry jam can taste flat or overly heavy after cooking.

What temperature should cherry jam reach?

Cherry jam usually sets around 220°F / 104–105°C. At higher altitudes, the setting point may be closer to about 8°F above your local boiling point of water. Temperature is helpful, but it should be used with a cold plate test instead of replacing it.

Can this cherry jam recipe be canned?

The main no-pectin recipe is for refrigerator or freezer storage. For shelf-stable pantry jars, use a canning-safe recipe with proper boiling-water processing, correct headspace, and altitude adjustments.

Is low-sugar cherry jam safe for canning?

Only when the recipe is designed for that. Low-sugar cherry jam can be canned when you use a tested reduced-sugar canning recipe or a low/no-sugar pectin method designed for canning. Do not simply cut sugar from a traditional recipe and store the jars in the pantry.

What is the difference between cherry jam and cherry jelly?

Cherry jam is made with chopped or crushed cherries, so it has fruit texture. Cherry jelly is made from strained cherry juice, so it is smooth and clear. Jelly usually needs a different method and often uses pectin for a firm set.

Can I make cherry jam without a thermometer?

Yes. Use the cold plate test. Place a small plate in the freezer before cooking, spoon a little jam onto it, wait briefly, then push the jam with your finger. If it wrinkles and does not run like syrup, the jam is ready.

Can I double this cherry jam recipe?

It is better to make two small batches instead of one large batch. Small batches cook faster, evaporate more evenly, and are easier to set. Large batches can stay watery longer and may overcook before they thicken properly.

Did you make this with sweet cherries, sour cherries, or frozen cherries? Tell us which one you used, whether you used pectin, and whether your jam set soft, medium, or firm. Your note can help the next person decide how long to cook their batch.

Final Thoughts

That is the real point of jam: catching fruit at its best and giving it a second life in a jar. A good cherry jam does not have to be perfect like store-bought jelly. It should taste bright, look glossy, spread easily, and remind you why cherries were worth saving in the first place.

Posted on Leave a comment

Pineapple Jam Recipe and Pineapple Preserves

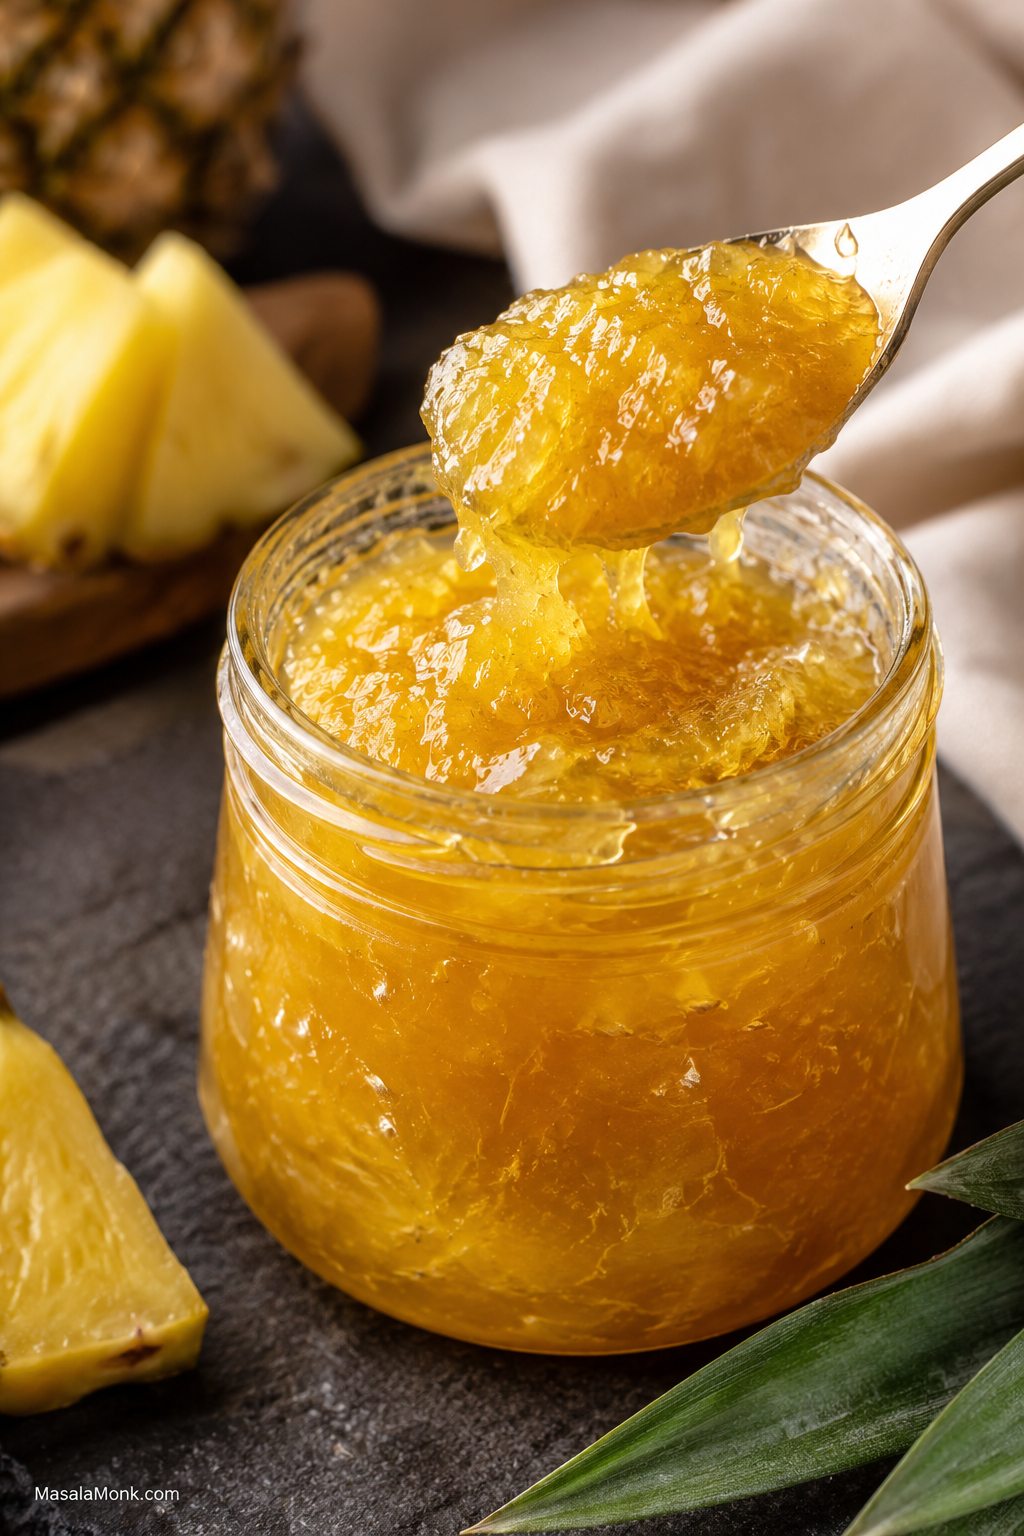
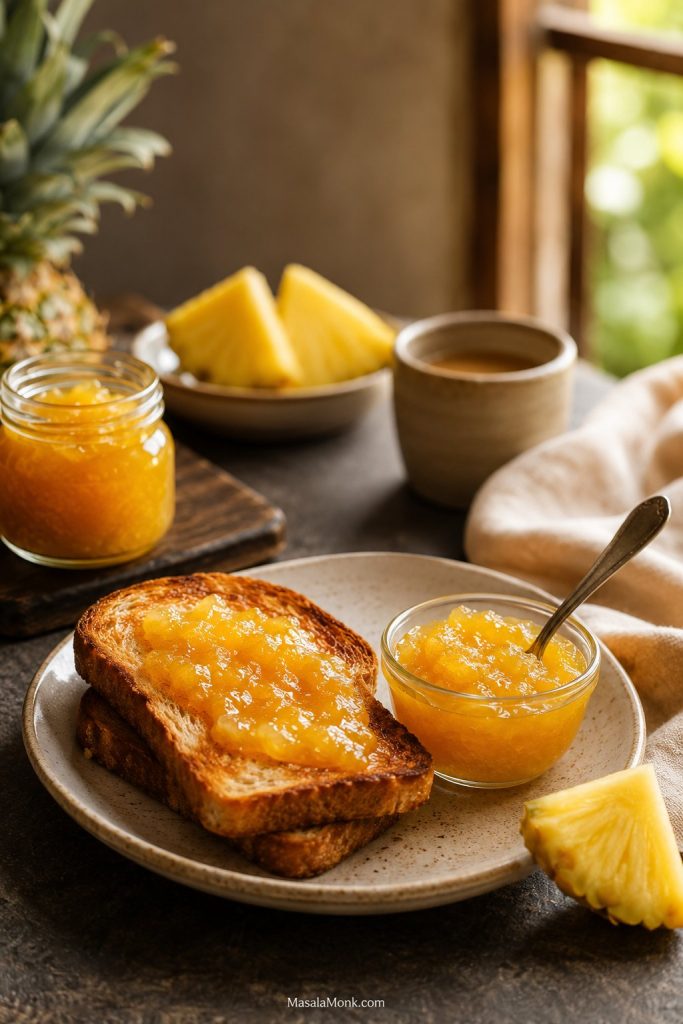
Open glass jar of glossy golden pineapple jam with a spoon lifting thick jam and fresh pineapple wedges behind it

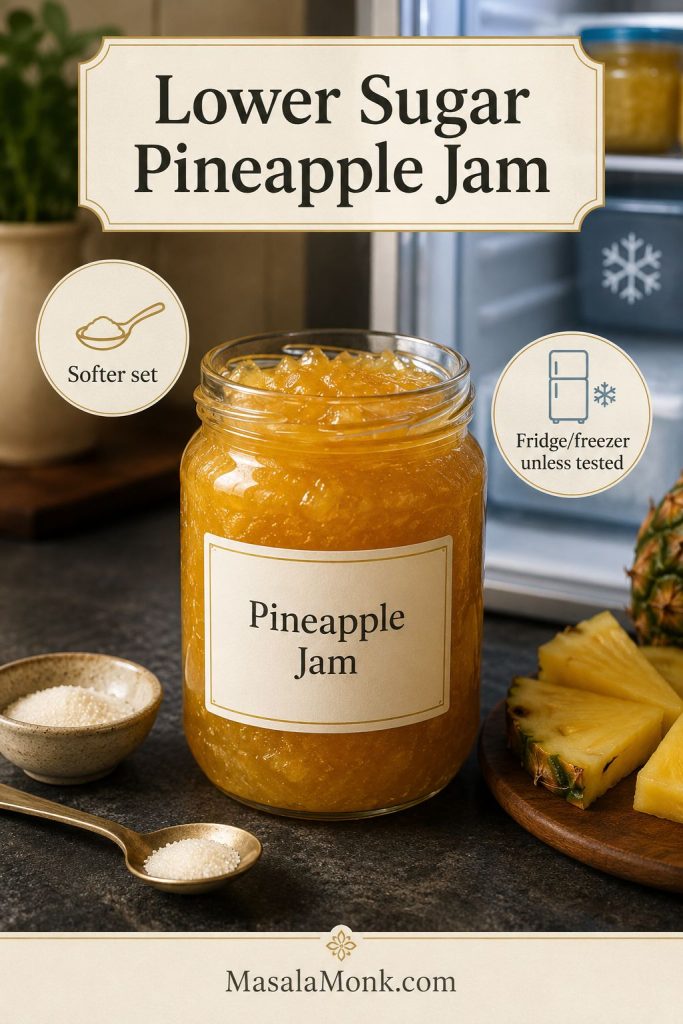
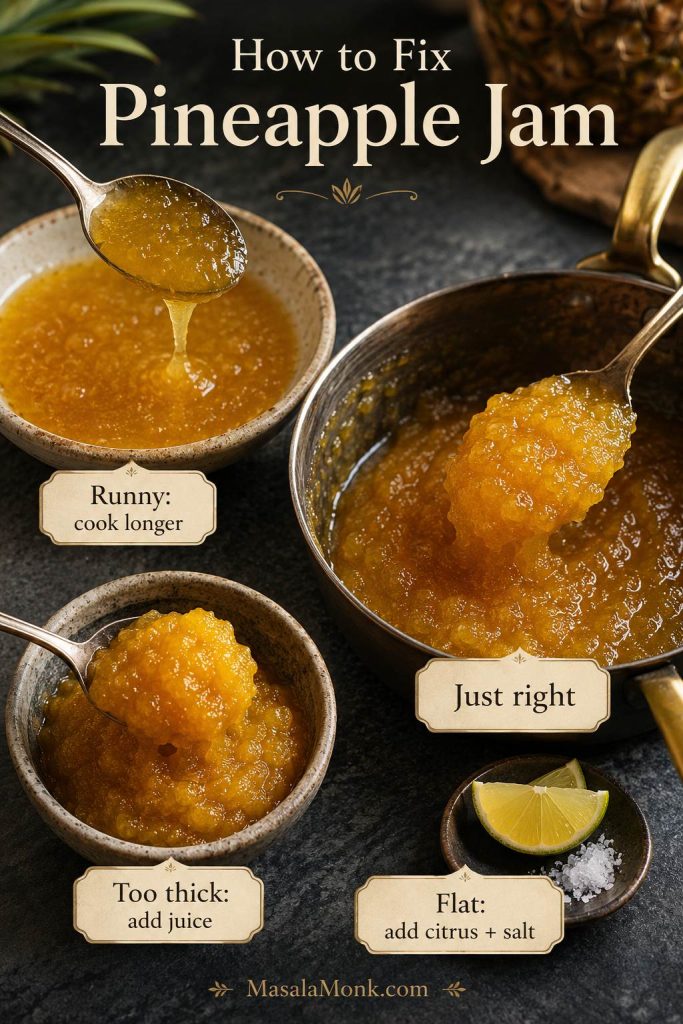
This pineapple jam recipe turns fresh pineapple or canned crushed pineapple into a glossy, golden spread that tastes bright, tropical, and properly homemade. Make it smooth and spoonable for toast, leave it chunkier for pineapple preserves, or cook it down further when you need a thick filling for tarts, cookies, and pastries.

The main version is a simple no-pectin pineapple jam for the fridge or freezer. Pineapple, sugar, lemon or lime juice, and a pinch of salt cook down into a sweet-tart fruit spread that thickens as it cools and stays soft enough to spread.

Once you know what the bubbles, spoon trail, and cold-plate test should look like, the recipe becomes very forgiving. Use crushed pineapple for jam, diced pineapple for preserves, canned pineapple for a quick pantry batch, or a wider pan and longer cooking time for pineapple tart filling.

The best part is that the recipe does not fall apart if your pineapple is extra juicy, your can is a little watery, or you want a softer spoonable finish instead of a firm jar. The texture tests below will tell you when to stop.

Table of Contents

Use this guide to choose between smooth pineapple jam, chunkier pineapple preserves, a quick canned pineapple batch, or a thicker filling for tarts and pastries.

Quick Answer

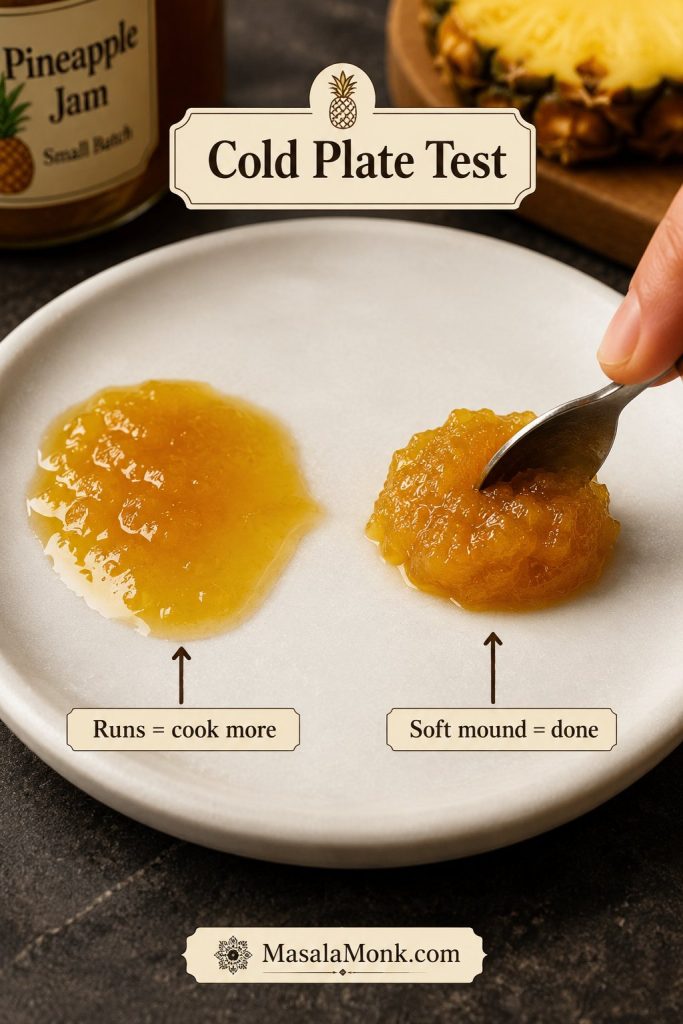
For an easy pineapple jam recipe, simmer crushed pineapple with sugar, lemon or lime juice, and a pinch of salt until it turns shiny, golden, and thick enough to mound softly on a spoon. If you want pineapple preserves instead, use diced pineapple and stop cooking while the fruit pieces are still visible in a thick syrup.

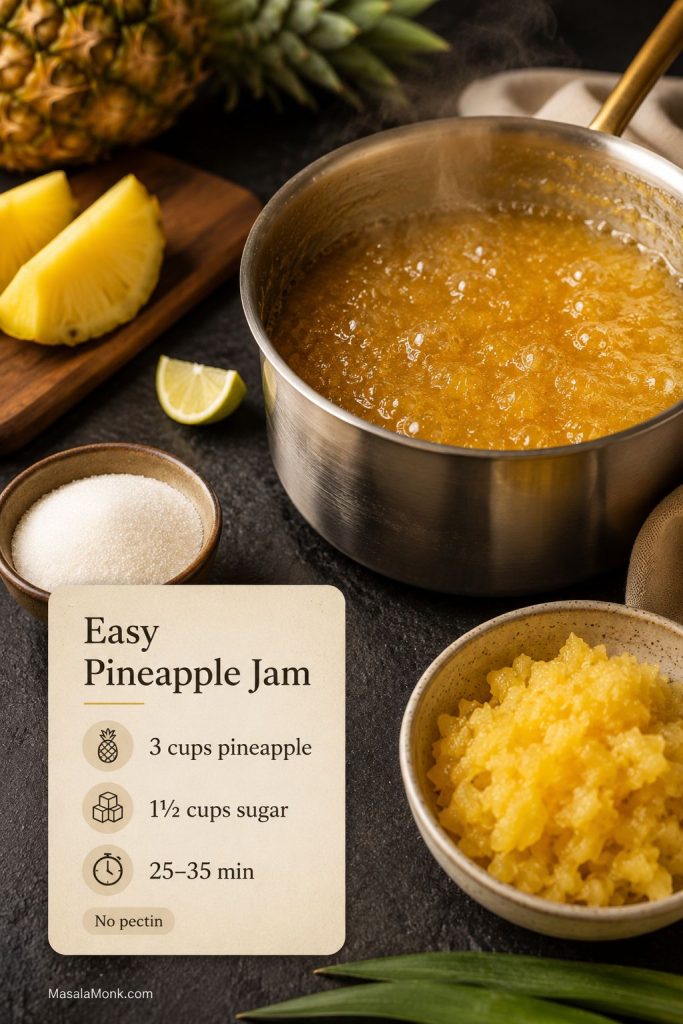
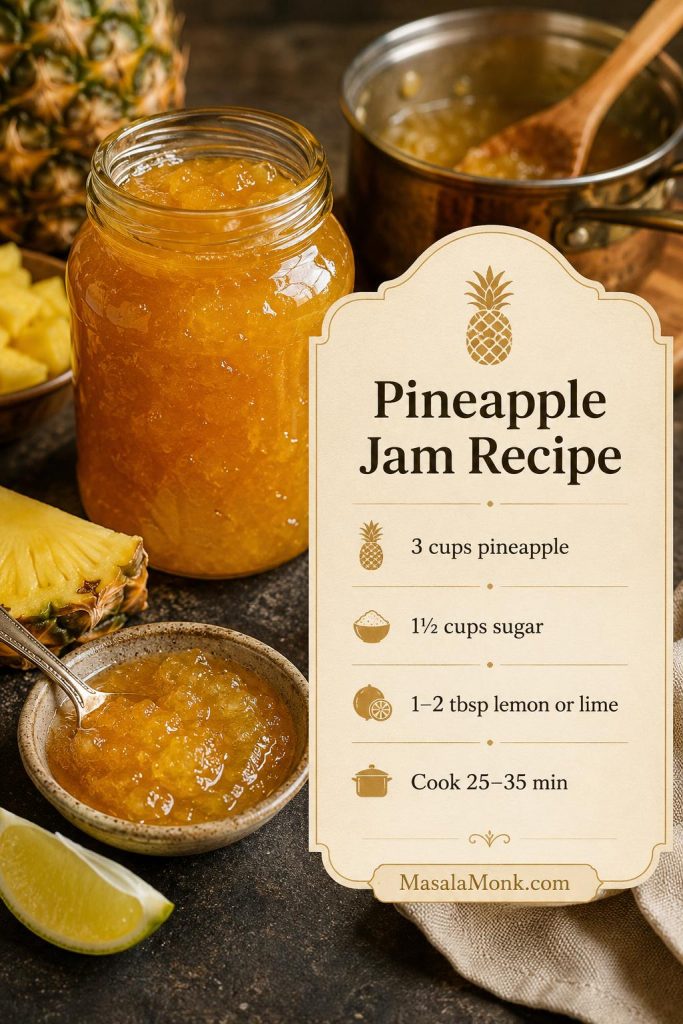
The easiest no-pectin ratio is 3 cups crushed pineapple, 1½ cups sugar, and 1–2 tablespoons lemon or lime juice. Cook for about 25–35 minutes. The jam is ready when it leaves a brief trail in the pan, passes the cold-plate test, or reaches about 220°F / 104°C at sea level.

However, do not worry if it looks a little loose while hot. Pineapple jam thickens as it cools, so the goal is glossy and spreadable rather than stiff or rubbery. For the safest first batch, make the crushed pineapple version and refrigerate it.

Best first batch: Start with the no-pectin pineapple jam made with crushed pineapple. After that, try diced preserves, canned pineapple jam, or a thicker filling for tarts and pastries.
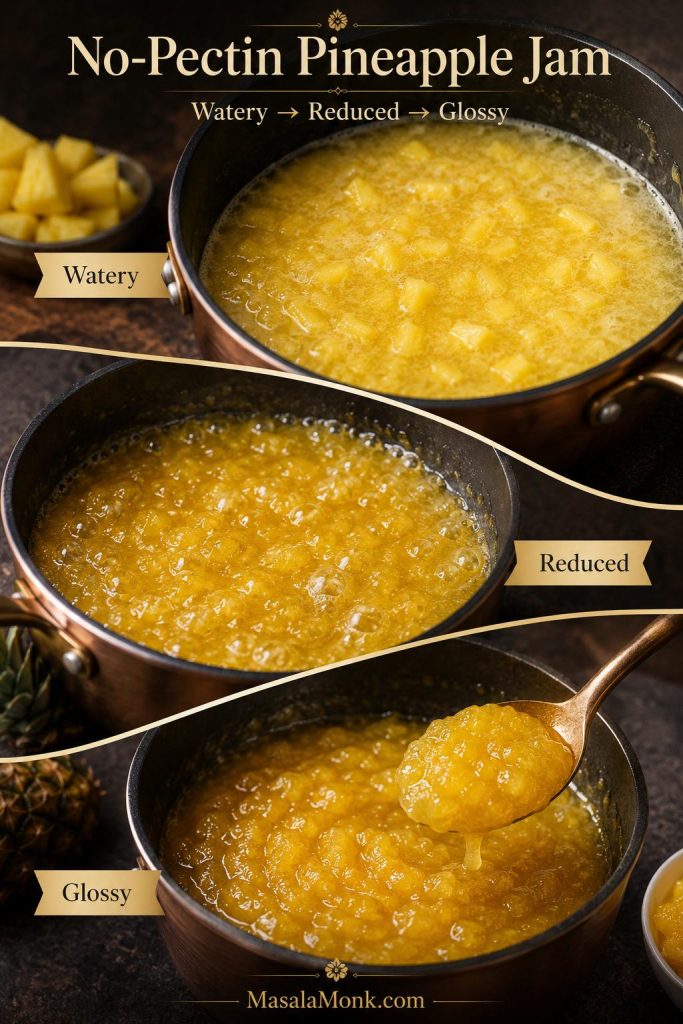
Saucepan of bubbling pineapple jam with crushed pineapple, sugar, citrus, and a quick ratio guide
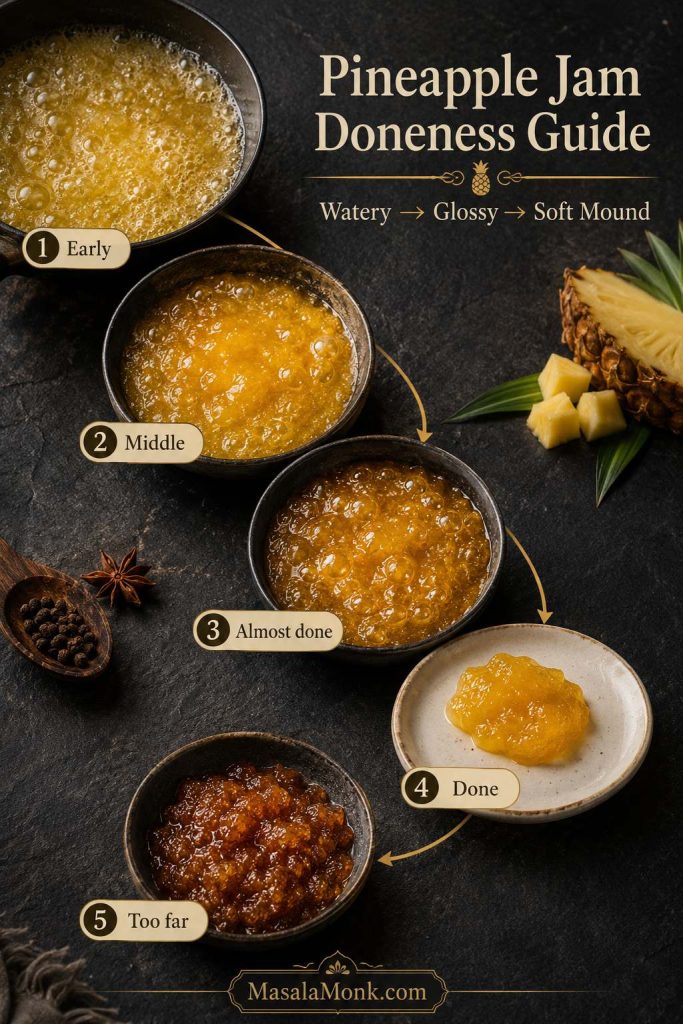
Start with the simple no-pectin pineapple jam ratio, then let the pan tell you when it is done. As the fruit reduces, the bubbles slow down and the mixture turns shiny instead of watery.

Pineapple Jam Recipe at a Glance

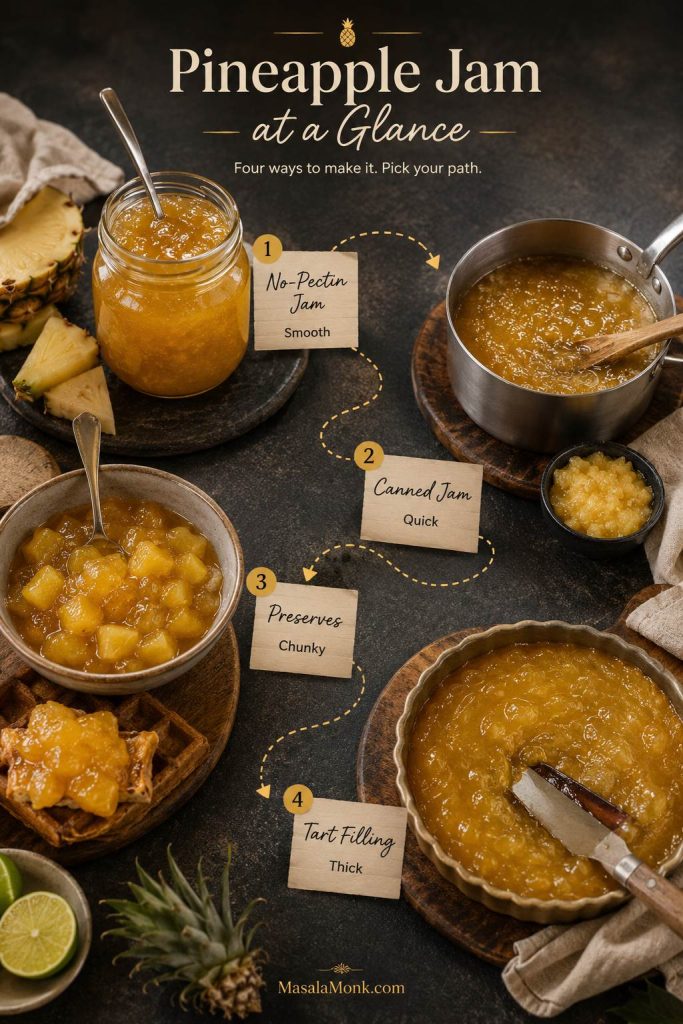
This pineapple jam recipe can go in four useful directions: soft-set jam, chunkier preserves, quick canned pineapple jam, or a much thicker tart filling. Start with the version that matches how you plan to serve it.

Pineapple jam at-a-glance guide showing no-pectin jam, canned jam, preserves, and tart filling routes
One pineapple jam recipe can become a breakfast spread, chunky preserve, canned-pineapple batch, or tart filling. As a result, choosing the route first helps you cook toward the right texture.
Version Pineapple Sugar Cook Time Best For
No-pectin pineapple jam 3 cups / about 680 g crushed pineapple 1½ cups / 300 g 25–35 minutes Toast, cookies, cakes, yogurt, everyday spreading
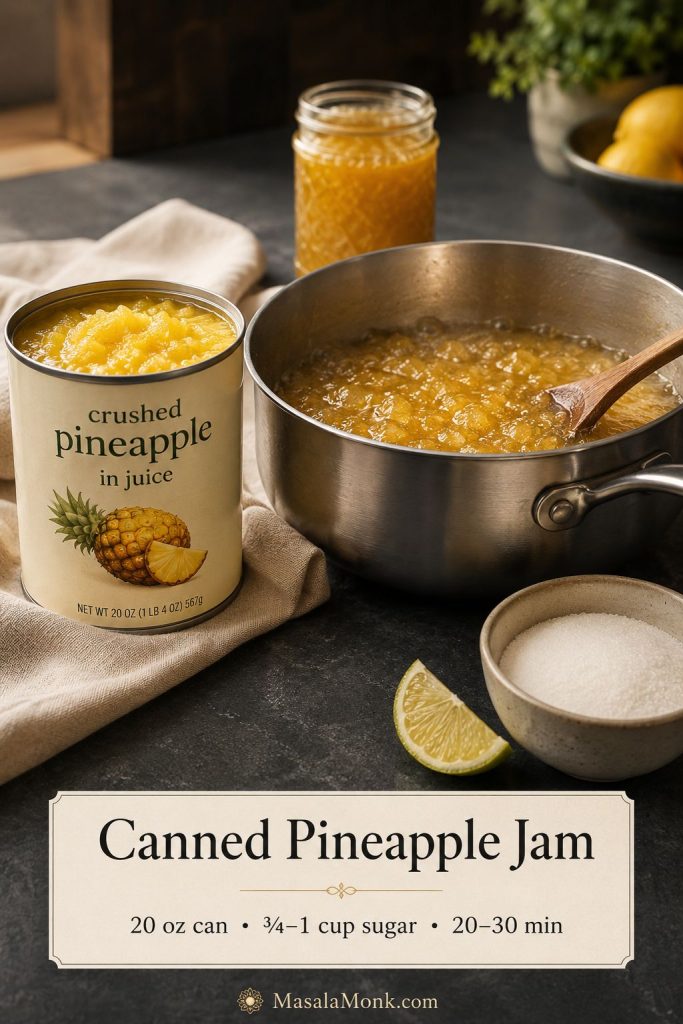
Canned pineapple jam 1 can / 20 oz / 567 g crushed pineapple in juice ¾–1 cup / 150–200 g 20–30 minutes Quick pantry batch, small jars, beginner version
Pineapple preserves 5½–6 cups diced pineapple ⅔–1 cup 30–40 minutes Biscuits, waffles, ice cream, cheese boards, glazes
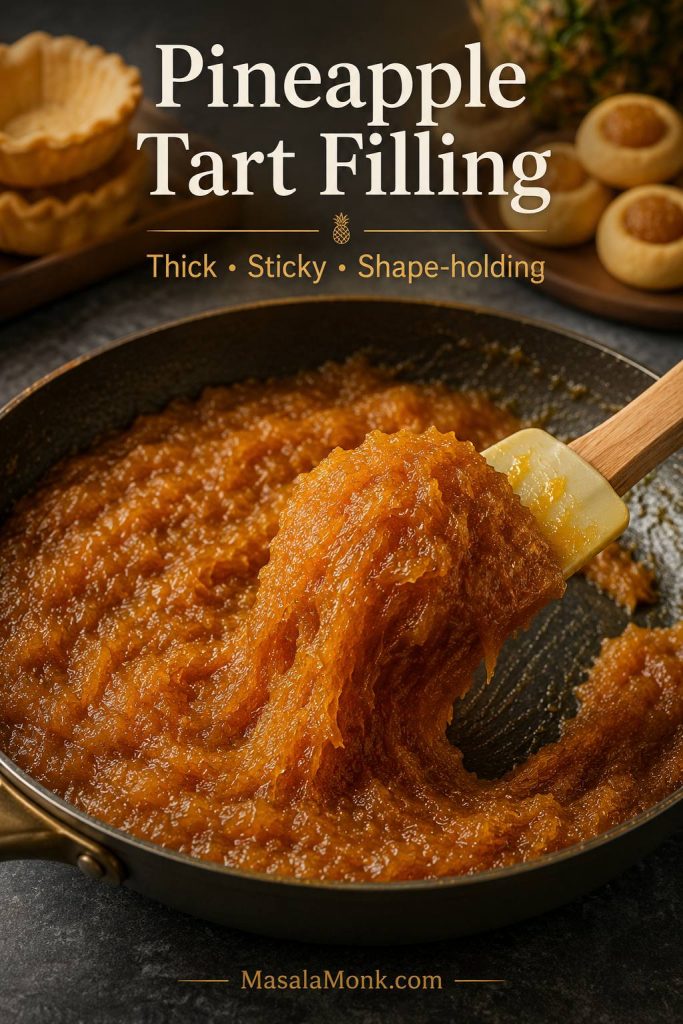
Pineapple tart filling 4 cups grated or finely pulsed pineapple ½–¾ cup, then adjust 1–2½ hours Pineapple tarts, pastry filling, thumbprint cookies
Choose your version: Use crushed pineapple for soft, spreadable jam; diced pineapple for chunkier preserves; canned crushed pineapple for the quickest small batch; and finely pulsed pineapple cooked much longer for tart or pastry filling. For pantry storage, do not use the flexible recipe as written — follow a tested canning method instead.

Pineapple Jam vs Pineapple Preserves

Although pineapple jam and pineapple preserves use similar ingredients, they do not eat the same way. This pineapple jam recipe gives you both paths, so you can choose the texture that fits how you plan to use it.

A smoother jam is easier to spread because the fruit is crushed, finely chopped, pulsed, or mashed as it cooks. Choose this version for toast, scones, thumbprint cookies, cake layers, yogurt bowls, and everyday spooning.

Meanwhile, preserves are chunkier. The fruit is usually diced into small, even pieces and cooked until tender in a thick syrup. Choose this version when you want visible pineapple pieces on biscuits, pancakes, waffles, cheesecake, ice cream, cheese boards, or savory glazes.

Another easy way to think about it: jam should glide across toast, while preserves should give you soft little pineapple pieces in each spoonful.

Diagonal comparison of smooth pineapple jam spread on toast and chunky pineapple preserves spooned over a biscuit or waffle
Pineapple jam and pineapple preserves are separated by texture more than ingredients. Crushed pineapple gives a smoother spread, while diced pineapple keeps soft fruit pieces in the finished preserve.
Version Fruit Cut Texture Best Uses
Pineapple jam Crushed, finely chopped, or pulsed Smoother, soft-set, glossy, spreadable Toast, scones, cookies, cake filling, yogurt, pastries
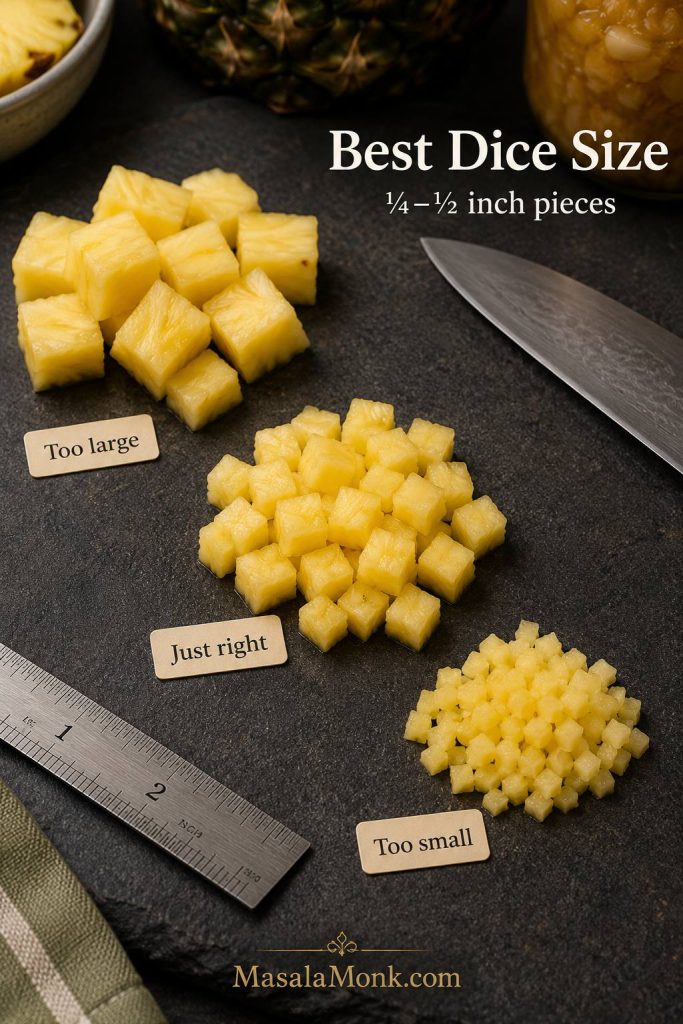
Pineapple preserves Small dice, about ¼–½ inch Chunkier fruit pieces in thick syrup Biscuits, waffles, ice cream, cheese boards, glazes
Pineapple tart filling Grated, finely pulsed, or cooked down further Very thick, sticky, paste-like Pineapple tarts, cookies, pastry filling, filled buns

Ingredients for Pineapple Jam and Preserves

You only need a few ingredients, but each one has a job. Pineapple brings the fruit and acidity, sugar helps the mixture thicken and shine, citrus keeps the flavor lively, and salt balances the sweetness. Because this pineapple jam recipe is flexible, the fruit cut matters as much as the ingredient list.

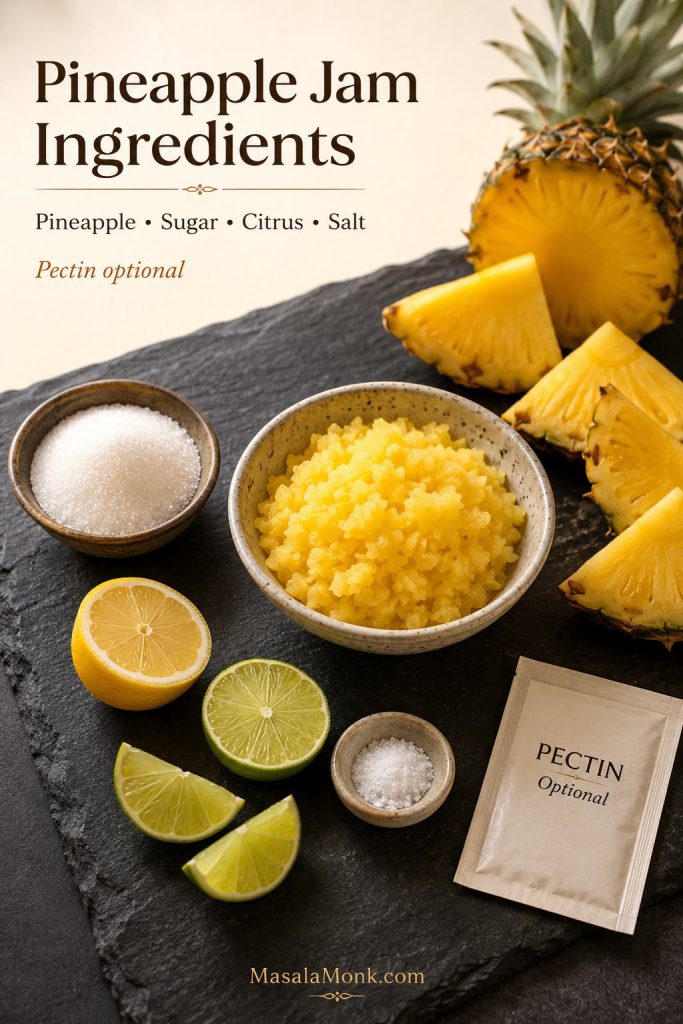
Pineapple jam ingredients including fresh pineapple, crushed pineapple, sugar, lemon, lime, salt, and optional pectin
Pineapple, sugar, citrus, and salt are enough for a flexible refrigerator jam. However, pectin can help when you want a firmer set, a faster cook, or a tested canning-style formula.

Pineapple

Fresh ripe pineapple gives the brightest flavor and color. Canned crushed pineapple works well when you want a faster batch. For jam, crush or finely chop the fruit. For preserves, cut it into small even pieces so everything softens at the same rate.

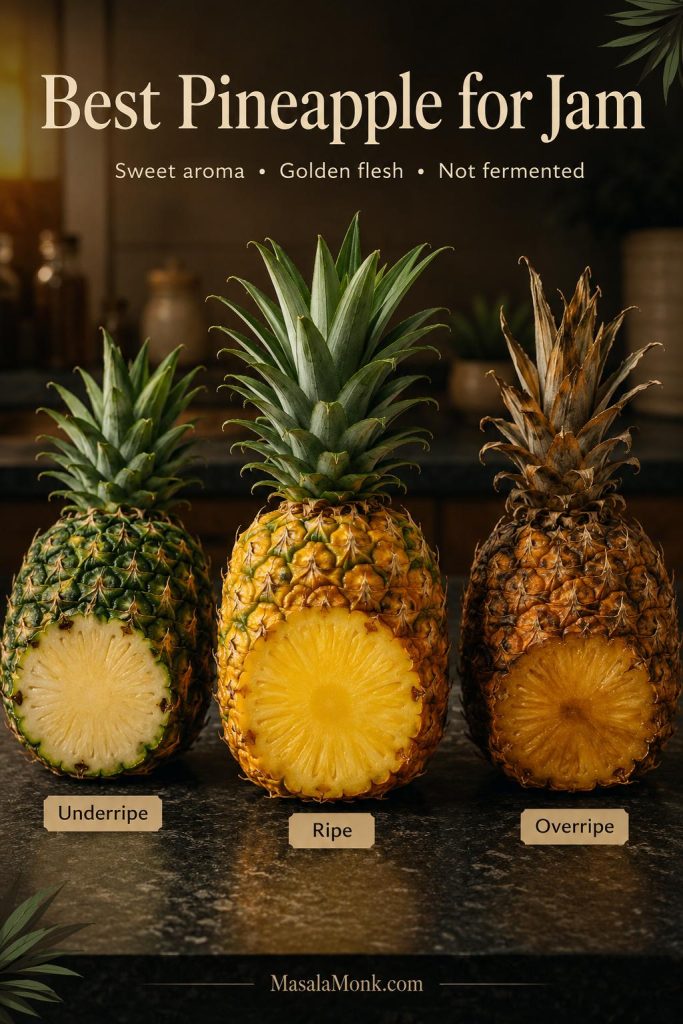
Choose pineapple that smells sweet and fruity, not fermented. Very underripe pineapple can taste sharp, while overripe pineapple may make the jam darker and softer. A very sweet pineapple gives a rounder jam; a sharper one may need the higher end of the sugar range. If the fruit tastes flat, lime juice usually wakes it up better than more sugar.

Pineapple selection guide comparing underripe, ripe, and overripe pineapple for jam making
Ripe pineapple gives homemade pineapple jam the brightest color and flavor. Meanwhile, underripe fruit can taste sharp, and overripe pineapple may cook down darker and softer.

Sugar

Sugar does more than sweeten the jar. It helps create body, improves the glossy finish, and supports the spreadable texture. For the main no-pectin version, start with 1½ cups sugar for 3 cups crushed pineapple. Use up to 2 cups if you prefer a firmer, sweeter jam.

Lemon or Lime Juice

Lemon juice gives a clean, classic fruit-spread flavor. Lime juice tastes a little more tropical and works especially well if you plan to use the jam with coconut desserts, pineapple tart filling, or drink-inspired pairings.

Salt

A small pinch of salt will not make the jam salty. Instead, it rounds out the sugar and helps the pineapple taste brighter.

Pectin, Optional

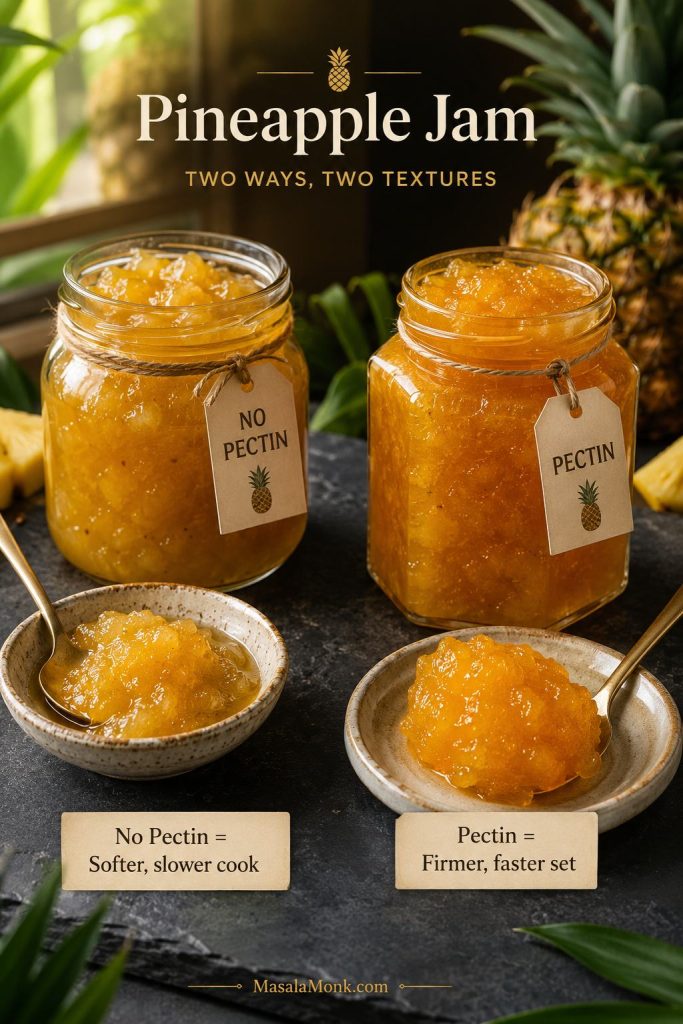
You can make pineapple jam without pectin, but pectin is useful when you want a quicker set, a firmer jar, or a lower-sugar method designed for that purpose. Different pectin types need different sugar levels and cooking steps, so follow the instructions on the package if you use it.

Fresh vs Canned Pineapple

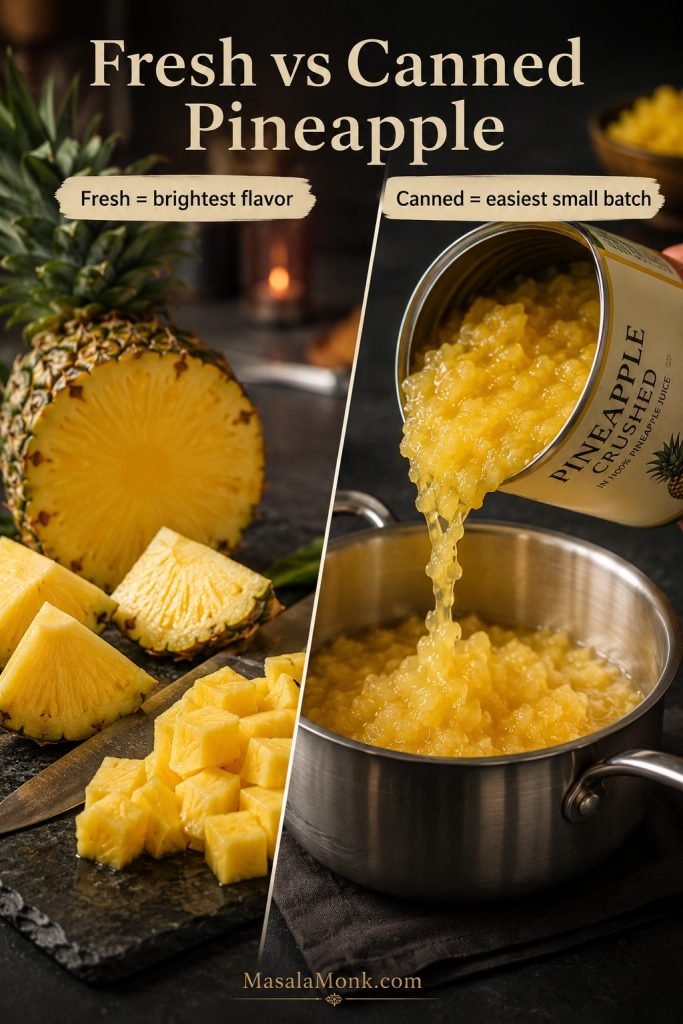
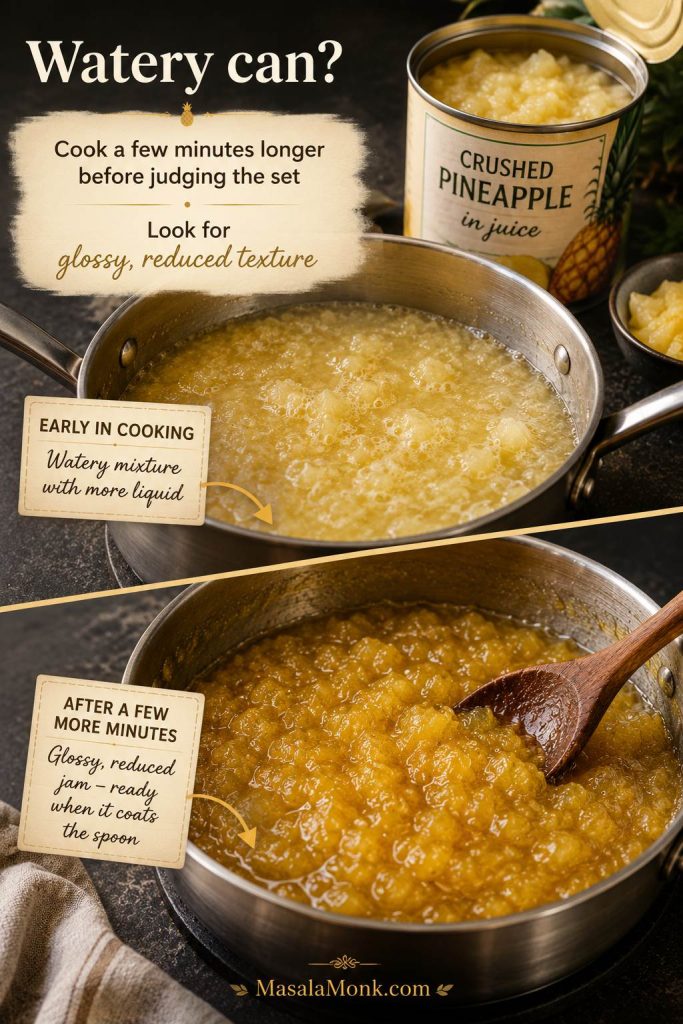
Fresh pineapple gives the brightest aroma and color, but canned pineapple is not a failure shortcut. It is fast, consistent, available year-round, and especially useful for a small-batch pineapple jam recipe. In fact, canned crushed pineapple is the easiest beginner version because the fruit is already evenly cut. The only real adjustment is moisture: if the can looks watery, cook a few minutes longer before judging the set.

Fresh pineapple being chopped beside canned crushed pineapple being poured into a saucepan for jam
Fresh pineapple gives the most vivid aroma, but canned crushed pineapple makes the easiest small-batch pineapple jam. Since the fruit is already evenly cut, it reduces with less prep work.

How to Prep Fresh Pineapple for Jam

When using fresh pineapple, peel, core, and chop the fruit first. Then, pulse it in a food processor for jam or dice it by hand for preserves. Try not to leave large pieces of tough core in the mixture because they can stay fibrous even after cooking.

Best Canned Pineapple to Use

For canned pineapple jam, choose crushed pineapple or pineapple chunks packed in juice rather than heavy syrup. Drain only if the can is extremely watery. Some juice helps the fruit cook down evenly and keeps the sugar from catching too early.

Watery canned crushed pineapple in juice reducing into thicker glossy pineapple jam in a saucepan
Canned pineapple jam can look loose at first because some cans carry more juice than others. Instead of adding thickeners too soon, simmer a little longer and wait for a glossy, reduced texture.
Pineapple Type Best For How to Use It
Fresh pineapple Brightest flavor, best color, homemade preserves Peel, core, chop, then crush or dice depending on texture
Canned crushed pineapple in juice Quick pineapple jam, small batches, pantry version Use with juice unless very watery; simmer longer if needed
Canned pineapple chunks Preserves or jam after chopping Chop smaller or pulse briefly before cooking
Pineapple in syrup Last-resort option Reduce added sugar and expect a sweeter final jam

If you are working with extra pineapple juice, save it for drinks, smoothies, marinades, or a tropical party bowl like this punch with pineapple juice.

Small-Batch Pineapple Jam

A small batch is perfect when you have one can of pineapple or a little fresh fruit left after cutting a whole pineapple. Since this is a small flexible batch, keep it chilled instead of treating it as pantry-stable.

Small batches are also helpful when you are learning the texture cues. They reduce faster, are easier to stir, and give you a low-pressure way to understand how pineapple changes as it cooks. If you are standing in the kitchen with one 20-ounce can of crushed pineapple, this is the easiest place to start.

Small-batch canned pineapple jam setup with a 20-ounce can of crushed pineapple in juice, saucepan, sugar, citrus, and finished jar
A 20-ounce can of crushed pineapple is a practical shortcut for small-batch pineapple jam. Because the fruit is already crushed, the key is reducing the juice until the spread looks shiny and spoonable.

Tiny 8-Ounce Can Version

  • 1 can / 8 oz / 227 g crushed pineapple in juice
  • ⅓–½ cup / 65–100 g sugar
  • 1–2 teaspoons lemon or lime juice
  • Small pinch of salt

Simmer everything in a small saucepan for 15–25 minutes, stirring often, until shiny and jammy. This makes roughly one small jar, depending on how much you reduce it.

Tiny batch pineapple jam setup with an 8-ounce can of crushed pineapple in juice, small jar, lemon wedge, sugar, and saucepan
The 8-ounce can version is a smart tiny batch when you only want one small jar. It also gives you a low-risk way to practice the cold-plate test before making more.

20-Ounce Can Version

  • 1 can / 20 oz / 567 g crushed pineapple in juice
  • ¾–1 cup / 150–200 g sugar
  • 1 tablespoon / 15 ml lemon or lime juice
  • Pinch of salt

Cook for 20–30 minutes, or until the bubbles look slower and the fruit has reduced into a soft-set spread. If the canned pineapple is very juicy, the batch may need a few extra minutes.

Pineapple Jam Without Pectin

This no-pectin pineapple jam recipe is all about patience, not complicated technique. As the pineapple simmers, excess moisture cooks off, the sugar concentrates, and the mixture slowly changes from juicy fruit sauce into a glossy spread.

Because pineapple is not naturally high in pectin, the mixture needs enough time to reduce. A heavy-bottomed saucepan helps prevent scorching, while a wider pan speeds up evaporation.

Wide pan and heavy-bottom saucepan comparison for reducing pineapple jam without scorching
A wide pan speeds up pineapple jam because more surface area lets moisture evaporate. At the same time, a heavy bottom helps protect the sugar and fruit from scorching.

No-pectin pineapple jam sets by reduction rather than by a strong natural pectin gel. That means the finished texture is usually softer and more spoonable than commercial jam, but the flavor is more concentrated because the fruit cooks down slowly.

Three cooking stages of no-pectin pineapple jam changing from watery fruit to reduced sauce and glossy jam
No-pectin pineapple jam thickens by reduction rather than a strong commercial-style gel. Therefore, the texture should move from juicy fruit sauce to glossy spread as water cooks off.

The method is simple: combine crushed pineapple, sugar, lemon or lime juice, and salt. Bring the mixture to a boil, then simmer and stir often. As it cooks, the fruit will look less watery, the bubbles will become slower and shinier, and the jam will start leaving a brief trail when you drag a spatula across the bottom of the pan.

Texture tip: Pineapple jam thickens more as it cools. Therefore, stop when it is slightly looser than the final texture you want.

How to Make Pineapple Preserves

Make preserves when you want little golden pieces of pineapple in every spoonful. They are chunkier than jam, a little more syrupy, and especially good over biscuits, waffles, yogurt, ice cream, or cheesecake.

Chunky pineapple preserves being spooned over a waffle with visible pineapple pieces in glossy syrup
Pineapple preserves should keep visible fruit pieces in a thick syrup. For the best result, dice the fruit evenly and avoid mashing it so much that it turns into smooth jam.

Think of this as the pineapple preserve recipe path: diced fruit, less mashing, and a syrupy finish with visible golden pieces instead of a smoother spread.

Then, cut the fruit into small pieces, about ¼–½ inch. Pieces that are too large can feel chewy or slide off toast; however, pieces that are too small will collapse into jam.

Pineapple dice-size guide with too-large, just-right, and too-small pieces for preserves
Even pineapple pieces cook more predictably. Aim for ¼–½ inch dice so the preserves stay spoonable, tender, and chunky without becoming chewy or collapsing completely.

Do not pulse preserves too finely unless you want jam. The whole point is to keep small pineapple pieces visible.

For a fruit-forward batch, use less sugar than the classic no-pectin jam. A good starting point is 5½–6 cups diced pineapple, ⅔–1 cup sugar, 2 tablespoons lemon juice, and a pinch of salt.

Cook the mixture in a wide pan for about 30–40 minutes, stirring often, until the pineapple turns tender and golden and the liquid reduces to a thick syrup. If the fruit starts breaking down too much, lower the heat and stir more gently.

For a middle texture, mash only part of the fruit. As a result, you get preserves with body: chunky enough for biscuits and waffles, but still thick enough to spoon over yogurt, cheesecake, or ice cream.

How to Tell When Pineapple Jam Is Done

Because hot jam looks looser than cooled jam, the most common mistake is stopping too early. Instead of relying only on the clock, use the texture cues below.

If this is your first time making pineapple jam, judge it by texture rather than time alone. Some pineapples are juicier than others, and canned pineapple can vary from can to can, so a batch may need a few extra minutes.

Doneness at a glance: Fast watery bubbles mean it is too early. Slower glossy bubbles mean it is close. A soft mound on a cold plate means it is ready. If the jam slides like syrup, cook it a few minutes longer.
Stage Visual Cue What It Means
Early Fast, watery bubbles Keep cooking; too much moisture remains
Middle Thicker fruit sauce Stir more often so the bottom does not catch
Almost done Slow, glossy bubbles Start testing with a spoon trail or cold plate
Done Soft mound on a cold plate Jar and cool; it will thicken more as it chills
Too far Sticky, dark, stiff texture Loosen gently with a splash of pineapple juice or water
Pineapple jam doneness guide showing early watery bubbles, thicker sauce, glossy bubbles, soft mound, and overcooked jam
Doneness is easier to judge by texture than by minutes alone. Watery bubbles mean keep cooking, slow glossy bubbles mean start testing, and a soft mound means the jam is ready.

Spoon Trail Test

Drag a spatula or wooden spoon across the bottom of the pan. If the jam leaves a clean trail for a moment before slowly filling in, it is close. If liquid rushes back immediately, keep cooking.

Spoon trail test in a pan of thick pineapple jam with a spatula leaving a visible path through the jam
When a spoon or spatula leaves a brief trail across the pan, the pineapple jam is close. However, the mixture should still look glossy and spreadable, not dry or paste-like.

Cold Plate Test

Place a small plate in the freezer before you start cooking. When the jam looks thick, spoon a little onto the cold plate and wait 30–60 seconds. Then, push it with your finger. It should thicken, wrinkle slightly, or hold a soft mound instead of running like juice.

Cold plate test showing one runny pineapple jam sample and one soft mound sample being pushed with a spoon
The cold-plate test shows how pineapple jam will behave after cooling. If the sample runs like syrup, continue cooking; if it mounds softly, stop before it turns sticky.

Thermometer Cue

A classic jam-style set usually lands around 220°F / 104°C at sea level. This is a useful guide, but it should not be your only test. Pineapple type, pan width, sugar level, and altitude can all affect the final texture.

If you live at a higher elevation, the finishing temperature can be slightly lower. Therefore, use the cold-plate test and spoon trail along with the thermometer.

Bubble Cue

At the beginning, the mixture bubbles quickly and looks watery. Near the end, the bubbles become larger, slower, and glossier. The jam will look more like a thick fruit spread than a simmering fruit sauce.

Texture What It Looks Like What to Do
Too runny Liquid rushes back after stirring; cold-plate sample runs Cook 5–10 minutes longer, stirring often
Just right Shiny, soft-set, spoonable, gentle mound on cold plate Remove from heat and jar while warm
Too thick Stiff, sticky, hard to spread, darkening quickly Stir in 1–2 tablespoons water or pineapple juice and warm gently

Use this quick visual recipe card as a saveable reminder before the full method below.

Saveable pineapple jam recipe card with pineapple, sugar, lemon or lime, cooking time, jar, saucepan, and pineapple pieces
Use the base pineapple jam recipe first, then adjust the fruit cut to match your final texture. Crushed pineapple gives a smooth spread, while diced pineapple creates chunkier preserves.

Pineapple Jam Recipe Card: No-Pectin Jam or Chunky Preserves

This base pineapple jam recipe makes soft-set no-pectin jam. Use crushed pineapple for jam or diced pineapple for chunkier preserves.

Prep Time10 minutes
Cook TimeJam: 25–35 minutes; preserves: 30–40 minutes
YieldJam: about 2½–3 cups / about three 8-ounce jars; preserves: about 3–4 cups
StorageFridge or freezer

Ingredients for Pineapple Jam

  • 3 cups / about 680 g crushed pineapple, fresh or canned in juice
  • 1½ cups / 300 g granulated sugar
  • 1–2 tablespoons / 15–30 ml lemon or lime juice
  • ⅛ teaspoon fine salt, or a small pinch

For a firmer, sweeter jam: increase sugar up to 2 cups / 400 g.

For Pineapple Preserves Instead

  • Use 5½–6 cups small diced pineapple, about ¼–½ inch pieces
  • Use ⅔–1 cup sugar, depending on sweetness
  • Use 2 tablespoons / 30 ml lemon juice
  • Add a pinch of salt

Equipment

  • Heavy-bottomed saucepan or wide pan
  • Food processor, blender, knife, or potato masher
  • Silicone spatula or wooden spoon
  • Measuring cups or digital scale
  • Jam thermometer, optional
  • Small freezer plate for testing
  • Clean jars with lids

Method

  1. Prepare the pineapple. For jam, crush or finely chop the pineapple. For preserves, dice it into small even pieces.
  2. Combine the ingredients. Add pineapple, sugar, lemon or lime juice, and salt to a heavy saucepan.
  3. Start cooking. Bring to a boil over medium-high heat, stirring often so the sugar dissolves evenly.
  4. Simmer and reduce. For jam, cook for 25–35 minutes, stirring frequently. For preserves, cook for 30–40 minutes, or until the pineapple pieces are tender and suspended in thick syrup. Scrape the bottom and sides of the pan so the mixture does not scorch.
  5. Check the texture. Jam is ready when it looks shiny, thickened, and spoonable. It should leave a brief trail in the pan, mound softly on a cold plate, or reach about 220°F / 104°C at sea level. Preserves should look syrupy with visible fruit pieces.
  6. Jar and cool. Spoon the hot jam or preserves into clean jars. Let cool, then cover and refrigerate. The mixture will thicken more as it chills.

Notes

  • This flexible no-pectin recipe is intended for refrigerator or freezer storage.
  • For shelf-stable canning, follow a tested preservation method and proper processing instructions.
  • If using canned pineapple packed in syrup, reduce the sugar and taste as it cooks.
  • For a smoother jam, use an immersion blender briefly before the jam gets too thick.
  • Avoid doubling the batch in the same pan the first time. Larger batches take longer to reduce and are easier to scorch, so make two separate batches if you need more.

Pineapple Jam With Pectin

If you want a firmer version of this pineapple jam recipe, pectin can help you get there without cooking the fruit as long. It can also help if you are using a lower-sugar method designed for pectin.

However, pectin is not one-size-fits-all. Regular powdered pectin, liquid pectin, low-sugar pectin, and calcium-activated pectin all behave differently. Some require a high sugar ratio, while others are designed for lower-sugar spreads.

Two jars of pineapple jam comparing softer no-pectin jam with firmer pectin-set jam
Pectin is useful when you want a faster, firmer pineapple jam, but it is not always necessary. For a softer homemade spread, the no-pectin method gives a more spoonable finish.

Pectin versions are not automatically better; they are simply faster and firmer. If you use pectin, follow the specific package instructions for fruit amount, sugar amount, boiling time, and jar processing. Otherwise, the jam may turn too stiff, too loose, overly sweet, or unsuitable for pantry storage if you are trying to can it.

Fresh pineapple note: Some pectin methods recommend boiling fresh pineapple first because fresh pineapple contains enzymes that can interfere with gel formation. If your pectin brand gives pineapple-specific instructions, follow them.

Canning Pineapple Jam and Preserves Safely

Important: The recipe card above is written for refrigerator or freezer storage. Do not treat it as a shelf-stable canning recipe unless you switch to a tested canning formula and follow the exact fruit, acid, sugar, pectin, jar size, headspace, and processing time.

Pineapple jam can be canned, but pantry storage needs a tested method, not a flexible refrigerator-jam formula. The amount of sugar, acid, pectin, fruit, headspace, jar size, and processing time all matter.

Because this is a flexible pineapple jam recipe, treat the main batch as a refrigerator or freezer pineapple jam. If you want pantry storage, use a tested preservation method and follow the jar size, headspace, and processing time exactly.

For shelf-stable jars, Ball’s pineapple jam canning recipe is a useful reference. In addition, the National Center for Home Food Preservation guide to jams, jellies, and marmalades is a good place to check broader home-preservation safety guidance.

Be especially careful with low-sugar or sugar-free pineapple jam. Reducing sugar can affect set, texture, and storage safety. If you want a lower-sugar version, use a pectin and method designed for low-sugar jam, then refrigerate, freeze, or process only according to the instructions for that exact style.

Lower-sugar pineapple jam jar with small sugar cue and refrigerator-freezer storage reminder
Lower-sugar pineapple jam often sets softer because sugar helps with body and preservation. Unless you are using a tested low-sugar method, store it in the refrigerator or freezer.

Pineapple Jam for Tarts and Filling

You can also adapt this pineapple jam recipe into a thicker filling for tarts, cookies, and pastries. Unlike spreadable jam, tart filling cooks until most of the liquid evaporates and the mixture becomes sticky, concentrated, and paste-like.

Tart Filling Ratio

For a small tart-filling batch, start with about 4 cups finely pulsed or grated pineapple, ½–¾ cup sugar, 1 tablespoon lemon or lime juice, and a pinch of salt. Add sugar after some of the pineapple liquid has cooked off, then keep reducing until the filling is thick, sticky, and no longer watery.

How Thick Tart Filling Should Be

Cook it in a wide pan so moisture evaporates quickly. Then, continue cooking over medium-low heat until the mixture is darker, concentrated, and able to hold its shape when cooled.

For tart filling, the mixture should not slide around the pan like jam. It should move as a sticky mass, leave the pan bottom visible for longer, and hold its shape once cooled.

Thick pineapple tart filling being lifted from a pan with a spatula while tart shells sit in the background
Pineapple tart filling needs to be thicker than breakfast jam. Cook it until it moves as one sticky mass, holds its shape, and no longer releases watery juice around the edges.

Near the end, stir more often and lower the heat if the filling starts catching on the bottom. Tart filling is ready when it looks darker, moves together as one sticky mass, and no longer releases watery juice around the edges.

This can take much longer than jam for toast. Depending on pineapple quantity and juiciness, tart filling may need 1–2½ hours. It is ready when a cooled spoonful holds its shape and does not leak liquid. For rolled pineapple tarts, the cooled filling should be thick enough to portion and shape.

Flavor Options for Pineapple Tart Filling

Finally, optional spices such as cinnamon, clove, star anise, ginger, or vanilla can make pineapple filling warmer and more dessert-like. Use them lightly so the fruit stays the main flavor.

How to Store Pineapple Jam and Preserves

After cooking, let the jam cool before sealing and storing. It will thicken as it cools, so do not judge the final texture while it is still boiling hot.

Because this pineapple jam recipe is written as a flexible refrigerator or freezer method, storage depends on sugar level, cleanliness, and how the jars are handled after cooling.

Storage Method How Long Best For
Refrigerator For best quality, use within about 2 weeks. Higher-sugar batches handled only with clean utensils may last longer. Everyday no-pectin pineapple jam and preserves
Freezer About 2–3 months for best texture Small batches, lower-sugar versions, extra jars
Shelf-stable pantry storage Only with a tested canning method Properly processed jam using safe canning instructions

Use clean jars and utensils every time. If the jam smells fermented, looks moldy, becomes fizzy, or changes in a way that feels off, discard it.

Ways to Use Pineapple Jam and Preserves

The fun of pineapple jam is that it moves easily between breakfast, dessert, and savory food. It can be the bright layer in a cake, the glossy topping on cheesecake, or the sweet-tart glaze that wakes up grilled chicken or pork.

Serving spread showing pineapple jam on toast, cheesecake, waffles, ice cream, and a savory glaze dish
Pineapple jam works beyond toast because its sweet-tart flavor cuts through rich foods. Try it with cheesecake, waffles, coconut ice cream, cheese boards, or a quick glaze for chicken, pork, shrimp, or tofu.
  • Spread on toast, biscuits, English muffins, or scones.
  • Spoon over pancakes, waffles, French toast, yogurt, or oatmeal.
  • Use as a filling for thumbprint cookies, sandwich cookies, cakes, cupcakes, or tart shells.
  • Spoon over chilled cheesecake, especially a simple no bake cheesecake where the bright pineapple cuts through the creamy filling.
  • Serve chunky pineapple preserves with vanilla ice cream, yogurt, or a scoop of homemade coconut ice cream.
  • Brush over grilled chicken, pork chops, ham, shrimp, or tofu as a sweet-tart glaze.
  • Pair with cream cheese, goat cheese, or brie for a quick appetizer.
  • Use a spoonful in tropical mocktails, cocktails, or fruit punches when you want pineapple sweetness and texture.

Best Version for Each Use

Use Best Version Why It Works
Toast, scones, biscuits Soft-set pineapple jam Spreads easily without large fruit pieces falling off
Waffles, pancakes, ice cream Pineapple preserves Chunky fruit pieces feel more generous as a topping
Thumbprint cookies or tart shells Thicker jam Holds better and does not run as much during serving
Pineapple tarts and pastry filling Tart filling Cooked longer until sticky, concentrated, and shape-holding
Pork, chicken, shrimp, or tofu glaze Preserves or looser jam Melts into a sweet-tart glaze with visible fruit if desired
Cheesecake or coconut desserts Jam or preserves Bright pineapple cuts through rich, creamy desserts

Troubleshooting Pineapple Jam

Pineapple jam is forgiving. However, the texture can shift depending on pineapple ripeness, water content, pan size, sugar level, and cooking time.

If your batch does not look right at first, do not panic. Most texture issues can be fixed by cooking a little longer, adding a splash of liquid, or balancing the sweetness with citrus and salt.

Quick Fixes for Common Problems

Problem Likely Cause Fix
Jam is runny Not cooked long enough, pineapple was very juicy, or sugar was reduced too much Return to the pan and simmer 5–10 minutes longer. Test on a cold plate before jarring again.
Jam is too thick Over-reduced or cooked at too high a heat Warm gently with 1–2 tablespoons water, pineapple juice, or lemon juice until spreadable.
Jam tastes too sweet Pineapple was very ripe or canned in syrup Add a little more lemon or lime juice and a tiny pinch of salt. Next time, reduce sugar slightly.
Jam tastes flat Not enough acid or salt Add lemon or lime juice in small amounts, then taste again.
Preserves are tough or chewy Pineapple pieces were too large or included too much core Chop smaller next time. For this batch, cook gently with a splash of water until softer.
Jam is browning too fast Heat is too high or pan bottom is too thin Lower the heat, stir more often, and use a heavier pan next time.
Canned pineapple flavor tastes dull Pineapple was packed in syrup or tasted muted from the can Add lime juice, lemon zest, ginger, or a small splash of pineapple juice to brighten it.
Troubleshooting guide showing runny pineapple jam, just-right jam, too-thick jam, citrus, salt, and fix labels
Most pineapple jam problems are fixable. Cook runny jam longer, loosen an overly thick batch with a splash of juice, and brighten flat flavor with citrus plus a tiny pinch of salt.

The Most Common Texture Mistake

The easiest mistake is judging the jam while it is still hot. If it slides across the cold plate like syrup, give it another few minutes. If it mounds softly and looks shiny, stop before it turns sticky or overly firm.

Pineapple Jam Variations

Once you have the basic method, this recipe is easy to adapt. Keep the first batch simple, then try one of these variations.

Pineapple Lime Jam

Use lime juice instead of lemon juice and add ½–1 teaspoon lime zest near the end. This gives the jam a brighter tropical finish.

Pineapple Ginger Jam

Add 1–2 teaspoons freshly grated ginger while the fruit cooks. Ginger works especially well if you plan to use the jam as a glaze for chicken, pork, shrimp, or tofu.

Pineapple Vanilla Jam

Stir in ½–1 teaspoon vanilla after removing the jam from the heat. This makes it softer and more dessert-like, especially for pancakes, yogurt, cakes, or thumbprint cookies.

Pineapple Coconut Jam

Add 2–4 tablespoons finely shredded coconut near the end of cooking, or stir in toasted coconut after the jam cools. This leans into a piña colada-style flavor, especially if you like the pineapple-coconut pairing in these piña colada variations.

Pineapple Jalapeño Jam

Add 1–2 tablespoons finely minced jalapeño for a sweet-hot condiment. This is excellent with cream cheese, grilled meats, tacos, sandwiches, and cheese boards. For a shelf-stable spicy jam, use a tested canning method rather than improvising the acid and pepper ratio.

Brown Sugar Pineapple Preserves

Replace 2–4 tablespoons of the white sugar with brown sugar for a deeper caramel flavor. This version works especially well as a glaze for ham, pork, or grilled pineapple desserts.

Thicker Pineapple Pastry Filling

Cook the jam longer over low heat until it is thick enough to hold its shape. This is the better version for pineapple tarts, filled cookies, pastry pockets, and cake layers that need a firmer filling.

FAQs

Jam or preserves: what is the real difference?

The difference is mostly texture. Pineapple jam is smoother because the fruit is crushed or finely chopped. Pineapple preserves are chunkier, with small pieces of fruit suspended in syrup.

Do you need pectin for pineapple jam?

No, not for a refrigerator or freezer version. Pineapple, sugar, and citrus can cook down into a soft-set jam on their own. However, pectin is helpful if you want a firmer set, a quicker recipe, a lower-sugar method, or a canning formula designed for that purpose.

When is pineapple jam safe for pantry storage?

Pineapple jam is safe for pantry storage only when you follow a tested canning method with the correct sugar, acid, pectin if required, jar size, headspace, and processing time. The flexible no-pectin recipe on this page should be treated as refrigerator or freezer jam unless you switch to a tested canning formula.

What is the safest way to make lower-sugar pineapple jam?

Use a lower-sugar pectin method or keep the jam refrigerated or frozen. Reducing sugar in a regular no-pectin batch can make the texture softer, and it should not be treated as shelf-stable unless the recipe is designed for that kind of storage.

What changes when you use canned pineapple?

Canned pineapple is usually softer and wetter than fresh pineapple, so it may cook down faster or need a few extra minutes depending on how much juice is in the can. Use pineapple packed in juice when possible, and simmer until it becomes shiny, reduced, and spoonable.

What is the best pineapple for jam?

Fresh ripe pineapple gives the brightest flavor. Canned crushed pineapple in juice is the easiest option and works well for small-batch pineapple jam. Avoid syrup-packed pineapple unless you are prepared to reduce the sugar.

Should you use crushed pineapple or chunks for preserves?

Use chunks or diced pineapple for preserves because you want visible fruit pieces. Crushed pineapple is better for a smoother jam. If using canned chunks, cut them smaller so they soften evenly and spoon easily over biscuits, waffles, yogurt, or ice cream.

Why is my pineapple jam runny?

Runny pineapple jam usually needs more cooking time. Pineapple can release a lot of liquid, especially if it is very ripe or canned with juice. Return the jam to the pan and simmer until it looks reduced, shiny, and spoonable. Then test it on a cold plate before jarring again.

How long does homemade pineapple jam last?

For best quality, use refrigerator pineapple jam within about 2 weeks. Higher-sugar batches handled only with clean utensils may last longer, but discard the jar if you see mold, fizzing, fermentation, off smells, or any change that feels unsafe.

How do you make pineapple jam thicker for tarts?

Cook it longer in a wide pan over medium-low heat until most of the moisture evaporates. Tart filling should be much thicker than spreadable jam. It should move as a sticky mass, leave the pan bottom visible for longer, and hold its shape once cooled.

Where does pineapple jam taste best besides toast?

Pineapple jam is excellent with biscuits, scones, pancakes, waffles, yogurt, ice cream, cheesecake, thumbprint cookies, cakes, pork, chicken, shrimp, cheese boards, and tropical desserts. Chunkier pineapple preserves are especially good when you want visible fruit pieces.

Final Thoughts

The best pineapple jam tastes like concentrated pineapple: bright, tropical, sweet-tart, and just thick enough to spoon generously over whatever needs a little sunshine. Start with crushed pineapple for the easiest jam, switch to diced fruit when you want preserves, and cook it longer when you need a sturdy filling for tarts or pastries.

Toast spread with homemade pineapple jam beside a small bowl of chunky preserves, pineapple wedges, spoon, and warm breakfast setting
Once you understand the texture cues, pineapple jam becomes easy to customize. Keep it smooth for breakfast toast, or leave it chunkier when you want a dessert-style preserve.

After one batch, the texture cues become much easier to recognize. The bubbles slow down, the color deepens, the spoon leaves a trail, and the jam turns shiny enough to jar. That is the moment to stop, cool it, and decide where the first spoonful is going.

If you make it, notice whether you preferred fresh pineapple, canned crushed pineapple, or diced preserves. That one choice changes the texture more than anything else, and it is usually the difference between a smooth breakfast jam and a chunkier dessert-style preserve.