Posted on Leave a comment

Cherry Jam Recipe That Sets

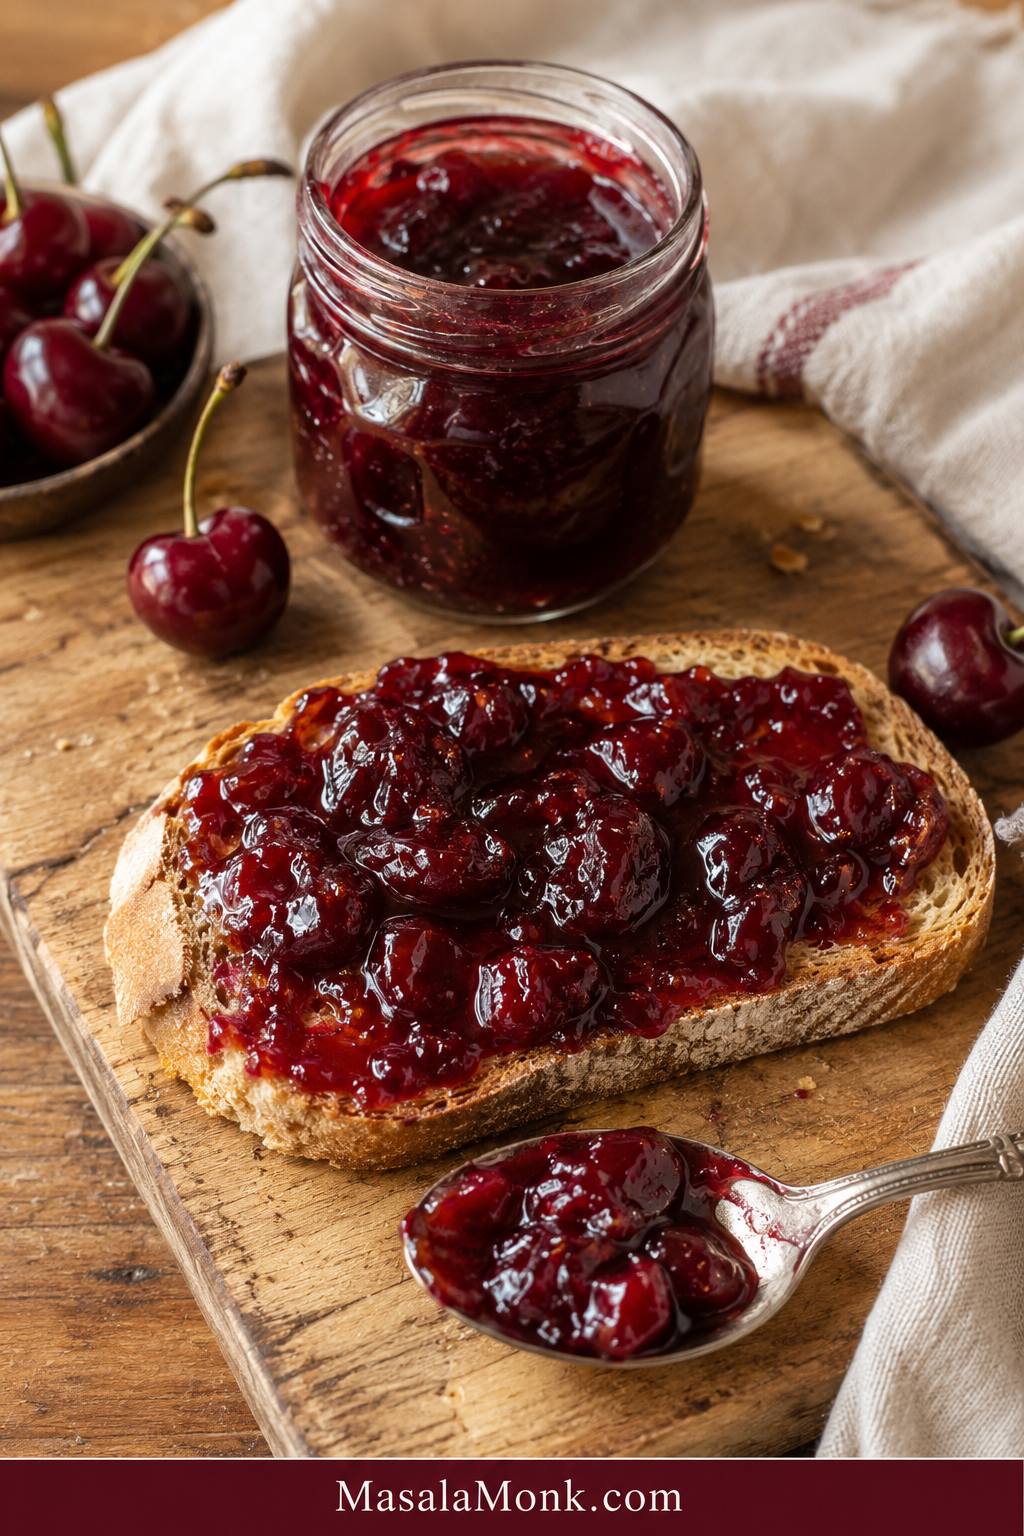
Glossy homemade cherry jam with visible cherry pieces spread on toast beside an open jar and spoon.

Cherry jam is one of those recipes that feels easy until the pot starts asking questions. Is it thick enough? Will it set after cooling? Should you add pectin? Can frozen cherries work? What if you want less sugar? And if the jar is going into the pantry, is the recipe actually safe for canning?

This cherry jam recipe is built to answer those questions before they ruin a batch. The main method is a small-batch, no-pectin cherry jam for the refrigerator or freezer: glossy, spoonable, fruit-forward, and bright enough to taste like cherries instead of cooked sugar.

Once you know what ready jam looks and feels like, the whole process becomes much calmer. The bubbles get heavier, the spoon leaves a little trail, the fruit looks glossy, and the jam starts moving more slowly in the pan. That is the moment you are looking for.

The goal is not a stiff, factory-style jam. The goal is a soft, beautiful cherry spread that tastes fresh, sets enough to spoon and spread, and does not leave you guessing. This recipe is flexible where a refrigerator jam can be flexible, and strict where safety needs it.

Jump to Recipe · Make It Now · Set Tests · Fix Runny Jam · Canning Notes

Quick Answer: How Do You Make Cherry Jam That Sets?

To make a simple cherry jam without pectin, combine 500 g / about 3 cups pitted cherries, 200 g / about 1 cup sugar, and 2 tablespoons / 30 ml lemon juice in a wide pan. Cook until the cherries soften and the syrup turns glossy, then use the Glossy-and-Wrinkle Method: cook until the bubbles look slow and shiny, then confirm the set with a cold plate wrinkle test.

The jam usually reaches this stage around 220°F / 104–105°C. Temperature helps, but the cold plate test tells you how the jam will behave once cooled.

You will usually need about 600–700 g / 1 1/3–1 1/2 lb whole cherries to get around 500 g / about 3 cups pitted cherries, depending on cherry size and pit weight.

This gives you a soft-to-medium set cherry jam for the refrigerator or freezer. It should be thick enough to spread on toast, but still soft enough to spoon over pancakes, yogurt, cheesecake, ice cream, or rice pudding.

Storage note: Keep this no-pectin version chilled or frozen. Pantry jars need a canning-tested cherry jam recipe with proper processing.

Make It Now

If you are standing in front of a bowl of cherries and just want jam today, start here. Use 500 g pitted cherries, 200 g sugar, and 2 tablespoons lemon juice. Cook in a wide pan until the jam looks glossy, thickened, and heavy-bubbled, then confirm the wrinkle on a cold plate. Cool, cover, and refrigerate.

The rest of the guide is there for the moments when the pot starts looking confusing: frozen cherries releasing extra juice, sugar changes, pectin questions, loose jam, texture choices, or pantry storage.

Cherry Jam Recipe Card: No-Pectin Cherry Jam

This is the small batch to make when you want cherry jam today without turning the kitchen into a full canning project. It cooks on the stovetop, uses no boxed pectin, and sets into a soft, glossy spread once chilled.

Keep the heat lively but not wild. You want steady bubbling, not angry splattering. Near the end, slow down and test instead of rushing the jar.

Prep time15 minutes
Cook time25–35 minutes
Total time40–50 minutes
YieldAbout 1 1/2 cups / 360 ml
MethodStovetop
StorageRefrigerator 2–3 weeks or freezer up to 3 months

Ingredients

  • 500 g / about 3 cups pitted cherries, fresh or thawed frozen, chopped or halved
  • 200 g / about 1 cup granulated sugar
  • 2 tablespoons / 30 ml lemon juice
  • 1 small pinch salt, optional
  • 1/8 to 1/4 teaspoon almond extract, optional
  • 1 teaspoon vanilla extract, optional
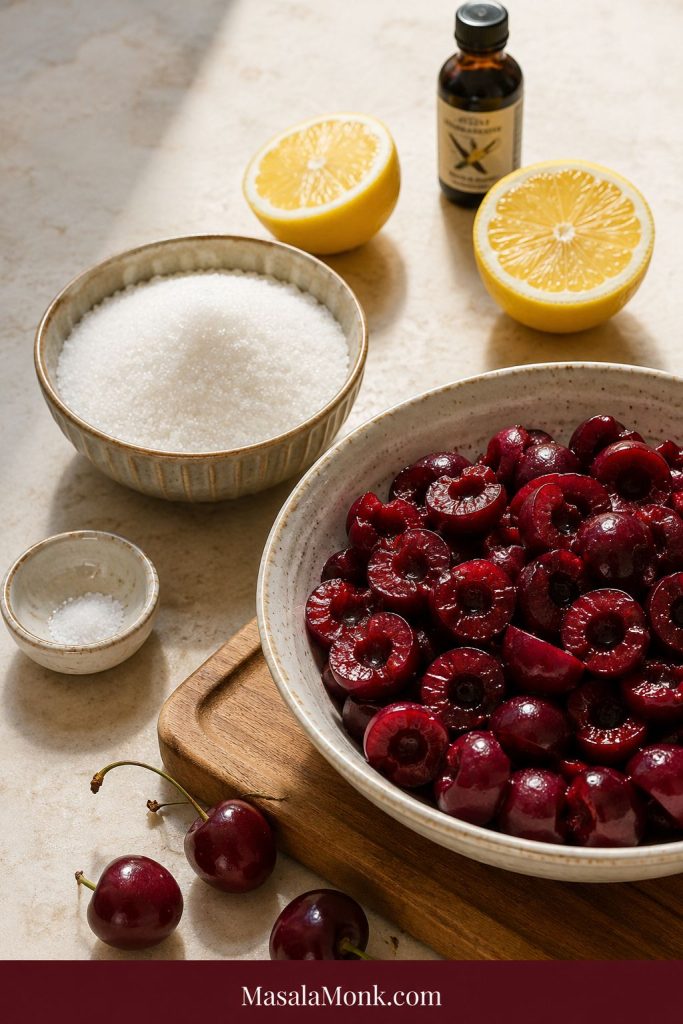
Pitted cherries in a bowl with sugar, lemon halves, salt, and a small flavoring bottle on a light surface.
Cherries give the jam body, sugar helps it thicken, and lemon juice adds the brightness and acidity a no-pectin batch needs.

Whole cherry note: Buy about 600–700 g / 1 1/3–1 1/2 lb whole cherries to get around 500 g / about 3 cups pitted cherries. The exact yield depends on cherry size, pit weight, and how much you trim.

Instructions

  1. Prepare the cherries. Pit the cherries and chop them roughly. Chop smaller for smoother jam or leave some halves for a chunkier preserve-style texture.
  2. Combine. Add cherries, sugar, lemon juice, and salt to a wide heavy-bottomed pan. Stir well.
  3. Rest briefly. Let the cherries sit for 15–30 minutes if you have time. This draws out juice and helps the sugar dissolve.
  4. Heat gently. Cook over medium heat until the sugar dissolves and the cherries release more liquid.
  5. Mash for texture. Use a potato masher or spoon to break down the fruit lightly. For smoother jam, mash more; for chunkier jam, leave more pieces intact.
  6. Boil and reduce. Increase the heat to medium-high and cook, stirring often, until the bubbles become slower, glossier, and heavier.
  7. Test the set. Aim for about 220°F / 104–105°C, then check with a cold plate test. If the cooled sample wrinkles gently and does not run like syrup, it is ready.
  8. Finish the flavor. Turn off the heat. Stir in almond extract or vanilla, if using. Start small, especially with almond extract.
  9. Jar and cool. Rest the jam for 5 minutes, spoon into clean jars, cool, cover, and refrigerate. For longer storage, freeze in freezer-safe containers with a little headspace.

What Success Looks Like

The finished jam should be glossy, deep red, spoonable, and slightly loose while warm. It should not look stiff in the pan. Once cooled, it should thicken into a soft spread that holds on toast but still falls easily from a spoon.

It helps to test on a cold plate even when the thermometer says 220°F, because cherry batches vary. If the spoon trail closes immediately, keep cooking. If it pauses for a second before filling in, you are close.

And if it cools softer than you hoped, you have not wasted the cherries. Reboil it for a thicker set, or use it as a cherry sauce over breakfast and desserts. A loose cherry jar can still be wonderful.

Need visual help before you jar? Jump to Set Tests · check if it is runny or just hot

Why You’ll Love This Cherry Jam

The best part is the first cooled spoonful: deep red, glossy, sweet-tart, and still tasting like cherries. This small batch is not for a huge pantry project. It is for toast tomorrow, yogurt tonight, cheesecake on the weekend, and the quiet satisfaction of saving good cherries before they disappear.

  • Simple ingredients: cherries, sugar, lemon, and optional flavoring.
  • Fresh or frozen cherries both work.
  • A soft, glossy, spreadable set without boxed pectin.
  • Visual cues show when the jam is ready, so you are not relying only on a timer.
  • The small-batch method keeps the process manageable.
  • Clear help is included for loose jam, frozen cherries, pectin, sugar changes, and canning boundaries.
  • Use it as jam, dessert topping, breakfast swirl, cake filling, or cheese board spooning sauce.

In This Guide

The recipe above is the simple path. The guide below is grouped by what you need in the moment.

Make the jam: Why It Works · Ingredients · Equipment · Step-by-Step Cues

Choose your method: Fresh, Frozen, or Canned · Sweet vs Sour · Method Choice · Pectin vs No Pectin · Scaling · Low Sugar

Fix the set: Set Tests · Runny or Just Hot? · Fix Runny Jam · Canning Notes

Use and store: Texture · Adjustments · Variations · Uses · Storage · Mistakes · FAQs · Final Thoughts

Why This Cherry Jam Works

This recipe works because it asks you to watch the jam, not just the timer. Some cherries are juicy, some are firm, some are sweet, and frozen cherries often release more liquid than fresh ones. The clock helps, but the pan tells the truth.

  • A wide pan helps water evaporate. More surface area means the jam thickens faster and tastes fresher.
  • Sugar builds body. It sweetens the fruit, but it also helps with shine, texture, and set.
  • Lemon juice keeps the flavor awake. Sweet cherries especially need acidity so the finished spread does not taste flat.
  • Small batches are easier to control. The fruit cooks down faster and is less likely to set unevenly.
  • Set tests prevent guessing. A thermometer, cold plate, spoon trail, and cooled texture matter more than the exact minute count.

No-pectin jam gives a concentrated, cooked-fruit flavor because it thickens by reduction. Pectin-set jam usually cooks faster and can keep a fresher fruit note, but the texture and sugar formula are more exact.

The same texture-first thinking also helps in a fig jam recipe, where the fruit thickens into a rustic spread instead of a clear jelly.

Ingredients for Cherry Jam

Cherry jam is simple, but it is not random. Each ingredient has a job: cherries bring the fruit, sugar helps the texture and shine, lemon keeps the flavor bright, and a small pinch of salt makes the sweetness taste rounder.

Cherries

Fresh cherries give the best texture, but frozen cherries are often easier and work very well. Sweet cherries make a deep, mellow jam. Sour cherries make a brighter, tangier batch. If using frozen fruit, thaw and drain it first so the extra juice does not stretch the cooking time too far.

Whole Cherries to Pitted Cherries

This yield check is useful before you cook, because cherries lose weight to pits, stems, and trimming.
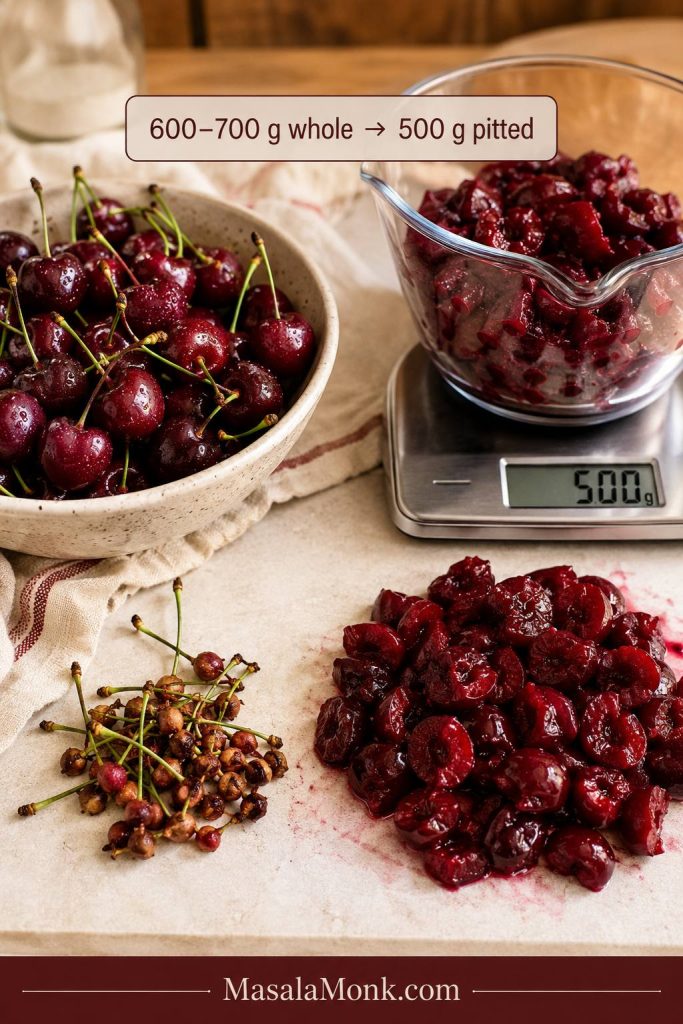
Whole cherries, pitted chopped cherries, cherry pits, stems, and a kitchen scale showing 500 grams.
Before pitting, plan for the weight loss: 600–700 g whole cherries usually gives about 500 g pitted fruit for one small batch.

Bing and other dark sweet cherries make a rich, dark red jam. Rainier cherries can work too, but the color will be lighter and the flavor softer. Sour cherries, tart cherries, pie cherries, and Morello cherries make a brighter spread with more tang and may need slightly more sugar depending on taste. For a broader look at the fruit itself, this guide to the benefits of cherries explains sweet and tart cherries in a more general way.

Sugar

Sugar is not only a sweetener. In jam, it helps the mixture thicken, shine, and hold a spreadable texture. You can reduce it slightly for a softer refrigerated batch, but do not heavily cut sugar in any recipe you plan to can.

Lemon Juice

Lemon juice gives the jam brightness and balance. It is especially important with sweet cherries, which can taste heavy once cooked. For a fridge batch, fresh lemon juice is fine. For canning, follow the tested recipe exactly, especially if it asks for bottled lemon juice.

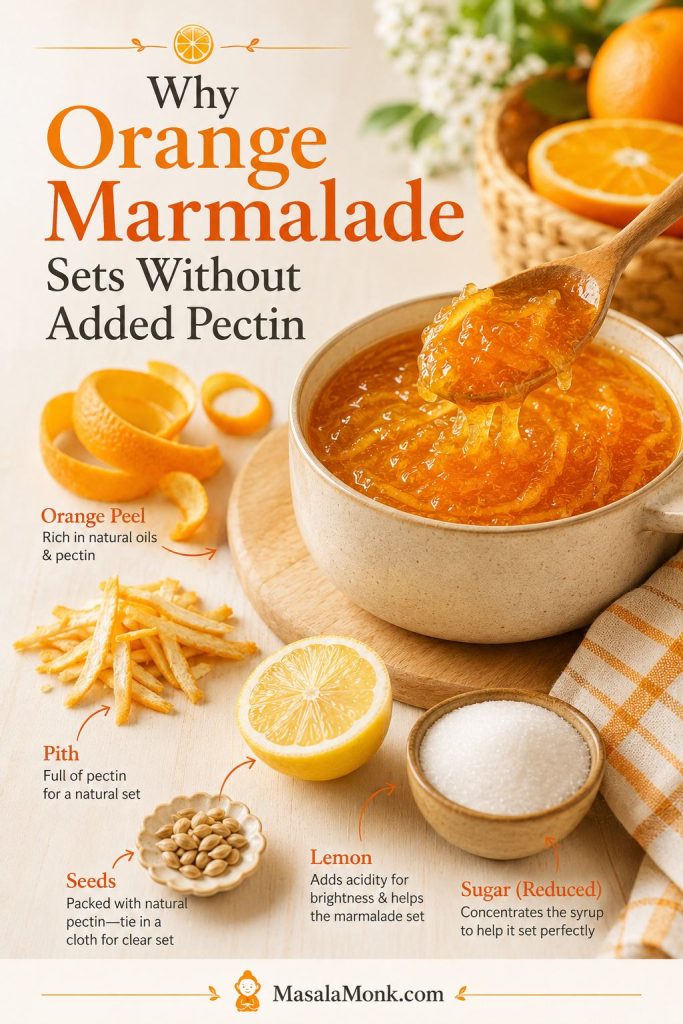
If you enjoy citrusy preserves, the peel-and-acid balance in this orange marmalade recipe is a useful next read.

Salt, Almond, and Vanilla

A small pinch of salt is optional, but useful. It should not make the jam salty; it simply helps the cherry flavor taste fuller. Almond extract gives a classic cherry-almond note, but it can take over quickly, so start with 1/8 teaspoon. Vanilla is gentler and gives the jam a rounder finish.

Equipment You Need

For refrigerator cherry jam, the most important tool is a wide heavy-bottomed pan. It helps extra cherry juice evaporate before the fruit tastes overcooked.

  • Cherry pitter, sturdy straw, or chopstick
  • Wide heavy-bottomed pan
  • Wooden spoon or silicone spatula
  • Potato masher
  • Thermometer, optional but helpful
  • Two chilled plates for set testing
  • Clean jars or freezer-safe containers

No cherry pitter? Push a sturdy straw or chopstick through the stem end and pop the pit out over a bowl. It is slower than a pitter, but it works well for a small batch.

For shelf-stable canning, use a canning-tested recipe and proper water-bath equipment, not just clean storage jars.

How to Make Cherry Jam Step by Step: What to Watch For

Once the cherries are in the pan, the recipe becomes less about exact minutes and more about watching the fruit change. The recipe card gives the practical steps. This section slows them down so you know what to look for.

1. Pit and Chop the Cherries

Remove every pit before cooking. Then chop the cherries roughly. Smaller pieces give a smoother jam that spreads easily. Larger pieces give a chunkier preserve-style texture with visible fruit.

2. Mix With Sugar and Lemon, Then Rest

Add the cherries, sugar, lemon juice, and optional salt to a wide pan. Stir until the cherries are coated. If you have time, let the mixture sit for 15–30 minutes so the fruit releases juice and the sugar begins to dissolve.
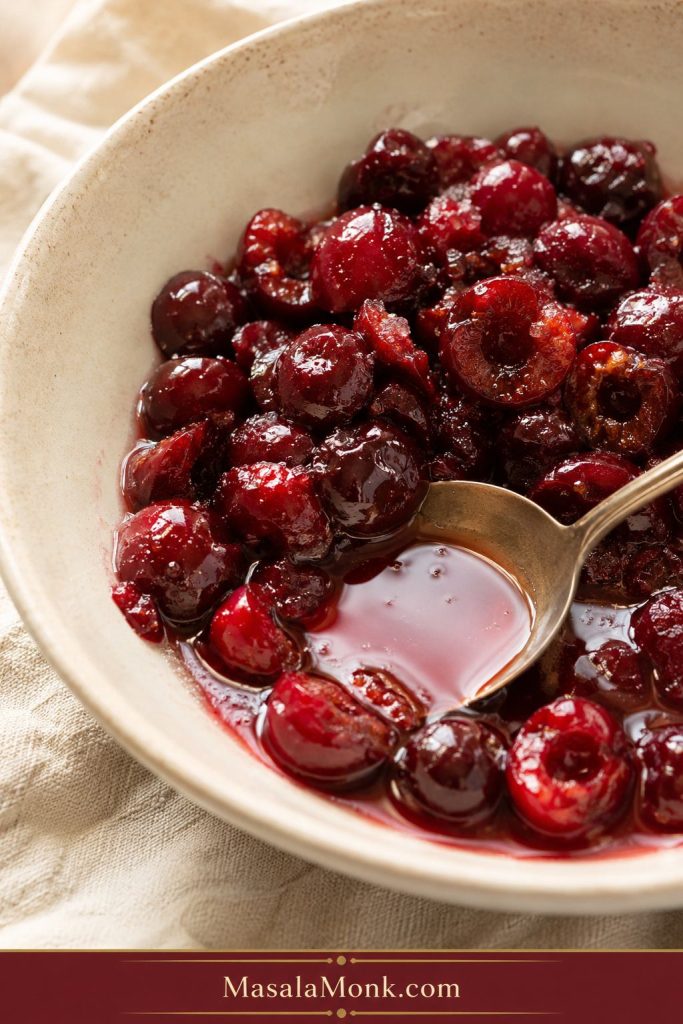
Pitted cherries mixed with sugar and lemon juice in a bowl with red syrup pooling around a spoon.
After resting with sugar and lemon, the cherries release ruby syrup, so the fruit softens more evenly when cooking begins.

3. Start Gently

Cook over medium heat at first. This lets the sugar dissolve without catching on the bottom. Stir often, especially once the mixture starts to bubble and the kitchen begins to smell like warm cherries.
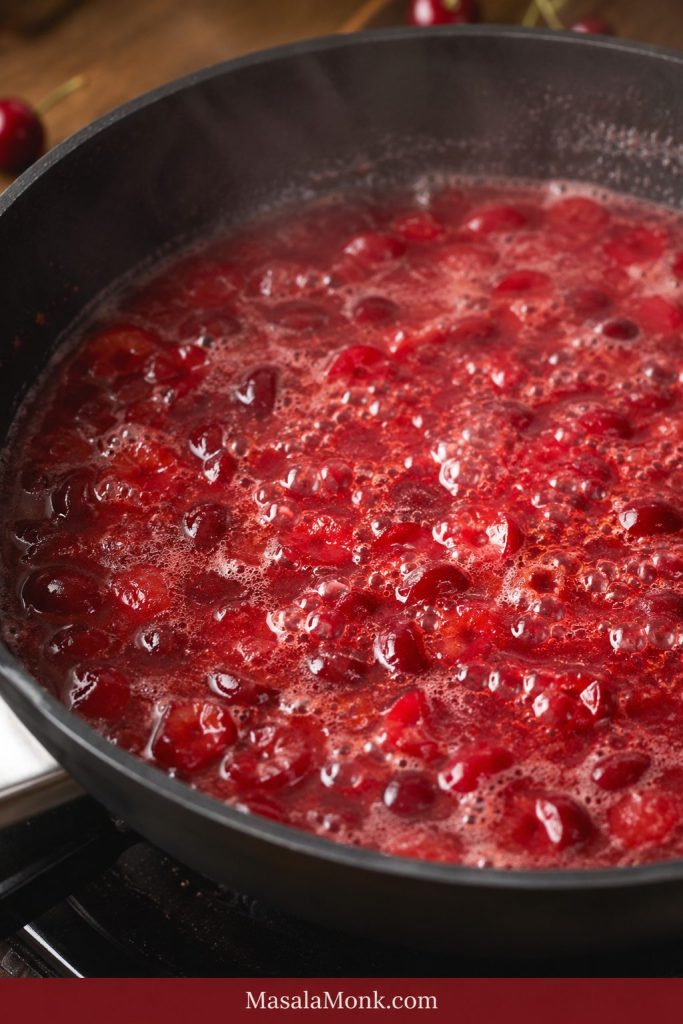
Cherry mixture boiling in a dark pan with thin red liquid, small bubbles, steam, and visible fruit pieces.
At first, the mixture may look thin, foamy, and watery; however, that loose boil is normal before the syrup concentrates.

4. Mash for Texture

When the cherries soften, use a potato masher or spoon to break them down lightly. You do not have to turn them into puree. For a smoother jam, mash more; for a chunkier preserve-style texture, leave some larger fruit pieces.

5. Boil Until Glossy

Increase the heat and let the jam bubble steadily. At first, the bubbles will look thin and watery. As moisture evaporates, they become slower, glossier, and heavier. Stir more often near the end because the sugar is more concentrated. The jam should smell fruity and bright, not caramelized.

A little foam is normal while the jam boils. Stir through it, then skim near the end only if you want a clearer-looking jar.
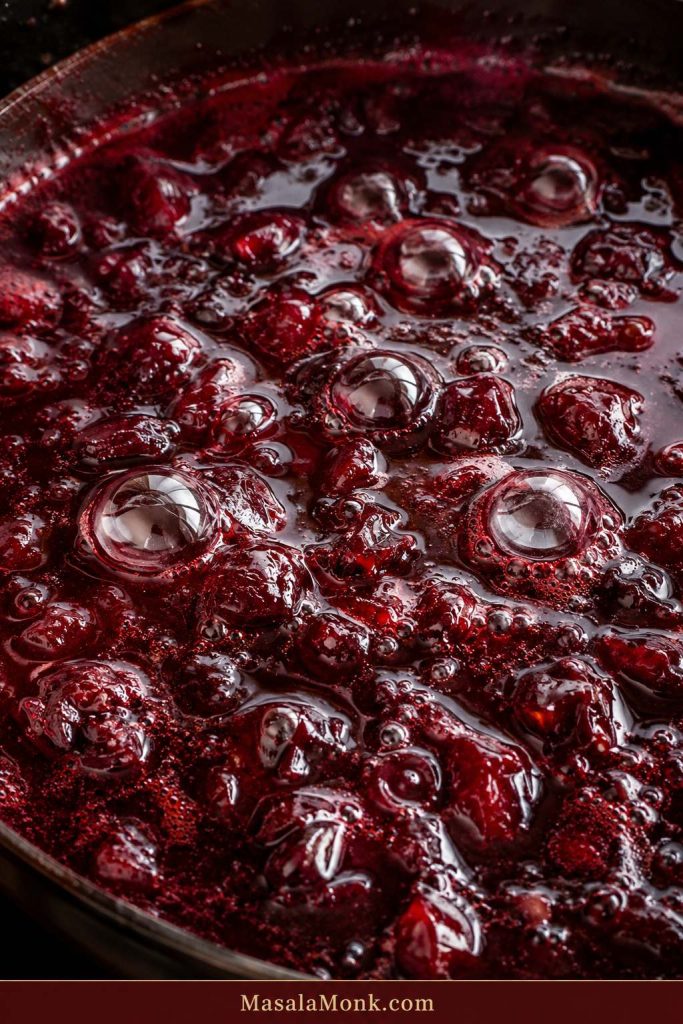
Close-up of thick dark ruby cherry jam bubbling in a pan with shiny syrup and pieces of cherry.
As moisture cooks off, the bubbles slow down and turn glossy, giving you the first clear sign that the jam is close.

6. Test Before You Jar

Do not judge the jam only while it is hot. Hot jam always looks looser than cooled jam. Use a thermometer, cold plate, spoon test, or pan trail test before you stop cooking.

Once the jam starts looking glossy, stop watching the clock and start watching the texture.
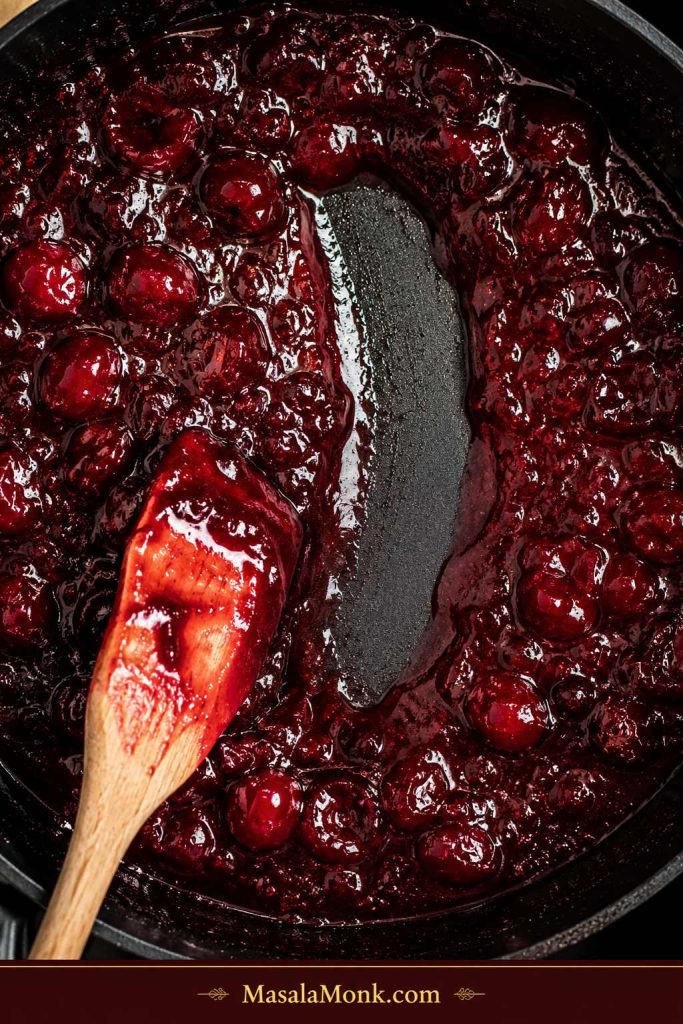
Spoon pulled through thick cherry jam in a dark pan, leaving a clear trail through the jam.
Next, pull a spoon through the pan; if the trail pauses before closing, the texture is ready for the cold plate test.

7. Finish the Flavor

Once the set is right, turn off the heat before adding almond extract or vanilla. Starting with a small amount keeps the cherry flavor in charge.

8. Jar and Cool

Let the jam settle for a few minutes, then spoon it into clean jars. Cool it before covering tightly, then refrigerate or freeze according to the storage notes.

Before you stop cooking: use the set tests · see the cold plate test

Fresh, Frozen, or Canned Cherries: What Works Best?

Frozen cherries work well for jam if you thaw, drain, and add back only enough juice to keep the pan from drying out. Fresh and canned cherries can work too, but they need different handling.

Fresh vs Frozen Cherries for Jam

This visual comparison helps explain why thawed frozen cherries often need drainage before they go into the pan.
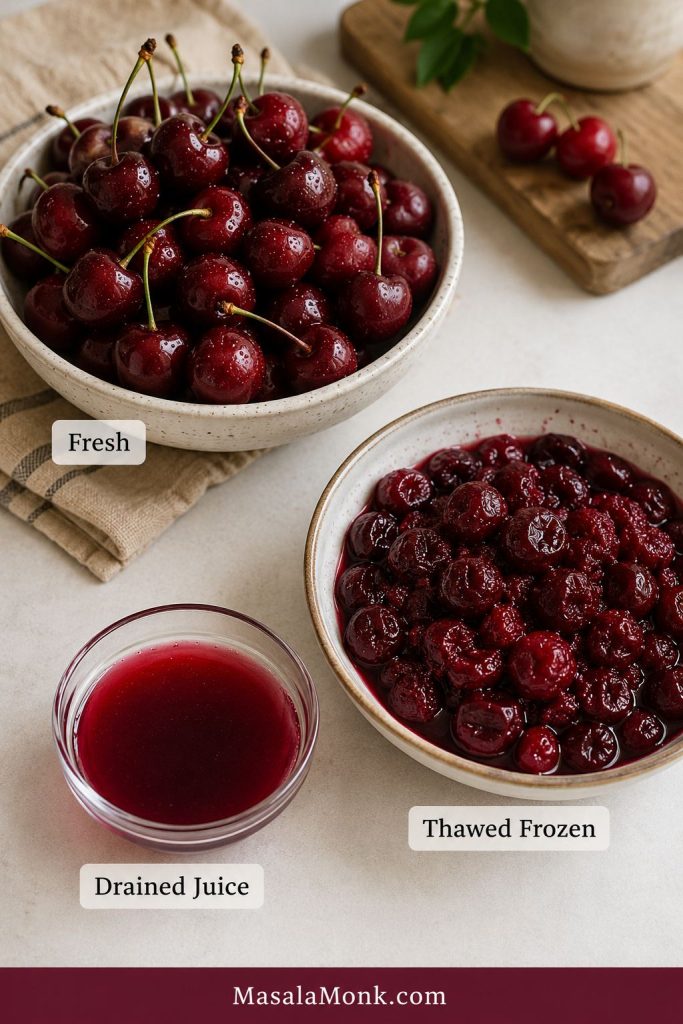
Fresh cherries, thawed frozen cherries, and a small bowl of drained red cherry juice arranged with labels.
Frozen cherries work well, but thawing and draining them first prevents extra juice from stretching the cooking time.
Cherry typeHow to use itWhat to watch
Fresh cherriesPit, chop, and macerate with sugar and lemonBest texture and cleanest fruit flavor
Frozen cherriesThaw, drain, reserve the juice, then cookThey release more water, so cooking may take longer
Canned cherriesDrain well before cookingTexture is softer and flavor depends on syrup or packing liquid
Sour cherriesTaste before adjusting sugar and lemonBright, tart, excellent for jam
Sweet cherriesUse lemon juice for balanceCan taste flat if cooked without enough acidity

How to Make Cherry Jam From Frozen Cherries

Thaw the cherries first, then drain them well. Start the jam with the drained fruit, sugar, and lemon juice. Keep the reserved juice nearby and add back only a splash if the pan looks dry. If you add all the thawed juice at once, the jam may take much longer to thicken.

Frozen cherries are not a problem. They simply bring more water to the pan, so the fix is patience and drainage, not panic. If you are using frozen cherries, notice how much juice they release after thawing; that one detail explains a lot about cook time and final set.

For another quick fridge-friendly fruit spread, this strawberry and apple preserve keeps the same simple, small-batch spirit.

Canned cherry note: Use plain canned cherries packed in juice, water, or syrup, and drain them well. Do not use cherry pie filling as a direct substitute. Pie filling already has sugar, starch or thickener, and flavoring, so it cooks and sets differently from plain cherries.

If frozen cherries made the jam look loose: compare warm vs cooled texture · see the reboil fix

Sweet Cherry Jam vs Sour Cherry Jam

Sweet cherry jam and sour cherry jam have different personalities. Sweet cherries give a dark, mellow, rounded result. Sour cherries, tart cherries, pie cherries, and Morello cherries give a brighter batch with sharper fruit flavor.

If you are using sweet cherries, lemon juice is important because it keeps the jam from tasting heavy. If you are using sour cherries, taste the fruit first. Some need a little more sugar, while others are tart in a way that makes the finished jar more exciting.

Which Cherry Jam Method Should You Use?

The easiest way to avoid confusion is to choose the goal before choosing the method. A fridge jar can be flexible. A pantry jar needs rules.

  • Jam today: use the no-pectin refrigerator recipe.
  • Firmer classic jam: use a pectin method.
  • Less sugar: choose low/no-sugar pectin or a reduced-sugar method.
  • Pantry jars: use a canning-tested recipe.
  • Quick topping: stop softer and use it as cherry sauce.

This is not meant to scare you away from canning. It is meant to keep the two projects separate: a quick cherry jam for the fridge today, and a tested pantry-safe recipe when you want jars for the shelf.

Cherry Jam With Pectin or Without Pectin?

You do not need pectin for soft-set refrigerator cherry jam, but pectin is useful when you want a firmer set, a lower-sugar structure, or a canning-safe formula. Pectin is not cheating; it is just a different kind of jam.

Think of pectin as a different route, not a shortcut. No-pectin jam gives you a soft, reduced-fruit spread. Pectin gives you more structure and predictability, especially when sugar or pantry storage matters.

Pectin types are not casual swaps. Powdered pectin, liquid pectin, and low/no-sugar pectin are built for different methods, and each one has its own sugar, acid, and boiling expectations.

MethodBest forWhat to expect
No pectinSimple small-batch refrigerator or freezer jamSoft, concentrated, fruit-forward
Powdered pectinFirmer jam and many canning formulasMore predictable, but method matters
Liquid pectinSpecific jelly, jam, or freezer jam recipesNot a direct swap for powdered pectin
Low/no-sugar pectinReduced-sugar jamBest route when sugar is reduced heavily

Because cherries are naturally lower in pectin, a no-pectin batch sets mainly by reduction. The water cooks off, the sugar concentrates, the lemon sharpens the flavor, and the mixture thickens into a soft spread as it cools.

What Changes When You Use Pectin?

A classic pectin cherry jam is more exact than this flexible fridge recipe. It usually starts with prepared cherries, lemon juice, and a setting aid. The mixture is brought to a full rolling boil, sugar is added, and then the jam returns to a hard boil for the time stated in the tested recipe or package instructions.

For shelf-stable jars, follow a tested canning source rather than improvising. The National Center for Home Food Preservation’s cherry jam with pectin method uses prepared cherries, powdered pectin, sugar, hot jars, 1/4 inch headspace, and boiling-water processing with altitude guidance.

Changing sugar or storing jars on the shelf? read the low-sugar notes · check the canning boundary

Can You Scale This Cherry Jam Recipe?

The easiest ratio for a small no-pectin cherry jam is about 5 parts pitted cherries to 2 parts sugar by weight, plus enough lemon juice to brighten the fruit and help the mixture behave in the pan.

Batch sizePitted cherriesSugarLemon juiceNotes
Very small test batch250 g / about 1 1/2 cups100 g / about 1/2 cup1 tbsp / 15 mlGood for testing sweetness and set
Standard small batch500 g / about 3 cups200 g / about 1 cup2 tbsp / 30 mlBest starting point for this recipe
Double batch1 kg / about 6 cups400 g / about 2 cups4 tbsp / 60 mlBetter made as two separate batches

For best results, do not begin with the double batch. This jam sets more predictably when the fruit cooks down quickly in a wide pan. Two smaller batches are easier than one overloaded pot.

Choose Your Cherry Jam Texture

Now that the method is clear, texture is the fun part. You can make this jam smoother, chunkier, looser, or thicker depending on how you plan to use it.

  • Smoother jam: chop the cherries small and mash them well as they cook.
  • Chunky jam: leave some cherry halves or larger pieces so the fruit stays visible.
  • Sauce-like topping: stop a little softer and use it over pancakes, yogurt, ice cream, or rice pudding.
  • Preserve-style jar: mash less and let some fruit pieces stay large enough to spoon.
  • Cake filling: cook a little thicker and always confirm the set on a cold plate.

Can You Use This Cherry Jam as Cake Filling?

Yes, but cook it slightly thicker than a spooning sauce and let it cool completely before using. For layer cakes, spread a thin barrier of frosting around the edge of the cake layer before adding jam so it does not slide out. If the jam is very loose, use it as a topping instead of a filling.

Substitutions and Adjustments

Flavor has room to play. Set and storage are less casual. Before you adjust sugar, acid, or pectin, decide where the jar is going to live: refrigerator, freezer, or pantry.

  • Less sugar: works in a modest way for a softer refrigerated jam, but the set will be looser.
  • Honey or maple syrup: possible in small amounts for fridge jam, but the texture and flavor will change.
  • Lime instead of lemon: fine for flavor in a fridge batch, but follow canning-tested recipes exactly for pantry jars.
  • Vanilla or almond: add after cooking, and start small so the cherry flavor stays clear.
  • Double batch: not recommended for your first try. Make two small batches for better control.

How to Know Cherry Jam Is Set

This is the moment most homemade jam goes wrong: the jam looks too loose while it is hot, so you keep boiling, and then it cools into something sticky and overcooked. Cherry jam should leave the pan looking glossy and slightly softer than your final goal.

The easiest way to remember it is the Glossy-and-Wrinkle Method: cook until the bubbles turn slow and glossy, then confirm the set with the cold plate wrinkle test.

If you only remember one thing, remember this: hot jam lies. It moves more freely in the pan than it will after cooling. Give it a proper test before deciding it needs more time.

Glossy-and-Wrinkle Method

This three-part cue keeps the process practical: look for glossy bubbles, check the spoon trail, then confirm the set with a chilled plate.
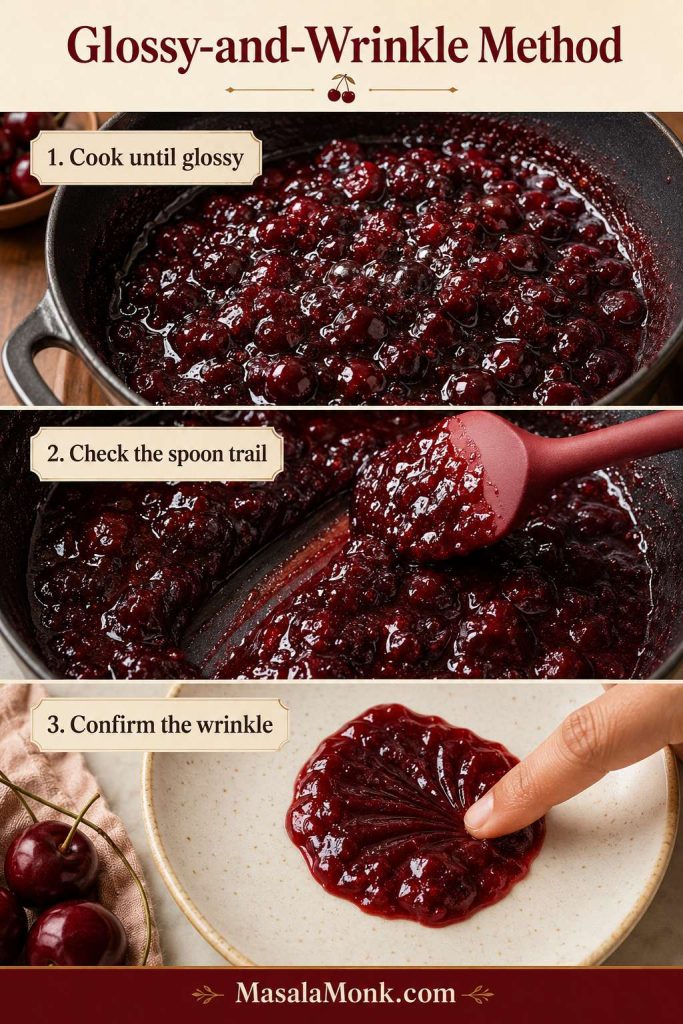
Three-step cherry jam method board showing glossy bubbles, a spoon trail, and jam wrinkling on a plate.
For a reliable no-pectin set, follow the Glossy-and-Wrinkle Method: glossy bubbles, spoon trail, then a cold plate wrinkle.

You Are Close When…

  • The bubbles look slower, heavier, and glossier.
  • The jam looks shiny instead of watery.
  • A spoon trail pauses before closing.
  • A cold plate sample wrinkles gently when pushed.
  • The smell is fruity and bright, not caramelized.

The goal is not to boil the jam into submission. Once it is glossy, heavy-bubbled, and passing the cold plate test, stop.

Set testHow to do itWhat you want
Thermometer testCook until the jam reaches about 220°F / 104–105°CJam is near the setting stage
Cold plate testDrop jam on a chilled plate, wait, then push itThe surface wrinkles slightly and does not run like syrup
Spoon testLift a spoon and let the jam fall backIt falls in thicker drops or sheets instead of thin drips
Pan trail testDrag a spatula through the jamThe trail briefly holds before filling in

Cold Plate Test: Not Ready vs Ready

Use this test after the bubbles turn glossy, because a cooled sample shows the final texture more honestly than the hot pan.
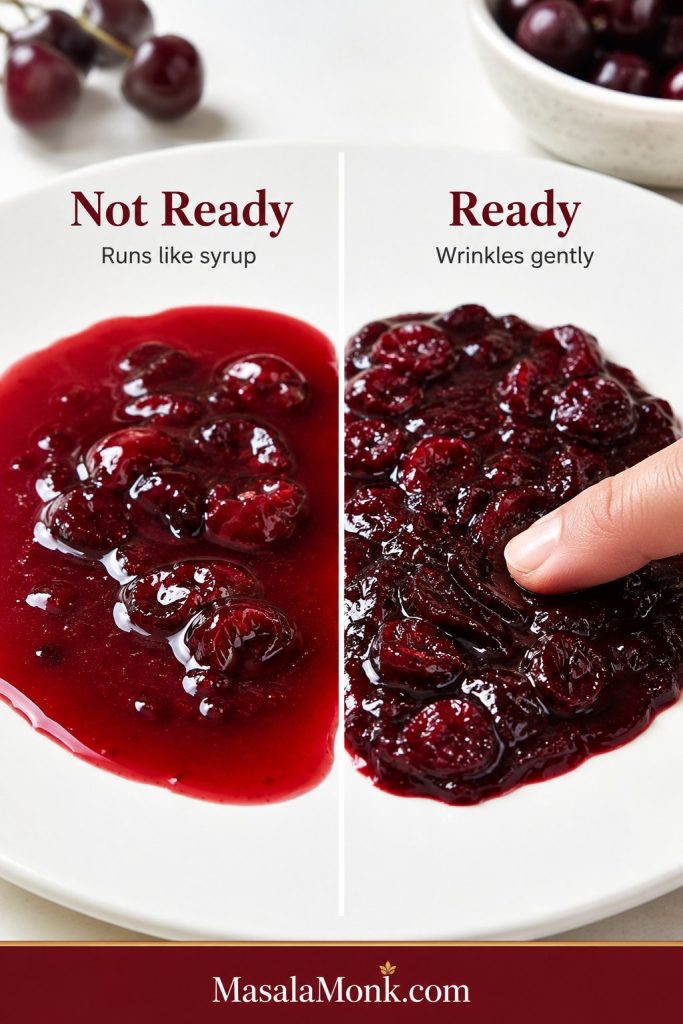
Split comparison of cherry jam on a white plate, with runny jam labeled Not Ready and wrinkled jam labeled Ready.
Finally, the cold plate test gives the clearest answer: syrupy jam needs more time, while a gentle wrinkle means it is ready.

For the cold plate test, keep two small plates in the freezer before you start cooking. When the jam looks close, spoon a little onto a chilled plate, wait 30–60 seconds, then push it. A gentle wrinkle means it is ready. When the sample runs quickly, cook for a few more minutes and test again.

When your first batch sets softer than expected, write down the cook time and texture. The second batch is usually much easier because you already know how your pan and cherries behave.

Still not sure? compare warm and cooled jam · fix a truly runny batch

Is It Actually Runny, or Just Hot?

Before fixing cherry jam, let it cool completely. Warm jam can look thin even when it is going to set. After cooling, check the texture with a spoon.

Warm Jam vs Cooled Jam

This is the check that prevents overcooking: judge a cooled spoonful, not the bubbling jam in the pan.
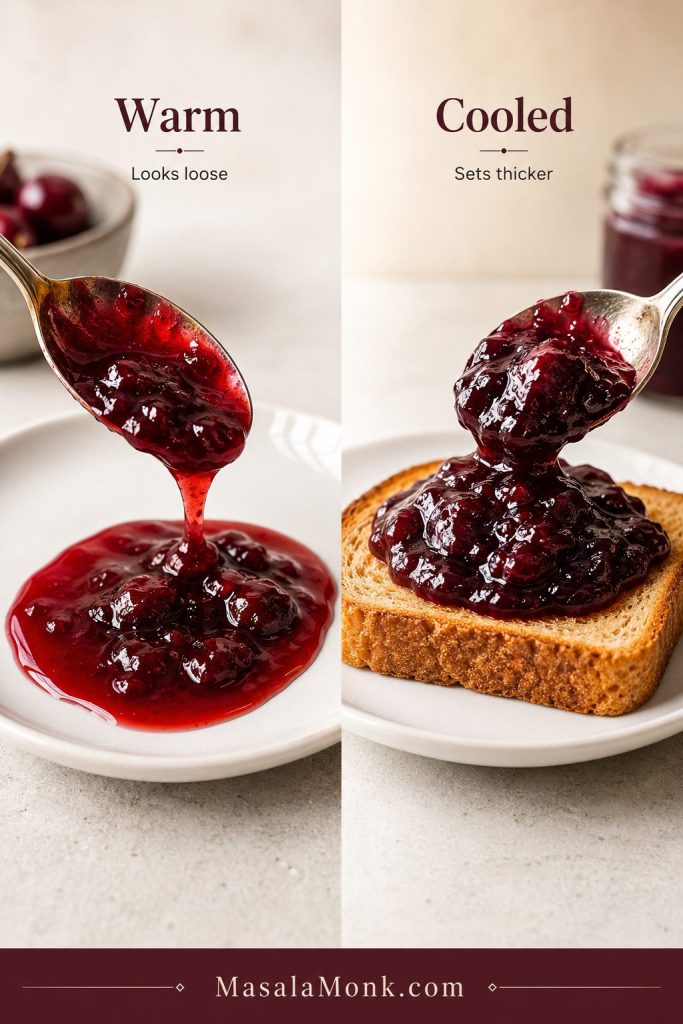
Side-by-side comparison of warm cherry jam dripping from a spoon and cooled cherry jam holding thicker on toast.
Hot jam always looks looser than the finished set, so judge the texture only after a cooled spoonful has thickened.
  • Runs like syrup: it probably needs more cooking.
  • Slowly slides from the spoon: it may be a soft-set jam, not a failed batch.
  • Holds softly on toast: it is set enough for fridge jam.
  • Feels sticky or chewy: it may be overcooked.

Most jam panic happens too early, while the jar is still warm. A soft set is not a mistake. It is the style of this jam.

Why Your Cherry Jam Did Not Set

Cherry jam is usually runny because it was undercooked, made with too much liquid, cooked in too large a batch, reduced too heavily in sugar, or made with the wrong pectin method. Most of the time, the jar is not ruined.

Runny, Soft-Set, or Overcooked?

A visual texture check helps you decide whether the batch needs more cooking, has reached a soft fridge set, or went too far.
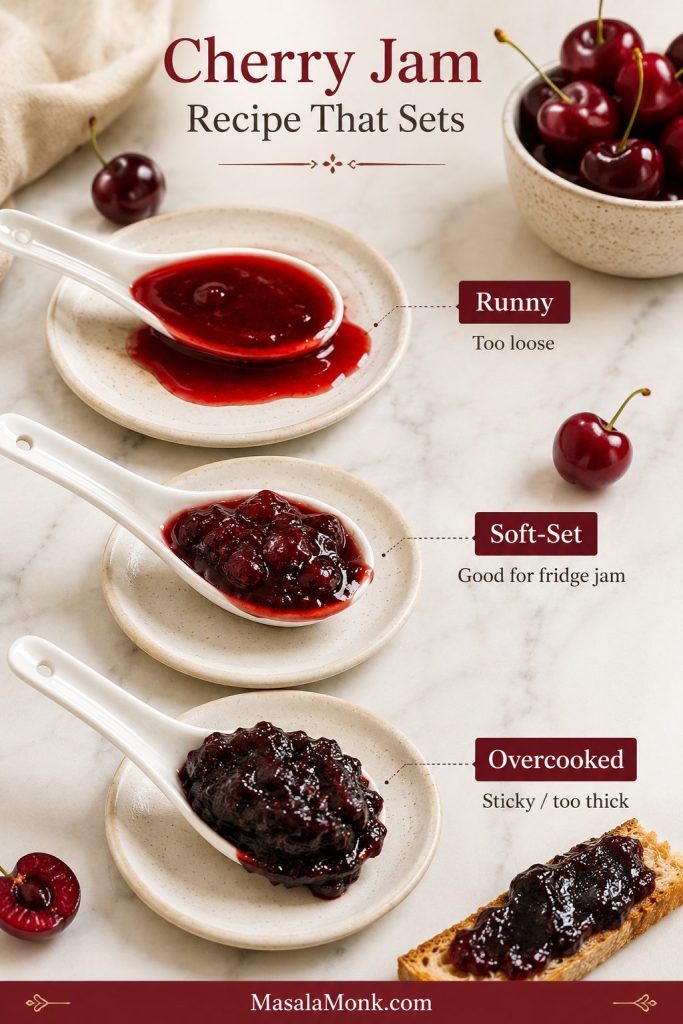
Three labeled cherry jam samples showing runny jam, soft-set jam, and overcooked jam on white spoons.
Soft-set jam should be glossy and spoonable; by contrast, runny jam spreads too fast and overcooked jam turns stiff.
ProblemLikely causeWhat to do nowNext time
Very runnyToo much liquid or undercookingReturn to a wide pan and simmer longerDrain frozen cherries and test the set
Syrupy after coolingDid not reach setting stageReboil and use cold plate testCook to texture, not only time
Weak set with pectinWrong pectin method or old pectinFollow the pectin brand’s remake instructionsUse fresh pectin and exact boil timing
Loose low-sugar jamToo much sugar reductionUse as sauce or remake with low-sugar pectinUse pectin made for reduced sugar
Too thickOvercookingLoosen warm jam with a little hot water or lemon juiceStop when glossy and softly set
Flat flavorNot enough acidAdd lemon juice a teaspoon at a timeUse enough lemon with sweet cherries

How to Fix Runny Cherry Jam

Let the jam cool completely before you fix it. If you used pectin, wait up to 24 hours because some pectin jams continue to set after jarring. If it is still too loose, choose the fix based on the style you made.

For No-Pectin Cherry Jam: Reboil and Retest

Use a wide pan so extra water can evaporate quickly without flattening the cherry flavor.
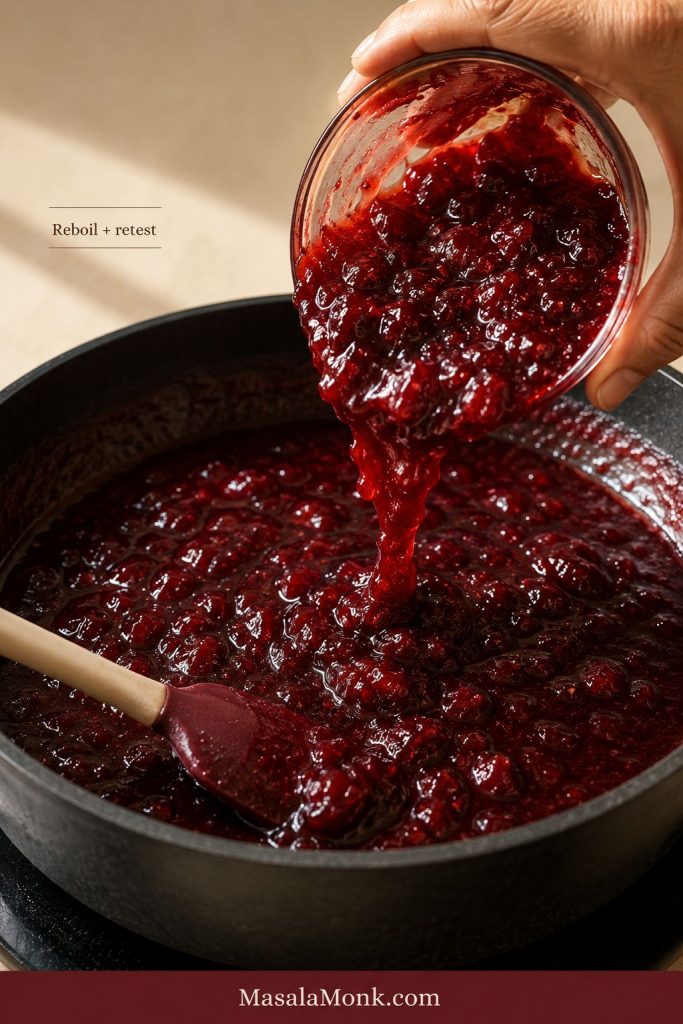
Runny cherry jam being poured from a jar into a wide dark pan with a spatula for reboiling.
If the cooled batch is truly too loose, pour it back into a wide pan, simmer briefly, and retest before the fruit overcooks.
  1. Pour the loose jam back into a wide pan.
  2. Bring it to a steady boil over medium-high heat.
  3. Cook for a few minutes, stirring often.
  4. Test on a chilled plate.
  5. Stop when the jam wrinkles slightly or sheets from the spoon.

Do not boil it endlessly. A longer boil is not always better; sometimes it just cooks away the fresh cherry flavor.

For Pectin Cherry Jam

If you used packaged pectin, follow that pectin brand’s remake instructions. Pectin formulas vary, and adding more pectin without the correct sugar, acid, and boiling method can make the texture gummy or uneven.

For Jam That Will Not Set Firmly

Use it as cherry sauce. This is not a failure if the flavor is good. A loose cherry jam can be better than stiff jam on pancakes, yogurt, ice cream, cheesecake, waffles, oatmeal, and desserts.

Once the texture is right: return to the recipe card · see ways to use cherry jam

Can You Can This Cherry Jam?

The main no-pectin recipe in this post is written for the refrigerator or freezer. It is not a shelf-stable canning recipe.

This does not mean canning is difficult. It only means pantry storage needs a recipe built for pantry storage. The recipe card version is flexible because it stays cold; a pantry recipe has to be exact because it is stored at room temperature.

The difference is the whole formula: sugar level, acid, jar size, headspace, processing time, and altitude. For shelf-stable jars, use a canning-tested cherry jam recipe and follow the exact instructions. The National Center for Home Food Preservation’s cherry jam with pectin method is a better reference point for pantry jars than a flexible fridge-jam recipe.

Fridge Jam vs Pantry Canning

The safest way to think about storage is simple: chilled jars can stay flexible, but pantry jars need a tested process.
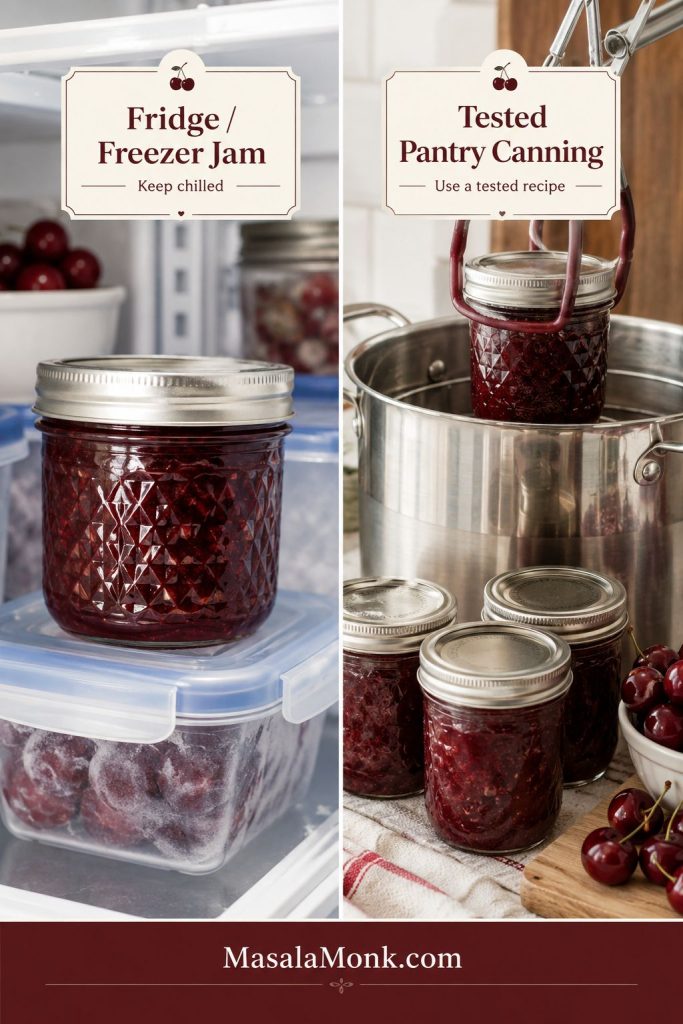
Split image showing cherry jam stored in a refrigerator on one side and jars processed in a water-bath canner on the other.
For safe storage, keep this small-batch jam in the fridge or freezer; shelf-stable jars need a tested canning recipe.

What Changes for Canned Cherry Jam?

  • The recipe usually uses pectin for a reliable set.
  • The sugar level is part of the pantry-safe formula, not just a taste choice.
  • Jam jars need correct headspace, often 1/4 inch / about 6 mm.
  • Filled jars need boiling-water processing for the correct time.
  • Processing time may change with altitude.
  • Jar inversion is not a substitute for proper water-bath processing.
  • Low-sugar canning needs a reduced-sugar canning route or low/no-sugar pectin system.

Think of this as two different goals: a chilled homemade jar today, or a pantry-safe jar for later. Make the recipe card version when you want a quick homemade spread. Use a water-bath canning route when you want pantry jars.

Keeping this as a chilled batch? jump to storage · see serving ideas

Can You Make Low Sugar Cherry Jam?

Low sugar cherry jam can be lovely, especially when the cherries are flavorful. Just do not treat sugar like decoration. Sugar does more than sweeten the fruit; it helps the jam set, shine, and store properly.

Reducing sugar for a fridge jar is a taste choice. Reducing sugar for a pantry jar is a preservation change. That is why low-sugar cherry jam should not come from cutting sugar from a regular recipe at the end.

For a softer refrigerated batch, you can reduce sugar modestly and accept a looser finish. For a more reliable low-sugar set, use pectin designed for low-sugar or no-sugar jam and follow that pectin’s instructions. Oregon State University Extension explains why reduced-sugar fruit spreads need different handling here: Low-Sugar Jams and Jellies.

  • Slightly less sweet fridge jam: reduce sugar modestly and expect a softer set.
  • Firm low-sugar jam: use low/no-sugar pectin.
  • Sugar-free jam: use a tested sugar-free pectin method.
  • Low-sugar canned jam: use a canning-safe recipe designed for reduced sugar.

Cherry Freezer Jam Is Different

Freezer jam is its own style, not just cooked jam stored cold. It often uses fresh crushed fruit, sugar, and pectin, then sets in the fridge or freezer without water-bath processing. It is fresh-tasting and easy, but it still belongs in the freezer or refrigerator, not the pantry.

Cherry Jam, Jelly, Preserves, Compote, and Chia Jam

If you are comparing cherry jam with jelly, preserves, compote, or chia jam, here is the quick difference.

NameWhat it meansTexture
Cherry jamChopped or crushed cherries cooked with sugarSpreadable with fruit texture
Cherry preservesLarger cherry pieces in syrupy jamChunkier and fruitier
Cherry jellyStrained cherry juice set with sugar and pectinClear and smooth
Cherry compoteFruit cooked briefly with sugar or syrupLoose sauce
Cherry chia jamQuick fridge spread thickened with chia seedsSoft and seedy

If you want fruit pieces, make cherry jam or preserves. If you want a clear, smooth spread, cherry jelly is the better recipe. If you only need a quick topping, compote or chia jam may be enough.

Cherry Jam Flavor Variations

Plain cherry jam is the best first batch because it teaches you the set and sweetness. After that, small flavor changes can make the same base recipe feel completely different.

  • Vanilla cherry jam: add 1 teaspoon vanilla extract after cooking.
  • Cherry almond jam: add 1/8 to 1/4 teaspoon almond extract at the end.
  • Amaretto cherry jam: stir in a small splash of amaretto after cooking for a dessert-style jam.
  • Black forest cherry jam: pair cherry jam with chocolate desserts instead of adding too much cocoa to the jar.
  • Lemon cherry jam: add lemon zest for a brighter finish.
  • Jalapeño cherry jam: add finely chopped jalapeño for a sweet-savory cheese board jam.
  • Mixed berry cherry jam: replace part of the cherries with raspberries, strawberries, or blueberries.
  • Rhubarb cherry jam: add tart rhubarb for a sharper preserve.

When adding extracts, start small. Cherry jam has a delicate fruit flavor, and almond or alcohol-based flavors can take over quickly. If you want the chocolate-cherry direction, pair the jam with chocolate cream cheese frosting instead of adding too much cocoa to the jar.

How to Use Cherry Jam

A spoonful of cherry jam can make a plain breakfast feel like something you planned. It is especially good anywhere you want a dark, sweet-tart spoonful against something creamy, buttery, or crisp.

Serving Ideas for Cherry Jam

The best uses pair the jam with creamy, buttery, or lightly crisp foods so the cherry flavor stays bright.
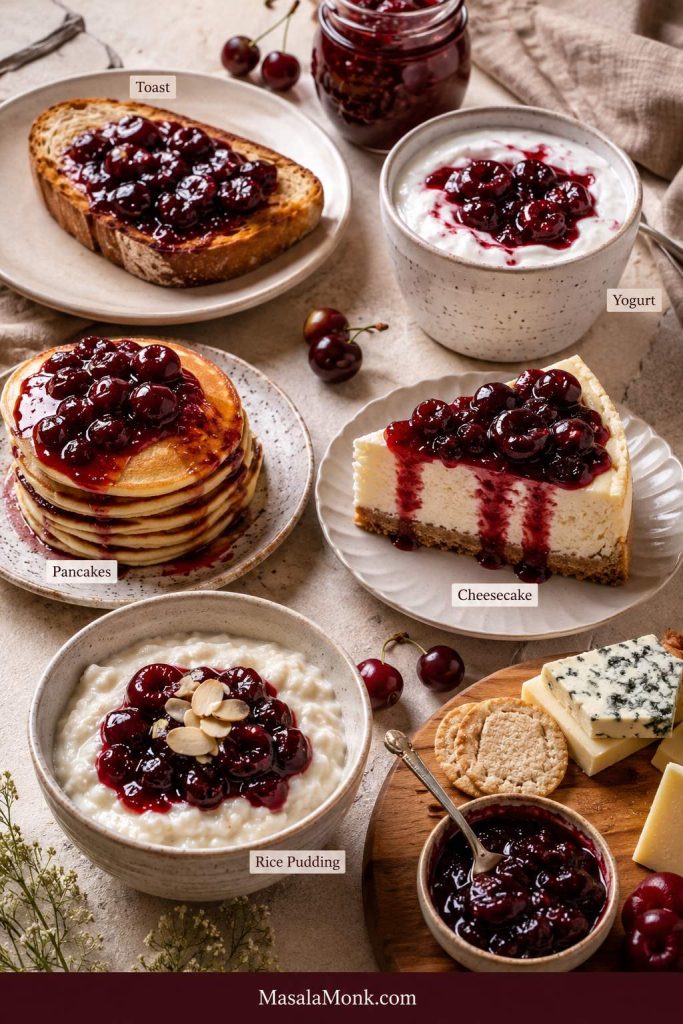
Cherry jam served with toast, yogurt, pancakes, cheesecake, rice pudding, and a small cheese board.
Once set, the jam adds a bright fruit finish to toast, yogurt, pancakes, cheesecake, rice pudding, and cheese boards.
  • Spread on toast, sourdough, biscuits, croissants, or English muffins.
  • Spoon over protein-rich cherry pancakes for a double-cherry breakfast.
  • Swirl a spoonful into overnight oats for a cherry-yogurt breakfast jar.
  • Spoon it over a no bake cheesecake for an easy cherry cheesecake topping.
  • Spread between cake layers with whipped cream, buttercream, or cream cheese frosting.
  • Fill thumbprint cookies, sandwich cookies, hand pies, or pastries.
  • Serve with brie, cream cheese, goat cheese, or a cheese board.
  • Warm slightly and brush over chicken, pork, or ham as a glaze.
  • Spoon a loose batch over rice pudding with cooked rice, vanilla ice cream, or pound cake.

How to Store Cherry Jam

Once the jar is cool, the storage choice matters more than the jar itself. A refrigerated jam, freezer jam, and properly canned jam should not be treated the same way.

Storage methodHow longNotes
Refrigerator2–3 weeksBest for the no-pectin recipe in this post
FreezerUp to 3 monthsUse freezer-safe containers and leave headspace
Properly canned jarsFollow tested canning guidanceOnly for correctly processed shelf-stable recipes
Opened canned jarRefrigerate after openingUse as you would regular jam

Always use clean utensils when scooping jam from the jar. If jam smells fermented, grows mold, becomes fizzy, or looks unusual, discard it.

Common Cherry Jam Mistakes to Avoid

Most cherry jam problems come from the same few moments: too much liquid, not enough testing, too much heat, or treating a fridge jar like a pantry jar. Watch for these and the whole batch becomes much easier to control.

  • Using a deep narrow pot. A wide pan helps extra water evaporate faster.
  • Skipping lemon juice with sweet cherries. Sweet cherries need acidity for a brighter flavor.
  • Adding all the thawed frozen cherry juice. Too much liquid makes the jam take longer to set.
  • Using cherry pie filling as the fruit. Pie filling already contains sugar and thickeners, so it is not the same as plain cherries.
  • Reducing sugar randomly. Sugar affects texture, shine, set, and storage.
  • Doubling the batch without adjusting technique. Larger batches take longer to reach the setting stage.
  • Boiling too long. Overcooked jam can become sticky, dull, and too firm.
  • Judging set while hot. Jam thickens as it cools.
  • Using expired pectin. Old pectin can lead to a weak set.
  • Swapping pectin types without checking the method. Powdered, liquid, and low/no-sugar pectin behave differently.
  • Treating cold-storage jam like pantry jam. Fridge and freezer jams stay chilled; shelf-stable jars need a canning-tested method.

Cherry Jam Recipe FAQ

Why is my cherry jam runny?

Cherry jam is usually runny because it was undercooked, made with too much liquid, cooked in too large a batch, reduced too heavily in sugar, or made with the wrong pectin method. Let the jam cool fully before deciding it failed, because jam thickens as it cools.

Does cherry jam need pectin?

No. Cherry jam does not need pectin for a soft refrigerator set, but pectin helps when you want a firmer jam, reduced-sugar structure, or pantry-safe canning recipe. For the no-pectin version here, cook the fruit down properly and test it on a cold plate.

What cherries are best for jam?

Sweet cherries make a deep, mellow jam, while sour cherries make a brighter and tangier jam. Bing cherries, dark sweet cherries, tart cherries, pie cherries, and Morello cherries can all work. Rainier cherries are fine too, but the jam will be lighter in color and softer in flavor.

How many cherries do I need for this recipe?

You need 500 g / about 3 cups pitted cherries for this recipe. Start with about 600–700 g / 1 1/3–1 1/2 lb whole cherries to allow for the pits and stems.

Do frozen cherries work for cherry jam?

Yes. Frozen cherries work well for cherry jam if you thaw and drain them first, then add back only a splash of reserved juice if the pan looks dry. They often release more liquid than fresh cherries, so the jam may take a little longer to thicken.

Can I make cherry jam with canned cherries?

Yes, but use plain canned cherries and drain them well before cooking. Cherries packed in syrup, juice, or water can work, but cherry pie filling is not a direct substitute because it already contains sugar, thickeners, and flavoring.

How much sugar do I need for cherry jam?

For the no-pectin fridge jam in this post, use 200 g / about 1 cup sugar for 500 g / about 3 cups pitted cherries. That gives a balanced soft-to-medium set. Less sugar can work for a softer fridge jam, but the texture will be looser. Pectin canning recipes often use more sugar because the sugar level is part of the formula.

Is lemon juice necessary in cherry jam?

Lemon juice is strongly recommended, especially with sweet cherries. It brightens the flavor and helps the jam set better. Without lemon, sweet cherry jam can taste flat or overly heavy after cooking.

What temperature should cherry jam reach?

Cherry jam usually sets around 220°F / 104–105°C. At higher altitudes, the setting point may be closer to about 8°F above your local boiling point of water. Temperature is helpful, but it should be used with a cold plate test instead of replacing it.

Can this cherry jam recipe be canned?

The main no-pectin recipe is for refrigerator or freezer storage. For shelf-stable pantry jars, use a canning-safe recipe with proper boiling-water processing, correct headspace, and altitude adjustments.

Is low-sugar cherry jam safe for canning?

Only when the recipe is designed for that. Low-sugar cherry jam can be canned when you use a tested reduced-sugar canning recipe or a low/no-sugar pectin method designed for canning. Do not simply cut sugar from a traditional recipe and store the jars in the pantry.

What is the difference between cherry jam and cherry jelly?

Cherry jam is made with chopped or crushed cherries, so it has fruit texture. Cherry jelly is made from strained cherry juice, so it is smooth and clear. Jelly usually needs a different method and often uses pectin for a firm set.

Can I make cherry jam without a thermometer?

Yes. Use the cold plate test. Place a small plate in the freezer before cooking, spoon a little jam onto it, wait briefly, then push the jam with your finger. If it wrinkles and does not run like syrup, the jam is ready.

Can I double this cherry jam recipe?

It is better to make two small batches instead of one large batch. Small batches cook faster, evaporate more evenly, and are easier to set. Large batches can stay watery longer and may overcook before they thicken properly.

Did you make this with sweet cherries, sour cherries, or frozen cherries? Tell us which one you used, whether you used pectin, and whether your jam set soft, medium, or firm. Your note can help the next person decide how long to cook their batch.

Final Thoughts

That is the real point of jam: catching fruit at its best and giving it a second life in a jar. A good cherry jam does not have to be perfect like store-bought jelly. It should taste bright, look glossy, spread easily, and remind you why cherries were worth saving in the first place.
Posted on Leave a comment

Orange Marmalade Recipe: Easy, Bright, No Boxed Pectin

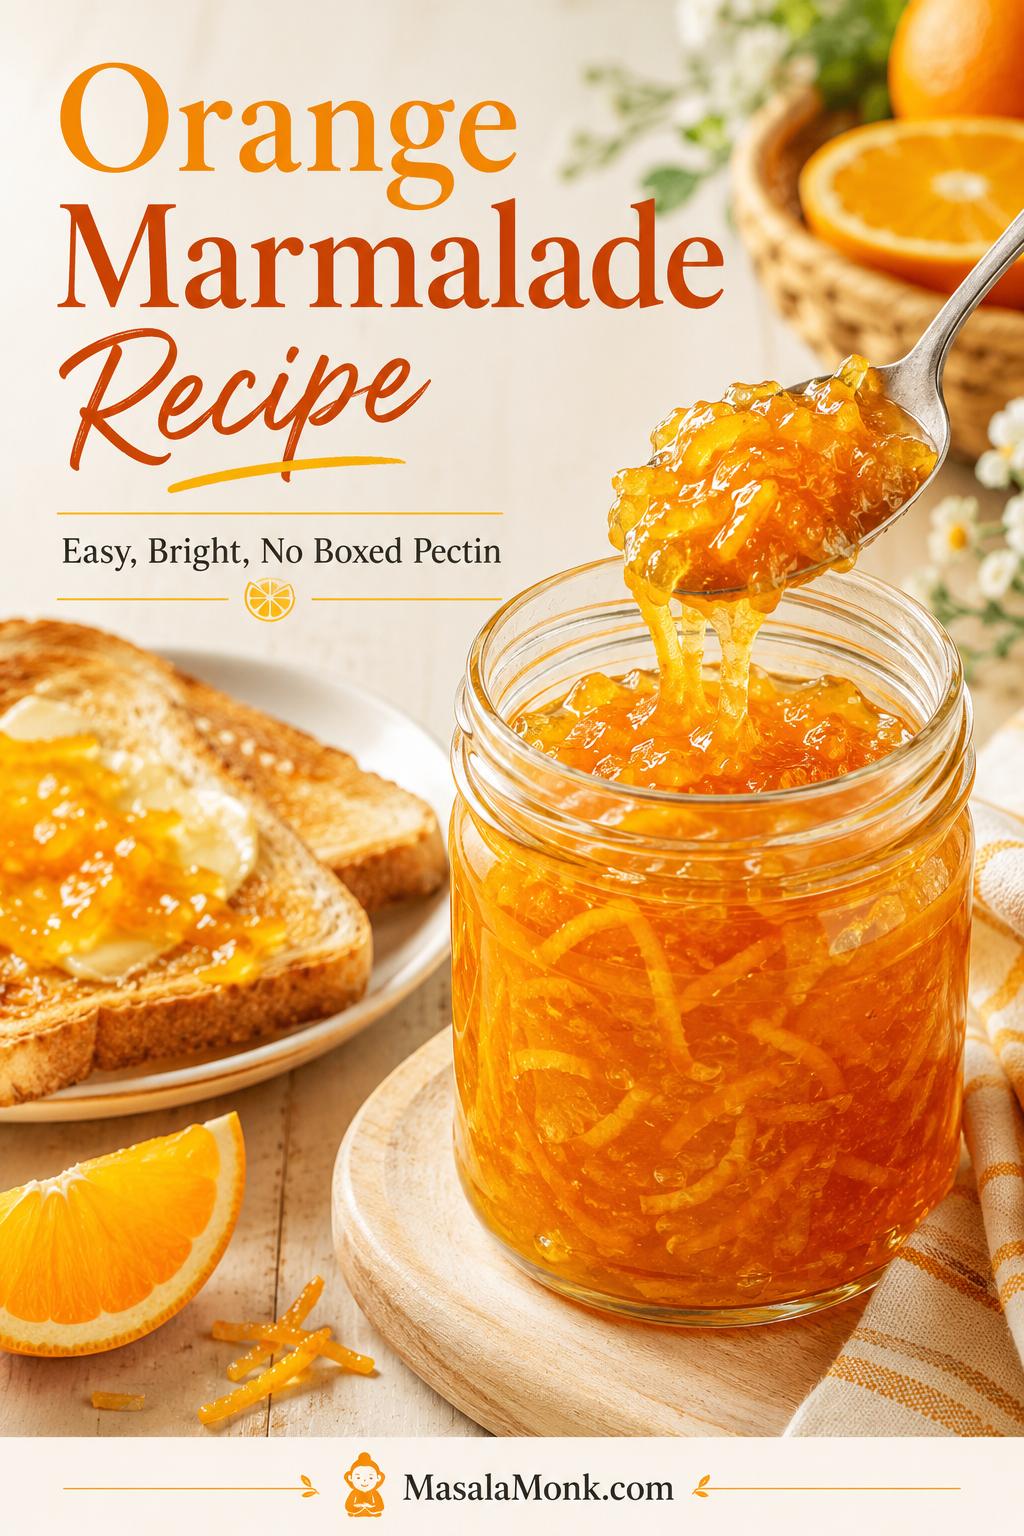
Clear glass jar of homemade orange marmalade with visible peel, a spoon lifting marmalade, buttered toast, and fresh oranges on a warm kitchen surface.

Orange marmalade sounds simple until you make it for the first time. Then the questions arrive all at once: how much peel should stay in, why does it taste bitter, does it need pectin, how do you know it has set, and what happens if it is still runny after cooling?

But a good batch is worth the small bit of patience. It makes the kitchen smell like orange peel and warm sugar, turns plain toast into something golden and deliberate, and gives you a jar that can brighten cakes, glazes, yogurt, cheese boards, and sauces for weeks.

This is not a giant traditional Seville marmalade project. It is a practical orange marmalade recipe for regular sweet oranges: real orange peel that softens instead of turning chewy, balanced bitterness, no boxed pectin, and a soft fridge/freezer set you can actually use.

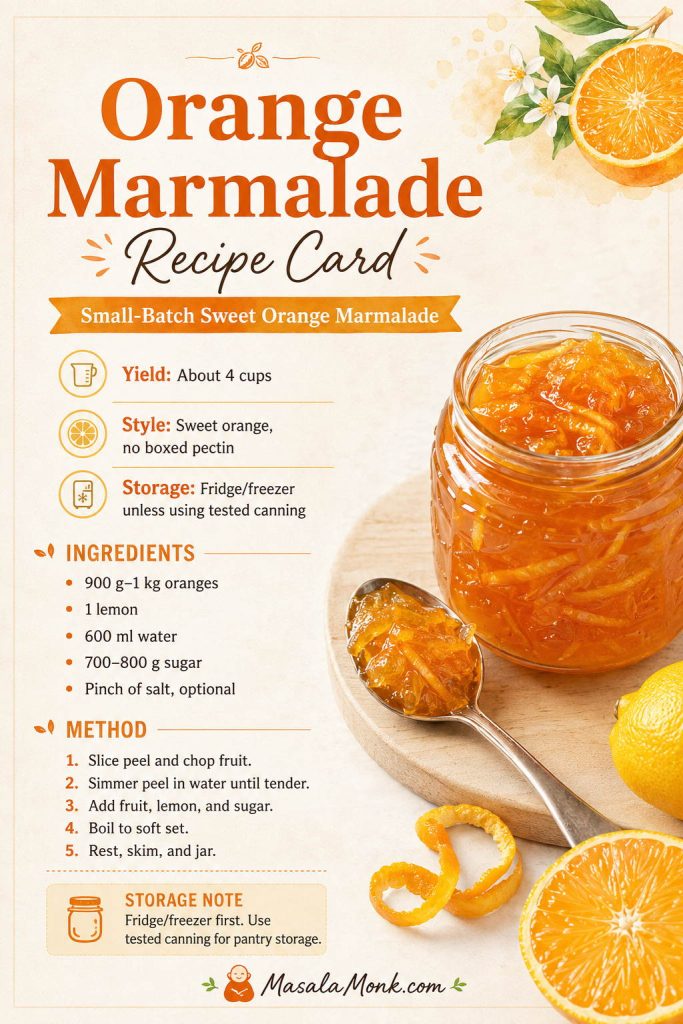
The method is built for the kind of jar you want to open again: bright citrus, delicate peel, enough bittersweet edge to taste like marmalade, and a set that spreads instead of bouncing like jelly. The working formula is 900 g to 1 kg oranges, 1 lemon, 600 ml water, and 700 to 800 g sugar for about 4 cups of fridge/freezer marmalade.

Quick Answer: How Do You Make Orange Marmalade?

To make orange marmalade, scrub the oranges, slice the peel, simmer the peel in water until it gives easily, then add chopped orange flesh, lemon juice, and sugar. Boil the mixture at an active bubble until the syrup turns glossy and thick enough to pass the cold-plate test.

This is an orange peel marmalade, not a smooth orange jam: the peel is sliced, softened, and suspended in the final jar. You still get real marmalade texture, but the peel is cooked gently first so it tastes balanced instead of harsh.

No added pectin is required. The set comes from citrus peel, lemon, sugar, and reduction, with the cold plate showing you when the hot syrup will cool into a soft spread.

What Good Orange Marmalade Texture Looks Like

Use this visual before the first batch: it shows the difference between a loose orange syrup and a preserve with peel held through the body of the marmalade.

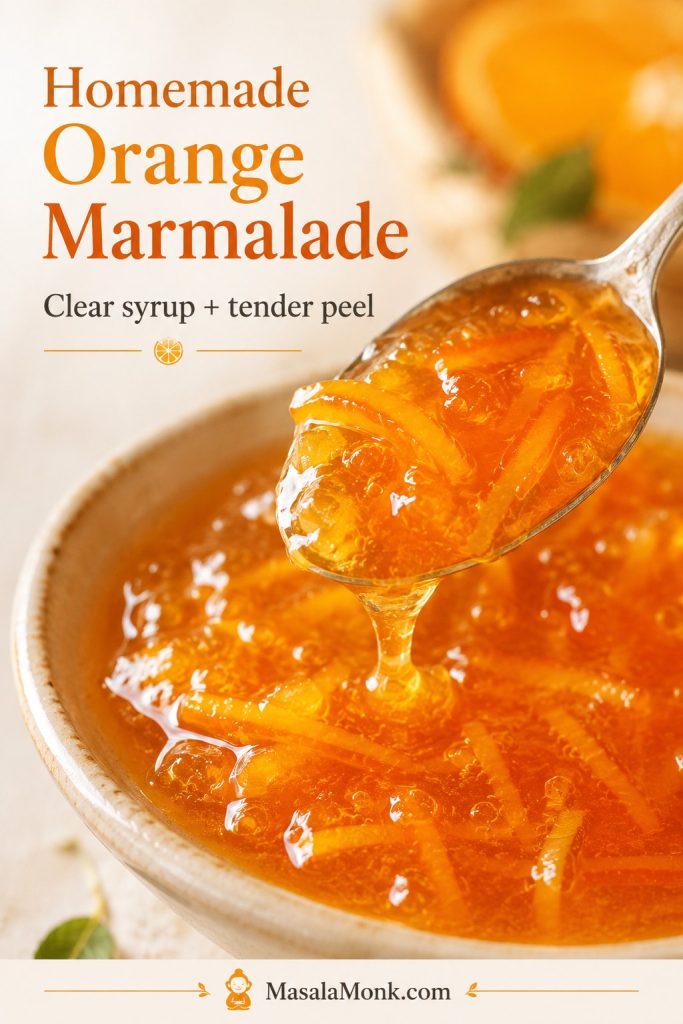
Close-up spoonful of orange marmalade showing clear amber syrup, tender orange peel strips, and a glossy spoonable texture.
Before you cook, notice the texture target. Good orange marmalade should look clear and glossy, with tender peel suspended through the syrup instead of floating in watery liquid.

At a Glance

Best forBeginners who want tender peel, bright citrus, and a soft set
Batch styleFridge/freezer marmalade, about 4 cups
Main fruitRegular sweet oranges, preferably thin-skinned
PectinNo added pectin in the main recipe
TextureSpoonable, glossy, with tender orange peel
Best testCold-plate wrinkle test
StorageRefrigerator or freezer by default
CanningUse a preservation-tested method for shelf-stable jars

This Recipe Is Best If…

Choose this version if you want one manageable fridge/freezer batch made with regular sweet oranges, real peel, no boxed pectin, and a soft set that spreads easily. For pantry canning, sugar-free marmalade, Seville-only marmalade, or smooth orange jam, use a method written for that style.

What Is Orange Marmalade?

Orange marmalade is a citrus preserve made with orange peel, orange pulp or juice, sugar, and water. The peel is the personality of marmalade: it brings texture, bitterness, aroma, and natural pectin support.

A good jar should be sweet, bright, glossy, and a little bitter. It should spread easily, but it should not run off toast like syrup. Orange juice alone makes more of a jelly-style base; marmalade needs peel to feel like marmalade.

At the table, it should make breakfast feel less automatic: bitter enough to wake up the butter, bright enough to cut through cream, and soft enough to drag across toast without tearing it.

Orange Marmalade vs Orange Jam

The simplest difference is peel. Orange marmalade includes citrus peel, while orange jam is usually smoother, sweeter, and less peel-forward. If you remove almost all the peel or blend the mixture until completely smooth, the result may still taste delicious, but it will feel closer to orange jam than classic marmalade.

If peel is the reason you avoid marmalade, do not start with thick-cut. Start with a fine shred. You may find you like marmalade more when the peel is tender, delicate, and spreadable rather than chunky and chewy.

Ingredients and Equipment for Homemade Orange Marmalade

Core Ingredients and What They Do

Start here if you want the recipe to make sense before you cook. These few ingredients control flavor, peel tenderness, natural set, and storage style.

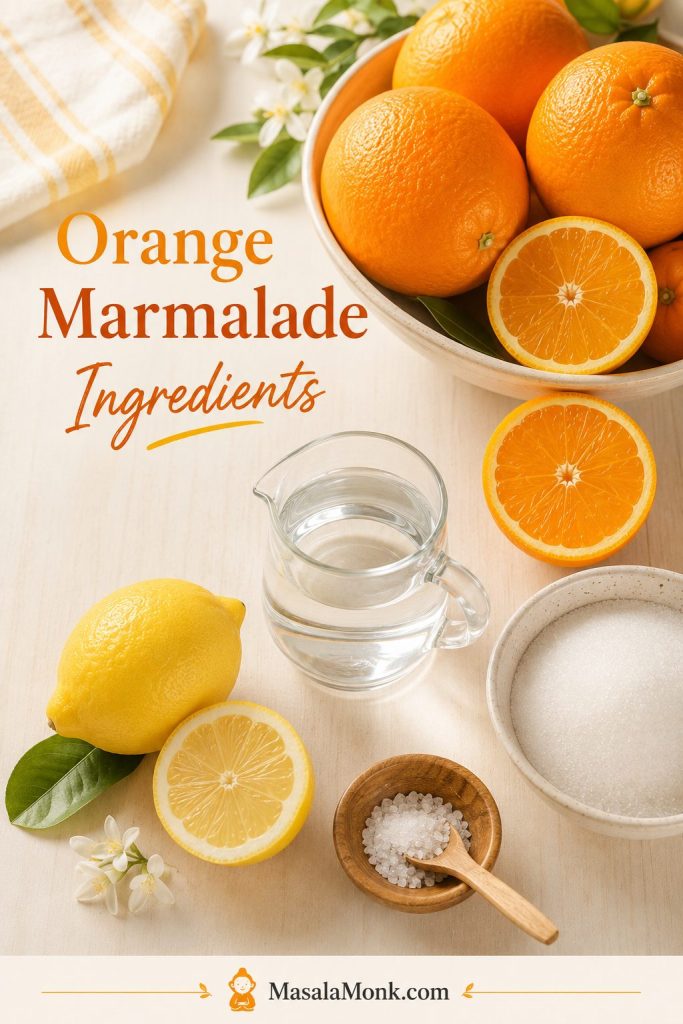
Oranges, lemon, sugar, water, and a small bowl of salt arranged on a light surface for making orange marmalade.
Because this orange marmalade recipe uses only a few ingredients, each one matters: oranges bring peel and flavor, lemon supports acidity, and sugar gives the preserve body.

Marmalade does not hide behind many ingredients. If the oranges are fragrant, the lemon is bright, and the peel is soft before the sugar goes in, the jar tastes alive.

The oranges bring flavor, peel, juice, and natural citrus pectin. Lemon is not just for flavor; its acidity helps that pectin work. Sugar gives the marmalade body, gloss, and keeping power. Water buys the peel time to soften before the syrup starts tightening.

IngredientAmount for this recipeWhy it matters
Regular sweet oranges900 g to 1 kg / about 2 to 2.2 lbProvide the citrus flavor, peel texture, juice, and natural pectin base.
Lemon1 medium lemon, juiced, about 2 to 3 tablespoons / 30 to 45 mlAdds brightness and acidity, which helps the natural pectin work.
Water600 ml / 2 1/2 cups, plus more if neededSoftens the peel before sugar is added and prevents scorching early on.
Sugar700 to 800 g / about 3 1/2 to 4 cupsSweetens, supports set, gives gloss, and improves keeping quality.
SaltA tiny pinch, optionalRounds the sweetness and makes the citrus taste brighter.

Sugar, Set, and Low-Sugar Boundaries

Which sugar amount should you choose? Use 700 g for a brighter, softer refrigerator marmalade. Use 800 g for a firmer, more classic set. If you reduce the sugar heavily in this natural-pectin recipe, expect a softer, shorter-keeping marmalade.

Sugar substitutes do not behave like sugar in regular marmalade. They may sweeten the fruit, but they do not provide the same set, gloss, or preservation. For very low-sugar or sugar-free marmalade, use a method designed for that style rather than simply swapping the sugar here.

Equipment You’ll Need

You do not need a professional preserving setup for this refrigerator marmalade. A few basics are enough: a digital scale, a large deep non-reactive pot, a sharp knife and board, two small freezer-safe plates for the cold-plate set test, and clean jars. A thermometer is helpful but optional; cheesecloth or muslin is only needed if you want to simmer seeds for extra natural pectin support.

For pantry storage, use proper water-bath canning equipment and a preservation-tested recipe. This main recipe is written first as a refrigerator or freezer marmalade.

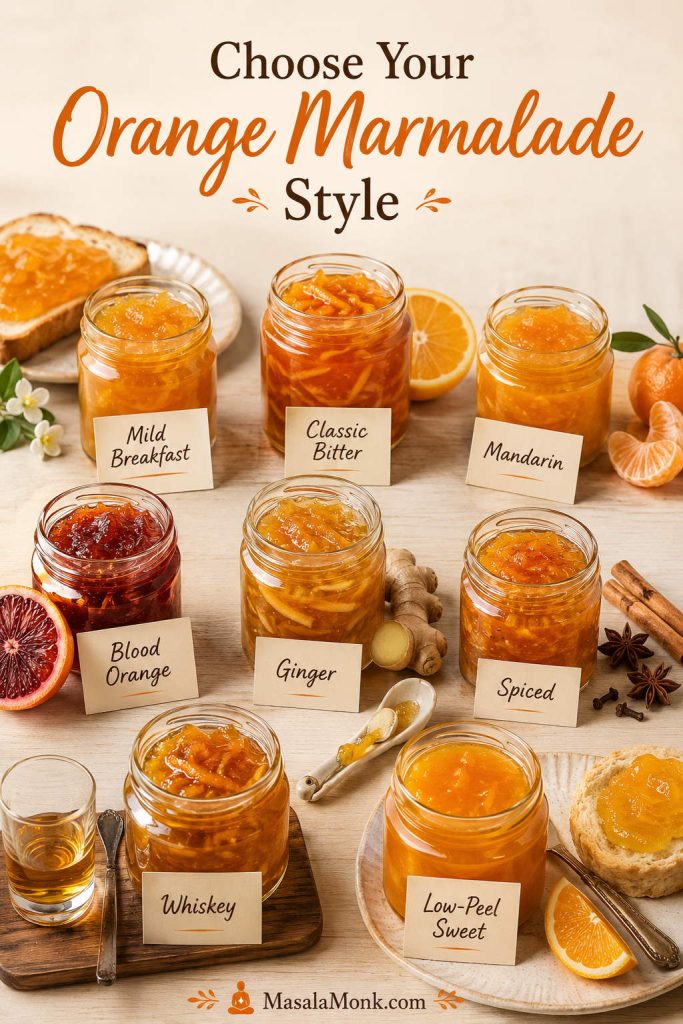
Which Oranges Should You Use?

Best Sweet Oranges for a First Batch

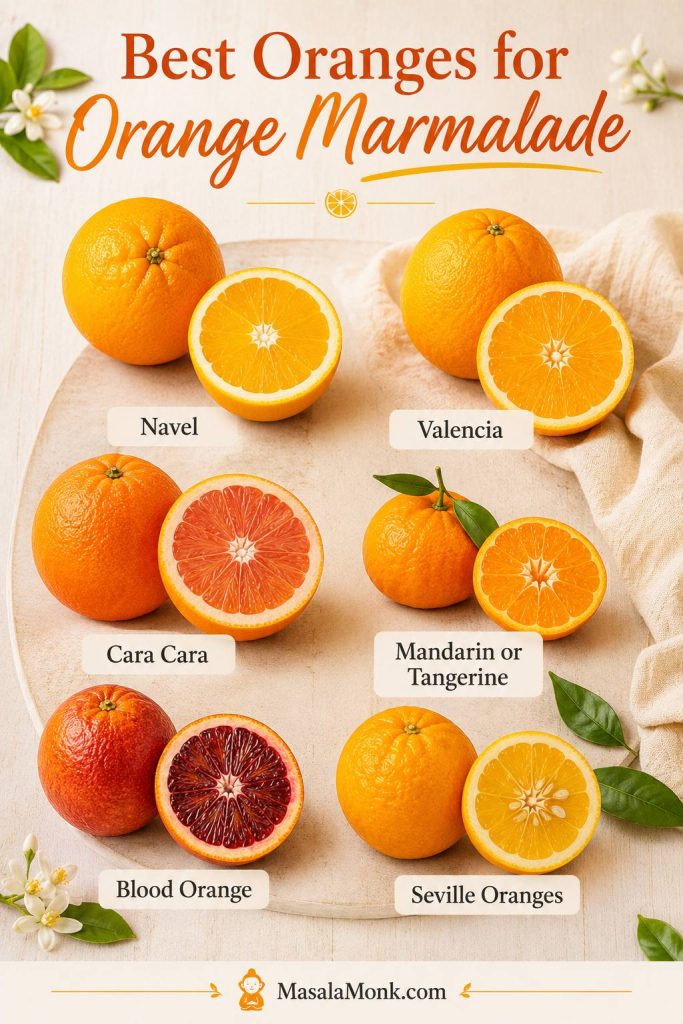
Use this guide before you shop: the orange variety changes sweetness, bitterness, color, and how beginner-friendly the finished jar feels.

Labeled guide showing navel, Valencia, Cara Cara, mandarin or tangerine, blood orange, and Seville oranges for marmalade.
The best oranges for marmalade depend on the flavor you want. Sweet oranges make a gentler beginner-friendly jar, while Seville oranges create a more traditional bitter-orange marmalade.

Choose oranges with fresh, fragrant peel. Thin-skinned fruit is easiest because it gives you delicate shreds without too much thick, bitter white pith.

Navel oranges are the simplest choice for most kitchens. Valencia oranges give a bright, juicy flavor. Cara Cara oranges make a softer, sweeter-tasting marmalade with a rosy citrus note. Mandarins and tangerines can work too, especially for a sweeter preserve, but they behave slightly differently because their peel is thinner and their flavor is less bitter.

Seville, Mandarins, and Other Marmalade Styles

Small sour oranges or calamondins make a sharper preserve. MasalaMonk also has a calamondin orange marmalade recipe for that more intense citrus style.

For most sweet-orange variations, keep the fruit weight the same and adjust by the set test rather than by the clock.

Orange typeFlavor and textureBest use
Navel orangesSweet, easy to find, usually seedlessBest beginner choice
Valencia orangesJuicy, bright, classic orange flavorSweet orange marmalade
Cara Cara orangesSweeter, softer, gently floralMilder marmalade
Mandarins or tangerinesThin peel, sweeter flavor, softer textureSmall-batch marmalade or jam-style spreads
Blood orangesDeep color, berry-like citrus noteSeasonal variation
Seville orangesBitter, aromatic, traditionalClassic bitter marmalade

This main recipe uses sweet oranges because they are easy to find and mild enough for a first batch. Seville oranges make a more traditional, bitter, aromatic jar, so treat them as a focused variation rather than a required ingredient.

The peel is going into the jar, so treat the outside of the orange like an ingredient. Remove stickers, rinse the fruit under running water, and scrub the peel well. Unwaxed or organic oranges are ideal if you can get them, but regular oranges can still work if they are washed thoroughly. Avoid bruised, moldy, or damaged fruit because marmalade concentrates the flavor of the whole orange.

How Thin Should You Cut the Orange Peel?

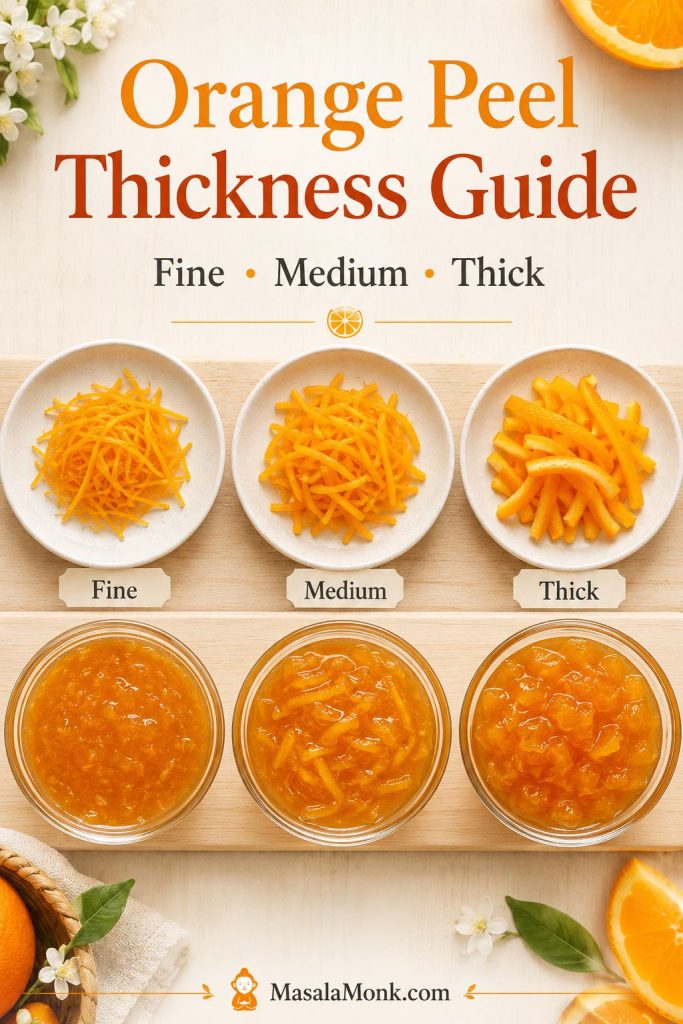
The peel is the personality of marmalade. Thin shreds feel delicate and spread easily. Medium shreds taste more classic. Thick-cut peel gives a stronger bitter bite and a more traditional feel, but it needs more time to soften.

Texture target: Choose the peel cut before you cook; the thinner the shred, the gentler and more spreadable the jar will feel.

Guide showing fine, medium, and thick orange peel strips with matching marmalade texture samples underneath.
Peel thickness changes the whole jar. Fine peel gives a softer breakfast-style marmalade, while thicker peel creates a stronger, more traditional bite.
Peel styleResultBest for
Fine shredTender, easy to spread, less chewyBeginners, toast, scones, yogurt
Medium shredClassic marmalade textureAll-purpose jars
Thick cutStronger bite, more bitterness, more chewTraditional marmalade lovers
Food processorRustic, quick, less elegantShortcut marmalade
Low-peelSweeter, softer, more jam-likePeople afraid of bitterness

Tender peel is where good marmalade begins. Simmer the peel until it gives easily before adding sugar. Once sugar enters the pot, the peel is much less willing to soften. This is the difference between delicate shreds and chewy strips.

Can You Use a Food Processor?

Yes, but use it carefully. A food processor can save time, especially if you like a rustic marmalade, but it can also chop the peel unevenly or turn the fruit too pulpy. Pulse in short bursts and stop before the mixture becomes a puree.

A food processor version will taste good, but it may feel closer to orange jam if the peel disappears into the spread. Whole-orange methods are faster, but this separated-peel method gives you better control over bitterness, pith, and final texture. If your oranges have very thick pith, separating the peel is the safer choice.

Why This Method Works

This method is built around the places small-batch marmalade usually goes wrong: peel that stays chewy, syrup that refuses to set, and a pot that can move from bright citrus to overcooked sugar faster than expected.

What you doWhy it works
Soften the peel before adding sugarSugar slows further softening, so this prevents tough, chewy peel.
Add lemonAcidity helps natural citrus pectin work and keeps the flavor bright.
Dissolve sugar before boiling hardThis lowers the risk of graininess and scorching.
Boil after the peel is tenderWater evaporates, sugar concentrates, and the syrup gains body.
Test on a cold plateHot marmalade looks loose; the chilled test shows the final set more clearly.

Optional seed bag: If your oranges or lemon have seeds, you can tie the seeds and membranes in cheesecloth and simmer the bag with the fruit. Skip this for the simplest version; the marmalade can still set with peel, lemon, sugar, and proper cooking.

How to Make Orange Marmalade

The method below focuses on the cues that matter most: soft peel, syrupy body, and a set that holds after cooling. Aim for a jar with peel suspended through the syrup and a texture that spoons easily once cooled. If it bounces like jelly, it has gone too far. If it runs like syrup, it needs more cooking.

Your first batch does not need to be perfect to be useful. If it sets softly, spreads easily, and tastes bright once cooled, it is a successful jar.

Before You Start: 5 Small Safeguards

  • Let the peel soften before sugar goes in.
  • Use a deep pot because marmalade rises as it boils.
  • Judge the set from a chilled sample, not the hot pot.
  • Keep enough sugar if you want a classic set.
  • Treat this as fridge/freezer marmalade unless you follow tested canning guidance.

What you should see: first the peel softens; then the syrup looks thin and loose; later the bubbles slow, the spoonful lands heavier, and the peel starts to sit inside the syrup instead of floating in watery liquid.

Step 1: Prepare the fruit

Wash and scrub the oranges and lemon. Slice off the hard ends. Remove the orange peel in wide strips, then cut the peel into fine or medium shreds. Chop the orange flesh and save as much juice as possible. Remove seeds so they do not end up in the jar; save them only if you plan to use the optional seed bag.

Before you chop: This is where the marmalade gets its final texture, so keep the peel intentional instead of chopping everything into a pulp.

Hands cutting oranges on a wooden board with sliced peel strips, chopped orange flesh, and peeled fruit separated for marmalade.
Separating the peel from the fruit gives you more control over bitterness, texture, and tenderness, especially when making orange marmalade without boxed pectin.

Rustic shortcut: Instead of separating peel and flesh, you can slice the whole oranges very thinly and remove seeds as you go. This is faster, but the final texture is more rustic and may taste more bitter if the fruit has thick pith.

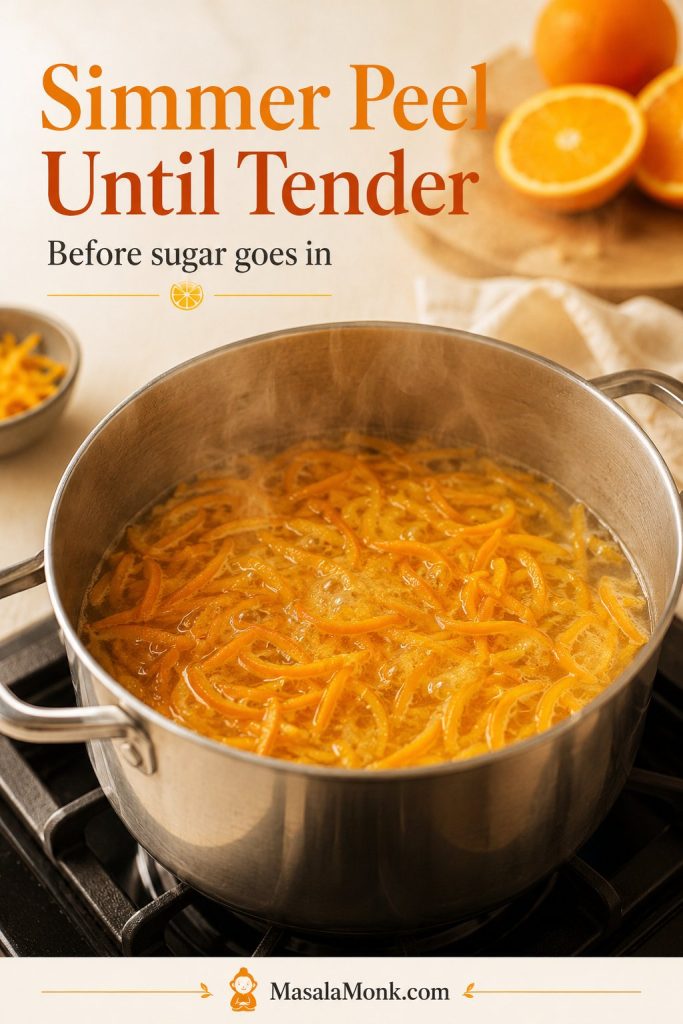
Step 2: Simmer the peel until tender

Put the sliced peel into a large heavy non-reactive saucepan with the water. Bring it to a boil, then reduce to a steady simmer. Simmer partly covered if the water is evaporating too fast; uncover once you start reducing after the sugar goes in. Cook until the peel is soft enough to squash between your fingers or cut against the side of the pot with a spoon. Depending on peel thickness, this may take 20 to 35 minutes.

Before sugar: At this point you are cooking the peel, not setting the marmalade. Give the strips time to relax before the syrup tightens.

Orange peel strips simmering in water inside a saucepan on the stovetop before sugar is added.
This is the quiet step that decides peel texture. If the strips still feel firm now, they will stay chewy in the finished orange marmalade.

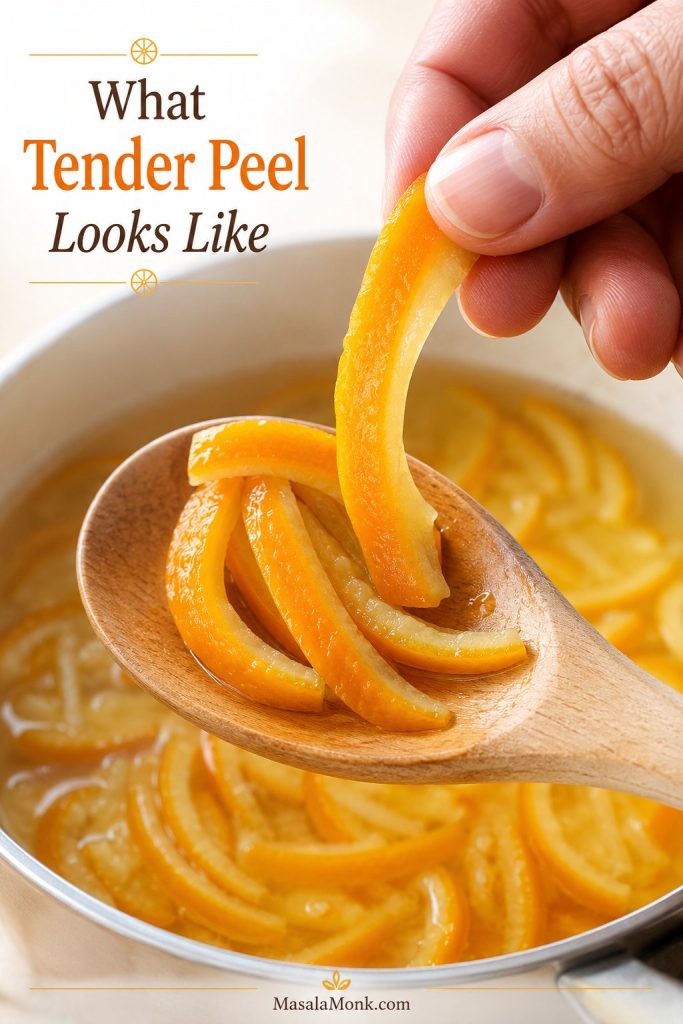
This stage can feel slow, but it is where good marmalade is made. By the time the peel is ready, there should still be some liquid in the pot. If the pan is nearly dry, add a splash more water. If it looks very watery, simmer uncovered for a few extra minutes before adding sugar.

Look for this: Move on only when the peel gives easily. Sugar will sweeten the pot, but it will not magically soften chewy strips later.

Fingers bending a softened orange peel strip over a wooden spoon above a pot of simmered peel.
The peel is ready when it bends easily instead of snapping or feeling chewy. This small cue helps prevent tough peel in the finished marmalade.

Step 3: Add fruit, lemon, and sugar

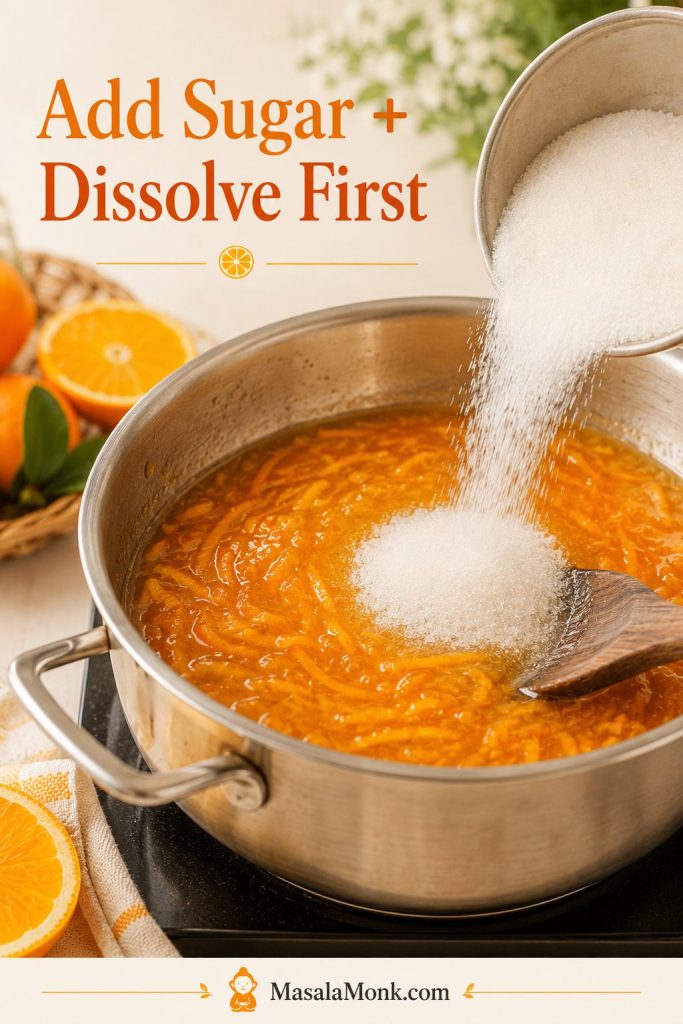
Add the chopped orange flesh, saved orange juice, lemon juice, and optional pinch of salt. If you are using a seed bag, add it now too. Stir in the sugar over medium heat until it dissolves fully. Letting the sugar disappear into the liquid before the hard boil helps prevent graininess and scorching.

Once sugar goes in: The mixture behaves more like syrup, so dissolve it fully before turning up the heat.

Sugar being poured into a pot of orange marmalade mixture with visible orange peel and a wooden spoon.
Once sugar enters the pot, the cooking changes quickly. Dissolving it fully first gives the marmalade a smoother syrup and lowers the risk of scorching.

Step 4: Boil until glossy and spoonable

Once the sugar has dissolved, increase the heat and cook the marmalade at a steady, active bubble rather than a violent boil. Use a pot with enough room because the mixture rises and spatters as it cooks. Stir often enough to prevent sticking, and stir more often near the end when the syrup thickens and the peel can catch on the bottom.

This is the point where marmalade can test your patience. It looks loose, the bubbles keep changing, and the urge to keep boiling is strong. Watch the texture instead: early bubbles are thin and watery; later, the syrup looks heavier, the peel turns more translucent, and the spoonful starts to cling lightly instead of splashing thinly.

Watch the bubbles: The bubbles are your early warning system. They move from thin and splashy to slower, heavier, and glossier as the syrup concentrates.

Three-stage guide showing orange marmalade at early watery bubbles, thicker reduction bubbles, and glossy near-set bubbles.
As the marmalade reduces, the bubbles change from light and watery to thicker and glossier. Watching that shift is often more useful than watching the clock.

After the sugar goes in, the boiling stage usually takes 20 to 35 minutes, depending on pot width, orange juiciness, and heat level. Wide pans reduce faster; narrower pots may take longer. Start testing before you think it is done, because hot marmalade always looks looser than cooled marmalade.

Stop when the chilled sample wrinkles softly, not when the pot looks stiff. If the syrup starts smelling deeply caramelized or darkens quickly, it is moving away from bright citrus and into cooked sugar.

Step 5: Rest and jar

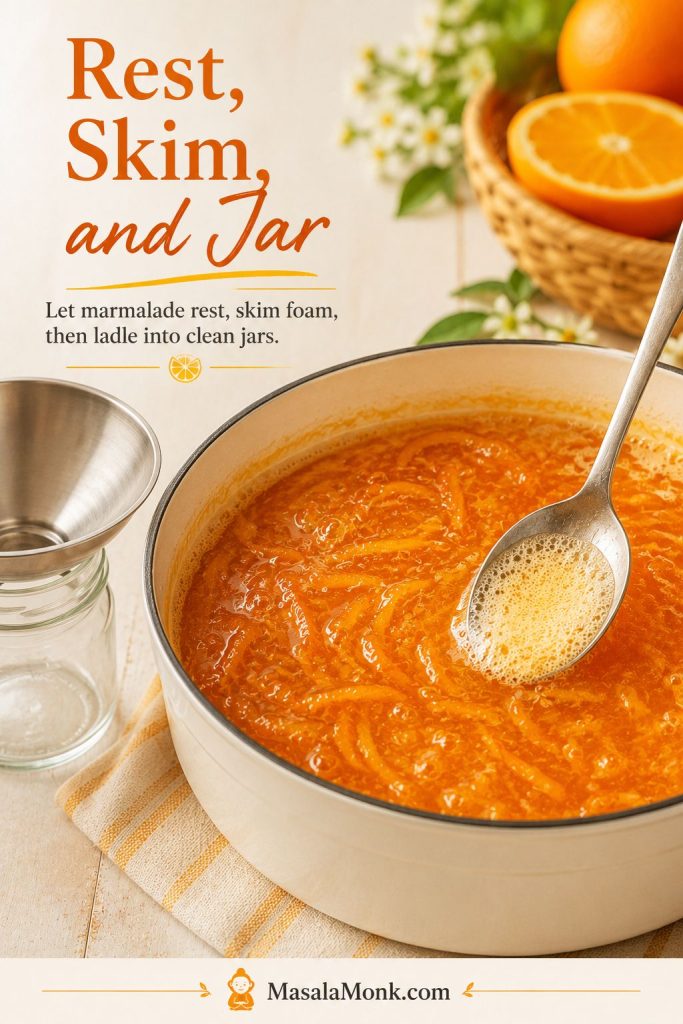
If you used a seed bag, lift it out carefully just before jarring. Press it gently against the side of the pot with a spoon, using tongs if needed, then discard it. When the marmalade passes the cold-plate test, take it off the heat and let it rest for 5 to 10 minutes so the peel distributes more evenly.

If you jar immediately while the mixture is very fluid, the peel can float toward the top. That short rest helps the syrup settle just enough to hold the peel more evenly.

Foam is normal and does not mean the batch has failed. It is mostly trapped air from boiling. Skim it for a clearer jar, or leave a little if you do not mind a rustic finish. Spoon the marmalade into clean jars. Let refrigerator jars cool, then chill them. If you plan to freeze the marmalade, leave headspace so the preserve can expand. Pantry storage needs a reliable water-bath canning process from a tested source.

Before filling jars: A short rest before filling helps the peel stay more evenly distributed, especially in a soft-set fridge marmalade.

Spoon skimming foam from a pot of finished orange marmalade with a jar and funnel nearby for filling.
After boiling, let the marmalade settle briefly, skim excess foam, and then jar it. This helps the peel distribute more evenly and keeps the jars cleaner.

How to Know Orange Marmalade Has Set

Set is not a timer. It is a texture.

This is the moment people usually panic, but the cold plate is your calm button. Marmalade does not look fully set while it is still boiling. The pot will almost always look looser than you expect; that is why you test a cooled spoonful instead of arguing with the boiling syrup.

The Cold-Plate Test

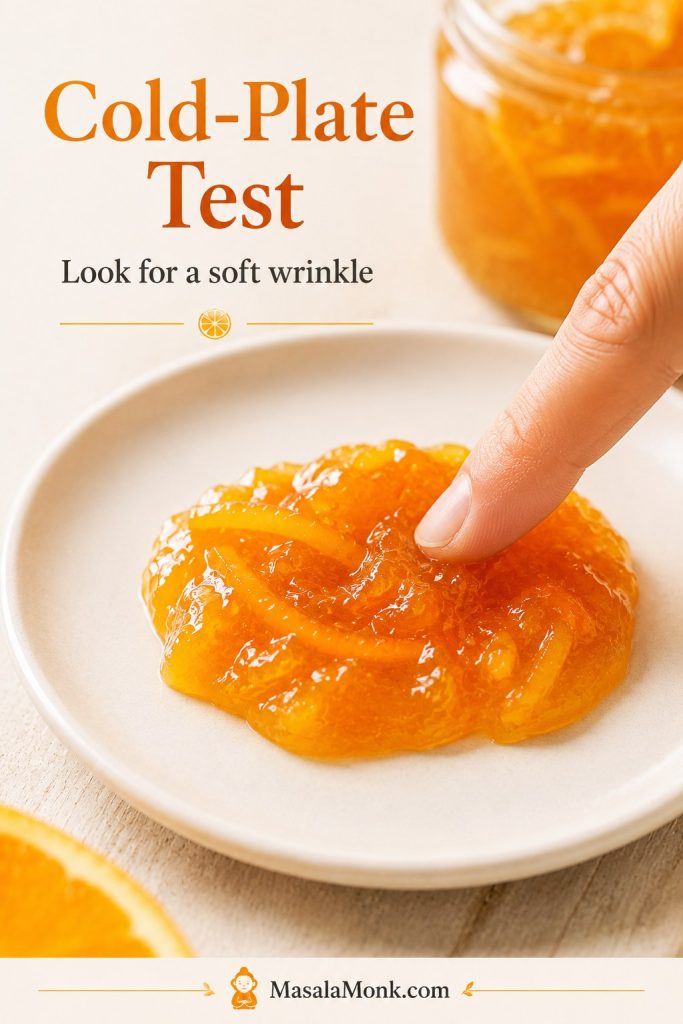
Before you start cooking, put two small plates in the freezer. When the marmalade looks clear and slightly thickened, spoon a little onto a cold plate. Wait about one minute, then push the edge with your finger. If the surface wrinkles softly and does not run back like syrup, the marmalade is ready.

Set check: The sample should wrinkle softly after chilling. If it snaps firm or feels rubbery, the batch has gone past the soft-set stage.

Finger pushing a spoonful of orange marmalade on a small white plate to check for a soft wrinkle.
The cold-plate test shows how hot marmalade will behave after cooling. Look for a soft wrinkle, not a rubbery or stiff set.

If it runs freely, cook for a few more minutes and test again. Use a clean cold plate each time if possible. Taste only after the marmalade cools a little; hot marmalade can taste sharper and sweeter in a way that does not represent the final jar.

Marmalade Setting Temperature: When to Stop Boiling

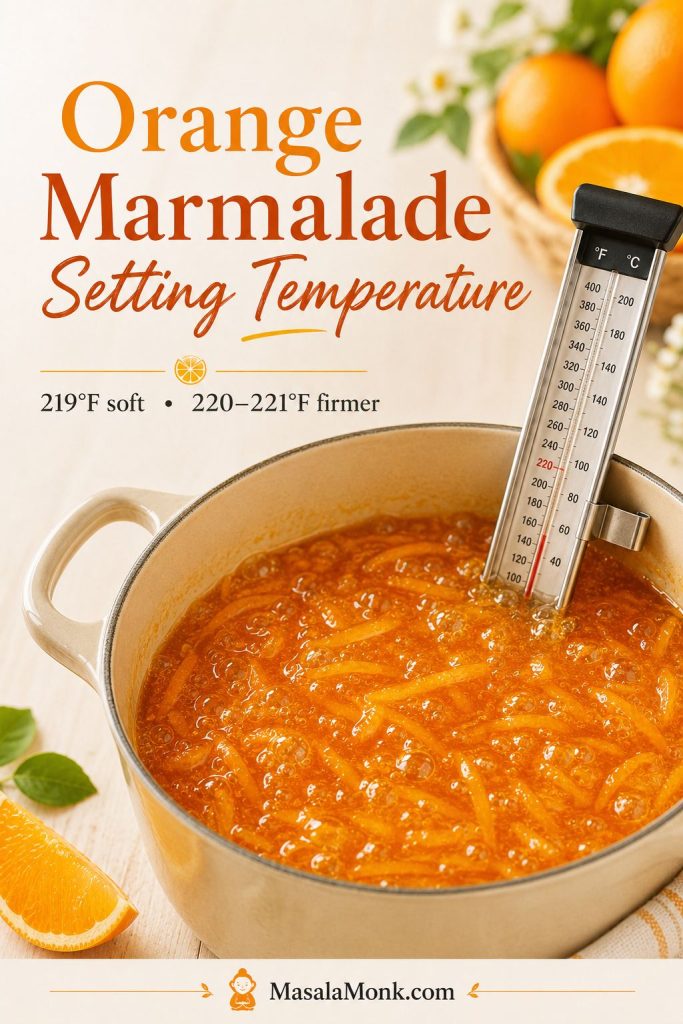
At sea level, many marmalades set near 220°F / 104.4°C, but the exact number shifts with altitude, batch size, fruit, and pot shape. Treat the thermometer as a cue, not the final judge. At higher elevations, trust the cold-plate test more than the number on the thermometer.

Thermometer check: Use the thermometer as a checkpoint, then confirm with a cooled sample so you do not overshoot a soft spreadable set.

Candy thermometer clipped into a pot of bubbling orange marmalade with visible peel and temperature guidance above.
A thermometer can guide you toward the set point, but it should not work alone. Pair the temperature reading with the cold-plate or spoon test for better judgment.
Temperature cueLikely texture
217°F / 103°CBrighter and looser; may still be runny depending on fruit and pot shape.
219°F / 104°CSoft-set range for many home batches; confirm with the cold-plate test.
220–221°F / 104.4–105°CFirmer, more classic set; watch closely so it does not become stiff.
Past this rangeHigher risk of dark flavor, chewy peel, or a set that is too firm.

Spoon Test: What Marmalade Looks Like When It Is Ready

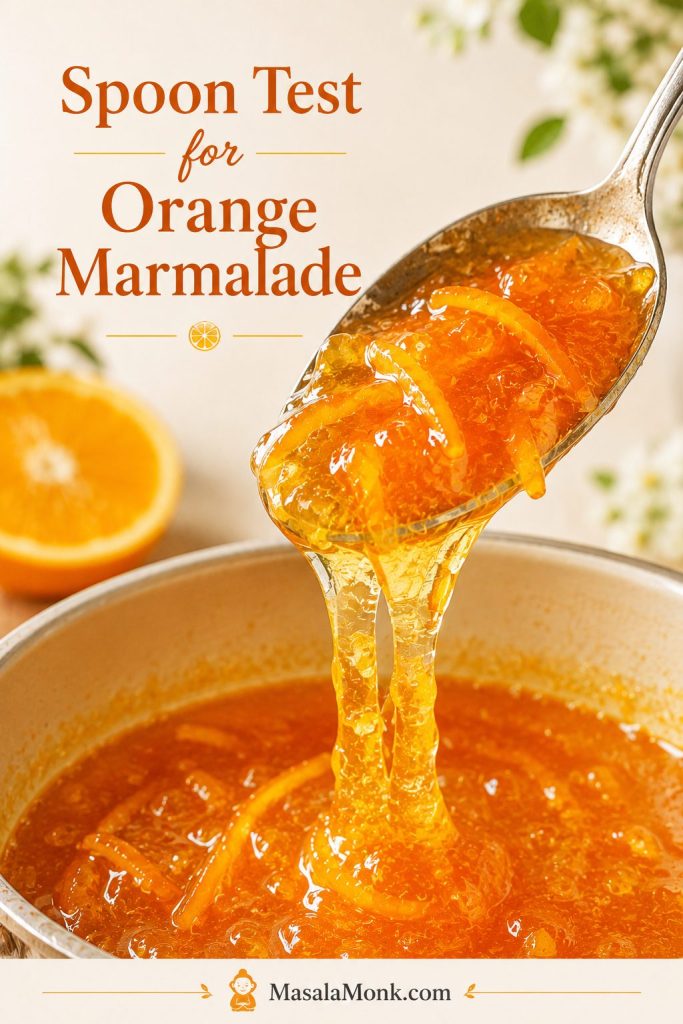
Near the set point, the syrup looks more polished and falls from the spoon in heavier drops rather than thin streams. The peel also looks suspended in the syrup instead of floating in watery liquid.

Spoon check: Use this when the cold plate is not enough. Heavier drops and clinging peel tell you the syrup is gaining body.

Spoon lifted above a pot of orange marmalade with thick glossy syrup and orange peel dripping slowly back into the pot.
The spoon test helps you read the syrup while it is still hot. Near the set point, the marmalade falls more slowly and the peel clings to the spoon.

Small-batch warning: fridge/freezer batches and wide pans can over-reduce quickly. Start testing early, especially once the mixture looks syrupy and thickened. It is easier to cook runny marmalade a little more than to rescue a jar that has gone too stiff.

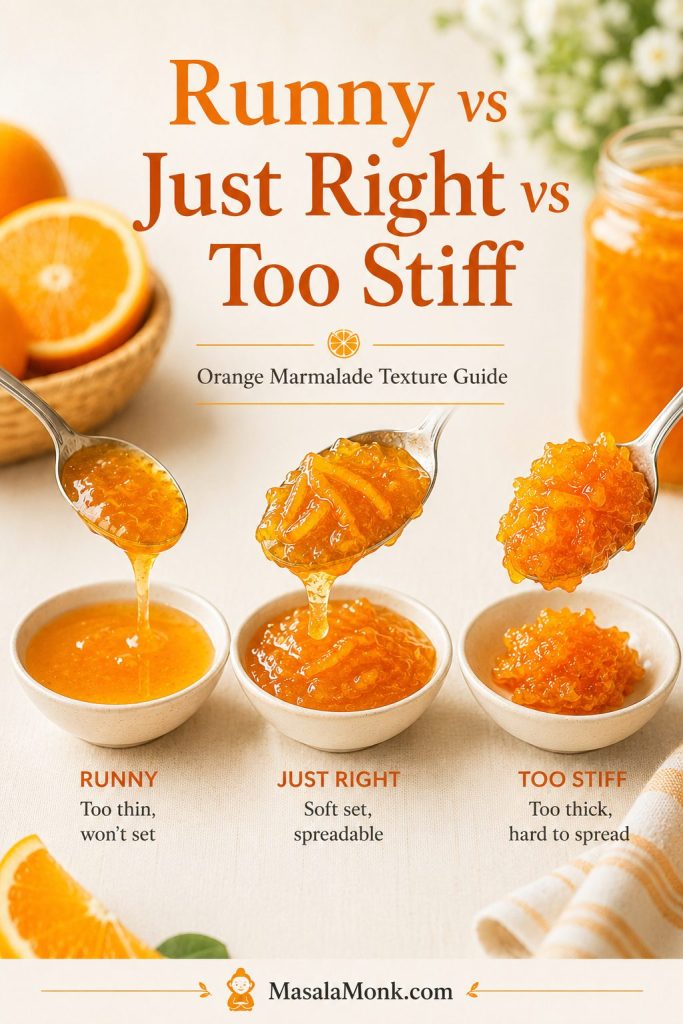
What Runny, Just Right, and Too Stiff Look Like

Use this visual before troubleshooting. It helps you compare your jar to the texture you actually want, not just to a timer or temperature number.

Three bowls and spoons comparing runny orange marmalade, softly set marmalade, and overly stiff marmalade.
This texture guide helps you judge your own batch. Runny marmalade needs more cooking, just-right marmalade mounds softly, and too-stiff marmalade can be hard to spread.

Why This Orange Marmalade Sets Naturally

There is no added pectin in this recipe. Pectin is the fruit’s natural setting helper, and citrus keeps much of it in the peel, pith, seeds, and membranes. Think of the peel, pith, and seeds as the structure; the lemon as the acidity; and the sugar reduction as the syrup that lets everything hold together.

Natural set check: This recipe still has structure; it simply uses the fruit’s own pectin instead of a boxed packet.

Kitchen explainer showing orange peel and pith, lemon, sugar, boiling marmalade, and a finished jar to explain natural marmalade set.
No added pectin does not mean no structure. Orange peel, pith, lemon, sugar, boiling, and cooling all work together to create a soft marmalade set.

If you remove almost all the peel and pith, reduce the sugar heavily, or stop cooking too early, the marmalade may stay loose. Sugar also matters: it does not only sweeten the preserve; it helps the syrup thicken as water evaporates. If you enjoy this kind of small-batch preserve logic, MasalaMonk’s fig jam recipe also shows how fruit, sugar, and testing work together without making the process feel complicated.

How to Make Orange Marmalade Less Bitter

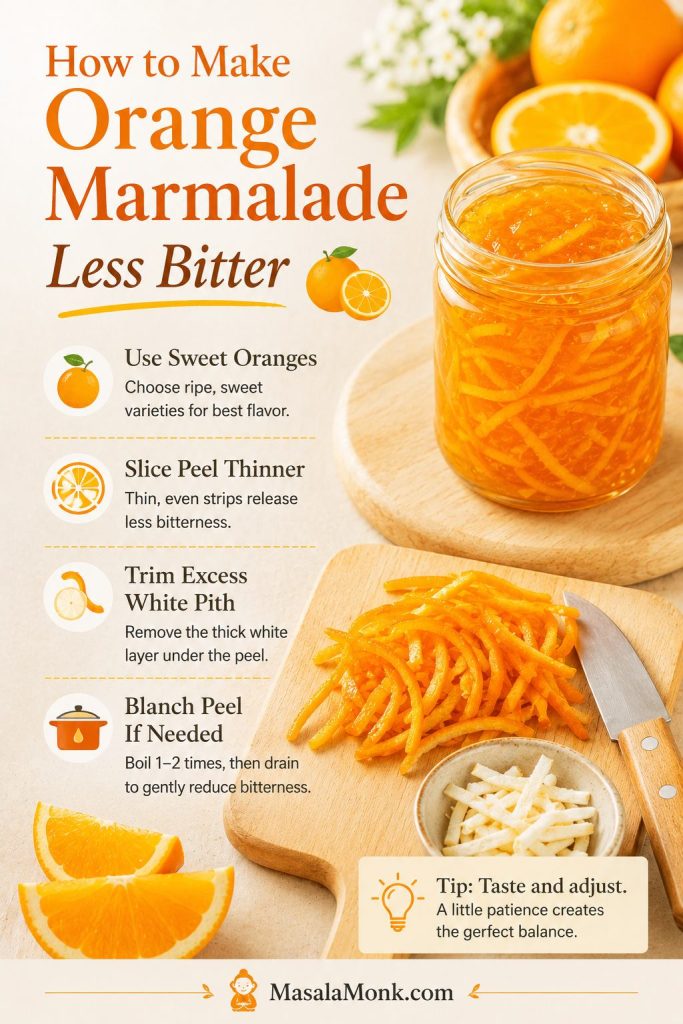
A little bitterness is the point; harsh bitterness is the problem. The right bitterness should make the orange taste deeper, not make the peel taste harsh or medicinal. For a milder jar, start with sweet oranges, slice the peel thinly, and avoid using too much thick white pith.

Flavor balance: Aim for orange depth, not harsh peel. The choices you make before boiling decide most of that balance.

Guide showing sweet oranges, thin orange peel strips, trimmed white pith, and blanching tips for less bitter orange marmalade.
Bitterness is part of marmalade, but it should not take over. Use sweeter oranges, thinner peel, and less thick white pith for a brighter, gentler jar.

The most important step is simmering the peel until it gives easily. This mellows the sharp edge and prevents chewy strips in the finished jar. Very bitter peel can be blanched once: cover it with water, boil for 2 minutes, drain, then continue with the recipe using fresh water.

Leave some pith for structure, though. Removing every trace of pith can make the marmalade sweeter, but it can also weaken the set. The goal is balance: trim thick, spongy excess pith when needed, but leave enough citrus structure for the marmalade to set. Judge bitterness after the marmalade cools; hot syrup can taste sharper than the final jar.

Orange Marmalade Troubleshooting

Marmalade is forgiving in a way that does not seem obvious while it is boiling. A loose jar can become sauce, a bitter jar can become glaze, and a firm jar can often be warmed back into usefulness. If something looks wrong, do not assume the batch is ruined; it usually tells you what it needs: more cooking, less heat, softer peel, or a different use for a jar that set too firmly.

Quick Fixes Before You Reboil

Fast fixes: runny marmalade can be cooked again, stiff marmalade can be loosened with a little hot water, bitter marmalade is best used in glazes or baking, and tough peel is mostly a next-time fix.

Common Marmalade Problems and Fixes

ProblemLikely reasonFix nowNext time
Marmalade is runnyUndercooked, too much water, low sugar, or weak pectinReturn it to the pot, boil again, and retest on a cold plateCook to a soft wrinkle and avoid reducing sugar too much
Marmalade is too stiffOvercooked or boiled past the set pointWarm gently with a spoonful or two of hot water until looserStop when the cold-plate test shows a soft wrinkle, not a firm rubbery set
Peel is toughSugar was added before the peel softenedUse the batch in glazes or sauces where texture matters lessSimmer peel until tender before adding sugar
Marmalade is too bitterToo much pith, bitter oranges, thick peel, or overcookingUse it in savory glazes, salad dressings, or bakingUse sweeter oranges, slice peel thinner, or blanch peel once
Sugar crystallizedSugar was not fully dissolved before boiling hardRewarm gently and stir; add a small splash of water if neededLet sugar dissolve over medium heat before a rolling boil
Marmalade darkened too muchCooked too long or heat was too high near the endUse darker marmalade in glazes, cheese boards, or baking if it tastes caramelized but not burntStart testing earlier and reduce heat slightly as it thickens
Peel floated to the topMarmalade was jarred immediately while very hot and looseStir the jar after partial cooling if using as fridge marmaladeLet marmalade rest 5 to 10 minutes before jarring

Once you understand this kind of cold-plate testing, the same logic helps with other small-batch preserves, like MasalaMonk’s cape gooseberry and mint jam.

Low-Sugar Orange Marmalade: What You Can and Cannot Reduce

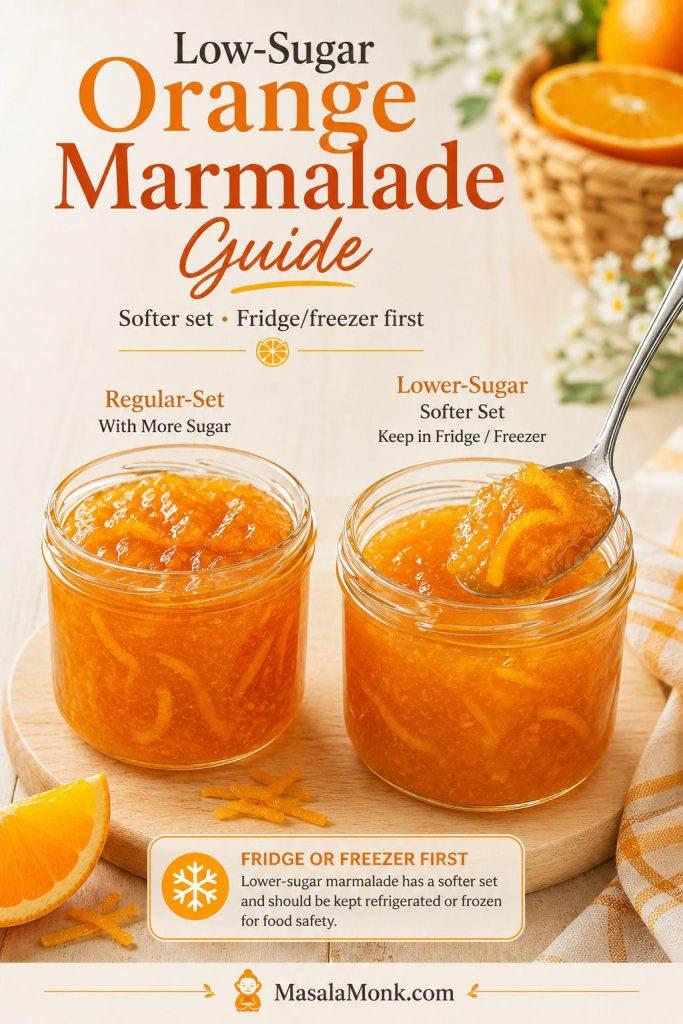
A slightly softer, lower-sugar fridge jar can still be lovely; it just needs to be treated as a different kind of marmalade. Think of it as a spoonable citrus spread rather than a classic pantry marmalade. You can reduce sugar a little for refrigerator storage if you accept a softer set, but it should not be treated like a traditional pantry preserve.

Lower-sugar reminder: Softer texture is not failure here; it is the expected tradeoff when you move away from classic marmalade sugar levels.

Two jars comparing regular-set orange marmalade and lower-sugar softer-set marmalade with a fridge or freezer storage reminder.
For lower-sugar marmalade, expect a softer spoonable texture rather than a firm classic set. Treat it as a fridge or freezer preserve unless using a tested method.

Very low-sugar marmalade is a separate style, not a simple subtraction. A very low-sugar or sugar-free orange marmalade usually needs special low/no-sugar pectin or a different method. For very low-sugar or sugar-free fruit spreads, the NCHFP reduced-sugar fruit spread guidance is a safer starting point than simply swapping sugar in a regular marmalade recipe.

For shelf-stable low-sugar jars, use a tested low-sugar canning recipe. Sugar substitutes do not give the same set or preservation as sugar in a regular marmalade recipe.

How to Store Orange Marmalade: Fridge, Freezer, and Safe Canning Notes

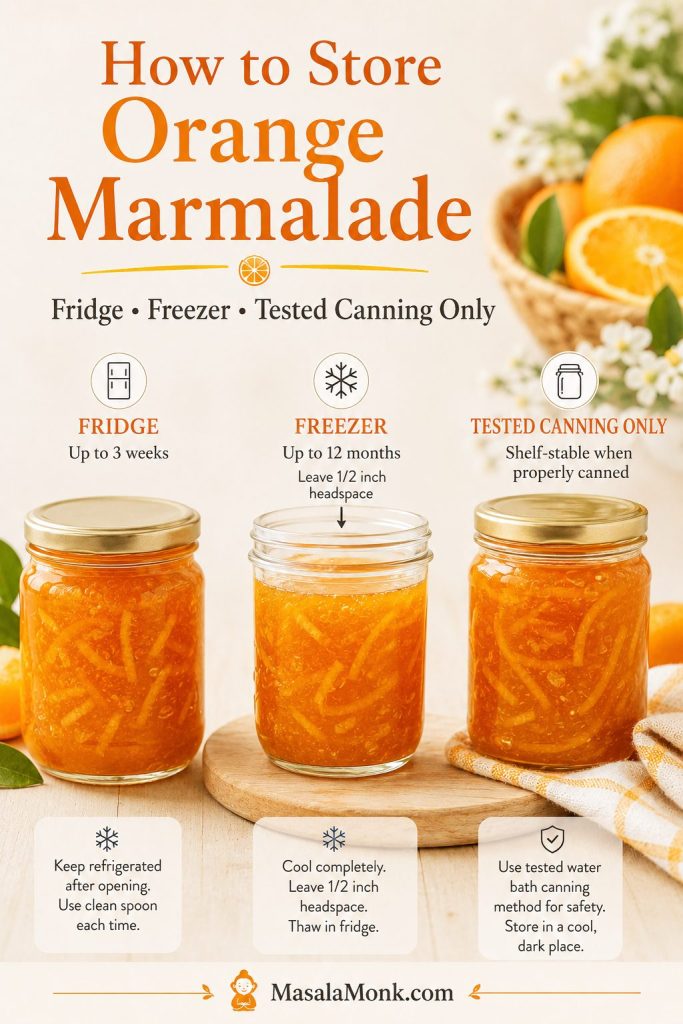
Fridge jar and pantry jar are not the same thing. This recipe is written first as a refrigerator or freezer orange marmalade, which keeps the method approachable and avoids pretending that every homemade jar is automatically shelf-stable.

Storage reminder: Choose the storage method before you fill the jars, because fridge, freezer, and pantry storage are not interchangeable.

Three jars of orange marmalade showing fridge storage, freezer storage with headspace, and tested canning-only pantry storage.
Fridge and freezer storage are simple for this small-batch marmalade. Pantry storage is a different process and needs tested canning instructions.

Refrigerator storage

Spoon the hot marmalade into clean jars, let it cool, then refrigerate. Use clean spoons when serving, and avoid leaving the jar out at room temperature for long stretches. For best quality, use refrigerated marmalade within 3 to 4 weeks, sooner if you reduced the sugar. Discard it if you see mold, bubbles, fermentation, or notice an off smell.

Freezer storage

Orange marmalade freezes well. Use freezer-safe jars or containers and leave headspace because the marmalade can expand as it freezes. Thaw in the refrigerator before using.

Shelf-stable canning

For shelf-stable marmalade, you need a tested formula, hot jars, correct headspace, proper lids, and the right boiling-water processing time for your jar size and elevation. The National Center for Home Food Preservation citrus marmalade guidance is a good authority to consult for jar preparation, headspace, and processing.

If you want pantry storage, use a proper water-bath canning method from the start.

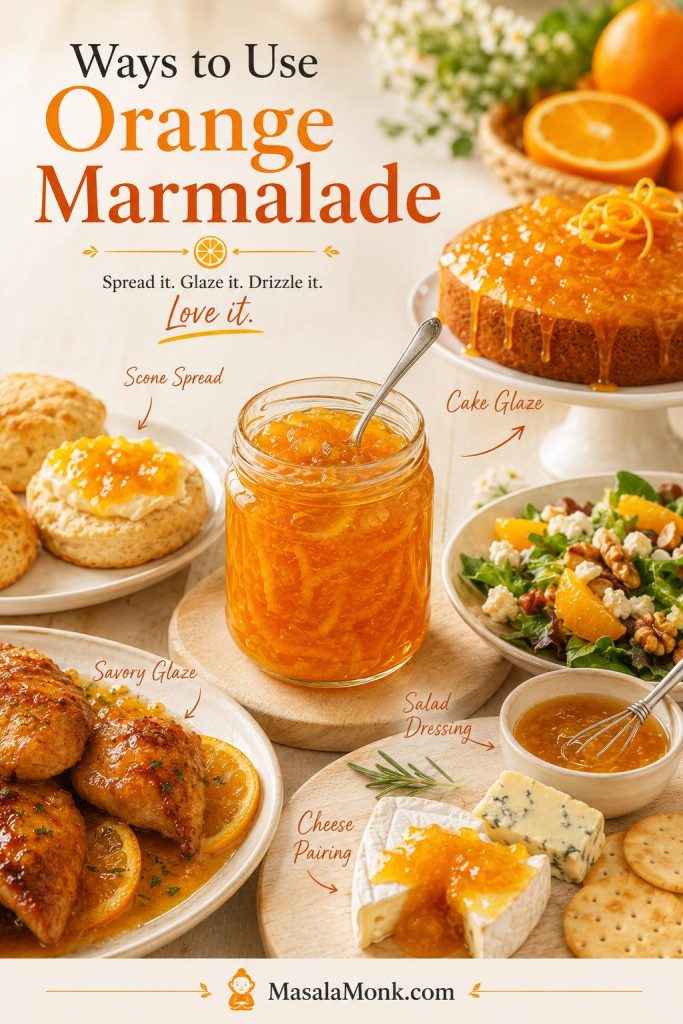
Ways to Use Orange Marmalade

Orange marmalade is not only for toast, although toast with butter is still its natural home. The best marmalade is not just sweet orange spread; it is a ready-made balance of citrus oil, sugar, bitterness, and peel. That is why one spoonful can do the work of zest, juice, syrup, and glaze.

A good jar earns its space in the fridge because it keeps solving small problems: breakfast needs brightness, cake needs a bittersweet seam, chicken needs a glaze, and cheese needs contrast.

Use-it-up idea: Think of marmalade as citrus, sweetness, bitterness, and peel in one spoonful, then use it wherever a dish needs brightness and gloss.

Orange marmalade served with scones, cake glaze, savory glazed chicken, salad dressing, cheese, crackers, and a central jar.
A good jar of orange marmalade is useful far beyond toast. Try it as a cake glaze, savory glaze, salad dressing base, or cheese board pairing.

Quick orange marmalade formulas

  • Quick glaze: 2 tablespoons marmalade + 1 teaspoon mustard + a splash of vinegar.
  • Savory glaze: 2 tablespoons marmalade + 1 teaspoon soy sauce + 1 teaspoon vinegar + a pinch of chili or ginger.
  • Salad dressing: 1 tablespoon marmalade + 1 tablespoon vinegar + 2 tablespoons olive oil.
  • Cake glaze: warm marmalade with a splash of water or lemon juice until brushable.
  • Cheese board pairing: marmalade + sharp cheese + roasted nuts + crackers.

Breakfast ideas

Spread orange marmalade on toast, croissants, English muffins, pancakes, waffles, and biscuits. It is especially good with warm easy English scones, where the citrus peel cuts through butter, cream, or clotted cream.

For a weekend breakfast plate, use a smaller spoonful with almond flour pancakes, where the almond flavor pairs naturally with orange.

Baking ideas

Use it as a cake filling, loaf cake glaze, thumbprint cookie center, bread pudding accent, or tart layer. It works especially well with almond, chocolate, vanilla, and warm spices.

For a citrus-on-citrus dessert, try it with an orange olive oil cake. For a nutty pairing, add a thin glossy layer to an almond cake.

Savory glazes and sauces

Warm orange marmalade with mustard, vinegar, soy sauce, chili, garlic, or ginger to make a quick glaze for chicken, duck, pork, ham, salmon, carrots, or roasted vegetables. The sweet-bitter citrus flavor works beautifully with rich meats. For a classic citrus-meat pairing, MasalaMonk’s orange sauce for duck shows how orange, acidity, stock, and a little sweetness can stay savory rather than sticky.

Holiday, drinks, and cheese boards

Stir a spoonful into cranberry sauce for peel, gloss, and citrus depth; this cranberry sauce with orange juice is a natural pairing.

Marmalade can also sweeten cocktails, mocktails, hot tea, and sparkling citrus drinks. For drinks, treat it like a citrus syrup: shake or stir it well with lemon, orange juice, or soda so the peel and sugar dissolve into the drink instead of sitting at the bottom.

For a cheese board, serve marmalade with soft cheese, sharp cheddar, blue cheese, crackers, roasted nuts, and dried fruit. A slightly bitter jar is especially good here because it cuts through richness instead of making the board taste too sweet.

Orange Marmalade Variations

Once you understand the base method, the variation depends on what you want to change: sweetness, bitterness, color, spice, or gifting value.

Choose Your Marmalade Style

  • Mild breakfast marmalade: sweet oranges, fine peel, and 700 g sugar.
  • Firmer classic set: sweet oranges or mixed citrus, medium peel, and 800 g sugar.
  • More bitter traditional flavor: Seville oranges or a Seville blend.
  • Sweeter soft spread: mandarins or tangerines.
  • Glaze or cheese-board jar: slightly stronger bitterness and medium peel.

Choose a style: Choose the version by mood and use: breakfast-soft, classic-bitter, ginger-warm, spiced-holiday, or low-peel sweet.

Multiple jars of orange marmalade variations labeled mild breakfast, classic bitter, mandarin, blood orange, ginger, spiced, whiskey, and low-peel sweet.
Once the base orange marmalade method makes sense, you can adjust the style toward sweeter, bitter, spiced, ginger, blood orange, or gifting-friendly versions.

Mandarin orange marmalade

Mandarins and tangerines are best when you want a softer, sunnier breakfast jar. Their peel is thinner and their flavor is naturally gentler, so the final marmalade feels less bitter than a classic Seville-style version.

Seville orange marmalade

Seville is for people who love marmalade’s bitter backbone: sharp, aromatic, and traditional. These oranges usually need enough sugar and careful use of seeds or membranes for natural pectin, so it is worth treating them as their own focused recipe.

Blood orange marmalade

Blood oranges are the dramatic color route: deeper, rosier, and lightly berry-like, but easier to over-darken if you cook them too far.

Orange ginger marmalade

Ginger pushes the jar toward toast, tea, winter baking, and savory glazes. Add finely grated fresh ginger or thin matchsticks of ginger during the final cooking stage.

Whiskey orange marmalade

Whiskey turns marmalade into a warmer gifting jar. Stir in a small splash after the marmalade comes off the heat. Keep it subtle: the goal is aroma and warmth, not a harsh alcohol taste.

Spiced orange marmalade

Spices make sense for holiday toast and cheese boards. Add a small piece of cinnamon, a few cloves, or a little star anise while the marmalade cooks, then remove the spices before jarring. Use a light hand so the spices support the orange instead of overpowering it.

Orange marmalade without peel

A low-peel version is better for a sweeter, softer spread, but it will be closer to orange jam than classic marmalade. Because peel and pith help with natural pectin, a no-peel version may need longer cooking, added pectin, or a softer-set expectation.

Orange Marmalade Recipe

If you remember only three things, remember these: soften the peel first, dissolve the sugar before the hard boil, and test the set on a cold plate.

The finished marmalade should be loose enough to spoon, with peel suspended in a clear, syrupy set. It will thicken more as it cools.

Small-Batch Sweet Orange Marmalade, No Boxed Pectin

This orange marmalade recipe uses regular sweet oranges, lemon, sugar, and water for a bittersweet, spoonable preserve with tender peel. It is written as a refrigerator or freezer marmalade, with separate canning safety notes if you want shelf-stable jars.

Prep time
20 to 25 minutes
Cook time
45 to 70 minutes
Total time
About 1 hour 10 minutes to 1 hour 35 minutes
Yield
About 4 cups

Before you start: Place two small plates in the freezer for testing, choose a large deep pot because marmalade bubbles up, and have clean jars ready.

Ingredients

  • 900 g to 1 kg regular sweet oranges, preferably thin-skinned, about 2 to 2.2 lb
  • 1 medium lemon, juiced, about 2 to 3 tablespoons / 30 to 45 ml
  • 600 ml water, about 2 1/2 cups, plus more if needed
  • 700 to 800 g sugar, about 3 1/2 to 4 cups
  • Tiny pinch of salt, optional

Method

Prepare and Soften the Peel
  1. Wash and prepare. Scrub the oranges and lemon well. Slice off the hard ends. Remove the orange peel in strips and cut it into fine or medium shreds. Fine peel gives the easiest spread; medium peel gives the most classic marmalade feel. Chop the orange flesh and save the juice. Remove seeds so they do not end up in the jar; save them only if you plan to use the optional seed bag.
  2. Simmer the peel. Add the sliced peel and water to a large heavy non-reactive saucepan. Bring to a boil, then simmer partly covered if the water is evaporating too quickly. Cook until the peel is soft enough to pinch or cut against the side of the pot with a spoon, about 20 to 35 minutes. Do not add sugar before this point.
  3. Check the liquid. When the peel is tender, there should still be some liquid in the pot. If it is nearly dry, add a splash more water. If it looks very watery, simmer uncovered for a few minutes before adding sugar.
  4. Add fruit and lemon. Add the chopped orange flesh, saved juice, lemon juice, and optional salt. If you are using a seed bag for extra natural pectin, add it now.
Boil, Test, Rest, and Store
  1. Dissolve the sugar. Stir in the sugar over medium heat until fully dissolved. Use 700 g for a softer fridge marmalade or 800 g for a firmer set.
  2. Boil to set. Increase the heat and cook at a steady, active bubble in a large deep pot, stirring often. Stir more often near the end as the syrup thickens. Start testing before it looks fully done, especially in a wide pan.
  3. Use the cold-plate test. Spoon a little marmalade onto a chilled plate, wait 1 minute, then push it gently. If it wrinkles softly, it is ready. Hot marmalade looks looser than cooled marmalade, so judge the chilled sample rather than the pot.
  4. Rest and jar. If using a seed bag, lift it out carefully, press it gently against the side of the pot, and discard. Remove the marmalade from heat and let it rest for 5 to 10 minutes. Skim foam if needed, then spoon into clean jars.
  5. Store safely. Spoon into clean jars, let cool at room temperature until no longer hot, then refrigerate. For freezing, leave headspace. Do not store this fridge/freezer version in the pantry unless you follow a tested water-bath canning method.

Recipe Notes

  • For a milder marmalade, use fine shreds of peel and sweet, thin-skinned oranges.
  • For a stronger, more traditional flavor, use some Seville orange or thicker peel.
  • If the peel tastes very bitter, blanch it once for 2 minutes, drain, then continue with the recipe.
  • If your fruit has seeds, you can simmer them in a small cheesecloth bag for extra natural pectin, but this is optional.
  • Yield can vary slightly depending on orange juiciness, pot width, and how far you reduce the syrup.
  • For pantry jars, follow tested canning guidance.

Saveable Orange Marmalade Recipe Card

Use the written recipe card above while cooking; this image is the quick visual version to save for your next batch.

Saveable orange marmalade recipe card with a jar of marmalade, ingredients, short method, yield, and fridge or freezer storage note.
Keep this recipe card handy when cooking. It brings the sweet-orange formula, soft-set method, and fridge/freezer storage reminder into one quick reference.

FAQs About Orange Marmalade

What is the difference between orange marmalade and orange jam?

Orange marmalade includes citrus peel, which gives it texture and a bittersweet edge. Orange jam is usually smoother, sweeter, and less peel-forward. If you blend the mixture completely or remove most of the peel, it will feel more like jam.

Do you need pectin for orange marmalade?

No boxed pectin is needed. Citrus naturally carries pectin in the peel, pith, seeds, and membranes; lemon, sugar, and cooking time help that pectin create a soft set. Low-sugar or no-peel versions may need extra pectin support.

Why did my orange marmalade not set?

It may be undercooked, too watery, too low in sugar, or short on natural pectin from peel and pith. Reboil it for a few minutes, then test again on a cold plate.

How do you fix runny marmalade?

Pour it back into a pot and bring it to a steady boil. Cook briefly, then test on a chilled plate. Stop when the cooled sample wrinkles softly.

Why is my marmalade bitter?

A little bitterness is normal; harsh bitterness is the problem. Too much thick pith, bitter fruit, thick-cut peel, or overcooking can make the jar taste too sharp.

How do you make marmalade less bitter?

Use sweet oranges, fine peel shreds, and only trim the thickest pith. Simmer the peel fully before sugar goes in. If the peel is very bitter, blanch it once for 2 minutes, drain, and continue with fresh water.

Which oranges are best for orange marmalade?

For beginner-friendly marmalade, use sweet, thin-skinned oranges such as navel, Valencia, or Cara Cara. Seville oranges are best for traditional bitter marmalade, while mandarins and tangerines make a sweeter, softer preserve.

Do I have to use Seville oranges?

No. Seville oranges are traditional, but this recipe is designed for regular sweet oranges. The result is milder, easier to shop for, and still properly marmalade-like.

Why is the peel in my marmalade tough?

Tough peel almost always means the sugar arrived too early. Simmer the peel until tender before adding sugar, because sugar slows further softening.

How long does homemade orange marmalade last?

Refrigerator marmalade is best used within 3 to 4 weeks, sooner if you reduced the sugar. Freezer marmalade lasts longer when packed with headspace in freezer-safe containers.

Is this orange marmalade safe for canning?

This fridge/freezer version should not be treated as pantry-safe by default. Orange marmalade can be canned when you use a tested formula and proper boiling-water processing, but do not simply jar this version and store it at room temperature.

What can I make with orange marmalade?

Use it on toast, scones, croissants, pancakes, yogurt, and oatmeal. It also works in cake fillings, thumbprint cookies, salad dressings, cheese boards, and savory glazes for chicken, duck, pork, ham, salmon, or roasted vegetables.

Can I make marmalade with less sugar?

You can reduce sugar slightly for a softer refrigerator jar. Very low-sugar or sugar-free marmalade needs a different method, often with special pectin, and should not be canned unless you use tested low-sugar canning guidance.

The first batch teaches you the rhythm: soften the peel, watch the bubbles slow, trust the cold plate, and stop before the jar gets stiff. After that, marmalade stops feeling fussy and starts feeling like one of those quiet kitchen skills that pays you back every time you open the fridge.

Back to top ↑

Posted on Leave a comment

How to make Mango Pickle? 5 Twists to Classic

Dry mango pickle made of original Ramkela mangoes.

If you’re a fan of bold and tangy flavors, Mango Pickle is a must-have in your culinary repertoire! Bursting with the irresistible combination of ripe mangoes, aromatic spices, and tangy goodness, this homemade pickle is the perfect accompaniment to spice up your meals. In this post, we’ll delve into the art of making Mango Pickle from scratch, provide tips on selecting the best mangoes for pickling, guide you through the step-by-step process, and offer creative variations to customize your pickle to perfection. Get ready to tantalize your taste buds with the mouthwatering tanginess of Mango Pickle! 🥭🌶️🥒

Why Mango Pickle? 🥭🌶️ Mango Pickle, also known as Aam ka Achaar, is a beloved condiment in many cultures. It adds a burst of flavor and tang to any meal, whether it’s paired with rice, bread, or even as a zesty addition to sandwiches and wraps. The combination of tangy mangoes and aromatic spices creates a tantalizing taste experience that enhances a wide range of dishes. By making your own Mango Pickle, you have control over the ingredients, allowing you to customize the flavors and adjust the spice level to your preference.

Crafting Homemade Mango Pickle 🥭🌶️🥒 Now, let’s dive into the process of making Mango Pickle:

Ingredients:

  • 4 cups raw mangoes, peeled and cut into small pieces
  • 1/4 cup mustard oil
  • 2 tablespoons mustard seeds
  • 2 tablespoons fennel seeds
  • 2 tablespoons fenugreek seeds
  • 1 tablespoon turmeric powder
  • 1 tablespoon red chili powder (adjust according to your spice preference)
  • 1 tablespoon nigella seeds (kalonji)
  • 1 tablespoon salt (adjust to taste)

Instructions:

  1. Start by washing the raw mangoes thoroughly and patting them dry. Remove the skin and cut the mangoes into small, bite-sized pieces. Make sure to discard the pit.
  2. In a large bowl, combine the mango pieces with salt. Mix well, ensuring that the salt is evenly distributed. Allow the mangoes to sit for about an hour to release their juices.
  3. While the mangoes are resting, heat mustard oil in a small pan over low heat until it reaches its smoking point. Let the oil cool to room temperature.
  4. In a separate pan, dry roast the mustard seeds, fennel seeds, and fenugreek seeds until they become fragrant and slightly darker in color. Remove from heat and let them cool.
  5. Grind the roasted seeds into a coarse powder using a mortar and pestle or a spice grinder.
  6. In the bowl with the mangoes, add the ground spice powder, turmeric powder, red chili powder, and nigella seeds. Mix well to ensure that the spices coat the mangoes evenly.
  7. Pour the cooled mustard oil over the mango mixture. The oil acts as a preservative and adds a distinct flavor to the pickle. Mix everything thoroughly.
  8. Transfer the mixture into a sterilized glass jar, ensuring that the mango pieces are fully immersed in the oil and spice mixture. Seal the jar tightly.
  9. Allow the Mango Pickle to mature in a cool and dark place for at least a week. During this time, the flavors will meld together, and the pickle will develop its signature tanginess.
  10. Once the pickle has matured, it’s ready to be enjoyed! Serve it as a condiment alongside your meals or use it to add a zesty kick to sandwiches, wraps, and more.

Tips for Selecting Mangoes for Pickling 🥭🌟 Choosing the right mangoes for pickling is crucial to achieve the desired texture and flavor in your Mango Pickle. Here are some tips to help you select the best mangoes:

  • Variety: Opt for firm and unripe mangoes that are suitable for pickling. Varieties such as Totapuri, Rajapuri, or Kesar work well due to their firmness and tangy flavor.
  • Texture: Look for mangoes that are firm and free from blemishes. They should be green or slightly yellow in color.
  • Sourness: For a tangier pickle, choose mangoes that have a slightly sour taste. This will add depth to the flavor profile of the pickle.

Creative Variations 🌈🌶️ While the traditional Mango Pickle recipe is already delicious, you can explore creative variations to personalize your pickle. Here are a few ideas:

  1. Spicy Mango Pickle: Increase the amount of red chili powder or add chopped green chilies to the pickle mixture for an extra kick of heat.
  2. Sweet and Tangy Mango Pickle: Balance the tanginess of the pickle by adding a touch of jaggery or sugar. This will create a delightful sweet and tangy flavor profile.
  3. Mango-Ginger Pickle: Enhance the flavors of your Mango Pickle by incorporating finely chopped ginger. The addition of ginger adds a subtle warmth and depth to the pickle.
  4. Mixed Mango Pickle: Combine different varieties of mangoes, such as raw and slightly ripe mangoes, to create a diverse range of flavors and textures in your pickle.
  5. Fruity Mango Pickle: Add diced fruits like apples, pineapples, or pears to the pickle mixture for a unique twist. The combination of tangy mangoes and sweet fruits creates a delightful flavor contrast.

Join Us for More Culinary Adventures! 🍽️🌍 If you’re passionate about exploring new flavors and connecting with fellow food enthusiasts, we invite you to join our vibrant community of foodies! Discover new recipes, share your culinary creations, and engage in conversations about all things food. Join our secret Facebook group, Eatlo, by visiting https://www.facebook.com/groups/eatlo and be a part of a community that celebrates the joy of cooking and the love for delicious food.

Conclusion Mango Pickle is a tangy and flavorful condiment that adds a zesty touch to your meals. With its combination of ripe mangoes, aromatic spices, and tangy goodness, Mango Pickle is a versatile addition to your culinary creations. By following the simple steps outlined in this recipe, you can make your own Mango Pickle that’s bursting with fresh flavors. So, grab some raw mangoes, gather your spices, and savor the mouthwatering tanginess of Mango Pickle with your favorite dishes! 🥭🌶️🥒

Posted on 1 Comment

How to make Mango Jam? Recipe with 5 Tangy Twists Inside

If you’re a fan of delicious spreads and the luscious sweetness of mangoes, then Mango Jam is an absolute must-try! Bursting with the tropical flavors of ripe mangoes, this homemade jam is a delightful combination of sweet and tangy notes that will elevate your breakfast or snack time. In this post, we’ll explore the art of making Mango Jam from scratch, provide tips on selecting the perfect mangoes, guide you through the step-by-step process, and share some creative twists, serving ideas, and five flavorful variations to enhance your jam experience. Get ready to embark on a flavorful journey with Mango Jam! 🥭🍯🌿

Why Mango Jam? 🥭🍯 Mango Jam is a delectable way to preserve the natural sweetness and tropical essence of mangoes. It’s a versatile spread that adds a burst of flavor to your morning toast, pancakes, or scones. With its vibrant color and delightful taste, Mango Jam is a true celebration of the mango season. Plus, by making your own jam, you have full control over the ingredients, ensuring a fresh and wholesome treat that you can enjoy throughout the year.

Crafting Homemade Mango Jam 🥭🍯🌿 Now, let’s dive into the process of making Mango Jam:

Ingredients:

  • 4 cups ripe mangoes, peeled, pitted, and finely chopped
  • 2 cups granulated sugar
  • 2 tablespoons fresh lemon juice
  • 1 teaspoon lemon zest (optional)

Instructions:

  1. Prepare the mangoes by peeling them, removing the pit, and finely chopping the flesh. Make sure to discard any fibrous parts.
  2. In a large, heavy-bottomed saucepan, combine the chopped mangoes, granulated sugar, fresh lemon juice, and lemon zest (if using). Stir well to ensure that the sugar is evenly distributed.
  3. Place the saucepan over medium heat and bring the mixture to a boil, stirring constantly to prevent it from sticking to the bottom. Once it reaches a boil, reduce the heat to low and let it simmer for about 45 minutes to an hour, or until the mixture thickens and reaches a jam-like consistency.
  4. As the jam cooks, use a spoon or a potato masher to break down any larger mango pieces, creating a smoother texture. You can leave some small fruit chunks if desired, for added texture in the jam.
  5. While the jam is still hot, carefully transfer it to sterilized glass jars, leaving a small headspace at the top. Seal the jars tightly.
  6. Let the jars cool to room temperature, and then refrigerate them for at least a few hours or overnight to allow the jam to set and the flavors to meld together.
  7. Once chilled and set, your homemade Mango Jam is ready to be enjoyed! Spread it on your favorite bread, toast, or use it as a filling for pastries and desserts.

Tips for Selecting Ripe Mangoes 🥭🌟 Choosing ripe and flavorful mangoes is essential to achieve the best taste in your Mango Jam. Here are some tips to help you select the perfect mangoes:

  • Color and Texture: Look for mangoes with vibrant hues and a slightly soft texture when gently pressed. Avoid mangoes that are too firm or too mushy.
  • Aroma: Smell the stem end of the mangoes. A ripe mango should have a sweet and fragrant aroma.
  • Varieties: Depending on availability in your region, choose mango varieties like Alphonso, Ataulfo, or Kent for their rich sweetness and smooth texture, which work wonderfully in jams.

Creative Twists and Serving Ideas 🌈🥭🍯 While traditional Mango Jam is already delightful on its own, you can experiment with some creative twists and serving ideas to elevate your jam experience. Here are five flavorful variations to inspire you:

  1. Mango Coconut Jam: Add a tropical twist to your Mango Jam by stirring in a few tablespoons of unsweetened coconut flakes or coconut cream. This addition enhances the exotic flavors and creates a creamy texture.
  2. Mango Passion Fruit Jam: Combine the tropical goodness of mangoes with the tangy sweetness of passion fruit. Simply mix in some fresh passion fruit pulp or store-bought passion fruit concentrate to your Mango Jam for a burst of vibrant flavors.
  3. Mango Lime Chili Jam: For those who enjoy a spicy kick, add a pinch of chili powder or finely chopped fresh chili peppers to your Mango Jam. Balance the heat with a squeeze of fresh lime juice for a tantalizing sweet and spicy combination.
  4. Mango Vanilla Bean Jam: Infuse your Mango Jam with the aromatic flavors of vanilla by adding a scraped vanilla bean or a few drops of pure vanilla extract. This addition enhances the overall sweetness and adds a hint of warmth to the jam.
  5. Mango Cardamom Jam: Elevate the flavors of your Mango Jam with a touch of cardamom spice. Add a pinch of ground cardamom to the mixture while it simmers, creating a fragrant and exotic twist to the jam.

Join Us for More Culinary Adventures! 🍽️🌍 If you’re passionate about exploring new flavors and connecting with fellow food enthusiasts, we invite you to join our vibrant community of foodies! Discover new recipes, share your culinary creations, and engage in conversations about all things food. Join our secret Facebook group, Eatlo, by visiting https://www.facebook.com/groups/eatlo and be a part of a community that celebrates the joy of cooking and the love for delicious food.

Conclusion Mango Jam is a delightful way to capture the essence of ripe mangoes and enjoy their tropical flavors throughout the year. With its sweet and tangy taste, Mango Jam adds a burst of sunshine to your breakfast or snack time. By following the simple steps outlined in this recipe, you can create your very own homemade Mango Jam that’s bursting with fresh flavors. So, grab some ripe mangoes, get cooking, and savor the sweet and tangy delight of Mango Jam on your favorite bread or pastry! 🥭🍯🌿

Posted on Leave a comment

Spice Up Your Meals with Simple Homemade Avakaya Recipe

If you’re a fan of spicy and tangy flavors, then Avakaya is the perfect condiment to tantalize your taste buds! Avakaya is a traditional Indian pickle made with raw mangoes, chili powder, and a blend of aromatic spices. This fiery and flavorful pickle adds a punch to any meal, whether it’s rice, roti, or even sandwiches. In this post, we’ll explore the art of making Avakaya at home, step-by-step, along with tips on selecting the right mangoes and preserving this delicious condiment. Get ready to add a burst of spice and zing to your culinary adventures with homemade Avakaya! 🌶️🥭🍛

The Allure of Avakaya 🌶️🥭 Avakaya is a beloved pickle from the Indian state of Andhra Pradesh, known for its vibrant flavors and spicy kick. The combination of tangy raw mangoes, fiery red chili powder, and aromatic spices creates a pickle that packs a punch. Avakaya is a versatile condiment that can elevate the simplest of meals with its tangy, spicy, and slightly sour taste. It’s a delightful accompaniment that adds excitement to rice, curries, parathas, or even as a dip for snacks. Prepare to experience a burst of flavors with every bite!

Crafting Homemade Avakaya 🌶️🥭🍯 Now, let’s dive into the recipe for homemade Avakaya:

Ingredients:

  • 4 cups raw mangoes, firm and sour, peeled and cut into small pieces
  • 1 cup red chili powder (adjust according to your spice preference)
  • 1/4 cup mustard seeds
  • 1/4 cup fenugreek seeds (methi seeds)
  • 1/2 cup sesame oil (gingelly oil)
  • 1/4 cup powdered jaggery or sugar (optional, for a touch of sweetness)
  • 1 tablespoon turmeric powder
  • Salt to taste

Instructions:

  1. Start by ensuring the raw mangoes are firm and sour. Wash them thoroughly, peel the skin, and cut them into small, bite-sized pieces. Remove any excess moisture from the mango pieces using a clean kitchen towel.
  2. In a large mixing bowl, add the mango pieces and sprinkle salt and turmeric powder. Mix well and set aside for about 30 minutes. This step helps to remove excess moisture from the mangoes.
  3. Meanwhile, dry roast the mustard seeds and fenugreek seeds separately until they turn aromatic. Allow them to cool down and then grind them into a fine powder using a spice grinder or mortar and pestle.
  4. In a separate bowl, combine the red chili powder, ground mustard and fenugreek powder, and jaggery or sugar (if using). Mix well to ensure all the spices are evenly distributed.
  5. Heat sesame oil in a pan on medium heat. Once hot, turn off the heat and let it cool down slightly. The oil should be warm, not scorching hot.
  6. Now, add the spice mixture to the mango pieces. Mix thoroughly to coat the mangoes with the spices.
  7. Slowly pour the warm sesame oil over the mango mixture. The oil helps in preserving the pickle and imparts a rich flavor.
  8. Mix everything together until well combined. Ensure that the mango pieces are evenly coated with the spice mixture and oil.
  9. Transfer the Avakaya pickle to a clean, dry glass jar. Press the mixture down firmly to remove any air gaps. Ensure that the pickle is fully submerged in the oil.
  10. Seal the jar tightly and store it in a cool, dry place for at least a week to allow the flavors to meld together. During this time, the mangoes will absorb the flavors of the spices and develop a tangy taste.
  11. After a week, you can start enjoying your homemade Avakaya pickle. It can be stored for several months, but make sure to refrigerate it to extend its shelf life.

Tips for Selecting Mangoes for Avakaya 🥭🌟 To make the best Avakaya, choose raw mangoes that are firm, sour, and have a thin skin. Mango varieties such as Totapuri, Rajapuri, or Banganapalli work well for Avakaya. Avoid mangoes that are overly ripe or fibrous, as they may not provide the desired texture and taste.

Join Us for More Culinary Adventures! 🍽️🌍 If you’re a food enthusiast looking to connect with like-minded individuals and discover new flavors, we invite you to join our vibrant foodie community! Join our secret Facebook group, Eatlo, where we share recipes, exchange ideas, and celebrate the joys of culinary creativity. Visit https://www.facebook.com/groups/eatlo to be a part of our community of passionate foodies.

Conclusion With homemade Avakaya, you can add a burst of spice and tang to your meals. This fiery and flavorful pickle made with raw mangoes and aromatic spices is a true delight for your taste buds. The tangy and spicy notes of Avakaya can elevate any dish and create a memorable dining experience. So, gather the ingredients, follow the recipe, and embark on a culinary adventure with homemade Avakaya! 🌶️🥭🍛