You have swordfish steaks on the counter, a lemon ready to cut, and one big question: how do you cook them without turning them dry? Swordfish feels special because it is thick, meaty, and steak-like, but that also makes it a little nerve-racking the first time.
This swordfish recipe keeps the process clear without taking away the pleasure of dinner. Start with a bright lemon garlic seasoning, then cook the steaks the way that fits your kitchen: grilled, pan-seared, baked, broiled, or in the air fryer.
Use it as a choose-your-method guide. A ¾-inch steak and a 1½-inch steak should not be treated the same way, and a grill, skillet, oven, broiler, and air fryer all need slightly different timing. The goal is simple: a golden outside, a juicy center, and a lemony finish that makes the fish feel worth the fuss.
Once you know the rhythm, it becomes easy: dry the surface, season boldly, cook hot enough to brown, stop before the center tightens, and finish with lemon, herbs, butter, capers, salsa, or a bright relish.
In This Guide
Start Here
Cook It Right
Quick Answer: What Is the Best Way to Cook Swordfish?
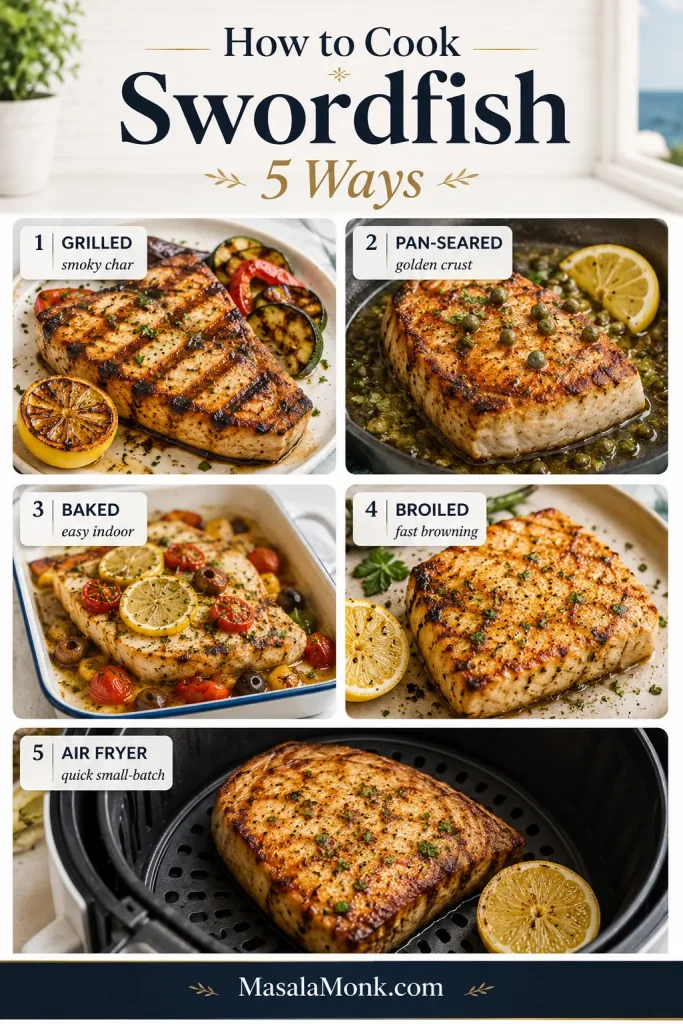
The right way to cook swordfish depends on the dinner you want. Grill it for smoke and char, pan-sear it for a golden crust, bake it for an easy indoor meal, broil it for fast grill-style browning, or use the air fryer for a quick small-batch dinner.
For most home cooks, the easiest starting point is lemon garlic swordfish steaks cooked on the grill or in a hot skillet. Choose steaks about 1 inch / 2.5 cm thick, season them with olive oil, lemon, garlic, salt, pepper, and herbs, then cook until the thickest part looks opaque and separates easily with gentle pressure.
- Most reliable method: pan-seared or grilled swordfish
- No-grill choice: baked swordfish at 400°F / 200°C
- Fast indoor choice: broiled swordfish
- Quick appliance choice: air fryer swordfish at 400°F / 204°C
- Good steak size: 6–8 oz / 170–225 g per person
- Ideal thickness: about 1 inch / 2.5 cm
- Food-safety temperature: 145°F / 63°C; without a thermometer, look for an opaque center that flakes easily
Before choosing a method, compare the five paths side by side. This guide shows where the grill, skillet, oven, broiler, and air fryer each make sense.
If this is your first time, start with pan-seared or baked. Both give you more control than a roaring grill or broiler, and both still give you a dinner that feels special: browned fish, lemony sauce, and a firm juicy bite.
Need the next step? Jump to the recipe · compare cooking methods · check cook times
Swordfish at a Glance
| Main recipe | Lemon garlic swordfish steaks |
| Servings | 4 |
| Steak size | 4 steaks, 6–8 oz / 170–225 g each |
| Ideal thickness | About 1 inch / 2.5 cm |
| Marinade time | 15–30 minutes |
| Cook time | Most methods take 8–15 minutes; thick steaks may take closer to 18 minutes |
| Flavor style | Lemon, garlic, herbs, olive oil, butter, capers, tomato, olives, mango salsa, Cajun seasoning |
| Doneness cue | Center looks set and opaque; flakes separate with gentle pressure |
| Food-safety temperature | 145°F / 63°C |
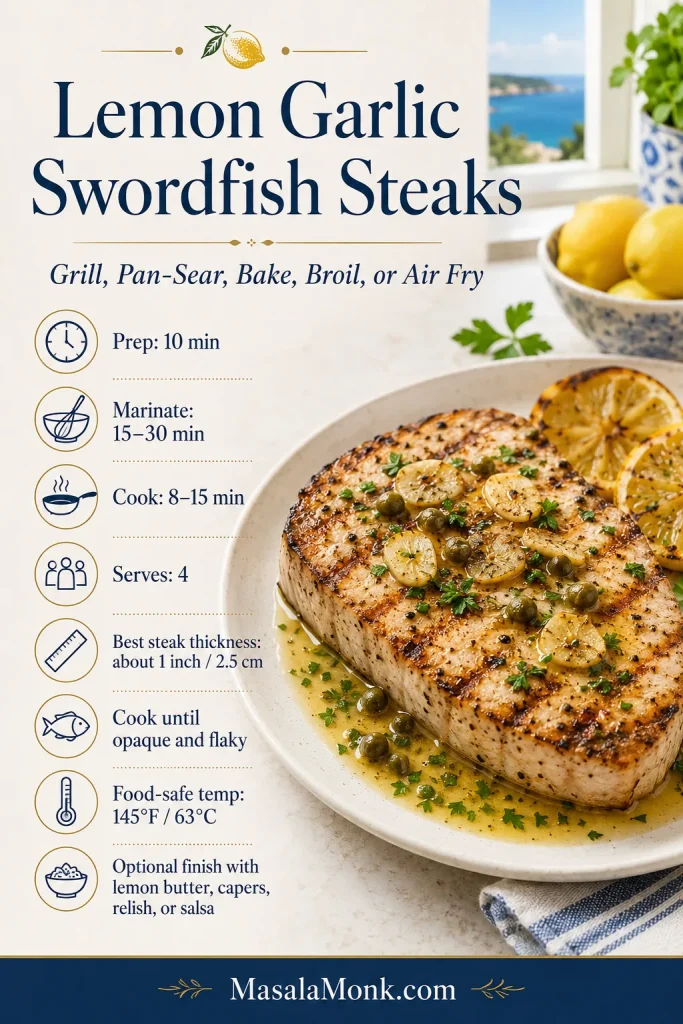
Lemon Garlic Swordfish Steaks — Grill, Pan-Sear, Bake, Broil, or Air Fry
This is the base recipe for all five cooking methods below. The seasoning is simple enough for a weeknight, but it gives you the kind of golden, lemony, garlicky swordfish that can sit next to roasted potatoes, cucumber salad, warm bread, or a spoonful of salsa and feel like a restaurant plate.
Prep time: 10 minutes
Marinating time: 15 to 30 minutes
Cook time: 8 to 15 minutes for most steaks
Total time: about 30 to 45 minutes
Servings: 4
Difficulty: Easy, but timing matters
Ingredients
| Ingredient | Amount | Notes |
|---|---|---|
| Swordfish steaks | 4 steaks, 6–8 oz / 170–225 g each | Even thickness helps them cook evenly |
| Olive oil | 3 tbsp / 45 ml | Helps carry the seasoning and protect the surface |
| Fresh lemon juice | 2 tbsp / 30 ml | Brightens the fish; do not marinate too long in citrus |
| Lemon zest | From 1 lemon | Adds lemon aroma without extra acidity |
| Garlic | 3 cloves, finely minced | Use 2 cloves for a milder version |
| Kosher salt | 1 tsp, or to taste | Use less if adding capers or soy-based marinade |
| Black pepper | ½ tsp | Freshly ground is best |
| Fresh parsley or chives | 2 tbsp, chopped | Plus more for serving |
| Optional butter finish | 2–3 tbsp / 28–42 g | Good for pan-seared, broiled, or baked swordfish |
| Optional capers | 1–2 tbsp | Best with lemon butter or pan sauce |
Instructions
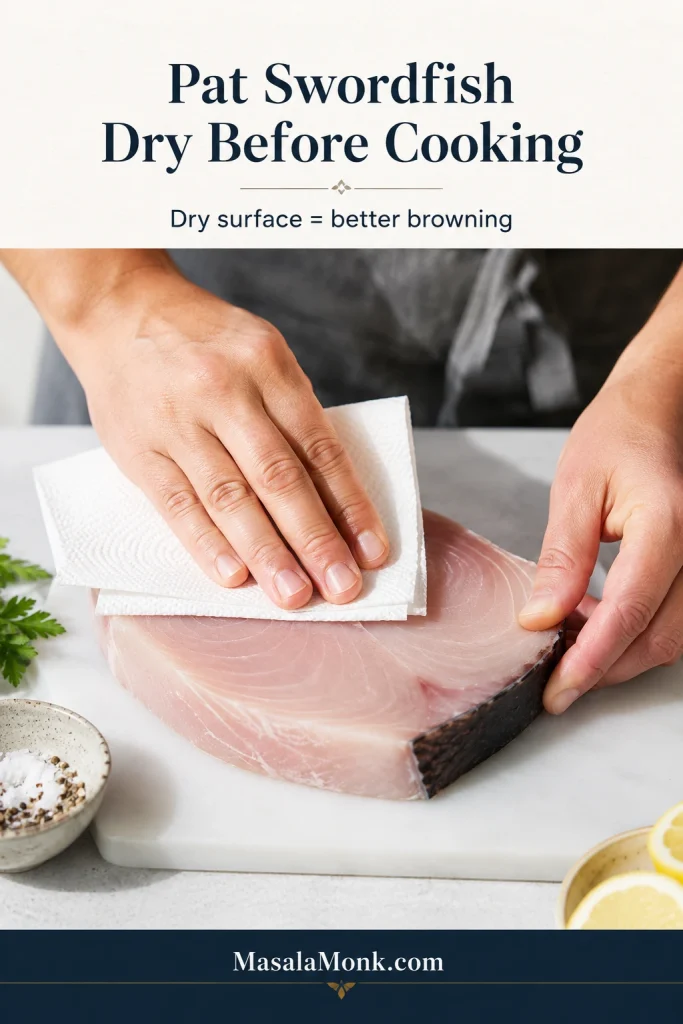
- Dry the fish. Pat both sides very dry with paper towels. This is what helps the outside brown instead of steam.
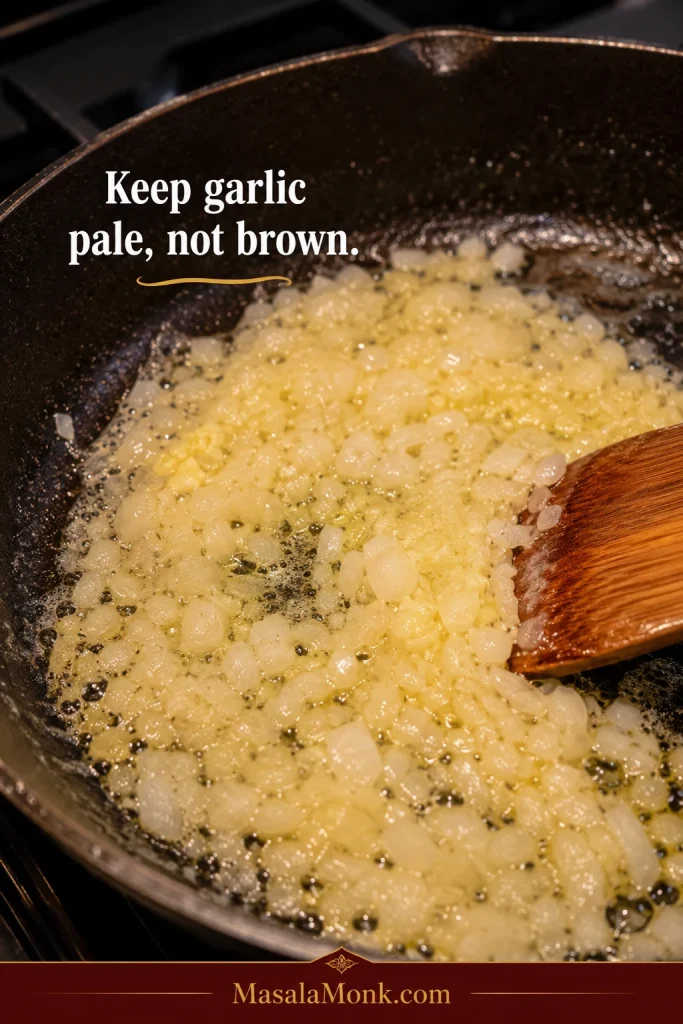
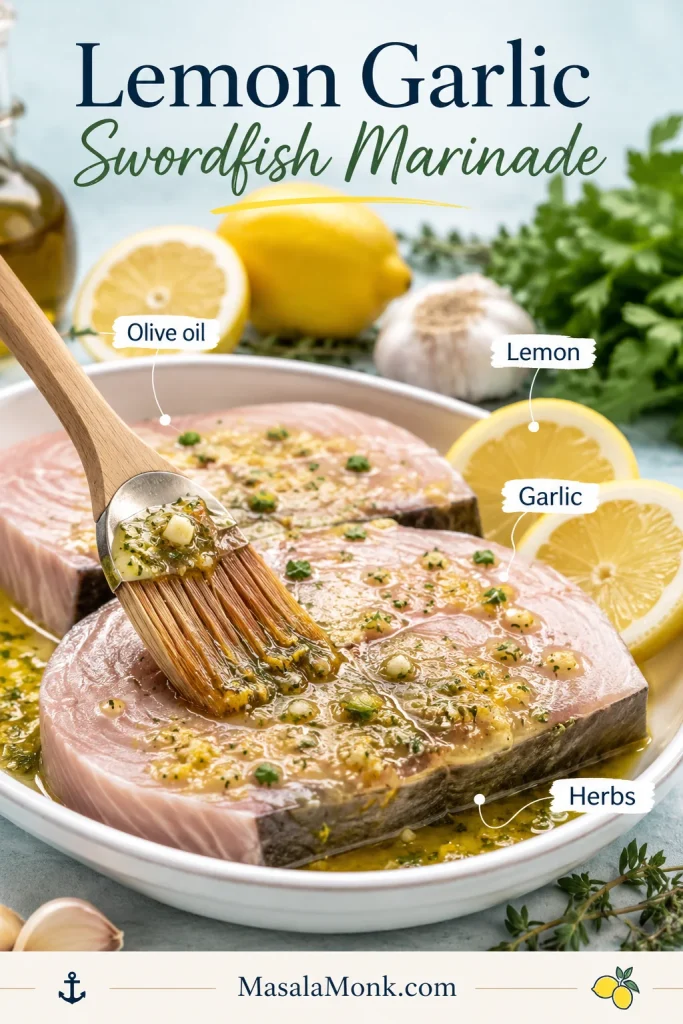
- Make the lemon garlic seasoning. In a small bowl, mix olive oil, lemon juice, lemon zest, garlic, salt, pepper, and chopped herbs.
- Season the steaks. Brush the mixture over both sides. Let the fish sit for 15 to 30 minutes while you prepare your cooking method. If marinating longer than a quick preheat rest, cover and refrigerate it.
- Cook with your chosen method. Use the grill, skillet, oven, broiler, or air fryer instructions below.
- Check the thickest part. It should no longer look glossy or translucent. For food safety, cook fish to 145°F / 63°C.
- Rest and finish. Let the fish rest for 3 to 5 minutes, then finish with melted butter, capers, extra lemon, fresh herbs, salsa verde, tomato olive relish, or mango salsa.
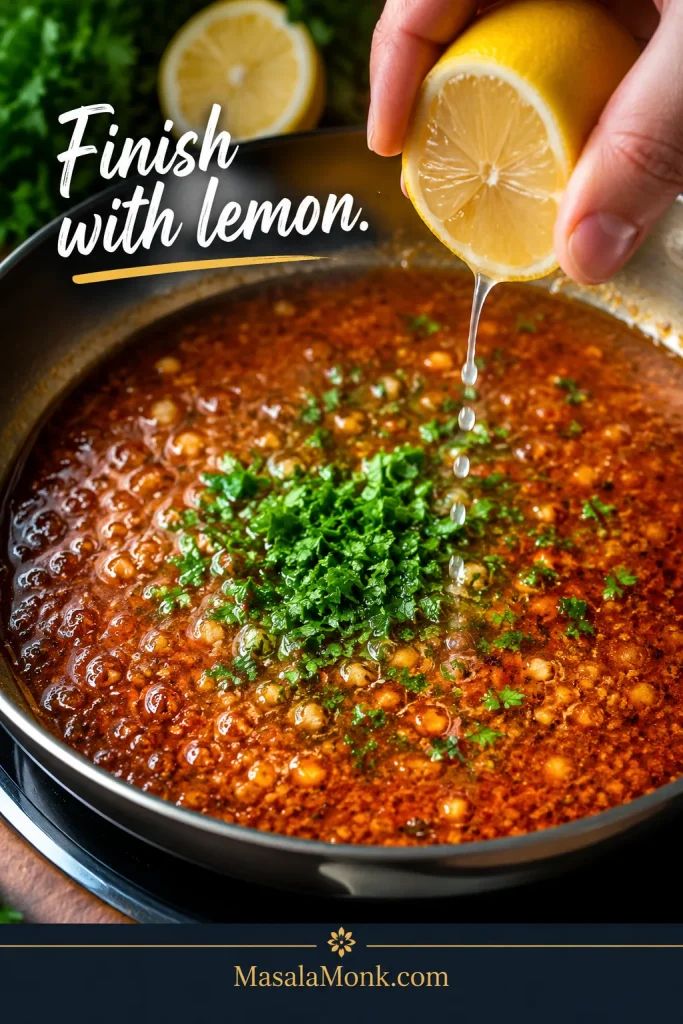
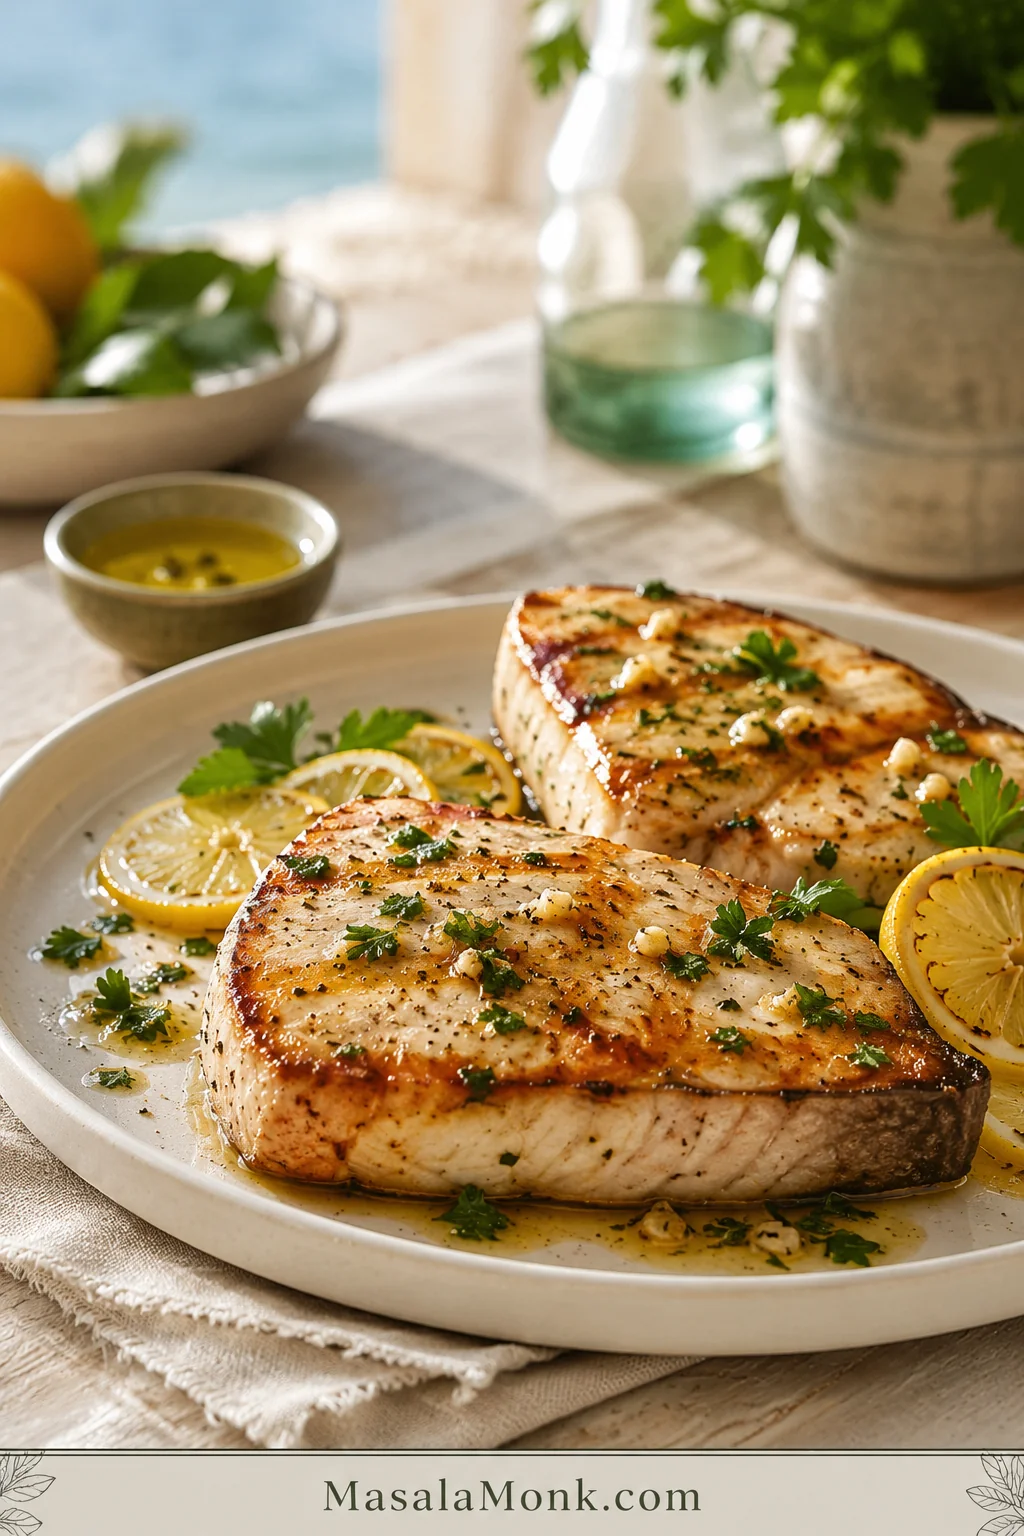
Before the fish hits the heat, the lemon garlic seasoning should coat the surface without soaking it for too long. This is the quick flavor step that keeps the fish bright while still letting it brown.
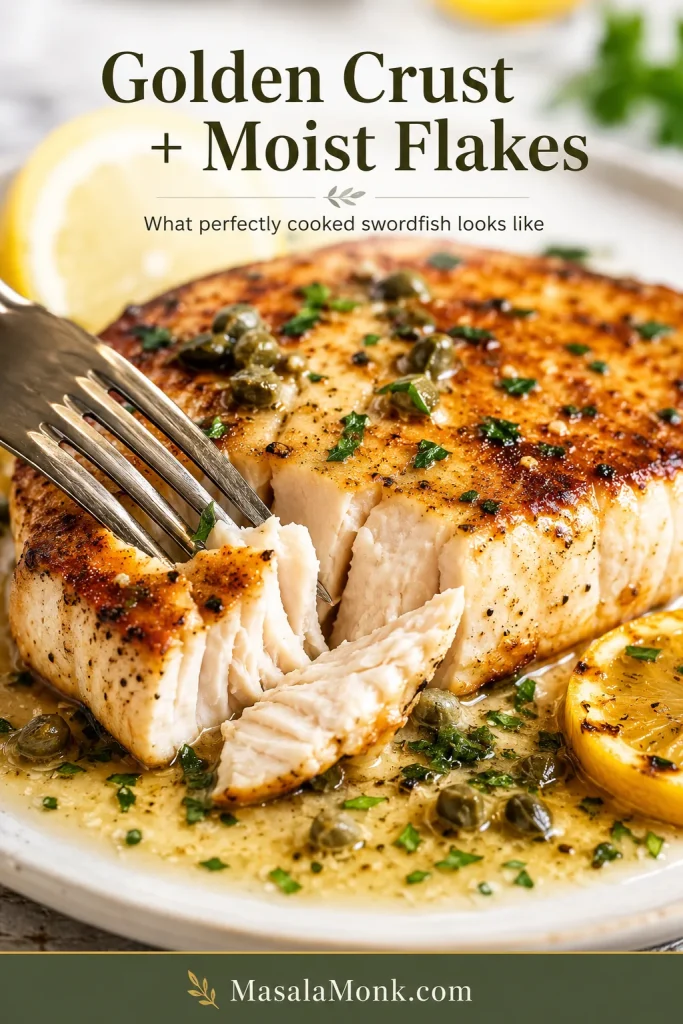
What success looks like: you are aiming for swordfish that is browned at the edges, opaque in the center, and still moist enough that lemon butter, capers, or tomato relish glide over the flakes instead of rescuing them.
After the ingredients and method, use this recipe-card image as a saveable recap. It keeps the swordfish steak thickness, timing range, and safe finish temperature in one easy place.
Cooking now? Choose your method · check timing by thickness · confirm doneness
Why This Recipe Works
The easiest way to cook swordfish confidently is to separate flavor from technique. The lemon garlic seasoning stays the same; the cooking method changes based on your kitchen, steak thickness, and comfort level.
- One seasoning works five ways. Lemon, garlic, olive oil, herbs, salt, and pepper suit grilling, searing, baking, broiling, and air frying.
- Timing is built around thick steaks. Swordfish behaves more like a seafood steak than a delicate fillet, so thickness matters.
- A method table helps you decide fast. You can choose grill, skillet, oven, broiler, or air fryer without scrolling through five separate recipes.
- Bright finishes keep the fish lively. Lemon, herbs, capers, butter, tomato relish, mango salsa, or a cool yogurt sauce add moisture and brightness without hiding the clean flavor.
This is the kind of seafood dinner to make when you want something that feels restaurant-level without restaurant nerves: a golden steak of fish, a bright lemony finish, and one clear method you can trust.
Before You Cook: Buying and Prep Tips
Good swordfish starts at the seafood counter, before the pan or grill ever enters the picture. Ask for steaks that are close in thickness so they finish at the same time. For dinner portions, 6–8 oz / 170–225 g per person works well.
You do not need the most expensive piece in the case; you need one that looks fresh, smells clean, and cooks evenly.
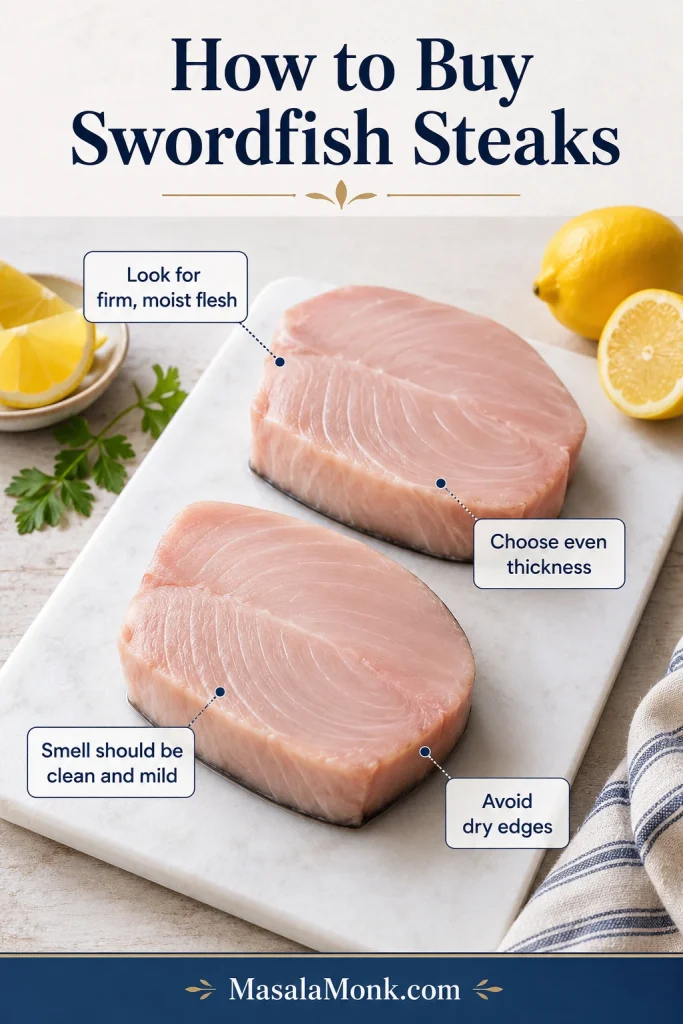
- Look for firm, moist flesh. It should look fresh and slightly glossy, not dry or tired around the edges.
- Smell matters. Fresh swordfish should smell clean and mild, not sharp, sour, or ammonia-like.
- Choose even thickness. Uneven steaks are harder to cook because the thin end dries before the thick end is done.
- Check the bloodline. A little darker meat is normal, but avoid pieces where the bloodline looks very brown, dried out, or unpleasantly strong-smelling.
- Skin on or off is fine. Some steaks have a strip of skin around the edge. You can cook with it on to help the steak hold together, then remove it before eating if you prefer.
At the seafood counter, the best swordfish steaks look firm, moist, and even. This buying guide helps you avoid dry edges and uneven cuts before cooking starts.
Swordfish Steak vs Swordfish Fillet
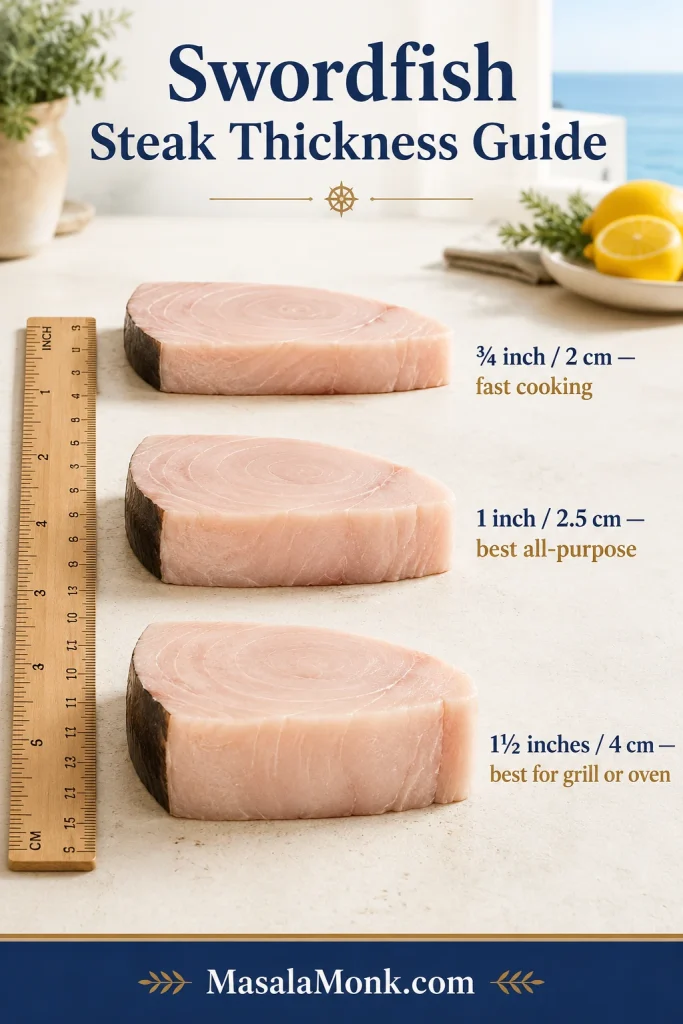
At many seafood counters, “swordfish steak” and “swordfish fillet” are used loosely. For this recipe, look for steak-like pieces about ¾ to 1½ inches thick. Thinner pieces suit the skillet, broiler, and air fryer. Thicker pieces are excellent on the grill or in the oven, but they are easier to judge with a thermometer.
Thickness is the timing clue many cooks miss. Use this guide to separate quick ¾-inch steaks from all-purpose 1-inch steaks and thicker cuts that need gentler finishing.
Fresh or Frozen Swordfish
Frozen swordfish can work well if it is thawed properly. Thaw it in the refrigerator overnight, then pat it very dry before seasoning. Cooking from frozen is less predictable because the outside can firm up before the middle is ready.
Equipment That Helps
You do not need fancy equipment. Paper towels and an instant-read thermometer do most of the heavy lifting.
- Instant-read thermometer: the easiest way to avoid overcooking thick steaks
- Paper towels: essential for drying the surface
- Fish spatula or tongs: useful for gentle flipping
- Heavy skillet: cast iron, stainless steel, or sturdy nonstick for searing
- Rimmed baking sheet: helpful for baking and broiling
- Grill brush: important if grilling, because clean grates release the fish better
Ready to cook? Check thickness · choose a method · use the cook-time guide
Choose Your Swordfish Cooking Method
Not sure whether to grill, sear, bake, broil, or air fry? Use this table first. It combines the method choice and situation guide so you can get to cooking faster.
| Situation | Choose | Why It Works | Watch Closely |
|---|---|---|---|
| You want smoke, char, and summer flavor | Grill | Direct heat gives grill marks and a steakhouse-style seafood plate | Clean and oil the grates; flip only when the fish releases |
| You want a golden crust indoors | Pan-sear | The skillet gives strong contact and sets you up for lemon caper butter | Do not move the fish too early |
| You want the easiest indoor method | Bake | Steady oven heat is calmer and good for several steaks at once | Do not keep baking just to chase color |
| You want fast indoor browning | Broil | High top heat gives grill-style edges without going outside | Stay nearby; broilers move fast |
| You want a quick small-batch dinner | Air fryer | Circulating heat cooks smaller steaks quickly with little mess | Thin pieces dry quickly |
| Your steaks are thick, closer to 1½ inches | Grill with a cooler zone, bake, or pan + oven | Thicker fish needs gentler finishing after browning | Use a thermometer instead of guessing |
Go straight to a method: grill · pan-sear · bake · broil · air fryer
How to Keep Swordfish Juicy
Swordfish is sturdy, but it is still a lean fish. It does not need rescuing if you stop at the right moment; it needs just enough heat to brown the outside while the middle stays moist.
Browning starts before the fish touches heat. Patting swordfish dry removes surface moisture so the crust can form instead of steaming.
- Choose thicker, even steaks when possible. Very thin pieces cook fast and give you less margin.
- Dry the surface before seasoning. Moisture blocks browning.
- Use enough heat to brown. A hot grill or skillet creates color before the inside dries out.
- Avoid long acidic marinades. Lemon and lime are wonderful, but too much time in acid can change the texture.
- Stop before it feels tight. The fish should be firm, not hard.
- Rest briefly. A few minutes off the heat helps the juices settle.
- Finish with brightness. Lemon butter, capers, tomato olive relish, salsa verde, mango salsa, or herbs make the final plate feel juicy and lively.
Swordfish Cook Time by Thickness
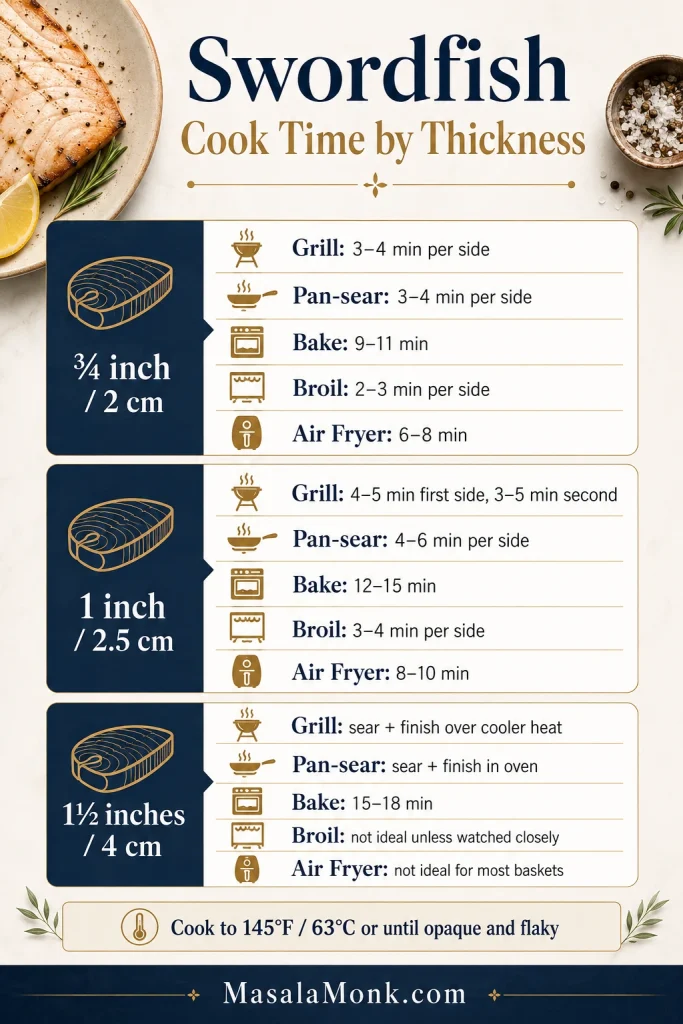
If one table matters most while you cook, make it this one. The clock is a starting point; steak thickness and heat level decide the final minute.
| Thickness | Grill | Pan-Sear | Bake | Broil | Air Fryer |
|---|---|---|---|---|---|
| ¾ inch / 2 cm | 3–4 min per side | 3–4 min per side | 9–11 min | 2–3 min per side | 6–8 min |
| 1 inch / 2.5 cm | 4–5 min first side, 3–5 min second | 4–6 min per side | 12–15 min | 3–4 min per side | 8–10 min |
| 1½ inches / 4 cm | Sear over hot zone, finish over cooler zone | Sear, then finish in oven | 15–18 min | Not ideal unless monitored carefully | Not ideal for most baskets |
For thick steaks, use a thermometer. With thin steaks, start looking before the timer ends and pull the fish before the texture turns stiff.
Use the timing with a method: grill · pan-sear · bake · broil · air fryer · doneness cues
After checking thickness, use the cook-time chart as a starting point. The final minute still depends on heat, steak size, and the way the center looks.
How to Grill Swordfish
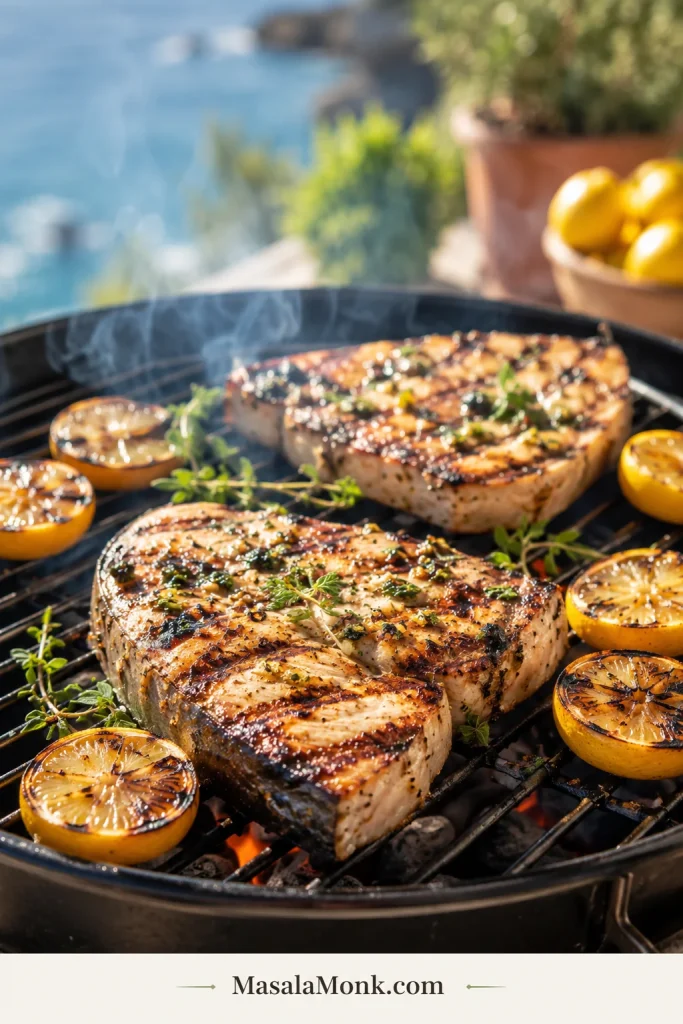
Grilled swordfish is for smoke, char, and summer plates. The fish is sturdy enough for direct heat, and the grill gives you those browned edges that taste especially good with lemon, herbs, and a cold salad.
For smoky char, the grill needs clean oiled grates and one confident flip. The image below shows the browned edges you are aiming for.
For Smoke, Char, and Summer Plates
- Preheat the grill to medium-high heat, about 400°F / 200°C.
- Clean the grates well, then oil them lightly.
- Brush the seasoned steaks with a little extra oil if the surface looks dry.
- Place the fish on the grill and leave it alone for 4 to 5 minutes.
- Flip once with tongs or a fish spatula.
- Cook the second side for 3 to 5 minutes, depending on thickness.
- Check the thickest part, then rest briefly before serving.
Grill cue: If the fish sticks when you try to lift it, do not force it. Give it another minute. Swordfish usually releases once the surface has browned enough.
Finish it with: salmoriglio, chimichurri, lemon garlic butter, tomato olive relish, or mango salsa. A squeeze of lemon over charred edges is often enough.
Swordfish Kabob Variation
For kabobs, cut thick steaks into large 1½-inch cubes, marinate briefly, thread onto skewers, and grill until cooked through. Smaller cubes move fast, so stay close and pull them before they feel tight or dry.
How to Pan-Sear Swordfish
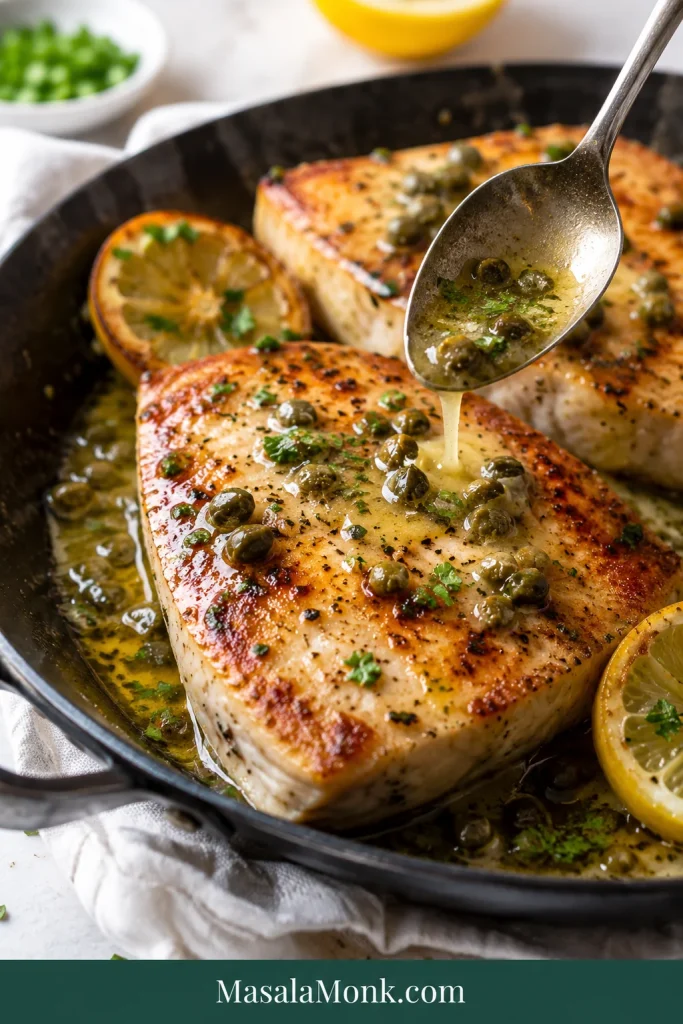
Pan-searing is the move when you want swordfish to feel like a restaurant main: browned outside, firm juicy center, and a lemon caper butter you can spoon over the top.
For the skillet method, aim for firm fish with a browned surface before adding lemon caper butter. That contrast keeps pan-seared swordfish rich but fresh.
For a Golden Crust and Lemon Caper Sauce
- Heat a heavy skillet over medium-high heat.
- Add a thin layer of oil.
- Place the fish in the pan and cook without moving for 4 to 6 minutes.
- Flip once and cook the second side for another 4 to 6 minutes.
- Check the thickest part for doneness.
- Rest briefly before saucing.
Pan cue: You want browning, not rushing. If the first side looks pale after 4 minutes, give it another minute before flipping. When it is ready, the edges should look golden and the fish should lift with less resistance.
Quick Lemon Caper Pan Sauce
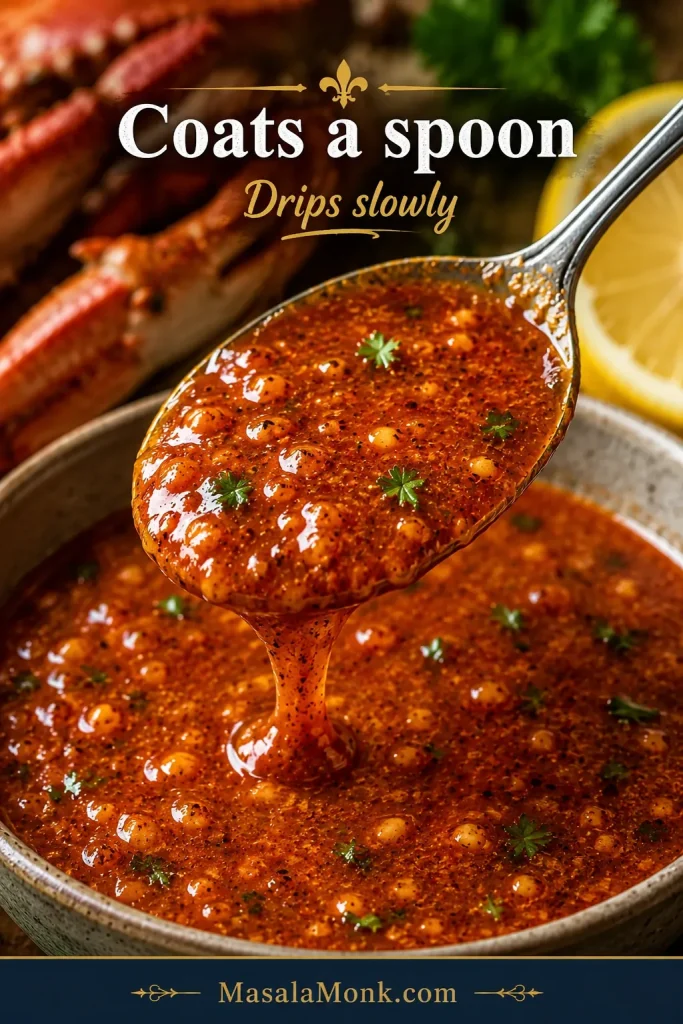
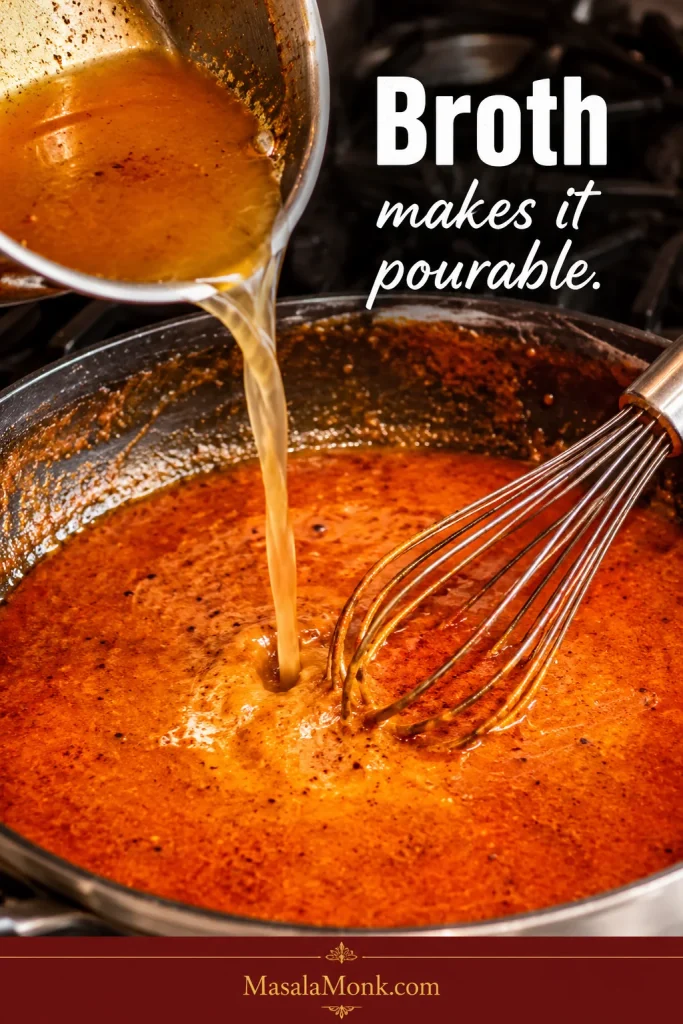
After removing the fish, lower the heat. Add 2 tablespoons butter, 1 tablespoon lemon juice, 1 to 2 tablespoons capers, and a splash of water or broth. Stir for about a minute, then spoon the sauce over the rested steaks.
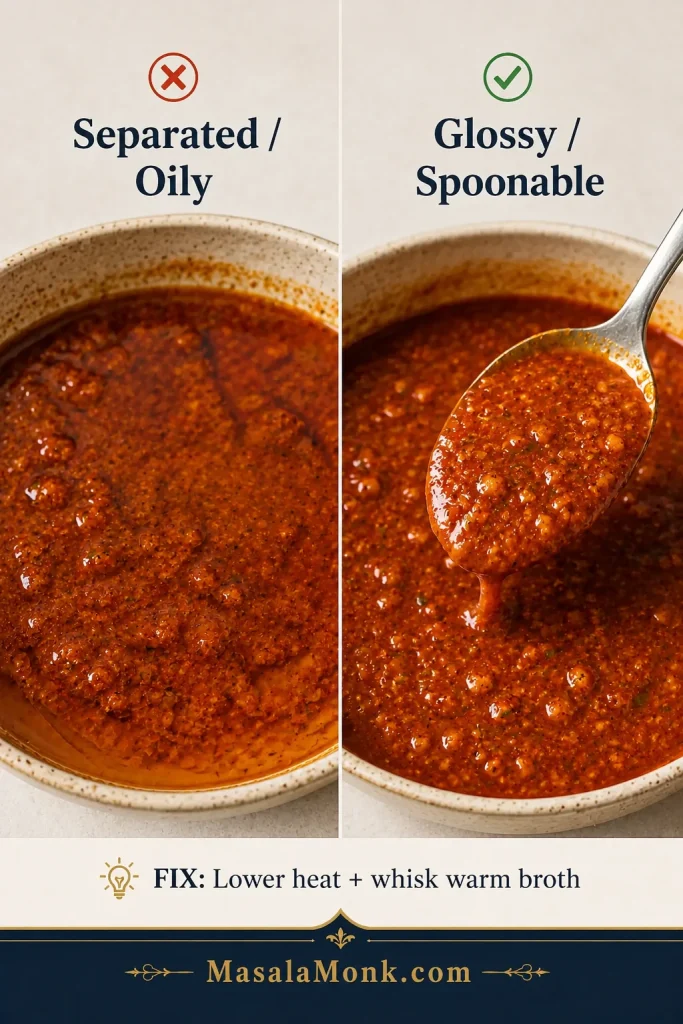
Before serving, check the texture: browned outside, opaque flakes inside, and moisture in the center. Sauce should add shine, not hide dryness.
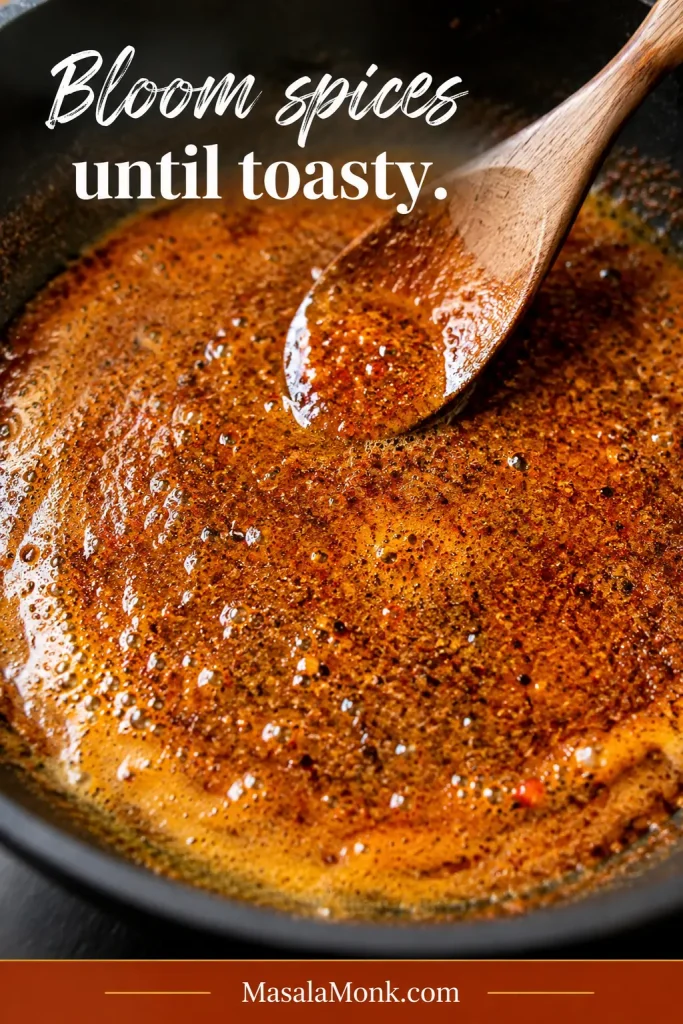
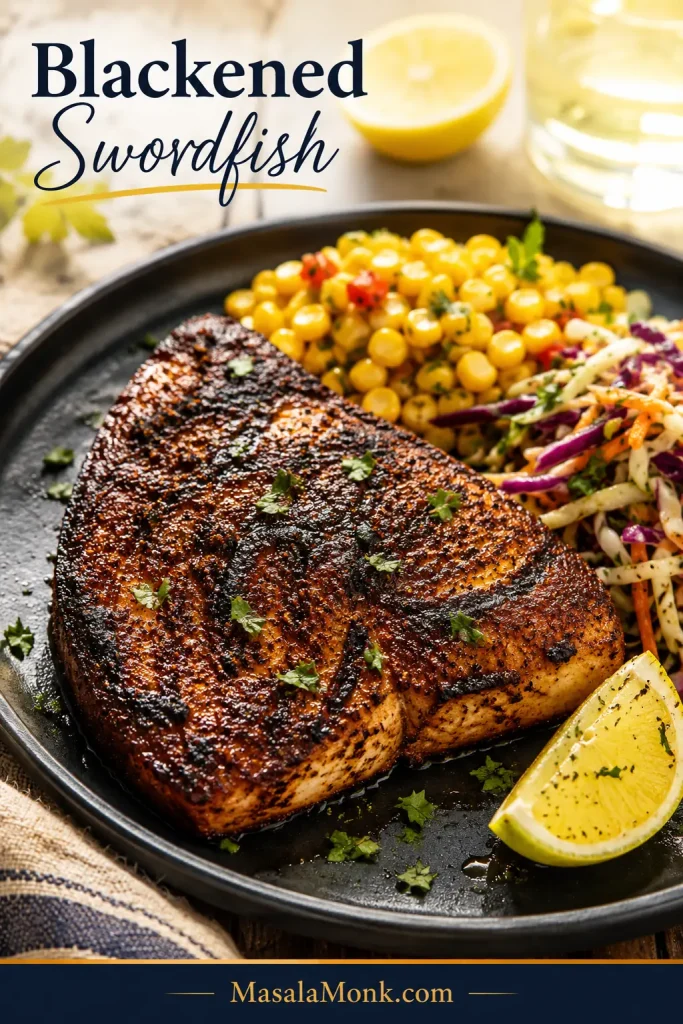
Blackened Swordfish Variation
For blackened swordfish, skip the lemon juice in the pre-cook seasoning and coat the steaks with oil, paprika, garlic powder, onion powder, oregano, black pepper, cayenne, and salt. Sear in a hot skillet until deeply browned, then finish with lemon butter or a lighter version of this Cajun garlic butter sauce.
With blackened swordfish, the crust should be dark from spice, not scorched. The inside still needs to stay moist and tender.
Pan + Oven Finish for Thick Swordfish
For steaks closer to 1½ inches thick, sear the first side for about 3 minutes, flip, then move an oven-safe skillet to a 400°F / 200°C oven for 5 to 6 minutes. This gives the middle time to cook without making the crust too dark.
How to Bake Swordfish
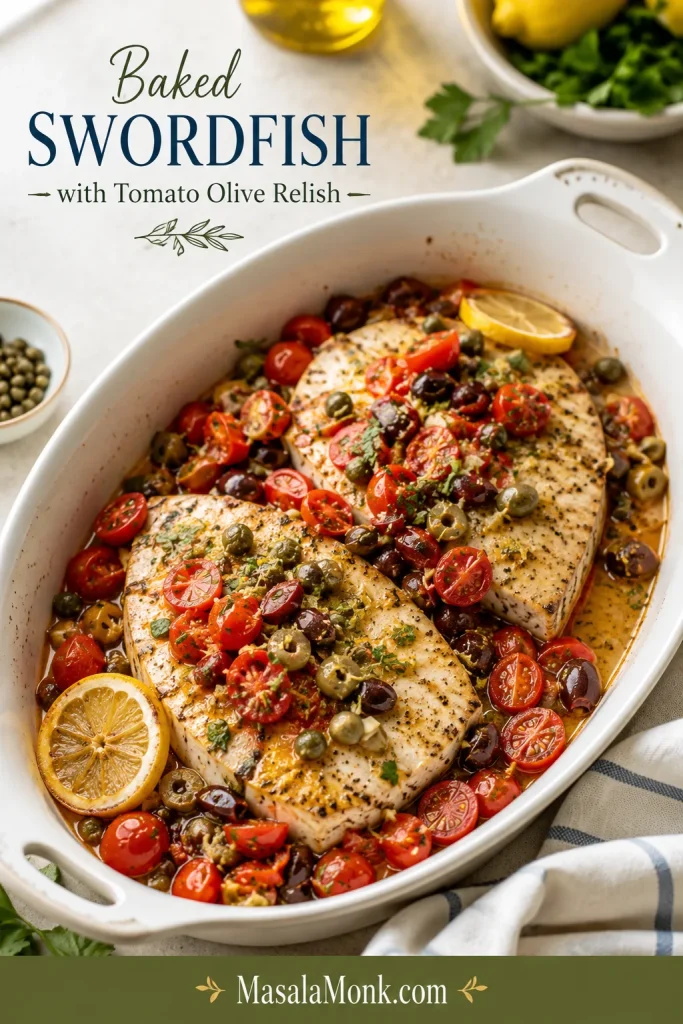
Baked swordfish is the easiest indoor dinner. It will not look as dramatic as grilled swordfish, but it gives you steady heat, less splatter, and plenty of room for a tomato olive topping or lemon butter finish.
For the baked method, think steady heat instead of dramatic char. Tomato olive relish adds color, acidity, and moisture once the fish is cooked.
- Preheat the oven to 400°F / 200°C.
- Place the seasoned steaks in a lightly oiled baking dish or on a rimmed baking sheet.
- Bake 1-inch steaks for 12 to 15 minutes.
- Start looking at thinner pieces around 9 to 10 minutes.
- Check the center for doneness.
- Rest briefly before serving.
Baking cue: If the top looks pale but the middle is done, do not keep baking just for color. Finish with sauce, herbs, or relish instead. A moist, gently cooked center matters more than a dramatic top.
Easy Tomato Olive Topping
Mix 1 cup chopped tomatoes, ¼ cup chopped olives, 1 tablespoon capers, 1 tablespoon olive oil, 1 tablespoon lemon juice, 2 tablespoons chopped parsley, and black pepper. Spoon it over baked swordfish just before serving for a bright Mediterranean finish.
How to Broil Swordfish
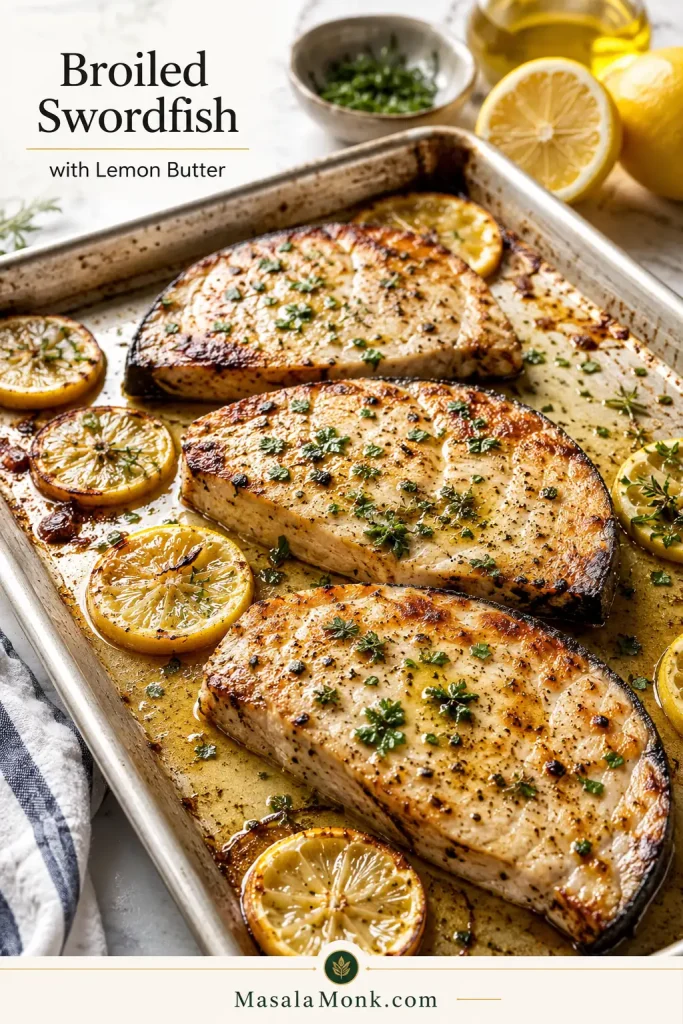
Broiled swordfish is for fast grill-style browning without going outside. It is not difficult, but it is quick. Stay close and let the top heat do its job.
Under the broiler, swordfish browns fast from above. Keep it on a sheet pan, watch the surface, and stop before the center tightens.
For Fast Grill-Style Browning
- Preheat the broiler fully.
- Place the oven rack 4 to 6 inches from the heat source.
- Line a rimmed baking sheet with foil, or use an oven-safe grill pan.
- Place the seasoned steaks on the pan.
- Broil for 3 to 4 minutes on the first side.
- Flip carefully and broil for another 3 to 4 minutes.
- Check doneness immediately and rest before serving.
Broiler cue: If the top browns too fast, lower the rack or finish the fish in a 400°F / 200°C oven for a few minutes. Broilers vary, so your eyes matter as much as the timer.
Broiled swordfish is excellent with garlic butter, lemon herbs, Cajun butter, or a small spoonful of garlic aioli on the side.
How to Air Fry Swordfish
Air fryer swordfish is the small-batch, low-mess option. It is especially useful when you want a quick seafood dinner without heating the oven or dealing with grill grates.
Inside the air fryer basket, swordfish works best in a single layer. Thin steaks need early checking because circulating heat dries them faster than the oven.

For a Quick Small-Batch Dinner
- Preheat the air fryer to 400°F / 204°C.
- Lightly oil the air fryer basket.
- Place the seasoned steaks in a single layer.
- Air fry fresh ¾-inch to 1-inch steaks for 8 to 10 minutes.
- Flip halfway through cooking.
- Check the middle of the thickest steak.
- Rest briefly before serving.
Air fryer cue: Thin swordfish dries out faster in the air fryer than in the oven. If the surface looks dry before the middle is ready, finish with lemon butter, salsa, or sauce after cooking instead of adding more time.
Cajun seasoning, oregano, lemon pepper, mango salsa, and cabbage slaw all work especially well with air fryer swordfish.
Before serving: confirm doneness · choose a sauce · build a plate · recipe card
How to Know When Swordfish Is Done
Swordfish is done when the center turns opaque and the fish separates easily with a fork. For food safety, fish should reach 145°F / 63°C according to FoodSafety.gov.
The safest standard to follow is 145°F / 63°C. In restaurant-style cooking, swordfish is sometimes pulled earlier, around 130°F to 140°F, so carryover heat can finish the center and keep the texture juicier. That is a texture choice, not the official food-safety recommendation. When cooking for children, older adults, pregnant or breastfeeding people, or anyone immunocompromised, follow the 145°F / 63°C guidance.
Doneness is easier when you combine temperature and visual cues. Look for an opaque center, separating flakes, and a firm but not hard texture.
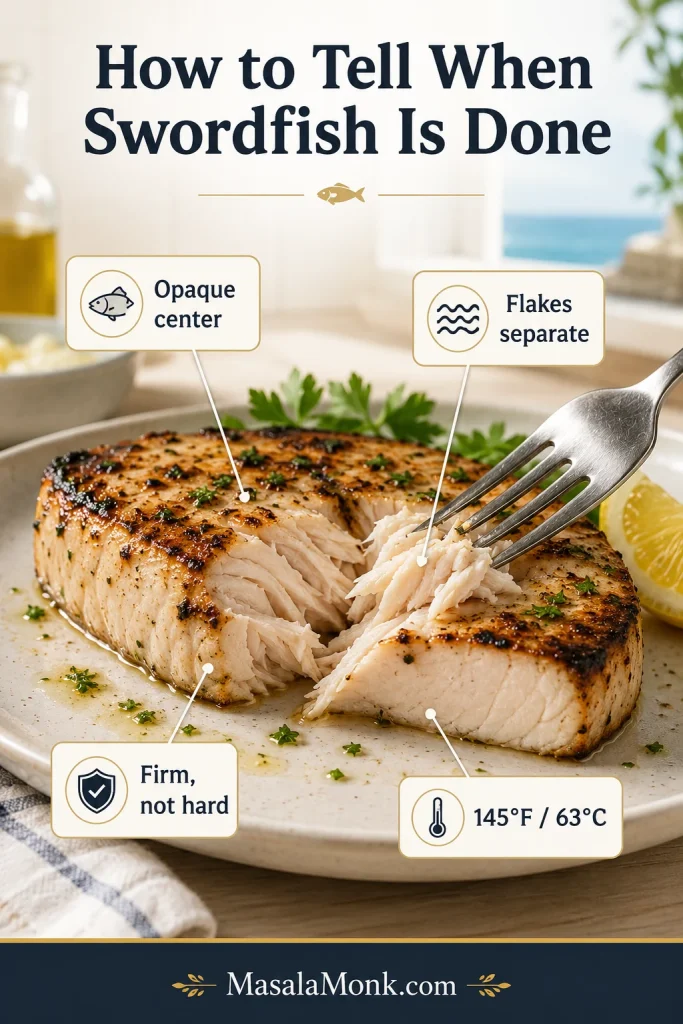
No Thermometer?
Cut gently into the thickest part of one steak. The center should look set and opaque, not glossy or translucent, and the flakes should separate with gentle pressure. If it still looks raw in the middle, cook for 1 more minute and check again.
Mercury note: One more thing to know before making swordfish a regular habit: it is a high-mercury fish. The FDA fish advice lists swordfish as a fish to avoid for pregnant or breastfeeding people and young children. For other adults, swordfish is best enjoyed occasionally as a special seafood dinner, not as an everyday fish.
Marinades for Swordfish
Swordfish does not need a long soak. It needs a short, confident flavor coat. Use lemon garlic for classic flavor, soy ginger for sweet-savory depth, and Cajun spice oil for smoky heat.
- Quick flavor: 10 to 15 minutes
- Everyday range: 15 to 30 minutes
- Stronger marinade: up to 1 hour, covered in the refrigerator
- Avoid: very long lemon or lime marinades that can change the texture
| Marinade | Use | Formula for 4 Steaks |
|---|---|---|
| Lemon Garlic Herb | Classic all-purpose flavor | 3 tbsp olive oil, 2 tbsp lemon juice, zest of 1 lemon, 3 minced garlic cloves, 1 tsp kosher salt, ½ tsp black pepper, 2 tbsp parsley |
| Soy Ginger | Grilled, broiled, or air fryer swordfish | 2 tbsp soy sauce, 1 tbsp oil, 1 tbsp lemon juice or rice vinegar, 1 tsp grated ginger, 1 minced garlic clove, 1 tsp honey, black pepper |
| Cajun Spice Oil | Pan-seared, broiled, blackened, or air fryer swordfish | 2 tbsp oil, 1 tsp paprika, ½ tsp garlic powder, ½ tsp onion powder, ½ tsp oregano, ¼ tsp cayenne or chili powder, salt to taste |
After marinating, let the excess drip off. If the surface looks wet, pat it lightly before cooking so it can brown.
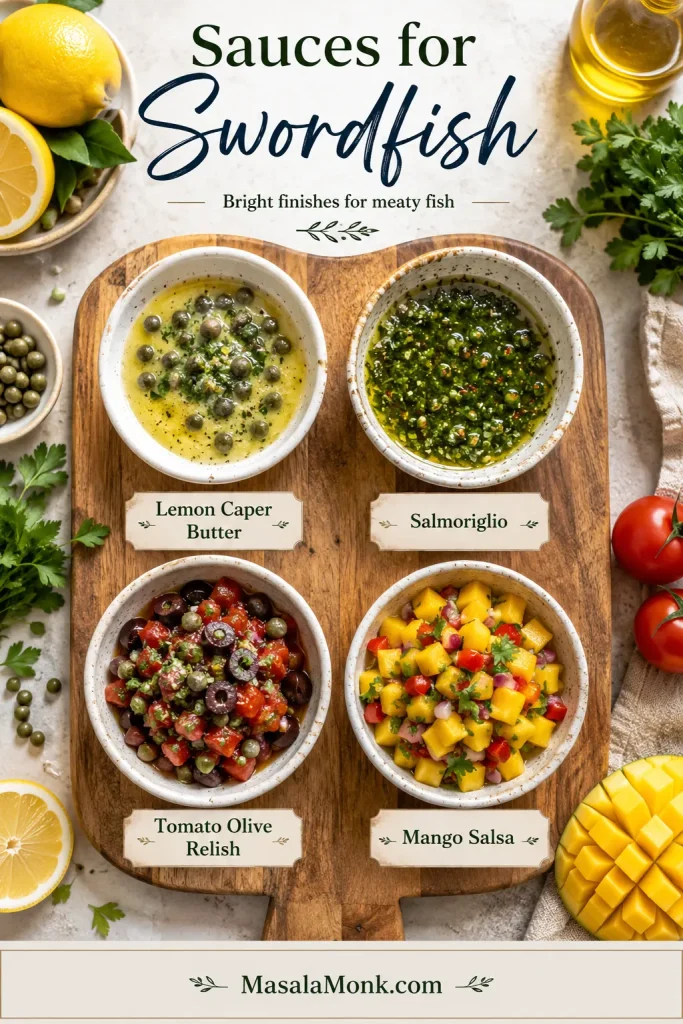
Sauces and Flavor Variations for Swordfish
Once the fish is cooked, the sauce changes the whole mood of dinner. Keep it bright and classic, go Mediterranean, add smoky heat, or make it summery with fruit and herbs.
A little acidity matters here: lemon, capers, tomato, vinegar, herbs, or fruit can wake up the meaty fish without burying it.
Once the fish is cooked, choose a sauce by mood. Lemon caper butter, salmoriglio, tomato olive relish, and mango salsa all brighten swordfish in different ways.
| Mood | Sauce or Finish | How to Use It |
|---|---|---|
| Bright and classic | Lemon garlic butter or lemon caper butter | Spoon over grilled, pan-seared, baked, or broiled swordfish |
| Mediterranean | Salmoriglio, tomato olive relish, or tzatziki sauce | Use with grilled or baked fish, cucumber, herbs, and warm pita |
| Spicy and smoky | Cajun butter or blackened seasoning | Best with pan-seared, broiled, or air fryer swordfish |
| Summer fresh | Mango salsa, chimichurri, or salsa verde | Add after cooking for color, moisture, and freshness |
| Cold and creamy | Garlic aioli, yogurt sauce, or herb sauce | Use lightly for sandwiches, broiled fish, or leftovers |
Easy Lemon Caper Butter
Melt 2 tablespoons butter with 1 tablespoon lemon juice and 1 to 2 tablespoons capers. Spoon over hot swordfish and finish with parsley. This is the simplest way to make pan-seared swordfish feel dinner-party ready.
Salmoriglio for Grilled Swordfish
Whisk 3 tablespoons olive oil with 1 tablespoon lemon juice, 1 small grated or minced garlic clove, 1 tablespoon chopped parsley, ½ teaspoon dried oregano, salt, and black pepper. Spoon over grilled swordfish after it rests.
Tomato Olive Relish
Mix 1 cup chopped tomatoes, ¼ cup chopped olives, 1 tablespoon capers, 1 tablespoon olive oil, 1 tablespoon lemon juice, 2 tablespoons chopped parsley, and black pepper. It is especially good when the fish needs freshness and color.
What to Serve With Swordfish
Think about the sauce first. If you finish the fish with butter, capers, aioli, or a creamy sauce, choose something fresh on the side. For simply grilled fish with lemon and herbs, you can go heartier with potatoes, rice, pasta, couscous, or corn.
A crisp cucumber salad is one of the easiest light sides, especially with grilled or broiled swordfish.
To build the plate, match the sides to the finish. Rich butter sauces want fresh salads, while simple grilled swordfish can handle potatoes, grains, or tacos.

| Mood | Good Sides |
|---|---|
| Light and fresh | Green salad, cucumber tomato salad, asparagus, green beans, lemony herbs |
| Mediterranean | Orzo, couscous, Greek potatoes, olives, roasted peppers, tomato salad, or chickpea salad |
| Cozy dinner | Rice pilaf, garlic mashed potatoes, garlic bread, pasta, roasted potatoes |
| Summer grill | Corn, zucchini, tomato salad, potato salad, mango salsa, grilled vegetables |
| Low-carb | Cauliflower rice, leafy greens, grilled vegetables, cucumber salad |
Easy Swordfish Dinner Plates
- Grilled swordfish plate: cucumber salad, roasted carrots, and salmoriglio.
- Pan-seared swordfish plate: lemon caper butter, rice pilaf, and green beans.
- Air fryer swordfish plate: mango salsa, cabbage slaw, lime, and warm tortillas.
- Cozy baked swordfish plate: tomato olive relish with pesto pasta or lemony pasta.
After dinner: store leftovers · read FAQs · jump back to recipe · back to top
Storage, Leftovers, and Reheating
Swordfish is best right after cooking, but leftovers can still be useful if you handle them gently.
- Refrigerate: Store cooked swordfish in an airtight container for up to 2 days.
- Reheat gently: Warm at low heat until just heated through.
- Use cold: Leftover swordfish is often better cold or room temperature in salads, sandwiches, tacos, or grain bowls.
Flake leftovers into fish tacos with cabbage and lime, add them to pasta with olive oil and herbs, or build a seafood-style grain bowl with cucumber, rice, quinoa, couscous, and sauce.
Common Mistakes to Avoid
- Buying uneven steaks: thin ends overcook before thick centers are done.
- Skipping the dry step: surface moisture prevents browning.
- Moving it too early: on the grill or in a pan, let the crust form before flipping.
- Over-marinating: long acidic marinades can change the texture.
- Cooking by time only: use timing as a guide, then check the fish.
- Chasing color in the oven: baked swordfish may look pale but still be perfectly cooked.
- Reheating too aggressively: leftover swordfish dries out when overheated.
- Ignoring mercury guidance: swordfish is high in mercury, so it is not the best fish for pregnant or breastfeeding people and young children.
FAQs
These are the questions that usually come up right before the fish hits the pan, grill, oven, broiler, or air fryer.
What is the best way to cook swordfish?
Grilling and pan-searing are the strongest methods if you want browning. Baking is easiest indoors, broiling is fastest for grill-style edges, and the air fryer works well for smaller steaks.
How long should swordfish steaks cook?
For 1-inch steaks, grill for about 4–5 minutes on the first side and 3–5 minutes on the second side, pan-sear for 4–6 minutes per side, bake at 400°F / 200°C for 12–15 minutes, broil for 3–4 minutes per side, or air fry at 400°F / 204°C for 8–10 minutes.
How do you know when swordfish is done?
The center should look opaque and separate easily with a fork. For food safety, cook fish to 145°F / 63°C.
Should swordfish be pink in the middle?
Its middle should not look raw, glossy, or translucent. Some restaurant-style cooking pulls swordfish earlier for a juicier texture, but 145°F / 63°C is the official food-safety temperature.
How do you keep swordfish from drying out?
Choose evenly thick steaks, dry the surface, cook hot enough to brown, stop before the fish feels stiff, and finish with something bright or moist like lemon butter, capers, salsa, or relish.
Is swordfish better grilled or pan-seared?
Grilled swordfish is better for smoke and char. Pan-seared swordfish is better for a golden crust and lemon caper sauce. Both are excellent for 1-inch steaks.
Should swordfish be marinated before cooking?
A short marinade helps, but it is not required. Fifteen to 30 minutes in olive oil, lemon, garlic, herbs, salt, and pepper is enough for most swordfish steaks.
Can you bake swordfish?
Yes. Bake 1-inch swordfish steaks at 400°F / 200°C for about 12–15 minutes, then finish with lemon butter, herbs, or tomato olive relish.
Can you air fry swordfish?
Absolutely. Air fry fresh ¾-inch to 1-inch steaks at 400°F / 204°C for 8–10 minutes, flipping halfway. Start checking sooner if the pieces are thin.
Can you cook swordfish from frozen?
You can, but thawing first gives better seasoning coverage and more even cooking. Frozen steaks can cook unevenly, with the outside firming before the middle is ready.
What sauce goes with swordfish?
Lemon caper butter, salmoriglio, tomato olive relish, mango salsa, chimichurri, salsa verde, Cajun butter, and light garlic aioli all work well.
What can I do with leftover swordfish?
Use leftovers in tacos, salads, pasta, sandwiches, or grain bowls. Reheat gently, or serve cold with lemon, herbs, and a bright dressing.
Final Thoughts
Once you cook swordfish this way, it stops feeling risky. You know what to buy, which method to choose, when to flip, when to stop, and how to finish the plate with something bright.
That is the shift: swordfish stops being the expensive fish you are afraid to overcook and starts feeling like the seafood steak you know how to handle — grill for smoke, pan-sear for crust, bake for ease, broil for speed, or air fry for the simplest path to a lemony, juicy dinner.
If you make this swordfish, tell us which method you used — grilled, pan-seared, baked, broiled, or air fried — and whether you finished it with lemon butter, salsa, relish, or something completely your own.