Posted on Leave a comment

Stuffed Shells Recipe: Easy Baked Ricotta Pasta Shells

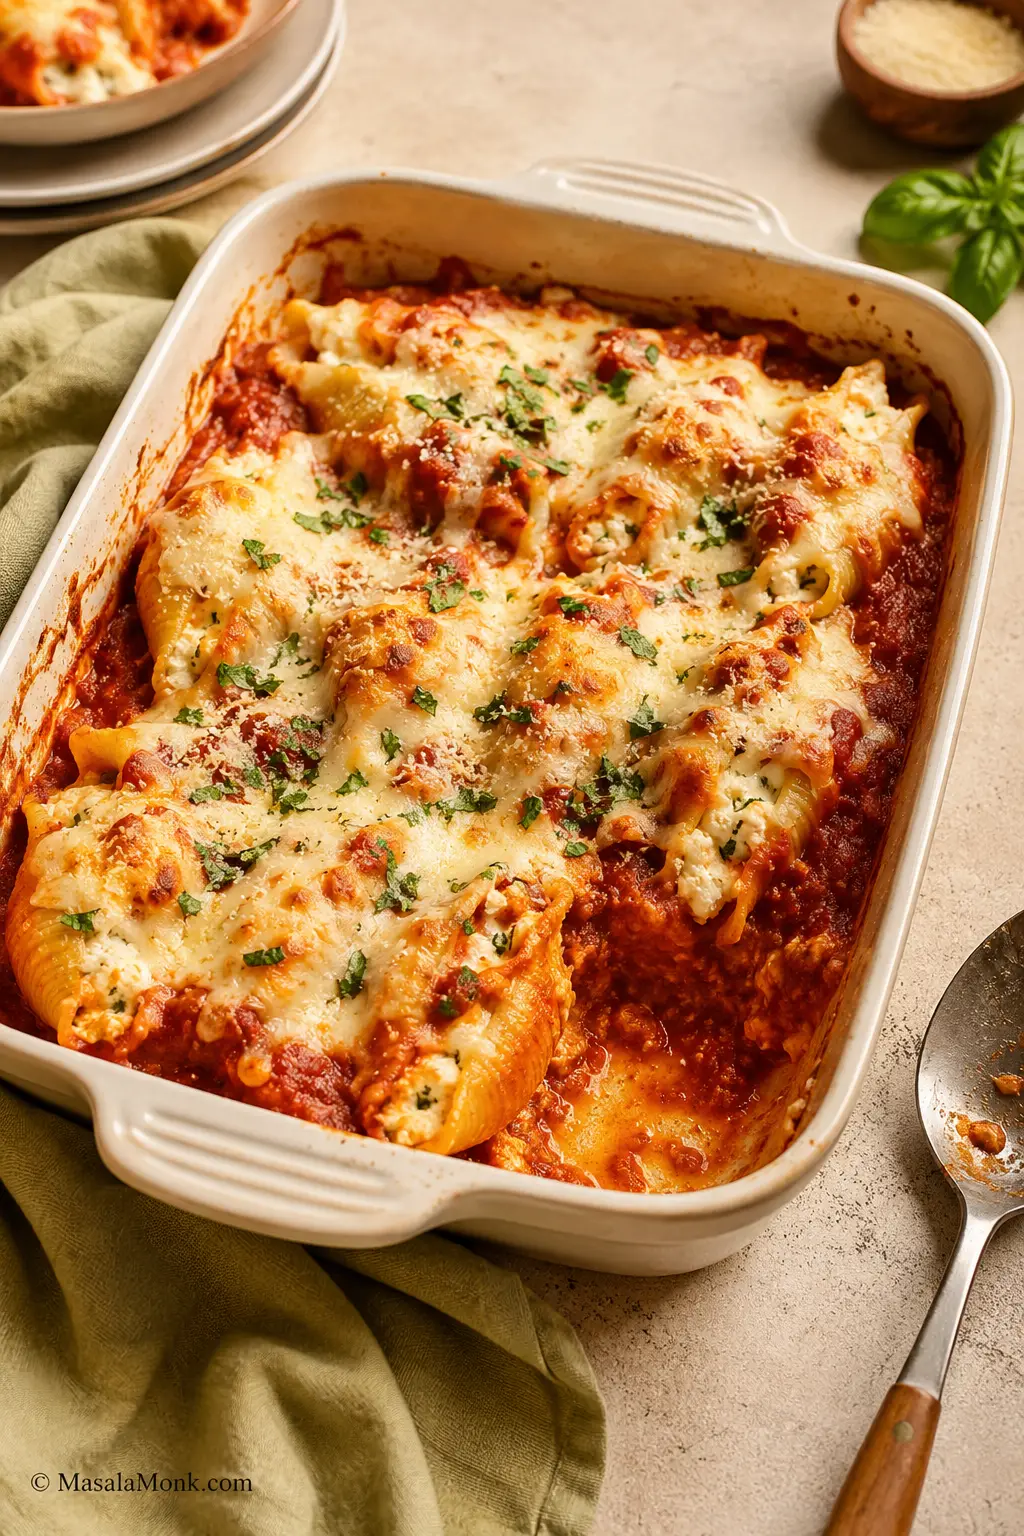
Baked ricotta stuffed shells with marinara sauce and melted mozzarella in a cream baking dish.

Stuffed shells are the kind of baked pasta that makes the table feel full before anyone even sits down: tender jumbo shells, creamy ricotta filling, tomato sauce bubbling around the edges, and mozzarella melted over the top. They give you lasagna-level comfort without all the layering, and the recipe is much more forgiving than it looks.

This version is built to avoid the usual stuffed shell problems: loose ricotta filling, dry pasta edges, shells that turn mushy after baking, and a tray that looks good on top but tastes flat in the middle. Think of it as the no-dry-shell method: thick filling, enough sauce, a covered bake first, and tender shells all the way through.

It fits one classic 9×13-inch baking dish: about 20–24 filled jumbo shells, a seasoned ricotta-mozzarella filling, marinara under and over the pasta, and mozzarella melted on top. A few shells may tear while boiling. The first few you fill may look messy. That is normal. Once everything is tucked into sauce and baked until bubbling, nobody at the table can tell which ones were imperfect.

Stuffed Shells at a Glance

No long planning needed. Here is the quick version before you start.

  • Start with a 12 oz / 340g box of jumbo pasta shells, or enough to cook 28–30 shells.
  • Aim to fill about 24 shells. If your shells are very large, you may fit closer to 20–22 in the baking dish.
  • Mix 15–16 oz / 425–454g ricotta with mozzarella, parmesan, egg, garlic, herbs, salt, and pepper.
  • Use about 3 cups / 720ml marinara sauce, with sauce under and over the shells.
  • Bake at 375°F / 190°C for 25 minutes covered, then 8–10 minutes uncovered.
  • Rest for 5–10 minutes before serving so the filling settles and the shells lift more cleanly.

Boil, fill, sauce, cover, bake, rest — that is the whole recipe. This is also a good one to save because the base method stays the same even when the filling changes.

Quick answers: Yes, you boil the shells first for this version. Use about 3 cups sauce for one 9×13-inch baking dish. Egg helps the filling set, but you can skip it if you prefer a softer filling. Stuffed shells freeze best before baking.
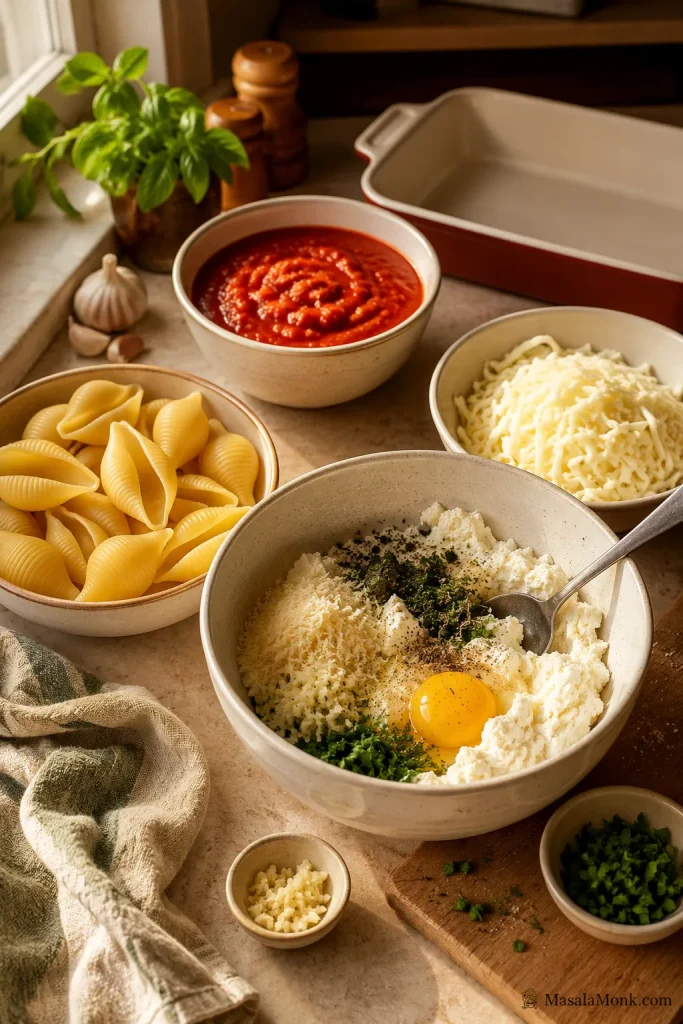
Jumbo pasta shells, ricotta, marinara sauce, mozzarella, parmesan, egg, garlic, herbs, and a baking dish on a kitchen counter.
Start with the essentials: jumbo shells, thick ricotta filling, marinara, mozzarella, parmesan, egg, garlic, and herbs.

Why This Stuffed Shells Recipe Works

This method is built around four small choices that make the biggest difference: undercook the shells slightly, keep the ricotta filling thick, use sauce under and over the pasta, and bake covered before browning the cheese.

  • Shells stay tender. Boiling them just shy of al dente keeps them flexible enough to fill, but firm enough to finish in the oven.
  • Filling stays creamy, not runny. Ricotta gives body, mozzarella gives melt, parmesan adds savory depth, and egg helps everything set.
  • Sauce protects the pasta. Marinara on the bottom keeps the shells from sticking, while sauce over and around the shells prevents dry edges.
  • A covered bake does the work. Foil traps heat and steam so the pasta finishes cooking gently before the cheese browns.
  • Flexibility is built in. Keep it classic, add spinach, stir meat into the sauce, swap in cottage cheese, or freeze a batch for later.

Best of all, the edge of the baking dish tells you dinner is almost ready: sauce bubbling up around the shells, little golden patches of mozzarella, and the smell of garlic, tomato, and browned cheese.
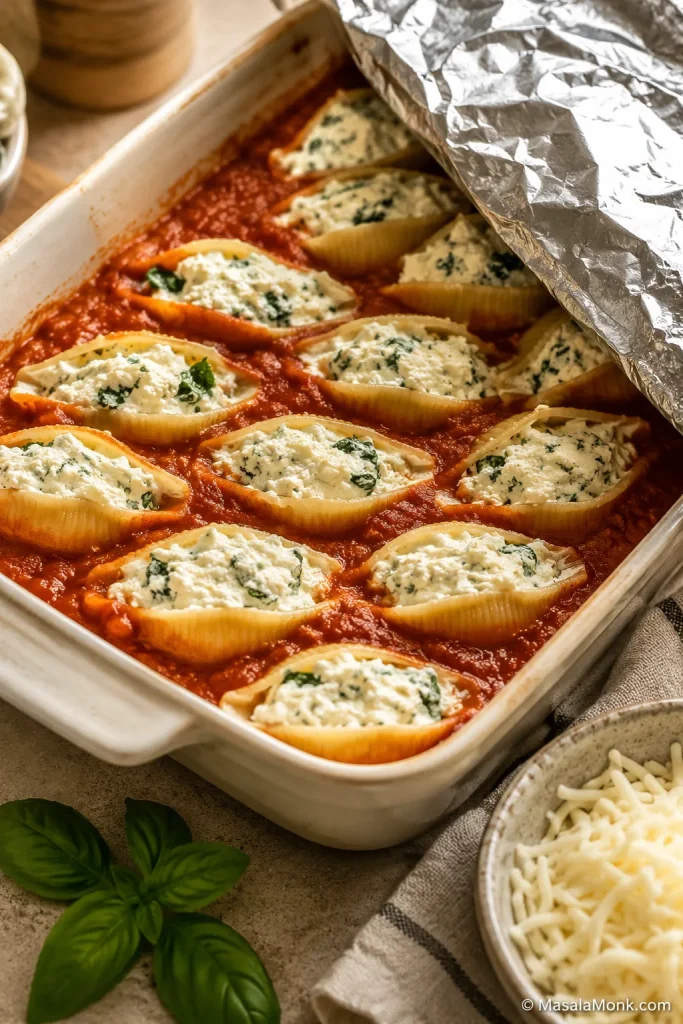
Filled jumbo shells sitting in marinara sauce with foil partly covering the baking dish before baking.
The no-dry-shell method is simple: sauce underneath, sauce around the edges, and foil on top for the first bake.

Ingredients You Need

Stuffed shells do not need complicated ingredients, but they do need the right balance: sturdy shells, thick ricotta filling, enough sauce, and mozzarella that melts without making the pasta watery.

Jumbo Pasta Shells

Choose a 12 oz / 340g box of jumbo pasta shells. These are the large shells made for stuffing, not small shell pasta or macaroni-style shells. Cook 28–30 jumbo shells for one baking dish, or cook the whole box if you like having extra backups.

Some shells will split or fold while boiling, so cook a few extras and move on. The sauce and cheese hide almost everything.

Ricotta Cheese

Use 15–16 oz / 425–454g ricotta cheese. Whole milk ricotta gives the creamiest filling. Loose or watery ricotta should be drained for 10–15 minutes in a fine-mesh strainer or on a few layers of paper towel before mixing. For the right texture, the ricotta filling section shows what the mixture should look like before stuffing.
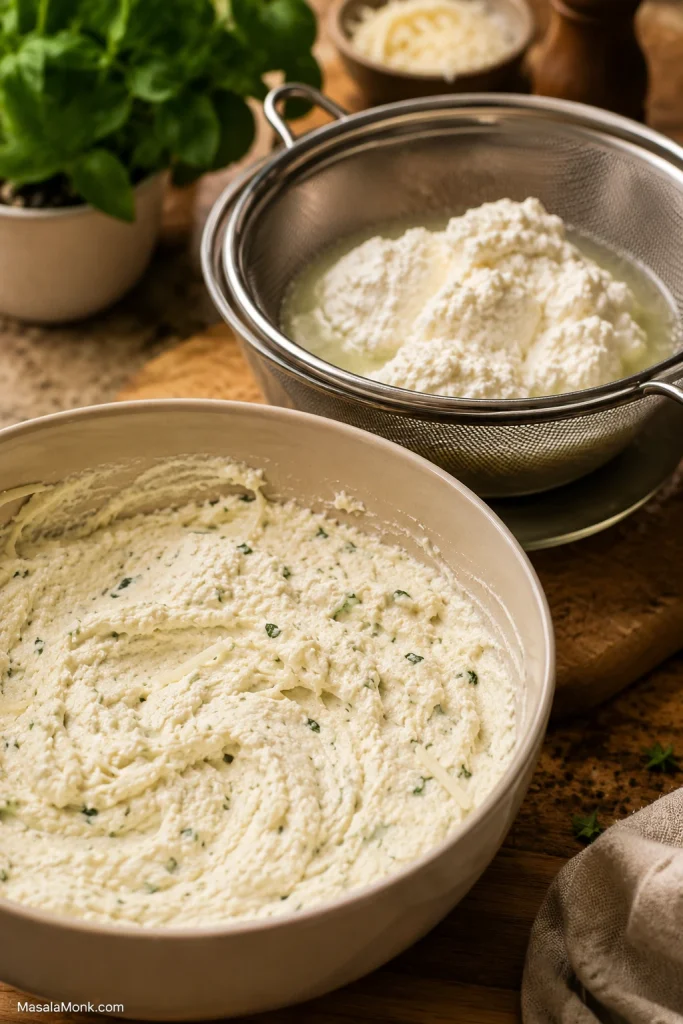
Ricotta draining in a fine-mesh strainer with thick cheese filling nearby.
Loose ricotta should be drained first; thick filling is what prevents watery stuffed shells after baking.

Mozzarella

You need 3 cups shredded low-moisture mozzarella, about 12 oz / 340g, divided between the filling and topping. Low-moisture mozzarella melts into the filling and gives the top a bubbly finish without watering down the pasta. Fresh mozzarella can be used on top in small amounts, but it is softer and wetter.

Parmesan or Pecorino

Use ½ cup / 45–55g grated parmesan or pecorino. Ricotta gives you the creamy center, but parmesan or pecorino is what makes the filling taste seasoned and savory instead of just milky.

Egg

One large egg helps bind the ricotta filling so it holds together after baking. You can skip it, but the filling will be softer. If you leave out the egg, add a little extra parmesan or mozzarella to help the filling hold.

Marinara Sauce

About 3 cups / 720ml marinara sauce gives one baking dish enough sauce for the bottom, top, and edges. A 24 oz / 680g jar is the practical shortcut and usually gives enough sauce for one batch. A good jarred marinara is not a shortcut to apologize for here; stuffed shells are mostly about enough sauce and a well-seasoned filling. If you want to make your own, this homemade marinara sauce gives you a classic base plus spicy, dipping, low-sodium, and sugar-free variations.

Very thick marinara benefits from 2–4 tablespoons of water before baking. If your jar is slightly short or extra thick, loosen it with a splash of water and save a little warm sauce for serving.

Garlic, Herbs, Salt, and Pepper

Ricotta needs seasoning. Garlic, Italian seasoning or fresh herbs, salt, pepper, and optional red pepper flakes make the filling taste like dinner instead of plain cheese. Use ½ teaspoon salt if your parmesan and sauce are already salty. Use closer to ¾ teaspoon if your ricotta is mild and your sauce is lower in salt.

Dried Italian seasoning is the easiest pantry option. Fresh parsley adds brightness, basil gives a sweeter flavor, and oregano gives the filling a stronger Italian-American note. Save fresh basil partly for the top after baking.

Optional Spinach

Either fresh or frozen spinach works; the real rule is to squeeze out as much moisture as possible. Wet spinach can turn a creamy filling loose and watery. For the full version, jump to spinach ricotta stuffed shells.

Optional Meat

The main recipe below is a classic cheese stuffed shells recipe, but cooked ground beef or Italian sausage can make the meal heartier. Brown the meat fully before adding it to the sauce or filling, then drain off excess fat so the pasta does not turn greasy. For the heartier version, see meat stuffed shells.

Tools That Help

You do not need special tools. A large pot, colander, mixing bowl, 9×13-inch / 23×33 cm baking dish, foil, and a spoon or zip-top bag are enough. A zip-top bag with one corner snipped off can make filling the shells faster and neater, but a spoon works perfectly well.

The first few shells are usually the messiest; by the fifth or sixth one, you will know exactly how much filling your shells can hold.

What Pasta Shells Should You Use?

Jumbo pasta shells are the shape you want here. They are large enough to hold ricotta filling and sturdy enough to bake in sauce. Small shells, medium shells, macaroni shells, and regular conchiglie are better for tossing with sauce, not stuffing.

Boil the shells 2–3 minutes shy of al dente. They should be flexible enough to open and fill, but not fully soft. Spread them on a tray to cool; rinse only if they are sticking badly or too hot to handle.

Depending on shell size and your baking dish, you may fit 20–24 filled shells. Aim for 24, but do not force them in. A slightly looser baking dish bakes better than crushed shells.
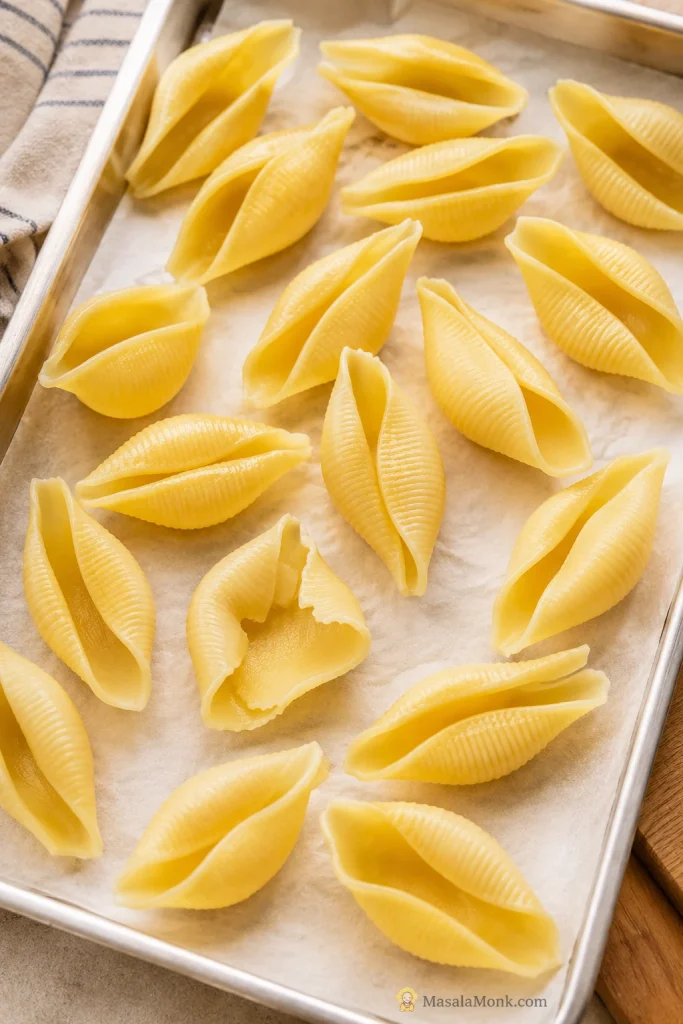
Cooked jumbo pasta shells spread on a tray with one torn shell visible.
Cook jumbo shells just shy of al dente and boil a few extras, because a torn shell or two is normal when stuffing pasta.

The Best Ricotta Filling for Stuffed Shells

The filling should look thick and scoopable, more like a cheese spread than a sauce. It should mound on a spoon without running off. If it spreads like sauce, it is too wet; if it feels dry or crumbly, a spoonful of ricotta or sauce will loosen it.

A good stuffed shells filling uses ricotta for creaminess, mozzarella for melt, parmesan or pecorino for savory depth, egg for structure, and garlic, herbs, salt, and pepper for flavor. To check the seasoning safely, mix the cheeses, garlic, herbs, salt, and pepper first, taste, then add the egg last.
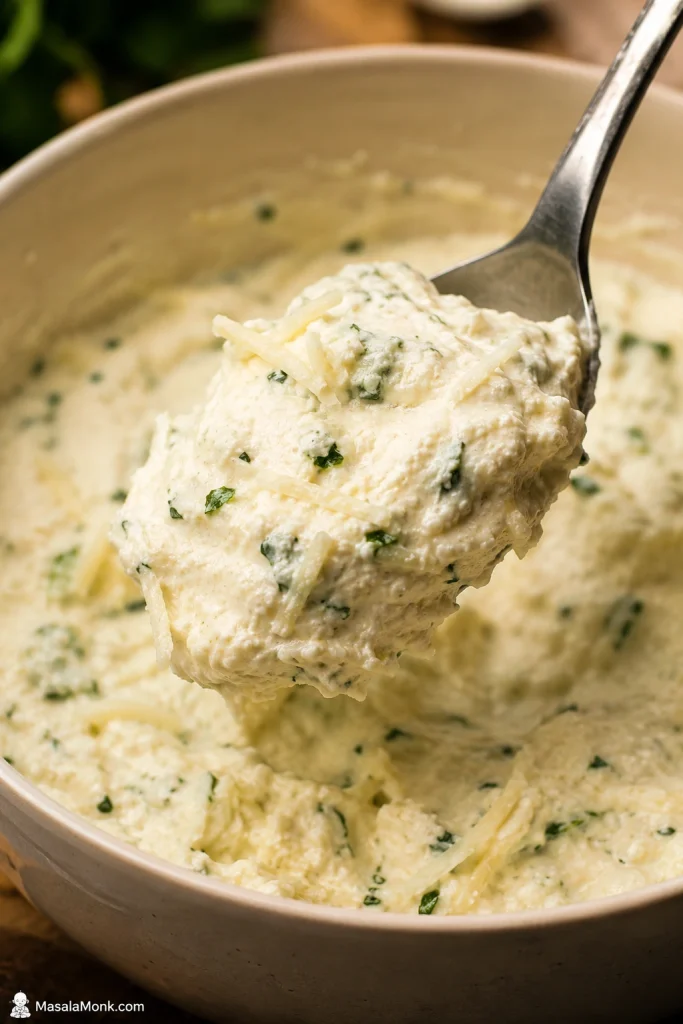
Thick ricotta cheese filling with herbs mounding on a spoon above a bowl.
A good ricotta filling should mound on a spoon, not drip, so it stays creamy inside each pasta shell.

Save This Stuffed Shells Filling Ratio

For one 9×13-inch baking dish, use:

  • 15–16 oz / 425–454g ricotta
  • 2 cups / about 225g mozzarella inside the filling
  • ½ cup / 45–55g parmesan or pecorino
  • 1 large egg
  • 1–2 garlic cloves
  • Herbs, salt, and pepper
  • 1 cup / about 115g mozzarella for the top

Once the filling looks thick and scoopable, you are in good shape.

How Much Sauce Do Stuffed Shells Need?

Use about 3 cups / 720ml marinara for one 9×13-inch baking dish. The shells should sit in sauce and have sauce spooned over and around them, but they do not need to be buried.

  • 1 cup / 240ml goes on the bottom of the baking dish
  • 1½–2 cups / 360–480ml goes over and around the filled shells
  • Extra warm sauce can be served on the side if you like a saucier plate

Before baking, you should still see the shape of each shell, but the edges should be surrounded by sauce.
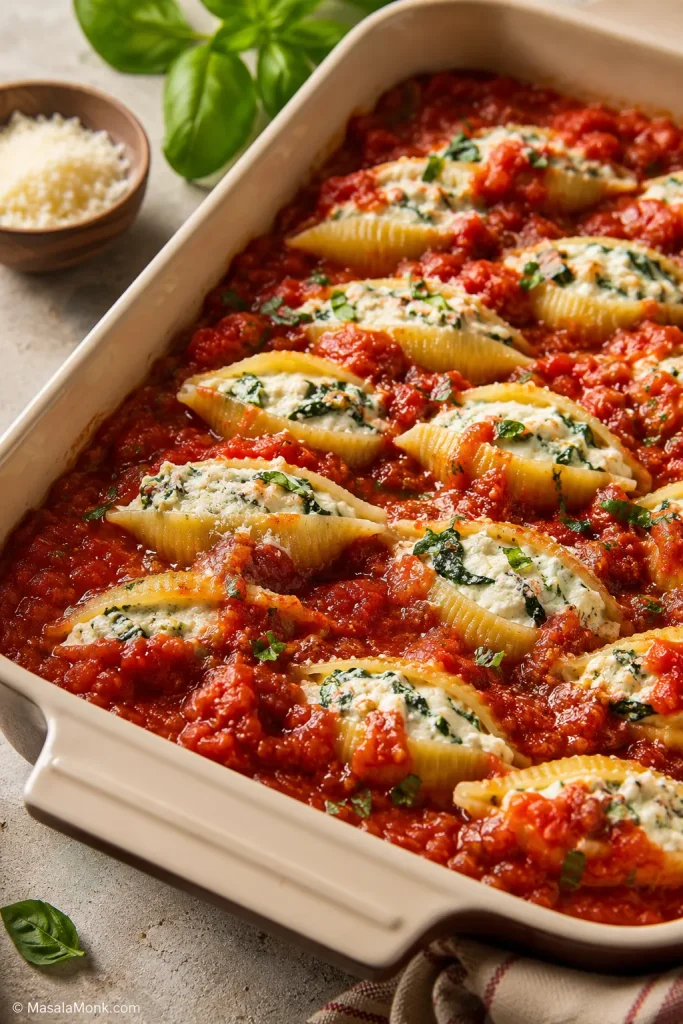
Filled stuffed shells in a baking dish with marinara sauce spooned around and between them.
The shells should stay visible, but the edges need enough marinara to finish tender instead of drying out.

How to Make Stuffed Shells

With the shells, filling, and sauce sorted, assembly is simple: sauce, filled shells, more sauce, cheese, foil, and oven. While the shells boil, mix the filling and spread sauce in the baking dish. By the time the shells are cool enough to handle, the filling and baking dish are ready.

1. Boil the shells

Bring a large pot of salted water to a boil. Add the jumbo shells and cook them 2–3 minutes less than the package says for al dente. Drain and let them cool until they are easy to handle.

2. Make the ricotta filling

In a large bowl, mix ricotta, 2 cups mozzarella, parmesan, egg, garlic, herbs, salt, pepper, and optional red pepper flakes. The filling should be creamy but thick enough to hold its shape on a spoon.

3. Add sauce to the baking dish

Spread about 1 cup of marinara sauce across the bottom of a 9×13-inch / 23×33 cm baking dish. This layer keeps the shells from sticking and protects the bottom of the pasta.

4. Fill the shells

Fill each shell with about 1½–2 tablespoons / about 30g of ricotta filling, depending on shell size. Use a spoon, piping bag, or zip-top bag. Fill generously, but not so much that the shells split. Do not worry if a little filling shows or the shells sit at slightly different angles.

A hand filling a jumbo pasta shell with ricotta mixture using a spoon.
Fill each shell generously, then stop before the pasta stretches or splits around the ricotta filling.

5. Arrange and sauce

Place the filled shells in the baking dish, filling-side up. Spoon the remaining sauce over and around the shells. You want the pasta to look full and well-coated, not dry or sparse.
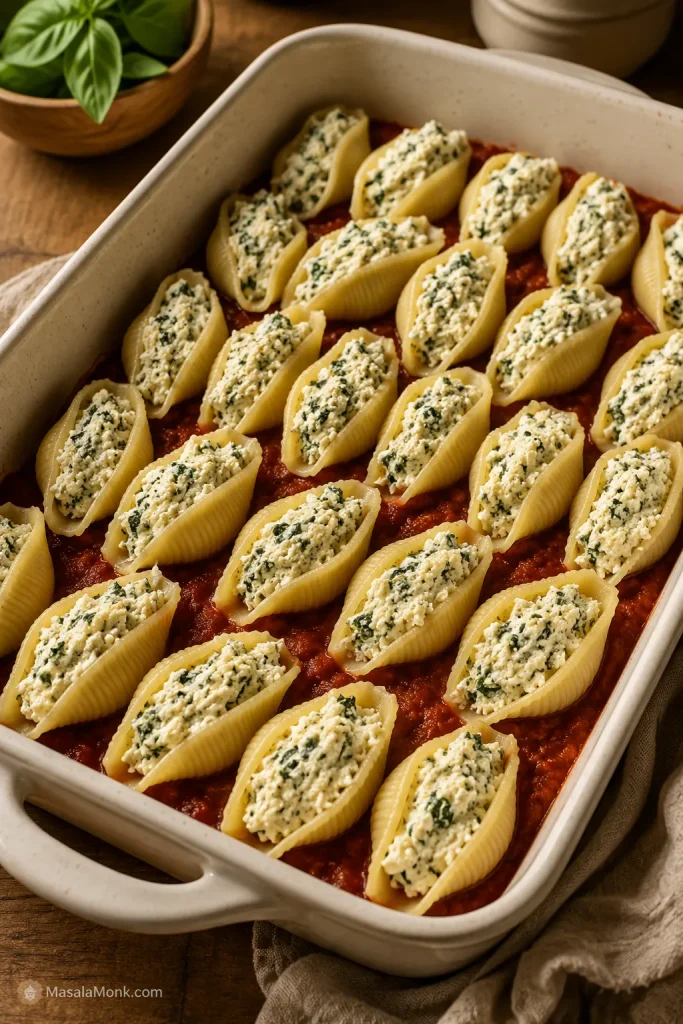
Ricotta-filled jumbo shells arranged in marinara sauce in a baking dish before baking.
Once the filled shells sit in sauce, cover the dish so the pasta can finish baking gently and evenly.

6. Bake covered, then uncovered

Cover the baking dish with foil without pressing it into the shells. If the foil may touch the sauce or cheese, place a sheet of parchment under the foil or tent the foil slightly. Bake at 375°F / 190°C for 25 minutes.
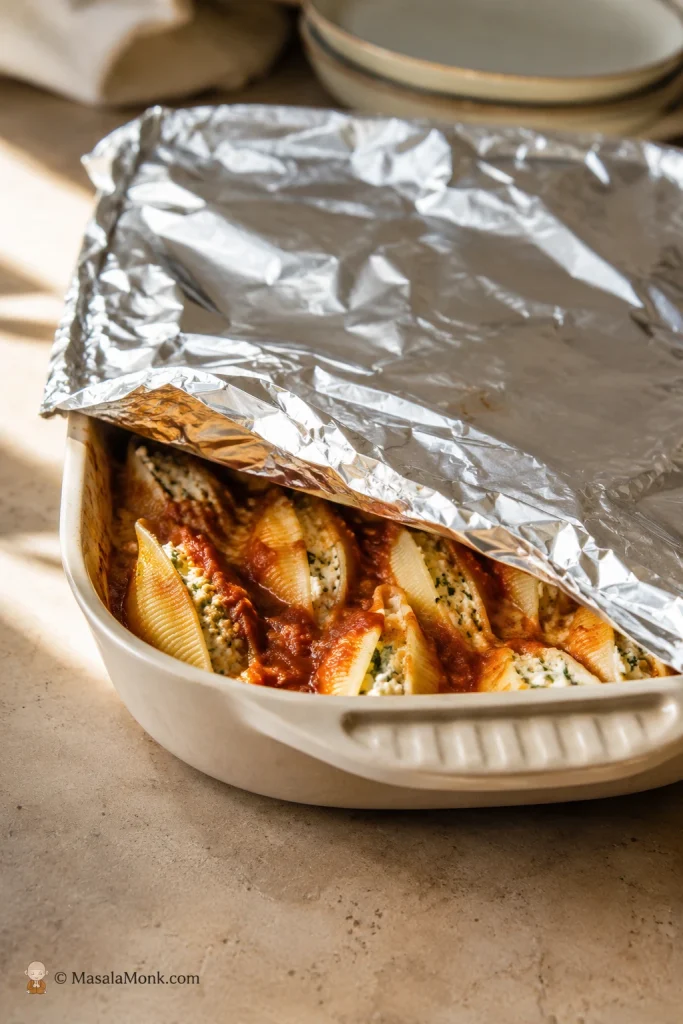
Stuffed shells in a baking dish loosely covered with foil before baking.
Foil traps steam during the first bake, which helps stuffed pasta shells stay soft and tender.

Remove the foil, sprinkle the remaining mozzarella over the top, and bake for another 8–10 minutes, until the cheese is melted and the sauce is bubbling. The uncovered bake is where the top gets those golden spots.
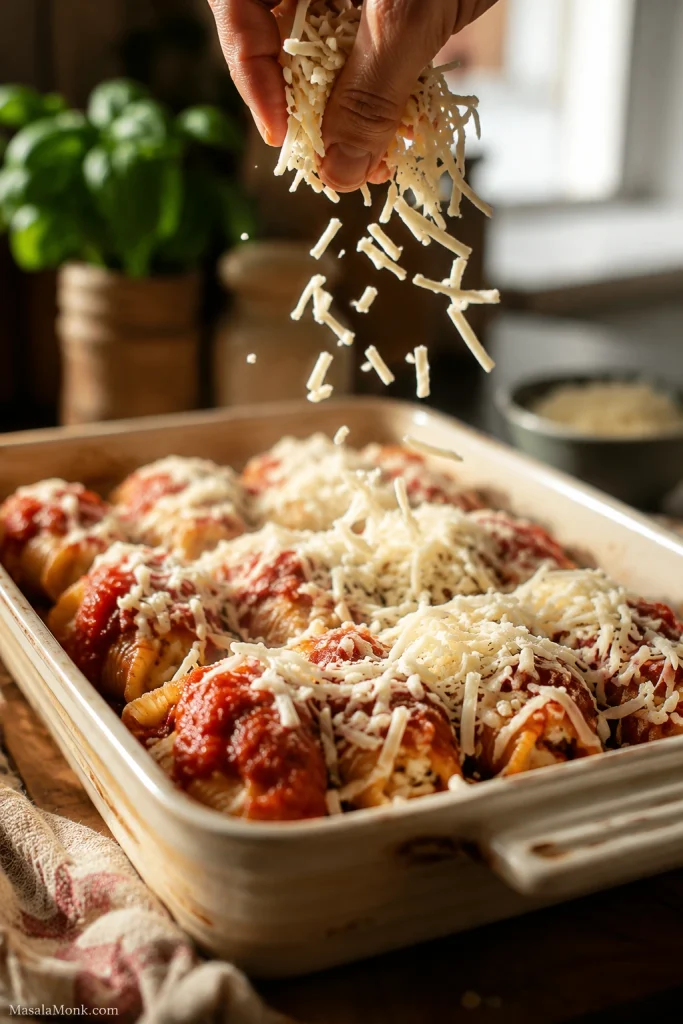
Shredded mozzarella being sprinkled over sauced stuffed shells in a baking dish.
Add mozzarella after the covered bake, then uncover the dish so the cheese melts and lightly browns.

7. Rest before serving

Let the stuffed shells rest for 5–10 minutes before serving. This is the hardest part because it smells ready, but the short rest makes serving much cleaner. After resting, the shells should lift from the baking dish without spilling all their filling.
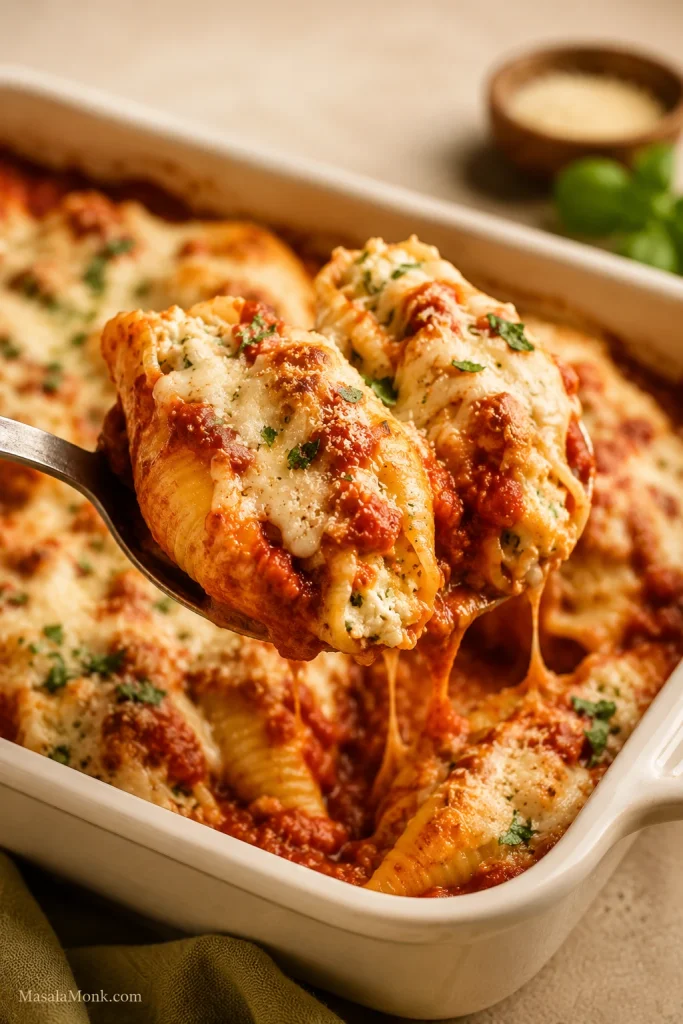
Rested stuffed shells being lifted from a baking dish with sauce and melted cheese.
Rest baked stuffed shells before serving so the filling settles and each shell lifts cleanly from the sauce.

How to Know When Stuffed Shells Are Done

The stuffed shells are done when the sauce is bubbling around the edges, the cheese is melted and lightly browned in spots, and the filling is hot in the center. The best bite is fork-tender pasta, thick ricotta filling, tangy tomato sauce, and a little golden mozzarella from the top.
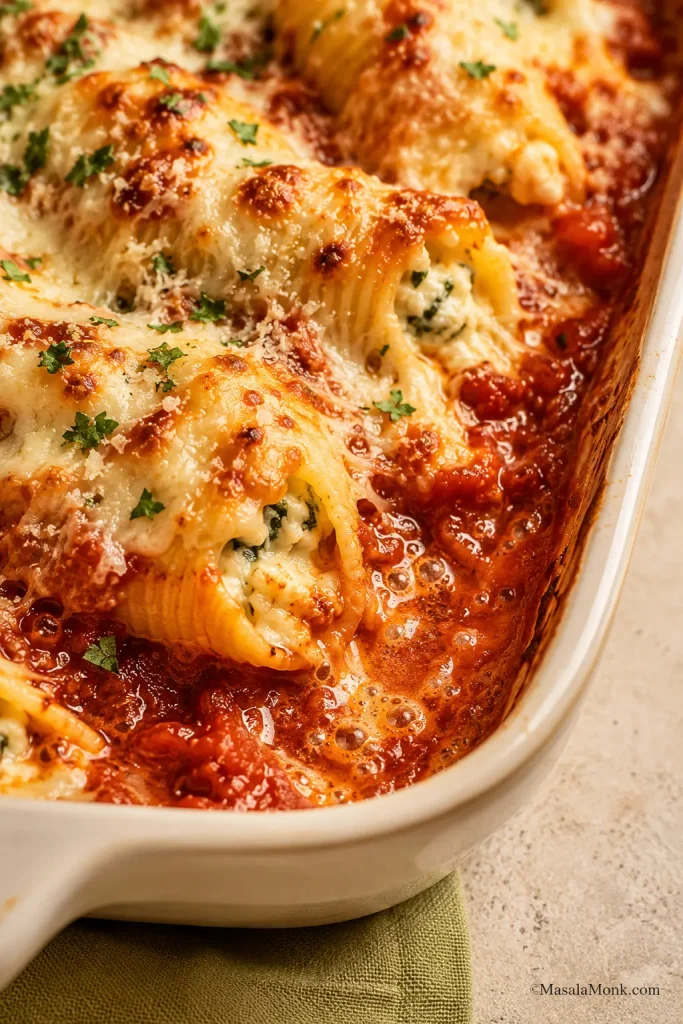
Close-up of baked stuffed shells with bubbling marinara sauce and browned mozzarella at the edge of the baking dish.
Check the edge of the baking dish: bubbling sauce and melted cheese mean the shells are hot through the center.

If the top cheese browns before the center is hot, cover the pasta loosely with foil again and keep baking until the filling is hot through the middle.

Stuffed Shells Recipe

This is the full classic version: jumbo shells filled with seasoned ricotta, tucked into marinara, covered until tender, then finished uncovered so the mozzarella melts into golden spots.

  • Yield:
    6 servings
  • Prep time:
    30 minutes
  • Cook time:
    35 minutes
  • Total time:
    1 hour 5 minutes
  • Oven temperature:
    375°F / 190°C
  • Baking dish:
    9×13-inch / 23×33 cm

Ingredients

  • 12 oz / 340g jumbo pasta shells, or enough to cook 28–30 shells
  • 3 cups / about 720ml marinara sauce, or one 24 oz / 680g jar, divided
  • 15–16 oz / 425–454g ricotta cheese
  • 3 cups shredded low-moisture mozzarella, about 12 oz / 340g, divided
  • ½ cup / 45–55g grated parmesan or pecorino
  • 1 large egg
  • 1–2 garlic cloves, minced or grated
  • 1 tsp dried Italian seasoning, or 2–3 tbsp chopped fresh parsley or basil
  • ½–¾ tsp salt, plus more for pasta water
  • ¼–½ tsp black pepper
  • Pinch of red pepper flakes, optional
  • A few drops of olive oil, only if needed to keep cooked shells from sticking

Instructions

  1. Heat the oven. Preheat the oven to 375°F / 190°C.
  2. Cook the shells. Bring a large pot of salted water to a boil. Add 28–30 jumbo shells and cook 2–3 minutes less than the package directions for al dente. Drain and let cool until easy to handle. If the shells start sticking, spread them on a tray or toss with only a few drops of olive oil.
  3. Make the filling. In a large bowl, combine ricotta, 2 cups mozzarella, parmesan, garlic, Italian seasoning or herbs, salt, pepper, and red pepper flakes if using. Taste the cheese mixture before adding the egg, then mix in the egg last.
  4. Prepare the baking dish. Spread about 1 cup of marinara sauce over the bottom of a 9×13-inch / 23×33 cm baking dish.
  5. Fill the shells. Spoon about 1½–2 tablespoons / about 30g filling into each shell. Arrange the filled shells in the dish, filling-side up. Aim for 24 filled shells; if your shells are very large, 20–22 may fit better.
  6. Add sauce. Spoon the remaining marinara sauce over and around the shells. Cover the baking dish tightly with foil, tenting it slightly so it does not press into the cheese or filling.
  7. Bake covered. Bake for 25 minutes, until the shells are hot and the sauce is bubbling around the edges.
  8. Finish uncovered. Remove the foil, sprinkle the remaining 1 cup mozzarella over the top, and bake uncovered for 8–10 minutes, until the cheese is melted and lightly browned in spots.
  9. Rest and serve. Let the stuffed shells rest for 5–10 minutes before serving. Serve with extra warm marinara if you like a saucier plate.

Recipe Notes

  • Softer top cheese: Add all the mozzarella before covering and baking if you want a fully melted top.
  • Stretchier browned top: Save the final cup of mozzarella and add it after the covered bake.
  • Spinach shells: Add 5 oz / 140g cooked fresh spinach or 8 oz / 225–250g thawed frozen spinach, squeezed very dry.
  • Meat sauce version: Add ½–1 lb / 225–450g cooked ground beef or Italian sausage to the sauce, and increase sauce by ½–1 cup if the pasta looks dry.
  • Cottage cheese swap: Blend cottage cheese briefly for a smoother filling and drain it first if it looks watery.

Small Details That Make Better Stuffed Shells

  • Cook 28–30 shells. You need backups for the ones that tear.
  • Drain watery ricotta. Loose ricotta makes the filling run instead of mound.
  • Taste before adding egg. It is easier to fix bland filling before the egg goes in.
  • Loosen very thick marinara. A few tablespoons of water help the sauce move around the shells.
  • Cover first. The pasta finishes cooking in the sauce before the cheese browns.
  • Rest before serving. The filling firms slightly as it sits.

Make-Ahead, Freezer, and Reheating Instructions

Stuffed shells are one of the best baked pasta dinners to prepare ahead. The shells, filling, sauce, and cheese all hold up well, and a freezer batch feels like a future dinner already handled. This is also a good place to make two baking dishes: bake one tonight and freeze the second before baking.

Best Make-Ahead Option

Assemble the stuffed shells up to 24 hours ahead. Fill the shells, arrange them in sauce, cover tightly, and refrigerate. Let them sit at room temperature only while the oven preheats, about 20–30 minutes. If baking straight from the fridge, add 5–10 minutes to the covered baking time.
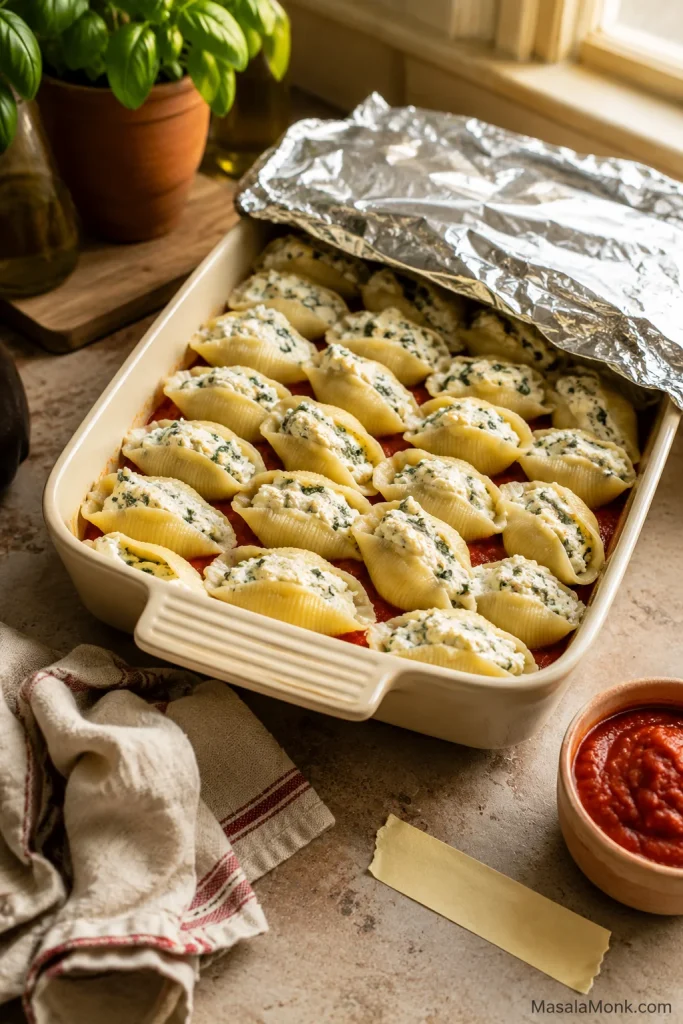
Unbaked stuffed shells in a baking dish partly covered with foil, with sauce nearby.
Stuffed shells are ideal for make-ahead dinners because you can refrigerate or freeze them before baking.

Best Freezer Option

Freeze stuffed shells before baking. Assemble the shells in a freezer-safe baking dish, cover tightly with plastic wrap and foil or a freezer-safe lid, and freeze for up to 2–3 months for best quality.

If you froze the shells in a glass or ceramic baking dish, thaw them overnight unless the dish is labeled freezer-to-oven safe. That helps prevent sudden temperature shock. You can also freeze the filled shells separately and transfer them to an oven-safe dish with sauce before baking.

Best Small-Batch Freezer Option

Freeze filled shells on a tray until firm, then transfer them to a freezer-safe bag or container. Later, place only the number of shells you need into a baking dish with sauce and cheese. This is useful when you want 2–4 servings instead of a full batch.
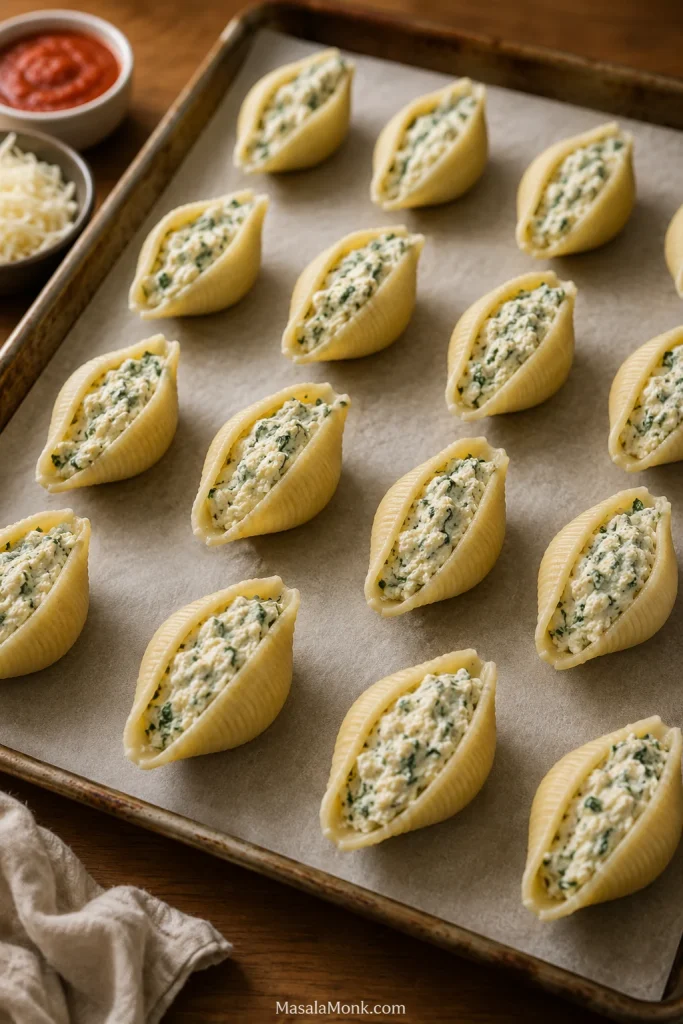
Ricotta-filled jumbo pasta shells spaced apart on a parchment-lined tray before freezing.
Freeze stuffed shells in a single layer first so they do not stick together; once firm, you can transfer them for easy small-batch freezer meals later.

Best Texture After Freezing

For the best texture, thaw frozen stuffed shells overnight in the refrigerator before baking. Before baking, remove any plastic wrap and cover the baking dish again with foil. Bake as directed, adding 5–10 extra minutes if the pasta is still cold.

How to Bake Frozen Stuffed Shells

To bake from frozen, cover the baking dish with foil and bake at 350°F / 175°C for about 60–75 minutes, or until the center is steaming hot. Uncover, add cheese if needed, and bake 10–15 minutes more until bubbling and melted.

How to Store Leftovers

Store leftover stuffed shells in an airtight container in the refrigerator for 3–4 days. A 3–4 day refrigerator window is also the general USDA guidance for cooked leftovers, so it is a good limit to use here.

How to Reheat Stuffed Shells

Reheat covered in the oven at 350°F / 175°C until hot, or microwave individual portions. Add a spoonful of extra sauce or a small splash of water before reheating so the pasta does not dry out.

Leftover Ideas

Leftover stuffed shells are best reheated with extra sauce, but you can also chop them into smaller pieces and reheat them like baked pasta. Add fresh herbs, parmesan, or a little extra marinara to wake the flavor back up. This is the sort of dinner that makes leftovers feel like a reward.

Stuffed Shells Variations

Think of the recipe card as the house version. The variations are how you adjust the pasta for the people eating it — greener for spinach lovers, meatier for Sunday dinner, lighter with cottage cheese, or richer with Alfredo.

Which Stuffed Shells Variation Should You Make?

Spinach Ricotta Stuffed Shells

Add spinach to the ricotta filling for a classic spinach stuffed shells variation. Fresh spinach and frozen spinach both work, but the spinach needs to be cooked, chopped, and squeezed very dry before it goes into the filling. Use about 5 oz / 140g fresh spinach or 8 oz / 225–250g frozen spinach.
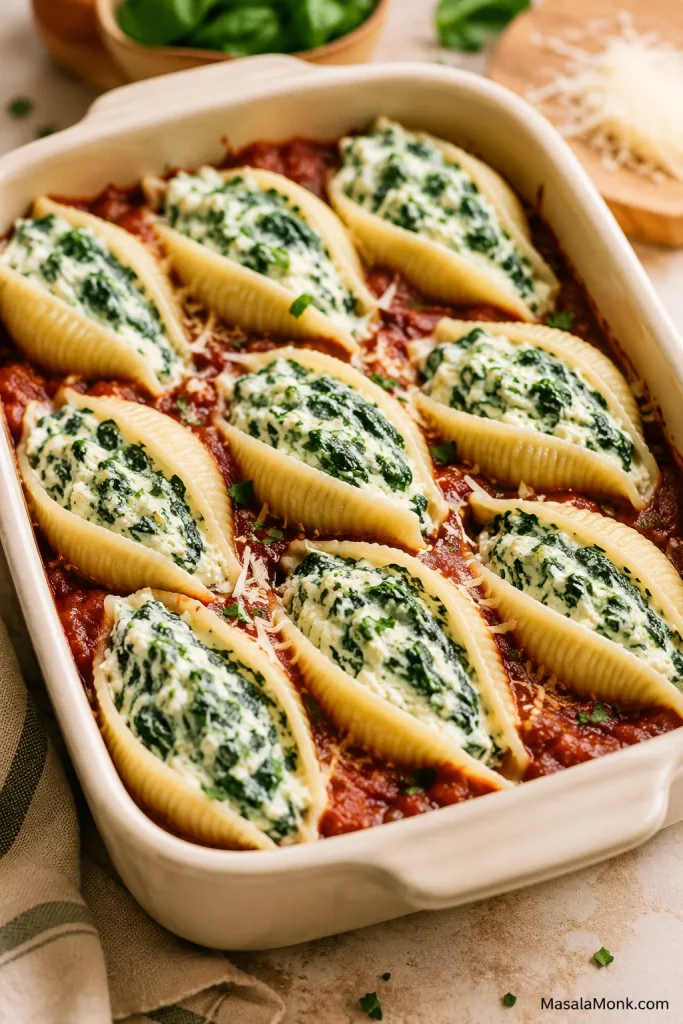
Spinach ricotta stuffed shells arranged in marinara sauce in a cream baking dish.
For spinach ricotta stuffed shells, squeeze the spinach dry so the filling stays creamy instead of watery.

Beef Stuffed Shells

For the cleanest shells, keep the ricotta filling mostly cheese-based and put the browned meat in the sauce. That gives every bite a hearty meat sauce without making the shells heavy or hard to close. Brown ½–1 lb / 225–450g ground beef with a little salt, pepper, garlic, and Italian seasoning, then drain excess fat before adding it to the marinara.

Sausage Stuffed Shells

Italian sausage brings more seasoning than ground beef, so it is the easiest way to make the sauce taste deeper. Remove it from the casing if needed, brown it well, and drain any excess fat. Sausage brings more salt and spice than plain ground beef, so taste before adding extra seasoning.
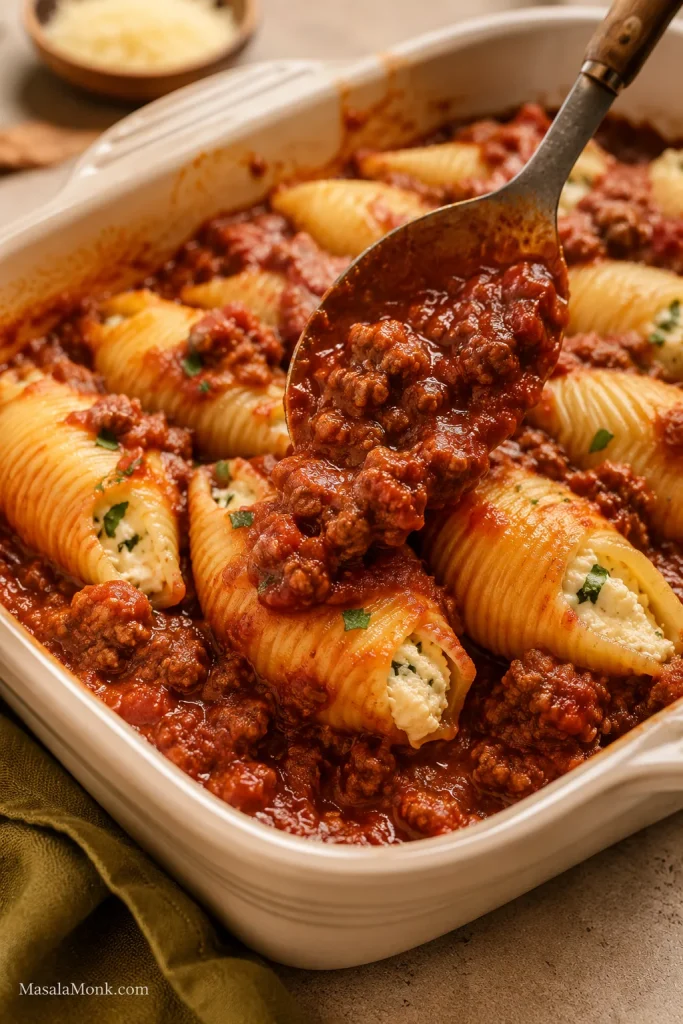
Ricotta stuffed shells with chunky beef or sausage marinara sauce spooned around them.
For meat stuffed shells, keep the cheese inside the pasta and stir browned beef or sausage into the marinara.

Cottage Cheese Stuffed Shells

Cottage cheese is the easiest ricotta swap and a good option if you want a lighter, higher-protein filling. Replace ricotta 1:1 by weight, drain it if watery, and blend it briefly for a smoother texture. The flavor is a little tangier and less classic than ricotta, but it bakes up creamy when mixed with mozzarella, parmesan, egg, garlic, and herbs.

Stuffed Shells Without Ricotta

If you do not have ricotta, use cottage cheese, a mix of cream cheese and mozzarella, a meat filling, roasted vegetables, or tofu ricotta for a dairy-free version. This helps if you dislike ricotta or simply do not have it. The recipe can still work well as long as the filling is thick and not watery.
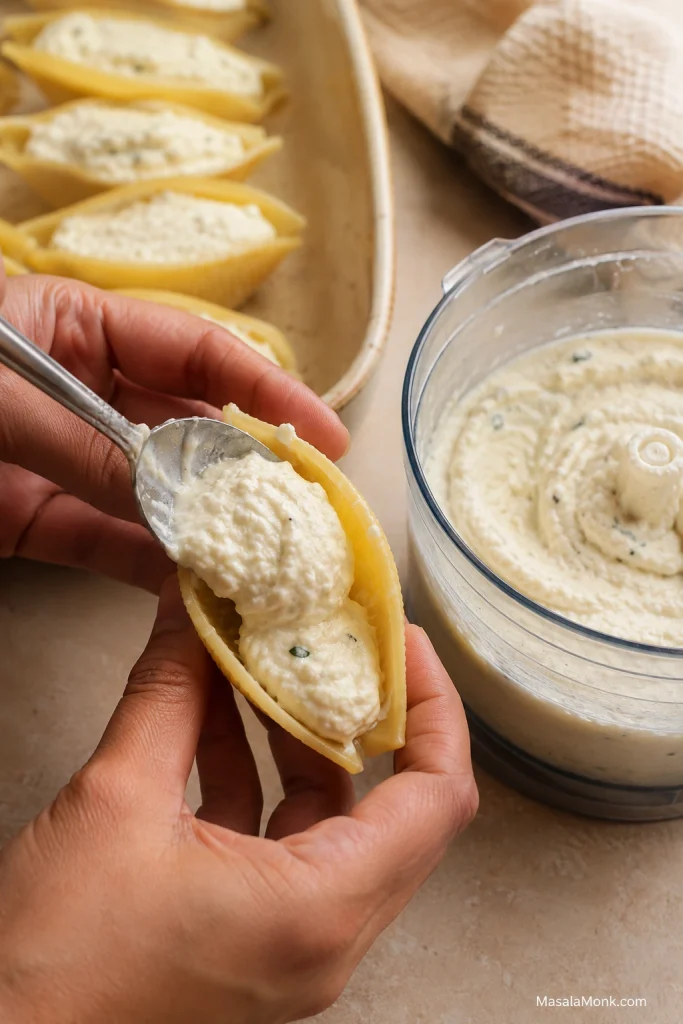
A jumbo pasta shell being filled with smooth blended cottage cheese mixture.
For stuffed shells without ricotta, blend cottage cheese until smooth so the filling holds its shape inside the pasta.

Alfredo Stuffed Shells

For a creamy white-sauce version, use Alfredo sauce instead of marinara. Because Alfredo is rich, spinach or chicken works especially well here. For more creamy pasta dinner ideas, see this chicken Alfredo pasta guide.
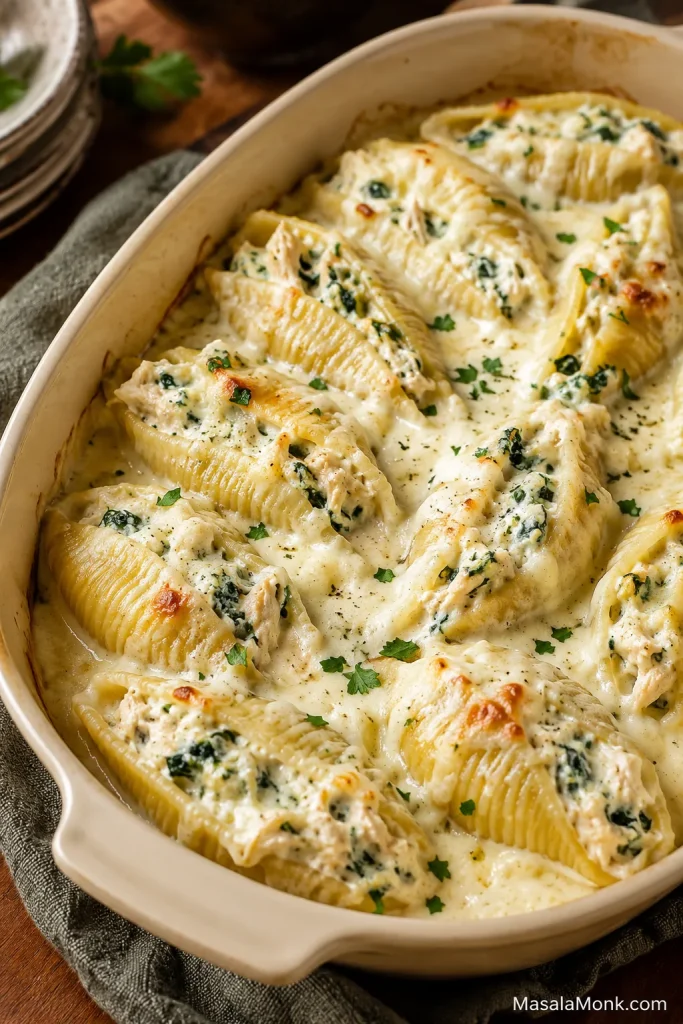
Alfredo stuffed shells with creamy white sauce, spinach, and melted mozzarella in a baking dish.
Alfredo stuffed shells are the creamy white-sauce variation to choose when you want spinach, chicken, or a richer pasta bake.

No-Boil Stuffed Shells

No-boil stuffed shells can work, but they need a different sauce ratio and a longer covered bake. This recipe is written for boiled shells because it gives the most predictable texture: shells that are flexible enough to fill, tender after baking, and less likely to stay firm in the center. If you want a true no-boil version, increase the sauce or liquid and keep the dish tightly covered until the pasta is fully tender.

Serving and Scaling

How Many Stuffed Shells Per Person?

Plan on 3–4 stuffed shells per adult if serving with salad, bread, or vegetables. Plan on 4–5 shells per person for a heartier main dish with fewer sides. A 9×13-inch baking dish with about 20–24 stuffed shells serves 6 people generously.
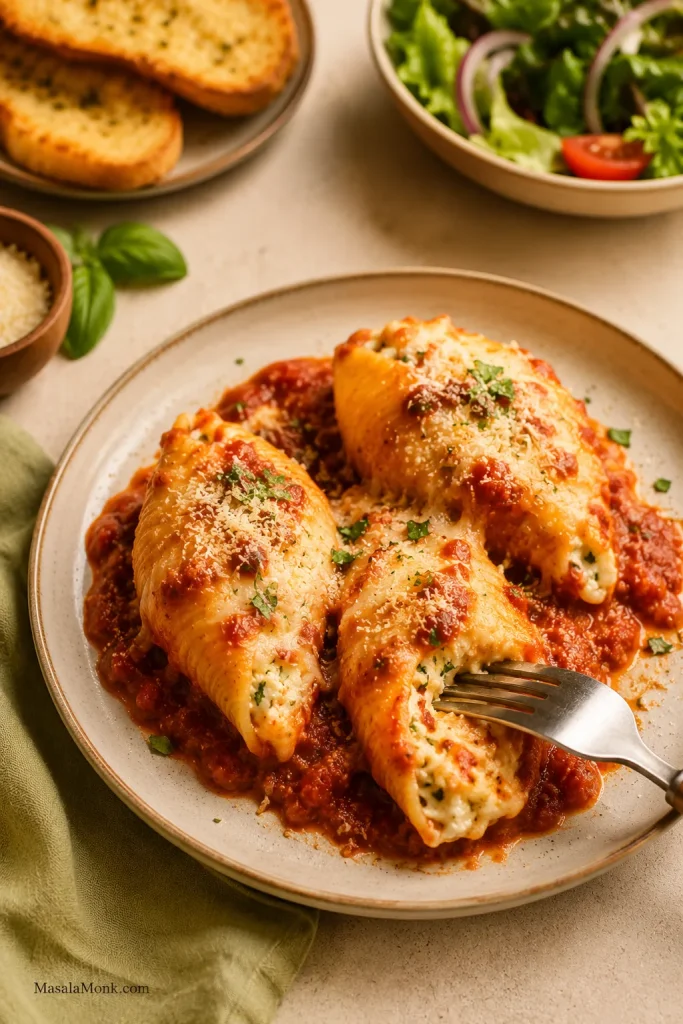
A plate of ricotta stuffed shells with marinara sauce, parmesan, herbs, and a fork.
For dinner portions, plan on three to four ricotta stuffed shells per adult with salad, garlic bread, or vegetables.

Can You Double This Recipe?

Yes. To double the recipe, use two 9×13-inch baking dishes instead of crowding everything into one deep dish. If baking both at the same time, rotate them halfway through if your oven has hot spots. If the pans are cold from the fridge, they may need a few extra minutes of covered baking time. You can also bake one now and freeze one for later.

What to Serve with Stuffed Shells

Stuffed shells are rich, cheesy, and well-sauced, so they pair best with something crisp, green, garlicky, or simple. On a weeknight, salad is enough. When serving company, add garlic bread and something fresh on the side.

Classic Comfort Sides

Light and Fresh Sides

  • Simple green salad with vinaigrette
  • Cucumber salad with vinegar, dill, and onion
  • Arugula salad with lemon

Extra Vegetable Sides

  • Roasted broccoli
  • Sautéed spinach or greens
  • Roasted zucchini or eggplant
  • Steamed green beans

Bigger Dinner Add-Ons

A fresh side can still feel filling: this chickpea salad brings lemon, herbs, cucumber, and crunch beside the cheesy shells.

Troubleshooting Stuffed Shells

Problem Cause Fix
Shells tear Overcooked or handled too hot Undercook slightly, cool, and boil extras
Shells stick Cooled in a pile Spread on a tray or use a few drops of oil
Filling is watery Wet ricotta or spinach Drain ricotta and squeeze spinach dry
Filling leaks Too much filling or loose filling Use about 30g filling per shell and keep filling thick
Shells are dry Too little sauce or uncovered too long Use sauce under and over; bake covered first
Edges dry out Not enough sauce near edges Spoon extra sauce around edges
Filling tastes bland Ricotta under-seasoned Add salt, parmesan, garlic, herbs, and pepper
Pasta is mushy Shells fully cooked before baking Boil 2–3 minutes shy of al dente
Top browns too fast Uncovered too long Cover loosely and keep baking
Frozen center is cold Covered bake too short Keep baking covered until center is hot
Cheese turns rubbery Overbaked or poor melting cheese Bake just until melted and use low-moisture mozzarella
Pasta looks watery Wet filling or vegetables Drain ingredients and rest before serving

If the shells or edges look dry after baking, spoon warm marinara around the pasta before serving. Sauce brings moisture back better than adding more cheese.
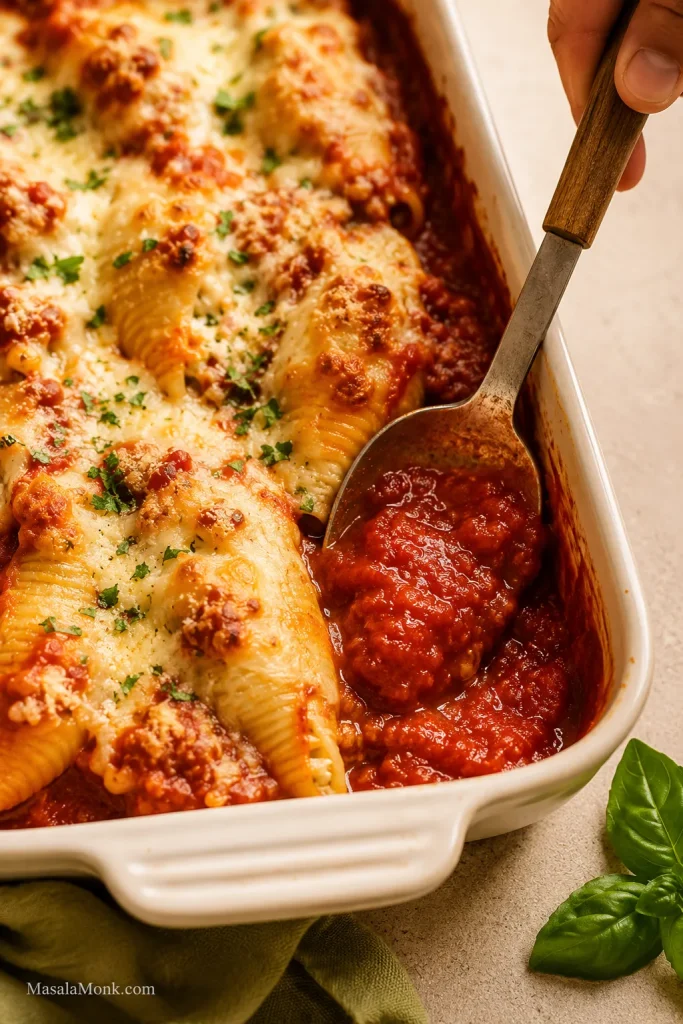
Extra marinara sauce being spooned around the edge of baked stuffed shells.
When the edges look dry, spoon warm marinara around the shells before serving to soften them again.

Frequently Asked Questions

A few common questions come up once you start adjusting the recipe. These quick answers should help you choose the right shells, filling, sauce, and make-ahead method.

What pasta shells do I use for stuffed shells?

Use jumbo pasta shells. Small shells, medium shells, and macaroni-style shells are not large enough for stuffing.

Do you have to boil shells before stuffing them?

For this version, yes. Boiling first gives you shells that are soft enough to fill but firm enough to finish in the oven. No-boil shells need more liquid and a longer covered bake.

What is the best cheese filling for stuffed shells?

The best classic filling uses ricotta, mozzarella, parmesan or pecorino, egg, garlic, herbs, salt, and pepper. Ricotta makes it creamy, mozzarella adds melt, parmesan adds depth, and egg helps it hold together.

Do I need egg in stuffed shells?

Egg helps the filling set so the shells lift more cleanly. You can skip it, but the filling will be softer. If skipping egg, add a little extra parmesan or mozzarella.

Can I use cottage cheese instead of ricotta?

You can replace ricotta 1:1 by weight, drain cottage cheese if watery, and blend it first if you want a smoother filling. The no-ricotta section gives more options.

Can I make stuffed shells without ricotta?

Yes — use cottage cheese, cream cheese mixed with mozzarella, a meat filling, roasted vegetables, or tofu ricotta. Keep the filling thick so it does not run out of the shells.

How much sauce do stuffed shells need?

For one 9×13-inch baking dish, use about 3 cups / 720ml sauce. Spread about 1 cup on the bottom and spoon the rest over and around the filled shells.

Do you bake stuffed shells covered or uncovered?

Bake them covered for most of the time so the pasta stays moist and the filling heats through. Uncover at the end to melt and lightly brown the cheese.

How do you keep stuffed shells from drying out?

Use sauce under and over the shells, cover the baking dish for the first bake, and reheat leftovers with extra sauce or a small splash of water. That is the same no-dry-shell method used in the main recipe.

Can I make stuffed shells ahead of time?

Yes. Assemble stuffed shells up to 24 hours ahead, cover, and refrigerate. The make-ahead section explains the timing and freezer options.

Can stuffed shells be frozen?

Freeze them before baking for the best texture, either as a full baking dish or as individual filled shells. Use within 2–3 months for best quality.

Can I bake stuffed shells from frozen?

You can bake them covered at 350°F / 175°C for 60–75 minutes, or until the center is hot. Then uncover and bake until the sauce bubbles and the cheese melts.

Can I add meat to stuffed shells?

Meat works best in the sauce, where it makes the dish heartier without weighing down the ricotta filling. Brown and drain the meat before adding it.

How many stuffed shells per person?

Plan on 3–4 stuffed shells per adult with sides, or 4–5 shells per person for a heartier main dish.

How long do leftover stuffed shells last?

Leftovers keep for 3–4 days and reheat best with extra sauce. Store them in an airtight container in the refrigerator and reheat until hot.

Make It Your Own

A good batch of stuffed shells should feel generous: pasta tucked into sauce, cheese bubbling around the edges, and enough filling in every shell that nobody feels shortchanged. The whole recipe comes back to the same simple method: thick filling, enough sauce, covered bake, tender shells.

This is the kind of tray that looks a little messy in the best way: sauce at the edges, cheese pulling from the spoon, and enough shells for someone to quietly go back for one more.
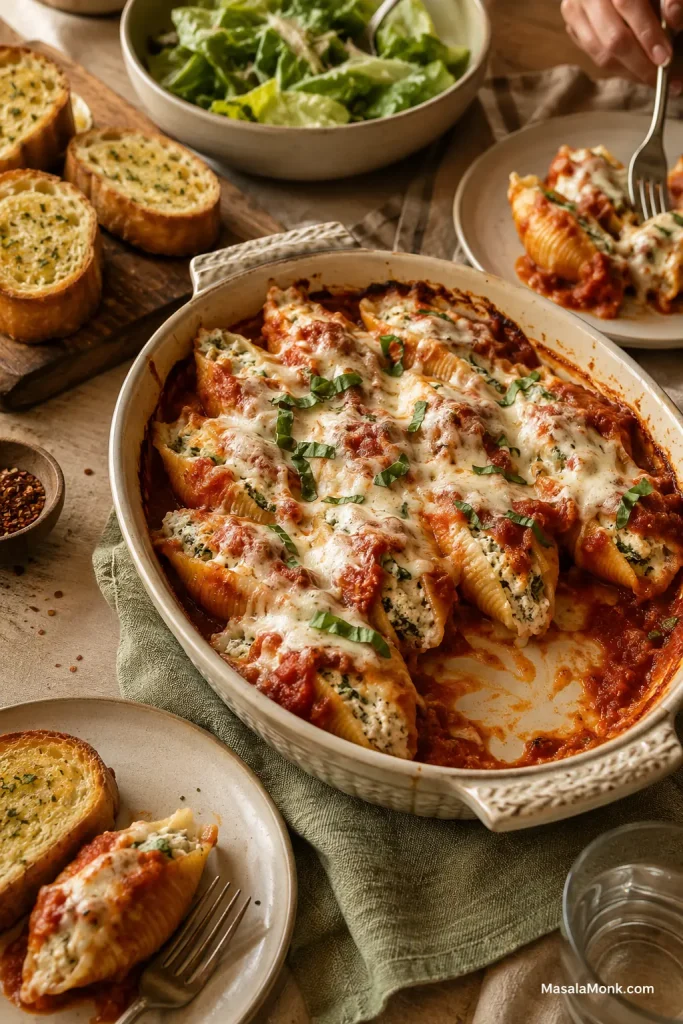
A family-style baking dish of stuffed shells served with garlic bread, salad, plates, and a fork.
Serve stuffed shells family-style with garlic bread and salad; this is the pasta bake people come back to for one more shell.

You can keep the recipe classic, add spinach, make it meaty with beef or sausage, swap in cottage cheese, use Alfredo sauce, or freeze a batch for another night. For another cozy pasta dinner after this one, save this broccoli pasta too.

If you make these stuffed shells, tell us which version landed on your table: classic ricotta, spinach, meat sauce, cottage cheese, Alfredo, or extra saucy. I especially want to know if you froze a batch for later — that is where this recipe really earns its keep.
Back to top ↑

Posted on Leave a comment

Creamy Mushroom Sauce Recipe for Steak, Chicken, Pasta & More

A good creamy mushroom sauce should make the plate feel complete: rich enough for steak, loose enough for pasta, and spoonable enough for potatoes or rice.

This is the sauce to make when dinner is almost there but needs one thing to pull it together. Steak feels restaurant-style. Chicken tastes richer. Pasta turns silky. Even potatoes, rice, toast, or roasted vegetables feel like a proper meal once a glossy mushroom sauce lands on top.

It is not quite a side dish and not quite a gravy; it is the thing that makes the plate feel finished.

The secret is simple: brown the mushrooms first, then choose the finish. Let them release their moisture, shrink, darken, and catch at the edges before the cream goes in. Once that happens, garlic, broth, cream, parmesan, thyme, black pepper, and a little lemon turn those browned bits into a sauce you can use half a dozen ways.

This creamy mushroom sauce recipe takes about 20 to 25 minutes and makes roughly 3 cups / 700 to 720 ml. Keep it thick for steak, loosen it for pasta, soften it for chicken, or push it slightly toward gravy for potatoes and rice. Start with the creamy version below; the no-cream, no-wine, dairy-free, and gravy-style notes are adaptations, not separate recipes.

Creamy Mushroom Sauce at a Glance

A good mushroom sauce starts with well-browned mushrooms, then turns into a shiny skillet sauce that tastes savory first and creamy second.

  • Time: about 20 to 25 minutes in a wide skillet
  • Yield: about 3 cups / 700 to 720 ml
  • Mushrooms: 400–450g / 14–16 oz, roughly two 8 oz packs
  • Best mushrooms: cremini, baby bella, button, portobello, or mixed mushrooms
  • Best uses: steak, chicken, pork chops, pasta, mashed potatoes, rice, vegetables, toast, and omelettes
  • Texture: smooth and spoonable, not watery, gluey, greasy, or split

This is a skillet mushroom sauce, not a condensed soup shortcut or a mushroom ragu. Brown the mushrooms first, then finish with cream and parmesan so the sauce tastes deep before it tastes creamy.

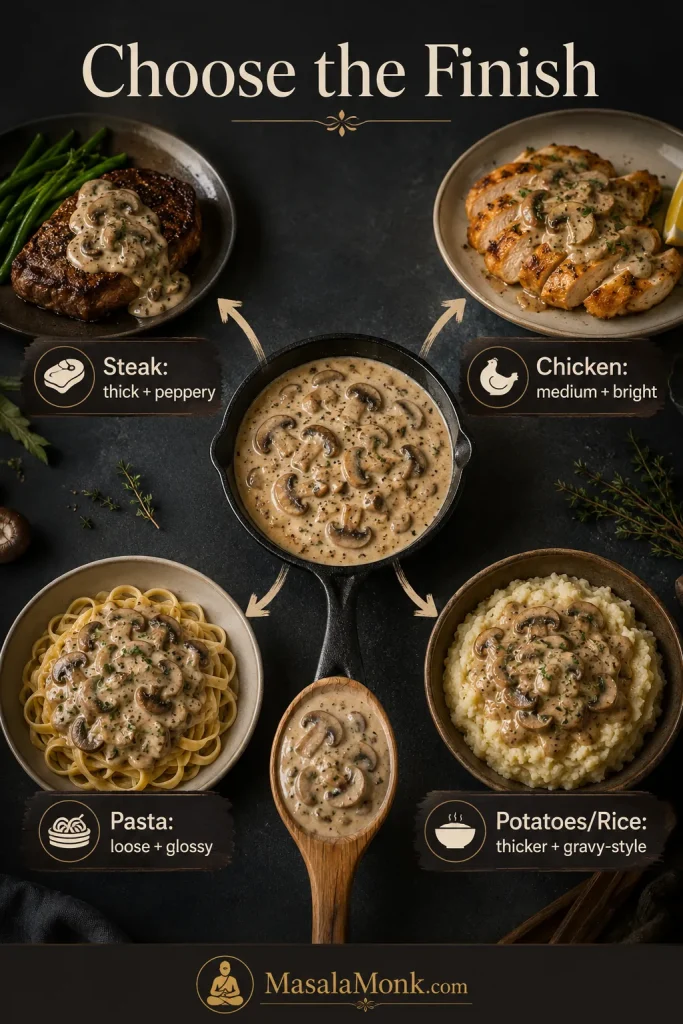
Choose the Finish Before You Start

One skillet, one base, many possible dinners. Before you reduce it too far, decide where it is going: over steak, through pasta, across chicken, or closer to gravy.

Sauce map guide showing mushroom sauce served with steak, chicken, pasta, and potatoes or rice, with different finish notes for each.
Use the Sauce Map before the final simmer so one mushroom sauce can move toward steak, chicken, pasta, or potatoes without starting over.
Serve it withTextureLiquidFinish
SteakThick, shiny, spoonableBeef broth, pan drippings, or red wineBlack pepper, Dijon, Worcestershire, thyme
ChickenMedium creamyChicken brothLemon, parsley, parmesan
PastaLooser and silkyPasta water, cream, brothParmesan, black pepper, parsley
Pork chopsCreamy and smotheredChicken broth or pork pan juicesGarlic, thyme, optional slurry
Potatoes or riceThicker, gravy-likeStock or brothFlour or cornstarch option
Vegetables or toastMushroom-heavy, not too looseCream, milk, or brothHerbs, lemon, black pepper

Once you know the direction, jump to the notes for steak, chicken, pasta, pork chops, or potatoes and rice.

Before you start: Use a wide skillet. Wait until the mushroom liquid cooks off. Add parmesan over low heat. Those three choices prevent most watery, bland, split, or clumpy mushroom sauce problems.

Pick the direction first, then cook the base recipe below. In the final 2 minutes, the same skillet can stay thick for steak, loosen for pasta, or move closer to gravy.

Creamy Mushroom Sauce Recipe for Steak, Chicken, Pasta & More

A flexible skillet mushroom sauce built on deeply browned mushrooms, garlic, broth, cream, parmesan, thyme, and black pepper. Keep it spoonable for steak, looser for pasta, or thicken it slightly for a gravy-style finish.

Prep Time8 minutes
Cook Time15 minutes
Total Time23 minutes
YieldAbout 3 cups / 700–720 ml

Serves: 4 to 5 over steak, chicken, or pork chops; 3 to 4 with pasta

Equipment: 10- to 12-inch skillet, wooden spoon or spatula, whisk, measuring cup, fine grater or microplane

Ingredients

  • 400–450g / 14–16 oz mushrooms, sliced about 1/4 inch / 6 mm thick
  • 2 tbsp / 28g butter
  • 1 tbsp / 15 ml olive oil
  • 1 small shallot, finely minced, or 1/4 cup minced onion
  • 3 garlic cloves, minced
  • 2 tsp fresh thyme leaves, or 1/2 tsp dried thyme
  • 1/4 cup / 60 ml dry white wine, optional
  • 1/2 cup / 120 ml chicken, beef, or vegetable broth
  • 1 cup / 240 ml heavy cream or double cream
  • 1/3 cup / about 30g finely grated parmesan
  • 1–2 tsp lemon juice, to taste
  • 1/4 tsp salt to start, plus more to taste after parmesan
  • Freshly ground black pepper, to taste
  • 1–2 tbsp chopped parsley, optional, for finishing

Optional thickener for a gravy-style sauce: 1 tsp cornstarch mixed with 1 tbsp cold water.

Instructions

  1. Brown the mushrooms. Heat the butter and olive oil in a wide skillet over medium-high heat. Add the mushrooms and cook for 6 to 8 minutes, stirring occasionally, until they release moisture, the moisture evaporates, the pan looks mostly dry, and the edges begin to brown. If the pan is crowded, cook them in two batches.
  2. Add aromatics. Season the browned mushrooms with 1/4 tsp salt and black pepper. Add the shallot or onion and cook for 1 to 2 minutes. Add the garlic and thyme and cook for 30 to 45 seconds, just until fragrant.
  3. Deglaze the pan. Pour in the wine, or use extra broth if skipping wine. Scrape the browned bits from the bottom of the skillet. Simmer until the wine smells less sharp and reduces by about half, about 1 minute.
  4. Add broth and cream. Lower the heat to medium. Add the broth and cream. Simmer gently for 4 to 6 minutes, stirring occasionally, until the cream turns beige, the sauce begins to thicken, and it leaves light trails when you stir.
  5. Finish with parmesan. Reduce the heat to low. Stir in the parmesan gradually until melted and smooth. Taste before adding more salt.
  6. Balance the sauce. Add black pepper and 1 teaspoon lemon juice. Taste again. If it tastes flat, add salt. If it tastes heavy, add lemon. If it tastes creamy but not savory, add parmesan, Worcestershire, or more pepper.
  7. Adjust thickness. For steak or pork chops, simmer a little longer until spoonable. For pasta, stop slightly loose and loosen with reserved pasta water as needed. For a thicker gravy-style sauce, stir in the cornstarch slurry and simmer for 30 to 60 seconds.
  8. Serve warm. Spoon over steak, chicken, pork chops, pasta, mashed potatoes, rice, roasted vegetables, meatballs, toast, or omelettes.

Best Finishes

  • Steak: beef broth, Dijon, Worcestershire, and extra black pepper.
  • Chicken: chicken broth, lemon, parsley, and a medium-thick texture.
  • Pasta: stop the sauce slightly loose and loosen with pasta water.
  • No wine or gravy-style: use broth instead of wine; add the optional slurry for a thicker finish.

Storage: Refrigerate leftovers and reheat gently with a splash of liquid.

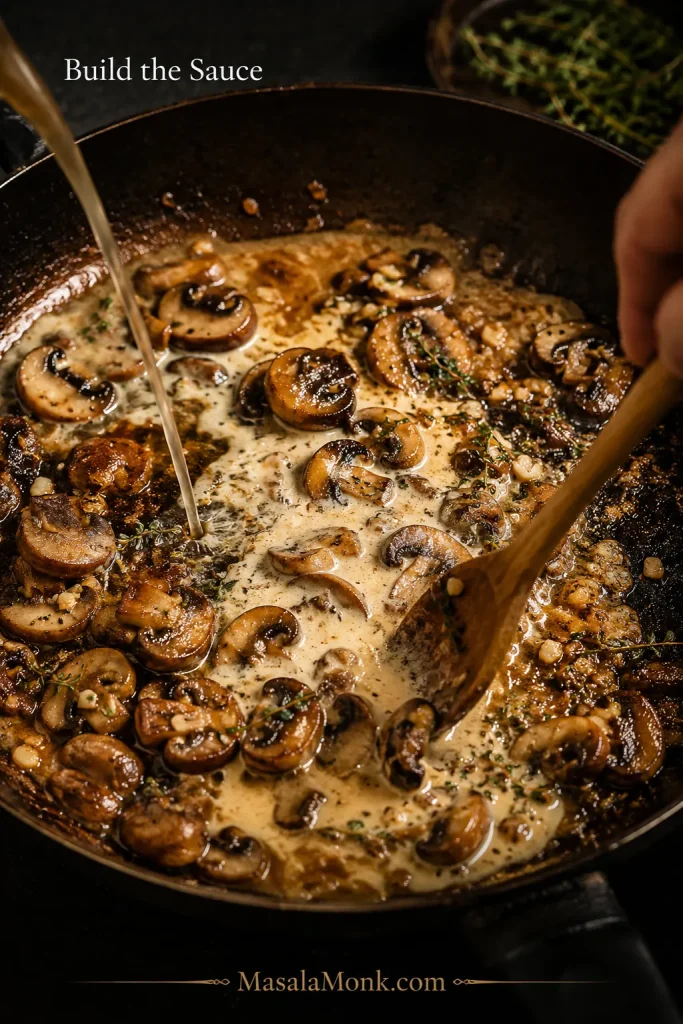
This is the quick turn from browned mushrooms to sauce: liquid lifts the browned bits, and cream pulls everything together.

Cream and liquid being poured into a skillet of browned mushrooms while a spoon stirs the sauce.
After browning, deglazing pulls flavor from the skillet into the sauce. Then cream ties the mushrooms, garlic, thyme, and pan juices together.

What Browning Should Look and Smell Like

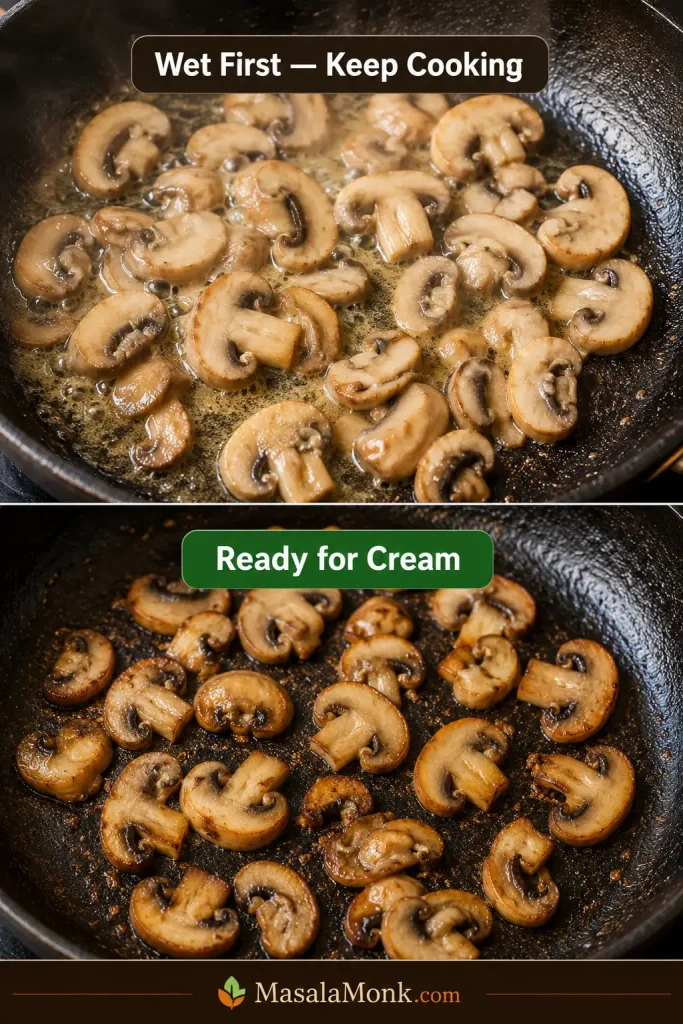
This is the part where patience pays you back. Mushrooms do not become rich the second they hit the pan. First they steam, then they shrink, then the pan goes quieter and drier, and only after that do the edges begin to brown.

Do not judge the sauce in the first few minutes; mushrooms get messy before they get good. They may look wet, crowded, and pale at first, but keep going. The pan should smell deeper and nuttier before the cream goes in, not just buttery.

Two stages of mushrooms cooking in a pan: wet pale mushrooms labeled Wet First — Keep Cooking and browned mushrooms labeled Ready for Cream.
First comes moisture, then color. When the pan quiets down and the mushrooms turn golden at the edges, the sauce will taste much more savory.
  • Too wet: keep cooking until the pan looks mostly dry.
  • Too crowded: cook the mushrooms in two batches.
  • Too pale: give them another minute or two before adding garlic.
  • Ready for cream: the mushrooms are smaller, darker, and golden at the edges.

If the sauce still turns watery, bland, or thin after browning, use the troubleshooting guide before adding more cream.

Once the cream goes in, keep the heat gentle. The cream should turn beige as it picks up the browned mushroom juices. If it tastes creamy but not mushroomy, the problem is usually browning, not the amount of cream.

Tested texture note: A 12-inch skillet browns 400–450g mushrooms much better than a small saucepan. If the mushrooms pile up deeply, cook them in two batches. The sauce also thickens after parmesan and again as it cools, so stop slightly looser than you want it on the plate if it will sit for more than 5 minutes or if you are tossing it with pasta.

Ingredient Notes

The sauce is simple enough that the small choices show. Mushrooms bring savoriness, broth balances the pan, cream gives body, parmesan adds depth, and lemon keeps the finish lifted.

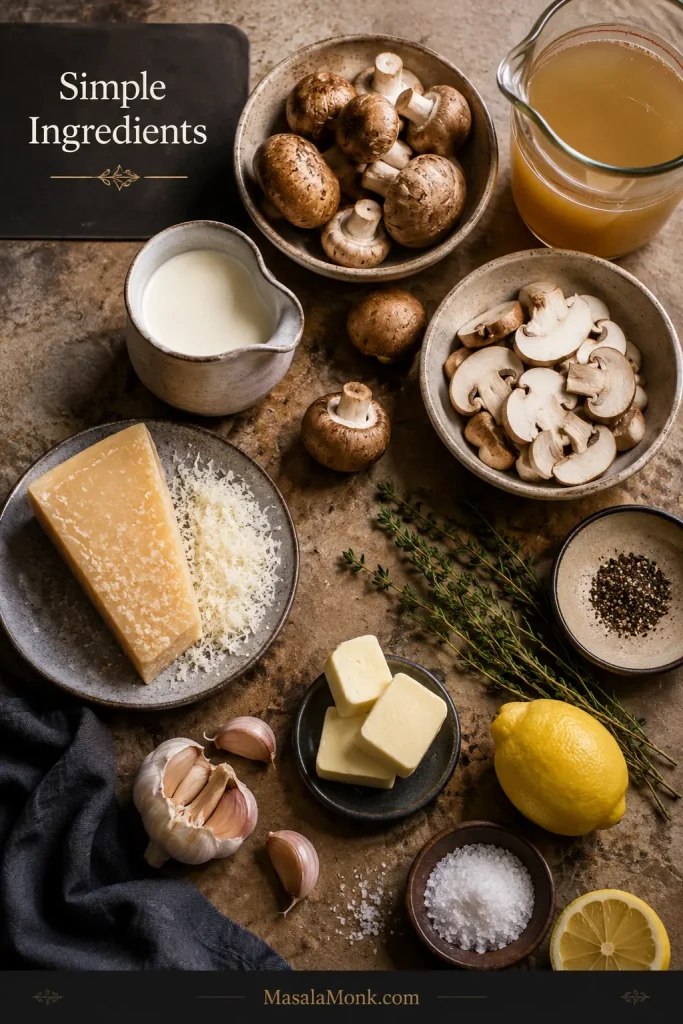
Ingredients for mushroom sauce arranged on a table, including mushrooms, cream, broth, parmesan, garlic, thyme, butter, lemon, salt, and black pepper.
Before the pan gets hot, line up the sauce builders: dry mushrooms for searing, broth for the pan, cream for body, parmesan for depth, and lemon for balance.

Cremini or baby bella mushrooms give the best everyday flavor, but button, portobello, or mixed mushrooms also work. Slice them about 1/4 inch / 6 mm thick.

Fresh, dry-looking mushrooms sear better than damp ones. If the mushrooms are dirty, a quick rinse is fine, but dry them well before cooking. For a quick visual reference, the Mushroom Council’s mushroom cleaning tips show the same brush, wipe, or brief-rinse approach.

Butter adds roundness, olive oil helps with heat, and pan drippings make the sauce deeper if you cooked steak, chicken, or pork first. Use chicken broth for chicken and pasta, beef broth for steak, and vegetable broth for a vegetarian version.

Heavy cream gives the smoothest finish, and finely grated parmesan melts into the pan instead of sitting in clumps. MasalaMonk’s Parmesan vs Parmigiano Reggiano guide is helpful when choosing between hard cheeses.

Dry white wine helps lift the browned bits from the pan, but broth works well too. If you skip wine, finish with lemon juice so the sauce still tastes bright.

Cooking without cream, wine, or dairy? Use the no-cream substitutions and dairy-free notes before you start.

Getting the Texture Right

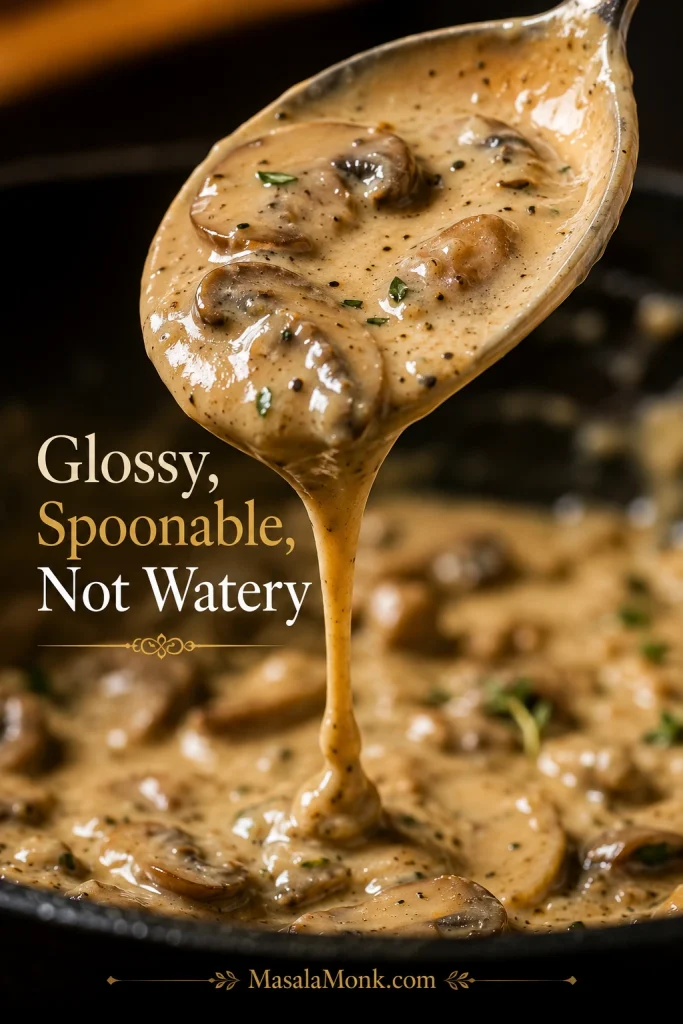
The sauce should coat the back of a spoon and fall in a slow ribbon for steak, chicken, and pork chops. For pasta, it should flow more loosely because it tightens as you toss. For potatoes, rice, or meatballs, it can sit closer to gravy.

Spoon test: Dip a spoon into the sauce and run your finger through the coating on the back. A line that holds for a moment means it is thick enough for steak or chicken. When the coating closes immediately, simmer longer. Loosen the sauce gently if it barely moves.

Close-up of creamy mushroom sauce with mushroom slices coating a spoon and dripping back into the pan.
Use the spoon test before serving. If the sauce coats and drips slowly, it is ready; if it runs, reduce it; if it drags, loosen it gently.

Then check the final texture.

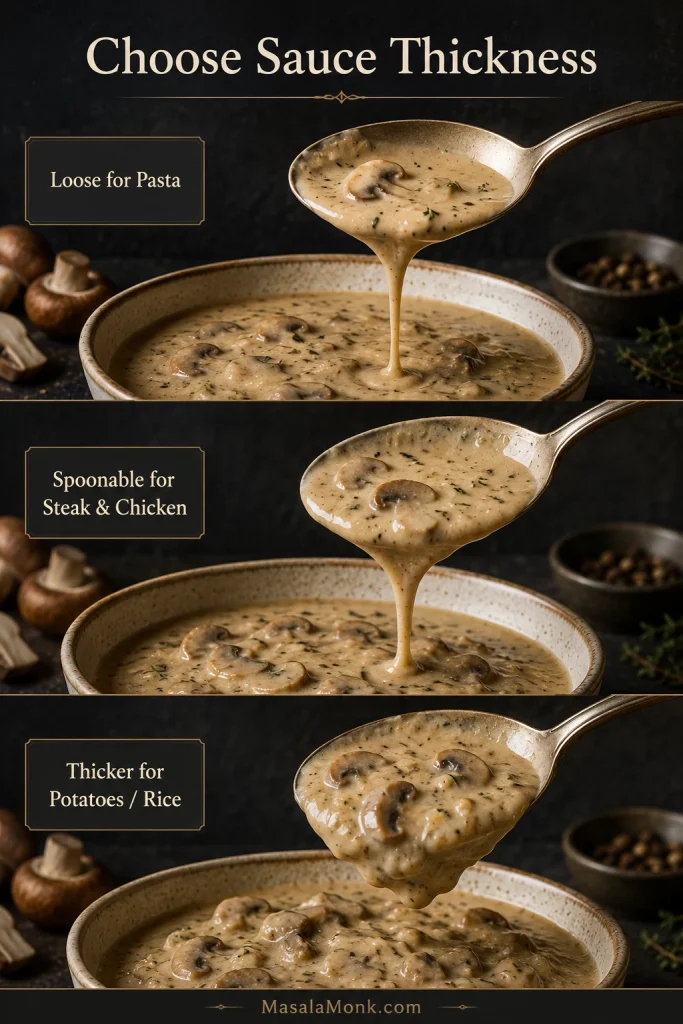
Guide showing three mushroom sauce thicknesses: loose for pasta, spoonable for steak and chicken, and thicker for potatoes or rice.
Thickness is the final choice. Keep it loose for pasta, medium-spoonable for steak and chicken, and heavier when you want a mushroom gravy finish.

Use that texture guide before serving: thicker for steak, looser for pasta, or gravy-style for potatoes and rice.

If pasta tightens in the bowl, that is normal. A splash of hot pasta water brings it back.

How Much Sauce to Use — and Where It Works Best

Use enough sauce to feel generous, not so much that steak, pasta, or potatoes disappear under it.

Serve it withHow much to use
Steak1/3 to 1/2 cup per steak
Chicken breast or thigh1/3 cup per piece
Pork chop1/3 to 1/2 cup per chop
PastaFull batch for 250g / 8 oz long pasta or 300g / 10 oz short pasta
Mashed potatoes, rice, or vegetables1/4 to 1/3 cup per serving
Toast or omelette2 to 4 tbsp per serving

Mushroom Sauce for Steak

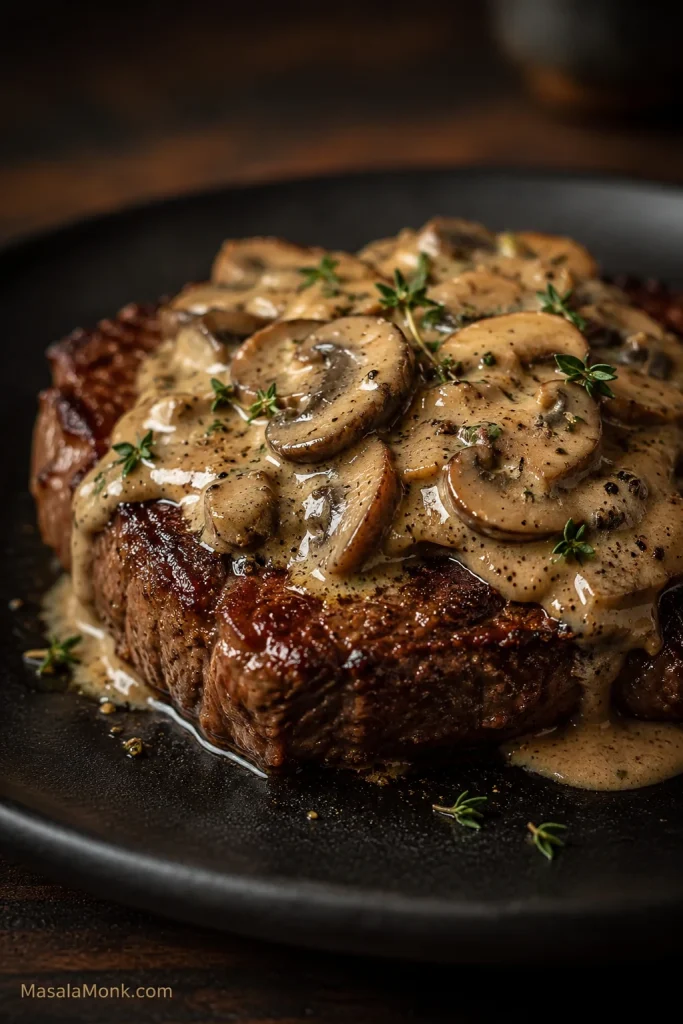
For steak: use pan drippings if you have them, and reduce until the sauce sits on the meat instead of running across the plate.

Seared steak on a dark plate topped with mushroom sauce, sliced mushrooms, thyme, and black pepper.
Mushroom sauce for steak should cling to the meat while the seared crust stays visible. Pepper, thyme, Dijon, or Worcestershire can deepen the finish.

Mushroom Sauce for Chicken

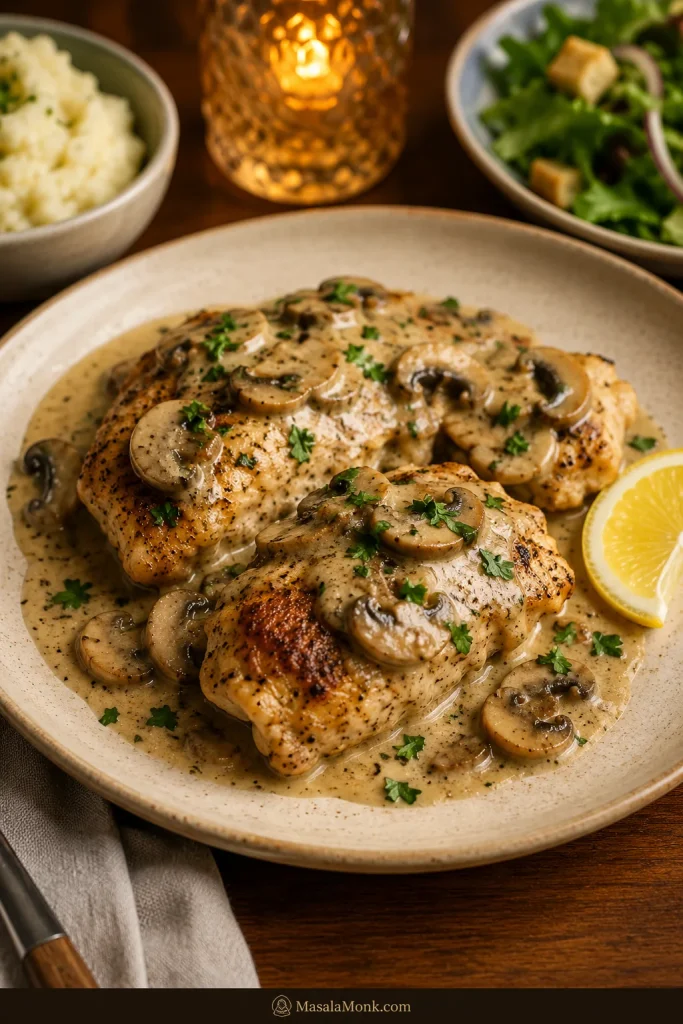
For chicken: keep the sauce medium-thick and bright with lemon or parsley. If the chicken is already cooked, warm it gently in the sauce. If it is not fully cooked, finish it gently until the thickest part reaches 165°F / 74°C. For a complete chicken dinner using this flavor family, see MasalaMonk’s Cream of Mushroom Chicken Recipe.

Chicken pieces on a cream-colored plate covered with mushroom sauce, sliced mushrooms, parsley, and a lemon wedge.
Mushroom sauce for chicken works best when it is rich but still bright. Parsley and lemon keep the cream from feeling too heavy.

Mushroom Sauce for Pasta

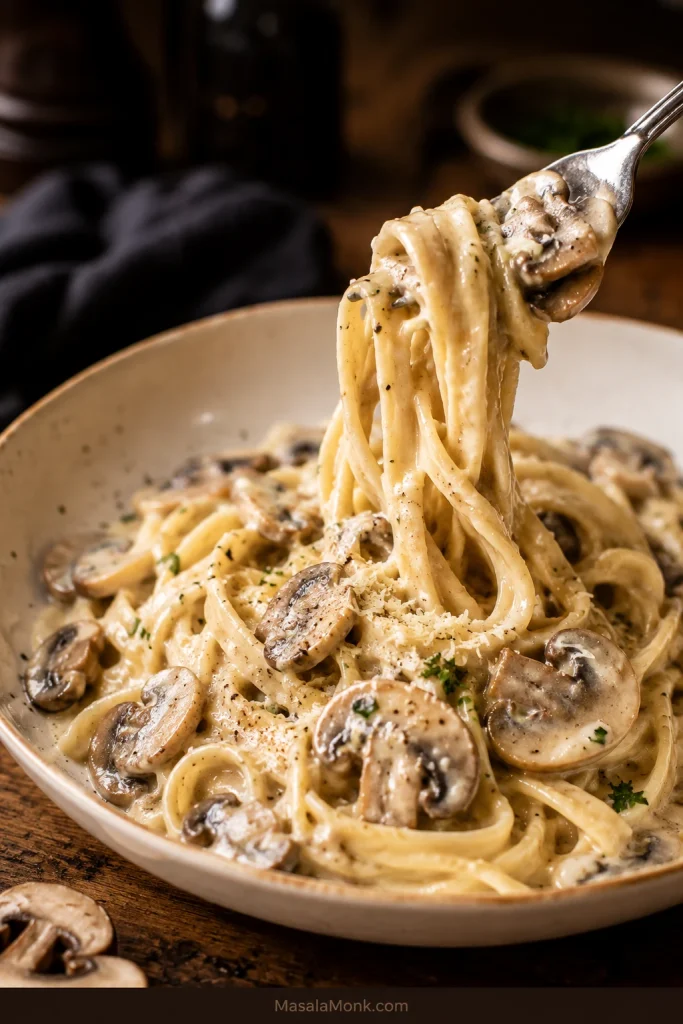
For pasta: keep the sauce loose enough to coat, not clump. Reserve 1 cup pasta water before draining, then toss over low heat and add pasta water 2 to 4 tablespoons at a time until glossy.

Pasta lifted with a fork from a bowl of mushroom sauce with sliced mushrooms, parmesan, parsley, and black pepper.
Keep mushroom pasta sauce loose and glossy so it slides through the noodles instead of settling in clumps.

Mushroom Sauce for Pork Chops

Pork chops: use chicken broth or pork pan juices and reduce until the sauce coats the chops well. A full pork version is waiting in MasalaMonk’s Cream of Mushroom Pork Chops.

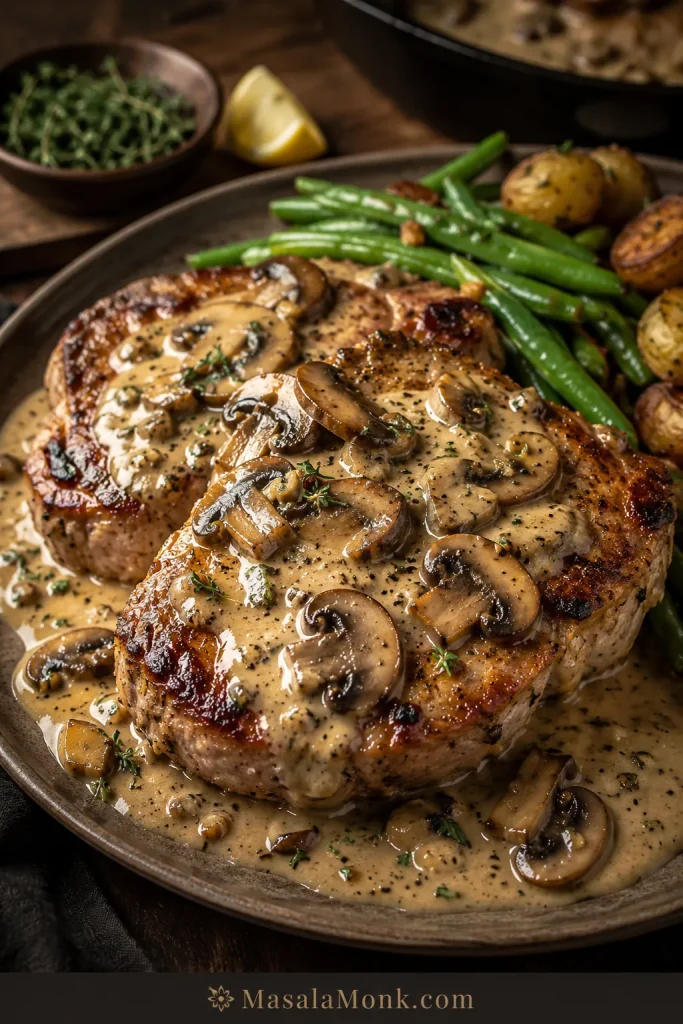
Seared pork chops topped with mushroom sauce, sliced mushrooms, black pepper, thyme, green beans, and roasted potatoes.
Mushroom sauce for pork chops should be generous but controlled, coating the chop while leaving the seared edges visible.

Mushroom Sauce for Potatoes and Rice

Potatoes, rice, vegetables, toast, or omelettes: use a slightly thicker finish and let the mushrooms stay the focus. This sauce is especially good over garlic mashed potatoes. With rice, keep it looser so it soaks in instead of sitting heavily on top; MasalaMonk’s guide on how to cook rice is a simple place to start.

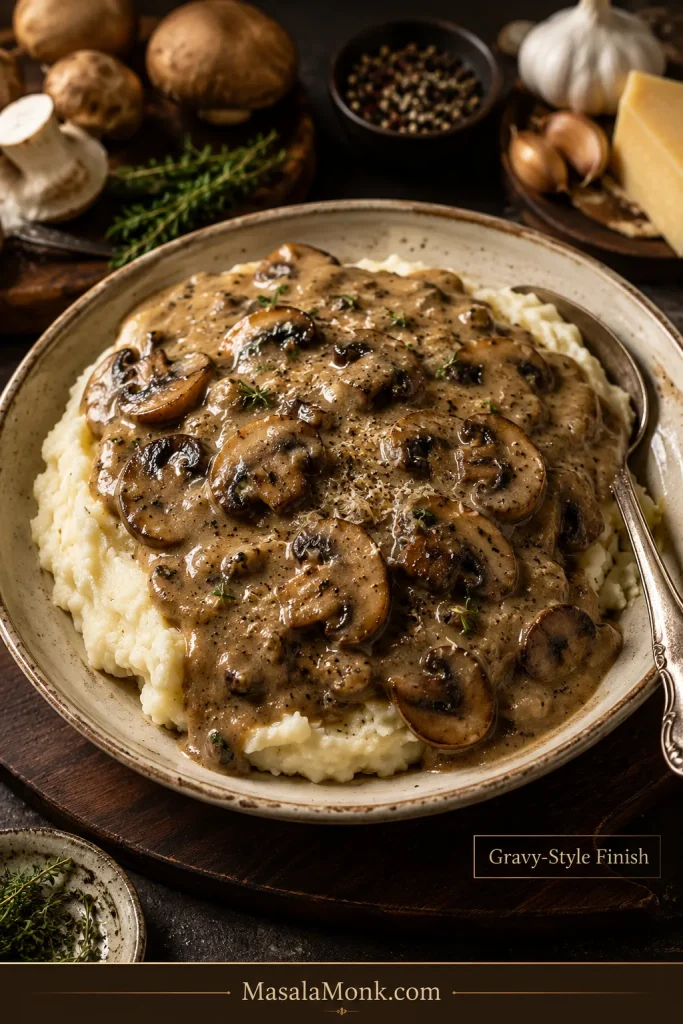
Thick mushroom sauce with visible mushroom slices spooned over mashed potatoes on a cream-colored plate.
Potatoes or rice work best when the sauce moves toward mushroom gravy: thicker, spoonable, and full of visible mushroom pieces.

No Cream, No Wine & Dairy-Free Options

Once the base works, substitutions become less risky because you know what each ingredient is replacing. Remove cream and you need body. Skip wine and you need brightness. Go dairy-free and you need body plus savoriness.

Without Cream

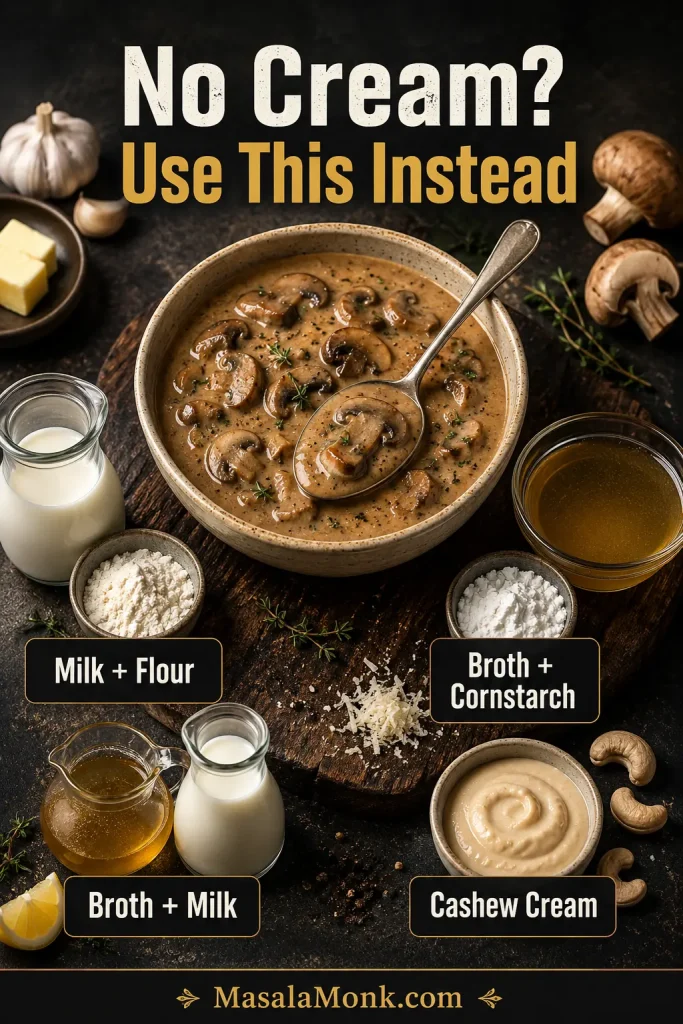
The no-cream versions will not all taste identical, but they can still be rich, savory, and useful. Choose milk + flour for creamy, broth + cornstarch for gravy-like, and cashew cream for dairy-free richness.

VersionHow to replace 1 cup / 240 ml creamBest for
Milk + flourCook 1 tbsp flour in the fat for 1 minute, then whisk in 1 cup / 240 ml whole milk gradually.Chicken, pasta, toast
Broth + cornstarchUse 1 cup / 240 ml extra broth, then thicken with 1–2 tsp cornstarch mixed with cold water.Steak, potatoes, rice, gravy-style sauce
Broth + milkUse 3/4 cup / 180 ml broth plus 1/4 cup / 60 ml whole milk, then thicken lightly if needed.Lighter creamy sauce
Cashew creamUse 1 cup / 240 ml cashew cream in place of heavy cream.Dairy-free pasta or vegetables
Guide for mushroom sauce without cream showing milk and flour, broth and cornstarch, broth and milk, and cashew cream options.
Mushroom sauce without cream still needs body. Flour, cornstarch, broth, milk, or cashew cream can thicken the sauce depending on what you have.

If you are also skipping wine or dairy, use the no-wine and dairy-free guide before finishing the sauce.

If using milk instead of cream, keep the heat gentle. Milk-based sauces are more likely to curdle or separate if boiled hard.

Without Wine

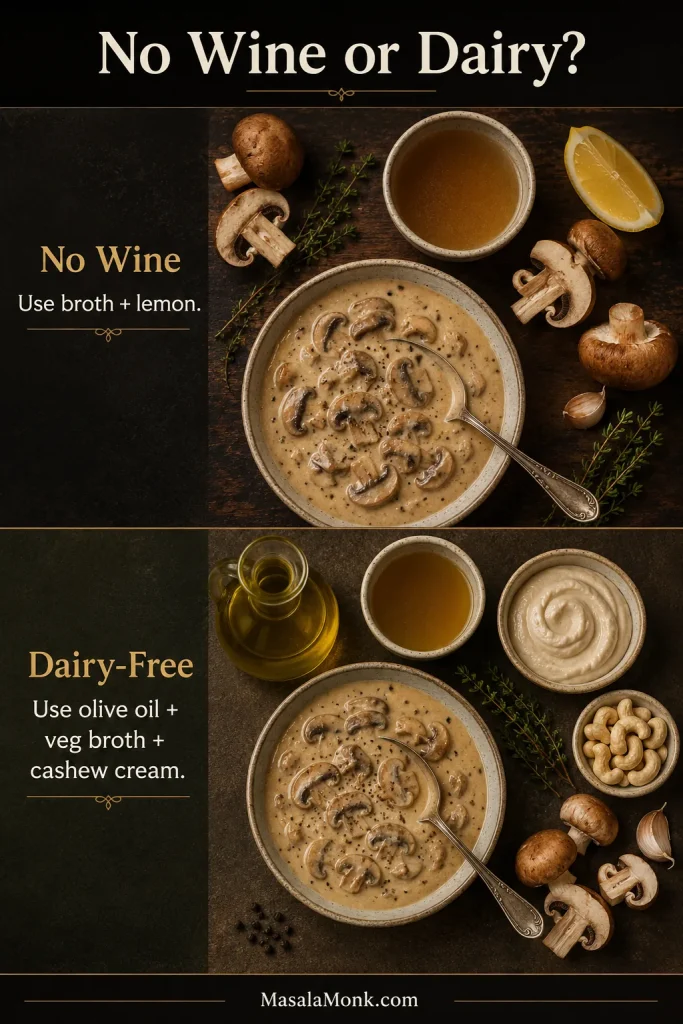
Wine helps, but it is not the soul of the sauce. Browned mushrooms, broth, parmesan, and lemon do most of the real work. Replace the wine with the same amount of broth, then add 1 to 2 teaspoons lemon juice before serving.

Dairy-Free

Use olive oil or vegan butter instead of butter, vegetable broth instead of chicken or beef broth, and cashew cream for the most neutral creamy body. For a lighter sauce, use vegetable broth and cornstarch slurry, then add a small splash of soy sauce or tamari for savory depth. Use unsweetened dairy-free milk only. Avoid sweetened plant milks; coconut milk works but changes the flavor.

These two swaps solve different problems: broth and lemon replace wine’s brightness, while olive oil, vegetable broth, and cashew cream replace dairy’s body.

Guide for no-wine and dairy-free mushroom sauce showing broth, lemon, olive oil, vegetable broth, cashew cream, cashews, mushrooms, garlic, and thyme.
Without wine, add brightness with broth and lemon. A dairy-free mushroom sauce gets body from olive oil, vegetable broth, and cashew cream.

Small Flavor Adjustments

To make it more garlicky, increase the garlic to 4 or 5 cloves and add it only after the mushrooms brown. A deeper steak version can use red wine, beef broth, Dijon, Worcestershire, thyme, and extra black pepper. Brighten the pan with lemon, parsley, or a splash of white wine. For more savoriness, add a few drops of Worcestershire or soy sauce, more parmesan, or a little extra broth.

Mushroom Sauce vs Mushroom Gravy

The line between sauce and gravy is blurry in real kitchens. If it is going over steak or pasta, keep it silkier. If it is going over potatoes, rice, meatballs, or roasts, you can push it thicker and more stock-forward.

FeatureMushroom sauceMushroom gravy
BaseCream + brothStock + roux or slurry
ColorCreamy, pale, golden, or beigeBrown and savory
TextureSilky, rich, spoonablePourable, thicker, gravy-like
Best forSteak, chicken, pork chops, pastaMashed potatoes, meatloaf, roasts, rice
FreezingNot ideal if cream-basedBetter if made without cream
ThickenerReduction, parmesan, optional slurryFlour, roux, or cornstarch

This recipe is a creamy sauce first. To take it closer to gravy, use more broth, less cream, and the optional cornstarch slurry.

Can This Replace Canned Cream of Mushroom Soup?

Yes, this homemade sauce can replace canned cream of mushroom soup as a spoonable topping for chicken, pork chops, rice, pasta, potatoes, or vegetables. It tastes fresher and more mushroom-forward than canned soup.

As a pourable dinner sauce, keep the full 3-cup batch as written. To make a condensed-soup-style replacement, reduce and thicken it to about 2 cups. A gravy-style topping can stay closer to 2 1/2 to 3 cups, then thicken with slurry or roux.

Casseroles need a thicker sauce than a pourable skillet topping because the sauce has to hold vegetables, noodles, protein, and topping together. To turn the same sauce idea into a full casserole, MasalaMonk’s green bean casserole is a useful next step.
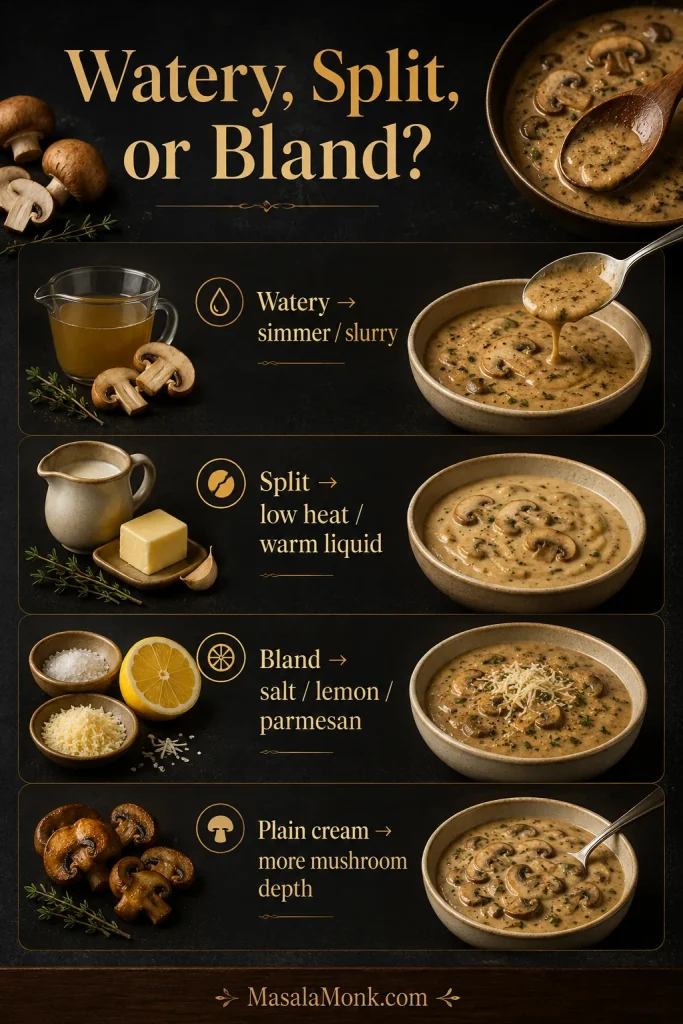
Watery, Split or Bland? Fix It Fast

If your sauce looks wrong, do not panic. Most mushroom sauce problems are fixable. Usually, the issue comes from mushrooms that steamed instead of browned, cream that boiled too hard, cheese added over high heat, or a sauce that was made too thick before pasta or reheating.

Quick Visual Fixes

Troubleshooting guide for mushroom sauce showing fixes for watery, split, bland, and plain cream-tasting sauce.
Use the fix-it guide at the first sign of trouble: reduce watery sauce, warm split sauce gently, brighten bland sauce, and build more mushroom depth.

Detailed Fix Table

ProblemFix nowNext time
Watery sauceSimmer uncovered for 2 to 5 minutes, or stir in 1 tsp cornstarch mixed with 1 tbsp cold water.Give the mushrooms enough time for the pan to dry before adding cream.
Too thickAdd warm broth, milk, cream, or pasta water 1 tbsp at a time.Stop simmering while the sauce is slightly looser than you want it on the plate.
Split or greasyLower heat and whisk in a splash of warm broth or cream. Avoid adding cold liquid directly.Keep the cream at a gentle simmer.
Tastes like plain creamAdd parmesan, salt, pepper, thyme, lemon, Worcestershire, or a splash of broth.Brown mushrooms longer and deglaze the pan before adding cream.
BlandAdd salt if flat, lemon if heavy, parmesan or Worcestershire if it lacks depth.Taste after parmesan before final seasoning.
Rubbery mushroomsKeep cooking until moisture evaporates and edges brown.Use a wide pan and avoid crowding.
Floury tasteSimmer 2 to 3 minutes longer after adding liquid.Cook flour in the fat for about 1 minute before adding liquid.
Parmesan clumpedTake the pan off the heat and whisk gently. Add a splash of warm liquid if needed.Use finely grated parmesan and avoid high heat.
Pasta absorbed the sauceAdd pasta water 2 to 4 tbsp at a time and toss over low heat.Keep the sauce looser before adding pasta.

Most fixes come back to two things: give the mushrooms more time in the pan, then keep the creamy finish gentle. For watery or bland sauce problems, recheck the wet-to-browned mushroom cue and the spoon test.

Storage, Reheating, and Make-Ahead Tips

Cream sauces are not difficult to reheat; they just do not like being rushed. Store leftovers in an airtight container in the refrigerator for 3 to 4 days. For general leftover safety, the USDA recommends using refrigerated leftovers within 3 to 4 days.

  • To refrigerate: cool the sauce, then store in an airtight container.
  • To reheat on the stove: warm over low or medium-low heat, stirring often.
  • To loosen: add a splash of broth, milk, cream, or pasta water.
  • To microwave: use short bursts and stir between each one.
  • To freeze: cream-based sauce is not ideal because it can split. A no-cream, gravy-style version freezes better.

If the sauce looks separated after chilling, warm it slowly and whisk in a little liquid. Do not bring it to a hard boil. For more general leftover storage guidance, see the USDA’s Leftovers and Food Safety guide.

FAQs About Mushroom Sauce

Can I use canned mushrooms?

Yes, canned mushrooms work in a pinch, but fresh mushrooms give better browning and flavor. Drain canned mushrooms well, pat them dry, and brown them before adding liquid.

How do I make mushroom sauce thicker?

Simmer mushroom sauce uncovered first; that gives the best flavor. For a faster fix, add a slurry made from 1 teaspoon cornstarch and 1 tablespoon cold water.

Why is my mushroom sauce watery?

Mushroom sauce is usually watery when the pan is still too wet before the cream goes in. Simmer uncovered, or use a small cornstarch slurry if dinner is waiting.

Why does it taste like plain cream?

If mushroom sauce tastes like plain cream, the mushrooms probably needed more browning, or the sauce needs salt, parmesan, pepper, lemon, or Worcestershire. It should taste savory before it tastes creamy.

Is this the same as mushroom gravy?

No. Mushroom sauce is usually creamier and better for steak, chicken, pasta, and pork chops. Mushroom gravy is usually more stock-based, brown, and thickened with flour or cornstarch.

What can I use instead of cream?

Use milk with flour for a lighter creamy sauce, broth with cornstarch for a gravy-style sauce, or cashew cream for dairy-free richness. Milk and broth are thinner than cream, so they usually need a thickener.

Can I make mushroom sauce ahead of time?

Yes. Make it 2 to 3 days ahead, refrigerate, and reheat gently with a splash of liquid. Leftovers keep for 3 to 4 days in an airtight container.

Why did the sauce split?

Cream sauces usually split when boiled too hard or reheated too aggressively. Lower the heat and whisk in a splash of warm broth or cream.

Final Spoonful

Once you understand the texture, this becomes the sauce you can pull out for half-finished dinners: steak that needs polish, chicken that needs richness, pasta that needs gloss, or potatoes that need comfort.

Tried it over steak, chicken, pasta, potatoes, or something else? Tell me what you spooned it over and how you finished it — Dijon, Worcestershire, extra pepper, pasta water, or your own trick.

Back to top

Posted on 2 Comments

Easy Cheese Sauce Recipe for Mac, Broccoli, Nachos and More

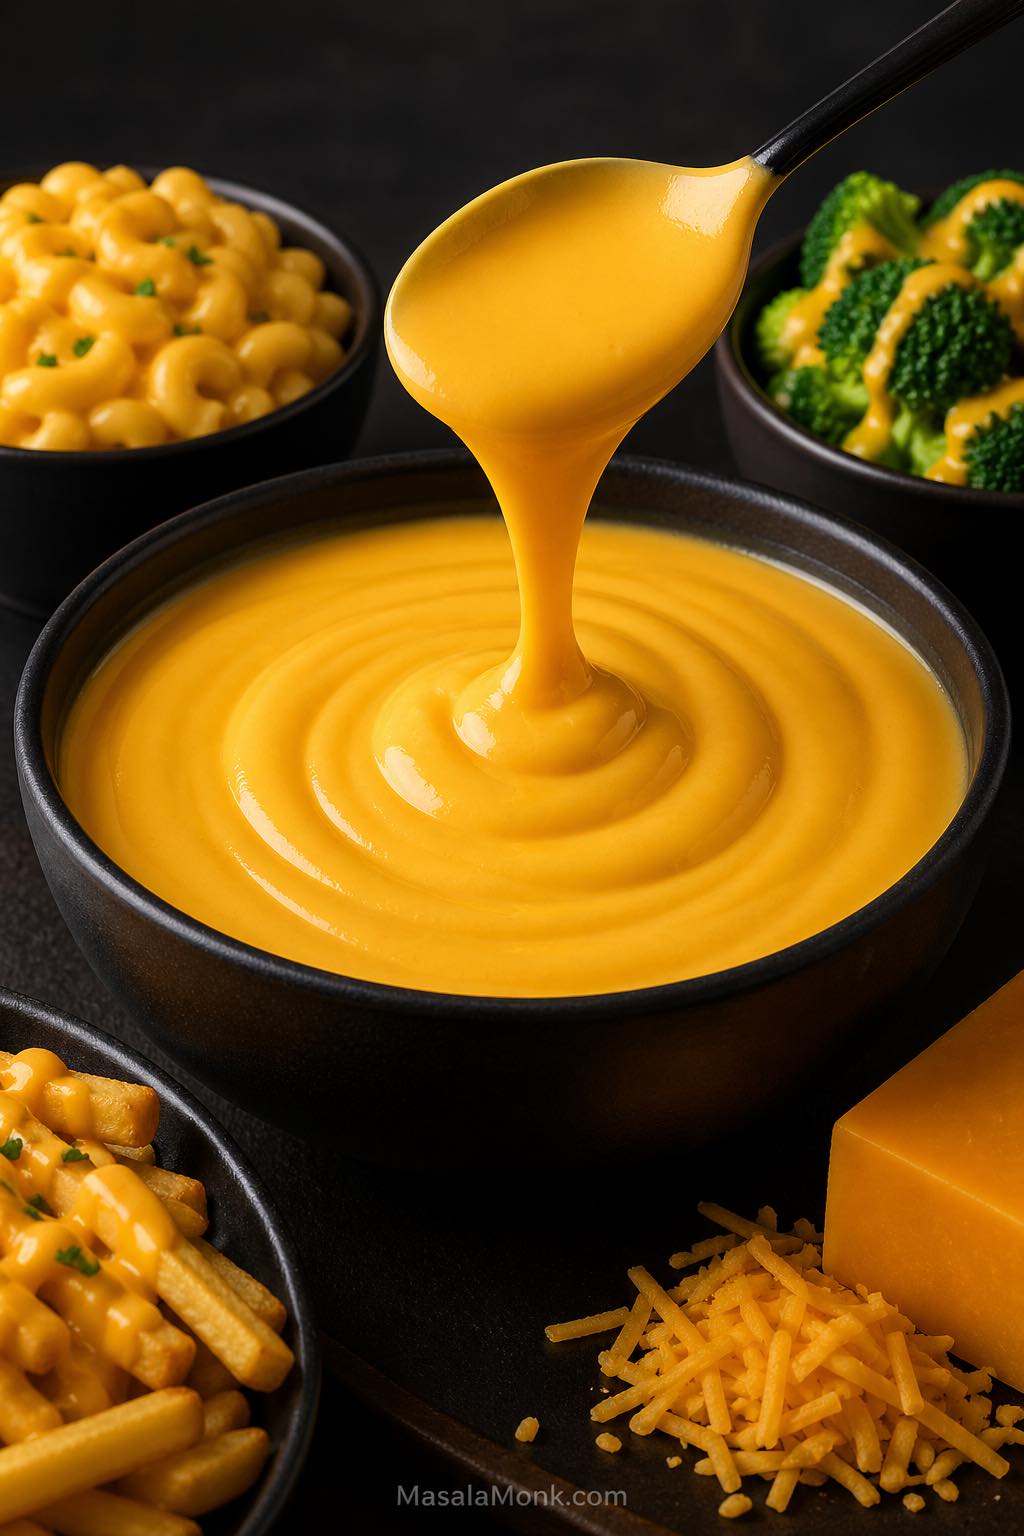
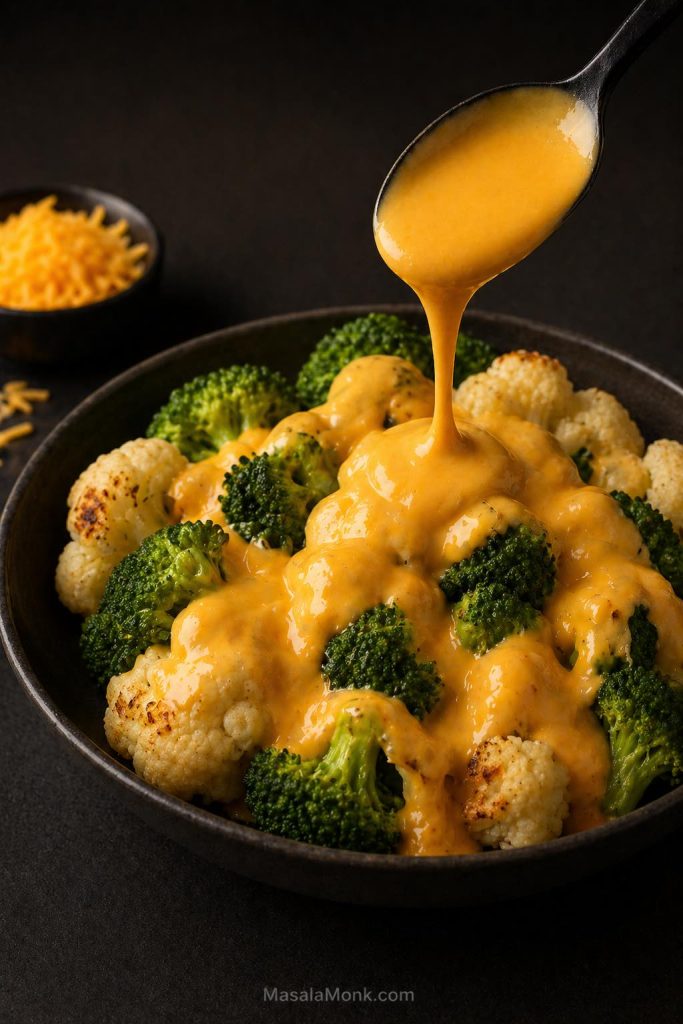
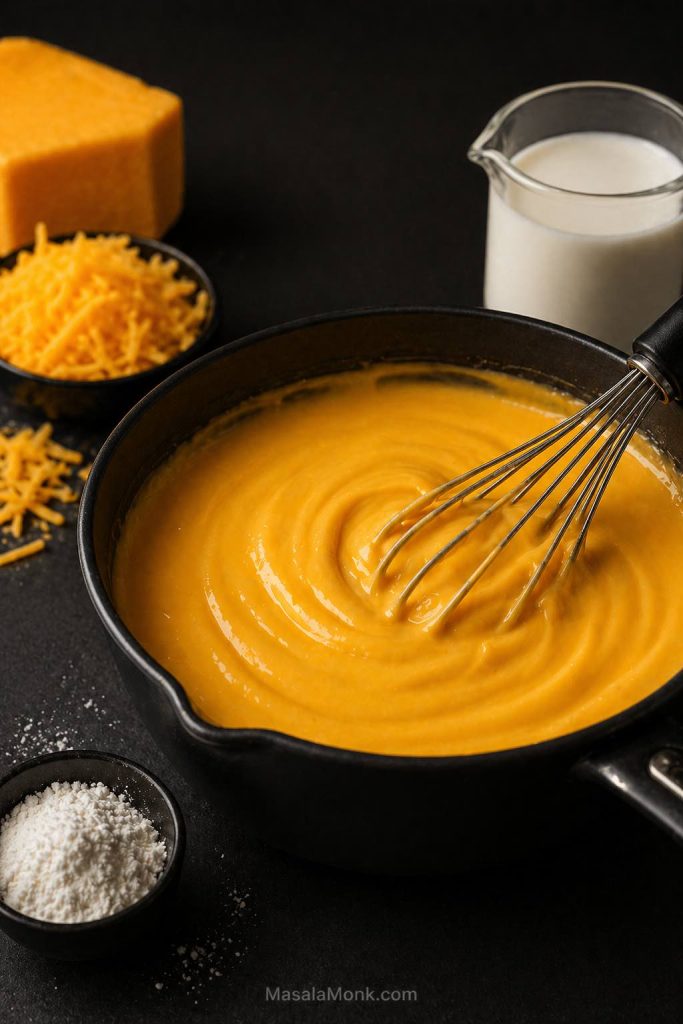
Smooth cheddar cheese sauce lifted with a spoon, served with mac and cheese, broccoli, fries and grated cheddar.

A good cheese sauce recipe should give you a smooth, creamy, cheesy sauce that is easy to control. It should work for mac and cheese, broccoli, cauliflower, fries, baked potatoes, pasta, nachos, pretzels, burgers, rice bowls, and casseroles without turning grainy, oily, lumpy, or gluey.

This easy cheese sauce recipe uses a simple butter-flour roux, milk, and freshly grated cheddar. The method is quick, but the details matter: cook the roux long enough, add the milk slowly, remove the pan from heat before adding cheese, and adjust the texture based on how you plan to serve it.

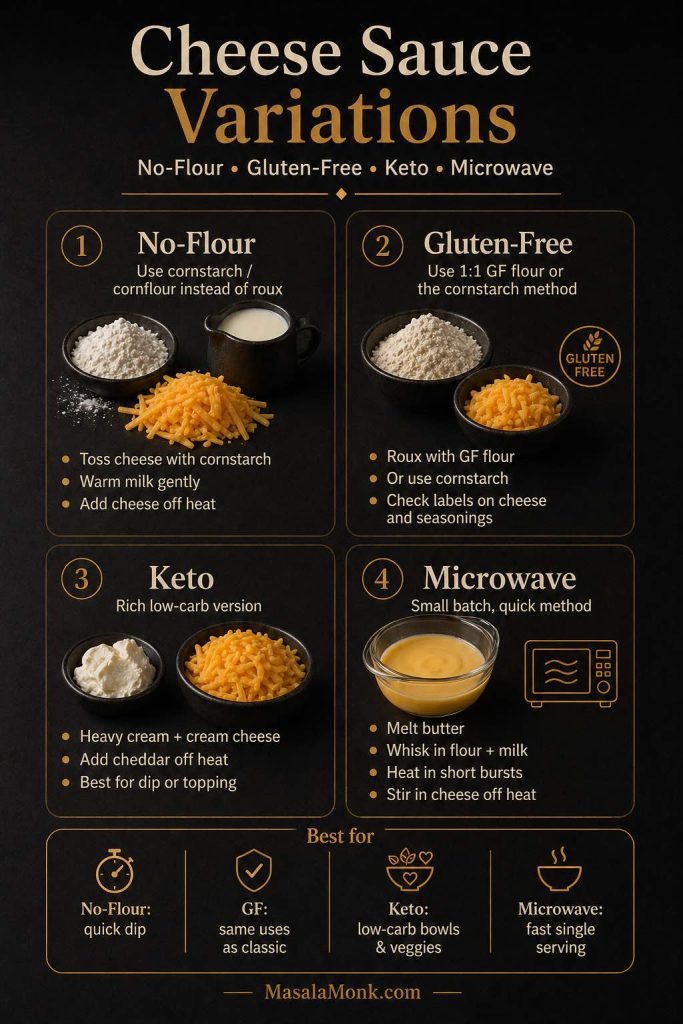
The main recipe turns cheddar cheese, milk, butter, and flour into a medium-thick sauce for vegetables, fries, potatoes, sandwiches, and pasta. It tastes fresher than a jarred sauce because it starts from scratch with real ingredients. From there, you can adapt the same base for mac and cheese, broccoli, cauliflower, pasta, nachos, no-flour sauce, gluten-free sauce, keto sauce, microwave sauce, thicker dips, thinner drizzles, and reheated leftovers.

Cheese Sauce Guide

Use this guide to make a smooth basic cheese sauce first, then adjust the texture, ingredients, and method for the way you want to serve it.

Quick Answer: How to Make Cheese Sauce

To make a smooth cheese sauce, melt butter, whisk in flour, cook the roux briefly, then slowly whisk in milk. Once the base thickens, remove the pan from heat and stir in freshly grated cheddar until melted.

The most important step is adding the cheese away from direct heat. That way, the sauce stays creamy instead of turning grainy, oily, or separated.

For a reliable all-purpose sauce, this recipe uses 2 tablespoons butter, 2 tablespoons flour, 1¼ cups milk, and 6 ounces freshly grated cheddar cheese. That gives you a medium-thick sauce for mac and cheese, broccoli, cauliflower, baked potatoes, fries, pasta, and nachos-style drizzling.

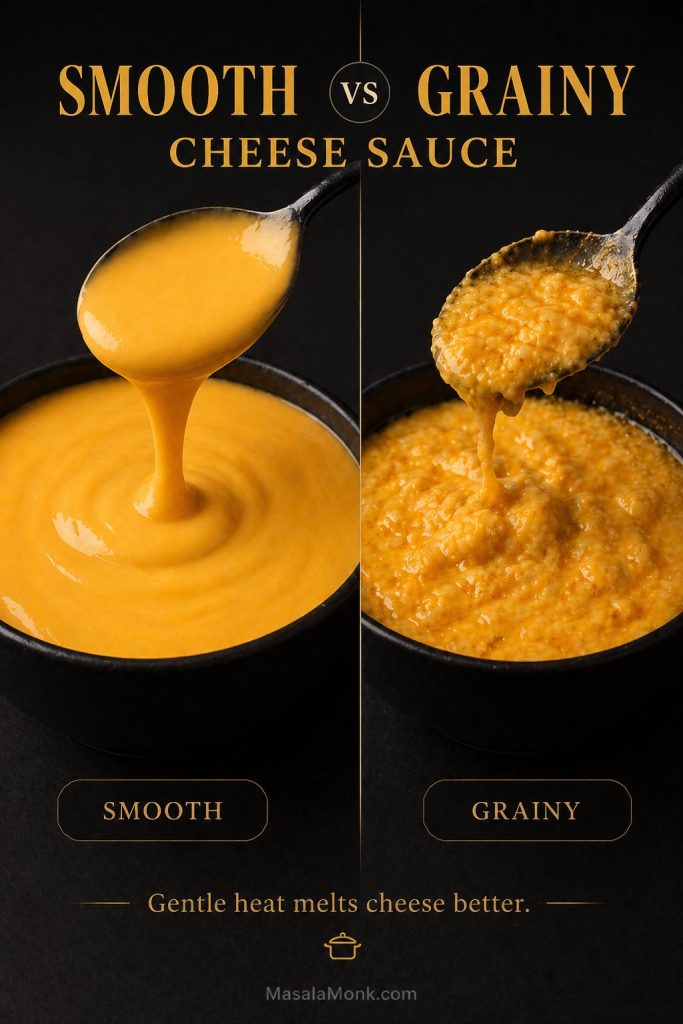
The smooth sauce rule: thicken the milk base first, then turn off the heat before adding cheese. Cheese does not need hard boiling to melt. Gentle residual heat is enough.

At a Glance

At a glance: This cheese sauce recipe makes about 2 cups / 480 ml / 0.48 L of smooth cheddar sauce in about 12 minutes. It uses 2 tbsp butter, 2 tbsp flour, 1¼ cups / 300 ml milk, and 6 oz / 170 g cheddar cheese. Keep it thick for broccoli, fries, potatoes, and sandwiches, or thin it with warm milk for pasta, mac and cheese, and rice bowls.

Practically speaking, that means you can start with one reliable base and adjust it without guessing. The same cheese sauce can stay thick for fries, loosen into a pasta coating, cover broccoli and cauliflower, or shift into a no-flour version with one small method change.

Why This Cheese Sauce Recipe Works

This recipe works because the cheese is added to a thickened milk sauce instead of being melted directly over high heat. As a result, the cheddar has a smoother base to melt into and the finished sauce is easier to control.

The butter and flour create a smooth base, the milk gives the sauce enough moisture, and the cheddar melts in gently after the pan comes off the heat. The same butter-flour-milk logic also shows up in béchamel sauce. Here, however, the base becomes richer because cheddar cheese is stirred in at the end.

That order matters. When cheese is boiled too hard, the sauce can turn grainy, oily, or separated. With a thickened milk base, though, the cheese has a smoother place to melt.

For a homemade cheese sauce, the goal is not just melting cheese. The recipe needs enough liquid, enough thickening power, and gentle heat so the sauce stays smooth after the cheddar melts.

This recipe also starts with a medium-thick texture on purpose. It is thick enough for vegetables, fries, potatoes, and sandwiches, while still being easy to loosen with warm milk or pasta water when you want a thinner sauce for noodles, mac and cheese, or rice bowls.

Cheese Sauce Ingredients

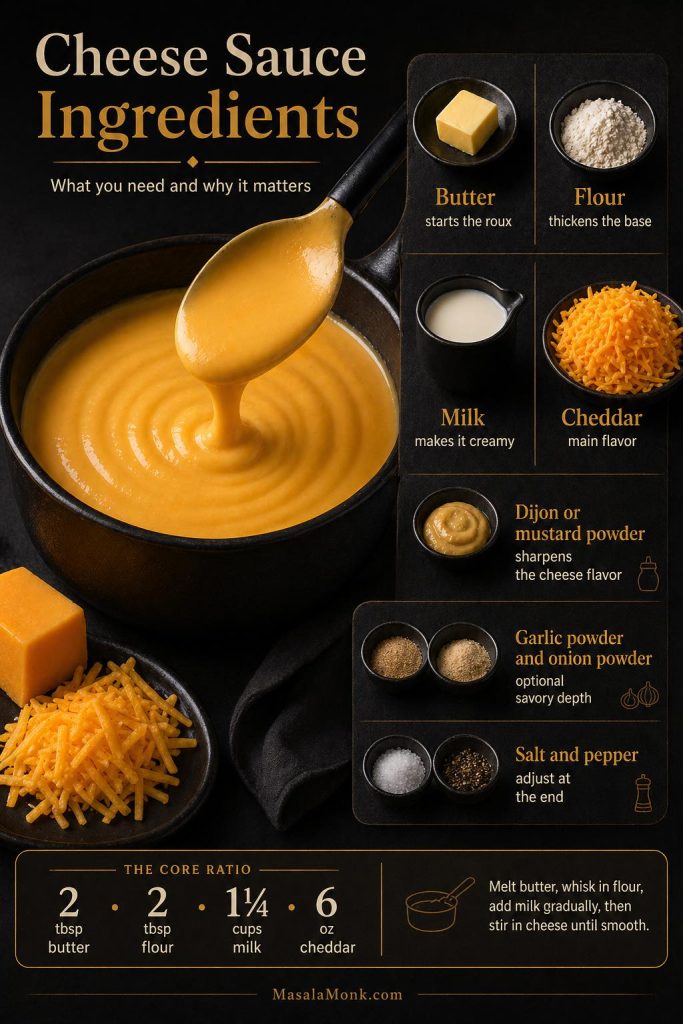
Although this recipe uses basic ingredients, each one has a specific job. The butter and flour create the thickened base, the milk makes it creamy, and the cheddar cheese gives the sauce its main flavor.

Cheese sauce ingredients guide showing butter, flour, milk, cheddar, mustard, garlic powder, onion powder, salt and pepper with the core ratio.
The basic cheese sauce ingredients are simple, but each one has a job: butter and flour build the roux, milk makes the sauce creamy, cheddar gives flavor, and seasonings sharpen the final taste.

Main Ingredients and What They Do

Ingredient Amount Why it matters
Unsalted butter 2 tbsp / 28 g / 1 oz Combines with flour to make the roux. Salted butter works too, but reduce added salt.
All-purpose flour / plain flour 2 tbsp / 16–18 g / 0.6 oz Thickens the milk and helps stabilize the sauce so the cheese melts smoothly. Do not use self-rising flour.
Whole milk 1¼ cups / 300 ml / 10 fl oz / 0.3 L Gives the sauce body and creaminess. Whole milk gives the smoothest everyday result.
Freshly grated cheddar cheese 6 oz / 170 g / about 1½ cups The main cheese. Medium cheddar is the easiest default; sharp cheddar gives stronger flavor.
Dijon mustard or mustard powder 1 tsp Dijon / 5 ml, or ¼ tsp mustard powder / about 1 g Optional, but it sharpens the flavor and makes the sauce taste more cheesy.
Garlic powder ¼ tsp / about 0.7 g Optional background flavor, especially good for potatoes, fries, broccoli, and pasta.
Onion powder ¼ tsp / about 0.6 g Optional savory depth without making the sauce taste onion-heavy.
White pepper or black pepper Pinch to ⅛ tsp / about 0.3 g Adds gentle warmth. White pepper keeps the sauce paler; black pepper is easier to find.
Salt ⅛–¼ tsp / about 0.75–1.5 g Add after the cheese melts because cheddar can vary a lot in saltiness.

Measurement note: cheese is best measured by weight. If using cups, lightly spoon the grated cheese into the cup instead of packing it down. For this recipe, 1 cup of liquid is treated as 240 ml.

Milk Options

The milk you choose changes the richness of the sauce. Whole milk is the best everyday choice for this cheese sauce recipe, although other dairy options can work depending on the texture you want.

  • Whole milk: best everyday choice for a smooth, creamy cheese sauce.
  • 2% milk: works, but the sauce will taste slightly lighter.
  • Skim milk: not ideal because the sauce can taste thinner and less creamy.
  • Half-and-half: richer and thicker; useful when you want a heavier sauce.
  • Heavy cream: very rich; better for keto-style sauce than the basic roux version.

Can I Use Pre-Shredded Cheese?

Freshly grated cheese melts more smoothly. Pre-shredded cheese is convenient, but many bags contain anti-caking ingredients that can make the sauce less silky. If pre-shredded cheese is all you have, use gentle heat, add it slowly, and avoid boiling after it goes in.

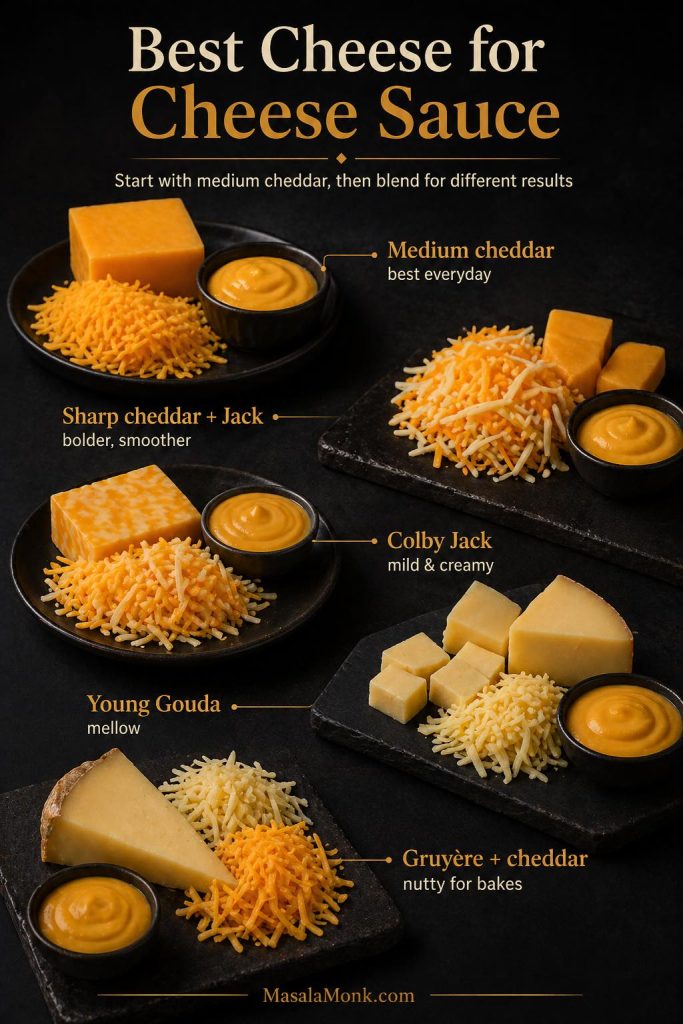
Best Cheese for Cheese Sauce

In general, the best cheese for cheese sauce is flavorful but still easy to melt. Medium cheddar is the safest default because it gives a classic cheddar taste without becoming as temperamental as very aged cheese.

Best cheeses for cheese sauce including medium cheddar, sharp cheddar with Monterey Jack, Colby Jack, young Gouda, and Gruyère with cheddar.
Medium cheddar is the easiest everyday choice for cheese sauce, while Monterey Jack, Colby Jack, young Gouda and Gruyère can help adjust the flavor, smoothness and richness.

For the smoothest everyday result, start with medium cheddar or a cheddar-Monterey Jack blend. Sharp cheddar gives stronger flavor, but it works best when blended with a smoother melting cheese.

Cheese Best use Notes
Medium cheddar Best everyday choice Balanced flavor, good melting, and classic color.
Sharp cheddar Stronger cheddar flavor Use gentle heat. Sharp cheddar tastes great but can turn grainy if overheated.
Mild cheddar Kid-friendly sauce Smooth and mellow, but less bold.
White cheddar White cheese sauce Good when you want a pale sauce for pasta, potatoes, or vegetables.
Monterey Jack Smooth melting blend Excellent mixed with cheddar when you want a softer, creamier melt.
Colby or Colby Jack Mild creamy sauce Good for kids, nachos-style drizzling, and burgers.
Young Gouda Creamy, mellow sauce Use young gouda rather than very aged gouda for smoother melting.
Gruyère Cauliflower, potatoes, gratins Nutty and excellent, but more expensive. Good blended with cheddar.
Parmesan Flavor accent Use a small amount with cheddar or Jack. Parmesan alone can make the texture gritty.
Mozzarella Stretchy accent Not ideal as the main cheese sauce cheese. It can become stringy.
Blue cheese or Gorgonzola Specialty sauces Better for dedicated blue cheese or Gorgonzola sauce, not the basic cheddar version.

Once you know the texture you like, you can experiment with sharper cheddar, smoked cheddar, white cheddar, gouda, Gruyère, or small amounts of Parmesan.

How to Make Cheese Sauce

Before you start cooking, it helps to understand that the method is simple but heat-sensitive. Timing and temperature control make the difference between a smooth cheese sauce and a grainy one. This recipe works best in a small to medium heavy-bottomed saucepan, about 1.5–2 qt / 1.5–2 L.

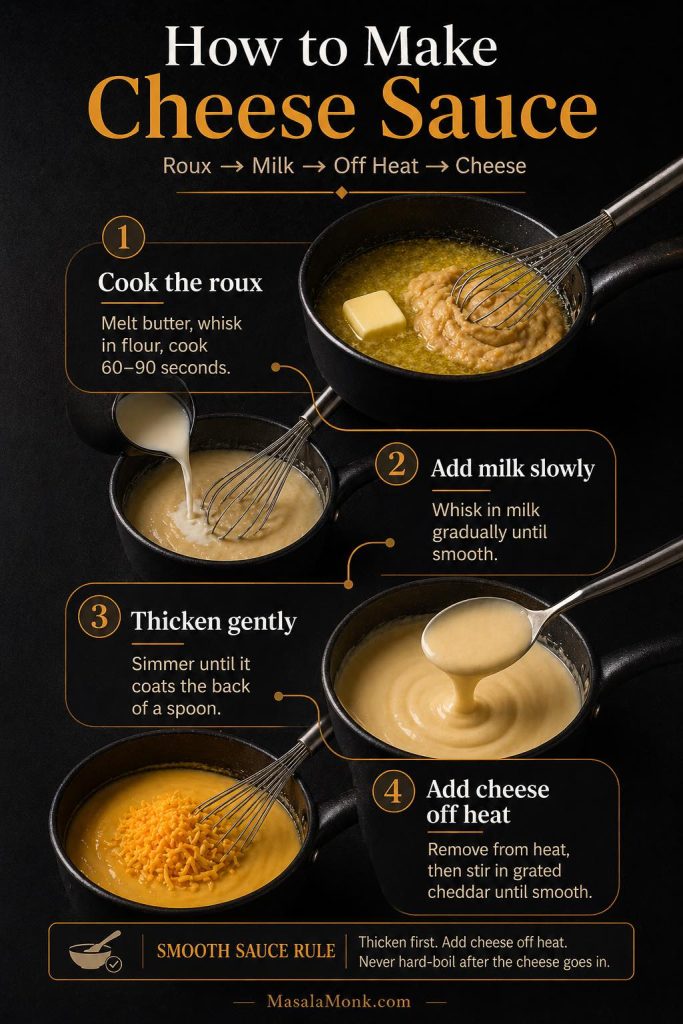
Step-by-step guide showing how to make cheese sauce by melting butter, whisking in flour, adding milk and stirring in cheddar.
The key to smooth cheese sauce is the order of steps: make the roux, add milk slowly, thicken the base, then remove the pan from heat before stirring in cheddar.

1. Grate the Cheese First

Grate the cheddar before you start cooking. Cheese melts more evenly when it is ready to add in small handfuls. If it is very cold, let it sit at room temperature for a few minutes while you make the roux.

2. Melt the Butter Gently

Place the saucepan over medium-low to medium heat. Add the butter and let it melt without browning. If the butter starts sizzling aggressively, lower the heat.

3. Whisk in the Flour

Add the flour and whisk for 60–90 seconds. The mixture should look pale, foamy, and smooth. This step cooks out the raw flour taste. Do not brown the roux for this recipe; a pale roux keeps the sauce creamy and mild.

4. Add the Milk Slowly

Whisk in the milk in 3 additions. Add a splash first, whisk until smooth, then add more. This gradual method helps prevent lumps. Once all the milk is in, keep whisking until the sauce looks smooth.

5. Simmer Until the Base Thickens

Cook the milk base until it reaches a gentle simmer and coats the back of a spoon. This usually takes 3–5 minutes. At this stage, you want gentle bubbling around the edges, not a hard boil.

6. Remove From Heat Before Adding Cheese

Turn off the heat and move the pan away from the burner if your stove stays hot. Wait until the bubbling settles. Then stir in the grated cheese by handfuls, letting each handful melt before adding the next.

7. Season and Adjust

Once the cheese is melted, taste the sauce. Add salt only after tasting because cheddar can be mild or salty depending on the brand and age. To build more flavor, add mustard, pepper, garlic powder, onion powder, cayenne, or a small splash of hot sauce.

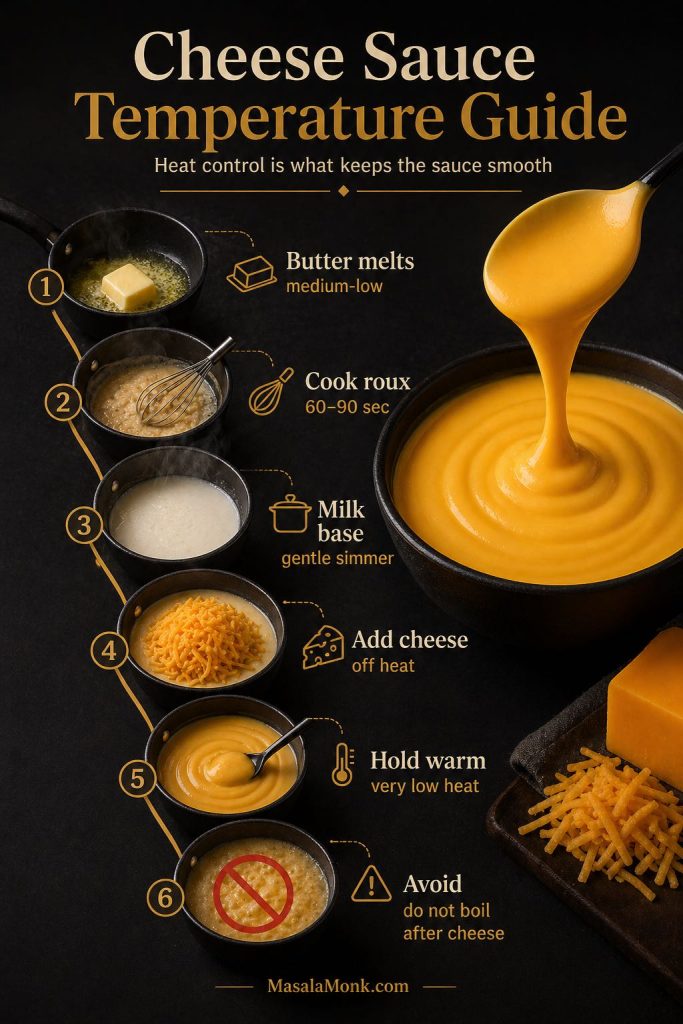
Cheese Sauce Temperature Guide

Cheese is most fragile after it melts, so temperature control is one of the easiest ways to protect the texture. You do not need to measure every stage, but the cues below help when you want the sauce to turn out the same way every time.

Cheese sauce temperature guide showing butter melting, roux cooking, milk simmering, cheese added off heat and sauce held warm.
Heat control is what keeps cheese sauce smooth. Cook the roux and milk base gently, then add the cheese off heat so the sauce does not turn grainy or oily.
Stage Best temperature / heat cue Why it matters
Melting butter Medium-low to medium heat The butter should melt gently without browning.
Cooking the roux 60–90 seconds over medium-low heat This removes the raw flour taste while keeping the sauce pale.
Thickening the milk base Gentle simmer, about 82–88°C / 180–190°F The flour fully thickens the milk before the cheese is added.
Before adding cheese Turn off heat and let bubbling stop Cheese melts best with residual heat, not aggressive boiling.
Melting cheese Ideally about 65–75°C / 150–167°F This helps the cheese melt smoothly without separating.
Holding warm Very low heat, about 55–60°C / 130–140°F if using a thermometer This keeps the sauce warm without pushing it toward splitting.
Danger zone for texture Do not hard-boil after cheese is added Hard boiling can make cheese sauce grainy, oily, or separated.

Cheese Sauce Ratio

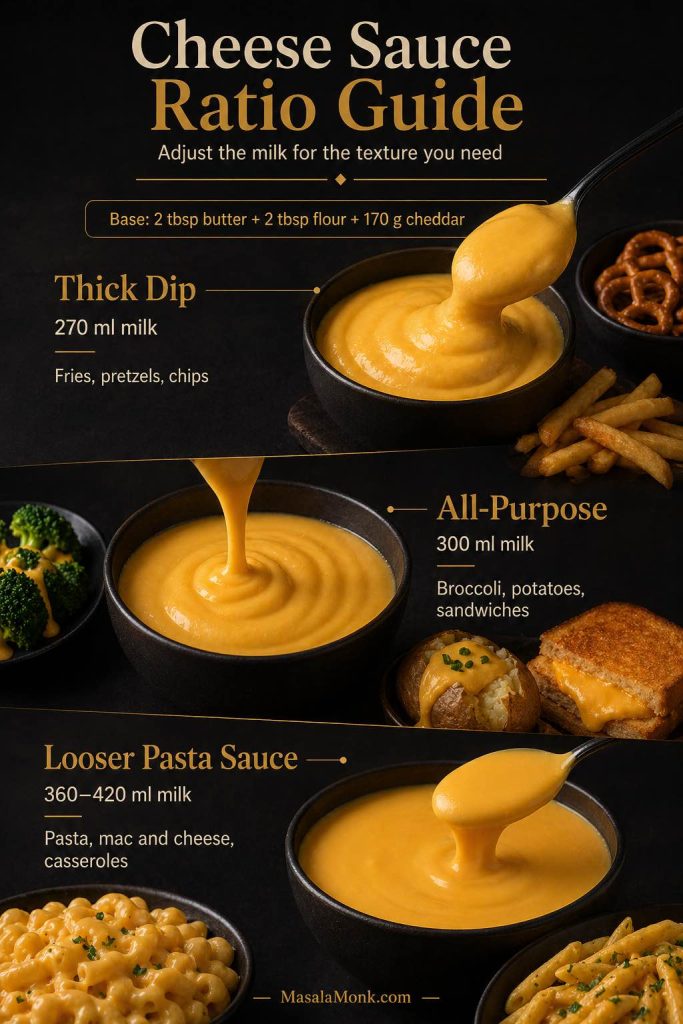
Once you understand the base ratio, the recipe becomes easier to adjust. Instead of starting over, you can change the amount of milk or cheese depending on whether you want a dip, a topping, or a looser pasta sauce.

The easiest cheese sauce ratio for this recipe is 2 tbsp butter + 2 tbsp flour + 300 ml milk + 170 g cheese. That gives you a medium-thick sauce. For dipping, reduce the milk slightly; for pasta, add more liquid after the cheese melts.

Cheese sauce ratio guide showing thick dip, all-purpose cheese sauce and looser pasta sauce with different milk amounts.
Use the same butter, flour and cheddar base, then adjust the milk to make a thick dip, an all-purpose sauce, or a looser cheese sauce for pasta and casseroles.
Style Milk Cheese Best for
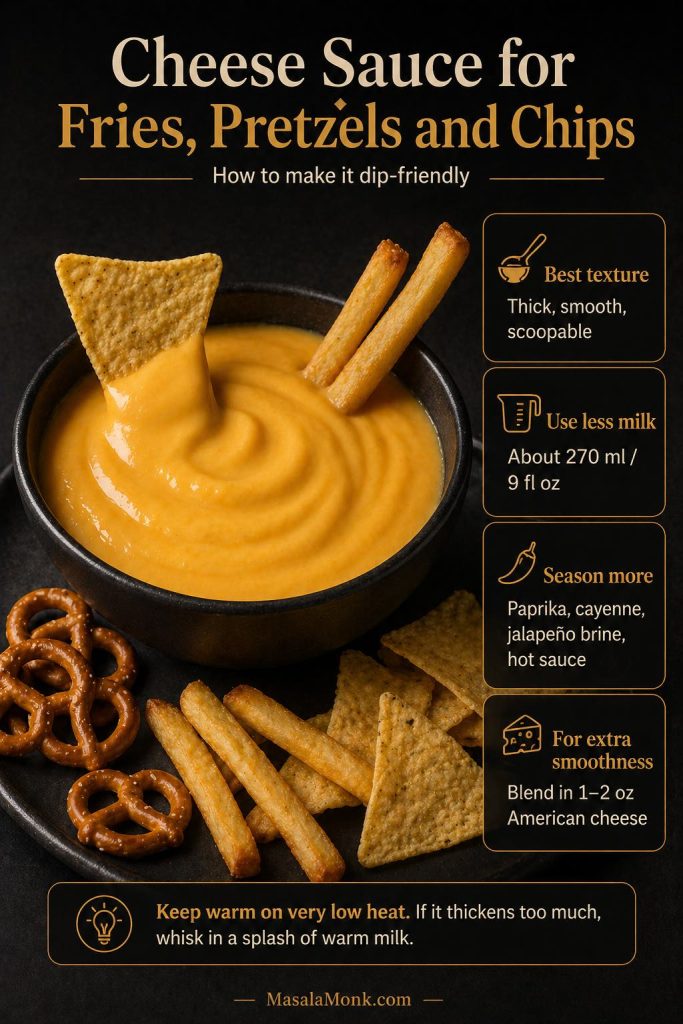
Thick dip 270 ml / 9 fl oz 170 g / 6 oz Fries, pretzels, chips, burgers
All-purpose sauce 300 ml / 10 fl oz 170 g / 6 oz Broccoli, cauliflower, potatoes, sandwiches
Looser pasta sauce 360–420 ml / 12–14 fl oz 170 g / 6 oz Pasta, macaroni, rice bowls, casseroles

Texture cue: when the sauce is hot, it should fall from a spoon in a thick ribbon. If it sits in a heavy blob, whisk in warm milk. If it runs like plain milk, simmer the base longer next time before adding cheese.

How to Scale This Cheese Sauce Recipe

Fortunately, this recipe scales well as long as you keep the butter, flour, milk, and cheese in balance. For the smoothest result, use a larger pan when doubling the recipe so the milk base thickens evenly.

Yield Butter Flour Milk Cheese
1 cup / 240 ml / 0.24 L 1 tbsp / 14 g 1 tbsp / 8–9 g 150 ml / 5 fl oz 85 g / 3 oz
2 cups / 480 ml / 0.48 L 2 tbsp / 28 g 2 tbsp / 16–18 g 300 ml / 10 fl oz 170 g / 6 oz
4 cups / 960 ml / 0.96 L 4 tbsp / 56 g 4 tbsp / 32–36 g 600 ml / 20 fl oz 340 g / 12 oz

Easy Homemade Cheese Sauce Recipe

This recipe makes a smooth cheddar cheese sauce that is thick enough for vegetables, fries, and baked potatoes, but easy to thin for pasta, mac and cheese, rice bowls, or drizzling.

Prep Time5 minutes
Cook Time7 minutes
Total Time12 minutes
YieldAbout 2 cups / 480 ml / 0.48 L

Equipment

  • Small to medium heavy-bottomed saucepan, about 1.5–2 qt / 1.5–2 L
  • Whisk
  • Box grater or fine grater

Ingredients

  • 2 tbsp unsalted butter / 28 g / 1 oz
  • 2 tbsp all-purpose flour or plain flour / 16–18 g / 0.6 oz
  • 1¼ cups whole milk / 300 ml / 10 fl oz / 0.3 L, warmed slightly if possible
  • 6 oz freshly grated cheddar cheese / 170 g / about 1½ cups
  • 1 tsp Dijon mustard / 5 ml, or ¼ tsp mustard powder / about 1 g
  • ¼ tsp garlic powder / about 0.7 g, optional
  • ¼ tsp onion powder / about 0.6 g, optional
  • Pinch to ⅛ tsp white pepper or black pepper / about 0.3 g
  • ⅛–¼ tsp salt / about 0.75–1.5 g, added to taste after the cheese melts
  • Warm milk, as needed, for thinning

Instructions

  1. Grate the cheese. Grate the cheddar from a block and set it aside. Freshly grated cheese melts more smoothly than most bagged shredded cheese.
  2. Make the roux. Melt the butter in a saucepan over medium-low to medium heat. Add the flour and whisk for 60–90 seconds, until pale, smooth, and lightly foamy.
  3. Add the milk. Slowly whisk in the milk in 3 additions, smoothing out the sauce before adding more. Keep whisking until no lumps remain.
  4. Thicken the base. Cook for 3–5 minutes, whisking often, until the sauce reaches a gentle simmer and coats the back of a spoon.
  5. Remove from heat. Turn off the heat and let the bubbling settle. This helps keep the cheese from overheating.
  6. Add the cheese. Stir in the grated cheddar by handfuls, letting each handful melt before adding the next.
  7. Season. Stir in Dijon, garlic powder, onion powder, pepper, and a small amount of salt. Taste and adjust.
  8. Adjust the texture. For a thinner cheese sauce, whisk in warm milk 1 tbsp / 15 ml at a time. For a thicker dip, add a little more grated cheese off heat.

Recipe Notes

  • Do not boil the sauce after the cheese is added.
  • For pasta or mac and cheese, thin this recipe with warm milk or pasta water until the cheese sauce is glossy and loose enough to coat noodles.
  • For fries, pretzels, burgers, or sandwiches, keep the sauce slightly thicker.
  • For extra smoothness, use medium cheddar or a cheddar-Monterey Jack blend.
  • Cheese is best measured by weight. Cup measurements vary depending on how finely the cheese is grated and how tightly it is packed.

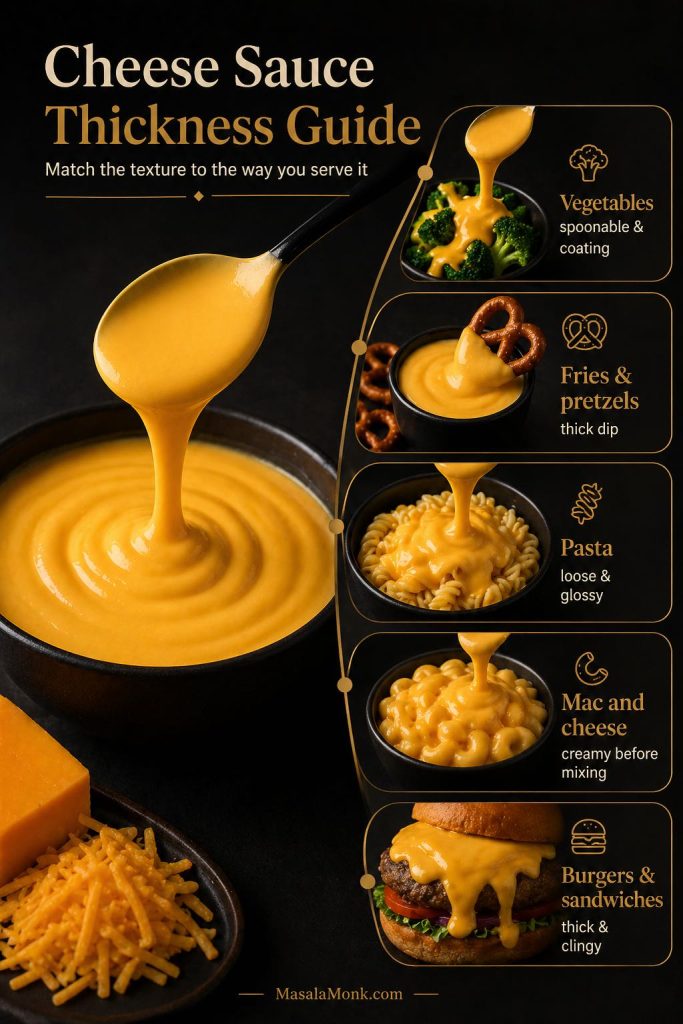
How Thick Should Cheese Sauce Be?

In practice, the best thickness depends on how you want to use the sauce. A cheese sauce for fries should be thicker than a cheese sauce for pasta, while a sauce for casseroles should start slightly loose because it thickens in the oven.

Cheese sauce thickness guide showing different textures for vegetables, fries, pasta, mac and cheese, burgers and sandwiches.
The best cheese sauce texture depends on how you serve it: spoonable for vegetables, thick for fries and pretzels, loose for pasta, creamy for mac and cheese, and clingy for burgers or sandwiches.
Use Best texture How to adjust the main recipe
Broccoli or cauliflower Spoonable and coating Use the main recipe as written.
Fries, pretzels, chips Thick dip Use 270–300 ml milk, or add 30 g / 1 oz extra cheese off heat.
Pasta Looser, glossy, coating Add 60–120 ml / 2–4 fl oz warm milk or pasta water after the cheese melts.
Macaroni and cheese Creamy and loose before mixing Thin slightly before adding pasta because noodles absorb sauce.
Baked potatoes Medium-thick Use the main recipe as written.
Rice bowls or grain bowls Pourable drizzle Add 30–60 ml / 1–2 fl oz warm milk.
Casseroles and bakes Slightly loose before baking Add about 60 ml / 2 fl oz extra milk because oven heat thickens it.
Burgers and sandwiches Thick and clingy Use a little less milk or add extra cheese.

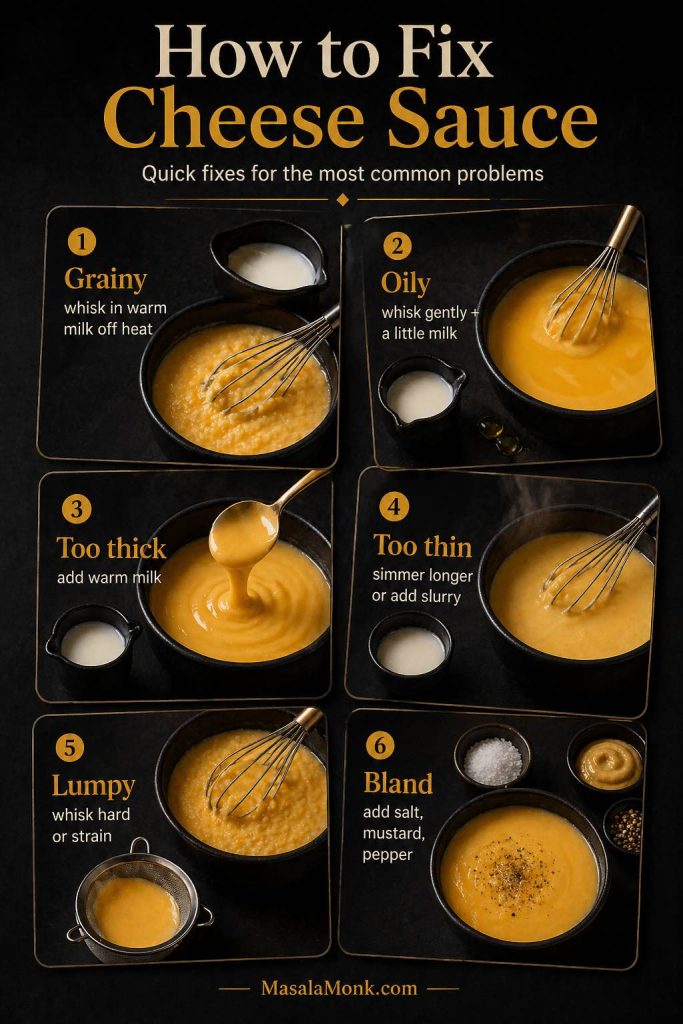
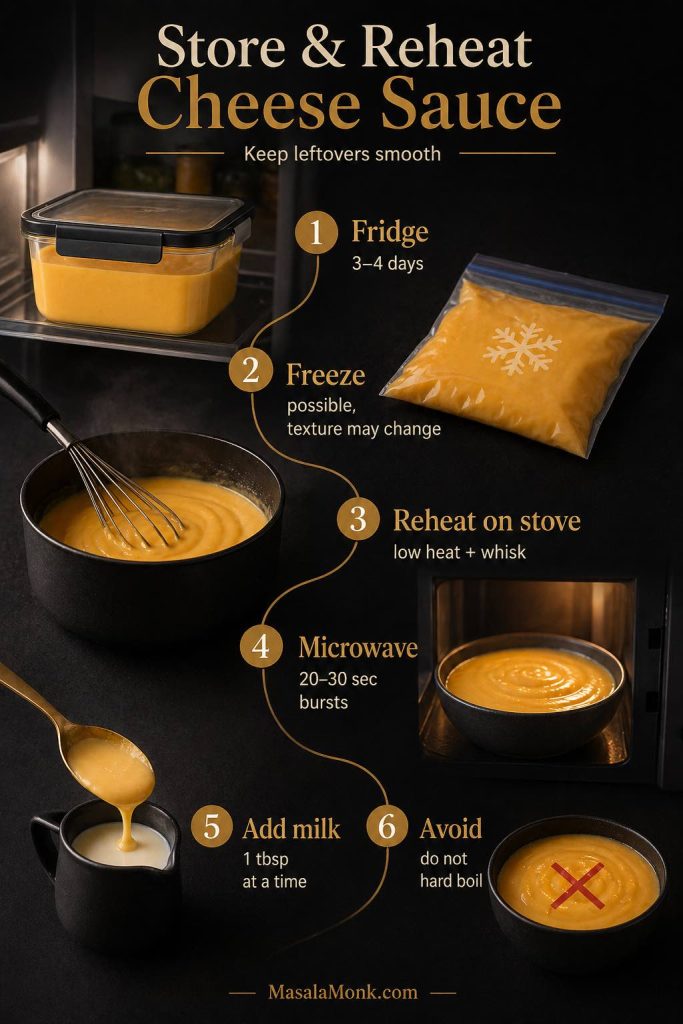
If the sauce cools down, it will thicken. However, that does not mean you made the recipe wrong. Warm the cheese sauce gently and whisk in a splash of milk to bring it back to a pourable texture.

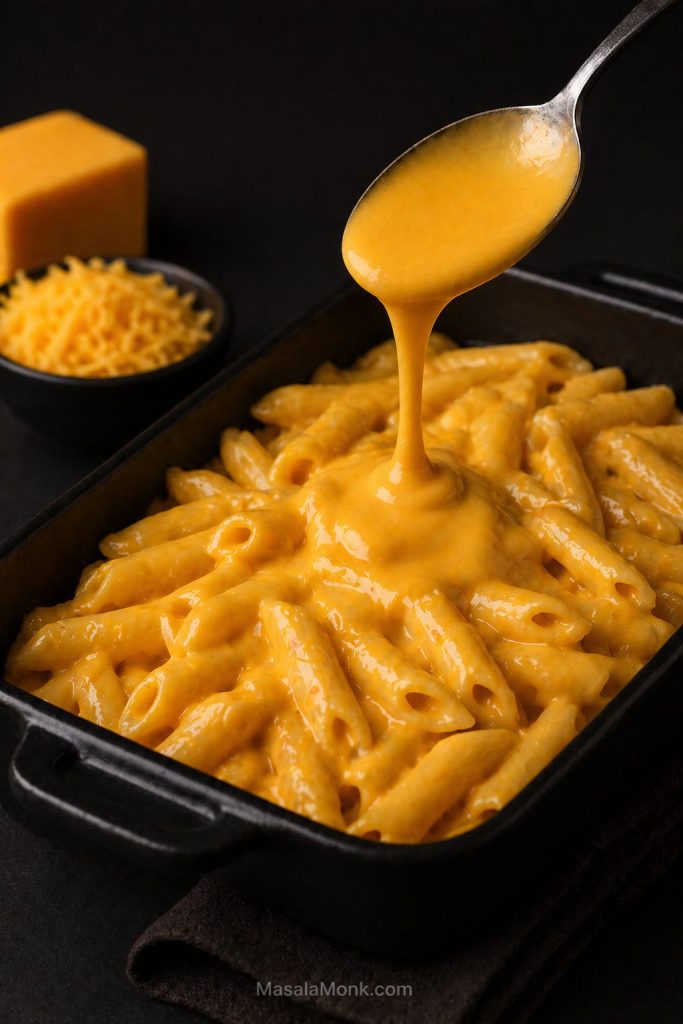
Cheese Sauce for Mac and Cheese

For mac and cheese, the sauce should be slightly looser than a dip because pasta absorbs liquid as it sits. Therefore, instead of making the sauce extra thick in the pan, keep it glossy and pourable before mixing it with the macaroni.

Creamy macaroni and cheese coated with smooth cheddar cheese sauce in a dark bowl.
For mac and cheese, keep the sauce slightly loose and glossy before mixing because pasta absorbs liquid as it sits.

One batch of this recipe is usually enough for 8 oz / 225 g pasta when making creamy stovetop mac and cheese. A larger batch with 1 lb / 450 g pasta needs a doubled sauce recipe, or about 4 cups / 960 ml sauce. If you are baking the mac and cheese, loosen the sauce with an extra 60–120 ml / 2–4 fl oz milk because the oven will thicken it.

For the smoothest mac and cheese sauce, use medium cheddar with a smoother melting cheese such as Monterey Jack, Colby Jack, or young gouda. Sharp cheddar adds flavor, but too much aged cheese can make the sauce more likely to turn gritty if it gets too hot.

If you want a full pasta build instead of only the sauce, use this macaroni and cheese recipe for stovetop, baked, and Southern-style options.

Cheese Sauce for Broccoli, Cauliflower, and Vegetables

For broccoli, cauliflower, and other vegetables, the goal is different. Instead of making a loose pasta sauce, you want a spoonable sauce that coats the florets without clumping on top.
Broccoli and cauliflower served with smooth cheddar cheese sauce spooned over the vegetables.
For broccoli and cauliflower, the cheese sauce should be spoonable and coating, thick enough to cling to the florets without clumping heavily on top.

For steamed broccoli or cauliflower, use the main recipe as written. If the vegetables are very wet, drain them well first, because extra water can thin the sauce and make it slide off. For roasted vegetables, the sauce can be slightly looser because the dry edges help it cling.

For cauliflower cheese or a vegetable bake, keep the sauce a little looser before baking. As the dish sits in the oven, the cheese sauce thickens and the vegetables release moisture, so a sauce that looks perfect in the pan can become too heavy after baking.

For a full comfort-food dinner, this cheesy chicken broccoli rice shows how broccoli and cheese can move from a side dish into a complete meal.

Cheese Sauce for Pasta, Lasagna, and Casseroles

When cheese sauce is used for pasta, lasagna, or casseroles, it needs extra looseness because starches and oven heat both thicken the final dish. For that reason, a sauce that looks slightly thin before baking often finishes at the right texture.

Pasta in a dark baking dish coated with looser glossy cheddar cheese sauce for casseroles and pasta bakes.
Pasta, lasagna and casseroles need a slightly looser cheese sauce because noodles, starches and oven heat all thicken the final dish.

For pasta, thin the finished sauce with 60–120 ml / 2–4 fl oz warm milk or pasta water before tossing. Pasta water adds starch and helps the sauce cling, while milk keeps the flavor creamier. If the pasta sits for more than a few minutes, loosen it again with a small splash of warm milk.

For lasagna, pasta bakes, and casseroles, use the looser pasta-sauce ratio from the table above. A thicker sauce can work for topping, but it can make layered dishes feel heavy or gluey once baked.

For another creamy pasta direction, this chicken Alfredo pasta is useful because it stays in the same creamy sauce family while using a different method. If you want a baked pasta idea, this baked ziti recipe collection gives more casserole-style inspiration.

Nacho Cheese Sauce for Fries, Pretzels, Chips, and Dips

For fries, pretzels, chips, and dips, the sauce should be thicker and more seasoned than a pasta sauce. Otherwise, it can taste too mild once it is spread over salty snacks or used as a dip.

Thick cheddar cheese sauce served as a dip with fries, pretzels and tortilla chips.
For fries, pretzels and chips, make the cheese sauce thicker and more seasoned so it stays scoopable, flavorful and dip-friendly.

To make this recipe work more like a nacho cheese sauce, use the thick-dip ratio: 270 ml / 9 fl oz milk with 170 g / 6 oz cheese. Then season it with paprika, cayenne, jalapeño brine, hot sauce, garlic powder, or a little mustard. These additions make the sauce taste more like a dip instead of a plain cheddar topping.

For a smoother processed-style dip, replace 1–2 oz / 30–55 g of the cheddar with American cheese or another easy-melting processed cheese. Alternatively, a small amount of sodium citrate can make a very glossy sauce, but that is an advanced option rather than a requirement for this homemade version.

For a snack-style pairing, serve the thicker version with crispy homemade French fries. For a bigger game-day board, add pretzels, chips, roasted potatoes, or a scoopable dip on the side.

The classic roux method is the best starting point, but it is not the only option. If you need a no-flour, gluten-free, keto, or microwave cheese sauce, use the quick guide below before choosing the version that fits your kitchen.

Cheese sauce variations guide showing no-flour, gluten-free, keto and microwave cheese sauce methods.
The same cheese sauce idea can be adapted into no-flour, gluten-free, keto and microwave versions depending on how you cook and what ingredients you want to avoid.

Cheese Sauce Without Flour

Still, a roux is not the only way to make a smooth sauce. If you want to skip flour, cornstarch can help the cheese melt into the liquid without making the sauce gritty.

You can make cheese sauce without flour by using cornstarch, also called cornflour in the UK and India. This version is useful if you want a flourless cheese sauce, a gluten-free cheese sauce, or a quicker sauce that does not start with a roux.

The no-flour version of this recipe uses cornstarch to help the cheese melt into the sauce smoothly. It makes a glossy sauce that is especially useful for dipping, drizzling, and quick snacks.

No-flour cheese sauce made with cornstarch, milk and cheddar stirred into a smooth sauce.
For cheese sauce without flour, cornstarch or cornflour helps the cheddar melt smoothly into the milk without starting from a classic butter-flour roux.
Ingredient US Metric
Evaporated milk or whole milk 1 cup 240 ml / 8 fl oz / 0.24 L
Freshly grated cheddar cheese 6 oz 170 g
Cornstarch / cornflour 1½ tsp 4–5 g
Butter 1 tbsp 14 g / 0.5 oz
Dijon mustard or mustard powder 1 tsp Dijon or ¼ tsp powder 5 ml Dijon or about 1 g powder
Salt and pepper To taste To taste

How to Make No-Flour Cheese Sauce

  1. Toss the grated cheddar cheese with the cornstarch until lightly coated.
  2. Warm the milk and butter in a saucepan over medium-low heat until steaming, not boiling.
  3. Lower the heat or remove the pan from heat.
  4. Add the cheese by handfuls, stirring until smooth.
  5. Add mustard, pepper, and salt to taste.
  6. If the sauce is too thick, loosen it gradually with warm milk, about 1 tbsp / 15 ml at a time.

Important: cornflour here means white cornstarch, not yellow cornmeal, maize flour, or makki atta. Cornmeal will not make a smooth cheese sauce.

Gluten-Free Cheese Sauce

As a result, the no-flour method also becomes the easiest gluten-free path for many readers. Still, a gluten-free flour blend can work well if you prefer the classic roux technique.

There are two easy ways to make gluten-free cheese sauce. The best choice depends on whether you want the recipe to feel like a classic roux-based cheese sauce or a faster cornstarch-thickened sauce.

  • Use a 1:1 gluten-free flour blend in the main roux recipe. This keeps the method almost the same.
  • Use the cornstarch/cornflour method above. This is the cleanest option if you want to avoid wheat flour completely.

If you are cooking for someone who needs a strictly gluten-free meal, check the labels on the cheese, mustard, seasonings, and any toppings you serve with the sauce.

Keto Cheese Sauce

On the other hand, keto cheese sauce needs a different base, since the classic version relies on both flour and milk. This version skips the roux and uses cream, cream cheese, butter, and cheddar instead.

Ingredient Amount
Heavy cream ½ cup / 120 ml / 4 fl oz / 0.12 L
Cream cheese 2 oz / 55 g
Freshly grated cheddar cheese 4 oz / 115 g
Butter 1 tbsp / 14 g / 0.5 oz
Mustard powder ¼ tsp / about 1 g
Pepper, cayenne, or hot sauce To taste

Warm the cream, butter, and cream cheese over low heat until smooth. Remove from heat and stir in the cheddar gradually. Do not boil after adding cheddar. This keto version is richer and heavier than the classic sauce, so it works best as a dip, topping, or low-carb drizzle.

For low-carb dipping, pair this richer sauce with sturdy options from this keto chips guide, especially if you want something scoopable for nachos, dips, or snack plates.

Microwave Cheese Sauce

Although the stovetop method gives you the best control, the microwave works for a small batch when speed matters more than precision. For best results, heat the base in short bursts and stir often.

Ingredient Amount
Butter 1 tbsp / 14 g / 0.5 oz
Flour 1 tbsp / 8–9 g / 0.3 oz
Milk ½ cup / 120 ml / 4 fl oz / 0.12 L
Freshly grated cheddar cheese 2–3 oz / 55–85 g
Salt, pepper, mustard To taste
  1. Melt the butter in a microwave-safe bowl for 20–30 seconds.
  2. Whisk in the flour until smooth.
  3. Whisk in the milk gradually.
  4. Microwave for 45 seconds, then whisk.
  5. Microwave for another 30–45 seconds, or until thickened.
  6. Stir in the grated cheese off heat until smooth.
  7. Thin with a small splash of warm milk if needed.

Use short microwave bursts and stir often. The sauce can overheat quickly in the microwave, especially after the cheese is added.

How to Fix Grainy, Oily, Thick, Thin, or Lumpy Cheese Sauce

When cheese sauce goes wrong, the problem usually comes from heat, cheese choice, or the order of steps. Fortunately, many issues can be fixed, especially if you catch them early.

Comparison of smooth cheese sauce and grainy cheese sauce showing the difference between silky and broken texture.
Smooth cheese sauce comes from gentle heat and gradual melting. Grainy cheese sauce usually happens when the cheese overheats, separates, or is added before the base is ready.

Quick Fixes for Common Cheese Sauce Problems

Problem Likely cause How to fix it
Grainy or gritty cheese sauce The cheese overheated, the sauce boiled after cheese was added, or the cheese was very aged. Remove from heat. Whisk in warm milk 1 tbsp / 15 ml at a time. If needed, blend briefly or strain. Next time, add cheese off heat.
Oily or separated sauce The emulsion broke and fat separated from the cheese. Lower the heat immediately. Whisk in warm milk, or add a tiny cornstarch slurry made with ½ tsp cornstarch and 1 tbsp / 15 ml cold milk.
Lumpy sauce Milk was added too quickly to the roux, or the sauce was not whisked enough. Whisk firmly. If lumps remain before adding cheese, strain the sauce, then continue.
Floury taste The roux was undercooked. Cook the butter and flour for 60–90 seconds before adding milk. It should smell lightly buttery, not raw.
Too thick Too much cheese, too little milk, too much simmering, or the sauce cooled down. Whisk in warm milk 1 tbsp / 15 ml at a time until it loosens.
Too thin The milk base did not thicken enough before cheese was added. Simmer the base longer next time. To fix now, use a small cornstarch slurry and heat gently until thicker.
Stringy sauce Too much mozzarella or another stretchy cheese, or cheese was overheated. Use cheddar, Monterey Jack, Colby, or young Gouda as the base. Keep stretchy cheeses as accents.
Bland sauce Mild cheese, not enough salt, or no sharp/acidic seasoning. Add salt carefully, then mustard, pepper, garlic powder, onion powder, cayenne, or a small splash of hot sauce.
Too salty Salty cheese, salted butter, or too much added salt. Whisk in unsalted milk or cream. Serve with unsalted potatoes, pasta, rice, or vegetables.

How to Prevent Cheese Sauce Problems Next Time

To prevent most problems, grate the cheese fresh, cook the roux briefly, thicken the milk before adding cheese, and remove the pan from heat before stirring in the cheddar. Rather than using more heat to force the cheese to melt, give it time to melt gently in the hot sauce base.

Guide showing how to fix grainy, oily, thick, thin, lumpy and bland cheese sauce.
Most cheese sauce problems can be corrected if you catch them early: lower the heat, whisk gently, add warm milk, strain lumps, or adjust seasoning once the sauce is smooth again.

Why Cheese Sauce Turns Grainy

Cheese sauce turns grainy when the cheese proteins tighten and the fat separates instead of staying evenly dispersed in the sauce. High heat makes this more likely. Very sharp, aged, or dry cheeses can also be more difficult to melt smoothly.

For that reason, the safest method is to thicken the milk first, turn off the heat, and then stir in the cheese gradually. The residual heat melts the cheese without pushing it into a hard boil.

For a deeper look at why cheese sauces break, Serious Eats explains how heat can separate cheese fat, water, and proteins, which is why gentle heat matters so much here.

Can I Use Sodium Citrate for Extra-Smooth Cheese Sauce?

Yes, but treat it as an advanced option rather than a requirement. Sodium citrate is an emulsifying salt that helps cheese melt into a very smooth, glossy sauce. It is most useful when you want a processed-style dip or nacho-style sauce that stays more fluid as it cools.

If you already use sodium citrate in your kitchen, follow the ratio on your product or use a tested sodium-citrate sauce formula. For this homemade cheese sauce recipe, though, the roux method is the easier and more familiar starting point.

How to Store and Reheat Cheese Sauce

Even though cheese sauce is best fresh, leftovers can still work well if you reheat them gently. Cool leftover sauce quickly, transfer it to a shallow airtight container, and refrigerate it within 2 hours.

For general leftover safety, FoodSafety.gov recommends keeping refrigerators at 40°F / 4°C or below and freezers at 0°F / -18°C or below.

Guide showing how to store and reheat cheese sauce in the fridge, freezer, saucepan and microwave.
Leftover cheese sauce is best reheated gently. Use low heat, whisk often, and add a splash of milk to bring the sauce back to a smooth, pourable texture.

After that, reheat only the amount you need. Repeated cooling and reheating can make the sauce more likely to split, especially because this recipe contains both cheese and milk.

Storage method Best guidance
Refrigerator Store in an airtight container for 3–4 days.
Refrigerator temperature Keep at or below 4°C / 40°F.
Freezer Possible, but not ideal for texture. Freeze for up to 1–2 months for best quality.
Freezer temperature Keep at about -18°C / 0°F for longer storage.
Stovetop reheating Reheat over low heat, whisking often. Add milk 1 tbsp / 15 ml at a time.
Microwave reheating Use 20–30 second bursts and stir between each burst.
Keeping warm Use very low heat or a warm setting. Stir occasionally and add milk if it thickens.
What to avoid Do not hard-boil leftover cheese sauce. It can split or turn grainy.

If refrigerated cheese sauce looks thick or slightly set, that is normal. To bring it back, warm it gently and whisk in a splash of milk until it becomes smooth again.

What to Serve With Cheese Sauce

By this point, you can treat the sauce as a flexible base rather than a single-use recipe. It can work as a vegetable sauce, pasta sauce, potato topping, snack dip, sandwich sauce, or creamy base for simple dinners.

Vegetables

  • Broccoli
  • Cauliflower
  • Roasted carrots
  • Green beans
  • Asparagus
  • Brussels sprouts
  • Roasted potatoes

Pasta, Rice, and Potatoes

  • Macaroni
  • Shells
  • Penne
  • Rotini
  • Baked potatoes
  • Rice bowls
  • Casseroles

Snacks, Sandwiches, and Game-Day Food

  • French fries
  • Potato wedges
  • Pretzels
  • Nachos-style chips
  • Burgers
  • Chicken sandwiches
  • Grilled cheese
  • Paneer wraps
  • Tofu wraps

If you are building a game-day table, this sauce can sit next to a warmer, scoopable dip like buffalo chicken dip instead of trying to do every job on the table by itself.

Cheese Sauce FAQs

Can I Make This Cheese Sauce From Scratch?

Yes. This recipe makes cheese sauce from scratch with butter, flour, milk, and cheddar cheese. You do not need a packaged mix, jarred sauce, or processed cheese unless you want a glossier processed-style version.

Can I Make Cheese Sauce Without Flour?

Yes. Use cornstarch/cornflour instead of flour. Toss the grated cheese with cornstarch, warm the milk, then stir the cheese in gently. This is also a good gluten-free method if all your ingredients are certified gluten-free.

Is Cheese Sauce Gluten-Free?

The main recipe is not gluten-free because it uses all-purpose flour. To make it gluten-free, use a 1:1 gluten-free flour blend or use the cornstarch/cornflour method.

Is Cheese Sauce Keto?

The main recipe is not keto because it uses flour and milk. For keto cheese sauce, use heavy cream, cream cheese, butter, and cheddar instead.

Why Is My Cheese Sauce Grainy?

Cheese sauce usually turns grainy when the cheese gets too hot. Remove the sauce from heat before adding cheese, add the cheese gradually, and avoid boiling after the cheese melts.

How Do I Thin Cheese Sauce?

Whisk in warm milk 1 tablespoon / 15 ml at a time until the cheese sauce reaches the texture you want. For pasta, you can also use warm pasta water.

How Do I Thicken Cheese Sauce?

If the sauce is only slightly thin, let the milk base simmer a little longer before adding cheese. If the finished cheese sauce is thin, whisk in a small cornstarch slurry and heat gently, or add more grated cheese off heat.

Can I Make Cheese Sauce Without Milk?

Yes, but the sauce will change. Unsweetened oat milk, almond milk, or another neutral dairy-free milk can work, but the sauce may taste lighter and less creamy. Water works in an emergency, but milk gives this recipe a smoother cheese sauce with better flavor.

Can I Make Cheese Sauce With Water?

You can, but milk gives a much better texture and flavor. Water makes the sauce thinner and less creamy. If you need to avoid milk, use an unsweetened dairy-free milk that works well in savory sauces.

Can I Make Cheese Sauce With Cream?

Yes, but cream makes the cheese sauce richer and heavier. You can replace part of the milk with cream, or use cream in the keto version. For an everyday recipe, whole milk gives a better balance.

Can I Add American Cheese for a Smoother Sauce?

Yes. If you want a smoother, more processed-style cheese sauce, replace 1–2 oz / 30–55 g of the cheddar with American cheese or another easy-melting processed cheese. It makes the sauce glossier and more stable, but the flavor will be less purely cheddar.

Can I Freeze Cheese Sauce?

You can freeze cheese sauce, but the texture may change after thawing. Reheat it slowly over low heat and whisk in milk to bring it back together. For the smoothest texture, cheese sauce is best made fresh or refrigerated for a few days.

What Cheese Melts Best for Cheese Sauce?

Medium cheddar, mild cheddar, Monterey Jack, Colby Jack, young gouda, and Gruyère melt well. Very aged cheddar, Parmesan, and mozzarella can be used, but they are better as accents rather than the entire sauce base.

Is Cheese Sauce the Same as Mornay Sauce?

They are related. A classic Mornay sauce is a cheese sauce made from béchamel, usually with cheeses such as Gruyère, Parmesan, or other melting cheeses. This recipe is a practical cheddar cheese sauce for everyday cooking.

Can I Use This Cheese Sauce Recipe for Mac and Cheese?

Yes. Thin it slightly with warm milk or pasta water before tossing it with cooked macaroni because pasta absorbs sauce quickly. For baked mac and cheese, keep the sauce even looser before it goes into the oven.

Can I Use This Cheese Sauce Recipe for Nachos?

Yes, for a quick nachos-style drizzle. Keep it warm, make it slightly thicker, and season with cayenne, paprika, jalapeño, or hot sauce. For a more stadium-style nacho cheese sauce, use a smoother melting blend, a little American cheese, or an emulsifying-salt method.

Easy cheese sauce recipe graphic with smooth cheddar sauce for mac and cheese, broccoli, nachos, fries and dips.
Save this easy cheese sauce recipe for a smooth cheddar sauce you can use with mac and cheese, broccoli, nachos, fries, dips and more.

Back to top

Posted on 5 Comments

How to Cook Tortellini (Fresh, Frozen, Dried) + Easy Dinner Ideas

Magazine-style cover showing cheese tortellini in rich tomato sauce topped with basil and Parmesan, titled “How to Cook Perfect Tortellini” (MasalaMonk.com).

If you’re figuring out how to cook tortellini so it stays tender, bouncy, and intact—without turning mushy or splitting open—you’re about to make tortellini nights much easier. Cooking tortellini is mostly about a few small, repeatable moves: salted water, a controlled simmer, early tasting, and a quick finish in sauce or broth. Once those habits click, you can cook tortellini confidently whether it’s fresh tortellini from the fridge, frozen tortellini from the freezer, or dried tortellini from the pantry.

Because tortellini is stuffed pasta, it brings its own richness and seasoning. As a result, dinner doesn’t need a complicated plan. On one night, cheese tortellini can become pesto tortellini with chicken and tomatoes. On another, spinach and ricotta tortellini can turn into a bright, simple pomodoro bowl. Meanwhile, meat tortellini in broth can feel soothing in the best way. And when you want something snacky, you can air fry tortellini until crisp and dip it into marinara.

This is a practical, reader-first guide to how to cook tortellini in the formats you actually buy, followed by dinner frameworks you can reuse without boredom—one pot tortellini, slow cooker tortellini, creamy tortellini pasta, tortellini pomodoro, bolognese tortellini, tortellini in brodo, and tortellini prosciutto e panna.


Tortellini basics that make everything else easier

Tortellini is a small, ring-shaped stuffed pasta with deep roots in Bologna and the surrounding region. Traditionally, tortellini in brodo—tortellini served in broth—is one of the most iconic ways to eat it. If you’re curious about the cultural side, the Dotta Confraternita del Tortellino shares the tradition around the “registered” tortellino filling on their site. You don’t need that history to cook well; still, it explains why tortellini is designed to taste complete with simple treatment.

In everyday cooking, tortellini’s superpower is this: the filling is already seasoned, and the pasta shape catches sauce naturally. Therefore, you can keep your sauce straightforward and still end up with a bowl that feels finished.

Tortellini vs ravioli: why shape changes how you cook and serve

Ravioli is larger and often more delicate, so it’s commonly served with sauce spooned over the top. Tortellini is smaller, which makes it easy to toss in sauce and easy to serve in soups. If you enjoy stuffed pasta in general, you might like MasalaMonk’s playful take on variation and filling ideas in this ravioli piece. It’s a nice reminder that stuffed pasta can be flexible and fun.

Also Read: Manhattan Cocktail Recipe (Classic + 6 Variations)


How to cook tortellini every time: the universal method

Before you choose pesto or cream or broth, lock in the basics. This is how to cook tortellini successfully no matter what the filling is—cheese tortellini, spinach tortellini, meat tortellini, mushroom tortellini, or pumpkin tortellini.

  1. Use a roomy pot and plenty of water
    Stuffed pasta needs space. When the pot is crowded, tortellini sticks and cooks unevenly. More water also helps the temperature recover quickly after you add the pasta.
  2. Salt the water generously
    This matters more than people expect. Tortellini is thick and filled, so the outer pasta can taste bland if the water isn’t seasoned. With salted water, even simple sauces taste better.
  3. Choose a lively simmer over a violent boil
    A roaring, chaotic boil can knock tortellini around and encourage splitting. Instead, keep the water bubbling actively but not aggressively—especially for fresh tortellini and refrigerated tortellini.
  4. Stir early, then back off
    Stir gently right after adding tortellini so it doesn’t stick to itself or to the pot. After that, let it cook. Too much stirring can tear delicate pasta.
  5. Reserve pasta water—every time
    Before draining, scoop out a mug of cooking water. That starchy water helps sauces cling and emulsify. Consequently, pesto turns glossy instead of oily, cream sauces loosen without thinning, and tomato sauces coat instead of sliding.
  6. Finish in sauce or broth for 30–60 seconds
    Instead of draining and pouring sauce over the top, toss cooked tortellini in a warm pan of sauce for a minute. This short finish is a major part of how to cook tortellini so it tastes cohesive rather than assembled.

You’ll see these steps repeated throughout the recipes below because they’re the foundation.

Tortellini guide card showing the 5-step rhythm for how to cook tortellini so it stays tender and not mushy: salt water, simmer, stir once, taste early, finish in sauce or broth.
Save this: the 5-step rhythm for how to cook tortellini (fresh, frozen, or dried) so it stays tender—then finish it in sauce or broth for a glossy, restaurant-style bite.

Also Read: Green Chutney Recipe (Coriander–Mint / Cilantro Chutney)


Tortellini you’ll see most often: fillings and formats

Knowing what you bought makes “what should I do with it?” instantly easier.

Common fillings and what they naturally like

  • Cheese tortellini is the weeknight workhorse. It might be labeled three cheese tortellini, 3 cheese tortellini, four cheese tortellini, 4 cheese tortellini, five cheese tortellini, or 5 cheese tortellini. It also shows up as tortellini formaggi or tortellini formaggio. Because it’s rich, it pairs beautifully with pesto, tomato sauce, or broth. It also works in a cream sauce, especially with pepper.
  • Spinach tortellini often appears as spinach and ricotta tortellini, ricotta spinach tortellini, or tortellini ricotta spinaci. It’s excellent with lighter sauces: butter and garlic, bright tomato, or a gentle cream finish.
  • Meat tortellini can be labeled meat filled tortellini, meat stuffed tortellini, beef tortellini, or veal tortellini. It shines in broth and also works in ragù when the sauce is balanced.
  • Specialty fillings like mushroom tortellini, porcini tortellini, gorgonzola tortellini, pumpkin tortellini, lobster tortellini, and truffle tortellini (tortellini tartufo) usually taste best with a restrained sauce so the filling remains the star.
Guide card showing common tortellini fillings and best sauce pairings: cheese tortellini with marinara or pesto, spinach and ricotta tortellini with alfredo or butter and sage, meat tortellini with bolognese or brown butter, and mushroom or pumpkin tortellini with cream or garlic butter.
Quick pairing chart: match cheese, spinach & ricotta, meat, and mushroom/pumpkin tortellini to the sauce that flatters the filling—an easy way to pick pesto, marinara, cream, or bolognese without overthinking dinner.

Formats: fresh, refrigerated, frozen, dried

  • Fresh tortellini / refrigerated tortellini cooks quickly and needs gentle heat.
  • Frozen tortellini cooks straight from frozen and benefits from careful tasting.
  • Dried tortellini takes longer and holds up well in thicker sauces.

Once you identify the format, how to cook tortellini becomes far more predictable.

Infographic comparing how to cook fresh tortellini, frozen tortellini, and dried tortellini: gentle simmer and taste early for fresh, cook from frozen and stir once for frozen, longer cook and thicker sauces for dried.
Quick cheat sheet: how to cook fresh, frozen, and dried tortellini without overcooking—use this guide to choose the right simmer style and finish based on what you bought.

Also Read: Best Vermouth for a Negroni Cocktail Drink Recipe


How to cook fresh tortellini and refrigerated tortellini

Fresh and refrigerated tortellini cook fast, so the goal is to hit tender-and-bouncy rather than soft-and-saggy.

Bring salted water to a gentle boil. Then reduce slightly to a lively simmer. Add tortellini and stir gently once or twice. Start checking early and keep tasting.

A lot of refrigerated “fresh style” tortellini lines cook in just a few minutes. For an example of clear brand timing, Giovanni Rana shares cooking guidance on this product page. If you’re cooking rana tortellini, rana cheese tortellini, or a similar refrigerated pack, that’s a helpful reference point.

How to tell it’s done:
The pasta should feel tender but still springy, and the filling should be hot through the center. If the pasta feels floppy or waterlogged, it’s gone too far.

Done-or-overdone tortellini doneness test card showing how to tell tortellini is done: pasta should be tender and springy, filling hot in the center, and the tortellini shape intact without leaks.
Don’t rely on floating alone—use this quick doneness test to know when tortellini is perfectly cooked (tender, springy, hot in the center) before you finish it in sauce.

What to do immediately after draining:
Fresh tortellini keeps cooking from residual heat. Therefore, have your sauce ready before you drain. Toss it in warm sauce right away and loosen with pasta water until glossy. This is a crucial detail in how to cook tortellini well, and it’s also the easiest improvement to make.

Also Read: Sandwich for Breakfast: Breakfast Sandwich Recipe + 10 Variations


How to cook frozen tortellini so it doesn’t split

Frozen tortellini is convenient, but it’s easiest to ruin by treating it roughly.

Don’t thaw it first. Instead, cook it straight from frozen in salted water. Stir gently at the beginning to prevent sticking. Then let it cook and start tasting early. Since frozen tortellini thickness varies by brand and style, tasting beats guessing.

Frozen tortellini cooking guide card with tips to prevent splitting: cook from frozen, simmer not a hard boil, stir once then leave it, drain carefully and toss softly.
Frozen tortellini tip sheet: cook straight from frozen and keep the water at a steady simmer—this prevents splitting and keeps the filling where it belongs.

If you’re using a refrigerated line that’s meant to be cooked from frozen with a simple adjustment, follow the package guidance. Giovanni Rana notes a cook-from-frozen timing approach on the same instruction page.

Once tender, drain carefully and finish gently in sauce. A soft toss matters because hot tortellini is delicate; consequently, aggressive stirring can cause splits right at the end.

That “gentle finish” is central to how to cook tortellini from frozen with consistent results.

Also Read: Rob Roy Drink Recipe: Classic Scotch Cocktail (Perfect + Dry + Sweet Variations)


How to cook dried tortellini and keep it tender

Dried tortellini behaves more like pantry pasta. It needs longer cooking and tolerates a stronger boil, yet it still benefits from tasting near the end.

Bring salted water to a boil. Add tortellini and stir gently. Maintain a steady boil until the pasta is fully tender and the filling is hot through the center.

If you want a reference point for timing expectations, Barilla provides context on this tortellini recipe page. It’s especially useful if you’re cooking barilla tortellini or another shelf-stable tortellini.

After draining, finish the tortellini in sauce for a minute with pasta water. Because dried tortellini is sturdy, it’s excellent for marinara tortellini, bolognese tortellini, and baked pasta dinners.

Also Read: Strawberry Smoothie Recipes (12 Easy Blends + Bowls & Protein Shakes)


How to cook tortellini in broth and tortellini in brodo

Broth is one of the most satisfying ways to serve stuffed pasta. It’s light, soothing, and surprisingly elegant. Better still, broth allows the filling to shine rather than competing with it.

Warm good broth gently. Add aromatics if you like—garlic, onion, pepper, herbs, or a Parmesan rind. Then add tortellini and cook until tender. Finish with Parmesan and pepper.

Tortellini in broth guide card showing how to cook tortellini in brodo: warm broth gently, add aromatics if desired, add tortellini near the end, finish with greens and parmesan.
Tortellini in broth (brodo) template: keep the broth at a gentle simmer and add tortellini near the end so it stays intact—then finish with greens, parmesan, and pepper.

Tortellini in broth with greens and herbs

To make it feel more complete, add greens near the end. Spinach is easiest because it wilts quickly. Kale works too, although it benefits from a little more time. Finish with herbs and a squeeze of lemon if you want extra lift.

Meat tortellini in broth is especially satisfying. However, cheese tortellini in broth can be wonderful too, particularly when you want comfort without heaviness.

Tortellini in brodo: the classic style

Tortellini in brodo is a traditional presentation associated with Bologna. For a cultural reference and overview, Bologna Welcome shares an explanation on this page. At home, keep it simple: good broth, gently cooked tortellini, Parmesan, and pepper. That restraint is what makes it special.

If you’re learning how to cook tortellini for soups, remember this: add the tortellini near the end and keep the simmer gentle so the pasta stays intact.

Also Read: Paper Plane Cocktail Recipe + Best Amaro Substitutes & Tips


Pesto tortellini: bright dinners in minutes

Pesto tortellini is fast, vibrant, and forgiving. It’s especially good with cheese tortellini because the basil and garlic cut the richness. Spinach tortellini works too, although a lighter coating tends to taste better.

Cook tortellini, drain, and reserve pasta water. Warm pesto gently in a pan without boiling it. Toss in tortellini and add pasta water a spoonful at a time until the sauce becomes glossy and clings.

Pesto tortellini pairings guide card showing what to add to pesto tortellini: cheese tortellini with tomatoes and chicken, spinach and ricotta tortellini with peas and asparagus, and a pepper and lemon finish.
Save this pairing guide for pesto tortellini: add tomatoes + chicken to cheese tortellini, pair spinach and ricotta tortellini with peas/asparagus, then finish with pepper and lemon for a brighter bowl.

For pesto inspiration and variations, these MasalaMonk posts fit naturally, and you might want to have a look:

Chicken pesto tortellini with tomatoes

To make chicken pesto tortellini, add shredded chicken at the end and toss briefly. Then add cherry tomatoes or roasted peppers for sweetness. Finish with pepper and a squeeze of lemon. As a result, the bowl stays bright rather than heavy.

Pesto and tortellini with vegetables

For a lighter dinner, add vegetables. Broccoli, peas, asparagus, and zucchini all work. Add sturdy vegetables earlier and leafy greens later. Meanwhile, keep the pesto coating light and glossy.

This is a simple way to practice how to cook tortellini while also making it feel fresh and varied.

Also Read: 7 Pizza Sauce Recipes | Marinara, White Garlic, Alfredo, Buffalo, BBQ, Vodka & Ranch


Creamy tortellini pasta that tastes rich but not heavy

Creamy tortellini is comfort food. Still, it doesn’t have to feel overly heavy. The trick is using pasta water to create a silky sauce rather than a thick one.

Start with butter and garlic in a pan. Add cream and warm gently. Then add tortellini and toss. Finally, loosen with pasta water until glossy. Finish with Parmesan and pepper.

For creamy pasta technique and variations, these MasalaMonk resources are excellent companions:

Tortellini guide card showing how to finish tortellini in sauce with pasta water for a glossy coating: add to warm sauce, splash pasta water, toss 30–60 seconds, stop when glossy and clinging.
The easiest upgrade: finish tortellini in warm sauce with a splash of pasta water for 30–60 seconds—this makes pesto, tomato, and creamy tortellini cling beautifully instead of sliding off.

Cream cheese tortellini for weeknights

Cream cheese tortellini is a fast shortcut that still tastes luxurious. Warm a splash of broth or milk, whisk in cream cheese, and then loosen with pasta water. Add garlic, pepper, and Parmesan. Toss in tortellini and finish with spinach.

Because spinach adds freshness, the bowl feels balanced. Moreover, it turns “creamy” into “creamy but not too much.”

Creamy chicken tortellini and creamy sausage tortellini

To make creamy chicken tortellini, stir shredded chicken in at the end and finish with lemon zest or herbs. For creamy sausage tortellini, brown sausage first, then build the cream sauce around it. Add spinach near the end for color and contrast.

When you’re building these bowls, you’re practicing how to cook tortellini and how to finish it properly—two skills that make the whole category easier.

Also Read: Oat Pancakes Recipe (Healthy Oatmeal Pancakes)


Tortellini pomodoro and marinara tortellini for classic comfort

Tomato sauce is one of the easiest ways to balance rich fillings. Tortellini pomodoro tastes bright and simple, while marinara tortellini leans more cozy and savory.

Warm tomato sauce in a pan. Cook tortellini. Add it to the sauce and toss gently. Use pasta water to help the sauce cling. Finish with Parmesan and a drizzle of olive oil.

If you like making sauce from scratch, MasalaMonk has a helpful guide to tomato sauce from fresh tomatoes. If you want multiple sauce styles for different moods, this roundup is useful: sauce variations including marinara and vodka.

How to cook tortellini and mushrooms in tomato sauce

Sauté mushrooms until browned. Add them to the sauce. Then toss in tortellini and finish with Parmesan and pepper. This works especially well with mushroom tortellini, but it upgrades plain cheese tortellini too.

Tortellini and spinach in tomato sauce

Add spinach at the end so it stays green. Meanwhile, keep the sauce bright with a little basil or oregano.

In both cases, the key is the finish: that quick toss is still how to cook tortellini so it tastes unified.

Also Read: Double Chocolate Chip Cookies – Easy Recipe with 7 Variations


Bolognese tortellini, ground beef tortellini, and sausage tortellini

Ragù-style sauces pair beautifully with tortellini, particularly meat tortellini and cheese tortellini. However, because tortellini filling is already rich, the sauce should be savory and balanced rather than greasy.

For a solid ragù foundation, MasalaMonk’s bolognese sauce recipe is a great internal reference.

How to cook ground beef and tortellini: weeknight ragù energy

Brown ground beef with onion and garlic. Add tomato sauce and herbs. Simmer briefly. Cook tortellini separately, then toss it into the sauce for a minute with a splash of pasta water. Finish with Parmesan.

Italian sausage and tortellini: deeper flavor, same method

Brown sausage first. Add onion and garlic. Add sauce and a splash of broth. Toss in cooked tortellini and finish with spinach and Parmesan. Consequently, sausage and tortellini tastes hearty without feeling clumsy.

Tortelloni bolognese note

If you’re using tortelloni (larger stuffed pasta), keep the stirring gentle and taste early. Tortelloni can be slightly more delicate when hot, so finishing carefully matters even more.

In every case, you’re applying the same idea: cook tortellini gently, then finish it briefly in sauce. That’s how to cook tortellini so it stays intact and tastes cohesive.

Also Read: 10 High Calorie Protein Shakes & Smoothie Recipes for Healthy Weight Gain


How to cook one pot tortellini that doesn’t feel like a shortcut

One pot tortellini is popular because it saves dishes, but it can also taste genuinely good when the sauce and pasta finish together.

Start by sautéing onion and garlic in olive oil. Add broth and sauce. Bring to a gentle simmer. Add tortellini and cook until tender. Finish with Parmesan and herbs.

One-pot tortellini guide card showing the correct order: sauté aromatics, add sauce and broth, simmer gently, add tortellini, add greens last and finish with parmesan.
One-pot tortellini works when the order is right—sauté first, simmer the liquid, then add tortellini and finish with greens so it stays tender instead of overcooking.

If you like the general one-pot structure, MasalaMonk’s one-pot chicken bacon ranch pasta shows the comfort-forward approach in a way that’s easy to adapt.

One pot tortellini and sausage

Brown sausage first to build flavor. Then add onion and garlic, pour in marinara and broth, and add tortellini. Finish with spinach and Parmesan.

One pot chicken and tortellini

Build a lighter base with broth and a spoonful of tomato sauce. Add tortellini, then stir in shredded chicken near the end. Finish with basil and pepper. Alternatively, swap the tomato base for pesto and you’ve got chicken tortellini with pesto in a one-pot lane.

One pot tortellini and vegetables

Add broccoli, peas, asparagus, or zucchini. Add sturdy vegetables earlier and greens later. Meanwhile, keep the sauce simple so the bowl stays clean.

These dinners reinforce how to cook tortellini while also keeping the routine interesting.

Also Read: Healthy Pumpkin Spice Latte (Low Cal, Real Pumpkin)


Slow cooker tortellini and crock pot chicken tortellini that stays tender

Slow cooker tortellini can be excellent, yet timing matters. Tortellini cooks quickly, so it should go in near the end. Add it too early and it turns soft. Therefore, build the base first, then add tortellini late.

Slow cooker tortellini guide card explaining when to add tortellini: build the base first, cook chicken and vegetables until tender, add tortellini near the end, and serve soon to prevent mush.
Slow cooker rule: add tortellini at the end so it stays tender—this is the key to crock pot chicken tortellini and slow cooker tortellini that doesn’t turn mushy.

For a useful internal reference on slow cooker soup structure, MasalaMonk’s crock pot lasagna soup is a strong companion.

How to cook chicken tortellini crock pot style (brothy or creamy)

Add chicken, broth, aromatics, and vegetables to the slow cooker. Cook until the chicken is tender, then shred it. Add tortellini during the final stretch. Finish with spinach and Parmesan.

For a creamy version, stir in cream cheese or a splash of cream right before serving. This approach naturally covers chicken tortellini crock pot, chicken tortellini in crock pot, chicken tortellini slow cooker, and crockpot chicken and tortellini without forcing anything.

How to cook slow cooker tortellini with sausage

Brown sausage if you can; it adds depth. If you’re short on time, it still works, although the flavor is milder. Add sauce and broth, let the base cook, then add tortellini near the end. Finish with Parmesan and pepper.

Again, the principle holds: timing is the heart of how to cook tortellini in slow cooker meals.

Also Read: Mayo Recipe: 15+ Homemade Mayonnaise Variations


How to cook instant Pot tortellini with better control

Stuffed pasta can overcook under pressure, so a controlled simmer often works better than a long pressure cook.

Use sauté mode to cook onion and garlic. Add broth and sauce. Bring to a simmer. Add tortellini and cook until tender, tasting early. Finish with Parmesan and herbs.

It’s simple, yet it’s reliable. In other words, it’s a practical way to apply how to cook tortellini when you want speed without guesswork.

Also Read: Instant Pot Lentil Recipes for Effortless Weight Loss and Quick Meals


Air fry tortellini: crunchy snacks and easy appetizers

Air fried tortellini is crunchy, salty, and perfect for dipping. It’s also a great way to make a simple package feel like a fun event.

Cook tortellini first. Drain thoroughly and pat dry. Toss lightly with oil and seasoning. Air fry until crisp, shaking occasionally for even browning.

Crispy tortellini air fryer guide card showing how to air fry tortellini: boil first, dry very well, toss with light oil and seasoning, air fry until crisp, then serve with marinara or pesto for dipping.
Air fried tortellini tip: boil, then dry it really well before air frying—this is the key to crispy tortellini (not soggy), perfect with marinara or pesto for dipping.

For a tested external reference, The Kitchn shares a method and review on air-fried cheese tortellini.

Air fryers vary, so technique matters. If you run into uneven browning or sogginess, MasalaMonk’s air fryer mistakes guide helps you troubleshoot quickly.

For another crisp snack companion, MasalaMonk’s air fried chilli garlic potato bites is a fun pairing idea for parties.

Serve air fry tortellini with marinara, pesto, or a creamy dip. If you want “fried tortellini” vibes without deep frying, this method hits that craving.

Also Read: French Toast Sticks (Air Fryer + Oven Recipe) — Crispy Outside, Custardy Inside


Tortellini prosciutto e panna: How to cook the creamy classic

Tortellini prosciutto e panna is one of those dishes that tastes like you ordered it, even though it comes together quickly. You get a silky cream sauce, savory prosciutto, tender pasta, and a peppery finish.

For a traditional reference, La Cucina Italiana shares a classic approach on tortellini panna e prosciutto.

To make it at home, cook tortellini gently and reserve pasta water. Warm butter in a pan, sizzle chopped prosciutto briefly, then add cream. Toss in tortellini and loosen with pasta water until glossy. Finish with black pepper and Parmesan.

If you enjoy understanding how different Parmesan styles affect flavor, MasalaMonk’s Parmesan guide is a great companion.

This dish is also a reminder that how to cook tortellini for cream sauces is mostly about the finish: gentle toss, glossy coating, and serving promptly.

Also Read: Peanut Butter Cookies (Classic Recipe & 3 Variations)


Store-bought tortellini: Rana, Barilla, Buitoni, and what really matters

Store-bought tortellini can taste excellent. The secret isn’t magic—it’s matching format to method and finishing properly.

  • For refrigerated rana tortellini or giovanni rana tortellini, keep the simmer gentle and taste early. If you want a concrete reference for timing, check Giovanni Rana’s instructions.
  • For pantry-style products such as barilla tortellini (where available), longer boiling and sturdier sauces work well. Timing expectations are reflected on Barilla’s recipe page.
  • For buitoni tortellini, the same logic applies: salted water, gentle simmer, early tasting, and a brief finish in sauce.

If you like browsing for variation ideas, these external sources are useful for inspiration:

The big takeaway is simple: brands vary, but how to cook tortellini successfully is consistent—gentle cooking and a smart finish.

Also Read: Moscow Mule Recipe (Vodka Mule): The Master Formula + 9 Variations


Dietary versions: vegan tortellini, vegetarian tortellini, gf tortellini, eggless, non-dairy

Tortellini can fit many diets if you choose the right product and pair it with the right sauce.

  • Vegan tortellini / non dairy tortellini: finish in tomato sauce, broth, or dairy-free pesto. For pesto flexibility, MasalaMonk’s pesto hub is a helpful starting point.
  • Vegetarian tortellini: cheese tortellini and spinach and ricotta tortellini work beautifully in pesto, tomato, and light cream lanes.
  • GF tortellini: keep the simmer gentle and stir carefully, since gluten-free pastas can be more delicate.
  • Eggless tortellini: treat it like delicate fresh pasta and avoid aggressive boiling.

If you occasionally enjoy pasta alternatives, MasalaMonk has thoughtful reads on lentil pasta and keto-friendly pasta alternatives.

No matter the diet, the method stays the same. In other words, how to cook tortellini still comes down to gentle heat, tasting early, and finishing properly.

Also Read: Blueberry Pancakes (6 Recipes) + Homemade Pancake Mix


Troubleshooting: quick fixes when tortellini misbehaves

Even when you’ve learned how to cook tortellini, a few common problems can pop up. Fortunately, most fixes are simple.

Tortellini troubleshooting guide card with quick fixes: tortellini sticks (use a bigger pot and stir once early), splits (simmer and drain gently), turns mushy (taste earlier and serve fast), and sauce slides (use pasta water and toss longer).
If tortellini sticks, splits, or turns mushy, it’s usually a heat-and-handling issue—use these quick fixes to keep stuffed pasta intact and perfectly tender.

Tortellini sticks together
Use a larger pot and more water. Stir gently right after adding it. If it clumps anyway, don’t force it aggressively; often it loosens as it cooks.

Tortellini splits or leaks filling
Lower the boil to a lively simmer. Stir less. Drain gently. If it’s frozen, don’t thaw first.

Tortellini turns mushy
It likely overcooked or sat too long in hot sauce. Next time, taste earlier and serve soon after finishing.

Sauce is thin or slides off
Use reserved pasta water and toss longer. The starch helps emulsify. As a result, the sauce clings instead of slipping.

Also Read: Baked Jalapeño Poppers (Oven) — Time, Temp & Bacon Tips


Leftovers: storing and reheating without ruining the texture

Tortellini is best fresh, yet leftovers can still be enjoyable when reheated gently.

Reheat tortellini guide card with tips for leftovers: for creamy tortellini add a splash of milk or water and warm gently, for tomato-based tortellini add a spoon of water and stir, and for tortellini in broth reheat without hard boiling.
Leftover tortellini reheats best with gentle heat and a splash of liquid—use this quick guide to keep creamy, tomato, and broth-based tortellini from turning dry or mushy.

For safety guidance, these references are reliable:

For texture, reheat slowly and add a splash of liquid:

  • For creamy tortellini pasta, add a little milk or water and warm gently.
  • For tomato-based tortellini, add a spoonful of water and stir.
  • For tortellini in broth, warm slowly without boiling hard.

This approach preserves the “just cooked” feel as much as possible.

Also Read: Classic Deviled Eggs (Easy) + 8 Flavorful Variations


What to serve with tortellini so dinner feels complete

A good side dish doesn’t need to be complicated. It just needs to complement the bowl.

Garlic bread is a classic with marinara tortellini and bolognese tortellini. If you want a homemade option, MasalaMonk’s garlic bread loaf recipe fits naturally.

What to serve with tortellini pairing guide card suggesting sides for different sauces: tomato sauces with garlic bread and salad, cream sauces with roasted vegetables and lemony greens, broth/brodo with crusty bread and herbs, and pesto with tomatoes and simple vegetables.
Not sure what to serve with tortellini? Use this quick pairing guide to build a complete dinner—match your sauce (tomato, creamy, broth, or pesto) with an easy side that balances the bowl.

If you’re building a more social meal—especially with tortellini prosciutto e panna—a small board works beautifully. MasalaMonk’s charcuterie board guide can help you set that up with confidence.

For quick seasoning support in soups and sauces, an herb blend can help. MasalaMonk’s Italian seasoning mix is a simple pantry staple.

If you want baked-pasta comfort on another night, MasalaMonk’s baked ziti recipes can offer inspiration, while their béchamel sauce guide and cottage cheese lasagna are excellent for creamy, layered comfort.


A simple dinner “template” that makes tortellini nights effortless

When you’re holding a pack of tortellini and don’t want to overthink, use this quick template:

  1. Pick the format: fresh/refrigerated, frozen, or dried.
  2. Pick the lane: pesto, creamy, tomato, broth, or ragù.
  3. Pick one add-in: chicken, sausage, mushrooms, or greens.
  4. Pick a finish: Parmesan, pepper, lemon, or herbs.
Tortellini dinner template guide card showing a simple build-your-own dinner method: pick the format (fresh, frozen, dried), pick the lane (pesto, cream, tomato), pick one add-in (chicken, sausage, mushrooms, greens), and pick a finish (parmesan, pepper, lemon, herbs).
Save this “pick 4” tortellini dinner template: choose your tortellini format, sauce lane, one add-in, and a finishing touch—an easy way to turn any pack of tortellini into dinner without overthinking.

That’s it. With those four choices, you’ll never feel stuck—and you’ll naturally practice how to cook tortellini in ways that keep getting easier.

Also Read: Sheet Pan Chicken Fajitas Recipe (Easy One-Pan Oven Fajitas)


The bottom line on how to cook tortellini

The best way to master how to cook tortellini isn’t memorizing an exact number of minutes. It’s repeating the same handful of habits until they become automatic: salt the water, keep the simmer controlled, taste early, reserve pasta water, and finish in sauce or broth.

From there, tortellini becomes endlessly flexible. Pesto tortellini can become a bright chicken dinner. Creamy tortellini pasta can become a cozy bowl with spinach. Tortellini pomodoro can become a reliable classic. Tortellini in brodo can become your comforting reset meal. One pot tortellini can become your low-dishes routine. Slow cooker tortellini can become your hands-off plan. Air fry tortellini can become your crunchy appetizer.

Once you have the rhythm, you won’t just know how to cook tortellini—you’ll know how to turn it into dinner, almost any way you want, whenever you need it.

Also Read: How to Make Churros (Authentic + Easy Recipe)

FAQs about How to Cook Tortellini

1) How long does it take to cook tortellini?

Most tortellini cooks quickly, yet the exact time depends on whether it’s fresh tortellini, refrigerated tortellini, frozen tortellini, or dried tortellini. In practice, the best approach is to taste early and keep checking until the pasta is tender and the filling is hot through the center. If you’re learning how to cook tortellini consistently, tasting is more dependable than relying on one fixed number.

2) How do I know when tortellini is done cooking?

Tortellini is done when the pasta feels tender but still springy and the filling tastes fully warmed. Also, the pieces usually look slightly plumper. If the pasta feels firm at the edges, it needs a bit more time. Conversely, if it feels floppy or waterlogged, it likely cooked too long.

3) Should tortellini float when it’s finished?

Often, tortellini will float as it nears doneness, although floating alone isn’t a guarantee. Instead, treat floating as a sign to start tasting. That way, you’ll learn how to cook tortellini to the exact texture you like.

4) Do I cook frozen tortellini without thawing?

Yes—cook frozen tortellini straight from frozen. Thawing can weaken the pasta and increase the chance of splitting. Rather than thawing, add the frozen tortellini to salted water at a controlled boil and taste early as it cooks.

5) Why does my tortellini break or leak filling?

Tortellini may split if the boil is too aggressive, if it’s stirred roughly, or if it’s overcooked. For better results, keep the water at a lively simmer, stir gently only at the start, and drain carefully. In addition, finishing tortellini in sauce with a light toss helps prevent tearing.

6) What’s the best way to cook cheese tortellini?

Cheese tortellini tastes best when the water is salted and the pasta is finished briefly in sauce. After draining, toss it in marinara, pesto, or a light cream sauce with a splash of pasta water to help the sauce cling. If you’re focusing on how to cook tortellini for weeknights, cheese-filled tortellini is the easiest place to start.

7) How do I cook spinach and ricotta tortellini without making it soggy?

For spinach and ricotta tortellini (also called ricotta spinach tortellini or tortellini ricotta spinaci), use a gentle simmer and start tasting early. Then, avoid letting it sit in a colander. Instead, transfer it straight into a warm sauce so it stays tender yet not mushy.

8) Can I cook tortellini in broth?

Absolutely. Tortellini in broth is a classic way to serve stuffed pasta. Warm the broth gently, then cook tortellini at a mild simmer until tender. Afterwards, add herbs or spinach near the end for a fresher bowl.

9) What is tortellini in brodo?

Tortellini in brodo is tortellini served in broth, traditionally associated with Bologna. Even at home, it’s straightforward: a flavorful broth, tender tortellini, and a simple finish like Parmesan and pepper.

10) How do I make pesto tortellini without it turning oily?

To keep pesto tortellini glossy, warm the pesto gently instead of boiling it. Then, add a splash of reserved pasta water while tossing. As a result, the sauce emulsifies and coats the tortellini evenly.

11) What’s the easiest creamy tortellini pasta for beginners?

A simple creamy tortellini pasta often starts with butter, garlic, and cream, finished with pasta water for a silky texture. Alternatively, cream cheese tortellini is even simpler: melt cream cheese with a little milk or broth, then loosen with pasta water before tossing in tortellini.

12) Can I make one pot tortellini?

Yes—one pot tortellini is a practical dinner. Simmer your sauce with broth, then add tortellini and cook until tender. Finally, finish with Parmesan or herbs. This method works particularly well for cheese tortellini pasta and tortellini with veggies.

13) Can I make tortellini in a slow cooker or crock pot?

Yes, though timing matters. For slow cooker tortellini or crock pot tortellini, build the soup or sauce base first and add tortellini near the end so it doesn’t overcook. The same idea applies to chicken tortellini crock pot and chicken tortellini slow cooker recipes.

14) How do I make chicken tortellini in a crock pot without mushy pasta?

Cook the chicken and broth base first, shred the chicken, then add tortellini during the last part of cooking. That way, the tortellini stays tender. Likewise, add spinach at the end so it remains bright.

15) Can I cook tortellini in an Instant Pot?

Yes, although it’s easy to overcook stuffed pasta under pressure. For better control, use sauté mode to build flavor, then simmer tortellini gently until tender. This approach fits how to cook tortellini when you want speed without guesswork.

16) How do I make air fryer tortellini?

To make air fry tortellini (or air fried tortellini), cook tortellini first, drain well, pat dry, then toss lightly with oil and seasoning. Next, air fry until crisp, shaking occasionally for even browning. Serve with marinara, pesto, or a creamy dip.

17) What’s the difference between tortellini and tortelloni?

Tortelloni is larger than tortellini and often has a softer, more delicate feel. Because of its size, it may need a bit more time to heat through. Still, the same principles for how to cook tortellini apply: gentle simmer, early tasting, and a careful finish in sauce.

18) How do I cook store-bought tortellini like Rana tortellini or Buitoni tortellini?

For rana tortellini, giovanni rana tortellini, and buitoni tortellini, follow the package timing as a baseline, then taste to confirm doneness. Usually, refrigerated styles cook quickly, whereas dried versions take longer. In all cases, finishing in sauce with pasta water improves texture and flavor.

19) How do I keep tortellini from sticking together?

Use plenty of water, stir gently right after adding tortellini, and avoid overcrowding the pot. Additionally, don’t drain and let it sit too long; transferring into sauce promptly helps keep pieces separate.

20) Can I reheat tortellini without it turning mushy?

Yes. Reheat gently with a splash of liquid—water for tomato sauces, milk or broth for creamy sauces, and extra broth for soups. Then warm slowly rather than boiling hard. This method helps preserve texture when you’re practicing how to cook tortellini for leftovers, too.

21) Can tortellini be vegetarian or vegan?

Yes. Vegetarian tortellini often includes cheese or spinach and ricotta. Vegan tortellini and non dairy tortellini are also available depending on brand and store. Even so, the cooking method stays similar: gentle simmer, early tasting, and a careful finish.

22) Is there gluten-free tortellini?

Yes—gf tortellini exists, although it can be more delicate than wheat-based pasta. Therefore, keep the simmer controlled, stir minimally, and taste early so it doesn’t overcook.

23) Can I make tortellini with sausage or ground beef?

Definitely. Sausage tortellini works well in tomato sauce, creamy sauces, or one-pot dinners. Similarly, ground beef tortellini pairs nicely with a bolognese-style sauce. For best texture, cook tortellini separately and toss it in the sauce briefly right before serving.

24) What are the best sauces for tortellini?

The best sauces depend on the filling. Cheese tortellini suits pesto, marinara, pomodoro, and cream sauces. Spinach and ricotta tortellini often shines with lighter tomato or butter-garlic sauces. Meat tortellini is excellent in broth and also works in ragù. When in doubt, keep the sauce balanced and let the filling lead.

25) Why does my tortellini taste bland even when the sauce is good?

Usually, the cooking water wasn’t salted enough, or the tortellini wasn’t finished in sauce. Salted water seasons the pasta itself, while a short toss in sauce helps the flavors stick. Together, those steps are the simplest upgrade in how to cook tortellini so it tastes fully seasoned.

Posted on 8 Comments

Baked Ziti Recipe Collection: 15 Easy Variations

Cover image of 15 baked ziti variations with a cheesy fork-lift, labeled easy, no-boil, and vegetarian.

A good baked ziti recipe is one of those rare dinners that feels like it belongs everywhere at once. It can be a relaxed weeknight ziti meal, a “feed the whole table” Sunday ziti dish, or the dependable tray you bring to a potluck when you don’t want to overthink it. Better still, the same basic method can flex in a dozen directions—extra cheesy, no ricotta, vegetarian, sausage-studded, slow cooker, gluten-free—without losing what makes baked pasta so comforting in the first place.

So this is a reader-first collection: one reliable classic baked ziti recipe, followed by clearly labeled recipe cards for versions you might look for on different nights. Along the way, you’ll also see natural pairings (drinks and lighter sides) that make the whole spread feel complete rather than heavy.


Ziti pasta, explained (and the best swaps)

Ziti pasta is a short, smooth tube—built for sauce, built for cheese, built for baking. It’s often linked to celebrations: Barilla notes that “zita” can mean “bride,” and that ziti has traditionally been served at weddings as “the bride’s pasta.” If you enjoy those little stories that make a dish feel rooted, it’s a lovely detail to know while you cook. You can read that background directly on Barilla’s ziti page: Barilla Ziti.

On the practical side, the best part is this: you don’t need perfect ziti to make baked ziti. In fact, the wider point of a baked pasta is resilience. If the shop only has rigatoni or penne, you can still get that same saucy-cheesy structure.

De Cecco’s pasta notes are helpful for substitution thinking because they describe which shapes suit oven-baked recipes and “dense, colourful sauces.” Their Zita page even calls out baked dishes specifically: De Cecco Zita n° 18. That’s exactly the kind of sauce-and-shape compatibility you want when you’re building a pasta bake that won’t dry out.

Easy swap guide:

  • Best swap for ziti: rigatoni (sturdy, lots of surface)
  • Next best: penne (especially penne rigate)
  • If you want it smoother: zita / mezza zita
  • If you’re using gluten-free pasta: choose a thicker tube shape and undercook slightly before baking (more on that later)
Ziti pasta swaps infographic showing rigatoni, penne, and zita as the best pasta shapes for baked ziti, with a gluten-free tip to choose thicker tubes.
Can’t find ziti pasta? Use rigatoni for the sturdiest baked ziti, penne as the easy everyday swap, or zita for a smooth tube—plus a simple gluten-free baked ziti tip: choose thicker pasta shapes so they stay firm after baking.

Also Read: Manhattan Cocktail Recipe (Classic + 6 Variations)


The master baked ziti method (why it works)

Before we jump into all the fun variations, it helps to understand what makes a baked ziti recipe succeed. Baked ziti is basically three things repeated in layers:

  1. Pasta that’s slightly underdone so it finishes in the oven
  2. Sauce that’s a little looser than you’d use for stovetop pasta
  3. Cheese in two roles: creamy “binder” (ricotta, cottage cheese, béchamel, etc.) and melty “top” (mozzarella + parm)

Once you internalize that, you can make almost any baked pasta feel balanced.

Master baked ziti method infographic showing the layering order—pasta, sauce, and cheese (repeat)—with tips to undercook pasta, loosen sauce, and bake until bubbly.
Use this master baked ziti method every time: slightly undercook the pasta, keep the sauce a little looser, then layer pasta + sauce + cheese (repeat) for a baked ziti recipe that stays saucy, creamy, and bubbly—not dry.

If you prefer a brighter, fresher sauce rather than a purely jarred flavor, a homemade base can lift the entire pan. This MasalaMonk guide walks through a food-mill method and a no–food mill option: Tomato Sauce From Fresh Tomatoes. It’s an easy way to make the sauce taste “alive” without turning dinner into a project.

On nights you want a creamier, more lasagna-like vibe, a white sauce layer can do the job too. MasalaMonk’s béchamel guide covers classic and vegan versions (and helps you avoid lumps): Béchamel Sauce for Lasagna.


Classic baked ziti recipe (the base you can build on)

This is the dependable classic baked ziti recipe. Every variation below either uses this exactly or swaps a few ingredients while keeping the same structure.

Classic baked ziti recipe in a casserole dish with marinara, ricotta, and melted mozzarella, labeled serves 6–8 and 45 minutes.
Save this classic baked ziti recipe card as your base method—once you nail this tray, every variation below (easy, no-boil, vegetarian, sausage, slow cooker, gluten-free, and more) becomes a simple swap.

Ingredients (serves 6–8)

  • 450 g (1 lb) ziti pasta (or rigatoni/penne)
  • 2 tbsp olive oil
  • 4–5 cloves garlic, minced
  • 1 small onion, finely chopped (optional)
  • 700–800 g marinara sauce (about 3 cups), plus a splash of water if it’s very thick
  • 250 g ricotta (about 1 cup)
  • 200 g mozzarella, shredded (about 2 cups), divided
  • 50 g parmesan, grated (about 1/2 cup)
  • 1 tsp dried oregano (or Italian seasoning)
  • Salt and black pepper
  • Basil or parsley for serving (optional)

Method

  1. Heat the oven to 190°C / 375°F. Lightly oil a baking dish.
  2. Cook the pasta in well-salted water until just shy of al dente (1–2 minutes less than the package suggests). Drain.
  3. Make the sauce base: warm olive oil, sauté onion until soft (if using), then add garlic for 30–45 seconds. Pour in marinara, add oregano, and let it simmer 5 minutes. If the sauce looks very thick, loosen with a splash of water.
  4. Combine: toss the drained pasta with most of the sauce.
  5. Layer: spread a thin layer of sauce in the dish. Add half the pasta. Dollop ricotta across the surface. Sprinkle with some mozzarella. Add the remaining pasta, spoon the remaining sauce on top, then finish with mozzarella and parmesan.
  6. Bake 25–30 minutes until bubbling at the edges and the top looks glossy. If you want deeper browning, broil 1–2 minutes at the end.
  7. Rest 10 minutes before serving so the ziti dish slices cleanly.
Baked ziti quick timing card showing the standard baked ziti temperature (375°F/190°C), boil pasta 1–2 minutes under, bake 25–30 minutes, and rest 10 minutes.
Use this baked ziti quick timing guide every time: bake at 375°F / 190°C, boil pasta 1–2 minutes under al dente, bake until bubbly (25–30 minutes), then rest 10 minutes for cleaner slices.

From here, you can keep the base exactly as-is—or pivot to the version that matches your night.

Also Read: Double Chocolate Chip Cookies – Easy Recipe with 7 Variations


Recipe cards: 15 baked ziti variations

1) Easy baked ziti recipe (weeknight-friendly)

Sometimes you don’t want a “project,” you just want dinner to happen. This easy baked ziti recipe leans on smart shortcuts while still tasting like a real baked pasta.

Easy baked ziti recipe (weeknight-friendly) shown in a bowl with marinara and ricotta mixed in, labeled 1 bowl and 4 steps.
This easy baked ziti recipe is the weeknight shortcut: mix ricotta directly into sauced pasta, top with mozzarella and parmesan, then bake until bubbly—fewer bowls, same comfort.

What changes from classic: fewer steps, fewer bowls, more mixing.

Ingredients

  • Use the classic ingredient list, but:
    • Skip the onion
    • Use a good jarred marinara
    • Mix ricotta directly into the pasta-sauce mixture instead of dolloping and layering (faster and still creamy)

Steps

  1. Cook pasta slightly under al dente and drain.
  2. Warm marinara with a little garlic and oregano.
  3. Stir pasta + sauce together, then fold in ricotta, half the mozzarella, and a small handful of parmesan.
  4. Pour into the dish, top with remaining cheese, and bake until bubbling.

Even though it’s a shortcut ziti meal, it still hits the same comfort notes—gooey top, saucy center, that “baked pasta” smell when you pull it from the oven.

Also Read: Paper Plane Cocktail Recipe + Best Amaro Substitutes & Tips


2) No boil baked ziti recipe (dump-and-bake style)

If you’ve ever wanted baked ziti without boiling water at all, this is where the no boil baked ziti approach shines. The trick is hydration: the pasta absorbs liquid in the oven instead of in a pot.

No-boil baked ziti in a baking dish with foil being lifted off, showing the dump-and-bake method using marinara and water.
No-boil baked ziti is the easiest “dump-and-bake” version: coat dry pasta in marinara + water, cover tightly with foil, then bake until the ziti turns tender and the top gets bubbly and cheesy.

Serious Eats explains the logic clearly in their no-boil method, including why soaking can deliver al dente baked pasta without an extra pot: The Food Lab’s No-Boil Baked Ziti.

Ingredients (serves 6–8)

  • 450 g ziti (or penne/rigatoni)
  • 4 cups marinara (slightly more than classic)
  • 1 cup water or light stock
  • 250 g ricotta
  • 200 g mozzarella, divided
  • 50 g parmesan
  • Oregano, salt, pepper

Steps

  1. Heat oven to 190°C / 375°F.
  2. Mix marinara and water/stock in a bowl. Taste and season.
  3. Stir in dry pasta until coated. Let it sit 10 minutes to start hydrating.
  4. Assemble like classic (sauce layer, pasta, ricotta, cheese, repeat).
  5. Cover tightly with foil and bake 40 minutes.
  6. Uncover and bake another 10–15 minutes to brown and reduce excess moisture.
  7. Rest 10 minutes before serving.

Meanwhile, if you want a quicker “less-fuss” take that still feels like baked ziti, Serious Eats also has a skillet baked ziti version: Easy Skillet Baked Ziti with Sausage and Ricotta. Even if you don’t follow it exactly, it’s useful for understanding moisture balance.

Also Read: Green Chutney Recipe (Coriander–Mint / Cilantro Chutney)


3) Baked ziti recipe with ricotta cheese (extra creamy, 3-cheese feel)

A baked ziti with ricotta cheese should feel generous, not dry. Here, the goal is a creamy layer that stays soft after baking, plus enough mozzarella to stretch without turning the whole dish into a cheese brick.

Baked ziti with ricotta cheese showing evenly spaced ricotta dollops in a baking dish, labeled extra creamy (3-cheese feel) with tips to season ricotta and rest 12 minutes.
For extra-creamy baked ziti with ricotta cheese, season the ricotta, dollop it evenly across the pasta, and let the bake rest about 12 minutes—this keeps the ricotta layer soft, creamy, and more sliceable (a true 3-cheese feel).

What changes from classic: more ricotta, more parmesan, slightly wetter mix.

Ingredients

  • Use the classic list, plus:
    • +125 g ricotta (an extra 1/2 cup)
    • +25 g parmesan (a few extra spoonfuls)
    • Optional: 1 egg (helps set the ricotta layer into a “lasagna-like” slice)

Steps

  1. Mix ricotta with parmesan, black pepper, and (optionally) an egg.
  2. Layer ricotta more evenly (smaller dollops, closer together).
  3. Add a splash of pasta water or plain water to the sauce so the bake stays moist.
  4. Bake until bubbling, then rest longer—about 12 minutes—so the ricotta settles.

After that, if you’re the kind of cook who enjoys creamy sauce techniques beyond ricotta, the white sauce approach can be a fun detour: Béchamel Sauce for Lasagna.


4) Baked ziti without ricotta (still rich, no compromise recipe)

Baked ziti without ricotta is more common than people think—sometimes it’s a preference, other times it’s just what your fridge looks like. The key is replacing ricotta’s two jobs: creaminess and structure.

Baked ziti without ricotta guide showing the best creamy swaps: cottage cheese, Greek yogurt, and cream cheese mixed with milk.
Making baked ziti without ricotta? These three creamy swaps keep the ziti dish rich and sliceable: cottage cheese (closest match), Greek yogurt (lighter and tangy), or cream cheese + milk (smooth and indulgent).

Pick one creamy substitute

  • Cottage cheese (best match; see next recipe card)
  • Cream cheese + milk (for a smooth, indulgent texture)
  • Greek yogurt (tangy and lighter; best with extra mozzarella)

Option A: Cream cheese swap

  • Replace ricotta with 150 g cream cheese + 3–4 tbsp milk, whisked smooth.
  • Add a pinch of garlic powder or oregano.

Option B: Greek yogurt swap

  • Replace ricotta with 250 g thick Greek yogurt.
  • Increase mozzarella slightly, because yogurt doesn’t melt the way cheese does.

In contrast to ricotta, these swaps blend in more smoothly, so you can either layer them or stir them directly into the pasta-sauce mixture. Either route works; your choice depends on whether you want a “layered ziti dish” or a more unified, creamy baked pasta.

Also Read: Rob Roy Drink Recipe: Classic Scotch Cocktail (Perfect + Dry + Sweet Variations)


5) Baked ziti with cottage cheese (creamy recipe + protein-forward)

Baked ziti with cottage cheese is one of those “sounds odd until you try it” upgrades. Cottage cheese bakes into a creamy layer, especially if you blend it briefly.

Baked ziti with cottage cheese recipe card showing a creamy slice with ziti pasta, marinara, melted mozzarella, and a fork, labeled creamy and protein-forward.
Baked ziti with cottage cheese is the easiest ricotta swap—blend it for a smoother “ricotta-style” layer, then bake until bubbly for a creamy, protein-forward ziti dish that tastes even better the next day.

If you want a full casserole-style cousin to this idea, MasalaMonk has a dedicated baked pasta guide that uses cottage cheese in a layered format: Cottage Cheese Lasagna Recipe. It’s a great “next recipe” pathway once you fall in love with cottage cheese in pasta bakes.

Ingredients

  • Use the classic list, but swap:
    • Ricotta → 250 g (1 cup) cottage cheese
  • Optional: blend cottage cheese 20–30 seconds for a smoother texture
  • Optional: add lemon zest + black pepper (surprisingly good)

Steps

  1. Cook pasta slightly under.
  2. Simmer sauce briefly.
  3. Mix cottage cheese with parmesan and pepper.
  4. Layer as in classic, or stir cottage cheese into the pasta for a faster bake.
  5. Bake until bubbly and golden.

Notably, cottage cheese versions often taste even better the next day, once the flavor settles and the cheese layer firms up slightly.

Also Read: Sandwich for Breakfast: Breakfast Sandwich Recipe + 10 Variations


6) Baked ziti recipe with ground beef (classic “family tray”)

Baked ziti with ground beef is the tray that disappears first at a potluck—hearty, familiar, and easy to portion. If you’re looking for baked ziti with hamburger meat, this is the version you want.

Baked ziti with ground beef (hamburger meat) in a casserole dish with melted mozzarella and marinara, served as a hearty family tray.
This baked ziti with ground beef (aka baked ziti with hamburger meat) is the classic family-tray version—brown the beef, simmer it in marinara, then bake with mozzarella for a hearty, crowd-pleasing ziti dish.

Ingredients

  • Classic ingredients, plus:
    • 450 g ground beef
    • Optional: 1/2 tsp chili flakes
    • Optional: a pinch of smoked paprika (adds depth)

Steps

  1. Brown the ground beef in a pan until fully cooked. Drain excess fat if needed.
  2. Stir beef into the marinara and simmer 5 minutes so the flavors meld.
  3. Combine with pasta and assemble like classic.
  4. Bake until bubbling and browned on top.

Alternatively, if you’re cooking for a crowd that likes a little heat, add a spoon of chili crisp or crushed red pepper between layers—small change, big payoff.

Also Read: Strawberry Smoothie Recipes (12 Easy Blends + Bowls & Protein Shakes)


7) Sausage baked ziti (deep, savory, a little bold recipe)

Sausage baked ziti has a richer, more seasoned backbone than ground beef, which makes it ideal when you want flavor without extra spices.

Sausage baked ziti in a cast-iron skillet with Italian sausage, marinara sauce, melted mozzarella, and a cheesy spoon lift.
Sausage baked ziti brings deep, savory flavor with almost no extra effort—brown Italian sausage, simmer it in marinara, then bake with mozzarella until bubbly and scoopable.

Ingredients

  • Classic ingredients, plus:
    • 450 g Italian sausage (casings removed)
    • Optional: fennel seeds if your sausage is mild
    • Optional: sautéed peppers for a sweeter balance

Steps

  1. Brown sausage, breaking it into chunks. Let it get a bit caramelized.
  2. Add marinara to the pan and simmer 5 minutes.
  3. Continue with the classic method.

If you’re already in a sausage mood, you may also enjoy the “cozy slow-cooker” lane of Italian-American comfort—MasalaMonk’s Crock Pot Lasagna Soup has the same spirit, just in bowl form.


8) Meatball baked ziti (sliceable and satisfying)

Meatball baked ziti is the “party version” of the dish: the slices look impressive, and every serving has a clear highlight.

Meatball baked ziti in a casserole dish with a slice lifted on a spatula, showing meatballs, marinara sauce, ziti pasta, and melted mozzarella.
Meatball baked ziti is the “party version” of baked ziti—nestle warmed meatballs into saucy layers, then bake until bubbling so every slice delivers a meatball, plenty of marinara, and a melty mozzarella top.

Ingredients

  • Classic ingredients, plus:
    • 12–16 cooked meatballs (homemade or store-bought)
  • Optional: extra marinara for spooning over servings

Steps

  1. If using store-bought meatballs, warm them in marinara so they’re flavorful and tender.
  2. Assemble the dish: sauce layer → pasta → ricotta/cottage cheese layer → nestle meatballs → cheese → repeat.
  3. Bake until fully hot and bubbling.

Consequently, this version often benefits from an extra 5 minutes of rest time so the meatballs don’t shift when you serve.

Also Read: Classic Rum Punch + 9 Recipes (Pitcher & Party-Friendly)


9) Vegetarian baked ziti recipe (baked ziti without meat, still hearty)

Vegetarian baked ziti should never feel like “the meatless option.” The fix is texture and umami: mushrooms, spinach, roasted veg, or a mix.

Vegetarian baked ziti with mushrooms and spinach in marinara, topped with melted mozzarella and a cheesy spoon lift, labeled hearty and no meat needed.
Vegetarian baked ziti doesn’t have to feel like the “meatless option”—browned mushrooms and wilted spinach add savory depth, while a bubbling mozzarella top keeps this baked ziti without meat just as comforting as the classic.

If you’re curious about building meat-like satisfaction from mushrooms in general, MasalaMonk has a useful plant-based guide: “Mushrooms” Instead of “Beef”. It’s not a ziti recipe, yet it’s packed with ideas for getting that savory, filling feel without meat.

Ingredients

  • Classic ingredients, plus:
    • 300–400 g mushrooms, sliced
    • 2 cups spinach
    • Optional: 1 tbsp soy sauce (tiny amount, big umami)

Steps

  1. Sauté mushrooms until they’re browned and you’ve cooked off their moisture.
  2. Stir mushrooms into the sauce and simmer 5 minutes.
  3. Stir spinach into the hot sauce just until it wilts.
  4. Assemble and bake like classic.

At the same time, a fresh, crunchy side makes the whole ziti meal feel lighter. A quick option that pairs beautifully is this garlicky skillet veg: Skillet Mushroom and Zucchini Stir Fry.


10) Veggie baked pasta (roasted vegetables, baked ziti style)

If you want veggie baked pasta, this is the version that hits that exact craving: roasted vegetables folded into marinara, then baked with pasta and cheese.

Roasted veggie add-in guide for veggie baked pasta (ziti style) showing roasted zucchini, bell pepper, and eggplant with marinara and uncooked ziti.
For veggie baked pasta (baked ziti style), roast zucchini, peppers, and eggplant until caramelized, then fold them into marinara before baking—this keeps the vegetables flavorful and prevents a watery pasta bake.

Ingredients

  • Classic ingredients, plus:
    • 1 zucchini, diced
    • 1 bell pepper, diced
    • 1 small eggplant, diced (optional but great)
    • 2 tbsp olive oil
    • Salt + pepper

Steps

  1. Roast the vegetables at 220°C / 425°F for ~20 minutes until browned at the edges.
  2. Stir roasted veg into the sauce and simmer 2–3 minutes.
  3. Assemble and bake like classic.

Because roasted vegetables can release moisture as they sit, this version tends to bake best when you roast until properly caramelized rather than “just soft.”

Also Read: 7 Pizza Sauce Recipes | Marinara, White Garlic, Alfredo, Buffalo, BBQ, Vodka & Ranch


11) Crock pot baked ziti (recipe of slow cooker baked ziti)

Crock pot baked ziti is for days when you want dinner to cook while you do literally anything else. It’s softer than oven-baked ziti and a little less browned, but it’s incredibly convenient.

Crock pot baked ziti in a slow cooker with a ladle lifting a cheesy portion, showing slow cooker baked ziti texture with marinara and melted mozzarella.
Crock pot baked ziti is the hands-off version of a baked ziti recipe—layer pasta, sauce, and cheese in the slow cooker, then scoop up a saucy, melty dinner that’s perfect for busy days.

Two ways to do it

  • Best texture: parboil pasta 4–5 minutes (still very underdone), then slow cook
  • Easiest: use a no-boil style approach with extra liquid, but keep a close eye on softness

Ingredients

  • 450 g ziti
  • 4 cups marinara
  • 1 cup water (only if you’re using the “no-boil” approach)
  • 250 g ricotta or cottage cheese
  • 2 cups mozzarella + parmesan
  • Oregano, salt, pepper

Steps

  1. Lightly oil the slow cooker insert.
  2. Mix sauce (and water if using). Season well.
  3. Layer sauce → pasta → ricotta/cottage cheese → mozzarella. Repeat until used up.
  4. Cook on LOW until pasta is tender and the center is hot (typically 2–3 hours, depending on your cooker).
  5. Let it sit with the lid off for 10 minutes before serving so it thickens slightly.

If you enjoy slow cooker comfort meals in this general lane, Crock Pot Lasagna Soup is another cozy option that uses similar flavors.


12) Vegan baked ziti (plant-based recipe, still comforting)

A vegan baked ziti recipe should feel creamy and cohesive rather than “pasta with tomato sauce.” The secret is a good ricotta-style component and enough seasoning to make it taste finished.

Vegan baked ziti that actually feels creamy: cashew “ricotta” adds richness, greens balance the marinara, and a meltable vegan cheese on top gives you that classic baked-ziti comfort—fully plant-based.

Ingredients

  • 450 g ziti (choose vegan-friendly pasta)
  • 3–4 cups marinara
  • 2–3 cups spinach or kale
  • Vegan mozzarella shreds (or a meltable vegan cheese)
  • Cashew ricotta (quick version):
    • 1 cup cashews (soaked if you can)
    • 2–3 tbsp lemon juice
    • 1 clove garlic
    • Salt + pepper
    • A splash of water to blend

Steps

  1. Blend cashew ricotta until creamy but not soupy.
  2. Cook pasta slightly under, or use a hydrated/no-boil method with extra liquid.
  3. Stir greens into sauce to wilt.
  4. Assemble: sauce → pasta → cashew ricotta → vegan cheese → repeat.
  5. Bake until hot and the top is lightly browned.

Even if you’re not fully vegan, this is a helpful “plant-based dinner” baked pasta to have in rotation—especially when cooking for mixed diets.

Also Read: Vegan Mayo Recipe Guide: 5 Plant-Based Mayonnaise


13) Gluten-free baked ziti (no mush, no sadness)

Gluten-free baked ziti is completely doable, but the timing matters. GF pasta softens faster, and oven heat can push it past “tender” into “too soft” if you’re not careful.

Gluten-free baked ziti timing guide comparing undercooked pasta vs overcooked pasta, showing firmer ziti tubes on the left and softer texture on the right, with tips to boil 2–3 minutes under and check at 20 minutes.
Gluten-free baked ziti is all about timing: boil the pasta 2–3 minutes under, then start checking the bake early (around 20 minutes) so the ziti stays firm instead of turning soft or mushy.

Ingredients

  • Same as classic, but use gluten-free ziti/penne/rigatoni

Steps

  1. Boil GF pasta until it’s more underdone than you think (often 2–3 minutes under the box time).
  2. Keep the sauce slightly looser than usual.
  3. Assemble and bake, but start checking at 20 minutes rather than 30.

If you like the idea of higher-protein pasta alternatives, you might also enjoy reading about legume-based options like lentil pasta—MasalaMonk has a guide that covers brands and recipes: Lentil Pasta for Weight Loss: Nutrition, Brands & 5 Recipes. You don’t have to make it about weight; it’s simply a useful overview of textures and cooking behavior.


14) Pizza baked ziti (pepperoni, oregano, “slice night” energy)

Pizza baked ziti is exactly what it sounds like: a baked ziti dish that leans into pizza flavors—pepperoni, extra oregano, and a cheesier top.

Pizza baked ziti with pepperoni and melted mozzarella in a skillet, showing a cheesy slice being lifted, labeled pepperoni and extra oregano.
Pizza baked ziti is the fun, crowd-pleasing twist—pepperoni, extra oregano, and a bubbly mozzarella top turn baked ziti into “slice night” comfort that’s perfect for movie night.

Ingredients

  • Classic ingredients, plus:
    • 80–120 g pepperoni (or plant-based pepperoni)
    • +1/2 tsp oregano
    • Optional: a few spoonfuls of pizza sauce mixed into the marinara

Steps

  1. Assemble like classic, but add pepperoni near the top layer and between layers for more punch.
  2. Finish with extra mozzarella and a little parmesan.
  3. Bake until the edges bubble and the top browns.

In other words, this is the baked pasta version of movie night: simple, loud flavors, very little fuss.

Also Read: Blueberry Pancakes (6 Recipes) + Homemade Pancake Mix


15) “Fresh sauce” baked ziti (lighter, brighter, still cozy)

Finally, when you want baked ziti that tastes less “heavy winter casserole” and more “fresh tomato pasta baked into comfort,” a homemade sauce base makes a noticeable difference.

Fresh sauce baked ziti card showing a skillet of fresh tomato sauce with basil, tomatoes, garlic, and olive oil, labeled brighter and tomato-forward.
Fresh sauce baked ziti tastes lighter and more tomato-forward—use fresh tomatoes, basil, and olive oil for a brighter baked ziti recipe that still bakes up cozy and bubbly.

Use the classic recipe, but swap jarred marinara for a fresh sauce. This MasalaMonk guide keeps it approachable: Tomato Sauce From Fresh Tomatoes.

To keep the overall pan balanced, pair the fresh sauce with either:

As a result, you get a baked ziti recipe that still feels comforting, but tastes brighter and more “tomato-forward.”

Also Read: Authentic Chimichurri Recipe (Argentine Steak Sauce)


How to store, freeze, and reheat baked ziti safely

Leftovers are part of the baked ziti charm, and it’s worth handling them safely so you can enjoy the second (and third) round with confidence.

For fridge storage, USDA guidance commonly points to using cooked leftovers within about 3–4 days, and reheating to 165°F (74°C). You can reference USDA’s food safety page here: Leftovers and Food Safety (USDA FSIS). Foodsafety.gov also reinforces reheating leftovers to 165°F and offers practical reheating reminders: Leftovers: The Gift that Keeps on Giving. If you like a simple chart format, Foodsafety.gov’s minimum internal temperatures include a leftovers line at 165°F: Safe Minimum Internal Temperatures.

Freeze and reheat baked ziti guide showing a labeled foil pan and storage tips: refrigerate 3–4 days and reheat leftovers to 165°F (74°C).
Freeze and reheat baked ziti the easy way: label your tray, keep leftovers in the fridge for 3–4 days, and reheat baked ziti until it reaches 165°F (74°C)—cover with foil first, then uncover to refresh the cheesy top.

Reheating baked ziti (best texture)

  • Oven method: cover with foil and warm until hot throughout; uncover for the last few minutes to re-crisp the top.
  • Microwave method: add a spoon of water or sauce, cover loosely, and reheat in bursts so it warms evenly.

If you’re freezing a full tray, Allrecipes has a practical guide on what freezes well and how to protect texture: How to Freeze Casseroles. It’s especially helpful for baked pasta because it talks through moisture, dairy, and best practices for baking from frozen.

Freezing baked ziti (simple approach)

  1. Cool fully.
  2. Wrap tightly (plastic wrap + foil, or a tight lid).
  3. Label with date.
  4. Reheat covered first, then uncover to brown.

Also Read: Double Chocolate Chip Cookies – Easy Recipe with 7 Variations


What to serve with baked ziti (drinks + lighter sides that fit naturally)

A baked ziti meal can be rich, so pairing it with something bright—or simply something crunchy—makes the whole dinner feel more complete. Instead of piling on another heavy side, aim for contrast: tang, citrus, herbs, crisp vegetables, or a cooling drink.

Drinks that work especially well

For something creamy and soothing, mango lassi is a classic partner to tomato-rich meals because it softens acidity and heat. MasalaMonk’s version includes five variations, so you can keep it simple or get playful: How to make Mango Lassi (5 versions).

If you’d rather go refreshing and zippy, jal jeera is a punchy cumin-citrus drink that feels tailor-made for richer baked pasta nights: Jal Jeera aka the Indian Lemonade.

And if you’re setting a family-friendly table (or you just want something bubbly that reads “special”), this MasalaMonk roundup has plenty of options: Apple juice mocktails for every occasion.

If you want a more tropical, hydration-forward angle, MasalaMonk also has a collection that includes both cocktails and mocktail-leaning ideas built around coconut water: Coconut water cocktails and refreshing drink ideas. Even if you skip the alcohol, the flavor pairings are useful inspiration.

Wondering what to serve with baked ziti? Pair a rich baked ziti recipe with a crisp salad, a bright green side, and a refreshing drink to balance the richness and make the meal feel lighter.

Lighter sides that balance a baked pasta

A quick vegetable side is often enough. This simple garlicky sauté is fast, bright, and surprisingly perfect next to baked ziti: Skillet Mushroom and Zucchini Stir Fry.

For crunch and protein, a peanut salad gives you that fresh bite that baked pasta lacks by design: Crunchy, tangy, spicy peanut salad.

If you want a gentle “balance the plate” mindset without turning dinner into a lecture, Harvard’s Healthy Eating Plate is a simple visual reminder to load up vegetables and choose whole grains when you can: Healthy Eating Plate (Harvard Nutrition Source). Their whole grains overview is also useful if you’re deciding between refined pasta and whole-grain options: Whole Grains (Harvard Nutrition Source).


A final word before you pick your version

The best baked ziti recipe is the one you’ll actually make again. Some nights that’s a classic tray with ricotta and mozzarella; other times it’s baked ziti without ricotta because that’s what you’ve got; and occasionally it’s a slow cooker baked ziti because you want dinner to cook while life happens.

Pick your baked ziti variations guide showing options for weeknight (easy, no-boil), creamy (ricotta, no ricotta, cottage cheese), hearty (ground beef, sausage, meatballs), diet (vegetarian, vegan, gluten-free), and pizza baked ziti.
Not sure which baked ziti recipe to make tonight? Use this quick baked ziti variations guide to choose by mood—easy or no-boil for weeknights, ricotta or cottage cheese for creamy, ground beef/sausage/meatballs for hearty, vegetarian/vegan/gluten-free for dietary needs, or pizza baked ziti for “slice night.”

Start with the classic base once. Then, the next time you’re craving a different vibe, jump straight to the recipe card that matches your pantry and your mood—easy baked ziti, sausage baked ziti, vegetarian baked ziti, veggie baked pasta, no boil baked ziti, gluten-free baked ziti, vegan baked ziti recipe, or pizza baked ziti. That’s the whole point of keeping all the variations together: one method, many dinners, no stress.

Also Read: How to Make Churros (Authentic + Easy Recipe)

FAQs

1) What is the best baked ziti recipe for beginners?

For most beginners, the best baked ziti recipe is the classic version with marinara, ricotta, mozzarella, and parmesan. It’s forgiving, it bakes evenly, and the layers help prevent dryness. If you’re nervous about timing, cook the pasta slightly under al dente so it finishes perfectly in the oven.

2) What makes an easy baked ziti recipe truly “easy”?

An easy baked ziti recipe usually means fewer steps and fewer dishes. Common shortcuts include using jarred marinara, skipping sautéed onion, and mixing the ricotta directly into the pasta and sauce instead of carefully layering. As long as you still bake it until bubbling, it will taste like a proper baked ziti dish.

3) Can I make baked ziti with ricotta cheese and still keep it creamy?

Yes. Baked ziti with ricotta cheese stays creamy when the sauce is not too thick and the pasta is slightly undercooked before baking. Additionally, seasoning the ricotta (salt, pepper, parmesan) improves flavor without changing texture. If you like a softer middle, add a small splash of water to the sauce before assembling.

4) Can you make baked ziti without ricotta?

Absolutely. Baked ziti without ricotta works well with cottage cheese, a cream cheese blend, or thick Greek yogurt. The key is choosing a substitute that adds moisture and helps the layers hold together. In many cases, you’ll want a touch more mozzarella on top since ricotta-free versions rely more on melt for that classic comfort bite.

5) Is baked ziti with cottage cheese a good substitute for ricotta?

Surprisingly, yes. Baked ziti with cottage cheese is one of the closest swaps for ricotta because it bakes into a creamy layer. For a smoother texture, blend the cottage cheese briefly before using it. On the other hand, if you prefer more texture, use it as-is.

6) Can I make baked ziti without meat and still make it filling?

Definitely. Vegetarian baked ziti (or baked ziti without meat) is satisfying when you add ingredients that bring savory depth, such as mushrooms, spinach, roasted vegetables, or a mix of the three. In particular, browning mushrooms well before adding them to sauce makes the whole ziti meal taste richer without needing meat.

7) What’s the difference between vegetarian baked ziti and veggie baked pasta?

Vegetarian baked ziti is usually a baked ziti recipe that skips meat but keeps the classic pasta-bake structure. Veggie baked pasta, meanwhile, often leans more heavily on vegetables—especially roasted vegetables—as the “main event,” with pasta and cheese supporting them. In practice, they overlap a lot; the difference is simply emphasis.

8) Can I make baked ziti with ground beef (hamburger meat)?

Yes. Baked ziti with ground beef—often sought as baked ziti with hamburger meat—starts by browning the beef, draining extra fat, then simmering it briefly in marinara. Afterward, assemble and bake like any other baked ziti recipe. For deeper flavor, let the beef brown a little more before adding sauce.

9) Is sausage baked ziti better than ground beef baked ziti?

It depends on what you want. Sausage baked ziti tends to taste more boldly seasoned because the sausage already contains spices. Ground beef baked ziti, by contrast, is milder and more “classic cafeteria comfort” in the best way. If you’re serving a crowd with mixed tastes, ground beef is often the safer pick.

10) How do I make meatball baked ziti without drying it out?

Use meatballs that are fully cooked but not overbaked, and keep them nestled within saucy layers rather than sitting exposed on top. Also, add enough marinara so the bake stays moist. If the dish looks dry before it goes into the oven, it will only get drier during baking.

11) What pasta can I use if I can’t find ziti pasta?

If ziti pasta is unavailable, use rigatoni, penne, or other short tube shapes. The main idea is choosing a pasta that holds sauce and stands up to baking. Avoid very thin pasta shapes, because they can turn soft more quickly in the oven.

12) How do I keep baked ziti from drying out?

First, don’t overcook the pasta before baking. Next, make sure the sauce is loose enough—thick sauce can bake up too tight and dry. Finally, cover with foil for part of the bake if your oven runs hot, then uncover near the end to brown the cheese.

13) What is no boil baked ziti, and does it really work?

No boil baked ziti is a method where dry pasta hydrates in the oven using extra liquid from sauce and added water or stock. It can work very well, provided the dish is covered tightly for the first stage of baking and you use enough liquid. If you prefer a firmer bite, uncover near the end so excess moisture cooks off.

14) Can I make crock pot baked ziti or baked ziti in a slow cooker?

Yes—crock pot baked ziti is popular because it’s hands-off. For better texture, parboil the pasta briefly before layering. If you use dry pasta, you’ll need extra liquid and careful timing to prevent it from getting too soft.

15) Can I make a vegan baked ziti recipe that still tastes rich?

Yes. Vegan baked ziti is richest when you include a creamy component (like cashew “ricotta”) plus enough seasoning in the sauce. Also, adding greens like spinach helps balance the richness. If you’re aiming for that classic baked ziti feel, a meltable vegan cheese on top helps deliver the familiar finish.

16) How do I make gluten-free baked ziti without mushy pasta?

Gluten-free baked ziti turns out best when the pasta is undercooked before baking and the bake time is watched more closely. In addition, keep the sauce slightly looser so the pasta finishes cooking without drying out. Since different GF pastas behave differently, checking doneness early is the easiest safeguard.

17) Can I assemble baked ziti ahead of time?

Yes. Assemble the baked ziti recipe, cover tightly, and refrigerate. When baking from cold, add extra time so the center heats through. If the top browns too quickly, cover with foil and uncover later to finish.

18) Can I freeze baked ziti, and should I freeze it baked or unbaked?

You can freeze baked ziti either way. Freezing unbaked keeps the cheese layer fresher in texture, while freezing baked is convenient for quick reheating. Either option works; the difference is simply whether you want “ready-to-reheat” convenience or “fresh-baked” texture.

19) How long does baked ziti last in the fridge?

Typically, baked ziti lasts several days in the fridge when stored in an airtight container. For best flavor and texture, eat it sooner rather than later, because baked pasta continues to absorb sauce over time.

20) How do I reheat baked ziti so it stays cheesy and moist?

For the best texture, reheat in the oven covered with foil, then uncover briefly to refresh the top. If using a microwave, add a small spoon of water or extra sauce before reheating so the pasta doesn’t dry out. Either way, heating gently is better than blasting it quickly.

21) What temperature do you bake baked ziti at?

Most baked ziti recipes bake well around 190°C / 375°F. That temperature is hot enough to bubble sauce and melt cheese without scorching the top too fast. If you want more browning, use a short broil at the end rather than raising the oven temperature.

22) What are the most popular baked ziti variations?

The most popular baked ziti variations tend to include easy baked ziti, baked ziti with ricotta, baked ziti without ricotta, baked ziti with cottage cheese, vegetarian baked ziti (baked ziti without meat), baked ziti with ground beef (hamburger meat), sausage baked ziti, crock pot baked ziti, vegan baked ziti, gluten-free baked ziti, and pizza baked ziti.