Posted on — Leave a comment

Cannoli Filling Recipe: Creamy Ricotta That Holds Its Shape

Three blistered cannoli shells filled with white ricotta cream, mini chocolate chips, chopped pistachios and orange zest on a dark blue plate.

Pipe a little cannoli filling onto a plate and the ridges should stay where the tip left them. The cream should feel cool and creamy on the tongue, taste unmistakably of ricotta, and hold its shape without turning stiff like frosting.

The frustrating bowl is the one that looks fine until the sugar goes in, then suddenly loosens. Or the ricotta drains all night but still feels grainy. Or you keep mixing to make it smoother and somehow make it thinner instead.

Cannoli filling is a sweet ricotta cream piped inside crisp cannoli shells. At its traditional core, it is simply ricotta and sugar. Chocolate, citrus and cinnamon appear in different fillings, while chopped pistachios commonly finish the exposed ends.

Most problems with cannoli filling start with the ricotta, before the sugar ever goes in. Wet ricotta needs draining. Coarse ricotta needs smoothing. Those are different jobs.
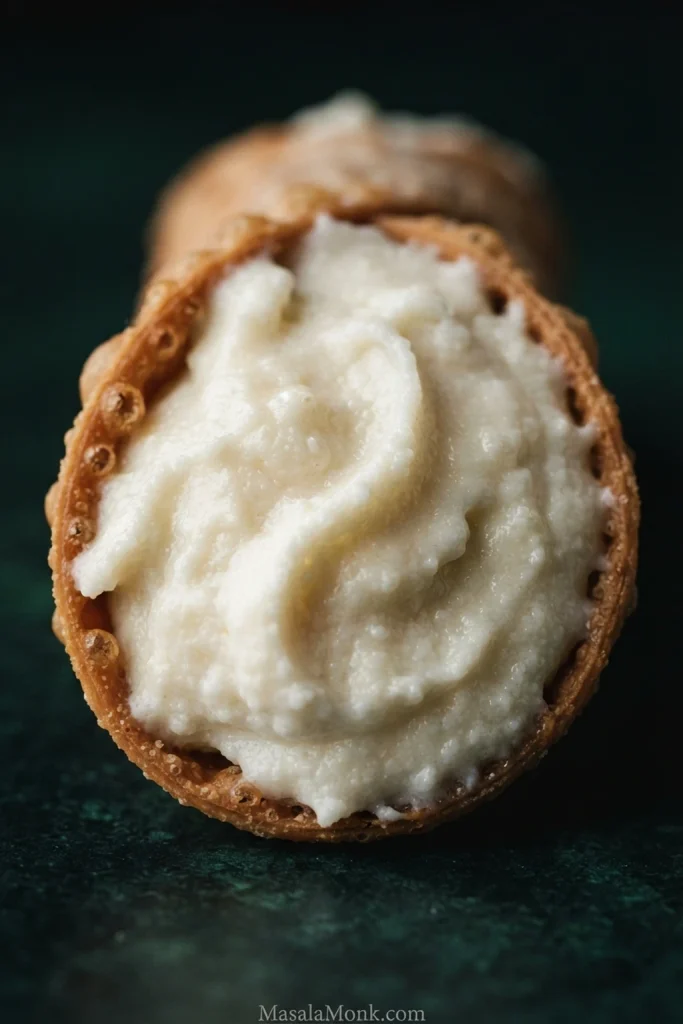
Close-up inside a cannoli shell filled with thick white ricotta cream, showing fine curds and softly defined piping ridges.
Perfectly smooth is not the only sign of good cannoli filling. A faint ricotta grain can still be excellent; what matters more is that the cream remains cohesive, pipeable and free of visible watery separation.

This version keeps the cream firmly ricotta-forward. Mascarpone, whipped cream, cream cheese, cornstarch and gelatin are unnecessary for the main recipe. If you also need homemade shells, rolling thickness, frying temperatures and complete assembly, use our complete cannoli recipe.

Check the Ricotta Before You Add Sugar

Before measuring sugar or reaching for a mixer, look at the ricotta itself. A quick check here is more useful than automatically deciding every tub needs an overnight drain.

What you seeWhat it meansNext move
Whey pools around the ricotta and it spreads instead of holding a moundToo wetDrain it
Ricotta sits in a thick mound with no watery ringMoisture is probably rightStart the filling
Ricotta is thick but visibly coarse or curdyWater may not be the problemSieve it later for smoothness

The goal is ricotta with enough moisture to stay creamy but not so much free whey that the finished filling slumps.
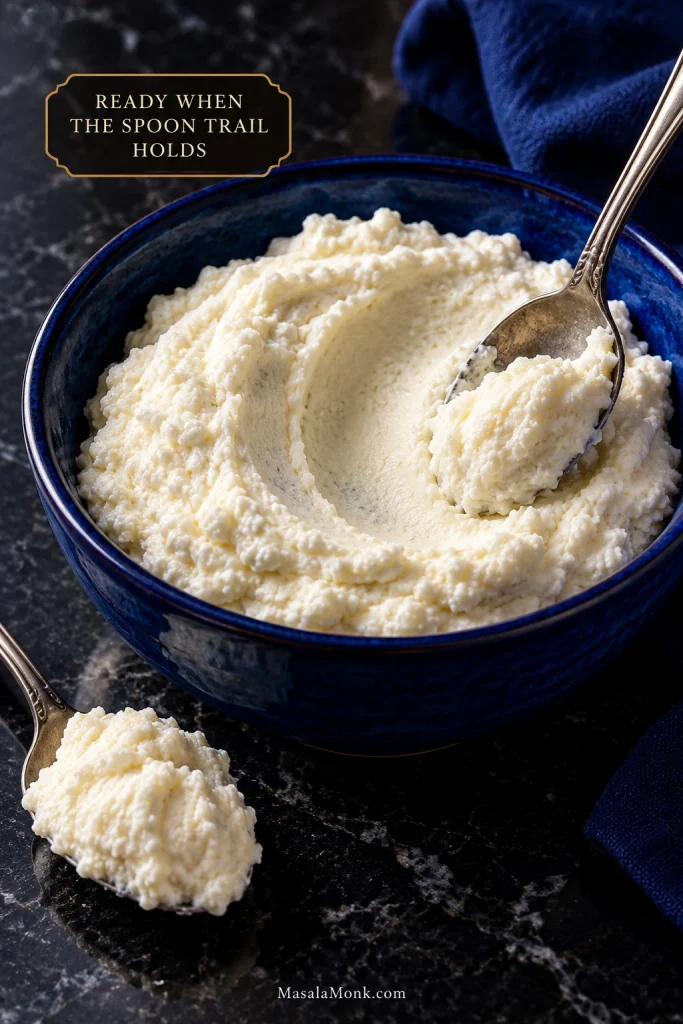
Thick ricotta in a bowl with a spoon-drawn channel that remains open instead of filling with liquid.
The spoon trail is really a moisture test, not a smoothness test. So if the ricotta holds a mound without releasing whey, coarse curds can be dealt with later rather than mistakenly draining an already-thick cheese further.

Cannoli Filling Recipe

For about 20–24 cannoli, start with 680 g / 24 oz whole-milk ricotta, drained only if needed and weighed after any draining, plus 125 g / 4.4 oz superfine sugar, then add vanilla and optional orange, cinnamon and chocolate.

There are three useful checkpoints: the mound test before sugar, the sieve test while refining the texture, and the pipe test before chocolate or other mix-ins go in.

Recipe detailGuidance
Active timeAbout 15–20 minutes
Drain timeOnly as needed; a few hours may be enough, while very wet ricotta can need overnight draining
First sugar rest20–30 minutes
Optional final sugar rest10–15 minutes
CookingNone
Approximate finished fillingAbout 805–890 g / 28–31 oz depending on extra sugar and chocolate
Approximate shell yieldAbout 20–24 cannoli using shells around the size made with a 4-inch / 10-cm cutter; larger shells or more generous filling will reduce the yield
Finished textureCreamy, pipeable and able to hold its ridges

Equipment

  • digital kitchen scale
  • fine-mesh sieve
  • mixing bowl
  • flexible spatula or large spoon
  • cheesecloth or a clean thin kitchen cloth for particularly wet ricotta
  • small plate and light weight if weighted draining is needed
  • piping bag with a large round or star opening

Ingredients

  • 680 g / 24 oz / 1½ lb whole-milk ricotta, drained only if needed and weighed after any draining
  • 125 g / 4.4 oz superfine or caster sugar
  • up to 25 g / 0.9 oz additional superfine or caster sugar, only if the finished cream needs it
  • ½ teaspoon / 2.5 ml vanilla extract
  • 1 teaspoon finely grated orange zest, optional but recommended
  • up to ⅛ teaspoon ground cinnamon, optional
  • 60 g / about 2 oz mini dark chocolate chips, or chocolate chopped finely enough to pass through your piping tip, optional

Shopping note: if your ricotta needs draining, about 900 g / 32 oz / 2 lb is a useful starting purchase to end with roughly 680 g / 24 oz. Drain loss varies considerably by brand, so treat this as a shopping allowance rather than a guaranteed conversion.
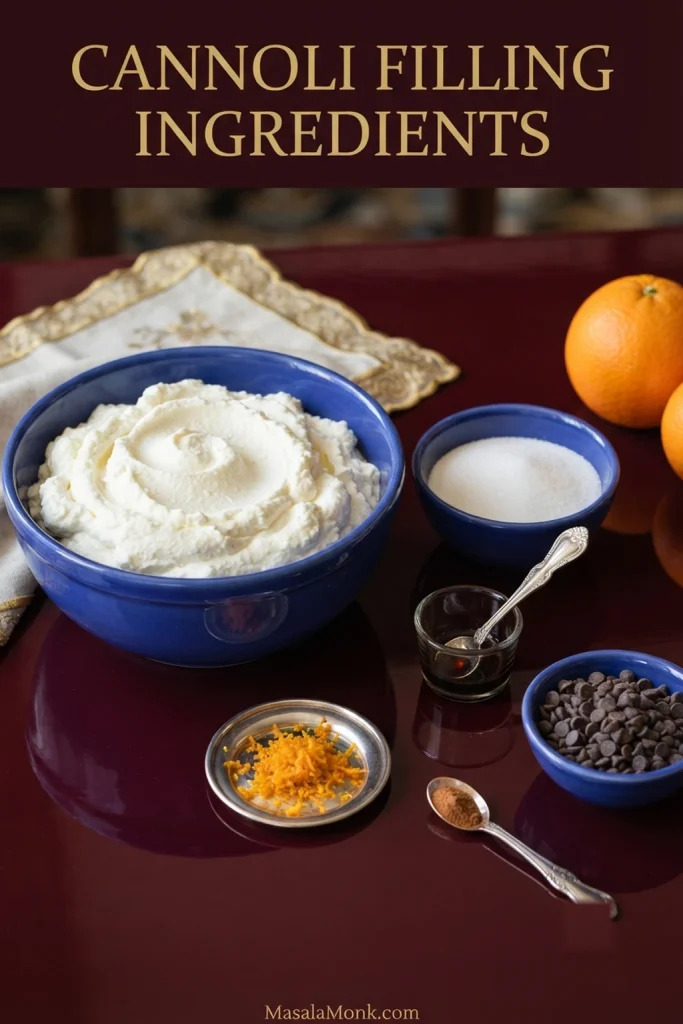
Bowl of ricotta surrounded by sugar, orange zest, vanilla and chocolate chips arranged as ingredients for cannoli filling.
Sequence matters: judge the ricotta before sugar changes its texture, then add aromatics and chocolate only after the cream is stable.

Drain Only If the Ricotta Needs It

Ricotta that already sits thickly in its container with little free whey may need only brief draining. Wetter cheese should go into a fine-mesh sieve set over a bowl in the refrigerator.

For particularly loose ricotta, line the sieve with cheesecloth or a thin clean kitchen cloth. A small plate with a light weight on top can encourage more whey out.

Keep the ricotta refrigerated throughout.
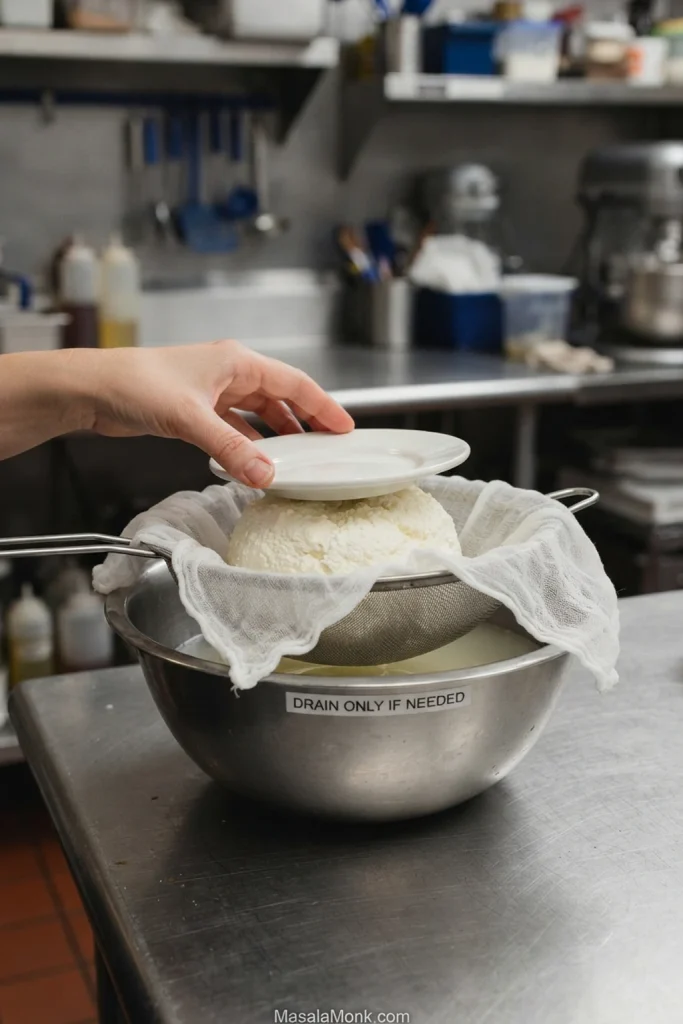
Hand placing a small plate over ricotta in a cloth-lined fine-mesh sieve set above a metal bowl to collect whey.
Gentle pressure should remove free whey without squeezing the ricotta dry; the goal is the right moisture level, not maximum drainage.

Make Sure It Passes the Mound Test

Spoon some ricotta into a bowl. It should sit up without slowly flattening. Drag a spoon through the centre and look at the trail.

If the channel immediately fills with liquid or a watery ring forms around the cheese, keep draining. Once the ricotta is thick, soft and able to hold that trail, move on.

Dry and crumbly ricotta has gone too far in the opposite direction.

Add the Sugar and Give It Time

Fold 125 g / 4.4 oz superfine sugar gently into the ricotta. There is no need to whip it.

Cover and refrigerate for 20–30 minutes. As the sugar dissolves, excess moisture may become more noticeable, which is one reason the mound test matters before sweetening.

Taste the cream cold. If you want a sweeter filling, fold in some or all of the remaining 25 g / 0.9 oz sugar and refrigerate for another 10–15 minutes. Well-prepared ricotta should remain thick and creamy through that rest; wetter ricotta may loosen much more noticeably.

Sieve for Creaminess

Push the sweetened ricotta through a fine-mesh sieve with a flexible spatula or the back of a spoon.

Look at the first few spoonfuls as they come through. The cream should be noticeably finer while still holding its mound. If it starts loosening as you work, stop there; perfect silkiness is not worth losing the structure.

That is the sieve test: the curds get finer without the structure disappearing. A food processor is faster but easier to overdo; for this recipe, the sieve gives you much more control.
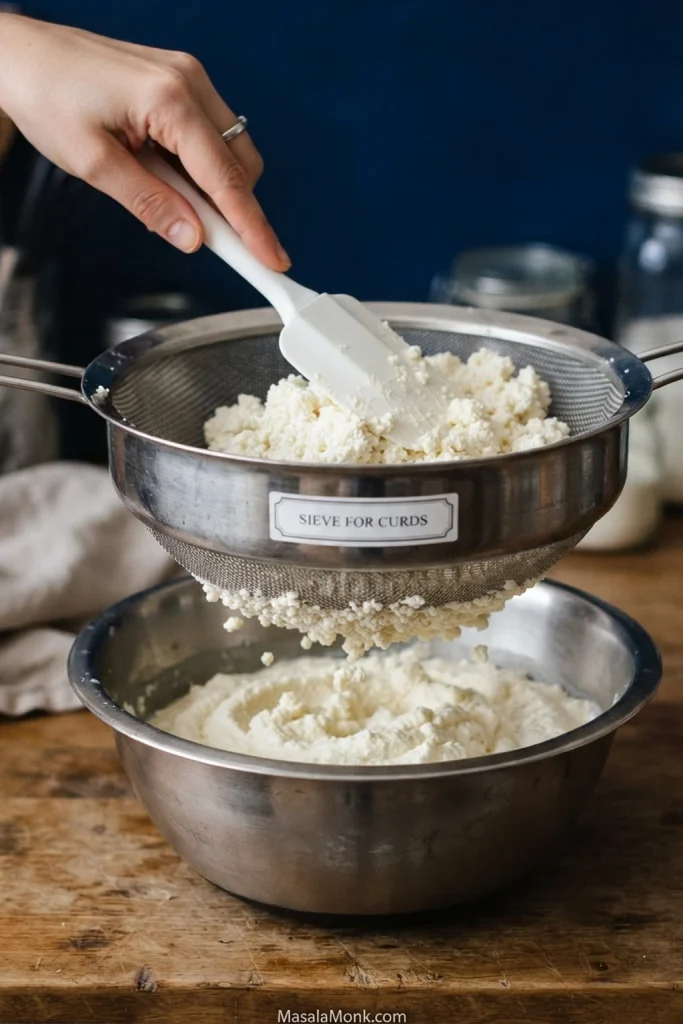
Hand pressing coarse ricotta through a fine-mesh sieve with a spatula, with finer ricotta collecting in the bowl below.
A coarse-but-thick filling belongs at the sieve; a genuinely wet filling belongs back at moisture control. That distinction keeps sieving from becoming another form of unnecessary mixing and helps preserve the cream’s structure.

Flavour Lightly

Fold in the vanilla, orange zest and, if you want it, a small amount of cinnamon. You’re looking for cream that still tastes like fresh ricotta, just without coarse curds getting in the way.

Pass the Pipe Test

Before adding chocolate or packing the whole batch into a piping bag, test a small amount on a plate or in an empty shell. Fix the texture while the cream is still in the bowl; it is much easier than wrestling with a loaded bag.

Filling stateWhat it does
Too looseRidges disappear quickly and the cream spreads
ReadyFlows under moderate pressure and keeps its shape
Too dryTears, feels chalky or takes excessive force to pipe

If it holds those ridges and tastes good, leave it alone. You have the filling.
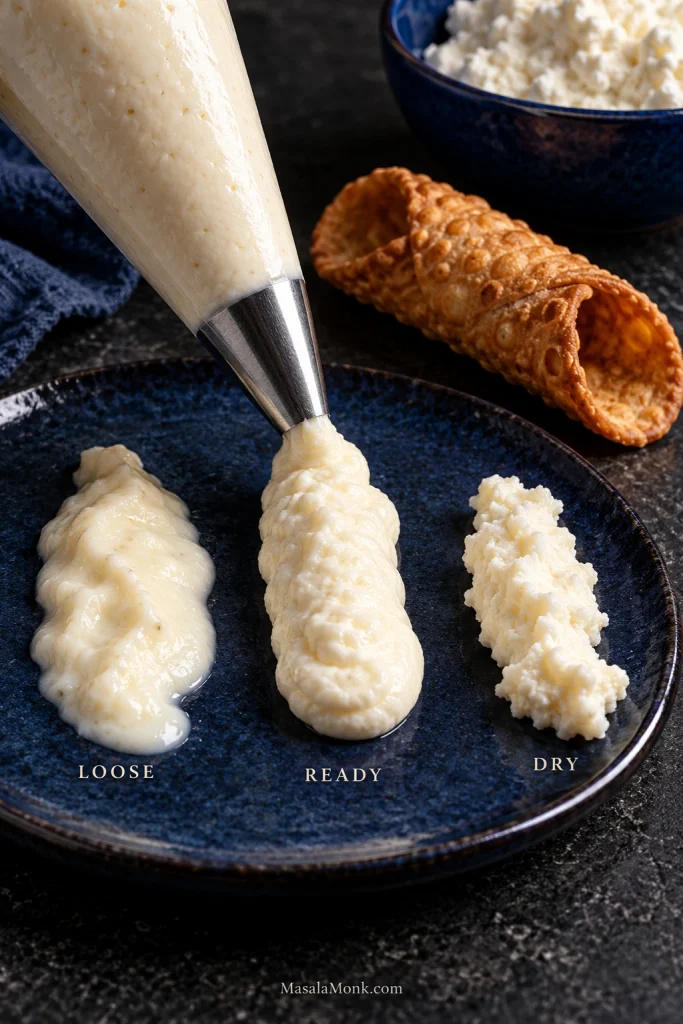
Three piped samples of cannoli filling labeled loose, ready and dry, showing a spreading sample, defined ridges and a rough stiff extrusion.
During the cannoli filling pipe test, notice the effort as well as the shape. Ready cream should keep defined ridges under moderate pressure; if those ridges appear only after a hard squeeze, the mixture may already be too dry.

Add Chocolate Last

Fold in mini chocolate chips or finely chopped chocolate only after the plain cream has reached the right consistency. Texture problems are much easier to correct before chips, nuts or candied fruit are scattered through the bowl.

Cover and refrigerate the filling until needed. Keep the shells separate.

Mound before sugar. Sieve for curds. Pipe before mix-ins. If your cream passes all three checks, you can stop here and fill the shells. The rest is for troubleshooting, choosing ricotta or making variations.
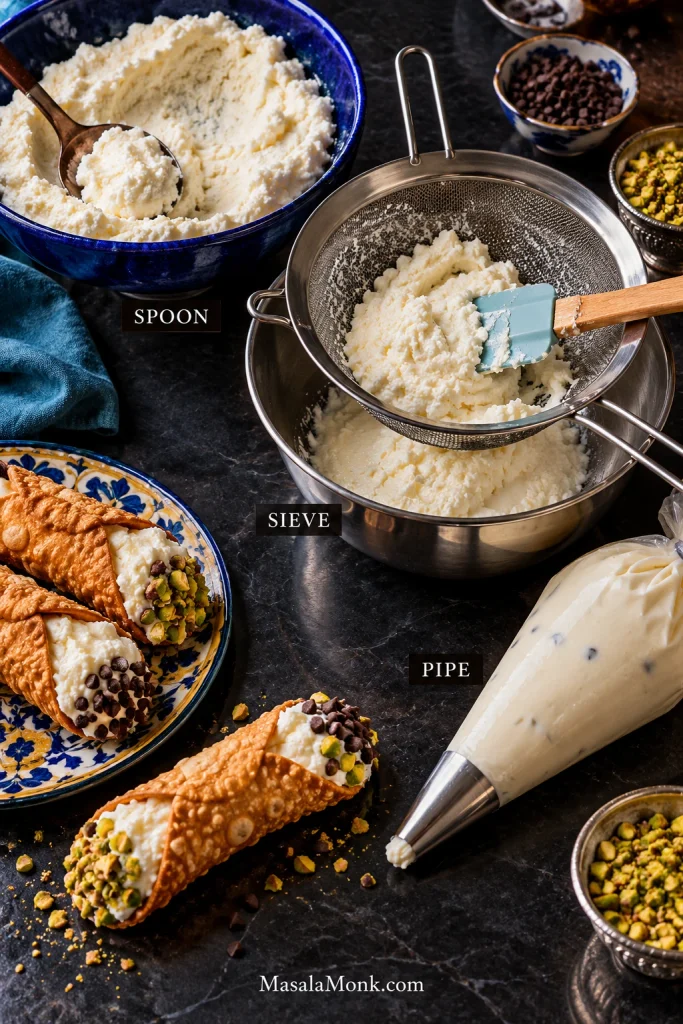
Three-part cannoli filling workflow showing ricotta checked with a spoon, pressed through a sieve and piped from a pastry bag.
Each checkpoint protects the next: fix moisture first, refine curds second, then confirm pipeability before mix-ins make corrections harder.

Need More Help With the Filling?

Read the Ricotta, Not the Clock

If your ricotta is visibly wet, plan on several hours of draining—but stop when it passes the mound test instead of obeying the clock blindly.

Cannoli recipes often give a fixed time: two hours, overnight, sometimes a full day. In practice, one tub can lose a substantial pool of whey quickly while another stays loose for much longer. Pastry-style ricotta may arrive ready to use.

The clock is useful. It is not the endpoint.

Passive and Weighted Draining

Moderately moist ricotta usually drains well in a fine-mesh sieve over a bowl. Very wet cheese can benefit from a cloth-lined sieve and gentle weight.

The weight should encourage whey out, not compress the ricotta into a dry block. Check the cheese itself; more hours are not automatically better.

When Ricotta Is Too Dry

Ricotta can absolutely become too dry for cannoli filling. Over-drained cheese turns chalky and awkward to pipe, while very dry ricotta impastata may need a little moisture added back.

Loosen an overly stiff batch with cold whole milk, 1 teaspoon / 5 ml at a time. Mix gently and stop as soon as the cream pipes comfortably.

Grainy Is Not Runny

Runny cream usually points to excess moisture. Graininess points toward coarse ricotta curds. A sandy texture can come from sugar that has not fully dissolved.

A well-drained ricotta can still be coarse. More draining will remove water, but it will not make those curds smaller.

A faint ricotta grain is not automatically a flaw if the cream tastes pleasant and pipes cleanly. Traditional cannoli fillings vary in smoothness, and the aim is creaminess without erasing every trace of the cheese.
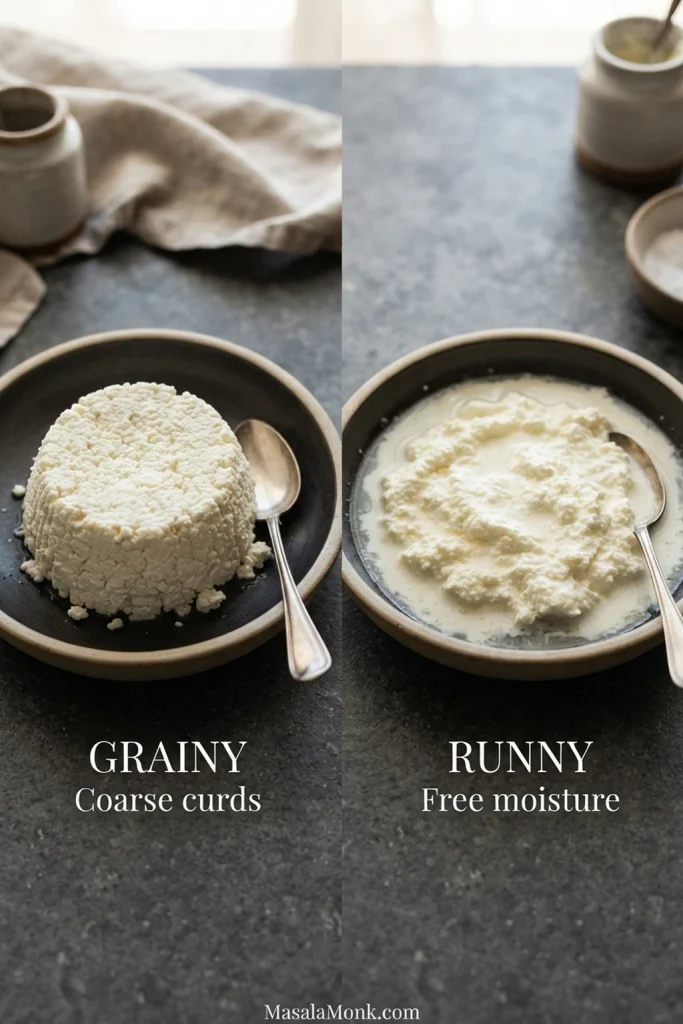
Side-by-side bowls labeled grainy and runny; the grainy ricotta filling holds its shape with coarse curds while the runny filling spreads with visible moisture.
For grainy versus runny cannoli filling, behaviour tells you more than appearance alone. Cream that looks coarse but still stands may simply need refinement; filling that slumps or releases liquid points to a different problem entirely.

Fix My Cannoli Filling

Before adding anything else, look at what the cream is actually doing.

What you seeLikely reasonFirst move
Ricotta is loose before sugarToo much wheyDrain more effectively
Filling loosens after sugarRicotta may have been carrying more free moisture than it appeared toStop adding sugar and reassess moisture
Filling gets thinner as you mixIt is being overworkedStop mixing
Filling is thick but grainyCoarse ricotta curdsUse the fine sieve
Filling feels sandySugar has not fully dissolvedGive it more resting time
Filling is chalky and difficult to pipeRicotta is too dryLoosen very gradually
It doesn’t taste like the bakery cannoli you rememberThe cheese, sugar level or aromatics may differ from that bakery’s styleAdjust the cheese or flavour balance
Piping ridges disappear immediatelyFinished cream is too softChill briefly, then check moisture
Chocolate clogs the tipPieces are too largeUse smaller chocolate or a wider tip
Liquid appears after an overnight restMoisture is separating from the ricottaReassess the filling instead of simply chilling longer

It Loosened After I Added Sugar

Sugar can make excess moisture more noticeable as it dissolves. Well-prepared ricotta should remain thick; wetter ricotta may loosen much more noticeably.

If the mixture becomes genuinely wet and is still free of chips or nuts, careful additional draining may help. Taste again afterward because some dissolved sugar may leave with the liquid.

It Gets Thinner the More I Mix

Stop mixing. Once it’s smooth enough, more mixing can make it looser.

It Doesn’t Taste Like the Bakery Cannoli You Remember

The filling you remember may have been smoother, sweeter, more citrusy or almost mousse-like depending on the bakery. Sheep’s-milk ricotta, ricotta impastata, finer curds, different sugar ratios and a little mascarpone can all change that impression.

Changing the ricotta may get you closer to the cannoli you remember than adding more vanilla or cinnamon.

It Is Too Sweet

This often follows an attempt to use sugar as a thickener, or a cup-for-cup substitution between powdered and granulated sugars. Weigh the sugar and make the final sweetness adjustment only after tasting the cream cold.

Using Cornstarch to Thicken Cannoli Filling

Raw cornstarch is a poor first rescue for runny cannoli filling. Stirred into a no-cook ricotta cream, it can leave a chalky texture while the excess whey remains in the bowl.

Not sure where to begin? Stop mixing first. If the cream is simply warm and soft, chill it for 20–30 minutes and check it again. Then decide whether you’re looking at free whey or coarse curds: drain the first, sieve the second. Retaste after any correction. If the bowl is fundamentally soupy, starting again with properly prepared ricotta may give you a better result than piling in thickeners.

Which Ricotta Makes the Best Cannoli Cream?

Start with full-fat ricotta that tastes fresh and is not swimming in whey. A little curdiness is manageable; excessive water is the bigger headache.

Fresh Sheep’s-Milk Ricotta

Sheep’s-milk ricotta is strongly associated with Sicilian cannoli and has a richer, more distinctive dairy flavour. Use it when good fresh sheep’s ricotta is available to you.

Whole-Milk Ricotta from Cow’s Milk

This is the realistic option for many home cooks and works very well. Look for a fresh, mild whole-milk ricotta that already has some body. If one brand repeatedly releases huge amounts of whey or remains unpleasantly coarse after draining, changing the ricotta may help more than changing the sugar or mixing technique.

Ricotta Impastata

In pastry shops, you may also come across ricotta impastata—a drier, smoother pastry ricotta made for jobs like cannoli. Most versions need little or no additional draining, and some are dense enough to need a small splash of milk before they pipe comfortably.

Don’t confuse impastata with ricotta salata. Ricotta salata is salted, pressed and aged into a firm cheese for slicing, crumbling or grating; it is not a substitute for cannoli filling.

If the cannoli you remember had a deeper, sheepier dairy flavour, technique alone may not recreate it. The ricotta itself may be the difference.
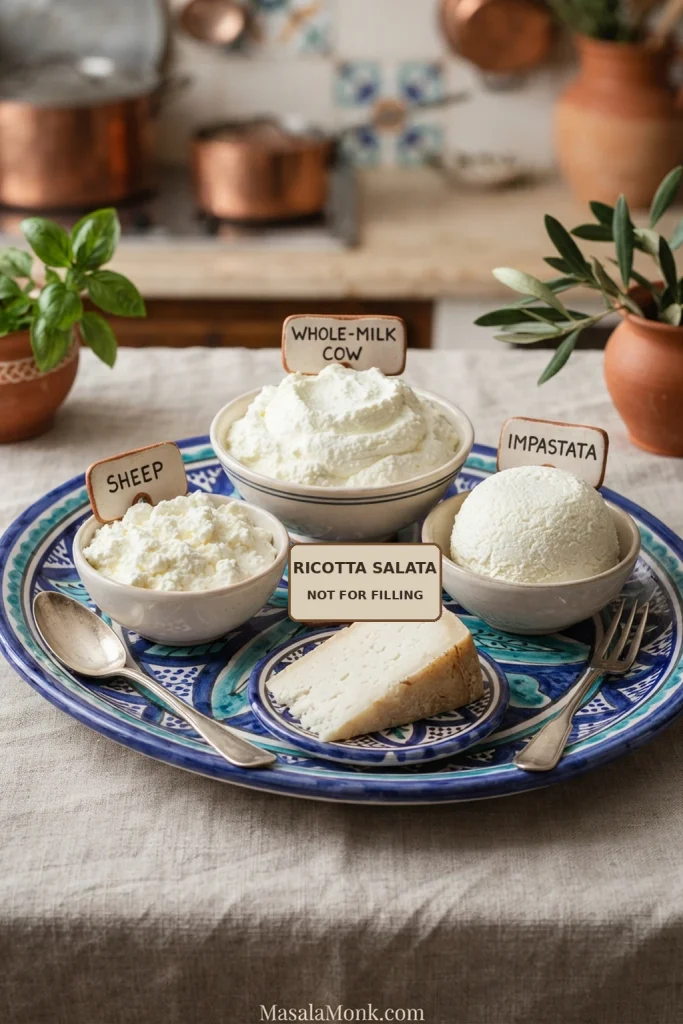
Four ricotta examples arranged together: sheep’s-milk ricotta, whole-milk cow’s ricotta, ricotta impastata and a firm slice of ricotta salata marked as not for filling.
Ricotta choice changes both flavour and starting texture: sheep’s milk is distinctive, impastata starts drier, and whole-milk cow’s ricotta is the practical baseline.

How Traditional Is This Cannoli Filling?

The traditional core of Sicilian cannoli filling is ricotta and sugar. Sheep’s-milk ricotta is particularly important in Sicily, although sweetness, smoothness and garnishes vary by region, pastry shop and family.

The official Visit Sicily cannoli recipe, for example, uses sheep’s-milk ricotta with sugar, vanilla, chocolate and candied orange, and recommends pushing the ricotta through a very fine sieve instead of using electric whisks to smooth it.

Chocolate, pistachios, candied orange or citron, cinnamon and other aromatics all appear in different versions. Mascarpone and whipped cream are not required for the basic Sicilian ricotta-and-sugar filling, although both appear in modern variations.

Three Sicilian-style cannoli filled with ricotta cream and finished with pistachios, dark chocolate and candied orange on colorful ceramic plates.
Traditional Sicilian cannoli vary in garnish, but the defining centre remains sweetened ricotta; chocolate, pistachio and candied citrus are variations around that core.

Sugar Changes More Than Sweetness

Cannoli cream is made with different sugars depending on the bakery and recipe. This version uses superfine or caster sugar because the small crystals dissolve readily during the refrigerated rest.

Regular granulated sugar can work too, but its larger crystals need more time to dissolve.

Powdered Sugar Works Too

Use 125 g / 4.4 oz sifted powdered, icing or confectioners’ sugar in place of the initial caster sugar. Use the same weight, not the same cup measure.

Some brands contain a little anti-caking starch, so the texture may differ slightly from the caster-sugar version. Extra sugar is still a poor answer to wet ricotta; it raises the sweetness much faster than it solves the moisture problem.
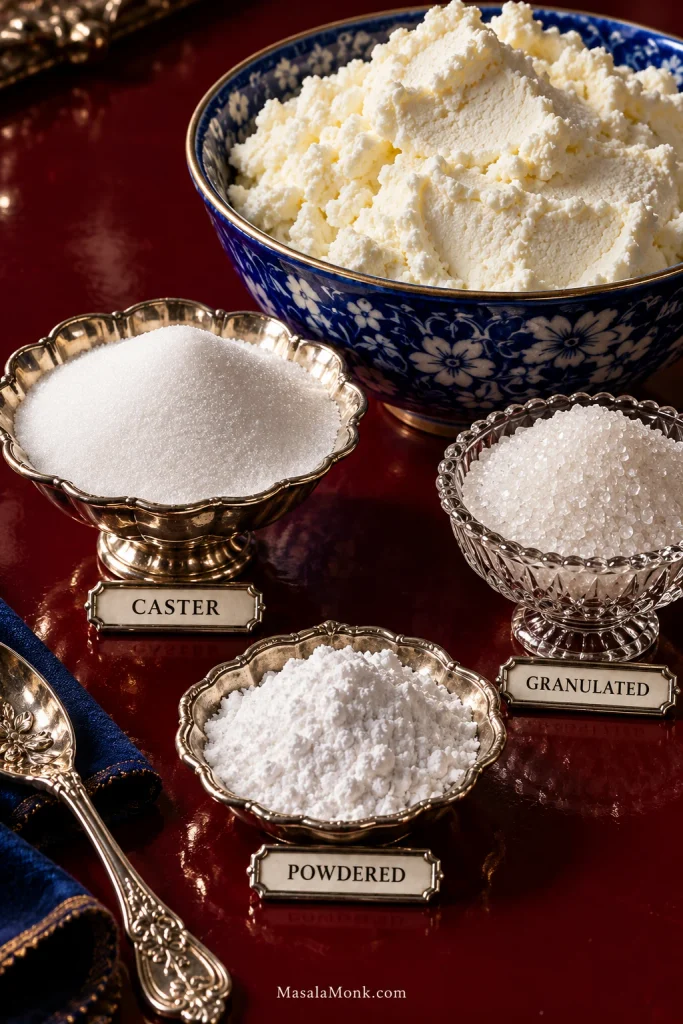
Caster sugar, regular granulated sugar and powdered sugar shown separately beside a bowl of ricotta cream, with their different textures visible.
Finer sugar dissolves faster, while coarser crystals need more resting time. Weigh substitutions so sweetness stays comparable while you judge texture separately.

Adding Mascarpone for a Richer Filling

Mascarpone gives cannoli cream a richer, smoother and denser character. Ricotta remains the defining cheese in the traditional filling.

For a richer but still ricotta-forward variation, replace about one-fifth of the ricotta with mascarpone. Sweeten the variation gradually, chilling and tasting the cream before adding more sugar.

Ways to Change the Filling

Once the plain cream is where you want it, variations are much easier to control.

Chocolate. Fold mini dark chocolate chips into the finished cream, or keep the filling plain and press chopped chocolate onto the exposed ends after piping.

Pistachio. Finely chopped pistachios are especially good on the exposed ends. Pistachio paste changes the sweetness, fat and thickness enough that it deserves its own adjusted formula.

Orange or citron. Finely grated orange zest or small pieces of candied orange or citron work beautifully with ricotta. Keep the quantity restrained; citrus peel becomes assertive quickly.

Three cannoli variations featuring chocolate, chopped pistachio and orange-citron finishes around ricotta filling.
Keep toppings outside when you want contrast without changing the base cream; concentrated pastes alter the filling itself, including its sweetness, fat and thickness.

Whipped Cream Makes It Lighter

Some modern recipes fold separately whipped cream into ricotta for a lighter, fluffier result. Pouring liquid heavy cream into loose ricotta is a different technique and can make a wet filling wetter.

If You’re Using Cannoli Cream in a Cake

Thick cannoli cream can be delicious between modest cake layers once it is firm enough to pipe cleanly. Taller or heavier cakes may need a buttercream dam around the perimeter so the ricotta does not squeeze outward.

Heavy tiers, fondant-covered cakes and detailed exterior piping need a filling or frosting designed for those structural demands.

A cake filled with fresh ricotta cannoli cream should also remain refrigerated.

If you need something that can cover a cake, hold cupcake swirls or form simple borders, use our cream cheese frosting recipe instead of trying to turn this ricotta filling into frosting.
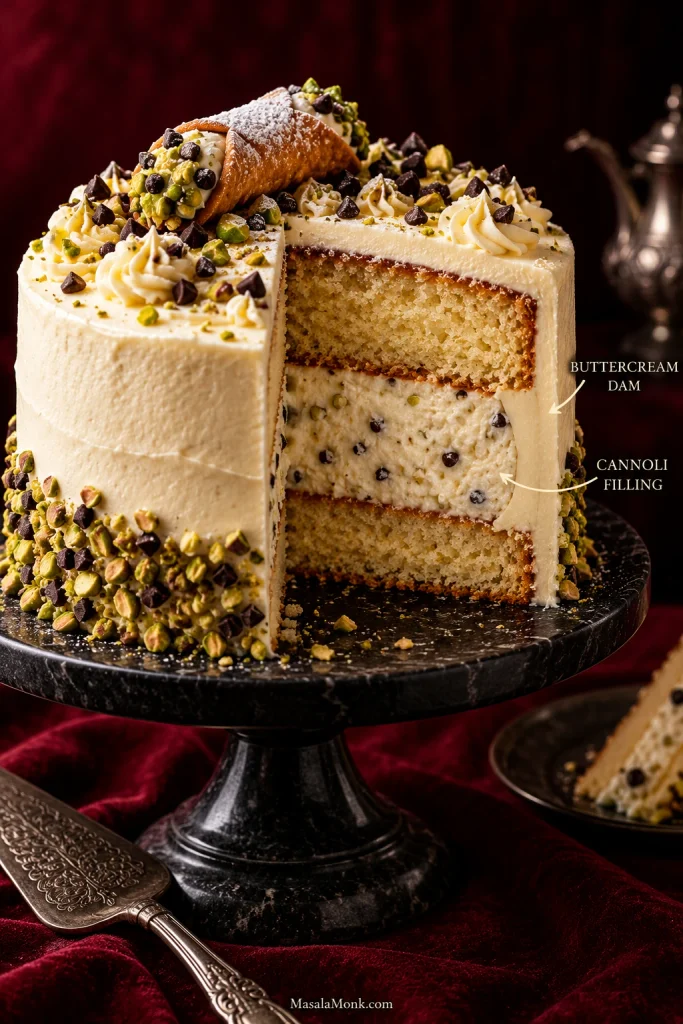
Tall cake slice showing pale cannoli cream between layers, contained inside a firmer buttercream border around the perimeter.
A buttercream dam controls sideways squeeze; it does not make ricotta cream load-bearing. Taller or heavier cakes still need fillings suited to the pressure above.

For the cannoli themselves, once the cream tastes the way you want, the next job is getting it cleanly into the shell.

Pipe the Filling from Both Ends

The best way to fill cannoli shells is to pipe from both ends toward the centre. That prevents a shell that looks full at the openings but hides an empty tunnel through the middle.

  1. Transfer the cold cream to a piping bag with a large round or star tip.
  2. Insert the tip well into one end of the shell.
  3. Pipe while slowly withdrawing the bag toward the opening.
  4. Turn the shell and repeat from the other side.
  5. Let the two portions meet in the centre.
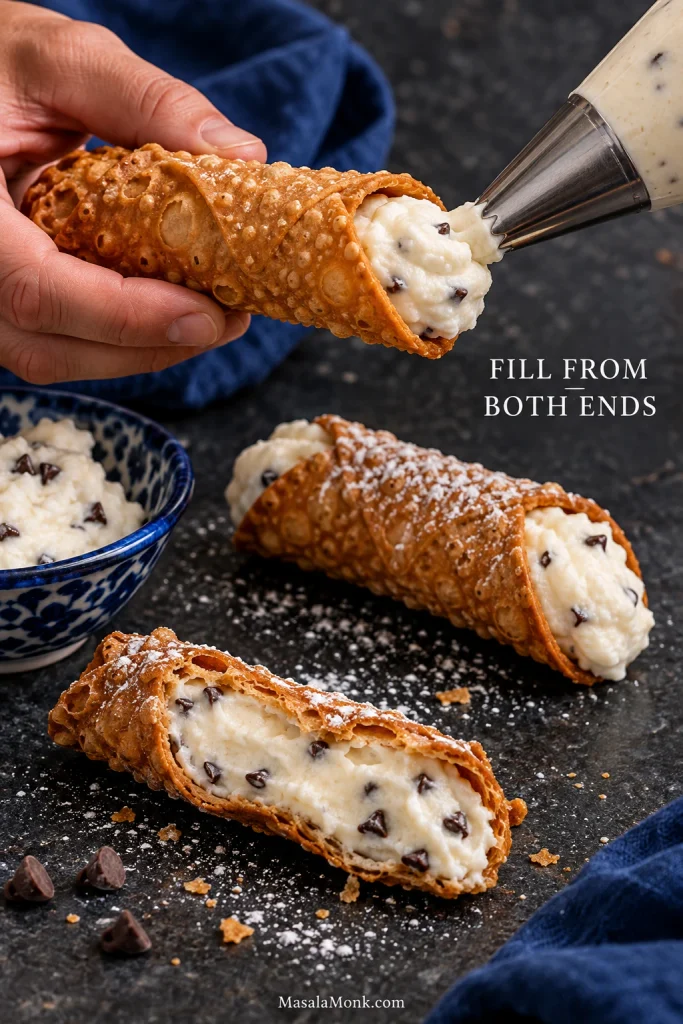
Hand piping ricotta cream deep into one end of a cannoli shell, demonstrating filling from both sides toward the centre.
Piping from both sides turns an invisible centre into two shorter passes, making an even fill easier to judge without overpacking the ends.

With mini chocolate chips in the cream, use an opening around ½ inch / 12–13 mm so the pieces can pass cleanly. A sturdy zip-top freezer bag with one corner snipped off also works when you do not have a pastry bag.

The payoff for all that moisture control is the contrast: cold ricotta cream inside a shell that still fractures when you bite it.
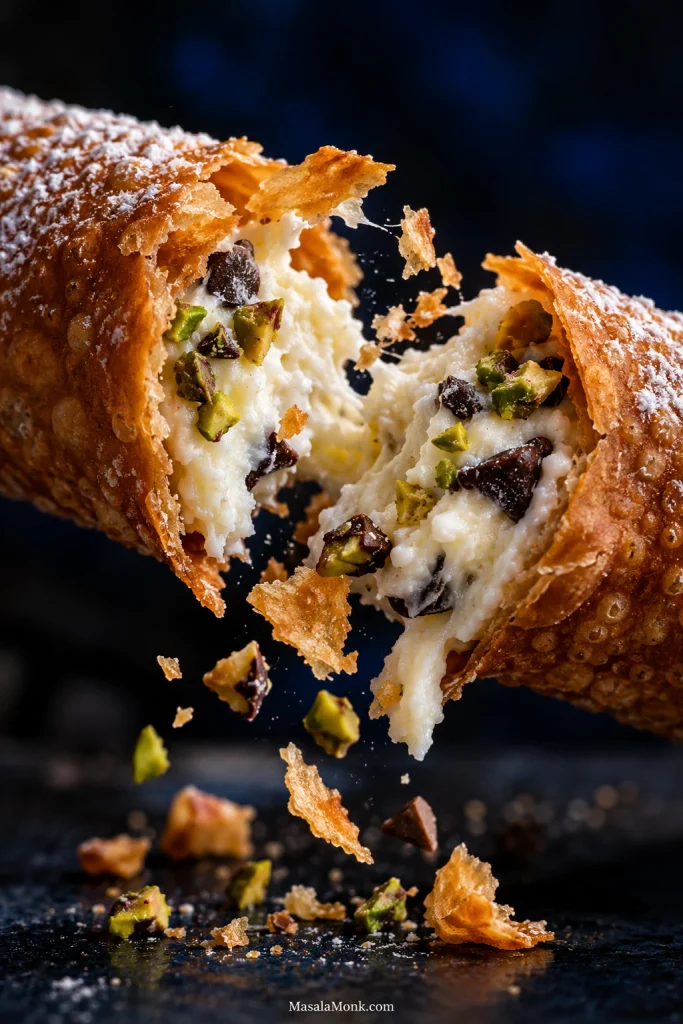
Cannolo breaking open with brittle shell flakes and shards around the fracture, exposing thick white ricotta cream inside.
The fracture is a useful quality cue: a cannoli shell that still breaks into dry, brittle flakes has retained the texture you worked for. Once that clean snap begins disappearing, moisture has already started changing the pastry.

For homemade shells, dough thickness, frying temperature, the first-shell test and complete assembly, return to the full MasalaMonk cannoli recipe.

Make the Filling Ahead. Fill the Shells Late.

For the crispest shell, fill cannoli as close to serving as practical. The ricotta cream can be prepared earlier; the shells are better kept dry and empty.

Once the cream touches the fried pastry, moisture begins moving into the shell. How quickly it softens depends on the shell, humidity and the filling itself.

For a Party

Day before: make the cream, cover it well and refrigerate it.

Before serving: prepare chocolate, pistachios, candied citrus or other garnishes. Keep the shells dry in an airtight container.

Final hour: fill from both ends, garnish and serve. The closer to serving you fill them, the crisper the shells will be.
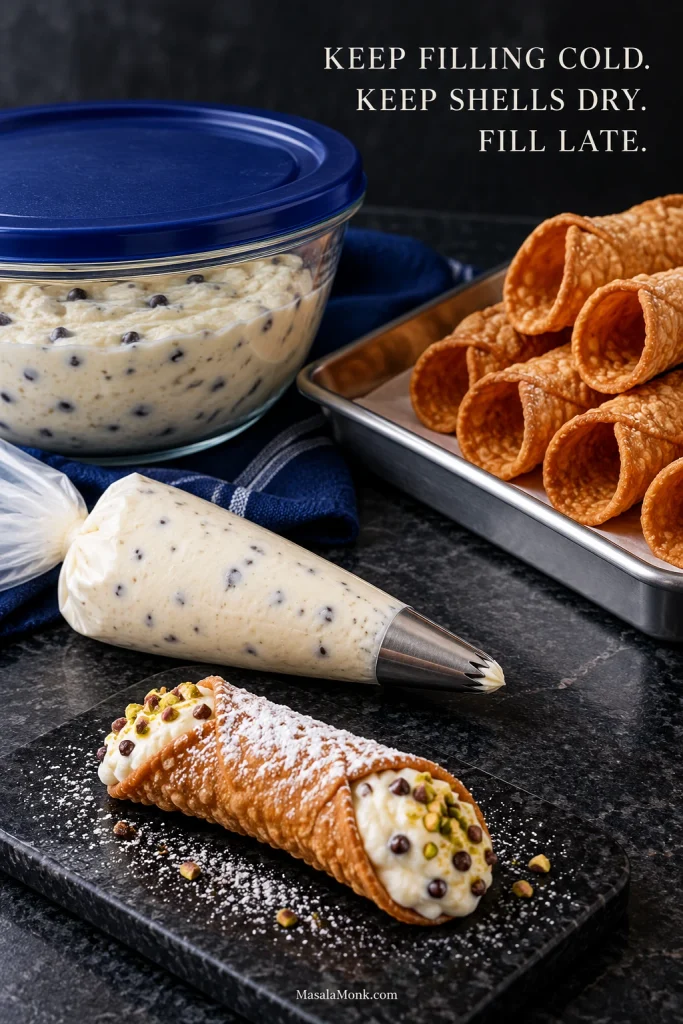
Container of chilled ricotta filling beside dry empty cannoli shells, a filled piping bag and one finished cannolo.
For make-ahead cannoli, the countdown starts when cream meets pastry. Before that, chilled filling and dry shells can wait separately without sacrificing crispness.

A Chocolate Barrier Buys Time

A thin coating of melted chocolate inside the shell slows the movement of moisture from the cream into the pastry. It helps, but it does not make an overnight-filled cannoli taste freshly assembled.
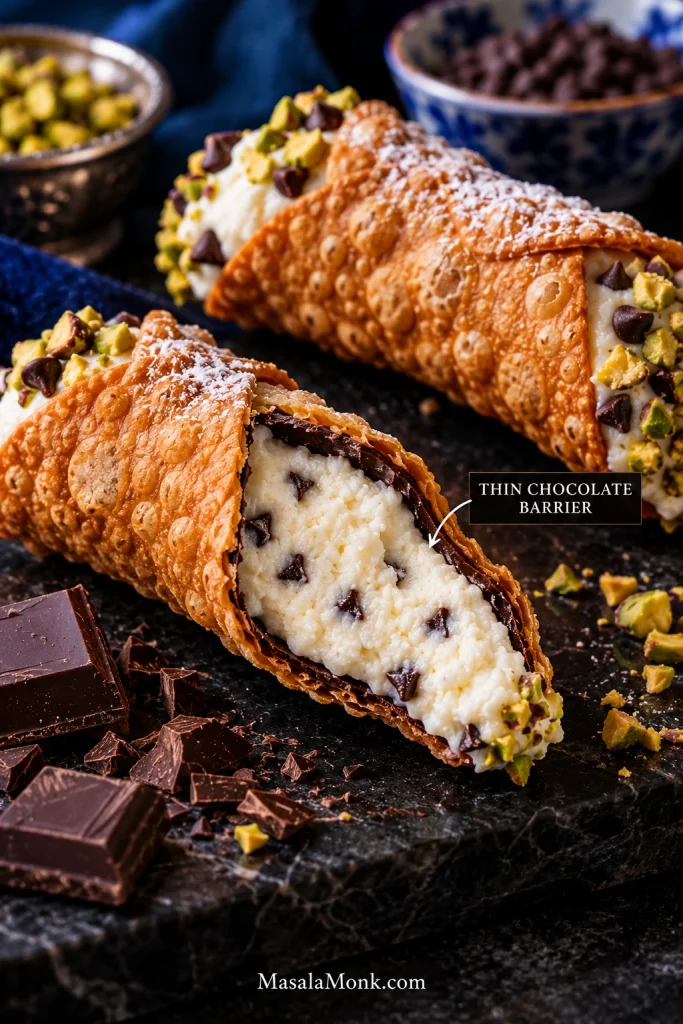
Cutaway cannolo showing a thin dark chocolate coating between the fried shell and the white ricotta filling.
A chocolate lining is a delay layer, not a storage solution: it slows moisture transfer where it separates ricotta from shell, but cannot stop softening indefinitely.

How Long the Filling Keeps

For the best flavour and texture, use cannoli filling within 1–2 days. If it has been kept continuously refrigerated at 4°C / 40°F or colder, plan to use it within about 3 days rather than stretching storage longer.

Follow FoodSafety.gov’s refrigeration guidance for fresh dairy: return perishable food to refrigeration within 2 hours, or within 1 hour when the surrounding temperature is above 32°C / 90°F.

Filling that has spent too long outside safe refrigeration should be discarded even if it still looks normal.

Freezing Changes the Texture

Cannoli filling can be frozen, although thawing usually hurts the texture. Ricotta may become grainier or release water, so refrigeration is the better choice when the finished cream matters.

Keep the filling cold. Keep the shells dry. Fill them late. The crisp shell can take it from there.
Posted on — Leave a comment

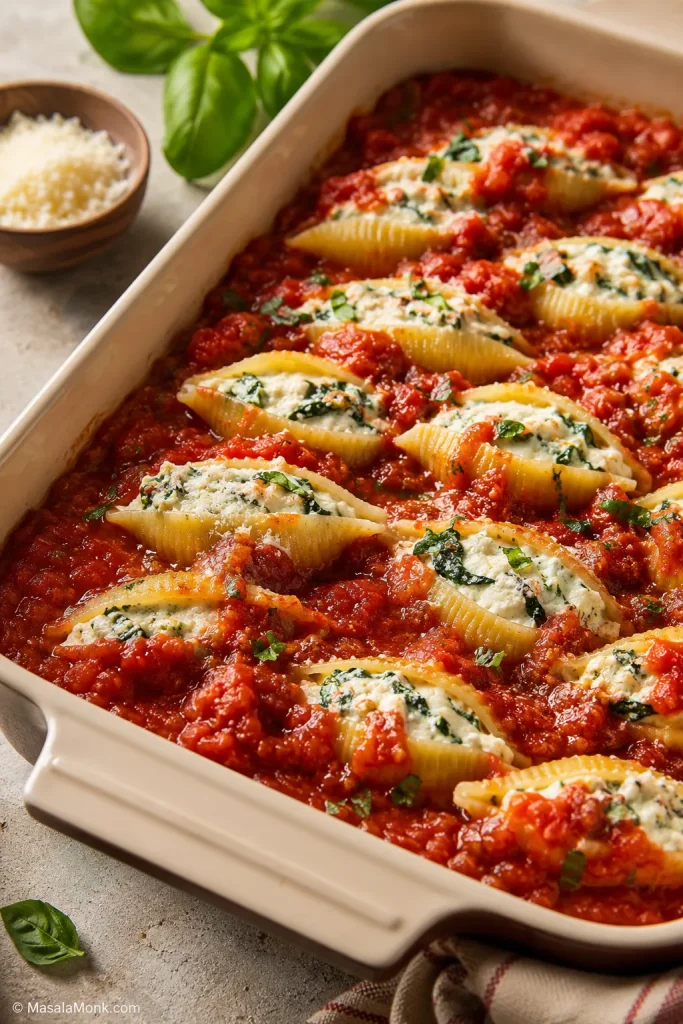
Stuffed Shells Recipe: Easy Baked Ricotta Pasta Shells

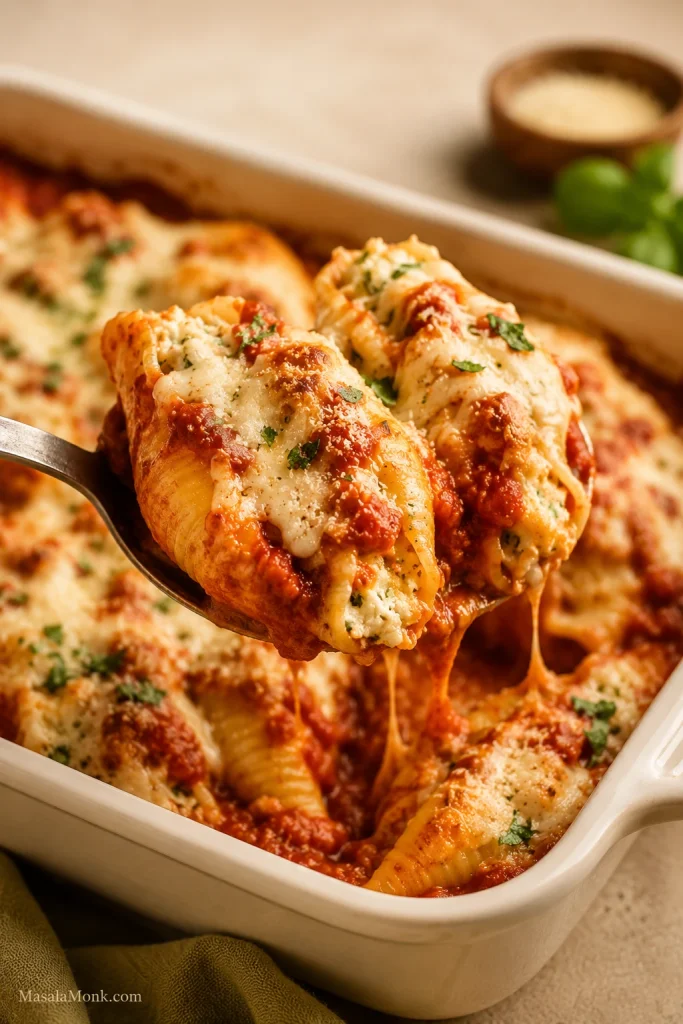
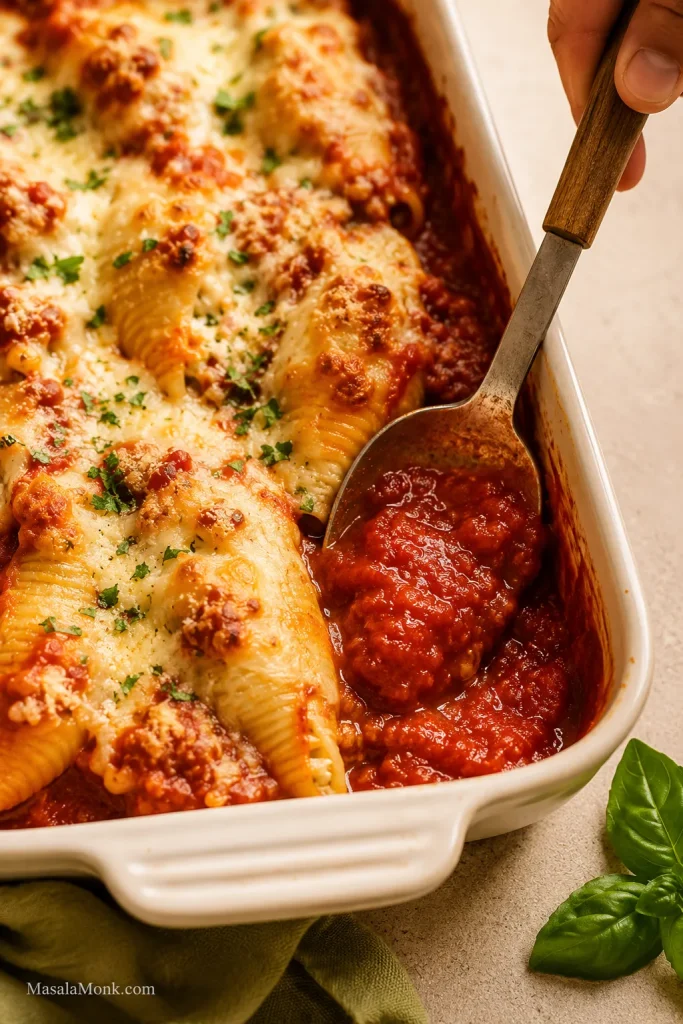
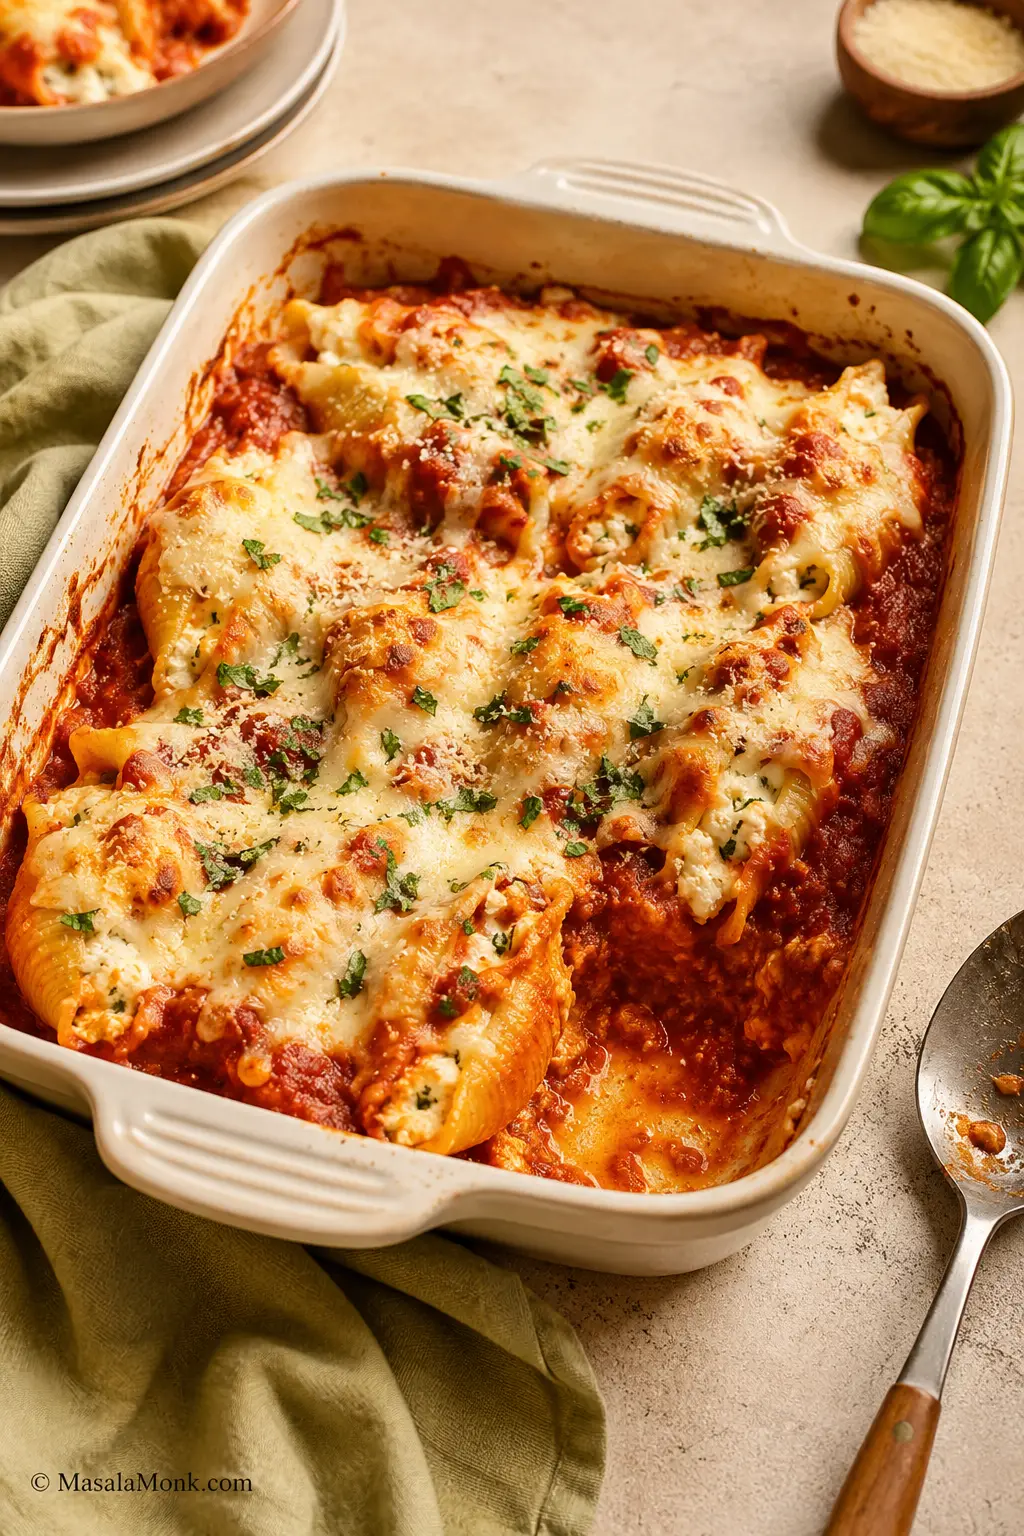
Baked ricotta stuffed shells with marinara sauce and melted mozzarella in a cream baking dish.

Stuffed shells are the kind of baked pasta that makes the table feel full before anyone even sits down: tender jumbo shells, creamy ricotta filling, tomato sauce bubbling around the edges, and mozzarella melted over the top. They give you lasagna-level comfort without all the layering, and the recipe is much more forgiving than it looks.

This version is built to avoid the usual stuffed shell problems: loose ricotta filling, dry pasta edges, shells that turn mushy after baking, and a tray that looks good on top but tastes flat in the middle. Think of it as the no-dry-shell method: thick filling, enough sauce, a covered bake first, and tender shells all the way through.

It fits one classic 9×13-inch baking dish: about 20–24 filled jumbo shells, a seasoned ricotta-mozzarella filling, marinara under and over the pasta, and mozzarella melted on top. A few shells may tear while boiling. The first few you fill may look messy. That is normal. Once everything is tucked into sauce and baked until bubbling, nobody at the table can tell which ones were imperfect.

Stuffed Shells at a Glance

No long planning needed. Here is the quick version before you start.

  • Start with a 12 oz / 340g box of jumbo pasta shells, or enough to cook 28–30 shells.
  • Aim to fill about 24 shells. If your shells are very large, you may fit closer to 20–22 in the baking dish.
  • Mix 15–16 oz / 425–454g ricotta with mozzarella, parmesan, egg, garlic, herbs, salt, and pepper.
  • Use about 3 cups / 720ml marinara sauce, with sauce under and over the shells.
  • Bake at 375°F / 190°C for 25 minutes covered, then 8–10 minutes uncovered.
  • Rest for 5–10 minutes before serving so the filling settles and the shells lift more cleanly.

Boil, fill, sauce, cover, bake, rest — that is the whole recipe. This is also a good one to save because the base method stays the same even when the filling changes.

Quick answers: Yes, you boil the shells first for this version. Use about 3 cups sauce for one 9×13-inch baking dish. Egg helps the filling set, but you can skip it if you prefer a softer filling. Stuffed shells freeze best before baking.

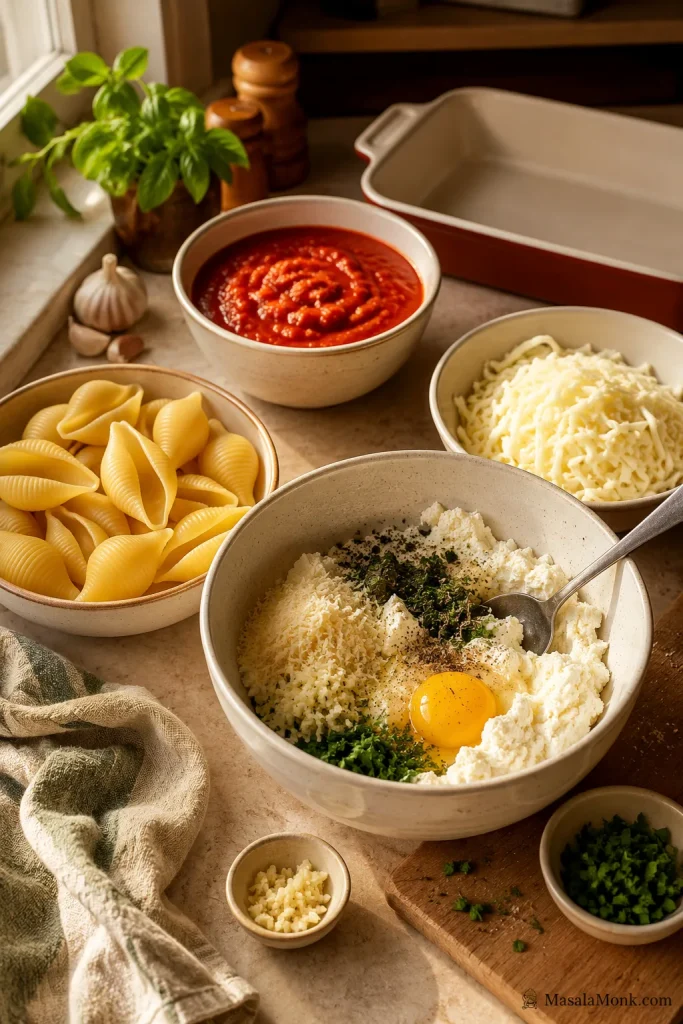
Jumbo pasta shells, ricotta, marinara sauce, mozzarella, parmesan, egg, garlic, herbs, and a baking dish on a kitchen counter.
Start with the essentials: jumbo shells, thick ricotta filling, marinara, mozzarella, parmesan, egg, garlic, and herbs.

Why This Stuffed Shells Recipe Works

This method is built around four small choices that make the biggest difference: undercook the shells slightly, keep the ricotta filling thick, use sauce under and over the pasta, and bake covered before browning the cheese.

  • Shells stay tender. Boiling them just shy of al dente keeps them flexible enough to fill, but firm enough to finish in the oven.
  • Filling stays creamy, not runny. Ricotta gives body, mozzarella gives melt, parmesan adds savory depth, and egg helps everything set.
  • Sauce protects the pasta. Marinara on the bottom keeps the shells from sticking, while sauce over and around the shells prevents dry edges.
  • A covered bake does the work. Foil traps heat and steam so the pasta finishes cooking gently before the cheese browns.
  • Flexibility is built in. Keep it classic, add spinach, stir meat into the sauce, swap in cottage cheese, or freeze a batch for later.

Best of all, the edge of the baking dish tells you dinner is almost ready: sauce bubbling up around the shells, little golden patches of mozzarella, and the smell of garlic, tomato, and browned cheese.

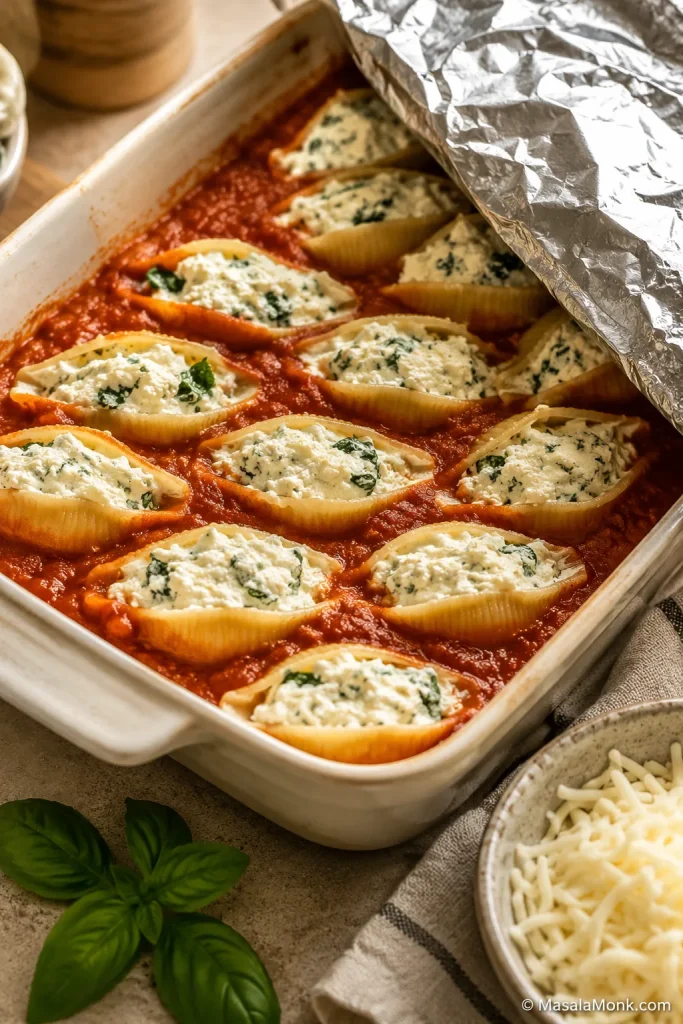
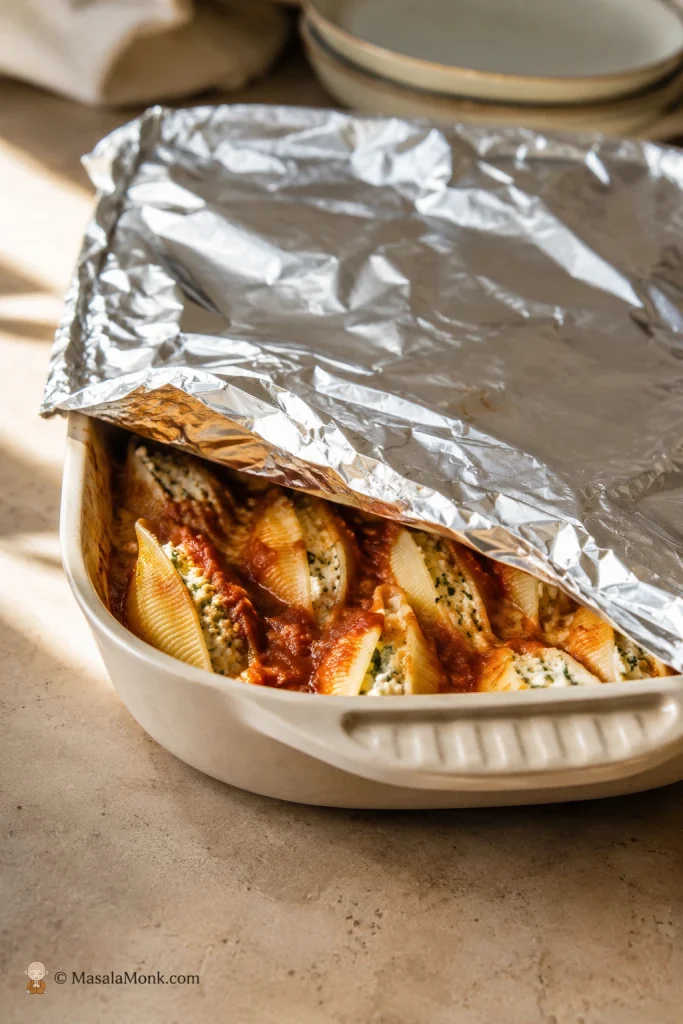
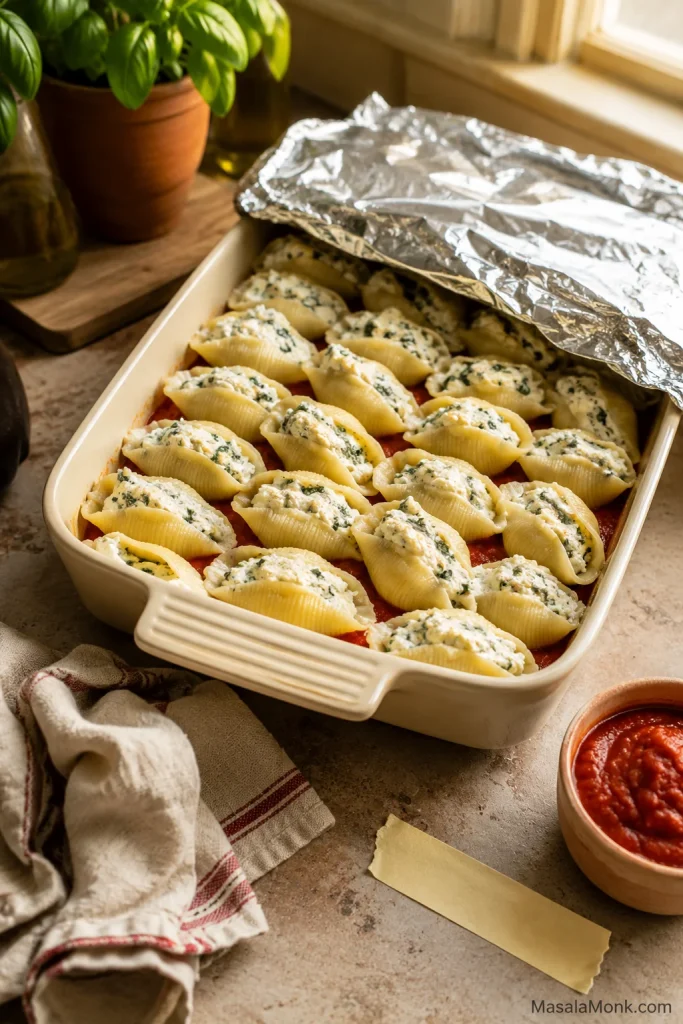
Filled jumbo shells sitting in marinara sauce with foil partly covering the baking dish before baking.
The no-dry-shell method is simple: sauce underneath, sauce around the edges, and foil on top for the first bake.

Ingredients You Need

Stuffed shells do not need complicated ingredients, but they do need the right balance: sturdy shells, thick ricotta filling, enough sauce, and mozzarella that melts without making the pasta watery.

Jumbo Pasta Shells

Choose a 12 oz / 340g box of jumbo pasta shells. These are the large shells made for stuffing, not small shell pasta or macaroni-style shells. Cook 28–30 jumbo shells for one baking dish, or cook the whole box if you like having extra backups.

Some shells will split or fold while boiling, so cook a few extras and move on. The sauce and cheese hide almost everything.

Ricotta Cheese

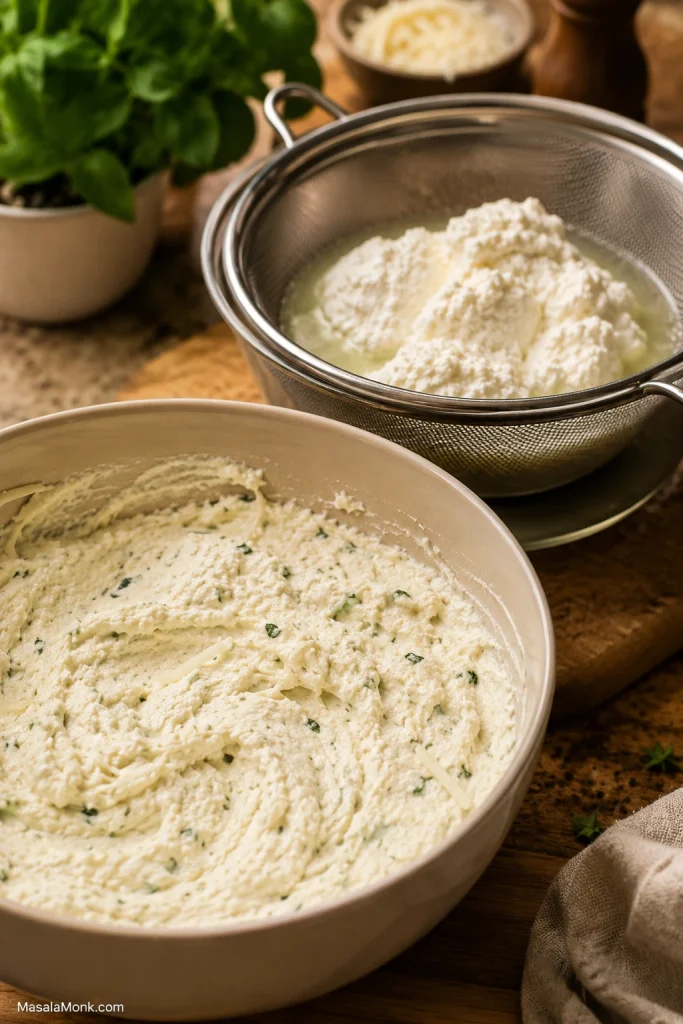
Use 15–16 oz / 425–454g ricotta cheese. Whole milk ricotta gives the creamiest filling. Loose or watery ricotta should be drained for 10–15 minutes in a fine-mesh strainer or on a few layers of paper towel before mixing. For the right texture, the ricotta filling section shows what the mixture should look like before stuffing.

Ricotta draining in a fine-mesh strainer with thick cheese filling nearby.
Loose ricotta should be drained first; thick filling is what prevents watery stuffed shells after baking.

Mozzarella

You need 3 cups shredded low-moisture mozzarella, about 12 oz / 340g, divided between the filling and topping. Low-moisture mozzarella melts into the filling and gives the top a bubbly finish without watering down the pasta. Fresh mozzarella can be used on top in small amounts, but it is softer and wetter.

Parmesan or Pecorino

Use ½ cup / 45–55g grated parmesan or pecorino. Ricotta gives you the creamy center, but parmesan or pecorino is what makes the filling taste seasoned and savory instead of just milky.

Egg

One large egg helps bind the ricotta filling so it holds together after baking. You can skip it, but the filling will be softer. If you leave out the egg, add a little extra parmesan or mozzarella to help the filling hold.

Marinara Sauce

About 3 cups / 720ml marinara sauce gives one baking dish enough sauce for the bottom, top, and edges. A 24 oz / 680g jar is the practical shortcut and usually gives enough sauce for one batch. A good jarred marinara is not a shortcut to apologize for here; stuffed shells are mostly about enough sauce and a well-seasoned filling. If you want to make your own, this homemade marinara sauce gives you a classic base plus spicy, dipping, low-sodium, and sugar-free variations.

Very thick marinara benefits from 2–4 tablespoons of water before baking. If your jar is slightly short or extra thick, loosen it with a splash of water and save a little warm sauce for serving.

Garlic, Herbs, Salt, and Pepper

Ricotta needs seasoning. Garlic, Italian seasoning or fresh herbs, salt, pepper, and optional red pepper flakes make the filling taste like dinner instead of plain cheese. Use ½ teaspoon salt if your parmesan and sauce are already salty. Use closer to ¾ teaspoon if your ricotta is mild and your sauce is lower in salt.

Dried Italian seasoning is the easiest pantry option. Fresh parsley adds brightness, basil gives a sweeter flavor, and oregano gives the filling a stronger Italian-American note. Save fresh basil partly for the top after baking.

Optional Spinach

Either fresh or frozen spinach works; the real rule is to squeeze out as much moisture as possible. Wet spinach can turn a creamy filling loose and watery. For the full version, jump to spinach ricotta stuffed shells.

Optional Meat

The main recipe below is a classic cheese stuffed shells recipe, but cooked ground beef or Italian sausage can make the meal heartier. Brown the meat fully before adding it to the sauce or filling, then drain off excess fat so the pasta does not turn greasy. For the heartier version, see meat stuffed shells.

Tools That Help

You do not need special tools. A large pot, colander, mixing bowl, 9×13-inch / 23×33 cm baking dish, foil, and a spoon or zip-top bag are enough. A zip-top bag with one corner snipped off can make filling the shells faster and neater, but a spoon works perfectly well.

The first few shells are usually the messiest; by the fifth or sixth one, you will know exactly how much filling your shells can hold.

What Pasta Shells Should You Use?

Jumbo pasta shells are the shape you want here. They are large enough to hold ricotta filling and sturdy enough to bake in sauce. Small shells, medium shells, macaroni shells, and regular conchiglie are better for tossing with sauce, not stuffing.

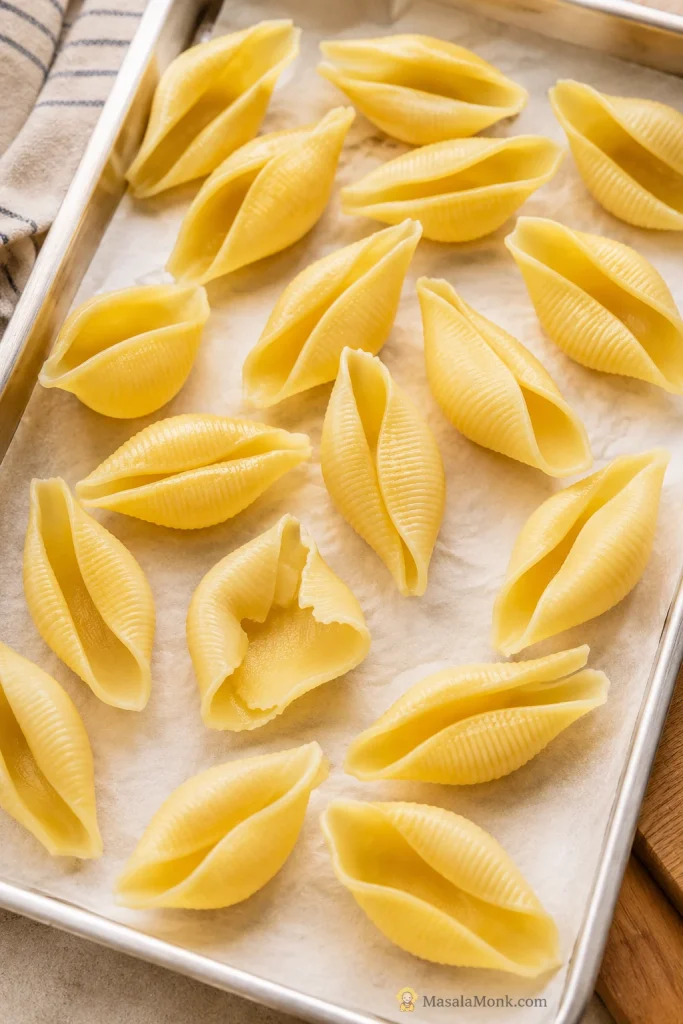
Boil the shells 2–3 minutes shy of al dente. They should be flexible enough to open and fill, but not fully soft. Spread them on a tray to cool; rinse only if they are sticking badly or too hot to handle.

Depending on shell size and your baking dish, you may fit 20–24 filled shells. Aim for 24, but do not force them in. A slightly looser baking dish bakes better than crushed shells.

Cooked jumbo pasta shells spread on a tray with one torn shell visible.
Cook jumbo shells just shy of al dente and boil a few extras, because a torn shell or two is normal when stuffing pasta.

The Best Ricotta Filling for Stuffed Shells

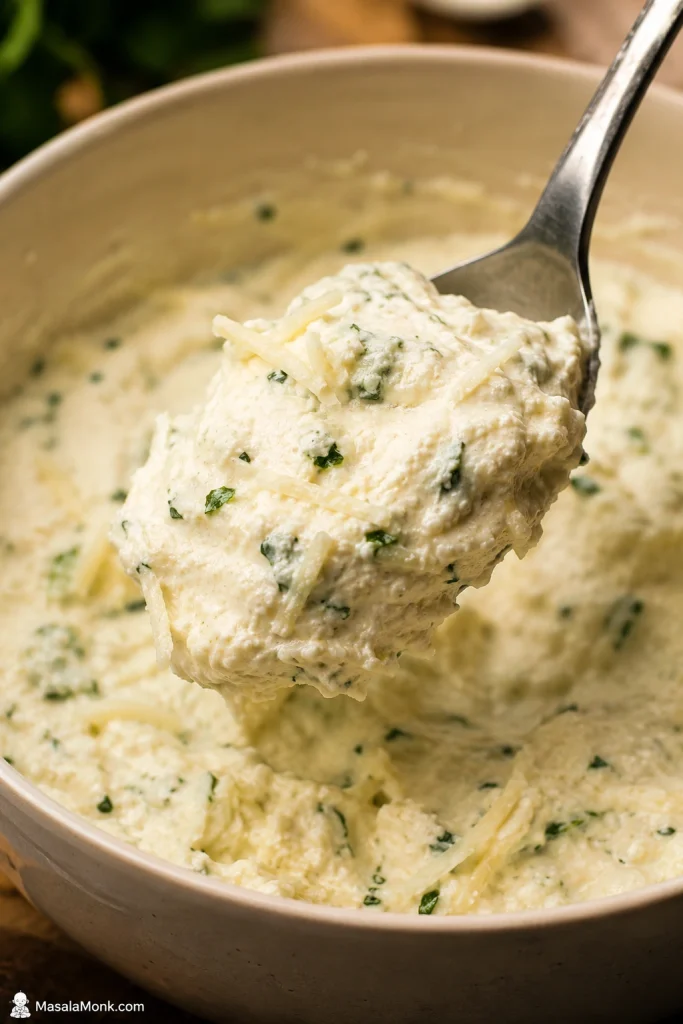
The filling should look thick and scoopable, more like a cheese spread than a sauce. It should mound on a spoon without running off. If it spreads like sauce, it is too wet; if it feels dry or crumbly, a spoonful of ricotta or sauce will loosen it.

A good stuffed shells filling uses ricotta for creaminess, mozzarella for melt, parmesan or pecorino for savory depth, egg for structure, and garlic, herbs, salt, and pepper for flavor. To check the seasoning safely, mix the cheeses, garlic, herbs, salt, and pepper first, taste, then add the egg last.

Thick ricotta cheese filling with herbs mounding on a spoon above a bowl.
A good ricotta filling should mound on a spoon, not drip, so it stays creamy inside each pasta shell.

Save This Stuffed Shells Filling Ratio

For one 9×13-inch baking dish, use:

  • 15–16 oz / 425–454g ricotta
  • 2 cups / about 225g mozzarella inside the filling
  • ½ cup / 45–55g parmesan or pecorino
  • 1 large egg
  • 1–2 garlic cloves
  • Herbs, salt, and pepper
  • 1 cup / about 115g mozzarella for the top

Once the filling looks thick and scoopable, you are in good shape.

How Much Sauce Do Stuffed Shells Need?

Use about 3 cups / 720ml marinara for one 9×13-inch baking dish. The shells should sit in sauce and have sauce spooned over and around them, but they do not need to be buried.

  • 1 cup / 240ml goes on the bottom of the baking dish
  • 1½–2 cups / 360–480ml goes over and around the filled shells
  • Extra warm sauce can be served on the side if you like a saucier plate

Before baking, you should still see the shape of each shell, but the edges should be surrounded by sauce.

Filled stuffed shells in a baking dish with marinara sauce spooned around and between them.
The shells should stay visible, but the edges need enough marinara to finish tender instead of drying out.

How to Make Stuffed Shells

With the shells, filling, and sauce sorted, assembly is simple: sauce, filled shells, more sauce, cheese, foil, and oven. While the shells boil, mix the filling and spread sauce in the baking dish. By the time the shells are cool enough to handle, the filling and baking dish are ready.

1. Boil the shells

Bring a large pot of salted water to a boil. Add the jumbo shells and cook them 2–3 minutes less than the package says for al dente. Drain and let them cool until they are easy to handle.

2. Make the ricotta filling

In a large bowl, mix ricotta, 2 cups mozzarella, parmesan, egg, garlic, herbs, salt, pepper, and optional red pepper flakes. The filling should be creamy but thick enough to hold its shape on a spoon.

3. Add sauce to the baking dish

Spread about 1 cup of marinara sauce across the bottom of a 9×13-inch / 23×33 cm baking dish. This layer keeps the shells from sticking and protects the bottom of the pasta.

4. Fill the shells

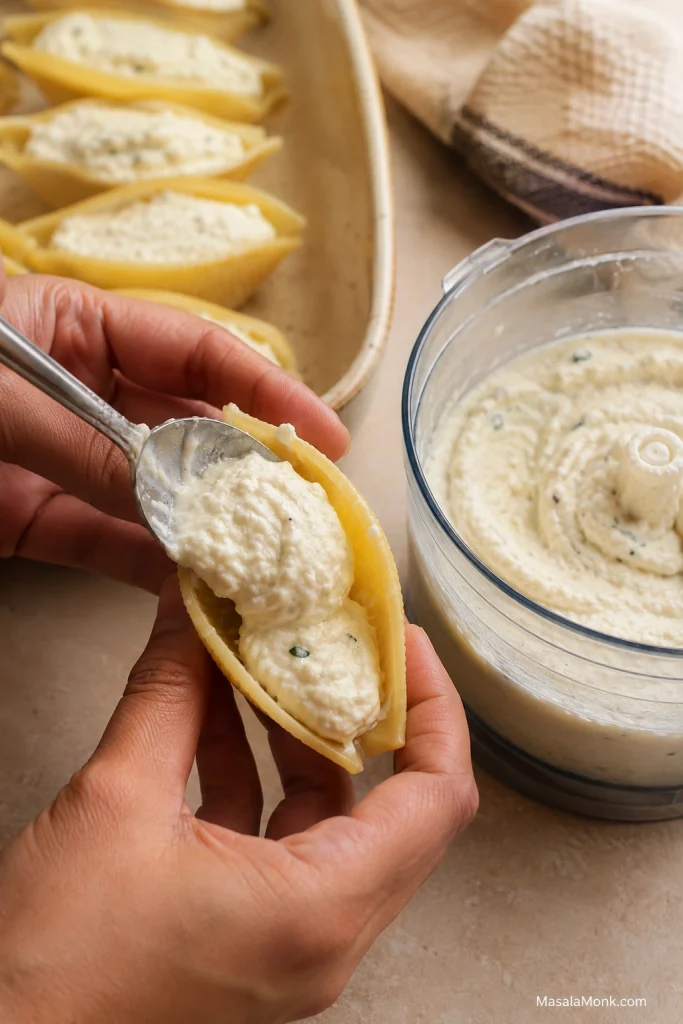
Fill each shell with about 1½–2 tablespoons / about 30g of ricotta filling, depending on shell size. Use a spoon, piping bag, or zip-top bag. Fill generously, but not so much that the shells split. Do not worry if a little filling shows or the shells sit at slightly different angles.

A hand filling a jumbo pasta shell with ricotta mixture using a spoon.
Fill each shell generously, then stop before the pasta stretches or splits around the ricotta filling.

5. Arrange and sauce

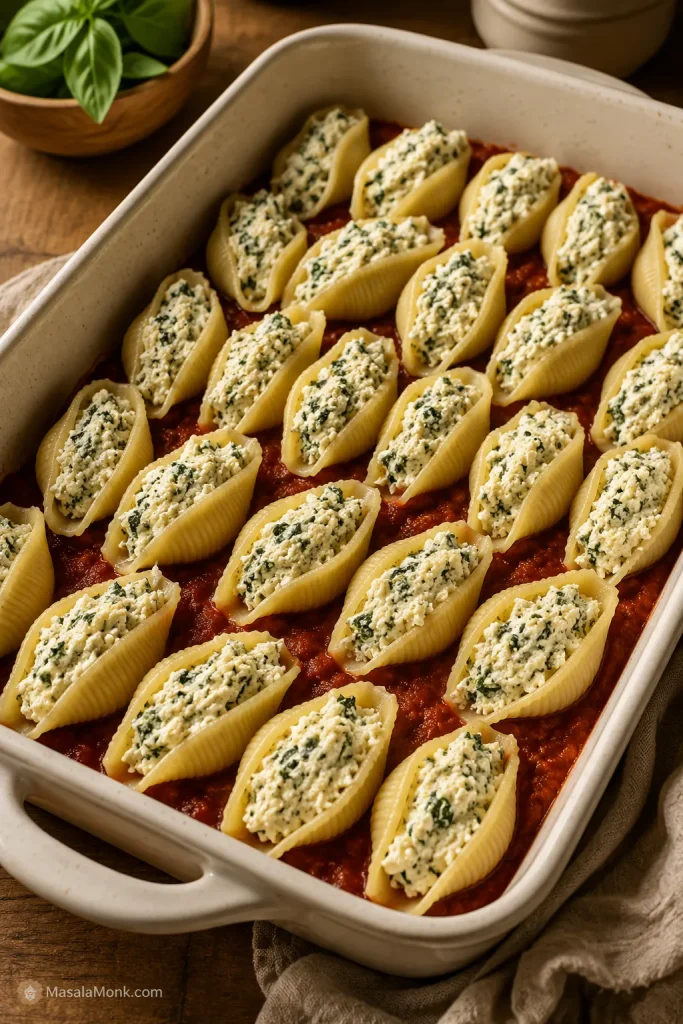
Place the filled shells in the baking dish, filling-side up. Spoon the remaining sauce over and around the shells. You want the pasta to look full and well-coated, not dry or sparse.

Ricotta-filled jumbo shells arranged in marinara sauce in a baking dish before baking.
Once the filled shells sit in sauce, cover the dish so the pasta can finish baking gently and evenly.

6. Bake covered, then uncovered

Cover the baking dish with foil without pressing it into the shells. If the foil may touch the sauce or cheese, place a sheet of parchment under the foil or tent the foil slightly. Bake at 375°F / 190°C for 25 minutes.

Stuffed shells in a baking dish loosely covered with foil before baking.
Foil traps steam during the first bake, which helps stuffed pasta shells stay soft and tender.

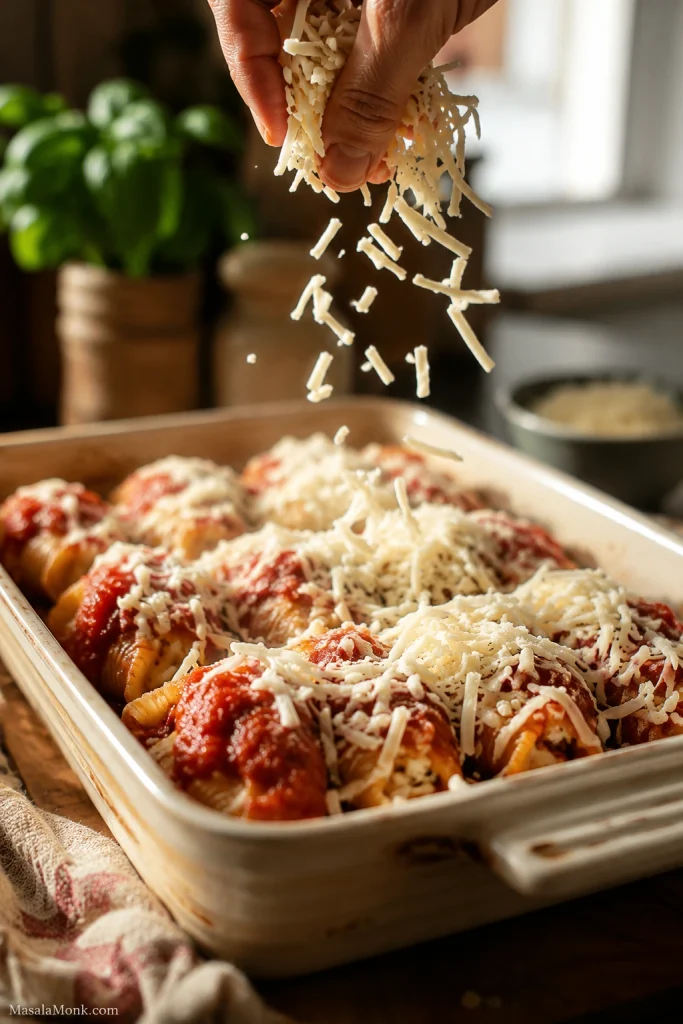
Remove the foil, sprinkle the remaining mozzarella over the top, and bake for another 8–10 minutes, until the cheese is melted and the sauce is bubbling. The uncovered bake is where the top gets those golden spots.

Shredded mozzarella being sprinkled over sauced stuffed shells in a baking dish.
Add mozzarella after the covered bake, then uncover the dish so the cheese melts and lightly browns.

7. Rest before serving

Let the stuffed shells rest for 5–10 minutes before serving. This is the hardest part because it smells ready, but the short rest makes serving much cleaner. After resting, the shells should lift from the baking dish without spilling all their filling.

Rested stuffed shells being lifted from a baking dish with sauce and melted cheese.
Rest baked stuffed shells before serving so the filling settles and each shell lifts cleanly from the sauce.

How to Know When Stuffed Shells Are Done

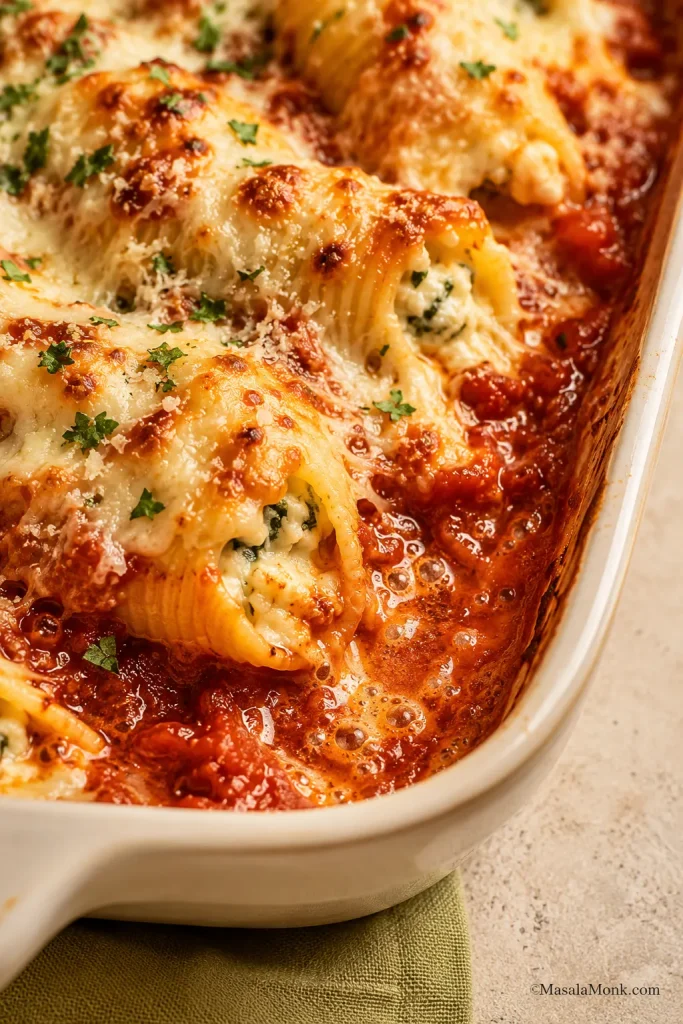
The stuffed shells are done when the sauce is bubbling around the edges, the cheese is melted and lightly browned in spots, and the filling is hot in the center. The best bite is fork-tender pasta, thick ricotta filling, tangy tomato sauce, and a little golden mozzarella from the top.

Close-up of baked stuffed shells with bubbling marinara sauce and browned mozzarella at the edge of the baking dish.
Check the edge of the baking dish: bubbling sauce and melted cheese mean the shells are hot through the center.

If the top cheese browns before the center is hot, cover the pasta loosely with foil again and keep baking until the filling is hot through the middle.

Stuffed Shells Recipe

This is the full classic version: jumbo shells filled with seasoned ricotta, tucked into marinara, covered until tender, then finished uncovered so the mozzarella melts into golden spots.

  • Yield:
    6 servings
  • Prep time:
    30 minutes
  • Cook time:
    35 minutes
  • Total time:
    1 hour 5 minutes
  • Oven temperature:
    375°F / 190°C
  • Baking dish:
    9×13-inch / 23×33 cm

Ingredients

  • 12 oz / 340g jumbo pasta shells, or enough to cook 28–30 shells
  • 3 cups / about 720ml marinara sauce, or one 24 oz / 680g jar, divided
  • 15–16 oz / 425–454g ricotta cheese
  • 3 cups shredded low-moisture mozzarella, about 12 oz / 340g, divided
  • ½ cup / 45–55g grated parmesan or pecorino
  • 1 large egg
  • 1–2 garlic cloves, minced or grated
  • 1 tsp dried Italian seasoning, or 2–3 tbsp chopped fresh parsley or basil
  • ½–¾ tsp salt, plus more for pasta water
  • ¼–½ tsp black pepper
  • Pinch of red pepper flakes, optional
  • A few drops of olive oil, only if needed to keep cooked shells from sticking

Instructions

  1. Heat the oven. Preheat the oven to 375°F / 190°C.
  2. Cook the shells. Bring a large pot of salted water to a boil. Add 28–30 jumbo shells and cook 2–3 minutes less than the package directions for al dente. Drain and let cool until easy to handle. If the shells start sticking, spread them on a tray or toss with only a few drops of olive oil.
  3. Make the filling. In a large bowl, combine ricotta, 2 cups mozzarella, parmesan, garlic, Italian seasoning or herbs, salt, pepper, and red pepper flakes if using. Taste the cheese mixture before adding the egg, then mix in the egg last.
  4. Prepare the baking dish. Spread about 1 cup of marinara sauce over the bottom of a 9×13-inch / 23×33 cm baking dish.
  5. Fill the shells. Spoon about 1½–2 tablespoons / about 30g filling into each shell. Arrange the filled shells in the dish, filling-side up. Aim for 24 filled shells; if your shells are very large, 20–22 may fit better.
  6. Add sauce. Spoon the remaining marinara sauce over and around the shells. Cover the baking dish tightly with foil, tenting it slightly so it does not press into the cheese or filling.
  7. Bake covered. Bake for 25 minutes, until the shells are hot and the sauce is bubbling around the edges.
  8. Finish uncovered. Remove the foil, sprinkle the remaining 1 cup mozzarella over the top, and bake uncovered for 8–10 minutes, until the cheese is melted and lightly browned in spots.
  9. Rest and serve. Let the stuffed shells rest for 5–10 minutes before serving. Serve with extra warm marinara if you like a saucier plate.

Recipe Notes

  • Softer top cheese: Add all the mozzarella before covering and baking if you want a fully melted top.
  • Stretchier browned top: Save the final cup of mozzarella and add it after the covered bake.
  • Spinach shells: Add 5 oz / 140g cooked fresh spinach or 8 oz / 225–250g thawed frozen spinach, squeezed very dry.
  • Meat sauce version: Add ½–1 lb / 225–450g cooked ground beef or Italian sausage to the sauce, and increase sauce by ½–1 cup if the pasta looks dry.
  • Cottage cheese swap: Blend cottage cheese briefly for a smoother filling and drain it first if it looks watery.

Small Details That Make Better Stuffed Shells

  • Cook 28–30 shells. You need backups for the ones that tear.
  • Drain watery ricotta. Loose ricotta makes the filling run instead of mound.
  • Taste before adding egg. It is easier to fix bland filling before the egg goes in.
  • Loosen very thick marinara. A few tablespoons of water help the sauce move around the shells.
  • Cover first. The pasta finishes cooking in the sauce before the cheese browns.
  • Rest before serving. The filling firms slightly as it sits.

Make-Ahead, Freezer, and Reheating Instructions

Stuffed shells are one of the best baked pasta dinners to prepare ahead. The shells, filling, sauce, and cheese all hold up well, and a freezer batch feels like a future dinner already handled. This is also a good place to make two baking dishes: bake one tonight and freeze the second before baking.

Best Make-Ahead Option

Assemble the stuffed shells up to 24 hours ahead. Fill the shells, arrange them in sauce, cover tightly, and refrigerate. Let them sit at room temperature only while the oven preheats, about 20–30 minutes. If baking straight from the fridge, add 5–10 minutes to the covered baking time.

Unbaked stuffed shells in a baking dish partly covered with foil, with sauce nearby.
Stuffed shells are ideal for make-ahead dinners because you can refrigerate or freeze them before baking.

Best Freezer Option

Freeze stuffed shells before baking. Assemble the shells in a freezer-safe baking dish, cover tightly with plastic wrap and foil or a freezer-safe lid, and freeze for up to 2–3 months for best quality.

If you froze the shells in a glass or ceramic baking dish, thaw them overnight unless the dish is labeled freezer-to-oven safe. That helps prevent sudden temperature shock. You can also freeze the filled shells separately and transfer them to an oven-safe dish with sauce before baking.

Best Small-Batch Freezer Option

Freeze filled shells on a tray until firm, then transfer them to a freezer-safe bag or container. Later, place only the number of shells you need into a baking dish with sauce and cheese. This is useful when you want 2–4 servings instead of a full batch.

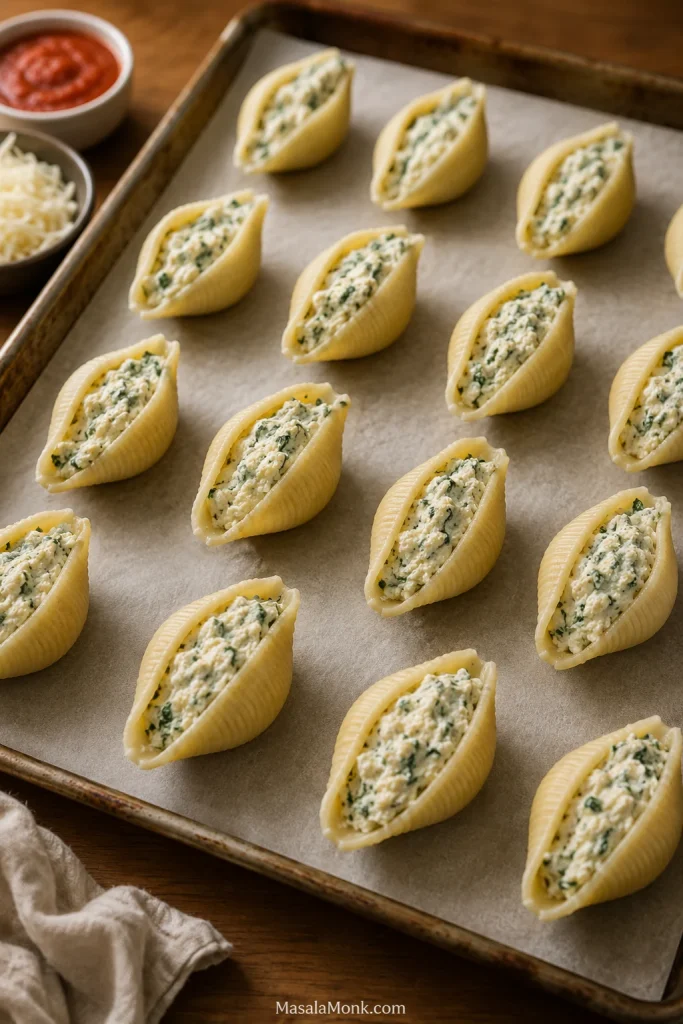
Ricotta-filled jumbo pasta shells spaced apart on a parchment-lined tray before freezing.
Freeze stuffed shells in a single layer first so they do not stick together; once firm, you can transfer them for easy small-batch freezer meals later.

Best Texture After Freezing

For the best texture, thaw frozen stuffed shells overnight in the refrigerator before baking. Before baking, remove any plastic wrap and cover the baking dish again with foil. Bake as directed, adding 5–10 extra minutes if the pasta is still cold.

How to Bake Frozen Stuffed Shells

To bake from frozen, cover the baking dish with foil and bake at 350°F / 175°C for about 60–75 minutes, or until the center is steaming hot. Uncover, add cheese if needed, and bake 10–15 minutes more until bubbling and melted.

How to Store Leftovers

Store leftover stuffed shells in an airtight container in the refrigerator for 3–4 days. A 3–4 day refrigerator window is also the general USDA guidance for cooked leftovers, so it is a good limit to use here.

How to Reheat Stuffed Shells

Reheat covered in the oven at 350°F / 175°C until hot, or microwave individual portions. Add a spoonful of extra sauce or a small splash of water before reheating so the pasta does not dry out.

Leftover Ideas

Leftover stuffed shells are best reheated with extra sauce, but you can also chop them into smaller pieces and reheat them like baked pasta. Add fresh herbs, parmesan, or a little extra marinara to wake the flavor back up. This is the sort of dinner that makes leftovers feel like a reward.

Stuffed Shells Variations

Think of the recipe card as the house version. The variations are how you adjust the pasta for the people eating it — greener for spinach lovers, meatier for Sunday dinner, lighter with cottage cheese, or richer with Alfredo.

Which Stuffed Shells Variation Should You Make?

Spinach Ricotta Stuffed Shells

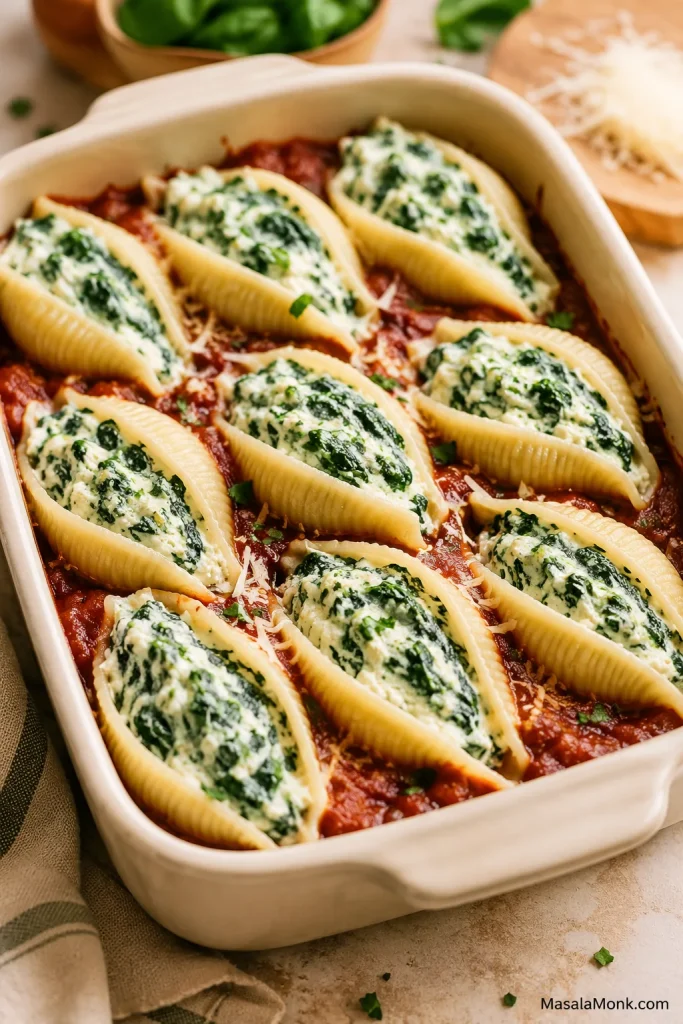
Add spinach to the ricotta filling for a classic spinach stuffed shells variation. Fresh spinach and frozen spinach both work, but the spinach needs to be cooked, chopped, and squeezed very dry before it goes into the filling. Use about 5 oz / 140g fresh spinach or 8 oz / 225–250g frozen spinach.

Spinach ricotta stuffed shells arranged in marinara sauce in a cream baking dish.
For spinach ricotta stuffed shells, squeeze the spinach dry so the filling stays creamy instead of watery.

Beef Stuffed Shells

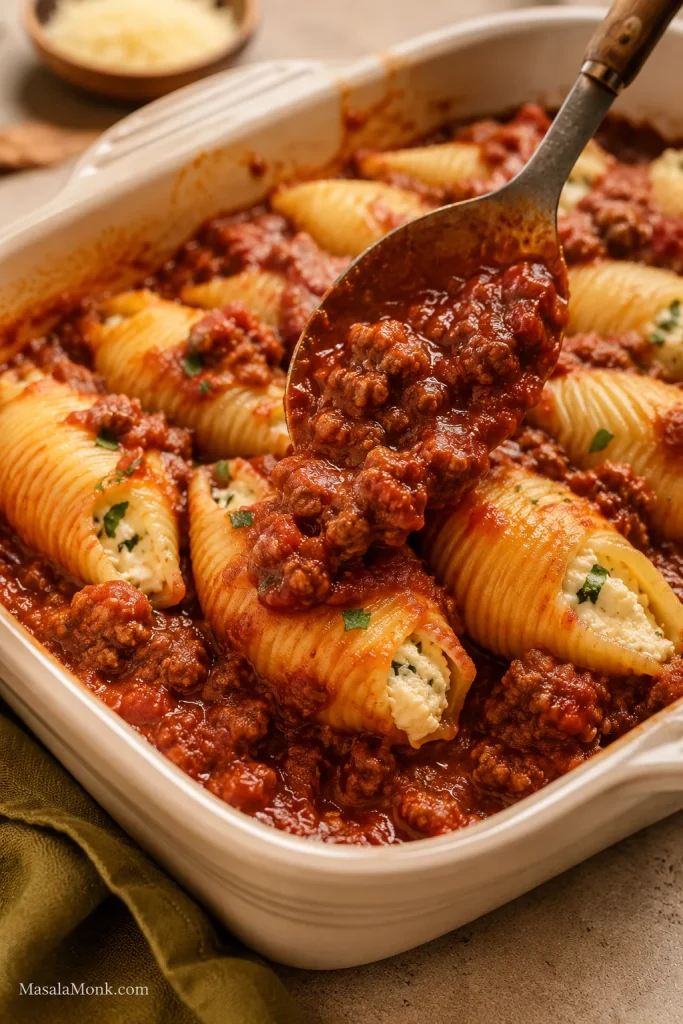
For the cleanest shells, keep the ricotta filling mostly cheese-based and put the browned meat in the sauce. That gives every bite a hearty meat sauce without making the shells heavy or hard to close. Brown ½–1 lb / 225–450g ground beef with a little salt, pepper, garlic, and Italian seasoning, then drain excess fat before adding it to the marinara.

Sausage Stuffed Shells

Italian sausage brings more seasoning than ground beef, so it is the easiest way to make the sauce taste deeper. Remove it from the casing if needed, brown it well, and drain any excess fat. Sausage brings more salt and spice than plain ground beef, so taste before adding extra seasoning.

Ricotta stuffed shells with chunky beef or sausage marinara sauce spooned around them.
For meat stuffed shells, keep the cheese inside the pasta and stir browned beef or sausage into the marinara.

Cottage Cheese Stuffed Shells

Cottage cheese is the easiest ricotta swap and a good option if you want a lighter, higher-protein filling. Replace ricotta 1:1 by weight, drain it if watery, and blend it briefly for a smoother texture. The flavor is a little tangier and less classic than ricotta, but it bakes up creamy when mixed with mozzarella, parmesan, egg, garlic, and herbs.

Stuffed Shells Without Ricotta

If you do not have ricotta, use cottage cheese, a mix of cream cheese and mozzarella, a meat filling, roasted vegetables, or tofu ricotta for a dairy-free version. This helps if you dislike ricotta or simply do not have it. The recipe can still work well as long as the filling is thick and not watery.

A jumbo pasta shell being filled with smooth blended cottage cheese mixture.
For stuffed shells without ricotta, blend cottage cheese until smooth so the filling holds its shape inside the pasta.

Alfredo Stuffed Shells

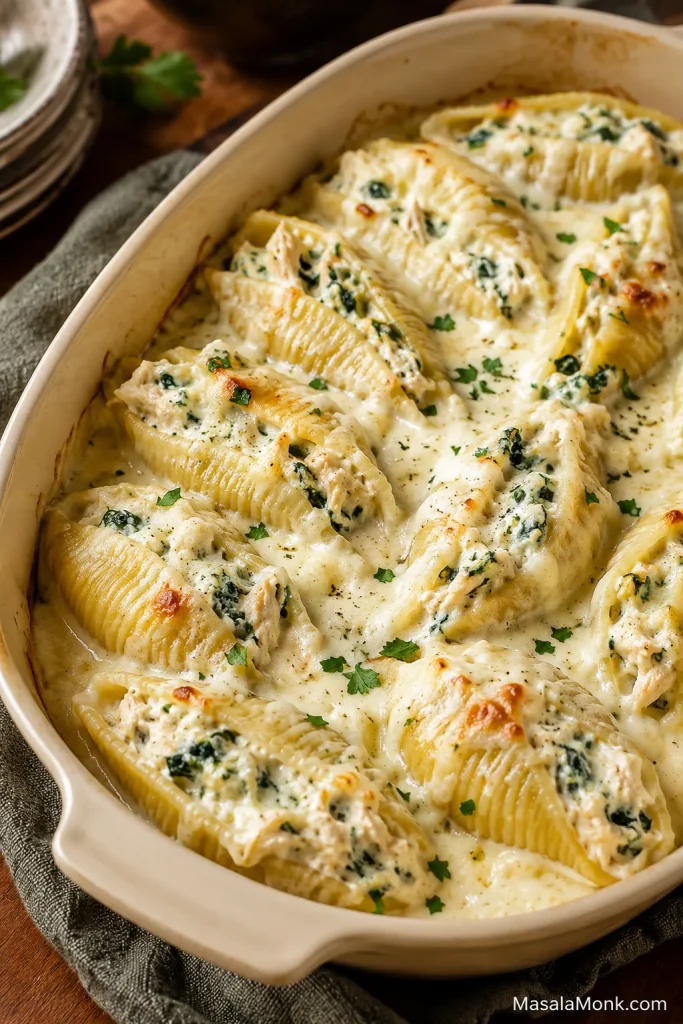
For a creamy white-sauce version, use Alfredo sauce instead of marinara. Because Alfredo is rich, spinach or chicken works especially well here. For more creamy pasta dinner ideas, see this chicken Alfredo pasta guide.

Alfredo stuffed shells with creamy white sauce, spinach, and melted mozzarella in a baking dish.
Alfredo stuffed shells are the creamy white-sauce variation to choose when you want spinach, chicken, or a richer pasta bake.

No-Boil Stuffed Shells

No-boil stuffed shells can work, but they need a different sauce ratio and a longer covered bake. This recipe is written for boiled shells because it gives the most predictable texture: shells that are flexible enough to fill, tender after baking, and less likely to stay firm in the center. If you want a true no-boil version, increase the sauce or liquid and keep the dish tightly covered until the pasta is fully tender.

Serving and Scaling

How Many Stuffed Shells Per Person?

Plan on 3–4 stuffed shells per adult if serving with salad, bread, or vegetables. Plan on 4–5 shells per person for a heartier main dish with fewer sides. A 9×13-inch baking dish with about 20–24 stuffed shells serves 6 people generously.

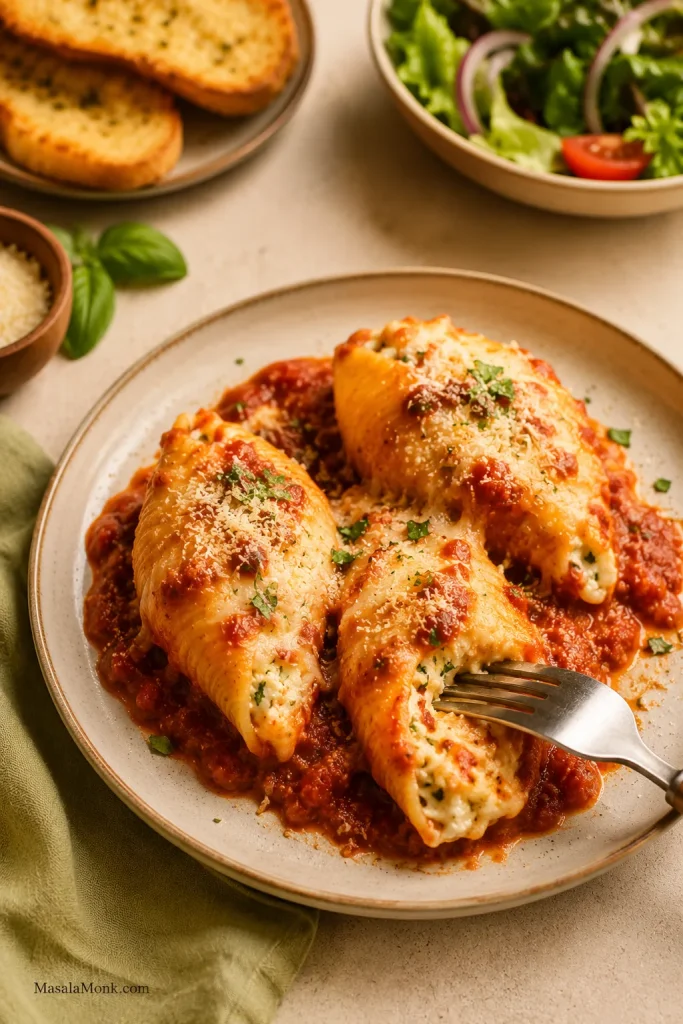
A plate of ricotta stuffed shells with marinara sauce, parmesan, herbs, and a fork.
For dinner portions, plan on three to four ricotta stuffed shells per adult with salad, garlic bread, or vegetables.

Can You Double This Recipe?

Yes. To double the recipe, use two 9×13-inch baking dishes instead of crowding everything into one deep dish. If baking both at the same time, rotate them halfway through if your oven has hot spots. If the pans are cold from the fridge, they may need a few extra minutes of covered baking time. You can also bake one now and freeze one for later.

What to Serve with Stuffed Shells

Stuffed shells are rich, cheesy, and well-sauced, so they pair best with something crisp, green, garlicky, or simple. On a weeknight, salad is enough. When serving company, add garlic bread and something fresh on the side.

Classic Comfort Sides

Light and Fresh Sides

  • Simple green salad with vinaigrette
  • Cucumber salad with vinegar, dill, and onion
  • Arugula salad with lemon

Extra Vegetable Sides

  • Roasted broccoli
  • Sautéed spinach or greens
  • Roasted zucchini or eggplant
  • Steamed green beans

Bigger Dinner Add-Ons

A fresh side can still feel filling: this chickpea salad brings lemon, herbs, cucumber, and crunch beside the cheesy shells.

Troubleshooting Stuffed Shells

Problem Cause Fix
Shells tear Overcooked or handled too hot Undercook slightly, cool, and boil extras
Shells stick Cooled in a pile Spread on a tray or use a few drops of oil
Filling is watery Wet ricotta or spinach Drain ricotta and squeeze spinach dry
Filling leaks Too much filling or loose filling Use about 30g filling per shell and keep filling thick
Shells are dry Too little sauce or uncovered too long Use sauce under and over; bake covered first
Edges dry out Not enough sauce near edges Spoon extra sauce around edges
Filling tastes bland Ricotta under-seasoned Add salt, parmesan, garlic, herbs, and pepper
Pasta is mushy Shells fully cooked before baking Boil 2–3 minutes shy of al dente
Top browns too fast Uncovered too long Cover loosely and keep baking
Frozen center is cold Covered bake too short Keep baking covered until center is hot
Cheese turns rubbery Overbaked or poor melting cheese Bake just until melted and use low-moisture mozzarella
Pasta looks watery Wet filling or vegetables Drain ingredients and rest before serving

If the shells or edges look dry after baking, spoon warm marinara around the pasta before serving. Sauce brings moisture back better than adding more cheese.

Extra marinara sauce being spooned around the edge of baked stuffed shells.
When the edges look dry, spoon warm marinara around the shells before serving to soften them again.

Frequently Asked Questions

A few common questions come up once you start adjusting the recipe. These quick answers should help you choose the right shells, filling, sauce, and make-ahead method.

What pasta shells do I use for stuffed shells?

Use jumbo pasta shells. Small shells, medium shells, and macaroni-style shells are not large enough for stuffing.

Do you have to boil shells before stuffing them?

For this version, yes. Boiling first gives you shells that are soft enough to fill but firm enough to finish in the oven. No-boil shells need more liquid and a longer covered bake.

What is the best cheese filling for stuffed shells?

The best classic filling uses ricotta, mozzarella, parmesan or pecorino, egg, garlic, herbs, salt, and pepper. Ricotta makes it creamy, mozzarella adds melt, parmesan adds depth, and egg helps it hold together.

Do I need egg in stuffed shells?

Egg helps the filling set so the shells lift more cleanly. You can skip it, but the filling will be softer. If skipping egg, add a little extra parmesan or mozzarella.

Can I use cottage cheese instead of ricotta?

You can replace ricotta 1:1 by weight, drain cottage cheese if watery, and blend it first if you want a smoother filling. The no-ricotta section gives more options.

Can I make stuffed shells without ricotta?

Yes — use cottage cheese, cream cheese mixed with mozzarella, a meat filling, roasted vegetables, or tofu ricotta. Keep the filling thick so it does not run out of the shells.

How much sauce do stuffed shells need?

For one 9×13-inch baking dish, use about 3 cups / 720ml sauce. Spread about 1 cup on the bottom and spoon the rest over and around the filled shells.

Do you bake stuffed shells covered or uncovered?

Bake them covered for most of the time so the pasta stays moist and the filling heats through. Uncover at the end to melt and lightly brown the cheese.

How do you keep stuffed shells from drying out?

Use sauce under and over the shells, cover the baking dish for the first bake, and reheat leftovers with extra sauce or a small splash of water. That is the same no-dry-shell method used in the main recipe.

Can I make stuffed shells ahead of time?

Yes. Assemble stuffed shells up to 24 hours ahead, cover, and refrigerate. The make-ahead section explains the timing and freezer options.

Can stuffed shells be frozen?

Freeze them before baking for the best texture, either as a full baking dish or as individual filled shells. Use within 2–3 months for best quality.

Can I bake stuffed shells from frozen?

You can bake them covered at 350°F / 175°C for 60–75 minutes, or until the center is hot. Then uncover and bake until the sauce bubbles and the cheese melts.

Can I add meat to stuffed shells?

Meat works best in the sauce, where it makes the dish heartier without weighing down the ricotta filling. Brown and drain the meat before adding it.

How many stuffed shells per person?

Plan on 3–4 stuffed shells per adult with sides, or 4–5 shells per person for a heartier main dish.

How long do leftover stuffed shells last?

Leftovers keep for 3–4 days and reheat best with extra sauce. Store them in an airtight container in the refrigerator and reheat until hot.

Make It Your Own

A good batch of stuffed shells should feel generous: pasta tucked into sauce, cheese bubbling around the edges, and enough filling in every shell that nobody feels shortchanged. The whole recipe comes back to the same simple method: thick filling, enough sauce, covered bake, tender shells.

This is the kind of tray that looks a little messy in the best way: sauce at the edges, cheese pulling from the spoon, and enough shells for someone to quietly go back for one more.

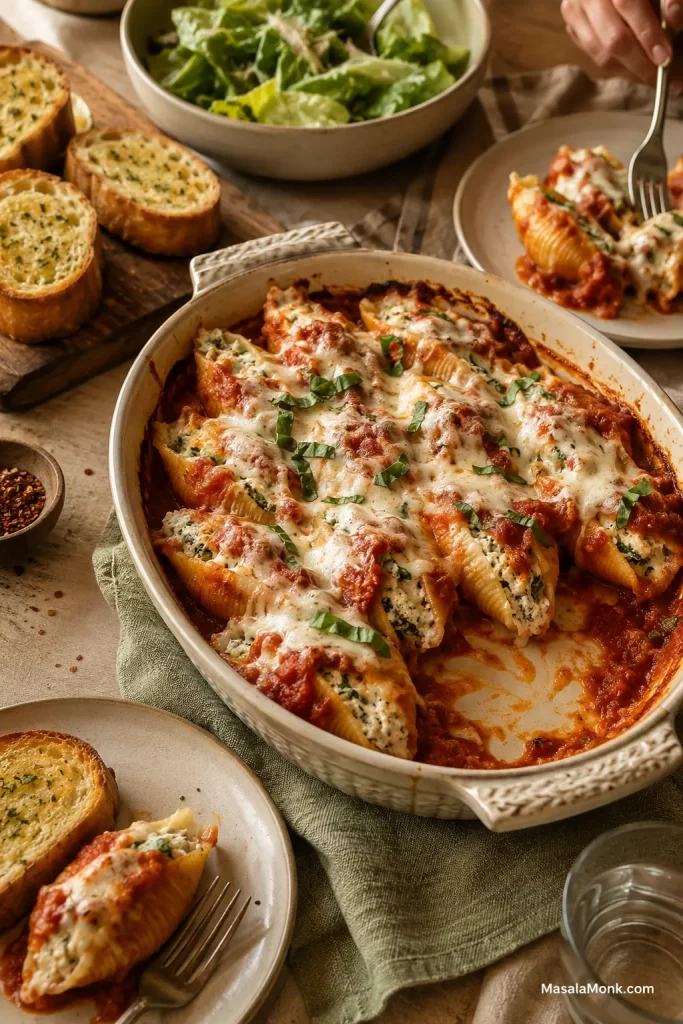
A family-style baking dish of stuffed shells served with garlic bread, salad, plates, and a fork.
Serve stuffed shells family-style with garlic bread and salad; this is the pasta bake people come back to for one more shell.

You can keep the recipe classic, add spinach, make it meaty with beef or sausage, swap in cottage cheese, use Alfredo sauce, or freeze a batch for another night. For another cozy pasta dinner after this one, save this broccoli pasta too.

If you make these stuffed shells, tell us which version landed on your table: classic ricotta, spinach, meat sauce, cottage cheese, Alfredo, or extra saucy. I especially want to know if you froze a batch for later — that is where this recipe really earns its keep.

Back to top ↑