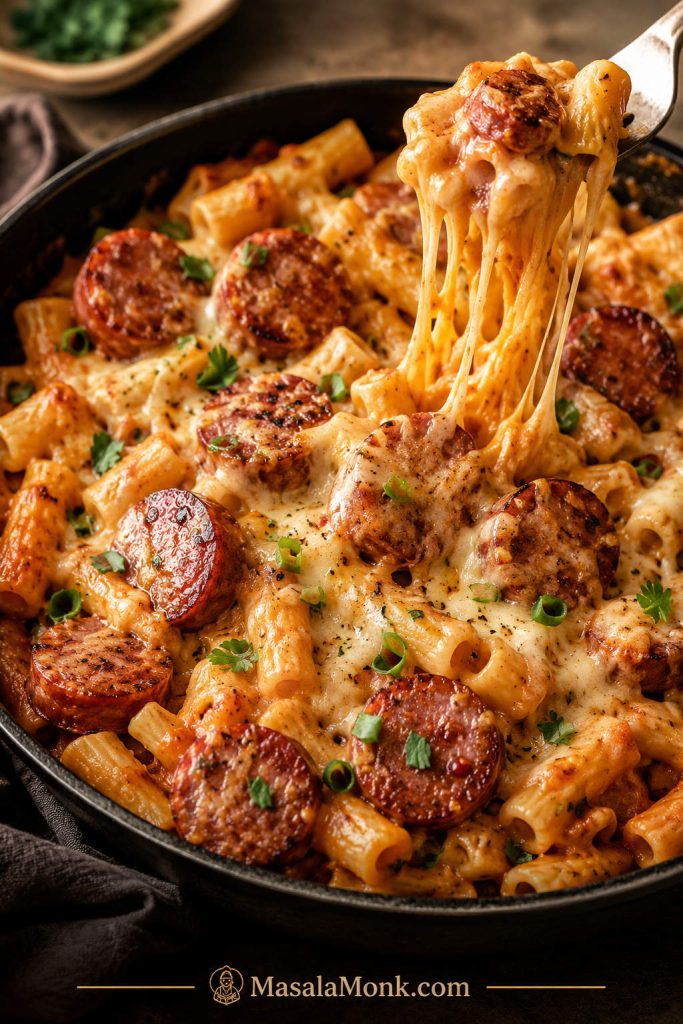
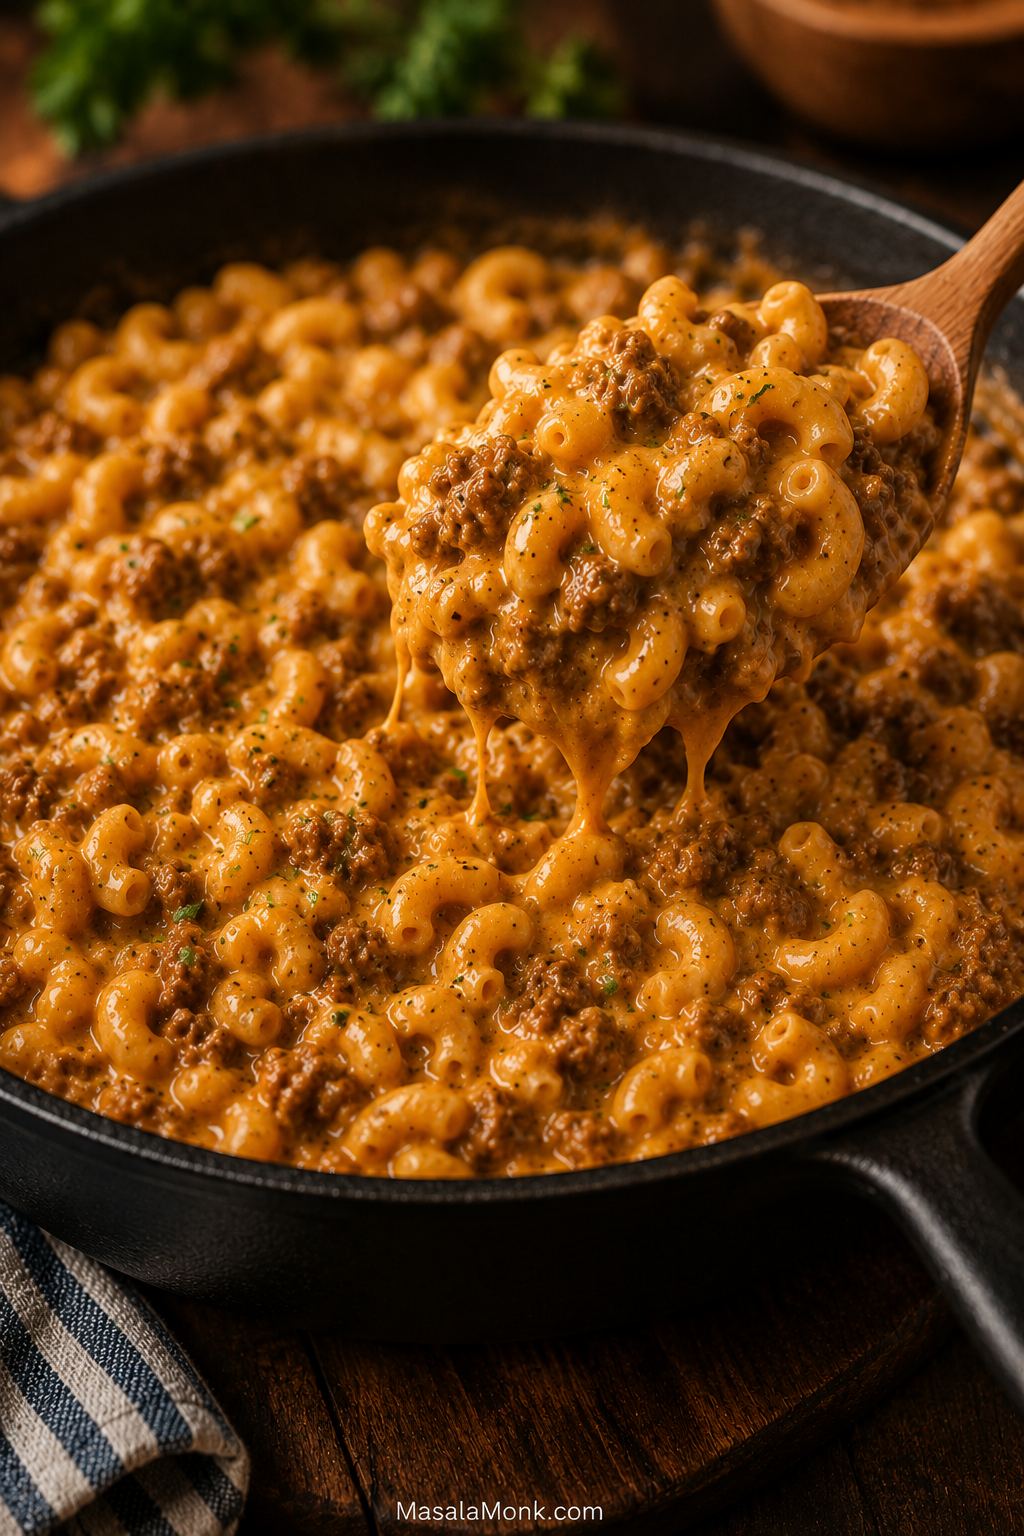
This sausage pasta recipe is the skillet dinner you make when you want something comforting, saucy, and deeply satisfying without turning dinner into a project. Browned Italian sausage gives the pan its savory base, short pasta catches the little crumbles, and a tomato-parmesan cream sauce pulls everything together into a cozy bowl in about 30 minutes.
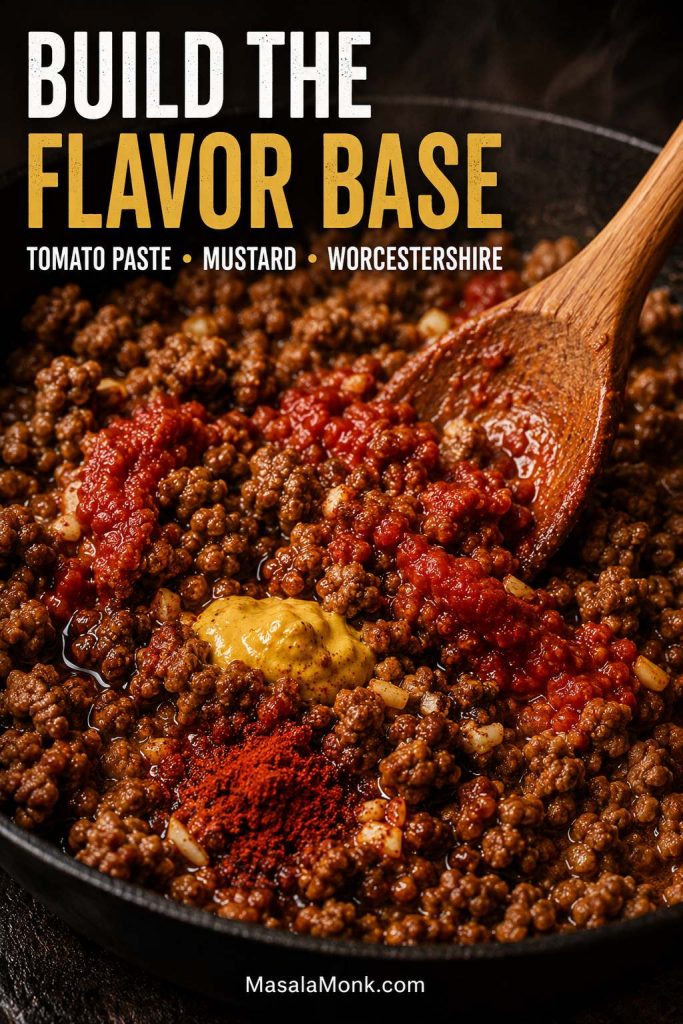
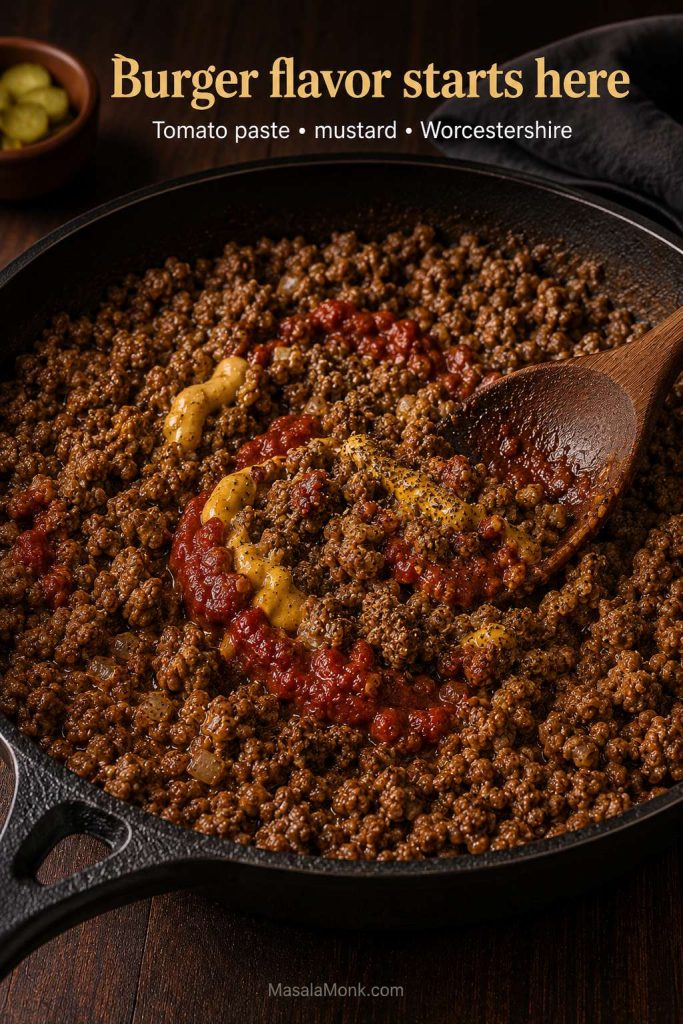
As the sausage browns, the pan starts doing the work for you: the fat turns flavorful, the browned bits cling to the bottom, and the tomato paste picks up all of that depth before the cream and parmesan smooth everything out.
The promise is simple: one base skillet, the pasta shape you have, and a creamy finish that does not turn dry. Make it mild, spicy, smoky, baked, one-pot, or packed with greens, but keep the same rule in mind — brown the sausage well and finish the pasta loose enough to toss.
It is the kind of pasta where the last few bites in the bowl are mostly sausage crumbles, parmesan, and creamy red sauce — which is exactly why it works.
Table of Contents
Start with the quick answer and recipe card, then use the sausage, pasta-shape, variation, storage, and troubleshooting sections as needed.
Start Here
Cook It Right
Make It Your Way
Save, Fix, Reheat
Quick Answer: The Best Way to Make Sausage Pasta
The best sausage pasta is made with browned Italian sausage, short pasta, and a tomato-parmesan cream sauce loosened with reserved pasta water. It should taste rich but not heavy, saucy but not soupy, and flexible enough to work with mild, hot, smoked, or chicken sausage.
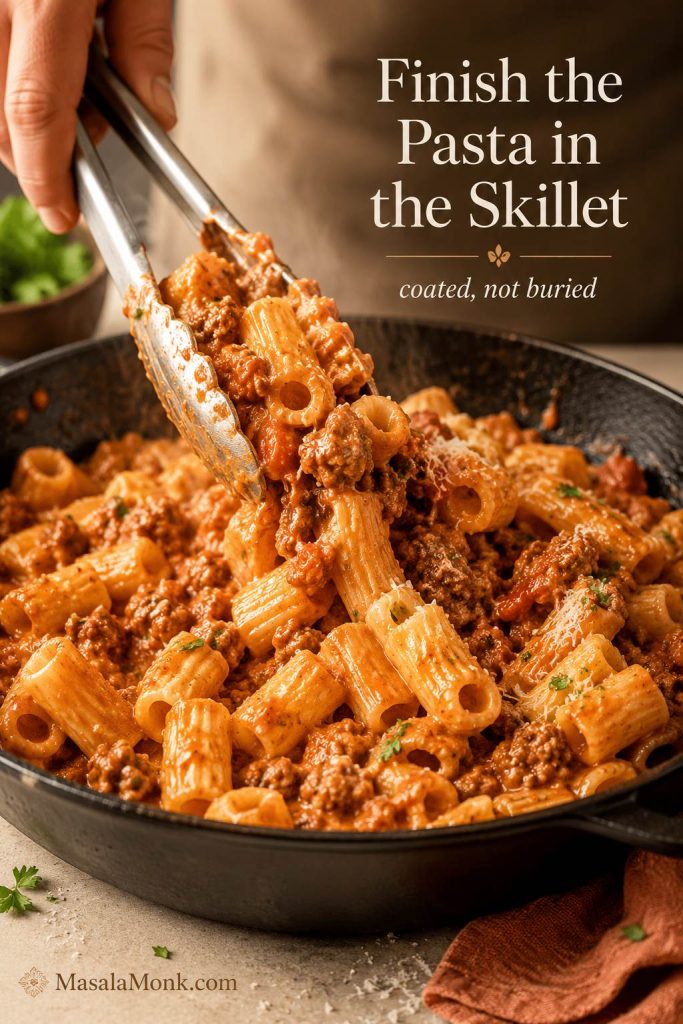
Finish the pasta in the skillet instead of spooning the creamy tomato base over it at the end. Add the pasta to the pan with a splash of the water you saved before draining, then toss until everything looks coated, glossy, and still loose enough to move.
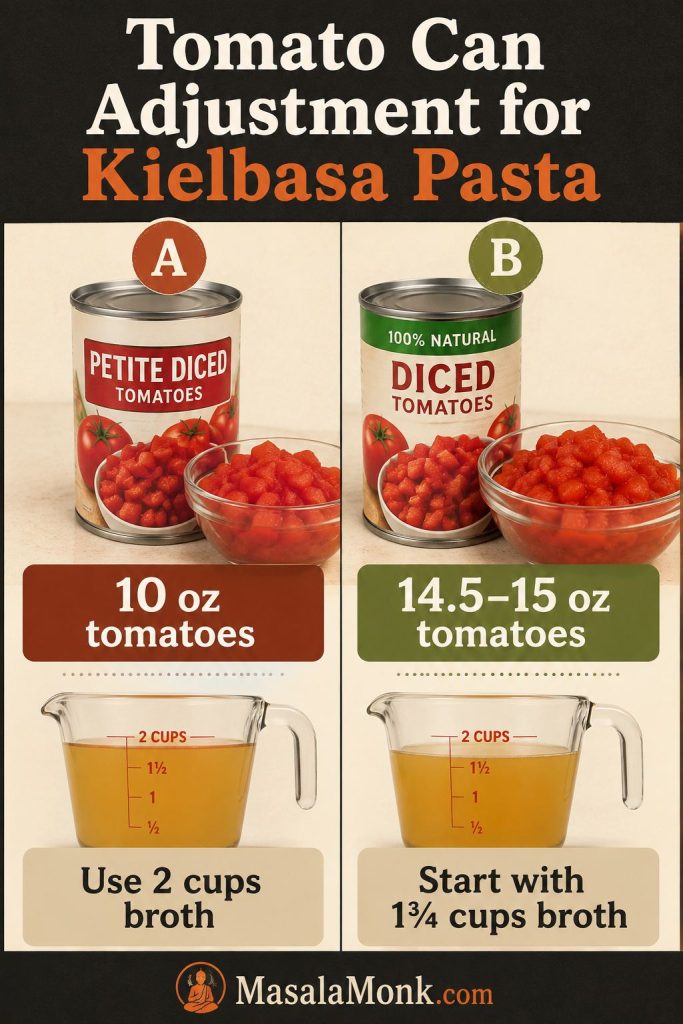
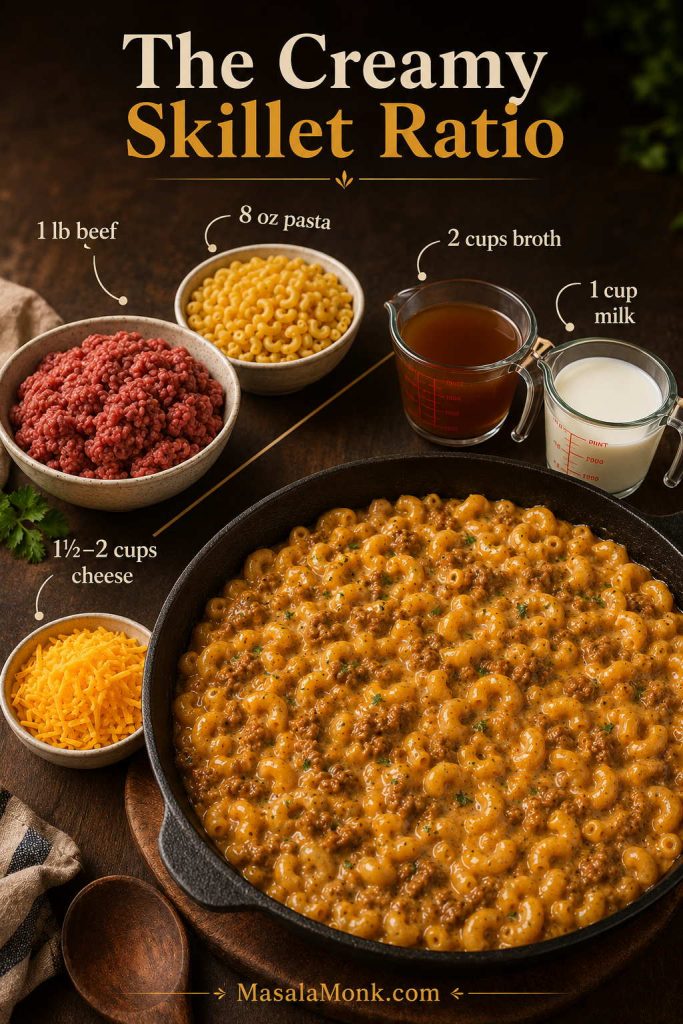
For a balanced skillet, use 1 pound / 450 g Italian sausage, 12 ounces / 340 g short pasta, 2 tablespoons tomato paste, 14 to 15 ounces / 400 to 425 g crushed tomatoes or passata, 3/4 cup / 180 ml cream, and 1/2 cup / 50 g parmesan.
Choosing ingredients now? Jump to Best Sausage or Best Pasta Shapes before you start cooking.
Sausage Pasta at a Glance
| Detail | Recommended |
|---|---|
| Sausage | Mild or hot Italian sausage |
| Pasta | Rigatoni if choosing one; penne, shells, fusilli, and cavatappi also work well |
| Style | Tomato-parmesan cream sauce |
| Total time | About 30 minutes |
| Main pan | Large 12-inch / 30 cm deep skillet or sauté pan |
| Add-ins | Spinach, mushrooms, peppers, broccoli, peas, kale, or sun-dried tomatoes |
| Texture cue | Creamy, glossy, and loose enough to toss in the skillet |
| Leftovers | Reheat gently with a splash of milk, cream, broth, or water |
If texture is your main worry, go straight to How to Keep Sausage Pasta Creamy, Not Dry. For leftovers, see Storage and Reheating.
Sausage Pasta Recipe Card
The full recipe is below with the amounts, timing, and texture cues in one place. Use it as the base skillet, then come back to the sausage, pasta shape, add-in, and troubleshooting sections when you want to change the mood of the bowl.
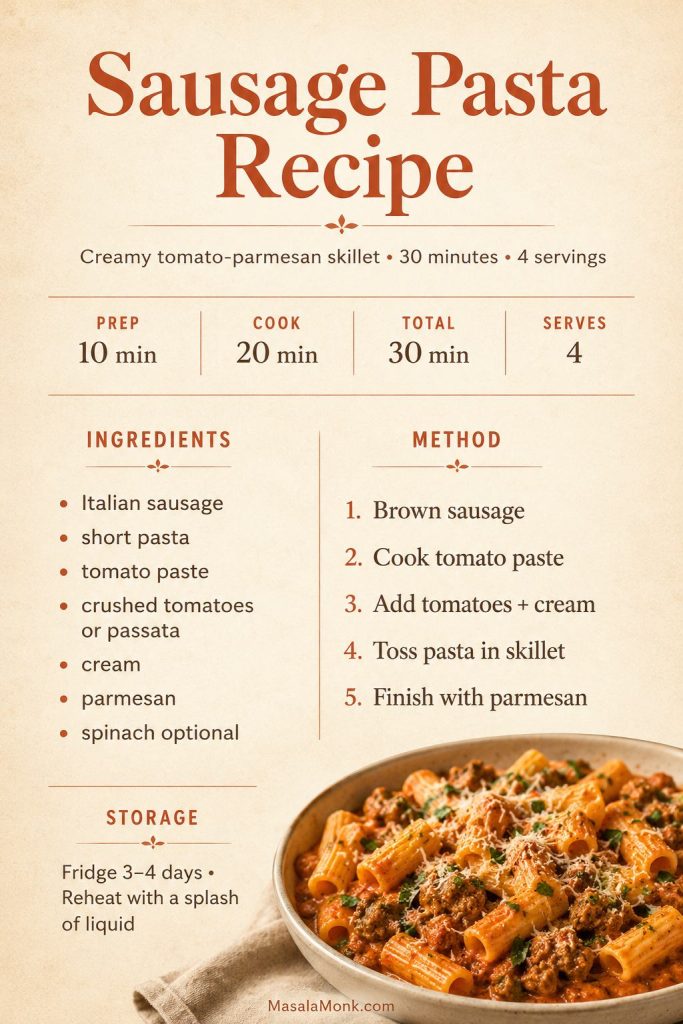
Sausage Pasta Recipe with Creamy Tomato-Parmesan Sauce
This easy sausage pasta is made with browned Italian sausage, short pasta, garlic, tomato paste, crushed tomatoes, cream, parmesan, and pasta water for a glossy tomato-parmesan finish. It is rich, cozy, and ready in about 30 minutes.
Equipment
- Large pot for pasta
- Large 12-inch / 30 cm deep skillet or sauté pan
- Wooden spoon or spatula
- Measuring cup for pasta water
- Grater for parmesan
Ingredients
- 12 oz / 340 g rigatoni, penne, shells, fusilli, or another short pasta
- 1 lb / 450 g Italian sausage, mild or hot, casings removed if using links
- 1 tbsp / 15 ml olive oil, only if needed
- 1 small yellow onion, finely chopped
- 3 to 4 garlic cloves, minced
- 2 tbsp / 30 g tomato paste
- 1 tsp Italian seasoning
- 1/4 to 1/2 tsp red pepper flakes, optional
- 14 to 15 oz / 400 to 425 g crushed tomatoes or passata
- 3/4 cup / 180 ml heavy cream
- 1 cup / 240 ml reserved pasta water, divided and used as needed
- 1/2 cup / 50 g freshly grated parmesan, plus more for serving
- 2 packed cups / about 60 g baby spinach, optional
- Salt and black pepper, to taste
- Fresh basil or parsley, for serving
Instructions
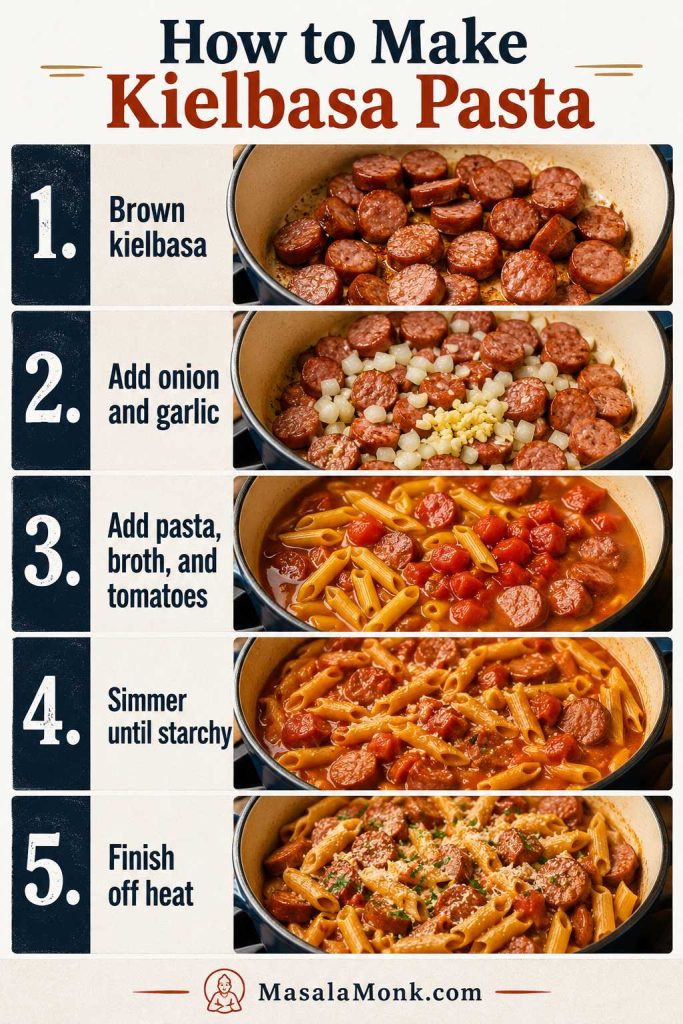
Cook the Pasta and Brown the Sausage
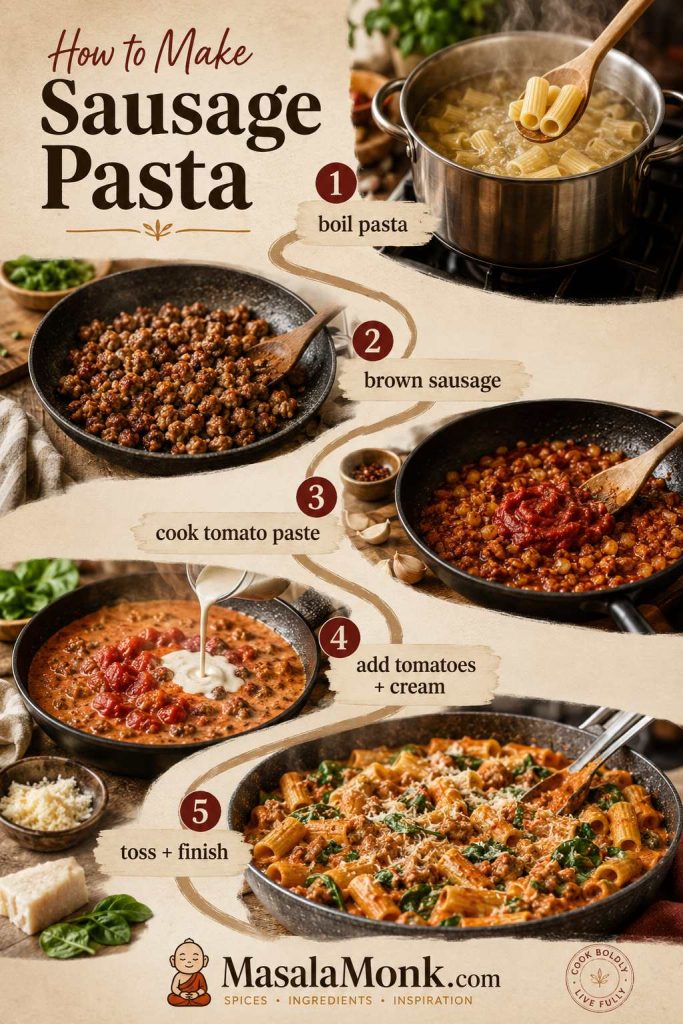
- Cook the pasta. Bring a large pot of salted water to a boil. Add the pasta and cook 1 to 2 minutes shy of al dente. Reserve 1 cup / 240 ml pasta water, then drain.
- Brown the sausage. While the pasta cooks, heat a large deep skillet over medium-high heat. Add the sausage and break it into small crumbles. Cook for 6 to 8 minutes, stirring only as needed, until the sausage has browned edges and no longer looks gray. If the sausage is lean and the pan looks dry, add 1 tablespoon olive oil.
- Drain excess fat if needed. If there is more than about 1 tablespoon fat in the pan, spoon off the excess. Leave a little behind for flavor.
Build the Sauce and Finish the Pasta
- Add onion and garlic. Add the chopped onion and cook for 2 to 3 minutes, until softened. Stir in the garlic and cook for about 30 seconds, just until fragrant.
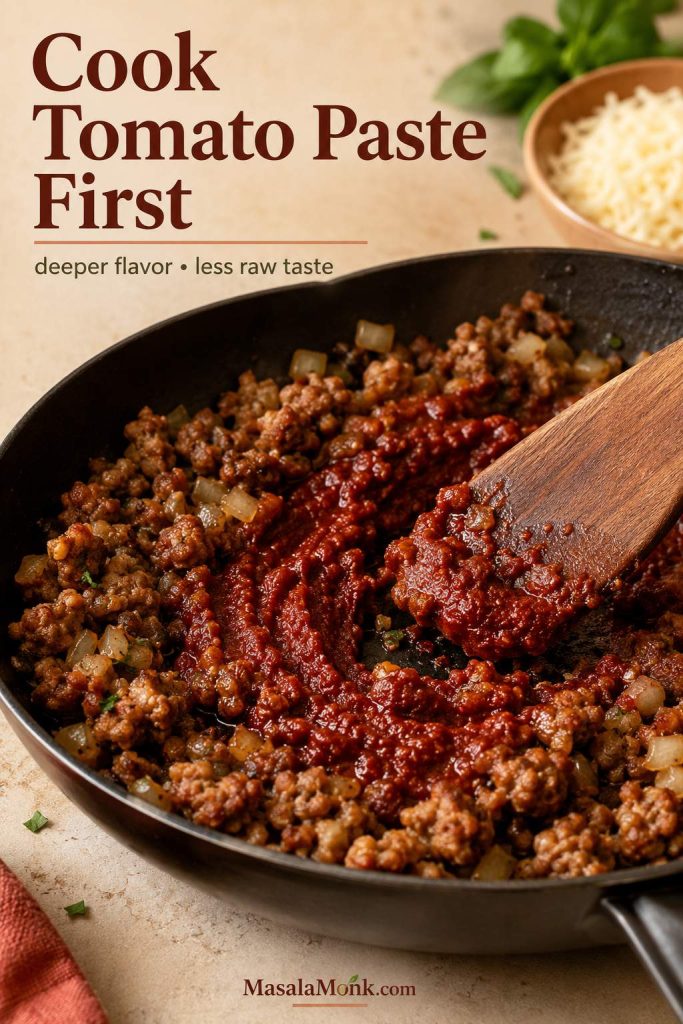
- Cook the tomato paste. Add tomato paste, Italian seasoning, and red pepper flakes. Stir for 1 to 2 minutes, until the tomato paste darkens slightly and coats the sausage. It should smell richer and less raw.
- Simmer the tomato base. Add crushed tomatoes or passata. Stir well, scraping up any browned bits from the pan. Simmer for 4 to 5 minutes, until slightly thickened.
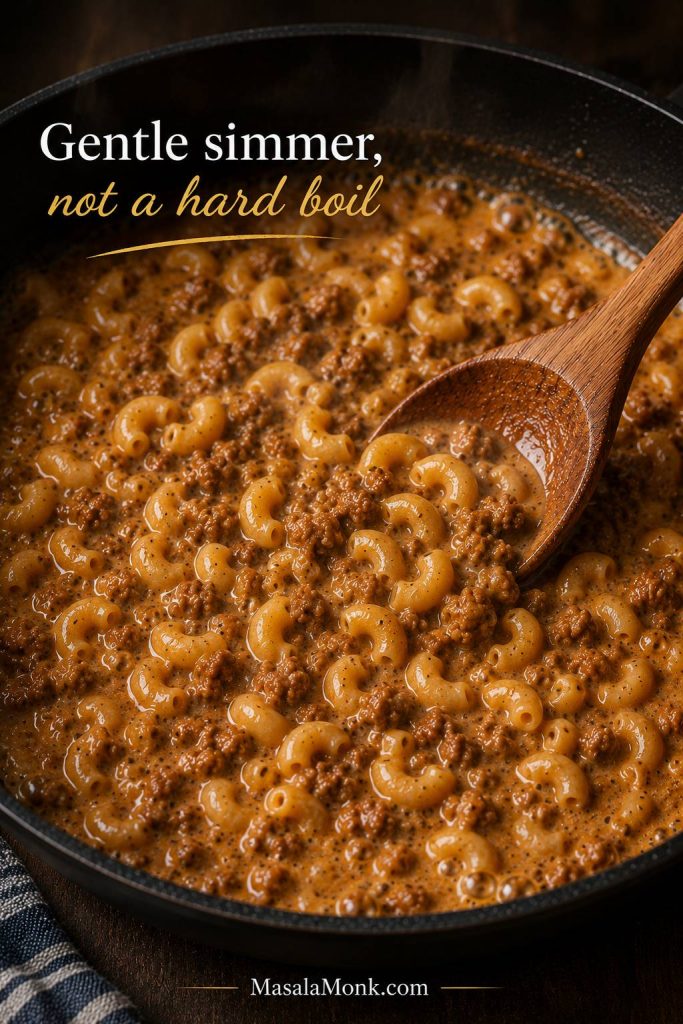
- Add cream gently. Lower the heat to medium-low and stir in the heavy cream. Do not boil the pan hard after adding cream.
- Toss with pasta. Add the drained pasta and 1/4 cup / 60 ml reserved pasta water. Toss well until the pasta is coated and finishes cooking in the pan.
- Adjust the texture. The pasta should look coated and still move when tossed. If it starts tightening quickly, add more pasta water 1 to 2 tablespoons at a time and toss again.
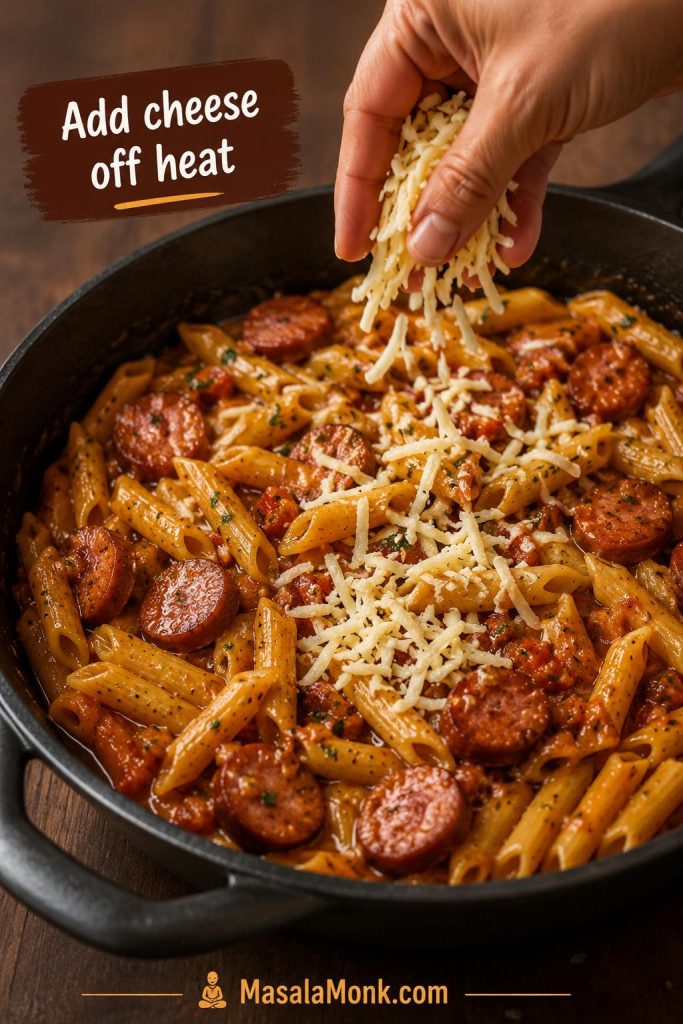
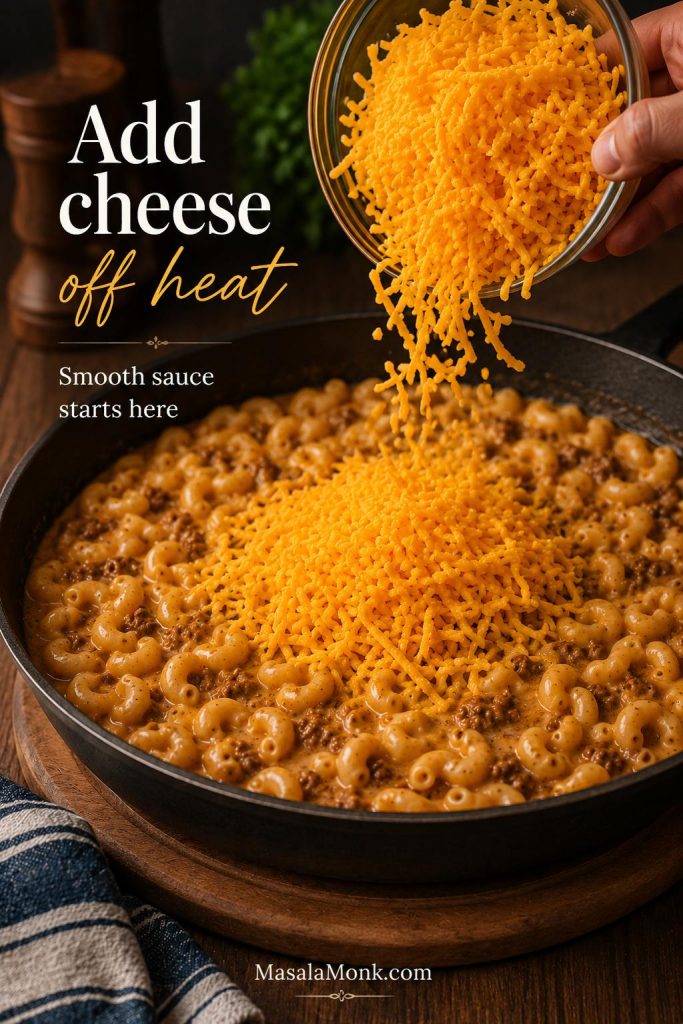
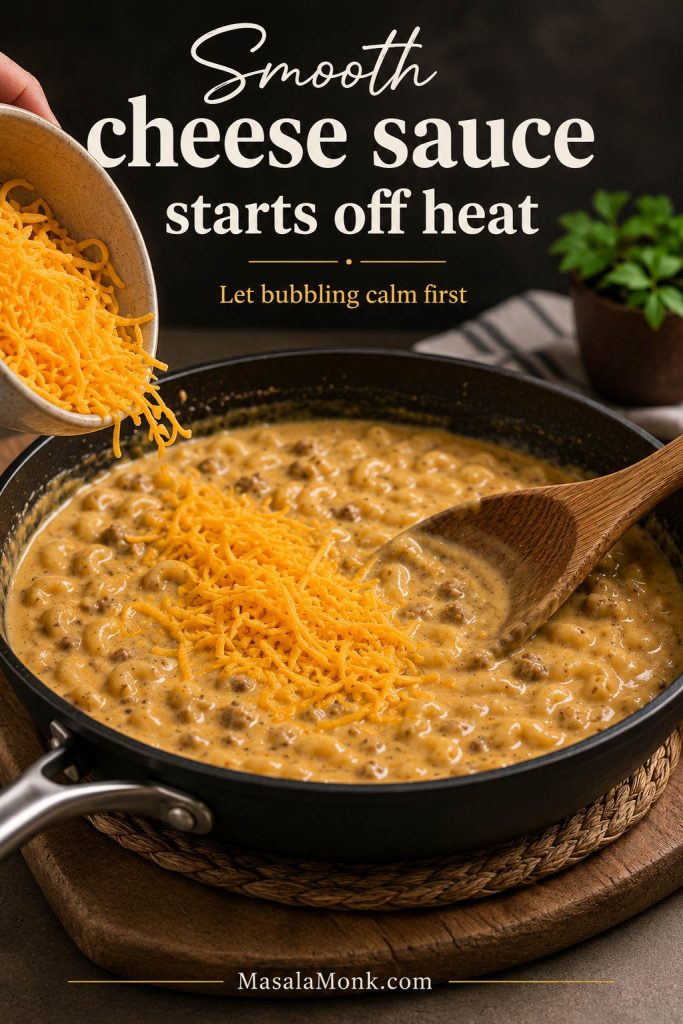
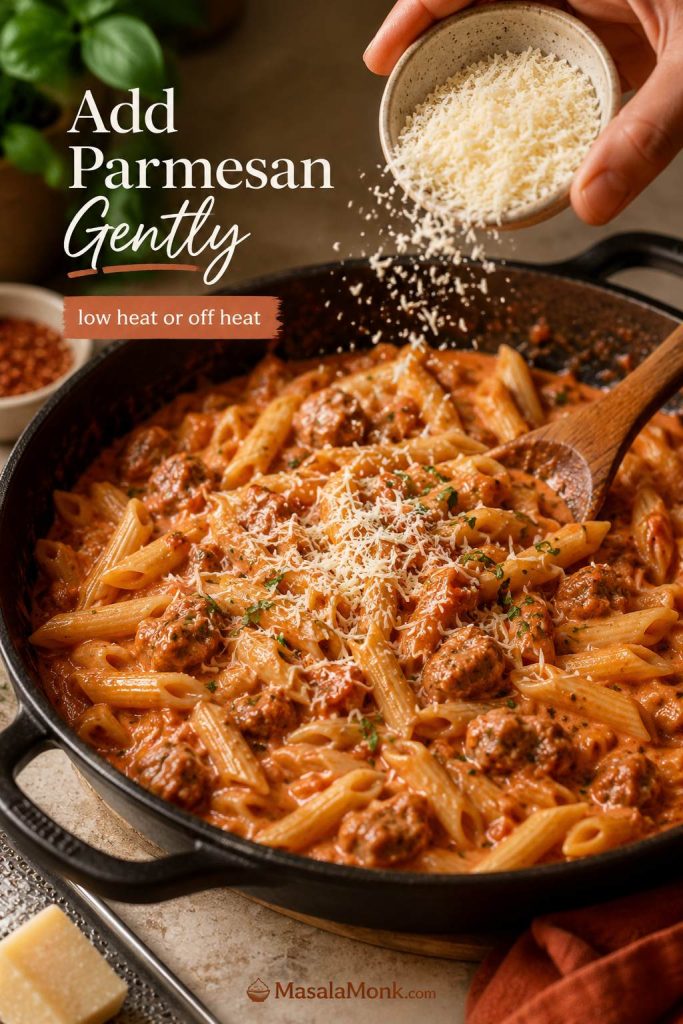
- Finish with parmesan and spinach. Add parmesan on low heat or off heat and stir until melted. Add spinach, if using, and toss until just wilted.
- Taste and serve. Season with salt and black pepper to taste. Serve right away while the sauce is still glossy, with more parmesan and fresh basil or parsley.
Notes
- Use mild Italian sausage for the most balanced version and hot Italian sausage for a spicier pasta.
- Use 1/4 teaspoon red pepper flakes for gentle warmth and 1/2 teaspoon for a more noticeable kick.
- Salt the pasta water well, but go easy on added salt until the sausage and parmesan are in the pan.
- If using sausage links, remove the casings before browning so the sausage can crumble into the sauce.
- For a smoother finish, use passata. For more texture, use crushed tomatoes.
- When the skillet gets too thick, add pasta water 1 to 2 tablespoons at a time.
- Chicken or turkey sausage usually needs a little olive oil because it is leaner than pork sausage.
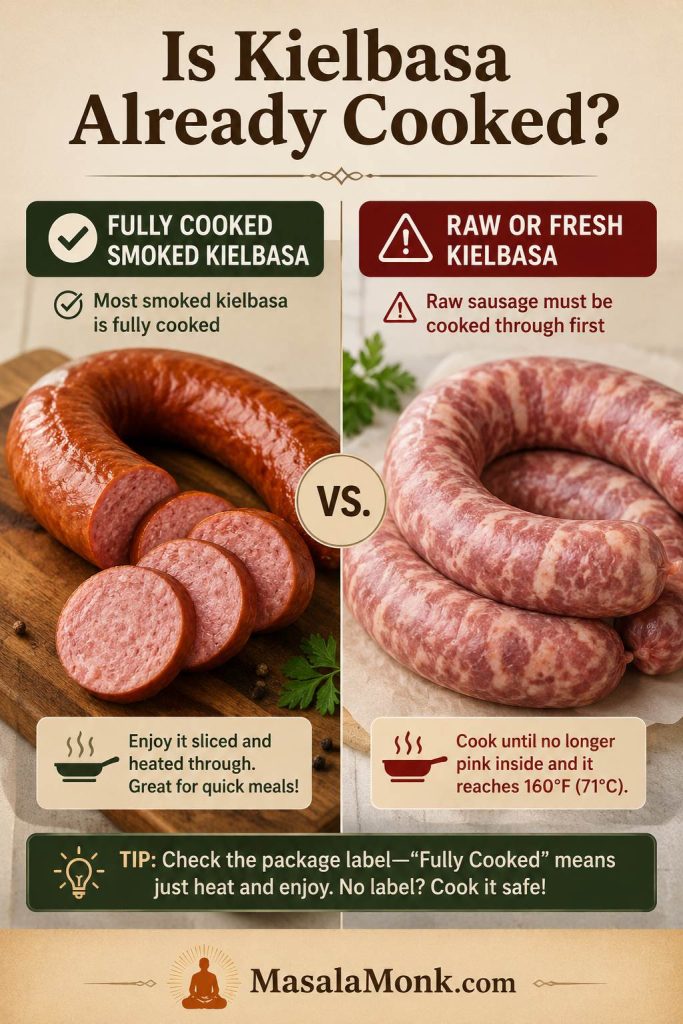
- Fully cooked smoked sausage or kielbasa should be sliced and browned instead of crumbled.
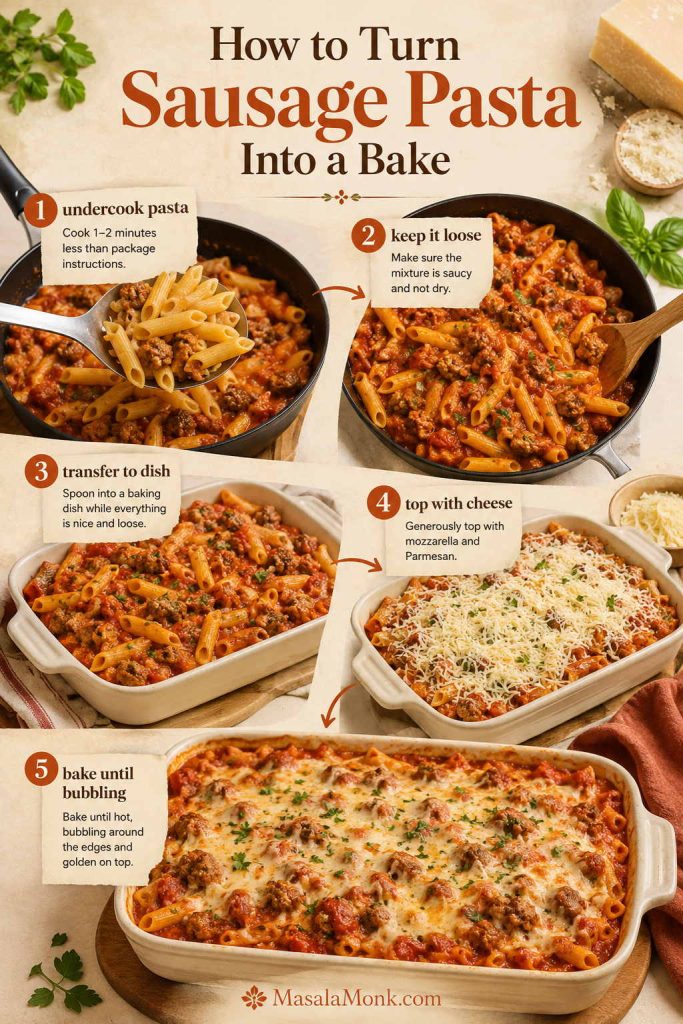
- For a sausage pasta bake, keep the skillet mixture looser, top with mozzarella and parmesan, and bake until bubbling.
Storage
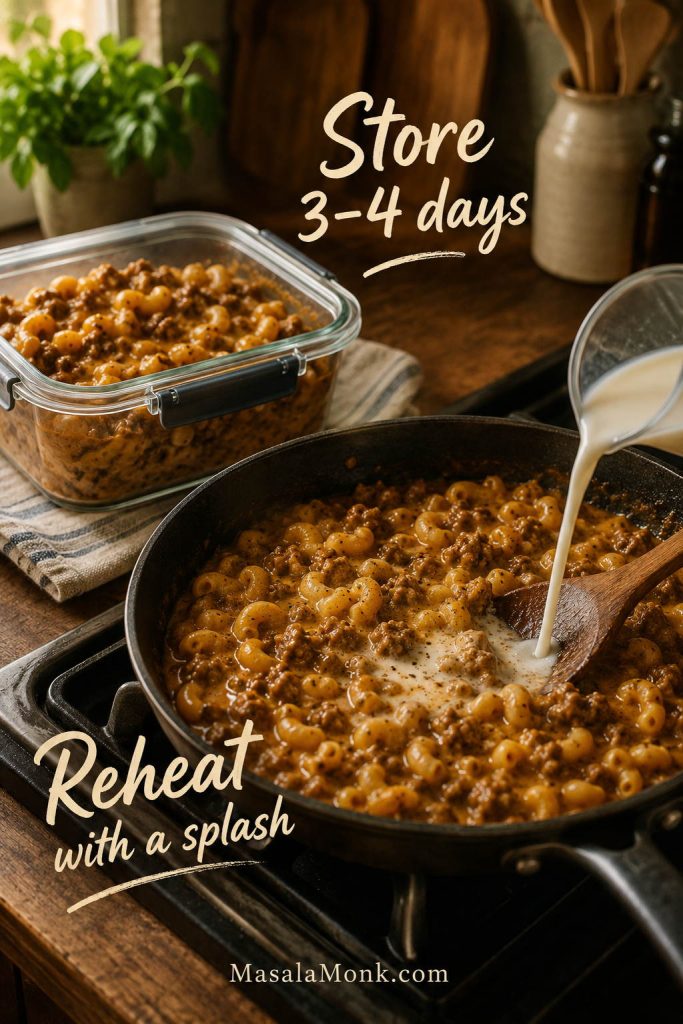
Store leftovers in an airtight container in the refrigerator for 3 to 4 days. Reheat gently with a splash of milk, cream, broth, or water to loosen the sauce.
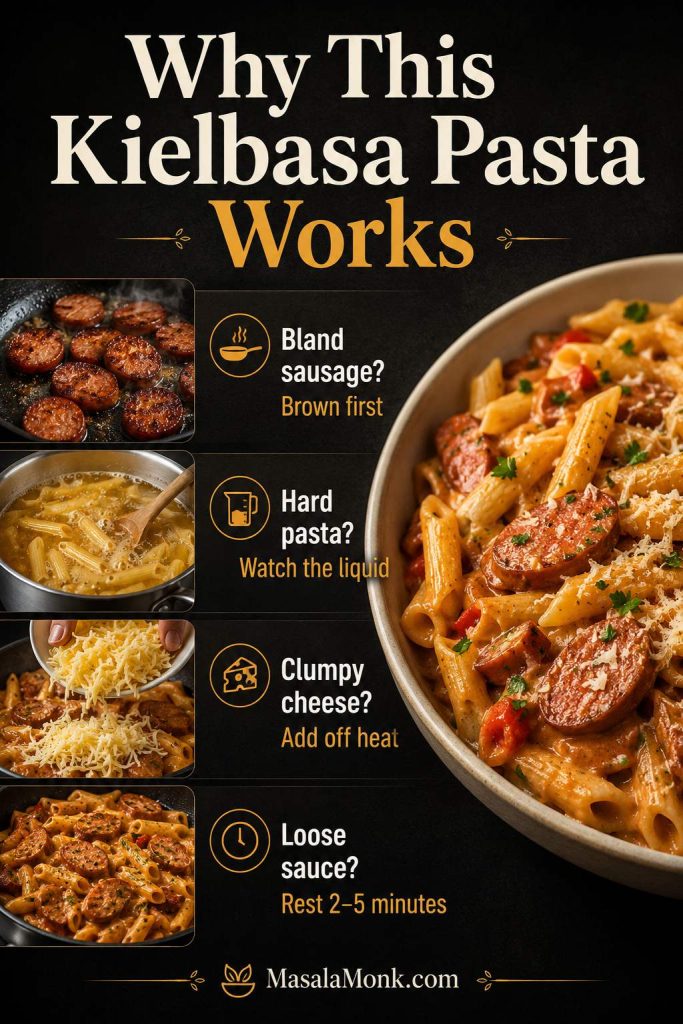
Why This Sausage Pasta Recipe Works
A good sausage pasta should taste like the sausage, tomato, cream, and pasta were built together in the same pan. This recipe does that by browning the sausage first, cooking the tomato paste until it smells richer, and finishing the pasta directly in the skillet.
Browning creates the first layer of sauce
Italian sausage brings salt, fat, fennel, garlic, herbs, and sometimes chile. When it browns, those seasoned drippings flavor the whole pan. The browned bits are not leftovers from cooking the sausage; they are the first layer of the sauce.
Tomato paste makes it taste slow-cooked
Tomato paste gives the creamy red base a deeper, slightly sweeter tomato flavor without needing a long simmer. A minute or two in the hot pan takes away the raw edge and makes the whole skillet taste more rounded.
Cream and parmesan make it rich, not heavy
Cream softens the acidity of the tomatoes, while parmesan adds saltiness and body. Added gently, the cheese melts into the sauce instead of clumping in salty patches.
A loose skillet gives you a better bowl
The pasta should slide when you spoon it, not sit in one stiff mound. A little reserved pasta water keeps the skillet glossy, movable, and saucy enough to survive the trip from pan to plate.
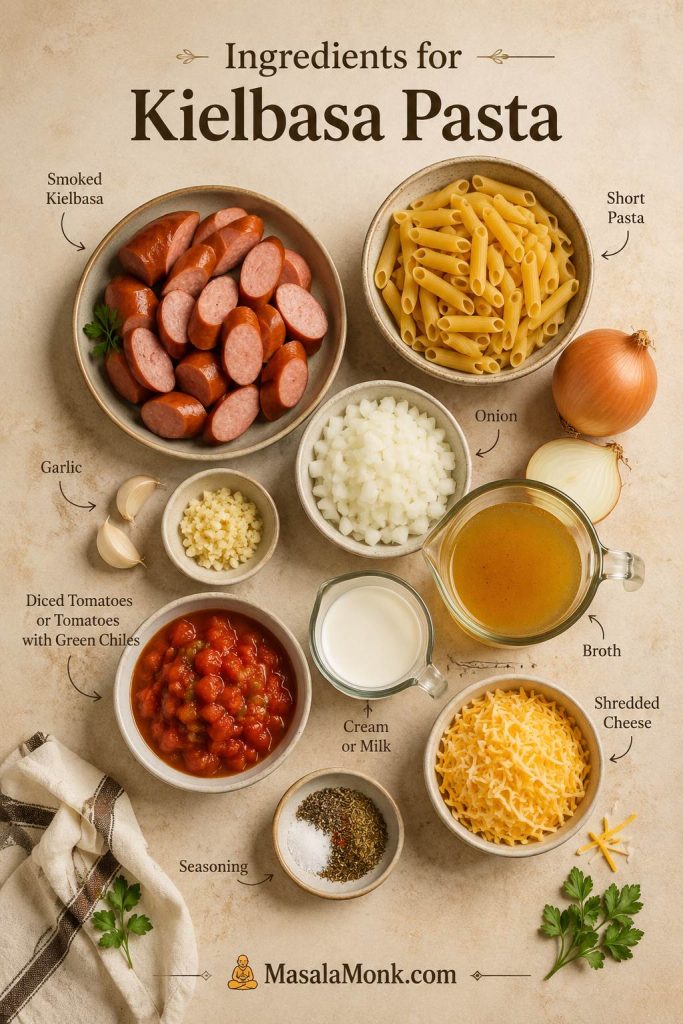
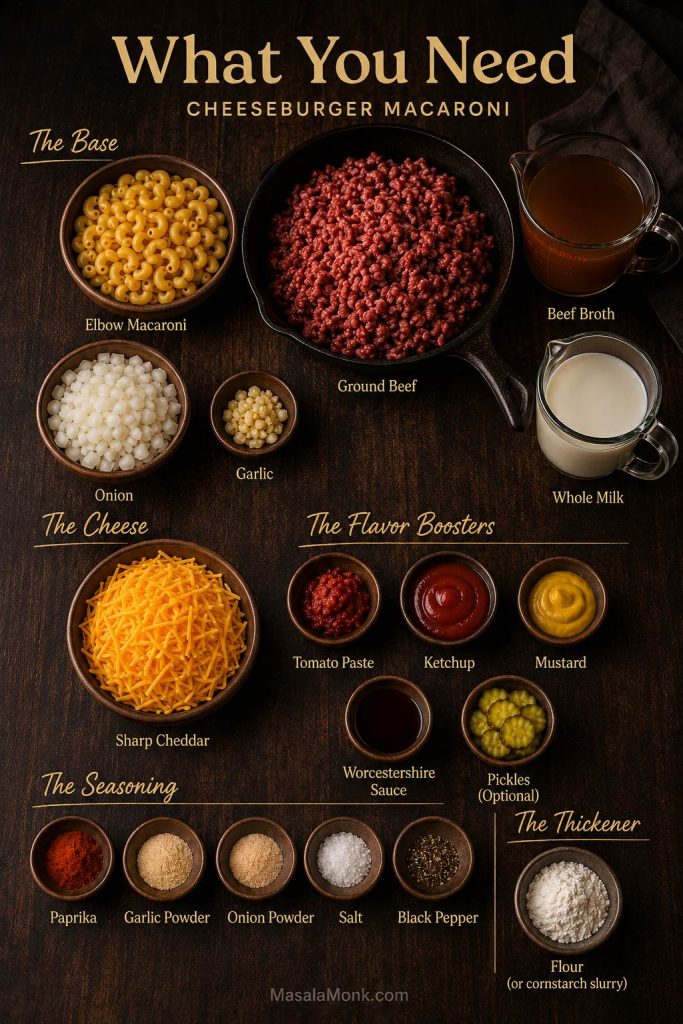
Ingredients You Need
The ingredient list is short, which is why the little choices matter: sausage with enough seasoning, tomatoes that do not taste flat, and parmesan that melts into the sauce instead of sitting on top.
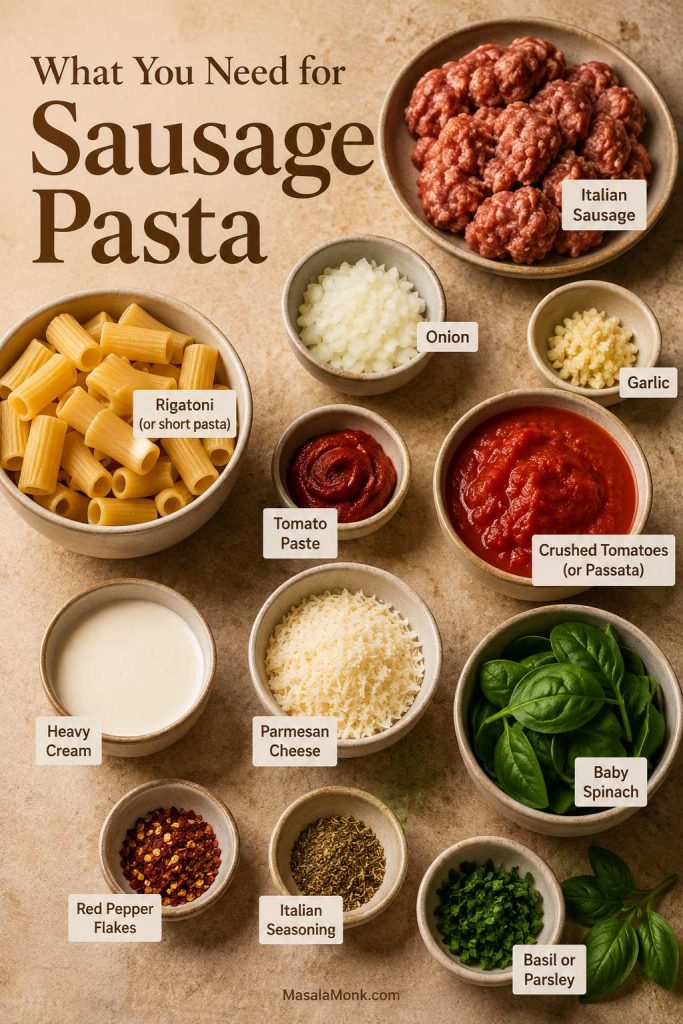
Pasta
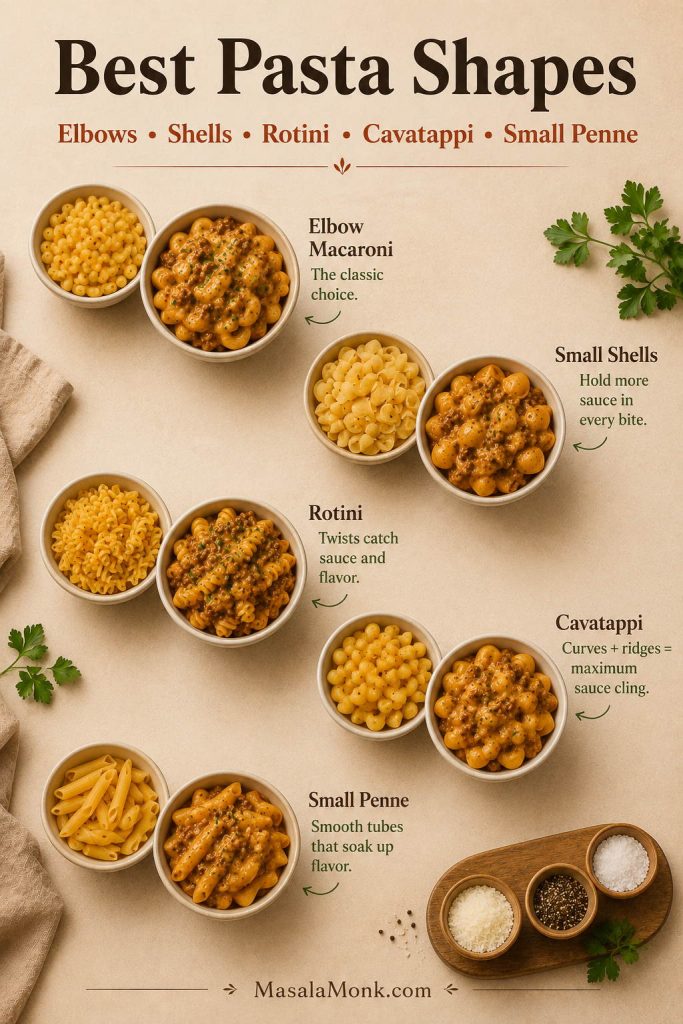
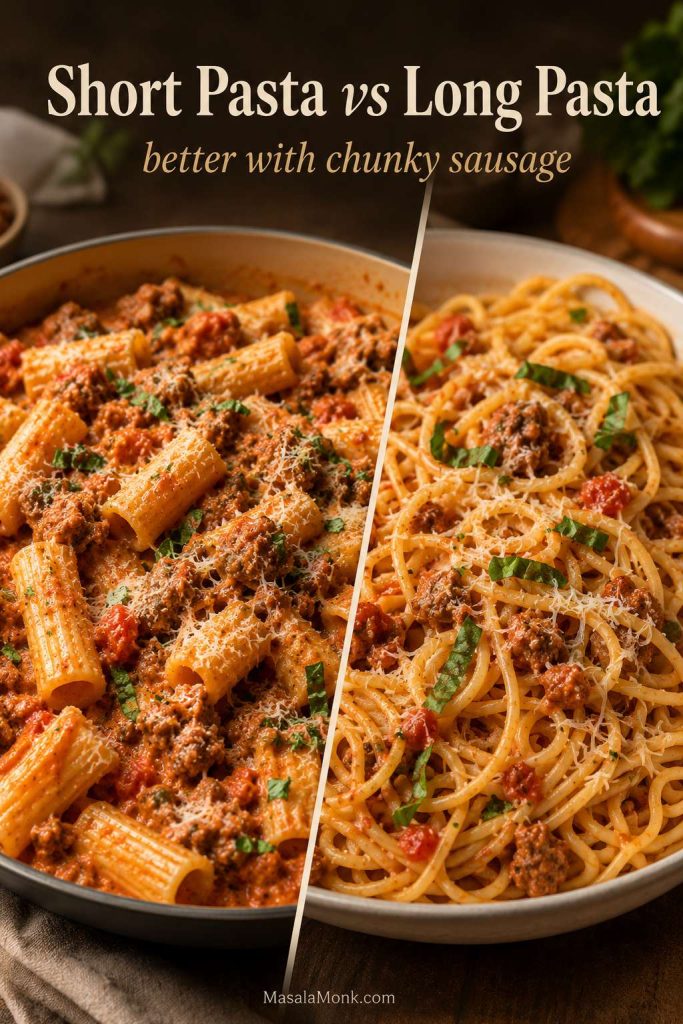
Use 12 ounces / 340 g short pasta. Rigatoni is the easiest win, but penne, shells, fusilli, rotini, and cavatappi all work because they catch sausage crumbles and creamy tomato sauce. Long pasta can work in a pinch, but chunky sausage mixtures usually cling better to short shapes.
Salt the pasta water well, but go easy on added salt later until the sausage and parmesan are in the pan. Some sausage brands are much saltier than others, and parmesan brings its own salt too.
Italian sausage
Use 1 pound / 450 g Italian sausage, either mild or hot. Mild sausage gives you the cozy, family-friendly version; hot Italian sausage turns the same skillet into something deeper and spicier.
You do not need fancy sausage for this. You need sausage that browns well, tastes good on its own, and has enough seasoning to carry the dish.
Tomato paste and crushed tomatoes
Choose passata if you want a smoother finish and crushed tomatoes if you like a little texture. Tomato paste gives concentrated flavor, while the tomatoes give the skillet body. If the tomatoes taste sharp, soften the edge with a little extra cream, parmesan, or a tiny pinch of sugar.
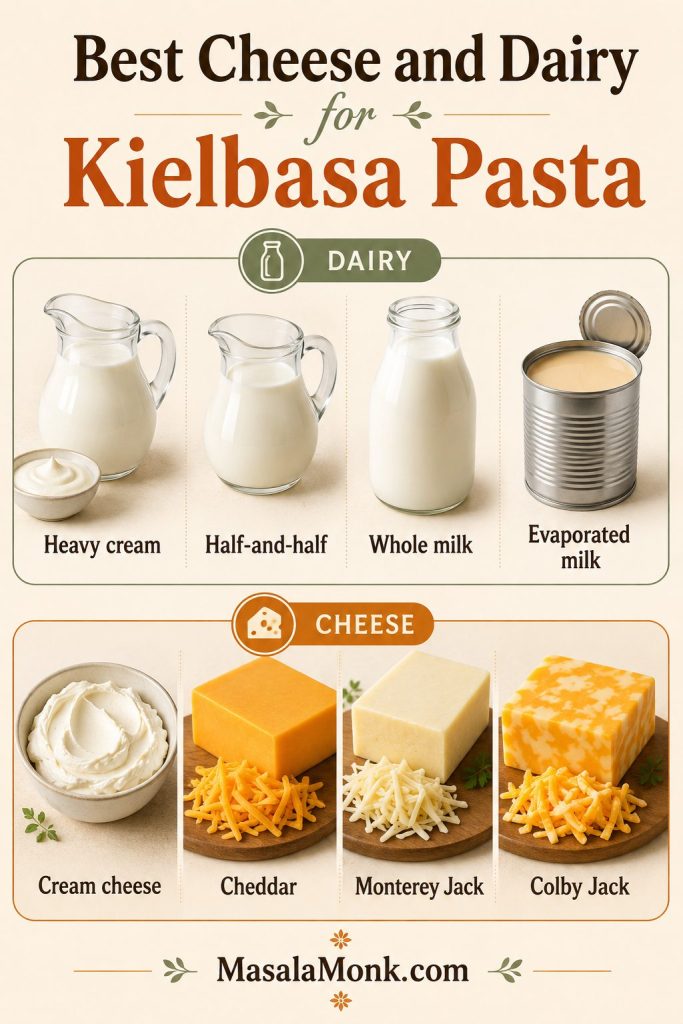
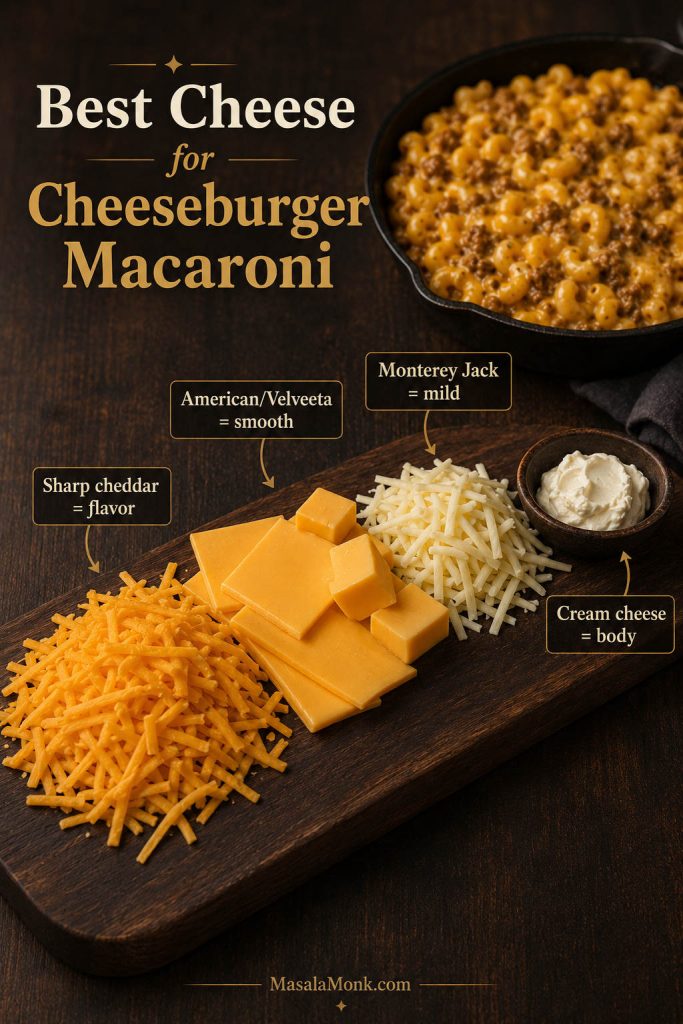
Cream and parmesan
Heavy cream gives the tomato base a velvety finish without turning this into a cream-only pasta. Freshly grated parmesan melts more smoothly than pre-shredded cheese, seasons the bowl, and adds a savory finish without making the pasta feel heavy.
Half-and-half can work for a lighter finish, but it needs gentler heat. Milk is more likely to split in a tomato sauce, so use it only if you are comfortable with a thinner, less creamy result.
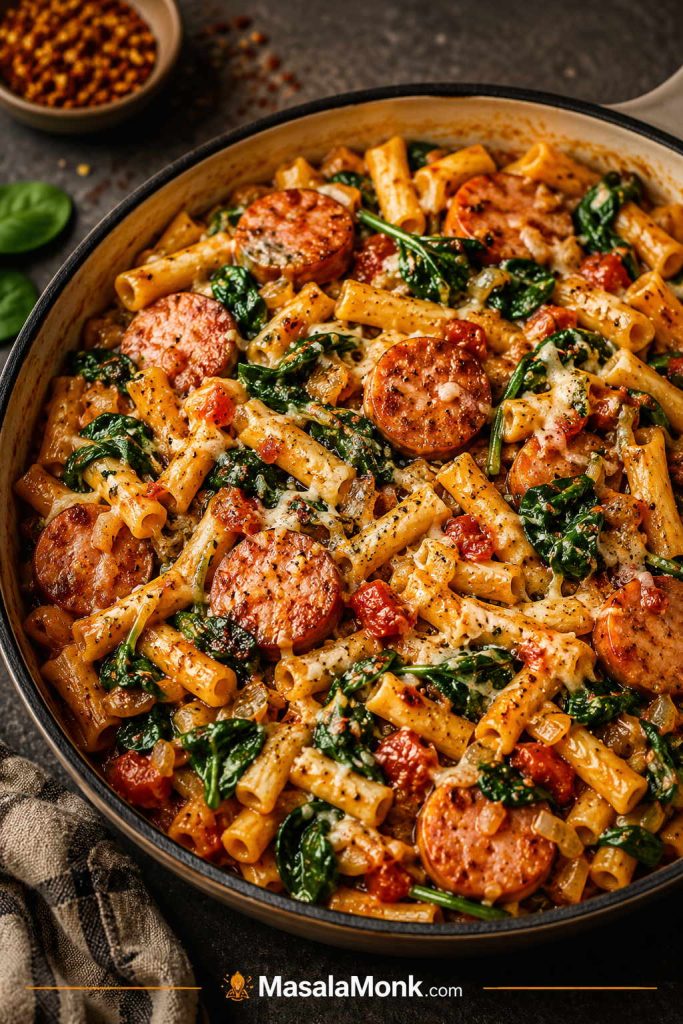
Spinach and other add-ins
Spinach is optional, but it earns its place: it wilts into the hot sauce in seconds and gives the bowl a fresh green break from all the sausage, cream, and parmesan. Mushrooms, peppers, peas, broccoli, kale, and sun-dried tomatoes also work well.
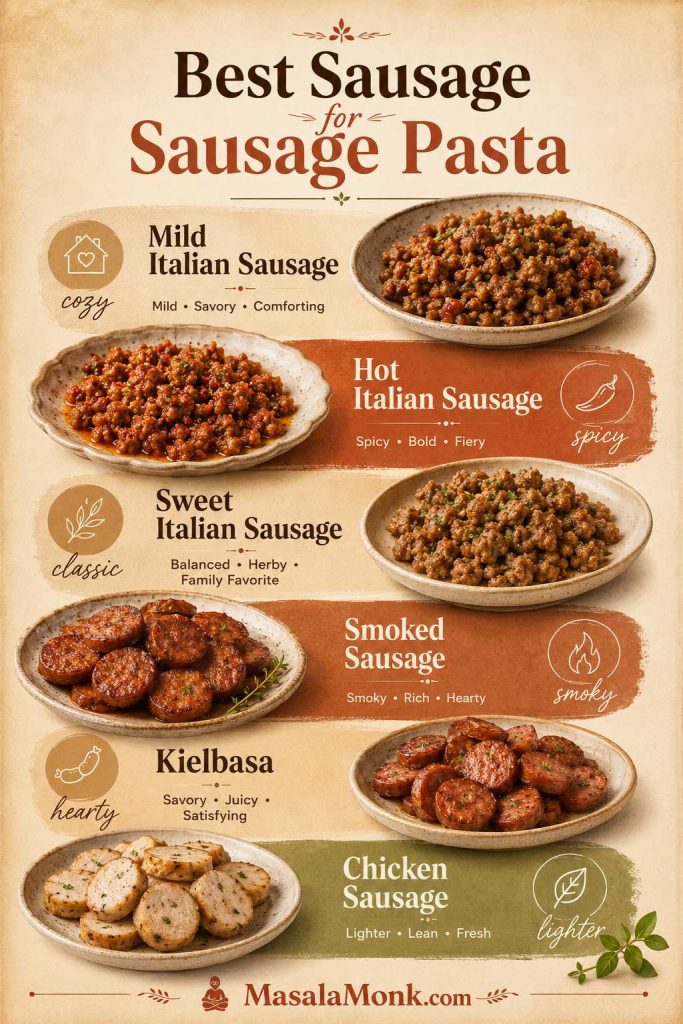
Best Sausage for Sausage Pasta
The sausage decides whether this becomes a cozy Italian-style skillet, a spicy red-sauce pasta, or a smoky weeknight shortcut. When you are staring at mild, hot, sweet, smoked, and chicken sausage, the choice is less about right or wrong and more about what kind of dinner you want.
Still deciding at the store? Compare mild vs hot Italian sausage, or see how smoked sausage differs from Italian sausage.
| Sausage | How to Use It |
|---|---|
| Mild Italian sausage | Safest first choice. Savory, balanced, and family-friendly. |
| Hot Italian sausage | Great for a spicier pasta with deeper flavor. |
| Sweet Italian sausage | Softer, often fennel-forward, and good with tomato sauces. |
| Ground sausage meat | Easiest to brown evenly and crumble into the sauce. |
| Sausage links | Remove the casings before browning so the meat can crumble into the pan. |
| Smoked sausage | Slice and sear it, especially for cheesy, Cajun, or one-pot variations. |
| Kielbasa | Excellent for a smoky variation. It behaves more like smoked sausage than raw Italian sausage. |
| Chicken or turkey sausage | Leaner option. Add a little oil and extra seasoning if the pan seems dry. |
| Breakfast sausage | Possible, but not ideal for a classic Italian-style pasta because it can taste sweeter and more sage-forward. |
For this exact recipe, mild or hot Italian sausage is the best choice because it crumbles through the pan and seasons everything as it browns. Smoked sausage and kielbasa are delicious, but they make a different kind of pasta because they are sliced and seared instead of broken into the tomato-cream base.
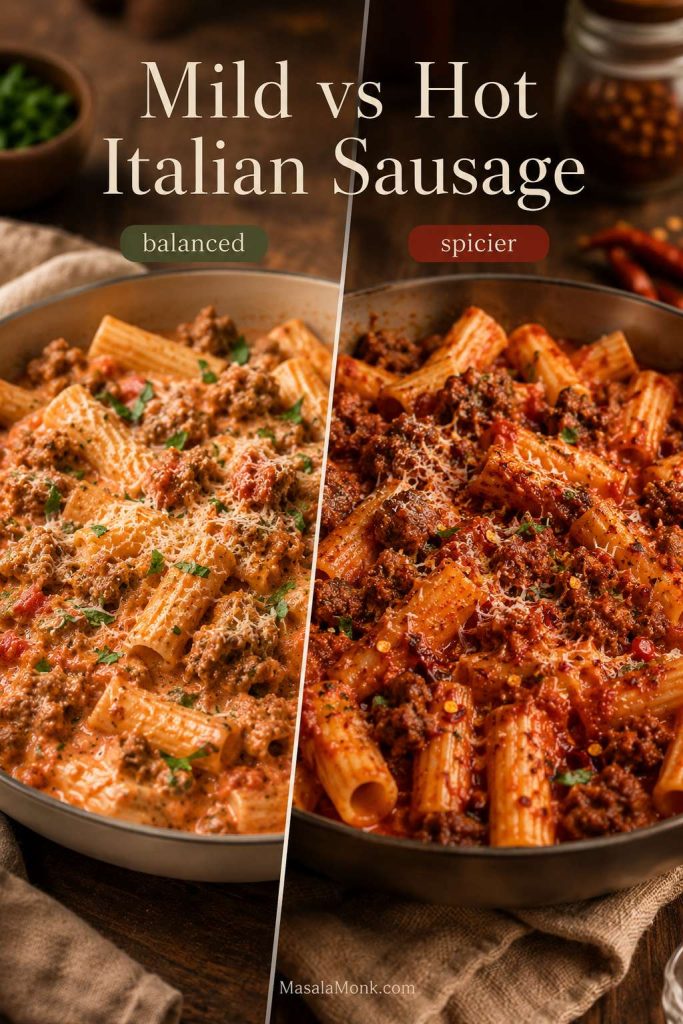
Mild vs Hot Italian Sausage
Use this comparison when you are choosing between a balanced family-style skillet and a spicier version with the same creamy tomato base.
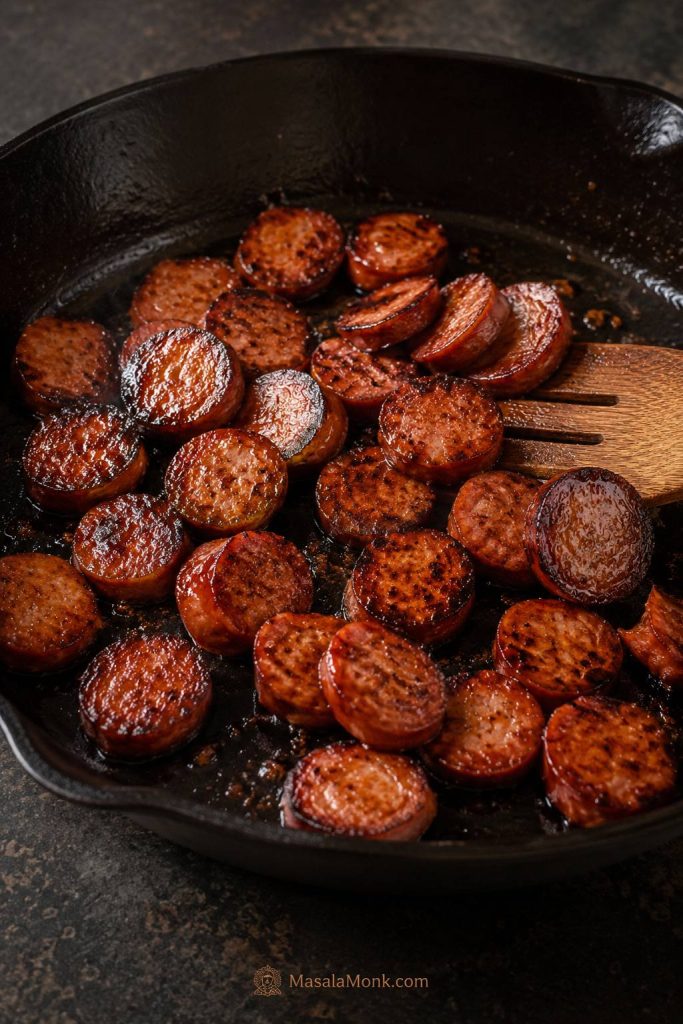
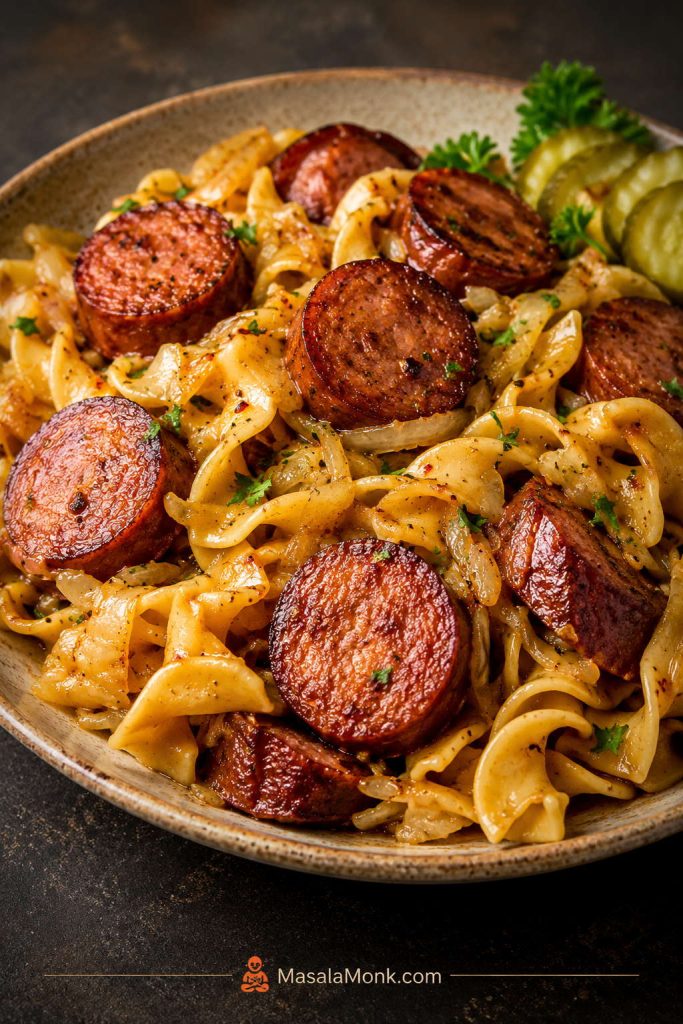
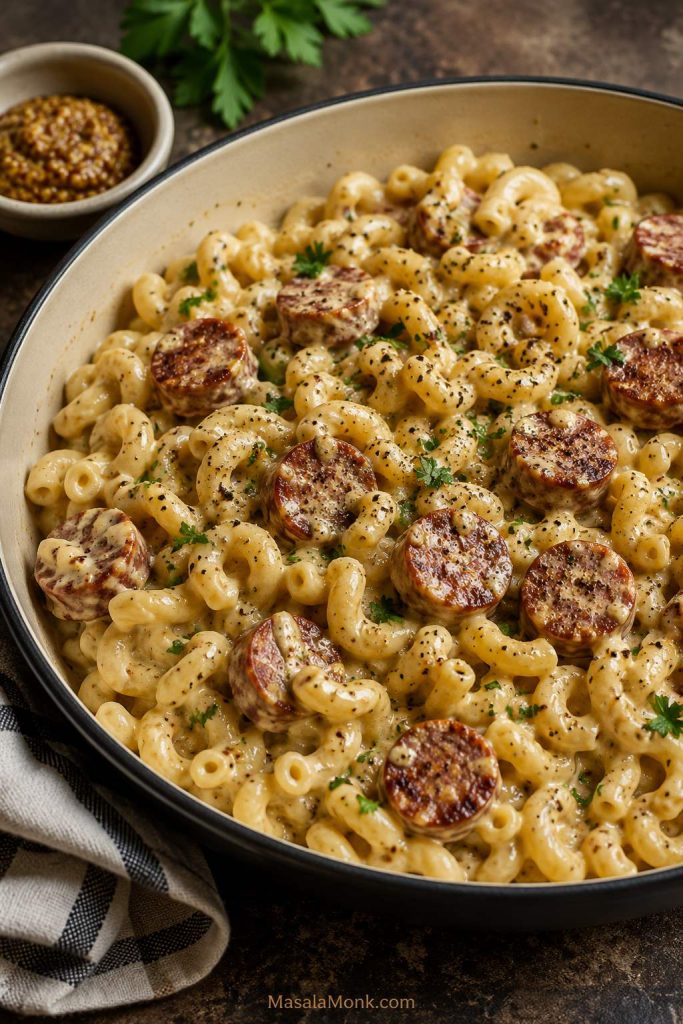
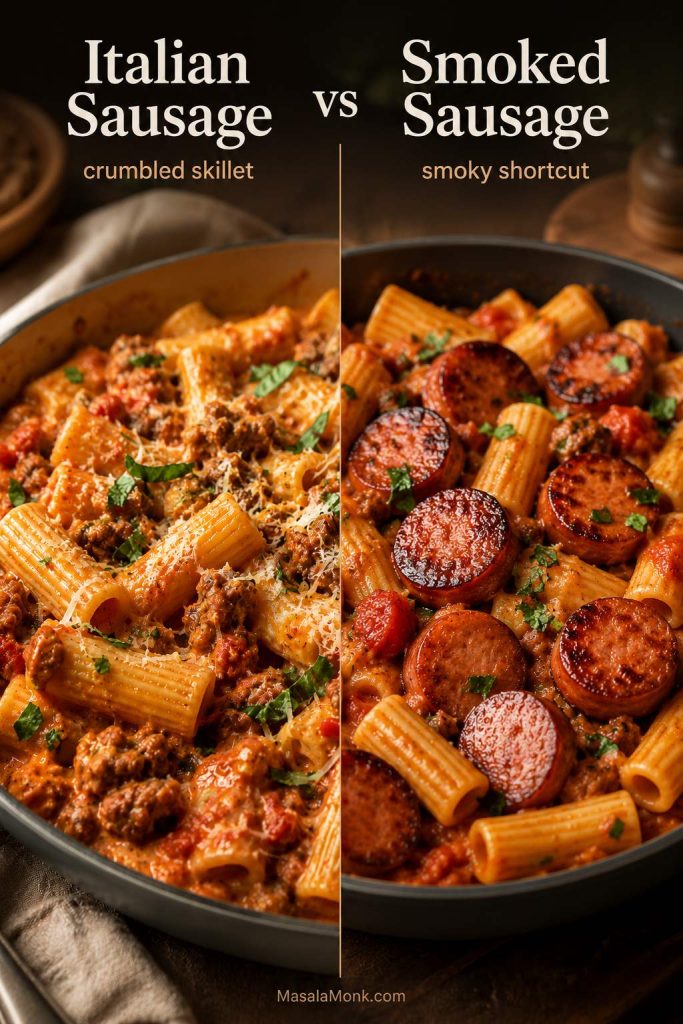
Crumbled Italian Sausage vs Sliced Smoked Sausage
These two sausage styles behave differently in the pan, so the image below shows why crumbles and coins lead to different pasta textures.
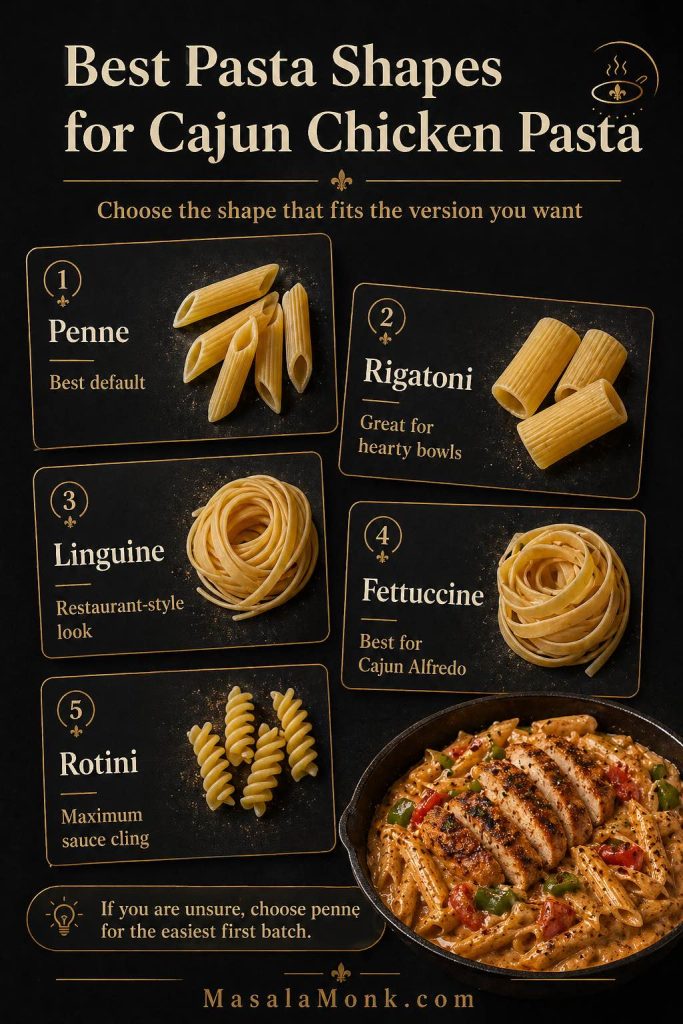
Best Pasta Shapes for Sausage Pasta
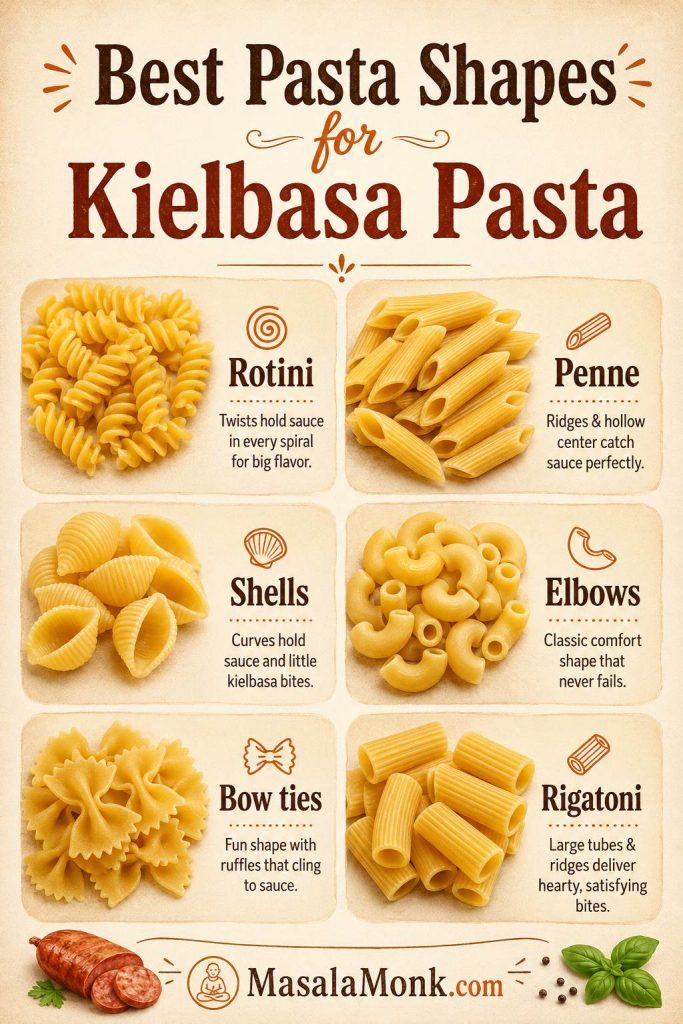
Short pasta shapes are best for this kind of sauce because they hold chunky bits better than long strands. Think tubes, cups, ridges, and curls — anything that gives the sausage and creamy tomato base somewhere to land.
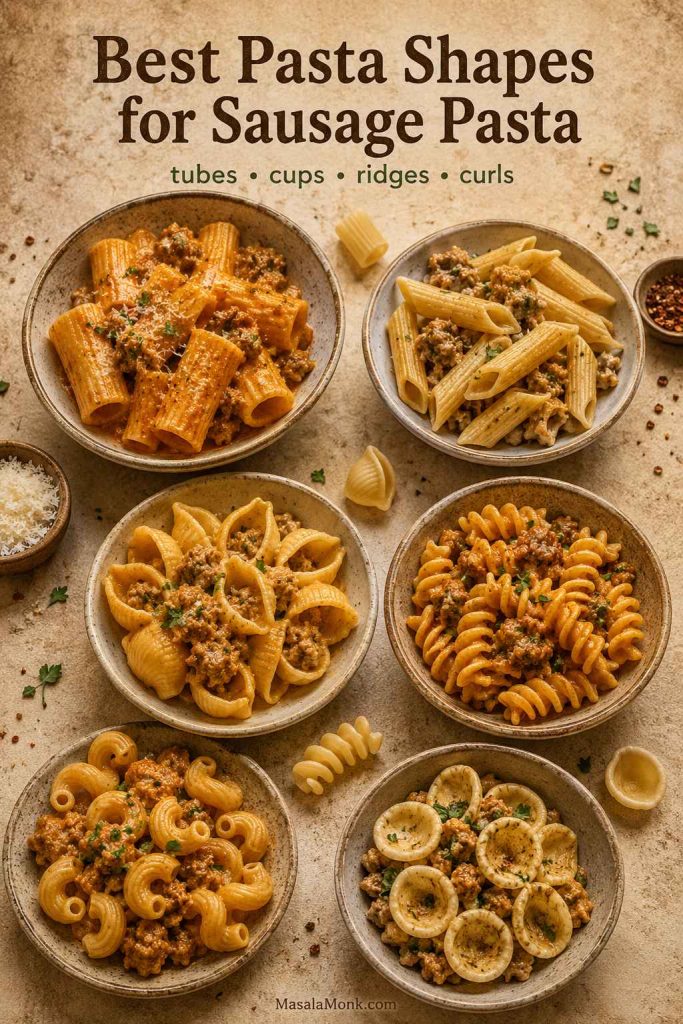
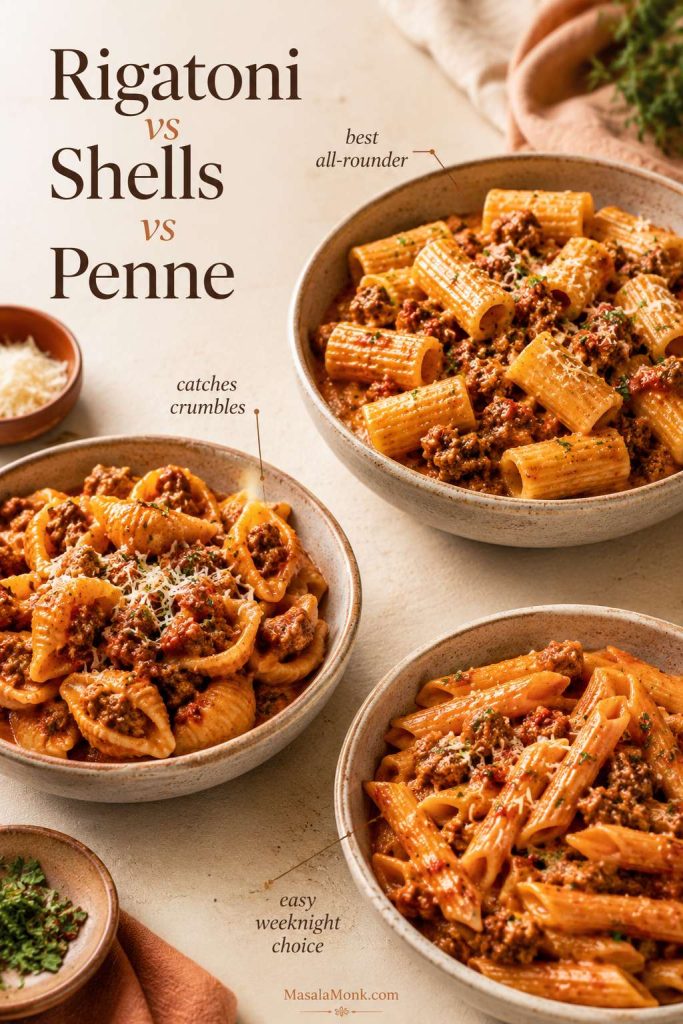
If you only want one answer, choose rigatoni. It is big enough to feel generous, ridged enough to hold the creamy tomato base, and hollow enough to catch little pieces of sausage.
| Pasta Shape | Why It Works |
|---|---|
| Rigatoni | Most reliable all-rounder. The tubes and ridges catch sausage and sauce beautifully. |
| Penne | Easy, reliable, and common. A safe weeknight choice for a tomato-parmesan finish. |
| Shells | Little bowls for sausage crumbles, parmesan, and creamy red sauce. |
| Fusilli or rotini | The twists catch thicker sauces well. |
| Cavatappi | Great for cheesy, smoked sausage, or baked variations. |
| Orecchiette | Small cups that hold sausage crumbles and greens especially well. |
| Spaghetti or linguine | Works in a pinch, but chunky sausage crumbles are harder to distribute evenly. |
Rigatoni vs Shells vs Penne
These three shapes are the easiest choices for most home cooks: rigatoni for structure, shells for catching crumbles, and penne for a reliable pantry option.
Short Pasta vs Long Pasta
Long pasta can still taste good, but short shapes distribute chunky sausage sauce more evenly from the first bite to the bottom of the bowl.
Whatever shape you choose, cook it slightly under al dente before it goes into the sauce. The pasta finishes in the skillet, absorbs flavor, and stays firmer on the plate.
You do not need a special pasta shape to make this work, but a ridged short shape makes the whole dish feel more generous because every bite carries sauce and sausage.
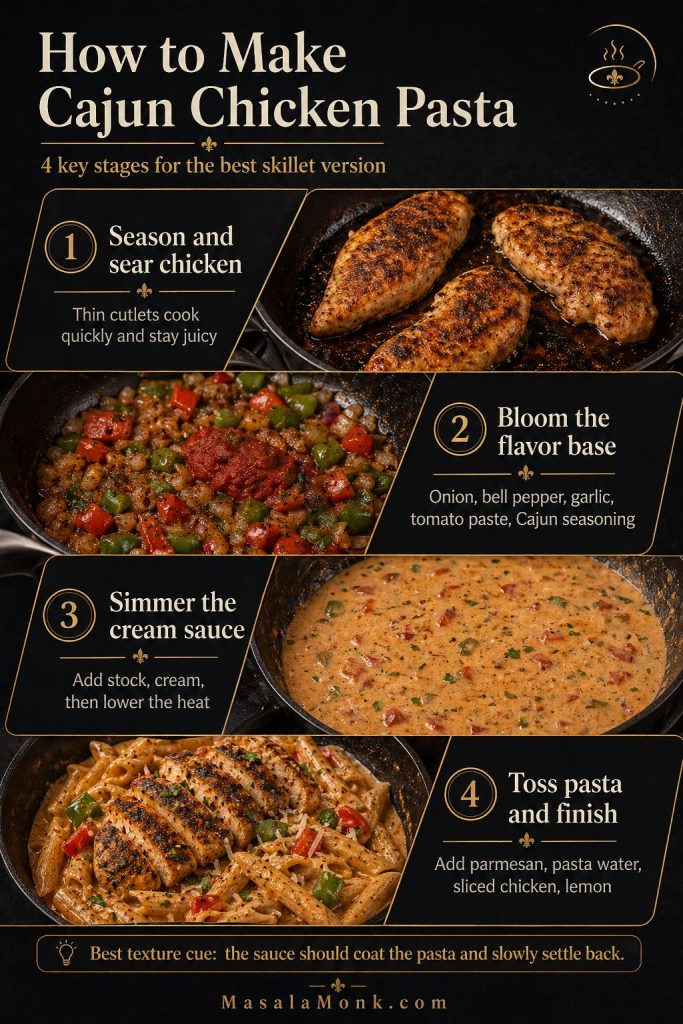
Step-by-Step Tips That Make Sausage Pasta Better
The recipe card gives you the full method, so this section focuses on the cues that make the difference between a decent pasta and a skillet you want to make again.
Pull the pasta before it is fully done
Cook the pasta 1 to 2 minutes shy of al dente so it can finish in the skillet. If it is already soft before it reaches the sauce, it can turn heavy by the time everything is tossed together.
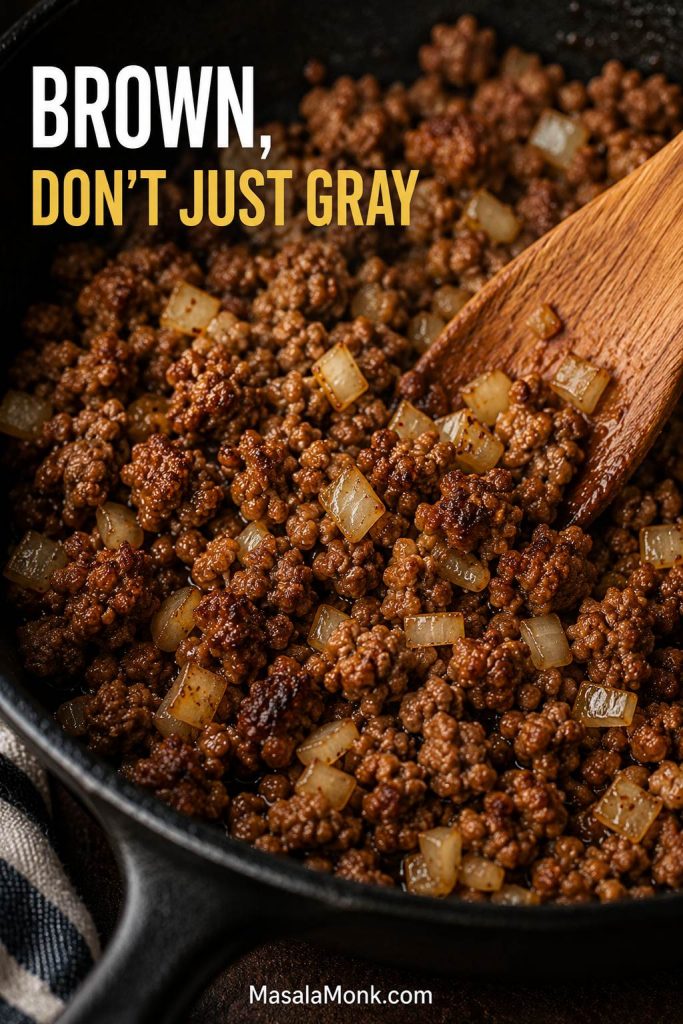
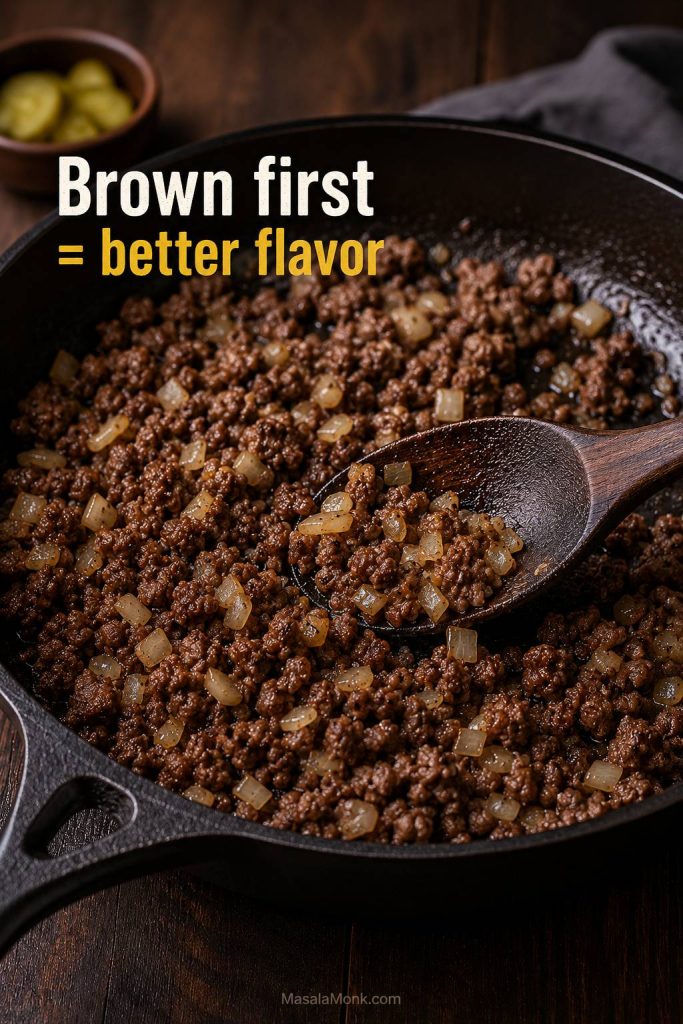
Brown the sausage until it has edges
You want browned edges and little savory bits in the pan, not pale sausage that simply looks cooked. Brown, then sauce. If the sausage only turns gray, the pasta will taste flatter.
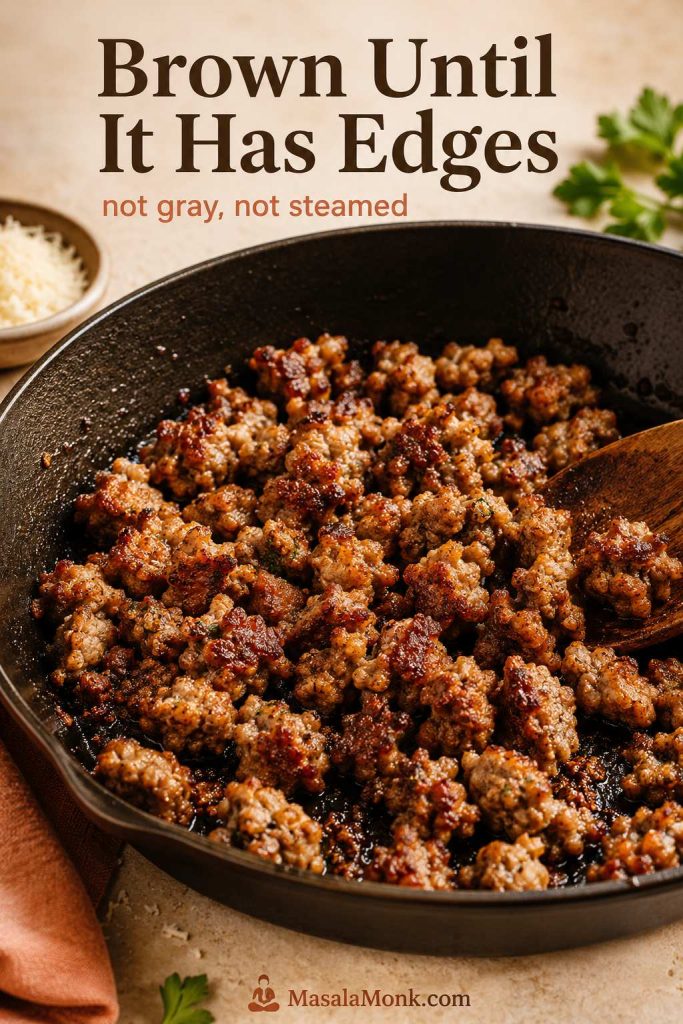
A little sausage fat is flavor; too much can make the finished pasta feel greasy. If there is more than about 1 tablespoon fat in the pan after browning, spoon off the excess before adding the onion.
Cook the tomato paste until it smells richer
Tomato paste tastes better when it gets a minute in the hot pan with the sausage, onion, garlic, and seasoning. It should darken slightly and smell deeper before the crushed tomatoes or passata go in.
Toss until the pasta looks coated, not buried
Once the pasta goes into the skillet, the goal is coating, not drowning. Start with 1/4 cup / 60 ml reserved pasta water, toss, and add more only as needed. Different pasta shapes and brands absorb liquid differently.
Finish gently with parmesan and herbs
Parmesan melts best on low heat or off heat. Stir it in gently, then loosen the pan if needed. Creamy pasta is at its best right after tossing; if it tightens while everyone is getting to the table, add a small splash of warm water, milk, or cream and toss again.
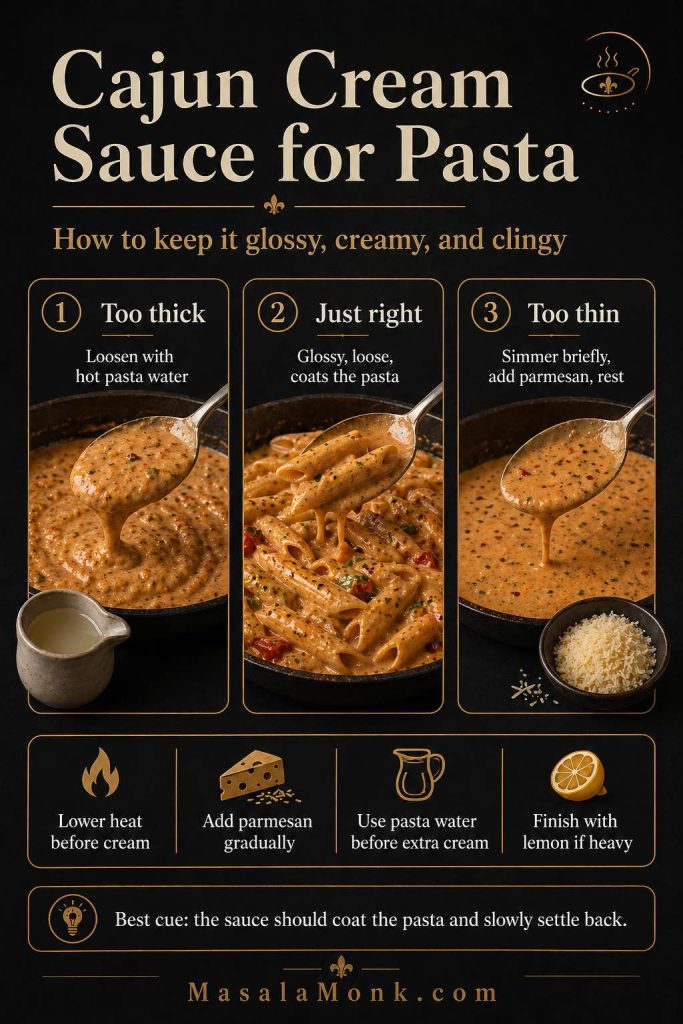
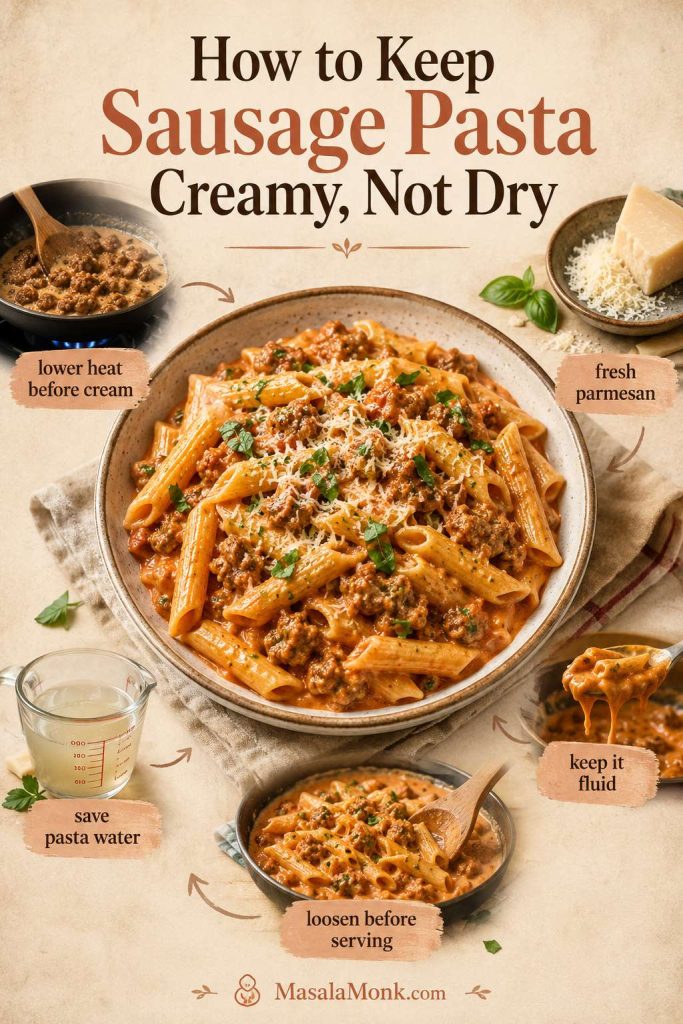
How to Keep Sausage Pasta Creamy, Not Dry
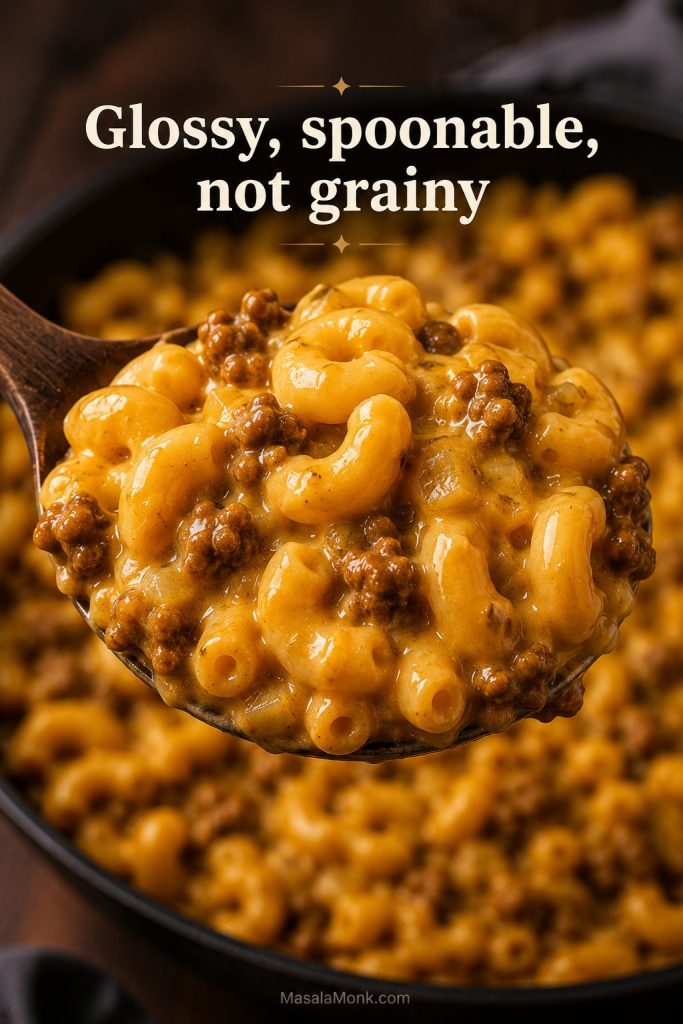
Creamy sausage pasta should not feel stiff or heavy. The pasta should look coated, not buried, and the pan should still move when you toss it.
Already fixing a problem? Jump to Troubleshooting. Working with leftovers? Go to Reheating Creamy Sausage Pasta.
- Lower the heat before adding cream. Tomato is acidic, and high heat can make cream sauces split or look oily.
- Use freshly grated parmesan. It melts more smoothly and tastes better than pre-shredded cheese.
- Save pasta water. It loosens the pan without making the dish watery.
- Keep the skillet a little fluid. Pasta keeps absorbing liquid after you turn off the heat.
- Taste before serving. Sausage and parmesan are salty, so the final salt level depends on the brands you use.
- Add liquid before the pasta looks dry. A small splash at the right moment keeps the sauce creamy instead of rescuing it after it has already tightened.
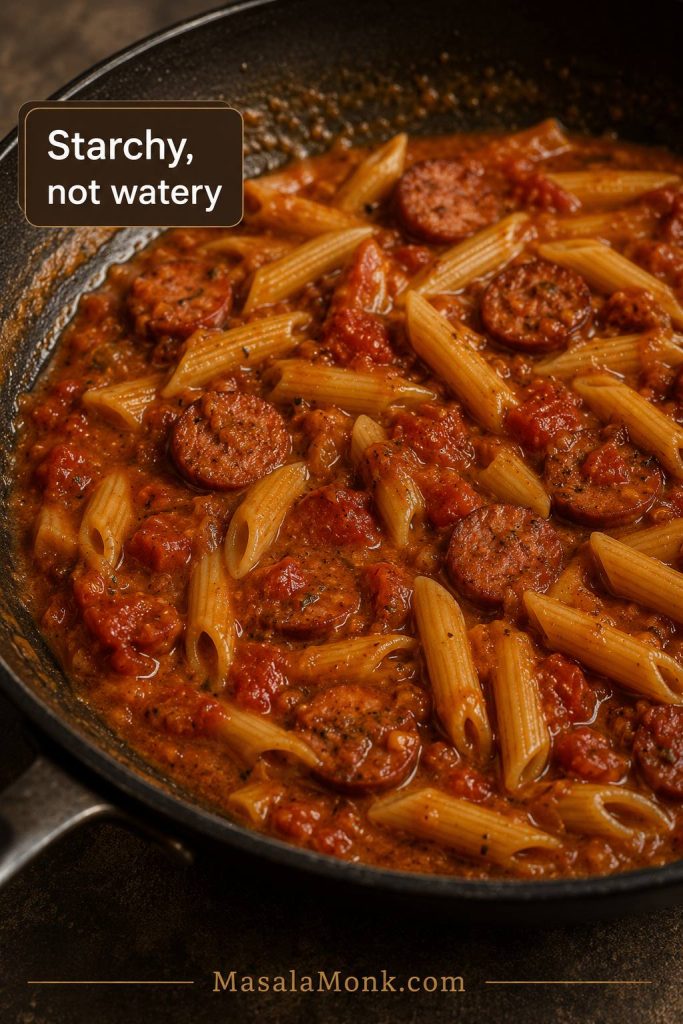
Save Pasta Water for a Glossy Finish
Keep a cup of cloudy pasta water nearby before draining. It helps the creamy tomato sauce loosen while keeping enough body to cling to the pasta.

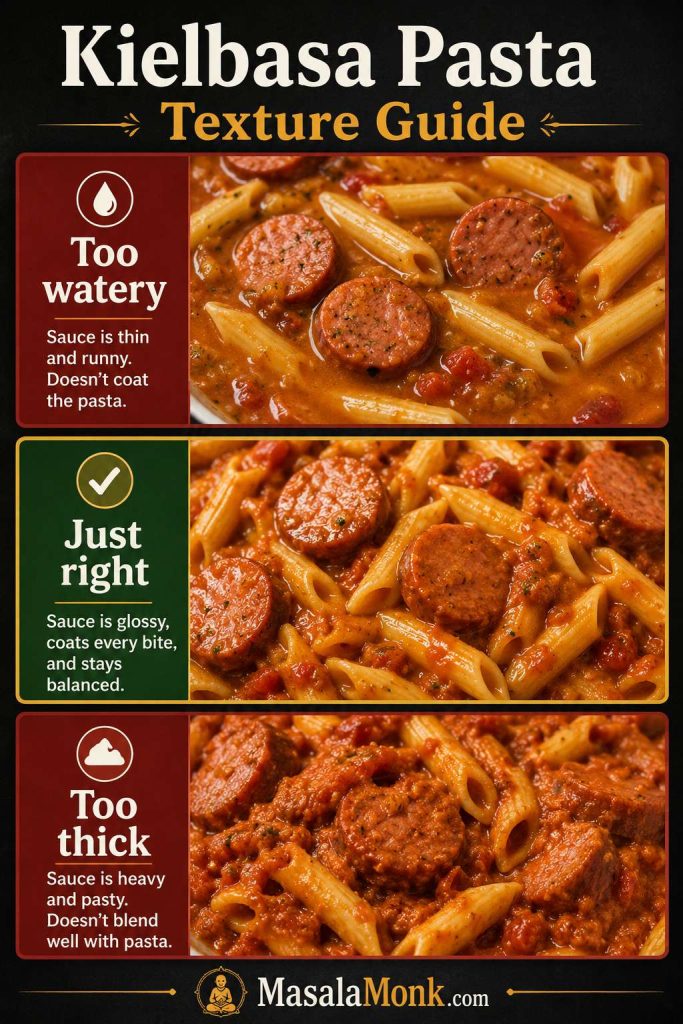
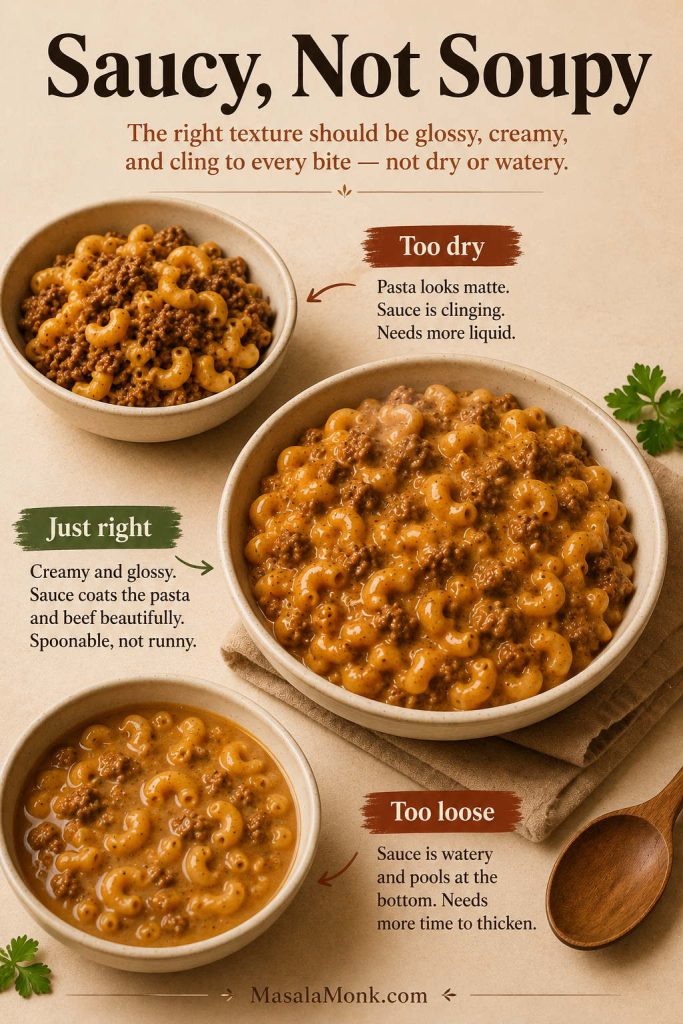
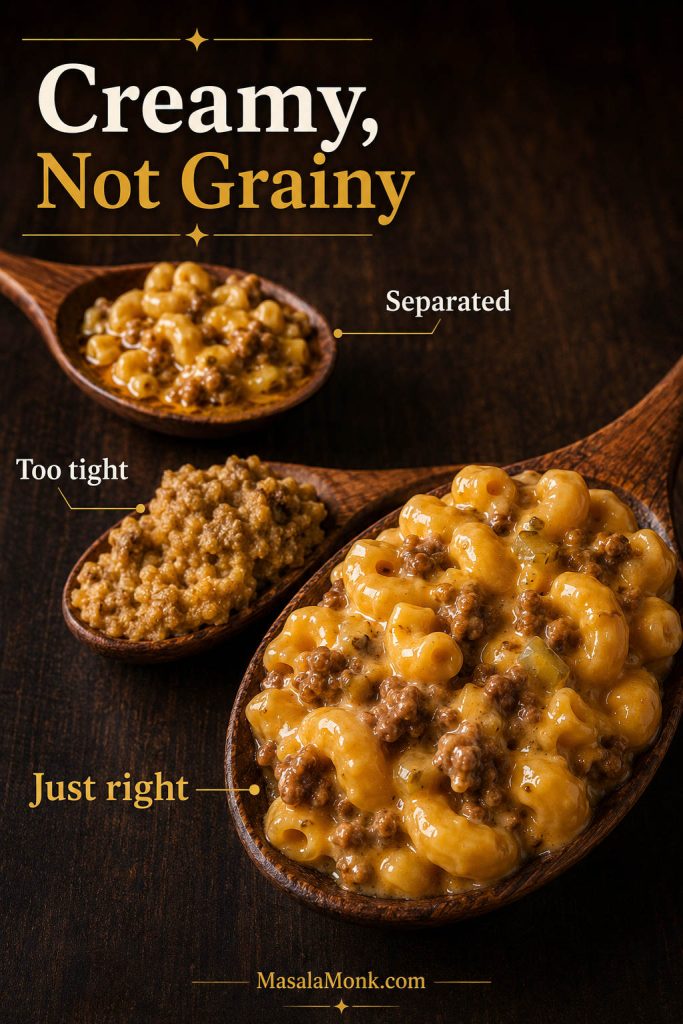
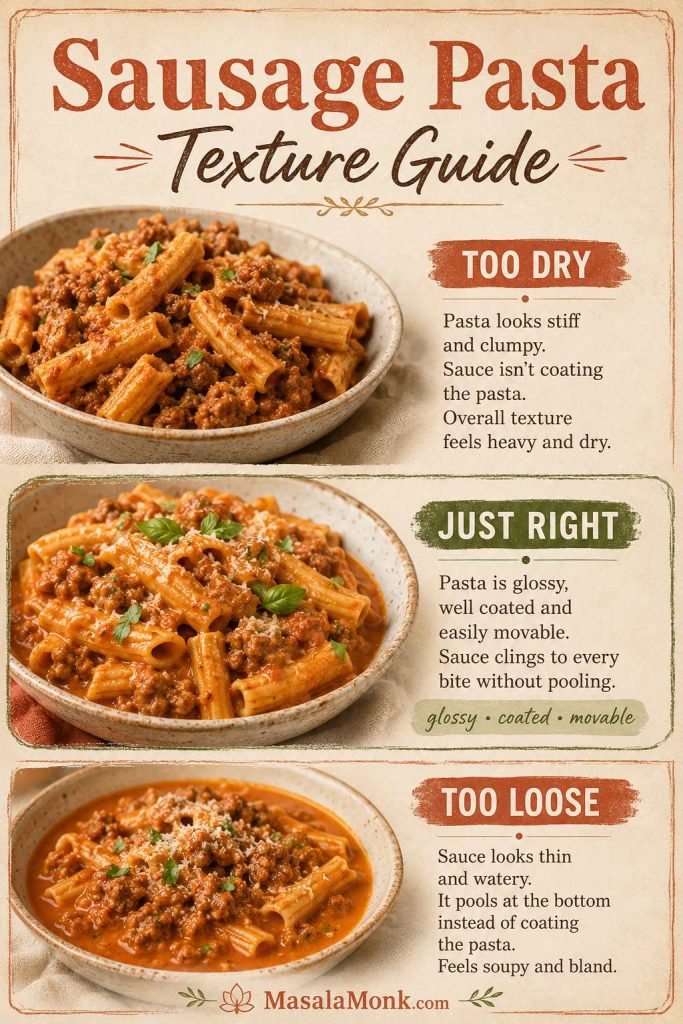
Sausage Pasta Texture Guide
Use this texture guide when the skillet looks too tight or too loose. The goal is a glossy coating that moves when tossed, not a stiff mound or a watery pool.
If you like the tomato-cream balance here, this Vodka Pasta Recipe uses the same family of tomato paste, cream, parmesan, and pasta water in a smoother red sauce.
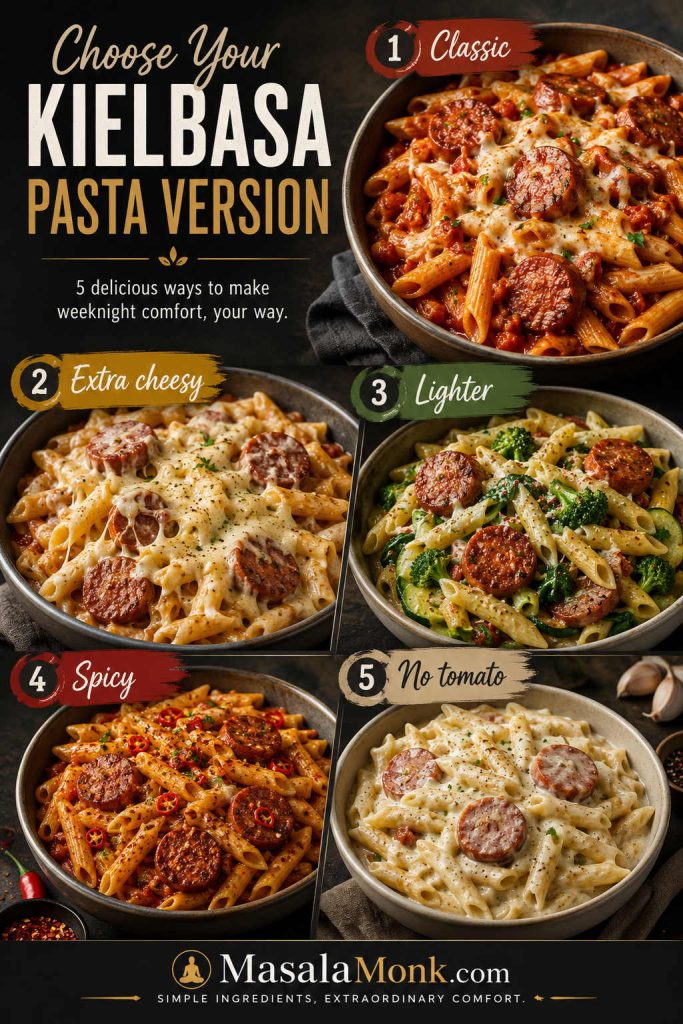
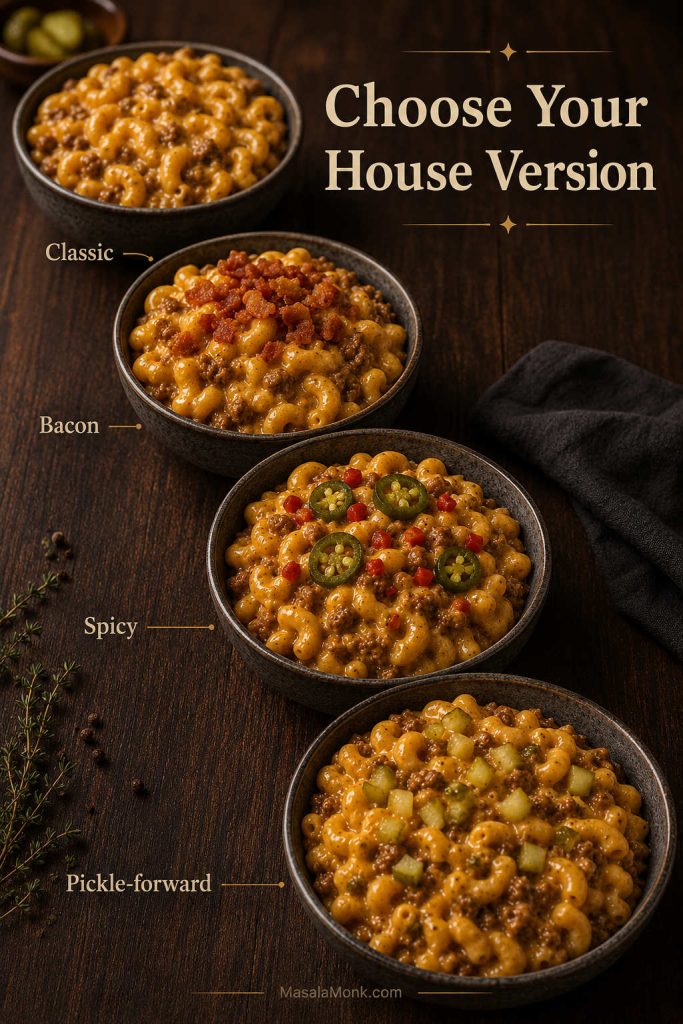
Easy Variations
Once you understand the base skillet, the variations stop feeling like separate recipes. You are just deciding what mood the pasta should have: creamier, smokier, spicier, baked, brighter, or lighter.
Want vegetables instead of a full variation? Jump to Add-Ins. Want the oven version? Go to Sausage Pasta Bake. Want fewer dishes? See One-Pot Sausage Pasta.
| If You Want It… | Do This |
|---|---|
| Creamier | Use less crushed tomato and increase the cream to 1 cup / 240 ml. |
| More tomato-forward | Use a full 28-ounce / 800 g can of crushed tomatoes or passata and reduce or skip the cream. |
| Smoky | Use browned smoked sausage or kielbasa coins instead of crumbled raw Italian sausage. |
| Baked | Keep the sauce looser, transfer to a 9×13-inch / 23×33 cm dish, and top with cheese. |
| One-pot | Use controlled liquid, simmer gently, and add cream and parmesan near the end. |
| Lighter | Use chicken or turkey sausage, a little olive oil, and plenty of herbs. |
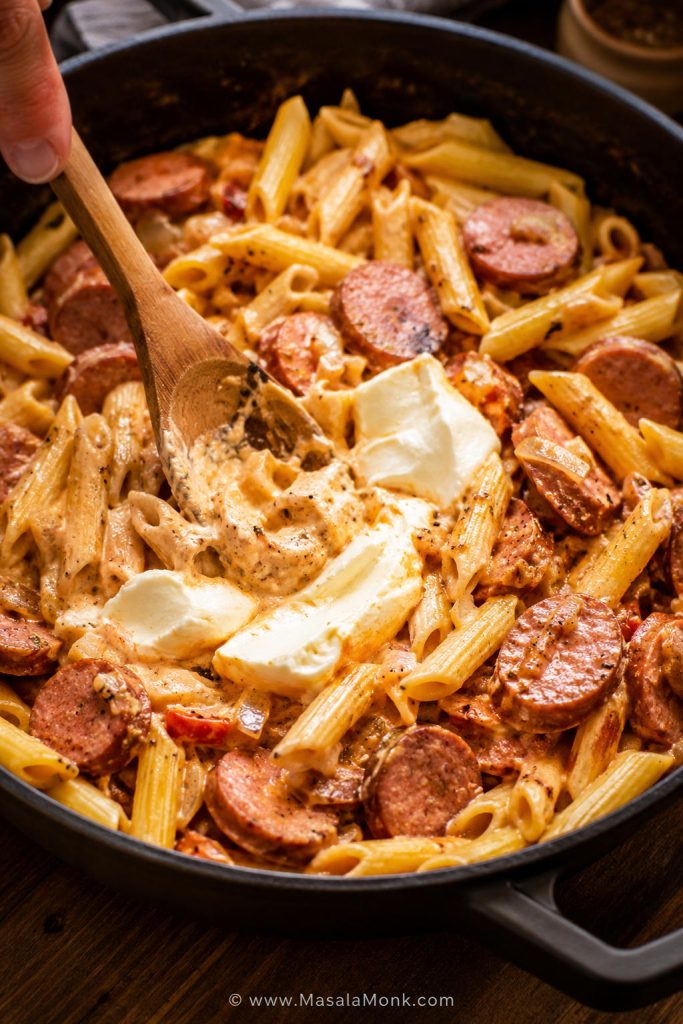
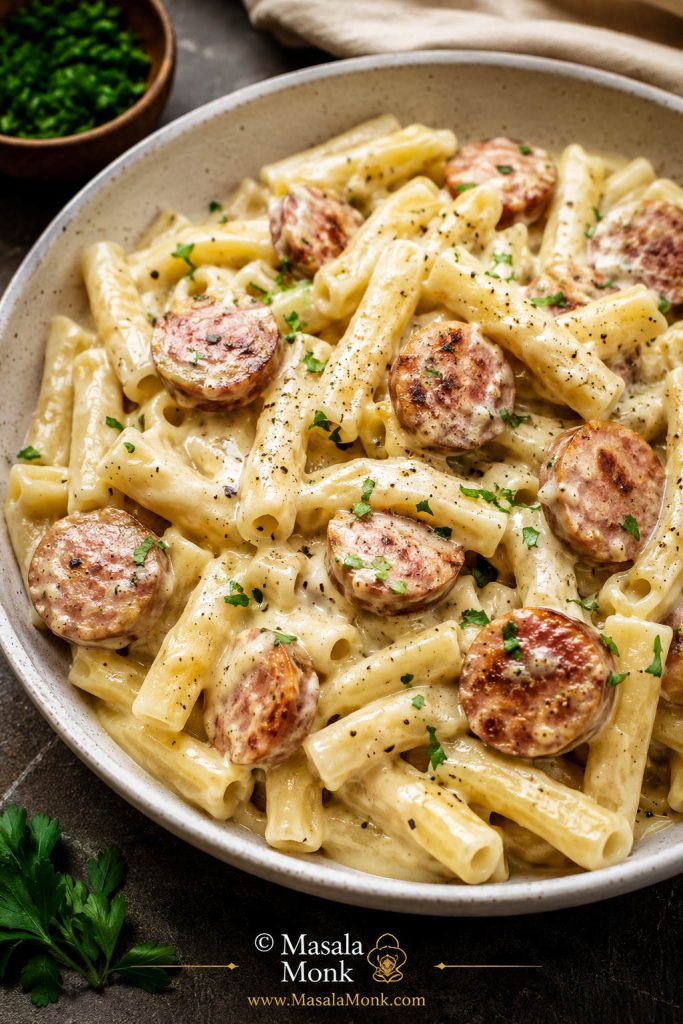
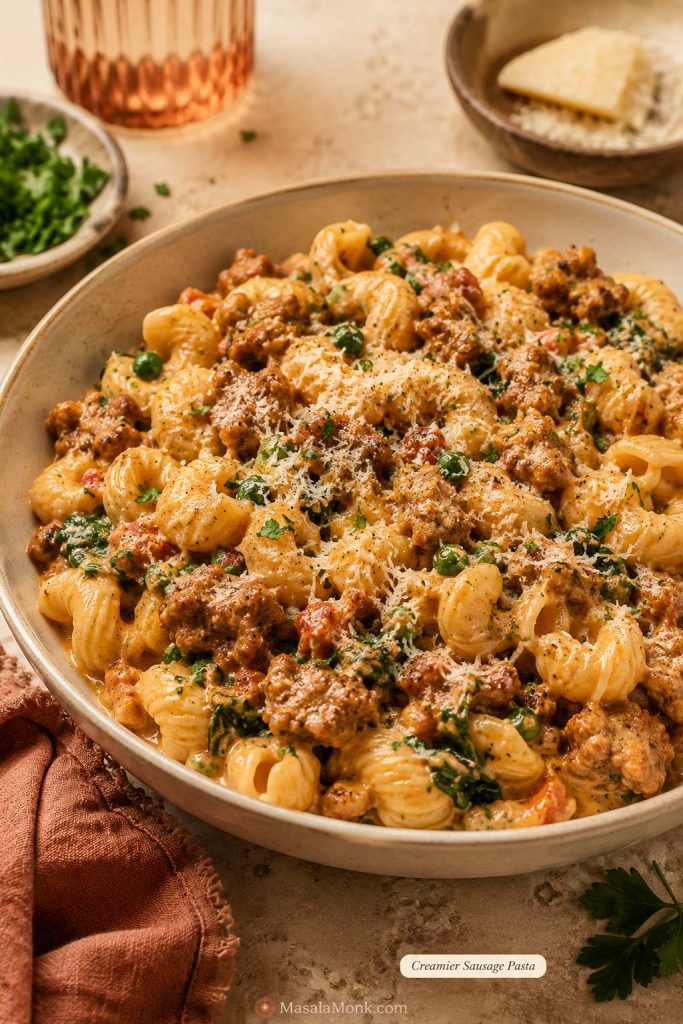
Creamier Sausage Pasta
For a richer, softer version, reduce the crushed tomatoes to about 1 cup / 240 ml and increase the cream to 1 cup / 240 ml. Add a little extra parmesan at the end. This version feels fuller, so spinach, peas, or broccoli help balance the bowl.
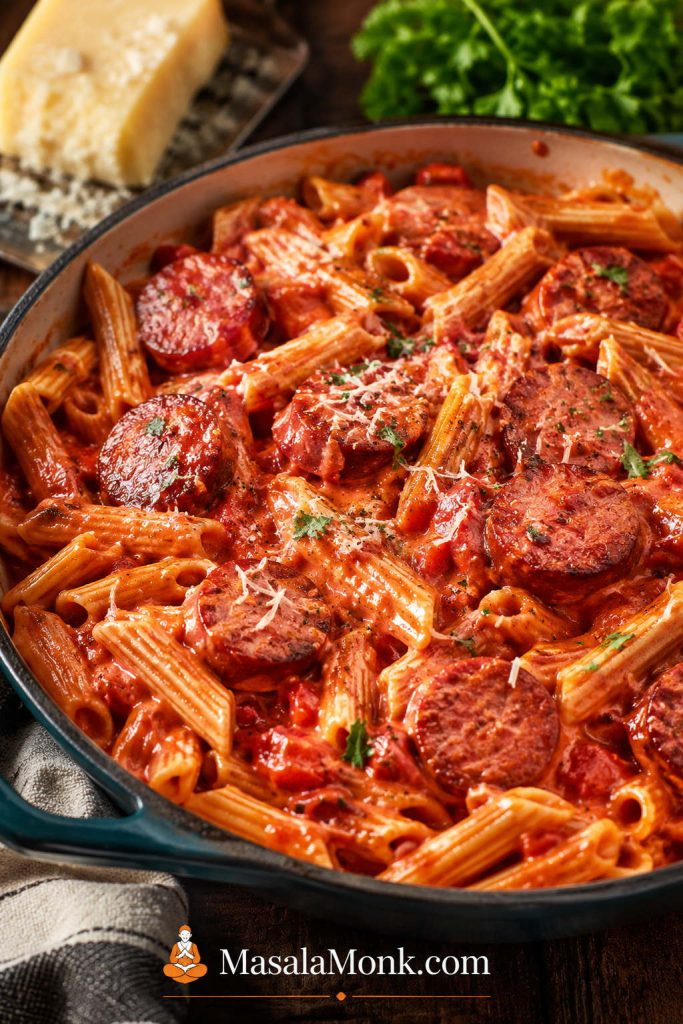
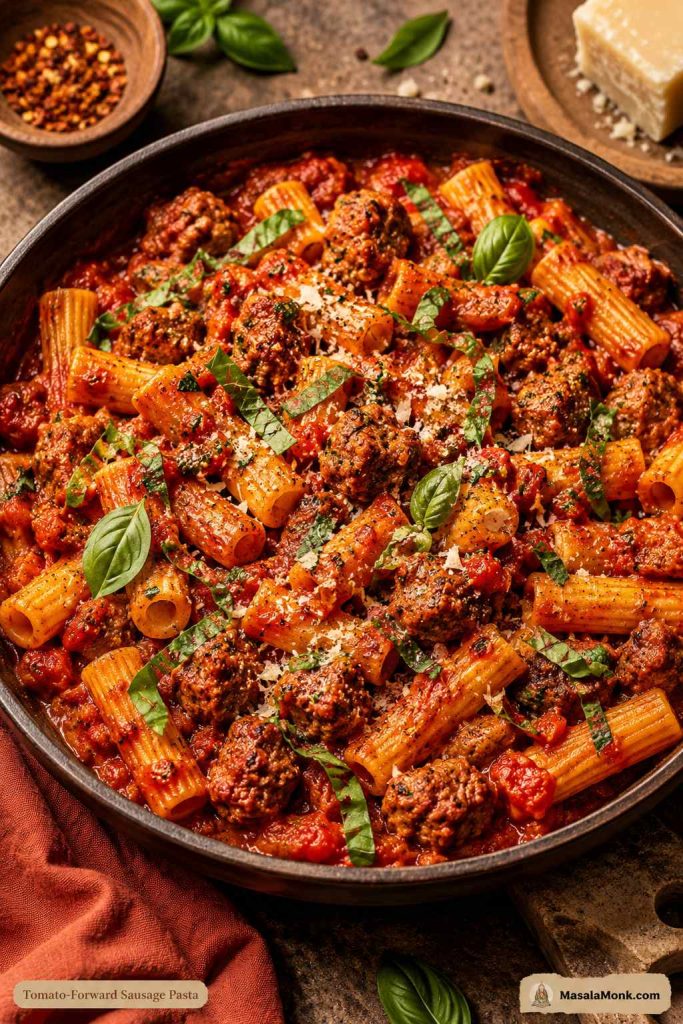
Tomato-Forward Sausage Pasta
For a brighter, redder pasta, use a full 28-ounce / 800 g can of crushed tomatoes or passata and reduce the cream to 1/4 cup / 60 ml, or skip it entirely. Add basil at the end for freshness.
Fresh tomatoes can work here too, but they need more reduction than canned tomatoes or passata. This Tomato Sauce From Fresh Tomatoes guide shows how to cook them down until the flavor is concentrated enough for pasta.
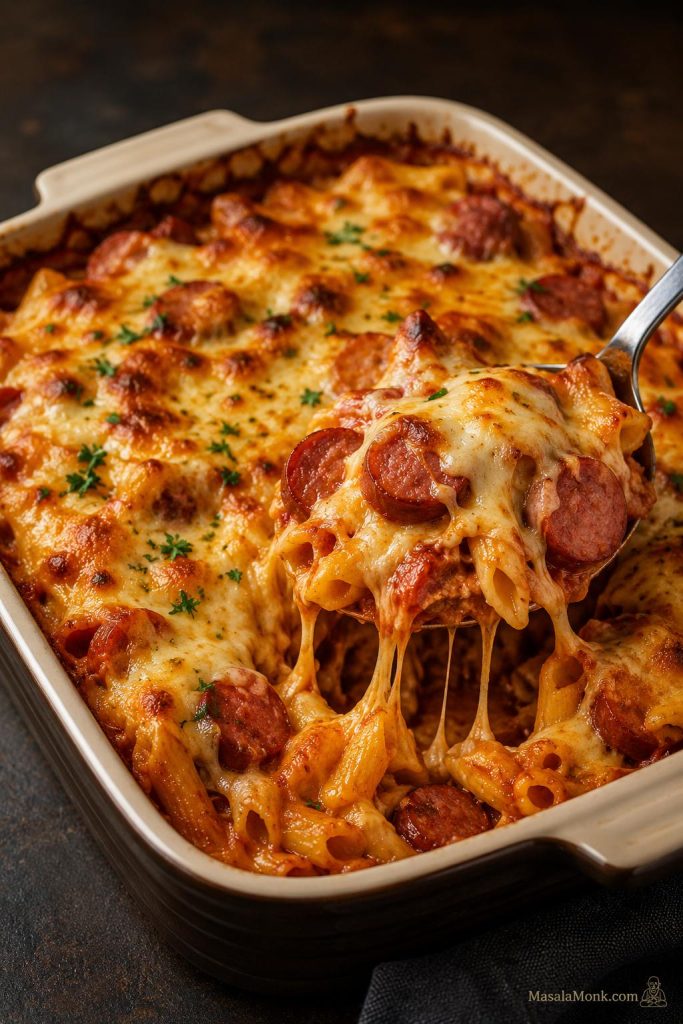
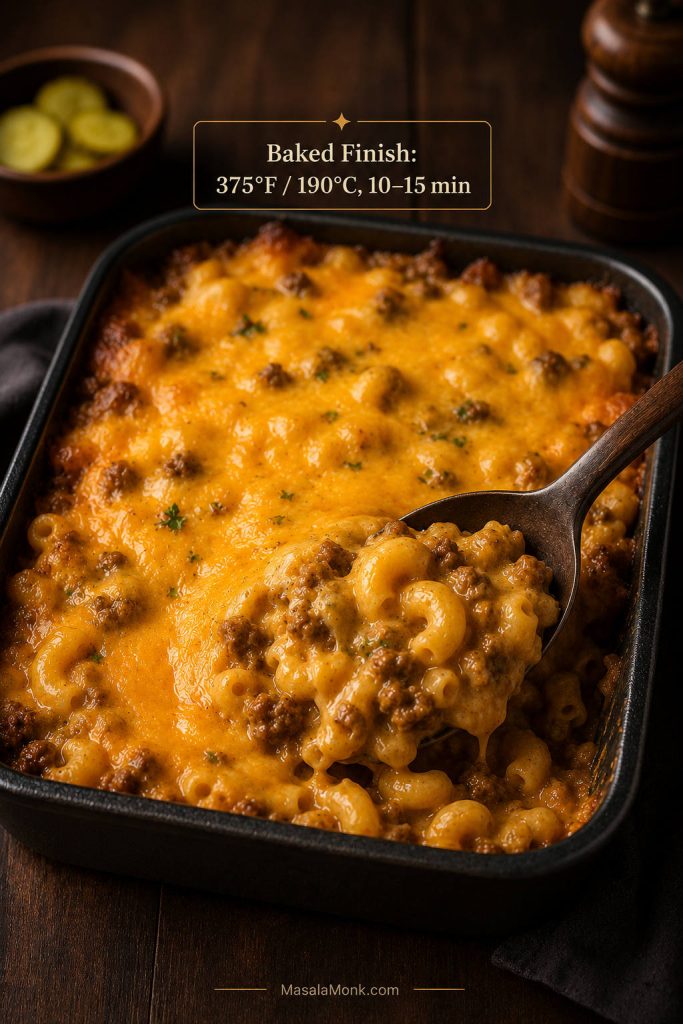
Sausage Pasta Bake
To turn this into a sausage pasta bake, cook the pasta 2 minutes under al dente and keep the sauce looser than usual. For the full recipe, use a 9×13-inch / 23×33 cm baking dish. Transfer everything to the dish, top with 1 to 1 1/2 cups shredded mozzarella and extra parmesan, then bake at 375°F / 190°C for 15 to 20 minutes, or until bubbling around the edges.
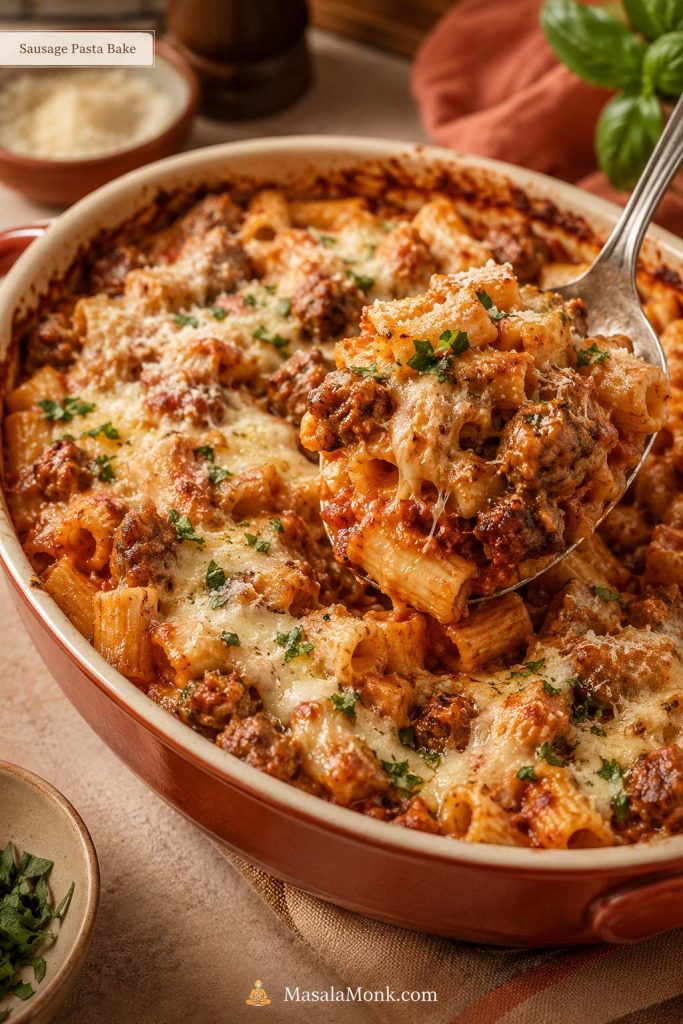
For a golden top, broil for 1 to 3 minutes at the end, watching closely. Let the pasta bake rest for 5 to 10 minutes before serving so the sauce settles instead of running straight out of the dish.
The key with baked pasta is moisture. Loose sauce is not a mistake; it is insurance. If the pasta and sauce look perfect before baking, the final bake may turn dry.
This is the version to make when you want scoopable, cheesy comfort rather than a glossy skillet pasta.
How to Turn Sausage Pasta Into a Bake
Use the visual steps below as a quick bake-conversion check before the dish goes into the oven.
When baked pasta is the goal, this Baked Ziti Recipe goes deeper into cheese layers, make-ahead timing, and the saucier texture baked pasta needs.
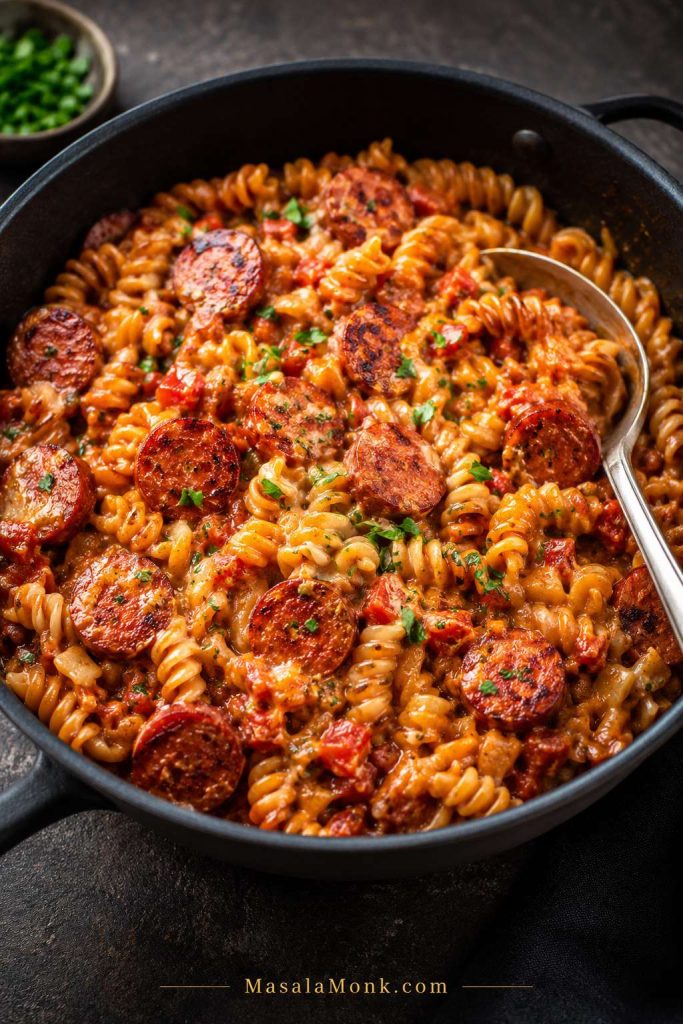
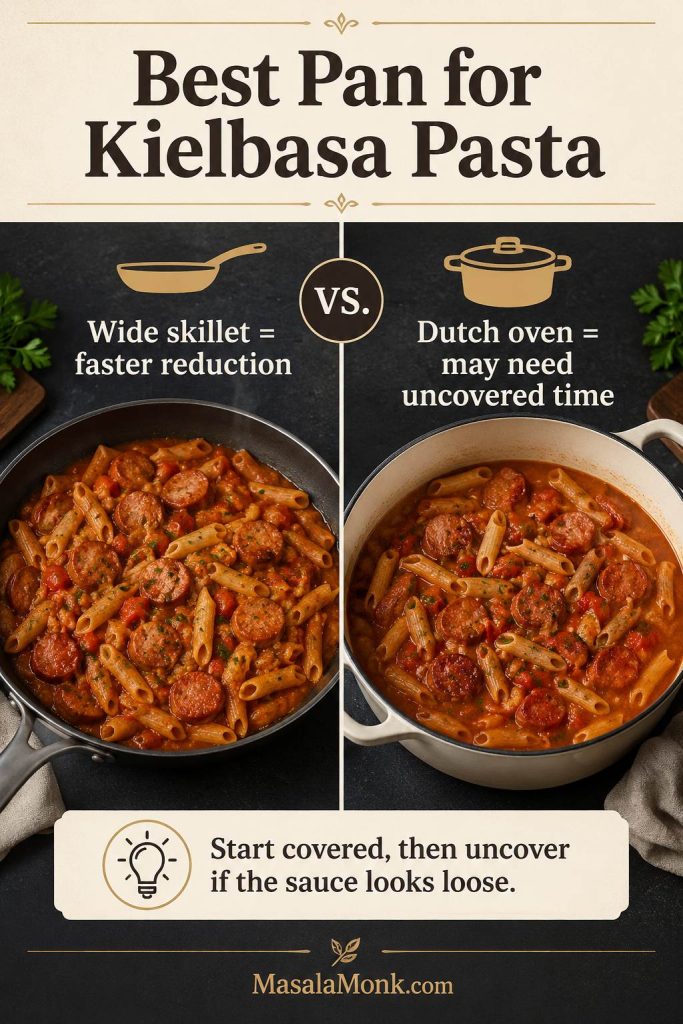
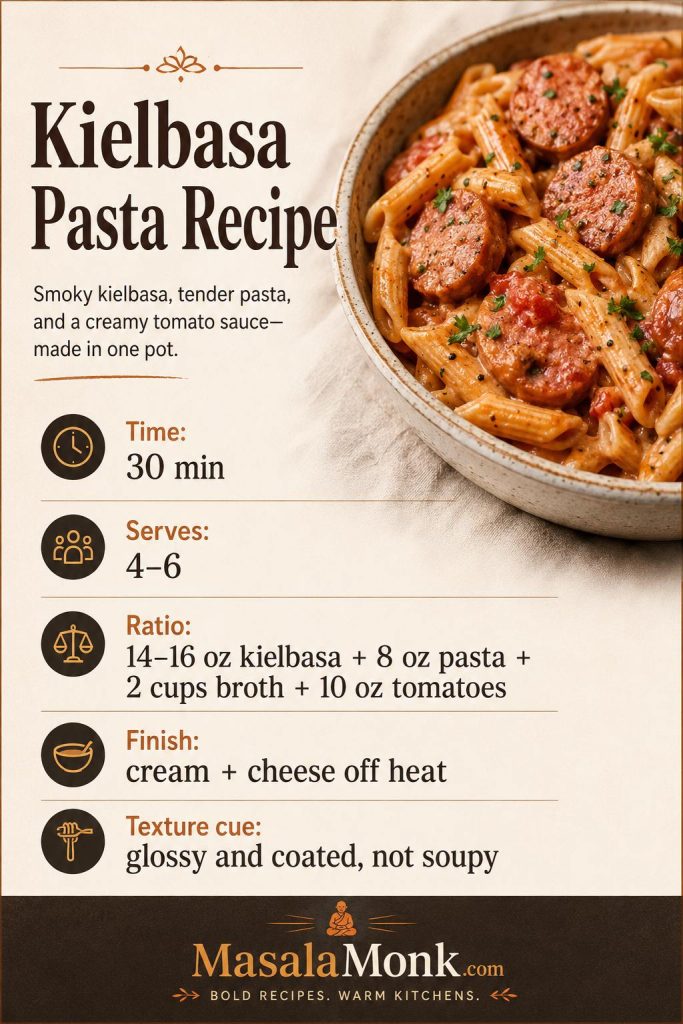
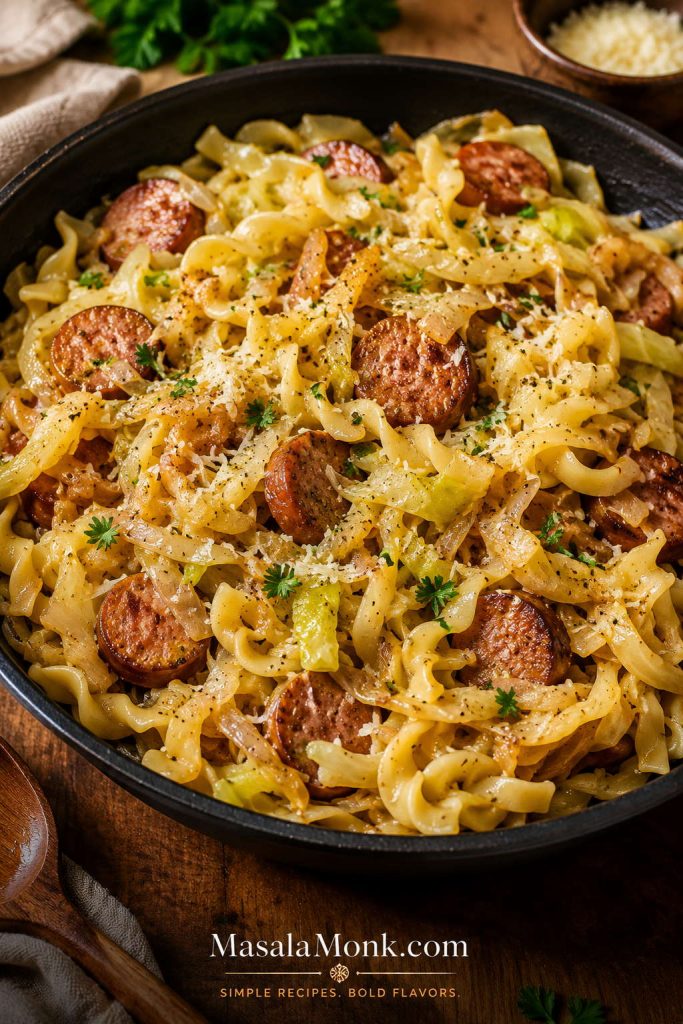
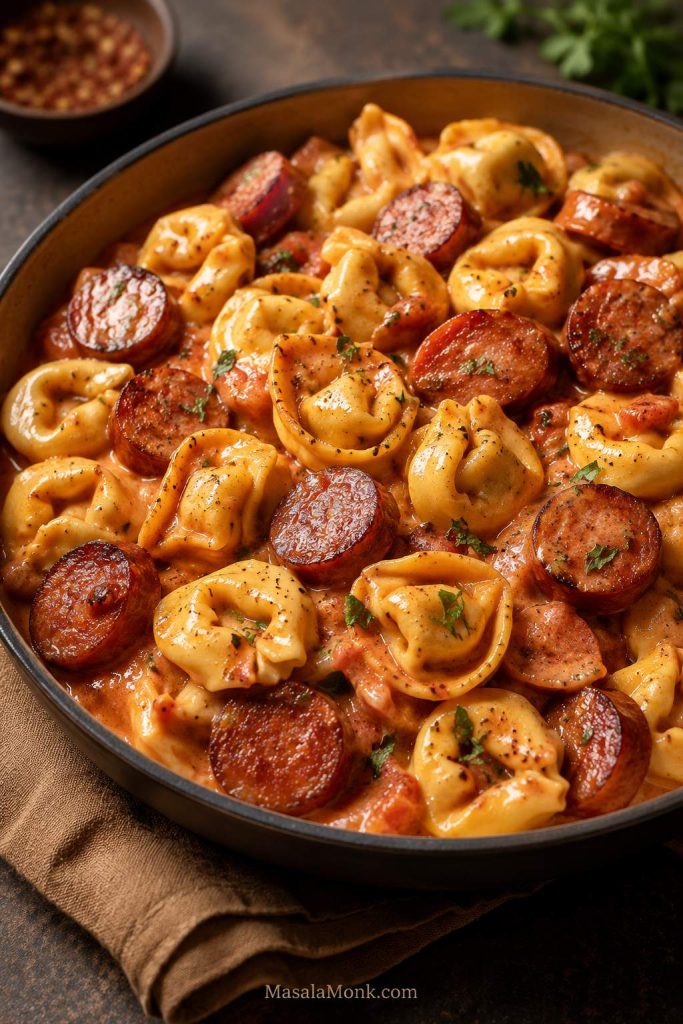
Smoked Sausage or Kielbasa Pasta
Smoked sausage and kielbasa turn this into a shortcut smoky dinner. Slice them into coins, brown both sides, and then fold them into the creamy tomato base. They are especially good with cavatappi, penne, cheddar, parmesan, spinach, peppers, or Cajun seasoning.
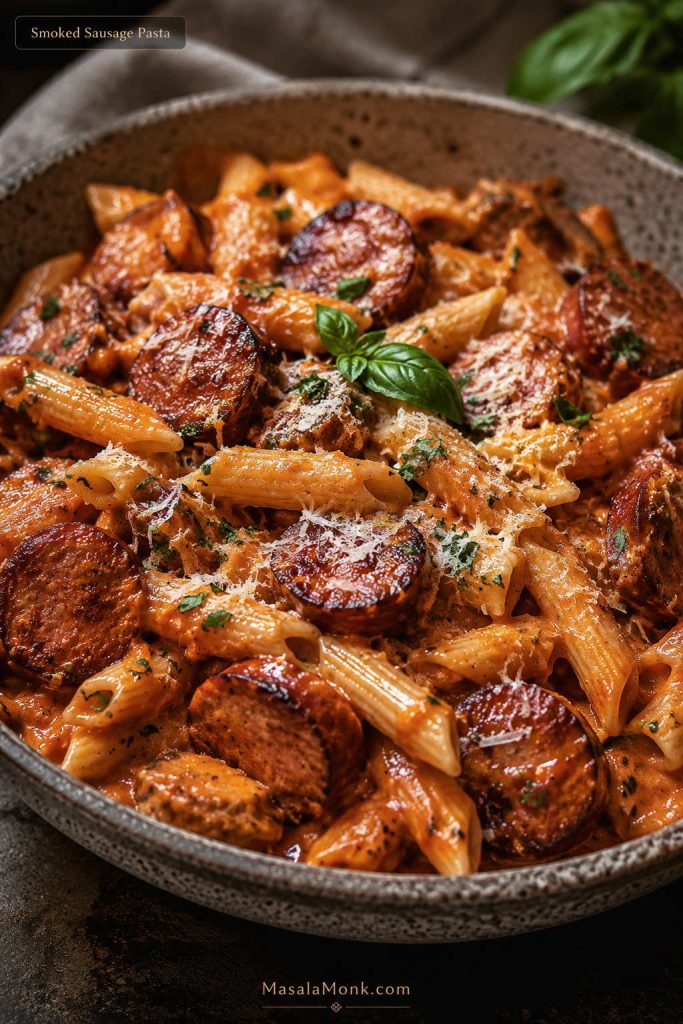
Smoky Kielbasa Pasta Variation
For this kielbasa pasta variation, thicker coins, cupped pasta shapes, and greens or peppers help it feel different from regular smoked sausage pasta.

For a full smoky version, use the method in this Kielbasa Pasta Recipe and treat this recipe as the Italian sausage version.
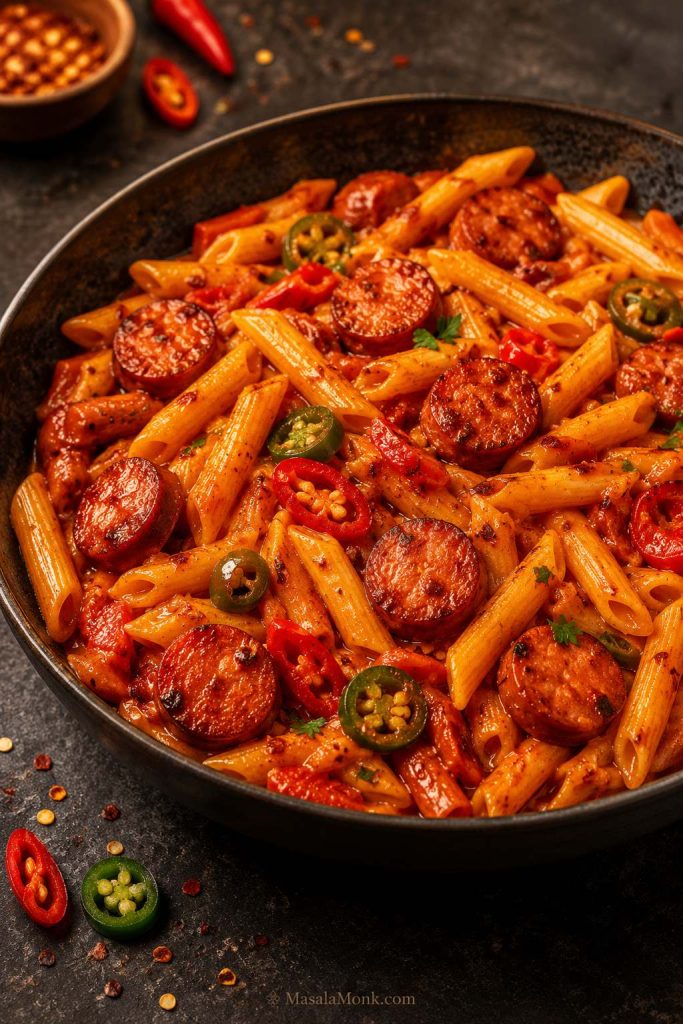
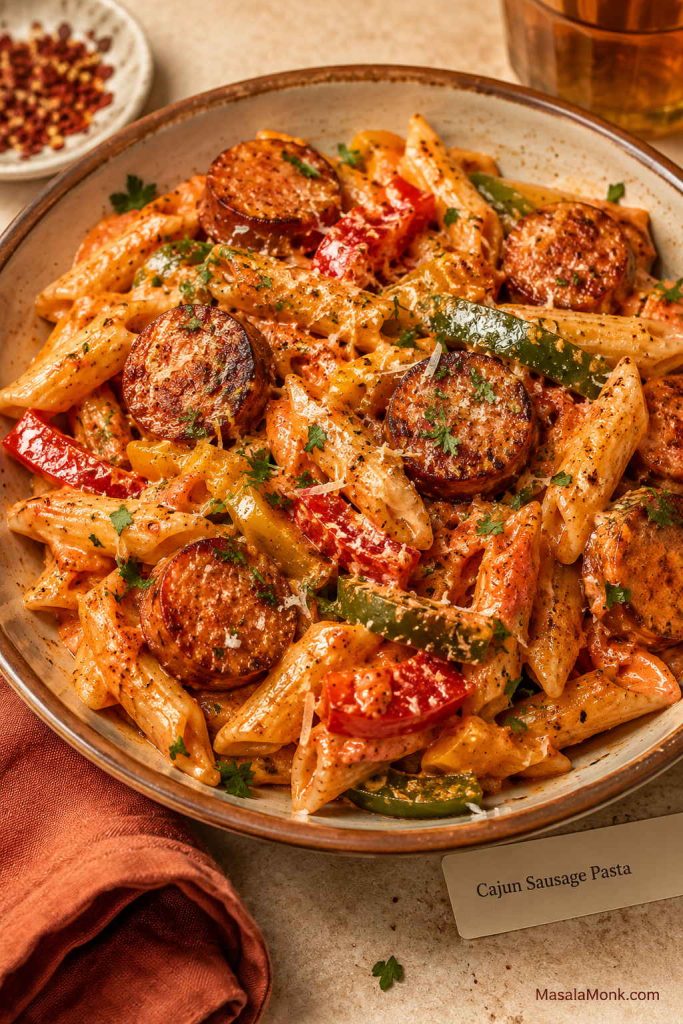
Cajun Sausage Pasta
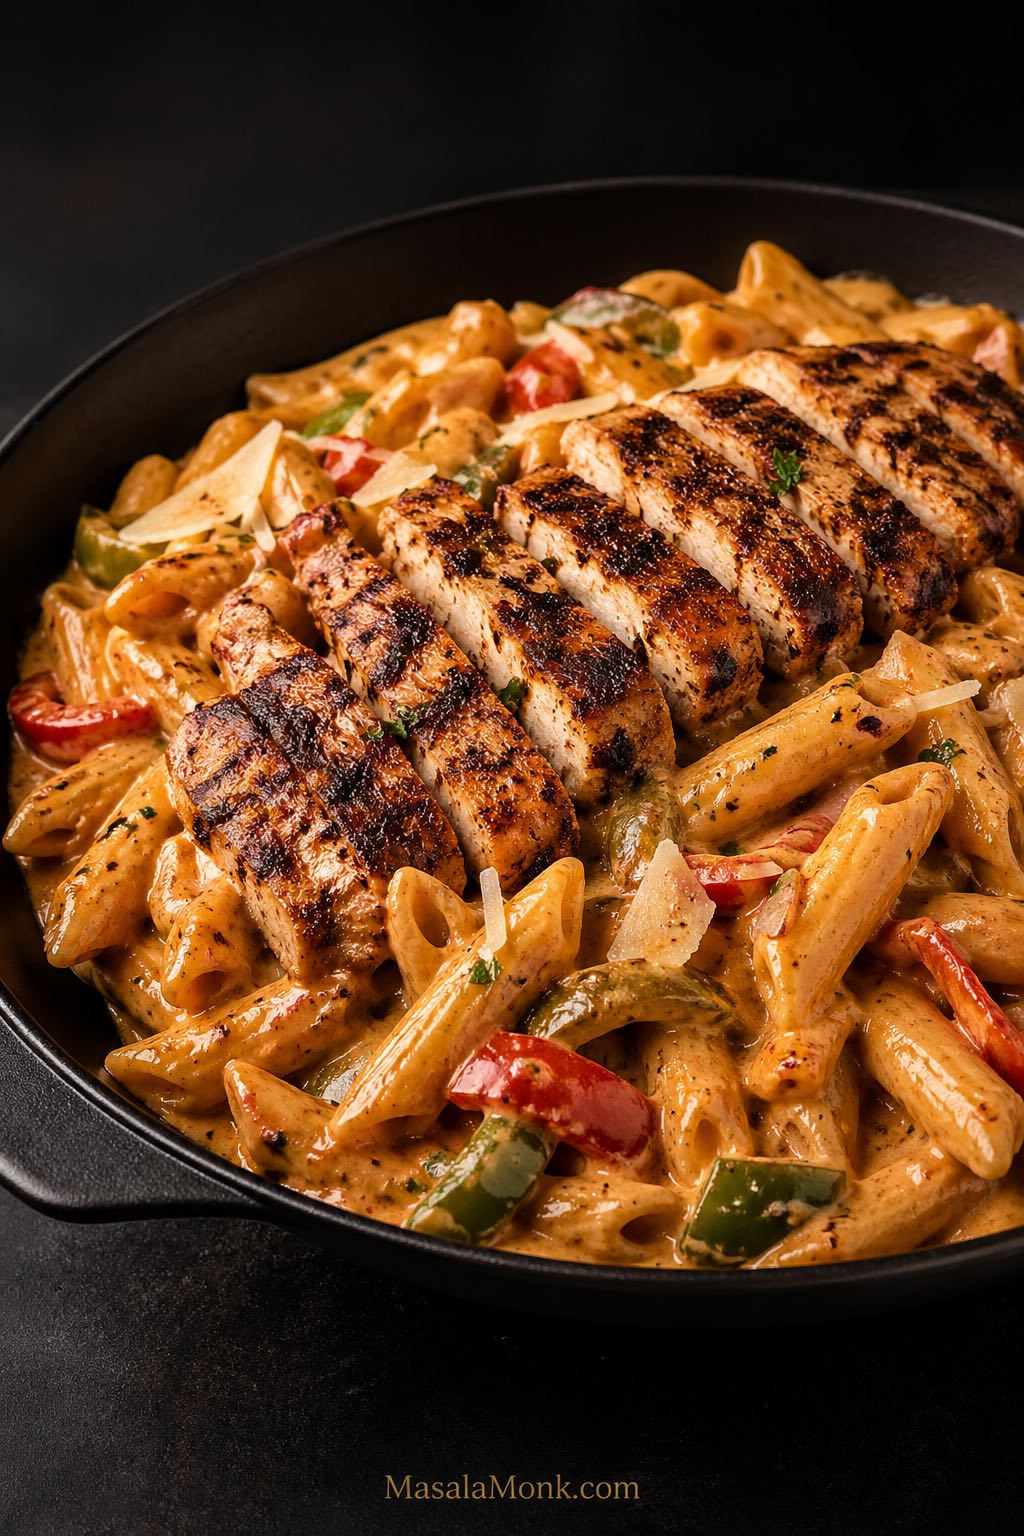
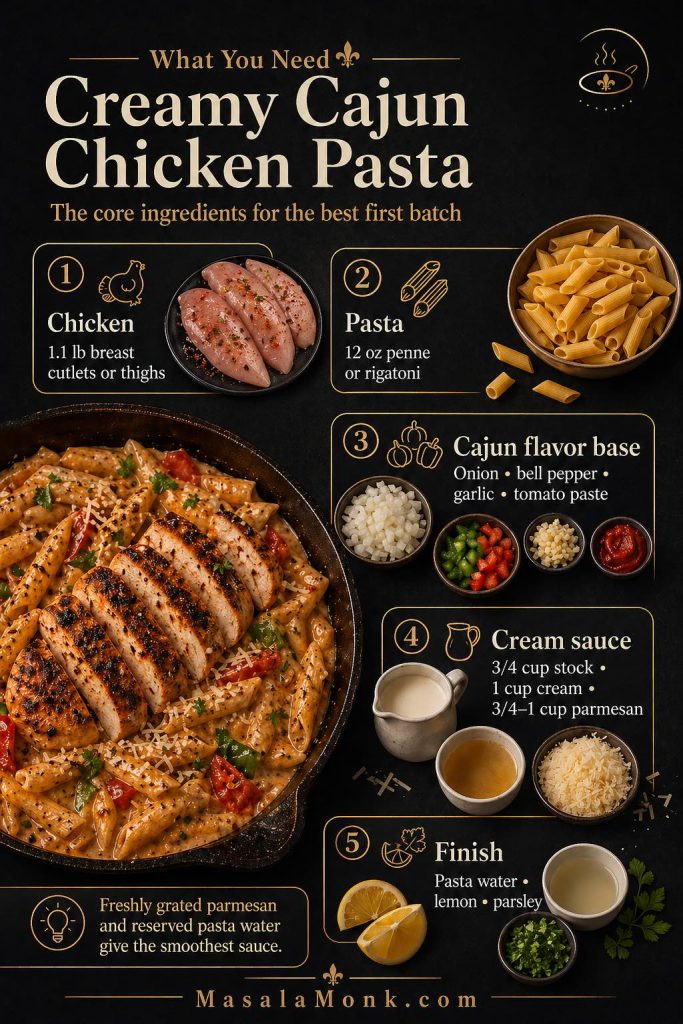
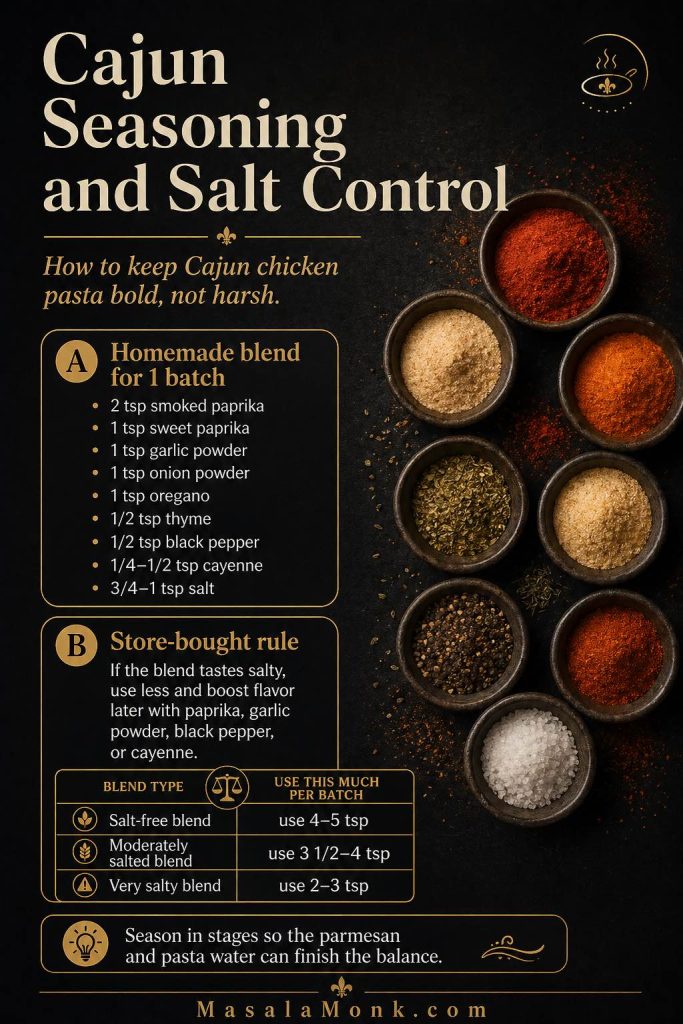
For a bolder, peppery version, use andouille or smoked sausage, add Cajun seasoning, and cook diced bell peppers and onions with the sausage. Keep the creamy red sauce, then finish with extra black pepper, parsley, and parmesan. If you like creamy Cajun-style dinners, this also pairs naturally with Cajun Chicken Pasta.
Chicken Sausage Pasta
Chicken sausage works well when you want a lighter skillet, but it usually needs a little help. Fully cooked chicken sausage should be sliced and browned. Raw chicken sausage should be removed from the casings and cooked like Italian sausage. Because it is leaner, add a little olive oil and do not skip the tomato paste, parmesan, or herbs.

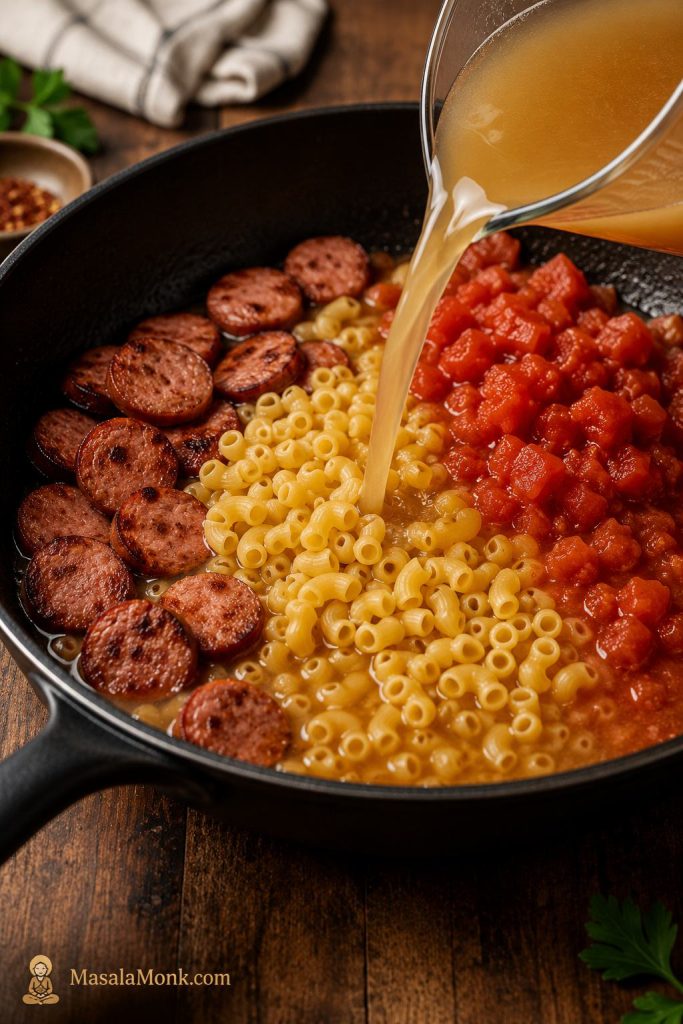
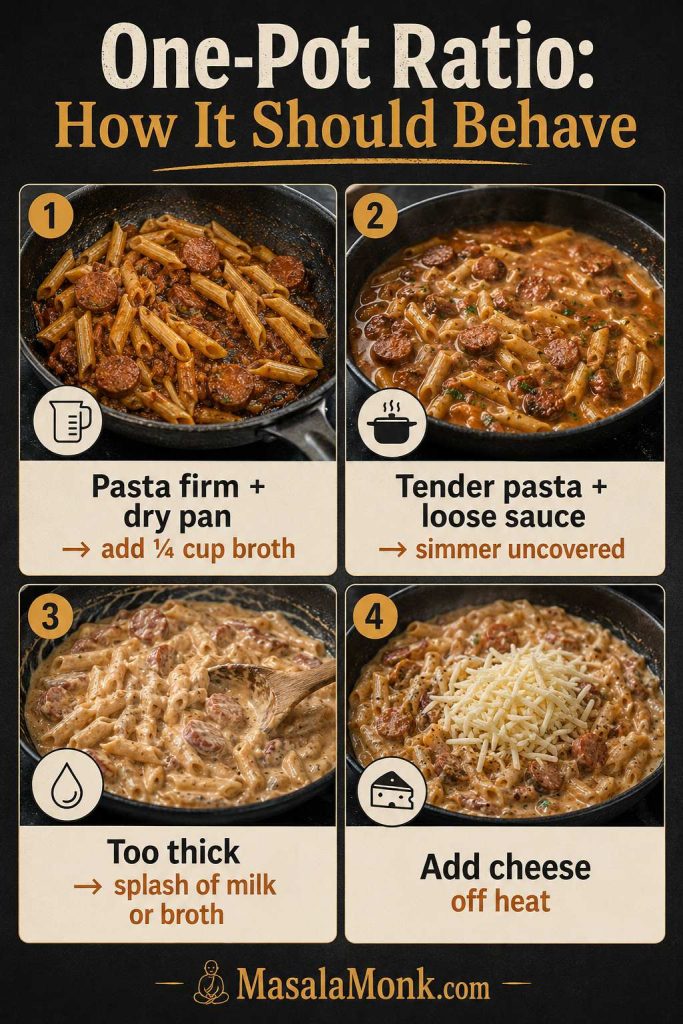
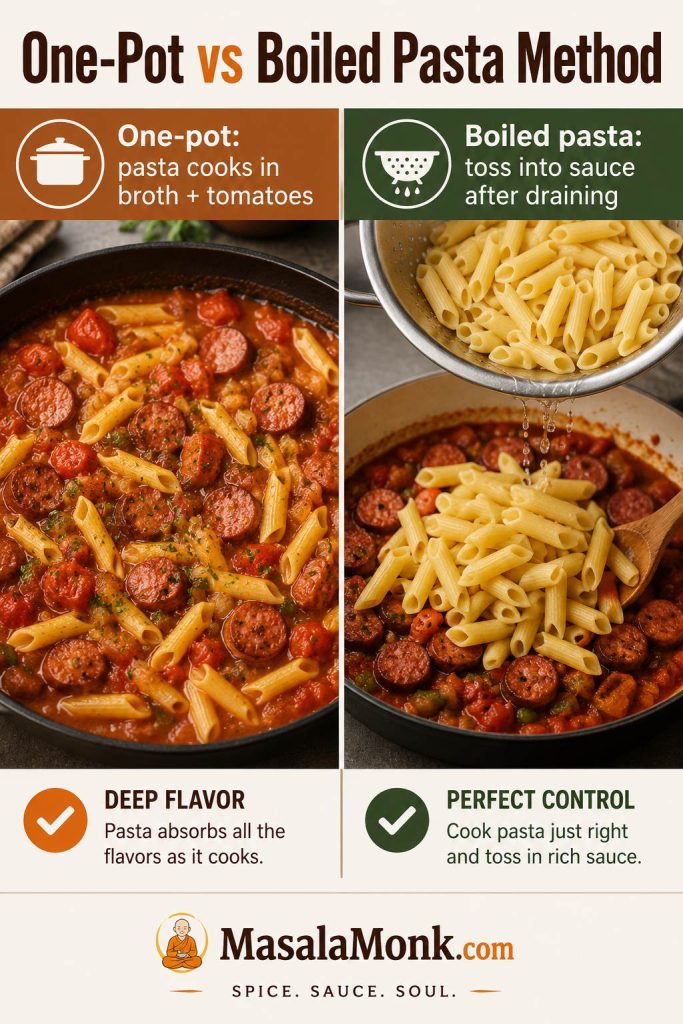
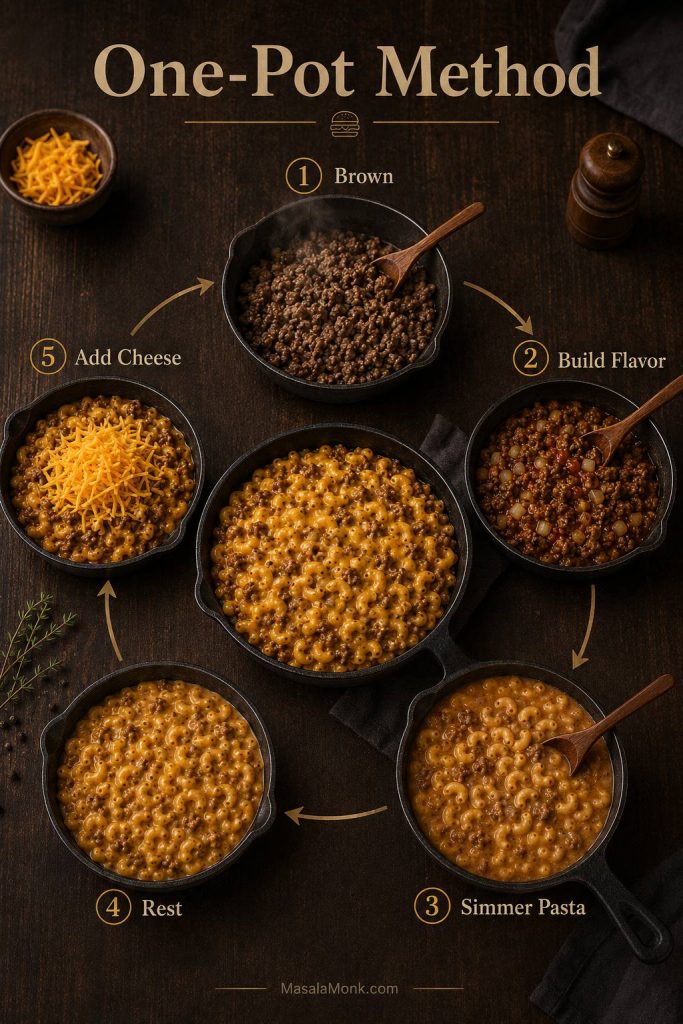
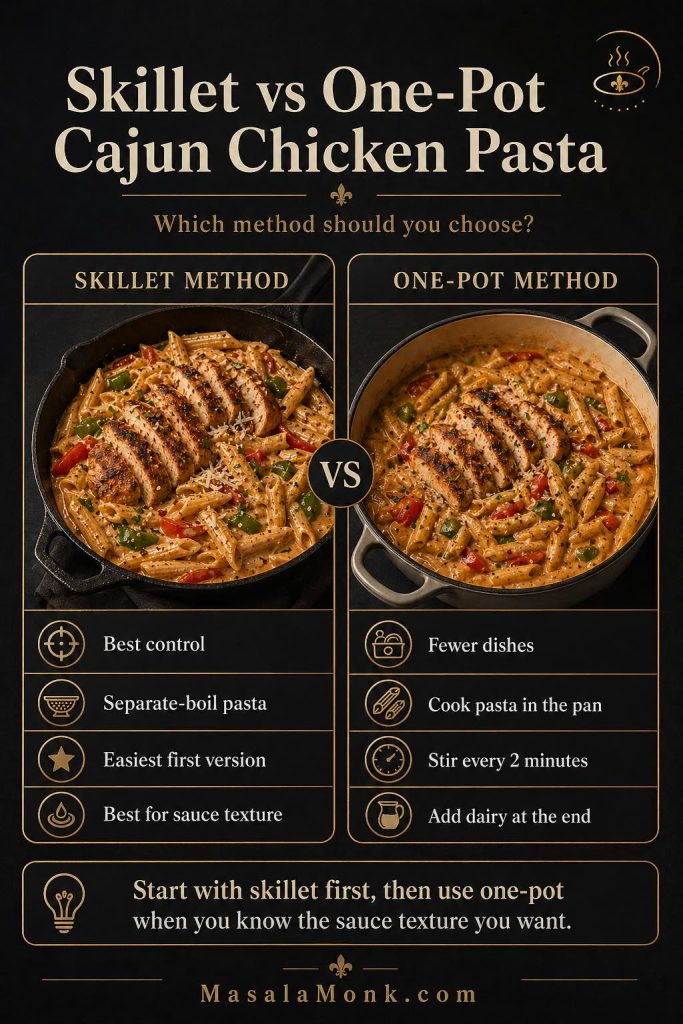
One-Pot Sausage Pasta
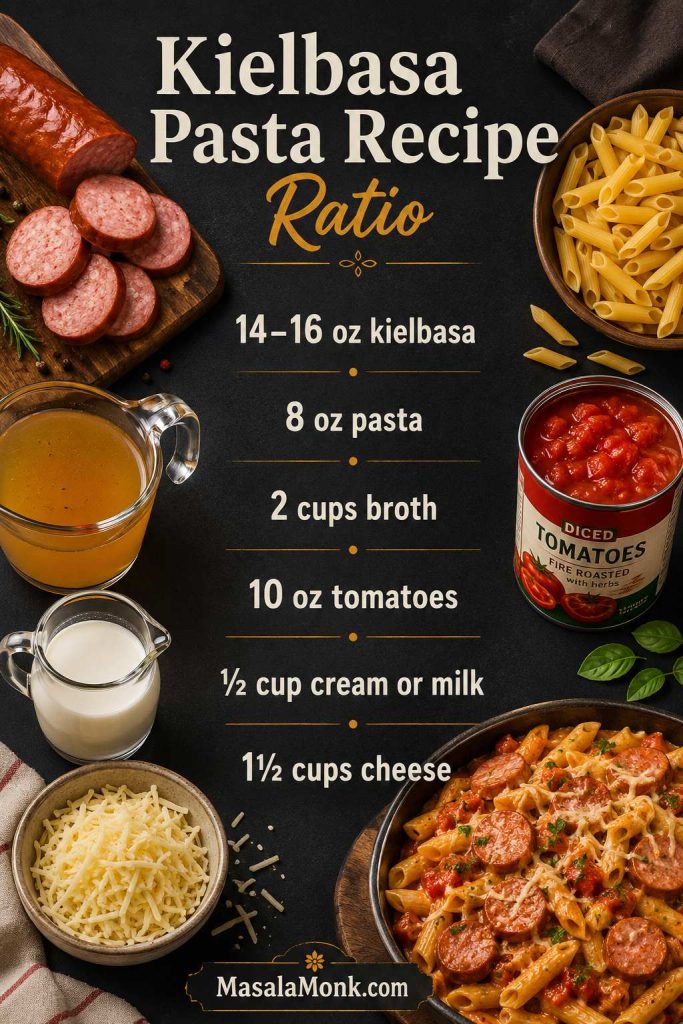
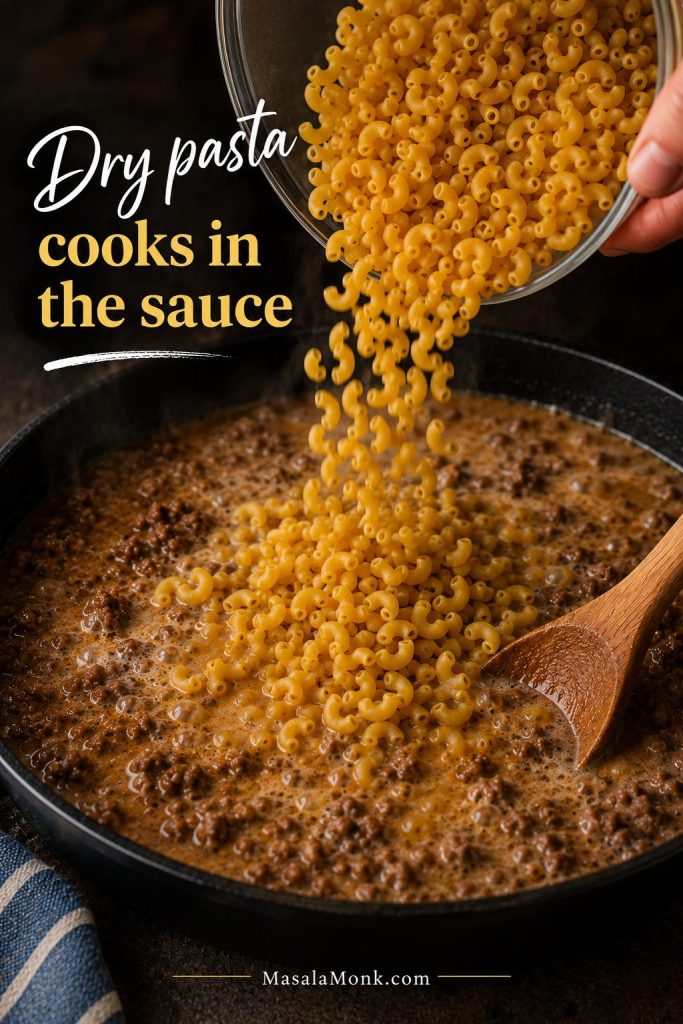
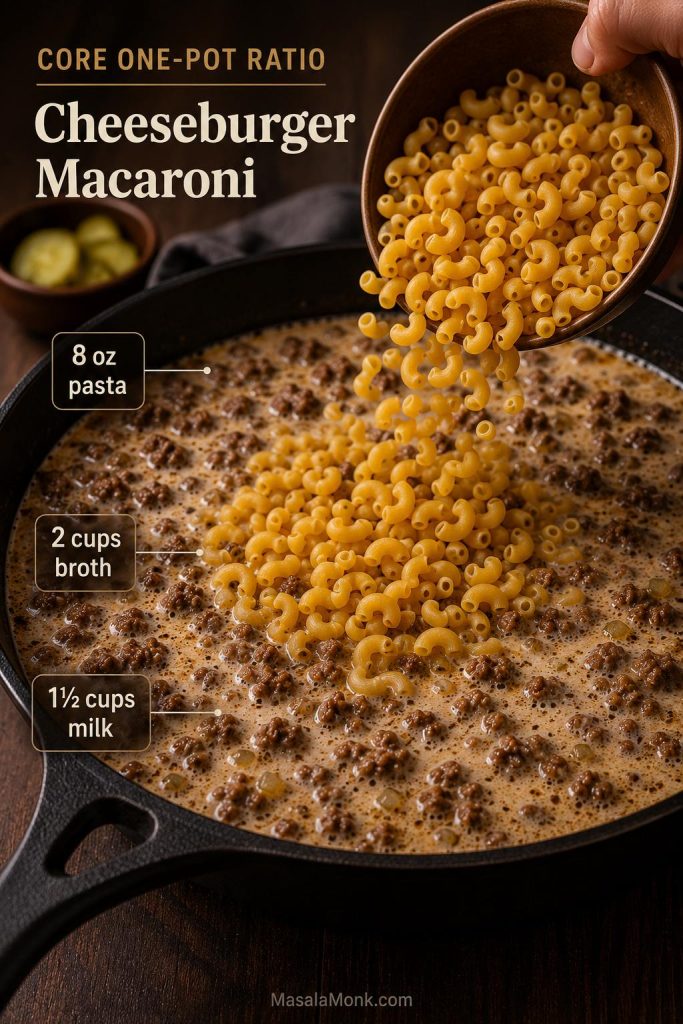
You can make a one-pot version, and the key is controlled liquid. For a smaller one-pot batch with 8 oz / 225 g short pasta, brown 8 to 12 oz / 225 to 340 g sausage, then add 2 cups / 480 ml broth or water and 14 to 15 oz / 400 to 425 g crushed tomatoes or passata. Keep it at a steady simmer, not a hard boil, and use a wide deep pan so the pasta cooks evenly.
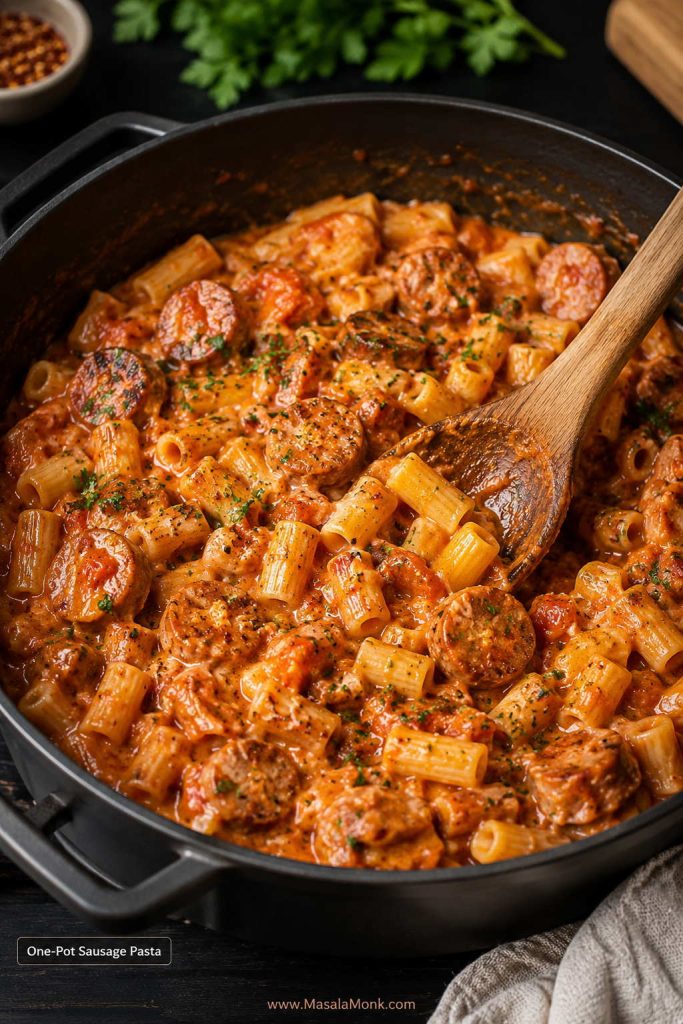
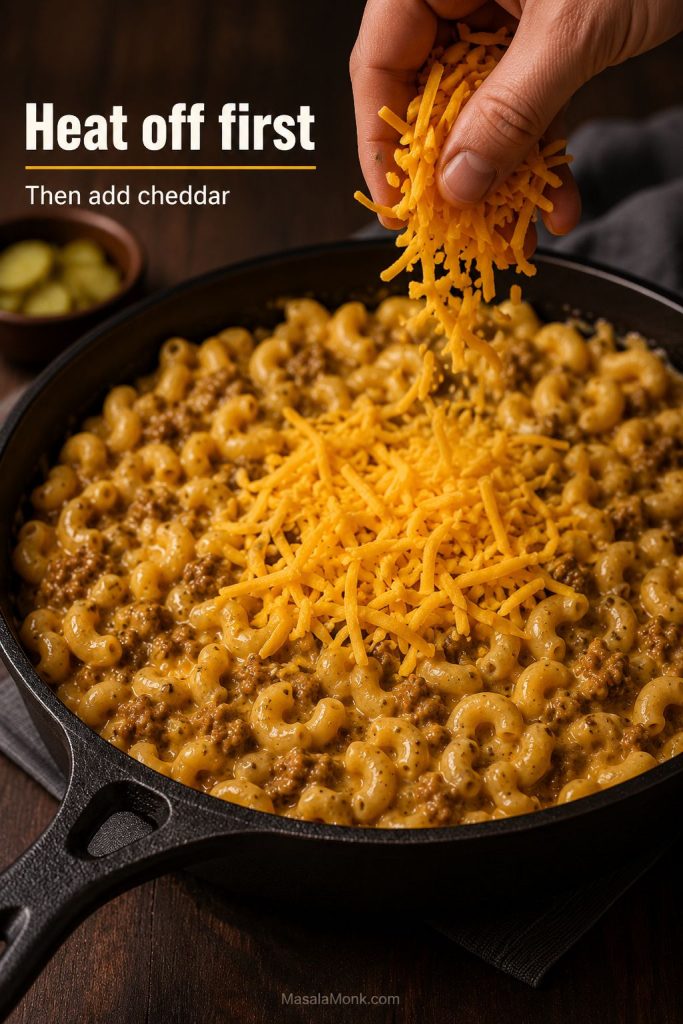
When the pasta is still firm but the pan is drying out, add more broth or water in 1/4 cup / 60 ml splashes. Stir in 1/2 cup / 120 ml cream and 1/3 cup / about 35 g parmesan near the end, not at the beginning. Cream and cheese are easier to keep smooth once the pasta is almost cooked.
The separate-boil method in the recipe card is still more reliable, especially for a creamy sauce. One-pot pasta is convenient, but pasta shape, pan width, and heat level can change how much liquid you need.
For another creamy one-pot dinner, this One-Pot Chicken Bacon Ranch Pasta shows how much liquid no-drain pasta needs as it cooks.
Jarred Marinara Shortcut
For a shortcut, use about 1 1/2 cups / 360 ml jarred marinara instead of crushed tomatoes. Reduce the tomato paste to 1 tablespoon if the sauce is already intense. Still add cream, parmesan, and a little pasta water so the pasta tastes freshly finished instead of simply poured from a jar.
For a homemade version of that shortcut, use this Marinara Sauce Recipe in place of jarred marinara.
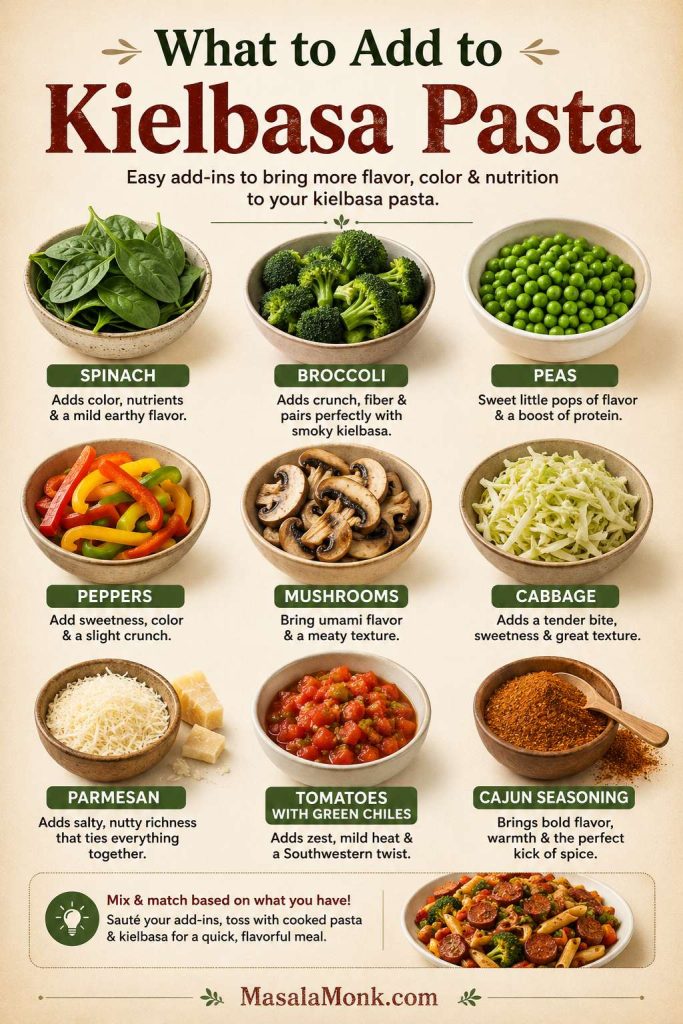
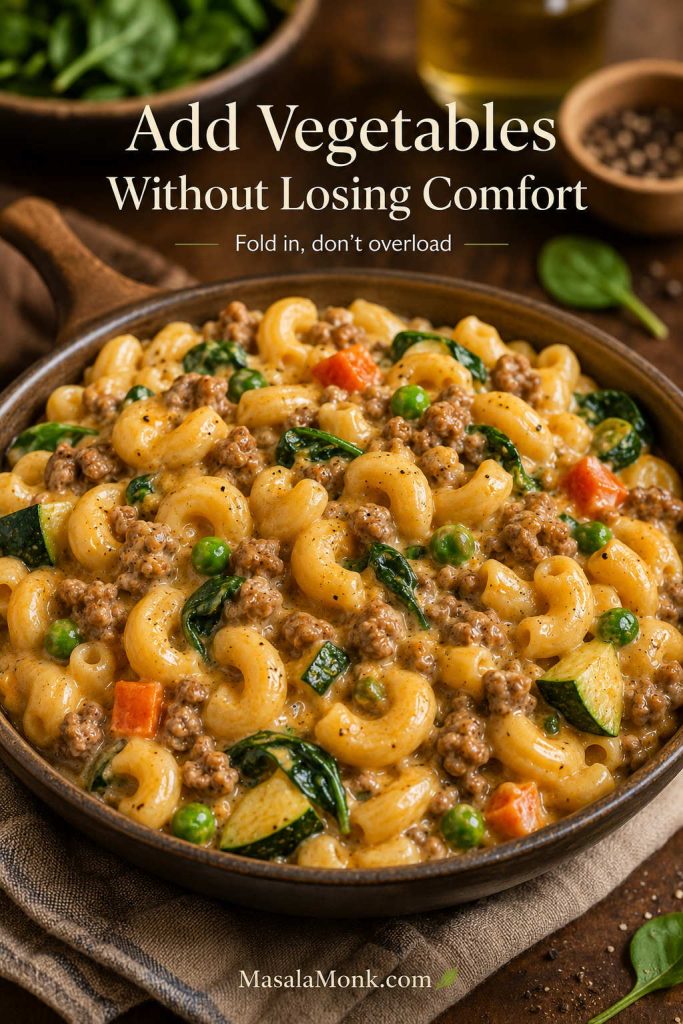
Add-Ins That Work Well
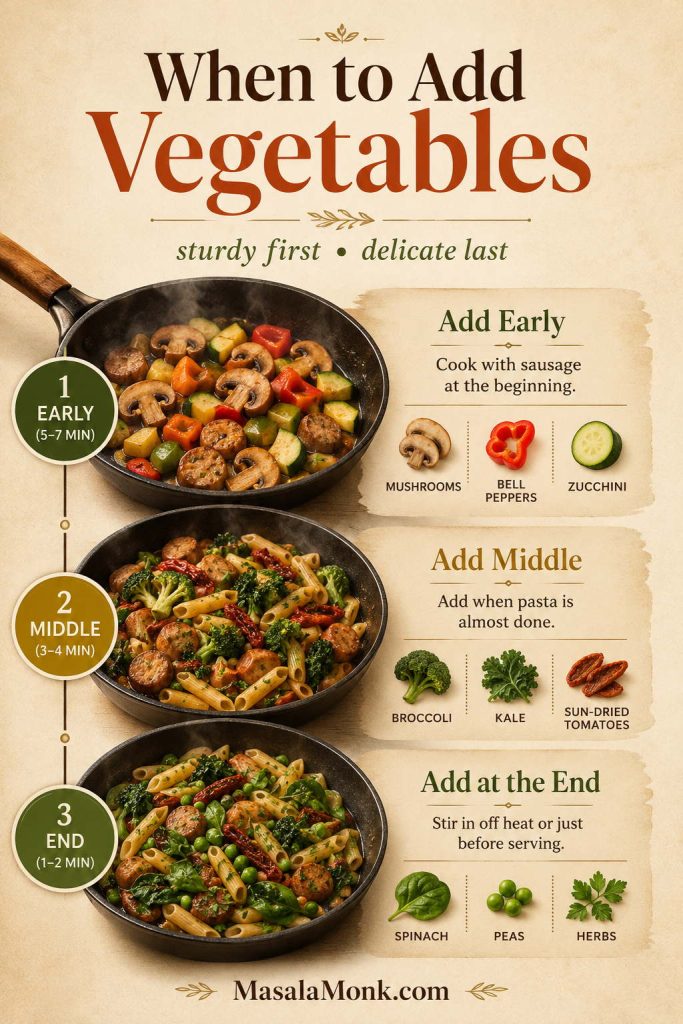
The recipe is flexible, but the timing matters. Add sturdy vegetables early so they soften, and delicate greens near the end so they stay fresh. You do not need to turn this into a vegetable drawer clean-out. One good add-in is usually better than five competing ones.

Already know what you want to add? Use the vegetable timing guide so sturdy vegetables soften and delicate greens stay fresh.
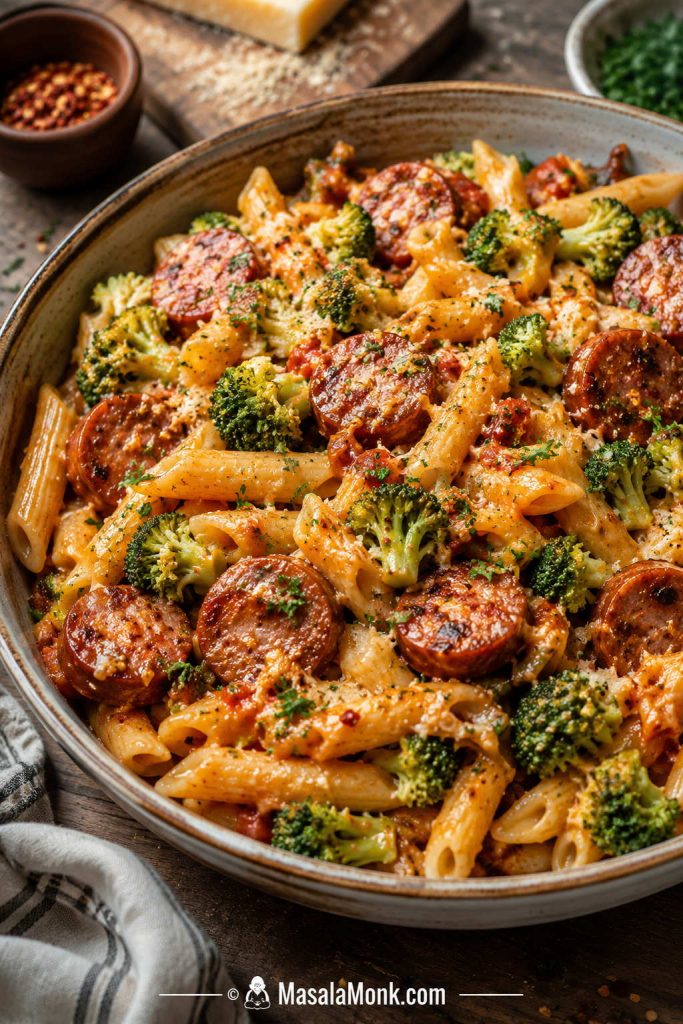
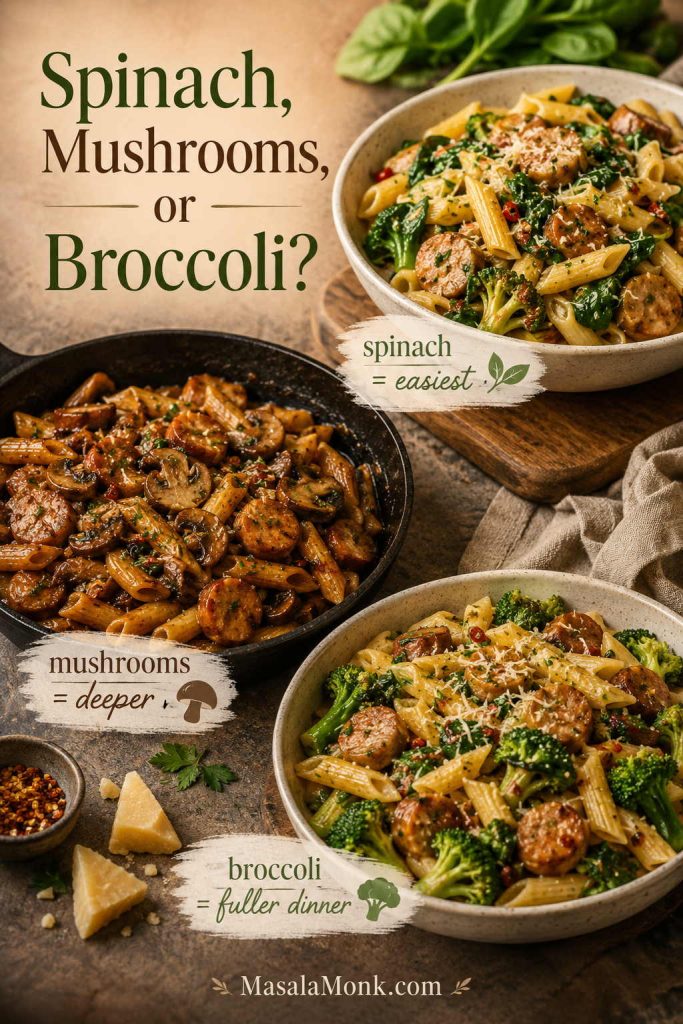
Best Everyday Add-Ins: Spinach, Mushrooms, or Broccoli
For the simplest choice, use spinach; for deeper flavor, use mushrooms; and for a fuller dinner, add broccoli without changing the basic sauce.
| Add-In | When to Add It |
|---|---|
| Spinach | Stir in at the end until just wilted. |
| Mushrooms | Cook after browning the sausage, before adding tomato paste. |
| Bell peppers | Cook with the onion until softened. |
| Broccoli | Blanch with the pasta for the last 2 minutes, or steam separately. |
| Peas | Add near the end; frozen peas only need a minute or two. |
| Kale | Add before spinach would go in; it needs a little more time to soften. |
| Sun-dried tomatoes | Stir in with the garlic and tomato paste for a deeper flavor. |
| Roasted red peppers | Add with the crushed tomatoes or at the end for a sweeter pepper flavor. |
| Zucchini | Sauté after the sausage; avoid overcooking or it can turn watery. |
When to Add Vegetables to Sausage Pasta
Use this timing guide when you are adding more than one vegetable. It keeps hearty pieces from staying raw and delicate greens from overcooking.
For a cozy sausage dinner with a different texture, this Slow Cooker Sausage Casserole Recipe is one to keep for colder evenings or hands-off cooking days.
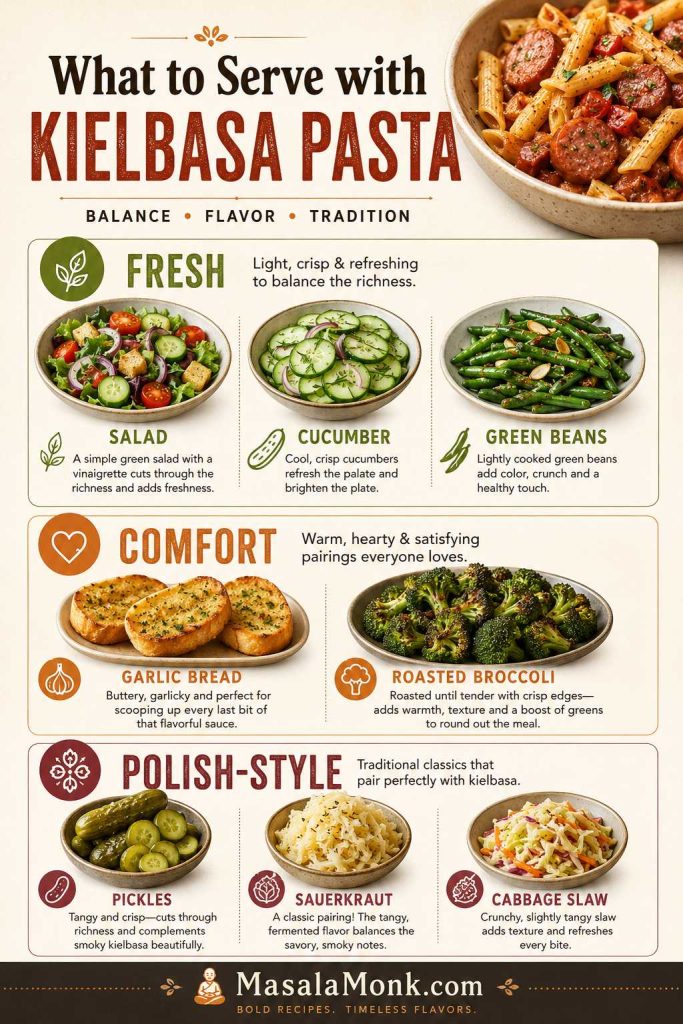
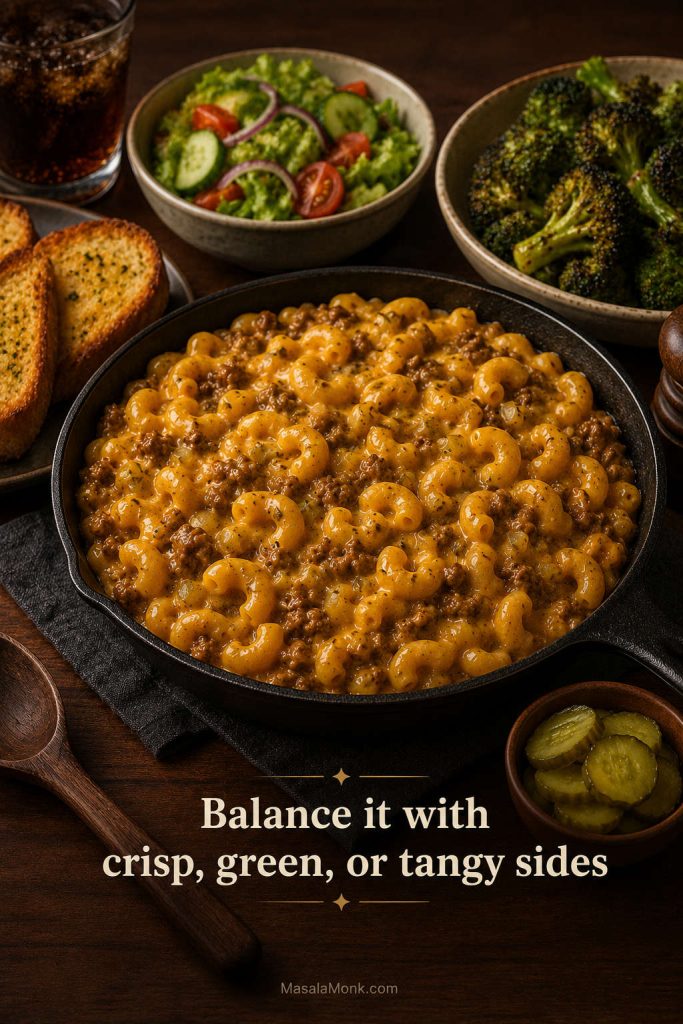
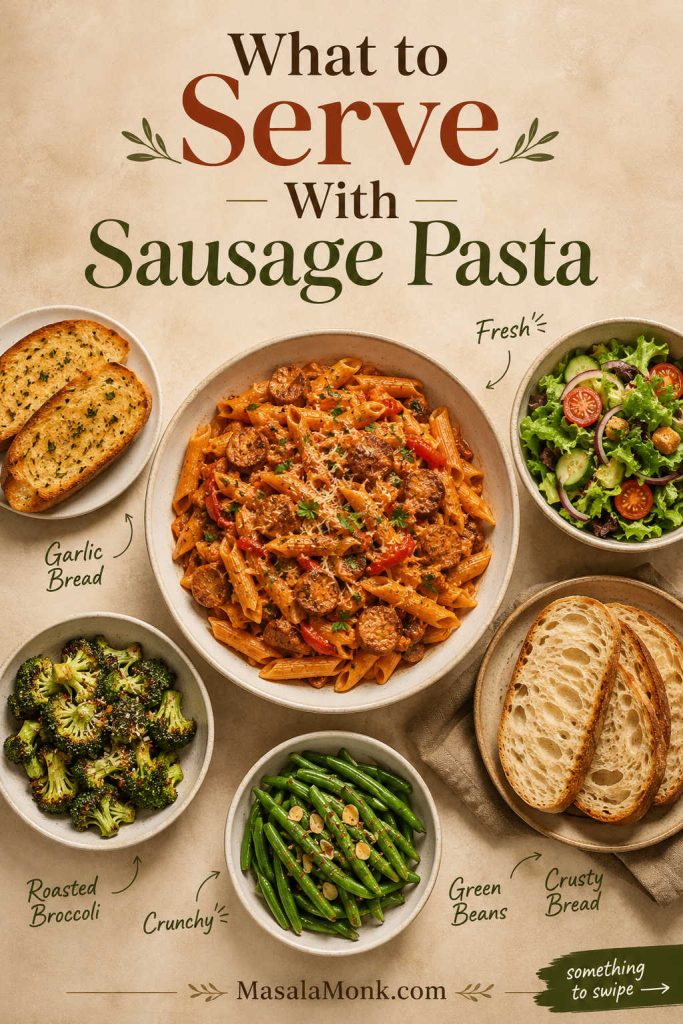
What to Serve with Sausage Pasta
Because the pasta is already rich and saucy, the best sides either cut through it, scoop it up, or add something green. Keep the side simple so the sausage pasta still feels like the main event.
| If You Want… | Serve This |
|---|---|
| A simple dinner | Garlic bread, crusty bread, or a green salad |
| More vegetables | Roasted broccoli, green beans, zucchini, or peppers |
| More comfort | Garlic bread, Caesar-style salad, or a cheesy baked version |
| A lighter plate | Simple salad, steamed greens, or roasted vegetables |
For most nights, a green salad or garlic bread is enough. The pasta already brings the richness; the side just needs to bring crunch, freshness, or something to swipe through the sauce.
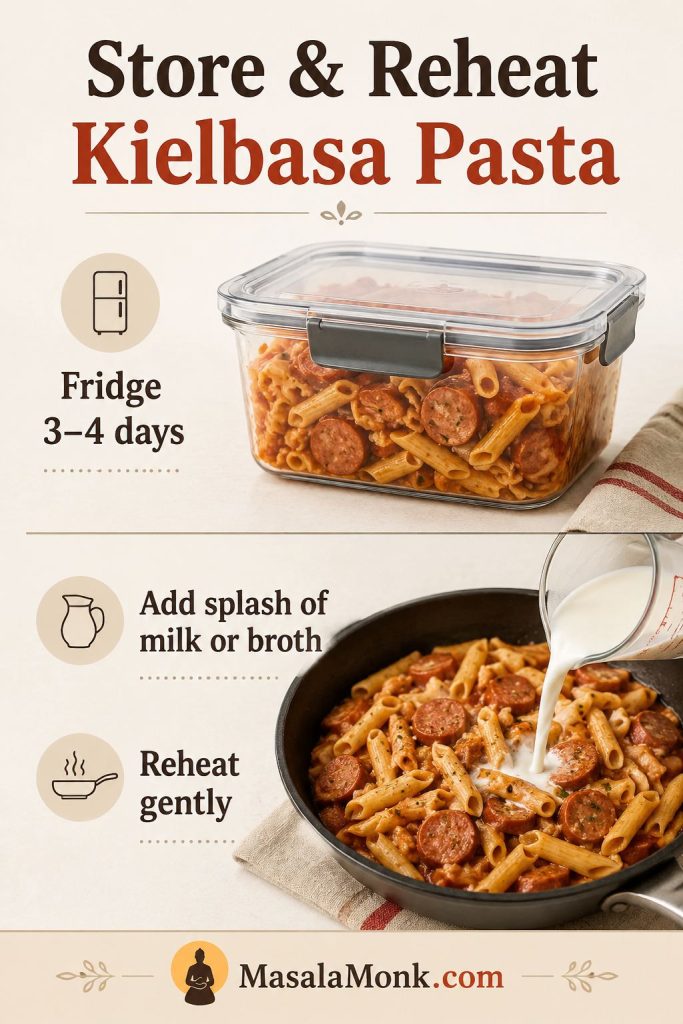
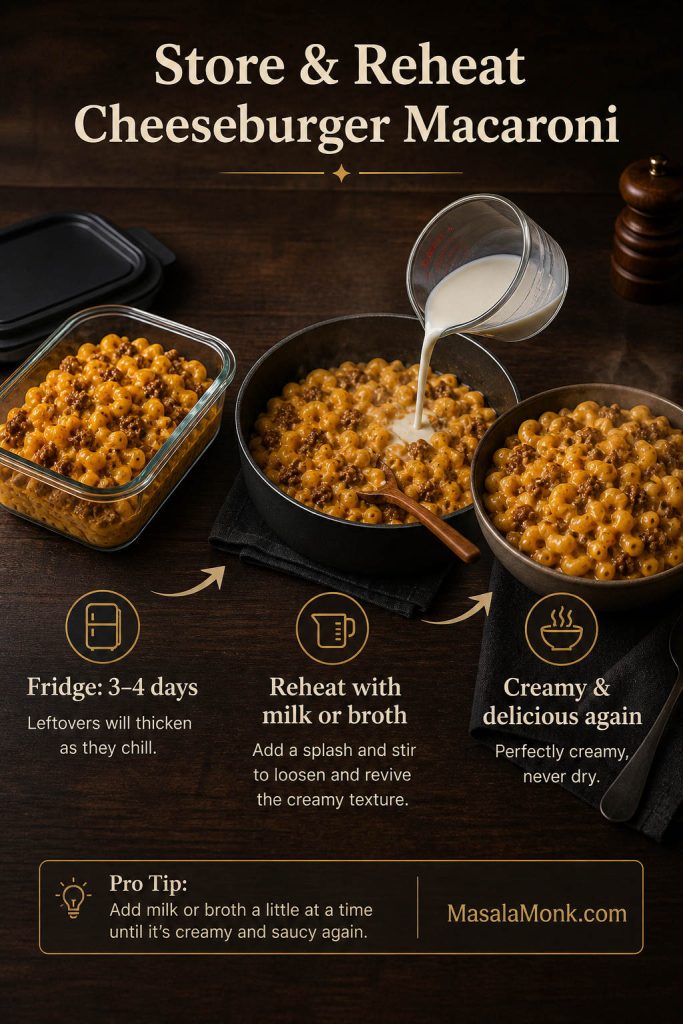
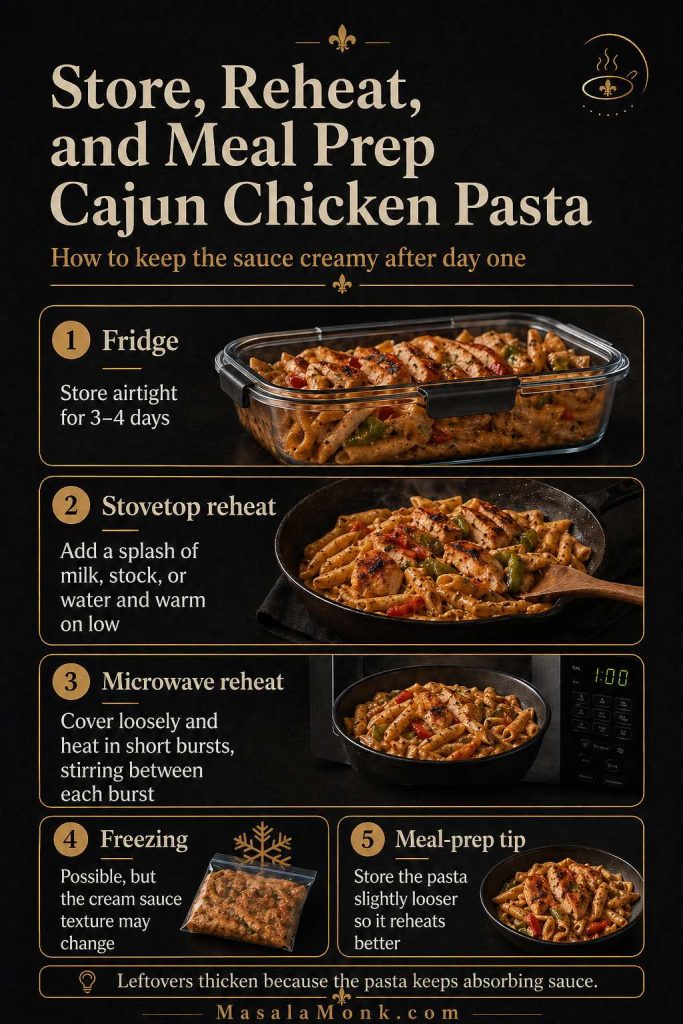
How to Store and Reheat Sausage Pasta
Sausage pasta is best when freshly tossed, but leftovers can still be very good. Creamy pasta often tightens in the fridge because the pasta keeps absorbing the sauce. That is normal. A splash of liquid and gentle heat bring it back.
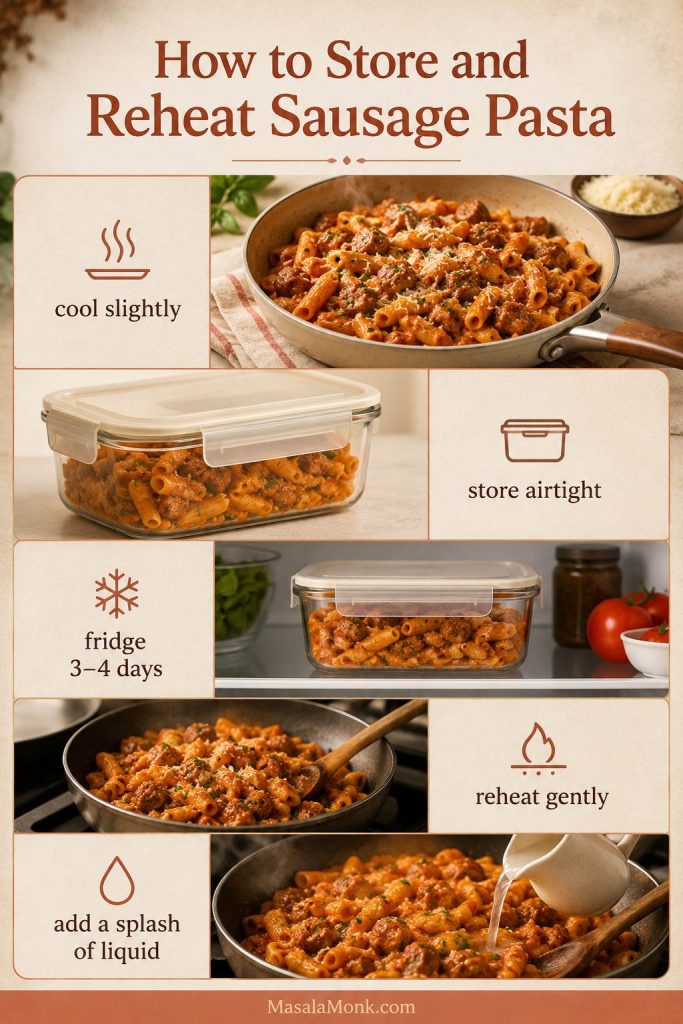
- Refrigerate: store in an airtight container for 3 to 4 days.
- Freeze: freeze only if needed. The flavor will hold, but the cream sauce may look slightly grainy or separated after thawing. Warm it gently with a splash of liquid and stir well.
- Stovetop: add a splash of milk, cream, broth, or water and warm gently over low heat.
- Microwave: add a small splash of liquid, cover loosely, and stir halfway through.
- Avoid overheating: high heat can make the cream and cheese separate.
How to Reheat Creamy Sausage Pasta
If the pasta looks tight after chilling, add moisture before more heat. A small splash loosens the sauce so it can coat the pasta again.

If reheating does not fix the texture, jump to Troubleshooting for the quickest sauce adjustments.
Leftovers will not look as silky cold from the fridge, and that is completely normal. If the pasta still looks tight after reheating, add another small splash of liquid and stir again. Liquid is the fix; heat alone will only make creamy pasta tighter.
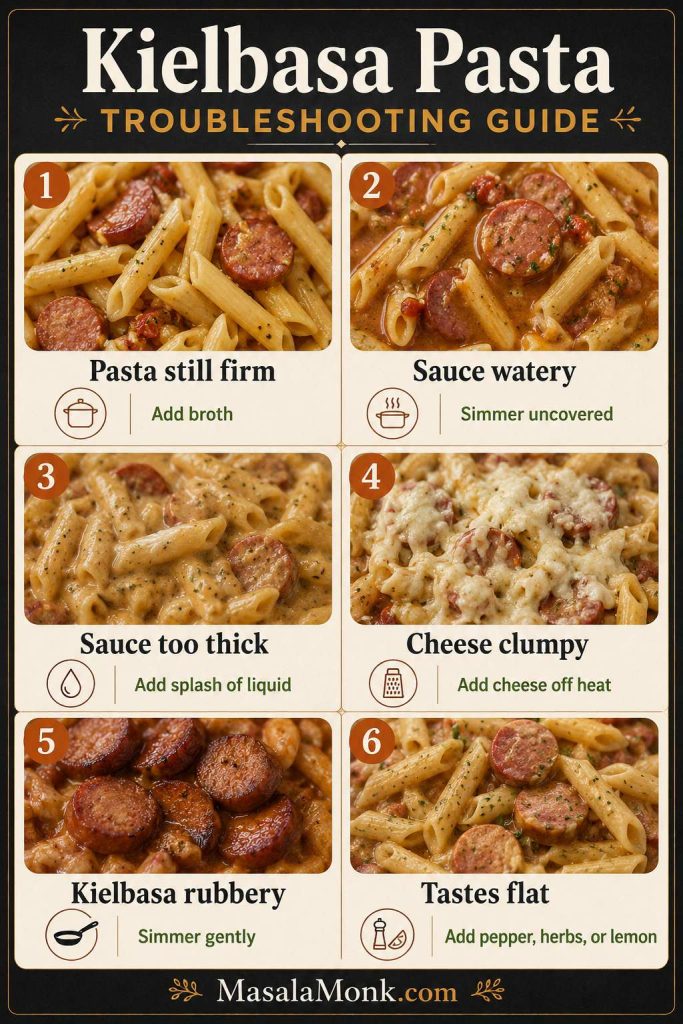
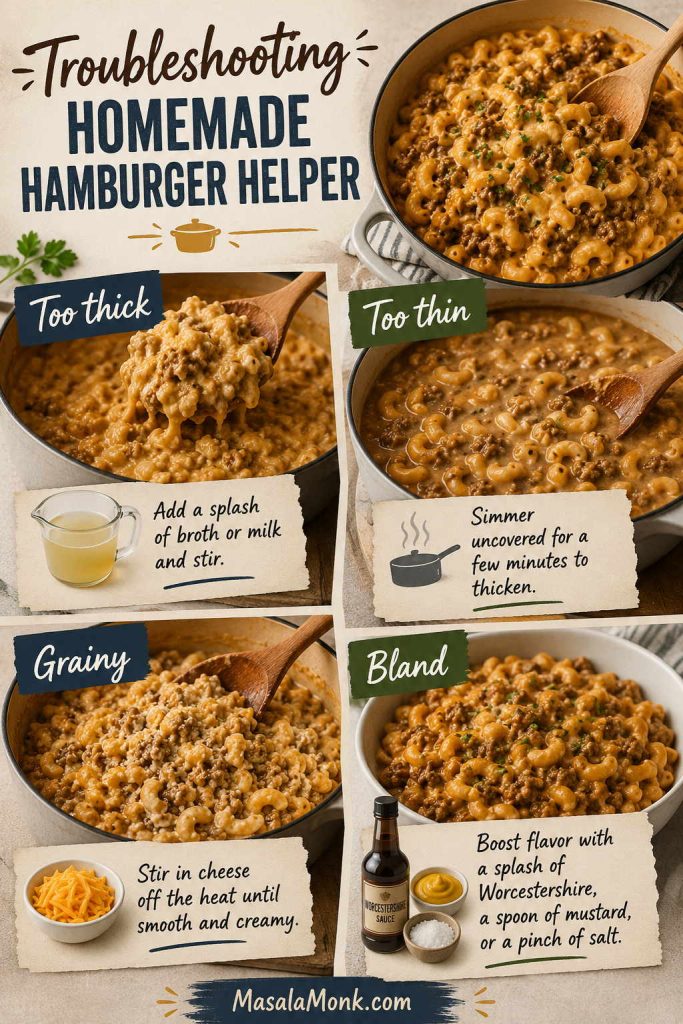
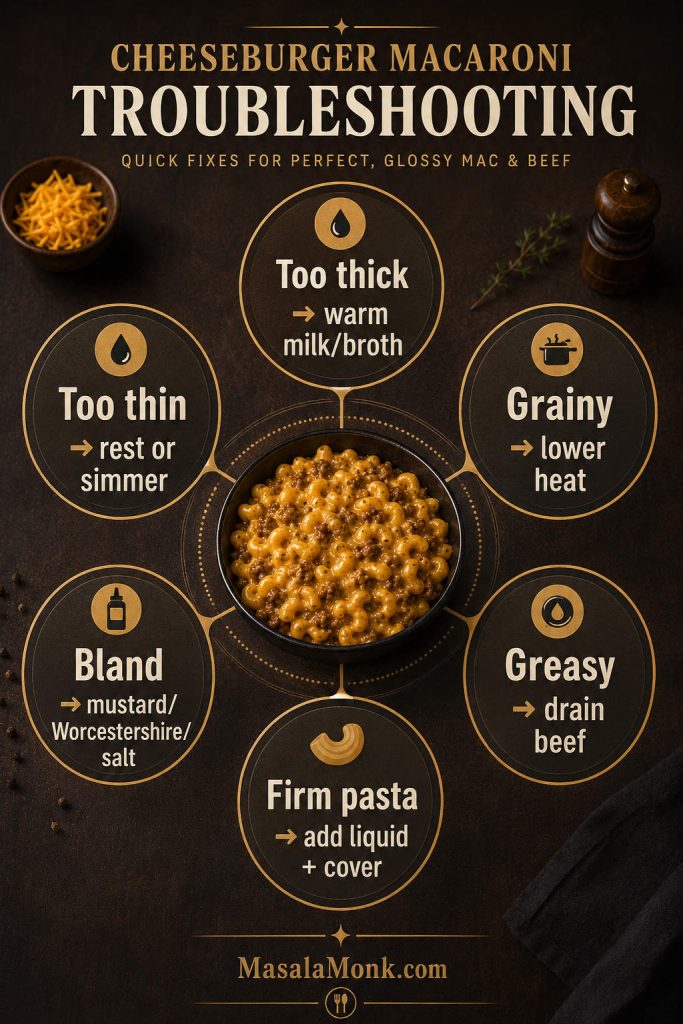
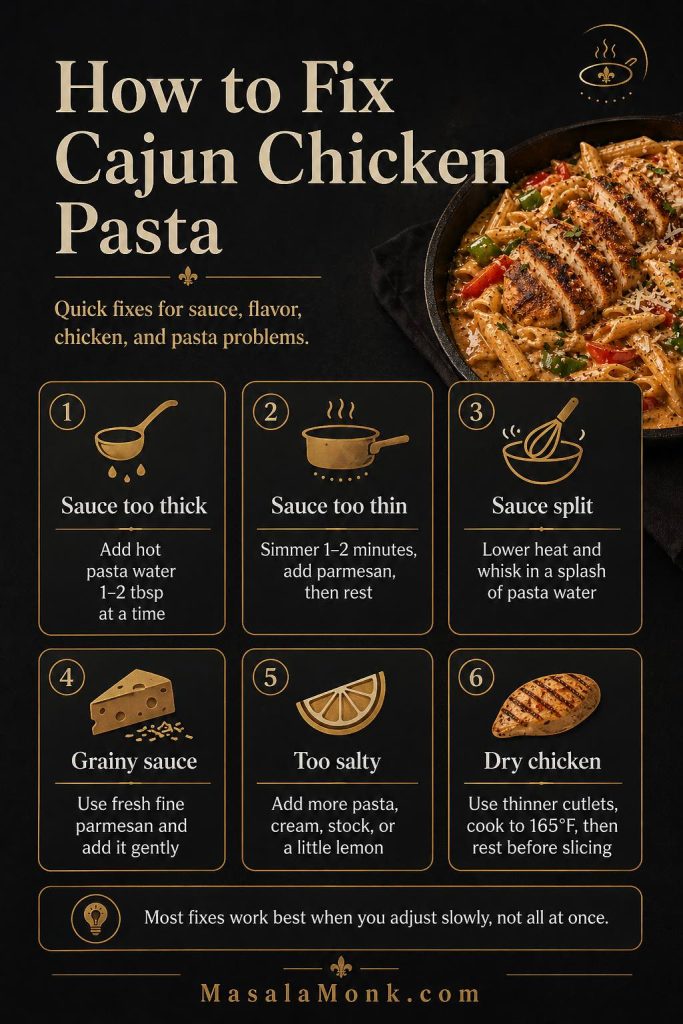
Troubleshooting Sausage Pasta
Most sausage pasta problems are easy to fix. If the sauce tightens, splits, looks greasy, or tastes a little flat, do not panic. Start with the smallest fix first. Creamy pasta usually needs adjustment, not rescue.
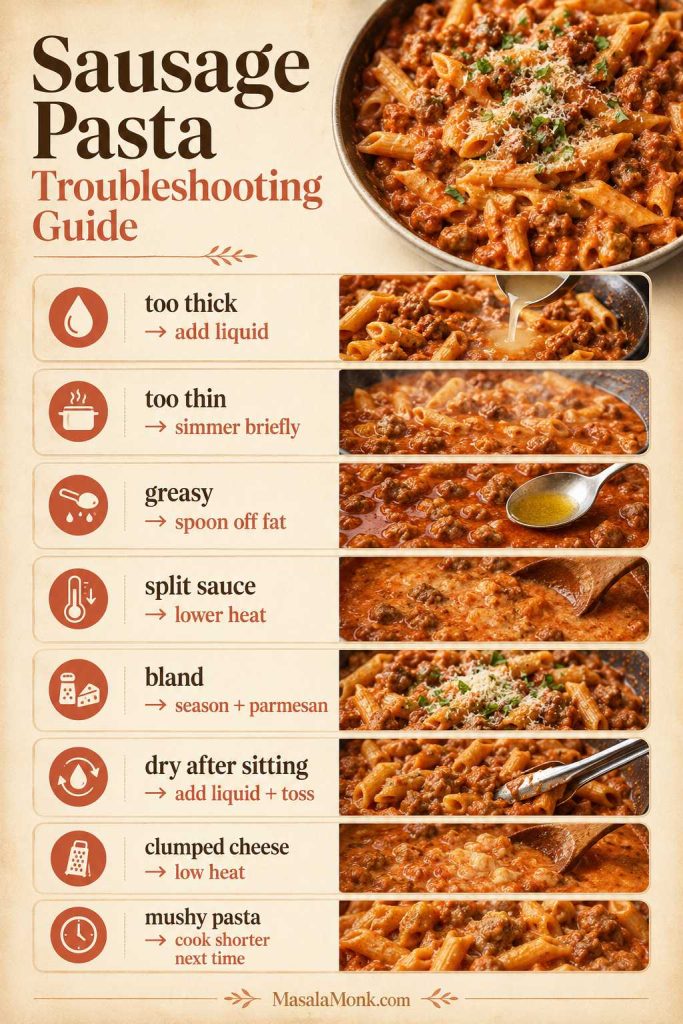
| Problem | Fix |
|---|---|
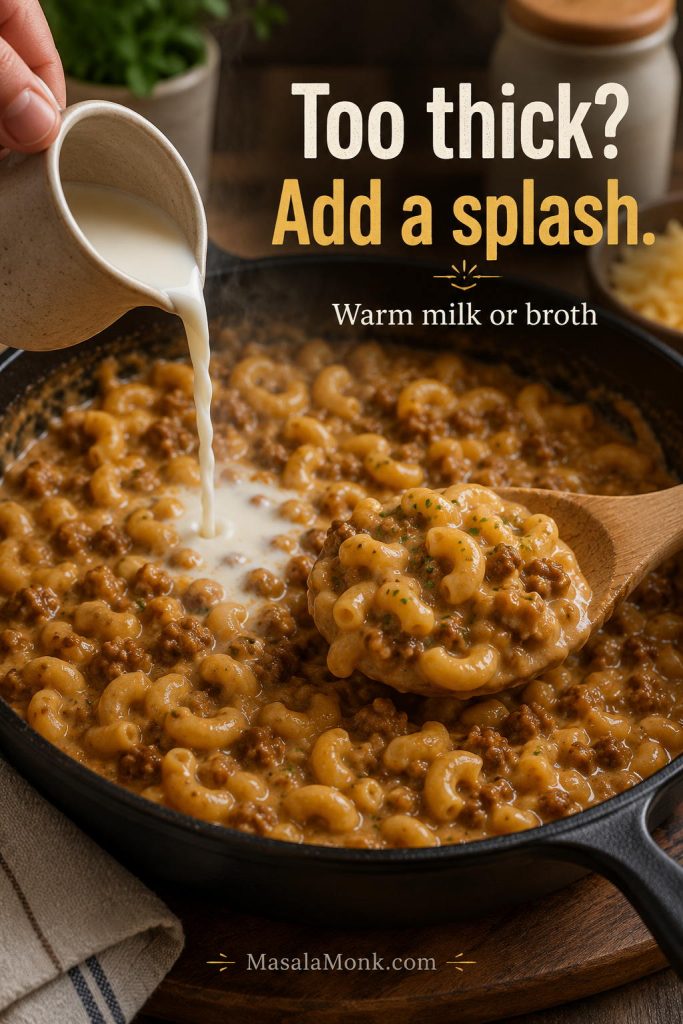
| Sauce is too thick | Add reserved pasta water 1 to 2 tablespoons at a time and toss until the sauce loosens. |
| Sauce is too thin | Simmer briefly before adding the pasta, or toss the pasta in the sauce for another minute. |
| Sauce looks greasy | Lower the heat, add a splash of pasta water, and toss well. Drain excess sausage fat next time if needed. |
| Sauce split | Turn the heat down, add pasta water, and stir gently. Do not boil cream sauce hard. |
| Pasta tastes bland | Add salt, parmesan, black pepper, red pepper flakes, fresh herbs, or a little more browned sausage flavor. |
| Pasta is dry after sitting | Reheat with a splash of milk, cream, broth, or water. |
| Tomato tastes too sharp | Add a little more cream, parmesan, or a tiny pinch of sugar. |
| Pasta is mushy | Cook it 1 to 2 minutes under al dente next time, especially if baking or reheating. |
| Cheese clumped | Use freshly grated parmesan and add it off heat or on very low heat. |
| Sausage tastes flat | Brown it longer next time. For the current batch, add red pepper flakes, parmesan, black pepper, or fresh herbs. |
Most fixes are small. A splash of water, lower heat, or another minute of tossing usually does more than starting over.
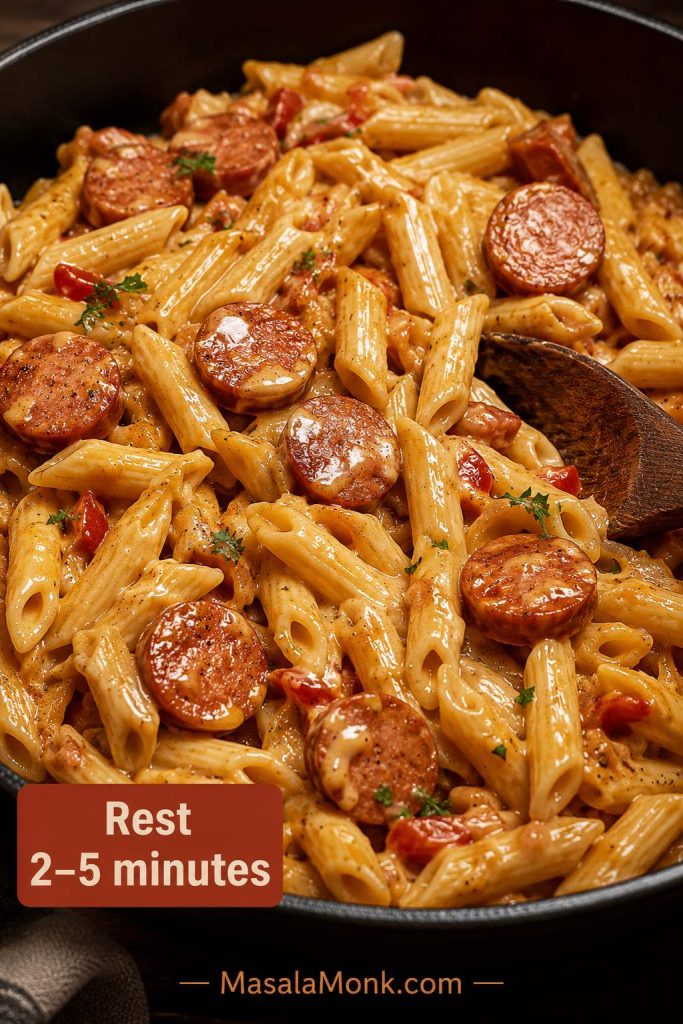
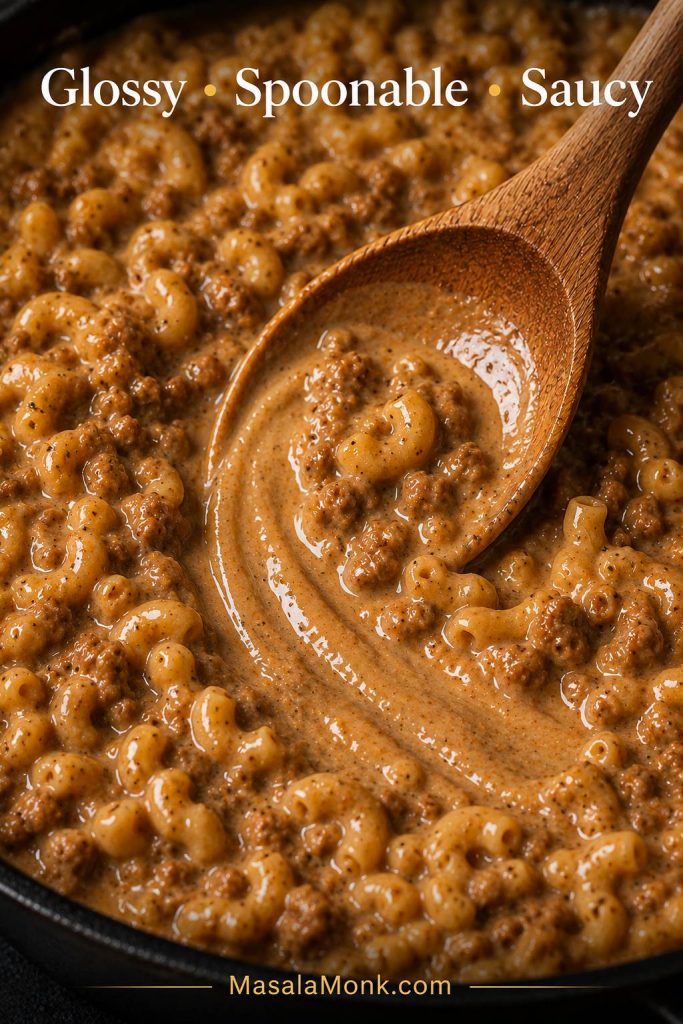
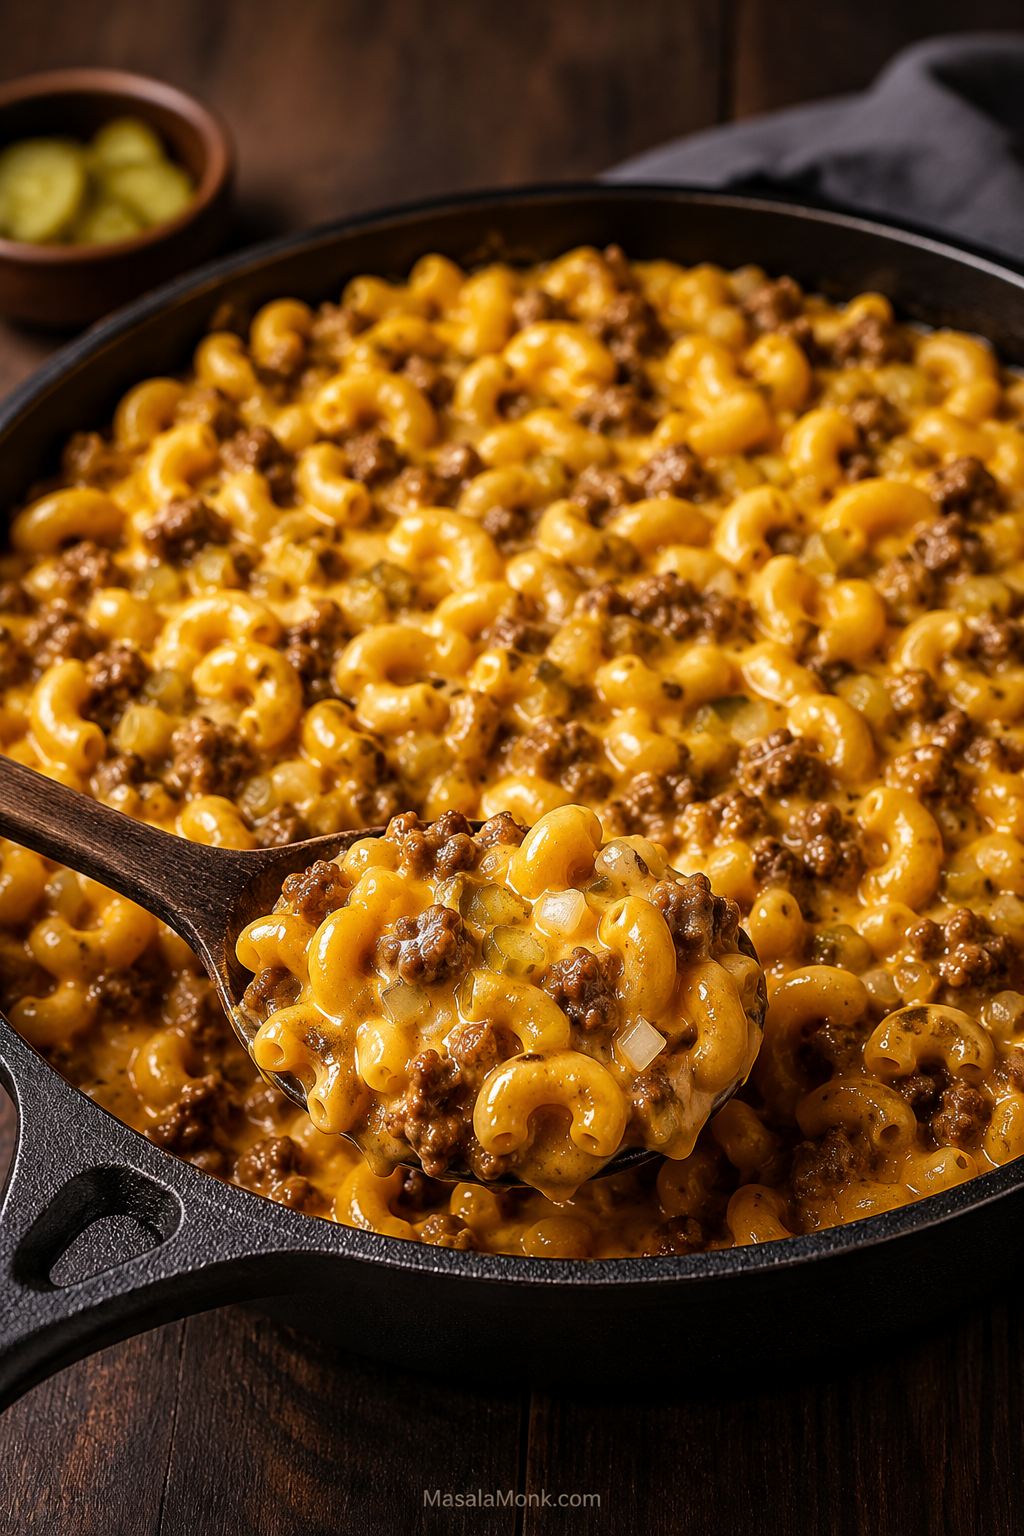
Final Glossy Finish Cue
Before serving, look for the texture in this final cue: pasta that is coated, movable, and glossy, with sausage crumbles still visible in the ridges and folds.

FAQs
What kind of sausage is best for sausage pasta?
Mild or hot Italian sausage is the best choice for classic sausage pasta. Mild sausage keeps it cozy and balanced, while hot Italian sausage makes the same creamy tomato skillet deeper and spicier.
How does smoked sausage change the recipe?
Smoked sausage is usually already cooked, so slice it into coins and brown the cut sides before building the sauce. It gives the dish a smokier flavor and works especially well in cheesy, one-pot, Cajun, or kielbasa-style versions.
Is jarred marinara okay here?
Yes. Use about 1 1/2 cups / 360 ml jarred marinara instead of crushed tomatoes. Reduce the tomato paste to 1 tablespoon if the marinara is already intense, then finish with cream, parmesan, and a splash of pasta water.
What if I do not want to use cream?
For a no-cream version, lean on crushed tomatoes or passata, then finish with pasta water and parmesan so the pasta still has body. It will taste brighter and more tomato-forward, but still satisfying if the sausage is browned well.
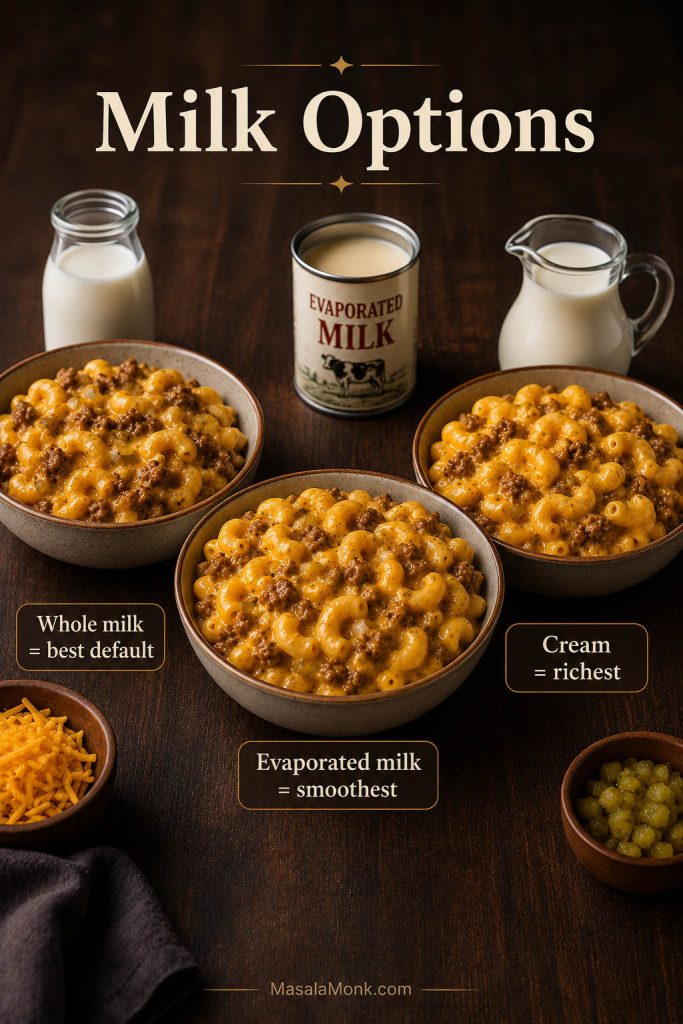
Is milk a good substitute for cream?
Milk can work, but the sauce will be thinner and less stable. Half-and-half is a better substitute, and evaporated milk can work if you want creaminess without heavy cream.
Why is my sausage pasta sauce too thick?
It usually means the pasta kept drinking the sauce after it left the heat. Add reserved pasta water 1 to 2 tablespoons at a time and toss until the skillet loosens again.
How do I turn this into a sausage pasta bake?
Cook the pasta 2 minutes under al dente, keep the sauce looser than you would for skillet pasta, transfer everything to a 9×13-inch / 23×33 cm baking dish, top with mozzarella and parmesan, and bake at 375°F / 190°C for 15 to 20 minutes.
What pasta shape works best with sausage sauce?
Rigatoni is the easiest all-rounder because the ridges and hollow center catch sausage crumbles and sauce. Penne, shells, fusilli, cavatappi, and orecchiette also work well.
How do I reheat creamy sausage pasta without drying it out?
Add a splash of milk, cream, broth, or water before reheating. Warm gently and stir halfway through. The pasta needs moisture more than it needs more heat.
What changes if I double the recipe?
Use a very large skillet, sauté pan, or Dutch oven. Brown the sausage in batches so it sears instead of steaming, then add pasta water gradually at the end so the skillet stays glossy without becoming watery.
If you make this with hot Italian sausage, smoked sausage, kielbasa, spinach, rigatoni, shells, or another swap, leave a comment with what you used. Those small changes are often what make this recipe your own.