Posted on Leave a comment

Kielbasa and Potatoes Recipe

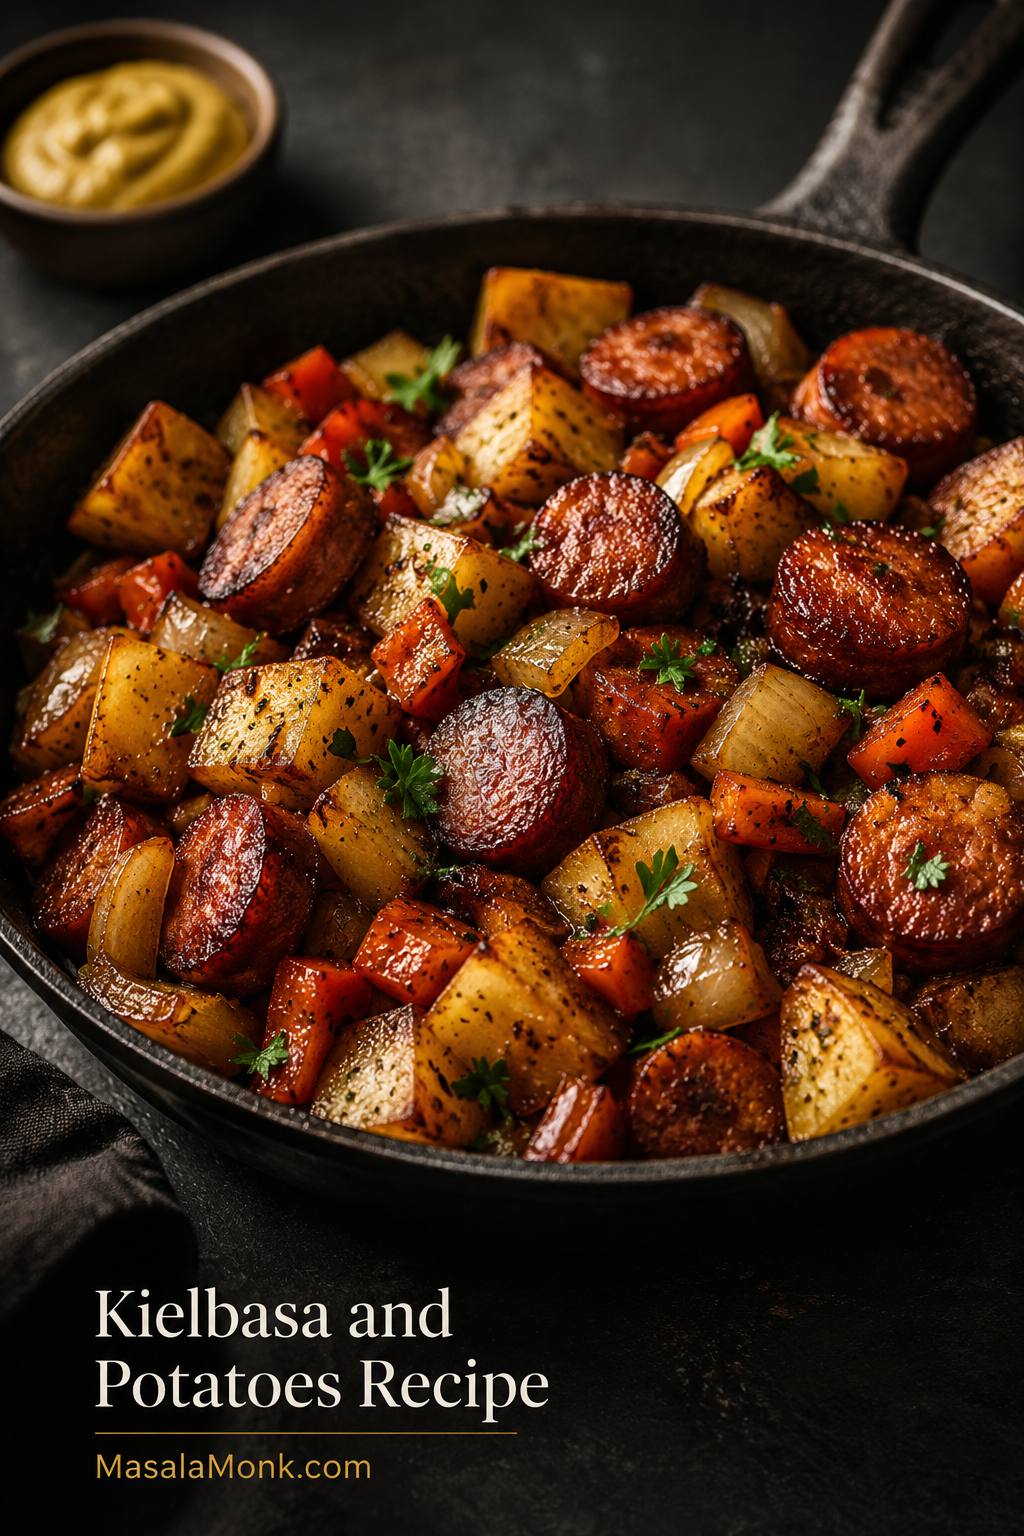
Cast iron skillet filled with browned kielbasa slices, golden potatoes, onions, bell peppers, parsley, and a small bowl of mustard.

Kielbasa and potatoes is the dinner you make when you have a ring of smoky sausage, a few potatoes, and no interest in turning the evening into a project. It is filling, inexpensive, and forgiving — the kind of skillet meal that still works when you have one pepper, half an onion, a handful of green beans, or nothing extra beyond the sausage and potatoes.

This kielbasa and potatoes recipe is built around one simple fix: the sausage browns much faster than the potatoes cook. When everything goes into the pan at once, the kielbasa can turn dry or rubbery before the potatoes are tender. Here, the sausage gets color first, the potatoes get time in those savory drippings, and everything comes back together at the end.

The result is a real weeknight dinner: crisp-edged potatoes, browned kielbasa, sweet onions, bell peppers, garlic, and a smoky seasoning that tastes cozy without needing a cream sauce or a casserole dish. Keep it classic, make it faster with a microwave potato shortcut, roast it on a sheet pan, turn it into a slow cooker meal, or add cabbage, sauerkraut, green beans, or cheese depending on what you have.

By the end, the potatoes should have browned corners, the sausage should be glossy at the edges, and the onions should be soft and sweet enough to make the whole pan taste like more than the sum of its parts.

The goal: a skillet that looks like a full dinner — browned sausage, golden potatoes, sweet onion, bell pepper, and enough color to feel complete.
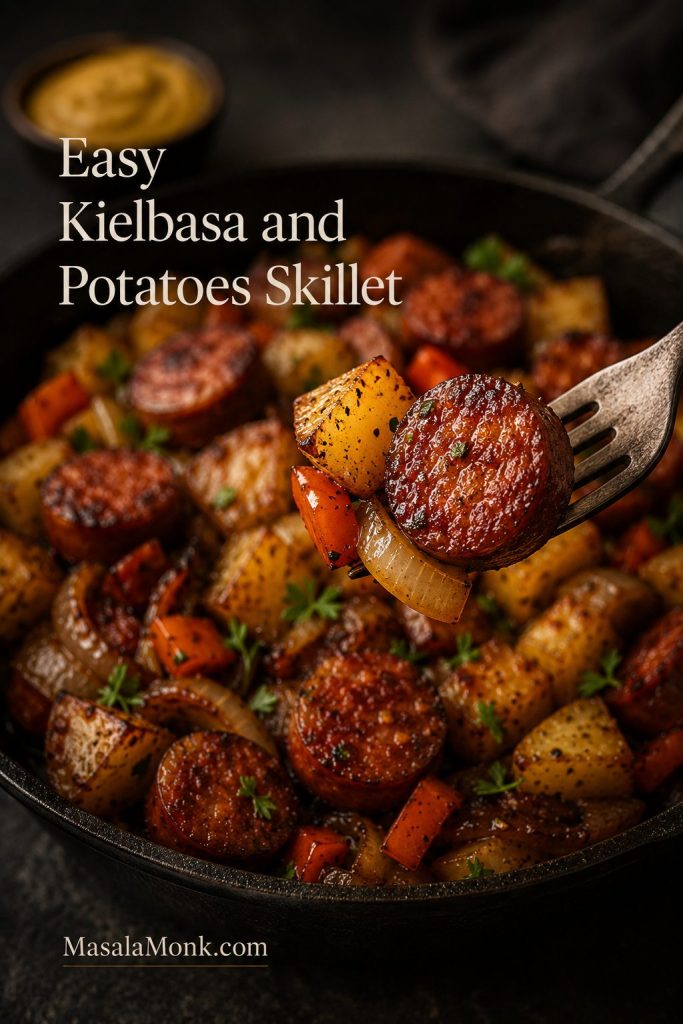
Fork lifting a bite of kielbasa, potato, onion, and bell pepper from a skillet.
This easy kielbasa and potatoes skillet works because every bite has contrast: smoky sausage, tender potato, sweet onion, and a little pepper brightness.

Quick Answer: The Best Way to Make Kielbasa and Potatoes

The easiest way to make kielbasa and potatoes is in a large skillet. Brown sliced kielbasa first, move it to a plate, then cook diced potatoes in the sausage drippings until they are tender inside and golden around the edges. Add onions, peppers, garlic, and seasoning, then return the kielbasa at the end so it stays browned and juicy.

The timing matters: the kielbasa gets color quickly, while the potatoes need a longer turn in the pan.
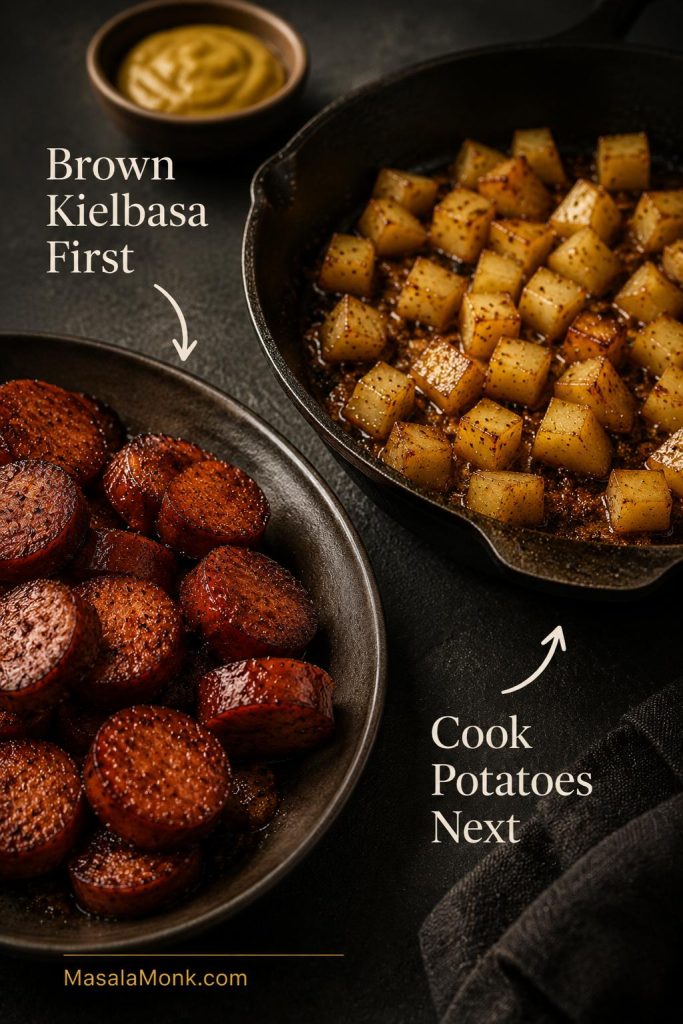
Instructional image showing browned kielbasa on a plate and potatoes cooking in sausage drippings.
Brown kielbasa first so the potatoes can cook in the sausage drippings without drying out the meat. This timing move is what makes the skillet version work better than dumping everything in at once.

For the weeknight skillet version, use:

  • 14–16 oz / 400–450 g kielbasa
  • 1½ lb / 680 g potatoes
  • 1 medium onion, about 150–180 g
  • 1 large bell pepper, about 150 g
  • 2 tbsp oil
  • Garlic, smoked paprika, black pepper, and parsley

On a rushed night, microwave the potatoes for a few minutes before adding them to the skillet. For a more hands-off dinner, use the oven or sheet pan route. For soft comfort food instead of crisp potatoes, use the slow cooker.

Need to choose fast? Jump to the microwave potato shortcut, the sheet pan version, or the slow cooker method.

The main trick: do not make the kielbasa sit in the pan while the potatoes finish cooking. Brown the sausage, remove it, cook the potatoes properly, then bring the sausage back at the end.

Kielbasa and Potatoes at a Glance

Different approaches solve different dinner problems. The skillet gives you the best browning, the oven gives you a more hands-off meal, and the slow cooker gives you soft, cozy comfort. You do not need to use every variation here. The skillet recipe stands on its own; the extra sections are there for nights when your fridge points you in a different direction.

This is the kind of dinner that changes with the night: crisp skillet edges when you have time, soft slow-cooker comfort when you do not, and whatever vegetable is already in the fridge.

Method Use It For Approx. Total Time Texture
Skillet Kielbasa and Potatoes Go-to weeknight dinner 40–45 minutes Crisp-edged potatoes, browned sausage
Microwave Shortcut Skillet Fastest stovetop option 25–35 minutes Tender potatoes with browned edges
Oven / Sheet Pan Hands-off cooking and easy cleanup 35–45 minutes Roasted potatoes, lightly browned sausage
Air Fryer Crisp edges without heating the oven 20–25 minutes Crisp potatoes, browned sausage edges
Slow Cooker Dump-and-go comfort food 3–6 hours Soft and cozy, not crispy
Cabbage Variation Heartier one-pan meal 40–45 minutes Tender cabbage, smoky sausage, soft-crisp potatoes
Sauerkraut Variation Tangy, old-school flavor 40–45 minutes Softer, sharper, savory
Cheesy Casserole Richer comfort-food dinner 45–70 minutes Creamy, baked, cheesy
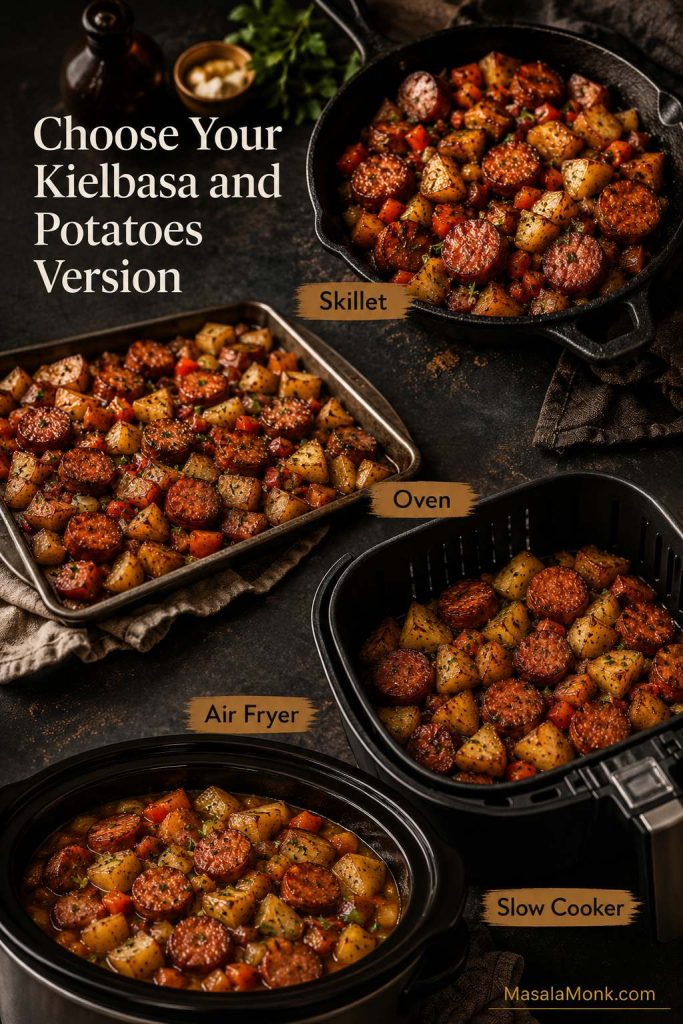
Method chooser showing skillet, oven, air fryer, and slow cooker versions of kielbasa and potatoes.
Choose the method based on the texture you want. The skillet gives the best browning, the oven is easier, the air fryer is crisp and fast, and the slow cooker turns kielbasa and potatoes into soft comfort food.

Texture check: the skillet route is for crisp edges; the slow cooker route is for a softer, cozier sausage-and-potato dinner.
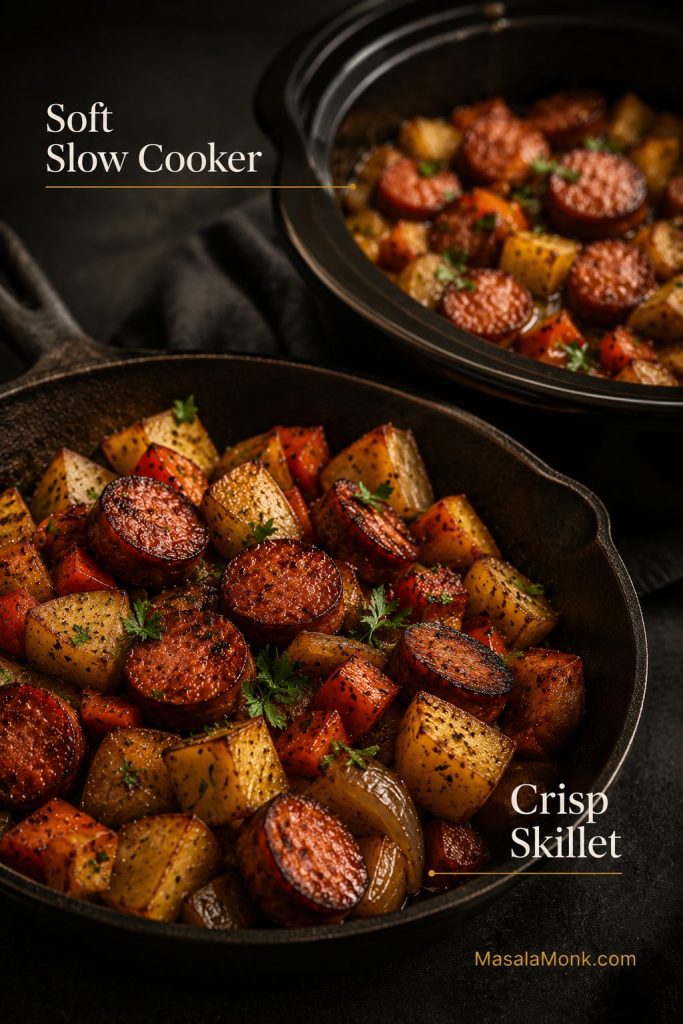
Comparison of crisp skillet kielbasa and potatoes with a softer slow cooker version.
Skillet kielbasa and potatoes give you crisp edges, while the slow cooker gives you a softer, cozier meal. Both work well, but they are not meant to have the same texture.

Why This Kielbasa and Potatoes Recipe Works

The whole dish gets easier once you treat the sausage and potatoes differently. Kielbasa is often already cooked, so it only needs enough time to brown and heat through. Potatoes need longer. They need steam to soften inside and direct skillet heat to brown outside.

That is why the sausage goes first, but does not stay in the pan the whole time. It browns, leaves behind savory drippings, and comes out before it overcooks. Then the potatoes get their own stage: covered first so they soften, then uncovered so they can crisp. A little browning on the bottom of the pan is not failure; it is flavor waiting to be picked up by the potatoes.

The onions and peppers go in after the potatoes are mostly tender, so they soften into the pan without losing all their sweetness and color. Garlic and paprika go in near the end so they bloom quickly instead of burning.

It is still simple food. It just has better timing.

Ingredients You’ll Need

Because the ingredient list is short, balance matters more than quantity: salty smoked sausage, creamy potatoes, sweet onion, a little pepper brightness, and just enough mustard, vinegar, or hot sauce at the end to keep the pan from tasting heavy.
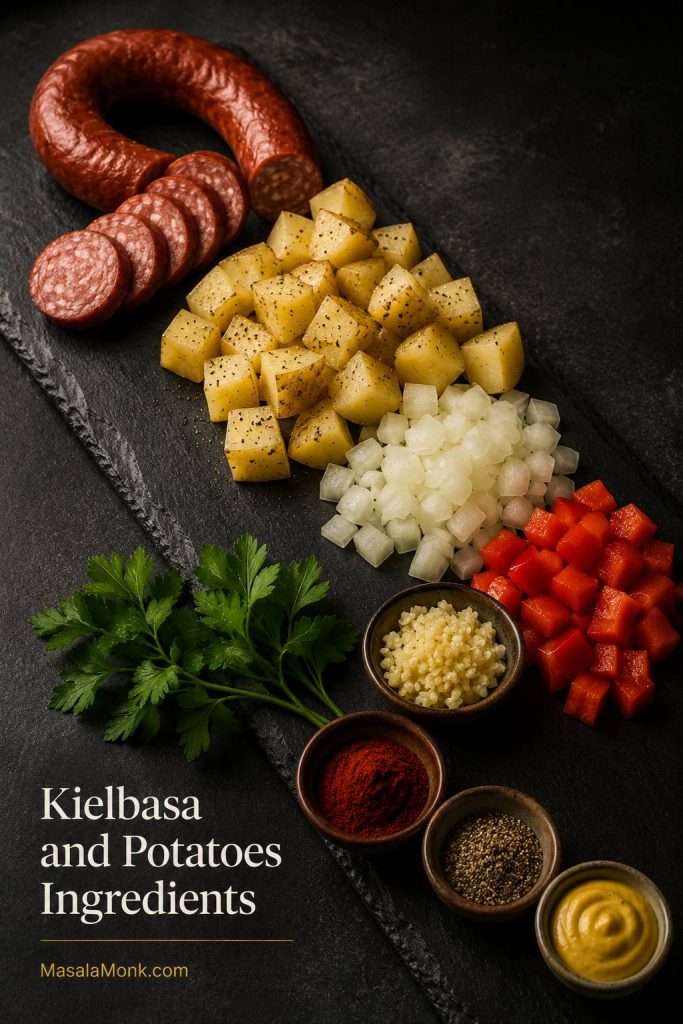
Ingredients for kielbasa and potatoes arranged on a dark surface, including sausage, potatoes, onion, pepper, garlic, paprika, mustard, and parsley.
A short ingredient list makes each choice matter more. In this kielbasa and potatoes skillet, sausage brings smoke, potatoes bring body, and mustard or vinegar keeps the rich pan from feeling flat.

Kielbasa

Use smoked kielbasa or Polish sausage, sliced into ½-inch rounds. Many packaged smoked kielbasa products sold in grocery stores are fully cooked, but always check the label. If you are using raw sausage, cook it fully before combining it with the potatoes.

Pork kielbasa gives the richest flavor and usually releases enough fat to help flavor the potatoes. Turkey or chicken kielbasa works too, but it is leaner, so add a little extra oil.

Potatoes

Yukon Gold, baby gold, or baby red potatoes are the easiest choices because they hold their shape while becoming creamy inside. Cut them small for skillet cooking. Large chunks are the main reason potatoes stay hard while the sausage overcooks.

Onion

A medium yellow or sweet onion gives the pan a savory base. Slice it if you want a rustic look, or chop it if you want everything to mix more evenly.

Bell Pepper

Bell pepper is optional, but it makes the dish feel more complete. Red peppers taste sweeter, green peppers taste sharper, and yellow or orange peppers sit somewhere in the middle.

Garlic and Seasoning

Garlic, smoked paprika, black pepper, and a little oregano or Italian seasoning are enough. Go easy on salt until the end because kielbasa can be salty.

Optional Finish

Dijon mustard, hot sauce, parsley, parmesan, or a tiny splash of apple cider vinegar can brighten the skillet right before serving. Mustard is especially good because it cuts through the richness of the sausage and potatoes.

Best Potatoes for Kielbasa and Potatoes

Potatoes are the only part of this dinner that can really slow you down, so it is worth getting the cut right before the pan gets hot. Choose a potato that can hold its shape, then cut it small enough to cook before the sausage dries out.
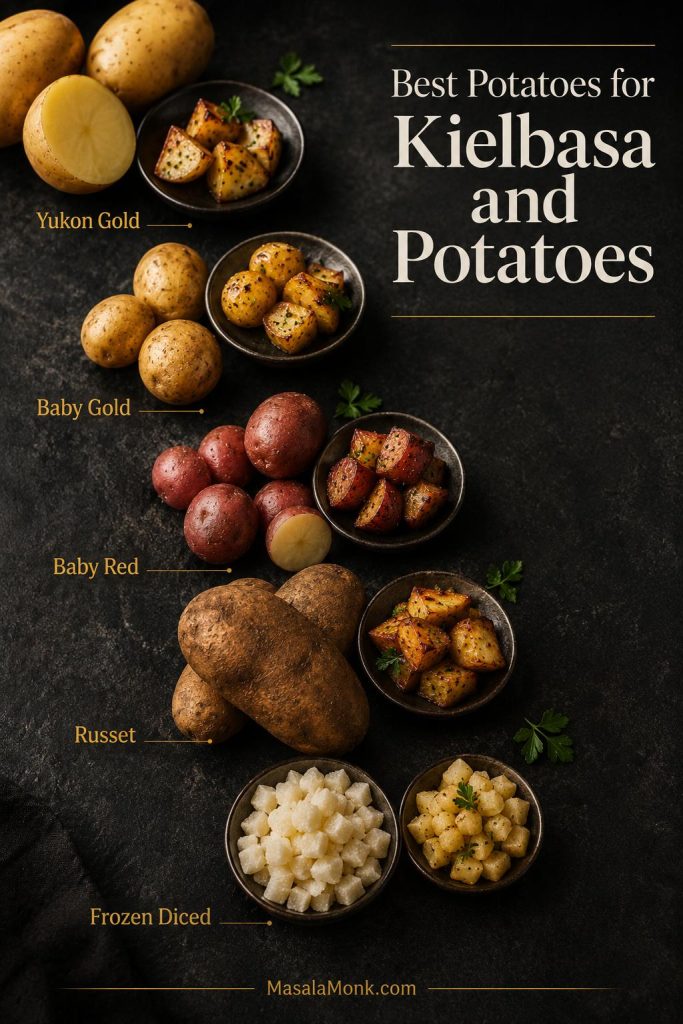
Potato guide showing Yukon Gold, baby gold, baby red, russet, and frozen diced potatoes.
Yukon Gold, baby gold, and baby red potatoes are the easiest choices for kielbasa and potatoes because they hold their shape and brown well. Russets can crisp nicely, but they need gentler handling.
Potato Type Use It For What to Know
Yukon Gold Most reliable all-purpose choice Creamy inside, holds shape well, browns nicely.
Baby Gold Potatoes Skillet or sheet pan Small, tender, and easy to cut into even pieces.
Baby Red Potatoes Skillet, oven, cabbage variation Hold their shape well and give a firmer bite.
Russet Potatoes Crispier edges Can break apart if over-stirred; cut evenly and handle gently.
Frozen Diced Potatoes Slow cooker or casserole Convenient, but not ideal for the crispiest skillet texture.

Potato Cut-Size Guide

Once the potatoes are cut correctly, the rest of the recipe becomes much easier. Smaller pieces cook faster and give you a better chance of golden edges.
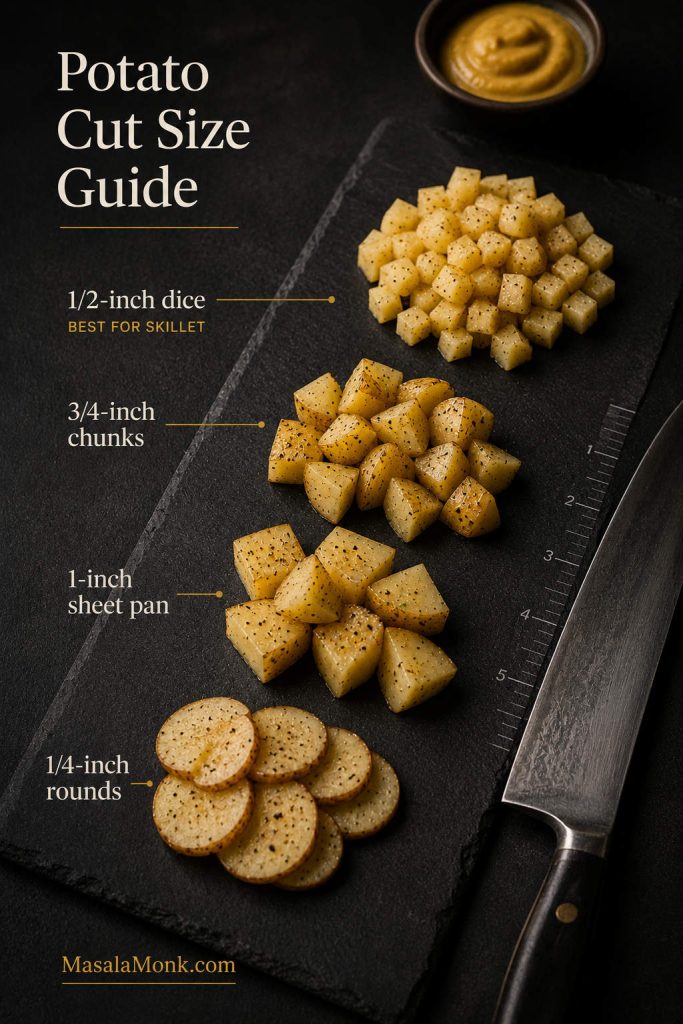
Potato cut-size guide showing half-inch dice, three-quarter-inch chunks, one-inch chunks, and quarter-inch rounds.
Potato cut size decides how smoothly this recipe cooks. For the skillet version, ½-inch pieces are the safest choice because they soften before the sausage dries out.
Potato Cut Use It For What to Expect
½-inch dice Skillet method Fast, even cooking and crisp edges.
¾-inch chunks Skillet or oven Heartier bite, but needs more covered time.
1-inch chunks Sheet pan Good for roasting if spread in one layer.
¼-inch rounds Roasted or pan-fried style Browns quickly, but can break if stirred too much.
Halved baby potatoes Sheet pan Works if they are very small; quarter larger ones.

For the main skillet recipe, ½-inch pieces are the safest choice. Bigger chunks can work, but they usually need extra covered cooking time or a microwave head start. Hard potatoes usually mean one of three things: the pieces were too large, the pan was crowded, or the potatoes did not get enough covered time.

Hard-potato fix: cut smaller, cover longer, or use the microwave shortcut before browning.
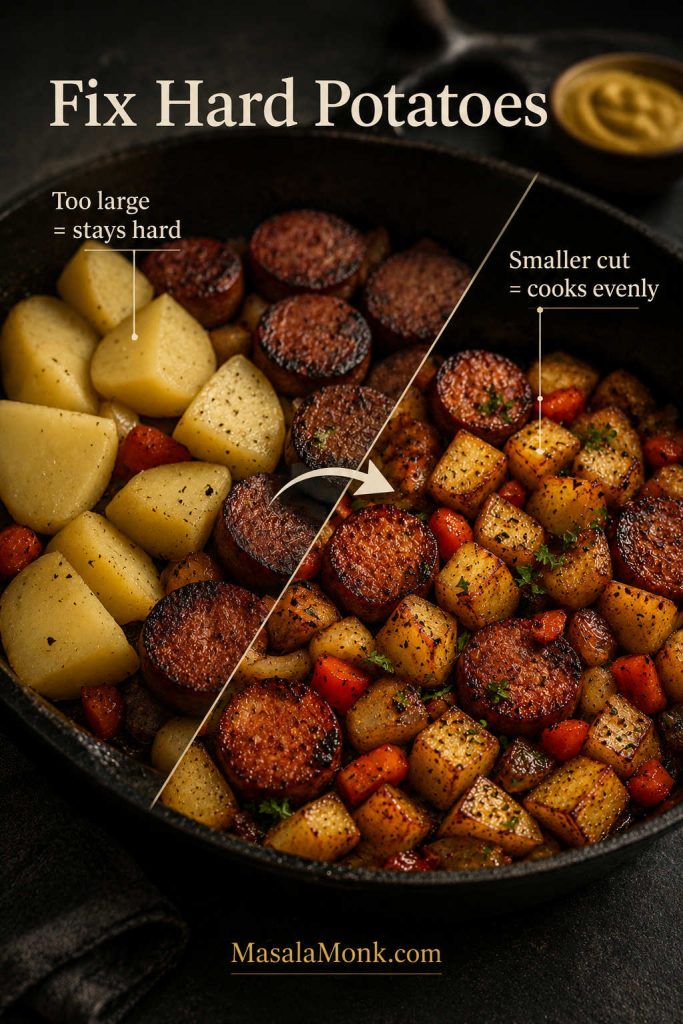
Before-and-after image comparing large pale potato chunks with smaller browned potatoes in a kielbasa skillet.
Hard potatoes usually mean the pieces were too large, the pan was crowded, or the skillet was uncovered too soon. Cut smaller, cover longer, and let the potatoes finish before returning the sausage.

Best Kielbasa to Use

After the potatoes, the sausage choice mostly changes richness and how much fat you get in the pan. Smoked kielbasa is the easiest choice because it is flavorful, widely available, and often already cooked. If you are using raw sausage instead, cook it fully before combining it with the potatoes.

Choose by richness: pork gives the fullest drippings, while leaner sausage needs a little help from oil.
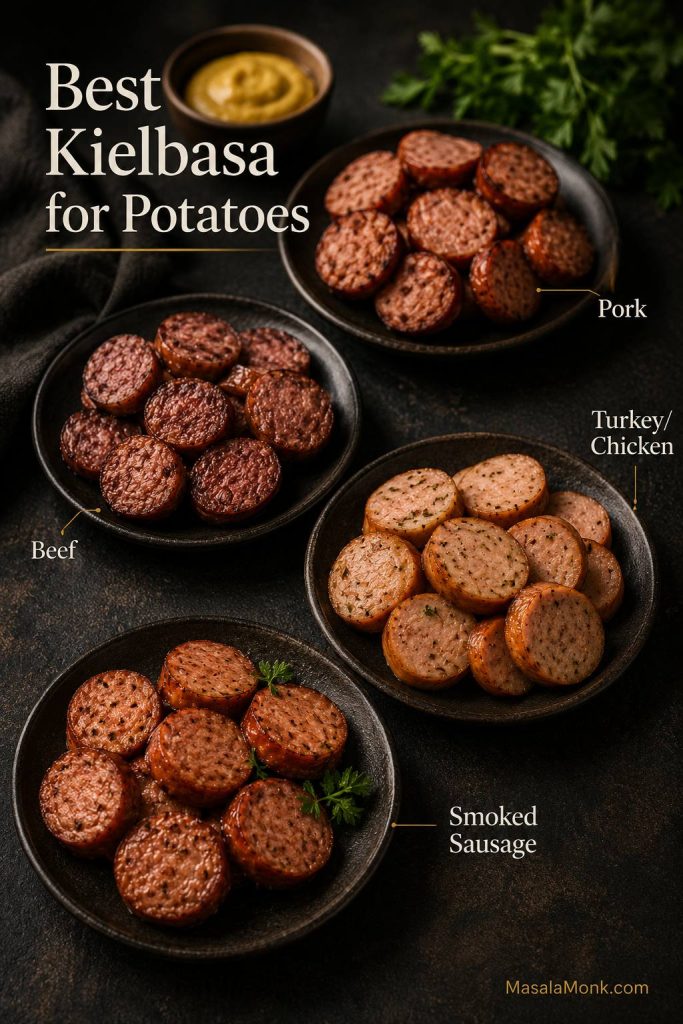
Four types of sliced sausage labeled pork, beef, turkey or chicken, and smoked sausage for kielbasa and potatoes.
Pork kielbasa gives the richest skillet flavor, but beef, turkey, chicken, or smoked sausage can all work. If the sausage is lean, add a little extra oil so the potatoes still brown properly.

For a deeper safety reference on sausage types and handling, the USDA has a helpful guide to sausages and food safety.

Check the package before cooking: many smoked kielbasa products are fully cooked, but raw sausage needs to be cooked through first.

Sliced kielbasa with a check-label reminder about fully cooked and raw sausage.
Many smoked kielbasa packages are fully cooked, but the label still matters. If the sausage is raw, cook it fully before combining it with the potatoes.
Type Flavor What Helps
Pork Kielbasa Rich, smoky, classic Usually releases enough fat to help flavor the potatoes.
Beef Kielbasa Hearty and smoky Great with mustard, cabbage, and sauerkraut.
Turkey Kielbasa Lighter and leaner Add extra oil because it will not render as much fat.
Chicken Kielbasa Mild and lighter Brown briefly and return at the end so it does not dry out.
Smoked Sausage Similar, depending on brand A good substitute if kielbasa is not available.

Using turkey or chicken kielbasa? Add enough oil for browning, then follow the same skillet timing.
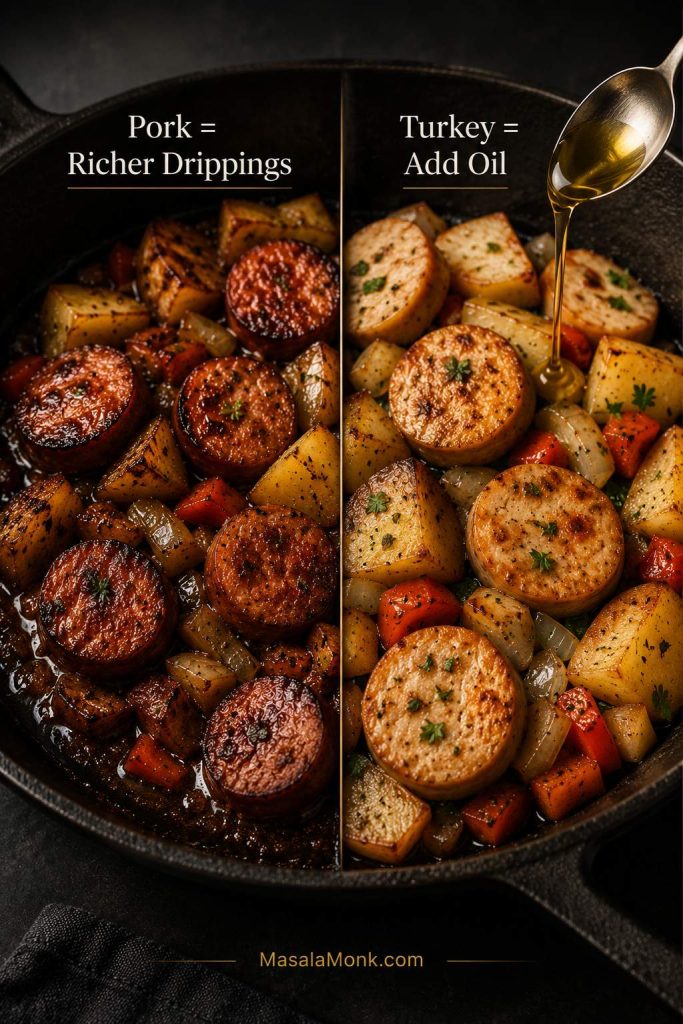
Comparison of pork kielbasa with richer drippings and turkey kielbasa with added oil for cooking potatoes.
Pork kielbasa naturally seasons the pan with drippings. However, turkey or chicken kielbasa can still make a good kielbasa and potatoes dinner if you add enough oil for browning.

How to Make Kielbasa and Potatoes in a Skillet

The skillet is the go-to approach because it gives you browned sausage, golden potatoes, and a real dinner from one pan. Use a 12-inch heavy skillet or cast iron skillet if you have one. A lid helps the potatoes soften before you crisp them.

Ready to cook now? Skip ahead to the recipe card, or keep reading for the visual skillet method.

Brown the Kielbasa First

Heat 1 tablespoon oil in a large skillet over medium-high heat. Add the sliced kielbasa in a single layer and cook for 4–6 minutes, turning once or twice, until the edges are browned.
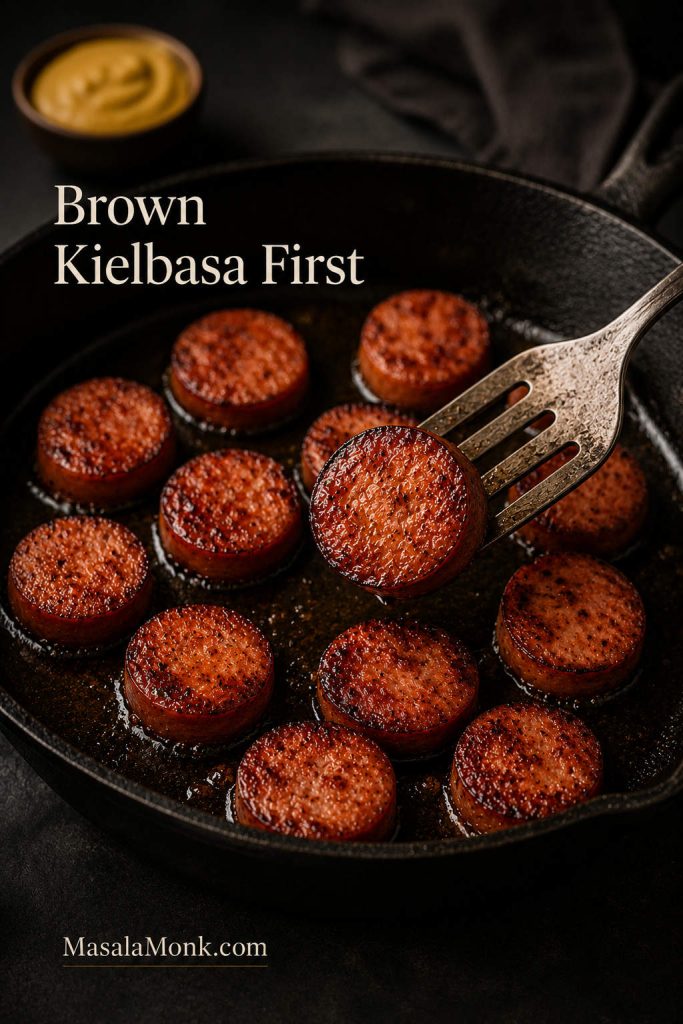
Kielbasa slices browning in a cast iron skillet with a utensil lifting one piece.
Browning the kielbasa first builds flavor quickly. Once the sausage has color, remove it so the potatoes can cook longer without turning the meat dry or rubbery.

You are not trying to cook it for a long time. You just want color, savory drippings, and browned edges. Once the kielbasa is browned but not shriveled, move it to a plate.

Move it out of the pan now: the potatoes still need time, and the kielbasa only needs to return once everything is nearly done.
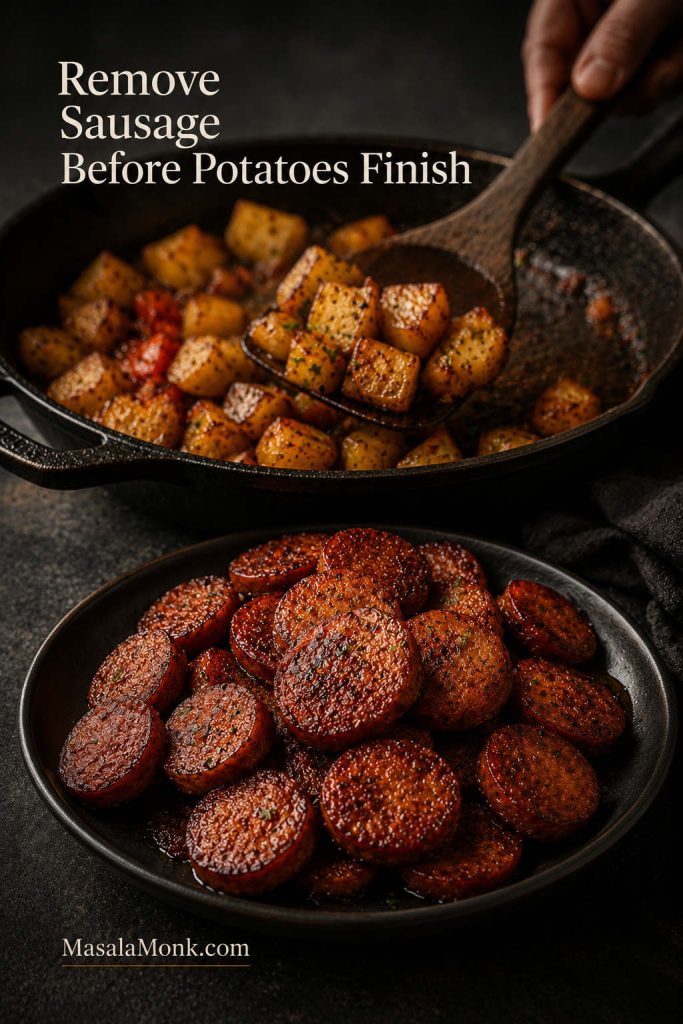
Browned kielbasa on a plate beside a skillet of potatoes cooking in the pan drippings.
Removing the kielbasa is not an unnecessary extra step. It protects the sausage while the potatoes get the time and pan contact they need.

Cook the Potatoes Until Tender

Add the diced potatoes to the same skillet with the remaining oil. Stir so they pick up the sausage drippings. Add a small pinch of salt, then cover the skillet and cook over medium heat for 10–12 minutes.
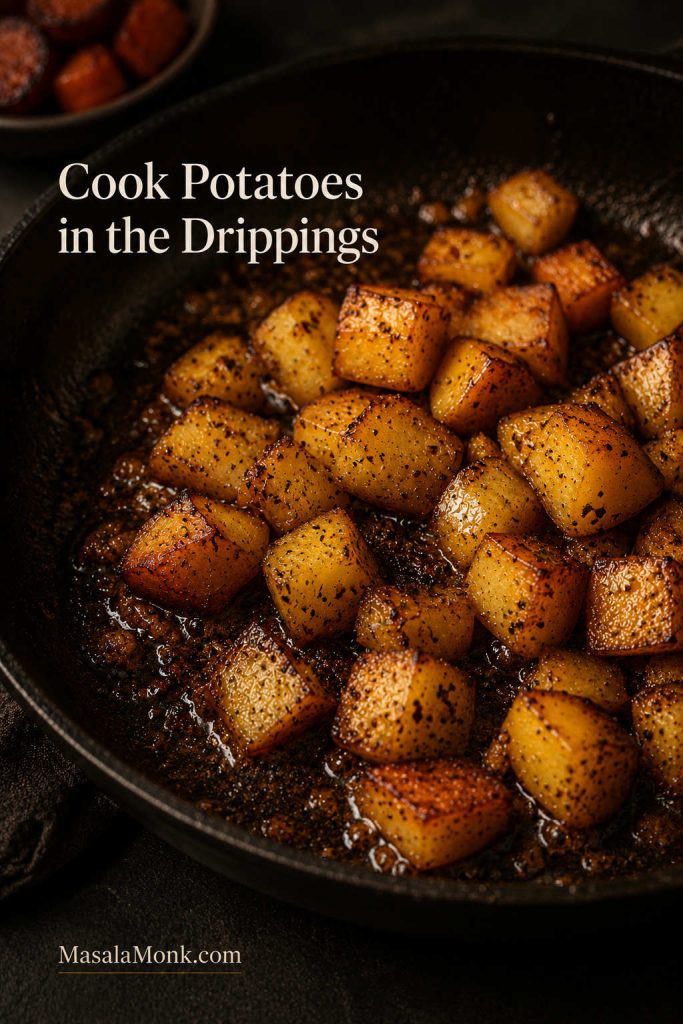
Close-up of potato cubes cooking in glossy sausage drippings with browned bits in a cast iron skillet.
The sausage drippings season the potatoes before anything else goes back into the pan. Let the potatoes pick up those browned bits for deeper flavor and better skillet texture.

The lid matters. It traps enough steam to help the potatoes soften inside. When the pan looks dry or the potatoes are sticking hard, add 2 tablespoons of water or chicken stock. Use small splashes, not a big pour, so the pan does not turn soupy.

Crisp the Potatoes

Once the potatoes are nearly fork-tender, remove the lid. Let them cook uncovered for 6–8 minutes, stirring only occasionally. If you move them constantly, they will not brown as well.
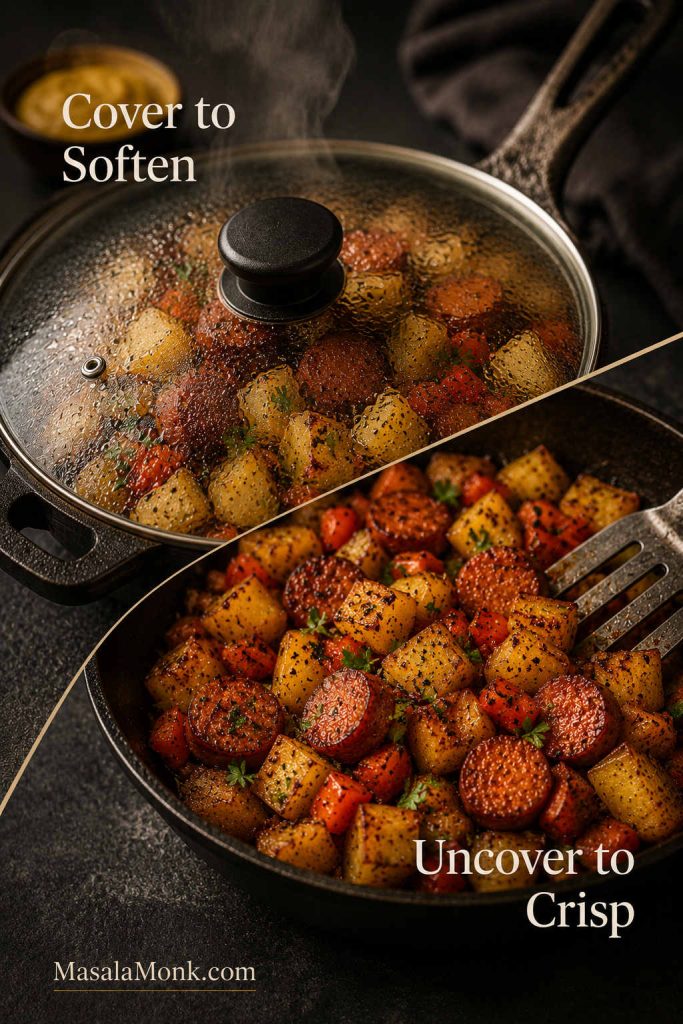
Split cooking image showing potatoes covered to soften and uncovered to crisp.
Cover the potatoes first to soften the centers, then uncover the pan so the edges can brown. That two-stage method helps prevent both hard potatoes and pale, steamed potatoes.

Soft but pale potatoes need more direct contact with the pan. Potatoes that are browning too quickly but still hard in the middle need lower heat, a lid, and another tablespoon or two of water.

Add the Onions and Peppers

When the potatoes are mostly tender, add the onion and bell pepper. Cook for 4–5 minutes, until the vegetables soften but still have some shape.
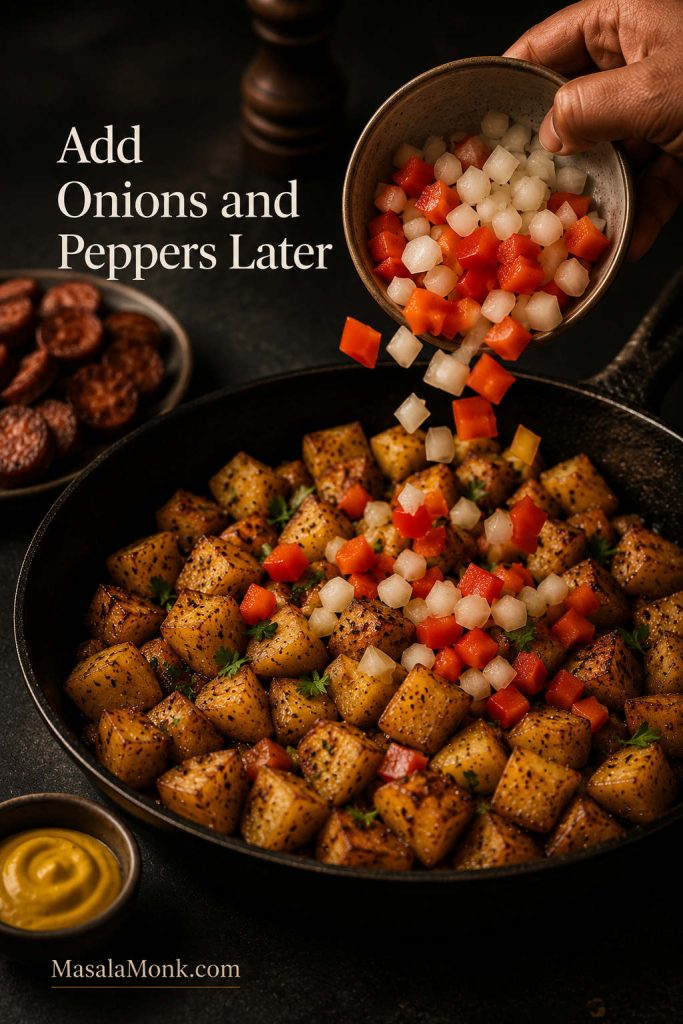
Hand adding sliced onion and bell pepper to a skillet of partially cooked potatoes and kielbasa.
Onions and peppers work better after the potatoes have already started softening. That way, they add sweetness and color instead of collapsing before the skillet is finished.

This timing keeps the onions sweet and the peppers lively. If they go in at the beginning, they can turn limp before the potatoes are ready.

Season and Return the Kielbasa

Add the garlic, smoked paprika, oregano, and black pepper. Stir for 30–60 seconds, just until the paprika darkens slightly and the garlic smells warm. Then return the browned kielbasa to the skillet and toss everything together.
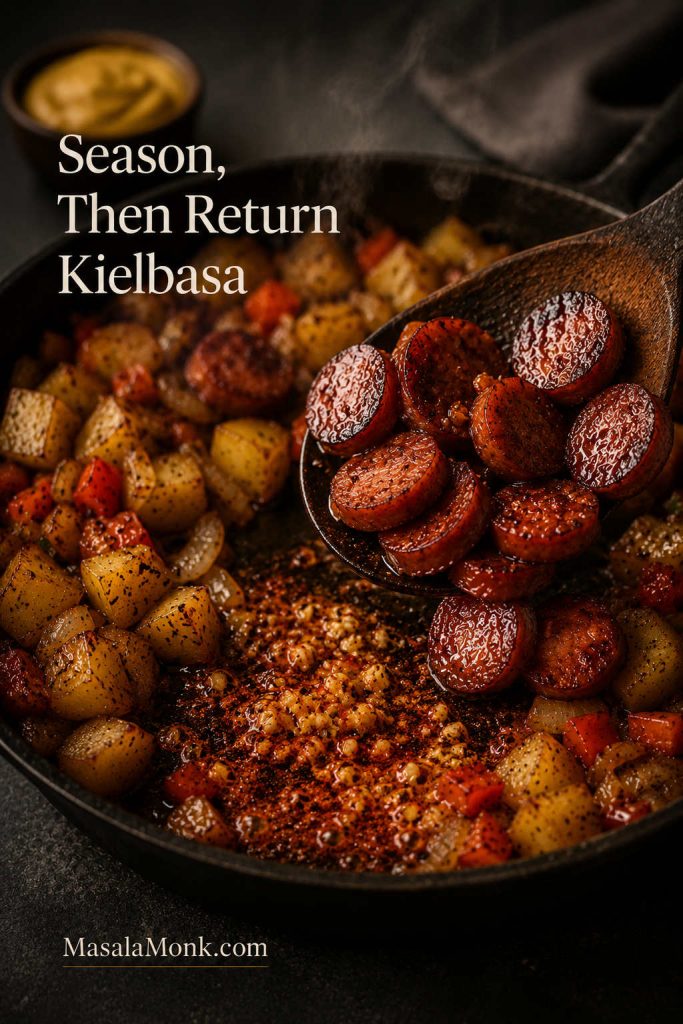
Kielbasa being returned to a skillet with potatoes, vegetables, garlic, and paprika.
Season near the end so the garlic and paprika bloom instead of burn. Then return the kielbasa just long enough to warm through and coat everything in the skillet flavor.

Cook for 2–3 minutes, until the kielbasa is hot throughout. The best bites have a little of everything: browned sausage edge, tender potato center, sweet onion, and just enough pepper or mustard to keep the skillet from feeling heavy. Taste before adding more salt, since some kielbasa brands are salty enough on their own.

Final texture check: the potatoes should look golden at the edges, and the kielbasa should look browned but not shriveled.
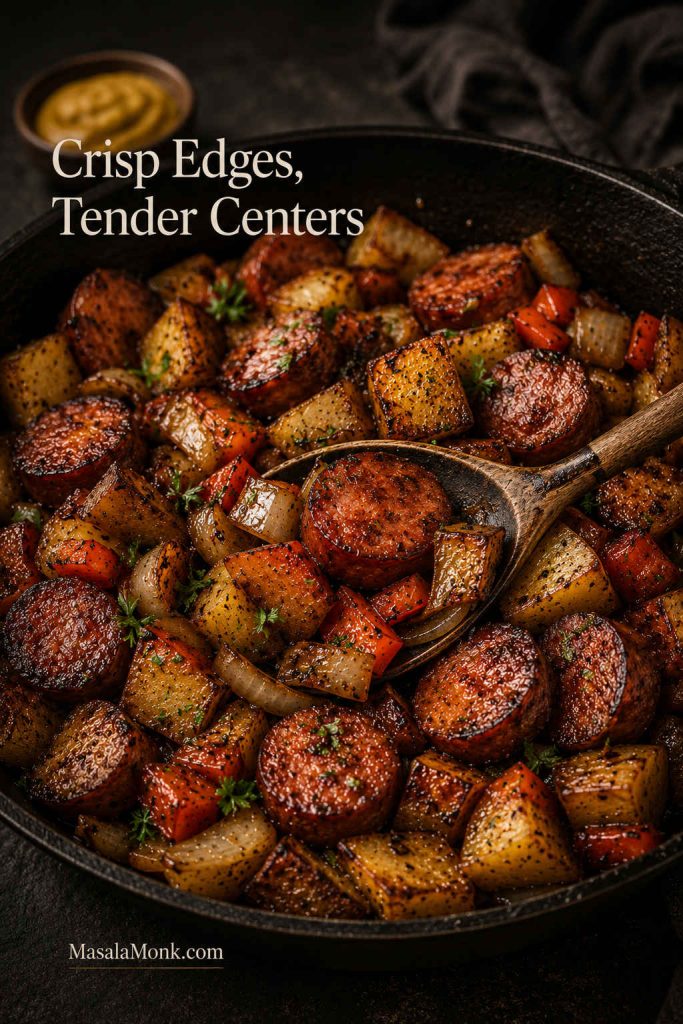
Finished skillet of browned kielbasa, golden potatoes, onions, and bell peppers with a serving spoon.
The finished skillet should have crisp-edged potatoes, browned sausage, and enough onion and pepper to keep the meal from feeling too heavy. Taste at the end before adding more salt.

Do not worry if your pan needs a small adjustment. Larger potatoes need more time, lean kielbasa needs a little more oil, and a crowded skillet needs patience. This is a forgiving dinner as long as you do not rush the potatoes or leave the sausage in the pan too long.

Faster Method: Microwave the Potatoes First

On a rushed night, give the potatoes a head start in the microwave before they go into the skillet. This is the easiest way to avoid the classic problem of browned sausage with hard potatoes.

Put the diced potatoes in a microwave-safe bowl with 2 tablespoons of water. Cover loosely and microwave for 4–5 minutes, just until the potatoes begin to soften. Drain well, then add them to the skillet after browning the kielbasa.

The microwave softens the centers; the skillet still gives the potatoes their browned edges.
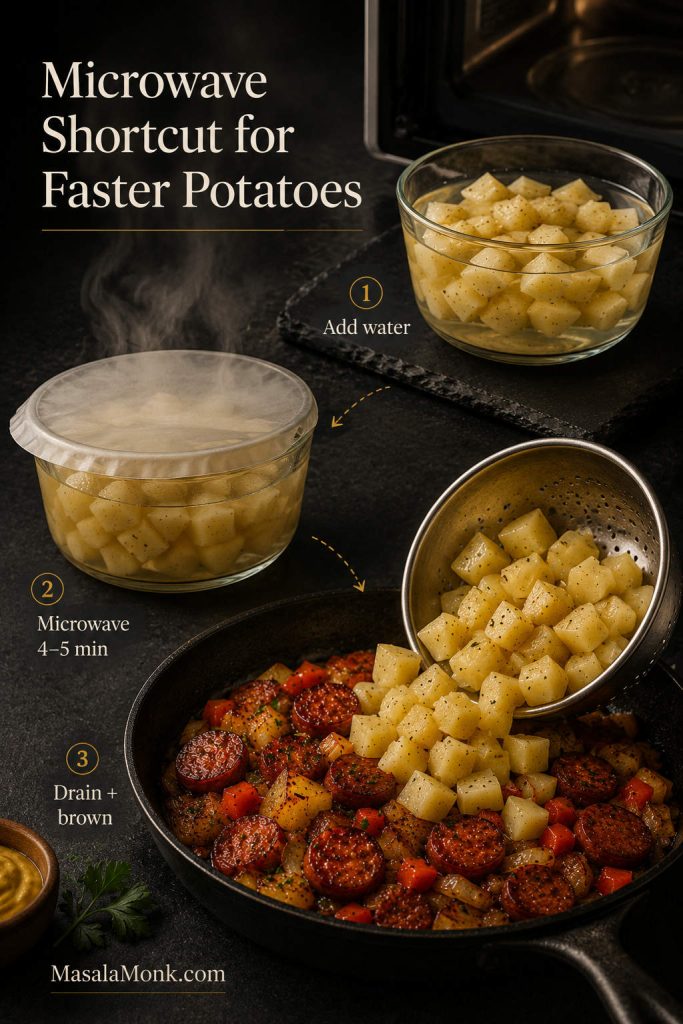
Three-step microwave shortcut showing diced potatoes with water, a covered bowl, and potatoes going into a skillet.
A short microwave head start makes the skillet much faster. Just drain the potatoes well afterward so they can still brown in the pan instead of steaming.

You still get skillet browning, but the centers soften much faster. This shortcut is especially useful if your potato pieces are closer to ¾ inch than ½ inch.

If you are ready to cook, jump to the main recipe card. The sections after it are there for swaps, shortcuts, and different ways to use the same sausage-and-potato base.

Use this visual summary when you want the main skillet rhythm at a glance.
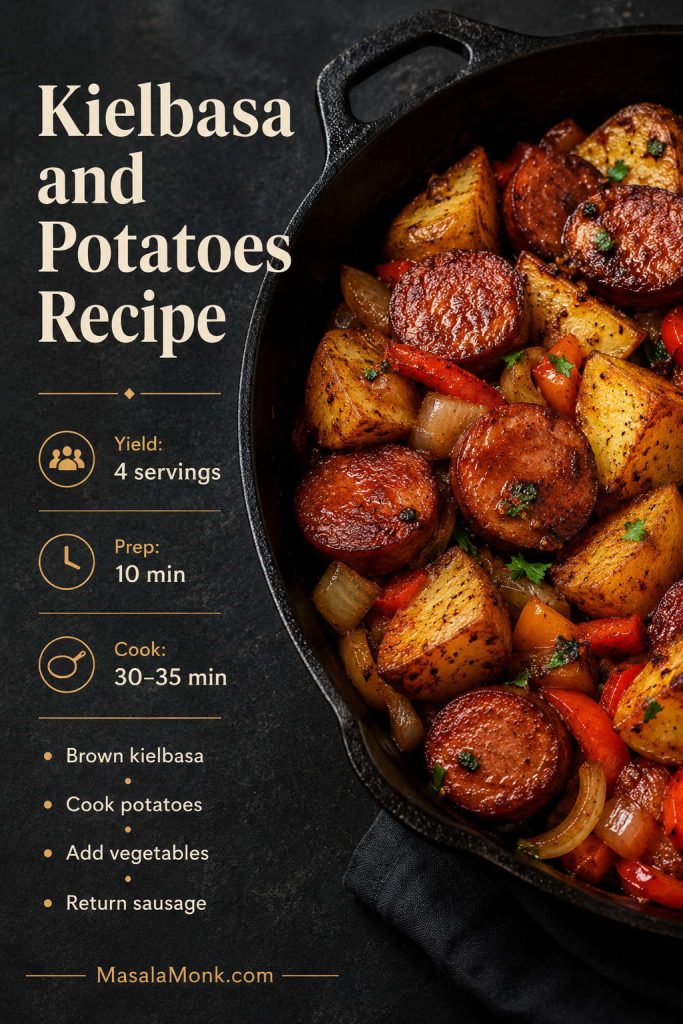
Recipe card image for kielbasa and potatoes with a skillet photo, yield, prep time, cook time, and method summary.
Keep the core rhythm simple: brown the kielbasa, cook the potatoes properly, add the vegetables, then bring the sausage back at the end. That sequence is the backbone of the recipe.

Kielbasa and Potatoes Recipe Card

This is the main skillet version: browned smoked sausage, golden-edged potatoes, sweet onion, bell pepper, garlic, and smoky seasoning. It is built for crisp edges, tender centers, and a finish you can brighten with mustard, hot sauce, or black pepper.

Yield4 servings
Prep Time10 minutes
Cook Time30–35 minutes
Total Time40–45 minutes

Equipment

  • 12-inch heavy skillet or cast iron skillet
  • Lid for the skillet
  • Cutting board
  • Sharp knife
  • Spatula

Ingredients

  • 14–16 oz / 400–450 g kielbasa, sliced into ½-inch rounds
  • 1½ lb / 680 g Yukon Gold, baby gold, or baby red potatoes, cut into ½-inch pieces
  • 2 tbsp olive oil or neutral cooking oil, divided
  • 1 medium onion, about 150–180 g, sliced or chopped
  • 1 large bell pepper, about 150 g, sliced or chopped
  • 2–3 garlic cloves, minced
  • 1 tsp smoked paprika
  • ½ tsp dried oregano or Italian seasoning
  • ½ tsp black pepper
  • ¼ tsp salt to start, plus more to taste
  • 2–4 tbsp chicken stock or water, only if needed
  • 1 tbsp chopped parsley, optional
  • 1–2 tsp Dijon mustard or a splash of hot sauce, optional for finishing

Instructions

  1. Brown the kielbasa. Heat 1 tablespoon oil in a large skillet over medium-high heat. Add the sliced kielbasa in a single layer and cook for 4–6 minutes, turning once or twice, until browned on the edges. Transfer to a plate.
  2. Start the potatoes. Add the remaining 1 tablespoon oil to the skillet. Add the diced potatoes and ¼ teaspoon salt. Stir to coat them in the oil and sausage drippings.
  3. Cover and cook. Reduce the heat to medium, cover the skillet, and cook the potatoes for 10–12 minutes, stirring once or twice. If the pan looks dry or the potatoes are sticking hard, add 2 tablespoons water or chicken stock.
  4. Crisp the potatoes. Remove the lid and continue cooking for 6–8 minutes, stirring occasionally, until the potatoes are fork-tender inside and golden on the edges. The potatoes should pierce easily with a fork before the kielbasa goes back in.
  5. Add onion and pepper. Stir in the onion and bell pepper. Cook for 4–5 minutes, until softened but not mushy.
  6. Season. Add garlic, smoked paprika, oregano, and black pepper. Cook for 30–60 seconds, just until fragrant.
  7. Return the kielbasa. Add the browned kielbasa back to the skillet and toss everything together. Cook for 2–3 minutes, until hot throughout.
  8. Finish and serve. Taste and adjust salt carefully. Finish with parsley, Dijon mustard, hot sauce, or extra black pepper.

Faster Potato Shortcut

Microwave the diced potatoes with 2 tablespoons water for 4–5 minutes before adding them to the skillet. Drain well, then brown them in the sausage drippings.

Notes

  • Use a large skillet. If the pan is too small, the potatoes will steam instead of brown.
  • If your potatoes are larger than ½ inch, microwave them first or expect a longer cook time.
  • If using turkey or chicken kielbasa, add a little extra oil because lean sausage does not release as much fat as pork kielbasa.
  • Do not add too much salt at the beginning. Kielbasa can be salty, so taste near the end.
  • For a cabbage variation, add 3–4 cups / 250–350 g sliced cabbage once the potatoes are almost tender.
  • For sauerkraut, use 1½–2 cups drained sauerkraut and add it after the potatoes are tender and browned.
  • For a sheet pan dinner, roast potatoes and vegetables first at 400°F / 200°C, then add kielbasa halfway through.
  • For an air fryer version, give the potatoes a head start before adding the kielbasa so the sausage does not overcook.

Timing guide: the main method works because each ingredient gets the right amount of pan time.
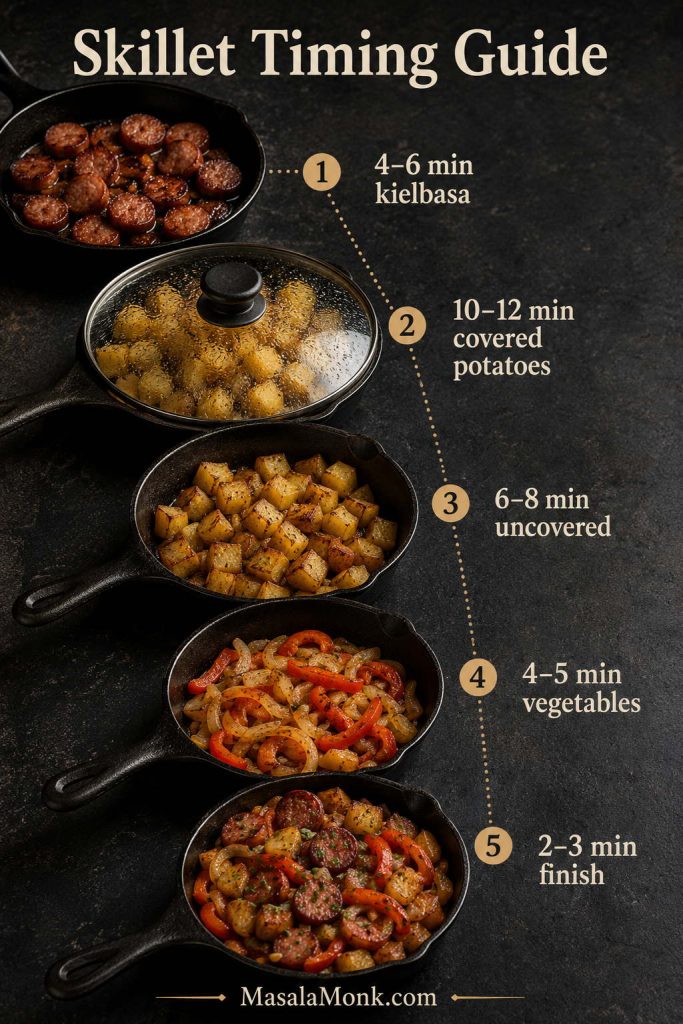
Timing guide for kielbasa and potatoes showing sausage browning, covered potatoes, uncovered potatoes, vegetables, and final finish.
This timing guide prevents the most common mistake: treating sausage and potatoes like they cook at the same speed. They do not, and the skillet tastes better when each step gets its own moment.

Once the skillet version makes sense, the rest is mostly about what kind of dinner you want: roasted and hands-off, soft and slow-cooked, sharper with sauerkraut, fuller with cabbage or green beans, or rich enough to become a cheesy casserole.

Oven and Sheet Pan Kielbasa and Potatoes

The sheet pan route is for nights when you want dinner mostly hands-off and do not mind a slightly softer sausage edge. The potatoes still need the head start, but the oven does most of the work.

For the sheet pan version, spread the food out so the potatoes roast instead of steam.
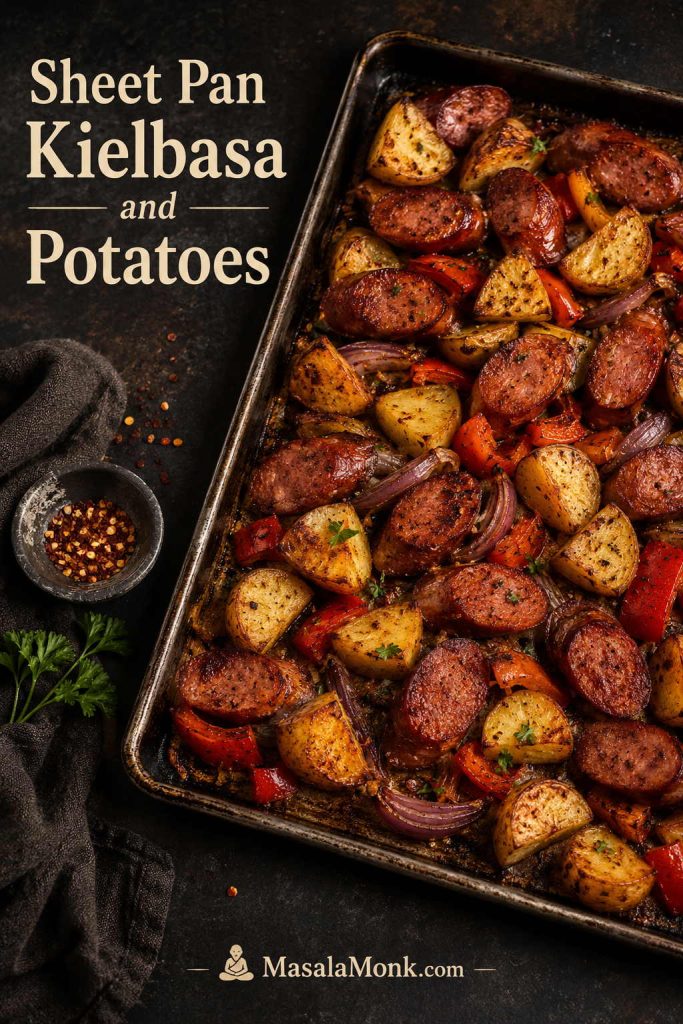
Sheet pan with kielbasa, potatoes, and peppers spread in one layer for oven roasting.
For the sheet pan version, spacing matters. A crowded tray steams, while a spread-out tray gives the potatoes a better chance to roast and brown.

Preheat the oven to 400°F / 200°C. Use a large 13×18-inch rimmed sheet pan. Cut the potatoes into ¾–1 inch pieces, then toss them with onion, bell pepper, 2–3 tablespoons oil, smoked paprika, black pepper, and ¼ tsp salt to start.

Spread everything in a single layer. If the pan is crowded, the potatoes will steam instead of roast. Use two pans if you are doubling the recipe, then check the spacing guide below.
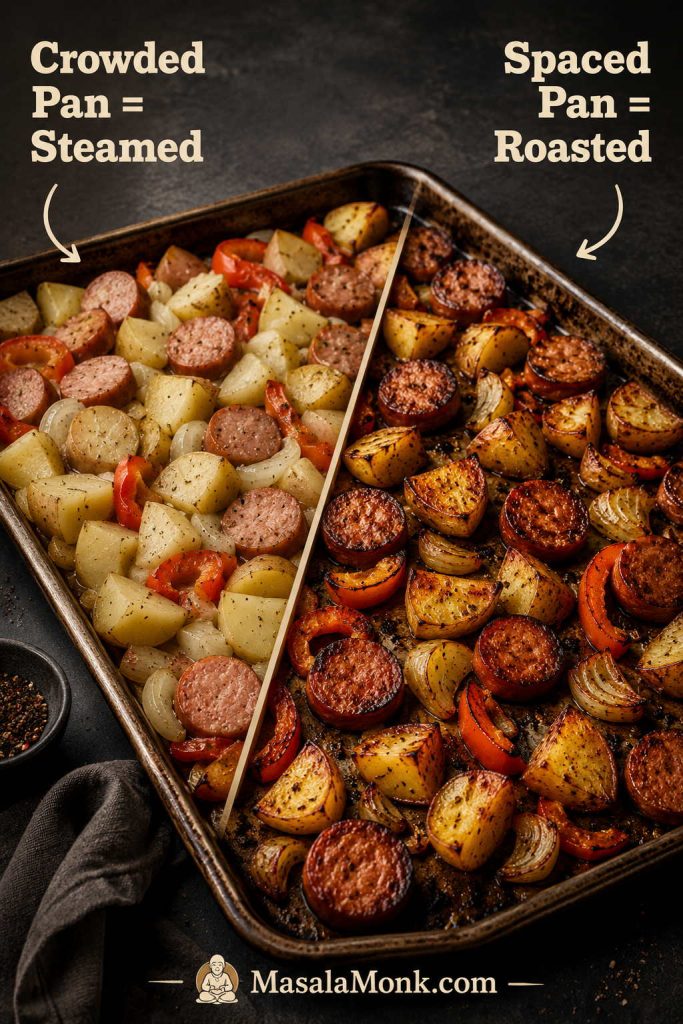
Comparison of a crowded sheet pan that steams and a spaced sheet pan that roasts.
If sheet pan potatoes come out soft instead of roasted, crowding is usually the reason. Use a larger pan or divide the batch between two trays for better browning.

The same one-pan logic also works well in these sheet pan chicken fajitas, where peppers, onions, and high heat do most of the work.

Most Reliable Sheet Pan Timing

Roast the potatoes, onions, and peppers for 15–20 minutes first. Then add the sliced kielbasa, toss, and roast for another 10–15 minutes, until the potatoes are tender and the sausage is browned.
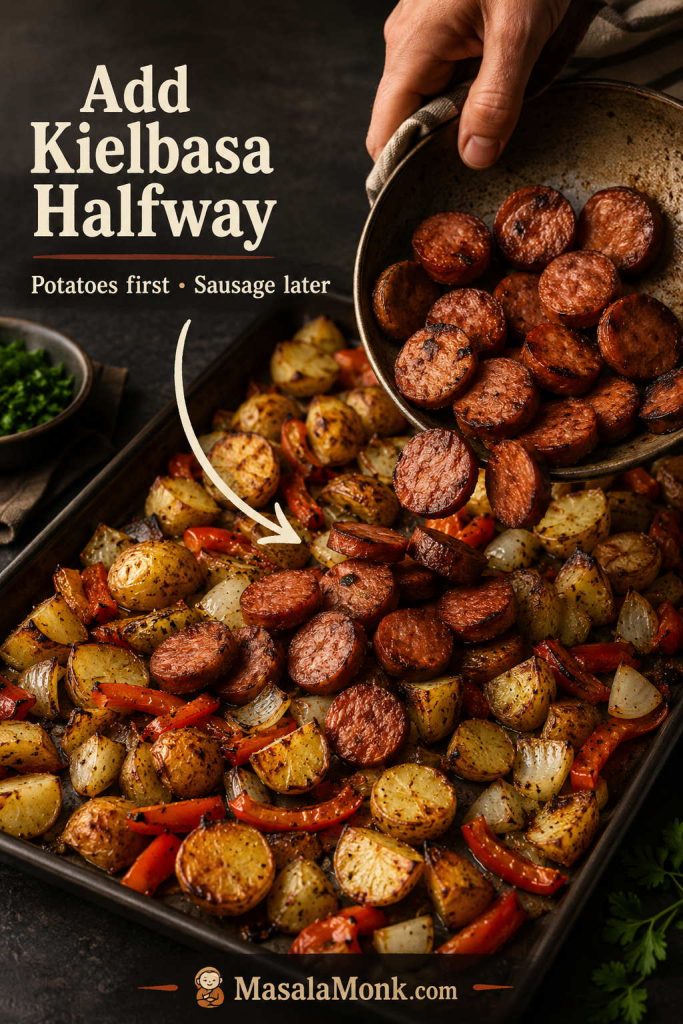
Hand adding sliced kielbasa to a sheet pan of partially roasted potatoes and vegetables.
Add the kielbasa halfway through the sheet pan method if you want the sausage browned but not dried out. The potatoes need the earlier head start.

Adding kielbasa later keeps it juicier. Adding it from the start gives deeper browning, but the sausage can get drier, especially if you are using turkey or chicken kielbasa.

Oven Choice Use It For Result
Add kielbasa from the start When you want deeper sausage color More browning, slightly drier texture.
Add kielbasa halfway through Most reliable sheet pan timing Juicier sausage, still browned.
Add lean kielbasa later Turkey or chicken kielbasa Less drying, better texture.

Air Fryer Kielbasa and Potatoes

The air fryer works best when you want crisp edges without heating the oven. It follows the same basic idea as the skillet and sheet pan versions: give the potatoes a head start, then add the kielbasa once the potatoes are partly tender.
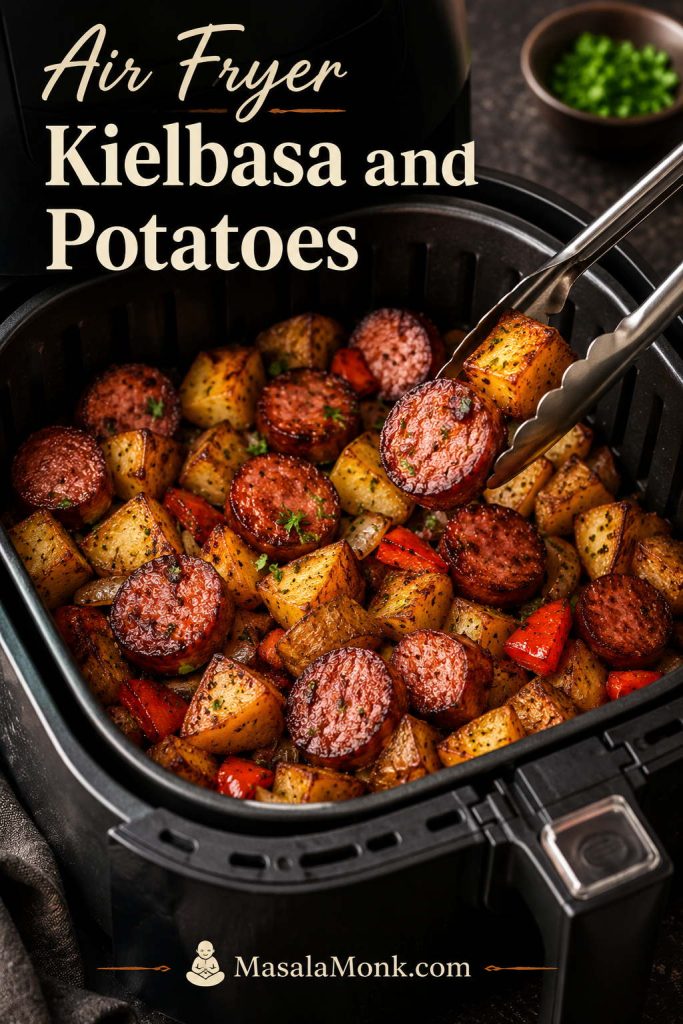
Air fryer basket filled with crisp potatoes and browned kielbasa, with tongs lifting a bite.
The air fryer version works best in a single layer. The basket needs enough room for hot air to move around the potatoes and sausage.

Cut the potatoes into ½–¾ inch pieces, then toss them with oil, smoked paprika, black pepper, and a small pinch of salt. Air fry at 380–400°F / 190–200°C for about 10–12 minutes, shaking once.

Potatoes go first: this keeps the sausage from overcooking while the potatoes finish softening.
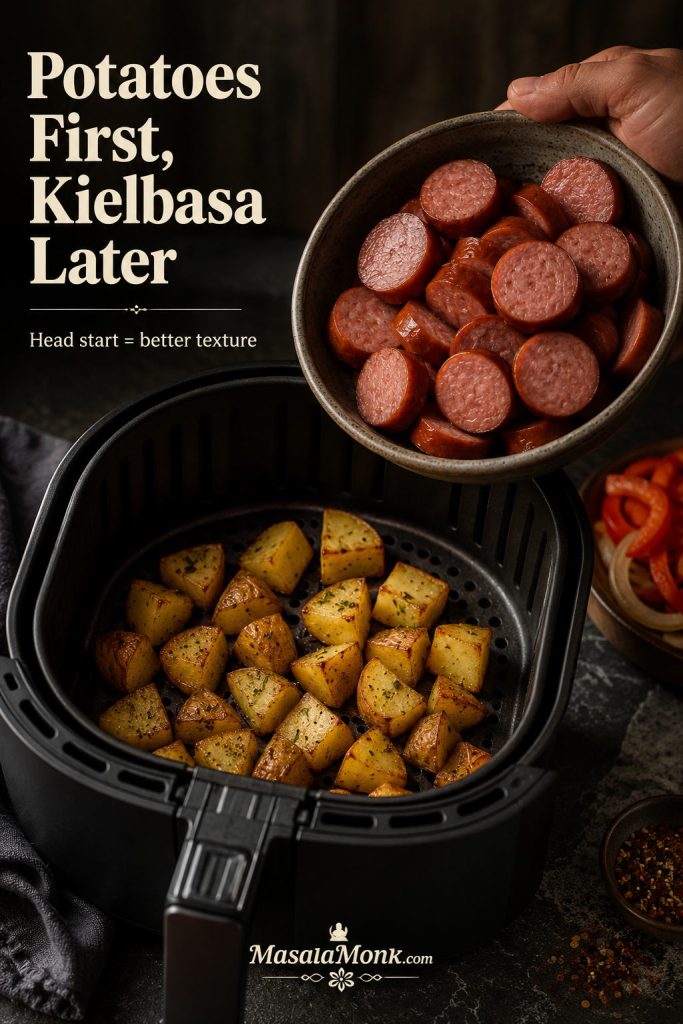
Partly cooked potatoes in an air fryer basket with kielbasa slices ready to be added later.
The air fryer method turns out better when the potatoes go in first. Add the sausage later so it browns at the edges without overcooking before the potatoes are tender.

Add sliced kielbasa and any quick-cooking peppers or onions, then air fry for another 6–10 minutes, shaking once or twice, until the potatoes are tender and the sausage is browned at the edges. Work in batches if your basket is small; crowded potatoes steam instead of crisp.
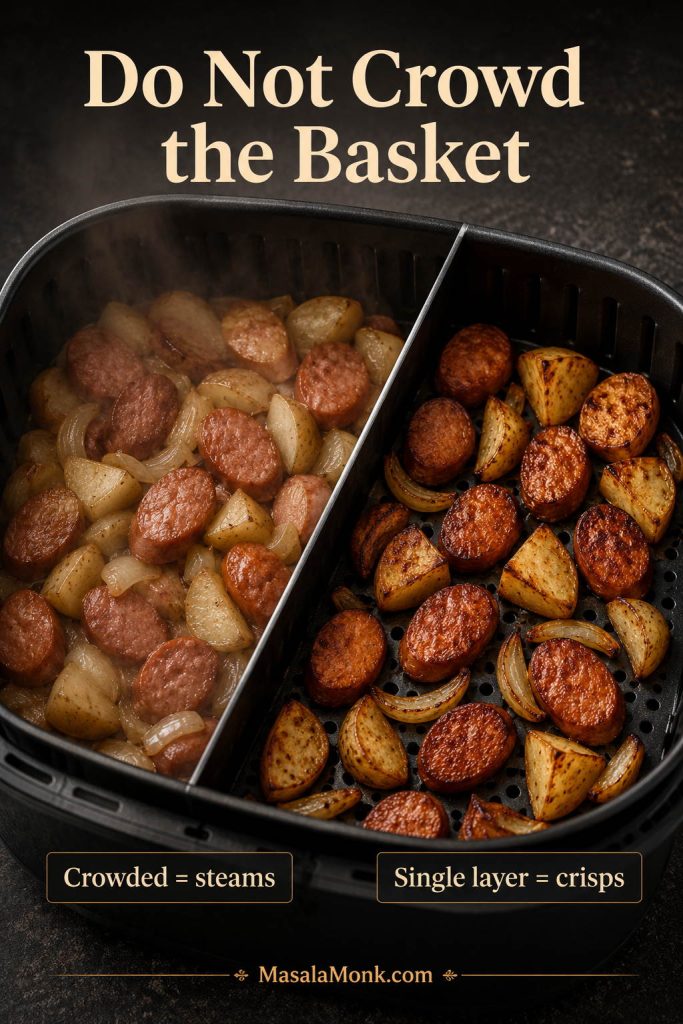
Air fryer comparison showing a crowded basket and a single-layer basket for kielbasa and potatoes.
The air fryer rewards space. When the basket is too full, the potatoes steam instead of crisp, so work in batches if needed.

Slow Cooker Kielbasa and Potatoes

The slow cooker version belongs in a different lane: soft, cozy comfort food instead of browned skillet edges. This is the low-effort version for busy days, but it should be judged as a tender potato-and-sausage supper, not a crispy skillet dinner.

What to Add to the Slow Cooker

A basic slow cooker batch can stay simple:

  • 14–16 oz / 400–450 g kielbasa, sliced
  • 1½–2 lb / 680–900 g potatoes, cut into ¾–1 inch chunks
  • 1 medium onion, chopped
  • ½ cup chicken broth to start, up to 1 cup if needed
  • Garlic, smoked paprika, black pepper, and ¼ tsp salt to start
  • Optional cabbage, carrots, or green beans
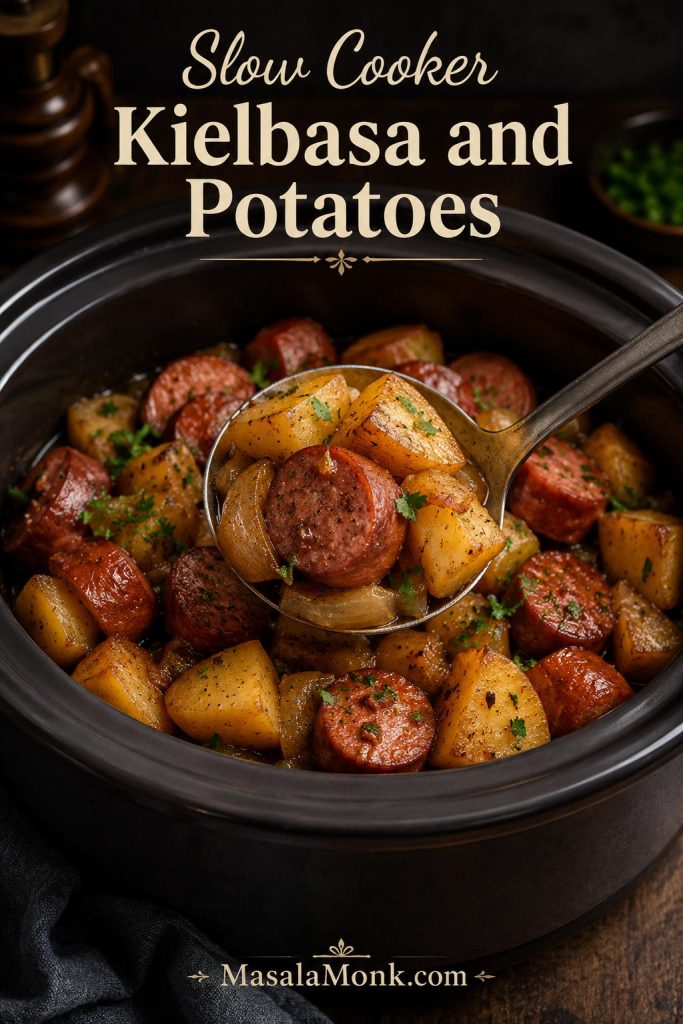
Slow cooker filled with tender potatoes and kielbasa, with a spoon lifting a soft serving.
Use the slow cooker when you want tender potatoes and smoky sausage with almost no hands-on work. The tradeoff is texture: this version is cozy and soft rather than browned and crisp.

How Long to Cook Slow Cooker Kielbasa and Potatoes

Cook on low for 5–6 hours or high for 3–4 hours, depending on the size of the potatoes and the strength of your slow cooker. If your slow cooker runs hot or you want a softer, more braised result, use the higher end of the broth range. If you are adding cabbage or frozen vegetables, stay closer to ½ cup broth because they release moisture as they cook.

For a little more sausage flavor, sear the kielbasa first before adding it to the slow cooker.

If you are already pulling out the slow cooker, this slow cooker sausage casserole recipe is another cozy sausage dinner with a saucier, softer finish.

Creamy Slow Cooker Option

For a creamy version, use frozen diced potatoes or par-cooked potatoes, then add cream soup, sour cream, milk, or cheese near the end. Stir dairy in late so it stays smoother.

Texture note: slow cooker kielbasa and potatoes will be soft and comforting. They will not have the crisp edges of a skillet or sheet pan version.
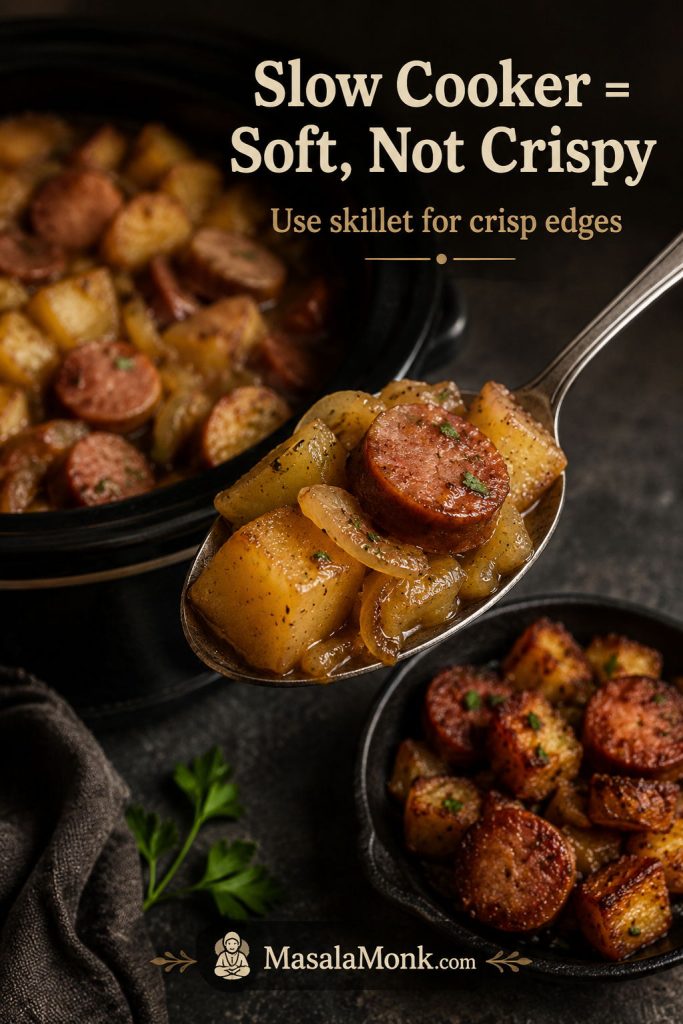
Texture comparison showing soft slow cooker kielbasa and potatoes with a crisp skillet reference.
The slow cooker and skillet solve different dinner moods. One gives soft comfort; the other gives browned potato edges, so choose based on the texture you want most.

Kielbasa, Cabbage, and Potatoes

When you want the skillet to feel more like an old-school, full-plate dinner, cabbage is the easiest add-in. It stretches the meal, turns sweet as it wilts, and works beautifully with smoky sausage.
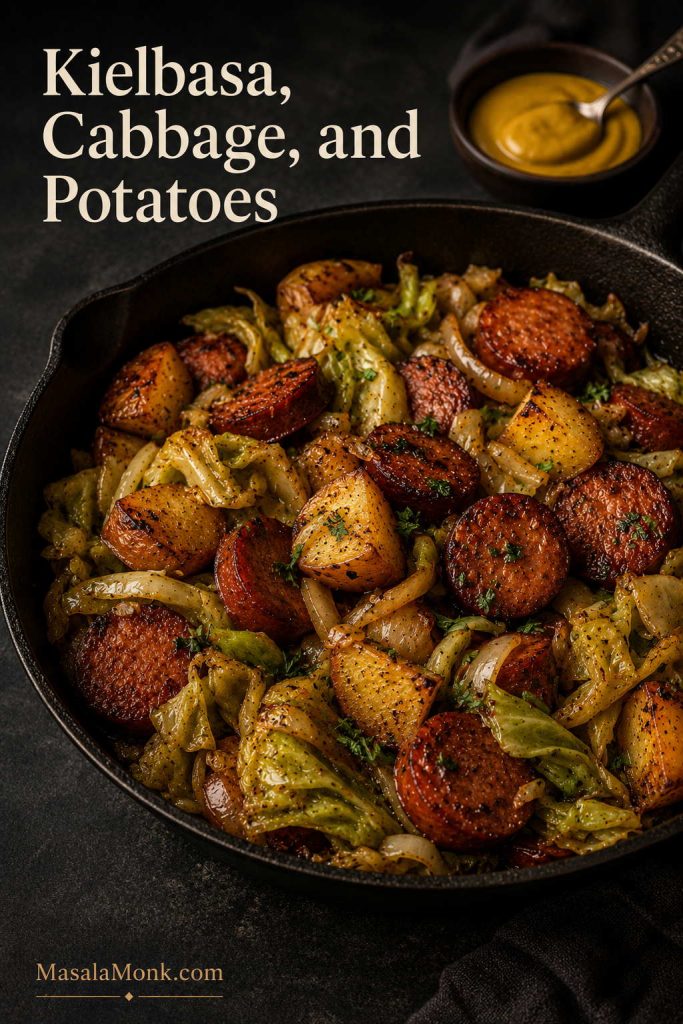
Skillet of kielbasa, cabbage, and potatoes with mustard on the side.
Cabbage gives this skillet an old-school supper feel. It stretches the pan, adds a little sweetness, and works especially well with mustard on the side.

This is the variation that feels most like an old-school supper: smoky, filling, a little sweet from the cabbage, and good with mustard on the side.

For the main recipe amount, add 3–4 cups sliced cabbage, about 250–350 g. Add it once the potatoes are almost tender, not at the beginning. Pour in 2 tablespoons water or stock, cover the skillet, and cook until the cabbage softens.
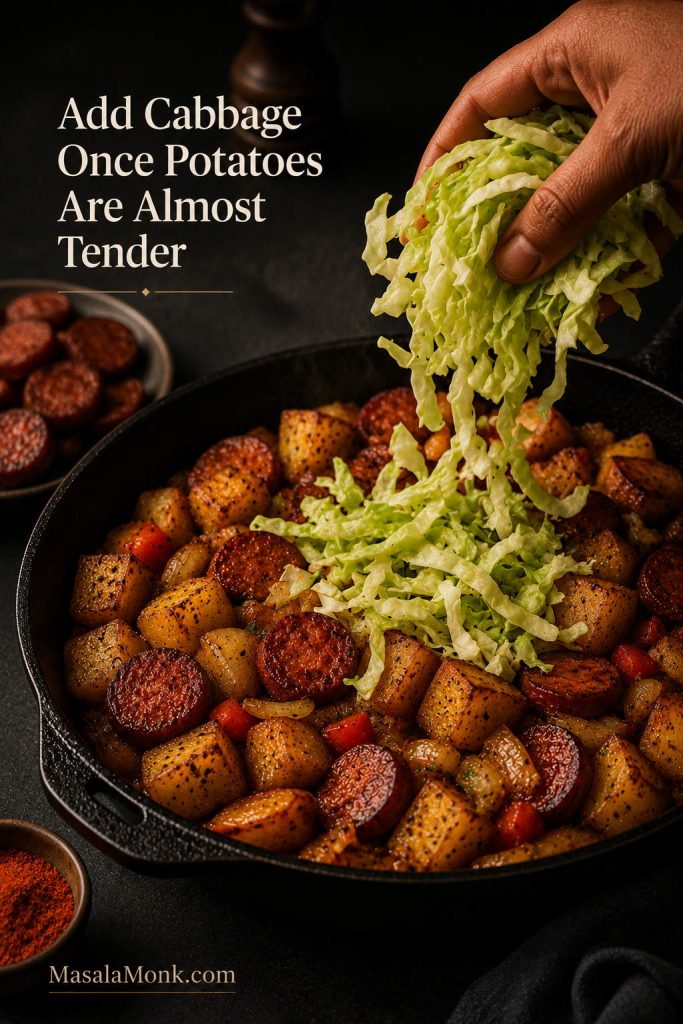
Hand adding sliced cabbage to a skillet of browned potatoes, kielbasa, onions, and peppers.
Add cabbage after the potatoes have started to cook, not at the very beginning. That timing keeps the cabbage tender while giving the potatoes a better chance to brown.

For crisp-tender cabbage, cook it for 2–5 minutes. For softer cabbage, cook it for 6–8 minutes. The pan may look very full at first, but cabbage shrinks as it cooks. If your pan is already crowded, add the cabbage in two handfuls and let the first handful wilt before adding the rest.

Finish with black pepper, mustard, or a small splash of vinegar if the dish needs brightness.

Want a tangier version? Jump to kielbasa, sauerkraut, and potatoes.

If you want cabbage on the side instead of in the pan, this coleslaw recipe gives you the cold, creamy crunch that works especially well with smoky sausage and potatoes.

Kielbasa, Sauerkraut, and Potatoes

Use the sauerkraut version when you want the skillet sharper, tangier, and more old-school. It is especially good with mustard on the side, but because sauerkraut brings moisture and acidity, it should go in after the potatoes have already browned.
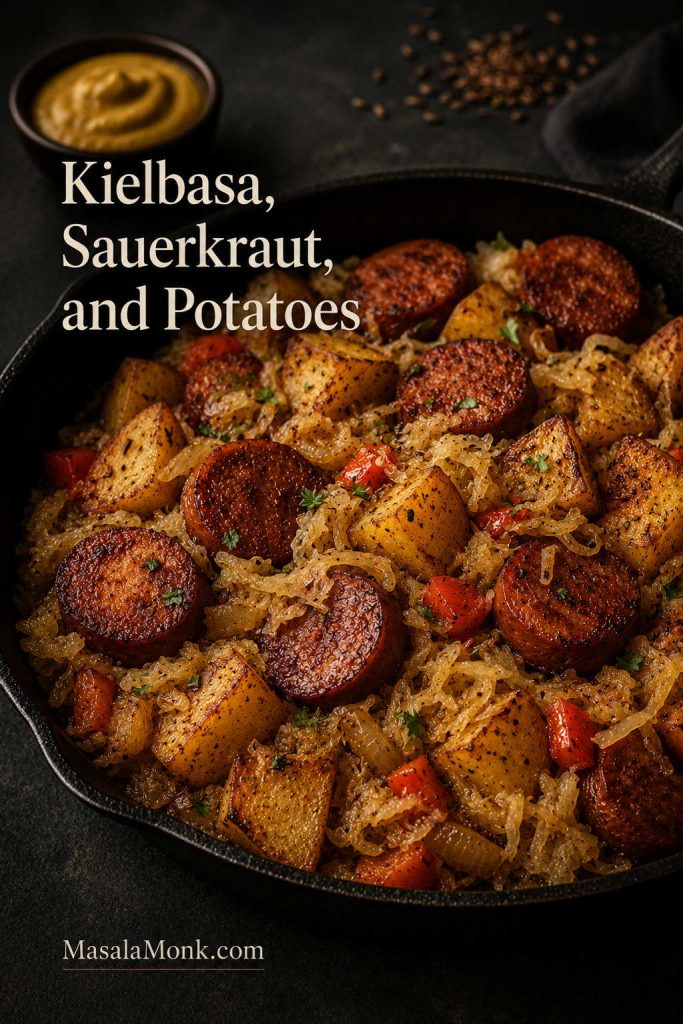
Skillet of browned kielbasa, potatoes, and sauerkraut with mustard and caraway nearby.
Sauerkraut gives the pan a tangy, mustard-friendly edge. Because it adds moisture, stir it in after the potatoes have browned.

For the main recipe amount, use 1½–2 cups drained sauerkraut. If you want crisp potatoes, do not add sauerkraut until the potatoes are already tender and browned. Added too early, the extra moisture can keep the potatoes from browning.
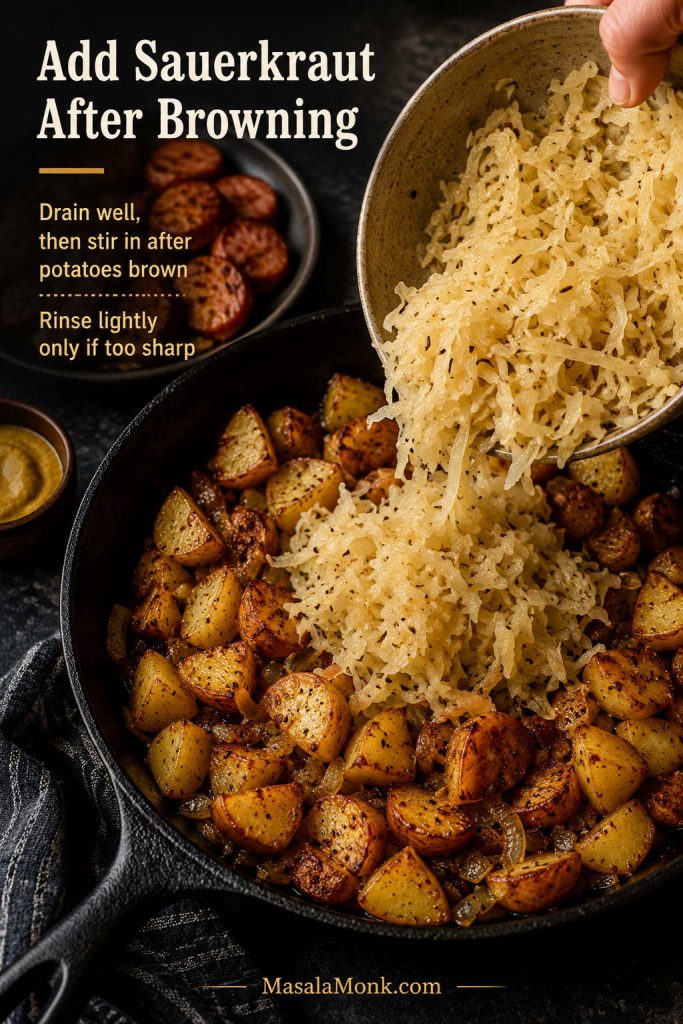
Well-drained sauerkraut being added from a bowl to browned potatoes and kielbasa in a skillet.
Drain sauerkraut well, then add it after the potatoes have color. However, if it tastes too sharp or salty, a light rinse can soften the flavor without losing the tang.

For a skillet variation, drain the sauerkraut well. For a softer, more braised dish, use a little of the sauerkraut liquid and cover the pan for a few minutes. If the sauerkraut tastes too sharp or salty, rinse it lightly and drain again before adding.

Mustard, caraway, thyme, sage, apple, and black pepper all work well with sauerkraut. The mustard keeps the skillet savory, while apple can soften the sharp edges.

Want a milder vegetable route? Jump to the green bean variation.

Kielbasa, Green Beans, and Potatoes

Green beans are the easiest way to make the skillet feel like a complete dinner without cooking a separate vegetable. Fresh beans keep it brighter, frozen beans make it easier, and canned beans work when you only need a quick, soft add-in.
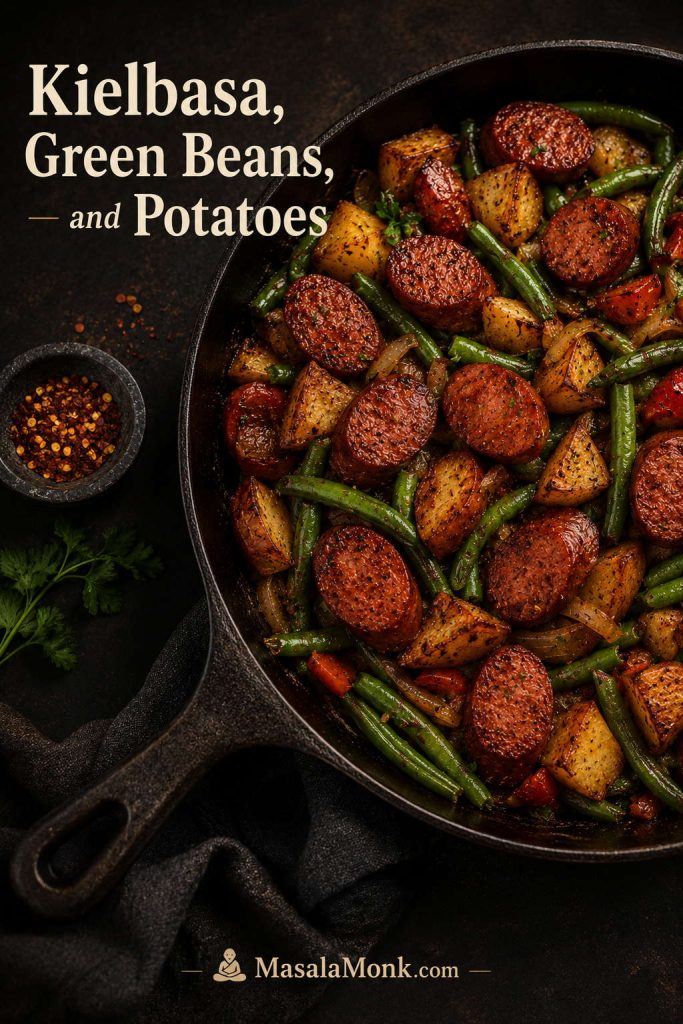
Skillet of kielbasa, green beans, potatoes, onions, and peppers.
Green beans make this sausage and potato skillet feel like a fuller dinner without cooking a separate vegetable. Add them late enough that they stay green instead of turning dull and soft.

Choose the bean by texture: fresh stays snappier, frozen is easy, and canned should only be warmed through.
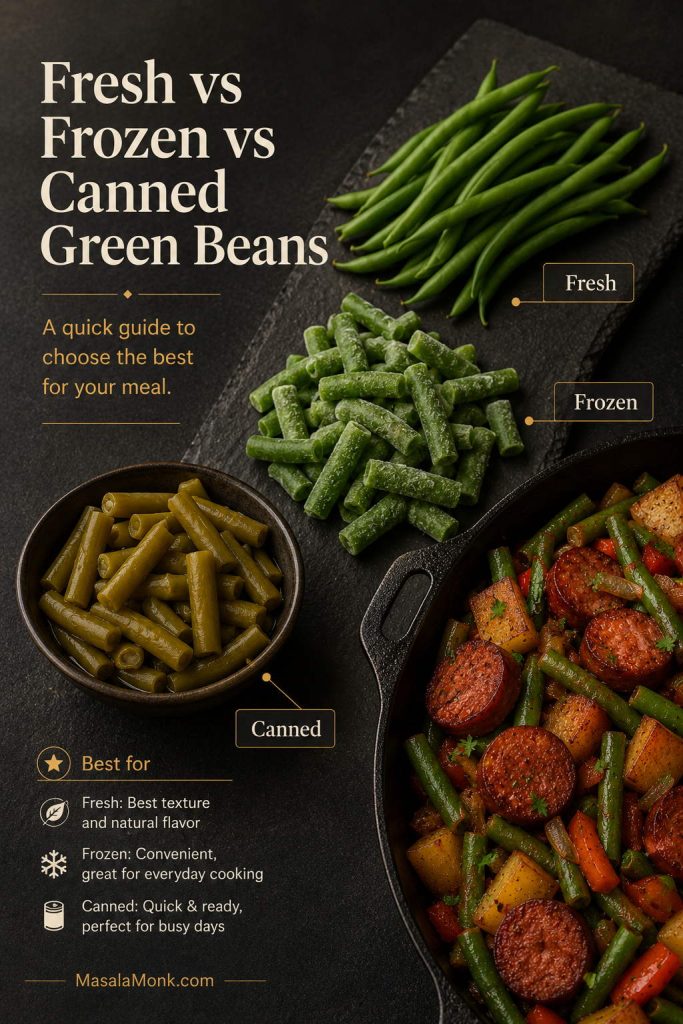
Guide comparing fresh, frozen, and canned green beans with a skillet of kielbasa and potatoes.
Fresh green beans give the best bite, frozen beans are convenient, and canned beans only need warming. Add each type at the right time for better texture.
Green Bean Type When to Add Result
Fresh Green Beans When potatoes are partly tender Brighter color, firmer bite.
Frozen Green Beans Near the end or on a sheet pan Easy, moist, slightly softer.
Canned Green Beans Last 2–3 minutes Soft; only needs warming.

Green beans should support the skillet, not water it down. Add them late enough that they stay green and the potatoes keep their browned edges.

For the stovetop version, add fresh green beans after the potatoes have started to soften. Frozen green beans can go in closer to the end. Canned green beans should be drained and stirred in only long enough to heat through.

For a creamy green-bean side instead of a skillet add-in, this green bean casserole recipe fits better.

Cheesy Kielbasa and Potato Casserole Variation

This is the version for the night when crisp edges matter less than a bubbling dish of sausage, potatoes, and melted cheese. It is richer and softer than the skillet, so the potato prep matters even more.
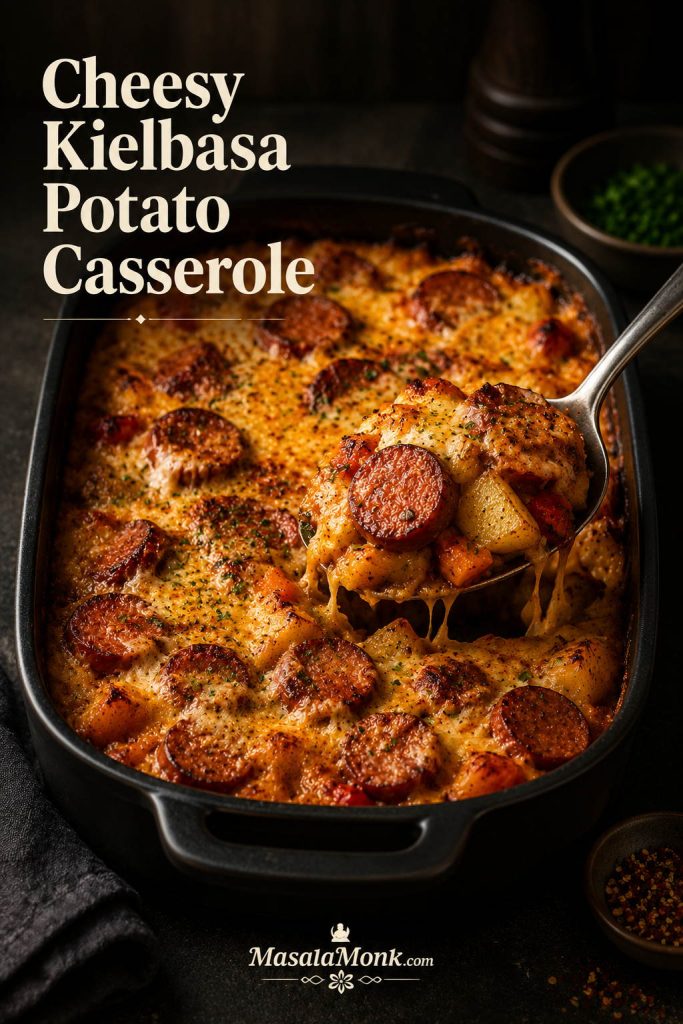
Cheesy kielbasa potato casserole in a baking dish with a spoon lifting sausage and potatoes.
The casserole path is for nights when you want melted cheese and softer comfort instead of skillet crispness. Par-cooked potatoes make the bake much more reliable.

Par-Cook the Potatoes First

The most important rule is to par-cook the potatoes. Do not rely on thick raw potato chunks to cook through in a short casserole bake. Use par-cooked diced potatoes, thinly sliced potatoes, frozen diced potatoes, or hash browns for a softer, easier approach.
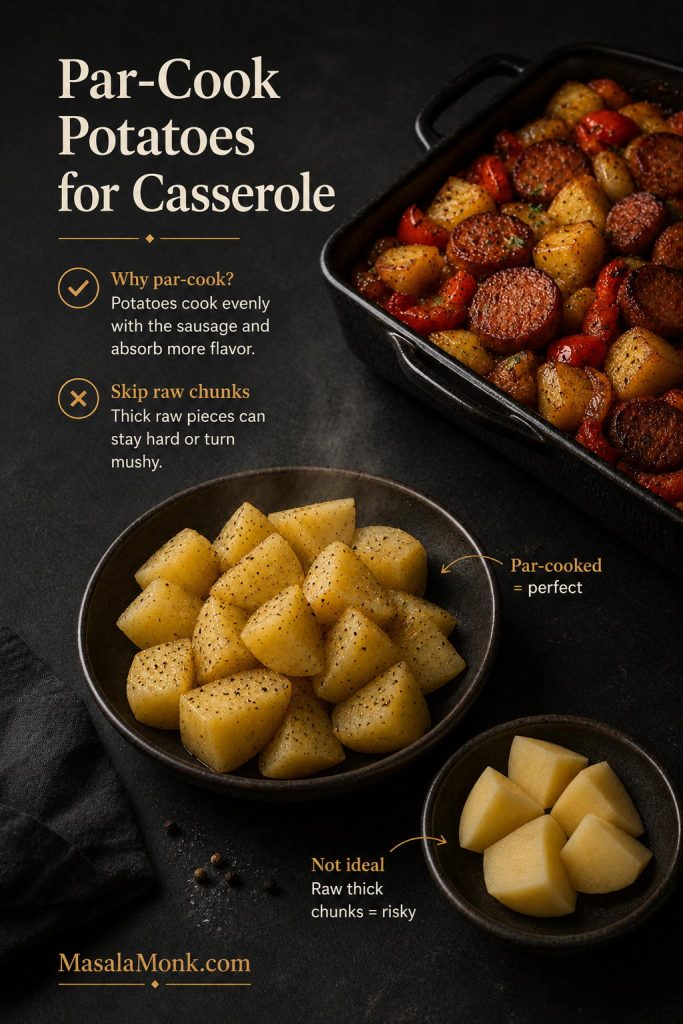
Par-cooked potato chunks beside a casserole dish with a warning about thick raw chunks.
Cheese can melt before raw potato chunks finish cooking. Par-cooking the potatoes first helps the casserole turn tender in the center instead of uneven or crunchy.

How to Bake the Casserole

Brown the kielbasa in a skillet, then mix the sausage and potatoes with a creamy sauce or cheese sauce. Transfer everything to a greased 9×13-inch baking dish and bake at 350–375°F / 175–190°C until hot and bubbling.

Most par-cooked potato casseroles need about 25–40 minutes, depending on the depth of the dish and how soft the potatoes were before baking. If the potatoes need more time, cover the dish for the first part of baking. Uncover near the end, add shredded cheese if you like, and bake until the top is melted and lightly golden.

Best Cheese and Finish

Cheddar, Monterey Jack, and mozzarella all work, depending on whether you want sharpness, creaminess, or stretch.

If the cheesy, bubbly part is what you are craving, this tater tot casserole recipe goes even further into crispy-topped comfort food.

Looking for kielbasa potato soup? Soup is a different dinner. It needs broth, aromatics, potatoes, and often cream, cheese, cabbage, kale, corn, or carrots. This guide stays focused on the skillet version: browned sausage, golden potatoes, and one-pan comfort.

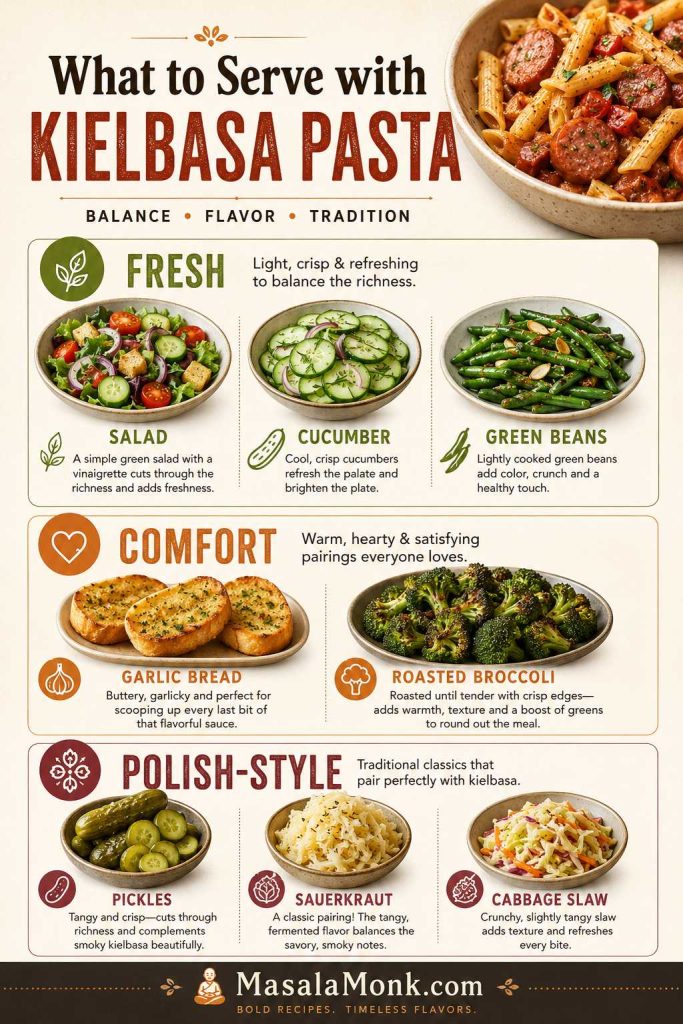
What to Serve with Kielbasa and Potatoes

This skillet can stand alone, especially when you add onions and peppers. Because kielbasa and potatoes are smoky, salty, and rich, the best sides usually do one of three things: add crunch, add acidity, or bring something fresh to the plate.
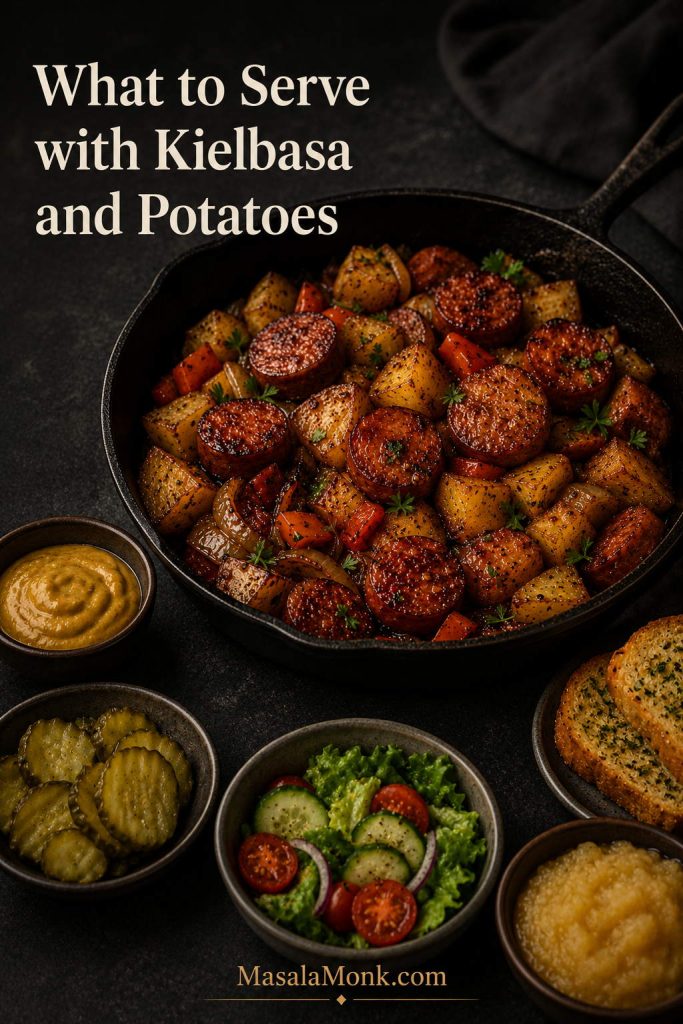
Skillet of kielbasa and potatoes served with mustard, pickles, salad, bread, and applesauce.
A smoky sausage-and-potato skillet tastes best with contrast on the plate. Pickles, mustard, salad, applesauce, or bread can add acidity, crunch, freshness, or softness.

Try it with:

  • A simple green salad with vinaigrette
  • Roasted broccoli or green beans
  • Steamed cabbage
  • Pickles or sauerkraut
  • Mustard on the side
  • Rye bread, crusty bread, or a warm slice of homemade garlic bread
  • Applesauce for a sweet contrast

If the skillet tastes heavy, start with mustard, pickles, sauerkraut, vinaigrette, applesauce, hot sauce, or more black pepper before adding anything creamy.

For another smoky sausage dinner in a creamier direction, try this kielbasa pasta recipe.

If you want something spoonable with beans and sausage, this red beans and rice recipe is a better fit.

Storage and Reheating

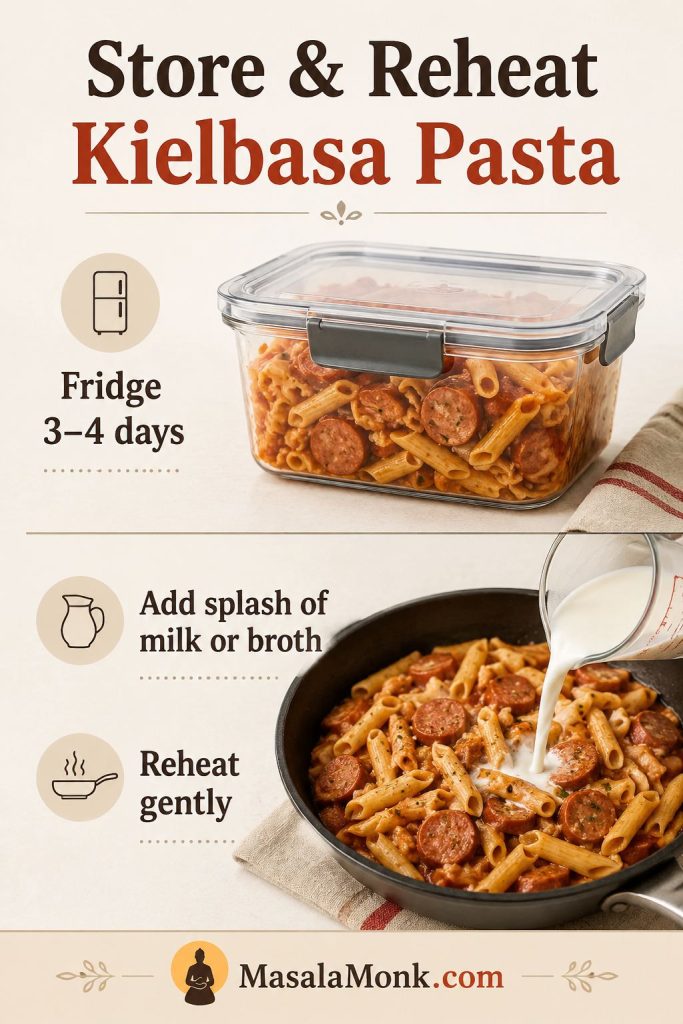
Let leftovers cool, then store them in an airtight container in the refrigerator. For best quality, eat them within 3–4 days. The USDA also recommends reheating leftovers to 165°F / 74°C; you can read more in their guide to leftovers and food safety.

To reheat on the stovetop, add the leftovers to a skillet with a small splash of water or oil. Cook over medium heat, stirring occasionally, until hot. This gives the potatoes a better texture than the microwave.

Leftovers are especially good as a breakfast hash. Reheat them in a skillet until the potatoes pick up fresh edges, then add a fried egg, mustard, hot sauce, or a few pickles on the side.

Leftover kielbasa and potatoes reheated as a breakfast hash with a fried egg on top.
Leftovers become more useful when you reheat them like a hash. A fried egg, mustard, or hot sauce turns yesterday’s skillet into an easy breakfast.

To reheat in the microwave, cover loosely and heat in short intervals, stirring between each one. The potatoes will be softer, but the smoky sausage-and-potato flavor will still be there.

Freezing is possible, but potatoes can become grainy or watery after thawing. If you do freeze leftovers, reheat them in a skillet or oven rather than expecting the same fresh-cooked texture.

Troubleshooting Kielbasa and Potatoes

Use this section when the skillet is technically cooked but something feels off: the potatoes are hard, the sausage is dry, the cabbage is watery, or the flavor needs brightness.
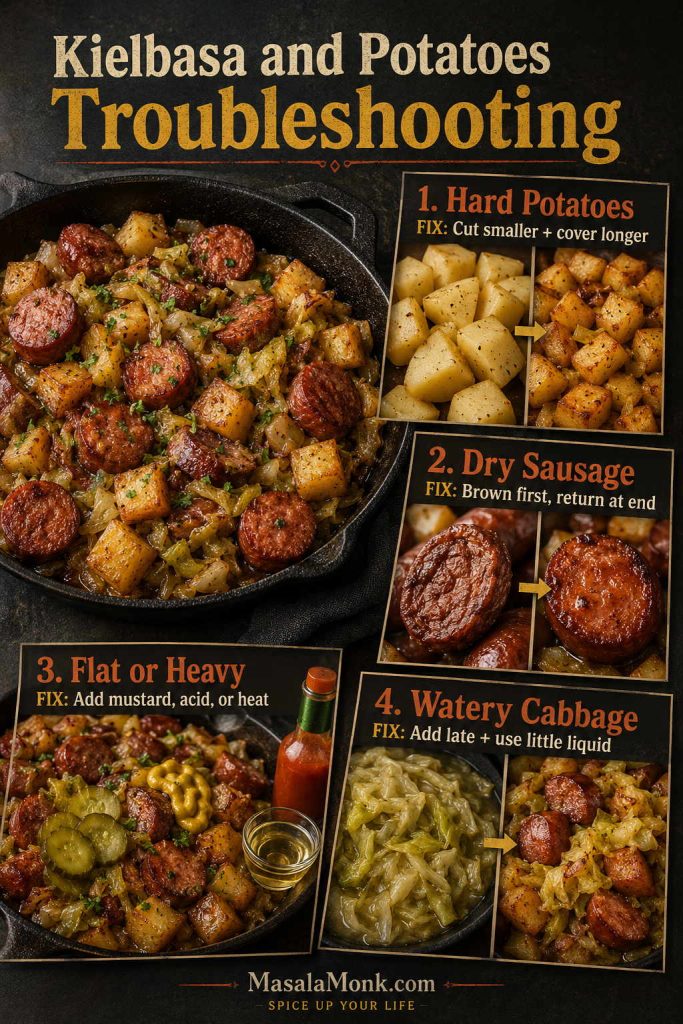
Troubleshooting board for kielbasa and potatoes showing fixes for hard potatoes, dry sausage, flat flavor, and watery cabbage.
Most kielbasa and potatoes problems come from timing, moisture, or balance. Cut potatoes smaller, return sausage late, brighten heavy flavor with acid, and add cabbage after the potatoes have a head start.

Texture and Browning Problems

Problem What Happened How to Fix It
Potatoes are still hard The pieces were too large, the pan was too crowded, or the skillet was uncovered too soon. Cover the skillet longer and add 1–2 tbsp water or stock. Next time, cut smaller or microwave first.
Sausage is dry or rubbery The kielbasa cooked too long while the potatoes were still softening. Brown the kielbasa first, remove it, and return it only at the end.
Potatoes are mushy The potatoes were over-stirred, overcooked, or too starchy. Use Yukon Gold, baby gold, or red potatoes. Stir less often once they begin to soften.
Potatoes are not browning The skillet is crowded, covered too long, or stirred too often. Remove the lid, spread the potatoes out, and let them sit between stirs.
The skillet is greasy The kielbasa released more fat than expected. Spoon off extra fat after browning the kielbasa, then continue with the potatoes.

Flavor and Add-In Fixes

Problem What Happened How to Fix It
The dish tastes flat or heavy The sausage and potatoes need acidity, heat, or freshness to balance the richness. Add mustard, vinegar, hot sauce, black pepper, pickles, sauerkraut, parsley, or a small splash of apple cider vinegar.
Garlic tastes burnt It was added too early or cooked over high heat. Add garlic near the end and cook it for only 30–60 seconds before returning the kielbasa.
Cabbage is watery Too much liquid was added or the cabbage cooked too long. Add cabbage late and use only a small splash of water or stock.
Sauerkraut is too sharp The sauerkraut was very acidic or too much liquid was included. Drain well, rinse lightly if needed, and balance with onion, mustard, or a little apple.
Slow cooker onions are crunchy The onion pieces were too large or added raw to a short cook. Dice them smaller or sauté them before adding to the slow cooker.

FAQs

Do you cook kielbasa or potatoes first?

Brown the kielbasa first, but only long enough to give it color and leave savory drippings in the pan. Then remove it, cook the potatoes, and return the kielbasa at the end so it heats through without becoming dry or rubbery.

How do you make potatoes cook faster in a skillet?

Cut them into ½-inch pieces and cover the skillet during the first part of cooking. For the fastest route, microwave the diced potatoes with a little water for 4–5 minutes, drain them, then brown them in the skillet.

Should I boil potatoes before frying them with kielbasa?

You do not have to boil them. Microwaving is usually easier and faster. If you already have boiled or leftover potatoes, you can use them; just brown them gently in the skillet so they do not fall apart.

What potatoes work best with kielbasa?

Yukon Gold, baby gold, and baby red potatoes are the most reliable choices because they hold their shape and brown well. Russets can work, but they are more likely to break apart if you stir them too often.

What can I use instead of bell peppers?

Use cabbage, green beans, mushrooms, carrots, or skip the pepper. Keep the onion if you can; it adds sweetness and helps balance the smoky sausage.

What seasoning goes best with kielbasa and potatoes?

Smoked paprika, garlic, black pepper, oregano, mustard, parsley, and a little hot sauce all work well. For sauerkraut variations, try mustard, caraway, thyme, sage, or apple.

Is kielbasa already cooked?

Many packaged smoked kielbasa products are fully cooked, but you should always check the label. Even when it is fully cooked, browning it in the skillet gives it much better flavor.

Is this better in a skillet or the oven?

Choose the skillet if you want the crispiest potatoes and deepest sausage browning. The oven is better for easier cleanup and less hands-on cooking. Save the slow cooker for a softer comfort-food version, not crisp edges.

Do canned potatoes work in this recipe?

Yes, but the texture will be softer. Drain them well and add them to the skillet after browning the kielbasa. Cook uncovered so they can pick up some color.

What about frozen diced potatoes?

Frozen diced potatoes work best in slow cooker meals or casseroles. For a skillet, thaw and pat them dry if possible so they brown instead of steaming.

How do I keep potatoes from sticking?

Use enough oil, let the skillet heat properly, and avoid moving the potatoes constantly. If the browned bits get too dark before the potatoes are tender, add a small splash of water or stock and cover the pan for a few minutes.

When should cabbage or sauerkraut go in?

Add cabbage once the potatoes are almost tender so it has time to wilt without getting watery. Add drained sauerkraut after the potatoes are cooked and browned so the extra moisture does not stop them from crisping.

How long do leftovers last?

Store leftovers in an airtight container in the refrigerator and use them within 3–4 days. Reheat until hot throughout, ideally to 165°F / 74°C.

Does kielbasa and potatoes freeze well?

It can be frozen, but the potatoes may soften or become slightly grainy after thawing. For the best texture, refrigerate leftovers and reheat them in a skillet within a few days.

If you make this skillet your own, tell us what went in — cabbage, sauerkraut, green beans, cheese, mustard, extra peppers, or just the classic sausage and potatoes. These are exactly the kinds of dinners people quietly customize every time they make them.
Back to top

Posted on Leave a comment

Kielbasa Pasta Recipe

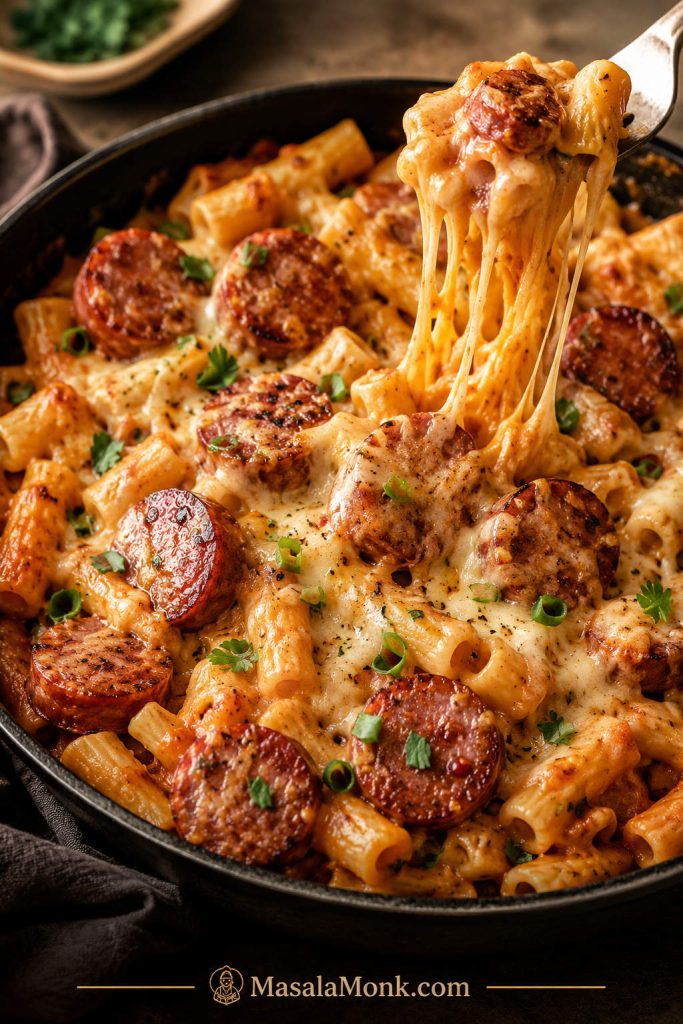
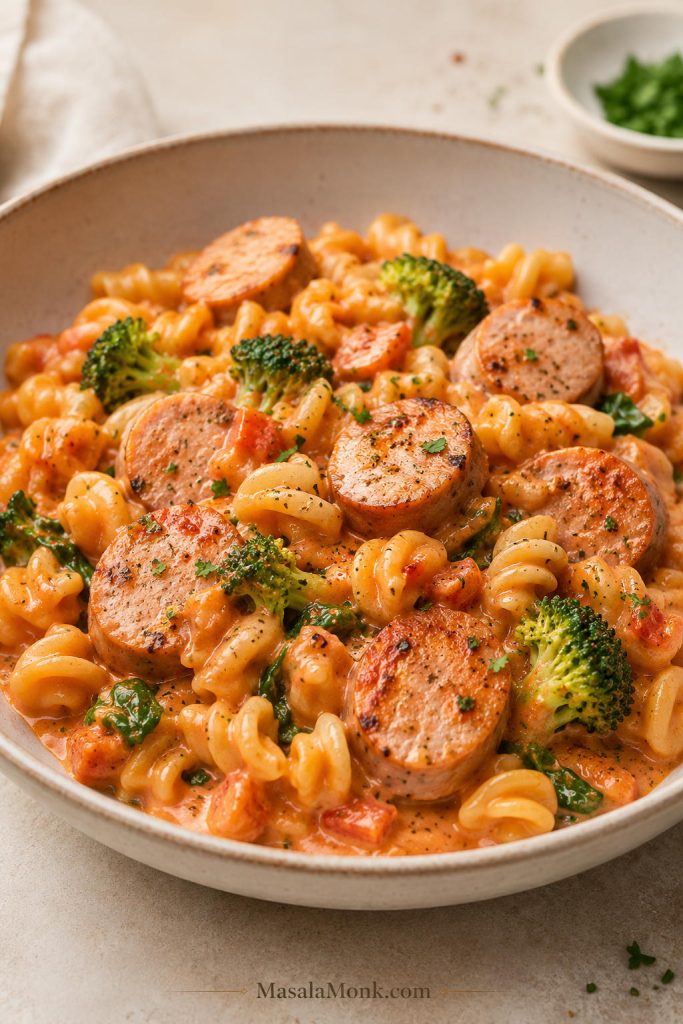
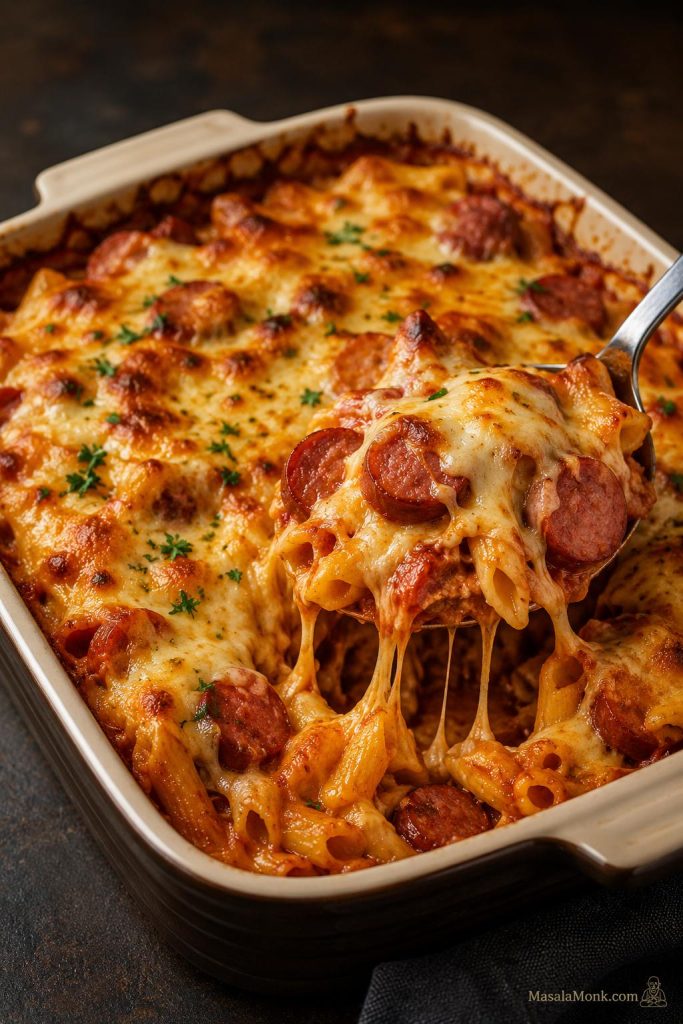
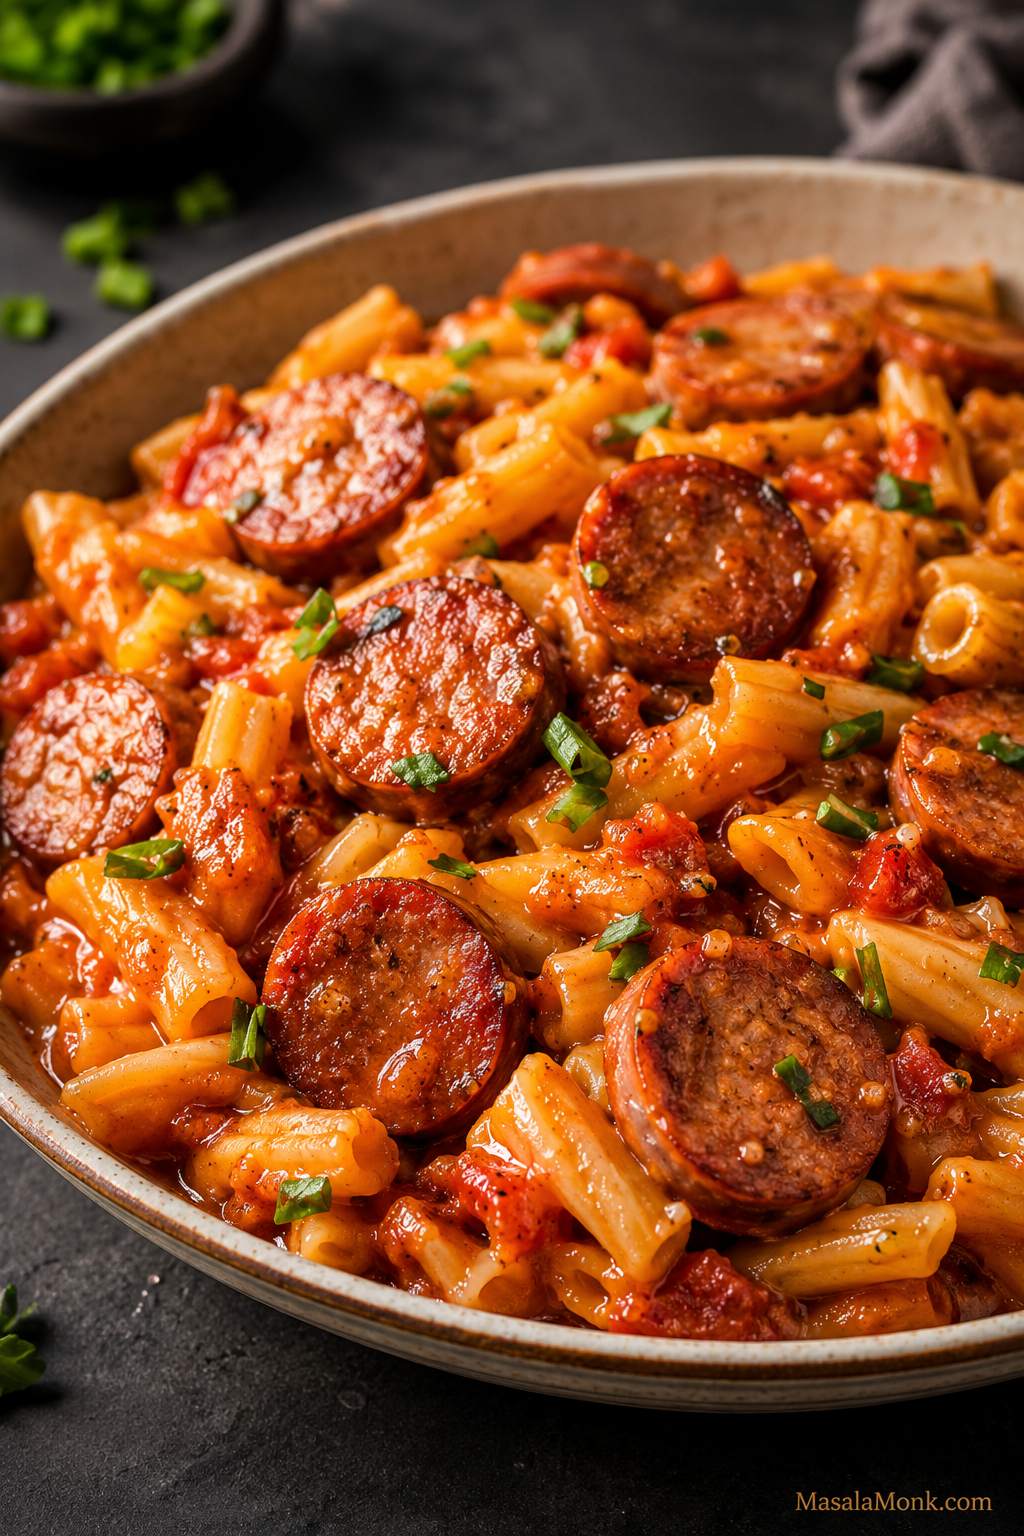
Bowl of kielbasa pasta with browned sausage slices, short pasta, tomato-cheese sauce, and parsley garnish.

This kielbasa pasta recipe is the dinner to make when there is smoked kielbasa in the fridge, half a box of pasta in the pantry, and no one wants another pot to wash. The sausage browns first, the pasta cooks right in the skillet, and the whole pan finishes with cream and cheese for a smoky, filling dinner that tastes bigger than the effort.

The method is what makes it reliable. Brown the kielbasa for flavor, simmer the pasta in the right amount of broth and tomatoes, add dairy only after the pasta is tender, and melt the cheese off heat so the sauce clings instead of turning grainy.

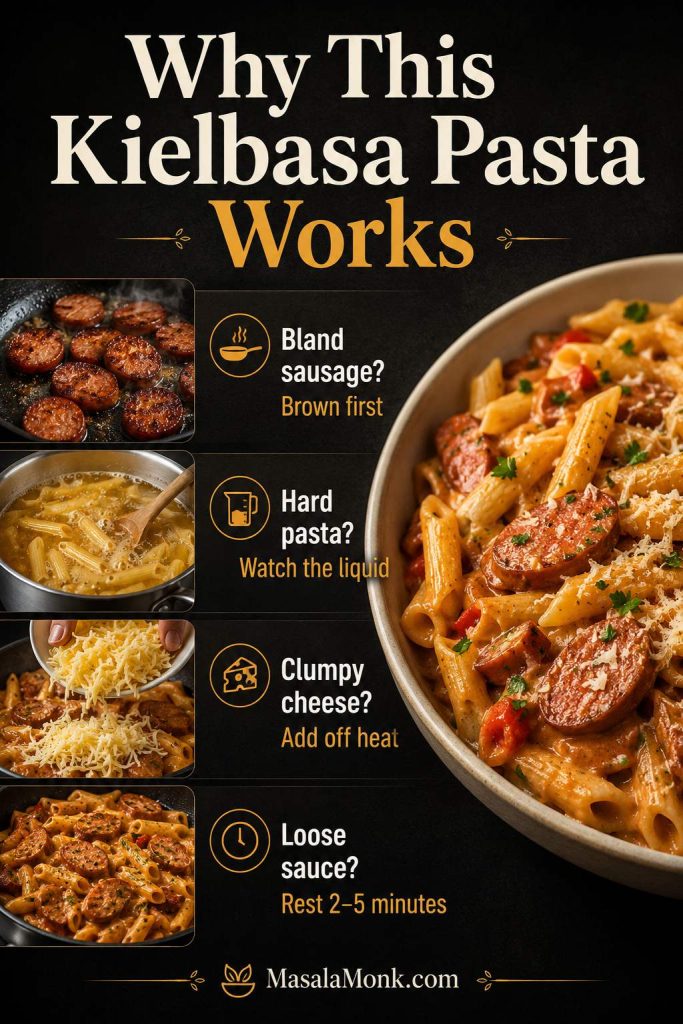
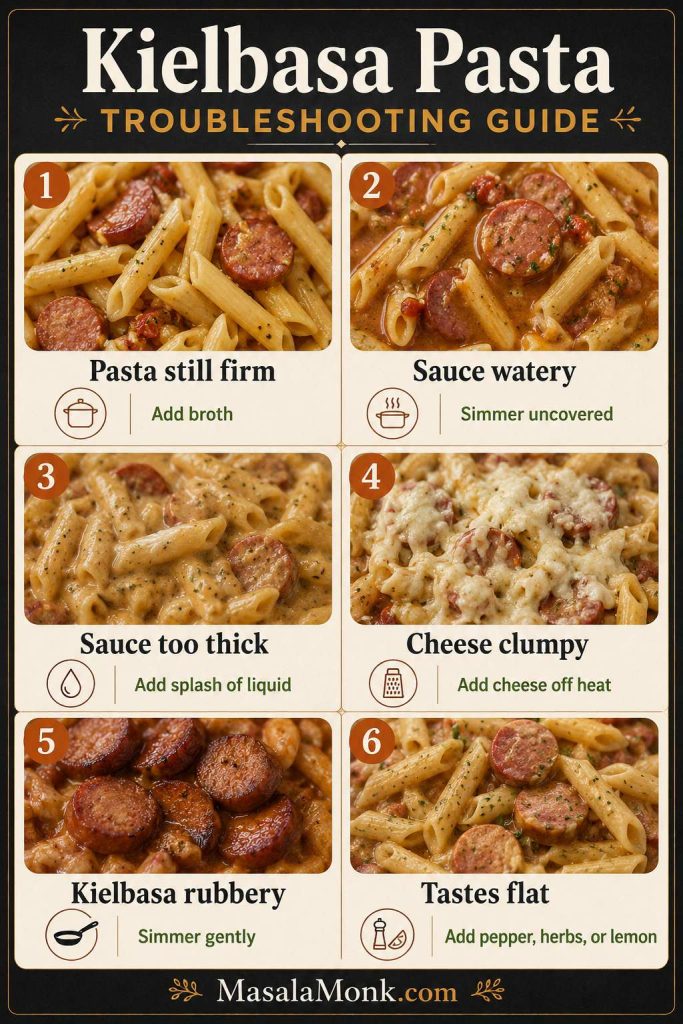
This version is built for the real problems people run into with one-pot pasta: pasta that stays too firm, sauce that turns watery, cheese that clumps, or kielbasa that goes rubbery. The ratio, timing, pan-size notes, and troubleshooting table below are there so the recipe still works in a real kitchen, not just on a perfect stove.

Quick Answer: The Best Way to Make Kielbasa Pasta

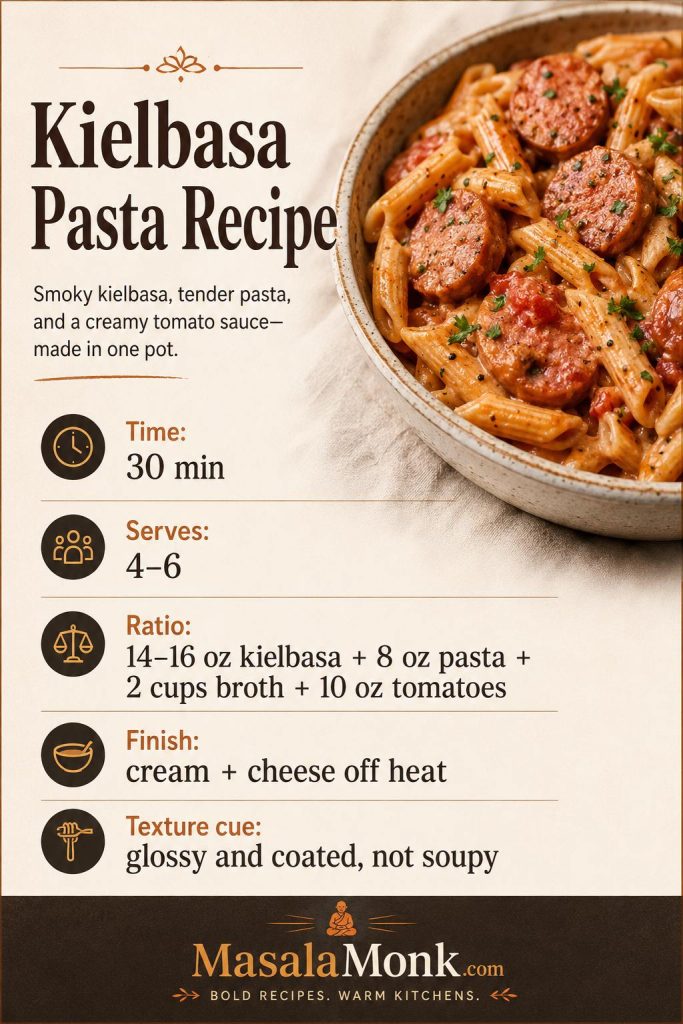
The best way to make kielbasa pasta is to brown sliced smoked kielbasa, simmer short pasta directly in broth and tomatoes, then add cream and shredded cheese off heat. Letting the pan rest for a few minutes at the end helps the sauce tighten so it coats the pasta instead of staying loose.

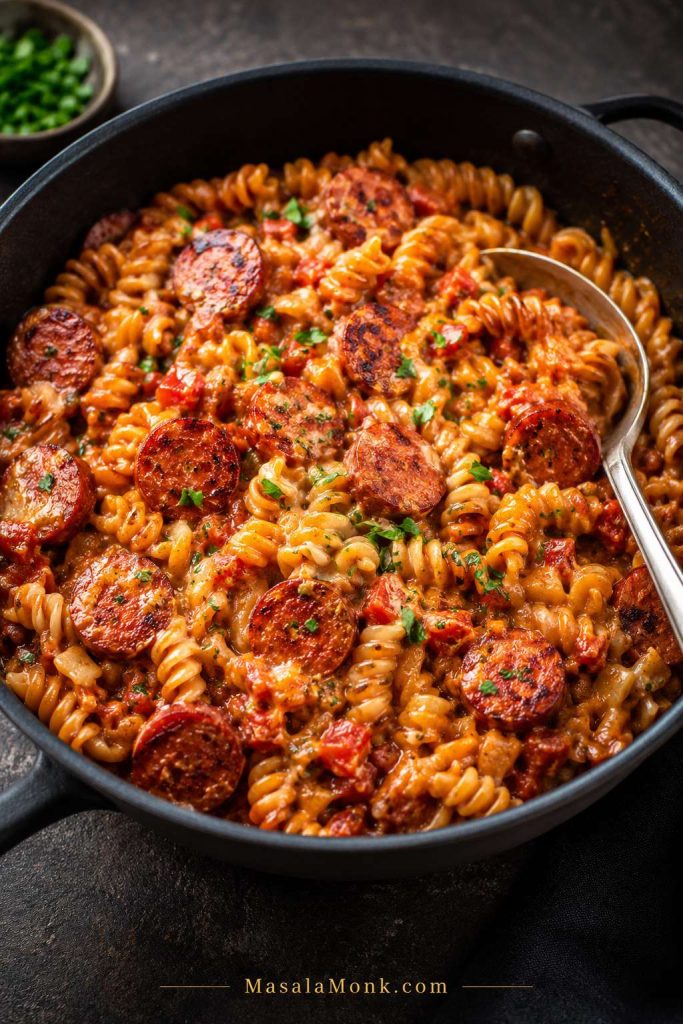
Skillet of one-pot kielbasa pasta with rotini, browned sausage, creamy tomato-cheese sauce, garnish, and a serving spoon.
This is the one-pot payoff: the pasta cooks in the skillet, releases starch into the liquid, and helps the sauce thicken without a separate boiling pot.

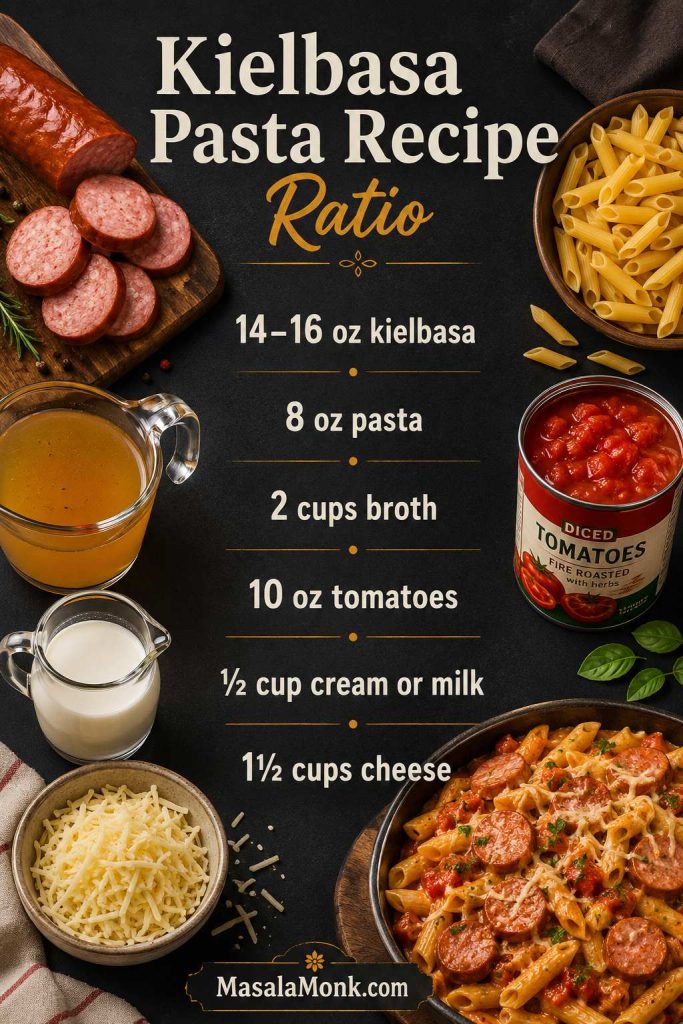
The most reliable ratio is 14–16 oz smoked kielbasa, 8 oz short pasta, 2 cups broth, 10 oz diced tomatoes, ½ cup cream or milk, and 1½ cups freshly shredded cheese. A 10 oz can of tomatoes with green chiles also works for a mild spicy version. Rotini, penne, shells, elbows, rigatoni, and bow ties are the safest shapes because they cook evenly in the skillet and hold the tomato-cheese coating.

The Quick Kielbasa Pasta Ratio

Ratio board for kielbasa pasta showing kielbasa, pasta, broth, tomatoes, cream or milk, and shredded cheese.
Use the ratio as your guardrail: kielbasa brings smoke, broth and tomatoes cook the pasta, and dairy goes in only after the noodles are tender.

Ready to cook from the exact amounts? Go straight to the recipe card, or use the one-pot liquid ratio if you want to understand how the pan should behave.

Kielbasa Pasta at a Glance

Time:
About 30 minutes
Method:
One pot / deep skillet
Best pasta:
Rotini, penne, shells, elbows, bow ties
Flavor:
Smoky, lightly tangy, cheese-rich

The finished pasta is smoky first, then rich and lightly tangy from the tomatoes. The cheese makes the skillet feel cozy, while the browned kielbasa keeps each bite savory instead of bland. It is filling, but not heavy in the way a baked casserole can be.

Why This Kielbasa Pasta Recipe Works

The tricky part is not finding ingredients that go together. Kielbasa, pasta, tomatoes, cream, and cheese already make sense. The real trick is getting them to behave in one pan: browned sausage, tender pasta, and a smooth sauce that clings instead of pooling at the bottom.
  • Browning the kielbasa first gives the sausage better texture and leaves smoky browned bits in the pan.

  • Cooking the pasta in broth and tomatoes lets the pasta starch thicken the skillet base naturally.
  • Using short pasta makes the one-pot timing more reliable.
  • Adding cream and cheese off heat keeps the finish silky and reduces clumping.
  • Resting the pan briefly lets the coating settle around the pasta instead of looking loose.
Board explaining why kielbasa pasta works with tips to brown sausage, watch liquid, add cheese off heat, and rest the pan.
The strongest one-pot kielbasa pasta recipes prevent problems early: brown for flavor, manage the liquid, melt cheese gently, and let the pan settle.

The tomatoes add just enough acidity to balance the richness, while the cream and cheese make the dish comforting. Because kielbasa is already smoky and salty, the recipe also uses low-sodium broth and waits until the end to adjust salt.

It also makes good use of everyday ingredients: a package of smoked sausage, a short pasta shape, canned tomatoes, broth, and cheese. That is part of the appeal — it feels like a full dinner without needing a long shopping list.

Ingredients for Creamy Kielbasa Pasta

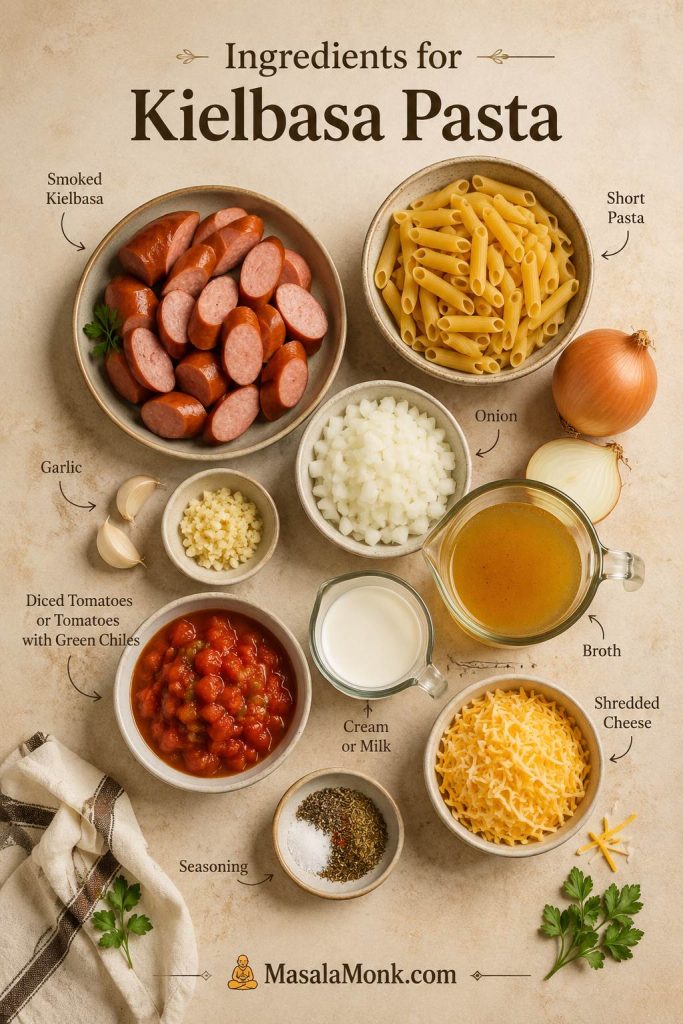
These are the base ingredients for creamy kielbasa sausage pasta. The recipe is flexible, but the amounts below keep the pasta, liquid, tomatoes, dairy, and cheese in balance.

Base Ingredients and Amounts

Ingredients for kielbasa pasta including smoked kielbasa, short pasta, onion, garlic, broth, tomatoes, cream, cheese, and seasoning.
The ingredient list is simple, so the order matters: smoked sausage first for flavor, liquid next for pasta, and cheese last for smoothness.
Ingredient Amount Why it matters
Olive oil 1 tablespoon / 15 ml Helps brown the kielbasa and soften the onion.
Smoked kielbasa 14–16 oz / 400–450 g The savory base of the dish. Slice it about ¼ inch / 6 mm thick.
Yellow onion 1 small onion / about 120 g Adds sweetness and helps loosen the browned bits from the pan.
Garlic 3 cloves Adds depth. Cook it briefly so it does not burn.
Short pasta 8 oz / 225 g Rotini, penne, shells, elbows, rigatoni, and bow ties are easiest for one-pan cooking.
Low-sodium chicken broth 2 cups / 480 ml Cooks the pasta and forms the base of the skillet sauce.
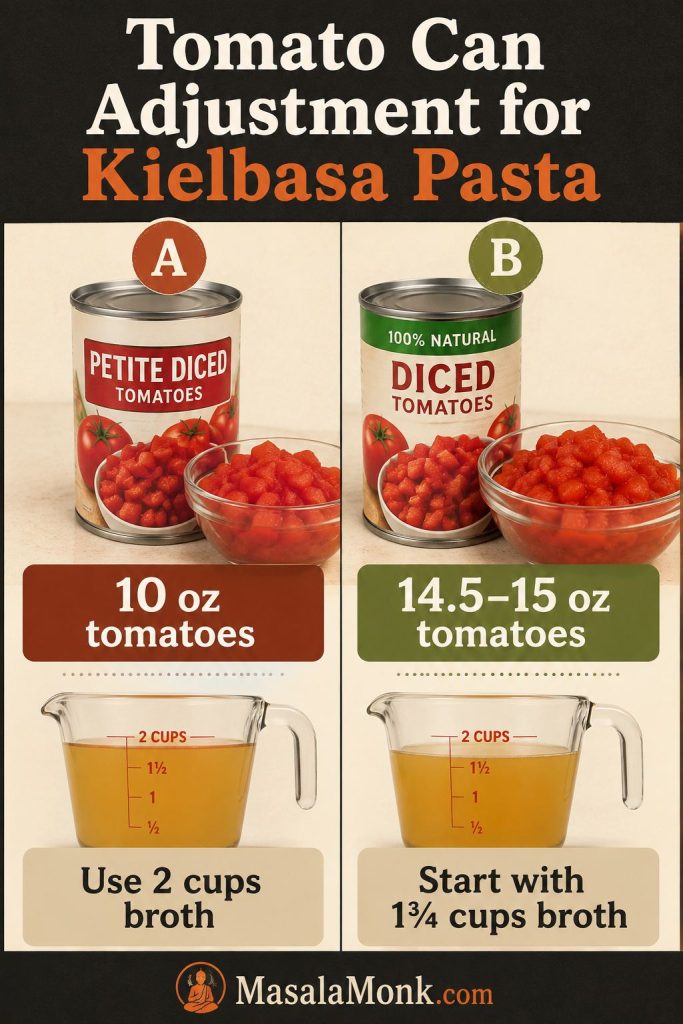
Diced tomatoes or tomatoes with green chiles 10 oz / 283 g can, with juices Adds acidity and balances the richness. A 10 oz can keeps the ratio tight; if using a standard 14.5–15 oz can, reduce the broth as noted below.
Cream, half-and-half, or whole milk ½ cup / 120 ml Makes the finish velvety. Heavy cream is richest; whole milk is lighter.
Shredded cheese 1½ cups / 150–170 g Cheddar, Monterey Jack, Colby Jack, or a blend all fit the dish.
Seasoning ½ teaspoon smoked paprika or Italian seasoning, plus black pepper Smoked paprika deepens the sausage flavor; Italian seasoning gives a pasta-dinner profile.

Tomato, Cheese, and First-Batch Notes

Use this table as a guide, not a trap. Once the pasta is simmering, the pan will tell you what it needs: a splash more broth, a few uncovered minutes, or lower heat before the cheese goes in.

Best first version

For your first batch, use rotini or penne, heavy cream or half-and-half, and freshly shredded cheddar-jack or Monterey Jack. Once you know how the sauce behaves, the spinach, spicy, tomato-cream, and tortellini variations are easy to adjust.

If you only have a 14.5–15 oz can of tomatoes

You can still use it. Start with 1¾ cups / 420 ml broth instead of the full 2 cups / 480 ml. Then add more broth only if the pasta is still firm and the pan looks dry. This keeps the sauce from becoming watery.

Using a larger tomato can? The tomato-can adjustment and the liquid-ratio section work together so the skillet stays saucy without turning watery.

Tomato can adjustment board showing 10 ounces tomatoes with 2 cups broth and 14.5 to 15 ounces tomatoes with 1 3/4 cups broth.
If your tomato can is larger than 10 ounces, reduce the broth first; otherwise, the skillet can turn loose before the pasta is done.

For cheese, freshly shredded is best. Pre-shredded cheese can work, but it often contains anti-caking starches that can make the sauce less silky. For the best cheesy kielbasa pasta, shred cheese from a block and stir it in after turning off the heat.

Is Kielbasa Already Cooked?

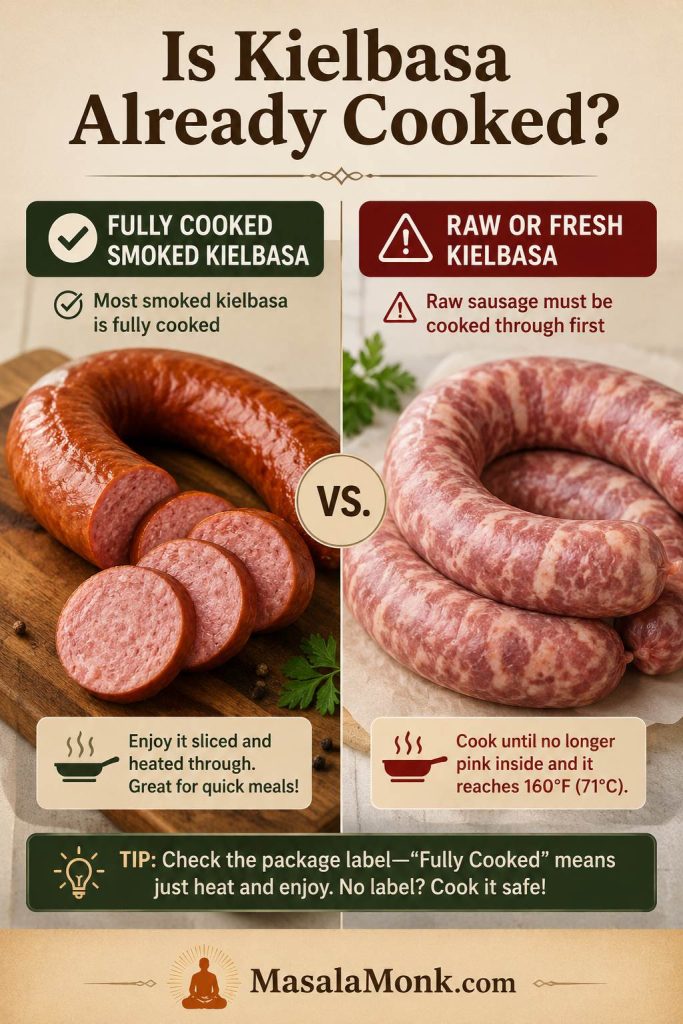
Most smoked kielbasa sold in supermarkets is fully cooked, which means you are browning and reheating it for this pasta, not cooking it from raw. Still, check the package. If you are using fresh or raw sausage instead of smoked fully cooked kielbasa, cook it fully before adding the pasta and sauce ingredients.

Comparison board showing fully cooked smoked kielbasa and raw sausage with cooking guidance for each.
Most smoked kielbasa only needs browning and reheating; however, raw sausage should be fully cooked before it joins the pasta.

For food safety, raw ground meat sausages generally need to reach 160°F / 71°C, while poultry sausages need to reach 165°F / 74°C. You can confirm current safe-temperature guidance on FoodSafety.gov’s safe minimum temperature chart.

Helpful note

If your kielbasa package says “fully cooked,” brown it for flavor, then let it simmer gently with the pasta. Fully cooked smoked kielbasa does not need long cooking, and overcooking can make it rubbery.

Best Pasta Shapes for Kielbasa Pasta

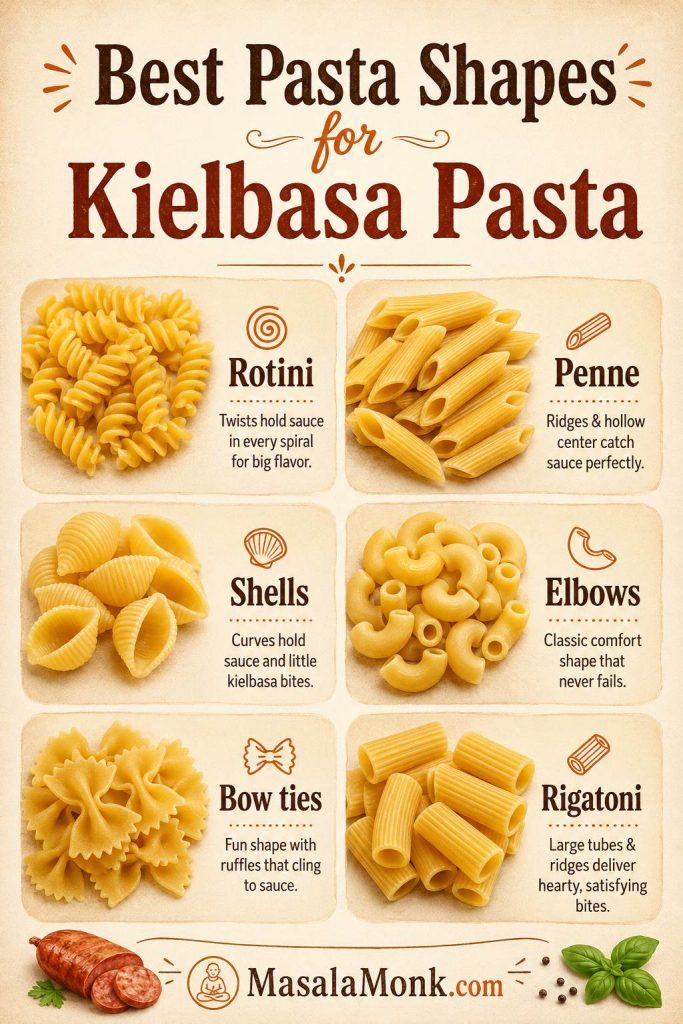
Short pasta works best in this kielbasa pasta dish because it cooks evenly in the skillet and catches the tomato-cheese coating. Long pasta like spaghetti can work in other recipes, but it is less predictable in a one-pan skillet because it needs different liquid, stirring, and timing.

Pasta shape guide showing rotini, penne, shells, elbows, bow ties, and rigatoni for kielbasa pasta.
Short shapes like rotini, penne, shells, elbows, and bow ties are easier to stir, cook evenly, and catch the tomato-cheese finish.

Because pasta shape changes cooking time, check the liquid ratio if you use rigatoni, bow ties, or another larger shape.

Pasta shape Best use
Rotini Best all-around choice because the twists catch the cheese and tomato base.
Penne Sturdy, easy to find, and reliable in skillet pasta.
Farfalle / bow ties Great visual shape and good for a family-style pan of pasta.
Shells Hold the creamy coating in the center, especially with cheese.
Elbows Good for a mac-and-cheese style kielbasa pasta.
Rigatoni Sturdy and satisfying, but may need a few extra minutes and a splash more broth.

For a brighter pasta night with a greener, herbier sauce, this pesto pasta recipe goes in a fresher direction. This kielbasa version is richer and more skillet-dinner style, but both are useful weeknight pasta options.

How to Make Kielbasa Pasta in One Pot

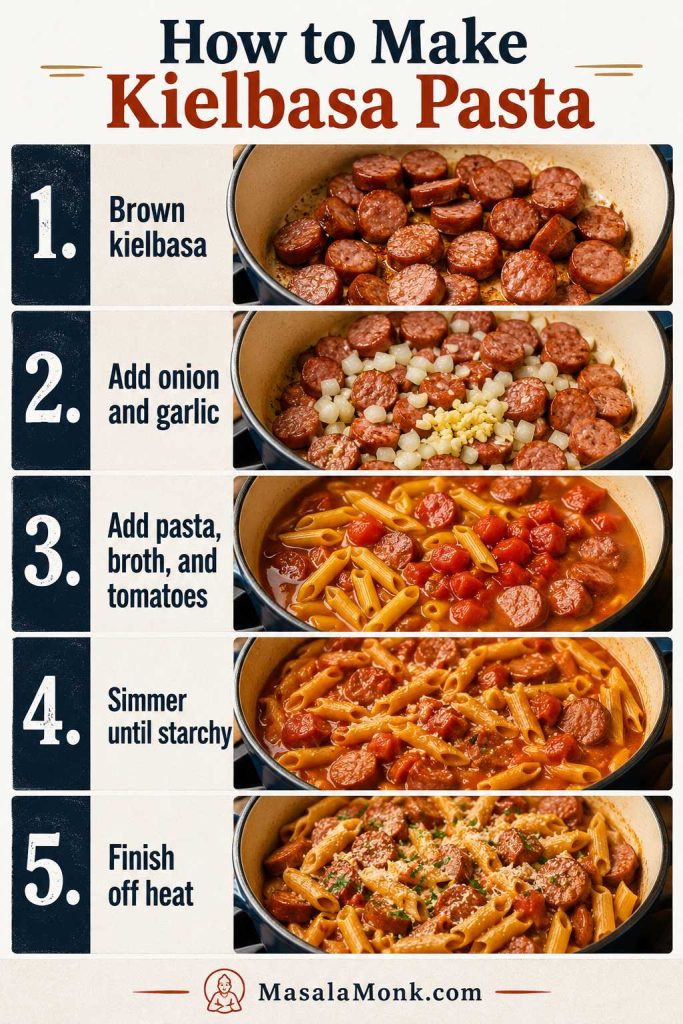
This method uses one deep skillet, sauté pan, or Dutch oven. The pasta cooks directly in the sauce base, so there is no separate pot of boiling water and no draining.

Step-by-step board showing kielbasa pasta made by browning sausage, adding onion and garlic, adding pasta and liquid, simmering, and finishing off heat.
The method is simple, but the sequence does the work: sear, simmer, soften, then melt.

1. Brown the kielbasa

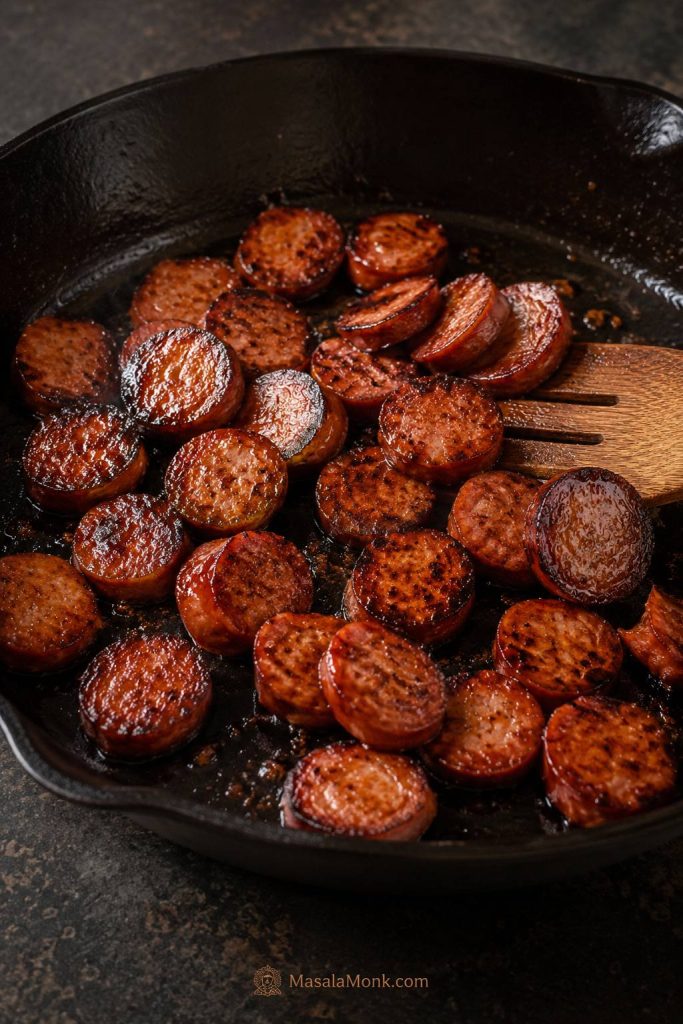
Heat the olive oil in a 12-inch deep skillet, 4–5 quart sauté pan, or Dutch oven over medium-high heat. Add the sliced kielbasa in a single layer as much as possible and cook for 4–6 minutes, stirring occasionally, until the edges are browned and the pan smells smoky and savory. Do not cook it until dry; you just want color, not tough sausage.

Sliced kielbasa browning in a dark skillet with seared edges, rendered fat, and a spatula.
This is where the smoky flavor starts; if the kielbasa only warms through without browning, the whole pan tastes less savory.

The pan should smell smoky before the pasta goes in; that browned sausage flavor is what makes the whole skillet taste deeper.

2. Add onion and garlic

Add the diced onion and cook for 2–3 minutes, until it starts to soften. Stir in the garlic and cook for about 30 seconds. Garlic burns quickly, so it only needs a short head start before the liquid goes in.

3. Add pasta, broth, tomatoes, and seasoning

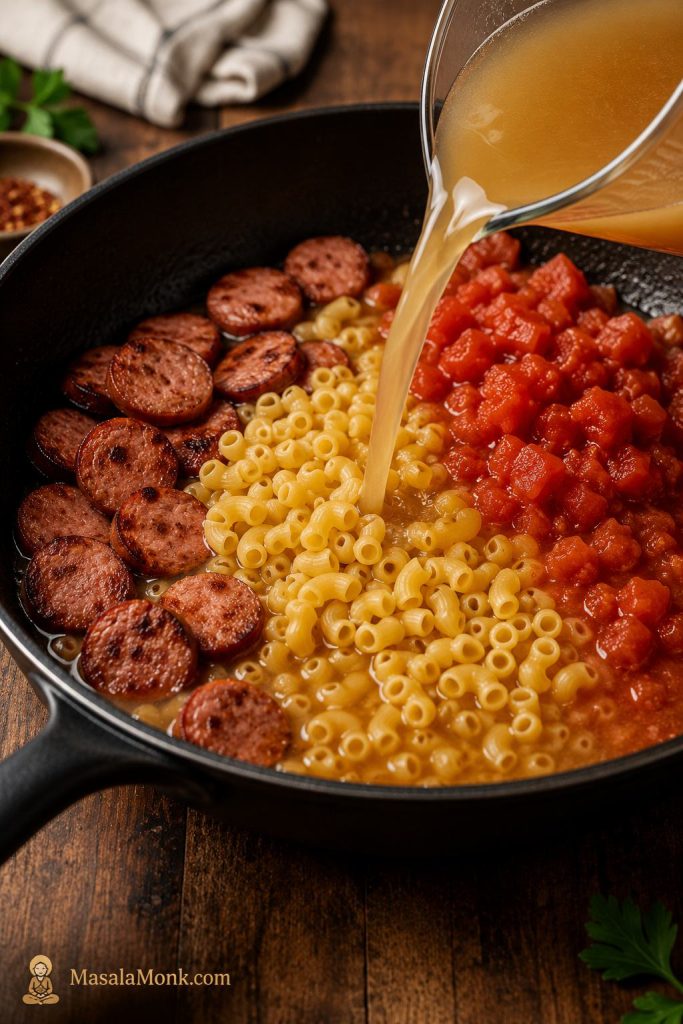
Stir in the dry pasta, broth, diced tomatoes with their juices, smoked paprika or Italian seasoning, and black pepper. Scrape the bottom of the pan so the browned bits dissolve into the liquid. Those browned bits help the pasta taste deeper without extra work.

Dry pasta, broth, and diced tomatoes being added to a skillet with browned kielbasa.
Dry pasta can go straight into the skillet because the broth and tomatoes cook it while picking up flavor from the browned sausage.

4. Simmer until the pasta is tender

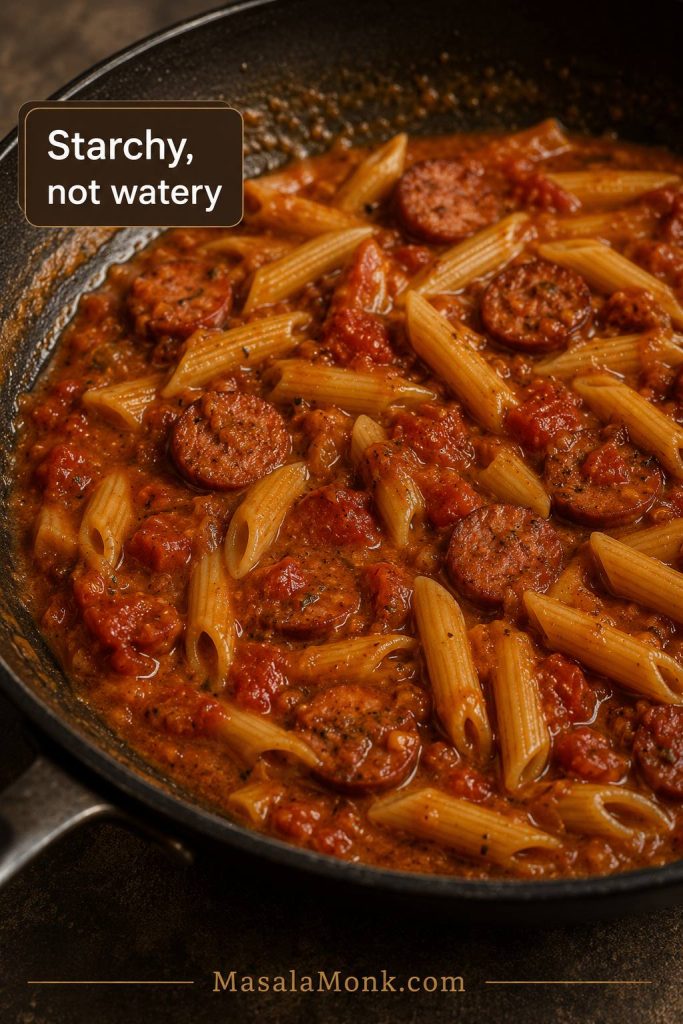
Bring the mixture to a boil, then reduce the heat to a steady simmer. Cover and cook for 12–15 minutes, stirring every few minutes so the pasta cooks evenly and does not stick. The pasta may not be completely submerged the whole time; stir every few minutes so the top pieces rotate into the liquid.

Kielbasa pasta simmering in a tomato-broth base with the text Starchy, not watery.
At this stage, the liquid should start looking thicker and slightly cloudy because the pasta starch is moving into the pan.

Not sure whether the pan looks right? The sauce texture guide below shows the difference between too watery, just right, and too thick.

Start checking around 12 minutes. If the pan looks dry before the pasta is tender, add ¼ cup / 60 ml more broth or water and continue cooking.

By the end, the pasta should be tender and the tomato-broth base should look slightly starchy, not watery. It should already be starting to cling before the cream and cheese go in.

5. Finish with cream and cheese

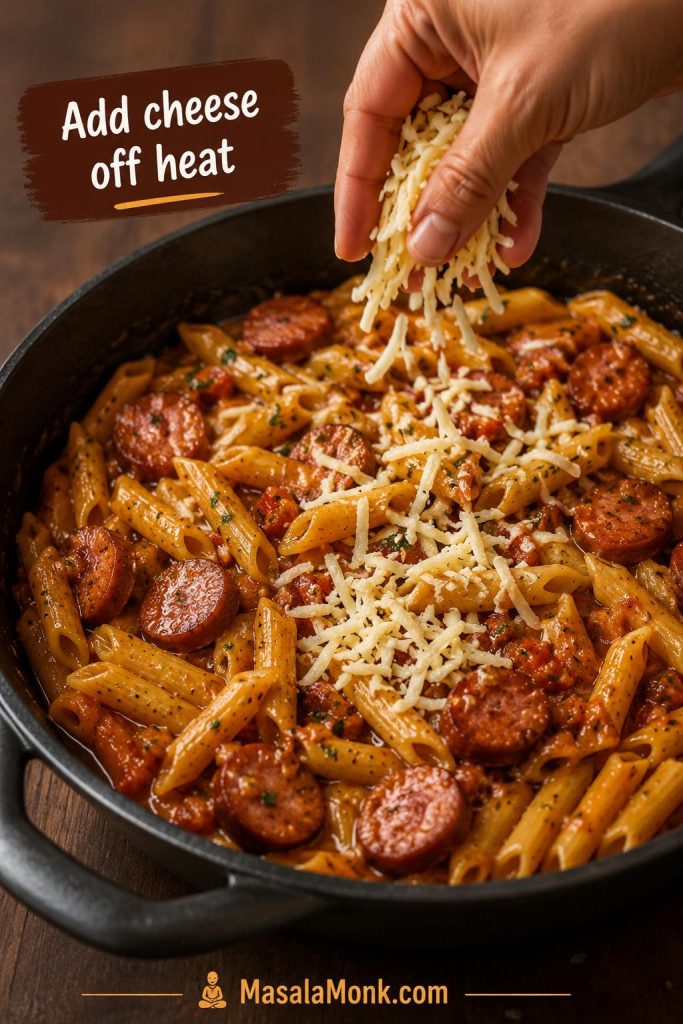
When the pasta is tender, turn off the heat. Stir in the cream, half-and-half, or milk, then add the shredded cheese gradually instead of dumping it in all at once. Cover the pan for 2–5 minutes so the coating settles and the cheese melts into the pasta. Taste and adjust salt only at the end.

Shredded cheese being added to kielbasa pasta in a skillet with the text Add cheese off heat.
Turn the heat off before the cheese goes in; gentle residual warmth gives you a smoother finish than boiling ever will.

When the cheese melts in, the pasta should look glossy and coated, not wet or soupy. That short rest is what turns the pan from saucy to settled.

Let the Skillet Rest Before Serving

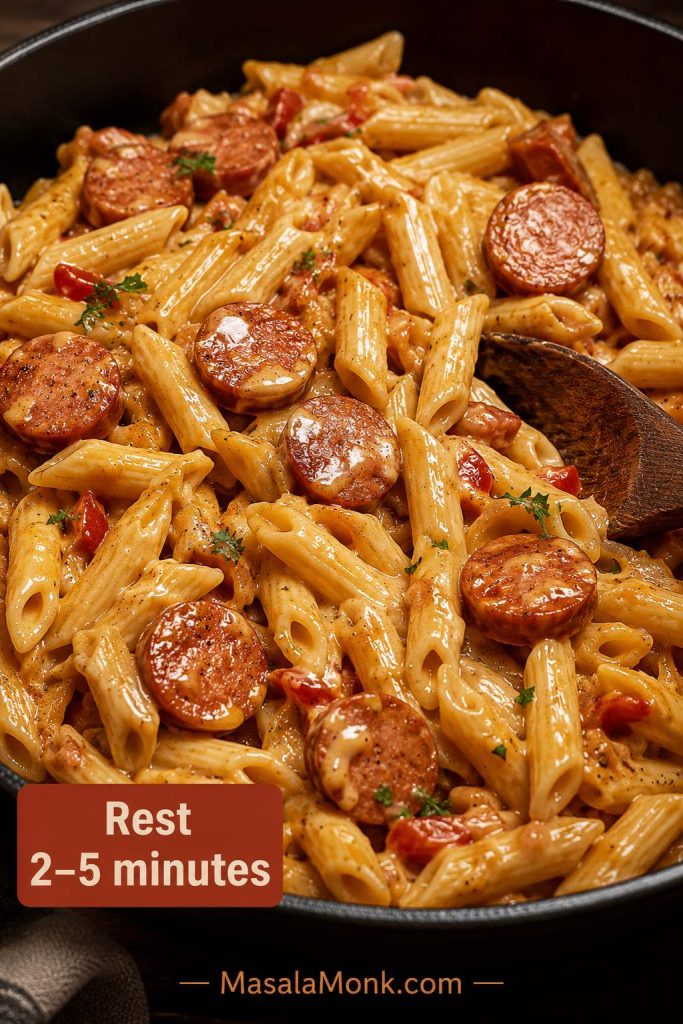
A brief rest gives the cheese and pasta starch time to settle, so the finished pan scoops more cleanly.

Finished kielbasa pasta resting in a skillet with glossy sauce and the text Rest 2–5 minutes.
Do not skip the rest; those few minutes turn a loose-looking pan into pasta that scoops cleanly.

The One-Pot Liquid Ratio

The most important part of one-pot kielbasa pasta is the liquid ratio. Too little liquid and the pasta stays hard. Too much liquid and the skillet turns soupy. For this recipe, the reliable starting point is:

Base one-pot ratio

8 oz / 225 g dry short pasta + 2 cups / 480 ml broth + 10 oz / 283 g diced tomatoes or tomatoes with green chiles

Cook the pasta in that mixture first. Add the cream and cheese only after the pasta is tender.

This is the part worth remembering: cook the pasta in broth and tomatoes first, then add cream and cheese only after the pasta is tender.

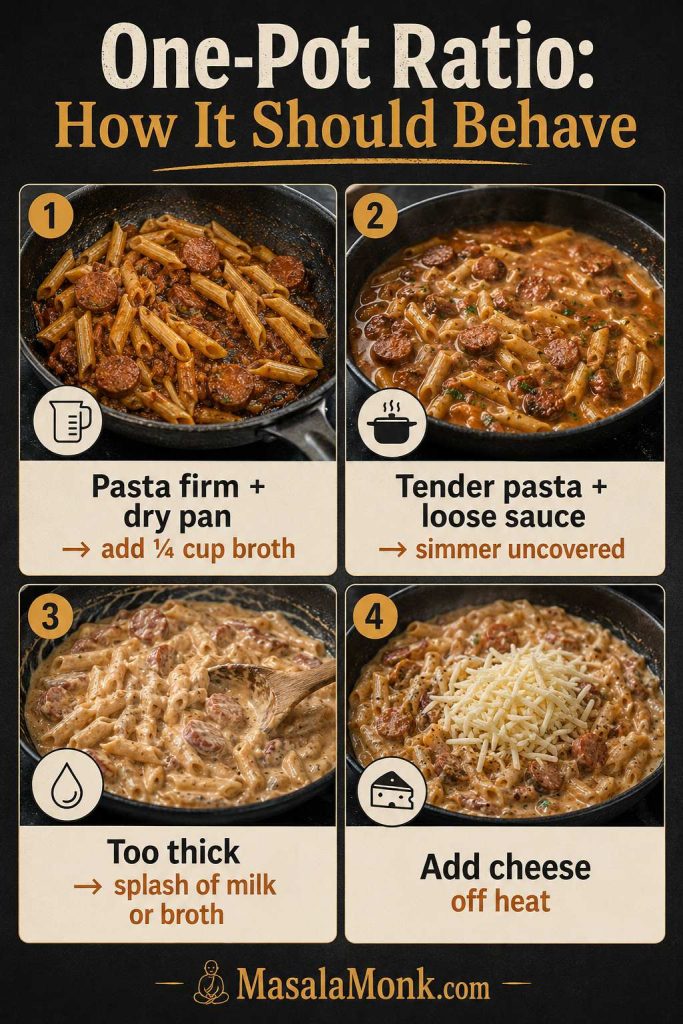
One-pot kielbasa pasta ratio board with fixes for dry pan, loose sauce, thick sauce, and adding cheese off heat.
Instead of following the timer blindly, read the pan: loosen dry pasta, reduce loose sauce, and finish with cheese only when the noodles are tender.

Different pasta shapes absorb liquid at slightly different rates, and every stove behaves a little differently. That is why this recipe gives adjustment points instead of pretending every pan will look identical.

What you see What to do
Pasta is firm and the pan is dry Add ¼ cup / 60 ml broth or water, cover, and cook 2–3 minutes more.
Pasta is tender but sauce is loose Simmer uncovered for 2–4 minutes before adding cheese.
Sauce is too thick Add milk, cream, or broth 1–2 tablespoons at a time.
Cheese looks clumpy Remove the pan from heat and stir gently. Next time, use freshly shredded cheese.

Do not worry if your pan needs one small adjustment. One-pot pasta is more about watching the texture than following the clock blindly, and a splash of broth can fix most dry-pan moments.

Kielbasa Pasta Sauce Texture Guide

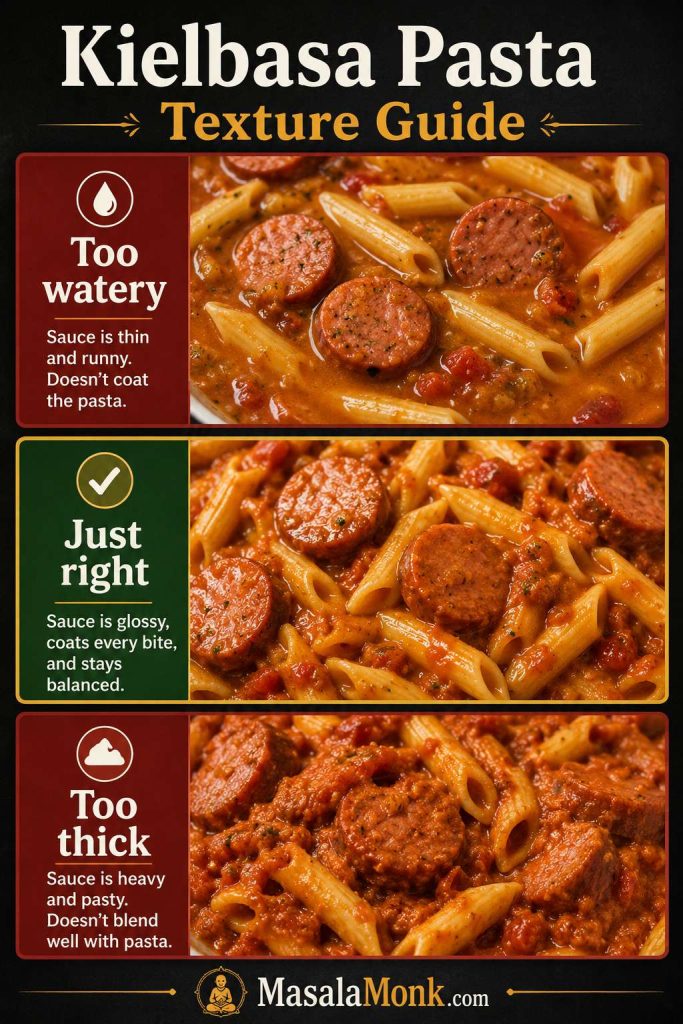
Use the texture as your cue before serving: loose pasta needs reduction, tight pasta needs a splash of liquid, and the best pan looks spoonable.

Texture guide showing kielbasa pasta sauce that is too watery, just right, and too thick.
Texture is easier to fix before serving: simmer if it is loose, splash in liquid if it is tight, and stop when the pasta looks spoonable.

Best Pan for One-Pot Kielbasa Pasta

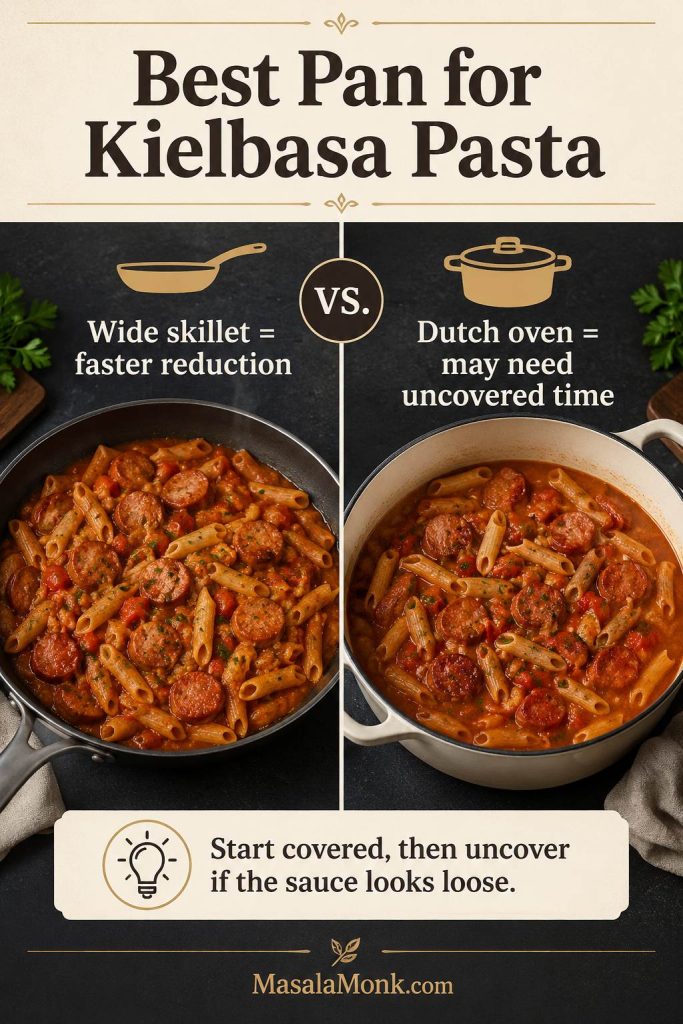
Pan size matters too. A wide, deep skillet reduces liquid faster, while a narrower Dutch oven may hold more moisture. If your pan is wide, watch for dryness sooner; if it is narrow, uncover for a few minutes if the sauce looks loose.

Comparison board showing a wide skillet for faster reduction and a Dutch oven that may need uncovered time.
A wide skillet gives steam more room to escape, while a deeper pot may need uncovered time before the sauce tightens.

One-Pot vs Boiled-Pasta Method

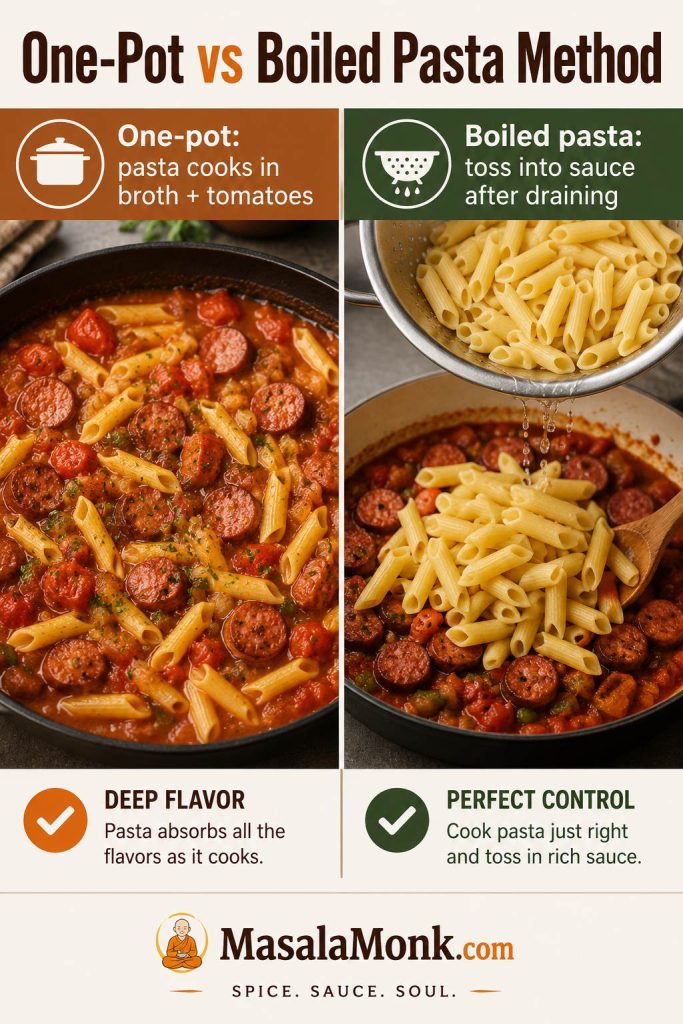
The one-pot method is best for speed, fewer dishes, and a cozy weeknight skillet dinner. Because the pasta cooks in broth and tomatoes, its starch helps thicken the sauce. This is the method used in the recipe card below.

Side-by-side board comparing one-pot kielbasa pasta cooked in broth and tomatoes with boiled pasta tossed into sauce.
One-pot pasta builds body in the pan, while boiled pasta gives more control when you use a larger shape or want a looser sauce.

The same one-pan comfort works in other dinners too; this one-pot chicken bacon ranch pasta takes the skillet method in a creamy chicken, bacon, and ranch direction.

However, a boiled-pasta method is useful if maximum sauce control matters, the pasta shape is larger, or the one-pot liquid ratio feels uncertain. To use that method, boil the pasta separately until 1 minute shy of al dente, reserve 1 cup / 240 ml pasta water, then toss the drained pasta into the browned kielbasa sauce. Add reserved pasta water a splash at a time until the sauce coats the pasta.

Method Best for Tradeoff
One-pot method Fast dinner, fewer dishes, cozy skillet texture Needs the right liquid ratio and occasional stirring
Boiled-pasta method Sauce control, large pasta shapes, very creamy finish Uses a second pot and takes slightly more attention

Cream, Milk, and Cheese: What Works Best?

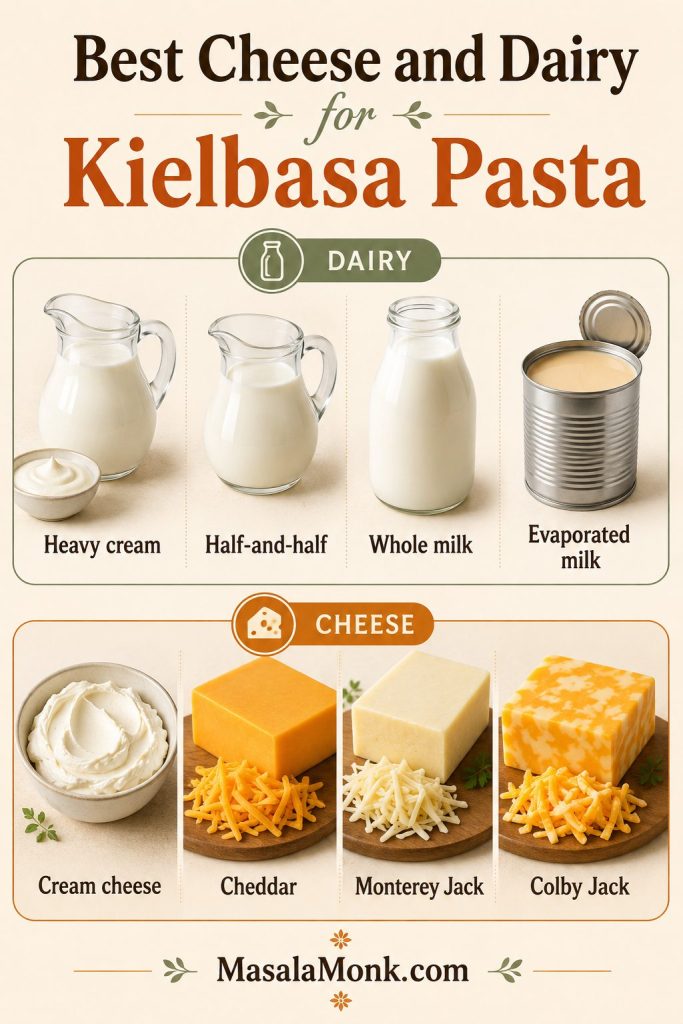
The dairy you choose changes the whole mood of the skillet. Heavy cream makes the richest, glossiest pan. Half-and-half keeps it creamy without feeling too heavy. Whole milk gives a lighter bowl, but it needs gentler heat so the sauce does not split.

Dairy and cheese guide showing heavy cream, half-and-half, whole milk, evaporated milk, cream cheese, cheddar, Monterey Jack, and Colby Jack.
Cream, milk, cream cheese, and shredded cheese all behave differently, so choose based on texture: rich, light, thick, or extra melty.

For cheese, Monterey Jack and Colby Jack melt cleanly, cheddar gives sharper flavor, and a cheddar-jack blend gives a good balance. Add cheese off heat and stir gently. If the mixture seems thick after the cheese melts, loosen it with 1–2 tablespoons of milk, cream, broth, or reserved pasta water.

Dairy or cheese Best use
Heavy cream Richest finish and least likely to split.
Half-and-half Balanced creamy texture without being too heavy.
Whole milk Lighter finish; avoid boiling hard after adding it.
Evaporated milk Useful cream substitute with more body than regular milk; keep the heat gentle.
Cream cheese Thicker, tangier shortcut; use 2–3 oz / 55–85 g softened cream cheese in place of part of the cream.
Monterey Jack / Colby Jack Melts cleanly and gives a softer, creamy finish.
Cheddar Sharper flavor, best when freshly shredded.

The same gentle-heat rule matters in any cheese sauce. This easy cheese sauce recipe goes deeper into why cheese turns creamy, grainy, oily, or thick.

With those choices handled, the recipe itself is straightforward: brown, simmer, finish gently, and let the pan rest for a few minutes before serving.

If the cheese clumps, the sauce looks loose, or the pan thickens too much, use the troubleshooting guide before serving.

Recipe Card: Creamy Kielbasa Pasta

Servings:
4 generous servings or 6 smaller servings
Prep time:
10 minutes
Cook time:
20 minutes
Total time:
30 minutes

Equipment

  • 12-inch deep skillet, 4–5 quart sauté pan, or Dutch oven with lid
  • Cutting board and knife
  • Wooden spoon or silicone spatula
  • Box grater, if shredding cheese from a block

Ingredients

  • 1 tablespoon olive oil / 15 ml
  • 14–16 oz smoked kielbasa / 400–450 g, sliced ¼ inch / 6 mm thick
  • 1 small yellow onion / about 120 g, diced
  • 3 garlic cloves, minced
  • 8 oz short pasta / 225 g, such as rotini, penne, shells, elbows, rigatoni, or bow ties
  • 2 cups low-sodium chicken broth / 480 ml, plus extra if needed
  • 1 can diced tomatoes or tomatoes with green chiles, 10 oz / 283 g, with juices; do not drain
  • ½ teaspoon smoked paprika or Italian seasoning
  • ½ teaspoon black pepper
  • ½ cup heavy cream, half-and-half, or whole milk / 120 ml
  • 1½ cups freshly shredded cheddar, Monterey Jack, or Colby Jack / 150–170 g
  • Salt, to taste
  • 2 tablespoons sliced green onion or parsley, optional

Instructions

  1. Brown the kielbasa. Heat olive oil in a deep skillet or Dutch oven over medium-high heat. Add sliced kielbasa and cook for 4–6 minutes, stirring occasionally, until browned at the edges.
  2. Cook the aromatics. Add diced onion and cook for 2–3 minutes. Stir in garlic and cook for 30 seconds.
  3. Add pasta and liquid. Stir in dry pasta, broth, diced tomatoes with juices, smoked paprika or Italian seasoning, and black pepper. Scrape the bottom of the pan.
  4. Simmer. Bring to a boil, then reduce to a steady simmer. Cover and cook for 12–15 minutes, stirring every few minutes, until the pasta is tender. The pasta does not need to stay fully submerged the entire time; stirring helps the top pieces rotate into the liquid.
  5. Adjust if needed. If the pan gets dry before the pasta is done, add ¼ cup / 60 ml broth or water and continue cooking. If the pasta is tender but the sauce is loose, simmer uncovered for 2–4 minutes.
  6. Finish off heat. Turn off the heat. Stir in cream, then add shredded cheese gradually until melted and smooth. Do not boil after the dairy and cheese go in.
  7. Rest and serve. Cover for 2–5 minutes, then taste and adjust salt if needed. Garnish with green onion or parsley.

Recipe Notes

  • Texture target: The finished pasta should be glossy and coated, not soupy. It will thicken more after 2–5 minutes of resting.
  • If using a 14.5–15 oz can of diced tomatoes instead of 10 oz, start with 1¾ cups / 420 ml broth and add more only if needed.
  • A wide pan reduces liquid faster; a narrower Dutch oven may need a few uncovered minutes at the end.
  • Use low-sodium broth because kielbasa and cheese can already be salty.
  • Freshly shredded cheese gives the creamiest finish; pre-shredded cheese can still work, but it may not melt as cleanly.
  • Add cream and cheese off heat so the sauce stays creamy and coats the pasta cleanly.
  • For a cream cheese shortcut, use 2–3 oz / 55–85 g softened cream cheese in place of part of the cream.
  • For a no-tomato version, skip the tomatoes and use 2½ cups / 600 ml broth for 8 oz / 225 g pasta.
  • Fully cooked smoked kielbasa only needs browning and reheating. If using raw or fresh sausage, cook it fully before adding it to the pasta.
  • If the sauce thickens too much after resting, loosen it with a splash of milk, cream, or broth.
Saveable kielbasa pasta recipe card with time, servings, ingredient ratio, off-heat cheese finish, and texture cue.
Save the method more than the measurements: cook the pasta first, finish the dairy off heat, and let the pan rest before serving.

Did you make this with rotini, penne, bow ties, shells, or tortellini? Leave the pasta shape, cheese, and any add-ins you used — those small swaps help the next reader decide what to try.

Variations for Kielbasa Pasta

Once the base method is clear, this recipe can move in several directions. Keep the same skillet structure, then adjust the cheese, vegetables, sausage, or sauce style.

Use this section when you have the base recipe down and want to match the skillet to what is actually in the fridge.

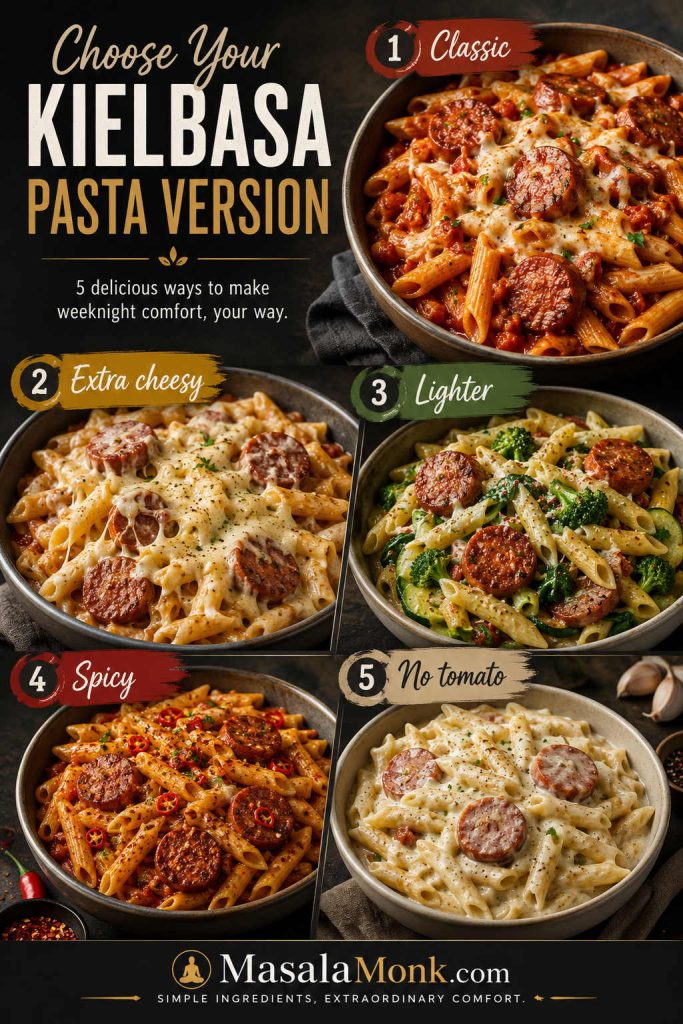
Chooser board showing classic, extra cheesy, lighter, spicy, and no-tomato kielbasa pasta versions.
After the base skillet works once, use the same method to go cheesier, lighter, spicier, tomato-free, or more vegetable-forward.

Choose Your Version

Classic: cheddar-jack, diced tomatoes, cream.

Extra cheesy: increase cheese to 2 cups / about 225 g.

Lighter: turkey kielbasa, spinach, and half-and-half.

Spicy: pepper Jack, Cajun seasoning, or tomatoes with green chiles.

No tomato: broth, cream, cheese, black pepper, and parsley.

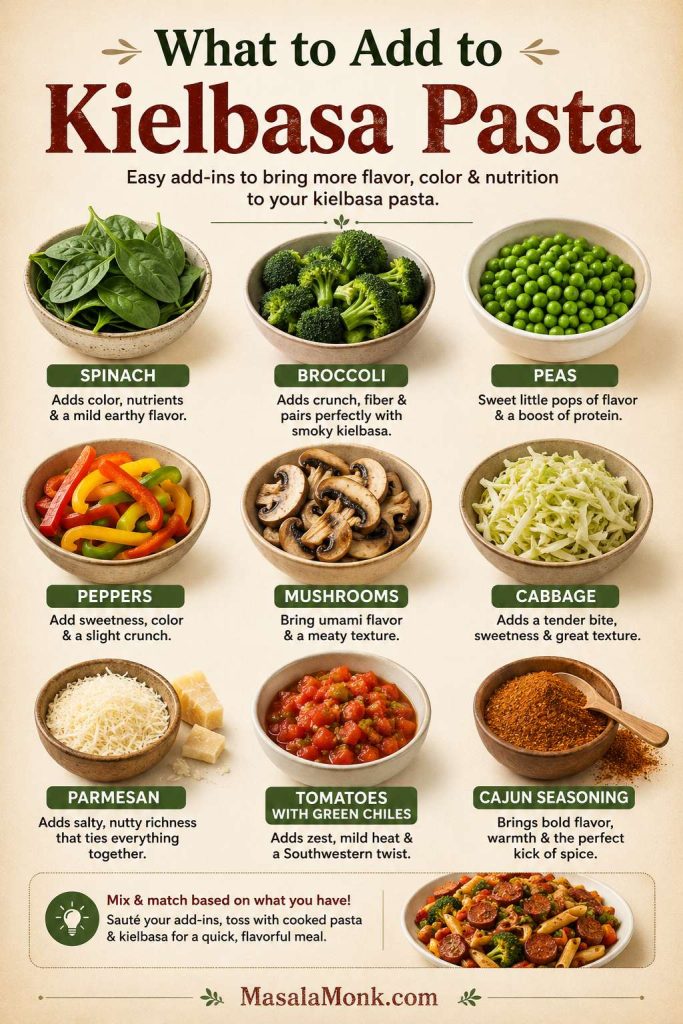
Looking for smaller changes instead of a full variation? The add-ins section shows when to add spinach, broccoli, peas, peppers, mushrooms, cabbage, Parmesan, and seasoning.

Cheesy Kielbasa Pasta

A more cheese-forward version starts by increasing the cheese to 2 cups / about 225 g. Monterey Jack melts especially well, cheddar adds sharper flavor, and Colby Jack gives a softer, family-friendly finish. Add the cheese off heat and stir gently so the coating stays creamy instead of stringy or grainy. When you want a pasta dinner where cheese is the whole point, this macaroni and cheese recipe is the natural comfort-food lane.

Cheesy kielbasa pasta with melted cheese pull, browned sausage slices, short pasta, tomato sauce, and herbs.
A cheesier kielbasa pasta works best when the cheese melts into hot pasta gently, not when it boils in the pan.

Cream Cheese Shortcut

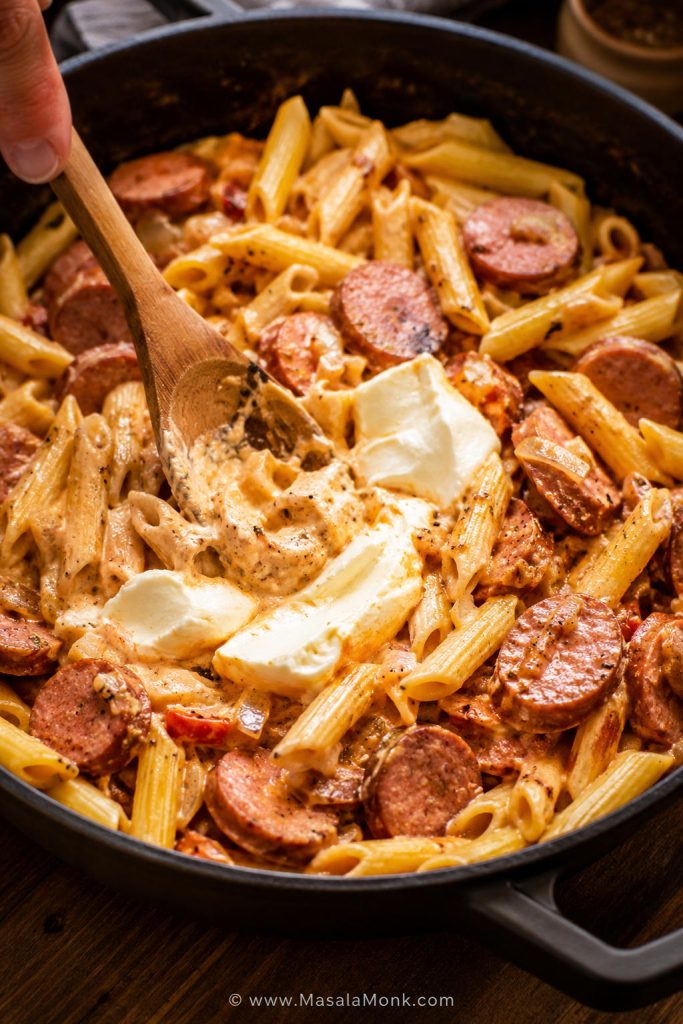
Cream cheese gives the skillet a thicker, tangier finish. Use 2–3 oz / 55–85 g softened cream cheese instead of part of the cream. Cut it into small pieces and stir it in after the pasta is tender, before adding shredded cheese. Keep the heat low or off so it melts into the pan instead of turning lumpy.

Cream cheese being stirred into kielbasa pasta in a skillet with sausage slices, pasta, and creamy sauce.
Cream cheese is a shortcut to a thicker sauce, but it needs gentle heat and steady stirring so it melts instead of staying in pockets.

Kielbasa Spinach Pasta

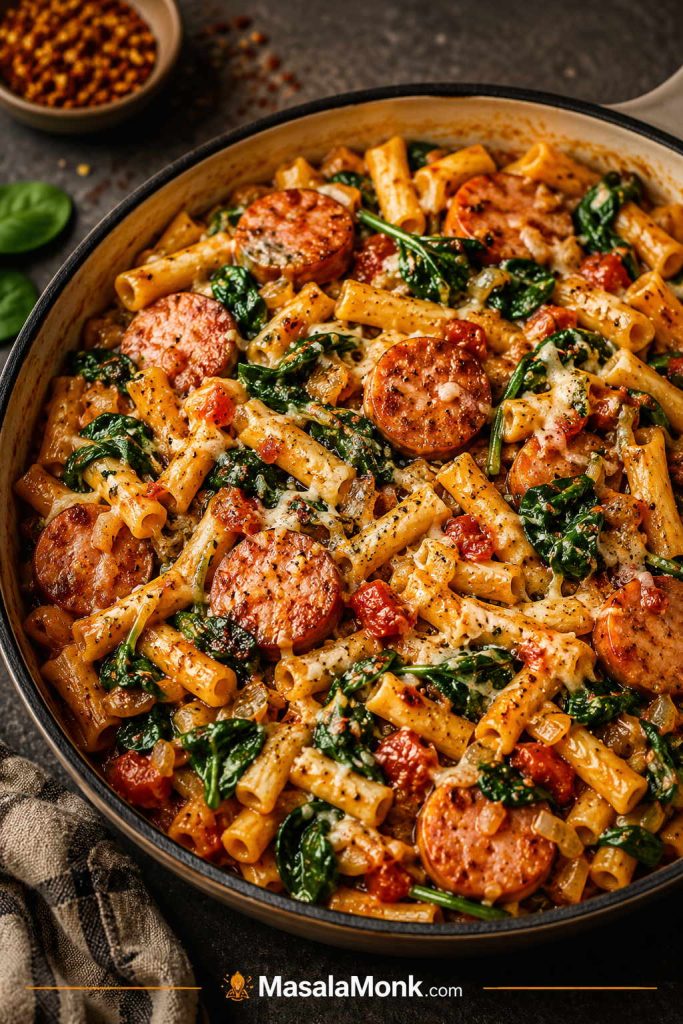
Spinach is the easiest fresh add-in. Stir in 2–3 cups fresh baby spinach / 60–90 g at the end, just before the cheese. The residual heat will wilt it quickly. If using frozen spinach, thaw it first and squeeze it very dry; otherwise, the extra water can thin the creamy base.

Kielbasa spinach pasta with wilted spinach, browned sausage slices, short pasta, tomatoes, and creamy sauce.
Spinach belongs near the end because the heat of the pasta wilts it quickly without adding extra water to the pan.

Kielbasa Broccoli Pasta

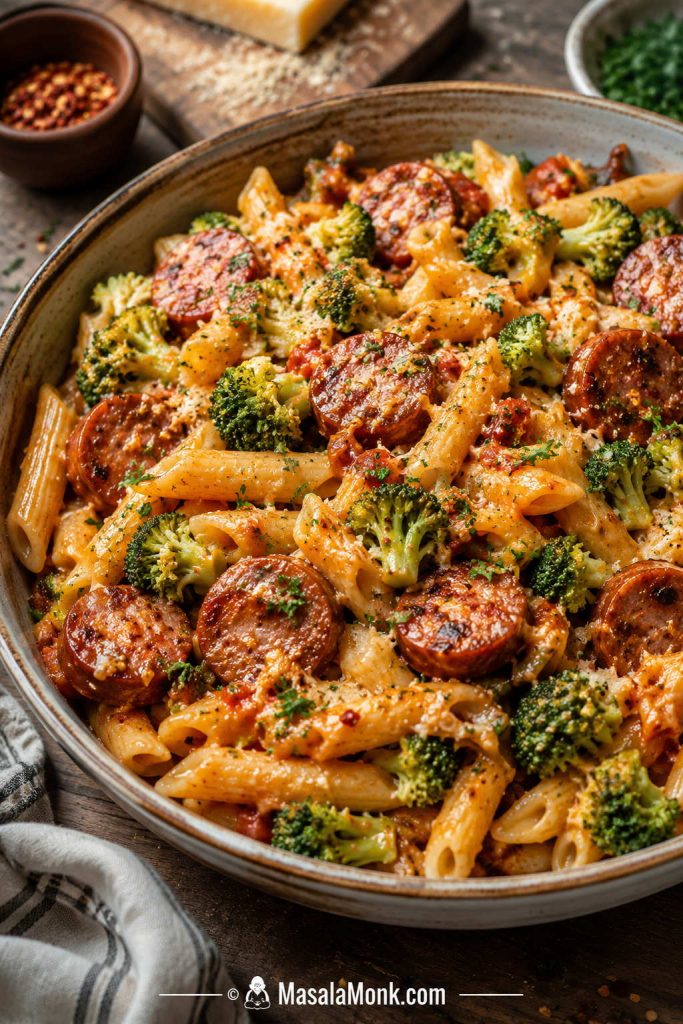
Broccoli works best when cut into small florets and added halfway through the simmering time. If the florets are large, steam or microwave them briefly first so the pasta does not overcook while the broccoli catches up.

Kielbasa broccoli pasta with penne, browned sausage slices, small broccoli florets, tomato-cheese sauce, and herbs.
For kielbasa broccoli pasta, small florets are best because they turn tender before the pasta overcooks.

Polish Sausage Pasta

Smoked Polish sausage can usually be used the same way as smoked kielbasa. Slice it about ¼ inch / 6 mm thick, brown it first, and be cautious with added salt. This gives you a Polish kielbasa pasta version without changing the base method.

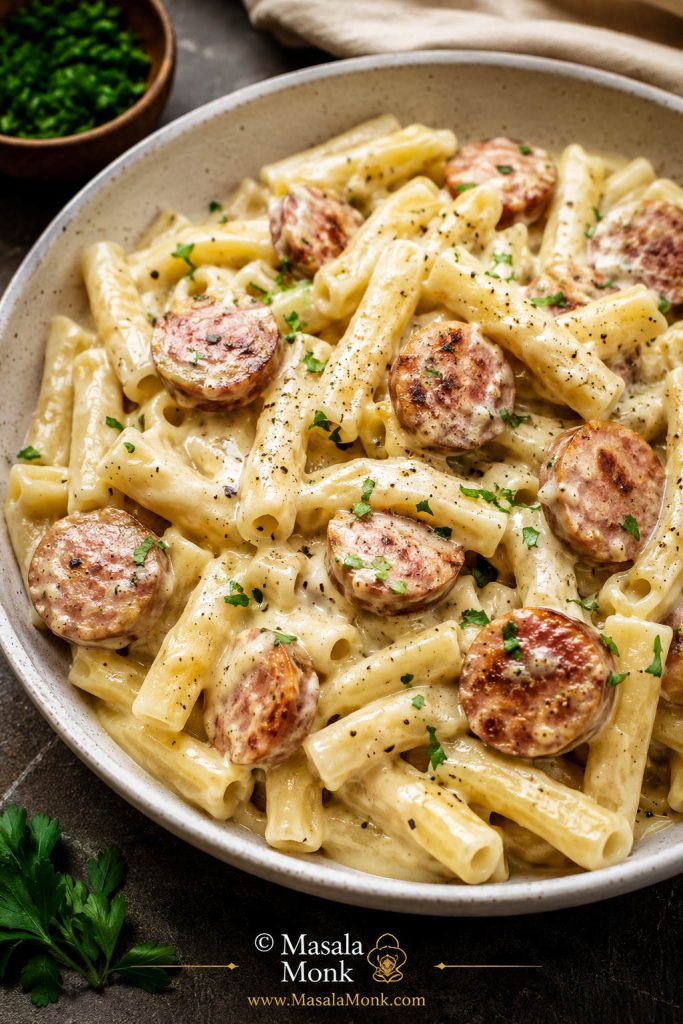
Polish sausage pasta with browned smoked sausage slices, noodles or pasta, herbs, and pickle garnish.
Polish sausage pasta can lean more savory and sausage-forward, especially with parsley, cabbage, pickles, or black pepper for contrast.

Cabbage and Kielbasa Pasta

For a cabbage-noodle style version, cook thinly sliced cabbage with the onion until softened before adding the liquid. Keep the sauce lighter, then finish with black pepper, parsley, and a small amount of Dijon or Parmesan.

Cabbage and kielbasa pasta in a skillet with cooked cabbage, onions, sausage slices, noodles, herbs, and grated cheese.
Cooking cabbage with the onion gives this variation a cabbage-noodle feel, so it tastes lighter and less tomato-heavy than the base version.

Turkey Kielbasa Pasta

Turkey kielbasa gives the pan a lighter feel. Use the same amount, but watch it closely because it is usually leaner and can dry out faster. Add a little extra oil if the pan looks dry, and pair it with spinach, broccoli, bell peppers, or peas for a fresher dinner.

Turkey kielbasa pasta with lighter sausage slices, rotini, broccoli, greens, and a light tomato-cream sauce.
Turkey kielbasa keeps the pasta lighter, while broccoli or spinach adds freshness without turning the skillet into a diet dish.

Tomato-Cream Kielbasa Pasta

The tomato-cream version leans a little more Italian-style. Use crushed tomatoes instead of diced tomatoes, add 1 tablespoon tomato paste with the garlic, and replace some of the cheddar with Parmesan or mozzarella. For a creamier tomato-sauce direction, the balance is closer to this vodka pasta recipe, where tomato, dairy, and pasta water do most of the work.

Tomato-cream kielbasa pasta with browned sausage slices, short pasta, red creamy sauce, herbs, and grated cheese.
A redder tomato-cream kielbasa pasta is useful when you want more tang from tomatoes to balance the smoked sausage.

No-Tomato Creamy Kielbasa Pasta

The white version skips tomatoes and uses 2½ cups / 600 ml broth for 8 oz / 225 g pasta. Add the cream and cheese after the pasta is tender, then brighten the finished skillet with black pepper, parsley, Parmesan, or a small squeeze of lemon. The flavor is softer and richer without the tomato acidity.

No-tomato kielbasa pasta with pale cream sauce, browned sausage slices, short pasta, black pepper, and parsley.
Without tomatoes, the pasta needs sharper finishing flavors; black pepper, parsley, Parmesan, Dijon, or lemon keep the creamy version lively.

Creamy Mustard Kielbasa Pasta

Dijon gives the pan a sharper edge. Stir 1–2 teaspoons Dijon mustard into the cream before adding it to the pasta. Parmesan, black pepper, and a little thyme fit especially well here. Keep the mustard subtle; it should brighten the dish, not take over the whole pan.

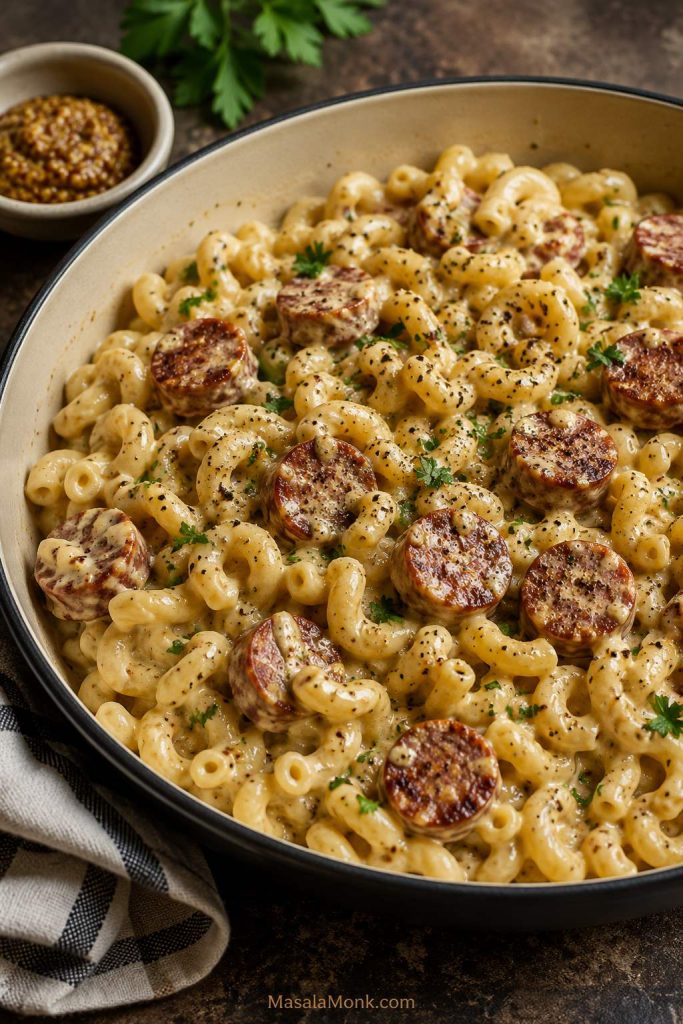
Creamy mustard kielbasa pasta with browned sausage slices, short pasta, pale golden sauce, black pepper, parsley, and a small bowl of mustard.
Mustard is useful when the sauce needs lift; a small amount cuts through the cream and makes the smoked sausage taste deeper.

Spicy Kielbasa Pasta

To make it spicy, start small. Add red pepper flakes, Cajun seasoning, diced jalapeño, pepper Jack cheese, or tomatoes with green chiles. Kielbasa and cheese already bring a lot of flavor, so build heat gradually. For a bolder spicy-creamy pasta built around Cajun seasoning, this Cajun chicken pasta pushes that flavor direction further.

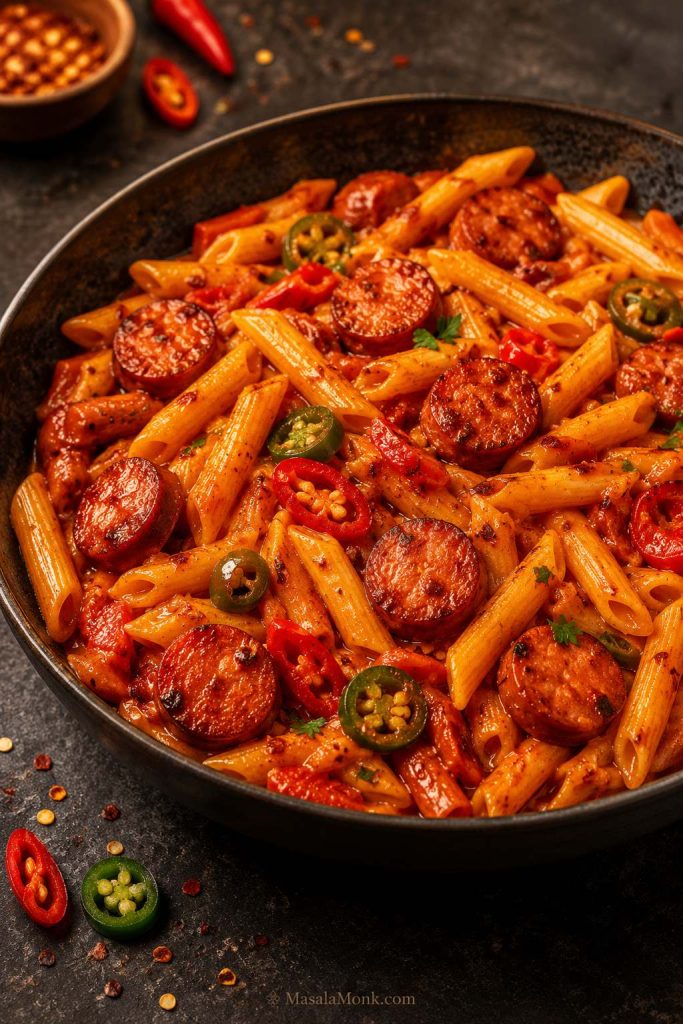
Spicy kielbasa pasta with penne, browned sausage slices, red tomato sauce, jalapeno slices, red chile slices, and pepper flakes.
For spicy kielbasa pasta, use chiles or pepper flakes as accents instead of burying the smoky sausage under heat.

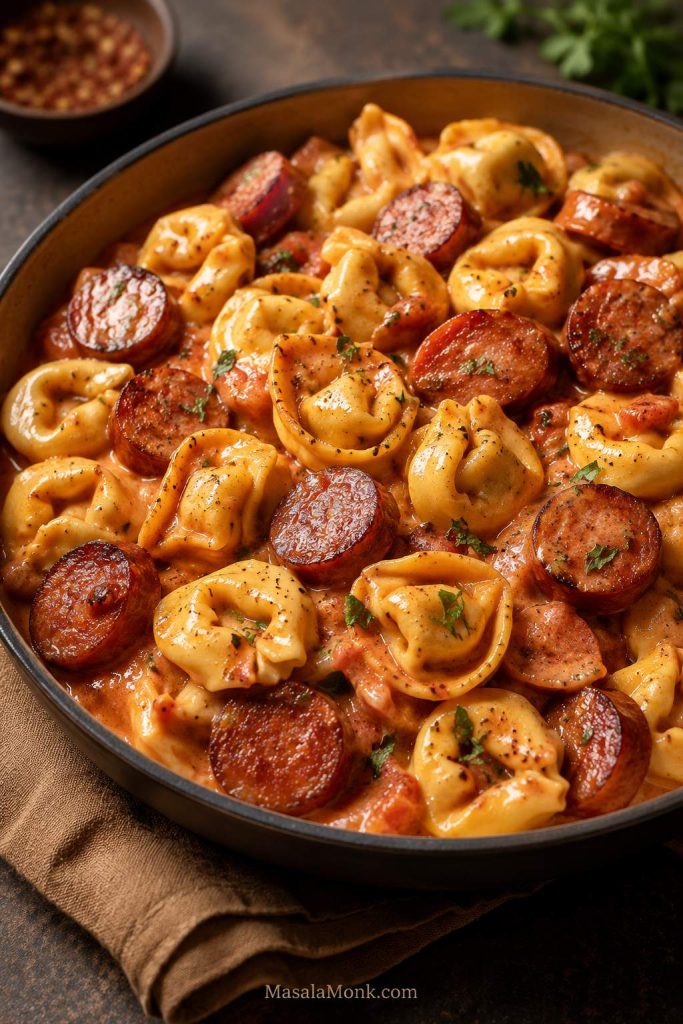
Tortellini Kielbasa Pasta

Tortellini can work, but it does not behave like dry pasta. Use refrigerated cheese tortellini, reduce the broth, and simmer for less time. Frozen tortellini may need to be boiled first, depending on the package instructions. If you are unsure about fresh, frozen, or dried filled pasta timing, this how to cook tortellini guide keeps the differences simple.

Tortellini kielbasa pasta with cheese tortellini, browned sausage slices, creamy tomato sauce, herbs, and black pepper.
Tortellini is a shortcut variation, not a dry-pasta swap; add it later or cook it gently so the filling stays intact.

Baked Kielbasa Pasta

Baked kielbasa pasta works best when the skillet version is left slightly saucier. Transfer it to a baking dish, top with extra cheese, and bake at 375°F / 190°C until bubbling. This gives you a bubbly, casserole-style finish with a cheesier top. For more baked pasta structure and variation ideas, this baked ziti recipe collection is a natural next step.

Baked kielbasa pasta casserole with browned melted cheese, sausage slices, pasta, tomato sauce, and a spoon lifting a cheesy serving.
Baked kielbasa pasta works best when the skillet starts a little saucier, because the oven tightens everything as the cheese browns.

What to Add to Kielbasa Pasta

Kielbasa and pasta can handle plenty of add-ins, but timing matters. Some vegetables need to cook before the liquid goes in, while others should be added near the end.

Add-ins guide showing spinach, broccoli, peas, peppers, mushrooms, cabbage, Parmesan, tomatoes with green chiles, and Cajun seasoning for kielbasa pasta.
Add-ins work better when timed correctly: sturdy vegetables cook early, while spinach, peas, cheese, and seasoning belong near the end.
Add-in When to add it Best note
Spinach At the end Fresh spinach wilts quickly. Frozen spinach should be thawed and squeezed dry.
Broccoli Halfway through simmering Use small florets so they cook before the pasta is done.
Frozen peas Last 2–3 minutes They only need to heat through.
Bell peppers With the onion Good with smoked paprika, tomato, and cheddar.
Mushrooms Before adding liquid Brown them first so they do not water down the sauce.
Cabbage Before adding liquid Use only for a cabbage-noodle style skillet; cook it down with the onion before adding liquid.
Tomatoes with green chiles With the broth Use a 10 oz can for a mild spicy tomato base.
Cajun seasoning With the broth and tomatoes Use lightly because kielbasa may already be salty.
Parmesan Off heat Adds salty, savory depth. Use less salt if adding Parmesan.

For an easy family-style version, try peas, cheddar, and green onion. A lighter skillet can use turkey kielbasa, spinach, and half-and-half. To add heat, pair tomatoes with green chiles, pepper Jack, and a small amount of Cajun seasoning. A Polish-inspired direction works well with cabbage, onion, mustard, and parsley.

What to Serve with Kielbasa Pasta

For something fresh, serve kielbasa pasta with green salad, cucumber salad, green beans, or roasted broccoli. When the meal needs more comfort, add garlic bread or a simple bread side for scooping up the extra sauce; this homemade garlic bread loaf fits naturally. A sharper Polish-style contrast can come from pickles, sauerkraut, sautéed cabbage, or crisp cabbage slaw.

Serving guide for kielbasa pasta with salad, cucumber, green beans, garlic bread, roasted broccoli, pickles, sauerkraut, and cabbage slaw.
Because kielbasa pasta is rich and smoky, the best sides either freshen the plate, add comfort, or bring a sharp Polish-style contrast.

Because the pasta is rich and savory, acidic or crunchy sides fit especially well. A little brightness keeps the meal from feeling too heavy.

Storage and Reheating

Store leftover kielbasa pasta in an airtight container in the refrigerator for 3–4 days. The USDA gives the same 3–4 day refrigerator window for cooked leftovers in its leftovers and food safety guidance.

Storage and reheating guide showing kielbasa pasta in an airtight container and pasta reheating with a splash of milk or broth.
Leftover kielbasa pasta reheats better with gentle heat and a splash of liquid, so the sauce loosens instead of separating.

Stovetop reheating gives the best texture. Add a splash of milk, cream, or broth before heating, then warm gently over low heat and stir often. For the microwave, use lower power and stir halfway through. Avoid boiling the pasta after the cream and cheese are in the sauce, because high heat can make dairy-based sauces separate.

You can freeze it, but creamy pasta is always best fresh. The sauce may look slightly grainy after thawing, and the pasta will soften more once reheated. If you know you want freezer portions, undercook the pasta slightly and add extra liquid when reheating.

If the pasta looks too thick after chilling, the troubleshooting section uses the same liquid-adjustment logic that helps with leftovers.

Troubleshooting Kielbasa Pasta

If the skillet looks wrong halfway through, it is usually not ruined. One-pot pasta changes quickly in the last few minutes, and most problems need only a splash of liquid, a few minutes uncovered, or lower heat.

Troubleshooting guide for kielbasa pasta with fixes for firm pasta, watery sauce, thick sauce, clumpy cheese, rubbery kielbasa, and flat flavor.
Most kielbasa pasta mistakes are texture problems, not recipe failures; adjust the liquid, heat, or seasoning before giving up on the pan.
Problem Likely cause Fix
Pasta is still hard Not enough liquid, heat too low, or pasta shape needs more time Add ¼ cup / 60 ml broth or water, cover, and cook 2–3 minutes more.
Sauce is watery Too much liquid or not enough reduction Simmer uncovered for 2–4 minutes before adding more cheese.
Sauce is too thick Pasta absorbed more liquid than expected Add milk, cream, or broth 1–2 tablespoons at a time.
Cheese is clumpy Heat was too high or cheese had anti-caking starch Remove the pan from heat before adding cheese. Use freshly shredded cheese when possible.
Kielbasa is rubbery It cooked too long after browning Brown it for flavor, then keep the simmer gentle.
Dish tastes flat Needs seasoning, acid, or savory depth Add black pepper, smoked paprika, Parmesan, parsley, or a small squeeze of lemon.
Dish tastes too salty Kielbasa, broth, tomatoes, and cheese all added salt Use low-sodium broth next time. Add a splash of cream or milk to soften the saltiness.
Pasta is mushy It cooked too long or rested too long over heat Start checking around 12 minutes and turn off heat as soon as the pasta is tender.

FAQs About Kielbasa Pasta

What pasta goes best with kielbasa?

Rotini, penne, shells, elbows, farfalle, and rigatoni all hold up well with kielbasa. Short pasta is the easiest choice because it cooks evenly in the skillet and catches the tomato-cheese coating.

Is kielbasa already cooked?

Most smoked kielbasa is fully cooked, but you should still check the package. If you are using raw or fresh sausage, cook it fully before adding it to the pasta.

Can Polish sausage be used instead of kielbasa?

Smoked Polish sausage is the easiest swap for kielbasa in this recipe. Use the same amount, slice it evenly, and brown it before adding the pasta and liquid.

Can I use a 15 oz can of diced tomatoes?

A 14.5–15 oz can works, but reduce the broth first. Start with 1¾ cups / 420 ml broth instead of 2 cups / 480 ml, then add more only if the pasta is still firm and the pan looks dry.

Can I make kielbasa pasta without tomatoes?

A no-tomato version works best with 2½ cups / 600 ml broth for 8 oz / 225 g pasta. Finish with cream, cheese, black pepper, parsley, Parmesan, or a small squeeze of lemon so the dish still has enough flavor and lift.

Can I use cream cheese instead of cream?

Cream cheese can replace part of the cream if you want a thicker, tangier sauce. Use 2–3 oz / 55–85 g softened cream cheese, cut it into small pieces, and stir it in after the pasta is tender.

What cheese melts best in kielbasa pasta?

Monterey Jack, Colby Jack, mild cheddar, and cheddar-jack blends are the easiest choices. For the creamiest finish, shred cheese from a block and add it after turning off the heat.

What is the best pan for one-pot kielbasa pasta?

A 12-inch deep skillet or 4–5 quart sauté pan is ideal because it gives the pasta enough room while still letting the liquid reduce. A Dutch oven also works, but it may hold more moisture, so you may need to uncover it near the end.

Can I double this recipe?

You can double it, but use a large Dutch oven or wide pot instead of a standard skillet. Stir more often, expect a slightly longer simmer, and add liquid gradually rather than doubling every splash at once. One-pot pasta scales best when you watch the texture, not only the timer.

How do I make kielbasa pasta without cream?

Whole milk, half-and-half, evaporated milk, or a little extra broth with cheese can all replace heavy cream. The sauce will be less rich with milk than with cream, but it can still coat the pasta well if you add the cheese off heat.

How do I keep the sauce creamy after reheating?

Reheat gently with a splash of milk or broth. High heat can make the sauce separate, so warm leftovers slowly and stir often.

Can spinach be added to kielbasa pasta?

Fresh baby spinach is the easiest add-in. Stir it in near the end so it wilts into the hot pasta. If using frozen spinach, thaw it and squeeze it dry before adding it to the sauce.

Does tortellini work instead of pasta?

Refrigerated tortellini can work if you reduce the liquid and cook it for less time. Frozen tortellini may need to be boiled first, depending on the package directions.

How do I make this kielbasa pasta spicy?

Add red pepper flakes, Cajun seasoning, diced jalapeño, pepper Jack cheese, or tomatoes with green chiles. Start with a small amount, taste, and build from there.

Why is my one-pot pasta mushy?

It was probably cooked too long or stirred too aggressively after the pasta became tender. Start checking the pasta around 12 minutes, and let it rest off heat instead of continuing to simmer once it is done.

Final Thoughts

This is the kind of dinner that turns ordinary fridge-and-pantry ingredients into a full skillet meal. Smoked sausage, short pasta, tomato, cream, and cheese become hearty and generous once you understand the basic ratio, and the recipe stays flexible enough for whatever pasta shape, dairy, or add-in you have around.

For another one-pan dinner built around simple pantry ingredients, this homemade Hamburger Helper recipe uses beef, macaroni, and cheddar sauce in a similar comfort-food lane.

Once you know what the pan should look like, the recipe becomes easy to trust. Add broth if the pasta needs more time, simmer uncovered if the skillet looks loose, and add the cheese off heat for the smoothest result. Those small choices are what turn a basic kielbasa and pasta dish into the kind of weeknight dinner people ask for again.

That is why this kind of skillet dinner earns repeat status: it is simple, adjustable, and still feels like a proper meal.

If you made your version with a different pasta shape, cheese, or add-in, leave a note with what worked. Those details are often what help the next person choose between rotini, penne, shells, spinach, tortellini, or the no-tomato version.

Back to top ↑