
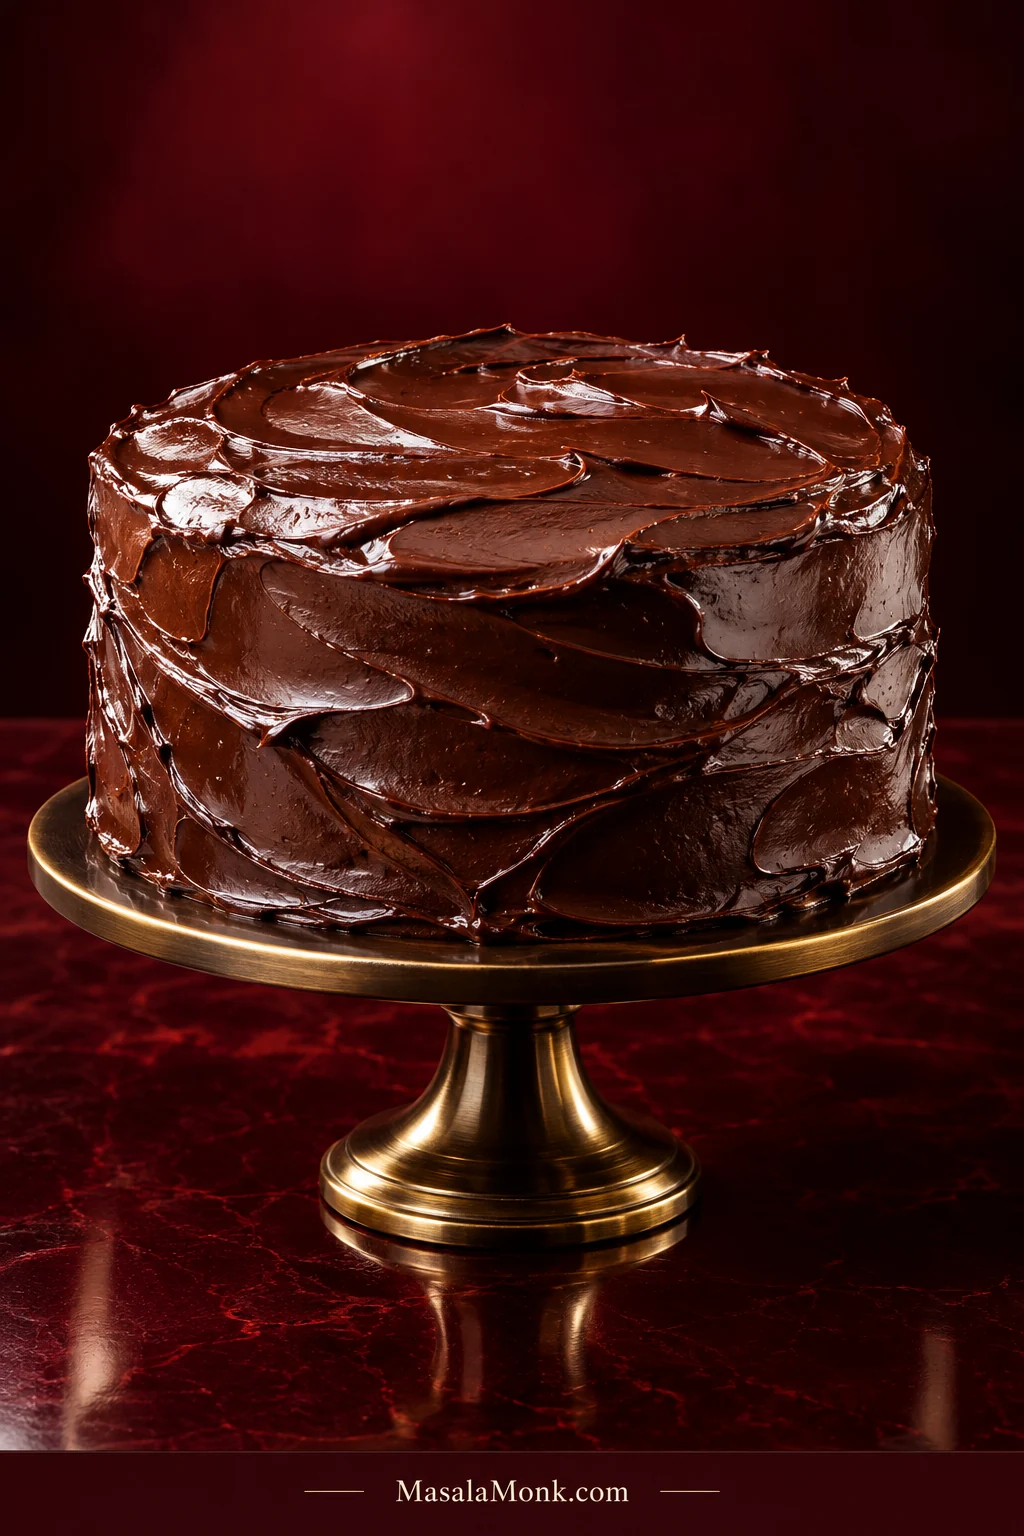
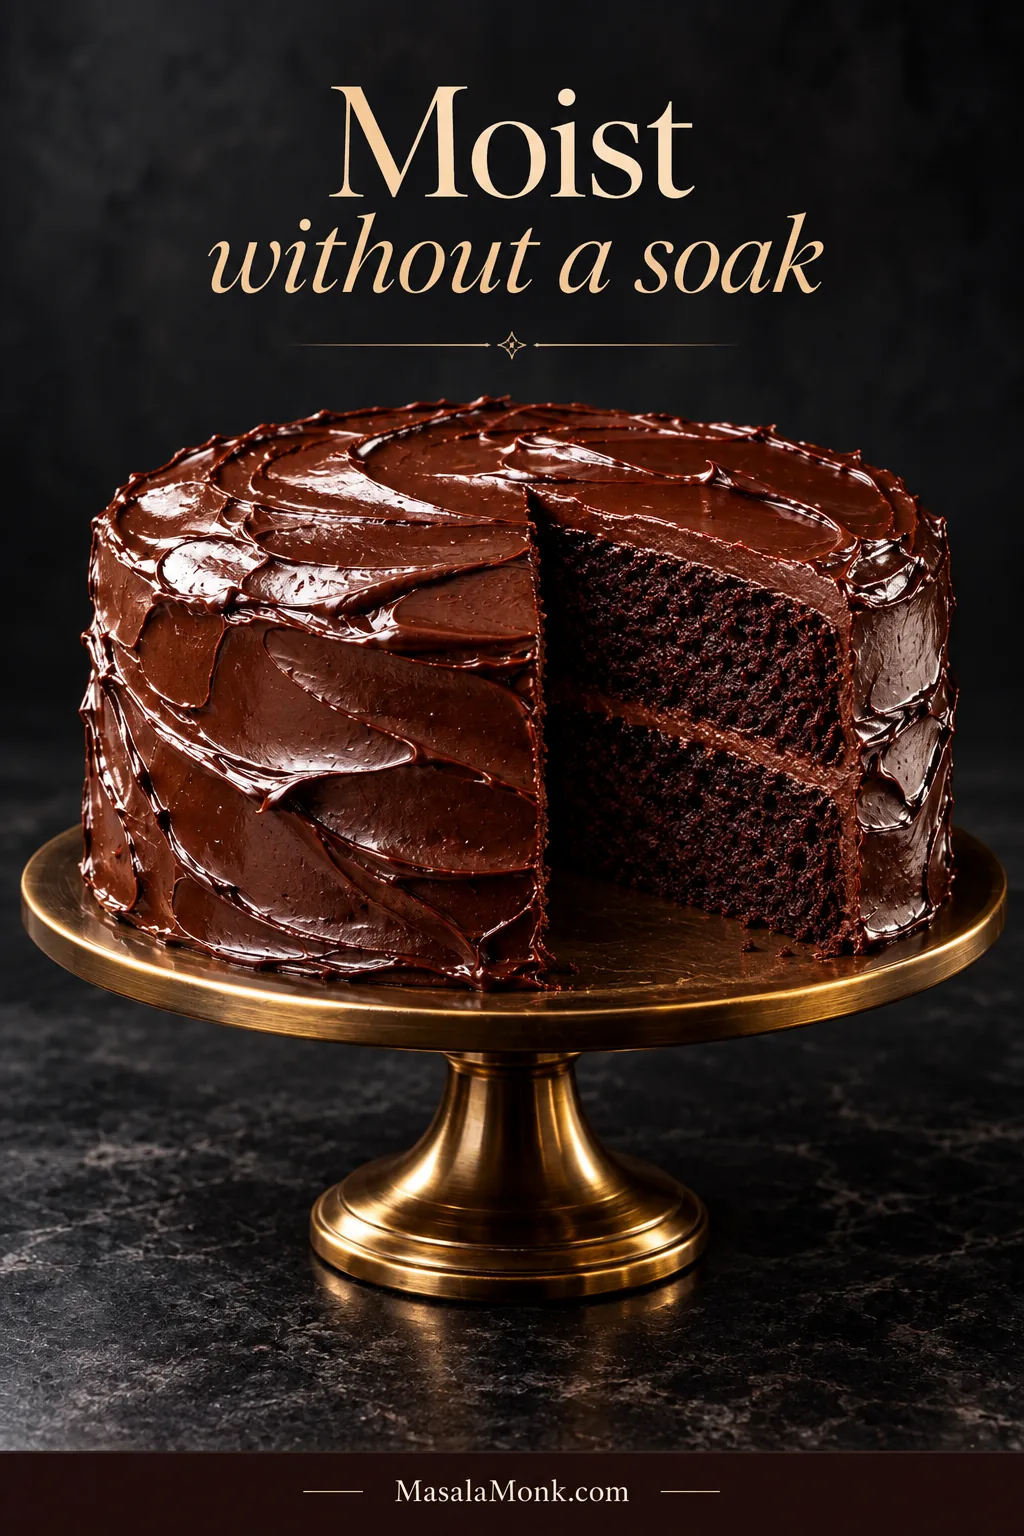
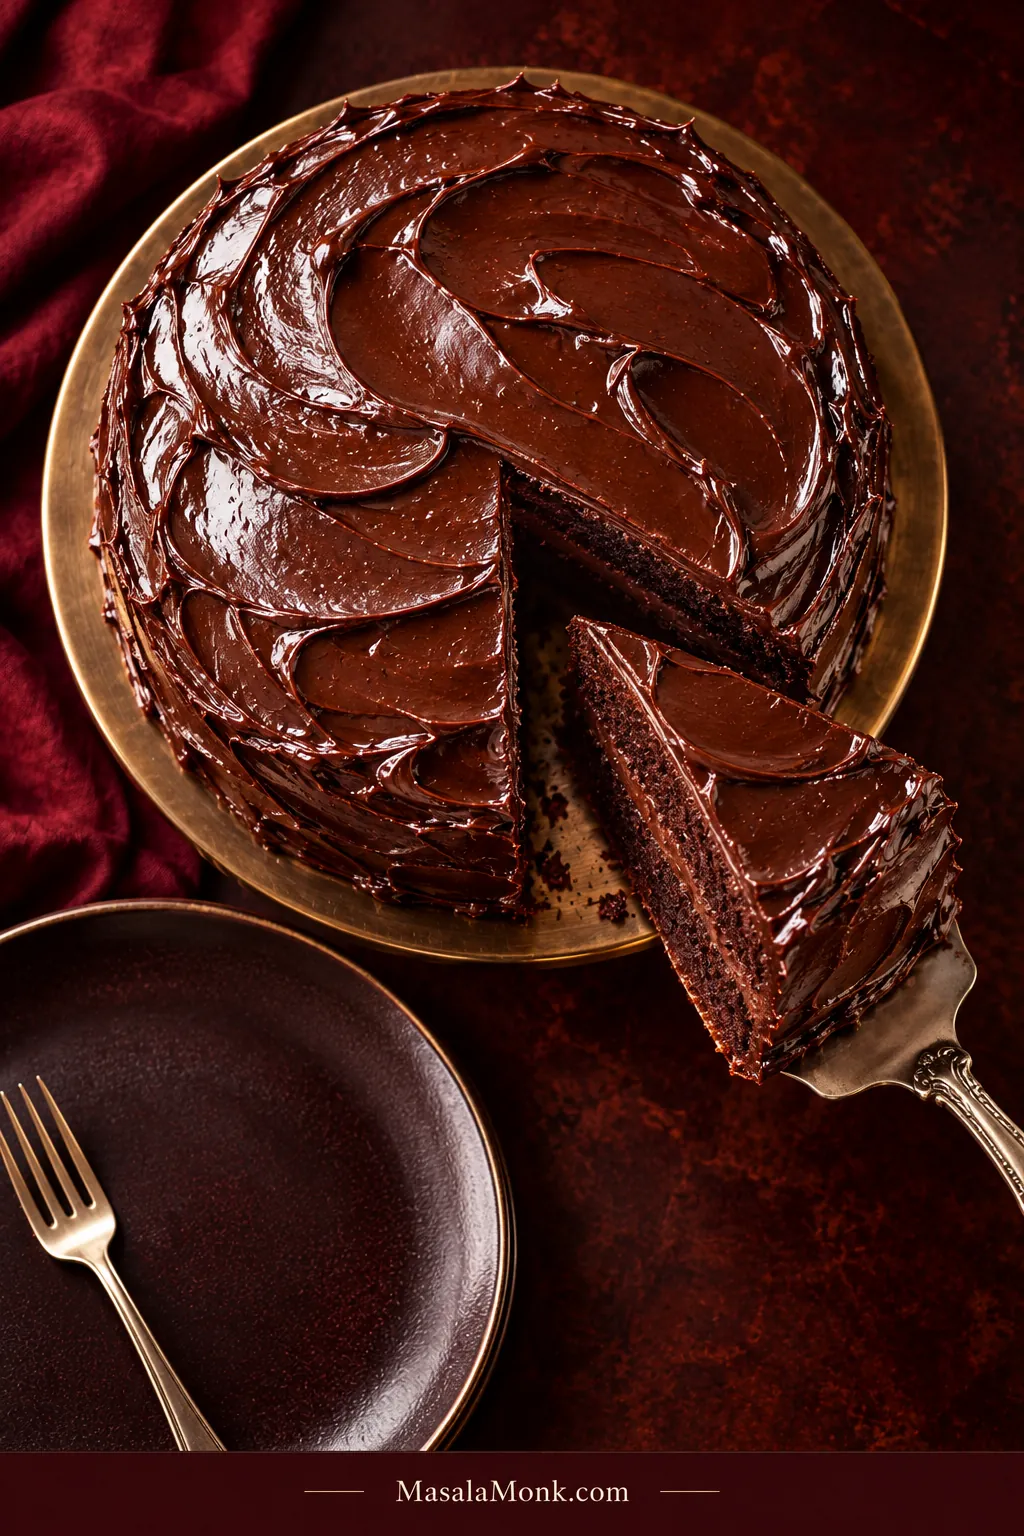
This Matilda cake recipe recreates the chocolate cake from Matilda in all its Bruce Bogtrotter excess: very dark chocolate layers, a deeply moist crumb, a generous chocolate ganache seam through the middle, and glossy chocolate ganache frosting swept generously over the top and sides. The finished cake is intensely chocolatey, with enough structure to stack and slice cleanly.
The batter comes together in one bowl with a whisk; the ganache frosting is the only other component. Oil keeps the crumb soft, buttermilk and sour cream bring richness and body, and hot coffee deepens the cocoa. It is dramatic enough for a birthday or celebration and still manageable in an ordinary home kitchen.
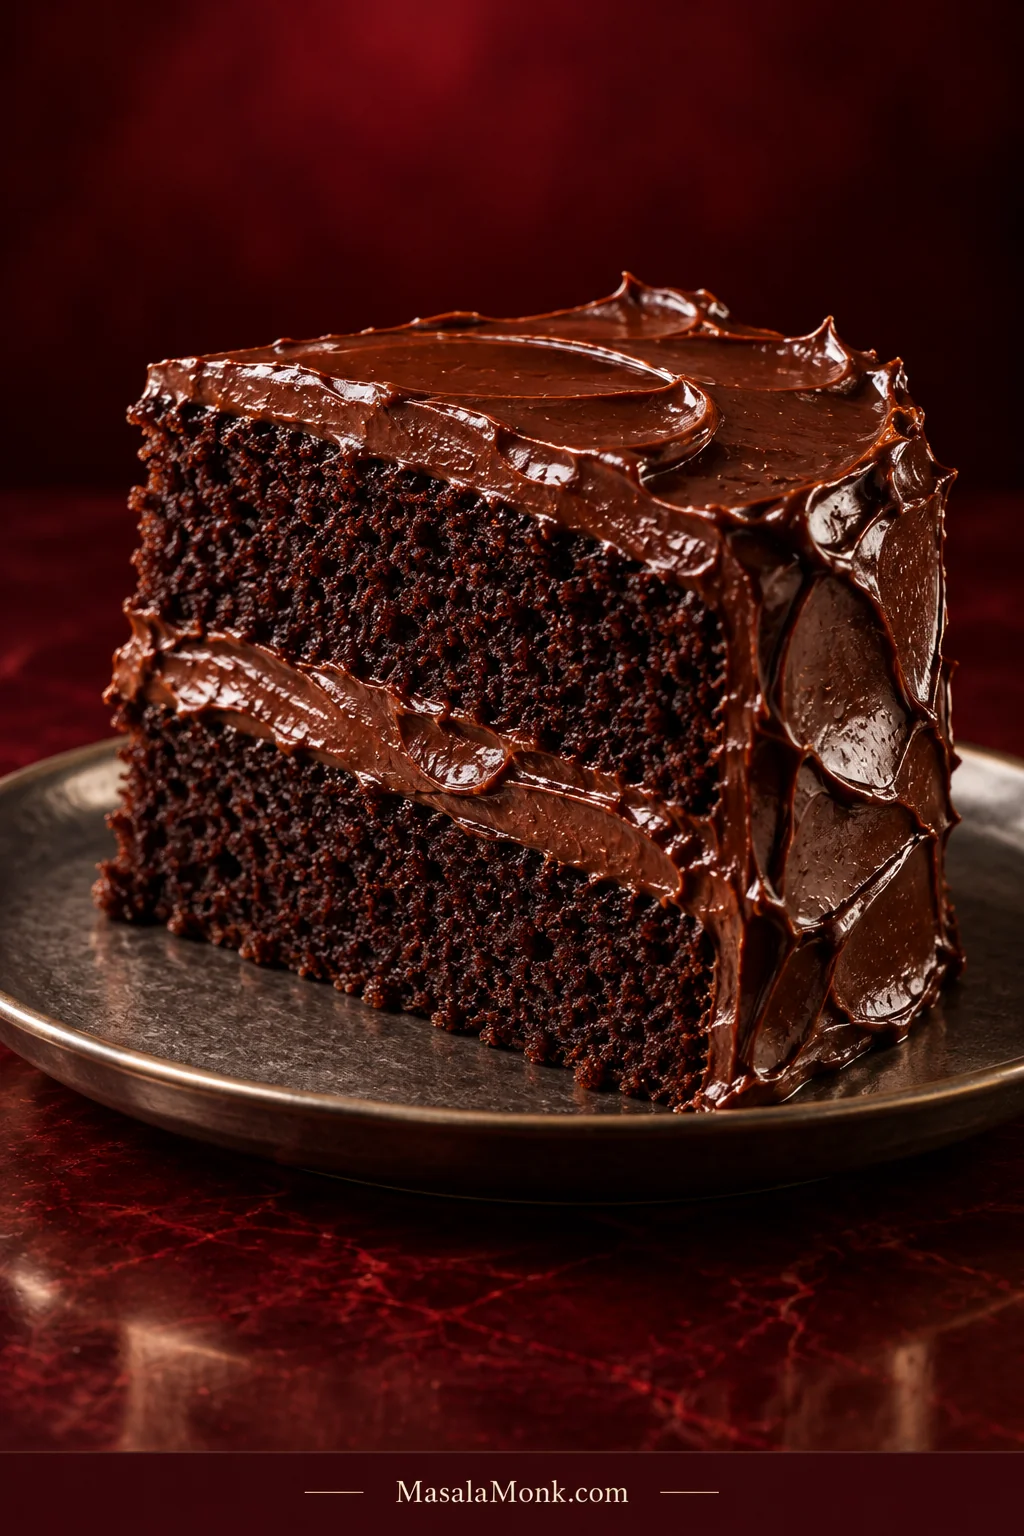
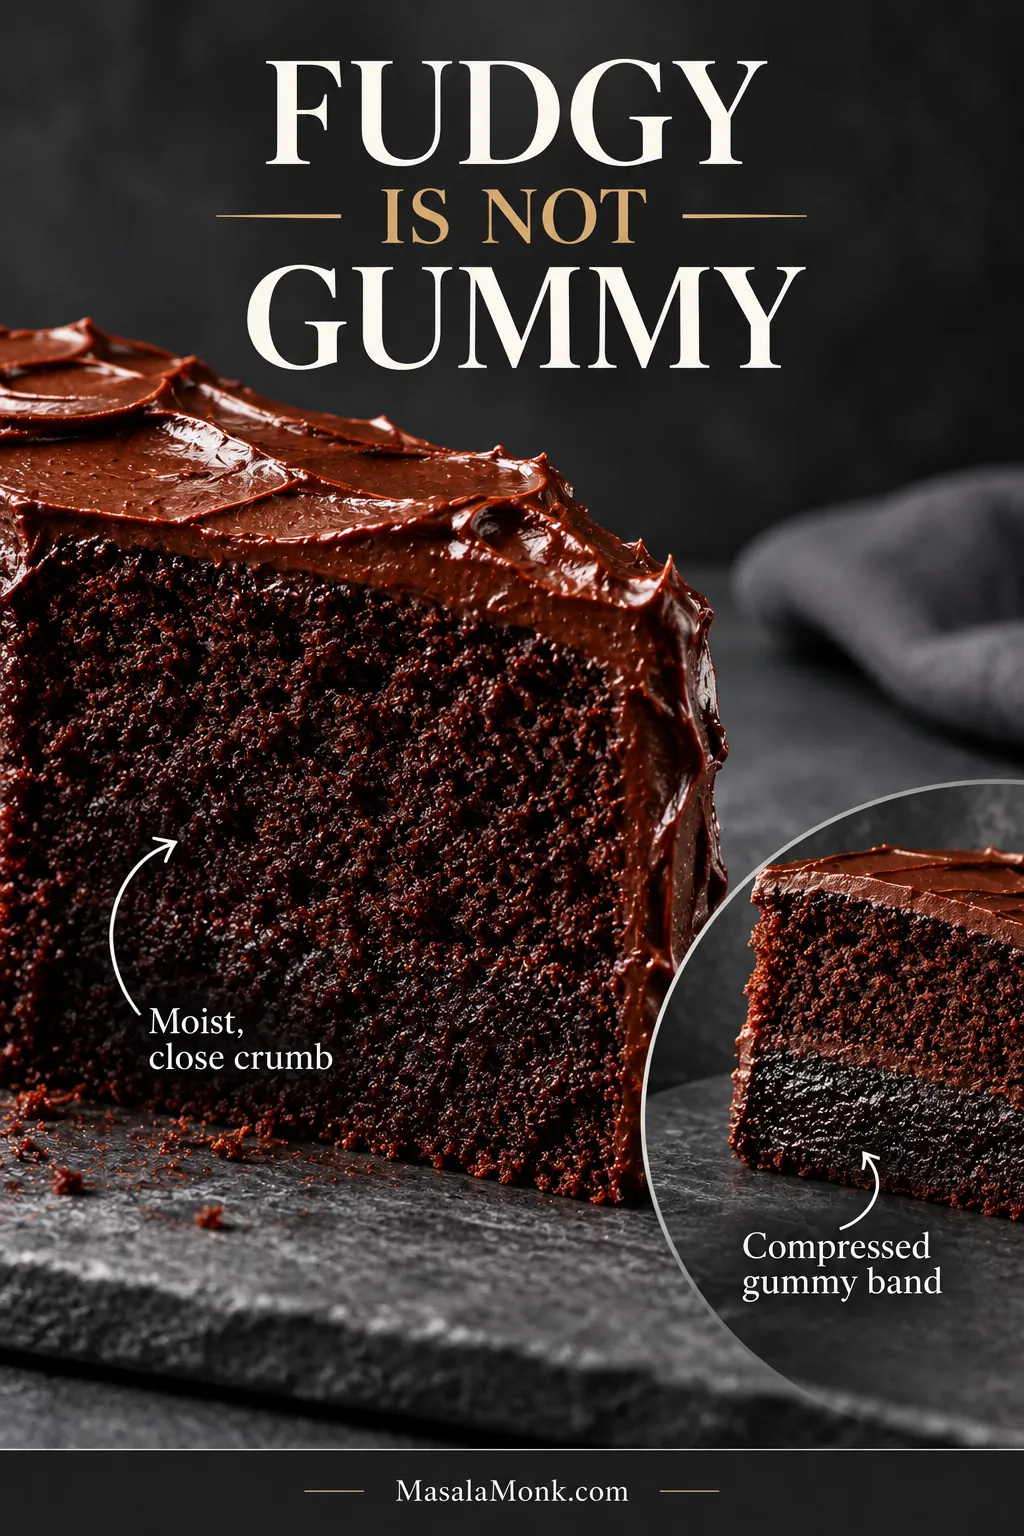
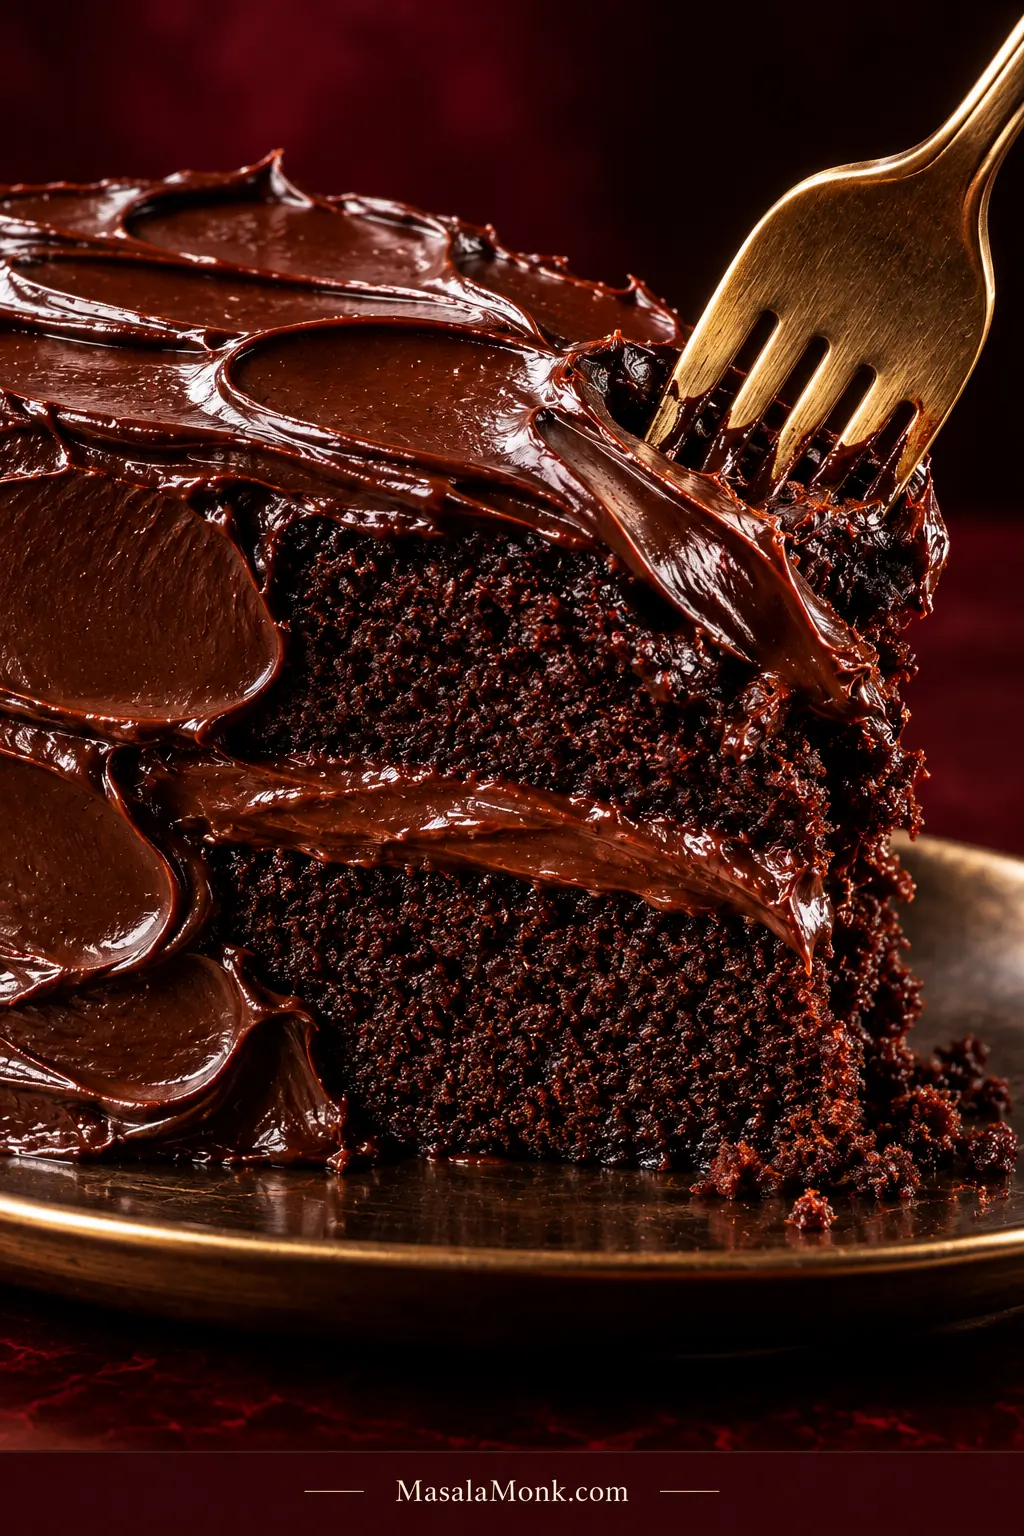
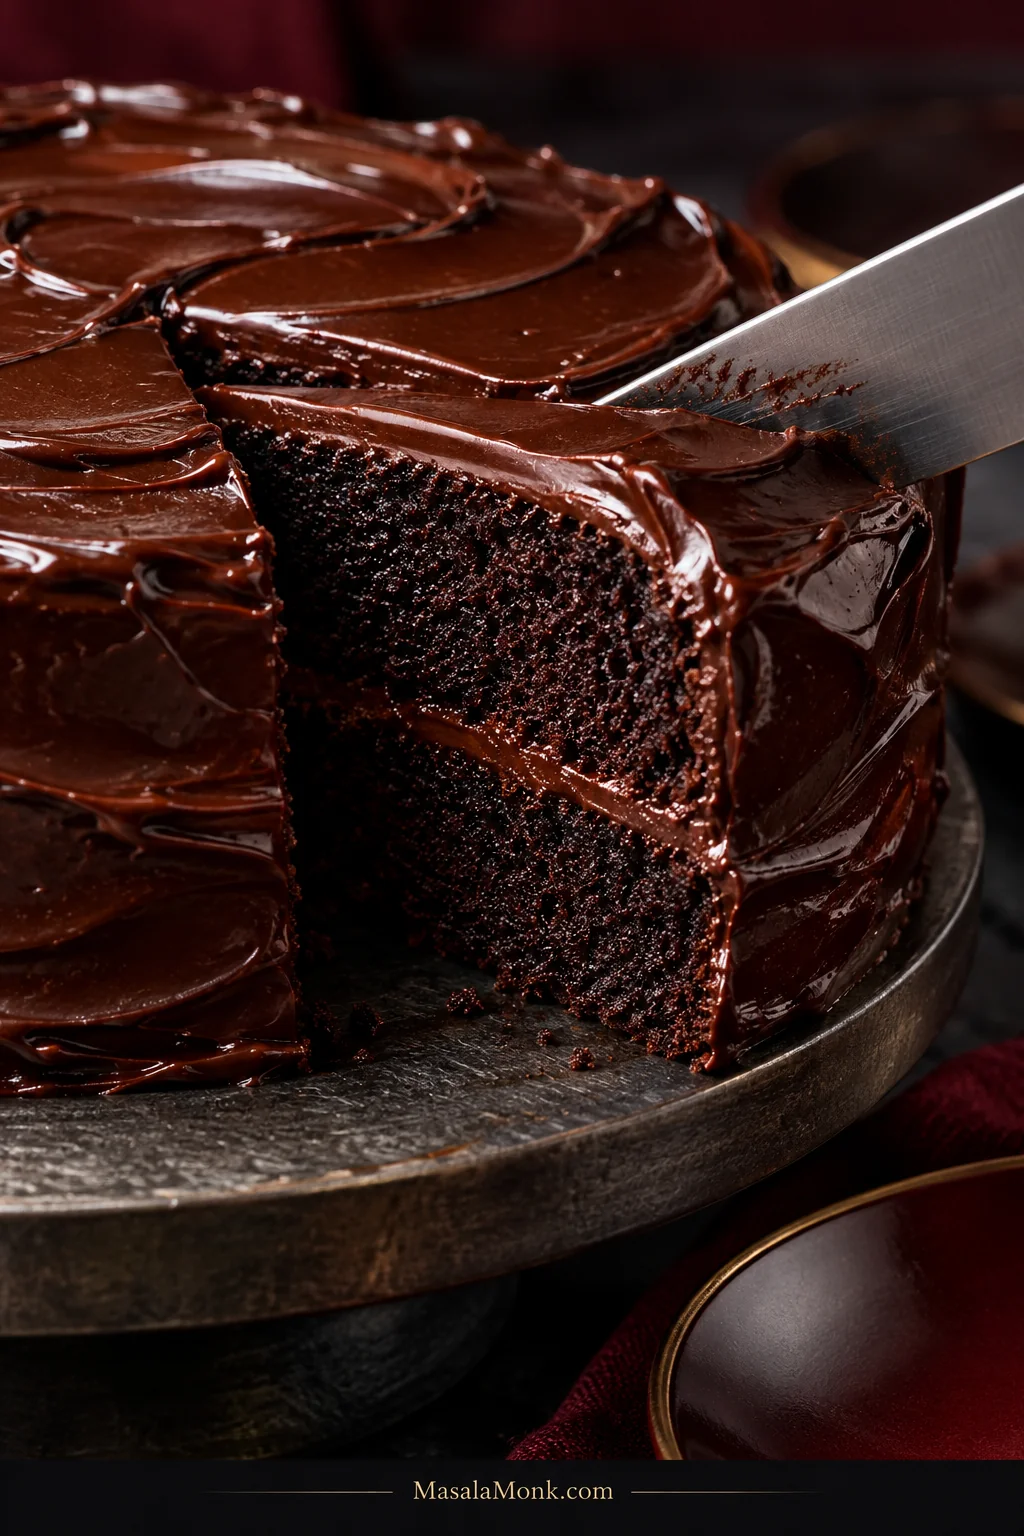
The crumb is close, dark, and almost fudgy, while the ganache stays soft enough to give beneath the fork instead of setting into a hard chocolate shell.
Matilda Cake Recipe
A dark, deeply chocolatey layer cake with a soft, moist crumb and a generous glossy chocolate ganache frosting. The cake stays tender without a soak, and the thick chocolate coating delivers the extravagant Bruce Bogtrotter finish.
Equipment
- Two 8-inch × 2-inch / 20cm × 5cm round metal cake pans
- Parchment paper
- Large mixing bowl
- Balloon whisk and rubber spatula
- Digital kitchen scale, strongly recommended
- Wire cooling rack
- Heatproof bowl and small saucepan
- Offset spatula or broad butter knife
- Electric hand mixer, optional; use briefly on low speed
You do not need a stand mixer. For the most consistent cake, use the gram weights where given; the cup measurements are rounded US-volume equivalents.
Chocolate Cake Ingredients
- 1¾ cups + 1 tablespoon (220g) all-purpose flour
- ¾ cup + 1 tablespoon (70g) Dutch-process cocoa powder
- 1½ teaspoons (6g) baking powder
- 1 teaspoon (5g) baking soda
- 1 teaspoon (5g) fine salt
- 1⅓ cups (270g) granulated sugar
- ⅓ cup packed (70g) light or dark brown sugar
- 3 large eggs, about 150g without shells, room temperature
- ½ cup (120ml) neutral oil, such as canola, vegetable, sunflower, or grapeseed
- ⅔ cup (160ml) buttermilk, room temperature
- ½ cup (120g) full-fat sour cream, room temperature
- 2 teaspoons (10ml) vanilla extract
- ¾ cup (180ml) strong hot coffee, hot decaf coffee, or hot water
Glossy Chocolate Ganache Frosting Ingredients
- 14.1 oz (400g) 55–60% semisweet or dark chocolate, finely chopped
- 1 cup + 2 tablespoons (270ml) heavy cream or heavy whipping cream, ideally 35–36%+ milk fat
- ⅞ cup (100g) powdered sugar (icing sugar), sifted
- 6 tablespoons / 3 oz (85g) unsalted butter, very soft but not greasy
- 1 tablespoon (20g) light corn syrup, optional; omit without replacing
- ¼ teaspoon fine salt
- 1 teaspoon (5ml) vanilla extract
Instructions
Bake the Cake
- Prepare the oven and pans. Heat the oven to 350°F / 175°C conventional or about 320°F / 160°C fan. Grease two 8-inch × 2-inch / 20cm × 5cm round metal pans and line the bottoms with parchment.
- Mix the dry ingredients. Whisk the flour, Dutch-process cocoa, baking powder, baking soda, and salt in a large bowl until the cocoa is evenly dispersed.
- Add the sugars and wet ingredients. Whisk in both sugars. Add the eggs, oil, buttermilk, sour cream, and vanilla, then whisk just until the batter is smooth.
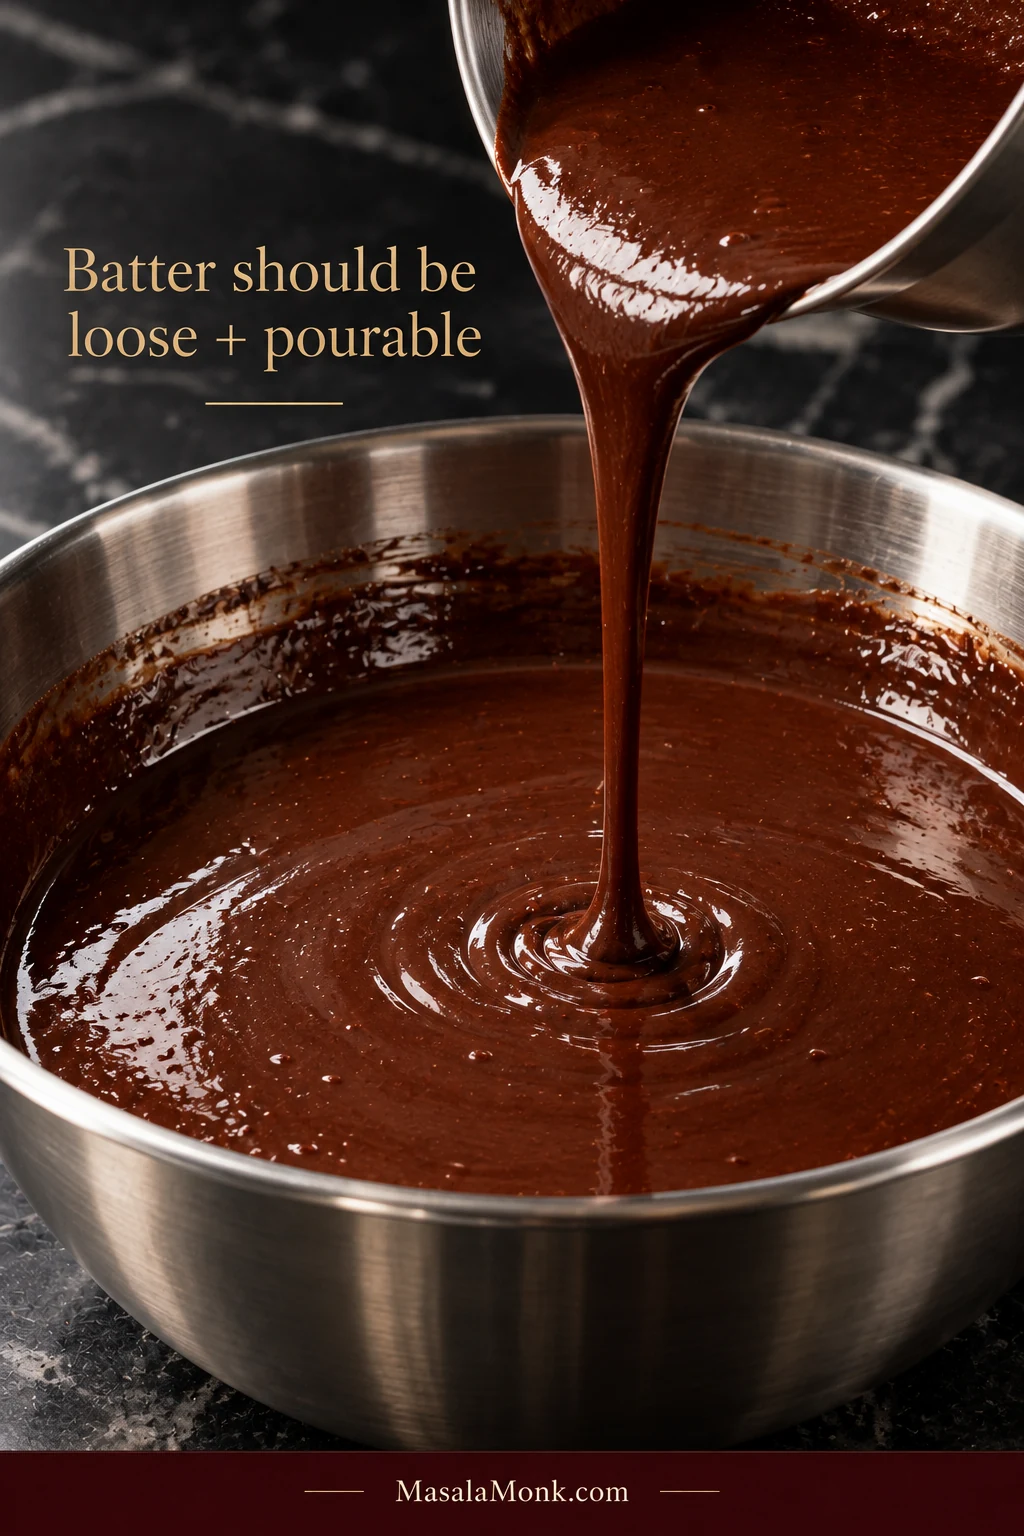
- Add the hot coffee. Pour it in gradually while whisking gently. Expect a loose, pourable batter—much thinner than a traditional butter-cake batter. Adding extra flour here will make the finished cake drier.
- Divide the batter. Aim for roughly 685–690g per pan. Weighing each pan is quicker and more reliable than judging two pans of dark batter by eye.
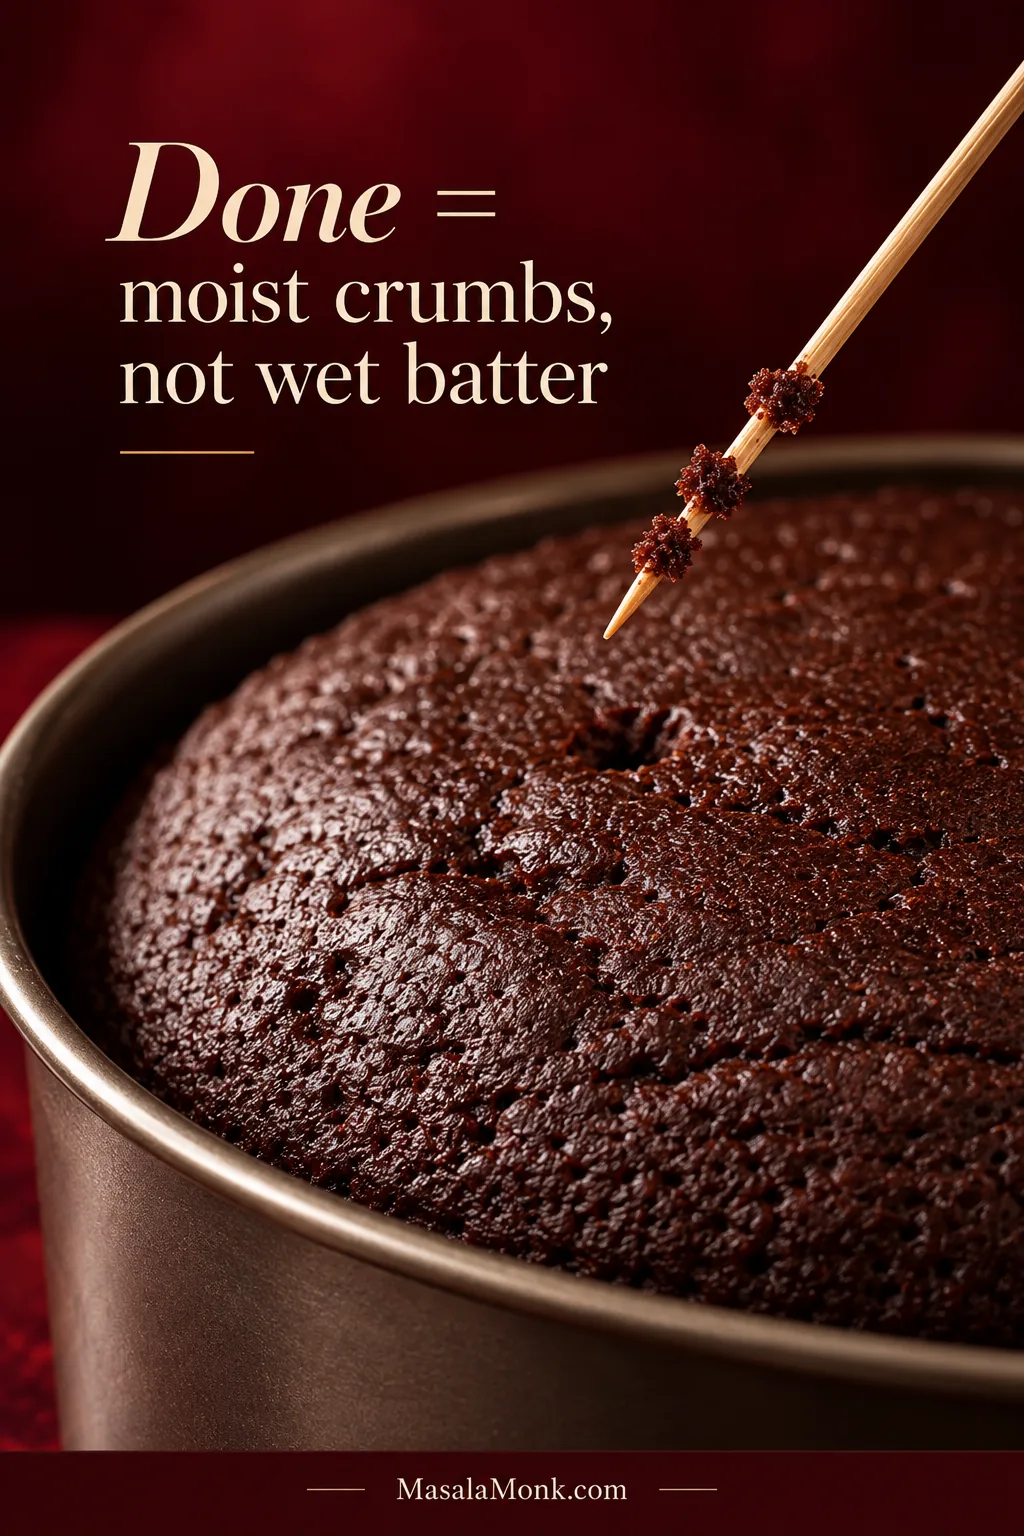
- Bake. Bake for about 32–38 minutes. Start checking at 32 minutes. The cake is ready when the center springs back gently, the edges just begin to release from the pan, and a tester inserted into the middle carries a few moist crumbs but no liquid batter.
- Start cooling the layers. Leave the cakes in their pans for 10 minutes, then turn them onto a wire rack and remove the parchment. Let them cool uncovered until completely cool.
Make the Ganache Frosting
- Make the ganache base while the cakes cool. Put the chopped chocolate in a heatproof bowl. Heat the cream, optional corn syrup, and salt until steaming with small bubbles around the edge. Avoid a hard boil.
- Bring the ganache together. Pour the hot cream over the chocolate and leave it untouched for 3 minutes. Stir slowly in the center until a smooth pool of chocolate forms, then widen the circles until everything comes together. Stir in the vanilla.
- Let the cake and ganache cool together. Leave the ganache at room temperature while the layers finish cooling. It should lose its warmth and begin to thicken while remaining easy to stir. A cool kitchen will move this along faster than a warm one. If it becomes quite firm before the cakes are ready, warm it very gently until easily stirrable again.
- Finish the frosting. Whisk the sifted powdered sugar into the ganache, then add the soft butter a little at a time. Stop when the frosting is dark, smooth, and able to hold a broad swoop. If using an electric mixer, keep it on low; prolonged whipping will make the frosting paler and fluffier.
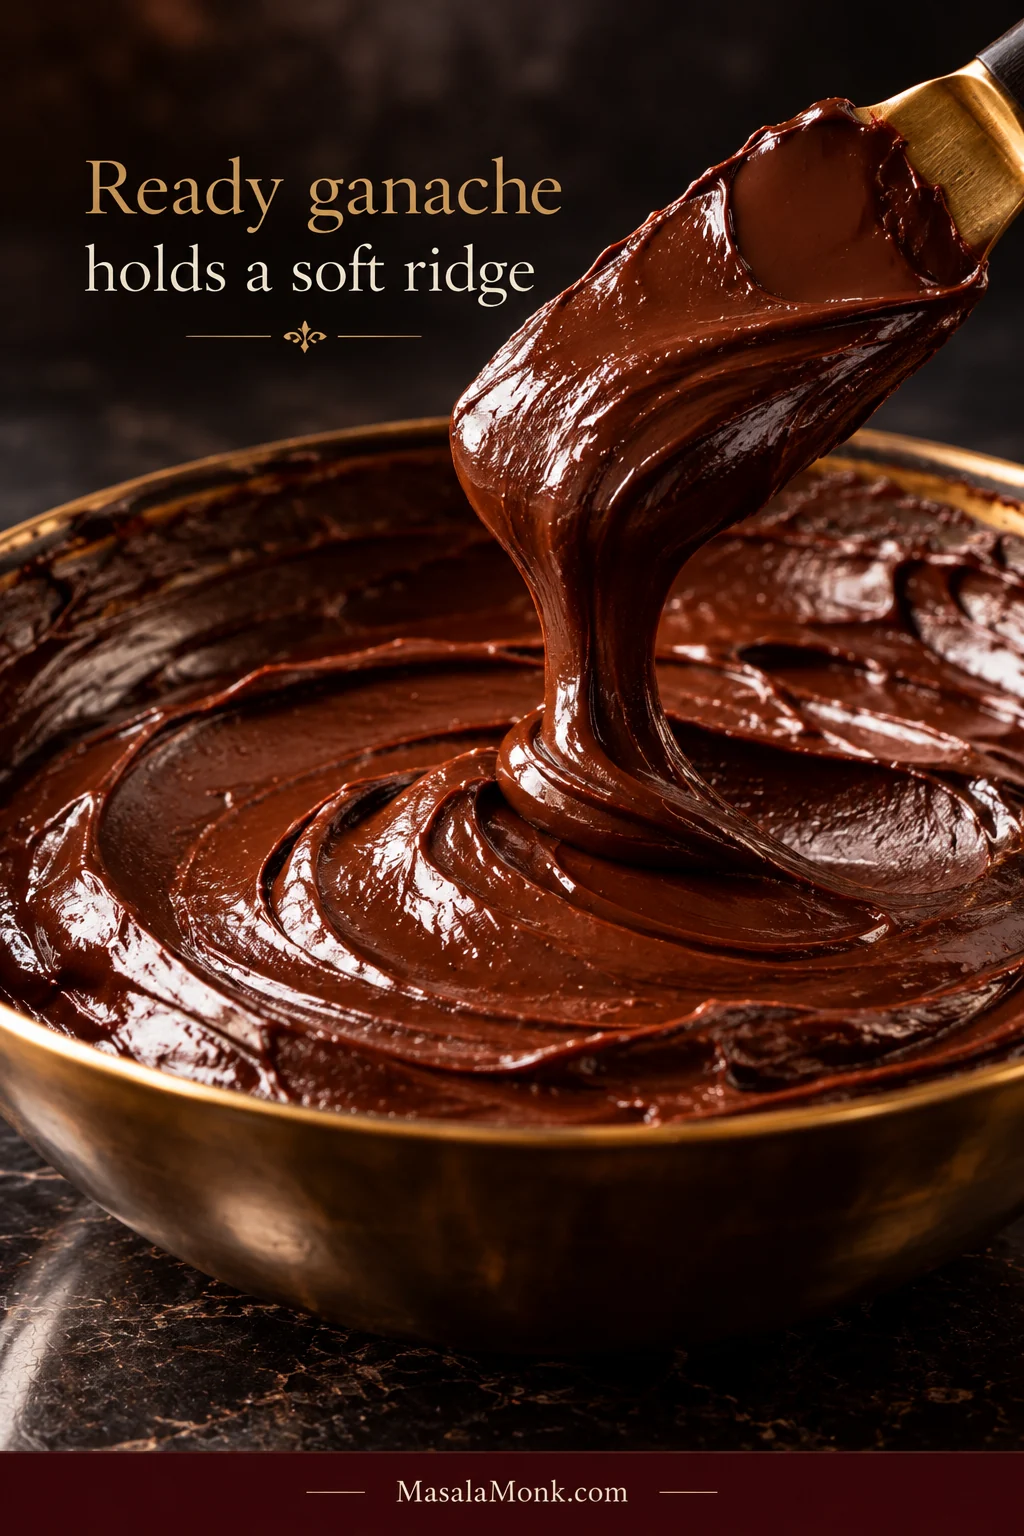
- Check the consistency. Ready frosting falls from the spatula in a thick ribbon and leaves a soft ridge behind. If it still flows, give it more time. If it has become stiff enough to drag, warm it for only a few seconds and stir again.
Assemble, Finish, and Serve
- Prepare the layers. If either cake has a pronounced dome, trim only enough to give the upper layer a steady, level surface.
- Fill the cake. Place the first layer on a serving plate or cake board. Spread about 200–225g frosting over the top, taking it almost to the edge. Add the second layer without pressing down hard.
- Set the stack. Chill for 15–20 minutes. In a warm kitchen, this short pause can be the difference between easy frosting and chasing the top layer around the plate.
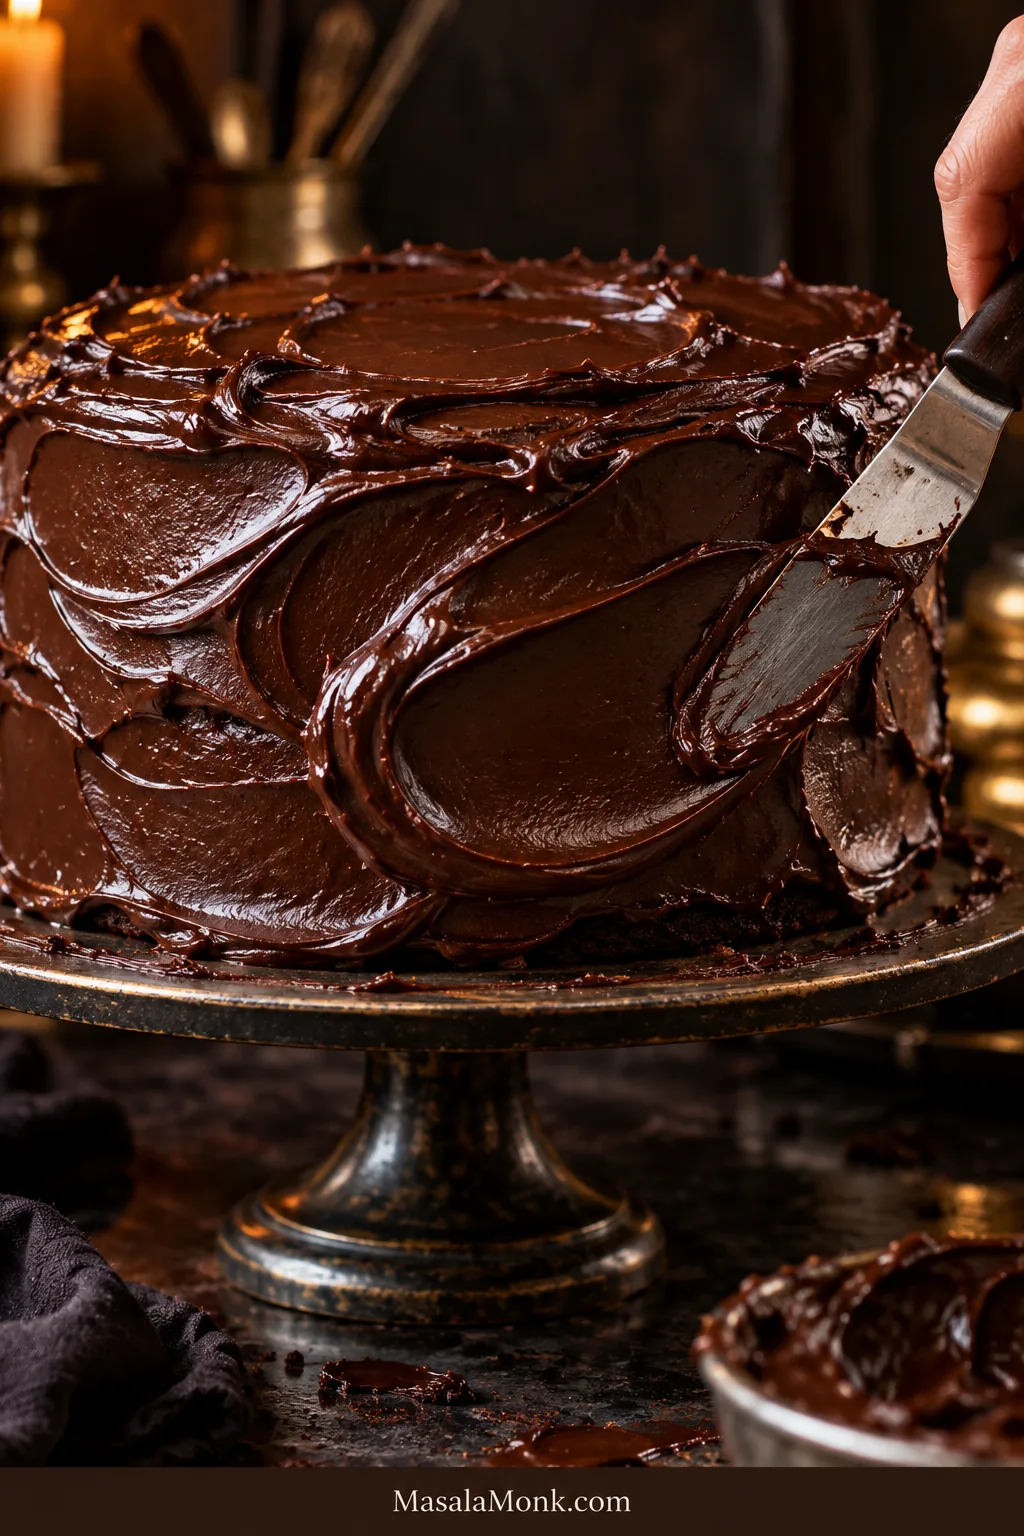
- Finish generously. Spread the remaining frosting over the top and sides. Make broad, imperfect chocolate swoops with the back of an offset spatula. This is not a cake that needs perfectly straight edges.
- Serve. If the cake has been refrigerated, give it about 30–45 minutes at room temperature before slicing. The ganache should soften and the crumb should feel tender again.
Before You Swap Anything
- Cocoa: Stick with Dutch-process cocoa here. Natural cocoa is lighter and more acidic, so a straight swap can change both the color and the rise.
- Coffee: Hot decaf coffee or hot water works at the same volume.
- Chocolate: 55–60% cacao gives deep flavor and softens nicely again once the chilled cake has had time to temper.
- Milk chocolate: It is sweeter and softer. A 1:1 swap will usually give you a sweeter, looser frosting.
- Egg-free or dairy-free: Eggs, buttermilk, and sour cream all contribute to this particular crumb. If you need to remove them, start with one of MasalaMonk’s vegan chocolate cake recipes rather than rebuilding all three parts of this batter at once.
What Makes It Matilda Cake?
Matilda cake, also called Bruce Bogtrotter cake, is the dark, extravagant chocolate cake inspired by Bruce’s famous cake scene in the 1996 film Matilda, usually recreated with moist chocolate layers and a thick ganache or fudge-style frosting.
Roald Dahl’s Revolting Recipes includes its own Bruce Bogtrotter chocolate cake, although it differs from the towering screen versions people tend to picture today. For the 2022 Matilda the Musical film, Juliet Sear created the Bruce Bogtrotter cake, and her published home version uses two 8-inch chocolate layers with a ganache-based frosting. That two-layer approach gives us plenty of drama without making the finished cake needlessly difficult to handle.
You may also have seen the name attached to Parker’s Matilda Cake in Dubai, served with chocolate sponge, crunchy chocolate flakes, and chocolate sauce. Here, we’re staying with the Bruce Bogtrotter-style layer cake.
How Matilda Cake Stays Moist Without Turning Gummy
Oil, buttermilk, and sour cream work together to keep the crumb soft and rich. Dividing that moist batter between two relatively shallow pans lets the centers set before the edges have time to dry out.
Dutch-process cocoa brings the dark color and deep chocolate flavor. Hot coffee intensifies the cocoa; in the finished cake, it should read as chocolate rather than distinctly of coffee.
Cocoa choice also affects how the batter rises, which is why the recipe specifies Dutch-process rather than treating every cocoa as interchangeable. King Arthur has a useful explanation of Dutch-process versus natural cocoa if you want a deeper look at the difference.
Pan Depth Matters More Than Another Timer
This recipe is designed for two 8-inch × 2-inch / 20cm × 5cm round pans. Pouring all of this high-moisture batter into one very deep pan makes dry edges and an underdone center much more likely because heat has farther to travel before the middle sets.
Does Matilda cake need a soak? No. This cake stays moist without one. Some modern and viral versions soak their layers with chocolate milk, coffee syrup, or another sweet liquid; they are taking a different route to an especially lush cake.
If what you want is a cake built around soaking, Tres Leches Cake is designed for exactly that.
Read the Cake at Three Stages
The timer gets you close. The batter and cake tell you when you are actually there.
| Stage | What success looks like |
|---|---|
| Batter | Smooth, glossy, loose, and pourable after the hot coffee goes in. It should be much thinner than a butter-cake batter. |
| Baked layer | The center springs back gently and a tester carries a few moist crumbs, with no shiny liquid batter. |
| Cooled layer | Soft under your fingers, yet sturdy enough to lift and stack without sagging or tearing. |
A fudgy crumb still has to be baked through. A genuinely liquid center belongs to a different dessert, like Chocolate Lava Cake. Here, a few damp crumbs are fine; shiny wet batter is not.
A dense, gluey strip near the bottom is different again. Too much leavener, inaccurate measurements, or uneven mixing can leave part of the crumb compressed and gummy. Extra oven time will not necessarily fix that; it may simply dry out the cake around it.
Bake Today, Finish Tomorrow
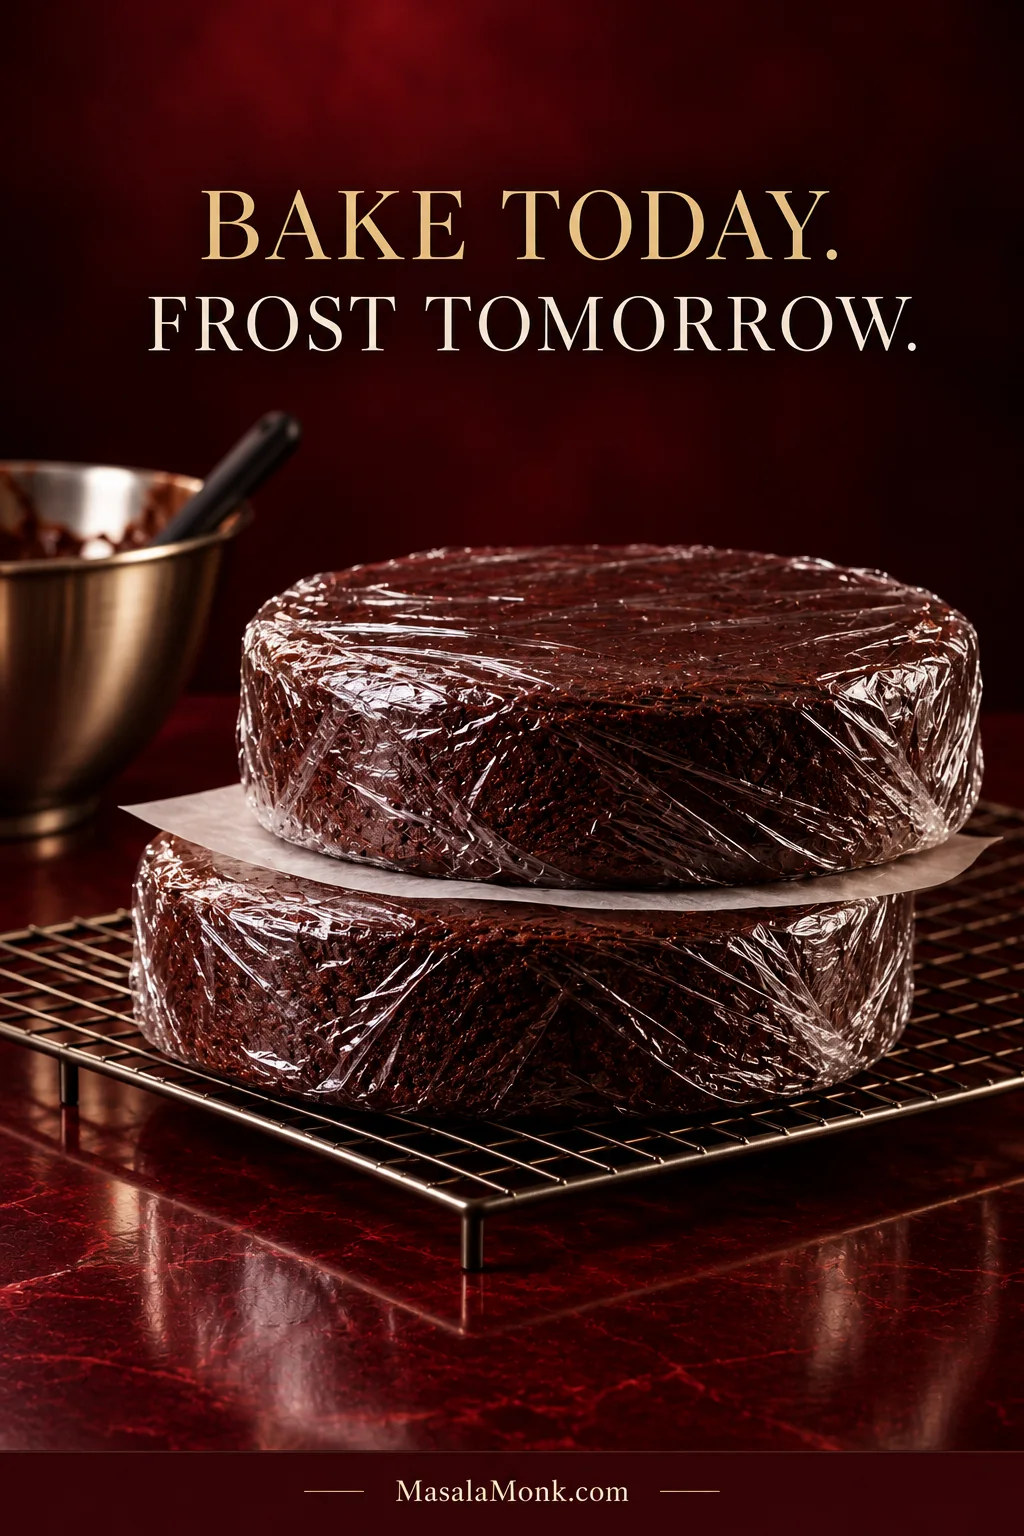
Day 1 — bake, cool, and wrap. Let the layers cool completely, then wrap them well. Keep the wrapped layers at cool room temperature overnight. If your kitchen is very warm, refrigerate them instead; let them lose the hard refrigerator chill, still wrapped, before assembly.
Day 2 — frost and assemble. Make the ganache frosting, wait until it reaches the thick spreadable stage, fill the cake, give the stack its short chill, then finish the outside.
If everything has to happen in one day, make the ganache while the cake layers cool. The part not to rush is the cake itself. A layer that still feels warm in the center is not ready for chocolate frosting, no matter how late the afternoon is getting.
The Ganache Frosting Has a Working Window
Chocolate and cream form the base. Powdered sugar gives the frosting a little more body; soft butter makes it plush and easy to sweep over the cake.
Ready frosting holds a soft ridge on the spatula. Watch the texture rather than the clock. Once you know what that consistency looks like, the frosting is much less fussy than a fixed cooling time would make it seem. A warm kitchen slows the thickening; a cool one speeds it up.
| Frosting state | What it means |
|---|---|
| Too warm | It flows and quickly loses its shape. Leave it a little longer and stir occasionally. |
| Ready | It falls in a thick ribbon, holds a soft mound, and keeps a broad swoop. Use it now. |
| Too cold | It drags through the bowl or starts pulling crumbs from the cake. Warm it for a few seconds and stir again. |
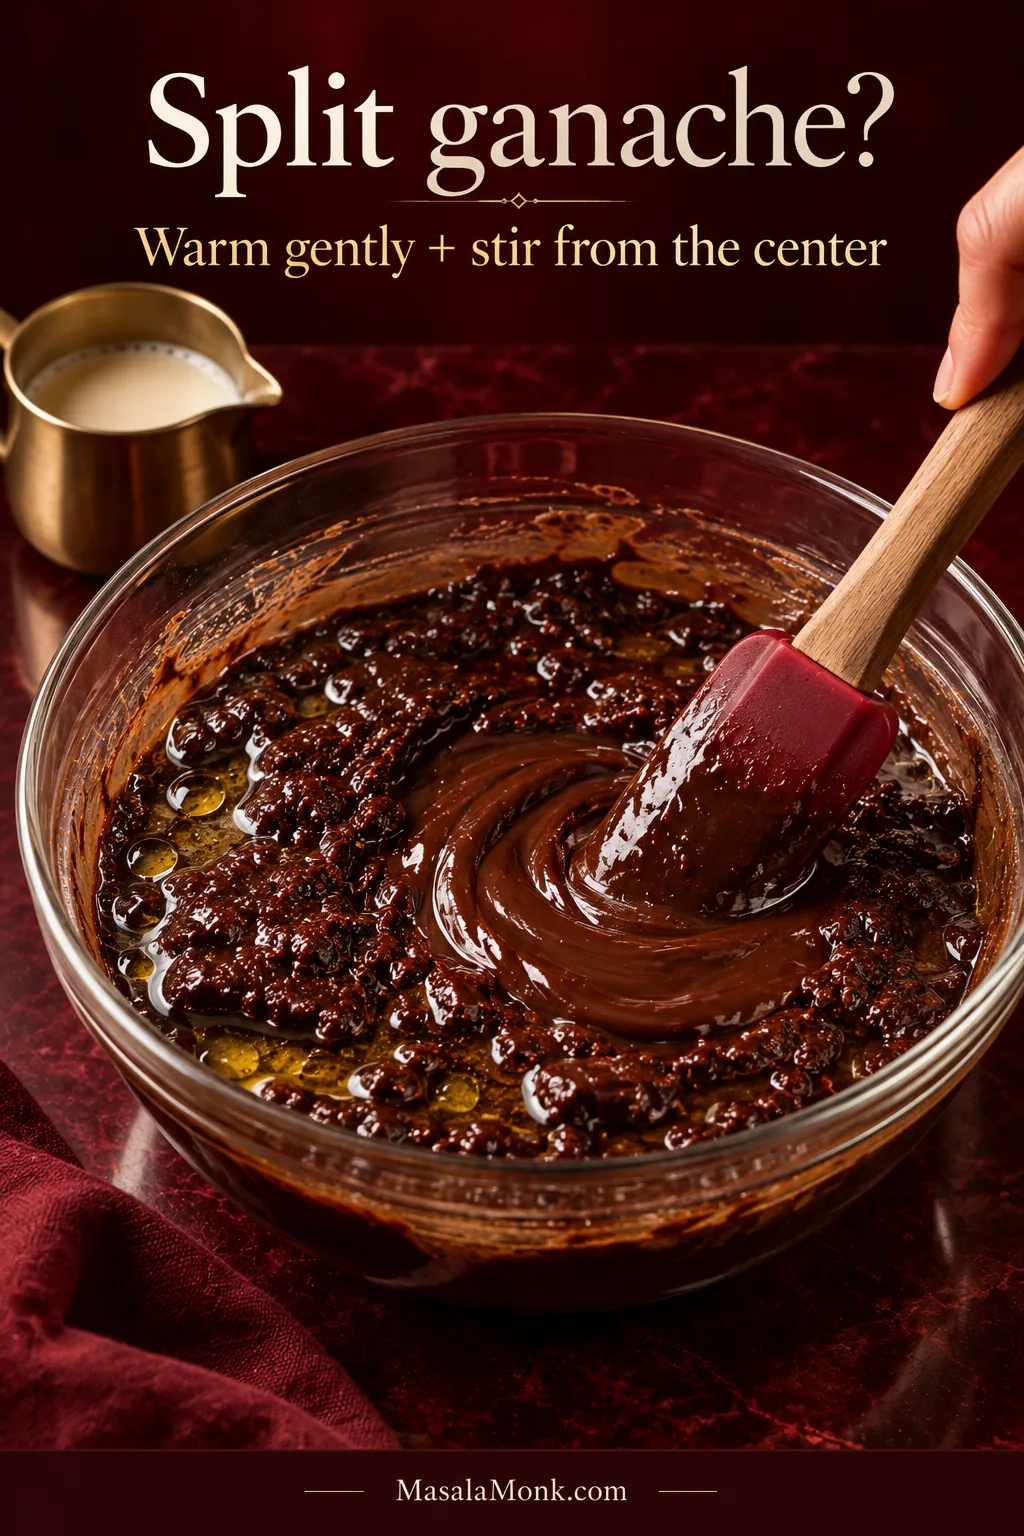
| Broken | The ganache base looks oily or separated rather than uniformly glossy. Use the split-ganache rescue in the troubleshooting section. |
Chocolate around 55–60% cacao gives plenty of depth and softens nicely again after refrigeration. Finely chopped bars or couverture also melt more predictably than many baking chips, which are made to retain more of their shape.
The frosting is shiniest when freshly mixed and spread. As the chocolate settles, that gloss naturally softens toward a rich satin sheen. The optional corn syrup adds a little extra gloss and helps the ganache stay supple after chilling; you can leave it out without replacing it.
Stack the Cake While Both Parts Are Ready
If either cake has a pronounced dome, trim it first. An uneven layer is much simpler to fix before 200g of soft chocolate is sitting on top of it.
About 200–225g frosting in the middle gives you a generous filling and keeps the upper layer stable. Once the second layer is in place, chill the stack for 15–20 minutes so the center has time to settle.
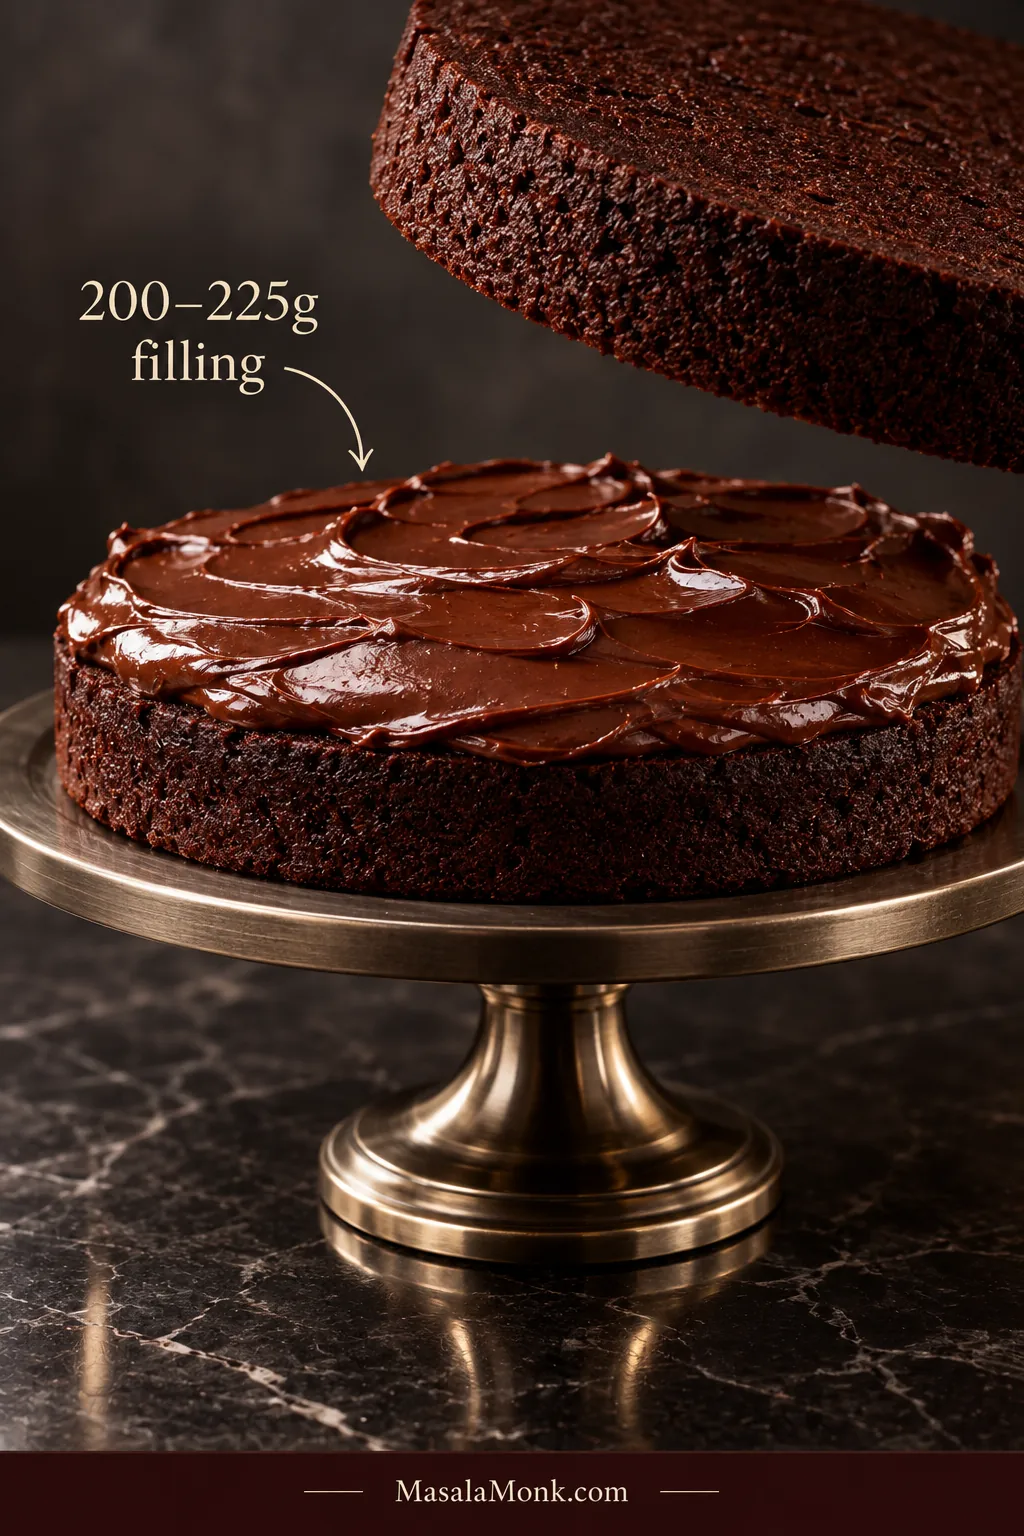
Then cover the cake generously. Broad, loose chocolate swoops suit it far better than razor-straight buttercream walls or delicate piping. The Bruce Bogtrotter effect comes from abundance, not precision.
This is one cake worth bringing to the table whole. When you cut the first wedge, the frosting should pull slightly against the knife before giving way to a dark, close crumb and that generous chocolate seam through the middle.
When the Matilda Cake Goes Sideways
Start with what you can see. Most problems point back to temperature, measurements, pan depth, or timing.
| Problem | Likely cause + fix |
|---|---|
| Batter looks watery | That is expected once the hot coffee is mixed in. Keep going; adding flour now will leave the finished cake drier. |
| Cake is dry or crumbly | Too much flour, too much oven time, or an oven running hot are the usual causes. Weigh the flour and begin checking sooner. |
| Center is visibly wet | The middle has not finished baking. Continue in short increments and judge the actual center rather than the edges. |
| Dense gummy strip near the bottom | Recheck the measurements, mixing, and leaveners. Too much leavener or uneven mixing can create a gummy band, as can an underbaked center. |
| Center sank | The middle may not have been fully set, or the oven may have been opened too early. Look for gentle springback, slight edge release, and moist crumbs before removing the pans. |
| Frosting is runny | It is usually still too warm. Give it more time and stir occasionally before changing anything. If it remains unusually loose once cool, recheck the chocolate and cream amounts. |
| Frosting is too firm or starts dragging | It has cooled too far, the cake is ice-cold, or the chocolate is much darker than specified. Warm the frosting briefly and let very cold layers lose some chill. |
| Ganache base is greasy or split | If the ganache stays greasy or separated, use the split-ganache rescue below. |
| Layers slide | The cake or filling is too warm, a layer is badly domed, or there is too much soft filling. Level if needed and chill the stack before continuing; see Stack the Cake for the assembly cues. |
How to Fix Split Chocolate Ganache
A split ganache is usually fixable. Warm it gently and stir from the center. A teaspoon of warm cream can help a stubborn split come back together; an immersion blender can also help if you keep the head submerged and avoid beating in air.
Storage, Freezing, and Serving Matilda Cake
Matilda cake is best served after it has lost the hard refrigerator chill. Give a whole cake or large portion about 30–45 minutes before slicing, until the ganache feels supple and the crumb feels tender again. Individual slices usually soften faster.
Refrigerator: Keep the assembled cake covered and use it within about 5 days for the best texture and flavor.
For clean slices: Warm a long sharp knife under hot water, wipe it completely dry, then cut. Rewarm and wipe the blade between portions when you want especially neat layers.
Freeze unfrosted layers: Cool them completely, wrap tightly, and freeze for up to 3 months. Thaw while still wrapped so most condensation collects on the wrapping rather than directly on the cake.
Freeze finished slices: Wrap individual portions well and use within about 2 months for the best quality. Thaw in the refrigerator, then let the chocolate soften closer to room temperature before eating.
The finished cake should look a little excessive and eat much softer than it looks: tender dark chocolate cake under a generous coat of ganache that gives softly beneath the fork. That is the sweet spot here—all the Bruce Bogtrotter drama, with a cake that stays moist, slices cleanly, and tastes every bit as rich as it looks.








