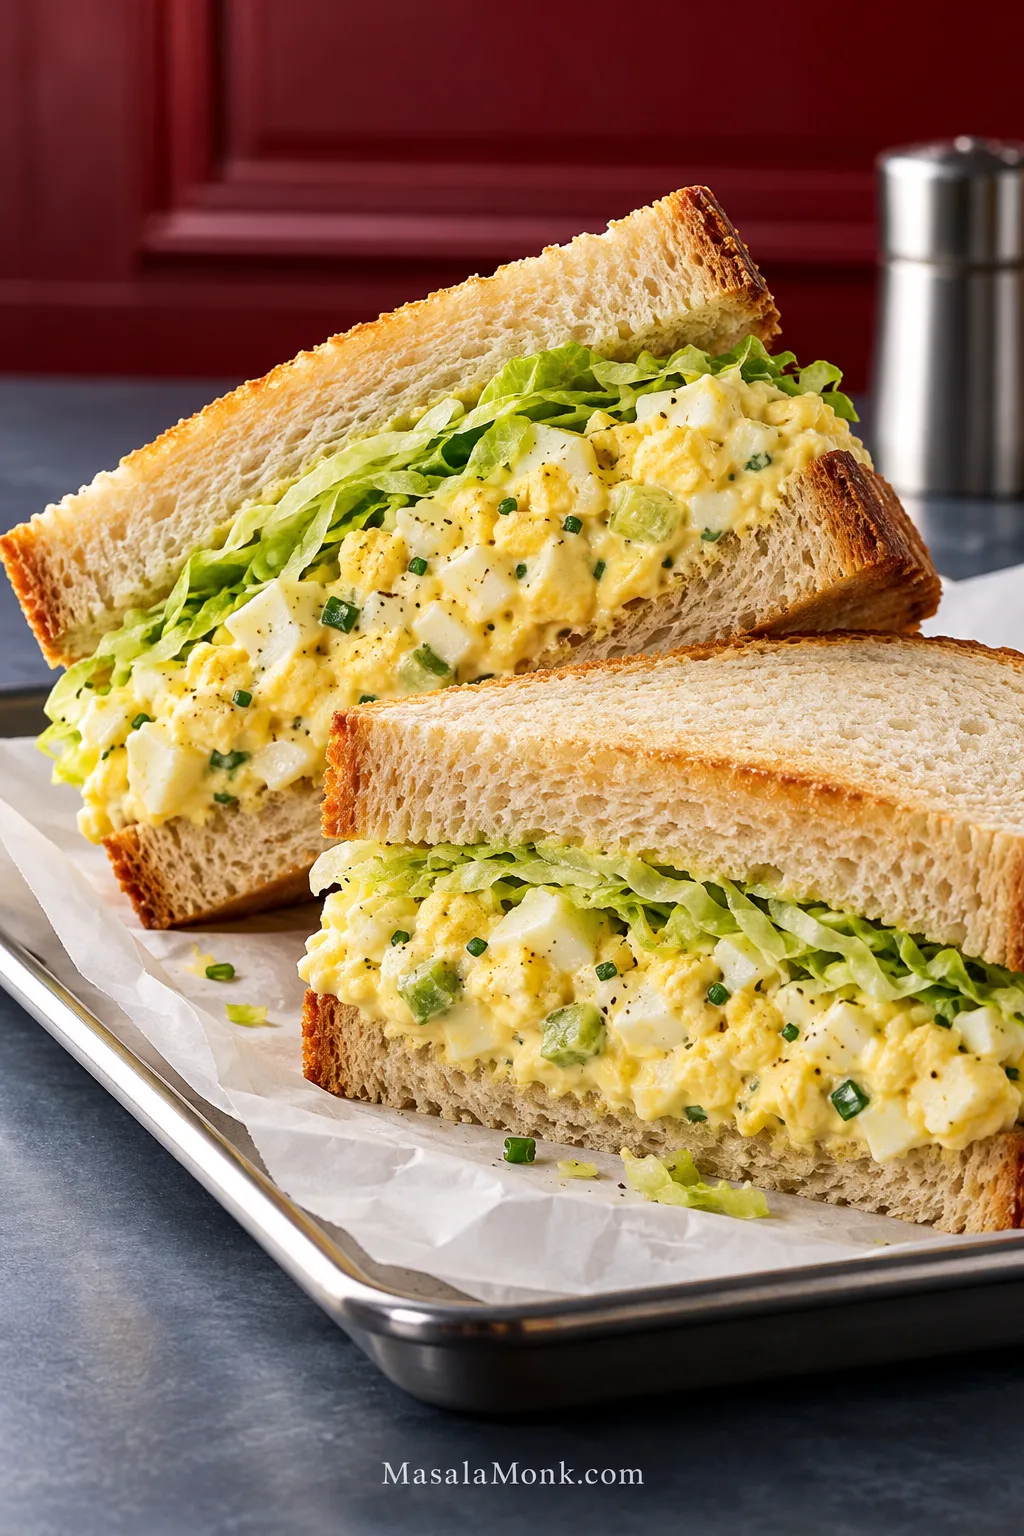
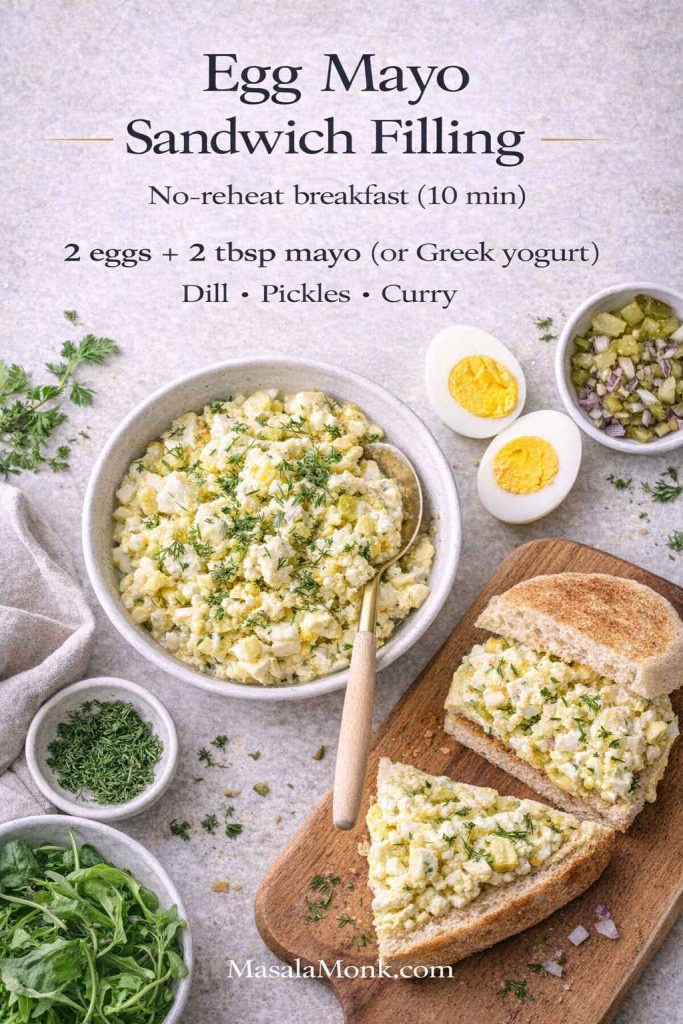
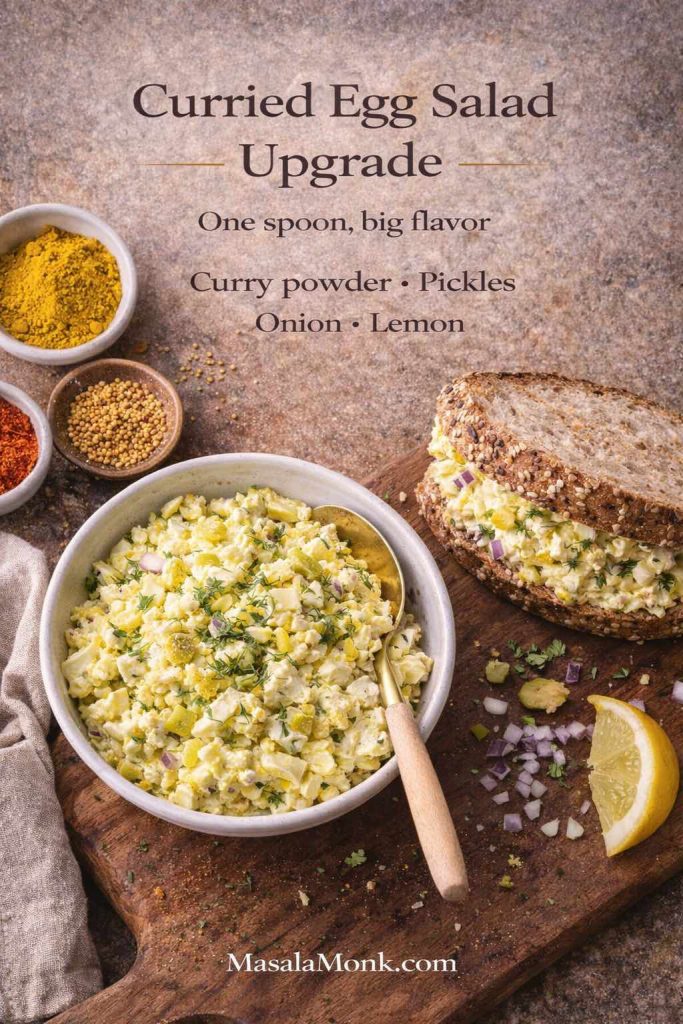
A good egg salad sandwich is one of those lunches that doesn’t need much: tender eggs, a creamy dressing, a little crunch and bread you actually want to eat. The filling should stay cool and soft inside the sandwich, with enough tang to keep it lively and enough texture that you can still tell you’re eating eggs.
This easy egg salad recipe gets its creaminess from more than mayonnaise. Two cooked yolks are mashed into the dressing first, then the remaining eggs are chopped and folded in. The dressing gets richer and thicker while the whites stay in distinct, tender pieces.
Keep it classic, add dill pickle or relish, leave out the celery or mustard, or scale the batch to whatever number of hard-boiled eggs happen to be in the fridge. If the eggs are already cooked and chilled, lunch is about 10 minutes away.
With 6 large eggs, begin with ¼ cup (60 ml / about 60 g) mayonnaise. Mash two yolks into the dressing, then fold in the chopped eggs. Leave the extra spoonful of mayo alone until everything else is mixed.
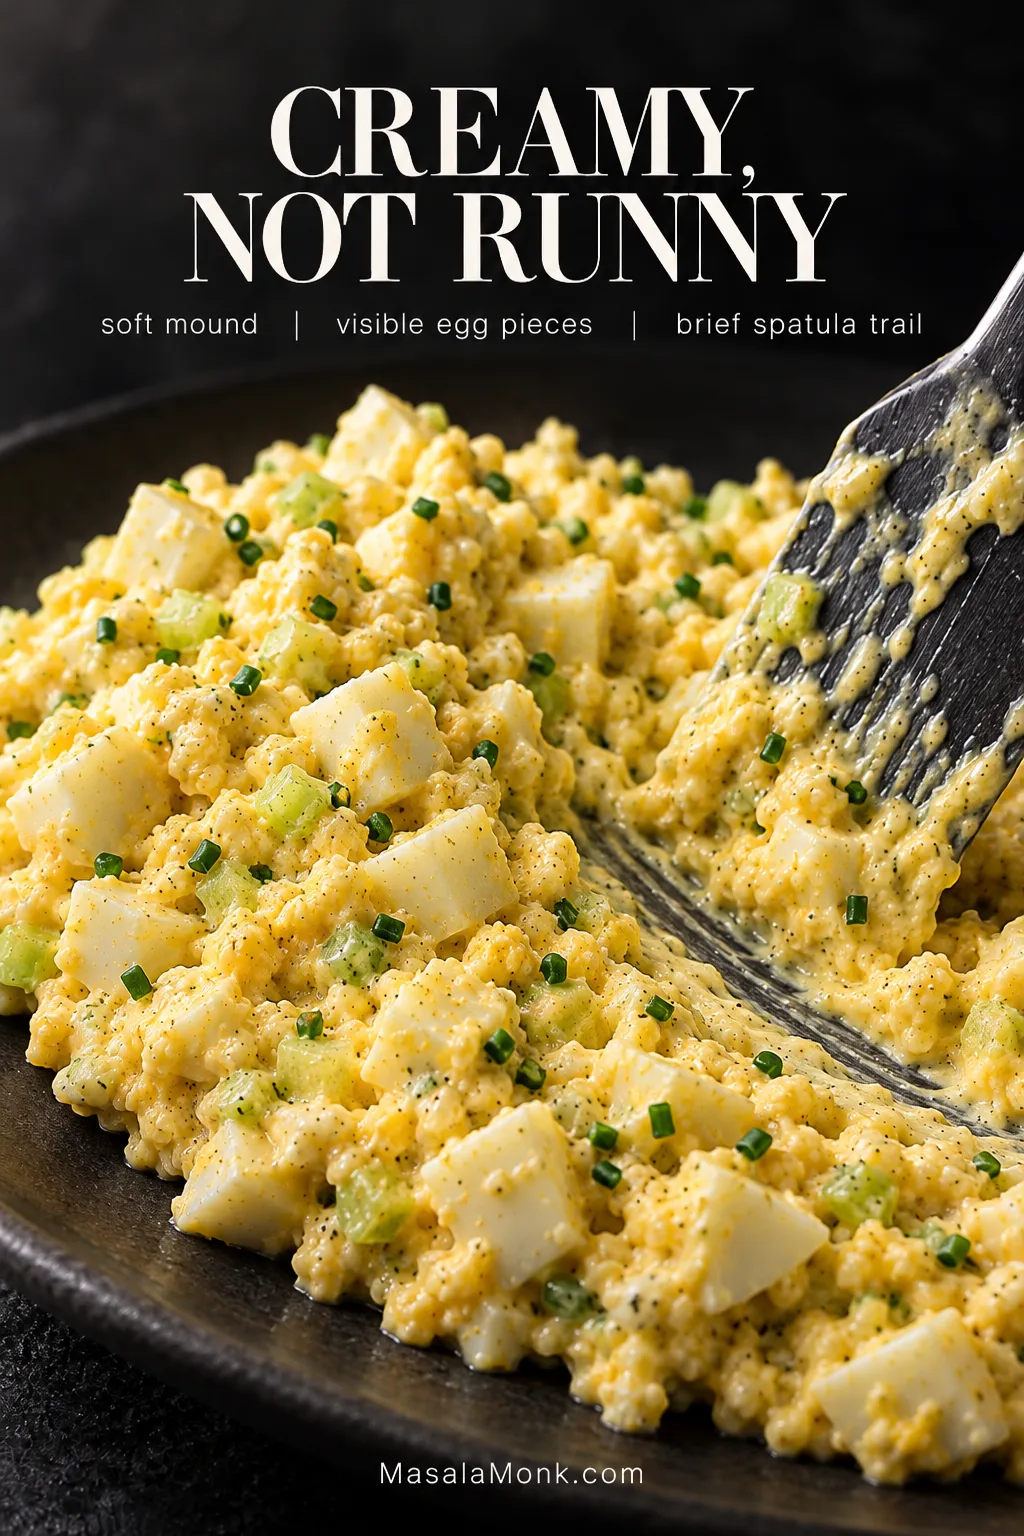
What success looks like: the salad should sit in a soft mound on a spoon. Pieces of egg white should still be obvious, yet the filling should spread easily. Drag a spatula through the mixture and you should see the path for a moment before the salad slowly settles back.
Once the dressing already connects the egg pieces, another spoonful can blur their definition instead of improving the salad. Check the texture after mixing before adding more.
Already have hard-boiled eggs? Use 6 large cooked, completely chilled eggs and go straight to the dressing. You can eat the salad immediately; a short chill simply makes the filling a little firmer for sandwiches.
Easy, Creamy Egg Salad Recipe
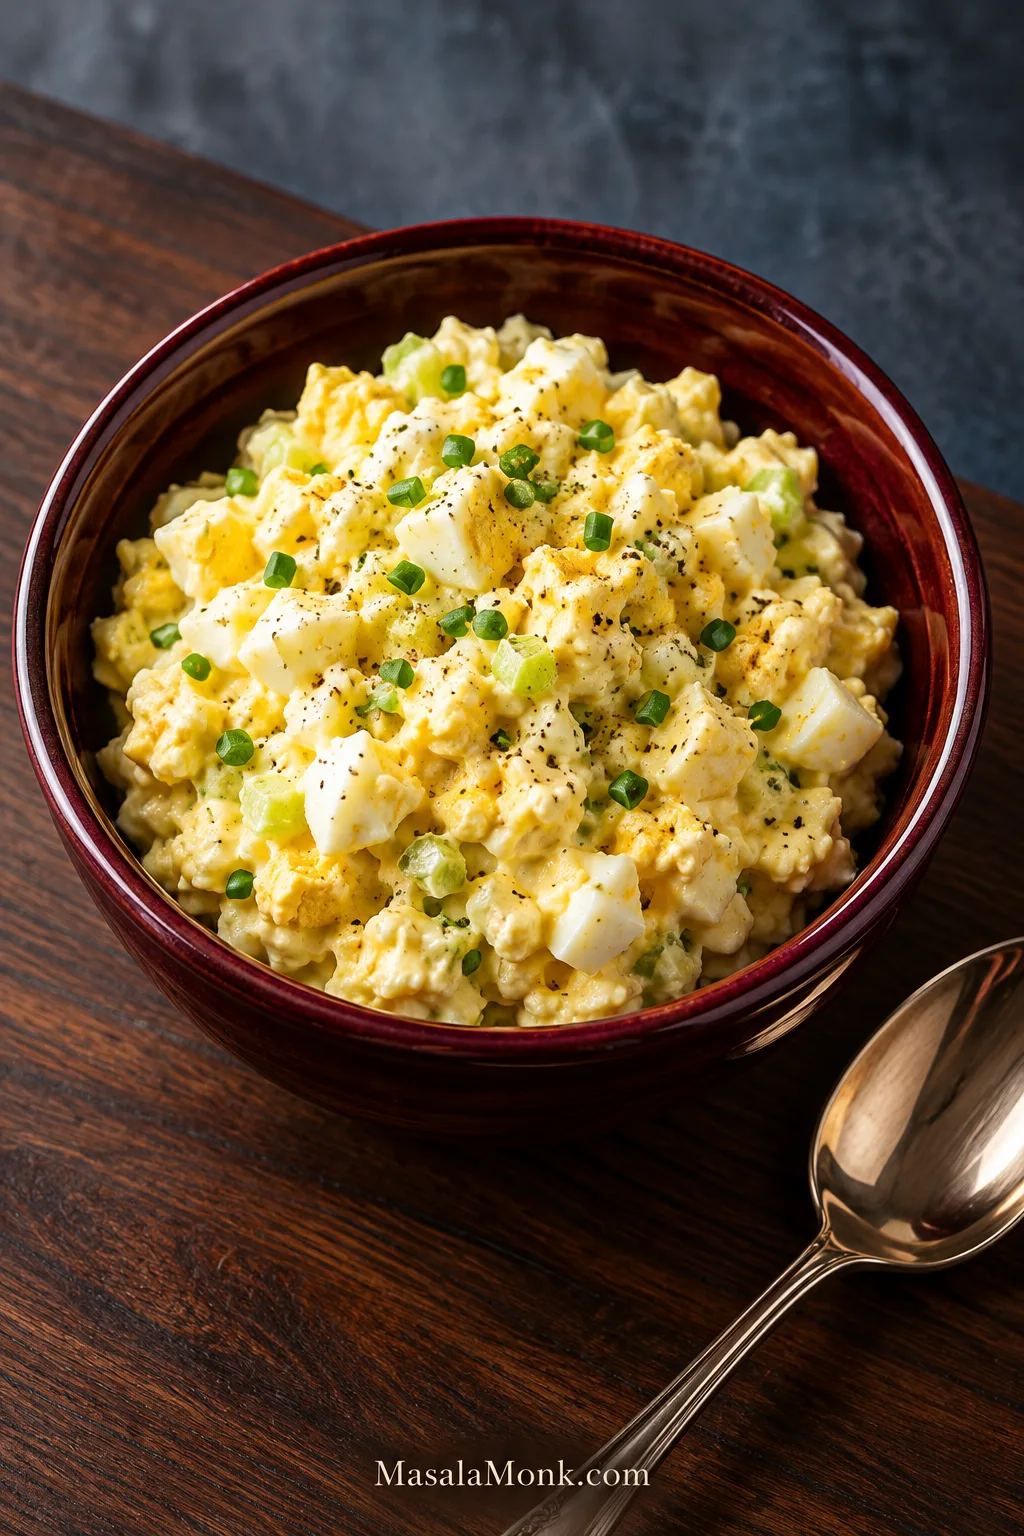
Classic egg salad with tender chopped eggs, a creamy dressing made richer with mashed yolks, and just enough fresh crunch for a satisfying sandwich.
Keep the egg pieces larger than the celery and chives. That way, the vegetables add little bursts of crunch and freshness without taking over the soft, tender texture of the eggs.
Prep 10–15 minutes
Cook 11 minutes
Cool About 10 minutes
Optional Chill 20–30 minutes
Yield About 3–4 sandwiches
Total time: about 35–45 minutes from starting the water to finished egg salad, including heating, cooking, cooling, peeling and mixing. Add another 20–30 minutes if you want the salad chilled before serving. With cooked, chilled eggs ready to go, mixing takes about 10 minutes.
Equipment
Medium saucepan
Bowl for ice water
Cutting board and knife
Medium mixing bowl
Fork and spatula or large spoon
Ingredients
6 large eggs
¼ cup mayonnaise — 60 ml / about 60 g
2 teaspoons Dijon mustard — 10 ml
1 teaspoon fresh lemon juice — 5 ml
3 tablespoons very finely diced celery — about 20 g
1 tablespoon finely chopped fresh chives or scallion greens — about 3 g
¼ teaspoon fine salt, plus more to taste
¼ teaspoon freshly ground black pepper, plus more to taste
Up to 1 tablespoon additional mayonnaise — 15 ml / about 15 g, only if needed
Optional additions
1–2 tablespoons finely chopped, well-drained dill pickle or relish
1–2 teaspoons finely chopped fresh dill
For a lighter dressing: replace 2 tablespoons of the mayonnaise with 2 tablespoons thick full-fat Greek yogurt
For sandwiches, optional
6–8 slices bread, as needed
Lettuce
A very thin layer of butter or mayonnaise on the bread if packing ahead
Method
Cook and Cool the Eggs
Bring the water to a boil. Fill a medium saucepan with enough water to cover the eggs by at least 1 inch (2.5 cm), then bring it to a full boil.
Cook the eggs for 11 minutes. Lower the refrigerator-cold eggs gently into the boiling water. Start the timer as soon as the last egg goes in. Adjust the heat so the water keeps a controlled boil without knocking the eggs around.
Cool and peel. Transfer the eggs straight into ice water and leave them for about 10 minutes, or until cold all the way through. Peel.
Make the Yolk Dressing
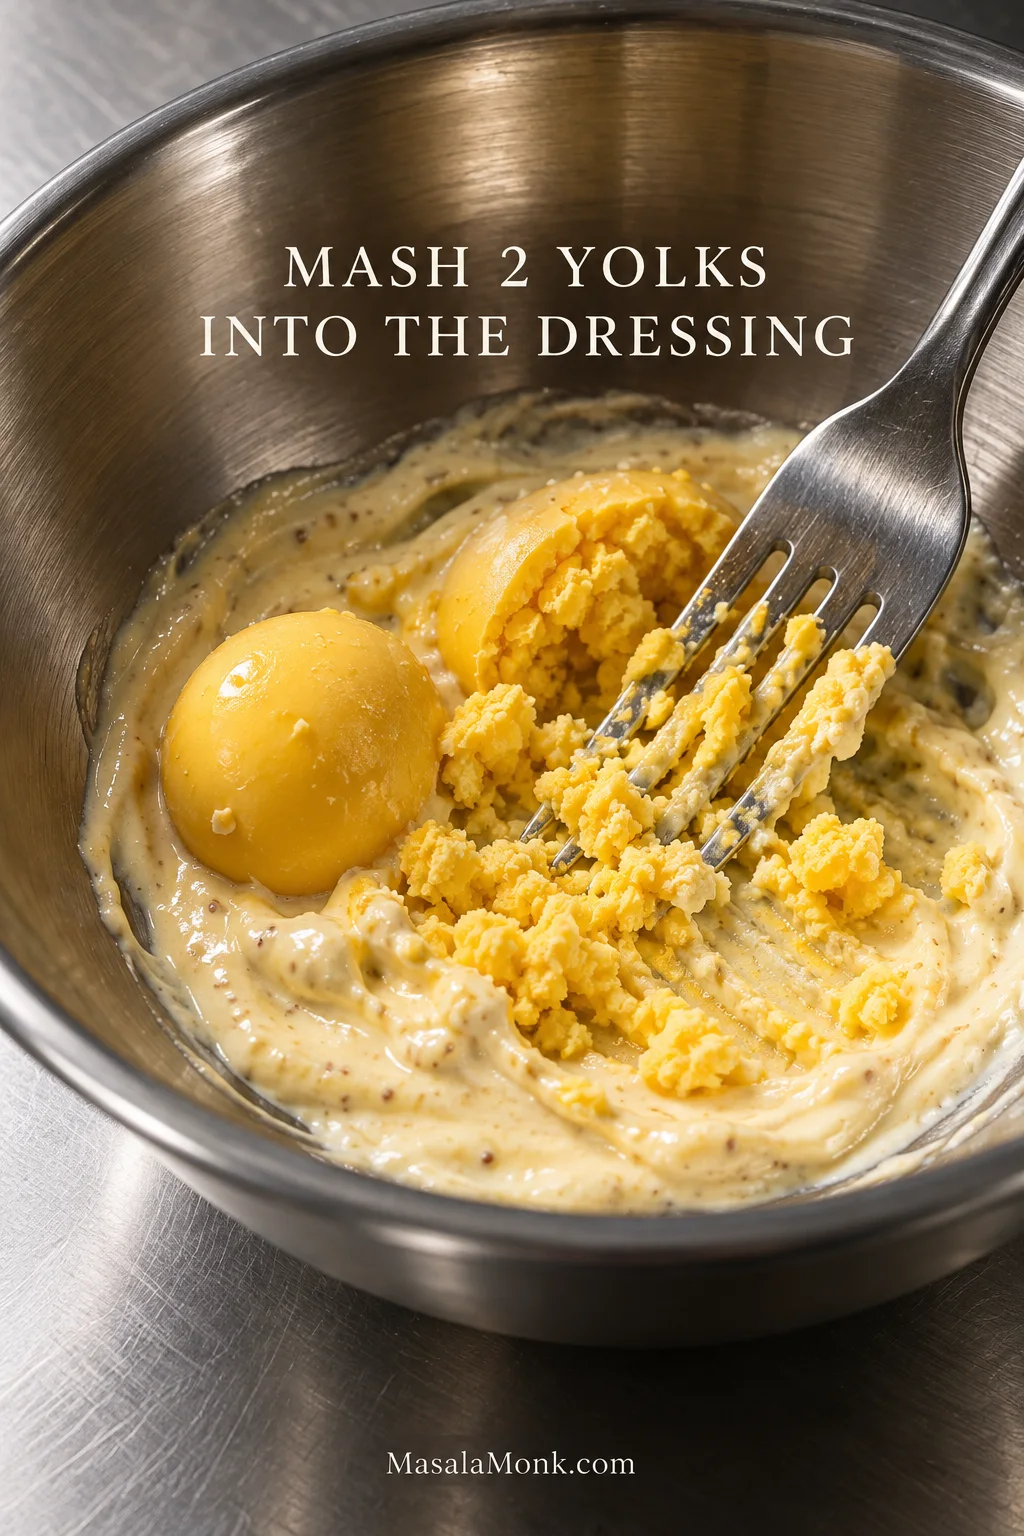
Make the yolk dressing. Halve two eggs and remove their yolks. Mash those yolks with the mayonnaise, Dijon, lemon juice, salt and black pepper until mostly smooth. If replacing some or all of the mayonnaise with thick, full-fat Greek yogurt, mix it in here.
The dressing should be mostly smooth before the chopped whites return to the bowl. A few tiny yolk flecks are fine; dry crumbles are not. Getting the base cohesive now means less handling later.
Mash the yolks thoroughly before the chopped whites go in. Doing the heavier mixing now means you can handle the finished salad gently later.
Fold and Finish the Egg Salad
Chop the eggs. Cut the four whole eggs plus the two reserved whites into roughly ½-inch (about 1 cm) pieces.
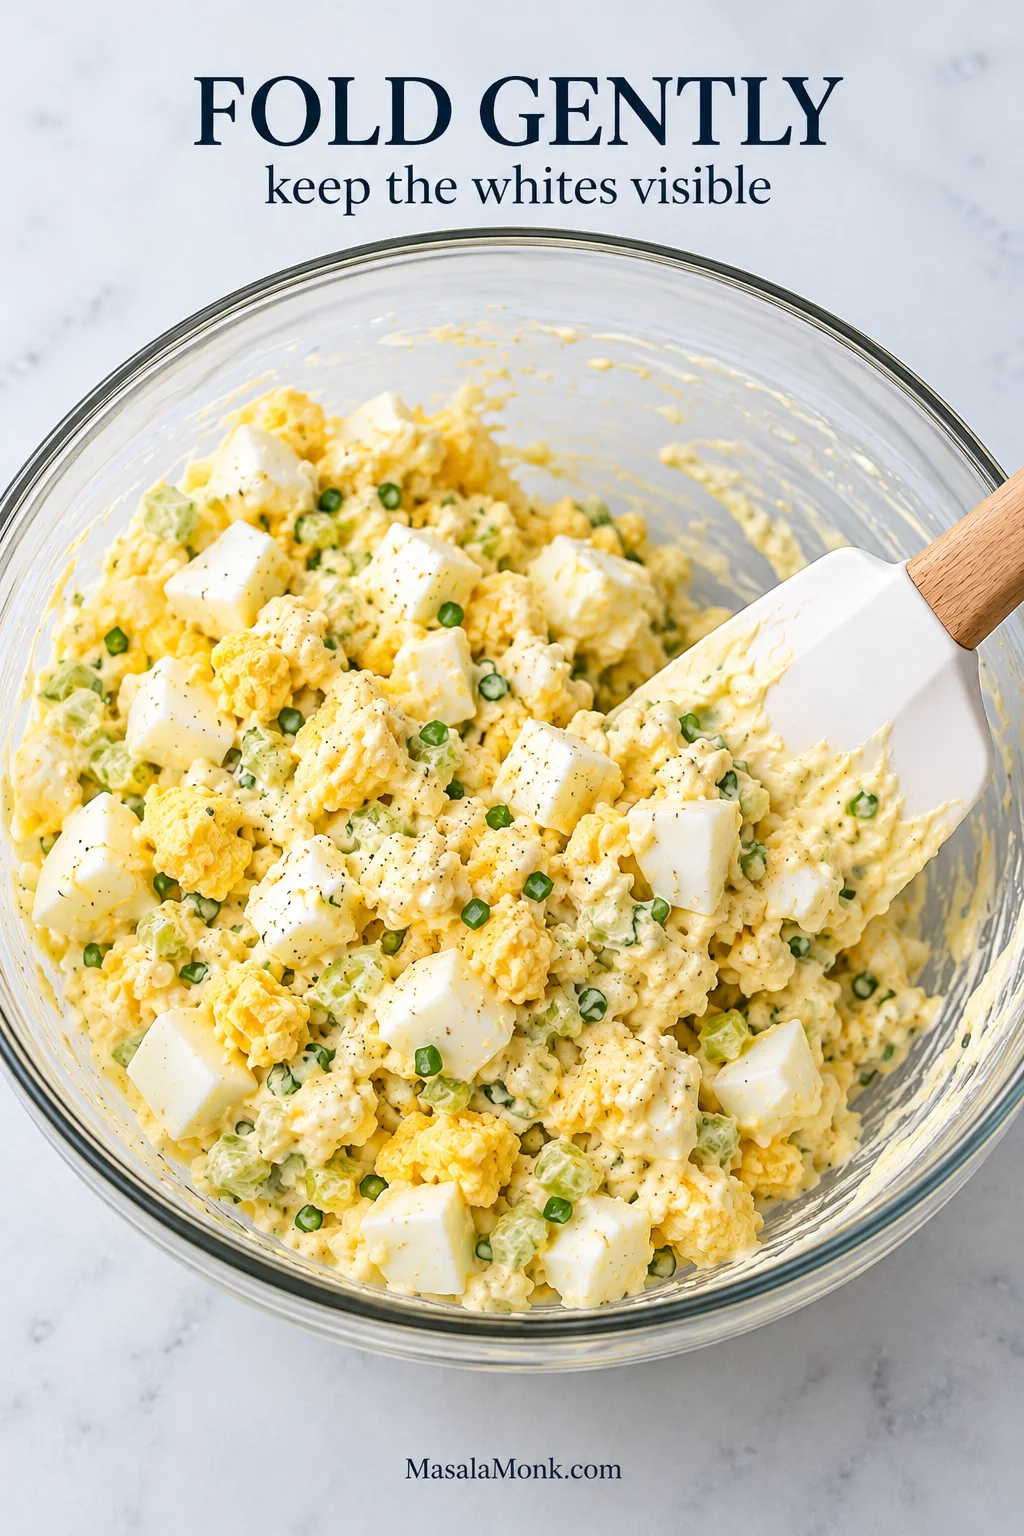
Fold the salad together. Add the chopped eggs, celery and chives or scallion. If using the optional chopped pickle, relish or dill, add it now. Fold gently just until everything is coated, stopping while the pieces of white are still easy to see.
At this stage, the mixture should still look irregular rather than uniformly mashed. Large pieces of white should remain visible while the dressing clings around them; that is the cue to stop folding.
A flexible spatula lifts the eggs from the bottom of the bowl rather than cutting through the whites with repeated stirring.
Check the consistency. Spoon up some salad. It should hold a soft mound rather than slump into a glossy puddle. If the salad is firmer than you want, add the optional mayonnaise 1 teaspoon at a time.
Serve or chill. With thoroughly chilled eggs, you can serve the salad immediately. For a firmer sandwich filling, cover and refrigerate for 20–30 minutes. Taste while cold and adjust with another pinch of salt, black pepper or a few drops of lemon if needed.
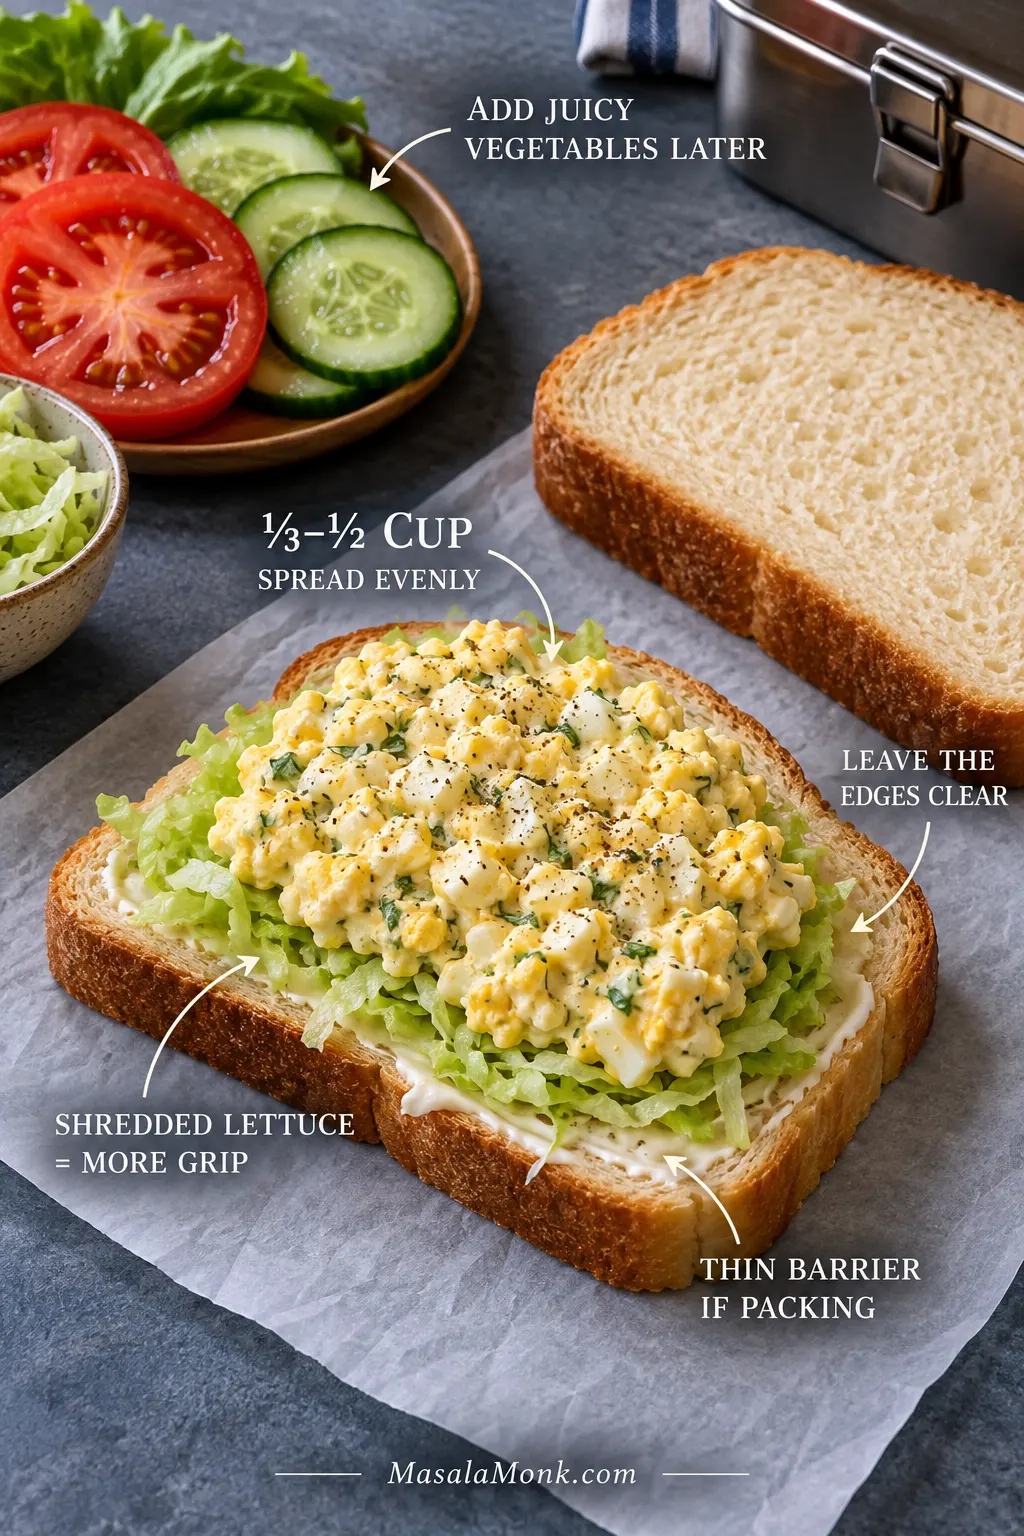
For sandwiches: roughly ⅓–½ cup filling is usually plenty for a regular sandwich, depending on the bread and how generously you like it filled.
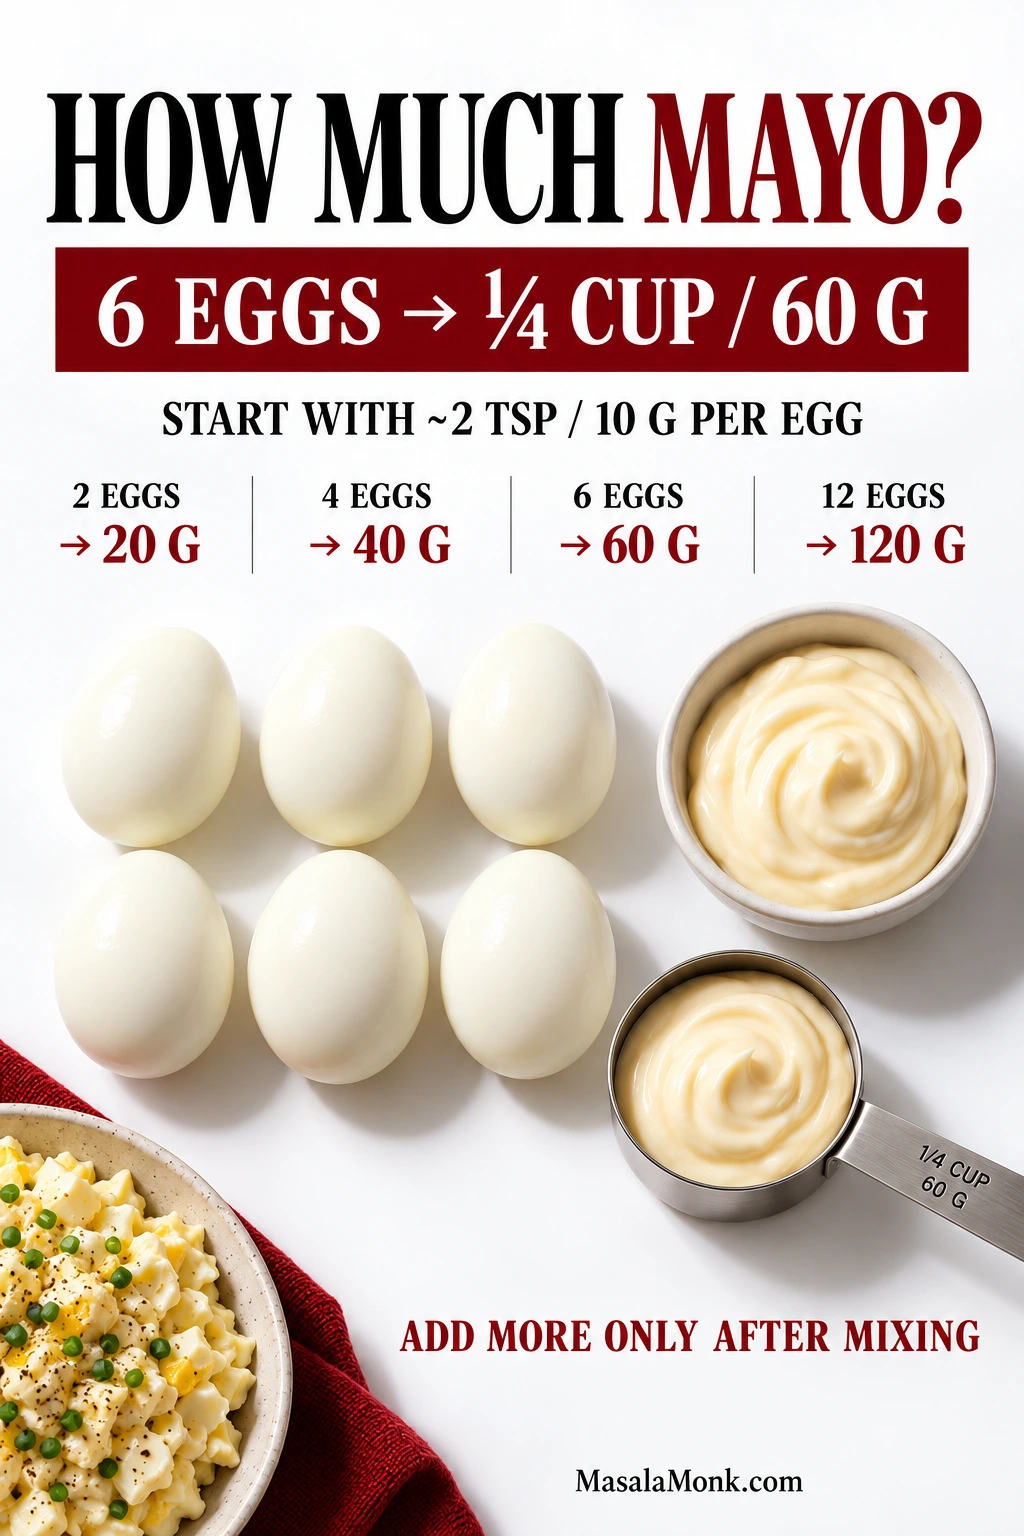
For 6 large eggs, start with ¼ cup (60 ml / about 60 g) mayonnaise. The two mashed yolks thicken the dressing further, so there is no reason to add more until the whole salad is mixed.
Recipes can swing from a few spoonfuls of mayo to half a cup or more for the same number of eggs. Once there is too much, though, the first thing you notice is the dressing rather than the egg.
Judge the salad, not the measuring spoon. If it holds its shape and still spreads easily, you’re done. A firmer batch may need another teaspoon of mayo; add it only after everything else is mixed.
At the right balance, the dressing settles into the spaces between the chopped whites instead of covering every piece in a thick coat. You get creaminess in every bite without losing the tender texture of the eggs.
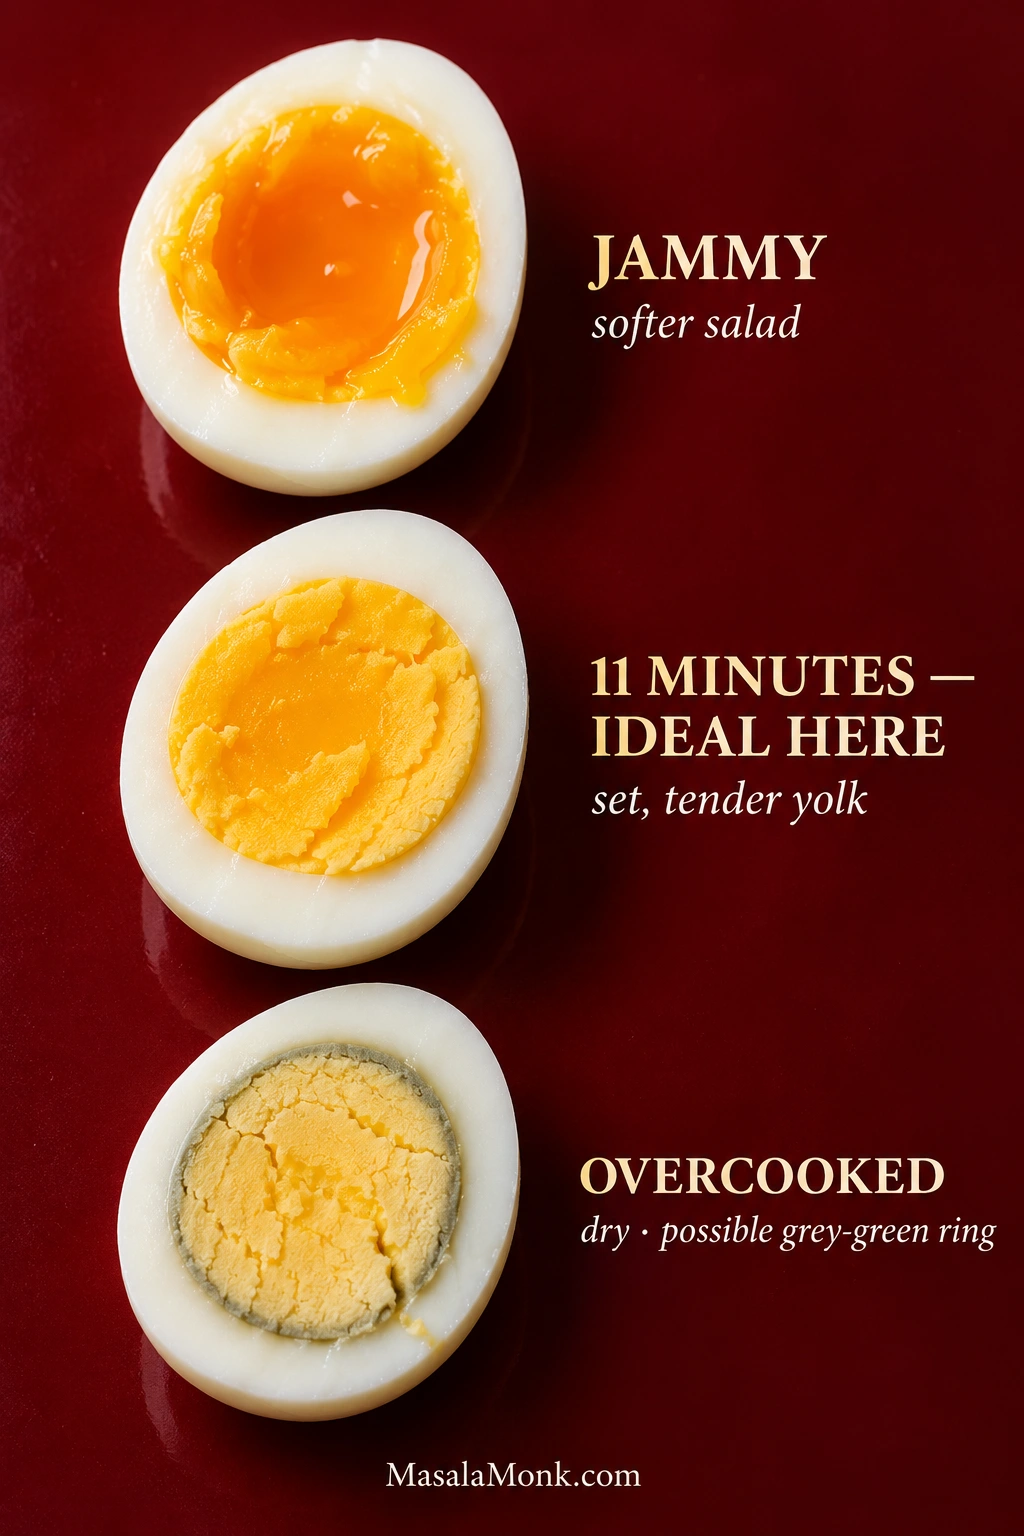
For this style of egg salad, the yolks should be fully set but still tender and yellow. Very soft or jammy yolks make a softer, richer salad; here we’re after the firmer classic texture that holds up especially well in a sandwich.
For large refrigerator-cold eggs, the target here is about 11 minutes in boiling water followed by immediate ice-water cooling. The full step-by-step method is in the recipe card above.
Eleven minutes produces yolks that mash smoothly into the dressing while leaving the whites firm enough to cut into clean pieces. Jammy yolks smear more readily; overcooked ones can become chalky.
Peeling doesn’t need to be pretty. Start near the wider end if you can get beneath the membrane there, but don’t fight for a perfectly smooth egg. Any little torn patches disappear under the knife. This is egg salad, not deviled eggs.
Gray-green yolk? The egg probably cooked a little too long or cooled too slowly. That discoloration is harmless; accurate timing and rapid cooling help prevent it next time.
Steaming is another good route, generally around 12–13 minutes for refrigerator-cold large eggs followed by immediate cooling. An air fryer works too; our air fryer hard-boiled eggs guide has timings for firm yolks.
Pickle, Relish or Neither?
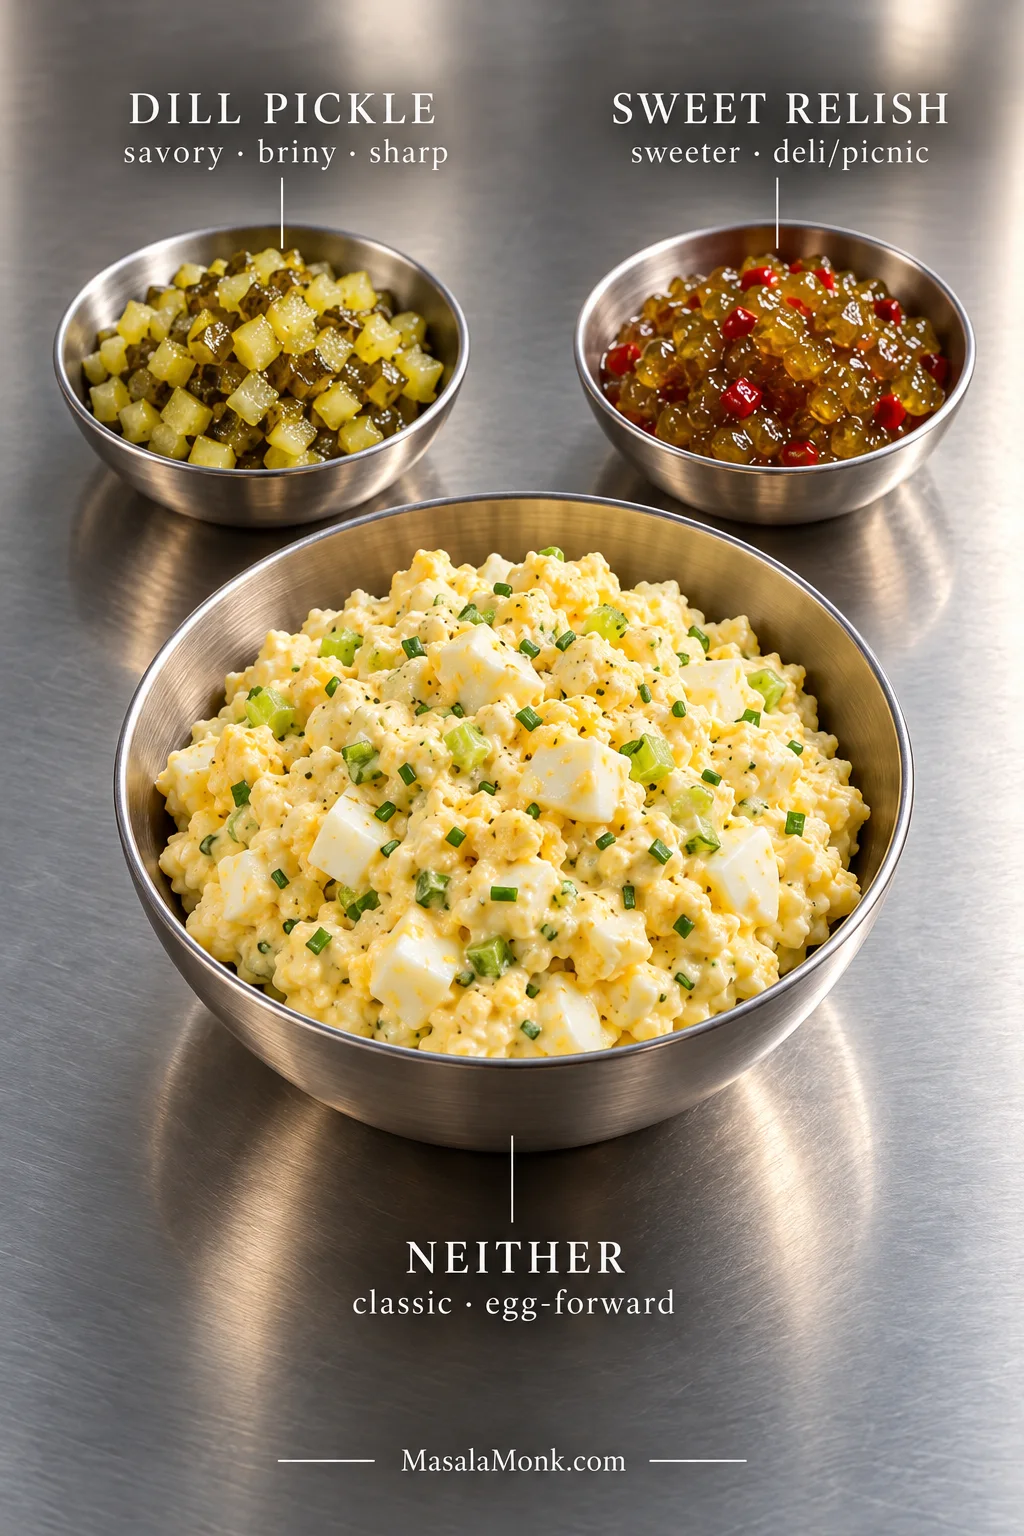
Plenty of good egg salads never see a pickle jar. Still, a little pickle or relish can be excellent when you want more contrast against the rich eggs and mayo.
Dill pickle or dill relish keeps the flavor savory, briny and sharp. Sweet relish moves the salad toward that sweeter, old-fashioned picnic or deli style. Tiny pieces are enough—you want an occasional salty or sweet hit, not pickle in every bite.
Drain spoonable relish well and blot chopped pickles before folding them in. That keeps their briny or sweet flavor in the salad without bringing extra liquid along with it.
For six eggs, 1–2 tablespoons is plenty. Chop pickles finely and drain or blot them well. The flavor belongs in the salad; the extra liquid doesn’t.
Pickle brine counts as liquid. A teaspoon can brighten the dressing nicely, but once brine goes in, taste before adding the full amount of lemon.
If you want another accent, try fresh dill, paprika, hot sauce, capers or horseradish—but pick one direction rather than piling several competing flavors into the same salad. Our egg seasoning guide has more ideas when you want them.
What You Can Leave Out or Swap
Don’t like celery? Leave it out. No mustard is fine too. Egg salad doesn’t stop working because one of the usual additions isn’t your thing.
A salad without celery is softer; one without mustard is milder. Neither is a broken recipe.
Start with ¼ cup thick, full-fat Greek yogurt in place of the ¼ cup mayonnaise. Expect a tangier, less rich salad; adjust the texture after mixing.
Mustard
Leave it out.
Celery
Nothing has to replace it. Finely chopped pickle or scallion adds crunch if you miss it.
Scale the Batch
Got four eggs instead of six? There’s no need to make another trip to the store. For any batch size, start with about 2 teaspoons (10 g) mayonnaise per egg. The table below gives a few useful reference points.
Start with about 10 g of mayonnaise per egg. Three eggs need roughly 30 g; five need about 50 g. Then let the finished texture—not the arithmetic—decide whether you need more.
Eggs
Starting mayo
Dijon to start
2
1 tbsp + 1 tsp / ~20 g
About ½ tsp
4
2 tbsp + 2 tsp / ~40 g
About 1¼ tsp
6
¼ cup / ~60 g
2 tsp
12
½ cup / ~120 g
1 tbsp + 1 tsp
For the yolk dressing, mash 1 yolk for a 2–4 egg batch, 2 yolks for 6 eggs, and about 4 yolks for 12 eggs.
Mustard and lemon don’t need laboratory precision. Scale the mayonnaise carefully; adjust the seasoning once the smaller or larger batch is mixed.
Boiling a full dozen but only using half here? The extras are perfect for a batch of classic deviled eggs.
For a sandwich that stays together, use cold, moundable egg salad and roughly ⅓–½ cup per sandwich. Spread it evenly, and add a moisture barrier if lunch has to travel.
Soft bread benefits from a thin butter or mayonnaise barrier when the sandwich has to sit before lunch. Keep the filling cold, spread it level, and add juicy vegetables closer to serving time.
The filling can be perfect in the mixing bowl and still end up down your fingers once it meets bread. Loose salad squeezes out. Too much filling makes every bite awkward. Soft bread eventually gives in to moisture.
Spread the filling into an even layer and leave a little space around the edges. There’s no advantage to building a mountain in the middle. If you’re adding lettuce, finely shredded leaves add some grip; one broad leaf sometimes acts more like a slide.
Soft white, Pullman or whole-wheat bread gives you a tender sandwich when lunch is being eaten soon. Toasted rye or sourdough adds more structure and holds up better when the sandwich needs to travel.
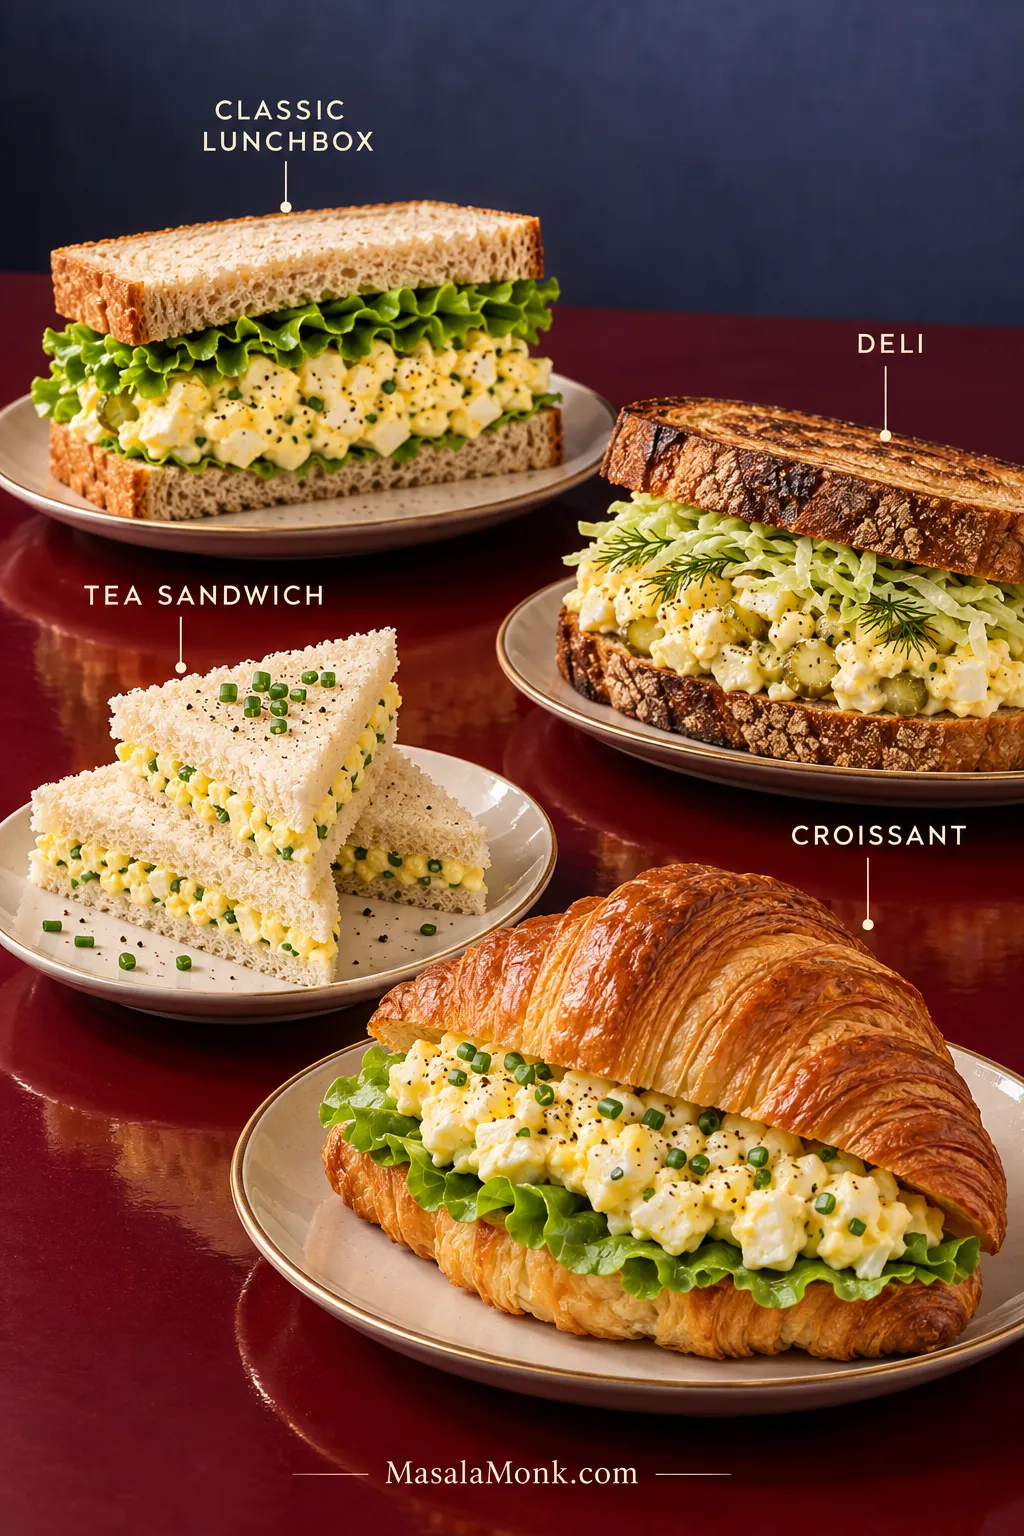
4 Easy Egg Salad Sandwich Ideas
Classic lunchbox: soft white or whole-wheat bread, egg salad, crisp lettuce and plenty of black pepper.
Deli-style: lightly toasted rye or sourdough, dill-pickle egg salad and finely shredded lettuce.
Tea sandwiches: chop or grate the eggs finer, spread a thinner layer over lightly buttered soft white bread, trim the crusts and cut into fingers or triangles.
Croissant lunch: a modest layer of egg salad, butter lettuce and extra chives inside a split croissant.
Match the filling to the bread: use a thin layer for tea sandwiches, a moderate amount in a croissant, and a generous but sturdy spread on toasted deli bread.
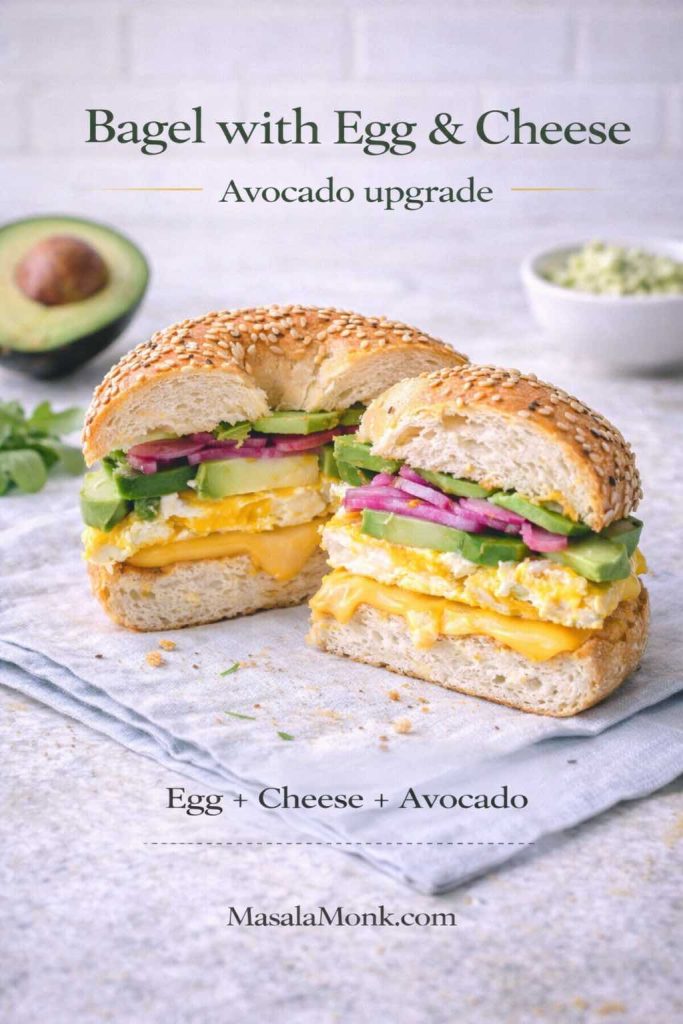
A toasted homemade bagel is another sturdy option, especially with chives, black pepper or dill pickle in the filling.
No bread at all is fine too. A scoop of cold egg salad works with crisp crackers, tucked into lettuce cups or spooned over greens.
How to Keep an Egg Salad Sandwich from Getting Soggy
For a packed sandwich, a very thin coating of butter or mayonnaise on the inside of the bread slows moisture from soaking in. Lettuce helps as well. Save juicy tomato or cucumber for closer to serving time—after several hours inside a packed sandwich, both can make the bread noticeably wetter.
Why Egg Salad Turns Watery
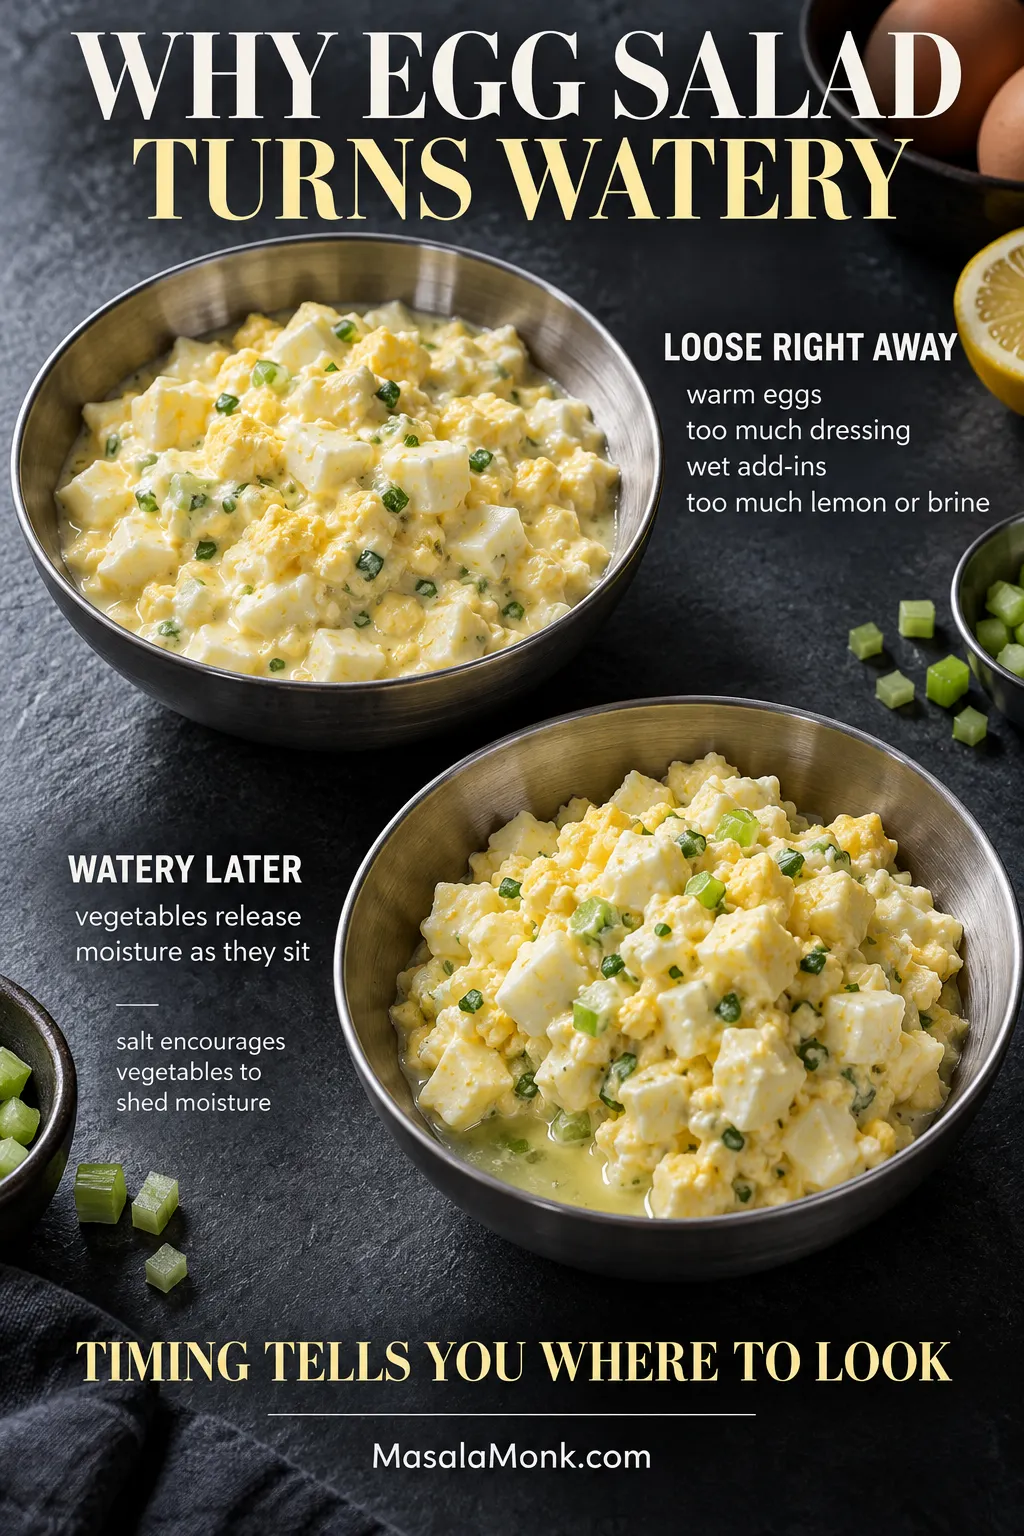
Egg salad that is loose or glossy immediately usually has warm eggs, too much dressing, or wet add-ins. Too much lemon or pickle brine can thin it too. Liquid pooling later is different: that is usually moisture released by celery, onion, pickles or other vegetables as the salad sits.
The timing tells you where to look first. A salad that is loose immediately has a different problem from a batch that starts out fine and develops a shiny pool at the bottom after a night in the fridge.
Look at the liquid as well as when it appears. A glossy, slumping mixture suggests excess dressing or warm ingredients; a thin, clear pool around the bowl edge is a stronger clue that vegetables released moisture as the salad sat.
Salt encourages chopped vegetables to shed moisture as they sit. That’s why the salad can look just right at first and wetter the next day.
Match the Fix to When the Water Appears
What you see
Likely cause and fix
Loose or glossy immediately
If the eggs were still warm, chill the salad first. If it remains too loose, fold in a little additional chopped cooked egg. Next time, cool the eggs fully, measure the mayo before adding more, and drain wet add-ins well.
Liquid pooled after sitting
Celery, onion, pickles or other vegetables have probably released moisture as the salad rested. Spoon or blot away obvious pooled liquid, then stir gently. Dry wet add-ins well next time and save very juicy vegetables for serving.
Cucumber is refreshing with egg salad, just not mixed into a batch that needs to hold overnight. For that same cool crunch without extra water, serve a crisp cucumber salad alongside.
A Few Common Fixes
Too dry? Stir it first; chilled egg salad sometimes tightens as it rests. Still dry? Add mayo a teaspoon at a time.
Bland? Check the salt. Dijon, lemon or pickle brine can bring back some brightness once the seasoning is right.
Tastes mostly of mayo? Fold in more chopped cooked egg if you have it. Otherwise, start with less mayonnaise next time and add more only after mixing.
Too sour or sharp? A small spoonful of mayo softens mild sharpness. If you’ve added far too much lemon or brine, there isn’t a neat one-spoon fix.
Turned pasty? The eggs were probably chopped too finely or mixed too long. It is hard to undo completely; next time, stop while the whites are still easy to pick out.
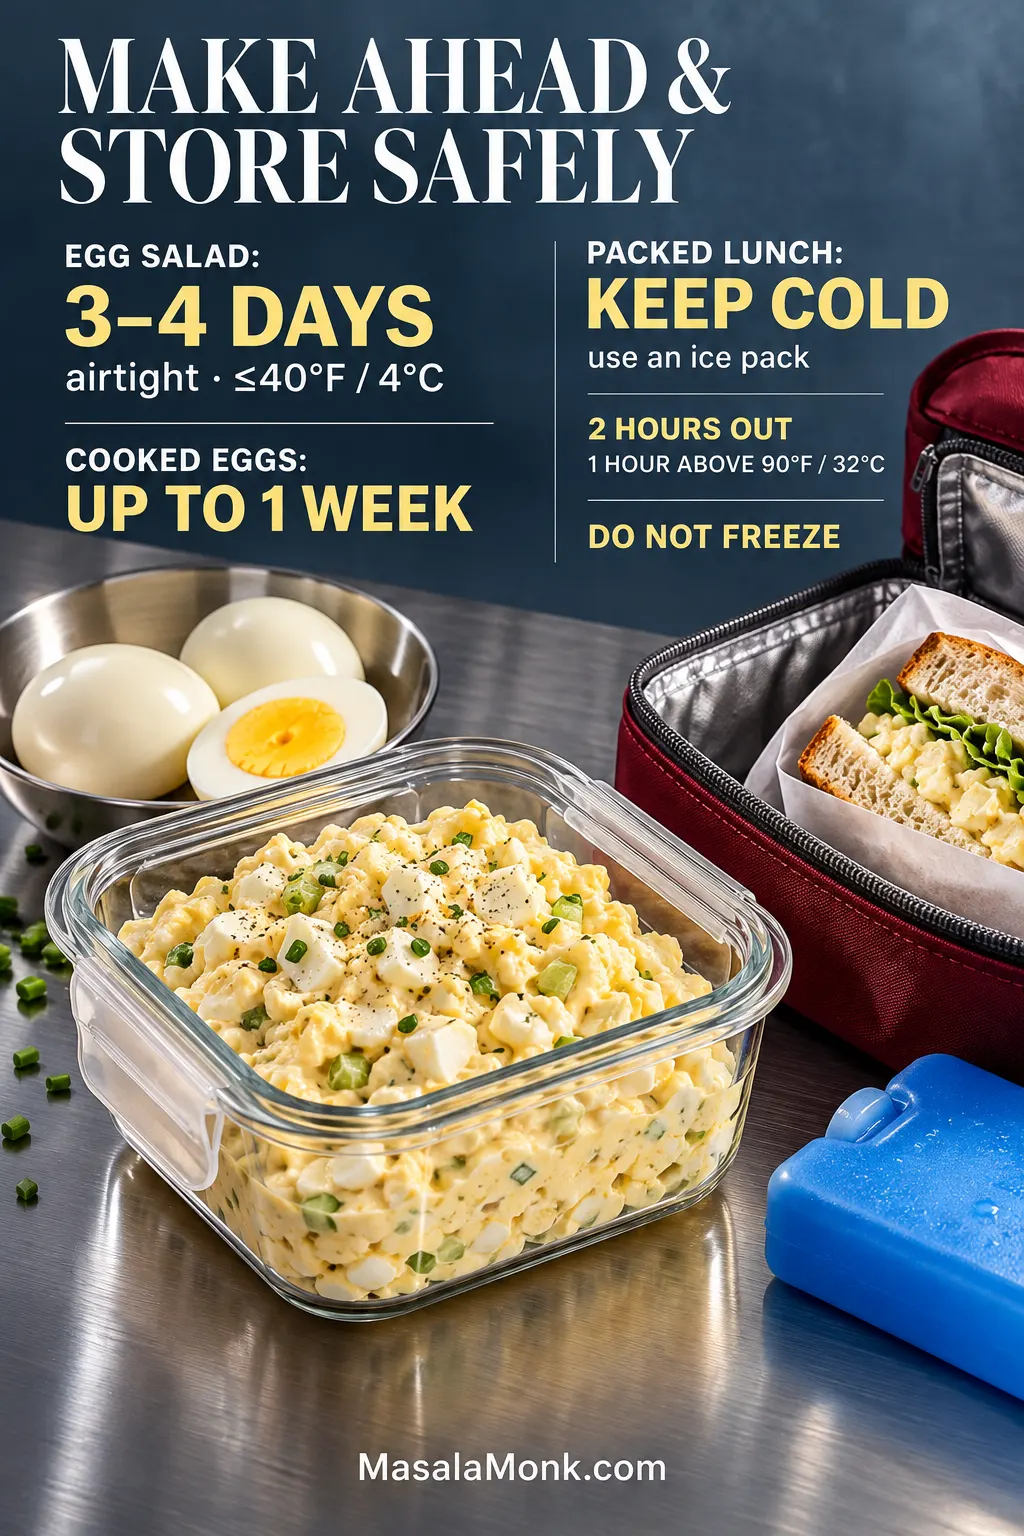
Finished egg salad keeps for 3–4 days in an airtight container in the refrigerator at 40°F (4°C) or colder. It doesn’t freeze well; the whites become rubbery and the creamy dressing loses its smooth texture after thawing.The FoodSafety.gov cold-storage chart gives the official storage window.
Egg salad is excellent the day it is made and works well a day ahead too. To prep farther in advance, cook the eggs first and leave the mixing until later. Properly refrigerated hard-cooked eggs can be kept for up to 1 week. Once they are mixed into egg salad, use the earlier limit: 3–4 days for the finished salad, or sooner if the cooked eggs were already several days old. FDA egg-safety guidance has the full handling advice.
Packed sandwiches need to stay cold too. Use an insulated lunch bag with an ice pack or frozen gel pack. Cooked eggs and egg dishes should not sit unrefrigerated for more than 2 hours, or more than 1 hour above 90°F (32°C).
Date the container when you mix the salad and use it within 3–4 days, or sooner if the cooked eggs were already several days old. Keep a packed sandwich cold with an ice pack.
For a picnic, serve the egg salad with potato salad, crisp vegetables and something salty on the side.
Once the salad is cold and seasoned, there isn’t much left to fuss with. Spoon it onto good bread, add something crisp if you want it, and lunch is done.
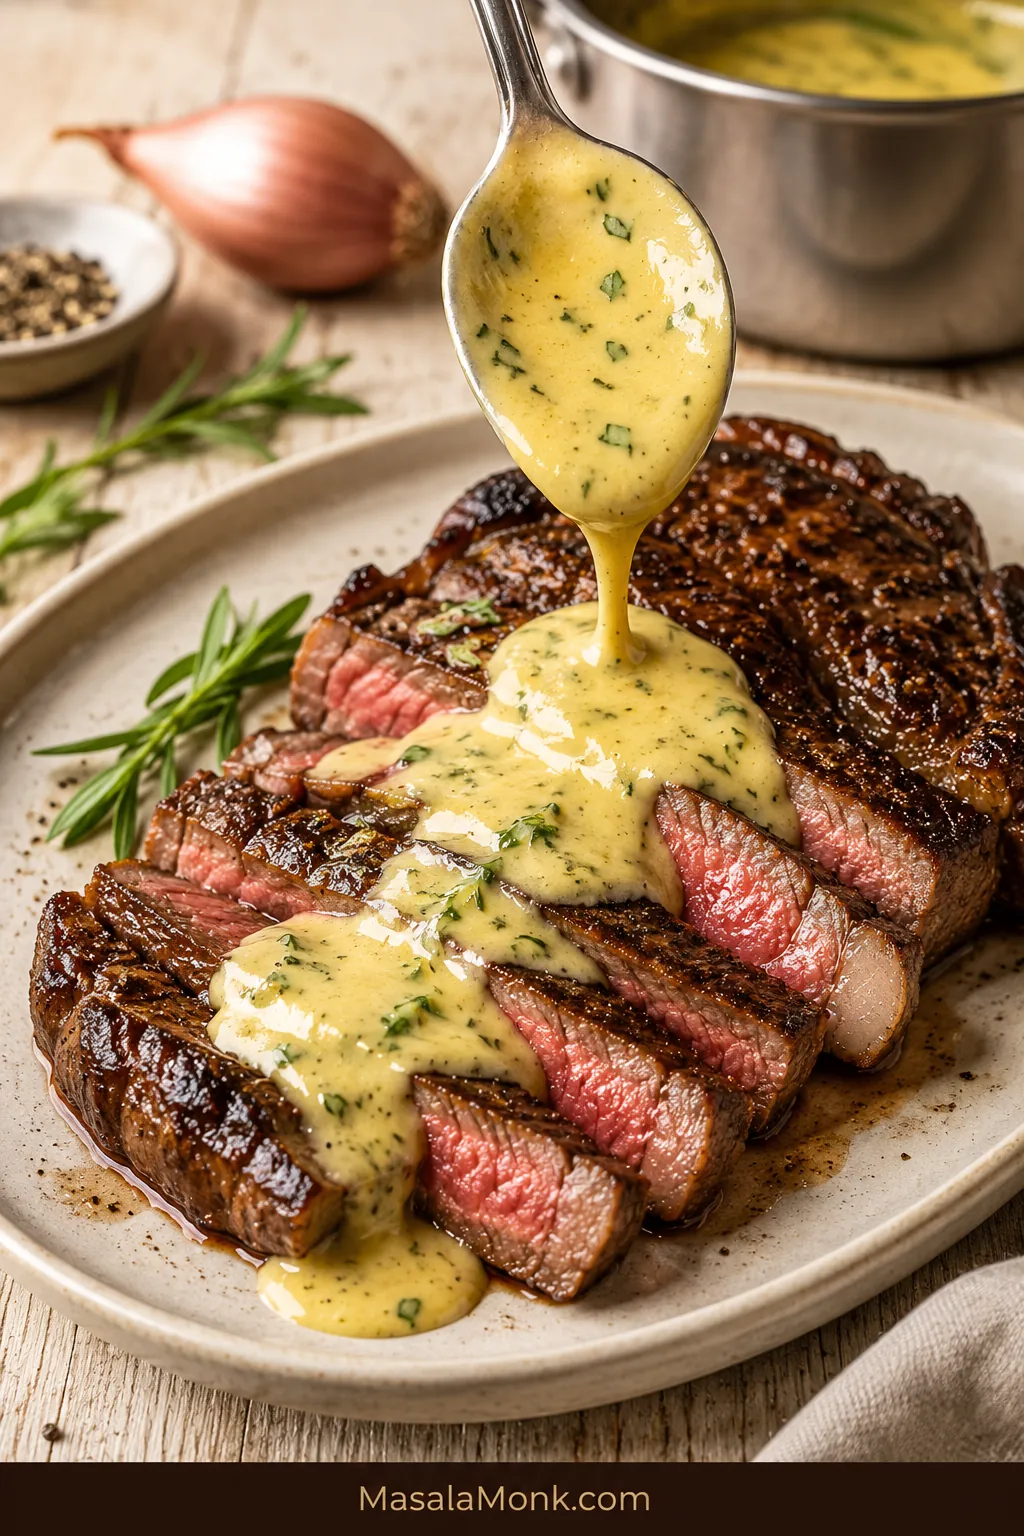
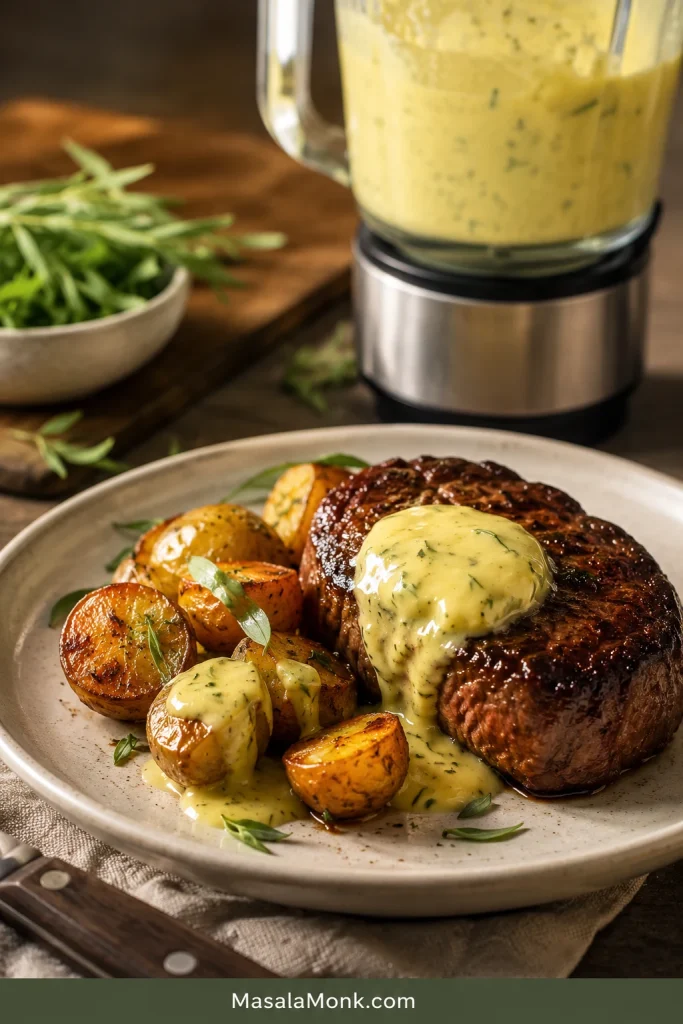
Béarnaise is the sauce that makes steak night feel special before anyone even takes a bite. It is warm, buttery, sharp with vinegar and shallot, and full of fresh tarragon. Spoon it over seared steak and it melts into the juices on the plate in the best possible way.
This is an easy blender béarnaise sauce for steak, made with a sharp tarragon reduction, egg yolks, and hot clarified butter or ghee — no double boiler required. You still get the classic French steakhouse flavor, but the blender does the hard part.
This is the version for the night you want the steakhouse feeling without turning dinner into a project. Make the tarragon reduction first, cook your steak, then blend the sauce while the steak rests. The whole recipe takes about 15–20 minutes, but the actual blending takes under 2 minutes once the butter and reduction are ready.
The first spoonful should feel rich, then wake up with vinegar, shallot, and tarragon so the steak tastes bigger, not heavier.
Cooking right now? Start here. The notes below are for butter choices, reduction cues, storage, substitutions, and split-sauce fixes.
At a glance: make the reduction, blend it with yolks, slowly stream in hot butter, then finish with fresh tarragon. That is the whole sauce.
Best for: steak frites, filet mignon, ribeye, prime rib, salmon, lobster, asparagus, roasted potatoes, and eggs.
Yield: about 1 cup / 240 ml, enough for 4 generous portions or 6 smaller spooned servings. Total time: 15–20 minutes. Method: immersion blender or stick blender. Serve: warm.
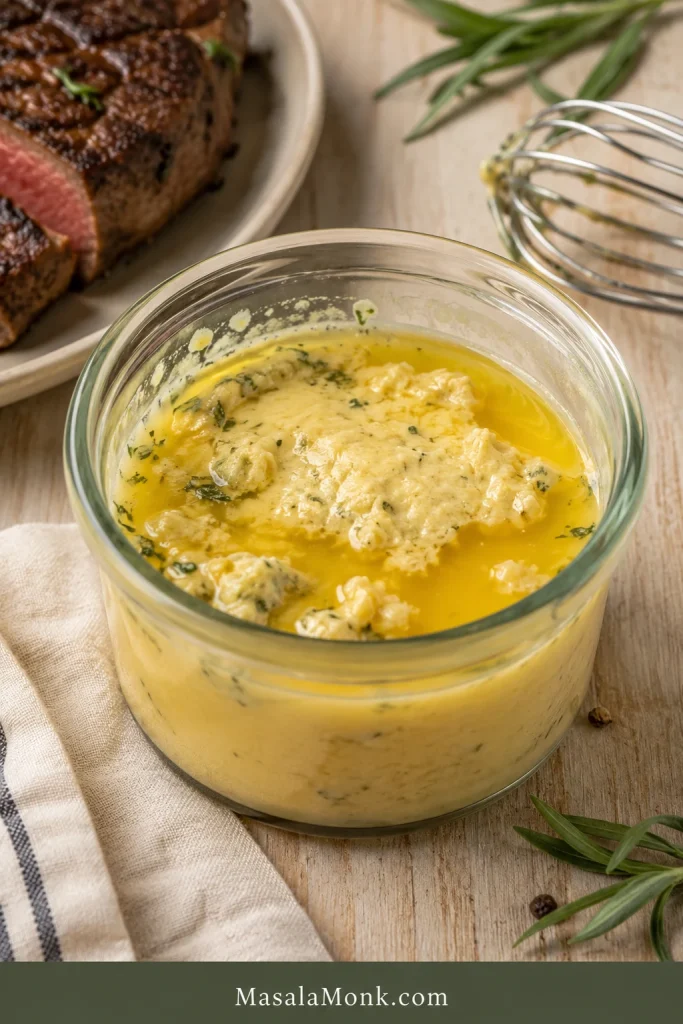
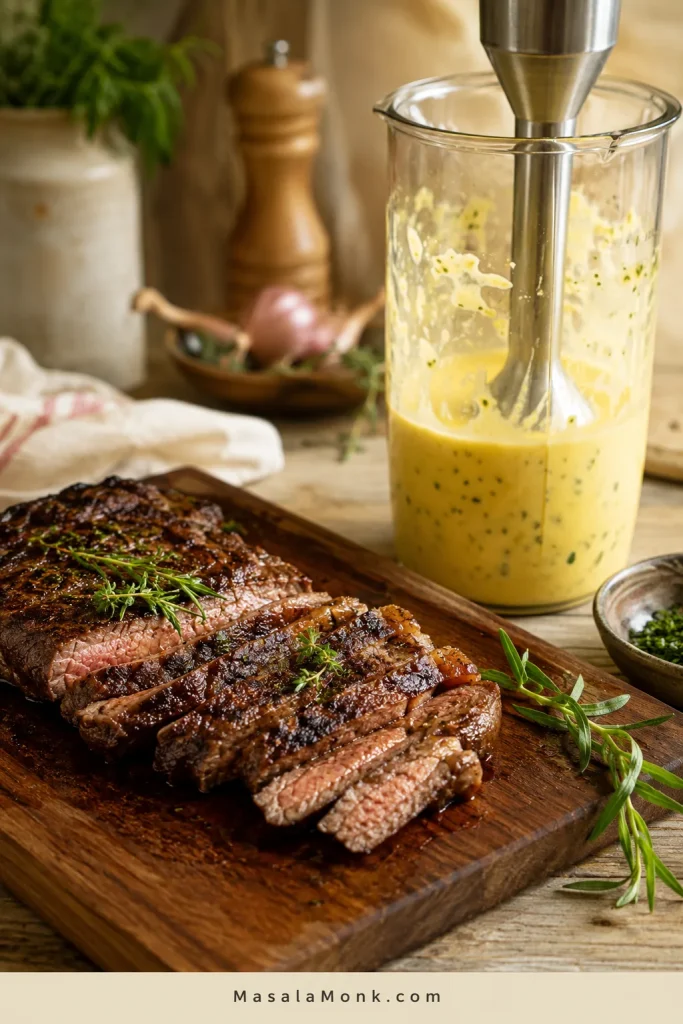
For the easiest version, use ghee or clarified butter and an immersion blender in a tall narrow jar. Make the reduction before the steak goes on, then blend while the steak rests. Aim for a sauce thicker than cream, looser than mayo, and warm enough to melt into the steak juices without turning oily.
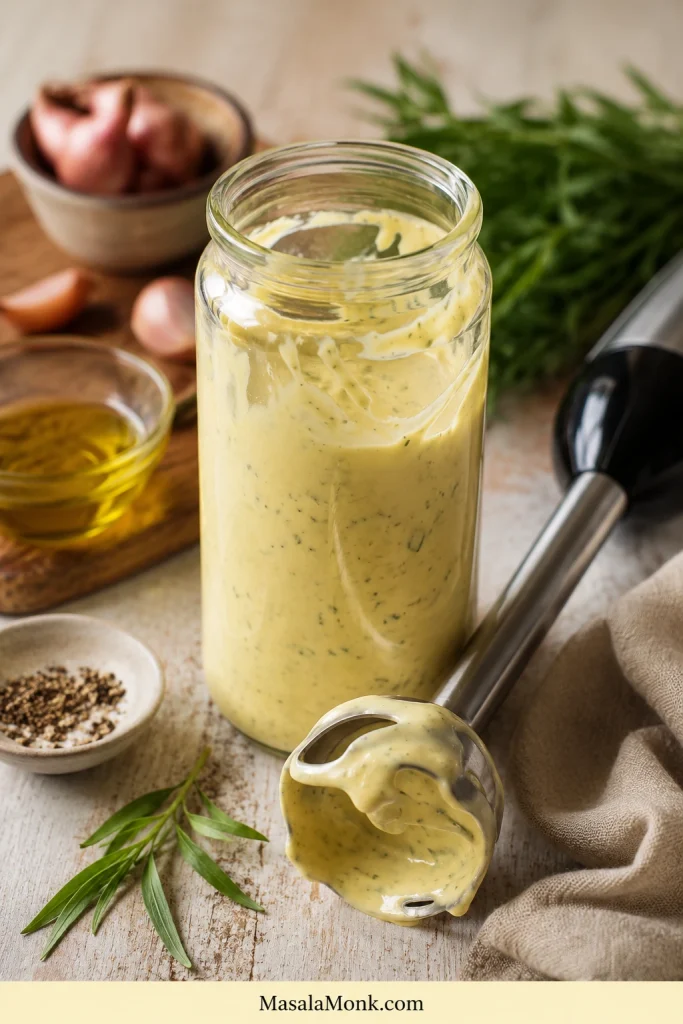
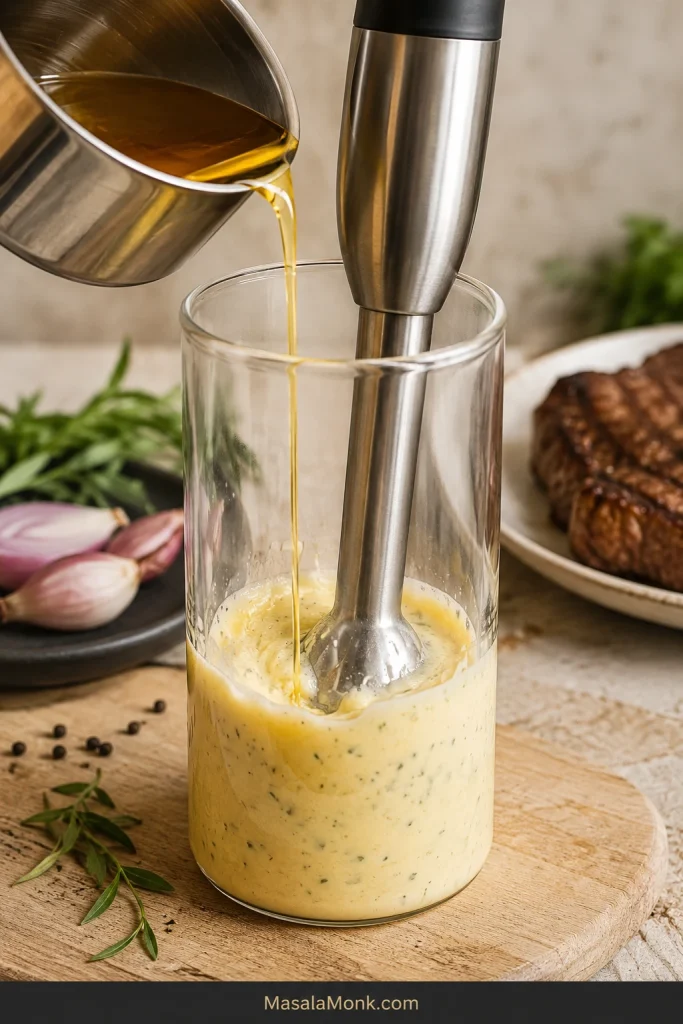
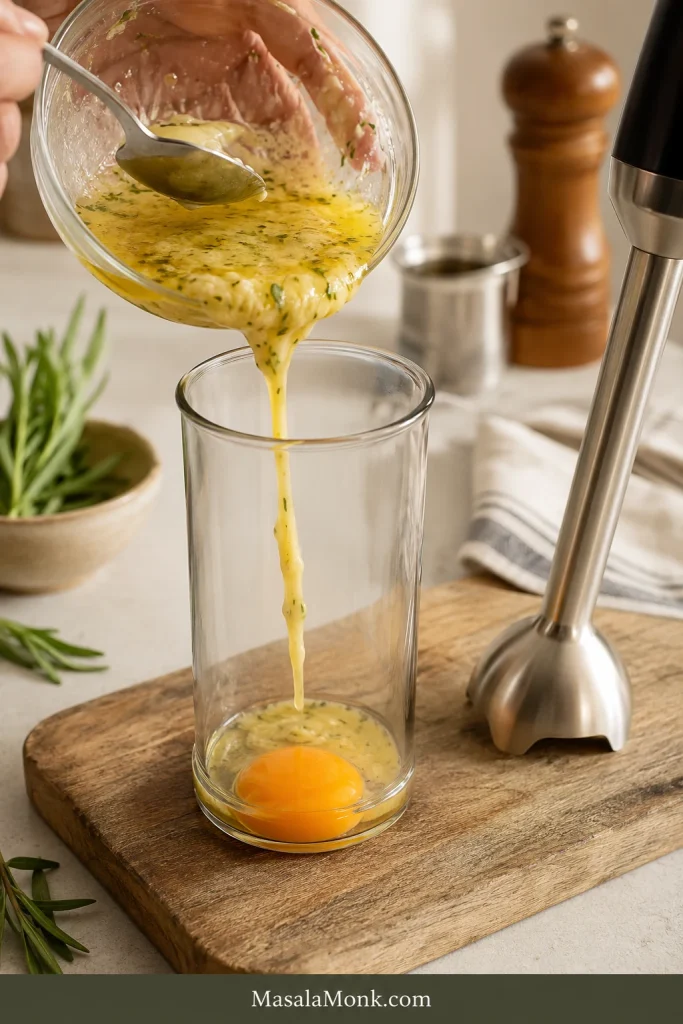
This blender method works best when the jar is narrow enough for the blender head to stay covered. That setup helps the sauce form before too much butter is added.
For blender béarnaise, the tall narrow jar matters because it helps the immersion blender pull the yolks and hot butter into one smooth sauce.
Reduction Ingredients
These aromatics make the reduction taste like béarnaise before the butter and yolks turn it into a sauce.
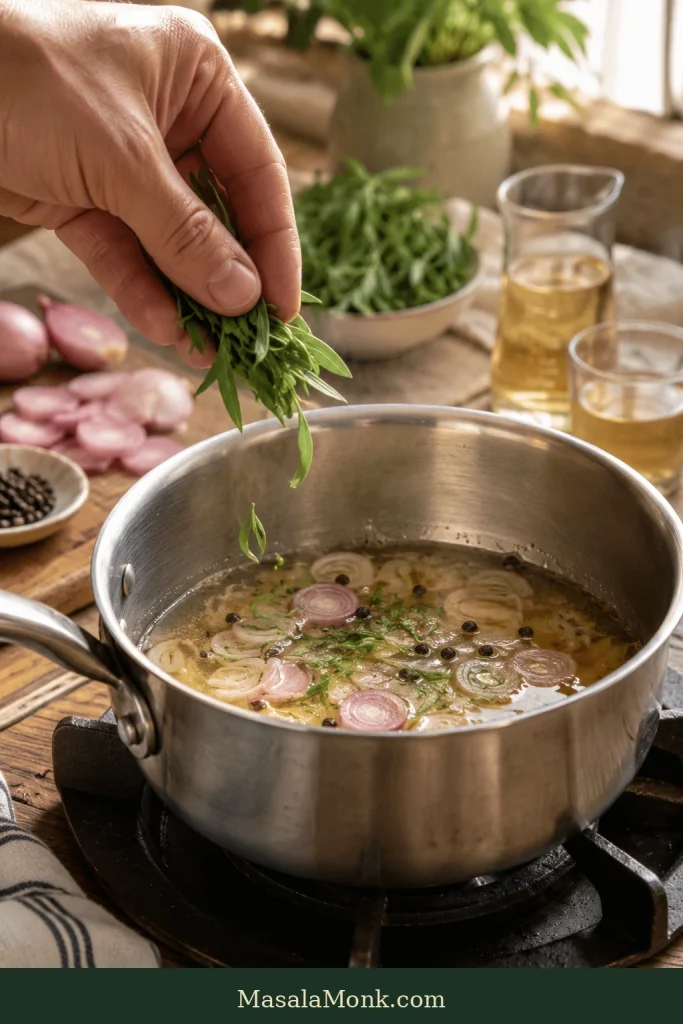
First, simmer wine, vinegar, shallot, peppercorns, and tarragon together; this gives the sauce its sharp steakhouse flavor before any butter is added.
Ingredient
US Measure
Metric
Dry white wine
¼ cup
60 ml
White wine vinegar or Champagne vinegar
2 tbsp
30 ml
Small shallot, minced or sliced
1 small
20–30 g
Fresh tarragon stems or whole sprigs
2–3 sprigs
4–6 g
Black peppercorns, lightly crushed
¼–½ tsp
1–2 g
Sauce Ingredients
Ingredient
US Measure
Metric
Large egg yolks, room temperature
3 yolks
About 54 g total
Hot clarified butter or ghee
¾ cup
170–175 g
Kosher salt
¼ tsp, plus more to taste
1–1.5 g
Lemon juice
1–2 tsp
5–10 ml
Fresh tarragon leaves, finely chopped
1 tbsp
3–4 g
Chervil or parsley, optional
1 tbsp
3–4 g
Warm water, only if needed
1 tsp at a time
5 ml at a time
Quick Method
Simmer the wine, vinegar, shallot, tarragon stems, and peppercorns until reduced to about 1½–2 tablespoons / 22–30 ml of strained liquid.
Strain the reduction and let it cool for a few minutes. The pan should still have a small puddle of liquid before straining, not just wet shallots.
Add egg yolks, reduction, salt, and 1 teaspoon lemon juice to a tall narrow jar.
Blend briefly on medium to high speed, then slowly stream in hot clarified butter or ghee while the blender runs.
Blend until thick, glossy, and spoonable. Stop once it comes together. Stir in chopped tarragon and adjust with salt, lemon, or warm water.
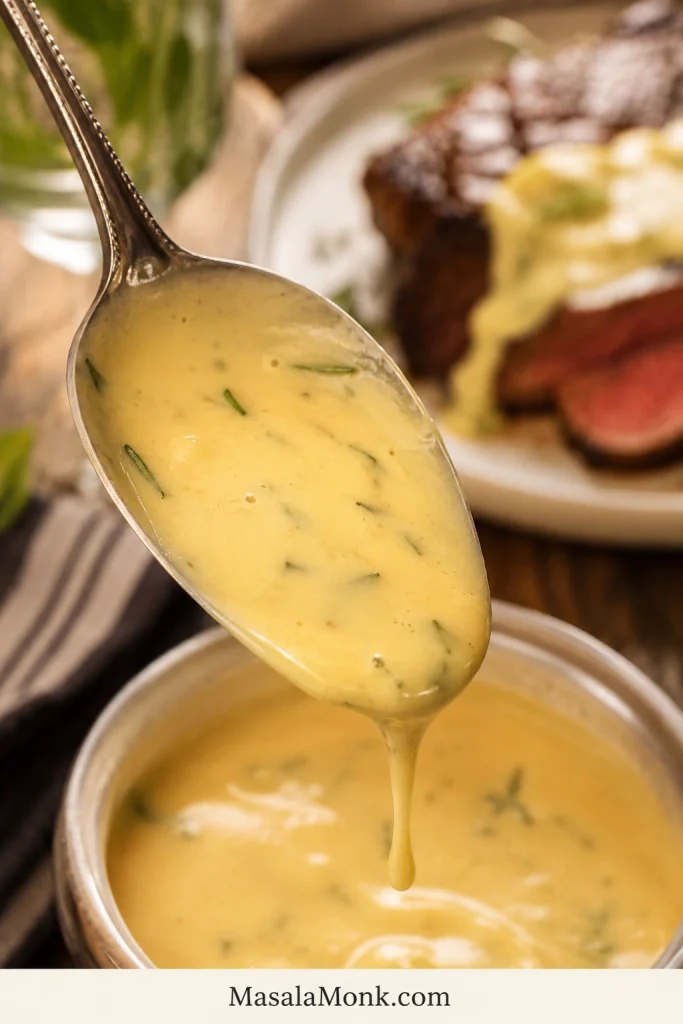
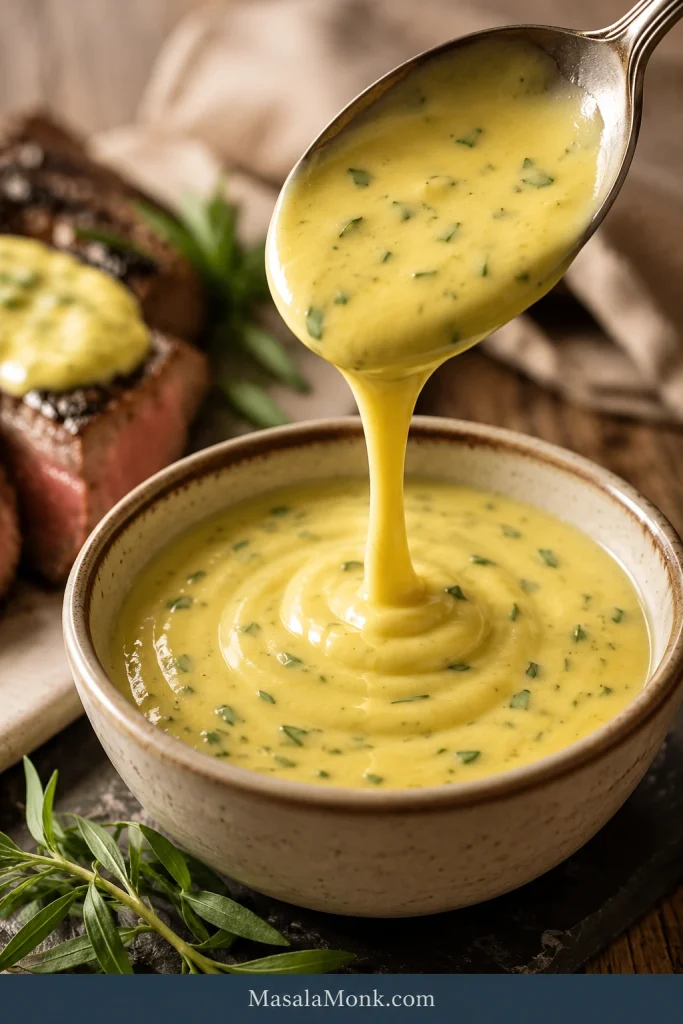
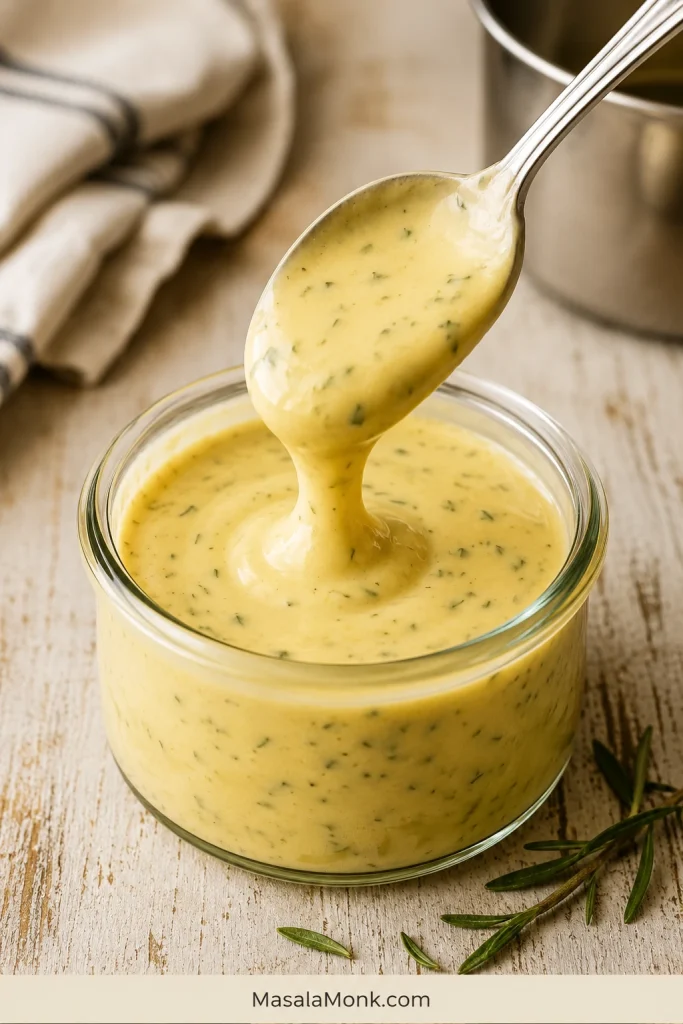
Success check: the finished béarnaise should coat the back of a spoon and drip slowly. Before serving, taste for three things: salt, brightness, and tarragon. Flat sauce usually needs salt. Heavy sauce needs a few drops of lemon. Buttery sauce that does not taste like béarnaise needs more chopped tarragon.
Check the Sauce Before Serving
A spoon test is faster than guessing. If the sauce clings and drips slowly, it is ready for steak.
Use the spoon test before serving: béarnaise should cling to the spoon and fall slowly, not run off like thin cream.
Why this works: hot butter gently warms the yolks, the wine-vinegar reduction brings acidity and tarragon flavor, and the tall narrow jar helps the blender pull everything into a stable emulsion.
Egg safety note: Béarnaise is gently warmed, not boiled, so use fresh, clean, uncracked eggs. For pregnant people, elderly guests, young children, or anyone immunocompromised, use pasteurized eggs or choose a fully cooked sauce instead. The FDA recommends pasteurized eggs or egg products for menu items made with raw or lightly cooked shell eggs, including sauces such as hollandaise and béarnaise.
Ingredients
Each ingredient has a job: butter gives body, vinegar keeps it bright, and tarragon makes it taste like béarnaise.
Béarnaise Sauce Ingredients at a Glance
A good béarnaise does not need many ingredients, but each one should earn its place: fat, acidity, herbs, aromatics, and yolks.
Before you start, gather the real flavor builders: tarragon, shallot, wine, vinegar, peppercorns, egg yolks, and clarified butter or ghee.
Egg yolks give the sauce body and help the butter hold with the reduction.
Clarified butter or ghee creates the smooth, buttery base. Clarified butter is more stable than regular melted butter.
White wine and vinegar bring acidity so the sauce does not feel heavy.
Shallot and black pepper add savory depth to the reduction.
Tarragon gives béarnaise its signature fresh, lightly sweet, anise-like flavor.
Lemon juice brightens the finished sauce. Start with 1 teaspoon, then add more only after tasting.
Chervil or parsley adds a fresh herb finish, but it is optional.
Butter gives béarnaise its luxury, but vinegar, shallot, and tarragon give it a reason to exist.
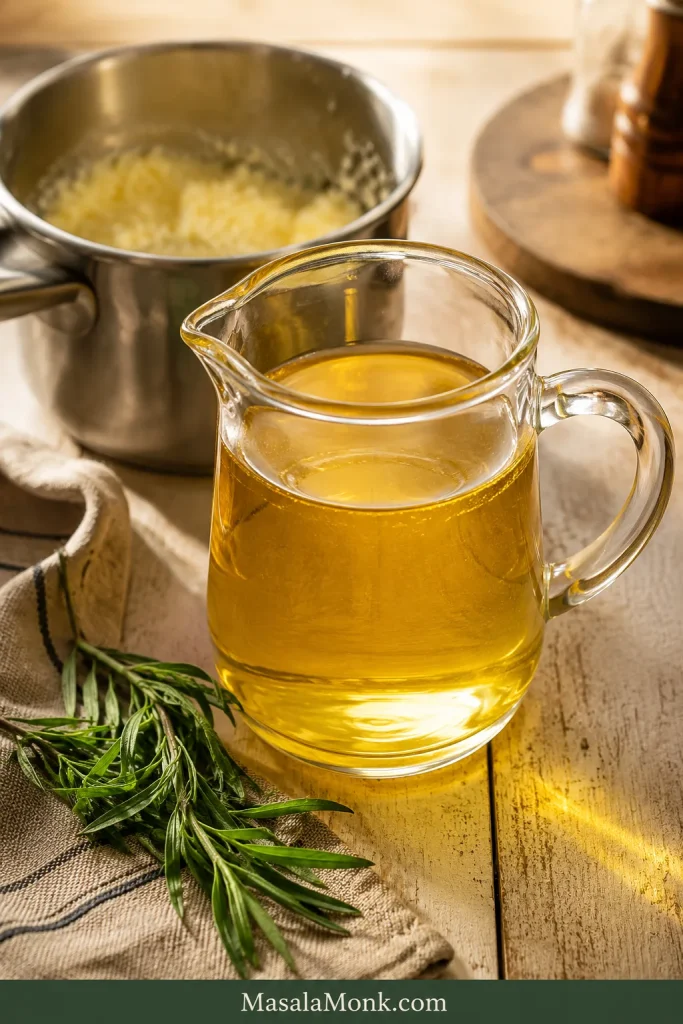
Tarragon matters most. Use stems or whole sprigs in the reduction, then fresh chopped leaves at the end. Chervil is lovely if you have it, but the recipe still works without it.
The shallot can be minced or sliced, the wine only needs to be dry, and ghee is completely fine. Focus on a concentrated-but-not-dry reduction and a slow butter stream at the start.
Best Butter, Wine, and Vinegar for Béarnaise
You do not need rare ingredients, but you do want the right kind of butter, a dry wine, and a clean vinegar. If you like sauces where acid and herbs do the heavy lifting, this chimichurri recipe is the brighter, no-butter steak sauce to keep in the same rotation.
Clarified butter is the most reliable choice because the water and milk solids have been removed. Ghee is the easiest shortcut because it is already clarified. Regular unsalted melted butter works in a pinch, though the finished sauce may be slightly looser. Salted butter can work too; reduce the added salt and taste at the end. Brown butter changes the flavor too much for this tarragon sauce.
To clarify butter quickly, start with about 1 cup / 225 g unsalted butter. Melt it gently, let it sit for a minute, skim off any foam if you like, then pour off the clear golden butter and leave the white solids behind. For this recipe, you need about ¾ cup / 170–175 g clarified butter.
What Clarified Butter Should Look Like
The clear golden butter is what you want to pour into the sauce. Leave the cloudy milk solids behind so the emulsion has a better chance of staying smooth.
Clarified butter or ghee is the easiest fat for blender béarnaise because it blends smoothly and leaves most milk solids behind.
For wine, use a dry white wine such as Sauvignon Blanc, Pinot Grigio, Pinot Gris, dry Chardonnay, or dry vermouth. Avoid sweet wine, heavily oaked wine, and harsh cooking wine. The reduction makes every flavor louder, so use something clean and dry.
White wine vinegar is the easiest traditional choice. Champagne vinegar is softer. Tarragon vinegar is excellent if you want to boost the herb flavor. Red wine vinegar works, but tastes sharper and a little darker. Apple cider vinegar can work in a pinch, but it is less traditional.
Best Blender, Jar, and Tools for Béarnaise
Most important: use an immersion blender or stick blender in a tall narrow jar. The jar should be just wide enough for the blender head, which helps the yolks and butter pull into a stable sauce.
Also useful: a small saucepan for the reduction, a fine-mesh strainer for a smoother sauce, and a measuring cup or jug for pouring the butter slowly.
Optional: a thermometer helps if you want to check butter temperature, and a warmed thermos can hold the sauce briefly for serving.
A regular blender or Vitamix can work, but use low to medium speed and stream the butter slowly. Because the contents are warm, vent the lid slightly or remove the center cap and cover the opening with a folded towel.
No immersion blender? You can still use the classic whisked method, which uses the same reduction and butter.
In a cold kitchen, pre-warm the jar with hot water, then dry it before adding the yolks.
How to Make Blender Béarnaise
The blender does most of the work here. Your job is to make the reduction, keep the butter hot, and pour slowly at the beginning.
Keep the sauce warm and off direct heat; that is where béarnaise stays smoothest.
1. Make the Tarragon Reduction
Add the wine, vinegar, shallot, tarragon stems or sprigs, and crushed peppercorns to a small saucepan. Simmer gently until you have about 1½–2 tablespoons / 22–30 ml of strained liquid. This usually takes 5–8 minutes.
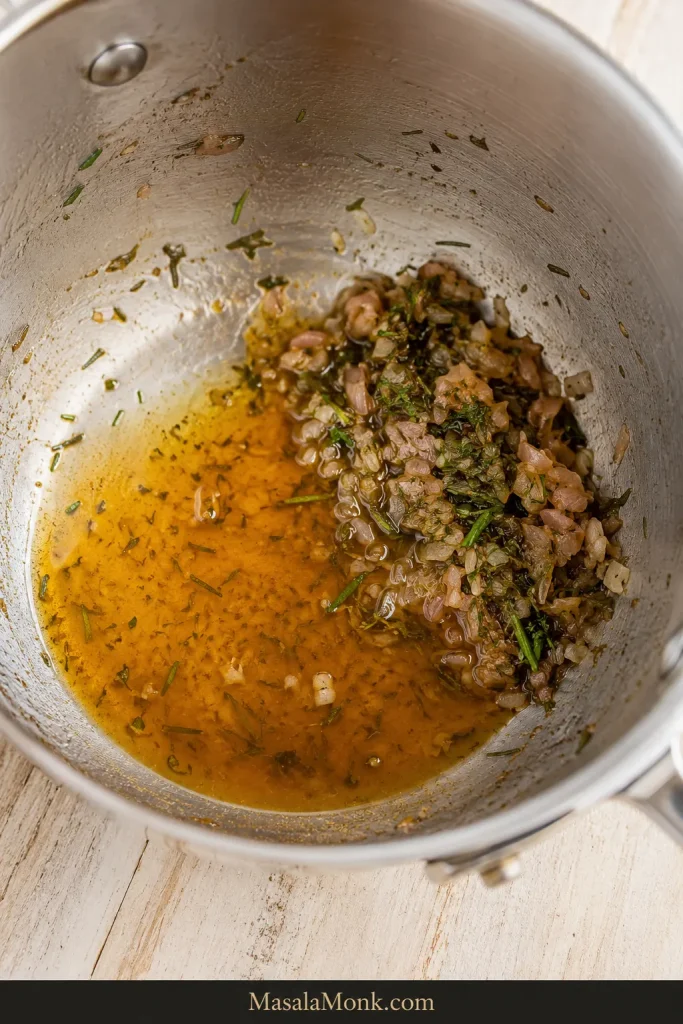
The reduction should smell sharp, herbal, and slightly sweet from the shallot. The pan should still have a small puddle of liquid, not just wet shallots. That little bit of liquid is part of the sauce.
This is where the sauce starts to smell like dinner instead of separate ingredients.
If the reduction goes too far, add 1–2 teaspoons warm water to the pan, swirl, and strain. You want concentrated flavor, not sticky syrup.
What the Tarragon Reduction Should Look Like
This is the point where the flavor is concentrated but the pan is not dry. You want enough liquid left to carry the tarragon, shallot, pepper, and vinegar into the sauce.
Stop reducing when only a small glossy puddle remains; that liquid is concentrated béarnaise flavor, not something to cook away completely.
2. Strain and Cool Slightly
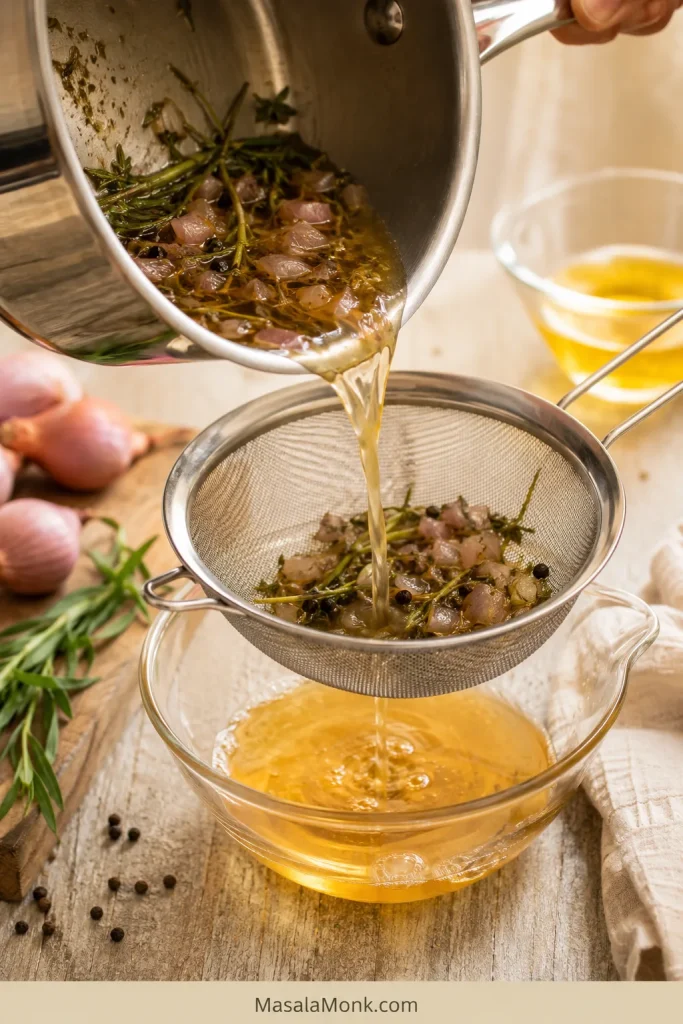
Pour the reduction through a fine-mesh strainer. Press gently on the shallot and herbs to get the flavorful liquid out, then discard the solids.
Straining gives you a smoother finish. A little minced shallot left in the sauce is fine for a rustic version, but the smooth version is easier for this blender method.
Next, strain the tarragon reduction so the blender sauce gets the flavor of the shallot and herbs without the rough pieces.
3. Add the Yolks
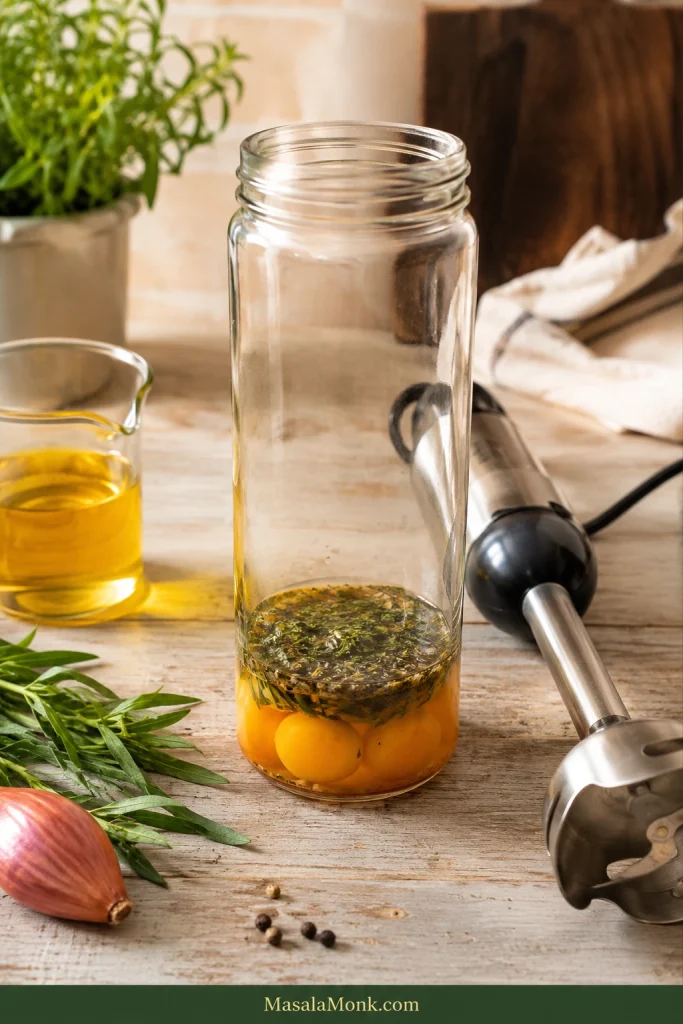
Add the egg yolks, strained reduction, salt, and 1 teaspoon lemon juice to your blending jar. This is the base that will catch the hot butter and turn it into béarnaise.
Room-temperature yolks emulsify more easily than cold yolks. Take eggs out 20–30 minutes before making the sauce, or place cold whole eggs in a bowl of warm water for 5 minutes before separating the yolks.
Start with yolks and cooled reduction in the jar; this base gives the hot butter something stable to blend into.
4. Heat the Butter
A thermometer is helpful but not required. Heat the clarified butter or ghee until hot and fully liquid. If using a thermometer, aim for about 160–180°F / 71–82°C.
Without a thermometer, the butter should be fully melted, lightly steaming, and hot to the touch if a drop hits a spoon. Keep it away from browning or smoking.
Butter that is too cool can leave the finished sauce thin. Butter that is aggressively hot can push the yolks too far.
5. Blend and Stream Slowly
Place the immersion blender at the bottom of the jar. Blend the yolks and reduction for 5–10 seconds on medium to high speed.
With the blender running, slowly stream in the hot butter. Start with a very thin stream. Once the sauce begins to thicken, you can pour a little faster.
Then, pour the hot butter slowly at first. A thin stream helps the béarnaise thicken instead of separating.
6. Finish and Taste
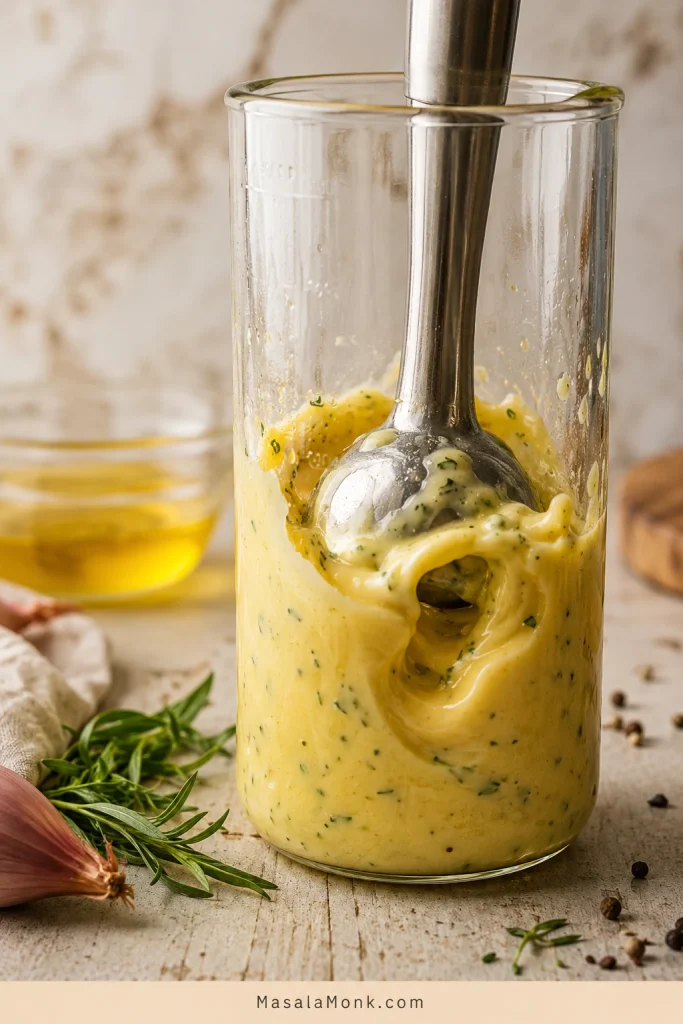
Blend until the sauce is thick, pale yellow, glossy, and spoonable. Near the end, move the blender gently up and down to bring everything together.
Once it looks smooth, stop. Over-blending can make the sauce too warm or loosen the texture, so treat the glossy emulsion as the cue to finish.
As the immersion blender runs, the sauce changes from loose yellow liquid to pale, glossy béarnaise with visible tarragon flecks.
Stir in the chopped tarragon and optional chervil or parsley. Taste once more and adjust with salt, lemon, or tarragon if needed.
Finish with Fresh Tarragon
Add the chopped herb once the sauce is already smooth. This keeps the final flavor fresh and unmistakably béarnaise.
Finally, fold in fresh tarragon off the heat so the herb stays bright and the sauce tastes like true béarnaise.
Texture target: thicker than cream, looser than mayo, rich enough to coat steak, and loose enough to drip slowly from a spoon.
When it falls from the spoon in a slow ribbon, stop blending. That is the moment to serve, not the moment to keep fixing it.
The Slow Ribbon Texture
This is the finished texture to look for: thick enough to coat food, but still soft enough to drip from a spoon.
Once the sauce drops in a slow ribbon, it is thick enough for steak but still loose enough for asparagus, salmon, or potatoes.
If it is too thick, blend in warm water, 1 teaspoon / 5 ml at a time, until it loosens.
Most béarnaise problems come from speed, heat, or a reduction that has gone too dry. The troubleshooting guide below shows how to spot the issue and bring the sauce back calmly.
Troubleshooting
Most béarnaise problems fall into two buckets: the sauce never formed, or it formed and then broke. If it never thickened, slow down and give the emulsion time. If it broke, start clean with warm water or a fresh yolk and blend the broken sauce back in slowly.
A slightly thick béarnaise is easier to fix than a broken one, so stop blending as soon as it looks smooth and spoonable.
How to Tell Béarnaise Has Split
A split sauce usually shows oily edges, butter pooling, or a grainy look. Stop adding butter and rebuild it slowly instead of pushing harder.
If béarnaise splits, look for oily edges or butter pooling on top; that means the emulsion has broken.
Béarnaise Troubleshooting Chart
Use this chart when the sauce looks wrong but you are not sure why. Match the symptom first, then choose the gentlest fix.
Problem
Why It Happened
How to Fix It
Sauce split or looks oily
Butter was added too fast, the sauce got too hot, or the emulsion broke.
Start with 1 teaspoon warm water or 1 fresh egg yolk in a clean jar. Blend while slowly adding the broken sauce back in.
Sauce is too thin
The emulsion has not thickened enough, or there is too much liquid.
Blend a little longer. If needed, heat very gently over barely simmering water while whisking.
Sauce is too thick
Too much butter, or the sauce has cooled and tightened.
Blend in warm water, 1 teaspoon / 5 ml at a time, until spoonable.
Scrambled bits
The egg yolks overheated.
If there are only a few bits, strain the sauce. If it tastes grainy or eggy, it is better to restart.
Too sour
The reduction was too sharp or too concentrated.
Add a little more warm butter first, then taste for salt. If the vinegar still feels harsh, round it out with a very small pinch of sugar.
Too salty
Salted butter, salty ghee, or too much added seasoning.
Add a few drops of lemon and a little more unsalted melted butter if available. Serve with unsalted steak, potatoes, or vegetables.
Bland
Not enough salt, tarragon, or acidity.
Add salt, chopped tarragon, and a few drops of lemon juice.
Butter pooling on top
The emulsion has broken.
Re-emulsify slowly into a clean jar with warm water or a fresh yolk.
A broken sauce looks more dramatic than it is. Pause, start clean, and rebuild it slowly.
How to Rescue Split Béarnaise
The safest rescue starts in a clean jar. Give the broken sauce a new base, then add it back slowly so the emulsion can reform.
To rebuild split béarnaise, add the broken sauce slowly into a clean yolk or a little warm water instead of whisking harder in the same bowl.
What Fixed Béarnaise Should Look Like
Once the sauce is rescued, it should look glossy and unified again. No greasy layer should be sitting on top.
After the rescue, the fixed béarnaise should look smooth again, with no greasy layer separating from the sauce.
Restaurant béarnaise feels fancy because it arrives warm, glossy, and perfectly timed with the steak. At home, the trick is not restaurant equipment. It is making the reduction first and blending the sauce right before serving.
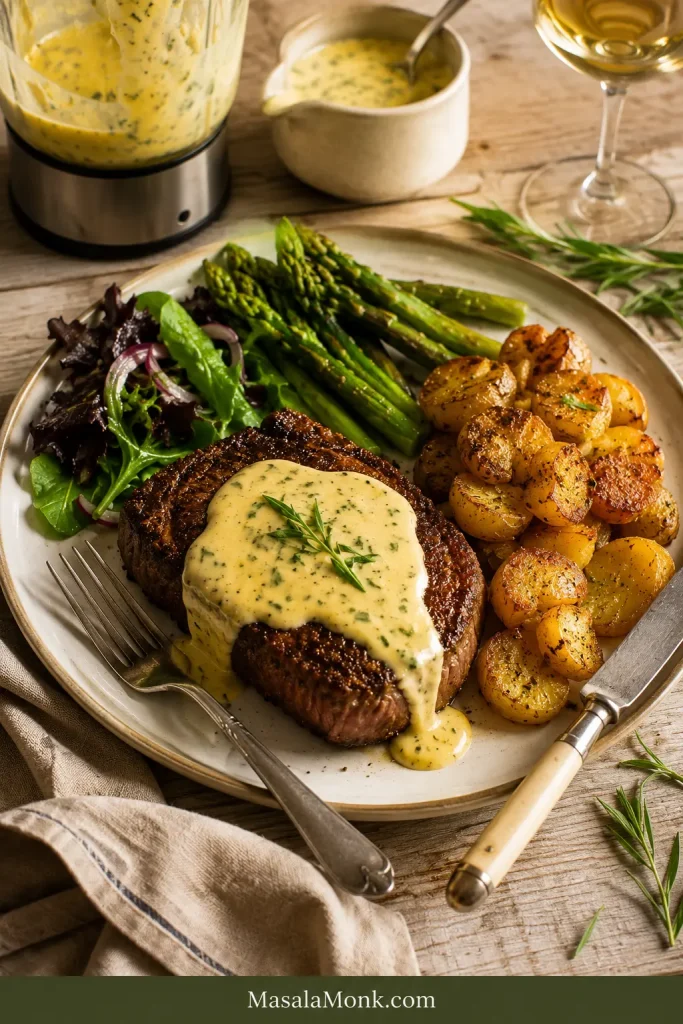
Béarnaise is famous with steak because it gives you richness and brightness at the same time. Plan on about 2–3 tablespoons per steak portion. This is not a sauce you pour like gravy. A few spoonfuls are enough to change the plate.
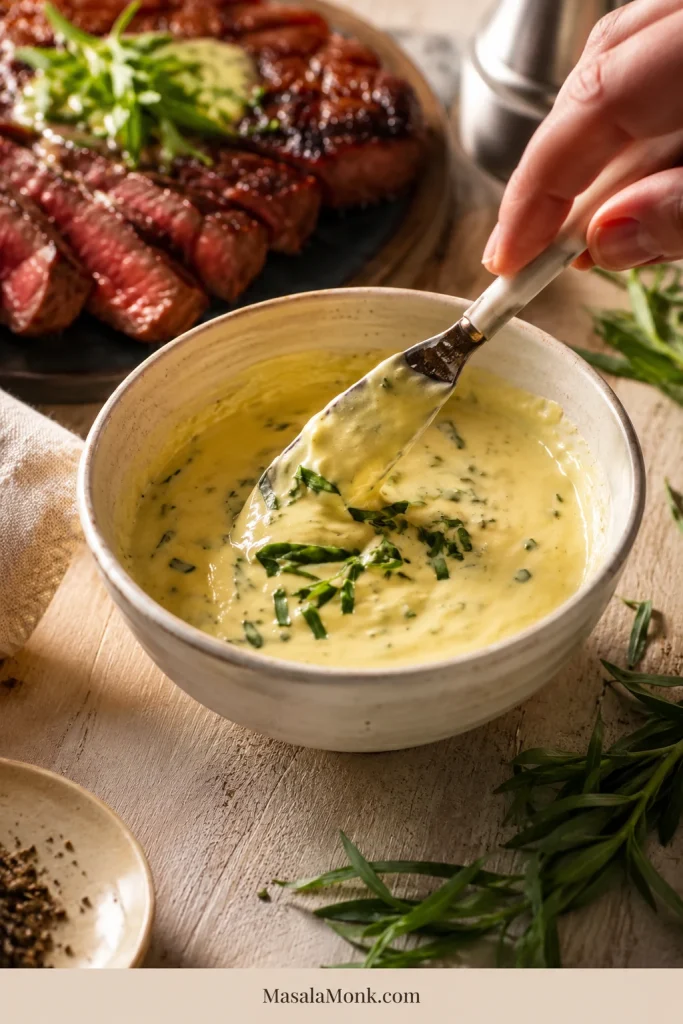
Spoon it over sliced steak so it catches in the juices. Use it on filet mignon when you want richness, ribeye when you want acidity against the fat, and prime rib when you want something brighter than gravy.
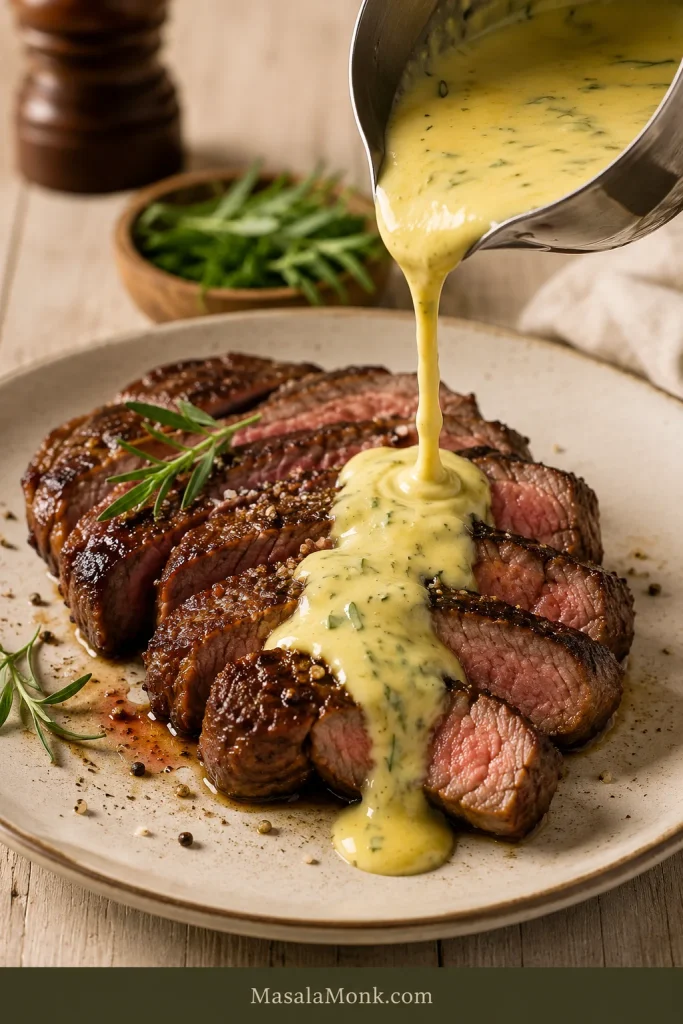
When the sauce meets hot steak, it should loosen at the edges, catch the meat juices, and leave a buttery tarragon trail on the plate.
How Much Béarnaise to Spoon Over Steak
A controlled pour gives the steak enough sauce for richness while still leaving the seared crust visible.
Pour béarnaise just before serving, using enough to coat the steak without hiding the crust or flooding the plate.
This is the sauce to make when the main dish is simple but you want the plate to feel like someone cared.
Blend the Sauce While the Steak Rests
This is the easiest timing move for steak night. The steak relaxes, the juices settle, and the béarnaise comes together right before serving.
Meanwhile, let the steak rest while the sauce comes together; that timing keeps dinner calm and the béarnaise warm.
Spoon the sauce over the steak just before serving.
Béarnaise is especially good with steak frites, filet mignon, ribeye, New York strip, sirloin, chateaubriand, and prime rib. It gives lean cuts richness and fatty cuts contrast.
What to Serve with Béarnaise Sauce
Steak is the classic pairing, but béarnaise is useful beyond beef.
Steakhouse pairings: prime rib, steak frites, roasted potatoes, fries, and asparagus.
Seafood pairings: salmon, white fish, lobster, crab, and crab cakes.
Brunch and leftovers: eggs, mushrooms, grilled chicken, and roasted vegetables.
Asparagus and roasted potatoes are the easiest vegetable wins. With seafood, salmon and lobster are the strongest pairings. Leftover sauce also works beautifully with eggs, mushrooms, and roasted vegetables. A spoonful is enough to make simple food feel cared for.
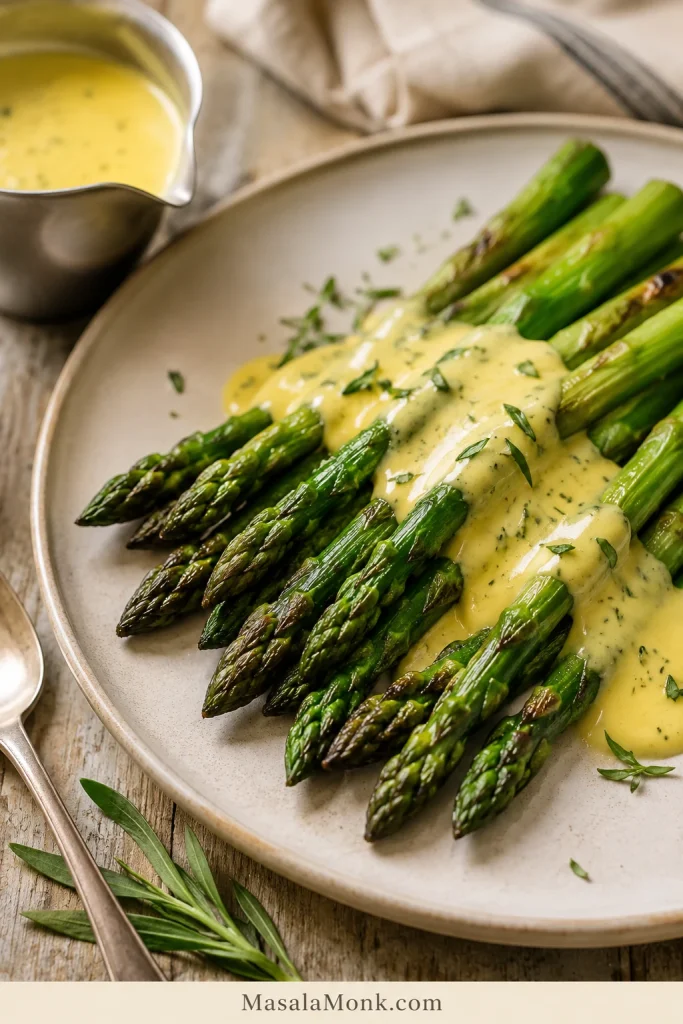
Béarnaise for Asparagus
Asparagus is the easiest vegetable pairing because the sauce adds richness while the vinegar keeps the spears lively.
Because of the vinegar and tarragon, béarnaise gives roasted asparagus richness while keeping the spears fresh and bright.
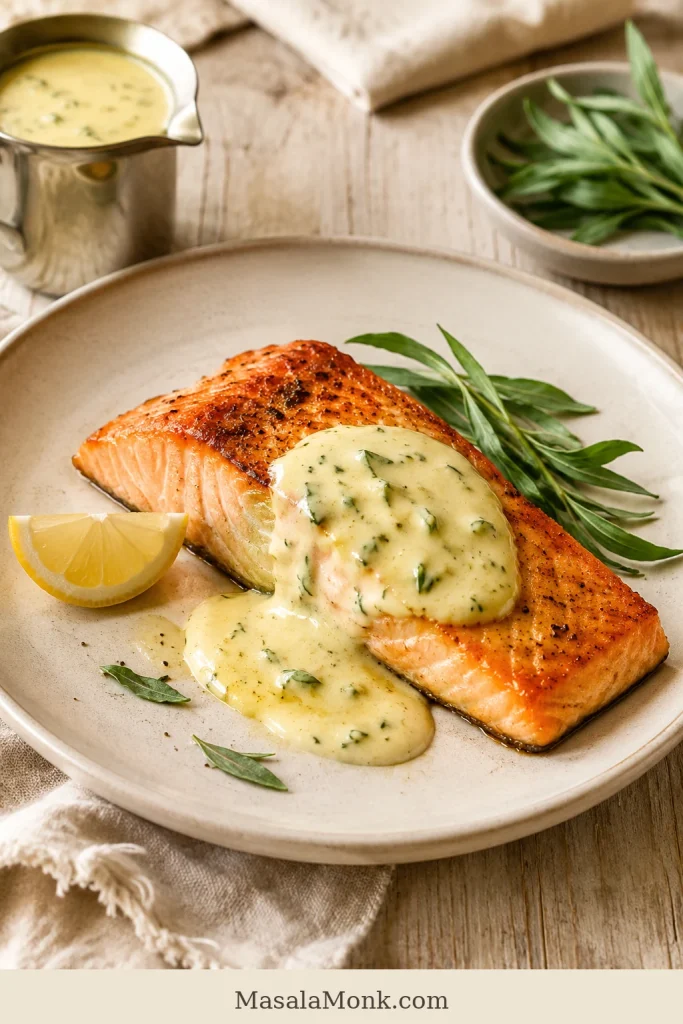
Béarnaise for Salmon
Salmon gives the sauce another place to shine beyond steak. Keep the spoonful small so the fish stays the focus.
Salmon works well with béarnaise because the butter adds luxury, while the tarragon and lemon keep the fish from feeling heavy.
Béarnaise is less ideal with very spicy dishes, tomato-heavy sauces, or delicate plates where a rich butter sauce would overwhelm the main ingredient.
For fish and chips or fried seafood, a cold, pickle-forward homemade tartar sauce may fit better.
What Is Béarnaise Sauce?
Béarnaise sauce is a warm French butter-and-egg-yolk sauce flavored with tarragon, shallot, pepper, white wine, and vinegar. It is a close relative of hollandaise, but it tastes sharper, more herbal, and is most often served with steak.
In plain terms, béarnaise is hollandaise’s steak-night cousin: buttery like hollandaise, but brighter, more savory, and built for browned meat.
A good béarnaise should not taste like plain melted butter. It should taste creamy at first, then bright and herbal enough to make you want the next bite. Tarragon gives it that lightly sweet, anise-like flavor that makes the sauce instantly recognizable.
Béarnaise vs Hollandaise
Béarnaise and hollandaise work the same basic magic: egg yolks help butter and a little liquid hold together as one smooth sauce. The difference is where they want to be served.
Steak, prime rib, salmon, lobster, crab, potatoes, asparagus
If hollandaise is the brunch sauce, béarnaise is the steak-night version: richer in herbs, sharper with vinegar, and built to stand up to browned meat. For the brunch side of this sauce family, this 5-minute Benedict sauce recipe uses a quick blender hollandaise method for eggs Benedict.
Classic Béarnaise Method
The blender method is the main recipe here. This classic whisked method is included for comparison, tradition, and anyone who wants the old-school French technique.
The classic method uses the same ingredients, but instead of using a blender, you whisk the yolks and reduction over gentle heat, then slowly whisk in clarified butter.
Make the same wine, vinegar, shallot, tarragon, and pepper reduction.
Strain the reduction and let it cool slightly.
Add egg yolks and reduction to a heatproof bowl set over a saucepan of barely simmering water.
Whisk constantly until the yolks thicken slightly and look pale and creamy.
Lift the bowl from the heat as needed if it feels too hot.
Slowly whisk in warm clarified butter, a few drops at first, then in a thin stream.
Finish with chopped tarragon, lemon juice, and salt.
The biggest danger with the classic method is overheating the yolks. Keep the heat gentle. If the bowl feels too hot to comfortably touch, lift it off the pan and keep whisking.
Make Ahead & Reheating
The best make-ahead move is simple: prepare the reduction early, then blend the sauce close to serving.
For guests, make the reduction before anyone arrives, then blend the sauce when the steak is resting. It gives you the calmest version of a sauce that looks much fussier than it is.
Making the Reduction Ahead
Simmer and strain the wine-vinegar-tarragon mixture, then refrigerate it for 1–2 days. Bring it back to room temperature before blending with the yolks.
Holding It for Dinner
Finished béarnaise is best fresh. If you need to hold it, keep it at serving temperature only as long as needed, ideally under an hour, in a warmed thermos or a bowl set near gentle heat. Keep it away from direct heat and boiling.
Béarnaise is an emulsion, not a simmering gravy. Make the reduction ahead, then finish the sauce close to serving whenever possible.
Refrigerating Leftover Sauce
You can refrigerate leftovers, but the texture changes. Because béarnaise is butter-based, it firms up in the fridge and may split when reheated. If storing leftovers, refrigerate them promptly in an airtight container and use within 1–2 days.
How to Reheat It Without Breaking the Sauce
Reheat it slowly. A warm water bath is safer than direct heat. Place the sauce in a heatproof bowl over warm water and whisk slowly until it loosens. If it is too thick, whisk in warm water a few drops at a time.
A microwave can work for very small amounts, but it is risky. Use very short bursts, whisk between each one, and stop before the sauce gets hot enough to scramble.
If It Gets Cold: Use It Like Béarnaise Butter
Cold béarnaise firms up like flavored butter. It will not have the same glossy texture, but it can still melt beautifully over hot steak, roasted potatoes, asparagus, or fish. Use a small spoonful the way you would use compound butter.
When chilled, leftover béarnaise firms like tarragon butter; melt a small spoonful over hot steak, potatoes, asparagus, or fish.
Substitutions
Béarnaise is flexible up to a point. You can adjust the wine, vinegar, herbs, and butter, but tarragon is the flavor that keeps it recognizable.
Béarnaise Without Fresh Tarragon
Use about 1 teaspoon dried tarragon for every 1 tablespoon fresh tarragon. Dried tarragon is stronger and less bright than fresh, so start small and adjust. Tarragon vinegar can also reinforce the flavor.
Without tarragon at all, you can make a delicious herb butter sauce, but it will lose the flavor that makes béarnaise recognizable. Use parsley, chives, dill, basil, or a mix of soft herbs if that is what you have.
Béarnaise Without Wine
Replace the wine with water, non-alcoholic white wine, or a little extra vinegar diluted with water. The sauce will be slightly less complex, but it will still work.
Salted Butter
Salted butter can work, but reduce the added salt. Taste the sauce at the end before adding more.
Quick Flavor Variations
Peppercorn béarnaise: add extra crushed black pepper to the reduction.
Chili béarnaise: add a pinch of cayenne or finely minced chili.
Lemon béarnaise: add extra lemon juice at the end, especially for fish or seafood.
Keep variations subtle. The sauce should still taste like tarragon, butter, and a sharp wine-vinegar reduction.
Small-Batch Béarnaise and Doubling Tips
For a smaller steak dinner, use 2 large yolks, about 1 tablespoon / 15 ml reduction, and about ½ cup / 115 g clarified butter or ghee. Very tiny batches can be harder in a blender because the blades need enough volume to catch the yolks and butter.
For guests, it is often safer to make two separate batches unless your container is tall and narrow enough for the blender head to stay submerged. Make the reduction ahead, then blend the sauce in one or two batches close to serving.
Real Shortcuts That Still Taste Like Béarnaise
The best shortcuts are the ones that keep the béarnaise identity: tarragon, acidity, egg yolks, and butter.
Use ghee: it behaves like clarified butter and keeps the butter step simple.
Make the reduction ahead: this is the best make-ahead shortcut for guests or steak night.
Use dried tarragon or tarragon vinegar: both help when fresh tarragon is limited.
Use a smaller spoonful: for a lighter serving, keep the real sauce but use less of it and brighten with lemon, pepper, and extra tarragon.
Cold Tarragon Mayo Shortcut
For a cold béarnaise-style shortcut, stir mayonnaise with chopped tarragon, lemon juice, Dijon mustard, a little minced shallot, black pepper, and a tiny splash of vinegar. For the base, you can use store-bought mayo or start with this homemade mayonnaise recipe and season it from there.
This is not warm béarnaise, but it works well with steak sandwiches, fries, cold seafood, and leftover roast beef.
When Store-Bought Makes Sense
Store-bought versions, packet mixes, and jars can help on a weeknight. Homemade béarnaise is still the better choice for steak dinners, holidays, guests, and date nights because the tarragon, shallot, vinegar, and butter are brightest when freshly combined.
A packet mix can save dinner, but it will not give you the same fresh tarragon lift as homemade sauce.
FAQs
Still adjusting the sauce or wondering if a swap will work? These quick answers cover the questions that usually come up mid-recipe.
What is béarnaise sauce?
Béarnaise is a warm French butter-and-egg-yolk sauce flavored with tarragon, shallot, vinegar, wine, and pepper. It is especially popular with steak.
What is béarnaise sauce made of?
It is made with egg yolks, clarified butter, white wine, vinegar, shallots, black pepper, and fresh tarragon. Some versions also include chervil, parsley, lemon juice, or cayenne.
Is béarnaise the same as hollandaise?
No. Hollandaise is usually flavored with lemon. Béarnaise uses tarragon, shallot, vinegar, wine, and pepper, which makes it more savory and better suited to steak.
What does béarnaise taste like?
It tastes buttery, tangy, and herbal, with tarragon giving it a lightly sweet, anise-like finish.
Does blender béarnaise work as well as classic?
Yes. Blender béarnaise can be smooth, rich, and steakhouse-worthy. The classic method gives you traditional whisked technique, but the blender method is easier and more reliable for most home cooks.
What can I use instead of fresh tarragon in béarnaise?
Use about 1 teaspoon dried tarragon for every 1 tablespoon fresh tarragon, or use tarragon vinegar to reinforce the flavor. Without tarragon, the sauce will taste more like an herb butter sauce than classic béarnaise.
How do you make béarnaise without wine?
Replace the wine with water, non-alcoholic white wine, or a little extra vinegar diluted with water. The flavor will be slightly less complex, but the sauce will still work.
Why did my béarnaise split?
It usually splits when the butter is added too quickly, the sauce gets too hot, or the emulsion does not form properly. To fix it, start with 1 teaspoon warm water or a fresh egg yolk in a clean jar, then slowly blend the broken sauce back in.
How far ahead can you make béarnaise?
The reduction can be made 1–2 days ahead. Finished béarnaise is best fresh, but it can be held briefly in a thermos or gentle water bath, ideally for less than an hour.
Should béarnaise be served warm or cold?
Béarnaise is best served warm. When cold, it firms like flavored butter. It can still melt nicely over hot steak, potatoes, asparagus, or fish, but it will not have the same glossy texture.
Is it béarnaise, bearnaise, or bernaise?
The classic French spelling is béarnaise. In English, many people type bearnaise without the accent, and some type bernaise. They usually mean the same tarragon butter sauce for steak.
Final Thought
You are not trying to pass a French sauce exam. You are trying to make steak taste richer, fish feel more special, and potatoes or asparagus disappear faster from the plate.
If the béarnaise is warm, glossy, balanced, and full of tarragon, you got there. Serve it before you overthink it.
Made it for steak, salmon, asparagus, or fries? Tell me where the béarnaise landed first — this is one of those sauces people start putting on everything.
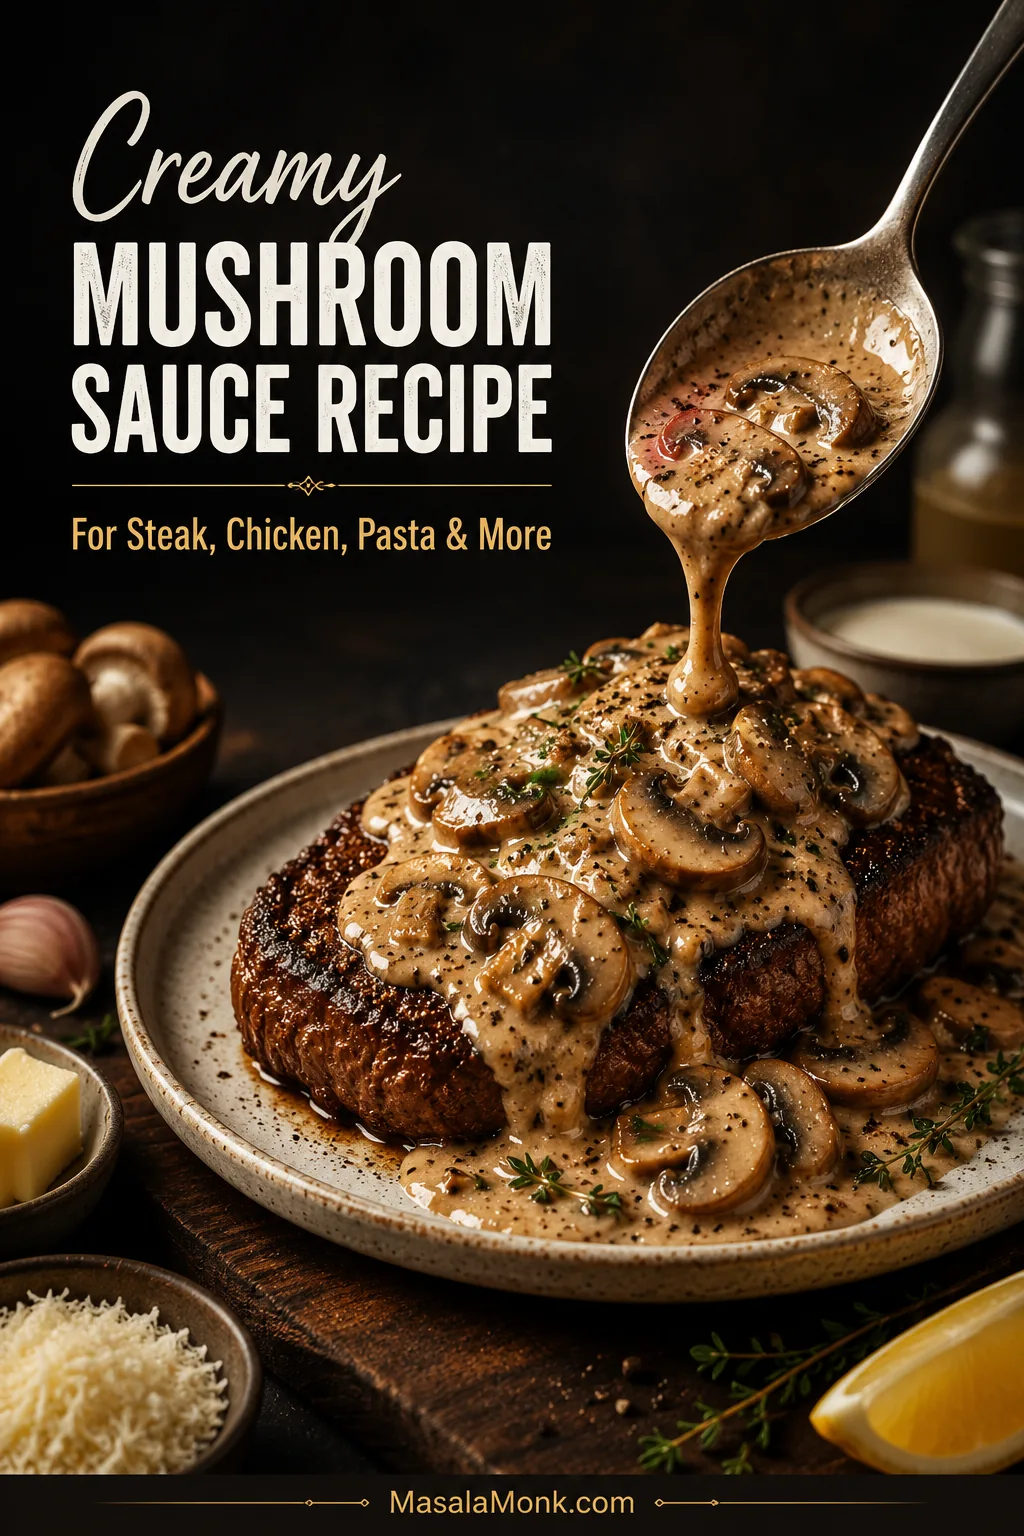
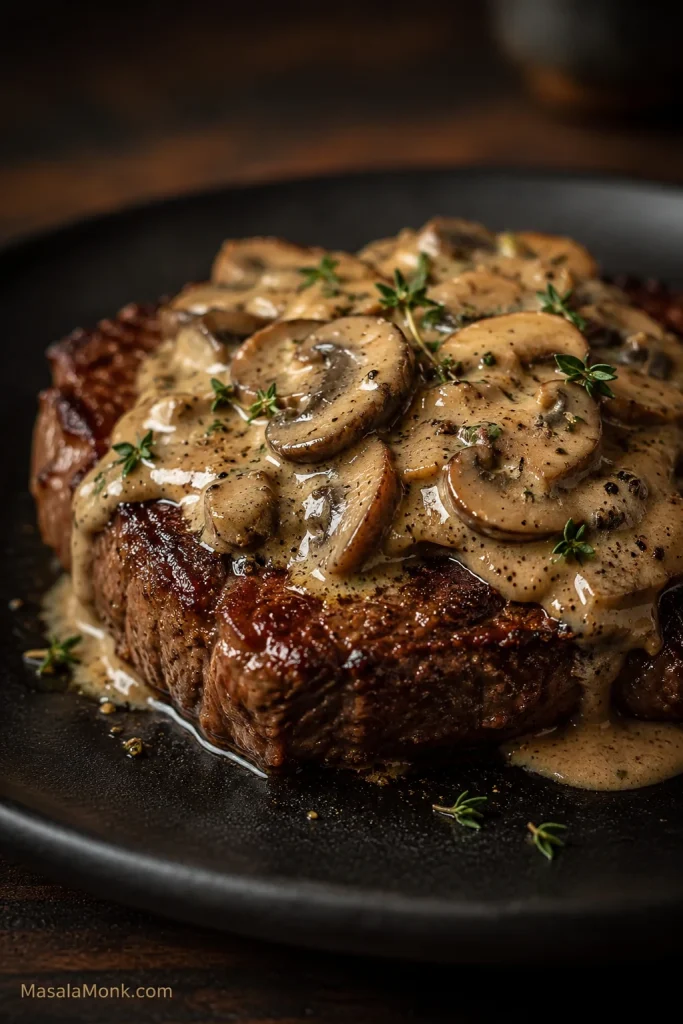
This is the sauce to make when dinner is almost there but needs one thing to pull it together. Steak feels restaurant-style. Chicken tastes richer. Pasta turns silky. Even potatoes, rice, toast, or roasted vegetables feel like a proper meal once a glossy mushroom sauce lands on top.
It is not quite a side dish and not quite a gravy; it is the thing that makes the plate feel finished.
The secret is simple: brown the mushrooms first, then choose the finish. Let them release their moisture, shrink, darken, and catch at the edges before the cream goes in. Once that happens, garlic, broth, cream, parmesan, thyme, black pepper, and a little lemon turn those browned bits into a sauce you can use half a dozen ways.
This creamy mushroom sauce recipe takes about 20 to 25 minutes and makes roughly 3 cups / 700 to 720 ml. Keep it thick for steak, loosen it for pasta, soften it for chicken, or push it slightly toward gravy for potatoes and rice. Start with the creamy version below; the no-cream, no-wine, dairy-free, and gravy-style notes are adaptations, not separate recipes.
A good mushroom sauce starts with well-browned mushrooms, then turns into a shiny skillet sauce that tastes savory first and creamy second.
Time: about 20 to 25 minutes in a wide skillet
Yield: about 3 cups / 700 to 720 ml
Mushrooms: 400–450g / 14–16 oz, roughly two 8 oz packs
Best mushrooms: cremini, baby bella, button, portobello, or mixed mushrooms
Best uses: steak, chicken, pork chops, pasta, mashed potatoes, rice, vegetables, toast, and omelettes
Texture: smooth and spoonable, not watery, gluey, greasy, or split
This is a skillet mushroom sauce, not a condensed soup shortcut or a mushroom ragu. Brown the mushrooms first, then finish with cream and parmesan so the sauce tastes deep before it tastes creamy.
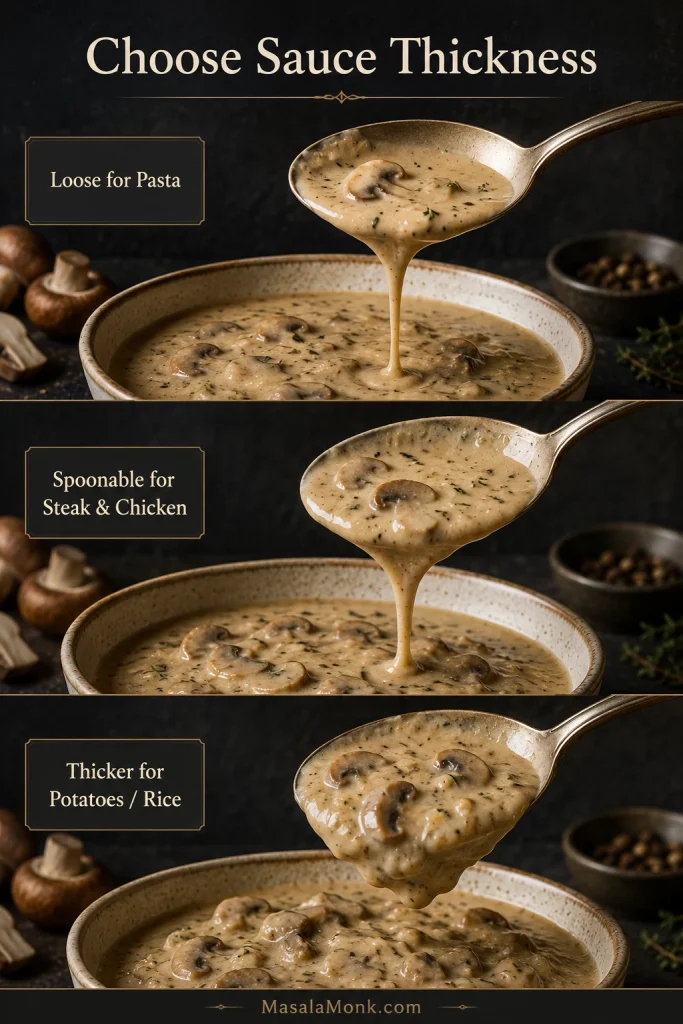
Choose the Finish Before You Start
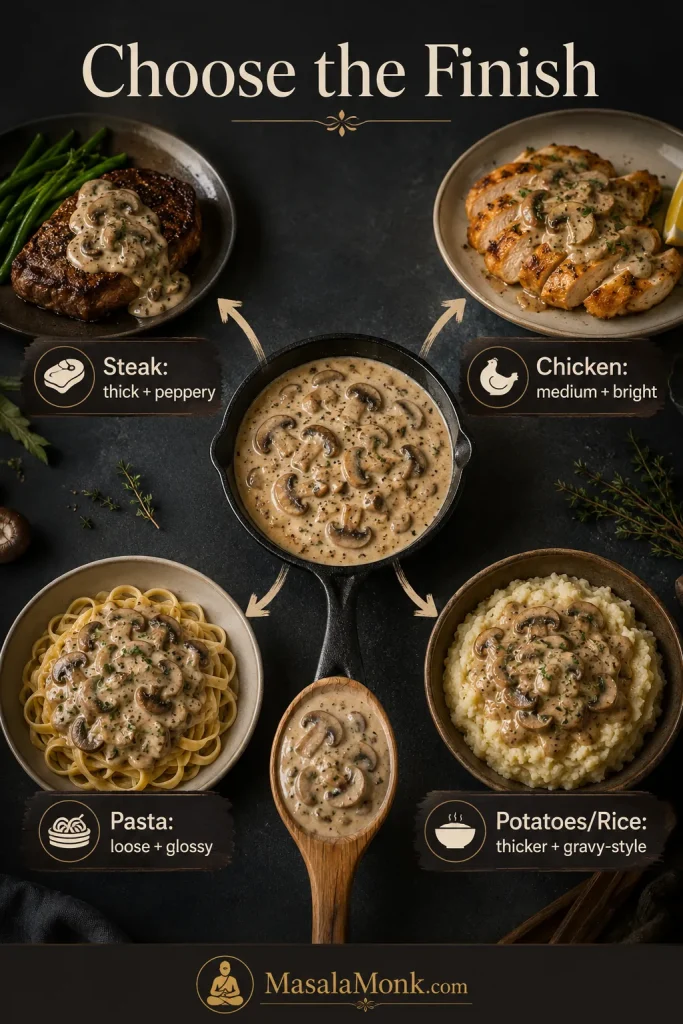
One skillet, one base, many possible dinners. Before you reduce it too far, decide where it is going: over steak, through pasta, across chicken, or closer to gravy.
Use the Sauce Map before the final simmer so one mushroom sauce can move toward steak, chicken, pasta, or potatoes without starting over.
Before you start: Use a wide skillet. Wait until the mushroom liquid cooks off. Add parmesan over low heat. Those three choices prevent most watery, bland, split, or clumpy mushroom sauce problems.
Pick the direction first, then cook the base recipe below. In the final 2 minutes, the same skillet can stay thick for steak, loosen for pasta, or move closer to gravy.
Creamy Mushroom Sauce Recipe for Steak, Chicken, Pasta & More
A flexible skillet mushroom sauce built on deeply browned mushrooms, garlic, broth, cream, parmesan, thyme, and black pepper. Keep it spoonable for steak, looser for pasta, or thicken it slightly for a gravy-style finish.
Prep Time8 minutes
Cook Time15 minutes
Total Time23 minutes
YieldAbout 3 cups / 700–720 ml
Serves: 4 to 5 over steak, chicken, or pork chops; 3 to 4 with pasta
Equipment: 10- to 12-inch skillet, wooden spoon or spatula, whisk, measuring cup, fine grater or microplane
Ingredients
400–450g / 14–16 oz mushrooms, sliced about 1/4 inch / 6 mm thick
2 tbsp / 28g butter
1 tbsp / 15 ml olive oil
1 small shallot, finely minced, or 1/4 cup minced onion
3 garlic cloves, minced
2 tsp fresh thyme leaves, or 1/2 tsp dried thyme
1/4 cup / 60 ml dry white wine, optional
1/2 cup / 120 ml chicken, beef, or vegetable broth
1 cup / 240 ml heavy cream or double cream
1/3 cup / about 30g finely grated parmesan
1–2 tsp lemon juice, to taste
1/4 tsp salt to start, plus more to taste after parmesan
Freshly ground black pepper, to taste
1–2 tbsp chopped parsley, optional, for finishing
Optional thickener for a gravy-style sauce: 1 tsp cornstarch mixed with 1 tbsp cold water.
Instructions
Brown the mushrooms. Heat the butter and olive oil in a wide skillet over medium-high heat. Add the mushrooms and cook for 6 to 8 minutes, stirring occasionally, until they release moisture, the moisture evaporates, the pan looks mostly dry, and the edges begin to brown. If the pan is crowded, cook them in two batches.
Add aromatics. Season the browned mushrooms with 1/4 tsp salt and black pepper. Add the shallot or onion and cook for 1 to 2 minutes. Add the garlic and thyme and cook for 30 to 45 seconds, just until fragrant.
Deglaze the pan. Pour in the wine, or use extra broth if skipping wine. Scrape the browned bits from the bottom of the skillet. Simmer until the wine smells less sharp and reduces by about half, about 1 minute.
Add broth and cream. Lower the heat to medium. Add the broth and cream. Simmer gently for 4 to 6 minutes, stirring occasionally, until the cream turns beige, the sauce begins to thicken, and it leaves light trails when you stir.
Finish with parmesan. Reduce the heat to low. Stir in the parmesan gradually until melted and smooth. Taste before adding more salt.
Balance the sauce. Add black pepper and 1 teaspoon lemon juice. Taste again. If it tastes flat, add salt. If it tastes heavy, add lemon. If it tastes creamy but not savory, add parmesan, Worcestershire, or more pepper.
Adjust thickness. For steak or pork chops, simmer a little longer until spoonable. For pasta, stop slightly loose and loosen with reserved pasta water as needed. For a thicker gravy-style sauce, stir in the cornstarch slurry and simmer for 30 to 60 seconds.
Serve warm. Spoon over steak, chicken, pork chops, pasta, mashed potatoes, rice, roasted vegetables, meatballs, toast, or omelettes.
Best Finishes
Steak: beef broth, Dijon, Worcestershire, and extra black pepper.
Chicken: chicken broth, lemon, parsley, and a medium-thick texture.
Pasta: stop the sauce slightly loose and loosen with pasta water.
No wine or gravy-style: use broth instead of wine; add the optional slurry for a thicker finish.
Storage: Refrigerate leftovers and reheat gently with a splash of liquid.
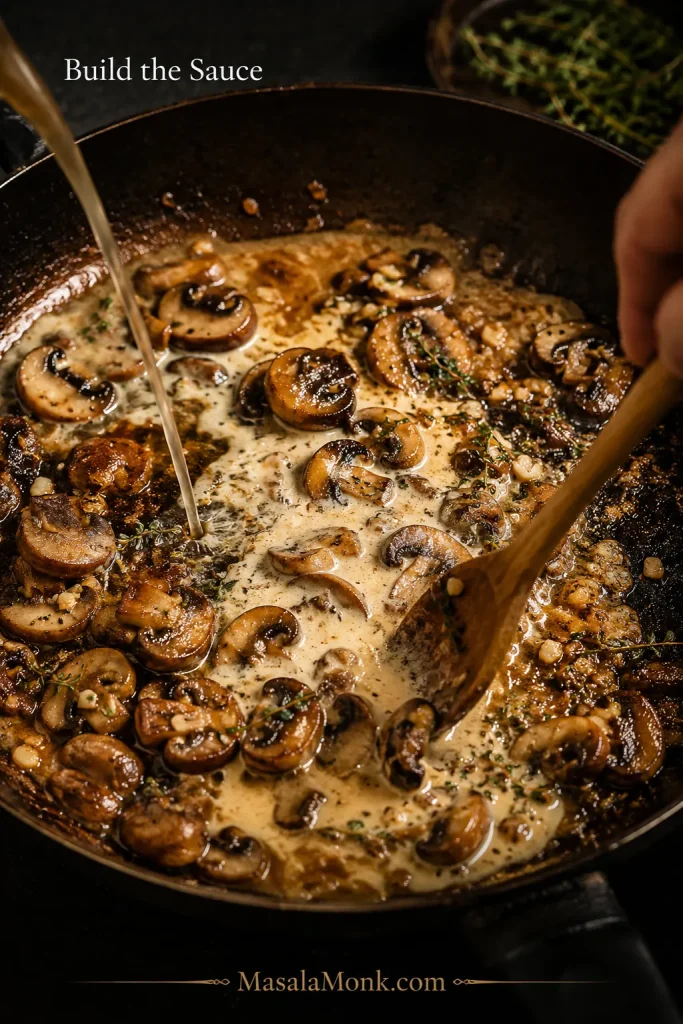
This is the quick turn from browned mushrooms to sauce: liquid lifts the browned bits, and cream pulls everything together.
After browning, deglazing pulls flavor from the skillet into the sauce. Then cream ties the mushrooms, garlic, thyme, and pan juices together.
What Browning Should Look and Smell Like
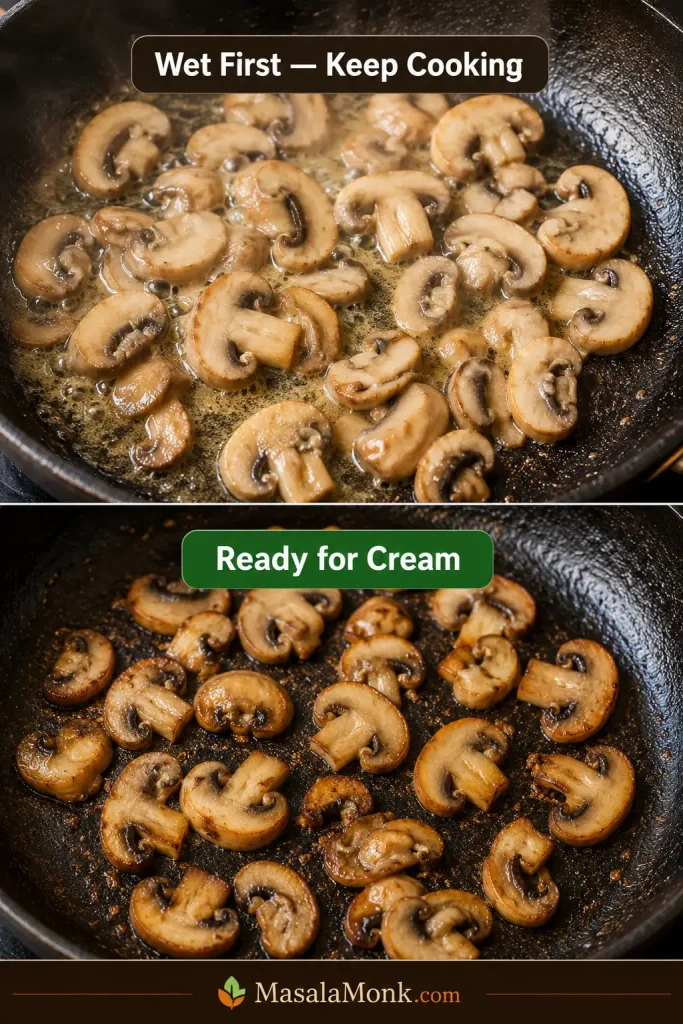
This is the part where patience pays you back. Mushrooms do not become rich the second they hit the pan. First they steam, then they shrink, then the pan goes quieter and drier, and only after that do the edges begin to brown.
Do not judge the sauce in the first few minutes; mushrooms get messy before they get good. They may look wet, crowded, and pale at first, but keep going. The pan should smell deeper and nuttier before the cream goes in, not just buttery.
First comes moisture, then color. When the pan quiets down and the mushrooms turn golden at the edges, the sauce will taste much more savory.
Too wet: keep cooking until the pan looks mostly dry.
Too crowded: cook the mushrooms in two batches.
Too pale: give them another minute or two before adding garlic.
Ready for cream: the mushrooms are smaller, darker, and golden at the edges.
If the sauce still turns watery, bland, or thin after browning, use the troubleshooting guide before adding more cream.
Once the cream goes in, keep the heat gentle. The cream should turn beige as it picks up the browned mushroom juices. If it tastes creamy but not mushroomy, the problem is usually browning, not the amount of cream.
Tested texture note: A 12-inch skillet browns 400–450g mushrooms much better than a small saucepan. If the mushrooms pile up deeply, cook them in two batches. The sauce also thickens after parmesan and again as it cools, so stop slightly looser than you want it on the plate if it will sit for more than 5 minutes or if you are tossing it with pasta.
Ingredient Notes
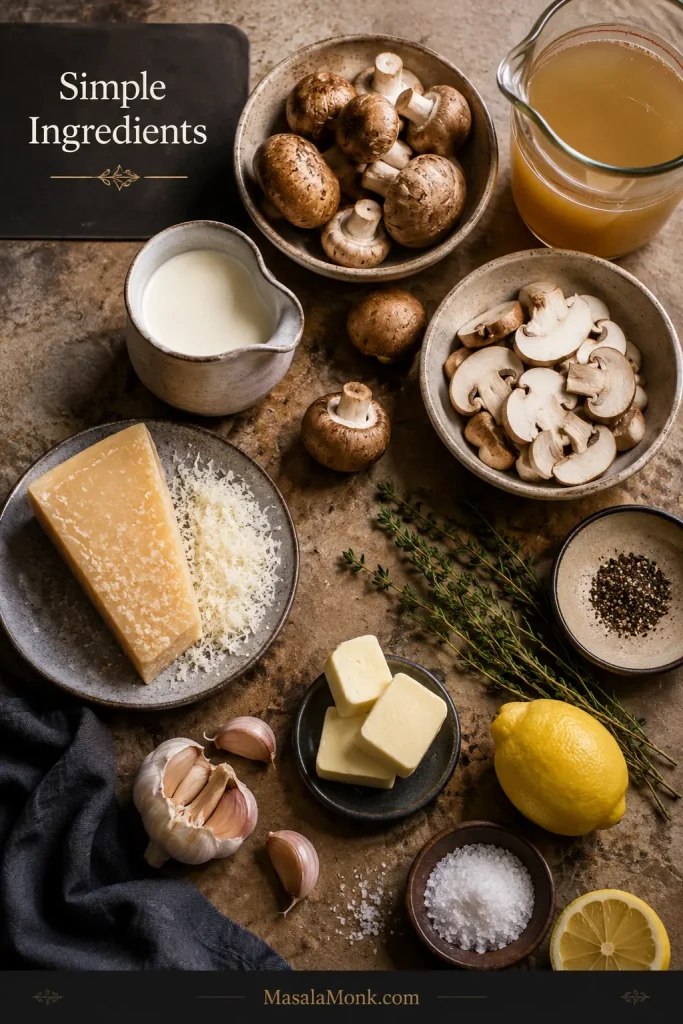
The sauce is simple enough that the small choices show. Mushrooms bring savoriness, broth balances the pan, cream gives body, parmesan adds depth, and lemon keeps the finish lifted.
Before the pan gets hot, line up the sauce builders: dry mushrooms for searing, broth for the pan, cream for body, parmesan for depth, and lemon for balance.
Cremini or baby bella mushrooms give the best everyday flavor, but button, portobello, or mixed mushrooms also work. Slice them about 1/4 inch / 6 mm thick.
Fresh, dry-looking mushrooms sear better than damp ones. If the mushrooms are dirty, a quick rinse is fine, but dry them well before cooking. For a quick visual reference, the Mushroom Council’s mushroom cleaning tips show the same brush, wipe, or brief-rinse approach.
Butter adds roundness, olive oil helps with heat, and pan drippings make the sauce deeper if you cooked steak, chicken, or pork first. Use chicken broth for chicken and pasta, beef broth for steak, and vegetable broth for a vegetarian version.
Heavy cream gives the smoothest finish, and finely grated parmesan melts into the pan instead of sitting in clumps. MasalaMonk’s Parmesan vs Parmigiano Reggiano guide is helpful when choosing between hard cheeses.
Dry white wine helps lift the browned bits from the pan, but broth works well too. If you skip wine, finish with lemon juice so the sauce still tastes bright.
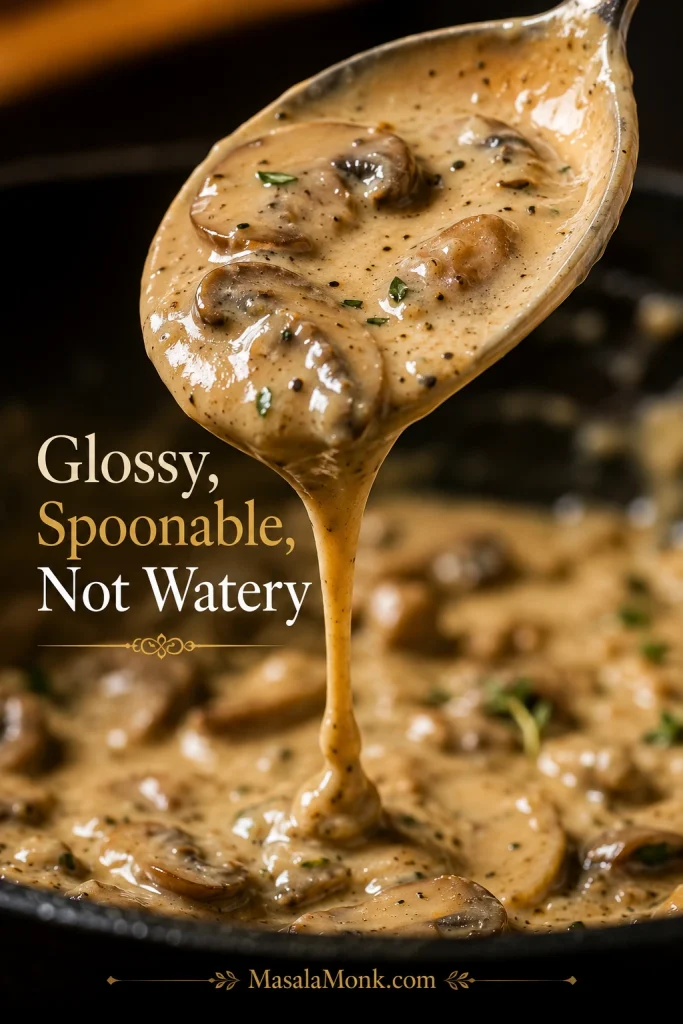
The sauce should coat the back of a spoon and fall in a slow ribbon for steak, chicken, and pork chops. For pasta, it should flow more loosely because it tightens as you toss. For potatoes, rice, or meatballs, it can sit closer to gravy.
Spoon test: Dip a spoon into the sauce and run your finger through the coating on the back. A line that holds for a moment means it is thick enough for steak or chicken. When the coating closes immediately, simmer longer. Loosen the sauce gently if it barely moves.
Use the spoon test before serving. If the sauce coats and drips slowly, it is ready; if it runs, reduce it; if it drags, loosen it gently.
Then check the final texture.
Thickness is the final choice. Keep it loose for pasta, medium-spoonable for steak and chicken, and heavier when you want a mushroom gravy finish.
If pasta tightens in the bowl, that is normal. A splash of hot pasta water brings it back.
How Much Sauce to Use — and Where It Works Best
Use enough sauce to feel generous, not so much that steak, pasta, or potatoes disappear under it.
Serve it with
How much to use
Steak
1/3 to 1/2 cup per steak
Chicken breast or thigh
1/3 cup per piece
Pork chop
1/3 to 1/2 cup per chop
Pasta
Full batch for 250g / 8 oz long pasta or 300g / 10 oz short pasta
Mashed potatoes, rice, or vegetables
1/4 to 1/3 cup per serving
Toast or omelette
2 to 4 tbsp per serving
Mushroom Sauce for Steak
For steak: use pan drippings if you have them, and reduce until the sauce sits on the meat instead of running across the plate.
Mushroom sauce for steak should cling to the meat while the seared crust stays visible. Pepper, thyme, Dijon, or Worcestershire can deepen the finish.
Mushroom Sauce for Chicken
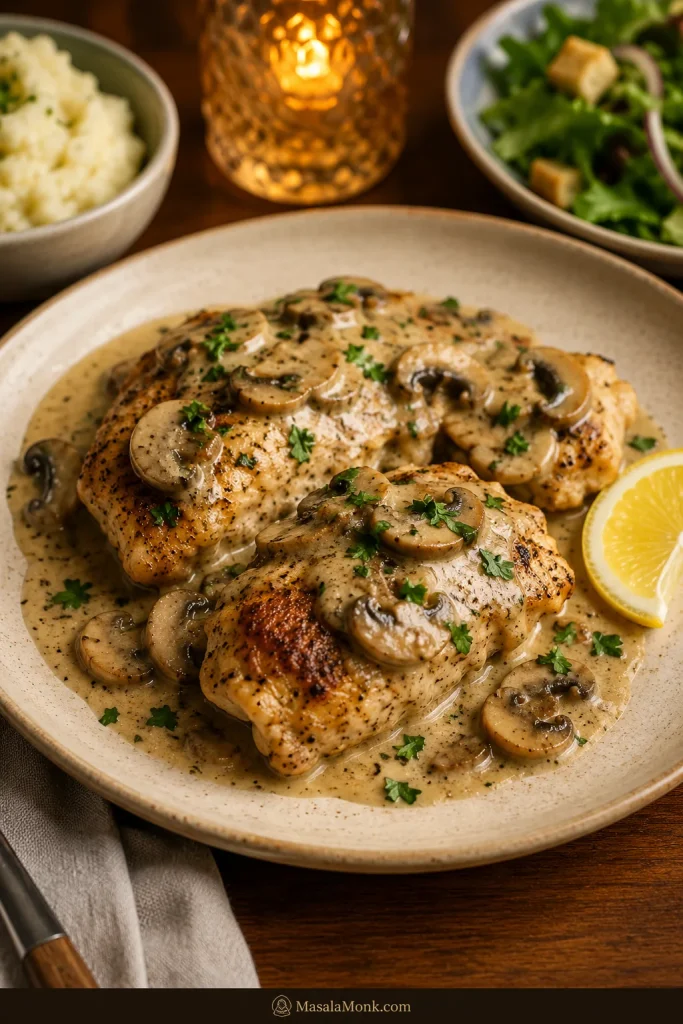
For chicken: keep the sauce medium-thick and bright with lemon or parsley. If the chicken is already cooked, warm it gently in the sauce. If it is not fully cooked, finish it gently until the thickest part reaches 165°F / 74°C. For a complete chicken dinner using this flavor family, see MasalaMonk’s Cream of Mushroom Chicken Recipe.
Mushroom sauce for chicken works best when it is rich but still bright. Parsley and lemon keep the cream from feeling too heavy.
Mushroom Sauce for Pasta
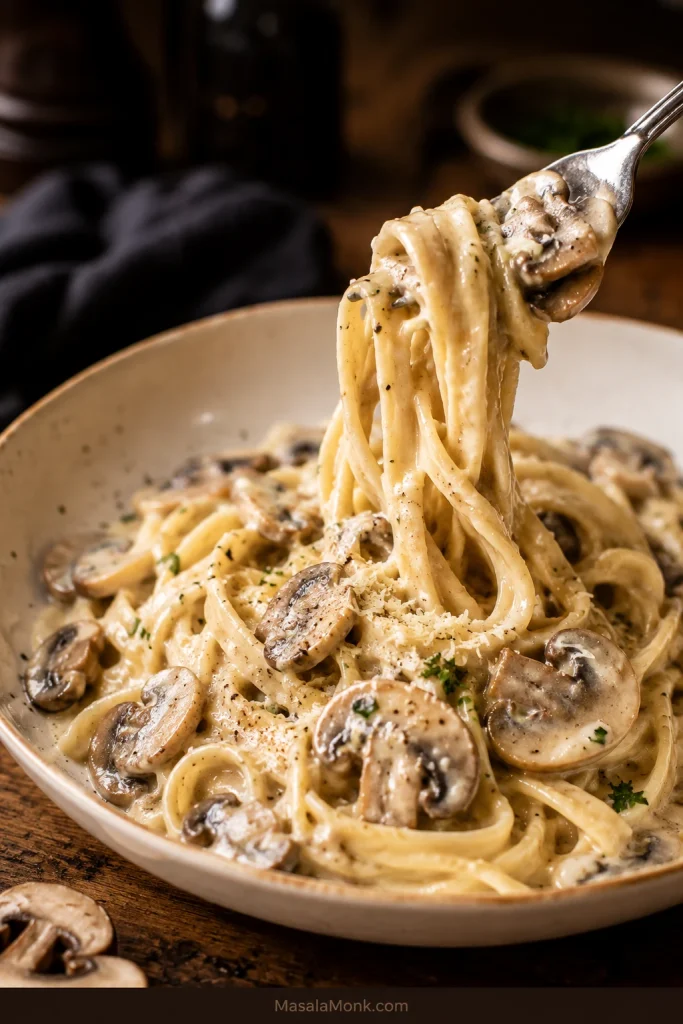
For pasta: keep the sauce loose enough to coat, not clump. Reserve 1 cup pasta water before draining, then toss over low heat and add pasta water 2 to 4 tablespoons at a time until glossy.
Keep mushroom pasta sauce loose and glossy so it slides through the noodles instead of settling in clumps.
Mushroom Sauce for Pork Chops
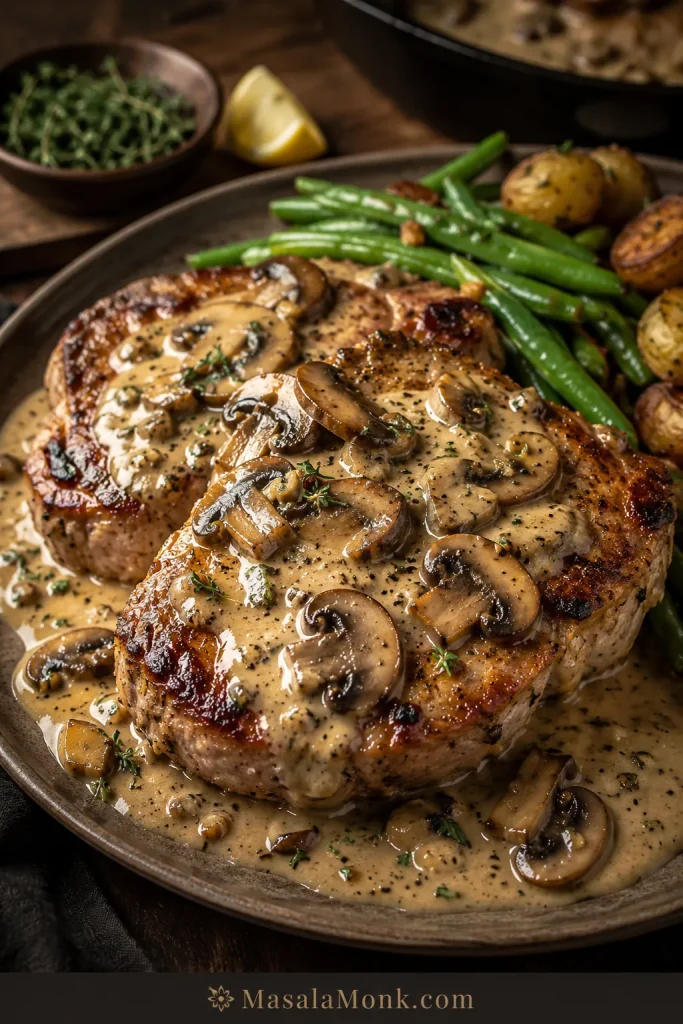
Pork chops: use chicken broth or pork pan juices and reduce until the sauce coats the chops well. A full pork version is waiting in MasalaMonk’s Cream of Mushroom Pork Chops.
Mushroom sauce for pork chops should be generous but controlled, coating the chop while leaving the seared edges visible.
Mushroom Sauce for Potatoes and Rice
Potatoes, rice, vegetables, toast, or omelettes: use a slightly thicker finish and let the mushrooms stay the focus. This sauce is especially good over garlic mashed potatoes. With rice, keep it looser so it soaks in instead of sitting heavily on top; MasalaMonk’s guide on how to cook rice is a simple place to start.
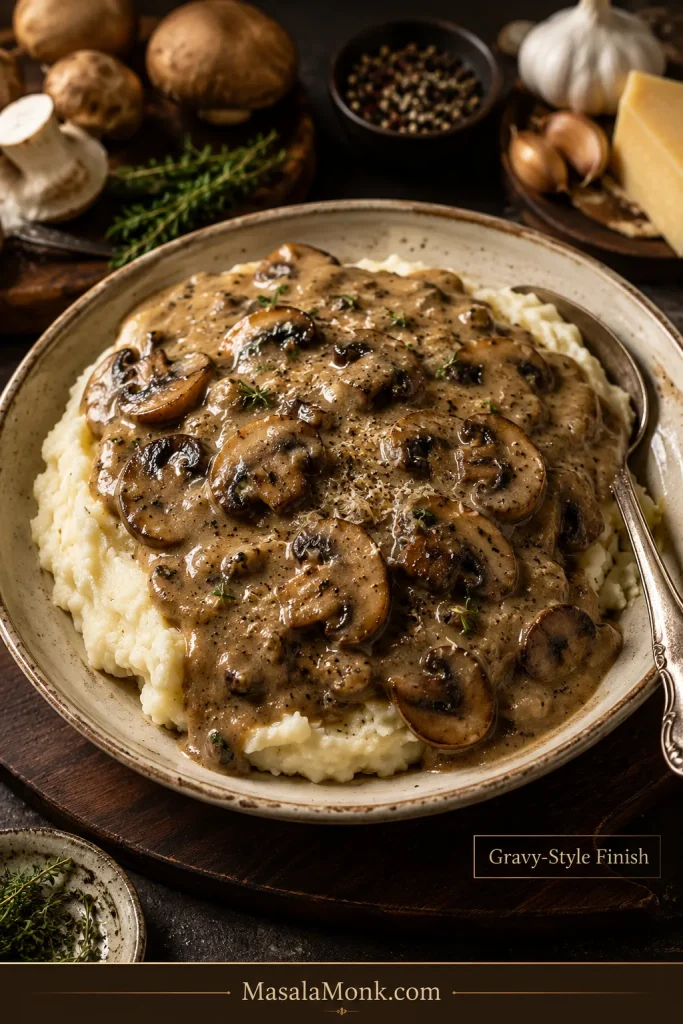
Potatoes or rice work best when the sauce moves toward mushroom gravy: thicker, spoonable, and full of visible mushroom pieces.
No Cream, No Wine & Dairy-Free Options
Once the base works, substitutions become less risky because you know what each ingredient is replacing. Remove cream and you need body. Skip wine and you need brightness. Go dairy-free and you need body plus savoriness.
Without Cream
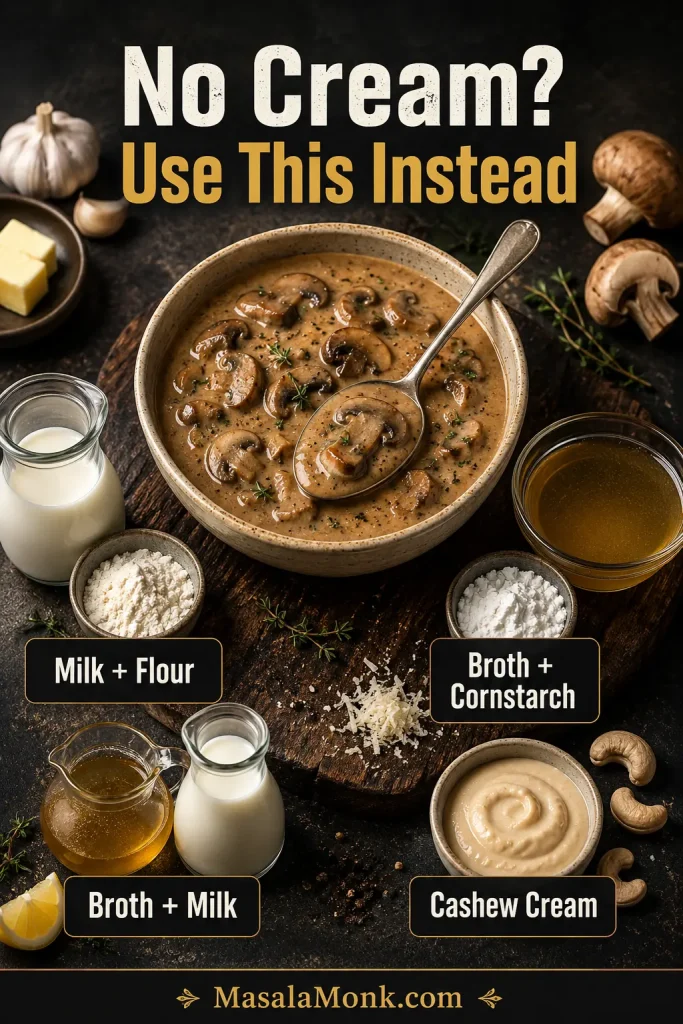
The no-cream versions will not all taste identical, but they can still be rich, savory, and useful. Choose milk + flour for creamy, broth + cornstarch for gravy-like, and cashew cream for dairy-free richness.
Version
How to replace 1 cup / 240 ml cream
Best for
Milk + flour
Cook 1 tbsp flour in the fat for 1 minute, then whisk in 1 cup / 240 ml whole milk gradually.
Chicken, pasta, toast
Broth + cornstarch
Use 1 cup / 240 ml extra broth, then thicken with 1–2 tsp cornstarch mixed with cold water.
Steak, potatoes, rice, gravy-style sauce
Broth + milk
Use 3/4 cup / 180 ml broth plus 1/4 cup / 60 ml whole milk, then thicken lightly if needed.
Lighter creamy sauce
Cashew cream
Use 1 cup / 240 ml cashew cream in place of heavy cream.
Dairy-free pasta or vegetables
Mushroom sauce without cream still needs body. Flour, cornstarch, broth, milk, or cashew cream can thicken the sauce depending on what you have.
If using milk instead of cream, keep the heat gentle. Milk-based sauces are more likely to curdle or separate if boiled hard.
Without Wine
Wine helps, but it is not the soul of the sauce. Browned mushrooms, broth, parmesan, and lemon do most of the real work. Replace the wine with the same amount of broth, then add 1 to 2 teaspoons lemon juice before serving.
Dairy-Free
Use olive oil or vegan butter instead of butter, vegetable broth instead of chicken or beef broth, and cashew cream for the most neutral creamy body. For a lighter sauce, use vegetable broth and cornstarch slurry, then add a small splash of soy sauce or tamari for savory depth. Use unsweetened dairy-free milk only. Avoid sweetened plant milks; coconut milk works but changes the flavor.
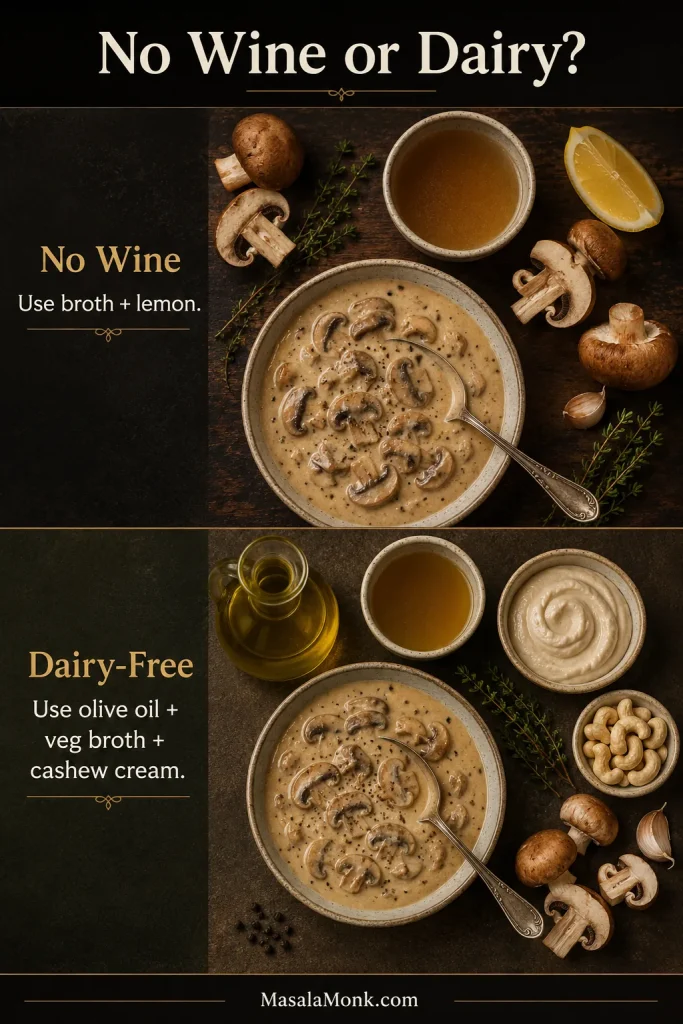
These two swaps solve different problems: broth and lemon replace wine’s brightness, while olive oil, vegetable broth, and cashew cream replace dairy’s body.
Without wine, add brightness with broth and lemon. A dairy-free mushroom sauce gets body from olive oil, vegetable broth, and cashew cream.
Small Flavor Adjustments
To make it more garlicky, increase the garlic to 4 or 5 cloves and add it only after the mushrooms brown. A deeper steak version can use red wine, beef broth, Dijon, Worcestershire, thyme, and extra black pepper. Brighten the pan with lemon, parsley, or a splash of white wine. For more savoriness, add a few drops of Worcestershire or soy sauce, more parmesan, or a little extra broth.
Mushroom Sauce vs Mushroom Gravy
The line between sauce and gravy is blurry in real kitchens. If it is going over steak or pasta, keep it silkier. If it is going over potatoes, rice, meatballs, or roasts, you can push it thicker and more stock-forward.
Feature
Mushroom sauce
Mushroom gravy
Base
Cream + broth
Stock + roux or slurry
Color
Creamy, pale, golden, or beige
Brown and savory
Texture
Silky, rich, spoonable
Pourable, thicker, gravy-like
Best for
Steak, chicken, pork chops, pasta
Mashed potatoes, meatloaf, roasts, rice
Freezing
Not ideal if cream-based
Better if made without cream
Thickener
Reduction, parmesan, optional slurry
Flour, roux, or cornstarch
This recipe is a creamy sauce first. To take it closer to gravy, use more broth, less cream, and the optional cornstarch slurry.
Can This Replace Canned Cream of Mushroom Soup?
Yes, this homemade sauce can replace canned cream of mushroom soup as a spoonable topping for chicken, pork chops, rice, pasta, potatoes, or vegetables. It tastes fresher and more mushroom-forward than canned soup.
As a pourable dinner sauce, keep the full 3-cup batch as written. To make a condensed-soup-style replacement, reduce and thicken it to about 2 cups. A gravy-style topping can stay closer to 2 1/2 to 3 cups, then thicken with slurry or roux.
Casseroles need a thicker sauce than a pourable skillet topping because the sauce has to hold vegetables, noodles, protein, and topping together. To turn the same sauce idea into a full casserole, MasalaMonk’s green bean casserole is a useful next step.
Watery, Split or Bland? Fix It Fast
If your sauce looks wrong, do not panic. Most mushroom sauce problems are fixable. Usually, the issue comes from mushrooms that steamed instead of browned, cream that boiled too hard, cheese added over high heat, or a sauce that was made too thick before pasta or reheating.
Quick Visual Fixes
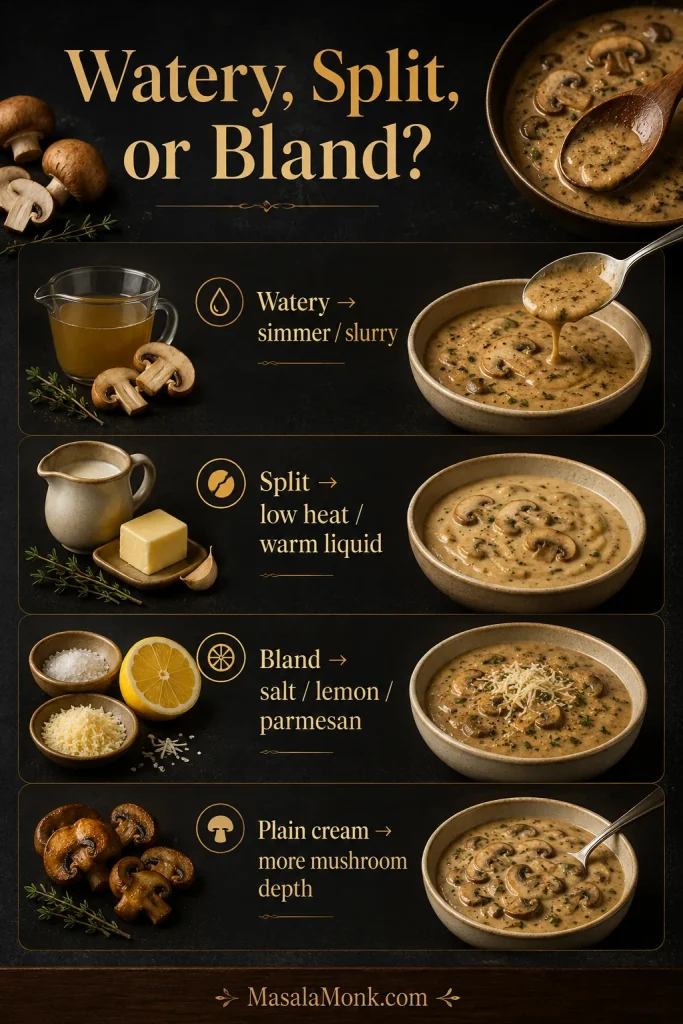
Use the fix-it guide at the first sign of trouble: reduce watery sauce, warm split sauce gently, brighten bland sauce, and build more mushroom depth.
Detailed Fix Table
Problem
Fix now
Next time
Watery sauce
Simmer uncovered for 2 to 5 minutes, or stir in 1 tsp cornstarch mixed with 1 tbsp cold water.
Give the mushrooms enough time for the pan to dry before adding cream.
Too thick
Add warm broth, milk, cream, or pasta water 1 tbsp at a time.
Stop simmering while the sauce is slightly looser than you want it on the plate.
Split or greasy
Lower heat and whisk in a splash of warm broth or cream. Avoid adding cold liquid directly.
Keep the cream at a gentle simmer.
Tastes like plain cream
Add parmesan, salt, pepper, thyme, lemon, Worcestershire, or a splash of broth.
Brown mushrooms longer and deglaze the pan before adding cream.
Bland
Add salt if flat, lemon if heavy, parmesan or Worcestershire if it lacks depth.
Taste after parmesan before final seasoning.
Rubbery mushrooms
Keep cooking until moisture evaporates and edges brown.
Use a wide pan and avoid crowding.
Floury taste
Simmer 2 to 3 minutes longer after adding liquid.
Cook flour in the fat for about 1 minute before adding liquid.
Parmesan clumped
Take the pan off the heat and whisk gently. Add a splash of warm liquid if needed.
Use finely grated parmesan and avoid high heat.
Pasta absorbed the sauce
Add pasta water 2 to 4 tbsp at a time and toss over low heat.
Keep the sauce looser before adding pasta.
Most fixes come back to two things: give the mushrooms more time in the pan, then keep the creamy finish gentle. For watery or bland sauce problems, recheck the wet-to-browned mushroom cue and the spoon test.
Storage, Reheating, and Make-Ahead Tips
Cream sauces are not difficult to reheat; they just do not like being rushed. Store leftovers in an airtight container in the refrigerator for 3 to 4 days. For general leftover safety, the USDA recommends using refrigerated leftovers within 3 to 4 days.
To refrigerate: cool the sauce, then store in an airtight container.
To reheat on the stove: warm over low or medium-low heat, stirring often.
To loosen: add a splash of broth, milk, cream, or pasta water.
To microwave: use short bursts and stir between each one.
To freeze: cream-based sauce is not ideal because it can split. A no-cream, gravy-style version freezes better.
If the sauce looks separated after chilling, warm it slowly and whisk in a little liquid. Do not bring it to a hard boil. For more general leftover storage guidance, see the USDA’s Leftovers and Food Safety guide.
FAQs About Mushroom Sauce
Can I use canned mushrooms?
Yes, canned mushrooms work in a pinch, but fresh mushrooms give better browning and flavor. Drain canned mushrooms well, pat them dry, and brown them before adding liquid.
How do I make mushroom sauce thicker?
Simmer mushroom sauce uncovered first; that gives the best flavor. For a faster fix, add a slurry made from 1 teaspoon cornstarch and 1 tablespoon cold water.
Why is my mushroom sauce watery?
Mushroom sauce is usually watery when the pan is still too wet before the cream goes in. Simmer uncovered, or use a small cornstarch slurry if dinner is waiting.
Why does it taste like plain cream?
If mushroom sauce tastes like plain cream, the mushrooms probably needed more browning, or the sauce needs salt, parmesan, pepper, lemon, or Worcestershire. It should taste savory before it tastes creamy.
Is this the same as mushroom gravy?
No. Mushroom sauce is usually creamier and better for steak, chicken, pasta, and pork chops. Mushroom gravy is usually more stock-based, brown, and thickened with flour or cornstarch.
What can I use instead of cream?
Use milk with flour for a lighter creamy sauce, broth with cornstarch for a gravy-style sauce, or cashew cream for dairy-free richness. Milk and broth are thinner than cream, so they usually need a thickener.
Can I make mushroom sauce ahead of time?
Yes. Make it 2 to 3 days ahead, refrigerate, and reheat gently with a splash of liquid. Leftovers keep for 3 to 4 days in an airtight container.
Why did the sauce split?
Cream sauces usually split when boiled too hard or reheated too aggressively. Lower the heat and whisk in a splash of warm broth or cream.
Final Spoonful
Once you understand the texture, this becomes the sauce you can pull out for half-finished dinners: steak that needs polish, chicken that needs richness, pasta that needs gloss, or potatoes that need comfort.
Tried it over steak, chicken, pasta, potatoes, or something else? Tell me what you spooned it over and how you finished it — Dijon, Worcestershire, extra pepper, pasta water, or your own trick.
A really good breakfast sandwich does two things at once. First, it tastes like you treated yourself—melty cheese, a warm egg, something crisp, something creamy. Then, almost secretly, it makes your morning easier because you can build it with whatever bread you already have: an English muffin, a croissant, a bagel, even waffles.
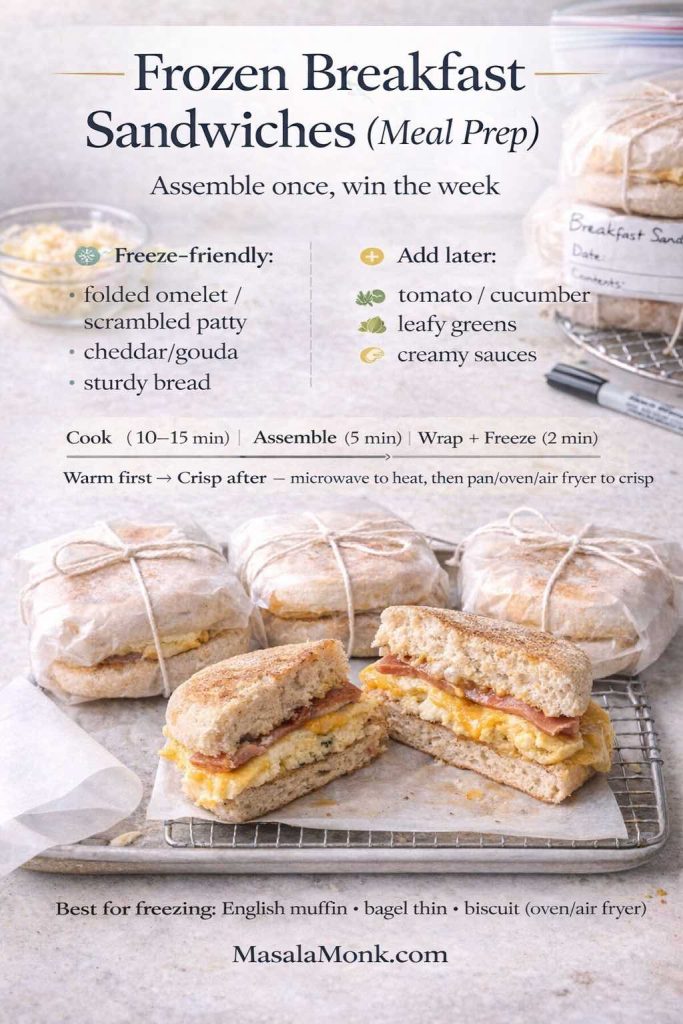
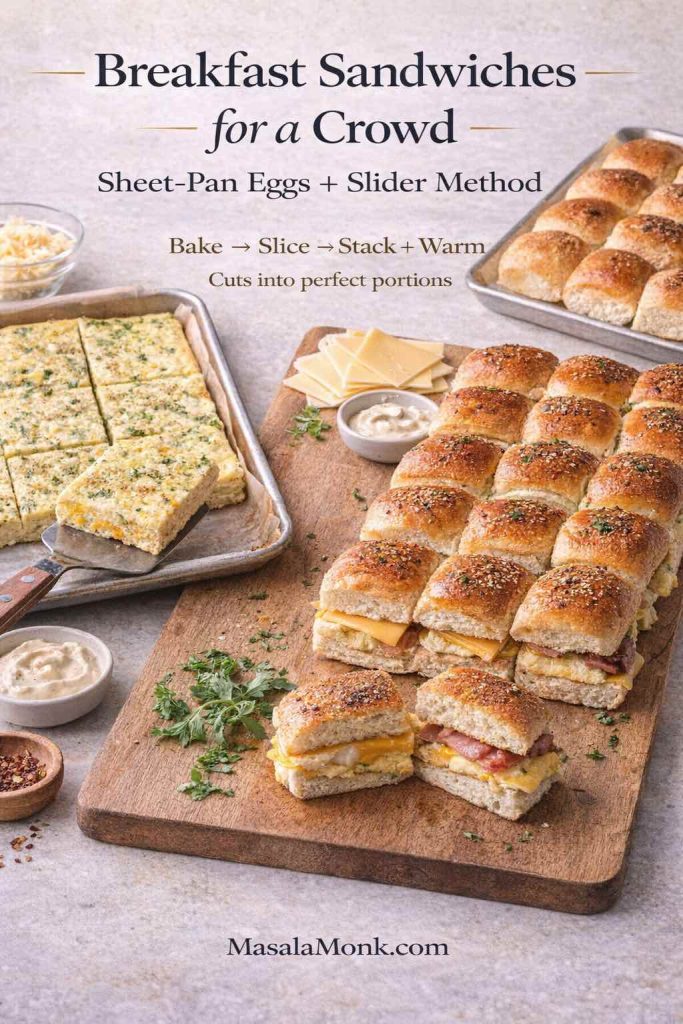
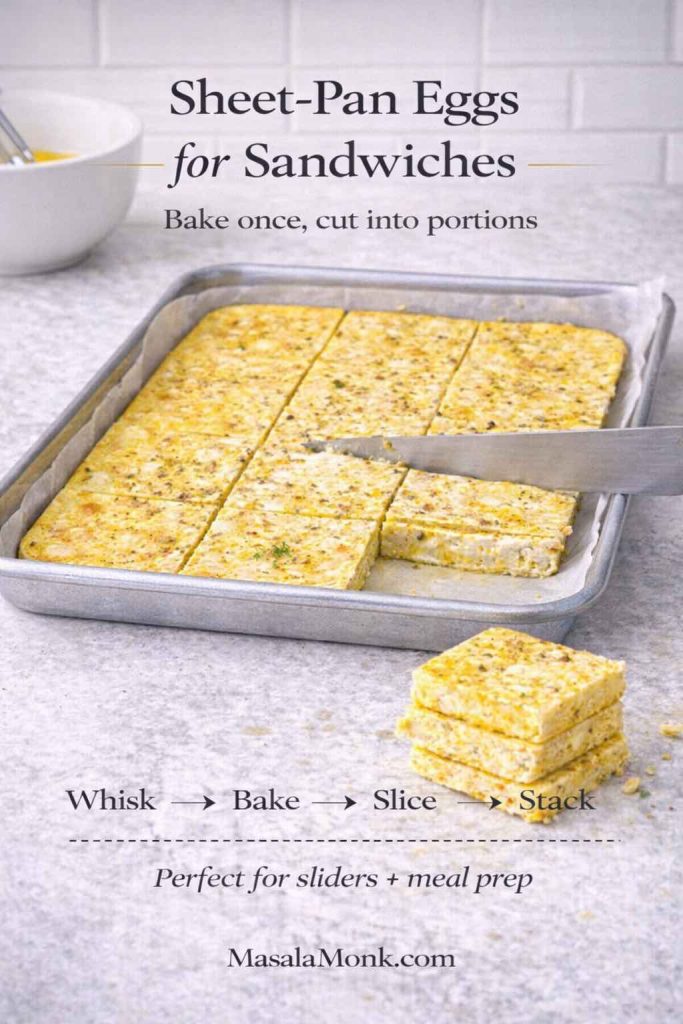
That’s the heart of this breakfast sandwich recipe. Instead of giving you one rigid version, we’ll start with a simple master build you can repeat, and then we’ll branch into the most-loved styles people actually search for and crave: egg and cheese, English muffin breakfast sandwich, breakfast croissant, croissant sandwiches, bagel with egg and cheese, scrambled egg sandwich, fried egg sandwich, high protein breakfast sandwich, vegetarian breakfast sandwich, gluten free breakfast sandwich, plus make-ahead frozen breakfast sandwiches for meal prep.
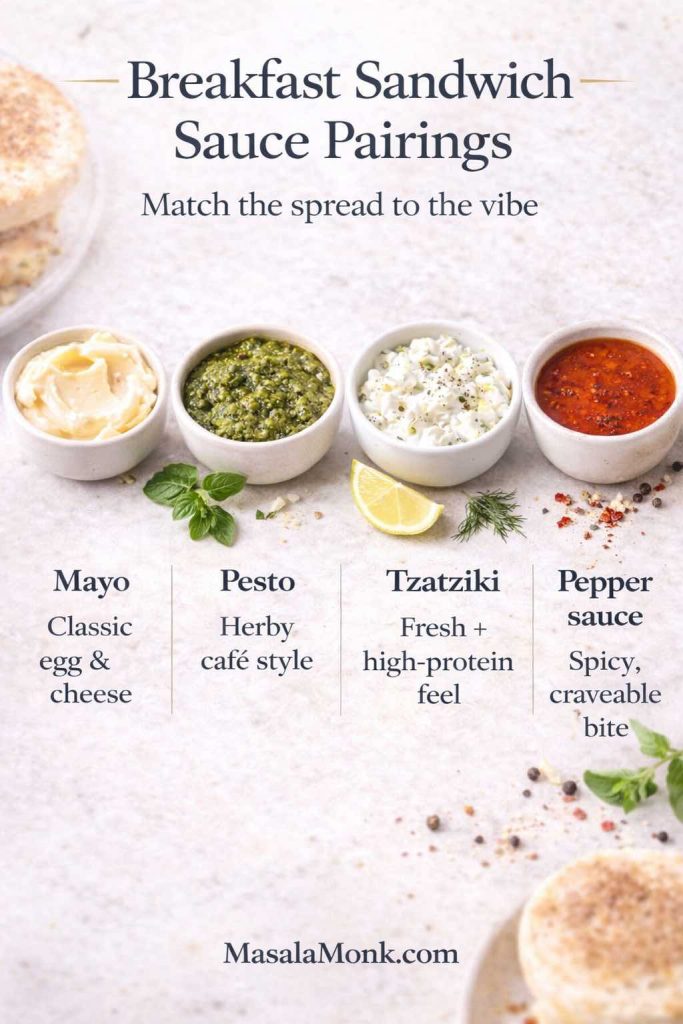
Along the way, we’ll lean on sauces and spreads that make a sandwich feel “finished” without being fussy—like a quick homemade mayo, a punchy pepper sauce, a bright pesto, or a thick tzatziki-style yogurt sauce—so every bite stays balanced instead of flat.
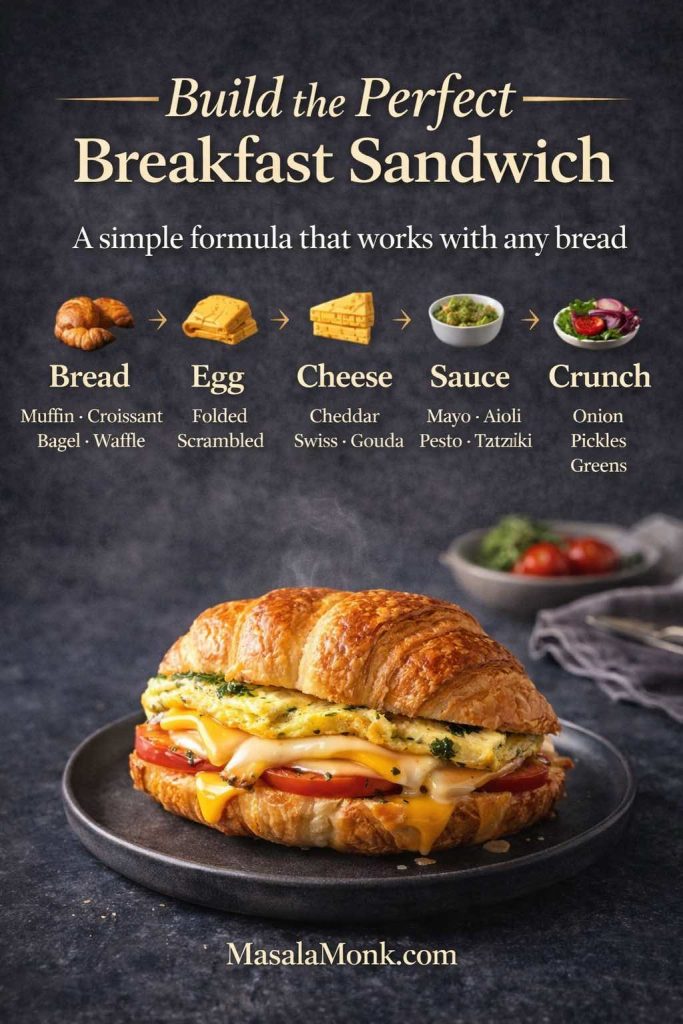
Breakfast sandwich: the master formula that works every time
Before we get into variations, it helps to have a dependable “base.” Think of it as a choose-your-own-adventure breakfast sandwich where each layer has a job.
Use this breakfast sandwich formula to mix and match your favorites—choose a bread base, add eggs and cheese, finish with a sauce, then layer on crunch for the perfect bite every time.
The five layers
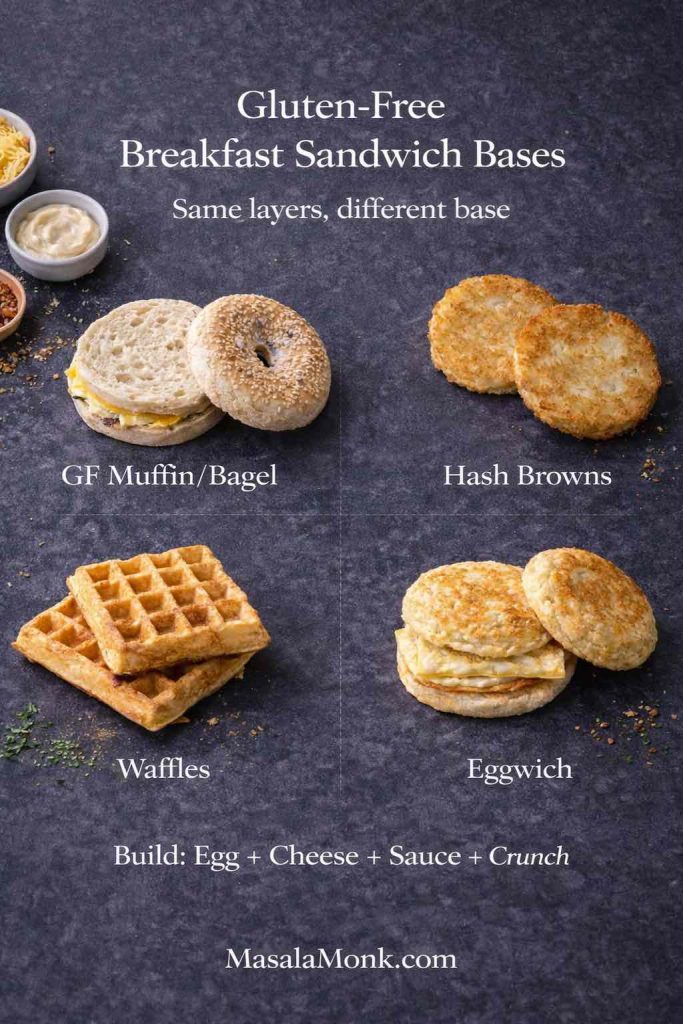
Bread (or bread substitute) English muffin, croissant, bagel, biscuit, sliced bread, waffles, or an egg-based “eggwich.”
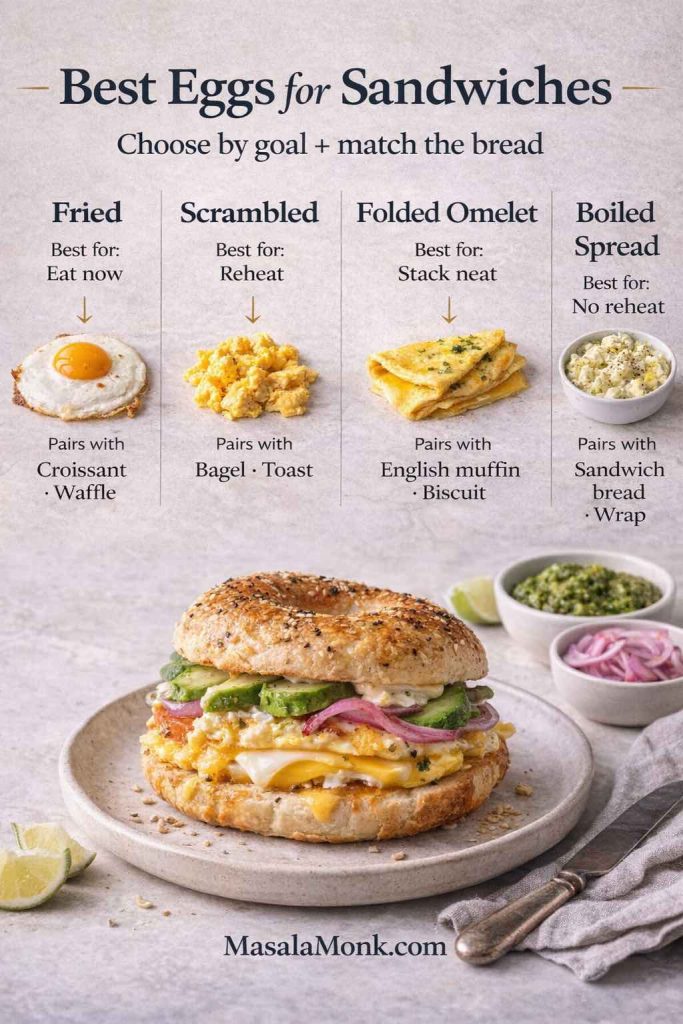
Eggs for sandwiches (the engine) Fried egg, scrambled egg, folded omelet, baked egg patty, or boiled eggs turned into a spread.
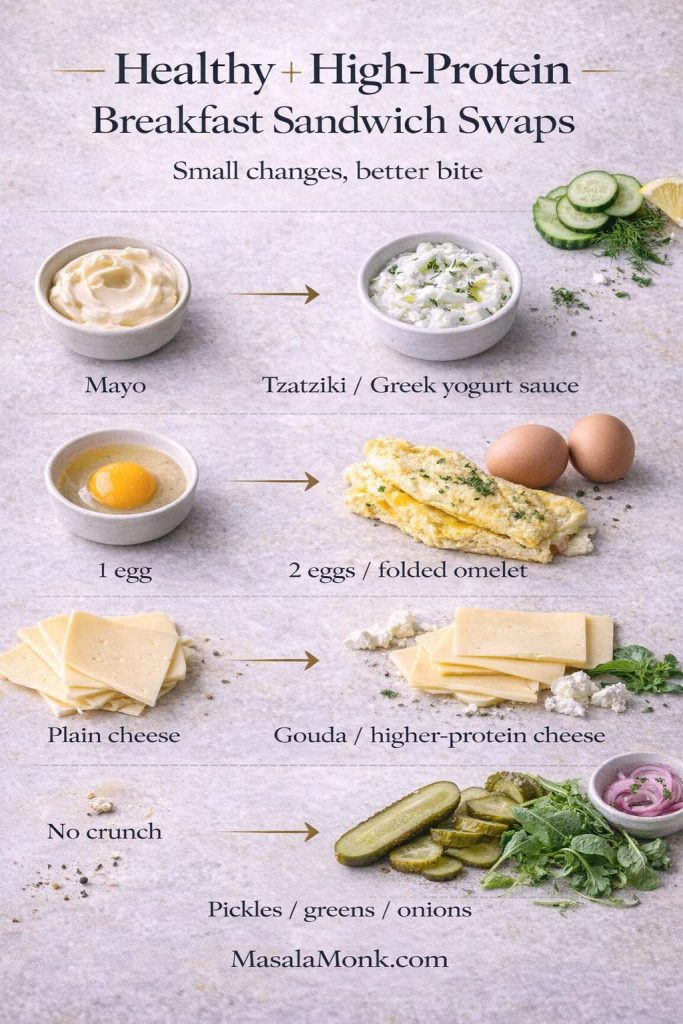
Cheese (the glue) Cheddar, mozzarella, gouda, pepper jack, or whatever melts well.
Sauce or spread (the comfort layer) Mayo, eggless mayo, vegan mayo, pesto, tzatziki, or a quick chili-mayo.
Texture + freshness (the wake-up layer) Crisp veggies, pickles, herbs, peppery greens, onions, tomatoes, even a little crunchy spice mix.
Once you understand those roles, breakfast sandwich ideas become effortless: swap the bread, switch the egg style, keep the sauce, change the crunch—suddenly you have a new breakfast without starting over.
First, toast or warm your bread. You’re not just adding crunch—you’re building a barrier so the sandwich doesn’t go soggy.
Next, cook your eggs in the style you want (fried or scrambled sections are coming up). While they’re still hot, add cheese and let it melt.
Then, spread sauce on the bread while it’s warm. That small detail matters: warm bread helps spreads cling instead of sliding.
After that, stack egg + cheese, add your texture layer, close the sandwich, and press gently for a few seconds so everything holds together.
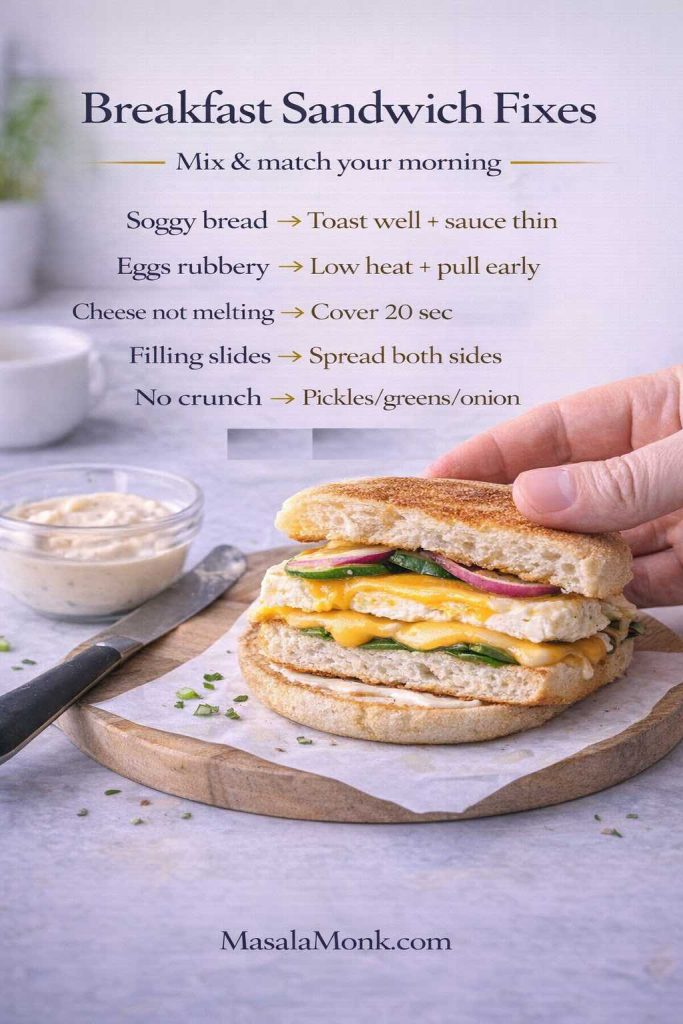
Save this breakfast sandwich fixes guide: toast bread well to prevent sogginess, cook eggs low and pull early for softness, cover briefly to melt cheese fast, spread sauce on both sides to stop slipping, and add pickles/greens/onion for crunch.
If you like checking food safety temps (especially when you’re batch-cooking), egg dishes are commonly cooked to 160°F / 71°C, and leftovers reheated to 165°F / 74°C—guidance you can see on the USDA safe temperature chart and on FoodSafety.gov’s chart.
Egg and cheese: the classic egg & cheese breakfast sandwich
Sometimes you don’t want a “creative” breakfast. You want the one that always works: egg and cheese, warm bread, a little seasoning, done.
Fried egg sandwich recipe (crispy edges, runny or set yolk)
Heat a pan, add butter or oil, crack in an egg, season it. Let the edges crisp; cover briefly if you want the top to set faster. Once it’s nearly where you want it, lay cheese on top and cover for 20–30 seconds so it melts smoothly.
For the best fried egg sandwich, aim for crispy edges and melted cheese—choose a runny yolk for richness or cover the pan briefly for a set yolk that travels better.
This version is ideal when you want a clean, structured bite—especially on an English muffin or bagel.
Scrambled egg sandwich (soft, fluffy, and forgiving)
Whisk 2 eggs with salt and pepper. Cook on low heat, stirring slowly. Pull the eggs off the heat while they’re still slightly glossy; the residual heat finishes them.
A scrambled egg sandwich is the best make-ahead egg sandwich—cook low and slow for soft, fluffy eggs that reheat well, then melt the cheese onto the eggs so every bite stays creamy instead of dry.
Scrambled egg sandwiches are particularly good when you’re packing breakfast for later, because the eggs stay tender instead of turning rubbery.
Choose Your Bread Base for the Perfect Breakfast Sandwich
Before you cook a single egg, pick the bread. It decides almost everything: how tidy the sandwich feels, how rich the bite is, and whether it holds up for meal prep or needs to be eaten right away. Once the base is locked in, the “best” egg and sauce choices become obvious—so you’re not building a great filling on the wrong foundation.
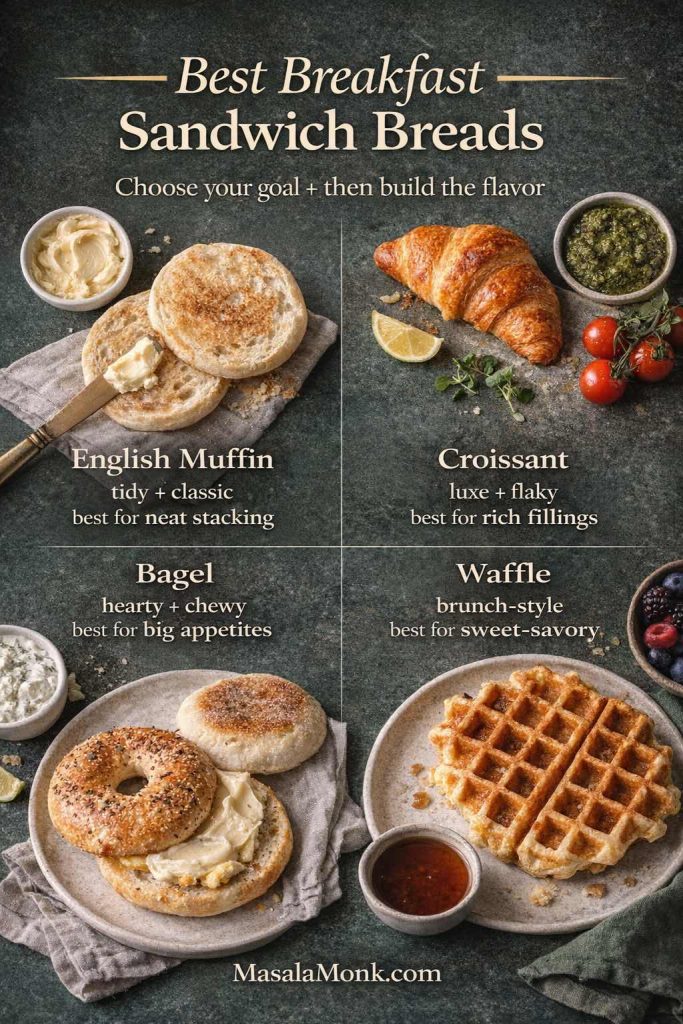
Pick your base first: English muffin for tidy stacking, croissant for a flaky breakfast croissant, bagel for a hearty breakfast bagel sandwich, or waffle for sweet-savory brunch sandwiches.
English muffin: the neat, classic breakfast sandwich
If you want a café-style breakfast sandwich that’s easy to hold and doesn’t slide around, the English muffin is the safest bet. It toasts beautifully, stays sturdy under egg and cheese, and naturally supports the “stacked” look most people want in an English muffin breakfast sandwich.
Croissant: the premium, flaky breakfast croissant
A croissant makes breakfast feel like a treat. It’s buttery and delicate, so it works best when your fillings are bold but not watery. Choose it when you want croissant sandwiches with a “bakery morning” vibe—just keep sauces and fresh veggies controlled so it doesn’t turn soft.
Bagel: the hearty breakfast bagel sandwich
Bagels are dense and satisfying, which is why a bagel with egg and cheese can feel like a full meal. They shine when you want contrast—soft egg, melty cheese, plus something bright and crunchy like onion, cucumber, or pickles. If you’re hungry-hungry, this is the base that delivers.
Waffles: sweet-savory waffle breakfast sandwich energy
Waffles turn the same ingredients into brunch. Because waffles carry a gentle sweetness, they pair especially well with salty cheese, peppery sauces, and savory fillings. Pick this base when you want a waffle breakfast sandwich that feels fun, dramatic, and very shareable.
Quick rule to decide in 5 seconds
For a tidy, classic bite, choose an English muffin. For luxury and flaky layers, reach for a croissant. When you want something big and seriously filling, go with a bagel. And if you’re craving brunch-style sweet-savory energy, waffles are the move.
English muffin breakfast sandwich (café-style, sturdy, and easy to hold)
The English muffin breakfast sandwich is popular for a reason: it’s compact, it toasts beautifully, and it doesn’t fall apart mid-commute.
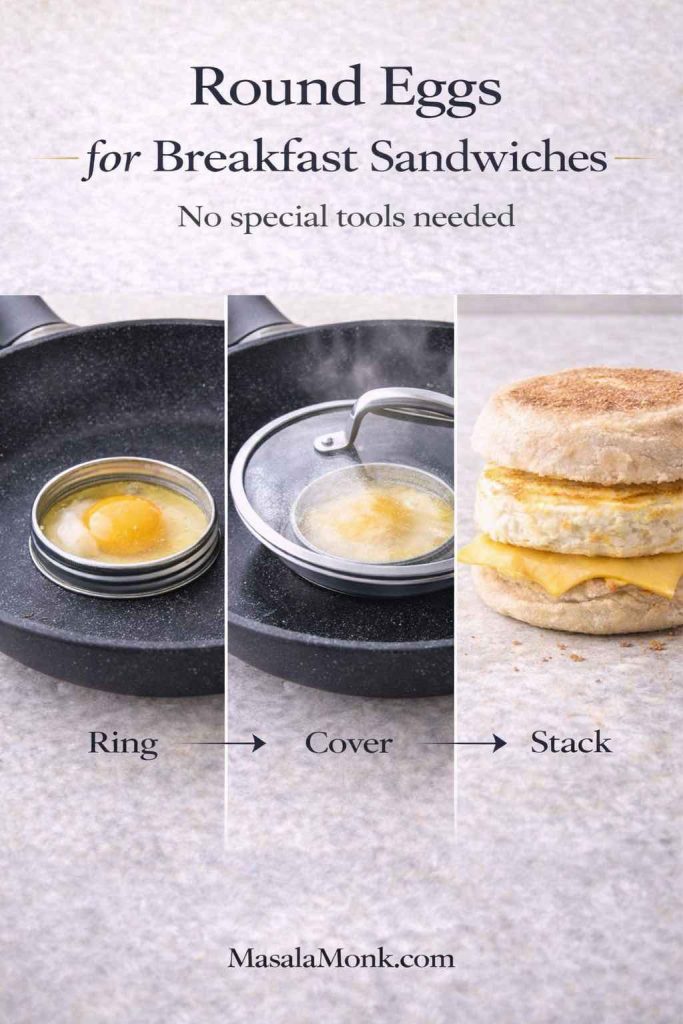
How to make round eggs for breakfast sandwiches (without special gear)
If you want that neat “egg patty” look, you don’t need a fancy ring. A wide mason jar lid ring, a cleaned metal cookie cutter, or even a DIY foil ring works.
Want café-style egg patties? This quick method shows how to make round eggs for breakfast sandwiches using a simple jar-lid ring—perfect for an English muffin breakfast sandwich that stacks neatly and stays easy to hold.
Warm the ring in the pan, grease it lightly, crack in the egg, and cover. As the egg sets, it becomes the perfect shape for English muffins.
Build: egg and cheese on English muffin
Toast muffin halves until crisp
Spread sauce on both sides
Add egg + cheese
Add one crisp layer (thin onion, tomato slice, spinach, or pickles)
Close, press gently, eat
This English muffin egg and cheese breakfast sandwich stacks neatly with a round egg patty and melty cheese—add a thin layer of spinach and onion for crunch and freshness without making the muffin soggy.
For a creamy base that can swing classic or spicy, a simple homemade mayo is hard to beat. If you want a versatile one with a lot of variations you can reuse for other sandwiches too, this guide is handy: homemade mayonnaise with 15+ easy variations.
If you’re feeding a mixed crowd—some people avoiding eggs in spreads or preferring egg-free condiments—you can also keep a jar of eggless mayonnaise or a fully dairy-free vegan mayo in rotation.
Breakfast croissant: when you want croissant sandwiches that feel like a treat
A breakfast croissant sandwich is the “I went out for breakfast” vibe—without leaving home. Because croissants are rich and flaky, the best versions keep fillings bold but not watery.
Croissant egg and cheese (the simple starter)
Warm the croissant (don’t over-toast—just warm and lightly crisp)
Add a soft scrambled egg layer
Add cheese while eggs are hot
Finish with pepper or chili flakes
Bacon egg and cheese croissant
Crisp bacon, melt cheese onto the egg, then add something fresh so it doesn’t feel heavy: a thin tomato slice, peppery greens, or even quick-pickled onions.
This bacon egg and cheese croissant delivers the classic breakfast croissant vibe at home—keep the croissant lightly warmed (not over-toasted), melt the cheese onto the eggs, then add crisp bacon and one fresh layer so it stays rich but balanced.
Sausage egg and cheese croissant
Sausage + egg + cheese is a classic breakfast sandwich trio for a reason. The croissant turns it into a weekend-level meal. If your sausage is strongly seasoned, keep the sauce simple—mayo or a yogurt-based spread—so it doesn’t clash.
Ham egg and cheese croissant
Ham loves mustard-mayo or herby mayo. Even a thin swipe makes the whole sandwich taste “designed,” not accidental.
If you want a sandwich spread that’s creamy yet tangy, Greek yogurt-style sauces are perfect on croissants too. This Greek tzatziki sauce recipe with variations gives you a thick, garlicky option that stays put instead of leaking out the sides.
Bagel with egg and cheese: the breakfast bagel sandwich that actually feels balanced
A bagel with egg and cheese is dense and satisfying, so it helps to build contrast—soft + crisp, rich + fresh, salty + bright.
This bagel with egg and cheese gets an easy avocado upgrade—add creamy avocado plus a sharp, crunchy layer like pickled onions to balance the richness and make a more satisfying breakfast bagel sandwich.
Bagel with egg and cheese (the core build)
Toast the bagel cut sides well. Spread sauce on both halves. Add egg + cheese, then add one “fresh” element: tomato, cucumber, avocado, or herbs.
Avocado egg sandwich on a bagel
Avocado and egg are a natural pair. Add black pepper, a squeeze of lemon, and something crunchy (onion or cucumber). The result feels like a healthy breakfast sandwich, even though it’s still comforting.
For a flavor blueprint you can borrow directly, this one is built for mornings: avocado, basil, and grilled tomato sandwich. You can adapt the same idea onto a bagel and add egg + cheese to turn it into a bigger breakfast.
Egg sandwich spread for bagels (when you want it creamy)
Instead of a whole egg, use a spreadable egg layer (egg mayo / egg salad style). It’s easier to eat, especially if you’re walking out the door.
We’ll do that properly in the egg mayo sandwich recipe section below.
Breakfast muffin sandwich: egg, cheese, and a sturdy base
“Breakfast muffin sandwich” can mean an English muffin sandwich, or it can mean a muffin-shaped bread base you toast and fill. Either way, the goal is the same: structure.
Egg and cheese muffin-style sandwich
Toast the base, add a folded omelet or egg patty, add cheese, then add a little sauce. Because this style is compact, it’s great for meal prep breakfast sandwiches as well.
If you’re making eggs in bulk for this, an easy workflow is to cook and peel a batch of eggs quickly. An air fryer is surprisingly effective for that—here’s a reliable method: air fryer hard boiled eggs.
Waffle breakfast sandwich: sweet-savory brunch energy
A waffle breakfast sandwich is where brunch gets playful. The key is using waffles that are crisp enough to hold fillings.
If you want to make waffles that stay golden and crisp even without dairy, this is a solid base: waffle recipe without milk. For more adventurous directions (including Indian twists that still feel natural), this is fun inspiration: Belgian waffle recipe + Indian twists.
This waffle breakfast sandwich turns a simple egg and cheese into a sweet-savory brunch—keep the waffles crisp, add melty cheese, then finish with spicy mayo for a bold contrast that still feels breakfast-friendly.
Waffle sandwich build ideas
Egg + cheese + spicy mayo
Scrambled egg + herbs + pepper sauce
Egg + cheese + avocado for a more “healthy breakfast sandwich” feel
Because waffles lean slightly sweet, a bright sauce works especially well. If you like heat, a pepper sauce can turn waffles and eggs into something unforgettable. This is a deep rabbit hole if you want options: pepper sauce recipe guide.
Egg sandwiches recipes: choosing the egg style that matches your morning
It’s easy to treat eggs like “one ingredient,” yet the cooking method changes the entire sandwich. So, instead of guessing, pick based on the kind of morning you’re having.
Not all egg sandwiches eat the same—use this guide to pick the best eggs for sandwiches (fried, scrambled, folded omelet, or boiled spread) and match them to the right bread for a better breakfast sandwich every time.
Fried egg sandwich (best for immediate eating)
Fried eggs are at their peak right out of the pan. That’s when the edges stay crisp and the yolk is still luscious. Consequently, this version shines for weekends or slow mornings.
Scrambled egg sandwich (best for reheating)
Scrambled eggs hold better than fried eggs in the fridge and reheat more evenly. Therefore, if you’re thinking meal prep, scrambled is your friend.
Folded omelet-style egg (best for neat layers)
Beat eggs, cook into a thin sheet, fold into a rectangle. This makes a tidy “egg patty” without tools. It’s also ideal for breakfast slider sandwiches because the pieces cut cleanly.
Boiled eggs for sandwiches (best for cold breakfast)
Boiled eggs can become a spread, which means you can eat your breakfast sandwich cold and still enjoy it. This is where egg mayo sandwich recipes, egg salad sandwiches, and even tuna egg sandwich variations come in.
If you want a broader set of ideas for using small egg counts creatively, this list can spark options: egg dishes with 2 eggs.
Egg mayo sandwich recipe: creamy, fast, and surprisingly breakfast-friendly
Egg mayo often gets treated as “lunch food,” yet it’s one of the best solutions for busy mornings. It’s fast, it’s filling, and it turns into a portable sandwich without needing to reheat anything.
Optional: chopped onion, dill, cucumber, chili flakes, a squeeze of lemon
This egg mayo sandwich filling doubles as a simple egg salad sandwich recipe—mix chopped boiled eggs with mayo (or Greek yogurt), then add dill and pickles for crunch and a fresher, lighter bite.
Method
Mash the eggs lightly, stir in mayo, season, then adjust texture. If you want it looser, add a tiny splash of milk or lemon. If you want it thicker, add more egg or a little grated cheese.
Turn egg mayo into egg salad sandwich recipe territory
If you want the “egg salad” vibe, fold in crunch: finely chopped celery (if you like), onion, pickles, or cucumber. Add a pinch of curry powder for a curried egg sandwich direction, or add paprika for a classic style.
Turn a basic egg mayo sandwich into a curried egg sandwich by stirring in curry powder, chopped pickles, onion, and a squeeze of lemon—an easy upgrade that adds brightness, crunch, and bold flavor.
Egg salad with greek yogurt (lighter, tangier)
Instead of all mayo, use thick yogurt or hung curd for part of the spread. It stays creamy, tastes fresher, and feels closer to a healthy breakfast sandwich.
Breakfast sandwich ideas that borrow from “real sandwich culture”
A breakfast sandwich doesn’t have to be only egg + cheese + meat. It can borrow from classic sandwich styles and still feel totally breakfast-appropriate.
The Bombay-inspired breakfast sandwich
If you’ve ever loved a spicy, chutney-forward sandwich, you can bring that energy to breakfast: toast bread, add green chutney or herby mayo, add egg + cheese, then add thin-sliced onion and tomato.
The hummus-and-veg morning sandwich (egg optional)
Some mornings you want breakfast without eggs. A hummus-based sandwich gives you protein and staying power while keeping things fresh.
Here’s a straightforward build to borrow: hummus veggie sandwich. Add a fried egg if you want it heartier, or keep it egg-free for a vegetarian breakfast sandwich that still satisfies.
Healthy breakfast sandwich and high protein breakfast sandwich variations
“Healthy” can mean a lot of things. For some people it means higher protein; for others it means lighter sauces; for many it means fewer ultra-processed ingredients. Thankfully, breakfast sandwiches can adapt without losing their comfort-food soul.
Build a healthy high-protein breakfast sandwich with simple swaps—use tzatziki or Greek yogurt sauce instead of mayo, double the eggs with a folded omelet layer, choose a more filling cheese, and add crunch with pickles, greens, or onions.
High protein breakfast sandwich (simple ways to level up)
Use 2 eggs instead of 1
Add an extra slice of cheese or use a higher-protein cheese
Vegetarian breakfast sandwich: options that don’t feel like “second place”
A vegetarian breakfast sandwich can be just as craveable as any meat-based version—provided you build for texture and seasoning.
Save these vegetarian breakfast sandwich ideas for easy morning variety—mushroom and cheese with egg, spinach pesto with egg, paneer with chutney, or hummus with crunchy veggies (egg optional) for a satisfying vegetarian breakfast sandwich.
Vegetarian breakfast sandwich (easy templates)
Egg + cheese + mushrooms + pepper sauce
Egg + cheese + spinach + pesto
Hummus + veggies + cheese (egg optional)
Paneer + egg + chutney (if you like a bigger, spiced bite)
If you want a leftover-friendly option that turns dinner into breakfast, this is a smart template: paneer sabji sandwich recipe. Add a fried egg and it becomes a powerful breakfast sandwich meal prep option.
Gluten free breakfast sandwich: easy swaps that still feel satisfying
Going gluten free doesn’t mean giving up the breakfast sandwich experience. It simply means switching the base while keeping the same layers.
For a gluten free breakfast sandwich, swap the base—not the whole idea: use a gluten-free muffin or bagel, crispy hash brown “buns,” gluten-free waffles, or an eggwich, then build with egg, cheese, sauce, and crunch.
Gluten free breakfast sandwich bases
Gluten-free English muffins or bagels
Hash brown “buns” (crispy potato rounds)
Waffles made with a gluten-free mix
Egg “buns” (eggwich style)
Once you pick the base, the rest is identical: egg + cheese + sauce + crunch. In other words, you’re not learning a new recipe—you’re just changing the vehicle.
An eggwich is essentially an egg sandwich where eggs replace bread. If you want a lower-carb or gluten-free breakfast sandwich that still feels indulgent, this is a strong move.
An eggwich is the easiest no-bread breakfast sandwich—use two thin egg “buns,” add melty cheese and a crunchy veggie layer, then finish with a sauce so it eats like a real breakfast sandwich while staying gluten-free.
How to build it
Cook two thin omelet “rounds,” let them cool slightly so they firm up, then use them as top and bottom. Add cheese, add filling, add sauce, press gently, and eat with a napkin because it’s joyfully messy.
Breakfast sandwich homemade sauces that make everything taste intentional
A sandwich can have perfect eggs and still taste “unfinished” without a good spread. Sauce isn’t extra; it’s the layer that ties everything together.
Use these breakfast sandwich sauce pairings to change the flavor fast—mayo for classic egg and cheese, pesto for a herby café-style sandwich, tzatziki for a fresh high-protein feel, and pepper sauce for a spicy, craveable bite.
If you’re cooking for pregnancy or generally avoiding raw-egg preparations, the FDA’s guidance for higher-risk groups is worth reading: Food Safety for Moms-to-Be.
Pepper sauce: the fastest way to make breakfast taste exciting
A little heat transforms egg and cheese into something you crave instead of something you tolerate. If you want options ranging from tangy vinegar hot sauces to creamy peppercorn-style sauces, this is a complete guide: pepper sauce recipe guide.
Tzatziki: cooling, thick, and perfect for breakfast sandwiches
Yogurt-based sauces are especially good when you’re building a healthy breakfast sandwich. They add creaminess without feeling heavy, and they pair beautifully with herbs and cucumbers: Greek tzatziki sauce recipe with variations.
Frozen breakfast sandwiches: make-ahead meal prep you’ll actually use
Frozen breakfast sandwiches have one job: save your morning when you have no time. The secret is building them in a way that reheats well. That means slightly drier eggs, sturdy bread, and sauces added after reheating.
Make-ahead frozen breakfast sandwiches work best when you freeze sturdy bread with a folded omelet or scrambled patty and melty cheese, then add fresh veggies and creamy sauces after reheating for the best texture.
What freezes well
English muffin breakfast sandwich builds
Bagel breakfast sandwich builds (slice thin so it reheats faster)
Biscuit-style builds (best reheated in oven/air fryer)
Folded omelet egg layers (they hold shape beautifully)
What to add later
Fresh tomato, cucumber, lettuce, delicate herbs, and most creamy sauces are better after reheating. Otherwise, you risk soggy bread or watery textures.
How to assemble frozen breakfast sandwiches
Cook eggs (scrambled patties or folded omelets work best). Melt cheese onto the eggs. Assemble on toasted bread. Wrap tightly. Freeze.
How to reheat
Microwave for speed, then finish in a pan or toaster oven for texture
Oven/toaster oven for the best overall result
Air fryer for crisp edges (especially on biscuits and croissants)
Reheat frozen breakfast sandwiches the café way: warm the center first in the microwave, crisp the outside in a pan or oven/air fryer, then finish with fresh toppings like pickled onions or greens for the best texture.
If you ever want a quick reference on storage timelines beyond “it seems fine,” the FoodKeeper app is a practical tool developed with USDA FSIS partners to help with fridge/freezer guidance.
For egg-specific safety basics, USFDA’s guidelines are clear and straightforward, including: methods for cooking eggs safely.
Meal prep breakfast sandwiches: a one-hour batch that changes your week
If you’re doing sandwich meal prep, it helps to commit to a single batch session. The goal isn’t perfection—it’s making weekday mornings almost automatic.
A simple batch plan
Toast a stack of English muffins or bagels
Cook eggs as folded omelets (fast, neat, scalable)
Breakfast sandwiches for a crowd: the easiest way to feed everyone without chaos
Sometimes you’re not making one breakfast sandwich. You’re making breakfast sandwiches—plural—because family is hungry, guests are over, or you want leftovers that actually feel useful.
Feeding a group? Use sheet-pan eggs for sandwiches: bake one large egg slab, slice into squares, then stack into slider rolls with cheese and warm—fast, tidy, and perfect for breakfast slider sandwiches.
Breakfast slider sandwiches (the party-friendly move)
Use a sheet of rolls, slice horizontally, layer eggs and cheese across the whole surface, add fillings, close, and bake until warm.
Sheet-pan eggs for sandwiches are the fastest way to prep a crowd—bake one tray, slice into tidy squares, then stack into breakfast sliders or meal prep breakfast sandwiches without the mess of cooking eggs one-by-one.
Sheet pan eggs for sandwiches (the cleanest bulk method)
Whisk eggs, season, pour into a sheet pan, bake until set, then cut into squares. This gives you uniform pieces that stack easily into every sandwich format: croissants, bagels, English muffins, and even waffles.
The reason breakfast sandwiches stay popular isn’t just convenience. It’s the way they adapt. On a slow day, you can make a fried egg sandwich with crisp edges and melty cheese. On a packed morning, you can grab a frozen breakfast sandwich, reheat it, and still feel like you ate something real. When you’re trying to eat lighter, you can pivot to yogurt sauces and veggie layers. When you’re craving comfort, you can go full breakfast croissant mode and lean into it.
If you take only one thing from this: build your breakfast sandwich recipe around layers with purpose—bread for structure, eggs for richness, cheese for glue, sauce for harmony, and crunch for contrast. Once that clicks, the rest becomes a rotation you can enjoy all year.
1) What is the best breakfast sandwich recipe for beginners?
The best breakfast sandwich recipe for beginners is a simple egg and cheese sandwich on toasted bread. Start with one fried or scrambled egg, add a slice of cheese while the egg is still hot, and finish with a light spread so the sandwich stays moist without turning soggy.
2) How do I make egg sandwiches that don’t fall apart?
To keep egg sandwiches from falling apart, toast the bread well, use cheese as a “glue” layer, and avoid overfilling with watery ingredients. If you’re adding tomato or cucumber, blot them first and keep the slices thin so the sandwich holds its shape.
3) What’s the easiest way to make round eggs for an English muffin breakfast sandwich?
For an English muffin breakfast sandwich, crack an egg into a lightly greased ring (a mason jar ring or cookie cutter works) and cover the pan so the top sets quickly. In this way, the egg cooks into a neat patty that matches the muffin size.
4) Which egg style works best for a breakfast sandwich: fried egg or scrambled egg?
A fried egg sandwich is ideal when you’re eating right away and want crisp edges or a runny yolk. By contrast, a scrambled egg sandwich is better for reheating and meal prep because the texture stays softer after warming.
5) Can I use boiled eggs for sandwiches?
Yes—boiled eggs for sandwiches are great when you want a no-reheat option. Simply chop or mash the eggs and mix with a spread to make an egg sandwich filling that’s easy to pack and quick to assemble.
6) What is an eggwich, and how is it different from an egg sandwich?
An eggwich is a breakfast sandwich made without bread, where eggs act as the “bun.” In other words, it’s a gluten free breakfast sandwich option that still includes classic fillings like cheese, veggies, and a sauce layer.
7) How do I make a high protein breakfast sandwich without changing the flavor too much?
A high protein breakfast sandwich can be made by using two eggs instead of one, adding an extra slice of cheese, or including a protein-forward filling like paneer or a thick yogurt-based spread. As a result, you get more staying power while keeping the taste familiar.
8) What’s the best bread for a breakfast sandwich?
The best bread depends on the texture you want. English muffins create a tidy breakfast muffin sandwich feel, croissants make a rich breakfast croissant, bagels give a chewy bite for a breakfast bagel sandwich, and waffles create a crisp-sweet waffle breakfast sandwich.
9) How do I keep croissant sandwiches from getting soggy?
Because croissants are delicate, warm them lightly, avoid watery fillings, and keep spreads thin. Additionally, add fresh items like tomato only right before eating so the layers stay flaky instead of soft.
10) What’s the simplest bagel with egg and cheese build?
Toast the bagel cut sides, spread a small amount of sauce, add egg and cheese, then finish with one fresh layer like tomato, cucumber, or avocado. Consequently, you get a bagel breakfast sandwich that feels balanced rather than heavy.
11) How can I make a healthy breakfast sandwich that still tastes satisfying?
A healthy breakfast sandwich can stay satisfying by focusing on texture and seasoning rather than extra fat. For example, use toasted bread, a well-seasoned egg, plenty of crunchy veggies, and a tangy spread such as yogurt-style sauce or a lighter mayo blend.
12) What are easy vegetarian breakfast sandwich options?
Vegetarian breakfast sandwich options include egg and cheese with sautéed mushrooms, egg with spinach and herbs, hummus with veggies (with or without egg), or paneer with onions and spices. Likewise, adding a crisp layer keeps it lively.
13) How do I make a gluten free breakfast sandwich at home?
For a gluten free breakfast sandwich, use gluten-free bread, a gluten-free bagel, or swap bread entirely by making an eggwich. Alternatively, you can use waffles made with a gluten-free mix for a sturdier base.
14) What are the best breakfast sandwich ideas when I’m bored of egg and cheese?
If you’re bored of egg and cheese, switch just one layer: try pesto instead of mayo, add mushrooms instead of bacon, use a croissant instead of an English muffin, or add avocado for a creamy contrast. Similarly, a peppery sauce can change the flavor without changing the structure.
15) Can I make frozen breakfast sandwiches for busy mornings?
Yes—frozen breakfast sandwiches are one of the easiest meal prep wins. Assemble sandwiches with egg and cheese, skip watery vegetables, wrap tightly, and freeze. Then reheat and add fresh toppings afterward for better texture.
16) What’s the best method for meal prep breakfast sandwiches that reheat well?
For meal prep breakfast sandwiches, use scrambled eggs or a folded omelet layer because they reheat evenly. Furthermore, toast the bread first, keep sauce minimal before freezing, and wrap each sandwich tightly to reduce freezer burn.
17) How long do frozen breakfast sandwiches last in the freezer?
Frozen breakfast sandwiches typically keep their best quality for about 1–2 months, although they can remain safe longer if stored properly. Even so, using airtight wrapping helps prevent dry edges and off flavors.
18) How do I reheat frozen breakfast sandwiches without making the bread rubbery?
To avoid rubbery bread, thaw slightly, microwave briefly to warm the center, then finish in a pan, toaster oven, or air fryer to crisp the outside. In short, heat for speed first, then crisp for texture.
19) What’s the difference between breakfast sandwich ideas and breakfast sandwich recipes?
Breakfast sandwich ideas are quick combinations or swaps you can try, whereas breakfast sandwich recipes include clear steps, timings, and a method you can repeat. Consequently, recipes are better when you want consistent results.
20) How do I make breakfast sandwiches for a crowd?
To make breakfast sandwiches for a crowd, cook eggs in a larger batch (scrambled or sheet-pan style), lay out bread bases, and assemble an assembly line. Afterwards, keep sandwiches warm in a low oven so everyone can eat together.
We’ve all faced the dilemma of leftover sabji sitting in the fridge, but don’t let it go to waste! Here’s a creative way to transform your leftover dry paneer sabji into a delicious and nutritious sandwich. This recipe is quick, easy, and perfect for a hearty breakfast or lunch.
Ingredients:
Leftover dry paneer sabji (you can use any dry sabji)
Finey chopped onion
Green chutney
Moong sprouts
Mayonnaise (Optional)
Bread slices
Black salt
Butter
Method:
Take two slice of bread and spread green chutney of your choice and repeat the process with mayonnaise. Layer the leftover paneer sabji
Add finely chopped onion and moong sprouts. Sprinkle a pinch of black salt for extra flavour. Cover the filling with another bread slice,
Heat a tawa (griddle) and spread some butter on it. Place the sandwich on the tawa and grill it until both sides are crispy and golden brown. Remove the sandwich from the pan and place it on a cutting board and slice it diagonally
Serve the hot, crispy sandwich with your favorite sauce or chutney,
This paneer sabji sandwich is not only a great way to utilize leftovers but also a tasty and nutritious meal that everyone will love. Give it a try and let us know how it turned out for you!
Explore More Delicious Sandwich Recipes If you enjoyed this sandwich, be sure to check out our other sandwich recipes for more tasty ideas. Here’s is some of our favorites: