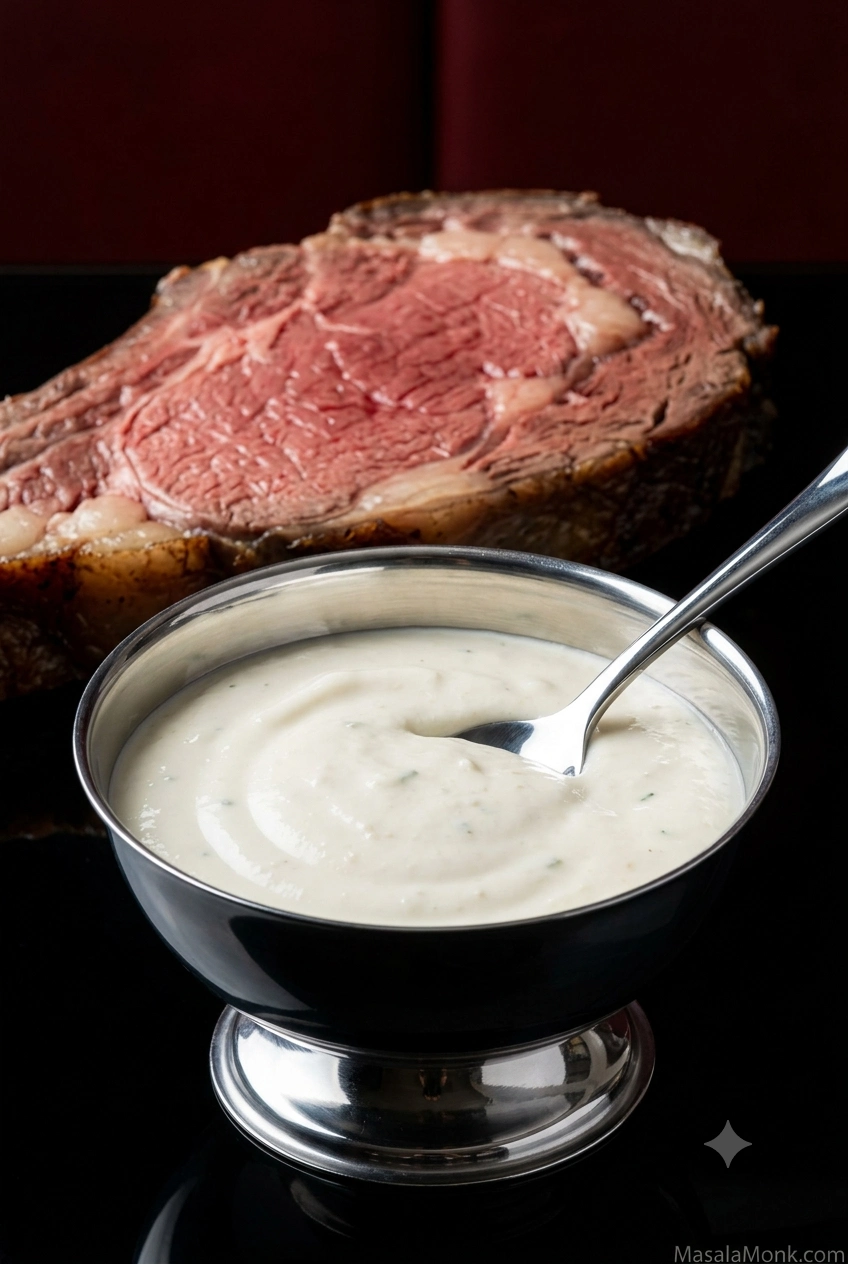
A spoonful of good horseradish sauce should wake up the next bite of prime rib without hiding it. It lands cold and creamy against the warm beef; then the horseradish rises briefly through the nose just as the richness starts to build.
The sauce itself is easy. Horseradish is less predictable. One jar can be polite and vinegary, while another hits behind the eyes with half the amount. So the horseradish goes in gradually: three tablespoons first, then more only after you taste it.
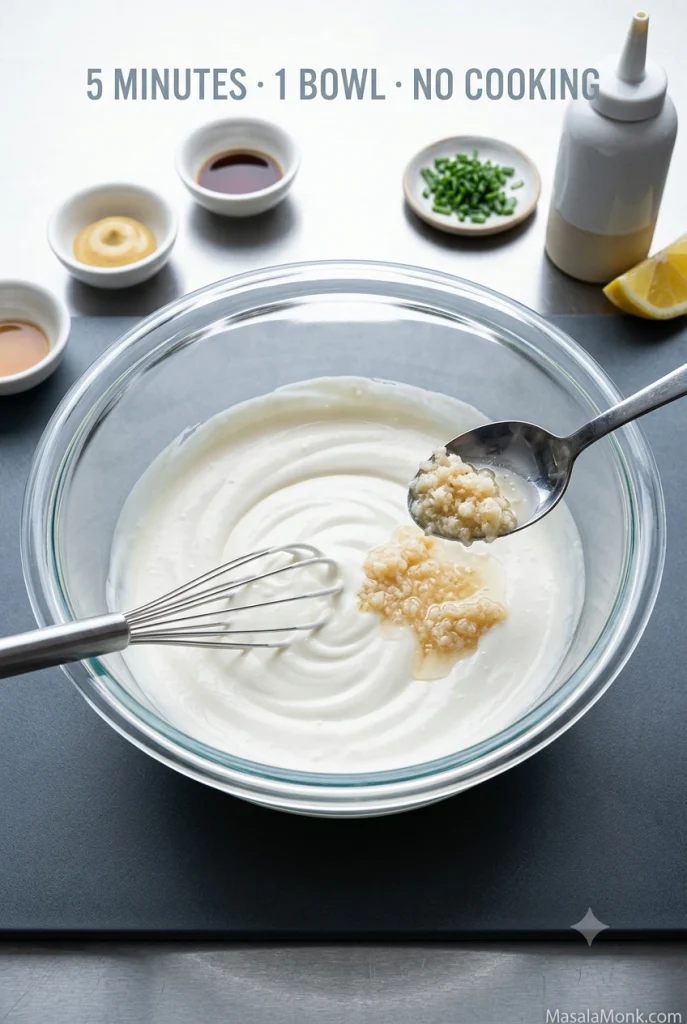
By the time a prime rib is resting, dinner already has enough moving parts. This should be the easy bowl: 5 minutes, one bowl, nothing to cook. Sour cream gives it body and coolness, a little mayonnaise smooths the texture, and the other flavors stay quiet enough that the beef and horseradish still lead.
Use prepared horseradish, usually grated or minced horseradish preserved with vinegar and salt. An already-creamy store-bought horseradish sauce is a finished condiment and behaves differently in this recipe.
If the jar has obvious free liquid, drain it before measuring. With ordinary prepared horseradish, start with 3 tablespoons / 45 mL and decide on the fourth after tasting. Using one marketed as extra hot? Start around 1–2 tablespoons / 15–30 mL and build from there.
Creamy Horseradish Sauce for Prime Rib
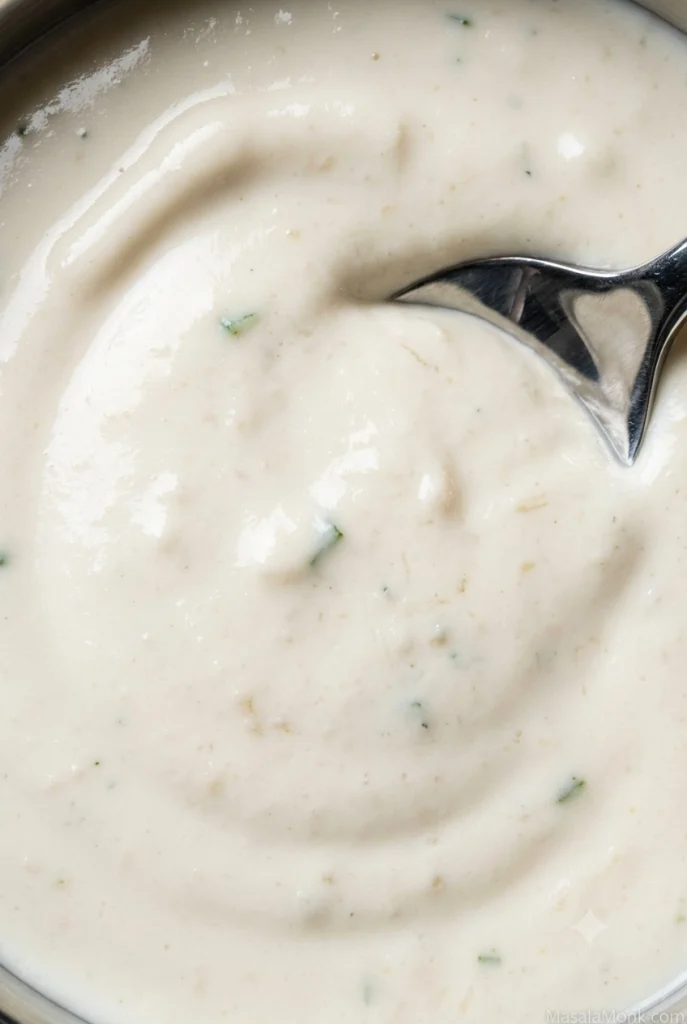
Cold, creamy and thick enough to cling to the beef, with enough horseradish to cut the richness without becoming mayo-heavy or mustardy.
Ready in5 minutes
CookingNone
Optional rest30 minutes
YieldAbout 1½ cups / 360 mL — about 12 servings at 2 Tbsp / 30 mL each
You need: a bowl and spoon or small whisk, plus a fine-mesh sieve if the horseradish is particularly wet.
Ingredients
1 cup / 240 g full-fat sour cream
2 tablespoons / about 30 g mayonnaise
4 tablespoons / 60 mL prepared horseradish, divided, plus more to taste — start with 3 tablespoons
1 teaspoon / 5 mL Dijon mustard
1 teaspoon / 5 mL Worcestershire sauce
1 teaspoon / 5 mL fresh lemon juice
1 tablespoon finely sliced fresh chives
¼ teaspoon fine sea salt, plus more to taste
¼ teaspoon freshly ground black pepper
The spoon trail should stay visible briefly; disappearing means too loose, while a rigid ridge means too stiff.
Method
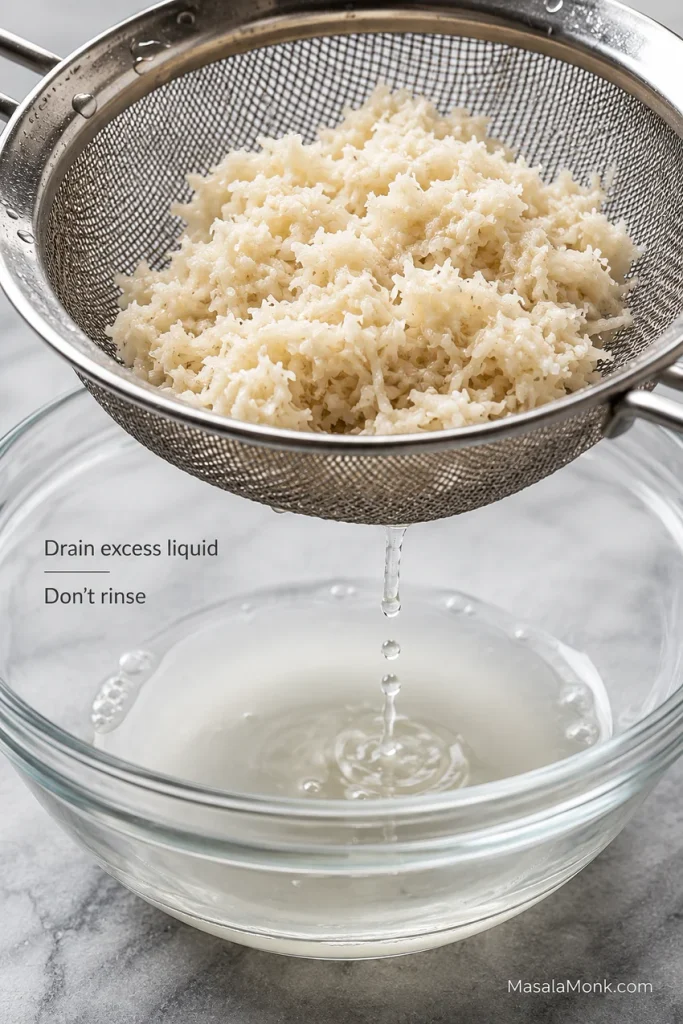
Drain the horseradish if needed. If there is obvious liquid around the grated horseradish, let the excess run off through a fine-mesh sieve. Don’t rinse it, and don’t squeeze it bone-dry. You want it moist, just not carrying a lot of extra brine into the sauce.
Start with most, not all, of the horseradish. Stir 3 tablespoons / 45 mL into the sour cream, mayonnaise, Dijon, Worcestershire, lemon juice, chives, salt and pepper. If the jar is labeled extra hot or tastes immediately fierce, begin with only 1–2 tablespoons / 15–30 mL.
Taste it cold, as you’ll serve it. A lively jar may already give you enough bite. For a stronger sauce, add the reserved horseradish. If the jar is unusually mild, add another teaspoon or two at a time, draining off obvious free liquid first and tasting between additions.
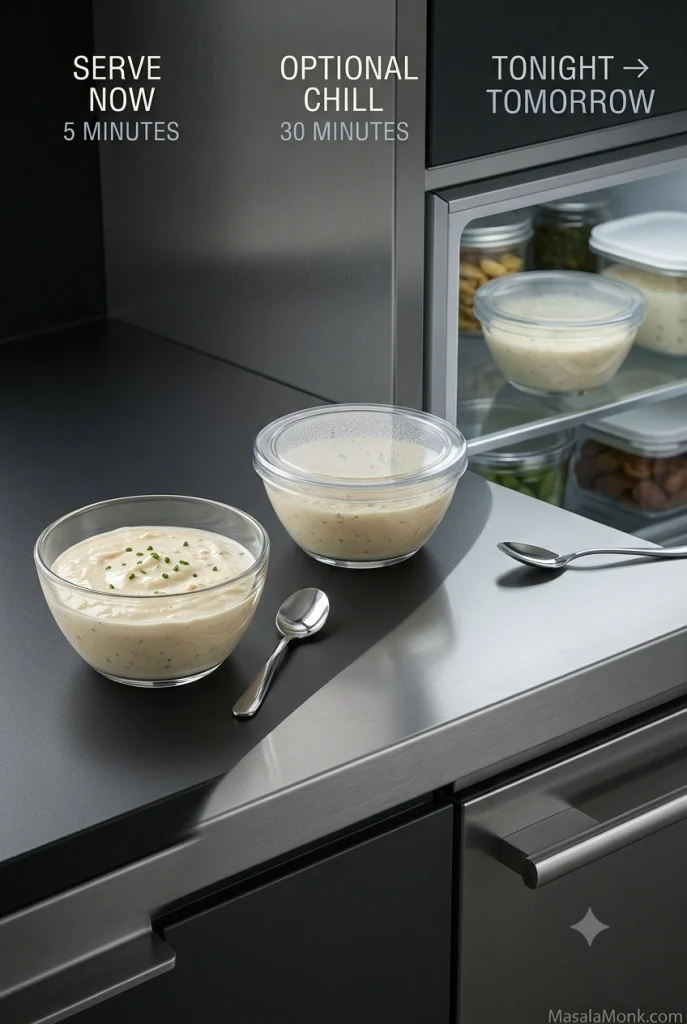
Serve now or chill briefly. The sauce is ready immediately, or you can refrigerate it for about 30 minutes before serving.
Stir and taste again before serving. Horseradish can soften as it sits, so make the final horseradish and salt adjustment at the end.
Stir until the horseradish is evenly distributed. A spoon or small whisk is enough; this sauce does not need whipping.
Check the Finished Consistency
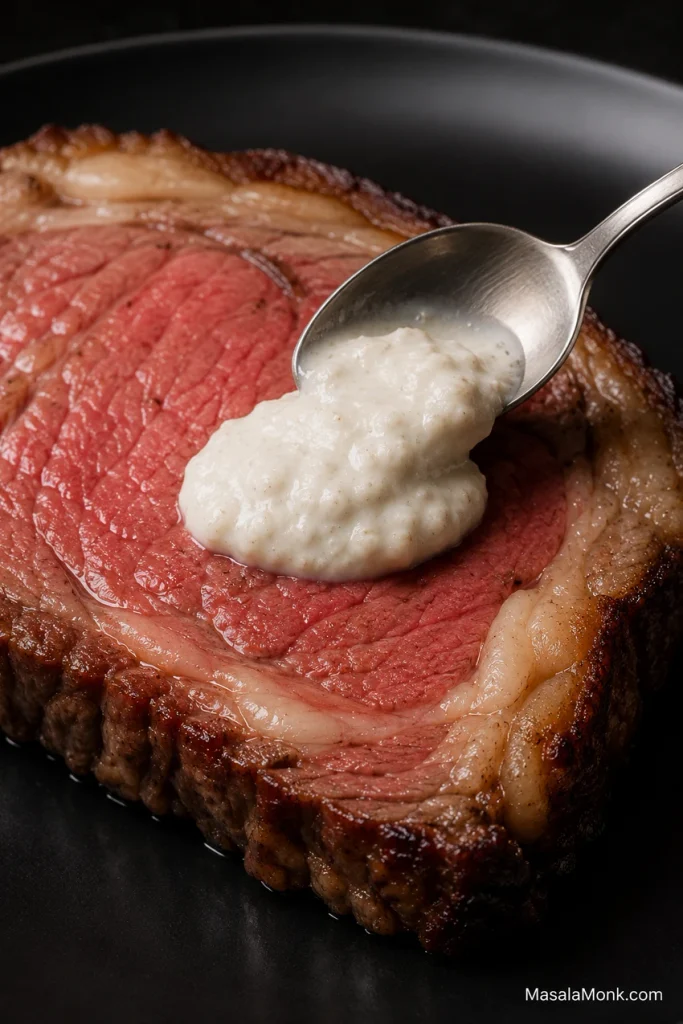
When it’s right: spoon some onto a slice of beef. It should hold in a soft mound instead of immediately puddling across the plate. Horseradish should be the flavor you notice; mustard, lemon and mayonnaise belong in the background. If one of those announces itself first, adjust the balance.
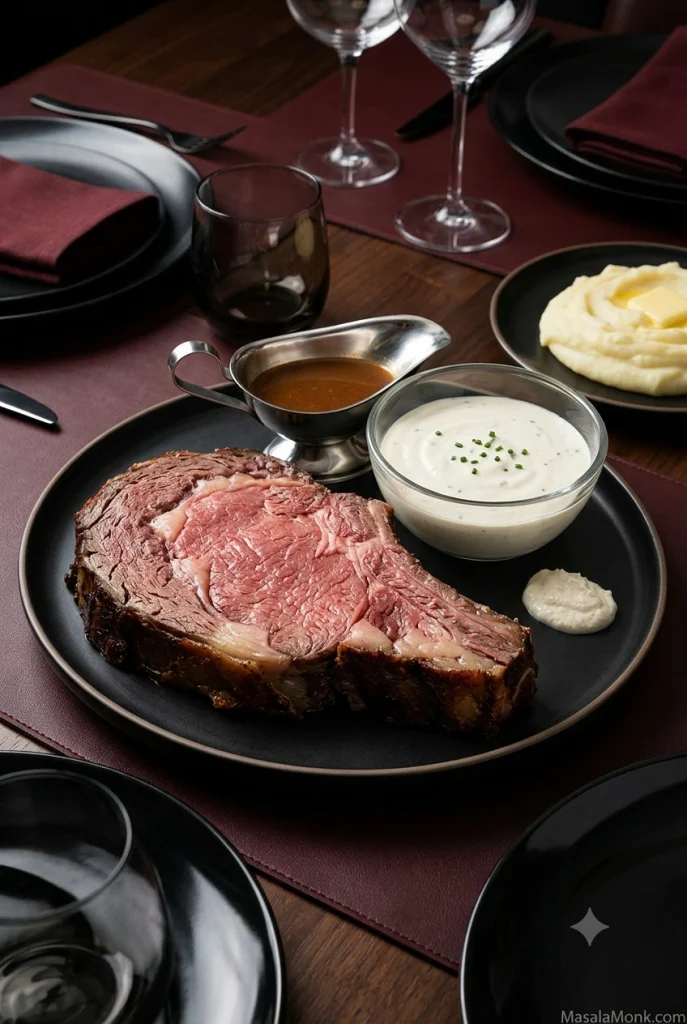
On warm prime rib, the sauce should soften slightly but stay with the bite instead of sliding across the plate.
Need Help With Your Sauce?
If the bowl tastes good, you’re done—you don’t need the rest of this guide. If something is off, or you’re working with a different kind of horseradish, use the section that matches the problem in front of you.
Horseradish heat rises quickly through the nose and then fades. It doesn’t sit on the tongue the way a chile or hot sauce does.
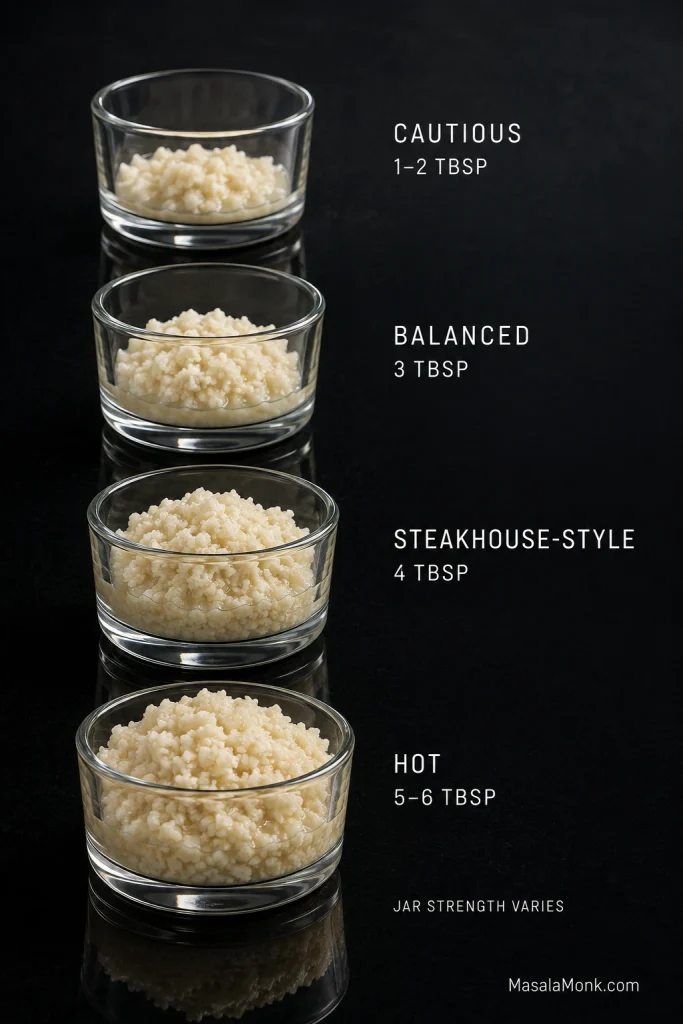
There’s no universal tablespoon count for “medium.” Brands vary, and something sold as extra hot may start far beyond a mild supermarket jar.
Treat the amounts below as starting points, not standardized heat ratings. The same 3 tablespoons can taste mild with one jar and assertive with another. These amounts are for the full batch above: 1 cup / 240 g sour cream plus 2 tablespoons mayonnaise.
Heat level
Prepared horseradish
What it feels like
Cautious start
1–2 Tbsp / 15–30 mL
Creamy first, with gentle horseradish behind it; also a sensible starting point for an unfamiliar extra-hot jar
Balanced
3 Tbsp / 45 mL
A clear horseradish lift without taking over the bite
Steakhouse-style
4 Tbsp / 60 mL
Strong enough to notice immediately, still comfortable beside rich beef
Hot
5–6 Tbsp / 75–90 mL
A nose-clearing bite for people who like their horseradish strong
Use these amounts as starting landmarks, then adjust in smaller spoonfuls after tasting your particular jar.
Taste the Jar Before You Blame the Recipe
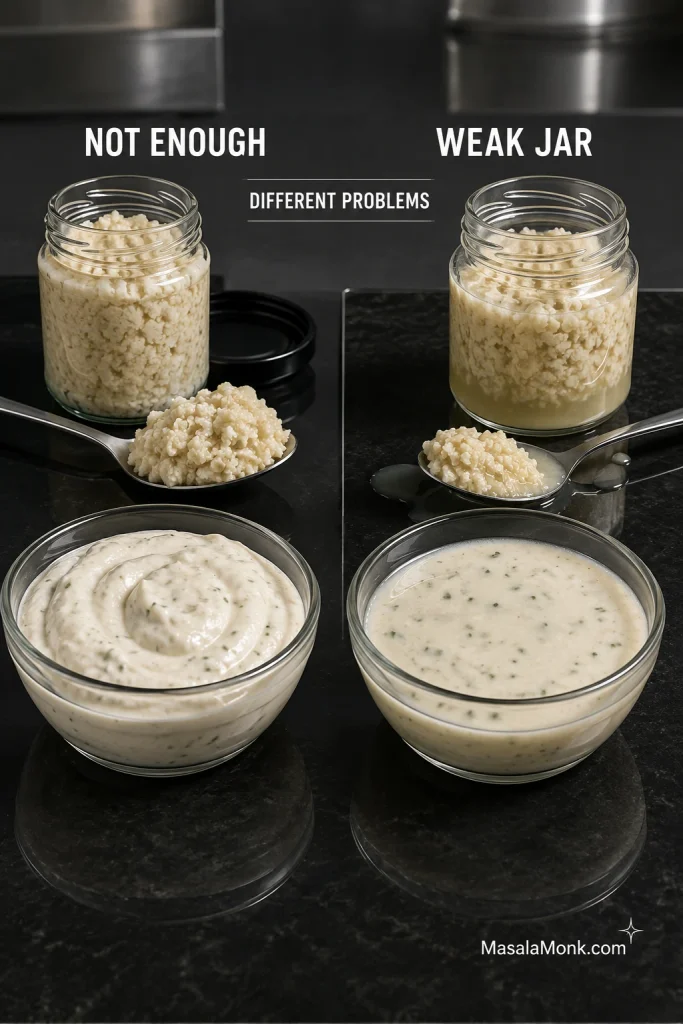
If the finished sauce still tastes mostly like sour cream, try a tiny amount of the prepared horseradish by itself.
A pungent jar will respond when you increase the amount. A weak, vinegar-heavy one can make the sauce wetter and wetter without bringing much more bite.
Opened horseradish gradually loses pungency too. If a sauce you’ve made before suddenly seems unusually mild, a fresher jar may give you a livelier result.
Not enough horseradish and weak horseradish are different problems.
Need more horseradish bite? Add horseradish. Dijon, lemon, black pepper and Worcestershire can all make the sauce taste stronger, but none gives you the same clean horseradish heat. If another spoonful barely changes anything, the jar itself is probably the limiting factor.
If extra horseradish changes texture more than flavor, the jar—not the recipe—is probably the limiting factor.
Troubleshooting Horseradish Sauce
Don’t start over. Most problems here can be fixed without making another batch. Figure out what changed before adding more of everything.
Match the Problem to the Fix
What happened?
Likely reason
Fix it now
It tastes mostly like sour cream
Too little horseradish for this jar
Add horseradish 1 teaspoon at a time
I added plenty and it is still weak
The horseradish itself may be mild or past its punch
Taste the jar; a fresher or stronger one may work better than adding more liquid
It is too hot
Strong horseradish or simply too much
Stir in more sour cream, then taste for salt again
It is watery
Wet horseradish or too much added liquid
Add thick sour cream and drain the next horseradish addition if visibly wet
It became watery overnight
A little liquid separated while chilling
Stir thoroughly before changing anything
It is too thick
Very thick sour cream
Add milk, cream or buttermilk 1 teaspoon at a time
It is too tangy
Too much added acid, or unusually tart sour cream
Too much lemon or vinegar? Dilute with sour cream. Very tart sour cream? Soften it with a little mayonnaise
It is too salty
Too much salt
Dilute with unsalted sour cream
It tastes too mayo-heavy
Too much mayonnaise for your taste
Add sour cream, then enough horseradish to bring the balance back
It tastes mustardy
Dijon is dominating
Dilute with sour cream and horseradish; don’t chase it with more acid
It seems milder after sitting
The horseradish may have mellowed
Stir first, then add more prepared horseradish from a pungent jar if needed
Half the table wants more heat
Different people, not a failed recipe
Split off a small portion and make only that part hotter
If More Horseradish Is Thinning the Sauce
Still getting thinner as you add horseradish? The packing liquid may be doing more damage than the grated horseradish. Drain the next addition so you’re increasing the horseradish itself without pouring another spoonful of vinegar-heavy liquid into the sauce.
Drain pooled brine, not ordinary moisture. The prepared horseradish should still look damp when it reaches the bowl.
Prepared Horseradish vs Store-Bought Creamy Horseradish Sauce
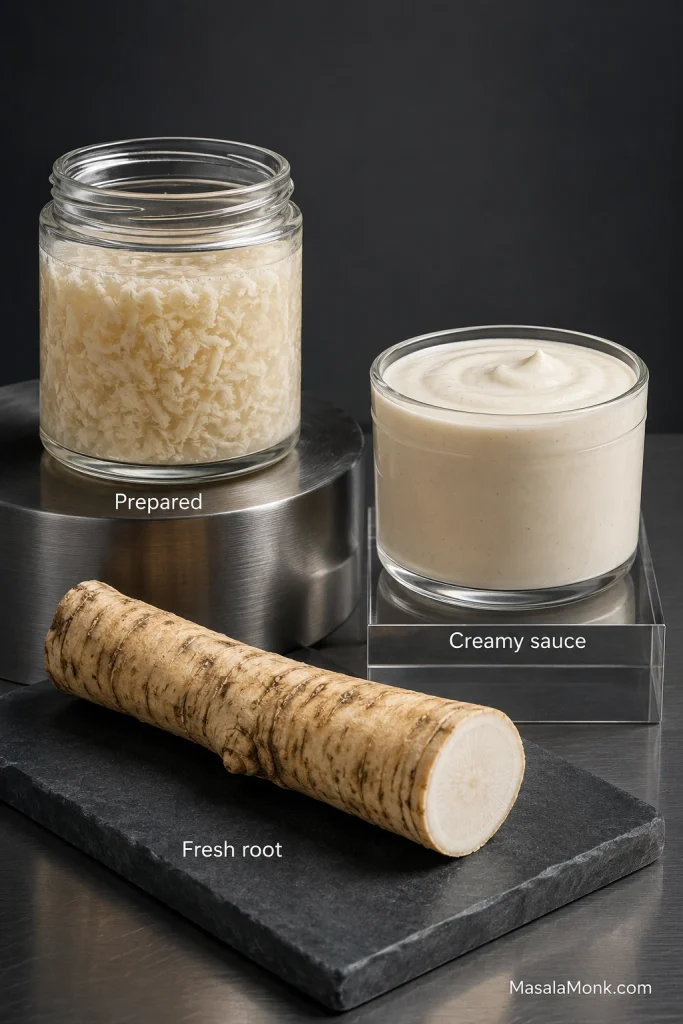
Standing in front of two similar jars? Read the label. Texture alone won’t reliably tell you which one you have.
Prepared or grated horseradish: This is what you want for the main recipe.
Prepared horseradish marketed as extra hot: Fine to use, but start with less. The actual intensity still varies from product to product.
Store-bought creamy horseradish sauce: This is already a finished condiment. Serve or adjust it as its own sauce instead of folding it into this recipe.
Fresh horseradish root:Use the fresh-root method below; fresh root behaves differently and can vary dramatically in strength.
Trust the label: prepared horseradish is an ingredient; creamy horseradish sauce is already a finished condiment.
Shopping for it? Prepared horseradish is often refrigerated near the deli or specialty condiments, although some brands are stocked in the regular condiment aisle.
Why the Ratio Works
The dairy is the buffer, not the flavor we’re trying to maximize. Enough sour cream takes the edge off an aggressive jar without burying the horseradish; too much can turn a mild jar into something that tastes mostly like sour cream. That’s why the horseradish stays adjustable instead of being locked to one universal amount.
The small amount of mayonnaise rounds out the texture. Dijon and Worcestershire add quiet savory depth, while 1 teaspoon of lemon gives the sauce some brightness. Prepared horseradish already brings acidity of its own, so the lemon doesn’t need to do much.
Useful Substitutions and Variations
If nothing is actually wrong with the sauce and you’re simply missing an ingredient—or want to change the flavor or texture—these are the easiest swaps.
For a tangier sauce: Replace the sour cream 1:1 with full-fat Greek yogurt.
For a richer sauce: Replace the sour cream 1:1 with crème fraîche.
No mayonnaise? Use 2 tablespoons more sour cream.
No chives? Finely sliced scallion greens are the closest swap. Dill works too, but changes the herb flavor more noticeably.
No Dijon or Worcestershire? Either can simply be left out.
No lemon? Start with a small splash of cider, white-wine or champagne vinegar. The prepared horseradish already contributes some acidity.
Using Fresh Horseradish Root
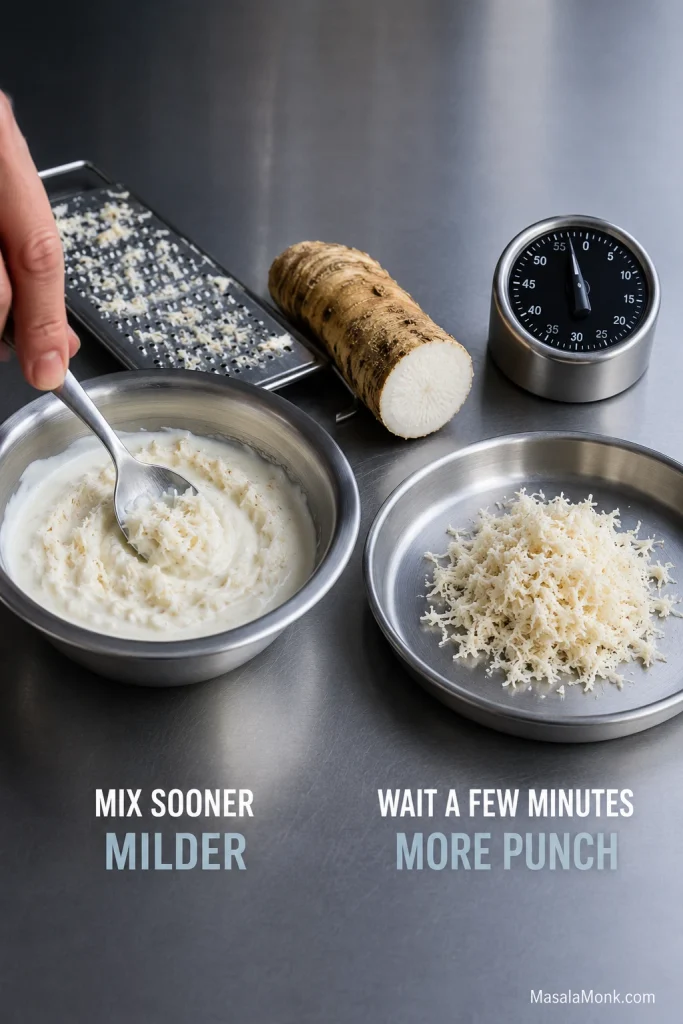
Fresh root isn’t a tablespoon-for-tablespoon replacement for prepared horseradish. Its strength can vary dramatically, and how quickly you mix it into the sauce affects the pungency too.
For this batch, start with about 1 tablespoon of freshly grated horseradish, or less if it already seems fierce.
Want a milder result? Grate the horseradish and stir it into the sauce promptly. Want more punch? Grate it, let it stand for a few minutes, then mix it in. Taste before adding more.
A short pause after grating lets more pungency develop before the fresh horseradish is mixed into the sauce.
Keep the root cold while you work and use good ventilation. Freshly cut horseradish can irritate your eyes and sinuses, so don’t lean over a food processor when you open it.
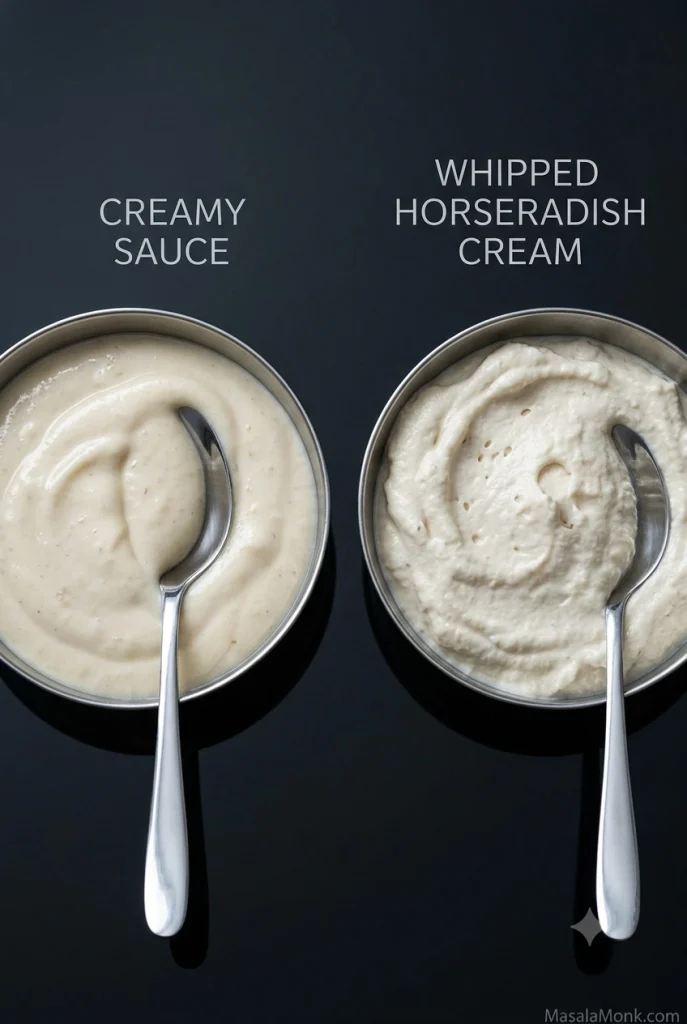
For a lighter, airier alternative, make whipped horseradish cream instead of the thicker sour-cream version.
Whip ½ cup / 120 mL cold heavy cream to soft peaks. Fold in 1–2 tablespoons / 15–30 mL prepared horseradish and a pinch of salt. Stop at soft peaks; it should stay loose enough to spoon over beef, not whipped as stiffly as dessert cream.
Creamy horseradish sauce clings; whipped horseradish cream gives the beef a lighter, airier finish.
Make Ahead, Chill and Store Horseradish Sauce
Prime rib is already resting: make the sauce and serve it. There’s no mandatory chill time hiding behind the five-minute promise.
Got 30 minutes: put it in the refrigerator while the rest of dinner comes together. The 30-minute chill is optional, but it gives the sauce a little time to settle and takes one job off your list before carving.
Making it tonight for tomorrow: this is an easy Christmas Eve job. Mix the sauce, cover it and refrigerate it. Before the roast is carved:
Stir the sauce thoroughly.
Taste it while it’s cold.
Add more prepared horseradish if the bite has softened.
Adjust the salt only after the horseradish is where you want it.
After an overnight chill, stir and taste before adjusting. The horseradish may have mellowed while it sat.
Doing some of the Christmas cooking ahead? Garlic mashed potatoes can be handled in advance too, buying you a little breathing room while the roast is finishing.
How Long Does It Keep?
Keep the sauce covered at 40°F / 4°C or colder and, as a conservative home-storage rule, use it within about 3–4 days. The texture and horseradish punch are usually best earlier in that window.
For a long buffet or holiday meal, put out a small bowl and replenish it from the refrigerator, or nest the bowl over ice. USDA food-safety guidance says perishable food should generally be refrigerated within 2 hours. When the surrounding temperature is above 90°F / 32°C, that window drops to 1 hour.
Freezing isn’t worth it here. Sour cream and mayonnaise can separate or turn grainy after thawing, and making a fresh batch takes five minutes.
Bring it to the table cold, in a small bowl. Prime rib is expensive, and people have wildly different ideas about how much horseradish is enjoyable. Let everyone control the spoon.
Serve the horseradish sauce separately so everyone controls the heat on their own plate.
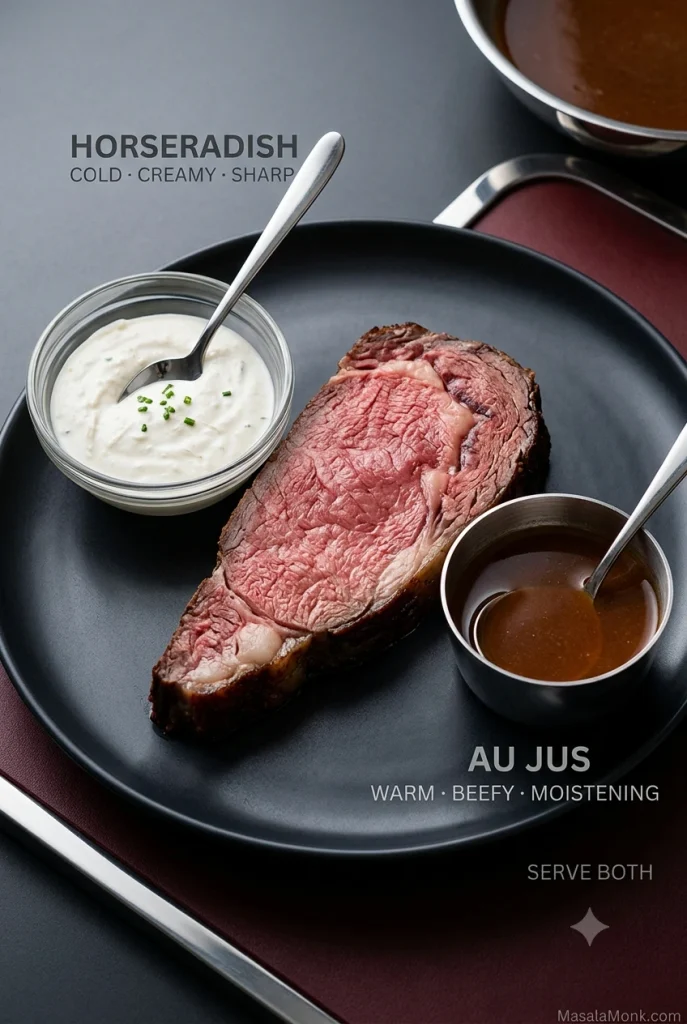
Horseradish Sauce or Au Jus?
Serve both when you can. They’re doing different jobs.
Au jus is warm and beefy. It adds moisture and reinforces the roast. Horseradish sauce is cold and sharp, cutting through fattier bites.
A little jus and a spoonful of horseradish sauce can happily share the same plate. Neither needs to drown the slice.
Use au jus for moisture and horseradish sauce for sharp contrast; they work best as separate accents.
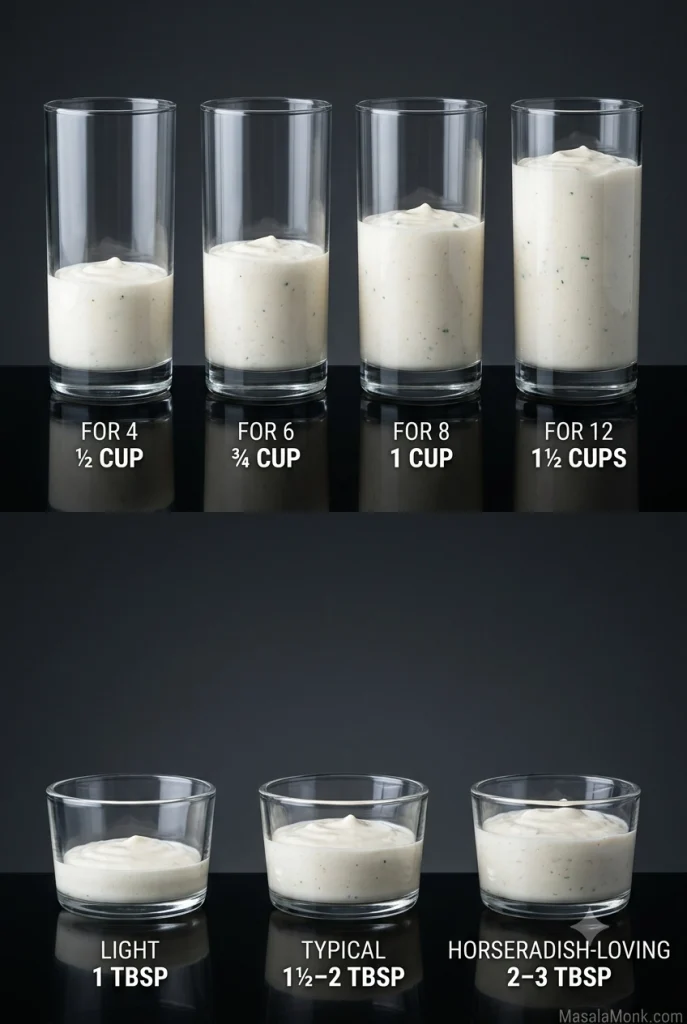
How Much Sauce Per Person?
How your crowd eats it
Plan per person
Light
About 1 Tbsp / 15 mL
Typical
About 1½–2 Tbsp / 22–30 mL
Horseradish-loving
About 2–3 Tbsp / 30–45 mL
Planning on 2 tablespoons / 30 mL per person? Make about ½ cup / 120 mL for four people or ¾ cup / 180 mL for six. For eight people, plan on 1 cup / 240 mL; for twelve, make the full 1½-cup / 360 mL batch.
For most tables, 1½–2 tablespoons per person is a useful planning middle ground.
Doubling or halving the recipe? Scale everything in the same proportion, but hold back roughly one-quarter of the horseradish. Taste the finished batch, then add only what it still needs.
If horseradish always disappears quickly at your prime rib dinners, make extra. Sauce left tomorrow is considerably less annoying than an empty bowl halfway through the meal.
Leftover Sauce? Start With a Roast Beef Sandwich
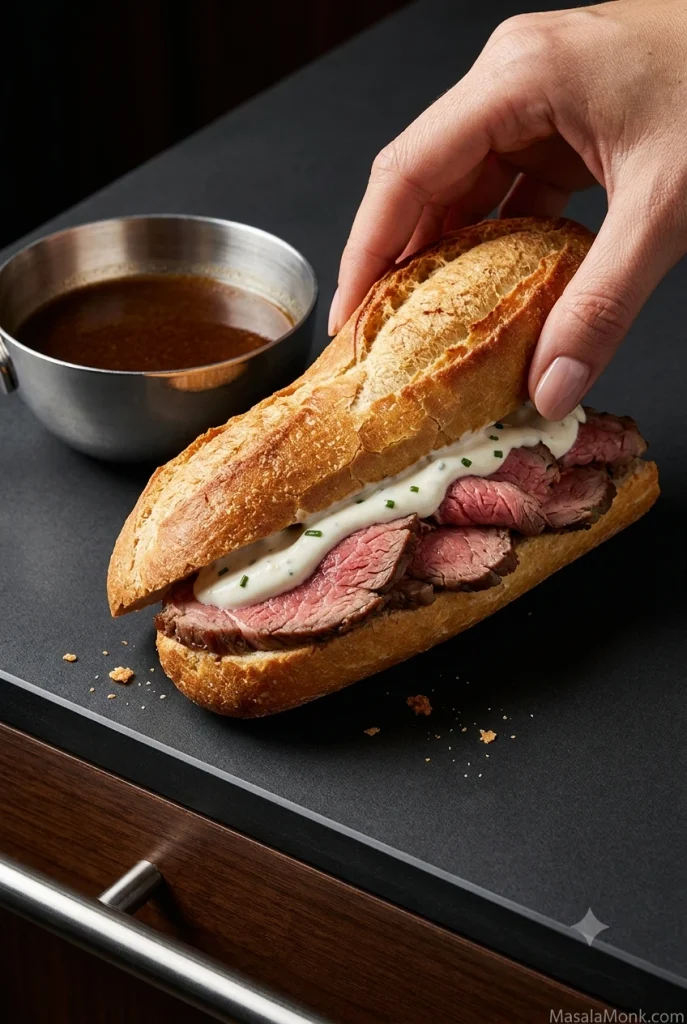
Cold prime rib or roast beef, crusty bread and creamy horseradish belong together for the same reason the sauce worked at dinner: the dairy softens the rich beef while the horseradish keeps the next mouthful lively.
When both beef and sauce survive dinner, tomorrow’s French dip sandwich practically plans itself.
Spread horseradish sauce on the bread and keep the au jus beefy and clean for dipping.
The remaining sauce is also good with baked potatoes, burgers, steak sandwiches, roast pork, pork chops or smoked beef.
The best bowl is not the one with the most horseradish. It is the one where a cold spoonful wakes up a warm slice of beef, gives you that brief lift through the nose, and then gets out of the way before the next bite.
Start with the balanced version, then make a small side portion hotter for anyone who wants more bite. The roast has already done the difficult part of dinner; the sauce only needs to know when to stop.
Made it? Tell us which prepared horseradish you used, how much ended up in your final batch, and where you landed on the heat scale. Different jars behave so differently that your answer may help the next person making it.
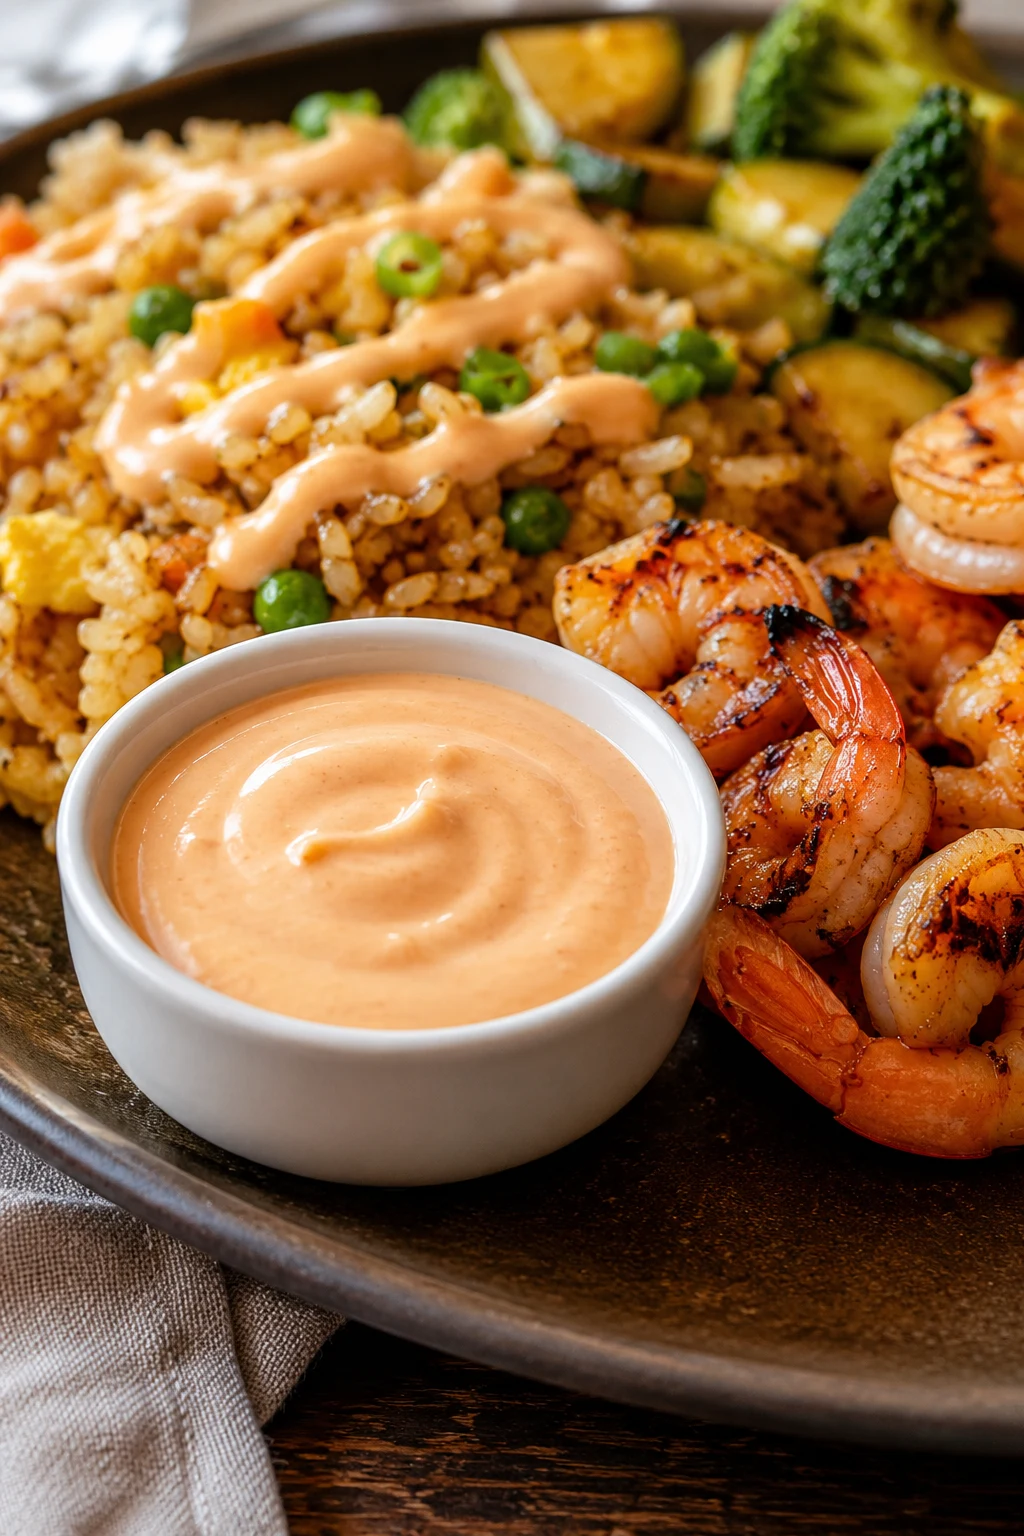
This yum yum sauce is the cool, creamy, pale pink-orange sauce people remember from the hibachi plate before anything else. It is a little sweet, a little tangy, rich enough for dipping, and somehow good on almost everything at the table.
Yum yum sauce is a mayo-based hibachi-style sauce made with ketchup or tomato paste, rice vinegar, sugar, garlic powder, onion powder, paprika, and water. It takes about 5 minutes to whisk together, then the fridge does the final work.
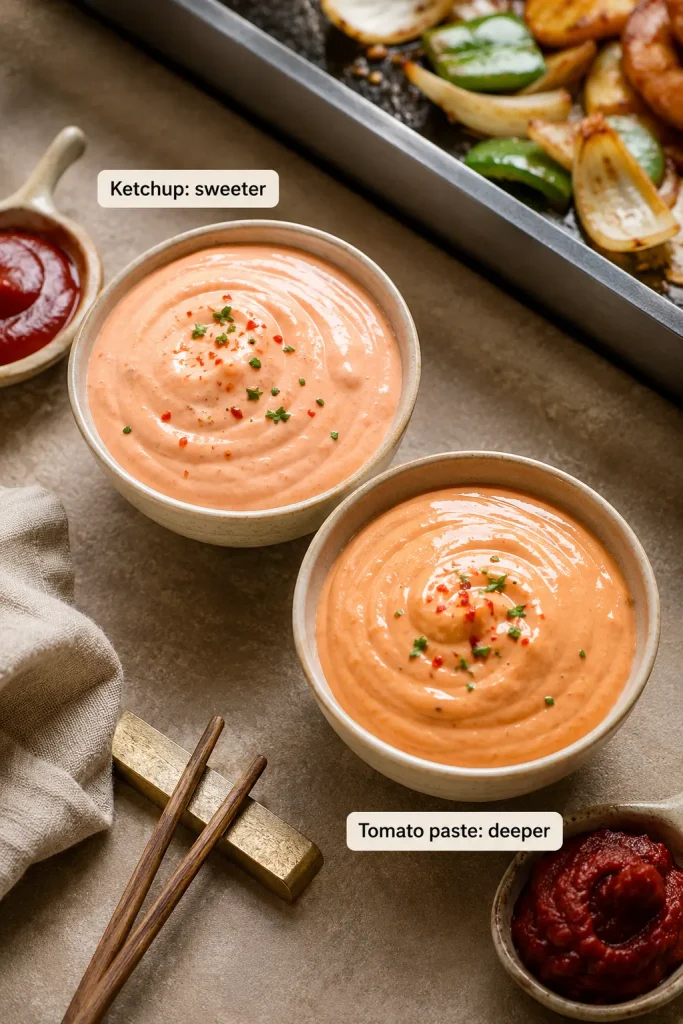
Make the simple ketchup version first. Once it chills, you can tune it sweeter, tangier, richer, thinner, or spicier without guessing. Ketchup gives you the friendly first batch; tomato paste gives you the deeper, less sweet version you try once you know what you like.
The goal is not just copying one restaurant bottle. It is to give you the sauce people keep reaching for: creamy but not heavy, sweet but not sugary, thin enough to drizzle, and bold enough to make rice, shrimp, chicken, and vegetables taste finished.
Keep it nearby when dinner is moving toward shrimp, vegetables, or a quick shrimp fried rice plate.
To make yum yum sauce, whisk mayonnaise with ketchup, rice vinegar, sugar, garlic powder, onion powder, paprika, a pinch of salt, and enough water to make it smooth. Ketchup gives the easiest sweet, pale pink-orange version. Tomato paste can replace ketchup when you want a deeper, less sweet sauce.
You can use it immediately if dinner is ready, but it tastes more like steakhouse-style yum yum sauce after chilling. Thirty minutes helps, 2 hours is better, and overnight gives the smoothest flavor. Stir before serving and thin with a little water if you want it pourable enough for fried rice, shrimp, chicken, vegetables, or bowls.
This sauce is often called hibachi white sauce, Japanese white sauce, shrimp sauce, pink sauce, or Japanese steakhouse sauce. It is best understood as an American hibachi-style restaurant sauce, not a traditional Japanese condiment.
Already cooking? Go straight to the recipe card, or use the texture guide if you need dip, drizzle, or dressing consistency.
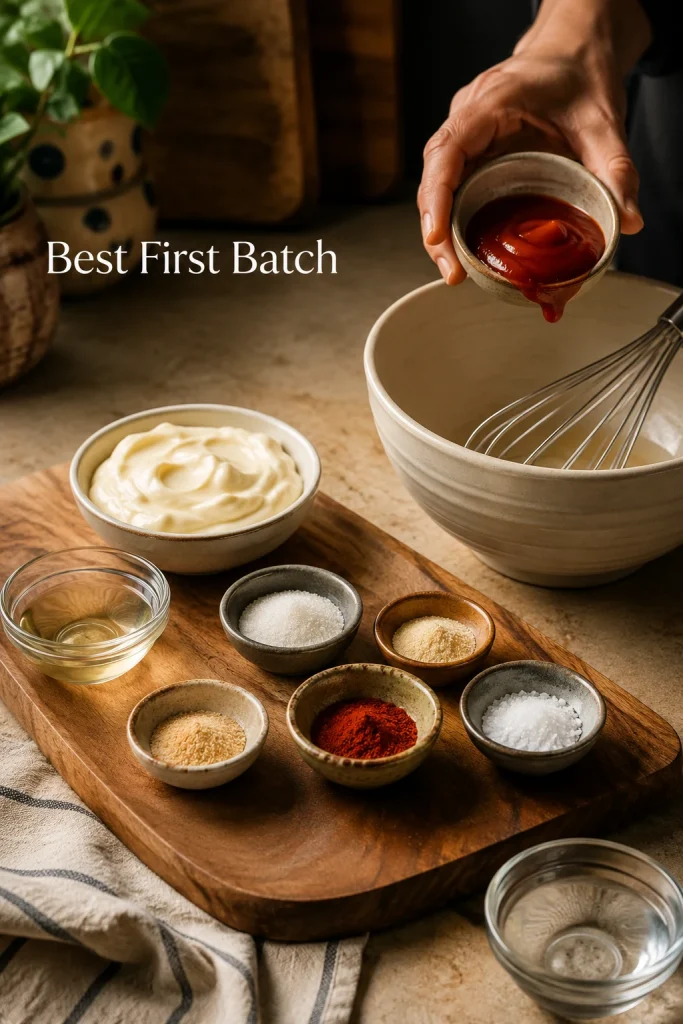
Best first batch: Use 1 cup mayo, 2 tablespoons ketchup, 2 teaspoons rice vinegar, 1 teaspoon sugar, 1 teaspoon garlic powder, ½ teaspoon onion powder, ½ teaspoon paprika, a pinch of salt, and 1 to 2 tablespoons water. Chill for 30 minutes. This gives you the classic sweet, creamy hibachi-style version before you start adjusting.
Start with the ketchup version when making your first batch because it gives the easiest sweet baseline before you adjust tang, heat, or richness.
Yum Yum Sauce at a Glance
Best default version
Regular mayo, ketchup, rice vinegar, sugar, garlic powder, onion powder, paprika, salt, and water
Active time
5 minutes
Minimum total time
35 minutes, including a 30-minute chill
Best flavor
After 2 hours or overnight
Yield
About 1¼ to 1½ cups / 300 to 360 ml, depending on thinning
Texture goal
Thick enough to dip, smooth enough to drizzle after thinning
Best with
Shrimp, fried rice, chicken, steak bites, vegetables, fries, spring rolls, rice bowls, wraps, and burgers
Storage
Up to 1 week in an airtight container in the refrigerator
Yum Yum Sauce Recipe
This easy yum yum sauce starts thick and creamy, then thins into the pale pink-orange drizzle people love with fried rice, shrimp, chicken, vegetables, steak bites, fries, spring rolls, and hibachi-style bowls. The main recipe uses ketchup for the easiest first batch. Tomato paste, Kewpie mayo, butter, and heat are included as optional upgrades when you want a richer steakhouse-style sauce.
1 to 2 tablespoons water / 15 to 30 ml, plus more as needed
Pinch of salt, to taste
Optional Restaurant-Style Add-Ins
Use 1 tablespoon tomato paste / 15 to 16 g instead of ketchup for a deeper, less sweet sauce.
Add 1 tablespoon melted cooled butter / 14 g for a silkier, richer finish.
Use Kewpie mayo instead of regular mayo for a fuller, more savory base.
Add a pinch of cayenne or ½ teaspoon sriracha for gentle heat.
If using tomato paste instead of ketchup, increase sugar to 2 teaspoons / 8 g.
Instructions
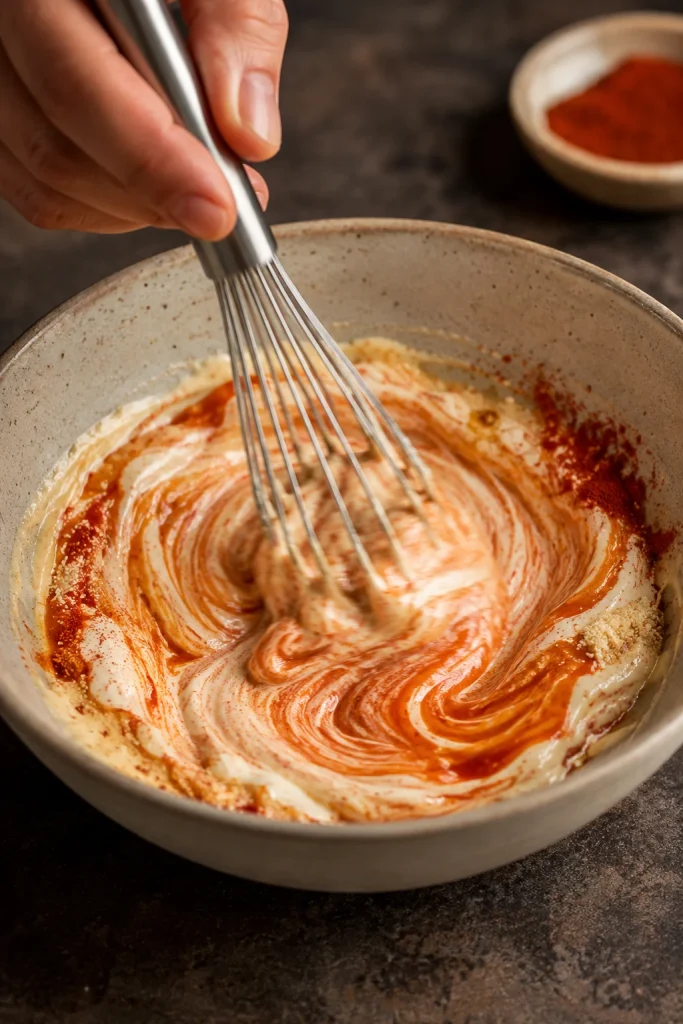
Add the mayonnaise, ketchup, rice vinegar, sugar, garlic powder, onion powder, paprika, and a pinch of salt to a mixing bowl.
Whisk until the sauce is smooth and evenly colored, with no streaks of tomato or spice.
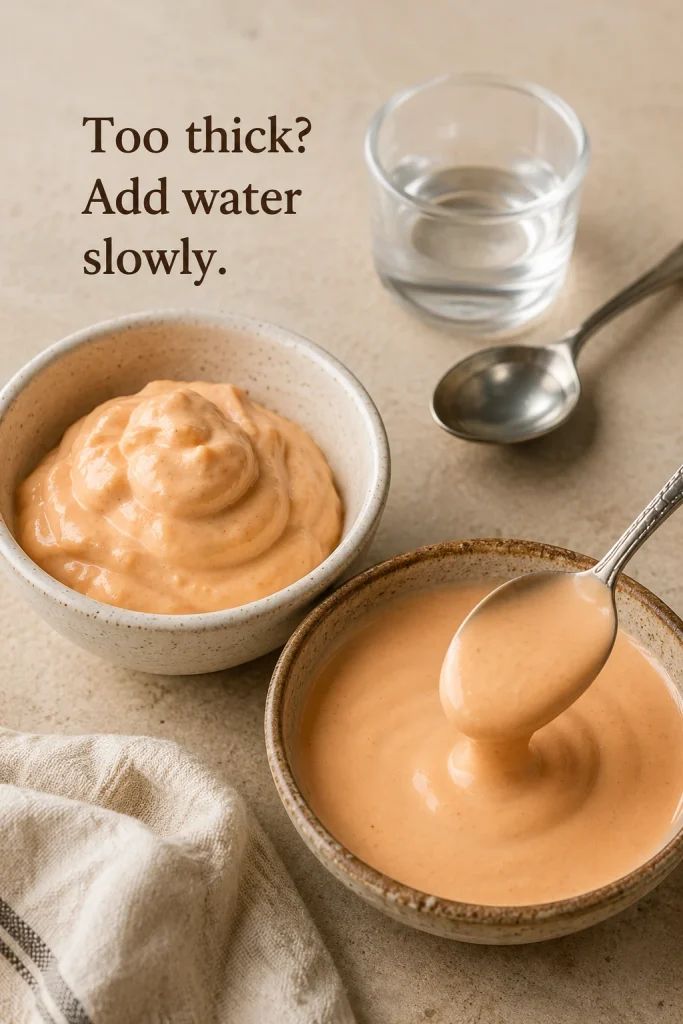
Add water 1 tablespoon at a time until the sauce reaches your preferred thickness.
If using butter, let the melted butter cool slightly, then whisk it into the sauce. Do not add hot butter directly to the mayo.
Taste lightly, but do not over-adjust yet. The flavor becomes smoother after chilling.
Cover and refrigerate for at least 30 minutes. For better flavor, chill for 2 hours or overnight.
Stir again before serving. Thin with another teaspoon or two of water if needed.
Recipe Notes
The ketchup version is sweeter, easier, and the best place to start.
The tomato paste version is deeper, less sweet, and better when you want the richer steakhouse-style finish.
Thick dip texture needs about 1 tablespoon water. Drizzle texture usually needs 2 to 3 tablespoons water. A looser dressing-style sauce can take up to 4 tablespoons.
To double the recipe, double everything except the water. Add water slowly at the end until the texture looks right.
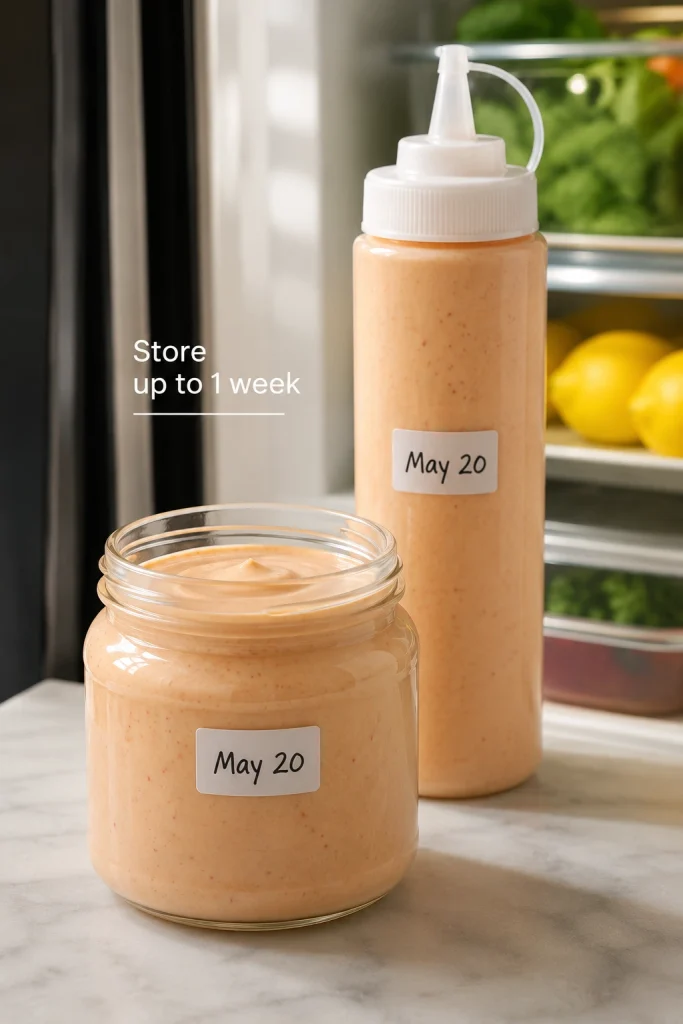
Store in an airtight jar in the refrigerator for up to 1 week.
Freezing is not recommended because mayo-based sauces can separate after thawing.
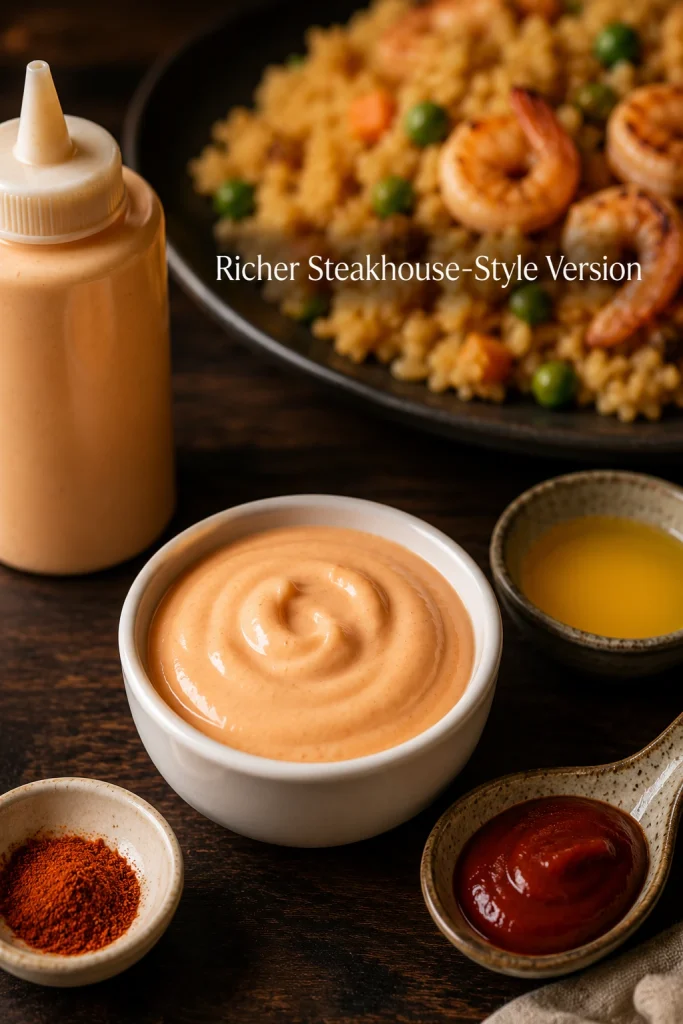
Closest restaurant-style version: Use Kewpie mayo, 1 tablespoon tomato paste instead of ketchup, 2 teaspoons sugar, 1 tablespoon cooled melted butter, 2 tablespoons water, and a tiny pinch of cayenne. Chill for at least 2 hours before serving.
For a richer steakhouse-style sauce, tomato paste, cooled melted butter, and a tiny pinch of heat make the flavor rounder.
Before You Start
Start with the ketchup version if this is your first batch. It tastes familiar right away: sweet, creamy, lightly tangy, and close to the sauce-cup flavor people remember from hibachi dinners. Try tomato paste next time if you want deeper color, stronger tomato flavor, and less sweetness.
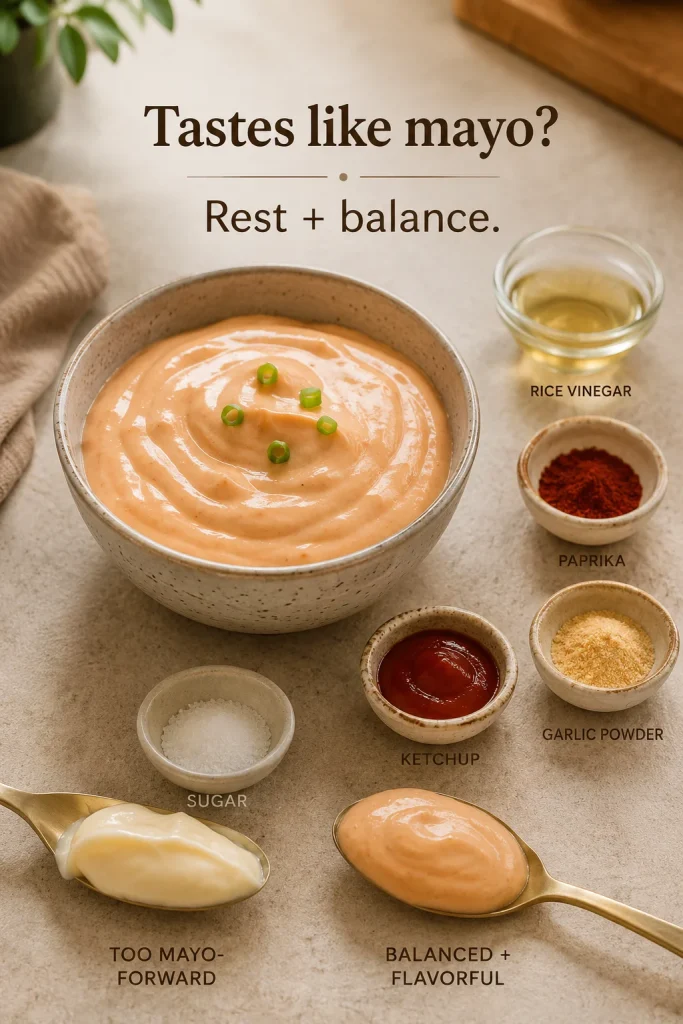
If it tastes like plain mayo after the first whisk, do not panic. That is normal before the sauce rests. A freshly mixed batch can taste sharper than expected, so give it 30 minutes before you start fixing things that may not be broken.
Yum yum sauce is a finishing sauce, not a pan sauce. Add it after cooking, not while the food is simmering or frying. For a sauce that cooks with the food, use this stir fry sauce recipe instead.
Choose Your Version: Classic, Richer, Spicy, or Lighter
The best version depends on what you want from the sauce tonight. Ketchup gives you the familiar sweet hibachi-night flavor. Tomato paste makes it deeper and less sweet. Kewpie and butter push it richer. Yogurt makes it lighter for bowls, even though it moves away from the classic copycat feel.
Add cayenne, sriracha, sambal, or chili garlic sauce
Creamy with gentle to medium heat
Keto or lower-sugar sauce
Tomato paste instead of ketchup + keto sweetener
Tangier, less sweet, still creamy
Lighter bowl sauce
Half mayo + half Greek yogurt
Brighter, lighter, better for bowls than copycat flavor
For a completely different quick dip in the same weeknight-sauce family, this peanut sauce recipe is better when you want something nutty, salty-sweet, and built for noodles or spring rolls.
Ketchup vs Tomato Paste
Stuck between ketchup and tomato paste? Use this as the simple rule: use ketchup for the easy sweet version and tomato paste for the deeper, less-sweet version.
Choose ketchup for a sweeter yum yum sauce, or tomato paste for a deeper, less-sweet restaurant-style flavor.
Use Ketchup When
Use Tomato Paste When
You want the easiest version
You want a deeper flavor
You prefer a sweeter sauce
You want less sweetness
You want a brighter pale pink-orange color
You want a more concentrated tomato taste
You are making it for kids or family meals
You are making a keto or lower-sugar version
You want a softer, familiar flavor
You want a richer steakhouse-style base
Ketchup usually needs less sugar. Tomato paste usually needs a little more. Taste after chilling.
Ingredients You Need
The core yum yum sauce ingredients are mayonnaise, ketchup or tomato paste, rice vinegar, sugar, garlic powder, onion powder, paprika, water, and salt. Butter and heat are optional.
Mayonnaise
Mayonnaise is the body of the sauce. Use one you already like, because its flavor comes through. Regular mayo works well. Kewpie tastes richer and slightly more savory. Light mayo or avocado oil mayo can work if you like the flavor, but the sauce may taste sharper or thinner. If using Miracle Whip, reduce the sugar and vinegar because it is already sweeter and tangier.
Ketchup or Tomato Paste
Ketchup gives the sauce that familiar hibachi-night sweetness. Tomato paste is the version you try when you want it to taste a little less sweet and a little more grown-up.
Rice Vinegar
Rice vinegar cuts through the richness of the mayo and keeps the sauce from tasting flat. It is mild enough to brighten the sauce without making it harsh.
Sugar
A little sugar gives the sauce its familiar sweet finish. Ketchup already contains sweetness, so the ketchup version needs less. Tomato paste is less sweet, so it usually needs a little more.
Garlic Powder, Onion Powder, and Paprika
Garlic powder and onion powder give savory depth without raw garlic bite. Paprika gives the sauce its warm color and keeps the flavor from feeling plain. Smoked paprika adds a deeper note that works well with grilled chicken, fried rice, shrimp, or steak bites.
Butter and Water
Butter is optional. Add it when you want the sauce to feel fuller and more like the little cup from a steakhouse; skip it when you want a brighter drizzle for rice or vegetables. Water decides whether the sauce behaves like a dip, drizzle, or dressing. Add it slowly because a small amount changes the consistency quickly.
Why This Recipe Works
This sauce works because every small ingredient fixes one common problem. Vinegar keeps the mayo from tasting heavy. Tomato gives color and tang. Sugar rounds the edges. Garlic powder, onion powder, and paprika make it taste like more than seasoned mayo. Water turns it from a thick dip into the soft ribbon people want over fried rice, shrimp, chicken, and vegetables.
The rest time matters too. After chilling, the garlic powder softens, the paprika settles into the mayo, and the vinegar stops tasting sharp. After 30 minutes it tastes more blended; after 2 hours it tastes closer to the steakhouse-style sauce people remember.
No Rice Vinegar? Use These Instead
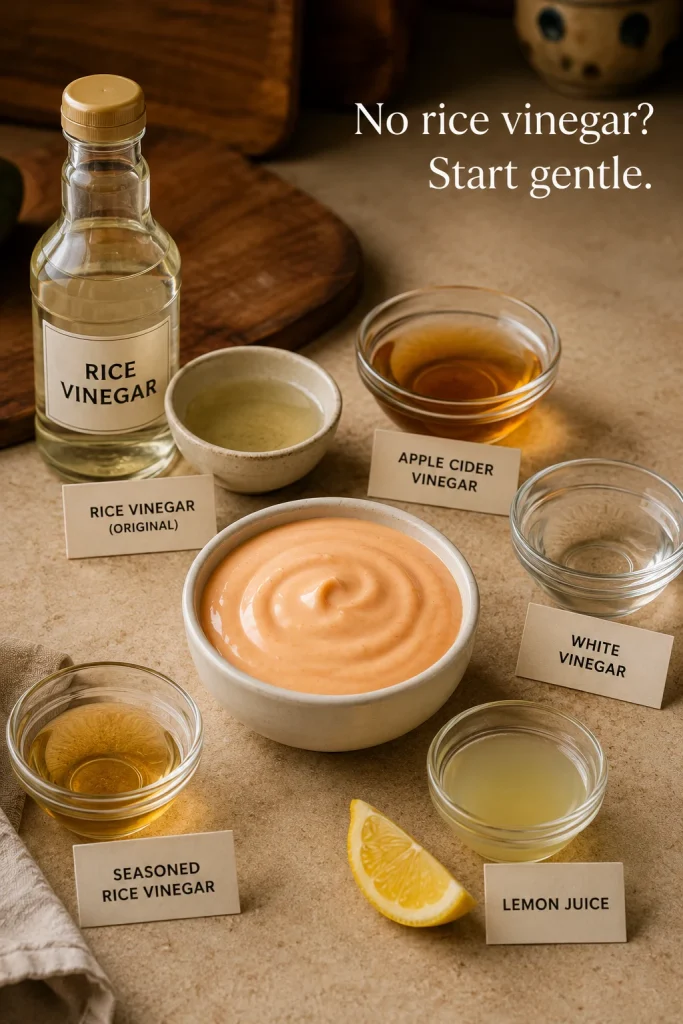
Rice vinegar is mild and slightly sweet, which is why it works well here. Rice vinegar is usually milder than sharp white vinegar; for example, Kikkoman lists its rice vinegar at 4.2% acidity. If you need a swap, use another gentle acid and adjust slowly.
When replacing rice vinegar, start small; apple cider vinegar, white vinegar, lemon juice, and seasoned rice vinegar all sharpen the sauce differently.
Substitute
How to Use It
Apple cider vinegar
Use the same amount. It is slightly fruitier and a little sharper.
White vinegar
Use a little less at first because it can taste sharper.
Lemon juice
Use the same amount for a fresher, brighter sauce.
Seasoned rice vinegar
Use the same amount, but reduce the sugar slightly because it may already be sweetened.
Mirin
Use a small splash for sweetness and depth, but do not rely on it as the only acid.
Avoid strong vinegars like balsamic or malt vinegar. They can overpower the mayo and tomato. Whichever swap you use, start small, let the sauce rest, and adjust after the flavor settles.
Butter or No Butter?
No, yum yum sauce does not need butter. A good sauce can be made with mayo, ketchup or tomato paste, vinegar, sugar, seasonings, and water. Butter is optional; it makes the sauce richer and silkier, but the sauce still works without it.
Add butter if you want a fuller, sauce-cup style finish. Skip it if you want a brighter sauce for fried rice, spring rolls, or vegetables. If you use butter, melt it gently and let it cool until warm, not hot, before whisking it into the mayo.
How to Make Yum Yum Sauce
Add the mayo, ketchup, vinegar, sugar, garlic powder, onion powder, paprika, and salt to a bowl. Whisk until the sauce is completely smooth and there are no streaks of tomato or spice left in the mayo.
Once the mayo, ketchup, vinegar, sugar, and spices turn evenly colored, the sauce is ready to chill and settle.
Thin the sauce with water. Start with 1 tablespoon for a thick dip. Add more water 1 teaspoon to 1 tablespoon at a time until it reaches the texture you want. If you are adding butter, make sure it is warm, not hot, before whisking it in.
Finished Sauce Texture
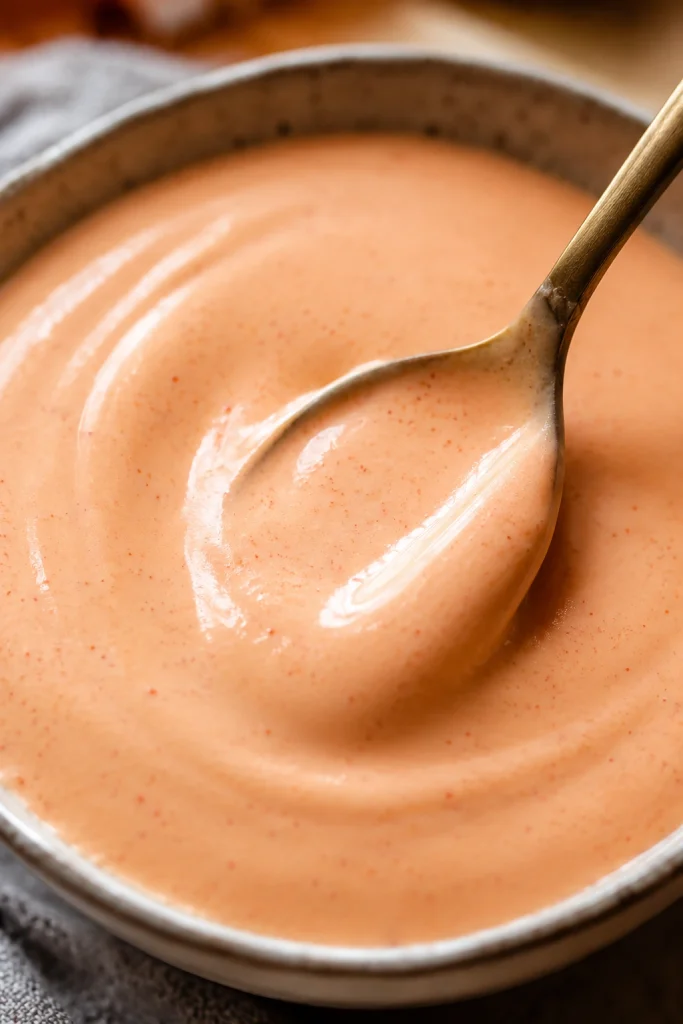
Once the sauce is fully whisked, check the spoon trail before you start changing the flavor. The texture should look glossy and smooth, not stiff or grainy.
A good finished sauce should leave a glossy spoon trail; if it looks stiff or heavy, loosen it slowly with water.
Taste the sauce, but do not make aggressive adjustments right away. Freshly mixed sauce often tastes more mayo-forward than the finished version. Cover and refrigerate it for at least 30 minutes, then stir and taste again.
A Few Things Not to Rush
Do not add all the water at once. The sauce can go from thick dip to thin dressing quickly.
Do not add hot butter directly to mayo. Let it cool first so the sauce stays smooth.
Do not cook the finished sauce in fried rice or stir-fry. Add it after cooking.
Do not use strong vinegars like balsamic or malt vinegar. They take the sauce in a completely different direction.
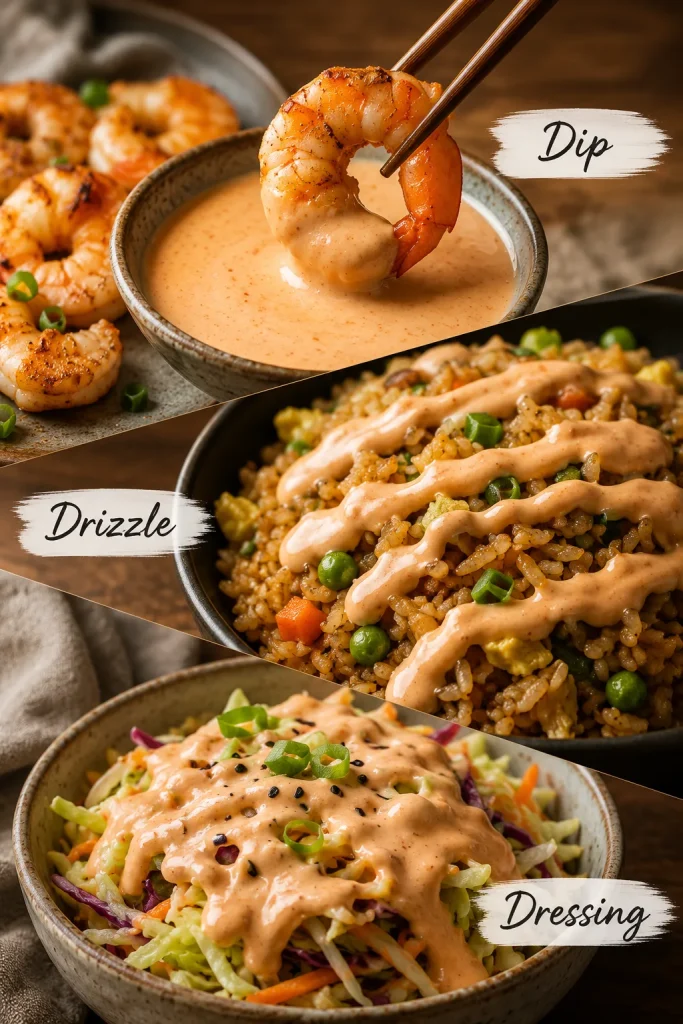
Best Texture: Dip, Drizzle, or Dressing
The right texture depends on the plate. Fries need a thick dip. Fried rice needs a loose ribbon. Shrimp can go either way.
Instead of using one texture for everything, keep it thick for dipping, looser for rice, and lightest for bowls or slaw.
Texture
Water Amount
Best For
Thick dip
1 tablespoon / 15 ml
Shrimp, fries, nuggets, spring rolls, dumplings, roasted potatoes
3 to 4 tablespoons / 45 to 60 ml, plus a little extra vinegar
Salads, slaws, grain bowls, cold noodle bowls
The sauce should fall softly from a spoon for rice, but cling after one dip for shrimp, fries, and spring rolls. If you are serving it with hot fried rice, make it slightly thinner than you think; the rice will make a thick sauce feel heavier. If the sauce is for fries or spring rolls, stop thinning early so it clings to crispy edges.
You can use the sauce immediately, but it tastes better after chilling. Right after mixing, the mayo, vinegar, tomato, sugar, and spices can taste separate. The sauce may also taste more mayo-forward than expected.
After 30 minutes in the fridge, the garlic powder and onion powder soften into the sauce. The paprika and tomato blend into the fat. The vinegar becomes less sharp, and the sweetness tastes less raw. After 2 hours, the flavor usually lands much closer to the hibachi-style sauce people remember from restaurants.
If you have time, make it the night before. Overnight chilling gives the smoothest flavor. If the sauce has been in the fridge overnight, let it sit for 5 to 10 minutes and stir before serving. It should be cool, not icy-thick.
Hibachi White Sauce, Japanese White Sauce, and Shrimp Sauce
If you have ever searched for “that white sauce from hibachi,” this is probably the sauce you meant. In many American hibachi and Japanese steakhouse-style restaurants, this creamy sauce is called yum yum sauce, hibachi white sauce, Japanese white sauce, shrimp sauce, pink sauce, or Japanese steakhouse sauce.
The names come from how people use it. Some remember it with shrimp, some with fried rice, and some from the little sauce cups at a steakhouse. Even though it is often called white sauce, most homemade versions are pale peach or pink-orange because of ketchup, tomato paste, and paprika.
There is no single official formula. The goal is the familiar balance: cool mayo base, gentle sweetness, mild tang, pale tomato color, and enough water to make it dip-friendly or drizzle-friendly.
Homemade vs Store-Bought Yum Yum Sauce
Store-bought yum yum sauce is useful when you just want a squeeze bottle in the fridge. The problem is that bottled versions can swing too sweet, too salty, too thin, or too much like a generic mayo dressing.
Homemade is better when you want the sauce to match the plate: thicker for fries, looser for fried rice, sweeter for kids, tangier for shrimp, richer for steakhouse-style bowls. You can also make gluten-free, vegan, keto, or lighter versions more easily when you control the ingredients.
What to Eat with Yum Yum Sauce
Think of this as a cool finishing sauce. It works anywhere you want something creamy enough to soften heat, bright enough to wake up rice, and rich enough to cling to crispy snacks. This is the drizzle that makes plain rice, shrimp, and vegetables feel like hibachi night at home.
Use
Best Texture
Fried rice
Loose drizzle
Shrimp
Thick dip or light drizzle
Chicken bowls
Drizzle
Fries and nuggets
Thick dip
Spring rolls and dumplings
Thick dip
Burgers, wraps, and tacos
Spread texture
Salads and slaws
Dressing-style
Fried Rice and Hibachi Plates
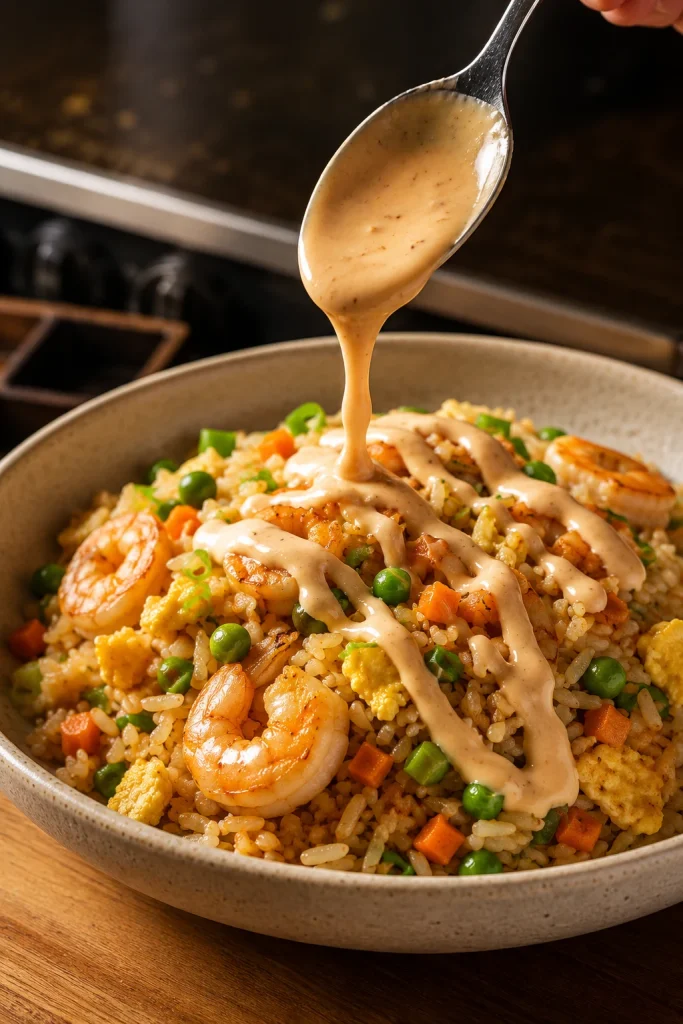
On fried rice and hibachi-style plates, keep it loose enough to fall from a spoon. You want pale, creamy streaks across hot rice, not a heavy scoop sitting on top. Add the sauce after cooking so the rice stays fluffy and the sauce stays smooth.
Drizzle the sauce after cooking fried rice so the grains stay fluffy and the cool sauce does not turn oily.
Shrimp, Seafood, and Chicken
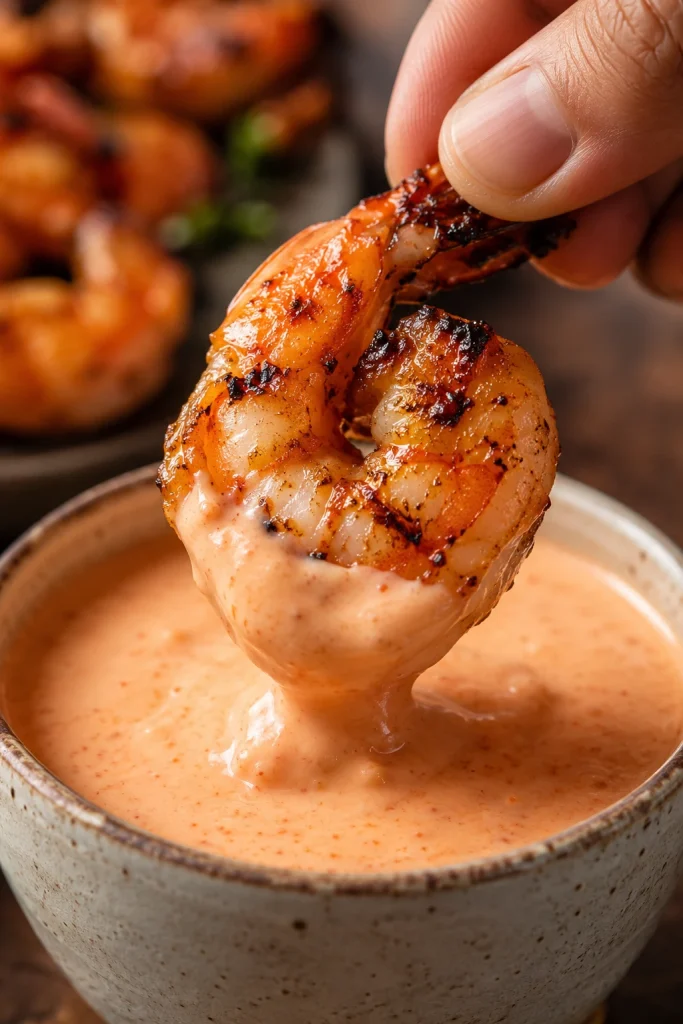
Shrimp can go either way: thick as a dip or slightly loosened as a drizzle. For shrimp, the sauce should be thick enough to cling after one dip. If the protein is already rich or fried, add a little extra vinegar to the sauce for balance.
Hibachi shrimp sauce works best as a thicker dip that clings after one swipe instead of sliding off the shrimp.
For another quick shrimp dinner with a brighter lemon-garlic direction, keep this shrimp scampi recipe nearby. If the meal is more fried fish than hibachi shrimp, this homemade tartar sauce is the better match.
Chicken, Steak Bites, and Hibachi Vegetables
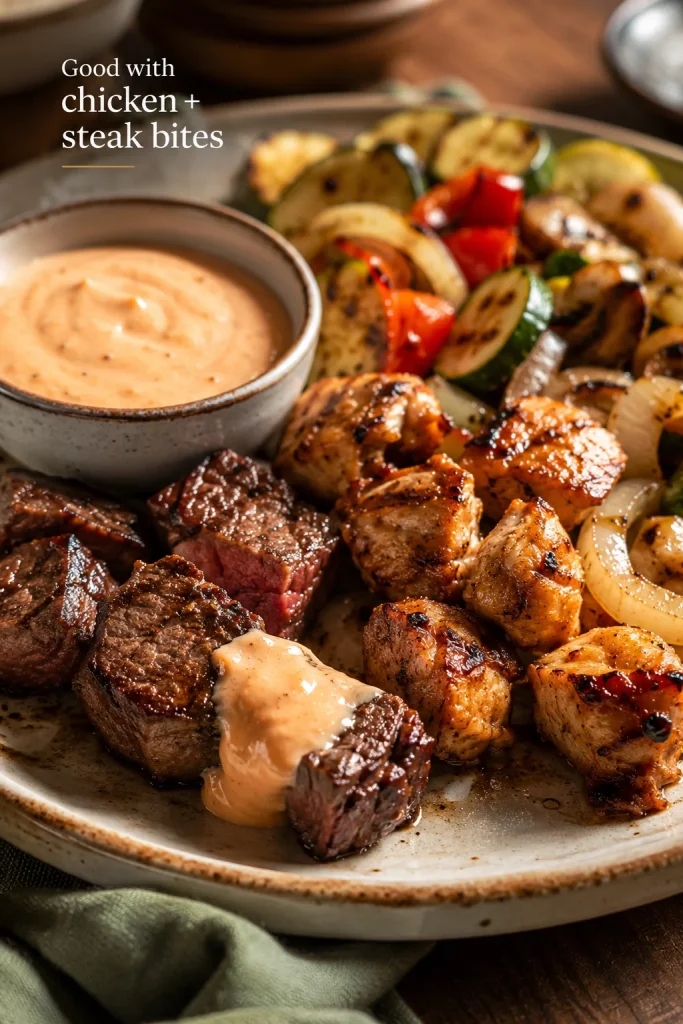
Chicken and steak bites are best with a cool, smooth sauce that softens charred edges without hiding the grilled flavor.
Beyond shrimp, a cool hibachi-style sauce helps balance grilled chicken, steak bites, onions, zucchini, and peppers.
Bowls, Wraps, and Rice Meals
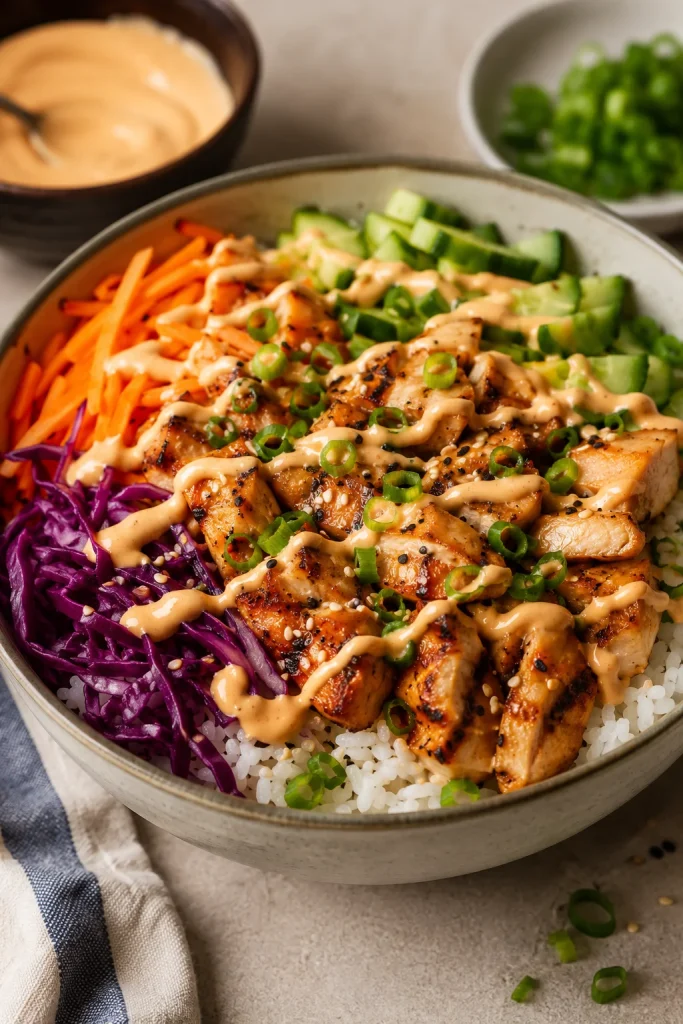
Bowls need a smoother drizzle. A spoonful can make a simple bowl feel finished, especially when there is warm rice, crunchy cucumber, cabbage, lettuce, carrots, grilled chicken, shrimp, beef, tofu, or crispy vegetables.
In rice bowls, a light drizzle adds flavor without covering the crunch of cucumber, cabbage, and carrots.
A seafood rice bowl can borrow the build from this salmon bowl recipe. With beef and rice, use it as a cool creamy contrast beside a saucy Korean beef bowl.
Fries, Spring Rolls, Dumplings, and Snacks
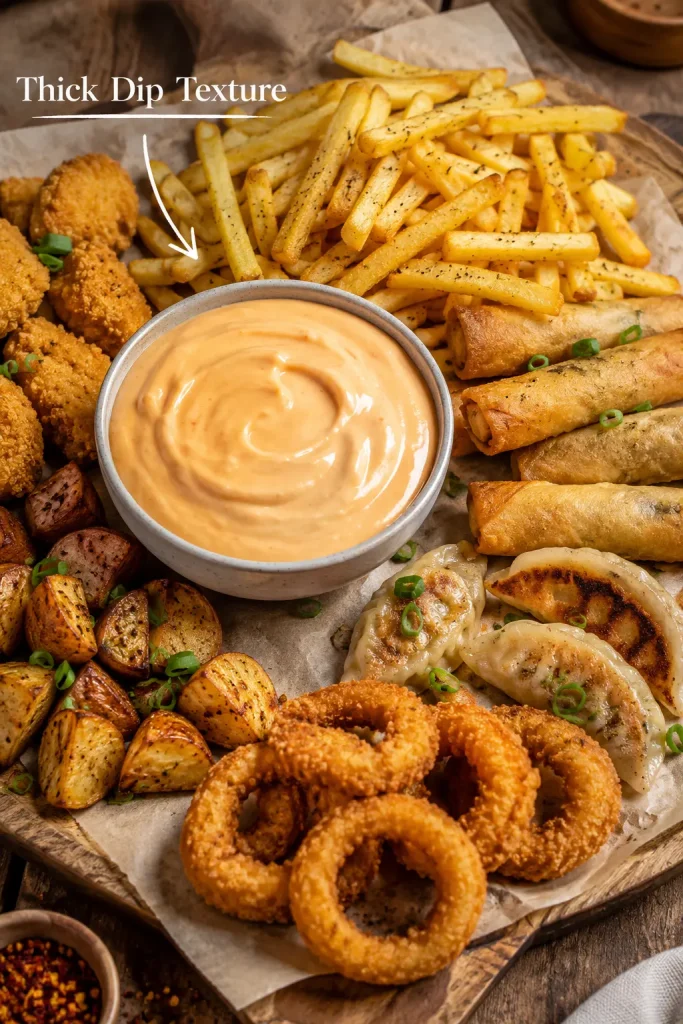
Crispy snacks are where the thicker version wins. Start with only 1 tablespoon water so the sauce clings to fries, nuggets, spring rolls, dumplings, potstickers, onion rings, roasted potatoes, and other crunchy bites instead of sliding back into the bowl.
Crispy snacks need a thicker sauce, so fries, spring rolls, dumplings, nuggets, and onion rings can catch it on their edges.
With spring rolls and fries, keep it spoonable and thick so every crispy edge catches some sauce. A crisp snack plate works well beside crispy veg spring rolls, fries, dumplings, or roasted potatoes.
Sandwiches, Burgers, and Tacos
As a burger, taco, or sandwich spread, keep it thicker than drizzle texture so it stays where you put it. It pairs especially well with crunchy lettuce, cucumber, cabbage, grilled chicken, shrimp, or crispy tofu.
Yum Yum Sauce Variations
Make the main version first if you can. Once you know the baseline, these variations help you make it spicier, richer, lighter, vegan, gluten-free, or lower in sugar.
Spicy Yum Yum Sauce
Add cayenne, sriracha, sambal, chili garlic sauce, or your favorite hot sauce. A pinch of cayenne gives gentle heat. About ½ to 1 teaspoon sriracha makes the sauce noticeably spicy. If it becomes too hot, add more mayo and a small pinch of sugar.
For a hotter fruit-and-chili direction that goes further than yum yum sauce, save this mango habanero sauce recipe for tacos, wings, shrimp, grilled chicken, paneer, tofu, or vegetables.
Kewpie Mayo Version
Kewpie mayo makes the sauce richer, smoother, and slightly more savory. It is a good choice if you want a fuller steakhouse-style flavor. Regular mayo still works well, especially when balanced with vinegar, tomato, garlic powder, paprika, and rest time.
Gluten-Free Version
This sauce can be made gluten-free if every packaged ingredient you use is labeled gluten-free. Check the mayo, ketchup, tomato paste, vinegar, hot sauce, and spice blends. If you add soy sauce, chili garlic sauce, or another condiment, choose a gluten-free version.
Vegan Version
Use vegan mayo in place of regular mayo. Skip the butter or use vegan butter. Sugar, maple syrup, or another sweetener can round out the flavor. Vegan mayo gives a more classic result than yogurt-style bases because it keeps the sauce creamy and rich.
Keto or Lower-Sugar Version
Tomato paste is usually the cleaner low-sugar base because ketchup brings sweetness before you even add a sweetener. Replace the sugar with a keto-friendly sweetener, then taste after chilling because some sweeteners can feel sharper before the sauce rests.
Low-Calorie or Greek Yogurt Version
The half-mayo, half-yogurt version is the sweet spot. It still tastes like a creamy sauce, while a full-yogurt version tastes more like a tangy bowl dressing. Use it for bowls, salads, slaws, or lighter chicken-and-rice plates rather than a strict hibachi copycat.
No-Mayo Version
You can make a no-mayo version with Greek yogurt, sour cream, vegan sour cream, or blended cashew cream, but it becomes a different sauce. To keep it balanced, add tomato, vinegar, sweetener, and seasoning in small amounts, then let it rest before adjusting again.
Troubleshooting Yum Yum Sauce
Most “failed” yum yum sauce is not actually failed. It usually just needs a short rest, a tiny splash of acid, or a spoonful of mayo to bring it back. If the flavor still feels off after chilling, the fix is usually small.
If the sauce is too thick, add water one teaspoon at a time until it changes from a mound to a smooth drizzle.
Problem
How to Fix It
It tastes too much like mayo
Chill first. Then add a little more vinegar, paprika, garlic powder, ketchup or tomato paste, and a small pinch of sugar.
Too sweet
Add rice vinegar, lemon juice, or a pinch of salt.
Sharp or tangy
Add more mayo and a tiny pinch of sugar.
Thick and heavy
Add water 1 teaspoon at a time until it loosens.
Thin or runny
Add mayo 1 tablespoon at a time until it thickens.
Looks too pale
Add a little more tomato paste, ketchup, or paprika.
Looks too orange
Add more mayo.
Not steakhouse-style enough
Use Kewpie mayo, add the optional cooled butter, and chill the sauce longer.
Too spicy
Add mayo and a small pinch of sugar.
Tastes flat
Add salt, onion powder, garlic powder, or a tiny splash of rice vinegar.
When It Tastes Too Much Like Mayo
A mayo-heavy sauce usually needs rest and small balancing moves, not a full restart.
When the sauce tastes mayo-heavy, rest it first; then balance it with rice vinegar, ketchup or tomato paste, paprika, garlic, and sweetness.
Storage and Make-Ahead
Store yum yum sauce in an airtight jar or covered container in the refrigerator for up to 1 week. Stir it before serving because the sauce may thicken slightly as it chills.
Refrigerate homemade yum yum sauce in a jar or squeeze bottle, then stir before serving because it thickens as it chills.
This is a good make-ahead sauce. The flavor is better after at least 30 minutes and usually best after 2 hours or overnight. If you are serving it for a hibachi-style dinner, make the sauce first and let it chill while you prepare the rice, shrimp, chicken, or vegetables.
A squeeze bottle is helpful when you want the restaurant-style drizzle over rice and shrimp. For storage, a jar is easier to clean.
Keep the sauce refrigerated and do not leave it sitting out for long periods. This is not a shelf-stable sauce and it is not meant for canning. For general food safety, FoodSafety.gov recommends refrigerating perishable foods within 2 hours and keeping the refrigerator at 40°F / 4°C or below.
If you use Greek yogurt, vegan mayo, homemade mayo, or any ingredient with a shorter use-by date, follow the shortest storage time. Freezing is not recommended because mayo-based sauces can separate and turn grainy after thawing.
Make-ahead tip: Make the sauce first when you start dinner. By the time the rice, shrimp, chicken, or vegetables are ready, the flavor will already be smoother. It is one of those small prep steps that makes tomorrow’s rice bowl easier before tomorrow even starts.
Yum yum sauce is usually made with mayonnaise, ketchup or tomato paste, vinegar, sugar, garlic powder, paprika, and water. Some versions also include butter, onion powder, cayenne, sriracha, mirin, or hot sauce.
Is yum yum sauce actually Japanese?
Not traditionally. It is best known as an American hibachi-style sauce served at many Japanese steakhouse-style restaurants.
Is yum yum sauce the same as hibachi white sauce?
Usually, yes. Many restaurants and home cooks use those names for the same creamy mayo-based sauce.
Is yum yum sauce the same as spicy mayo?
No. Spicy mayo is usually mayo mixed with sriracha or another hot sauce. Yum yum sauce has more rounded flavor from tomato, vinegar, sugar, garlic powder, paprika, and water.
Can I make yum yum sauce without tomato paste?
Yes. Use ketchup instead. For this recipe, 2 tablespoons ketchup gives the easiest sweet, pale pink-orange sauce. Because ketchup is already sweet, start with only 1 teaspoon sugar and adjust after chilling.
Is this Benihana-style yum yum sauce?
It is a homemade hibachi-style sauce in the same creamy, sweet-tangy family, but restaurant formulas vary. For the closest restaurant-style version, use Kewpie mayo, tomato paste, cooled melted butter, a tiny pinch of heat, and a 2-hour chill.
What can I use instead of rice vinegar?
Use apple cider vinegar, white vinegar, lemon juice, or seasoned rice vinegar. White vinegar is sharper, so start with a little less. Seasoned rice vinegar may already contain sugar, so reduce the sugar slightly.
Does yum yum sauce need butter?
No. Butter is optional. It adds richness and a silkier texture, but the sauce still works without it. If using butter, cool it before whisking it into the mayo.
Why does my yum yum sauce taste like mayo?
Freshly mixed sauce often tastes mayo-forward before it rests. Chill it for at least 30 minutes, then add a little more vinegar, paprika, garlic powder, tomato, and sugar if needed.
Is yum yum sauce good on fried rice?
Yes. Thin it to drizzle texture and add it after cooking, not in the pan. It gives hot fried rice a creamy, tangy finish without making the rice soggy.
What does yum yum sauce go with?
It goes well with shrimp, fried rice, chicken, steak, vegetables, rice bowls, fries, spring rolls, dumplings, nuggets, burgers, wraps, and roasted potatoes.
Is yum yum sauce gluten-free?
It can be gluten-free if every packaged ingredient you use is labeled gluten-free. Check mayo, ketchup, vinegar, hot sauce, spice blends, and any add-ins.
How long does homemade yum yum sauce last?
It keeps for up to 1 week in an airtight container in the refrigerator. Stir before serving and discard it if it smells off, changes texture, or has been left out too long.
Can you freeze yum yum sauce?
Freezing is not recommended. Mayo-based sauces can separate, turn watery, or become grainy after thawing. Make a fresh batch and store it in the refrigerator instead.
How do I make yum yum sauce spicy?
Add cayenne, sriracha, sambal, chili garlic sauce, or hot sauce. Start small, chill the sauce, and taste again before adding more.
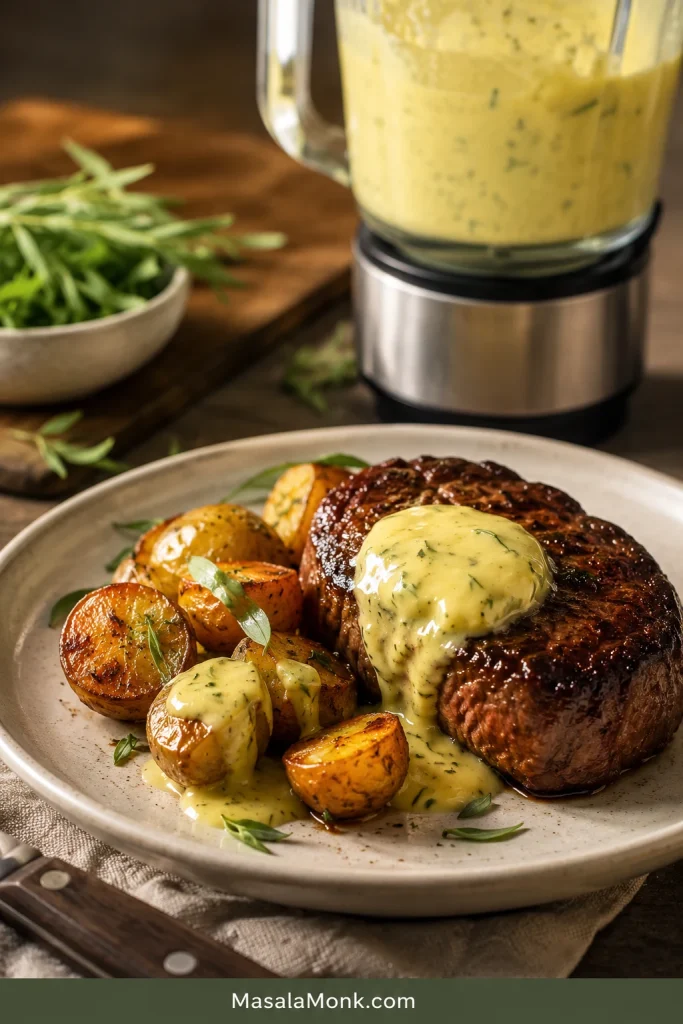
Béarnaise is the sauce that makes steak night feel special before anyone even takes a bite. It is warm, buttery, sharp with vinegar and shallot, and full of fresh tarragon. Spoon it over seared steak and it melts into the juices on the plate in the best possible way.
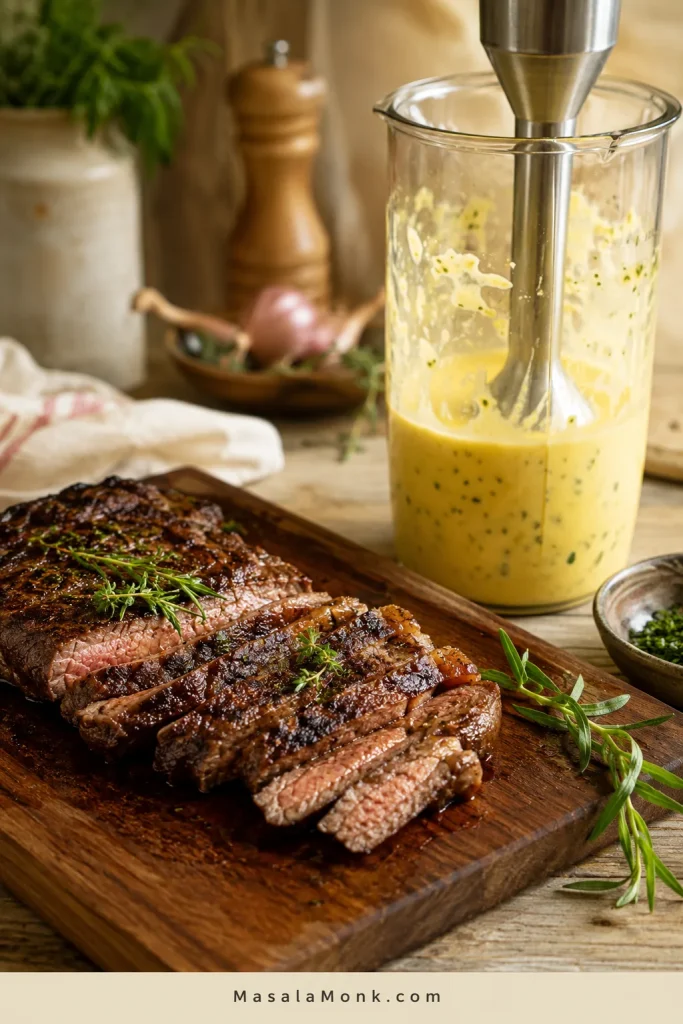
This is an easy blender béarnaise sauce for steak, made with a sharp tarragon reduction, egg yolks, and hot clarified butter or ghee — no double boiler required. You still get the classic French steakhouse flavor, but the blender does the hard part.
This is the version for the night you want the steakhouse feeling without turning dinner into a project. Make the tarragon reduction first, cook your steak, then blend the sauce while the steak rests. The whole recipe takes about 15–20 minutes, but the actual blending takes under 2 minutes once the butter and reduction are ready.
The first spoonful should feel rich, then wake up with vinegar, shallot, and tarragon so the steak tastes bigger, not heavier.
Cooking right now? Start here. The notes below are for butter choices, reduction cues, storage, substitutions, and split-sauce fixes.
At a glance: make the reduction, blend it with yolks, slowly stream in hot butter, then finish with fresh tarragon. That is the whole sauce.
Best for: steak frites, filet mignon, ribeye, prime rib, salmon, lobster, asparagus, roasted potatoes, and eggs.
Yield: about 1 cup / 240 ml, enough for 4 generous portions or 6 smaller spooned servings. Total time: 15–20 minutes. Method: immersion blender or stick blender. Serve: warm.
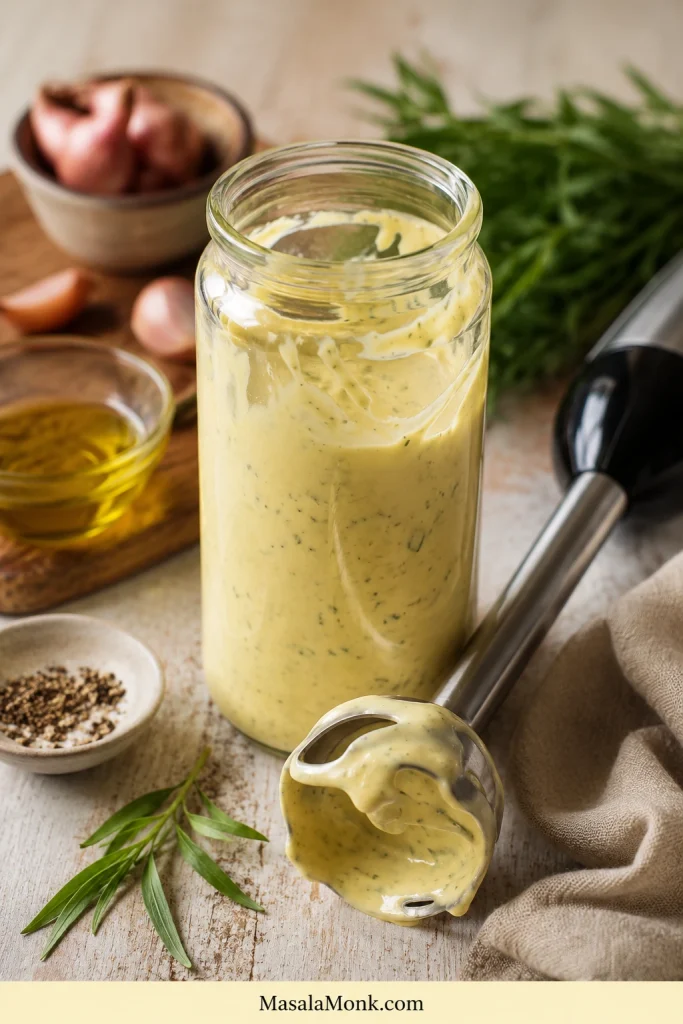
For the easiest version, use ghee or clarified butter and an immersion blender in a tall narrow jar. Make the reduction before the steak goes on, then blend while the steak rests. Aim for a sauce thicker than cream, looser than mayo, and warm enough to melt into the steak juices without turning oily.
This blender method works best when the jar is narrow enough for the blender head to stay covered. That setup helps the sauce form before too much butter is added.
For blender béarnaise, the tall narrow jar matters because it helps the immersion blender pull the yolks and hot butter into one smooth sauce.
Reduction Ingredients
These aromatics make the reduction taste like béarnaise before the butter and yolks turn it into a sauce.
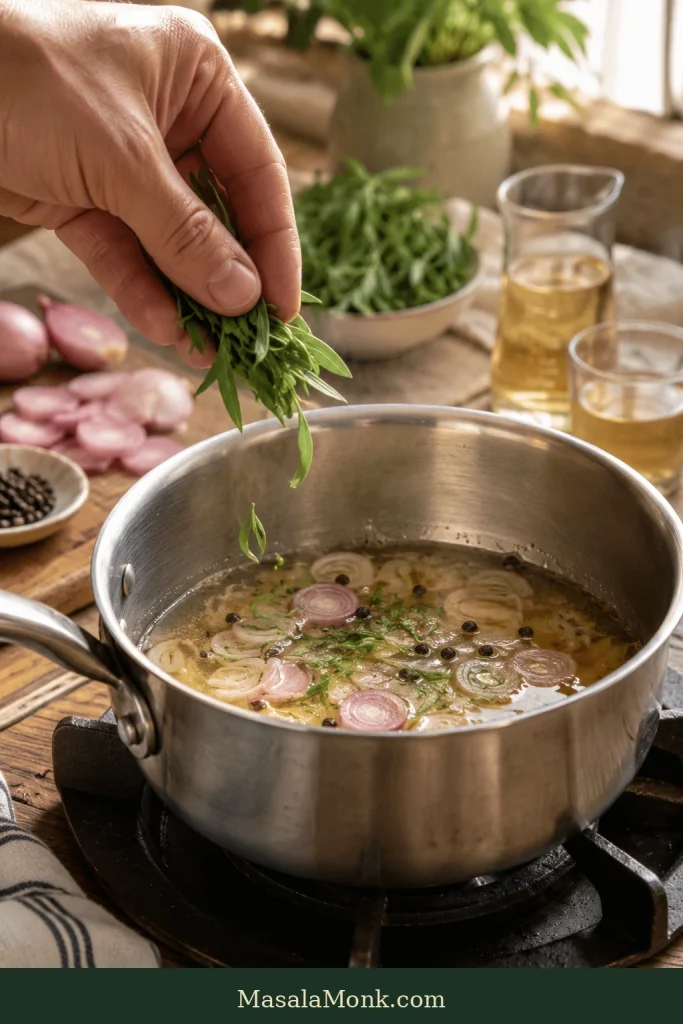
First, simmer wine, vinegar, shallot, peppercorns, and tarragon together; this gives the sauce its sharp steakhouse flavor before any butter is added.
Ingredient
US Measure
Metric
Dry white wine
¼ cup
60 ml
White wine vinegar or Champagne vinegar
2 tbsp
30 ml
Small shallot, minced or sliced
1 small
20–30 g
Fresh tarragon stems or whole sprigs
2–3 sprigs
4–6 g
Black peppercorns, lightly crushed
¼–½ tsp
1–2 g
Sauce Ingredients
Ingredient
US Measure
Metric
Large egg yolks, room temperature
3 yolks
About 54 g total
Hot clarified butter or ghee
¾ cup
170–175 g
Kosher salt
¼ tsp, plus more to taste
1–1.5 g
Lemon juice
1–2 tsp
5–10 ml
Fresh tarragon leaves, finely chopped
1 tbsp
3–4 g
Chervil or parsley, optional
1 tbsp
3–4 g
Warm water, only if needed
1 tsp at a time
5 ml at a time
Quick Method
Simmer the wine, vinegar, shallot, tarragon stems, and peppercorns until reduced to about 1½–2 tablespoons / 22–30 ml of strained liquid.
Strain the reduction and let it cool for a few minutes. The pan should still have a small puddle of liquid before straining, not just wet shallots.
Add egg yolks, reduction, salt, and 1 teaspoon lemon juice to a tall narrow jar.
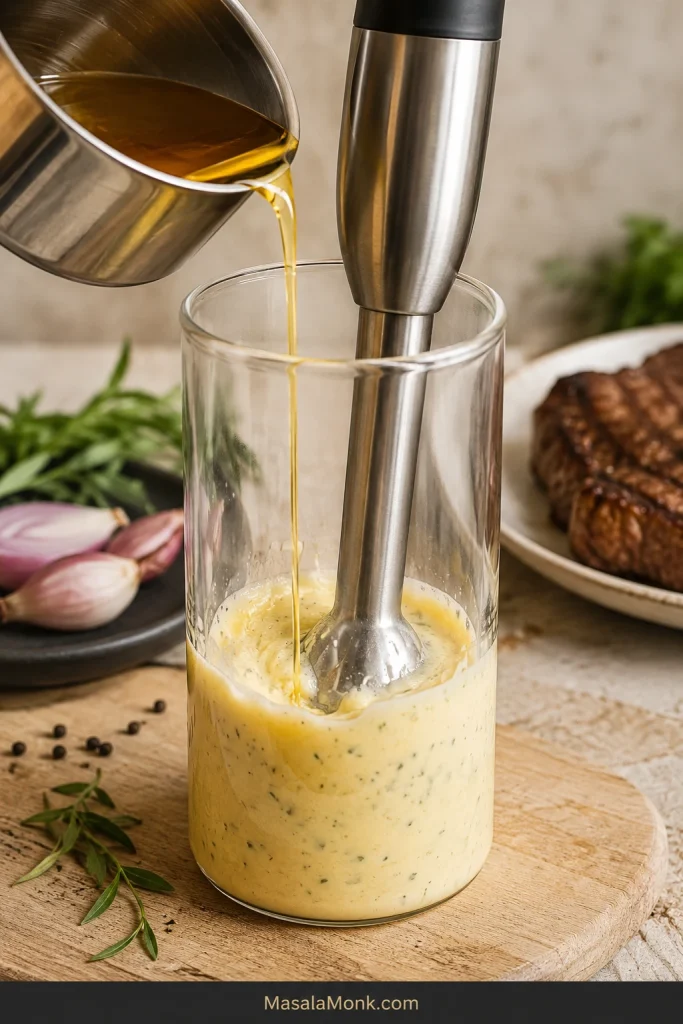
Blend briefly on medium to high speed, then slowly stream in hot clarified butter or ghee while the blender runs.
Blend until thick, glossy, and spoonable. Stop once it comes together. Stir in chopped tarragon and adjust with salt, lemon, or warm water.
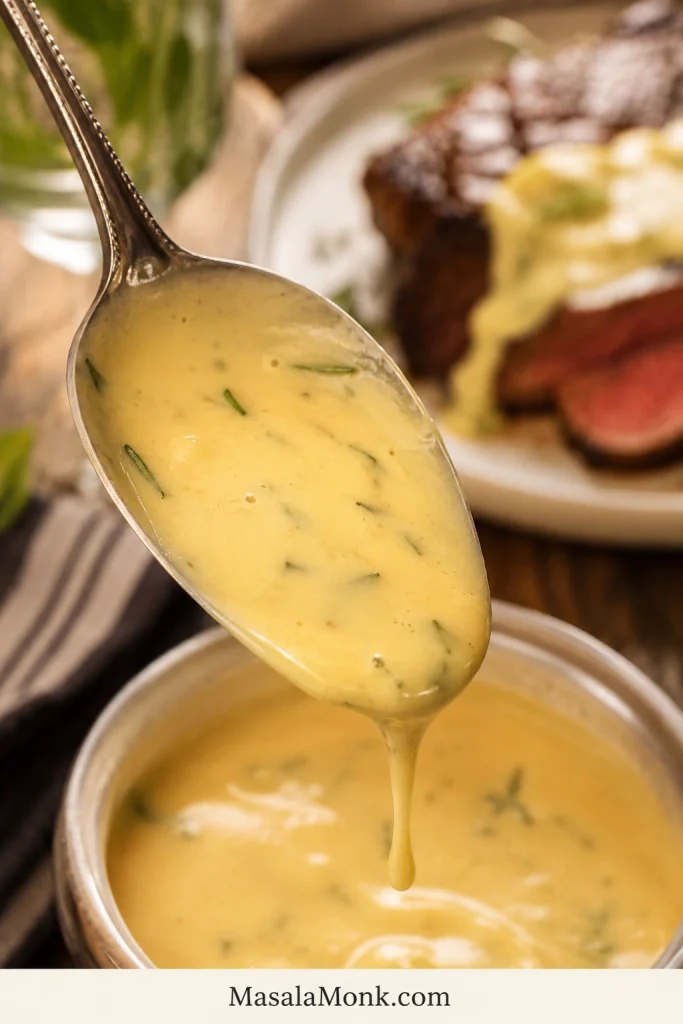
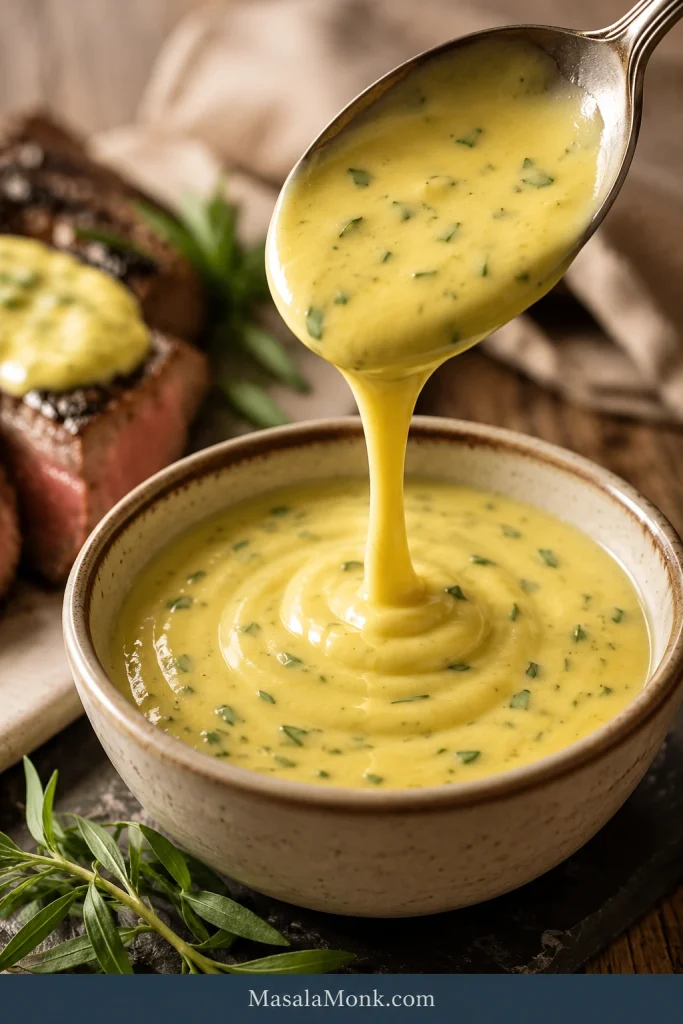
Success check: the finished béarnaise should coat the back of a spoon and drip slowly. Before serving, taste for three things: salt, brightness, and tarragon. Flat sauce usually needs salt. Heavy sauce needs a few drops of lemon. Buttery sauce that does not taste like béarnaise needs more chopped tarragon.
Check the Sauce Before Serving
A spoon test is faster than guessing. If the sauce clings and drips slowly, it is ready for steak.
Use the spoon test before serving: béarnaise should cling to the spoon and fall slowly, not run off like thin cream.
Why this works: hot butter gently warms the yolks, the wine-vinegar reduction brings acidity and tarragon flavor, and the tall narrow jar helps the blender pull everything into a stable emulsion.
Egg safety note: Béarnaise is gently warmed, not boiled, so use fresh, clean, uncracked eggs. For pregnant people, elderly guests, young children, or anyone immunocompromised, use pasteurized eggs or choose a fully cooked sauce instead. The FDA recommends pasteurized eggs or egg products for menu items made with raw or lightly cooked shell eggs, including sauces such as hollandaise and béarnaise.
Ingredients
Each ingredient has a job: butter gives body, vinegar keeps it bright, and tarragon makes it taste like béarnaise.
Béarnaise Sauce Ingredients at a Glance
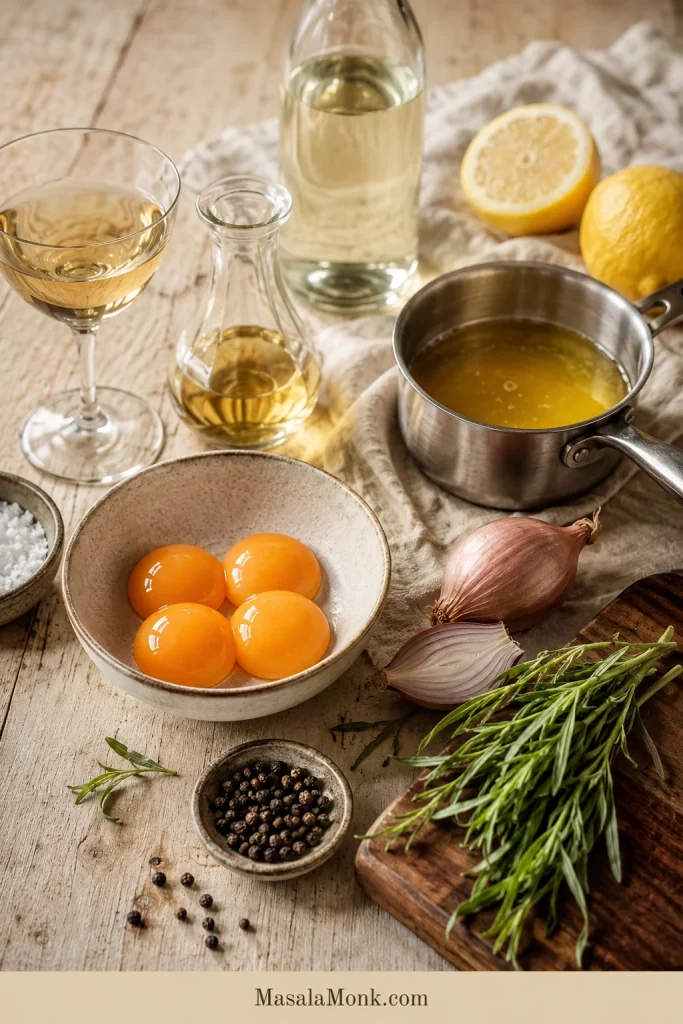
A good béarnaise does not need many ingredients, but each one should earn its place: fat, acidity, herbs, aromatics, and yolks.
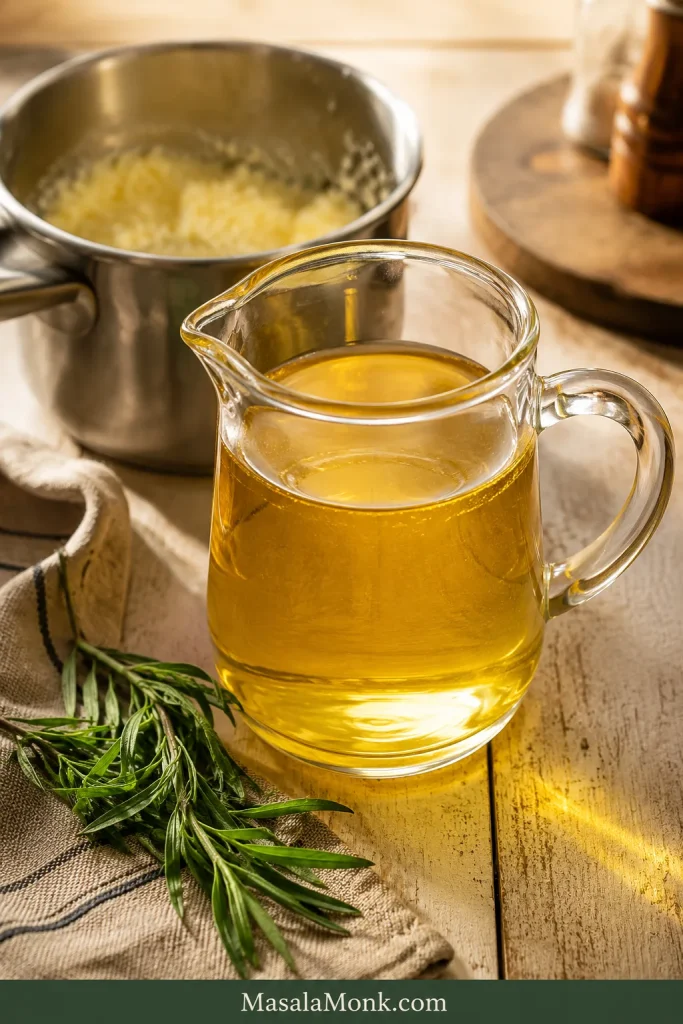
Before you start, gather the real flavor builders: tarragon, shallot, wine, vinegar, peppercorns, egg yolks, and clarified butter or ghee.
Egg yolks give the sauce body and help the butter hold with the reduction.
Clarified butter or ghee creates the smooth, buttery base. Clarified butter is more stable than regular melted butter.
White wine and vinegar bring acidity so the sauce does not feel heavy.
Shallot and black pepper add savory depth to the reduction.
Tarragon gives béarnaise its signature fresh, lightly sweet, anise-like flavor.
Lemon juice brightens the finished sauce. Start with 1 teaspoon, then add more only after tasting.
Chervil or parsley adds a fresh herb finish, but it is optional.
Butter gives béarnaise its luxury, but vinegar, shallot, and tarragon give it a reason to exist.
Tarragon matters most. Use stems or whole sprigs in the reduction, then fresh chopped leaves at the end. Chervil is lovely if you have it, but the recipe still works without it.
The shallot can be minced or sliced, the wine only needs to be dry, and ghee is completely fine. Focus on a concentrated-but-not-dry reduction and a slow butter stream at the start.
Best Butter, Wine, and Vinegar for Béarnaise
You do not need rare ingredients, but you do want the right kind of butter, a dry wine, and a clean vinegar. If you like sauces where acid and herbs do the heavy lifting, this chimichurri recipe is the brighter, no-butter steak sauce to keep in the same rotation.
Clarified butter is the most reliable choice because the water and milk solids have been removed. Ghee is the easiest shortcut because it is already clarified. Regular unsalted melted butter works in a pinch, though the finished sauce may be slightly looser. Salted butter can work too; reduce the added salt and taste at the end. Brown butter changes the flavor too much for this tarragon sauce.
To clarify butter quickly, start with about 1 cup / 225 g unsalted butter. Melt it gently, let it sit for a minute, skim off any foam if you like, then pour off the clear golden butter and leave the white solids behind. For this recipe, you need about ¾ cup / 170–175 g clarified butter.
What Clarified Butter Should Look Like
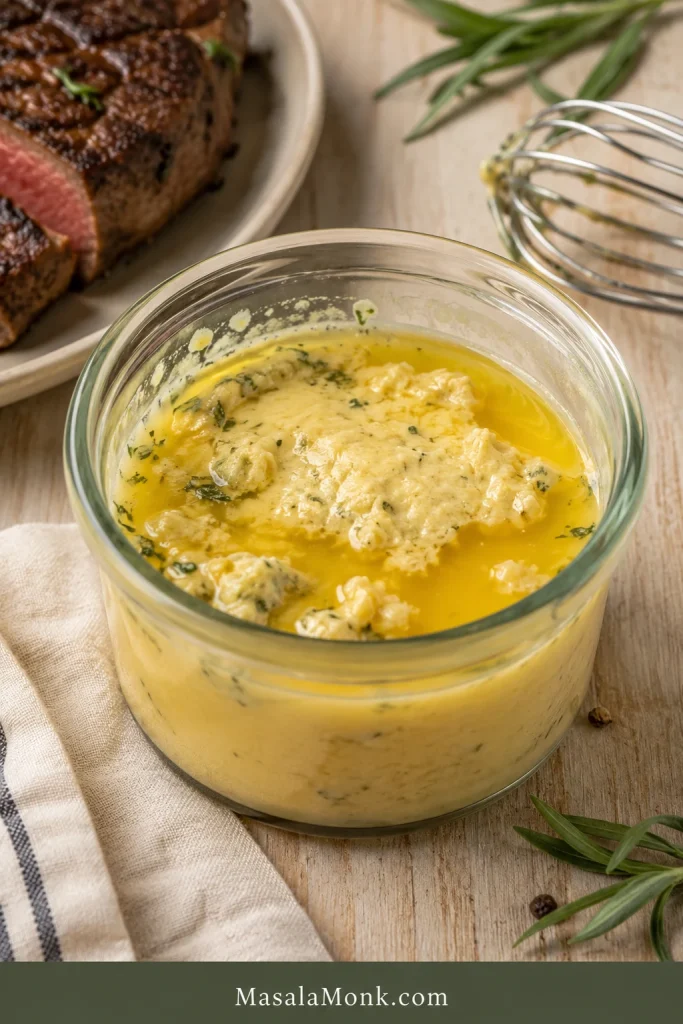
The clear golden butter is what you want to pour into the sauce. Leave the cloudy milk solids behind so the emulsion has a better chance of staying smooth.
Clarified butter or ghee is the easiest fat for blender béarnaise because it blends smoothly and leaves most milk solids behind.
For wine, use a dry white wine such as Sauvignon Blanc, Pinot Grigio, Pinot Gris, dry Chardonnay, or dry vermouth. Avoid sweet wine, heavily oaked wine, and harsh cooking wine. The reduction makes every flavor louder, so use something clean and dry.
White wine vinegar is the easiest traditional choice. Champagne vinegar is softer. Tarragon vinegar is excellent if you want to boost the herb flavor. Red wine vinegar works, but tastes sharper and a little darker. Apple cider vinegar can work in a pinch, but it is less traditional.
Best Blender, Jar, and Tools for Béarnaise
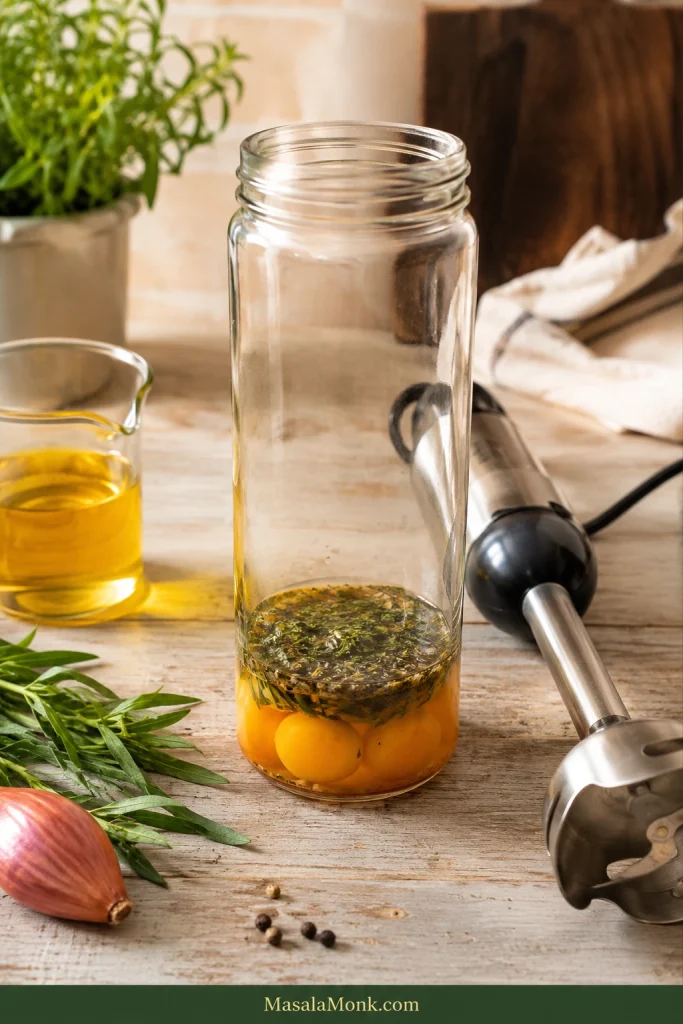
Most important: use an immersion blender or stick blender in a tall narrow jar. The jar should be just wide enough for the blender head, which helps the yolks and butter pull into a stable sauce.
Also useful: a small saucepan for the reduction, a fine-mesh strainer for a smoother sauce, and a measuring cup or jug for pouring the butter slowly.
Optional: a thermometer helps if you want to check butter temperature, and a warmed thermos can hold the sauce briefly for serving.
A regular blender or Vitamix can work, but use low to medium speed and stream the butter slowly. Because the contents are warm, vent the lid slightly or remove the center cap and cover the opening with a folded towel.
No immersion blender? You can still use the classic whisked method, which uses the same reduction and butter.
In a cold kitchen, pre-warm the jar with hot water, then dry it before adding the yolks.
How to Make Blender Béarnaise
The blender does most of the work here. Your job is to make the reduction, keep the butter hot, and pour slowly at the beginning.
Keep the sauce warm and off direct heat; that is where béarnaise stays smoothest.
1. Make the Tarragon Reduction
Add the wine, vinegar, shallot, tarragon stems or sprigs, and crushed peppercorns to a small saucepan. Simmer gently until you have about 1½–2 tablespoons / 22–30 ml of strained liquid. This usually takes 5–8 minutes.
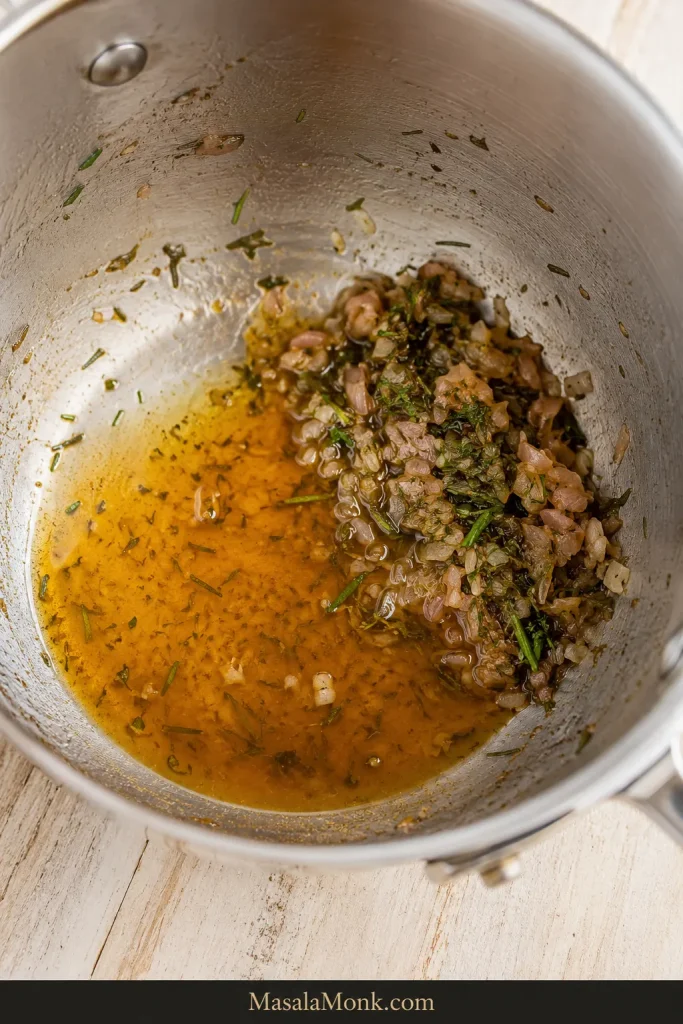
The reduction should smell sharp, herbal, and slightly sweet from the shallot. The pan should still have a small puddle of liquid, not just wet shallots. That little bit of liquid is part of the sauce.
This is where the sauce starts to smell like dinner instead of separate ingredients.
If the reduction goes too far, add 1–2 teaspoons warm water to the pan, swirl, and strain. You want concentrated flavor, not sticky syrup.
What the Tarragon Reduction Should Look Like
This is the point where the flavor is concentrated but the pan is not dry. You want enough liquid left to carry the tarragon, shallot, pepper, and vinegar into the sauce.
Stop reducing when only a small glossy puddle remains; that liquid is concentrated béarnaise flavor, not something to cook away completely.
2. Strain and Cool Slightly
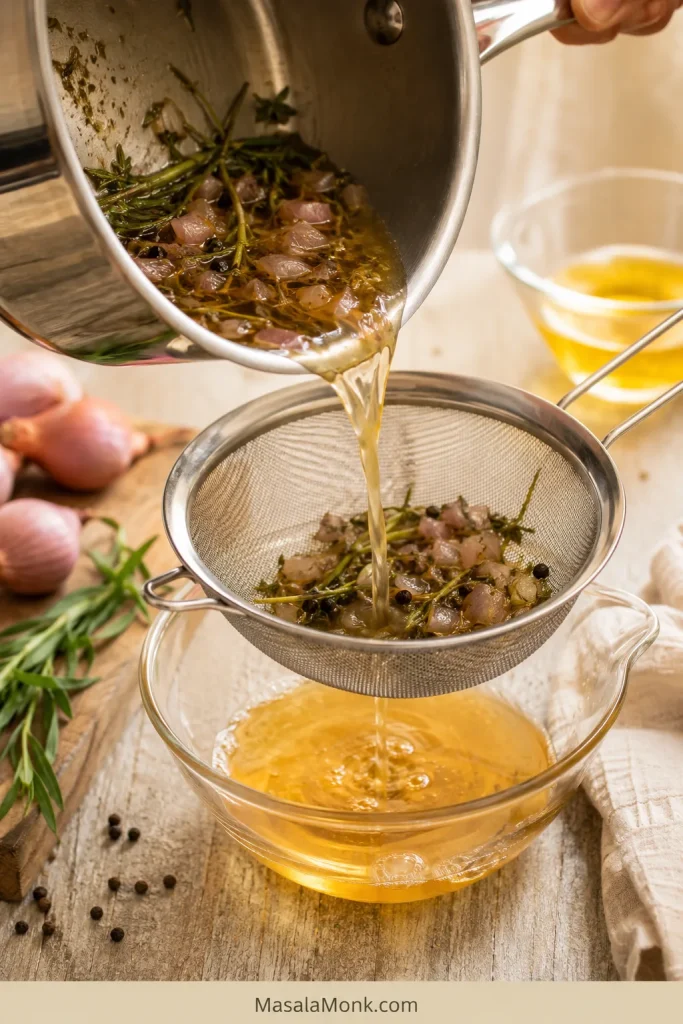
Pour the reduction through a fine-mesh strainer. Press gently on the shallot and herbs to get the flavorful liquid out, then discard the solids.
Straining gives you a smoother finish. A little minced shallot left in the sauce is fine for a rustic version, but the smooth version is easier for this blender method.
Next, strain the tarragon reduction so the blender sauce gets the flavor of the shallot and herbs without the rough pieces.
3. Add the Yolks
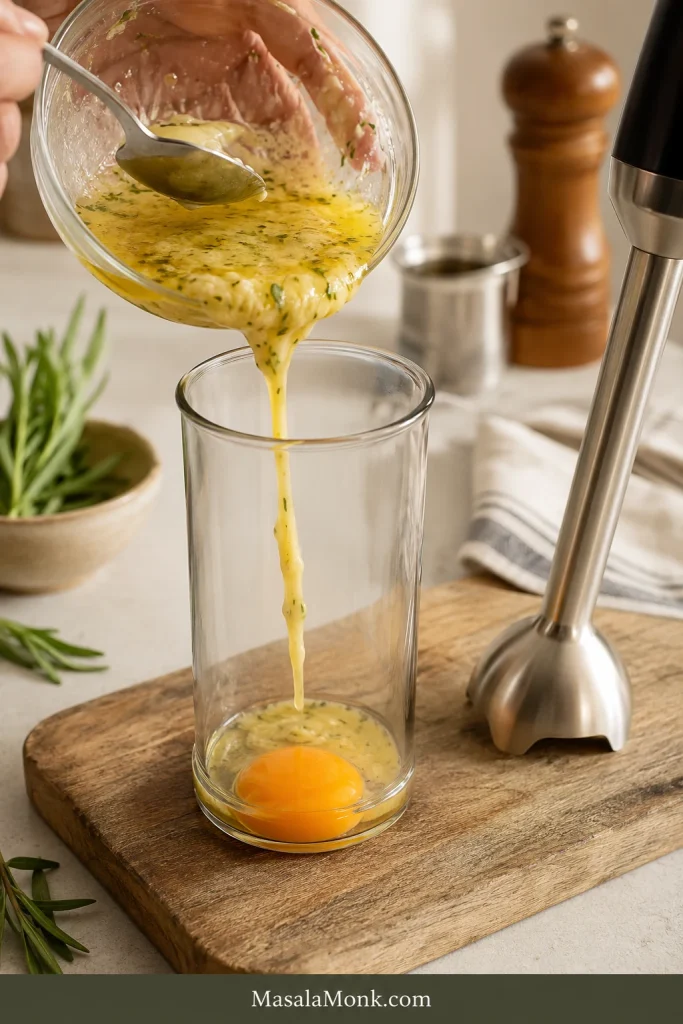
Add the egg yolks, strained reduction, salt, and 1 teaspoon lemon juice to your blending jar. This is the base that will catch the hot butter and turn it into béarnaise.
Room-temperature yolks emulsify more easily than cold yolks. Take eggs out 20–30 minutes before making the sauce, or place cold whole eggs in a bowl of warm water for 5 minutes before separating the yolks.
Start with yolks and cooled reduction in the jar; this base gives the hot butter something stable to blend into.
4. Heat the Butter
A thermometer is helpful but not required. Heat the clarified butter or ghee until hot and fully liquid. If using a thermometer, aim for about 160–180°F / 71–82°C.
Without a thermometer, the butter should be fully melted, lightly steaming, and hot to the touch if a drop hits a spoon. Keep it away from browning or smoking.
Butter that is too cool can leave the finished sauce thin. Butter that is aggressively hot can push the yolks too far.
5. Blend and Stream Slowly
Place the immersion blender at the bottom of the jar. Blend the yolks and reduction for 5–10 seconds on medium to high speed.
With the blender running, slowly stream in the hot butter. Start with a very thin stream. Once the sauce begins to thicken, you can pour a little faster.
Then, pour the hot butter slowly at first. A thin stream helps the béarnaise thicken instead of separating.
6. Finish and Taste
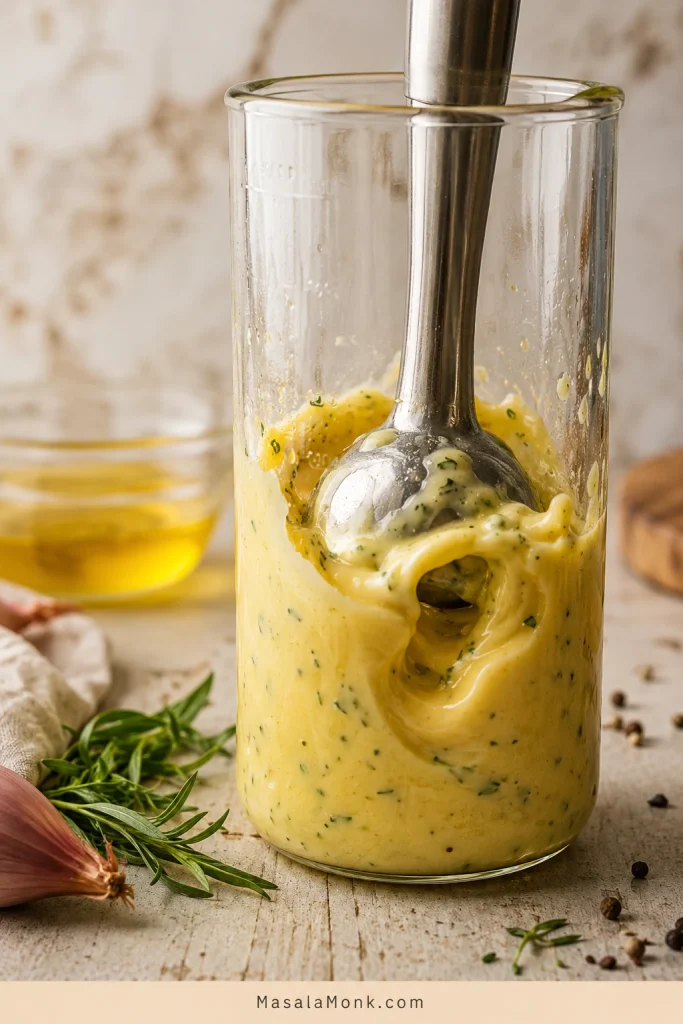
Blend until the sauce is thick, pale yellow, glossy, and spoonable. Near the end, move the blender gently up and down to bring everything together.
Once it looks smooth, stop. Over-blending can make the sauce too warm or loosen the texture, so treat the glossy emulsion as the cue to finish.
As the immersion blender runs, the sauce changes from loose yellow liquid to pale, glossy béarnaise with visible tarragon flecks.
Stir in the chopped tarragon and optional chervil or parsley. Taste once more and adjust with salt, lemon, or tarragon if needed.
Finish with Fresh Tarragon
Add the chopped herb once the sauce is already smooth. This keeps the final flavor fresh and unmistakably béarnaise.
Finally, fold in fresh tarragon off the heat so the herb stays bright and the sauce tastes like true béarnaise.
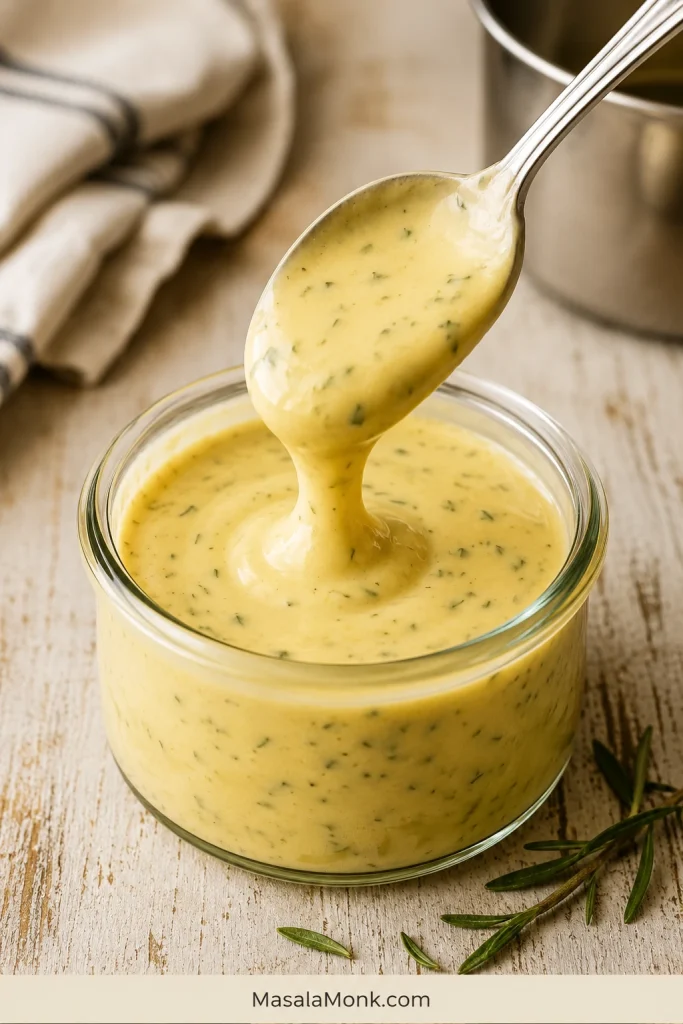
Texture target: thicker than cream, looser than mayo, rich enough to coat steak, and loose enough to drip slowly from a spoon.
When it falls from the spoon in a slow ribbon, stop blending. That is the moment to serve, not the moment to keep fixing it.
The Slow Ribbon Texture
This is the finished texture to look for: thick enough to coat food, but still soft enough to drip from a spoon.
Once the sauce drops in a slow ribbon, it is thick enough for steak but still loose enough for asparagus, salmon, or potatoes.
If it is too thick, blend in warm water, 1 teaspoon / 5 ml at a time, until it loosens.
Most béarnaise problems come from speed, heat, or a reduction that has gone too dry. The troubleshooting guide below shows how to spot the issue and bring the sauce back calmly.
Troubleshooting
Most béarnaise problems fall into two buckets: the sauce never formed, or it formed and then broke. If it never thickened, slow down and give the emulsion time. If it broke, start clean with warm water or a fresh yolk and blend the broken sauce back in slowly.
A slightly thick béarnaise is easier to fix than a broken one, so stop blending as soon as it looks smooth and spoonable.
How to Tell Béarnaise Has Split
A split sauce usually shows oily edges, butter pooling, or a grainy look. Stop adding butter and rebuild it slowly instead of pushing harder.
If béarnaise splits, look for oily edges or butter pooling on top; that means the emulsion has broken.
Béarnaise Troubleshooting Chart
Use this chart when the sauce looks wrong but you are not sure why. Match the symptom first, then choose the gentlest fix.
Problem
Why It Happened
How to Fix It
Sauce split or looks oily
Butter was added too fast, the sauce got too hot, or the emulsion broke.
Start with 1 teaspoon warm water or 1 fresh egg yolk in a clean jar. Blend while slowly adding the broken sauce back in.
Sauce is too thin
The emulsion has not thickened enough, or there is too much liquid.
Blend a little longer. If needed, heat very gently over barely simmering water while whisking.
Sauce is too thick
Too much butter, or the sauce has cooled and tightened.
Blend in warm water, 1 teaspoon / 5 ml at a time, until spoonable.
Scrambled bits
The egg yolks overheated.
If there are only a few bits, strain the sauce. If it tastes grainy or eggy, it is better to restart.
Too sour
The reduction was too sharp or too concentrated.
Add a little more warm butter first, then taste for salt. If the vinegar still feels harsh, round it out with a very small pinch of sugar.
Too salty
Salted butter, salty ghee, or too much added seasoning.
Add a few drops of lemon and a little more unsalted melted butter if available. Serve with unsalted steak, potatoes, or vegetables.
Bland
Not enough salt, tarragon, or acidity.
Add salt, chopped tarragon, and a few drops of lemon juice.
Butter pooling on top
The emulsion has broken.
Re-emulsify slowly into a clean jar with warm water or a fresh yolk.
A broken sauce looks more dramatic than it is. Pause, start clean, and rebuild it slowly.
How to Rescue Split Béarnaise
The safest rescue starts in a clean jar. Give the broken sauce a new base, then add it back slowly so the emulsion can reform.
To rebuild split béarnaise, add the broken sauce slowly into a clean yolk or a little warm water instead of whisking harder in the same bowl.
What Fixed Béarnaise Should Look Like
Once the sauce is rescued, it should look glossy and unified again. No greasy layer should be sitting on top.
After the rescue, the fixed béarnaise should look smooth again, with no greasy layer separating from the sauce.
Restaurant béarnaise feels fancy because it arrives warm, glossy, and perfectly timed with the steak. At home, the trick is not restaurant equipment. It is making the reduction first and blending the sauce right before serving.
Béarnaise is famous with steak because it gives you richness and brightness at the same time. Plan on about 2–3 tablespoons per steak portion. This is not a sauce you pour like gravy. A few spoonfuls are enough to change the plate.
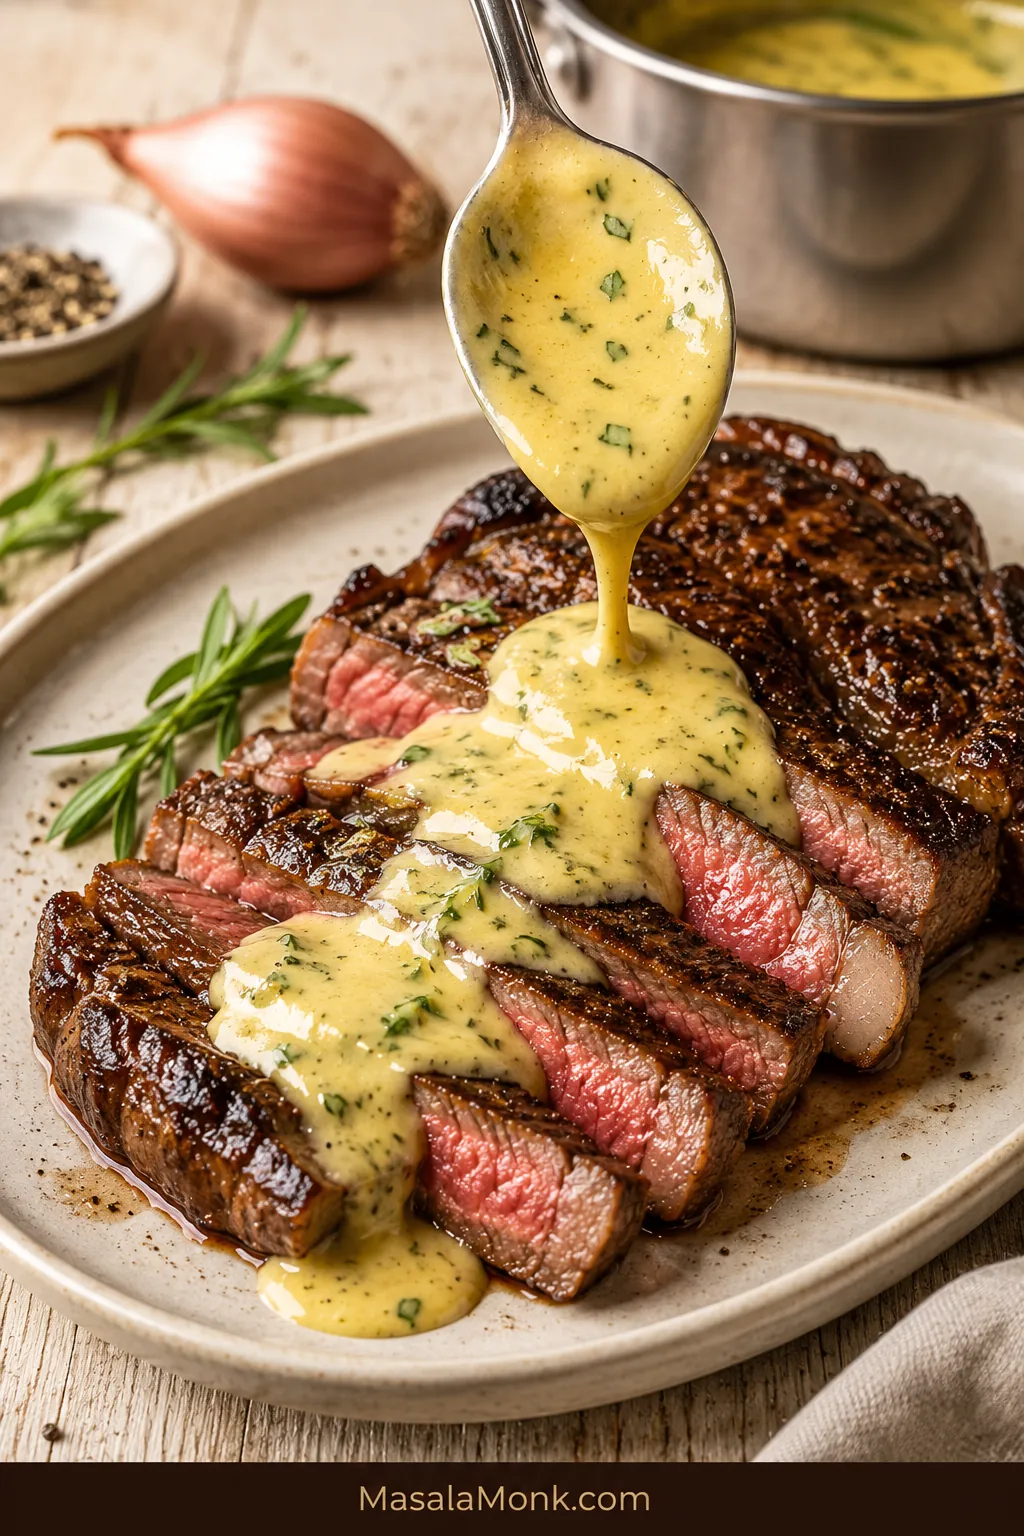
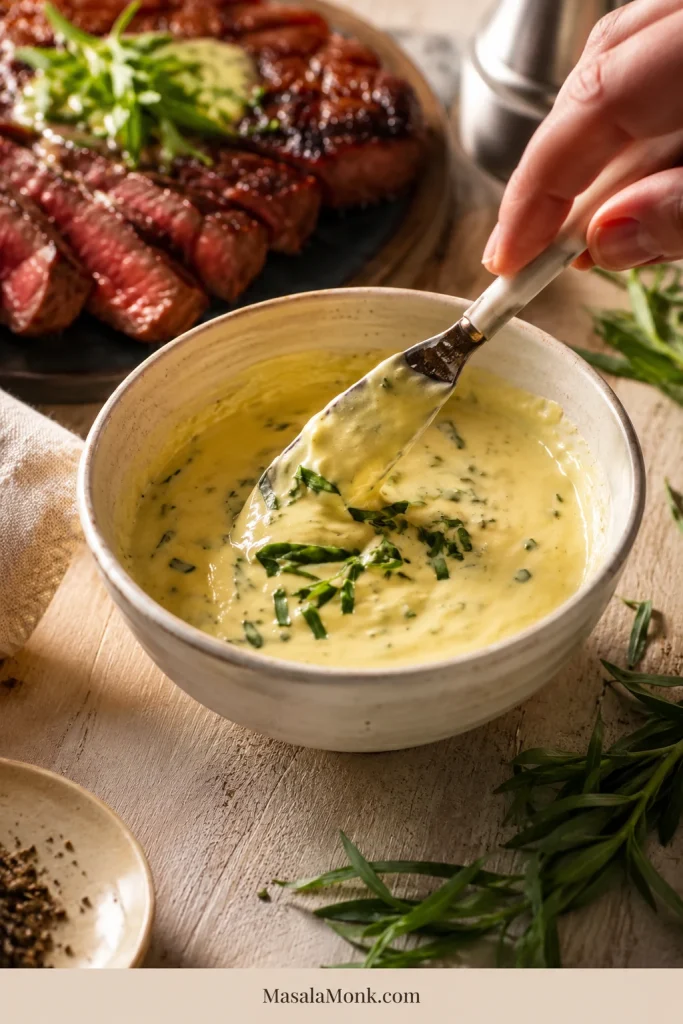
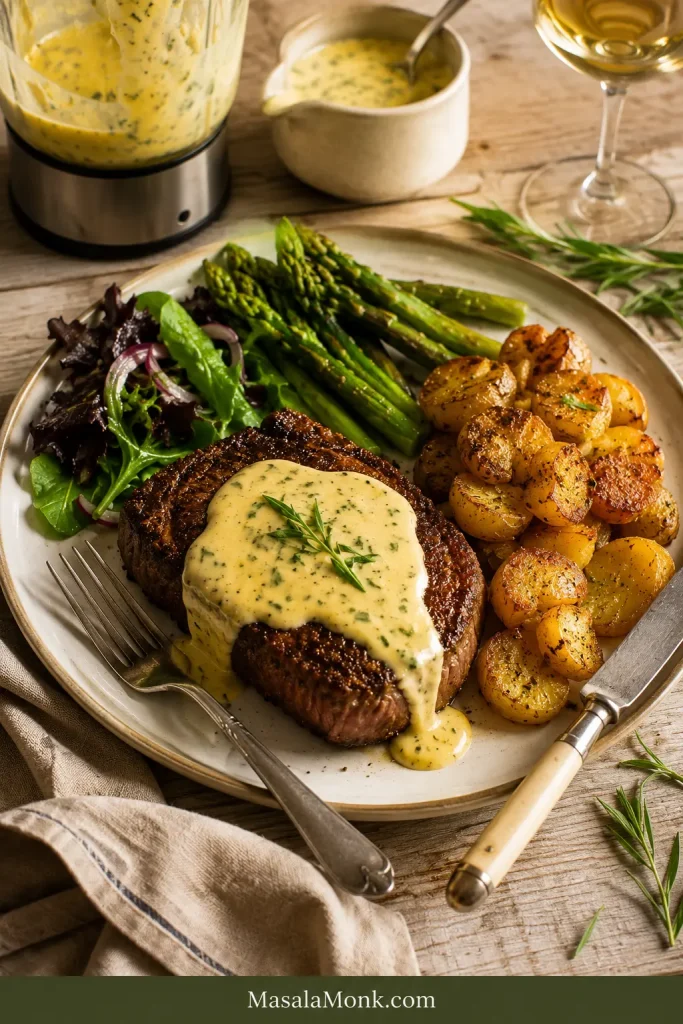
Spoon it over sliced steak so it catches in the juices. Use it on filet mignon when you want richness, ribeye when you want acidity against the fat, and prime rib when you want something brighter than gravy.
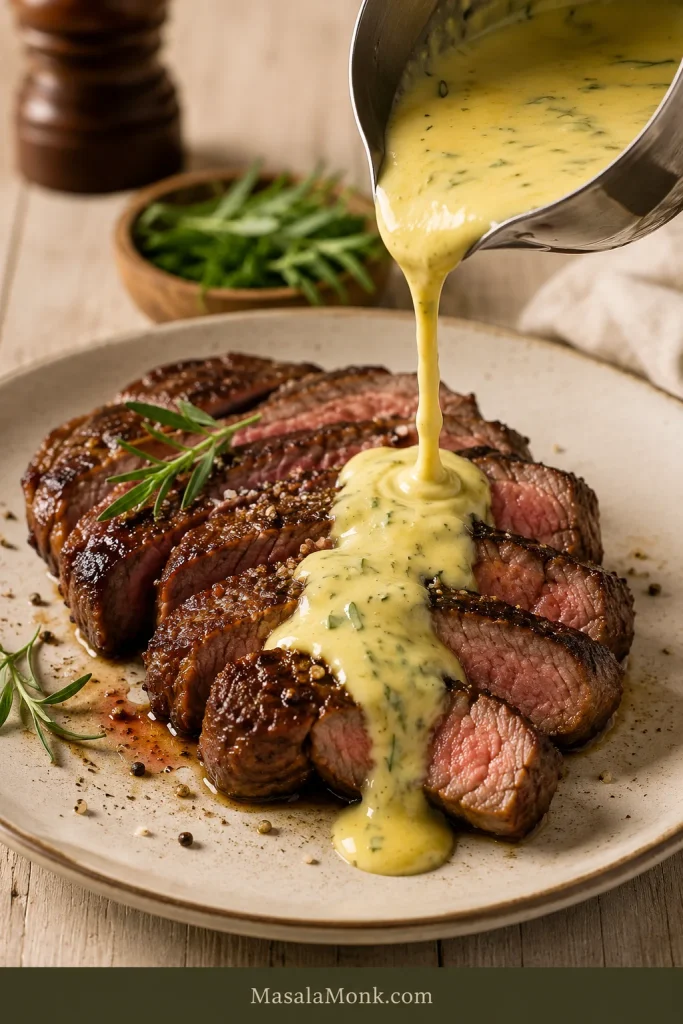
When the sauce meets hot steak, it should loosen at the edges, catch the meat juices, and leave a buttery tarragon trail on the plate.
How Much Béarnaise to Spoon Over Steak
A controlled pour gives the steak enough sauce for richness while still leaving the seared crust visible.
Pour béarnaise just before serving, using enough to coat the steak without hiding the crust or flooding the plate.
This is the sauce to make when the main dish is simple but you want the plate to feel like someone cared.
Blend the Sauce While the Steak Rests
This is the easiest timing move for steak night. The steak relaxes, the juices settle, and the béarnaise comes together right before serving.
Meanwhile, let the steak rest while the sauce comes together; that timing keeps dinner calm and the béarnaise warm.
Spoon the sauce over the steak just before serving.
Béarnaise is especially good with steak frites, filet mignon, ribeye, New York strip, sirloin, chateaubriand, and prime rib. It gives lean cuts richness and fatty cuts contrast.
What to Serve with Béarnaise Sauce
Steak is the classic pairing, but béarnaise is useful beyond beef.
Steakhouse pairings: prime rib, steak frites, roasted potatoes, fries, and asparagus.
Seafood pairings: salmon, white fish, lobster, crab, and crab cakes.
Brunch and leftovers: eggs, mushrooms, grilled chicken, and roasted vegetables.
Asparagus and roasted potatoes are the easiest vegetable wins. With seafood, salmon and lobster are the strongest pairings. Leftover sauce also works beautifully with eggs, mushrooms, and roasted vegetables. A spoonful is enough to make simple food feel cared for.
Béarnaise for Asparagus
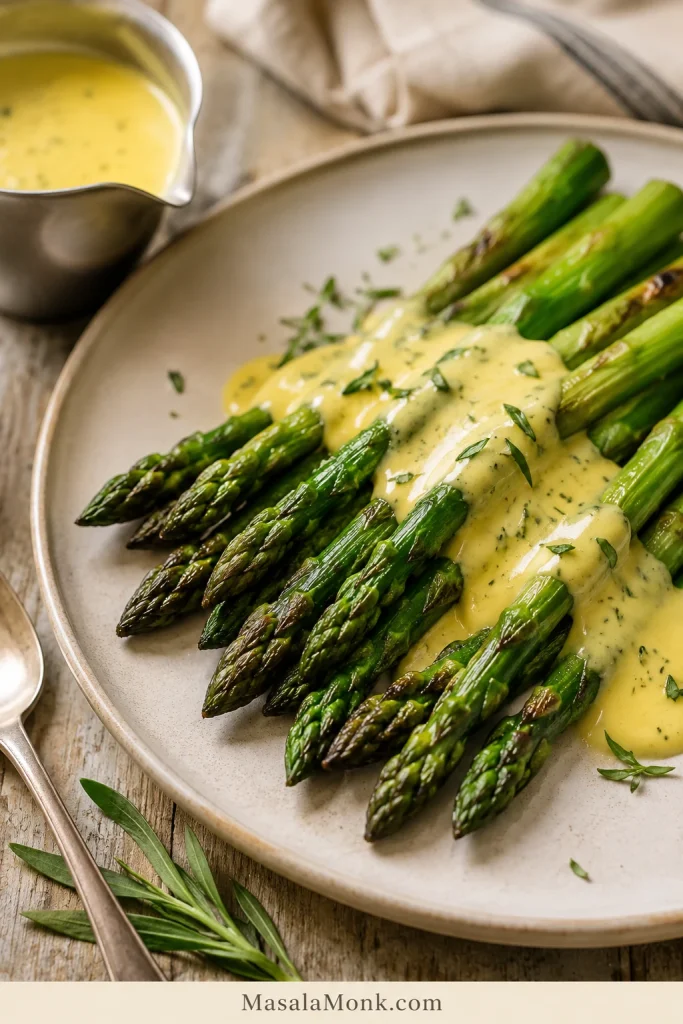
Asparagus is the easiest vegetable pairing because the sauce adds richness while the vinegar keeps the spears lively.
Because of the vinegar and tarragon, béarnaise gives roasted asparagus richness while keeping the spears fresh and bright.
Béarnaise for Salmon
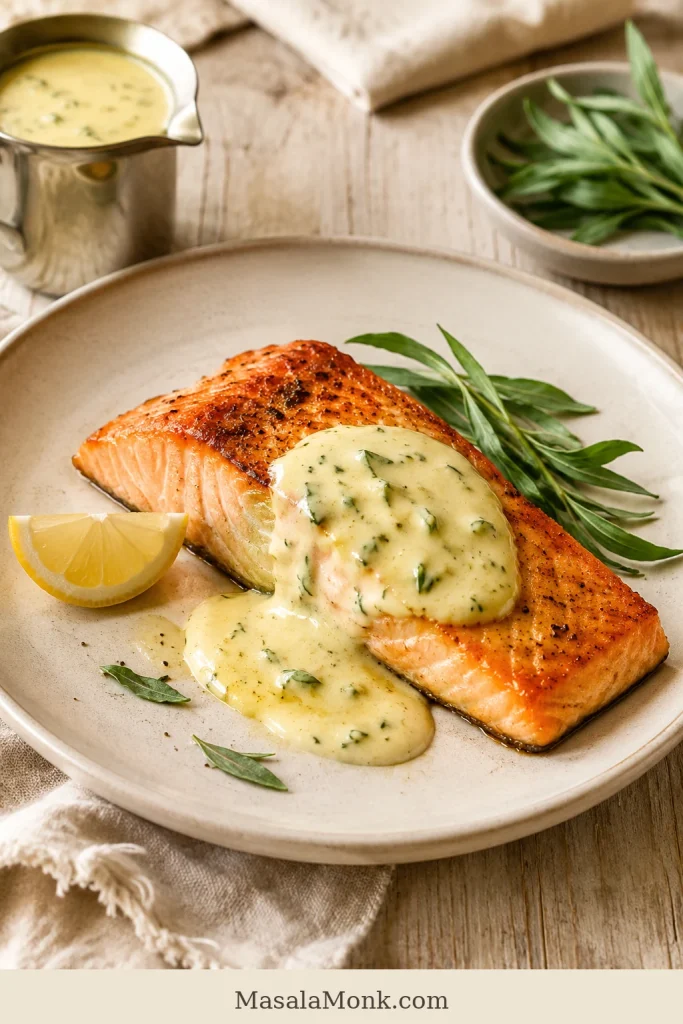
Salmon gives the sauce another place to shine beyond steak. Keep the spoonful small so the fish stays the focus.
Salmon works well with béarnaise because the butter adds luxury, while the tarragon and lemon keep the fish from feeling heavy.
Béarnaise is less ideal with very spicy dishes, tomato-heavy sauces, or delicate plates where a rich butter sauce would overwhelm the main ingredient.
For fish and chips or fried seafood, a cold, pickle-forward homemade tartar sauce may fit better.
What Is Béarnaise Sauce?
Béarnaise sauce is a warm French butter-and-egg-yolk sauce flavored with tarragon, shallot, pepper, white wine, and vinegar. It is a close relative of hollandaise, but it tastes sharper, more herbal, and is most often served with steak.
In plain terms, béarnaise is hollandaise’s steak-night cousin: buttery like hollandaise, but brighter, more savory, and built for browned meat.
A good béarnaise should not taste like plain melted butter. It should taste creamy at first, then bright and herbal enough to make you want the next bite. Tarragon gives it that lightly sweet, anise-like flavor that makes the sauce instantly recognizable.
Béarnaise vs Hollandaise
Béarnaise and hollandaise work the same basic magic: egg yolks help butter and a little liquid hold together as one smooth sauce. The difference is where they want to be served.
Steak, prime rib, salmon, lobster, crab, potatoes, asparagus
If hollandaise is the brunch sauce, béarnaise is the steak-night version: richer in herbs, sharper with vinegar, and built to stand up to browned meat. For the brunch side of this sauce family, this 5-minute Benedict sauce recipe uses a quick blender hollandaise method for eggs Benedict.
Classic Béarnaise Method
The blender method is the main recipe here. This classic whisked method is included for comparison, tradition, and anyone who wants the old-school French technique.
The classic method uses the same ingredients, but instead of using a blender, you whisk the yolks and reduction over gentle heat, then slowly whisk in clarified butter.
Make the same wine, vinegar, shallot, tarragon, and pepper reduction.
Strain the reduction and let it cool slightly.
Add egg yolks and reduction to a heatproof bowl set over a saucepan of barely simmering water.
Whisk constantly until the yolks thicken slightly and look pale and creamy.
Lift the bowl from the heat as needed if it feels too hot.
Slowly whisk in warm clarified butter, a few drops at first, then in a thin stream.
Finish with chopped tarragon, lemon juice, and salt.
The biggest danger with the classic method is overheating the yolks. Keep the heat gentle. If the bowl feels too hot to comfortably touch, lift it off the pan and keep whisking.
Make Ahead & Reheating
The best make-ahead move is simple: prepare the reduction early, then blend the sauce close to serving.
For guests, make the reduction before anyone arrives, then blend the sauce when the steak is resting. It gives you the calmest version of a sauce that looks much fussier than it is.
Making the Reduction Ahead
Simmer and strain the wine-vinegar-tarragon mixture, then refrigerate it for 1–2 days. Bring it back to room temperature before blending with the yolks.
Holding It for Dinner
Finished béarnaise is best fresh. If you need to hold it, keep it at serving temperature only as long as needed, ideally under an hour, in a warmed thermos or a bowl set near gentle heat. Keep it away from direct heat and boiling.
Béarnaise is an emulsion, not a simmering gravy. Make the reduction ahead, then finish the sauce close to serving whenever possible.
Refrigerating Leftover Sauce
You can refrigerate leftovers, but the texture changes. Because béarnaise is butter-based, it firms up in the fridge and may split when reheated. If storing leftovers, refrigerate them promptly in an airtight container and use within 1–2 days.
How to Reheat It Without Breaking the Sauce
Reheat it slowly. A warm water bath is safer than direct heat. Place the sauce in a heatproof bowl over warm water and whisk slowly until it loosens. If it is too thick, whisk in warm water a few drops at a time.
A microwave can work for very small amounts, but it is risky. Use very short bursts, whisk between each one, and stop before the sauce gets hot enough to scramble.
If It Gets Cold: Use It Like Béarnaise Butter
Cold béarnaise firms up like flavored butter. It will not have the same glossy texture, but it can still melt beautifully over hot steak, roasted potatoes, asparagus, or fish. Use a small spoonful the way you would use compound butter.
When chilled, leftover béarnaise firms like tarragon butter; melt a small spoonful over hot steak, potatoes, asparagus, or fish.
Substitutions
Béarnaise is flexible up to a point. You can adjust the wine, vinegar, herbs, and butter, but tarragon is the flavor that keeps it recognizable.
Béarnaise Without Fresh Tarragon
Use about 1 teaspoon dried tarragon for every 1 tablespoon fresh tarragon. Dried tarragon is stronger and less bright than fresh, so start small and adjust. Tarragon vinegar can also reinforce the flavor.
Without tarragon at all, you can make a delicious herb butter sauce, but it will lose the flavor that makes béarnaise recognizable. Use parsley, chives, dill, basil, or a mix of soft herbs if that is what you have.
Béarnaise Without Wine
Replace the wine with water, non-alcoholic white wine, or a little extra vinegar diluted with water. The sauce will be slightly less complex, but it will still work.
Salted Butter
Salted butter can work, but reduce the added salt. Taste the sauce at the end before adding more.
Quick Flavor Variations
Peppercorn béarnaise: add extra crushed black pepper to the reduction.
Chili béarnaise: add a pinch of cayenne or finely minced chili.
Lemon béarnaise: add extra lemon juice at the end, especially for fish or seafood.
Keep variations subtle. The sauce should still taste like tarragon, butter, and a sharp wine-vinegar reduction.
Small-Batch Béarnaise and Doubling Tips
For a smaller steak dinner, use 2 large yolks, about 1 tablespoon / 15 ml reduction, and about ½ cup / 115 g clarified butter or ghee. Very tiny batches can be harder in a blender because the blades need enough volume to catch the yolks and butter.
For guests, it is often safer to make two separate batches unless your container is tall and narrow enough for the blender head to stay submerged. Make the reduction ahead, then blend the sauce in one or two batches close to serving.
Real Shortcuts That Still Taste Like Béarnaise
The best shortcuts are the ones that keep the béarnaise identity: tarragon, acidity, egg yolks, and butter.
Use ghee: it behaves like clarified butter and keeps the butter step simple.
Make the reduction ahead: this is the best make-ahead shortcut for guests or steak night.
Use dried tarragon or tarragon vinegar: both help when fresh tarragon is limited.
Use a smaller spoonful: for a lighter serving, keep the real sauce but use less of it and brighten with lemon, pepper, and extra tarragon.
Cold Tarragon Mayo Shortcut
For a cold béarnaise-style shortcut, stir mayonnaise with chopped tarragon, lemon juice, Dijon mustard, a little minced shallot, black pepper, and a tiny splash of vinegar. For the base, you can use store-bought mayo or start with this homemade mayonnaise recipe and season it from there.
This is not warm béarnaise, but it works well with steak sandwiches, fries, cold seafood, and leftover roast beef.
When Store-Bought Makes Sense
Store-bought versions, packet mixes, and jars can help on a weeknight. Homemade béarnaise is still the better choice for steak dinners, holidays, guests, and date nights because the tarragon, shallot, vinegar, and butter are brightest when freshly combined.
A packet mix can save dinner, but it will not give you the same fresh tarragon lift as homemade sauce.
FAQs
Still adjusting the sauce or wondering if a swap will work? These quick answers cover the questions that usually come up mid-recipe.
What is béarnaise sauce?
Béarnaise is a warm French butter-and-egg-yolk sauce flavored with tarragon, shallot, vinegar, wine, and pepper. It is especially popular with steak.
What is béarnaise sauce made of?
It is made with egg yolks, clarified butter, white wine, vinegar, shallots, black pepper, and fresh tarragon. Some versions also include chervil, parsley, lemon juice, or cayenne.
Is béarnaise the same as hollandaise?
No. Hollandaise is usually flavored with lemon. Béarnaise uses tarragon, shallot, vinegar, wine, and pepper, which makes it more savory and better suited to steak.
What does béarnaise taste like?
It tastes buttery, tangy, and herbal, with tarragon giving it a lightly sweet, anise-like finish.
Does blender béarnaise work as well as classic?
Yes. Blender béarnaise can be smooth, rich, and steakhouse-worthy. The classic method gives you traditional whisked technique, but the blender method is easier and more reliable for most home cooks.
What can I use instead of fresh tarragon in béarnaise?
Use about 1 teaspoon dried tarragon for every 1 tablespoon fresh tarragon, or use tarragon vinegar to reinforce the flavor. Without tarragon, the sauce will taste more like an herb butter sauce than classic béarnaise.
How do you make béarnaise without wine?
Replace the wine with water, non-alcoholic white wine, or a little extra vinegar diluted with water. The flavor will be slightly less complex, but the sauce will still work.
Why did my béarnaise split?
It usually splits when the butter is added too quickly, the sauce gets too hot, or the emulsion does not form properly. To fix it, start with 1 teaspoon warm water or a fresh egg yolk in a clean jar, then slowly blend the broken sauce back in.
How far ahead can you make béarnaise?
The reduction can be made 1–2 days ahead. Finished béarnaise is best fresh, but it can be held briefly in a thermos or gentle water bath, ideally for less than an hour.
Should béarnaise be served warm or cold?
Béarnaise is best served warm. When cold, it firms like flavored butter. It can still melt nicely over hot steak, potatoes, asparagus, or fish, but it will not have the same glossy texture.
Is it béarnaise, bearnaise, or bernaise?
The classic French spelling is béarnaise. In English, many people type bearnaise without the accent, and some type bernaise. They usually mean the same tarragon butter sauce for steak.
Final Thought
You are not trying to pass a French sauce exam. You are trying to make steak taste richer, fish feel more special, and potatoes or asparagus disappear faster from the plate.
If the béarnaise is warm, glossy, balanced, and full of tarragon, you got there. Serve it before you overthink it.
Made it for steak, salmon, asparagus, or fries? Tell me where the béarnaise landed first — this is one of those sauces people start putting on everything.