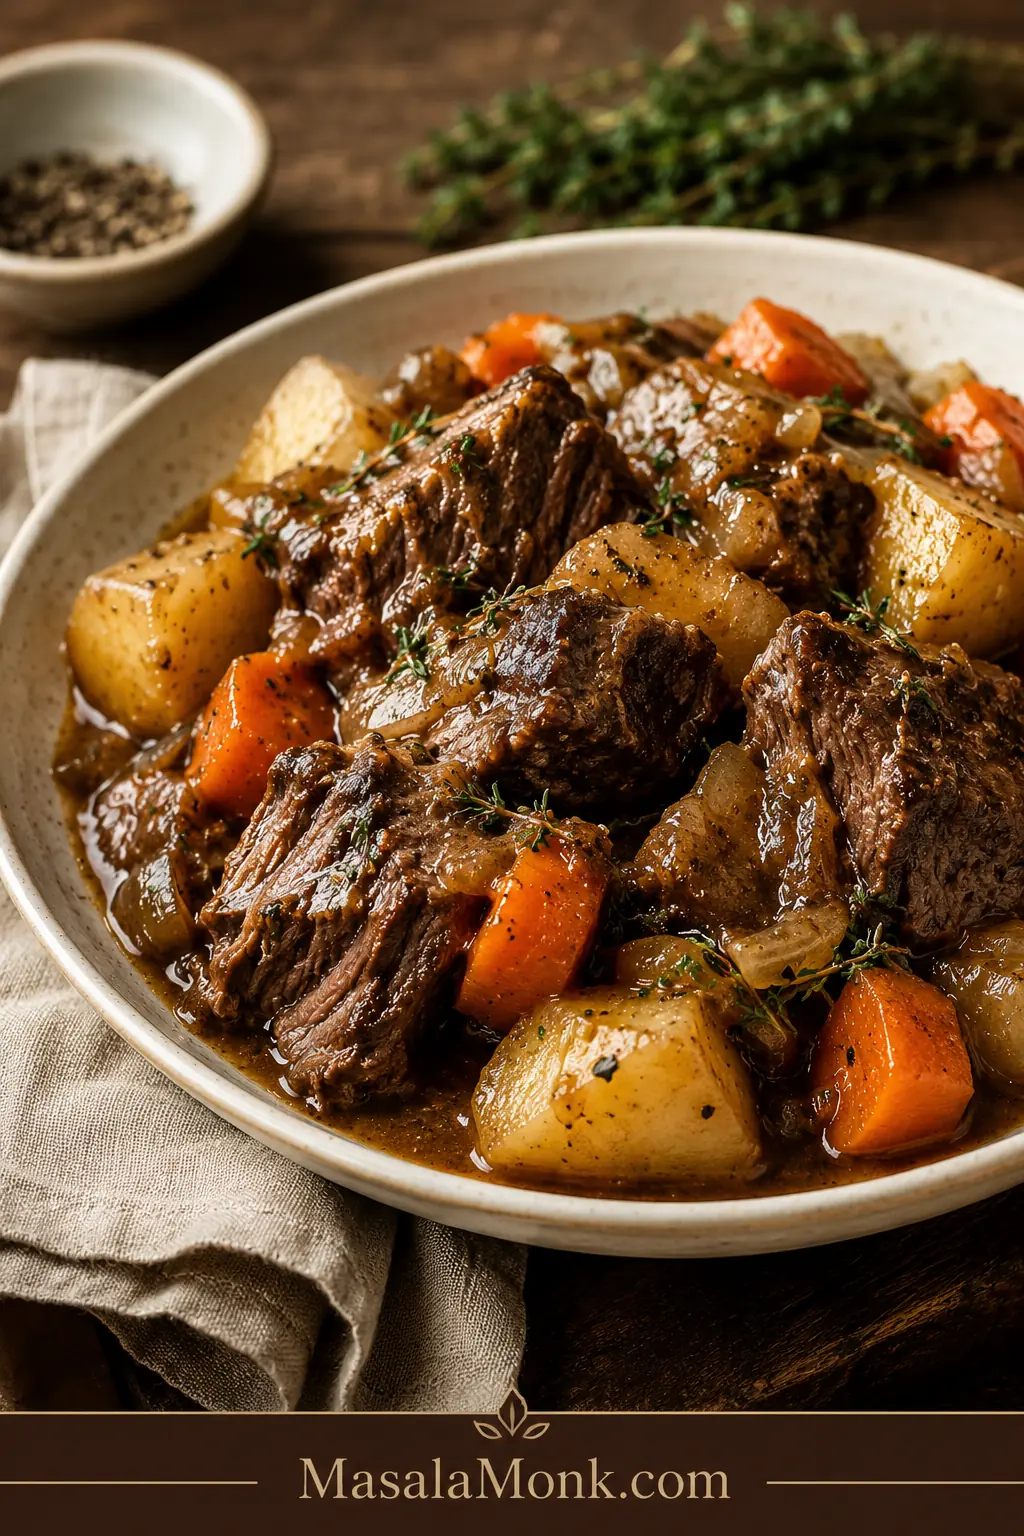
Slow cooker pot roast sounds simple until you are standing in the kitchen with a big piece of beef, wondering if you bought the right cut, added too much liquid, or started too late for dinner. This version is built to remove that guesswork: tender chuck roast, soft potatoes and carrots, and cooking juices that become real gravy instead of thin broth.
The method keeps the liquid controlled, uses the fork test instead of blind timing, and finishes the juices properly so the whole meal tastes complete. You get the comfort of classic pot roast without the usual problems: a tough roast, watery sauce, mushy vegetables, or broth pretending to be gravy.
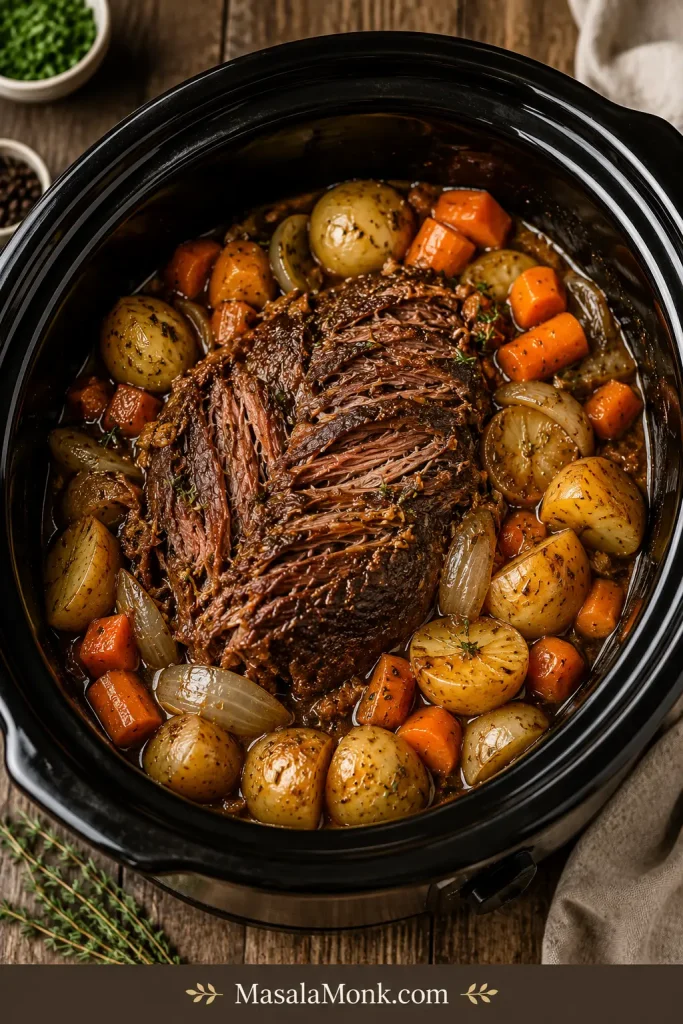
By the end, the onions should have melted into the sauce, the carrots should taste sweet and savory, the potatoes should catch the sauce, and the beef should feel like it finally relaxed. This is the kind of dinner where the gravy disappears first.
Use LOW when you can. Use HIGH when you need to. Sear the roast for deeper flavor, or skip the sear if the day is already busy. Pot roast is forgiving once you know what to look for; a firm roast usually needs more time, not more panic.
Quick Answer: Slow Cooker Pot Roast
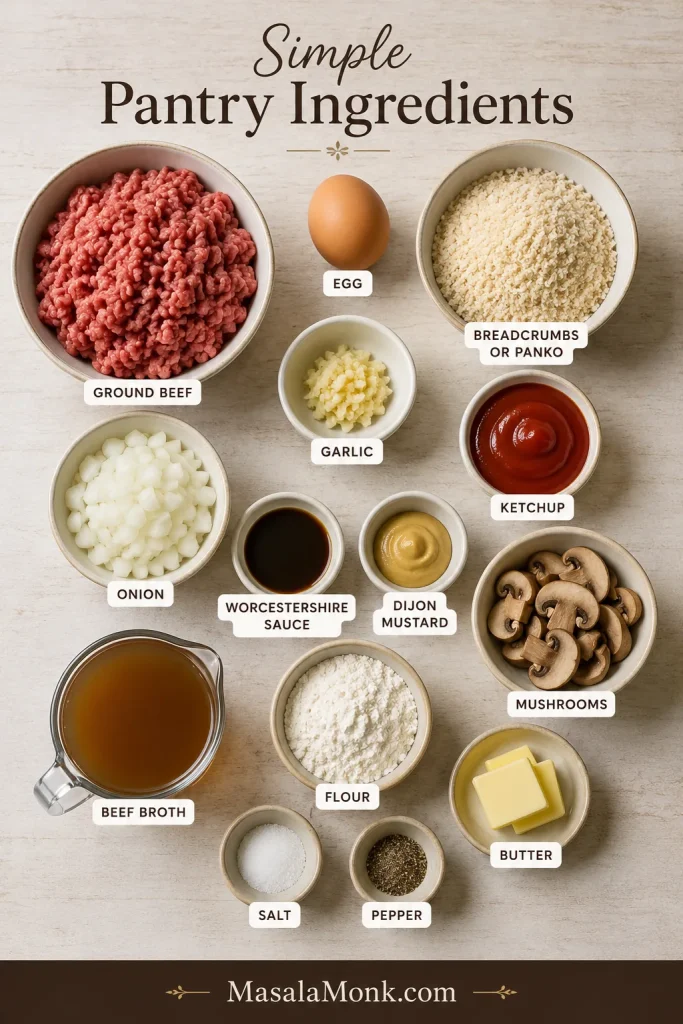
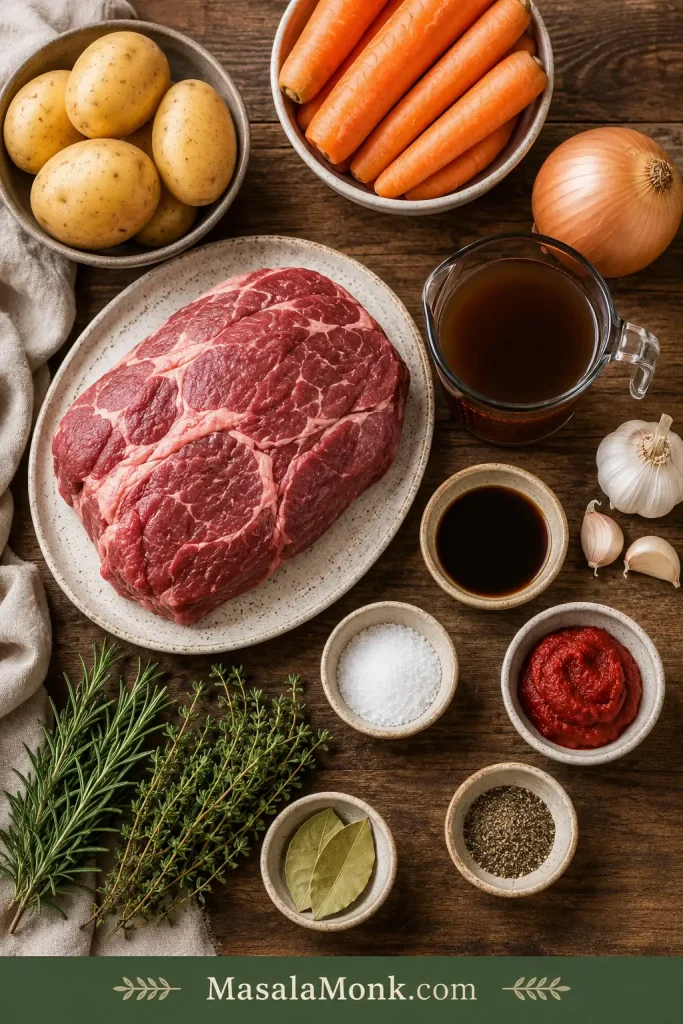
For the best slow cooker pot roast, use a 3 to 4 lb / 1.4 to 1.8 kg beef chuck roast. Season it well, sear it if possible, then cook it with onions, carrots, potatoes, garlic, beef broth, Worcestershire sauce, tomato paste, thyme, rosemary, and bay leaves.
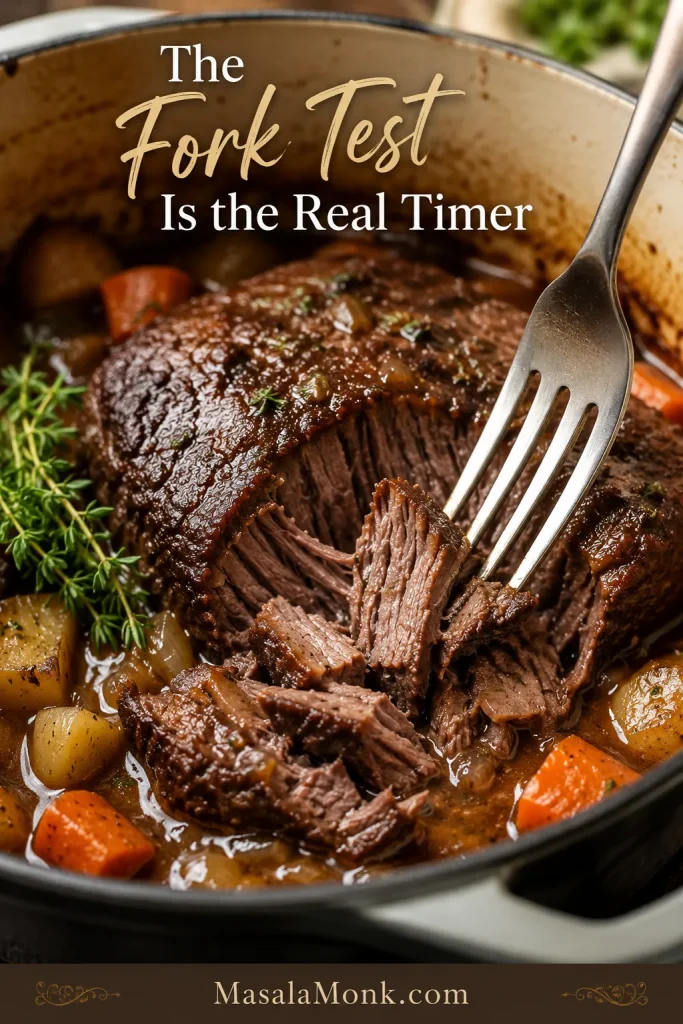
Cook on LOW for 8 to 10 hours or HIGH for 5 to 6 hours, until the roast is tender enough for a fork to slide in easily and the beef gives with gentle pressure. The fork test is the real timer.
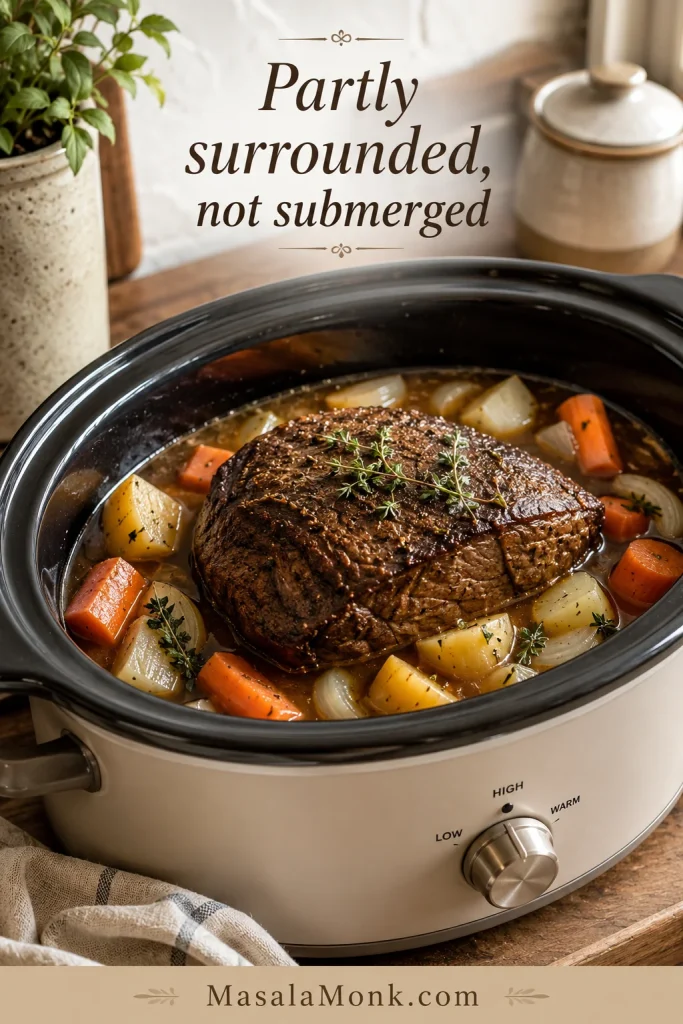
Use 1½ cups / 360 ml beef broth for rich, concentrated cooking juices. Use up to 2 cups / 480 ml if you want extra sauce for the table. Keep the roast partly surrounded by liquid, not buried in it. The beef and vegetables release moisture as they cook.
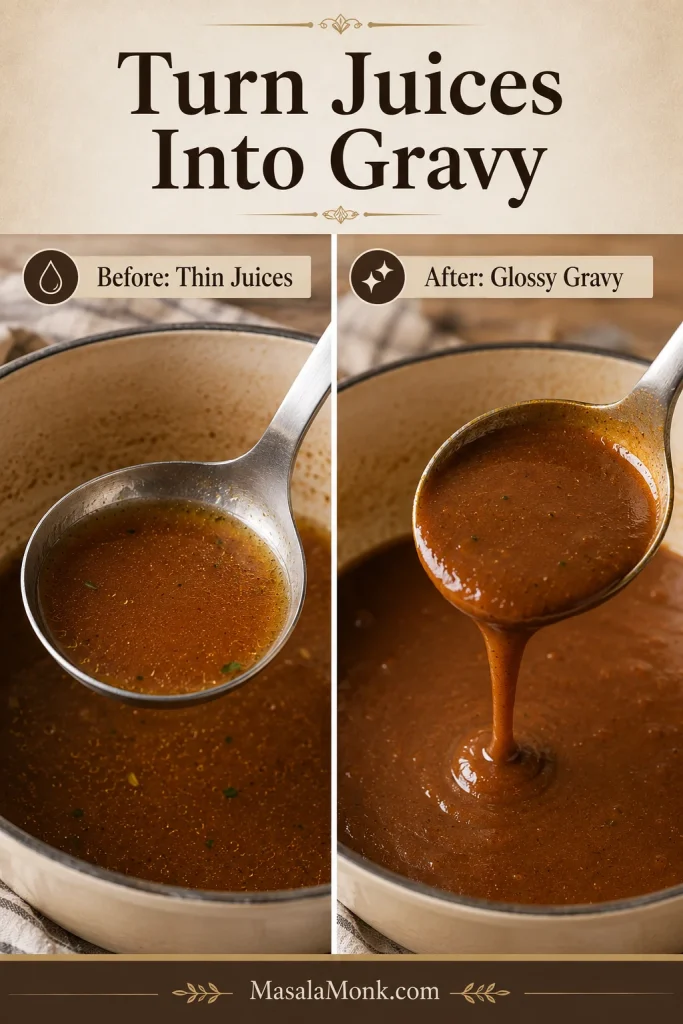
When the beef is tender, remove the roast and vegetables, then thicken the juices with a cornstarch slurry or a quick flour gravy. That final step is what turns a slow cooker full of beef and vegetables into proper pot roast dinner.
Slow Cooker Pot Roast Recipe Card
Recipe at a Glance
| Prep time | 20 minutes |
| Cook time | 8 to 10 hours on LOW, or 5 to 6 hours on HIGH |
| Total time | 5 hours 20 minutes to 10 hours 20 minutes, depending on HIGH or LOW setting |
| Servings | 6 to 8 |
| Best slow cooker size | 6-quart for a 3 to 4 lb roast; 7 to 8-quart for a 5 lb roast with vegetables |
| Best cut | Beef chuck roast |
| Best setting | LOW |
| Texture | Tender, sliceable, or shreddable |
Equipment
- 6-quart slow cooker
- Large skillet or Dutch oven for searing
- Tongs
- Cutting board
- Small bowl and whisk for the cornstarch slurry
- Ladle or measuring cup for the cooking juices
Ingredients
For the pot roast:
| Ingredient | Amount |
|---|---|
| Beef chuck roast | 3 to 4 lb / 1.4 to 1.8 kg |
| Olive oil or avocado oil | 2 tbsp / 30 ml |
| Fine salt | 1½ to 2 tsp / 9 to 12 g |
| Black pepper | 1 tsp / 2 to 3 g |
| Garlic powder | 1 tsp / about 3 g |
| Onion powder | 1 tsp / about 2 to 3 g |
| Paprika, sweet or smoked | 1 tsp / about 2 to 3 g |
| Dried thyme | 1 tsp / about 1 g |
| Dried rosemary | ½ tsp / about 0.5 g |
| Yellow onion, sliced thick | 1 large / about 250 g |
| Garlic cloves, minced or smashed | 4 to 6 cloves / about 15 to 25 g |
| Carrots, cut into large pieces | 1 lb / 450 g |
| Baby potatoes, Yukon gold, or red potatoes | 1½ to 2 lb / 680 to 900 g |
| Beef broth | 1½ cups / 360 ml |
| Worcestershire sauce | 1 to 2 tbsp / 15 to 30 ml |
| Tomato paste | 1 to 2 tbsp / 16 to 32 g |
| Bay leaves | 1 to 2 |
For the gravy:
| Ingredient | Amount |
|---|---|
| Hot cooking juices | 1½ to 2 cups / 360 to 480 ml |
| Cornstarch | 2 tbsp / about 16 g |
| Cold water | 3 tbsp / 45 ml |
Instructions
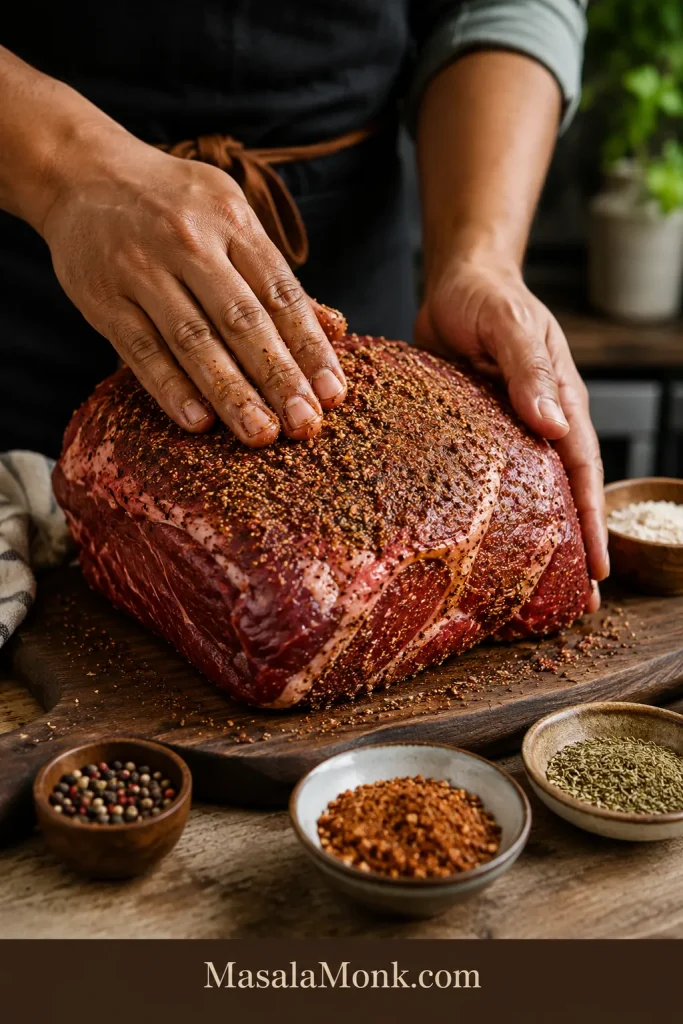
- Dry and season the roast. Pat the chuck roast dry. Mix the salt, pepper, garlic powder, onion powder, paprika, thyme, and rosemary, then rub the seasoning over every side of the beef.
- Sear for deeper flavor. Heat oil in a large skillet over medium-high heat. Brown the roast for 3 to 4 minutes per side. Skipping the sear still works; the finished flavor will simply be lighter.
- Layer the vegetables. Add the onion, carrots, and potatoes to the slow cooker. Keep the pieces large so they hold up during the long cook.
- Add the roast. Place the roast on top of or slightly between the vegetables. The lid should close easily.
- Add the broth mixture. Stir together the beef broth, Worcestershire sauce, tomato paste, garlic, and bay leaves. Pour around the roast. The beef should sit in some liquid but not be fully covered.
- Cook low and slow. Cover and cook on LOW for 8 to 10 hours, or on HIGH for 5 to 6 hours. Keep the lid on as much as possible.
- Check for tenderness. The roast is ready when a fork slides in easily and the meat pulls apart with gentle pressure. A tight or rubbery roast needs more cooking time.
- Rest the beef. Transfer the roast to a cutting board and the vegetables to a serving dish. Rest the beef for about 10 minutes while you make the gravy.
- Make the gravy. Ladle 1½ to 2 cups hot cooking juices into a saucepan. Whisk cornstarch with cold water, then whisk the slurry into the simmering liquid. Cook for 2 to 3 minutes, until glossy and thickened.
- Slice or shred. Slice across the grain for neat pieces, or pull into large chunks for a fall-apart pot roast.
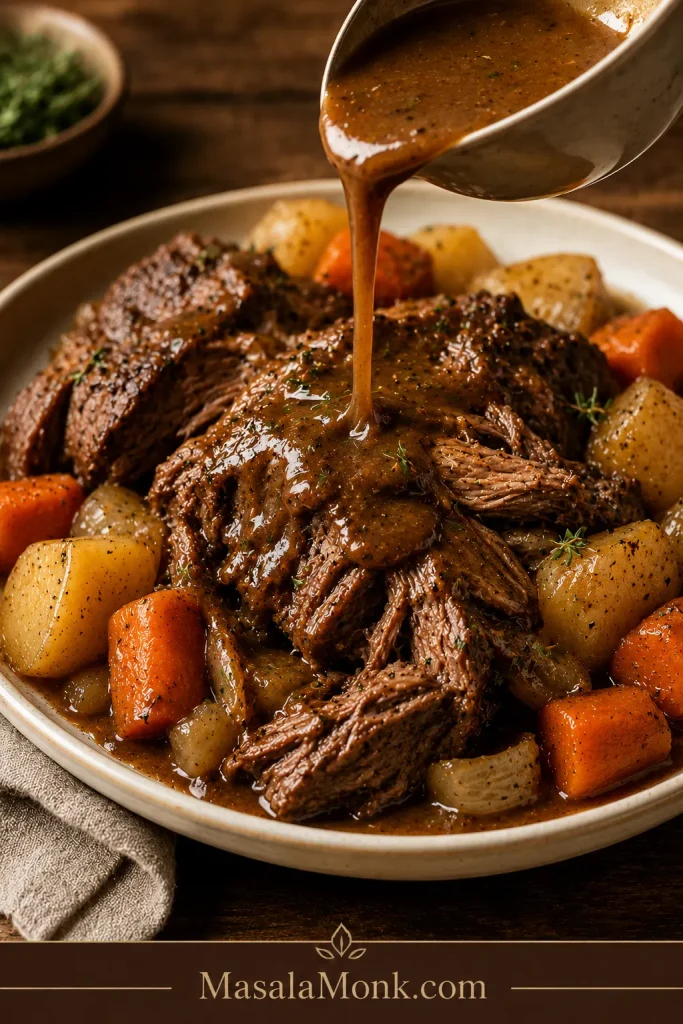
- Serve. Spoon the gravy over the beef, potatoes, and carrots.
Recipe Notes
- Start with thawed beef, not frozen.
- Use 1½ cups / 360 ml broth for balanced flavor and a concentrated gravy base. Use up to 2 cups / 480 ml if you want more sauce, but plan to simmer and thicken it.
- For best cooking, the slow cooker should be about half to two-thirds full. A tightly packed cooker or barely closed lid can slow the recipe down.
- For firmer potatoes and carrots, add them after the first 2 to 3 hours instead of at the beginning.
- Reduce the salt if using salted broth, bouillon, onion soup mix, ranch seasoning, au jus mix, or brown gravy packets.
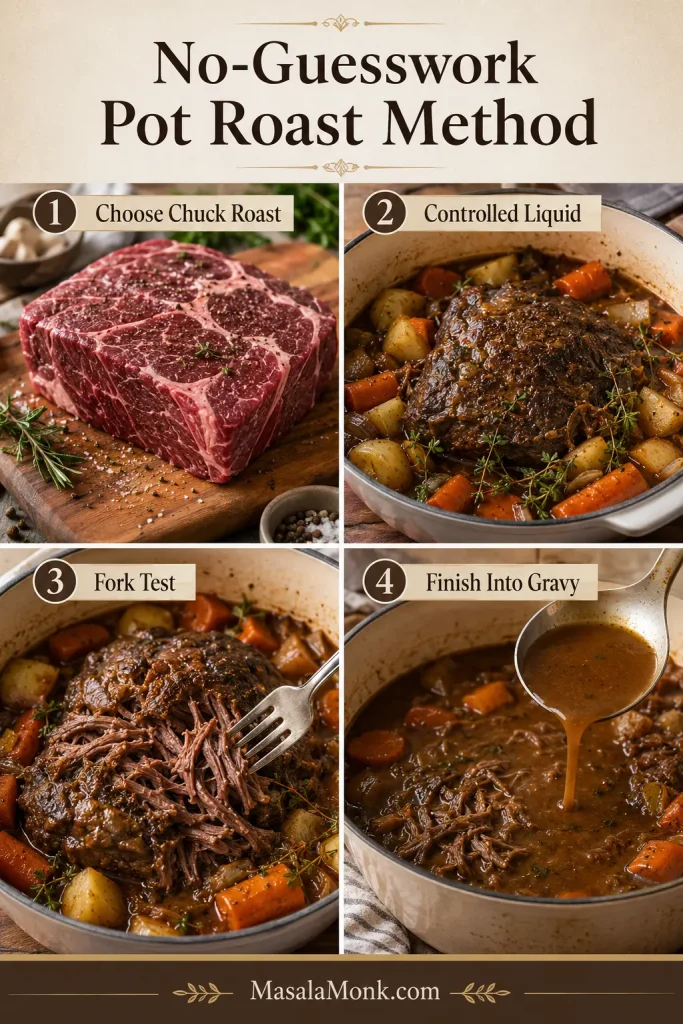
The No-Guesswork Pot Roast Method
Pot roast is not difficult, but a few choices decide whether it turns out rich and tender or thin and disappointing. This method keeps the recipe simple by focusing on the four things that matter most.
- Choose chuck roast. It has the marbling and connective tissue that soften during long cooking.
- Use controlled liquid. The slow cooker gives liquid back to you as the beef and vegetables cook.
- Cook until the fork test works. The timer is a guide; tenderness is the goal.
- Finish the juices into gravy. Simmer and thicken them so they taste like sauce, not plain broth.
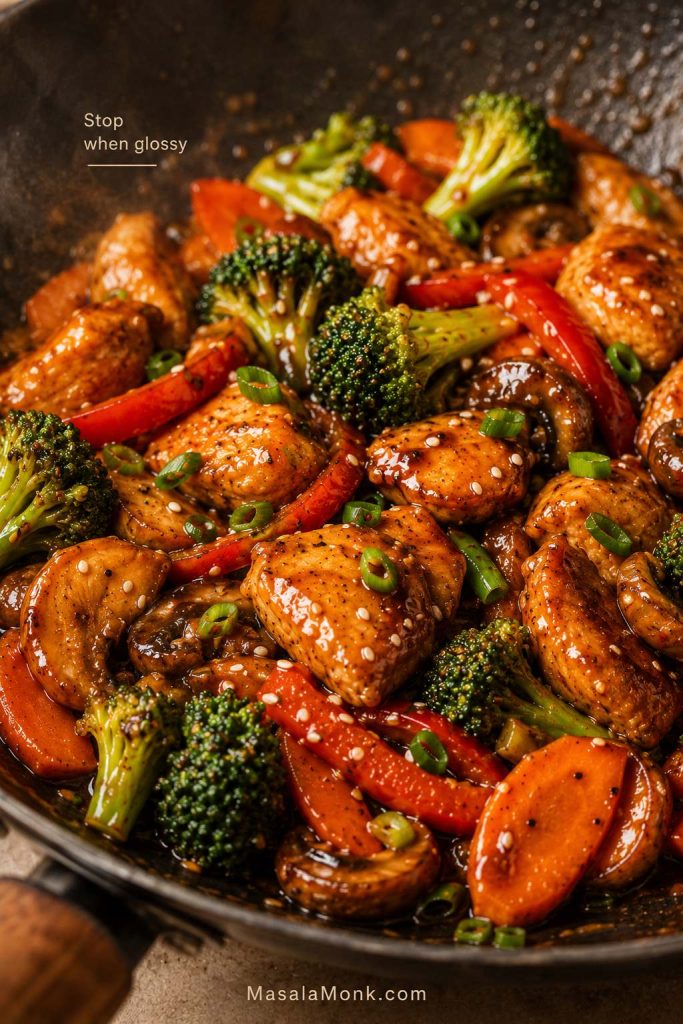
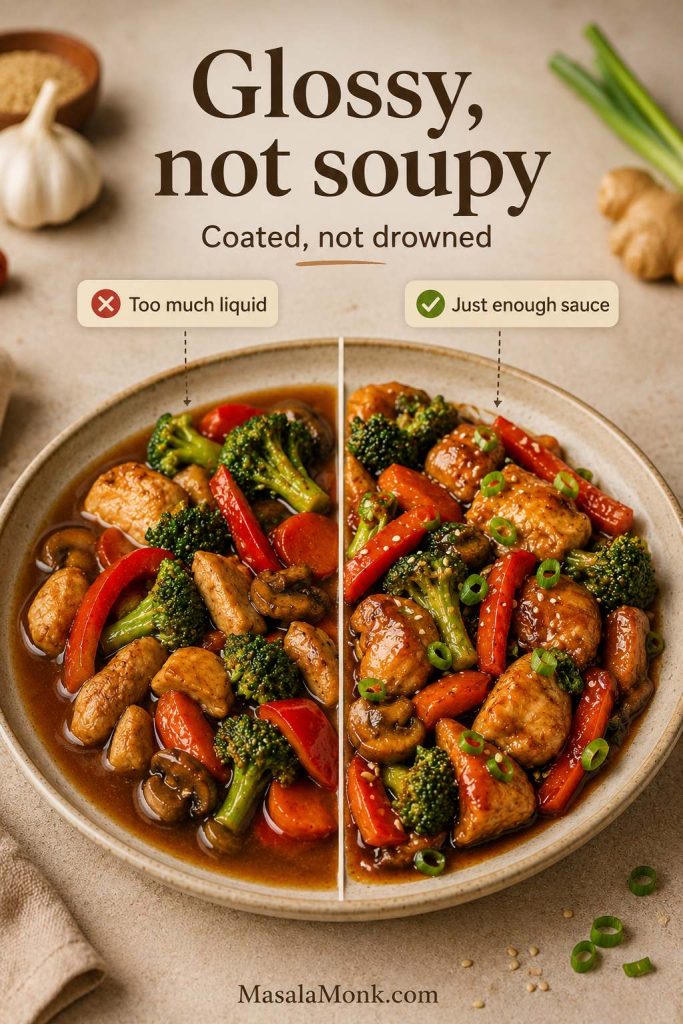
The biggest mistake with slow cooker pot roast is treating the liquid like soup. A little broth is enough to braise the beef; the real magic happens when those juices are finished into gravy.
Your Pot Roast Is Right When…
- A fork slides into the beef with little resistance.
- The roast separates into large tender chunks instead of springing back.
- The potatoes and carrots are soft but not completely collapsed.
- The gravy coats the back of a spoon after thickening.
- The finished sauce tastes savory and concentrated, not weak or broth-like.
The best moment is when the roast stops resisting. The fork goes in, the beef pulls into soft pieces, and the onions have almost disappeared into the sauce. That is when the slow cooker has done its job.
Jump to What You Need
- Recipe Card
- No-Guesswork Method
- Why This Pot Roast Turns Tender
- Best Cut for Pot Roast
- Ingredients and Substitutions
- Step-by-Step Method
- Cook Time Chart
- LOW vs HIGH
- Liquid Guide
- Gravy
- Potatoes and Carrots
- No-Sear Version
- Homemade Seasoning
- Shortcut Variations
- Troubleshooting
- Storage and Reheating
- Leftover Ideas
- Serving Ideas
- FAQs
Why This Pot Roast Turns Tender Instead of Tough
Pot roast becomes tender because a tougher, well-marbled cut of beef cooks gently for a long time. Chuck roast has connective tissue that softens during slow cooking. That is what gives you the rich, fall-apart texture people want from a classic slow cooker pot roast.
The controlled liquid matters too. A slow cooker traps steam, and the beef, onions, carrots, and potatoes all release moisture. Starting with 1½ cups / 360 ml broth gives you enough moisture for cooking and enough concentrated flavor for the sauce at the end.
Searing adds deeper color and a more roasted flavor, but it is not what makes the roast tender. Tenderness comes from the cut, the gentle heat, and enough time. The final sauce step is where the meal comes together: thin juices become a glossy finish that coats the beef and vegetables instead of running past them.
The clock gets you close, but the fork tells you the truth. Once the beef gives, the whole slow-cooker promise finally pays off.
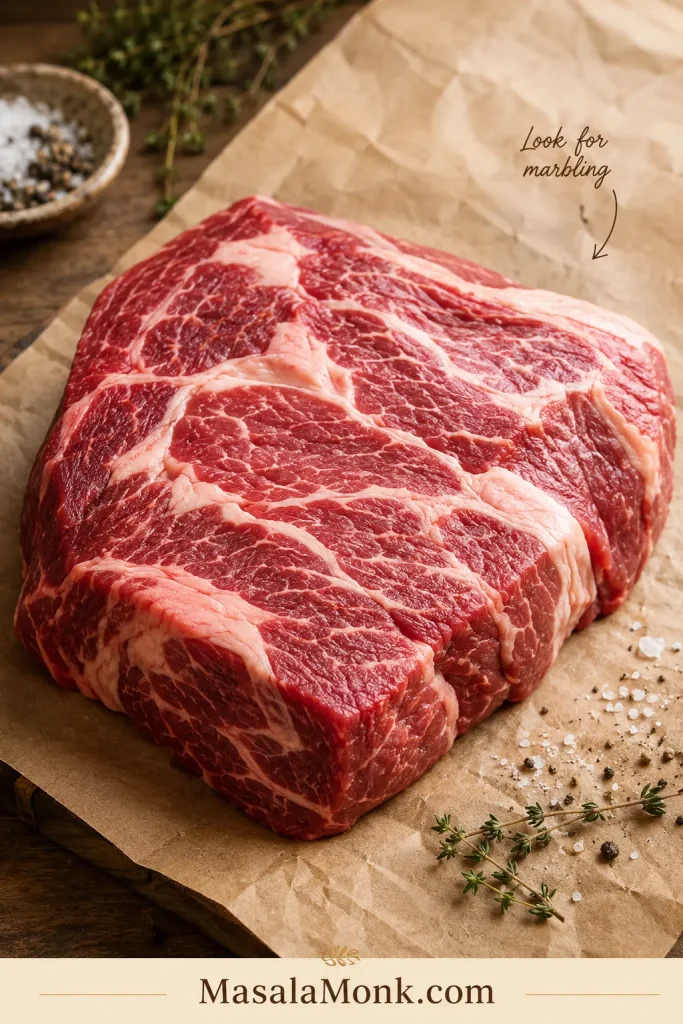
Best Cut for Slow Cooker Pot Roast
The best cut for slow cooker pot roast is beef chuck roast. It has the right balance of beefy flavor, fat, and connective tissue. When cooked low and slow, it becomes tender enough to slice into soft pieces or pull apart into large chunks.
Labels may say chuck roast, chuck shoulder, shoulder roast, arm roast, blade roast, or pot roast. Look for visible marbling and a roast meant for slow cooking or braising. A very lean, smooth-looking roast may be better sliced than shredded.
| Cut of Beef | Good for Slow Cooker Pot Roast? | Best Result |
|---|---|---|
| Chuck roast | Best choice | Tender, juicy, classic fall-apart pot roast |
| Chuck shoulder roast | Yes | Similar to chuck roast, rich and tender |
| Arm roast | Yes | Good slow-cooker cut, often sliceable |
| Blade roast | Yes | Flavorful and tender when cooked low and slow |
| Brisket | Yes | Rich, beefy, usually better sliced |
| Rump roast | Works, but leaner | Better sliced than shredded |
| Bottom round roast | Works carefully | Leaner, can dry out; slice thinly across the grain |
| Eye of round | Not ideal | Too lean for classic fall-apart pot roast |
Which Beef Cuts Work Best for Pot Roast?
This comparison separates classic fall-apart pot roast cuts from leaner roasts that usually need slicing, careful timing, and extra sauce.
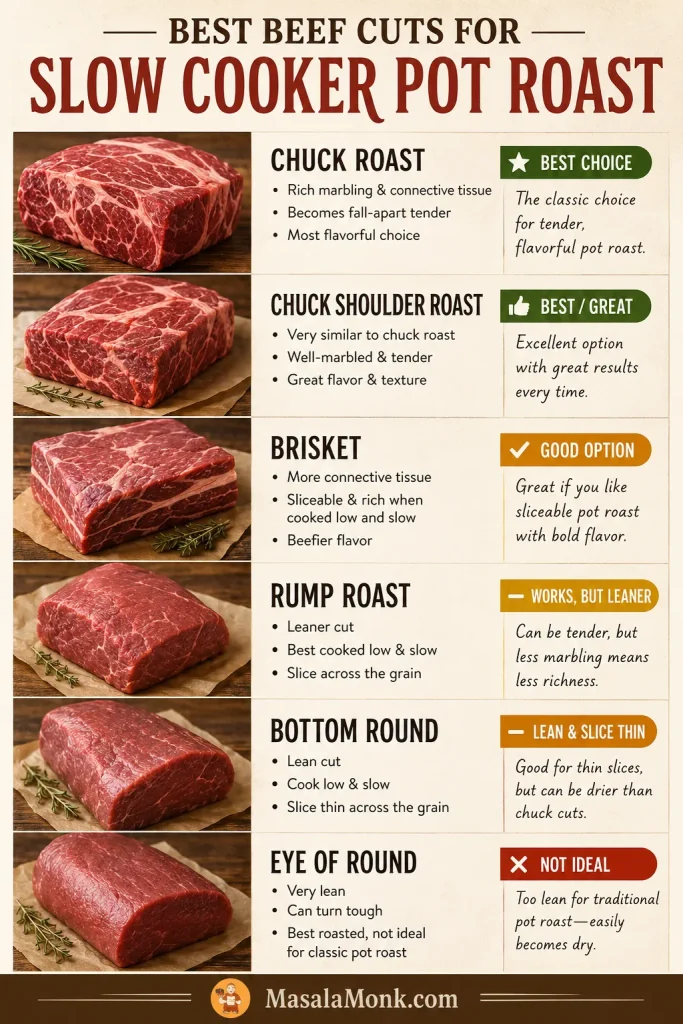
For the most forgiving result, choose chuck roast. Shoulder roast or arm roast can still make a good dinner. Rump roast and bottom round work better when sliced thinly with plenty of sauce.
If you are specifically using shoulder roast instead of chuck, MasalaMonk’s beef shoulder roast crock pot recipe goes deeper into that cut.
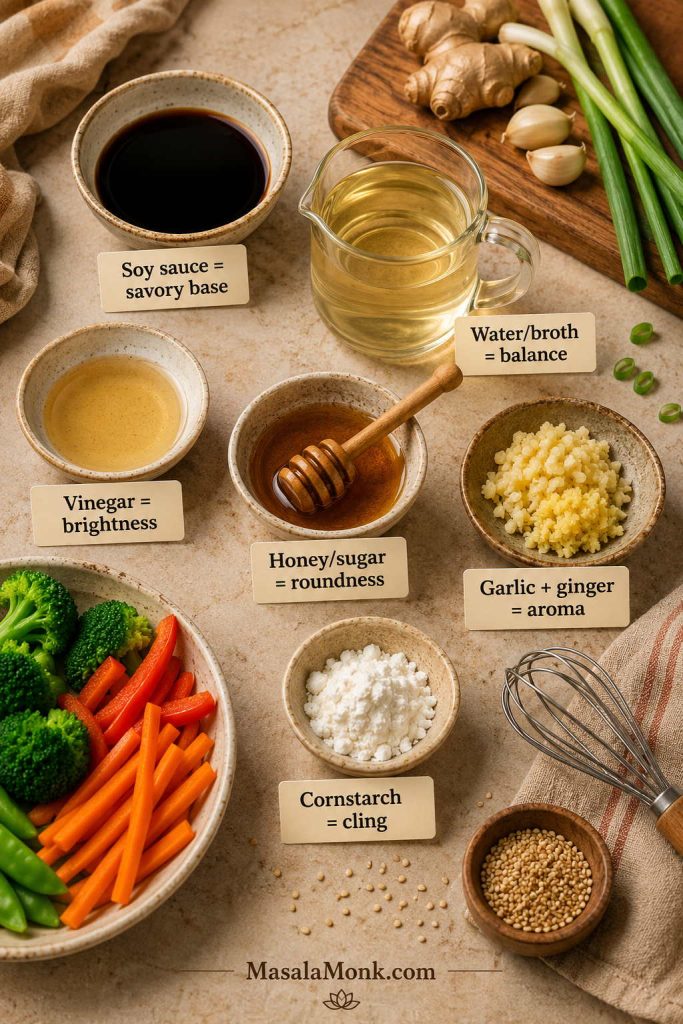
Ingredients That Build Tender Beef and Rich Gravy
Before the slow cooker starts, the recipe is really about balance: a marbled roast, sturdy vegetables, savory broth, and a few small ingredients that make the sauce taste complete.
Beef
A 3 to 4 lb chuck roast fits well in a 6-quart slow cooker with vegetables. Smaller roasts cook faster. Larger roasts may need a bigger cooker and more time.
Some visible marbling is a good thing. Trim large hard fat caps if needed, but keep enough marbling to help the roast stay moist and flavorful.
If you prefer smaller beef pieces instead of one large roast, MasalaMonk’s slow cooker beef stew recipe is a better fit than cutting this pot roast into small cubes.
Vegetables
Baby potatoes, Yukon gold potatoes, and red potatoes hold their shape well. Cut larger potatoes into big chunks so they stay intact during the long cook.
Thick-cut carrots give the best texture. Baby carrots are fine when convenience matters; they will be softer, but they still belong in a cozy pot roast.
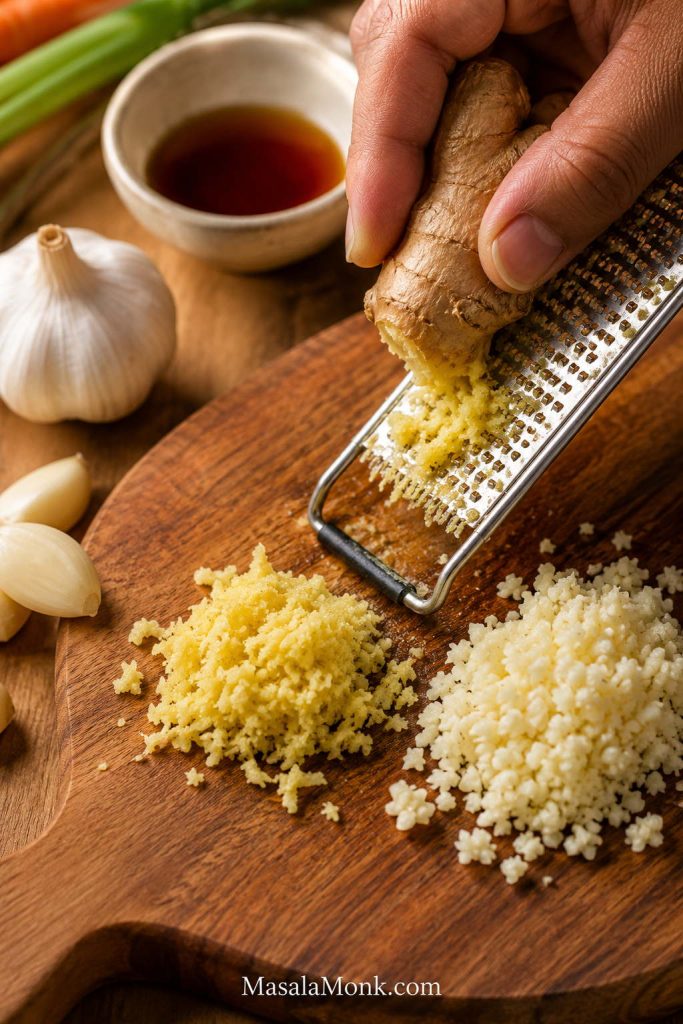
Onion and garlic build the base of the sauce. Slice the onion thick so it softens into the sauce without disappearing too early.
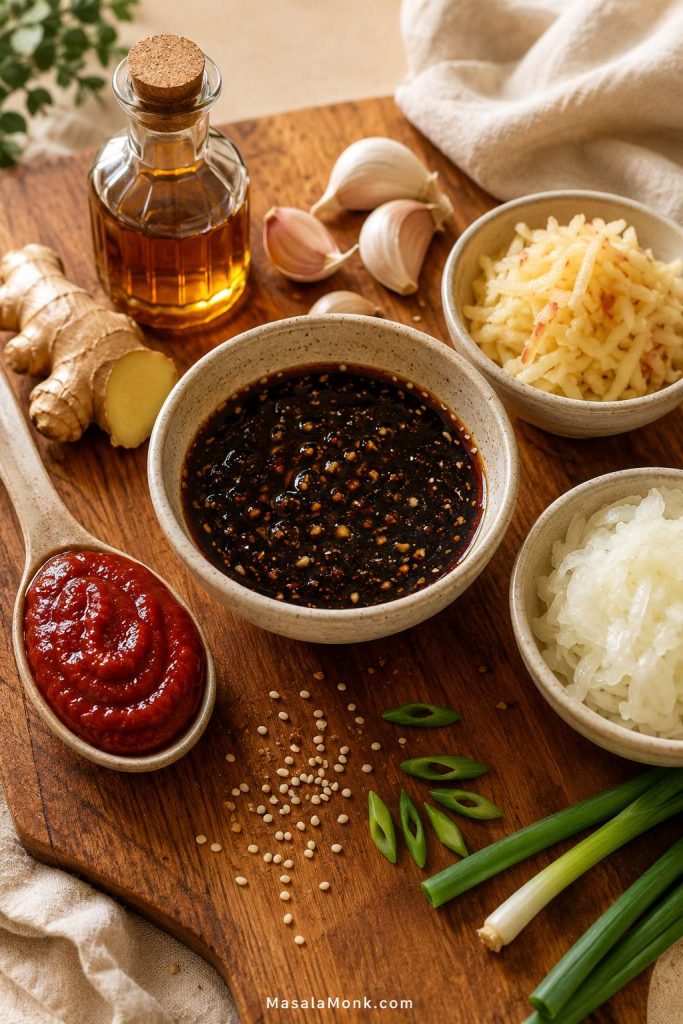
Flavor Builders
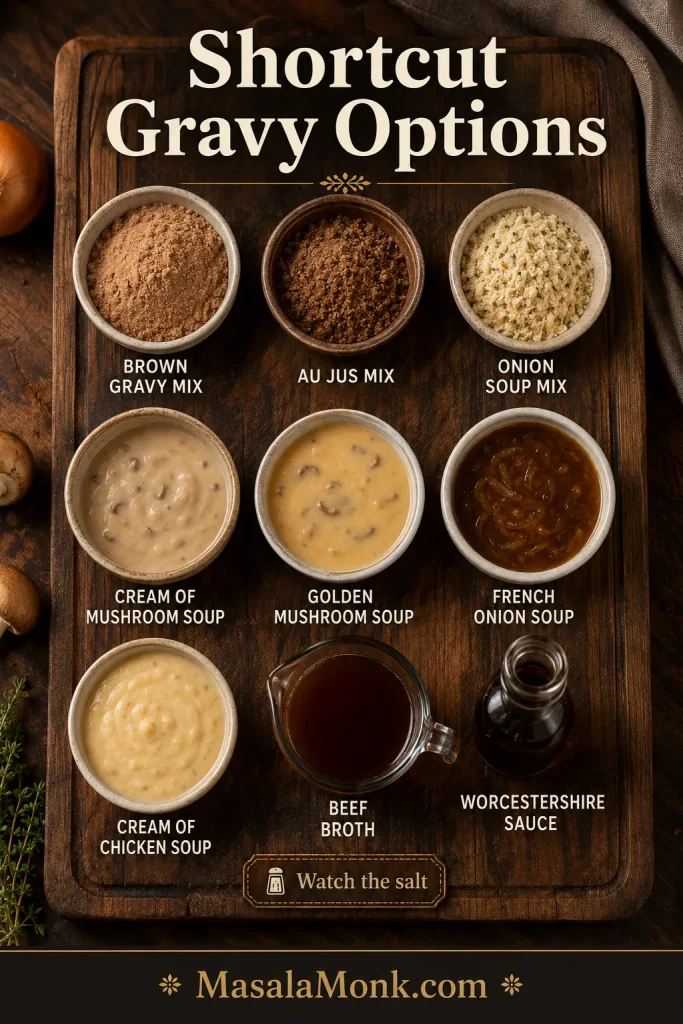
Beef broth gives the cooking juices body and flavor. Low-sodium broth is best if you plan to add bouillon, onion soup mix, ranch seasoning, au jus mix, or brown gravy packets.
Worcestershire sauce adds savory depth, while tomato paste gives the sauce color and richness without making the pot roast taste like tomato sauce. Thyme, rosemary, and bay leaf keep the flavor classic; go easy on dried rosemary because it can take over.
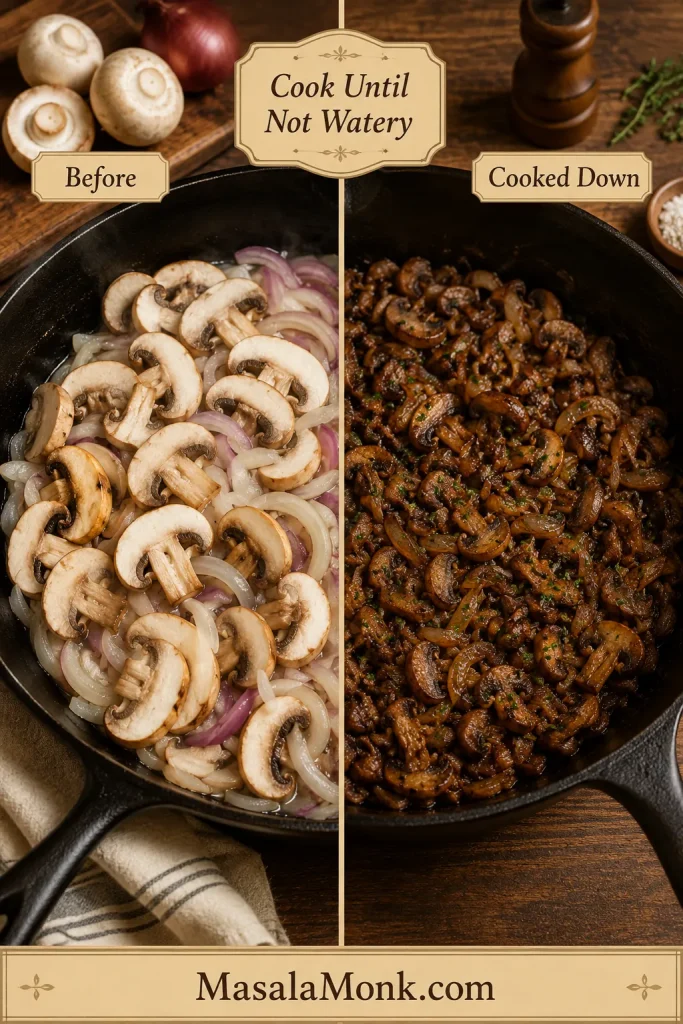
Mushrooms can release a lot of moisture in the slow cooker. Add them halfway through for better shape, or use MasalaMonk’s creamy mushroom sauce as a separate finish for potatoes, rice, or leftover roast.
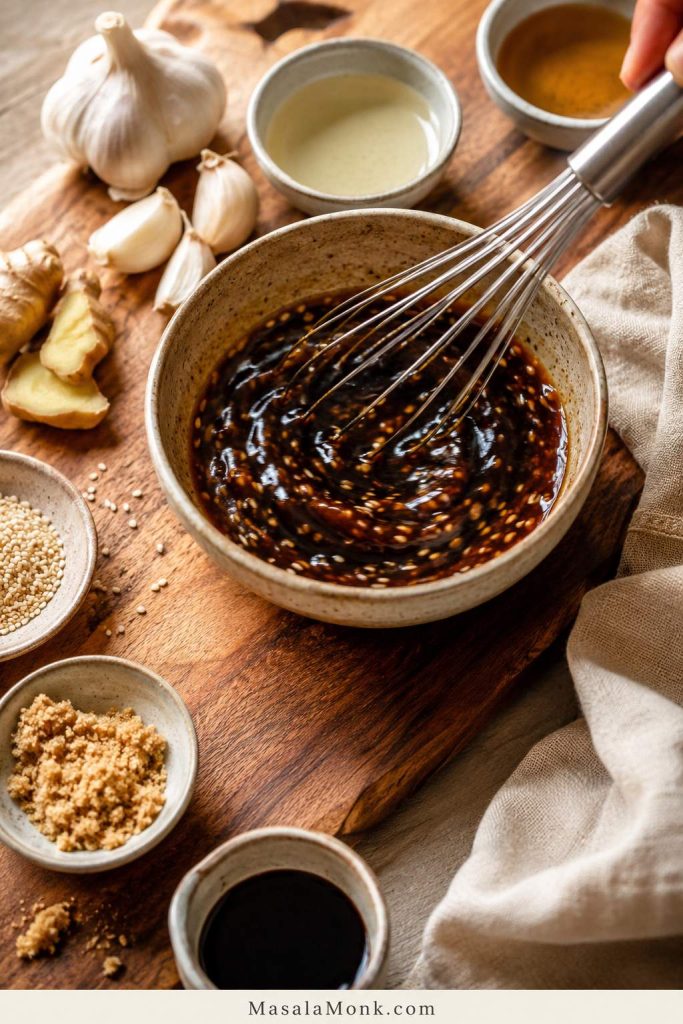
Gravy Ingredients
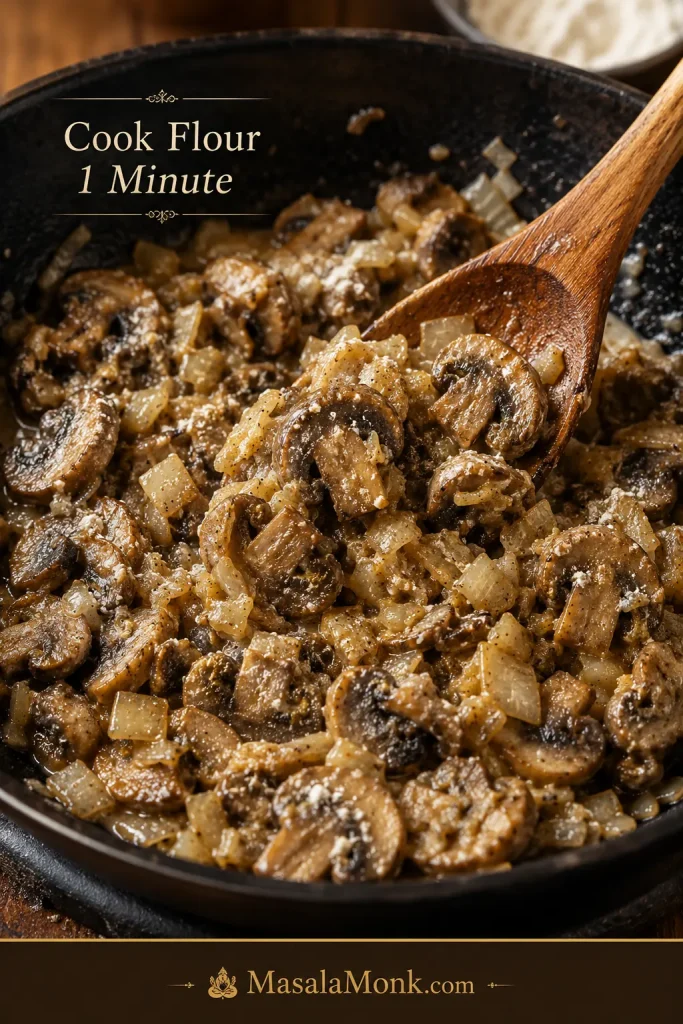
Cornstarch makes a quick glossy gravy. Always mix it with cold water first, then whisk the slurry into hot juices. For a more old-fashioned gravy, use butter and flour instead.
How to Make Slow Cooker Pot Roast Step by Step
Step 1: Season the Roast
Pat the roast dry, then coat it with salt, pepper, garlic powder, onion powder, paprika, thyme, and rosemary. Season every side so each slice or shredded piece tastes finished.
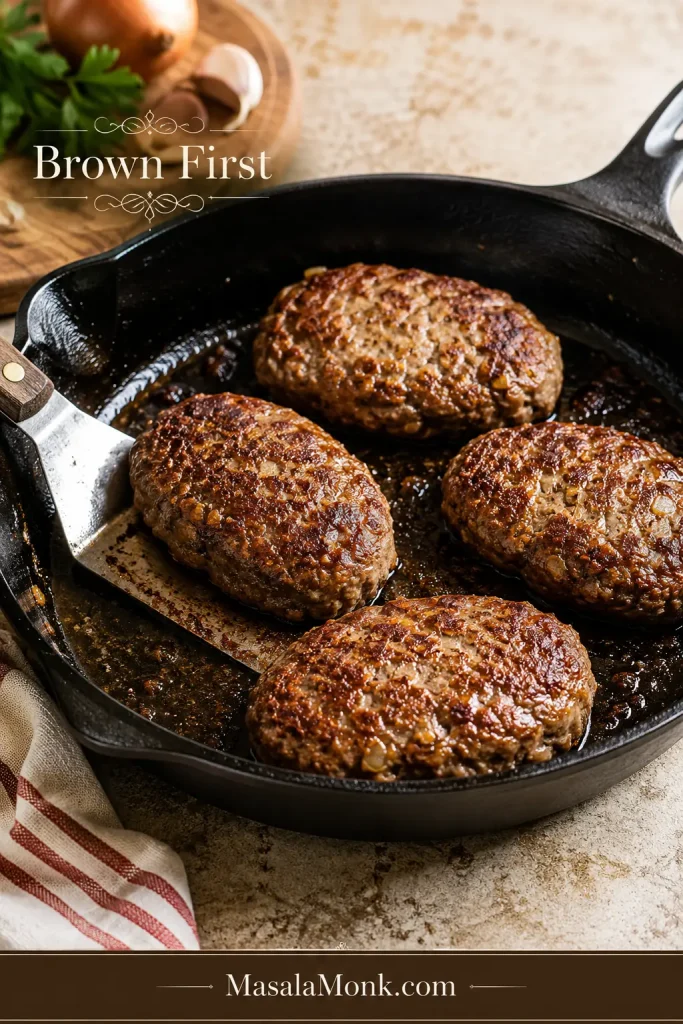
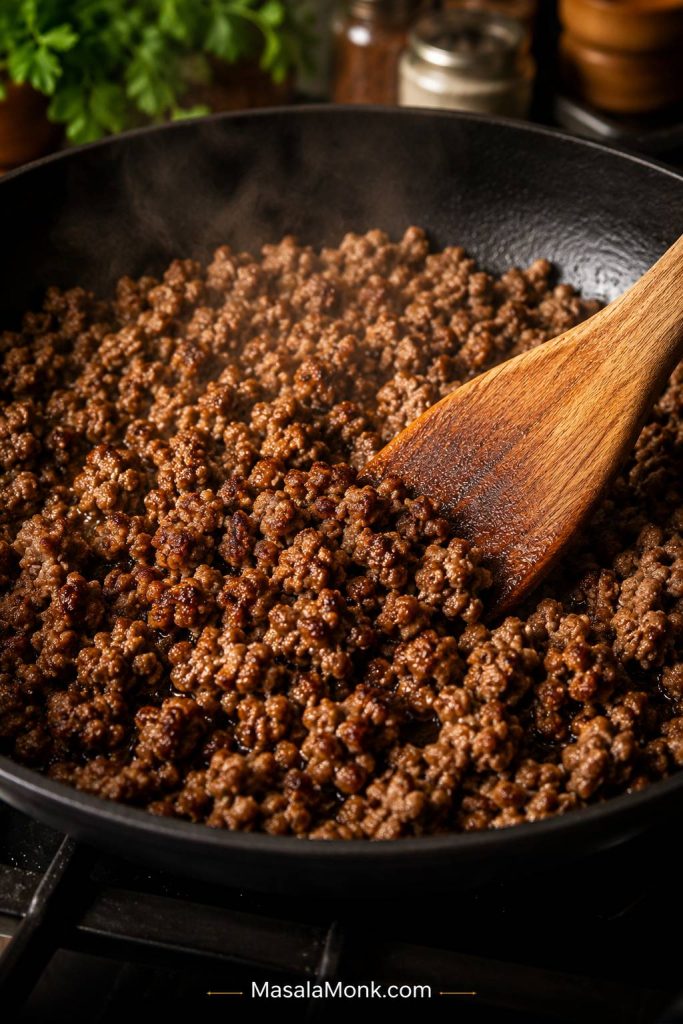
Step 2: Sear for Deeper Flavor
Heat oil in a skillet until hot, then brown the roast for 3 to 4 minutes per side. Let the crust form before turning. A good sear gives the gravy a deeper, roasted flavor.
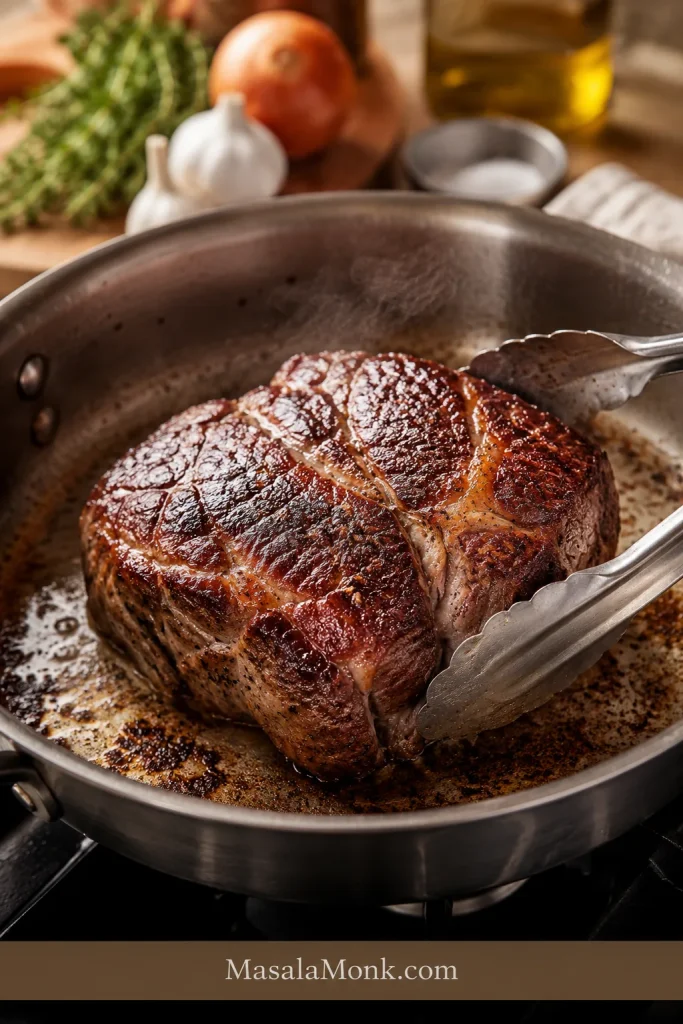
Skipping the sear is still okay. On a busy morning, a well-seasoned no-sear pot roast is better than no pot roast at all.
Step 3: Layer the Vegetables
Add the onion, potatoes, and carrots to the slow cooker. Keep the pieces large. Place the roast on top of or slightly between the vegetables, leaving enough space for the lid to close comfortably.

A roast that does not fit can be cut into 2 or 3 large pieces. Large pieces still cook like pot roast; small stew-sized chunks cook differently.
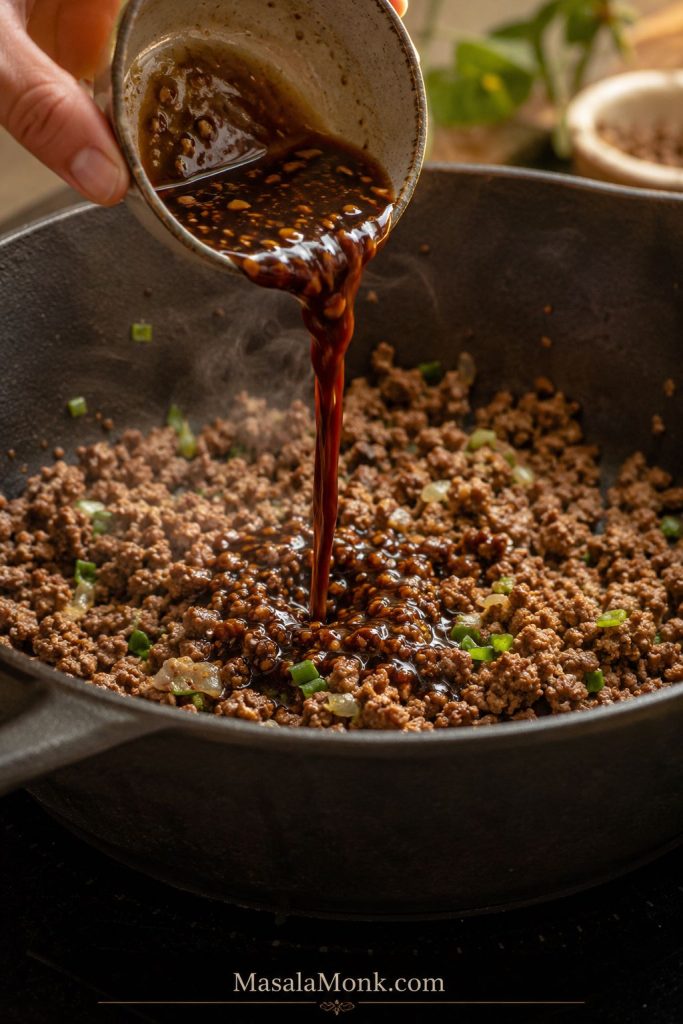
Step 4: Add the Broth Mixture
Stir together beef broth, Worcestershire sauce, tomato paste, garlic, and bay leaves. Pour it around the roast. The beef should sit in some liquid, but the top does not need to be covered.
Some recipes use enough broth to nearly cover the roast. This version uses less liquid on purpose so the juices stay concentrated enough to become sauce. Pot roast should braise gently, not cook like soup.
Step 5: Cook Until the Beef Gives
Cover and cook on LOW for 8 to 10 hours, or on HIGH for 5 to 6 hours. LOW gives chuck roast more time to soften and usually creates the best texture.
The roast is ready when a fork slides in easily and the meat pulls apart with gentle pressure. A tight or springy roast needs more time in the cooker.
Step 6: Rest, Make Gravy, and Serve
Move the roast to a cutting board and the vegetables to a serving dish. Rest the beef for 10 minutes while you make the sauce.
Ladle the cooking juices into a saucepan, skim excess fat if needed, and simmer. Whisk in a cornstarch slurry or make a flour gravy. Once the sauce coats the spoon, the whole dish changes from cooked beef and vegetables into proper pot roast dinner.
Slice across the grain for neat pieces, or pull the beef into large chunks. Spoon the glossy sauce over everything before serving.
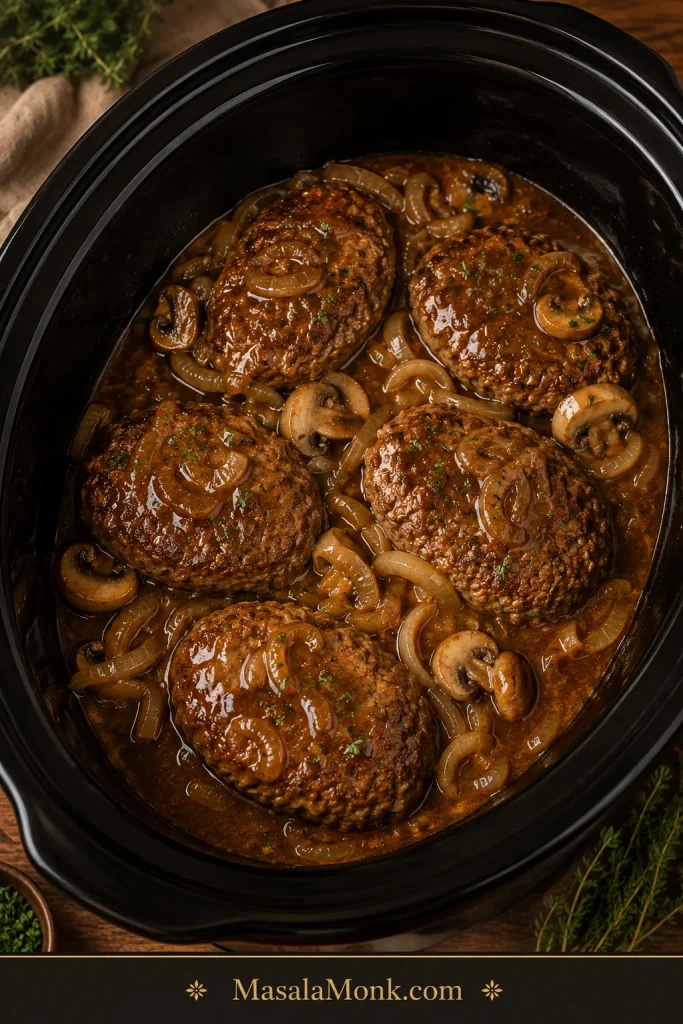
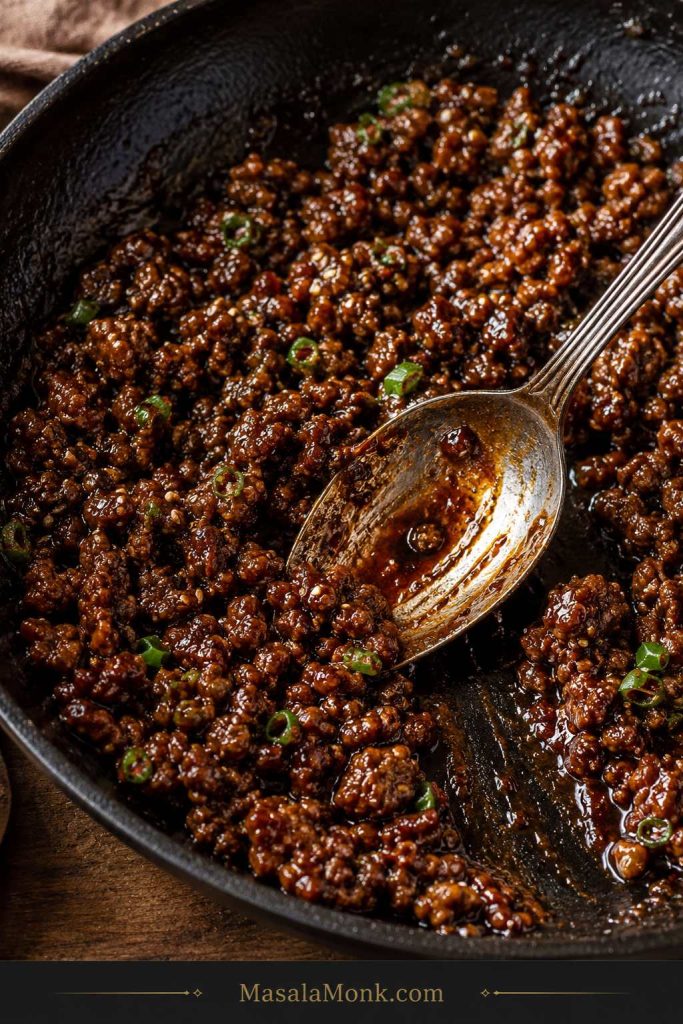
What the Finished Slow Cooker Should Look Like
Before serving, the beef should look relaxed and tender, the vegetables should still be recognizable, and the cooking juices should be ready to finish into sauce.
Slow Cooker Pot Roast Cook Time Chart
Cook time depends on the size, thickness, cut, slow cooker, and how full the cooker is. Use this chart as a guide, then let tenderness decide.
| Roast Size | LOW Setting | HIGH Setting | Best Result |
|---|---|---|---|
| 2 lb / 900 g | 6 to 7 hours | 3½ to 4½ hours | Tender, usually sliceable |
| 3 lb / 1.4 kg | 8 to 9 hours | 4½ to 5½ hours | Best standard family size |
| 4 lb / 1.8 kg | 9 to 10 hours | 5 to 6 hours | Classic fall-apart pot roast |
| 5 lb / 2.25 kg | 10 to 11 hours | 6 to 7+ hours | Large roast, needs patience |
A thick 3 lb roast can take longer than a flatter 4 lb roast. Older slow cookers, very full cookers, and leaner cuts can also change the timing. The clock gets dinner close; the fork tells you when the beef is really ready.
Is It Better to Cook Pot Roast on LOW or HIGH?
LOW is better for slow cooker pot roast because chuck roast has more time to soften. LOW is the comfort setting. HIGH is the schedule setting.
HIGH works when dinner needs to happen faster, but it is less forgiving. The roast may still need extra time if it feels tight at the end.
| Setting | Time for 3 to 4 lb Chuck Roast | Result |
|---|---|---|
| LOW | 8 to 10 hours | Best tenderness and texture |
| HIGH | 5 to 6 hours | Faster, still good when cooked until tender |
How Much Liquid to Use for Slow Cooker Pot Roast
Use less liquid than you might think. A slow cooker traps steam, and the beef and vegetables release moisture as they cook. The visual cue from Step 4 still applies here: the roast should be partly surrounded by liquid, not submerged. Starting with too much broth can leave you with thin flavor and extra reducing at the end.
| Goal | Liquid Amount |
|---|---|
| Rich, concentrated pot roast | 1 to 1½ cups / 240 to 360 ml |
| Balanced pot roast with gravy | 1½ cups / 360 ml |
| Extra gravy | 2 cups / 480 ml |
| Very large 5 lb roast | 2 to 2½ cups / 480 to 600 ml |
Keep the roast partly surrounded by liquid, not submerged. Extra broth is fine when you love a spoonable sauce, but plan to simmer and thicken the juices before serving.
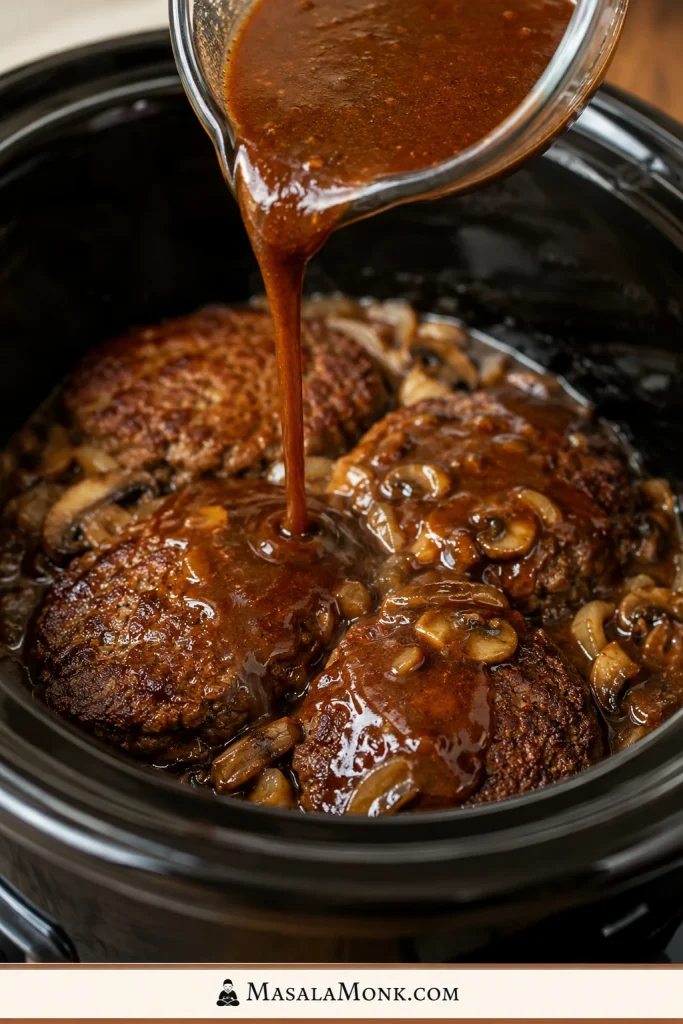
How to Turn the Slow Cooker Juices into Gravy
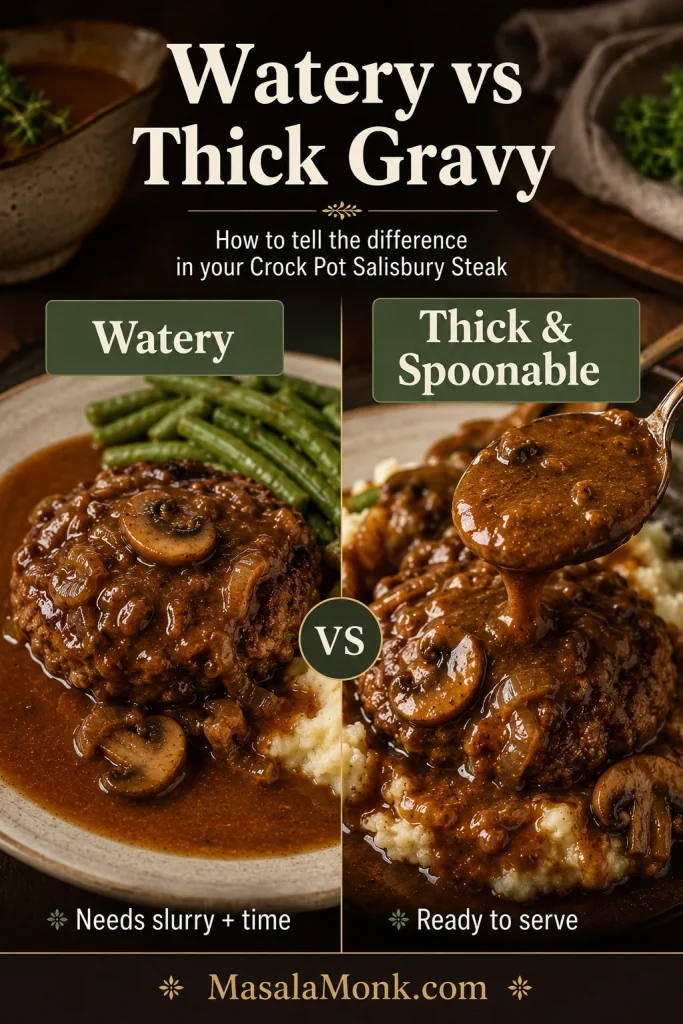
The juices in the slow cooker are one of the best parts of pot roast, but they need finishing. Straight from the cooker, they may be thin. After simmering and thickening, they become the rich sauce that pulls the plate together.
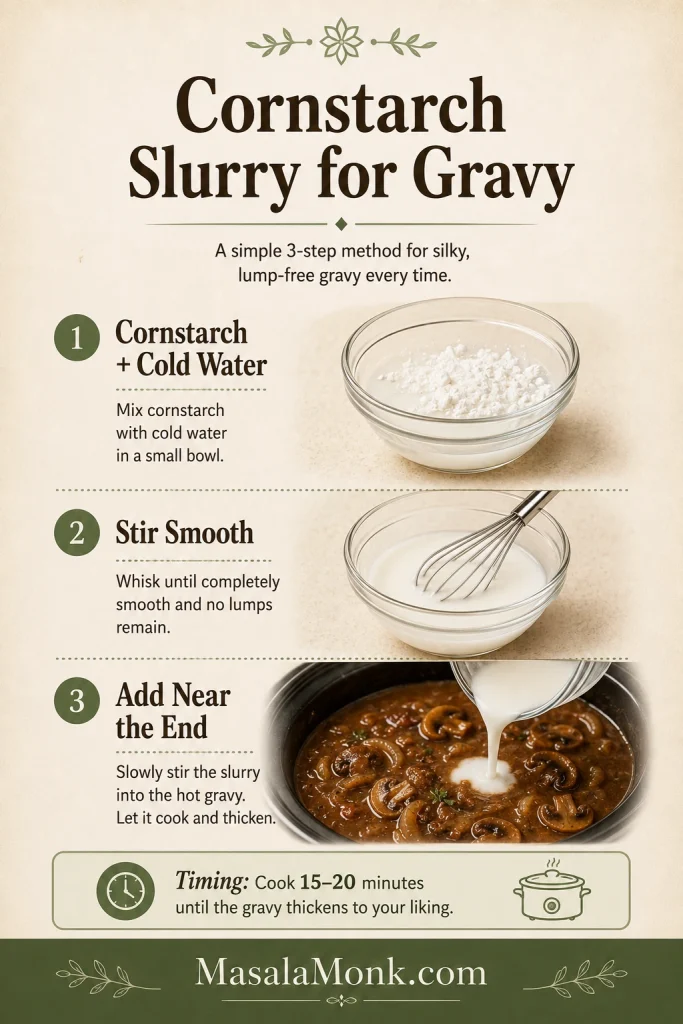
Cornstarch Slurry Gravy
Choose this for a fast, glossy gravy.
| Ingredient | Amount |
|---|---|
| Hot cooking juices | 1½ to 2 cups / 360 to 480 ml |
| Cornstarch | 2 tbsp / about 16 g |
| Cold water | 3 tbsp / 45 ml |
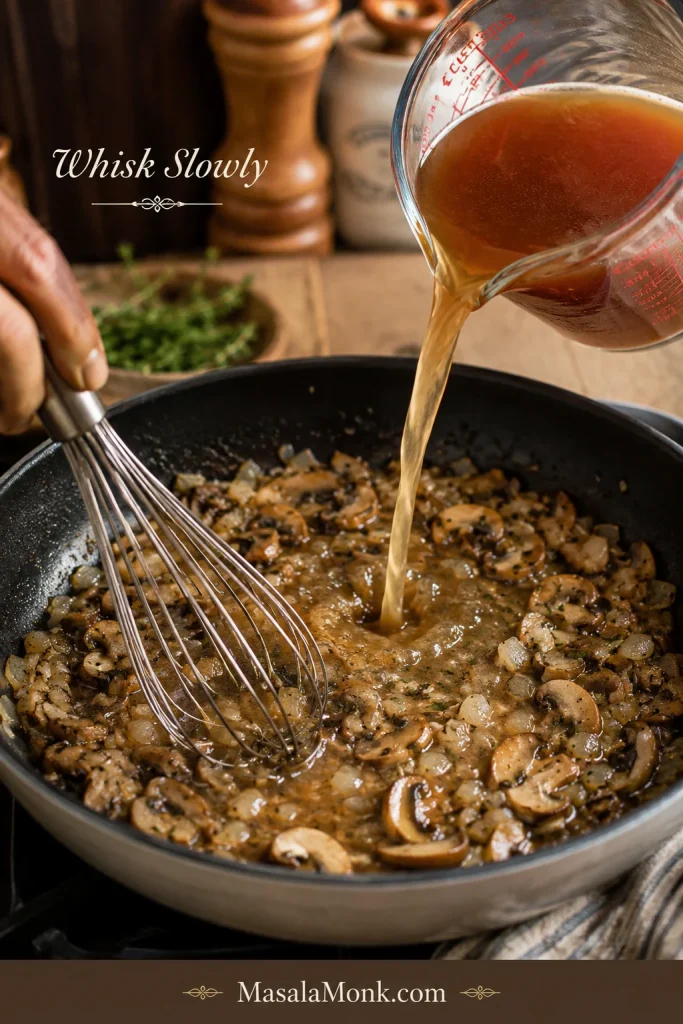
Whisk the cornstarch and cold water in a small bowl until smooth. Bring the cooking juices to a simmer in a saucepan. Whisk in the slurry and cook for 2 to 3 minutes, until the sauce thickens and turns glossy.
Flour Gravy
Choose this for a more old-fashioned gravy.
| Ingredient | Amount |
|---|---|
| Butter | 2 tbsp / about 28 g |
| Flour | 2 tbsp / about 16 g |
| Hot cooking juices | 1½ to 2 cups / 360 to 480 ml |
Melt the butter in a saucepan. Whisk in the flour and cook for 1 to 2 minutes. Slowly whisk in the hot juices, then simmer until thickened.
Gravy Fixes
| Problem | Fix |
|---|---|
| Gravy is watery | Simmer the juices to reduce, then thicken with slurry |
| Gravy is greasy | Skim fat before thickening |
| Gravy is bland | Add salt after reducing, plus pepper, Worcestershire sauce, or a pinch of bouillon |
| Gravy is too salty | Add unsalted broth or potato water; avoid reducing further |
| Gravy tastes flat | Add a small splash of Worcestershire sauce or a pinch of thyme |
| Gravy is too thick | Whisk in warm broth, a little at a time |
Taste the gravy after it has reduced and thickened. The flavor is easier to judge once the sauce has body, and that glossy finish is what makes the beef, potatoes, and carrots feel like one complete dinner.
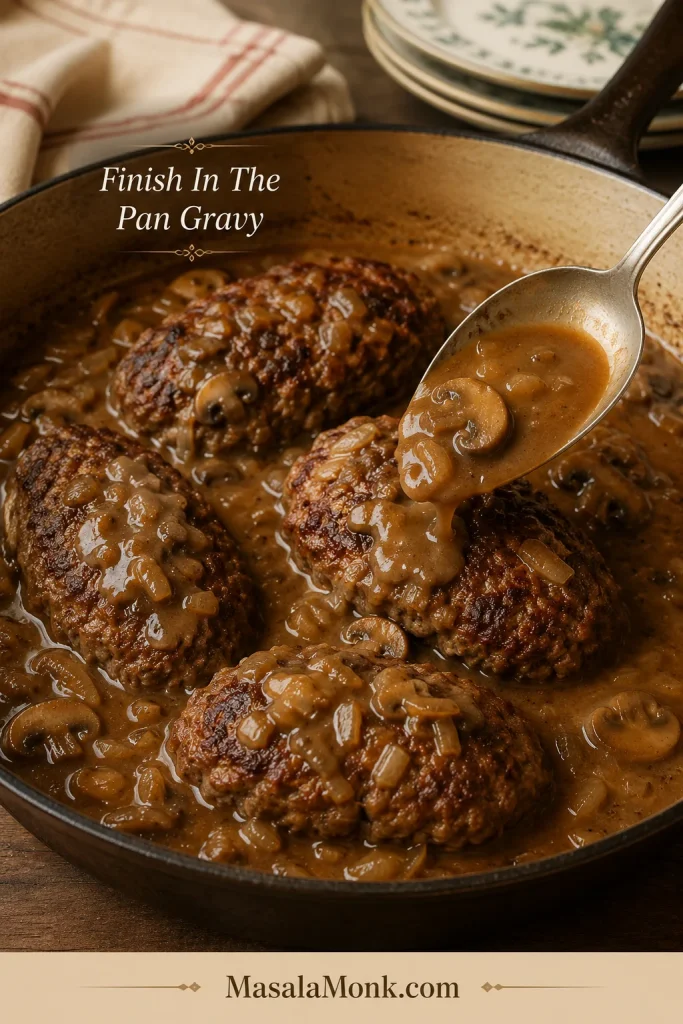
How the Finished Gravy Should Look
Once the gravy coats the beef and vegetables instead of running past them, the pot roast tastes richer and the whole plate feels finished.
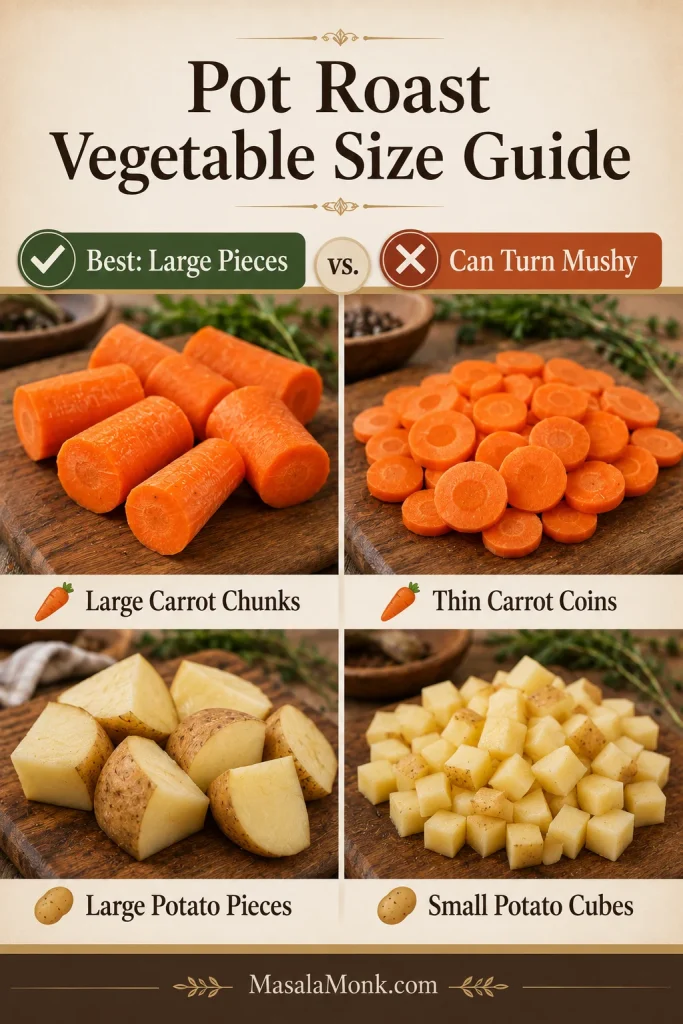
When to Add Potatoes and Carrots
Most people expect slow cooker pot roast to come with soft carrots and potatoes. Add them at the beginning for that classic comfort-food texture, or add them later when you want more bite.
| Desired Texture | When to Add Potatoes and Carrots |
|---|---|
| Soft, classic pot roast vegetables | Add at the beginning |
| Medium-soft vegetables | Add after 2 hours |
| Firmer potatoes and carrots | Add halfway through |
| Very soft carrots | Use baby carrots from the beginning |
| Less mushy potatoes | Use baby potatoes, Yukon gold, or red potatoes in large pieces |
Large pieces hold up better during a long LOW cook. Thin carrot coins and small potato cubes soften quickly.
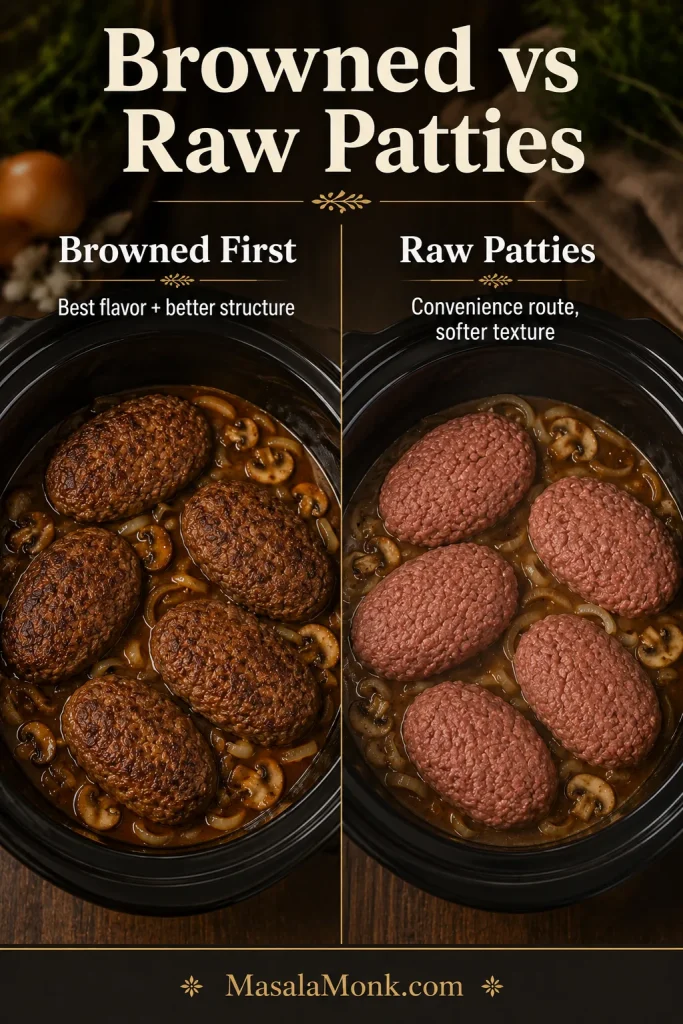
No-Sear Slow Cooker Pot Roast
You can make slow cooker pot roast without searing it first. The roast will still become tender; the flavor will be lighter and less roasted.
| Method | Result |
|---|---|
| Sear first | Deeper flavor, darker gravy, richer finish |
| No sear | Easier, still tender, lighter flavor |
Sear vs No-Sear Comparison
This comparison shows why searing gives a darker finish, while the no-sear version still works when convenience matters most.
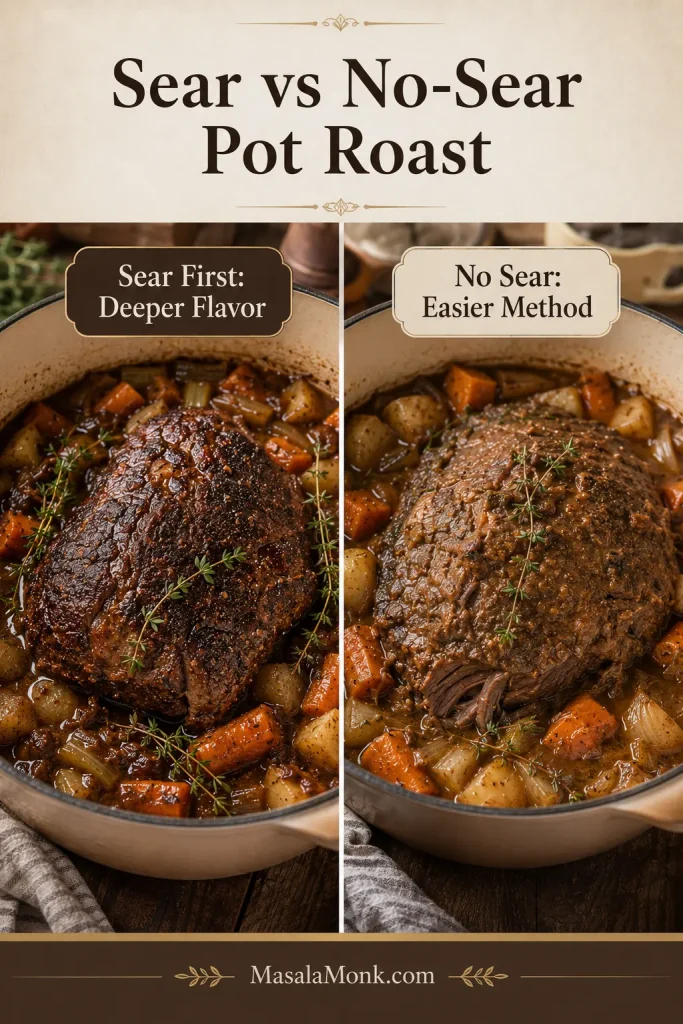
For a no-sear pot roast, season the beef well and lean on Worcestershire sauce, tomato paste, onion, garlic, and good broth for flavor. A busy morning version can still become a generous dinner by evening.
Homemade Pot Roast Seasoning
This blend gives you familiar packet-style comfort without making the gravy too salty.
| Seasoning | Amount |
|---|---|
| Fine salt | 1½ tsp |
| Black pepper | 1 tsp |
| Garlic powder | 1 tsp |
| Onion powder | 1 tsp |
| Paprika | 1 tsp |
| Dried thyme | 1 tsp |
| Dried rosemary | ½ tsp |
| Dried parsley, optional | ½ tsp |
| Bouillon powder, optional | ½ tsp |
Use this blend for a 3 to 4 lb roast. Use less salt when cooking with salted broth, onion soup mix, ranch seasoning, au jus mix, bouillon, or gravy packets.
For stronger flavor, season the roast up to 24 hours ahead and refrigerate it covered. Even 30 minutes helps. This blend also works for slow cooker beef stew, beef shoulder roast, and other slow-cooked beef dinners.
Shortcut Variations
There is nothing wrong with a packet-style pot roast if that is the flavor your family loves. Think of these as quick variations; the same rules still apply — use the right cut, control the salt, and finish the juices like gravy.
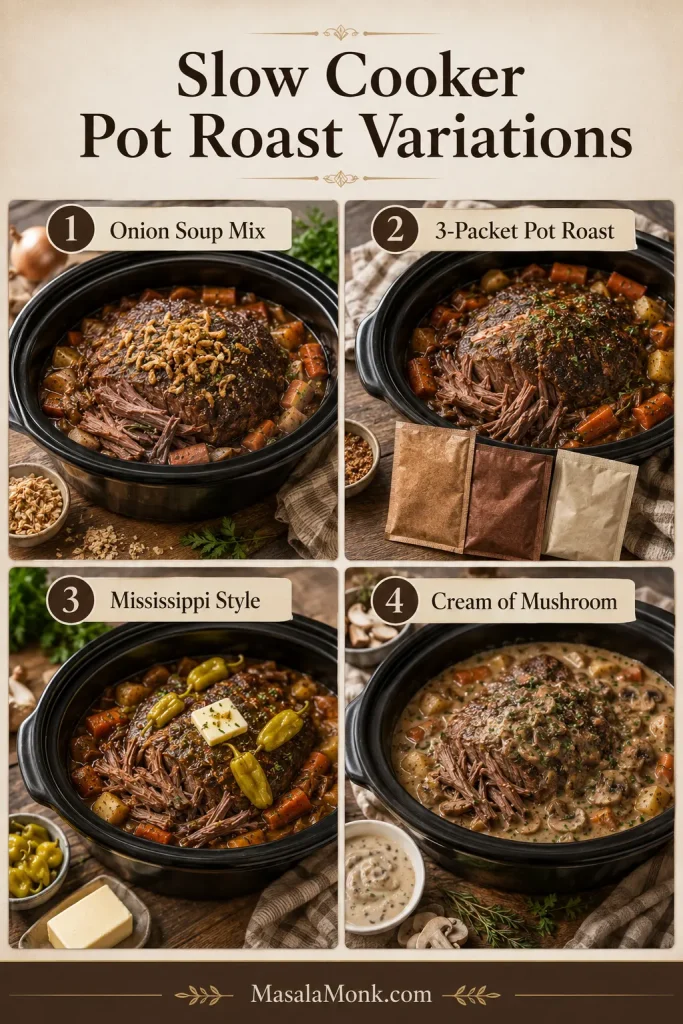
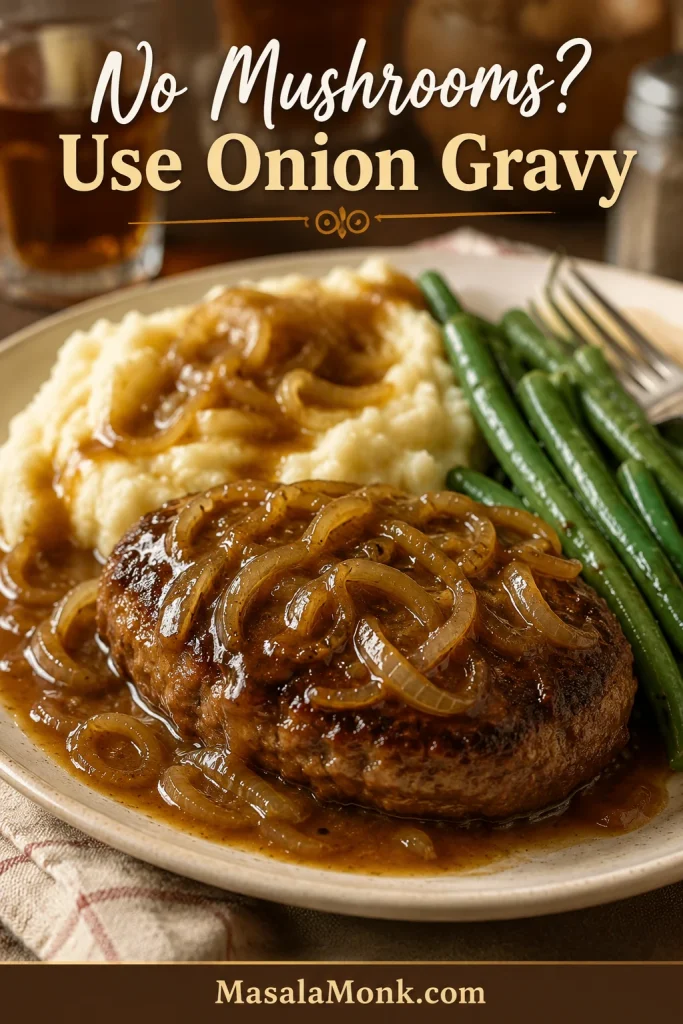
Onion Soup Mix Pot Roast
Use 1 packet onion soup mix with a 3 to 4 lb chuck roast, 1 to 1½ cups beef broth or water, potatoes, carrots, onions, and optional Worcestershire sauce. Treat the packet as seasoning, not as the whole gravy plan.
For another dinner built around onion soup mix and a proper gravy finish, MasalaMonk’s slow cooker French onion chicken is a good companion recipe.
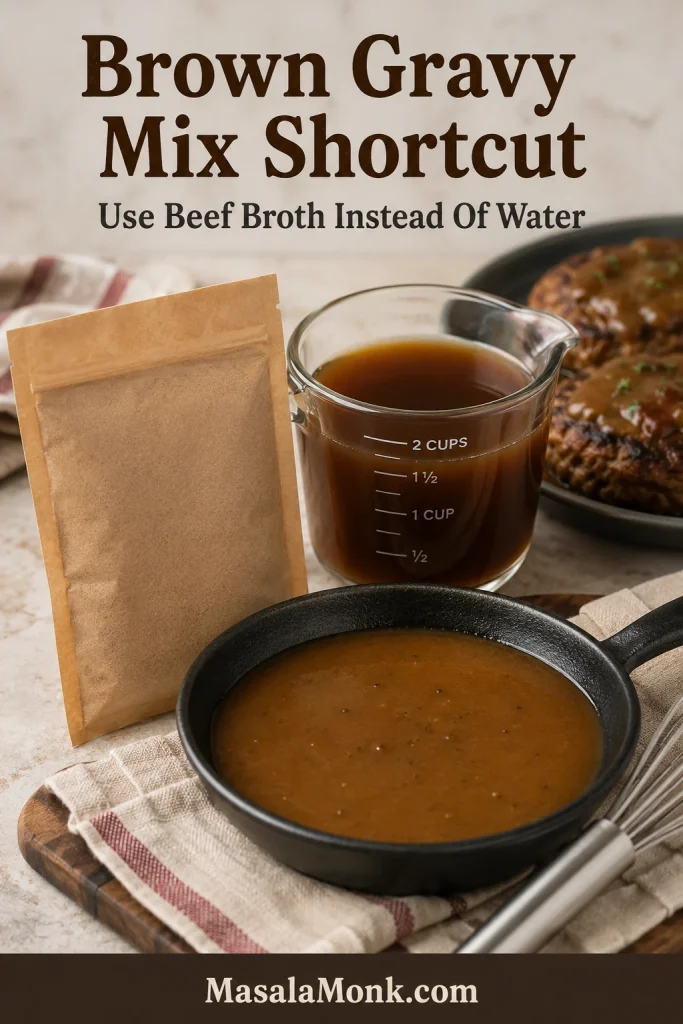
3 Packet Pot Roast
A common 3-packet pot roast uses ranch seasoning mix, Italian dressing mix, and brown gravy mix. It is very flavorful, but salt can build fast, so use low-sodium broth and season carefully.
Mississippi Pot Roast Style
Mississippi pot roast usually uses ranch seasoning, au jus mix, pepperoncini, butter, and chuck roast. It is tangy, rich, and usually served shredded over mashed potatoes, rice, noodles, or sandwich rolls.
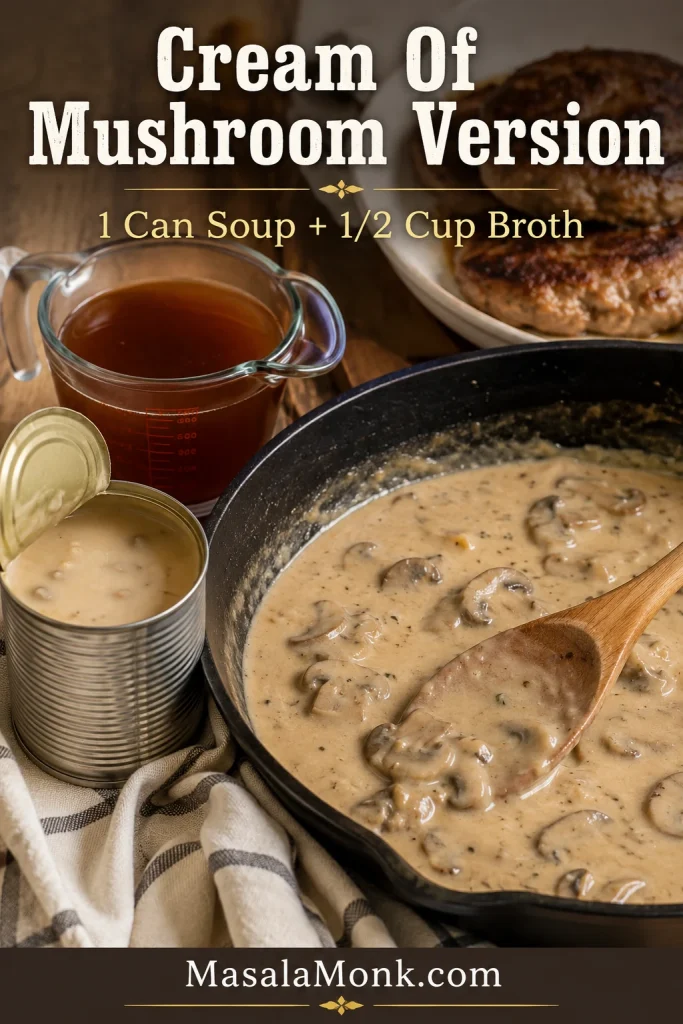
Cream of Mushroom Pot Roast
For an old-fashioned creamy version, add cream of mushroom soup and reduce the broth. Canned soup adds both liquid and body, so the recipe needs less extra broth.
Red Wine Pot Roast
Replace ½ cup / 120 ml of the broth with dry red wine. Keep the total liquid controlled so the sauce does not become thin.
Keto or Low-Carb Pot Roast
Skip the potatoes and use celery, mushrooms, turnips, radishes, or cauliflower mash. The beef and gravy are still the center of the meal.
Fixes for Tough, Watery, Bland, or Mushy Pot Roast
Most pot roast problems come down to cut, time, liquid, salt, or how the gravy was finished. Start with the simple fix before changing the whole recipe.
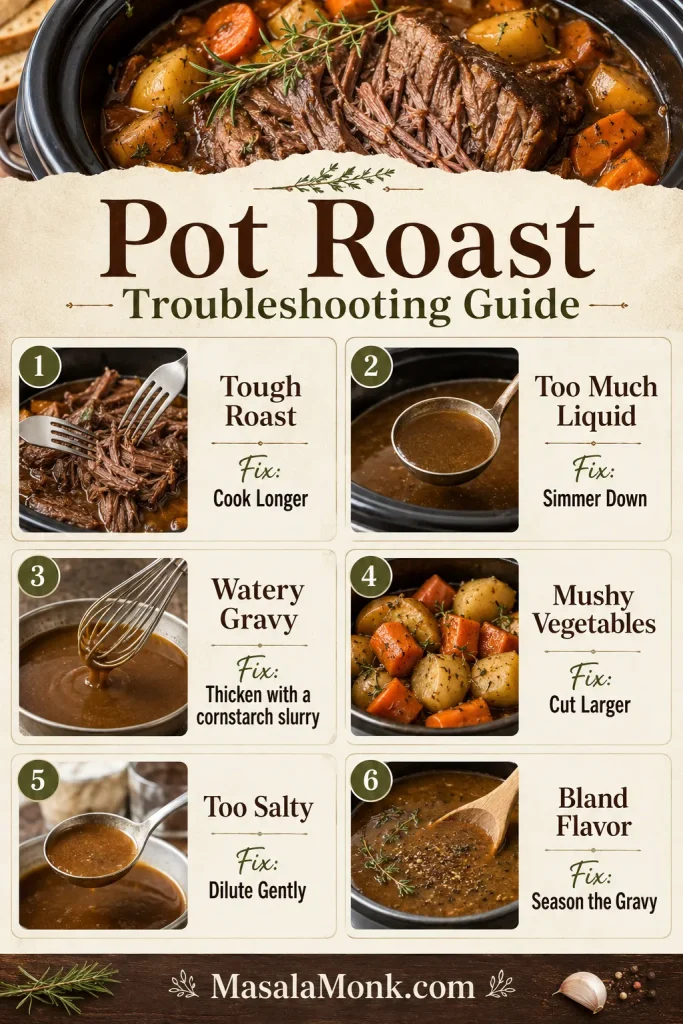
| Problem | Most Likely Cause | Best Fix |
|---|---|---|
| Roast is tough | Needs more time or is too lean | Keep cooking if it is chuck; slice thinly if it is lean |
| Roast is dry | Lean cut, overholding, or not enough sauce | Slice thinly and serve with plenty of sauce |
| Too much liquid | Beef and vegetables released moisture | Simmer the juices down before thickening |
| Gravy is weak | Too much broth or not reduced | Reduce, thicken, then season |
| Vegetables are mushy | Pieces were small or cooked too long | Use larger pieces or add them later next time |
| Pot roast is bland | Not enough seasoning or browning | Season the finished sauce and add Worcestershire sauce if needed |
| Too salty | Packets, bouillon, salted broth, or reduced gravy | Add unsalted broth or potato water; avoid further reducing |
Most pot roast problems feel bigger in the moment than they really are. Once the beef is tender and the sauce has body, dinner usually comes back together.
Why Is My Slow Cooker Pot Roast Tough?
A chuck roast that feels tight, chewy, or hard to pull apart usually needs more time. The connective tissue has not softened yet. Keep the lid on, cook longer, and check again near the end.
A leaner cut like rump roast or bottom round may never shred like chuck. Slice it thinly across the grain and serve it with sauce.
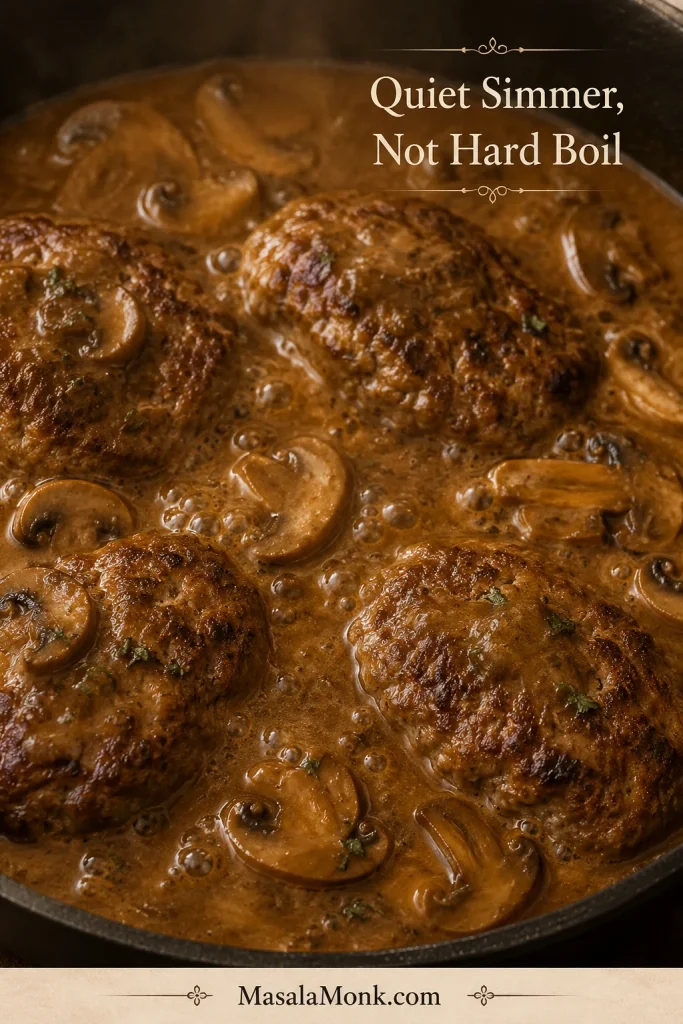
What If Dinner Is Close and the Roast Is Still Tough?
Move the vegetables out if they are ready, then let the beef keep cooking in the juices. For a stovetop rescue, transfer the beef and liquid to a covered pot and keep it at a gentle simmer. A hard boil can tighten the outside before the inside softens.
Why Is My Roast Chewy Even Though It Reached a Safe Temperature?
Safe temperature and tender pot roast are not the same thing. Beef roast can reach a safe temperature before chuck roast has cooked long enough to become soft and pull-apart tender.
Why Is There So Much Liquid in My Slow Cooker?
The roast and vegetables release moisture as they cook. Remove the meat and vegetables, simmer the juices in a saucepan, then thicken them into gravy. Next time, start with less broth unless extra sauce is the goal.
Why Are My Potatoes and Carrots Mushy?
They cooked too long or were cut too small. Large pieces of carrot and sturdy potatoes like baby potatoes, Yukon gold, or red potatoes hold up better. For firmer vegetables, add them after the first 2 to 3 hours.
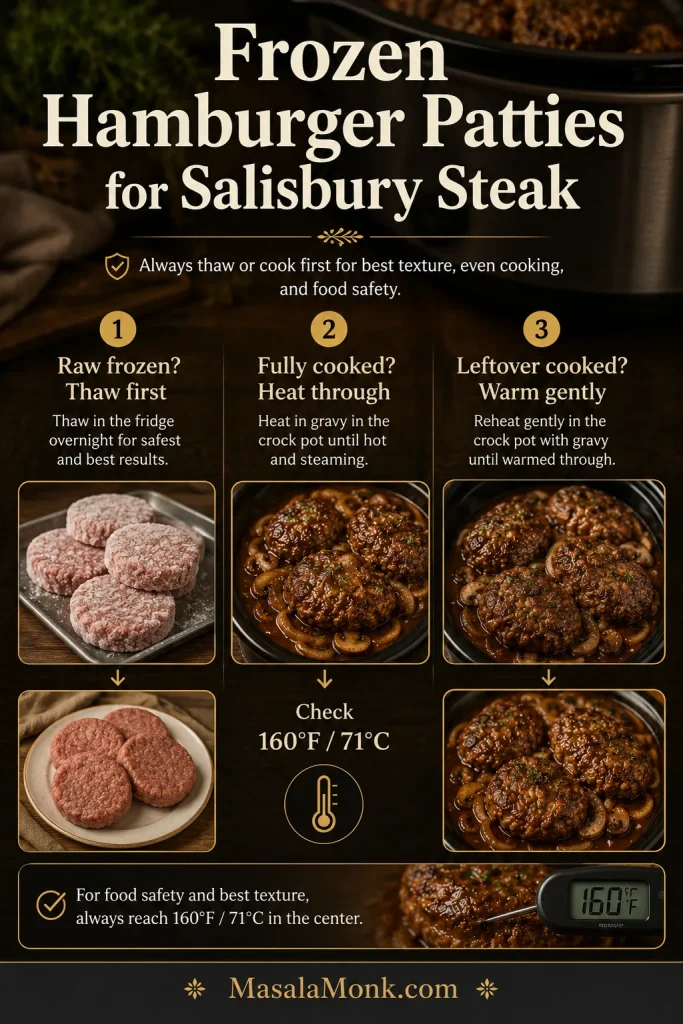
Can I Cook a Frozen Roast in the Slow Cooker?
It is better to thaw the roast first. USDA guidance says to thaw meat or poultry before putting it into a slow cooker, because frozen meat can take too long to heat safely and may cook unevenly. You can read more in the USDA’s slow cooker food safety guidance.
How to Store and Reheat Without Drying It Out
Pot roast keeps best when the beef is stored with sauce. That moisture protects the meat from drying out and makes reheating easier.
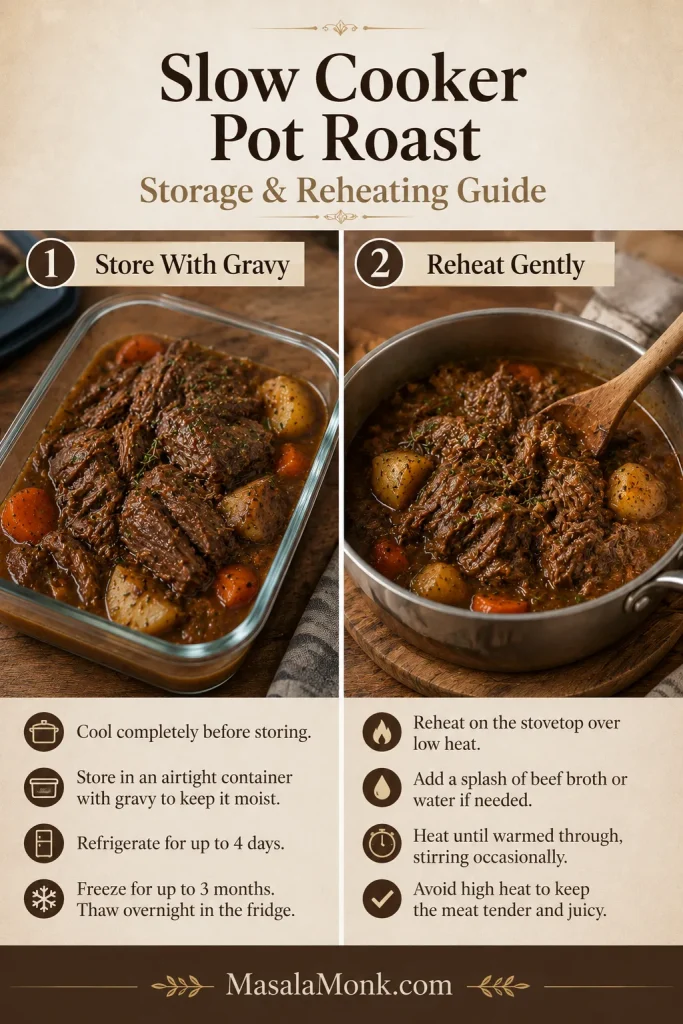
| Storage Method | Best Practice |
|---|---|
| Refrigerator | Store beef, vegetables, and gravy in airtight containers for 3 to 4 days |
| Freezer | Freeze beef with gravy for 2 to 3 months |
| Best freezer method | Freeze sliced or shredded beef with gravy, not dry |
| Reheating | Reheat gently with gravy on the stovetop or in the microwave |
| Potatoes after freezing | Potatoes may soften after thawing |
For the best freezer result, freeze the beef with its sauce and make fresh potatoes later.
Can You Make Pot Roast Ahead?
Yes. Pot roast is one of those dinners that often tastes even better the next day, especially when the beef is stored with sauce. Cook it fully, cool it, and refrigerate the beef with the cooking juices. The next day, skim any hardened fat from the top and reheat gently until hot.
The beef and sauce usually hold up better than the potatoes after chilling, so fresh potatoes or a fresh side can make leftovers feel new again.
Can You Hold Pot Roast on Warm?
You can hold pot roast on WARM for 1 to 2 hours after it is tender, as long as the food stays hot and the beef remains moist. Use LOW or HIGH until the roast is actually tender; WARM is for holding, not finishing.
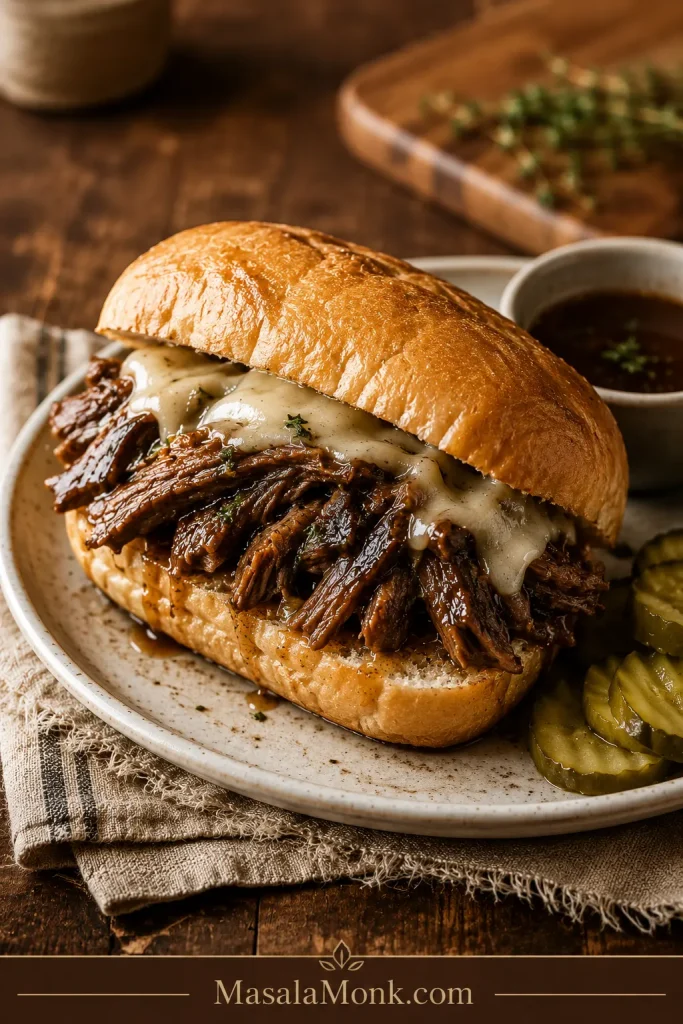
Leftover Pot Roast Ideas
Leftover pot roast is one of the best reasons to make a large roast. Keep the beef with sauce, then turn it into easy meals for the next day.
- Pot roast sandwiches with melted cheese
- Pot roast grilled cheese
- Beef over mashed potatoes
- Pot roast tacos
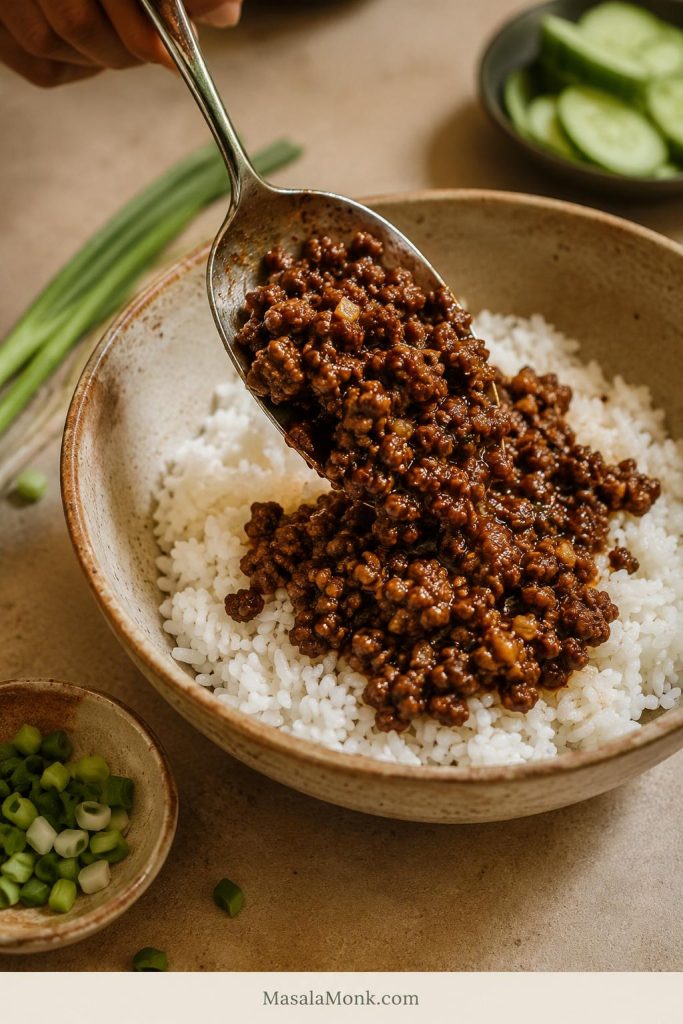
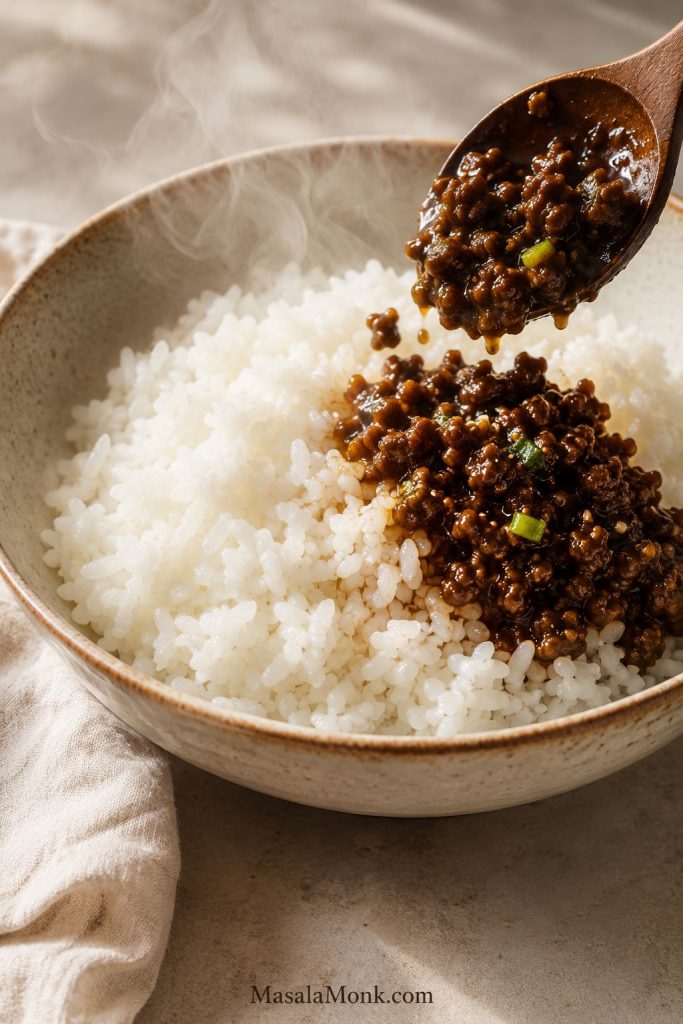
- Rice bowls with sauce and vegetables
- Pot roast soup
- Pot roast stroganoff
- Loaded baked potatoes
- Breakfast hash with eggs
- Sliders with horseradish sauce
- Egg noodles with beef and sauce
If you are turning leftovers into rice bowls, MasalaMonk’s how to cook rice guide helps keep the grains fluffy enough to catch the sauce without turning gummy.
If leftover sandwiches, sliders, bowls, and loaded potatoes are what you like most, MasalaMonk’s slow cooker pulled pork follows that same make-once, eat-many-ways comfort-food logic.
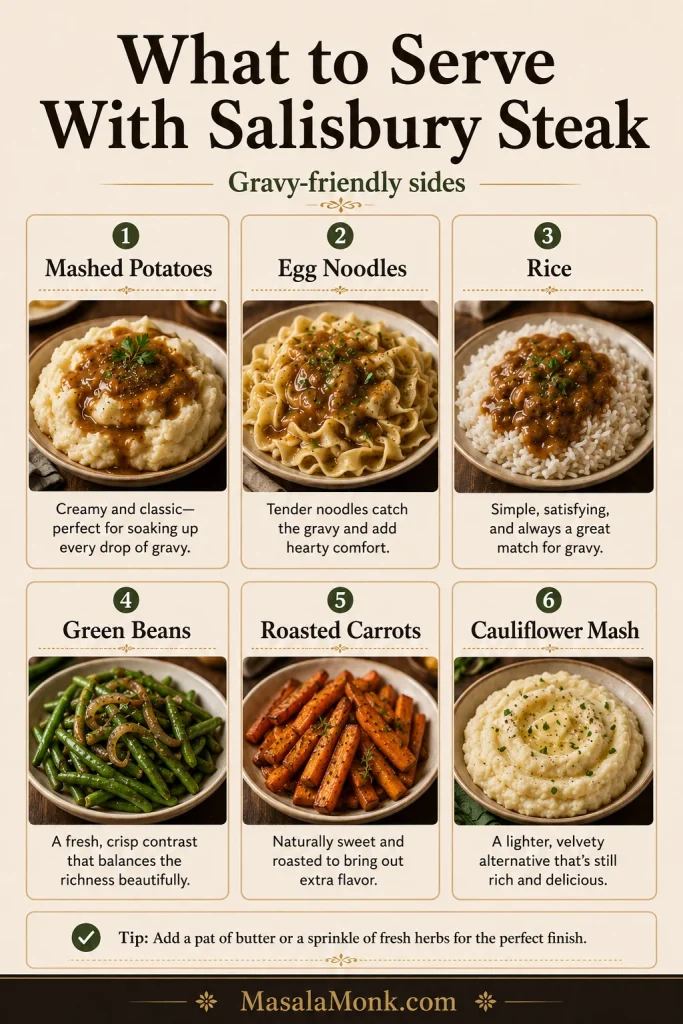
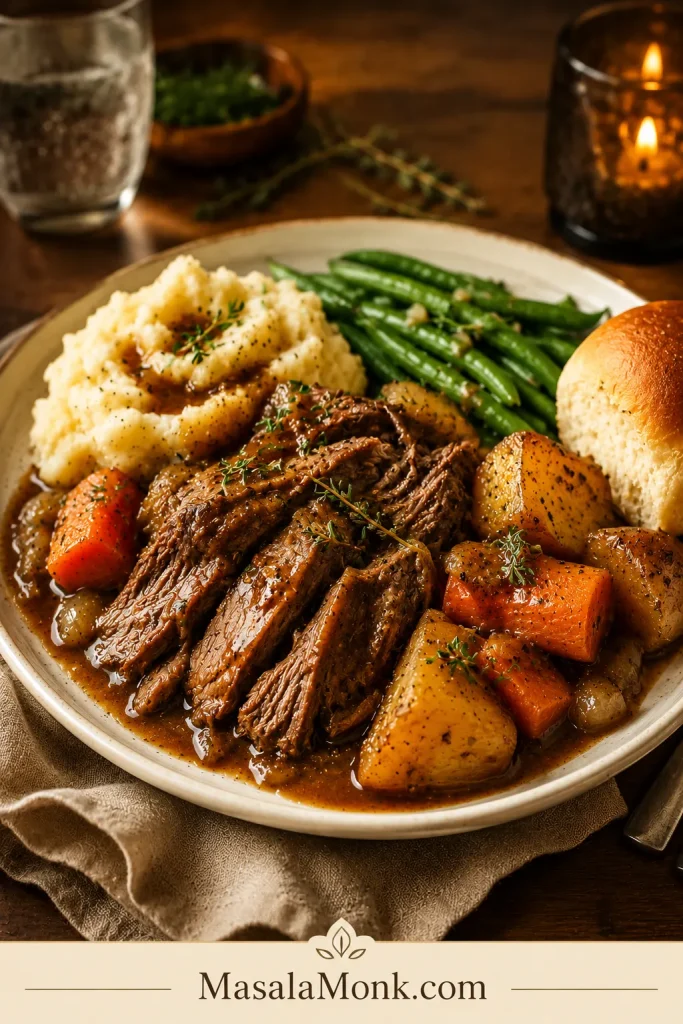
What to Serve With Pot Roast and Gravy
This recipe already includes potatoes and carrots, so it can be a full meal on its own. To stretch it or make the plate feel more complete, serve it with something that catches the sauce or balances the richness.
By the time it reaches the table, the meal should feel complete without needing anything fancy: tender beef, sweet carrots, soft potatoes, and enough sauce to pull it all together.
- Mashed potatoes
- Dinner rolls
- Egg noodles
- Rice
- Green beans
- Buttered peas
- Roasted broccoli
- Simple green salad
- Creamed spinach
- Biscuits
If you skip the potatoes in the slow cooker, serve the beef and gravy over MasalaMonk’s mashed potatoes recipe for the most classic plate.
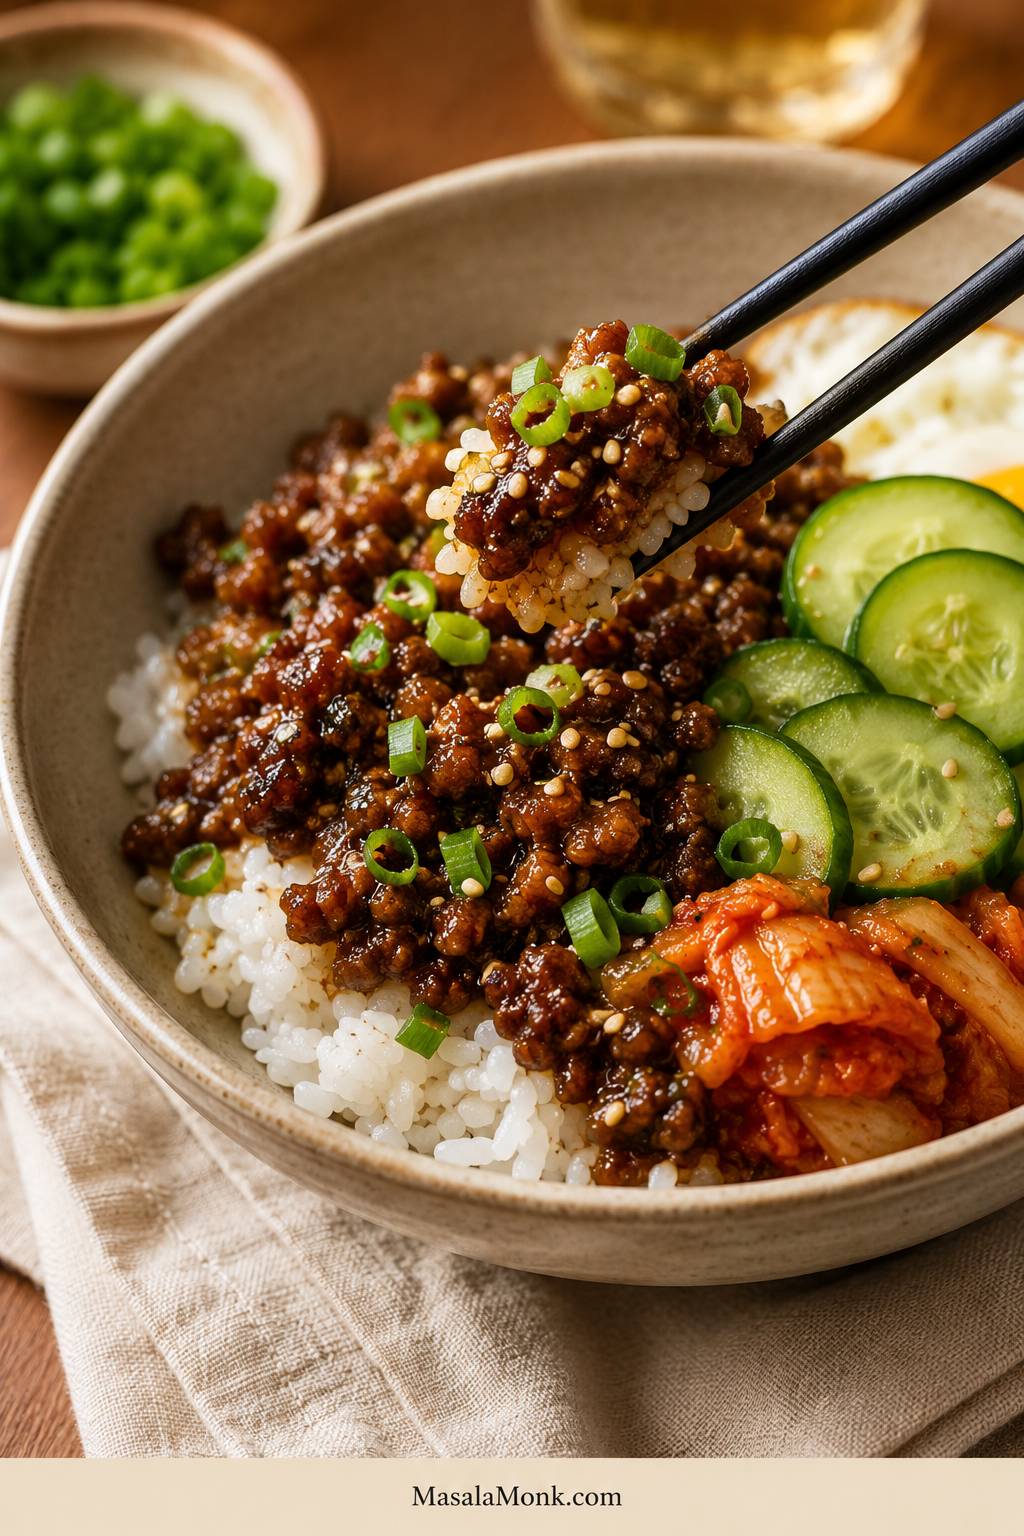
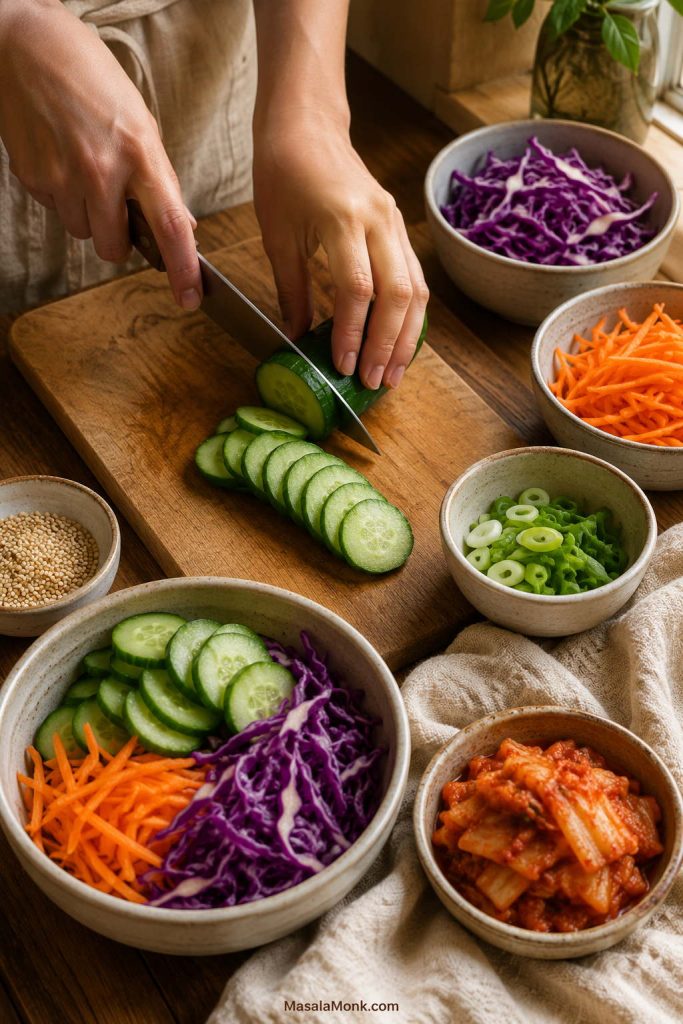
Because pot roast is rich and gravy-heavy, a cold side can help the plate feel fresher. This cucumber salad recipe gives you that crisp, tangy contrast.
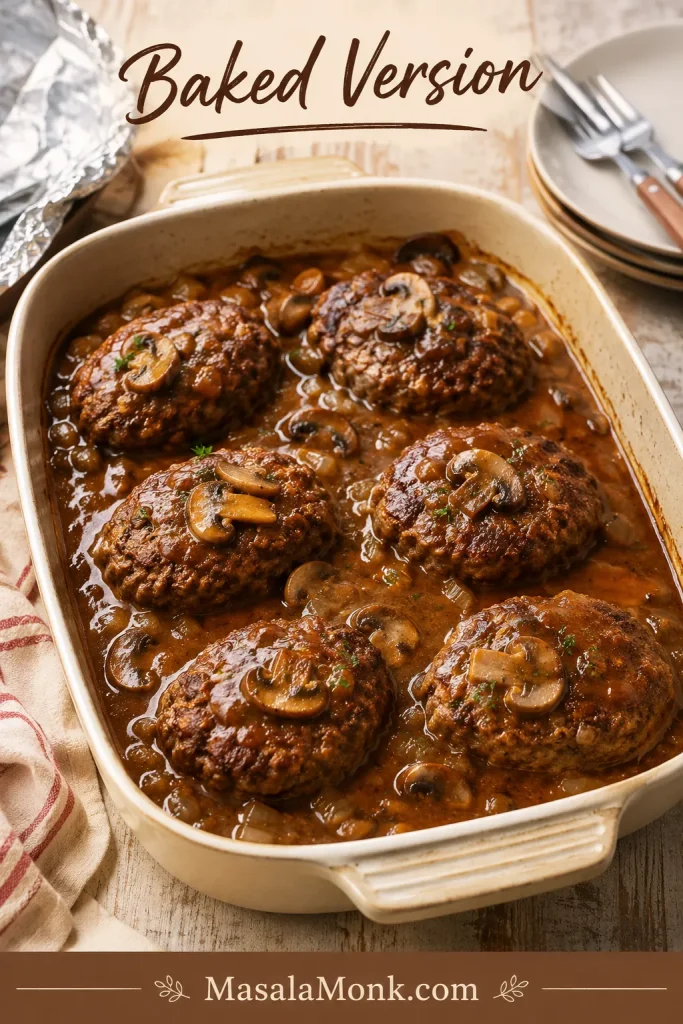
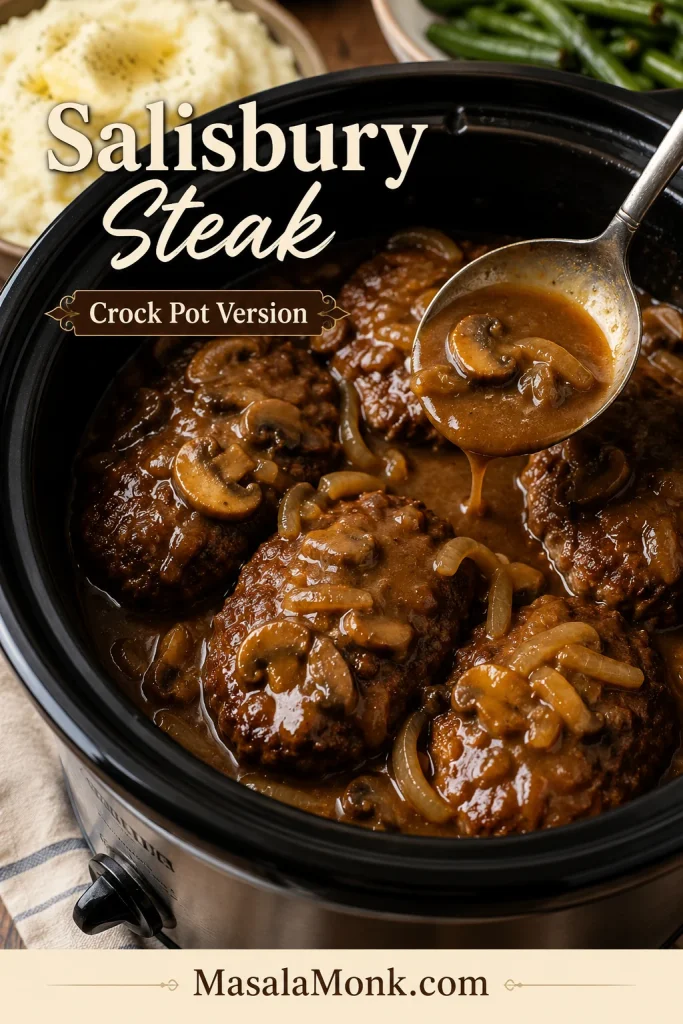
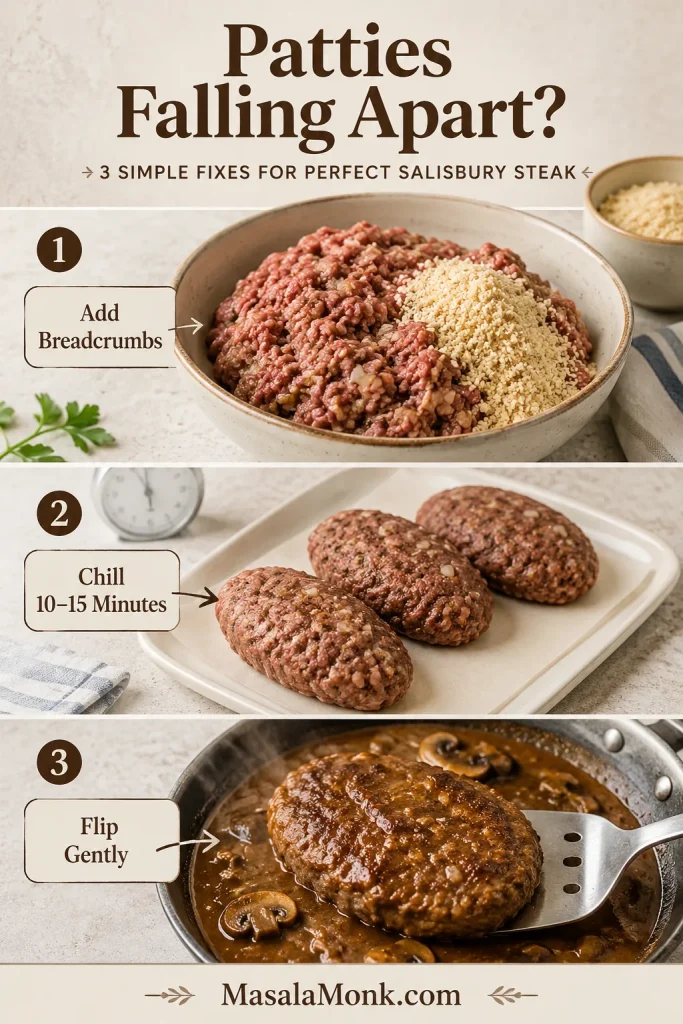
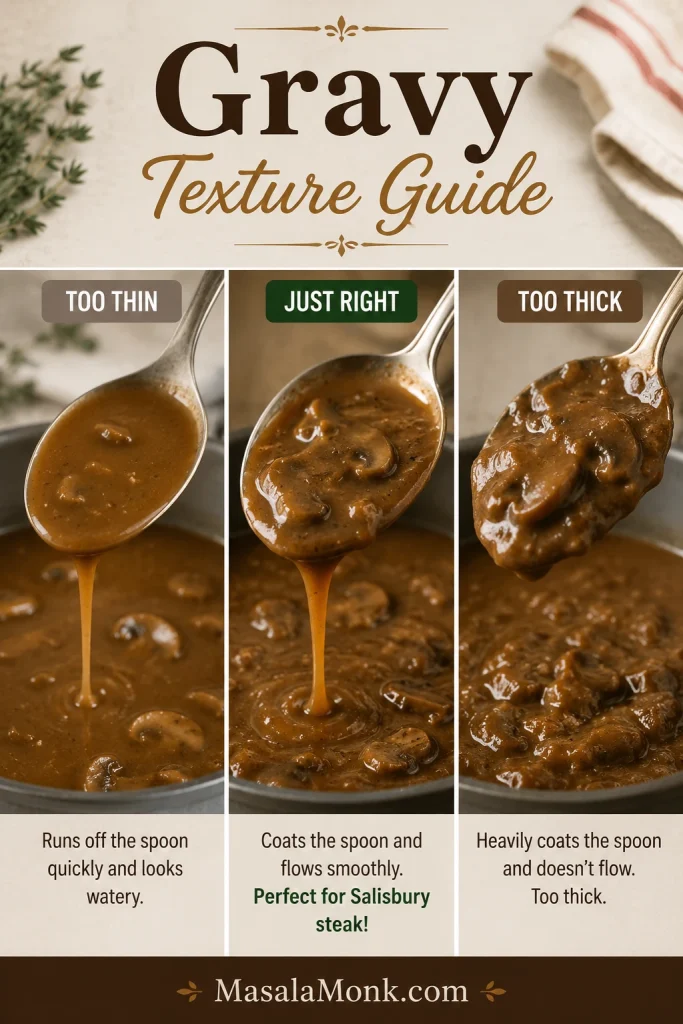
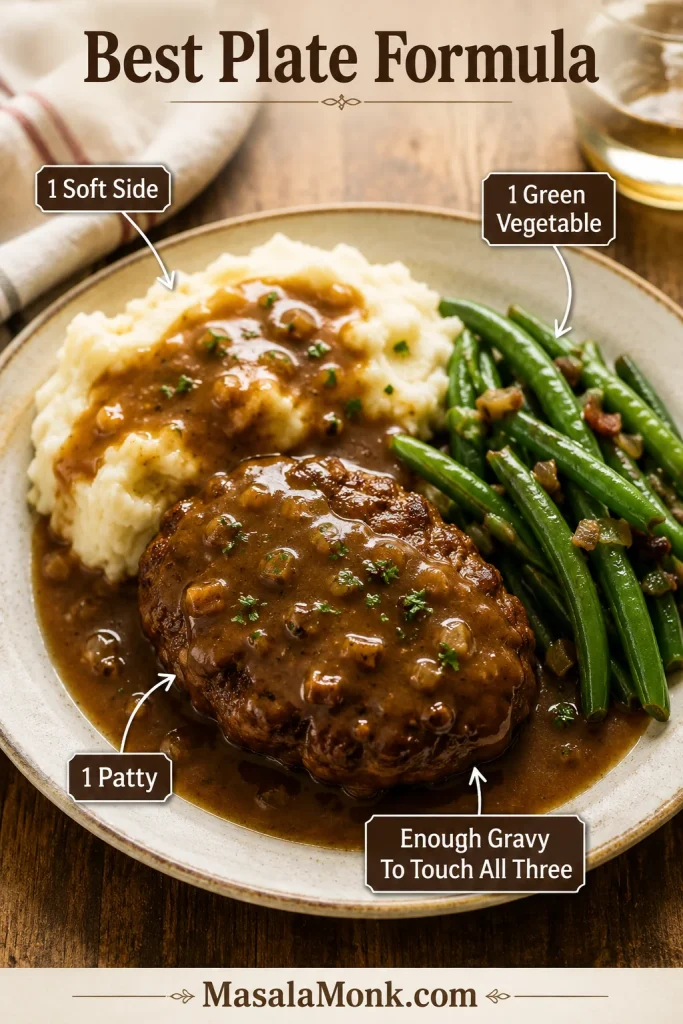
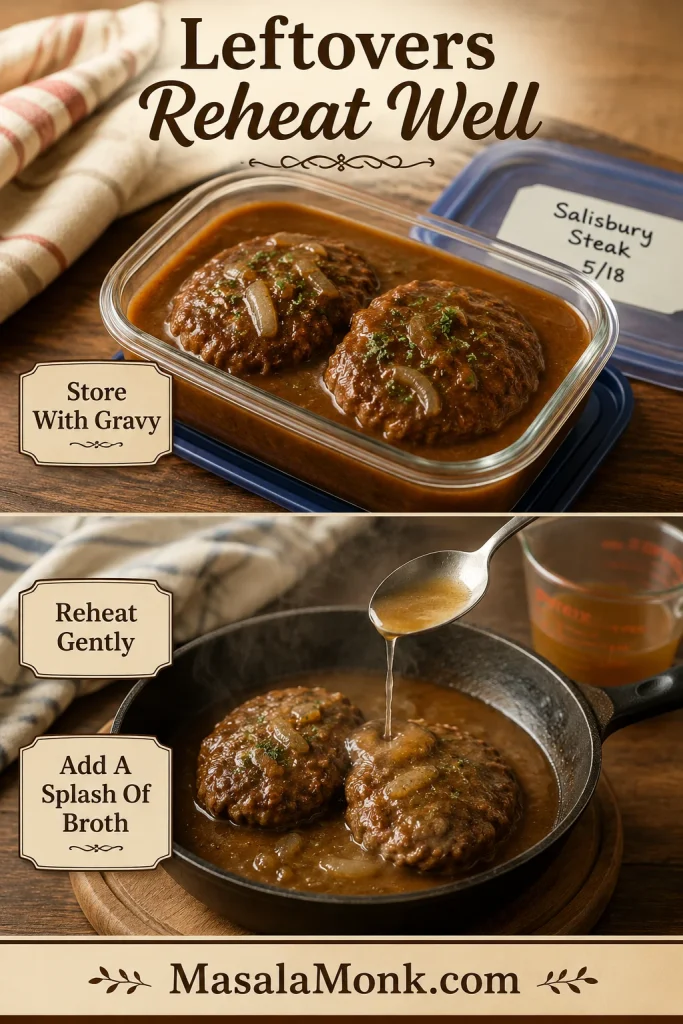
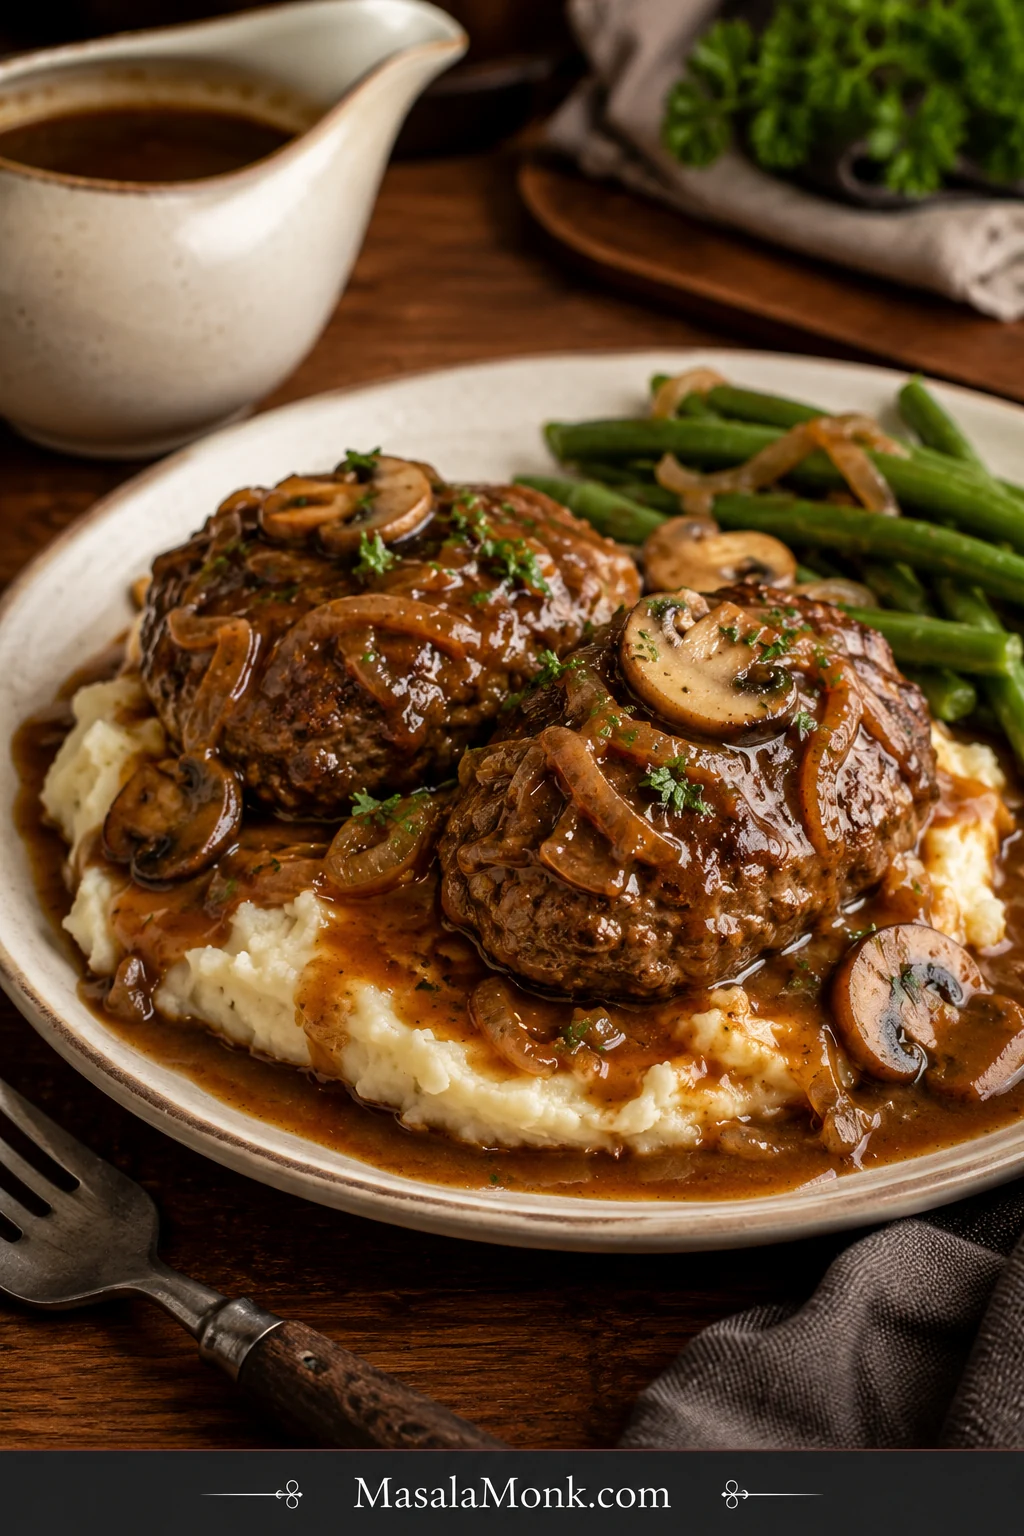
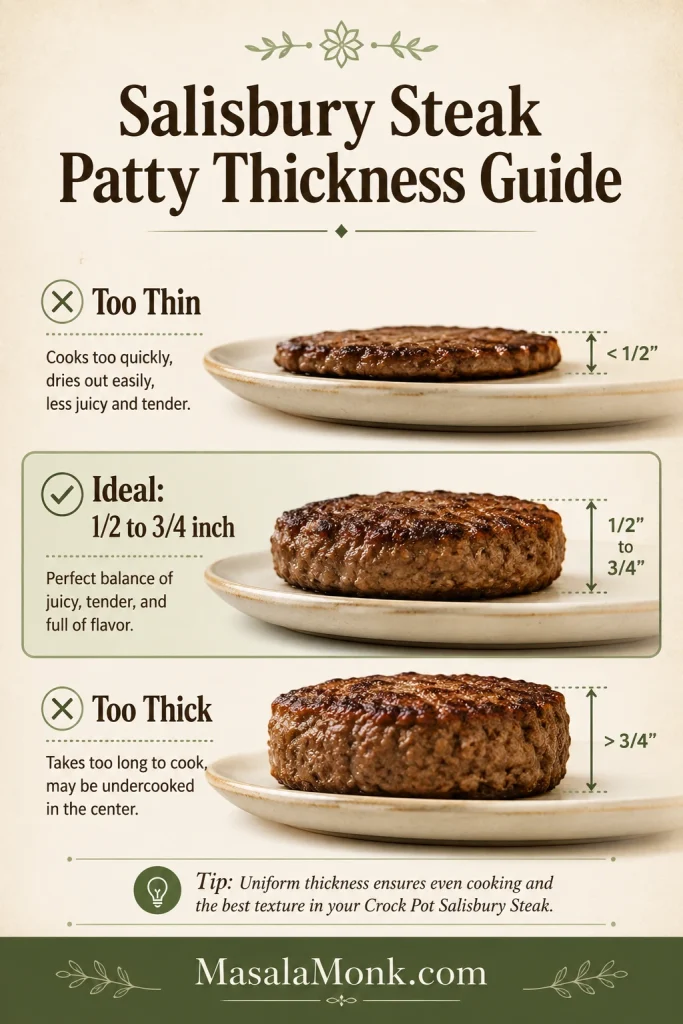
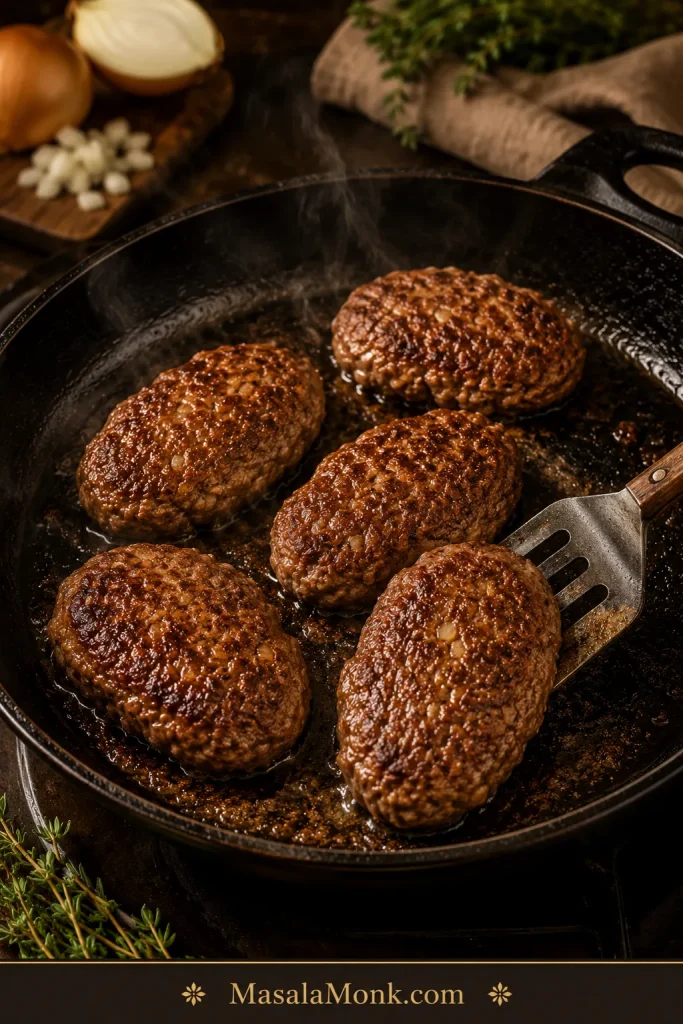
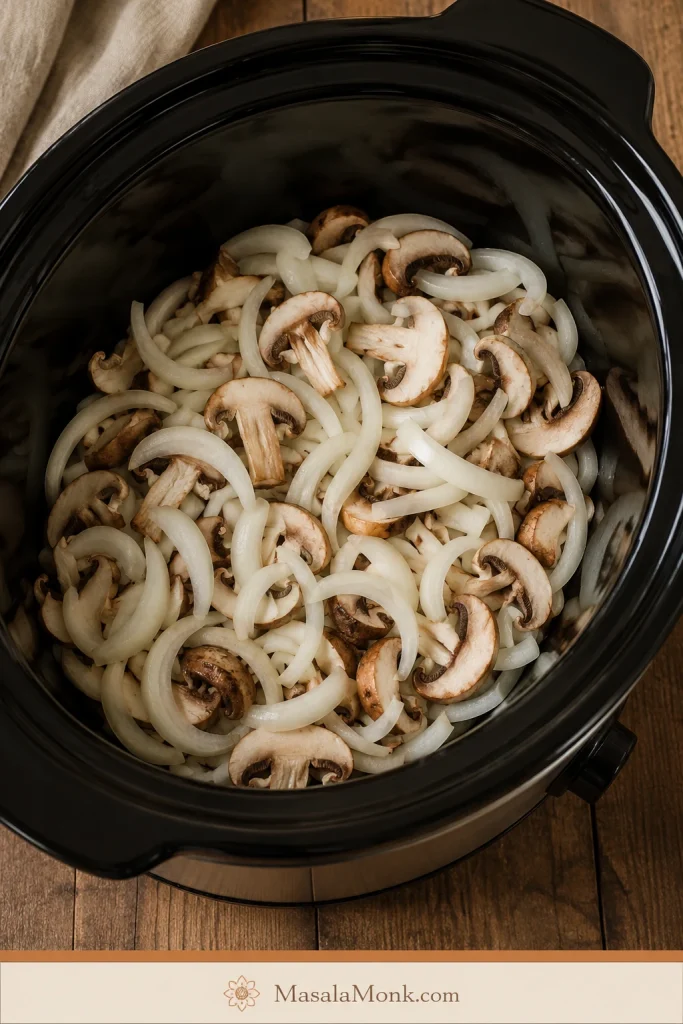
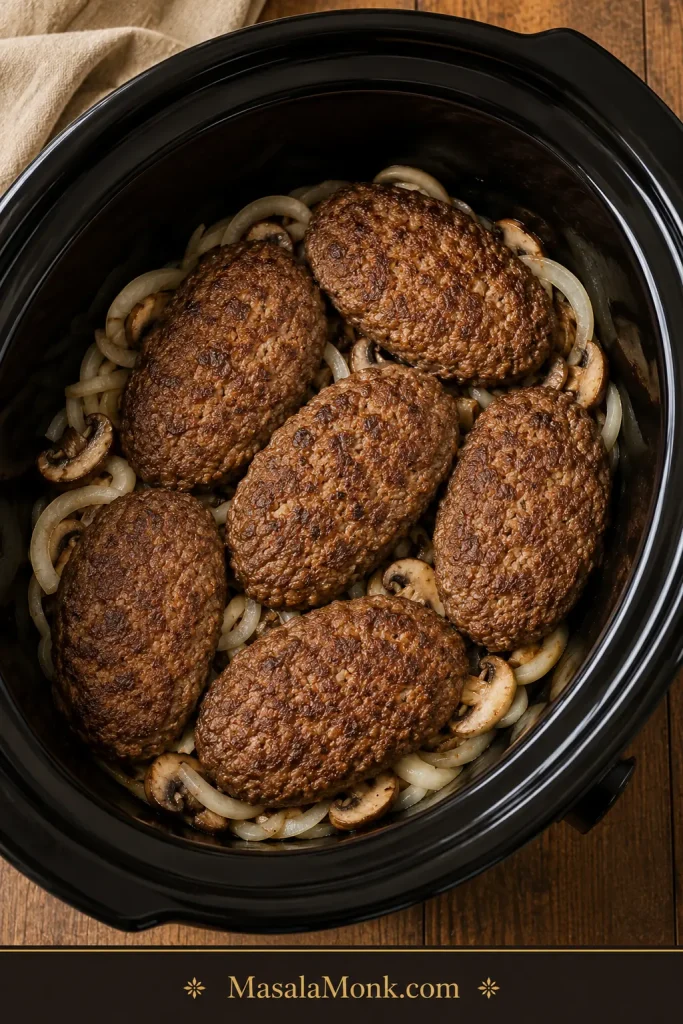
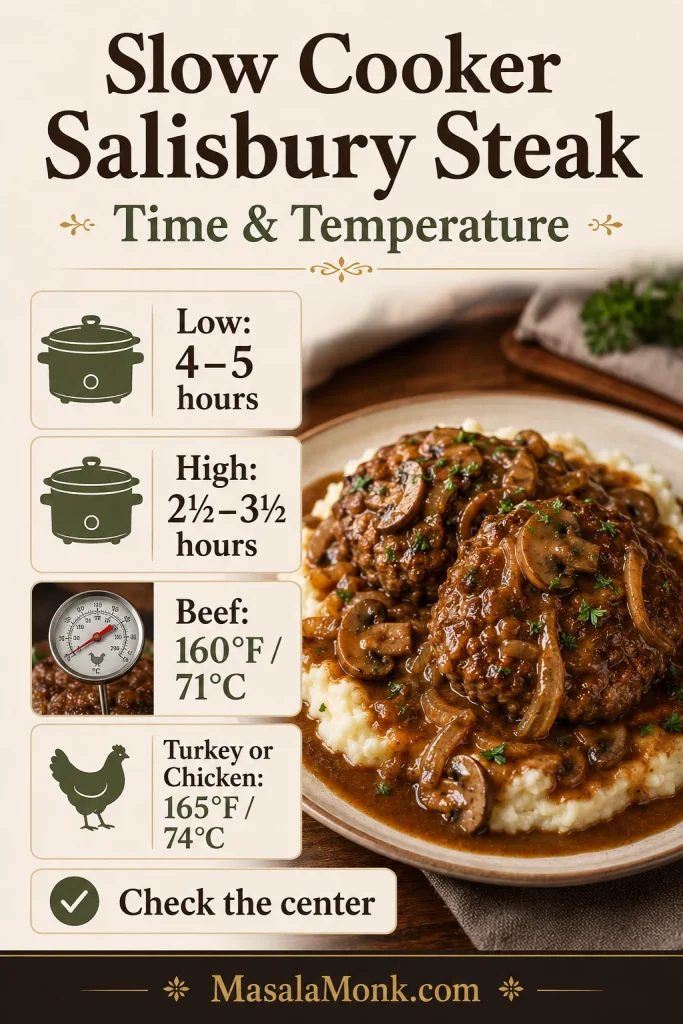
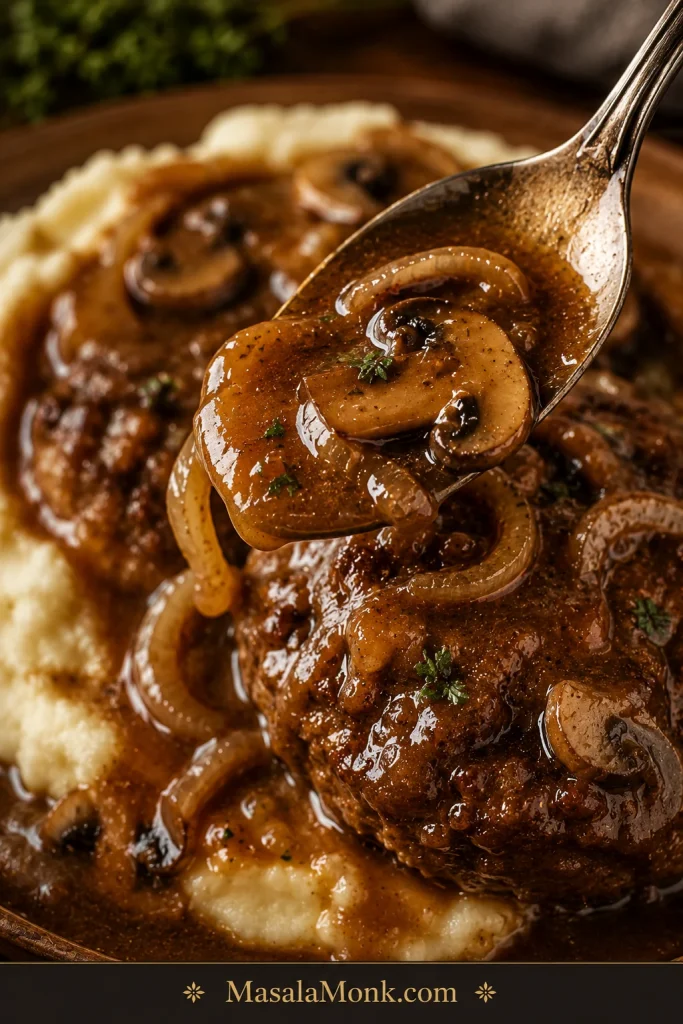
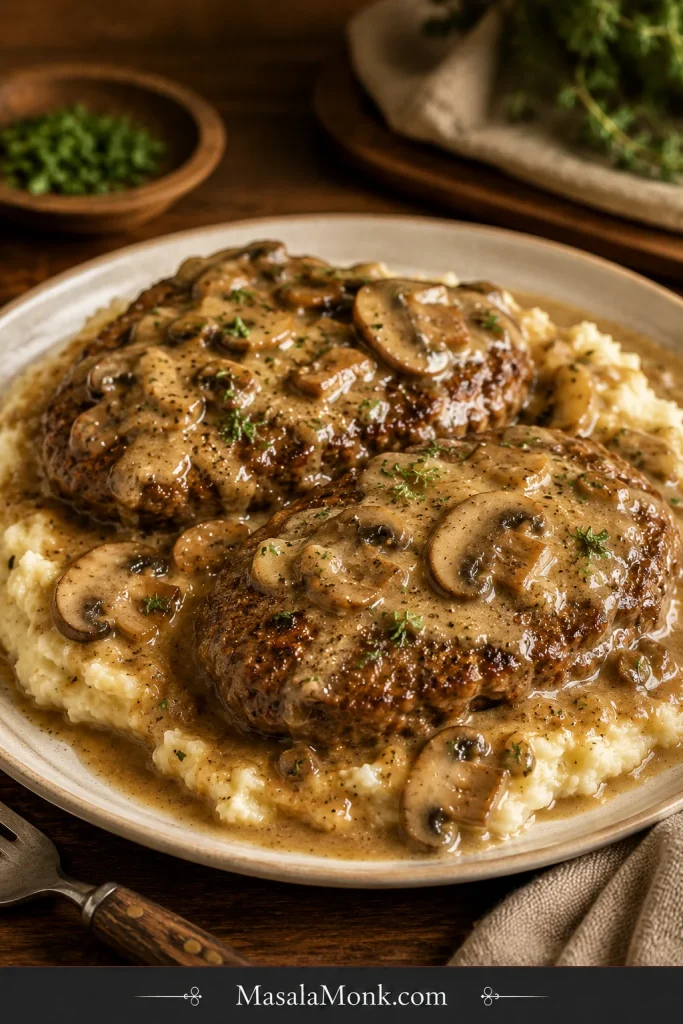
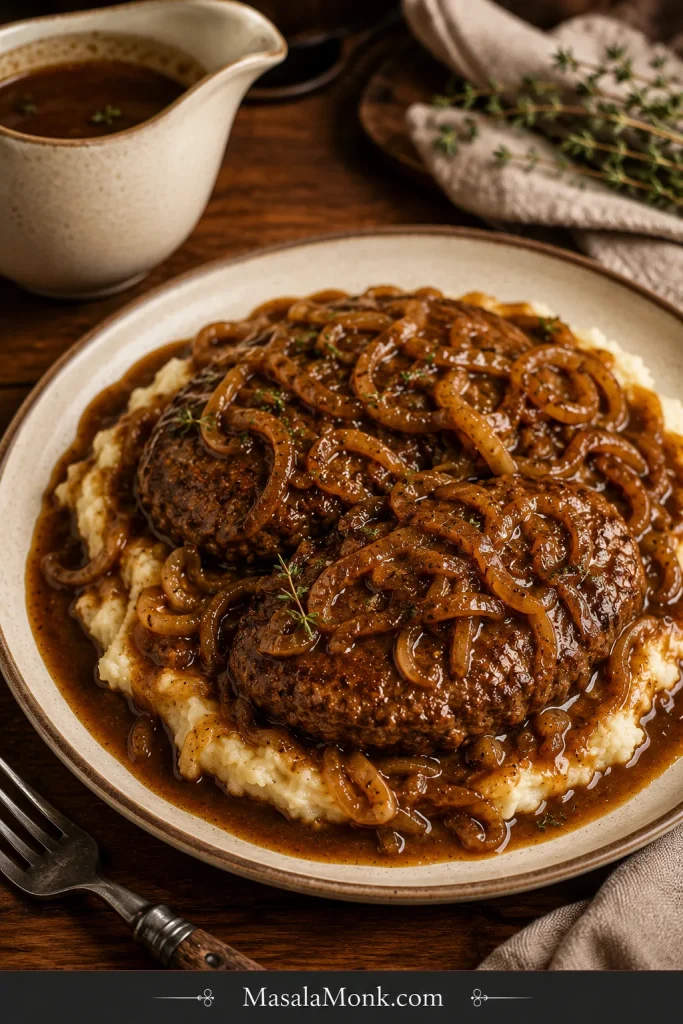
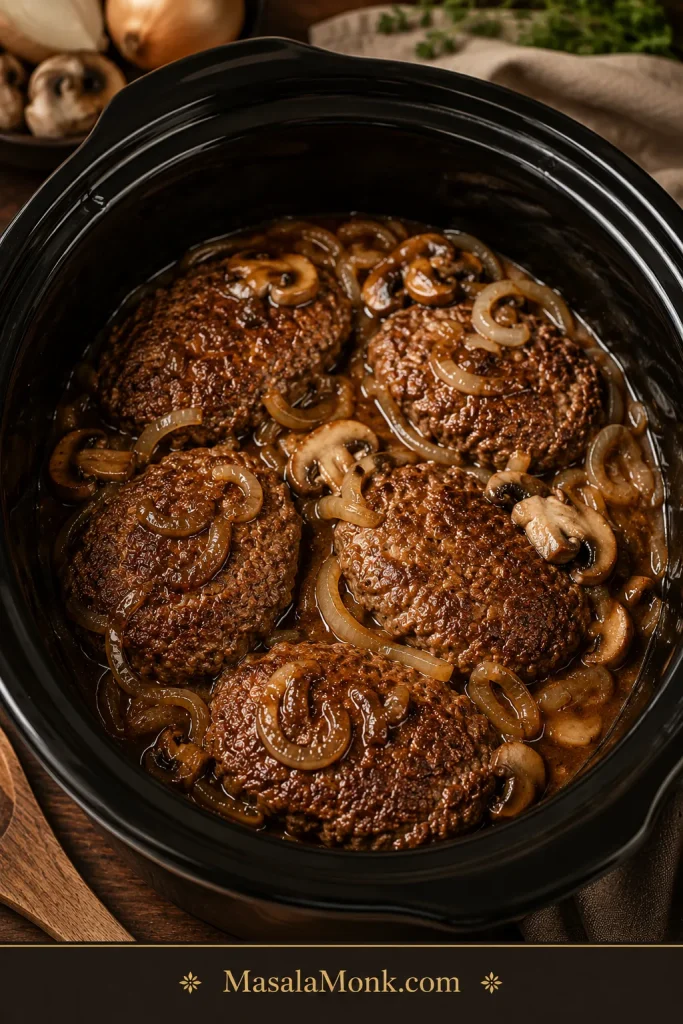
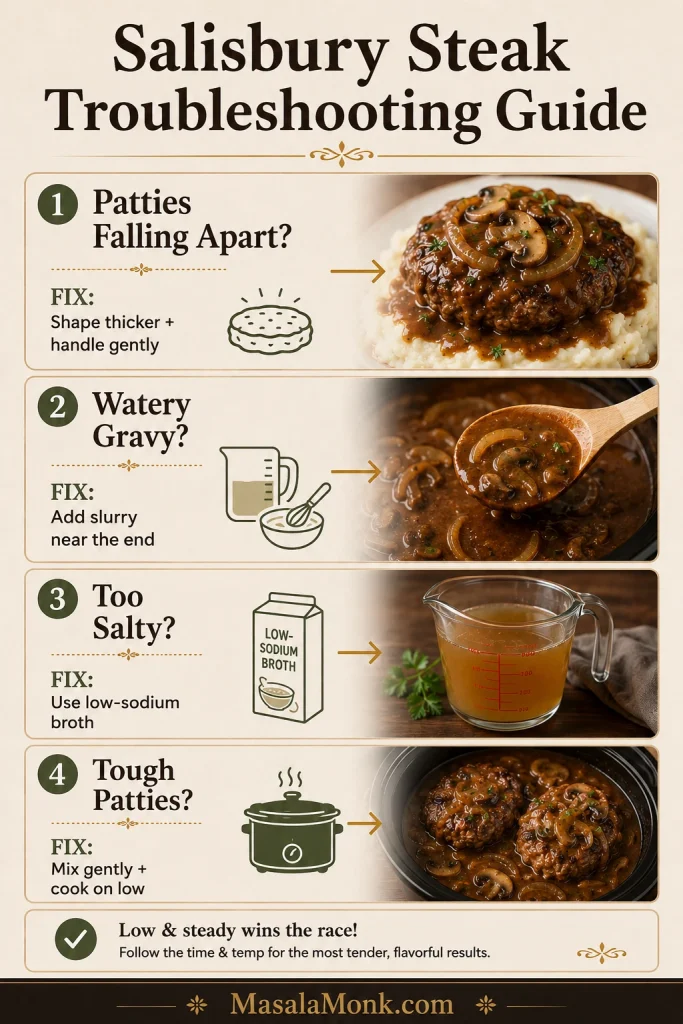
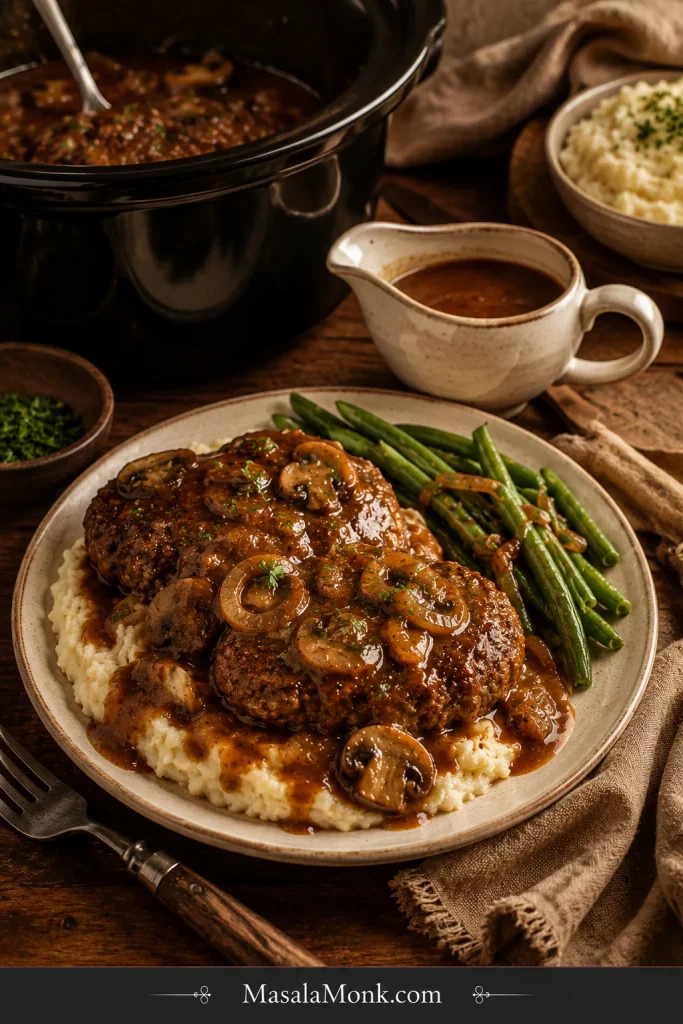
If you want another slow-cooker beef dinner with brown gravy, MasalaMonk’s crock pot Salisbury steak keeps the same mashed-potatoes-and-gravy comfort.
FAQs
What is the best cut of meat for slow cooker pot roast?
Chuck roast is the best cut for slow cooker pot roast. It has enough marbling and connective tissue to become tender during long cooking. Chuck shoulder, arm roast, and blade roast can also work well. Rump roast and bottom round are leaner, so they are better sliced than shredded.
Is this the same as Crock Pot pot roast?
Yes. Crock Pot is a popular slow cooker brand, so this recipe works as a Crock Pot pot roast or any 6-quart slow cooker pot roast. The timing and tenderness cues are the same.
Is it better to cook pot roast on LOW or HIGH?
LOW is better for the most tender pot roast. A 3 to 4 lb chuck roast usually needs 8 to 10 hours on LOW. HIGH works when needed and usually takes 5 to 6 hours, but the texture is often better on LOW.
How long does a 3 lb chuck roast take in the slow cooker?
A 3 lb chuck roast usually takes 8 to 9 hours on LOW or about 4½ to 5½ hours on HIGH. The exact time depends on the thickness of the roast and your slow cooker. Cook until a fork slides in easily.
How much liquid should I add to slow cooker pot roast?
For a rich, concentrated pot roast, start with 1 to 1½ cups / 240 to 360 ml. Use 2 cups / 480 ml for extra gravy. The slow cooker will create more liquid as the beef and vegetables cook, so the meat does not need to be fully covered.
How full should my slow cooker be?
For best results, aim for the slow cooker to be about half to two-thirds full. A cooker packed to the top can heat unevenly and may slow the recipe down.
Do potatoes and carrots go in at the beginning?
They can. Add potatoes and carrots at the beginning for soft, classic pot roast vegetables. For firmer vegetables, add them after the first 2 to 3 hours or halfway through cooking.
Do I have to sear the roast first?
No. Searing adds deeper flavor and a richer gravy, but the roast can still become tender without it. Season the beef well and use good broth, Worcestershire sauce, tomato paste, onion, and garlic.
What if the roast does not fit in the slow cooker?
Cut it into 2 or 3 large pieces. Avoid cutting it into small cubes unless you want a stew-like texture instead of classic pot roast.
How do I make gravy from the slow cooker juices?
Remove the meat and vegetables, then ladle 1½ to 2 cups of hot cooking juices into a saucepan. Simmer them, then whisk in a slurry made from 2 tablespoons cornstarch and 3 tablespoons cold water. Cook for 2 to 3 minutes until thickened.
Why is my pot roast still tough?
It usually needs more time. Chuck roast becomes tender after long, slow cooking. If it does not pull apart easily, keep cooking and check again near the end of the cooking window.
Can I use onion soup mix for slow cooker pot roast?
Yes. Use 1 packet onion soup mix with the broth, but reduce the added salt. Onion soup mix is already salty and flavorful, so taste the gravy before adding more seasoning.
Can I make pot roast ahead of time?
Yes. Pot roast often tastes even better the next day when the beef is stored with gravy. The sauce keeps it moist and makes reheating easier. Cook it fully, refrigerate the beef with the gravy, skim any hardened fat the next day, and reheat gently until hot.
Can I hold pot roast on warm?
Yes, once the roast is already tender. Keep it on WARM for 1 to 2 hours with gravy, as long as the food stays hot. Use LOW or HIGH to finish cooking a firm roast.
What if my slow cooker turns off during cooking?
If the slow cooker turns off during cooking and you do not know how long the food sat without heat, it is safest to discard it. If the interruption was very brief and the food is still steaming hot, restart cooking and use a thermometer, but do not guess with meat that may have cooled for a long time.
Can I freeze leftover pot roast?
Yes. Freeze sliced or shredded pot roast with gravy for the best texture. The gravy helps protect the beef so it reheats more gently. Use within 2 to 3 months. Potatoes can soften after freezing, so freeze the beef and gravy separately if you want the best reheated result.
What internal temperature should pot roast reach?
Beef roasts are safely cooked at 145°F / 63°C with a 3-minute rest, according to FoodSafety.gov’s safe minimum internal temperature chart. For pot roast, safe temperature is not the same as tenderness. Chuck roast usually needs much longer cooking before it becomes tender enough to pull apart.
Final Note
Slow cooker pot roast is at its best when it feels calm and generous: tender beef, soft vegetables, and enough gravy to spoon over every bite. Choose chuck roast when you can, keep the liquid controlled, and let the fork, not the clock, tell you when dinner is ready.
If you make it, leave a comment with your roast size, cut, slow cooker setting, liquid amount, and cook time — especially if you adjusted anything. Those details help other readers and make pot roast problems much easier to solve.