Posted on Leave a comment

General Tso Chicken Recipe: Crispy, Sticky, Better Than Takeout

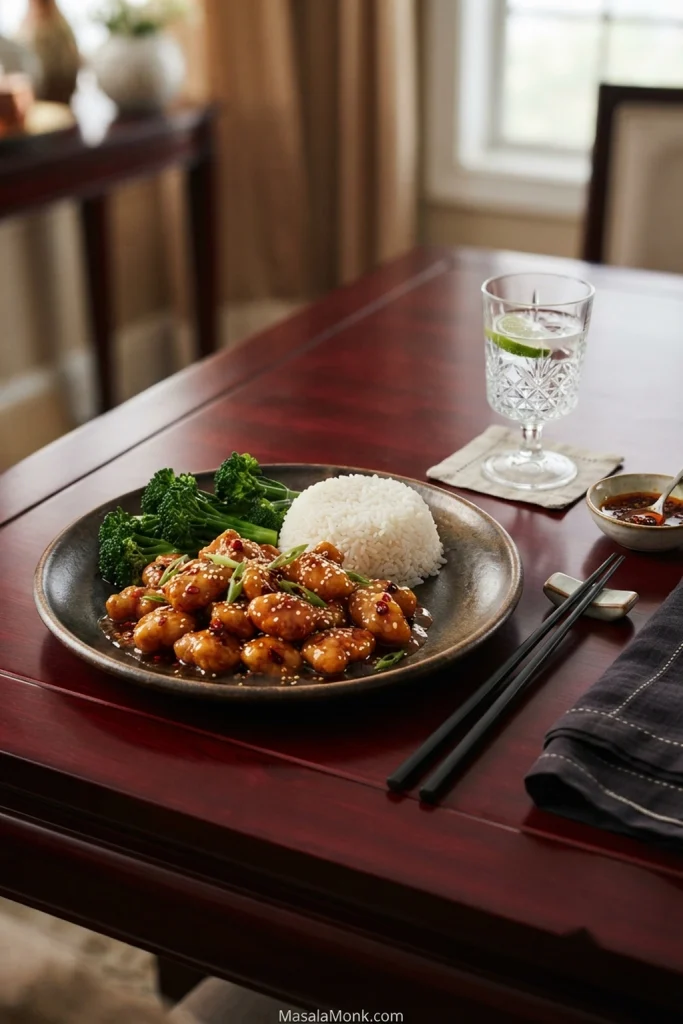
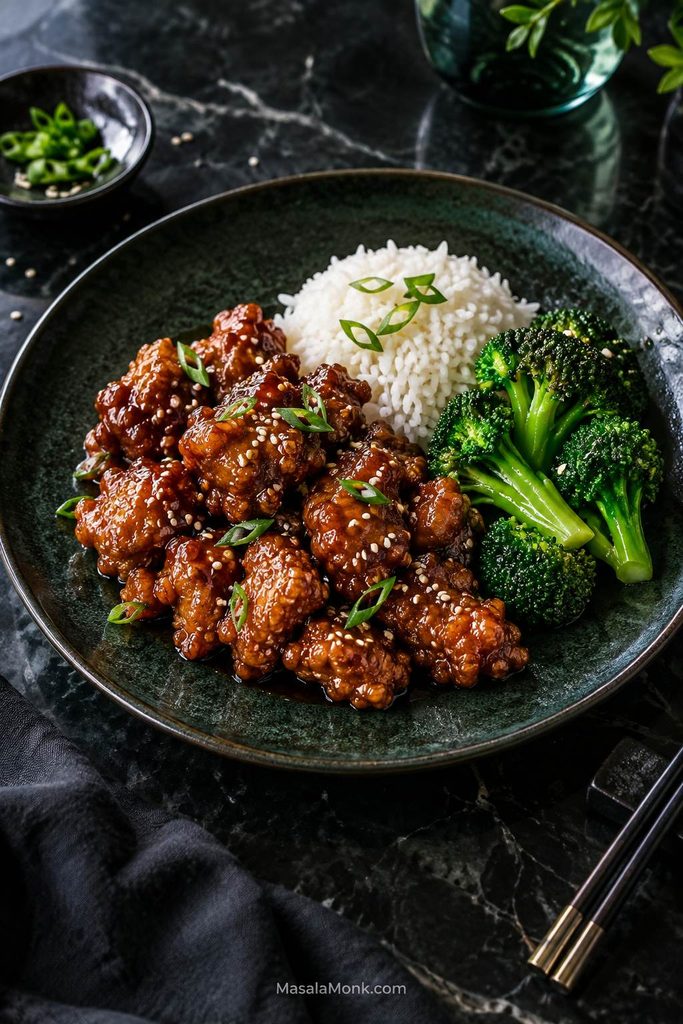
Bowl of glossy General Tso chicken over white rice with broccoli, scallions, sesame seeds, and dried red chilies on a dark surface.

This General Tso chicken recipe is for the takeout craving: crisp pieces of chicken, a glossy sweet-spicy sauce, garlic and ginger in the pan, and rice waiting underneath to catch every sticky spoonful.

The secret is timing, not a complicated sauce. Takeout chicken often softens because it sits in glaze on the way home. Here, the sauce meets the chicken at the last second, so the first few bites still have crunch.

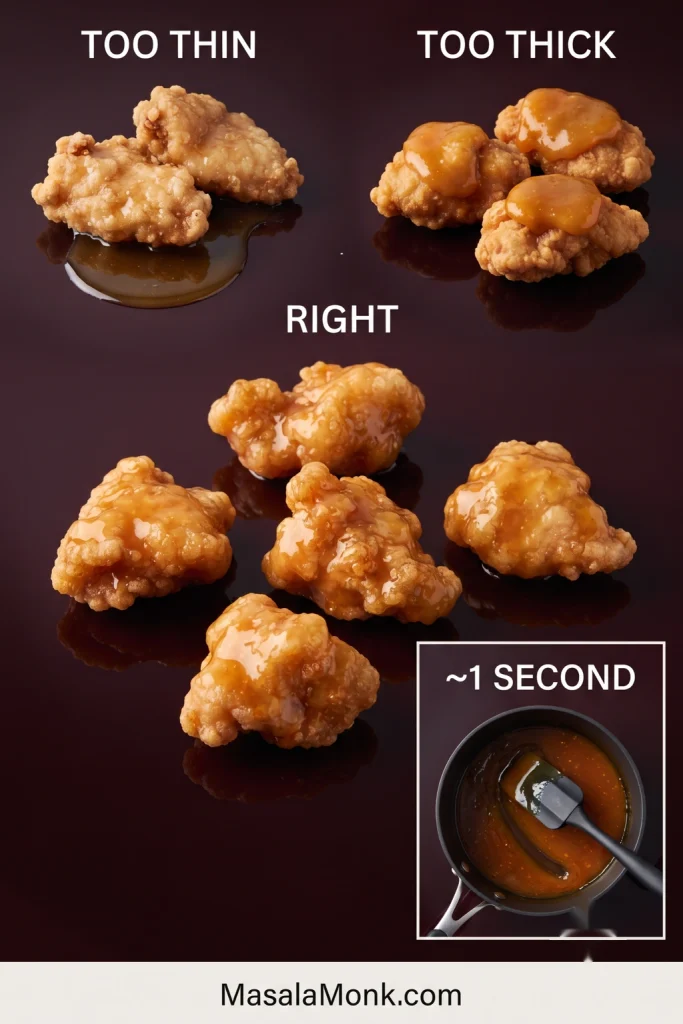
The whole recipe comes down to three cues: rough coating, thick glaze, fast toss. Remember that rhythm and you get crunchy edges, juicy centers, and sauce that clings instead of turning the pan soggy.

This version takes about 40 minutes from start to finish and uses a shallow-fry method, so you do not need a deep fryer. Better than takeout here does not mean fancier; it means the chicken is sauced at the last second, the glaze is balanced to your taste, and the first bite still feels fresh from the pan.

Jump to Recipe Card · 3-Cue Method · Visual Cues · Sauce · Keep It Crispy · Coating Choice · Air Fryer & Other Methods · Storage · FAQ

Quick Answer

The best homemade General Tso chicken is made by cutting boneless chicken into small pieces, coating it with cornstarch, shallow frying it until crisp, then tossing it briefly in a thick sweet-spicy sauce made with soy sauce, rice vinegar, hoisin, sugar, garlic, ginger, chili, sesame oil, stock or water, and cornstarch.

For the juiciest General Tso’s chicken, use boneless skinless chicken thighs. For the crispiest result without a deep fryer, fry the chicken in batches in about 2 cm / 3/4 inch of hot oil, thicken the sauce separately, and toss the fried pieces only at the end.

This recipe also helps with the two things that usually go wrong at home: soggy chicken and sauce that tastes too sweet, too salty, too thin, or too flat.

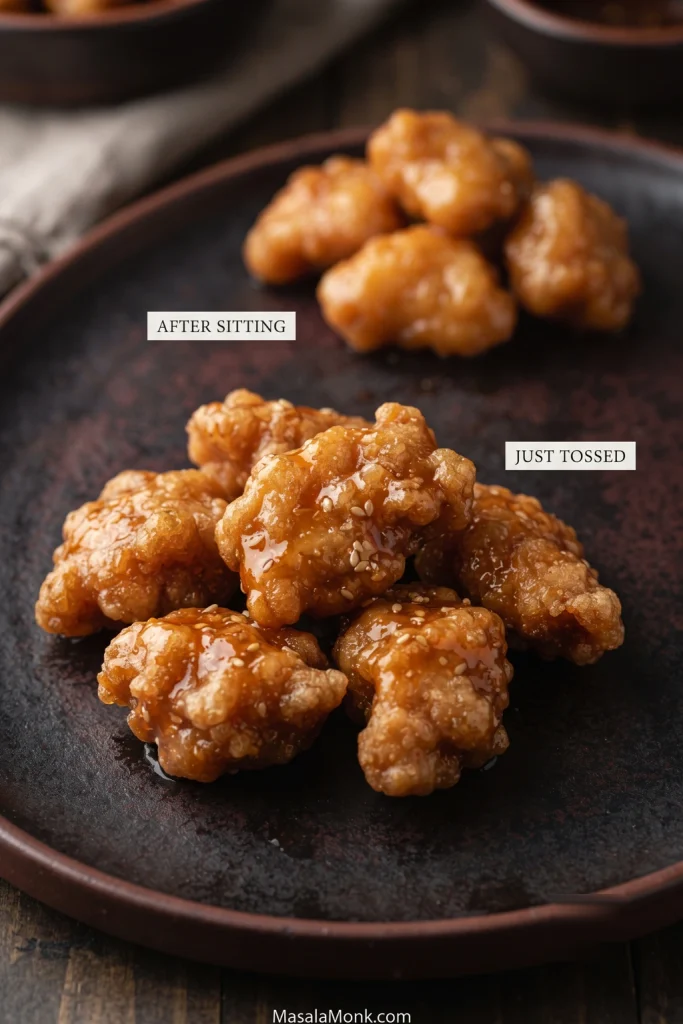
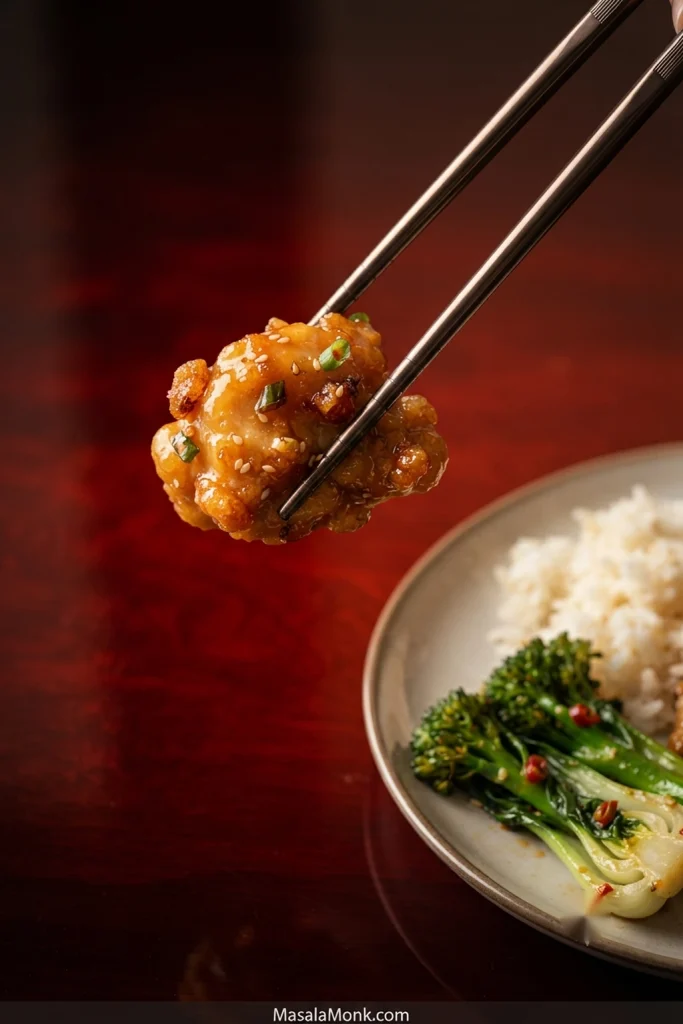
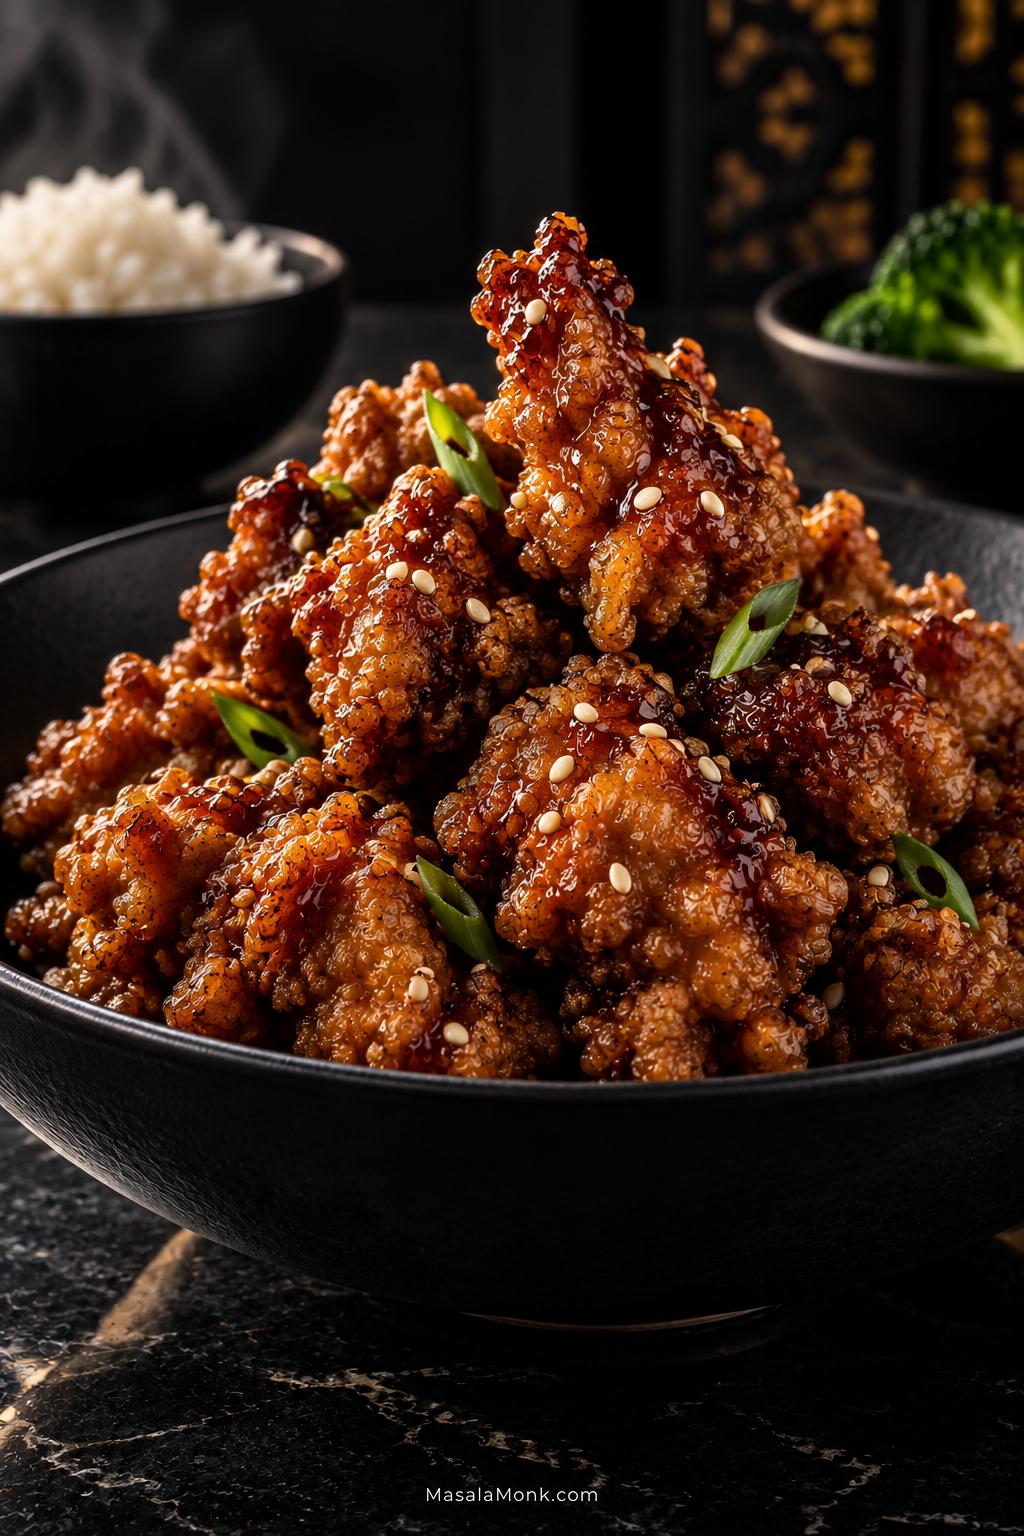
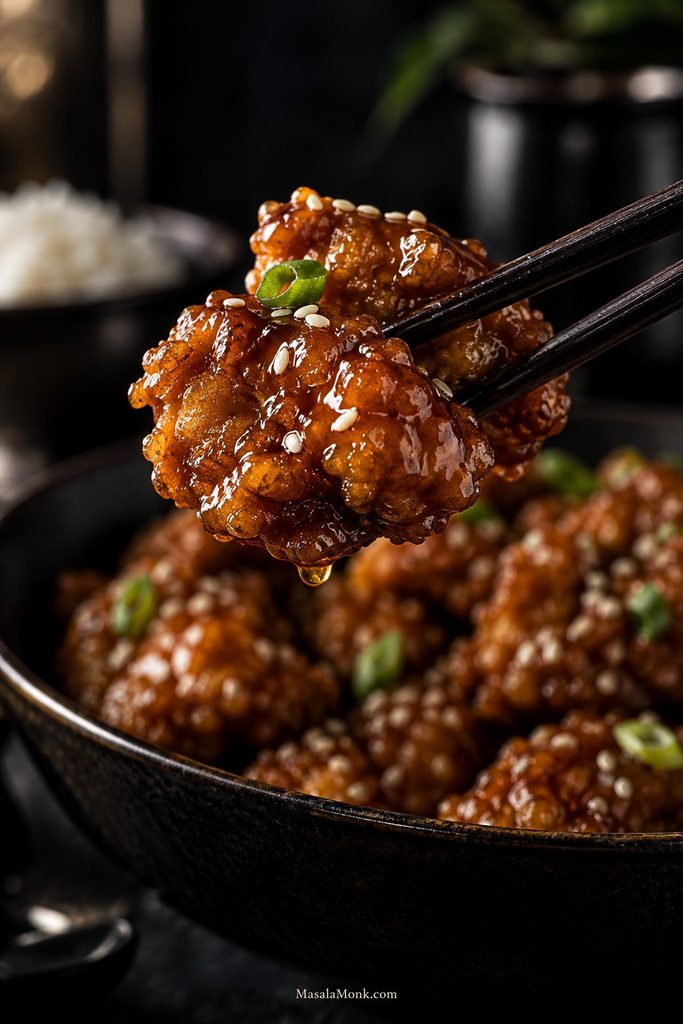
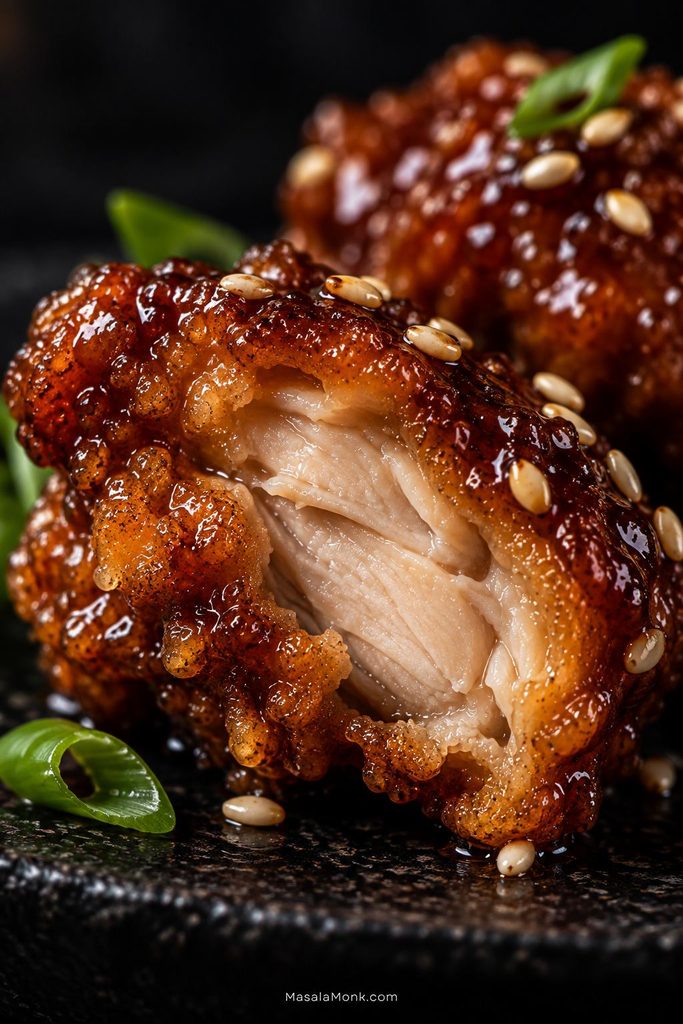
A close look at the finished chicken helps you know what the sauce should do: cling lightly to the ridges without hiding the crisp coating.

Close-up of sauced General Tso chicken pieces with rough crispy ridges, sesame seeds, scallions, and white rice underneath.
Sticky sauce, visible ridges, and rice underneath — this is the texture target.

The 3-Cue Method

If you remember only one thing before cooking, remember this: rough coating, thick glaze, fast toss. These three checks protect the texture more than any complicated sauce trick.

CueWhat to Look ForWhy It Matters
Rough coatingPatchy, dry-looking chicken pieces, not smooth pasteRough edges crisp better in hot oil
Thick glazeSauce that coats a spoon and leaves a short trailThin sauce soaks into the crust
Fast tossAbout 30 seconds in the panThe chicken gets coated without turning soft

Once the sauce is mixed, the chicken is coated, and the rice is already steaming, the cooking feels much calmer. From there, it is hot oil, a quick glaze, scallions on top, and the sticky takeout-style bowl you were hoping for.

The Three Cues in One Look

Use this visual as a quick check before cooking: the coating should look rough, the sauce should look thick, and the toss should happen fast.

Three-panel guide showing rough cornstarch-coated chicken, thick General Tso sauce with a spatula trail, and fried chicken tossed in sauce.
Rough coating, thick glaze, fast toss — these three checks protect the crisp edges.

General Tso Chicken at a Glance

FlavorSweet first, then savory, tangy, and gently spicy
TextureCrisp chicken edges with a sticky glaze
Best chickenBoneless skinless thighs for juicy takeout-style pieces
Leaner optionChicken breast, cut evenly and cooked carefully
Main methodShallow fry, thicken sauce, toss briefly
Oil depthAbout 2 cm / 3/4 inch
Oil amountAbout 1 1/2 cups in a 10-inch skillet; closer to 2 cups in a wider pan
Oil temperature375–390°F / 190–200°C
Chicken safe temperature165°F / 74°C inside
Best served withRice and broccoli

What Is General Tso Chicken?

General Tso chicken, often written as General Tso’s chicken, is a Chinese-American takeout dish made with crispy pieces of chicken tossed in a sweet, tangy, savory, lightly spicy sauce. It usually tastes sweet first, then savory and tangy, with a gentle chili warmth at the end. The goal is contrast: crisp edges, juicy chicken, and a shiny sauce that clings to each piece instead of pooling at the bottom of the pan.

Before You Start

This recipe moves quickly once the oil is hot, so a little prep makes everything easier. Start the rice first; this guide to cooking rice is useful when you want fluffy grains ready before the chicken hits the sauce.

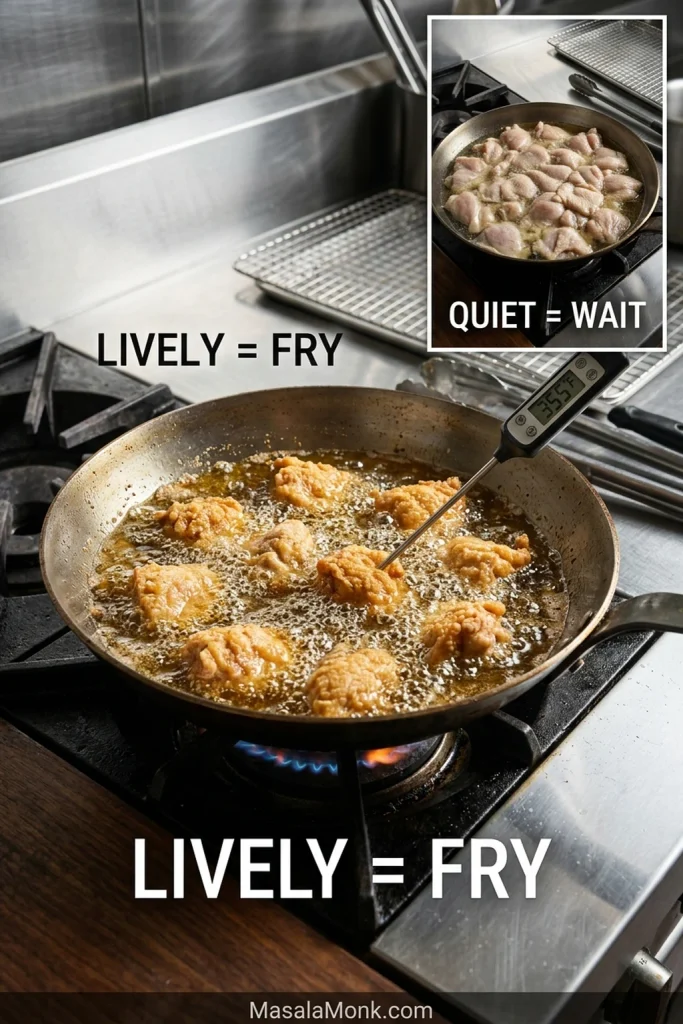
Frying feels less stressful when you treat the first piece as a test. Use a heavy pan, keep the oil shallow, and fry one small coated piece before the first full batch. When it sizzles steadily and turns golden without burning, the oil is ready.

Crispy General Tso Chicken Without Deep Frying

Summary: Crispy shallow-fried chicken tossed in a glossy sweet, tangy, lightly spicy General Tso sauce. This homemade version gives you takeout-style flavor without a deep fryer.

Prep Time20 minutes
Cook Time20 minutes
Total Time40 minutes
Servings4 servings
MethodShallow fry, thicken sauce, toss briefly
Skill LevelModerate, but very manageable with prep

Equipment

  • Large heavy skillet, wok, or Dutch oven
  • Mixing bowls
  • Whisk
  • Tongs or a spider strainer
  • Wire rack or paper towel-lined plate
  • Instant-read thermometer or oil thermometer, helpful but optional
  • Knife and cutting board

Ingredients

For the Chicken

  • 600g / 1.3 lb boneless skinless chicken thighs, cut into 1-inch / 2.5 cm pieces
  • 1 large egg white, or 2 tablespoons beaten egg, for better coating grip
  • 1 tablespoon soy sauce
  • 1 tablespoon Shaoxing wine, dry sherry, chicken stock, or water
  • 1/4 teaspoon salt, plus more only if needed
  • 1/4 teaspoon white pepper or black pepper
  • 1/2 cup / about 65g cornstarch, plus 1–2 tablespoons more if needed
  • Neutral oil for shallow frying, usually 1 1/2 to 2 cups depending on pan width

For the General Tso Sauce

  • 1/2 cup / 120ml chicken stock or water
  • 3 tablespoons low-sodium soy sauce
  • 2 tablespoons hoisin sauce
  • 2 tablespoons unseasoned rice vinegar
  • 2–3 tablespoons brown sugar or honey, depending on how sweet you like it
  • 1 tablespoon chili garlic sauce or sambal, or 1/2–1 teaspoon red pepper flakes
  • 2 teaspoons sesame oil
  • 1 tablespoon cornstarch

For the Aromatics and Serving

  • 2–3 garlic cloves, minced
  • 1 teaspoon fresh ginger, grated
  • 3–5 dried red chilies, optional
  • Cooked jasmine rice, white rice, brown rice, or fried rice
  • Steamed or stir-fried broccoli
  • Sliced scallions
  • Sesame seeds

Instructions

Prep the Chicken

1. Cut the chicken. Cut the chicken into even 1-inch / 2.5 cm pieces. Similar size matters more than perfect cubes.

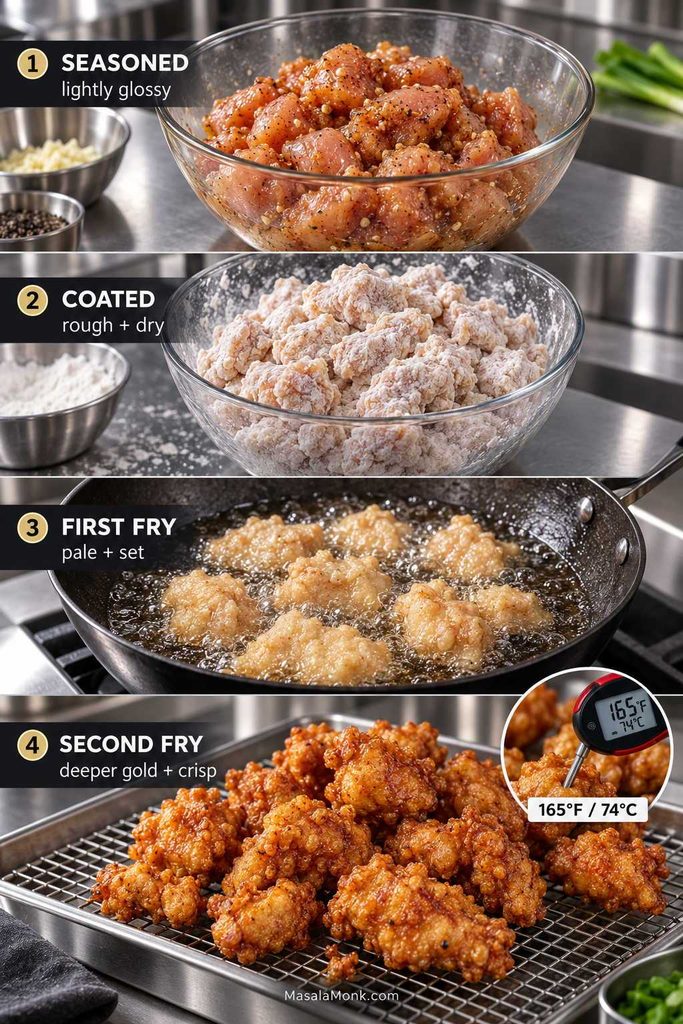
2. Season the chicken. In a bowl, combine the chicken with egg white or beaten egg, soy sauce, Shaoxing wine or another listed liquid, salt, and pepper. Stir until the pieces are lightly coated.

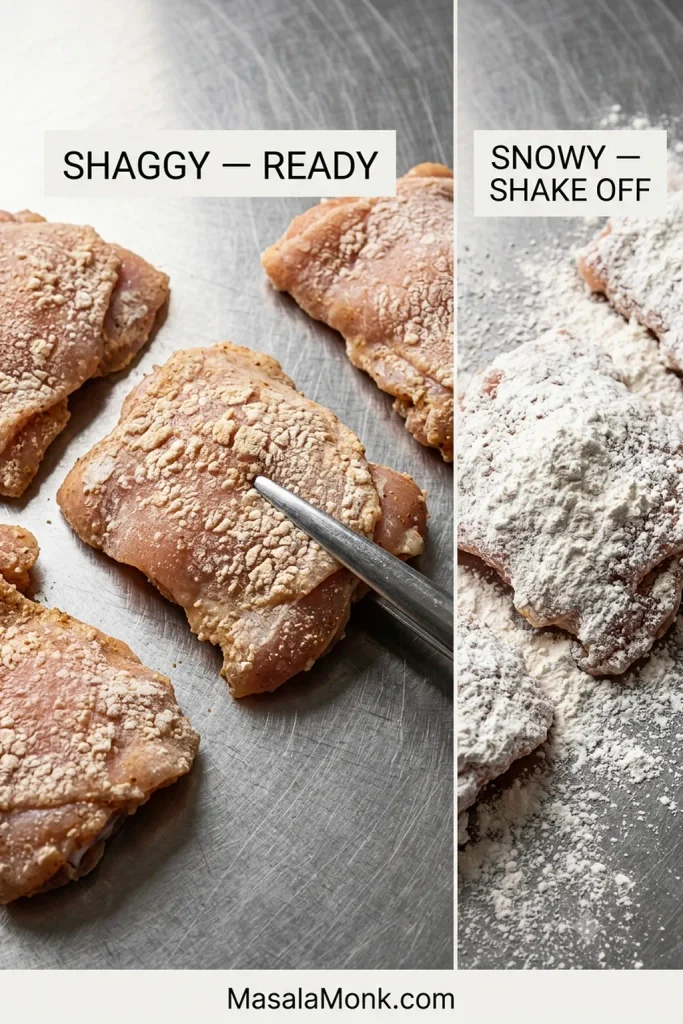
3. Add the cornstarch. Sprinkle in the cornstarch and toss until the chicken pieces have a thin, rough, mostly dry-looking coating. Uneven is good here because those rough patches turn into crisp edges in the oil. If the chicken looks wet or sticky, add another tablespoon or two of cornstarch. Shake off heavy loose clumps before frying.

4. Mix the sauce. In a separate bowl, whisk together the stock or water, soy sauce, hoisin sauce, rice vinegar, brown sugar or honey, chili garlic sauce, sesame oil, and cornstarch.

Fry and Drain

5. Heat the oil. Add about 2 cm / 3/4 inch neutral oil to a heavy skillet, wok, or Dutch oven. In a 10-inch skillet, start with about 1 1/2 cups oil. In a wider pan, you may need closer to 2 cups to reach the same shallow depth. Heat to 375–390°F / 190–200°C. Without a thermometer, look for shimmering oil and listen for an immediate steady sizzle when a small test piece goes in.

6. Fry in batches. Add the chicken in a single layer with space between pieces. Fry for 3–5 minutes total, turning as needed, until golden, crisp, and cooked through. The chicken should reach 165°F / 74°C inside.

7. Drain the chicken. Transfer the fried chicken to a wire rack or a paper towel-lined plate. A wire rack is best because it lets steam escape instead of collecting under the coating. Repeat with the remaining chicken.

Make the Sauce and Toss

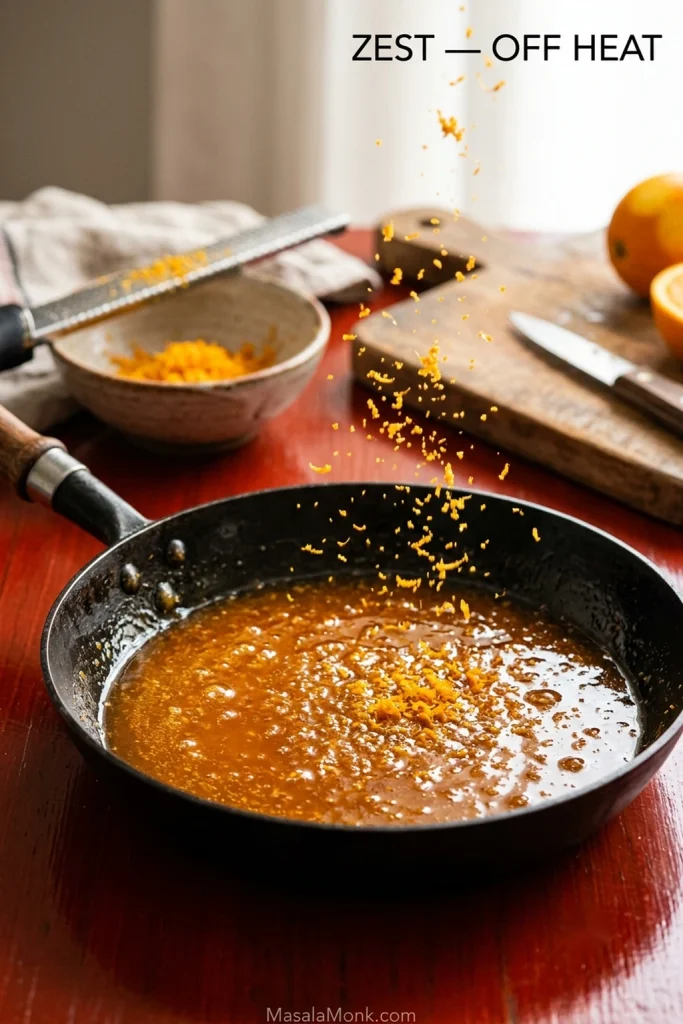
8. Cook the aromatics. Carefully pour off most of the oil, leaving about 1 tablespoon in the pan. Add the garlic, ginger, and dried chilies. Stir for 20–30 seconds, just until the garlic and ginger smell sharp, warm, and a little toasty. Stop before the garlic browns; burnt garlic can make the whole sauce taste harsh.

9. Thicken the sauce. Whisk the sauce once more, then pour it into the pan. Simmer for 1–2 minutes, stirring often, until the sauce turns shiny, darkens slightly, and moves like a glaze instead of a thin liquid. When you drag a spatula through the sauce, it should briefly leave a trail before flowing back together.

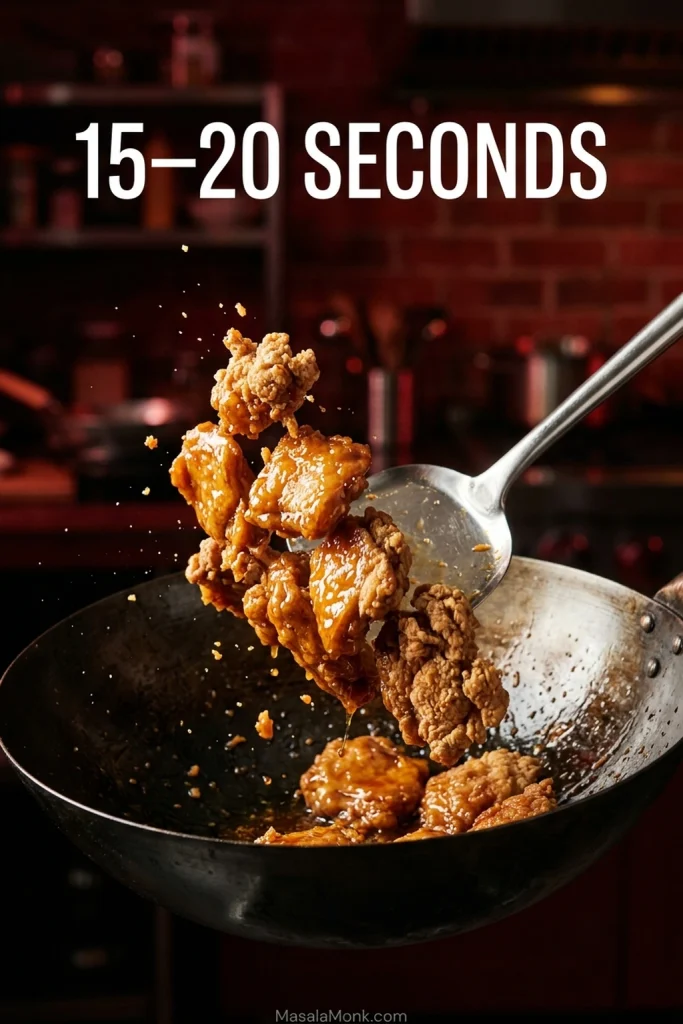
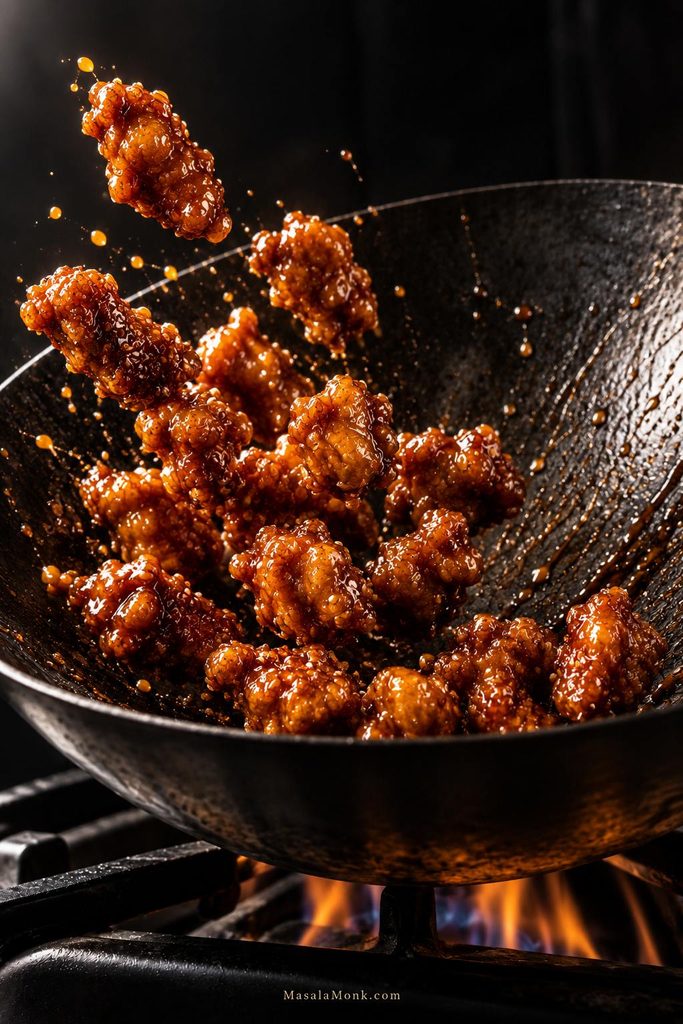
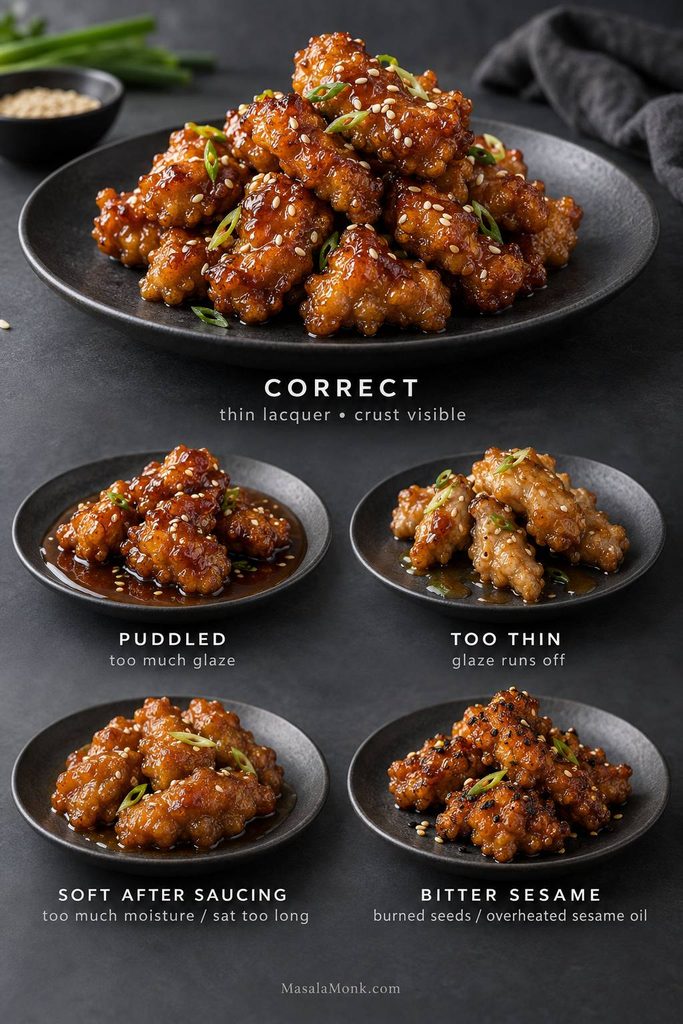
10. Toss quickly. Add the fried chicken back to the pan and toss for about 30 seconds, just until the glaze catches on the rough edges in a thin, shiny layer, with a few crisp ridges still showing. Get it out of the pan before the coating sits too long in the sauce.

11. Serve immediately. Finish with scallions and sesame seeds. Serve hot with rice and broccoli while the sauce is shiny and the edges still have some crunch.

Recipe Notes

  • Chicken thighs are the most forgiving choice because they stay juicy. Chicken breast works too, but avoid overcooking it.
  • Egg white gives the cleanest coating. If using whole beaten egg, use only 2 tablespoons at first and add extra cornstarch as needed.
  • Before frying, aim for rough, mostly dry chicken pieces. Before tossing, look for a glossy sauce that coats the spoon. If either one looks wet or thin, fix it before moving on.
  • The sauce must thicken before the chicken returns. This one step protects the coating more than anything else.
  • If the first batch browns before the chicken cooks through, the oil is too hot for the size of the pieces. Lower the heat slightly and give the next batch a little more time.
  • For a milder sauce, reduce the chili garlic sauce or skip the dried chilies.
  • For a sweeter restaurant-style sauce, use the full 3 tablespoons brown sugar or honey.
  • If using regular soy sauce instead of low-sodium soy sauce, reduce the added salt and taste the sauce before coating the chicken.

This is the kind of recipe where the first batch teaches you the pan. By the second batch, the sizzle, color, and sauce thickness start to make sense.

The coating will not look perfectly smooth, and that is a good thing. Rough, patchy bits are what crisp in the oil, and the sauce needs to be thick before the chicken returns so those edges stay noticeable in the first few bites.

Why This Recipe Works

This dish looks simple, but the texture depends on timing. Cool oil makes the coating greasy. Thin sauce softens the crust. Too much time in the pan after saucing turns crunchy edges into soft ones.

  • Small chicken pieces cook quickly. One-inch pieces brown fast and stay juicy inside.
  • Egg white and cornstarch build the right coating. Egg white helps the coating grip, while cornstarch fries up lighter and crisper than heavy breading.
  • Shallow frying gives better texture than a dry skillet. You get crunchy edges without needing a full deep fryer.
  • A thick glaze protects the crust. Sauce thickness matters more than sauce complexity because thin liquid soaks into fried coating.
  • A fast toss keeps the texture alive. The chicken needs enough time to catch the glaze, not enough time to stew in it.
  • The flavor is adjustable. You can make the sauce sweeter, spicier, tangier, or less salty before it ever touches the chicken.

Ingredients You’ll Need

You do not need a long list of specialty ingredients here. What matters is balance: enough sweetness to feel like takeout, enough vinegar to keep it bright, enough chili to warm the bowl, and enough garlic and ginger to make the sauce smell alive as soon as it hits the pan.

The sauce can taste a little bold before it hits the chicken because the rice, broccoli, and crisp coating will soften the edges.

Set Up Before the Pan Gets Hot

General Tso chicken moves quickly once the pan is hot, so this setup keeps the frying, sauce, and serving steps from colliding.

Ingredient board with chicken, cornstarch, egg white, soy sauce, hoisin sauce, rice vinegar, garlic, ginger, chilies, sesame oil, rice, broccoli, scallions, and seasonings.
A full setup keeps the frying, sauce, and final toss from feeling rushed.

Chicken and Coating

Chicken thighs are the easiest choice for juicy pieces because they handle hot oil well. Chicken breast works for a leaner version, but cut it evenly and pull it from the pan as soon as it is cooked through.

Egg white helps the cornstarch cling without making the coating heavy. Cornstarch is the ingredient to watch: too little and the pieces will not crisp well; too much loose powder can fall off in the oil. Aim for rough, dry-looking patches that cling to the chicken.

Sauce Ingredients

Low-sodium soy sauce gives you better control because the sauce reduces quickly. Hoisin adds body and that darker, rounder takeout sweetness. Rice vinegar keeps the sauce bright, while brown sugar or honey gives the sticky finish.

Chili garlic sauce gives spice plus flavor, sambal tastes sharper and more chili-forward, and red pepper flakes are the easiest pantry fix. Sesame oil goes in the sauce for aroma, and cornstarch turns everything glossy and spoon-coating.

When the balance is right, the sauce tastes bold on its own but even better once it catches the crisp chicken and drips into the rice.

Aromatics and Garnish

Fresh garlic and ginger wake up the sauce fast. Because the glaze only cooks for a minute or two, those fresh aromatics matter more here than they would in a long-simmered dish. Scallions, sesame seeds, and broccoli make the final bowl feel fresh instead of heavy.

Easy Ingredient Substitutions

IngredientBest SubstituteWhat Changes
Shaoxing wineDry sherry, chicken stock, or waterLess restaurant-style aroma, but still works
Rice vinegarApple cider vinegar, using slightly lessSharper flavor
Hoisin sauceExtra soy sauce, sugar or honey, and a splash of stockLess body, still sweet-savory
Chili garlic sauceSambal or red pepper flakesHeat changes slightly
Low-sodium soy sauceRegular soy sauce, with less added saltSauce can get salty faster
Chicken thighsChicken breastLeaner, less forgiving

Chicken Thighs vs Chicken Breast

Chicken thighs are juicier, more forgiving, and closer to the takeout texture most people expect. Chicken breast is leaner, but it dries out faster, so cut it evenly and pull it from the pan as soon as it reaches 165°F / 74°C.

FoodSafety.gov’s safe minimum internal temperature chart is a helpful reference if you use a thermometer often.

Cornstarch vs Batter: Which Coating Is Best?

There is more than one way to coat the chicken. The best choice depends on whether the night calls for fast, extra crunchy, or somewhere in the middle.

Coating MethodBest ForResult
Cornstarch onlyFastest weeknight versionLight crisp edges, easiest method
Egg white + cornstarchBest balance for shallow fryingBetter coating grip and stronger crispness
Flour + cornstarch + baking powderRestaurant-style crunchThicker, crispier coating; best with double frying

How Each Coating Looks After Frying

Use the coating comparison as a texture decision guide before you choose the fastest, balanced, or crunchiest version.

Three-panel comparison of fried chicken coatings labeled cornstarch only, egg white plus cornstarch, and flour plus cornstarch.
For coating style, cornstarch-only stays light, egg white plus cornstarch gives balance, and flour plus cornstarch adds a thicker crunch.

For this recipe, the egg-white-and-cornstarch method gives the best balance. It is still simple, but the coating grips better than cornstarch alone. For a very fast version, skip the egg white and use only cornstarch. For a restaurant-style version, add a little flour and baking powder and fry the chicken twice.

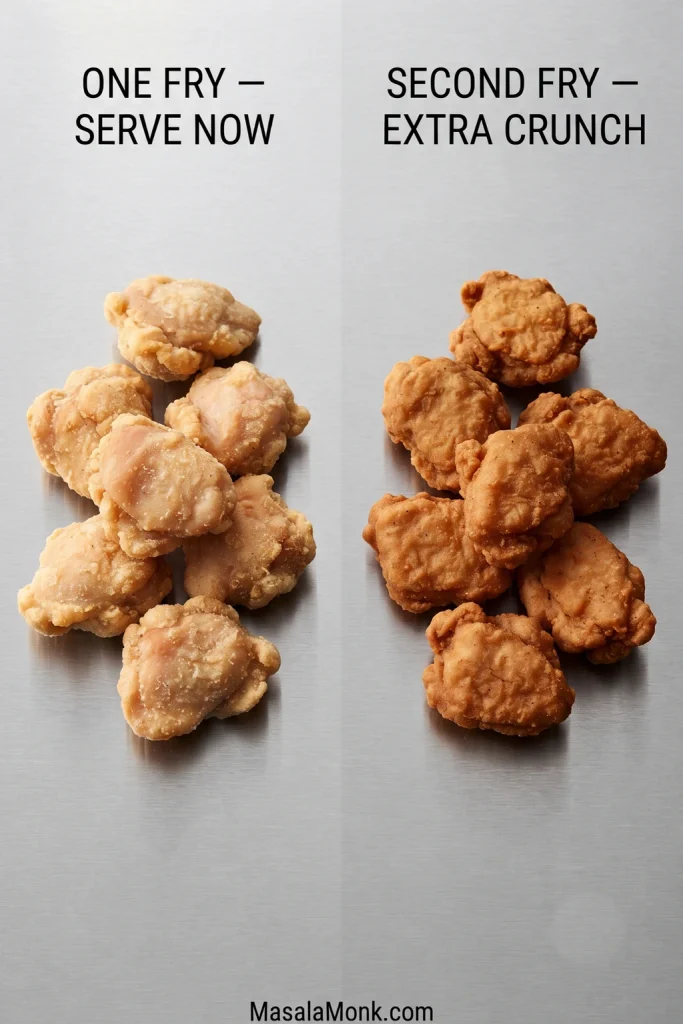
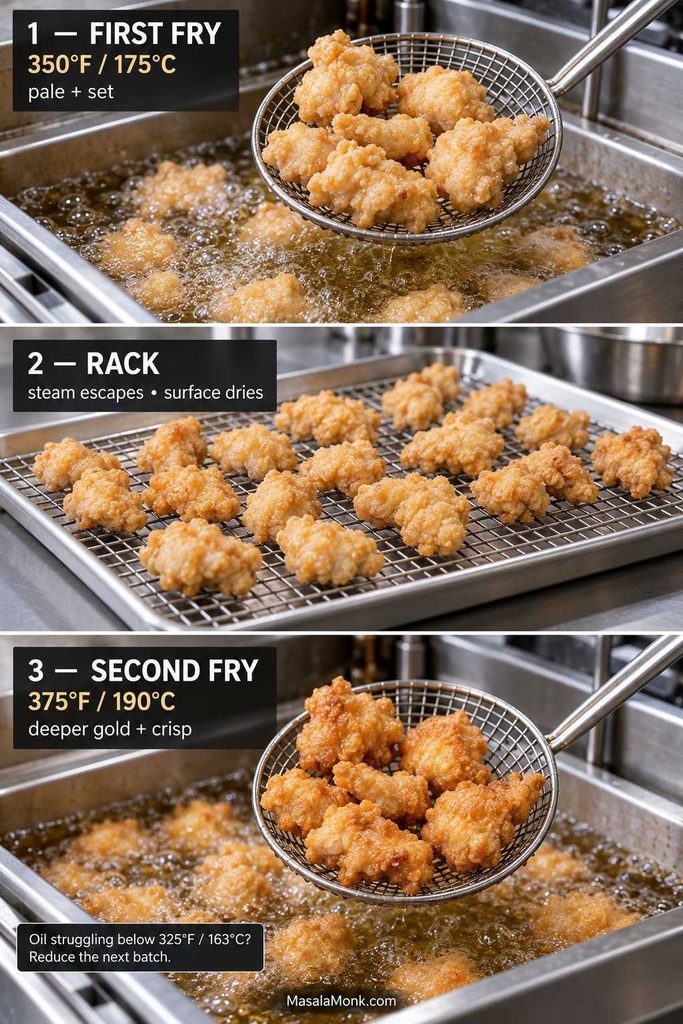
Extra crispy option: For a thicker, crunchier coating, replace part of the cornstarch with flour and add a pinch of baking powder. Fry once until cooked and lightly golden, rest the chicken on a rack, then fry again briefly until crisp. This gives a stronger restaurant-style crust, but it adds more oil, time, and cleanup.

General Tso Sauce: Sweet, Sticky, Spicy, and Tangy

This is where the dish becomes yours. The sauce should be sweet enough to feel like takeout, tangy enough to stay balanced, salty enough to season the chicken, and spicy enough to give warmth without overwhelming the bowl.

General Tso sauce formula: salty soy sauce, sweet brown sugar or honey, rounded hoisin, bright rice vinegar, chili warmth, fresh garlic and ginger, and enough cornstarch to turn it glossy and thick.

Garlic, Ginger, and Chilies

The sauce starts with a quick aromatic sizzle. Keep it brief so the garlic and ginger taste warm and sharp, not browned or bitter.

Minced garlic, grated ginger, and dried red chilies sizzling in oil in a black wok with a wooden spatula.
Once the chicken is fried, let garlic, ginger, and chilies sizzle briefly so the General Tso sauce starts with bold aroma.

How Thick Should the Sauce Be?

Look for a sauce that coats a spoon and leaves a short trail when you drag a spatula through the pan. It thickens quickly once it starts bubbling, so stay close. If it is watery when the chicken goes in, the coating will soften quickly.

When the Sauce Is Thick Enough

This is the visual cue to look for before the fried chicken goes back into the pan.

Thick glossy General Tso sauce in a dark skillet with a wooden spatula leaving a visible trail through the sauce.
The sauce trail is your sign to stop reducing; at this thickness, the glaze coats the chicken instead of soaking the crust.

If the sauce tightens before the chicken is ready, loosen it with a splash of water or stock, warm it until glossy again, then toss. When the sauce is right, it looks like something you want to drag a spoon through before the chicken even goes in.

Can You Make General Tso Sauce Ahead?

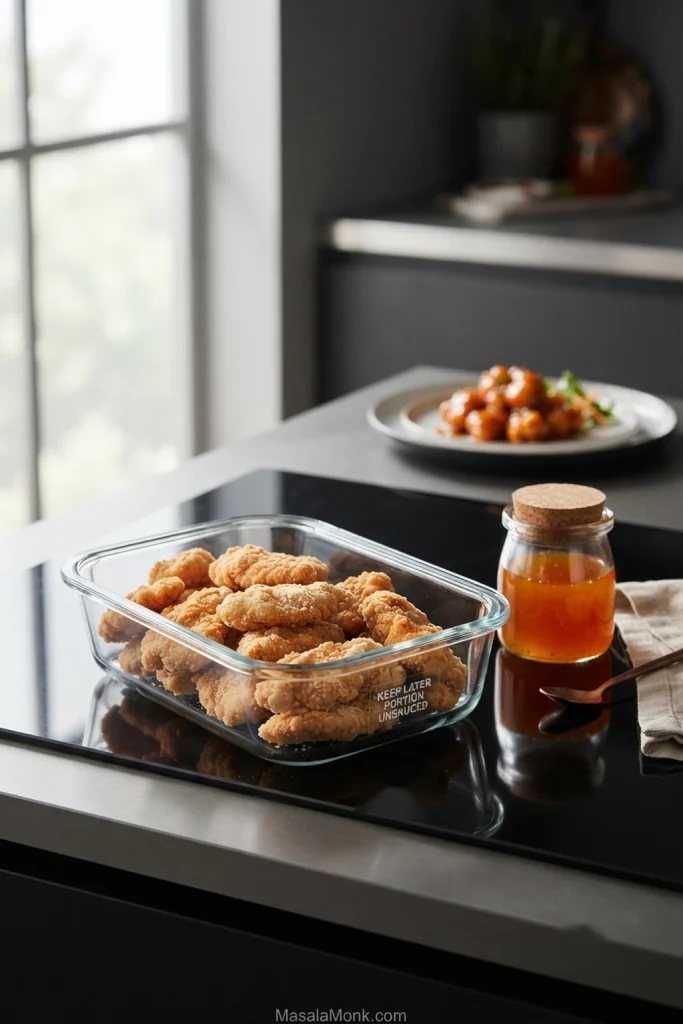
Yes. You can mix and cook the sauce 3–4 days ahead, then refrigerate it in an airtight container. Reheat it gently in a pan with a splash of water or stock until it turns glossy again. For the best texture, fry the chicken fresh and toss it with the warmed sauce right before serving.

Other Ways to Use General Tso Sauce

Use it with crispy tofu, shrimp, cauliflower, stir-fried vegetables, frozen chicken bites, or rice bowls. The rule stays the same: cook the sauce until shiny, then toss it with the main ingredient at the end.

General Tso Sauce Troubleshooting

Sauce ProblemHow to Fix It
Too thickAdd water or stock 1 tablespoon at a time until it loosens.
Too thinSimmer a little longer, or add a small cornstarch slurry.
Too saltyAdd water or stock, then balance with a little sugar and vinegar.
Too sweetAdd rice vinegar or chili garlic sauce.
Too spicyAdd a little hoisin, sugar, or water.
Tastes flatAdd a little more ginger, garlic, vinegar, or sesame oil.

How to Fix the Sauce Before Tossing

Fix the sauce while it is still by itself. Once the chicken returns, every extra minute in the pan softens the crust.

Troubleshooting guide with bowls of General Tso sauce labeled too thin, too salty, too sweet, and too thick, with suggested fixes.
Balance the sauce while it is still alone in the pan, before it can soften the chicken.

The sauce does not need to be perfect in the bowl before it hits the pan. It just needs to be balanced enough that, once it turns glossy, you want it on rice.

When in doubt, come back to the rhythm: rough coating, thick glaze, fast toss.

How It Should Look at Each Step

Once the exact steps are in front of you, these visual cues keep you from second-guessing the pan when the oil is hot and the recipe starts moving quickly.

Chicken Cut Size

The pieces do not need to be perfect cubes, but they should be close in size so they brown outside and cook through inside.

Raw boneless chicken pieces cut into one-inch chunks on a wooden cutting board with a knife and a 1 inch / 2.5 cm measurement label.
First, aim for roughly 1-inch chicken pieces; that size helps the inside cook through while the outside turns golden.

What the Marinade Should Look Like

Before the cornstarch goes in, the chicken should be lightly coated, not sitting in a puddle of marinade.

Chicken pieces being mixed in a ceramic bowl with egg white, soy sauce, pepper, and marinade on a wooden surface.
Next, the egg white and soy mixture lightly glosses the chicken, giving the cornstarch something to grab onto.

Rough Cornstarch Coating

Smooth paste is not the goal here. A patchy, dry-looking coating gives the sauce more crisp edges to grab later.

Close-up of chicken pieces tossed in cornstarch with a rough, patchy, mostly dry coating in a bowl.
After the cornstarch goes in, patchy and dry is what you want; those uneven spots become the crispest edges.

Set Up the Shallow Fry

Use enough oil to crisp the coating, but not so much that the recipe turns into a full deep-fry project.

Dark wok with a shallow layer of oil on a stovetop, with coated chicken pieces waiting nearby on a tray and frying tools at the side.
Meanwhile, a shallow layer of oil gives you crisp General Tso chicken without the mess of a deep fryer.

How to Know the Oil Is Ready

Test one piece before committing to a full batch. Steady bubbles mean the oil is ready; silence or smoke means you need to adjust.

Single cornstarch-coated chicken piece sizzling in shallow oil with small bubbles around it in a dark skillet.
Once one test piece bubbles steadily, the oil is ready; quiet oil turns coating greasy, while smoking oil browns too fast.

Frying in Batches

Space is part of the method. If the pieces touch everywhere, they steam before they crisp.

Several golden chicken pieces frying in a single layer with visible space between them in hot oil inside a dark wok.
Fry in batches so the pieces stay separate, the oil stays hot, and the coating has room to crisp instead of steam.

Why a Wire Rack Helps

A rack keeps the crust away from trapped steam while the rest of the recipe comes together.

Golden fried chicken pieces resting on a wire rack over a sheet pan with crumbs and dried red chilies nearby.
Then, move the fried chicken to a wire rack; airflow underneath protects the crust while you finish the sauce.

When to Stop Tossing

Look for coated chicken, not submerged chicken. As soon as the glaze catches on the rough edges, get it out of the pan.

Fried chicken pieces being tossed in glossy General Tso sauce in a black wok with scallions, dried chilies, and steam.
Finally, toss quickly until the sauce catches on the rough edges; look for glazed chicken, not simmered chicken.

If the chicken is softening too quickly, jump to how to keep General Tso chicken crispy.

How to Keep General Tso Chicken Crispy

If homemade saucy chicken usually turns soft on you, this is the part to remember. You are not chasing dry, shattering crunch here. You want that first little crackle before the sauce turns soft and sticky.

Why General Tso Chicken Gets Soggy

Most texture problems come from one of four places: crowded oil, thin sauce, trapped steam, or too much time in the glaze.

Diagnostic guide showing crowded fried chicken, thin sauce, trapped steam under a lid, and chicken sitting too long in sauce.
If the chicken softens quickly, check the usual suspects: crowding, thin sauce, trapped steam, or too much time in the glaze.

The Big 3 Crispy Rules

RuleWhy It Matters
Fry in batchesCrowding makes the coating steam instead of crisp.
Thicken the sauce firstThin sauce soaks into the crust.
Toss for about 30 secondsLong simmering softens the fried coating.

The supporting details matter too: pat the chicken dry if it looks wet, use enough cornstarch for a dry-looking coating, shake off heavy loose powder, drain the fried pieces on a rack, and serve as soon as the sauce goes on. Also avoid covering freshly fried or freshly sauced chicken; trapped steam is one of the fastest ways to soften the coating.

Quick Crispness Troubleshooting

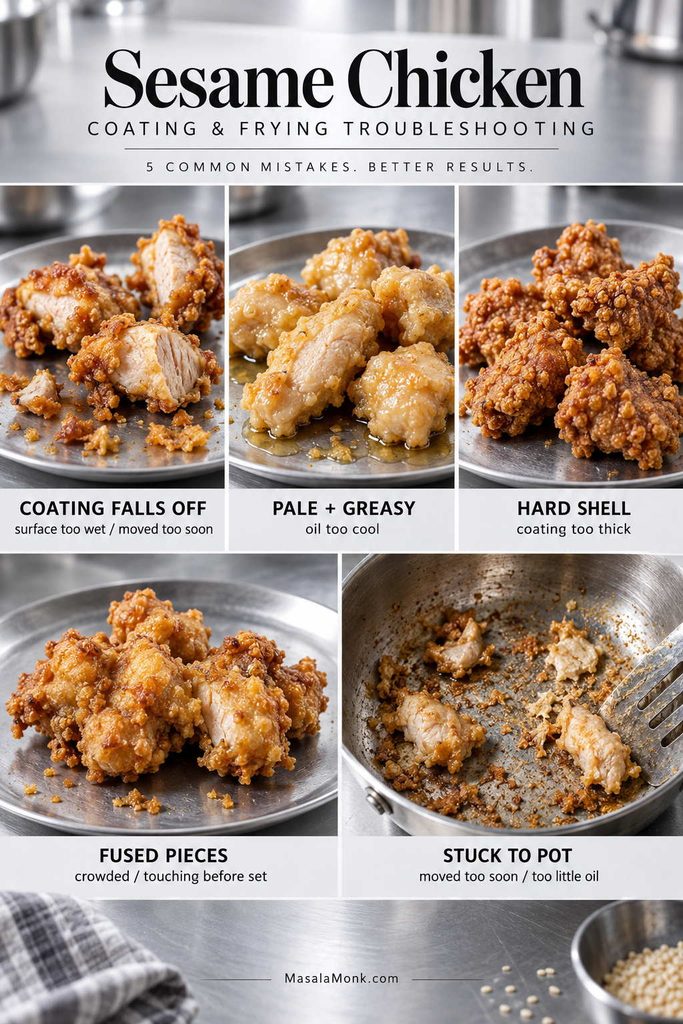
ProblemLikely CauseFix Next Time
Chicken feels greasyOil was too coolHeat oil until chicken sizzles immediately
Coating fell offChicken was too wet or stirred too muchUse more cornstarch and turn gently
Chicken softened fastSauce was thin or chicken sat too longThicken sauce first and toss right before serving
Chicken browned but inside was undercookedPieces were too large or oil too hotCut smaller pieces and control heat
Chicken is dryOvercooked or breast pieces were too smallUse thighs or cook breast just to 165°F / 74°C

If the chicken softened almost immediately, the sauce was probably too thin or the pieces sat in it too long. If they never got crisp in the first place, the oil was probably too cool or the pan was crowded.

Even when leftovers soften, the first serving should give you that little edge of crunch that makes the whole bowl feel worth the extra pan.

Make It Sweeter, Spicier, Tangier, or Less Salty

Taste before you toss. Once the chicken is in, you have less room to adjust the sauce without softening the coating.

Cooking for kids or spice-sensitive eaters? Start with less chili in the sauce and add chili oil, flakes, or sambal at the table.

Craving…Adjustment
Sweeter sauceAdd 1–2 teaspoons brown sugar or honey.
Extra heatAdd chili garlic sauce, sambal, red pepper flakes, or dried chilies.
Tangier sauceAdd another splash of rice vinegar.
Lower saltUse low-sodium soy sauce and add a little water or stock.
Bigger garlic flavorAdd one extra clove of garlic.
Restaurant-style depthAdd a little extra hoisin and sesame oil.
Less sweetnessUse 2 tablespoons sugar instead of 3 and add a little more vinegar.
Savory balanceAdd a splash more soy sauce or a spoon of stock, then rebalance with vinegar.

Make small changes and taste again. A good sauce does not taste like only sugar, only soy sauce, or only chili. It lands somewhere in the middle: sticky, bright, savory, and warm.

Lighter Version

To make the bowl a little lighter, use chicken breast, reduce the sugar to 2 tablespoons, choose low-sodium soy sauce, and use the air fryer or baked method. You will lose some takeout crunch, but you still get the sweet-spicy sauce, rice-bowl comfort, and a dinner that feels fun.

Choose Your Version

There are a few honest ways to make this dish, and they do not all promise the same texture. Pick the one that matches your night.

Craving This?Use This MethodWhat to Expect
Best balance of crisp and easyEgg white + cornstarch shallow fryJuicy chicken, crisp edges, no deep fryer
Fastest weeknight versionCornstarch-only skillet methodLighter coating, fewer steps
Restaurant-style crunchFlour + cornstarch + baking powder, then double fryCrispier crust, more oil and cleanup
Lower oilAir fryerUseful, but not as glossy-crisp as fried
Hands-off dinnerSlow cookerSaucy and tender, not crispy
No-fry family mealBaked or sheet-pan styleEasier cleanup, softer coating

If crispness matters most, use the main shallow-fry recipe. If convenience matters more, jump to the other cooking methods.

The recipe card above is the version to make first. Once you understand the texture you want, you can adjust the method without guessing.

Air Fryer, Baked, Slow Cooker, and Deep-Fry Notes

The shallow-fry version is the main recipe because it gives the best mix of crispness, control, and realistic home cleanup. Choose the method that matches your night, not the one that sounds most impressive.

In short: shallow fry for the best overall texture, air fry for lower oil, bake for easier cleanup, slow cook for saucy comfort, and deep fry for the crunchiest restaurant-style result. If your main goal is less oil or less hands-on cooking, a softer coating is not a failure; it is just a different dinner — saucier, easier, and still good over rice.

Which Cooking Method Fits Your Night?

This comparison keeps the method choice honest: crispness, oil level, cleanup, and sauciness all change depending on how you cook the chicken.

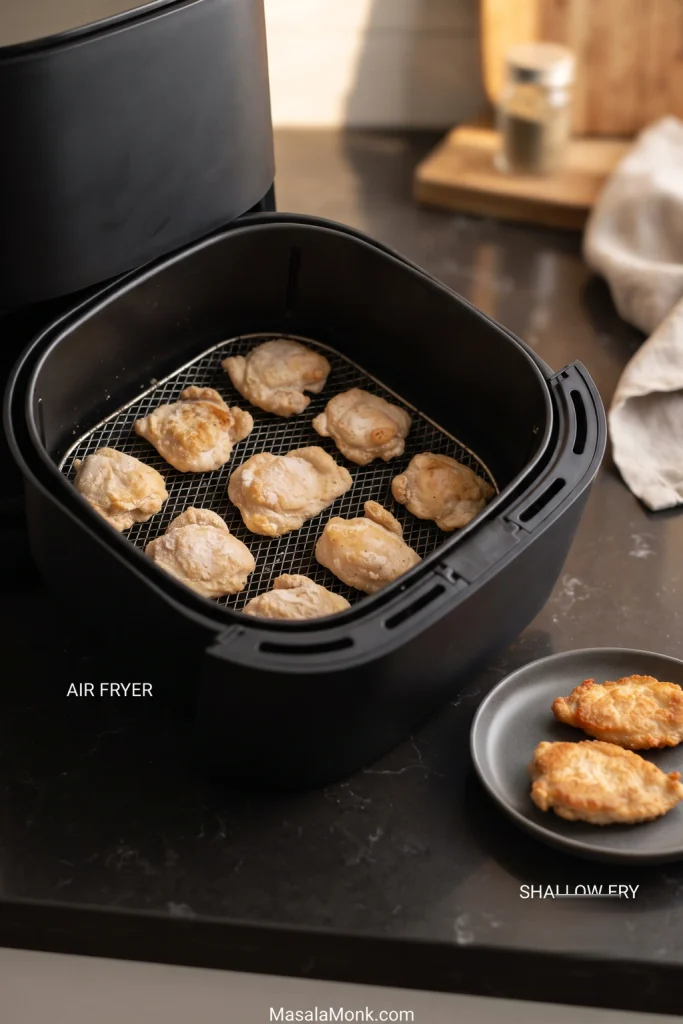
Four-panel comparison showing shallow fried, air fryer, baked, and slow cooker versions of General Tso chicken.
Choose the method by texture and time: shallow fry is crispest, air fryer is lighter, baked is simpler, and slow cooker is saucier.

Air Fryer General Tso Chicken

Air fryer General Tso chicken works best when the chicken is cooked separately and the sauce is made on the stove. Air fry coated chicken pieces at about 400°F / 200°C for 10–15 minutes, turning or shaking halfway through, then toss with hot sauce right before serving. Leave space between the pieces so the coating can dry and crisp instead of steaming.

If your air fryer chicken often turns out pale, uneven, or soft, this guide to common air fryer mistakes explains why spacing, flipping, and dry surfaces matter.

Baked General Tso Chicken

Baked General Tso chicken is easier and less messy, but it will be softer than fried. For better texture, bake the coated chicken on a rack or a well-oiled sheet pan, then sauce it after baking.

Slow Cooker General Tso Chicken

Slow cooker General Tso chicken is cozy and saucy. It is the version for spooning over rice, not the one for crisp edges. Brown the chicken first for better flavor, then cook it with the sauce and serve it hot.

Deep-Fried Restaurant-Style General Tso Chicken

The crispiest route is a deeper pot of oil and a double fry. Fry once until cooked and lightly golden, rest the chicken on a rack, then fry again briefly at a slightly hotter temperature before tossing with sauce.

Shortcut General Tso Chicken

For a shortcut dinner, use frozen crispy chicken bites or popcorn chicken and make only the sauce from scratch. Heat the chicken until crisp, simmer the sauce separately, then toss right before serving.

What to Serve With General Tso Chicken

General Tso chicken is rich and saucy, so it works best with simple sides that catch the sauce or balance the sweetness. Plain rice is the easiest base, but for a fuller takeout-style plate, shrimp fried rice works beautifully beside the sticky chicken.

  • Steamed jasmine rice or white rice
  • Brown rice
  • Fried rice
  • Steamed broccoli
  • Stir-fried green beans
  • Bok choy
  • Noodles
  • Cucumber salad
  • Cabbage slaw
  • Cauliflower rice for a lighter bowl

If serving broccoli, steam or blanch it for 3–4 minutes while the chicken drains, then serve it on the side or toss it into the pan only at the very end. Broccoli cuts through the sticky sauce and makes the plate feel complete without adding much extra work.

For the best bowl, add rice first, then broccoli, then the hot chicken. Spoon any extra sauce from the pan over the rice, not over the chicken, so the top pieces keep more texture. The best bowl is not neat; it is rice catching sauce, broccoli cutting the sweetness, and a few crisp edges still fighting through the glaze.

How to Build the Bowl

The rice can take the extra sauce. The top pieces should stay more exposed so the coating keeps a little texture.

General Tso chicken bowl with rice, broccoli, and glossy chicken while extra sauce is spooned onto the rice side.
For serving, spoon extra sauce onto the rice side so the top pieces keep more texture while the rice gets saucy.

The Final Bowl

The finished bowl should look saucy and generous, but the chicken should still show some crisp edges after tossing.

Close-up of finished General Tso chicken over white rice with broccoli, scallions, sesame seeds, and a spoon lifting rice and chicken.
The best bowl has saucy rice, bright broccoli, and chicken pieces with crisp edges still showing.

For a starter, add something crisp and snacky like these crispy veg spring rolls. A small bowl of peanut sauce gives the table a creamy, salty-sweet contrast.

Storage and Reheating

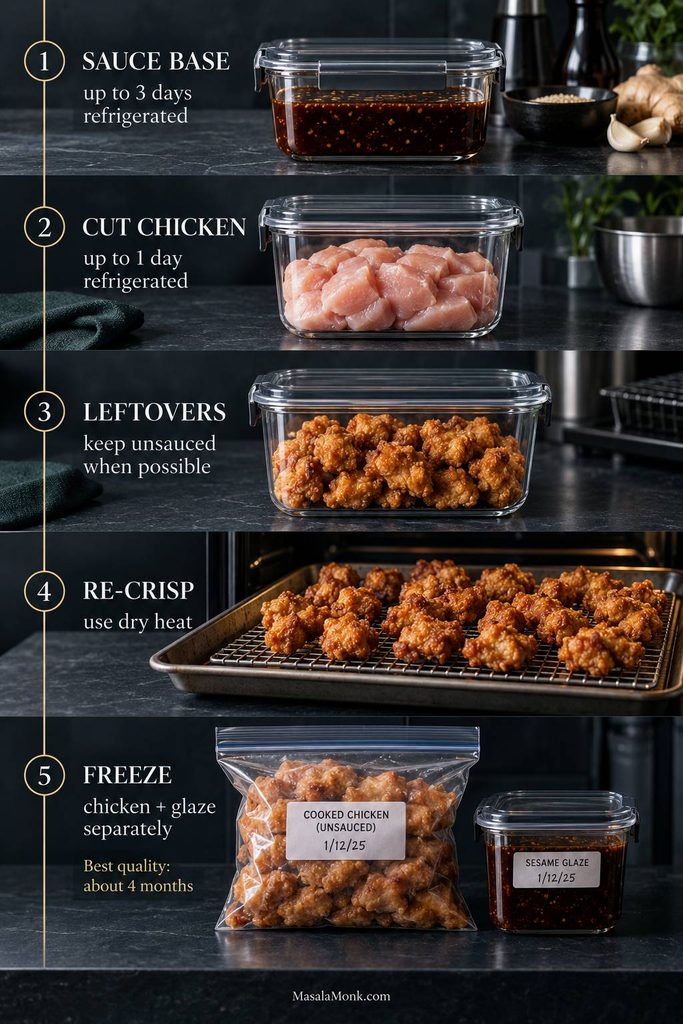
General Tso chicken is best fresh. The coating starts to soften once it is tossed in sauce, so the first serving will always have the best texture. Leftovers are still good over rice, just more saucy and soft than crackly.

  • Refrigerator: Store leftovers in an airtight container for 3–4 days.
  • Rice: Store rice separately if possible so it does not absorb all the sauce.
  • Microwave: Fastest option, but it softens the coating.
  • Air fryer: Reheat at about 350°F / 175°C for 6–8 minutes.
  • Skillet: Reheat over medium heat until hot, adding a splash of water if the sauce is too thick.
  • Freezer: You can freeze it, but the coating will not stay crisp after thawing.

Can You Make It Ahead?

The parts can be prepped ahead, but save the frying and tossing for the last minute. Mix the sauce, cut the chicken, and chop the aromatics earlier in the day, then cook when you are ready to eat.

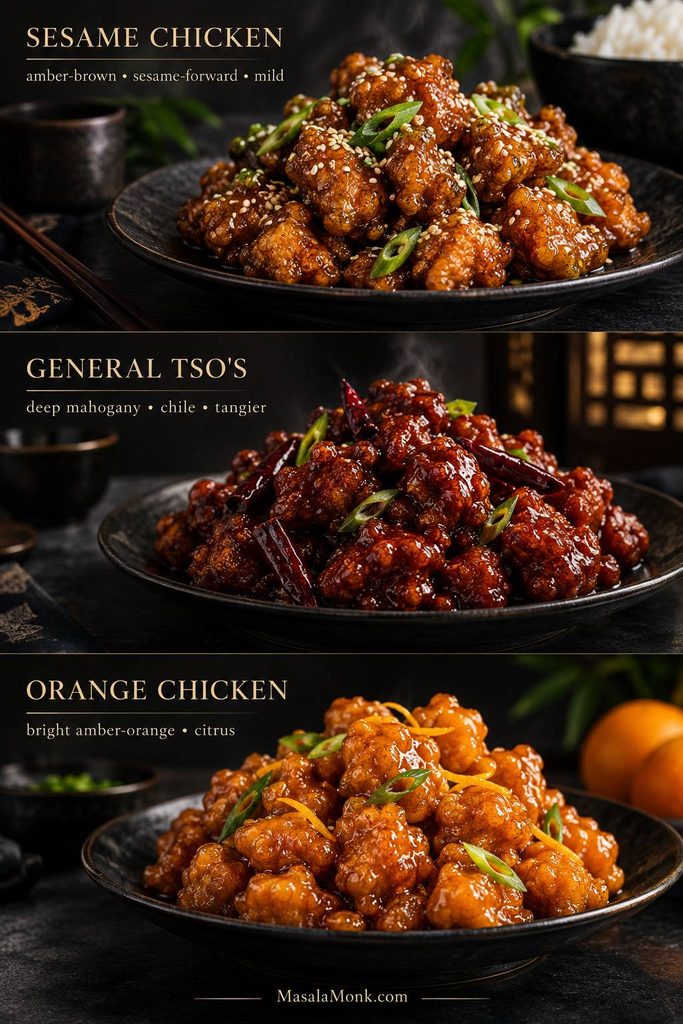
General Tso Chicken vs Sesame Chicken, Orange Chicken, and Kung Pao

These takeout dishes can look similar, but the flavor profiles are different.

DishMain FlavorTextureHeat Level
General Tso chickenSweet, tangy, savoryCrispy chicken in sticky glazeMild to medium
Sesame chickenSweeter, sesame-forwardCrispy or saucyMild
Orange chickenSweet citrusCrispy chicken in orange glazeUsually mild
Kung pao chickenSavory, spicy, nuttyStir-fried, not usually batteredMedium

Choose General Tso for sticky, sweet heat. Choose sesame chicken for a sweeter and milder sauce, orange chicken for citrus, and kung pao chicken for a less-sweet stir-fry with peanuts and chiles.

Is General Tso Chicken Authentic?

General Tso chicken is best known today as a Chinese-American restaurant dish. It has roots connected to Hunan-style cooking and the dish associated with Chef Peng Chang-kuei, but the version most people know from American takeout menus became sweeter, saucier, and more heavily coated over time. For a short background read, Smithsonian has a helpful piece on the history of General Tso’s chicken.

This is a takeout-style version, written for the flavor most people expect from the dish: crisp chicken, a sweet-spicy glaze, a little tang, and rice underneath. It is not trying to replace a traditional Chinese home recipe.

Once you understand the coating, sauce thickness, and toss timing, most General Tso problems become easy to fix.

FAQ

Is General Tso chicken spicy?

General Tso chicken is usually mildly spicy, not extremely hot. The heat comes from chili garlic sauce, dried red chilies, sambal, or red pepper flakes. For a family-friendly version, use less chili sauce and skip the dried chilies. For more heat, add extra chili near the end and taste as you go.

What is General Tso sauce made of?

General Tso sauce is made with soy sauce, rice vinegar, sugar or honey, hoisin, chili, garlic, ginger, sesame oil, stock or water, and cornstarch. It should taste sweet, savory, tangy, lightly spicy, and thick enough to coat the chicken.

Can I make General Tso chicken without hoisin sauce?

Yes. The sauce will be a little less rounded and glossy, but it will still work. Use an extra teaspoon of soy sauce, a little more sugar or honey, and a small splash of water or stock. If you have oyster sauce, add 1 teaspoon for body. Taste before tossing the chicken.

Why is my General Tso sauce not sticky?

General Tso sauce is usually not sticky because it is too thin, has not simmered long enough, or does not have enough cornstarch. Simmer it until glossy and spoon-coating. If it still looks watery, add a small cornstarch slurry and cook for another minute.

What oil is best for frying General Tso chicken?

Use a neutral high-heat oil such as canola, vegetable, peanut, sunflower, or rice bran oil. Avoid olive oil for this shallow-fry method because the oil needs to get hot enough for the coating to crisp quickly.

Can I use frozen chicken?

Yes, but thaw it completely first and pat it very dry before coating. Do not coat or fry frozen chicken pieces; the extra moisture can make the coating fall off, splatter in the oil, and turn the chicken soggy. For safest cooking, check the thickest piece and cook the chicken to 165°F / 74°C.

Why did my chicken get soggy?

Chicken gets soggy when the sauce is too thin, the pan is crowded, or the fried pieces sit in sauce too long. Fry in batches, drain well, thicken the sauce first, and toss right before serving.

Can I use chicken breast instead of thighs?

Yes, chicken breast works, but it is leaner and dries out faster than thighs. Cut it into even 1-inch pieces and avoid overcooking it. Chicken thighs are more forgiving and usually give a juicier, more takeout-style result.

Is General Tso the same as General Tao, General Cho, or General Gau chicken?

General Tao chicken, General Cho chicken, General Gau chicken, General Tsao chicken, and chicken tso are often used for very similar sweet-spicy crispy chicken dishes. The spelling changes by restaurant and region, but most people are looking for the same takeout-style idea.

Can I make it without deep frying?

Yes, shallow frying gives the closest texture without using a deep fryer. Air fryer and oven versions also work, but the coating will be lighter and less like classic takeout. For the crispiest result, shallow frying or deep frying works best.

How do I make it gluten-free?

Use gluten-free tamari instead of soy sauce and choose a gluten-free hoisin sauce. Cornstarch is usually gluten-free, but always check the label if needed. Serve with rice and vegetables instead of noodles unless the noodles are certified gluten-free.

Can General Tso chicken be made ahead of time?

The parts can be prepped ahead, but save the frying and tossing for the last minute. Mix the sauce, cut the chicken, and chop the aromatics earlier in the day, then cook when you are ready to eat.

What is the difference between General Tso chicken and sesame chicken?

General Tso chicken is usually tangier and spicier, while sesame chicken is sweeter, milder, and more sesame-forward. Both are often made with crispy chicken and sticky sauce, but General Tso has more heat and a sharper sweet-tangy balance.

Can I use bottled General Tso sauce?

Yes, bottled General Tso sauce works when dinner needs to be fast. Heat it separately and toss the chicken only at the end so the coating does not sit in sauce too long. Homemade still gives you better control over sweetness, salt, heat, and thickness.

Make it once as written, then adjust the sauce the way your table likes it. A little more vinegar, a little more chili, a little less sugar — that is when this stops feeling like a copied takeout order and starts feeling like yours. Next time, you will know exactly what to change.

Back to the recipe card · Back to top

Posted on Leave a comment

Stir Fry Sauce Recipe: One Sauce for Chicken, Beef, Tofu, Vegetables & Noodles

Finished chicken stir-fry with broccoli, bell peppers, carrots, mushrooms, rice, and a small jar of brown stir fry sauce in the background.

A stir-fry can look perfect in the pan and still taste disappointing if the sauce is off. Use too little, and dinner feels dry. Pour too much, and the vegetables turn watery. Go too salty, and you lose the freshness. Let it get too sweet, and everything starts tasting bottled.

The short version: mix one jar, add it near the end, and use about 1 cup for a family-size stir-fry so dinner turns glossy, not watery.

This homemade stir fry sauce is built around a simple MasalaMonk rule: salt, loosen, brighten, round, aroma, cling. Soy sauce gives the savory base, water or broth keeps it balanced, vinegar brightens it, honey or brown sugar rounds it, garlic-ginger-sesame bring aroma, and cornstarch helps it cling to the food instead of pooling at the bottom of the pan.

It takes about five minutes to mix and works with chicken, beef, tofu, shrimp, vegetables, noodles, rice bowls, and those tired weeknight dinners where the fridge has a few vegetables, a protein, and no clear plan.

This is the sauce to keep in your back pocket: flexible enough for whatever is in the pan, reliable enough to make a random skillet taste like a real dinner, and easy enough to adjust lighter, deeper, sweeter, spicier, lower-sodium, vegan, keto-friendly, gluten-free, or soy-free.

Quick Answer: What Is Stir Fry Sauce Made Of?

A basic stir fry sauce is made with soy sauce, water or broth, rice vinegar, honey or brown sugar, toasted sesame oil, garlic, ginger, and cornstarch. Whisk everything together, add it near the end of cooking, and let it bubble for 30 to 60 seconds until it turns glossy and coats the food.

For most stir-fries, use about ¾ to 1 cup sauce for 1 lb / 450 g protein plus vegetables. Use less for fried rice, more for noodles, and slightly less if your vegetables release a lot of water.

If you have ever poured sauce into a stir-fry and watched it turn thin, salty, or soupy, the problem was probably not you. It was usually timing, pan moisture, or too much sauce for the amount of food in the pan.

Need a specific fix? Jump to how much sauce to use, when to add it, or how to fix watery stir-fry sauce.

What the sauce texture should look like

Before the sauce ever hits the pan, check the texture. It should be thin enough to pour, but balanced enough to turn shiny and cling once heated.

Close-up of glossy brown stir fry sauce coating a spoon, with visible bits of garlic, chili, sesame, and scallion.
Use the spoon as a quick texture check: the sauce should pour easily, but still leave a shiny coating behind. That is the texture that helps it cling in the pan.

Recipe at a Glance

Prep time:
5 minutes
Cook time:
No cooking until added to the pan
Yield:
About 1 cup / 250 ml
Servings:
1 family-size stir-fry / about 4 portions
Best for:
Chicken, beef, tofu, vegetables, noodles, rice bowls
Flavor:
Savory, lightly sweet, garlicky, gingery
Make-ahead:
5–7 days in the fridge
Main cue:
Add near the end; stop when shiny and coating

Easy Homemade Stir-Fry Sauce

This is the all-purpose version to start with. It is balanced enough for chicken, beef, tofu, vegetables, noodles, and rice bowls, but simple enough to mix before the pan is even hot.

All-Purpose Stir Fry Sauce

Prep: 5 minutes
Cook: no-cook sauce; 1–3 minutes in pan
Yield: about 1 cup / 250 ml
Serves: 1 family-size stir-fry / about 4 portions

Equipment

No special equipment is needed. A small bowl or jar, a whisk or fork, measuring spoons, and a hot wok or large skillet are enough.

Best For

Chicken, beef, tofu, shrimp, vegetables, noodles, rice bowls, and quick weeknight stir-fries.

Not Best For

It is not meant for deep-frying or as a thick dip straight from the jar. This sauce shines when it hits hot food in the pan and has a minute to thicken.

Ingredients

  • ½ cup / 120 ml water or low-sodium broth
  • ⅓ cup / 80 ml low-sodium soy sauce
  • 1 tablespoon / 15 ml rice vinegar
  • 1 tablespoon honey or brown sugar, about 20 g honey or 12–13 g sugar
  • 2 teaspoons / 10 ml toasted sesame oil
  • 2 garlic cloves, grated or very finely minced
  • 2 teaspoons fresh ginger, grated
  • 1 tablespoon cornstarch / cornflour (the white thickening starch), about 8 g
  • ¼ to ½ teaspoon red pepper flakes, chili garlic sauce, or sriracha, optional

Instructions

  1. Add the water or broth, soy sauce, rice vinegar, honey or brown sugar, sesame oil, garlic, ginger, cornstarch, and chili if using to a bowl or jar.
  2. Whisk well, or close the jar and shake until the cornstarch is fully dissolved.
  3. Use immediately, or refrigerate in an airtight jar.
  4. Shake or whisk again before using because the cornstarch settles as the sauce sits.
  5. Add near the end of stir-frying, after the protein and vegetables are mostly cooked.
  6. Let it bubble for 30 to 60 seconds, tossing until it turns shiny and coats the food.

Recipe Notes

  • Use low-sodium soy sauce for the best balance. Regular soy sauce can become too salty once reduced.
  • Use broth instead of water when you want a deeper sauce for chicken or beef.
  • For a brighter sauce, add 1 extra teaspoon rice vinegar at the end.
  • For a saucier rice bowl, add 2 to 4 tablespoons extra water or broth when the sauce hits the pan.
  • Do not pour it into a pan full of watery vegetables. Cook off extra moisture first.
  • If using this as a marinade, leave out the cornstarch. Cornstarch is for thickening in the hot pan; in a marinade, it can settle, clump, or make the surface pasty.
  • Yes, you can double the recipe. Double all ingredients, store in a larger jar, and shake well before each use.
  • It is also a good meal-prep sauce. Keep a jar in the fridge, and you are halfway to a stir-fry before the pan is even hot.

Why a jar of sauce makes stir-fry easier

A mixed sauce jar turns stir-fry into assembly cooking. With the flavor base ready, you can focus on heat, sequence, and not overcrowding the pan.

Clear glass jar of brown homemade stir fry sauce on a counter with garlic, ginger, scallions, soy sauce, and sesame oil nearby.
Because the sauce is mixed before cooking, weeknight stir-fries move faster. Keep it in a jar, then shake before using so the cornstarch blends back into the sauce.

Stir fry sauce ingredients before you mix

Keep the ingredients measured before cooking starts. Stir-fries move quickly, so the sauce should be ready before the wok or skillet gets hot.

Overhead flat-lay of stir fry sauce ingredients including soy sauce, broth, rice vinegar, honey, sesame oil, garlic, ginger, cornstarch, chili, and scallions.
The ingredient list is short, but each part matters: soy sauce brings salt, vinegar brightens, sweetener rounds, aromatics wake it up, and cornstarch helps it finish properly.

Mix the sauce before the pan gets hot

Whisk or shake until the cornstarch disappears into the liquid. That prevents last-minute measuring and gives the thickener time to disperse evenly.

Hand whisking brown homemade stir fry sauce in a ceramic bowl, with a wok of vegetables in the background and garlic, ginger, chili, scallions, and sesame nearby.
Mix the sauce before the pan gets hot. Then, once the protein and vegetables are ready, you can add it quickly instead of overcooking dinner while you measure.

Before you pour it into the pan: check how much sauce to use and when to add it so the stir-fry turns glossy instead of soupy.

The first time this sauce really clicks is when you stop treating it like a separate recipe and start treating it like a dinner shortcut. A jar in the fridge means chicken, tofu, broccoli, mushrooms, noodles, or leftover rice can turn into something that feels planned — as long as you use the right amount.

Timing cue: Mix the sauce before the pan gets hot. The protein should be cooked, the vegetables should be crisp-tender, and the pan should be hot but not swimming in liquid before the sauce goes in.

The MasalaMonk Stir-Fry Sauce Rule

A good stir-fry sauce is not just soy sauce plus thickener. It needs balance. Once you understand what each part is doing, you can adjust the sauce without guessing.

The six-part sauce rule

Use this as the control panel for the recipe. If dinner tastes off, fix the missing role instead of adding random ingredients.

Educational graphic showing a bowl of stir fry sauce and the MasalaMonk stir-fry sauce rule: salt, loosen, brighten, round, aroma, and cling, with ingredient examples around the bowl.
This is the control system for the whole recipe: salt, loosen, brighten, round, aroma, and cling. Once you understand those six jobs, you can fix the sauce without guessing.
Balance Part Ingredient Job in the Sauce
Salt Soy sauce, tamari, coconut aminos Creates the savory base.
Loosen Water or broth Keeps the sauce from becoming too salty or heavy.
Brighten Rice vinegar, lime juice Cuts through richness and keeps the flavor awake.
Round Honey, brown sugar, maple syrup Softens salt, acid, and heat.
Aroma Garlic, ginger, toasted sesame oil Makes the sauce smell fresh instead of flat.
Cling Cornstarch, arrowroot, xanthan gum Helps the sauce coat the food instead of pooling.

That is the real trick. The recipe gives you the base, but this rule tells you how to fix it. Too salty? Loosen. Too flat? Brighten. Too sharp? Round. Too thin? Help it cling. Too bottled? Add aroma.

Using the rule to fix dinner? If the sauce tastes too salty, too flat, too thin, or too sweet, jump to the troubleshooting table.

How Much Stir Fry Sauce to Use

This is the part most recipes skip, and it is also the part that saves dinner. The same sauce can taste perfect or overwhelming depending on how much food is in the pan.

If your stir-fries usually taste either dry or soupy, use the table first, then check the image cue that matches what you are cooking.

What You Are Cooking How Much Sauce to Use What to Watch
1 lb / 450 g chicken + vegetables ¾ to 1 cup Use the full cup if serving over rice and you want extra sauce.
1 lb / 450 g beef + vegetables ⅔ to 1 cup Beef can handle a deeper, slightly stronger sauce.
14 oz / 400 g tofu + vegetables About ⅔ cup Use a slightly thicker sauce so it clings to crisp tofu.
4 cups vegetables only About ½ cup Use less if the vegetables release water.
6 cups vegetables + 1 lb protein About 1 cup This is the classic family-size stir-fry amount.
200 g fresh noodles or 100 g dried noodles + add-ins ⅔ to 1 cup Noodles absorb sauce quickly; add water or broth if needed.
Fried rice-style stir fry 3 to 5 tablespoons Too much sauce makes rice wet and soft.
Very saucy takeout-style stir fry 1 cup plus 2 to 4 tablespoons water or broth Best when serving over plain rice.

How much sauce to use for chicken stir-fry

For chicken and vegetables, start with ¾ cup if the pan is modest and go up to 1 cup when you want extra sauce for plain rice.

Cooked chicken pieces, mixed vegetables, and a measuring cup of brown stir fry sauce with text reading “Chicken + vegetables” and “Use ¾–1 cup sauce.”
Chicken and vegetables usually need ¾ to 1 cup sauce for a family-size pan. Use the higher end when serving over plain rice, where a little extra sauce is useful.

How much sauce to use for tofu stir-fry

Tofu works better with restraint. Too much sauce softens the crisp edges before they can hold flavor.

Crisp golden tofu cubes with broccoli, peppers, snap peas, carrots, and a measuring cup of sauce, with text reading “Tofu + vegetables” and “Use about ⅔ cup sauce.”
Tofu needs enough sauce to cling to its crisp edges, but not so much that the pan floods. About ⅔ cup is a good starting point for tofu and vegetables.

How much sauce to use for vegetables

Vegetables release moisture as they cook, so a smaller amount of sauce often looks light at first but finishes better after bubbling.

Colorful vegetable stir-fry with broccoli, peppers, carrots, mushrooms, snap peas, zucchini, and a measuring cup of sauce, with text reading “Vegetables only” and “Use about ½ cup sauce.”
Vegetable-only stir-fries need restraint because the vegetables release water as they cook. Start with about ½ cup, then add more only after the sauce thickens.

How much sauce to use for noodles

Noodles absorb sauce quickly. Keep water or broth nearby so you can loosen the pan without adding more salt or sweetness.

Glossy noodle stir-fry being lifted with tongs, with chicken, broccoli, peppers, and a measuring cup of sauce labeled “Noodles” and “Use ⅔–1 cup sauce.”
Noodles absorb sauce as they sit, so keep the finish flexible. Start with ⅔ to 1 cup sauce, then loosen with a splash of water if the noodles tighten up.

How much sauce to use for fried rice

Fried rice needs seasoning, not a full stir-fry sauce pour. Start with a few tablespoons, toss, taste, and stop before the grains clump.

Pan of fried rice with vegetables, egg, scallions, and a tablespoon of sauce, with text reading “Fried rice,” “Use only 3–5 tbsp,” and “Seasoned, not wet.”
Fried rice is seasoned, not sauced. Use only 3 to 5 tablespoons so the grains stay separate instead of turning wet and clumpy.

Amount rule: Start lower if your pan is crowded, your vegetables are watery, or your noodles are already soft. You can always add more sauce after it thickens; you cannot easily remove extra once the pan turns soupy.
When to Add the Sauce

Add it near the end of cooking, not at the beginning. The sauce is there to coat and finish the food, not to boil the vegetables or stew the protein.

The stir-fry order before sauce goes in

The pan should be hot, the protein mostly cooked, and excess vegetable moisture reduced before the sauce goes in.

  1. Heat the wok or large skillet first. A hot pan helps food sear instead of steam.
  2. Cook the protein. Chicken, beef, shrimp, pork, or tofu need direct heat before sauce.
  3. Remove the protein if needed. This prevents overcooking while vegetables finish.
  4. Cook firm vegetables first. Broccoli and carrots need more time than bok choy leaves or peppers.
  5. Cook off extra moisture. A watery pan dilutes the sauce.
  6. Return the protein and shake the sauce. Cornstarch settles, so mix it again.
  7. Add the sauce and toss for 30 to 60 seconds. Stop when it thickens and finishes the pan.
Brown stir fry sauce being poured from a jar into a wok of mostly cooked chicken, broccoli, carrots, peppers, snap peas, and scallions.
Add the sauce near the end, not at the beginning. The food should already be mostly cooked, so the sauce only needs a short bubble to thicken and coat.

Cloudy to glossy: what the sauce should do in the pan

In the pan, the sauce often starts cloudy because the cornstarch is just beginning to hydrate. Once it bubbles around the edges, it should turn clearer, darker, and shinier.

Wok of chicken and vegetables with cloudy brown sauce bubbling around the food and text reading “Cloudy at first is normal.”
At first, cornstarch sauce can look cloudy in the pan. Give it 30 to 60 seconds of bubbling, and it should turn clearer, shinier, and more clingy.

Stop when the sauce turns glossy

The stop point is short and visual: the sauce tightens, the food looks coated, and the vegetables still look bright. Keep cooking after that and the flavor can turn too salty.

Close-up of glossy chicken stir-fry with broccoli, carrots, red peppers, mushrooms, scallions, and sauce clinging to the food, with small text reading “Stop when glossy.”
This is the stop point: the sauce has tightened, the food looks coated, and the vegetables still look bright. Keep cooking much longer and the sauce can turn too salty.

Glossy, not soupy: the final texture cue

The goal is glossy, not soupy — coated, not drowned. If sauce sits under the food instead of clinging to it, the pan probably has too much liquid.

Comparison image with one side showing a stir-fry in too much liquid and the other side showing a coated stir-fry, with text reading “Glossy, not soupy,” “Coated, not drowned,” “Too much liquid,” and “Just enough sauce.”
The difference is liquid control. Too much stir-fry sauce drowns the pan; just enough coats the food and keeps the vegetables crisp-looking.

Good stir-frying is mostly prep, heat, and sequence. Serious Eats explains those stir-frying basics in depth, but for this sauce the main thing is simple: mix it first and add it near the end.

If you need rice underneath your stir-fry, MasalaMonk’s how to cook rice guide is useful when you want fluffy rice that can hold sauce without turning mushy.

Why This Recipe Works

Why each ingredient has a job

This recipe works because each ingredient solves a specific sauce problem. Use the roles below when you need to adjust taste, thickness, or balance.

Ingredient-role graphic with labeled bowls showing soy sauce as savory base, water or broth as balance, vinegar as brightness, honey as roundness, garlic and ginger as aroma, and cornstarch as cling.
When a sauce tastes off, fix the role that is missing. Add broth to loosen, vinegar to brighten, honey or sugar to round, garlic and ginger for aroma, or cornstarch for cling.

This sauce is simple, but it is not random. Soy sauce brings salt and savory depth, while water or broth keeps it from becoming too intense. Rice vinegar adds brightness, and honey or brown sugar rounds the sharp edges so the sauce tastes balanced instead of harsh.

Garlic and ginger give the sauce its classic stir-fry aroma. Toasted sesame oil adds a warm nutty finish. Cornstarch is what changes the sauce from thin liquid into a shiny coating in the hot pan.

The goal is not a heavy glaze. The goal is a thin mixture that thickens in the hot pan, grabs onto the food, and leaves everything tasting seasoned but still fresh.

When it is right, you should smell the garlic and ginger first, see the sauce turn from cloudy to shiny, and still taste the freshness of the vegetables underneath. The sauce should make the food feel finished, not hidden.

Ingredients and Substitutions

Think of this section as permission to adjust. The sauce does not fall apart if you swap broth for water, honey for maple syrup, or tamari for soy sauce. You just need to keep the balance: salt, loosen, brighten, round, aroma, and cling.

Cooking for a specific need? Jump to gluten-free, soy-free, vegan, lower-sodium, and keto variations.

Soy Sauce

Low-sodium soy sauce is the best default. Regular soy sauce can work, but it becomes stronger as it reduces. If you only have regular soy sauce, use ¼ cup instead of ⅓ cup, then add 1 to 2 extra tablespoons water or broth.

For gluten-free sauce, use certified gluten-free tamari, certified gluten-free soy sauce, or coconut aminos. For a soy-free style version, coconut aminos are usually the easiest starting point, but they are sweeter and less salty than soy sauce, so reduce the sweetener and taste at the end.

Water or Broth

Water keeps the flavor clean and light. Broth gives more depth. Chicken broth works well with chicken, beef broth gives beef stir-fries a deeper base, and vegetable broth keeps tofu or vegetable stir-fries flexible. Low-sodium broth is best because the soy sauce already brings salt.

Honey or Brown Sugar

A little sweetness balances the saltiness of soy sauce and the sharpness of vinegar. Honey gives a smooth feel. Brown sugar gives deeper flavor. Maple syrup works well for a vegan version.

For the base sauce, keep the sweetener modest. This is a balanced weeknight sauce, not a sticky glaze. If you want something sweeter, use the honey soy variation below.

Rice Vinegar

Rice vinegar keeps the sauce bright. Apple cider vinegar can work in a pinch. Lime juice also works, especially for a Thai-inspired version, but it changes the flavor and makes the sauce sharper.

Garlic and Ginger

Fresh garlic and ginger make the sauce taste more alive. Grating them helps them disappear into the mixture and spread evenly through the pan.

Close-up of fresh ginger being grated beside minced garlic on a wooden cutting board, with garlic cloves and a small bowl in the background.
Fresh garlic and ginger do more than add flavor; they make the sauce smell freshly cooked instead of bottled. Grating them helps that aroma spread quickly through the stir-fry.

If you need to use powders, replace 2 garlic cloves with about ½ teaspoon garlic powder, and replace 2 teaspoons fresh ginger with about ½ to ¾ teaspoon ground ginger. The sauce will still work, but fresh gives better aroma.

Toasted Sesame Oil

Use toasted sesame oil for flavor, not as the main cooking oil. Two teaspoons are enough to make the sauce taste warm and nutty without overpowering the garlic and ginger.

Cornstarch / Cornflour

Cornstarch thickens the sauce and gives it that takeout-style finish. It must be mixed into cold or room-temperature liquid before heating. If dry cornstarch hits hot liquid directly, it can clump.

Bowl of brown stir fry sauce being whisked with visible text reading “Whisk cornstarch cold first” and “No clumps in the pan.”
Cornstarch works best when it is whisked into cool liquid first. That small step prevents clumps and helps the sauce turn smooth when it bubbles.

It also settles when the sauce sits, so always shake or whisk before adding it to the pan.

Can you make it without cornstarch? Yes, but it will be thinner. You can simmer it slightly longer, use arrowroot for some gluten-free or grain-free versions, or use a tiny amount of xanthan gum for keto sauce. Cornstarch is still the easiest everyday thickener.

How to Use This Sauce for Different Stir-Fries

Once the base is mixed, the rest is about matching the sauce to the food. Chicken wants balance. Beef can take depth. Tofu needs cling. Vegetables need restraint. Noodles need room to move.

For Chicken

Chicken is mild, so the sauce should stay balanced rather than too salty or too sweet. The base recipe works as written, especially if you use broth instead of water.

For 1 lb / 450 g chicken plus vegetables, ¾ to 1 cup is usually right. Go closer to the full cup if you are serving it over rice and want a little extra sauce to catch underneath.

The main danger with chicken is not the sauce; it is overcooking the chicken while waiting for the sauce to thicken. Keep the final simmer short.

Good vegetables for chicken include broccoli, bell peppers, carrots, snap peas, green beans, mushrooms, cabbage, bok choy, zucchini, and onions.

Chicken stir-fry being served from a wok onto rice, with broccoli, carrots, peppers, mushrooms, peas, and glossy brown sauce.
This is the chicken use-case: tender pieces, crisp vegetables, and enough sauce to catch on the rice without turning the bowl soupy.

For Beef

Beef likes a darker, more savory sauce. Start by swapping water for broth. Oyster sauce gives the quickest savory boost, Shaoxing wine or dry sherry adds restaurant-style depth, white pepper brings quiet warmth, and a small splash of dark soy sauce gives color if you have it.

You do not need every add-in at once. Even one or two — broth, oyster sauce, or white pepper — can make the sauce taste deeper.

For 1 lb / 450 g beef plus vegetables, ⅔ to 1 cup works well. Beef can carry a stronger sauce, especially with broccoli, mushrooms, green beans, or rice underneath.

Slice beef thinly across the grain and cook it quickly over high heat. Add the sauce only after the beef and vegetables are mostly cooked, then toss just long enough for everything to thicken and coat.

Beef stir-fry with thin beef slices, broccoli, mushrooms, red peppers, green beans, scallions, sesame seeds, and glossy dark brown sauce.
For beef, lean deeper and more savory. A darker brown sauce works well with mushrooms, broccoli, peppers, and thin slices of tender beef.

For Tofu

Tofu needs the sauce to cling, not slide off. If the tofu is not browned first, it can taste bland even when the sauce itself tastes good.

A 14 oz / 400 g block of tofu plus vegetables usually needs about ⅔ cup. More than that can flood the pan before the tofu has a chance to hold the flavor.

Press firm or extra-firm tofu, cut it into cubes or slabs, and pat it dry before it hits the pan. A dry surface browns better, and browned tofu holds sauce better.

Golden tofu cubes in a wok with broccoli, bell peppers, snap peas, mushrooms, scallions, sesame seeds, and glossy brown sauce.
Brown the tofu first so the sauce has something to hold onto. Crisp edges make tofu taste more seasoned and keep the sauce from sliding off.

For a lower-carb tofu dinner idea, MasalaMonk’s tofu and broccoli stir-fry with cauliflower rice is a natural fit, especially when you want a high-protein meal without noodles or regular rice.

For a vegan tofu stir-fry, use vegetable broth and maple syrup or sugar instead of honey. If you want deeper savory flavor, add mushroom powder or a little dried-shiitake soaking liquid.

For Vegetables

Vegetables are sneaky. They look dry when they first hit the pan, then suddenly release enough water to thin the whole sauce. That is why vegetable stir-fries need less sauce and a hotter pan.

Four cups of vegetables usually need only about ½ cup sauce. That may look modest, but vegetables release their own moisture as they cook.

Mushrooms and zucchini are the biggest water releasers here. Give them space, use higher heat, and wait until their moisture cooks off before adding the sauce.

Cook firm vegetables first: broccoli, carrots, cauliflower, green beans, cabbage stems. Add softer vegetables later: bell peppers, mushrooms, zucchini, bok choy leaves, snap peas, and scallions.

Colorful vegetable-only stir-fry with broccoli, red and yellow peppers, carrots, mushrooms, snap peas, zucchini, scallions, and a light glossy sauce.
A vegetable stir-fry should still look fresh after saucing. Keep the coating light so the broccoli, peppers, carrots, mushrooms, and snap peas stay colorful.

For Noodles and Rice

Noodles drink sauce quickly, so they need a looser finish. For noodles, use ⅔ to 1 cup sauce for about 200 g fresh noodles or 100 g dried noodles, plus your protein and vegetables. Start lower if the noodles are already soft or oily; add a splash of water or broth if they drink up the sauce too quickly.

If cooked noodles are clumped before they go into the pan, loosen them first with a splash of water or oil. Sauce cannot coat noodles evenly if they enter the pan as one sticky block.

Chopsticks lifting glossy stir-fried noodles from a wok with vegetables, tofu or chicken pieces, scallions, and brown sauce.
Noodle stir-fry is ready when the strands separate and shine instead of clumping together. If the pan feels tight, add a splash of water and toss briefly.

For fried rice-style cooking, use much less. Start with 3 to 5 tablespoons. Too much liquid makes rice wet and heavy. Cold cooked rice works better than freshly cooked hot rice because it is drier and separates more easily in the pan.

If you like saucy rice-bowl dinners, use the full cup in the stir-fry and serve it over plain rice. For fried rice, season gradually.

For a takeout-style egg dish with a glossy sauce, MasalaMonk’s egg foo young recipe is a useful companion because it also leans on a savory sauce that thickens and coats.

Back to top ↑

Easy Sauce Variations

You do not need every variation today. Make the base sauce first. Come back to this section when you want it sweeter, spicier, darker, lower-sodium, vegan, gluten-free, keto-friendly, or soy-free.

Choose the sauce direction that fits dinner

Use the base recipe as your starting point, then nudge it sweeter, hotter, darker, or looser depending on what is in the pan.

Three labeled bowls of stir fry sauce showing Honey Soy, Spicy, and Dark Takeout-Style variations with honey, chilies, mushrooms, ginger, and scallions nearby.
Once the base sauce works, choose the direction that fits dinner: honey soy for shine, spicy for heat, or dark takeout-style for a deeper brown sauce.
If You Want Change This Best For
Balanced everyday sauce Use the base recipe as written. Chicken, tofu, vegetables, rice bowls
Sweeter honey soy Increase honey to 2 tablespoons. Chicken, shrimp, tofu, noodles
Darker takeout-style sauce Use broth, oyster sauce, Shaoxing wine, and white pepper. Beef, broccoli, mushrooms, cabbage
Spicy sauce Add chili garlic sauce, sriracha, chili crisp, or fresh chilies. Chicken, shrimp, tofu, noodles
Noodle-friendly sauce Keep it looser with extra water or broth. Fresh noodles, dried noodles, rice noodles
Soy-free style Use coconut aminos and reduce the sweetener. Tofu, vegetables, chicken, rice bowls

Pick the version closest to tonight’s dinner, then adjust from there. Chicken and noodles may want sweeter or looser; beef may want darker; vegetables usually want restraint.

If you find a version that works especially well — extra ginger, chili crisp, coconut aminos, mushroom broth, less sweetener, or something completely your own — leave it in the comments so another reader can borrow the idea.

3 Ingredient Stir Fry Sauce

A 3 ingredient version is useful when you need something fast and do not have the full list of ingredients. Mix soy sauce, honey or brown sugar, and a cornstarch slurry. It works in a pinch, but the full sauce tastes more balanced because it includes acid, aromatics, sesame oil, and a proper loosened base.

Chinese Takeout-Style Brown Sauce Variation

For a deeper, darker, more takeout-style sauce, start by swapping water for broth. Oyster sauce brings the quickest savory boost, Shaoxing wine or dry sherry adds restaurant-style depth, white pepper brings quiet warmth, and a small splash of dark soy sauce gives color if you have it. Reduce the honey or brown sugar slightly so the sauce stays savory.

Vegetarian cooks can use mushroom sauce instead of oyster sauce. For a vegan version, skip oyster sauce and use mushroom powder, shiitake soaking liquid, or a vegan mushroom stir-fry sauce.

Honey Soy Stir Fry Sauce

The honey soy version is sweeter and shinier: increase the honey to 2 tablespoons. It works especially well with chicken, shrimp, salmon, tofu, broccoli, carrots, bell peppers, and noodles. If it tastes too sweet, balance it with rice vinegar, lime juice, chili flakes, or a little more soy sauce.

Spicy Stir Fry Sauce

To make it spicy, add red pepper flakes, chili garlic sauce, sriracha, gochujang, chili crisp, or fresh chopped chilies to the base recipe. Start small. Spicy sauce tastes better when it still has balance: salt, sweetness, acid, garlic, ginger, and heat.

Thai-Inspired Quick Stir-Fry Sauce

This is not a replacement for a specific Thai dish sauce. It is a quick direction for weeknight stir-fries when you want the flavor to lean brighter, sharper, and more chili-forward. Replace some rice vinegar with lime juice, add a little fish sauce if you are not vegetarian, reduce the soy sauce slightly, and keep the garlic and chili strong.

If you want a full Thai basil stir-fry, MasalaMonk’s Pad Kra Pao recipe goes deeper into that sharper, basil-heavy sauce style.

Teriyaki-Style Stir Fry Sauce

For a teriyaki-style version, make the sauce sweeter and shinier. Increase the sweetener, use a little more ginger, and let it reduce until it looks lightly glazed. Use this when you want a sweeter rice-bowl style dinner rather than a lighter vegetable stir-fry. For a dedicated sweeter glaze, see MasalaMonk’s teriyaki sauce recipe.

Diet and Substitution Variations

These versions are not here to make the sauce feel restricted. They are here so the same jar can still work when someone at the table needs less sodium, no gluten, no soy, no animal products, or no sugar.

Use this section like a shortcut: lower-sodium if salt is the problem, gluten-free if wheat is the problem, soy-free if soy itself is the problem, and keto if sugar or starch is the problem.

Easy stir fry sauce swaps that are not interchangeable

The labels matter here. Gluten-free, soy-free, vegan, and lower-sodium changes solve different problems, so choose the swap that matches the actual need.

Ingredient-swap guide for stir fry sauce with visible labels for gluten-free tamari or coconut aminos, soy-free coconut aminos, vegan maple syrup and vegetable broth, and lower-sodium dilute and taste.
Substitution labels matter. Tamari can help with gluten-free stir fry sauce, but it is usually soy-based; coconut aminos are the better soy-free starting point.

Lower-Sodium Version

A lower-sodium version needs more than just low-sodium soy sauce. Low-sodium soy sauce still contains sodium, and the sauce can become saltier as it reduces. Reduce the soy sauce first, increase water or unsalted broth, and build flavor with garlic, ginger, vinegar, chili, scallions, mushrooms, and sesame aroma.

Do not add salt until the stir-fry is finished and tasted. If you are cooking for a strict sodium limit, use label numbers rather than taste alone.

Keto / Sugar-Free Version

For a keto or sugar-free version, skip the honey or brown sugar and use a keto-friendly sweetener only if needed. Cornstarch is not ideal for strict keto. Use up to ⅛ teaspoon xanthan gum for 1 cup sauce, starting with a smaller pinch if your brand thickens aggressively.

Xanthan gum does not behave like cornstarch: cornstarch thickens as it cooks, while xanthan gum thickens as it hydrates. Whisk well, wait a minute, and add more only if you really need it. A sauce can go from glossy to gummy quickly.

Vegan Version

To make it vegan, use vegetable broth and maple syrup or sugar instead of honey. Avoid oyster sauce, fish sauce, chicken broth, chicken bouillon, and non-vegan bottled sauces. For deeper savory flavor, add mushroom powder, finely minced mushrooms, or a little dried-shiitake soaking liquid.

If you are building more plant-forward meals around tofu, tempeh, edamame, lentils, or beans, MasalaMonk’s plant-based protein sources guide can help you choose what to pair with the sauce.

Gluten-Free Version

Regular soy sauce often contains wheat, so it is not always gluten-free. Use certified gluten-free tamari, certified gluten-free soy sauce, or coconut aminos. Also check the labels on broth, oyster sauce, hoisin sauce, chili garlic sauce, and bottled sauces because gluten can appear in places you may not expect.

No Soy Sauce vs Soy-Free vs Gluten-Free

These terms sound similar, but they are not interchangeable. That matters when you are cooking for allergies, gluten-free needs, or someone who is avoiding soy completely. For a broader look at tamari, coconut aminos, and liquid aminos, EatingWell’s guide to soy sauce substitutes is a helpful reference.

Phrase What It Actually Means What to Watch
Without soy sauce The recipe does not use soy sauce. It may still contain soy from hoisin, oyster-style sauces, or other condiments.
Soy-free No soy ingredients at all. Check every label carefully.
Gluten-free No wheat/gluten ingredients. Tamari may be gluten-free but still contains soy.
Coconut aminos A common soy-free and gluten-free substitute for soy sauce. Usually sweeter and less salty, so reduce sweetener.
Liquid aminos A savory soy-sauce-like seasoning. Many versions are soy-based and can still be high in sodium; check the label.

Without Soy Sauce

A sauce without soy sauce is not always the same as a soy-free sauce. Some recipes skip soy sauce but use hoisin sauce, oyster sauce, or other bottled condiments that may still contain soy. That may be fine if you only want to avoid soy sauce specifically, but it is not appropriate for someone who needs a truly soy-free version.

Coconut aminos are the easiest starting point for a soy-sauce-style substitute. From there, garlic, ginger, vinegar, chili, and a little mushroom depth help bring back the savory edge that soy sauce usually provides.

Truly Soy-Free Version

For a truly soy-free version, check every ingredient label carefully. Do not use soy sauce, tamari, hoisin sauce, or oyster-style sauces unless they are clearly labeled soy-free. Use coconut aminos as the main savory base, then add garlic, ginger, rice vinegar, sesame oil if tolerated, chili, and mushroom flavor for depth.

Back to top ↑

Homemade vs Store-Bought Stir Fry Sauce

Store-bought sauce is convenient, but it often leans too sweet, too salty, or too thick. Homemade sauce lets you adjust the balance in the moment: more vinegar for brightness, more broth for looseness, more garlic or ginger for freshness, and a little sweetener only when the sauce tastes harsh.

If you are using bottled sauce, start with ⅓ to ½ cup for a small two-serving stir-fry, or ½ to ¾ cup for a larger pan. Bottled sauces are often saltier and sweeter than homemade, so add less first and stretch with water or broth if needed.

  • Too salty? Dilute with water or broth and add more vegetables.
  • Too sweet? Add rice vinegar, lime juice, chili, or a little soy sauce.
  • Too thick? Loosen with water or broth.
  • Too flat? Add fresh garlic, ginger, scallions, chili, or toasted sesame oil.
  • Tastes bottled? Add fresh aromatics and a splash of acid.

Use bottled sauce near the end of cooking, just like homemade. If it is already thick and sweet, do not simmer it for too long or it can become sticky and overpowering.

How to Fix Sauce Problems

A stir-fry can go sideways fast, but most sauce problems are fixable while the pan is still hot. Usually the pan needs one small correction, not a restart.

Most sauce problems start earlier: check the amount guide and the timing cue if your stir-fries often turn watery, salty, or too thick.

Quick fixes for common stir-fry sauce problems

Problem Why It Happened Fix
Sauce is too salty Too much regular soy sauce, salty broth, or bottled sauce. Add water or broth, vinegar or lime, more vegetables, or a little sweetener.
Sauce is too thin Not enough cornstarch, not simmered long enough, or pan is watery. Simmer 30–60 seconds more or add a small slurry.
Sauce is too thick Too much cornstarch or sauce reduced too much. Add water or broth 1 tablespoon at a time.
Sauce tastes flat Not enough acid, garlic, ginger, or heat. Add vinegar, lime, garlic, ginger, chili, or sesame oil.
Sauce is too sweet Too much honey, sugar, or bottled sauce. Add vinegar, chili, soy sauce, or broth.
Sauce clumps Cornstarch was added directly to hot liquid. Mix cornstarch with cold liquid first.
Stir-fry turns watery Vegetables released moisture into the pan. Cook off liquid before adding sauce.
Sauce burns Sugary sauce cooked too long over high heat. Add sauce at the end, lower the heat slightly if needed, and stop once glossy.
Noodles absorb everything Noodles are thirsty or sauce is too thick. Add water or broth and toss briefly.
Tofu tastes bland Tofu was not crisped or sauce was too thin. Crisp tofu first and use a slightly thicker sauce.
Sauce tastes bottled It is sweet, salty, and thick but missing freshness. Add fresh garlic, ginger, vinegar or lime, scallions, chili, or sesame oil.

Why your stir-fry turns watery

The most common mistake is adding sauce to a crowded, watery pan. Cook the vegetables until extra moisture reduces, then add the sauce and let it bubble briefly.

Wok of chicken and vegetables sitting in thin watery sauce with text reading “Watery pan? Cook off moisture first.”
If the pan turns watery, pause before adding more sauce. Cook off vegetable moisture first, especially with mushrooms, zucchini, or a crowded skillet.

Small fixes before you restart dinner

Small save: If the pan tastes almost right but not quite, add a splash of water if it is too strong, a little vinegar if it feels flat, or a pinch of sugar if it tastes harsh. Tiny changes fix most stir-fry sauce problems.

How to Store It

Store the sauce in an airtight jar in the refrigerator for 5 to 7 days. Shake or whisk before using because the cornstarch settles at the bottom.

You can also freeze it for up to 3 months. Thaw in the refrigerator, then whisk or shake well before adding it to the pan. If freezing, use a freezer-safe container and leave a little room for expansion.

Do not worry if it looks cloudy or separated when cold. Cornstarch can settle and make the sauce look uneven. Once heated and stirred, it should smooth out again.

If the sauce has already been cooked into a stir-fry, store leftovers in an airtight container. For best texture, store noodles or rice separately from saucy stir-fry when possible.

What to Serve With It

It fits easy dinners like chicken and broccoli, beef and green beans, tofu and bok choy, shrimp and vegetables, cabbage and mushrooms, or zucchini and peppers.

Serve those over steamed jasmine rice, brown rice, cauliflower rice, stir-fried noodles, lettuce wraps, or fried rice. For choosing between rice, quinoa, cauliflower rice, or lighter base options, MasalaMonk’s quinoa vs rice guide is helpful, especially if you are balancing fullness, carbs, and texture.

If you want a cool, crisp side beside a salty-sweet stir-fry, MasalaMonk’s cucumber salad is a simple contrast: fresh, tangy, and fast enough to make while the sauce is resting in the jar.

If you want a rice-based takeout-style meal with a different flavor direction, MasalaMonk’s Spam fried rice recipe shows how little sauce fried rice actually needs compared with a saucy stir-fry.

At its best, the sauce leaves you with crisp vegetables, tender protein, and just enough savory-sweet shine for the rice or noodles to catch.

Frequently Asked Questions

What is stir fry sauce made of?

It is usually made with soy sauce, water or broth, rice vinegar, a little sweetener, garlic, ginger, sesame oil, and cornstarch. Together, they make a sauce that is savory, lightly sweet, aromatic, and able to thicken in the pan.

How much sauce should I use for a stir-fry?

Use about ¾ to 1 cup for 1 lb / 450 g protein plus vegetables. Use about ½ cup for vegetables only, ⅔ to 1 cup for noodles, and only 3 to 5 tablespoons for fried rice.

When should I add sauce to a stir-fry?

Add it near the end of cooking, after the protein and vegetables are mostly cooked. Let it bubble for 30 to 60 seconds until it turns glossy and coats the food.

Can I make this without soy sauce?

Yes. Coconut aminos are the easiest soy-sauce-style substitute. They are usually sweeter and less salty than soy sauce, so reduce the sweetener and adjust the flavor at the end. Be careful with hoisin, oyster sauce, and bottled sauces because they may still contain soy even if they are not soy sauce.

Is this sauce gluten-free?

Only if you use the right soy sauce substitute. Regular soy sauce often contains wheat, so choose certified gluten-free tamari, certified gluten-free soy sauce, or coconut aminos, and check all bottled add-ins.

How do I make a lower-sodium version?

Use low-sodium soy sauce or a lower-sodium alternative, water or unsalted broth, and extra garlic, ginger, vinegar, chili, scallions, or mushroom flavor. Avoid high-sodium bottled sauces unless the label works for your needs.

How do I make a keto version?

Skip honey or sugar and use a keto sweetener only if needed. Replace cornstarch with up to ⅛ teaspoon xanthan gum for 1 cup sauce, starting with a small pinch. Soy sauce, tamari, or coconut aminos can all work depending on your carb and sodium needs.

Can I use this for noodles?

Yes. Use ⅔ to 1 cup for a noodle stir-fry, and keep a little water or broth nearby. Noodles absorb sauce quickly, so you may need a splash to loosen everything in the pan.

Can I use this as a marinade?

Yes, but leave out the cornstarch if using it as a marinade. Cornstarch is for thickening in the pan, not for soaking raw protein. Add the cornstarch later when you are ready to cook.

Why is my sauce too salty?

The most common reason is regular soy sauce, salty broth, or too much bottled sauce. Dilute with water or broth, add more vegetables, brighten with vinegar or lime, or balance with a small amount of sweetener.

Why did it not thicken?

It may not have simmered long enough, the pan may have too much vegetable liquid, or there may not be enough cornstarch. Let it bubble briefly, or add a small slurry made from cornstarch and cold water.

How long does homemade stir fry sauce last?

It lasts 5 to 7 days in an airtight jar in the refrigerator. Shake or whisk before using because the cornstarch settles.

Final Notes

Do not let the length of the guide make the sauce feel complicated. The base recipe is simple; the extra notes are just here to help you adjust it without guessing.

Once you know the rule — salt, loosen, brighten, round, aroma, cling — stir-fry sauce stops feeling like a fixed recipe and starts feeling like something you can control.

Keep a jar ready, and a random mix of protein, vegetables, and rice or noodles starts to feel like dinner instead of leftovers. If you make it your own — sweeter, spicier, soy-free, or extra garlicky — share what worked so others can borrow the idea too.

Back to top ↑

Posted on Leave a comment

Egg Foo Young Recipe with Takeout-Style Gravy

Golden Egg Foo Young patties served with brown gravy, sliced scallions, steamed rice, chopsticks, and a spoon on a ceramic plate.

The best Egg Foo Young recipe tastes like old-school Chinese-American takeout rebuilt for a home skillet: soft egg in the center, browned edges outside, little snaps of vegetable crunch, and brown gravy that turns plain rice into dinner. It should not taste like a flat breakfast omelet wearing sauce. It should feel sturdier, saucier, and more generous than that.

Homemade Egg Foo Young usually goes wrong in predictable ways: the filling is too wet, the patties tear when flipped, the eggs turn rubbery, or the gravy thickens into paste. This version keeps the mixture balanced, uses a clear 6-egg to 2–2½ cup filling ratio, and treats the first patty as a test round so you can adjust the heat, oil, or scoop size before the whole batch is cooked. If your first patty misbehaves, jump to troubleshooting before cooking the next one.

The method starts in a skillet and ends with hot gravy over rice. You can pan-fry for an easy weeknight dinner, shallow-fry for better browned edges, or use the restaurant-style method when you want puffier patties. Either way, the goal is the same: tender egg patties that hold together, a sauce that moves instead of sitting like paste, and a plate that finally feels like Egg Foo Young rather than an omelet with toppings.

Why the gravy should move: the sauce should coat the patty while still flowing into the rice. If it sits like paste, the dish starts feeling heavy before the eggs have a chance to shine.

Glossy brown gravy being poured from a small pitcher over a golden Egg Foo Young patty with rice blurred in the background.
The sauce should move as it pours. If it sits heavily on the patty, thin the gravy before serving so the eggs stay tender instead of buried.

Quick Answer: What Is Egg Foo Young?

Egg Foo Young is a Chinese-style egg patty made with beaten eggs, vegetables, and often shrimp, chicken, pork, beef, tofu, or extra vegetables. In Chinese-American takeout, it is usually served as separate patties with brown gravy and rice.

You may also see it written as Egg Foo Yung, Egg Fu Yung, or Egg Foo Yong. The spelling changes, but the idea stays the same: vegetables and protein are mixed directly into beaten eggs, cooked into patties, and finished with a savory brown sauce.

This recipe is built for the gravy-over-rice version people usually mean when they crave Egg Foo Young: browned edges, a tender center, crisp little vegetables, and enough sauce to make rice feel like part of the dish. It is not a folded breakfast omelet, a baked egg casserole, or a dry scramble. The patty should be sturdy enough for sauce, soft enough to cut cleanly, and generous enough that every bite tastes like more than plain egg. If the sauce is the part you came for, go straight to the brown gravy method.

Cut-open Chinese-American Egg Foo Young patty served with rice, brown gravy, scallions, a spoon, and a takeout box in the background.
This is the old-school Chinese-American version many people mean when they crave Egg Foo Young: separate patties, rice, scallions, and a savory brown sauce.

What this recipe prevents: wet filling that tears the patties, flat omelet-like rounds with no browned edges, bland eggs that depend completely on sauce, and gravy that turns gluey before it reaches the plate.

Recipe snapshot

Egg Foo Young at a Glance

Yield4 servings / 6 medium patties
Prep Time15 minutes
Cook Time20 minutes
Total Time35 minutes

Main method: pan-fried or shallow-fried patties in a skillet.

Restaurant-style option: deeper oil for puffier, crisp-edged patties.

Sauce: brown cornstarch gravy with stock, soy sauce, oyster sauce, sesame oil, and white pepper.

Best served with: steamed rice, fried rice, noodles, stir-fried vegetables, or a crisp cucumber salad.

Fastest weeknight version: use cooked shrimp, leftover chicken, roast pork, pressed tofu, or quick-cooking vegetables. Make the gravy first, cook smaller ⅓- to ½-cup patties, and adjust after the first one instead of forcing the whole batch through the same heat.

Cooked shrimp, chopped chicken, pressed tofu, scallions, eggs, and a skillet arranged for a quick Egg Foo Young dinner.
For a faster weeknight Egg Foo Young, start with cooked protein or pressed tofu; then keep the patties smaller so they set quickly and flip cleanly.

Why This Egg Foo Young Recipe Works

The egg has to stay in charge. That is the whole recipe. You want enough vegetables and protein to make the patties taste generous, but enough beaten egg to set around everything and hold the shape when you lift it from the pan.

  • The ratio keeps the patties stable. Six large eggs comfortably hold about 2 to 2½ cups total filling.
  • Small, controlled add-ins cook cleanly. Drained sprouts, thin cabbage, diced onion, and chopped protein stay tucked inside the egg instead of leaking water into the pan.
  • A tiny cornstarch slurry helps structure. One teaspoon in the egg mixture helps the patty hold without making it bouncy.
  • The sauce stays adjustable. Making the gravy separately means you can thin, thicken, or season it without overcooking the eggs.
  • The oil level controls texture. Pan-fry for weeknight ease, shallow-fry for better edges, or use deeper oil for restaurant-style puff.

The main rule: think of the mixture as eggs carrying filling, not vegetables barely glued together with egg. If the bowl looks like a dry pile or a loose soup, fix that before the first patty hits the pan.

Spoon lifting scoopable Egg Foo Young batter with beaten egg coating bean sprouts, scallions, onion, and chopped protein.
Before the mixture reaches the skillet, it should look scoopable and egg-forward. In other words, the eggs should carry the filling, not barely glue it together.

Ingredients for Fluffy Egg Foo Young

This is the kind of recipe that turns a few eggs, a handful of vegetables, and a little gravy into a proper meal. The ingredient list is simple; the important part is cutting the filling small enough to cook quickly and keeping it steady enough to stay inside the patty.

Small pieces are your friend here. They cook quickly, stay tucked into the egg, and give every bite crunch, sweetness, and little pockets of savoriness.

Egg Foo Young ingredients including eggs, bean sprouts, scallions, cabbage, chopped protein, soy sauce, stock, oyster sauce, and cornstarch on a prep counter.
Good Egg Foo Young starts before the pan: dry sprouts, small vegetables, measured filling, and a ready gravy base make the cooking much easier to control.

To make the Egg Patties

Eggs, Vegetables, and Protein

  • Eggs: Six large eggs make 6 medium patties, enough for 4 servings with rice and gravy.
  • Bean sprouts: One cup / about 70–85 g gives the patties classic crunch without crowding the eggs. Drain them well so the mixture stays scoopable. No sprouts? See the bean sprout substitutes.
  • Protein or tofu: Keep this to 115–140 g / 4–5 oz for the 6-egg version. Cooked shrimp, chicken, roast pork, or firm tofu all work as long as they are chopped small.
  • Vegetable-only version: Choose thin vegetables and keep the total filling within the ratio below. A quick sauté helps mushrooms, zucchini, or bell pepper settle into the eggs instead of loosening the mixture.
  • Onion: A small ¼ cup / about 35 g is enough once it is finely diced.
  • Cabbage or mushrooms: Use ⅓ to ½ cup / about 35–50 g finely shredded cabbage or thinly sliced mushrooms. Mushrooms should be pre-cooked if they seem watery.
  • Scallions / spring onions: Two scallions / about 15–20 g add freshness without making the mixture heavy.

Drain Bean Sprouts Before Mixing

Bean sprouts add the classic crunch, but they also carry water. Drain them before mixing so the egg can set cleanly around the filling.

Fresh bean sprouts draining in a fine mesh strainer over a bowl on a kitchen counter.
Wet sprouts can loosen the egg mixture quickly, so draining them well gives the first patty a much better chance of holding together.

Seasoning, Structure, and Frying Oil

  • Cornstarch: Mix 1 teaspoon / about 3 g cornstarch with 1 tablespoon / 15 ml cold water before whisking it into the eggs.
  • Sesame oil: A small ½ teaspoon / 2.5 ml adds aroma. More can overpower the patties.
  • White pepper: A little white pepper gives the eggs and gravy that warm Chinese-restaurant note without making the dish spicy.
  • Neutral oil: Use just enough to coat the pan for tender patties, or about ¼ inch / 6 mm for puffier shallow-fried edges.

Egg-to-filling ratio: for 6 large eggs, keep the total filling around 2 to 2½ cups. That includes bean sprouts, onion, cabbage or mushrooms, scallions, and protein. Use the numbers as a guide, but trust the bowl too: the egg should still visibly surround the filling.

Egg Foo Young ratio guide showing bowls for 4 eggs, 6 eggs, and 8 eggs with measured amounts of vegetables and protein.
The egg-to-filling ratio is the reason the patties hold together. Too much filling makes them tear, while enough beaten egg helps everything set into a stable round.
EggsTotal FillingBest Yield
4 large eggsAbout 1½ cups4 small patties
6 large eggs2 to 2½ cups6 medium patties
8 large eggs3 to 3½ cups8 medium patties or 6 large patties

Ingredient Prep Matters

If you remember only one prep rule, make it this: the add-ins should help the egg set, not fight it. When vegetables are drained and cut small, the patties cook calmly instead of sputtering, tearing, or leaking in the pan.

Hand slicing cabbage, scallions, onion, and mushrooms into small pieces on a cutting board for Egg Foo Young.
Small, thin vegetables cook more evenly inside the patties, so the egg can set around them instead of tearing around bulky pieces.

Cook Watery Vegetables First

Mushrooms, zucchini, bell pepper, and similar vegetables can release liquid as they cook. If you use more than ⅓ to ½ cup, sauté them briefly first, then let them cool before adding them to the eggs. Cooked shrimp, chicken, pork, or tofu should also be chopped small enough to stay tucked into the patty when you flip it.

Mushrooms and zucchini being sautéed in a skillet before being added to Egg Foo Young batter.
A quick sauté lets mushrooms, zucchini, and other watery add-ins release steam before they weaken the Egg Foo Young batter.

What Goes Into Egg Foo Young Gravy

Some people call it Egg Foo Young sauce, but the takeout version eats more like a light brown gravy. It should taste rounded, not just salty: savory from stock and soy sauce, slightly rich from oyster sauce, and smooth enough to coat the eggs without weighing them down.

Saucepan with Egg Foo Young gravy ingredients including stock, soy sauce, oyster sauce, cornstarch, white pepper, sesame oil, and dark soy sauce.
Egg Foo Young gravy gets its flavor before it thickens, so build the base with stock, soy sauce, oyster sauce, white pepper, and sesame oil first.
  • Stock: Chicken stock gives the most familiar flavor; 2 cups / 480 ml is enough sauce for the patties and rice. Vegetable stock works for a meatless version.
  • Light soy sauce: 1½ tablespoons / about 22 ml seasons the gravy and adds umami.
  • Oyster sauce: 1 tablespoon / 15 ml gives the sauce body and a deeper restaurant-style flavor.
  • Dark soy sauce: ½ teaspoon / 2.5 ml is optional, but it gives the gravy a deeper brown color.
  • Sugar: 1–2 teaspoons / 4–8 g rounds out the salty sauces without making the gravy sweet.
  • White pepper: ¼ teaspoon adds gentle warmth.
  • Cornstarch slurry: 2 tablespoons / about 16 g cornstarch mixed with 3 tablespoons / 45 ml cold water thickens the gravy.
  • Sesame oil: ½ teaspoon / 2.5 ml goes in at the end so the aroma stays fresh.

Easy swaps: use vegetable stock for a meatless gravy, vegetarian oyster sauce or mushroom sauce instead of oyster sauce, and tamari only if every other ingredient is also gluten-free. Dark soy sauce is optional; the gravy will be lighter without it but still good.

Pan-Fried vs Restaurant-Style Egg Foo Young

There are two common versions of Egg Foo Young in people’s minds. One is an easy skillet patty with gravy. The other is the puffier, crisp-edged Chinese restaurant version cooked in more oil. Both can be delicious, but the oil level changes the texture.

Pan-fried Egg Foo Young patty compared with a puffier restaurant-style patty near a wok and wire rack.
Pan-fried Egg Foo Young is easier at home; however, more oil creates puffier restaurant-style edges and a richer takeout texture.
MethodBest ForTextureNotes
Pan-friedEasy home cookingTender, lightly goldenUses the least oil and is easiest for beginners.
Shallow-friedBest home balanceGolden edges, slightly fuller centerUse about ¼ inch / 6 mm oil in a skillet or wok.
Deep-friedRestaurant-style puffPuffy, crisp-edged, richerUses more oil and needs temperature control.

Best setup for most home cooks: use a 10-inch nonstick skillet, a ½-cup measure, and a thin flexible spatula. Shallow-frying with about ¼ inch / 6 mm oil gives better browning than a barely oiled pan without the mess of deep-frying. Want the puffier version? Skip to the restaurant-style method.

How to Make Egg Foo Young

Once the filling is chopped, the gravy ingredients are measured, and your pan is ready, the recipe moves quickly. Keep the bowl close to the stove, cook in small batches, and adjust the heat after the first patty if you need to.

1. Prep the Filling

Drain the bean sprouts very well. Finely dice the onion, slice the scallions, and shred the cabbage or slice the mushrooms thinly. Chop your shrimp, chicken, pork, tofu, or vegetables into small pieces.

Cook chicken or pork first so the eggs can stay tender instead of waiting in the pan for meat to finish. Cooked shrimp, cooked chicken, roast pork, or tofu can go straight into the filling.

2. Make the Gravy Before Frying

Once the eggs hit the pan, things move quickly. Having the gravy ready means the patties can go straight from skillet to plate while they are still soft in the center and browned at the edges. If the sauce thickens while the patties cook, a splash of stock or water will bring it back.

3. Mix the Eggs

In a large bowl, whisk the eggs until the whites and yolks are fully combined. In a small bowl, mix 1 teaspoon cornstarch with 1 tablespoon cold water, then whisk that slurry into the eggs with sesame oil and white pepper.

Fold in the bean sprouts, onion, cabbage or mushrooms, scallions, and protein. The mixture should scoop easily: glossy egg around the filling, not soup and not a dry vegetable pile. Mix right before cooking so the vegetables keep their snap and the batter stays light.

4. Cook the Patties

Heat the Pan and Scoop the Batter

Heat a nonstick skillet, wok, or well-seasoned pan over medium to medium-high heat. Add enough neutral oil to coat the bottom for pan-frying, or about ¼ inch / 6 mm oil for a more shallow-fried texture.

Egg Foo Young patty frying in shallow oil with bubbles around the golden edge and a spatula near the pan.
A shallow layer of oil helps the edge set before the center dries out, which makes the patty sturdier when it is time to flip.

Use a ½-cup measure for standard patties. Scoop the egg mixture into the pan, nudging the filling into a round shape. Cook until the edges are set and the bottom is golden, about 2 to 3 minutes. Flip carefully and cook the second side until the middle has no liquid egg, about 1½ to 2 minutes more.

Let It Set Before Flipping

Egg Foo Young patty being lifted and flipped on a thin spatula in a skillet with shallow oil.
Wait until the first side feels stable on the spatula. Then flip once, gently, instead of moving the patty while the center is still loose.

Use the First Patty as Your Test

The first patty is often the test patty. If it browns too fast, lower the heat before the next batch; if it sticks or looks dry around the edges, add a little more oil. Look for a center that springs lightly and no loose egg running from the middle. After that first patty, the recipe usually relaxes: you know whether the pan wants less heat, more oil, or a smaller scoop. If the first one tears, browns too fast, or stays runny, do not guess; check the troubleshooting table before cooking the next batch.

Slightly uneven first Egg Foo Young patty on a spatula beside a skillet and a bowl of batter.
One imperfect first patty can save the whole batch, because it shows whether the pan needs less heat, more oil, or a smaller scoop.

Scoop size guide: use ⅓-cup scoops for small beginner-friendly patties, ½-cup scoops for standard home patties, and ¾-cup scoops only if you are using more oil and feel confident flipping larger rounds.

How to Know the Patties Are Right

Cut-open Egg Foo Young patty with golden edges, a set center, bean sprouts, scallions, and visible filling.
The best doneness cue is texture: the center should be set, the edge should be browned, and the inside should still look tender rather than dry.

You nailed the patties when:

  • The edges are golden but not hard.
  • The center springs lightly when pressed.
  • No loose egg runs from the middle.
  • The patty lifts without tearing.
  • The sprouts still have a little snap.

Doneness cue: the egg should be set in the center, not wet or liquid. Shrimp should look opaque. Chicken and pork are safest and easiest when cooked before they go into the egg mixture. For exact food-safe temperatures for egg dishes and poultry, the USDA safe temperature chart is a useful reference.

5. Rest Briefly, Then Serve

Transfer the cooked patties to a wire rack or a plate lined with paper towel. Let them rest in a single layer so the edges stay better. Spoon hot gravy over the top right before serving so the eggs stay tender and the sauce softens the edges without making the plate soupy.

How to Make the Brown Gravy

Bad Egg Foo Young gravy usually goes watery or gluey. The sweet spot is smooth, savory, and spoon-coating, with enough body to cling to the patties but enough movement to sink into the rice. That is the difference between plain egg patties and the takeout-style plate people remember.

Once the slurry is smooth, the sauce is simple. Cornstarch must be mixed with cold water before it touches hot liquid; otherwise, it can clump almost instantly.

Cornstarch slurry being stirred with cold water in a small glass bowl for Egg Foo Young gravy.
A smooth slurry is the shortcut to smooth Egg Foo Young gravy; mix it cold first, then whisk it into the hot sauce gradually.
  1. Combine the base. In a small saucepan, combine stock, light soy sauce, oyster sauce, optional dark soy sauce, sugar, and white pepper.
  2. Bring to a simmer. Heat gently until the mixture is steaming and lightly bubbling.
  3. Make the slurry. In a small bowl, stir cornstarch with cold water until smooth.
  4. Thicken slowly. Whisk the slurry into the simmering gravy a little at a time.
  5. Simmer until shiny. Cook for 30 to 60 seconds, until the gravy coats the back of a spoon.
  6. Finish with sesame oil. Add sesame oil at the end so the aroma stays fresh.

Gravy texture cue: the gravy should look shiny, coat the back of a spoon, and still pour easily. If it sits heavily on the patty, thin it before serving. If it disappears through the rice like broth, give it a little more time or a little more slurry.

Glossy brown Egg Foo Young gravy coating the back of a spoon with a visible drip over a saucepan.
Once the gravy coats the spoon and drips slowly, it is ready: thick enough for the patties, but still loose enough to flow into the rice.

Cornstarch Gravy vs Roux Gravy

The main recipe uses cornstarch because it is fast, glossy, and easy to control. If you want a richer old-school body, start with a light roux and finish with a smaller amount of slurry.

Two bowls of brown gravy showing a glossy cornstarch gravy and a thicker roux-style gravy with spoon trails.
Cornstarch gives Egg Foo Young gravy a glossy, lighter finish, while a roux adds a rounder restaurant-style body. Choose based on the texture you want.
StyleBest ForTexture
Cornstarch-only gravyFast weeknight Egg Foo YoungGlossy, light, pourable
Roux + cornstarch gravyMore old-school restaurant bodyRounder, richer, more gravy-like
Arrowroot gravyCorn-free adjustmentClearer and slightly slicker; avoid long boiling

For a roux version, cook 1 tablespoon neutral oil with 1 tablespoon flour for 1 to 2 minutes, then whisk in the stock and seasonings before finishing with a smaller amount of cornstarch slurry. Making the gravy gluten-free means checking every ingredient, not just swapping the soy sauce. Use tamari only if the stock, oyster sauce or vegetarian oyster sauce, and thickener are also gluten-free.

Restaurant-Style Egg Foo Young: How to Get Puffier Patties

Restaurant-style Egg Foo Young is not just “more oil.” Hotter oil sets the outside quickly, which helps the patty puff and brown before the center overcooks. That is why shallow-frying gives you a better home version than a barely oiled pan, and deeper oil gives you the most dramatic restaurant-style texture.

Oil Temperature for Restaurant-Style Puff

For puffier patties, use a wok or deep pot with 2–3 inches of neutral oil. Heat the oil to about 350°F / 175°C. When the egg mixture goes in, the oil temperature will drop. Letting the patties cook closer to 325°F / 160°C helps them puff and set without scorching.

Restaurant-style Egg Foo Young patty puffing in hot oil with a thermometer clipped to a wok and a wire rack nearby.
For restaurant-style Egg Foo Young, hot oil sets the outside quickly. Meanwhile, the center stays tender because the patty puffs before it overcooks.
  • Use a ladle instead of pouring from the bowl.
  • Lower the egg mixture gently into the oil so it forms a round patty.
  • Let the first side set before moving it.
  • Flip once the edges look golden and the patty feels stable.
  • Drain on a wire rack, not a flat plate, so the edges stay crisp.
  • Give each patty room so the oil stays hot and the edges set quickly.

Egg Foo Young Variations

Choose the variation by what you want from the plate. Shrimp gives the most classic takeout feel, chicken is the easiest leftover dinner, pork or char siu brings deeper flavor, and tofu or vegetables make the lightest version. The rule stays the same for all of them: keep the pieces small, control watery add-ins, and let the egg remain the binder.

How to Prep Add-Ins

Before you choose shrimp, chicken, pork, tofu, or vegetables, check how much moisture and cooking time that add-in brings to the eggs.

Prep bowls of shrimp, cooked chicken, pork or char siu, tofu, mushrooms, and cabbage for Egg Foo Young variations.
Different add-ins need different prep. Cooked meats are easiest, while mushrooms, tofu, and cabbage need the right size and moisture control.
Add-InCooked or Raw?Prep CueWatch-Out
ShrimpCooked easiest; raw okay if smallChop large shrimpRaw shrimp must turn opaque
ChickenCooked bestDice or shred smallRaw chicken can overcook the eggs
Pork / char siuCooked bestDice smallCan make the filling salty
Firm tofuUse pressed tofuPat dry and dice smallSoft tofu breaks down
MushroomsPre-cook if using more than a littleSlice thinReleases water
CabbageRaw okay if thinShred fineToo much makes patties loose

Shrimp Egg Foo Young

Shrimp is the most takeout-feeling version: sweet, quick-cooking, and easy to pair with brown gravy. Cooked small shrimp are easiest. If using raw shrimp, chop them small enough to turn opaque by the time the egg sets.

Shrimp Egg Foo Young patty cut open to show shrimp inside, served with brown gravy, scallions, and rice.
Shrimp Egg Foo Young gives the most classic takeout feel; for best results, chop large shrimp so the pieces stay tucked inside the patty.

Chicken Egg Foo Young

Chicken is the best leftover version. Use cooked chicken, chopped or shredded small, so the eggs can stay tender instead of waiting in the pan for raw meat to finish.

Cooked chopped chicken being folded into Egg Foo Young batter with bean sprouts, scallions, and vegetables in a glass bowl.
Chicken Egg Foo Young works best with cooked, chopped chicken because the eggs can set quickly instead of waiting for raw meat to cook through.

Pork Egg Foo Young

Pork, roast pork, or char siu gives the deepest old-school flavor. Dice it small and season the egg mixture lightly because cooked pork can bring plenty of salt on its own.

Pork Egg Foo Young patty cut open with diced char siu inside, scallions on top, and brown gravy in a bowl nearby.
Pork or char siu adds deeper flavor, but the pieces still need to be small enough for the egg to bind into a clean patty.

Vegetable Egg Foo Young

Vegetable Egg Foo Young works best when the vegetables are chosen for texture, not just volume. Thin cabbage, sprouts, scallions, and shredded carrot can usually go in raw; mushrooms, zucchini, bell pepper, and watery greens should be cooked briefly first.

Firm tofu works well if you want a meatless version with more body. Press it, pat it dry, and dice it small before adding it to the bowl. For vegetarian gravy, use vegetable stock and vegetarian oyster sauce or mushroom sauce.

Vegetable and tofu Egg Foo Young patty cut open with tofu cubes, bean sprouts, cabbage, carrot, scallions, and brown gravy.
Vegetable Egg Foo Young works best when the filling is chosen for texture, not volume. Firm tofu, cabbage, sprouts, and scallions keep it light but satisfying.

No Bean Sprouts? Use These Instead

Bean sprouts give Egg Foo Young its classic crunch, but you can still make good patties without them. Choose the substitute by what the mixture needs.

Bean sprout substitutes for Egg Foo Young including Napa cabbage, water chestnuts, snow peas, shredded cabbage, carrot, scallions, mushrooms, zucchini, and greens.
No bean sprouts? Use crisp substitutes like Napa cabbage, water chestnuts, or snow peas. Cook watery vegetables first so they do not loosen the batter.
  • For crunch: thin Napa cabbage, diced water chestnuts, or julienned snow peas.
  • For easy volume: finely shredded cabbage, shredded carrot, or extra scallions.
  • Use carefully: mushrooms, zucchini, and watery greens. Cook them briefly first, then cool before adding them to the eggs.

The substitute should support the egg, not take over the bowl. If the mixture starts looking like vegetables barely coated in egg, add another beaten egg or hold some filling back for the next batch.

Troubleshooting Egg Foo Young

Start with the First Patty

If your first patty is messy, do not panic. Egg Foo Young is easy to adjust batch by batch because you can change the scoop size, heat, oil, or mixture before the next patty goes in.

Most Egg Foo Young problems are batch-by-batch problems, not recipe-ending problems. Even restaurant-style Egg Foo Young is not about perfect circles; it is about tender eggs, enough filling, and a sauce that brings the plate together.

Egg Foo Young troubleshooting guide showing patties that fall apart, stay too runny, have burnt edges, and turn out just right.
One messy patty does not ruin Egg Foo Young; instead, use it to fix the mixture, heat, oil, or scoop size before the next round.

Common Problems and Quick Fixes

ProblemFix NowFix Next Time
Patties fall apartMake smaller patties and add 1 beaten egg to the remaining mixture if needed.Keep total filling to 2–2½ cups per 6 eggs.
Mixture looks waterySpoon off excess liquid before frying.Drain sprouts well and pre-cook vegetables that release liquid.
Center stays runnyLower heat slightly and cover the pan briefly.Use ½-cup scoops instead of oversized patties.
Edges burn before center setsReduce heat and add a little more oil if the pan is dry.Cook over medium to medium-high heat, not high heat.
Patties taste blandServe with hot gravy and garnish with scallions or white pepper.Use flavorful stock, white pepper, sesame oil, and a well-seasoned gravy.
Patties turn rubberyReheat gently and avoid cooking them further.Pull patties once the egg is set; do not cook until dry.
Gravy is too thinAdd a little more cornstarch slurry and simmer briefly.Bring the sauce to a simmer before adding slurry.
Gravy is too thickWhisk in stock or water, a splash at a time.Add slurry gradually instead of all at once.
Gravy is lumpyStrain it if needed, then whisk smooth.Mix cornstarch with cold water first and stream it in while whisking.
Leftovers become soggyReheat patties separately from the gravy.Store patties and gravy in separate containers.

What to Serve with Egg Foo Young

Plain steamed rice is the classic base because it catches the salty-silky finish and keeps the plate from feeling too rich. The rice is not just filler here; it is part of why the dish feels like dinner.

If you are making Egg Foo Young for brunch, keep the sides lighter with something crisp like this cucumber salad recipe. If you are building a Chinese restaurant-style dinner, pair it with fried rice, noodles, or stir-fried greens.

  • Steamed jasmine rice: the easiest and most classic base.
  • Spam fried rice: ideal when you want a full restaurant-style plate. You can also use the same cold-rice method with simpler add-ins.
  • Garlic noodles: richer, cozier, and good with extra gravy.
  • Stir-fried greens: bok choy, cabbage, green beans, broccoli, or snow peas all work well.
  • Cucumber salad: a cool, crisp contrast to the hot gravy.
  • Chili oil: add at the table if you want heat.
  • Extra scallions: a fresh finish that keeps the dish from feeling heavy.

Storage, Make-Ahead Tips, and Reheating

Egg Foo Young is at its best when the patties are hot and the gravy is freshly spooned over the top, but leftovers can still be very good if the sauce and eggs are stored separately. This keeps the patties from absorbing too much gravy and turning soft. For general leftover timing and storage safety, the USDA’s leftovers and food safety guidance is a useful reference.
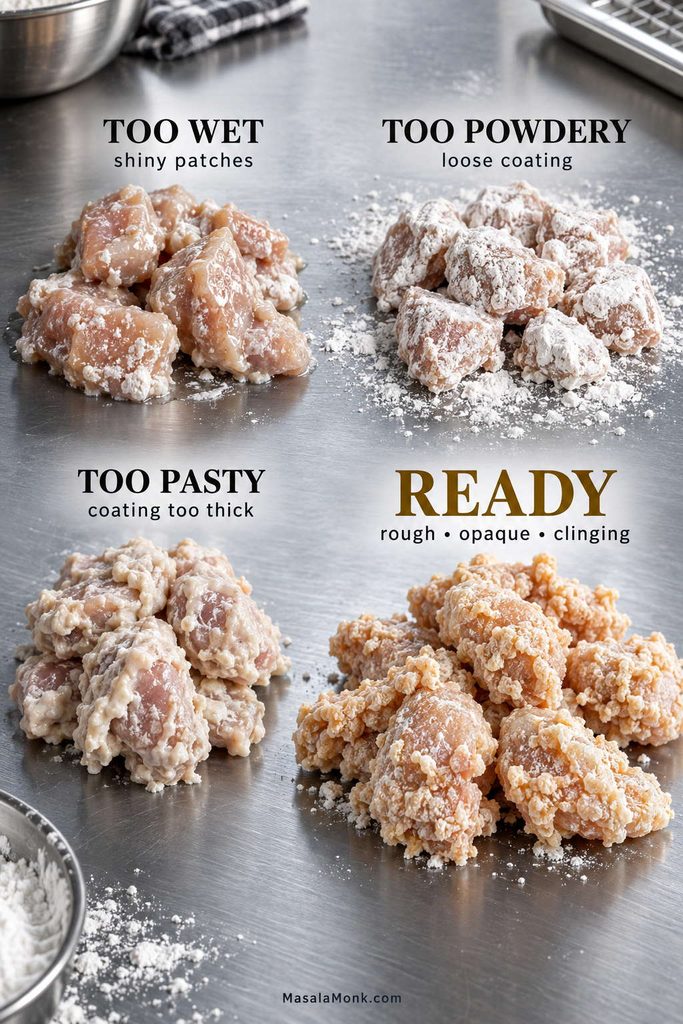
  • Make the gravy ahead: prepare it up to 2 days ahead and refrigerate it separately. Reheat gently and thin with stock or water if needed.
  • Prep the vegetables ahead: chop them earlier in the day and keep them dry in the fridge. Mix them with the eggs only right before cooking.
  • Refrigerate: store cooked patties and gravy in separate airtight containers for up to 3–4 days.
  • Reheat patties: warm gently in a skillet over low to medium heat, or use an air fryer briefly if you want firmer edges.
  • Reheat gravy: warm in a saucepan, whisking in a splash of stock or water if it has thickened.
  • Microwave carefully: use short bursts because eggs can turn rubbery when overheated.
  • Freeze only if needed: freeze patties without gravy. The texture is better refrigerated than frozen.

FAQs

Is Egg Foo Young the same as an omelet?

It is omelet-like, but not exactly the same as a Western folded omelet. Egg Foo Young has the vegetables and protein mixed directly into the eggs, is usually cooked as separate patties, and is served with brown gravy.
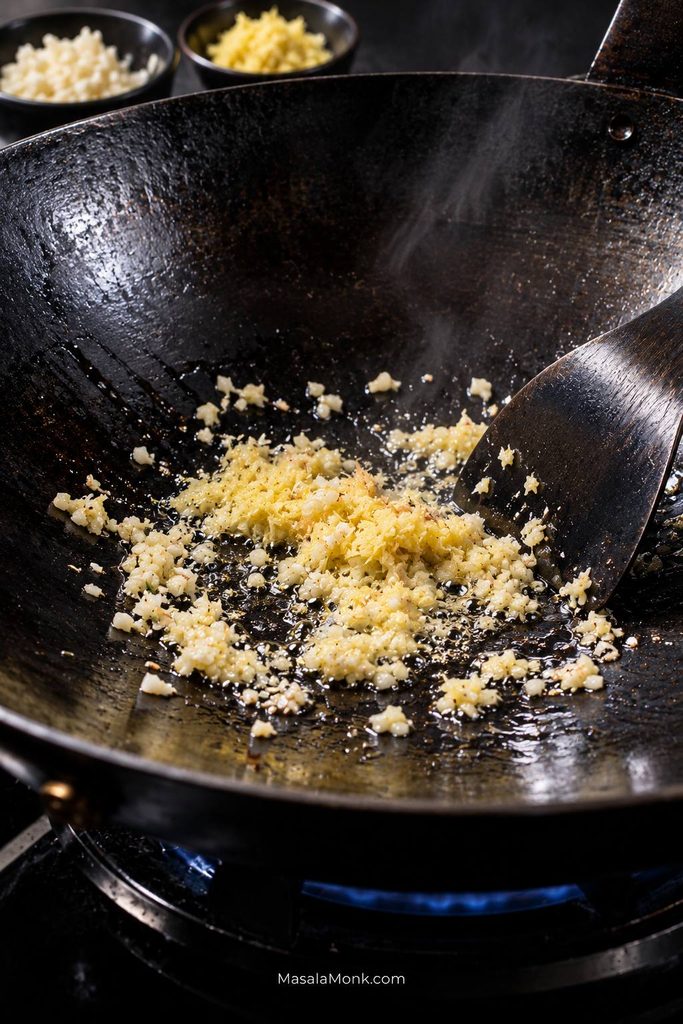
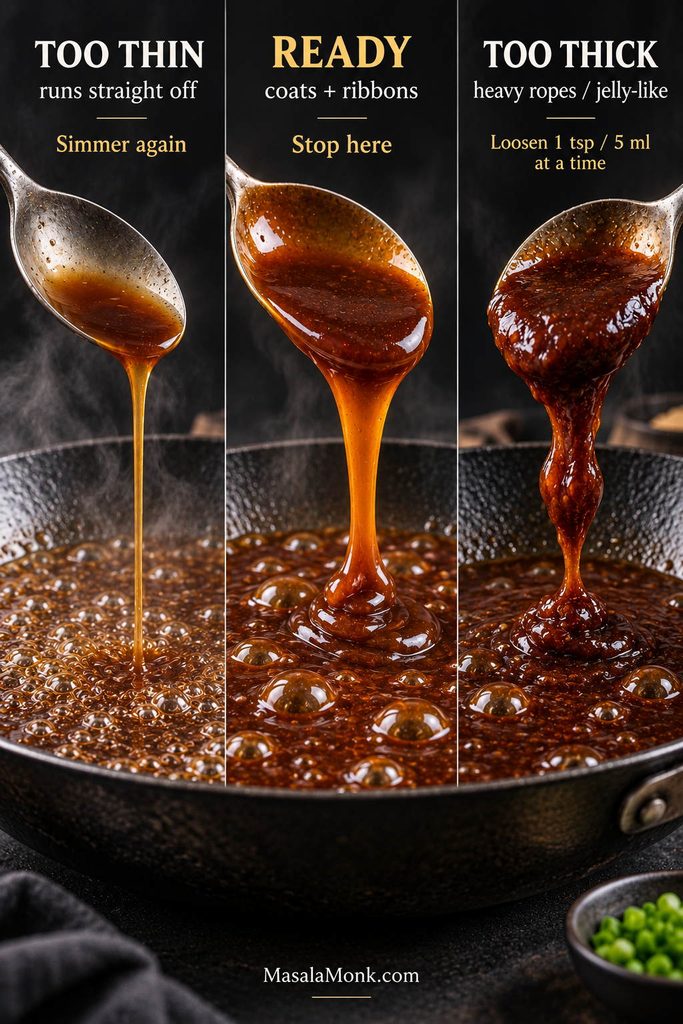
What is Egg Foo Young gravy made of?

Most Egg Foo Young gravy is made with stock, soy sauce, oyster sauce, white pepper, sesame oil, and a cornstarch slurry. A roux can be added for a rounder, more old-school restaurant-style body.

Why does my Egg Foo Young fall apart?

Usually, the filling is too wet, too heavy, or the patties are too large. Keep the filling around 2 to 2½ cups for 6 eggs, drain vegetables well, and use ½-cup scoops.

Why is my Egg Foo Young not fluffy?

Flat Egg Foo Young usually comes from a dry pan, oversized patties, or watery filling. A barely oiled skillet makes the mixture behave like a flat omelet. A little more oil, smaller scoops, and controlled add-ins help the edges puff before the center dries out.

What meat is best for Egg Foo Young?

Shrimp gives the most classic takeout feel, chicken is easiest for leftovers, and roast pork or char siu gives deeper flavor. Whatever protein you choose, keep it small so the egg can hold it.

Can Egg Foo Young be made without bean sprouts?

Yes. Use thin Napa cabbage, shredded cabbage, water chestnuts, snow peas, shredded carrot, or extra scallions. Choose small, controlled substitutes so the egg patties still hold together.

Is Egg Foo Young Chinese or Chinese-American?

Egg Foo Young has roots in Chinese egg dishes, but the gravy-covered version many people order from takeout menus is strongly Chinese-American. This recipe is built around that restaurant-style plate: separate egg patties, vegetables, optional protein, rice, and brown gravy.

Can the gravy be vegetarian?

Yes. Use vegetable stock and vegetarian oyster sauce or mushroom sauce. Check the soy sauce and other condiments too if you need the whole dish to meet a specific dietary requirement.

How do I make Egg Foo Young taste like takeout?

The takeout flavor comes from three things working together: enough oil to brown the edges, small amounts of white pepper and sesame oil, and a brown gravy that tastes savory before it thickens. If the patties are dry and the gravy is flat, it will taste like an omelet with sauce, not Egg Foo Young.

Should the gravy go on before or after serving?

Spoon the gravy over the patties just before serving. If the patties sit in gravy too long, they soften and lose their best texture.

Can you bake or air-fry Egg Foo Young?

You can bake or air-fry the egg mixture in a small greased pan, but it will eat more like a baked omelet or mini frittata than classic Egg Foo Young. For browned edges and takeout-style texture, a skillet with enough oil is still the better method. For a baked egg texture, these egg muffin cups are a better fit.

Once the ratio clicks, Egg Foo Young stops feeling fussy. The first patty teaches you the heat, the sauce goes on at the end, and the rest becomes a flexible dinner you can make with shrimp, chicken, pork, tofu, or the vegetables already in the fridge.

Egg Foo Young Step by Step

Use this quick visual recap before the recipe card if you want the whole cooking flow in one place: prep the filling, mix the eggs, cook the patties, thicken the gravy, and serve hot.

Step-by-step Egg Foo Young process showing filling prep, egg mixing, patty cooking, gravy thickening, and serving with rice.
This visual roadmap shows the whole flow: prep the filling, mix the eggs, cook the patties, thicken the gravy, then serve hot.

Recipe card

Egg Foo Young Recipe with Takeout-Style Gravy

Fluffy Chinese-American egg patties with crisp vegetables, your choice of shrimp, chicken, pork, tofu, or extra vegetables, and smooth brown gravy to spoon over rice.

Prep Time15 minutes
Cook Time20 minutes
Total Time35 minutes
Servings4

Yield: 6 medium patties

Method: Pan-fried / shallow-fried

Cuisine: Chinese-American

Course: Dinner, main dish, brunch

Ingredients

For the Egg Patties

  • 6 large eggs
  • 1 teaspoon / about 3 g cornstarch mixed with 1 tablespoon / 15 ml cold water
  • ½ teaspoon / 2.5 ml toasted sesame oil
  • ¼ teaspoon white pepper
  • 1 cup / about 70–85 g bean sprouts, rinsed and very well drained
  • 115–140 g / 4–5 oz chopped cooked shrimp, cooked chicken, roast pork, or firm tofu
  • ¼ cup / about 35 g finely diced onion
  • ⅓ to ½ cup / about 35–50 g finely shredded cabbage or thinly sliced mushrooms
  • 2 scallions / spring onions, thinly sliced
  • 2–4 tablespoons / 30–60 ml neutral oil for pan-frying, or more as needed for shallow-frying

For the Gravy

  • 2 cups / 480 ml chicken stock or vegetable stock
  • 1½ tablespoons / about 22 ml light soy sauce
  • 1 tablespoon / 15 ml oyster sauce or vegetarian oyster sauce
  • ½ teaspoon / 2.5 ml dark soy sauce, optional
  • 1–2 teaspoons / 4–8 g sugar, to taste
  • ¼ teaspoon white pepper
  • 2 tablespoons / about 16 g cornstarch
  • 3 tablespoons / 45 ml cold water
  • ½ teaspoon / 2.5 ml toasted sesame oil

For Serving

  • Steamed rice or fried rice
  • Extra sliced scallions
  • Chili oil, optional

Instructions

Make the Gravy

  1. Prep the filling. Drain the bean sprouts well. Dice the onion, slice the scallions, shred the cabbage or mushrooms, and chop the protein small. Pre-cook raw chicken, raw pork, mushrooms, or vegetables that release a lot of moisture.
  2. Start the gravy. In a small saucepan, combine the stock, soy sauce, oyster sauce, optional dark soy sauce, sugar, and white pepper. Bring to a gentle simmer.
  3. Thicken the gravy. Stir 2 tablespoons cornstarch with 3 tablespoons cold water until smooth. Whisk the slurry into the simmering gravy a little at a time. Simmer for 30 to 60 seconds, until smooth and spoon-coating. Stir in sesame oil and keep warm.

Mix and Cook the Patties

  1. Mix the eggs. In a large bowl, whisk the eggs. Stir 1 teaspoon cornstarch with 1 tablespoon cold water, then whisk it into the eggs with sesame oil and white pepper.
  2. Add the filling. Fold in the bean sprouts, protein, onion, cabbage or mushrooms, and scallions. The mixture should scoop easily: glossy egg around the filling, not soup and not a dry vegetable pile.
  3. Heat the pan. Heat a nonstick skillet or wok over medium to medium-high heat. Add enough oil to coat the bottom, or about ¼ inch / 6 mm oil for a shallow-fried texture.
  4. Cook the patties. Scoop about ½ cup egg mixture into the pan for each patty. Cook for 2 to 3 minutes, until the edges set and the bottom is golden. Flip carefully and cook for 1½ to 2 minutes more, until the middle has no liquid egg.
  5. Adjust after the first patty. If it browns too quickly, lower the heat. If it sticks or looks dry around the edges, add a little more oil before the next batch.

Rest and Serve

  1. Repeat and serve. Cook the remaining patties in batches. Transfer to a wire rack or paper towel-lined plate, let them rest in a single layer, and spoon hot gravy over the patties just before serving.

Notes

  • Keep total filling around 2 to 2½ cups for 6 eggs.
  • The mixture should look egg-forward: glossy egg around the filling, not vegetables barely coated in egg.
  • The first patty is your test patty. Adjust heat, oil, or scoop size before continuing.
  • Use ⅓-cup scoops for easier flipping or ½-cup scoops for standard patties.
  • Cook chicken or pork before adding it. Cooked shrimp is easiest; raw shrimp should be chopped small and cooked until opaque.
  • For puffier edges, shallow-fry with about ¼ inch / 6 mm oil.
  • For roux-style gravy, cook 1 tablespoon oil with 1 tablespoon flour for 1 to 2 minutes, whisk in the stock and seasonings, then finish with less slurry.
  • Spoon gravy over the patties just before serving, not far ahead.
  • Store patties and gravy separately.

Back to top