Posted on Leave a comment

Juicy Air Fryer Chicken Breast Recipe: Time & Temperature Guide

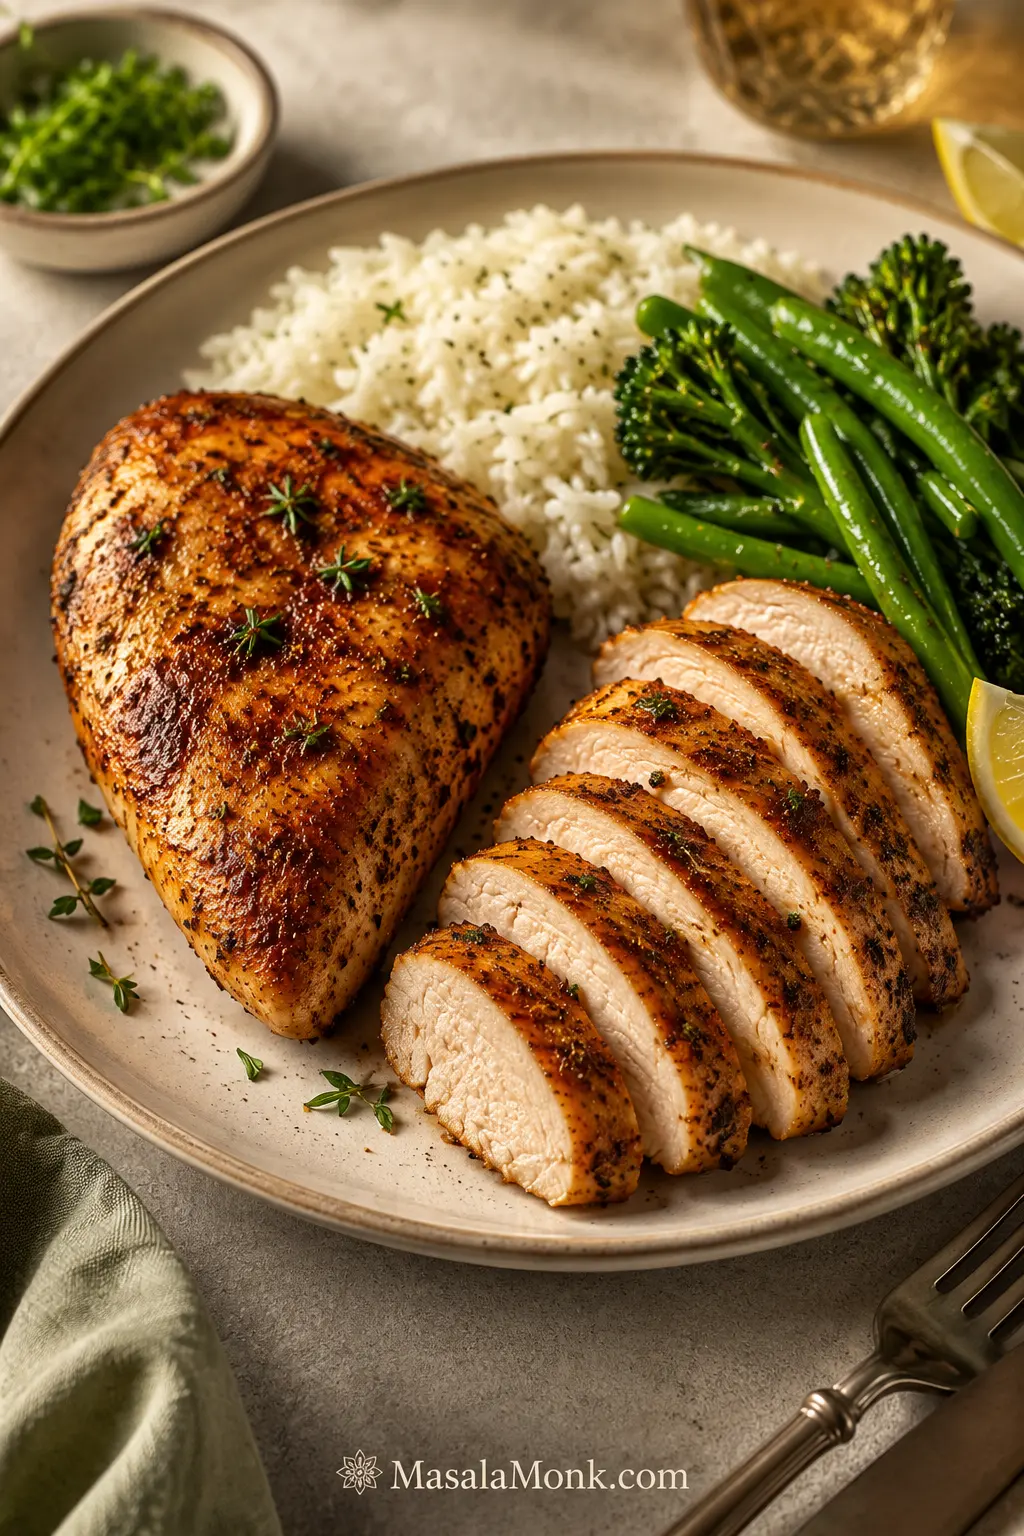
Sliced paprika-garlic air fryer chicken breast served with rice, green vegetables, lemon and herbs on a warm plate.

Air fryer chicken breast should be one of the easiest dinners in your week: quick enough for tonight, versatile enough for tomorrow’s lunch, and simple enough that you don’t need to hover over it.

When it goes well, the paprika-garlic coating is warm, savoury and lightly bronzed. The rested centre stays tender enough to slice cleanly and juicy enough to eat without hiding it beneath a heavy sauce.

When it doesn’t, the narrow end turns dry while the thick centre is still catching up—or the seasoning darkens before the meat is ready. That inconsistency is real. Chicken breasts don’t arrive in one standard size, and air fryers don’t all move heat in exactly the same way.

Start with the chicken, not the timer. Weight gives you the broad cooking window; thickness tells you when to check.

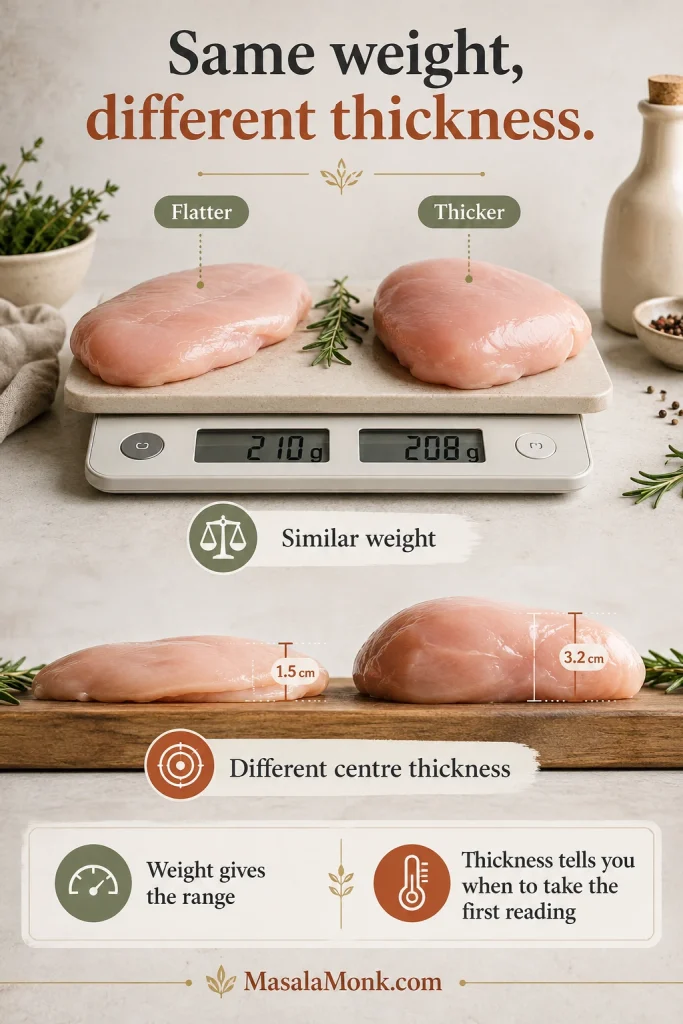
Two breasts can weigh almost the same and still cook differently when one is much thicker through the centre.

Comparison of two raw chicken breasts with similar weights but different centre thicknesses, showing why thickness affects cooking time.
Similar weights can hide very different centre thicknesses — and different first-check times.

Quick Answer: How Long to Air Fry Chicken Breast

Air-fry fresh, boneless, skinless, unbreaded chicken breasts at 375°F / 190°C. For breasts weighing about 7–8 oz / 200–225 g each and evened to roughly ¾ inch / 2 cm thick, begin checking at 9 minutes. Many will finish between 10 and 14 minutes.

Flip once during cooking. Insert an instant-read thermometer sideways into the thickest part and remove each breast when the centre reaches 165°F / 74°C. Rest the chicken for five minutes on a clean plate or board rather than inside the hot basket.

The time range gets you close; the temperature in the centre gives you the final answer.

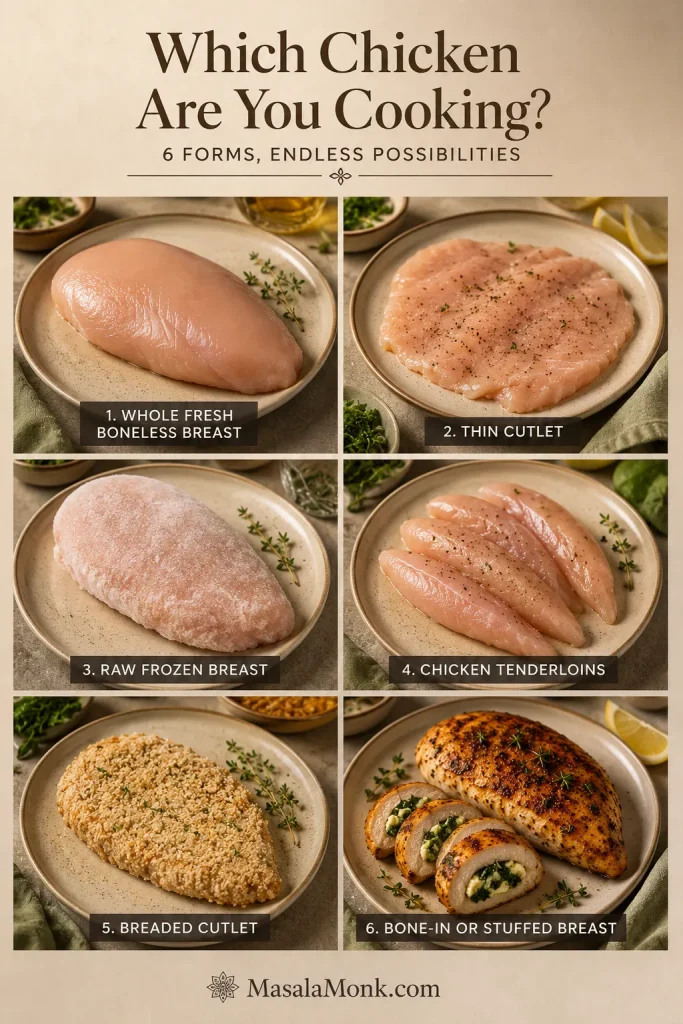
Which Chicken Are You Cooking?

Match your chicken to the row below before using the timing.

What you haveBest approach
Fresh, whole, boneless and unbreaded breastUse the recipe and timing chart below
Thin-sliced breast or chicken cutletUse the thin-cutlet row and check the centre much earlier
Raw frozen chicken breastChoose a method written specifically for frozen chicken
Chicken tenderloinsUse these shorter air-fryer tenderloin directions
Breaded breast or cutletsChoose a method designed for breading and oil spray
Stuffed or bone-in breastChoose instructions designed for that form

Using fresh, whole, boneless chicken breast? Go straight to the recipe card. Cooking a thinner or thicker piece? Check the timing chart first.

Air Fryer Chicken Breast Recipe

Make this version first. The paprika-garlic coating develops golden patches and a savoury edge, while the seasoning is simple enough to work in salads, wraps, pasta, sandwiches and meal-prep bowls.

Prep time10 minutes
Cook timeAbout 10–14 minutes
Rest time5 minutes
Total timeAbout 25–29 minutes
Servings2 main-dish servings or 4 smaller meal-prep portions
SettingAir Fry or equivalent Air Crisp setting
Temperature375°F / 190°C
Safe internal temperature165°F / 74°C
EquipmentAir fryer, instant-read thermometer, tongs, and a meat mallet, rolling pin or small heavy pan

Ingredients

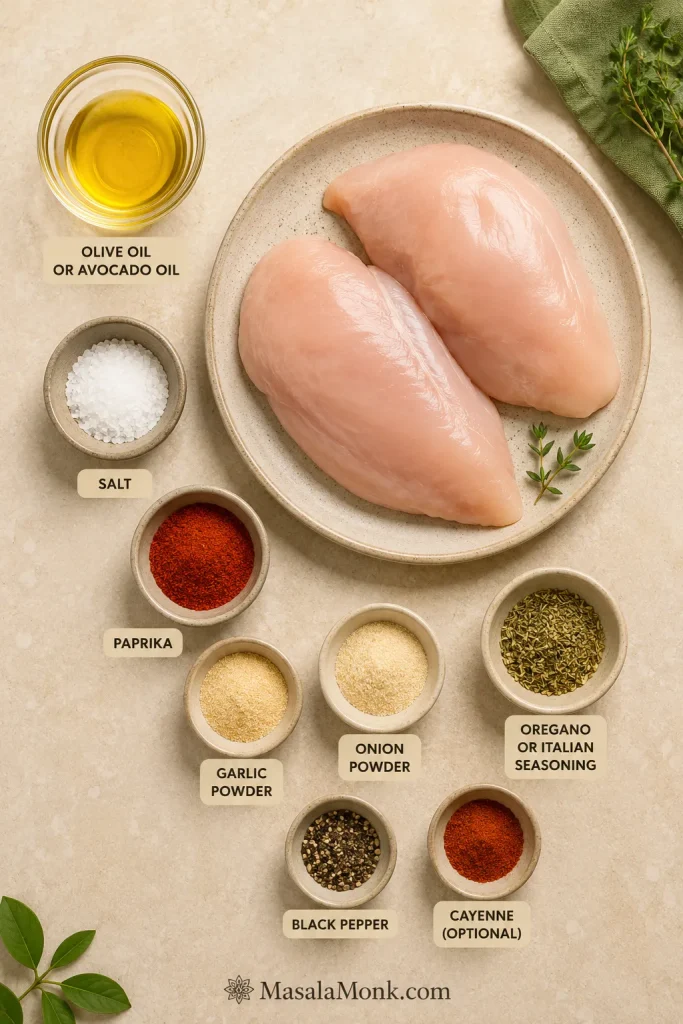
  • 2 boneless, skinless chicken breasts, about 14–16 oz / 400–450 g total
  • 2 teaspoons / 10 ml olive oil or avocado oil
  • Fine salt, ¾ teaspoon, roughly 4–4.5 g depending on crystal size
  • Paprika, 1 teaspoon
  • Garlic powder, ¾ teaspoon
  • Onion powder, ½ teaspoon
  • Dried oregano or Italian seasoning, ½ teaspoon
  • Ground black pepper, ¼ teaspoon
  • Pinch of cayenne pepper, optional
Overhead ingredient board with raw chicken breasts, oil, salt, paprika, garlic powder, onion powder, oregano, black pepper and cayenne.
This simple paprika-garlic base adds colour and savoury flavour without turning the dish into a sauced recipe.
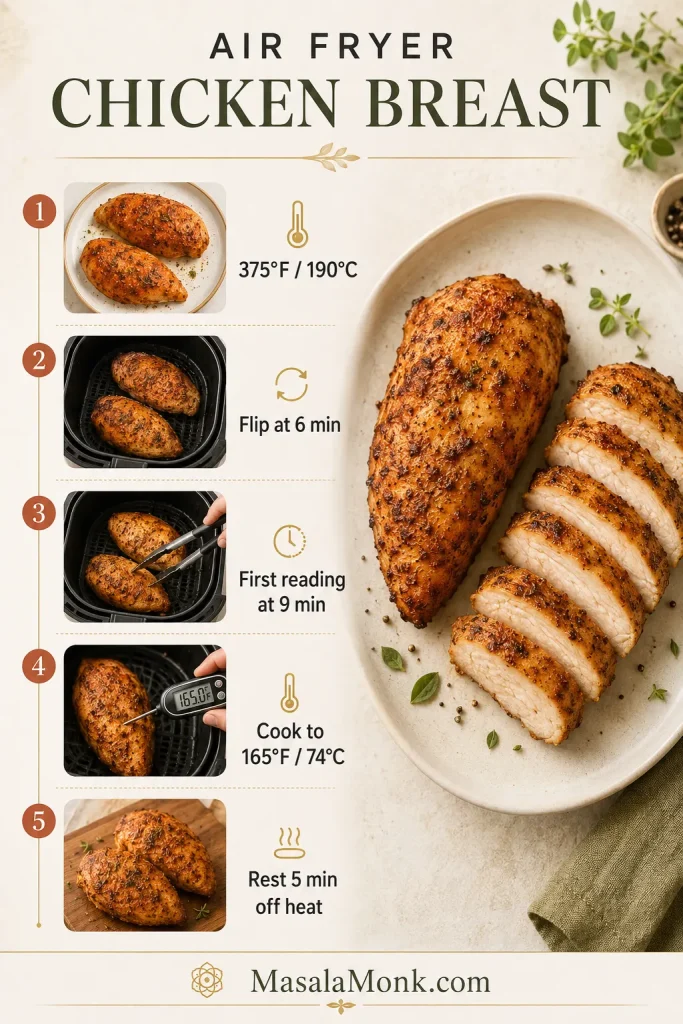
Vertical air fryer chicken breast method guide showing 375°F, flip at 6 minutes, first reading at 9 minutes, 165°F endpoint and 5-minute rest.
Use this map as a checkpoint: 375°F / 190°C, flip at 6 minutes, first reading at 9 minutes, finish at 165°F / 74°C and rest off heat.

Instructions

Prepare the chicken

  1. Check the size. The timing below works best for breasts weighing about 7–8 oz / 200–225 g each. Take a noticeably smaller piece out first if it reaches temperature sooner.
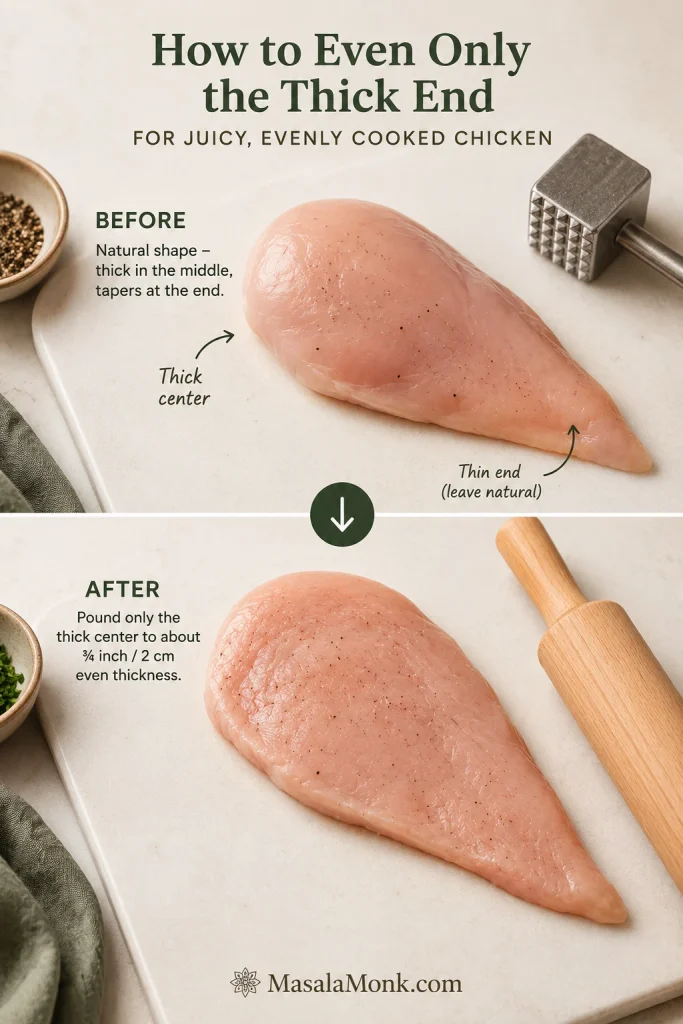
  2. Even the thickest section. Place the chicken between two sheets of baking parchment or inside a sturdy food-safe bag. Gently level only the thick central area until each breast is close to ¾ inch / 2 cm thick.
Before-and-after guide showing a raw chicken breast with the thick centre gently flattened while the thin tapered end remains natural.
Level the thick centre only; keep the thin end from getting hammered flat and drying out.
  1. Preheat the air fryer. Select Air Fry, or the equivalent Air Crisp setting, and heat to 375°F / 190°C for about three minutes. Follow the manufacturer’s guidance when it recommends a different preheating routine.
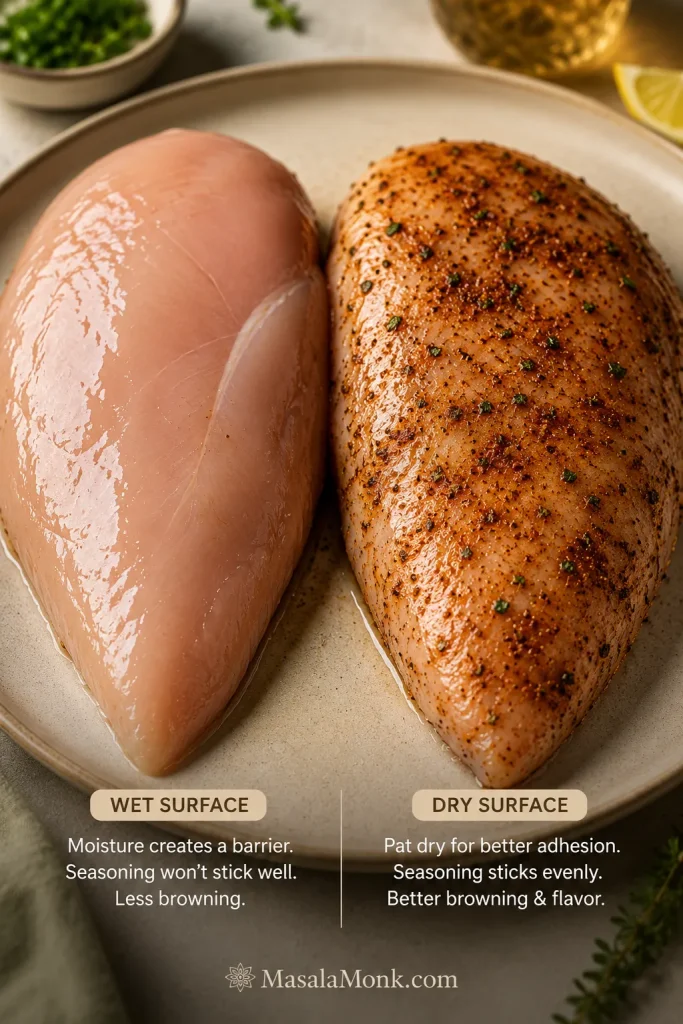
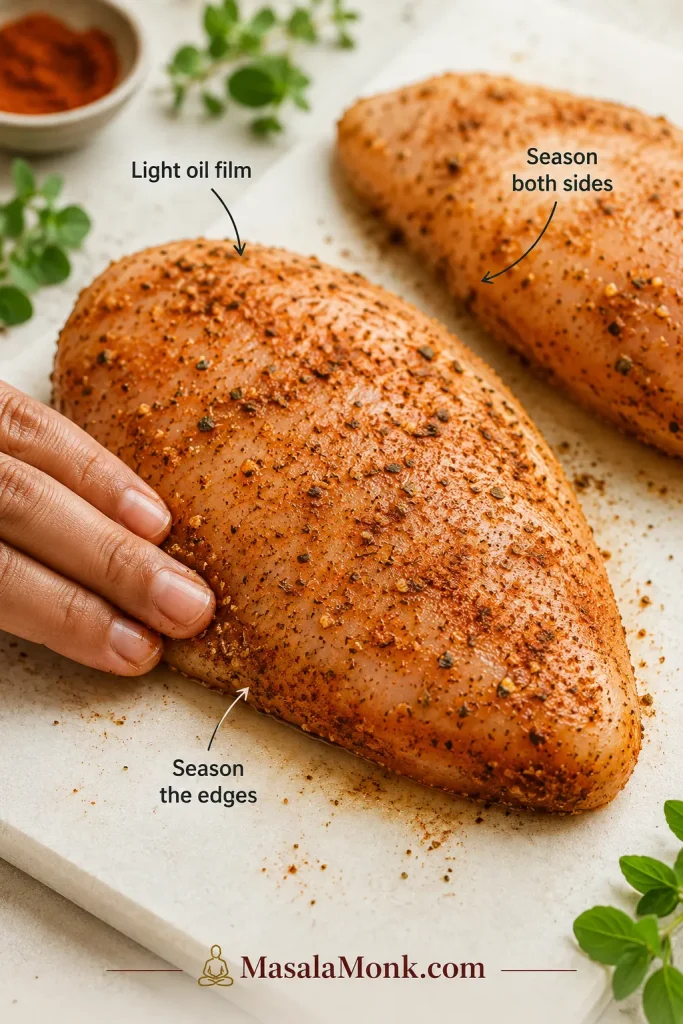
  2. Dry and season. Pat the breasts dry with paper towels and coat them with the oil. Mix the salt, paprika, garlic powder, onion powder, oregano, black pepper and optional cayenne, then season both sides and the thicker edges.
Split comparison of a wet raw chicken breast surface and a dried, seasoned chicken breast surface with better seasoning adhesion.
Dry the surface so the spices cling and the exterior browns more evenly.
Close-up of raw chicken breast with paprika-garlic seasoning on the surface and thick side edge, with labels for light oil and seasoning.
A thin oil film is enough; season the thick edges too, so every slice carries flavour.

Cook, check and rest

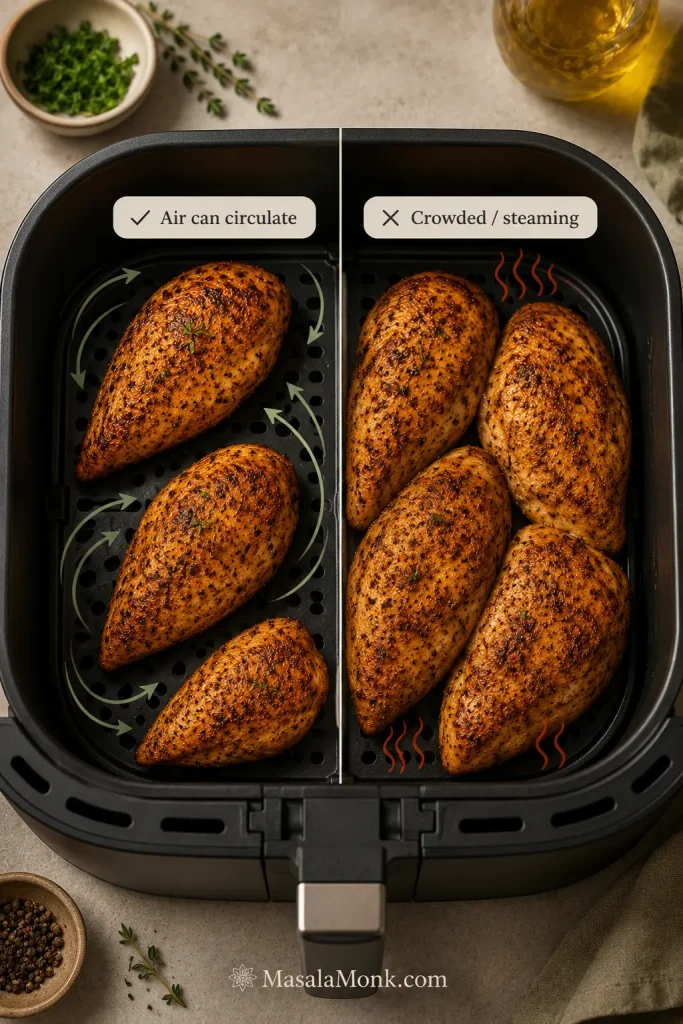
  1. Arrange the basket. Place the chicken in one layer with a visible gap between the pieces. Extra basket spray is usually unnecessary when the chicken is lightly oiled and the basket coating is in good condition.
Split air fryer basket comparison showing properly spaced chicken breasts with airflow arrows and crowded chicken breasts touching.
Visible space is part of the method. Crowded chicken steams before it browns.
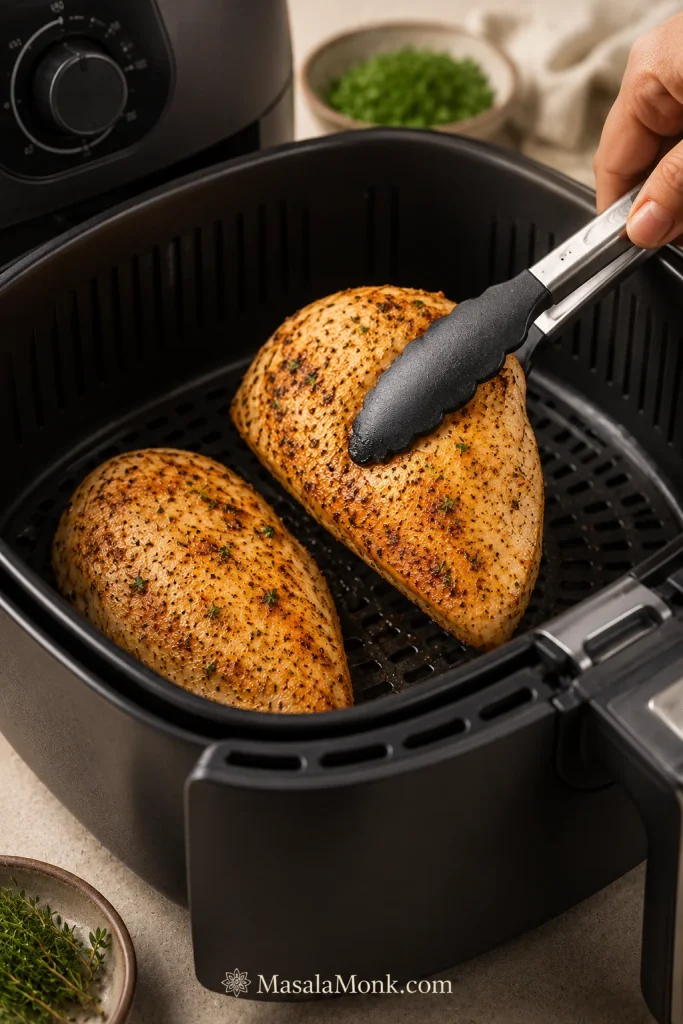
  1. Cook and flip. Air-fry for six minutes, then turn the chicken gently with tongs. Look for scattered golden patches and the aroma of toasted spices. Do not wait for a dark crust.
  2. Take the first temperature reading. Cook for another three minutes, then insert an instant-read thermometer sideways into the thickest central part.
  3. Finish the chicken. A reading below 165°F / 74°C is useful: you have caught the chicken while there is still room to finish it gently. Continue in one-minute increments and lift out each piece as soon as it reaches temperature.
Tongs turning paprika-seasoned chicken breasts in a black air fryer basket at the flip stage with golden browned patches.
Use colour as a clue, not the final answer. Temperature decides when the chicken is done.
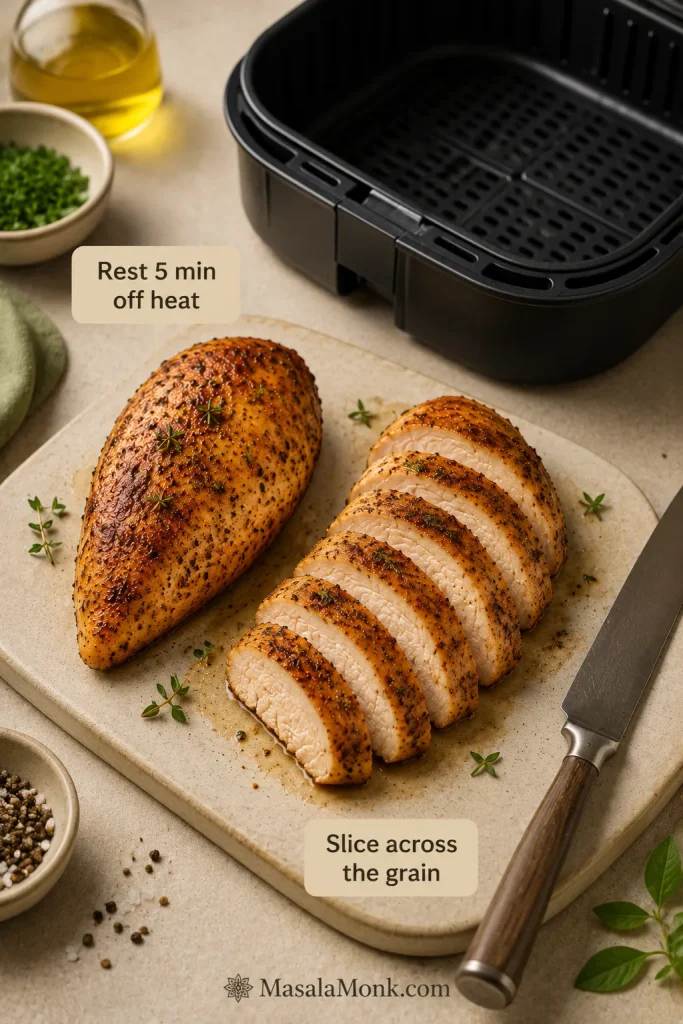
  1. Rest away from the heat. Transfer the chicken to a clean plate or cutting board and rest for five minutes.
  2. Slice across the grain. Cut the rested chicken this way for shorter, more tender pieces.
Cooked air fryer chicken breast resting on a clean board beside an empty basket, with one breast sliced across the grain.
Rest outside the hot basket, then slice across the grain for shorter, more tender pieces.
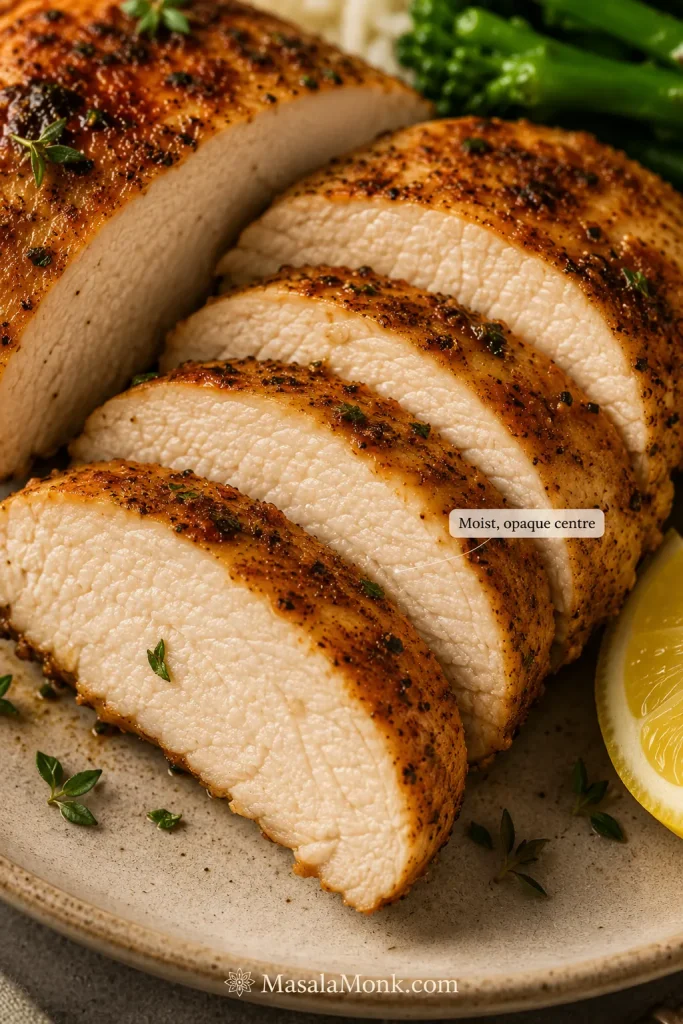
Macro close-up of sliced air fryer chicken breast with a moist opaque centre, paprika-garlic crust, lemon and herbs.
The target slice is opaque, moist and gently glossy, not pink, chalky or oily.

Food-safety reminder

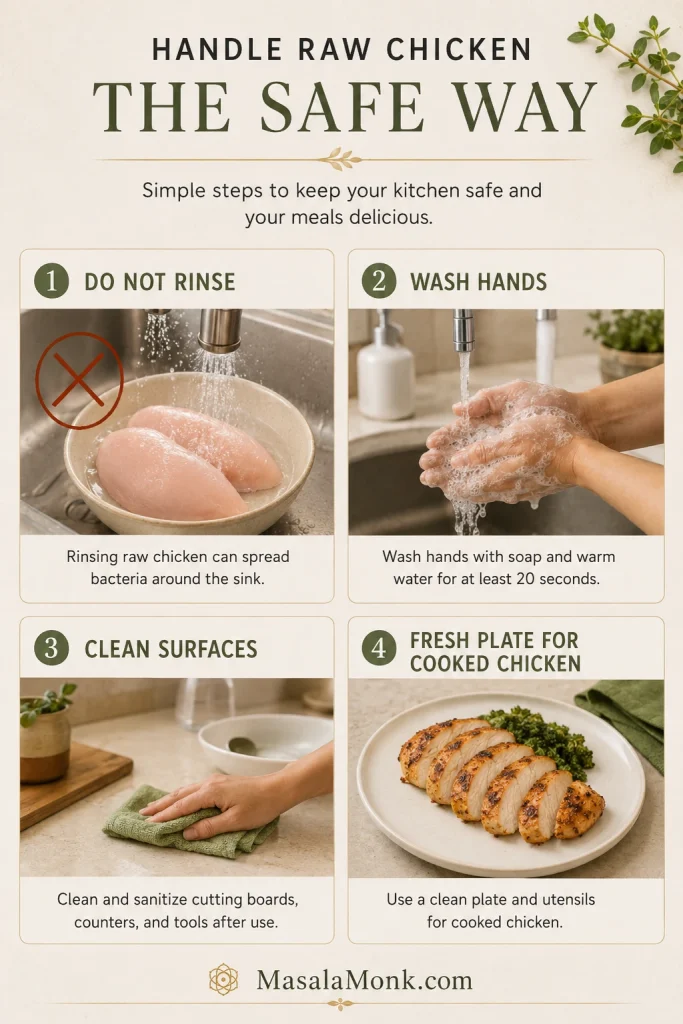
Raw-chicken safety: Don’t rinse raw poultry. Wash your hands after handling it, clean any surface it touched, and use clean utensils and a fresh plate for the cooked chicken.

Four-panel raw chicken safety guide showing do not rinse, wash hands, clean surfaces and use a fresh plate for cooked chicken.
Skip rinsing, wash hands, clean surfaces and switch to a fresh plate before cooked chicken comes out.

Recipe Notes

  • Fridge-cold chicken: The breasts can go directly from the refrigerator to preparation. They do not need to reach room temperature.
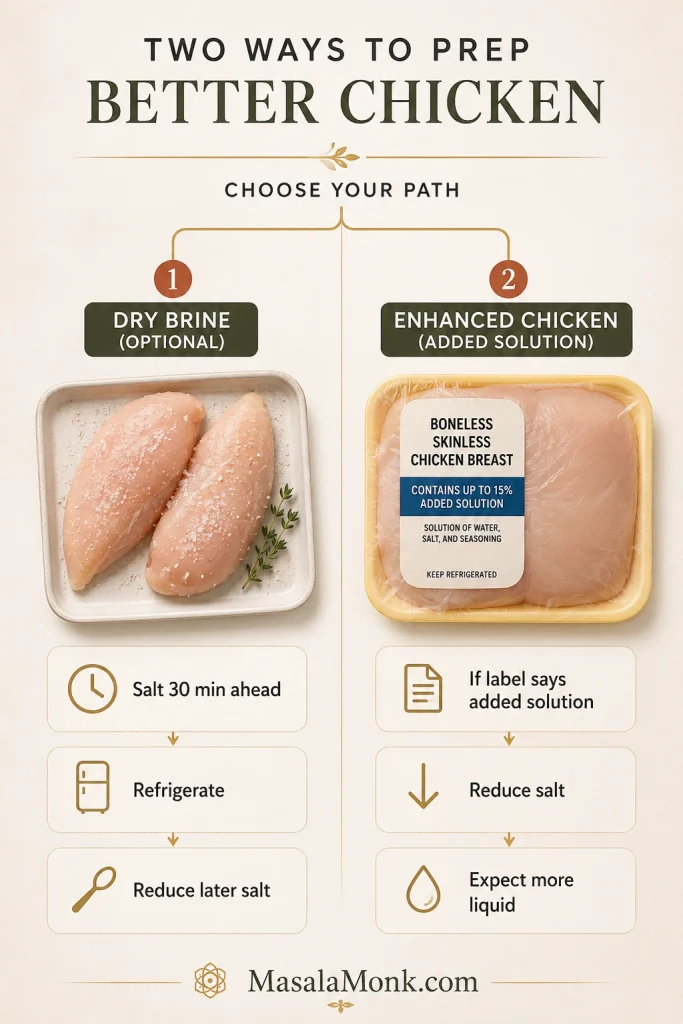
  • Enhanced chicken: When the package says the meat contains an added solution, reduce the salt and expect it to release more liquid.
  • Optional 30-minute dry brine: Salt the chicken in advance and keep it refrigerated for deeper seasoning. Reduce or omit the salt in the later spice mixture.
Two-branch prep guide showing salted raw chicken for a dry brine and packaged chicken labeled as containing added solution.
Salted chicken can taste more seasoned; enhanced chicken may need less salt and can release more liquid.

Use this visual checklist when your package does not match the fresh, whole, boneless chicken breast method above.

Six-panel guide showing whole fresh breast, thin cutlet, frozen breast, chicken tenderloins, breaded cutlet and stuffed chicken breast.
Match the form before you use the timing; whole breasts, cutlets, tenderloins and frozen pieces need different handling.

Four things make the difference: even the thick end, dry the surface, leave visible gaps and take the first temperature reading early. Together, they help the centre cook through without drying the tapered end.

Air Fryer Chicken Breast Time and Thickness Chart

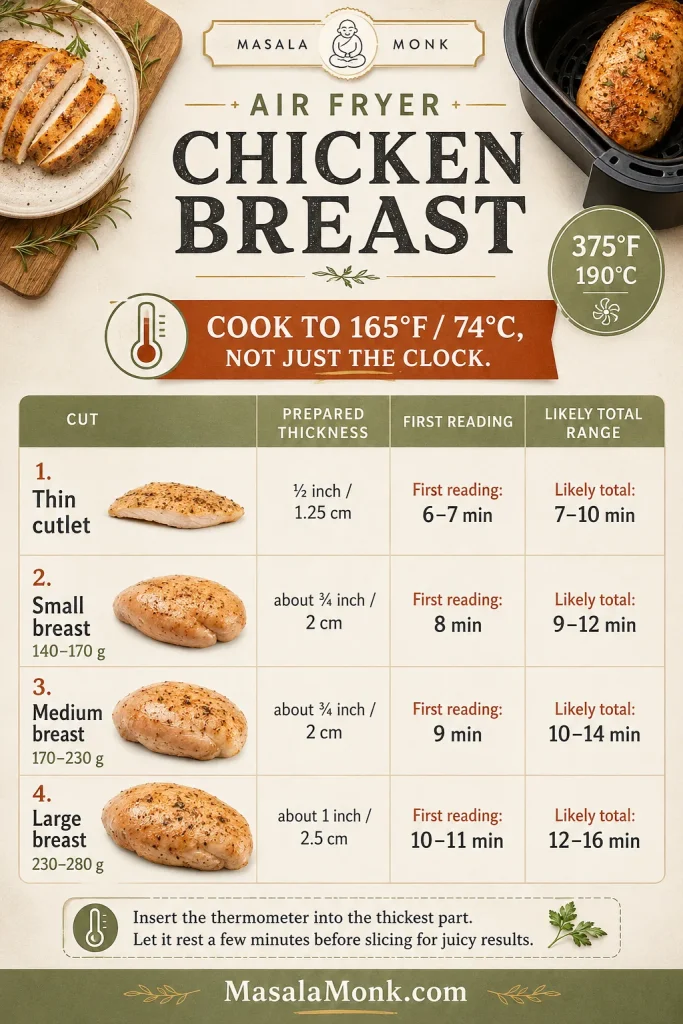
Start with the row that most closely matches the piece in front of you. Similar-sized breasts are easier to manage together, while extremely large or strongly tapered pieces are better sliced horizontally before cooking.

How to use this timing chart: These ranges are starting points for fresh, boneless, skinless chicken breasts prepared to the thickness shown. The first-reading time is intentionally early because breast shape, basket position and machine style can change the finish time. Use the chart to know when to start checking; use 165°F / 74°C in the thickest centre to know when to stop.

Chicken formIndividual weightPrepared thicknessTiming at 375°F / 190°C
Thin cutlet3–5 oz / 85–140 g⅜–½ inch / 1–1.25 cmFirst reading: 5 minutes; often 6–10 minutes total
Small breast5–6½ oz / 140–185 gAbout ⅝ inch / 1.5–1.6 cmFirst reading: 7 minutes; often 8–11 minutes total
Medium breast6½–8 oz / 185–225 gAbout ¾ inch / 2 cmFirst reading: 9 minutes; often 10–14 minutes total
Large breast8–10 oz / 225–285 g¾–1 inch / 2–2.5 cmFirst reading: 10–11 minutes; often 12–16 minutes total
Very large breastMore than 10 oz / 285 gMore than 1 inch / 2.5 cmButterfly or slice horizontally, then use the row matching the new thickness
Timing chart for air fryer chicken breast at 375°F showing thin cutlet, small, medium and large breast first-reading times and total ranges.
The chart tells you when to take the first reading; the thermometer tells you when to stop.

If your chicken needs another two or three minutes, nothing has gone wrong. The chart tells you when to start looking; it does not force every breast to finish on schedule.

Once you have the timing range, check how to confirm doneness or return to the recipe card.

How to Tell When the Chicken Is Done

Use a thermometer first

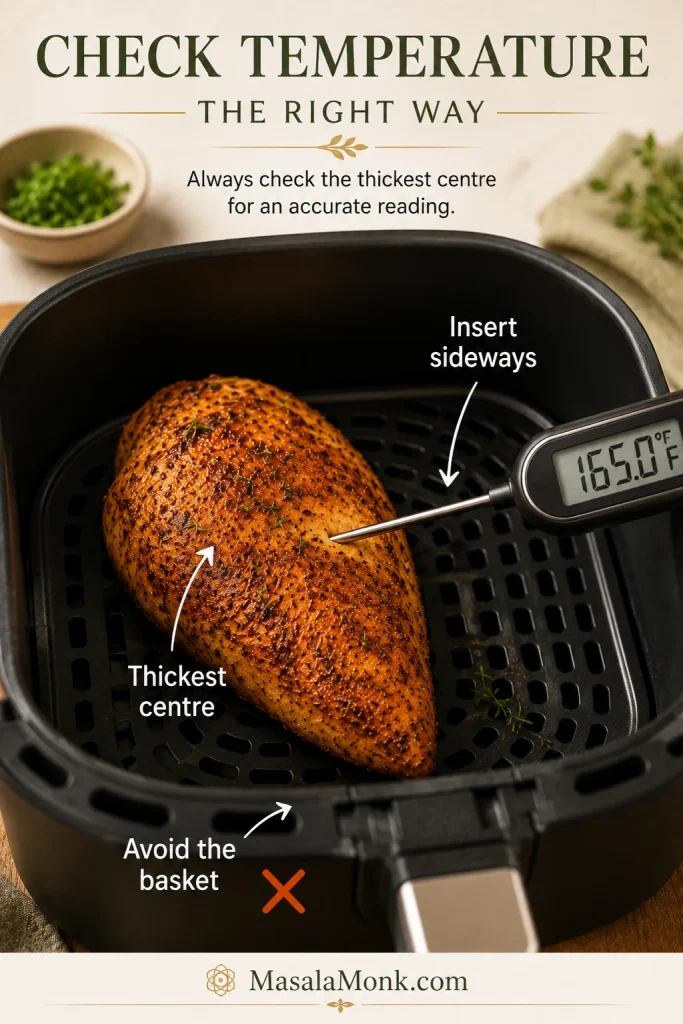
Chicken breast is safely cooked when the centre of its thickest part reaches 165°F / 74°C. Insert the thermometer from the side so the sensing tip reaches the middle instead of passing through the meat and touching the basket. Take the first reading before you expect the chicken to be done; a lower number means there is still room to finish it gently.

Instant-read thermometer inserted sideways into the thickest centre of a paprika-garlic chicken breast in an air fryer basket.
Insert from the side so the probe reaches the thickest centre without touching the basket.

The official safe minimum internal temperature guidance lists 165°F / 74°C for poultry, including chicken breast.

If you do not have a thermometer

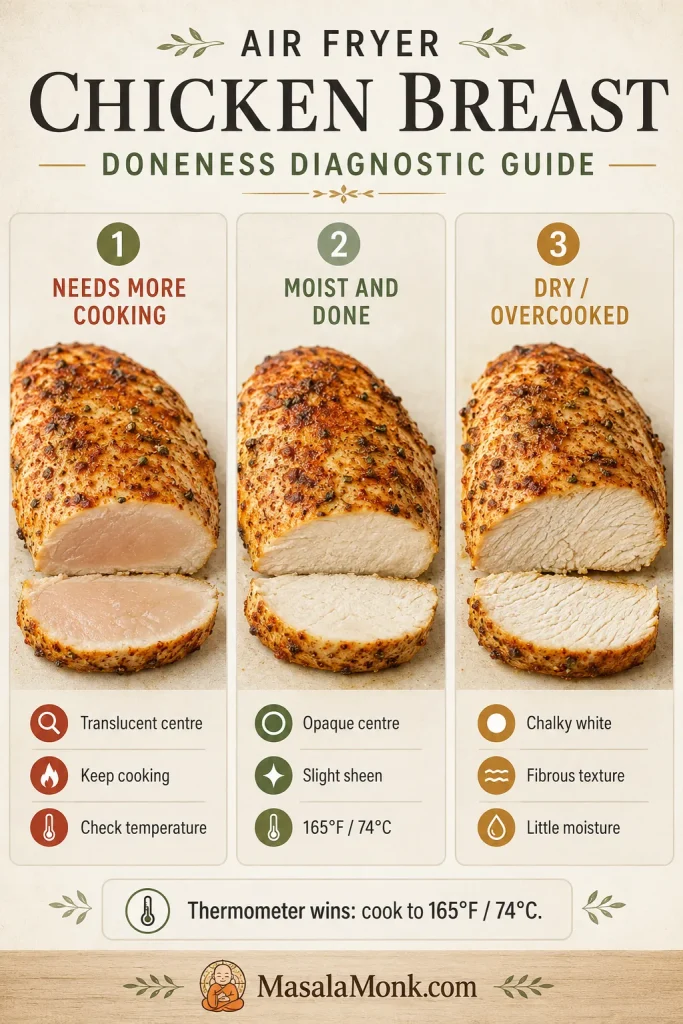
No thermometer? Cut into the centre of the thickest breast. The meat should be opaque with no glossy, translucent or raw-looking section. Return it to the air fryer in one-minute increments when needed. Visual checks are less dependable, so an instant-read thermometer remains the easiest way to remove the guesswork.

Three-panel chicken breast doneness guide showing translucent centre, moist opaque centre and dry fibrous overcooked centre.
Colour and texture cues help you spot trouble, but 165°F / 74°C in the thickest centre is the decision point.

The first slice should look moist through the centre, with a slight sheen of juice rather than a wet raw appearance or dry, fibrous meat. Once you have seen that fully cooked centre, the next batch becomes much easier to judge.

Chicken breast is leaner and less forgiving than chicken thighs. For a richer cut with a wider timing margin, use this air fryer chicken thighs recipe.

Chicken is cooked and resting? Jump to serving ideas. Still troubleshooting texture? Go to the problem-solving section.

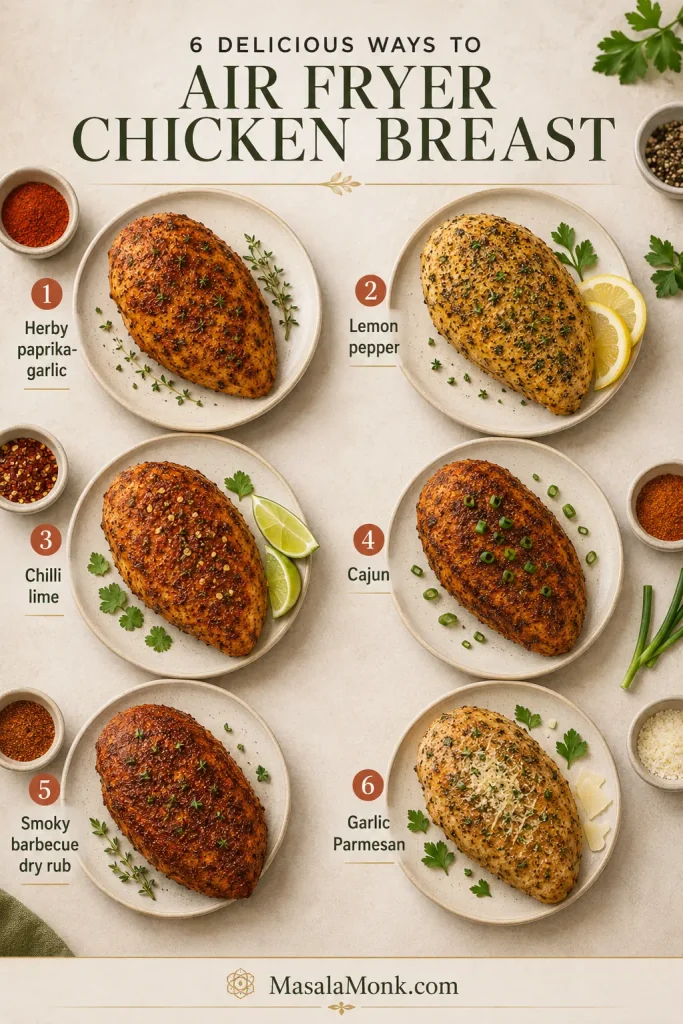
Seasoning Ideas and Marinades

Six air fryer chicken breast seasoning options labeled herby paprika-garlic, lemon pepper, chilli lime, Cajun, smoky barbecue dry rub and garlic Parmesan.
Change the flavour, not the method: thickness, early checks and final temperature still matter.

Bright and fresh

For lemon pepper chicken, replace the paprika and oregano with a lemon-pepper blend, checking first to see how much salt it contains. Finish with fresh lemon after cooking.

For chilli lime, add chilli powder and cumin to the base seasoning, then squeeze lime over the warm slices. A spoonful of salsa also works well when the chicken is headed for tacos or rice bowls.

Prefer browned chicken with a proper lemon-butter pan sauce? Use this lemon pepper chicken recipe.

Smoky and savoury

Cajun seasoning can replace the individual spices, although many blends already contain salt. For smoky barbecue chicken, use smoked paprika and add barbecue sauce only during the final one to two minutes so the sugars do not scorch.

With garlic Parmesan, lean into the garlic powder and add finely grated Parmesan near the end. Cheese left in the basket for the full cooking time can darken before a thick breast is ready.

Marinated chicken

A thin oil-based or yogurt marinade works well. Let the excess drip away so the chicken browns instead of steaming beneath a heavy coating.

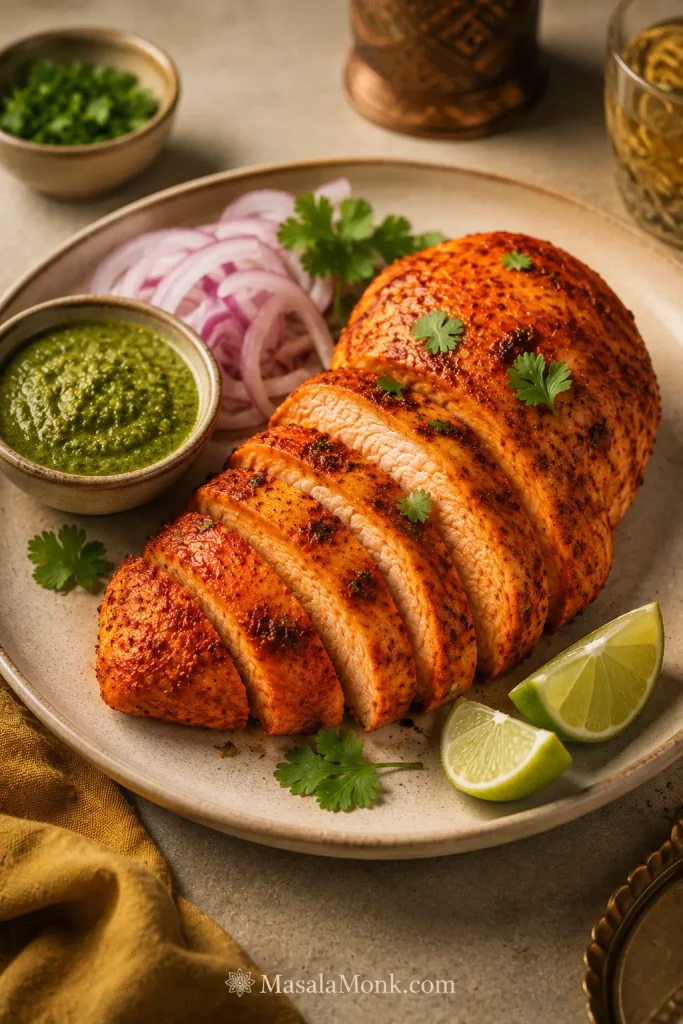
Tandoori-inspired chicken can be coated with yogurt, ginger, garlic, chilli, garam masala and salt. Serve it with a bright coriander-mint green chutney.

Tandoori-inspired air fryer chicken breast sliced on a plate with green chutney, red onion, lime wedges and coriander.
Yogurt, spices, chutney, onion and lime give this variation MasalaMonk flavour without fake tandoor char.

Keep acid-heavy marinades relatively short because a long soak in lemon or vinegar can soften the outer texture. Add sticky, sweet marinades closer to the end.

Keep any sauce intended for serving separate from marinade that touched raw poultry. If the same mixture is reused, it must be safely cooked first.

Turn It Into Dinner

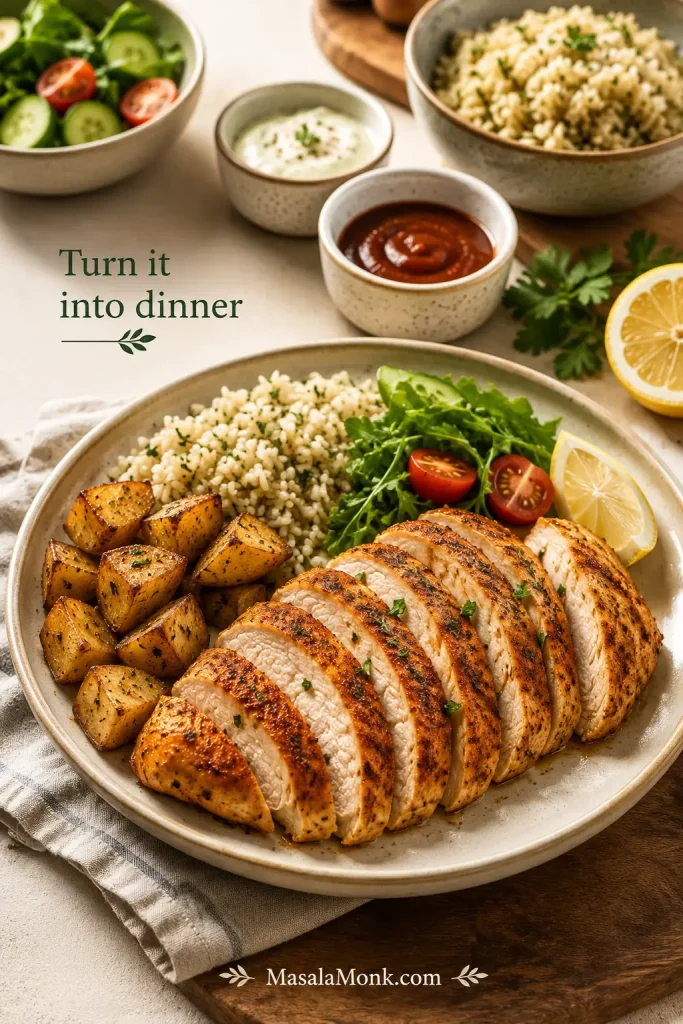
Spoon something cool, sharp or creamy over the warm slices—a squeeze of lemon, green chutney, honey mustard or herby chimichurri—and simple chicken immediately feels like a finished dinner.

Eat it tonight

Serve it with fluffy rice, couscous or a tray of crispy ranch roasted potatoes. Add a green vegetable or a crisp salad.

For a quick sauce, finish the plate with lemon, pesto, salsa or a spoonful of homemade honey mustard dressing.

Sliced paprika-garlic air fryer chicken breast served with rice, roasted potatoes, salad, sauces, lemon and herbs.
Rice, potatoes, greens and a small sauce turn the chicken into a complete dinner.

Make tomorrow easier

  • Slice it cold for salads, wraps and sandwiches
  • Cube it for rice or grain bowls
  • Fold it into pesto pasta for an easy second-night dinner
  • Chop it into cheesy chicken broccoli rice, adding the cooked chicken near the end so it warms without drying again
  • Shred it into soup or pack it with vegetables and a separate sauce for lunch
Four-panel lunch board showing air fryer chicken in a salad, grain bowl, wrap and chicken-broccoli rice bowl.
Cook once, then use the leftovers in a salad, grain bowl, wrap or chicken-broccoli rice.

Most cooks can stop after the serving ideas. If your basket, liner or machine behaves differently, use the setup notes below. Storing leftovers? Jump to storage and reheating.

Temperature and Air-Fryer Setup

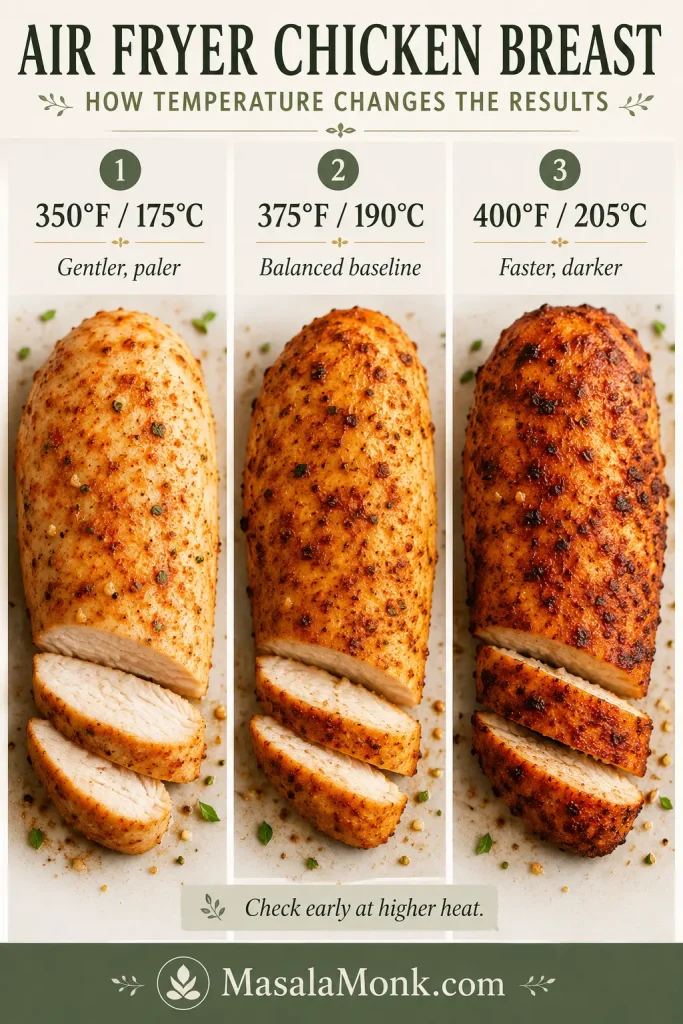
The main recipe uses 375°F / 190°C because it gives everyday chicken breasts a useful balance of colour, speed and control. Other settings still have their place.

TemperatureBest useTrade-off
350°F / 177°CThicker but reasonably even pieces when gentler browning is preferredSlower cooking with less surface colour
375°F / 190°CEveryday whole or evenly prepared breastsThe best general balance of speed, colour and control
400°F / 204°CThin fillets and faster browningA narrower margin before the edges dry or spices darken
Three-panel comparison of air fryer chicken breast cooked at 350°F, 375°F and 400°F with paler, balanced and darker results.
350°F is gentler, 375°F is the baseline and 400°F / 204°C browns faster; check earlier when cooking hotter.

Save temperatures above 400°F / 204°C for thin pieces or specialised coatings.

Cooking a larger batch in the oven? This baked chicken breast recipe uses the same weight-and-thickness approach.

Preheating, settings and basket capacity

Select Air Fry, or the equivalent Air Crisp setting, and preheat for the published timing. If an oven-style machine has no Air Fry setting, use convection Bake or Roast at 375°F / 190°C as a starting point.

Cook as many breasts as fit in one uncrowded layer. A full basket may need a little longer because several cold pieces pull down the heat at once. Check differently sized breasts separately and remove each one when it is ready.

Parchment, silicone and machine styles

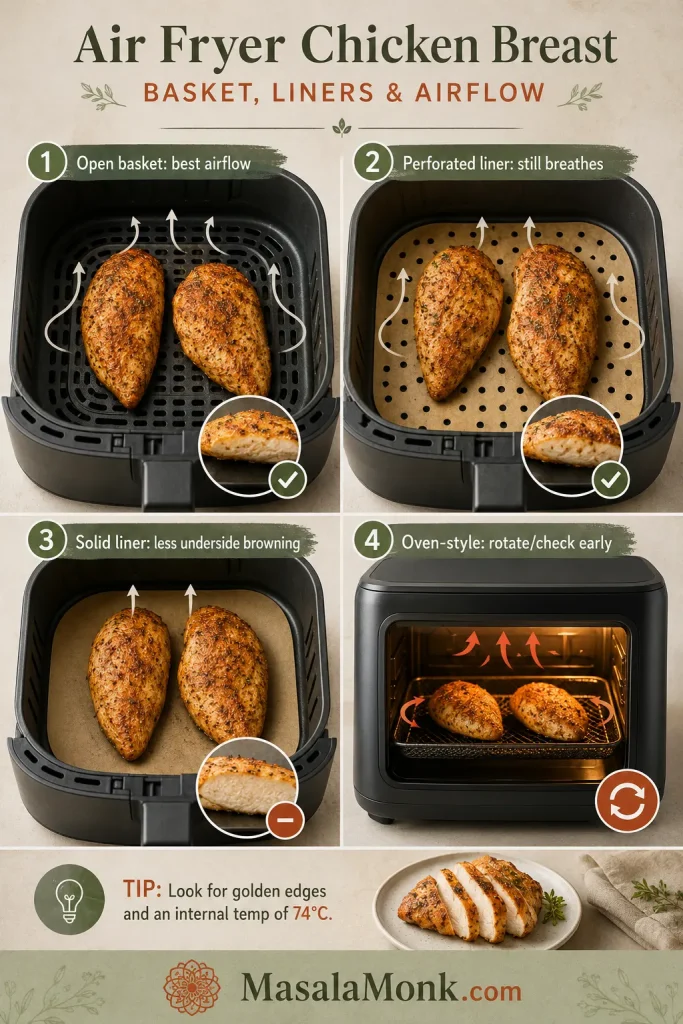
  • Never preheat loose parchment without food holding it down; moving air can lift it toward the heating element.
  • Solid liners reduce airflow beneath the chicken and can leave the underside paler or wetter.
  • Perforated liners preserve more airflow than solid sheets.
  • Compact baskets often colour food quickly, while oven-style models may brown more strongly near the back or upper rack.
Four-panel air fryer airflow guide showing open basket, perforated liner, solid liner and oven-style air fryer with airflow arrows.
Open baskets circulate best; perforated liners breathe, solid liners slow browning, and oven-style models may need rotation.

For help with liners, blocked airflow, smoking and cleanup, see these common air-fryer mistakes and their fixes.

Storage and Reheating

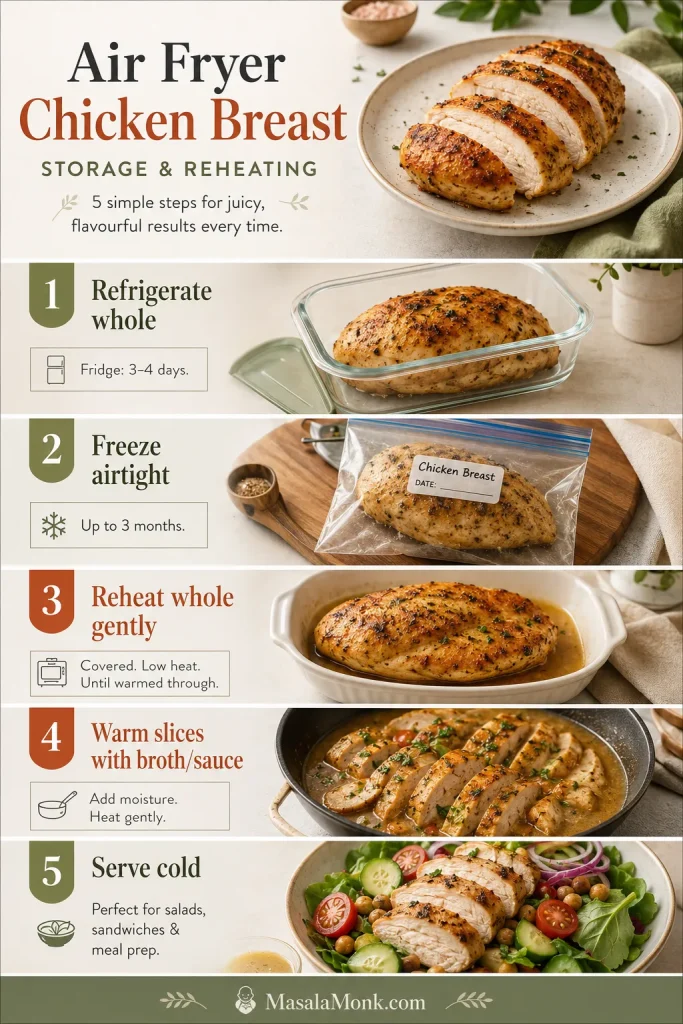
Saving the second breast for tomorrow? Keep it whole when practical; whole chicken generally holds its moisture better than pre-sliced meat. Refrigerate it within two hours—or within one hour when the surrounding temperature is above 90°F / 32°C.

Divide a larger batch between shallow containers so it cools more quickly.

NeedBest approach
RefrigerateStore in an airtight container for 3–4 days
FreezePack airtight, remove excess air and use within about 4 months for the best quality
Reheat one breastAir-fry at 325–350°F / 160–177°C with a light brush of broth or oil
Reheat slicesWarm over low skillet heat with a splash of broth or sauce
Serve without reheatingUse properly refrigerated chicken in salads, wraps and sandwiches
Storage and reheating guide for air fryer chicken breast showing refrigerating, freezing, reheating whole, warming slices with sauce and serving cold.
Store whole when practical, then reheat gently or add moisture to slices to protect texture.

Reheat cooked chicken to 165°F / 74°C. Thin slices heat—and overheat—much faster than a whole breast.

Freezer note: Four months is a quality recommendation. Chicken held continuously at 0°F / −18°C remains safe longer, although its texture will gradually decline.

When you need a larger, hands-off batch rather than the air fryer’s quick small-basket method, these crock pot chicken breast recipes offer several dinner and meal-prep directions.

For detailed cooling, storage and reheating guidance, see the USDA leftovers and food-safety guide.

Back to top ↑

Troubleshooting Dry or Uneven Chicken

The way the chicken failed usually tells you what to change.

Cooking problems

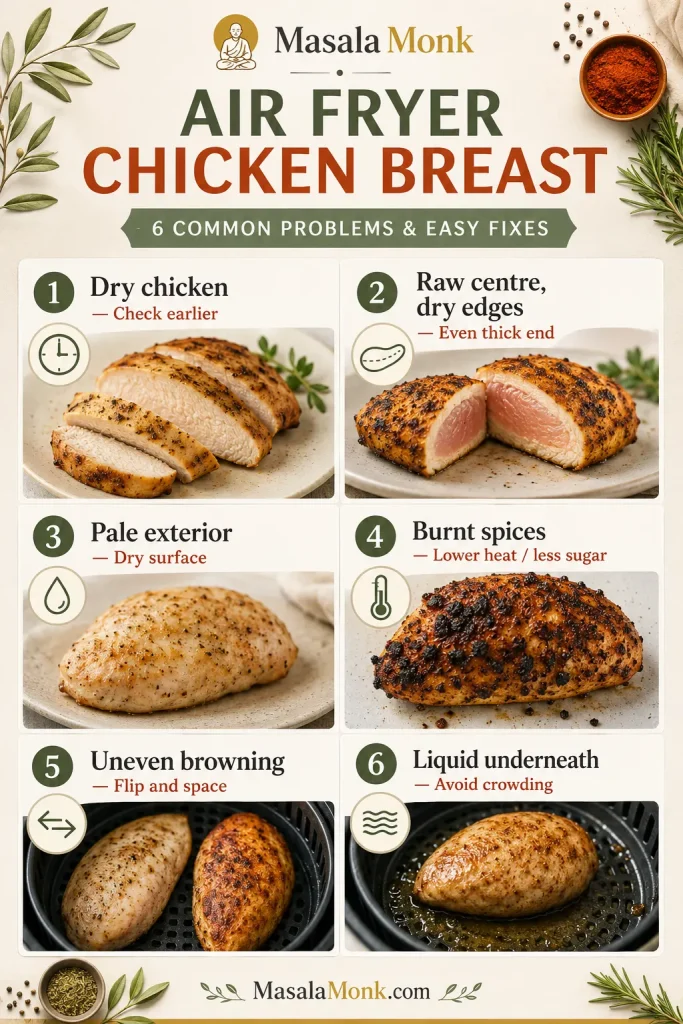
ProblemLikely reasonWhat to change
The chicken is dryIt cooked too long or stayed inside the hot basket after it was readyTake the temperature earlier and transfer it out promptly
The centre is raw but the edges are dryThe breast was too thick or unevenButterfly it or gently even the thick section
The outside is paleThe surface was wet, the basket was crowded or there was very little oilPat the chicken dry and use a thin, even oil coating
The spices burntThe heat was high or the seasoning contained sugar or a large amount of paprikaUse gentler heat or add sweet sauces near the end
The seasoning fell offThe surface was wet or the chicken was turned roughlyDry the surface and flip gently with tongs
The chicken browned unevenlyThe basket was crowded, the chicken was not flipped or the machine has a hot areaLeave more space and turn or rotate once

Timing, reheating and basket problems

ProblemLikely reasonWhat to change
The chicken took much longerIt was thicker, colder, crowded or cooked from a cold startContinue in short increments and note the thickness for next time
One breast finished firstThe pieces differed in weight, thickness or basket positionLift out each piece when it is ready
Liquid collected beneath itThe meat contained added solution, the basket was crowded or the marinade was heavyReduce excess coating and leave more open space
The reheated chicken is rubberyIt was reheated too hot or for too longUse gentler heat, add moisture and stop once it reaches temperature
The air fryer smokedOld grease, excessive oil, loose spice or sugary marinade reached a hot surfaceStop cooking, clean the drawer and apply sweet sauce late
Troubleshooting board for air fryer chicken breast showing dry chicken, raw centre, pale exterior, burnt spices, uneven browning and liquid underneath.
Dry, pale, uneven or watery chicken usually points back to timing, thickness, surface moisture, spacing or added solution.

Cooked correctly but still tough or fibrous? Occasionally, the problem comes from the meat rather than from overcooking. A poultry-quality condition commonly called woody breast can leave some pieces unusually firm even when they reach the correct temperature. Slice the chicken thinly and serve it with a moist sauce or dressing.

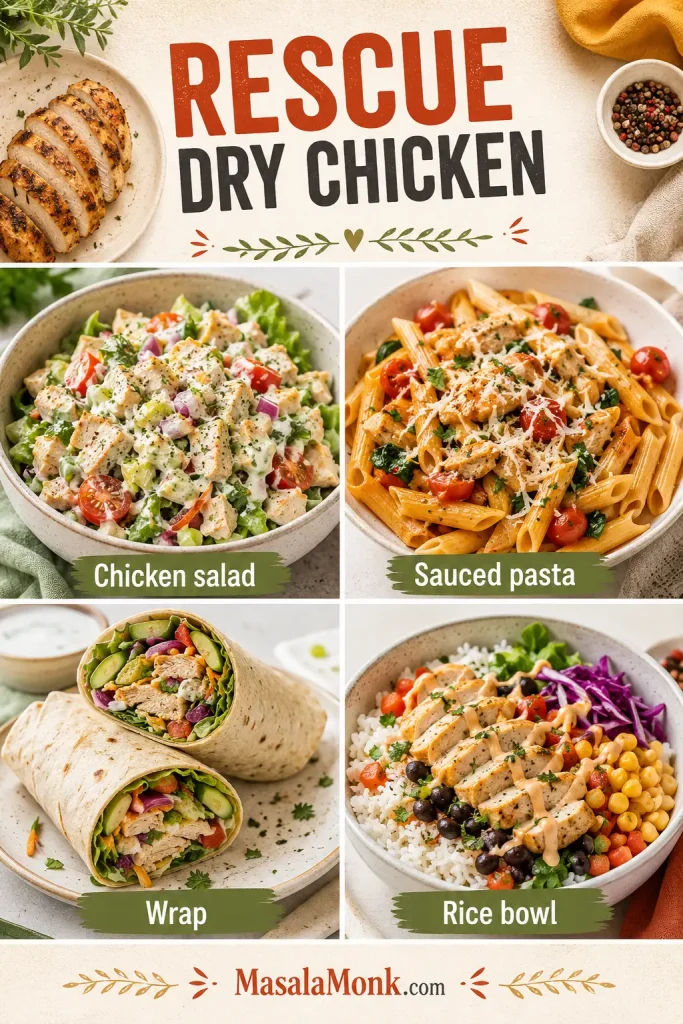
How to Rescue Chicken That Is Already Dry

You can’t uncook dry chicken, but you can make it much more enjoyable. Slice it thinly across the grain and add moisture instead of reheating it again as a plain whole breast.

Four-panel rescue board showing dry chicken turned into chicken salad, sauced pasta, a vegetable wrap and a rice bowl with sauce.
Dry chicken is not wasted; chop, sauce, wrap or bowl it instead of reheating it plain.
  • Chop it finely and turn it into a creamy chicken salad sandwich
  • Fold it into pasta with a creamy or tomato sauce
  • Tuck thin slices into a wrap with dressing and crunchy vegetables
  • Warm it briefly in broth, gravy or pan juices
  • Cube it for a rice bowl and add salsa, yogurt sauce or a generous spoonful of homemade chimichurri

Starting over with fresh chicken? Return to the recipe card. Need the timing again? Open the time chart.

Frequently Asked Questions

Do I need to brine chicken breast before air frying?

No. Evening the thick section and taking an early temperature reading matter more for this baseline method. For deeper seasoning, salt the chicken about 30 minutes ahead and keep it refrigerated. A wet brine can also work, but it adds time, and chicken labelled as containing an added solution may already be seasoned.

Do I need to preheat the air fryer?

Preheating gives the published timing a more consistent starting point. You can cook from a cold start, but the chicken may need a little longer. Take the first reading at the usual time rather than automatically adding several minutes.

Do I have to flip air fryer chicken breast?

Flipping is recommended because most basket air fryers colour more strongly from above. The chicken can still cook through without flipping, but the underside may remain paler and the result may be less even.

Can I use this timing for frozen chicken breast?

No. Frozen chicken needs a method designed around a longer cooking window and the way the centre thaws as it cooks. Do not simply add a few minutes to this fresh-chicken recipe.

Can I make air fryer chicken breast without oil?

Yes. Oil is not required for the chicken to cook safely, but the seasoning may cling less evenly and the exterior may remain paler. Pat the surface very dry and press the seasoning on firmly before cooking.


The Takeaway

Start with the chicken, not the timer. Even the thick section and leave space around each breast. Weight gets you into the right range; thickness tells you when to take the first reading. Move each piece out of the hot basket as soon as it is ready.

Then let it rest while you finish the rice, dress the salad or warm the tortillas. Slice it while it is still moist, add the sauce that suits the evening, and keep the second breast for the lunch that will be easier tomorrow.

If you make it, tell us which air fryer you used, how large the breasts were, how long they took and what you served with them. Did the weight-and-thickness chart match your batch? Your experience may help the next person standing over the basket.

Back to top ↑

Posted on Leave a comment

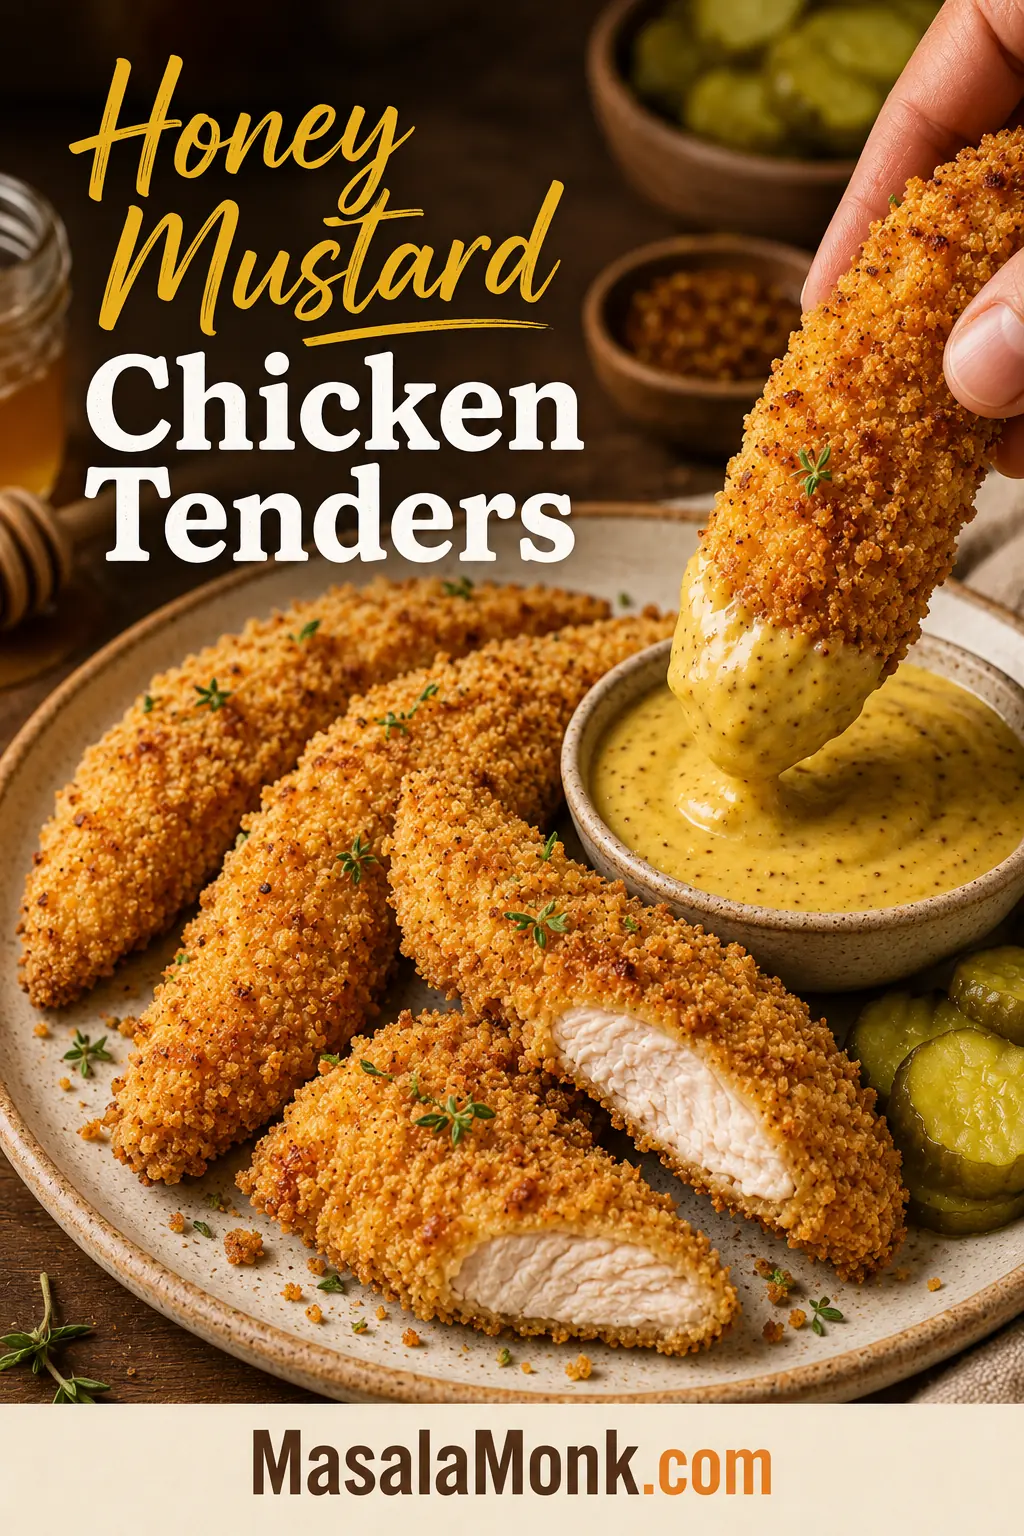
Honey Mustard Chicken Tenders Recipe

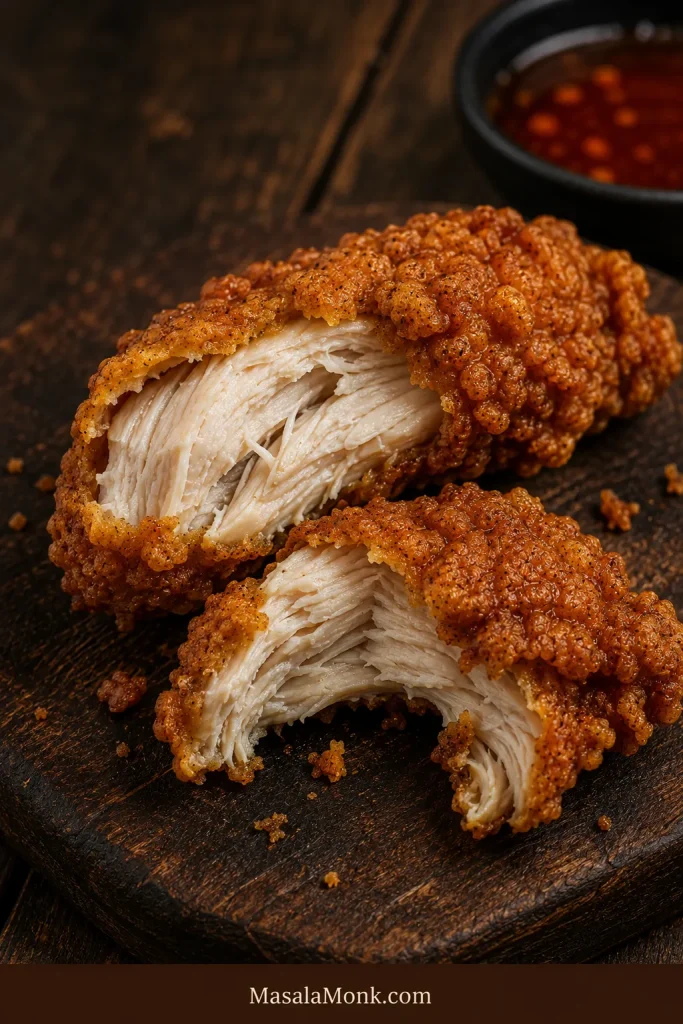
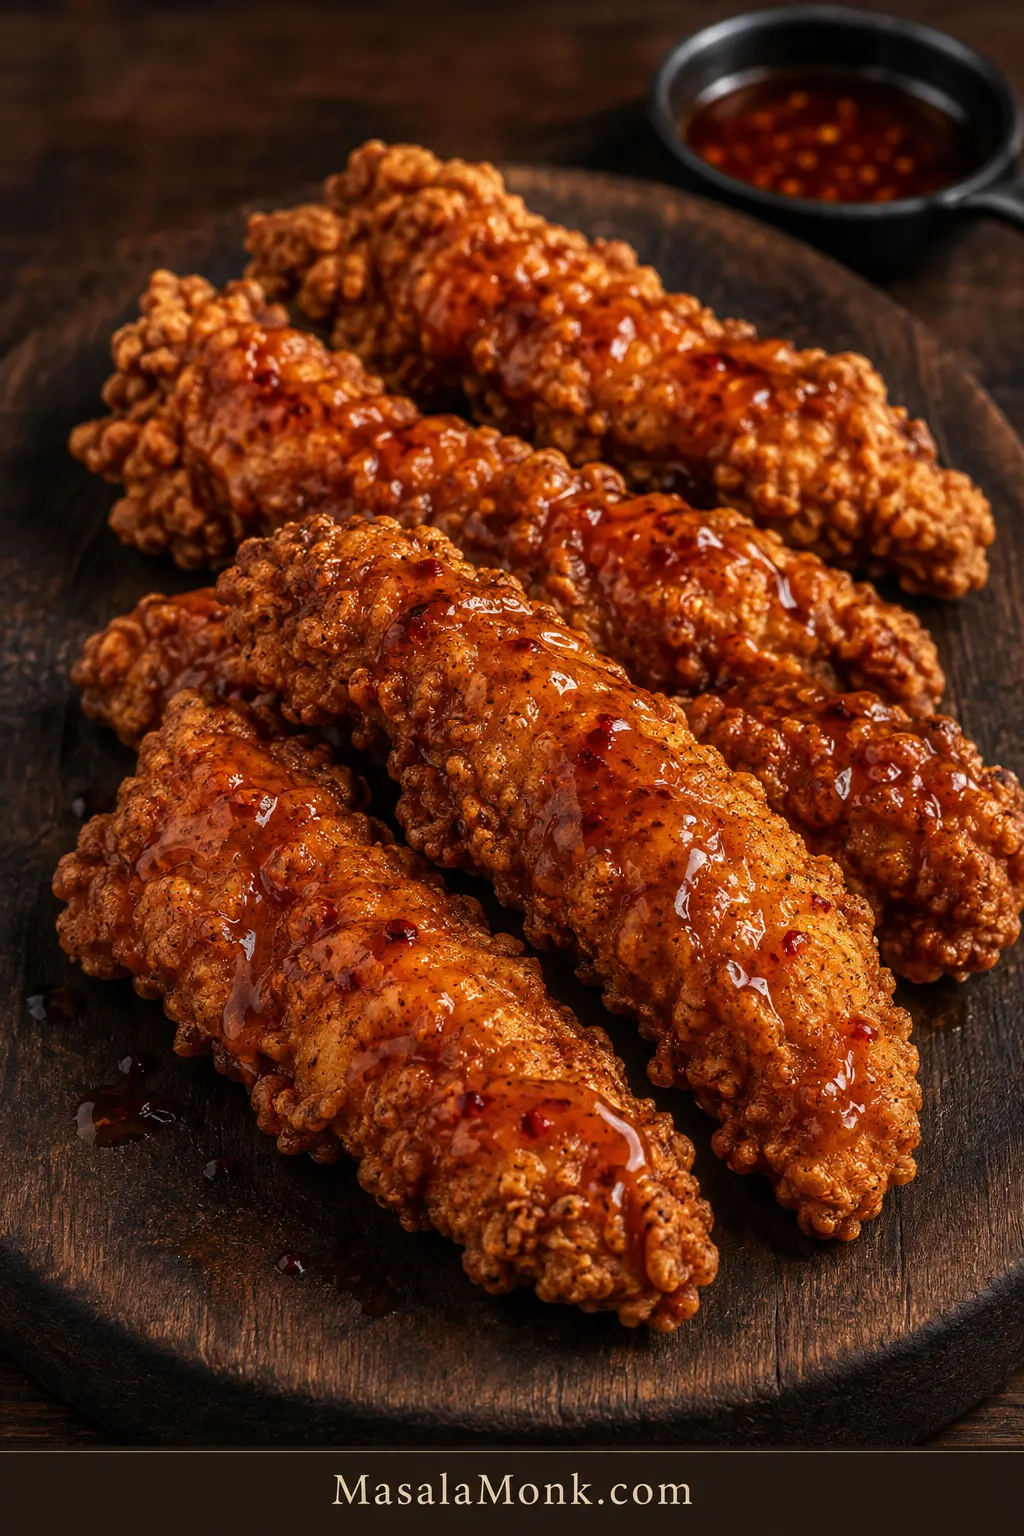
Golden panko-coated honey mustard chicken tenders on a plate with dip, pickles, crumbs, and a cut-open cooked tender.

These honey mustard chicken tenders are for the night you want crispy chicken strips, a creamy sweet-tangy dip, and zero deep-frying drama. The chicken stays juicy, the panko turns golden, and every piece is made for dragging through honey mustard sauce.

They are the kind of tenders people pick from the tray before dinner is even on the table: crisp edges, juicy centers, and just enough honey mustard to keep everyone reaching for one more.

Here, the goal is simple: no pale panko, no soggy bottoms, no dry chicken, and no wasted dipping sauce because it touched raw chicken. Everything runs on one simple system: creamy honey mustard as the binder, panko as the crunch, clean dip reserved first, then an oven or air fryer finish.

Remember the signature rule: mix once, divide first — one clean bowl for dipping, one bowl for coating raw chicken. For the best all-around tray, use chicken strips about 3/4 inch thick, press them into panko, and bake at 425°F / 220°C until golden and cooked through. It is the kind of dinner that feels fun without asking you to set up a frying station or babysit a pan of oil.

Quick Answer: How to Make Honey Mustard Chicken Tenders

To make crispy honey mustard chicken tenders, pat chicken tenderloins or chicken breast strips dry, coat them in a creamy mustard-honey mixture, reserve clean sauce before raw chicken touches the rest, press the coated chicken into panko breadcrumbs, then bake at 425°F / 220°C for 16–20 minutes or air fry at 390°F / 200°C for 10–12 minutes.

The chicken is done when the thickest piece reaches 165°F / 74°C. For the best texture, keep the strips evenly sized, spray the crumb layer lightly with oil, leave space between pieces, and dip at the table instead of pouring sauce over the crust too early.

Jump to recipe card · Oven method · Air fryer method · Fix a problem

Honey Mustard Chicken Tenders Recipe Card

Recipe: Crispy Honey Mustard Chicken Tenders

Main method: Oven baked
Alternate method: Air fryer
Servings: 4
Yield: About 10–12 chicken tenders

Prep Time15 minutes
Optional Rest15–30 minutes
Cook Time16–20 minutes oven / 10–12 minutes air fryer
Total Time35–45 minutes, plus optional 15–30 minute rest
Chicken Doneness165°F / 74°C internal temperature

Ingredients

For the Chicken and Coating

  • 1 1/2 lb / 680 g / 24 oz chicken tenderloins, or boneless chicken breast sliced into strips about 3/4 inch thick
  • 1 1/2 cups / 75–90 g panko breadcrumbs
  • Fine salt, 1 teaspoon / 5–6 g, divided
  • Black pepper, 1/2 teaspoon
  • Garlic powder, 1 teaspoon
  • Onion powder, 1/2 teaspoon
  • Smoked paprika or sweet paprika, 1 teaspoon
  • Oil spray, or 1 tablespoon / 15 ml olive oil for drizzling

For the Honey Mustard Coating and Dipping Sauce

  • 1/4 cup / 60 ml / about 60 g Dijon mustard, yellow mustard, or a mix of both
  • 3 tablespoons honey / 45 ml / about 60 g
  • 3 tablespoons mayonnaise or Greek yogurt / 45 ml / about 45 g
  • 1 tablespoon / 15 ml lemon juice or apple cider vinegar
  • 1/4 teaspoon garlic powder
  • Pinch of salt and black pepper, to taste

Sauce note: This amount gives enough sauce to coat the chicken and reserve a small dipping bowl. For sauce-heavy serving, make a second half-batch of honey mustard or reserve more before raw chicken touches it.

Instructions

Prepare the Sauce

  1. In a bowl, mix the mustard, honey, mayonnaise or Greek yogurt, lemon juice or vinegar, garlic powder, salt and pepper.
  2. Taste and adjust. Make it sweeter with more honey, sharper with extra Dijon, or brighter with a little more lemon juice.
  3. Mix once, divide first: reserve about one-third to one-half of the sauce in a clean bowl for dipping. Keep this portion away from raw chicken.

Coat the Chicken

  1. Pat the chicken tenders dry with paper towels. The surface should look dry, not shiny-wet.
  2. Season the chicken lightly with some of the salt, pepper, garlic powder, onion powder and paprika.
  3. Add the chicken to the remaining honey mustard mixture and turn until each piece is coated.
  4. Let the chicken sit for 15–30 minutes if you have time. Avoid a long acidic marinade for very thin strips because the surface can soften and the coating may not grip as well.
  5. Place the panko breadcrumbs in a shallow bowl. Season with the remaining salt and spices.
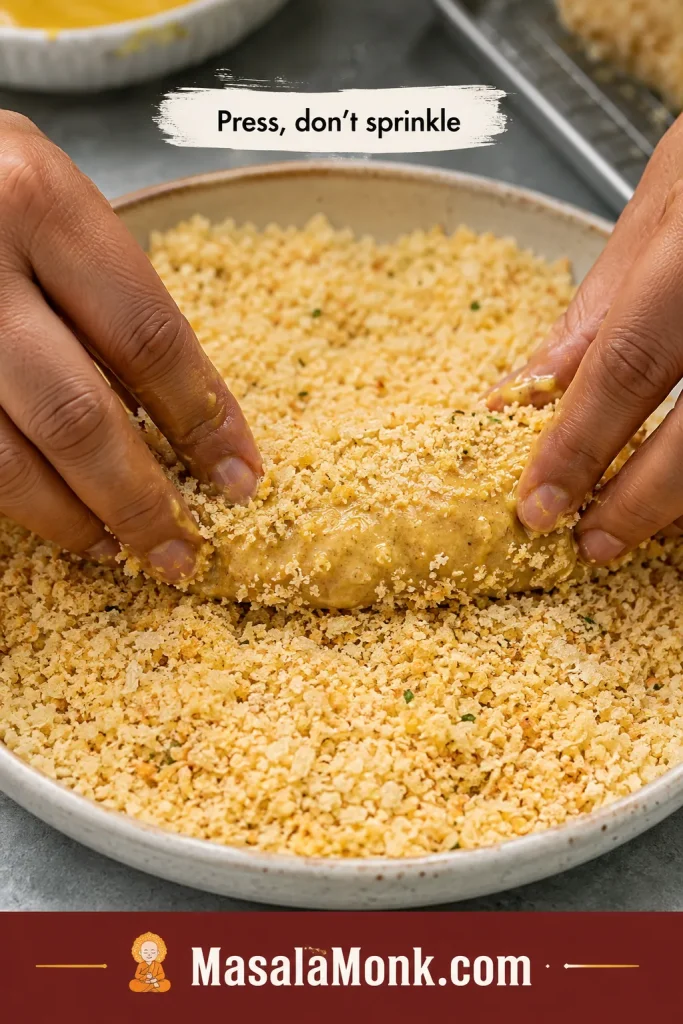
  6. Press each honey mustard-coated chicken tender firmly into the panko, turning to coat all sides.

Bake the Chicken Tenders

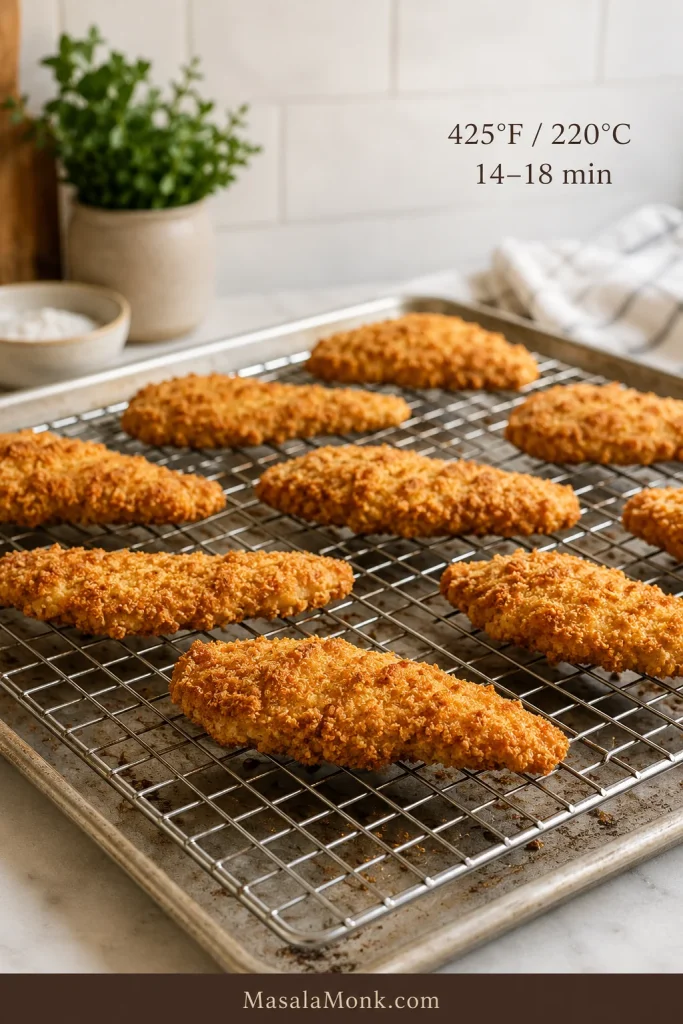
  1. Preheat the oven to 425°F / 220°C. Line a baking sheet with parchment paper. For crispier bottoms, place a wire rack over the baking sheet.
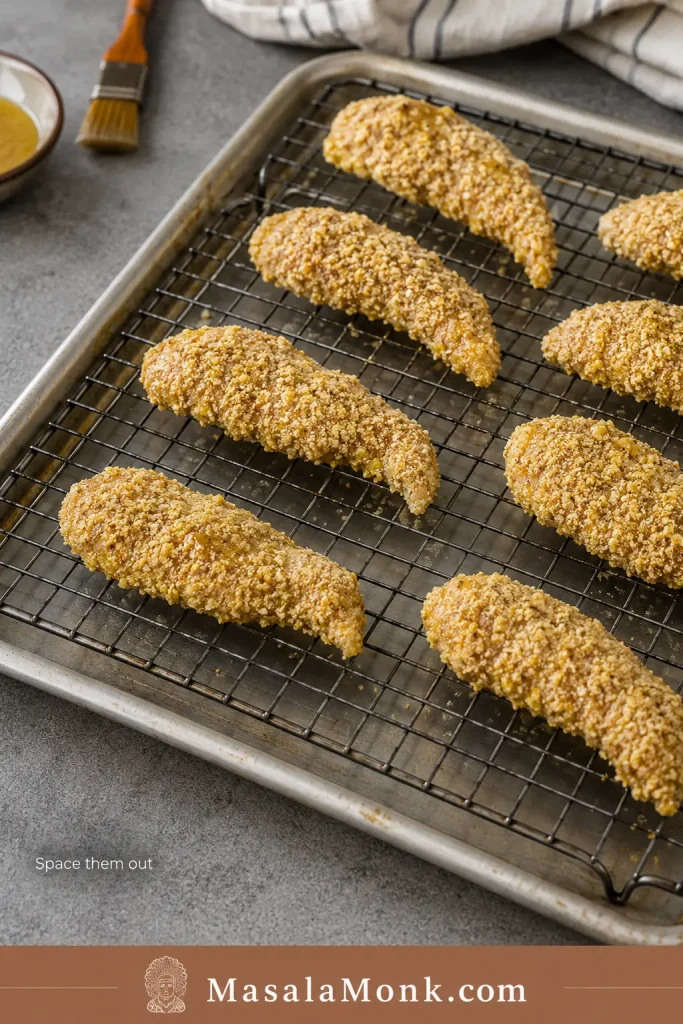
  2. Arrange the coated tenders in a single layer with space between them.
  3. Spray the tops lightly with oil, or drizzle with a small amount of olive oil.
  4. Bake for 16–20 minutes, flipping once if needed, until the edges are golden and the chicken is cooked through.
  5. Check the thickest tender for doneness.
  6. Rest for 3–5 minutes on a rack or plate, then serve with the reserved clean honey mustard dipping sauce.

Air Fryer Method

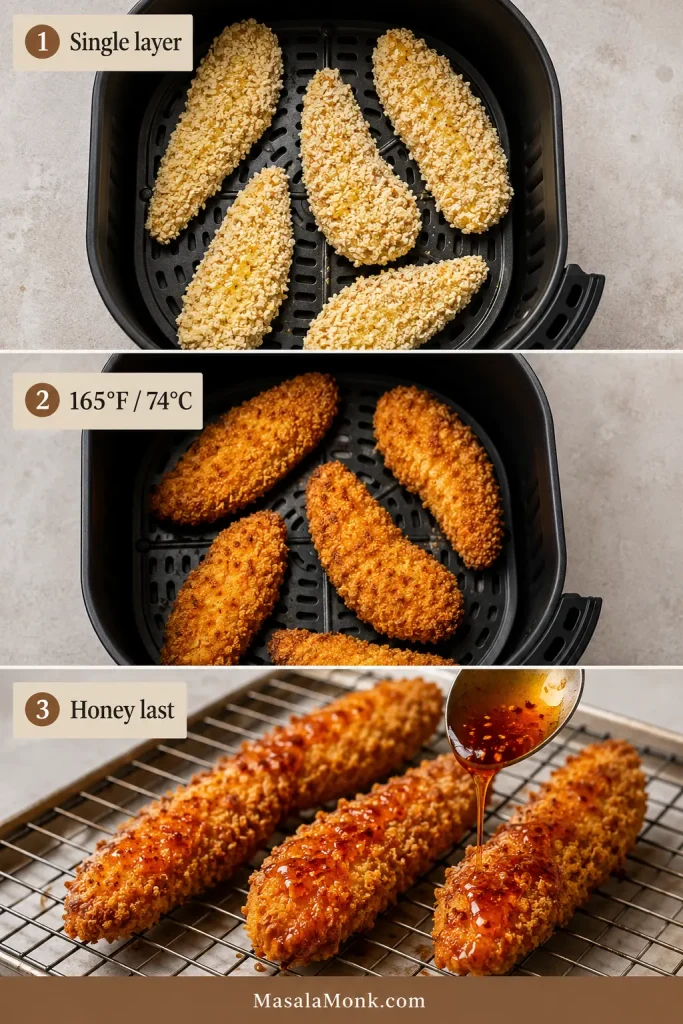
  1. Preheat the air fryer to 390°F / 200°C.
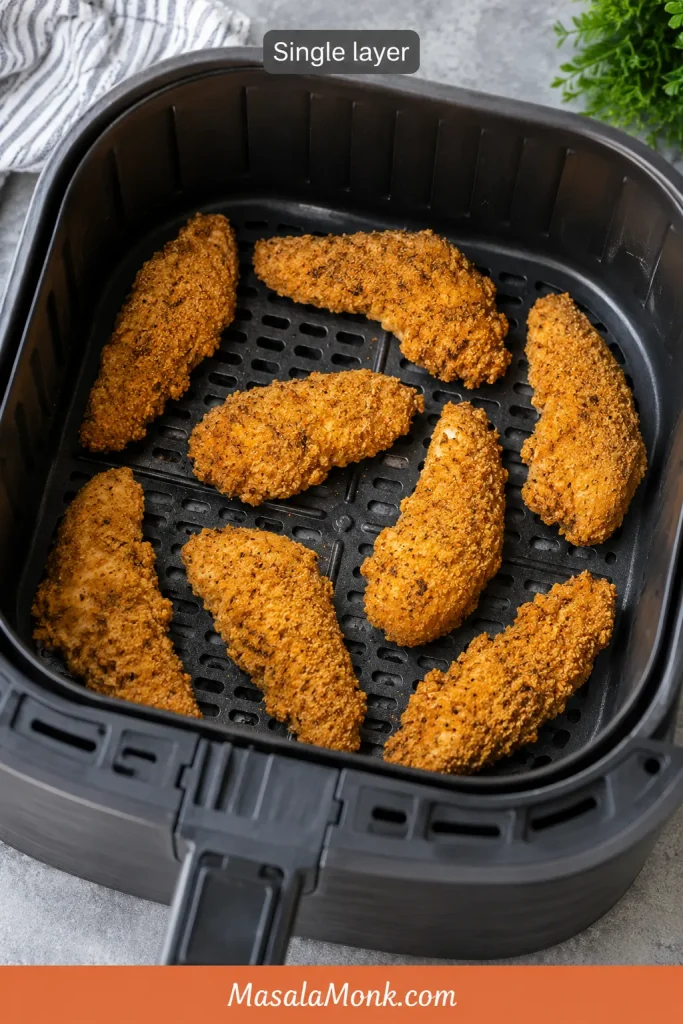
  2. Arrange the chicken tenders in a single layer. Do not overcrowd the basket.
  3. Spray lightly with oil.
  4. Air fry for 10–12 minutes, flipping halfway, until crisp and cooked through. Check around 9–10 minutes the first time because air fryers brown at different speeds.
  5. Cook in batches if needed. Two lighter batches will beat one crowded batch every time.

Recipe Notes

  • No egg is needed here because the honey mustard mixture acts as the binder.
  • Very thin strips cook quickly, so start checking early.
  • Thicker tenders may need the full 20 minutes, or a gentler 400°F / 200°C bake for a few extra minutes.
  • For the crunchiest crust, use a wire rack and oil spray.
  • To get a familiar fast-food-style honey mustard, use more yellow mustard and mayonnaise.
  • Prefer a sharper Dijon-style sauce? Use more Dijon and a little extra lemon juice.

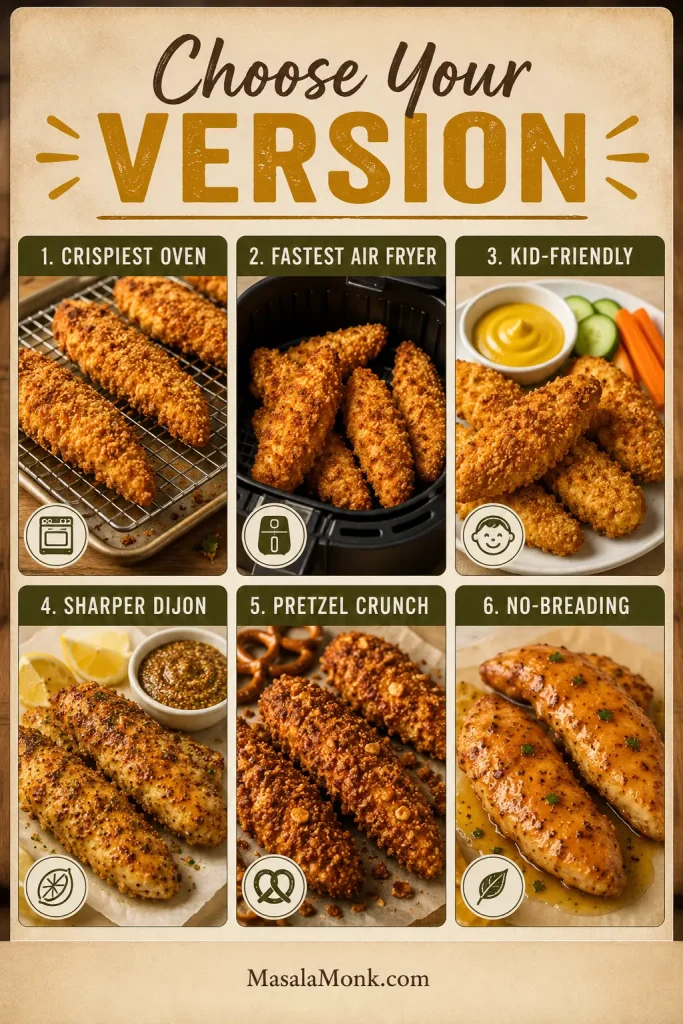
Choose Your Version

Already know what kind of tray you want? Use this table to steer the recipe. The base method stays the same; the small changes below make the tenders crunchier, faster, milder, sharper, party-style, or gluten-free.

Six-panel board comparing honey mustard chicken tender versions: oven, air fryer, kid-friendly, Dijon, pretzel crunch, and no-breading.
Choose the version that fits your night: oven-baked for maximum crunch, air fryer for speed, Dijon for a sharper bite, pretzel crumbs for texture, or no-breading for a lighter option.
Want This Result?Do This
Crispiest oven tendersUse panko, toast it first if you can, spray with oil, and bake on a wire rack.
Fastest versionUse the air fryer at 390°F / 200°C in a single layer.
Kid-friendly flavorUse yellow mustard, mayonnaise, and a little extra honey.
Sharper Dijon versionUse more Dijon, Greek yogurt, and extra lemon juice.
Party-style crunchReplace panko with crushed pretzels and reduce added salt.
Gluten-free versionUse gluten-free panko or crushed gluten-free rice cereal.
No-breading versionSkip the panko and bake lightly coated honey mustard tenderloins.

Time and Temperature Guide

Chicken tenders cook quickly, so timing matters. Use the table below as a guide, then check the thickest piece before serving.

MethodTemperatureTimeBest For
Oven, standard tenders425°F / 220°C16–20 minutesFull batch, golden crumb crust
Oven, thick tenders400°F / 200°C20–25 minutesLarger chicken strips
Air fryer390°F / 200°C10–12 minutesFast crisping, smaller batches
Reheat375–390°F / 190–200°C5–8 minutes, or until hot and crispLeftovers

Chicken should reach 165°F / 74°C in the thickest part. The tenders should also look golden at the edges and feel firm when lifted with tongs, but the thermometer is the safest check.

Once the timing is clear, the next thing is texture. These tenders work because the coating is built to cling, brown, and stay crisp long enough to dip.

Why This Recipe Works

The best honey mustard chicken tenders are not just sweet chicken in breadcrumbs. They need a coating that stays put, a crust that browns before the chicken dries out, and a dipping sauce that does not soften the crunch too early.

The magic is not complicated, but it does depend on a few small choices that keep baked tenders from tasting like soft breaded chicken.

  • Dry chicken helps the coating grip. You want the mustard-honey layer to cling, not slide around.
  • Honey mustard replaces egg. It gives the crumbs something to hold onto and adds flavor at the same time.
  • Panko gives the oven-fried bite. It is lighter and flakier than regular breadcrumbs.
  • Oil spray brings the color. Dry crumbs stay pale; a little oil helps them turn golden.
  • Space and a rack fight steam. Give the tenders a little breathing room so they brown instead of softening together.
  • Reserved sauce stays clean. Moving the dip to a separate bowl before coating the chicken keeps serving simple and safe.

When those pieces work together, you get the comfort of chicken fingers, the brightness of honey mustard, and a crisp bite that still tastes juicy underneath.

The best part is the contrast: the craggy panko shell, the tender strip of chicken inside, and that cool-sweet honey mustard dip catching in all the little crispy edges.

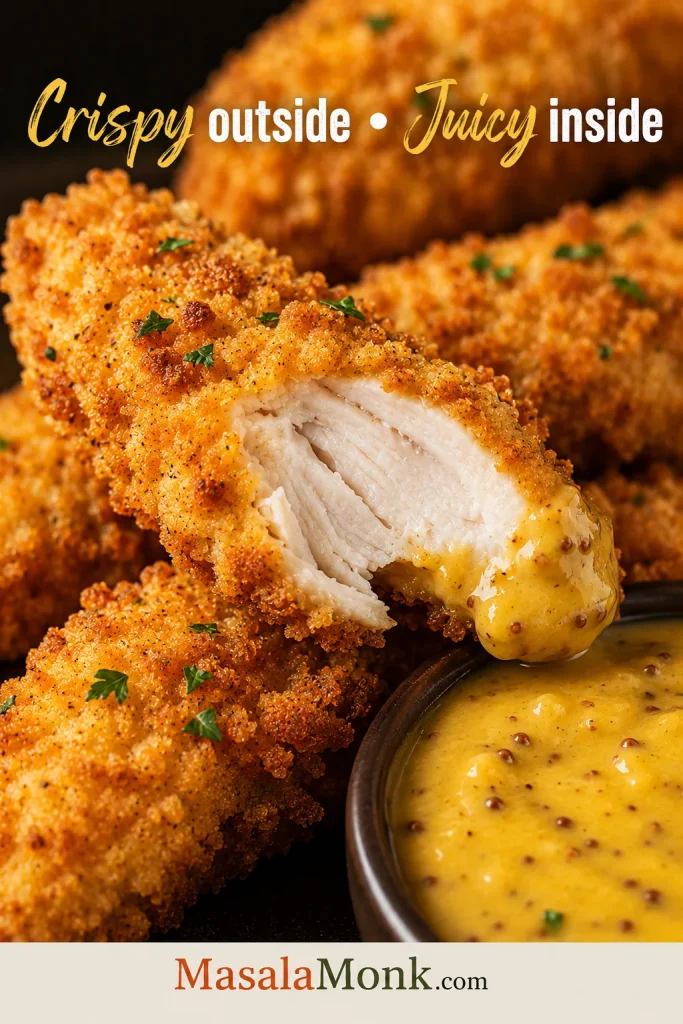
Crispy Outside, Juicy Inside

This is the texture target to keep in mind before you start coating: crisp crumbs on the outside, tender chicken in the middle, and sauce served on the side so the crust stays lively.

Close-up of a cut-open crispy chicken tender with golden panko coating, white cooked chicken inside, and honey mustard dip nearby.
Aim for contrast in every bite: a crunchy panko shell outside and moist white chicken inside. Pull the tenders once they are cooked through so the center stays juicy.

Ingredients You Need

Most of the flavor comes from the ingredients. Simple tools and small technique choices handle the texture.

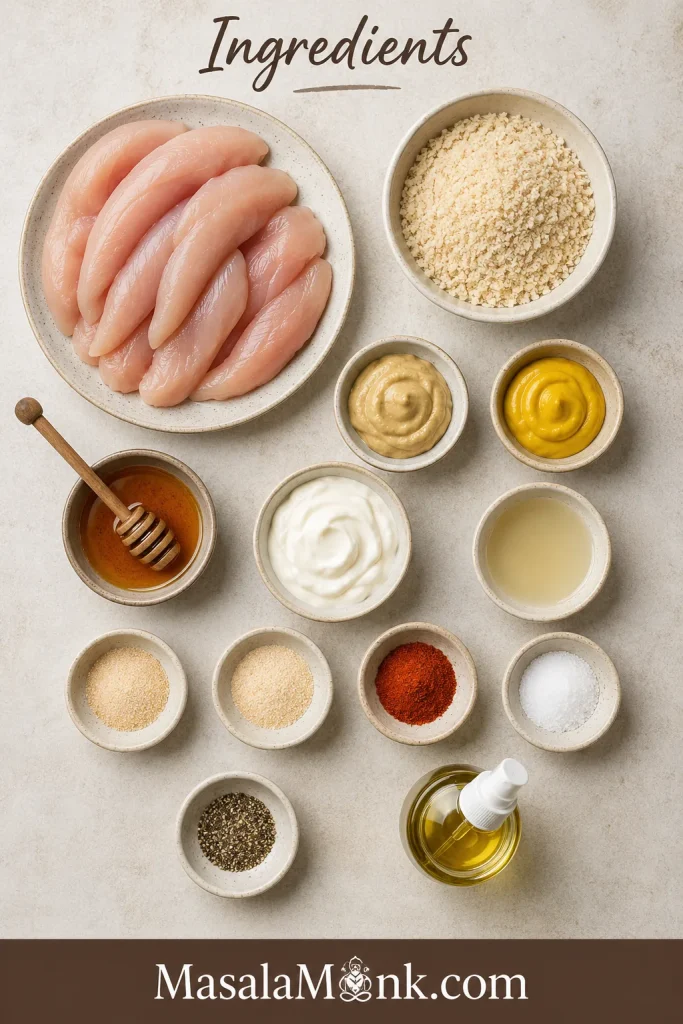
Overhead layout of ingredients for honey mustard chicken tenders, including raw chicken, panko, mustard, honey, yogurt or mayo, spices, and oil.
Set out the chicken, panko, sauce ingredients, seasonings, and oil spray before you start. It keeps the coating step smooth and makes it easier to reserve a clean dipping bowl.

Chicken Tenderloins or Chicken Breast

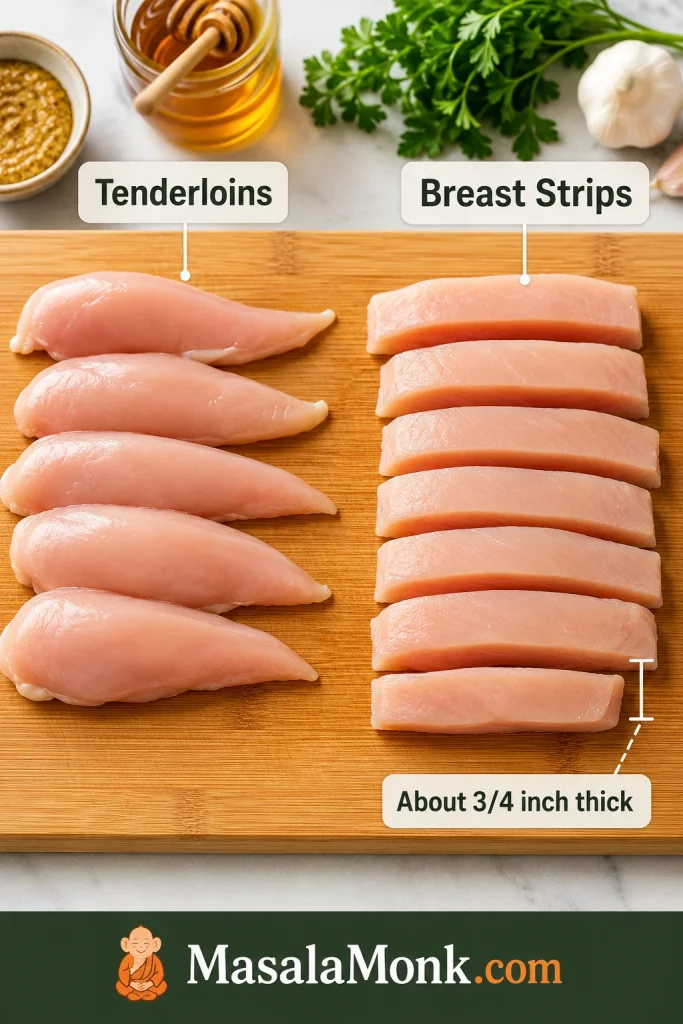
Chicken tenderloins are easiest because they are already shaped like strips. Boneless chicken breast works too; just slice it lengthwise into even pieces about 3/4 inch thick at the widest part. Very thin strips cook before the crumbs brown, while very thick strips need more time and can darken the honey before the center is done.

Raw chicken tenderloins and sliced chicken breast strips arranged side by side on a cutting board with a 3/4 inch thickness label.
Even thickness matters more than perfect shape. Keep chicken tenderloins or breast strips close to 3/4 inch thick so the coating can brown before the center dries out.

If you are starting with full chicken breasts and want more detail on keeping them juicy, this baked chicken breast recipe goes deeper into timing, thickness, and avoiding dry chicken.

Mustard

Dijon brings bite; yellow mustard brings nostalgia. Use Dijon for a sharper sauce, yellow mustard for a milder dipping-sauce flavor, or a mix of both for the best middle ground.

Honey

Honey gives the sauce its classic sweetness, but this is not a sticky glaze recipe. The honey mustard flavors the chicken while the panko does the crisping, so the tenders stay crunchy instead of turning syrupy.

Mayonnaise or Greek Yogurt

Mayonnaise makes the sauce creamy and familiar. Greek yogurt gives you a lighter, tangier version. Both help the mustard-honey coating cling to the chicken and hold the crumbs in place.

If you like making creamy sauces from scratch, this homemade mayonnaise guide gives you a richer base for dips.

Panko Breadcrumbs

Panko is what keeps baked tenders from feeling like soft breaded chicken. The flakes are light and uneven, so they create a craggy shell that feels much closer to fried chicken fingers.

This recipe skips the classic flour-and-egg dredge to keep the coating simple. The mustard-honey layer works as the glue. For a firmer, more restaurant-style crust, lightly dust the chicken with flour before dipping it into the sauce, then press it into the panko.

Seasonings

Garlic powder, onion powder, paprika, salt and pepper are enough. They make the coating savory without hiding the honey mustard flavor.

Equipment That Helps

You can make these with a baking sheet and a bowl, but a few simple tools make the difference between “good enough” tenders and crisp, golden ones.

  • Rimmed baking sheet: Keeps crumbs and oil contained.
  • Parchment paper: Helps prevent sticking and makes cleanup easier.
  • Wire rack: Gives the bottoms a better chance to crisp.
  • Shallow bowl: Makes pressing the panko onto the chicken easier.
  • Oil spray: Helps the crumbs turn golden without deep frying.
  • Air fryer: Optional, but excellent for smaller batches.
  • Instant-read thermometer: Helpful for avoiding dry or undercooked chicken.

Honey Mustard Sauce: Dip, Binder or Marinade?

Honey mustard does three jobs here: it helps the crumbs stick, flavors the chicken, and gives you that creamy dipping bowl at the end. The only rule is that the dip must be reserved before raw chicken touches the rest.

Sauce safety rule: mix once, divide first. Make one batch of honey mustard, then immediately move the dipping portion to a clean bowl before raw chicken touches the rest.

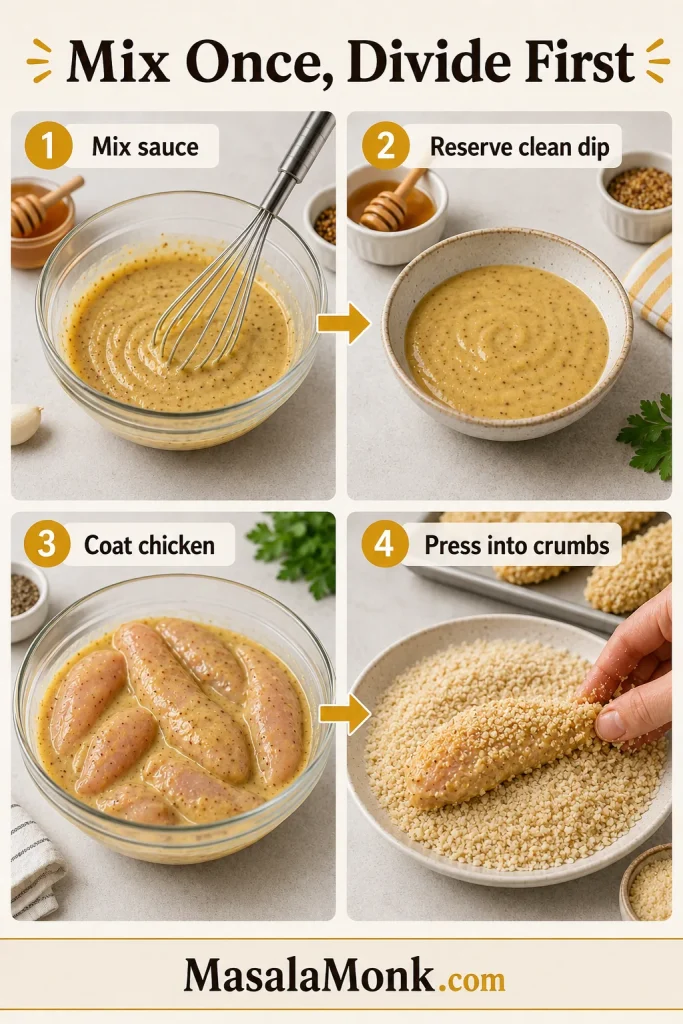
Mix Once, Divide First

This visible split is what keeps dinner simple: one bowl becomes the clean dip, while the rest of the sauce seasons and coats the raw chicken before breading.

Four-panel guide showing honey mustard sauce mixed, clean dip reserved, raw chicken coated, and chicken pressed into panko crumbs.
Mix once, then divide before raw chicken touches the sauce. This keeps one bowl safe and clean for dipping while the remaining honey mustard becomes the flavorful coating binder.

The sauce has three jobs. First, it helps the crumb layer stick. At the table, it gives the cooked tenders that creamy sweet-tangy finish. If the chicken rests for 15–30 minutes before breading, the same sauce also works as a short flavor boost.

Honey Mustard Sauce Spoon Test

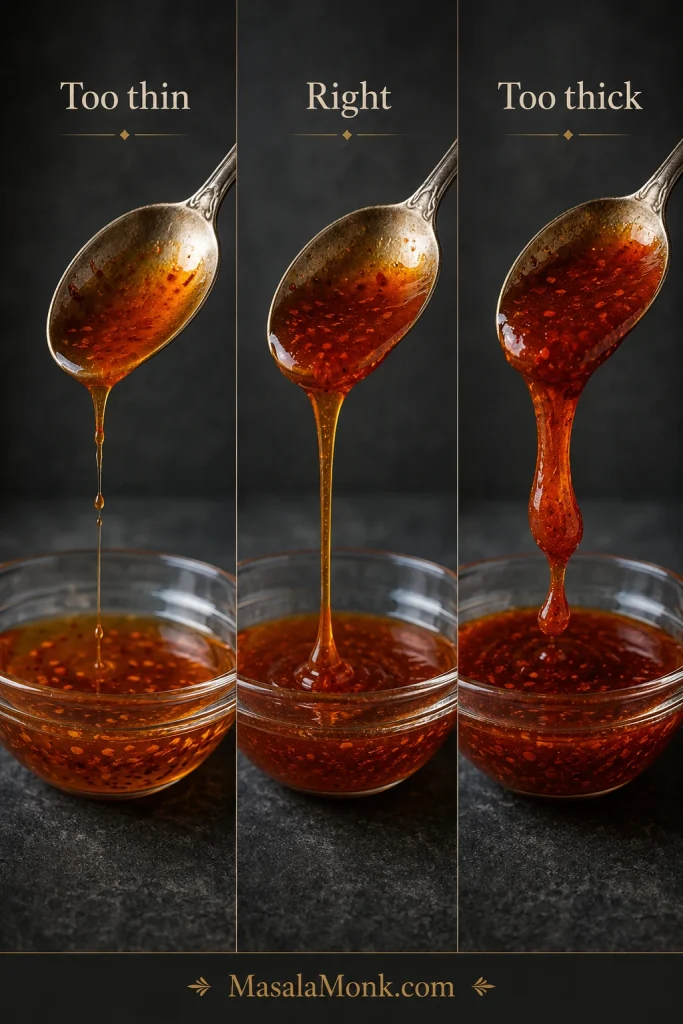
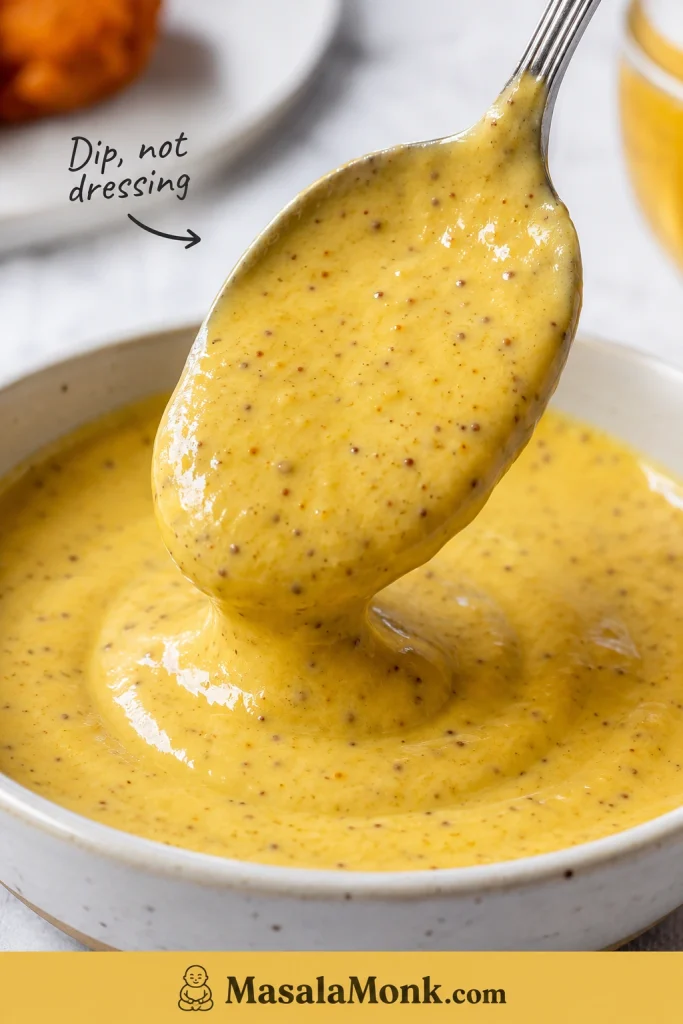
Before the chicken goes in, lift a spoon through the sauce and check the texture. It should coat the spoon in a creamy layer, not run off immediately.

Thick creamy honey mustard sauce clinging to the back of a spoon above a bowl with visible mustard specks.
Look for a spoon-coating texture: thick enough to cling, creamy enough to dip. If the honey mustard looks runny, thicken it slightly before coating the chicken.

For a loose sauce, whisk in another spoonful of mayo or Greek yogurt before breading. A thicker sauce grips the chicken better and protects the panko from turning wet.

Very thin strips do not need an overnight marinade, especially if your sauce is tangy with lemon juice or vinegar. Too much time in an acidic sauce can soften the surface and make the coating less secure.

Simple Honey Mustard Dipping Sauce Ratio

  • 1/4 cup / 60 ml mayonnaise or Greek yogurt
  • 2 tablespoons / 30 ml Dijon or yellow mustard
  • 2 tablespoons honey / 30 ml / about 40 g
  • 1–2 teaspoons lemon juice or apple cider vinegar
  • Pinch of garlic powder
  • Salt and pepper to taste

Make it sweeter with more honey, sharper with extra Dijon, or more familiar and restaurant-style with yellow mustard and mayo. Greek yogurt plus a little extra lemon juice gives you the lighter, tangier version.

If you enjoy this sweet-tangy lane, mango mustard sauce is a fun next dip for fries, wraps and sandwiches.

Next: press into panko · Bake the tenders · Air fry the tenders · Back to recipe card

How to Make Honey Mustard Chicken Tenders

Once the recipe card is open, these are the small visual cues that make the tray come out right: dry surface, spoon-coating sauce, firmly pressed crumbs, enough space, and golden edges.

1. Dry and Season the Chicken

The chicken should look dry before the sauce goes on. You want the mustard-honey coating to cling, not slide around.

2. Mix, Taste and Divide the Sauce

The sauce should taste sweet first, tangy next, and creamy enough to dip. Once it tastes right, reserve the clean dipping portion before you coat the raw chicken.

3. Coat Lightly, Not Heavily

You want a thin layer of honey mustard clinging to the chicken, not a heavy blanket of sauce. Too much sauce can make the crumbs wet and slow down browning.

4. Press the Panko

Press the crumbs onto the chicken instead of sprinkling them over the top. The coating should look attached before it goes into the oven or air fryer.

Hands pressing a honey-mustard-coated chicken tender into coarse panko breadcrumbs in a shallow bowl.
After coating the chicken, press it firmly into the panko instead of sprinkling crumbs over the top. This helps the breadcrumb crust grip better during baking or air frying.

5. Space, Spray and Cook

Leave gaps between the tenders and give the crumb layer a light spray of oil. This is the step that makes the tray look like dinner instead of pale baked chicken: the crumbs need both heat and a little fat to turn golden.

Oven Method

Use the oven when you want the whole tray ready together, with enough tenders for dinner plates and a few “just one more” pieces.

  • Temperature: 425°F / 220°C
  • Time: 16–20 minutes
  • Best setup: parchment-lined baking sheet or a wire rack over a baking sheet
  • Texture goal: golden crumbs, juicy chicken, crisp edges
Oven method guide for panko honey mustard chicken tenders showing baking temperature, time, wire rack use, and safe doneness.
For the oven method, high heat and rack spacing do most of the work. The rack helps the panko crisp underneath while the quick bake keeps the chicken tender.

Why Use a Wire Rack?

A wire rack helps hot air reach the bottom of the tenders, which keeps them from steaming against the pan. When baking directly on parchment, flip the tenders once for better bottom color. With a rack, flipping is optional.

Breaded chicken tenders spaced apart on a wire rack over a rimmed baking sheet before baking.
A wire rack gives baked chicken tenders an instant crispness boost. Because heat can move underneath the pieces, the bottoms stay drier and the panko browns more evenly.

Thick tenders can bake at 400°F / 200°C for about 20–25 minutes. Thin strips may be ready closer to 14–16 minutes, so start checking early.

Compare the air fryer method · Make them extra crispy · See serving ideas · Back to recipe card

Air Fryer Method

Use the air fryer when speed matters more than cooking the whole batch at once. It crisps the crumb layer quickly, but only if the basket has enough space.

Air Fryer Single Layer Setup

Before starting the timer, check the basket. The pieces should sit in one layer with visible gaps, even if that means cooking two smaller batches.

Breaded chicken tenders arranged in a single layer inside a black air fryer basket with space between each piece.
In the air fryer, crowding turns crisping into steaming. Therefore, leave small gaps between the tenders so the hot air can brown the panko coating properly.
  • Temperature: 390°F / 200°C
  • Time: 10–12 minutes
  • Flip: halfway through
  • Oil: light spray on both sides
  • Best rule: cook in batches if the basket is small

Air Fryer Time and Temperature Guide

Use this quick visual check when you want the air fryer version: moderate-high heat, a halfway flip, and enough space for the crumbs to crisp.

Air fryer method guide with breaded chicken tenders in a basket and text for temperature, time, flipping, single-layer spacing, and doneness.
Give every tender room in the air fryer basket. Meanwhile, flipping halfway helps both sides get direct heat so the coating crisps instead of softening.

Different air fryers brown at different speeds, so check around 9–10 minutes the first time. Keep the first batch warm on a rack in a low oven while the rest cook, and avoid stacking hot tenders in a bowl because steam will soften the crust.

The same air-flow rule shows up in crispy recipes like air fryer chicken wings: dry surfaces, space between pieces, and late saucing protect the crunch.

Make them extra crispy · Try another coating · See serving ideas · Back to recipe card

Extra Crispy Upgrades

Once the basic method is in place, these upgrades take baked chicken tenders from good to properly crisp. They are especially helpful if your baked tenders usually come out pale or soft.

  • Toast the panko first. This is the best color upgrade. Toasting gives baked tenders a golden head start before the chicken has a chance to overcook.
  • Use a wire rack. It lets heat move around the tenders instead of trapping steam underneath.
  • Spray both sides lightly. A little oil helps the crumbs brown and gives the crust a more oven-fried texture.
  • Rest cooked tenders on a rack. If you have a rack, use it even after baking. It keeps the bottoms from softening while everyone is getting plates ready.
  • Avoid stacking. Hot tenders piled together will soften quickly.
  • Dip, do not drown. Let the crust stay in charge until the moment you eat.

Best Coatings for Honey Mustard Chicken Tenders

Panko is the easiest default, but honey mustard chicken tenders are flexible. Use this quick guide to choose the coating that fits the meal.

Coating comparison board showing panko, pretzel, cornflake, and gluten-free crumbs with chicken tender samples.
Each coating changes the crunch. Panko stays light and flaky, pretzel crumbs add salty depth, cornflakes create a bigger golden crust, and gluten-free crumbs keep the recipe flexible.
CoatingBest ForNotes
Panko breadcrumbsClassic crispy baked tendersBest default choice
Crushed pretzelsSalty, crunchy party-style tendersUse less added salt
Crushed cornflakesExtra crisp kid-friendly tendersCrush finely but not into powder
Regular breadcrumbsSofter chicken stripsWorks, but less crisp than panko
Gluten-free pankoGluten-free versionCheck labels on mustard and seasonings too
Crushed rice cerealEmergency gluten-free crunchBest with a little extra seasoning

If you use pretzels or cornflakes, crush them into small uneven crumbs. A little texture is good, but a fine powder will not give the same crunch.

Variations

Once the basic tray works, this recipe is easy to bend toward the people eating it — sweeter for kids, sharper for Dijon lovers, spicier for game day, crunchier with pretzels, or lighter without mayo.

Spicy Hot Honey Mustard Chicken Tenders

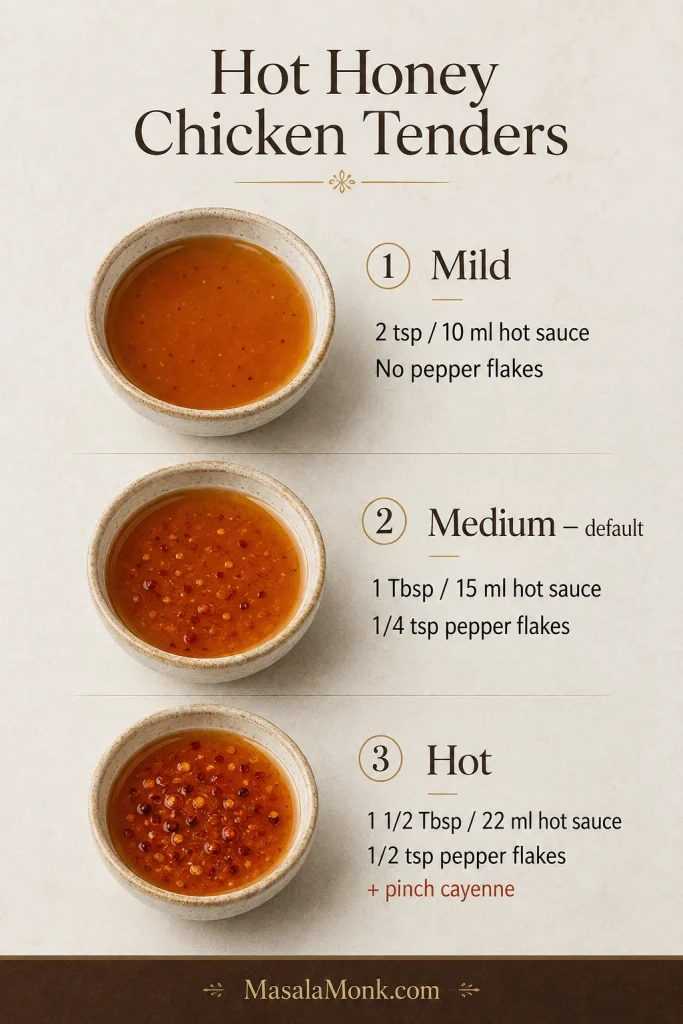
This is the game-day version: still sweet and creamy, but with enough heat to keep people dipping. Add a pinch of cayenne, chili powder or hot sauce to the honey mustard mixture. You can also finish the cooked tenders with a tiny drizzle of hot honey, but add it at the table so the coating stays crisp.

For a fruitier heat, borrow the sweet-spicy direction from this mango habanero sauce and add only a small amount to the honey mustard dip.

Pretzel-Crusted Honey Mustard Tenders

Replace the panko with crushed pretzels for a salty snack-style crust that feels made for a party tray. Reduce the salt in the crumb mixture because pretzels are already salty.

Buttermilk Honey Mustard Chicken Tenders

For a more tender, classic chicken-finger texture, soak the chicken in buttermilk for 30 minutes before coating. Pat off the excess before adding the honey mustard mixture so the panko does not slide off.

No-Mayo Honey Mustard Sauce

Use Greek yogurt when you want the dip tangier and lighter without losing the creamy coating. Add a little extra honey if you want it sweeter. For an egg-free creamy base, eggless mayonnaise also works well.

Kid-Friendly Yellow Mustard Version

Use yellow mustard instead of Dijon, skip the cayenne or spicy seasonings, and keep the sauce a little sweeter. This version tastes closer to familiar fast-food honey mustard.

Gluten-Free Honey Mustard Chicken Tenders

Use gluten-free panko or crushed gluten-free rice cereal. Also check the mustard, mayonnaise and seasonings to make sure they fit your needs.

No-Breading Honey Mustard Tenderloins

This version is not trying to be crispy. It is for the night you want juicy honey mustard tenderloins over rice, salad, or roasted vegetables. Skip the panko, coat the chicken lightly in honey mustard, and bake on parchment until cooked through, starting to check around 14–16 minutes depending on thickness.

Green Chutney Mayo Dip

For an Indian-style dipping sauce, stir a spoonful of green chutney into mayo or Greek yogurt. It gives the tenders a fresh coriander-mint bite without changing the main recipe.

Shallow-fried note: If you want a more classic chicken-finger texture, shallow fry the coated tenders in a thin layer of neutral oil until golden and cooked through. Keep the heat moderate so the honey in the coating does not brown too fast.

What to Serve with Honey Mustard Chicken Tenders

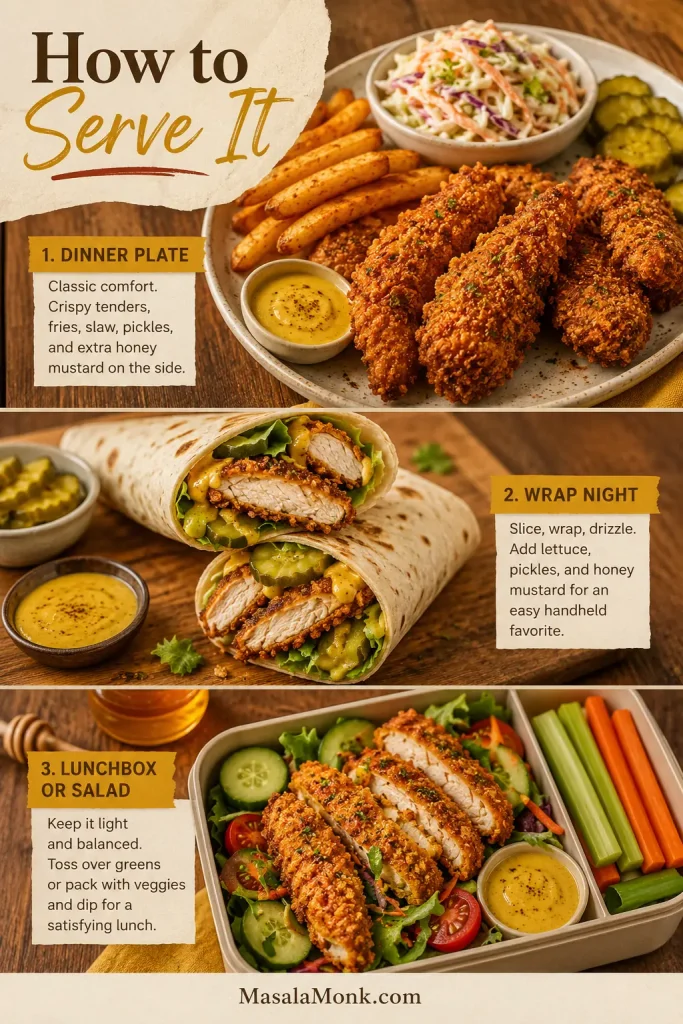
Once the tray is done, the only real question is whether this is a cozy dinner, a game-day snack, or a wrap-and-leftovers situation. Keep the dip close and build the meal around something crisp, creamy, tangy or fresh.

Three serving ideas for honey mustard chicken tenders: dinner plate with fries and slaw, chicken wrap, and lunchbox salad.
These tenders can move from snack to full meal with the right sides. Try them with fries and slaw, tuck them into wraps, or slice them over salad with extra honey mustard.
  • Weeknight dinner: roasted broccoli, green beans, mashed potatoes, or macaroni and cheese.
  • Diner-style plate: crispy homemade French fries, creamy coleslaw, pickles, and extra honey mustard.
  • Game-day tray: buffalo chicken dip, potato wedges, celery sticks, and a pile of napkins.
  • Lunchbox or salad bowl: cucumber salad, green salad, crunchy vegetables, and sliced cold tenders.
  • Wrap or sandwich night: lettuce, pickles, soft buns or tortillas, and enough sauce to swipe through every bite.

Leftover tenders are great sliced over salad, tucked into wraps, or layered into sandwiches with lettuce, pickles and extra honey mustard. For more lunch ideas, these chicken sandwich recipes are a useful next stop.

Storage, Freezing and Reheating

The main rule for leftovers is simple: keep the sauce separate and bring the crunch back with dry heat.

Storing Leftovers

Store cooked chicken tenders in an airtight container in the fridge for 3–4 days. Keep the honey mustard sauce in a separate container so the coating does not soften. That 3–4 day window matches the FoodSafety.gov cold storage chart for cooked meat and poultry leftovers.

Reheating

For the best texture, reheat the tenders in an oven or air fryer at 375–390°F / 190–200°C for about 5–8 minutes, or until hot and crisp. The microwave works if you are in a hurry, but it will soften the coating.

Freezing

For easiest freezing, freeze cooked tenders. Raw breaded tenders can also be frozen if the chicken was handled cold and clean, but cooked leftovers are simpler and safer for most home kitchens. Freeze in a single layer first, then move to a freezer-safe bag or container.

Do not freeze the dipping sauce with the chicken. Make fresh sauce or store it separately in the fridge.

Troubleshooting

Most honey mustard chicken tender problems come down to moisture, crowding, or too much sauce. If baked tenders have ever come out pale, soft, or half-naked on the pan, this is the section that saves the next batch.

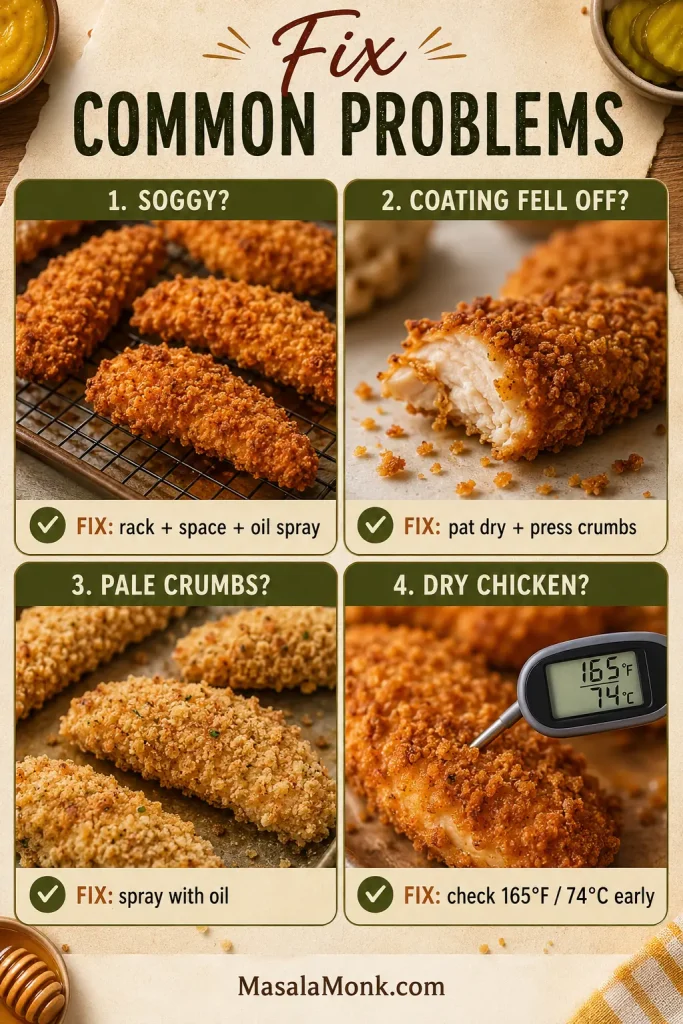
Troubleshooting board showing fixes for soggy chicken tenders, coating falling off, pale crumbs, and dry chicken with temperature guidance.
For soggy coating, fix the airflow first with a rack, spacing, and oil spray. When crumbs fall off, start earlier by patting the chicken dry and pressing the panko firmly.

Why Are My Chicken Tenders Soggy?

Likely causes: crowding, too much sauce, not enough oil on the crumbs, or stacking hot tenders after cooking.

Fix: leave space between pieces, use a rack if possible, spray lightly with oil, rest cooked tenders without stacking, and dip at the table instead of saucing early.

Why Did My Coating Fall Off?

Likely causes: wet chicken, thin sauce, loose crumbs, or not enough pressing.

Fix: pat the chicken dry, use a creamy coating that clings, and press each tender into the panko until the crumbs look attached.

Why Is My Panko Pale?

Likely causes: dry breadcrumbs, low browning, or not enough time for color before the chicken is done.

Fix: spray or drizzle the panko lightly with oil. For deeper color, toast the panko before coating the chicken.

Why Did the Honey Burn?

Likely causes: a sauce layer that is too heavy, very small chicken pieces, or cooking too long.

Fix: use a thin coating, rely on panko for crunch, and start checking thin strips early.

Why Is the Chicken Dry?

Likely causes: thin strips, uneven sizes, or cooking past the safe internal temperature.

Fix: cut even pieces, start checking early, and use a thermometer in the thickest tender.

Why Is the Sauce Too Sweet or Too Sharp?

Likely causes: too much honey for your taste, too much Dijon, or not enough creamy base.

Fix: add mustard or lemon juice if it is too sweet. Add honey, mayo, or Greek yogurt if it is too sharp. Honey mustard should taste sweet first, tangy next, and creamy enough to dip.

Back to recipe card · Review oven method · Review air fryer method · Back to top

FAQs

Are Chicken Tenders and Chicken Strips the Same Thing?

They are often used the same way in recipes. Tenderloins are the small natural strips attached to the chicken breast. Strips are usually sliced from boneless chicken breast. Both work as long as the pieces are similar in size.

Can I Use Chicken Breast Instead of Tenderloins?

Yes. Slice boneless chicken breast into even strips about 3/4 inch thick at the widest part. Try not to make them too thin, because thin strips can dry out before the coating gets crisp.

Do I Need Flour or Egg for These Chicken Tenders?

No. The honey mustard mixture works as the binder in this recipe. For a firmer restaurant-style crust, lightly dust the chicken with flour before adding the sauce and panko.

Can I Make Honey Mustard Chicken Tenders in the Air Fryer?

Yes. Air fry at 390°F / 200°C for 10–12 minutes, flipping halfway, until the chicken is crisp and cooked through. Cook in batches so the basket is not crowded.

How Do I Keep Baked Chicken Tenders Crispy?

Use panko breadcrumbs, spray or drizzle the coating lightly with oil, leave space between the tenders, and bake at high heat. A wire rack helps too. Keep the sauce on the side until serving.

Can I Make These Gluten-Free?

Yes. Use gluten-free panko or crushed gluten-free rice cereal. Check your mustard, mayonnaise, and seasonings as well if gluten-free cooking is important for your household.

Can I Make the Sauce Without Mayo?

Yes. Use Greek yogurt for a tangier, lighter sauce. Add a little extra honey if you want it sweeter, or use eggless mayonnaise if you want a mayo-style sauce without egg.

Can I Use the Same Honey Mustard as Marinade and Dip?

Only if you divide it first. Reserve the dipping portion in a clean bowl before raw chicken touches the rest. The sauce used on raw chicken should not be served as a dip unless it is cooked safely.

How Do I Reheat or Freeze Honey Mustard Chicken Tenders?

Reheat cooked tenders in an oven or air fryer at 375–390°F / 190–200°C for 5–8 minutes, or until hot and crisp. For freezing, cooked tenders are the easiest option. Freeze in a single layer first, then store in a freezer-safe bag or container.

Final Bite

The win here is simple: no frying pot, no soggy tray, no dry chicken, and no wasted dipping sauce because it touched raw chicken.

Just golden panko, juicy strips, and a clean bowl of sweet-tangy honey mustard that somehow disappears faster than expected. Keep the sauce creamy, the crumbs well-pressed, and the dip on the side until the moment everyone starts reaching.

Posted on Leave a comment

General Tso Chicken Recipe: Crispy, Sticky, Better Than Takeout

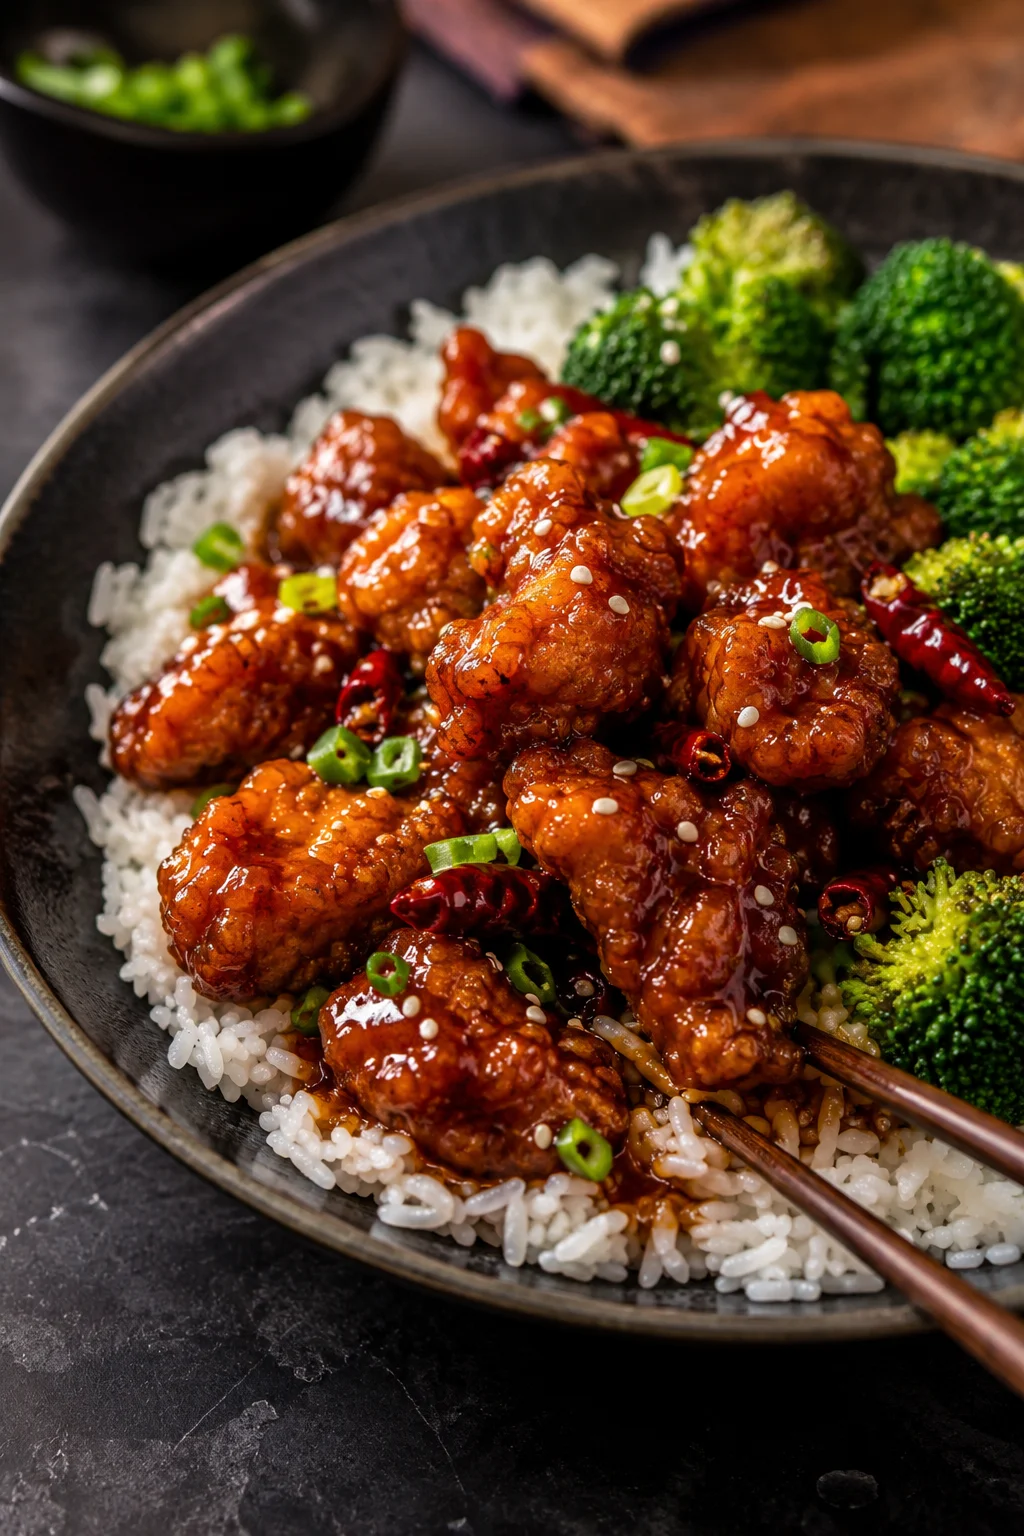
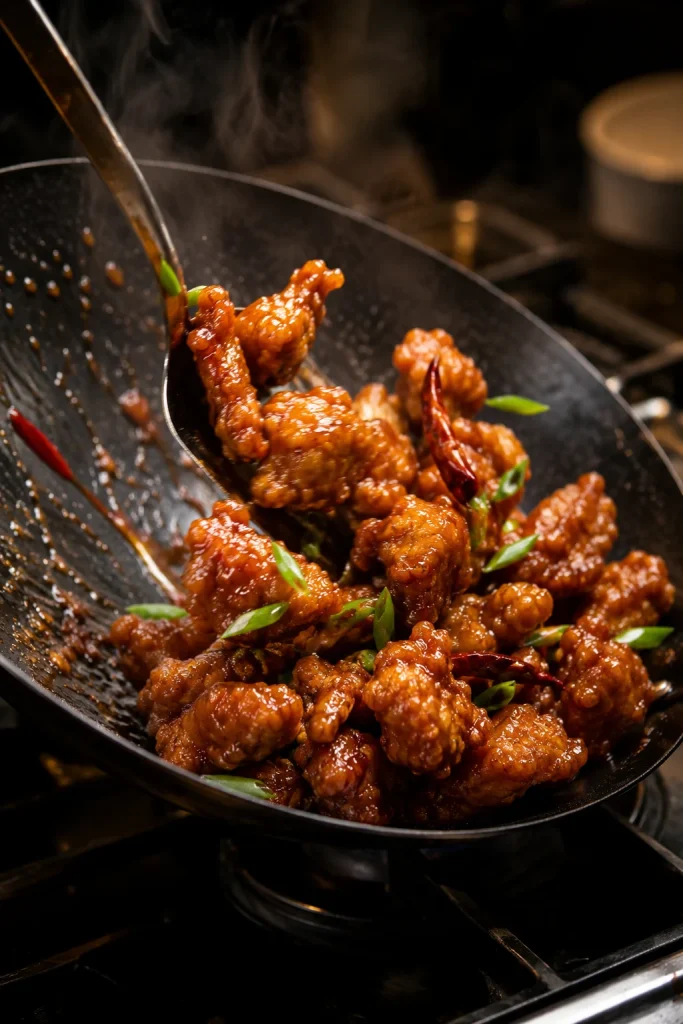
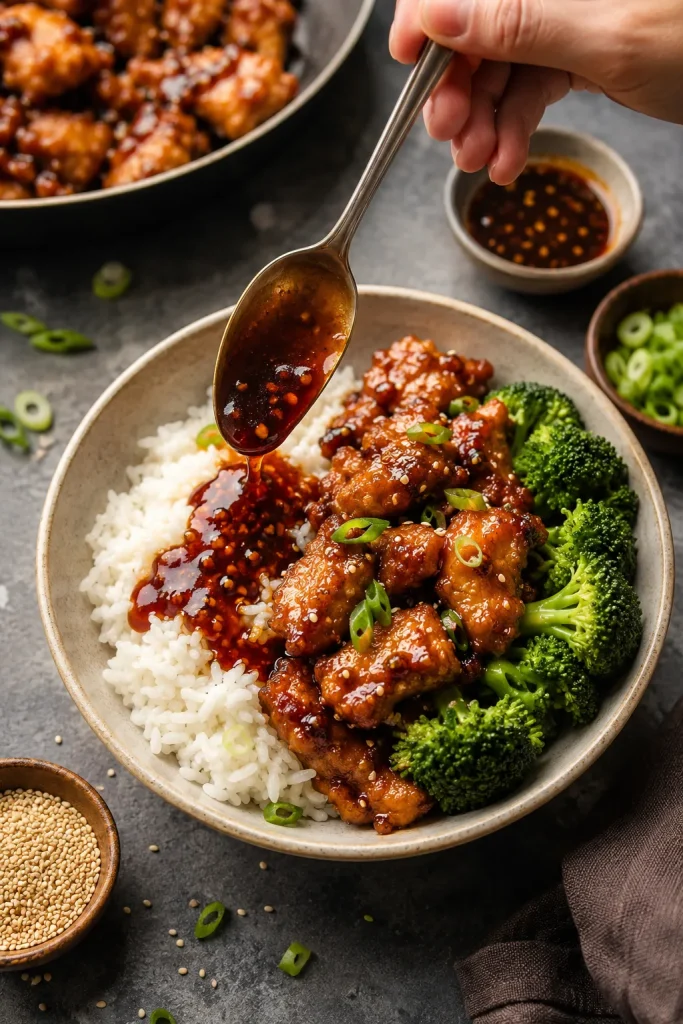
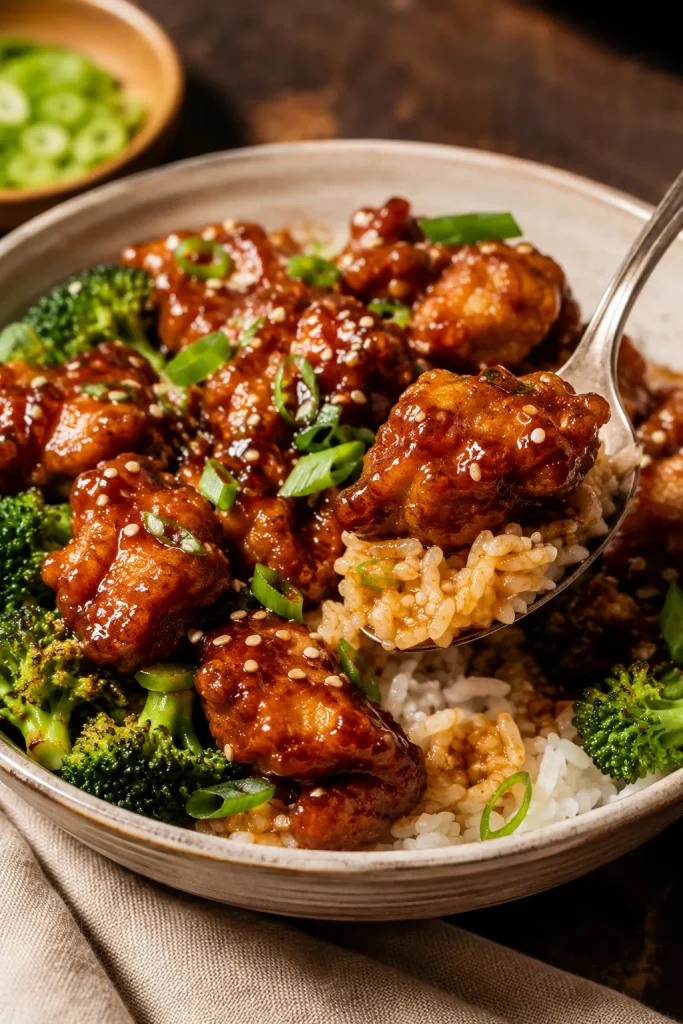
Bowl of glossy General Tso chicken over white rice with broccoli, scallions, sesame seeds, and dried red chilies on a dark surface.

This General Tso chicken recipe is for the takeout craving: crisp pieces of chicken, a glossy sweet-spicy sauce, garlic and ginger in the pan, and rice waiting underneath to catch every sticky spoonful.

The secret is timing, not a complicated sauce. Takeout chicken often softens because it sits in glaze on the way home. Here, the sauce meets the chicken at the last second, so the first few bites still have crunch.

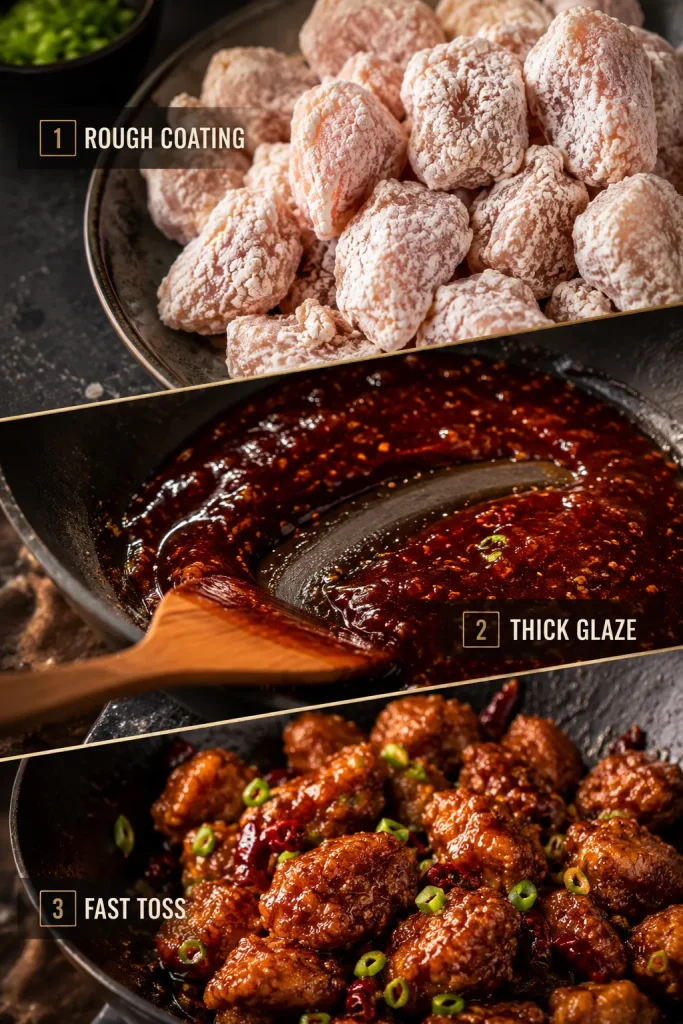
The whole recipe comes down to three cues: rough coating, thick glaze, fast toss. Remember that rhythm and you get crunchy edges, juicy centers, and sauce that clings instead of turning the pan soggy.

This version takes about 40 minutes from start to finish and uses a shallow-fry method, so you do not need a deep fryer. Better than takeout here does not mean fancier; it means the chicken is sauced at the last second, the glaze is balanced to your taste, and the first bite still feels fresh from the pan.

Jump to Recipe Card · 3-Cue Method · Visual Cues · Sauce · Keep It Crispy · Coating Choice · Air Fryer & Other Methods · Storage · FAQ

Quick Answer

The best homemade General Tso chicken is made by cutting boneless chicken into small pieces, coating it with cornstarch, shallow frying it until crisp, then tossing it briefly in a thick sweet-spicy sauce made with soy sauce, rice vinegar, hoisin, sugar, garlic, ginger, chili, sesame oil, stock or water, and cornstarch.

For the juiciest General Tso’s chicken, use boneless skinless chicken thighs. For the crispiest result without a deep fryer, fry the chicken in batches in about 2 cm / 3/4 inch of hot oil, thicken the sauce separately, and toss the fried pieces only at the end.

This recipe also helps with the two things that usually go wrong at home: soggy chicken and sauce that tastes too sweet, too salty, too thin, or too flat.

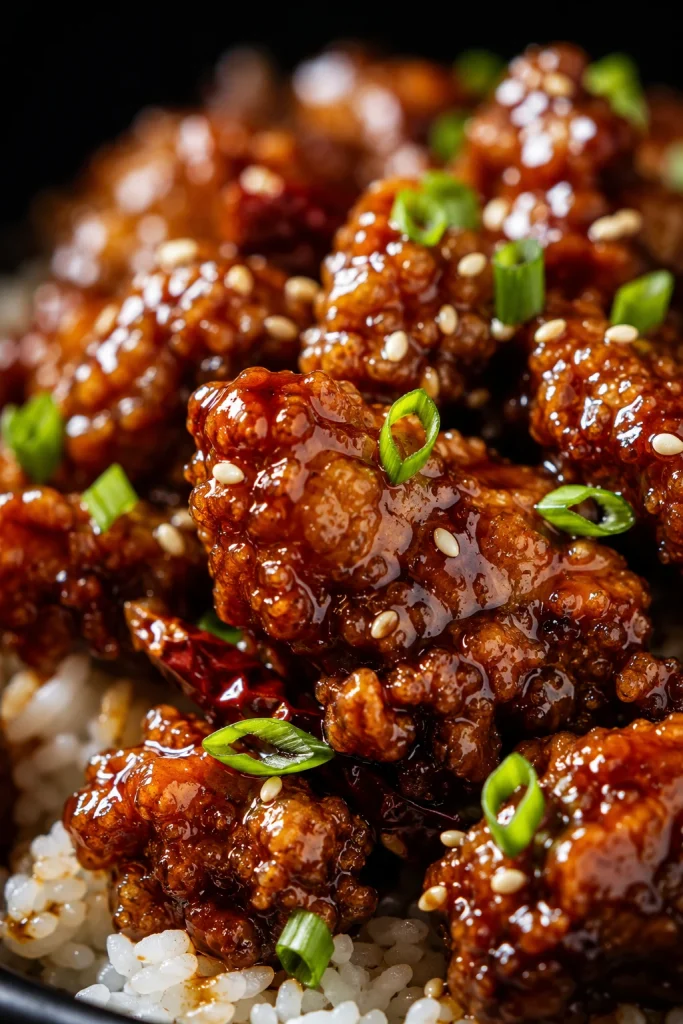
A close look at the finished chicken helps you know what the sauce should do: cling lightly to the ridges without hiding the crisp coating.

Close-up of sauced General Tso chicken pieces with rough crispy ridges, sesame seeds, scallions, and white rice underneath.
Sticky sauce, visible ridges, and rice underneath — this is the texture target.

The 3-Cue Method

If you remember only one thing before cooking, remember this: rough coating, thick glaze, fast toss. These three checks protect the texture more than any complicated sauce trick.

CueWhat to Look ForWhy It Matters
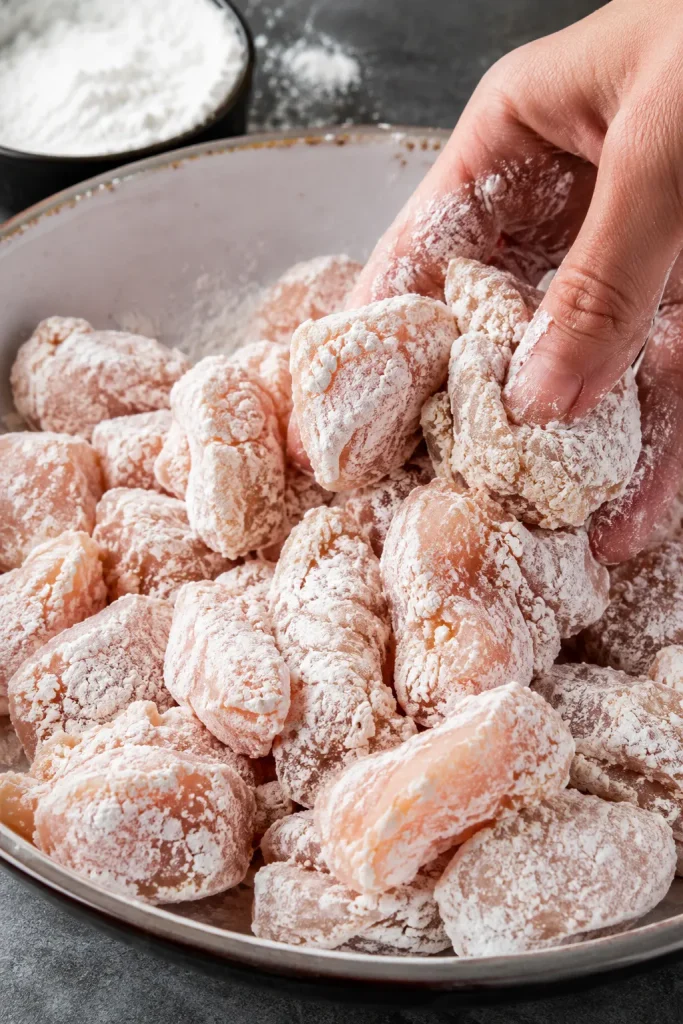
Rough coatingPatchy, dry-looking chicken pieces, not smooth pasteRough edges crisp better in hot oil
Thick glazeSauce that coats a spoon and leaves a short trailThin sauce soaks into the crust
Fast tossAbout 30 seconds in the panThe chicken gets coated without turning soft

Once the sauce is mixed, the chicken is coated, and the rice is already steaming, the cooking feels much calmer. From there, it is hot oil, a quick glaze, scallions on top, and the sticky takeout-style bowl you were hoping for.

The Three Cues in One Look

Use this visual as a quick check before cooking: the coating should look rough, the sauce should look thick, and the toss should happen fast.

Three-panel guide showing rough cornstarch-coated chicken, thick General Tso sauce with a spatula trail, and fried chicken tossed in sauce.
Rough coating, thick glaze, fast toss — these three checks protect the crisp edges.

General Tso Chicken at a Glance

FlavorSweet first, then savory, tangy, and gently spicy
TextureCrisp chicken edges with a sticky glaze
Best chickenBoneless skinless thighs for juicy takeout-style pieces
Leaner optionChicken breast, cut evenly and cooked carefully
Main methodShallow fry, thicken sauce, toss briefly
Oil depthAbout 2 cm / 3/4 inch
Oil amountAbout 1 1/2 cups in a 10-inch skillet; closer to 2 cups in a wider pan
Oil temperature375–390°F / 190–200°C
Chicken safe temperature165°F / 74°C inside
Best served withRice and broccoli

What Is General Tso Chicken?

General Tso chicken, often written as General Tso’s chicken, is a Chinese-American takeout dish made with crispy pieces of chicken tossed in a sweet, tangy, savory, lightly spicy sauce. It usually tastes sweet first, then savory and tangy, with a gentle chili warmth at the end. The goal is contrast: crisp edges, juicy chicken, and a shiny sauce that clings to each piece instead of pooling at the bottom of the pan.

Before You Start

This recipe moves quickly once the oil is hot, so a little prep makes everything easier. Start the rice first; this guide to cooking rice is useful when you want fluffy grains ready before the chicken hits the sauce.

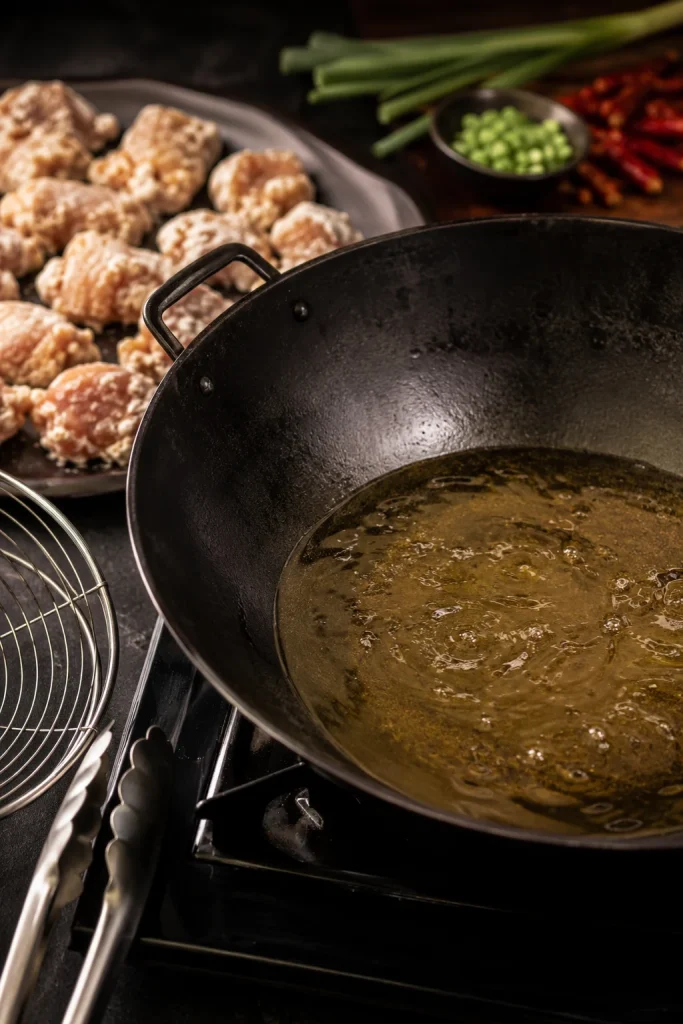
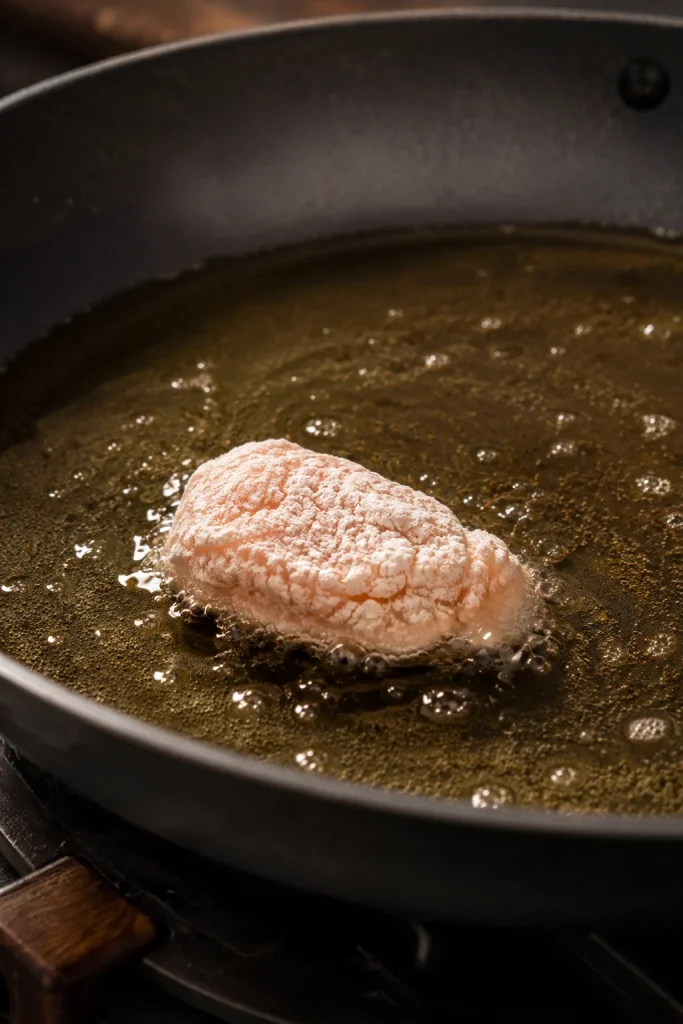
Frying feels less stressful when you treat the first piece as a test. Use a heavy pan, keep the oil shallow, and fry one small coated piece before the first full batch. When it sizzles steadily and turns golden without burning, the oil is ready.

Crispy General Tso Chicken Without Deep Frying

Summary: Crispy shallow-fried chicken tossed in a glossy sweet, tangy, lightly spicy General Tso sauce. This homemade version gives you takeout-style flavor without a deep fryer.

Prep Time20 minutes
Cook Time20 minutes
Total Time40 minutes
Servings4 servings
MethodShallow fry, thicken sauce, toss briefly
Skill LevelModerate, but very manageable with prep

Equipment

  • Large heavy skillet, wok, or Dutch oven
  • Mixing bowls
  • Whisk
  • Tongs or a spider strainer
  • Wire rack or paper towel-lined plate
  • Instant-read thermometer or oil thermometer, helpful but optional
  • Knife and cutting board

Ingredients

For the Chicken

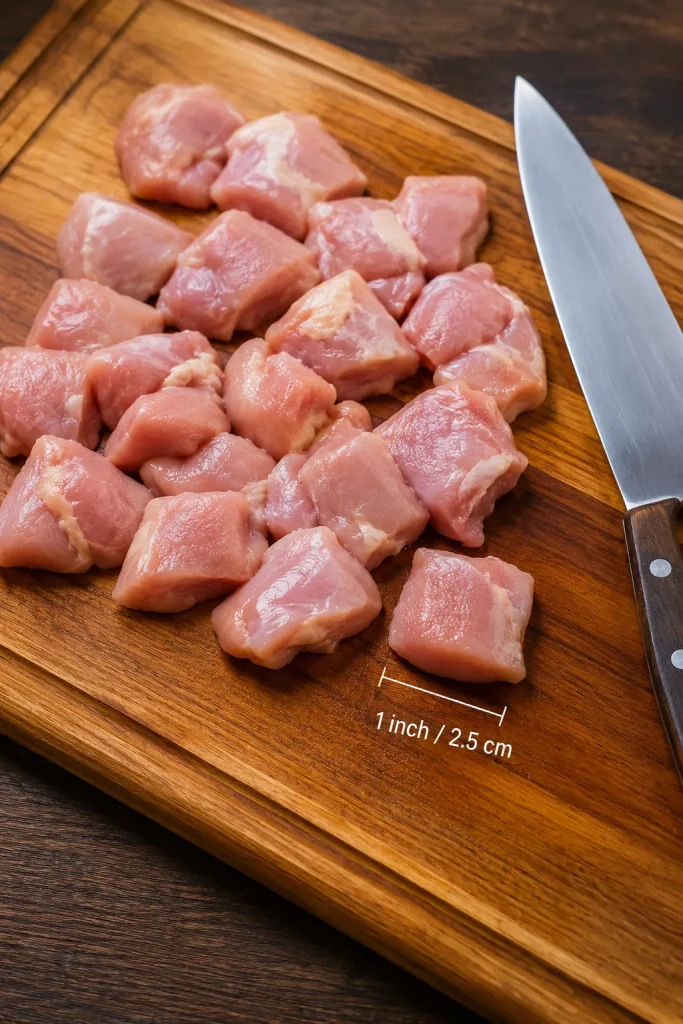
  • 600g / 1.3 lb boneless skinless chicken thighs, cut into 1-inch / 2.5 cm pieces
  • 1 large egg white, or 2 tablespoons beaten egg, for better coating grip
  • 1 tablespoon soy sauce
  • 1 tablespoon Shaoxing wine, dry sherry, chicken stock, or water
  • 1/4 teaspoon salt, plus more only if needed
  • 1/4 teaspoon white pepper or black pepper
  • 1/2 cup / about 65g cornstarch, plus 1–2 tablespoons more if needed
  • Neutral oil for shallow frying, usually 1 1/2 to 2 cups depending on pan width

For the General Tso Sauce

  • 1/2 cup / 120ml chicken stock or water
  • 3 tablespoons low-sodium soy sauce
  • 2 tablespoons hoisin sauce
  • 2 tablespoons unseasoned rice vinegar
  • 2–3 tablespoons brown sugar or honey, depending on how sweet you like it
  • 1 tablespoon chili garlic sauce or sambal, or 1/2–1 teaspoon red pepper flakes
  • 2 teaspoons sesame oil
  • 1 tablespoon cornstarch

For the Aromatics and Serving

  • 2–3 garlic cloves, minced
  • 1 teaspoon fresh ginger, grated
  • 3–5 dried red chilies, optional
  • Cooked jasmine rice, white rice, brown rice, or fried rice
  • Steamed or stir-fried broccoli
  • Sliced scallions
  • Sesame seeds

Instructions

Prep the Chicken

1. Cut the chicken. Cut the chicken into even 1-inch / 2.5 cm pieces. Similar size matters more than perfect cubes.

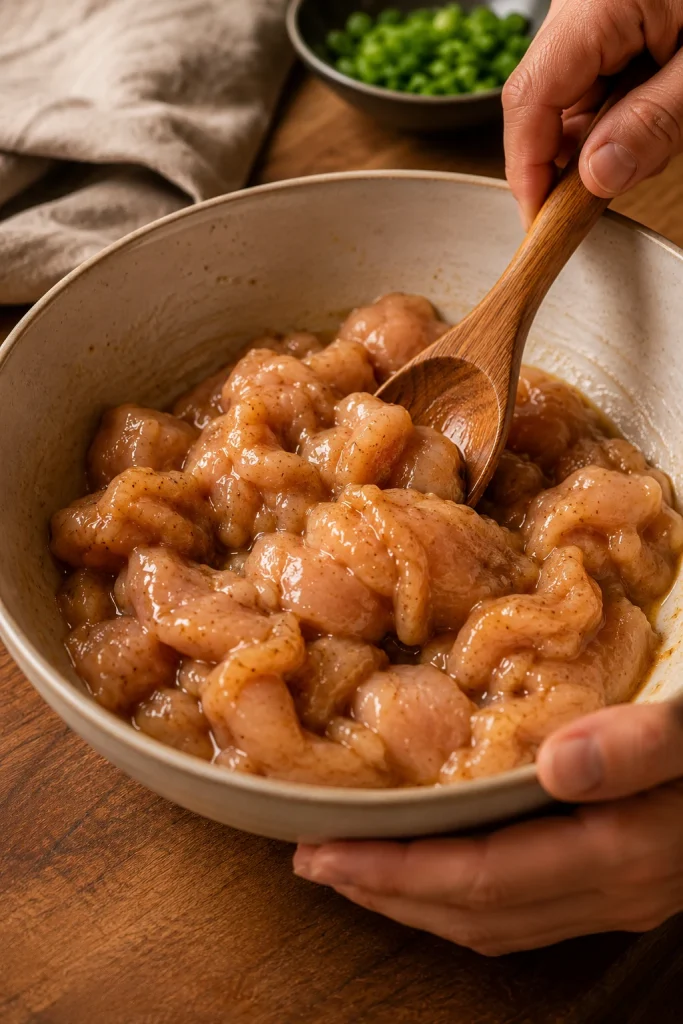
2. Season the chicken. In a bowl, combine the chicken with egg white or beaten egg, soy sauce, Shaoxing wine or another listed liquid, salt, and pepper. Stir until the pieces are lightly coated.

3. Add the cornstarch. Sprinkle in the cornstarch and toss until the chicken pieces have a thin, rough, mostly dry-looking coating. Uneven is good here because those rough patches turn into crisp edges in the oil. If the chicken looks wet or sticky, add another tablespoon or two of cornstarch. Shake off heavy loose clumps before frying.

4. Mix the sauce. In a separate bowl, whisk together the stock or water, soy sauce, hoisin sauce, rice vinegar, brown sugar or honey, chili garlic sauce, sesame oil, and cornstarch.

Fry and Drain

5. Heat the oil. Add about 2 cm / 3/4 inch neutral oil to a heavy skillet, wok, or Dutch oven. In a 10-inch skillet, start with about 1 1/2 cups oil. In a wider pan, you may need closer to 2 cups to reach the same shallow depth. Heat to 375–390°F / 190–200°C. Without a thermometer, look for shimmering oil and listen for an immediate steady sizzle when a small test piece goes in.

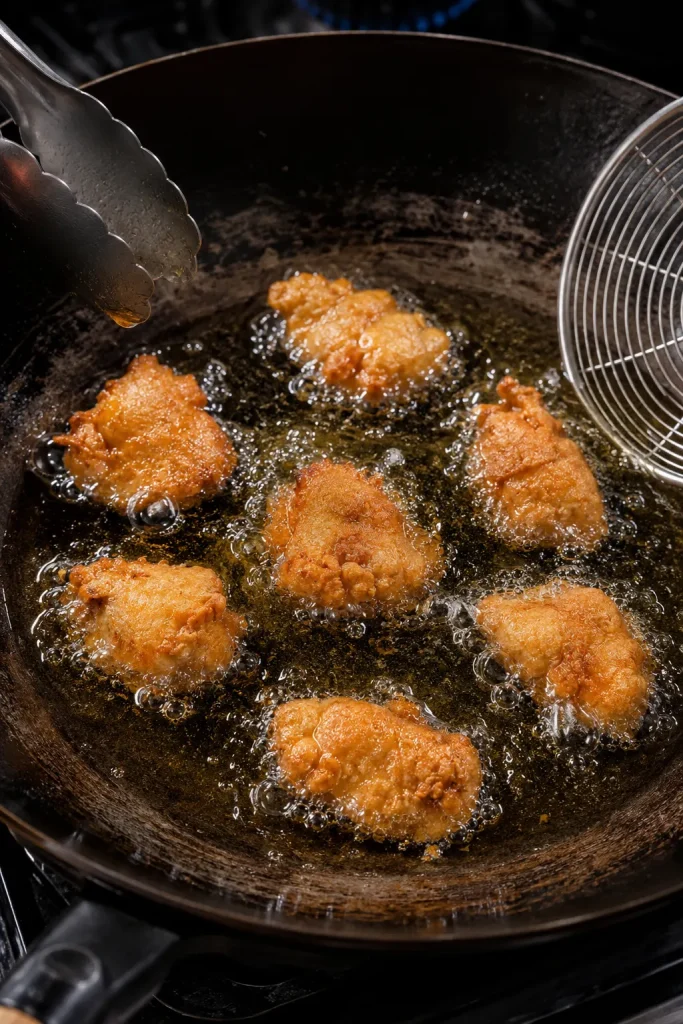
6. Fry in batches. Add the chicken in a single layer with space between pieces. Fry for 3–5 minutes total, turning as needed, until golden, crisp, and cooked through. The chicken should reach 165°F / 74°C inside.

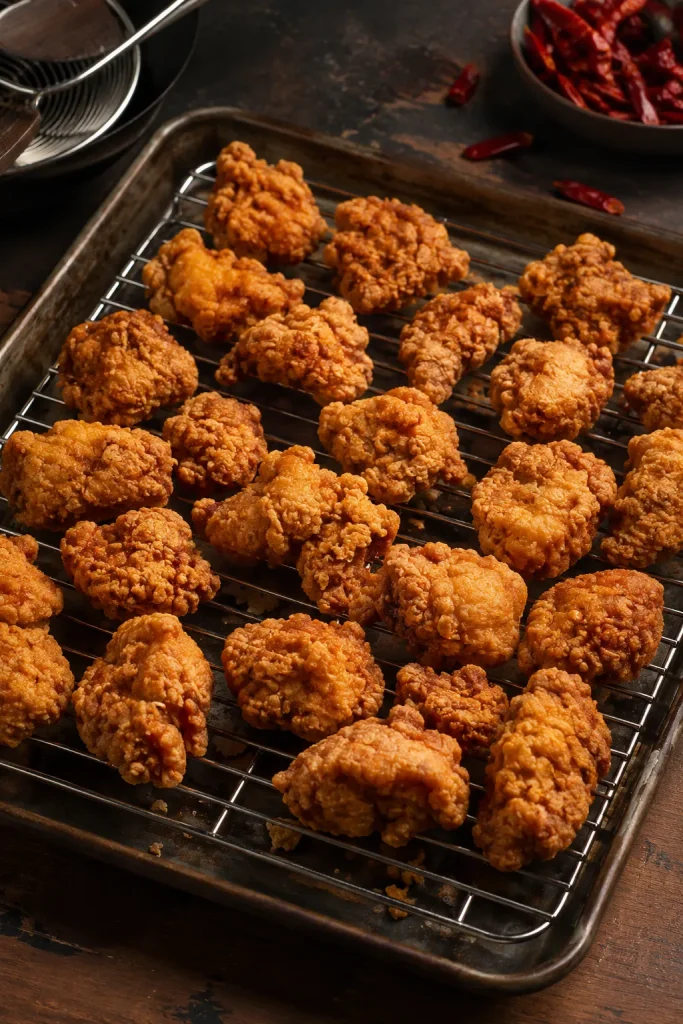
7. Drain the chicken. Transfer the fried chicken to a wire rack or a paper towel-lined plate. A wire rack is best because it lets steam escape instead of collecting under the coating. Repeat with the remaining chicken.

Make the Sauce and Toss

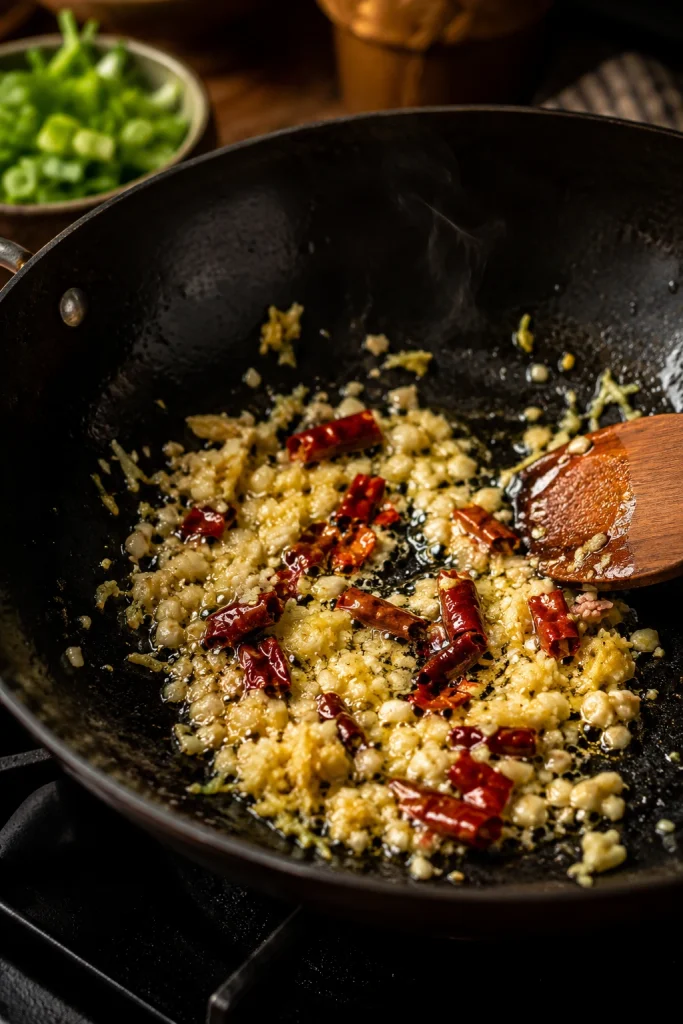
8. Cook the aromatics. Carefully pour off most of the oil, leaving about 1 tablespoon in the pan. Add the garlic, ginger, and dried chilies. Stir for 20–30 seconds, just until the garlic and ginger smell sharp, warm, and a little toasty. Stop before the garlic browns; burnt garlic can make the whole sauce taste harsh.

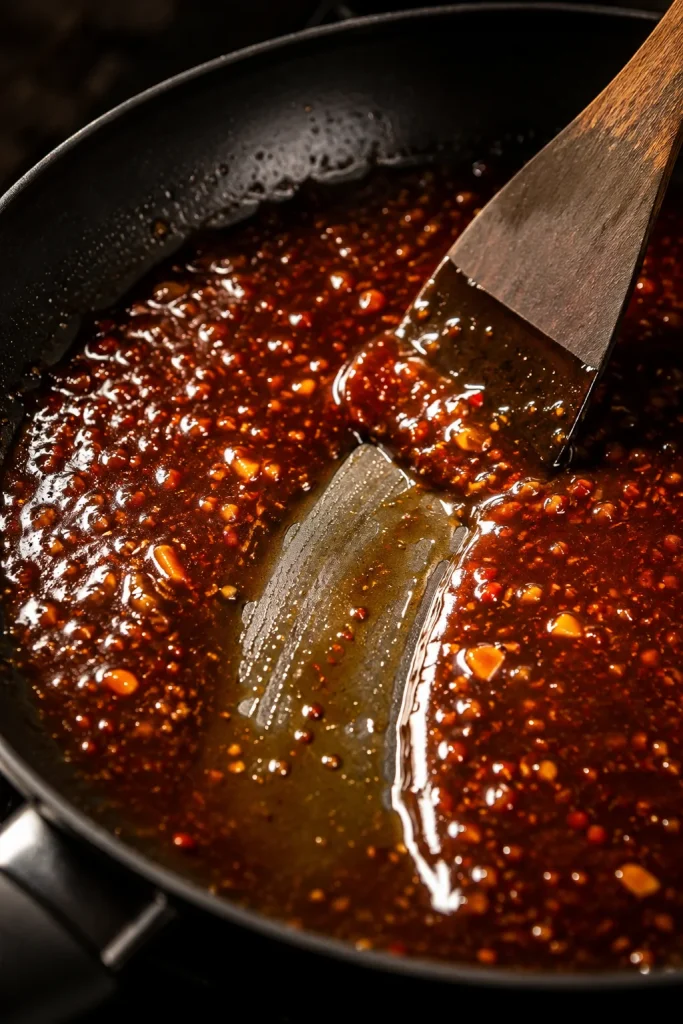
9. Thicken the sauce. Whisk the sauce once more, then pour it into the pan. Simmer for 1–2 minutes, stirring often, until the sauce turns shiny, darkens slightly, and moves like a glaze instead of a thin liquid. When you drag a spatula through the sauce, it should briefly leave a trail before flowing back together.

10. Toss quickly. Add the fried chicken back to the pan and toss for about 30 seconds, just until the glaze catches on the rough edges in a thin, shiny layer, with a few crisp ridges still showing. Get it out of the pan before the coating sits too long in the sauce.

11. Serve immediately. Finish with scallions and sesame seeds. Serve hot with rice and broccoli while the sauce is shiny and the edges still have some crunch.

Recipe Notes

  • Chicken thighs are the most forgiving choice because they stay juicy. Chicken breast works too, but avoid overcooking it.
  • Egg white gives the cleanest coating. If using whole beaten egg, use only 2 tablespoons at first and add extra cornstarch as needed.
  • Before frying, aim for rough, mostly dry chicken pieces. Before tossing, look for a glossy sauce that coats the spoon. If either one looks wet or thin, fix it before moving on.
  • The sauce must thicken before the chicken returns. This one step protects the coating more than anything else.
  • If the first batch browns before the chicken cooks through, the oil is too hot for the size of the pieces. Lower the heat slightly and give the next batch a little more time.
  • For a milder sauce, reduce the chili garlic sauce or skip the dried chilies.
  • For a sweeter restaurant-style sauce, use the full 3 tablespoons brown sugar or honey.
  • If using regular soy sauce instead of low-sodium soy sauce, reduce the added salt and taste the sauce before coating the chicken.

This is the kind of recipe where the first batch teaches you the pan. By the second batch, the sizzle, color, and sauce thickness start to make sense.

The coating will not look perfectly smooth, and that is a good thing. Rough, patchy bits are what crisp in the oil, and the sauce needs to be thick before the chicken returns so those edges stay noticeable in the first few bites.

Why This Recipe Works

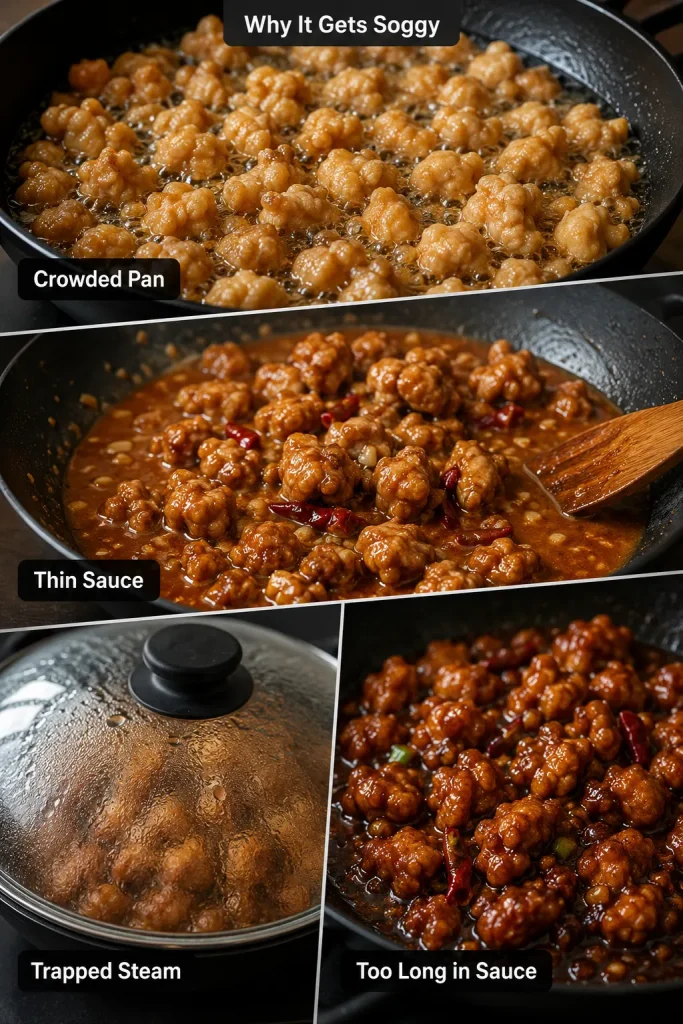
This dish looks simple, but the texture depends on timing. Cool oil makes the coating greasy. Thin sauce softens the crust. Too much time in the pan after saucing turns crunchy edges into soft ones.

  • Small chicken pieces cook quickly. One-inch pieces brown fast and stay juicy inside.
  • Egg white and cornstarch build the right coating. Egg white helps the coating grip, while cornstarch fries up lighter and crisper than heavy breading.
  • Shallow frying gives better texture than a dry skillet. You get crunchy edges without needing a full deep fryer.
  • A thick glaze protects the crust. Sauce thickness matters more than sauce complexity because thin liquid soaks into fried coating.
  • A fast toss keeps the texture alive. The chicken needs enough time to catch the glaze, not enough time to stew in it.
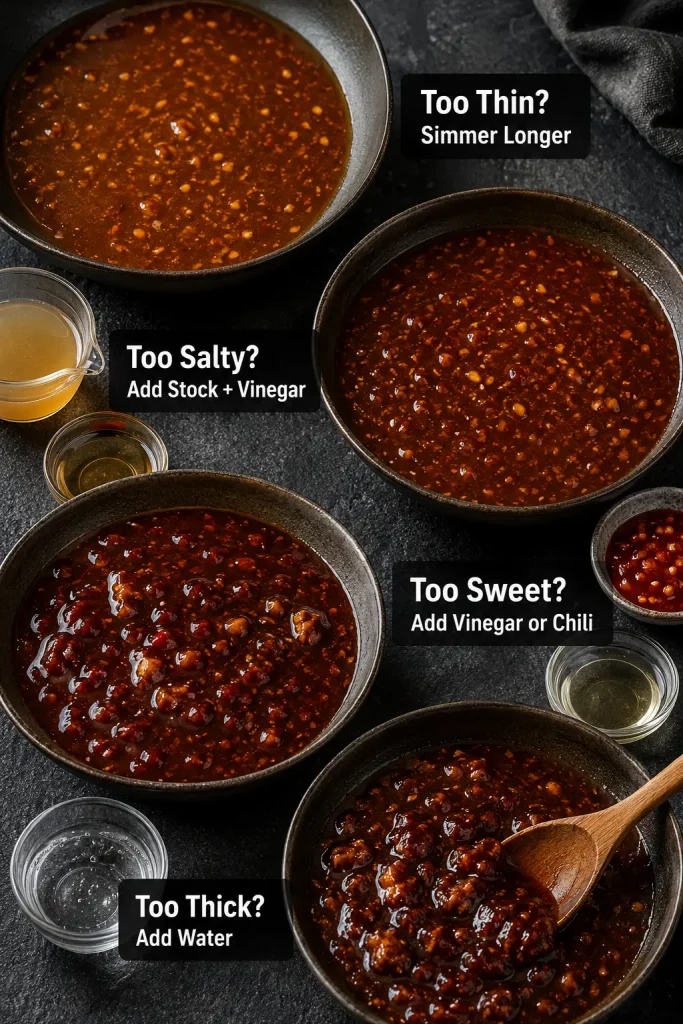
  • The flavor is adjustable. You can make the sauce sweeter, spicier, tangier, or less salty before it ever touches the chicken.

Ingredients You’ll Need

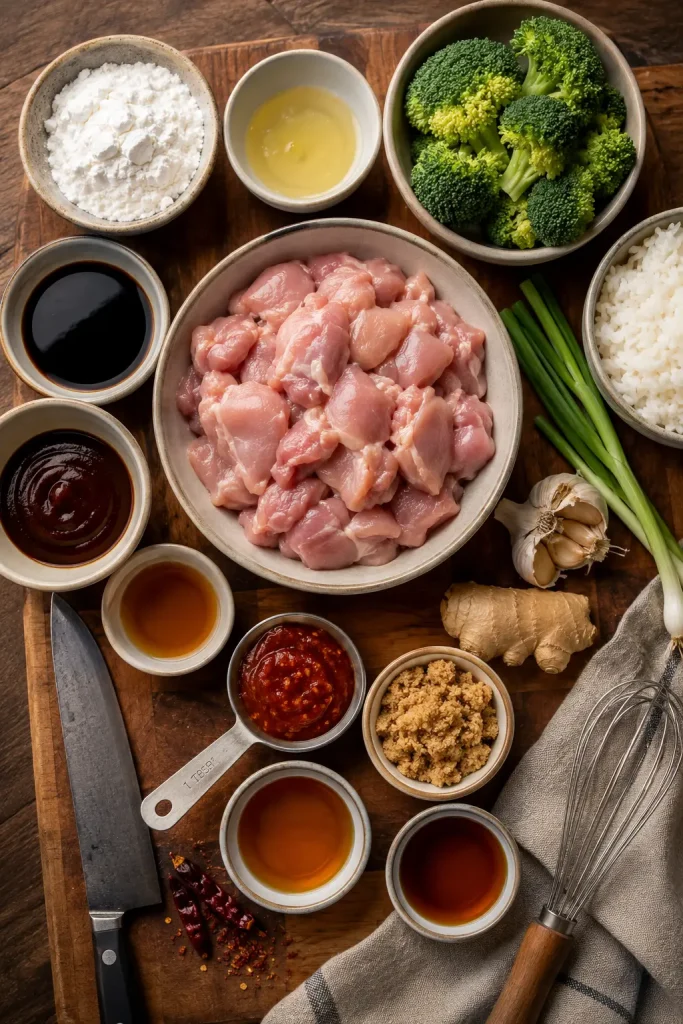
You do not need a long list of specialty ingredients here. What matters is balance: enough sweetness to feel like takeout, enough vinegar to keep it bright, enough chili to warm the bowl, and enough garlic and ginger to make the sauce smell alive as soon as it hits the pan.

The sauce can taste a little bold before it hits the chicken because the rice, broccoli, and crisp coating will soften the edges.

Set Up Before the Pan Gets Hot

General Tso chicken moves quickly once the pan is hot, so this setup keeps the frying, sauce, and serving steps from colliding.

Ingredient board with chicken, cornstarch, egg white, soy sauce, hoisin sauce, rice vinegar, garlic, ginger, chilies, sesame oil, rice, broccoli, scallions, and seasonings.
A full setup keeps the frying, sauce, and final toss from feeling rushed.

Chicken and Coating

Chicken thighs are the easiest choice for juicy pieces because they handle hot oil well. Chicken breast works for a leaner version, but cut it evenly and pull it from the pan as soon as it is cooked through.

Egg white helps the cornstarch cling without making the coating heavy. Cornstarch is the ingredient to watch: too little and the pieces will not crisp well; too much loose powder can fall off in the oil. Aim for rough, dry-looking patches that cling to the chicken.

Sauce Ingredients

Low-sodium soy sauce gives you better control because the sauce reduces quickly. Hoisin adds body and that darker, rounder takeout sweetness. Rice vinegar keeps the sauce bright, while brown sugar or honey gives the sticky finish.

Chili garlic sauce gives spice plus flavor, sambal tastes sharper and more chili-forward, and red pepper flakes are the easiest pantry fix. Sesame oil goes in the sauce for aroma, and cornstarch turns everything glossy and spoon-coating.

When the balance is right, the sauce tastes bold on its own but even better once it catches the crisp chicken and drips into the rice.

Aromatics and Garnish

Fresh garlic and ginger wake up the sauce fast. Because the glaze only cooks for a minute or two, those fresh aromatics matter more here than they would in a long-simmered dish. Scallions, sesame seeds, and broccoli make the final bowl feel fresh instead of heavy.

Easy Ingredient Substitutions

IngredientBest SubstituteWhat Changes
Shaoxing wineDry sherry, chicken stock, or waterLess restaurant-style aroma, but still works
Rice vinegarApple cider vinegar, using slightly lessSharper flavor
Hoisin sauceExtra soy sauce, sugar or honey, and a splash of stockLess body, still sweet-savory
Chili garlic sauceSambal or red pepper flakesHeat changes slightly
Low-sodium soy sauceRegular soy sauce, with less added saltSauce can get salty faster
Chicken thighsChicken breastLeaner, less forgiving

Chicken Thighs vs Chicken Breast

Chicken thighs are juicier, more forgiving, and closer to the takeout texture most people expect. Chicken breast is leaner, but it dries out faster, so cut it evenly and pull it from the pan as soon as it reaches 165°F / 74°C.

FoodSafety.gov’s safe minimum internal temperature chart is a helpful reference if you use a thermometer often.

Cornstarch vs Batter: Which Coating Is Best?

There is more than one way to coat the chicken. The best choice depends on whether the night calls for fast, extra crunchy, or somewhere in the middle.

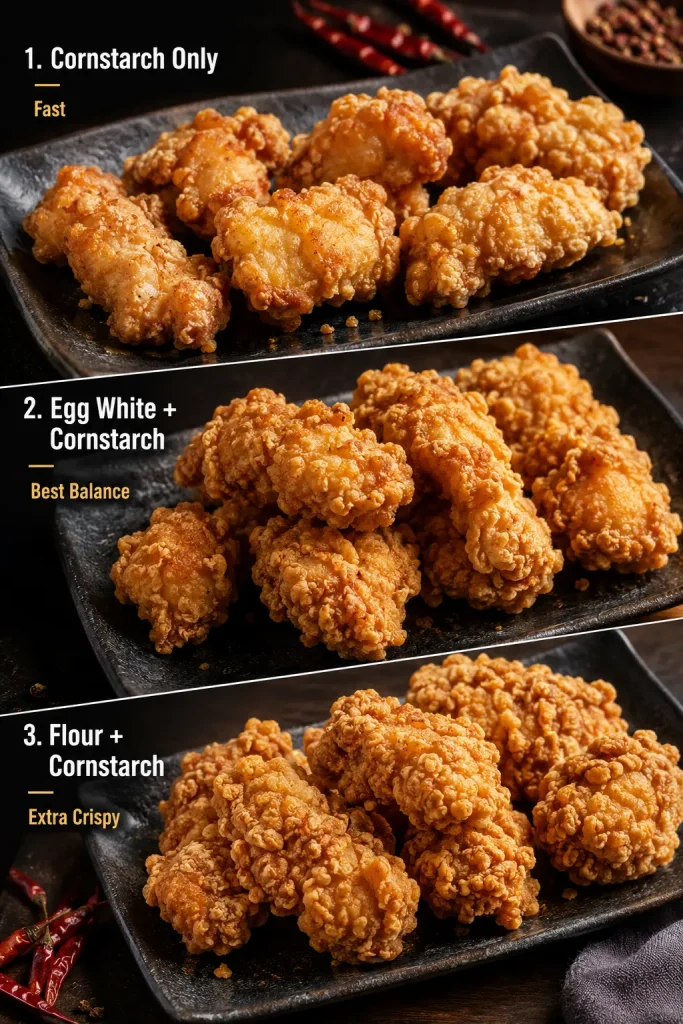
Coating MethodBest ForResult
Cornstarch onlyFastest weeknight versionLight crisp edges, easiest method
Egg white + cornstarchBest balance for shallow fryingBetter coating grip and stronger crispness
Flour + cornstarch + baking powderRestaurant-style crunchThicker, crispier coating; best with double frying

How Each Coating Looks After Frying

Use the coating comparison as a texture decision guide before you choose the fastest, balanced, or crunchiest version.

Three-panel comparison of fried chicken coatings labeled cornstarch only, egg white plus cornstarch, and flour plus cornstarch.
For coating style, cornstarch-only stays light, egg white plus cornstarch gives balance, and flour plus cornstarch adds a thicker crunch.

For this recipe, the egg-white-and-cornstarch method gives the best balance. It is still simple, but the coating grips better than cornstarch alone. For a very fast version, skip the egg white and use only cornstarch. For a restaurant-style version, add a little flour and baking powder and fry the chicken twice.

Extra crispy option: For a thicker, crunchier coating, replace part of the cornstarch with flour and add a pinch of baking powder. Fry once until cooked and lightly golden, rest the chicken on a rack, then fry again briefly until crisp. This gives a stronger restaurant-style crust, but it adds more oil, time, and cleanup.

General Tso Sauce: Sweet, Sticky, Spicy, and Tangy

This is where the dish becomes yours. The sauce should be sweet enough to feel like takeout, tangy enough to stay balanced, salty enough to season the chicken, and spicy enough to give warmth without overwhelming the bowl.

General Tso sauce formula: salty soy sauce, sweet brown sugar or honey, rounded hoisin, bright rice vinegar, chili warmth, fresh garlic and ginger, and enough cornstarch to turn it glossy and thick.

Garlic, Ginger, and Chilies

The sauce starts with a quick aromatic sizzle. Keep it brief so the garlic and ginger taste warm and sharp, not browned or bitter.

Minced garlic, grated ginger, and dried red chilies sizzling in oil in a black wok with a wooden spatula.
Once the chicken is fried, let garlic, ginger, and chilies sizzle briefly so the General Tso sauce starts with bold aroma.

How Thick Should the Sauce Be?

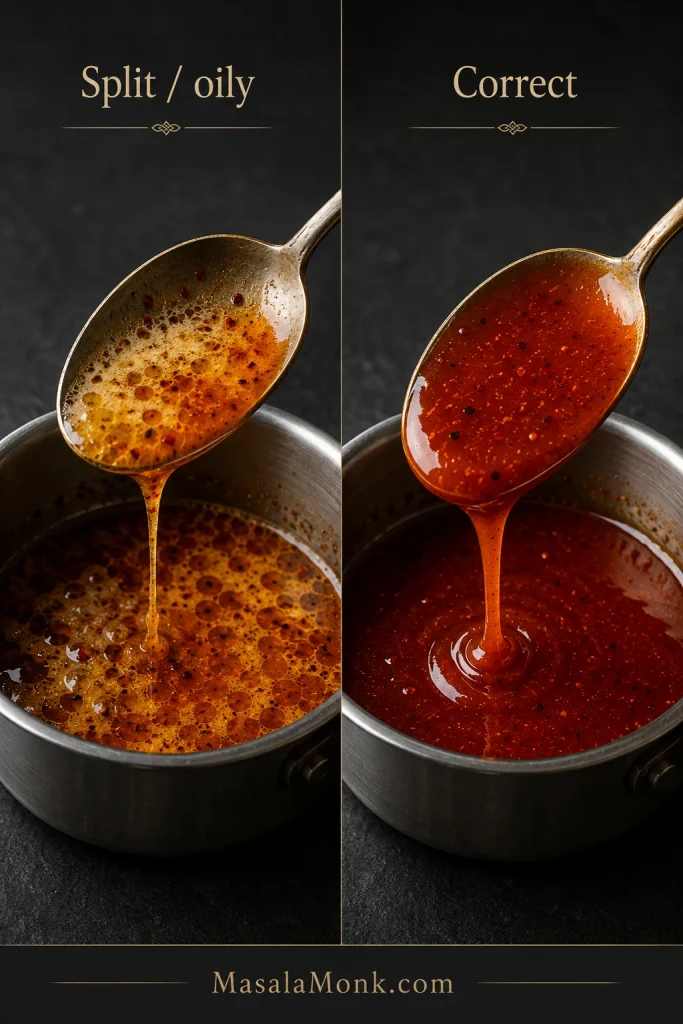
Look for a sauce that coats a spoon and leaves a short trail when you drag a spatula through the pan. It thickens quickly once it starts bubbling, so stay close. If it is watery when the chicken goes in, the coating will soften quickly.

When the Sauce Is Thick Enough

This is the visual cue to look for before the fried chicken goes back into the pan.

Thick glossy General Tso sauce in a dark skillet with a wooden spatula leaving a visible trail through the sauce.
The sauce trail is your sign to stop reducing; at this thickness, the glaze coats the chicken instead of soaking the crust.

If the sauce tightens before the chicken is ready, loosen it with a splash of water or stock, warm it until glossy again, then toss. When the sauce is right, it looks like something you want to drag a spoon through before the chicken even goes in.

Can You Make General Tso Sauce Ahead?

Yes. You can mix and cook the sauce 3–4 days ahead, then refrigerate it in an airtight container. Reheat it gently in a pan with a splash of water or stock until it turns glossy again. For the best texture, fry the chicken fresh and toss it with the warmed sauce right before serving.

Other Ways to Use General Tso Sauce

Use it with crispy tofu, shrimp, cauliflower, stir-fried vegetables, frozen chicken bites, or rice bowls. The rule stays the same: cook the sauce until shiny, then toss it with the main ingredient at the end.

General Tso Sauce Troubleshooting

Sauce ProblemHow to Fix It
Too thickAdd water or stock 1 tablespoon at a time until it loosens.
Too thinSimmer a little longer, or add a small cornstarch slurry.
Too saltyAdd water or stock, then balance with a little sugar and vinegar.
Too sweetAdd rice vinegar or chili garlic sauce.
Too spicyAdd a little hoisin, sugar, or water.
Tastes flatAdd a little more ginger, garlic, vinegar, or sesame oil.

How to Fix the Sauce Before Tossing

Fix the sauce while it is still by itself. Once the chicken returns, every extra minute in the pan softens the crust.

Troubleshooting guide with bowls of General Tso sauce labeled too thin, too salty, too sweet, and too thick, with suggested fixes.
Balance the sauce while it is still alone in the pan, before it can soften the chicken.

The sauce does not need to be perfect in the bowl before it hits the pan. It just needs to be balanced enough that, once it turns glossy, you want it on rice.

When in doubt, come back to the rhythm: rough coating, thick glaze, fast toss.

How It Should Look at Each Step

Once the exact steps are in front of you, these visual cues keep you from second-guessing the pan when the oil is hot and the recipe starts moving quickly.

Chicken Cut Size

The pieces do not need to be perfect cubes, but they should be close in size so they brown outside and cook through inside.

Raw boneless chicken pieces cut into one-inch chunks on a wooden cutting board with a knife and a 1 inch / 2.5 cm measurement label.
First, aim for roughly 1-inch chicken pieces; that size helps the inside cook through while the outside turns golden.

What the Marinade Should Look Like

Before the cornstarch goes in, the chicken should be lightly coated, not sitting in a puddle of marinade.

Chicken pieces being mixed in a ceramic bowl with egg white, soy sauce, pepper, and marinade on a wooden surface.
Next, the egg white and soy mixture lightly glosses the chicken, giving the cornstarch something to grab onto.

Rough Cornstarch Coating

Smooth paste is not the goal here. A patchy, dry-looking coating gives the sauce more crisp edges to grab later.

Close-up of chicken pieces tossed in cornstarch with a rough, patchy, mostly dry coating in a bowl.
After the cornstarch goes in, patchy and dry is what you want; those uneven spots become the crispest edges.

Set Up the Shallow Fry

Use enough oil to crisp the coating, but not so much that the recipe turns into a full deep-fry project.

Dark wok with a shallow layer of oil on a stovetop, with coated chicken pieces waiting nearby on a tray and frying tools at the side.
Meanwhile, a shallow layer of oil gives you crisp General Tso chicken without the mess of a deep fryer.

How to Know the Oil Is Ready

Test one piece before committing to a full batch. Steady bubbles mean the oil is ready; silence or smoke means you need to adjust.

Single cornstarch-coated chicken piece sizzling in shallow oil with small bubbles around it in a dark skillet.
Once one test piece bubbles steadily, the oil is ready; quiet oil turns coating greasy, while smoking oil browns too fast.

Frying in Batches

Space is part of the method. If the pieces touch everywhere, they steam before they crisp.

Several golden chicken pieces frying in a single layer with visible space between them in hot oil inside a dark wok.
Fry in batches so the pieces stay separate, the oil stays hot, and the coating has room to crisp instead of steam.

Why a Wire Rack Helps

A rack keeps the crust away from trapped steam while the rest of the recipe comes together.

Golden fried chicken pieces resting on a wire rack over a sheet pan with crumbs and dried red chilies nearby.
Then, move the fried chicken to a wire rack; airflow underneath protects the crust while you finish the sauce.

When to Stop Tossing

Look for coated chicken, not submerged chicken. As soon as the glaze catches on the rough edges, get it out of the pan.

Fried chicken pieces being tossed in glossy General Tso sauce in a black wok with scallions, dried chilies, and steam.
Finally, toss quickly until the sauce catches on the rough edges; look for glazed chicken, not simmered chicken.

If the chicken is softening too quickly, jump to how to keep General Tso chicken crispy.

How to Keep General Tso Chicken Crispy

If homemade saucy chicken usually turns soft on you, this is the part to remember. You are not chasing dry, shattering crunch here. You want that first little crackle before the sauce turns soft and sticky.

Why General Tso Chicken Gets Soggy

Most texture problems come from one of four places: crowded oil, thin sauce, trapped steam, or too much time in the glaze.

Diagnostic guide showing crowded fried chicken, thin sauce, trapped steam under a lid, and chicken sitting too long in sauce.
If the chicken softens quickly, check the usual suspects: crowding, thin sauce, trapped steam, or too much time in the glaze.

The Big 3 Crispy Rules

RuleWhy It Matters
Fry in batchesCrowding makes the coating steam instead of crisp.
Thicken the sauce firstThin sauce soaks into the crust.
Toss for about 30 secondsLong simmering softens the fried coating.

The supporting details matter too: pat the chicken dry if it looks wet, use enough cornstarch for a dry-looking coating, shake off heavy loose powder, drain the fried pieces on a rack, and serve as soon as the sauce goes on. Also avoid covering freshly fried or freshly sauced chicken; trapped steam is one of the fastest ways to soften the coating.

Quick Crispness Troubleshooting

ProblemLikely CauseFix Next Time
Chicken feels greasyOil was too coolHeat oil until chicken sizzles immediately
Coating fell offChicken was too wet or stirred too muchUse more cornstarch and turn gently
Chicken softened fastSauce was thin or chicken sat too longThicken sauce first and toss right before serving
Chicken browned but inside was undercookedPieces were too large or oil too hotCut smaller pieces and control heat
Chicken is dryOvercooked or breast pieces were too smallUse thighs or cook breast just to 165°F / 74°C

If the chicken softened almost immediately, the sauce was probably too thin or the pieces sat in it too long. If they never got crisp in the first place, the oil was probably too cool or the pan was crowded.

Even when leftovers soften, the first serving should give you that little edge of crunch that makes the whole bowl feel worth the extra pan.

Make It Sweeter, Spicier, Tangier, or Less Salty

Taste before you toss. Once the chicken is in, you have less room to adjust the sauce without softening the coating.

Cooking for kids or spice-sensitive eaters? Start with less chili in the sauce and add chili oil, flakes, or sambal at the table.

Craving…Adjustment
Sweeter sauceAdd 1–2 teaspoons brown sugar or honey.
Extra heatAdd chili garlic sauce, sambal, red pepper flakes, or dried chilies.
Tangier sauceAdd another splash of rice vinegar.
Lower saltUse low-sodium soy sauce and add a little water or stock.
Bigger garlic flavorAdd one extra clove of garlic.
Restaurant-style depthAdd a little extra hoisin and sesame oil.
Less sweetnessUse 2 tablespoons sugar instead of 3 and add a little more vinegar.
Savory balanceAdd a splash more soy sauce or a spoon of stock, then rebalance with vinegar.

Make small changes and taste again. A good sauce does not taste like only sugar, only soy sauce, or only chili. It lands somewhere in the middle: sticky, bright, savory, and warm.

Lighter Version

To make the bowl a little lighter, use chicken breast, reduce the sugar to 2 tablespoons, choose low-sodium soy sauce, and use the air fryer or baked method. You will lose some takeout crunch, but you still get the sweet-spicy sauce, rice-bowl comfort, and a dinner that feels fun.

Choose Your Version

There are a few honest ways to make this dish, and they do not all promise the same texture. Pick the one that matches your night.
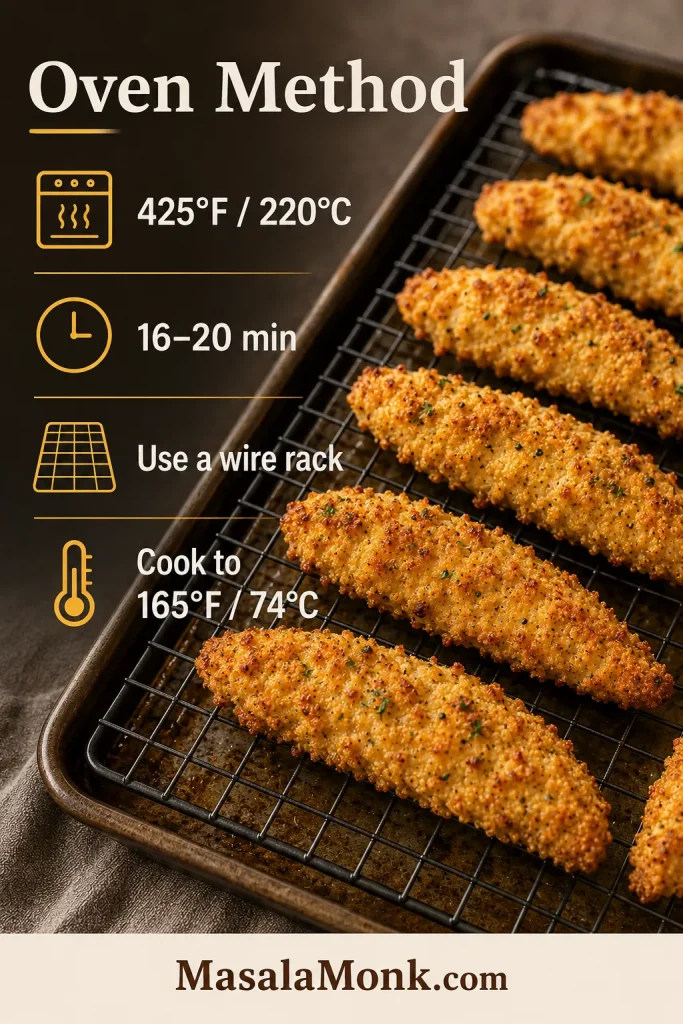
Craving This?Use This MethodWhat to Expect
Best balance of crisp and easyEgg white + cornstarch shallow fryJuicy chicken, crisp edges, no deep fryer
Fastest weeknight versionCornstarch-only skillet methodLighter coating, fewer steps
Restaurant-style crunchFlour + cornstarch + baking powder, then double fryCrispier crust, more oil and cleanup
Lower oilAir fryerUseful, but not as glossy-crisp as fried
Hands-off dinnerSlow cookerSaucy and tender, not crispy
No-fry family mealBaked or sheet-pan styleEasier cleanup, softer coating

If crispness matters most, use the main shallow-fry recipe. If convenience matters more, jump to the other cooking methods.

The recipe card above is the version to make first. Once you understand the texture you want, you can adjust the method without guessing.
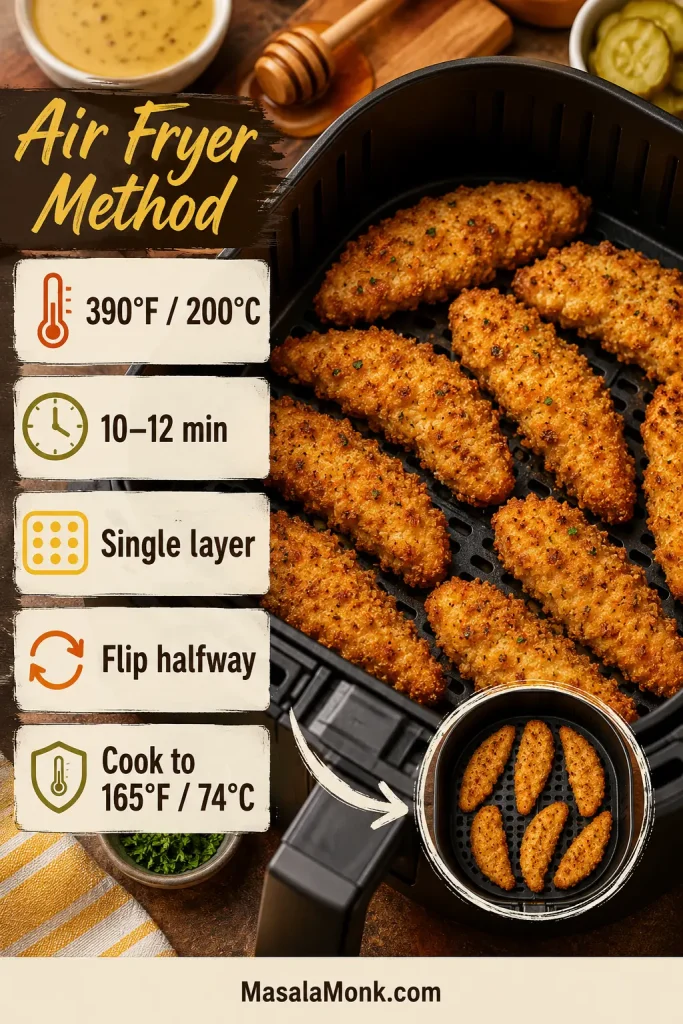
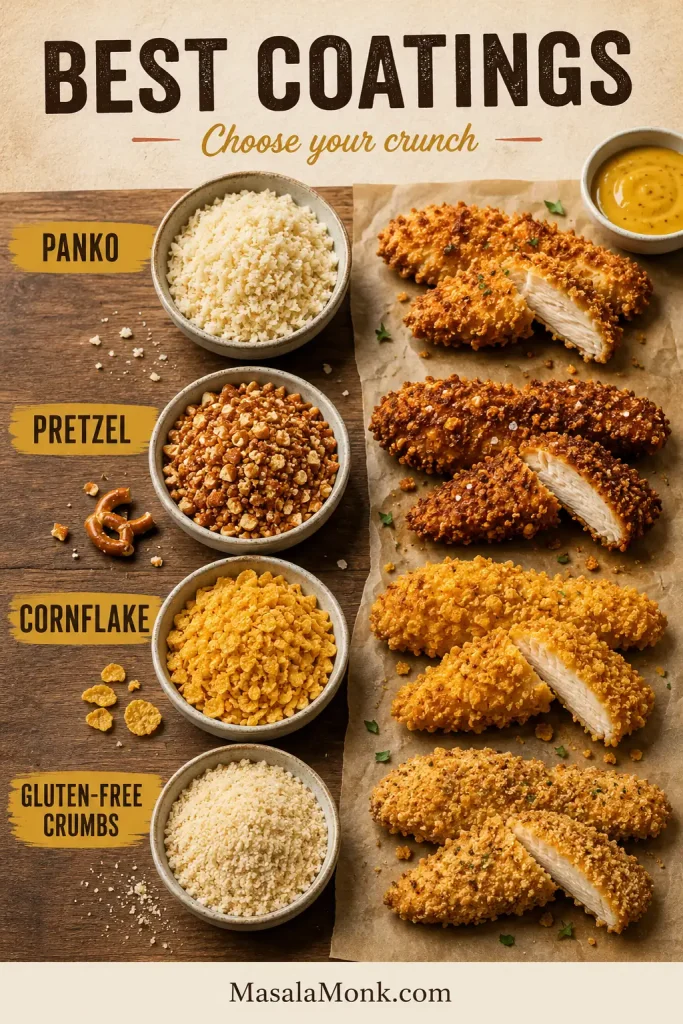
Air Fryer, Baked, Slow Cooker, and Deep-Fry Notes

The shallow-fry version is the main recipe because it gives the best mix of crispness, control, and realistic home cleanup. Choose the method that matches your night, not the one that sounds most impressive.

In short: shallow fry for the best overall texture, air fry for lower oil, bake for easier cleanup, slow cook for saucy comfort, and deep fry for the crunchiest restaurant-style result. If your main goal is less oil or less hands-on cooking, a softer coating is not a failure; it is just a different dinner — saucier, easier, and still good over rice.

Which Cooking Method Fits Your Night?

This comparison keeps the method choice honest: crispness, oil level, cleanup, and sauciness all change depending on how you cook the chicken.

Four-panel comparison showing shallow fried, air fryer, baked, and slow cooker versions of General Tso chicken.
Choose the method by texture and time: shallow fry is crispest, air fryer is lighter, baked is simpler, and slow cooker is saucier.

Air Fryer General Tso Chicken

Air fryer General Tso chicken works best when the chicken is cooked separately and the sauce is made on the stove. Air fry coated chicken pieces at about 400°F / 200°C for 10–15 minutes, turning or shaking halfway through, then toss with hot sauce right before serving. Leave space between the pieces so the coating can dry and crisp instead of steaming.

If your air fryer chicken often turns out pale, uneven, or soft, this guide to common air fryer mistakes explains why spacing, flipping, and dry surfaces matter.

Baked General Tso Chicken

Baked General Tso chicken is easier and less messy, but it will be softer than fried. For better texture, bake the coated chicken on a rack or a well-oiled sheet pan, then sauce it after baking.

Slow Cooker General Tso Chicken

Slow cooker General Tso chicken is cozy and saucy. It is the version for spooning over rice, not the one for crisp edges. Brown the chicken first for better flavor, then cook it with the sauce and serve it hot.

Deep-Fried Restaurant-Style General Tso Chicken

The crispiest route is a deeper pot of oil and a double fry. Fry once until cooked and lightly golden, rest the chicken on a rack, then fry again briefly at a slightly hotter temperature before tossing with sauce.

Shortcut General Tso Chicken

For a shortcut dinner, use frozen crispy chicken bites or popcorn chicken and make only the sauce from scratch. Heat the chicken until crisp, simmer the sauce separately, then toss right before serving.

What to Serve With General Tso Chicken

General Tso chicken is rich and saucy, so it works best with simple sides that catch the sauce or balance the sweetness. Plain rice is the easiest base, but for a fuller takeout-style plate, shrimp fried rice works beautifully beside the sticky chicken.

  • Steamed jasmine rice or white rice
  • Brown rice
  • Fried rice
  • Steamed broccoli
  • Stir-fried green beans
  • Bok choy
  • Noodles
  • Cucumber salad
  • Cabbage slaw
  • Cauliflower rice for a lighter bowl

If serving broccoli, steam or blanch it for 3–4 minutes while the chicken drains, then serve it on the side or toss it into the pan only at the very end. Broccoli cuts through the sticky sauce and makes the plate feel complete without adding much extra work.

For the best bowl, add rice first, then broccoli, then the hot chicken. Spoon any extra sauce from the pan over the rice, not over the chicken, so the top pieces keep more texture. The best bowl is not neat; it is rice catching sauce, broccoli cutting the sweetness, and a few crisp edges still fighting through the glaze.

How to Build the Bowl

The rice can take the extra sauce. The top pieces should stay more exposed so the coating keeps a little texture.

General Tso chicken bowl with rice, broccoli, and glossy chicken while extra sauce is spooned onto the rice side.
For serving, spoon extra sauce onto the rice side so the top pieces keep more texture while the rice gets saucy.

The Final Bowl

The finished bowl should look saucy and generous, but the chicken should still show some crisp edges after tossing.

Close-up of finished General Tso chicken over white rice with broccoli, scallions, sesame seeds, and a spoon lifting rice and chicken.
The best bowl has saucy rice, bright broccoli, and chicken pieces with crisp edges still showing.

For a starter, add something crisp and snacky like these crispy veg spring rolls. A small bowl of peanut sauce gives the table a creamy, salty-sweet contrast.

Storage and Reheating

General Tso chicken is best fresh. The coating starts to soften once it is tossed in sauce, so the first serving will always have the best texture. Leftovers are still good over rice, just more saucy and soft than crackly.

  • Refrigerator: Store leftovers in an airtight container for 3–4 days.
  • Rice: Store rice separately if possible so it does not absorb all the sauce.
  • Microwave: Fastest option, but it softens the coating.
  • Air fryer: Reheat at about 350°F / 175°C for 6–8 minutes.
  • Skillet: Reheat over medium heat until hot, adding a splash of water if the sauce is too thick.
  • Freezer: You can freeze it, but the coating will not stay crisp after thawing.

Can You Make It Ahead?

The parts can be prepped ahead, but save the frying and tossing for the last minute. Mix the sauce, cut the chicken, and chop the aromatics earlier in the day, then cook when you are ready to eat.

General Tso Chicken vs Sesame Chicken, Orange Chicken, and Kung Pao

These takeout dishes can look similar, but the flavor profiles are different.

DishMain FlavorTextureHeat Level
General Tso chickenSweet, tangy, savoryCrispy chicken in sticky glazeMild to medium
Sesame chickenSweeter, sesame-forwardCrispy or saucyMild
Orange chickenSweet citrusCrispy chicken in orange glazeUsually mild
Kung pao chickenSavory, spicy, nuttyStir-fried, not usually batteredMedium

Choose General Tso for sticky, sweet heat. Choose sesame chicken for a sweeter and milder sauce, orange chicken for citrus, and kung pao chicken for a less-sweet stir-fry with peanuts and chiles.

Is General Tso Chicken Authentic?

General Tso chicken is best known today as a Chinese-American restaurant dish. It has roots connected to Hunan-style cooking and the dish associated with Chef Peng Chang-kuei, but the version most people know from American takeout menus became sweeter, saucier, and more heavily coated over time. For a short background read, Smithsonian has a helpful piece on the history of General Tso’s chicken.

This is a takeout-style version, written for the flavor most people expect from the dish: crisp chicken, a sweet-spicy glaze, a little tang, and rice underneath. It is not trying to replace a traditional Chinese home recipe.

Once you understand the coating, sauce thickness, and toss timing, most General Tso problems become easy to fix.

FAQ

Is General Tso chicken spicy?

General Tso chicken is usually mildly spicy, not extremely hot. The heat comes from chili garlic sauce, dried red chilies, sambal, or red pepper flakes. For a family-friendly version, use less chili sauce and skip the dried chilies. For more heat, add extra chili near the end and taste as you go.

What is General Tso sauce made of?

General Tso sauce is made with soy sauce, rice vinegar, sugar or honey, hoisin, chili, garlic, ginger, sesame oil, stock or water, and cornstarch. It should taste sweet, savory, tangy, lightly spicy, and thick enough to coat the chicken.

Can I make General Tso chicken without hoisin sauce?

Yes. The sauce will be a little less rounded and glossy, but it will still work. Use an extra teaspoon of soy sauce, a little more sugar or honey, and a small splash of water or stock. If you have oyster sauce, add 1 teaspoon for body. Taste before tossing the chicken.

Why is my General Tso sauce not sticky?

General Tso sauce is usually not sticky because it is too thin, has not simmered long enough, or does not have enough cornstarch. Simmer it until glossy and spoon-coating. If it still looks watery, add a small cornstarch slurry and cook for another minute.

What oil is best for frying General Tso chicken?

Use a neutral high-heat oil such as canola, vegetable, peanut, sunflower, or rice bran oil. Avoid olive oil for this shallow-fry method because the oil needs to get hot enough for the coating to crisp quickly.

Can I use frozen chicken?

Yes, but thaw it completely first and pat it very dry before coating. Do not coat or fry frozen chicken pieces; the extra moisture can make the coating fall off, splatter in the oil, and turn the chicken soggy. For safest cooking, check the thickest piece and cook the chicken to 165°F / 74°C.

Why did my chicken get soggy?

Chicken gets soggy when the sauce is too thin, the pan is crowded, or the fried pieces sit in sauce too long. Fry in batches, drain well, thicken the sauce first, and toss right before serving.

Can I use chicken breast instead of thighs?

Yes, chicken breast works, but it is leaner and dries out faster than thighs. Cut it into even 1-inch pieces and avoid overcooking it. Chicken thighs are more forgiving and usually give a juicier, more takeout-style result.

Is General Tso the same as General Tao, General Cho, or General Gau chicken?

General Tao chicken, General Cho chicken, General Gau chicken, General Tsao chicken, and chicken tso are often used for very similar sweet-spicy crispy chicken dishes. The spelling changes by restaurant and region, but most people are looking for the same takeout-style idea.

Can I make it without deep frying?

Yes, shallow frying gives the closest texture without using a deep fryer. Air fryer and oven versions also work, but the coating will be lighter and less like classic takeout. For the crispiest result, shallow frying or deep frying works best.

How do I make it gluten-free?

Use gluten-free tamari instead of soy sauce and choose a gluten-free hoisin sauce. Cornstarch is usually gluten-free, but always check the label if needed. Serve with rice and vegetables instead of noodles unless the noodles are certified gluten-free.

Can General Tso chicken be made ahead of time?

The parts can be prepped ahead, but save the frying and tossing for the last minute. Mix the sauce, cut the chicken, and chop the aromatics earlier in the day, then cook when you are ready to eat.

What is the difference between General Tso chicken and sesame chicken?

General Tso chicken is usually tangier and spicier, while sesame chicken is sweeter, milder, and more sesame-forward. Both are often made with crispy chicken and sticky sauce, but General Tso has more heat and a sharper sweet-tangy balance.

Can I use bottled General Tso sauce?

Yes, bottled General Tso sauce works when dinner needs to be fast. Heat it separately and toss the chicken only at the end so the coating does not sit in sauce too long. Homemade still gives you better control over sweetness, salt, heat, and thickness.

Make it once as written, then adjust the sauce the way your table likes it. A little more vinegar, a little more chili, a little less sugar — that is when this stops feeling like a copied takeout order and starts feeling like yours. Next time, you will know exactly what to change.

Back to the recipe card · Back to top