Posted on Leave a comment

Hot Honey Chicken Tenders Recipe: Crispy, Juicy & Sweet-Spicy

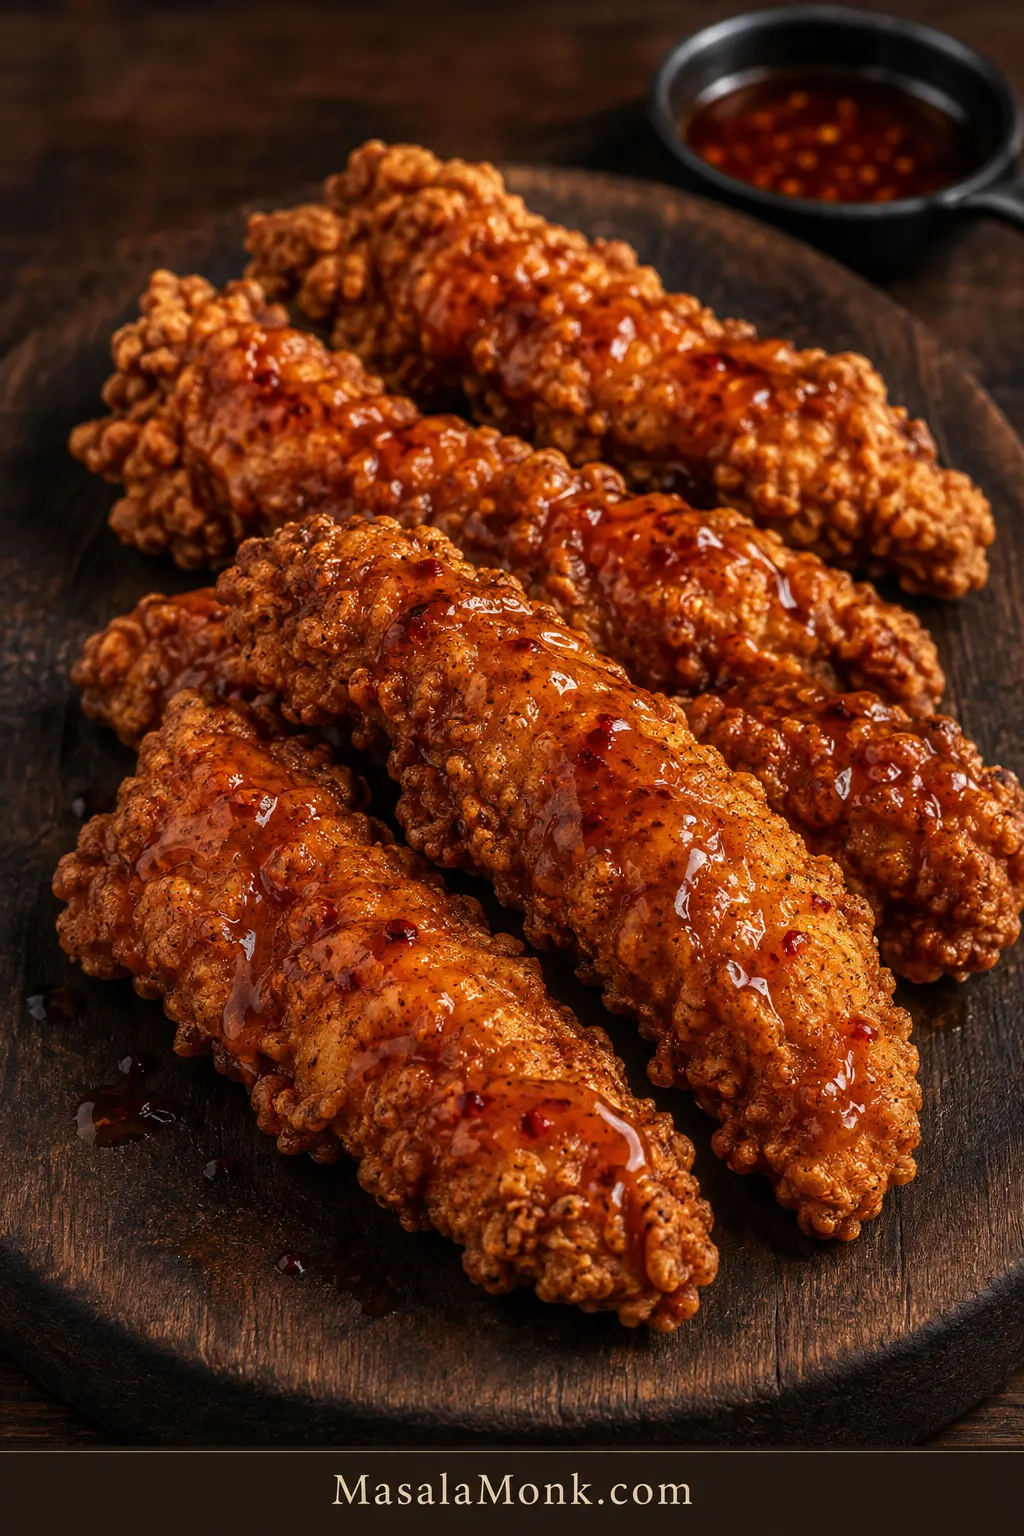
Deep-golden craggy fried chicken tenders with thin amber-red hot honey drizzled over the exposed crust.

The best hot honey chicken tenders crackle when you bite through the coating, then give way to juicy chicken, sticky honey and a little heat that arrives just after the sweetness. Those rough golden ridges matter—they give the honey somewhere to catch without covering every bit of crunch.

Homemade tenders usually go wrong in a few predictable places. The breading slips off, too much chicken cools the oil, a thick piece stays underdone while the outside darkens, or the hot honey goes on so heavily that a beautiful crust turns soft almost immediately.

This version keeps those trouble spots under control without turning fried chicken into a project. The chicken is seasoned before breading, the coating gets rough little flour flakes for extra crunch, and only a few similarly sized pieces go into the oil at a time. Once the tenders hit the rack, you can drizzle, brush or toss them depending on how much crunch you want to keep.

Quick Answer: How to Make Crispy Hot Honey Chicken Tenders

  • Marinate: Season 1½ lb (680 g) chicken tenders in buttermilk for at least 30 minutes; 2–4 hours gives the seasoning more time to work.
  • Bread: Press the chicken into a flour-cornstarch dredge with small damp flour flakes, then rest the breaded tenders for 10 minutes.
  • Fry: Start the oil at 360–365°F (182–185°C), keep it around 340–350°F (171–177°C) while the chicken cooks, and cook the thickest piece to 165°F (74°C).
  • Finish: Rest the fried chicken on a wire rack for 2–3 minutes, then add warm hot honey.

Build the crunch before frying, protect it afterward, and add the hot honey last.
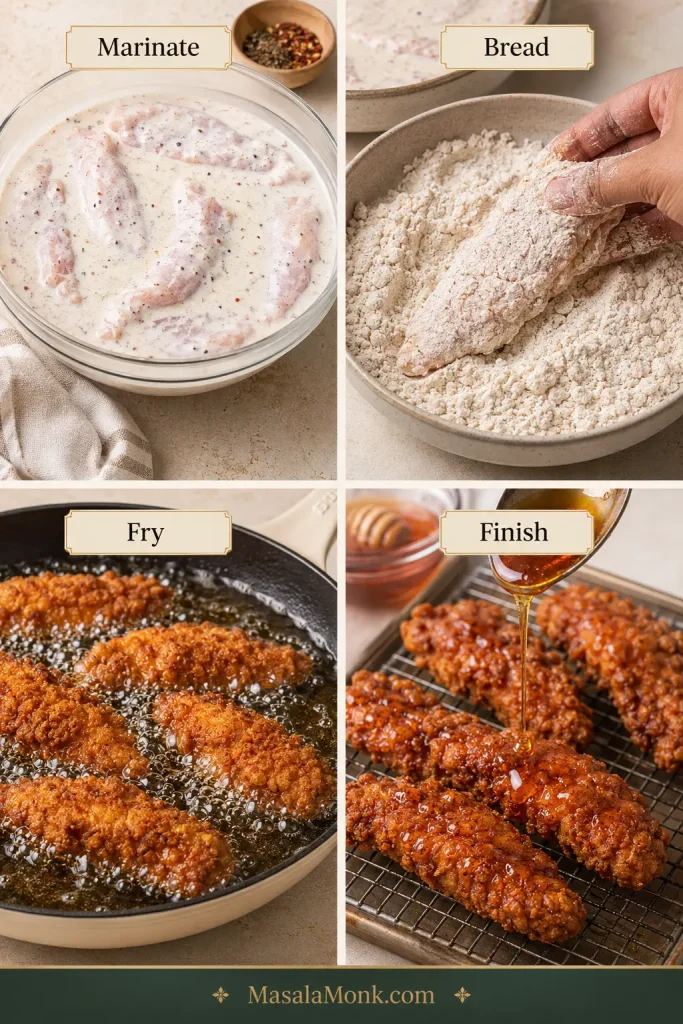
Four-step guide showing chicken marinating, being breaded, frying in oil, and finished with hot honey.

Choose Your Hot Honey Finish

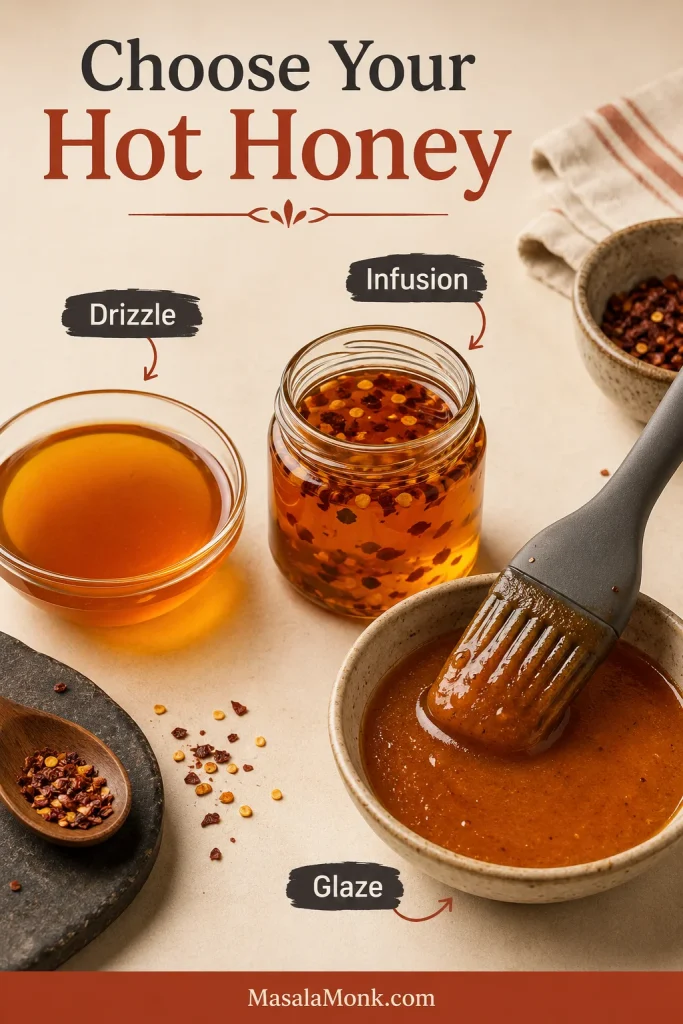
How you add the hot honey changes the bite. A drizzle leaves plenty of golden ridges exposed; a full toss fills almost every crevice with sauce.

You wantFinishWhat to expect
Maximum crunchDrizzleSweet heat with plenty of crisp breading still exposed. Recommended.
More even sauceBrushBroader coverage while much of the coating stays crisp.
Sticky glazed chickenTossMaximum sauce coverage; eat it right away.

The main recipe uses the drizzle method.
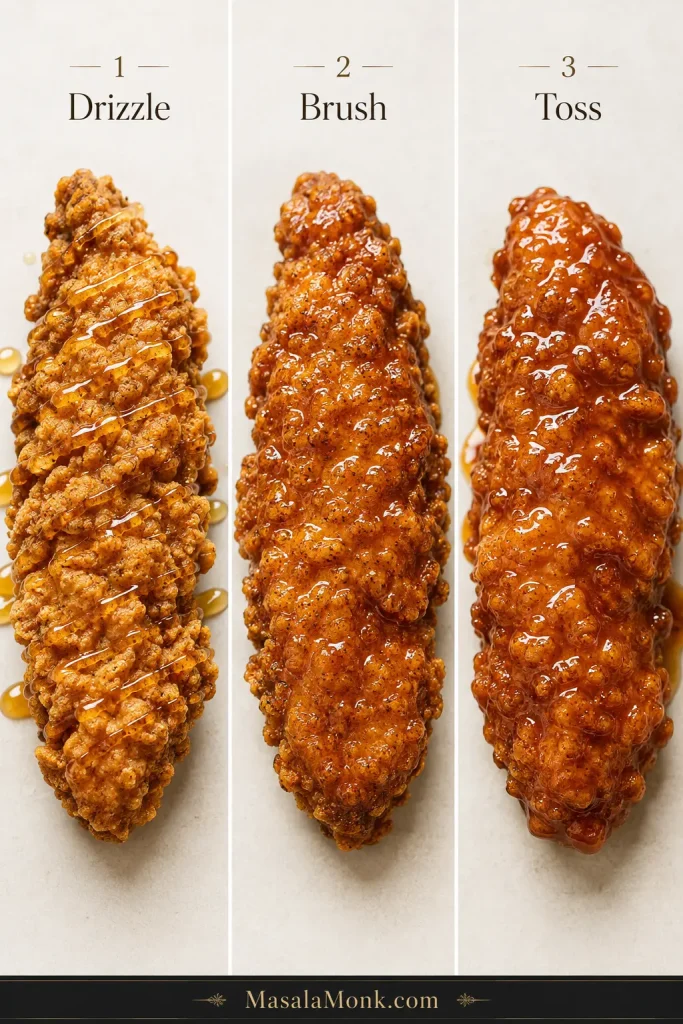
Three-panel comparison of fried chicken tenders with drizzled, brushed, and tossed hot honey, from least to most sauce coverage.

Hot Honey Chicken Tenders Recipe

Craggy, deeply golden chicken tenders with juicy centers and warm hot honey that catches in the ridges instead of soaking the whole crust.

  • Yield: 10–12 tenders
  • Serves: about 4
  • Hands-on time: about 50 minutes
  • Marinate: 30 minutes minimum; 2–4 hours preferred
  • Total time: about 1 hour 20 minutes with the 30-minute marinade
  • Doubling: double the ingredients, but keep the same small frying batches

Equipment

  • 5–6-quart heavy Dutch oven or similarly deep pot
  • Deep-fry thermometer or other clip-on oil thermometer
  • Instant-read thermometer for the chicken
  • Wire rack set over a rimmed tray

You will also need a parchment-lined tray or large plate for the raw breaded chicken, shallow bowls, a small saucepan and tongs or a spider/skimmer. Keep a clean utensil ready for transferring the cooked chicken.

For the Chicken

  • 1½ lb (680 g) chicken tenderloins, ideally 10–12 similarly sized pieces
  • 1 cup (240 ml) buttermilk
  • 1 tablespoon (15 ml) cayenne-style hot sauce
  • 6 g fine sea salt, about 1 teaspoon
  • 1 teaspoon garlic powder
  • ½ teaspoon freshly ground black pepper

No buttermilk? Put 1 tablespoon (15 ml) lemon juice or white vinegar in a measuring cup, then add enough whole milk to reach 1 cup (240 ml). Stir and let it stand for 5 minutes.
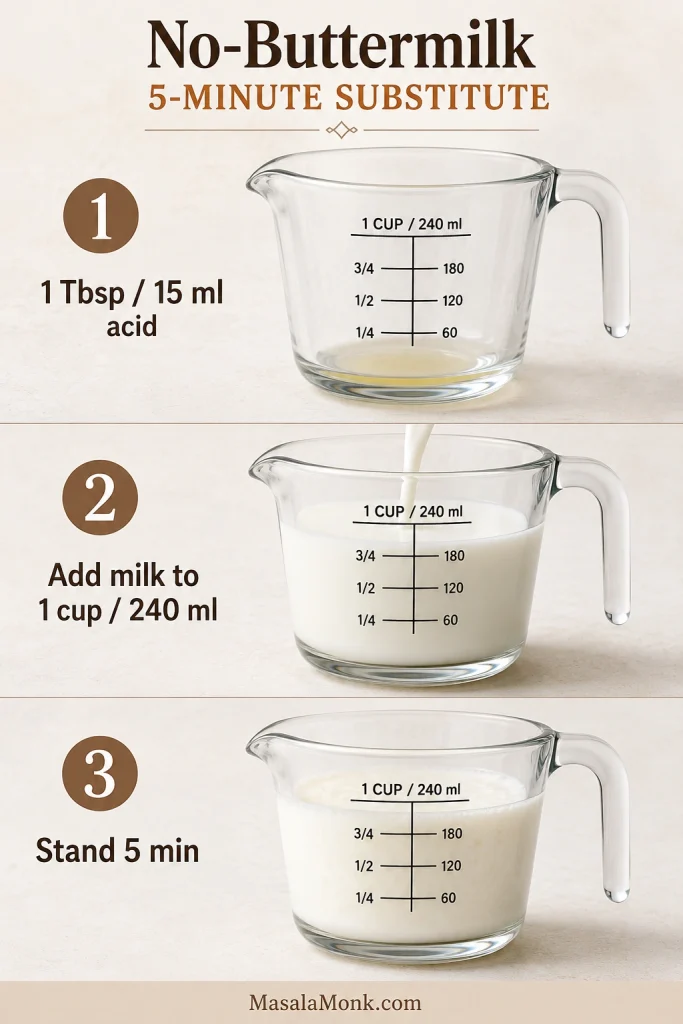
Three-step guide showing 15 ml acid in a measuring cup, milk added to 240 ml total, and slight thickening after five minutes.

Using chicken breast? Cut it into strips ¾–1 inch (2–2.5 cm) wide and ½–¾ inch (1.25–2 cm) thick. Aim for 2–2½ oz (55–70 g) per strip.
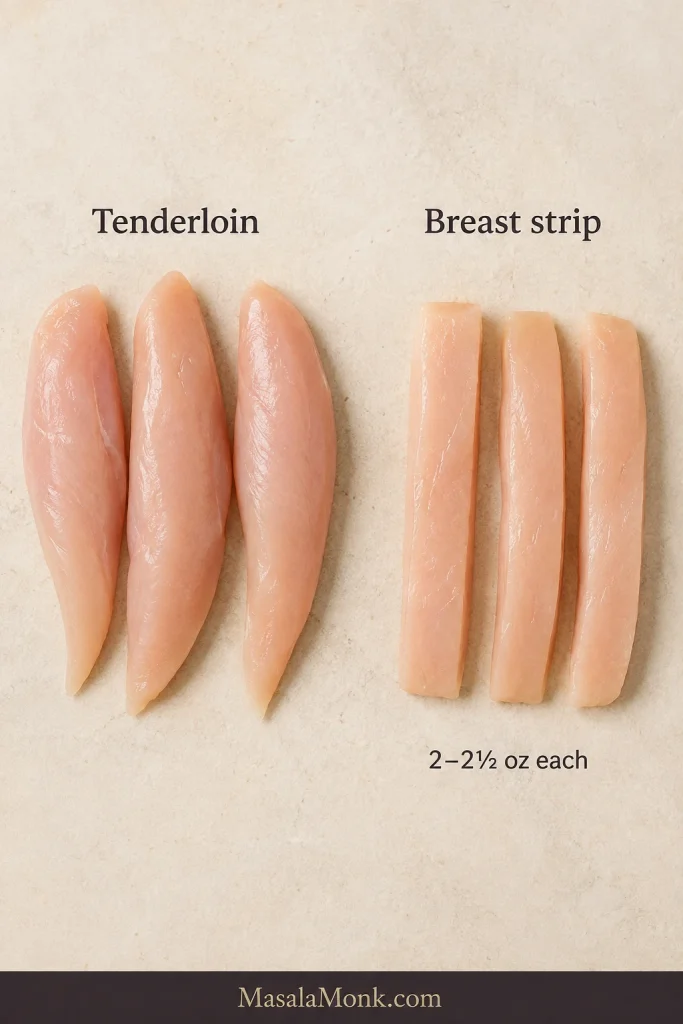
Raw chicken tenderloins beside similarly sized chicken breast strips labeled about 2 to 2½ ounces each.

For the Crispy Coating

  • 1½ cups (180 g) all-purpose flour
  • ½ cup (60–65 g) cornstarch
  • 1½ teaspoons baking powder
  • 8 g fine sea salt, about 1⅓ teaspoons
  • 1 teaspoon garlic powder
  • 1 teaspoon onion powder
  • 1 teaspoon sweet paprika
  • 1 teaspoon freshly ground black pepper
  • ¼ teaspoon cayenne pepper, optional
  • 3 tablespoons (45 ml) seasoned buttermilk mixture, removed before the raw chicken is added

If you use kosher salt, follow the gram weights rather than the teaspoon estimates because crystal size varies by brand.

For the Medium Hot Honey

  • ½ cup (170 g) honey
  • 1 tablespoon (15 ml) cayenne-style hot sauce
  • 1 teaspoon (5 ml) apple cider vinegar or fresh lemon juice
  • ¼ teaspoon crushed red pepper flakes
  • Small pinch fine salt
  • 1 tablespoon (14 g) unsalted butter, optional

Use a thin, vinegar-forward cayenne hot sauce here. Thick sriracha, chili crisp and highly concentrated pepper sauces behave differently and are not tablespoon-for-tablespoon substitutes.
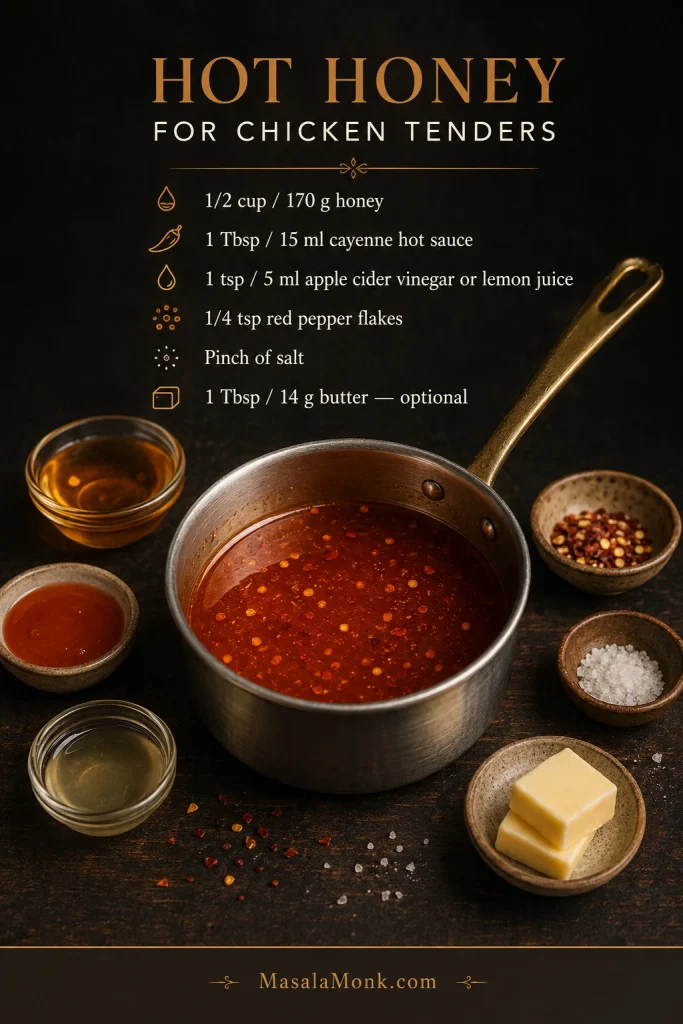
Hot honey recipe guide with a saucepan and honey, cayenne hot sauce, acid, red pepper flakes, salt, and optional butter.

Want it milder, hotter or made with bottled hot honey? See the hot honey adjustment table and notes.

For Frying

  • 1½–2 quarts (1.4–1.9 L) neutral frying oil, or enough to reach 1¼–1½ inches (3–4 cm) deep in your pot while leaving plenty of empty space above the oil

Peanut, canola, sunflower or standard vegetable oil all work well. Let the depth in your pot determine the exact amount. Fresh oil—or clean, well-filtered oil that still smells neutral—gives the cleanest flavor.

New to deep frying? The USDA deep-fat frying safety guide is worth reading before you heat the oil.

Instructions

Marinate, Make the Hot Honey and Bread

  1. Season and marinate the chicken. Whisk together the buttermilk, hot sauce, salt, garlic powder and black pepper. Before raw chicken enters the bowl, spoon 3 tablespoons (45 ml) into a separate clean bowl for the dredge. Add the chicken, turn to coat, cover and refrigerate for at least 30 minutes. Two to four hours is ideal; these thin pieces gain little from a much longer soak.
  2. While the chicken marinates, make the hot honey. Combine the honey, hot sauce, vinegar or lemon juice, red pepper flakes and salt in a small saucepan. Warm over low heat for 1–2 minutes, just until loose and fragrant. Do not boil. Stir in the butter if using, taste and set aside. Rewarm briefly before serving if the sauce thickens.
  3. Mix the dredge while the chicken finishes marinating. Whisk together the flour, cornstarch, baking powder, salt, garlic powder, onion powder, paprika, black pepper and cayenne. Drizzle the clean reserved buttermilk over the flour mixture and rub lightly with your fingertips until small damp flakes and pebbly pieces form. Break apart anything that resembles wet dough.
  4. Bread the chicken. Lift one tender from the marinade and let the excess drip back into the bowl. Do not pat it dry. The surface should stay tacky without dripping in streams. Press the chicken firmly into the dredge on every side, picking up some of the rough flour flakes, then place it on the parchment-lined tray. Repeat with the remaining pieces. Discard the remaining raw-chicken marinade and any dredge that touched raw chicken.

Fry the Chicken

  1. Rest the breading and start heating the oil. Begin heating the oil to 360–365°F (182–185°C). Let the breaded chicken rest for at least 10 minutes while the oil comes up to temperature. The coating should look shaggy and slightly hydrated in patches. If the oil needs another few minutes, the chicken can simply stay on the tray.
  2. Fry the first batch and let the coating set. Lower 3–4 tenders gently into the oil, leaving visible space between them. Do not keep nudging or turning them as soon as they land; give the crust time to set. Aim to keep the oil around 340–350°F (171–177°C).
  3. Cook until deep gold and 165°F. Pieces in the 2–2½ oz (55–70 g) range usually need 5–7 minutes total. Turn once when needed. The bubbling should stay energetic while the ridges move gradually from pale to deep gold. Start checking the largest piece near the early end of the range; poultry should reach 165°F (74°C) in the thickest part.

Once a batch comes out deep gold, crisp at the edges and 165°F (74°C) in the center, you have your pot figured out. The remaining batches are mostly repetition.
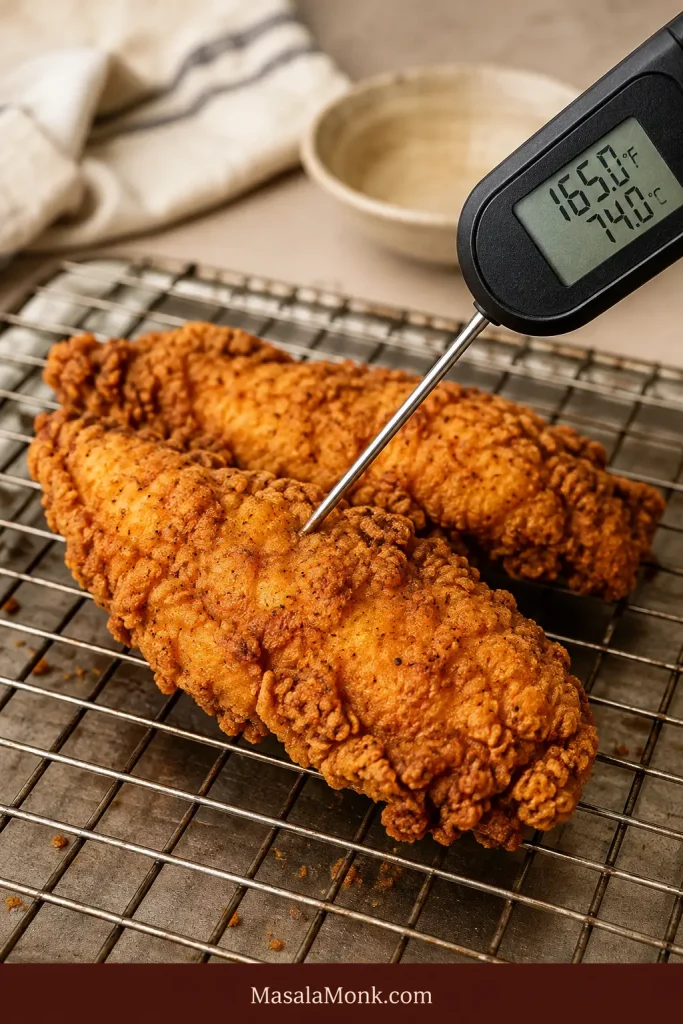
Deep-golden fried chicken tenders on a wire rack with a thermometer showing 165°F and 74°C.

Rack, Reset and Finish

  1. Move the cooked chicken to the rack. Transfer the tenders with clean tongs or a clean spider/skimmer and keep them in one layer so steam can escape underneath.
  2. Reset the oil between batches. Let it return to the starting range before adding more chicken. If recovery is slow, make the next batch smaller. Skim out loose breading once it turns dark so burnt crumbs do not make later batches bitter.
  3. Add the hot honey last. Give each fried batch 2–3 minutes on the rack, until the strongest steam has eased. Rewarm the sauce if needed, then drizzle it over only the tenders you expect to eat right away. The honey should fall in glossy ribbons and catch on the rough ridges. Keep the rest of the sauce at the table.

Give the steam somewhere to go: the rack keeps the bottom from softening while the crust settles before the hot honey goes on.
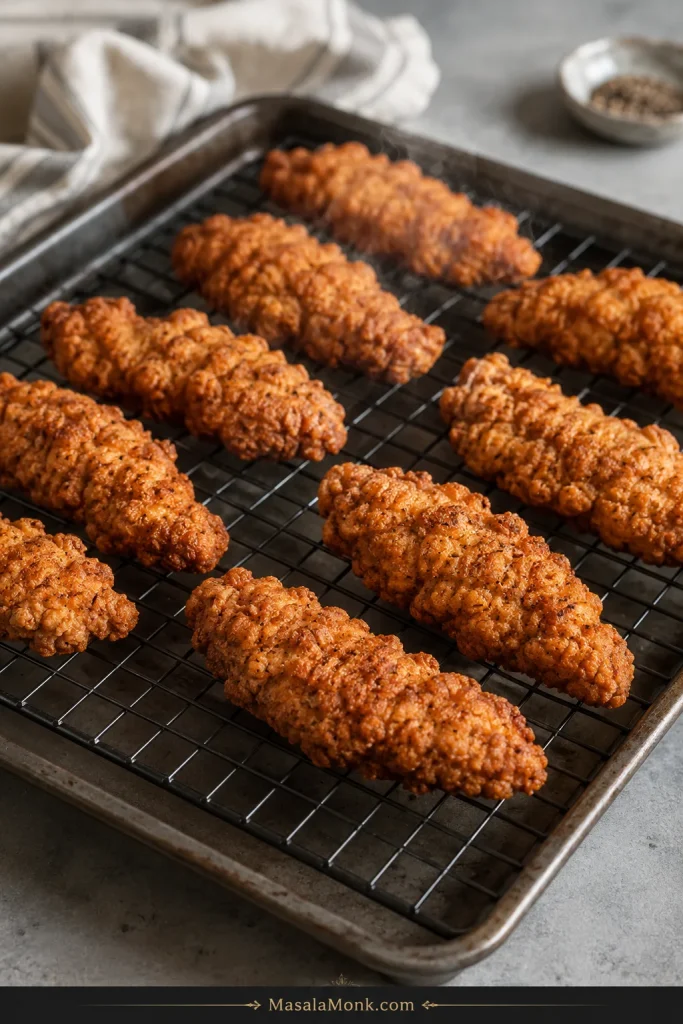
Unsauced fried chicken tenders resting in one layer on a raised wire rack with air space underneath.

For the first serving, drizzle a few tenders and listen for that first crunch before deciding whether the rest need more honey.
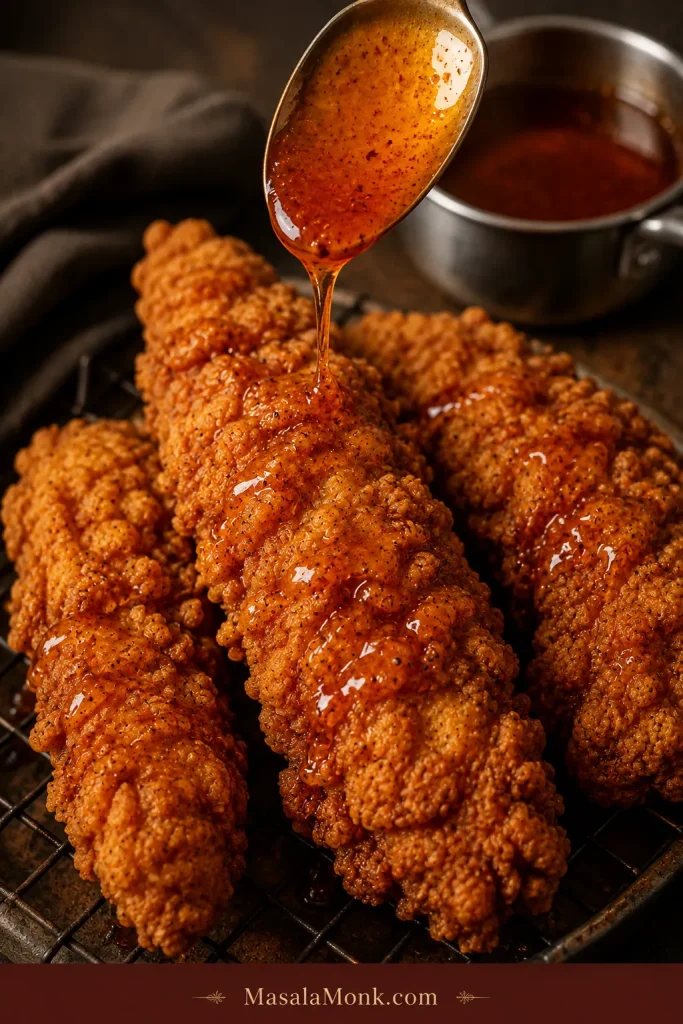
Pepper-flecked amber-red hot honey falling from a spoon in thin ribbons over craggy fried chicken tenders.

Break one open while it is still hot: the center should be moist white chicken beneath a closely attached craggy crust, not a thick hollow shell.
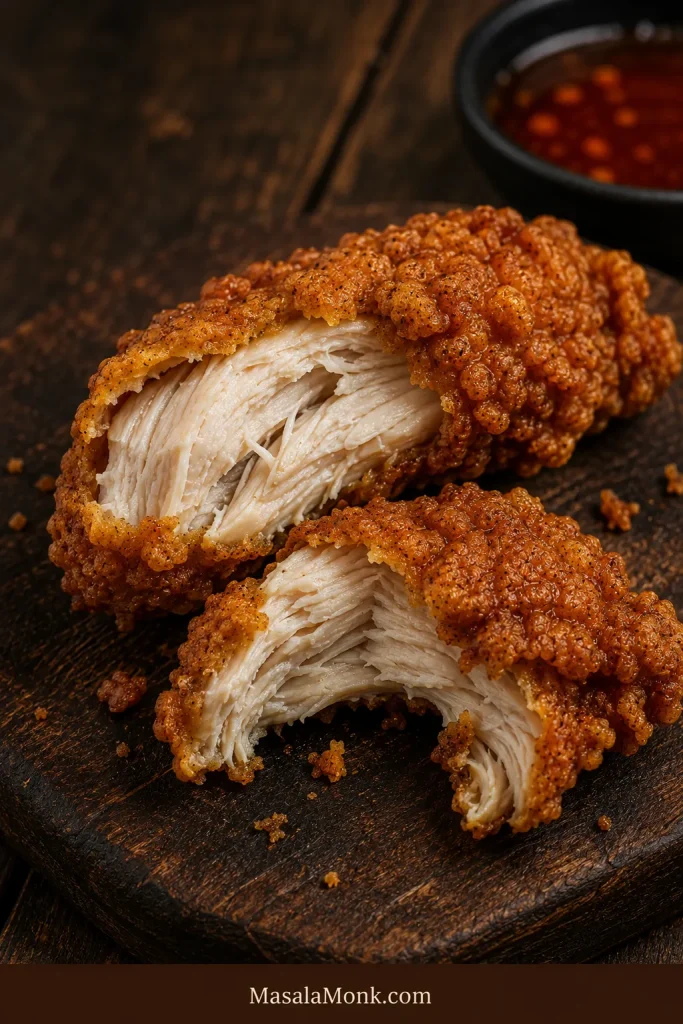
Fried chicken tender broken open to reveal moist white chicken inside a closely attached deep-golden craggy crust.

Need help with a particular part of the recipe? Jump to breading problems, oil temperature, air-fryer and oven methods, hot honey adjustments, troubleshooting or storage and reheating.

Chicken Tenderloins or Chicken Breast Strips?

Tenderloins are already close to the shape you want. Split or gently flatten any unusually thick ones so they finish alongside the rest.

The firm white tendon is harmless. Trim the exposed portion, or grip it with paper towel and gently pull it through the tines of a fork if you prefer to remove more. Stop if the tender begins tearing.
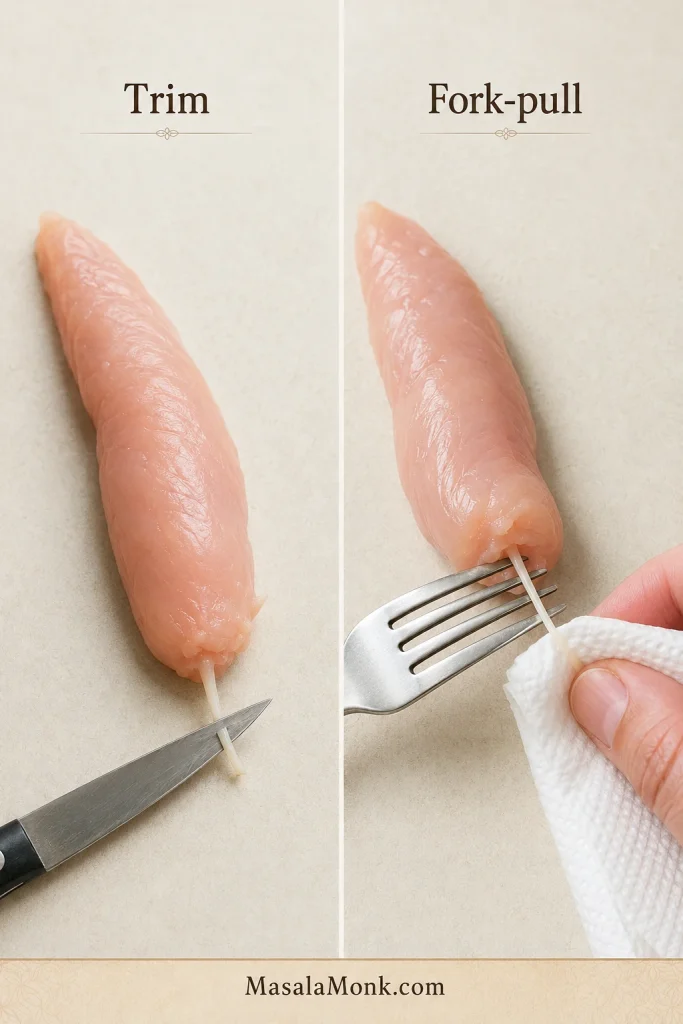
Two-panel guide showing a white tendon trimmed from a raw chicken tenderloin and pulled through fork tines with a paper towel.

Chicken breast is an easy substitute. Cut it to the size given in the recipe rather than making long, thick strips. Similar-size pieces are what keep the frying time predictable.

If you would rather cook the breasts whole, our baked chicken breast recipe goes deeper into thickness, timing and keeping lean chicken juicy.

Chicken fingers, strips and tenders are often used loosely for the finished dish. Here, size matters more than the label on the package.

The Ingredients That Actually Change the Result

Buttermilk

Buttermilk carries seasoning, adds mild tang and leaves a naturally tacky surface for the flour. The milk-and-acid substitute in the recipe is thinner than cultured buttermilk, but it still gives the coating something to grip.
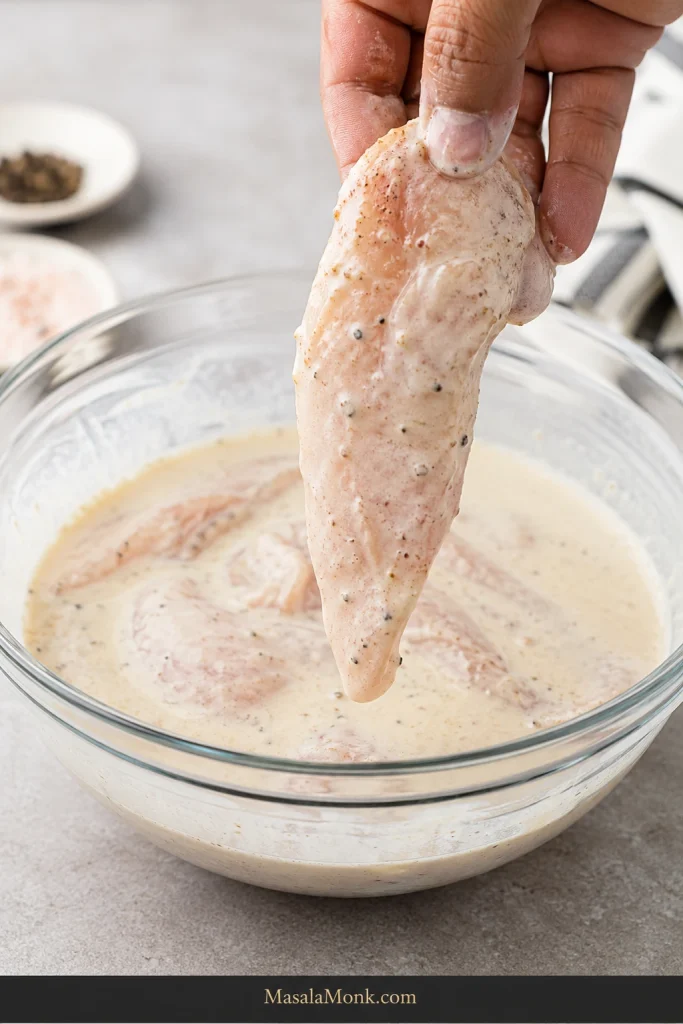
Buttermilk-marinated chicken tender lifted from a bowl with a moist, tacky surface and no heavy streams of marinade.

If the recipe leaves most of a carton behind, save it for flaky Southern buttermilk biscuits. Fried chicken and warm biscuits rarely need much persuasion to share a plate.

Flour, Cornstarch and Baking Powder

Flour gives the coating enough structure to cling to the chicken, while cornstarch keeps the fried edges lighter and crisper. A little baking powder helps keep the surface rough instead of dense and smooth. When the clean reserved buttermilk is rubbed lightly through this mixture, the small damp flakes become the craggy pieces you want the chicken to pick up.
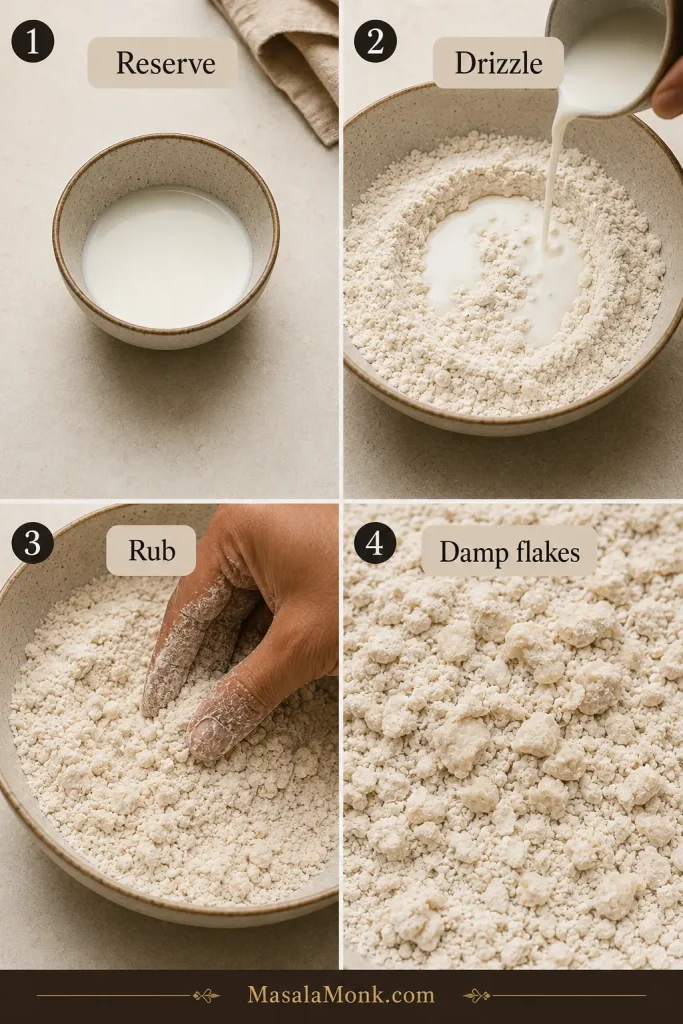
Four-step guide showing clean buttermilk reserved, drizzled into flour dredge, rubbed with fingertips, and forming small damp flour flakes.

What you are building toward: a fried crust with thin ridges, folds and blisters rather than one thick, smooth shell. Those irregular edges create more crisp surface without burying the chicken in breading.
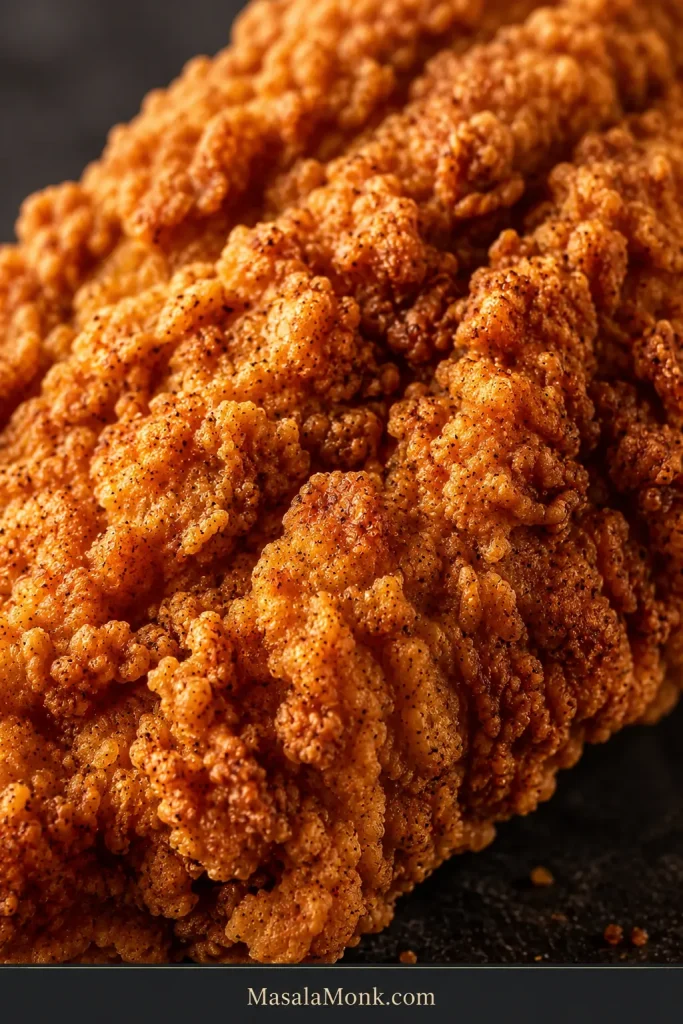
Extreme close-up of fried chicken crust with irregular flour ridges, folds, small flakes, and dark-golden peaks.

Seasoning the Chicken and the Coating

Seasoning in the marinade reaches the meat itself; seasoning in the dredge flavors the crust. Once the honey goes on, that distinction matters. Sweet, spicy sauce should finish good fried chicken rather than cover a bland center.

Sweet paprika brings color and mild pepper flavor. Cayenne in the dredge is optional, especially when several people at the table have different ideas about what “hot” means.

How to Keep Breading on Chicken Tenders

Before frying, the coating can tell you a lot. Good breading looks rough and patchy, with some flour hydrated against the chicken and little shaggy ridges still standing up.
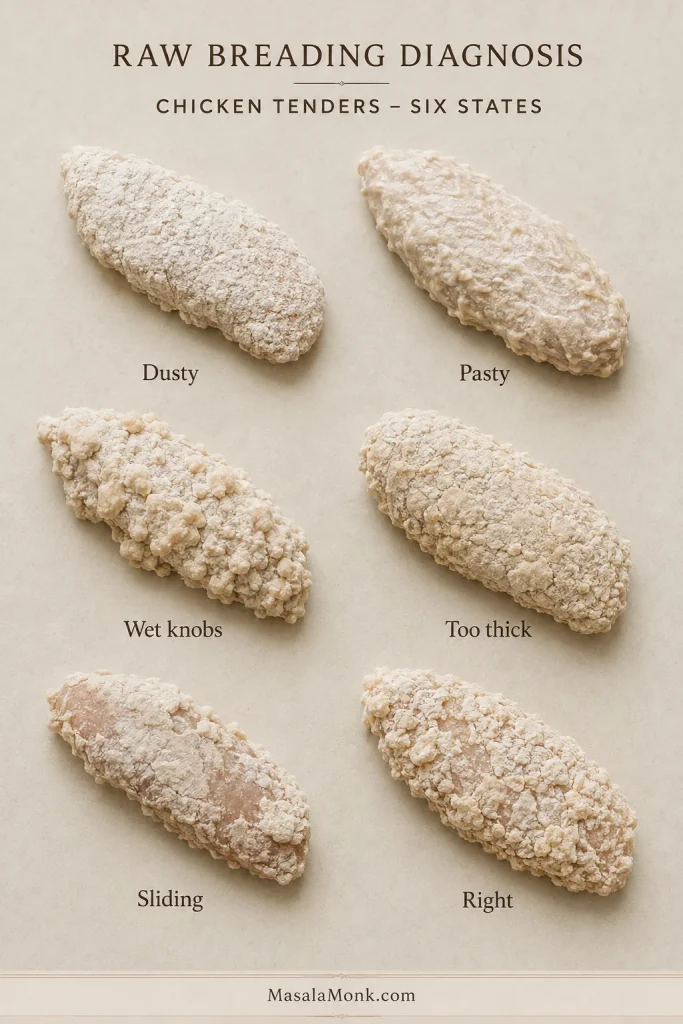
Six breaded chicken tenders labeled Dusty, Pasty, Wet knobs, Too thick, Sliding, and Right.
  • Still dusty almost everywhere after resting? A few floury spots are fine. On the next tender, let slightly less marinade drip away before dredging; do not try to wet an already breaded piece.
  • Smooth and pasty? Too much marinade followed the chicken into the flour. Let the next piece drip a little longer.
  • Huge wet knobs? Break the damp flour clumps smaller so they fry into crisp ridges rather than hard chunks.
  • A thick shell forming around the meat? The coating is too heavy. One well-pressed dredge is enough for this recipe.
  • Coating slides when you lift the tender? Press it on more firmly and give the breading its full resting time.
  • Rough, patchy and a little untidy? Good. Leave it alone.

Keeping one hand for wet chicken and the other for dry dredge also prevents the breading process from turning into a bowl full of floury fingerprints.

After the breading rests: the coating should still look rough and shaggy, with only a few slightly hydrated patches. It should not turn uniformly shiny, smooth or wet.
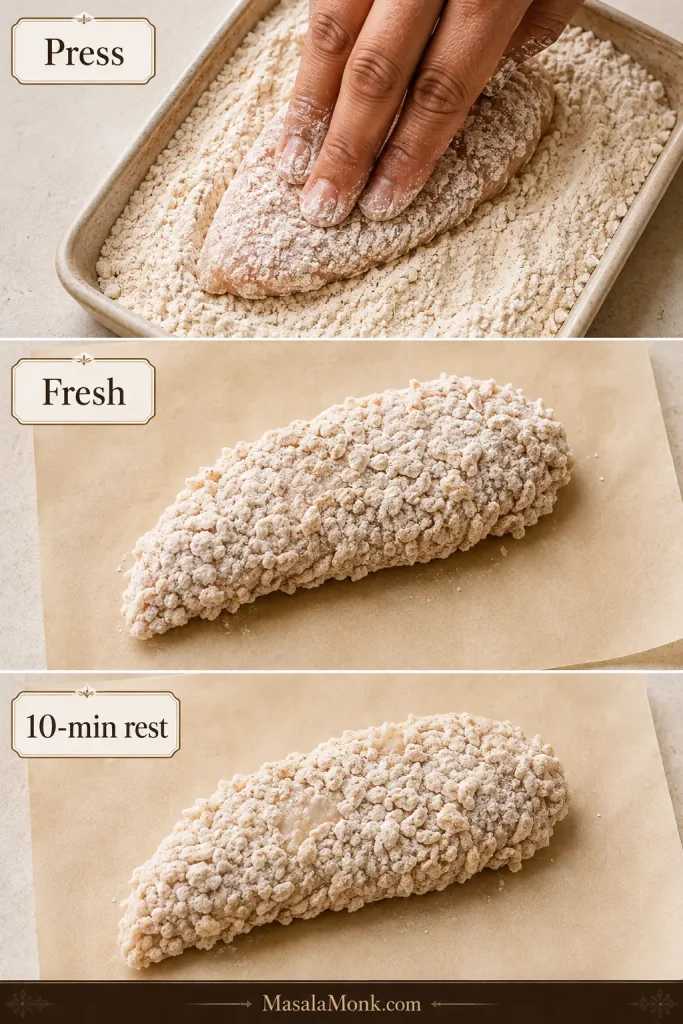
Three stages showing breading pressed onto chicken, a freshly coated tender, and the slightly hydrated coating after a 10-minute rest.

How to Control the Oil Temperature Between Batches

A thermometer makes home frying much less mysterious. The useful number is not only where the oil starts; it is what happens after cold chicken enters the pot.

StageTargetWhat you want to see
Before chicken enters360–365°F (182–185°C)Enough stored heat for the initial temperature drop
While frying340–350°F (171–177°C)Steady bubbling and gradual golden browning
Before the next batchBack near 360–365°F (182–185°C)Oil recovered before more cold chicken enters

Little flour peaks that darken almost immediately mean the oil is running too hot. Pale chicken sitting in weak bubbles points the other way. Small crumbs in the pot are normal, but remove them once they turn dark.
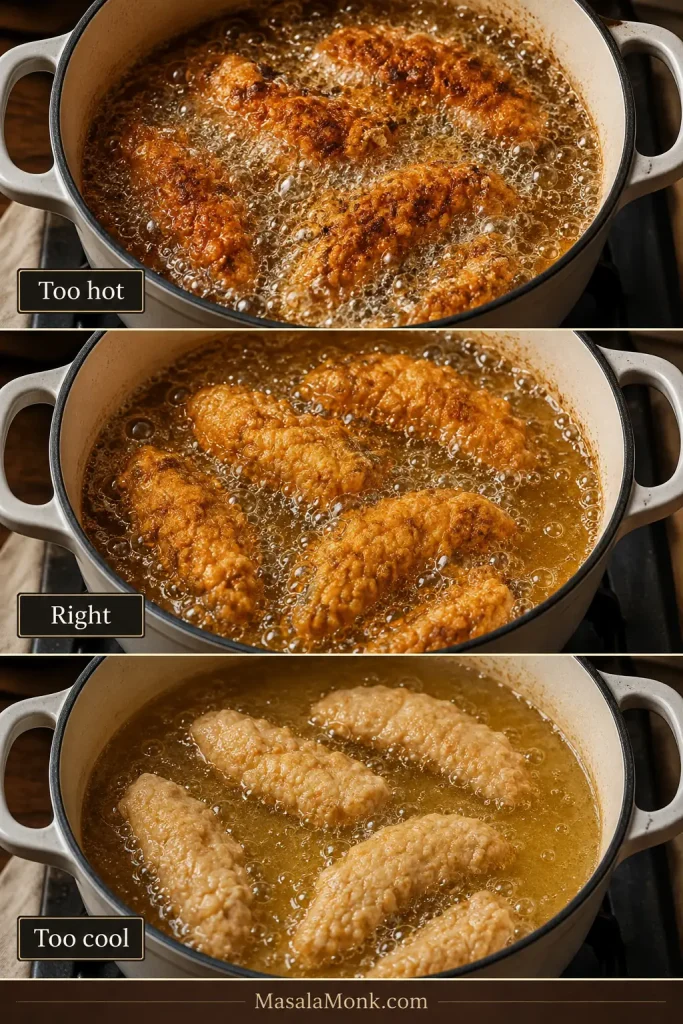
Three-panel frying comparison showing chicken in oil that is too hot, correctly heated, and too cool.

Use the first batch to learn your pot. Once the bubbling and browning settle into the right rhythm, the remaining batches become much easier to repeat.

A deep cast-iron skillet is another good option. A Dutch oven gives you higher sides and a little more protection from splatter. An electric fryer is fine too; resist filling the basket just because there is room.

Use the bubbling as a batch-size check: leave visible oil between the tenders, and if active bubbling weakens sharply after loading the pot, make the next batch smaller rather than squeezing in another piece.
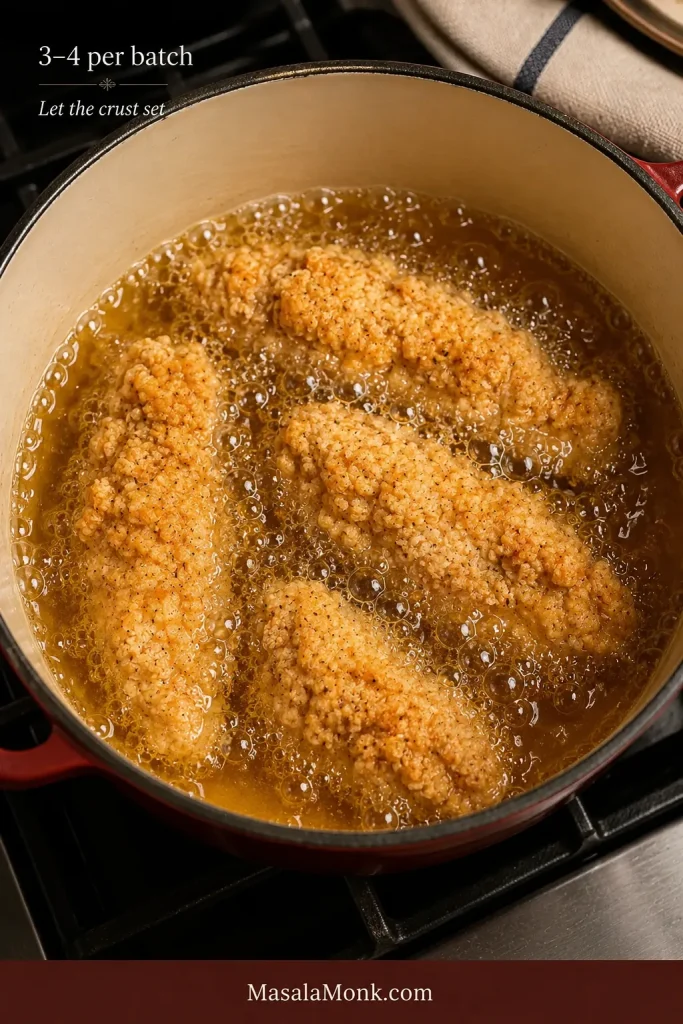
Four breaded chicken tenders frying with visible oil between each piece and no utensil disturbing the coating.

Keep the whole frying cycle in view: start near 360–365°F (182–185°C), let the oil work around 340–350°F (171–177°C), then give it time to recover before the next batch.
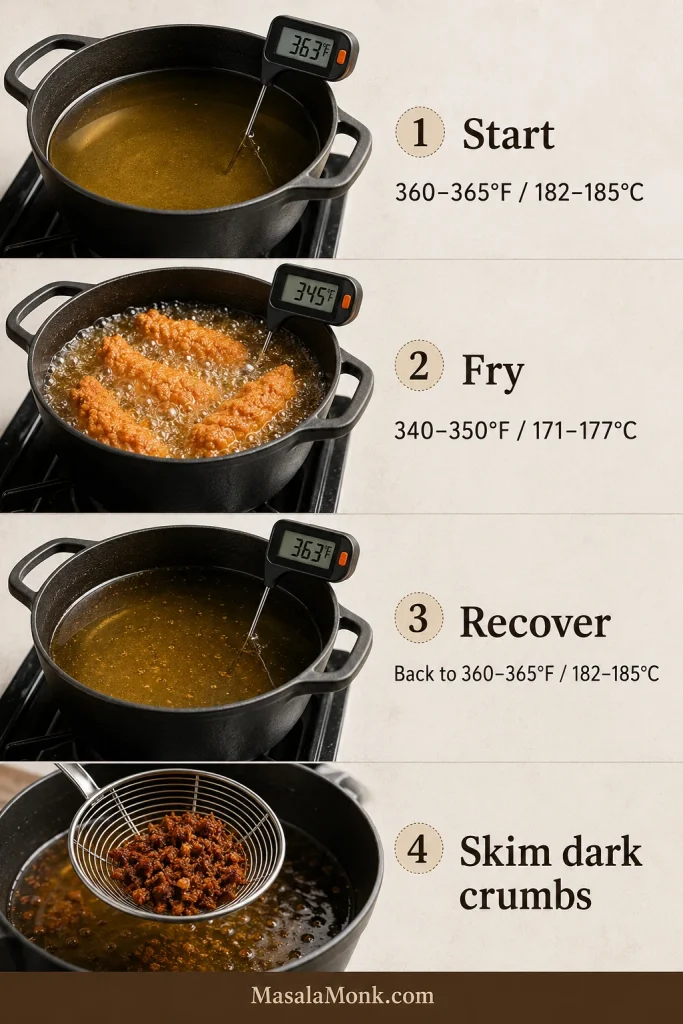
Oil-temperature guide showing the start range, working fry range, recovery before the next batch, and dark crumbs being skimmed.

From here, choose your cooking path: use the air fryer or oven, or skip to the hot honey adjustments if you are frying.

Air Fryer and Oven Methods

The flour coating used for frying relies on hot oil to set those craggy edges. Dry heat does better with panko. Use the air fryer when you want to avoid a pot of oil; the oven is easier when you need more tenders at once.
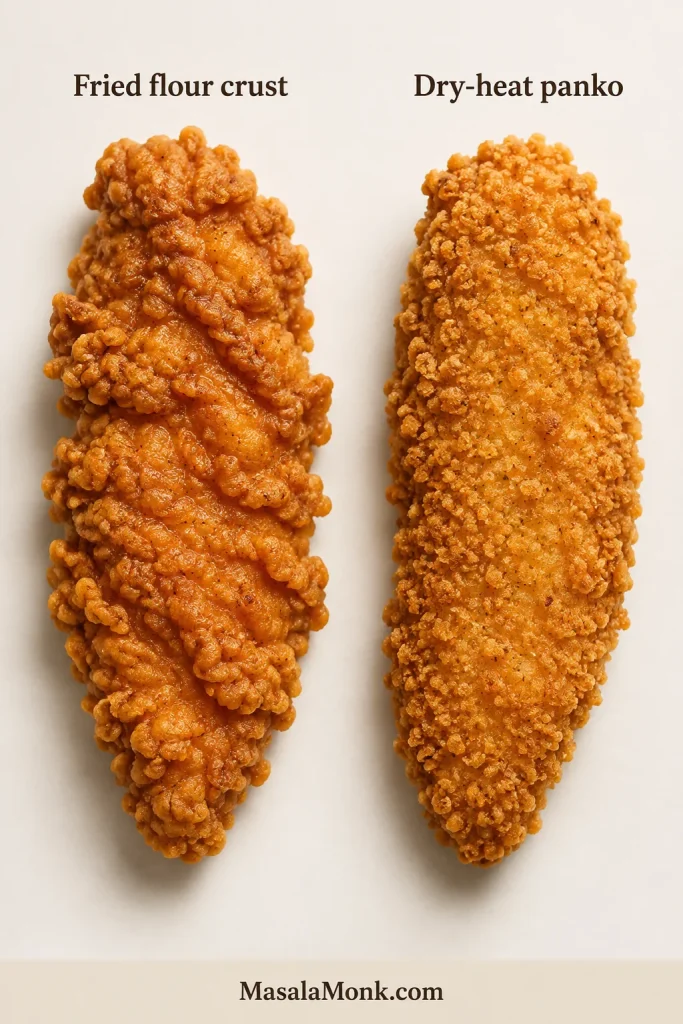
Side-by-side chicken tenders comparing irregular fried flour crust with a coarser dry-heat panko coating.

For the cooking times below, use 10–12 similarly sized tenderloins or chicken breast strips around 2–2½ oz (55–70 g) each. Very thick pieces will need longer.

Prepare the same medium hot honey used for the fried version while the chicken marinates, or use the heat-adjustment section for a milder, hotter or bottled version.

Marinade for Air Fryer or Oven Tenders

For 1½ lb (680 g) chicken, use:

  • 1 cup (240 ml) buttermilk
  • 1 tablespoon (15 ml) cayenne hot sauce
  • 6 g fine sea salt, about 1 teaspoon
  • 1 teaspoon garlic powder
  • ½ teaspoon freshly ground black pepper

Marinate for at least 30 minutes; 2–4 hours is ideal. Unlike the fried version, you do not need to reserve any marinade for the coating.

If you are cooking with dry heat anyway, our honey mustard chicken tenders use a similar panko approach with a tangier finish.

Panko Coating

  • ½ cup (60 g) all-purpose flour
  • 2 large eggs
  • 1½ cups (95 g) panko breadcrumbs
  • 1 tablespoon (15 ml) neutral oil
  • Oil spray or a little extra neutral oil for the basket, rack and any dry crumb patches
  • 6 g fine sea salt, about 1 teaspoon
  • 1 teaspoon garlic powder
  • 1 teaspoon onion powder
  • 1 teaspoon sweet paprika
  • ½ teaspoon freshly ground black pepper
  • ⅛ teaspoon cayenne, optional

Mix the dry seasonings together. Stir roughly one-third into the flour and the rest into the panko, then work the tablespoon of oil through the crumbs.

Air Fryer

  1. Let excess marinade drip from the chicken.
  2. Coat lightly in seasoned flour, dip in beaten egg, then press firmly into the panko.
  3. Preheat the air fryer to 400°F (205°C) if your model benefits from preheating.
  4. Lightly oil the basket and arrange the tenders in one layer with space around them. Mist any visibly dry crumb patches.
  5. Air fry for 8–11 minutes, turning halfway, until golden and 165°F (74°C) in the thickest piece.
  6. Transfer the tenders to a wire rack and rest for 2–3 minutes, until the initial steam has eased. Drizzle with warm hot honey just before serving.
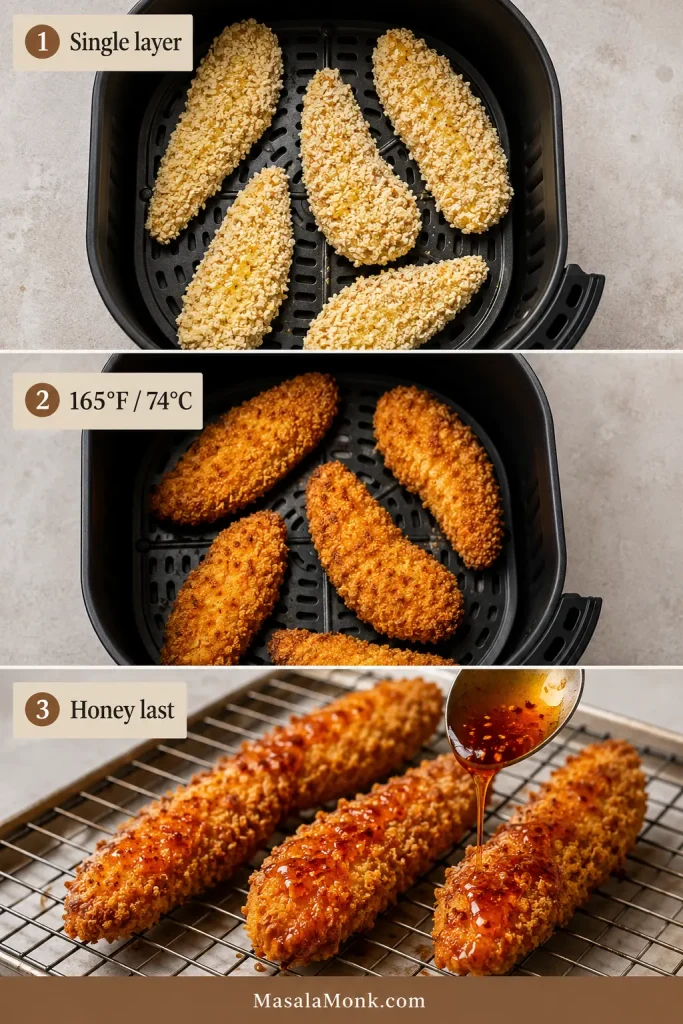
Three-stage air-fryer guide showing spaced panko chicken tenders, cooked tenders at 165°F, and hot honey added after cooking.

Later batches may finish a little sooner once the air fryer is thoroughly hot.

Oven

  1. Heat the oven to 425°F (220°C).
  2. Set a lightly greased wire rack over a rimmed baking sheet.
  3. Bread the chicken with the panko mixture and arrange the pieces in one layer. Mist any dry-looking crumb patches.
  4. Bake for 14–18 minutes, depending on thickness, until golden and 165°F (74°C) inside.
  5. Leave the tenders on the rack for 2–3 minutes, until the initial steam has eased, then drizzle with warm hot honey.
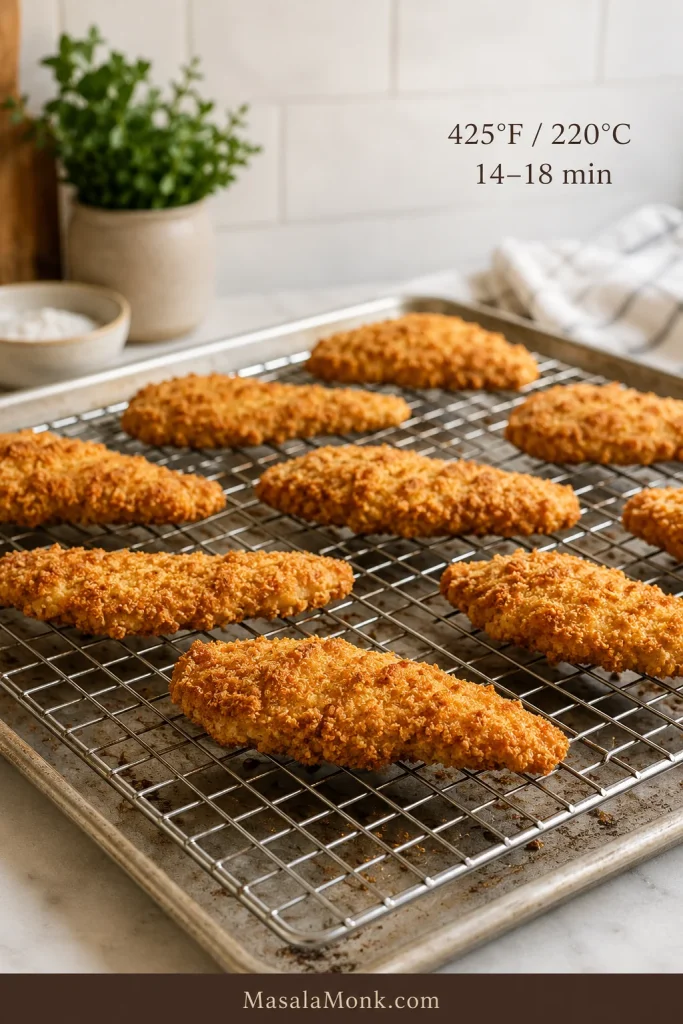
Golden panko-coated chicken tenders spaced on a raised wire rack over a rimmed baking sheet.

Adjust the Hot Honey: Mild, Medium or Hot

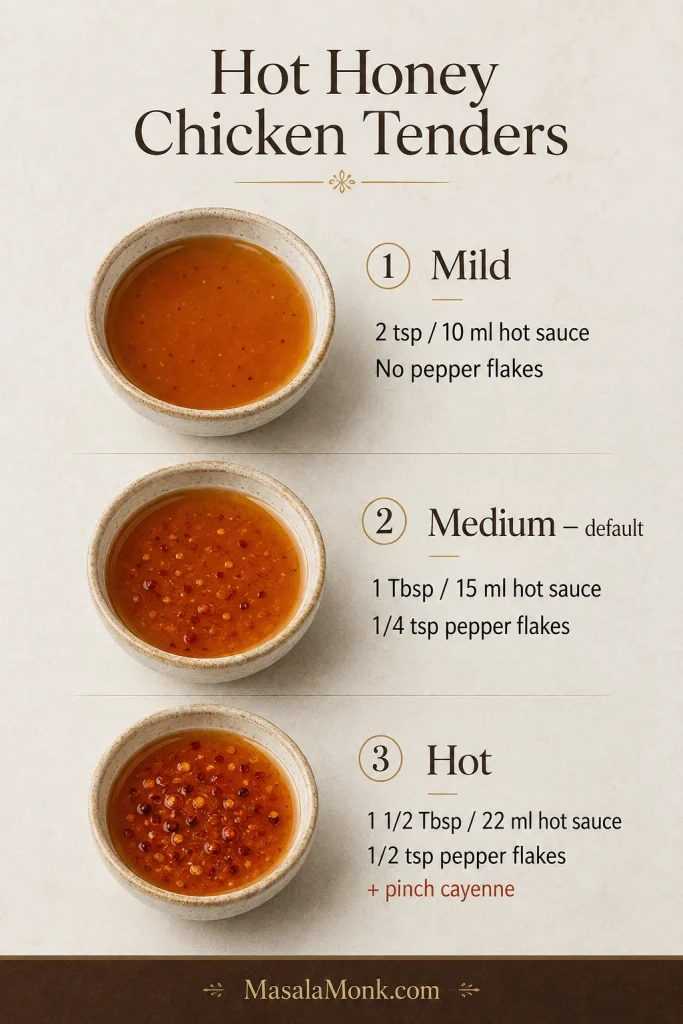
The recipe is medium as written. Keep the ½ cup (170 g) honey, teaspoon of acid and pinch of salt the same, then choose the heat level below.

Heat levelUse this
Mild2 teaspoons (10 ml) cayenne hot sauce; no pepper flakes
Medium — default1 tablespoon (15 ml) cayenne hot sauce + ¼ teaspoon red pepper flakes
Hot1½ tablespoons (22 ml) cayenne hot sauce + ½ teaspoon red pepper flakes + a small optional pinch of cayenne
Three bowls of hot honey labeled Mild, Medium default, and Hot with increasing hot sauce and pepper flakes.

Taste the sauce warm before adding more heat; hot sauces and pepper flakes vary quite a bit.

One batch can easily cover two heat preferences. Divide the warm honey between two bowls and increase the chili in only one; there is no need to make the fried chicken itself aggressively spicy.

Butter is optional. One tablespoon (14 g) makes the glaze richer and slightly softens the heat; keep the sauce over low heat so it stays smooth.

How Much Hot Honey Do You Need?

  • Drizzle: start with ¼ cup (60 ml)
  • Brush: use roughly ⅓ cup (80 ml)
  • Toss: use most or all of the basic sauce batch

Make 1½ batches when you want heavily glazed chicken and extra sauce at the table. The sauce should be warm enough to fall in ribbons, but not thin or watery.
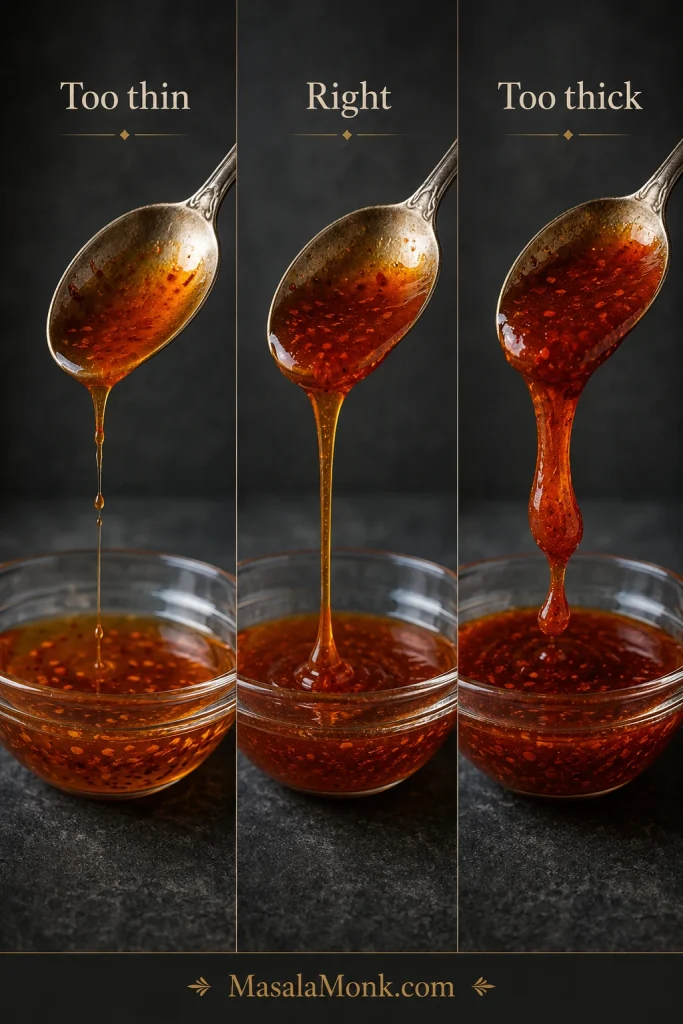
Three spoons of hot honey labeled Too thin, Right, and Too thick, showing progressively thicker dripping consistencies.

Already have bottled hot honey? Start with ½ cup (120 ml). A few drops of vinegar or lemon juice can sharpen it if the sweetness feels flat.

For more variations on the sauce itself, see our hot honey sauce recipe.

What Went Wrong?

If a batch goes wrong, do not change five things at once. Start with what you can see; the crust, color and oil usually point toward the problem.

Breading and Frying Problems

What you seeWhat it means and what to change
Breading falls offToo much marinade, weak pressing or too little resting time. Let excess drip, press firmly and give the coating time to settle.
Breading is thick and hardThe wet flour pieces are too large or the dredge is too heavy. Use smaller flakes and one substantial coating.
Chicken is pale and greasyThe oil spent too much of the batch too cool. Fry fewer pieces and let it recover before reloading.
Outside is dark, center underdoneThe oil is too hot or the chicken is too thick. Lower the heat and make the pieces more even.
Chicken is dryIt cooked too long. Start checking the largest piece sooner.
Bottom turns softSteam is trapped underneath. Move cooked tenders to a wire rack in one layer.
Later batches taste bitterLoose breading has burned in the oil. Skim out dark crumbs between batches.

A pot that starts at 360°F but spends most of the batch near 300°F is still frying too cool. What the thermometer does after the chicken enters matters more than the starting number alone.

Hot Honey and Crispness Problems

What you seeWhat it means and what to change
Sauce softens the crust quicklyThe chicken was sauced too soon or too heavily. Give it a brief rack rest and start with a drizzle.
Hot honey is too sweet or too hotToo sweet: add a little acid, salt and measured heat. Too hot: stir in more honey; butter can soften the heat too.
Hot honey looks oily or splitButter-containing sauce may have overheated. Take it off the heat, whisk gently and rewarm only over low heat.
Sauce runs offIt is too hot or thin. Let it cool until it falls from the spoon in ribbons.

If buttered hot honey turns oily or streaky: take it off the heat, whisk gently and rewarm only over low heat. The finished sauce should look smooth and cohesive rather than separated.
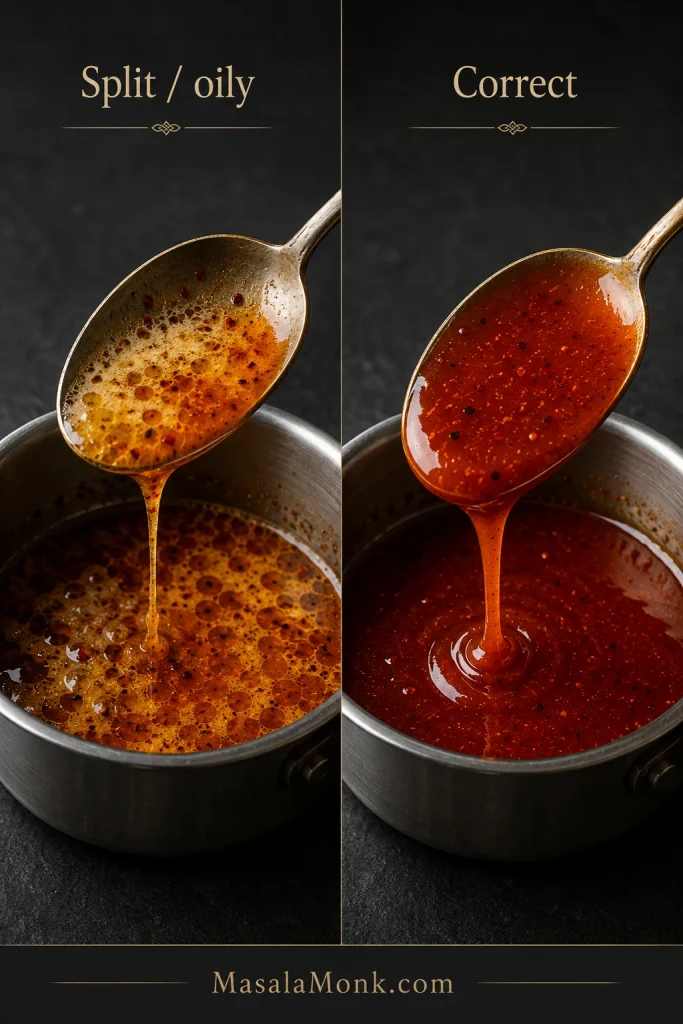
Two-panel comparison of separated oily hot honey and smooth, cohesive pepper-flecked hot honey.

Correct one thing at a time while the sauce is warm: use a little acid, salt and measured heat when it is too sweet; add more honey when it is too hot. If someone at the table simply wants a gentler creamy option, our easy yum yum sauce gives them another path without changing the whole batch.
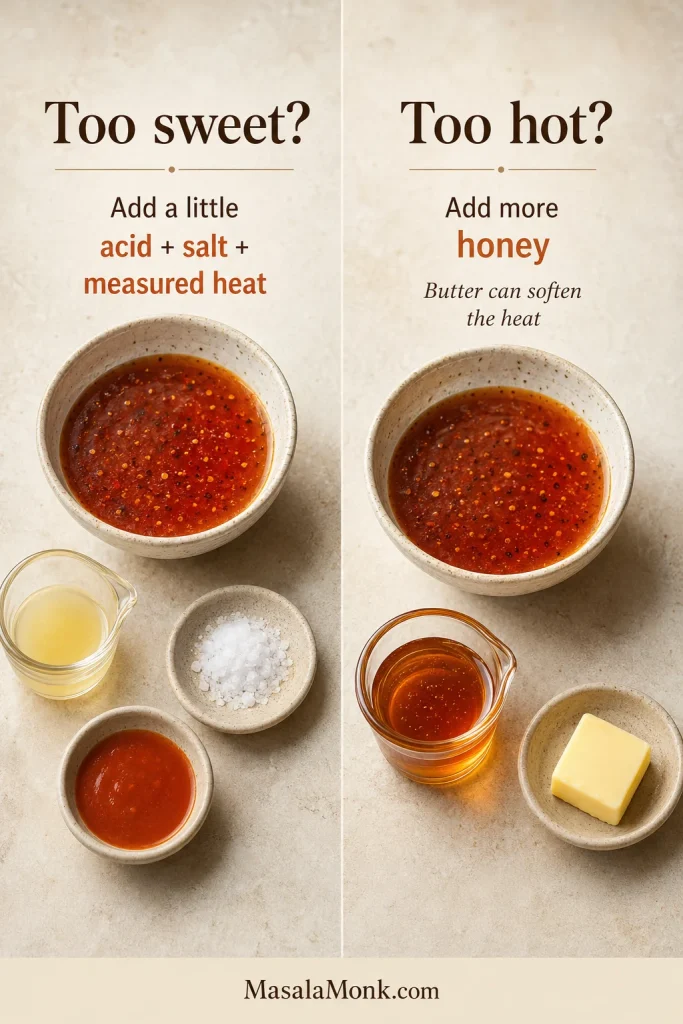
Two-panel troubleshooting guide showing acid, salt, and hot sauce for overly sweet hot honey and honey with optional butter for overly hot sauce.

Make Ahead, Store and Reheat

Hot honey: Make it up to 1 week ahead, refrigerate it in a covered container and warm it gently before serving. Low heat is especially important when butter is included.

Chicken: Marinate 2–4 hours ahead when convenient. Bread it close to frying; the short 10-minute rest helps the coating settle, while a long breaded hold works against that rough, crisp texture.

If coleslaw is part of dinner, this is a good moment to make it too. Our creamy coleslaw recipe can chill while the chicken marinates.

Holding fresh batches: Keep the tenders unsauced on their rack in a 200°F (95°C) oven for up to 30 minutes while you finish frying. A short hold works, but straight from frying is still best.

Leftovers: Refrigerate cooked chicken for 3–4 days, with extra hot honey stored separately whenever possible.

Freezing: Freeze cooked tenders unsauced. For best quality, use them within roughly 1–3 months, then re-crisp before adding fresh hot honey.

  • Air fryer: 350°F (175°C) for 4–6 minutes
  • Oven: 375°F (190°C) on a rack for 8–12 minutes
  • Microwave: quickest, but the coating will be softer

Whichever method you choose, reheat the center of the chicken to 165°F (74°C), then add fresh hot honey.
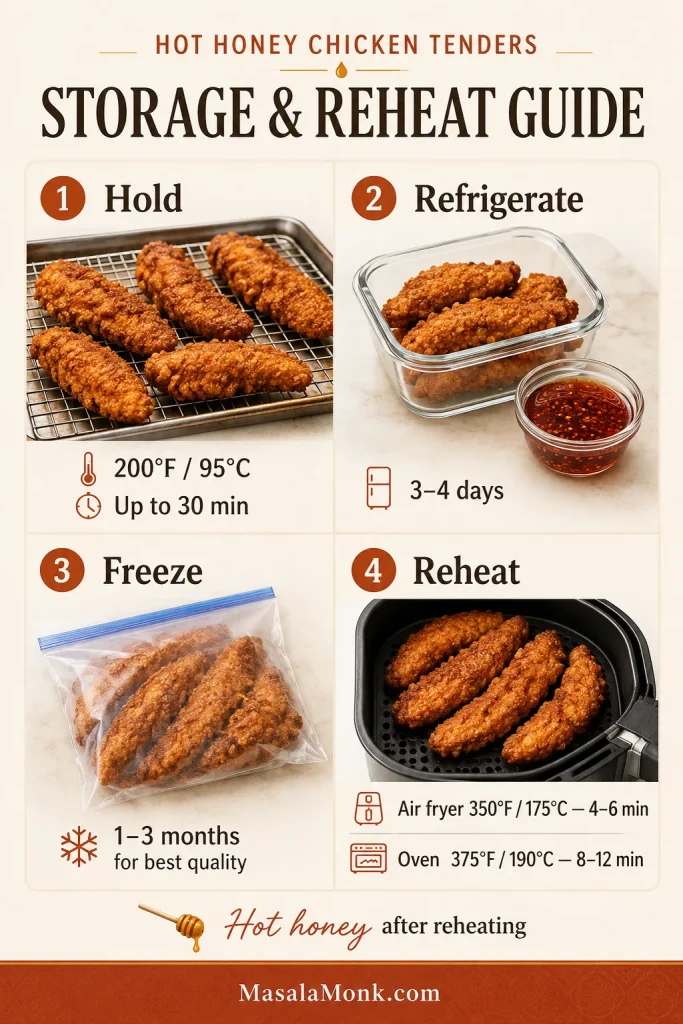
Four-part guide showing fried chicken held on a rack, refrigerated with sauce separate, frozen, and reheated in an air fryer.

What to Serve With Hot Honey Chicken Tenders

You do not need an elaborate plate. Something cold and crunchy, creamy, tart or pickled is usually enough to balance rich fried chicken and sticky sweet heat.
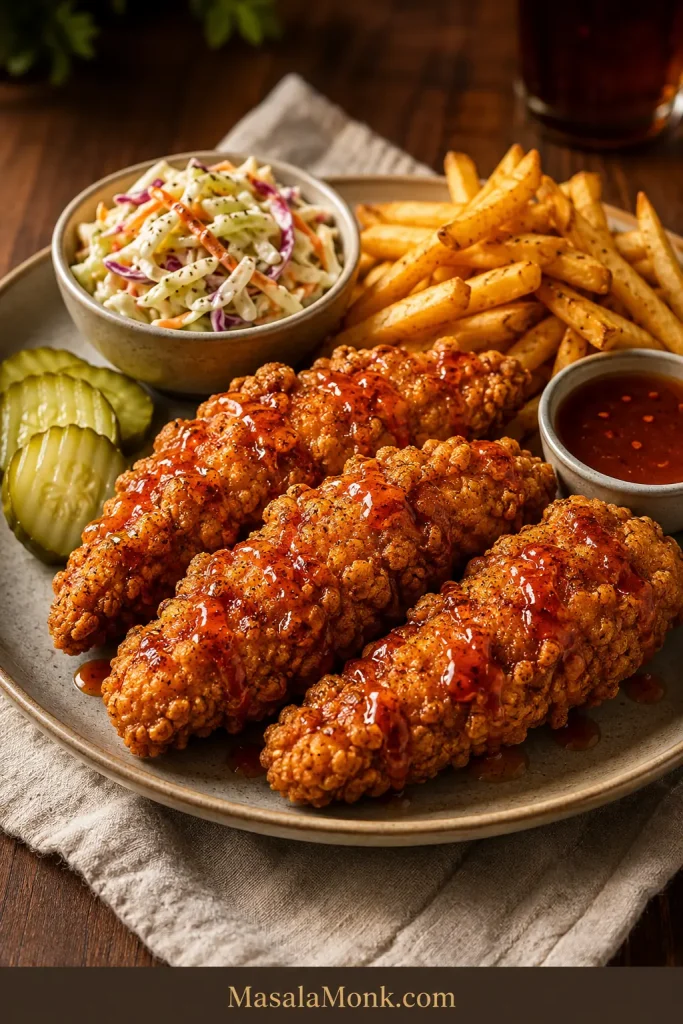
Plate of hot honey chicken tenders with fries, creamy coleslaw, pickle slices, and a small bowl of extra sauce.
  • Classic and crunchy: Add crispy homemade French fries, slaw and plenty of pickles.
  • Cold and sharp: A crisp cucumber salad with vinegar and dill cuts through both the frying oil and the honey beautifully.
  • Sandwich night: Add slaw, pickles and a little hot honey to a toasted bun. Our chicken sandwich recipes have more ideas for building around crisp chicken.
  • Sweet-savory: Pile the tenders onto waffles and drizzle the honey over both while leaving plenty of fried ridges exposed.
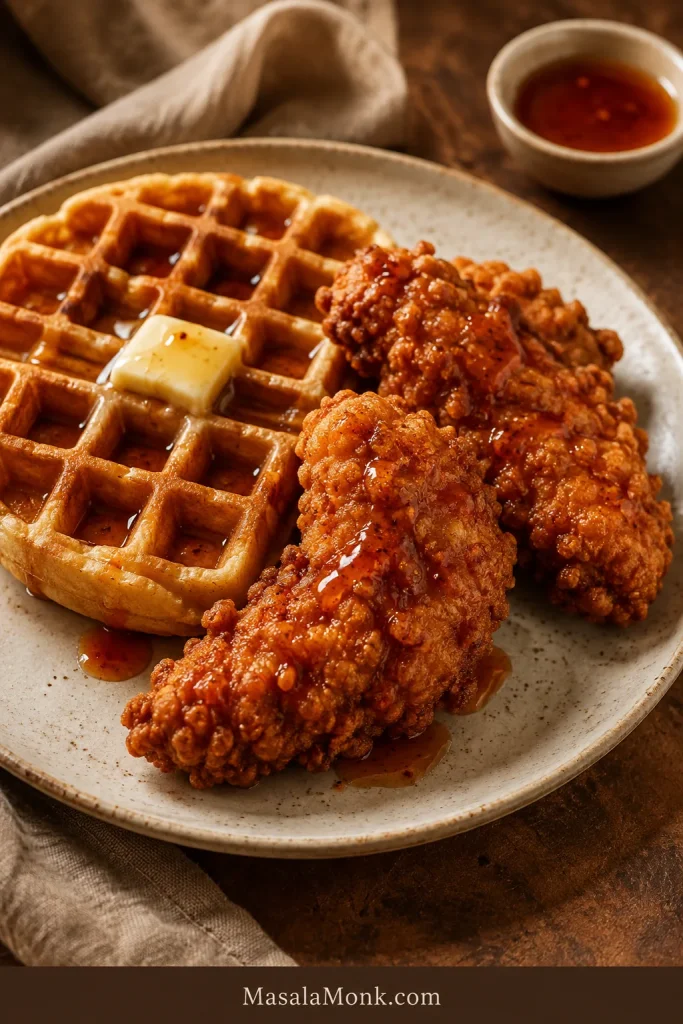
Hot honey chicken tenders beside a golden waffle with butter, thin hot-honey drizzle, and a small bowl of extra sauce.

The best plate of these still lets you see rough dark-gold ridges beneath thin glossy streaks of honey. The first bite should give you crunch and juicy chicken, then sweetness, then the chili catching up a moment later.

If you make them, tell us whether you used tenderloins or breast strips, how you cooked them, and whether you drizzled, brushed or tossed the hot honey. Your notes may help the next person standing over a batch of chicken wondering whether theirs looks right.
Posted on Leave a comment

Hot Honey Sauce Recipe: Easy, Spicy and Ready in 2 Minutes

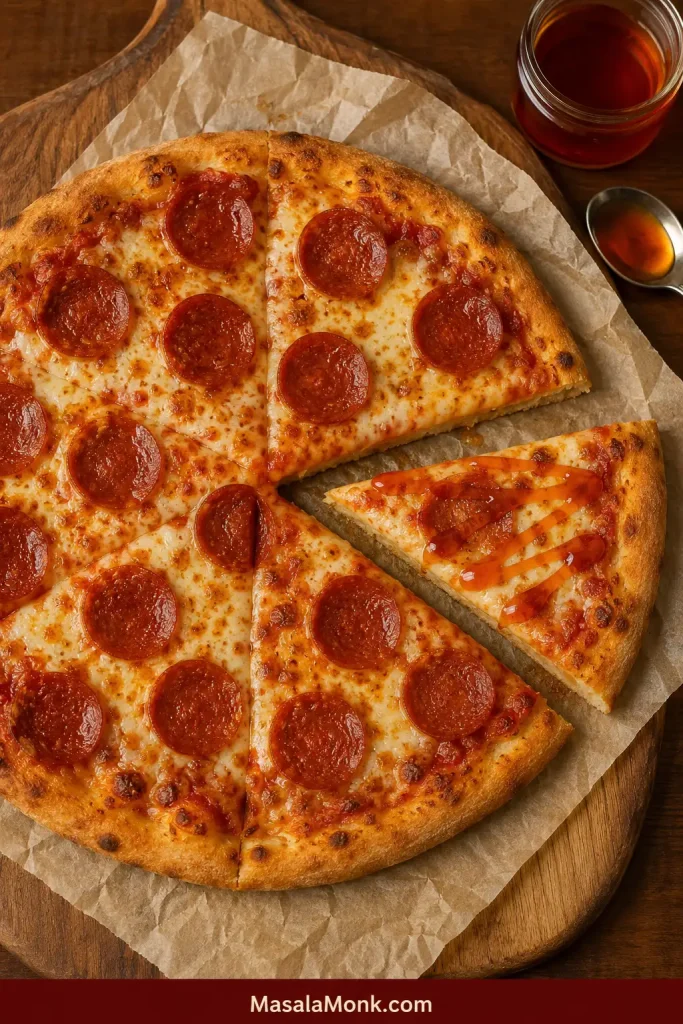
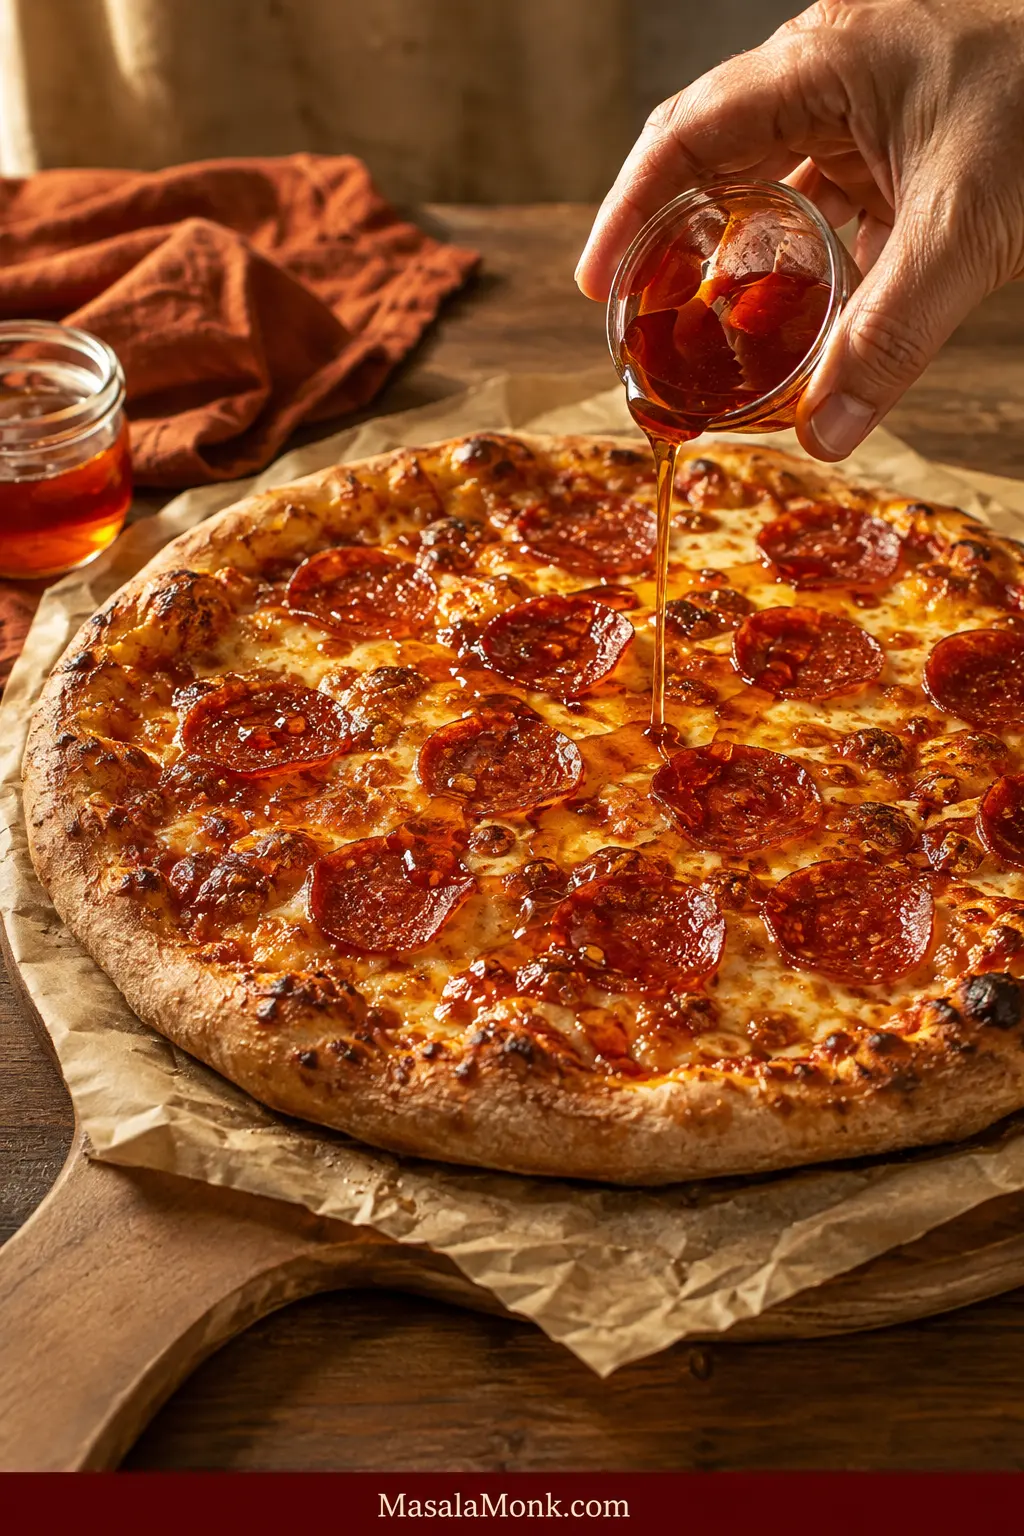
A thin stream of glossy amber-red hot honey being drizzled over a freshly baked pepperoni pizza with browned crust and melted cheese.

Hot honey sauce is what you make when plain honey feels too sweet, ordinary hot sauce feels too sharp and the food in front of you needs both. It gives pizza a glossy finishing drizzle, wakes up chicken tenders, clings to crisp wings and turns a warm biscuit into something worth slowing down for.

In its simplest form, hot honey is a two-ingredient, no-cook mixture of honey and hot sauce. A small pinch of salt can sharpen the balance when the sauce needs it. Whisk everything together in about two minutes and use it immediately.

You can also infuse honey with dried chilli for a clearer pepper flavour or add butter for a richer glaze. They share the same name, but they do different jobs: one drizzles, one tastes clearly of dried chilli and one stays where it lands.

Quick formula

Hot Honey Sauce at a Glance

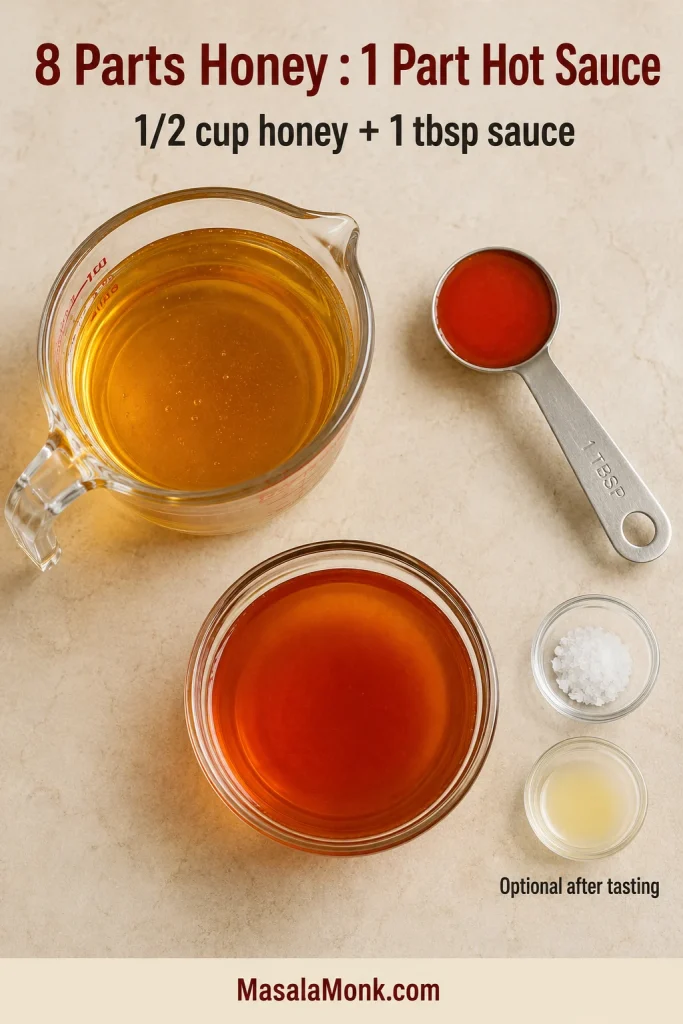
Start with an 8:1 ratio of honey to thin cayenne-style hot sauce: ½ cup / 170 g honey to 1 tablespoon / 15 ml hot sauce for the full batch. Add one small pinch of salt only if the sauce needs it.

Cayenne raises the heat without adding more liquid. If the sweetness feels heavy, stir in a little vinegar or lemon juice. Honey and hot sauce may already be enough.

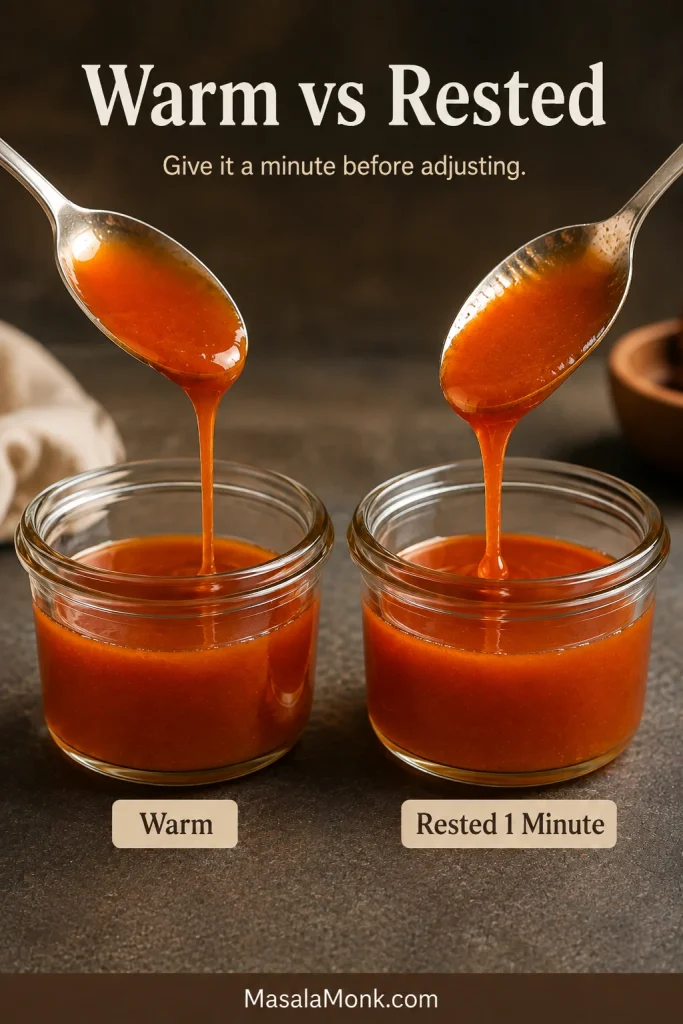
Warm hot honey always looks looser. Give it a minute before deciding that it needs more honey.

Overhead arrangement of half a cup of honey, one tablespoon of hot sauce and a bowl of finished hot honey illustrating an eight-to-one ratio.
Scale the 8:1 ratio easily: 8 teaspoons honey to 1 teaspoon thin hot sauce makes a small test batch.

Choose Your Hot Honey Sauce

The no-cook sauce is the everyday choice. For a more distinct pepper flavour, use the dried-chilli infusion. Butter turns hot honey into a glaze that coats wings, chicken or salmon.

Swipe or scroll sideways to see the full table.

MethodConsistencyHands-onTotalBest for
Quick hot honey sauceSmooth and pourable2 minutes2 minutesPizza, chicken, sandwiches and dipping
Chilli-infused hot honeyClear, glossy and lightly texturedAbout 5 minutesAbout 10–20 minutesPizza, biscuits, cheese and fried foods
Buttery hot honey glazeRich, glossy and clingyAbout 5 minutesAbout 5–7 minutesWings, tenders, salmon and vegetables
Three hot honey styles side by side: smooth translucent drizzle, dried-chilli-infused honey with flakes, and a thicker buttery glaze.
Choose by how the sauce should behave: smooth hot honey drizzles, butter glaze clings, and dried-chilli infusion leaves visible chilli in the sauce.

Make this first

Quick No-Cook Hot Honey Sauce Recipe

This is the default sauce: honey-led, clearly spicy and fluid enough to drizzle while still leaving a light coating on chicken, bread or pizza crust.

Time
2 minutes

Yield
About 9 tbsp / 135 ml

Serving size
1 tbsp / 15 ml

Texture
Glossy and pourable

Ingredients

Core ingredients

  • ½ cup runny honey — 4 fl oz / 120 ml; about 6 oz / 170 g by weight
  • 1 tablespoon thin, medium-heat cayenne-style hot sauce — ½ fl oz / 15 ml

Optional after tasting

  • One small pinch fine salt — useful when the hot sauce is not already salty
  • Up to 1 teaspoon apple cider vinegar or lemon juice — added ¼ teaspoon at a time
  • ⅛–¼ teaspoon cayenne pepper for extra heat

Method

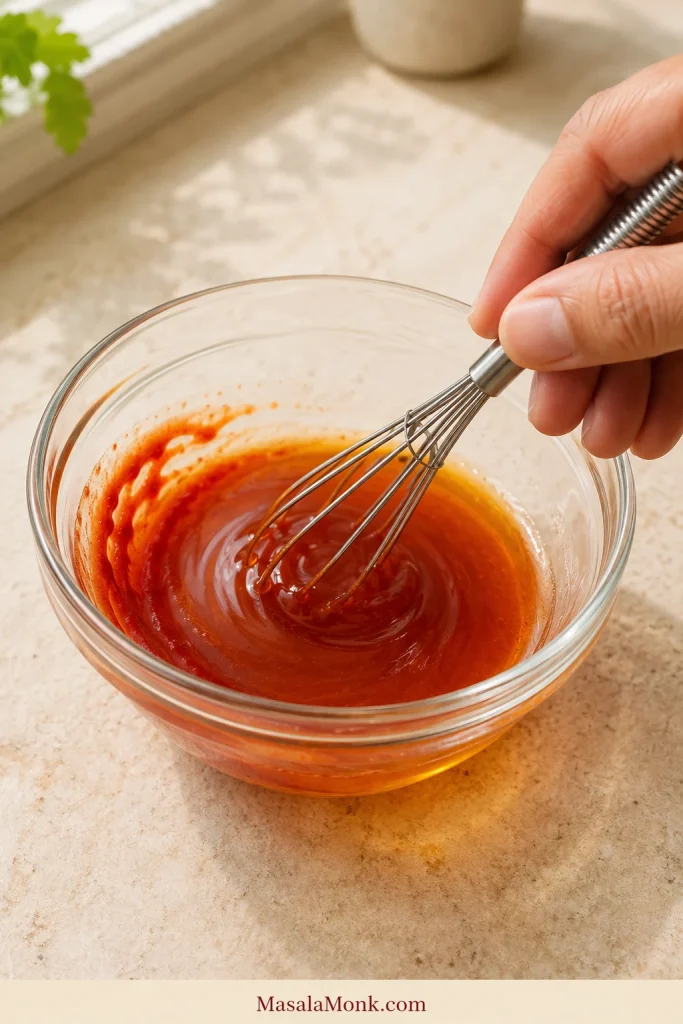
  1. Whisk. Combine the honey and hot sauce in a small bowl until the colour is even and no red streaks remain. Stir in the salt if needed.
  2. Taste. The honey should come through first, then give way to the hot sauce’s tang and chilli warmth.
  3. Adjust only if needed. Cayenne makes it hotter. Vinegar or lemon juice lightens sweetness that lingers too heavily.
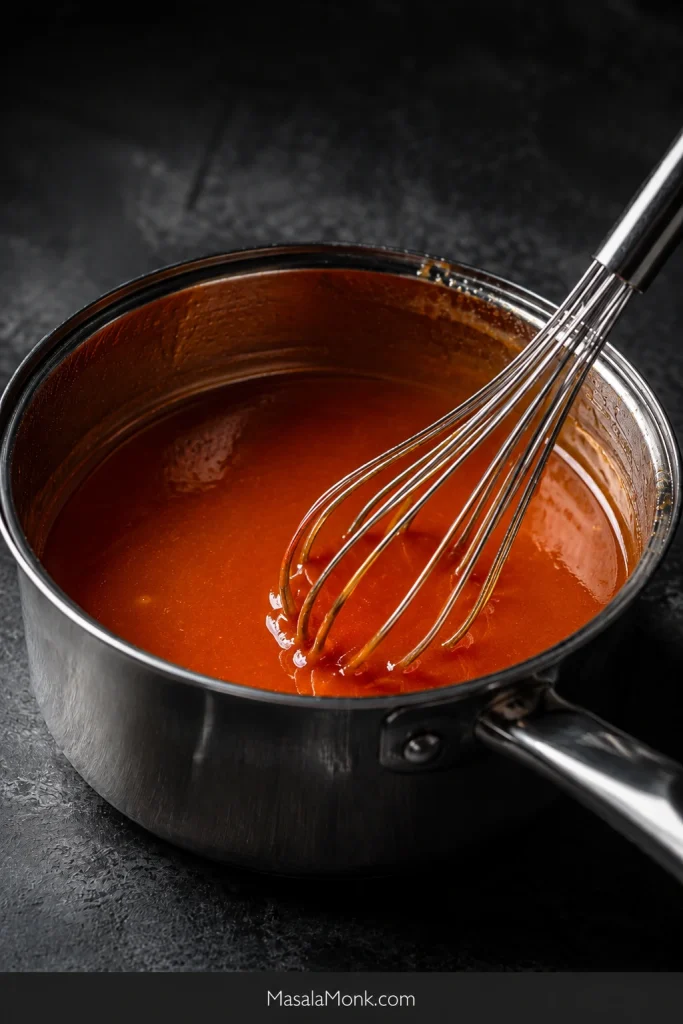
A hand whisking honey and hot sauce in a clear glass bowl while a few darker red streaks remain around the edge.
Sweep the whisk around the bowl edge before stopping; concentrated hot sauce can hide along the rim.

For a finer drizzle: warm the sauce over low heat for 30–60 seconds or microwave it in a microwave-safe bowl for 10 seconds at a time. Stop as soon as the honey loosens. It does not need to bubble.

That is it—no simmering, steeping or special chilli required.

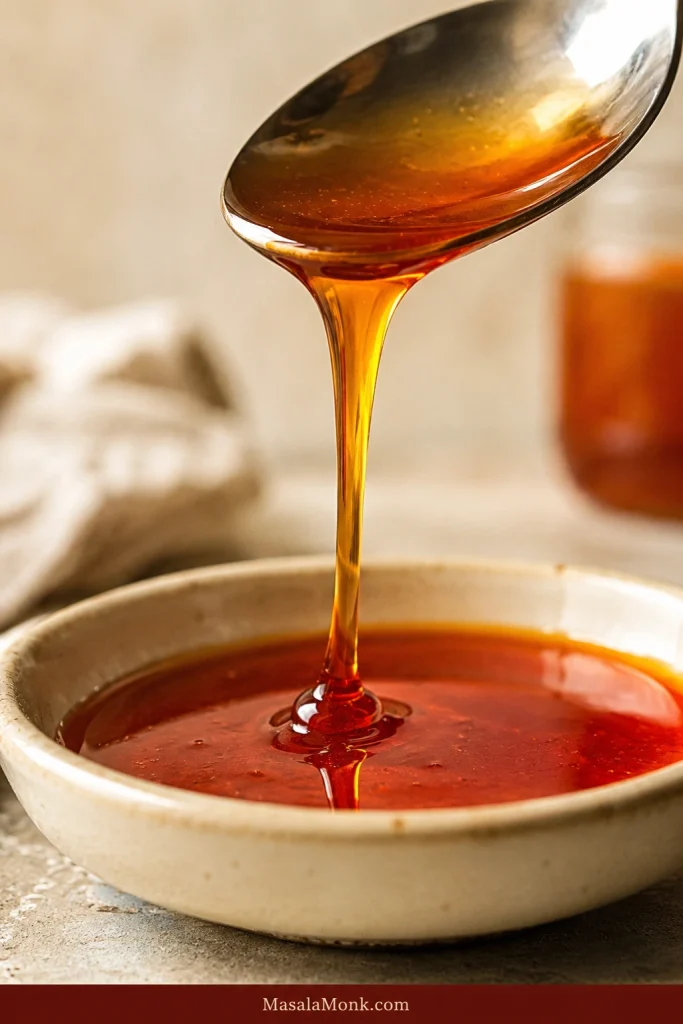
What success looks like: the sauce falls from a spoon in a smooth ribbon and leaves a light glossy film behind. Honey should arrive first and chilli should follow. If the first taste already works, leave it alone.

Glossy amber-red hot honey falling from a silver spoon in one smooth ribbon into a shallow cream-coloured dish.
A good drizzle stays continuous for a moment, letting you draw thin lines instead of blobs.

Recipe Notes

  • Taste your hot sauce first: cayenne sauce, Sriracha and concentrated habanero sauce will not produce the same flavour or flow.
  • Sauce crisp food last: the longer fried food sits under honey, the softer its coating becomes.

How to Use Hot Honey Sauce

A light coating is usually enough. Taste the food before pouring on more.

Brown first; glaze late. Crisp food gets the sauce shortly before serving.

Swipe or scroll sideways to see the full table.

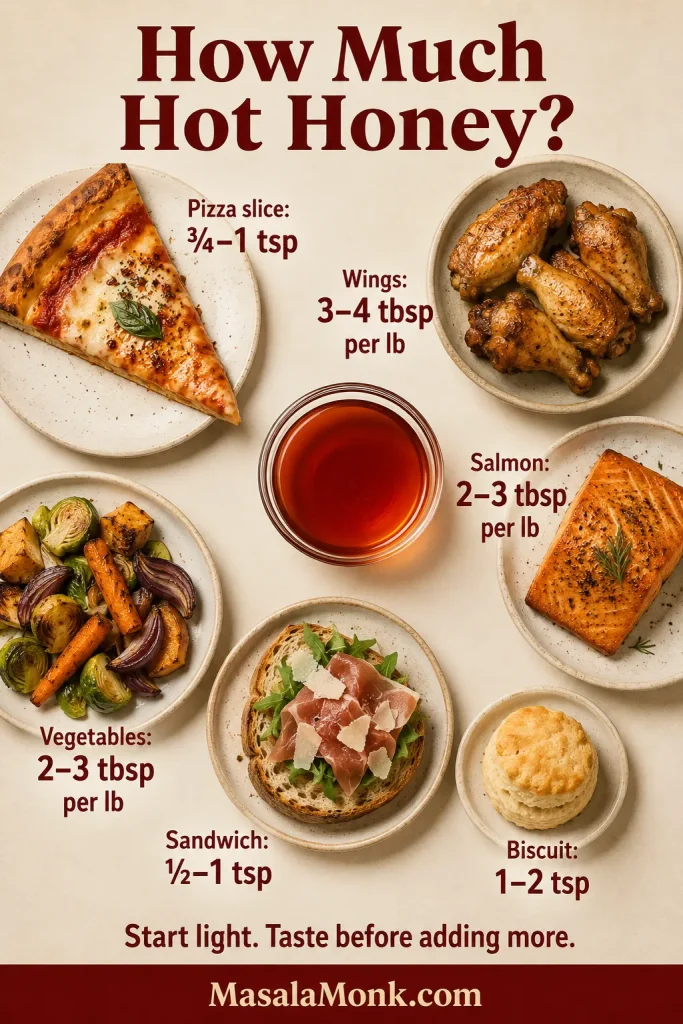
FoodStarting amountWhen to add it
12-inch pizza2–3 tbsp / 30–45 mlImmediately after baking
One pizza slice¾–1 tsp / 4–5 mlAfter baking
1 lb / 450 g wings3–4 tbsp / 45–60 mlToss after cooking
1 lb / 450 g tenders3–4 tbsp / 45–60 mlToss or drizzle shortly before serving
1 lb / 450 g salmon2–3 tbsp / 30–45 mlBrush on near the end
1 lb / 450 g vegetables2–3 tbsp / 30–45 mlAdd near the end or after roasting
Four sandwiches2–4 tsp / 10–20 mlDrizzle during assembly
Biscuits or cornbread1–2 tsp per servingAdd at the table
Overhead serving guide with pizza, wings, salmon, roasted vegetables, a sandwich and a biscuit arranged around hot honey with suggested portions.
Use the guide as a starting range; even distribution often gives enough sweet heat without more sauce.

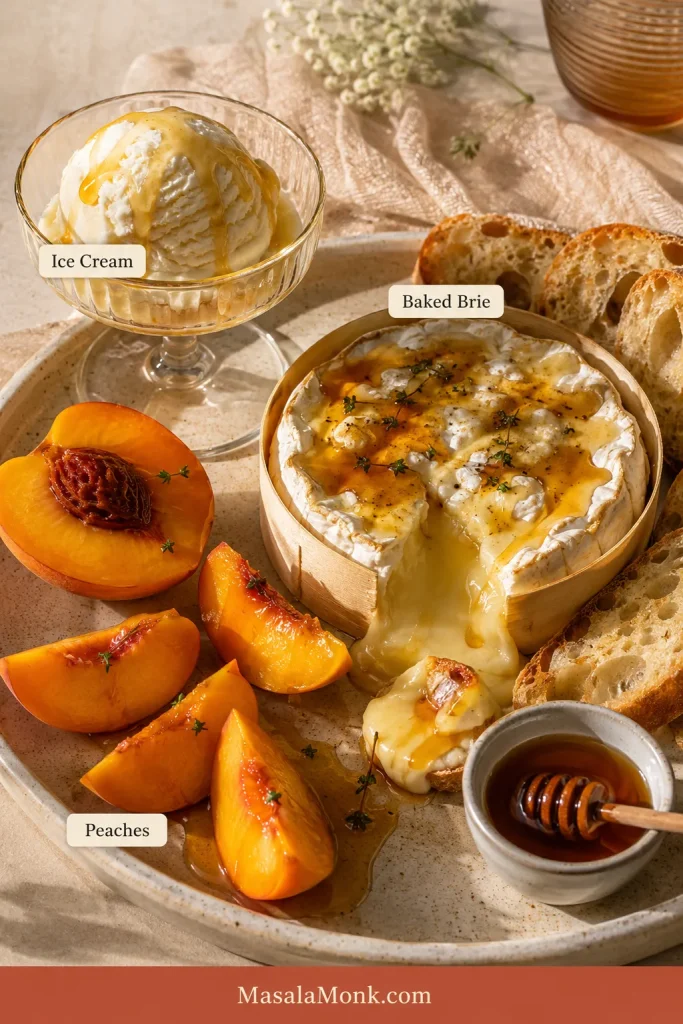
For a sweeter contrast, try a teaspoon over vanilla ice cream, baked brie or ripe peaches. Cold dairy softens the heat; warm cheese and fruit brighten the sweetness.

Hot honey drizzled over vanilla ice cream, baked brie and ripe peaches in one bright editorial food arrangement.
For desserts, drizzle at the table so the contrast stays distinct against cold dairy, warm cheese or fruit.

Hot Honey for Pizza

Hot honey belongs on the pizza after it leaves the oven. Residual heat loosens the drizzle without baking it into the cheese.

Not sure whether it belongs there? Drizzle one slice first. The cheese tastes richer, salty toppings become sharper and the crust suddenly feels worth dipping. Then decide whether the rest needs it.

Overhead pepperoni pizza with one slice pulled slightly away and drizzled with hot honey while the rest of the pizza remains undrizzled.
Test a slice with representative toppings; extra cheese, cured meat or pickles can change how much heat the pizza needs.

Choose the base from these pizza sauce recipes, then finish with a light drizzle. Too much makes the centre wet and sweet.

Hot Honey for Wings and Chicken Tenders

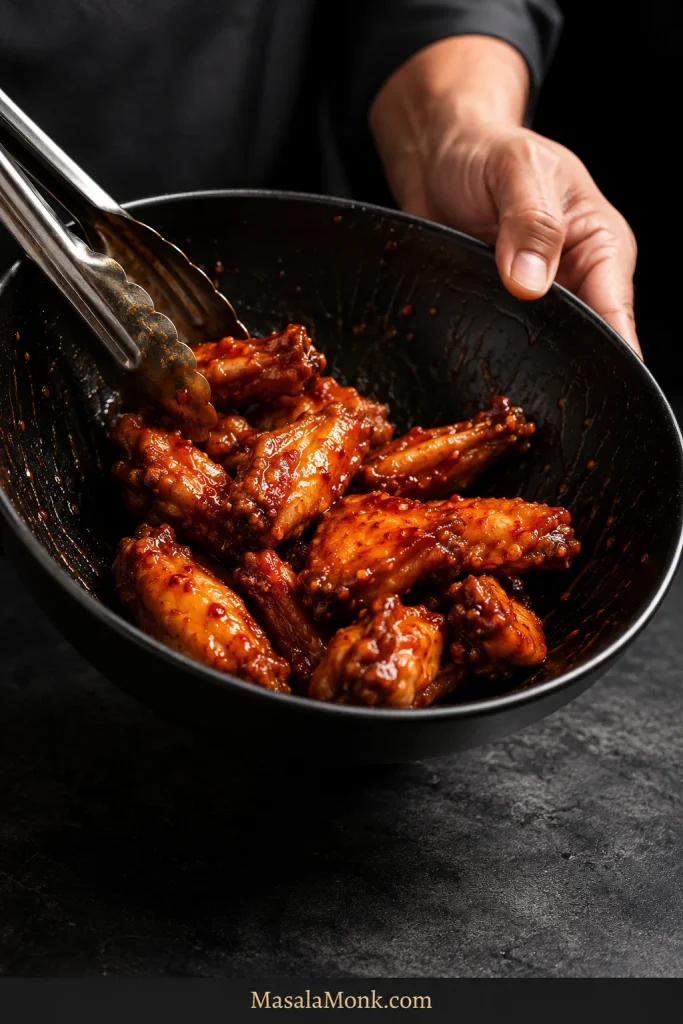
Cook the chicken until crisp, then add the sauce shortly before serving.

Crisp chicken wings being tossed in a dark bowl with a thin glossy hot honey coating and no visible pool of sauce at the bottom.
Use a wide bowl and toss rather than stir so a smaller amount coats the wings evenly.

Serve honey mustard chicken tenders with hot honey on the side so the crumb stays crisp until each bite is dipped.

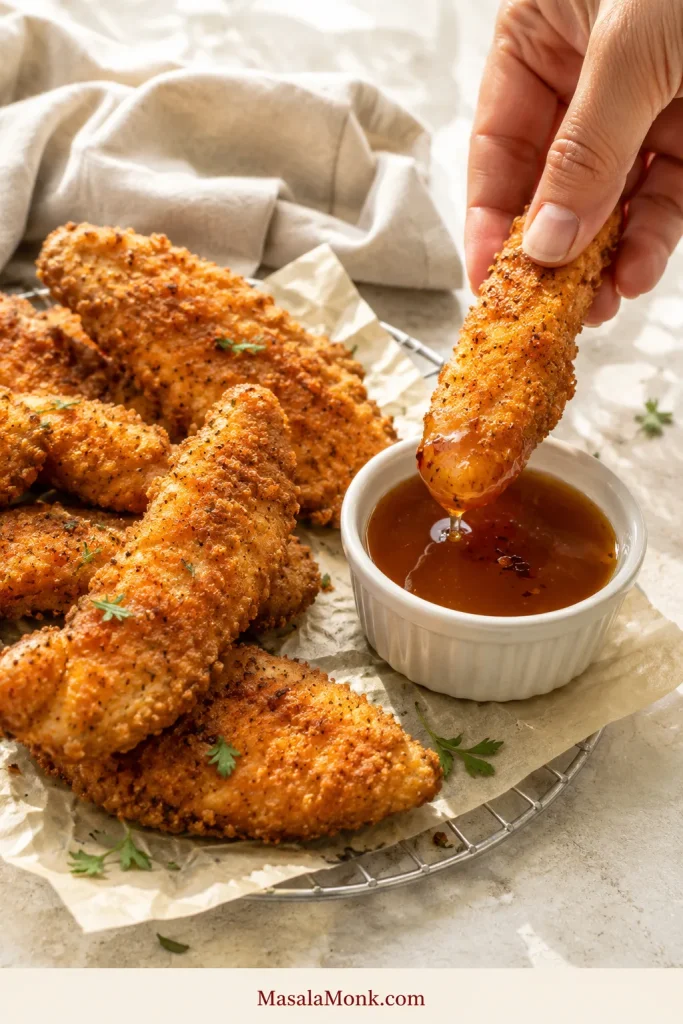
A crisp chicken tender being dipped into a small ramekin of smooth hot honey while the remaining tenders stay unsauced.
Dip one edge to keep sauce and crunch in the same bite; a full dunk softens more coating.

Crisp food should not sit in sauce while everyone slowly finds their way to the table.

Hot Honey Glaze for Salmon

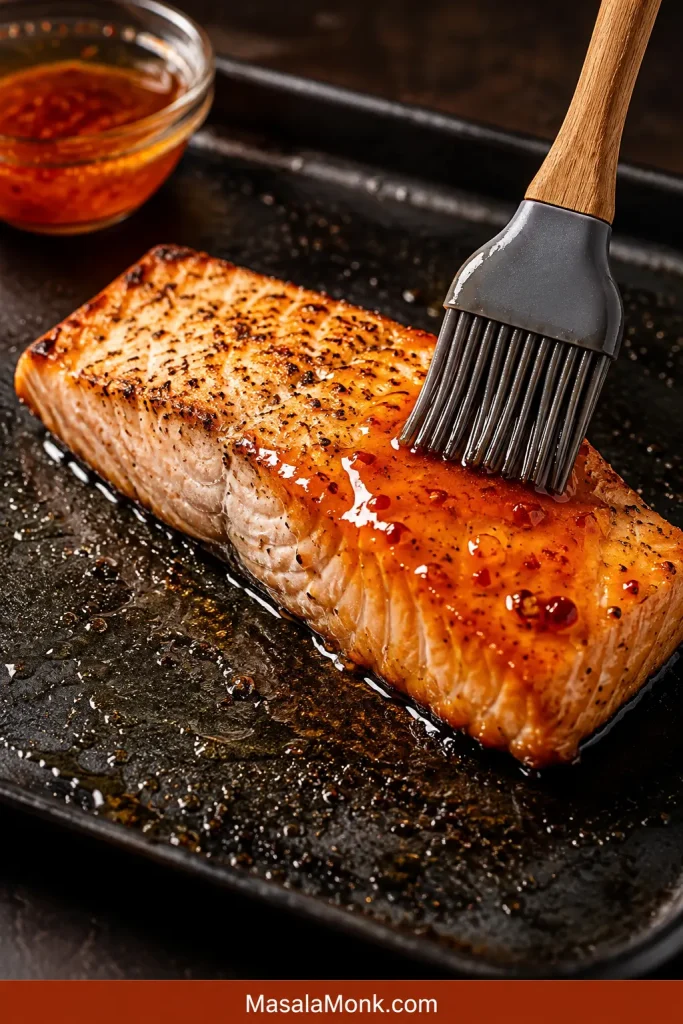
Brush the glaze on once the salmon is nearly opaque and beginning to flake. In this honey garlic salmon, the fish browns before the honey sauce enters the pan.

A silicone brush applying a thin glossy hot honey glaze to part of an already browned salmon fillet.
Brush salmon with a thin film, not a puddle; it clings evenly and is easy to build.

Hot Honey on Sandwiches

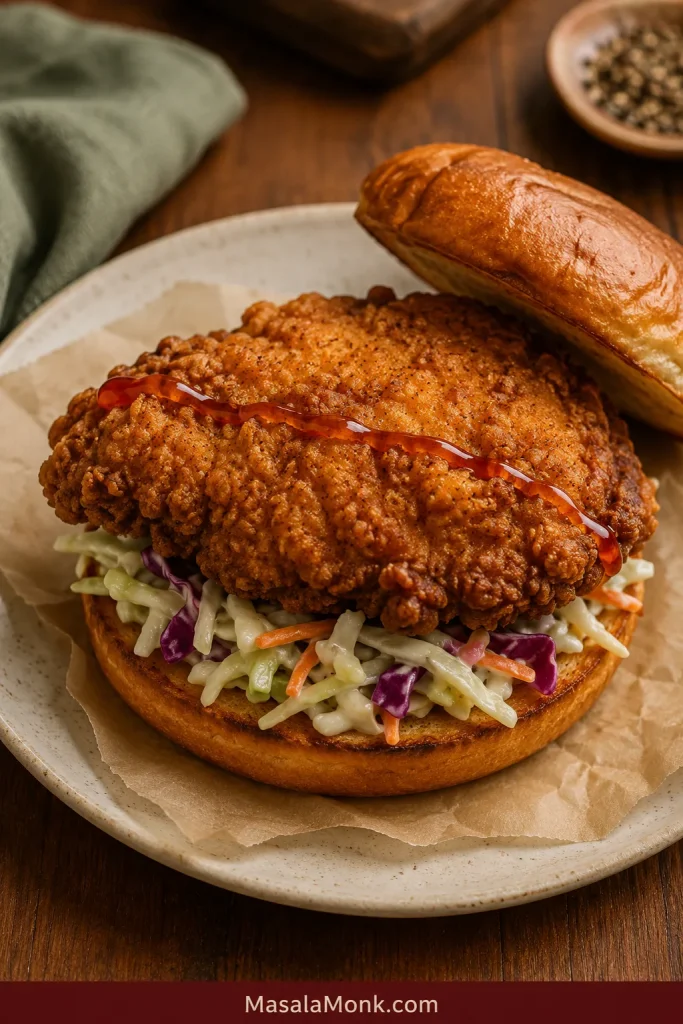
Usually, a thin line across the filling is enough. A heavier pour sinks into the bread and dulls the contrast between crisp, creamy and salty ingredients.

An open crispy chicken sandwich with one thin line of translucent amber-red hot honey across the filling and the top bun set aside.
Put hot honey on the filling rather than the bun so the bread stays drier and the chicken stays crisp.

It works particularly well on the crispy, Buffalo and BBQ options in these chicken sandwich recipes.

Hot Honey on Roasted Vegetables

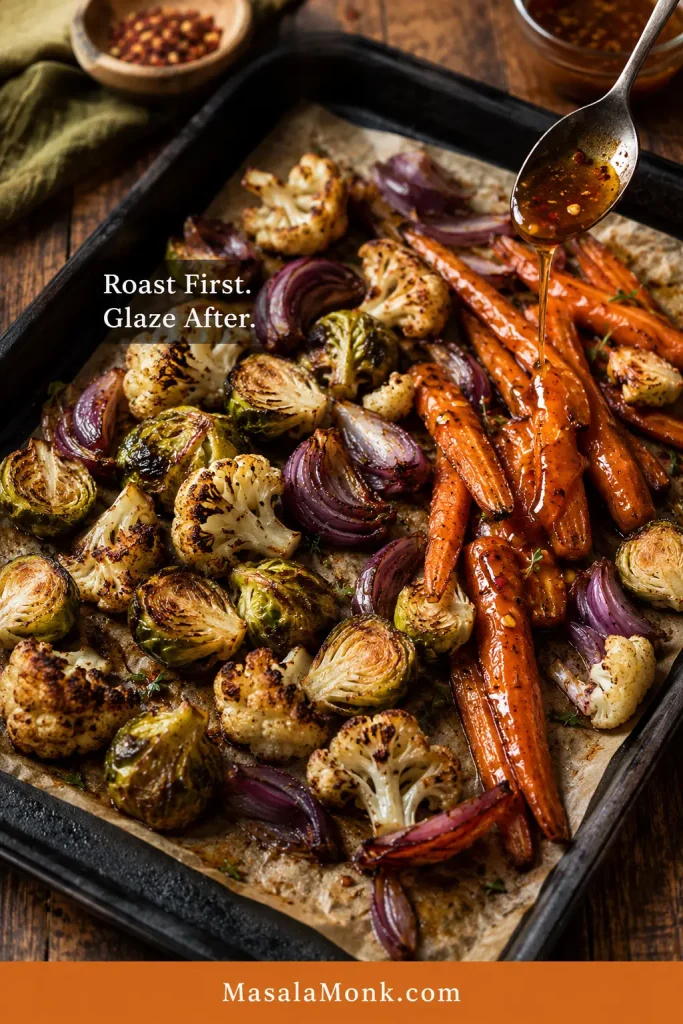
Carrots, sweet potatoes, cauliflower, Brussels sprouts and squash all take hot honey well. Let them brown and become tender before adding it.

These oven roasted carrots show the timing clearly: the vegetables should look roasted before they look glazed.

A spoon adding hot honey to deeply browned roasted carrots, Brussels sprouts, cauliflower and red onion after roasting.
Toss roasted vegetables while the tray is still hot; residual heat helps a little hot honey spread farther.

Hot Honey Ingredients and Substitutions

The bottle changes more than the heat. It can make the sauce sharper, thinner or thicker, sweeter, saltier or more garlicky before you add anything else.

Best Honey for Hot Honey

Ordinary runny honey is the easiest choice. Mild clover or a light, gently flavoured wildflower honey lets the chilli stand out. Darker honey brings more character.

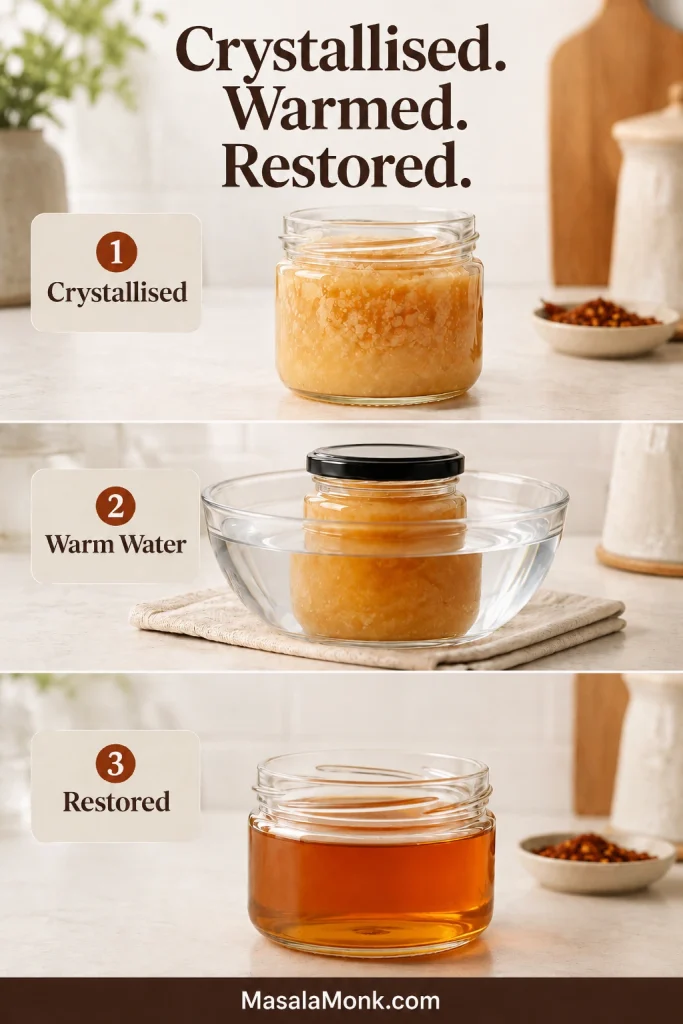
Partially crystallised honey is still fine. Set the tightly closed, heat-safe glass jar in warm—not boiling—water, or heat the measured honey briefly over low heat. Once it flows freely, use it.

Choose the Right Hot Sauce

This recipe is written for a thin, medium-heat cayenne sauce—the familiar kind that pours easily from the bottle.

Swipe or scroll sideways to see the full table.

Hot-sauce styleStart withEffect on the hot honey
Thin cayenne-style sauce1 tbsp / 15 mlModerate acidity and easy pourability
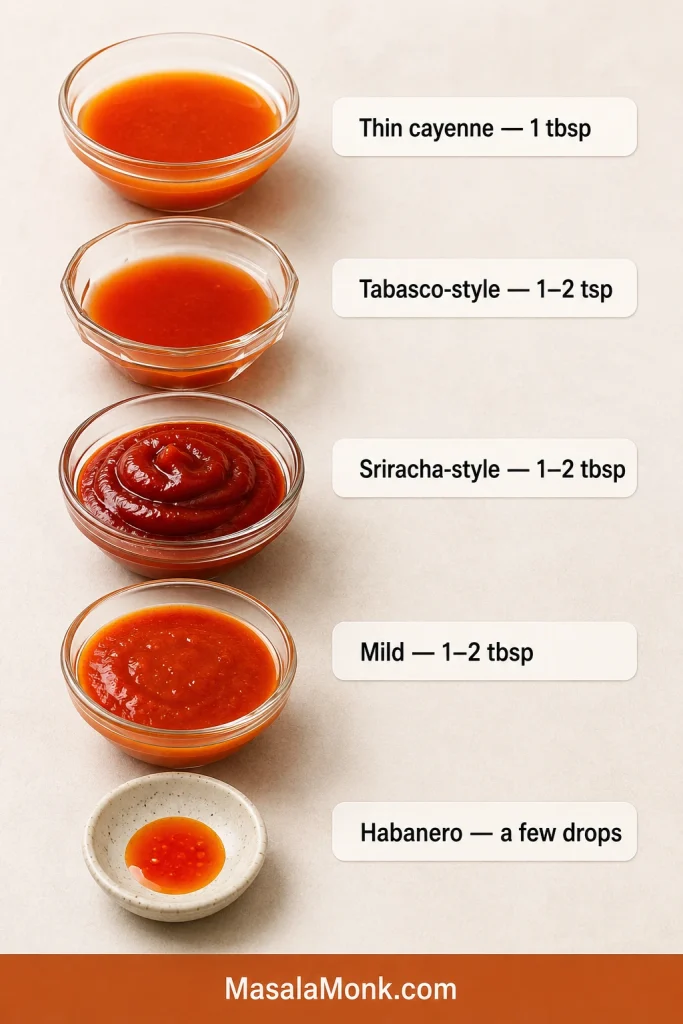
Tabasco-style sauce1–2 tsp / 5–10 mlSharper, thinner and more concentrated
Sriracha1–2 tbsp / 15–30 mlThicker, sweeter and more garlicky
Mild hot sauce1–2 tbsp / 15–30 mlMore tang before strong heat develops
Habanero or super-hot sauceA few dropsStrong heat without noticeably thinning the honey
Five unbranded hot sauce styles with visibly different thicknesses and suggested starting amounts, from thin cayenne sauce to concentrated habanero sauce.
Watch viscosity as well as heat; a thick sauce can alter the drizzle more than a hotter sauce used by the drop.

Fruit-based sauces make the mixture sweeter and more aromatic. Habanero sauces bring sharper, faster heat. The pepper sauce guide compares those styles in more detail.

Cayenne and Dried Chilli Flakes

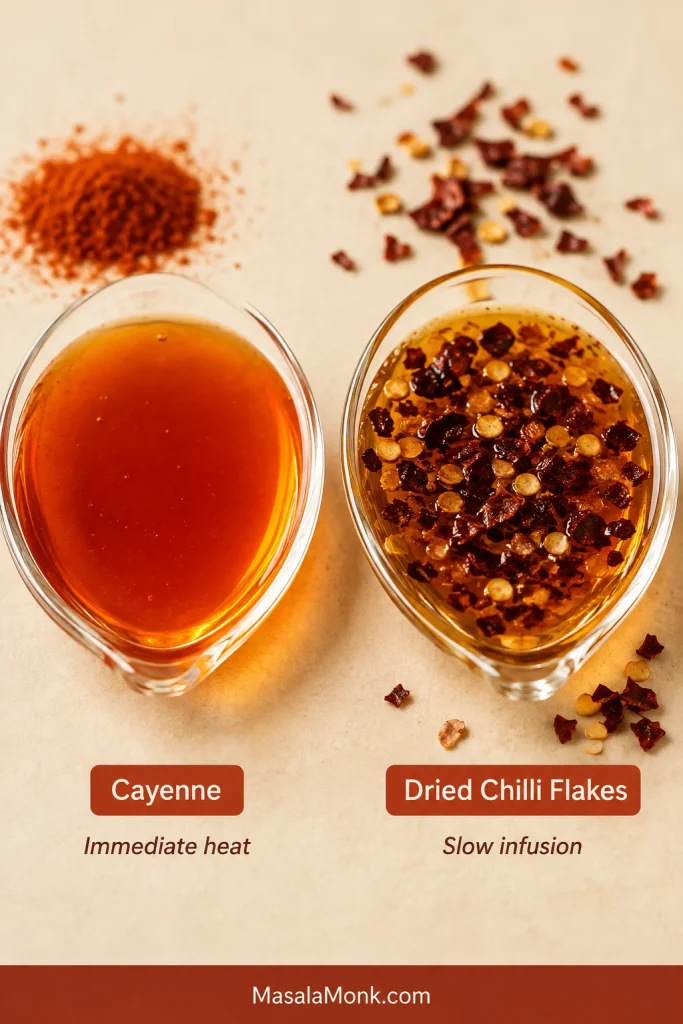
Cayenne gives immediate heat without adding liquid. It is useful when the flavour is right but the sauce needs more fire.

Dried chilli flakes release their warmth more slowly. Leave them in if you are serving the hot honey soon and want the heat to keep building. Strain them out before bottling or storing.

Smooth cayenne-based hot honey beside clear amber honey containing dried chilli flakes, comparing immediate heat with a slower infusion.
Cayenne keeps hot honey smooth; dried chilli adds visible texture and slower-building heat.

Oregon State University Extension’s infused-honey safety guidance explains handling, straining, storage and spoilage signs for honey infused with fully dried ingredients.

Acid, salt and butter: bottled hot sauce may already bring all the acidity the honey needs, so taste before adding more. A small pinch of salt clears away some of the syrupy sweetness. Butter changes the job completely, turning the drizzle into a glaze that stays on the food.

How Spicy Should Hot Honey Be?

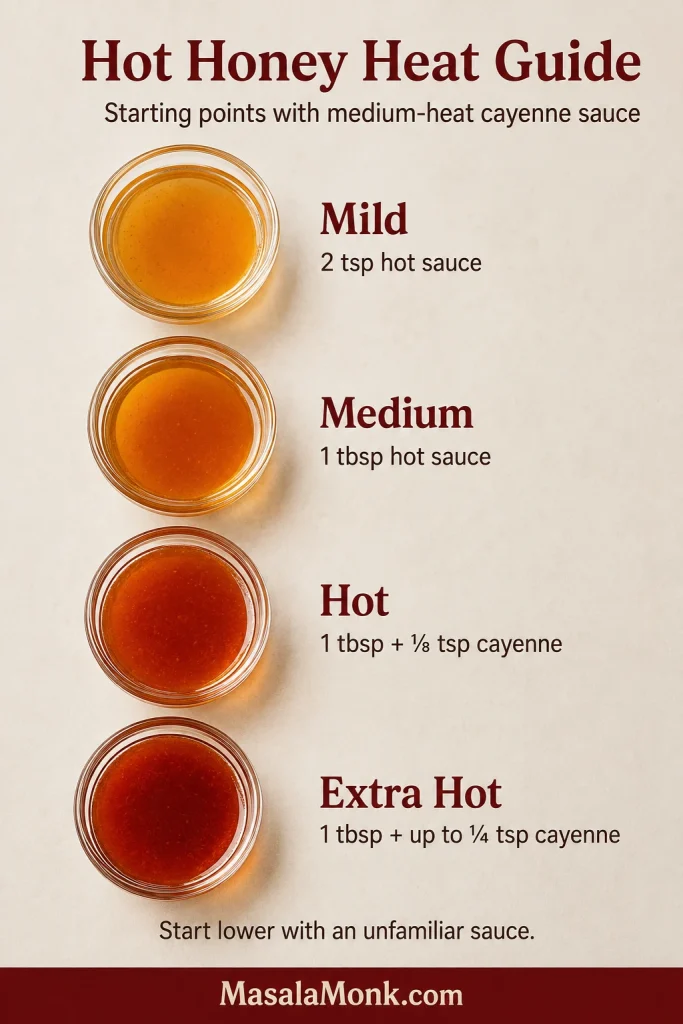
The amounts below are starting points using a medium-heat cayenne-style hot sauce. They are not universal heat ratings; begin lower with an unfamiliar sauce or cayenne powder.

Swipe or scroll sideways to see the full table.

Heat levelCayenne-style hot sauceCayenne powderWhat to expect
Mild2 tsp / 10 mlNoneMostly honey with a warm finish
Medium1 tbsp / 15 mlNoneClear chilli warmth after the sweetness
Hot1 tbsp / 15 ml⅛ tspStronger heat without changing the flow
Extra hot1 tbsp / 15 mlUp to ¼ tspStrong, lingering heat
Four smooth hot honey samples labelled mild, medium, hot and extra hot with increasing amounts of hot sauce and ground cayenne.
Change one variable at a time: hot sauce affects acidity and flow, while cayenne mostly raises heat.

A spoonful tasted alone feels much hotter than the same amount spread across dinner.

Made it hotter than you wanted? Jump to the troubleshooting guide →

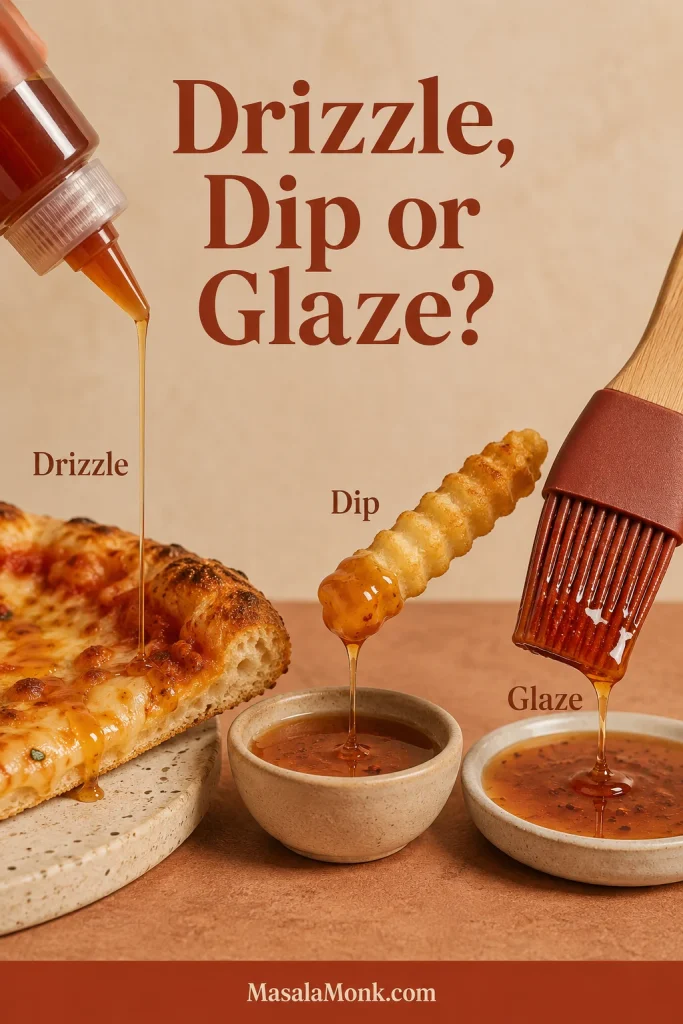
Make It a Drizzle, Dip or Glaze

For dipping, stir hot honey into Dijon or mayonnaise. When you need a coating rather than a pour, use the butter glaze.

To adjust the consistency: let a thin-looking sauce cool before changing it. More honey will thicken it. If it is too thick, warmth may be all it needs. When the flavour is already right, thin only the portion you plan to serve with a few drops of warm water.

Three hot honey uses shown together: a thin drizzle over crust, a fry lifted from dipping sauce, and glaze coating a silicone brush.
Drizzle is a last-second accent, dip stays separate until the bite, and glaze is meant to cling.

Hot Honey Dipping Sauce

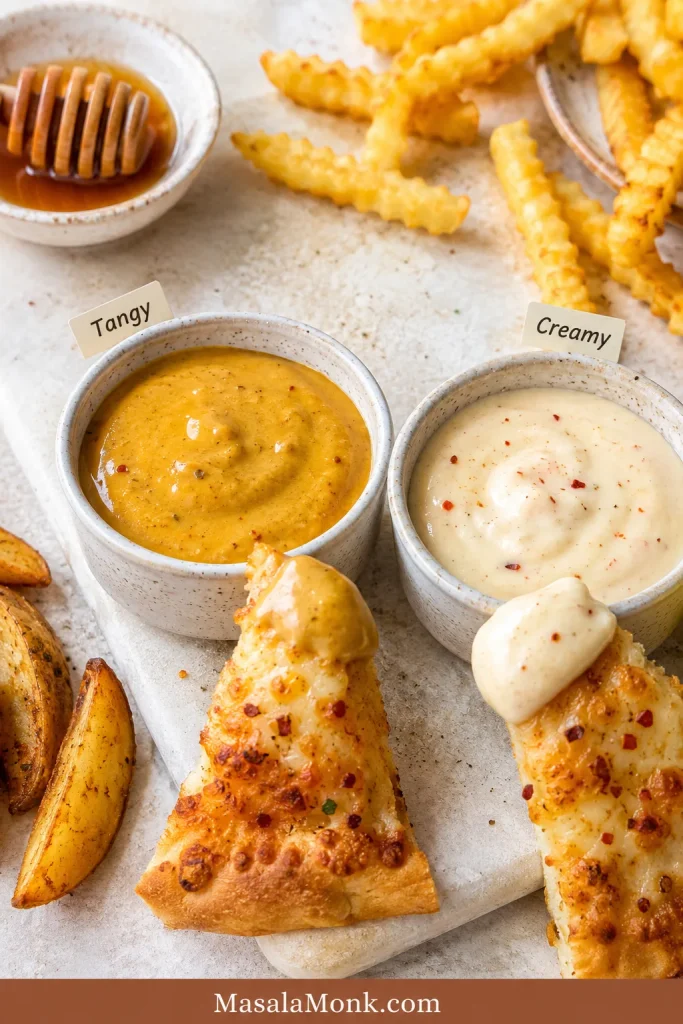
  • Tangy mustard dip: mix 2 tablespoons Dijon mustard with 1 tablespoon hot honey. Stir in more hot honey for a sweeter dip.
  • Creamy hot honey dip: mix ¼ cup / 60 g mayonnaise with 1–2 tablespoons hot honey.
Two ramekins containing a golden hot honey mustard dip and a pale creamy hot honey dip served with crisp potato pieces.
Mustard adds tang; a creamy hot honey dip softens the edge of heavily seasoned fried food.

Refrigerate both dips promptly.

Need a sauce that clings to wings? Jump to the buttery glaze →

Two More Ways to Make Hot Honey

Choose the infusion when you want the dried chilli itself to come through. Butter is better when the sauce needs to stay on a wing instead of running into the bowl.

Classic Chilli-Infused Hot Honey

  • ½ cup honey — 4 fl oz / 120 ml; about 6 oz / 170 g by weight
  • ½–1 teaspoon fully dried red pepper flakes
  • One small pinch fine salt, optional
  • ½ teaspoon apple cider vinegar, optional for immediate use
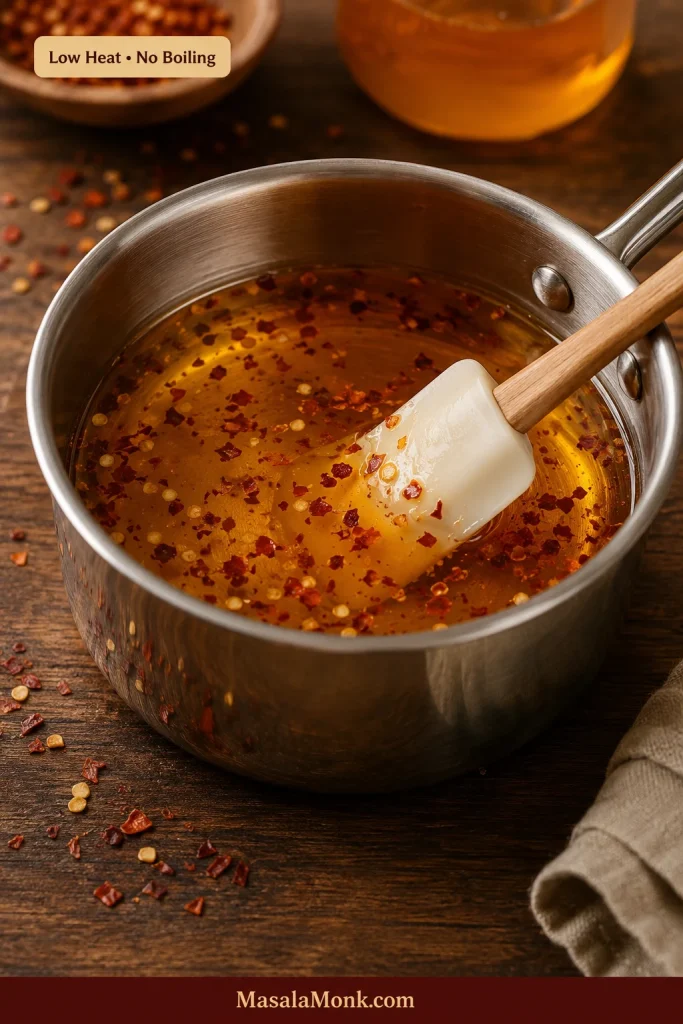
  1. Combine the honey and dried chilli flakes in a small saucepan.
  2. Warm over low heat for 3–4 minutes, stirring often. The honey should loosen and smell like warm chilli—not caramel.
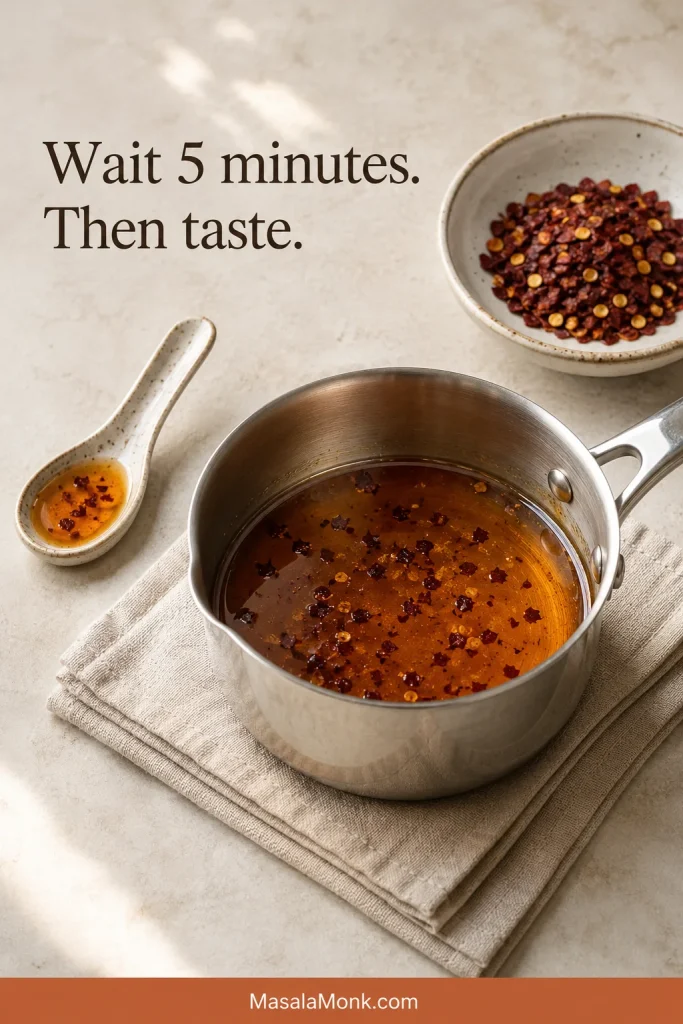
  3. Remove it from the heat. Use it immediately for gentle warmth or leave it for 5–15 minutes for more chilli flavour.
  4. Stir in the salt. For a sauce being served now, vinegar can lighten sweetness that still feels heavy.
  5. Strain for a smooth drizzle.
Clear amber honey with dried red chilli flakes warming gently in a small stainless saucepan with a calm, unbubbled surface.
Watch the surface: looser honey and easy stirring are enough. Active bubbling means the infusion is too hot.

The chilli may taste quiet at first. Give it a few minutes before adding more; a gentle infusion can become fierce while it rests.

A saucepan of dried-chilli hot honey resting off the heat beside a tasting spoon and an untouched portion of extra dried chilli flakes.
After resting, stir before tasting again; settled flakes can make one spoonful much hotter than the batch.

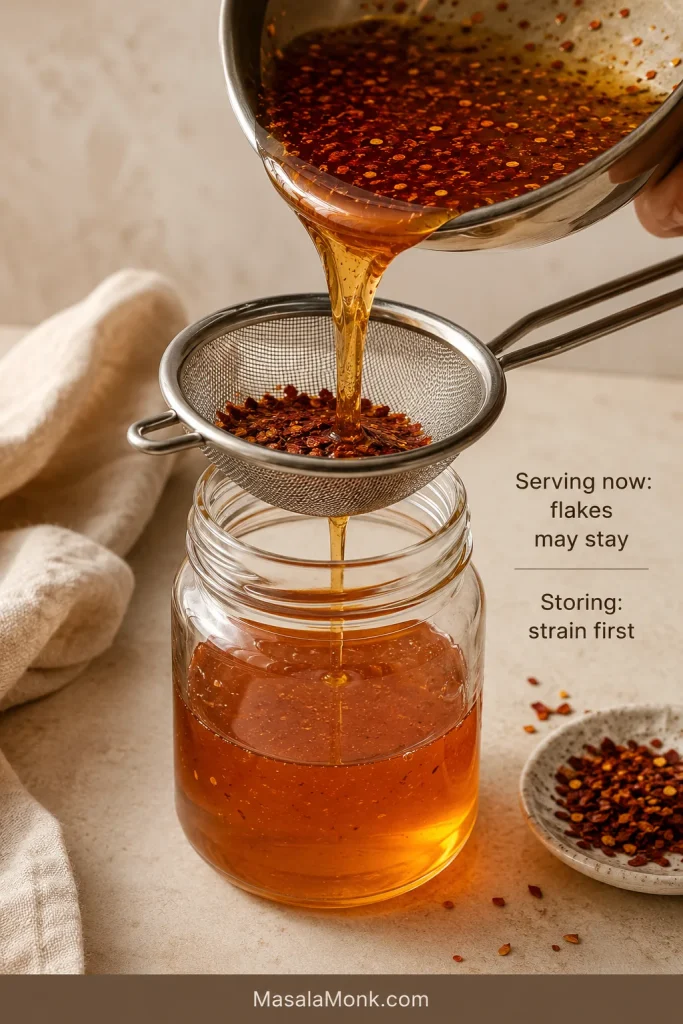
Serving now or storing? Flakes may remain in a batch being served immediately, but strain them out before bottling or storing.

Dried-chilli hot honey being poured through a fine metal strainer into a clean glass jar while the chilli flakes remain trapped in the mesh.
Let the sieve drain naturally rather than pressing the flakes; fewer fine solids make a cleaner pour.

Making the infusion ahead? Jump to storage and reheating →

Buttery Hot Honey Wing Sauce and Glaze

  • ¼ cup honey — 2 fl oz / 60 ml; about 3 oz / 85 g by weight
  • 2 tablespoons unsalted butter — 1 oz / 28 g
  • 1 tablespoon hot sauce — ½ fl oz / 15 ml
  • ¼ teaspoon garlic powder
  • One small pinch fine salt, optional
  • ½ teaspoon apple cider vinegar, optional
  1. Melt the butter in a small saucepan over low heat.
  2. Stir in the honey, hot sauce, garlic powder and salt. Add the vinegar now if using.
  3. Whisk for 2–3 minutes, just until smooth and glossy.
  4. Remove it before vigorous bubbling begins. Let it stand for 1–2 minutes before tossing or brushing.
Smooth red-gold buttery hot honey glaze being whisked in a small stainless saucepan on a dark surface.
A smooth butter glaze should show no clear butter ring; whisk trails should quickly close into one glossy surface.

With air fryer chicken wings, let the skin crisp before adding the warm glaze.

Warm glaze can look alarmingly loose. Give it a minute. Glossy streaks in the tossing bowl are fine; a pool beneath the wings means you used too much or the glaze needs another spoonful of honey.

Two matching red-gold hot honey glazes compared side by side, with the warm glaze flowing in a longer stream and the rested glaze clinging more.
After resting, look for cling rather than stiffness: the glaze should coat the spoon but still move when tilted.

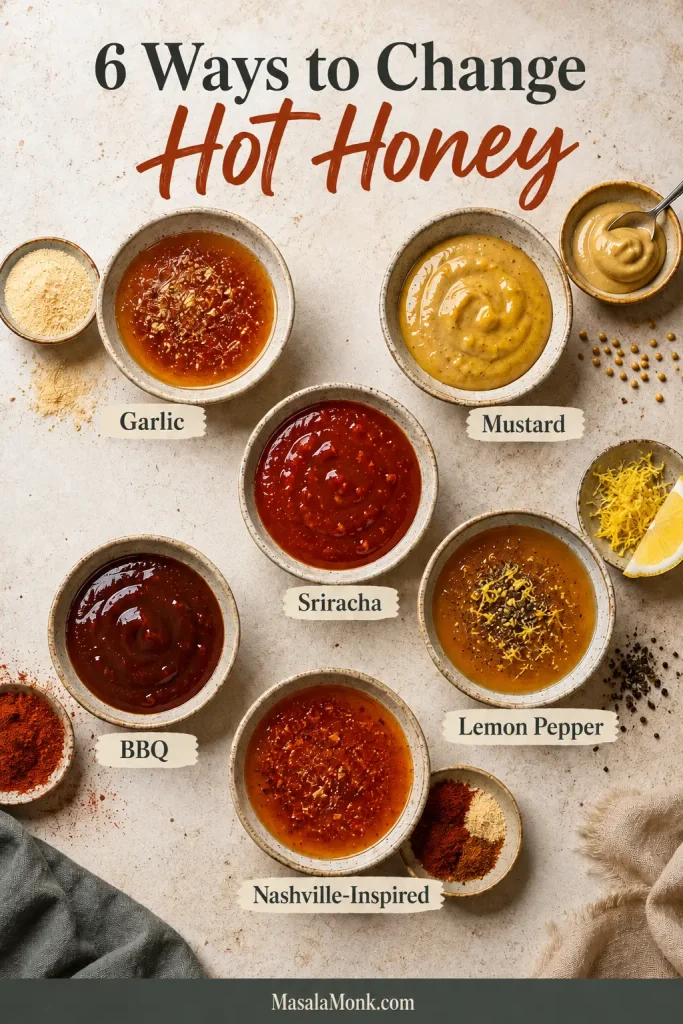
Hot Honey Variations

Make the plain sauce first. Change it only if the food calls for something more specific.

Six labelled hot honey variations made with garlic powder, mustard, Sriracha-style sauce, BBQ sauce, lemon pepper and Nashville-inspired spices.
Try one flavour family at a time; garlic, mustard or BBQ should still taste like hot honey.
  • Garlic hot honey: stir in ¼ teaspoon garlic powder. It works particularly well on chicken and honey garlic pork chops.
  • Hot honey mustard: mix 2 tablespoons Dijon with 1–2 tablespoons hot honey.
  • Honey-Sriracha: replace the cayenne-style sauce with 1–2 tablespoons Sriracha for a thicker, sweeter and more garlicky sauce.
  • Hot honey BBQ: stir 2–3 tablespoons hot honey into ½ cup BBQ sauce. Brush it over chicken or pork near the end of cooking.
  • Lemon pepper: add ½ teaspoon finely grated lemon zest and ¼ teaspoon coarse black pepper. It is especially good on lemon pepper chicken wings.
  • Nashville-inspired: add ⅛ teaspoon each cayenne and smoked paprika, plus a small pinch of garlic powder.

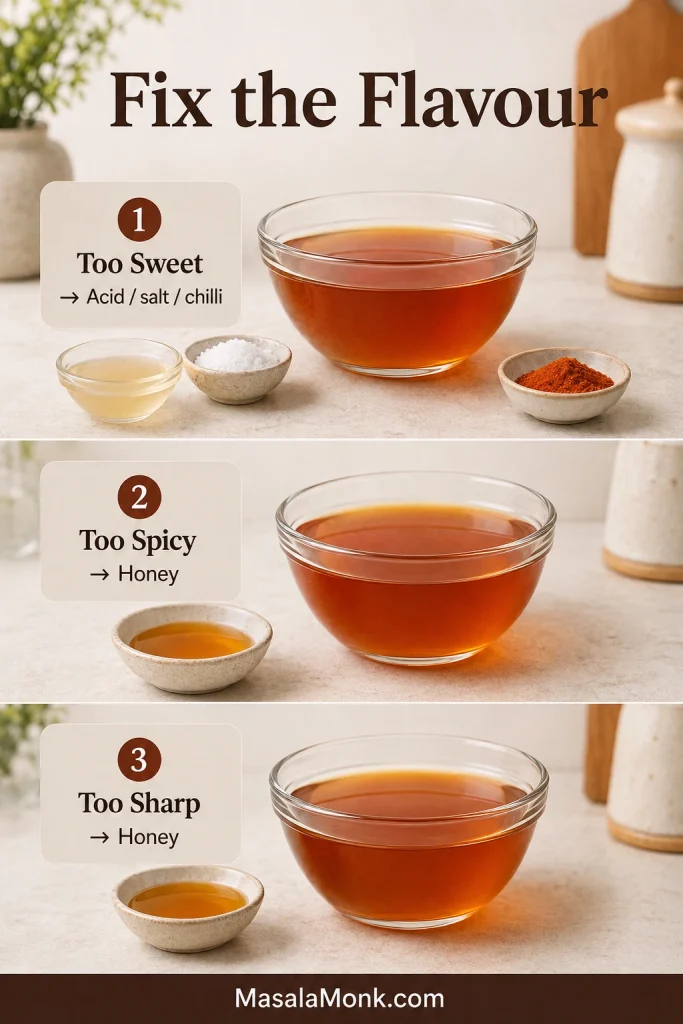
How to Fix Hot Honey Sauce

Hot honey is forgiving. Most batches are one small adjustment from balance, so judge the flavour first and the consistency second.

Three smooth bowls of hot honey showing corrections for sauce that is too sweet, too spicy or too sharp, with acid, salt, cayenne and honey nearby.
Fix one problem at a time: make a small correction, stir, then retaste. Multiple changes are harder to judge.

Swipe or scroll sideways to see the full table.

What happenedWhyWhat to do
Too sweetIt needs brightness, salt or heatStir in a little vinegar, salt or chilli
Too spicyToo much chilli or a long infusionAdd honey and remove any chilli solids
Too acidicThe hot sauce or vinegar is too sharpAdd honey
Too thinIt is still warm or contains too much liquidCool first, then add honey if needed
Too thick while coolThe honey is cold or the ratio needs adjustingWarm gently; thin only the serving portion if needed
Hard or chewy after cookingIt was heated too farRewarm and loosen the serving portion with a little liquid
Scorched or bitterThe honey overheatedStart again; burnt honey cannot be repaired
Butter separatedThe glaze became too hotRemove from the heat and whisk firmly
Wings became soggyToo much sauce or too much waitingUse less and toss immediately before serving
Gets hotter in storageChilli solids remain in the jarStrain them out or dilute the sauce with honey
Grainy or crystallisedNatural honey crystallisationWarm in a water bath or short microwave bursts

How to Store and Reheat Hot Honey Sauce

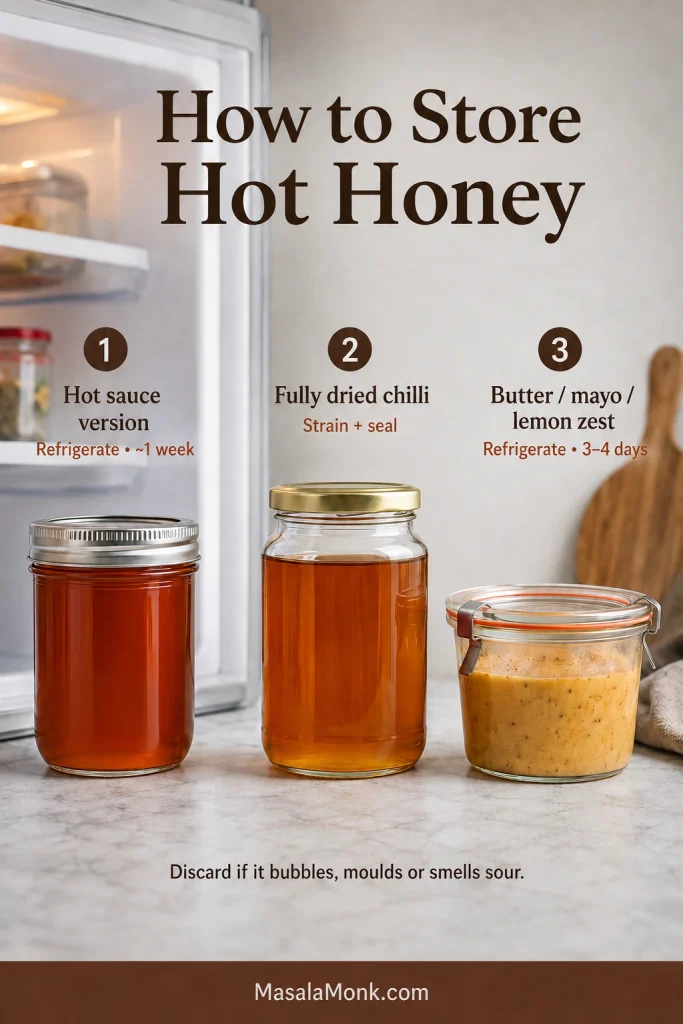
  • Bottled-hot-sauce version: refrigerate it and use it within about one week for the best flavour and texture. This is a cautious home-kitchen window because bottled sauces vary in acidity and moisture.
  • Fully dried-chilli infusion: strain it into a clean, tightly sealed food-grade container before storing. Keep moisture out. Refrigerate the batch if vinegar has been added.
  • Butter glaze, mayonnaise dip or lemon-zest variation: refrigerate promptly and use within 3–4 days.
Three containers illustrating storage for smooth bottled-sauce hot honey, strained fully dried-chilli honey, and a refrigerated butter or creamy hot honey variation.
Label the jar with the version you made; storage changes with butter, mayonnaise, lemon zest or dried-chilli infusion.

Discard any batch that develops bubbling, mould or an alcoholic or sour smell.

To loosen cold hot honey, microwave it in a microwave-safe container with any metal lid removed, in 10-second bursts. Set a tightly closed, heat-safe glass jar in warm—not boiling—water as another option. Butter glaze can be rewarmed over the lowest heat. Stop as soon as the sauce flows again.

Do not give honey to a child under 12 months. See the USDA explanation of the infant-botulism risk.

Hot Honey Sauce FAQ

What Is Hot Honey Sauce Made From?

The simplest version is honey and hot sauce, with a small pinch of salt only if the balance needs it.

Can You Make Hot Honey With Regular Hot Sauce?

Yes. A thin cayenne-style hot sauce is the easiest choice; use less if the bottle is unusually hot or sharp.

Do You Need to Cook Hot Honey?

No. Whisk the bottled-hot-sauce version together cold; heat only to loosen thick honey or infuse dried chilli.

Can You Make Hot Honey Without Vinegar?

Yes. Skip it when the hot sauce already gives the mixture enough brightness.

Can I Use Cayenne Instead of Chilli Flakes?

Yes. Cayenne gives immediate, even heat; chilli flakes create a slower infusion and visible texture.

Does Homemade Hot Honey Need Refrigeration?

Refrigerate the bottled-hot-sauce version in this recipe. Fully dried-chilli infusions have separate storage guidance, while butter glaze, mayonnaise dip and lemon-zest versions should remain refrigerated.

Why Did My Hot Honey Harden or Crystallise?

Honey naturally crystallises, and a cooked sauce can also stiffen if heated too long. Warm it gently until it flows again. If it smells scorched or tastes bitter, start over.

Three-stage guide showing grainy crystallised hot honey, the sealed jar sitting in warm water, and the same honey restored to a smooth amber liquid.
Crystals often appear at the sides or bottom first. Stop warming once the graininess has dissolved throughout.

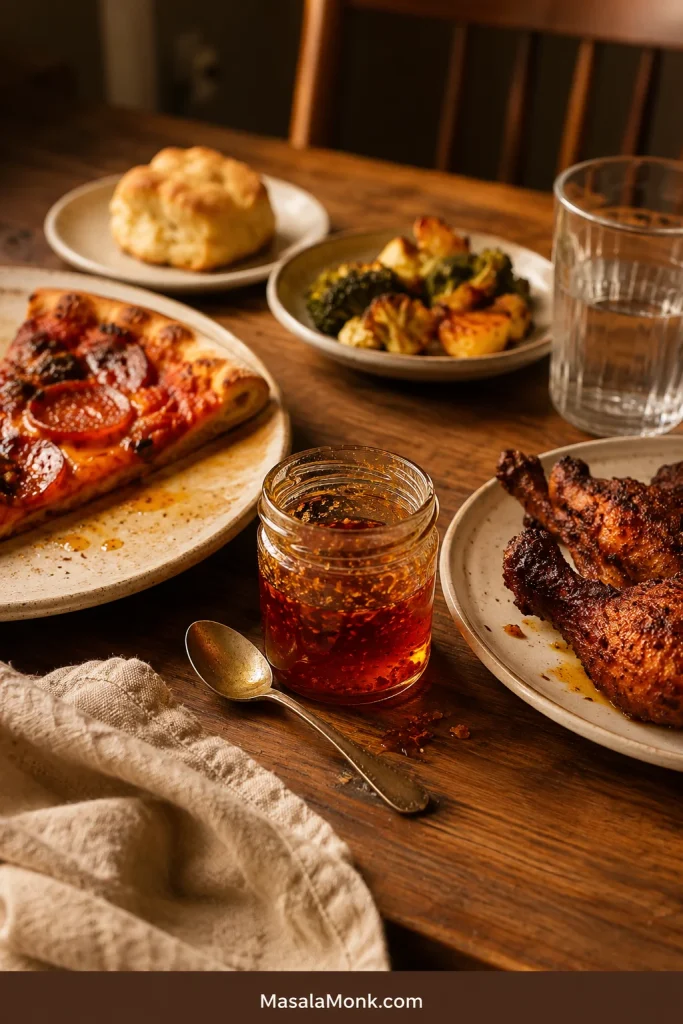
A Small Jar That Solves Dinner

The jar looks almost too simple for how often it solves dinner. Then it lands on hot pizza or crisp chicken, the honey turns glossy and the chilli arrives a second later.

A partly served evening meal with pizza, crisp chicken, roasted vegetables and a biscuit surrounding a small used jar of hot honey on a wooden table.
Keep the jar on the table and let everyone add their own; the right amount is personal.

What did you drizzle it over first?

Posted on 25 Comments

10 Best Chicken Sandwich Recipes (BBQ, Parm, Buffalo & More)

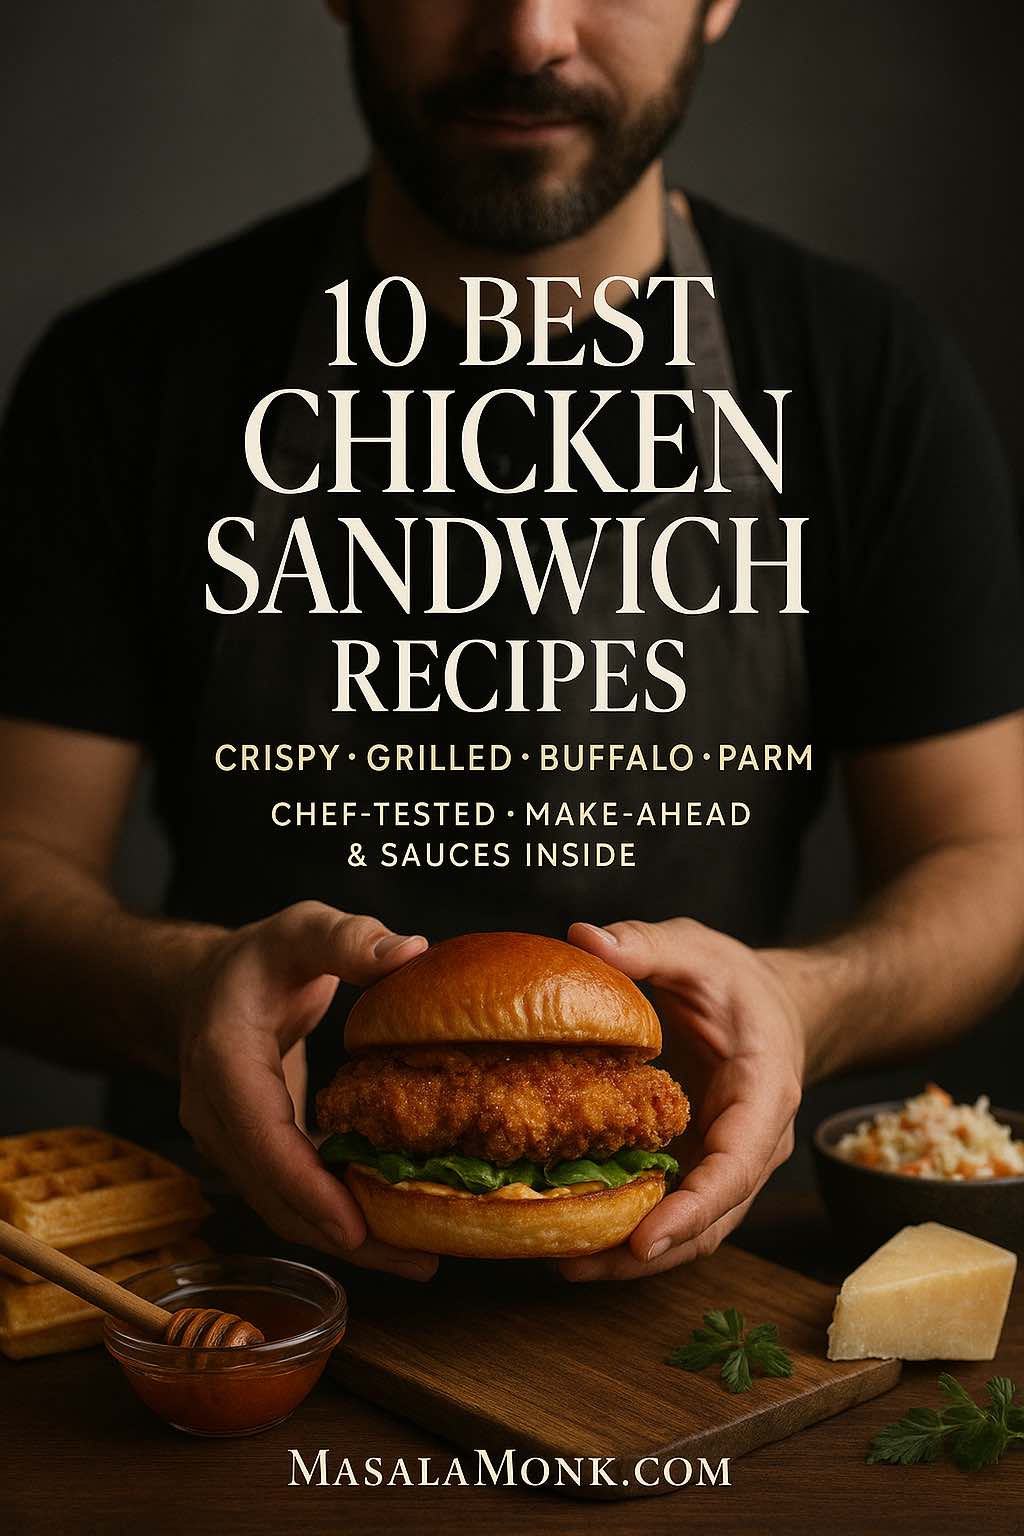
Hands presenting a crispy brioche chicken sandwich on a wooden board with waffles, hot honey, coleslaw and Parmesan—cover for 10 best chicken sandwich recipes.

If you’ve been hunting for chicken sandwich recipes that actually make weeknights easier and weekends more fun, you’re in the right kitchen. What follows is a practical, long-form guide that treats each sandwich as a modular build: master one or two base methods, then riff with sauces, textures, and breads to create a dozen outcomes without doubling your workload. Moreover, you’ll see natural places to swap in leaner spreads, make-ahead steps, and clever sides, so the same grocery list works across the entire lineup.

Before we stack our first bun, a few baseline techniques keep everything juicy and crisp. First, grill or pan-sear chicken breasts after a short marinade so the meat cooks evenly and stays tender. Then, for any crispy builds, shallow-fry panko-breaded cutlets or tenders and drain on a rack—maximum crunch, minimal oiliness. And when you do bake buns, brioche or potato rolls bring the gentle sweetness that makes the whole bite pop. Meanwhile, keep a small sauce kit at the ready: a house sandwich sauce (mayo + Dijon + lemon), a classic Buffalo, a simple hot honey, a blackened spice rub, and a Caesar you actually want to lick off your fingers. As you’ll soon notice, those five components power nearly everything below.

For safety’s sake, cook chicken to 165°F/74°C in the center; for a clear reference, the USDA maintains an up-to-date safe temperature chart. And for a beautifully crisp exterior that stays light rather than heavy, this tested method for fried breaded cutlets explains why panko plus proper oil temperature yields shattering crunch without greasiness. If you’re a home baker, buttery, tender brioche buns elevate even the simplest grilled build; they toast fast, so give them just a minute on the griddle.

With that mise en place squared away, let’s cook. Each section includes the build (bread • protein • sauce • toppings) plus variations, sides, storage, and “make it tonight” shortcuts. Transition from one to the next as your pantry dictates—every technique repeats cleanly, so you never start from scratch.

Also Read: Macaroni & Cheese Recipe: Creamy Stovetop, Baked & Southern


A flexible sauce & seasoning mini-kit for all 10 chicken sandwich recipes

House Sandwich Sauce (all-purpose): ¼ cup mayo + 1 Tbsp Dijon + 1 tsp lemon + a pinch of sugar + salt & pepper. Spread thinly on both buns so it touches the chicken on each side; you get flavor in every bite without sogging the crumb.

Buffalo: ¼ cup hot sauce + 2 Tbsp melted butter. Toss after cooking so the crust remains crisp. For herby cool-down, a tried-and-true ranch dressing stays stable even when sandwiches linger a few minutes.

Hot Honey: 3 Tbsp honey + 1–2 tsp hot sauce + a dot of vinegar. If you want a fail-safe template with good pourability, this quick hot honey method works on tenders, cutlets, and fries alike.

Blackened Rub: 1 tsp paprika + 1 tsp garlic powder + ½ tsp onion powder + ½ tsp thyme + ½ tsp oregano + ¼–½ tsp cayenne + salt & pepper. Pat onto lightly oiled chicken right before it hits the grill.

Caesar Dressing (anchovy-forward): Egg yolk, neutral oil, lemon, garlic, Worcestershire, grated Parmesan, and anchovies; for the classic balance of briny and creamy, follow this reliable Caesar dressing recipe. It clings to romaine and sliced chicken, preventing slippery stacks.

Pesto-Mayo: 3 Tbsp mayo + 2 Tbsp pesto. It supports rotisserie builds and grilled sandwiches without overpowering delicate greens.

Chipotle-Lime Mayo: ¼ cup mayo + 1–2 tsp minced chipotle + 1 tsp lime juice. Use in the Bacon Ranch section as a smoky alternative.

Greek-Yogurt Ranch (lighter swap): Blend thick yogurt with herbs, lemon, a touch of mayo, and garlic powder; the idea mirrors the creamy tactics used in MasalaMonk’s yogurt-based spreads. Pair particularly with Buffalo or grilled options when you want cool tang without extra weight.
Food safety reminder: Regardless of sauce or rub, finish chicken to 165°F/74°C and rest briefly. For the authoritative line on temperatures, bookmark the USDA chart.
Also Read: Pumpkin Spice, Your Way: Master Blend, Variations & Real-World Recipes


How to make these Chicken Sandwich recipes weeknight-proof

Batch once, eat many: Grill two or three extra breasts while the fire is hot; tomorrow they become Caesar or Bacon-Ranch, and the day after you’ll have Teriyaki or Rotisserie-Pesto. Because you’re relying on the same core textures, your brain gets faster with each repetition.
Toast strategically: A barely browned bun protects against sauce soak. Conversely, a too-dark toast can taste bitter and dry; aim for golden at the edges only.

Build with purpose: Moisture buffers—like lettuce dressed lightly or sauce spread on both buns—prevent sliding layers. Similarly, placing bacon between chicken and sauce keeps the lettuce crisp in the Bacon Ranch sub.

When crispy matters: Rack-cool cutlets for two minutes before moving them to buns. That tiny pause lets steam escape so crunch survives beneath hot sauce or marinara. For a refresher on oil temperature, dredge order, and panko behavior, revisit the fried breaded cutlets guide.

Use your freezer smartly: Portion shredded rotisserie chicken into flat bags (about 1½ cups each) and freeze. Later, thaw in minutes under running water, warm gently with sauce, and dinner appears before you can set the table.

Also Read: Lemon Drop Martini Recipe (Classic, 3-Ingredient, & More)


How to customize textures without complicating your shopping list

Although each of these chicken sandwich recipes is dialed for speed, you can nudge texture and flavor in countless ways without adding new errands. For instance, swap the potato bun for toasted sourdough in the Rotisserie build to add chew. Likewise, layer a thin slice of fresh mozzarella under pesto-mayo for creamy elasticity. Or, should you want spice that’s fragrant rather than fiery, opt for blackened seasoning without the cayenne and finish with lemon zest.

In contrast, if you crave bolder heat, look to drizzles instead of heavier sauces: a spoon of hot honey over Nashville-leaning fried cutlets lights up the palate while keeping crunch intact. Meanwhile, for Buffalo, try the harissa-ranch tweak; because harissa brings both chili and aromatics, it broadens the flavor without demanding more salt or sugar. And whenever you serve Buffalo or Bacon-Ranch, offer a ramekin of blue cheese dip or ranch on the side. For reliable party-style dips and their ideal thickness, MasalaMonk’s blue cheese dip guide is a helpful calibration tool.


Bread, heat, and timing: small details for Chicken Sandwich Recipes

Bread choices: Brioche is plush for grilled builds, potato rolls love BBQ, ciabatta resists Caesar’s dressing, and sub rolls cradle Parm and Teriyaki. Spread sauce thinly on both sides so every bite tastes seasoned; you’ll use less overall and the sandwich eats cleaner.

Heat management: Keep fried cutlets at 175°C/350°F oil temperature; too cool and they drink oil, too hot and the crust burns before the interior cooks. Simultaneously, warm sauces gently rather than boiling them; aggressive heat can split mayo-based dressings and turn glazes sticky.

Toasting sequence: Toast bread first; the residual heat keeps it aromatic while you stack. If you’re juggling batches, toast in the oven on a sheet tray—fast, even, and hands-free.

Slice direction: Cut grilled breasts on the bias to maximize surface area for sauce; sliced chicken absorbs flavor and nests into buns better than a whole filet.

Carryover cooking: Rest chicken a few minutes; juices redistribute, preventing the soggy-bun effect where a sudden gush soaks the bottom half.

Also Read: What to Mix with Jim Beam: Best Mixers & Easy Cocktails


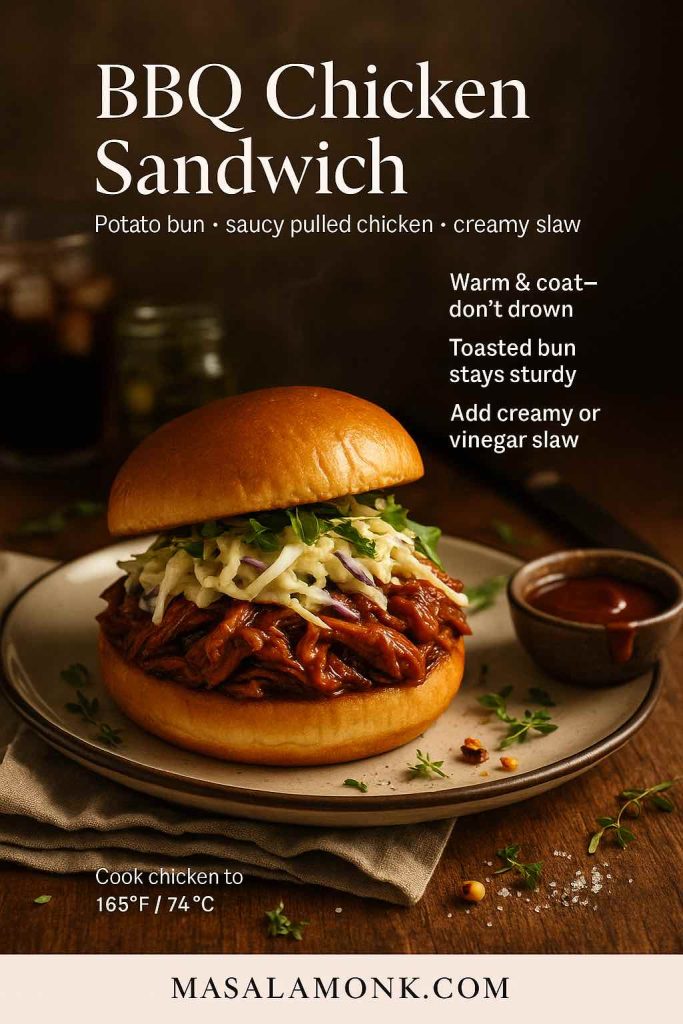
1) BBQ Chicken Sandwich (pulled, shredded, or sliced breast)

Build: Potato bun • shredded chicken or sliced grilled breast • tangy BBQ sauce • creamy slaw • handful of greens.

Start by warming shredded chicken with just enough sauce to coat—about ⅓ to ½ cup per 3 cups meat. Consequently, the chicken stays moist while the bun doesn’t collapse under excess liquid. To finish, mound the sauced chicken onto a toasted potato bun, spoon on creamy slaw for crunch, and tuck in peppery greens or a few thin onion slices. If you prefer a lighter direction, use a smaller roll and add a crisp veg side; for lunch-oriented fiber boosts and smart bread choices, MasalaMonk’s guide to high-fiber sandwiches inspires sturdy, satisfying combinations without feeling heavy.

BBQ chicken sandwich on potato bun with creamy slaw, styled recipe card with MasalaMonk branding.
BBQ Chicken Sandwich Recipe — saucy pulled chicken on a toasted potato bun with creamy (or vinegar) slaw. Warm the meat just to coat (don’t drown), toast the bun for structure, and always cook chicken to 165°F/74°C. More weeknight builds at MasalaMonk.com.

Variations:

  • Vinegar-slaw vibe: Swap creamy slaw for a light, sharp version to cut through saucy richness.
  • Smoky-sweet glaze: Reduce BBQ sauce with a spoon of brown sugar until glossy, then brush onto sliced breasts right before serving.
  • Party sliders: Build on mini rolls and bake briefly under a foil tent to warm through.

Make-ahead: Shred chicken the day before; keep sauce separate until reheating. Additionally, toast buns just before serving to preserve texture.

Side serving ideas: Oven fries, corn salad, or quick-dressed cabbage with lime and a pinch of cumin. As an optional party move, set out a small bowl of extra sauce so diners can adjust heat and sweetness to taste.

Also Read: Classic vs. Authentic Alfredo: 5 Essential Recipes


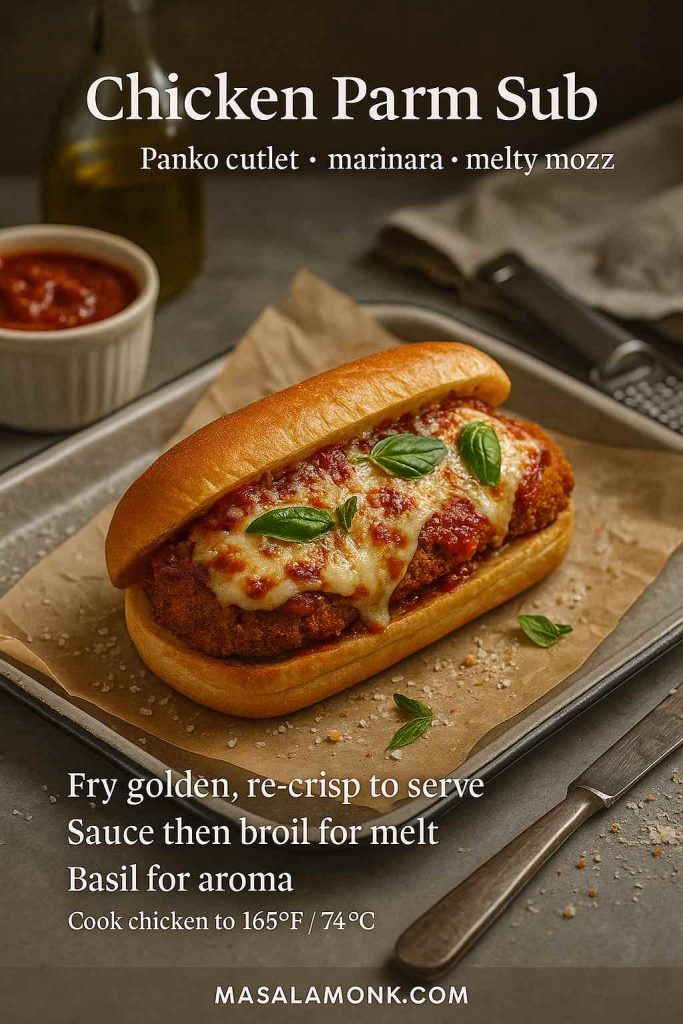
2) Chicken Parm Sandwich (sub/hoagie/grinder)

Build: Sub roll • hot, crispy cutlet • warm marinara • provolone or mozzarella • grated Parmesan.

Here’s where shallow-fried cutlets shine. Bread them flour → egg → panko, season generously, and fry 3–4 minutes per side until golden. Subsequently, sauce a split sub roll, lay in the cutlet, blanket with cheese, and broil until the edges freckle and the center melts. For technique depth and crumb choices, this schnitzel-style approach to chicken schnitzel clarifies how oil temperature and dredge order affect crispness.

Chicken Parm sub with crispy panko cutlet, marinara, melted mozzarella and basil; elegant recipe card by MasalaMonk.
Chicken Parm Sub Recipe — crispy panko chicken cutlet in a toasted hoagie, topped with warm marinara and melty mozzarella. Re-crisp cutlet in a hot oven, then sauce and broil for bubbly cheese; finish with Parmesan and basil. Always cook chicken to 165°F/74°C. More chicken sandwich ideas at MasalaMonk.com.

Variations:

  • The grinder melt: Add a few spoonfuls of marinara on top, then more Parmesan before broiling—messy, magnificent.
  • The speed sub: Use toaster-oven heat while the cutlet rests; the bread will be ready the instant your cheese lands.
  • The basil finish: Tear basil over the top as you serve; aroma and freshness balance the rich sauce-cheese duo.

Make-ahead: Fry cutlets earlier in the day, cool on a rack, then re-crisp in a hot oven (220°C/425°F) for 6–8 minutes. In other words, you cook once, eat twice.

Sides: A tangy salad or roasted broccoli with lemon pairs beautifully. Keep the plate lean—this sandwich does the heavy lifting.

Also Read: Homemade & DIY Coffee Creamer: 16 Flavor Recipes (French Vanilla, Pumpkin Spice & More)


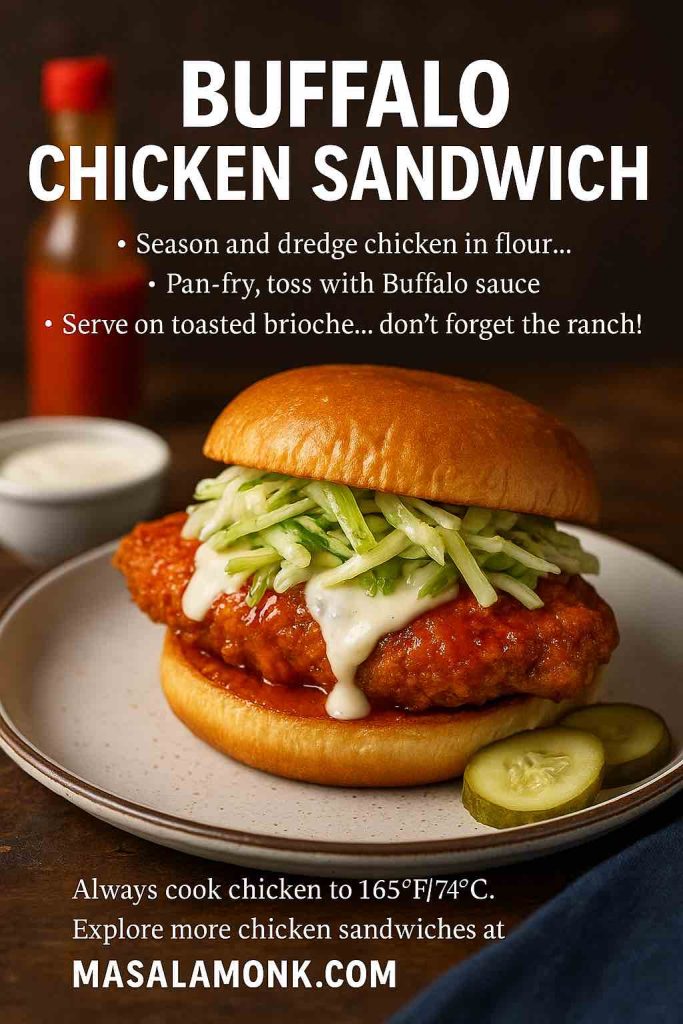
3) Buffalo Chicken Sandwich

Build: Kaiser roll • crispy or grilled chicken • Buffalo sauce • ranch or blue cheese • celery slaw.

Toss hot chicken with Buffalo sauce after cooking so the crust remains crisp. Meanwhile, choose your dressing wisely: blue cheese emphasizes tang and funk, ranch leans herbaceous and mellow. For an at-home classic you’ll reuse constantly, this homemade ranch dressing nails the buttermilk-herb balance. If you gravitate to blue cheese, MasalaMonk’s deep-dive on a party-friendly blue cheese dip offers useful tips on thickness and crumble size, which, incidentally, also govern how neatly your sandwich eats.

Buffalo chicken sandwich on brioche with celery slaw and ranch; elegant recipe card by MasalaMonk.
Buffalo Chicken Sandwich Recipe — crispy chicken tossed after frying in Buffalo sauce, stacked on toasted brioche with celery slaw and ranch (or blue cheese). Keep it glossy, not soggy; add a light hot-honey drizzle for balance. Always cook chicken to 165°F/74°C. Explore more weeknight chicken sandwiches at MasalaMonk.com.

Variations:

  • Grilled Buffalo: Brush a touch of sauce on the chicken right off the grill, then drizzle more once it’s on the bun.
  • Extra heat: Add a small squeeze of hot honey over the slaw to contrast the vinegar heat with gentle sweetness—there’s a quick method here: easy hot honey.
  • Harissa-ranch twist: Blend a spoon of harissa into ranch for smoky, floral warmth; a reliable reference is this streamlined harissa ranch.

Make-ahead: Celery slaw keeps well for a day; dress it lightly and add more right before serving. Likewise, buns can be split ahead, then toasted à la minute for speed.

Sides: Baked potato wedges or carrot sticks with extra dip—simple, crunchy, and well-matched.

Also Read: Air Fryer Chicken Wings (Super Crispy, No Baking Powder)


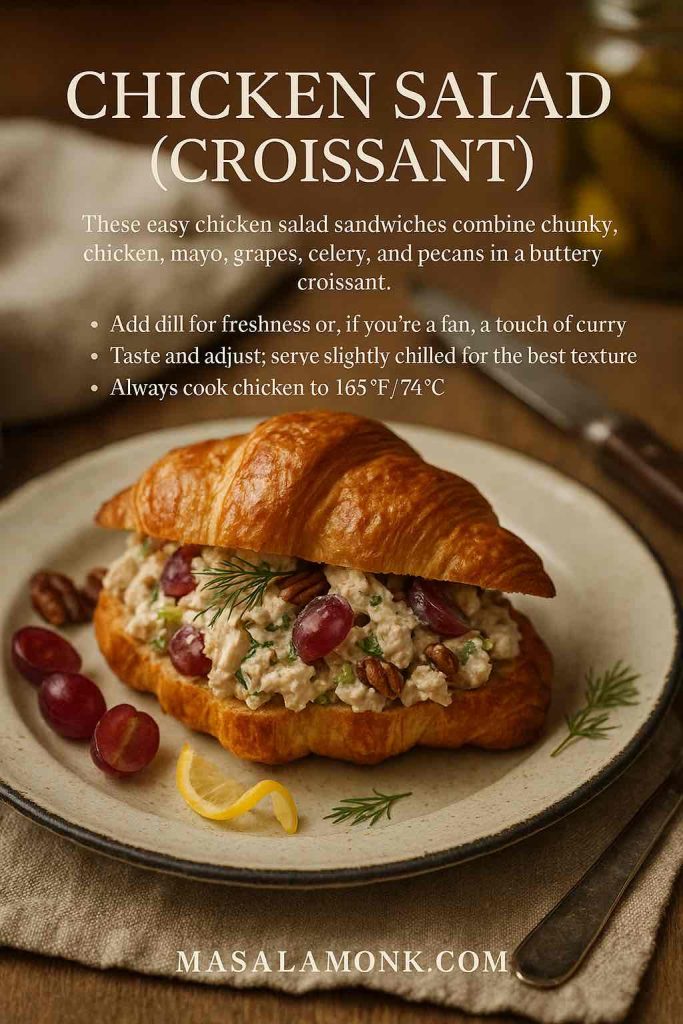
4) Chicken Salad Sandwiches (croissants, finger/tea, cranberry)

Build: Croissant or soft bread • chicken salad (chopped chicken + mayo + Dijon + lemon + salt & pepper) • crisp lettuce.

Cube or shred cooked chicken, stir with just enough dressing to coat, then fold in finely chopped celery for snap. If you like a tangy-sweet counterpoint, add dried cranberries and a handful of toasted pecans. For a lighter texture that still feels creamy, blend part of the mayo with strained yogurt; MasalaMonk’s tutorial on a protein-forward hung curd spinach sandwich shows how thick yogurt behaves in spreads without watering them down.

Chicken salad croissant with grapes, celery and pecans; elegant recipe card by MasalaMonk.
Chicken Salad Croissant Recipe — chunky chicken, celery, grapes and pecans in a creamy mayo-Dijon-lemon dressing. Chill 30 minutes for best texture; swap in part Greek yogurt for a lighter spread and add dill or a pinch of curry. Always cook chicken to 165°F/74°C. More easy lunch ideas at MasalaMonk.com.

Variations:

  • Tea sandwiches: Trim crusts, layer thinly, and cut into tidy rectangles; ideal for parties.
  • Crunch play: Gently fold in diced apple or halved grapes; sweetness brightens savory notes.
  • Herb garden: Dill and chives make this feel fresh without overpowering.

Make-ahead: The salad is better after an hour in the fridge; assemble just before serving to preserve bread texture. Additionally, croissants benefit from a quick, gentle warm-up to re-flake their layers.

Sides: A delicate salad with a lemony vinaigrette balances the richness. Thinly sliced cucumbers seasoned with salt and pepper add cool crunch without heaviness.

Also Read: Chicken Alfredo Pasta, 5 Ways (Classic to Cajun, Veg, 15-Minute Jar, Healthy)


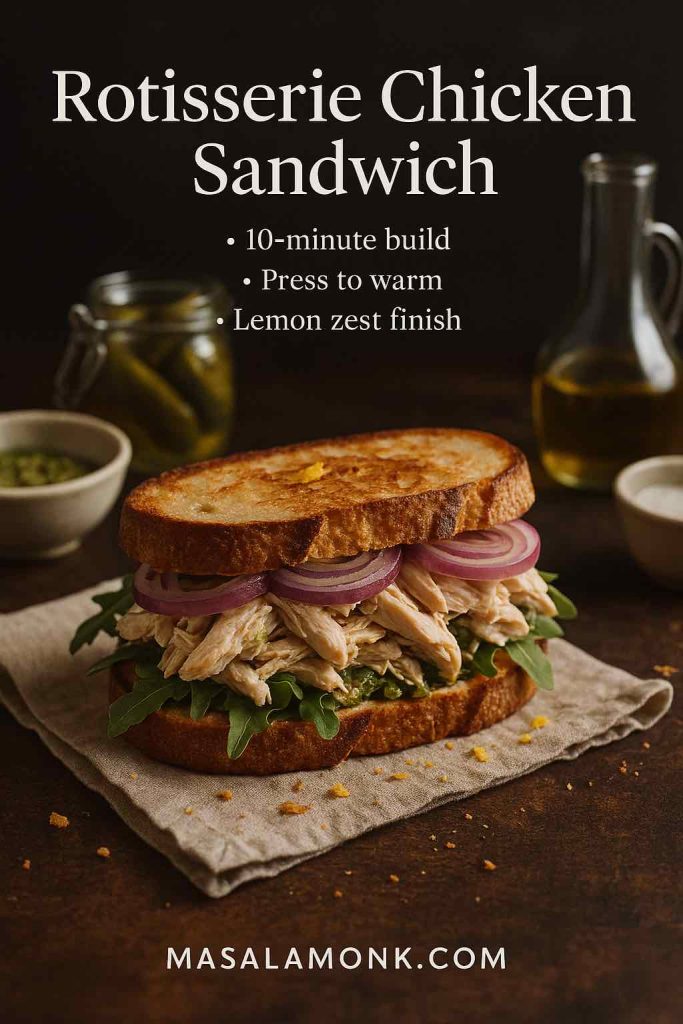
5) Rotisserie Chicken Sandwich (quick recipe)

Build: Rustic sourdough • warm rotisserie chicken • house sandwich sauce or pesto-mayo • arugula • thin red onion.

This is the weeknight hero: already-cooked chicken, a fast sauce, and a handful of greens. Consequently, dinner appears in ten minutes flat. If you’re aiming for a mayo alternative, hummus makes a great stand-in; the texture lessons from MasalaMonk’s approachable hummus veggie sandwich translate perfectly—spread generously to “glue” loose shreds, then add greens so the bread doesn’t slip.

Chicken salad croissant with grapes, celery and pecans; elegant recipe card by MasalaMonk.
Chicken Salad Croissant Recipe — chunky chicken, celery, grapes and pecans in a creamy mayo-Dijon-lemon dressing. Chill 30 minutes for best texture; swap in part Greek yogurt for a lighter spread and add dill or a pinch of curry. Always cook chicken to 165°F/74°C. More easy lunch ideas at MasalaMonk.com.

Variations:

  • Pesto-mayo: Stir 2 Tbsp pesto into 3 Tbsp mayo; peppery, bright, and superb with arugula.
  • Warm press: After building, press the sandwich in a skillet under a small pan for a minute to marry the layers.
  • Citrus snap: A whisper of lemon zest over the top lifts everything.

Make-ahead: Portion rotisserie meat into small containers; freeze in flat bags for instant defrosting. Then, rewarm gently with your sauce to keep it juicy.

Sides: Tomato salad with olive oil and flaky salt; or, for a heartier plate, small roasted potatoes with rosemary.

Also Read: Ceramic vs Teflon (PTFE) Cookware: Safety, Heat Limits, Durability & Which to Buy


6) Grilled Chicken Sandwich (with Blackened option)

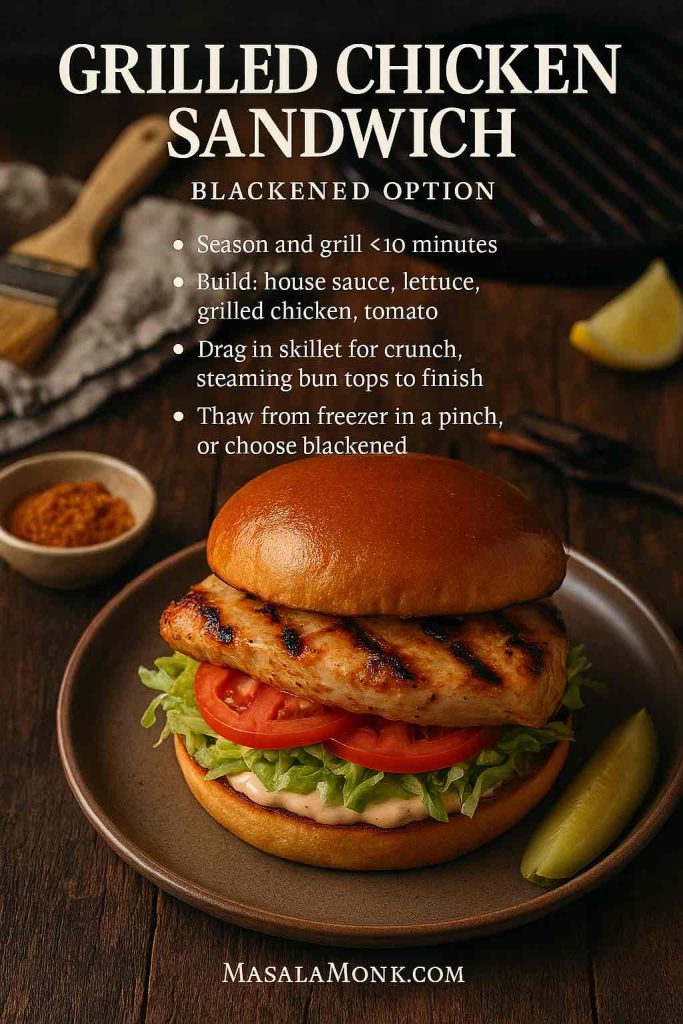
Build: Brioche • grilled breast • house sauce • tomato slices • shredded lettuce.

Pound chicken lightly for even thickness; marinate 30 minutes in oil, lemon, garlic, paprika, and salt. Grill over medium-high heat until the thickest area reaches 165°F/74°C, then rest 5 minutes before slicing. If you prefer a bolder profile, dust on a blackened spice blend (paprika, garlic and onion powders, thyme, oregano, cayenne, salt, and pepper) before grilling; the aromatic crust complements cool lettuce and a bright sauce.

Grilled chicken sandwich on brioche with lettuce, tomato and house sauce; blackened seasoning option—MasalaMonk recipe card.
Grilled Chicken Sandwich (Blackened Option) — quick marinade (oil, lemon, garlic, paprika), grill to 165°F/74°C, rest 5 minutes. Toast brioche, layer house sauce → lettuce → chicken → tomato for structure. For extra flavor, dust on a blackened spice rub before grilling; finish with a squeeze of lemon.

Variations:

  • Citrus-herb: Swap paprika for lemon zest and rosemary; finish with a squeeze of lemon.
  • Avocado layer: Mash avocado with lime and a pinch of salt; spread onto the bottom bun as a creamy shield.
  • Spicy mayo: Whisk in a teaspoon of hot sauce or a dab of chili crisp for a nudge of heat.

Make-ahead: Mix the marinade in the morning; the rest is mostly hands-off. Furthermore, you can grill extra breasts and hold them for salads or wraps later in the week.

Sides: Coleslaw, grilled corn, or a crunchy chopped salad. Toast the brioche lightly so it stays plush inside but sturdy outside—buns scorch quickly, so keep an eye out.

Also Read: Coconut Water Cocktails: 10 Easy, Refreshing Drinks


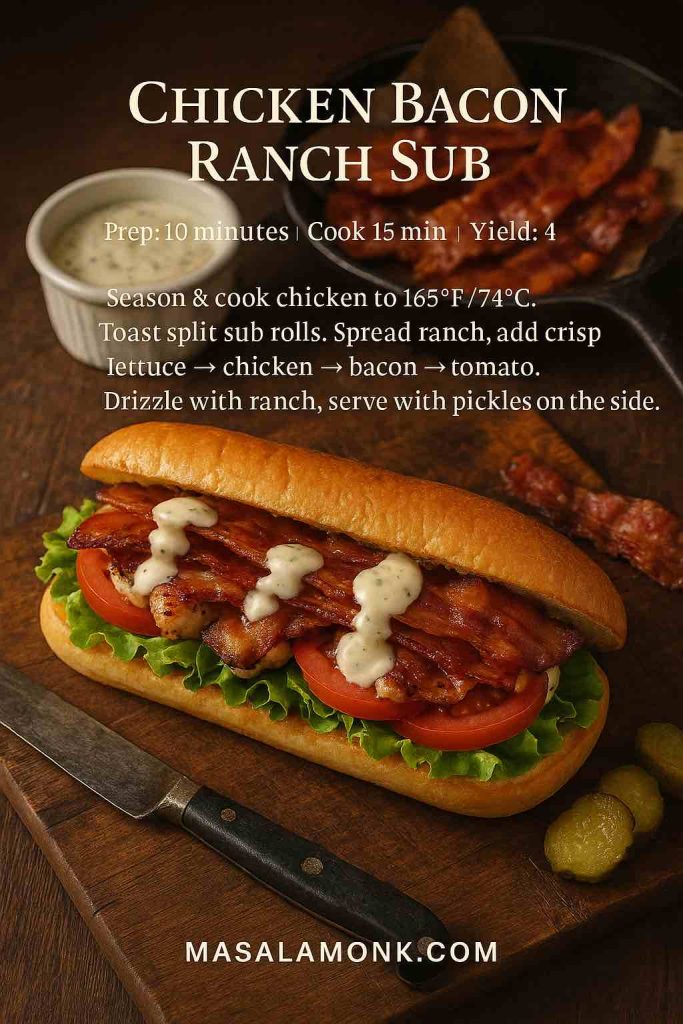
7) Chicken Bacon Ranch Sub Recipe

Build: Soft sub roll • grilled or crispy chicken • ranch • hot bacon • tomato • shredded lettuce.

This sandwich succeeds on balance: smoky bacon, cool ranch, crisp lettuce. To keep it from tipping heavy, toast the roll so the crumb stays resilient, then layer chicken first, bacon second; that way, heat rises to the ranch rather than sogging the lettuce. If you want a lighter profile, use a yogurt-forward dressing to cut richness while preserving body. For matching your spice to your mood, fold a spoon of minced chipotle into the ranch—smoky and gently fiery—or lean into herb brightness.

Helpful reference points: A dependable, from-scratch ranch dressing sets your baseline; if you’re looking to calibrate heat for snacks and sides on the same day, MasalaMonk’s timing and texture notes in their air fryer chicken wings guide help synchronize oven and counter space so everything lands hot together.

Chicken bacon ranch sub with grilled chicken, crispy bacon, lettuce, tomato and ranch on a toasted roll — MasalaMonk.
Chicken Bacon Ranch Sub Recipe — Toast split rolls, then stack ranch → lettuce → chicken → bacon → tomato for a tidy, crunchy bite. Oven-bake bacon on a rack for extra crisp, use a yogurt-forward ranch to lighten it, and cook chicken to 165°F/74°C. Try a chipotle-lime ranch for smoky heat.

Variations:

  • Club-style: Add a thin slice of cheddar and a second layer of lettuce; slice on the bias for neater halves.
  • Chipotle-ranch: Stir in smoky chile; add avocado for coolness.
  • BLT-plus: Use only lettuce, bacon, and ranch with grilled chicken—clean, classic, and fast.

Make-ahead: Cook bacon in the oven on a rack; it stays flat and extra crisp. Assemble subs quickly right before serving so the lettuce stays lively.

Sides: Crisp apples or cucumber spears; the fresh snap works wonders against the sandwich’s savory depth.

Also Read: 10 Creative Chia Pudding Recipes for Every Taste


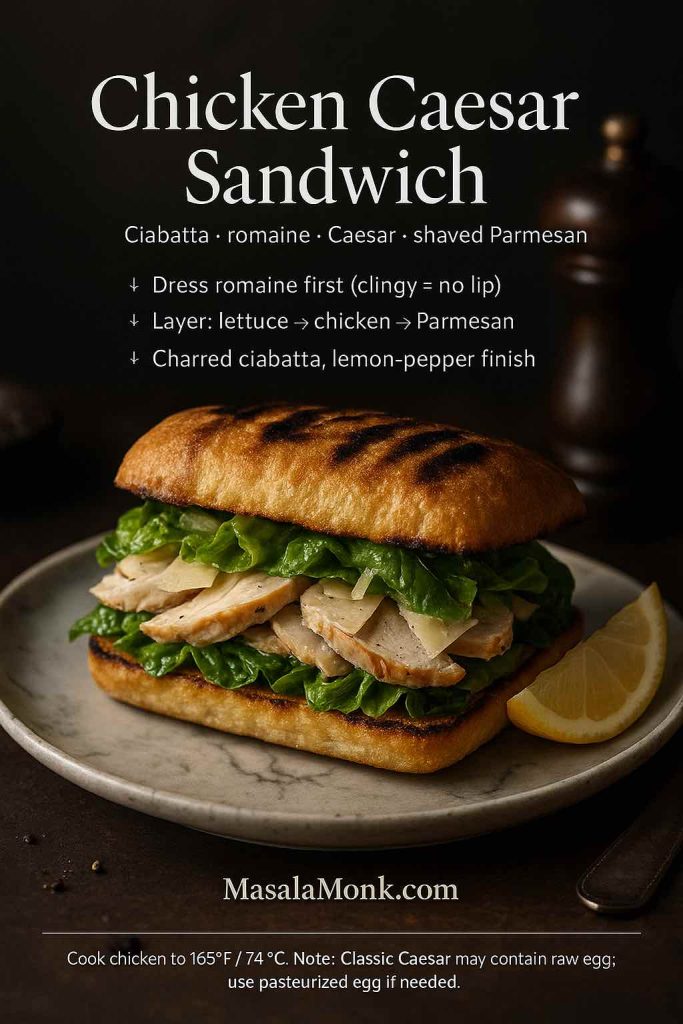
8) Chicken Caesar Sandwich Recipes

Build: Ciabatta • sliced grilled chicken • Caesar dressing • romaine • shaved Parmesan.

Toss romaine lightly in dressing first, add it to the bread to create a moisture buffer, then layer chicken and extra Parmesan. Notably, the dressing choice shapes the whole experience: anchovy-forward versions read bold and classic, while mayo-based or yogurt-touched dressings feel round and gentle. For a rock-solid method that emulates the original table-side spirit, rely on this Caesar dressing recipe; it emulsifies into a silky sauce that clings to lettuce and chicken alike.

Chicken Caesar sandwich on charred ciabatta with dressed romaine and shaved Parmesan—MasalaMonk recipe card.
Chicken Caesar Sandwich Recipe — charred ciabatta, romaine tossed first in anchovy-forward Caesar, layered with sliced grilled chicken and shaved Parmesan. Finish with lemon and pepper. Use pasteurized egg if making classic dressing; cook chicken to 165°F/74°C. More weeknight builds at MasalaMonk.com.

Variations:

  • Grilled Caesar: Char the ciabatta briefly; smoke plus garlic equals big flavor.
  • Crispy-Caesar hybrid: Use a small crispy cutlet instead of sliced grilled chicken; the contrast is addictive.
  • Lemon-pepper finish: A final grind of pepper and a squeeze of lemon dial in brightness.

Make-ahead: Wash and spin romaine well in advance; dry leaves are the secret to a Caesar that doesn’t weep. Store dressing chilled; toss just before serving to preserve crunch.

Sides: Cherry tomatoes with olive oil and capers, or a simple zucchini sauté with garlic and herbs.

Also Read: Punch with Pineapple Juice: Guide & 9 Party-Perfect Recipes


9) How to make Chicken & Waffle Sandwich

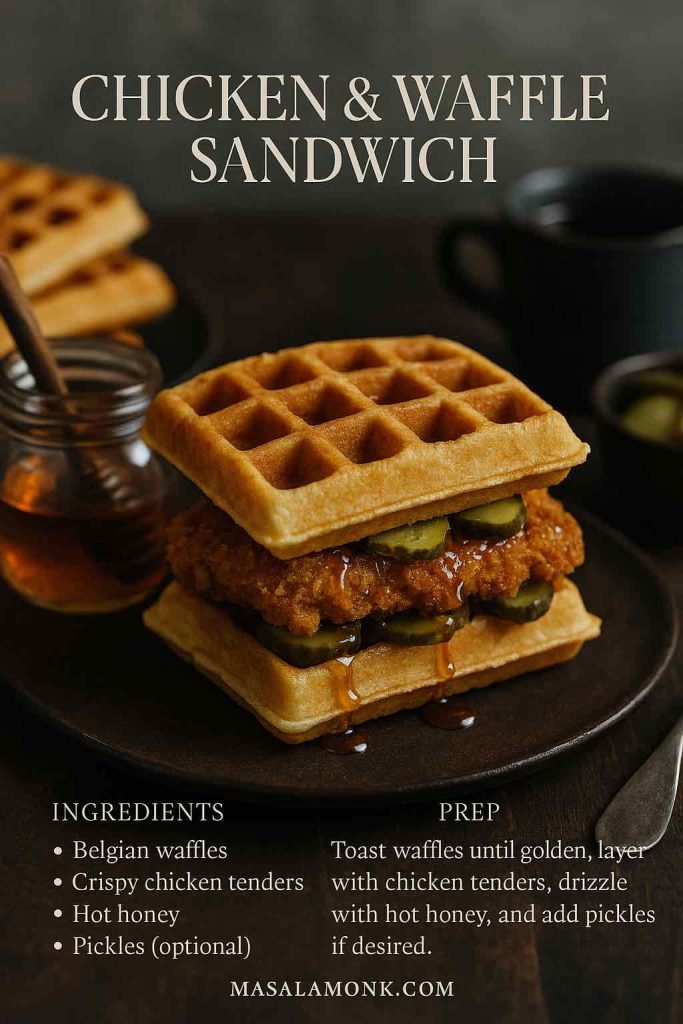
Build: Belgian waffles • crispy tenders • hot honey or maple • (optional) thin pickle slices • napkins on standby.

Sometimes you want unabashed fun. Fry or air-fry tenders until audibly crisp, set between warm waffles, and drizzle lightly with a sweet-heat glaze. For a measured, quick approach that you can tune from gentle to fiery, this streamlined method for hot honey is remarkably consistent. If you prefer to skip pickles, lean on a bit more acidity in the glaze or finish with a squeeze of lemon to offset the sweetness.

Chicken & waffle sandwich with crispy tenders, hot honey drizzle and pickles—MasalaMonk recipe card.
Chicken & Waffle Sandwich Recipe — golden Belgian waffles with crispy chicken tenders, a light hot-honey drizzle, and optional pickles. Re-crisp waffles in a toaster for snap; keep tenders on a rack so they stay crunchy. If cooking chicken from raw, finish to 165°F/74°C. More comfort-food sandwiches at MasalaMonk.com.

Variations:

  • Spicy maple: Warm maple syrup with a pinch of cayenne; it reads classic diner in the best way.
  • Cheddar crunch: Add a thin layer of sharp cheddar; salty richness loves hot honey.
  • Waffle sliders: Quarter the waffles and use smaller tenders for two-bite party food.

Make-ahead: Waffles freeze beautifully; re-crisp them in a toaster or dry skillet. Meanwhile, keep tenders in a warm oven on a rack to hold crunch until serving.

Sides: Fruit salad or coleslaw; either option brings brightness to the party.

Also Read: How to make Mango Salad? 5 Crazy Ideas Inside


10) Recipe for Chicken Teriyaki Sandwich (sub)

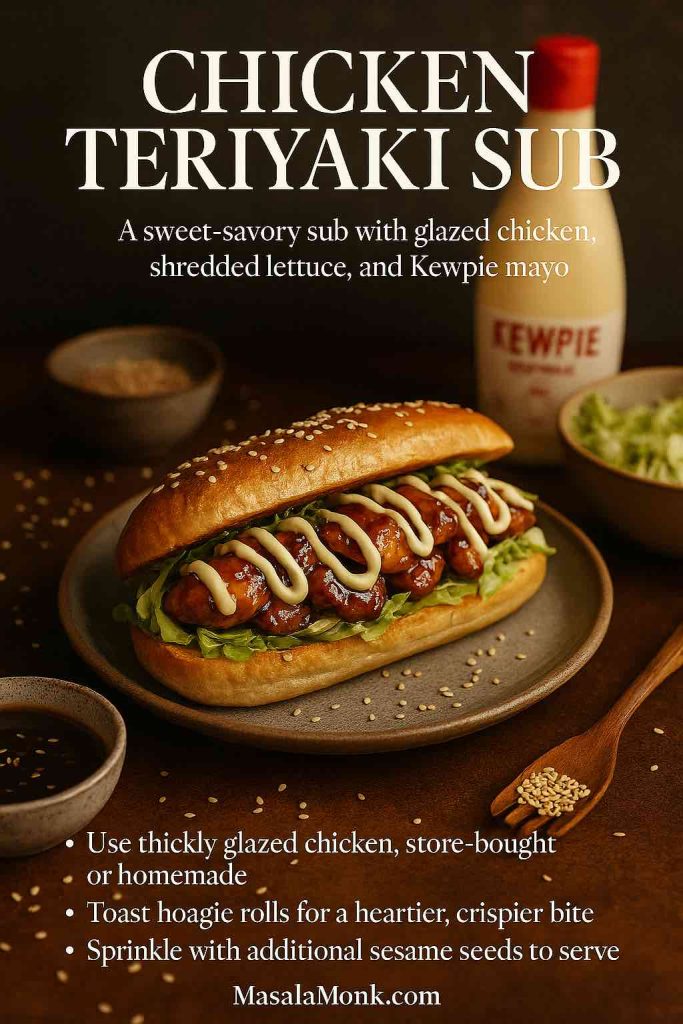
Build: Soft sub • grilled chicken tossed in teriyaki glaze • mayonnaise or kewpie • cucumber • scallions.

Slice grilled chicken and warm it gently with a small pool of teriyaki until glazed—no need to simmer aggressively. Next, swipe the roll with a thin layer of mayo (or kewpie for silkiness), load the glazed chicken, then finish with cucumbers and scallions for refreshing crunch. Because the glaze carries sweetness, that fresh, green bite keeps balance in check.

Chicken teriyaki sub with glossy glazed chicken, shredded lettuce, Kewpie mayo and sesame—MasalaMonk recipe card.
Chicken Teriyaki Sub Recipe — warm sliced chicken in just enough teriyaki glaze to coat (don’t candy), tuck into a toasted hoagie with lettuce (or cucumber + scallions), finish with Kewpie mayo and sesame seeds. Try a chili-crisp mayo for heat. Cook chicken to 165°F/74°C. More weeknight subs at MasalaMonk.com.

Variations:

  • Pineapple-teriyaki: Add finely diced pineapple to the glaze and simmer for a minute; tropical, bright, and fun.
  • Sesame finish: Toast sesame seeds and scatter them on top; nutty aroma for almost zero effort.
  • Spicy-sesame mayo: Stir in a little chili crisp; it complements the glaze while adding texture.

Make-ahead: Mix glaze and prep scallions in the morning. Assemble at dinner with almost no cleanup.

Sides: Snap peas with a sesame-soy dressing, or oven fries dusted with garlic powder.

Also Read: 10 Easy Potato Appetizers: Crispy, Cheesy & Party-Perfect


Example week: five dinners from one weekend prep

Saturday: Grill four marinated breasts; fry a batch of cutlets; whisk house sauce, ranch, hot honey, and blackened rub. Bake or buy a pack of soft buns.

Sunday (BBQ): Shred one breast, warm with BBQ, pile onto potato buns with slaw. Save leftover slaw for tomorrow.

Monday (Buffalo): Re-crisp two cutlets; toss in Buffalo; add celery slaw and ranch. Offer a quick side of carrot sticks.

Wednesday (Caesar): Slice a grilled breast, toss romaine in dressing, and build on ciabatta with Parmesan. Serve cherry tomatoes on the side.

Friday (Teriyaki): Slice the last grilled breast, glaze quickly with teriyaki, and layer in a soft sub with cucumber and scallions. Finish with sesame seeds.

As a result, you’ve enjoyed five distinctive chicken sandwich recipes without feeling like you ate the same dinner twice. And, crucially, your sauces and prepped components carried you through with almost no midweek effort.


Final thoughts (and a few sources you’ll actually use again)

Cooking at home scales best when your core methods repeat effortlessly. Once you’ve internalized grilling to 165°F/74°C (see the USDA temperature chart) and crisping cutlets the right way (that cutlet guide is gold), you can improvise with confidence. Then, with a small sauce rotation—anchovy-forward Caesar dressing, trusty ranch, and adaptable hot honey—you’ll steer flavor from bright to rich to spicy without rewriting the shopping list.

Meanwhile, for days you want a gentle, wholesome vibe, sneak in hummus or strained yogurt as your creamy element; MasalaMonk’s approach to yogurt-based spreads and their straightforward hummus sandwich offer texture tricks that keep sandwiches tidy and satisfying. And when you’re in the mood to go full comfort—say, Chicken Parm on a broiled sub—remember that a little basil and a properly toasted roll raise the bar more than an extra ounce of cheese ever could.

In the end, these chicken sandwich recipes are a toolkit: start with either grilled or crispy, choose a sauce and a bread, add crunch and greens, and you’re done. Vary heat levels to suit the crowd, keep buns warm, and let rest times do their magic. Tonight, maybe it’s BBQ with slaw; tomorrow, Buffalo with harissa-ranch; next weekend, Teriyaki with cucumber and scallions. Different sandwiches, same ease—and the same happy table.

FAQs

1. What are the must-know basics for chicken sandwich recipes?

Start with even-thickness chicken, season generously, and cook to a safe internal temperature of 165°F/74°C. Moreover, rest the meat a few minutes so juices settle. Choose buns that match the filling (brioche for grilled, sub rolls for saucy builds), and toast lightly to resist sogginess.

2. Which buns work best for BBQ, Parm, and Buffalo styles?

For BBQ, potato buns cushion saucy fillings; conversely, Chicken Parm thrives in sturdy sub rolls that can handle broiling. Buffalo sandwiches prefer kaiser rolls or brioche—soft yet resilient—so the heat and dressing stay balanced.

3. How do I keep crispy cutlets crunchy after saucing?

Fry to golden, drain on a rack, then sauce right before serving. Additionally, spread condiments thinly on both sides of the bun and add a lettuce “buffer” to reduce steam and seepage.

4. What is the simplest “house” sauce to anchor most chicken sandwich recipes?

A quick blend of mayo, Dijon, lemon juice, a pinch of sugar, salt, and pepper delivers tang, creaminess, and balance. Furthermore, it pairs with grilled, crispy, or shredded chicken without overpowering.

5. How can I make a healthier chicken sandwich without losing flavor?

Go grilled rather than fried, then swap part of the mayo for strained yogurt. Likewise, load on crunchy vegetables, choose whole-grain or lighter rolls, and keep sauces to 1–2 tablespoons per sandwich.

6. What’s the easiest way to batch-prep for busy weeks?

Marinate and grill multiple breasts at once; slice some, keep others whole. Meanwhile, prep a small trio of sauces (Buffalo, house, pesto-mayo) and store them chilled. Consequently, you can build BBQ, Caesar, or Bacon-Ranch in minutes.

7. How do I prevent wet, collapsing sandwiches?

Toast buns, pat greens dry, and assemble in a moisture-smart order: sauce → lettuce → chicken → toppings → tiny sauce dot on the top bun. Notably, shredded and pulled versions benefit from being warmed with just enough sauce to coat—not drown.

8. What’s a reliable blueprint for BBQ chicken sandwich success?

Warm shredded chicken in your favorite BBQ sauce, pile onto a soft bun, then finish with slaw for crunch and acidity. Alternatively, thin-sliced grilled breast works when you want leaner texture.

9. How do I nail a Buffalo chicken sandwich without losing crispness?

Sauce after frying or grilling, not before. Add celery slaw for snap; pick ranch for herbal coolness or blue cheese for tang. Beyond that, a drizzle of hot honey can balance heat with gentle sweetness.

10. Any quick upgrades for Chicken Parm sandwich night?

Use panko-breaded cutlets, warm marinara, and melt provolone or mozzarella under the broiler. Even so, a final shower of grated Parmesan and torn basil lifts aroma and adds savory depth.

11. What defines a great chicken salad sandwich?

Tender, bite-size chicken bound with just enough dressing to coat, plus crisp celery and a bright note like lemon. Additionally, croissants or soft sandwich bread keep the bite tender; add cranberries or pecans for contrast when desired.

12. How do I turn rotisserie leftovers into a stellar sandwich?

Shred, warm gently with a spoon of sauce or pesto-mayo, then stack with fresh greens and thin onions on toasted sourdough. On the other hand, pressing the sandwich briefly in a skillet can marry layers without drying the filling.

13. What’s the difference between grilled and blackened chicken sandwiches?

Grilled relies on marinade and char for flavor; blackened adds a spice crust (paprika, garlic, thyme, oregano, cayenne) seared quickly for aroma and color. Ultimately, both finish at 165°F/74°C and benefit from a cool, crisp lettuce layer.

14. How do I balance a chicken bacon ranch sub so it isn’t too heavy?

Keep bacon crisp, use a thinner smear of ranch, and layer lettuce for freshness. Additionally, consider a yogurt-forward ranch or a chipotle-lime variation to add brightness without extra fat.

15. What makes a chicken Caesar sandwich work as well as the salad?

Dry, crunchy romaine, anchovy-forward dressing, and shaved Parmesan—plus sliced grilled chicken for protein. Furthermore, ciabatta or toasted sourdough stands up to dressing without collapsing.

16. Tips for a clean, handheld chicken & waffle experience?

Use waffles with defined pockets, keep tenders extra crisp, and drizzle hot honey sparingly. Alternatively, squeeze in a lemon wedge for acidity if you skip pickles but still want balance.

17. How do I keep teriyaki chicken sandwiches from turning sweet-heavy?

Glaze lightly and add fresh, watery crunch—think cucumber and scallions. Likewise, a thin swipe of mayo or kewpie creates silkiness while tempering sugar.

18. What are the best proteins for shredded chicken sandwich ideas?

Poached, slow-cooked, or rotisserie chicken shred cleanly and reheat well. Consequently, they absorb sauces quickly—BBQ, Buffalo, pesto-mayo, or Caesar—without long simmering.

19. Which spreads are smart substitutes for mayo in chicken sandwich recipes?

Strained yogurt, hummus, mashed avocado with lime, and pesto-mayo hybrids deliver creaminess with character. Moreover, they help “glue” loose shreds so sandwiches hold together better.

20. How can I scale these recipes for crowds?

Batch the proteins, toast rolls on sheet pans, and set sauces in squeeze bottles. Likewise, pre-slice tomatoes and rinse lettuce early; assemble to order so textures stay crisp.

21. What’s the quickest path from fridge to plate on weeknights?

Keep grilled chicken sliced, a house sauce ready, and buns pre-split. Beyond that, assemble cold with greens or rewarm the chicken briefly, then finish with a fast slaw or cucumber ribbons.

22. How do I integrate spice without overwhelming the family?

Offer scalable heat: a blackened rub with modest cayenne, chipotle-lime mayo on the side, or a restrained drizzle of hot honey. In short, build mild by default and let diners add heat to taste.

23. What are the top “crowd-pleaser” chicken sandwich recipes to start with?

Begin with BBQ pulled, Chicken Parm, and Buffalo. Likewise, rotate Grilled (Blackened option) and Caesar for balance, then add Bacon-Ranch or Teriyaki when you want variety.

24. Any storage advice so leftovers still taste fresh?

Store components separately—bread at room temp, sauces chilled, chicken in airtight containers. Furthermore, re-crisp cutlets in a hot oven on a rack and re-toast buns right before serving.

25. How do I choose the right lettuce and toppings for structure?

Pick shredded iceberg or romaine for crunch and moisture control. Additionally, slice tomatoes thin, use just enough onion for lift, and avoid stacking wet components directly on the bottom bun.

26. Which sides consistently complement these styles?

Think bright and crisp: simple slaws, chopped salads, oven fries, or fresh fruit. Alternatively, a light soup or corn salad keeps the plate balanced without overshadowing the sandwich.

27. Can I freeze components for future chicken sandwich recipes?

Absolutely. Freeze shredded chicken flat in small bags, then thaw fast under cool water. Likewise, baked cutlets re-crisp nicely; just cool completely before freezing to preserve texture.

28. What’s the quickest seasoning upgrade if I have zero time?

Salt early, then add lemon zest or a dash of smoked paprika. Nevertheless, a tiny squeeze of citrus at the end often tastes as if you cooked longer.

29. How do I use one grocery list to cook multiple styles in a week?

Buy chicken breasts, buns, lemons, greens, celery, onions, and a few pantry sauces or their building blocks (hot sauce, Dijon, honey). Consequently, you can pivot among BBQ, Caesar, Buffalo, and Rotisserie-Pesto without extra trips.

30. What’s the single best tip for sandwich success every time?

Toast the bread, season the chicken well, and assemble with intention—buffers first, wet items last. Ultimately, that sequence keeps bites structured, flavorful, and satisfying.