
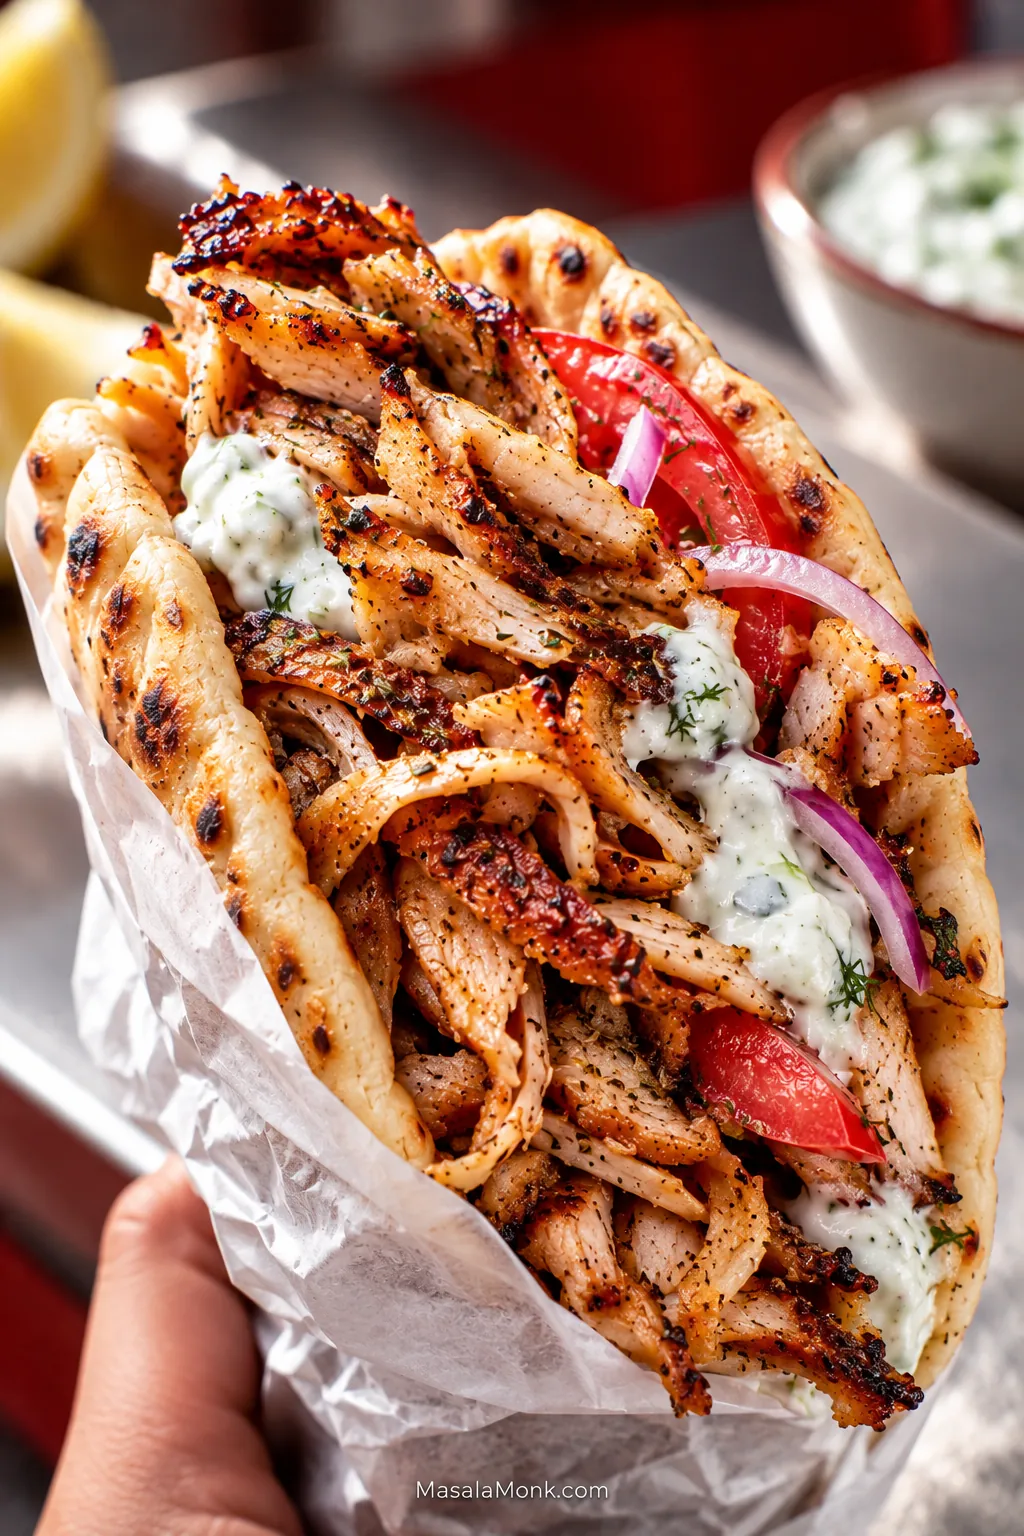
The giveaway is in the pile of chicken. If it comes out as six neat grilled thighs or tidy cubes from a skewer, it may taste excellent. But it still does not eat quite like the thin, irregular pieces shaved from a gyro stack.
Good chicken gyro meat gives you several textures at once. Some folds stay juicy and tender. Others pick up dark golden edges, while a few narrow ends turn almost crisp. Tuck those pieces into warm pita with cold, thick tzatziki, ripe tomato and sharp onion, and every bite catches a little of each.
The difficult part when you make chicken gyro meat at home is creating those layers without a commercial spit. Seasoning gets you only part of the way. The bigger job is building a compact roast that stays juicy, can be shaved thin, and still has enough moisture to survive one last blast of heat.
This Greek chicken gyro recipe uses an ordinary loaf pan to recreate that layered structure in a home oven. Boneless thighs are pressed together, roasted until just cooked through, rested, shaved thin and given one fast final hit of heat.
Chicken Gyros at a Glance
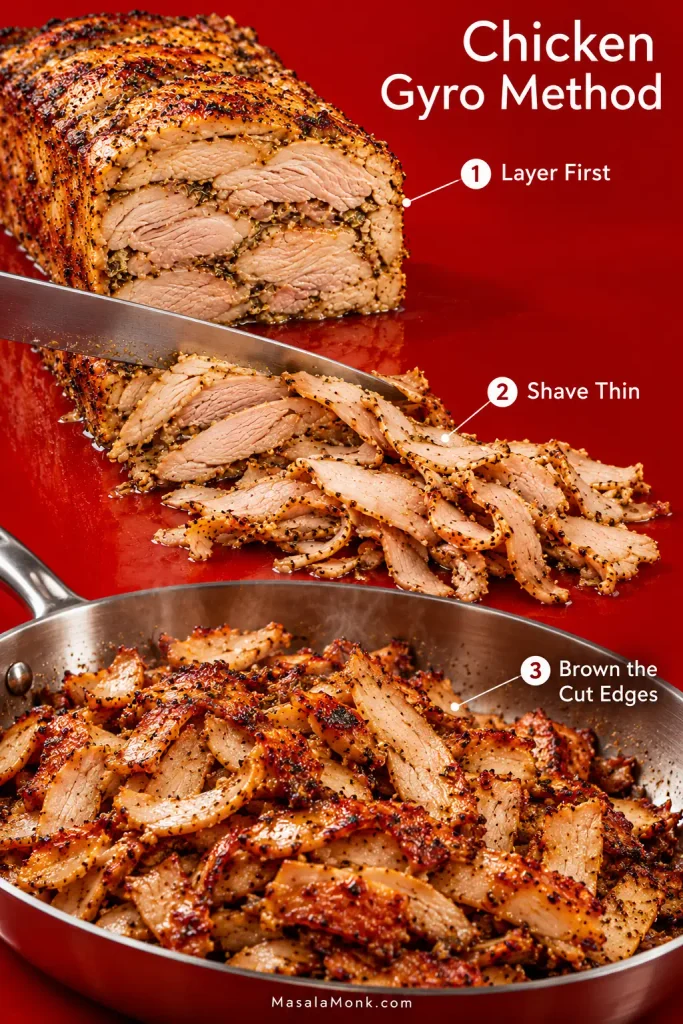
Layer first. Shave thin. Brown the cut edges. Those three jobs matter more here than adding another spoonful of spice.
Quick answer: Marinate whole chicken thighs, press them into a loaf pan and roast until the centre reaches 165°F / 74°C. Rest, shave the chicken into thin ribbons, then crisp small batches over high heat before wrapping them in warm pita with tzatziki.
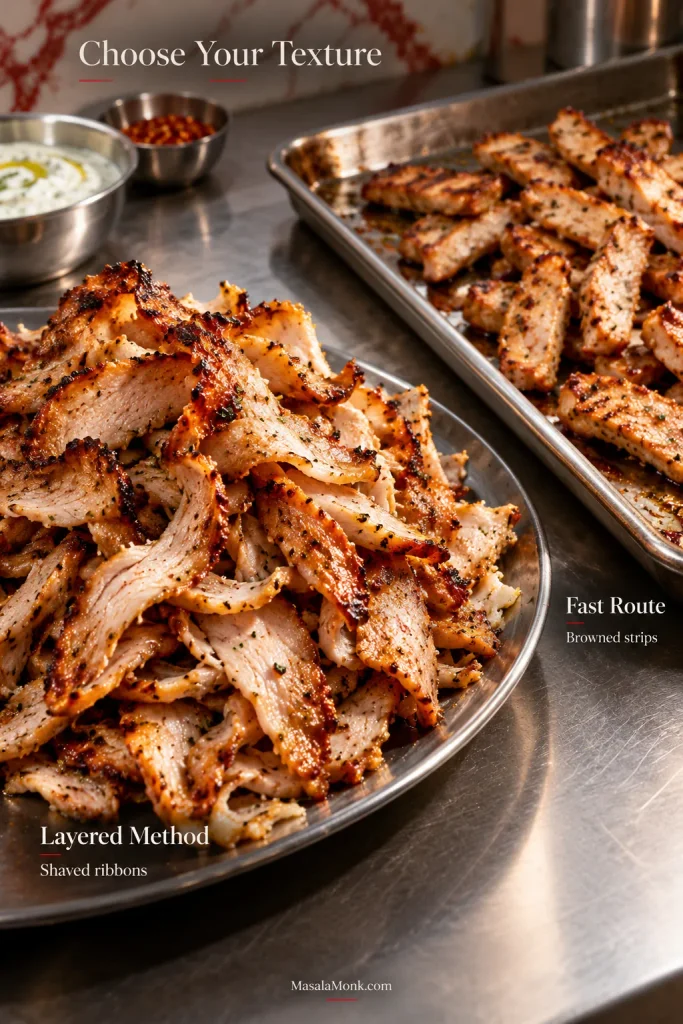
Need dinner sooner? The fast version uses chicken strips, a 30–60 minute marinade and a hot sheet pan. You lose the layered shave, but you still get juicy browned chicken for pita tonight.
Chicken Gyros Recipe
Keeping the thighs whole is deliberate. Once roasted together and sliced across the stack, they retain natural folds, grain and irregular edges instead of becoming six separate pieces of chicken.
For the chicken gyro meat
- 1 kg / 2 lb 3 oz boneless, skinless chicken thighs
- 80 g / about ⅓ cup thick plain Greek yogurt
- 30 ml / 2 tbsp extra-virgin olive oil
- 30 ml / 2 tbsp fresh lemon juice
- Finely grated zest of 1 lemon
- 4 large garlic cloves / about 16 g, finely grated or minced
- 1 tbsp dried oregano
- 2 tsp sweet paprika
- 1 tsp Dijon mustard
- 12 g / about 2 tsp fine sea salt; use weight when possible because salt density varies by brand and grind
- 1 tsp freshly ground black pepper
- 15–25 ml / 1–1½ tbsp extra olive oil for crisping, only if you do not get enough usable rendered chicken fat
For the thick tzatziki
- 250 g / about 1 cup thick Greek yogurt
- 170 g / about 6 oz English or Persian cucumber
- ¼ tsp fine salt for draining the cucumber
- 1 large garlic clove, finely grated; use 2 for a stronger sauce
- 15 ml / 1 tbsp extra-virgin olive oil
- 10 ml / 2 tsp fresh lemon juice
- 1 tbsp finely chopped fresh dill, optional
- ¼ tsp fine salt, then adjust after resting
- Freshly ground black pepper to taste
To build 6 chicken gyro wraps
- 6 soft Greek-style pitas, about 7–8 inches / 18–20 cm across
- 2 medium ripe tomatoes / about 280–300 g, sliced or chopped
- ½ small red onion / about 50–60 g, sliced very thin
- Lemon wedges, for serving only if needed
- Cooked fries, optional
Equipment that matters
- 9 × 5-inch / 23 × 13 cm metal loaf pan
- Parchment paper
- Large mixing bowl or food-safe container
- Instant-read thermometer
- Sharp chef’s knife
- 12-inch / 30 cm cast-iron or stainless-steel skillet, or a broiler-safe metal sheet pan
- Box grater and clean kitchen towel for the cucumber
1. Even out the chicken
Trim away large loose pockets of fat and any hanging flaps that stop the thighs lying flat. Leave the smaller seams of fat; they help the meat stay supple through the roast and final crisp.
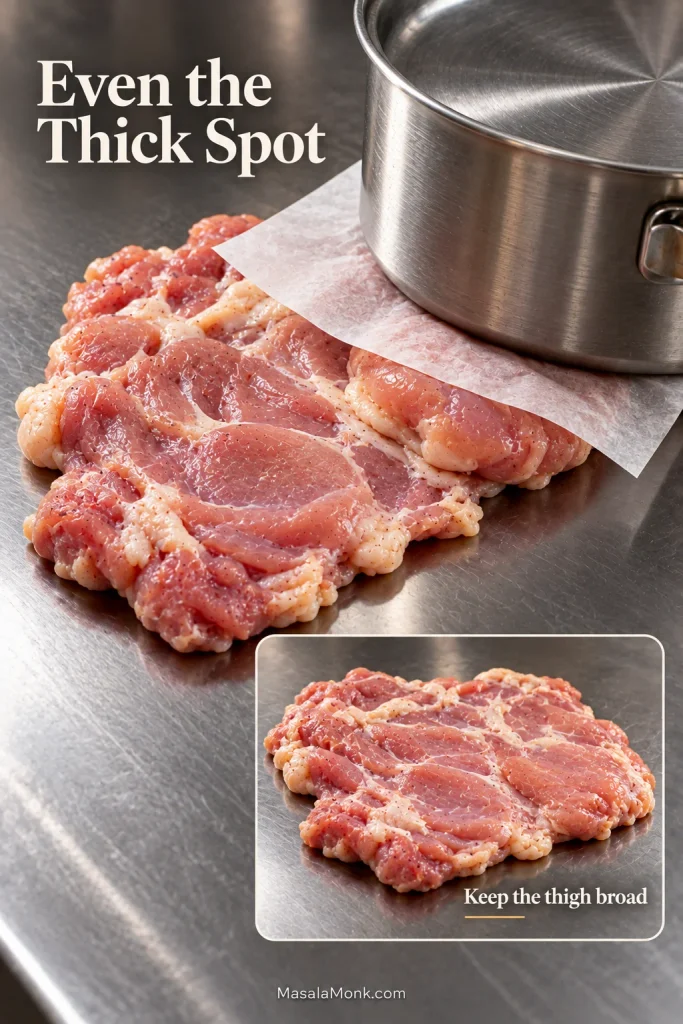
Open each thigh fully. If one section forms a dense knot while the rest is much thinner, cover the thigh with parchment. Give only that thick area a few firm taps with a meat mallet, rolling pin or heavy pan. Aim for broad, fairly even pieces that are still much thicker than cutlets. They do not need to look identical.
2. Make the chicken gyro marinade
Whisk the yogurt, olive oil, lemon juice, lemon zest, garlic, oregano, paprika, Dijon, salt and pepper until evenly combined.
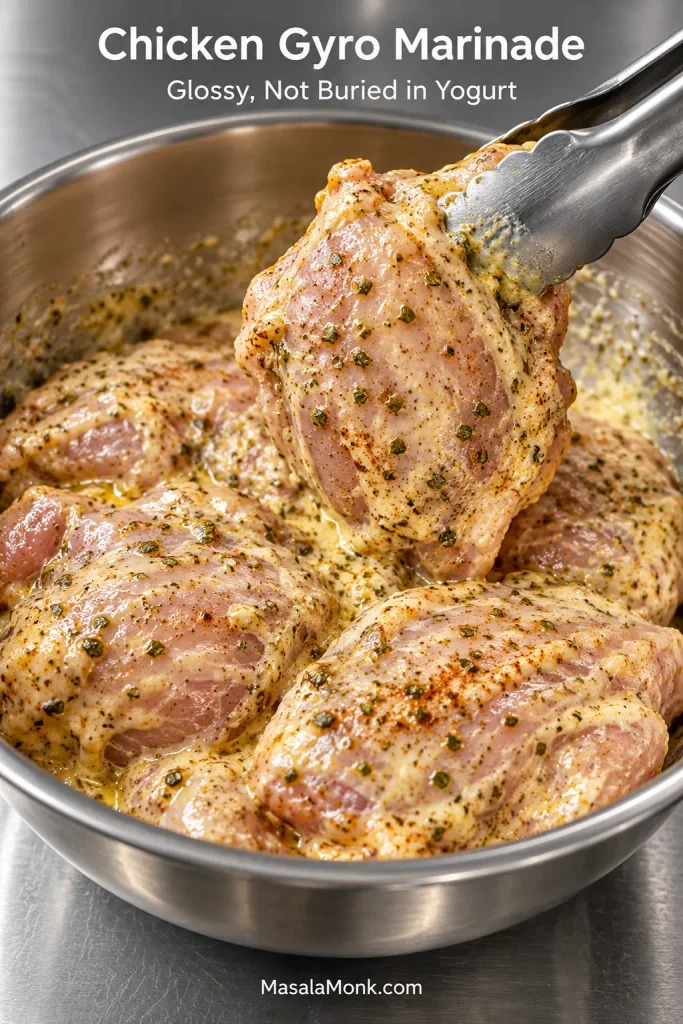
Add the thighs and turn them through the mixture. The right coating leaves the chicken glossy, speckled with oregano and paprika, with no heavy blanket of yogurt hiding the meat. Here, the seasoning stays oregano-led. Garlic and lemon are easy to taste, paprika brings warmth and colour, and the little bit of Dijon rounds things out without making the meat taste mustardy.
3. Marinate
Cover and refrigerate for at least 2 hours. For this marinade, 4–8 hours is a useful target and around 12 hours is plenty. That timing is about texture and flavour, not a food-safety cutoff.
4. Make the tzatziki while you wait
Grate the cucumber, toss it with ¼ teaspoon salt and leave it for about 10 minutes. Wrap it in a clean kitchen towel and squeeze firmly. Open the towel, gather it again and give it another hard twist. By then you should get only a few droplets, not another stream of cucumber water.
Mix the cucumber with the Greek yogurt, garlic, olive oil, lemon juice, dill if using, salt and pepper. Cover and refrigerate. The rest does the sauce good: the garlic settles down and the whole thing tastes more joined-up by the time the chicken is ready. You want it cool and thick enough to sit against hot meat without immediately running into the pita.
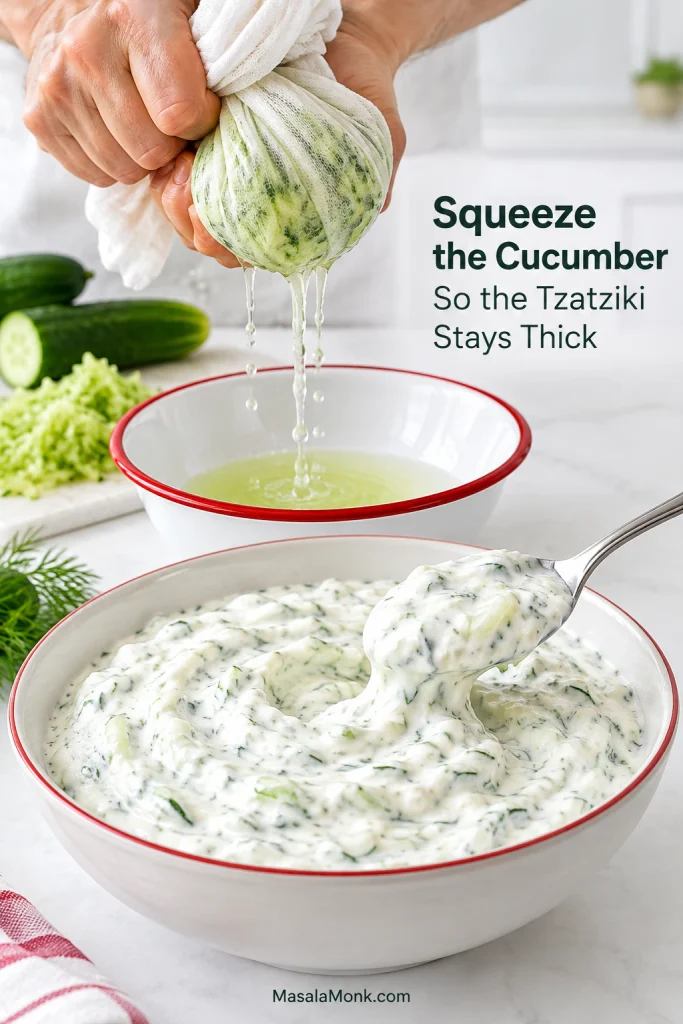
This batch makes a little more tzatziki than six wraps usually need. Put the rest on the table; somebody will use it.
5. Pack the loaf pan
Heat the oven to 375°F / 190°C conventional or about 350°F / 175°C fan. Line a 9 × 5-inch / 23 × 13 cm metal loaf pan with parchment, leaving enough overhang along the long sides to lift the chicken later.
Lift one thigh from the bowl and let the heavy excess marinade fall back. Lay it across the bottom, then continue with the remaining thighs, alternating where the thicker end sits so those dense sections do not all collect on one side. Press firmly every few pieces.
The top may look a little uneven; that is fine. Nobody is going to see a perfect loaf once you start shaving it. What matters underneath is a tightly packed set of thighs without large loose gaps.
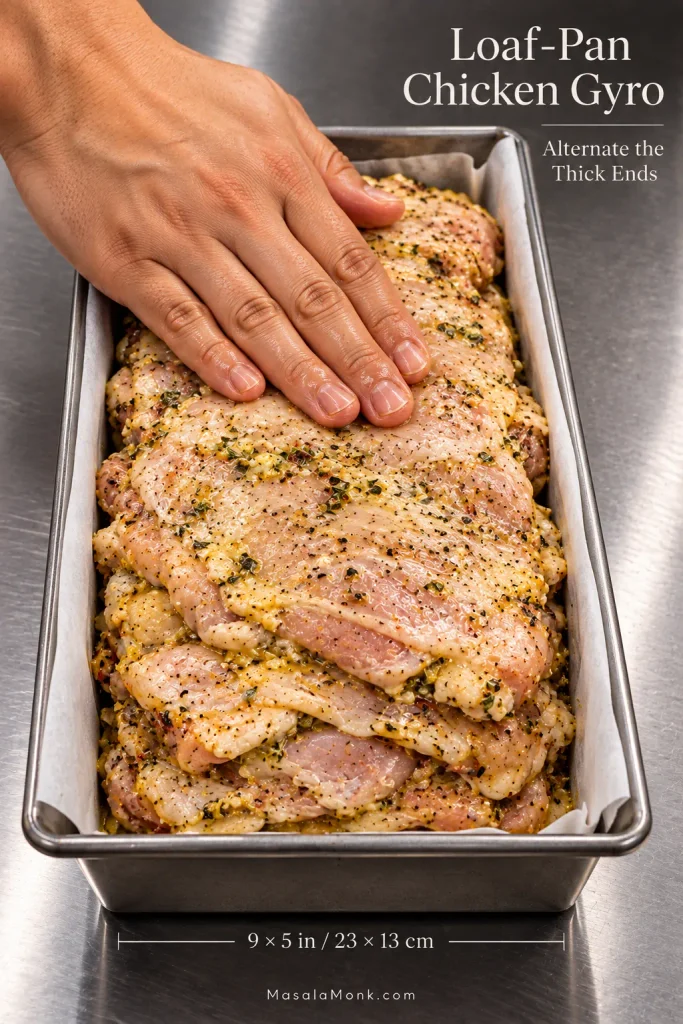
Discard the remaining marinade that has been in contact with the raw chicken.
6. Roast to temperature
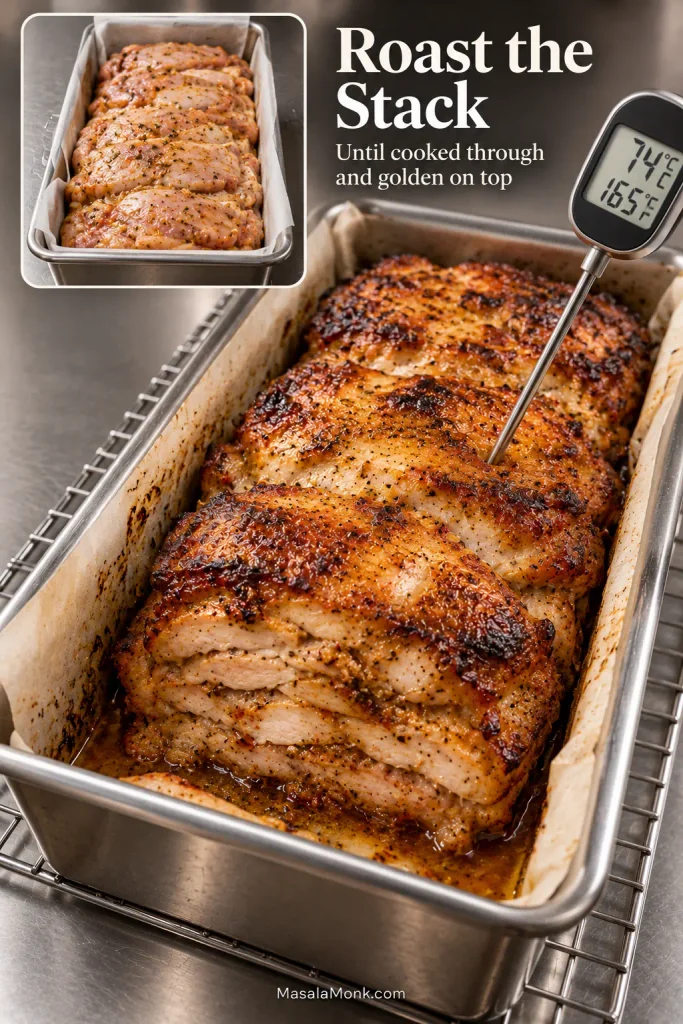
Roast uncovered on the middle rack. Begin checking around 55 minutes; most 1 kg stacks in this pan will finish somewhere around 60–90 minutes.
Insert an instant-read thermometer into the deepest central area without touching the pan. If the reading is close, check another nearby spot. The coldest reading should reach 165°F / 74°C, the USDA minimum internal temperature for poultry.
Meanwhile, the top should smell roasted and oregano-heavy and take on a deep golden colour. If it starts smelling sharply scorched or gets very dark while the middle is still below temperature, lay a loose piece of foil over the top and keep going.
7. Rest, then separate the fat and juices
Rest the chicken in the pan for 10 minutes. Meanwhile, slice the tomato and onion, set out the pita and get the crisping skillet ready.
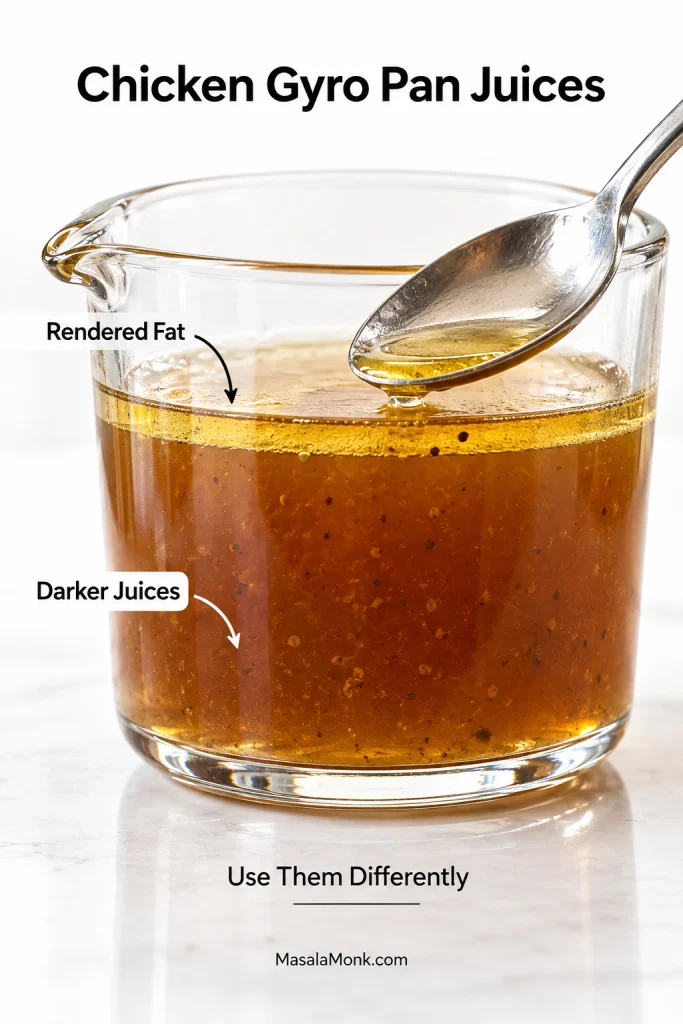
Pour the pan juices into a small heat-safe bowl and let them sit for a few minutes. Clear fat may gather on top, with the darker watery juices underneath.
When enough fat collects, spoon a little from the top for crisping and save the darker juices for leftovers. Barely any separation? Don’t fight it—use olive oil in the skillet and keep the pan juices for later. Lift the rested chicken onto a cutting board using the parchment sling.
8. Shave across the layers
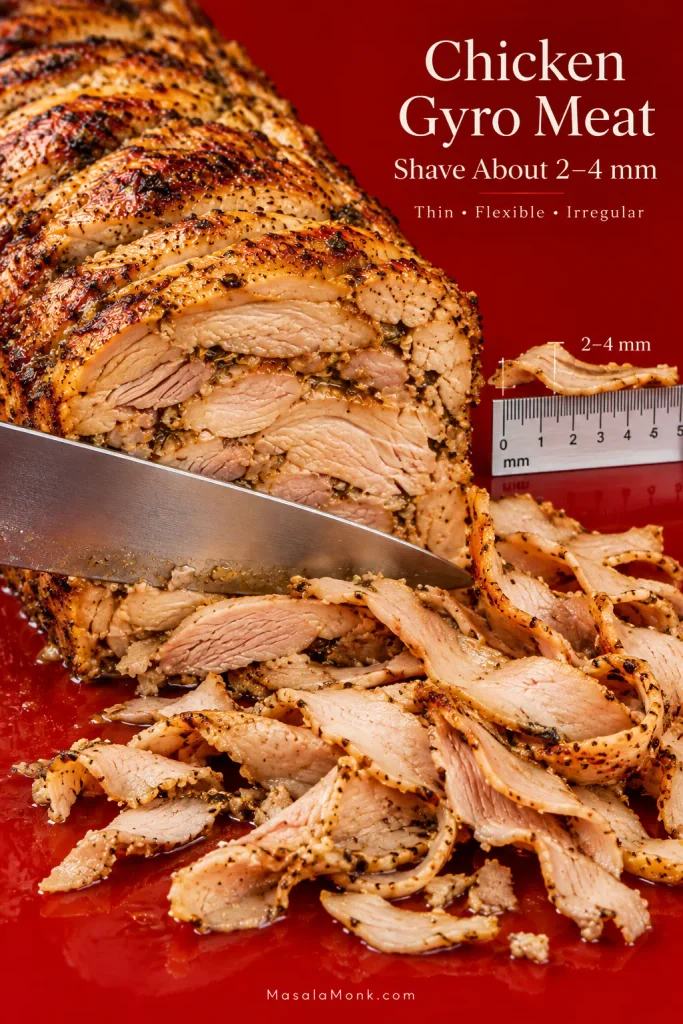
Now comes the part that explains why we bothered packing the thighs together. Cut across the roast and several pieces of chicken appear in each thin, irregular ribbon instead of six separate thigh-shaped slices.
Aim for roughly 2–4 mm. Some slices will stay broad and layered; others will split into little shards and ends. Keep all of them. Gyro meat looks better—and eats better—when the pile is a little unruly. If the board is filling with thick roast-chicken slices, take another pass with the knife.
9. Brown the cut faces
Heat a 12-inch / 30 cm cast-iron or stainless-steel skillet over medium-high to high heat. Add about 1 teaspoon of rendered chicken fat or olive oil, followed by about 150–200 g shaved chicken. In a smaller skillet, use less; you want a loose layer with bits of hot pan still visible between the meat.
The first batch is where the loaf finally starts looking like gyro.
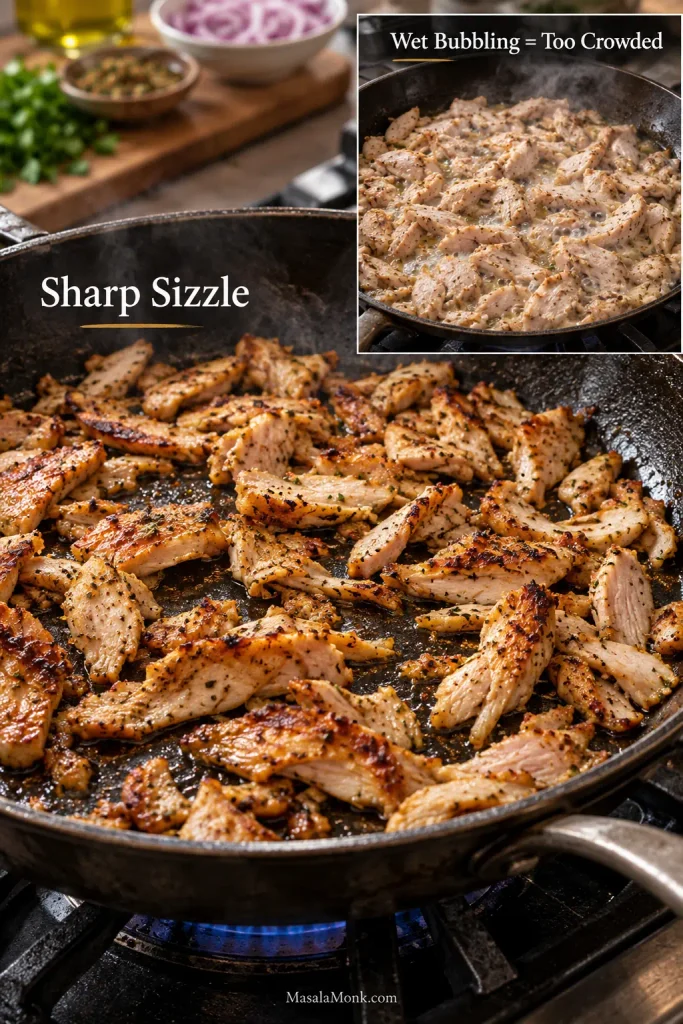
As it lands, the chicken should hit the pan with a sharp sizzle. Leave the first side alone for roughly 60–90 seconds, until the narrow edges begin curling and scattered rims turn dark golden. Toss and give the second side another 30–60 seconds.
Pull the chicken while the broader ribbons still bend easily. A few crisp tips are welcome; an entire batch of stiff chicken is not. Transfer each finished batch to a warm platter and leave it uncovered or only very loosely tented while you crisp the rest.
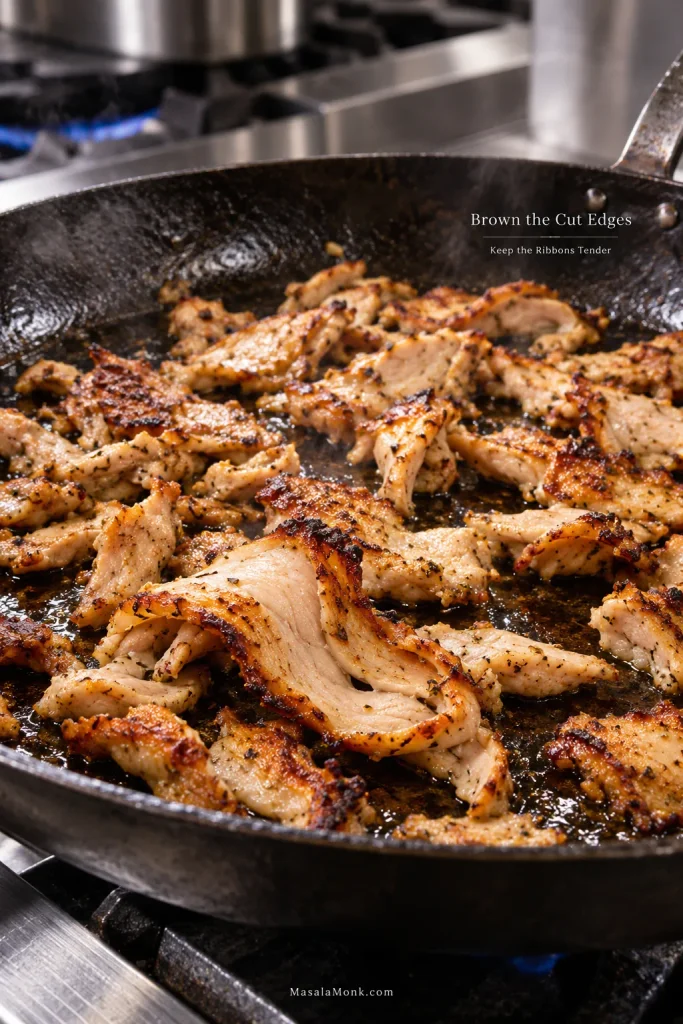
Wet bubbling means the skillet is getting crowded. Take some chicken out and let the pan recover its sharp sizzle before continuing.
10. Warm the pita and build the gyros
Warm each pita in a dry skillet for about 20–30 seconds per side, just until soft and flexible. Keep the warm rounds under a clean towel.
The simplest build is tzatziki → hot chicken → tomato → onion → optional fries. Keep most of the filling through the centre so the pita still folds easily. Use about 35–45 g / 2–3 tablespoons tzatziki and 120–130 g hot shaved chicken per pita.
Fold the sides around the filling and, for easier eating, wrap the lower half in parchment or foil.
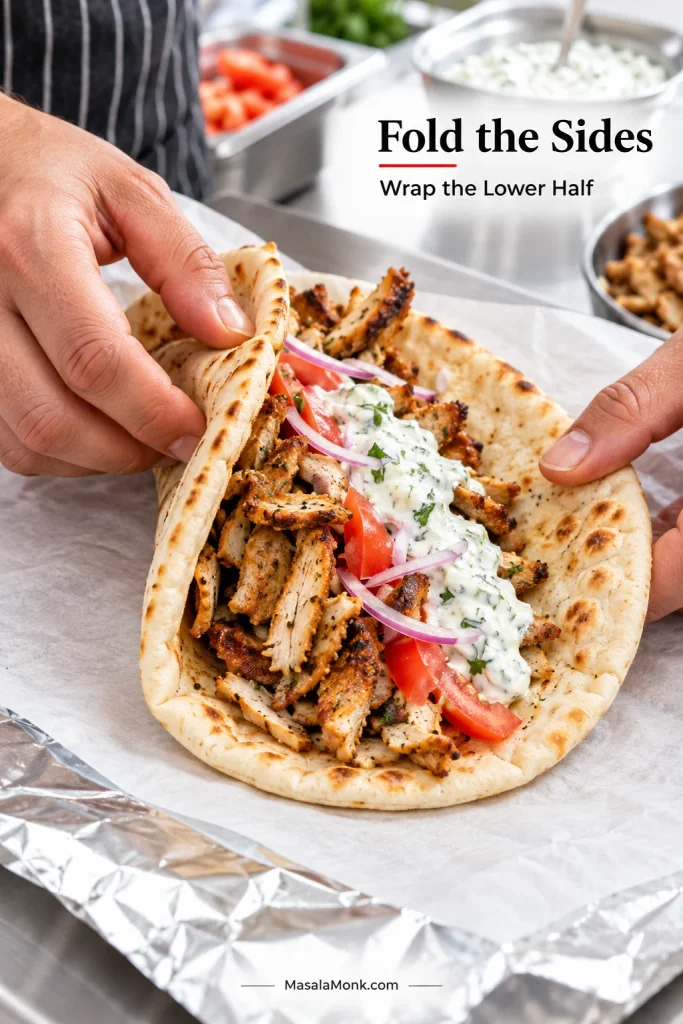
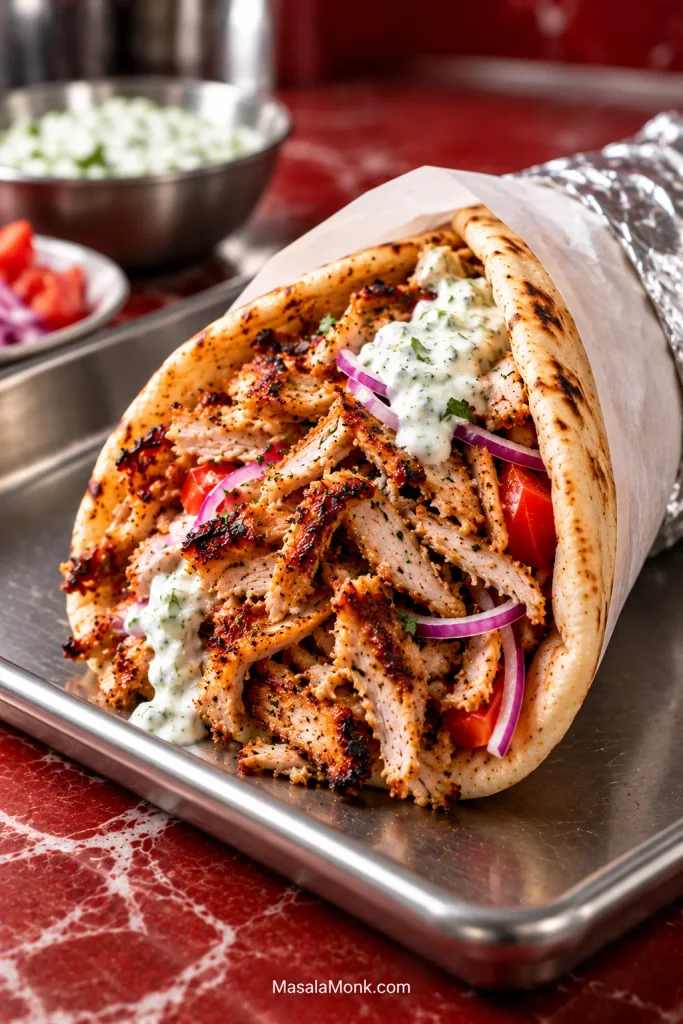
The best bite has hot browned chicken against cold garlicky tzatziki and soft warm pita. Add fries inside if you like, then taste before reaching for the lemon wedge. There is already acidity in the chicken, yogurt and tomato.
Chicken Gyro Guide
If the recipe is all you needed, you can stop there. For the reasoning behind the stack, the gyro-versus-souvlaki distinction and the fixes for steaming instead of browning, keep reading.
When Something Goes Wrong
Why the Stack Matters More Than Another Spoonful of Spice
The loaf-pan method makes more sense once you look at what a commercial gyro stack is doing as it cooks. As the outside browns, that layer is shaved away, and meat that was protected a moment ago becomes the new exterior. That repeated cycle creates the mixture of tender shaved meat and darker little edges that makes the pile so distinctive.
Cook those same flavours on separate thighs and the chicken can still be delicious, but the texture lands somewhere else. A tall homemade spit can imitate the restaurant setup more closely. The loaf pan gives up the theatre and keeps the useful part: meat cooked together in layers.
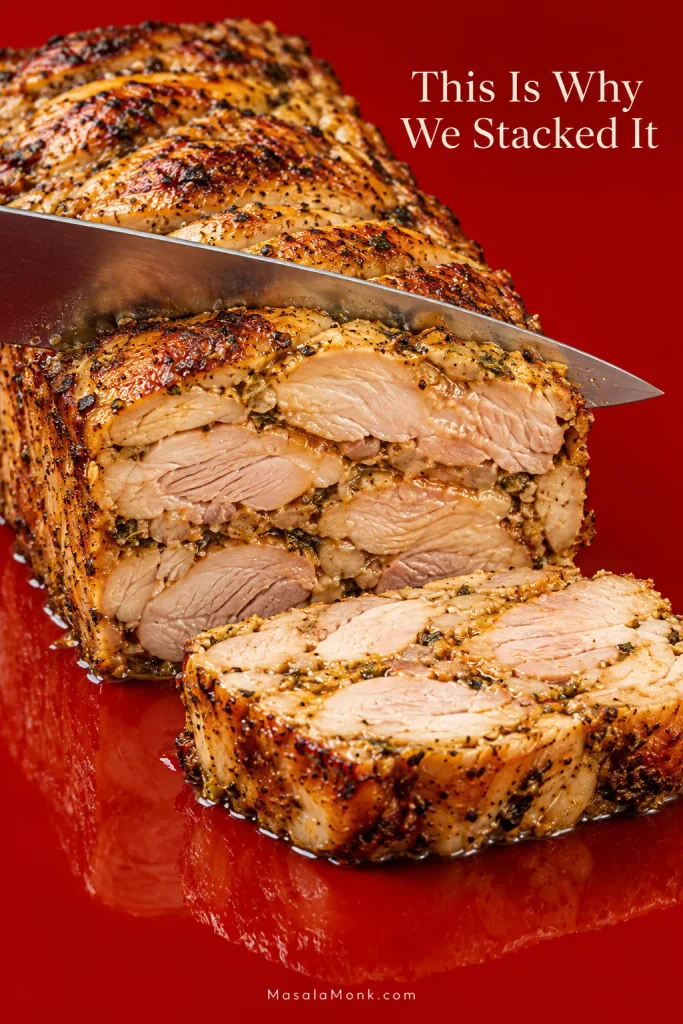
In other words, the pan builds the layers; the knife and skillet finish the job.
Chicken gyro vs souvlaki: what’s the difference?
Traditionally, gyro refers to meat cooked on a rotating stack and shaved from the browned exterior. In everyday use, especially outside Greece, “gyro” is also commonly used for the finished pita wrap.
With the traditional stack-and-shave style, chicken gyro meat is cooked as part of a larger stack. Chicken souvlaki is usually cut into individual pieces, threaded onto skewers and cooked directly over high heat. The fillings around them may look similar, but gyro gives you shaved layered ribbons while souvlaki gives you separate charred pieces.
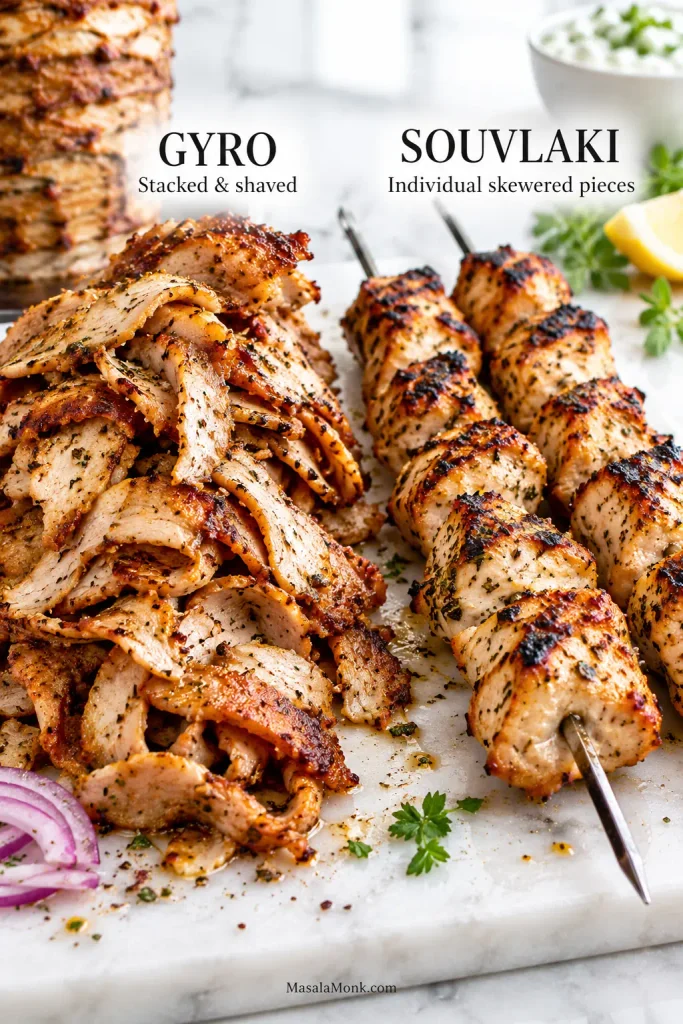
If charred pieces straight from a skewer are what you have in mind, the chicken souvlaki recipe is built around that result. Shawarma sits closer to gyro structurally because it also relies on stacked meat and browned exposed edges, although its seasoning moves in a warmer, more heavily spiced direction. The chicken shawarma recipe heads there deliberately; this gyro stays brighter and more oregano-led.
Chicken Thighs, Seasoning and Marinade
Thighs earn their place here twice. They stay forgiving during the roast, then handle the short blast of skillet heat without drying out as quickly as breast. For breast, use the quicker method farther down; flatter, faster cooking gives you much better control over doneness.
Chicken gyro seasoning varies widely across home and restaurant versions. Here, the profile stays bright and oregano-led, with sweet paprika for warmth and a little Dijon for savoury tang.
Yogurt helps the seasoning stay put, but the chicken does not need to swim in it. The modest amount here leaves the thighs glossy and seasoned, with no thick yogurt layer to cook away first.
For a yogurt-free version, leave out the yogurt and increase the olive oil to about 3 tablespoons. A shorter 1–4 hour marinade is plenty; there is little benefit to leaving this more citrus-forward version on the chicken all day.
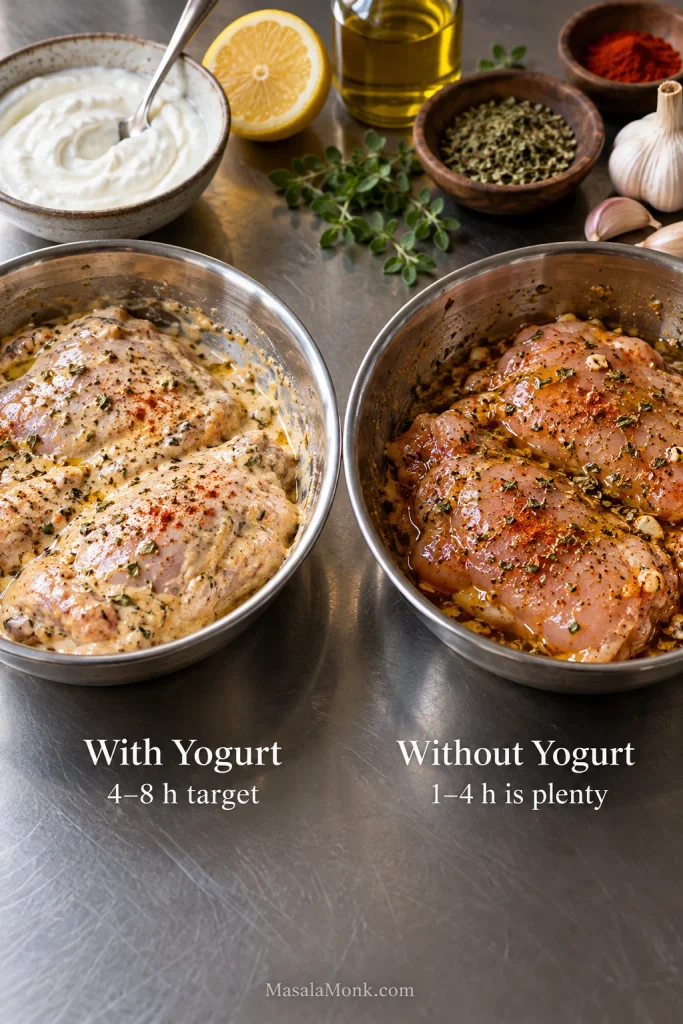
If yogurt-coated chicken stays pale or develops a grainy white surface, look at the coating before blaming the heat. A heavy wet layer has to lose a lot of water before the meat can brown.
Pack the Pan So the Chicken Can Be Shaved Later
The loaf pan presses broad thighs into one stable roast that can be cut across several layers at once. A 9 × 5-inch pan gives about 1 kg of chicken a manageable shape without the balancing act of a homemade vertical spit.
Once the stack is packed, the oven does most of the work; apart from checking the temperature near the end, there is nothing to turn or balance.
Alternate the thicker ends as you build and press every few pieces so large gaps do not run through the middle. For a double batch, use two pans. One extra-tall loaf changes the distance heat has to travel before the centre is cooked.
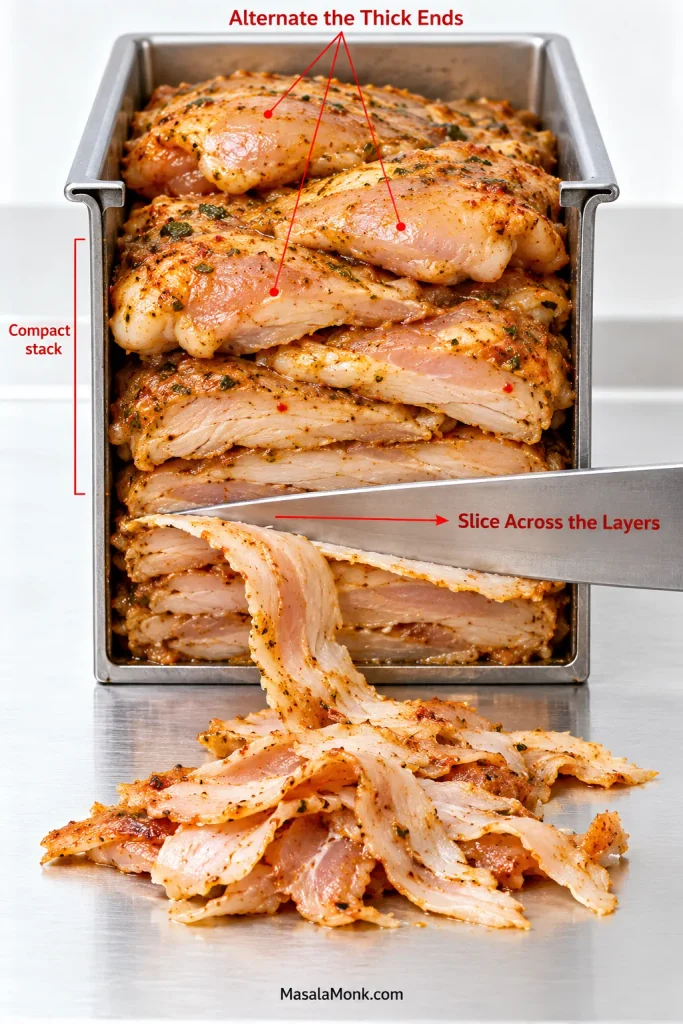
Some liquid around the chicken is normal. The protected inner layers cannot shed moisture directly into the oven, so water and rendered fat collect in the pan. Rest the roast, pour the liquid off and keep going. The browned edges come later.
Shave First, Then Chase the Crust
Those first few slices are the payoff. Each knife stroke cuts through several packed thighs at once and gives you ribbons with natural folds running through them. Broader pieces stay soft. Narrower shards and little ends colour faster.
Then listen.
A properly heated skillet gives a sharp frying sound as soon as the meat lands. Wet bubbling tells you the pan has become too crowded. The best batch still has plenty of tender chicken in it—you want browned edges scattered through the pile, not every slice cooked until crunchy.
For a larger amount, a hot broiler is easier than working through endless skillet batches. Spread the shaved chicken over a preheated metal tray with a light sheen of fat or oil and stay close; the narrow tips can darken quickly.
Now Turn the Chicken into a Gyro
Once the chicken is hot and browned, the wrap does not need much decoration. Warm pita, shaved chicken, thick tzatziki, ripe tomato and very thin onion are enough.
Keep the tzatziki thick enough to stay put against the hot chicken. For different cucumber, garlic and herb ratios, the Greek tzatziki sauce guide goes much deeper.
A soft, pocketless Greek-style pita is ideal because it folds around the filling. If you cannot find one, a soft pocket pita works too; the homemade pita bread recipe shows how to keep those rounds tender and flexible.
Fries can go straight inside. Feta, lettuce, cucumber and olives can all taste good too. Still, if you have spent this much time getting the chicken right, let the chicken be the thing you taste first.
Tzatziki is not the only sauce you’ll find with Greek chicken pita. The Greek Foodie notes that in Athens, chicken souvlaki is often served with a creamy mustard-yogurt sauce. If that is the flavour you remember, changing the sauce may get you closer than adding more spice to the chicken.
For a Build-Your-Own Chicken Gyro Meal
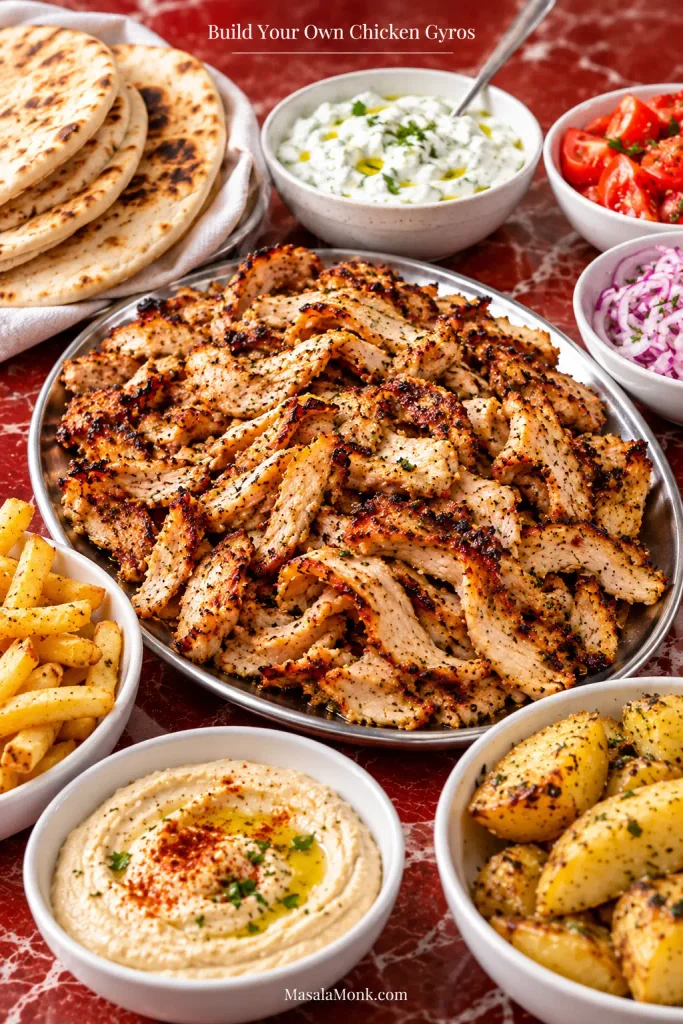
For a larger meal, put the chicken and warm pita on the table with extra-creamy hummus or a tray of Greek lemon potatoes and let everyone build their own plate.
When You Want Chicken Gyros Tonight
Sometimes dinner just needs to happen. For an easy chicken gyro recipe on a weeknight, change the shape of the meat instead of trying to rush the layered roast. With only a 30-minute marinade and a short roast, this version fits much more comfortably into an ordinary evening.
The trade-off is texture. You still get plenty of browned chicken, but the result is closer to Greek-marinated strips than meat shaved from a compact gyro stack.
Fast Sheet-Pan Chicken Gyros
Use the marinade formula from the main recipe above. Open the thighs flat before cutting, then divide any thick folded sections so the pieces are reasonably even. Cut into strips about 1–1.5 cm / ⅜–½ inch wide, coat them and refrigerate for 30–60 minutes. Discard any marinade left in the bowl after the raw chicken is removed.
- Heat a conventional oven to 425°F / 220°C or a fan oven to about 400°F / 200°C.
- Let heavy excess marinade drip away, then spread the strips in one layer on a large rimmed sheet pan. An 18 × 13-inch / 46 × 33 cm pan works well. Crowded chicken needs a second tray.
- Begin checking around 14–15 minutes. Expect roughly 16–22 minutes depending on strip thickness, tray load and oven, turning once during cooking.
- Remove the chicken once the thickest pieces reach 165°F / 74°C. If they need more colour, use a fully heated broiler for another 1–2 minutes.
Chicken Breast and Air-Fryer Options
Chicken breast belongs with this quicker route too. Cut it into similarly sized strips, marinate for roughly 30–60 minutes and begin checking 2–3 minutes earlier than the thigh strips. Pull it as soon as the thickest piece reaches 165°F / 74°C. Yogurt can flavour breast beautifully; it cannot save meat that has simply stayed on the heat too long.
For the air fryer, leave the thighs whole and opened flat, use the gyro marinade here and follow the boneless-thigh method in the air fryer chicken thighs recipe. Slice the cooked thighs afterwards and build the gyros as usual.
Chicken Gyro Troubleshooting
A watery marinade, a dark top, loose slices and chicken that steams in the skillet all start at different stages. Find the symptom below and fix the part of the process that caused it.
Marinade and Roasting Problems
| Problem | Why it happens + what to do |
|---|---|
| Before cooking: marinade looks thin and watery | Loose yogurt, wet chicken or excess liquid can thin the coating. Use thick Greek yogurt, measure the liquids and pat visibly wet chicken before marinating. |
| Before cooking: chicken has become unusually soft or mushy | A very long acidic marinade can soften the surface. Four to eight hours is plenty for this yogurt version; shorten the marinating time next round. |
| Roasting: top is dark but centre is below temperature | The exposed top is cooking faster than the packed centre. Cover loosely with foil and keep roasting until the middle reaches temperature. |
| Roasting: there is lots of liquid in the pan | Some liquid is normal. An unusually large amount can come from loose marinade or water-heavy chicken. Rest the roast and separate usable fat from the pan juices if you can. |
Slicing, Crisping and Assembly Problems
| Problem | Why it happens + what to do |
|---|---|
| Slicing: the roast separates into pieces | Natural thigh layers will not behave like a processed meat loaf. Give the chicken its full rest, use a sharp knife and slice across several layers at once. |
| Crisping: chicken steams instead of sizzling | The skillet is crowded. Remove some chicken, expose more hot pan and wait for the sharp frying sound to return. |
| Crisping: chicken becomes dry | The second cook has run too long. Stop once scattered edges are dark golden while the broader ribbons still bend easily. |
| Assembly: tzatziki becomes watery | The cucumber was not drained enough or the yogurt was loose. Use strained Greek yogurt and wring the salted cucumber more firmly. |
| Assembly: pita cracks | It is probably cold or has been heated until dry. Warm briefly, remove while soft and keep covered until filling. |
| At the table: the whole gyro tastes too sour | Acid has accumulated through chicken, yogurt, tomato and finishing lemon. Taste the assembled gyro before adding the lemon wedge. |
How to Store and Reheat Chicken Gyro Meat
Keep the parts separate if you are cooking ahead. The storage and reheating limits below follow USDA leftovers guidance. Tomato and tzatziki start softening pita almost as soon as the wrap is assembled.
| Storage | How long | Best approach |
|---|---|---|
| Refrigerator | 3–4 days | Cool promptly and store the chicken separately from pita, sauce and vegetables. |
| Freezer | About 3–4 months for best quality | Freeze cooked chicken in meal-sized portions. Raw marinated chicken can also be frozen promptly after coating; thaw completely in the refrigerator before cooking. |
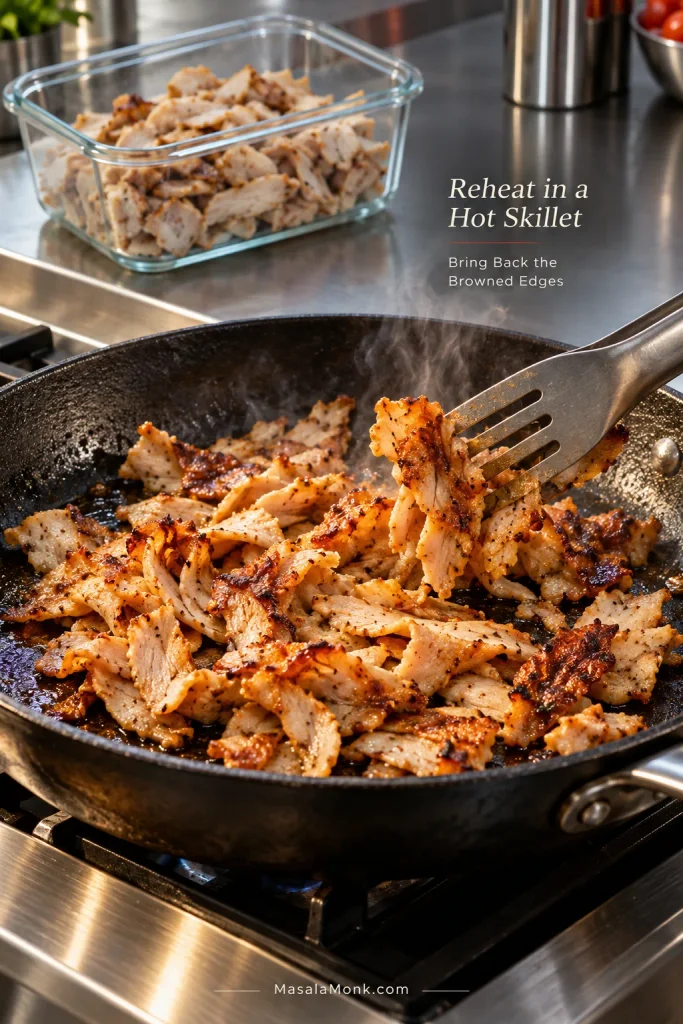
| Reheating | To 165°F / 74°C internally | Use a hot skillet when you also want to restore the browned edges. |
For the best day-two texture, give the chicken a short turn in a hot skillet. Use a little rendered fat when it needs browning or a spoonful of reserved pan juice when it needs moisture. A broiler or air fryer works too; the microwave is fine when speed matters more than crisp edges.
Leftover shaved chicken is also excellent over a cold Mediterranean chickpea salad. Reheat only the meat and keep the salad cold, and the next meal feels deliberately different from yesterday’s gyro.
The Best Bite Usually Is Not the Neatest One
You want a soft ribbon of thigh, one browned edge, cold tzatziki, a little tomato and onion, all caught in warm pita.
If the chicken pile has juicy folds, darker shaved edges and a few crisp little ends, leave it alone. That is the gyro.








