Posted on Leave a comment

BBQ Sauce for Pulled Pork

Pulled pork sandwich on parchment with glossy BBQ sauce, coleslaw, pickle slices, a toasted bun, and extra sauce in a small bowl.

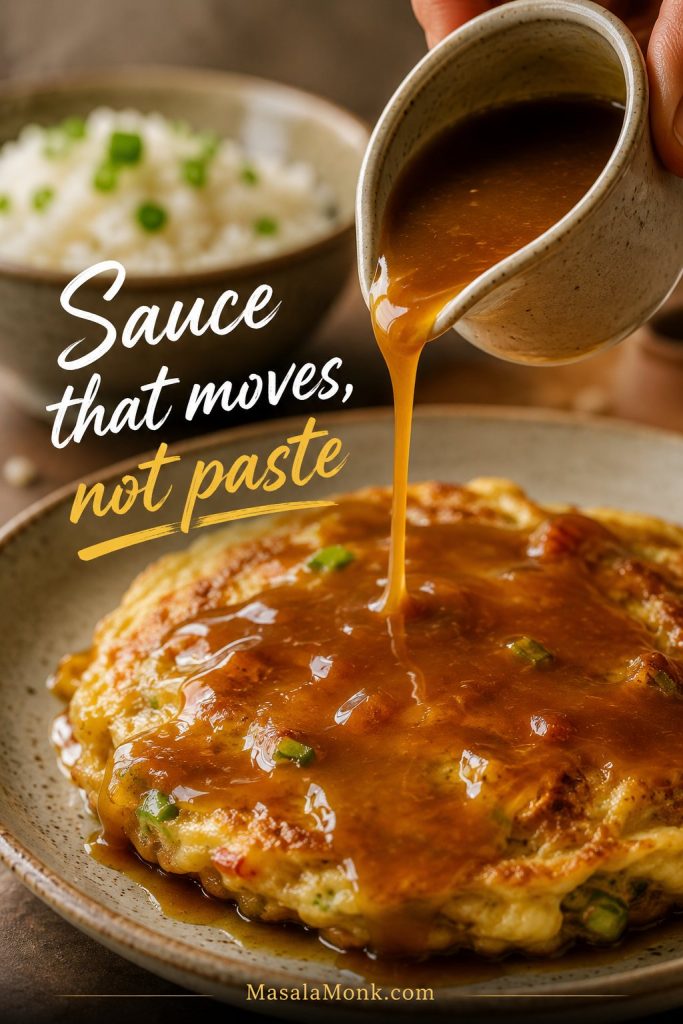
A lot of BBQ sauce is made for brushing, glazing, or dipping. Pulled pork needs something different. Once the meat is shredded, the sauce has to slip between the strands, brighten the richness, and still leave the pork tasting like pork.

This BBQ sauce for pulled pork is tomato-rich, tangy with apple cider vinegar, gently smoky, and loose enough to coat the shreds without turning them sticky or soggy. It lands between a classic sweet tomato BBQ sauce and a sharper Carolina-style finish, so it works for sandwiches, sliders, slow cooker pork, smoked pork, and leftovers.

The best move is simple: start light, sauce after shredding, and taste before adding more. If you are still cooking the pork, start with this slow cooker pulled pork recipe, then come back here for the sauce, timing, and amount.

Quick Answer

The best BBQ sauce for pulled pork is tangy, lightly sweet, gently smoky, and pourable enough to move through shredded meat. Use 1/4 to 1/3 cup sauce per pound of cooked pulled pork for a light coating, or about 1/2 cup per pound for saucy sandwiches.

Add most of the sauce after shredding, not before long cooking. Warm sauce spreads more evenly, and starting with less keeps the pork juicy instead of drowned.

Three pulled pork sauce rules: start lighter than you think, thin after simmering, and fix dry pork with moisture before adding sweetness.

Make It Now

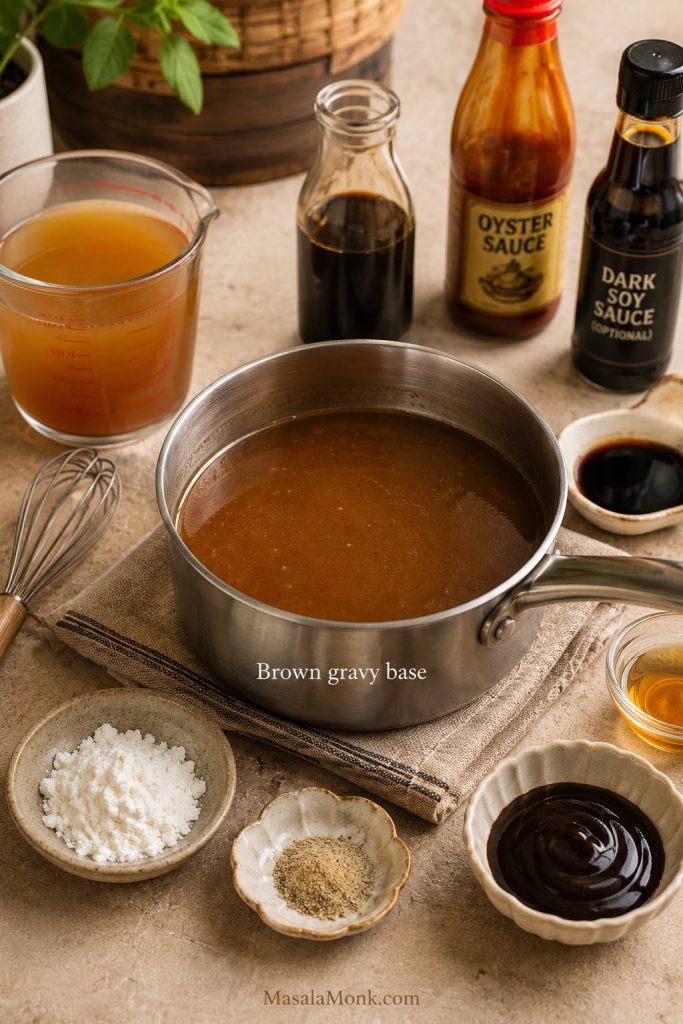
Need sauce fast? Whisk the ketchup, vinegar, sweeteners, mustard, Worcestershire, spices, and optional smoke in a saucepan. Simmer for 10 to 15 minutes, then thin it after cooking. For pulled pork, the finished sauce should fall from a spoon in a slow ribbon.

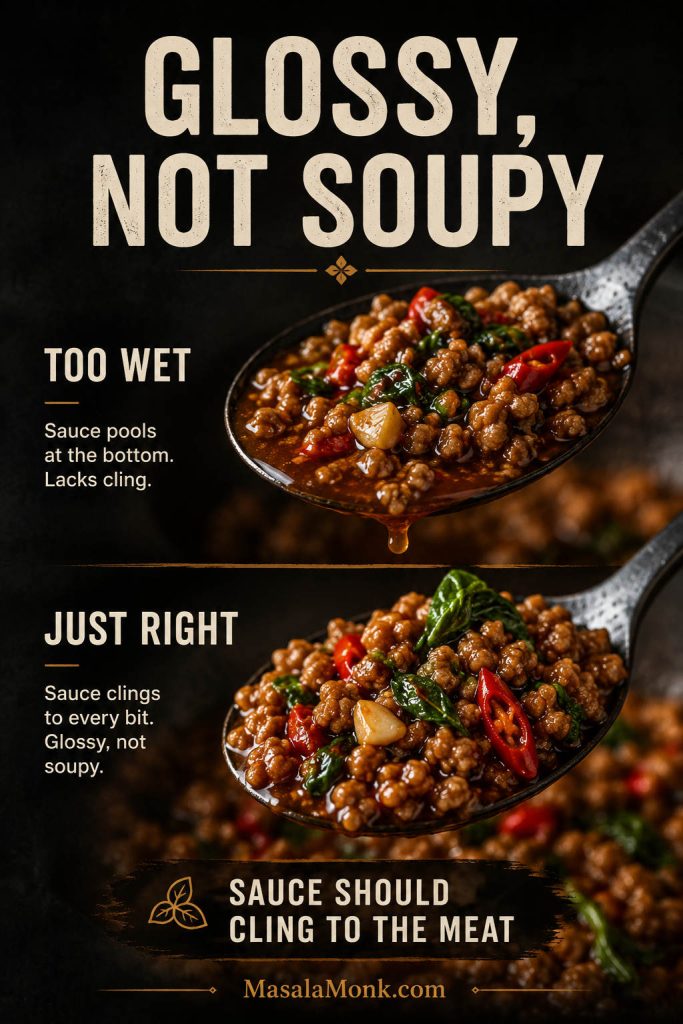
Check the Sauce Texture Before Tossing

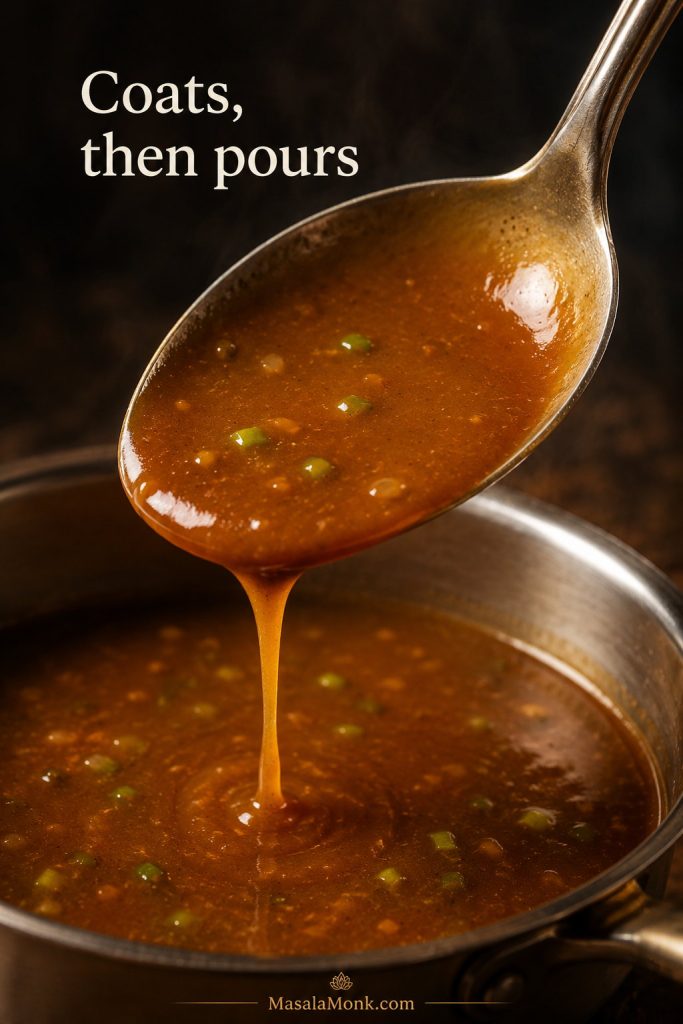
The sauce should cling first, then fall slowly from the spoon. That texture helps it coat the shreds without clumping or soaking the meat.

Thick red-brown BBQ sauce falling slowly from a spoon into a saucepan in a glossy ribbon.
Before the sauce touches the pork, check the ribbon. It should fall slowly from the spoon so it can coat shredded pork evenly instead of clumping in heavy patches.

If the pork tastes dry, resist the urge to bury it under sweeter sauce. Dry pulled pork usually needs moisture first, then flavor.

Jump to recipe card · Check sauce texture · See sauce amounts

BBQ Sauce for Pulled Pork Recipe

Sweet, Tangy BBQ Sauce for Pulled Pork

A quick homemade BBQ sauce that makes pulled pork taste balanced and saucy without hiding the meat. You get ketchup body first, vinegar lift next, a little molasses depth, and gentle smoke at the end.

On a sandwich, you should get soft pork, warm sauce, a little slaw or pickle sharpness, and a bun that still holds together — not one heavy mouthful of sugar.

Prep time5 minutes
Cook time10 to 15 minutes
Total time15 to 20 minutes
YieldAbout 2 to 2 1/2 cups / 480 to 600 ml, depending on how much you reduce and thin it
Serving size1/4 cup / 60 ml
Enough forAbout 4 to 5 lb / 1.8 to 2.25 kg cooked pulled pork, depending on how saucy you like it
Best forPulled pork, sandwiches, sliders, slow cooker pork, smoked pork, leftovers

Equipment

  • Medium saucepan
  • Whisk
  • Measuring cups and spoons
  • Wooden spoon or silicone spatula
  • Jar, bottle, or airtight container

Pulled Pork BBQ Sauce Ingredients

Each ingredient has a job: body, sweetness, vinegar lift, smoke, savory depth, or final texture control.

Homemade BBQ sauce ingredients arranged around a saucepan, including ketchup, apple cider vinegar, brown sugar, honey, molasses, mustard, Worcestershire sauce, smoked paprika, garlic, onion powder, black pepper, and liquid smoke.
This pulled pork BBQ sauce starts with ketchup for body, then uses apple cider vinegar, brown sugar, honey, molasses, mustard, Worcestershire, and smoked spices to build balance.
  • 1 1/2 cups / 360 ml ketchup
  • 1/2 cup / 120 ml apple cider vinegar
  • 1/3 cup / about 65 g packed brown sugar
  • 1 tbsp / 15 ml molasses
  • 1 tbsp / 15 ml honey
  • 1 1/2 tbsp / 22 ml Worcestershire sauce
  • 1 tbsp / 15 g Dijon or yellow mustard
  • 1 tsp / about 2 g smoked paprika
  • 1 tsp / about 3 g garlic powder
  • 1 tsp / about 2 to 3 g onion powder
  • 1/2 tsp chili powder or cayenne, more to taste
  • 1/2 tsp black pepper
  • 1/2 tsp salt, then more to taste; start with 1/4 tsp if the pork was cooked with a salty rub
  • 2 to 4 tbsp / 30 to 60 ml pork juices, apple juice, broth, or water, plus more only if needed
  • 4 to 8 drops liquid smoke, optional

Instructions

Simmer the BBQ Sauce Gently

Keep the heat controlled once the sauce reaches a bubble. A steady simmer builds flavor; a hard boil can scorch the sugar and make the sauce taste harsh.

Red-brown BBQ sauce gently simmering in a metal saucepan with a wooden spoon and small bubbles on the surface.
Once the BBQ sauce bubbles gently, keep the heat steady. A low simmer softens the vinegar, dissolves the sugar, and rounds out the flavor without scorching.
  1. Add all sauce ingredients except the thinning liquid to a medium saucepan: ketchup, vinegar, sweeteners, Worcestershire sauce, mustard, spices, salt, pepper, and optional liquid smoke.
  2. Whisk until mostly smooth. The sugar will dissolve as the sauce warms.
  3. Set the pan over medium heat and bring the sauce to a gentle simmer.
  4. Reduce the heat to medium-low and simmer for 10 to 15 minutes, stirring often enough that the sugar does not stick to the bottom.
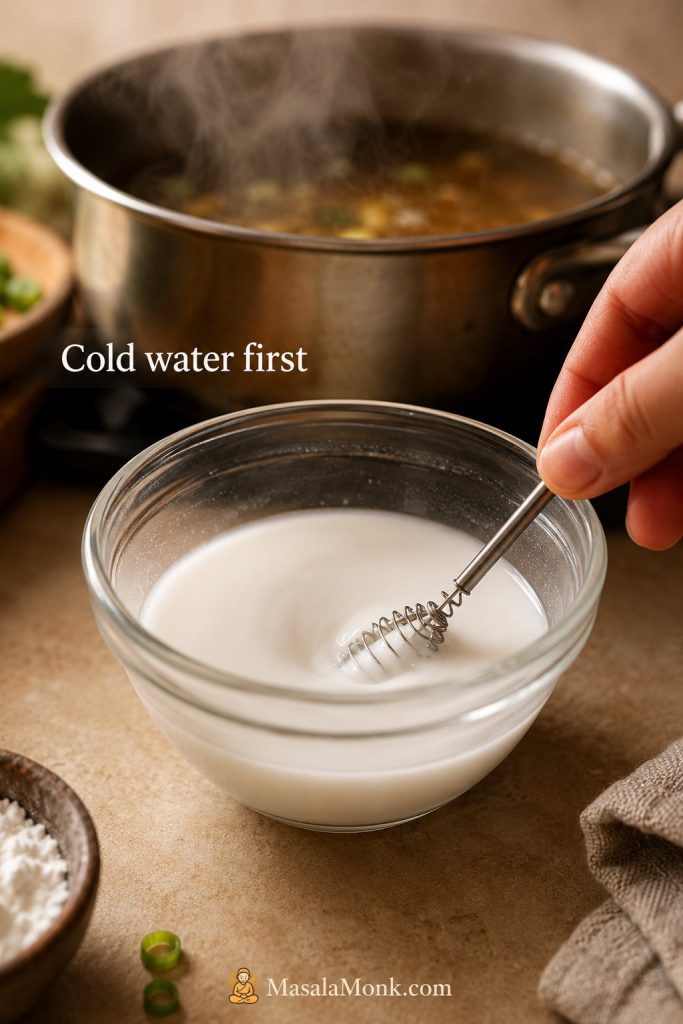
  5. Whisk in 2 tbsp pork juices, apple juice, broth, or water. Add more, a tablespoon at a time, until the sauce looks glossy and pourable.
  6. Taste and adjust. Add vinegar for more lift, honey or brown sugar for sweetness, Worcestershire for depth, cayenne for heat, or cooking juices if the sauce feels too thick.
  7. Use warm with shredded pulled pork, or cool completely before storing.

Thin BBQ Sauce After Simmering

Simmer first, then loosen the sauce at the end. That way you control the final texture instead of guessing before the sauce has reduced.

Broth or pork juices being poured from a glass measuring cup into a saucepan of thick BBQ sauce with a whisk inside.
The final splash of liquid is about control, not watering the sauce down. Pork juices, broth, apple juice, or water help the sauce move through the shreds.

Texture cue: the sauce should cling to a spoon, then run slowly when tilted. Heavy clumps mean it needs a splash of liquid. A watery run means it needs a few more minutes of uncovered simmering.

Scaling note: for a party tray, double the sauce and keep extra warm on the side. Do not double the liquid smoke at first; add it slowly to taste.

How much sauce to use · When to add sauce · Fix sauce problems

Most Helpful Sections

Once the sauce is made, the next question is not whether it is good — it is what your pork needs from it.

What Kind of Finish Does Your Pork Need?

A slow cooker batch, a smoky pork shoulder, dry leftovers, and a tray of sandwiches do not need the exact same finish. Start with the main sauce, then adjust based on what the meat needs.

You do not have to sauce the whole batch the same way. Keep the pork lightly sauced, then let people add more BBQ sauce or vinegar sauce at the table.

If your pulled pork is…Do this
Slow cooker pork and mildUse the main BBQ sauce with smoked paprika and some cooking juices.
Smoked and richKeep the BBQ sauce sharper, or add a light vinegar finishing sauce.
Going into sandwichesUse a slightly thicker BBQ sauce with enough vinegar to balance the bun and slaw.
Dry leftoversWarm with BBQ sauce plus reserved juices, broth, or apple juice.
Already sweetAdd vinegar, mustard, black pepper, or Worcestershire sauce.
Store-bought sauceWarm it, thin it, and sharpen it before tossing with pork.
Rich, fatty, or smokyUse less sauce at first, then brighten with vinegar or a light finishing sauce.

How Much BBQ Sauce for Pulled Pork

Use 1/4 to 1/3 cup BBQ sauce per pound of cooked pulled pork for a light coating, or about 1/2 cup per pound for saucy sandwiches. These amounts are for cooked pulled pork, not raw pork shoulder, because raw pork loses weight during cooking.

Sauce amount is where pulled pork usually goes wrong. Too little is easy to fix; too much can turn a good tray of pork into sweet, wet shreds.

Cooked pulled porkLightly saucedSaucy sandwiches
1 lb / 450 g1/4 to 1/3 cup / 60 to 80 ml1/2 cup / 120 ml
3 lb / 1.35 kg3/4 to 1 cup / 180 to 240 ml1 1/2 cups / 360 ml
5 lb / 2.25 kg1 1/4 to 1 2/3 cups / 300 to 400 ml2 to 2 1/2 cups / 480 to 600 ml
8 lb / 3.6 kg2 to 2 2/3 cups / 480 to 640 ml3 1/2 to 4 cups / 840 to 960 ml

BBQ Sauce Amount Chart

Use the chart as a starting point, then taste the pork after the first toss. Cooked pulled pork absorbs sauce differently depending on moisture, bark, and how finely it is shredded.

Infographic showing BBQ sauce amounts for cooked pulled pork: 1 pound uses 1/4 to 1/3 cup for light coating or 1/2 cup for saucy pork; 3 pounds uses 3/4 to 1 cup or 1 1/2 cups; 5 pounds uses 1 1/4 to 1 2/3 cups or 2 to 2 1/2 cups; 8 pounds uses 2 to 2 2/3 cups or 3 1/2 to 4 cups.
For cooked pulled pork, begin with 1/4 to 1/3 cup BBQ sauce per pound. Then move closer to 1/2 cup per pound only when the goal is saucy sandwiches.

Start light, then build. A small first toss gives you control. Once the pork has rested for a minute, you can always add another spoonful of warm sauce.

Lightly Sauced vs Over-Sauced Pulled Pork

Before adding more, look at the pork. Visible strands and a light gloss usually mean the sauce is doing its job.

Comparison showing lightly sauced pulled pork with visible strands beside over-sauced pulled pork with darker meat and sauce pooling.
The goal is coating, not drowning. Lightly sauced pulled pork keeps its strands and texture, while too much sauce can hide the meat and make the tray feel heavy.

Choose the lower amount for smoked pork, BBQ plates, or meat served with several sides. Move toward the higher amount for sandwiches, sliders, party trays, or leftovers that will be reheated later.

For a tray that will sit warm, keep the pork lightly sauced and hold extra sauce separately. Pork gets wetter as it sits, and guests can always add more.

A double batch of this sauce is usually enough for 8 to 10 lb cooked pulled pork if you are not drowning the meat.

Back to recipe · When to add sauce · Avoid over-saucing

When to Add BBQ Sauce to Pulled Pork

Add BBQ Sauce After Shredding

Add most BBQ sauce after shredding pulled pork, not before long cooking, so the sauce stays fresh and the meat stays easy to control.

Three-step guide showing shredded pulled pork first, warm BBQ sauce added second, and pulled pork tossed lightly with sauce third.
Sauce the pork after shredding when possible. That keeps the BBQ sauce fresher, protects the texture, and lets you decide how saucy the batch should be.

The same sauce can taste bright and fresh after shredding, or dull and heavy if it cooks too long with the meat. Waiting until the pork is pulled also lets you decide how saucy each batch should be.

SituationBest move
Slow cooker pulled porkAdd most of the sauce after shredding. Use cooking juices to loosen it.
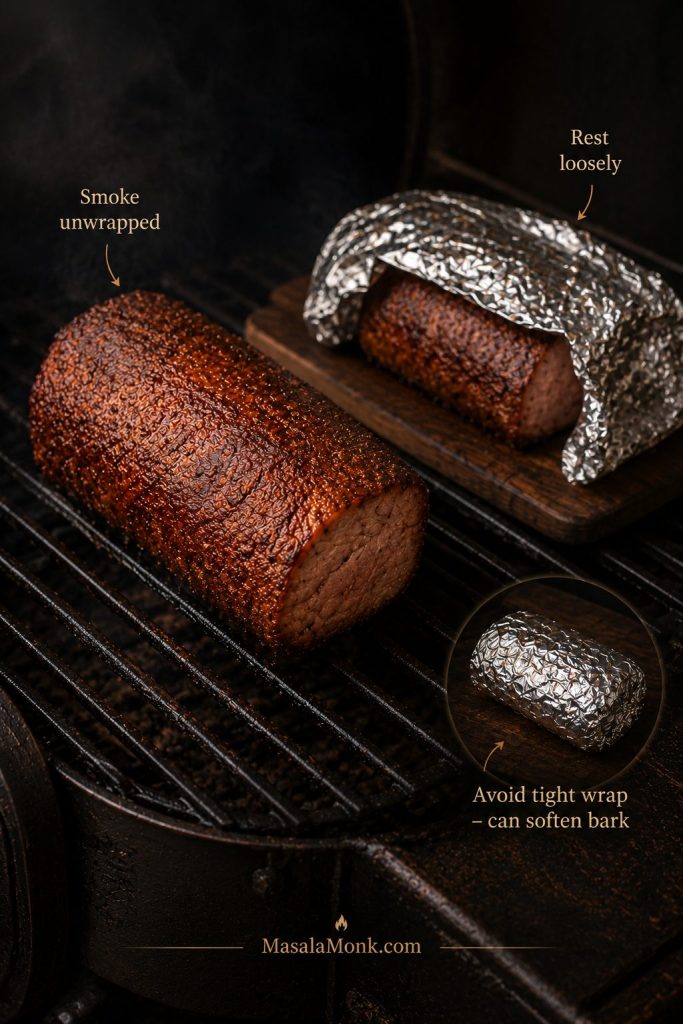
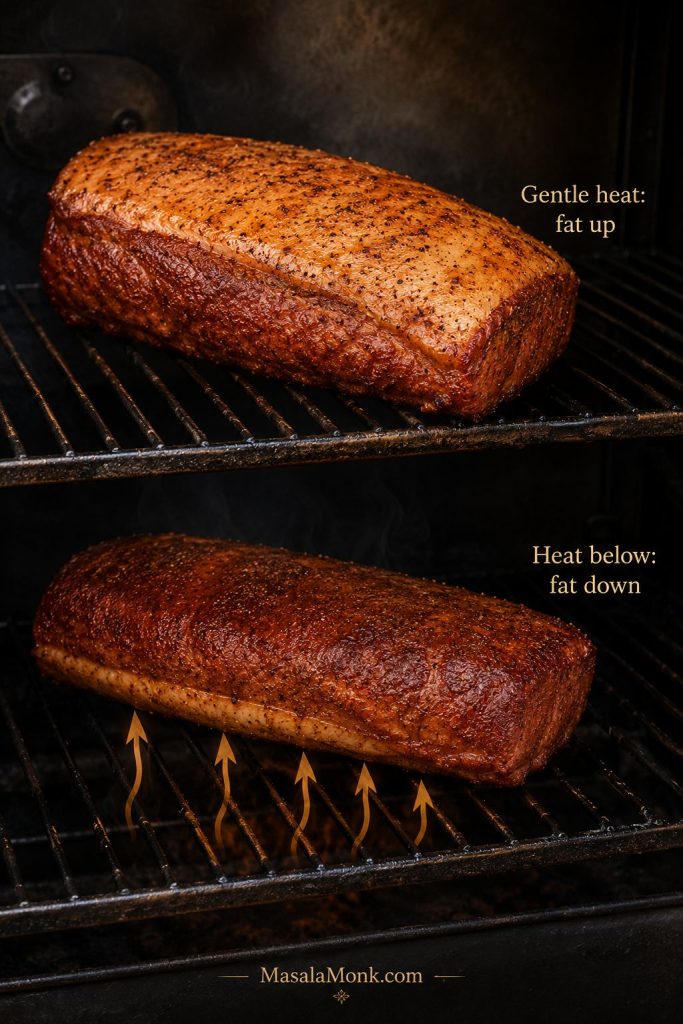
Smoked pulled porkSmoke the pork mostly unsauced, then add sauce after pulling or serve it on the side.
Pulled pork sandwichesToss lightly with warm sauce, then serve extra sauce separately.
Leftover pulled porkReheat with sauce plus reserved juices, broth, apple juice, or water.
Party trayKeep the pork lightly sauced, then hold extra warm sauce nearby.

Toss BBQ Sauce with Pulled Pork Gently

Warm sauce spreads faster and needs less stirring. Use tongs or two forks, then stop once the pork looks evenly coated.

Hands using metal tongs to gently toss warm BBQ sauce through shredded pulled pork in a parchment-lined tray.
After adding warm sauce, toss gently rather than stirring hard. That way, the pulled pork stays in soft strands instead of turning wet and mushy.

For deeper sauce flavor, add shredded pork to warm sauce and simmer gently for 10 to 20 minutes. Keep the heat low and stir gently so the pork stays in soft strands instead of turning mushy.

Sauce amount chart · Check sauce texture · How to toss the pork

The Texture That Coats Pulled Pork Without Soaking It

Pulled pork sauce should be thinner than a sticky rib glaze but thicker than a vinegar finishing sauce. It needs enough body to cling, but enough movement to reach all the shredded pieces.

Too Thick, Too Thin, or Just Right?

Dip a spoon into the sauce and tilt it. Aim for a slow ribbon, not heavy clumps and not a watery splash. A thick sauce needs a small splash of liquid; a thin sauce needs a few more minutes uncovered.

Infographic comparing pulled pork BBQ sauce textures labeled too thick, just right, and too thin, with spoons showing clumpy, ribboning, and runny sauce.
Texture decides how BBQ sauce behaves on shredded pork. Too thick will clump, too thin will run off, and the right sauce coats in a smooth ribbon.

Sandwich cue: if you have ever watched the bottom bun collapse before the first bite, the problem was probably not the pork. It was the sauce balance. The sauce should hold the meat together without soaking the bread.

How to thin sauce · Fix too thick or too thin sauce · Sandwich balance tips

Pulled Pork Sauce Mistakes to Avoid

You do not have to decide the whole batch at once. Keep the pork lightly sauced, taste one forkful, then decide whether it needs more sweetness, more vinegar, or just a spoon of warm cooking juices.

  • Pouring in the whole batch at once. Under-sauced pork is easy to fix; over-sauced pork makes you wish you had stopped two spoonfuls earlier.
  • Using cold sauce on warm pork. Cold sauce tightens everything up. Warm it first and the pork will toss more gently and evenly.
  • Making the sauce too thick. Pulled pork sauce should move through the shreds, not sit in clumps.
  • Adding more sugar when the pork tastes dry. Add moisture first, then adjust sweetness if needed.
  • Boiling sauced pulled pork hard. Once the meat is shredded, use low heat. Boiling can break the strands and make the texture mushy.
  • Cooking a sweet sauce for hours with the pork. Unless the recipe is built for it, long cooking can dull the sauce and make the pork taste overly sweet.

Why This Sauce Works with Shredded Pork

This is not a sticky rib glaze and not a thin vinegar-only finishing sauce. It sits in the middle: tomato-based, bright, gently smoky, and easy to pour.

Pork shoulder is rich, shredded meat has lots of surface area, and sandwiches need structure. A good pulled pork sauce has to handle all three: acidity to lift the meat, sweetness to round the edges, body to cling, and enough movement to reach the strands.

That is why a sauce that tastes slightly bold in the pan often tastes just right once it is folded into warm pork. Shredded pork has more surface area than sliced meat, so every spoonful affects more bites.

Ingredients and Substitutions

The recipe is simple, but each ingredient has a job. That is what keeps the sauce from tasting like warmed ketchup and sugar.

Ketchup

Ketchup gives the sauce its tomato base, color, body, and familiar BBQ flavor. It also keeps the recipe quick because the tomato is already cooked and lightly seasoned.

Apple Cider Vinegar

Apple cider vinegar keeps pulled pork from tasting heavy after the third bite. White vinegar works in a pinch, but use a little less because it tastes sharper. Rice vinegar gives a softer tang.

Brown Sugar, Honey, and Molasses

Brown sugar gives sweetness and body. Molasses adds darker BBQ depth. Honey rounds out the vinegar. No molasses? Use a little extra brown sugar or a spoon of maple syrup. The sauce will taste lighter but still work.

Worcestershire Sauce and Mustard

Worcestershire sauce brings savory depth, while mustard gives the sauce a sharper edge. Together, they keep the flavor from turning flat or candy-sweet.

Smoked Paprika and Liquid Smoke

Smoked paprika gives gentle BBQ flavor. Liquid smoke is optional and should be used carefully. A few drops can help slow cooker pork taste more BBQ-like, but too much can make the sauce harsh.

Pork Juices, Apple Juice, Broth, or Water

This is the final texture control. Pork juices make the sauce taste most connected to the meat, apple juice softens the tang, broth keeps it savory, and water loosens the sauce without adding a new flavor.

How to Make BBQ Sauce for Pulled Pork

The recipe card gives the exact steps, so think of this section as the cooking cues. Whisk everything before the pan gets too hot, then simmer gently until the sharp raw vinegar smell softens and the sauce tastes rounder.

Thin the sauce after simmering, not before. Simmering concentrates the flavor; thinning at the end lets you choose the right texture for shredded pork.

Taste the sauce before it touches the meat. It should feel a little louder in the pan, because shredded pork will soften the vinegar, sweetness, salt, and smoke.

Adjust one thing at a time. If the pork was cooked with a salty rub, fix sharpness and moisture before adding more salt.

BBQ Sauce vs Finishing Sauce

BBQ sauce is thicker and sweeter; finishing sauce is thinner, sharper, and used lightly after shredding to brighten rich pork.

TypeTextureFlavorBest use
BBQ sauceThicker and pourableTomato-rich, balanced, gently smokySandwiches, sliders, saucy pulled pork
Finishing sauceThinVinegar-forward, pepperySmoked pork, rich pork shoulder, Carolina-style pulled pork

BBQ Sauce vs Finishing Sauce for Pulled Pork

Use this comparison when you are deciding whether the pork needs body, brightness, or both.

Pulled pork with thick BBQ sauce in a bowl labeled body and gloss and thin vinegar finishing sauce in a jar labeled vinegar lift.
BBQ sauce gives pulled pork body, gloss, and richness. A finishing sauce works differently: it adds vinegar lift when smoky or fatty pork needs brightness.

Use finishing sauce when the pork is already smoky, rich, and good — it just needs a spark. BBQ sauce is what you use when you want a fuller sandwich sauce with body, sweetness, and gloss.

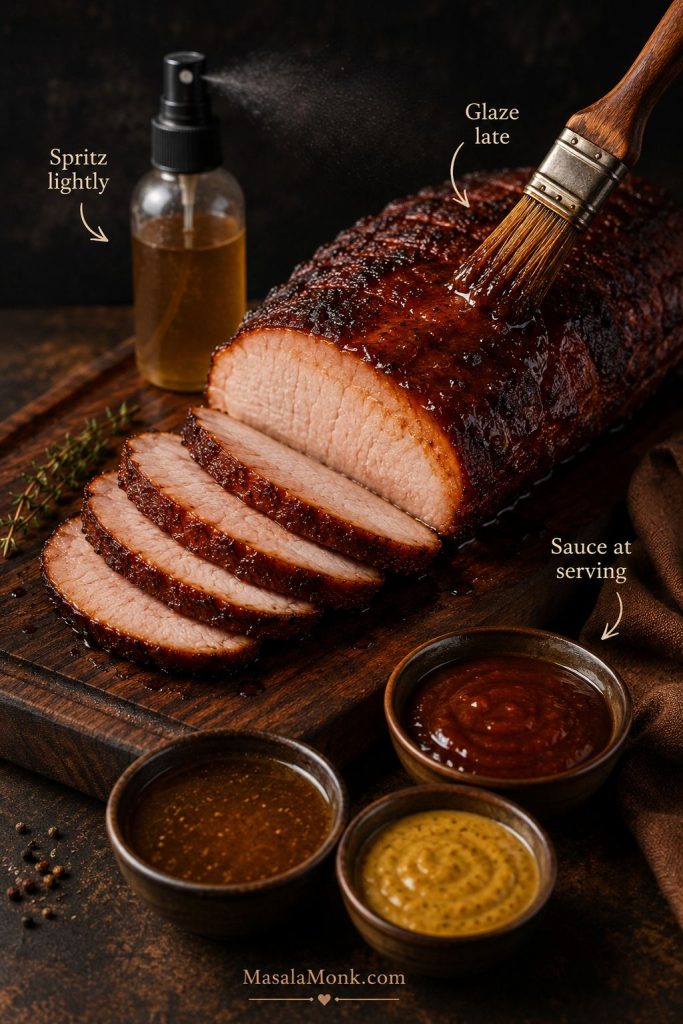
A mop sauce is different again. It is brushed or mopped onto meat while it cooks, especially during smoking; this Food & Wine mop sauce explainer describes it as a thin barbecue sauce used during cooking. The BBQ sauce in this recipe is thicker and sweeter than a mop sauce, so use it after the pork is cooked rather than as a long-cooking baste.

Quick Vinegar Finishing Sauce

For a quick vinegar finishing sauce, warm 1/2 cup / 120 ml apple cider vinegar with 1 1/2 tbsp brown sugar, 1/2 tsp salt, 1/4 tsp black pepper, 1/2 tsp red pepper flakes, and 1 tsp ketchup if you want a slightly rounder finish. Warm just until the sugar dissolves, then cool.

Start with 1 to 2 teaspoons finishing sauce per cup of shredded pork, toss, then taste before adding more. Vinegar finishing sauce is strong by design.

Fix bottled BBQ sauce · Use sauce for sandwiches · Back to main BBQ sauce

How to Steer the Sauce Without Starting Over

Once the sauce tastes balanced, these small changes let you steer it toward tangier, sweeter, smokier, spicier, thinner, less sweet, or richer without starting over.

Want it…Add this
More tangyApple cider vinegar
SweeterBrown sugar, honey, or molasses
SmokierSmoked paprika or a tiny amount of liquid smoke
SpicierCayenne, hot sauce, chili flakes, or chili powder
ThinnerPork juices, apple juice, broth, water, or vinegar
Less sweetVinegar, mustard, black pepper, or Worcestershire sauce
RicherA small knob of butter, added on low heat

To add fruitier heat, borrow the sweet-spicy direction from this mango habanero sauce recipe and stir a small spoonful into the BBQ sauce instead of plain hot sauce. Cleaner heat comes from cayenne or a few drops of sharp pepper sauce.

If you add butter, use low heat and whisk gently. High heat can make buttery sauce separate.

How to Make Bottled BBQ Sauce Work for Pulled Pork

Bottled sauce is not cheating. It is a base. The trick is to taste it like a cook, then adjust it for your pork.

Starting with a bottle is often the fastest route to good pulled pork; the difference is whether you use it straight or tune it first.

Bottled sauce may taste fine on a spoon but too sweet once it hits rich pork, so warm it before you sharpen, thin, or deepen it.

ProblemFix
Too sweetAdd apple cider vinegar and black pepper
Too thickAdd pork juices, broth, apple juice, water, or vinegar
Too flatAdd Worcestershire sauce, mustard, or smoked paprika
Too smokyAdd vinegar and a little honey or brown sugar
Too spicyAdd ketchup, honey, or a small piece of butter
Too thinSimmer uncovered for 5 to 10 minutes

How to Fix Bottled BBQ Sauce for Pulled Pork

Warm the bottled sauce first, then fix the specific problem you taste. A small adjustment usually works better than adding everything at once.

Infographic showing bottled BBQ sauce fixes: add vinegar and pepper if too sweet, juices or broth if too thick, Worcestershire and mustard if too flat, vinegar and honey if too smoky, ketchup or butter if too spicy, and simmer uncovered if too thin.
Bottled BBQ sauce can still work beautifully with pulled pork. Warm it first, then adjust sweetness, thickness, smoke, spice, or flat flavor one fix at a time.

Cold bottled sauce can tighten the texture of warm pulled pork, so warm it first if you can. Warm sauce spreads better and keeps the pork texture softer.

Make homemade sauce instead · Troubleshoot sauce problems · Use the right amount

For Sandwiches, Balance Matters More Than More Sauce

A pulled pork sandwich needs sauce with enough body to hold the meat together, but not so much thickness that it sits in sweet patches. The goal is a sandwich that feels juicy all the way through, but still lets you taste the pork, the slaw, the pickle, and the bun in one clean bite.

Build a Better Pulled Pork Sandwich

Think in layers: warm sauced pork, something crisp, something sharp, and a bun sturdy enough to hold it all together.

Open pulled pork sandwich with BBQ sauce, coleslaw, pickle slices, a toasted bun, and the top bun leaning back to show the layers.
For pulled pork sandwiches, balance matters more than extra sauce. Slaw, pickles, and a sturdy bun make the BBQ sauce taste brighter and the sandwich easier to eat.
  • Warm the sauce before tossing it with the pork.
  • Use enough sauce to coat, not flood.
  • Add extra sauce on the side instead of drowning the sandwich.
  • Use a tangier sauce if you are adding creamy coleslaw.
  • Add pickles or onions if the pork and sauce taste too sweet.
  • Use a sturdier bun if the pork is very juicy.

For the classic sandwich build, pair the pork with a crisp coleslaw recipe, pickles, and extra warm sauce on the side.

Sauce amount chart · Fix bottled sauce · Back to recipe

What to Use If You Do Not Want BBQ Sauce

Pulled pork does not have to be sweet or tomato-based. The important thing is moisture plus contrast: something to keep the meat juicy, and something to stop all that richness from tasting flat.

  • Vinegar finishing sauce: best for smoked or fatty pork.
  • Pork juices with vinegar and pepper: simple, savory, and not sweet.
  • Mustard sauce: tangy and good with sandwiches.
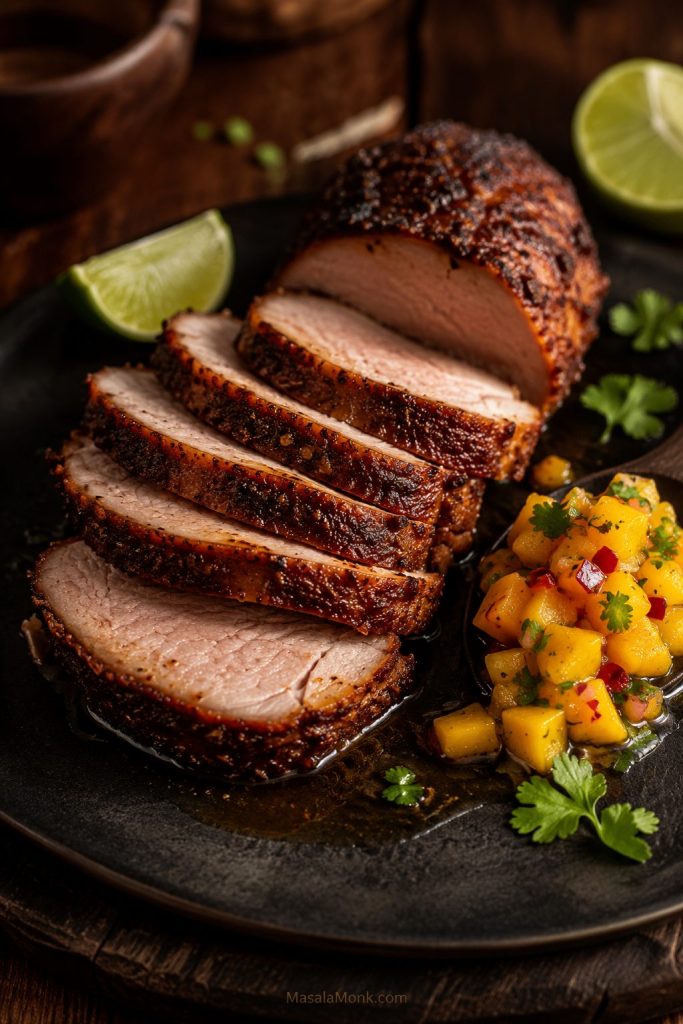
  • Salsa verde: good for tacos, rice bowls, and nachos; this salsa verde recipe works when you want a brighter, less sweet direction.
  • Chipotle sauce: smoky, spicy, and good for wraps.

For a group, the easiest move is to keep the pork lightly seasoned and offer two sauces: one classic BBQ sauce and one sharper vinegar-style sauce.

Storage and Freezing

Cool the sauce completely before storing it. Transfer it to a clean jar, bottle, or airtight container.

  • Fridge: store the sauce for 1 to 2 weeks.
  • Freezer: freeze the sauce for up to 3 months.
  • Thawing: thaw overnight in the fridge.
  • Reheating: warm gently in a saucepan over low heat.
  • If it thickens: thin with water, apple juice, broth, pork juices, or vinegar.

This is a good make-ahead sauce. The flavor gets smoother after a few hours in the fridge, especially if you used smoked paprika, mustard, or liquid smoke.

If the sauce has already been mixed with pulled pork, store it like cooked meat. USDA leftover guidance recommends refrigerating leftovers for 3 to 4 days or freezing them for longer storage. Refrigerate within 2 hours, and reheat gently with a splash of liquid so the pork stays moist.

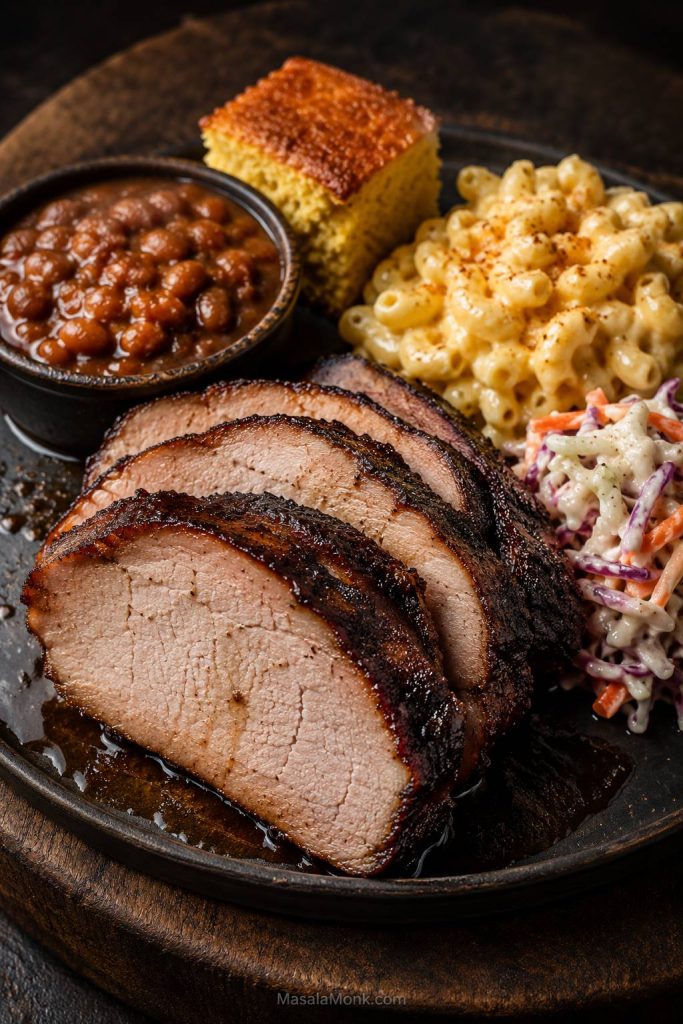
What to Serve with Pulled Pork BBQ Sauce

Pulled pork is the main reason to make this sauce, but it earns its place on the rest of the BBQ plate too. Serve it with crisp slaw, pickles, soft buns, baked beans, or creamy macaroni and cheese.

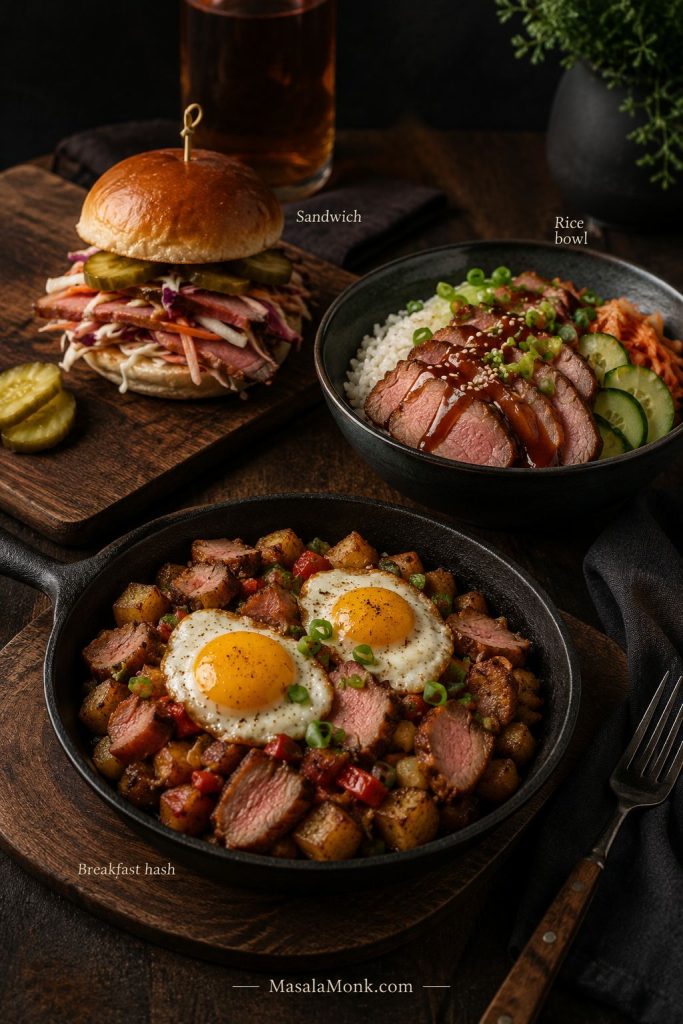
It also works for BBQ pork bowls, baked potatoes, nachos, sliders, and party trays where you want one sauce that can sit on the side without taking over the whole meal.

Troubleshooting

Most BBQ sauce problems are fixable, especially if you change one thing at a time instead of trying to rescue the whole pan in one move.

Pulled Pork Sauce Fixes

Start with the problem you can taste or see, then make one adjustment. That keeps the sauce balanced instead of swinging from too sweet to too sharp.

Troubleshooting infographic for pulled pork sauce showing fixes for common problems: too sweet with vinegar, too sharp with honey, too thick with juices, too thin with simmering, dry pork with moisture, and flat sauce with contrast.
When pulled pork sauce tastes off, change one thing at a time. Use vinegar for too sweet, honey for too sharp, juices for too thick, simmering for too thin, moisture for dry pork, and contrast for flat flavor.

The sauce is too sweet.

Start with apple cider vinegar, mustard, black pepper, or Worcestershire sauce. Add a little, then taste again.

The sauce is too sharp.

Round it with a little more brown sugar, honey, molasses, or ketchup. Simmer for a few minutes to soften the vinegar.

The sauce is too thick for shredded pork.

Whisk in a small splash of reserved juices, broth, apple juice, or water until it pours easily. Pulled pork sauce should not behave like a sticky glaze.

The sauce is too thin.

Simmer uncovered for 5 to 10 minutes, stirring often so the sugar does not stick to the pan.

The pork tastes dry even after adding sauce.

Restore moisture with sauce plus a splash of reserved juices, broth, apple juice, or water. Sauce adds flavor, but liquid brings the pork back.

The sauce tastes flat.

Bring it back with Worcestershire sauce, mustard, smoked paprika, a pinch of salt, or a splash of vinegar. Flat sauce usually needs contrast, not just more sugar.

Back to recipe · Back to Most Helpful Sections

FAQ

What is the best BBQ sauce for pulled pork?

The best BBQ sauce for pulled pork is tangy, lightly sweet, gently smoky, and pourable enough to coat shredded meat without hiding the pork.

How much BBQ sauce do I need per pound of pulled pork?

Use about 1/4 to 1/3 cup BBQ sauce per pound of cooked pulled pork for a light coating. For saucy sandwiches, use about 1/2 cup per pound.

Do you add BBQ sauce before or after shredding pulled pork?

Add most of the sauce after shredding. This keeps the meat easier to control and prevents the sauce from tasting dull after long cooking.

Should pulled pork be mixed with sauce or served on the side?

Both work. For sandwiches, mix in enough warm sauce to season the pork, then serve extra on the side. Smoked pork and party trays stay more flexible when the meat is only lightly sauced.

What is the difference between BBQ sauce and finishing sauce?

BBQ sauce is thicker, sweeter, and more tomato-based. Finishing sauce is thinner, sharper, and added after shredding to brighten rich or smoky pork.

Can I use vinegar sauce instead of BBQ sauce for pulled pork?

Yes. Vinegar sauce works especially well when the pork is already smoky, fatty, or rich. Apply it lightly; it is meant to brighten the meat, not soak it.

What sauce is best for pulled pork sandwiches?

Choose a sauce that is tangy enough to balance the pork and thick enough to hold the sandwich together. If the sandwich tastes heavy, add pickles, onions, slaw, mustard, or a little vinegar for contrast.

How do I make store-bought BBQ sauce better for pulled pork?

Warm it gently and adjust it. Add vinegar if it is too sweet, cooking juices or apple juice if it is too thick, Worcestershire and mustard if it tastes flat, or smoked paprika if it needs more BBQ flavor.

How do I thin BBQ sauce for shredded pork?

Thin BBQ sauce with pork juices, apple juice, broth, water, or apple cider vinegar. Add a little at a time until the sauce spreads through the pork without clumping.

Can I freeze homemade BBQ sauce?

Yes. Cool the sauce completely, transfer it to a freezer-safe container, and freeze for up to 3 months. Thaw in the fridge and reheat gently before using.

Final Tip

The best pulled pork sauce is not the one that shouts the loudest. It is the one that makes the pork taste fuller, juicier, and more complete without covering it up. Start with a little sauce, toss gently, taste, and adjust from there.

Once the pork tastes moist, balanced, and still like pork, stop. That is the point where BBQ sauce is doing its job.

Back to top · Back to recipe

Posted on Leave a comment

Egg Foo Young Recipe with Takeout-Style Gravy

Golden Egg Foo Young patties served with brown gravy, sliced scallions, steamed rice, chopsticks, and a spoon on a ceramic plate.

The best Egg Foo Young recipe tastes like old-school Chinese-American takeout rebuilt for a home skillet: soft egg in the center, browned edges outside, little snaps of vegetable crunch, and brown gravy that turns plain rice into dinner. It should not taste like a flat breakfast omelet wearing sauce. It should feel sturdier, saucier, and more generous than that.

Homemade Egg Foo Young usually goes wrong in predictable ways: the filling is too wet, the patties tear when flipped, the eggs turn rubbery, or the gravy thickens into paste. This version keeps the mixture balanced, uses a clear 6-egg to 2–2½ cup filling ratio, and treats the first patty as a test round so you can adjust the heat, oil, or scoop size before the whole batch is cooked. If your first patty misbehaves, jump to troubleshooting before cooking the next one.

The method starts in a skillet and ends with hot gravy over rice. You can pan-fry for an easy weeknight dinner, shallow-fry for better browned edges, or use the restaurant-style method when you want puffier patties. Either way, the goal is the same: tender egg patties that hold together, a sauce that moves instead of sitting like paste, and a plate that finally feels like Egg Foo Young rather than an omelet with toppings.

Why the gravy should move: the sauce should coat the patty while still flowing into the rice. If it sits like paste, the dish starts feeling heavy before the eggs have a chance to shine.

Glossy brown gravy being poured from a small pitcher over a golden Egg Foo Young patty with rice blurred in the background.
The sauce should move as it pours. If it sits heavily on the patty, thin the gravy before serving so the eggs stay tender instead of buried.

Quick Answer: What Is Egg Foo Young?

Egg Foo Young is a Chinese-style egg patty made with beaten eggs, vegetables, and often shrimp, chicken, pork, beef, tofu, or extra vegetables. In Chinese-American takeout, it is usually served as separate patties with brown gravy and rice.

You may also see it written as Egg Foo Yung, Egg Fu Yung, or Egg Foo Yong. The spelling changes, but the idea stays the same: vegetables and protein are mixed directly into beaten eggs, cooked into patties, and finished with a savory brown sauce.

This recipe is built for the gravy-over-rice version people usually mean when they crave Egg Foo Young: browned edges, a tender center, crisp little vegetables, and enough sauce to make rice feel like part of the dish. It is not a folded breakfast omelet, a baked egg casserole, or a dry scramble. The patty should be sturdy enough for sauce, soft enough to cut cleanly, and generous enough that every bite tastes like more than plain egg. If the sauce is the part you came for, go straight to the brown gravy method.

Cut-open Chinese-American Egg Foo Young patty served with rice, brown gravy, scallions, a spoon, and a takeout box in the background.
This is the old-school Chinese-American version many people mean when they crave Egg Foo Young: separate patties, rice, scallions, and a savory brown sauce.

What this recipe prevents: wet filling that tears the patties, flat omelet-like rounds with no browned edges, bland eggs that depend completely on sauce, and gravy that turns gluey before it reaches the plate.

Recipe snapshot

Egg Foo Young at a Glance

Yield4 servings / 6 medium patties
Prep Time15 minutes
Cook Time20 minutes
Total Time35 minutes

Main method: pan-fried or shallow-fried patties in a skillet.

Restaurant-style option: deeper oil for puffier, crisp-edged patties.

Sauce: brown cornstarch gravy with stock, soy sauce, oyster sauce, sesame oil, and white pepper.

Best served with: steamed rice, fried rice, noodles, stir-fried vegetables, or a crisp cucumber salad.

Fastest weeknight version: use cooked shrimp, leftover chicken, roast pork, pressed tofu, or quick-cooking vegetables. Make the gravy first, cook smaller ⅓- to ½-cup patties, and adjust after the first one instead of forcing the whole batch through the same heat.

Cooked shrimp, chopped chicken, pressed tofu, scallions, eggs, and a skillet arranged for a quick Egg Foo Young dinner.
For a faster weeknight Egg Foo Young, start with cooked protein or pressed tofu; then keep the patties smaller so they set quickly and flip cleanly.

Why This Egg Foo Young Recipe Works

The egg has to stay in charge. That is the whole recipe. You want enough vegetables and protein to make the patties taste generous, but enough beaten egg to set around everything and hold the shape when you lift it from the pan.

  • The ratio keeps the patties stable. Six large eggs comfortably hold about 2 to 2½ cups total filling.
  • Small, controlled add-ins cook cleanly. Drained sprouts, thin cabbage, diced onion, and chopped protein stay tucked inside the egg instead of leaking water into the pan.
  • A tiny cornstarch slurry helps structure. One teaspoon in the egg mixture helps the patty hold without making it bouncy.
  • The sauce stays adjustable. Making the gravy separately means you can thin, thicken, or season it without overcooking the eggs.
  • The oil level controls texture. Pan-fry for weeknight ease, shallow-fry for better edges, or use deeper oil for restaurant-style puff.

The main rule: think of the mixture as eggs carrying filling, not vegetables barely glued together with egg. If the bowl looks like a dry pile or a loose soup, fix that before the first patty hits the pan.

Spoon lifting scoopable Egg Foo Young batter with beaten egg coating bean sprouts, scallions, onion, and chopped protein.
Before the mixture reaches the skillet, it should look scoopable and egg-forward. In other words, the eggs should carry the filling, not barely glue it together.

Ingredients for Fluffy Egg Foo Young

This is the kind of recipe that turns a few eggs, a handful of vegetables, and a little gravy into a proper meal. The ingredient list is simple; the important part is cutting the filling small enough to cook quickly and keeping it steady enough to stay inside the patty.

Small pieces are your friend here. They cook quickly, stay tucked into the egg, and give every bite crunch, sweetness, and little pockets of savoriness.

Egg Foo Young ingredients including eggs, bean sprouts, scallions, cabbage, chopped protein, soy sauce, stock, oyster sauce, and cornstarch on a prep counter.
Good Egg Foo Young starts before the pan: dry sprouts, small vegetables, measured filling, and a ready gravy base make the cooking much easier to control.

To make the Egg Patties

Eggs, Vegetables, and Protein

  • Eggs: Six large eggs make 6 medium patties, enough for 4 servings with rice and gravy.
  • Bean sprouts: One cup / about 70–85 g gives the patties classic crunch without crowding the eggs. Drain them well so the mixture stays scoopable. No sprouts? See the bean sprout substitutes.
  • Protein or tofu: Keep this to 115–140 g / 4–5 oz for the 6-egg version. Cooked shrimp, chicken, roast pork, or firm tofu all work as long as they are chopped small.
  • Vegetable-only version: Choose thin vegetables and keep the total filling within the ratio below. A quick sauté helps mushrooms, zucchini, or bell pepper settle into the eggs instead of loosening the mixture.
  • Onion: A small ¼ cup / about 35 g is enough once it is finely diced.
  • Cabbage or mushrooms: Use ⅓ to ½ cup / about 35–50 g finely shredded cabbage or thinly sliced mushrooms. Mushrooms should be pre-cooked if they seem watery.
  • Scallions / spring onions: Two scallions / about 15–20 g add freshness without making the mixture heavy.

Drain Bean Sprouts Before Mixing

Bean sprouts add the classic crunch, but they also carry water. Drain them before mixing so the egg can set cleanly around the filling.

Fresh bean sprouts draining in a fine mesh strainer over a bowl on a kitchen counter.
Wet sprouts can loosen the egg mixture quickly, so draining them well gives the first patty a much better chance of holding together.

Seasoning, Structure, and Frying Oil

  • Cornstarch: Mix 1 teaspoon / about 3 g cornstarch with 1 tablespoon / 15 ml cold water before whisking it into the eggs.
  • Sesame oil: A small ½ teaspoon / 2.5 ml adds aroma. More can overpower the patties.
  • White pepper: A little white pepper gives the eggs and gravy that warm Chinese-restaurant note without making the dish spicy.
  • Neutral oil: Use just enough to coat the pan for tender patties, or about ¼ inch / 6 mm for puffier shallow-fried edges.

Egg-to-filling ratio: for 6 large eggs, keep the total filling around 2 to 2½ cups. That includes bean sprouts, onion, cabbage or mushrooms, scallions, and protein. Use the numbers as a guide, but trust the bowl too: the egg should still visibly surround the filling.

Egg Foo Young ratio guide showing bowls for 4 eggs, 6 eggs, and 8 eggs with measured amounts of vegetables and protein.
The egg-to-filling ratio is the reason the patties hold together. Too much filling makes them tear, while enough beaten egg helps everything set into a stable round.
EggsTotal FillingBest Yield
4 large eggsAbout 1½ cups4 small patties
6 large eggs2 to 2½ cups6 medium patties
8 large eggs3 to 3½ cups8 medium patties or 6 large patties

Ingredient Prep Matters

If you remember only one prep rule, make it this: the add-ins should help the egg set, not fight it. When vegetables are drained and cut small, the patties cook calmly instead of sputtering, tearing, or leaking in the pan.

Hand slicing cabbage, scallions, onion, and mushrooms into small pieces on a cutting board for Egg Foo Young.
Small, thin vegetables cook more evenly inside the patties, so the egg can set around them instead of tearing around bulky pieces.

Cook Watery Vegetables First

Mushrooms, zucchini, bell pepper, and similar vegetables can release liquid as they cook. If you use more than ⅓ to ½ cup, sauté them briefly first, then let them cool before adding them to the eggs. Cooked shrimp, chicken, pork, or tofu should also be chopped small enough to stay tucked into the patty when you flip it.

Mushrooms and zucchini being sautéed in a skillet before being added to Egg Foo Young batter.
A quick sauté lets mushrooms, zucchini, and other watery add-ins release steam before they weaken the Egg Foo Young batter.

What Goes Into Egg Foo Young Gravy

Some people call it Egg Foo Young sauce, but the takeout version eats more like a light brown gravy. It should taste rounded, not just salty: savory from stock and soy sauce, slightly rich from oyster sauce, and smooth enough to coat the eggs without weighing them down.

Saucepan with Egg Foo Young gravy ingredients including stock, soy sauce, oyster sauce, cornstarch, white pepper, sesame oil, and dark soy sauce.
Egg Foo Young gravy gets its flavor before it thickens, so build the base with stock, soy sauce, oyster sauce, white pepper, and sesame oil first.
  • Stock: Chicken stock gives the most familiar flavor; 2 cups / 480 ml is enough sauce for the patties and rice. Vegetable stock works for a meatless version.
  • Light soy sauce: 1½ tablespoons / about 22 ml seasons the gravy and adds umami.
  • Oyster sauce: 1 tablespoon / 15 ml gives the sauce body and a deeper restaurant-style flavor.
  • Dark soy sauce: ½ teaspoon / 2.5 ml is optional, but it gives the gravy a deeper brown color.
  • Sugar: 1–2 teaspoons / 4–8 g rounds out the salty sauces without making the gravy sweet.
  • White pepper: ¼ teaspoon adds gentle warmth.
  • Cornstarch slurry: 2 tablespoons / about 16 g cornstarch mixed with 3 tablespoons / 45 ml cold water thickens the gravy.
  • Sesame oil: ½ teaspoon / 2.5 ml goes in at the end so the aroma stays fresh.

Easy swaps: use vegetable stock for a meatless gravy, vegetarian oyster sauce or mushroom sauce instead of oyster sauce, and tamari only if every other ingredient is also gluten-free. Dark soy sauce is optional; the gravy will be lighter without it but still good.

Pan-Fried vs Restaurant-Style Egg Foo Young

There are two common versions of Egg Foo Young in people’s minds. One is an easy skillet patty with gravy. The other is the puffier, crisp-edged Chinese restaurant version cooked in more oil. Both can be delicious, but the oil level changes the texture.

Pan-fried Egg Foo Young patty compared with a puffier restaurant-style patty near a wok and wire rack.
Pan-fried Egg Foo Young is easier at home; however, more oil creates puffier restaurant-style edges and a richer takeout texture.
MethodBest ForTextureNotes
Pan-friedEasy home cookingTender, lightly goldenUses the least oil and is easiest for beginners.
Shallow-friedBest home balanceGolden edges, slightly fuller centerUse about ¼ inch / 6 mm oil in a skillet or wok.
Deep-friedRestaurant-style puffPuffy, crisp-edged, richerUses more oil and needs temperature control.

Best setup for most home cooks: use a 10-inch nonstick skillet, a ½-cup measure, and a thin flexible spatula. Shallow-frying with about ¼ inch / 6 mm oil gives better browning than a barely oiled pan without the mess of deep-frying. Want the puffier version? Skip to the restaurant-style method.

How to Make Egg Foo Young

Once the filling is chopped, the gravy ingredients are measured, and your pan is ready, the recipe moves quickly. Keep the bowl close to the stove, cook in small batches, and adjust the heat after the first patty if you need to.

1. Prep the Filling

Drain the bean sprouts very well. Finely dice the onion, slice the scallions, and shred the cabbage or slice the mushrooms thinly. Chop your shrimp, chicken, pork, tofu, or vegetables into small pieces.

Cook chicken or pork first so the eggs can stay tender instead of waiting in the pan for meat to finish. Cooked shrimp, cooked chicken, roast pork, or tofu can go straight into the filling.

2. Make the Gravy Before Frying

Once the eggs hit the pan, things move quickly. Having the gravy ready means the patties can go straight from skillet to plate while they are still soft in the center and browned at the edges. If the sauce thickens while the patties cook, a splash of stock or water will bring it back.

3. Mix the Eggs

In a large bowl, whisk the eggs until the whites and yolks are fully combined. In a small bowl, mix 1 teaspoon cornstarch with 1 tablespoon cold water, then whisk that slurry into the eggs with sesame oil and white pepper.

Fold in the bean sprouts, onion, cabbage or mushrooms, scallions, and protein. The mixture should scoop easily: glossy egg around the filling, not soup and not a dry vegetable pile. Mix right before cooking so the vegetables keep their snap and the batter stays light.

4. Cook the Patties

Heat the Pan and Scoop the Batter

Heat a nonstick skillet, wok, or well-seasoned pan over medium to medium-high heat. Add enough neutral oil to coat the bottom for pan-frying, or about ¼ inch / 6 mm oil for a more shallow-fried texture.

Egg Foo Young patty frying in shallow oil with bubbles around the golden edge and a spatula near the pan.
A shallow layer of oil helps the edge set before the center dries out, which makes the patty sturdier when it is time to flip.

Use a ½-cup measure for standard patties. Scoop the egg mixture into the pan, nudging the filling into a round shape. Cook until the edges are set and the bottom is golden, about 2 to 3 minutes. Flip carefully and cook the second side until the middle has no liquid egg, about 1½ to 2 minutes more.

Let It Set Before Flipping

Egg Foo Young patty being lifted and flipped on a thin spatula in a skillet with shallow oil.
Wait until the first side feels stable on the spatula. Then flip once, gently, instead of moving the patty while the center is still loose.

Use the First Patty as Your Test

The first patty is often the test patty. If it browns too fast, lower the heat before the next batch; if it sticks or looks dry around the edges, add a little more oil. Look for a center that springs lightly and no loose egg running from the middle. After that first patty, the recipe usually relaxes: you know whether the pan wants less heat, more oil, or a smaller scoop. If the first one tears, browns too fast, or stays runny, do not guess; check the troubleshooting table before cooking the next batch.

Slightly uneven first Egg Foo Young patty on a spatula beside a skillet and a bowl of batter.
One imperfect first patty can save the whole batch, because it shows whether the pan needs less heat, more oil, or a smaller scoop.

Scoop size guide: use ⅓-cup scoops for small beginner-friendly patties, ½-cup scoops for standard home patties, and ¾-cup scoops only if you are using more oil and feel confident flipping larger rounds.

How to Know the Patties Are Right

Cut-open Egg Foo Young patty with golden edges, a set center, bean sprouts, scallions, and visible filling.
The best doneness cue is texture: the center should be set, the edge should be browned, and the inside should still look tender rather than dry.

You nailed the patties when:

  • The edges are golden but not hard.
  • The center springs lightly when pressed.
  • No loose egg runs from the middle.
  • The patty lifts without tearing.
  • The sprouts still have a little snap.

Doneness cue: the egg should be set in the center, not wet or liquid. Shrimp should look opaque. Chicken and pork are safest and easiest when cooked before they go into the egg mixture. For exact food-safe temperatures for egg dishes and poultry, the USDA safe temperature chart is a useful reference.

5. Rest Briefly, Then Serve

Transfer the cooked patties to a wire rack or a plate lined with paper towel. Let them rest in a single layer so the edges stay better. Spoon hot gravy over the top right before serving so the eggs stay tender and the sauce softens the edges without making the plate soupy.

How to Make the Brown Gravy

Bad Egg Foo Young gravy usually goes watery or gluey. The sweet spot is smooth, savory, and spoon-coating, with enough body to cling to the patties but enough movement to sink into the rice. That is the difference between plain egg patties and the takeout-style plate people remember.

Once the slurry is smooth, the sauce is simple. Cornstarch must be mixed with cold water before it touches hot liquid; otherwise, it can clump almost instantly.

Cornstarch slurry being stirred with cold water in a small glass bowl for Egg Foo Young gravy.
A smooth slurry is the shortcut to smooth Egg Foo Young gravy; mix it cold first, then whisk it into the hot sauce gradually.
  1. Combine the base. In a small saucepan, combine stock, light soy sauce, oyster sauce, optional dark soy sauce, sugar, and white pepper.
  2. Bring to a simmer. Heat gently until the mixture is steaming and lightly bubbling.
  3. Make the slurry. In a small bowl, stir cornstarch with cold water until smooth.
  4. Thicken slowly. Whisk the slurry into the simmering gravy a little at a time.
  5. Simmer until shiny. Cook for 30 to 60 seconds, until the gravy coats the back of a spoon.
  6. Finish with sesame oil. Add sesame oil at the end so the aroma stays fresh.

Gravy texture cue: the gravy should look shiny, coat the back of a spoon, and still pour easily. If it sits heavily on the patty, thin it before serving. If it disappears through the rice like broth, give it a little more time or a little more slurry.

Glossy brown Egg Foo Young gravy coating the back of a spoon with a visible drip over a saucepan.
Once the gravy coats the spoon and drips slowly, it is ready: thick enough for the patties, but still loose enough to flow into the rice.

Cornstarch Gravy vs Roux Gravy

The main recipe uses cornstarch because it is fast, glossy, and easy to control. If you want a richer old-school body, start with a light roux and finish with a smaller amount of slurry.

Two bowls of brown gravy showing a glossy cornstarch gravy and a thicker roux-style gravy with spoon trails.
Cornstarch gives Egg Foo Young gravy a glossy, lighter finish, while a roux adds a rounder restaurant-style body. Choose based on the texture you want.
StyleBest ForTexture
Cornstarch-only gravyFast weeknight Egg Foo YoungGlossy, light, pourable
Roux + cornstarch gravyMore old-school restaurant bodyRounder, richer, more gravy-like
Arrowroot gravyCorn-free adjustmentClearer and slightly slicker; avoid long boiling

For a roux version, cook 1 tablespoon neutral oil with 1 tablespoon flour for 1 to 2 minutes, then whisk in the stock and seasonings before finishing with a smaller amount of cornstarch slurry. Making the gravy gluten-free means checking every ingredient, not just swapping the soy sauce. Use tamari only if the stock, oyster sauce or vegetarian oyster sauce, and thickener are also gluten-free.

Restaurant-Style Egg Foo Young: How to Get Puffier Patties

Restaurant-style Egg Foo Young is not just “more oil.” Hotter oil sets the outside quickly, which helps the patty puff and brown before the center overcooks. That is why shallow-frying gives you a better home version than a barely oiled pan, and deeper oil gives you the most dramatic restaurant-style texture.

Oil Temperature for Restaurant-Style Puff

For puffier patties, use a wok or deep pot with 2–3 inches of neutral oil. Heat the oil to about 350°F / 175°C. When the egg mixture goes in, the oil temperature will drop. Letting the patties cook closer to 325°F / 160°C helps them puff and set without scorching.

Restaurant-style Egg Foo Young patty puffing in hot oil with a thermometer clipped to a wok and a wire rack nearby.
For restaurant-style Egg Foo Young, hot oil sets the outside quickly. Meanwhile, the center stays tender because the patty puffs before it overcooks.
  • Use a ladle instead of pouring from the bowl.
  • Lower the egg mixture gently into the oil so it forms a round patty.
  • Let the first side set before moving it.
  • Flip once the edges look golden and the patty feels stable.
  • Drain on a wire rack, not a flat plate, so the edges stay crisp.
  • Give each patty room so the oil stays hot and the edges set quickly.

Egg Foo Young Variations

Choose the variation by what you want from the plate. Shrimp gives the most classic takeout feel, chicken is the easiest leftover dinner, pork or char siu brings deeper flavor, and tofu or vegetables make the lightest version. The rule stays the same for all of them: keep the pieces small, control watery add-ins, and let the egg remain the binder.

How to Prep Add-Ins

Before you choose shrimp, chicken, pork, tofu, or vegetables, check how much moisture and cooking time that add-in brings to the eggs.

Prep bowls of shrimp, cooked chicken, pork or char siu, tofu, mushrooms, and cabbage for Egg Foo Young variations.
Different add-ins need different prep. Cooked meats are easiest, while mushrooms, tofu, and cabbage need the right size and moisture control.
Add-InCooked or Raw?Prep CueWatch-Out
ShrimpCooked easiest; raw okay if smallChop large shrimpRaw shrimp must turn opaque
ChickenCooked bestDice or shred smallRaw chicken can overcook the eggs
Pork / char siuCooked bestDice smallCan make the filling salty
Firm tofuUse pressed tofuPat dry and dice smallSoft tofu breaks down
MushroomsPre-cook if using more than a littleSlice thinReleases water
CabbageRaw okay if thinShred fineToo much makes patties loose

Shrimp Egg Foo Young

Shrimp is the most takeout-feeling version: sweet, quick-cooking, and easy to pair with brown gravy. Cooked small shrimp are easiest. If using raw shrimp, chop them small enough to turn opaque by the time the egg sets.

Shrimp Egg Foo Young patty cut open to show shrimp inside, served with brown gravy, scallions, and rice.
Shrimp Egg Foo Young gives the most classic takeout feel; for best results, chop large shrimp so the pieces stay tucked inside the patty.

Chicken Egg Foo Young

Chicken is the best leftover version. Use cooked chicken, chopped or shredded small, so the eggs can stay tender instead of waiting in the pan for raw meat to finish.

Cooked chopped chicken being folded into Egg Foo Young batter with bean sprouts, scallions, and vegetables in a glass bowl.
Chicken Egg Foo Young works best with cooked, chopped chicken because the eggs can set quickly instead of waiting for raw meat to cook through.

Pork Egg Foo Young

Pork, roast pork, or char siu gives the deepest old-school flavor. Dice it small and season the egg mixture lightly because cooked pork can bring plenty of salt on its own.

Pork Egg Foo Young patty cut open with diced char siu inside, scallions on top, and brown gravy in a bowl nearby.
Pork or char siu adds deeper flavor, but the pieces still need to be small enough for the egg to bind into a clean patty.

Vegetable Egg Foo Young

Vegetable Egg Foo Young works best when the vegetables are chosen for texture, not just volume. Thin cabbage, sprouts, scallions, and shredded carrot can usually go in raw; mushrooms, zucchini, bell pepper, and watery greens should be cooked briefly first.

Firm tofu works well if you want a meatless version with more body. Press it, pat it dry, and dice it small before adding it to the bowl. For vegetarian gravy, use vegetable stock and vegetarian oyster sauce or mushroom sauce.

Vegetable and tofu Egg Foo Young patty cut open with tofu cubes, bean sprouts, cabbage, carrot, scallions, and brown gravy.
Vegetable Egg Foo Young works best when the filling is chosen for texture, not volume. Firm tofu, cabbage, sprouts, and scallions keep it light but satisfying.

No Bean Sprouts? Use These Instead

Bean sprouts give Egg Foo Young its classic crunch, but you can still make good patties without them. Choose the substitute by what the mixture needs.

Bean sprout substitutes for Egg Foo Young including Napa cabbage, water chestnuts, snow peas, shredded cabbage, carrot, scallions, mushrooms, zucchini, and greens.
No bean sprouts? Use crisp substitutes like Napa cabbage, water chestnuts, or snow peas. Cook watery vegetables first so they do not loosen the batter.
  • For crunch: thin Napa cabbage, diced water chestnuts, or julienned snow peas.
  • For easy volume: finely shredded cabbage, shredded carrot, or extra scallions.
  • Use carefully: mushrooms, zucchini, and watery greens. Cook them briefly first, then cool before adding them to the eggs.

The substitute should support the egg, not take over the bowl. If the mixture starts looking like vegetables barely coated in egg, add another beaten egg or hold some filling back for the next batch.

Troubleshooting Egg Foo Young

Start with the First Patty

If your first patty is messy, do not panic. Egg Foo Young is easy to adjust batch by batch because you can change the scoop size, heat, oil, or mixture before the next patty goes in.

Most Egg Foo Young problems are batch-by-batch problems, not recipe-ending problems. Even restaurant-style Egg Foo Young is not about perfect circles; it is about tender eggs, enough filling, and a sauce that brings the plate together.

Egg Foo Young troubleshooting guide showing patties that fall apart, stay too runny, have burnt edges, and turn out just right.
One messy patty does not ruin Egg Foo Young; instead, use it to fix the mixture, heat, oil, or scoop size before the next round.

Common Problems and Quick Fixes

ProblemFix NowFix Next Time
Patties fall apartMake smaller patties and add 1 beaten egg to the remaining mixture if needed.Keep total filling to 2–2½ cups per 6 eggs.
Mixture looks waterySpoon off excess liquid before frying.Drain sprouts well and pre-cook vegetables that release liquid.
Center stays runnyLower heat slightly and cover the pan briefly.Use ½-cup scoops instead of oversized patties.
Edges burn before center setsReduce heat and add a little more oil if the pan is dry.Cook over medium to medium-high heat, not high heat.
Patties taste blandServe with hot gravy and garnish with scallions or white pepper.Use flavorful stock, white pepper, sesame oil, and a well-seasoned gravy.
Patties turn rubberyReheat gently and avoid cooking them further.Pull patties once the egg is set; do not cook until dry.
Gravy is too thinAdd a little more cornstarch slurry and simmer briefly.Bring the sauce to a simmer before adding slurry.
Gravy is too thickWhisk in stock or water, a splash at a time.Add slurry gradually instead of all at once.
Gravy is lumpyStrain it if needed, then whisk smooth.Mix cornstarch with cold water first and stream it in while whisking.
Leftovers become soggyReheat patties separately from the gravy.Store patties and gravy in separate containers.

What to Serve with Egg Foo Young

Plain steamed rice is the classic base because it catches the salty-silky finish and keeps the plate from feeling too rich. The rice is not just filler here; it is part of why the dish feels like dinner.

If you are making Egg Foo Young for brunch, keep the sides lighter with something crisp like this cucumber salad recipe. If you are building a Chinese restaurant-style dinner, pair it with fried rice, noodles, or stir-fried greens.

  • Steamed jasmine rice: the easiest and most classic base.
  • Spam fried rice: ideal when you want a full restaurant-style plate. You can also use the same cold-rice method with simpler add-ins.
  • Garlic noodles: richer, cozier, and good with extra gravy.
  • Stir-fried greens: bok choy, cabbage, green beans, broccoli, or snow peas all work well.
  • Cucumber salad: a cool, crisp contrast to the hot gravy.
  • Chili oil: add at the table if you want heat.
  • Extra scallions: a fresh finish that keeps the dish from feeling heavy.

Storage, Make-Ahead Tips, and Reheating

Egg Foo Young is at its best when the patties are hot and the gravy is freshly spooned over the top, but leftovers can still be very good if the sauce and eggs are stored separately. This keeps the patties from absorbing too much gravy and turning soft. For general leftover timing and storage safety, the USDA’s leftovers and food safety guidance is a useful reference.

  • Make the gravy ahead: prepare it up to 2 days ahead and refrigerate it separately. Reheat gently and thin with stock or water if needed.
  • Prep the vegetables ahead: chop them earlier in the day and keep them dry in the fridge. Mix them with the eggs only right before cooking.
  • Refrigerate: store cooked patties and gravy in separate airtight containers for up to 3–4 days.
  • Reheat patties: warm gently in a skillet over low to medium heat, or use an air fryer briefly if you want firmer edges.
  • Reheat gravy: warm in a saucepan, whisking in a splash of stock or water if it has thickened.
  • Microwave carefully: use short bursts because eggs can turn rubbery when overheated.
  • Freeze only if needed: freeze patties without gravy. The texture is better refrigerated than frozen.

FAQs

Is Egg Foo Young the same as an omelet?

It is omelet-like, but not exactly the same as a Western folded omelet. Egg Foo Young has the vegetables and protein mixed directly into the eggs, is usually cooked as separate patties, and is served with brown gravy.

What is Egg Foo Young gravy made of?

Most Egg Foo Young gravy is made with stock, soy sauce, oyster sauce, white pepper, sesame oil, and a cornstarch slurry. A roux can be added for a rounder, more old-school restaurant-style body.

Why does my Egg Foo Young fall apart?

Usually, the filling is too wet, too heavy, or the patties are too large. Keep the filling around 2 to 2½ cups for 6 eggs, drain vegetables well, and use ½-cup scoops.

Why is my Egg Foo Young not fluffy?

Flat Egg Foo Young usually comes from a dry pan, oversized patties, or watery filling. A barely oiled skillet makes the mixture behave like a flat omelet. A little more oil, smaller scoops, and controlled add-ins help the edges puff before the center dries out.

What meat is best for Egg Foo Young?

Shrimp gives the most classic takeout feel, chicken is easiest for leftovers, and roast pork or char siu gives deeper flavor. Whatever protein you choose, keep it small so the egg can hold it.

Can Egg Foo Young be made without bean sprouts?

Yes. Use thin Napa cabbage, shredded cabbage, water chestnuts, snow peas, shredded carrot, or extra scallions. Choose small, controlled substitutes so the egg patties still hold together.

Is Egg Foo Young Chinese or Chinese-American?

Egg Foo Young has roots in Chinese egg dishes, but the gravy-covered version many people order from takeout menus is strongly Chinese-American. This recipe is built around that restaurant-style plate: separate egg patties, vegetables, optional protein, rice, and brown gravy.

Can the gravy be vegetarian?

Yes. Use vegetable stock and vegetarian oyster sauce or mushroom sauce. Check the soy sauce and other condiments too if you need the whole dish to meet a specific dietary requirement.

How do I make Egg Foo Young taste like takeout?

The takeout flavor comes from three things working together: enough oil to brown the edges, small amounts of white pepper and sesame oil, and a brown gravy that tastes savory before it thickens. If the patties are dry and the gravy is flat, it will taste like an omelet with sauce, not Egg Foo Young.

Should the gravy go on before or after serving?

Spoon the gravy over the patties just before serving. If the patties sit in gravy too long, they soften and lose their best texture.

Can you bake or air-fry Egg Foo Young?

You can bake or air-fry the egg mixture in a small greased pan, but it will eat more like a baked omelet or mini frittata than classic Egg Foo Young. For browned edges and takeout-style texture, a skillet with enough oil is still the better method. For a baked egg texture, these egg muffin cups are a better fit.

Once the ratio clicks, Egg Foo Young stops feeling fussy. The first patty teaches you the heat, the sauce goes on at the end, and the rest becomes a flexible dinner you can make with shrimp, chicken, pork, tofu, or the vegetables already in the fridge.

Egg Foo Young Step by Step

Use this quick visual recap before the recipe card if you want the whole cooking flow in one place: prep the filling, mix the eggs, cook the patties, thicken the gravy, and serve hot.

Step-by-step Egg Foo Young process showing filling prep, egg mixing, patty cooking, gravy thickening, and serving with rice.
This visual roadmap shows the whole flow: prep the filling, mix the eggs, cook the patties, thicken the gravy, then serve hot.

Recipe card

Egg Foo Young Recipe with Takeout-Style Gravy

Fluffy Chinese-American egg patties with crisp vegetables, your choice of shrimp, chicken, pork, tofu, or extra vegetables, and smooth brown gravy to spoon over rice.

Prep Time15 minutes
Cook Time20 minutes
Total Time35 minutes
Servings4

Yield: 6 medium patties

Method: Pan-fried / shallow-fried

Cuisine: Chinese-American

Course: Dinner, main dish, brunch

Ingredients

For the Egg Patties

  • 6 large eggs
  • 1 teaspoon / about 3 g cornstarch mixed with 1 tablespoon / 15 ml cold water
  • ½ teaspoon / 2.5 ml toasted sesame oil
  • ¼ teaspoon white pepper
  • 1 cup / about 70–85 g bean sprouts, rinsed and very well drained
  • 115–140 g / 4–5 oz chopped cooked shrimp, cooked chicken, roast pork, or firm tofu
  • ¼ cup / about 35 g finely diced onion
  • ⅓ to ½ cup / about 35–50 g finely shredded cabbage or thinly sliced mushrooms
  • 2 scallions / spring onions, thinly sliced
  • 2–4 tablespoons / 30–60 ml neutral oil for pan-frying, or more as needed for shallow-frying

For the Gravy

  • 2 cups / 480 ml chicken stock or vegetable stock
  • 1½ tablespoons / about 22 ml light soy sauce
  • 1 tablespoon / 15 ml oyster sauce or vegetarian oyster sauce
  • ½ teaspoon / 2.5 ml dark soy sauce, optional
  • 1–2 teaspoons / 4–8 g sugar, to taste
  • ¼ teaspoon white pepper
  • 2 tablespoons / about 16 g cornstarch
  • 3 tablespoons / 45 ml cold water
  • ½ teaspoon / 2.5 ml toasted sesame oil

For Serving

  • Steamed rice or fried rice
  • Extra sliced scallions
  • Chili oil, optional

Instructions

Make the Gravy

  1. Prep the filling. Drain the bean sprouts well. Dice the onion, slice the scallions, shred the cabbage or mushrooms, and chop the protein small. Pre-cook raw chicken, raw pork, mushrooms, or vegetables that release a lot of moisture.
  2. Start the gravy. In a small saucepan, combine the stock, soy sauce, oyster sauce, optional dark soy sauce, sugar, and white pepper. Bring to a gentle simmer.
  3. Thicken the gravy. Stir 2 tablespoons cornstarch with 3 tablespoons cold water until smooth. Whisk the slurry into the simmering gravy a little at a time. Simmer for 30 to 60 seconds, until smooth and spoon-coating. Stir in sesame oil and keep warm.

Mix and Cook the Patties

  1. Mix the eggs. In a large bowl, whisk the eggs. Stir 1 teaspoon cornstarch with 1 tablespoon cold water, then whisk it into the eggs with sesame oil and white pepper.
  2. Add the filling. Fold in the bean sprouts, protein, onion, cabbage or mushrooms, and scallions. The mixture should scoop easily: glossy egg around the filling, not soup and not a dry vegetable pile.
  3. Heat the pan. Heat a nonstick skillet or wok over medium to medium-high heat. Add enough oil to coat the bottom, or about ¼ inch / 6 mm oil for a shallow-fried texture.
  4. Cook the patties. Scoop about ½ cup egg mixture into the pan for each patty. Cook for 2 to 3 minutes, until the edges set and the bottom is golden. Flip carefully and cook for 1½ to 2 minutes more, until the middle has no liquid egg.
  5. Adjust after the first patty. If it browns too quickly, lower the heat. If it sticks or looks dry around the edges, add a little more oil before the next batch.

Rest and Serve

  1. Repeat and serve. Cook the remaining patties in batches. Transfer to a wire rack or paper towel-lined plate, let them rest in a single layer, and spoon hot gravy over the patties just before serving.

Notes

  • Keep total filling around 2 to 2½ cups for 6 eggs.
  • The mixture should look egg-forward: glossy egg around the filling, not vegetables barely coated in egg.
  • The first patty is your test patty. Adjust heat, oil, or scoop size before continuing.
  • Use ⅓-cup scoops for easier flipping or ½-cup scoops for standard patties.
  • Cook chicken or pork before adding it. Cooked shrimp is easiest; raw shrimp should be chopped small and cooked until opaque.
  • For puffier edges, shallow-fry with about ¼ inch / 6 mm oil.
  • For roux-style gravy, cook 1 tablespoon oil with 1 tablespoon flour for 1 to 2 minutes, whisk in the stock and seasonings, then finish with less slurry.
  • Spoon gravy over the patties just before serving, not far ahead.
  • Store patties and gravy separately.

Back to top

Posted on Leave a comment

Pinakbet Tagalog Recipe

Bowl of Pinakbet Tagalog with pork, squash, okra, eggplant, ampalaya, long beans, and tomato-bagoong sauce, served with rice nearby.

Pinakbet Tagalog is the kind of vegetable dish that makes rice feel necessary. The best spoonful has salty bagoong-rich juices, sweet squash, silky eggplant, tender okra, a little bitter ampalaya, and enough porky depth to make the vegetables feel like the meal.

It is generous, home-style Filipino cooking: vegetables cooked until they soften into each other, but not so far that everything turns muddy. The squash should become creamy at the edges, the eggplant should turn soft and shiny, and the bitter melon should balance the sweetness instead of taking over.

If your pinakbet has ever turned watery, too salty, too bitter, or too soft, the problem usually is not the ingredient list. It is the order. Squash needs a head start, okra needs restraint, and bagoong needs to be cooked with the tomatoes instead of dumped in heavily at the end.

This is a Pinakbet Tagalog-style home recipe: squash-forward, shrimp-paste seasoned, saucy enough for rice, and built to keep the vegetables tender but distinct. It also includes notes for a sharper Ilocano direction, no-bagoong substitutions, and the small timing cues that keep pakbet from becoming mushy.

Quick Answer: What Is Pinakbet?

Pinakbet is a Filipino vegetable stew made with bagoong, tomatoes, and vegetables such as squash, okra, eggplant, bitter melon, and long beans. This version is Pinakbet Tagalog, made with bagoong alamang, pork, squash, and mixed vegetables in a salty, savory sauce that is meant for rice.

For the easiest balanced version, cook pork with onion, garlic, tomatoes, and shrimp paste. Add squash first, long beans next, and eggplant, ampalaya, and okra near the end. That order keeps the vegetables tender without turning everything into one soft mixed stew; the full vegetable cooking order is below.

  • Main seasoning: bagoong alamang, or shrimp paste
  • Protein: pork belly or pork shoulder, cut into 1-inch pieces
  • Vegetables: squash, long beans, okra, eggplant, and ampalaya
  • Liquid: 1 cup / 240 ml water or light stock, plus more only if needed
  • Texture goal: glossy and saucy, not soupy or mushy

Start here: Use 1 tablespoon bagoong first, then adjust with 1–3 teaspoons more near the end. Bagoong brands vary a lot, and starting low gives you room to correct the seasoning.

Pinakbet at a Glance

Yield4 generous servings with rice, or 5–6 smaller side servings
Prep time20 minutes
Cook timeAbout 40 minutes
Total timeAbout 1 hour
Best pan12-inch wide pan, wok, deep skillet, or wide Dutch oven
Main flavorSalty, savory, lightly sweet, earthy, and a little bitter
Main fixGive squash a head start and add delicate vegetables near the end
Pinakbet at a glance guide showing yield, prep time, cook time, best pan, flavor profile, and texture goal.
Use this Pinakbet Tagalog snapshot to set the cooking target early: tender vegetables, modest sauce, and a spoonable finish that stays clear of watery or mushy.

Why these amounts work: This recipe starts with 1 tablespoon bagoong and 1 cup / 240 ml water because both salt and liquid build as the vegetables cook. Bagoong tastes sharper before it softens into the tomatoes and squash, and the vegetables release liquid as they simmer. If you are unsure how saucy the finished dish should look, use the texture guide below before adding more water.

Pinakbet Tagalog vs Ilocano: What This Recipe Is

This is a Pinakbet Tagalog-style recipe: squash-forward, seasoned with bagoong alamang, and saucy enough to spoon over rice. It is the style many home cooks expect when they want pakbet with pork, shrimp paste, kalabasa, eggplant, okra, ampalaya, and long beans.

A stricter Ilocano-style pinakbet is often more closely tied to bagoong isda or fermented fish seasoning, and the finish can be drier and more vegetable-forward. To move this recipe in that direction, use bagoong isda, reduce the liquid slightly, stir less, and let the vegetables cook down more quietly.

Side-by-side comparison of Pinakbet Tagalog and Ilocano-style pinakbet with notes about bagoong and texture differences.
Pinakbet Tagalog usually leans rounder, saucier, and squash-forward. By contrast, Ilocano-style pinakbet often tastes sharper and drier, so the bagoong choice changes the whole direction of the dish.

Cook’s clarity: Follow the recipe as written for a rounder, shrimp-paste Tagalog-style pakbet. Use the Ilocano notes if you want a sharper, drier, more fermented-fish direction. The bagoong guide below explains when to use bagoong alamang, bagoong isda, or a lighter substitute.

Why This Pinakbet Recipe Works

Good pinakbet is not about throwing every vegetable into the pan and hoping for the best. Squash, okra, eggplant, long beans, and bitter melon do not cook at the same speed, and shrimp paste is strong enough that small choices matter.

The goal is a pan of vegetables that has softened into itself without losing every shape and texture. Squash should yield but still stay visible. Eggplant should look silky and soft. Okra should be tender, not slippery across the whole dish. Ampalaya should bring enough bitterness to balance the squash and tomato, not dominate every bite.

Brown the pork first

Pork belly or pork shoulder gives the tomato and seasoning mixture more depth. Let a little fat render before the aromatics go in.

Bloom the bagoong with tomatoes

Cooking the shrimp paste with softened tomatoes rounds out the sharp saltiness and helps the flavor spread through the pan.

Stage the vegetables

Squash needs a head start. Eggplant, okra, and ampalaya go in later so they soften without collapsing.

Tested texture target: In a wide pan, 1 cup / 240 ml water is usually enough to soften the pork and start the vegetables. Add up to 1/2 cup / 120 ml more only if the pork or squash needs extra time. The finished dish should have shallow glossy juices that cling lightly to the vegetables, not a soup-like broth.

Pinakbet Ingredients

The amounts below make 4 generous servings with rice, or 5–6 smaller servings as part of a larger meal. You get enough pork for richness, enough fermented seasoning for depth, enough tomato for body, and enough vegetable contrast to make the dish feel generous.

If you are cooking outside the Philippines, check Filipino or broader Asian groceries for long beans, bitter melon, Filipino eggplant, kalabasa, and bagoong alamang. Green beans, kabocha, butternut squash, and slender eggplant can still make a good home version if you keep the same balance of sweet, bitter, tender, and firm. If your market does not carry every Filipino vegetable, the substitution guide shows which swaps keep the dish closest to the original balance.

If you cannot find every traditional ingredient, do not let that stop you. The dish still works when the pan has the same basic shape: something sweet, something bitter if possible, something tender, something green, and enough savory depth to make it feel complete.

Ingredient board for Pinakbet Tagalog with pork, bagoong alamang, tomatoes, onion, garlic, squash, long beans, okra, eggplant, and ampalaya.
These ingredients show why Pinakbet Tagalog works before the pan even heats up: pork adds richness, bagoong brings depth, tomatoes give body, and the vegetables create the sweet, bitter, tender, and crisp-tender contrast that defines the dish.

Ingredient Amounts and Why They Matter

IngredientUS measureMetricWhy it matters
Pork belly or pork shoulder1/2 lb225 gPork belly gives richness; shoulder is leaner and may need a little more time.
Cooking oil1 tbsp15 mlUse less if the pork is very fatty.
Onion1 medium110–150 gBuilds sweetness in the savory foundation.
Garlic3–4 cloves12–16 gAdd after the onion so it does not burn.
Tomatoes2 mediumAbout 225 gCook down into the savory juices.
Bagoong alamang1 tbsp to start, plus 1–3 tsp more to taste15 g to start, plus more to tasteStarting low helps prevent the dish from becoming too salty.
Water or light stock1 cup, plus up to 1/2 cup more as needed240 ml, plus up to 120 ml more as neededLoosens the tomato-bagoong mixture without making the dish soupy.
Kalabasa / squash2 cups cubed250–300 gAdds sweetness and body.
Sitaw / long beans1–1 1/2 cups cut100–150 gAdds green bite and structure.
Okra6–8 pieces100–150 gAdd late so it keeps its shape.
Ampalaya / bitter melon1/2 medium, or up to 1 medium if you enjoy bitternessAbout 100–225 gGives the signature bitter edge.
Eggplant1 large or 2 small170–250 gAdd late so it softens without dissolving.
Black pepper1/4 tspAbout 0.5 gOptional, but rounds the flavor.

Best Vegetables for Pinakbet

The best bites have contrast: sweet squash, bitter ampalaya, silky eggplant, tender okra, and salty tomato-bagoong juices that pull everything together.

Guide showing squash, okra, eggplant, ampalaya, long beans, and tomatoes used in pinakbet, with short role labels.
Each vegetable does something different in pakbet, so the mix matters as much as the seasoning. Kalabasa brings sweetness, long beans keep the dish structured, eggplant turns silky, okra adds body, and ampalaya brings the bitter edge that keeps the dish from tasting flat.

Kalabasa / Squash

This sweet squash makes the salty seasoning feel round. Cut it into sturdy chunks so the edges turn creamy without the pieces disappearing.

Okra

Okra is there for softness and body, but it needs a light hand. Trim only the ends, add it late, and let it turn tender without stirring it into the whole pan.

Eggplant

Eggplant is at its best when it turns silky and soaks up the tomato-bagoong juices. Keep the pieces thick so they soften without vanishing.

Ampalaya

Ampalaya is the edge of the dish. Use less if you want a milder pan, but do not erase all the bitterness; that little bite is what keeps the squash and tomato from tasting too sweet.

Sitaw / Long Beans

Long beans keep the dish from feeling too soft, especially beside squash and eggplant. Cut them into 2- to 3-inch pieces so they cook evenly and keep a little bite.

Tomatoes

Once tomatoes soften into the pan, they make the fermented seasoning taste fuller and less sharp. Give them time to collapse before adding water.

Best Cut Sizes for Pinakbet

Pinakbet is forgiving, but the knife work quietly decides a lot. Small squash collapses too early, thin eggplant disappears, and overcut okra can make the texture slippery.

Cut size guide showing pork pieces, squash chunks, long beans, eggplant pieces, ampalaya half-moons, okra pods, and chopped tomatoes for pinakbet.
Good knife work quietly improves Pinakbet Tagalog. Larger squash chunks hold shape better, thick eggplant pieces soften without disappearing, and lightly trimmed okra stays cleaner in texture, so the finished dish feels tender rather than collapsed.
IngredientBest cut sizeWhat to watch
Pork belly or shoulderAbout 1-inch piecesSmall enough to tenderize, large enough to stay juicy.
Squash / kalabasa1 to 1 1/2-inch chunksHolds shape while becoming tender.
Long beans / sitaw2 to 3-inch piecesCooks evenly and stays easy to serve.
EggplantThick diagonal pieces or large chunksSoftens without dissolving into the dish.
AmpalayaThin half-moonsDistributes bitterness without taking over every bite.
OkraWhole small pods or halved large podsLess cutting means a cleaner texture.
TomatoesRough choppedBreaks down into the tomato-bagoong mixture without needing perfect dice.

How to Reduce Ampalaya Bitterness

Optional ampalaya tip: For milder bitter melon, soak the sliced ampalaya in water with a big pinch of salt for 20–30 minutes, then drain before cooking. Skip this if you enjoy the stronger bitter edge.

Ampalaya bitterness guide showing sliced bitter melon, soaking in salted water for 20 to 30 minutes, draining, and keeping some bitterness.
Ampalaya should soften its bitterness, not lose it completely. A short salted-water soak helps mellow the sharpness; however, keeping a little bitterness in the final dish is exactly what makes Pinakbet Tagalog taste balanced instead of one-note.

Ingredient Substitutes If You Cannot Find Everything

Pinakbet is best with traditional vegetables, but a home pot can still work when the market does not give you everything. Think about what each ingredient brings to the pan: sweetness from squash, bitterness from ampalaya, body from okra, and salty depth from the fermented seasoning.

Ingredient substitutes guide for pinakbet showing alternatives for long beans, squash, bitter melon, eggplant, and pork.
Traditional ingredients are ideal, yet pinakbet can still work when the pot keeps the same shape: something sweet, something green, something tender, a little bitterness if possible, and enough savory depth to make the vegetables feel complete.
Traditional ingredientGood substituteWhat to watch
Sitaw / long beansGreen beansGreen beans cook faster, so add them a little later.
KalabasaKabocha, pumpkin, or butternut squashSweetness and cooking time vary by squash type.
AmpalayaUse less, or skip if unavailableThe dish becomes less bitter and milder.
Filipino eggplantAny slender eggplantSimilar texture; avoid tiny pieces because they collapse.
Pork bellyPork shoulder, shrimp, chicken thighs, or tofuChanges richness and cooking time.

From here, the seasoning does the heavy lifting. This is where pinakbet can become deep and rounded, or too salty too quickly, so taste slowly and let the tomatoes do their work.

Bagoong Alamang vs Bagoong Isda

Bagoong is the ingredient that makes pinakbet taste like pinakbet. In this Tagalog-style version, bagoong alamang gives a round shrimp-paste flavor. To move the dish in a sharper Ilocano direction, use bagoong isda or bagoong monamon instead. For more background on Filipino pantry staples like bagoong and patis, this Filipino pantry guide is helpful.

Comparison guide showing bagoong alamang and bagoong isda for Pinakbet Tagalog and Ilocano-style pinakbet.
Bagoong does more than add salt; it gives pinakbet its fermented depth and unmistakable savory backbone. For a rounder Tagalog-style flavor, bagoong alamang fits naturally, while bagoong isda pushes the dish toward a sharper Ilocano direction.

Raw vs Ginisang Bagoong

Raw bagoong alamang tends to taste sharper and saltier, so it benefits from being cooked briefly with tomatoes before the water goes in. Ginisang bagoong is already sautéed and often tastes rounder, but many jars are also sweeter. Taste before adding more, especially if the jar is meant to be eaten as a condiment.

If your ginisang bagoong tastes sweet straight from the jar, be slower with extra squash and do not add more seasoning until the vegetables are cooked. Sweet jarred shrimp paste can taste pleasantly round at first, then too sweet once the squash softens.

Taste Before Adding More

Bagoong is powerful, so use it with patience. Let it bloom with the tomatoes, then taste again later when the vegetables have softened around it. A spoonful of cooking liquid may taste strong by itself; taste with squash or rice before deciding whether the dish needs more. If you cannot use shrimp paste at all, skip ahead to the without-bagoong options.

Bagoong typeStart withAdd more when
Very salty bagoong alamang1 tbspThe vegetables are cooked but the dish tastes flat.
Sweeter ginisang bagoong1 tbsp, then adjustThe dish needs more savory depth, not more sweetness.
Bagoong isda1 tbspYou want a sharper Ilocano-style flavor.
Fish sauce substitute1 tbspOnly after tasting near the end.

Bloom the bagoong: Cook it briefly with the tomatoes before adding water. Raw-stirred bagoong can taste sharp; cooked shrimp paste tastes rounder and spreads better through the dish.

Equipment You Need

A 12-inch wide pan, wok, deep skillet, or wide Dutch oven works best. Pinakbet has bulky vegetables, so a narrow pot forces you to stir more aggressively, which can break the squash and eggplant. Use a lid for gentle steaming and a wooden spoon or silicone spatula for turning.

How to Cook Pinakbet

Once everything is cut, the cooking is mostly patience. Brown the pork, soften the aromatics, let the tomatoes collapse, then cook the bagoong long enough for the smell to turn round and savory instead of sharply salty.

Do not rush the beginning. The tomato and shrimp paste mixture is what makes the vegetables taste complete, not like plain vegetables wearing salt. Once the squash and beans are in, give the pan enough time before you decide it needs more water. If your past batches turned watery, salty, bitter, or mushy, the troubleshooting table after the method will help you fix the problem.

A wide cooking surface helps everything cook in a shallow layer instead of being crushed. Do not stir just because the pan is quiet. You are looking for pieces that have softened into each other without losing themselves.

Best Vegetable Cooking Order

Slow-cooking vegetables and fast-cooking vegetables should not be treated the same way. This is the order that keeps pinakbet tender without making it mushy.

Three-stage guide showing the cooking order for pinakbet: base ingredients, squash and long beans, then eggplant, ampalaya, and okra.
The cooking order keeps Pinakbet Tagalog from turning into one soft pile. Build the savory base first, let the sturdier vegetables get started, then finish with the delicate ones so every bite still has contrast.
Add firstAdd in the middleAdd last
Pork, onion, garlic, tomatoes, bagoongSquash, kamote if using, long beansEggplant, ampalaya, okra
Builds the savory foundationNeeds time but should hold shapeOvercooks faster and can turn too soft

Step-by-Step Method

Build the Pork, Tomato, and Bagoong Base

  1. Brown the pork. Heat oil in a wide pan over medium heat. Add pork in one layer and cook for 5–8 minutes, until lightly browned and some fat has rendered. Spread the pork out so it browns instead of steaming.

Visual Cue: Brown the Pork

Pork pieces browning in a wide pan at the beginning of making Pinakbet Tagalog.
Browning the pork first builds flavor before the vegetables ever hit the pan. As the fat renders and the edges deepen in color, the base becomes richer, which means the later tomato-bagoong mixture tastes fuller without needing extra seasoning.
  1. Cook the aromatics. Add onion and cook for about 2 minutes, until softened. Add garlic and cook for 30 seconds to 1 minute, just until fragrant.
  2. Soften the tomatoes. Add tomatoes and cook for 3–5 minutes, pressing them gently with the spoon. They should lose their raw shape and look juicy around the edges.
  3. Bloom the bagoong. Stir in 1 tablespoon bagoong and cook for 1–2 minutes. The smell should become rounder and more savory.

Visual Cue: Build the Tomato-Bagoong Base

Pork, onion, garlic, softened tomatoes, and bagoong being stirred together in a wide pan for Pinakbet Tagalog.
This step is where Pinakbet Tagalog starts tasting like itself. Once the tomatoes soften and the bagoong cooks into them, the flavor turns rounder and less harsh, so the vegetables later absorb something savory rather than just salty.
  1. Simmer the pork. Add 1 cup water or light stock. Cover and simmer for 15–20 minutes, or until the pork starts to become tender. If using pork shoulder and it still feels firm, simmer 5–10 minutes longer before adding squash. If the liquid already looks high before the squash goes in, do not add more yet; the vegetables will release more as they cook.

Visual Cue: Simmer the Pork

Pork simmering in shallow tomato-bagoong liquid in a wide pan with steam rising.
Simmer the pork before adding the vegetables, especially if you are using pork shoulder instead of belly. That little bit of patience lets the meat start tenderizing early, while the squash and softer vegetables can still cook on their own schedule later.

Add the Vegetables and Finish the Dish

  1. Add the squash. Add kalabasa and cook for 5–7 minutes. It should begin to soften, but it should not be falling apart. Add up to 1/2 cup / 120 ml more water only if the pan looks dry or the squash needs more time.

Visual Cue: Add Squash First

Orange squash chunks being added to pork and tomato-bagoong sauce in a wide pan for pinakbet.
Squash goes in first because it is the vegetable that changes the dish’s body. As the edges soften, it thickens the pan slightly and rounds out the stronger bagoong flavor without making the pakbet taste sweet.
  1. Add the long beans. Add sitaw and cook for 2–3 minutes. The beans should brighten and begin to soften while still keeping some bite.

Visual Cue: Add Long Beans Next

Long beans being added to partially cooked squash and pork in a wide pan of Pinakbet Tagalog.
Long beans belong in the middle of the cooking process rather than at the beginning or the very end. This timing helps them stay green and tender, so the final pakbet still has a little structure instead of turning uniformly soft.
  1. Finish with eggplant, ampalaya, and okra. Cover and cook for 4–6 minutes, turning gently once or twice. The eggplant should look silky, the okra should still hold shape, and the ampalaya should soften without taking over the whole pan.

Visual Cue: Finish with Eggplant, Ampalaya, and Okra

Eggplant, ampalaya, and okra being added last to a pan of Pinakbet Tagalog with squash and long beans already cooking.
Eggplant, ampalaya, and okra cook quickly, so they should finish the dish instead of starting it. Added late, they keep their character: the eggplant turns silky, the okra stays tender, and the ampalaya gives bitterness without taking over the whole pot.
  1. Taste and adjust. Add 1–3 teaspoons more bagoong, pepper, or a small splash of water only if needed. The cooking liquid should cling lightly to the vegetables, with no large pool of broth at the bottom. Serve hot with rice.

Visual Cue: Taste, Adjust, and Finish

Finished Pinakbet Tagalog in a wide pan with a spoon lifting vegetables and glossy sauce.
The final texture should look moist and glossy, not brothy. Before adding more bagoong, taste with squash or rice, because the seasoning settles once the vegetables soften into the sauce.

How Long to Cook Pinakbet

Pinakbet is a stovetop dish, so the “temperature” is really about heat control. Medium heat is enough for most of the recipe. If the pan gets too hot, the juices can stick and the vegetables can break before they cook through.

StageHeatTimeVisual cue
Brown porkMedium to medium-high5–8 minutesEdges lightly browned, fat beginning to render
AromaticsMedium2–3 minutesOnion softened, garlic fragrant
Tomato and bagoongMedium3–5 minutesTomatoes juicy, bagoong darker and aromatic
Pork simmerMedium-low15–20 minutes, longer if needed for pork shoulderPork starting to tenderize
SquashMedium5–7 minutesFork enters but squash holds shape
Long beansMedium2–3 minutesBrighter, tender-crisp
Eggplant, ampalaya, okraMedium4–6 minutesTender, silky, and not collapsed

How Pinakbet Should Look When It Is Done

The best pinakbet does not look perfect. It looks generous, saucy, and ready for rice. The squash should be creamy at the edges but still in chunks. The long beans should keep a little bite. The eggplant should turn silky, not disappear. The okra should be tender without making the whole dish slippery.

If there is a lot of loose liquid, simmer uncovered for a few minutes. If the pan is dry before everything is tender, add a small splash of water, cover again, and continue gently. The final texture should feel saucy and spoonable, with shallow coated juices rather than loose broth. For a quick visual check, compare your pan with the watery vs right vs mushy guide.

You are done when the squash is fork-tender, the eggplant is silky, the long beans still have bite, and the cooking liquid lightly clings to the vegetables.

Finished Pinakbet Tagalog with notes showing tender squash, silky eggplant, long beans with slight bite, and glossy sauce that is not soupy.
Good pinakbet should look soft, but not sloppy. The vegetables ought to be tender and comfortable in the sauce, yet still easy to recognize, while the liquid should lightly coat them instead of drifting around like a separate broth.

Too Watery, Just Right, or Too Mushy

Three-panel comparison showing pinakbet that is too watery, just right, and too mushy.
This is one of the easiest ways to judge your Pinakbet Tagalog at a glance. If it looks watery, simmer uncovered; if it looks mushy, the vegetables likely stayed in too long, while the ideal version holds shape and still looks glossy.

Pinakbet Recipe Card

Pinakbet Tagalog Recipe

This Filipino Pinakbet Tagalog recipe builds a savory pork, tomato, and bagoong mixture first, then adds the vegetables in stages. The squash softens, the eggplant turns silky, and the okra and long beans keep their shape.

Yield
4 generous servings

Prep Time
20 minutes

Cook Time
40 minutes

Total Time
1 hour

Ingredients

  • 1/2 lb / 225 g pork belly or pork shoulder, cut into 1-inch pieces
  • 1 tbsp / 15 ml cooking oil
  • 1 medium onion, chopped
  • 3–4 garlic cloves, minced
  • 2 medium tomatoes, chopped
  • 1 tbsp / 15 g bagoong alamang, plus 1–3 tsp more to taste
  • 1 cup / 240 ml water or light stock, plus up to 1/2 cup / 120 ml more as needed
  • 2 cups / 250–300 g kalabasa or squash, cut into 1 to 1 1/2-inch chunks
  • 1 to 1 1/2 cups / 100–150 g sitaw or long beans, cut into 2- to 3-inch pieces
  • 6–8 okra, trimmed
  • 1/2 medium ampalaya, or up to 1 medium if you enjoy bitterness, seeded and sliced into thin half-moons
  • 1 large eggplant or 2 small eggplants, cut into thick pieces
  • 1/4 tsp black pepper, optional

Instructions

  1. Heat oil in a wide pan over medium heat. Add pork in one layer and cook for 5–8 minutes, until lightly browned and some fat has rendered.
  2. Add onion and cook for about 2 minutes, until softened. Add garlic and cook for 30 seconds to 1 minute, just until fragrant.
  3. Add tomatoes and cook for 3–5 minutes, pressing them gently, until softened and juicy around the edges.
  4. Stir in 1 tablespoon bagoong and cook for 1–2 minutes, until the smell becomes rounder and more savory.
  5. Add 1 cup water or light stock. Cover and simmer for 15–20 minutes, until the pork starts to become tender. If using pork shoulder and it still feels firm, simmer 5–10 minutes longer before adding the squash. Add up to 1/2 cup more water only if needed.
  6. Add squash and cook for 5–7 minutes, until a fork starts to enter but the pieces still hold shape.
  7. Add long beans and cook for 2–3 minutes, until brighter and beginning to soften.
  8. Finish with eggplant, ampalaya, and okra. Cover and cook for 4–6 minutes, turning gently once or twice, until the vegetables are tender but still distinct.
  9. Taste and adjust with 1–3 teaspoons more bagoong or pepper if needed. The finished dish should be moist and spoonable, with no large pool of broth at the bottom of the pan. Serve hot with rice.

Notes

  • Use a wide 12-inch pan so the vegetables cook evenly without being crushed.
  • Start with 1 tablespoon bagoong, especially if your brand is very salty.
  • For milder ampalaya, soak the slices in salted water for 20–30 minutes, then drain.
  • Add extra water only if the pork or squash needs more time.
  • Add crispy pork, bagnet, or lechon kawali just before serving so it does not become soggy.

A good batch should make rice feel like part of the recipe, not just a side. The juices should be salty enough to carry the vegetables, but not so strong that the squash, eggplant, okra, and ampalaya disappear.

Cook’s confidence: Flexible: exact vegetable mix, protein, and bitterness level. Not flexible: cooking the seasoning with the tomatoes, keeping the liquid modest, and giving slower vegetables more time than delicate ones.

What Pinakbet Should Feel Like

Pinakbet is not meant to eat like a smooth stew. It is a dish of contrast: squash softening at the edges, bitter melon cutting through sweetness, eggplant soaking up salty juices, and rice pulling everything together.

Some homes make it drier and sharper; others prefer it saucier and sweeter from squash. This version stays in the Pinakbet Tagalog lane while giving you room to adjust the bitterness, protein, and finish toward your own table.

Pakbet is simply the everyday shorter name many people use for pinakbet. The more useful difference is style: Pinakbet Tagalog is often shrimp-paste and squash-forward, while Ilocano pinakbet often leans more toward fermented fish seasoning and a drier finish.

Can You Make Pinakbet Without Bagoong?

You can make pinakbet without bagoong, but it becomes a pinakbet-inspired vegetable stew. Bagoong does three jobs at once: it adds salt, fermentation, and deep umami. Replacing it means rebuilding all three, not just adding something salty.

If seafood is fine, fish sauce is the closest simple substitute. For seafood-free versions, use soy sauce or tamari for salt, mushroom powder for umami, and a little miso or extra cooked tomato for depth. Add these slowly and taste with a piece of squash or rice, because substitutes can become too salty fast.

  • No bagoong available: start with 1 tablespoon fish sauce, then adjust once the vegetables are tender.
  • Seafood-free version: use soy sauce or tamari plus mushroom powder and extra tomato.
  • Vegetarian or vegan direction: use miso, tamari, mushroom powder, and tomato to rebuild depth.
  • Lower-sodium attempt: use less bagoong rather than removing it completely, if possible.
Guide to making pinakbet without bagoong using fish sauce, soy sauce or tamari, mushroom powder, miso, and extra tomato.
Without bagoong, the dish changes, but it does not have to become bland. Instead of replacing only the salt, rebuild the missing layers with umami, depth, and a little extra tomato so the vegetables still taste grounded and complete.

Pinakbet Variations

You can change the protein, but do not rush the vegetables; they are still the heart of the dish.

Pinakbet with Pork Belly

This is the richest everyday version. Brown the pork first so the rendered fat flavors the tomatoes and shrimp paste.

Pinakbet with Bagnet

Stir some bagnet or lechon kawali in near the end, then reserve a few crisp pieces for topping. If all of it simmers too long, it will soften.

Pinakbet with crispy bagnet pieces on top, mixed vegetables, glossy sauce, and rice nearby.
Bagnet gives pinakbet a completely different texture, especially when the crisp pieces are added close to serving time. That way, you get crunchy pork against soft vegetables and savory sauce instead of letting everything turn uniformly tender.

Pinakbet with Shrimp

Add shrimp in the final 2–3 minutes, after the vegetables are almost tender. Shrimp cooks quickly and turns rubbery if simmered too long.

Pinakbet with shrimp, squash, long beans, okra, eggplant, ampalaya, tomatoes, and glossy sauce served with rice.
Shrimp pinakbet needs a lighter hand than the pork version because shrimp cooks quickly and can toughen fast. Add it when the vegetables are almost done, and the dish stays sweet, seafood-forward, and still recognizably pakbet.

Chicken Pinakbet

Use boneless chicken thighs rather than chicken breast. Brown them first, then simmer until nearly tender before adding the squash.

Ginataang Pinakbet

Add coconut milk after the pork has softened and the squash has started cooking. Simmer gently; hard boiling can make coconut milk split.

Ginataang pinakbet with creamy coconut milk sauce, squash, long beans, eggplant, okra, and ampalaya in a shallow serving pan.
Ginataang pinakbet is richer, although it should still feel like a vegetable dish rather than a coconut stew. Simmer gently once the coconut milk goes in, because that softer cooking keeps the sauce smooth and the vegetables clear and distinct.

Meatless Pinakbet

Skip the pork but build depth with extra tomato, mushroom powder, and careful seasoning. If using tofu, add it near the end so it does not break apart.

Meatless pinakbet with squash, long beans, okra, eggplant, ampalaya, tomatoes, and glossy savory sauce in a bowl.
A meatless pinakbet can still taste full when the vegetables are cooked carefully and the seasoning is layered thoughtfully. Mushrooms, miso, soy, or extra tomato can help, yet the real success still comes from keeping the vegetables varied in texture and flavor.

Timing is what keeps each vegetable from disappearing into the next. Pork and chicken need time early, shrimp goes in late, crispy pork is best partly reserved for the top, and coconut milk needs gentle heat.

How to Fix Common Pinakbet Problems

Pinakbet is forgiving, but it tells on you quickly. Too much water pools under the vegetables, too much bagoong shows up in the first bite, and too much stirring shows up in the squash.

Start With the Problem You See

Troubleshooting guide for pinakbet showing fixes for watery texture, too much salt, too much bitterness, mushy vegetables, slimy okra, and flat flavor.
Most pinakbet problems come from the same few places: too much liquid, too much bagoong, bitter melon used too heavily, or vegetables added all at once. Fix what you can in the pan, then use the next batch to correct the timing.

Problem-by-Problem Fixes

ProblemFix nowNext time
Too waterySimmer uncovered for 3–5 minutes.Use less water and add extra only if pork or squash needs more time. Remember that the vegetables release liquid too.
Too saltyAdd more squash, eggplant, or tomato. Serve with plain rice.Start with less bagoong and adjust after vegetables cook.
Too bitterAdd a little more squash or tomato.Use less ampalaya, slice it thinner, or soak it briefly.
Vegetables are mushyYou cannot fully reverse this, but you can simmer uncovered if watery.Add vegetables in stages and turn gently.
Squash collapsedLet it thicken the dish and avoid more stirring.Use larger chunks and do not add squash too early.
Okra made it slimySimmer uncovered briefly and avoid stirring hard.Trim only the ends and add okra near the end.
Tastes flatAdd a little more bagoong, fish sauce, or tomato, then simmer briefly.Bloom the seasoning with the tomatoes before adding water.
Bagoong tastes too strongAdd tomato or squash, simmer gently, and serve with plain rice.Use less at the start and adjust later.
Dish tastes too sweetAdd a little fish sauce or bagoong.Watch sweet ginisang bagoong and very sweet squash.
Too oilySpoon off excess fat before serving.Render pork first and remove extra fat before adding vegetables.
Pork is toughSimmer the pork pieces longer before serving if vegetables can handle it.Give pork more time before adding squash and delicate vegetables.

What to Serve With Pinakbet

Filipino meal spread with Pinakbet Tagalog, steamed rice, adobo, fried fish, grilled pork, dipping sauce, and calamansi.
Pinakbet shines beside plain steamed rice because the sauce is bold enough to carry the plate. For a fuller Filipino-style meal, add adobo, fried fish, or grilled pork while keeping pinakbet at the center.

Pinakbet is best with hot steamed rice. Because the tomato-bagoong mixture is bold, plain rice is not an afterthought here; it is part of how the dish works. If you want a dependable pot of rice, MasalaMonk’s guide on how to cook rice covers stovetop, cooker, and Instant Pot methods.

For a fuller Filipino-style meal, pinakbet sits naturally beside a savory protein dish like chicken adobo. Fried fish, grilled pork, simple chicken, or crispy pork also work well. If the pinakbet itself already has pork belly or bagnet, keep the rest of the meal simple.

Pinakbet is at its best when it tastes like more than the sum of its vegetables: salty enough for rice, sweet from squash, bitter enough to stay interesting, and saucy without becoming soup.

How to Store, Reheat, and Freeze Pinakbet

Cool leftovers quickly and store them in a shallow airtight container in the refrigerator. Pinakbet is best eaten within 3–4 days because it contains cooked vegetables and often pork or seafood-based seasoning. Store rice separately so the vegetables do not continue softening in the rice.

To reheat, warm it gently in a pan over low to medium-low heat. Add a splash of water only if the vegetables look dry. Avoid aggressive stirring because the squash and eggplant can break apart.

Microwaving is fine for a quick lunch, but the vegetables will soften more than they do in a pan. Freezing is possible, but not ideal; squash, eggplant, and okra soften further after thawing.

For general leftover safety, follow the USDA FSIS guidance on leftovers and food safety.

Some families prefer pinakbet drier and sharper; others like it saucier and sweeter from squash. Once you understand the timing, you can move the dish toward your table without losing its shape.

Back to top

FAQs About Pinakbet

What is pinakbet made of?

Most pinakbet starts with bagoong, tomatoes, and mixed vegetables such as squash, okra, eggplant, ampalaya, and long beans. Pork, shrimp, fish, bagnet, or crispy pork may be added depending on the household version.

Is pinakbet the same as pakbet?

Yes. Pakbet is the everyday shorter name many people use for pinakbet, though the exact style can change by region and household.

What does pinakbet taste like?

Pinakbet is savory, salty, earthy, lightly sweet, and a little bitter. The squash and tomatoes bring sweetness, while bagoong gives deep umami. A good version should taste balanced, not simply salty.

What is the difference between Pinakbet Tagalog and Ilocano pinakbet?

Pinakbet Tagalog usually uses bagoong alamang and squash, while Ilocano pinakbet is more closely tied to bagoong isda and a drier, more vegetable-forward finish. This recipe is Tagalog-style, with notes for adjusting it in a sharper Ilocano direction.

What is the best bagoong for pinakbet?

For Pinakbet Tagalog, bagoong alamang is the easiest fit because it gives a rounded shrimp-paste flavor. For a sharper Ilocano-style direction, use bagoong isda or bagoong monamon.

How do you keep pinakbet from getting mushy?

Add vegetables in stages and stir gently. Squash needs a head start, long beans need only a few minutes, and eggplant, ampalaya, and okra should go in near the end. A wide pan also helps because the vegetables steam and simmer instead of being crushed together.

Is pinakbet supposed to be soupy?

No. Pinakbet should be moist and saucy, not soupy. The vegetables should soften and shrink slightly, with cooking liquid clinging to them rather than floating in broth. If there is too much liquid, simmer uncovered for a few minutes.

Why is my pinakbet watery?

Pinakbet can turn watery if too much water was added or if the vegetables released more liquid than expected. Simmer uncovered until the liquid reduces and clings lightly to the vegetables. Next time, start with less water and add extra only if the pork or squash needs more time.

How do you reduce ampalaya bitterness in pinakbet?

Use less ampalaya, slice it evenly, and avoid overcooking it. For a milder flavor, soak the sliced bitter melon in lightly salted water for 20–30 minutes, then drain before cooking. A little bitterness should remain because it keeps the dish balanced.

What can I use instead of bagoong alamang?

Fish sauce is the easiest substitute if seafood is not a problem. For seafood-free versions, use soy sauce or tamari with mushroom powder and extra tomato. The flavor will not be the same, but it will have more depth than plain salt.

What is the difference between pinakbet and dinengdeng?

Both are Filipino vegetable dishes, but they eat differently. Pinakbet is usually a sautéed or simmered vegetable stew with bagoong, tomatoes, and often pork or seafood, while dinengdeng is generally lighter and more broth-like.

How long does pinakbet last in the fridge?

Pinakbet is best eaten within 3–4 days when stored in a shallow airtight container in the refrigerator. Reheat gently so the squash, eggplant, and okra do not break apart.

Posted on 1 Comment

Pad Kra Pao Recipe: Thai Basil Chicken, Pork, or Beef: Thai Basil Chicken, Pork, or Beef

Finished Pad Kra Pao rice plate with glossy basil minced meat, red chilies, fluffy white rice, lime, and a crispy fried egg on a dark plate.

Pad Kra Pao is the Thai rice plate you want when dinner needs to be fast but still loud: garlic in hot oil, chilies, glossy minced meat, fresh basil, steamed rice, and a crispy fried egg that breaks into the sauce.

It is bold without being complicated. Once the rice is ready and the sauce is mixed, the stir-fry itself takes only a few minutes, which is why this dish works so well for weeknights, leftovers, and those “I want takeout, but I can cook” nights.

You may know this dish as Thai basil chicken, pad krapow, pad ka pow, kra pao, or holy basil chicken. The names and spellings vary, but the craving is usually the same: a spicy basil stir-fry that tastes fresh, savory, chili-hot, and glossy.

Here, you can make it with chicken, pork, or beef, then use the same base for tofu or eggplant. You will also see what to do if you only have Thai basil instead of holy basil, how to adjust the sauce, and how to fix the common problems that make homemade Pad Kra Pao taste flat, salty, or dry.

Quick Answer: What Is Pad Kra Pao?

Pad Kra Pao is a Thai basil stir-fry made with garlic, chilies, meat or tofu, a salty-savory sauce, and basil. It is usually served over rice, often with a crispy fried egg on top.

If you came here looking for Thai basil chicken, this is the same dish family. Thai basil chicken is the version many people know from Thai restaurants: minced or chopped chicken stir-fried with garlic, chilies, basil, and sauce, then spooned over rice.

The most traditional version is made with holy basil, which has a sharper, peppery, clove-like aroma. Thai basil gives a different but still excellent home version: sweeter, more anise-like, and closer to many restaurant-style Thai basil chicken plates outside Thailand.

Best quick version: Use 450g / 1 lb ground chicken, pork, or beef; 5–8 garlic cloves; 3–6 chilies; 1½–2 cups basil leaves; and a sauce made with oyster sauce, fish sauce, soy sauce, dark soy, sugar, and a little water or stock. Stir-fry hot and fast, add basil at the end, and serve over rice with a crispy fried egg.

Need exact measurements? See the sauce ratio or jump to the recipe card.
Labeled Pad Kra Pao plate with basil stir-fry, white rice, and crispy fried egg callouts.
If you know this dish as Thai basil chicken, the idea is the same: a fast garlic-chili basil stir-fry made to land on rice, usually with a crispy fried egg on top.

Why This Pad Kra Pao Works

The flavor does not come from marinating or simmering. It comes from a hot pan, crushed garlic and chilies, meat that sizzles instead of steams, sauce that reduces until glossy, and basil added right at the end.

Keep those five things in place and the dish tastes bold even with practical substitutions. When it works, the pan smells sharp with garlic and chilies, the meat looks shiny instead of wet, and the basil hits at the end with a fresh, peppery lift.

That rhythm is the whole dish: hot, sharp, glossy, fresh.

Pad Kra Pao, Pad Krapow, Pad Ka Pow: Why So Many Spellings?

You may see this dish written as pad kra pao, pad krapow, pad ka pow, pad ka prao, pad gaprao, phat kaphrao, kra pao, or gai pad krapow. These spellings come from different ways of transliterating Thai into English.

For a home cook, the idea is simpler than the name: a hot, fast basil stir-fry with garlic, chilies, sauce, rice, and usually a fried egg. Here, we’ll call it Pad Kra Pao for consistency, but if a menu uses another spelling, you are still in the right place.

Editorial spelling guide for Pad Kra Pao with terms pad krapow, pad ka pow, pad gaprao, and a small plated basil stir-fry.
Because Thai names are transliterated several ways, pad kra pao, pad krapow, pad ka pow, and pad gaprao usually lead readers to the same basil-heavy stir-fry family.

Holy Basil vs Thai Basil

The basil question matters because it changes the flavor of the dish. It should not stop you from cooking, though.

Strictly speaking, holy basil is what gives Pad Kra Pao its name and sharper, peppery character. Thai basil is the easiest excellent home-cook route: not identical, but fresh, aromatic, easy to find, and deeply satisfying in this garlic-chili rice plate. For a deeper Thai cooking perspective on the dish, see this explanation from Hot Thai Kitchen.

Comparison board showing holy basil and Thai basil leaves with flavor notes beside a small Pad Kra Pao dish.
Holy basil gives Pad Kra Pao its sharper traditional bite; however, Thai basil is often the easiest excellent route for a home-style Thai basil chicken plate.

Holy Basil

Holy basil is the most traditional choice for Pad Kra Pao. It has a sharper, peppery, slightly clove-like flavor. If you can find Thai holy basil at an Asian grocery store, use it.

The leaves wilt quickly, so add them at the very end. Do not simmer them for several minutes or the aroma will fade.

Thai Basil

For most home cooks, Thai basil is the easiest reliable substitute. Its aroma is sweeter and more anise-like than holy basil, and it is easier to find in many places.

Many restaurant-style Thai basil chicken recipes use Thai basil, so the flavor will still feel familiar and satisfying. If you are cooking this on a normal weeknight, do not let the basil question stop dinner.

Sweet Basil

Sweet basil, also called Italian basil, will not taste the same as holy basil or Thai basil. Still, it can work when that is all you have.

The result will taste softer, sweeter, and less peppery. It may lean slightly toward a regular basil stir-fry rather than classic Pad Kra Pao, but it is better to make a good basil rice plate than to skip the dish completely.

Can You Use Tulsi?

Tulsi is related to holy basil, but it is not always a simple one-for-one replacement in cooking. Depending on the variety, it can taste medicinal, bitter, or very strong when used in large amounts.

If you want to try tulsi, use a smaller amount first and mix it with Thai basil or sweet basil if possible. Fresh basil in a hot pan is still better than waiting for the perfect herb and never cooking the dish.

Whatever basil you use, wash the leaves ahead of time and dry them well. Wet basil can splutter in the pan and add extra moisture right when you want the sauce to stay glossy.

Sweet basil and tulsi fallback herb board with notes about softer flavor and careful tulsi use.
When holy basil and Thai basil are not available, fresh herbs still help; sweet basil makes the dish softer, while tulsi should be used lightly because its flavor can turn strong.
Simple basil rule: use holy basil if you can get it, Thai basil when you want the easiest excellent home version, sweet basil only if that is what you have, and tulsi carefully.

Already know your basil choice? Go to the ingredients.
Decision board comparing holy basil, Thai basil, sweet basil, and tulsi for Pad Kra Pao.
Use the best basil you can find, but do not pause dinner over the herb question; the bigger win is keeping the garlic-chili-basil structure intact.

Ingredients You Need

Pad Kra Pao is short on ingredients, but every ingredient has a job. Think of them in two groups: the loud things that wake up the pan — garlic, chilies, basil — and the salty-sweet sauce that makes the rice worth eating.

Overhead Pad Kra Pao ingredient map with protein, garlic, chilies, basil, sauce ingredients, rice, egg, and shallot.
The ingredients work in groups: protein catches the sauce, garlic and chilies wake up the pan, basil finishes fresh, and rice plus egg turn it into dinner.

Chicken, Pork, Beef, Tofu, or Eggplant

Ground meat is easiest because it cooks quickly and catches the sauce well. Use ground chicken, ground pork, ground beef, or finely chopped boneless meat. Hand-chopped chicken thigh gives a slightly chunkier, more restaurant-style bite.

For the main recipe, use 450g / 1 lb meat. If your pack is 500g, that is fine. You may need a small extra handful of basil or a splash more water, but do not automatically increase every sauce ingredient.

You do not need to marinate the meat. The flavor comes from the hot garlic-chili base, the sauce reducing onto the meat, and the basil added at the end.

Pork gives the juiciest, most classic-feeling version. Chicken is the version many people recognize from Thai restaurant menus. Beef gives a deeper, richer stir-fry.

Garlic and Chilies

Do not be shy with garlic. Pad Kra Pao should taste bold.

Use 5–8 garlic cloves for 450g / 1 lb meat. For heat, use 3–6 Thai bird chilies, or use 2–4 Indian green chilies if that is what you have. For a mild family version, start with 1 Thai chili or 1 small green chili, then add extra chopped chilies at the table.

Shallots are optional. They add a little sweetness and body, but the dish still works without them.

A mortar and pestle gives the strongest aroma because it crushes the garlic and chilies instead of only cutting them. Finely chopping with a knife also works. The goal is rough, fragrant pieces, not a watery paste.

Garlic and chili guide with crushed garlic, Thai bird chilies, Indian green chilies, optional shallots, and a heat spectrum.
Garlic and chilies are not background flavor here; instead, they create the sharp first hit that keeps Pad Kra Pao from tasting like a regular soy-sauce stir-fry.

Sauce Ingredients

The sauce usually includes oyster sauce, fish sauce, light soy sauce, optional dark soy sauce, sugar, and a little water or stock.

Oyster sauce gives body and savory sweetness. Fish sauce gives salty depth. Light soy adds more salt and umami. Dark soy adds color, but the dish can still work without it. Sugar rounds the heat and salt.

For a vegetarian version, use vegetarian oyster sauce or mushroom sauce, replace fish sauce with light soy sauce, and keep the sugar modest because many mushroom sauces are already slightly sweet.

Pad Kra Pao sauce ingredients board with oyster sauce, fish sauce, light soy, dark soy, sugar, and water or stock role labels.
Oyster sauce gives body, fish sauce adds depth, soy brings umami, and a splash of water or stock helps the sauce coat instead of clump.

Rice and Crispy Fried Egg

Serve it over hot rice so the sauce has somewhere to land. Jasmine rice gives the most classic feel, but plain steamed rice, basmati, or even leftover rice will still do the job.

The crispy fried egg is optional only in the technical sense. In practice, it makes the plate feel complete. The runny yolk mixes with the salty basil stir-fry and rice, while the crisp edges add texture. If the egg yolk runs into the rice, that is not a problem. That is the point.

Pad Kra Pao rice plate with glossy basil meat, fluffy rice, a lacy crispy fried egg, and a close-up egg texture inset.
The crispy fried egg is more than garnish; once the yolk runs into hot rice, it softens the salty chili-basil stir-fry into a satisfying plate.

Easy Substitutions for Indian and Everyday Kitchens

Missing one bottle should not kill the dish. Losing the garlic-chili-basil structure will.

The goal is not to fake perfection. It is to keep the core of the dish intact with what you can actually buy.

Pad Kra Pao substitutions board for Indian kitchens with basil, green chilies, sauces, chicken keema, garlic, and a skillet or kadai cue.
Even with everyday swaps, keep the structure intact: fresh basil, sharp chilies, a salty-savory sauce, and a hot wide pan.
If You Do Not Have… Use This What Changes
Holy basil Thai basil Sweeter and more anise-like, but still excellent
Thai basil Sweet basil Softer and less peppery; still fresh and usable
Thai bird chilies Indian green chilies or serrano chilies Heat is less sharp, but the recipe still works
Dark soy sauce Skip it, or use a tiny extra splash of light soy Less dark color, but the flavor is still good
Fish sauce Light soy sauce plus a pinch of mushroom seasoning Less funky depth, but still savory
Oyster sauce Vegetarian oyster sauce or mushroom sauce Best vegetarian replacement for body and umami
Jasmine rice Plain steamed rice Less fragrant, but perfectly usable
Ground chicken Chicken keema or finely chopped boneless thigh Similar texture; chopped thigh stays juicier
Wok Wide skillet or wide kadai Works well if the pan is hot and not crowded

If your regular soy sauce is very dark and salty, use it like light soy sauce and skip the dark soy. Some supermarket soy sauces do not map neatly to “light soy” and “dark soy,” so taste and adjust gently.

The biggest substitution mistake is not using the “wrong” basil. It is crowding the pan and boiling the meat instead of stir-frying it. A hot, wide pan matters more than having every bottle exactly right.

Once your swaps are sorted, check the sauce ratio before you start cooking.

Best Pan and Equipment for Pad Kra Pao

A wok gives you quick heat and fast evaporation, but a wide skillet works very well for home cooking.

Use a 12-inch / 30cm skillet if you do not have a wok. A wide kadai can also work if it gives the meat enough surface area. Avoid using a small deep pan for a full batch because the meat will steam and release liquid.

For nonstick pans, use medium-high heat instead of the highest possible heat. For a wok or stainless-steel skillet, high heat is fine as long as you keep the food moving.

You will also need a small bowl for the sauce, a knife or mortar and pestle for the garlic and chilies, and a small frying pan if you are making crispy eggs.

Pan rule: the meat should sizzle, not steam. If the pan sounds quiet and wet, it is not stir-frying yet.
Best pan guide showing wok, wide skillet, and wide kadai with a sizzle versus steam cue for Pad Kra Pao.
A wide hot pan is the difference between stir-fried and steamed meat; therefore, listen for a real sizzle before adding the sauce.

If your pan setup is ready, go straight to the method.

Pad Kra Pao Sauce Ratio

The sauce should cling to the meat first and season the rice second. It should look glossy, not soupy.

When the sauce hits the pan, it should bubble hard almost immediately. When it looks like the rice underneath will want a spoonful of it, but the pan is not swimming, you are in the right zone.

Texture comparison board showing too wet Pad Kra Pao versus just-right glossy meat with basil and chilies.
The best texture is glossy and spoonable, not soupy; once the sauce clings to the meat, it flavors the rice without flooding the plate.

Balanced Sauce for 450g / 1 lb Meat

Ingredient Amount What It Does
Oyster sauce 1 tbsp / 15 ml Adds savory body and slight sweetness
Fish sauce 1 tbsp / 15 ml Gives salty, Thai-style depth
Light soy sauce 1 tbsp / 15 ml Adds salt and umami
Dark soy sauce 1–2 tsp / 5–10 ml, optional Adds color and deeper flavor
Sugar 1 tsp / about 4g Rounds the salt and chili heat
Water, chicken stock, or vegetable stock 2–3 tbsp / 30–45 ml Helps the sauce coat the meat
Saveable Pad Kra Pao sauce ratio card with measured oyster sauce, fish sauce, light soy, dark soy, sugar, and water or stock.
This Pad Kra Pao sauce ratio is built for 450g or 1 lb of meat, so the sauce should cling to the mince and lightly season the rice below.

Lower-Salt Sauce Ratio

If your fish sauce, soy sauce, or oyster sauce tastes especially salty, use this version first.

Ingredient Amount
Oyster sauce 1 tbsp / 15 ml
Fish sauce 2 tsp / 10 ml
Light soy sauce 2 tsp / 10 ml
Dark soy sauce 1 tsp / 5 ml, optional
Sugar 1 tsp / about 4g
Water, chicken stock, or vegetable stock 2 tbsp / 30 ml
Lower-salt Pad Kra Pao sauce ratio card with smaller fish sauce and soy sauce amounts for salty sauce brands.
If your fish sauce or soy sauce tastes very salty, start lower; then, after cooking, balance the plate with rice, lime, or a small extra splash of sauce.

Sauce brands vary, especially oyster sauce and soy sauce. If yours tastes very salty or very sweet straight from the bottle, start with the lower-salt ratio and adjust after cooking.

Taste after cooking. If the stir-fry is too salty, serve it with more rice and reduce fish sauce next time. If it tastes flat, it may need more garlic, chili, basil, or a better salt-sugar balance.

Once the sauce is mixed, move to the cooking method.

How to Make Pad Kra Pao

Pad Kra Pao cooks quickly, so the method is more about timing than difficulty. Once everything is lined up, the cooking feels fast rather than stressful.

Before turning on the stove, have the sauce mixed, basil picked and dried, garlic and chilies chopped, rice cooked, and eggs ready to fry. Once the pan is hot, there is not much time to stop and measure.

Pad Kra Pao prep setup with mixed sauce, basil, chopped garlic and chilies, cooked rice, and eggs on a dark surface.
Because Pad Kra Pao moves fast, prep the sauce, basil, aromatics, rice, and eggs first; then the cooking feels quick instead of chaotic.

Cook the Rice First

Start the rice before you cook the stir-fry. Once the garlic and chilies hit the pan, the dish moves fast.

Jasmine rice is the classic choice, but any plain steamed rice will work. If rice timing or water ratios are the part that usually slows you down, MasalaMonk’s guide to cooking perfect rice can help you get the base ready before the stir-fry starts. Avoid heavily seasoned rice because the stir-fry already has plenty of salt, chili, garlic, and basil.

Mix the Sauce Before You Start

Stir the oyster sauce, fish sauce, soy sauces, sugar, and water or stock in a small bowl.

Measure the sauce first, because garlic can burn while you are still looking for bottles.

Pound or Chop Garlic and Chilies

For the strongest aroma, pound garlic and chilies together in a mortar and pestle until roughly crushed. You do not need a smooth paste.

If you do not have a mortar and pestle, finely chop everything with a knife. A mini chopper also works, but stop before the mixture turns wet and pasty.

Fry the Crispy Egg

For each serving, use one egg. Heat 2–3 tablespoons of oil in a small pan, then fry the eggs one at a time or in batches. Add a little more oil between eggs only if the pan gets dry.

Crack in the egg and spoon hot oil over the whites until the edges are crisp and lacy. Keep the yolk runny if you like the classic rice-plate effect.

You can fry the eggs before the stir-fry and set them aside, or fry them right after the stir-fry if you prefer the egg hot from the pan.

Crispy fried egg technique board with hot oil, lacy golden edges, runny yolk, and spooning oil over the whites.
For a Thai-style crispy egg, hot oil matters; spoon it over the whites so the edges turn lacy while the yolk stays rich.

Stir-Fry the Meat Hot and Fast

Heat a wok over high heat, or use medium-high heat if you are cooking in a nonstick skillet. Add oil, then the garlic, chilies, and optional shallots.

The garlic and chilies should become fragrant within seconds. Do not let the garlic turn dark brown. This is the point where the kitchen should smell sharp, garlicky, and a little wild.

Garlic and sliced red and green chilies sizzling in oil in a wok with a spatula.
This is the aroma stage, so move quickly: the garlic should smell sharp and toasty before it gets dark.

Add the meat and break it up as it cooks. It should sizzle, not sit in liquid. If it releases moisture, spread it across the pan and keep cooking until most of that moisture evaporates.

If you add the sauce while the pan is still watery, the finished dish can taste boiled instead of stir-fried.

Before-and-after pan comparison showing wet minced meat versus moisture-cooked-off meat ready for sauce.
Add sauce only after the released moisture cooks off; otherwise, Pad Kra Pao turns boiled and watery instead of glossy.

If your pan is already looking wet, jump to the troubleshooting guide before adding basil.

Add Sauce and Reduce Until Glossy

Pour in the sauce and toss well. It should bubble quickly, coat the meat, and tighten around the pieces instead of pooling underneath.

If the pan looks dry, add 1–2 tablespoons of water or stock. If the pan looks soupy, keep cooking over high heat for another minute before adding basil.

The finished meat should look shiny and loose, not wet or clumpy.

Add Basil at the End

Turn the heat down or off, then add the basil leaves. Toss just until wilted.

Once the basil hits the hot meat, the whole pan should wake up. Long cooking dulls that aroma, so let the leaves collapse into the stir-fry and stop there.

Sequential board showing sauce bubbling into minced meat, coating the meat, and fresh basil added last.
Sauce goes in before basil because it needs heat to reduce; meanwhile, basil should only wilt at the end so the aroma stays fresh.

Serve Immediately

Spoon the basil stir-fry over hot rice. Add a crispy fried egg, cucumber slices, and lime if you like.

The first bite should be hot, salty, fresh, and softened by rice and yolk. This is not a dish that improves by sitting around, so serve it while the basil still smells alive.

Step-by-step Pad Kra Pao board with sauce, basil, garlic and chilies, stir-fried meat, sauce, basil, and a finished rice plate.
The method is simple when the order is clear: prep first, cook aromatics, brown the meat, reduce the sauce, then add basil right at the end.

Chicken, Pork, or Beef: Which Version Should You Make?

The same sauce and method work for chicken, pork, or beef, but each one gives the plate a different mood.

Choose chicken for the cleanest restaurant-style Thai basil chicken, pork for the juiciest street-food-style version, and beef for the darkest, most savory bowl.

Three-way Pad Kra Pao chooser board comparing chicken, pork, and beef rice plates with text labels.
The same sauce can lead to three moods: chicken is clean and fast, pork is juicy and classic, and beef is darker and more savory.

Once you choose the protein, use the recipe card for exact quantities and timing.

Thai Basil Chicken Version

For Thai basil chicken, use ground chicken, chicken keema, or finely chopped boneless chicken thigh.

Hand-chopped thigh gives little juicy pieces that catch the sauce, while ground chicken keeps the dish quick and familiar. Chicken breast works too, but it dries out faster, so chop it small and cook it quickly.

This is the lightest, fastest version and lets the basil come through clearly.

Thai basil chicken plate with glossy chicken pieces, red chilies, basil, rice, cucumber, lime, and crispy fried egg.
Thai basil chicken is the cleanest, fastest version; however, it still needs enough garlic, chilies, and basil to taste bold.

Pork Pad Kra Pao Version

Ground pork gives the richest, juiciest Pad Kra Pao. It is the version to make when you want the dish to feel more street-food-style and deeply satisfying.

Use 450g / 1 lb ground pork. If the pork is fatty, use slightly less oil and let some edges brown before adding the sauce. If it is very lean, keep the full 2 tablespoons of oil and avoid overcooking.

The fat carries the garlic and chili beautifully, especially if you can find holy basil.

Pork Pad Kra Pao plate with glossy browned pork mince, basil, red chilies, rice, and a crispy egg with runny yolk.
Pork gives the juiciest Pad Kra Pao because the fat carries garlic and chili especially well, while the egg makes the rice plate feel complete.

Thai Basil Beef Version

Thai basil beef gives the deepest, most savory bowl. Use ground beef, minced beef, or very thinly chopped steak.

Beef needs a hot, wide pan. If it steams instead of browns, the flavor turns flat. Cook in batches if needed, and use the higher end of the dark soy sauce range if you want a deeper color.

This is the version for a darker, richer rice plate with a strong garlic-chili base.

Thai basil beef rice plate with dark glossy beef, basil, red chilies, white rice, and crispy fried egg.
Thai basil beef should taste deeper and more savory than chicken, so keep the pan hot enough to brown without turning the basil dark.

Vegetarian, Tofu, and Eggplant Options

You can make a vegetarian Pad Kra Pao-style stir-fry with tofu, eggplant, mushrooms, or a mix of vegetables. These versions are not exactly the same as the classic meat rice plate, but the same garlic-chili-sauce-basil structure works well if you control moisture.

The best vegetarian version still needs the same attitude as the meat version: high heat, strong aromatics, and enough basil that the pan smells alive at the end.

For tofu, use firm or extra-firm tofu. Press it if it is very wet, then crumble it into small pieces. Cook it in a hot pan until the edges look lightly browned. The goal is the same as with meat: drive off moisture first, then let the sauce cling instead of slide off.

Tofu Pad Kra Pao plate with crisp glossy tofu, basil, red chilies, rice, and fried egg on a dark plate.
Tofu works best when it gets crisp edges first; after that, the sauce can cling instead of sliding off a wet surface.

If tofu is your main protein more often than a one-time swap, MasalaMonk’s tofu meal prep ideas go deeper into pressing, browning, saucing, and building rice-box style meals that still taste good later.

For eggplant, cut it into small pieces and cook it until tender before adding the sauce. Eggplant absorbs oil, so use a wide pan and avoid stirring too aggressively once it softens.

For mushrooms, cook them until their liquid evaporates. Then add the garlic-chili base, sauce, and basil.

Vegetarian Pad Kra Pao options board with glossy eggplant bowl and browned mushroom bowl with basil and red chilies.
Eggplant should turn tender and glossy, while mushrooms need their moisture cooked off first; otherwise, the vegetarian version can taste watery.

Use vegetarian oyster sauce or mushroom sauce. Replace fish sauce with soy sauce and, if you have it, a small pinch of mushroom seasoning.

For vegetarian sauce swaps, use the substitution guide before cooking.

What to Serve With Pad Kra Pao

Pad Kra Pao is usually served as a rice plate, not as a saucy curry. Keep the sides simple so the basil, garlic, chilies, and fried egg stay in focus.

  • Steamed jasmine rice
  • Crispy fried egg
  • Cucumber slices
  • Lime wedges
  • Extra chopped chilies
  • Prik nam pla — chopped chilies in fish sauce and lime — or soy sauce and lime for a vegetarian plate
Serving spread for Pad Kra Pao with rice, crispy fried egg, cucumber, lime, extra chilies, and prik nam pla labels.
The best sides are simple on purpose: cucumber cools the heat, lime brightens the sauce, extra chilies add control, and prik nam pla sharpens the rice.

Cucumber is especially useful because it cools the heat and gives the plate a fresh crunch. If you want that cooling side to feel a little more complete, a simple cucumber salad works well beside the hot basil stir-fry.

For a brighter Thai-style side, you can also serve it with a small portion of vegan Som Tam raw papaya salad. The crunch, lime, chili, and freshness make sense next to the rich fried egg and savory basil meat.

For the table-side chili condiment, keep the spoonful small and bright rather than drowning the rice.

Prik nam pla condiment bowl with sliced red and green chilies in fish sauce and lime, plus a soy-lime vegetarian note.
Prik nam pla adds salty heat in tiny spoonfuls; for vegetarian plates, soy sauce with lime gives a similar bright table-side lift.

If you bought a large bunch of basil, use the extra leaves quickly in another fresh herb recipe rather than letting them wilt. This dish is best when the basil tastes alive, not tired.

How to Fix Pad Kra Pao

Most Pad Kra Pao problems come from heat, timing, or sauce balance. Fortunately, the fixes are usually simple once you know what happened.

Fast diagnosis: watery usually means crowding or low heat, bland usually means weak garlic-chili-basil energy, salty usually means the sauce needs more rice or a lower-salt ratio, and dull basil flavor usually means the basil cooked too long.
Seasoning troubleshooting board for Pad Kra Pao with rice, lime, chilies, garlic, basil, fish sauce, and a glossy stir-fry bowl.
Fix the plate before you panic: rice and lime soften salt, fresh chilies restore heat, and garlic, basil, or fish sauce can wake up flat flavor.

Too Watery

Watery Pad Kra Pao almost always means the meat steamed before it fried.

Keep cooking until the liquid evaporates before adding basil. Next time, use a wider pan, higher heat, and do not double the recipe in one skillet. For larger batches, cook the meat in rounds.

Troubleshooting board showing watery Pad Kra Pao from a crowded pan and low heat beside glossy fixed stir-fry.
Watery Pad Kra Pao usually starts before the sauce goes in, so use a wider pan and cook off moisture before adding basil.

Sauce Is Pooling Under the Meat

Pooling sauce usually means the sauce went in before the pan was ready.

Keep the pan on high heat and toss until the sauce clings to the meat. Next time, start with 2 tablespoons water or stock, then add more only if the pan looks dry.

Too Salty

Salty Pad Kra Pao is usually easiest to fix on the plate, not in the pan.

Serve it with more plain rice and add a squeeze of lime. Next time, use the lower-salt sauce ratio and reduce fish sauce and light soy before reducing oyster sauce, because oyster sauce also gives body.

Too Sweet

Too much sweetness usually comes from sweet oyster sauce, dark sweet soy, or too much sugar.

To balance the current batch, add a small splash of fish sauce or light soy and serve it with plain rice. Next time, keep the added sugar modest.

Too Dry

If the meat tastes plain and dry instead of glossy, the pan probably needed a small splash of liquid near the end.

Add 1–2 tablespoons of water or stock and toss briefly over heat. The meat should be glossy enough to season the rice, not dry like plain mince.

Not Spicy Enough

If the dish tastes warm but not lively, the chilies are probably too mild or too few.

Add more chopped fresh chili next time, or serve extra chilies on the side. Fresh chilies give sharper flavor and better aroma than chili flakes alone.

Tastes Like Generic Stir-Fry

If it tastes like a regular soy-sauce stir-fry, the sharp things have been muted: garlic, chili, fish sauce, basil, or heat.

Use enough fresh basil, add it at the end, and make sure the sauce reduces onto the meat instead of staying loose in the pan.

Not Enough Basil Flavor

Weak basil flavor usually means one of two things: too little basil, or basil added while the pan was still boiling.

Use 1½–2 cups basil leaves for 450g / 1 lb meat. Add them only at the end and toss just until wilted.

Basil Turned Dark or Lost Its Aroma

Basil turns dull when it cooks too long.

Add it after the sauce has reduced and the heat is low or off. The leaves should wilt into the meat, not simmer.

Garlic Tastes Burnt

Burnt garlic means the aromatics waited too long before the meat went in.

Next time, stir the garlic and chilies only until fragrant, then add the meat as soon as the garlic smells sharp and toasty.

Meat Turned Rubbery

Rubbery meat is usually an overcooking problem, especially with chicken breast or lean beef.

Stir-fry until just cooked, reduce the sauce quickly, then finish with basil.

For texture and basil problems, focus on timing: keep the meat glossy, keep the garlic golden, and add basil only at the end.

Texture and basil troubleshooting board with dry meat, rubbery meat, weak basil, burnt garlic, glossy meat, basil leaves, and spooned stock.
Texture problems have small fixes: a splash of stock rescues dry meat, shorter cooking prevents rubbery meat, and basil belongs at the end.

Need to cook another batch instead? Return to the recipe card with the fixes in mind.

Storage and Reheating

Pad Kra Pao tastes best immediately, when the basil is fresh and the egg is crisp, but leftovers are still useful.

Store the cooked stir-fry in an airtight container in the fridge for up to 3 days. That sits within the USDA’s general 3–4 day guidance for refrigerated leftovers. Store rice separately if possible. Fried eggs are best cooked fresh, but you can skip the egg when reheating and fry a new one before serving.

To reheat, warm the stir-fry in a skillet with a splash of water. Heat just until hot. Do not cook it for too long or the basil flavor will fade further.

Leftovers will not have the same just-wilted basil aroma, but they still make a very good rice bowl the next day.

If you want to prep ahead, mix the sauce, chop the garlic and chilies, wash and dry the basil leaves, and cook the rice. Leave the actual stir-fry for right before eating.

Storage, reheating, and make-ahead board with cooked Pad Kra Pao in a glass container, reheating skillet, rice, eggs, sauce, basil, garlic, and chilies.
Pad Kra Pao is best fresh, but leftovers still work; reheat with a splash of water and fry a fresh egg if possible.

If you like salty-garlicky rice-plate dinners, MasalaMonk’s chicken adobo recipe is another strong one to cook next.

Pad Kra Pao Recipe Card

If this is your first time making it, start with the balanced sauce, use Thai basil if holy basil is hard to find, and keep the pan wide and hot. The first batch will quickly teach you your preferred salt, chili, and basil level.

Pad Kra Pao Recipe: Thai Basil Chicken, Pork, or Beef

This Pad Kra Pao recipe gives you a fast, garlicky Thai basil rice plate with chicken, pork, or beef, glossy sauce, and a crispy fried egg. Use holy basil if you can find it, or Thai basil for the easiest restaurant-style home version.

Prep Time 10 minutes
Cook Time 10–12 minutes
Total Time 20–22 minutes
Servings 4

Equipment

  • Wok or 12-inch / 30cm skillet
  • Small bowl for mixing the sauce
  • Mortar and pestle, knife, or mini chopper
  • Small frying pan for eggs
  • Spatula

Ingredients

For the Stir-Fry

  • 450g / 1 lb ground chicken, pork, or beef
  • 2 tbsp neutral oil, for the stir-fry
  • 5–8 garlic cloves, finely chopped or pounded
  • 3–6 Thai bird chilies, chopped, or 2–4 Indian green chilies
  • 1–2 shallots, thinly sliced, optional
  • 1½–2 cups holy basil or Thai basil leaves, about 30–60g depending on how tightly packed the leaves are
  • Steamed jasmine rice, for serving
  • 4 eggs
  • 2–3 tbsp neutral oil to start, plus more as needed for frying the eggs
  • Cucumber slices, optional
  • Lime wedges, optional

For the Sauce

  • 1 tbsp oyster sauce, 15 ml
  • 1 tbsp fish sauce, 15 ml
  • 1 tbsp light soy sauce, 15 ml
  • 1–2 tsp dark soy sauce, 5–10 ml, optional for deeper color
  • 1 tsp sugar, about 4g
  • 2–3 tbsp water, chicken stock, or vegetable stock, 30–45 ml

Instructions

  1. Cook the rice first. Pad Kra Pao cooks quickly, so have rice ready before you start the stir-fry.
  2. Mix the sauce. In a small bowl, stir together oyster sauce, fish sauce, light soy sauce, optional dark soy sauce, sugar, and water or stock.
  3. Prepare the aromatics. Pound or finely chop the garlic and chilies. Pick the basil leaves from the stems, wash them if needed, and dry them well.
  4. Fry the eggs. Heat 2–3 tablespoons oil in a small pan. Fry the eggs one at a time or in batches, spooning hot oil over the whites until the edges are crisp. Add more oil only if the pan gets dry. Set aside.
  5. Heat the pan. Heat a wok over high heat, or a wide nonstick skillet over medium-high heat.
  6. Cook the garlic and chilies. Add oil, then garlic, chilies, and optional shallots. Stir briefly until fragrant, without letting the garlic burn.
  7. Add the meat. Add ground chicken, pork, or beef. Break it up and stir-fry until cooked through and most moisture has evaporated.
  8. Add the sauce. Pour in the sauce and toss until the meat is glossy and coated. It should not be soupy.
  9. Add basil last. Turn the heat down or off, add basil, and toss just until wilted.
  10. Serve immediately. Spoon over rice and top each serving with a crispy fried egg. Add cucumber and lime if you like.

Notes

  • Holy basil gives the most traditional flavor; Thai basil is the easiest excellent home version.
  • Use neutral oil because olive oil or strongly flavored oils can fight the basil, garlic, and fish sauce.
  • You do not need to marinate the meat. The sauce and aromatics flavor it during the fast stir-fry.
  • If using 500g meat instead of 450g, keep the same sauce ratio first, then adjust only if needed.
  • For a less salty or milder version, reduce fish sauce and soy slightly, and start with 1 Thai chili or 1 small green chili.
  • If doubling the recipe, cook the meat in batches and add the basil only at the end.
Pad Kra Pao recipe card with serving time, ingredients, sauce amounts, method bullets, and a plated basil stir-fry with rice and egg.
Keep this card for the core formula: 1 lb meat, bold aromatics, balanced sauce, basil at the end, and rice plus egg to serve.

By the time the rice, basil stir-fry, and egg come together, the plate should feel hot, glossy, and immediate.

Close-up final Pad Kra Pao serving with glossy basil meat, white rice, crispy fried egg, runny yolk, red chilies, basil leaves, and spoon.
A good final plate should feel immediate: glossy meat, fresh basil, hot rice, and a yolk that runs into everything.

FAQs

Is Pad Kra Pao the same as Thai basil chicken?

Thai basil chicken is usually the chicken version of Pad Kra Pao. Traditionally, the dish is made with holy basil, but many restaurant and home versions use Thai basil because it is easier to find.

What does Pad Kra Pao taste like?

Pad Kra Pao tastes garlicky, salty-savory, spicy, and fresh from the basil. It should feel bold and punchy, with just enough glossy sauce to season the rice without turning the plate into curry.

What basil is best for Pad Kra Pao?

Holy basil gives the most traditional sharp, peppery flavor. Thai basil is the best practical substitute for most home kitchens. Sweet basil works only in a pinch; it makes the dish softer and less like classic Pad Kra Pao.

Can I use dried basil?

Dried basil is not a good replacement because Pad Kra Pao depends on the fresh aroma of basil added at the end. If dried basil is all you have, you can still make a garlic-chili stir-fry, but it will not taste like Pad Kra Pao or a fresh Thai basil chicken-style stir-fry.

Is Pad Kra Pao supposed to be saucy?

No, it should be glossy rather than soupy. You want enough sauce to season the rice, but not so much that the meat swims. Think juicy rice plate, not curry.

Does Pad Kra Pao need a fried egg?

The fried egg is technically optional, but it is part of the pleasure of the plate. The crisp edges add texture, and the yolk softens the salty, spicy meat into the rice.

Chicken breast, sliced chicken, or ground chicken: which works best?

Ground chicken or chopped chicken thigh is easiest and juiciest. Sliced chicken works too if you cut it small and cook it quickly. Chicken breast is usable, but it dries out faster than thigh.

What can replace fish sauce?

Use light soy sauce with a small pinch of mushroom seasoning if you have it. The flavor will be less funky and less Thai-style, but still savory.

What can replace oyster sauce?

Vegetarian oyster sauce or mushroom sauce is the best replacement. If you do not have either, use soy sauce with a little sugar, but the sauce will be thinner and less rounded.

Why did my Pad Kra Pao turn watery?

Watery Pad Kra Pao usually means the meat steamed before it fried. Use a wider pan, higher heat, and cook off moisture before adding the sauce.

Can I make Pad Kra Pao ahead?

You can prep the sauce, garlic, chilies, basil, and rice ahead of time. For the best flavor, cook the stir-fry right before eating because basil tastes freshest when added at the end.

How long does Pad Kra Pao keep in the fridge?

The cooked stir-fry keeps for up to 3 days in an airtight container. Reheat it in a skillet with a splash of water. Fry a fresh egg when serving if possible.

Once this rhythm clicks, Pad Kra Pao becomes less like a strict recipe and more like a rice-plate formula you can repeat with chicken, pork, beef, tofu, or whatever needs cooking.

Back to top ↑

Posted on Leave a comment

Smoked Pork Loin Recipe

Sliced smoked pork loin roast on a dark board with smoky crust, moist center, carving knife, and pan juices

Smoked Pork Loin Recipe sounds easy until the roast looks perfect on the smoker and still slices dry. Pork loin is leaner than pork shoulder, so it does not need to fall apart, shred, or cook all day. Instead, it needs steady smoke, a reliable thermometer, a short rest, and clean slicing.

This version is built for juicy slices: brown sugar, smoked paprika, mild fruitwood smoke, a steady 225°F smoker, and a firm stop at 145°F in the center. Because the method is simple, the small details matter even more. Pull the roast at the right temperature, rest it before slicing, and the meat can be smoky, tender, and dinner-worthy without drying out.

Use this for a boneless pork loin roast, not pork tenderloin. The timing changes completely when the package says tenderloin because tenderloin is much smaller and cooks faster.

The goal is not pulled pork and it is not a dry roast with smoke on the outside. The goal is a sliceable roast with a peppery-sweet crust, a gentle fruitwood aroma, and enough moisture that the first warm slice still glistens when it hits the board.

What You’ll Find in This Guide

This smoked pork loin guide is organized around the questions that matter while the roast is actually cooking: what cut to buy, what temperature to use, when to pull it, how to keep it juicy, and what to do when something starts going wrong.

Quick Answer: Smoked Pork Loin Time and Temperature

Smoke a 3–4 lb / 1.4–1.8 kg boneless pork loin at 225°F / 107°C until the thickest part reaches 145°F / 63°C, then rest it for 10–15 minutes before slicing. Most roasts take about 2–3 hours, while thicker roasts, cold weather, or a cooler-running smoker can push the cook closer to 3½ hours. Use the internal temperature, not the clock.

Key detail Best answer
Best smoker temperature 225°F / 107°C
Safe internal temperature 145°F / 63°C in the thickest part, followed by a rest
Rest time 10–15 minutes before slicing
Estimated cook time About 2–3 hours for a 3–4 lb roast; thick roasts may take longer
Best wood Apple, cherry, or pecan
Best cut Boneless pork loin roast, not tenderloin
Quick answer image for smoked pork loin showing 225°F smoker temperature, 145°F internal temperature, 10 to 15 minute rest, and 2 to 3 hour average cook time
This is the simple framework behind juicy smoked pork loin: gentle heat, a clear pull temperature, and a short rest before slicing. Because the roast is easy to overcook, these cues matter more than the clock alone.

Need the full step-by-step? Go to how to smoke pork loin, or check the time and temperature chart if you are planning around a smoker schedule.

What Perfect Smoked Pork Loin Should Look Like

The finished pork should not look like pulled pork or behave like brisket. It should have a smoky, seasoned outside, a moist center, and clean slices that bend slightly without crumbling. A juicy first slice with the crust still intact means you hit the right window.

Slight pink is normal once the pork has reached temperature and rested properly. Many juicy slices will look a little rosy instead of chalky white. The thermometer decides doneness; the slice tells you whether you protected the moisture.

Close-up of smoked pork loin slices with moist center, smoky edge, and clean slice texture
Perfect smoked pork loin should slice cleanly instead of shredding or crumbling. A lightly rosy center can be completely normal, while the clean slice tells you the roast stayed moist enough to serve.

Why This Smoked Pork Loin Recipe Works

Pork loin is lean, which is exactly why it can be so good when it is cooked carefully. It slices cleanly, takes smoke well, and does not need hours of rendering like pork shoulder. However, it has less internal fat to protect it from overcooking.

Juiciness comes from controlling the few details that matter most: steady heat, a balanced rub, a thermometer in the center, a proper rest, and thin slices across the grain. A dry roast and a juicy one are often separated by only a few degrees and a rushed slice.

When it works, the roast should slice cleanly through the smoky crust, stay moist in the center, and feel tender without falling apart. That is the sweet spot: smoky enough for a backyard plate, but still juicy enough for sandwiches, rice bowls, and leftovers the next day.

Why Pork Loin Should Not Be Cooked Like Pulled Pork

Do not use pulled-pork logic here. Pork shoulder becomes tender because it has fat and connective tissue that need long cooking. This cut is lean. By the time it feels like pulled pork, it is usually overcooked.
Sliced smoked pork loin compared with shredded pulled pork shoulder
Pork loin and pork shoulder can both go on the smoker, but they have different goals. Loin is best sliced, while shoulder needs long cooking because it has more fat and connective tissue.

Smoked Pork Loin vs Pork Tenderloin

Pork loin and tenderloin are not the same cut. This recipe is for the wider roast that slices like a small pork roast. Tenderloin is long, narrow, and much smaller, so it cooks much faster.

Before you start: this recipe is for a boneless pork loin roast, usually 3–4 lb and wide like a small roast. A package labeled pork tenderloin needs different timing.

When the label says tenderloin, switch recipes. MasalaMonk’s pork tenderloin in oven guide is a better fit for that cut, and the slow cooker pork tenderloin version is useful for a softer, saucier dinner.

Cut Shape Usual size Use this recipe? Cooking note
Pork loin Wide roast 3–5 lb / 1.4–2.3 kg Yes Smokes slowly and slices like a roast
Pork tenderloin Long, narrow, small 1–1.5 lb / 450–680 g No Cooks much faster and needs different timing
Raw pork loin roast and pork tenderloin compared on butcher paper to show the wide roast and narrow tenderloin shapes
Pork loin and pork tenderloin are easy to mix up at the store, but they need very different cooking times. Before seasoning, check the shape so you do not use roast timing on a much smaller tenderloin.

Still choosing at the store? Use the buying guide. Already have a boneless pork loin roast? Go straight to the ingredients.

Which Pork Loin to Buy for Smoking

Choose a roast that is even in thickness, compact enough to slice cleanly, and not trimmed completely bare. A small fat cap gives the lean meat a little protection, while an uneven roast with one thin tail can cook at different speeds from end to end.

Blade-end pork loin often has a little more fat and tenderness than the very lean center-cut end, which can make it more forgiving on the smoker. Center-cut still works well, especially when it has an even shape and you pull it on temperature instead of time.

  • Best size: 3–4 lb / 1.4–1.8 kg is easiest for this method.
  • Best shape: even thickness from end to end, without one very thin tail.
  • Best surface: a thin fat cap is helpful; thick hard fat can be trimmed.
  • Best for slicing: a compact roast with a consistent width gives cleaner dinner slices.
  • Check the label: enhanced, injected, seasoned, or solution-added pork needs less salt.
Pork loin buying guide showing an even roast, small fat cap, and label check for smoking
The best pork loin for smoking starts with an even shape and a little surface protection. As a result, the roast cooks more predictably and gives you cleaner slices at the end.

Enhanced or solution-added pork is already partly seasoned inside, so reduce the kosher salt in the rub. A full dry brine plus a salty rub can make the finished slices taste sharp, especially after smoking and reheating.

Pork loin package label showing enhanced or solution-added pork with a rub bowl and reduced salt cue
Enhanced or solution-added pork already carries salt inside the meat. Therefore, reducing the salt in the rub can prevent the finished smoked pork loin from tasting sharp or over-seasoned.

Once the roast looks right, move on to the rub and dry brine section so the salt level matches the pork you bought.

Ingredients for Smoked Pork Loin

The ingredient list is short because the smoker, the rub, and the final temperature do most of the work. Use a boneless roast around 3–4 pounds for the easiest timing.

  • Boneless pork loin roast: use a 3–4 lb / 1.4–1.8 kg roast for this method.
  • Dijon mustard or olive oil: either works as a binder so the rub sticks. Dijon adds a little tang but does not make the pork taste aggressively mustardy.
  • Brown sugar: adds gentle sweetness and helps the surface brown.
  • Smoked paprika: gives color and a smoky-sweet backbone.
  • Kosher salt: seasons the roast. Use less when the pork is already enhanced or packed in a salt solution.
  • Garlic powder and onion powder: build the savory base.
  • Black pepper: adds a clean peppery edge.
  • Chili powder: use a mild US-style chili powder blend. Use only ¼ teaspoon if substituting hot red chilli powder or cayenne.
  • Optional cumin, mustard powder, or cayenne: use a small amount for a deeper or spicier rub.
  • Apple juice, broth, or water: optional for a light spritz or reheating leftovers.
Ingredients for smoked pork loin including pork loin roast, Dijon, brown sugar, smoked paprika, spices, and apple juice
Smoked pork loin does not need a crowded ingredient list to taste complete. Instead, a balanced rub, mild smoke, and careful cooking do most of the work.

Best Rub and Optional Dry Brine for Smoked Pork Loin

The rub is sweet enough to build color, smoky enough to taste like BBQ, and savory enough to season the lean meat. It should not be so salty that leftovers become harsh after reheating.

Rub ingredient US amount Metric estimate
Brown sugar 2 tbsp 24–26 g
Smoked paprika 1 tbsp 6–7 g
Kosher salt 2 tsp 6–10 g depending brand
Garlic powder 2 tsp 6 g
Onion powder 1 tsp 3 g
Black pepper 1 tsp 2–3 g
Mild chili powder blend 1 tsp 3 g
Ground cumin or mustard powder, optional ½ tsp 1–1.5 g
Cayenne, optional ¼ tsp 0.5 g
Brown sugar smoked paprika rub for smoked pork loin with spices mixed in a bowl
The rub should taste smoky, savory, and lightly sweet before it ever touches the pork. Since pork loin has a mild flavor, balance matters more than heavy heat or too much salt.

You can also use 3–4 tablespoons of a store-bought pork rub. However, taste or check the label first because some BBQ rubs are much saltier than others. Use a lighter hand when the rub already tastes salty.

Should You Brine Smoked Pork Loin?

Brining is optional, but a short dry brine can help when the roast is very lean or you want deeper seasoning. Use the kosher salt from the recipe and apply it 4–12 hours ahead. Refrigerate the pork uncovered, then add the remaining rub ingredients before smoking. Do not add a second full round of salt.

Store-bought rubs and enhanced pork need extra caution because they may already contain plenty of salt. For most first cooks, the regular rub method is enough.

Dry brine setup for smoked pork loin with salted roast on a rack and remaining rub ingredients nearby
A short dry brine can season pork loin more evenly, especially when the roast is very lean. However, use the recipe salt for the brine so you do not accidentally double-salt the surface later.

After seasoning is sorted, choose your smoke profile in the best wood for smoking pork loin section.

Best Wood for Smoking Pork Loin

Mild fruitwood is the safest first choice because this cut is delicate enough to pick up smoke quickly. Apple and cherry are the easiest picks. Pecan gives a warmer, nuttier flavor. Hickory can work, but it is stronger, so use it lightly or blend it with apple or cherry.

First time smoking pork loin? Start with apple or cherry. You can always go stronger next time; however, you cannot take harsh smoke back once it is in a lean roast.

Wood Flavor Best use
Apple Mild, slightly sweet Best first choice for smoked pork loin
Cherry Mild, fruity, good color Great all-purpose pork wood
Pecan Warm and nutty Good when you want deeper BBQ flavor
Hickory Stronger and smoky Use lightly or blend with fruitwood
Maple Gentle sweetness Good with bacon, glaze, or sweeter rubs
Mesquite Very intense Usually too strong alone for lean pork loin
Apple, cherry, pecan, and hickory wood chunks arranged for choosing the best wood for smoking pork loin
Mild wood is usually the safest choice because pork loin picks up smoke quickly. Apple and cherry keep the flavor clean, while pecan and hickory add deeper BBQ character when used with restraint.

Equipment You’ll Need

You do not need much gear, but a reliable thermometer matters more than almost anything else here. Pork loin is lean enough that guessing by time or color can push it past the juicy window. Use a smoker, pellet grill, electric smoker, charcoal smoker, or grill set up for indirect heat, plus a probe thermometer or instant-read thermometer, a sharp knife, a cutting board, foil for resting, and a small bowl for mixing the rub.

Smoked pork loin equipment with probe thermometer, instant-read thermometer, knife, cutting board, foil, and rub bowl
A reliable thermometer matters more than extra gadgets for smoked pork loin. Since the roast can move from juicy to dry quickly, accurate temperature checks protect the whole cook.

With the tools ready, start the actual cook in how to smoke pork loin.

How to Smoke Pork Loin

The method is straightforward, but do not rush the setup. A dry surface, even seasoning, and correct thermometer placement make the cook much more predictable.

1. Trim the pork loin

Pat the roast dry with paper towels, then trim away any tough silver skin or thick hard fat. A soft fat cap can stay at about ¼ inch. A thicker cap can be scored lightly in a shallow diagonal pattern so the rub sits better on the surface.

Hand trimming and lightly scoring the fat cap on a raw pork loin before smoking
Trimming is not about removing every bit of fat. Instead, keep a thin soft cap for protection and remove thick hard fat that blocks seasoning from reaching the pork.

2. Add binder and rub

Rub the pork with Dijon mustard or olive oil. Mix the dry rub in a small bowl, then coat the meat evenly on all sides. You want an even layer, not a thick paste. Let the seasoned roast sit for 20–30 minutes while the smoker comes to temperature.

Applying Dijon binder and brown sugar smoked paprika rub to pork loin before smoking
Even seasoning gives the smoke something consistent to cling to. Once the pork is coated all over, the rub can set into a crust instead of collecting in salty patches.

3. Preheat the smoker

Preheat the smoker to 225°F / 107°C. This is the most forgiving temperature for a lean roast because it warms gently instead of racing past the target. Add apple, cherry, or pecan wood.

Need a slightly faster cook? Use 250°F / 121°C and start checking early. A pellet grill can also cook this cut at 275°F / 135°C, but the window between juicy and dry gets smaller.

Smoker preheating to 225°F with wood and seasoned pork loin ready to cook
A steady 225°F smoker gives smoked pork loin a calmer start. Because the roast is not heavily marbled, gentle heat helps the center warm through without drying the outside too soon.

4. Smoke until the pork reaches 145°F

Place the pork on the smoker grate once the smoker is steady. A visible fat cap can face up when the heat is indirect. Insert a probe thermometer into the thickest part of the roast, away from the edge and not buried in a pocket of fat.

Probe thermometer inserted into the thickest part of smoked pork loin on a smoker grate
A probe that sits too close to the surface can make the roast seem done early. Center placement gives you a truer reading and a better chance at juicy smoked pork loin.

What the Rub Should Look Like Mid-Cook

About halfway through, the rub should look set rather than wet, and the pork should smell smoky-sweet instead of raw and spicy.

Smoked pork loin halfway through cooking with the rub set on the surface
This is the stage where the surface changes from seasoned meat to bark-in-progress. The rub should look attached to the pork, not loose, wet, or burned.

When to Pull Smoked Pork Loin

Smoke until the thickest part reaches 145°F / 63°C. Do not wait for the roast to become fall-apart tender. That is pork shoulder logic, and it is one of the easiest ways to dry out this lean cut.

Smoked pork loin reaching 145°F internal temperature with a thermometer in the roast
The pull temperature is where smoked pork loin is won or lost. Once the center reaches the target, the next job is preserving moisture rather than chasing a softer texture.

5. Rest before slicing

After smoking, transfer the roast to a cutting board and rest for 10–15 minutes. This is the quiet part of the recipe, but it matters: the meat relaxes, the juices settle, and the first slice stays much cleaner. Tent loosely with foil in a cool kitchen, but do not seal it tightly unless you are okay with softening the crust.

Smoked pork loin resting under a loose foil tent before slicing
A loose rest protects the crust while giving the juices time to settle. Cutting too soon can make even a properly cooked roast seem drier than it is.

6. Slice across the grain

Slice across the grain into ¼–½ inch slices. Go thinner for sandwiches or leftovers, and slightly thicker for a dinner plate. Thinner slicing also helps when the meat feels firmer than you wanted.

Look for a moist center, a thin smoky edge, and juices that stay mostly in the meat instead of flooding the board.

Slicing smoked pork loin across the grain into clean juicy slices
Slicing across the grain makes smoked pork loin feel more tender on the plate. Thinner slices also work better for sandwiches, rice bowls, and next-day leftovers.

For planning future cooks, compare smoker temperatures in the time and temperature chart. For dry slices, dark rub, or soft bark, jump to troubleshooting smoked pork loin.

Smoked Pork Loin Time and Temperature Chart

Cook time helps with planning, but it is not the final test. Thickness, starting temperature, smoker swings, wind, weather, and probe placement all change the timing. Use this chart as a planning guide; however, trust the internal temperature before you trust the clock.

Smoker temperature Approximate time for 3–4 lb pork loin Best for Pull temperature
225°F / 107°C 2–3½ hours Most forgiving, more smoke, best beginner method 145°F / 63°C
250°F / 121°C 2–3 hours Balanced speed and smoke 145°F / 63°C
275°F / 135°C 1½–2¼ hours Faster pellet-grill version 145°F / 63°C
Smoked pork loin time and temperature guide showing 225°F, 250°F, 275°F smoker temperatures and 145°F pull temperature
Use the chart to plan your afternoon, not to override the thermometer. A thick roast, cold weather, or a cooler smoker can stretch the cook without meaning anything is wrong.

A slow roast is not automatically a problem. When the smoker is steady and the probe is placed correctly, let the thickest part come up gradually. Cranking the heat hard near the end can push the outside too far before the center is ready.

Shape matters more than total weight once the roast gets larger. A long, even piece may not take dramatically longer than a smaller one, while a very thick roast can take much longer. Build in extra time when cooking for a crowd.

What Temperature Keeps Smoked Pork Loin Juicy but Safe?

In this recipe, smoked pork loin is done at 145°F / 63°C in the thickest part of the roast, followed by a rest. The official FoodSafety.gov minimum internal temperature chart lists pork steaks, chops, and roasts at 145°F / 63°C with a 3-minute rest. The National Pork Board pork cooking temperature guide also lists 145°F with a rest for fresh cuts such as pork loin.

This recipe uses a longer 10–15 minute rest because a roast slices better after it has had time to settle. The extra rest is not about cooking it harder; it is about giving the juices time to calm down before the knife goes in.

Comparison of smoked pork loin slices at 145°F and overcooked dry pork loin slices
A few extra degrees can change smoked pork loin from moist and sliceable to firm and dry. That is why the recipe focuses on temperature control instead of long cooking.

The biggest mistake is waiting for pork loin to feel probe-tender like pork shoulder. By the time it feels like pulled pork, it is usually overcooked. Stop by temperature, not texture.

A slight pink tint, especially near the smoke ring, is normal. Color is only a clue; the thermometer is the safety test.

At that point, the outside should look smoky and seasoned, the center should still look moist, and the slices should hold together without crumbling. Spoon any juices on the board back over the pork instead of leaving them behind.

Beginner-safe method: make sure the thickest part reaches 145°F / 63°C, rest 10–15 minutes, then slice. Experienced cooks sometimes account for carryover heat by pulling a few degrees earlier, but the clearest method for most readers is to verify 145°F with a reliable thermometer.

Smoked Pork Loin Recipe

Juicy Smoked Pork Loin with Brown Sugar Paprika Rub

A juicy smoked pork loin with a brown sugar smoked paprika rub, mild fruitwood smoke, a smoky crust, and clean slices that stay moist after resting.

Prep Time15 minutes
Cook Time2–3½ hours
Rest Time10–15 minutes
Yield6–8 servings

Total time: about 2½–4 hours, depending on roast thickness and smoker temperature.
Smoker temperature: 225°F / 107°C
Internal temperature: 145°F / 63°C
Best wood: apple, cherry, or pecan
Cut: boneless pork loin roast, not pork tenderloin

Ingredients

  • 1 boneless pork loin roast, 3–4 lb / 1.4–1.8 kg
  • 1½ tbsp / 22 ml Dijon mustard or olive oil
  • 2 tbsp / 24–26 g brown sugar
  • 1 tbsp / 6–7 g smoked paprika
  • 2 tsp kosher salt, about 6–10 g depending brand; use less for enhanced or solution-added pork
  • 2 tsp / 6 g garlic powder
  • 1 tsp / 3 g onion powder
  • 1 tsp / 2–3 g black pepper
  • 1 tsp / 3 g mild US-style chili powder blend
  • ½ tsp ground cumin or mustard powder, optional
  • ¼ tsp cayenne or hot red chilli powder, optional
  • ¼–½ cup / 60–120 ml apple juice, broth, or water for spritzing or reheating, optional

Instructions

  1. Trim the pork. Pat the pork loin dry. Trim away silver skin and thick hard fat. Leave up to ¼ inch soft fat cap if present.
  2. Season. Rub the pork with Dijon mustard or olive oil. Mix the brown sugar, smoked paprika, salt, garlic powder, onion powder, black pepper, chili powder, and optional spices. Coat the pork evenly on all sides.
  3. Rest while the smoker heats. Let the seasoned pork sit for 20–30 minutes while you preheat the smoker to 225°F / 107°C.
  4. Smoke. Place the pork loin on the smoker grate over indirect heat. Insert a probe thermometer into the thickest part of the roast. Smoke until the internal temperature reaches 145°F / 63°C, usually about 2–3 hours for a 3–4 lb roast. Thick roasts or cooler-running smokers can take closer to 3½ hours.
  5. Rest. Transfer the pork to a cutting board and rest for 10–15 minutes. Tent loosely with foil if needed.
  6. Slice. Slice across the grain into ¼–½ inch slices. Serve with pan juices, BBQ sauce, mustard sauce, or your favorite sides.

Notes

  • Do not use this timing for pork tenderloin. Tenderloin is smaller and cooks faster.
  • Time is an estimate. Internal temperature decides doneness.
  • Use mild US-style chili powder for the full 1 teaspoon amount. Hot red chilli powder or cayenne should be reduced to ¼ teaspoon.
  • A 250°F smoker can speed the cook slightly; start checking early.
  • A 275°F pellet grill cook works, but the roast has a smaller margin before overcooking.
  • Salty store-bought rubs and enhanced pork both need less added kosher salt.
  • Leftovers reheat best with broth, apple juice, or pan juices and gentle covered heat.

Made this smoked pork loin? Leave a comment with your smoker type, wood choice, cook temperature, and pull temperature. Those details help the next cook decide whether to stay low at 225°F, try a faster pellet-grill version, or choose apple, cherry, or pecan wood.

No smoker today? The same temperature-first thinking applies to this slow cooker pork loin recipe: stop before the roast dries out, then slice it cleanly.

Pork Loin on Pellet Grill, Electric Smoker, Charcoal Smoker, or Offset

No matter what kind of smoker you use, the finish line stays the same: 145°F in the thickest part of the roast. The only real difference is how much attention your smoker needs along the way.

Pellet grill, electric smoker, charcoal setup, and offset smoker shown as options for smoking pork loin
Different smokers need different levels of attention, but the finish line stays the same. Whether you use a pellet grill, electric smoker, charcoal setup, or offset, cook the roast by internal temperature.

Pellet grill

Set the pellet grill to 225°F or 250°F. Apple, cherry, or pecan pellets are the easiest choices. Keep the lid closed as much as possible and check the internal temperature early, especially when cooking at 275°F.

Electric smoker

Use wood chips according to your smoker’s instructions and expect a gentler smoke profile. Because opening an electric smoker repeatedly can slow the cook, keep a probe in the roast when possible.

Charcoal smoker or Weber-style kettle

Set up two-zone indirect heat, keep the pork away from direct coals, and add one or two chunks of apple or cherry wood. Watch for temperature spikes. A roast getting too much heat from below can sit fat side down for extra surface protection.

Offset smoker

Run a clean, thin smoke and keep the pit steady. Rotate the roast when your smoker has a clear hot side. Because this cut is less forgiving, avoid letting the fire run too hot for too long.

How to Keep Smoked Pork Loin from Drying Out

Dry smoked pork loin usually comes from one of three things: the roast went past the target temperature, it was sliced too soon, or the slices were cut too thick or with the grain. Stop on temperature, rest before slicing, and cut against the grain.

  • Use a thermometer. Time is only a guide.
  • Do not cook it like pork shoulder. Pork loin is for slicing, not shredding.
  • Rest before slicing. Give the juices time to settle.
  • Slice across the grain. This makes the slices feel more tender.
  • Slice only what you need. A whole rested roast stays juicier than a pile of exposed slices.
  • Keep juices with leftovers. A little broth, apple juice, or pan juice helps during reheating.

Should You Wrap Pork Loin When Smoking?

You usually do not need to wrap pork loin while it smokes. Because the roast cooks faster than pork shoulder, it does not need the same long covered phase. Also, wrapping can soften the rub crust. Leave it unwrapped for the main method, then rest it loosely tented with foil.

Smoked pork loin shown unwrapped on a grate with a loosely tented roast and a tightly wrapped foil caution
Wrapping is useful for some barbecue cuts, but pork loin usually benefits from staying exposed to smoke. A loose tent during the rest is enough for most roasts.

A surface that gets too dark before the center is done can be loosely tented near the end. Glazed versions are better brushed during the final 15–25 minutes instead of wrapped from the beginning.

Should Pork Loin Be Smoked Fat Side Up or Down?

With gentle indirect heat, place a visible fat cap facing up. Strong heat from below is a reason to turn the fat side down so it helps protect the bottom of the roast.

Fat side direction can protect the surface, but it will not magically baste the center of a lean pork loin. Temperature control matters more than fat-side direction.

Two smoked pork loin roasts showing fat side up for gentle heat and fat side down when heat comes from below
Fat direction is about surface protection, not automatic basting. When heat comes from below, fat side down can shield the meat; with gentle indirect heat, fat side up works well.

Optional Glaze, Spritz, or Marinade

The basic dry-rub version is the easiest place to start. Once you have the temperature method down, a spritz, glaze, or simple marinade can move the pork in a sweeter, brighter, or more classic BBQ direction.

Smoked pork loin with glaze brush, spritz bottle, BBQ sauce, mustard sauce, and pan juices
Glaze, spritz, and sauce can add flavor, but they should not replace proper cooking. Pull the pork at the right time first, then use sauce or glaze to shape the final flavor.

Apple juice or broth spritz

Spritzing with apple juice, broth, or water can add a little surface moisture, but it is optional. Repeatedly opening the smoker just to spritz can slow the cook and create temperature swings.

BBQ glaze

Brush BBQ sauce, honey garlic glaze, or apple glaze on during the final 15–25 minutes. Glazing too early can make the sugar darken before the center is ready.

Sauce ideas for serving

Serve the slices with BBQ sauce, mustard sauce, apple glaze, or warm pan juices for a classic BBQ plate. A fresher finish can come from mango salsa; the fruit, lime, onion, and chile are especially good with tacos or rice bowls.

Sliced smoked pork loin served with mango salsa, lime, herbs, and pan juices
Mango salsa gives smoked pork loin a fresh contrast without hiding the smoke. The fruit, lime, and herbs work especially well when the pork is served in tacos, rice bowls, or lighter leftover meals.

Pairing a glaze or salsa with sides? The serving section has the best creamy, crisp, and BBQ-style options.

Apple-honey marinade

Marinate for a few hours in apple juice, honey, Dijon, black pepper, and a little thyme or oregano when you want a sweeter version. Pat the pork dry before adding the rub so the surface can still pick up smoke and color.

What to Serve with Smoked Pork Loin

Smoked pork loin works best with sides that bring creaminess, crunch, or brightness to the plate. The pork itself is smoky and sliceable, so the side dishes should either soften the plate, freshen it up, or make it feel like a proper BBQ dinner.

Smoked pork loin served with macaroni and cheese, slaw, baked beans, and cornbread
Smoked pork loin works best with sides that add creaminess, crunch, or brightness. Rich comfort sides and crisp salads both help balance the smoky slices.

A classic BBQ-style plate can stay simple: thick slices of pork, warm pan juices or sauce, coleslaw, baked beans, and cornbread. Richer sides like macaroni and cheese or mashed potatoes make the meal feel more comforting without needing a heavy glaze.

Sweet rubs and glazes need contrast. Coleslaw, apple slaw, or potato salad can cut through the smoke and keep the plate from feeling too heavy.

Leftovers are often better sliced thin, almost like smoky roast beef. Tuck them into sandwiches, sliders, tacos, rice bowls, breakfast hash, or quick skillet meals with a little broth, BBQ sauce, mustard sauce, or pan juice to bring back moisture. With sandwiches or sliders, homemade french fries fit better than another rich casserole.

Storage, Reheating, and Leftovers

Let leftover pork cool, then refrigerate it in an airtight container. Pan juices should stay with the pork when possible. Larger pieces hold moisture better than a pile of exposed slices, so slice only what you plan to eat.

To reheat sliced smoked pork loin, place the slices in a covered baking dish with a few tablespoons of broth, apple juice, or pan juices. Reheat gently until the pork is hot throughout; for food safety, cooked leftovers should reach 165°F / 74°C. Reheating the same slices again and again will dry out lean pork.

Leftover slices are especially good when they are cut thin and used in meals that bring back moisture: tacos with salsa, rice bowls with sauce, fried rice, sandwiches with mustard or BBQ sauce, or breakfast hash with eggs and potatoes. This guide to how to cook rice perfectly helps keep rice bowls and fried rice fluffy instead of gummy.

Smoked pork loin leftovers used in a sandwich, rice bowl, and breakfast hash with eggs and potatoes
Leftover smoked pork loin is best sliced thin and paired with moisture or texture. Sauce, rice, eggs, potatoes, salsa, and something crisp can all make the second meal feel intentional.

Leftover smoked pork loin ideas

  • Smoked pork sandwiches with BBQ sauce or mustard sauce
  • Tacos with slaw, salsa, and lime
  • Rice bowls with beans, corn, and avocado
  • Breakfast hash with potatoes and eggs, or tucked into a breakfast burrito
  • Fried rice with diced smoked pork
  • Mac and cheese topping
  • BBQ sliders
  • Protein for salads or grain bowls
  • Smoked pork and potatoes with gravy or cheese sauce

If the pork turned out drier than expected, the troubleshooting section has quick fixes for dry slices, dark rub, bland centers, and soft bark.

Troubleshooting Smoked Pork Loin

Something went wrong? The pork is usually still usable. A dry slice can be saved with thin cutting and warm juices, a dark crust can be softened with sauce, and a bland center can be helped at the table. Use the table below to fix this batch and make the next one easier.

Smoked pork loin troubleshooting guide showing dry slices with broth, dark rub with sauce, bland center with seasoning, and soft bark uncovered
Most smoked pork loin problems have a same-day fix. Add moisture to dry slices, balance dark crust with sauce, season bland pieces at serving, and uncover soft bark before plating.
Problem Likely cause Fix now Next time
Pork is dry Overcooked or sliced too soon Slice thin and serve with warm broth, BBQ sauce, mustard sauce, or pan juices Pull at 145°F and rest before slicing
Rub is too dark Sugar plus high heat Trim the darkest bits or sauce lightly Keep smoker around 225–250°F
Center tastes bland Thick roast seasoned only on the surface Serve with sauce, pan juices, or a finishing sprinkle of salt Season earlier, consider a short dry brine, and slice thinner
Cook is taking too long Thick roast, cold meat, or smoker running cool Keep cooking to internal temperature Use a probe thermometer and verify smoker temperature
Pork is pink inside Smoke ring or medium pork Check the thickest part with a thermometer Trust temperature, not color
Slices feel tough Sliced with the grain, sliced too thick, or slightly overcooked Slice thinner across the grain and serve with warm juices Notice grain direction before cooking and pull at 145°F
Bark is soft Wrapped too tightly or rested too long under sealed foil Uncover before serving Tent loosely instead of sealing tightly

Smoked Pork Loin Variations

Once you are comfortable with the basic 225°F smoker and 145°F internal temperature method, the flavor variations are easy. Keep the same doneness target and change the wood, rub, glaze, or serving sauce.

  • Applewood smoked pork loin: use apple wood, an optional apple juice spritz, and a brown sugar rub.
  • BBQ glazed smoked pork loin: brush with BBQ sauce during the final 15–25 minutes.
  • Honey garlic smoked pork loin: add a honey-garlic glaze near the end so the sugar does not burn.
  • Spicy smoked pork loin: add cayenne, chipotle powder, or spicy BBQ sauce.
  • Bacon wrapped smoked pork loin: wrap with bacon and monitor carefully because bacon rendering changes timing.
  • Stuffed smoked pork loin: butterfly, fill lightly, tie with butcher’s twine, and monitor the center carefully.
  • Smoked pork loin with apples and onions: serve the sliced pork with sautéed or roasted apples and onions.

FAQs

How long does it take to smoke pork loin?

A 3–4 lb boneless pork loin usually takes about 2–3 hours at 225°F, but thick roasts, cold weather, or cooler-running smokers can push it closer to 3½ hours. Start checking early and cook to 145°F internal temperature.

Can I smoke pork loin at 250°F or 275°F?

Yes. A 250°F smoker gives a slightly faster cook while still staying gentle. A 275°F pellet-grill cook also works, but start checking early because the roast has less time between juicy and dry.

What temperature keeps smoked pork loin juicy but safe?

Pork loin is done when the thickest part of the roast reaches 145°F / 63°C, followed by a rest. That temperature keeps the pork safe while still protecting moisture better than cooking it to 160°F or higher.

Should I brine pork loin before smoking?

You can, but it is optional. A short dry brine of 4–12 hours can help season the roast more deeply, especially when the pork loin is very lean. Go easy with salty rubs afterward so the finished slices do not taste over-seasoned.

Why is my smoked pork loin tough?

It may have been sliced with the grain, sliced too thick, or cooked past the juicy window. Thin slices across the grain and a little warm broth or pan juice can help this batch, while a thermometer helps prevent the problem next time.

Should pork loin be wrapped when smoking?

Usually, no. Pork loin cooks fast enough that it does not need a long wrapped phase, and wrapping can soften the rub crust. Leave the smoke to build on the surface, then tent loosely during the rest if needed.

Is it okay if the pork is still a little pink?

Yes, a little pink is normal when the pork has reached 145°F / 63°C and rested. Smoked pork can also show a rosy smoke ring near the outside. Use color as a visual clue, not the safety test; the thermometer is what matters.

Is pork loin the same as pork tenderloin?

No. Pork loin is a wider roast, while pork tenderloin is long, narrow, and much smaller. Tenderloin cooks much faster and should not use the same timing as this recipe.

Why does smoked pork loin not shred like pulled pork?

Pork loin is a lean roast, not a fatty shoulder cut. It is best cooked to 145°F and sliced. Classic pulled pork needs pork shoulder or pork butt because those cuts have more connective tissue and fat for long cooking.

What wood is best for smoked pork loin?

Apple and cherry are the best first choices because they are mild and slightly sweet. Pecan is good for deeper flavor, and hickory should be used lightly or blended with fruitwood.

Do you smoke pork loin fat side up or down?

Fat side up works well when heat is indirect and even. Strong heat from below is a good reason to place the fat side down. Temperature control matters more than fat-side direction.

Smoked pork loin is not a long, dramatic barbecue project. It is a lean roast that rewards timing. Keep the smoke gentle, stop on temperature, rest before slicing, and the payoff is simple: smoky crust, clean slices, and pork that still tastes good the next day.