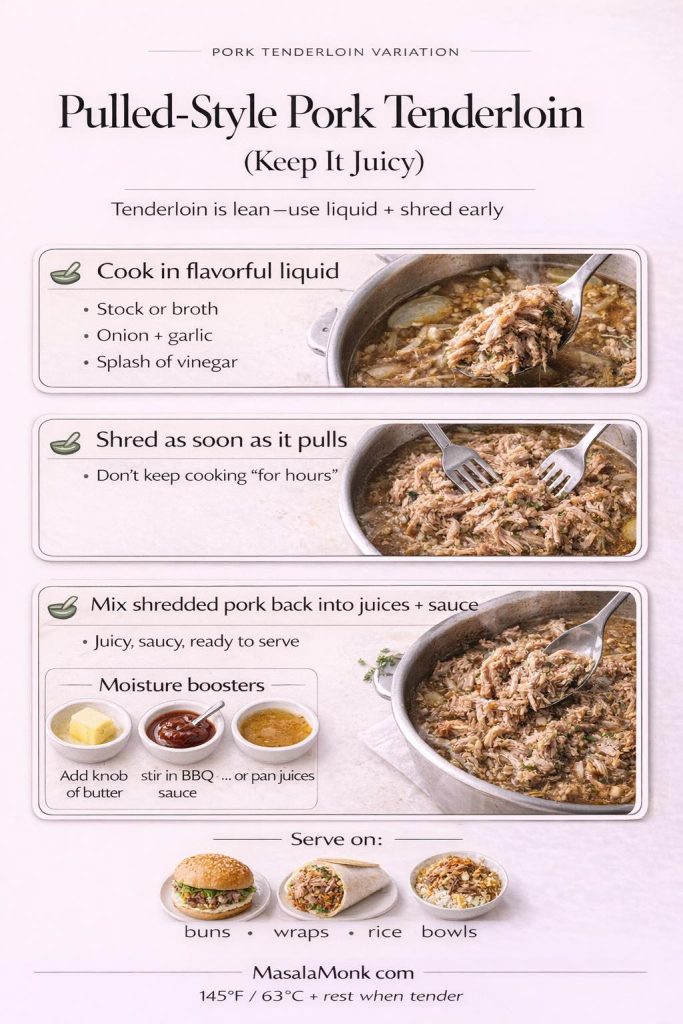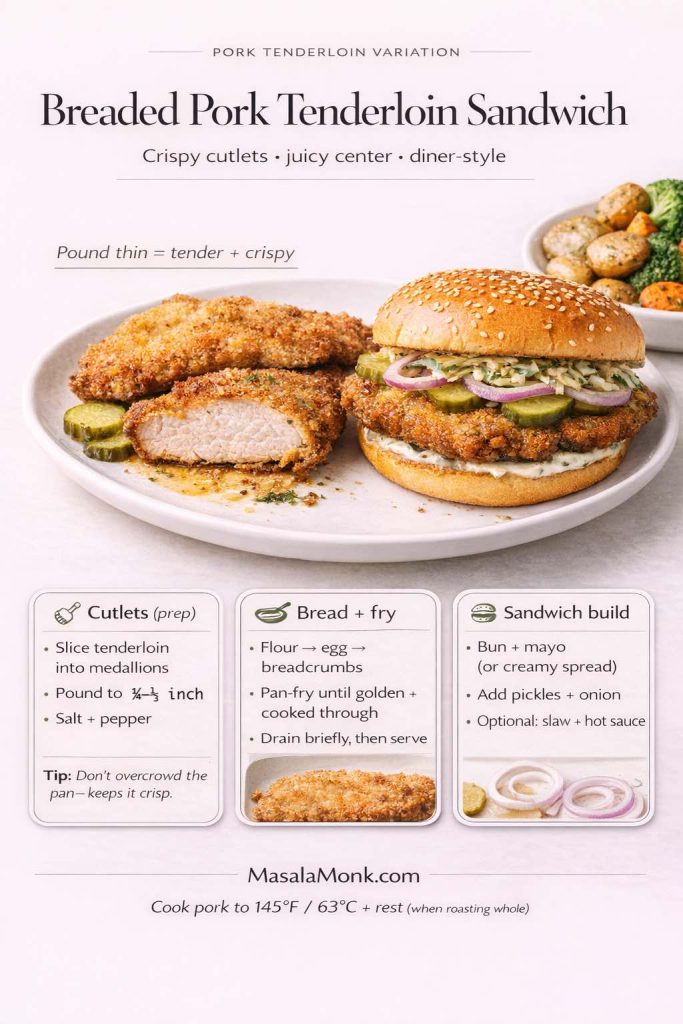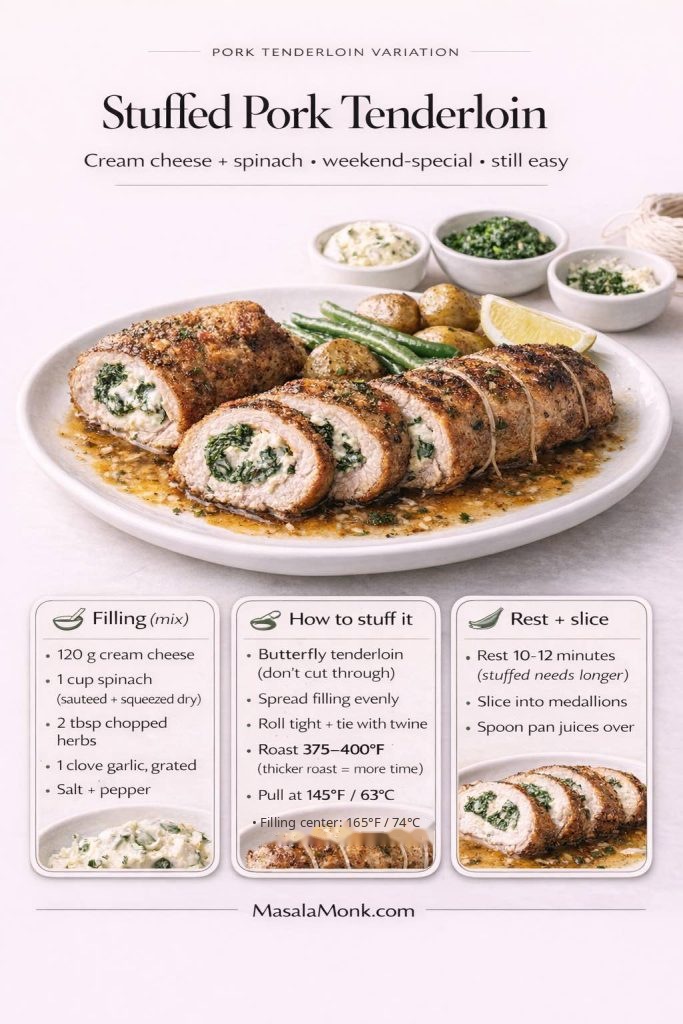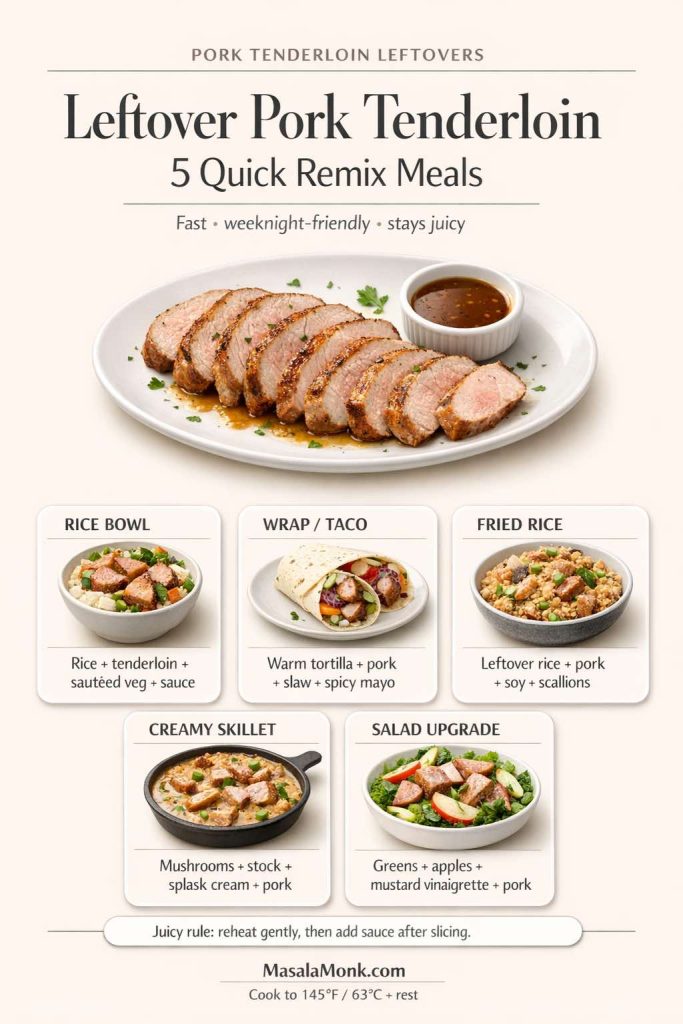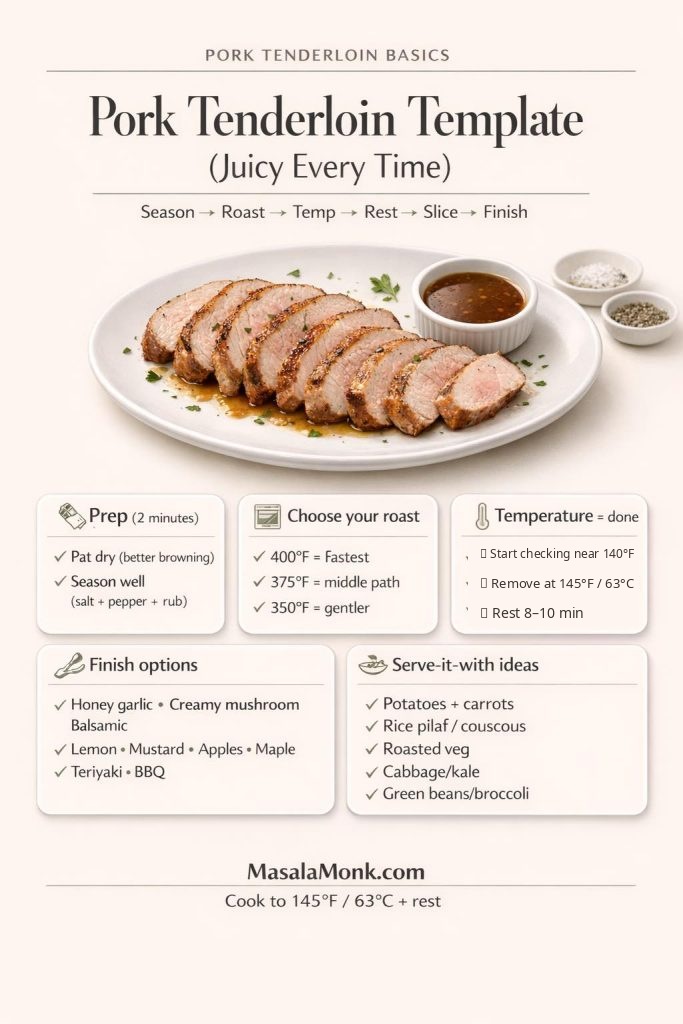
Posted on Leave a comment

Pork Tenderloin Marinade Recipe: Easy, Juicy & Perfect for Grill, Oven or Air Fryer

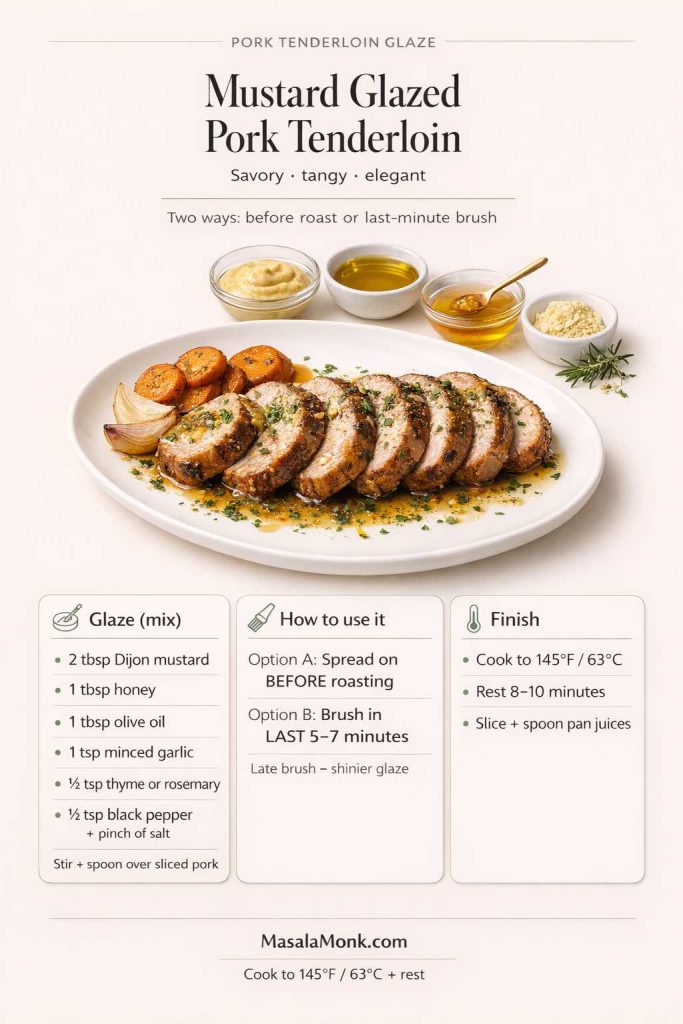
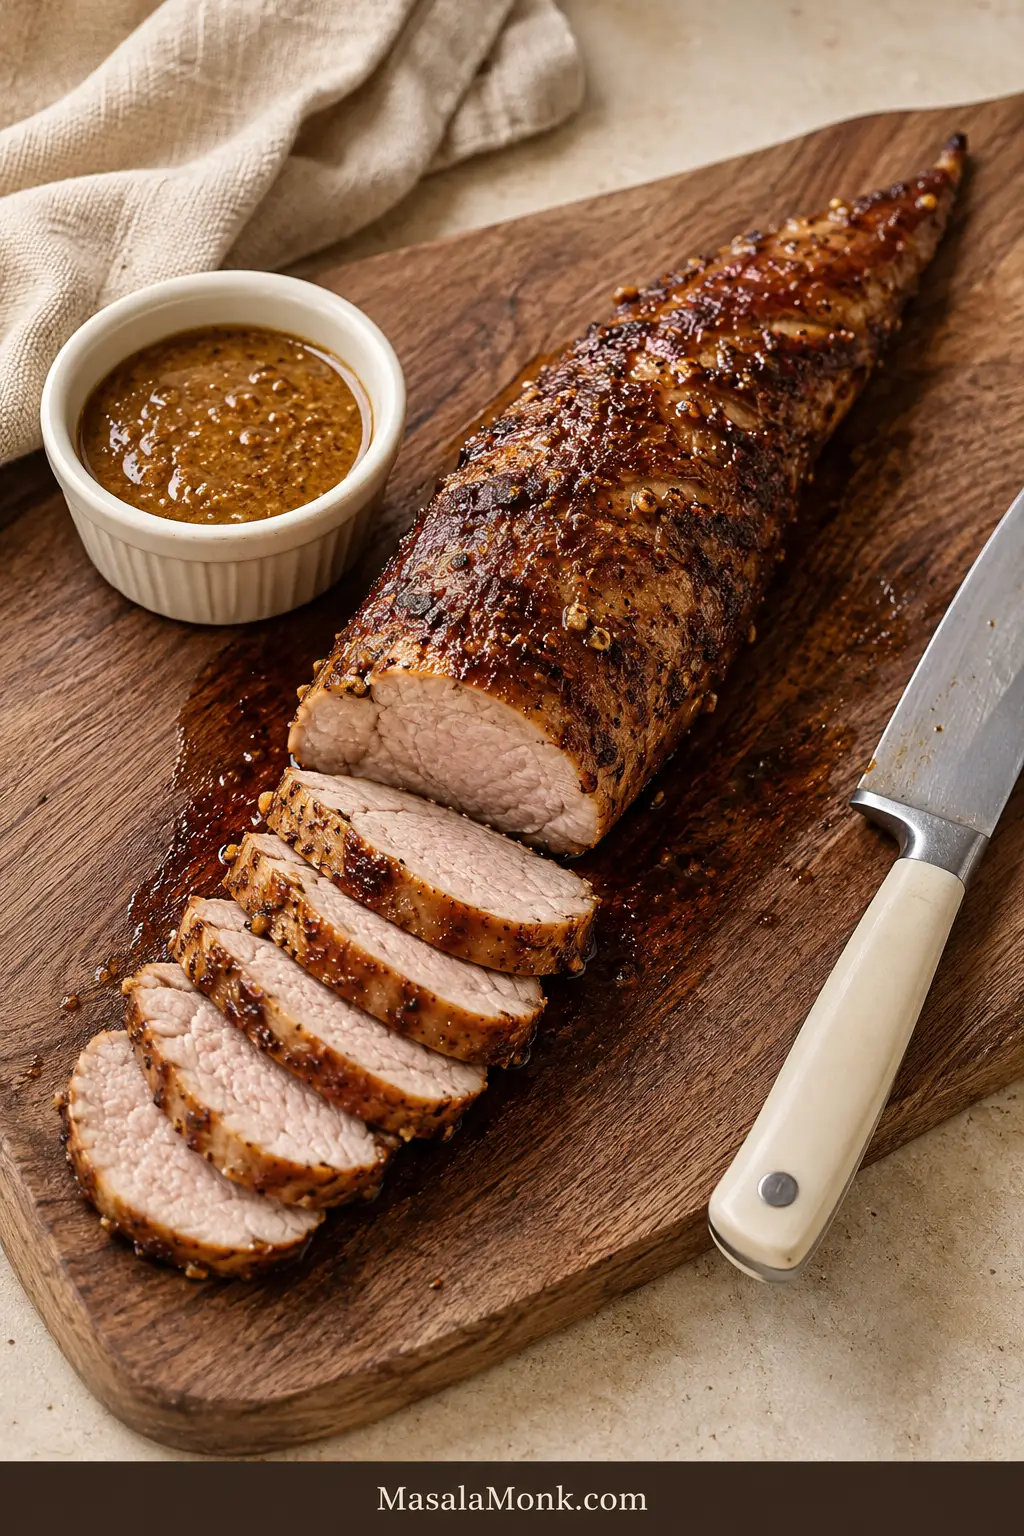
Sliced marinated pork tenderloin with a deep golden-mahogany crust, moist pale center, mustard-style sauce in a ramekin, and carving knife on a walnut board.

A good pork tenderloin marinade should give you savory, garlicky edges, enough sweetness to help the outside caramelize, and slices that still glisten when they reach the plate. It should not require an entire day of planning—and it definitely should not leave you with beautifully browned pork that somehow turned dry in the middle.

Pork tenderloin is naturally tender. The bigger risks are simpler: too much salt, a marinade that gets harsher with time, or leaving this very lean cut over the heat after the center is ready.

The marinade itself is a quick whisk-and-pour job, which makes this one of those dinners that can look like you worked much harder than you did. Even 30 minutes gives the outside noticeable seasoning, while 8–12 hours works when overnight prep is easier.

One thick tenderloin or two skinny ones, oven, grill or air fryer—you can adjust for what is actually in front of you without guessing.

Marinate for flavor. Cook for juiciness.

Quick Answer: How Long Should You Marinate Pork Tenderloin?

For this soy-Dijon marinade, 30 minutes gives the outside noticeable flavor, 2–4 hours is an easy same-day target, and 8–12 hours works for overnight prep.

Different marinades need different timing. A much more acidic mixture—or one made with fresh pineapple—should not automatically get the same overnight treatment.

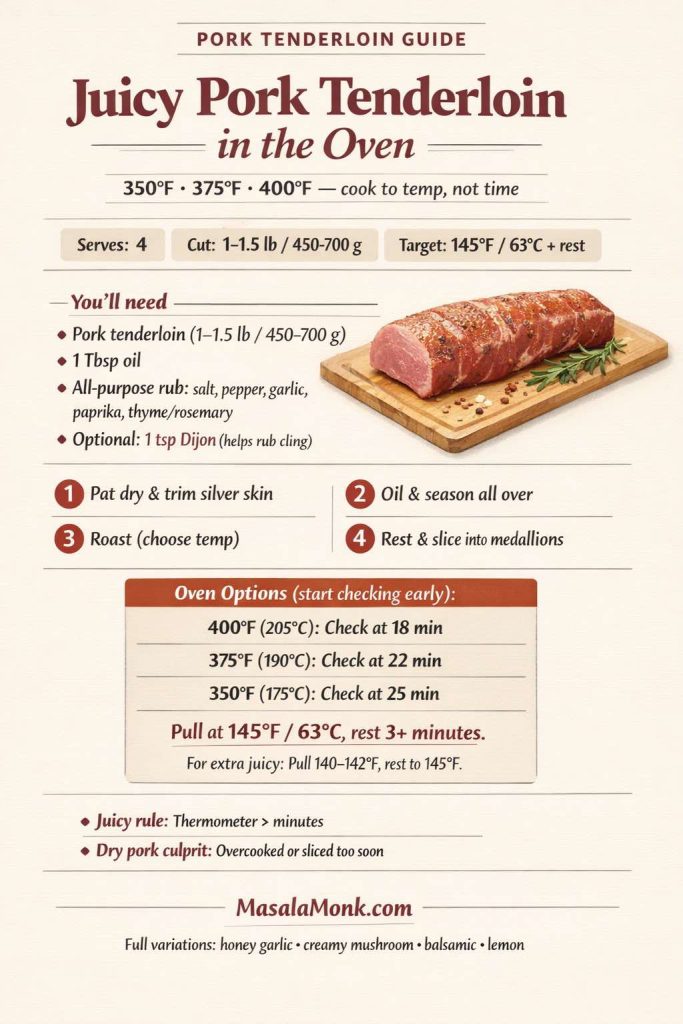
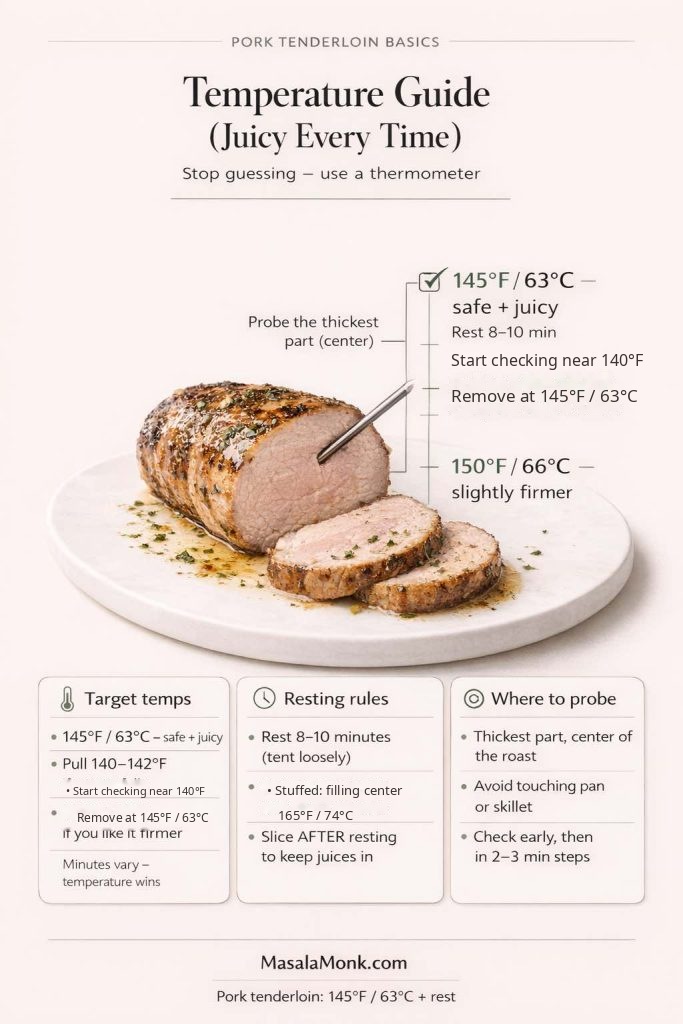
Once cooking begins, the timer tells you when to start checking; the thermometer tells you when to stop. Cook the thickest part to 145°F / 63°C. Rest the tenderloin for 5 minutes; the USDA safety minimum after reaching 145°F is at least 3 minutes.

Pork Tenderloin Marinade Recipe

This recipe is written for 1 lb / 454 g of plain pork tenderloin. If yours is close to that weight and you have an instant-read thermometer, make it as written and you’re set. The deeper notes are there for the nights when your pork, timing or appliance behaves differently.

Recipe at a Glance

Base pork weight1 lb / 454 g
Marinade prepQuick whisk-and-pour
Marinating window30 minutes to 12 hours
Oven400°F / 205°C
Grill400–450°F / 205–230°C, with a cooler zone
Air fryer400°F; use 200°C on models that use Celsius
Final internal temperature145°F / 63°C in the thickest part
Rest5 minutes
Serves3–4

Equipment: a large zip-top food bag or snug nonreactive container, small mixing bowl or measuring jug, whisk or fork, tongs and an instant-read meat thermometer.

Ingredients

  • 1 lb / 454 g plain pork tenderloin
  • 2 tbsp / 30 ml low-sodium soy sauce
  • 2 tbsp / 30 ml olive oil or avocado oil
  • 1 tbsp / 15 g Dijon mustard
  • 1 tbsp / about 12 g packed light brown sugar
  • 1 tbsp / 15 ml apple cider vinegar
  • 2 medium garlic cloves / about 6 g, finely grated or minced
  • ½ tsp / about 1 g black pepper
  • ½ tsp dried thyme or oregano

No extra salt is needed. Low-sodium soy sauce already handles most of the seasoning. Full-sodium soy, a salty rub or pork packed with a seasoning solution can push the finished tenderloin much saltier than expected.
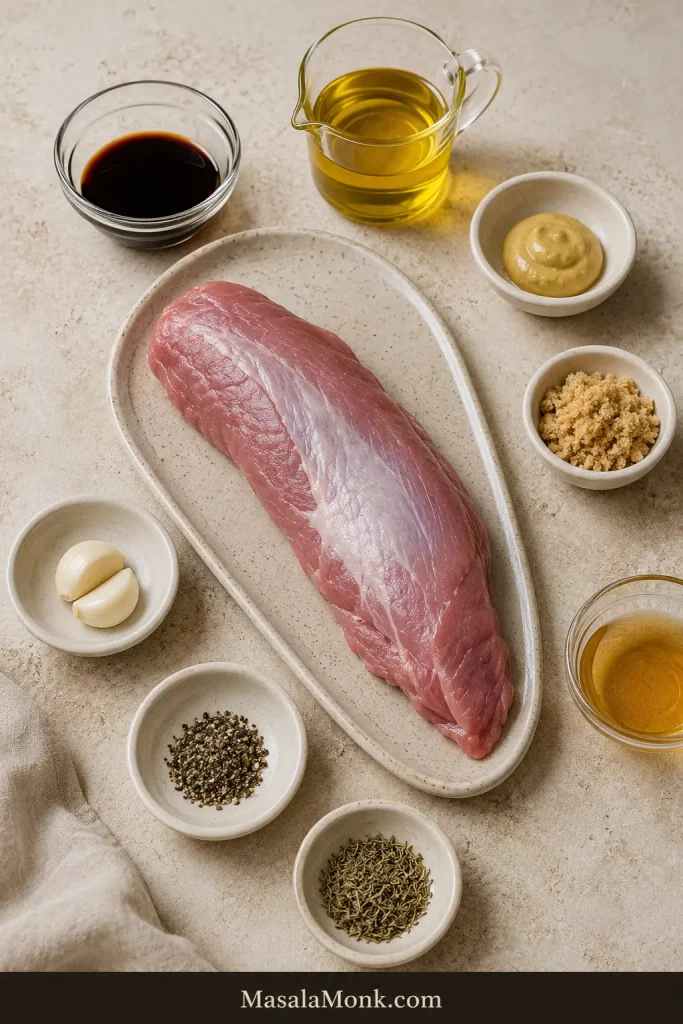
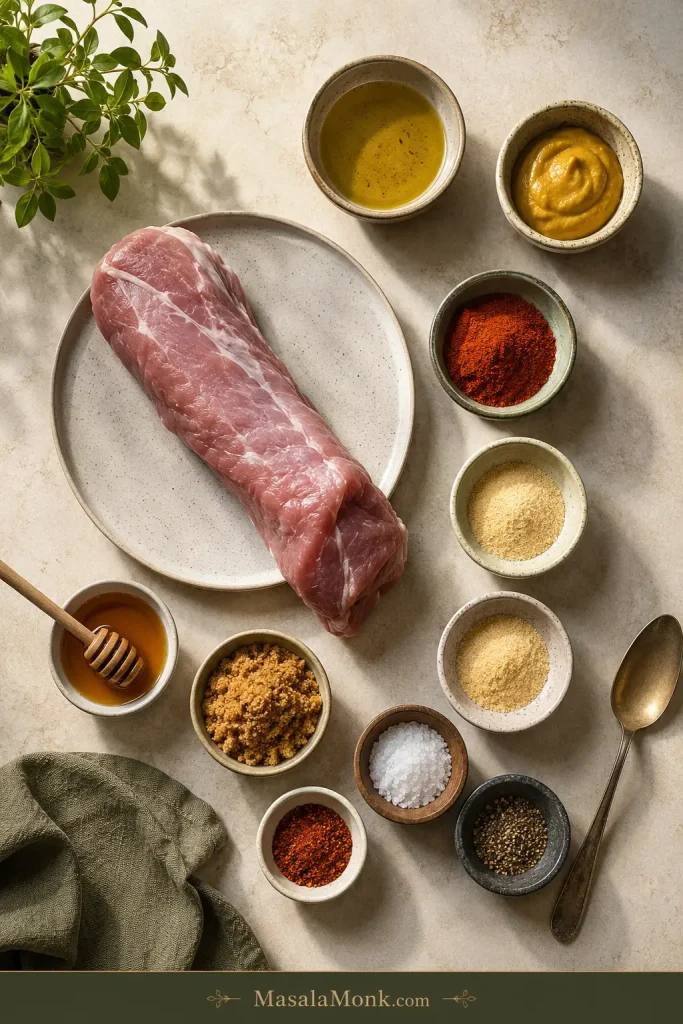
Pork tenderloin marinade ingredients around a raw tapered tenderloin: soy sauce, oil, Dijon, brown sugar, vinegar, garlic, pepper and herbs.
A snug coating is enough. Pork tenderloin does not need to sit submerged in marinade for the surface to be evenly seasoned.

Method

  1. Check the cut and label. Make sure you have pork tenderloin, not pork loin. If the package is pre-seasoned or enhanced, or says it contains a seasoning solution, check the sodium before adding this marinade.
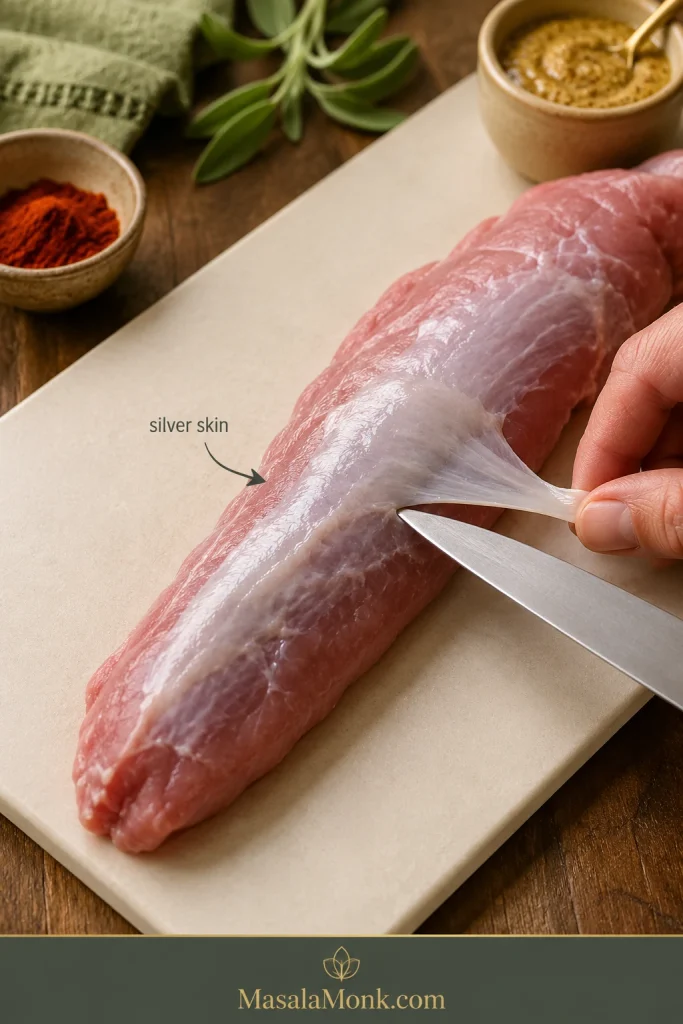
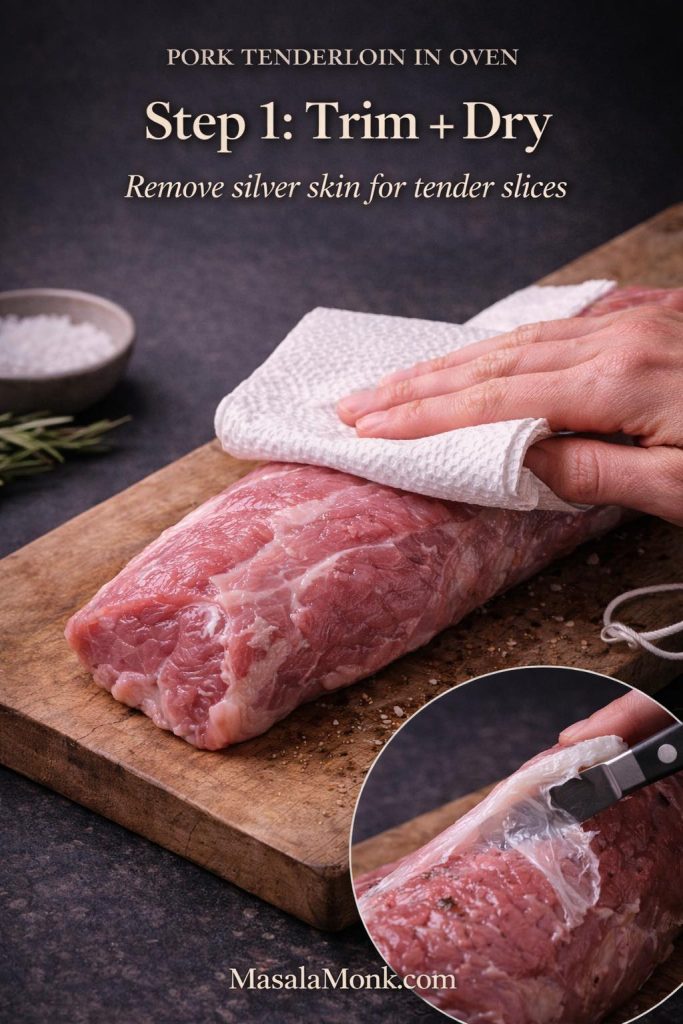
  2. Trim the silver skin. Slip a sharp knife just underneath the shiny membrane, angle the blade slightly upward and slice it away without digging deeply into the meat.
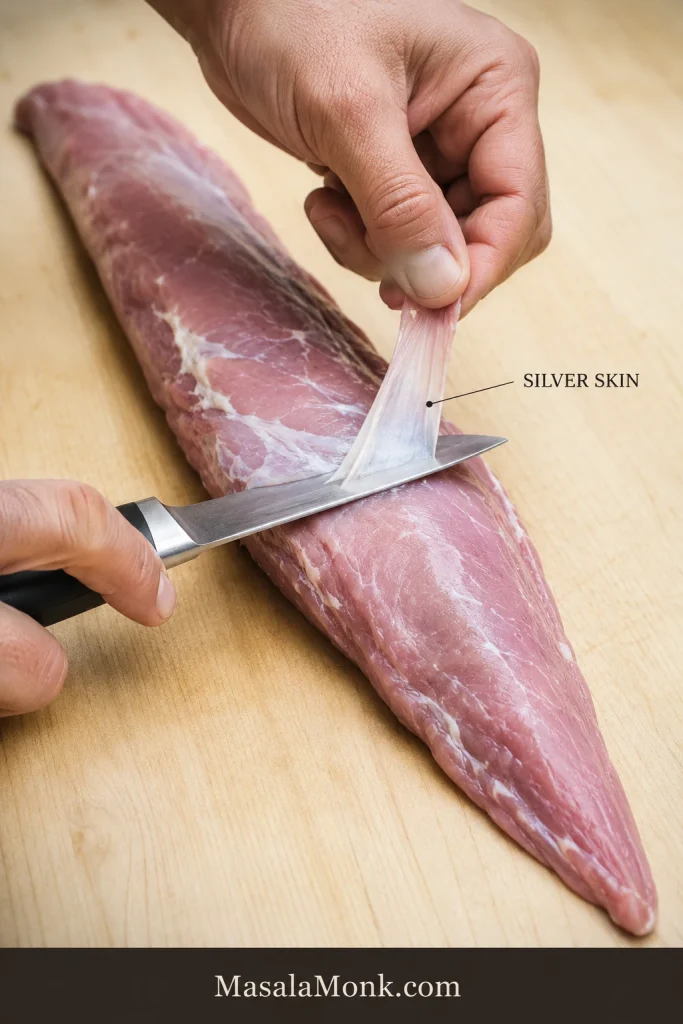
Hands trimming shiny silver skin from a raw tapered pork tenderloin with a knife angled beneath the membrane.
Silver skin feels firm and papery, unlike softer fat. Trim the shiny membrane without carving away good meat underneath.
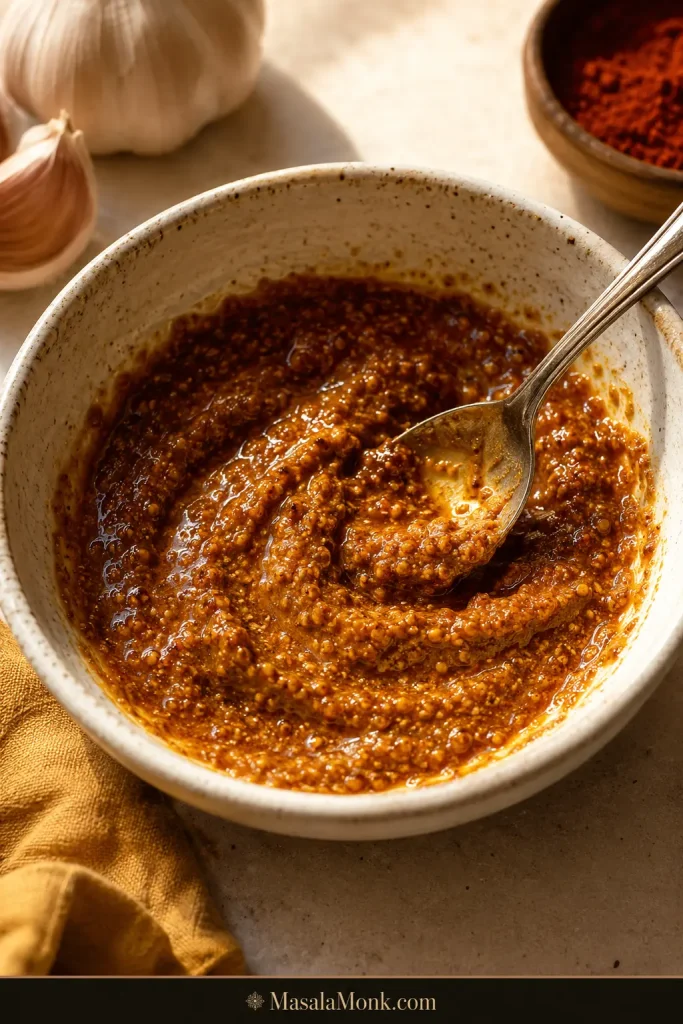
  1. Whisk the marinade. Combine the soy sauce, oil, Dijon, brown sugar, vinegar, garlic, pepper and herbs until smooth and the sugar is mostly dissolved. It should smell savory and garlicky first, with a light tang behind it.
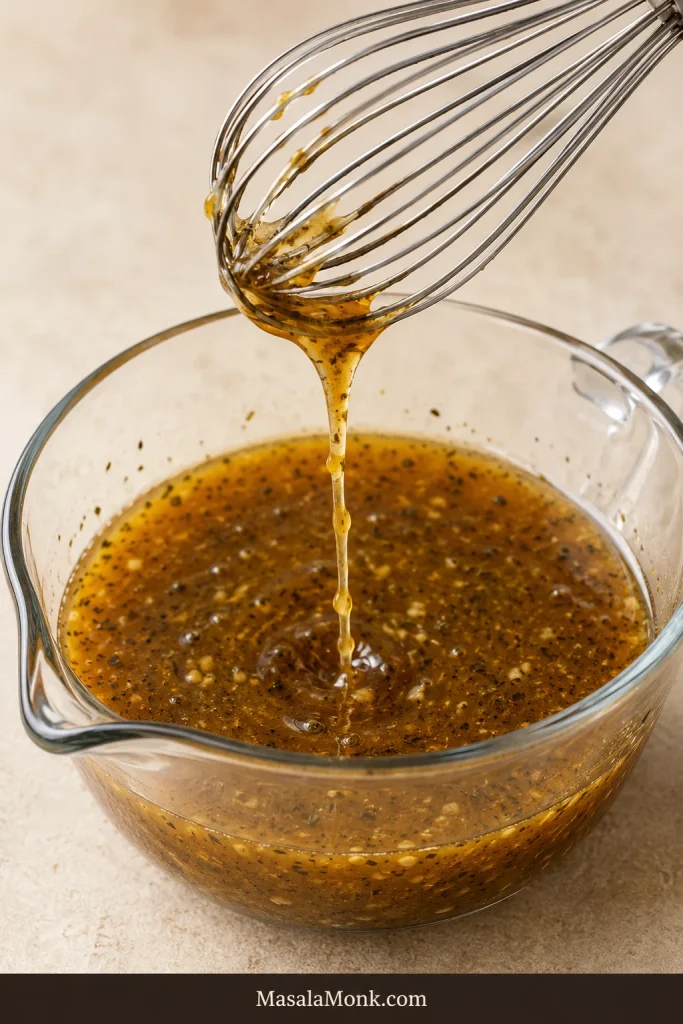
Thin amber-brown pork tenderloin marinade with garlic and herb flecks streaming from a whisk into a glass bowl.
The marinade should stream off the whisk, not cling like a glaze. If it turns sticky, it can scorch faster over high heat.
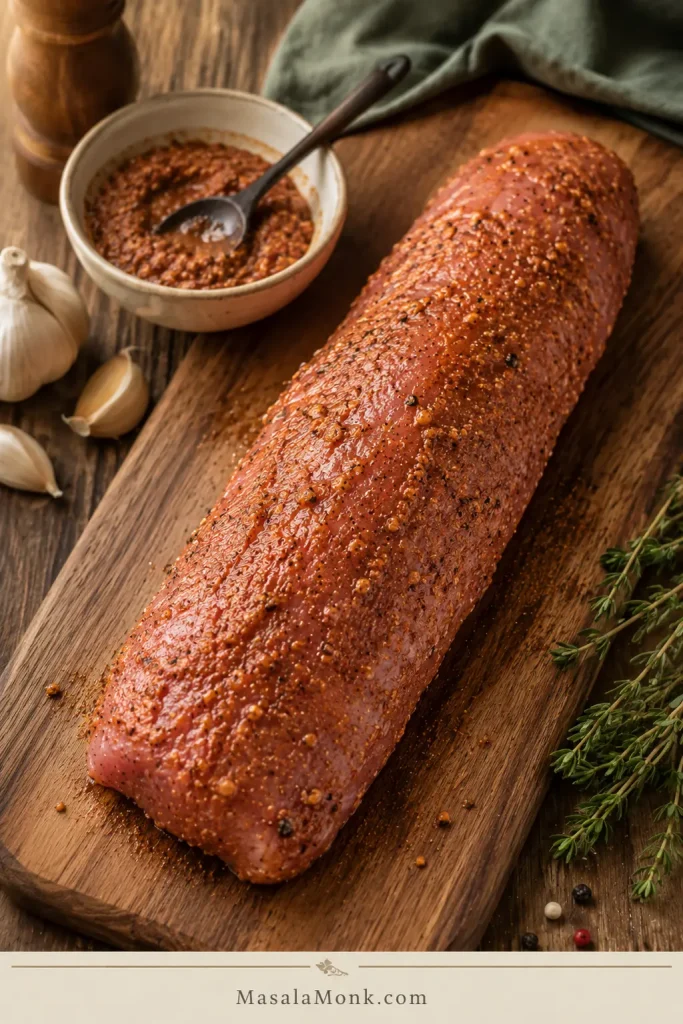
  1. Coat the pork. Put the tenderloin in a snug bag or container, add the marinade and turn until every side has a thin, even coating. The meat does not need to be submerged.
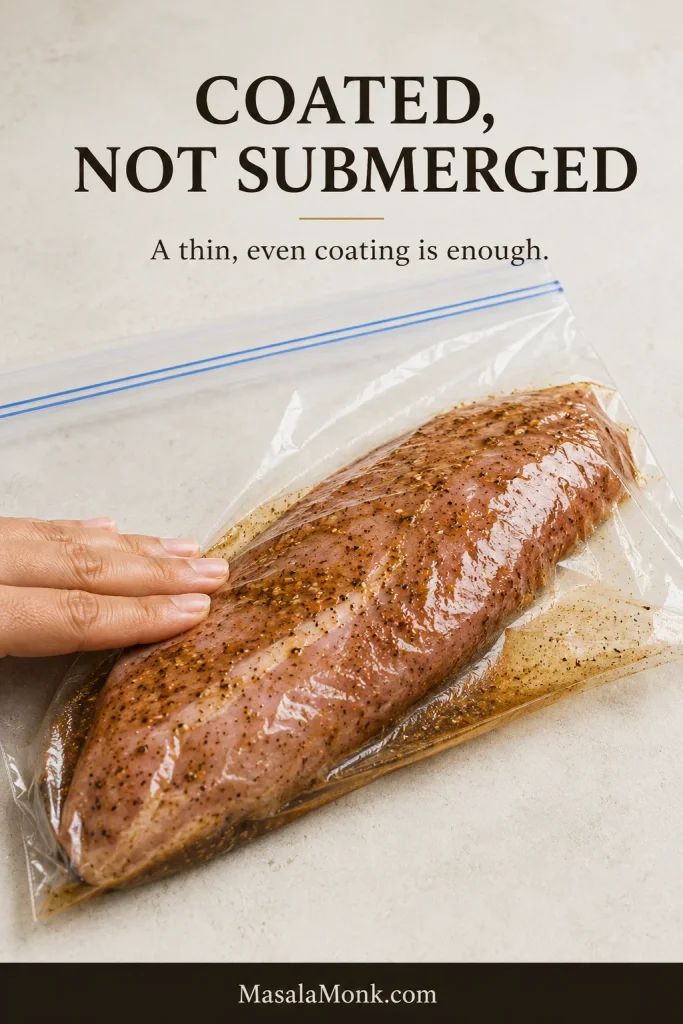
Raw pork tenderloin in a zip bag evenly coated with pork tenderloin marinade, with only a small amount pooling below.
A snug bag keeps a modest amount of marinade against the meat. Even coverage matters more than a deep pool of liquid.
  1. Refrigerate. Marinate for 30 minutes to 12 hours.
  2. Drain before cooking. Let the loose marinade run off. Pat the pork especially dry if you’re searing it before roasting.
  3. Choose your cooking method. Use the oven, grill or air-fryer directions below and cook until the thickest part reaches 145°F / 63°C.
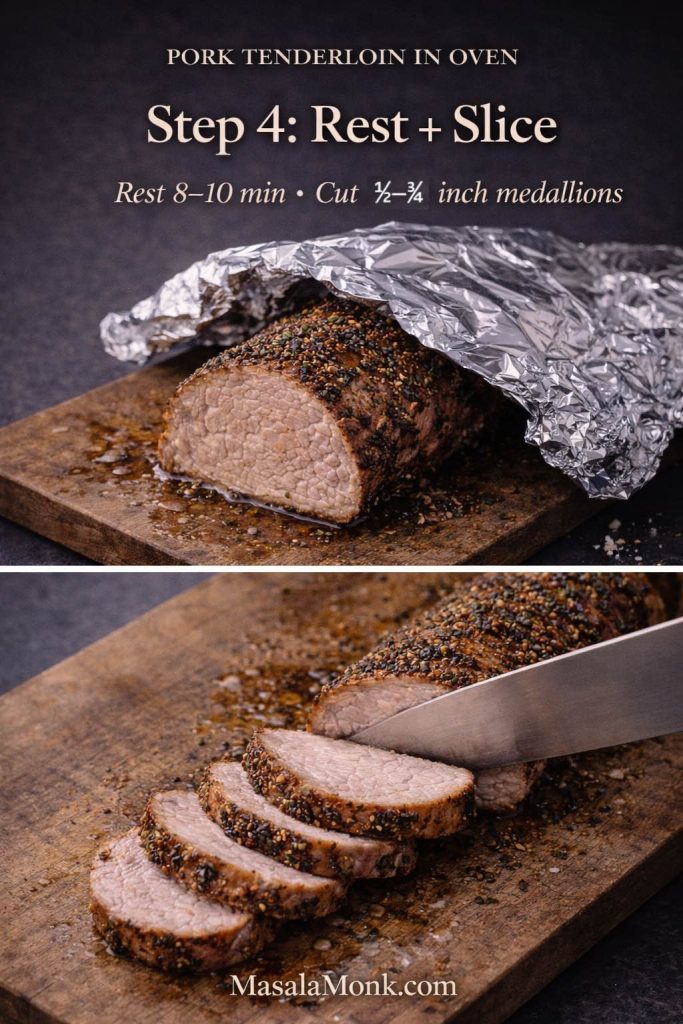
  4. Rest 5 minutes before slicing.

Choose Your Cooking Method

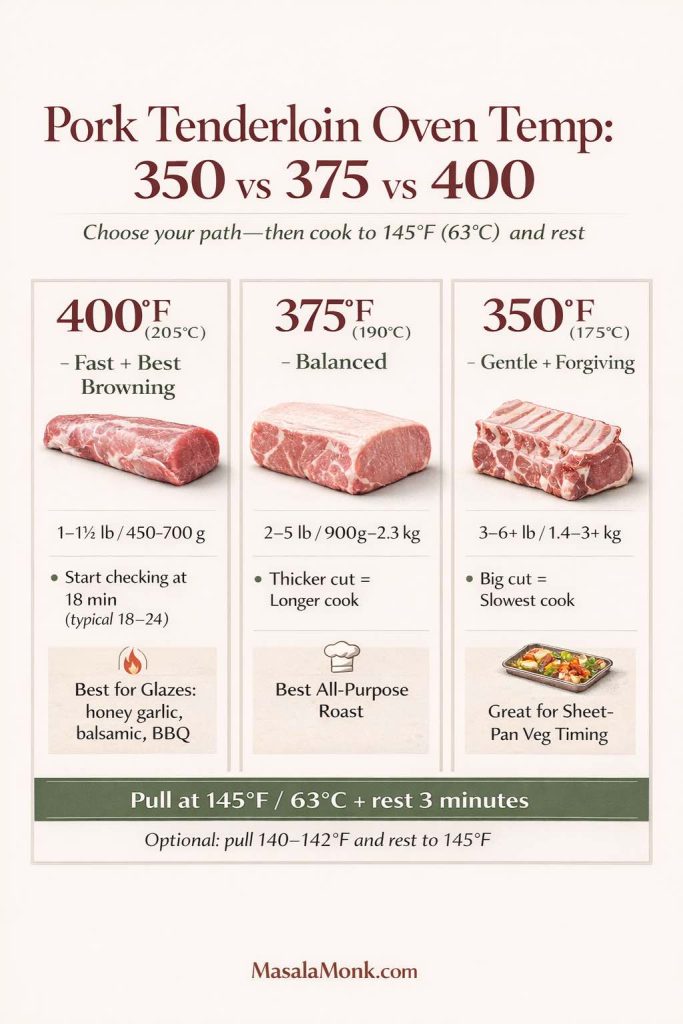
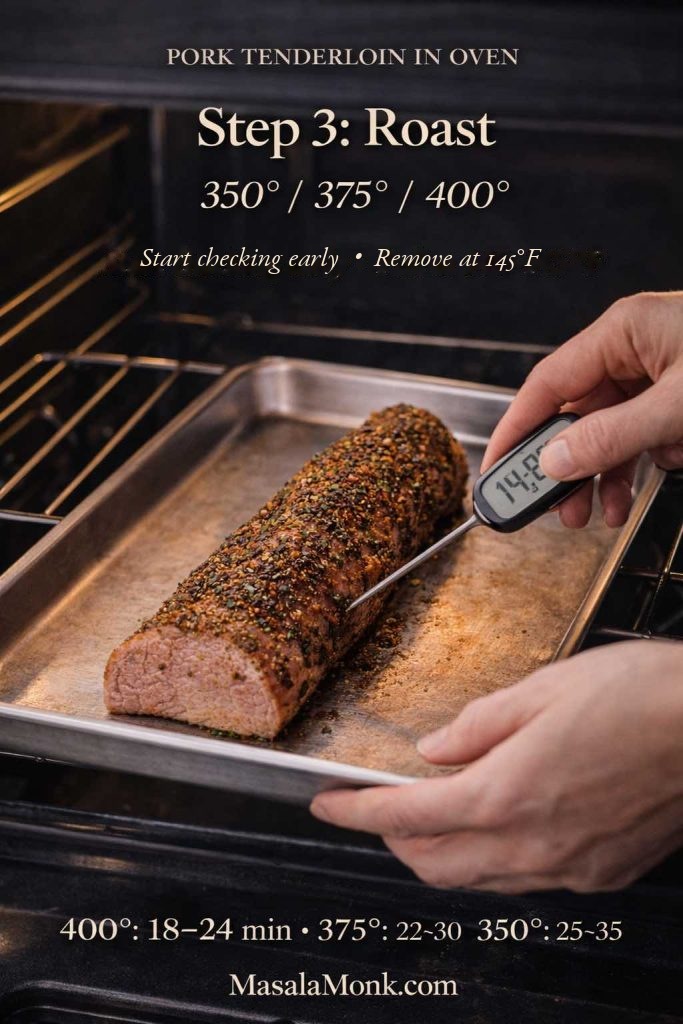
  • Oven: Roast at 400°F / 205°C. For a slim 1-pound tenderloin, begin checking around 18 minutes. Thicker pieces often need longer. Remove at 145°F / 63°C and rest 5 minutes.
  • Grill: Heat the grill to 400–450°F / 205–230°C with a hot side and a cooler side. Brown over direct heat, turning every 2–3 minutes, then move the pork to gentler heat once the crust looks good. Take a temperature reading once that crust is established and remove at 145°F / 63°C.
  • Air fryer: Set it to 400°F, or 200°C on models that use Celsius. Follow your appliance’s own preheating guidance. Turn around 10 minutes, then take the first temperature reading around 14 minutes for a roughly 1-pound tenderloin. Larger or thicker pieces need longer. Remove at 145°F / 63°C and rest 5 minutes.

That’s enough to get dinner on the table. Got a thicker tenderloin, a very hot grill or an air fryer that cooks faster than expected? The notes below cover those cases.

Optional serving sauce

Want extra sauce for the sliced pork? Make this separately so it never touches raw meat:

  • 1 tbsp / 15 ml low-sodium soy sauce
  • 1 tbsp / 15 ml olive or avocado oil
  • 1½ tsp Dijon mustard
  • 1½ tsp brown sugar
  • 1½ tsp apple cider vinegar
  • 1 medium garlic clove, finely grated or minced
  • ¼ tsp black pepper
  • ¼ tsp dried thyme or oregano

Whisk everything together in a small saucepan and warm gently over low heat while the pork rests, just until the sugar dissolves and the sauce looks smooth. Keep it spoonable rather than reducing it into a heavy glaze.

Success Cues: From Marinade to Slice

  • Marinade: savory and garlicky with a clean, gentle tang.
  • After marinating: the pork is coated from end to end without sitting in a deep pool.
  • Before searing: the exterior feels tacky, with no loose marinade running off.
  • On the grill: the crust develops deep roasted, caramelized patches before anything turns bitter-black.
  • After resting: the cut surface looks moist, with a little juice beading on the meat and board.

Need to Adapt the Recipe? Use This Guide

The straightforward version is above. Jump to whatever matches the pork or problem in front of you.


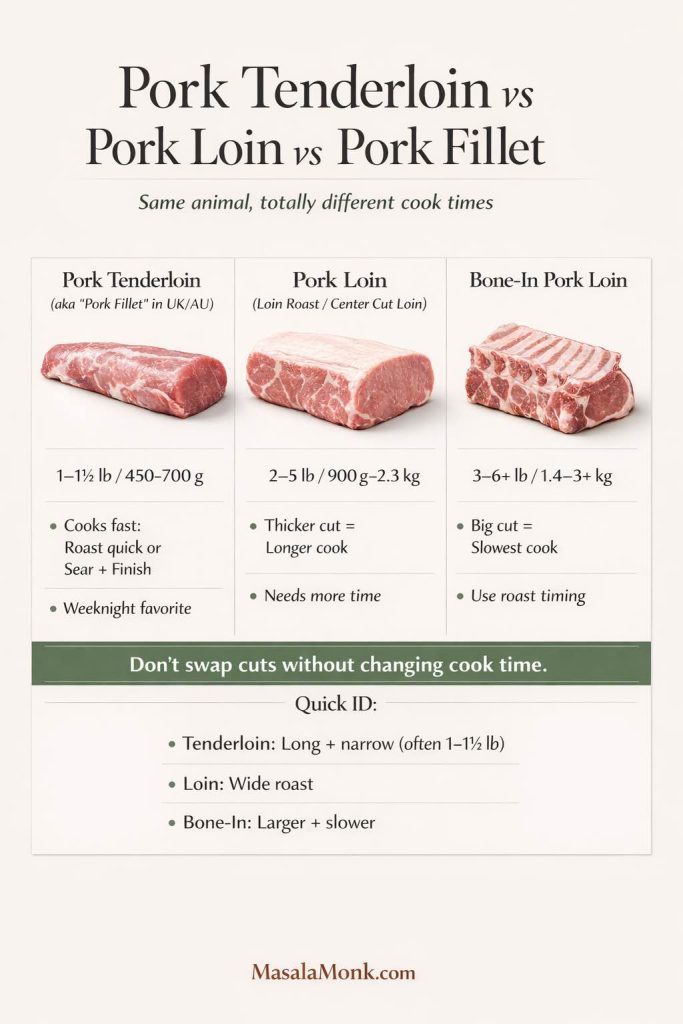
Pork Tenderloin vs Pork Loin, Medallions and Two-Packs

Long, narrow and very lean, pork tenderloin usually has one end tapering noticeably thinner than the other. In many markets, pork fillet is another common name for essentially the same cut.

Pork loin is different. It is broader, heavier and behaves more like a roast. If that’s what you bought, don’t use the tenderloin cooking times below. Our slow cooker pork loin recipe is one option when you want a low-and-slow route.

Medallions need less marinating and far less cooking time. They are usually tenderloin sliced crosswise into rounds, which exposes more surface to the marinade and gives heat a much shorter path through the meat.
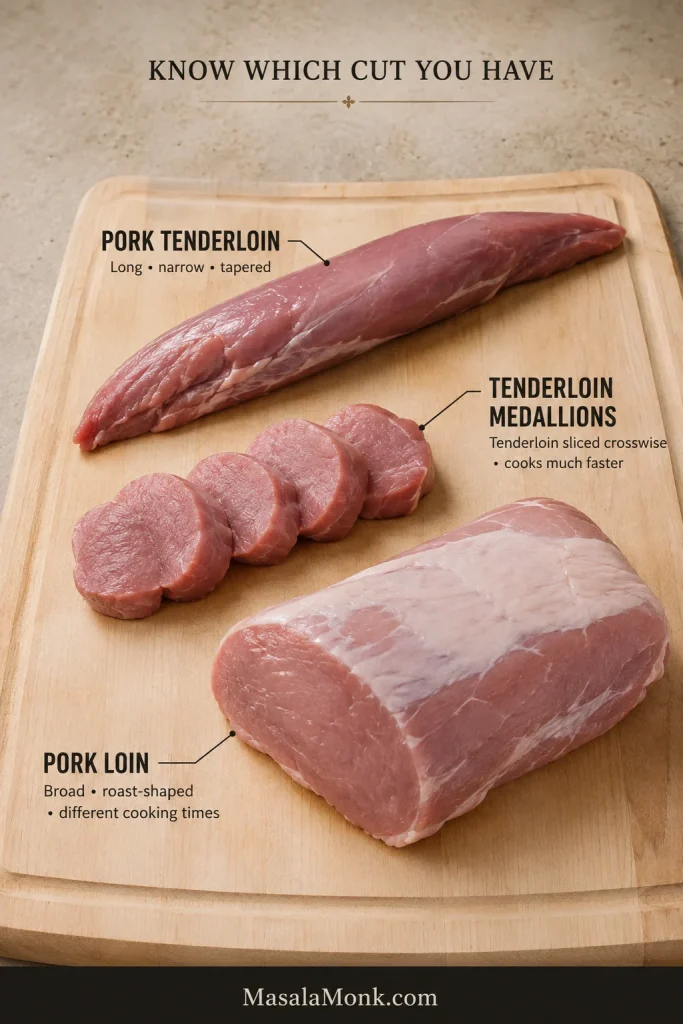
Raw pork tenderloin, tenderloin medallions and a much wider pork loin displayed side by side for comparison.
Tenderloin, medallions and pork loin do not cook on the same timetable. Identify the cut before you borrow any timing advice.

Two tenderloins from the same package rarely finish at exactly the same moment. Check the slimmer one first, pull it when it reaches temperature, and let the thicker piece keep going. Dinner is still on track.
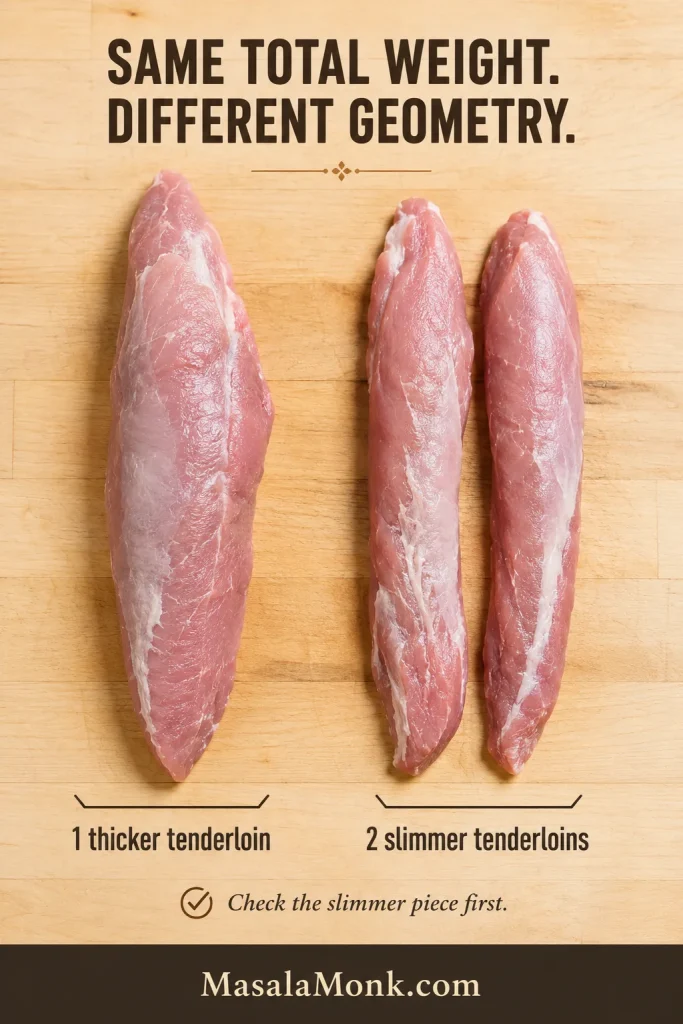
One thick tapered pork tenderloin beside two slimmer tenderloins of roughly similar combined weight.
Two pieces can share one package weight and still finish at different times. Thickness—not the combined weight—drives each center.

Packages marked pre-seasoned, pre-marinated or enhanced—or labeled as containing a seasoning solution—may carry plenty of salt before you add anything. Check the label first. If the pork is already marinated, skip the homemade mixture and go straight to the cooking method you want.

How Much Marinade Do You Need?

If your tenderloin is close to a pound, make one batch and move on. For a noticeably larger or smaller piece, use the table as your starting point, then look at the coating.

Pork weightStarting amount
About 12 oz / 340 g¾ batch
1 lb / 454 g1 batch
About 1¼ lb / 567 g1¼ batches
About 1½ lb / 680 g1½ batches
About 2 lb / 907 gUp to 2 batches; use enough to coat well

A snug bag may coat one larger tenderloin perfectly with less liquid than a broad container. Two smaller tenderloins expose more surface, so they can need a little more marinade to coat comfortably.

Zip the bag, turn the pork and look. Once every side has a light sheen from end to end, you’re there. You are coating pork, not poaching it.
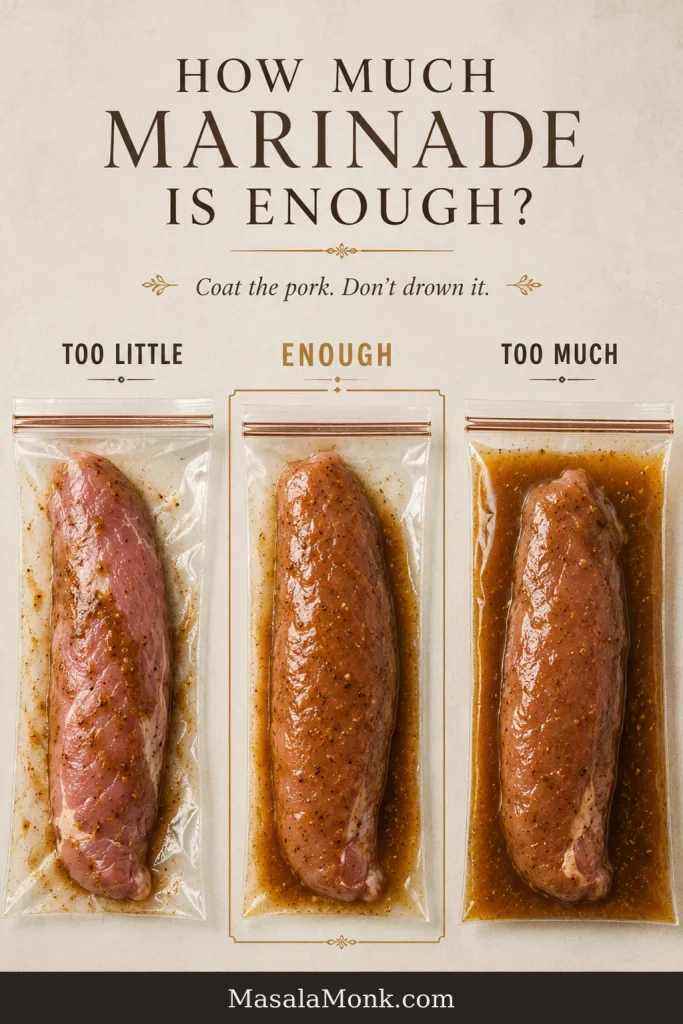
Three bags compare too little, enough and too much pork tenderloin marinade around raw tenderloin.
Before mixing more marinade, turn the bag and redistribute what you have. Dry patches can be a contact problem, not a quantity problem.

A wide casserole dish can make the same quantity look strangely small because the liquid spreads away from the meat. Turn the pork once or twice before deciding you need another batch.
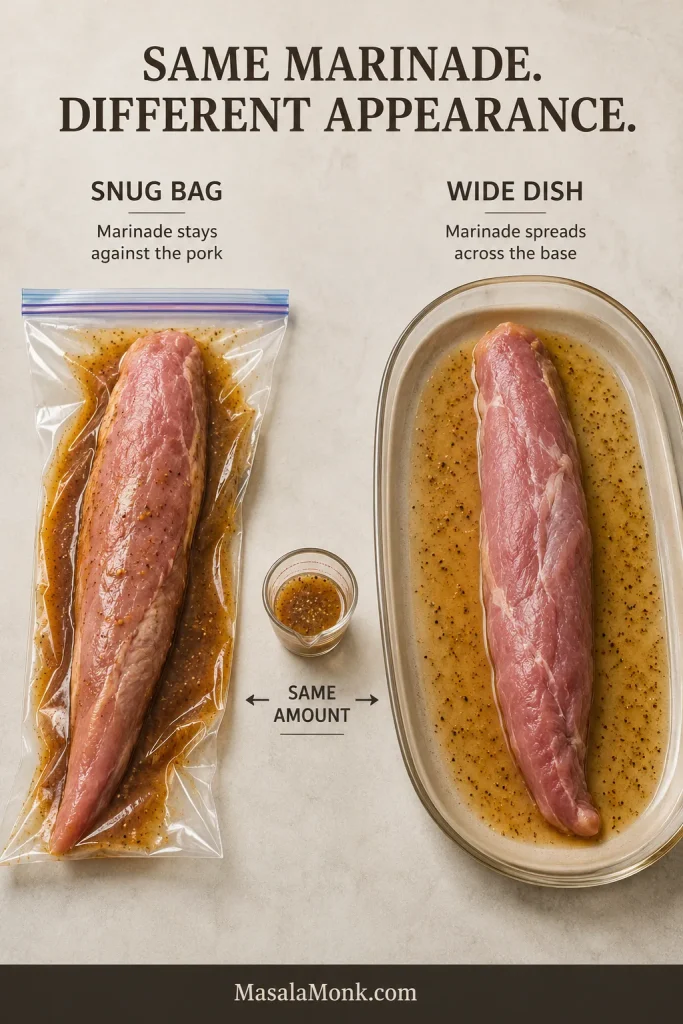
The same pork tenderloin marinade in a snug zip bag and a broad shallow dish, showing different visible liquid depth.
The same marinade looks shallower in a wide dish. A snug bag keeps it close to the pork and saves refrigerator space.

What This Marinade Does

Pork tenderloin does not need a marinade to become tender. This mixture is mainly about seasoning, aroma, balance and giving the outside more flavor when it meets the heat.

Expect savory soy and Dijon first, warm garlic behind them, a little sweetness at the browned edges, and enough vinegar to keep everything lively. The pork should still taste like pork; the marinade is there to make those outer bites better, not bury them.

  • Low-sodium soy sauce supplies salt and savory depth.
  • Dijon adds body and rounded tang.
  • Brown sugar balances the salty-tangy ingredients and encourages deeper browning.
  • Apple cider vinegar keeps the flavor bright.
  • Oil helps everything coat evenly, while garlic and herbs bring most of their aroma to the outer bites.
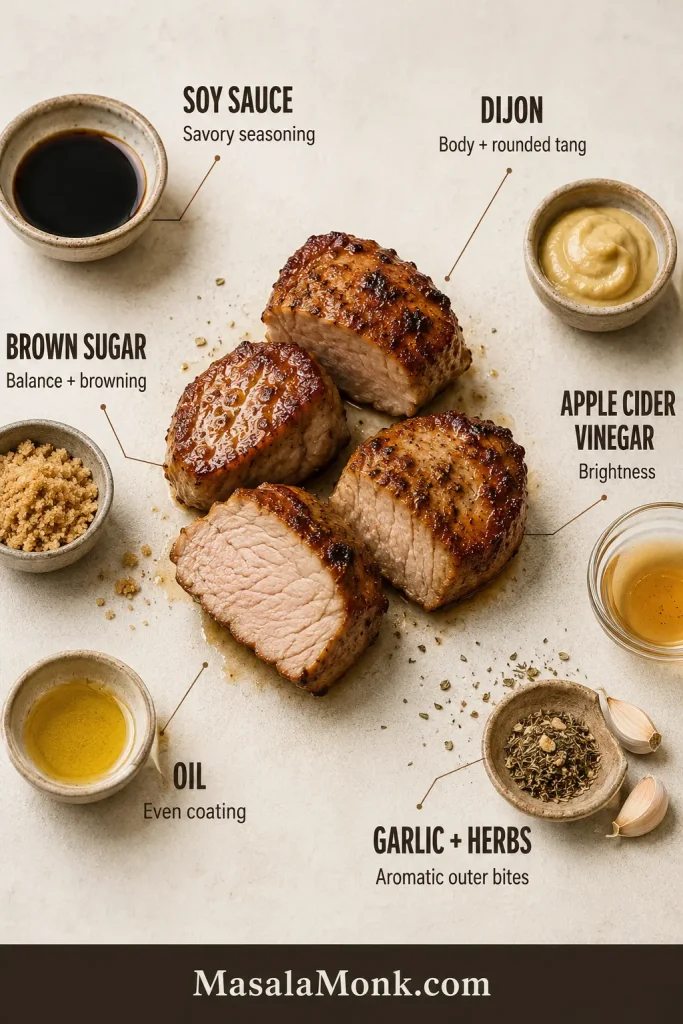
Cooked medallions surrounded by pork tenderloin marinade ingredients, with callouts for soy, Dijon, sugar, vinegar, oil, garlic and herbs.
Most of the marinade’s biggest payoff happens at the surface, where salt, sugar, garlic and heat build the browned, savory edge.

Once that coated surface hits real heat, this is where the marinade earns its keep: the garlic smells toastier, the sugar helps the edges deepen, and the salty-sweet crust becomes much more noticeable than it was in the bag.

Garlic, herbs and mustard still do most of their obvious work near the exterior. A milder center is normal. Slice the pork and bring the serving sauce to the table instead of trying to solve it with days in marinade.
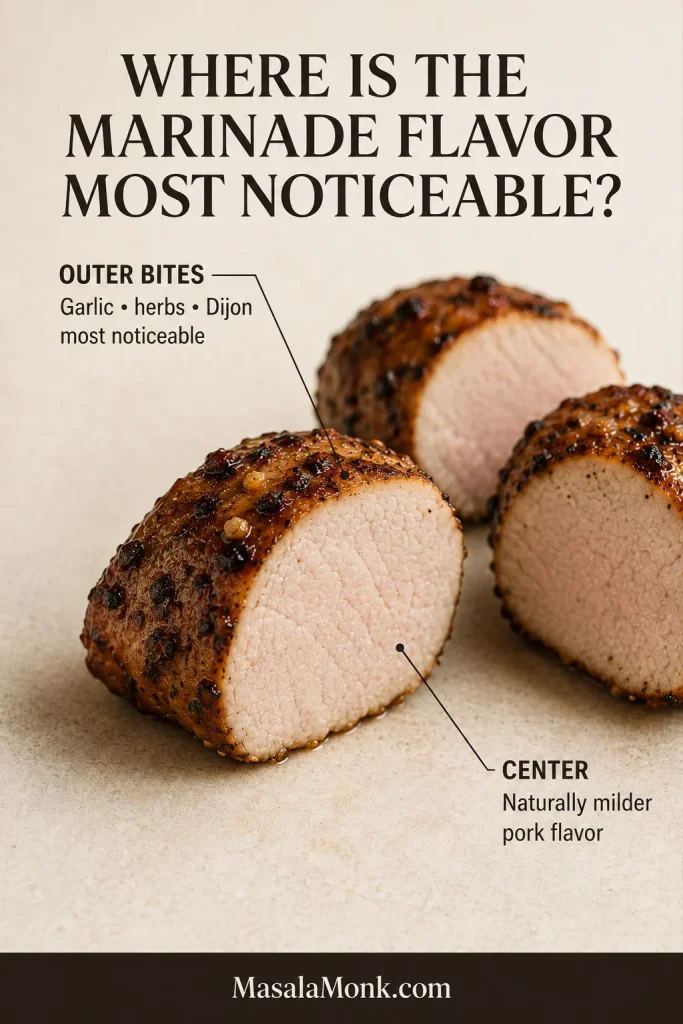
Pork medallions showing a browned outer crust and moist center, with callouts for where pork tenderloin marinade flavor is strongest.
Thinner slices give each bite more seasoned edge; thicker slices emphasize the milder center. Slice thickness changes how strong the marinade seems.

How Long to Marinate Pork Tenderloin

Marinating time belongs to the marinade. A mild soy-Dijon mixture, a citrus-heavy version and fresh pineapple all behave differently.

TimeBest useWhat to expect
30 minutesDinner is closeNoticeable seasoning around the outside
2–4 hoursSame-day prepA fuller, more settled savory flavor
8–12 hoursOvernight prepA convenient make-ahead window for this marinade
LongerUsually unnecessaryMore time without a guaranteed improvement

Anything in between is fine. Ninety minutes works. Six hours works. You haven’t missed a secret window because dinner moved by an hour.
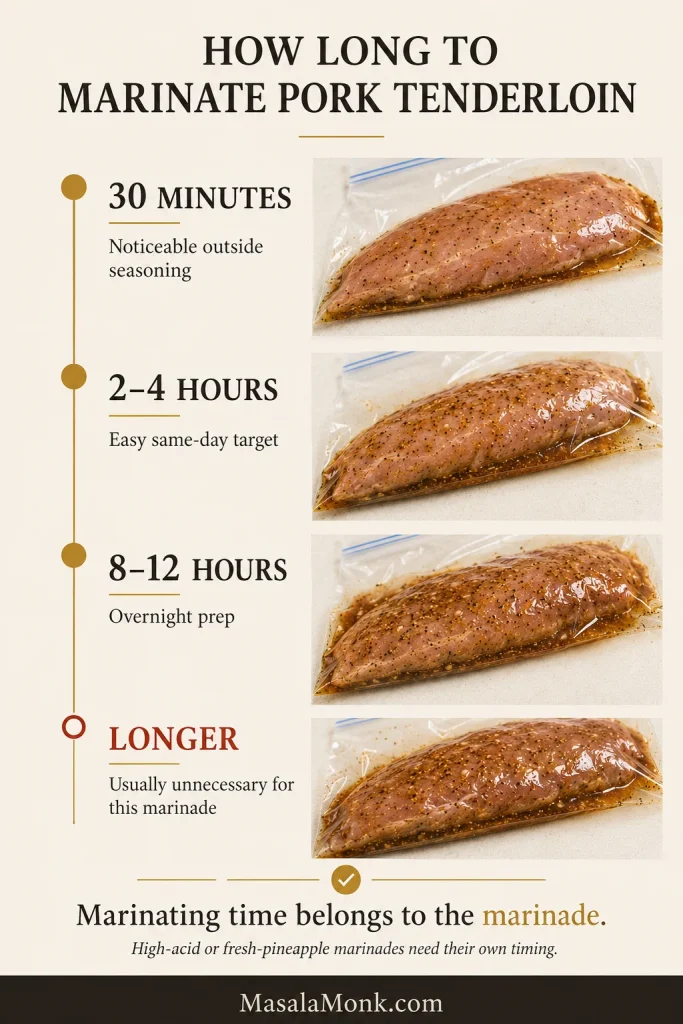
Pork tenderloin marinade timeline showing 30 minutes, 2–4 hours, 8–12 hours and longer.
Use this timeline for this soy-Dijon formula. Stronger acid or fresh pineapple needs a different clock.

Only have 30 minutes? Use them. Dinner is not ruined because you forgot to start at lunchtime. The center will stay milder than the outer bites, but the soy, garlic and mustard still have time to make themselves known.

Can you leave pork tenderloin in this marinade too long? Yes. Beyond about 12 hours, there is little reason to keep pushing. Extra salt, acid and time can eventually make the outer layer too salty, oddly firm or unpleasantly soft.

Safe and delicious are two different clocks. Pork can stay safely refrigerated longer than it needs to marinate here. USDA guidance permits pork in marinade in the refrigerator for up to 5 days, but that is a safety allowance—not a flavor or texture recommendation.

Fresh pineapple is different because bromelain can soften meat quickly. Use a separately timed pineapple marinade rather than adding it to this overnight formula.

Once the marinating time is up, the priority changes. Get the surface ready for heat, then let browning and temperature take over.

From Marinade to Heat

Keep the pork refrigerated while it marinates, turning it once if needed so every side stays coated. Any sauce meant for the table should be made separately before the raw pork is involved.

The USDA recommends marinating meat in the refrigerator. If marinade that touched raw pork is reused, bring it to a boil first; otherwise, discard it. See the USDA pork marinating guidance.

How wet should the pork be when it hits the heat?

  • Straight roasting: let the loose marinade drain well.
  • Sear, then roast: pat the exterior fairly dry so it can brown quickly.
  • Grill: let the excess drip away but keep a thin coating on the meat.
  • Air fryer: drain well so liquid does not collect underneath.

There is no need to rinse the pork. A lightly coated surface is exactly what you want.
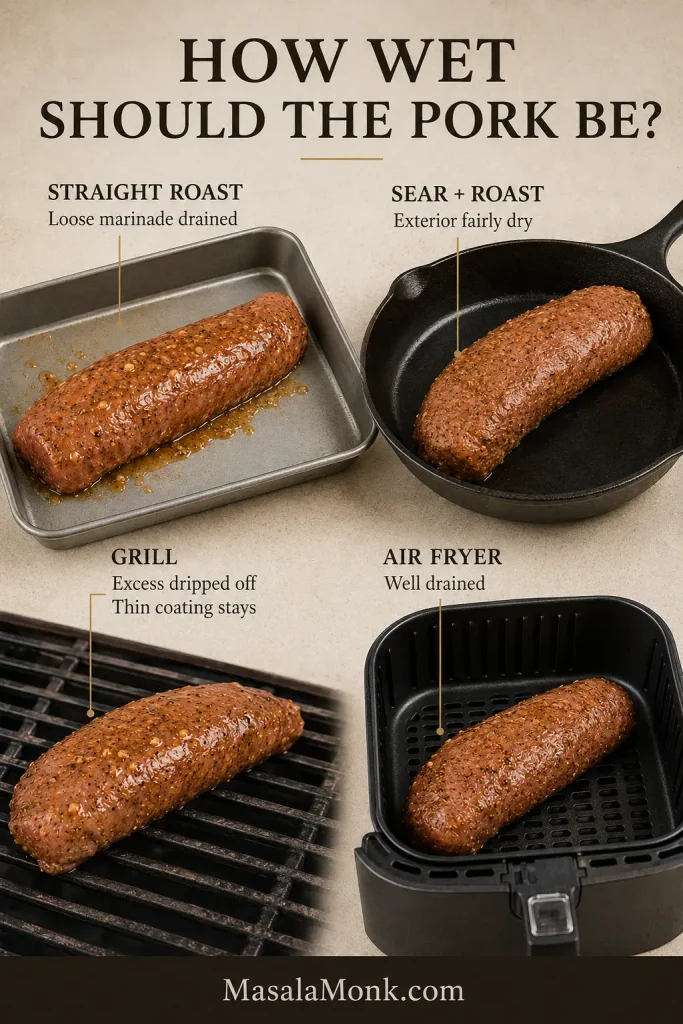
Raw marinated pork tenderloin prepared at four surface-moisture levels for roasting, searing, grilling and air frying.
Loose marinade slows browning. Drain well for roasting and air frying; pat especially dry before a hard sear.

The oven is the easiest controlled route, the grill gives this marinade its most dramatic crust, and the air fryer is hard to beat when speed matters. All three finish at the same place: 145°F / 63°C in the thickest part.

Marinated Pork Tenderloin in the Oven

Roast at 400°F / 205°C. For a slim 1-pound tenderloin, start checking around 18 minutes. Thicker pieces often need longer.

  1. Preheat the oven to 400°F / 205°C.
  2. Let the loose marinade drain away.
  3. Tuck a dramatically thin tail underneath so it does not finish long before the thicker middle.
  4. Place the pork on a lightly oiled rimmed pan or in a small roasting dish.
  5. Give a thicker piece more time and let the thermometer decide the finish.
  6. Remove at 145°F / 63°C and rest 5 minutes.

You’ll smell the garlic and mustard turning toastier before the pork is finished. The edges should deepen to a roasted brown, and by the time the thermometer says stop, the outside should look far more appetizing than the pale marinated pork that went into the oven.
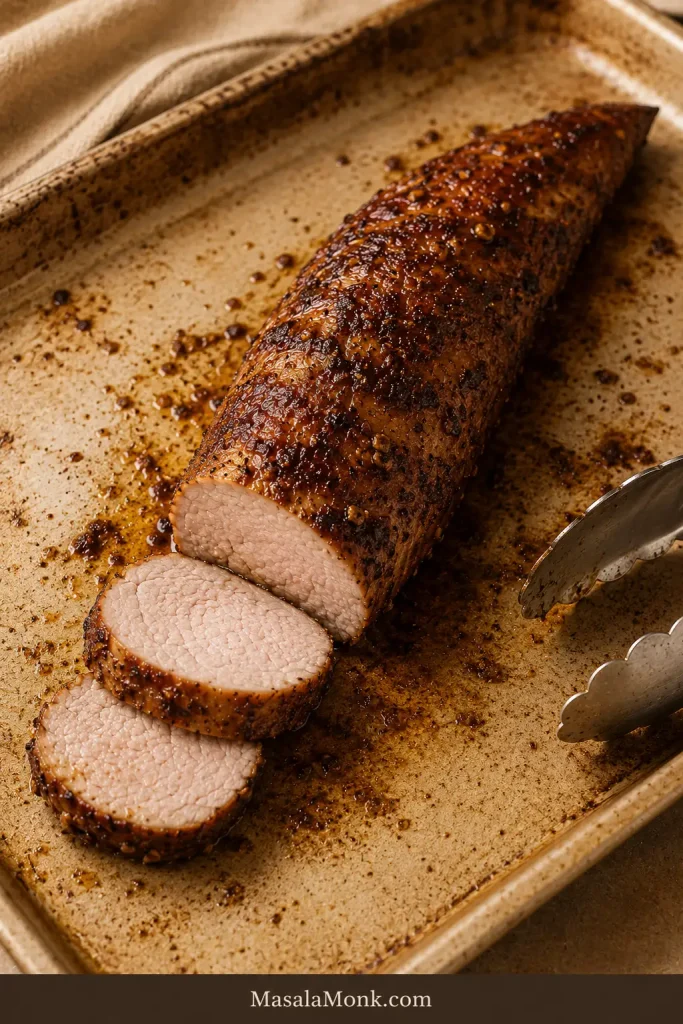
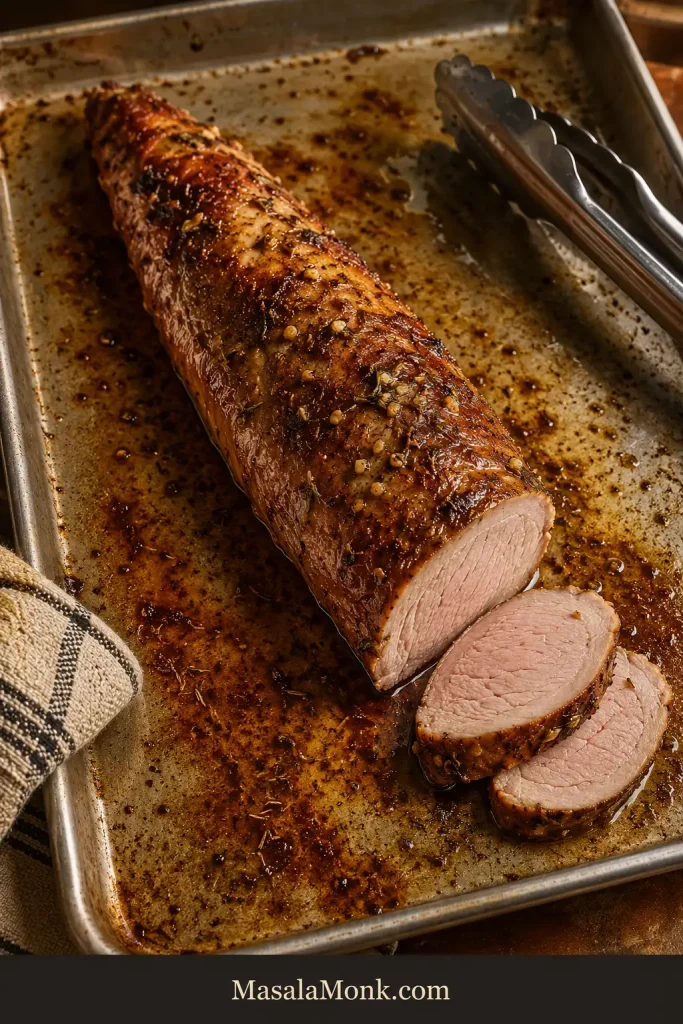
Oven-roasted pork tenderloin with a golden-mahogany crust, moist sliced center and browned cooking juices in the pan.
Those browned pan juices are useful. Spoon a little back over the sliced pork instead of leaving all that flavor behind.

For a Darker Crust: Sear, Then Roast

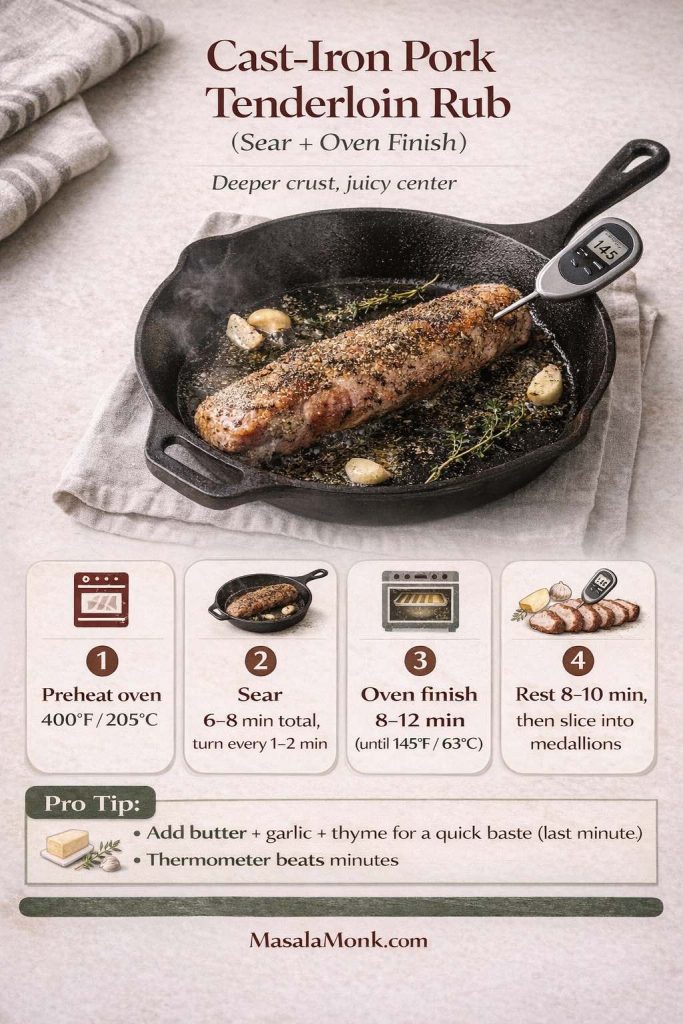
Heat a heavy oven-safe skillet over medium-high heat with a thin film of neutral oil. Pat the tenderloin fairly dry, then let its broad sides turn deep golden, about 1–2 minutes per side.

Move the skillet to the oven once the crust looks good and begin checking sooner than you would with a straight roast. The hot pan has already given the center a head start.
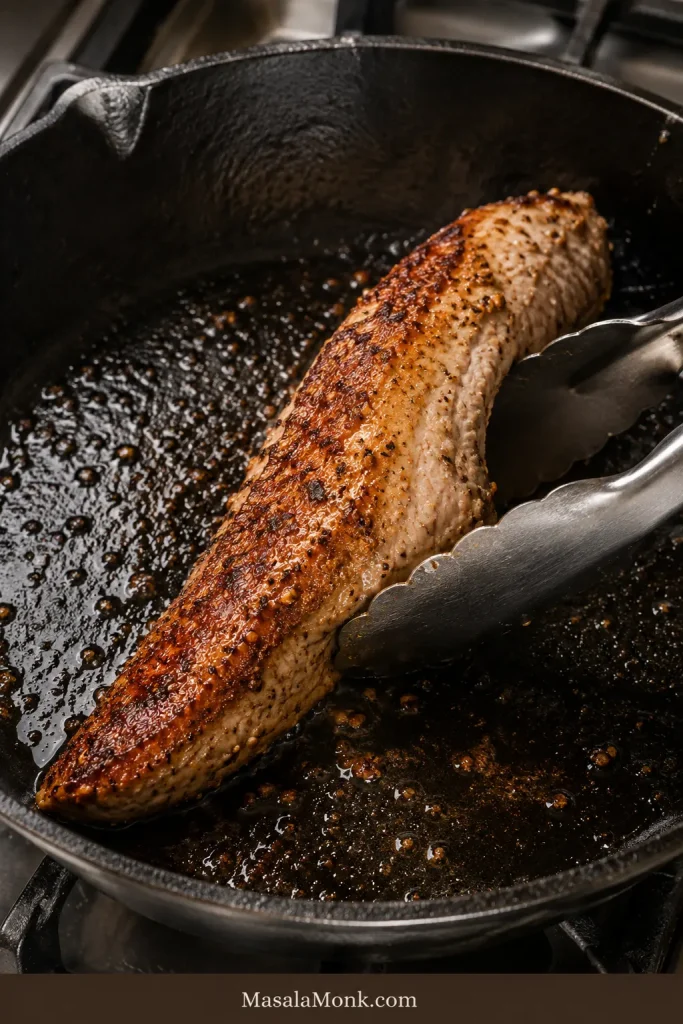
Tongs turning tapered pork tenderloin in a cast-iron skillet, with one side deeply browned and the rest still lighter.
Searing builds crust; it does not seal in juices. Once the exterior is browned, let gentler oven heat finish the center.

Our pork tenderloin in the oven guide goes deeper into oven-specific timing and temperature choices.

Pork Tenderloin Marinade for Grilling

The grill is where this marinade gets its boldest crust. Heat it to 400–450°F / 205–230°C and give yourself both a hot area for browning and a gentler area for finishing.

With gas, lower or switch off one burner. With charcoal, bank most of the coals to one side.

  1. Let the loose marinade drip away before the pork goes on.
  2. Start over direct heat and rotate every 2–3 minutes so several sides develop deep roasted color.
  3. Once the crust looks right, move the tenderloin to the cooler side if the middle still needs time.
  4. Close the lid and let gentler heat finish the center.
  5. Take the first temperature reading once the crust is established. Thickness and grill heat can move the finish time noticeably.
  6. Remove at 145°F / 63°C and rest 5 minutes.
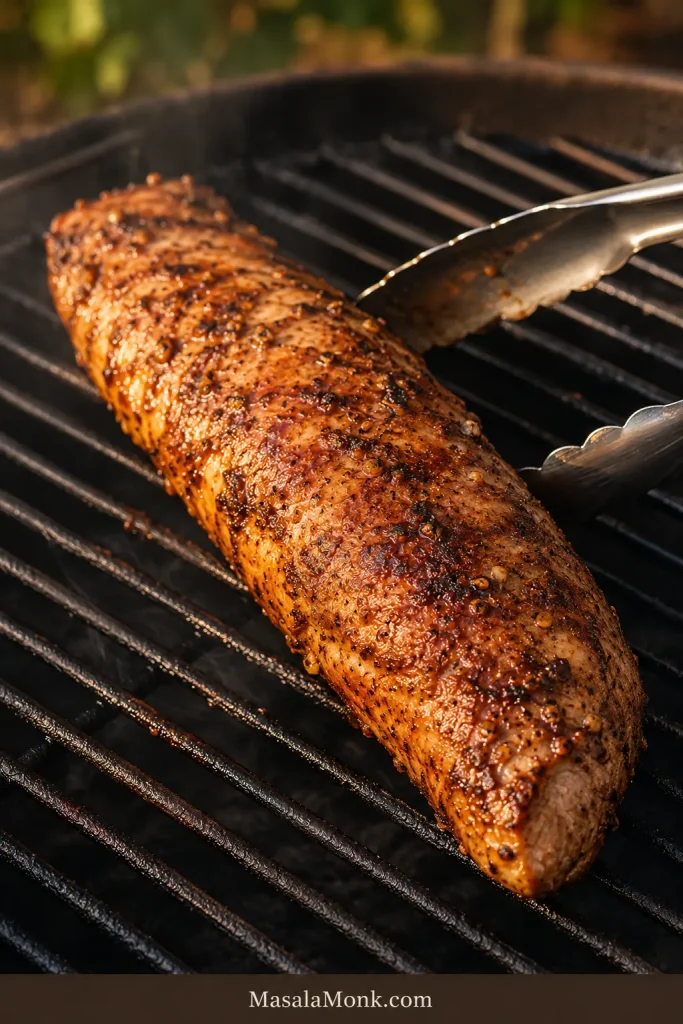
Marinated pork tenderloin on grill grates with irregular golden-mahogany browning, garlic flecks and a visibly tapered shape.
Look for irregular mahogany browning, not perfect black grill marks. Sugar, soy and garlic can turn bitter quickly over aggressive heat.

Beautiful crust, center not ready? Move it to the cooler side. You haven’t ruined anything. The direct heat has already done the browning; now the gentler side can finish the pork without scorching those salty-sweet edges.
Two-zone charcoal grill with browned pork tenderloin moving from the hot coal side to a cooler finishing zone.
Two-zone grilling separates browning from doneness. Once the crust is set, move cooler and let gentler heat finish the center.

Marinated Pork Tenderloin in the Air Fryer

Set the air fryer to 400°F, or 200°C on models that use Celsius. Follow your appliance’s instructions on whether it should preheat first; air fryers vary enough in size and power that cook times should be treated as starting points, not promises.
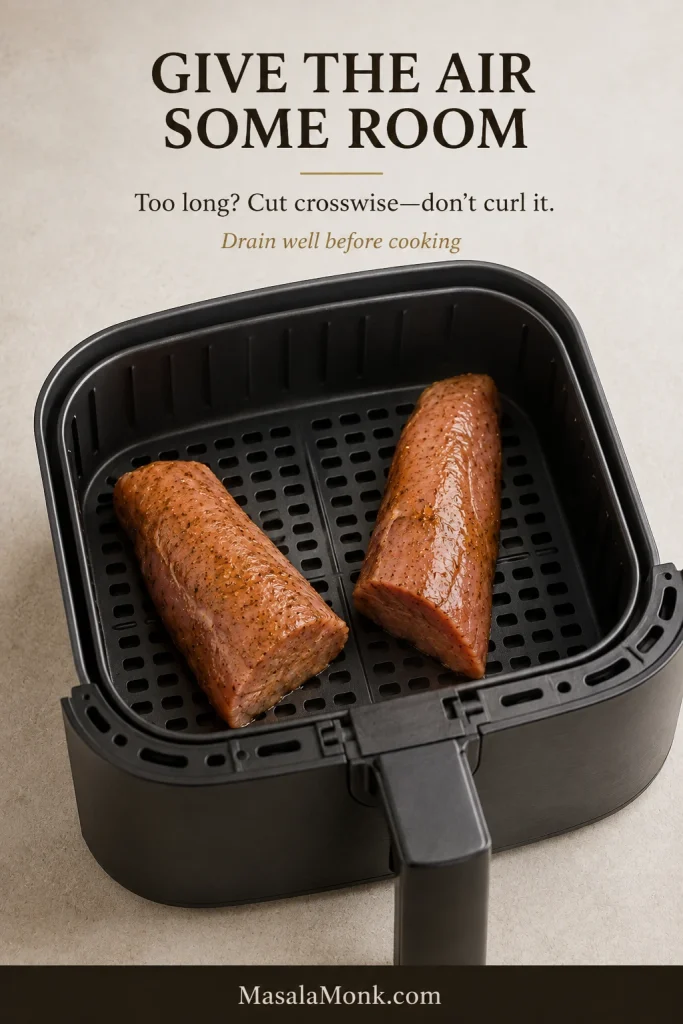
Raw marinated pork tenderloin cut into two straight pieces with open space around them in an air-fryer basket.
Air needs room to move around the pork. If a long tenderloin curls or crowds the basket, cutting it crosswise can improve evenness.
  1. Drain the tenderloin well and leave visible space around it.
  2. Cut an overly long tenderloin in half crosswise instead of curling it tightly around the basket.
  3. Cook for about 10 minutes, then turn the pork.
  4. For a tenderloin around 1 pound, take the first temperature reading around 14 minutes. A larger or thicker piece will usually need longer.
  5. Recheck the center as needed instead of automatically adding another fixed block of time.
  6. Remove at 145°F / 63°C and rest 5 minutes.

Air-fryer cooking time varies with appliance size and power, while the safe internal temperature does not. That’s why the thermometer matters more here than a minute-perfect chart.
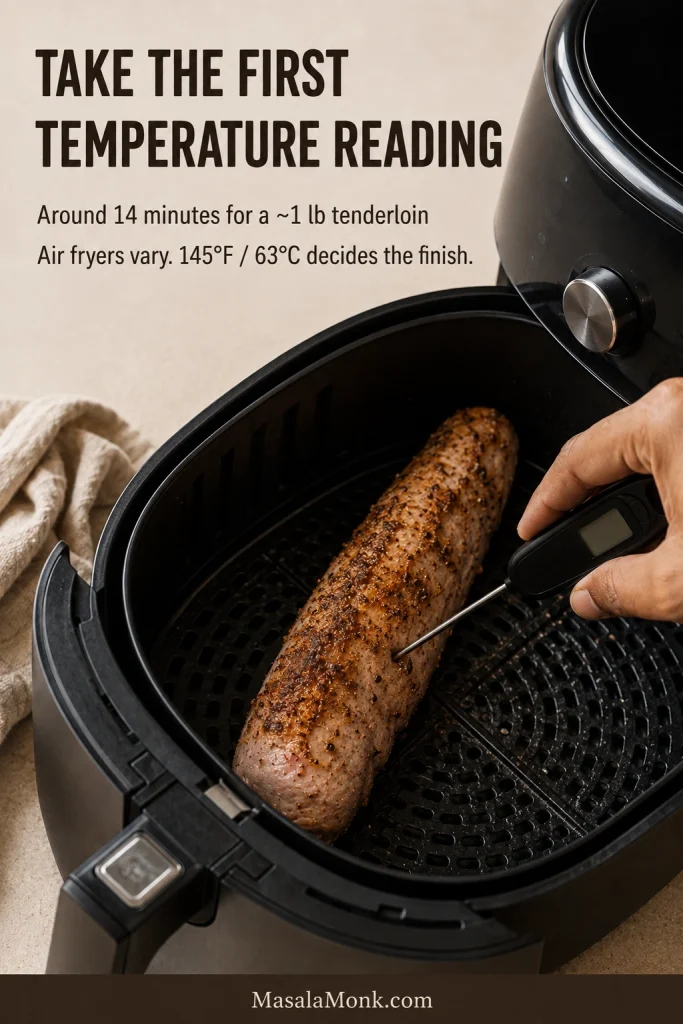
Partly browned pork tenderloin in an air-fryer basket being checked in the thickest section with an instant-read thermometer.
The first thermometer reading teaches you about your own air fryer. Remember whether this basket ran fast or slow for similar thickness next time.

For unusually thick pieces or more appliance-specific guidance, our air fryer pork tenderloin guide goes deeper.

Weight Sets the Marinade; Thickness Drives the Cook

Weight determines how much marinade to start with. Thickness determines when to start checking. Temperature determines when to stop.
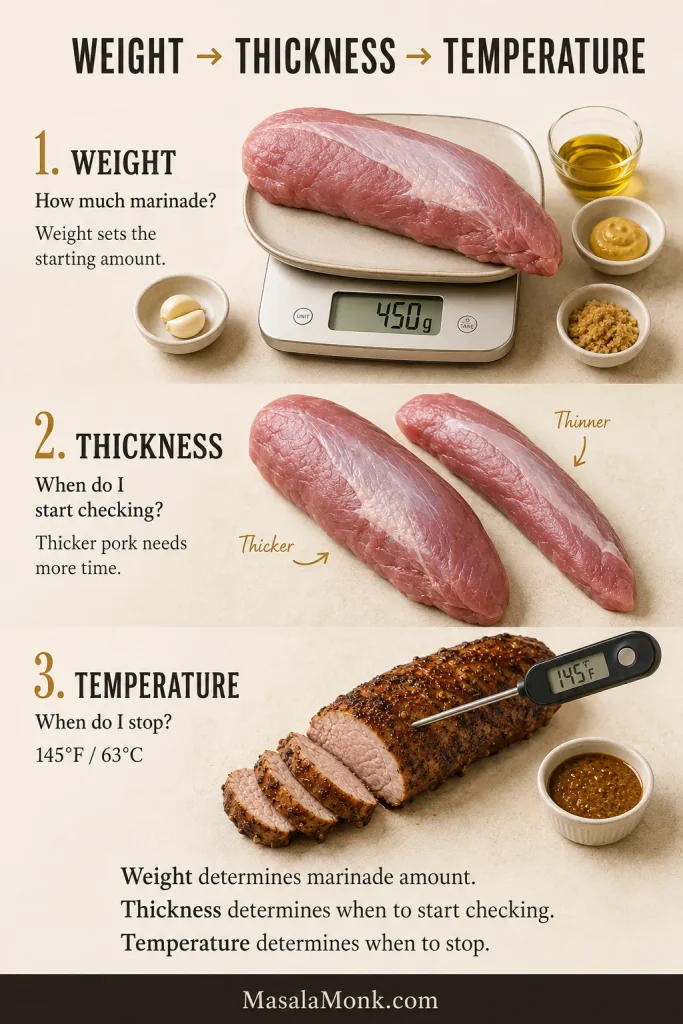
Infographic linking pork tenderloin weight, thickness and internal temperature with a scale, differently sized tenderloins and thermometer.
Two equally heavy tenderloins can finish at different times. Thickness—not package weight alone—is the better clue for when to start checking.

Two tenderloins can weigh almost the same and still finish several minutes apart because heat has farther to travel through the thicker one. Your pork does not need to look like the tenderloin in a recipe photo. Watch the piece in front of you.

The tapered tail often finishes first. Tuck a very thin end underneath for oven or air-fryer cooking, or point it toward gentler heat on the grill.
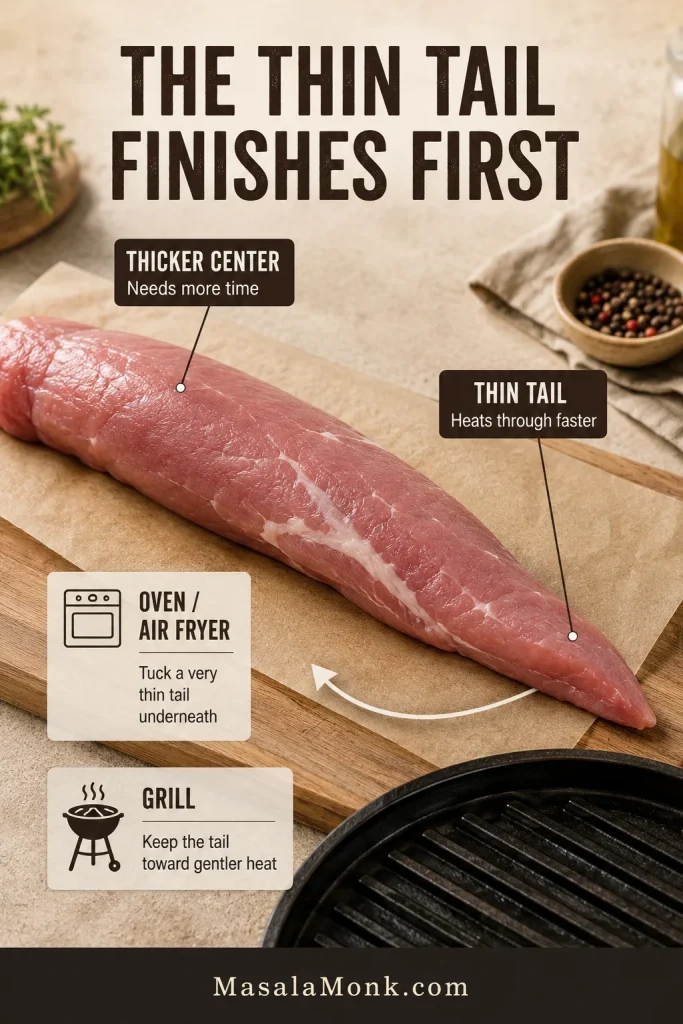
Raw tapered pork tenderloin labeled at the thick center and thin tail, with tuck-under and gentler-heat guidance.
A thin tail can dry before the center is ready. Tuck it under or keep that end over gentler heat.

How to Check Pork Tenderloin Temperature

Check the thickest part with an instant-read thermometer. On a narrow cut like tenderloin, inserting from the side can make it easier to get the thermometer tip into the center.
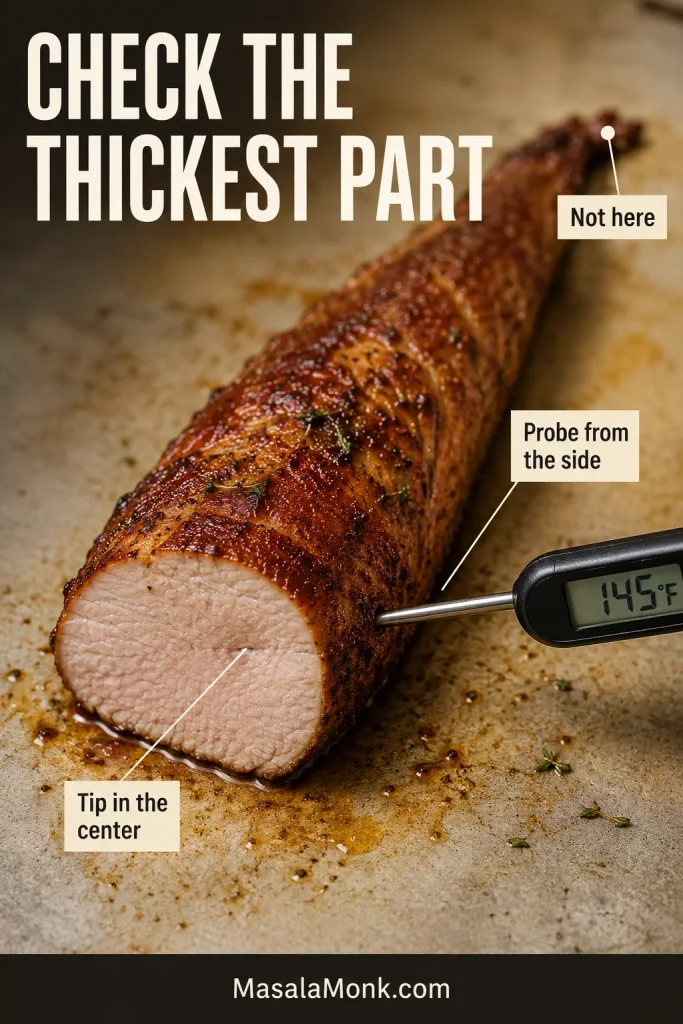
Thermometer inserted horizontally into the thickest part of cooked pork tenderloin, with the probe tip centered away from the tail.
Aim the probe tip at the center of the thickest section, not the tapered tail or the surface.

The USDA safe minimum for whole cuts of pork is 145°F / 62.8°C followed by at least a 3-minute rest. See the USDA safe minimum internal temperature chart.

A slight blush can be completely normal. Once the thickest part has reached 145°F / 63°C, you do not need to keep cooking until every slice turns white. A cool, translucent-looking center below temperature is different. The appearance tells you to check; the thermometer makes the final call.

Cooked pork tenderloin with a subtle pink center at 145°F beside a lower-temperature comparison slice.
A faint blush can remain at 145°F / 63°C. Use the thermometer—not color alone—to decide.

Ingredient Swaps and Flavor Variations

Missing something from the base marinade? Start with the swaps below. Want a deliberately different flavor instead? The variations come next.

Missing ingredientWhat to use instead
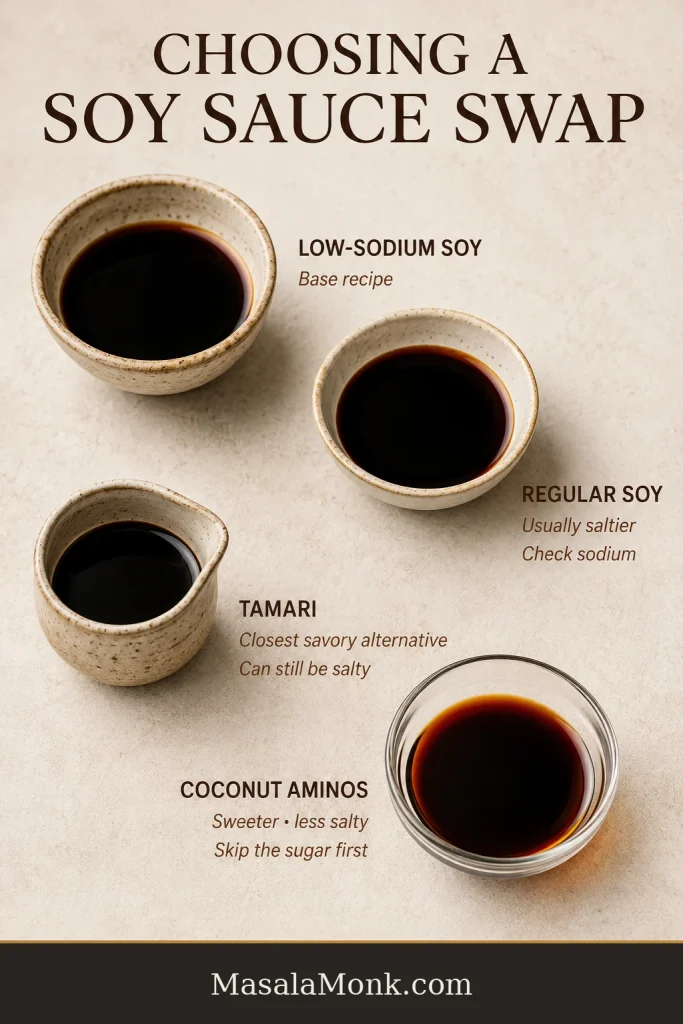
Low-sodium soy sauceRegular soy can work, but sodium varies widely by brand. Compare sodium per tablespoon and use less when needed.
Soy sauceTamari is often the closest savory substitute, though it may be just as salty. Coconut aminos is usually sweeter and less salty.
Brown sugarHoney or maple syrup can replace it; begin with a little less because liquid sweeteners make the coating stickier and can brown faster.
Fresh garlicUse about ½ tsp garlic powder in place of the two medium cloves.
Four sauce portions compare low-sodium soy sauce, regular soy sauce, tamari and coconut aminos for saltiness and sweetness.
A one-for-one swap can still change salt and sweetness. Adjust cautiously, especially with regular soy sauce or coconut aminos.

Pork Tenderloin Marinade Without Soy Sauce

For a soy-free version, replace the soy sauce with 2 tbsp / 30 ml coconut aminos and leave out the brown sugar at first.

Taste the unused mixture before the pork goes in. Pleasantly sweet but a little flat usually means it needs salt, not more sugar. Add fine salt a small pinch at a time until the savory side catches up. If gluten rather than soy is the concern, certified gluten-free tamari is generally the closer flavor swap.

Four Easy Flavor Directions

These are easy ways to nudge the base marinade in a new direction without turning the page into four more full recipes. Keep the salty-sweet-tangy balance in mind and taste any unused marinade before adding the pork.

Honey Mustard — rounder, sweeter and more lacquered. Replace the brown sugar with a slightly smaller amount of honey and increase the Dijon to about 1½ tbsp. Honey browns quickly, so watch aggressive heat.

Balsamic — darker, tangier and richer. Replace the cider vinegar with balsamic and begin with about half the brown sugar. Add more only if the unused marinade needs it.

Citrus-Garlic — bright and fresh. Use lemon or lime juice in place of the cider vinegar and add finely grated zest. Push the citrus much higher than the base amount and the pork should spend less time marinating.

Spicy — savory first, warmth at the finish. Add red-pepper flakes, minced fresh chilli or chilli sauce. A chilli sauce that is already sweet or salty may mean backing off the sugar or soy elsewhere.
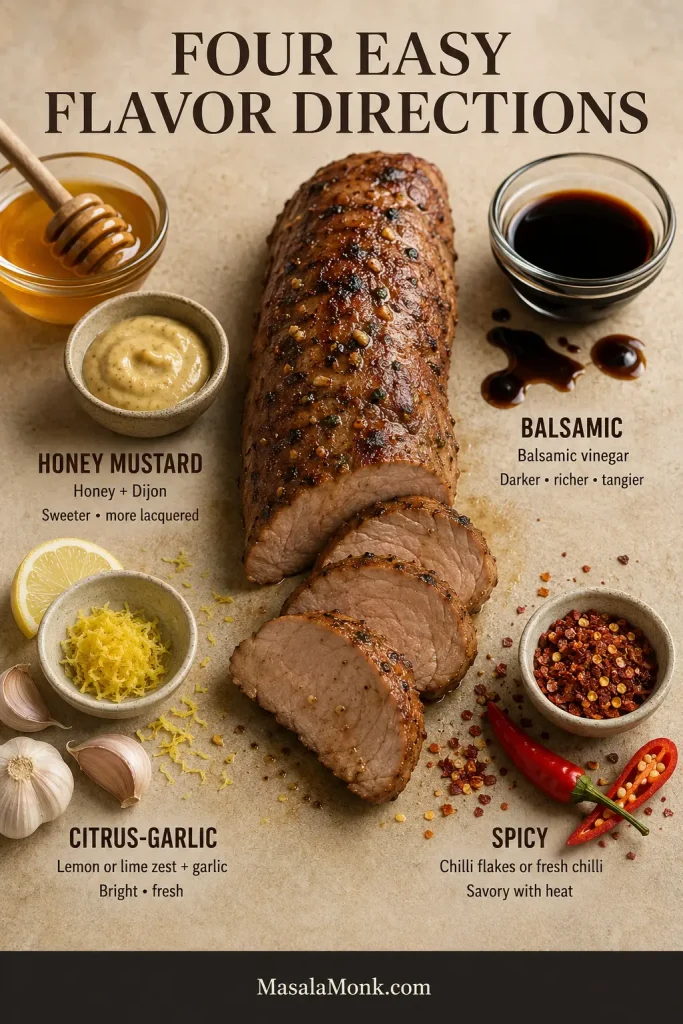
Sliced pork tenderloin with four pork tenderloin marinade variations: honey-Dijon, balsamic, citrus-garlic and spicy red chilli.
Change one flavor direction at a time. Honey-Dijon, balsamic, citrus-garlic and spicy versions stay clearer when the base structure remains familiar.

No time to marinate at all? A dry rub makes more sense when you want to season and cook immediately or when a dry, browned crust is the priority. For the opposite approach—sear first, then add a sweet-savory glaze—our honey garlic pork chops show how that works.

Pork Tenderloin Marinade Troubleshooting

If dinner has gone slightly sideways, start here. Some problems can still be improved tonight; others tell you what to change next time.
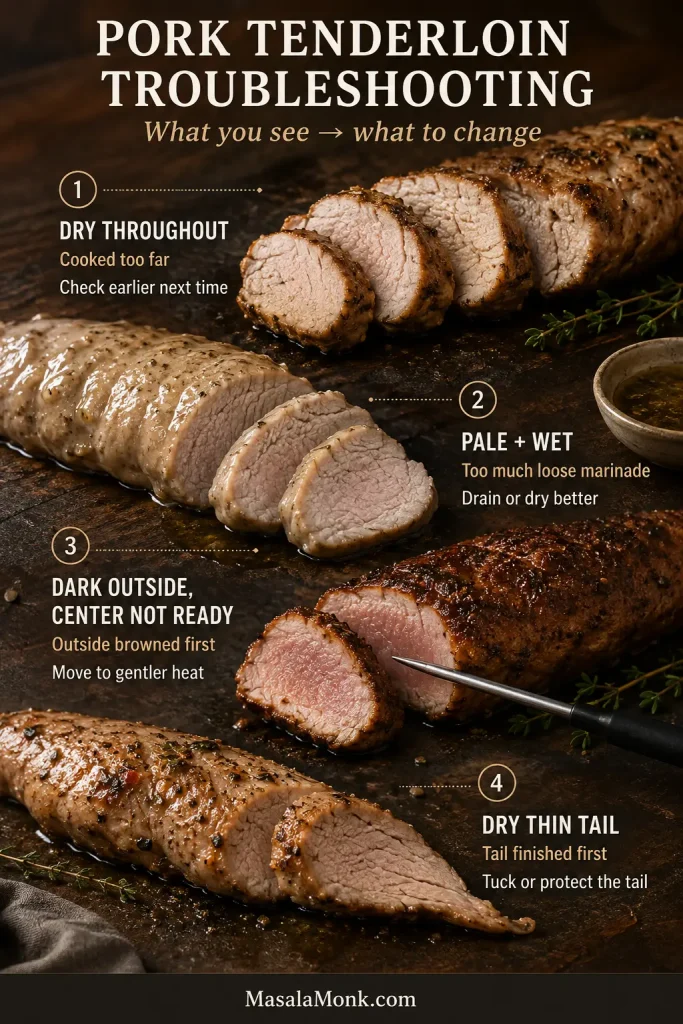
Troubleshooting graphic comparing dry slices, pale wet pork, a dark exterior with underdone center, and a dry thin tail.
Start by locating the problem: surface, center or thin end. That usually points to moisture, heat or cooking time as the next adjustment.

Cooking and Doneness Problems

ProblemWhat probably happenedWhat to do
Dry throughoutThe pork cooked too far.Slice thinly and add warm serving sauce now; start checking earlier next time.
Dry thin tailThe tapered end finished first.Give those slices extra sauce; tuck the tail or keep it toward gentler heat next time.
Dark outside, underdone middleThe crust finished before the center.Move to gentler or indirect heat and let the middle catch up.
Burned outsideWet sugary marinade met aggressive heat.Trim genuinely bitter patches if needed; drain better and save very sweet glazes for later next time.
Pale, wet-looking outsideThe pork carried too much loose moisture into the heat.Dry it more thoroughly before searing and give the skillet time to get properly hot.
One tenderloin finishes firstThe pieces are different thicknesses.Take the finished one out and let the thicker piece continue cooking.
The middle is slightly pinkProperly cooked pork can retain a blush.Check the thickest part with a thermometer and use temperature as the final decision.

Deep mahogany can be exactly what you want; brittle black sugar and garlic are different. If the exterior is the part making you hesitate, use the comparison below.
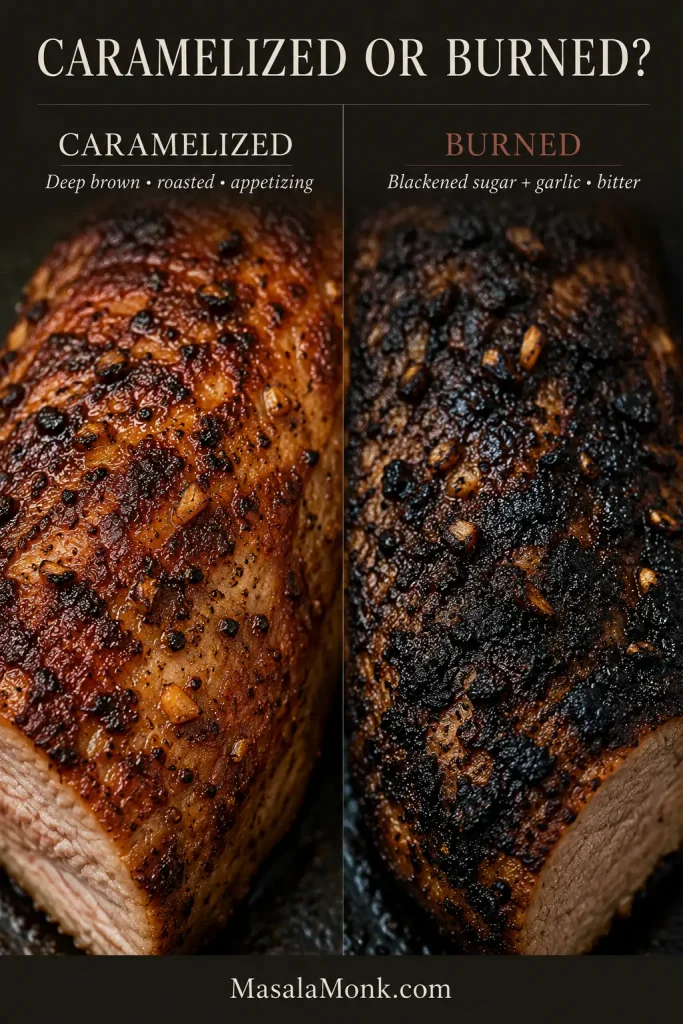
Macro comparison of mahogany caramelization on pork tenderloin beside a blackened, brittle surface with charred garlic.
Mahogany is caramelized; brittle black is burned. If the crust darkens too fast, lower the heat or move the pork cooler.

Salt, Texture and Flavor Problems

ProblemWhat probably happenedWhat to do
Too saltySoy, added salt, salty rub or enhanced pork stacked together.Serve with unsalted sides now; check the label and reduce the total sodium next time.
Ham-like or unusually firmToo much salt met too much time.Slice thinly now; reduce sodium and shorten the soak next time.
Soft, mealy or mushy outsideStrong acid or a fast-acting tenderizing ingredient sat too long.There is no true texture rescue; shorten the contact time next time.
Center tastes mildGarlic, mustard and herbs did most of their work near the exterior.Slice the pork and add serving sauce. More days in marinade are not the answer.

The flavor was great, but the pork was dry? That tells you the marinade did its job; cooking time is what needs changing. Extra hours in the bag cannot protect a lean tenderloin that stays over the heat too long.

Make Ahead, Freeze and Store

Yes—fresh pork tenderloin can be frozen in this marinade. Bag it and freeze promptly, then thaw it in the refrigerator before cooking.

A tenderloin that’s already frozen solid is different: thaw it in the refrigerator first, then add the marinade. The thawed surface coats more evenly, and you’ll have a much easier time judging the cook afterward.
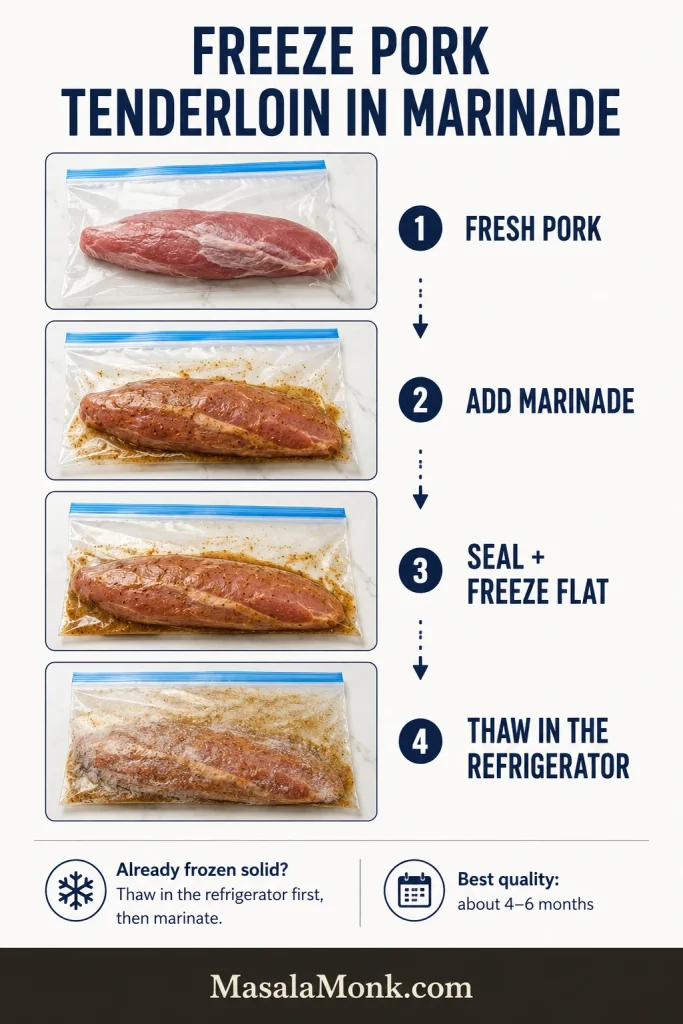
Pork tenderloin marinade freezer guide showing fresh pork bagged with marinade, frozen flat and thawed in the refrigerator.
Freeze the bag flat to save space and keep the marinade distributed around the pork. Thaw the sealed package in the refrigerator.
What you haveWhat to do
Unused marinadeMix ahead, cover and refrigerate until you’re ready to add pork.
Raw pork in marinadeFor best flavor and texture with this recipe, cook within the 30-minute to 12-hour window.
Fresh pork frozen in marinadeFreeze promptly; for best quality, aim to use within about 4–6 months. Thaw in the refrigerator before cooking.
Cooked porkRefrigerate promptly and use within 3–4 days.
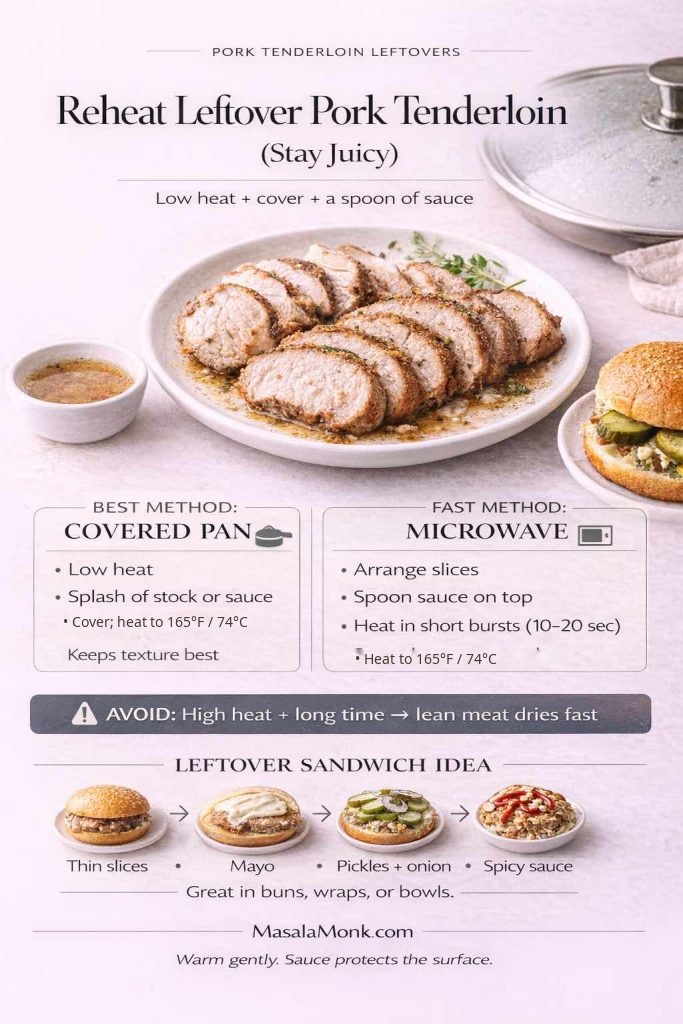
Leftovers you’re reheatingReheat to 165°F / 74°C.

Cold Pork Tenderloin Is Underrated

If tomorrow’s lunch is part of the plan, cold slices are genuinely excellent in sandwiches, salads and grain bowls. With such a lean cut, they can be more enjoyable than reheating every slice until the juiciness disappears.

An easy next-day plate is cold tenderloin with potato salad, pickles and something crisp and green. When you do want the pork warm, use gentle covered heat with a spoonful of serving sauce, broth or pan juices.
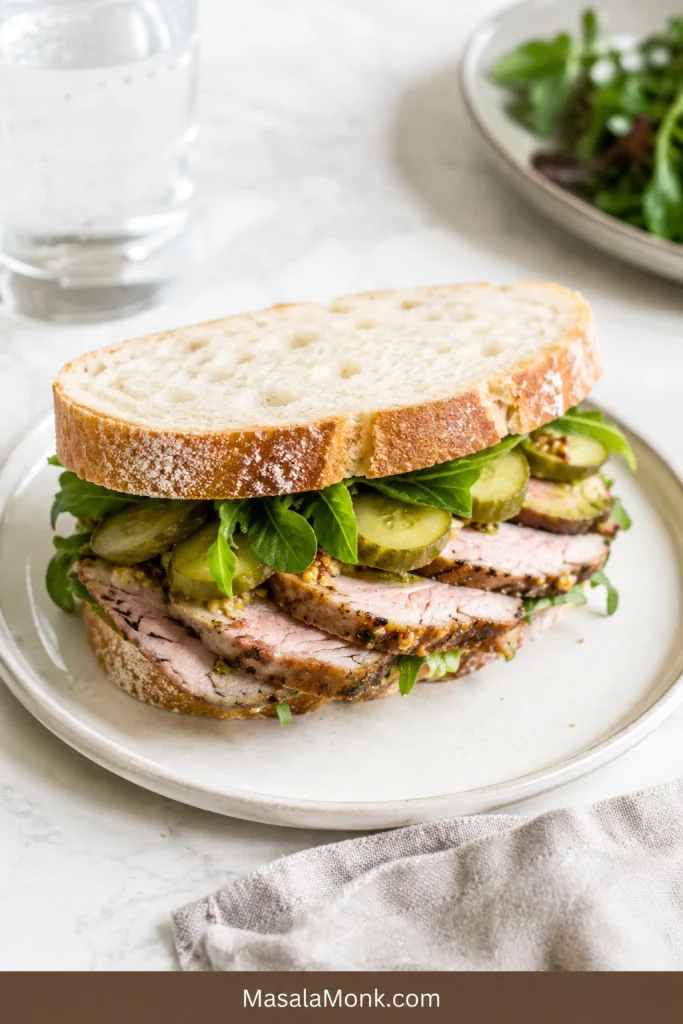
Sourdough sandwich with thin cold pork tenderloin slices, crisp greens, pickles and mustard-style dressing.
Cold tenderloin is easier to eat when sliced thin. Mustard, pickles and other bright, acidic ingredients also reach more of each bite.

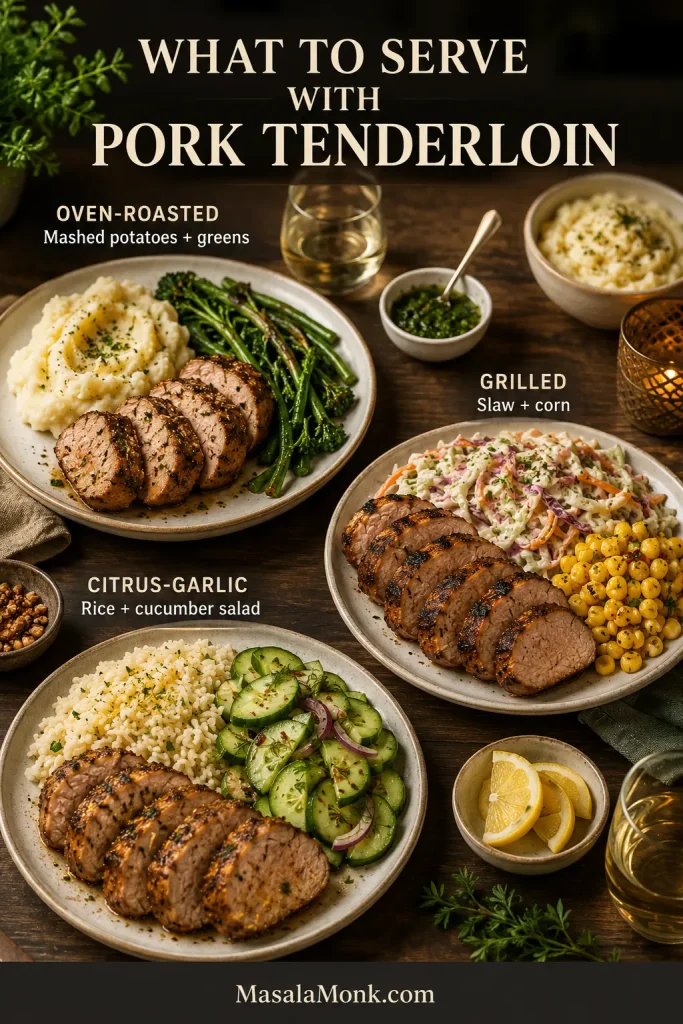
What to Serve With Marinated Pork Tenderloin

The pork already brings plenty of savory-sweet flavor, so give it sides that either catch the juices or freshen up the plate.

Three pork tenderloin pairings: roasted pork with mashed potatoes, grilled pork with slaw and corn, and citrus-garlic pork with rice.
Match the sides to the cooking style: creamy with roasted pork, crisp with grilled pork, fresh and bright with citrus-garlic.

Slice the rested tenderloin into medallions and spoon the board juices back over the warm cut surfaces. Bring the serving sauce to the table instead of burying the whole platter in it. The best bites have the contrast we’re after from the beginning: browned, garlicky edges and a center that still feels tender and juicy.

Frequently Asked Questions

Do I need to brine pork tenderloin before marinating?

No. The soy-based marinade already brings salt, so a separate brine adds another sodium layer and can push the pork toward overly salty or cured-tasting.

Do I need to poke holes in pork tenderloin?

No. An even coating is enough. Poking holes is unnecessary.

Do I need to bring pork tenderloin to room temperature before cooking?

No. Take it from the refrigerator, prepare the outside for your cooking method and let the thermometer tell you when the center is finished.


Marinate for Flavor. Cook for Juiciness.

Your tenderloin does not have to match the one in a recipe photo. Use its weight to decide how much marinade to start with, make sure every side is coated, then let thickness and temperature guide the cooking.

Get those pieces right and the first slice tells you you’ve nailed it: caramelized and garlicky around the edges, moist through the middle, with warm juice gathering on the board and enough sauce nearby to catch with the next bite.

If you make it, tell us the weight of your tenderloin, how long you marinated it, which cooking method you used and how long yours actually took. Those details give the next cook something genuinely helpful to compare with their own pork.
← Back to recipe · ↑ Back to top

Posted on Leave a comment

Air Fryer Pork Tenderloin Recipe: Juicy, Easy, No-Dry Timing Guide

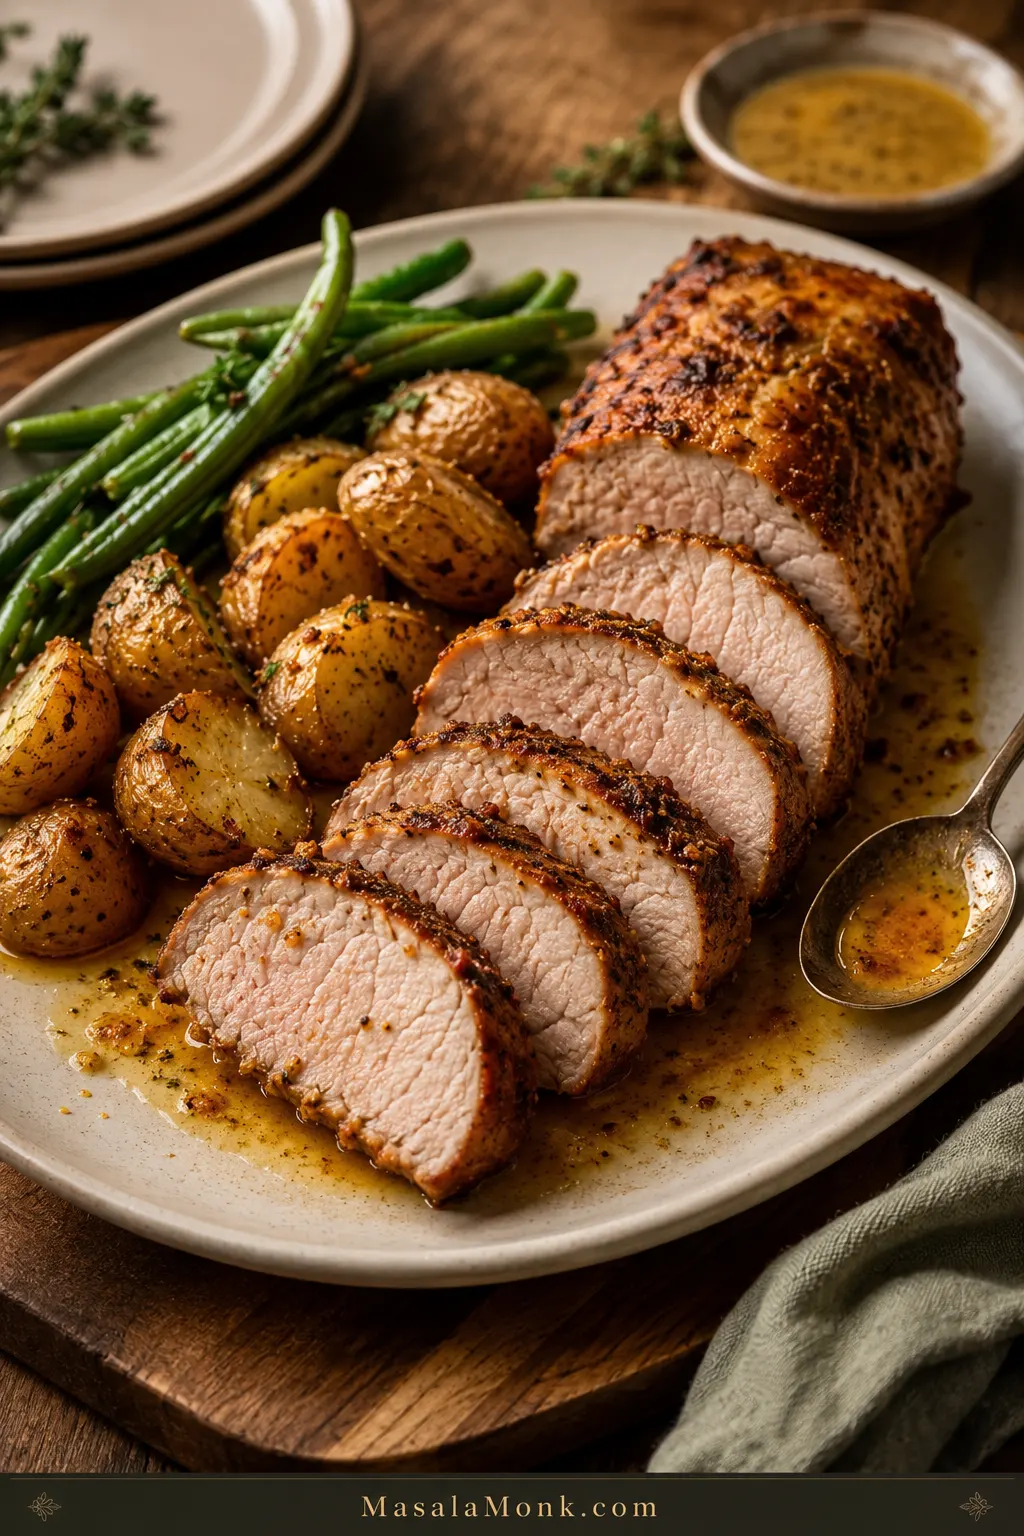
Sliced air fryer pork tenderloin with browned edges, tender center, roasted potatoes, green beans, and juices on a serving board.

Air fryer pork tenderloin is the kind of dinner that feels almost too easy when it goes right. The outside turns browned and savory, the inside stays juicy, and you can slice it onto plates in about half an hour without heating the oven.

You are not trying to make fancy pork here. The goal is smoky browned edges, tender slices, and just enough pan-style flavor to make dinner feel like more than a shortcut. Everything comes down to three things: cook it hot, check it early, and rest before slicing.

Because pork tenderloin is lean, a few extra minutes can turn glossy slices into dry pork, especially if your piece is small, your air fryer runs hot, or the package in front of you is actually pork loin instead of tenderloin.

This guide is built for the real-life versions too: small tenderloins, hot air fryers, pre-marinated packs, pork fillet labels, frozen pork, and the moment you realize your potatoes need longer than the pork.

Quick Answer

Cook pork tenderloin in the air fryer at 400°F / 200°C, or 205°C if your air fryer uses exact 5-degree settings, until the middle of the pork reads 145°F / 63°C. Most 1–1½ lb / 450–680g tenderloins take about 18–24 minutes, but small or slim pieces can finish sooner. Start checking early, rest for 5 minutes, then slice across the grain.

The clock gets you close. A temperature check saves the pork.

What success looks like

The pork should have browned, smoky-garlic edges, a moist center, and slices that look glossy instead of chalky. Spoon any board juices back over the sliced pork before serving. That little step makes the whole plate feel more finished.

Texture check: Before serving, look for a moist center and glossy slices rather than a chalky cut surface.

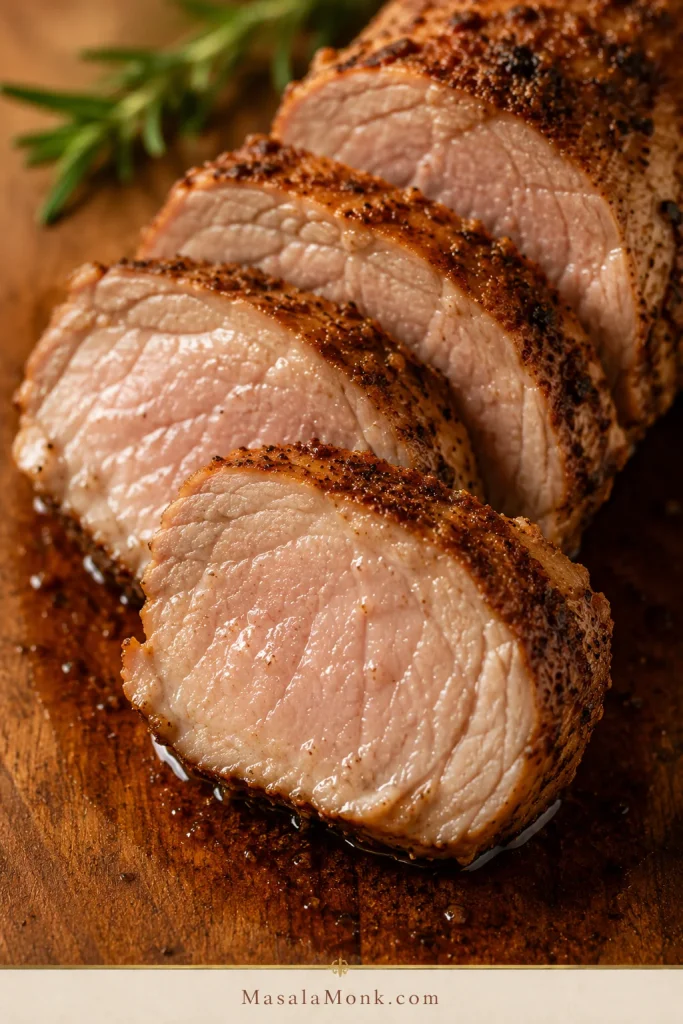
Close-up of sliced air fryer pork tenderloin with browned crust, moist center, and juices on a wooden cutting board.
Look for slices that stay glossy in the center after resting; that shine is the visual clue that the pork was not cooked too long.

Ready to cook? Jump to the recipe cardNeed timing? See the chart

Make this when

  • You want pork that slices juicy, not dry and gray.
  • You need dinner fast, but still want it to feel complete.
  • You bought pork tenderloin or pork fillet and need clear air fryer timing.
  • You are using a Ninja Foodi, basket air fryer, oven-style air fryer, or pre-marinated pack.
  • You want potatoes, carrots, green beans, rice, salad, or a simple sauce on the side.

Air Fryer Pork Tenderloin Recipe Card

This is the fast version: season the pork with a smoky garlic-Dijon rub, air fry it hot, check once before it overcooks, and rest it so the slices stay juicy.

Recipe at a Glance

RecipeAir Fryer Pork Tenderloin
Best cutPork tenderloin or pork fillet, 1–1½ lb / 450–680g
Prep time5–10 minutes
Cook time18–24 minutes for most tenderloins
Start checking13–14 minutes for small/slim pieces; 16–18 minutes for standard pieces
Rest time5 minutes
Total timeAbout 28–35 minutes
Servings4
Air fryer temperature400°F / 200°C, or 205°C if available
Internal temperature145°F / 63°C in the center, then rest

Ingredients

  • 1 pork tenderloin, 1–1½ lb / 450–680g
  • 1 tablespoon / 15 ml olive oil or avocado oil
  • 1 teaspoon / 5 ml Dijon mustard
  • 1–2 teaspoons brown sugar or honey
  • 1 teaspoon smoked paprika
  • 1 teaspoon garlic powder
  • ½ teaspoon onion powder
  • ¾–1 teaspoon kosher salt, depending on size and seasoning
  • ½ teaspoon black pepper
  • Pinch of cayenne, chili powder, or red pepper flakes, optional

Method

  1. Preheat the air fryer to 400°F / 200°C, or 205°C if your air fryer allows that setting. Give it 3–5 minutes if your model recommends preheating.
  2. Pat the pork dry. Remove any tough silver skin if present.
  3. Mix the oil, Dijon mustard, brown sugar or honey, smoked paprika, garlic powder, onion powder, salt, pepper, and optional chili in a small bowl.
  4. Rub the seasoning mixture all over the tenderloin.
  5. Place it in the air fryer basket with space around it. Cut it in half crosswise if needed so it fits without curling tightly.
  6. Air fry for 10–12 minutes, then flip.
  7. Continue cooking until the middle reaches 145°F / 63°C, checking early for small or slim tenderloins.
  8. Rest loosely tented for 5 minutes, then slice across the grain into thick, juicy pieces.

Do not cook by time alone. A slim 1 lb tenderloin and a thick 1½ lb tenderloin should not be treated like the same piece of meat.

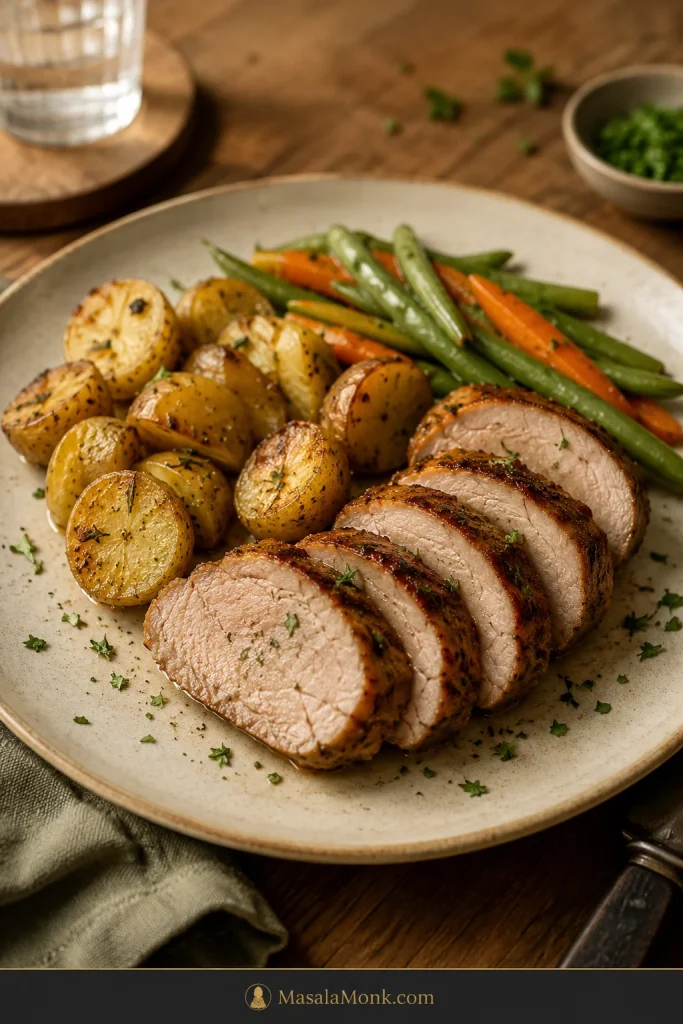
A simple plate of potatoes and green vegetables turns the tenderloin into a full weeknight dinner after the main method is done.

Plate of sliced pork tenderloin served with roasted potatoes, green beans, carrots, and herbs.
For a fast weeknight plate, pair pork tenderloin slices with potatoes and green vegetables so the air fryer recipe feels like a full meal, not just the main protein.

From here, the things that change the result are the cut, the thickness, the air fryer style, and when you stop cooking. That is what the rest of the guide helps you control.

Table of Contents

Choose your path

With a plain tenderloin, start with the recipe card and cooking chart. For a package labeled pork loin filet, check the cut section before you season anything. Adding potatoes or carrots? Read the sides section first so the pork does not wait around while the vegetables finish.

Why This Works

The air fryer works beautifully for pork tenderloin because the cut is small enough to cook through before the outside has time to dry out. You get browned edges without babysitting a skillet, as long as you stop at temperature.

The flavor is simple but satisfying: smoky, garlicky, lightly tangy, and just sweet enough to help the edges brown. Oil helps the rub toast instead of sitting dry on the surface. Dijon adds a quiet tang without making the pork taste mustardy. Brown sugar or honey helps the outside color. The short rest keeps the slices glossy when you cut in.

When it comes out right, the edges are smoky and browned, the slices look moist, and the mustard-garlic rub tastes like it took more effort than it did.

That is also why this tenderloin cooks hotter than some air fryer pork chops. Pork chops are flatter and can tighten quickly, so if the package in front of you is actually chops, switch to this air fryer boneless pork chops guide instead.

The no-dry rules

  • Use pork tenderloin, not pork loin. The cuts are different and need different timing.
  • Cook hot, but check early. 400°F / 200°C browns well, but small pieces finish quickly.
  • Test the middle, not the tapered end. The thin tail is not the doneness judge.
  • Rest before slicing. Five quiet minutes gives you glossier, juicier slices.
  • Do not chase “no pink.” A slight blush can be normal when the pork is cooked to temperature.

Before any of those rules can help, though, the cut has to be right.

Pork Tenderloin vs Pork Loin vs Pork Fillet

This is worth checking before you cook, because the wrong cut is the easiest way to follow the recipe perfectly and still end up disappointed. Pork tenderloin, pork loin, pork loin filet, pork fillet, and pork roast sound similar, but they do not cook the same way.

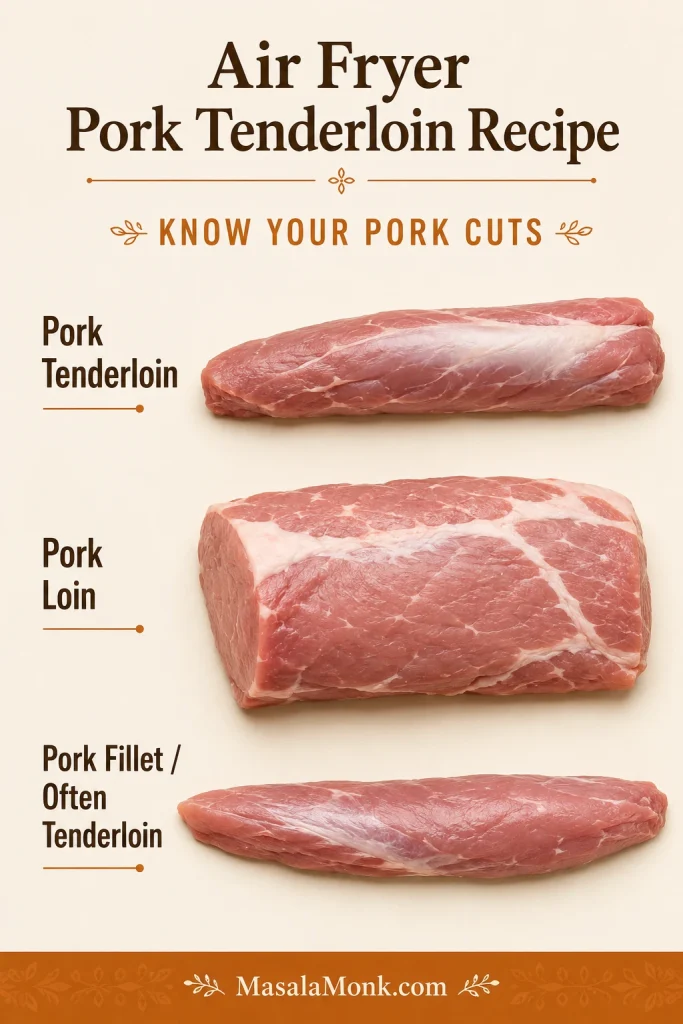
How to Identify the Right Cut

Cut check: Shape matters here; this visual helps you confirm tenderloin or pork fillet before using the air fryer timing.

Comparison image showing pork tenderloin, pork loin, and pork fillet with different shapes and sizes.
A quick shape check here can save the whole recipe: tenderloin and pork fillet are usually long and narrow, while pork loin is wider and cooks on a different timeline.
Package saysWhat it likely isUse this recipe?
Pork tenderloinLong, narrow, lean cut, usually 1–1½ lbYes
Pork filletOften the same cut as pork tenderloin in UK, Australia, and some grocery labelingYes, if long, narrow, and about 450–680g / 1–1½ lb
Pork loinWider, larger roast-style cutNo, it needs different timing
Pork loin filetCan be a branded or pre-marinated loin-style cut; check shape and weight carefullyMaybe, only if it looks like tenderloin
Pork roastUsually larger and wider than tenderloinNo

When to Switch Recipes

If it is wide like a roast, stop. This method is for a long, narrow pork tenderloin or pork fillet. A pork loin roast needs a different timing plan.

If your package turns out to be a bigger pork loin, you are not stuck — just switch methods. MasalaMonk already has a dedicated slow cooker pork loin recipe and a smoked pork loin recipe for that larger cut.

If you have pork tenderloin but want another cooking method, see the pork tenderloin in oven guide or this softer, hands-off slow cooker pork tenderloin recipe.

Cut confirmed? Back to the recipe cardGo to the cooking time chart

Ingredients for Juicy Pork Tenderloin

The ingredient list is short on purpose. Pork tenderloin does not need to be buried under sauce. It needs enough fat for browning, enough salt for flavor, and a rub that gives the air fryer something to toast.

The result is a smoky garlic crust with a little mustardy brightness and just enough sweetness to make the edges taste dinner-worthy, not sugary.

What Each Ingredient Does

Gather the rub ingredients before preheating so the pork can go from seasoning to basket without losing momentum.

Overhead view of pork tenderloin ingredients including raw pork, oil, Dijon mustard, smoked paprika, garlic powder, onion powder, salt, pepper, honey, and brown sugar.
This short ingredient list works because each part has a job: oil helps the rub cling, Dijon adds brightness, and paprika plus garlic build the crust.
IngredientUS amountMetric amountWhy it helps
Pork tenderloin1–1½ lb450–680gThe ideal size for this method
Olive oil or avocado oil1 tbsp15 mlHelps browning and seasoning coverage
Dijon mustard1 tsp5 mlAdds tang and helps the rub cling
Brown sugar or honey1–2 tsp5–10 mlBalances lean pork and helps browning
Smoked paprika1 tsp2–3gAdds color and smoky depth
Garlic powder1 tsp3gMain savory note
Onion powder½ tsp1–2gRounds out the rub
Kosher salt¾–1 tsp4–6gPrevents bland pork
Black pepper½ tsp1gAdds gentle heat
Cayenne or chili powderPinchPinchOptional heat

Salt and Seasoning Notes

For smaller or pre-marinated tenderloins, stay near the lower salt amount. Use the higher amount for a plain, larger one. When the pork is already seasoned, injected, or packed in a salty marinade, reduce the salt in the rub.

With fine salt or table salt instead of kosher salt, start with about ½ teaspoon for a 1 lb / 450g tenderloin and adjust next time. Fine salt packs more tightly, so the same spoonful tastes saltier.

Easy Substitutions

  • No Dijon? Use yellow mustard, whole-grain mustard, or skip it and add a small splash of lemon juice or vinegar for brightness.
  • No smoked paprika? Use regular paprika with a pinch of chili powder, cayenne, or cumin.
  • No brown sugar? Use honey or maple syrup. Skip the sweetener if your marinade is already sweet.
  • No avocado oil? Olive oil works well. Use a light coating so the rub clings and browns.
  • Using a salty seasoning blend? Reduce or skip the added salt until you know how salty the blend is.

Rub texture: Aim for a loose paste that coats the pork evenly instead of dropping into the basket.

Bowl of smoky garlic Dijon rub with a spoon, made with mustard, paprika, oil, garlic, and seasonings.
The rub should look like a loose paste so it clings to the pork instead of dropping off as dry seasoning in the basket.

Can I use a marinade instead?

Yes. For a simple marinade-style version, mix 1 tablespoon oil, 2 teaspoons soy sauce, 1 teaspoon Dijon mustard, 1 tablespoon honey or brown sugar, 1 teaspoon garlic powder, and 1–2 teaspoons lemon juice or vinegar. Marinate for 20–30 minutes if you have time, then air fry the same way and check the internal temperature.

Equipment You Need

You can make this with basic kitchen tools, but the thermometer is the one that matters. Pork tenderloin is too lean and too quick-cooking for blind timing.

  • Air fryer
  • Instant-read thermometer
  • Tongs
  • Small bowl for the seasoning paste
  • Measuring spoons
  • Paper towels
  • Cutting board
  • Sharp knife for trimming silver skin and slicing

Basket Air Fryer, Oven-Style Air Fryer, and Ninja Foodi Notes

Air fryer style changes how quickly the outside browns, so use this as a first-check guide before trusting one fixed time.

Air fryer typeWhat to expectFirst check
Basket air fryerBrowns fastest with strong direct airflow13–16 minutes
Oven-style air fryerMay need a few extra minutes16–18 minutes
Ninja Foodi or Foodi GrillCan brown aggressively from the top13–15 minutes
Small air fryerCut the tenderloin in half; do not coil it tightlyBased on thickness
Air fryer with linerBrowning can slow if airflow is blockedCheck color and temperature early

How to Prepare the Pork

A good result starts before the basket: dry the surface, season all sides, and remove any tough silver skin so the finished slices are tender from edge to edge.

Prep Steps Before Air Frying

Look for the shiny strip before seasoning; trimming it now prevents chewy bites later.

Raw pork tenderloin on a cutting board with silver skin being lifted and trimmed with a knife.
Trim the silver skin before cooking, otherwise that shiny strip stays tough even when the pork itself is perfectly done.
  1. Pat it dry. Surface moisture slows browning.
  2. Remove silver skin. This is the shiny, tough membrane that does not soften well during cooking. Slide a thin knife under it and trim it away.
  3. Trim lightly. Pork tenderloin is already lean. Remove loose fat or ragged edges, but do not over-trim.
  4. Protect the thin tail. If the tapered end is very thin, tuck it slightly under so it does not overcook too far ahead of the center.
  5. Season all over. Coat the top, bottom, sides, and tapered end.
  6. Let it sit briefly. Even 5–10 minutes while the air fryer preheats helps the seasoning settle.

Seasoning Check Before Air Frying

The tenderloin should look evenly coated before cooking, with no bare patches on the sides or tapered end.

Raw pork tenderloin coated evenly with reddish garlic Dijon seasoning paste on a wooden board.
Once the tenderloin is evenly coated, the paprika-Dijon rub can toast into a savory crust while the center stays protected from drying out.

How to Cook It in the Air Fryer

This is where the pork starts becoming dinner, not just a timing problem. Once it is seasoned, the cooking is simple. The only trick is not walking away for too long the first time you make it in your air fryer.

Basket spacing: Leave visible room around the pork so hot air can reach the sides and brown the surface.

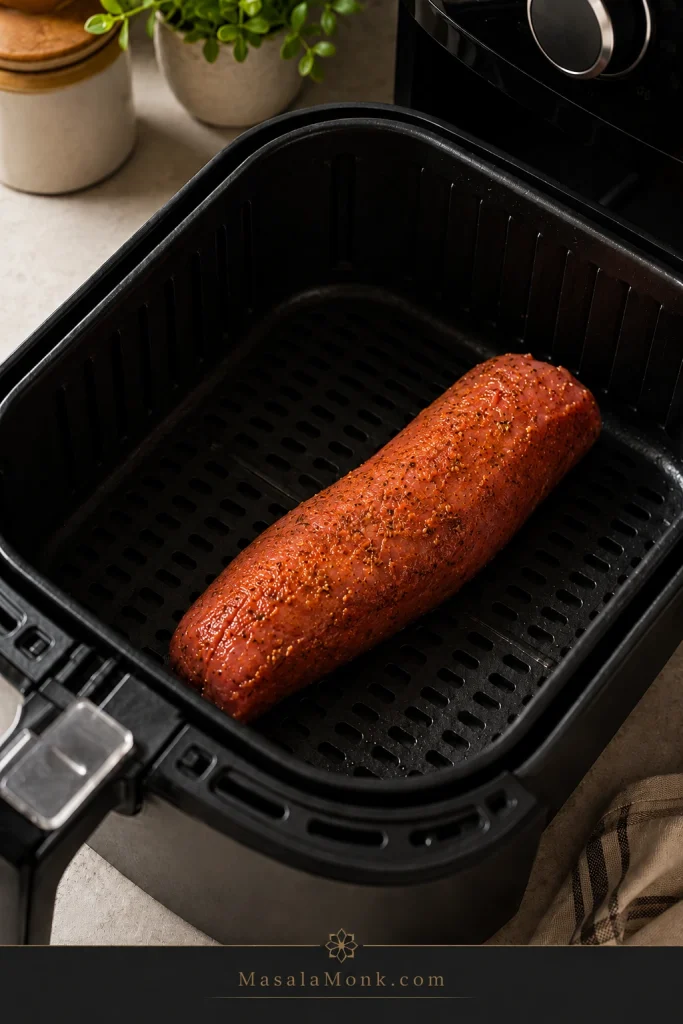
Seasoned raw pork tenderloin placed inside an air fryer basket with clear space around it.
Leave open space around the pork tenderloin in the air fryer basket; that airflow helps the surface brown instead of steaming.

Step-by-Step Air Fryer Method

  1. Preheat the air fryer. Set it to 400°F / 200°C, or 205°C if available. Preheat for 3–5 minutes if your air fryer recommends it.
  2. Season the pork. Rub the oil, mustard, and spice mixture over the whole tenderloin.
  3. Place it in the basket. Leave space around the meat so hot air can circulate. Cut it in half crosswise if it is too long.
  4. Cook the first side. Air fry for 10–12 minutes. The outside should be starting to color, but it does not need to look deeply browned yet.
  5. Flip. Turn the tenderloin with tongs. Some juices in the basket are normal.
  6. Watch the surface. By the time it is close, the rub should smell toasted and savory, and the outside should look browned in patches rather than wet.
  7. Finish cooking. Continue air frying until the middle reaches 145°F / 63°C.
  8. Rest. Transfer to a board and rest loosely tented for 5 minutes.
  9. Slice. Cut across the grain into thick slices. The center should look moist, not chalky.

After the Flip

After the flip, browned patches are enough; from this point, temperature matters more than chasing a darker crust.

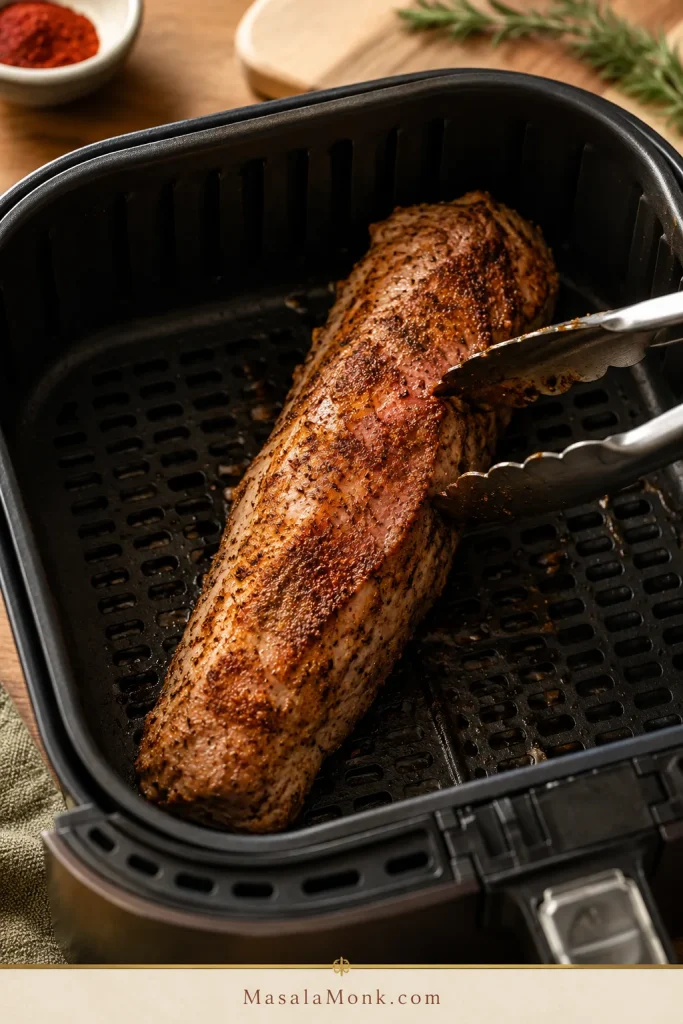
Pork tenderloin halfway cooked in an air fryer basket with browned seasoning patches after being flipped.
After flipping, the surface should start browning in patches; from here, rely on the thermometer rather than waiting for the outside to get darker.

When the Outside Browns Fast

Dark edges before a done center usually mean the heat is too aggressive. Lower the air fryer to 375–390°F / 190–200°C for the remaining minutes. If the pork is cooked through but pale, brush it with a little oil, honey mustard, or pan juices and air fry for 1–2 more minutes only if it is not already above temperature.

Rest and Slice Before Serving

Resting is not just waiting. It helps the juices settle before you slice. Spoon those juices back over the meat, and the pork tastes more finished.

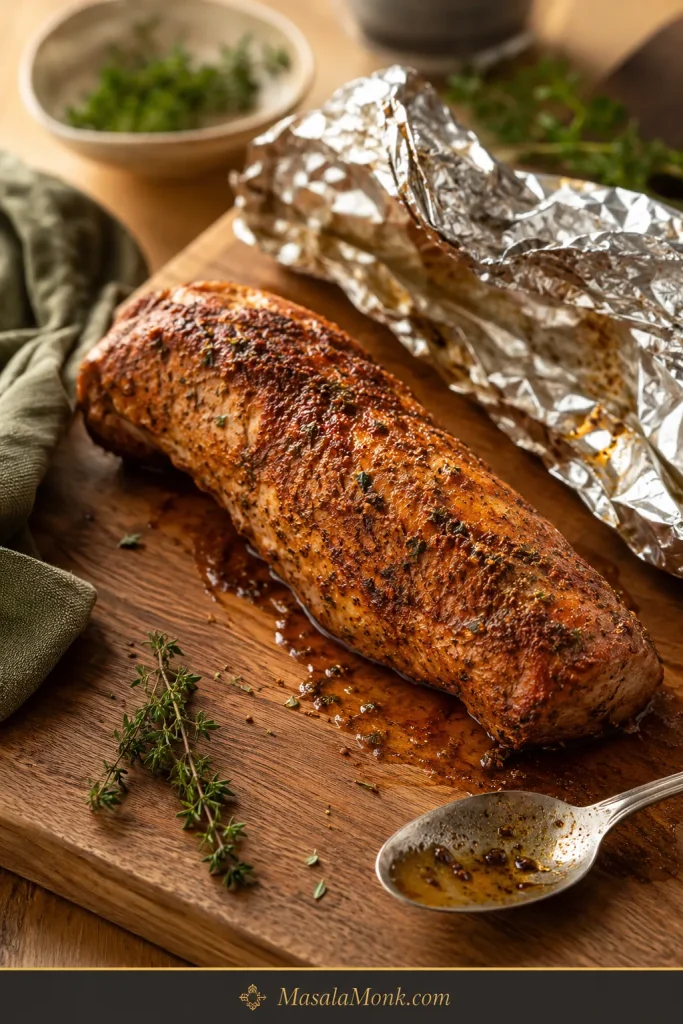
Rest the pork here before slicing so the juices settle and the board juices can be spooned back over the meat.

Whole cooked pork tenderloin resting on a wooden board with foil nearby, herbs, a spoon, and visible board juices.
Give the pork a few quiet minutes here; that short rest keeps more juices in the slices and leaves enough on the board to spoon back over the top.

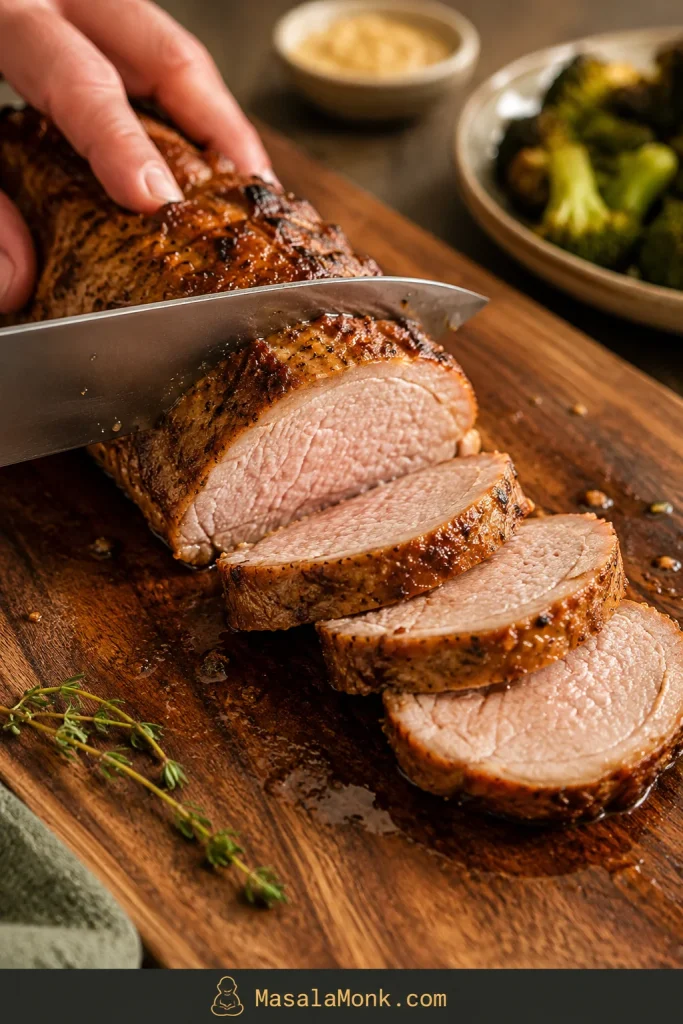
When the tenderloin has rested, use a steady cross-grain cut to make thick slices that stay moist on the plate.

Cooked pork tenderloin being sliced with a knife into thick pieces on a wooden cutting board.
Then slice across the grain into thick pieces; thinner slices dry out faster, while thicker slices hold moisture better on the plate.

Need exact timing? See the chartCheck the temperature guide

Cooking Time Chart by Weight

The chart is here to keep you from guessing, not to make the recipe complicated. Use the earliest check time when cooking a new brand, a new air fryer, or a pre-marinated pack.

First time with this air fryer? Watch closely once. After that, your own air fryer timing becomes the shortcut.

Use the timer to know when to start checking, then let the thermometer decide when the pork is done.

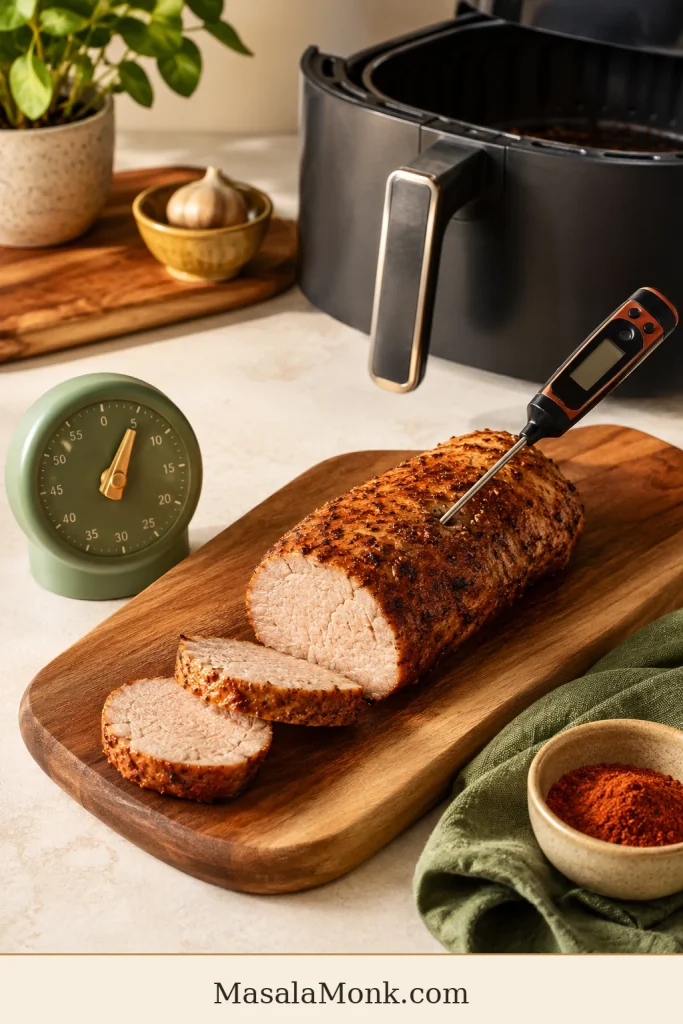
Cooked pork tenderloin on a cutting board with an instant-read thermometer, kitchen timer, air fryer, spice bowl, and green towel.
Your timer helps you know when to start checking, while the thermometer tells you when to stop; together, they make air fryer pork tenderloin repeatable.
Pork tenderloin sizeMetricAir fryer tempStart checkingLikely total time
Small or slim tenderloin450g / 1 lb400°F / 200°C13–14 min14–18 min
Standard tenderloin565g / 1¼ lb400°F / 200°C16 min18–22 min
Larger tenderloin680g / 1½ lb400°F / 200°C18–20 min20–26 min
Very thick tenderloin700g+ / 1½ lb+390–400°F / 200–205°C20 min24–28 min
Cut in half to fitSame total weight400°F / 200°C13–16 minDepends on thickness, not length

How to Use the Chart

Cutting a tenderloin in half does not automatically cook it in half the time. Thickness matters more than length. Pieces that stay thick in the center still need time, while slim pieces finish faster.

Save your first successful timing. Once you know how your air fryer handles a 1 lb or 1½ lb tenderloin, this recipe becomes much easier the next time.

If your “very thick tenderloin” is actually wide like a roast, pause and check the package. It may be pork loin, not tenderloin, and it needs a different cooking plan.

Internal Temperature and Pink Pork

Pork tenderloin is done when the middle of the thickest part reaches 145°F / 63°C, followed by a short rest. Check the largest section, not the thin tail end.

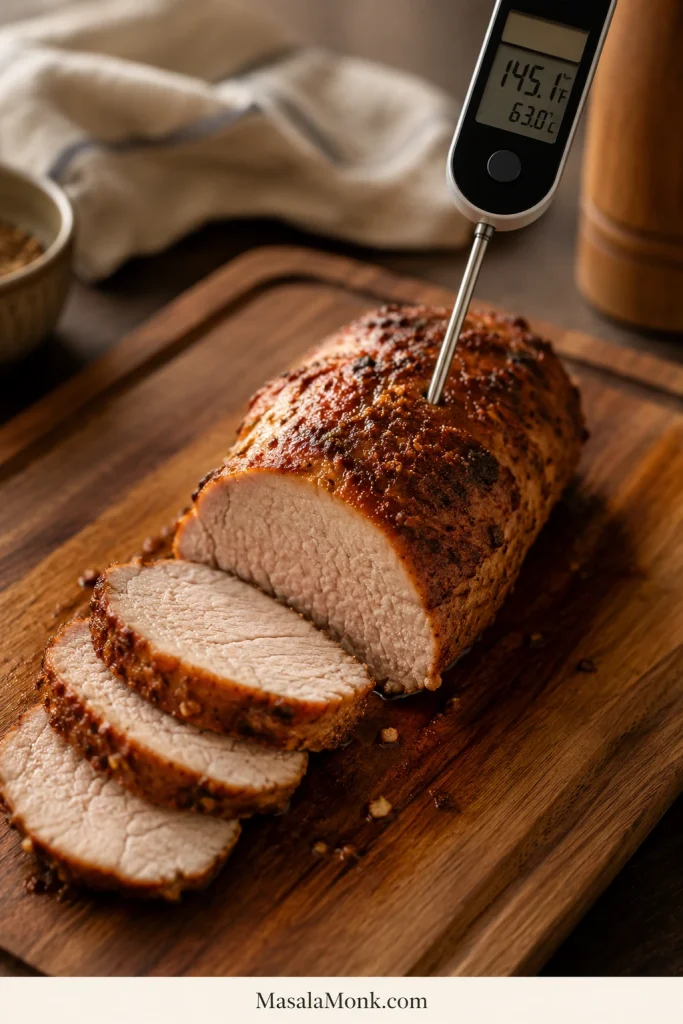
Temperature check: Measure the thickest center, not the thin end, when checking for 145°F / 63°C.

Instant-read thermometer inserted into the thickest center of cooked pork tenderloin on a wooden cutting board.
The thermometer should go into the thickest center, not the thin end; pull the pork at 145°F / 63°C so the slices stay tender after resting.

For food safety, FoodSafety.gov lists pork steaks, roasts, and chops at 145°F / 63°C with a 3-minute rest.

The National Pork Board pork cooking temperature guide gives the same practical guidance: 145°F, a short rest, and a digital thermometer.

What Pink Pork Means

That is why a slight blush of pink can be normal. Pink does not automatically mean raw; temperature tells you more than color.

For beginners, keep the target simple: cook to 145°F / 63°C, then rest for 5 minutes. Experienced cooks may start watching closely around 140–143°F because carryover can raise the final temperature during rest, but the clearest serving target for this recipe is still 145°F / 63°C.

Once you trust the thermometer, pork tenderloin stops being stressful. Instead of guessing by color or cutting into it five times, cook to the number, let it rest, and slice when the juices have settled.

Doneness guide

  • 140–143°F / 60–62°C: Watch closely here only if you understand carryover cooking and will rest the pork immediately.
  • 145°F / 63°C: Clearest finished target for most home cooks.
  • 150°F / 66°C: Still usable, but getting firmer.
  • 160°F / 71°C and above: Much drier, especially in lean tenderloin.

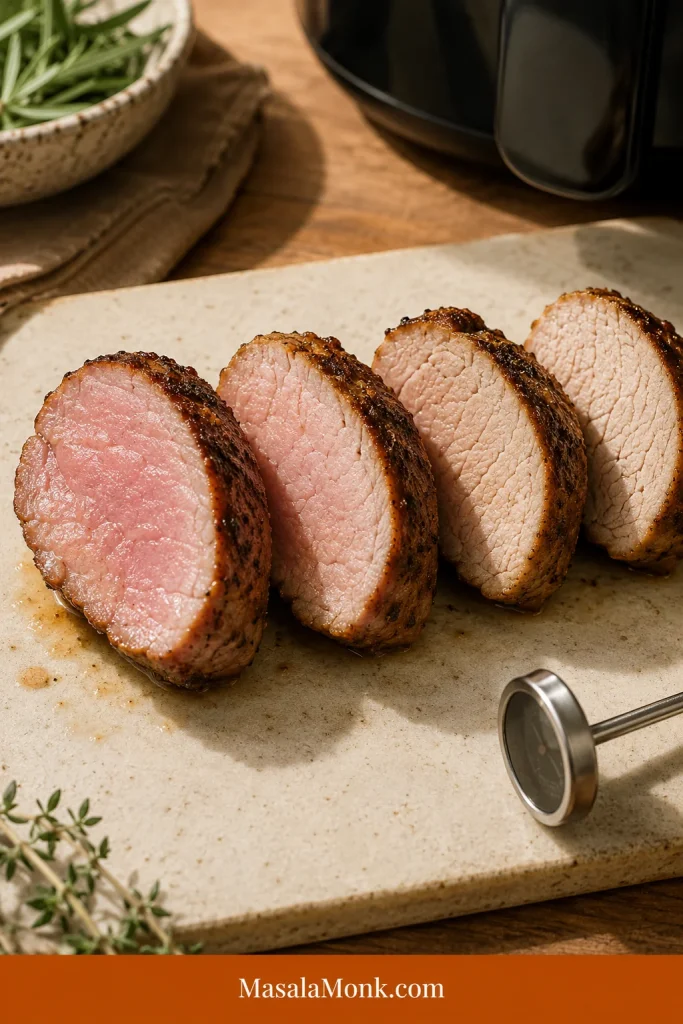
This visual pairs with the doneness guide: as pork cooks longer, the slices turn paler, firmer, and less glossy.

Four pork tenderloin slices arranged from pink and moist to pale and firmer, with a meat thermometer nearby.
As pork cooks longer, the slices turn paler and firmer; a slight blush with the right internal temperature can still mean tender, safe pork.

Nervous about dryness? Troubleshoot itBack to the recipe card

Why It Turns Dry — and How to Prevent It

This is the section to read if you are nervous, using a new air fryer, or already worried you left the pork in a minute too long. Dryness usually comes down to timing, cut, or resting. The good news is that all three are fixable.

ProblemWhat happensFix
Cooking by time onlyThe pork can overcook before you noticeUse the time chart, then do the doneness check
Using pork loin instead of tenderloinThe cut is larger and needs different timingCheck the package and shape before cooking
Very small tenderloinIt cooks faster than the recipe rangeStart checking at 13–14 minutes
No restJuices run out when slicedRest 5 minutes before cutting
Sugary marinade burns earlyThe outside darkens before the middle is doneCheck early or reduce the temperature slightly
Aggressive reheatingLeftovers become dry and firmReheat gently with sauce, broth, or butter

Match Your Result

Still not sure what happened? Match the result:

  • Outside dark, inside not ready: The heat was too aggressive, the rub was sugary, or the pork sat too close to the heating element. Lower the temperature for the remaining minutes.
  • Pale outside, dry inside: The pork likely cooked too long without enough surface oil or browning. Next time, dry it well, coat lightly with oil, and start checking earlier.
  • Only the thin end was dry: The tenderloin was tapered. Tuck the thin tail slightly under or expect the end pieces to cook faster than the center slices.

Dry pork is not ideal, but it is rarely beyond saving. Slice it thicker and serve it with something moist: pan juices, honey mustard, mushroom sauce, gravy, melted butter, broth, apple chutney, or a spoon of barbecue sauce.

If the slices need extra help, a spoon of creamy mushroom sauce turns slightly over-rested or lean pork into a much softer dinner plate.

Adding Potatoes, Carrots, or Green Beans

After the pork is under control, the real trick is keeping the sides from making it wait. You can cook it with potatoes, carrots, green beans, or sweet potatoes in the air fryer, but dense vegetables often take longer than the pork.

The pork is the part you protect. Vegetables are the part you can let keep cooking.

Best No-Dry Method

  1. Cook the tenderloin first.
  2. Rest it for 5–10 minutes.
  3. While it rests, cook or finish the potatoes, carrots, or green beans in the air fryer.
  4. Slice the pork right before serving.

This keeps the pork from waiting around while the potatoes catch up.

If you would rather keep the air fryer focused on the meat, make the potatoes separately. These ranch roasted potatoes give you crisp, salty-herby edges without forcing the tenderloin to wait in the basket.

One-Basket Dinner Example

For a simple one-basket version, use 1 lb / 450g pork tenderloin, 8 oz / 225g baby potatoes, and 1 large carrot. Halve the baby potatoes, slice the carrot thinly, toss the vegetables with oil and seasoning, and air fry them for 8–10 minutes at 390–400°F / 200–205°C. Add the seasoned pork, then cook until it reaches 145°F / 63°C. If the meat finishes before the vegetables are tender, remove and rest it while the vegetables cook a few minutes longer.

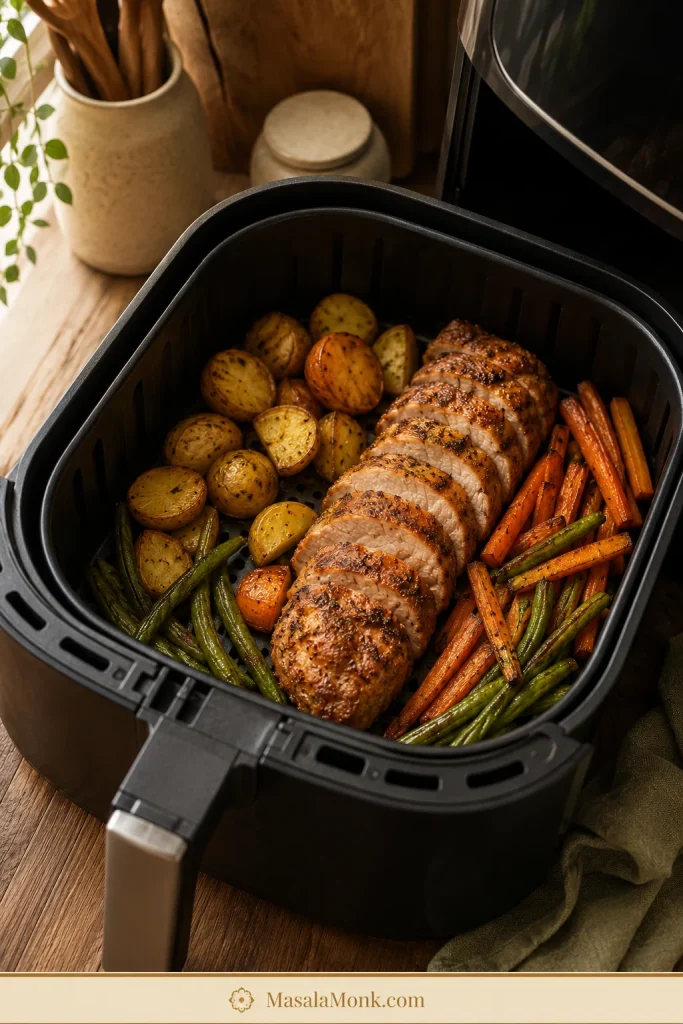
One-basket note: Keep the pork visible and let dense vegetables finish separately if they need more time.

Air fryer basket with sliced pork tenderloin, roasted baby potatoes, carrots, and green beans.
When making a one-basket dinner, keep the pork visible and give potatoes or carrots extra time so the vegetables finish without overcooking the meat.

Vegetable Timing Tips

SideBest way to handle it
Baby potatoesHalve them and give them a head start.
Regular potatoesCut into ½-inch cubes so they cook faster.
CarrotsSlice thinly or cut small; thick carrots need extra time.
Green beansAdd later or cook while pork rests.
Sweet potatoesCut small and expect them to need more time than green vegetables.

For a sweeter vegetable side, roasted carrots with honey, maple, or garlic work especially well with the smoky paprika and mustard in this pork rub.

Can You Cook It From Frozen?

Thawed is the recipe. Frozen is the emergency version.

A thawed tenderloin seasons better, browns better, cooks more evenly, and usually has a better texture. If you are staring at a frozen one and need a fallback, drop the heat and give it more time.

  • Use a lower temperature: about 330°F / 165°C.
  • Start checking around 30 minutes and expect roughly 33–38 minutes for many pieces, depending on thickness.
  • Start from frozen, then season once the surface softens enough for the rub to stick.
  • Flip halfway.
  • Check the middle, not just the browned outside.
  • Rest before slicing.

Do not cook a frozen double pack as one solid block. Separate the tenderloins first if they are frozen together. Do not use this fallback method for stuffed, rolled, or bacon-wrapped frozen tenderloin. Frozen breaded pork tenderloin is also a different product from raw whole tenderloin, so follow the package guidance and confirm doneness.

Smithfield, Hormel, and Pre-Marinated Packs

Pre-marinated packs are where label confusion shows up again. They are convenient, but some are pork tenderloin, some are pork loin filet, and some are wider, sweeter, or saltier than this recipe assumes.

These packs can still make an easy dinner; they just need a quick label check before they go into the basket.

Before cooking a pre-marinated pack, check the shape, salt level, sweetness, and final temperature instead of trusting the label alone.

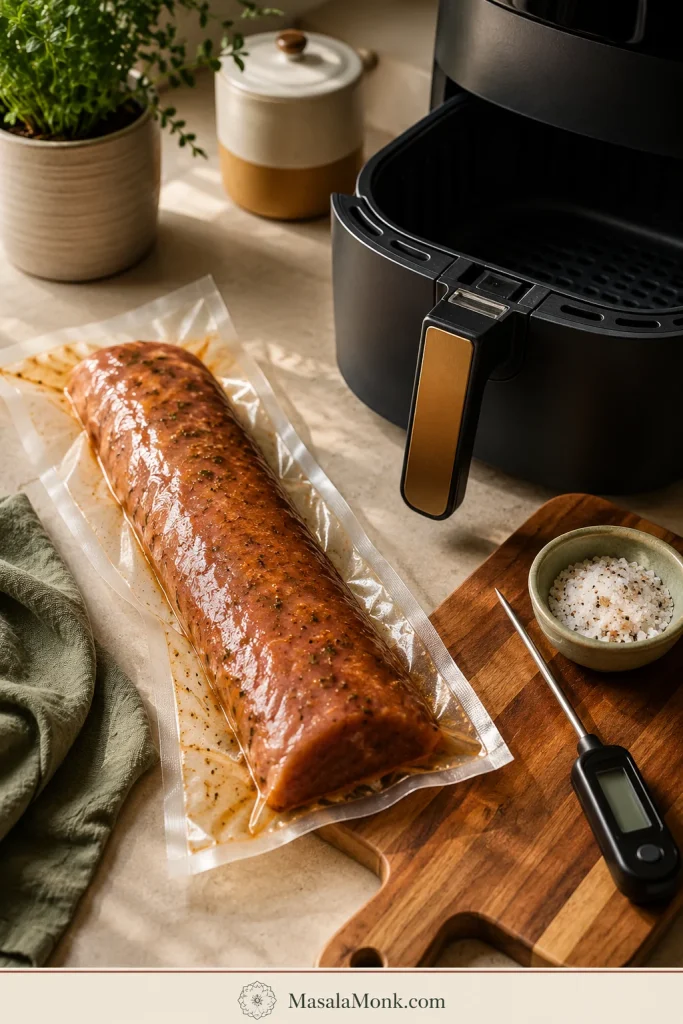
Unbranded pre-marinated pork tenderloin package beside an air fryer basket, thermometer, salt bowl, wooden board, and green towel.
Pre-marinated pork tenderloin can be convenient, but check the shape, salt level, sweetness, and final temperature instead of trusting package timing alone.

Pre-Marinated Package Checklist

  • Check the package name, weight, and shape before cooking.
  • Long, narrow packs around 1–1½ lb / 450–680g usually work with this method.
  • A pork loin filet label deserves a closer look. It may look long in the package but still be wider and denser than pork tenderloin.
  • Wider pork loin filet or roast-style packs need different timing.
  • Pat off excess wet marinade if it is very drippy.
  • Start checking around 15 minutes because sugar-heavy marinades can brown faster.
  • Dark edges early are a sign to check temperature before assuming the pork is done.
  • Use less added salt because many pre-marinated packs are already seasoned.

Package timing is a starting point, not a promise. Use the package for flavor guidance and your thermometer for doneness.

Air Fryer Pork Tenderloin Medallions

If you sliced the pork already, switch timing systems. Medallions cook much faster than a whole tenderloin, which makes them useful for rice bowls, salads, wraps, or a faster dinner plate.

  1. Slice the tenderloin into even medallions, about 1–1½ inches thick.
  2. Season both sides.
  3. Air fry at 350°F / 175°C for about 9–12 minutes, flipping once.
  4. Start checking around 7–8 minutes if the pieces are closer to 1 inch thick.
  5. Check the largest medallion for 145°F / 63°C, then rest briefly before serving.

Even thickness matters. Tiny end pieces cook faster than center-cut medallions, so pull them early if needed.

Flavor Variations

After you know when to stop cooking, the flavor can go almost anywhere. The timing usually stays close unless the tenderloin is thicker, smaller, wrapped, frozen, or heavily coated.

  • Honey mustard: Add extra Dijon and honey, then finish sliced pork with a small spoon of sauce.
  • BBQ rub: Use smoked paprika, brown sugar, garlic powder, onion powder, salt, pepper, and chili powder.
  • Garlic herb: Use garlic powder, thyme, rosemary, parsley, black pepper, and olive oil.
  • Cajun: Use Cajun seasoning, smoked paprika, garlic, and oil. Watch the salt if your blend is salty.
  • Soy-Dijon marinade: Use soy sauce, Dijon mustard, honey, garlic powder, and a little vinegar or lemon juice.
  • Spicy chili-garlic: Add chili flakes, cayenne, or chili paste to the oil and mustard mixture.
  • Bacon-wrapped: Cook more carefully because bacon needs time to render. Start checking early so the pork does not overcook while the bacon browns.

Choose honey mustard for a softer family-style dinner, Cajun for heat, garlic herb for mashed potatoes, and BBQ rub if you want leftovers for sandwiches.

After slicing, this honey mustard dressing can double as a bright pork drizzle, especially with the honey mustard or garlic herb versions.

With BBQ-style pork tenderloin, creamy coleslaw is a natural fresh side because it brings crunch, tang, and a little sweetness.

What to Serve with It

This pork tenderloin is flexible enough for a quick weeknight dinner, a meal-prep bowl, or a slightly nicer weekend plate. A few slices over mashed potatoes feels cozy; the same pork over rice with sauce becomes lunch tomorrow.

Once the pork is sliced, a platter with vegetables, potatoes, sauce, and board juices makes serving easier.

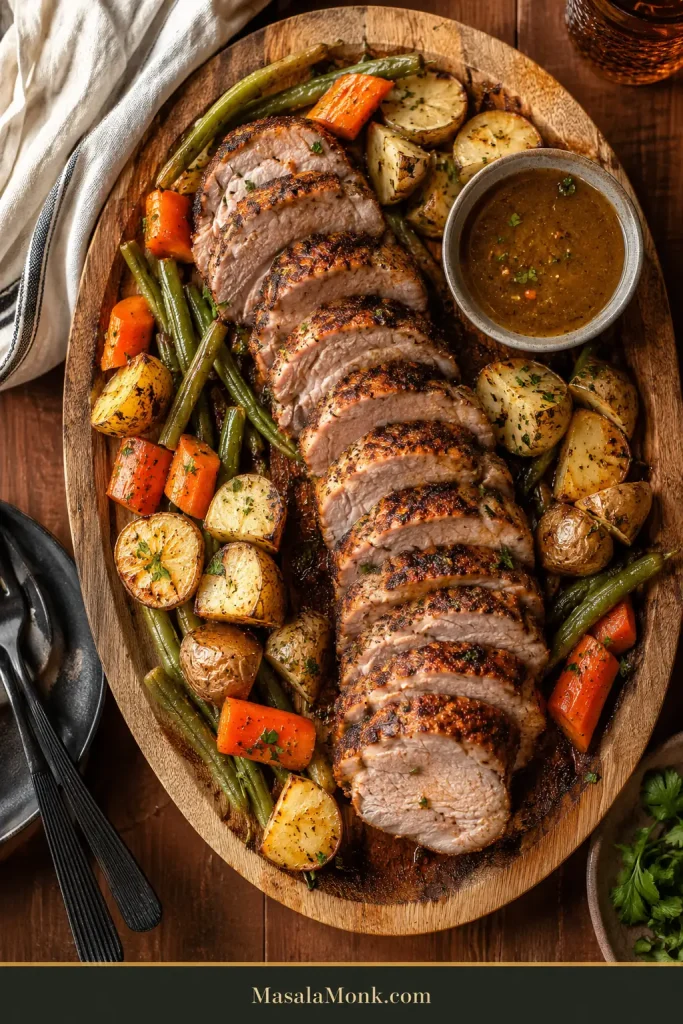
Family-style wooden platter with sliced pork tenderloin, roasted potatoes, carrots, green beans, herbs, and a bowl of sauce.
For serving, arrange sliced pork tenderloin with vegetables, potatoes, and sauce so each portion gets crust, tender center, and a little pan-style flavor.

Comfort sides

A classic comfort plate starts with sliced pork over creamy mashed potatoes, so the juices, mustard sauce, or mushroom gravy have somewhere to land.

Garlic mashed potatoes are the richer version, especially if you are skipping a sauce. For a cozy family-style dinner, creamy macaroni and cheese also works well with something green or crisp on the side.

Fresh sides

Something crisp beside the warm pork helps balance the plate. A wedge salad gives you cold crunch, creamy dressing, and steakhouse-style balance. Green beans, simple salad, apple sauce, apple chutney, and roasted carrots also fit the plate.

Bowls, wraps, and easy leftovers

Sliced pork works well over rice, in wraps, on salads, or tucked into quick bowls with vegetables and sauce. If you are turning leftovers into rice bowls, this how to cook rice guide helps with stovetop, rice cooker, and Instant Pot timing.

Make-Ahead Tips

You can season the pork up to 12 hours ahead and refrigerate it covered. Let it sit at room temperature for 15–20 minutes while the air fryer preheats, then cook as directed.

If the rub contains a lot of salt or soy sauce, avoid over-marinating a very small tenderloin. The smaller the piece, the faster salty marinades can make the texture feel firm.

Storage and Reheating

Leftover pork is best when you treat it gently. The meat is lean, so reheating should warm it through without blasting away the moisture you protected during cooking.

NeedBest method
Fridge storageStore in an airtight container for 3–4 days.
Freezer storageFreeze sliced or portioned pork, wrapped well, for easier reheating.
Air fryer reheatingReheat slices at 350°F / 175°C for 3–4 minutes.
Microwave reheatingAdd a splash of broth, water, butter, or sauce and heat gently.
What to avoidDo not blast a whole cooked tenderloin in the air fryer again. It can dry out before the center warms.

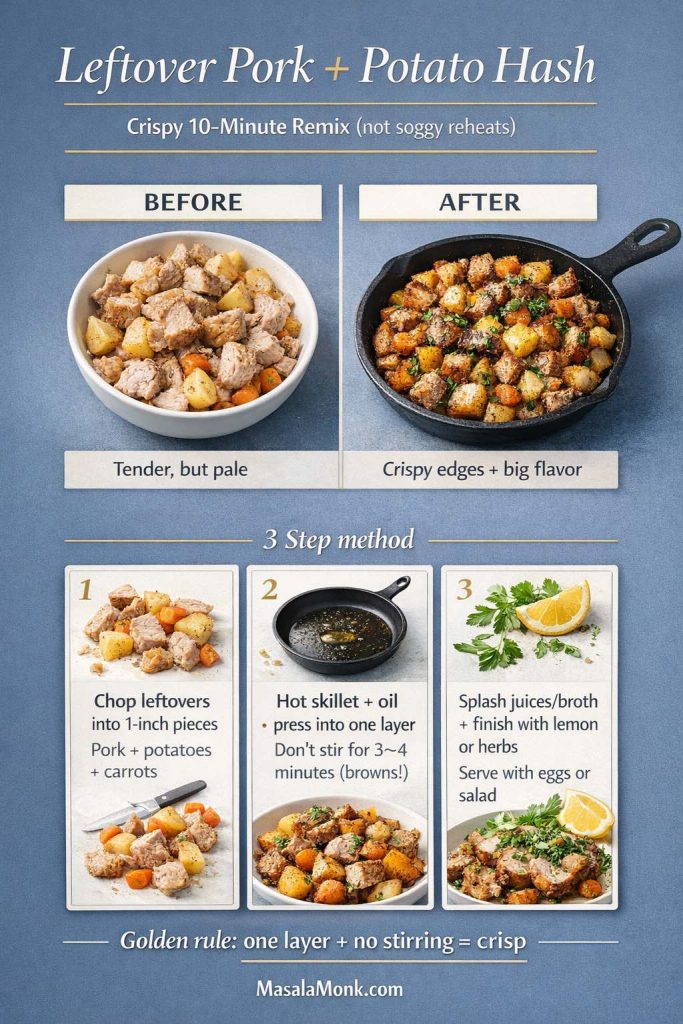
Leftover slices are best used gently: tucked into rice bowls with sauce, folded into wraps, chopped into breakfast hash, or added cold to salads instead of aggressively reheated.

Extra slices can become an easy lunch with rice, crisp vegetables, greens, and a sauce that brings moisture back.

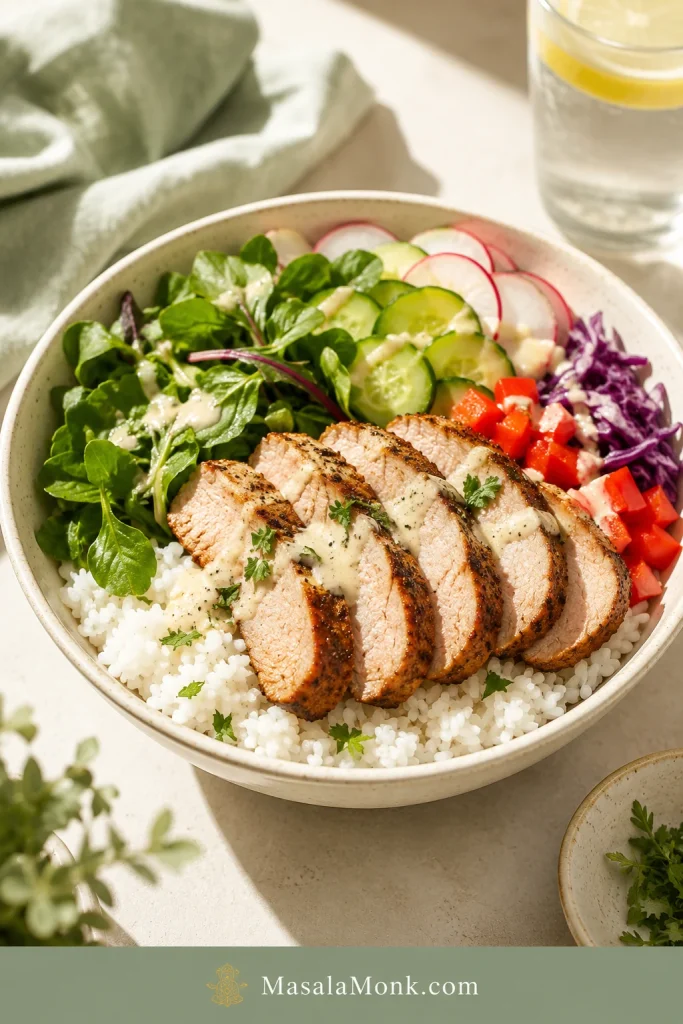
Rice bowl with sliced pork tenderloin, white rice, leafy greens, cucumber, radish, red pepper, purple cabbage, herbs, and sauce.
Finally, leftover air fryer pork tenderloin works beautifully in rice bowls because the sauce, greens, and crisp vegetables bring moisture back to the slices.

Go to FAQBack to the recipe cardBack to top

FAQ

How long do you cook pork tenderloin in the air fryer?

Most 1–1½ lb / 450–680g pork tenderloins take 18–24 minutes at 400°F / 200°C. Slim 1 lb pieces may finish closer to 14–18 minutes, while thick pieces may need 24–28 minutes. Use the chart, then confirm 145°F / 63°C in the center.

What temperature should I air fry pork tenderloin?

Set the air fryer to 400°F / 200°C, or 205°C if your model allows that setting. This gives good browning without a long cook time. If your air fryer runs very hot, reduce slightly to 375–390°F / 190–200°C and cook to temperature.

How do I keep it from drying out?

Use the right cut, check early, and rest before slicing. The mistake is usually not the seasoning — it is leaving lean pork in the air fryer a few minutes too long.

What if I do not have a meat thermometer?

A thermometer is strongly recommended because pork tenderloin is lean and cooks quickly. Without one, use the timing chart, slice into the thickest part, and check that the pork is hot all the way through with no raw-looking center. This is less reliable than a temperature check, so a small instant-read thermometer is worth it.

Is pork tenderloin the same as pork loin?

No. Pork tenderloin is long, narrow, and usually 1–1½ lb. Loin is wider, larger, and more roast-like. They need different cooking times, so checking the package before cooking matters.

Is pork fillet the same as pork tenderloin?

Often, yes. In many places, pork tenderloin is sold as pork fillet. If your pork fillet is long, narrow, and around 450–680g / 1–1½ lb, this air fryer method applies.

Can pork tenderloin be pink inside?

Yes. A slight blush can be normal when the pork is cooked to temperature. Do not keep cooking just to erase every hint of pink, or the tenderloin can turn dry.

Do I need to flip it?

Yes. Flipping helps the pork brown more evenly, especially in basket-style air fryers where the top often gets more direct heat than the bottom. Turn it after the first 10–12 minutes, then finish cooking.

Can I cook frozen pork tenderloin in the air fryer?

You can, but thawed is better for browning and texture. For frozen pork tenderloin, use about 330°F / 165°C, begin testing around 30 minutes, season once the surface softens, flip halfway, and confirm doneness before serving.

Can I cook pork tenderloin and potatoes together?

Yes, but potatoes need a head start because they usually take longer. Cook the pork first and finish the vegetables while it rests, or start small-cut potatoes 8–10 minutes before adding the pork.

How do I cook pre-marinated pork tenderloin?

Check that the package is actually pork tenderloin and not pork loin filet. Pat off excess wet marinade if needed, begin testing around 15 minutes, and cook until the pork reaches 145°F / 63°C. If the outside darkens early, check the temperature before assuming the middle is done.

Can I season pork tenderloin ahead of time?

Yes. You can season it up to 12 hours ahead and refrigerate it covered. Let it sit out for 15–20 minutes while the air fryer preheats so it is not going into the basket ice-cold.

How do I reheat leftovers?

Reheat slices at 350°F / 175°C for 3–4 minutes in the air fryer, or microwave gently with a splash of broth, water, butter, or sauce. Sliced pork reheats better than a whole tenderloin because it warms faster and needs less time.

Can I make pork tenderloin medallions in the air fryer?

Yes. Slice the tenderloin into even 1–1½ inch medallions, season both sides, and air fry at 350°F / 175°C for about 9–12 minutes, flipping once. Start checking early if the pieces are closer to 1 inch thick.

Final Tip

Once you know the cut, the temperature, and when to stop cooking, air fryer pork tenderloin becomes a very easy win: browned outside, juicy inside, and flexible enough for potatoes, salads, bowls, or leftovers the next day. The first cook teaches you your air fryer; after that, this becomes one of those dinners you can repeat without hovering over the basket.

If your air fryer runs especially hot or slow, drop your timing in the comments — model, weight, and total cook time are especially helpful. Someone else with the same style of air fryer may be comparing notes before dinner.

Back to recipe cardBack to cooking chartBack to top

Posted on 3 Comments

Slow Cooker Pork Tenderloin (Crock Pot Recipe) — 3 Easy Ways

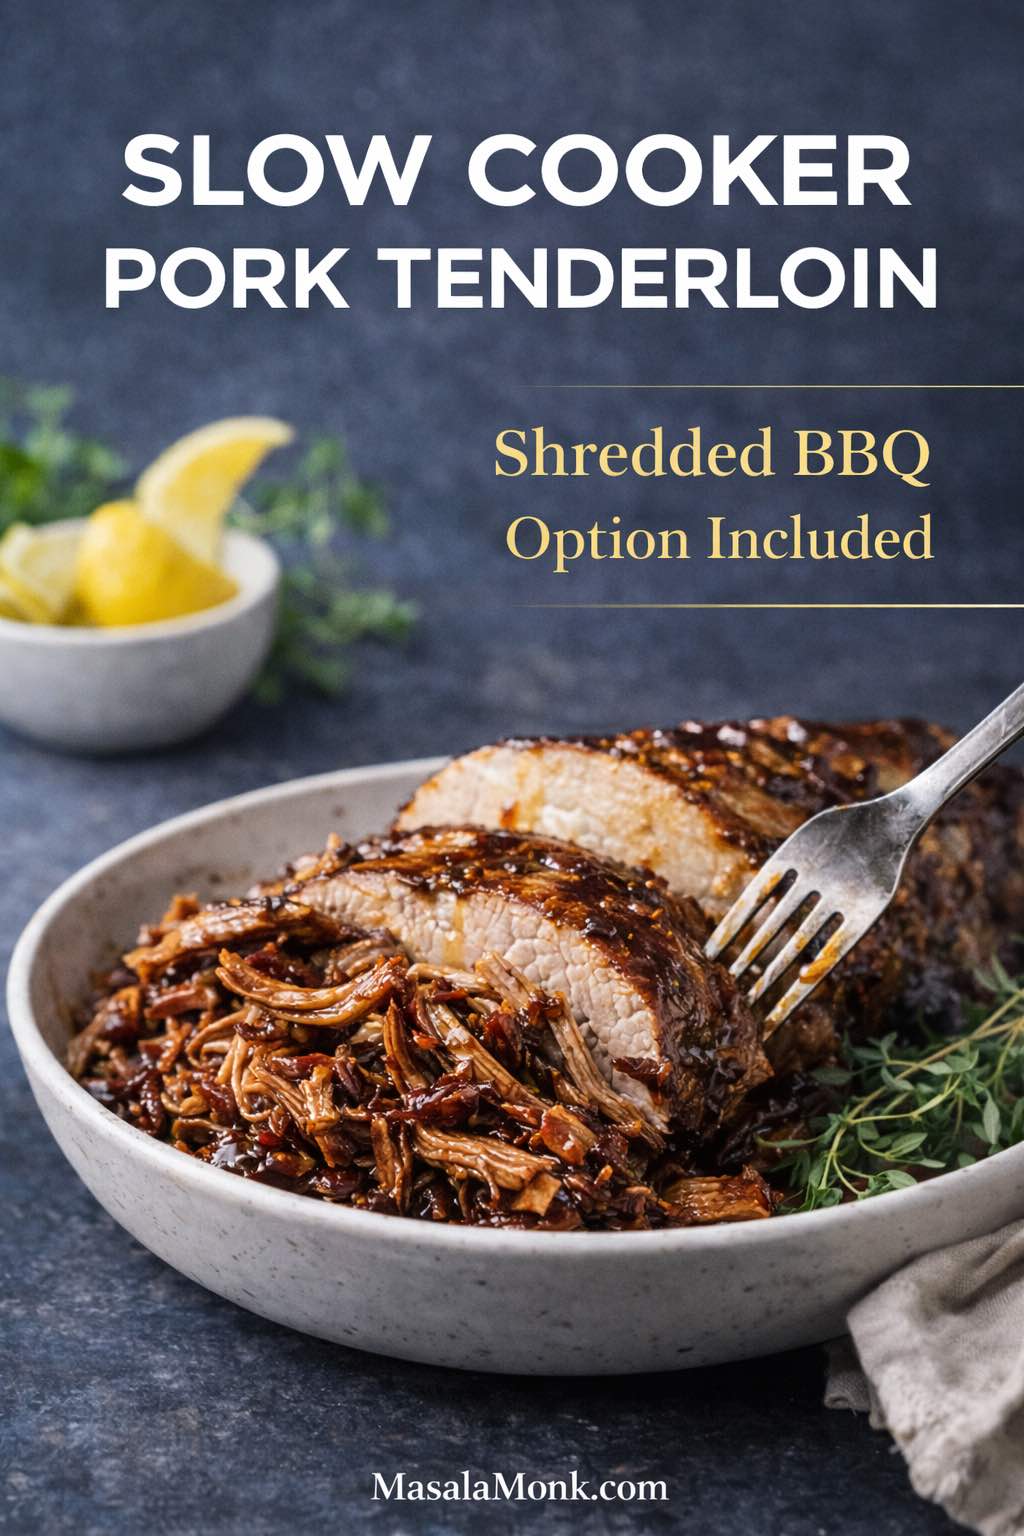
Shredded BBQ slow cooker pork tenderloin in a speckled bowl on a cool slate background, topped with sliced tenderloin and glossy barbecue sauce, with a fork resting in the bowl and the title “Slow Cooker Pork Tenderloin” on the cover.

There’s something quietly satisfying about a slow cooker dinner. You season, you layer, you set the lid, and then you go live your life while the kitchen slowly turns itself into the coziest room in the house. Slow cooker pork tenderloin fits that rhythm beautifully—provided you treat it like the lean, quick-cooking cut it is.

That’s the part that surprises people. A tenderloin sounds like it should love long, lazy cooking. However, because it’s so lean, it doesn’t have the same built-in cushion that pork shoulder has. In other words, slow cooking pork tenderloin works best when you’re aiming for a clear endpoint: juicy and sliceable at one temperature, or shreddable at a higher one. Once you cook to that endpoint, the rest becomes wonderfully flexible.

So this is a full guide to slow cooker pork tenderloin with three dependable recipes or “ways”:

  1. a classic sliceable version with glossy juices you can spoon over every slice
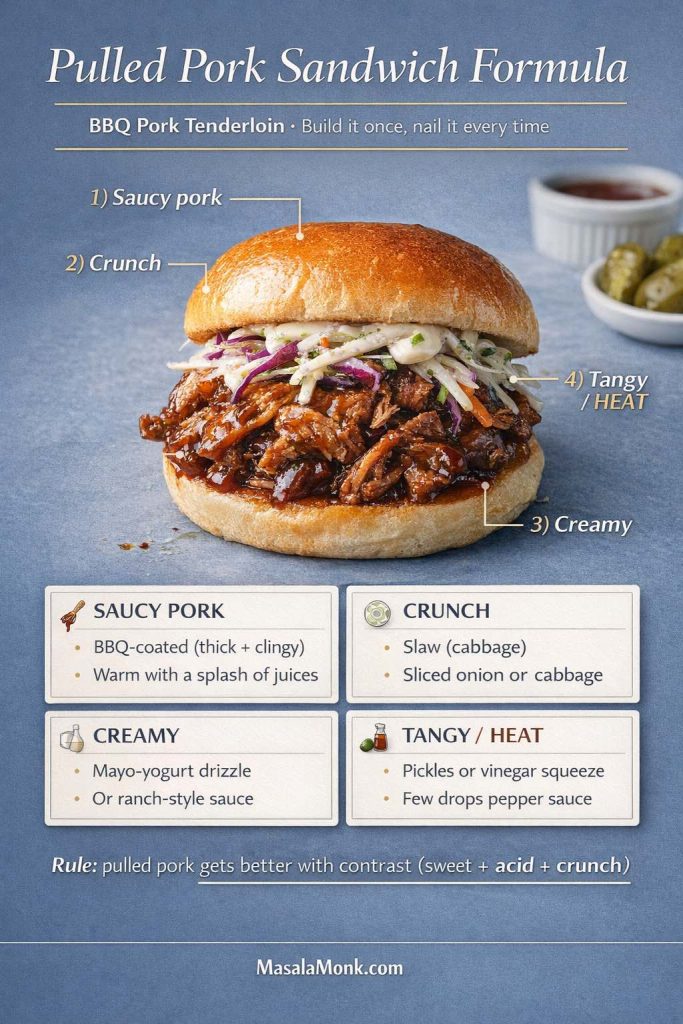
  2. a shredded, pulled-style BBQ version that turns into sandwiches, bowls, and sliders
  3. a complete one-pot meal with potatoes and carrots that feels like comfort food without extra pans

Along the way, you’ll also get the cooking time for pork tenderloin in slow cooker on LOW vs HIGH, the temperature targets that keep it juicy, and plenty of flavorful serving variations—because once you nail the method, you’ll want to use it often.


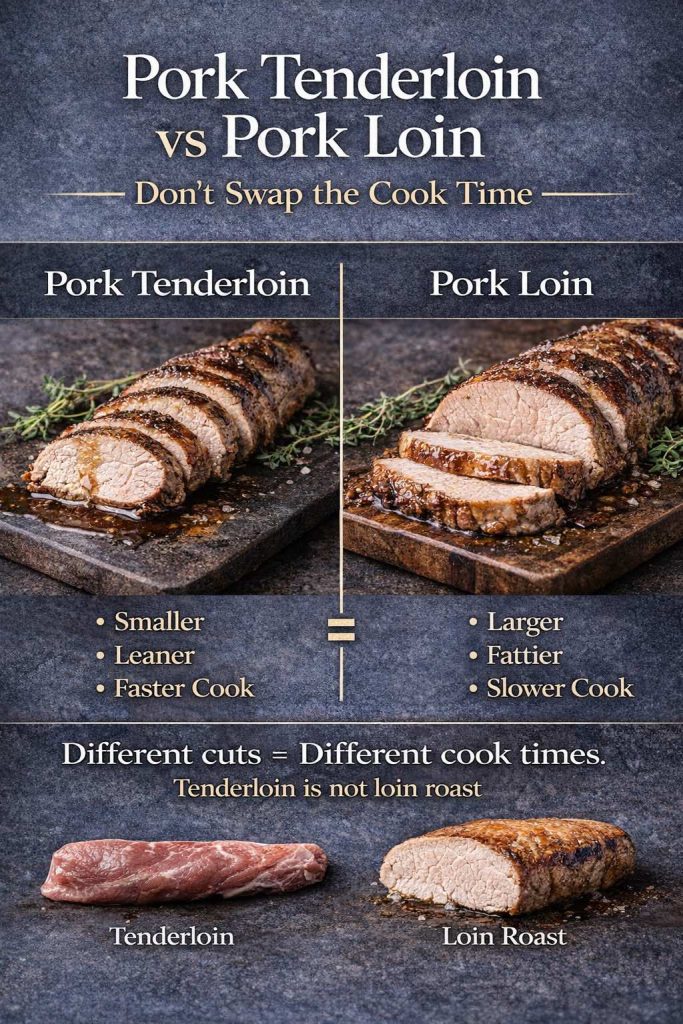
Slow Cooker Pork Tenderloin vs Pork Loin (Don’t Swap Cook Times)

Before you unwrap anything, it helps to confirm what you bought. Pork tenderloin and pork loin get confused constantly, and the slow cooker is where that mix-up can wreck dinner.

Infographic comparing pork tenderloin vs pork loin for slow cooking, showing tenderloin is smaller and leaner with a faster cook, while pork loin is larger and fattier with a slower cook, plus a note not to swap cook times when making slow cooker pork tenderloin.
Not sure if you have pork tenderloin or pork loin? This quick comparison makes it easy: tenderloin is smaller and leaner, so it cooks faster in the slow cooker, while pork loin is bigger and needs more time. Use this before you start so your slow cooker pork tenderloin stays juicy and your cook time makes sense—then follow the post for the full method, temperature targets, and the 3 easy ways (sliceable, shredded BBQ, or potatoes + carrots).

Pork tenderloin is long, narrow, and very lean. It cooks quickly and turns tender without needing hours upon hours. Pork loin is wider, often heavier, and typically needs more time to soften—especially if you’re trying to shred it.

Consequently, pork tenderloin in a slow cooker works best when you treat time as a guideline and temperature as your finish line. That shift—temperature over hours—keeps you out of the “dry but tender” zone.

If you cook tenderloin in other ways too and want a helpful comparison for texture and slicing, this guide on pork tenderloin in the oven is a great companion. It helps anchor your instincts: what tenderloin feels like when it’s juicy, how resting changes everything, and why “just a little longer” can be the wrong move.

Also Read: Chicken Pesto Pasta (Easy Base Recipe + Creamy, One-Pot, Baked & More)


Why Slow Cooker Pork Tenderloin Works (And When It Doesn’t)

Slow cookers excel at gentle, even heat. That’s why they’re great for soups, stews, and braises. At the same time, their superpower—steady heat over time—can become the very thing that dries out tenderloin if you leave it too long.

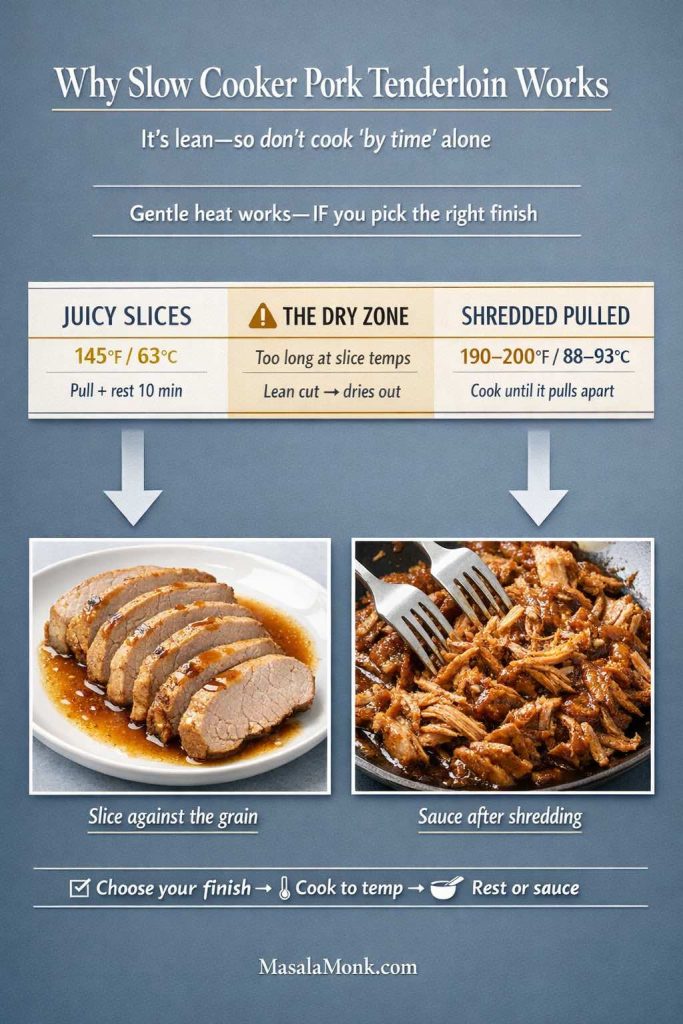
Infographic explaining why slow cooker pork tenderloin works and when it dries out, showing two finish paths: Juicy Slices pulled at 145°F / 63°C with a 10-minute rest, and Shredded Pulled cooked to 190–200°F / 88–93°C, plus a middle “dry zone” warning for cooking too long at slice temps, with photo tiles for slicing against the grain and saucing after shredding, and MasalaMonk.com in the footer.
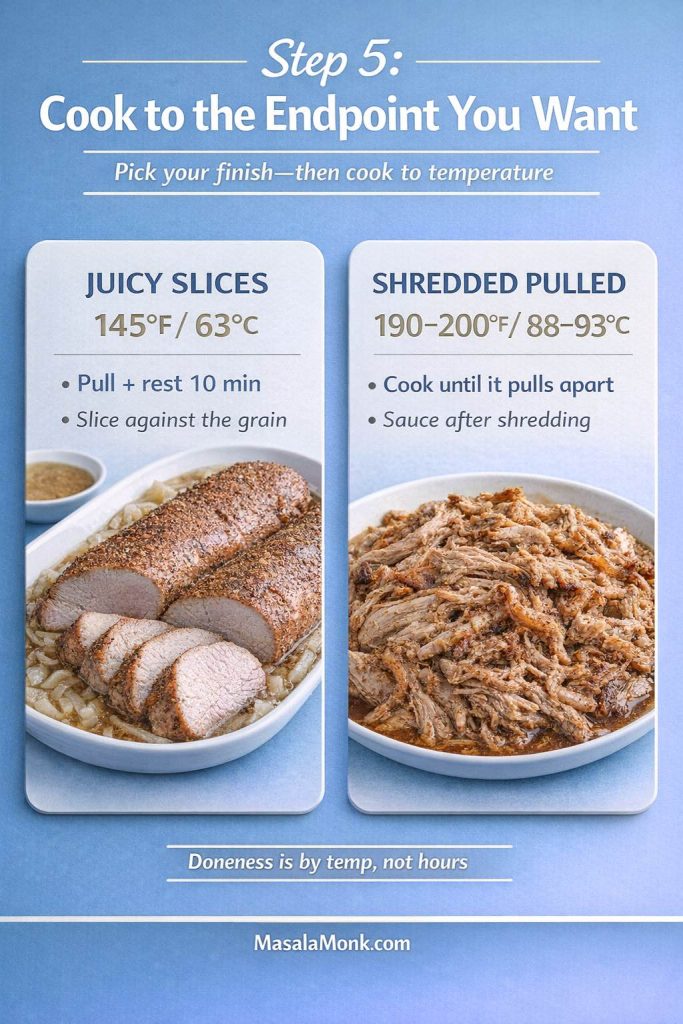
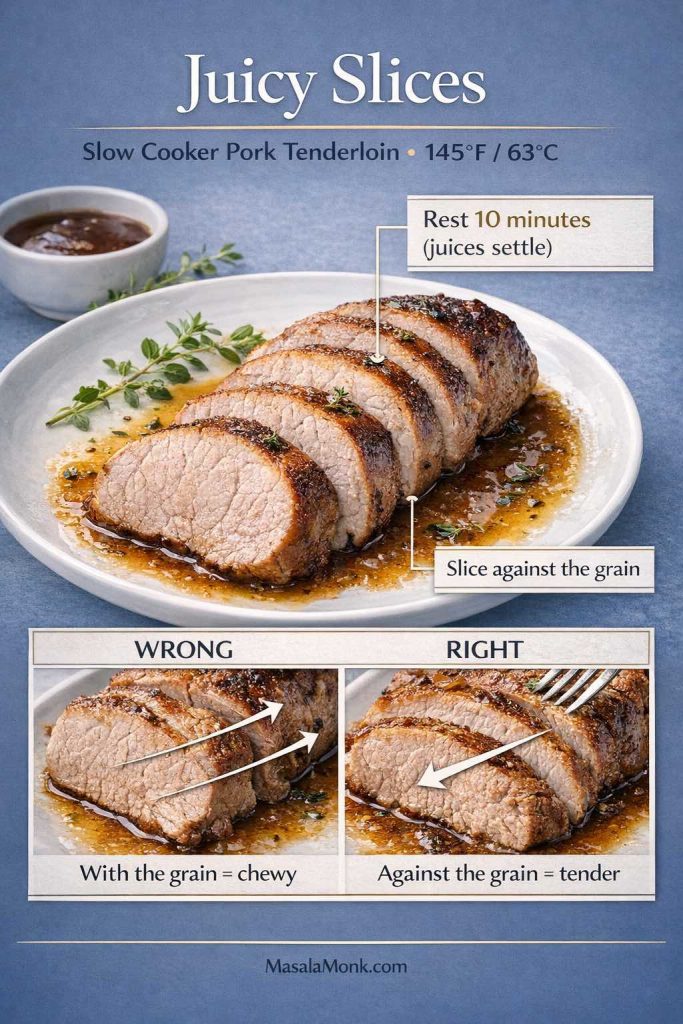
Slow cookers do gentle, even heat brilliantly—but pork tenderloin is lean, so the “set it and forget it” mindset can backfire. This visual shows the two finishes that work every time: Juicy Slices (pull at 145°F / 63°C, rest, slice against the grain) or Shredded Pulled (cook to 190–200°F / 88–93°C, then sauce after shredding). Save this “tenderloin window” guide so you always pick the right endpoint—tender, juicy results without drifting into the dry zone.

Here’s the good news: you don’t need fancy tricks. You simply need a structure.

  • For sliceable pork tenderloin crock pot style, you cook to a safe, juicy temperature, then rest and slice.
  • For slow cooker pork tenderloin shredded, you keep cooking until it pulls apart, then you sauce it so the meat stays flavorful and lush.

Once you use that structure, this becomes an “I can do this any week” meal. Moreover, it’s incredibly adaptable—BBQ one night, herb-bright the next, potatoes and carrots on a Sunday when you want a full pot of comfort.

Also Read: How to Make a Flax Egg (Recipe & Ratio for Vegan Baking)


Ingredients for Slow Cooker Pork Tenderloin (Crock Pot Base)

This base is designed to taste complete on its own while still leaving you room to pivot into BBQ or a hearty vegetable version.

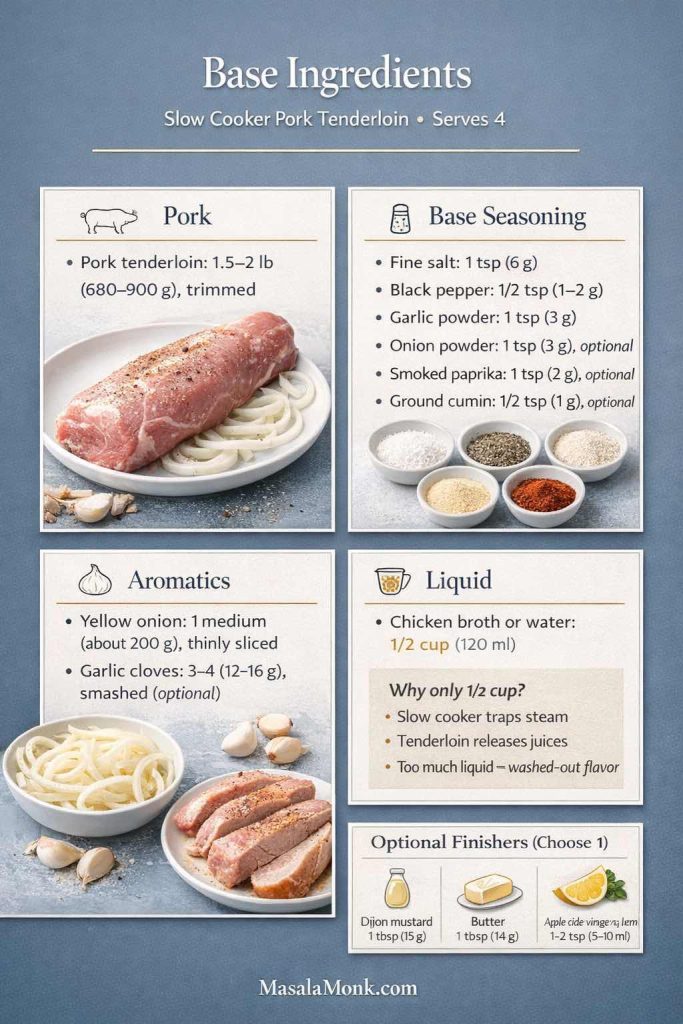
Infographic titled “Base Ingredients” for slow cooker pork tenderloin (serves 4) showing pork tenderloin amount, base seasoning list, aromatics (yellow onion and garlic), and a modest liquid amount (1/2 cup / 120 ml) with a note explaining why less liquid prevents washed-out flavor, plus optional finishers (Dijon, butter, apple cider vinegar or lemon) and MasalaMonk.com in the footer.
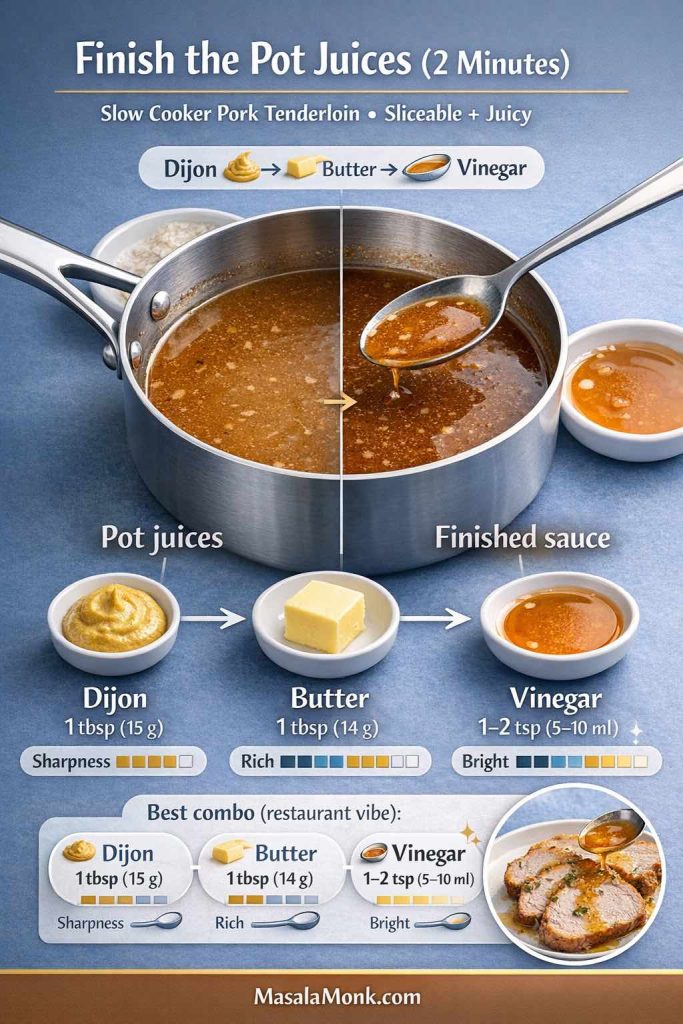
This is the complete crock pot base one can use for slow cooker pork tenderloin—simple, balanced, and flexible. The seasonings make it taste finished on its own, the onion bed builds depth, and the modest 1/2 cup (120 ml) liquid keeps the juices concentrated instead of watery. Then you can choose a quick finisher at the end—Dijon for savory, butter for richness, or a splash of vinegar/lemon for brightness. Save this ingredients snapshot so you can cook once and pivot into slices, shredded BBQ, or a full one-pot dinner.

Base ingredients for recipe (serves 4)

  • Pork tenderloin: 1.5–2 lb (680–900 g), trimmed
  • Fine salt: 1 tsp (6 g)
  • Black pepper: 1/2 tsp (1–2 g)
  • Garlic powder: 1 tsp (3 g)
  • Onion powder: 1 tsp (3 g), optional but excellent
  • Smoked paprika: 1 tsp (2 g), optional (especially good for BBQ direction)
  • Ground cumin: 1/2 tsp (1 g), optional (adds warmth without taking over)
  • Yellow onion: 1 medium (about 200 g), thinly sliced
  • Garlic cloves: 3–4 (12–16 g), smashed (optional)
  • Liquid: 1/2 cup (120 ml) chicken broth or water

Why the liquid is modest for Slow Cooker Pork Tenderloin

Slow cookers trap steam, so liquid doesn’t reduce the way it would on a stovetop. In addition, pork tenderloin releases its own juices as it cooks. Therefore, a modest amount—about 1/2 cup (120 ml)—creates a flavorful, concentrated pot of juices without washing out the seasoning.

Optional finishers (choose one later)

  • Dijon mustard: 1 tbsp (15 g)
  • Butter: 1 tbsp (14 g)
  • Apple cider vinegar or lemon juice: 1–2 tsp (5–10 ml), to taste

Those “small” finishers add up to a bigger, brighter flavor at the end—especially if you’re serving slices.

Also Read: Croquettes Recipe: One Master Method + 10 Popular Variations


How to Cook Pork Tenderloin in a Slow Cooker (Step-by-Step Recipe)

This method is the foundation for all three ways. It’s also the simplest path to easy pork tenderloin in slow cooker form—juicy, flavorful, and dependable.

1) Season with intention

Pat the tenderloin dry with paper towels, then season evenly with salt, pepper, garlic powder, and any optional spices you’re using. Rub gently so the seasoning adheres.

Drying the surface might seem fussy, yet it helps in two ways: the rub sticks better, and the outer layer doesn’t steam quite as quickly.

Seasoning isn’t just “sprinkle and hope”—it’s a quick setup that pays off later. Pat the tenderloin dry, season evenly, then rub so it actually adheres. That dry surface helps the outer layer avoid steaming too fast and keeps the flavor where you want it: on the meat. If you’re leaning toward BBQ or a warmer profile, paprika + cumin are the easiest optional upgrades without overpowering the base. Save Step 1—you’ll use it every time. MasalaMonk.com

2) Build a flavor bed

Lay the sliced onion (and smashed garlic, if using) in the bottom of the crock pot. The onions soften into the cooking liquid and bring a mellow sweetness that makes the pork taste fuller.

Infographic titled “Step 2: Build a Flavor Bed” showing sliced onions in a slow cooker with optional garlic cloves. Callouts note onions add mellow sweetness, garlic adds optional depth, and an even layer helps even cooking. Includes note that pork sits on top with no direct hot spots and MasalaMonk.com footer.
This is the quiet “chef move” that makes slow cooker pork taste fuller: a simple onion bed. As the onions soften, they melt into the juices and turn into a mellow, savory sweetness that makes the pork taste more complete—without extra effort. Keep the layer even, add garlic if you want depth, then set the pork on top so it cooks gently with no direct hot spots. It’s low effort, high payoff. MasalaMonk.com

3) Add liquid around the edges

Pour 1/2 cup (120 ml) broth or water into the pot. Try to pour around the onions so you don’t rinse all the seasoning off the pork when you set it in.

Infographic titled “Step 3: Add Liquid Around the Edges” showing broth being poured into a slow cooker around onions and pork tenderloin. Callouts say pour around onions, keeps rub from washing off, and modest liquid creates concentrated juices. Includes “½ cup / 120 ml” label and MasalaMonk.com footer.
The #1 reason slow cooker pork tastes bland is too much liquid. Here’s the fix: add only ½ cup (120 ml) and pour it around the edges so you don’t rinse off the rub. Slow cookers trap steam and pork releases juices, so a modest splash gives you rich, concentrated pot juices instead of a watery bath. This step is simple, but it’s what makes the final sauce taste like it belongs on the pork. MasalaMonk.com

4) Place the pork tenderloin on top in a slow cooker

Lay the tenderloin over the onions. Keep it as straight as possible so it cooks evenly.

Infographic titled “Step 4: Pork on Top” showing pork tenderloin placed above onions in a slow cooker with callouts: pork sits above onions, center it for even heat, keep it straight for even thickness, and “Don’t submerge.” MasalaMonk.com footer.
This tiny placement trick makes a big difference. Set the tenderloin on top of the onion bed, keep it centered, and lay it as straight as possible so it cooks evenly from end to end. You’re aiming for gentle heat + steady juices—not a submerged boil—so the pork stays tender and clean-tasting. If your tenderloin ever comes out uneven (one end perfect, one end dry), Step 4 is usually the fix. MasalaMonk.com

5) Cook to the endpoint you want

Now you choose the track:

  • For sliceable slow cooker pork tenderloin, you stop at the juicy temperature and rest.
  • For pulled pork from pork tenderloin in crock pot style, you keep cooking until it shreds easily, then you sauce it.
Infographic titled “Step 5: Cook to the Endpoint You Want” comparing two finish paths for slow cooker pork tenderloin: Juicy Slices at 145°F/63°C with pull and rest 10 minutes and slice against the grain, versus Shredded Pulled at 190–200°F/88–93°C cooked until it pulls apart and sauced after shredding. Includes note “Doneness is by temp, not hours” and MasalaMonk.com footer.
Step 5 is where this recipe becomes foolproof: pick the finish first, then cook to the right endpoint. If you want sliceable pork tenderloin, pull at 145°F / 63°C, rest 10 minutes, then slice against the grain. If you want pulled/shredded, keep going to 190–200°F / 88–93°C until it practically falls apart—then sauce after shredding so it stays bold and glossy, not watery. Save this one because it answers the biggest question instantly: slices or shred? MasalaMonk.com

Should you sear pork tenderloin before putting it in slow cooker?

You can, though you don’t have to.

  • If you have 5–7 minutes and want extra depth, sear in a hot skillet with a little oil: 60–90 seconds per side.
  • If you’re going for “dump and go,” skip it. The seasonings, onions, and finishing steps still deliver.

Either route works. The difference is flavor nuance, not success versus failure.

Infographic titled “The 5-Step Map: Slow Cooker Pork Tenderloin (Foundation Method)” showing a five-step workflow: pat dry and season, onion bed, add 1/2 cup (120 ml) liquid around edges, pork on top kept straight, and cook to endpoint. Bottom shows two finishes: slices at 145°F/63°C plus rest, or shred at 190–200°F/88–93°C plus sauce. MasalaMonk.com footer.
This is the “do-it-once, use-it-forever” method for slow cooker pork tenderloin. Follow the 5 steps, then choose your finish: juicy slices (145°F / 63°C + rest) or shredded pulled (190–200°F / 88–93°C + sauce). It’s the kind of guide you save because it removes the guesswork—especially the part most people get wrong (cooking by hours instead of endpoint). Keep this map handy for weeknights, meal prep, and easy pivots like BBQ or a veggie-packed one-pot dinner. MasalaMonk.com

A quick, trustworthy safety anchor

Slow cookers are safe and practical when used correctly. If you want a clear reference for safe handling and slow cooker practices, the USDA’s guide on slow cookers and food safety is a good citation to keep the method grounded.

Also Read: Ravioli Recipe Reinvented: 5 Indian-Inspired Twists on the Italian Classic


Cooking Time for Pork Tenderloin in Slow Cooker (LOW vs HIGH)

Cook time varies by thickness, slow cooker model, and whether the tenderloin started fridge-cold. Still, these ranges are practical starting points—especially if you pair them with a thermometer.

Cheat-sheet infographic for slow cooker pork tenderloin showing cook time and temperature targets: LOW and HIGH timing guidance, 145°F (63°C) for juicy slices with a 10-minute rest, and 190–200°F (88–93°C) for shreddable pork, on a cool slate background with sliced tenderloin photos.
Bookmark-worthy at-a-glance guide: this slow cooker pork tenderloin cheat sheet shows the timing range and the two temperature targets that change everything—145°F / 63°C for juicy, sliceable pork and 190–200°F / 88–93°C for a shredded, pulled-style finish. Use it while cooking to nail doneness without guesswork, then rest the meat so every slice (or shred) stays tender. Save this image for your next crock pot pork tenderloin night.

Temperature targets that keep it juicy

For sliceable tenderloin, the USDA lists 145°F / 63°C as the safe minimum internal temperature for whole cuts of pork, followed by a rest. You can cite their safe temperature chart right where you explain this.

For shreddable tenderloin (pulled-style), you’re aiming for tenderness more than a single number, yet it usually lands around:

  • 190–200°F / 88–93°C

Typical timing ranges (1.5–2 lb / 680–900 g tenderloin)

  • LOW: 2.5–4 hours
  • HIGH: 1.5–2.5 hours

Because models vary, start checking earlier than you think—particularly on HIGH. That early check is what keeps “juicy” from becoming “a little dry.”

Can you overcook pork tenderloin in a crock pot?

Yes, and it happens quietly. Tenderloin doesn’t have the fat cushion of shoulder. Once it sits past the ideal sliceable endpoint, moisture squeezes out. It may still be tender, yet the slices can taste dry.

Fortunately, there’s an easy rescue: if you overshoot the sliceable window, shift gears and shred it into a saucy version. Sauce won’t recreate lost moisture, but it can make the final dish far more enjoyable.

Also Read: Fish and Chips Reimagined: 5 Indian Twists (Recipe + Method)


Way 1: Classic Slow Cooker Pork Tenderloin (Sliceable + Juicy Recipe)

This is the version you make for neat slices, glossy pan juices, and a dinner plate that looks like you tried harder than you did. It also sets you up for easy leftovers—sandwiches, grain bowls, and quick reheats that still taste like dinner.

Ingredients (Way 1)

Base ingredients, plus one optional finisher:

  • Dijon mustard: 1 tbsp (15 g)
    or
  • Butter: 1 tbsp (14 g)
    optional brightener: apple cider vinegar 1–2 tsp (5–10 ml)

Steps (Way 1)

  1. Layer onions (and garlic if using) in the crock pot.
  2. Add 1/2 cup (120 ml) broth or water.
  3. Place seasoned tenderloin on top.
  4. Cook on LOW or HIGH until the thickest part hits 145°F / 63°C.
  5. Transfer to a plate, tent loosely with foil, and rest 10 minutes.
  6. While it rests, stir the pot juices. Add Dijon or butter for a glossy, flavorful finish.
  7. Slice against the grain and spoon juices over each serving.

How to slice pork tenderloin after slow cooking

After resting, slice across the grain into 1/2-inch (1–1.5 cm) pieces. Thin slices cool quickly and can feel drier, while thicker slices can feel less tender. Half-inch slices are a sweet spot for both tenderness and juiciness.

Infographic titled “Juicy Slices” for slow cooker pork tenderloin showing sliced pork on a plate with pan juices and two key tips: rest 10 minutes and slice against the grain, plus a temperature cue to pull at 145°F / 63°C and a WRONG vs RIGHT comparison of slicing direction for tender results.
Juicy slices aren’t luck—this quick guide shows the two moves that make slow cooker pork tenderloin taste tender instead of dry: rest 10 minutes so the juices settle, then slice against the grain for a softer bite. Pull the tenderloin at 145°F / 63°C, let it rest, and use the “wrong vs right” slice direction panel to get clean, tender slices every time. Save this for your next crock pot pork tenderloin night—especially when you want sliceable pork for plates, sandwiches, or easy leftovers.

Serving ideas for sliceable pork tenderloin in the crock pot or slow cooker

This version is quietly versatile. Depending on what you’re craving, it can go in a few directions:

  • Bright and herby: Spoon chimichurri over warm slices for a fresh, restaurant-feeling finish. The acidity and herbs lift the pork beautifully, while the oil adds richness without heaviness.
  • Comfort plate: Serve with mashed potatoes, roasted vegetables, or a simple rice pilaf.
  • Salad dinner: Add slices to a salad with crunchy cucumber, onion, and a sharp vinaigrette.
  • Sandwiches: Slice thinly the next day, add a creamy spread, and layer with crisp vegetables.

If you want a creamy base that behaves like a classic sandwich spread, our eggless mayonnaise works well as a simple read here—especially for readers who like a soft, creamy contrast to lean pork.
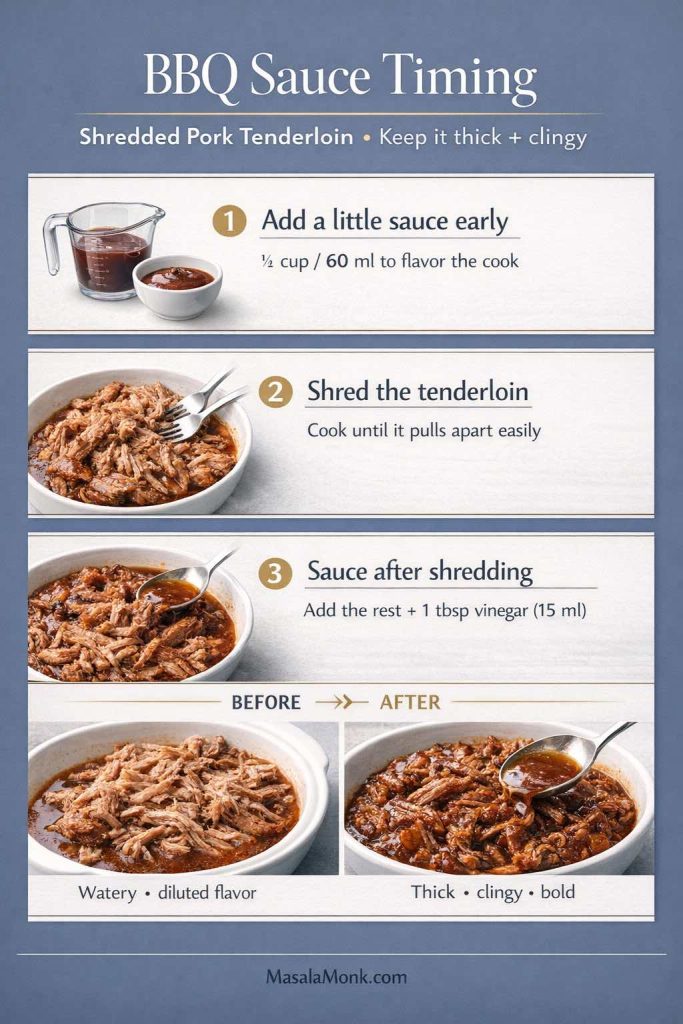
Make the pot juices taste “finished”

Slow cooker juices can taste good yet slightly muted, especially if you used water instead of broth. To bring them into focus:

  • Add Dijon for sharpness,
  • or butter for richness,
  • or a small splash of vinegar for brightness.

Even better, you can do two—Dijon plus butter is a classic combination that reads like a quick pan sauce without any extra work.

Infographic showing how to finish slow cooker pork tenderloin pot juices in 2 minutes: stir in Dijon mustard (1 tbsp), butter (1 tbsp), and a splash of vinegar (1–2 tsp) to turn thin crock pot juices into a glossy, brighter sauce. Includes “before vs finished” sauce visual, a best-combo strip, and a spooning-over-slices example.
Slow cooker pork tenderloin can be juicy yet the pot juices sometimes taste a little flat. This 2-minute finish fixes that fast: Dijon for sharpness, butter for richness, and a small splash of vinegar for brightness—turning crock pot juices into a glossy, “pan-sauce” style pour-over. Save this for your next sliceable slow cooker pork tenderloin night, then use it right after resting and before serving to make every slice taste bold and finished.

Leftovers for Way 1 (quick, satisfying reuses)

Sliceable tenderloin leftovers are a gift, especially when you store them with a little liquid.

  • Warm bowl: Reheat slices gently with a spoon of juices, then serve over rice with herbs and lemon.
  • Wraps: Add sliced pork, crisp vegetables, and a creamy spread.
  • Protein snack plate: Cold slices with pickles, a little mustard, and crunchy vegetables are surprisingly good.

Also Read: Dirty Martini Recipe (Classic, Extra Dirty, No Vermouth, Spicy, Blue Cheese, Tequila + Batched)


Way 2: Slow Cooker Pork Tenderloin Shredded (Pulled-Style BBQ Recipe)

This version answers a very real craving: the saucy, messy, satisfying joy of pulled pork—without needing pork shoulder. It’s not the same as shoulder, yet it can be wildly delicious when you treat it properly.

Here, you’re using pork tenderloin pulled pork in slow cooker style as a method: cook until it shreds, then sauce it so the flavor stays bold.

Ingredients (Way 2)

Base ingredients, plus:

  • BBQ sauce: 1 cup (240 ml), divided
  • Apple cider vinegar: 1 tbsp (15 ml)
  • Brown sugar or honey: 1 tbsp (12–15 g), optional (adjust to taste)
  • Optional heat: a few drops of pepper sauce

Why sauce timing matters

If you add all the BBQ sauce at the beginning, it tends to thin out and lose its punch. Instead, you want the pork to cook in a lightly seasoned liquid, then get coated in thicker sauce after shredding.

Infographic titled “BBQ Sauce Timing” for shredded slow cooker pork tenderloin, showing three steps: add a little sauce early (¼ cup / 60 ml), shred the tenderloin, then add the remaining sauce plus 1 tbsp vinegar (15 ml), with a before-and-after comparison of watery sauce versus thick, clingy BBQ sauce and MasalaMonk.com in the footer.
Watery BBQ is the fastest way to make shredded pork feel disappointing—this quick visual fixes it. Add just a little sauce early to flavor the cook, shred the slow cooker pork tenderloin once it pulls apart easily, then stir in the remaining BBQ sauce plus a splash of vinegar so it turns thick and clingy instead of diluted. Save this for the next time you’re making bbq pulled pork tenderloin in the crock pot—especially if you want bold flavor that actually coats every strand.

Steps (Way 2)

  1. Add onions and liquid to the crock pot. Stir in 1/4 cup (60 ml) BBQ sauce.
  2. Place the seasoned tenderloin on top.
  3. Cook on LOW until the meat shreds easily. For many slow cookers, that’s around 190–200°F / 88–93°C.
  4. Move tenderloin to a board and shred with two forks.
  5. Return shredded pork to the crock pot. Add remaining BBQ sauce, vinegar, and optional sweetener.
  6. Let it sit on WARM for 10–15 minutes so the sauce clings.
Infographic titled “Shred Test: Ready to Pull?” showing shredded slow cooker pork tenderloin being pulled with two forks, with callouts for the fork-twist test and “no resistance,” plus a target temperature of 190–200°F (88–93°C) and a NOT READY vs READY comparison to help make pulled-style shredded pork tenderloin.
If you’ve ever tried to shred pork and it “fights back,” this is your fix. Use the fork-twist shred test to know when slow cooker pork tenderloin is truly ready for a pulled-style finish: strands should separate easily with no resistance, usually around 190–200°F / 88–93°C. The bottom comparison shows what “not ready” looks like versus perfectly shred-ready pork, so you can cook with confidence and get juicy, saucy shredded pork tenderloin instead of dry strands. Save this for your next crock pot pulled pork night.

How to keep shredded pork tenderloin from drying out

  • Keep some of the cooking juices in the pot when you sauce it—enough to keep it luscious, not so much that it becomes watery.
  • Avoid holding it on WARM for a long time. A short rest for sauce absorption is great; extended holding can dry it out.

BBQ pulled pork tenderloin crock pot serving variations

Now the fun part: once you have saucy shredded pork, dinner becomes flexible. Instead of one meal, you suddenly have options.

1) Pulled pork sandwiches and sliders
Piles of shredded pork love contrast: creamy, crunchy, tangy, or spicy.

  • Creamy drizzle: Mix a spoon of eggless mayonnaise with a splash of vinegar and a pinch of salt for a quick slaw-like drizzle.
  • Crunchy topping: Add shredded cabbage or sliced onions for snap.
  • Build inspiration: If you like the “how to assemble a great sandwich” logic—creamy + crunchy + acidic—this roundup of chicken sandwich recipes is a natural pathway, because the assembly patterns work across proteins.

2) Bowls (fast, filling, meal-prep friendly)
Serve shredded pork tenderloin over:

  • rice,
  • quinoa,
  • mashed potatoes,
  • or roasted sweet potatoes.

Then add something bright (pickles, onions, a squeeze of lime) to keep the bowl from feeling heavy.

If you enjoy batch cooking and turning one protein into multiple meals, our meal prep framework on vegetarian and high-protein meal prep ideas is a natural read here, because the principles—balanced add-ons, smart storage, mix-and-match components—translate perfectly.

3) Potluck plates
BBQ-style shredded pork shines with cold sides. A classic pairing is potato salad, which balances smoky-sweet sauce with tangy creaminess.

4) Spicy BBQ finish
If you want the sauce to taste lively rather than just sweet, a few drops of pepper sauce added at the end can give you clean, controlled heat.

Infographic titled “Pulled Pork Sandwich Formula” for BBQ pork tenderloin, showing a pulled pork sandwich with labeled layers: 1) saucy pork, 2) crunch, 3) creamy, 4) tangy/heat. Includes four boxes with ideas: BBQ-coated pork warmed with a splash of juices; slaw or sliced onion/cabbage for crunch; mayo-yogurt drizzle or ranch-style sauce for creamy; pickles/vinegar squeeze and a few drops of pepper sauce for tangy/heat. Rule: contrast makes it better.
Pulled pork is good—pulled pork with contrast is unforgettable. Use this simple build-anytime formula for BBQ pork tenderloin: Saucy pork + Crunch + Creamy + Tangy/Heat. Start with thick, clingy BBQ-coated pork (warm it with a splash of juices), add slaw or quick-sliced onion for snap, finish with a creamy drizzle (mayo-yogurt or ranch-style), then wake it up with pickles/vinegar and a few drops of pepper sauce. That sweet + acid + crunch balance is what makes “pulled pork sandwiches” taste restaurant-level—even on a busy weeknight. Save this for your next slider night.

A gentle realism check (and why it still works)

Pulled tenderloin won’t have the same fatty silkiness as shoulder. Nevertheless, it can still be extremely satisfying—especially when you choose bold sauce, add acidity, and serve it with crunchy toppings. In a busy week, that combination hits the “comfort food” note without demanding much from you.

Also Read: Keto Hot Chocolate Recipe (Sugar-Free Hot Cocoa) + Best Homemade Mix


Way 3: Pork Tenderloin with Potatoes and Carrots (Crock Pot Meal Recipe)

This is the one-pot dinner that feels like you planned ahead. The pork cooks over vegetables, the juices drip down into the potatoes and carrots, and the whole thing tastes like it belongs on a cold evening.

It also answers a lot of practical cravings: crock pot pork tenderloin with carrots and potatoes, pork tenderloin in crock pot with potatoes and carrots, and slow cooker pork tenderloin with potatoes and carrots—all without feeling repetitive.

Infographic for one-pot slow cooker pork tenderloin with potatoes and carrots on a cool slate background, showing tips to cut vegetables large to prevent mush, place vegetables on the bottom with pork on top, cook LOW 6–7 hours or HIGH 3–4 hours, and a cut-size comparison of “too small” versus “just right” 1.5 in / 4 cm chunks, with MasalaMonk.com in the footer.
Want a full crock pot dinner without mushy vegetables? This one-pot slow cooker pork tenderloin guide shows the simple fixes: cut potatoes and carrots into large chunks (about 1.5 in / 4 cm), layer veg on the bottom and pork on top, and use the timing ranges so everything finishes tender—not falling apart. Save this for busy nights when you want pork tenderloin in the slow cooker with potatoes and carrots that actually hold their shape, then follow the post for the full method and serving variations.

Ingredients (Way 3)

Base ingredients, plus:

  • Baby potatoes: 1.5 lb (680 g), halved (quarter if large)
  • Carrots: 4 medium (about 300–350 g), cut into thick chunks
  • Olive oil: 1 tbsp (15 ml)
  • Salt (for vegetables): 3/4 tsp (4–5 g)
  • Black pepper: 1/2 tsp (1–2 g)
  • Dried thyme or rosemary: 1/2 tsp (1 g), optional
  • Optional finisher: butter 1 tbsp (14 g) or Dijon 1 tbsp (15 g)

Steps (Way 3)

  1. Toss potatoes and carrots with olive oil, salt, pepper, and herbs.
  2. Spread vegetables in the bottom of the crock pot.
  3. Layer sliced onion over the vegetables.
  4. Place the seasoned tenderloin on top.
  5. Pour 1/2 cup (120 ml) broth or water around the edges.
  6. Cook on LOW or HIGH until tenderloin reaches 145°F / 63°C.
  7. Rest pork 10 minutes, then slice.
  8. Taste pot juices and stir in butter or Dijon for a quick, glossy finish.
  9. Serve slices over vegetables with spooned juices.

When to add potatoes and carrots so they don’t turn mushy in slow cooker

Most of the time, adding them at the start works well—especially if pieces are large. However, slow cookers vary.

  • On LOW: add vegetables at the start; cut them large.
  • On HIGH: if your slow cooker runs hot, consider adding carrots and potatoes after the first 45–60 minutes, or keep pieces very large and check earlier.
Infographic titled “Finish + Serve” for slow cooker pork tenderloin with potatoes and carrots, showing three finishing moves: stir butter or Dijon into hot pot juices for gloss, add lemon or vinegar for brightness, and finish with parsley/cilantro or chimichurri. Includes three serving moods—cozy, bright, herby—and the rule to add sauces at the end.
Your one-pot pork tenderloin with potatoes and carrots is already comforting—this is how you make it pop. Use the pot juices like a built-in sauce: stir in butter or Dijon for instant gloss, add lemon/vinegar to lift the whole pot, then finish with fresh herbs (or chimichurri) right before serving. Pick a mood (cozy / bright / herby) and keep the rule: finish sauces go in at the end so flavors stay bold and the sauce stays glossy. Save this as your “final 3 moves” checklist.

Serving variations for the potatoes-and-carrots version

Because this meal has a hearty base, small finishing touches matter.

  • Herb finish: parsley or cilantro adds freshness.
  • Bright finish: a squeeze of lemon or a small splash of vinegar lifts the whole pot.
  • Sauce finish: a spoon of chimichurri turns this into a more vibrant, “special” dinner.
Infographic titled “Leftover Pork + Potato Hash” showing a before-and-after: leftover pork, potatoes, and carrots in a bowl versus a crispy skillet hash. Includes a 3-step method: chop leftovers into 1-inch pieces, cook in a hot oiled skillet pressed into one layer without stirring for 3–4 minutes, then add a splash of juices or broth and finish with lemon or herbs. Golden rule: one layer + no stirring = crisp.
Leftovers don’t have to taste like reheats. This 10-minute skillet hash turns leftover slow cooker pork tenderloin + potatoes + carrots into crispy edges and big flavor—fast. Chop into 1-inch pieces, heat a skillet with oil, press into one layer, and don’t stir for 3–4 minutes (that’s where the crunch happens). Finish with a small splash of reserved juices/broth, then lemon or herbs for lift. It’s the easiest “second meal” that feels brand new—perfect with eggs, salad, or a quick sauce. Save this for tomorrow-night dinner.

Turning leftovers into a second meal

This version reheats especially well because the vegetables hold moisture.

  • Reheat gently with a splash of broth or reserved juices.
  • Alternatively, chop leftover pork and vegetables, then crisp them in a skillet for a hash-like dinner.

Also Read: 10 Low Carb Chia Pudding Recipes for Weight Loss (Keto, High-Protein, Dairy-Free)


Pork Tenderloin with Vegetables in the Slow Cooker (Easy Mix-and-Match)

Once you’ve made the base method a couple of times, you start seeing how flexible it is. The vegetables section becomes less of a recipe and more of a rhythm: use what you have, add vegetables according to how quickly they soften, and keep the pork endpoint in mind.

Infographic titled “Vegetable Timing Map — Slow Cooker Pork Tenderloin” showing three columns: Add Early (onions, carrots, potatoes/sweet potatoes, parsnips, turnips), Add Mid-Cook (bell peppers, mushrooms, green beans), and Add Late (zucchini, spinach, peas). Bottom strip shows finish endpoints: slices at 145°F/63°C plus rest, or shred at 190–200°F/88–93°C plus sauce. MasalaMonk.com footer.
This is the easiest way to make pork tenderloin with vegetables in the slow cooker without ending up with mush. Add sturdy veg early (potatoes, carrots), add faster softeners mid-cook (peppers, mushrooms, green beans), and add delicate veg late (zucchini, spinach, peas). Then match it to your finish: juicy slices at 145°F / 63°C + rest or shredded pulled at 190–200°F / 88–93°C + sauce. Save this as your “use what you have” dinner map—once you follow the timing rhythm, it becomes effortless. MasalaMonk.com

Vegetables to add early (they can handle long heat)

  • onions
  • carrots
  • potatoes and sweet potatoes
  • parsnips
  • turnips

Vegetables to add mid-cook (they soften faster)

  • bell peppers
  • mushrooms (they can go early too, but they’ll get very soft)
  • green beans

And Vegetables to add late (they go mushy if overcooked)

  • zucchini
  • spinach
  • peas

If you like this hands-off approach and want a similar dinner style with a different protein, this post about crock pot chicken breast recipes is a great read, since the timing logic and “finish with sauce” idea overlaps nicely.

Also Read: Eggless Yorkshire Pudding (No Milk) Recipe


Can You Cook Pork Tenderloin from Frozen in a Crock Pot?

It’s tempting to drop frozen meat into a slow cooker and call it dinner. Still, with a slow cooker, the safety concern is time spent warming through the temperature range where bacteria can grow.

Infographic titled “Frozen Pork Tenderloin? Don’t use the slow cooker from frozen” explaining it warms too long through the danger zone (40°F–140°F / 4°C–60°C). Shows two safe options: thaw overnight in the fridge, or thaw in cold water in a sealed bag while changing water regularly, then cook immediately. Includes note that thawing first is safer, improves texture, and gives more predictable timing. MasalaMonk.com footer.
Frozen pork tenderloin feels like the ultimate shortcut, yet a crock pot isn’t the place for it—it can spend too long warming through the 40°F–140°F / 4°C–60°C danger zone. The easy fix is still hands-off: thaw overnight in the fridge, then make slow cooker pork tenderloin as written. Need it faster? Thaw in cold water in a sealed bag, changing the water regularly, then cook right away. You’ll get safer results, better texture, and timing you can actually trust—especially with a lean cut like pork tenderloin. MasalaMonk.com

USDA guidance advises against cooking frozen meat directly in a slow cooker. Their direct Q&A on cooking frozen foods in a slow cooker or crock pot is a clear citation for this. If you’d like a simple explanation of why, this USDA page on the 40°F to 140°F danger zone supports the reasoning without getting overly technical.

A safer workaround that still feels easy

  • Best option: thaw overnight in the fridge, then cook as written.
  • Faster option: thaw in a sealed bag in cold water, changing the water regularly, then cook immediately after thawing.

Besides being safer, thawing first usually gives you better texture and more predictable timing—especially important with a lean cut like tenderloin.

Also Read: Crock Pot Chicken Breast Recipes: 10 Easy Slow Cooker Dinners (Juicy Every Time)


How to Make Slow Cooker Pork Tenderloin Taste Bold (Not “Slow Cooker Plain”)

Sometimes the only downside of slow cooker pork is that it can taste… polite. Not bad, just a little quiet. Fortunately, boldness is simple to build.

Infographic titled “Bold Flavor Formula” for slow cooker pork tenderloin with “3 moves that wake it up.” Step 1: Base—salt + aromatics (seasoned not timid, onion + garlic for sweetness and depth, don’t over-dilute). Step 2: Add one contrast (vinegar/lemon, mustard, pepper sauce, herbs). Step 3: Finish fresh (chimichurri-style herb sauce, lemon or vinegar splash, fresh herbs). Example line: BBQ shredded + vinegar + a few drops pepper sauce. MasalaMonk.com.
Slow cooker pork tenderloin can turn out tender yet a little “quiet.” This quick Bold Flavor Formula fixes that in a repeatable way: (1) build a strong base with proper salt plus onion/garlic, (2) add one contrast like lemon/vinegar, mustard, a touch of heat, or herbs, then (3) finish fresh so the whole pot tastes bright and intentional. The example at the bottom is money for shredded BBQ: a little vinegar plus a few drops of pepper sauce keeps it balanced instead of overly sweet. Use this guide, then follow the full method and variations in this post.

Start with salt and aromatics

If the salt level is timid, the pork tastes muted. Meanwhile, onions and garlic add sweetness and depth without requiring extra work.

Add one contrast element to Slow Cooker Pork Tenderloin

Contrast wakes up the palate. Pick one:

  • vinegar or lemon (brightness)
  • mustard (sharpness)
  • pepper sauce (heat)
  • herbs (freshness)

In the BBQ shredded version, for example, vinegar plus a few drops of pepper sauce can make the sauce taste balanced rather than just sweet.

Finish with something fresh

This is where an herb sauce like chimichurri shines. It brings acidity, herbs, and richness in one spoon—exactly what lean pork loves.

Also Read: 10 Vegan Chocolate Cake Recipes (Easy, Moist, & Dairy-Free)


Troubleshooting Slow Cooker Pork Tenderloin (Real Fixes That Work)

Even with a good method, dinner can occasionally go sideways. The good news is most problems have practical solutions.

Troubleshooting infographic for slow cooker pork tenderloin with four common problems and fixes: pork is dry (slice and spoon warm juices; next time pull at 145°F/63°C and rest), tastes bland (add salt, vinegar, Dijon), vegetables are mushy (timing and cut size; cut 1.5 in/4 cm and add soft veg late), sauce is watery (simmer 5–8 minutes or stir in butter + Dijon).
Dinner went sideways? This “real fixes” card is the fastest way to rescue slow cooker pork tenderloin without starting over. It shows exactly what to do when pork turns dry, tastes bland, veggies go mushy, or the sauce stays watery—plus the one tweak that prevents each issue next time (hello: 145°F/63°C + rest, modest liquid, and quick sauce fixes).

“My pork tenderloin is dry.”

This usually comes from one of three things:

  • it cooked past the sliceable endpoint
  • it sat on WARM too long
  • it was sliced immediately, without resting

Fix right now: slice it, then spoon warm pot juices over the slices and let them sit for a few minutes. If you overshot significantly, pivot to shredded: pull it apart and sauce it BBQ-style so it eats better.

“It tastes bland.”

This is often a salt issue, not a spice issue.

Fix right now: adjust the cooking liquid. Add a pinch of salt, a splash of vinegar, and a spoon of Dijon. Stir well, then spoon over slices.

“The vegetables are mushy.”

This is timing and cut size.

Fix next time: cut vegetables larger, add them later on HIGH, or choose vegetables that tolerate longer cooking.

“The sauce is watery.”

Slow cookers don’t reduce liquids much.

Fix right now: remove pork and simmer the cooking liquid in a small saucepan for 5–8 minutes, or stir in butter and Dijon to give it body and shine.

Also Read: Peanut Butter Fudge: Recipes & Guide (8 Methods + Easy Variations)


Storage, Freezing, and Reheating (So It Stays Juicy)

A slow cooker pork tenderloin often turns into two meals. That’s a win—especially if you store it correctly.

Infographic titled “Store + Reheat (Stay Juicy)” for slow cooker pork tenderloin (sliced or shredded) with fridge storage 3–4 days and freezer storage up to 3 months, plus reheating tips for microwave, skillet, and slow cooker and a reminder to add a splash of juices so the pork stays tender, on a cool slate background with MasalaMonk.com in the footer.
Dry leftovers are optional. This quick “store + reheat” guide keeps slow cooker pork tenderloin juicy whether it’s sliced or shredded: refrigerate for 3–4 days, freeze up to 3 months in portions with sauce, then reheat gently—short microwave bursts, low skillet heat with a splash of broth, or LOW/WARM briefly in the slow cooker. The simplest win is the golden rule at the bottom: add a splash of juices so every bite stays tender. Save this for busy weeknights and meal-prep days.

Storage

  • Refrigerate in an airtight container for 3–4 days.
  • Store with a few spoonfuls of cooking liquid whenever possible.

Freezing

  • Freeze sliced or shredded pork with a little liquid for 2–3 months.
Infographic titled “Leftover Pork Tenderloin: 5 Fast Ways (Sliced or Shredded)” showing five meal ideas for leftover slow cooker pork tenderloin: BBQ sandwich with pickles and slaw, rice bowl with greens, tacos with quick slaw and lime, loaded potato finished with sauce, and a meal-prep salad, plus the note “Works for sliced OR shredded” and MasalaMonk.com in the footer.
Leftovers don’t have to feel like repeat dinner. This quick board turns leftover slow cooker pork tenderloin into five fast meals: a saucy BBQ sandwich with pickles and slaw, a rice bowl with greens and a drizzle, quick tacos with slaw and lime, a loaded baked potato finished with sauce, and a crisp meal-prep salad you can pack ahead. Save this for the next day-after dinner moment—whether your pork is sliced or shredded—then use the full post for cook times, temperature targets, and the 3 easy ways.

Reheating Slow Cooker Pork Tenderloin without drying out

  • Stovetop: warm gently in a covered pan with a splash of broth or reserved juices.
  • Microwave: cover and reheat in short bursts with a spoon of liquid.

The shredded BBQ version is especially forgiving because the sauce protects the meat. Conversely, sliceable tenderloin appreciates gentle heat and a little moisture.

Also Read: Sourdough Recipe: 10 Easy Bread Bakes (Loaves, Rolls & Bagels)


Flavor Variations (Same Method, New Mood)

Once you’ve made pork tenderloin in slow cooker form a few times, it’s fun to keep the method and shift the flavor. These are simple pivots that don’t demand extra effort.

Infographic titled “Flavor Switchboard” for slow cooker pork tenderloin showing three finish options: Teriyaki-style (glaze after cooking; reduce glaze to cling), Herb-bright chimichurri (spoon on slices at serving; add lemon/vinegar), and Spicy BBQ shredded (sauce after shredding; add a few drops pepper sauce). Rule: finish sauces go in at the end to keep flavor bold and sauce glossy.
Same slow cooker pork tenderloin… totally different dinner. This “Flavor Switchboard” makes it foolproof: Teriyaki (glaze AFTER cooking so it stays glossy), Chimichurri (spoon on slices at serving for instant lift), or Spicy BBQ shredded (sauce AFTER shredding so it clings). The rule is the real secret—finish sauces go in at the end so flavor stays bold instead of “slow cooker plain.”

Teriyaki-style finish Slow Cooker Pork Tenderloin

Cook using the base method, then glaze after cooking so the sauce stays glossy. This homemade teriyaki sauce is a natural read here because it’s best added at the end rather than simmered for hours.

Herb-bright finish Slow Cooker Pork Tenderloin

Slice the tenderloin and spoon chimichurri over the top. Add a salad, and the meal feels lighter instantly.

Spicy BBQ finish Slow Cooker Pork Tenderloin

In the shredded version, add a few drops of pepper sauce right before serving. The heat tastes clean and intentional, not random.

Also Read: Chicken Adobo — Step-by-Step Recipe — Classic Filipino Adobong Manok


Closing: The Method That Makes It Repeatable

Slow cooker pork tenderloin becomes easy when you treat it like what it is: a lean cut that rewards you for cooking to the right endpoint. After that, it turns into a repeatable method you can bend toward whatever you want—sliceable plates, saucy pulled-style sandwiches, or a full pot of potatoes and carrots that tastes like comfort.

Infographic titled “Slow Cooker Pork Tenderloin: 3 Easy Ways” showing three methods: juicy slices pulled at 145°F (63°C) with a 10-minute rest, shredded BBQ cooked to 190–200°F (88–93°C) and sauced after shredding, and a potatoes-and-carrots crock pot dinner, on a cool slate background with food photos and MasalaMonk.com in the footer.
One pork tenderloin, three dependable options: this slow cooker pork tenderloin guide breaks down the exact finish to choose—juicy slices at 145°F / 63°C (plus a rest), shredded BBQ at 190–200°F / 88–93°C (sauce after shredding), or a full crock pot dinner with potatoes and carrots. Save it for cooking nights when you want clear doneness targets and an easy plan that actually works, then use the post for the full method, timing ranges, and serving ideas.

Slow Cooker Pork Tenderloin FAQs

1) How long does it take to cook slow cooker pork tenderloin?

Most pork tenderloin in a slow cooker is done in 2.5–4 hours on LOW or 1.5–2.5 hours on HIGH, depending on thickness and your crock pot. Even so, the most reliable approach is checking the thickest part for doneness rather than trusting the clock.

2) What is the best internal temperature for slow cooker pork tenderloin?

For a sliceable, juicy result, cook slow cooker pork tenderloin to 145°F / 63°C, then rest it for about 10 minutes. Afterward, the juices settle back into the meat, which keeps the slices noticeably more moist.

3) Is it better to cook pork tenderloin in a crock pot on LOW or HIGH?

LOW is often more forgiving for even cooking, whereas HIGH can work well when you’re watching timing closely. That said, if your goal is the best pork tenderloin crock pot texture, using a thermometer matters more than the setting.

4) Can you overcook pork tenderloin in a slow cooker?

Yes. Because pork tenderloin is lean, it can turn dry if it stays cooking well past the sliceable endpoint. Instead, pull it at the right temperature and rest it; otherwise, consider shifting to a shredded finish where sauce helps the eating experience.

5) How do you keep pork tenderloin in the slow cooker from drying out?

First, avoid extended “keep warm” time. Next, use a modest amount of liquid and cook to the correct internal temperature. Finally, rest before slicing and spoon a little cooking juice over the meat for extra moisture.

6) Do you need to sear pork tenderloin before putting it in the crock pot?

Not necessarily. Searing adds a deeper, roasted flavor, yet slow cooker pork tenderloin can still taste excellent without it. If you’re short on time, seasoning well and finishing with flavorful juices can deliver plenty of richness.

7) Can you make pulled pork with pork tenderloin in a slow cooker?

You can make a pulled-style result, although it won’t be as fatty as classic shoulder. For pork tenderloin pulled pork in slow cooker form, cook until it shreds easily, then mix in sauce afterward so the flavor stays bold.

8) What cooking time works best for shredded pork tenderloin crock pot style?

For slow cooker pork tenderloin shredded, plan on 3–5 hours on LOW in many slow cookers, depending on size and thickness. Still, focus on the texture: if it pulls apart easily with forks, it’s ready to shred.

9) When should you add BBQ sauce for bbq pulled pork tenderloin crock pot recipes?

Rather than adding all the sauce at the beginning, add a small amount early and most of it after shredding. This way, bbq pork tenderloin crock pot results taste more concentrated and less watery.

10) Can you make pork loin pulled pork in a slow cooker the same way?

Pork loin for pulled pork in slow cooker recipes can work, but it behaves differently from tenderloin and often needs longer to become shreddable. Additionally, it can still dry out if cooked too long, so cooking to tenderness and saucing well is important.

11) What’s the difference between pork loin pulled pork and pork tenderloin pulled pork?

Pork loin pulled pork is typically a bit firmer and less delicate, while pulled pork made with pork tenderloin tends to shred into finer, softer strands. Either way, the finish—especially sauce and acidity—makes the biggest difference in how it eats.

12) Can you cook pork tenderloin with potatoes and carrots in the crock pot?

Absolutely. Pork tenderloin in crock pot with potatoes and carrots works best when vegetables are cut into larger chunks so they hold their shape. Meanwhile, placing the tenderloin on top helps it cook evenly without turning the vegetables mushy too soon.

13) When should you add vegetables to pork tenderloin in slow cooker recipes?

Hard vegetables like potatoes and carrots can go in early, particularly on LOW. Conversely, softer vegetables are better added later so they don’t collapse into the cooking liquid.

14) Can you cook pork tenderloin from frozen in a crock pot?

It’s not recommended to cook pork tenderloin from frozen in a slow cooker because it can take too long to heat through safely. Instead, thaw first, then cook normally for more predictable timing and better texture.

15) What’s the best way to reheat slow cooker pork tenderloin?

For the juiciest results, reheat slices gently with a splash of broth or reserved cooking juices. Similarly, shredded pork tenderloin reheats well when warmed in its sauce, which helps prevent dryness.

16) How do you store shredded pork loin crock pot recipes and leftovers safely?

Cool leftovers promptly, store them in airtight containers, and keep some juices or sauce with the meat for moisture. Then, reheat only what you need, warming it until it’s hot throughout.

17) Can you make crock pot pulled pork loin recipe results that stay moist?

Yes, especially if you avoid overcooking and finish with sauce after shredding. Additionally, adding a small splash of broth or cooking liquid while reheating helps maintain a tender, juicy texture.

18) What are the easiest flavor variations for slow cooker pork tenderloin?

For a simple change, swap the finishing sauce: go BBQ for a pulled-style option, add mustard and butter for a savory pan-juice finish, or use herbs and a splash of vinegar for a brighter plate. Either way, the core method for slow cooker pork tenderloin stays the same.

Posted on 7 Comments

Pork Tenderloin in Oven (Juicy, Easy, 350°F or 400°F) Recipe

Close-up of sliced pork tenderloin in the oven with a glossy finish; a basting brush drips sauce over the roast, with text showing 350° or 400° and 145°F for juicy slices.

Pork tenderloin in oven is one of the most satisfying “simple” dinners you can make—when it’s treated with a little respect. The cut is lean, which means it cooks quickly, slices beautifully, and takes on flavor fast. At the same time, that leanness is exactly why it can dry out if it’s pushed too far. The difference between tender, juicy medallions and a roast that feels chewy is usually just a handful of degrees and a few minutes of patience.

So this is a full, proper recipe-style guide: you’ll get a dependable oven method first, then upgrades that truly change the meal—honey garlic, creamy mushroom, brown sugar balsamic, lemon herb, mustard glaze, apples, maple-apricot, a BBQ finish, and a few bold, spicy table options. You’ll also get a cast-iron sear-and-finish method for deeper browning, a sheet-pan dinner with potatoes and carrots, and realistic versions for the slow cooker, Instant Pot, grill, and smoker. Finally, you’ll see how to use leftovers in a way that keeps them moist instead of sad.

Recipe card for juicy pork tenderloin in the oven showing 350°F, 375°F and 400°F cook times, plus 145°F (63°C) target temperature and resting tips.
Save this quick guide: pork tenderloin in the oven at 350°F, 375°F, or 400°F—plus the exact 145°F (63°C) internal temperature and resting rule for juicy slices every time.

Take what you need tonight, then come back later when you want a different flavor without learning a new technique.

Also Read: Croquettes Recipe: One Master Method + 10 Popular Variations


Pork tenderloin vs pork loin vs pork fillet (so timing finally clicks)

Before the oven even warms up, it helps to know what you’re cooking. Pork tenderloin and pork loin are not the same thing, and swapping them without adjusting time is one of the fastest ways to end up disappointed.

Infographic comparing pork tenderloin vs pork loin vs pork fillet, showing typical weights and why cook times differ so you don’t swap cuts without adjusting timing.
Not sure if you bought pork tenderloin or pork loin? This quick guide shows pork tenderloin vs pork loin vs pork fillet (UK/AU) and explains why cook time changes—so your oven roast stays juicy instead of overcooked.

Pork tenderloin is long, narrow, and usually weighs around 1 to 1½ pounds (about 450–700 g). It’s sometimes labeled as pork fillet, especially in the UK and Australia, which is why you’ll see phrases like “pork fillet oven time” or “roasting pork fillet UK.” In most cases, those are still talking about tenderloin.

Pork loin, on the other hand, is thicker and wider. It can show up as a whole boneless pork loin, a center cut pork loin filet, or a loin end pork roast, and it commonly weighs 2 to 5 pounds. A bone in pork loin roast will be even bigger and needs more time. When someone mentions “pork loin on the bone” or “bone in pork loin roast,” that’s a different cook altogether.

Tenderloin cooks quickly; loin cooks more slowly. That difference influences everything—temperature, timing, and how much rest you need.

If your package says pork tenderloin (sometimes labeled pork fillet), you’re in the right place. If it says pork loin roast, you can still use many flavor ideas below, but you must increase cook time and treat it like a larger roast. The flavors can transfer; the timing cannot.

The one rule that keeps pork tenderloin juicy

If there’s a single habit that transforms pork tenderloin, it’s cooking by internal temperature instead of guessing. Whole cuts of pork are considered safe at 145°F / 63°C followed by a short rest, as shown in the official guidance on the USDA safe temperature chart and the FoodSafety.gov temperature chart.

That standard is also where tenderloin tends to be at its best: juicy, tender, and sliceable. Practically speaking, many home cooks pull the tenderloin a few degrees early (around 140°F) only if they’re going to rest it fully and let carryover heat bring it up to 145°F; otherwise, pull it at 145°F, then rest.

If you’re looking for “pork fillet oven time,” use this chart first — “pork fillet” is another name for pork tenderloin in many regions. Times vary by thickness, so start checking a little early and cook to temperature.

Pork Fillet (Tenderloin) Oven Time Chart

Oven TempApprox. Cook Time*Best ForPull At (Internal Temp)
350°F (175°C)25–35 minMost even cooking, biggest “juicy” safety margin145°F / 63°C
375°F (190°C)22–30 minBalanced: quicker, still tender145°F / 63°C
400°F (205°C)18–25 minFastest; great when finishing with a glaze145°F / 63°C
Temperature & Time Guide Table for Pork Fillet (Tenderloin) Oven

Times assume a 1.25–2 lb (600–900 g) pork fillet/tenderloin. Thicker pieces take longer. If you’re cooking two smaller fillets, begin checking earlier.

Pork tenderloin internal temperature guide showing thermometer placement in the thickest center, target 145°F (63°C) with 8–10 minute rest, optional pull at 140–142°F for carryover heat, and 150°F (66°C) for a firmer finish.
Stop dry pork tenderloin: use this internal temperature cheat sheet—probe the thickest center, cook to 145°F (63°C), rest 8–10 minutes, and only pull at 140–142°F if you’re relying on carryover heat to finish gently.

Three small details make the biggest difference:

  • Carryover heat is real. The temperature rises slightly after you remove the roast from the oven.
  • Resting matters. It’s not a polite suggestion; it’s how juices settle back into the meat.
  • Slicing too early costs you moisture. Even a perfectly cooked tenderloin can look dry if you cut it the moment it comes out.

If you like a firmer, more cooked texture, you can pull closer to 150°F / 66°C. Even then, resting is still the secret to tenderness.

Also Read: Ravioli Recipe Reinvented: 5 Indian-Inspired Twists on the Italian Classic


Pork tenderloin in oven: 350°F vs 400°F vs 375°F

There’s more than one “right” oven temperature. What matters is how the heat fits your evening.

Chart comparing pork tenderloin oven temperatures 350°F, 375°F, and 400°F with when to start checking doneness and the 145°F (63°C) target internal temperature plus resting guidance.
Not sure whether to bake pork tenderloin at 350°F, 375°F, or 400°F? Use this quick chart to pick your oven temp, start checking at the right time, and pull at 145°F (63°C) for juicy pork tenderloin every time.

400°F (fast, great browning)

This is the weeknight favorite. It cooks quickly, encourages color on the outside, and works especially well with glazes—honey garlic, balsamic, maple-apricot, teriyaki-style finishes, or a BBQ brush-on at the end.

350°F (gentle, forgiving)

This is the calm, steady approach. It’s ideal when you’re also roasting vegetables and want everything to land together. It also gives you a slightly wider window before the meat goes past its sweet spot.

375°F (middle path)

This is the comfortable compromise: enough heat for browning, plus a gentler roast than 400°F.

No matter which temperature you pick, the finish remains the same: cook to temperature, rest, slice.

Also Read: Fish and Chips Reimagined: 5 Indian Twists (Recipe + Method)


The seasoning that makes pork taste like dinner, not “protein”

Because tenderloin is mild, seasoning is the difference between “fine” and genuinely craveable. Salt helps the meat hold onto moisture, while aromatics and spices build a crust that tastes roasted and savory.

You’ll get two approaches here:

  1. a reliable all-purpose rub
  2. targeted flavor profiles that turn the same roast into different meals
Recipe card for an all-purpose pork tenderloin rub with salt, paprika, garlic, herbs, and optional brown sugar, plus swap tips for lemon herb, glazes, and extra heat.
Use this all-purpose pork tenderloin rub for oven roasting, cast iron, grilling, or smoking—plus quick swaps for lemon herb, honey/balsamic/BBQ glazes, and extra heat for a more flavorful crust.

All-purpose tenderloin rub (recipe for 1–1½ lb / 450–700 g)

  • 1¼ tsp kosher salt (or ¾ tsp fine salt)
  • 1 tsp paprika (smoked paprika adds depth)
  • 1 tsp garlic powder (or 2–3 cloves fresh garlic, finely grated)
  • ½ tsp onion powder
  • ¾ tsp black pepper
  • 1 tsp dried thyme or dried rosemary (or 1½ tsp fresh, chopped)
  • 1 tsp brown sugar (optional, helps browning and pairs well with glazes)

This rub is flexible: it works for oven roasting, cast iron, grilling, and smoking. If you know you’re going lemon herb, you can skip the brown sugar. If you’re going honey garlic or balsamic, keep it.

A quick note on resting after seasoning

If you have time, season and let the tenderloin sit while the oven heats. Even 20 minutes helps. If you can do 45–60 minutes, the flavor tends to taste more “inside” the meat rather than just on the surface.

Also Read: Dirty Martini Recipe (Classic, Extra Dirty, No Vermouth, Spicy, Blue Cheese, Tequila + Batched)


Pork tenderloin in oven: the core recipe

This is the dependable method that anchors everything else. Once it’s familiar, variations become simple choices rather than brand-new recipes.

Recipe card for pork tenderloin in oven showing a sliced tenderloin on a board and the core method with oven temps 350, 375, and 400 degrees plus the 140–145°F pull temperature and 8–10 minute rest.
Save this core recipe card for pork tenderloin in the oven: choose 350°, 375°, or 400°, pull at 140–145°F, rest 8–10 minutes, then slice into juicy medallions—an easy base you can finish with any sauce, glaze, or side.

Ingredients (serves 4)

  • 1 pork tenderloin (1–1½ lb / 450–700 g), trimmed
  • 1 tbsp olive oil or neutral oil
  • All-purpose tenderloin rub (above)
  • Optional: 1 tsp Dijon mustard (subtle tang; helps seasoning cling)
  • Optional: 1 tbsp butter (useful for finishing or pan sauce)

If your package says pork fillet (UK/AU), it’s usually pork tenderloin—use the same 350/375/400 method below and pull at 145°F.

Step 1: Trim and dry

Pat the tenderloin dry very thoroughly. That dryness helps the seasoning stick and improves browning. If you see silver skin (a thin, shiny membrane), trim it away; it doesn’t soften with cooking.

Raw pork tenderloin being patted dry on a cutting board with a paper towel, with a small inset showing silver skin being trimmed—Step 1 for pork tenderloin in oven.
Before pork tenderloin goes in the oven, pat it very dry and trim off any silver skin—this one step improves browning and keeps the finished medallions tender instead of chewy.

If one end is thinner, tuck that end under itself and tie lightly with kitchen twine. That small adjustment helps the roast cook more evenly so you don’t end up with overdone tail slices.

Step 2: Season properly

Rub the tenderloin with oil. If using Dijon, rub it on next. Then coat all sides with the seasoning rub, pressing gently so it adheres.

Hand seasoning a raw pork tenderloin on a cutting board with oil, optional Dijon mustard, and a spice rub, labeled “Step 2: Season Properly” for pork tenderloin in oven.
For pork tenderloin in the oven that tastes seasoned all the way through, coat it evenly: oil first, a thin swipe of Dijon if you like, then press on the rub so it sticks—no patchy spots, better browning, better flavor.

At this point, the surface should look evenly coated, not patchy. The aroma should be savory and warm from paprika and garlic.

Step 3: Roast (choose one temperature)

Pork tenderloin in oven at 400°F (205°C)

  • Preheat oven to 400°F.
  • Roast 18–24 minutes, depending on thickness.
  • Start checking temperature at 18 minutes.
  • Pull when the thickest part reaches 140–145°F.
  • Rest 8–10 minutes, then slice.

What you’ll notice: the outside develops a deeper color, and the kitchen smells roasted and garlicky. The surface should look set and lightly browned rather than pale. This is the classic “pork tenderloin 400” approach that works beautifully for a quick dinner and crisp edges.

Seasoned pork tenderloin on a sheet pan in an oven with a thermometer probe, showing “Step 3: Roast” and guidance for 350°, 375°, or 400° and pulling at 140–145°F.
Roast pork tenderloin in the oven at 350°, 375°, or 400°—then start checking early and pull at 140–145°F so it stays juicy after the 8–10 minute rest.

Pork tenderloin in oven at 350°F (175°C)

  • Preheat oven to 350°F.
  • Roast 25–35 minutes.
  • Start checking temperature at 25 minutes.
  • Pull at 140–145°F.
  • Rest 8–10 minutes, then slice.

What you’ll notice: slightly gentler browning, an even roast, and a more gradual finish. This is a comfortable option when you’re coordinating sides, or when you want the tenderloin to finish more evenly across the center.

Pork tenderloin in oven at 375°F (190°C)

  • Preheat oven to 375°F.
  • Roast 22–30 minutes.
  • Start checking at 22 minutes.
  • Pull at 140–145°F.
  • Rest 8–10 minutes, then slice.

What you’ll notice: a balance—good color, but still forgiving.

Step 4: Rest, then slice into medallions

Move the tenderloin to a cutting board and tent loosely with foil. While it rests, you can make a pan sauce, warm a glaze, or finish sides.

Cooked pork tenderloin resting under a foil tent on a cutting board, then being sliced into 1/2 to 3/4 inch medallions, labeled “Step 4: Rest + Slice” for pork tenderloin in oven.
Step 4 is the juiciness step: rest pork tenderloin after roasting for 8–10 minutes, then slice across the grain into 1/2–3/4 inch medallions so every piece stays tender and moist.

After resting, slice across the grain into medallions. If the knife meets resistance, your slices may be too thick or you may be cutting in the wrong direction. Aim for slices about ½ to ¾ inch thick for a tender bite.

Also Read: Keto Hot Chocolate Recipe (Sugar-Free Hot Cocoa) + Best Homemade Mix


Cast iron pork tenderloin (sear + oven finish)

If you want deeper browning and a more savory “pan-roasted” flavor, start the tenderloin in a hot cast-iron skillet and finish it in the oven. The sear builds crust quickly; the oven brings the center to temperature gently.

This method is especially satisfying when serving the tenderloin plain with vegetables, because the crust brings flavor without needing a heavy sauce.

Ingredients

  • 1 seasoned pork tenderloin
  • 1 tbsp neutral oil (avocado, canola, grapeseed)
  • Optional: 1 tbsp butter + 1 smashed garlic clove + a sprig of thyme or rosemary
Infographic method card showing how to cook cast iron pork tenderloin by searing on the stove and finishing in the oven to 145°F (63°C), then resting and slicing into medallions.
Want a deeper crust? This cast iron pork tenderloin guide shows the sear + oven finish method (400°F) and the exact 145°F (63°C) target temp, so you get juicy slices with real browning—not dry pork.
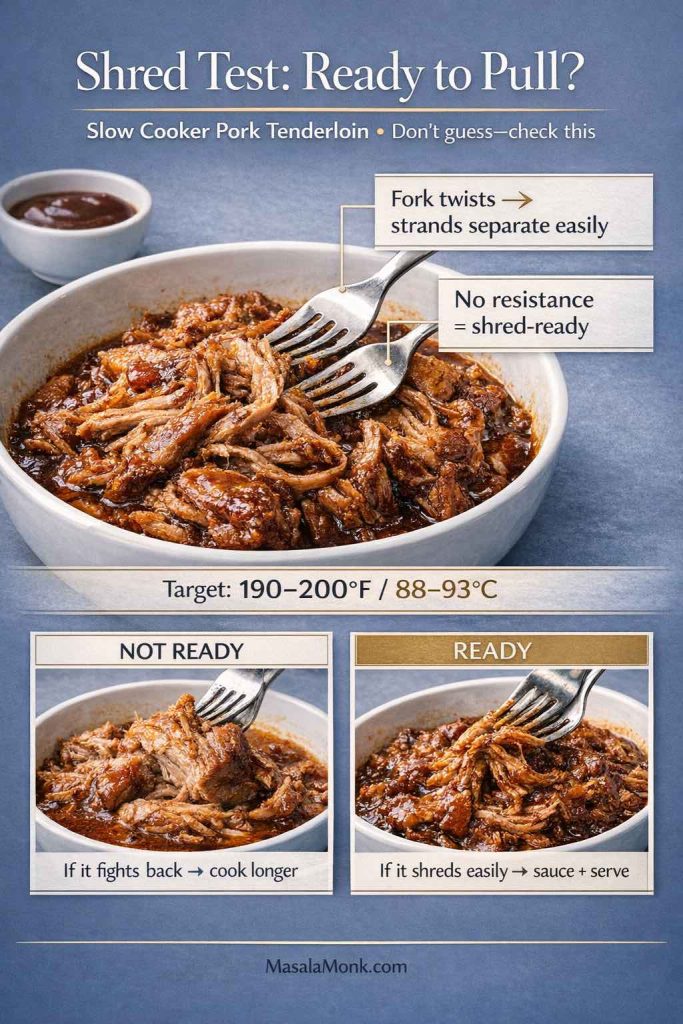
Method

  1. Preheat oven to 400°F.
  2. Heat a cast-iron skillet over medium-high until hot. Add oil.
  3. Lay the tenderloin in the pan. You should hear an immediate sizzle.
  4. Sear on all sides, turning every 1–2 minutes, until browned all around (about 6–8 minutes total).
  5. Slide the skillet into the oven. Roast until the center reaches 140–145°F (often 8–12 minutes depending on thickness).
  6. Rest 8–10 minutes, then slice.

If you’re adding butter, drop it in during the last minute on the stovetop. As it foams, baste the tenderloin with a spoon for 20–30 seconds. The aroma becomes richer and more “roast-like,” even before it goes into the oven.

This sear-then-finish approach mirrors classic pan-roasting logic, similar to what’s used in this pan-roasted pork tenderloin technique.

Serve-it-with ideas:

  • Creamy mushroom sauce (below) + mashed potatoes or roasted potatoes
  • Chimichurri on the side + grilled vegetables
  • Mustard glaze + carrots and onions roasted until sweet

Also Read: 10 Low Carb Chia Pudding Recipes for Weight Loss (Keto, High-Protein, Dairy-Free)


Pork tenderloin with potatoes and carrots (sheet-pan dinner)

A sheet-pan dinner turns tenderloin into a complete meal with minimal effort. The only trick is timing: potatoes and carrots need a head start; the pork goes in later so it stays juicy.

Ingredients (serves 4)

  • 1 pork tenderloin, seasoned (use the rub or any glaze variation)
  • 500 g potatoes, cut into 1-inch chunks
  • 3–4 carrots, cut into thick coins or batons
  • 1 medium onion, cut into wedges (optional but excellent)
  • 2–3 tbsp olive oil
  • 1 tsp kosher salt
  • ½ tsp black pepper
  • 1 tsp dried thyme or rosemary
  • Optional: 1 tsp smoked paprika for the vegetables
Step-by-step sheet-pan pork tenderloin with potatoes and carrots timing guide, showing veggie head start at 400°F or 350°F and finishing pork to 145°F (63°C) with resting tips.
One-pan dinner made easy: this sheet-pan pork tenderloin with potatoes and carrots guide shows the exact veggie head start and when to add the pork, so everything finishes together and the tenderloin stays juicy at 145°F (63°C).

Method

  1. Preheat oven to 400°F for crisp edges, or 350°F for a gentler roast.
  2. Toss potatoes, carrots, and onion with oil, salt, pepper, and herbs.
  3. Roast vegetables first:
    • At 400°F: 20 minutes
    • At 350°F: 25 minutes
  4. Push vegetables to the sides, then place the seasoned tenderloin in the center.
  5. Roast until the pork reaches 140–145°F.
  6. Move pork to a board to rest. Toss vegetables in the drippings and return them to the oven for 5–10 minutes if they need more color.
  7. Slice tenderloin into medallions and serve with the vegetables.

What you’ll notice: the carrots turn sweet, the onions soften and caramelize at the edges, and the potatoes soak up the meat juices like a built-in sauce.

If you like swapping potatoes, this quick read on white vs sweet potatoes can help decide what fits your flavor direction.

Serve-it-with ideas:

  • Honey garlic glaze + sweet potatoes + broccoli
  • Balsamic glaze + carrots + onions (they’re made for each other)
  • Lemon herb finish + white potatoes + green beans

Also Read: Garlic & Paprika Cabbage Rolls (Keto-Friendly Recipes) – 5 Bold Savory Twists


Sauce and glaze variations that are actually worth making

A good sauce changes everything. Even if your tenderloin is perfectly cooked, a finishing glaze or pan sauce makes the meal feel intentional—like you planned it rather than stumbled into it. Each variation below is complete, flavorful, and written so you can cook it without improvising.

Infographic chart of pork tenderloin sauces and glazes, including honey garlic, creamy mushroom, brown sugar balsamic, lemon herb, mustard glaze, apples, maple-apricot, BBQ finish, and spicy table sauces with timing tips.
Pick your flavor tonight: this pork tenderloin sauces and glazes chart shows when to apply each finish—honey garlic, creamy mushroom, brown sugar balsamic, lemon herb, mustard glaze, apples, maple-apricot, BBQ, and spicy table sauces—so you get a glossy, juicy result every time.

Honey garlic pork tenderloin (sticky, glossy, crowd-pleasing)

Honey garlic is the “everyone at the table is happy” flavor. It’s sweet, savory, and especially good when the tenderloin is sliced into medallions and coated in glaze.

Honey garlic glaze (recipe for 1 tenderloin)

  • 3 tbsp honey
  • 2 tbsp soy sauce (or tamari)
  • 1 tbsp apple cider vinegar or rice vinegar
  • 4 cloves garlic, finely minced or grated
  • 1 tsp grated ginger (optional, but adds warmth)
  • ½ tsp black pepper
  • Pinch of chili flakes (optional)
  • Optional thickener: 1 tsp cornstarch + 1 tbsp water
Honey garlic pork tenderloin recipe card showing sliced tenderloin medallions with sticky glaze, the glaze ingredients, and timing tips to brush in the last 5–7 minutes and rest before slicing.
This honey garlic pork tenderloin recipe card shows the simple glaze and the exact timing that prevents burning—brush in the last 5–7 minutes, rest, then slice and spoon extra sauce for a glossy, juicy finish.

Method

  1. Cook the tenderloin using the core oven method (400°F for speed, 350°F for gentleness).
  2. While it roasts, combine honey, soy sauce, vinegar, garlic, ginger, and pepper in a small saucepan.
  3. Warm gently for 2–3 minutes, stirring. The glaze should smell sweet and garlicky, not harsh.
  4. If you want it thicker, whisk in the cornstarch slurry and simmer 30–60 seconds until glossy.
  5. During the last 5–7 minutes of roasting, brush glaze over the tenderloin.
  6. Brush again as soon as it comes out, then rest.
  7. Slice into medallions and spoon remaining glaze over the top.

If you enjoy a teriyaki direction, a thicker homemade sauce like homemade teriyaki sauce works beautifully the same way—brushed on near the end so it turns lacquered rather than burnt.

Serve-it-with ideas:

  • Roasted broccoli or green beans + rice
  • Sweet potatoes + a bright cucumber salad
  • A simple slaw tucked into sandwiches the next day

Also Read: Eggless Yorkshire Pudding (No Milk) Recipe


Creamy mushroom pork tenderloin recipe (deep, savory comfort)

This is comfort food that still feels like a proper dinner. The flavor comes from browning mushrooms until they’re deeply savory—so the sauce tastes rich even before the cream goes in.

Creamy mushroom sauce (serves 4)

  • 250–300 g mushrooms, sliced
  • 1 tbsp butter
  • 1 tbsp olive oil
  • 1 small onion or 2 shallots, finely chopped
  • 3 cloves garlic, minced
  • ½ cup chicken stock (or water + a pinch of salt)
  • ½ cup cream (or coconut cream for dairy-free)
  • 1 tsp Dijon mustard
  • Optional: 1 tsp Worcestershire sauce
  • ½ tsp dried thyme or 1 tsp fresh thyme leaves
  • Salt and pepper
Creamy mushroom pork tenderloin recipe card with sliced pork medallions in mushroom cream sauce, plus key steps to brown mushrooms first, deglaze with stock, and finish with cream.
This creamy mushroom pork tenderloin recipe card shows the sauce essentials and the one step that makes it taste restaurant-level—brown the mushrooms first, then deglaze with stock and finish with cream before warming sliced pork in the sauce.

Method

  1. Roast or cast-iron sear the tenderloin to 140–145°F, then rest it.
  2. In the same skillet, heat butter and oil.
  3. Add mushrooms and spread them out. Let them sit undisturbed for 2 minutes so they brown instead of steaming.
  4. Stir, then keep cooking until moisture evaporates and the mushrooms deepen in color.
  5. Add onion/shallot and cook until softened.
  6. Add garlic and cook 30 seconds, just until fragrant.
  7. Pour in stock and scrape up browned bits. Simmer 2–3 minutes.
  8. Stir in cream, Dijon, thyme, and Worcestershire if using. Simmer until slightly thick.
  9. Slice tenderloin into medallions, then warm the slices in the sauce for 1–2 minutes.
  10. Taste, adjust salt and pepper, then serve.

If you want a lighter vegetable side that still feels hearty, a quick mushroom and zucchini skillet fits beautifully here—especially because it keeps the plate balanced.

Serve-it-with ideas:

  • Mashed potatoes (this sauce was made for them)
  • Buttered noodles or rice
  • Roasted asparagus or green beans for contrast

Also Read: Crock Pot Chicken Breast Recipes: 10 Easy Slow Cooker Dinners (Juicy Every Time)


Brown sugar balsamic pork tenderloin (tangy, glossy, slightly sweet)

This glaze tastes bold without requiring much effort. It’s especially good when you’re roasting vegetables on the side, because balsamic and brown sugar make carrots and onions taste even sweeter.

Balsamic glaze (recipe for 1 tenderloin)

  • 3 tbsp balsamic vinegar
  • 2 tbsp brown sugar (or honey)
  • 1 tsp Dijon mustard
  • 1 tbsp olive oil
  • ½ tsp black pepper
  • Pinch of salt
  • Optional: 1 tbsp soy sauce for extra savory depth
Recipe card for brown sugar balsamic pork tenderloin with sliced medallions, glaze ingredients, timing to brush in the last 5–7 minutes, and serving ideas like carrots, onions, and rice.
Brown sugar balsamic pork tenderloin, made the easy way: whisk the glaze, brush it on in the last 5–7 minutes (so the sugar doesn’t burn), then rest and slice for a tangy, glossy finish.

Method

  1. Whisk all glaze ingredients together.
  2. Roast the tenderloin using the core method.
  3. Brush glaze on during the last 5–7 minutes of roasting.
  4. Brush again right after it comes out.
  5. Rest, slice, and drizzle pan juices over the medallions.

Because this glaze contains sugar, it behaves best when applied late. That timing gives you caramelization instead of bitterness.

Serve-it-with ideas:

  • Roasted carrots + onions
  • Brussels sprouts or cabbage roasted until crisp
  • A simple grain like couscous or rice to soak up the glaze

Also Read: Mozzarella Sticks Recipe (Air Fryer, Oven, or Fried): String Cheese, Shredded Cheese, and Every Crunchy Variation


Lemon pork tenderloin (bright, clean, weeknight-perfect recipe)

When you want something lighter than honey or cream, lemon brings freshness instantly. It’s also a beautiful match for potatoes and green vegetables.

Lemon herb finish

  • Zest of 1 lemon
  • 2 tbsp lemon juice
  • 1 tbsp olive oil
  • 1 small garlic clove, grated
  • ½ tsp salt
  • ½ tsp black pepper
  • 1 tbsp chopped parsley (optional)
Lemon pork tenderloin recipe card with sliced medallions, lemon herb finish ingredients, and an optional quick lemon pan sauce with butter and stock, plus a note to spoon on after slicing.
Lemon pork tenderloin, two ways: spoon on a bright no-cook lemon herb finish after slicing, or make a quick lemon pan sauce (butter + stock) for a warmer, richer drizzle—both keep the pork fresh and juicy.

Quick lemon pan sauce (optional)

  • 1 tbsp butter
  • ¼ cup stock
  • 2 tbsp lemon juice
  • 1 tsp lemon zest
  • Pinch of salt

Method

  1. Roast the tenderloin and let it rest.
  2. Stir lemon herb finish ingredients together. Spoon over sliced medallions.
  3. If you want a warm sauce, simmer butter + stock + lemon juice/zest for 1–2 minutes, then spoon over.

The scent here is bright and clean—lemon zest, garlic, and warm pork together. It’s simple, yet it tastes intentional.

Serve-it-with ideas:

  • Roasted potatoes + sautéed greens
  • Steamed rice + cucumber salad
  • Grilled vegetables for a lighter plate

Also Read: Sourdough Starter Recipe: Make, Feed, Store & Fix Your Starter (Beginner Guide)


Mustard glazed pork tenderloin (savory, tangy, elegant)

Mustard adds a gentle bite that makes tenderloin taste more like a classic roast dinner. It’s also a fantastic choice when you’re serving potatoes and carrots.

Mustard glaze

  • 2 tbsp Dijon mustard
  • 1 tbsp honey
  • 1 tbsp olive oil
  • 1 tsp minced garlic
  • ½ tsp dried thyme or rosemary
  • ½ tsp black pepper
  • Pinch of salt
Mustard glazed pork tenderloin recipe card with sliced medallions, Dijon honey glaze ingredients, two timing options (before roasting or brush in last 5–7 minutes), and finishing tips to cook to 145°F (63°C) and rest.
Mustard glazed pork tenderloin that actually tastes “roast-dinner” good: mix Dijon + honey glaze, spread it on before roasting or brush in the last 5–7 minutes for extra shine, then rest and slice for juicy medallions.

Method

  1. Mix glaze ingredients and spread evenly over the tenderloin before roasting.
  2. Roast until the center reaches 140–145°F.
  3. Rest, slice, then spoon pan juices over the medallions.

The glaze becomes slightly darker at the edges and smells warmly herbal, especially with rosemary.

Serve-it-with ideas:

  • Sheet-pan potatoes and carrots
  • Green beans with a squeeze of lemon
  • A simple salad with crisp apples or pears

Also Read: How to make No-Bake Banana Pudding: No Oven Required Recipe


Pork tenderloin and apples (sweet-savory, cozy, balanced)

Apples and pork are a classic pairing because they bring sweetness and acidity that flatter savory meat. It feels cozy without needing cream.

Apple pan sauce (recipe serves 4)

  • 1 tbsp butter
  • 1 tbsp olive oil
  • 1 apple, thinly sliced (sweet-tart varieties work best)
  • 1 small onion or shallot, thinly sliced
  • ½ cup stock
  • 1 tsp Dijon mustard
  • 1 tbsp apple cider vinegar (optional)
  • Pinch of cinnamon (optional, use lightly)
  • Salt and pepper
Recipe card showing sliced pork tenderloin and apples with a glossy apple pan sauce, plus ingredients (butter, olive oil, apple, onion/shallot, stock, Dijon, optional cider vinegar), quick method steps, and serving ideas like roasted sweet potatoes, sautéed cabbage or kale, and rice pilaf.
Pork tenderloin and apples is the easiest “cozy but not heavy” dinner: roast the tenderloin, then spoon a quick apple pan sauce (apple + onion/shallot + stock + Dijon) over sliced medallions so the pork stays juicy. This card includes the exact ingredients, the 3–4 minute simmer method, and simple sides that fit—roasted sweet potatoes, sautéed cabbage/kale, or rice pilaf.

Method

  1. Roast the tenderloin and rest it.
  2. Heat butter and oil in a skillet. Sauté apples until lightly golden.
  3. Add onion/shallot and cook until softened.
  4. Pour in stock, scrape up browned bits, and simmer 3–4 minutes.
  5. Stir in Dijon and vinegar if using. Season well.
  6. Slice tenderloin and spoon apple sauce over the medallions.

For extra richness, add a small knob of butter at the end. For extra brightness, add a touch more vinegar.

Serve-it-with ideas:

  • Roasted sweet potatoes
  • Sautéed cabbage or kale
  • A simple rice pilaf

Also Read: Chicken Adobo — Step-by-Step Recipe — Classic Filipino Adobong Manok


Maple pork tenderloin (plus a quick apricot twist)

Maple gives you a glaze that feels different from honey—more caramel, less floral. Add apricot jam and it turns into a dinner-party finish with almost no extra work.
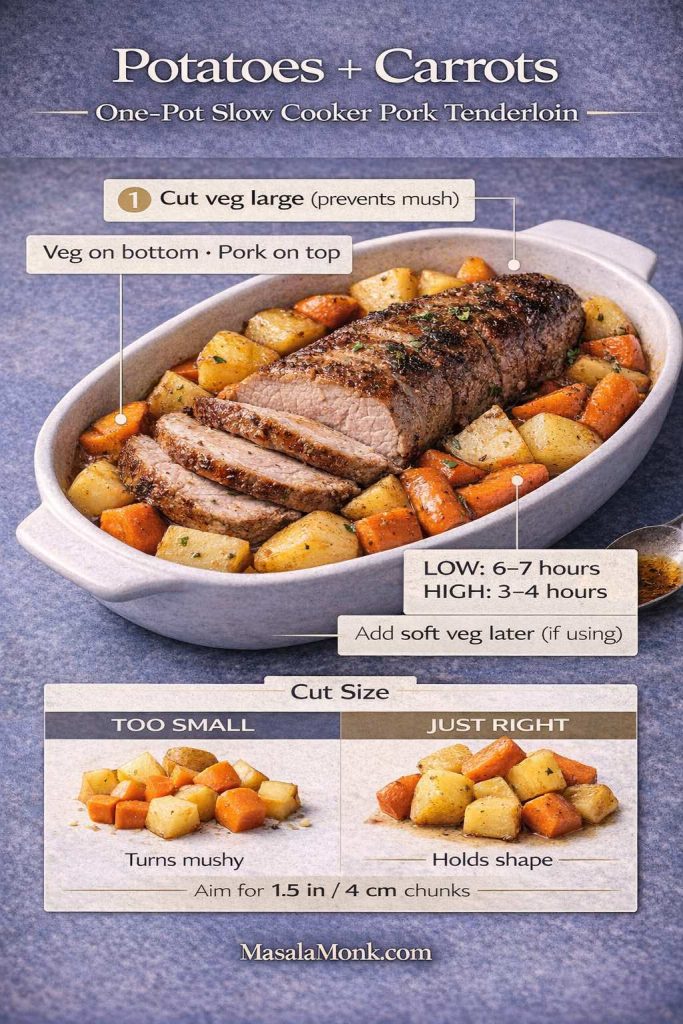
Maple glaze

  • 3 tbsp maple syrup
  • 1 tbsp Dijon mustard
  • 1 tbsp soy sauce
  • 1 tsp apple cider vinegar
  • 1 clove garlic, grated
  • Black pepper
Maple pork tenderloin glaze recipe card showing sliced, juicy pork tenderloin medallions coated in glossy maple glaze with bowls of maple syrup, Dijon, soy sauce, vinegar, garlic, and apricot jam. Includes maple glaze ingredients, optional apricot-maple twist, and timing tips to brush glaze in the last 5–7 minutes, rest 8–10 minutes, then slice.
Maple Pork Tenderloin (with optional apricot twist): whisk the quick maple glaze, then brush it on in the last 5–7 minutes so it turns glossy instead of burning. Rest 8–10 minutes, slice into medallions, and serve with roasted carrots + onions, wild/brown rice, and broccoli or green beans. This is the easiest “dinner-party” upgrade for pork tenderloin in the oven—same method, better finish.

Apricot-maple glaze

  • Maple glaze above
    • 1 tbsp apricot jam

Brush on during the last 5–7 minutes of roasting, then brush again after it comes out. Rest, slice, and spoon any extra glaze over the top.

Serve-it-with ideas:

  • Roasted carrots and onions
  • Wild rice or brown rice
  • Broccoli or green beans for freshness

Also Read: Sweetened Condensed Milk Fudge: 10 Easy Recipes


Spicy finishing options (when you want bold flavor at the table)

Some nights you want the tenderloin to stay simple, yet you still want punch. A finishing sauce on the side does that beautifully—each person can adjust heat and tang to taste.

If you love variety, pepper sauce ideas gives you multiple directions—from sharp and vinegary to smoky and deep.

For a bright, herby, garlic-forward option, a spoon of chimichurri sauce next to sliced tenderloin is especially good when the meat is simply roasted or grilled.

Spicy finishes for pork tenderloin: sliced roast pork with two sauces—chimichurri and pepper sauce—plus serving ideas for adding heat at the table.
Want bold flavor without risking dry pork? Use a spicy finishing sauce at the table. This guide shows two easy options—chimichurri (herby + garlicky) and a quick pepper sauce (vinegary or smoky)—plus serving combos that pair perfectly with roasted pork tenderloin. Pin it for later, then use it anytime you want heat without overcooking.

Serve-it-with ideas:

  • Plain roasted tenderloin + chimichurri + roasted vegetables
  • Honey garlic tenderloin + a hot sauce on the side for contrast
  • Mustard-glazed tenderloin + a sharp chili sauce for bite

Also Read: Sourdough Recipe: 10 Easy Bread Bakes (Loaves, Rolls & Bagels)


BBQ pork tenderloin (oven or grill)

BBQ flavor works beautifully on tenderloin as long as the sauce is applied late. Many BBQ-style sauces contain sugar, which can burn if brushed on too early.

BBQ pork tenderloin in oven

  1. Roast the seasoned tenderloin using the core method.
  2. During the last 5–7 minutes, brush with BBQ-style sauce.
  3. Finish roasting, then brush again after it comes out.
  4. Rest and slice.

If you enjoy playing with sauce styles—tangy, creamy, spiced, or sweet—collections like pizza sauce variations can inspire flavor directions while you keep the same “brush late” approach.

BBQ pork tenderloin sliced into medallions with glossy barbecue sauce on a white plate, plus slaw and grilled corn; text shows oven and grill BBQ finish steps, quick 30-minute marinade, and a reminder to brush sauce in the last 5–7 minutes and cook to 145°F/63°C with rest.
BBQ Pork Tenderloin (Oven or Grill): the key is timing—brush BBQ sauce in the last 5–7 minutes so the sugar doesn’t burn, then rest 8–10 minutes for juicy slices. This card includes an oven finish, a grill finish, and a quick 30-minute marinade you can use on busy nights.

Best grilled pork tenderloin

  1. Season with the base rub, or use a quick marinade.
  2. Grill over medium-high heat, turning every few minutes for even browning.
  3. Pull at 140–145°F.
  4. Rest, slice, serve.

A quick marinade for grilled marinated pork tenderloin:

  • 2 tbsp olive oil
  • 2 tbsp soy sauce
  • 1 tbsp lemon juice
  • 2 cloves garlic, grated
  • 1 tsp honey or brown sugar
  • Black pepper

Even 30 minutes helps.

Also Read: Peanut Butter Fudge: Recipes & Guide (8 Methods + Easy Variations)


Smoked pork tenderloin (Traeger-style approach, without drying it out)

Smoked tenderloin tastes fantastic, although tenderloin isn’t built for hours and hours of low-and-slow cooking. Because it’s lean, it benefits from a shorter smoke and a careful finish.

Smoked pork tenderloin on a white plate with a thermometer probe, plus a quick guide for pellet grill/smoker settings: smoke at 225°F (or 250°F), pull at 140–142°F if resting to reach 145°F, rest 8–10 minutes, and finish options like a quick high-heat blast, skillet sear, or late glaze brush-on. MasalaMonk.com.
Smoking pork tenderloin is all about short smoke + careful finish because the cut is lean. Save this quick guide for your pellet grill/Traeger: smoke at 225°F (or 250°F for faster cook), start checking early, then pull at 140–142°F if you’ll rest it fully so carryover lands you at 145°F. Want more crust? Use a 3–6 minute high-heat finish or a quick skillet sear—then slice only after resting for the juiciest medallions.

Smoke at a lower temperature until the tenderloin reaches 140–145°F internally, then rest. If you want more crust, finish briefly over higher heat.

No matter the smoker, the goal stays consistent: stop at temperature, then rest.

Also Read: 10 Vegan Chocolate Cake Recipes (Easy, Moist, & Dairy-Free)


Slow cooker pork tenderloin (sliceable, not overcooked)

A slow cooker can be a lifesaver. With tenderloin, the main priority is avoiding overcooking. Because it’s lean, it can go from tender to dry if it stays in too long.

Photorealistic recipe card showing sliced slow cooker pork tenderloin on a plate with juices and herbs, plus a slow cooker in the background. Text highlights: start checking at 2 hours, pull at 145°F / 63°C, rest 8–10 minutes. Three tip boxes cover setup (onion bed, 1/2 cup stock), timing rules (LOW, typical 2–3.5 hours), and finishing ideas (spoon juices, optional butter, pair with honey garlic/balsamic/mushroom).
Slow cooker pork tenderloin doesn’t have to turn dry—this quick visual guide shows the only timing rule that matters: start checking at 2 hours and pull at 145°F / 63°C, then rest before slicing. Use a simple onion-and-stock base for moisture, spoon the cooking juices over the slices, and “finish” it with an easy glaze (honey garlic, balsamic, or creamy mushroom) so it tastes like a real dinner—not just leftover protein.

Simple slow cooker tenderloin recipe

  • Place sliced onions in the bottom if you like.
  • Add ½ cup stock (or stock plus a splash of vinegar for brightness).
  • Add the seasoned tenderloin.
  • Cook on LOW and start checking at 2 hours; most 1–1½ lb tenderloins finish around 2–3½ hours—remove at 145°F, rest 8–10 minutes, then slice..
  • Remove once it reaches 145°F, rest, then slice.
  • Spoon cooking juices over the slices.

Finishing with sauce makes this feel more complete. Honey garlic, teriyaki-style, balsamic, or creamy mushroom all work well.

If you like slow cooker structure for lean meats, crock pot chicken breast recipes offers ideas that translate nicely because chicken breast shares the same “lean meat needs careful timing” reality.

Also Read: Kahlua Drinks: 10 Easy Cocktail Recipes (Milk, Vodka, Coffee)


Instant Pot pork tenderloin (fast, useful, best with sauce)

Pressure cooking can be fast and convenient, though it benefits from a good sauce afterward.

Instant Pot pork tenderloin sliced on a white plate with juices, shown beside an Instant Pot. Overlay text explains: 3 minutes high pressure + 10 minutes natural release, pull at 145°F/63°C and rest. Bottom cards outline setup (optional sear, add 1 cup liquid, trivet), cook + release steps, and reducing juices into a quick sauce.
Instant Pot pork tenderloin doesn’t have to be dry—this “3 minutes high pressure + 10 minutes natural release” template keeps it juicy every time. Sear for flavor (optional), add 1 cup stock/water, cook, then rest and slice into medallions. The trick that makes it taste finished: reduce the pot juices on sauté for 2–4 minutes and whisk in butter or stir in a glaze. Full oven + sauce guide (honey garlic, balsamic, lemon, mustard, apples, maple, BBQ) in the post—cook to 145°F / 63°C + rest for best results.
  • Sear first (optional but best): sauté 2–3 minutes per side.
  • Add liquid: 1 cup stock or water (plus onions/garlic if you want).
  • Pressure cook (High): 3 minutes for a typical 1–1½ lb tenderloin (use 4 minutes if it’s notably thick).
  • Release: 10 minutes natural release, then quick release.
  • Finish: check internal temp; rest 8–10 minutes, then slice.
  • Make it taste finished: simmer the pot juices on sauté for 2–4 minutes to reduce, then whisk in a knob of butter or stir in one of your glazes.

Because every model differs slightly, checking internal temperature remains the most reliable finish.

Also Read: Hot Chocolate Coffee: 3 Easy Recipes (Cocoa, Mix, or Espresso)


Pulled-style tenderloin (when you want shreddable pork)

Tenderloin is not the first choice for classic pulled pork because it’s lean. Still, if tenderloin is what you have and you want something shreddable, it can work—provided it’s protected with liquid and you stop as soon as it becomes tender.

Pulled-style pork tenderloin “keep it juicy” guide showing 3 steps: cook tenderloin in flavorful liquid (stock/broth, onion, garlic, splash of vinegar), shred as soon as it pulls (don’t cook for hours), then mix shredded pork back into the juices + sauce. Includes moisture boosters (butter, BBQ sauce, pan juices) and serving ideas (buns, wraps, rice bowls). MasalaMonk.com branding.
Pulled pork vibes without drying out lean tenderloin: cook it in a flavorful broth, shred as soon as it pulls, then stir it back into the juices so every bite stays saucy. This card doubles as a quick-reference for “pulled-style pork tenderloin” nights—use it for sliders, wraps, or rice bowls, and keep the moisture boosters (butter, BBQ sauce, pan juices) on standby.

Cook it in flavorful liquid (stock, onions, garlic, a touch of vinegar), then check for tenderness. As soon as it shreds easily, shred it and immediately mix it back into the cooking juices and sauce so it stays moist. Serve it in buns, wraps, or rice bowls.

  • Cook it in flavorful liquid.
  • Stop once it shreds easily.
  • Mix the shredded meat back into the cooking liquid and sauce immediately.

If your goal is the traditional barbecue pulled texture, pork shoulder is the best option. Pork loin can also handle longer cooking better than tenderloin. Even so, pulled-style tenderloin can be a satisfying “use what you have” dinner when it’s treated gently.

Also Read: Cappuccino Recipe: How to Make a Perfect Cappuccino at Home


Breaded pork tenderloin and pork fillet sandwich style (crispy, hearty, different meal)

Roasted tenderloin is one personality. Crispy cutlets are another. When you slice tenderloin into medallions, pound thin, bread, and pan-fry, you get a completely different meal—crisp edges, juicy center, and the kind of sandwich that feels like comfort food.

Breaded pork tenderloin sandwich guide with crispy cutlet photo and steps: slice tenderloin into medallions, pound thin, flour–egg–breadcrumbs, pan-fry until golden, then build sandwich with bun, mayo, pickles, and onion; MasalaMonk.com branding.
Craving a crispy, diner-style pork tenderloin sandwich? This quick visual guide shows the cutlet method (slice → pound thin → bread → pan-fry) plus the easiest sandwich build with pickles and onion. Perfect for turning pork tenderloin into a totally different meal—crunchy outside, juicy center. Save it for later and use it as your weeknight blueprint.

Basic recipe for crispy cutlets

  1. Slice tenderloin into medallions, then pound each slice thin.
  2. Season with salt and pepper.
  3. Dredge in flour, dip in beaten egg, then coat in breadcrumbs.
  4. Pan-fry until crisp and cooked through.

Serve in a bun with pickles, onion, and a creamy spread. A homemade spread like eggless mayonnaise makes it feel more intentional.

For extra flavor, add a spoon of spicy sauce or a tangy slaw. Meanwhile, the leftover cutlets are incredible sliced into wraps.

Also Read: 19 Essential Kitchen Tools That Make Cooking Easier


Stuffed pork tenderloin in oven (weekend-special, still approachable)

Stuffed tenderloin looks impressive and feels festive, especially for holiday pork tenderloin dinners. It does take a bit more prep, although the technique is approachable.

Vertical recipe card for stuffed pork tenderloin baked in the oven. Sliced pork tenderloin is rolled with a cream cheese and spinach filling, tied with twine, then roasted at 375–400°F and rested 10–12 minutes. Includes filling ingredients and simple step-by-step instructions with MasalaMonk.com branding.
Stuffed pork tenderloin in the oven, but make it weekend-special: a creamy spinach + cream cheese filling, rolled, tied, roasted (375–400°F), then rested so every slice stays juicy. This card shows the exact filling mix + the “don’t cut through” butterfly method + the pull-at-temp reminder (145°F / 63°C + rest). Save this for holidays, date night, or when you want pork tenderloin to feel impressive without being complicated. Full step-by-step guide + more glazes and dinner variations on MasalaMonk.com — pin it for later and share with a friend who loves easy roast dinners.

Cream cheese stuffed pork tenderloin (savory, rich)

Filling:

  • 120 g cream cheese
  • 1 cup spinach, sautéed and squeezed dry
  • 2 tbsp chopped herbs
  • 1 clove garlic, grated
  • Salt and pepper

Butterfly the tenderloin (slice lengthwise, not all the way through), open it like a book, and flatten gently. Spread filling, then roll tightly and tie with twine at intervals. Roast at 375–400°F, checking temperature carefully because the stuffed roll is thicker and needs extra time.

A stuffed tenderloin benefits from resting a bit longer—closer to 10–12 minutes—before slicing.

Also Read: How to Cook Tortellini (Fresh, Frozen, Dried) + Easy Dinner Ideas


Leftover pork tenderloin (how to keep it juicy)

Leftovers are often where tenderloin truly shines, because the slices work in sandwiches, bowls, and quick skillets.

Portrait infographic titled “Reheat Leftover Pork Tenderloin (Stay Juicy)” showing sliced pork tenderloin on a plate with a small sauce cup and a skillet lid in the background. Two tip boxes compare reheating methods: covered pan on low heat with a splash of stock or sauce for 2–4 minutes, and microwave in short 10–20 second bursts with sauce on top. A warning bar says avoid high heat and long time. Bottom row shows a leftover sandwich idea: thin slices, mayo, pickles and onion, spicy sauce. MasalaMonk.com branding at the bottom.
Leftover pork tenderloin can stay juicy—you just need gentle heat. Use a covered pan with a splash of stock or sauce for the best texture, or microwave in short bursts with sauce on top so it doesn’t dry out. Then turn those slices into a quick sandwich: mayo + pickles + onion + a little spicy sauce. Save this for meal-prep nights and weeknight leftovers. For the full pork tenderloin guide (temps, rest time, sauces + variations), do read the full post.

Best ways to reheat

  • Warm slices gently in a covered pan with a splash of stock or sauce.
  • Alternatively, microwave briefly with a spoon of sauce on top to protect the surface.
  • Avoid high heat for a long time, since lean meat dries quickly.
Infographic showing leftover pork tenderloin sliced on a plate with a sauce cup and five quick remix meal ideas: rice bowl, wrap/taco, fried rice, creamy skillet, and salad upgrade, plus a tip to reheat gently and add sauce after slicing.
Leftover pork tenderloin doesn’t have to taste “leftover.” This quick guide gives you 5 easy remix meals—rice bowl, wrap/taco, fried rice, creamy skillet, and salad upgrade—so you can turn sliced tenderloin into fresh dinners that still stay juicy. Save it for busy nights, then grab the full pork tenderloin method + sauces on MasalaMonk.com (cook to 145°F/63°C and rest for the best texture). Pin it now so you always have a plan for tomorrow’s leftovers.

Leftover sandwich idea

Slice the tenderloin thinly, spread mayo, add crunchy pickles and onions, then finish with a spicy sauce if you like. For inspiration on sandwich structure and flavors, a roundup of easy sandwich ideas can spark new combinations even when the protein changes.

Also Read: Double Chocolate Chip Cookies – Easy Recipe with 7 Variations


Putting it all together: a repeatable tenderloin template

Once you’ve cooked pork tenderloin in oven a few times, the process becomes simple:

  1. Pat dry, season well.
  2. Roast at 400°F for speed, 350°F for gentleness, or 375°F for the middle path.
  3. Pull at 140–145°F and rest.
  4. Slice into medallions.
  5. Finish with a sauce that matches the moment: honey garlic, creamy mushroom, balsamic, lemon, mustard, apples, maple, teriyaki, or BBQ.
Pork tenderloin template infographic showing sliced pork tenderloin on a white plate with pan juices and five cards: prep (pat dry, season), oven roast temps (400°F, 375°F, 350°F), internal temperature (pull 140–145°F, carryover to 145°F/63°C, rest 8–10 min), finish options (honey garlic, creamy mushroom, balsamic, lemon, mustard, apples, maple, teriyaki, BBQ), and serve-with ideas. MasalaMonk.com branding at bottom.
If you want juicy pork tenderloin in the oven every time, this “template” is the whole method in one glance: pat dry → season → choose 350/375/400°F → pull at 140–145°F → rest 8–10 minutes → slice → add your favorite finish (balsamic, lemon, mustard, apples, maple, teriyaki, BBQ, and more). Save this as your weeknight cheat sheet—and use it to remix the same tenderloin into totally different dinners with the sauce list + serve-with ideas.

From there, dinner becomes flexible. One night it’s pork tenderloin with potatoes and carrots. The next time it’s pork fillet in creamy mushroom sauce. Another evening, it becomes a pork fillet sandwich with crisp edges and a bright, punchy topping. Even smoked tenderloin has a place when you want that barbecue feel without committing to an all-day cook.

Most importantly, the tender result isn’t guesswork. Safe, juicy doneness comes from cooking to temperature and resting—exactly as laid out in the USDA temperature chart and the FoodSafety.gov internal temperature guide. Once that foundation is in place, everything else—glazes, sauces, sides, sandwiches—becomes a pleasure rather than a puzzle.
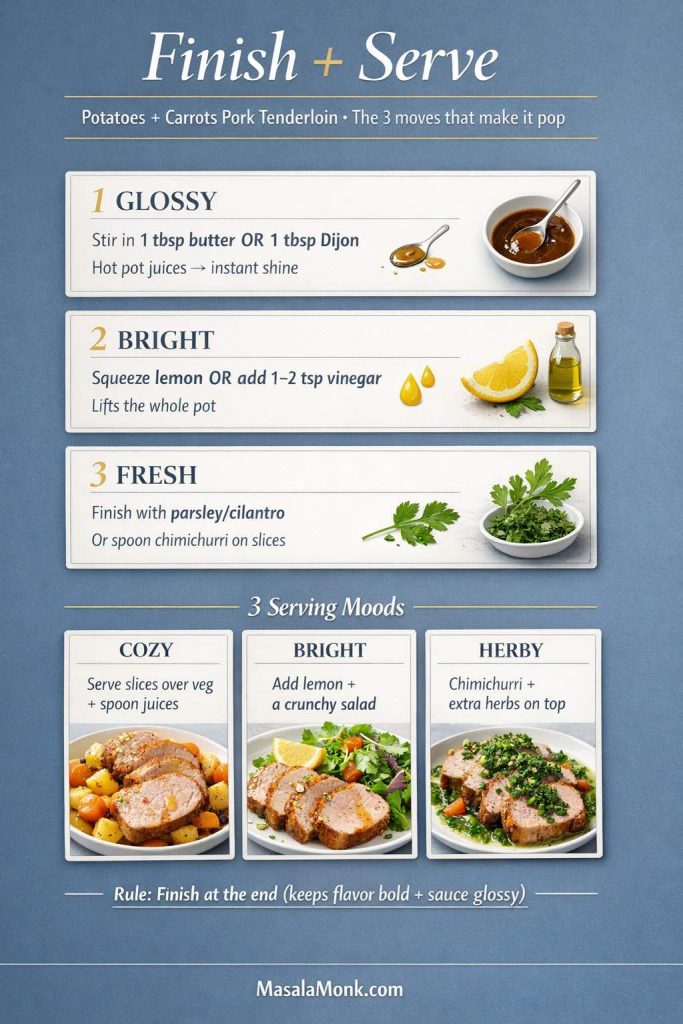
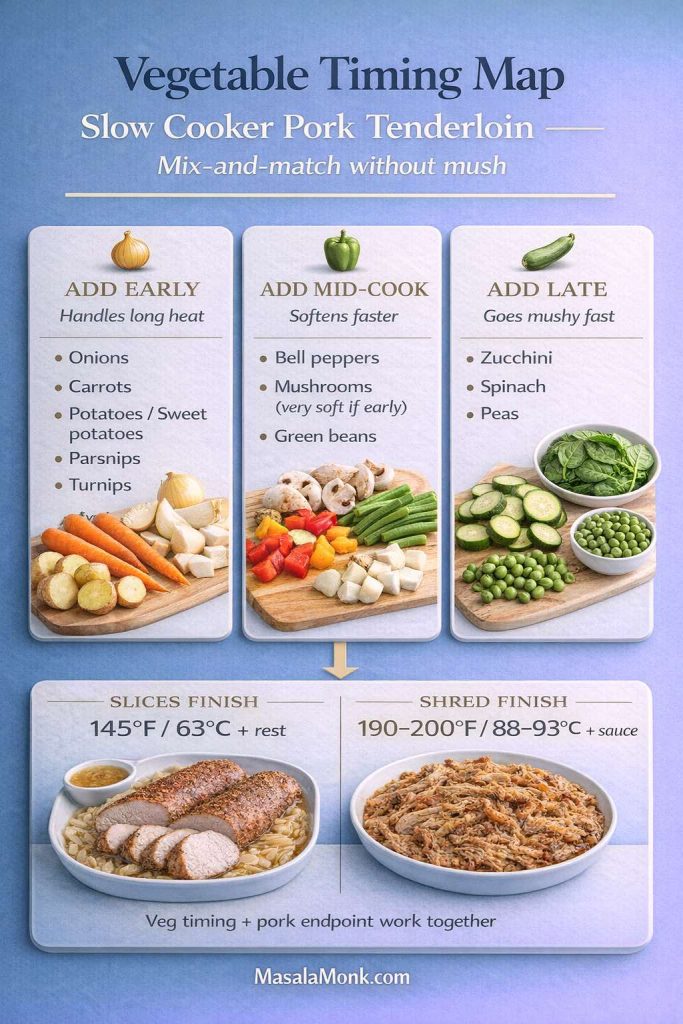
Also Read: How to Cook Bacon in the Oven (Crispy, No-Mess, Crowd-Ready Recipe)


FAQs

1) What’s the difference between pork tenderloin and pork loin?

Pork tenderloin is a smaller, long, narrow cut that cooks quickly and stays best when it’s pulled at the right internal temperature and rested. Pork loin is thicker and often much larger, so it needs more time in the oven. Because the cuts cook so differently, the same cook time rarely works for both.

2) What temperature should pork tenderloin be cooked to?

For a juicy result, cook pork tenderloin until the thickest part reaches 145°F (63°C), then let it rest before slicing. In practice, many cooks remove it a few degrees earlier and rely on resting to finish gently, which helps prevent dryness.

3) How long does pork tenderloin take in the oven at 400°F?

Pork tenderloin in oven at 400°F often takes about 18–24 minutes, depending on thickness. Even so, the most reliable finish comes from checking internal temperature rather than relying on a fixed minute count.

4) How long does pork tenderloin take in the oven at 350°F?

At 350°F, pork tenderloin typically roasts for about 25–35 minutes. Since tenderloins vary in thickness, start checking early and pull it as soon as it reaches the target temperature.

5) Is pork tenderloin better at 350 or 400?

Both work well, although they suit different goals. At 400°F you get a quicker cook and more browning, while 350°F gives a gentler roast and a slightly wider timing window. If you’re roasting vegetables on the same pan, 350°F can feel easier to manage.

6) What’s the best way to season pork tenderloin?

A simple seasoning for pork tenderloin usually includes salt, pepper, garlic, and herbs like rosemary or thyme. From there, you can build flavor with paprika for warmth, mustard for tang, or a sweet element like honey or brown sugar for a glaze-friendly crust.

7) Why is my pork tenderloin dry even when I follow the time?

Most often, it’s overcooked by a small margin or sliced too soon. Because tenderloin is lean, it can go past juicy quickly. Using a thermometer and resting the meat before cutting are the two most effective fixes.

8) Should I sear pork tenderloin before baking?

Searing isn’t required, yet it adds a deeper crust and a richer roasted flavor. A cast iron pork tenderloin method—sear first, then oven finish—gives great browning without drying out the center when you stop at the right temperature.

9) Can I cook pork tenderloin in a cast iron skillet?

Yes. Pan sear the tenderloin to build color, then transfer the skillet to the oven to finish. This approach keeps the outside flavorful while letting the inside cook gently and evenly.

10) Can I make pork tenderloin with potatoes and carrots on one pan?

Absolutely. For pork tenderloin with potatoes and carrots, roast the vegetables first so they can soften and brown, then add the tenderloin later so it stays juicy. That staggered timing prevents the pork from overcooking while the vegetables catch up.

11) How do I make honey garlic pork tenderloin without burning the glaze?

Brush the honey garlic glaze on near the end of roasting, not at the beginning. Since honey and sugar can darken quickly, adding the glaze late gives you shine and flavor without a scorched surface.

12) What sauce goes best with pork tenderloin?

It depends on the mood. Creamy mushroom sauce makes it comforting, balsamic glaze makes it bold and glossy, lemon sauce keeps it bright, and mustard glaze gives it a classic roast feel. Even a simple pan sauce made from the drippings can be enough.

13) Can I make creamy mushroom pork tenderloin ahead of time?

You can prep the sauce components ahead by slicing mushrooms and chopping aromatics, then cook the sauce while the pork rests. For best texture, warm the sliced tenderloin briefly in the sauce right before serving rather than simmering it for long.

14) Can pork tenderloin be cooked in a slow cooker?

Yes, although it’s important not to overcook it. Because tenderloin is lean, it should be cooked just until done, then rested and sliced. Pairing it with a sauce afterward helps keep it moist.

15) Can I make Instant Pot pork tenderloin?

Yes. Searing first improves flavor, then pressure cook briefly and check temperature before slicing. Since timing varies by model and thickness, confirming doneness with a thermometer helps avoid a dry result.

16) Can you make pulled pork from pork tenderloin?

You can make a pulled-style version, yet it won’t be as rich as classic pulled pork because tenderloin is lean. To keep it juicy, cook it in flavorful liquid and stop as soon as it shreds easily, then mix the meat back into the juices.

17) What’s the best way to reheat leftover pork tenderloin?

Reheat gently to avoid drying it out. Warm slices in a covered pan with a splash of broth or sauce, or microwave briefly with moisture on top. High heat for too long is what makes leftovers tough.

18) Can I slice pork tenderloin into medallions before cooking?

You can, especially if you want pan fried pork medallions or quick sautéed pork tenderloin. For oven roasting, however, cooking it whole usually keeps it juicier and makes timing easier.

19) How do I cook pork tenderloin on the grill?

Grill over medium-high heat and turn it every few minutes for even browning. Pull it when it reaches the target internal temperature, then rest before slicing. This method works particularly well with marinated pork tenderloin.

20) Can I smoke pork tenderloin on a pellet grill?

Yes, smoked pork tenderloin can be excellent when it’s cooked to temperature and not left in the smoker too long. Because it’s lean, a shorter smoke followed by resting helps preserve tenderness and moisture.