You are not here for a complicated pork chop dinner. You have pork chops, a can of cream of mushroom soup, and the hope that the gravy turns creamy while the pork stays juicy. This recipe keeps that old-school shortcut, then gives it better timing, better gravy, and fewer dry-pork surprises.
These cream of mushroom pork chops are built for a real weeknight: brown the pork, loosen condensed soup into mushroom gravy, simmer gently, and stop before the chops turn tough. It is cozy pantry cooking, handled with just enough care.
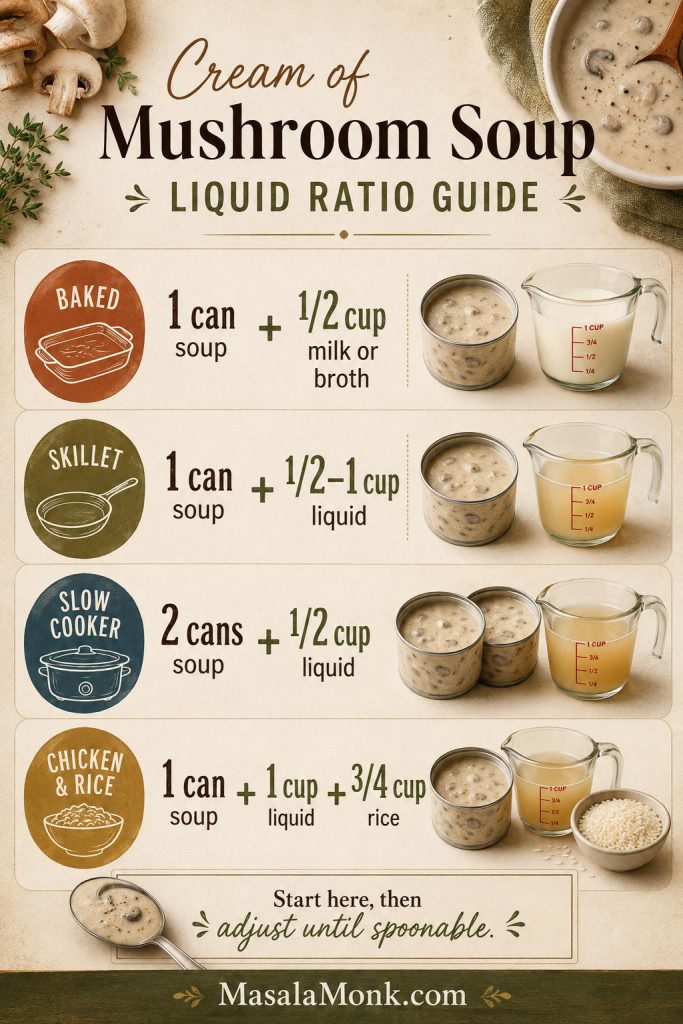
The simple formula is 4 pork chops, 1 can of condensed cream of mushroom soup, and ⅓ to ½ cup broth, milk, or water. Use ⅓ cup liquid for thicker gravy, ½ cup for a looser sauce, and chicken broth when you want fuller flavor without making the recipe harder.
The fast skillet version comes first because it is the easiest dinner for most nights. If you meant baked pork chops, crock pot pork chops, pork chops and rice, potatoes, stuffing, Campbell’s-style pork chops, or extra-smothered gravy, those notes are included too — because each version cooks differently.
Table of Contents
Make the Creamy Skillet Dinner
Quick Answer: Cream of Mushroom Pork Chops with Mushroom Soup Gravy
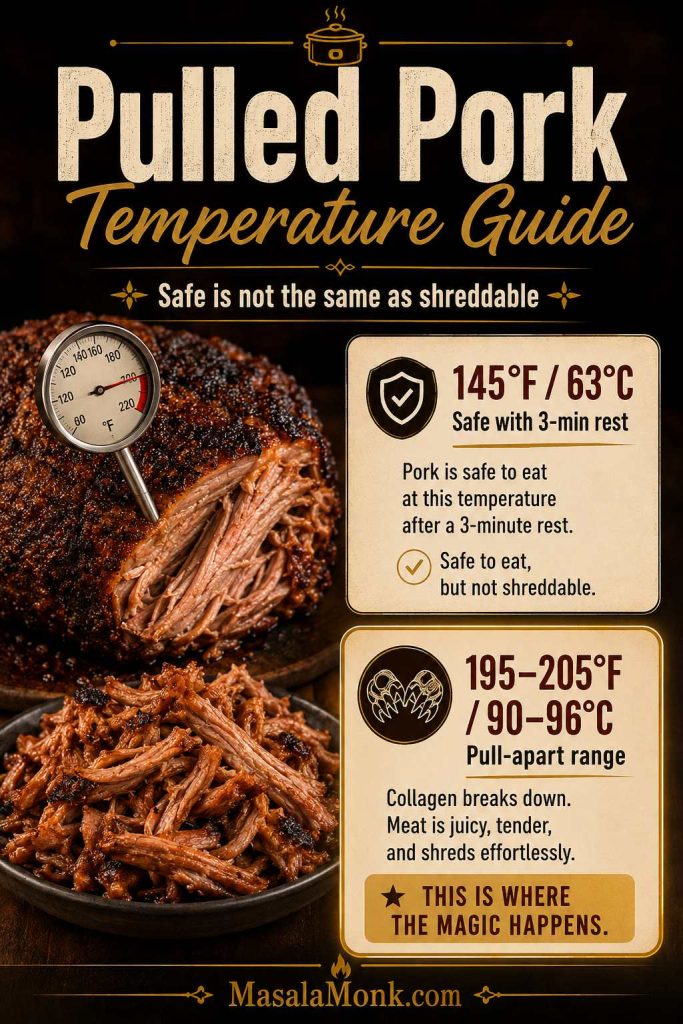
To make cream of mushroom pork chops, brown 4 seasoned pork chops in a skillet, whisk 1 can of condensed cream of mushroom soup with ⅓ to ½ cup chicken broth, milk, or water, then simmer gently until the thickest chop reaches 145°F / 63°C. Rest for 3 minutes and spoon the creamy mushroom gravy over the top.
Good default: use ¾–1 inch pork chops, ⅓ cup chicken broth, a 12-inch skillet, and low heat once the soup goes in. That combination gives you golden-edged pork and gravy thick enough to settle into mashed potatoes, rice, or egg noodles.
Bare pantry version: pork chops, condensed cream of mushroom soup, ½ cup water, and black pepper. It tastes simpler and more nostalgic, but it still works when dinner just needs to happen.
Gravy can wait. Pork cannot. Let the gravy be flexible, but treat the pork like it has a deadline. If the chops are done before the sauce is perfect, move them out and fix the gravy by itself.
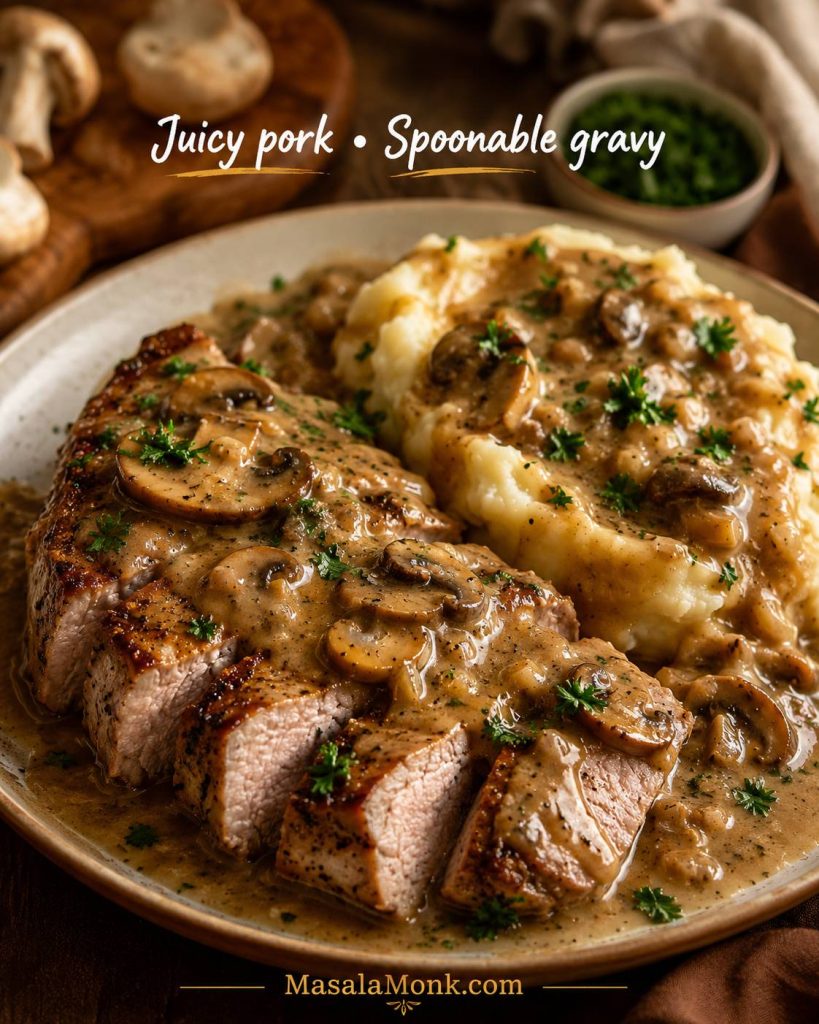
This is the kind of dinner where the gravy matters as much as the pork: thick enough for mashed potatoes, loose enough to spoon, and savory enough to make a plain side feel finished.
If you are not making the skillet version, jump to the baked version, crock pot version, or pork chops and rice version.
Skillet Recipe Snapshot
| Use | 4 pork chops, preferably ¾–1 inch thick |
|---|---|
| Soup | 1 can condensed cream of mushroom soup, 10.5 oz / 298 g |
| Liquid | ⅓ cup broth for thick gravy; up to ½ cup milk, broth, or water for looser sauce |
| Optional upgrade | 8 oz mushrooms, ½ onion, garlic, Worcestershire, Dijon |
| Method | Brown chops, make mushroom gravy, simmer gently, rest before serving |
| Time | About 30 minutes for the skillet version |
| Doneness | 145°F / 63°C plus a 3-minute rest |

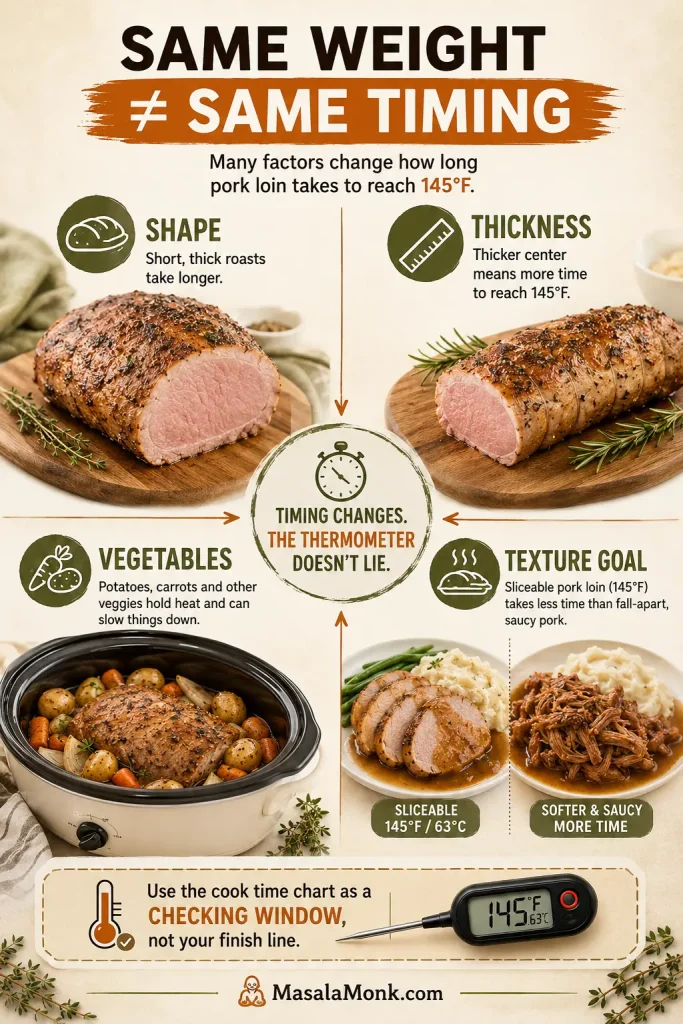
Many old canned-soup pork chop recipes simmer everything by time. This version uses the same pantry shortcut but changes the control point: the gravy can be adjusted by texture, while the pork is cooked by temperature.
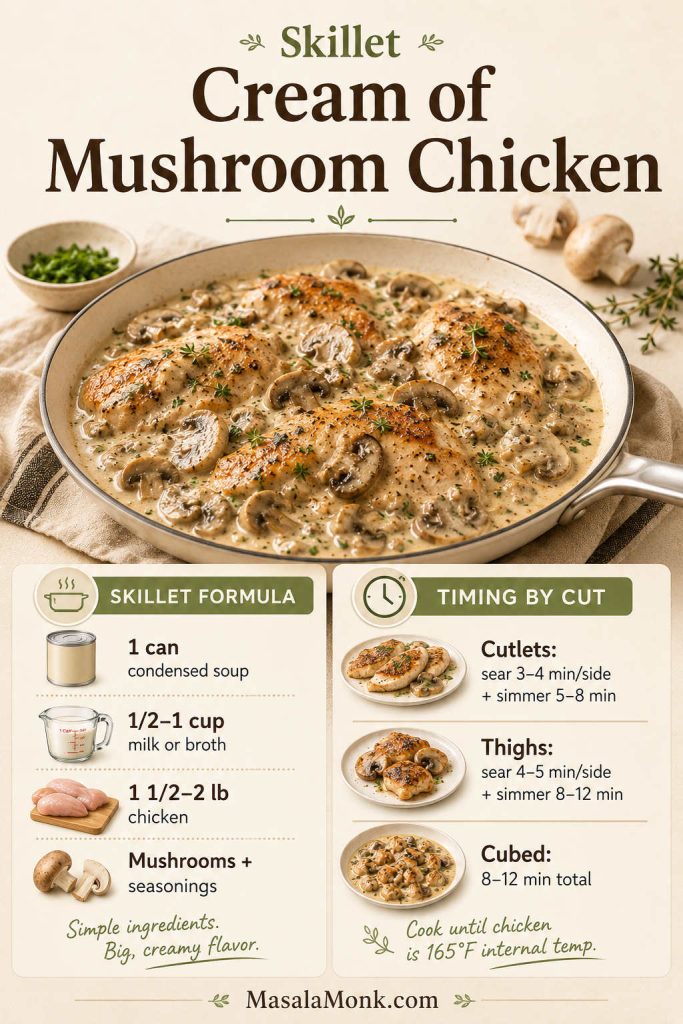
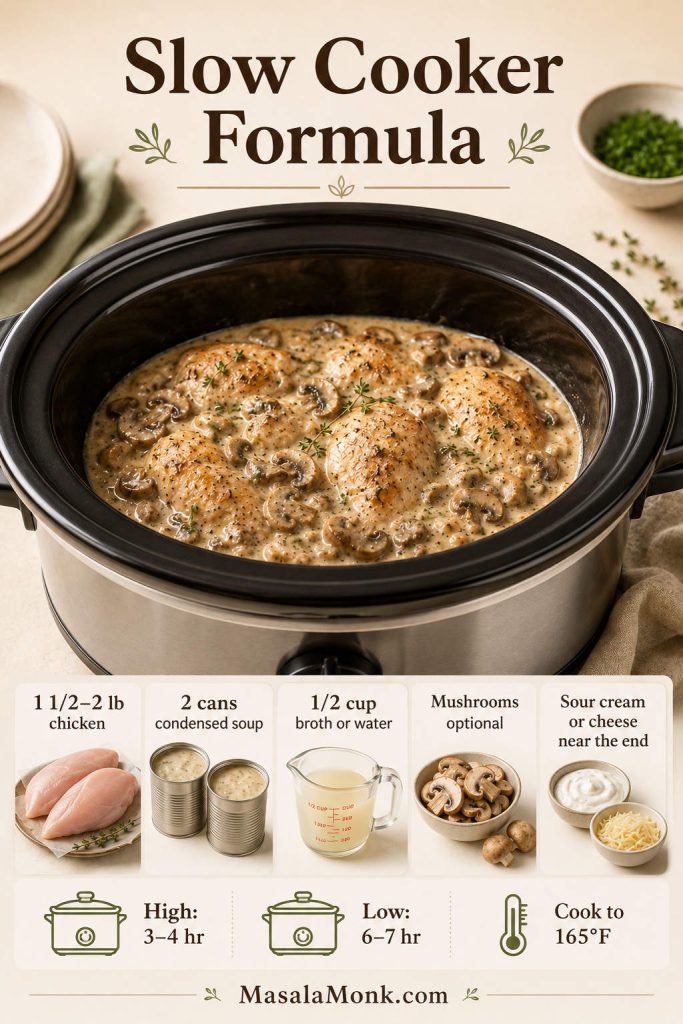
Cooking with chicken instead tonight? Our cream of mushroom chicken recipe uses the same cozy canned-soup idea, but the timing and doneness are built around chicken instead of pork.
At a Glance: Gear, Sides, and Watchouts
| Question | Quick answer |
|---|---|
| Skillet | Use a 12-inch skillet if adding mushrooms and onions; a 10-inch skillet works for the simplest pantry version. |
| Helpful equipment | Tongs, whisk or sturdy spoon, instant-read thermometer, and a plate for resting pork. |
| Method choice | Use the skillet for speed, the oven for covered bakes, and a casserole method for raw rice, potatoes, or stuffing. |
| Easy sides | Mashed potatoes, rice, egg noodles, green beans, peas, broccoli, biscuits, or a sharp salad. |
| Biggest mistakes to avoid | Overcooking thin chops, hard-boiling the sauce, adding too much liquid, and salting too early. |
Skillet, Baked, Crock Pot, or Rice: Which Cream of Mushroom Pork Chops Version Should You Make?
The same can of soup can become several different dinners. A quick skillet meal, an oven bake, a slow cooker dinner, and pork chops with rice all sound similar, but they do not need the same amount of liquid or time. Pick the path first, then the recipe gets much easier.
| If you want… | Use this method | Watch out for |
|---|---|---|
| Fast creamy pork chops | Main skillet method | Thin chops overcook quickly once they go back into the sauce. |
| The old-school canned-soup shortcut | Campbell’s-style pork chops | Water is classic, but broth gives a more savory gravy. |
| Oven-baked pork chops | Covered baked version | Do not bake lean chops by the clock; check early. |
| Crock pot pork chops | Slow cooker version | Very thin boneless chops can dry out before they taste tender. |
| Rice version | Cooked rice side or baked rice casserole | Uncooked rice needs more liquid and longer covered heat than skillet pork. |
| Potato version | Mashed potatoes side or covered potato bake | Raw potatoes must be sliced thin and cooked like a casserole. |
| Stuffing version | Covered stuffing bake | Dry stuffing steals moisture unless it is hydrated first. |
| Extra gravy / smothered pork chops | Smothered variation | Let the pork rest while you make the extra gravy rich. |

Easy distinction: the skillet recipe cooks pork chops in a creamy sauce. Rice, potatoes, stuffing, and slow-cooker versions also have to manage starch or long heat, so the moisture and timing change.
Why This Recipe Works
This recipe keeps the part people love — pork chops in creamy mushroom soup gravy — while fixing the parts that usually go wrong.
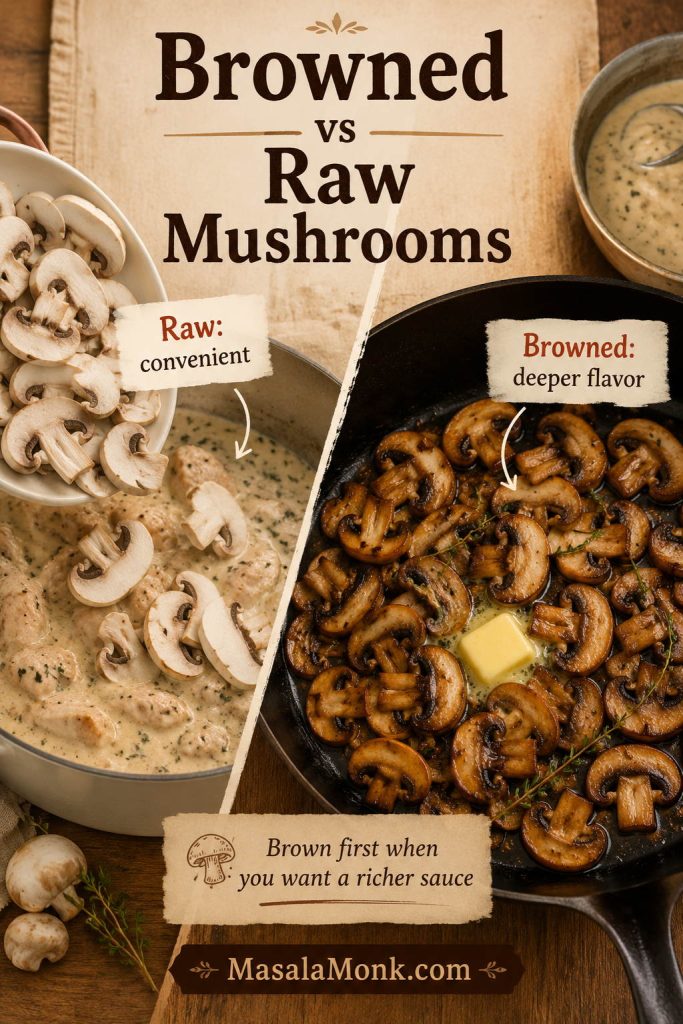
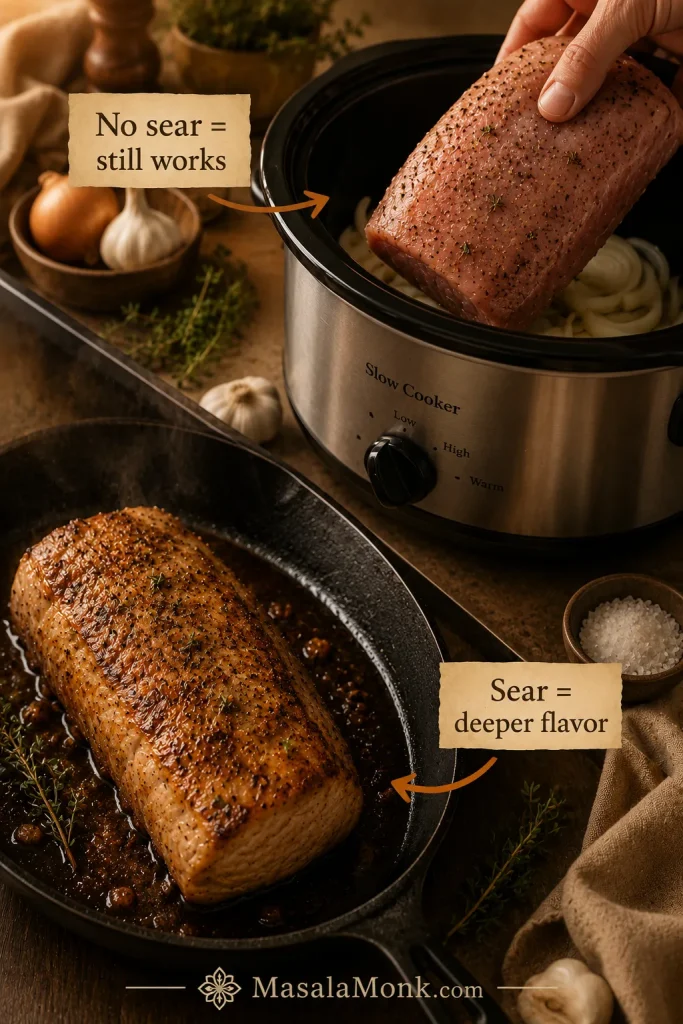
- Browning gives the pork a savory edge. The mushroom gravy softens everything later, but the first sear keeps the chops from tasting flat.
- The soup-to-liquid ratio stays controlled. Condensed soup needs a little help becoming gravy, not a whole pan of liquid.
- Mushrooms and onion make the shortcut taste more like dinner. They are optional, but they add sweetness, texture, and deeper mushroom flavor.
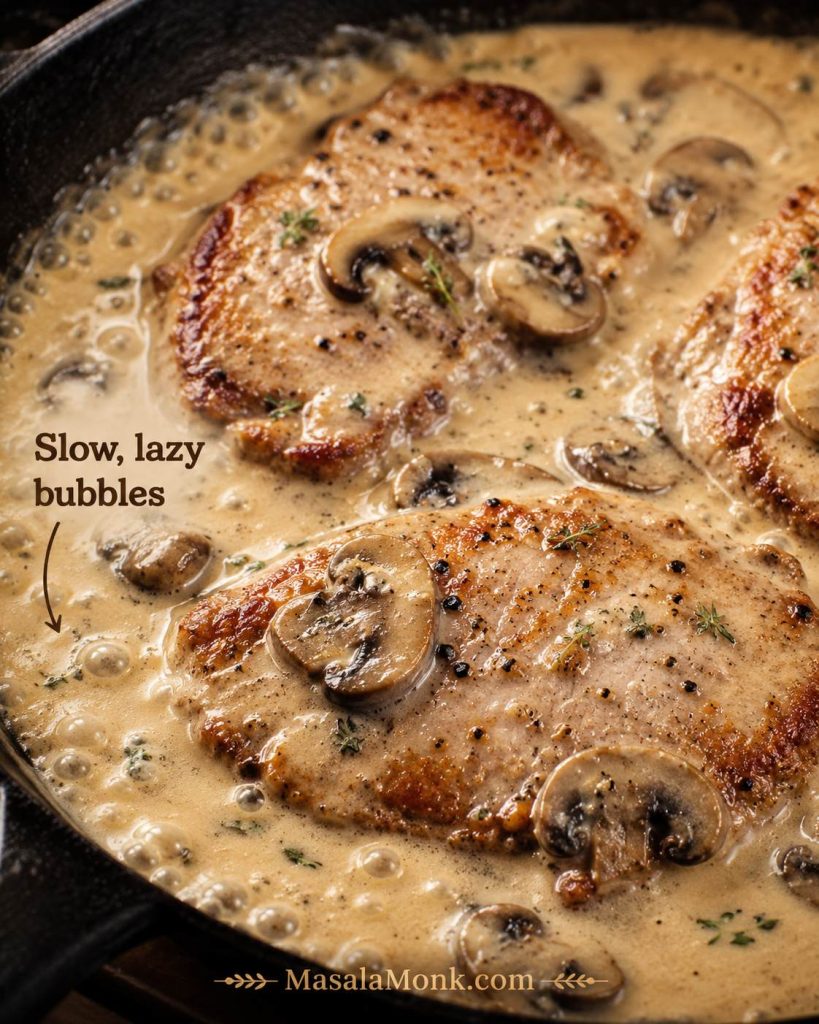
- A gentle simmer protects lean pork. Once the sauce goes in, slow bubbles are your friend. A hard boil is how creamy dinners turn tough.
- A thermometer separates the pork from the gravy problem. Once the chops are done, the sauce can keep thickening without them.
The result is still the creamy canned-soup dinner people remember, but with browned edges, a spoonable sauce, and pork that does not need to hide under the gravy.
This is not a recipe that asks you to pretend a can of soup is fancy. It simply helps that can do its job better: make creamy gravy, keep dinner simple, and give the pork chops something comforting to sit in.
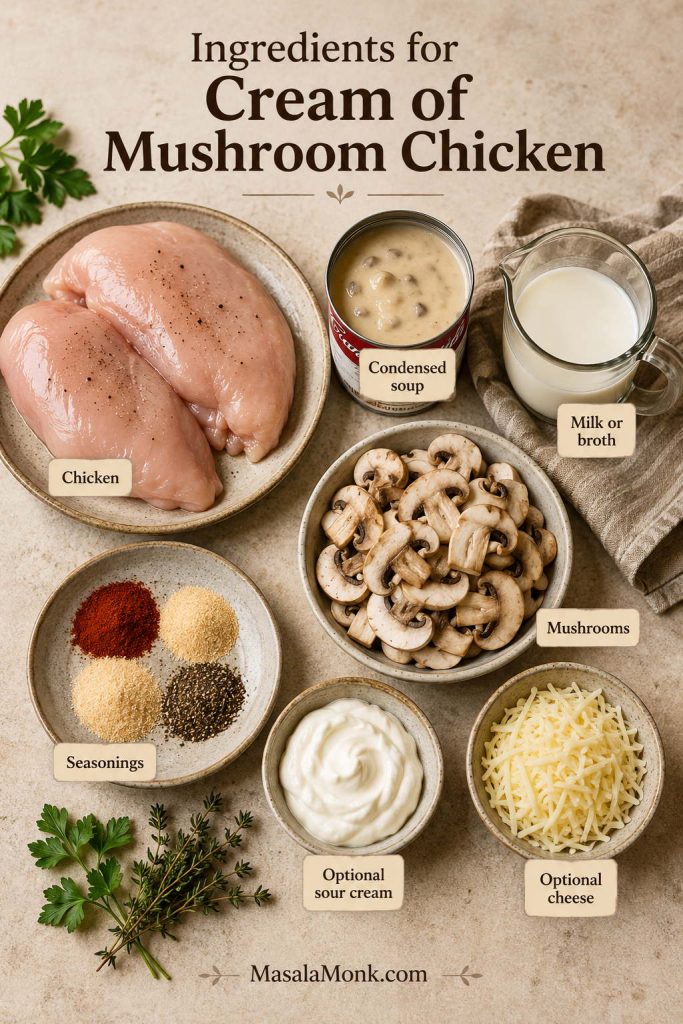
Ingredients for Pork Chops with Cream of Mushroom Soup
The ingredient list is short, which is exactly why the small choices matter. The soup brings the creamy base, the liquid sets the gravy texture, and the chop thickness decides how much breathing room you have before dinner goes from juicy to dry.
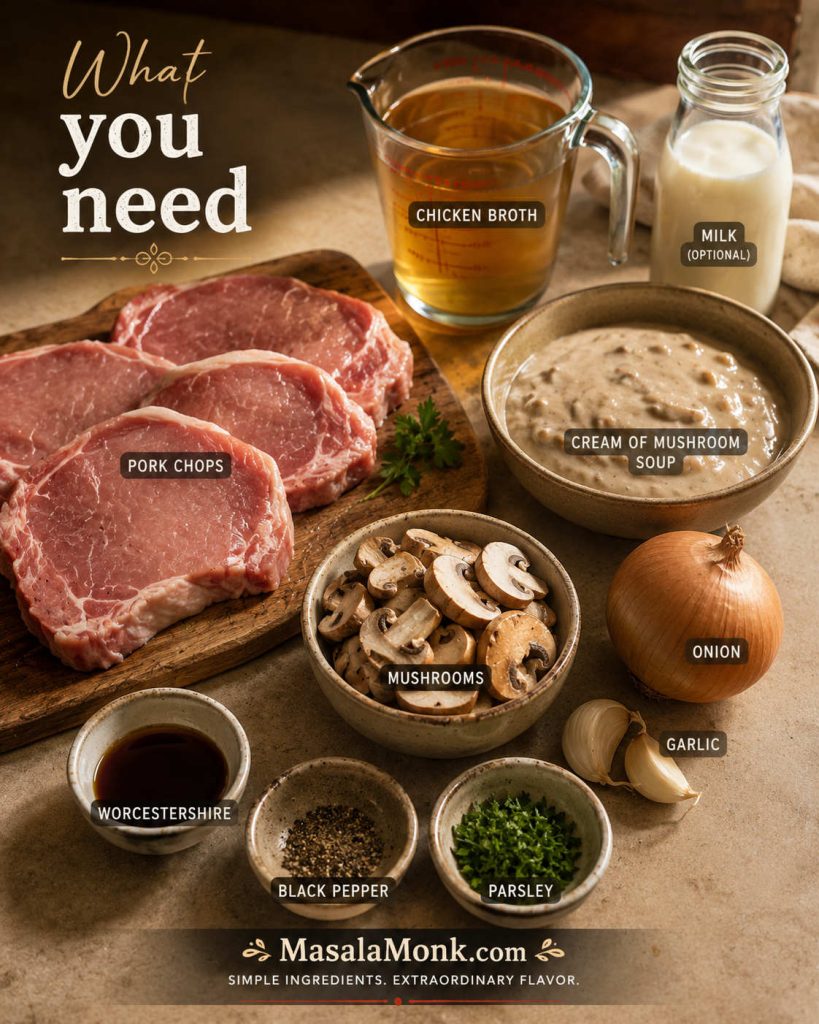
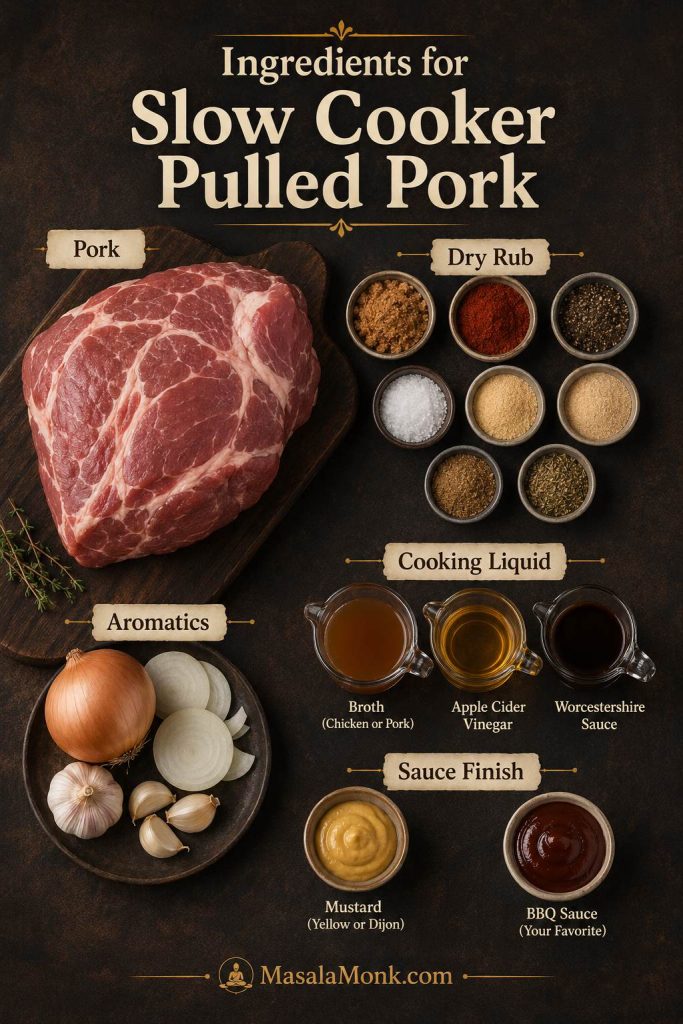
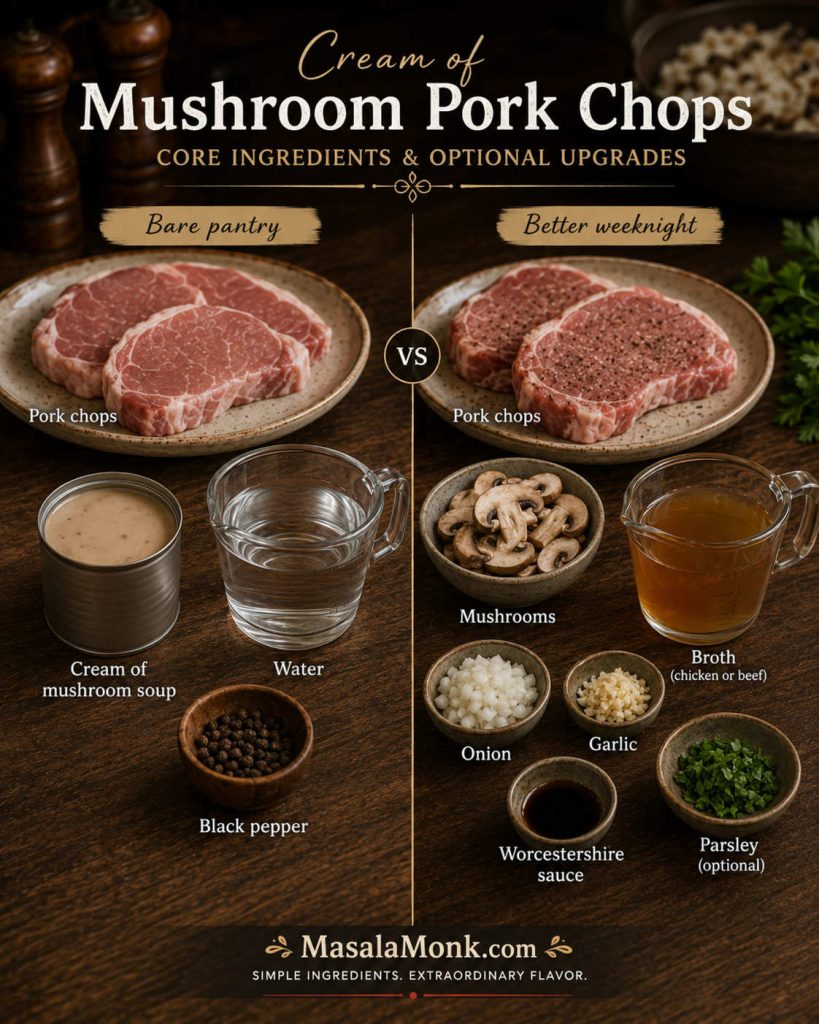
Bare pantry version: pork chops + condensed cream of mushroom soup + water + black pepper. Better weeknight version: add chicken broth, mushrooms, onion, garlic, Worcestershire, and thermometer timing. Both are valid; one is just more layered.
Core Ingredients and Optional Upgrades
| Ingredient | Amount | Why it matters |
|---|---|---|
| Pork chops | 4 chops, about 1½–2¼ lb / 680 g–1 kg total | Boneless or bone-in both work. Chops around ¾–1 inch thick are easiest to keep juicy. |
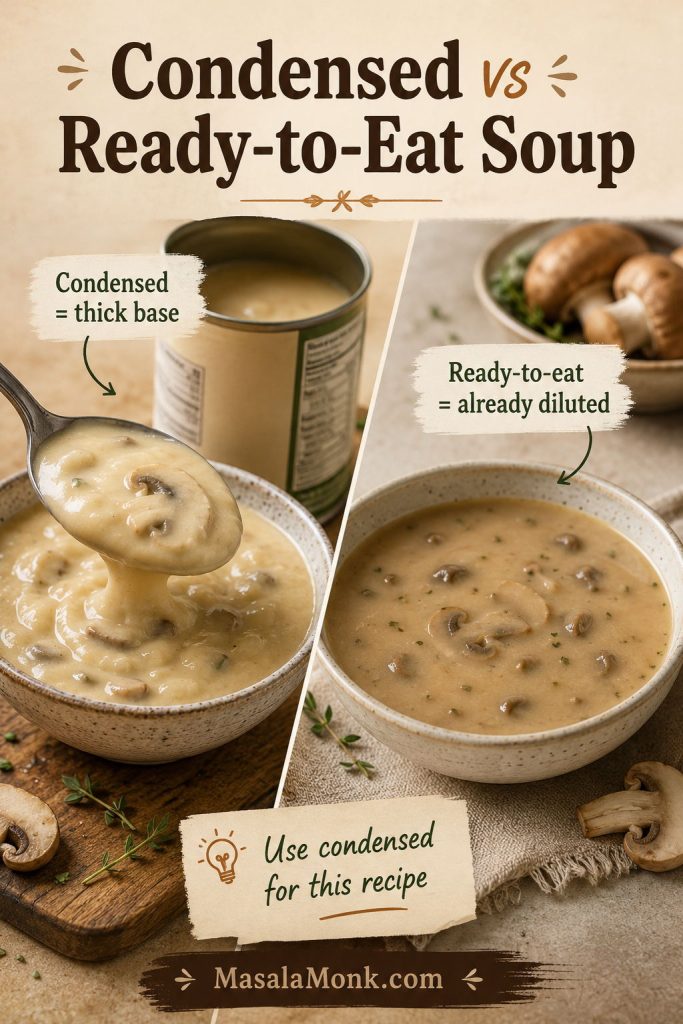
| Condensed cream of mushroom soup | 1 can, 10.5 oz / 298 g | The shortcut base for the creamy mushroom gravy. Low-sodium soup gives you more control if using broth or seasoning mix. |
| Chicken broth, milk, or water | ⅓–½ cup / 80–120 ml | Turns condensed soup into sauce. Broth is savory, milk is creamy, water is classic. |
| Fresh mushrooms | 8 oz / 225 g, sliced | Optional but recommended for deeper mushroom flavor and a more homemade texture. |
| Onion | ½ medium / 75–100 g, thinly sliced or diced | Adds sweetness and helps the sauce taste less like it came straight from the can. |
| Garlic | 2–3 cloves, minced | Adds savory depth; use garlic powder if that is what you have. |
| Oil + butter | 1 tablespoon each | Oil helps sear the pork; butter helps sauté mushrooms and onion. |
| Black pepper | ½ teaspoon, plus more to taste | Balances the creamy sauce and keeps the flavor from tasting sleepy. |
| Worcestershire sauce | 1–2 teaspoons / 5–10 ml, optional | Adds a savory edge that makes the gravy taste fuller. |
| Dijon mustard | 1 teaspoon / 5 g, optional | Adds a small sharp note without making the sauce taste mustardy. |
| Parsley | 1–2 tablespoons, chopped, optional | Freshens the finished plate. |
Salt note: start light. Condensed soup already brings salt, and the final gravy can get too salty if you also add regular broth, bouillon, onion soup mix, gravy mix, ranch seasoning, or seasoned salt. Taste the sauce before adding more.
Can You Skip the Fresh Mushrooms and Onion?
Pork chops, condensed soup, a little liquid, and black pepper will still get dinner on the table. Fresh mushrooms and onion make the gravy taste more layered, but the simple canned-soup version is the classic route. If you skip them, add garlic powder, Worcestershire sauce, or extra black pepper so the sauce does not taste flat.
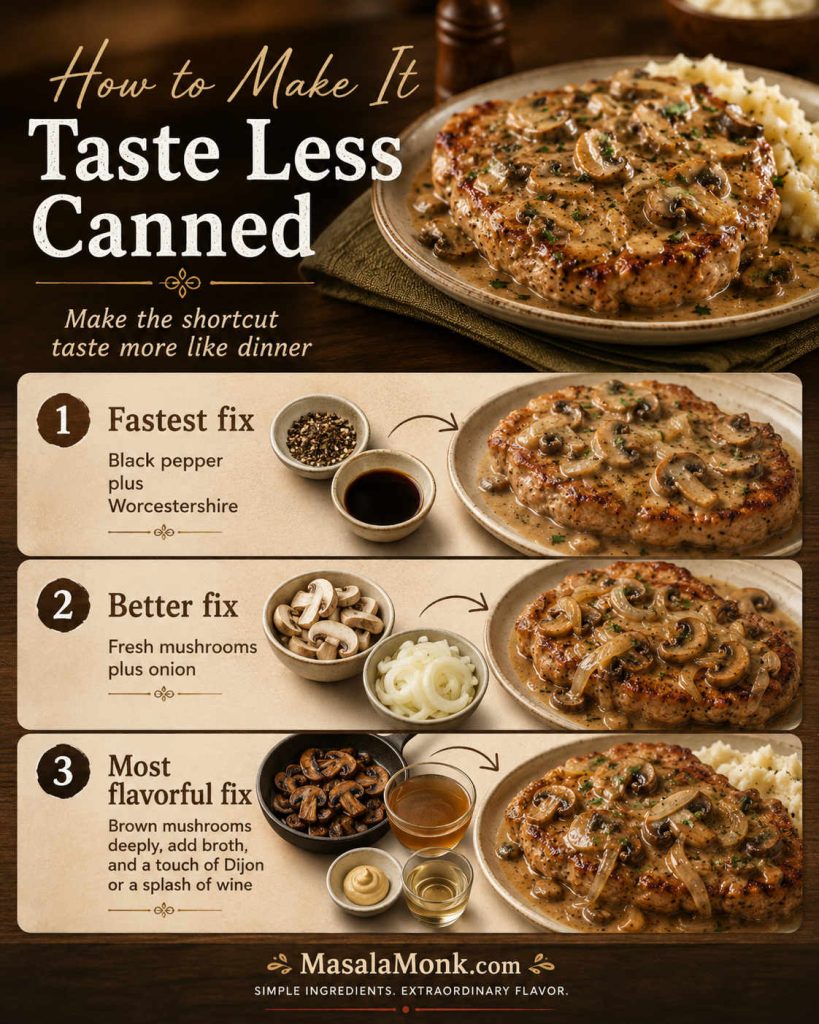
How to Make It Taste Less Canned
The goal is not to hide the shortcut. It is to make the shortcut taste more like dinner.
- Fastest fix: add black pepper and a splash of Worcestershire so the gravy tastes savory instead of flat.
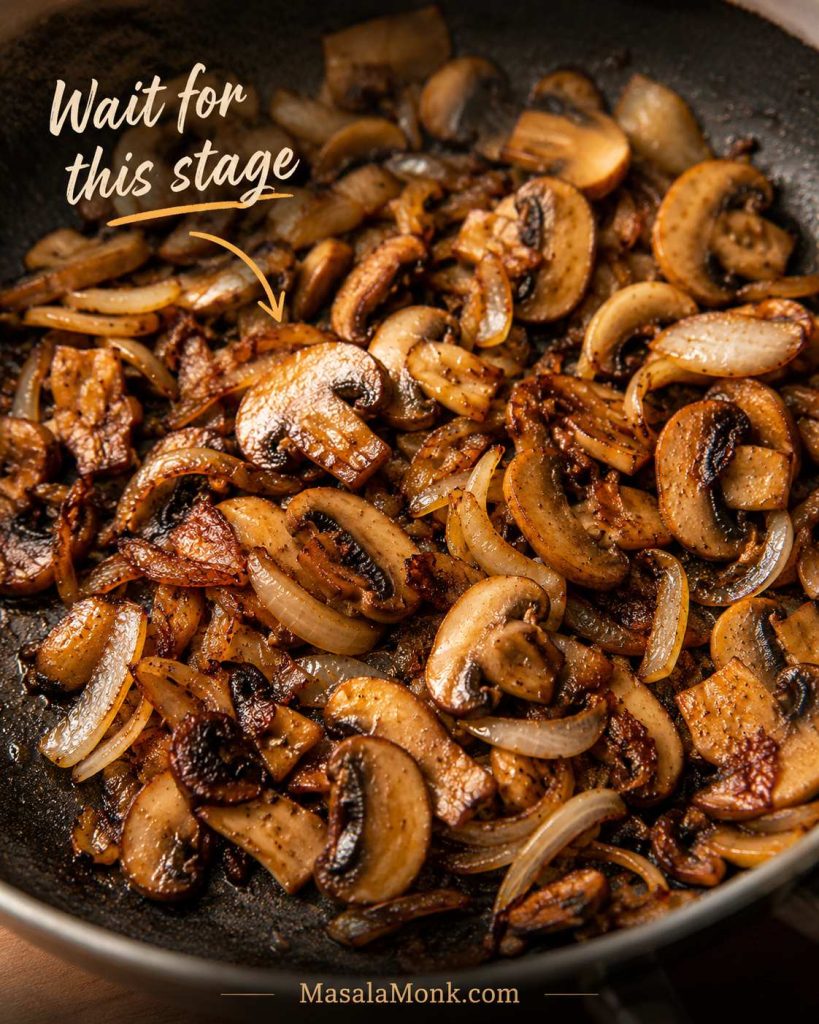
- Better fix: cook fresh mushrooms and onion until the mushroom water cooks off and the edges color.
- Most flavorful fix: use chicken broth, properly browned mushrooms, and a tiny spoon of Dijon or a tablespoon or two of dry white wine for a less canned finish.
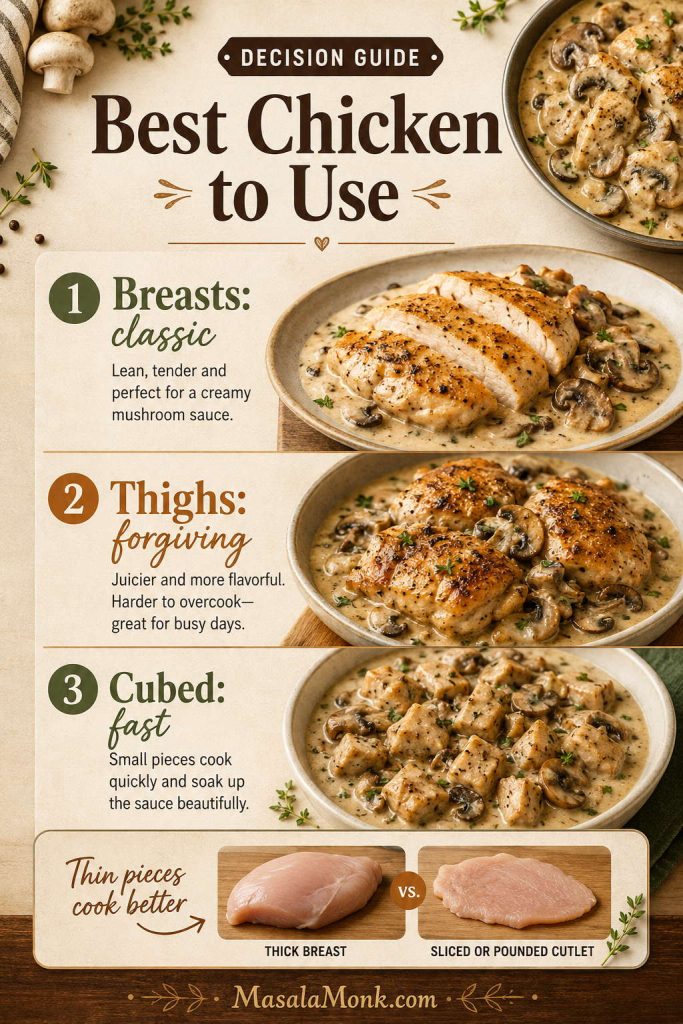
Choosing Pork Chops That Stay Juicy
The pork chop you choose decides how forgiving this dinner will be. A thick chop gives you a little breathing room. A thin cutlet needs a short leash.
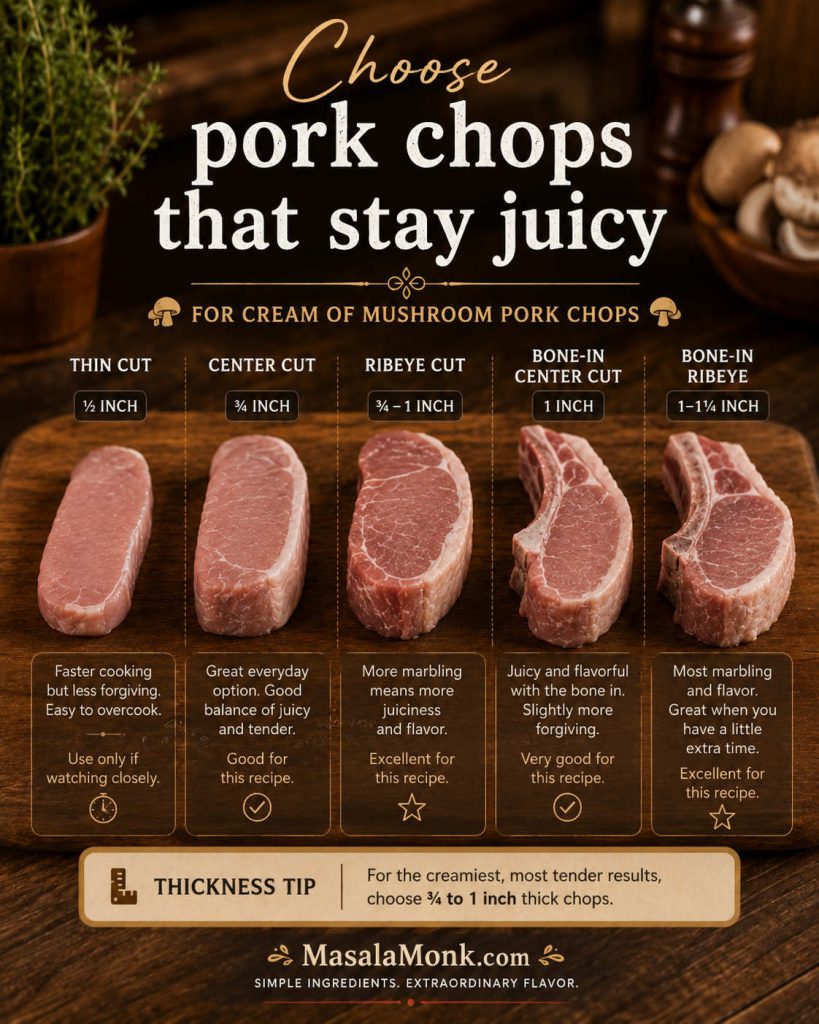
Boneless Pork Chops
Boneless pork chops are the easiest choice when you want dinner fast. They brown neatly, sit nicely under the mushroom gravy, and slice cleanly on the plate. Just watch the timing, because thin boneless chops do not forgive a long simmer.
For a reliable result, use boneless chops that are about ¾ to 1 inch thick. They are thick enough to brown well and stay juicy, but not so thick that the sauce is finished long before the pork is cooked.
Bone-In Pork Chops
Bone-in pork chops are often more forgiving. The bone and surrounding fat help protect the meat, so these are a good choice if you are nervous about dry pork chops. They may need a few extra minutes near the bone, so check the temperature in the thickest meaty part without touching the bone.
If the gravy thickens before the meat near the bone is done, add a splash of broth and keep the simmer gentle. The sauce is more forgiving than the pork; you can loosen it, thicken it, or adjust it later.
Boneless vs Bone-In Pork Chops
Use this comparison when you are choosing between speed and forgiveness: boneless chops cook faster, while bone-in chops give the gravy a little more time before the meat dries out.

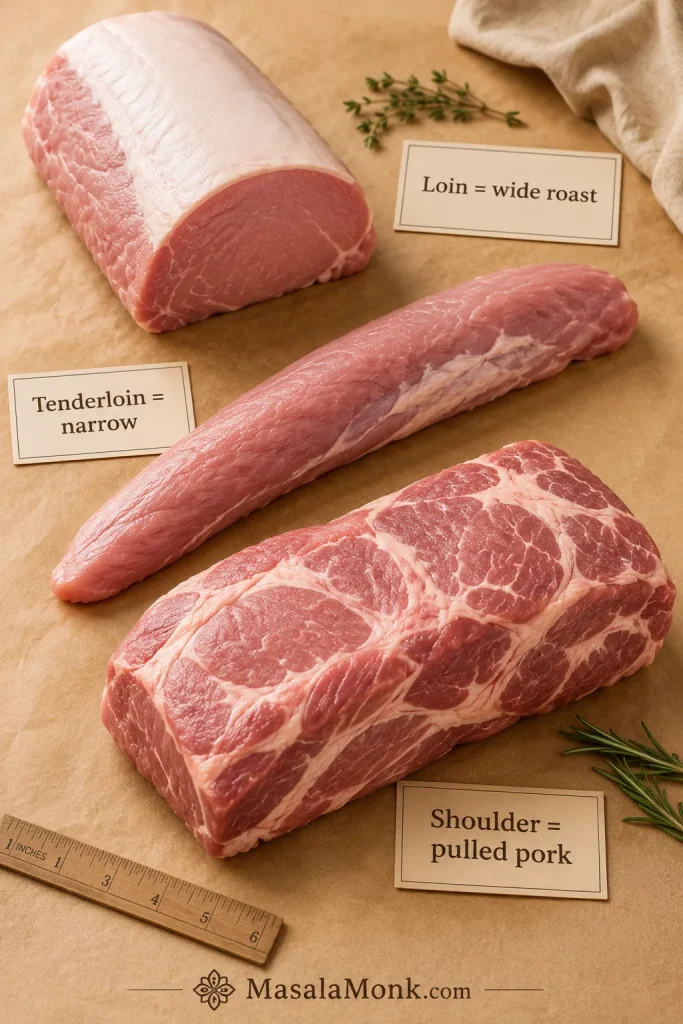
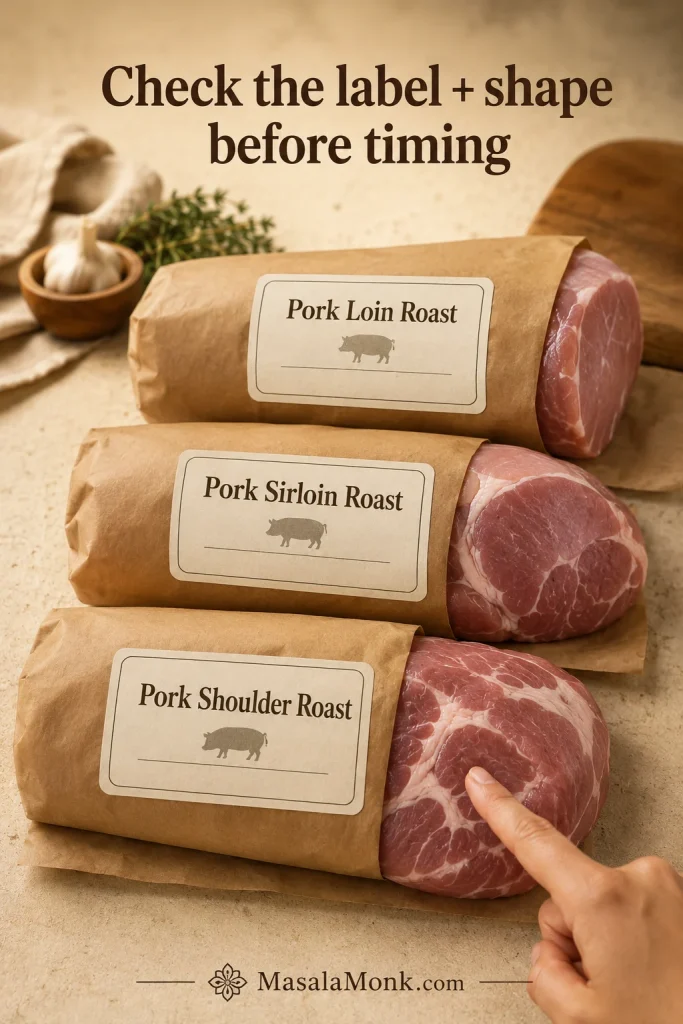
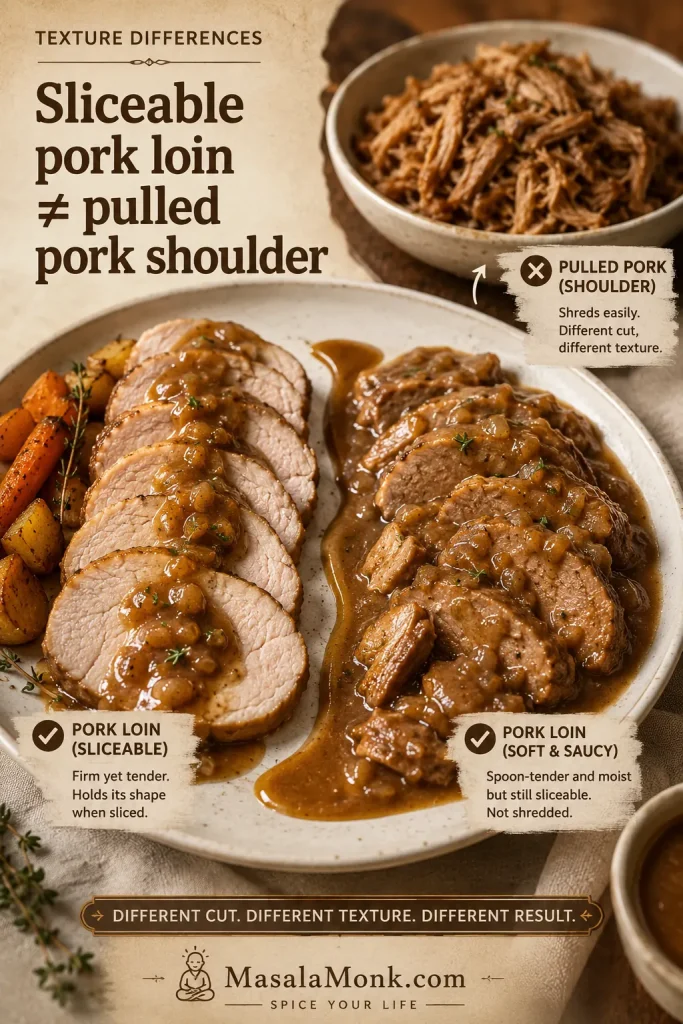
Pork Loin Chops with Cream of Mushroom Soup
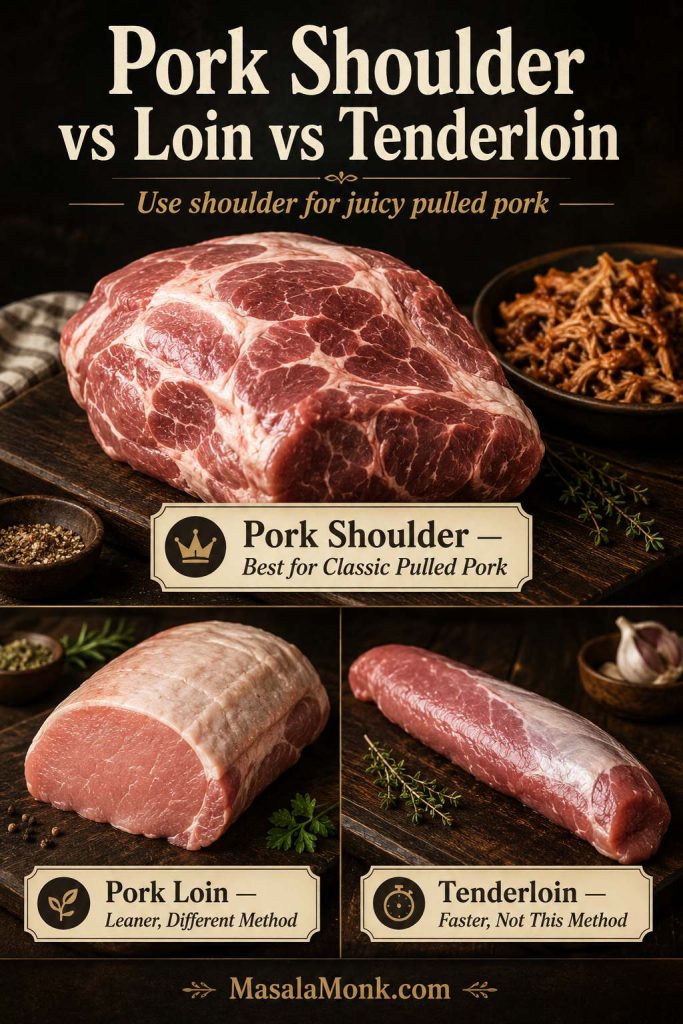
Pork loin chops work well in this recipe when they are sliced into chops and are about ¾ to 1 inch thick. They are lean, so cook them by temperature rather than by a long simmer time.
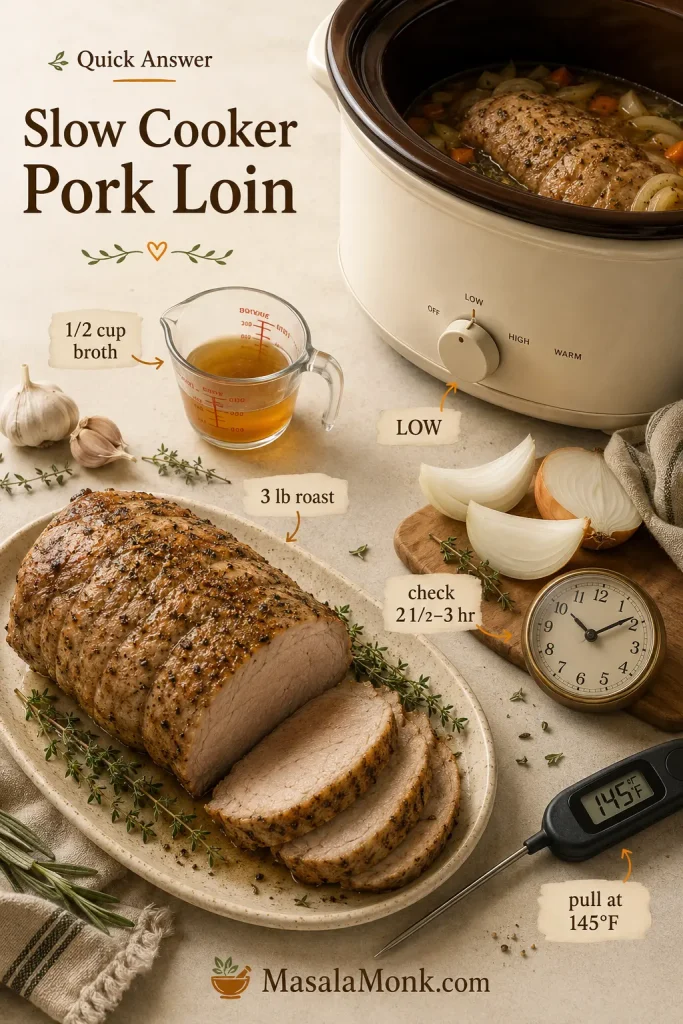
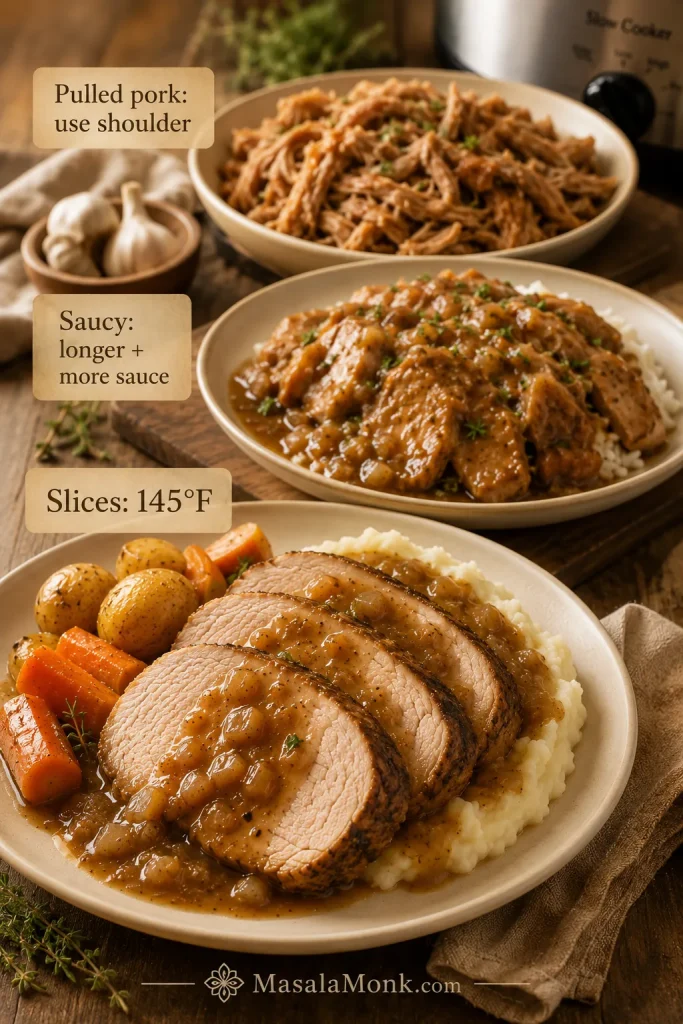
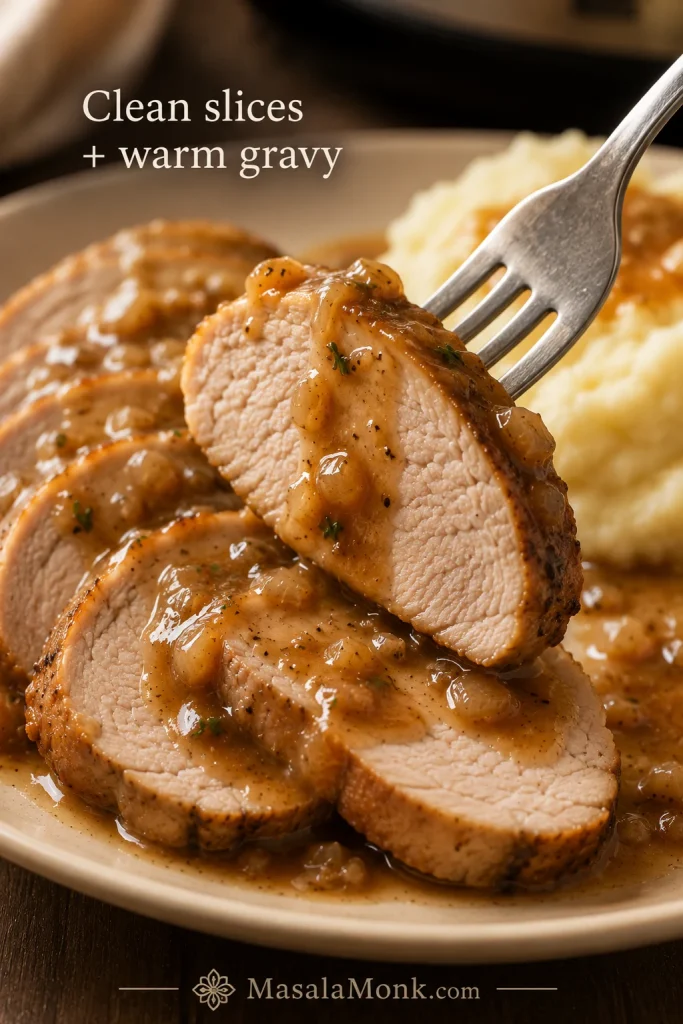
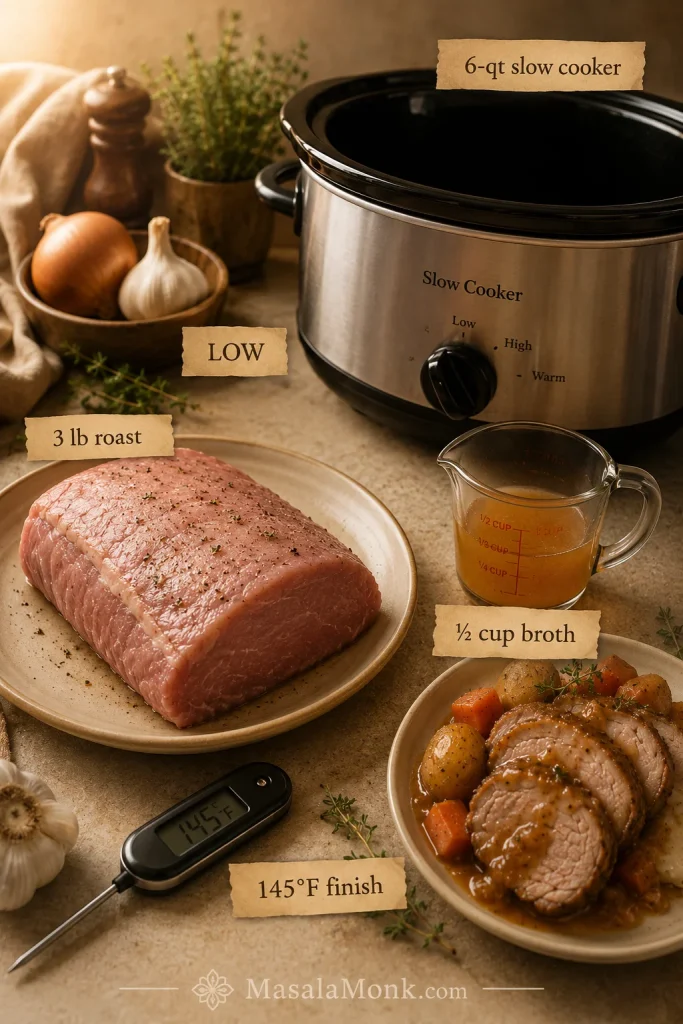
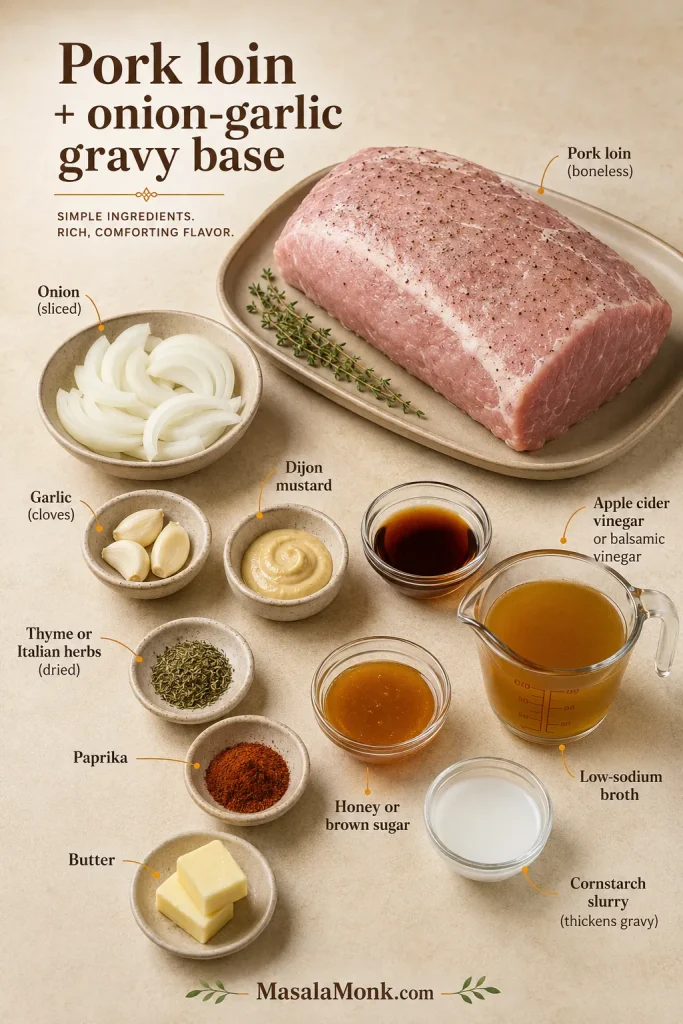
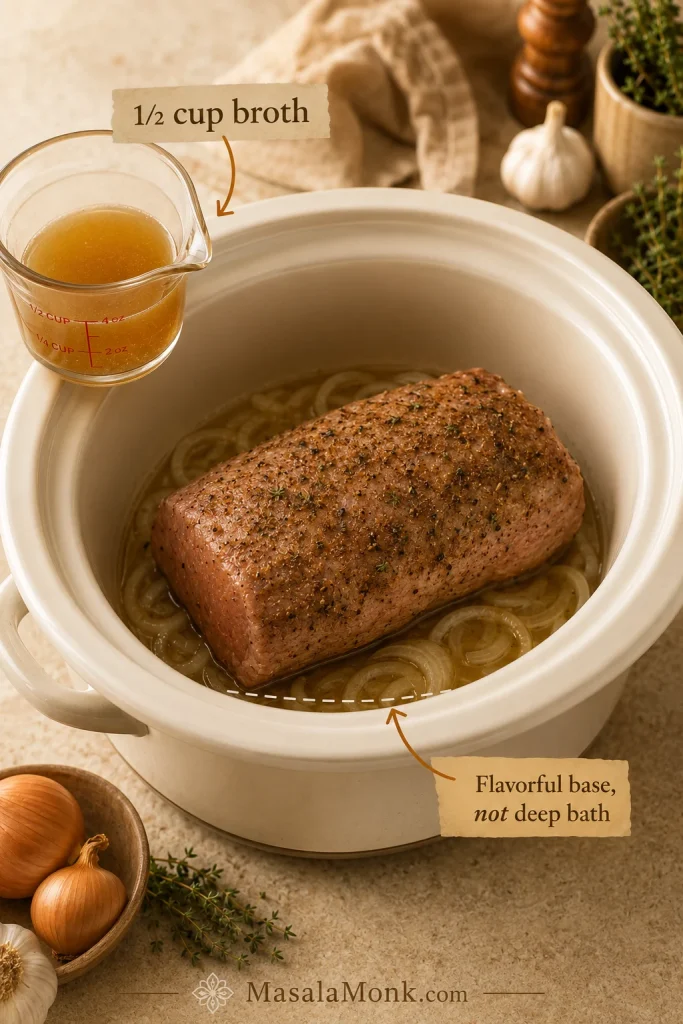
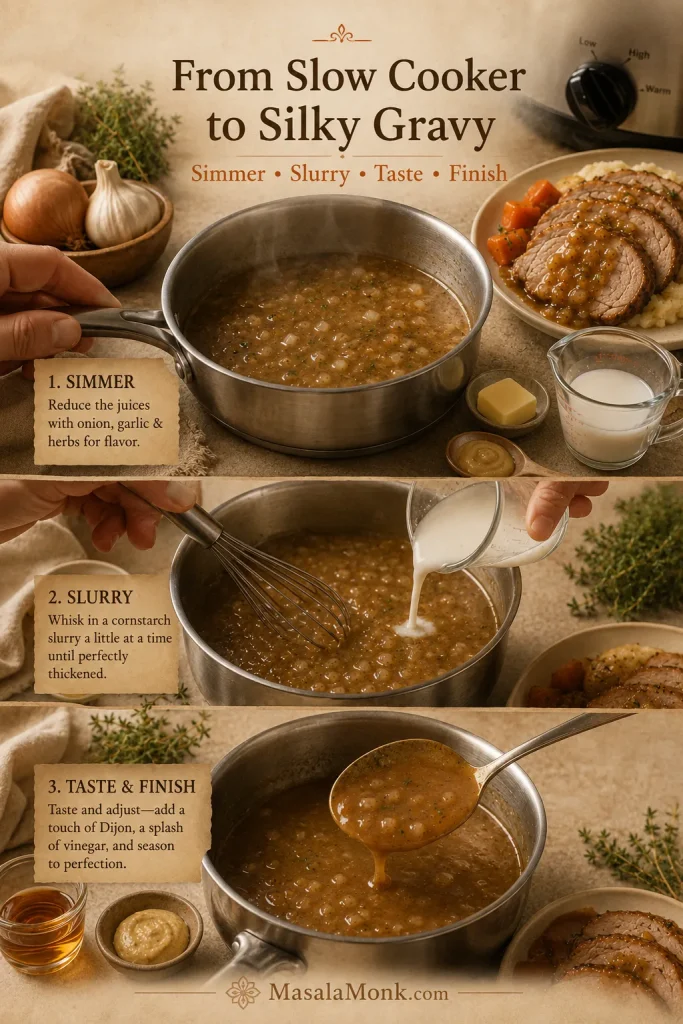
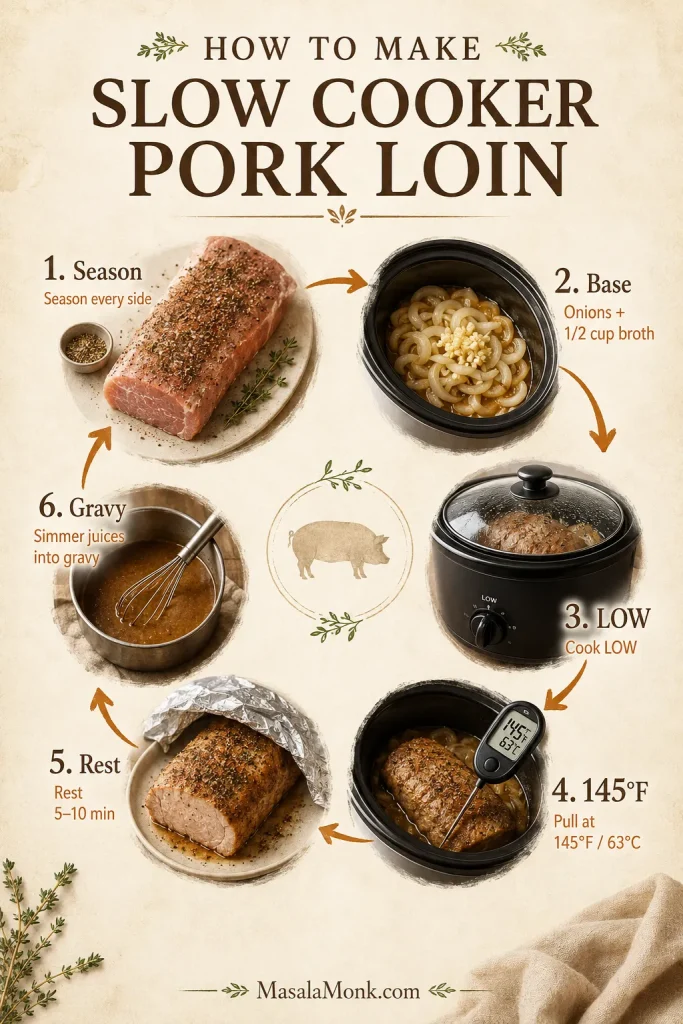
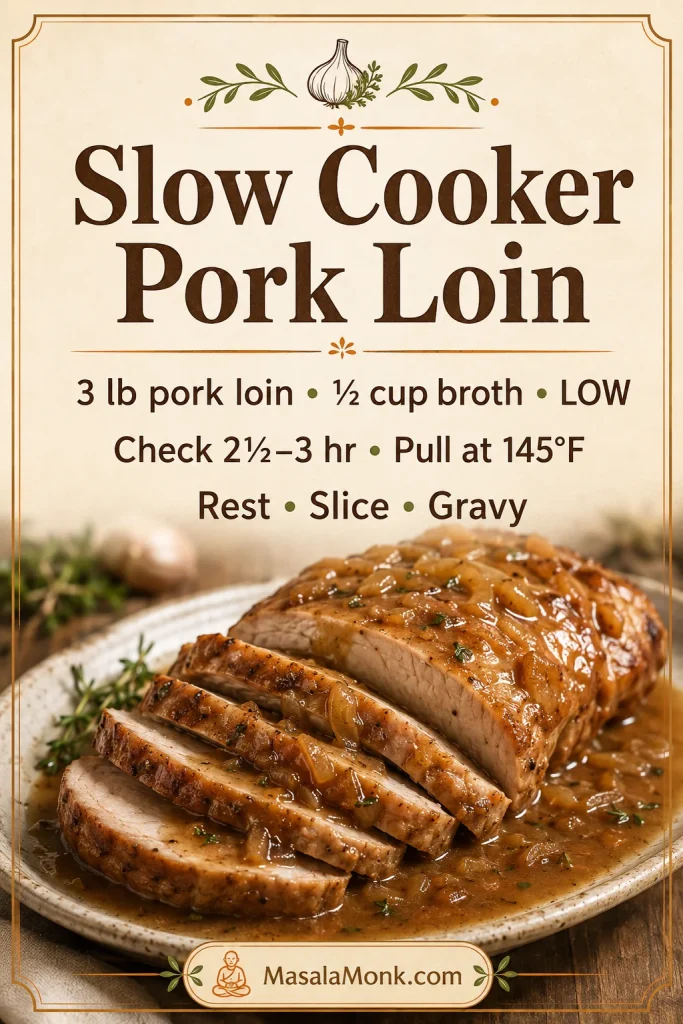
A whole pork loin roast does not use this skillet timing, and pork tenderloin is a different cut entirely. If you have a roast instead of chops, use a roast-specific method like our slow cooker pork loin recipe.

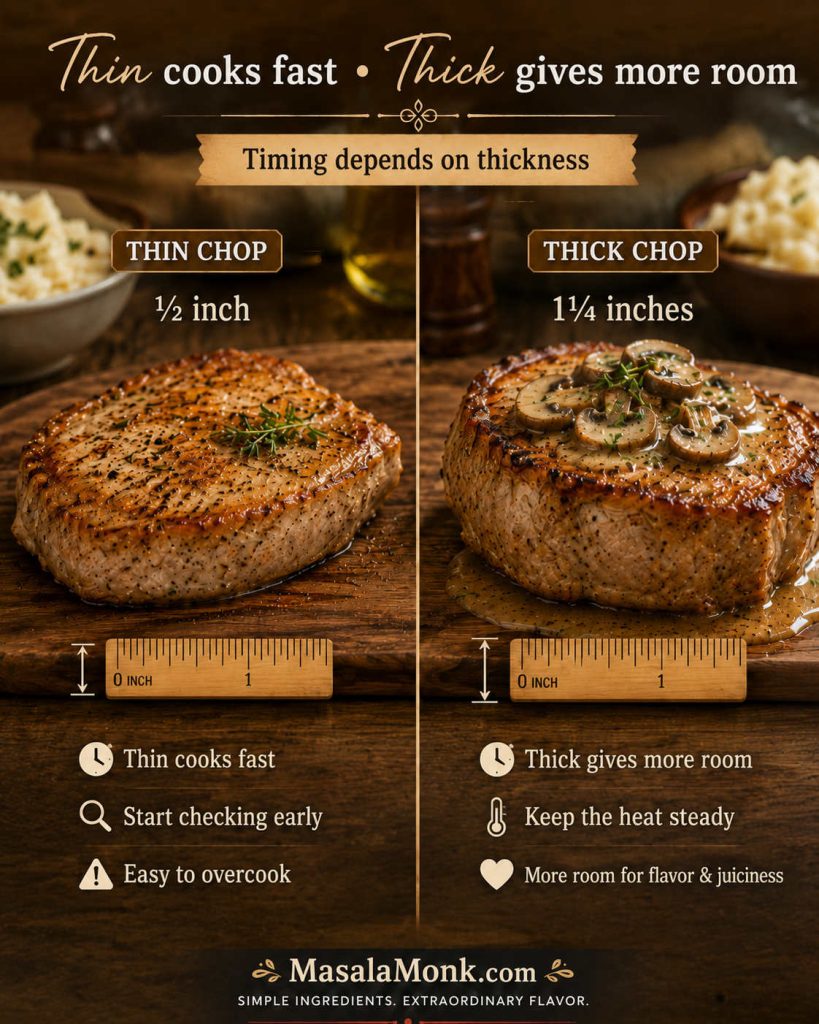
Thin Pork Chops and Pork Cutlets
Thin pork chops and pork cutlets need a very different rhythm. They brown quickly, cook quickly, and can go from tender to tough while you are still stirring the sauce.
For thin chops, sear briefly, make the sauce, then return them to the skillet only long enough to warm through and finish. Do not simmer thin pork chops for 20–30 minutes in cream of mushroom soup.
Frozen Pork Chops
Thaw frozen pork chops before making this skillet recipe. Thawed pork browns better, cooks more evenly, and does not release as much water into the pan. Frozen or half-thawed chops can make the sauce watery before the pork is cooked through.
Before simmering, check the pork chop timing guide so thin chops do not get thick-chop timing.
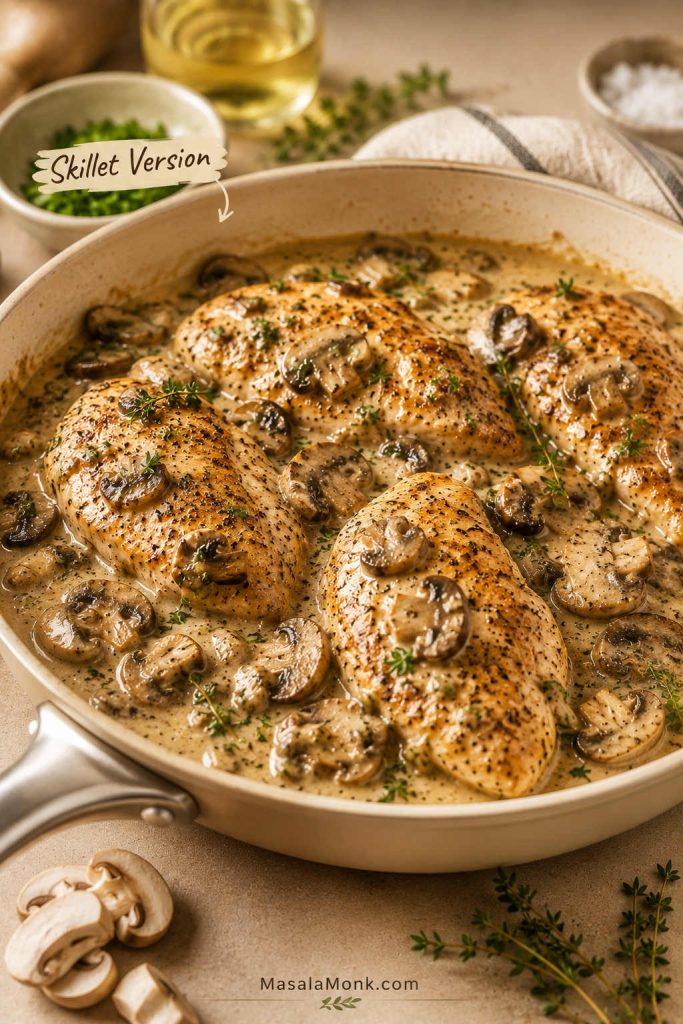
How to Make Pork Chops with Cream of Mushroom Soup in a Skillet
A 12-inch skillet is best if you are using mushrooms and onions. It gives the chops room to brown and the mushrooms space to release moisture, then brown instead of steam.
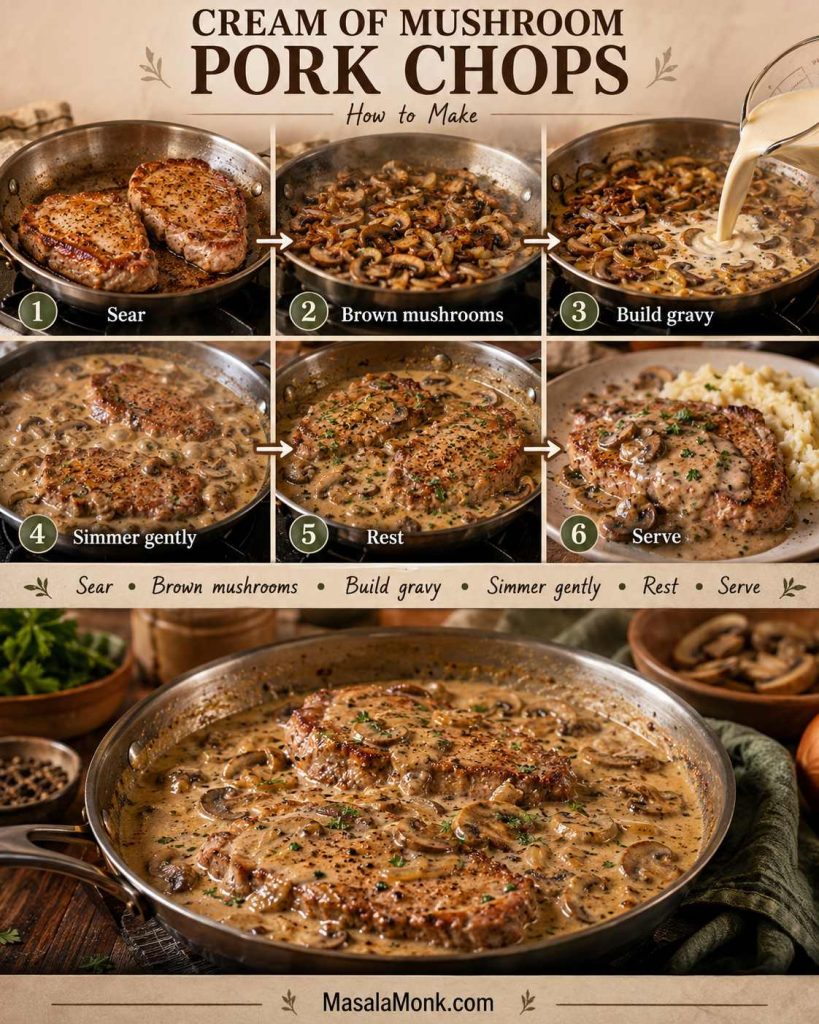
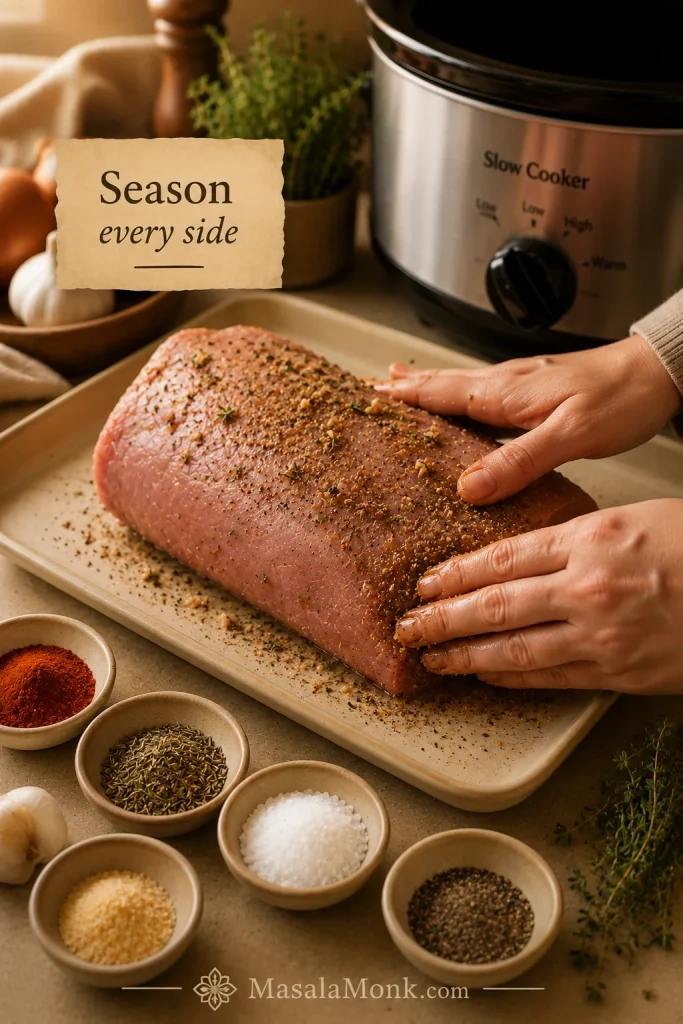
1. Pat the Pork Chops Dry and Season Lightly
Pat the pork chops dry with paper towels. Season both sides with black pepper, garlic powder or paprika if using, and only a small pinch of salt. Dry surfaces brown; wet surfaces steam.
2. Brown the Pork Chops
Heat the oil over medium-high heat. Add the pork chops in a single layer, working in batches if needed. Sear until the chops have golden edges instead of a gray steamed surface, about 3–5 minutes per side for ¾–1 inch chops.
Transfer the browned chops to a plate. They do not need to be fully cooked yet. You are building flavor before the creamy mushroom gravy goes in.

3. Cook the Mushrooms and Onion
Reduce the heat to medium. Add the butter, mushrooms, and onion. Mushrooms usually go through three stages: first they look dry, then they release water, then that water cooks off and the edges begin to brown. Do not rush this stage if you added fresh mushrooms; the moment their water cooks off and the edges start to brown is the moment the sauce stops tasting like plain condensed soup.
4. Add Garlic and Make the Mushroom Gravy
Add the garlic and cook for about 30 seconds. Whisk in the condensed soup and ⅓ cup chicken broth, milk, or water. Add Worcestershire and Dijon if using. The sauce should be loose enough to spoon, but thick enough to coat the pork. Add more liquid a tablespoon at a time.

5. Simmer the Pork Chops Gently
Return the pork chops and any plate juices to the skillet. Spoon gravy over the top, reduce the heat to medium-low, cover loosely, and simmer with slow, lazy bubbles. A rolling boil is too hard for lean pork and can make the gravy feel heavy.
Check the thickest part; when it reaches 145°F / 63°C, move the chops to a plate. If the gravy still needs work, fix the sauce without the pork in the pan.
6. Rest, Taste, and Serve
Rest the pork chops for 3 minutes. While they rest, taste the mushroom gravy. Add black pepper, a splash of broth or milk, parsley, or a tiny squeeze of lemon if the sauce tastes too heavy.
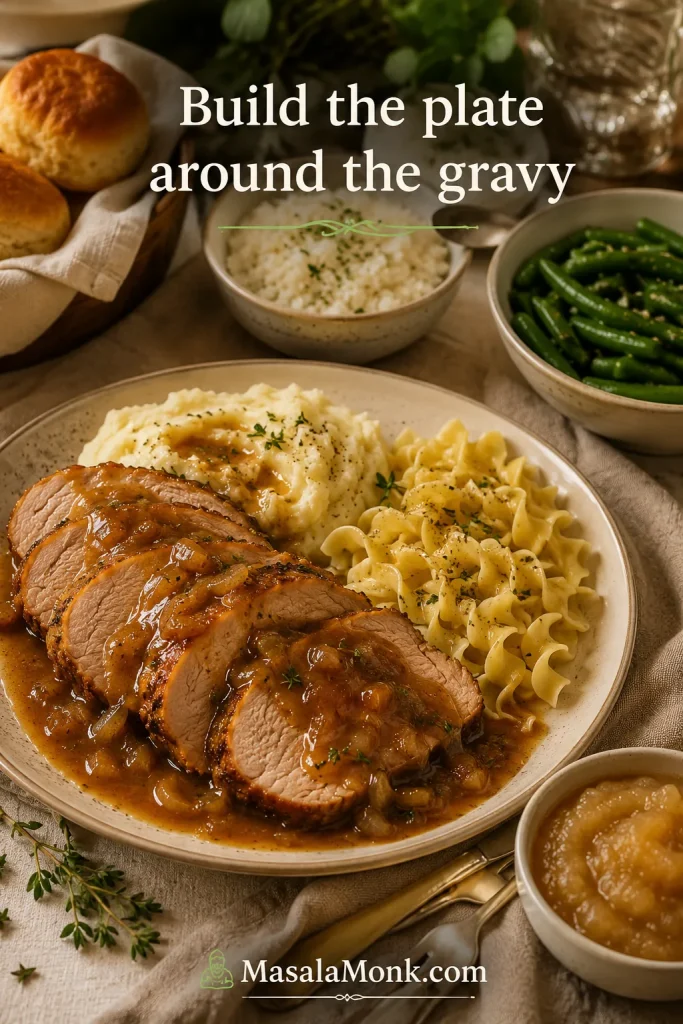
Spoon the creamy gravy over the pork and give it somewhere to land: mashed potatoes, rice, egg noodles, biscuits, or green beans all make the plate feel complete. The sauce should settle over the chop and drift into the side, not run across the plate like soup.
Cream of Mushroom Pork Chops Recipe Card
Classic skillet cream of mushroom pork chops with tender pork, creamy mushroom gravy, optional mushrooms and onions, and enough sauce for potatoes, rice, noodles, or green beans.
Recipe note: once the chops are done, move them out of the skillet and finish the gravy separately if needed.
Equipment
- 12-inch skillet, preferably heavy-bottomed
- Tongs
- Whisk or sturdy spoon
- Instant-read thermometer
- Plate for resting the pork chops
Ingredients
- 4 pork chops, about 1½–2¼ lb / 680 g–1 kg total, preferably ¾–1 inch thick
- ½ teaspoon black pepper, plus more to taste
- ½ teaspoon garlic powder or paprika, optional
- Small pinch of salt, optional
- 1 tablespoon oil / 15 ml
- 1 tablespoon butter / 14 g
- 8 oz / 225 g fresh mushrooms, sliced, optional but recommended
- ½ medium onion / 75–100 g, thinly sliced or diced, optional but recommended
- 2–3 garlic cloves, minced
- 1 can condensed cream of mushroom soup, 10.5 oz / 298 g, regular or low-sodium
- ⅓–½ cup / 80–120 ml chicken broth, milk, or water
- 1–2 teaspoons Worcestershire sauce / 5–10 ml, optional
- 1 teaspoon Dijon mustard / 5 g, optional
- 1–2 tablespoons chopped parsley, optional
Instructions
- Pat the pork chops dry. Season both sides with black pepper, garlic powder or paprika if using, and only a small pinch of salt.
- Heat the oil in a 12-inch skillet over medium-high heat. Add pork chops in a single layer, browning in batches if needed.
- Sear until golden, about 3–5 minutes per side for ¾–1 inch chops. Transfer to a plate. The pork does not need to be fully cooked yet.
- Reduce heat to medium. Add butter, mushrooms, and onion. Cook 5–7 minutes, until the mushrooms release moisture and begin to brown.
- Add garlic and cook for 30 seconds.
- Whisk in condensed cream of mushroom soup and ⅓ cup broth, milk, or water. Add Worcestershire and Dijon if using. Add more liquid a splash at a time if you want looser gravy.
- Return pork chops and plate juices to the skillet. Spoon gravy over the chops. Reduce heat to medium-low, cover loosely, and simmer gently until the thickest part reaches 145°F.
- If the pork is done before the gravy is thick enough, move the chops to a plate and simmer the sauce uncovered by itself.
- Rest pork chops for 3 minutes. Taste gravy and adjust with pepper, parsley, or a splash of liquid if needed.
- Serve hot with mushroom gravy spooned over the top.
Notes
- Use ⅓ cup liquid for thicker gravy and ½ cup for a looser sauce.
- Chicken broth is a good default liquid; milk is creamier; water is the classic canned-soup version.
- Thin pork chops cook fast. Check them early and do not simmer them like thick chops.
- Bone-in chops may need a few extra minutes near the bone.
- Once the soup is in the skillet, keep the heat low enough for slow bubbles.
- For baked, crock pot, rice, potato, or stuffing versions, the method and timing change.
Need to adjust the sauce? Use the mushroom gravy fixes for watery, thick, or salty gravy.
Creamy Mushroom Gravy Success Cues: Not Watery, Not Pasty
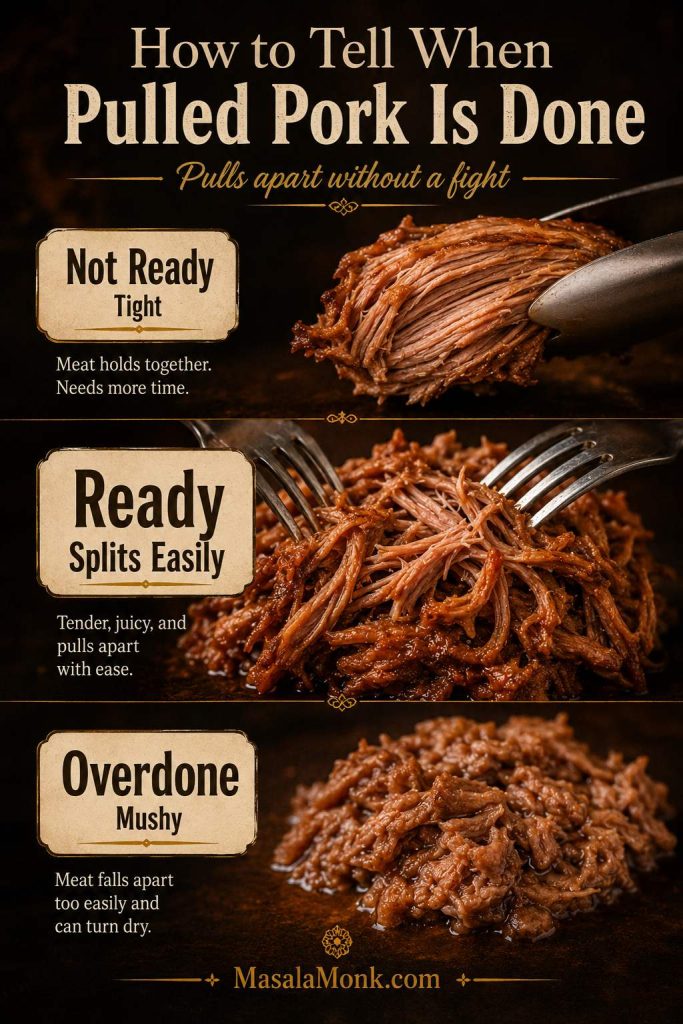
A strong version should feel like gravy dinner, not soup poured over meat. When you cut into the chop, the inside should still look moist, and the sauce should drag slowly from the spoon into potatoes, rice, or noodles.
| Success cue | What you want | What to fix |
|---|---|---|
| Gravy texture | Coats a spoon and moves slowly | Watery ring around the pan or paste-like sauce |
| Pork texture | Slices easily and looks moist inside | Dry, gray, tight meat from overcooking |
| Flavor | Savory, creamy, mushroom-forward | Too salty, bland, or flat |
| Core fix | Adjust the sauce after the chops are done | Leaving done pork in the pan while fixing gravy |
How Long to Cook Pork Chops in Cream of Mushroom Soup
This is where most pork chop dinners are won or lost. The gravy can look perfect while a thin chop quietly overcooks, so timing has to follow thickness, not habit.
Timing by Pork Chop Thickness
| Pork chop type | Sear time | Sauce simmer time | Timing note |
|---|---|---|---|
| Thin pork cutlets, about ¼ inch | 1–2 minutes per side | 1–3 minutes | Most of the cooking happens during the sear. Check early. |
| ½-inch boneless pork chops | 2–3 minutes per side | 3–5 minutes | Fast, but easy to overcook. |
| ¾-inch boneless pork chops | 3–4 minutes per side | 4–7 minutes | One of the easiest sizes for this recipe. |
| 1-inch boneless pork chops | 4–5 minutes per side | 6–10 minutes | Juicier than thin chops; use a thermometer. |
| 1-inch bone-in pork chops | 4–5 minutes per side | 8–12 minutes | May need a little longer near the bone. |
Most forgiving range: ¾–1 inch chops are the easiest size for this recipe. They brown well, stay juicier than thin cutlets, and give the gravy enough time to come together. Thin ½-inch chops still work, but they need a short simmer. Bone-in chops are forgiving, but check the meat near the bone.

Temperature and Resting Note
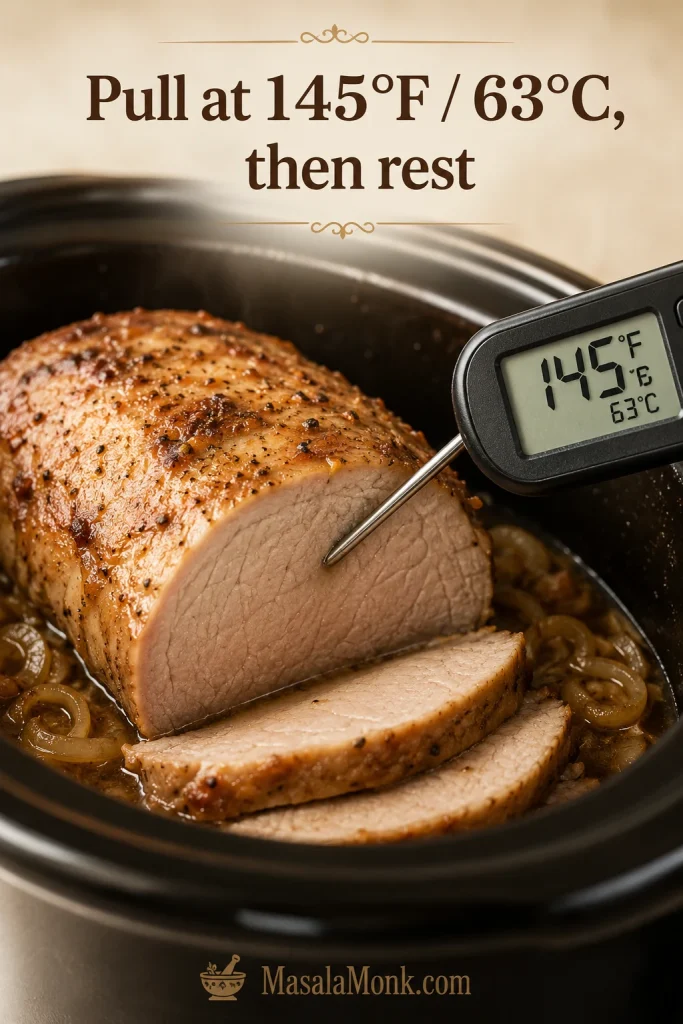
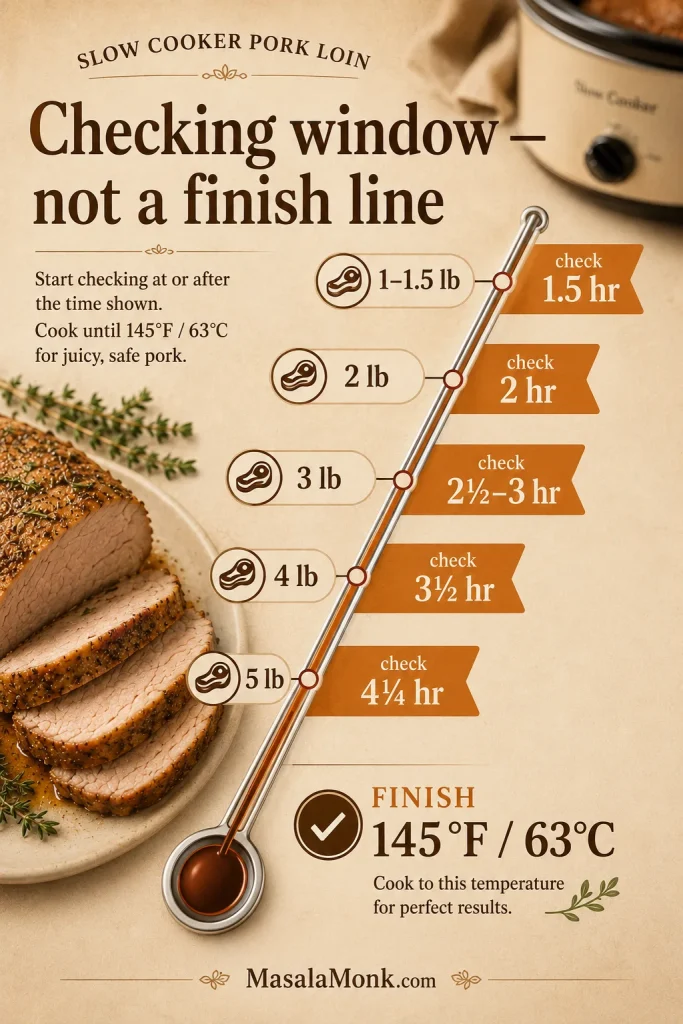
Treat the table as a starting point, not a contract. Thin chops may finish during the sear; thicker bone-in chops may need more time near the bone. The thermometer gets the final vote: 145°F / 63°C plus a 3-minute rest, which matches FoodSafety.gov’s safe minimum internal temperature guidance for pork chops.
A slightly pink center is not automatically a problem when pork has reached temperature and rested. Dry, gray pork usually comes from chasing old timing habits instead of stopping at the right doneness.
The same temperature-first idea matters with other lean pork cuts; our pork tenderloin in oven guide uses that same rest-before-slicing approach.
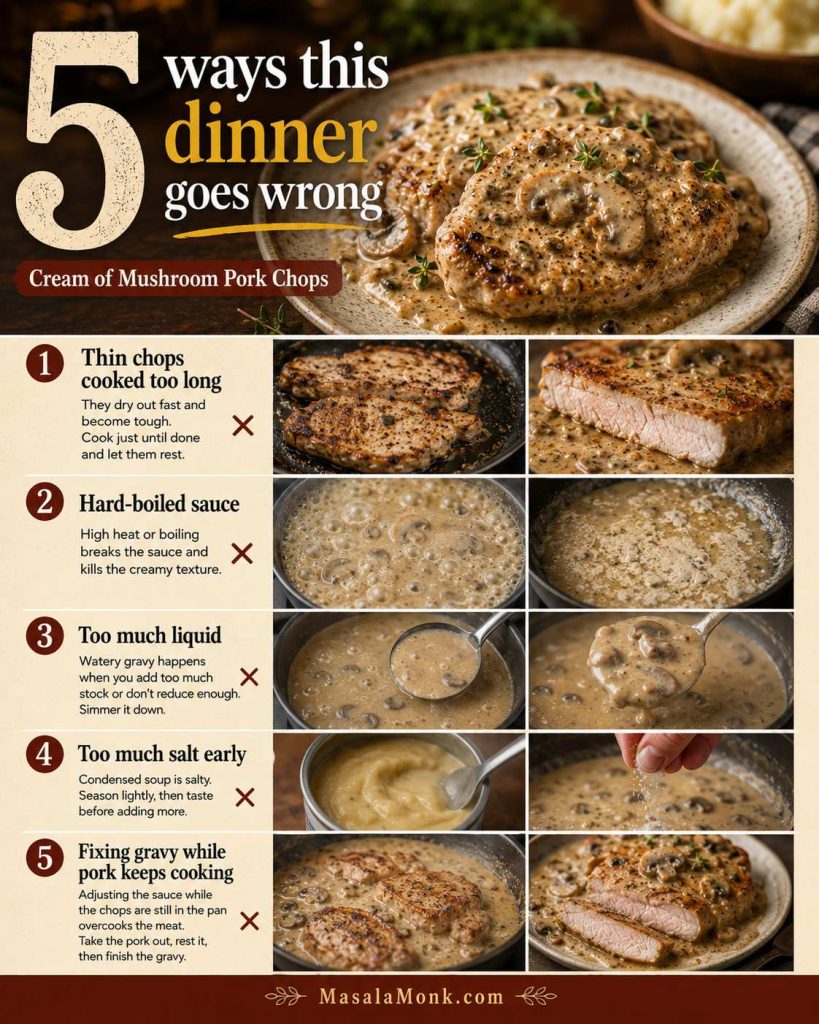
5 Ways This Dinner Goes Wrong — and How to Avoid Them
Most cream of mushroom pork chop problems come from one of five small choices. Fix these before they happen and the whole dinner feels easier.
- Do not cook thin chops like thick chops. They can turn tough before the gravy is done, so sear them briefly and return them only long enough to finish.
- Do not boil the sauce hard. Once the soup goes in, keep slow bubbles so the pork stays tender and the gravy stays creamy.
- Do not add all the liquid at once. Start with ⅓ cup and loosen gradually so the gravy does not turn soupy.
- Do not salt heavily before tasting the soup. Condensed soup and seasoning mixes can make the final gravy too salty.
- Do not fix gravy while finished pork keeps cooking. Move done chops out first, then thin, thicken, or reduce the sauce.
How to Make the Mushroom Gravy Creamy, Not Watery
The gravy should act like a blanket, not soup. It should coat the pork, slide slowly into mashed potatoes or rice, and taste savory instead of simply salty. Think of it as a mushroom cream sauce for pork chops: creamy enough to coat, but loose enough to spoon.
Mushroom Gravy Spoon Test
The easiest visual cue is the spoon: the gravy should cling lightly, then slide off slowly instead of running like broth or sitting like paste.

- Chicken broth gives the most savory, balanced mushroom gravy and is a reliable everyday default.
- Milk makes the sauce softer and creamier, with a milder comfort-food flavor.
- Water keeps the classic canned-soup taste and works well for the pantry version.
- A small splash of white wine brightens the gravy when you are using fresh mushrooms and onion.
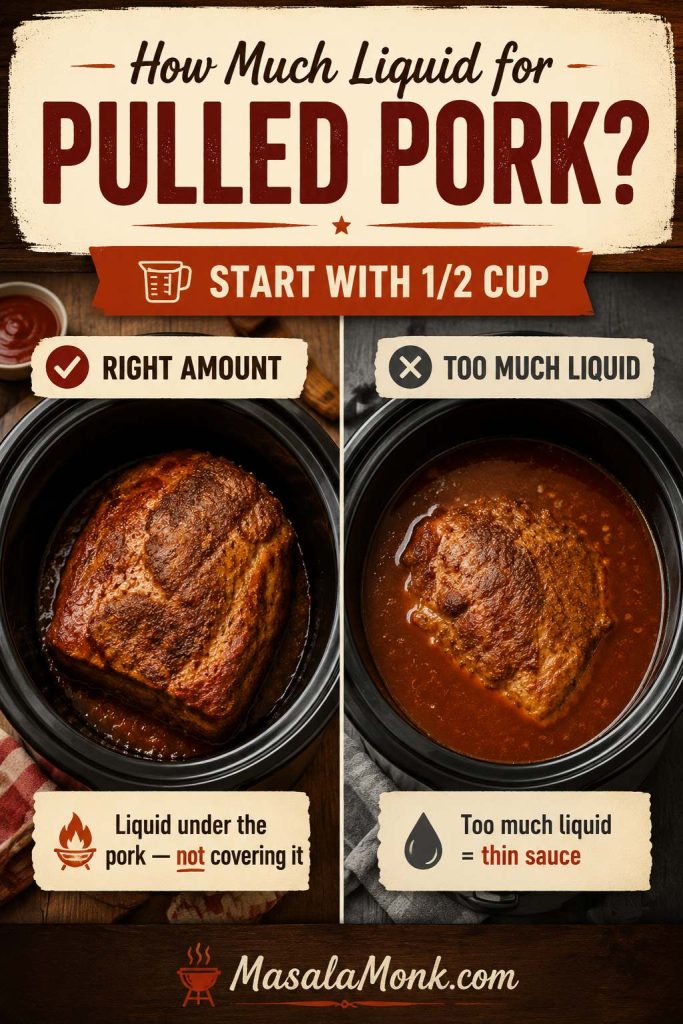
For one 10.5-ounce can of condensed cream of mushroom soup, start with ⅓ cup liquid if you want thick gravy. Use up to ½ cup when you want more sauce for rice, noodles, or potatoes. Add extra liquid in tablespoons, not big pours.
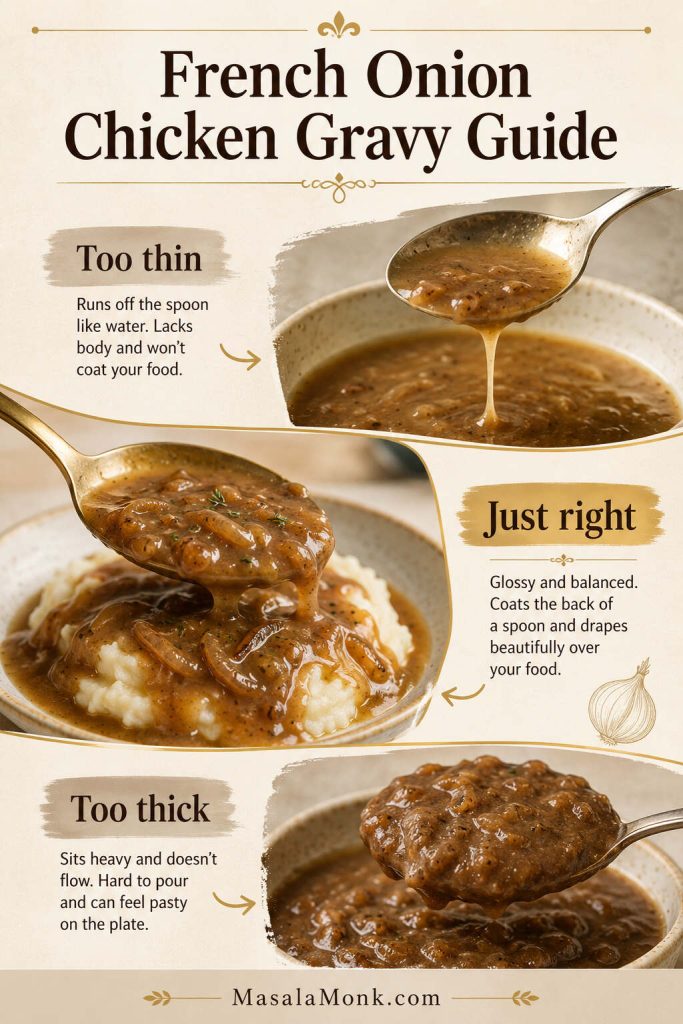
Too Thin, Just Right, or Too Thick Mushroom Gravy
Use the texture as your guide before serving. Thin gravy needs reducing, thick gravy needs a splash of liquid, and just-right gravy should look glossy and spoonable.

How to Thicken Mushroom Gravy
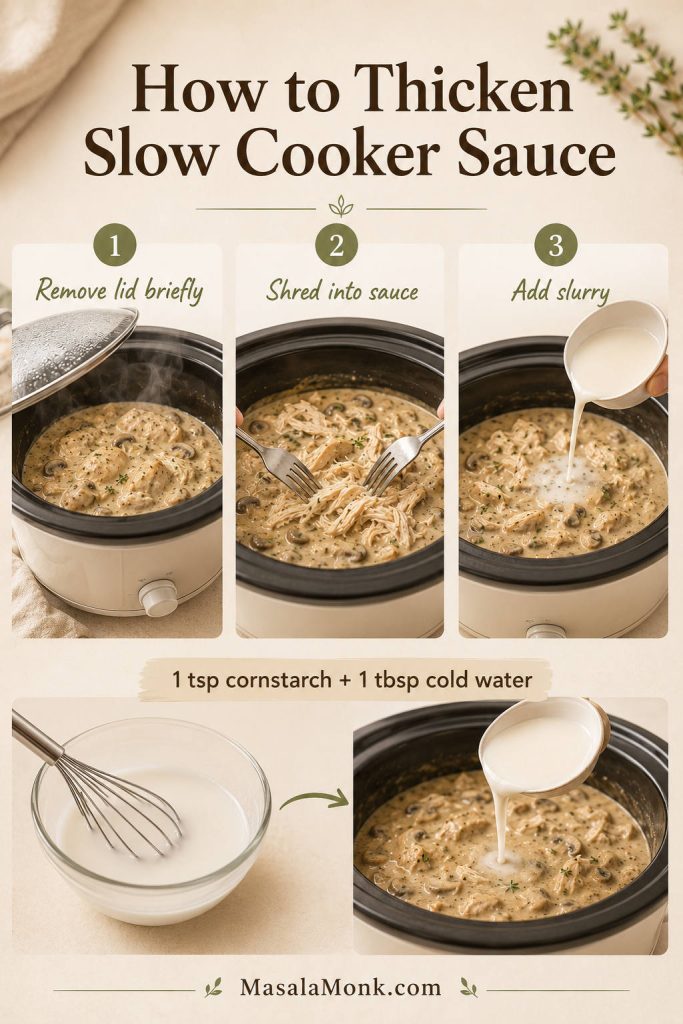
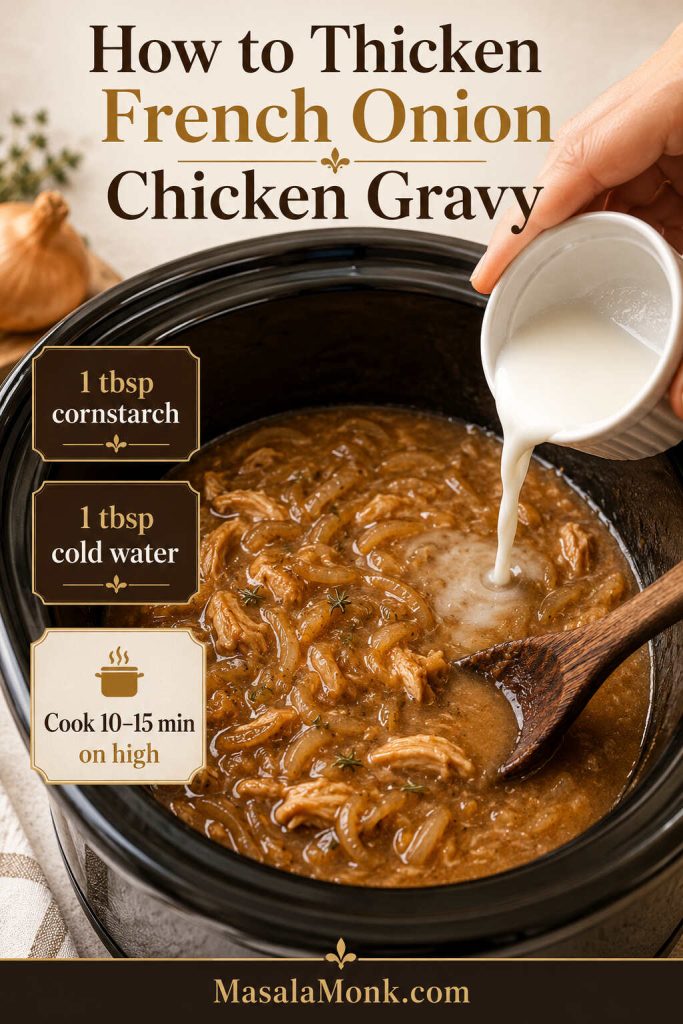
If the gravy is too thin, remove the pork chops and simmer the sauce uncovered until it coats a spoon. For a faster fix, whisk 1 teaspoon cornstarch with 1 tablespoon cold water, stir that slurry into the simmering gravy, and cook for a minute or two.
How to Thin Mushroom Gravy
If the gravy turns pasty, lower the heat and add broth, milk, or water a splash at a time. Stir until the sauce loosens and looks glossy again. A thick sauce is easy to fix as long as the pork is not still sitting in it over heat.
How to Keep the Gravy from Tasting Too Salty
Use low-sodium broth if your soup is salty, and be careful with onion soup mix, bouillon, gravy packets, ranch seasoning, or seasoned salt. If the finished sauce tastes too salty, soften it with milk, cream, unsalted broth, or sour cream, then serve it with plain potatoes, rice, noodles, or vegetables.
If the pork is already cooked and the sauce still needs help, use the troubleshooting guide instead of simmering the chops longer.
Campbell’s-Style Cream of Mushroom Pork Chops
This is the version many people remember: pork chops, condensed cream of mushroom soup, water, black pepper, and a short simmer. It is not fancy, and it does not need to be. The one upgrade worth keeping is temperature control instead of simmering by habit.

Campbell’s-style shortcut: brown 4 pork chops, stir 1 can condensed cream of mushroom soup with ½ cup water, return the chops to the pan, cover, and simmer gently until the pork reaches 145°F. Rest 3 minutes before serving.
That simple brown-soup-simmer idea is also the classic pattern behind Campbell’s Tasty 2-Step Pork Chops.
Use the classic version when you want the childhood shortcut. Use the upgraded version when you want the same comfort with deeper flavor and better gravy texture.
Water, Broth, or Milk for Campbell’s-Style Pork Chops
| Version | Liquid / add-ins | Flavor |
|---|---|---|
| Campbell’s-style classic | ½ cup water | Nostalgic, simple, most like the old shortcut |
| Better weeknight version | ⅓–½ cup chicken broth | Savory, fuller, still easy |
| Creamier version | ⅓–½ cup milk | Softer, richer, milder |
| Less canned version | Broth + mushrooms + onion + Worcestershire | More homemade without losing the shortcut |

The thermometer is the reliability upgrade. The classic recipe tells you to simmer until done; this version gives the pork a clear stopping point.
Baked, Crock Pot, Rice, Potatoes, and Stuffing Versions
These versions are popular because they solve different dinner problems. The baked version is hands-off, the crock pot version waits for you, and rice, potatoes, or stuffing can turn pork chops into a full casserole. The tradeoff is that each version needs its own moisture and timing.
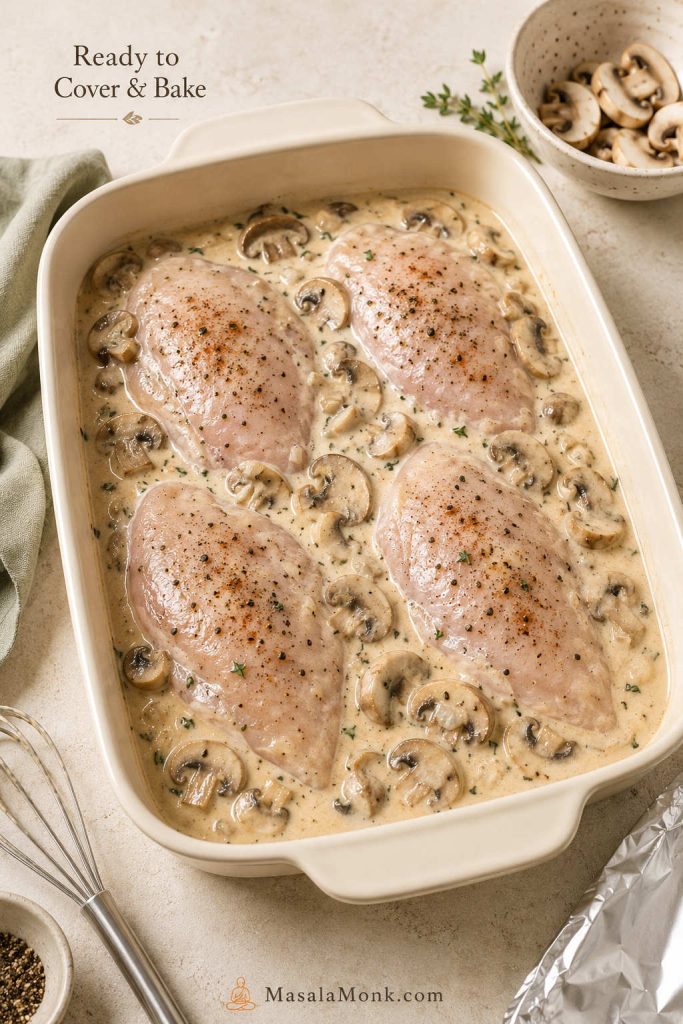
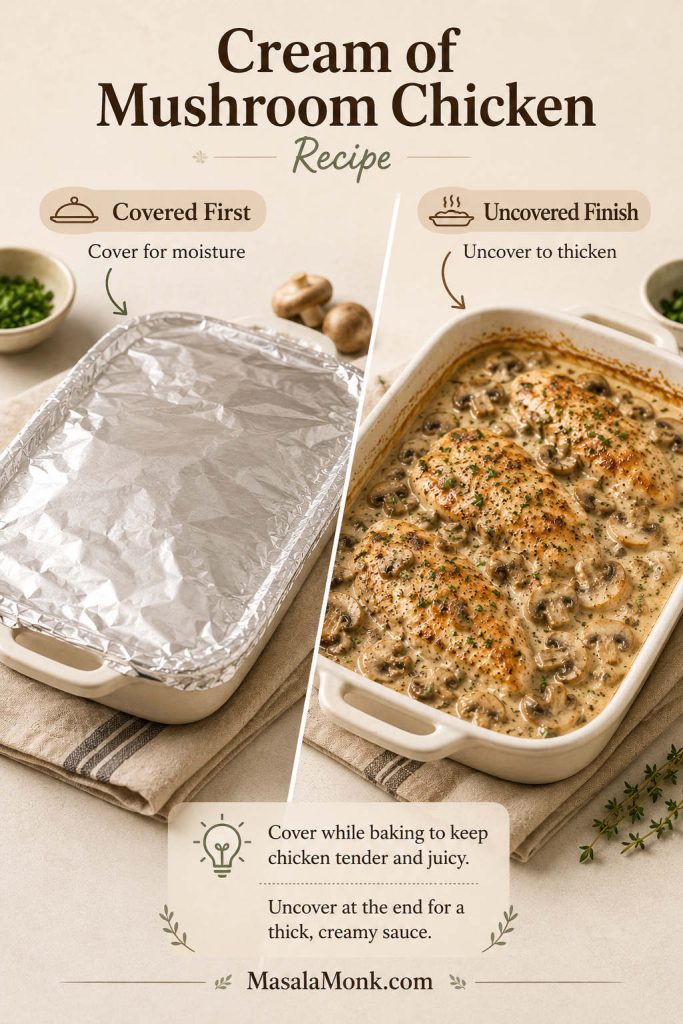
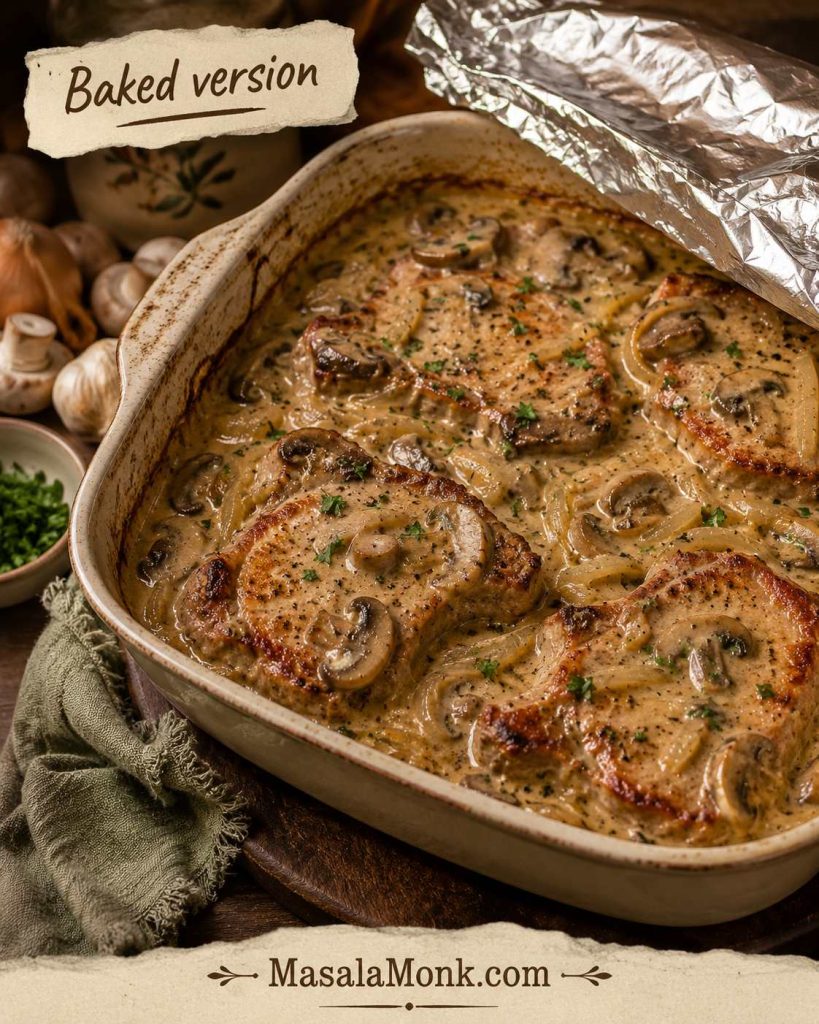
Baked Pork Chops with Cream of Mushroom Soup
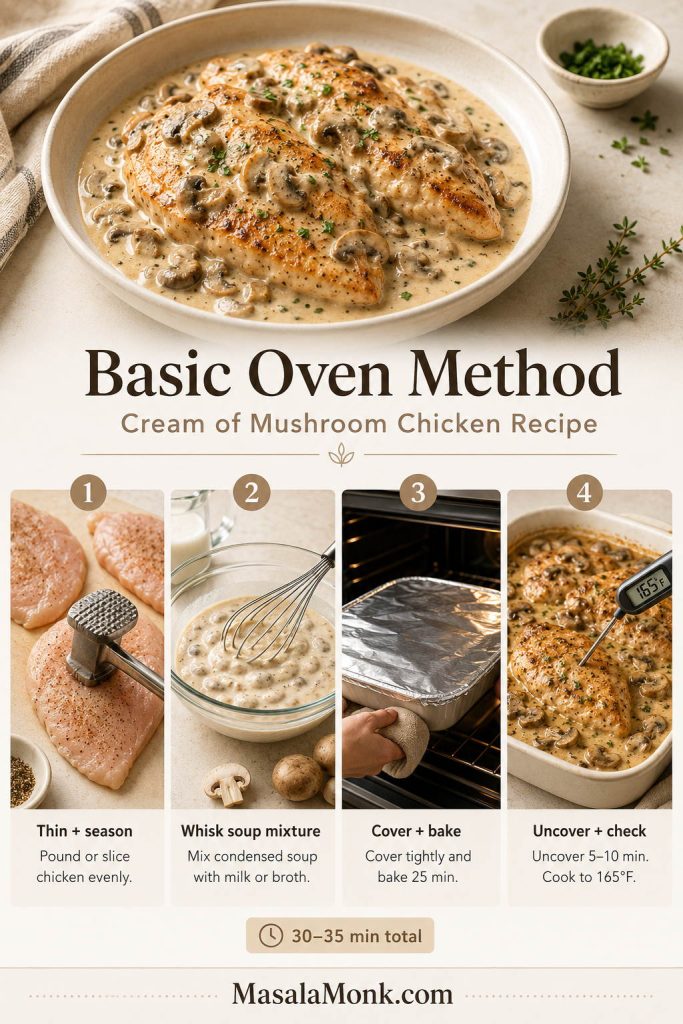
Oven answer: brown the pork chops first, cover them with cream of mushroom soup gravy, bake covered at 350°F, and stop when the chops are just done. Keep the dish covered for a creamy bake; uncover only briefly if the gravy needs to reduce.
For many ¾–1 inch chops, start checking around 25 minutes after browning; thicker covered versions may take longer, but doneness decides.
- Thin or ½-inch boneless chops need a short covered bake after a brief sear. Check early; they should not get thick-chop timing.
- ¾–1 inch boneless chops are the most reliable baked version because they brown well and give the sauce time to heat through.
- 1-inch bone-in chops make a cozier, more forgiving oven dinner, but check the meat near the bone.
Check early; baked chops can dry out if they sit too long after they are done. The oven should not become a holding place for already-finished lean pork.
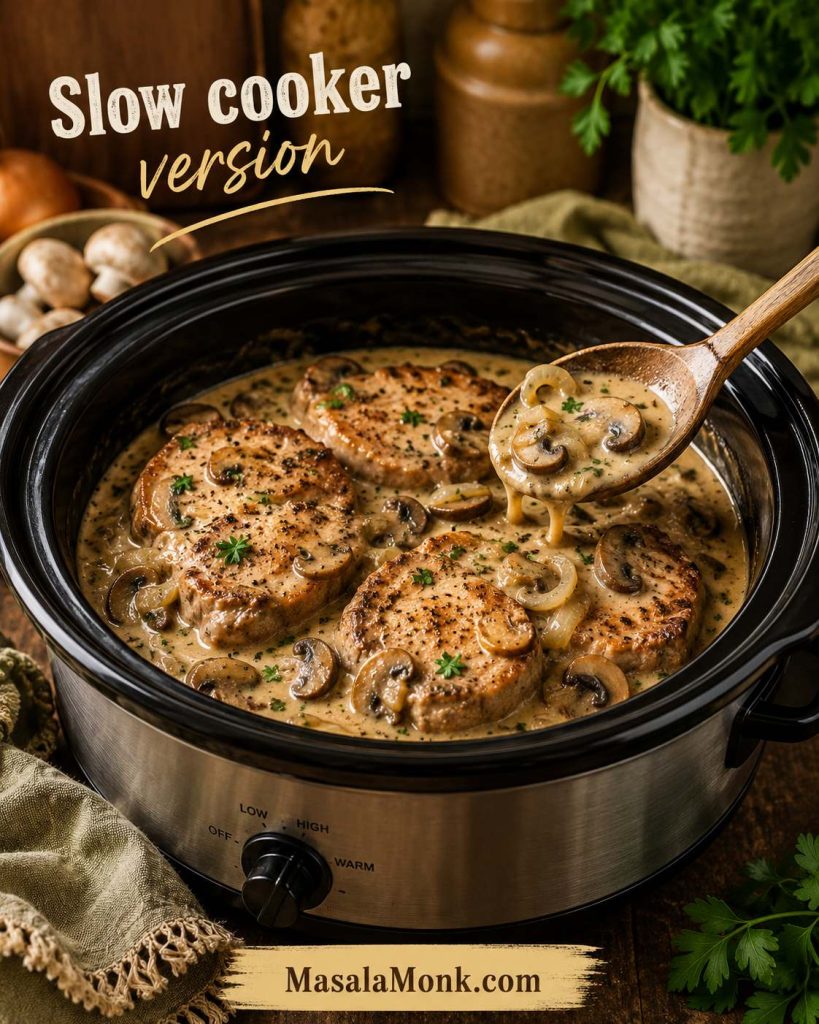
Crock Pot Cream of Mushroom Pork Chops
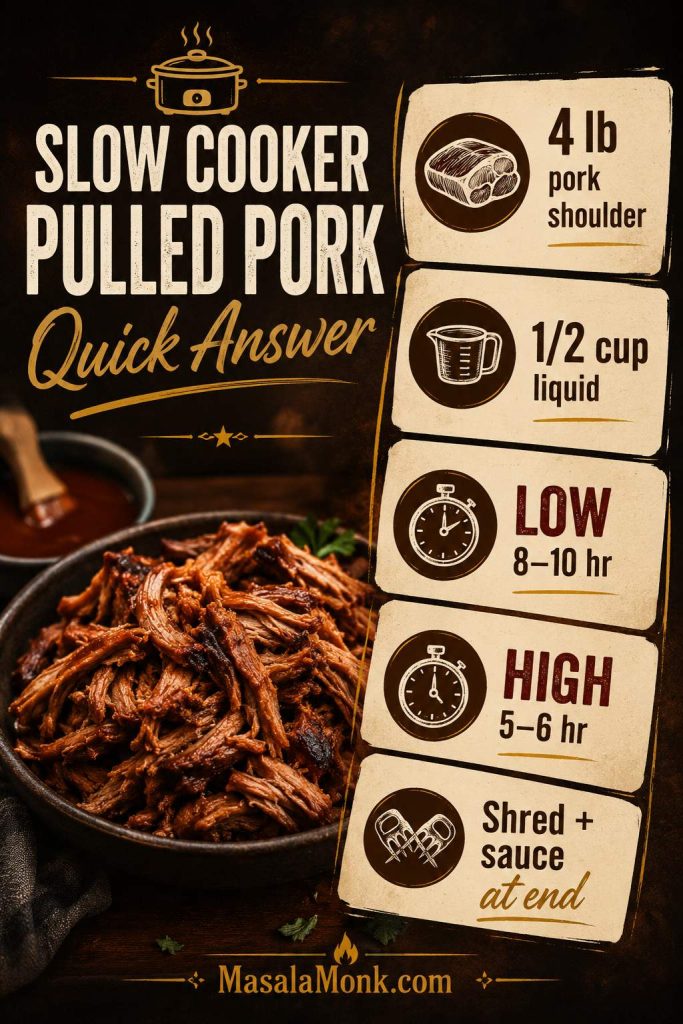
Slow cooker answer: use thawed thicker pork chops, condensed cream of mushroom soup, a little broth, and optional onion soup mix or mushrooms. For sliceable chops, start checking earlier; for fall-apart-style chops, many slow-cooker recipes run 6–8 hours on low. Very thin boneless chops are the riskiest choice, and the sauce can be thickened at the end if it looks loose.
A crock pot version is best treated as its own recipe, not as the skillet method stretched over several hours. Slow cookers trap liquid, so the gravy will usually be thinner than skillet gravy. Very thin boneless chops are convenient, but they can dry out before they become truly tender.
For a tangier slow-cooker pork chop dinner, our crock pot pork chops and sauerkraut goes in a different comfort-food direction.
- Thin boneless chops: use the skillet method if possible because they dry out easily under long heat.
- Thicker boneless chops: a better slow-cooker option because they give you more room before overcooking.
- Bone-in chops: good if they fit in one layer; the bone helps protect the meat a little.
- Loose sauce at the end: thicken it after the chops are cooked rather than cooking the pork longer.
Pork Chops and Rice with Cream of Mushroom Soup
Rice is where this recipe stops being a simple skillet dinner and starts behaving like a casserole. That is why the liquid changes so much.
For the quickest dinner, make the skillet pork chops first, then spoon the mushroom gravy over cooked rice.

Cooked Rice Side vs Baked Rice Casserole
| If you want… | Do this | Why |
|---|---|---|
| Skillet pork chops with rice | Cook rice separately and spoon mushroom gravy over it | The pork timing stays short and controlled. |
| One-pan pork chops and rice | Use a covered baked casserole method | Uncooked rice needs more liquid, tight coverage, and longer cooking. |
| Uncooked rice | Add enough broth/water and bake until rice is tender | A skillet sauce for pork chops does not contain enough liquid for raw rice. |
| Leftover cooked rice | Warm separately or fold into the sauce after the pork is done | It should heat through, not keep the pork cooking. |

For the safest weeknight version, make the skillet pork chops and serve them over cooked rice. For a true pork chops and rice casserole, build that dish around the rice from the beginning.
Simple Baked Rice Starting Point
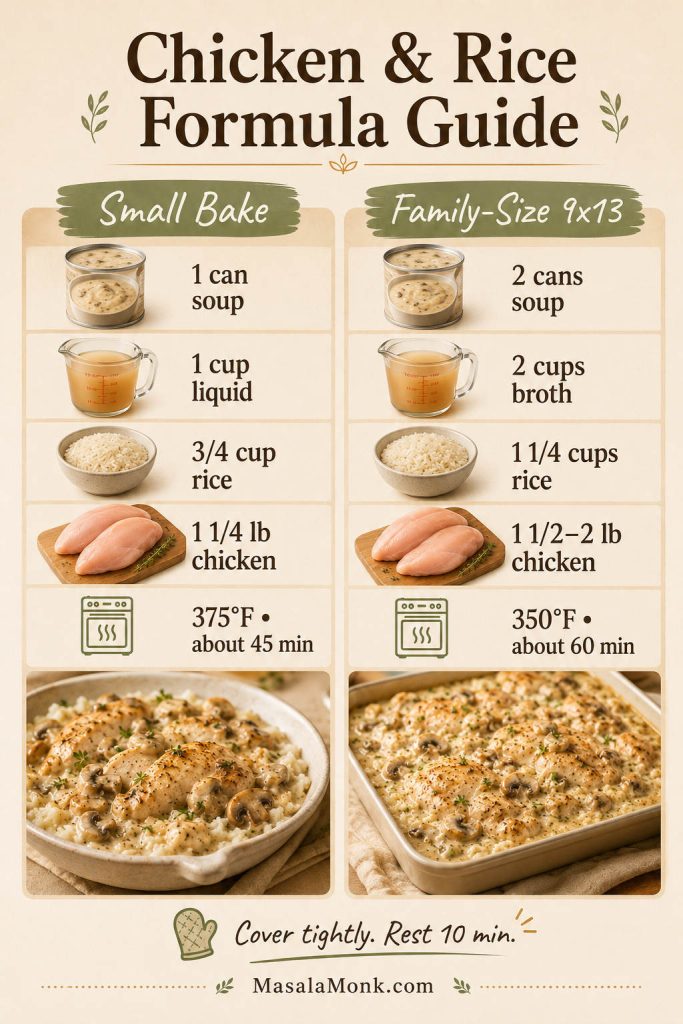
Simple baked rice direction: as a starting point for a casserole-style version, use 1 cup long-grain rice, 1 can condensed cream of mushroom soup, and about 1½ cups broth in a tightly covered dish, then bake at 350°F until the rice is tender and the pork is just done. If the pork finishes before the rice, lift the chops out and let the rice continue covered.
If adding rice to a slow cooker version, do not add it at the very beginning unless you are following a dedicated slow-cooker rice recipe. Rice can absorb too much liquid and turn mushy; add it later or serve the pork over separately cooked rice.
Pork Chops with Cream of Mushroom Soup and Potatoes
Easiest potato shortcut: serve the skillet version over mashed potatoes so the gravy has somewhere soft to land. For raw sliced potatoes, cut them thin, add enough liquid, cover tightly, and treat the dish like a casserole rather than a skillet pork chop recipe.

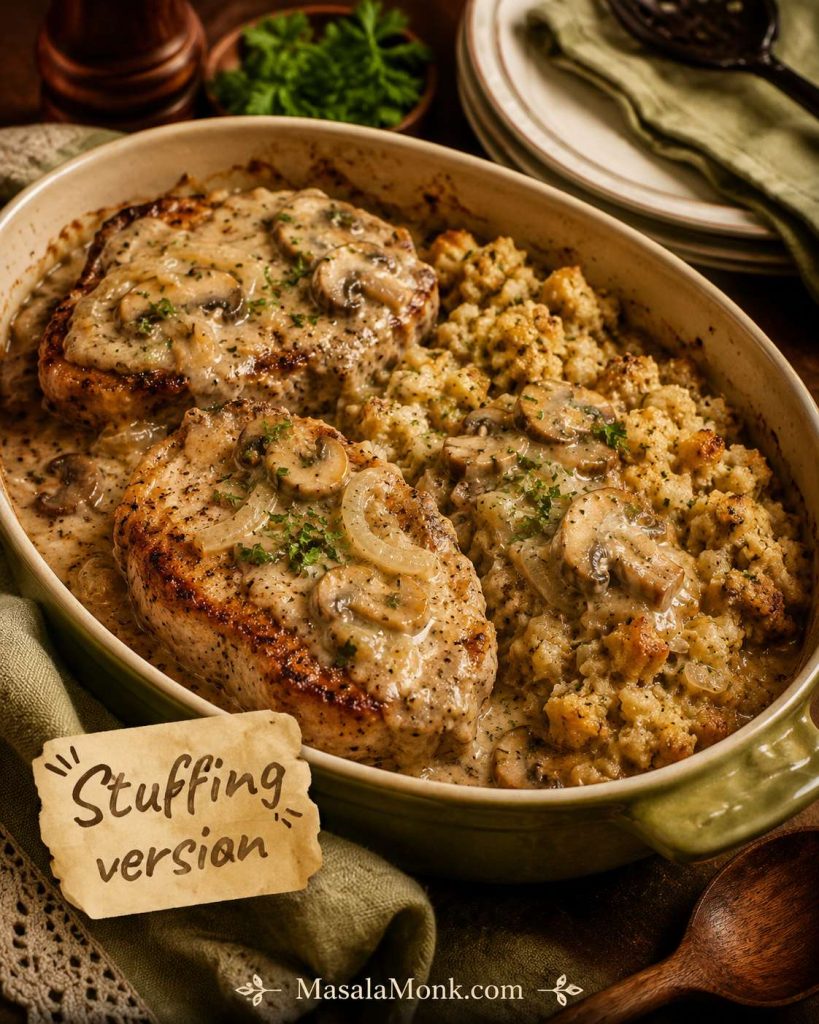
Pork Chops, Stuffing, and Cream of Mushroom Soup
Easiest stuffing shortcut: hydrate the stuffing first, then bake it covered with the pork and mushroom sauce. Dry stuffing should not be scattered into the pan because it will pull moisture from the gravy and make the whole dish feel dry.
Easy Variations
Use these variations to change the flavor while keeping the same easy skillet rhythm.
Soup Swaps
- Golden mushroom soup pork chops: use golden mushroom soup when you want a darker, tangier, more brown-gravy style sauce. It is less creamy than classic cream of mushroom.
- Cream of chicken soup substitute: use cream of chicken when you want a milder sauce or do not have mushroom soup. Add sautéed mushrooms if you still want mushroom flavor.
Flavor Boosters
- Onion soup mix: adds strong savory flavor, but use low-sodium soup or broth if possible because the gravy can get salty quickly.
- Ranch seasoning: gives a tangy, family-style flavor. Start with less than a full packet and taste before adding more.
- Worcestershire and Dijon: make the sauce taste fuller without changing the comfort-food feel.
Smothered Pork Chops with Cream of Mushroom Soup
For a smothered version, make extra gravy and use mushrooms, onions, and a little more liquid. Brown the chops, build the sauce, simmer gently, then remove the pork as soon as it is done. Reduce or thicken the gravy separately so the chops stay juicy while the sauce gets rich.

Richer Finishes
- Sour cream finish: take the skillet off the heat and stir in a spoonful of sour cream at the end for a tangier, creamier sauce.
- Extra mushrooms and onions: double the mushrooms if you want the gravy to feel more homemade and less like a plain soup sauce.
- Small splash of cream: useful if the sauce tastes sharp or salty and needs softening.
Double Batch for a Family Dinner
For 8 pork chops, use 2 cans of condensed cream of mushroom soup and about ⅔ to 1 cup liquid. Brown the pork in batches so it does not steam, then finish in a large skillet, braiser, or baking dish. Check chops individually because crowded pans do not cook evenly.
What to Serve with Cream of Mushroom Pork Chops
This is a gravy dinner, so give the gravy somewhere to land. The easiest sides are simple enough to carry the gravy or fresh enough to balance it.
- Mashed potatoes: the classic choice when you want a cozy plate with plenty of mushroom gravy.
- White rice or brown rice: easy, filling, and ideal when the rice is cooked separately from the skillet pork chops.
- Egg noodles: a stroganoff-style direction without changing the recipe.
- Green beans: crisp and fresh enough to balance the richness.
- Peas: sweet, simple, and very good with salty-creamy mushroom gravy.
- Broccoli: roasted or steamed, especially with extra black pepper on the sauce.
- Biscuits: useful when you want a very cozy, gravy-heavy plate.
- Simple salad: useful when the meal needs something bright and clean beside it.

If the gravy tastes rich or salty, choose a plain side like rice, potatoes, noodles, or steamed vegetables. If the plate feels a little too beige, add green beans, peas, broccoli, or a sharp salad. Let the mushroom sauce be the comfort; let the side bring the lift.
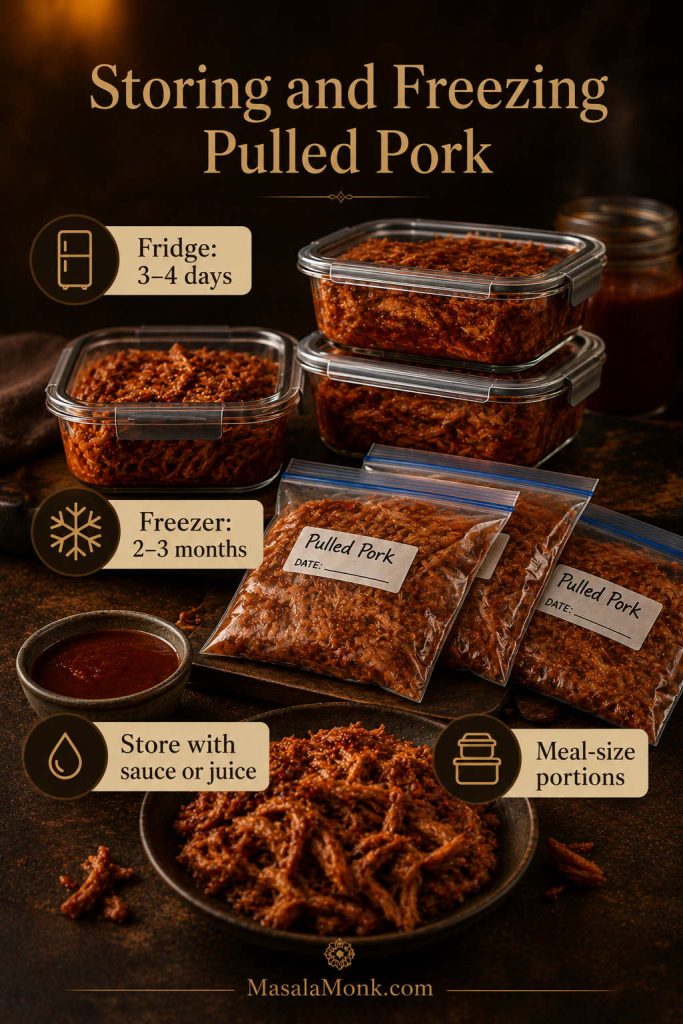
Storage and Reheating
Store leftover pork chops with the mushroom gravy when possible. The sauce helps protect the meat from drying out in the fridge and makes reheating easier.
| Storage question | Quick answer |
|---|---|
| Fridge | Store in an airtight container for 3–4 days. |
| Freezer | Freeze up to 2–3 months, though creamy gravy may look slightly separated after thawing. |
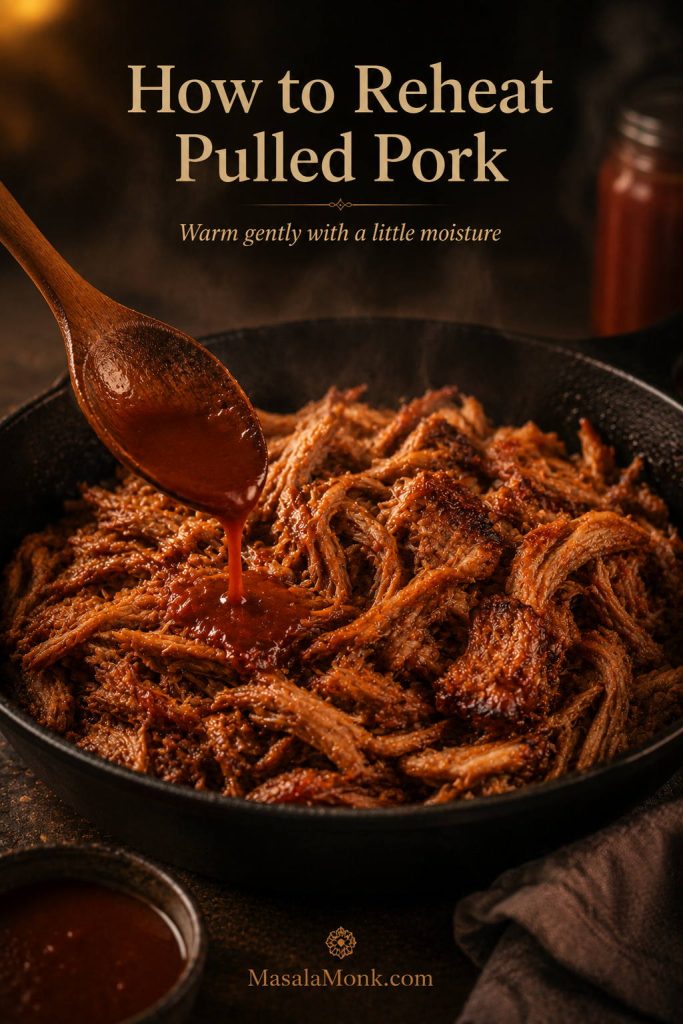
| Gentlest reheating method | Warm gently in a covered skillet over low heat with a splash of broth or milk. |
| Microwave | Use lower power, cover loosely, and heat in short bursts. |
| What to avoid | Do not boil leftovers hard; it tightens the pork and can make the sauce split. |
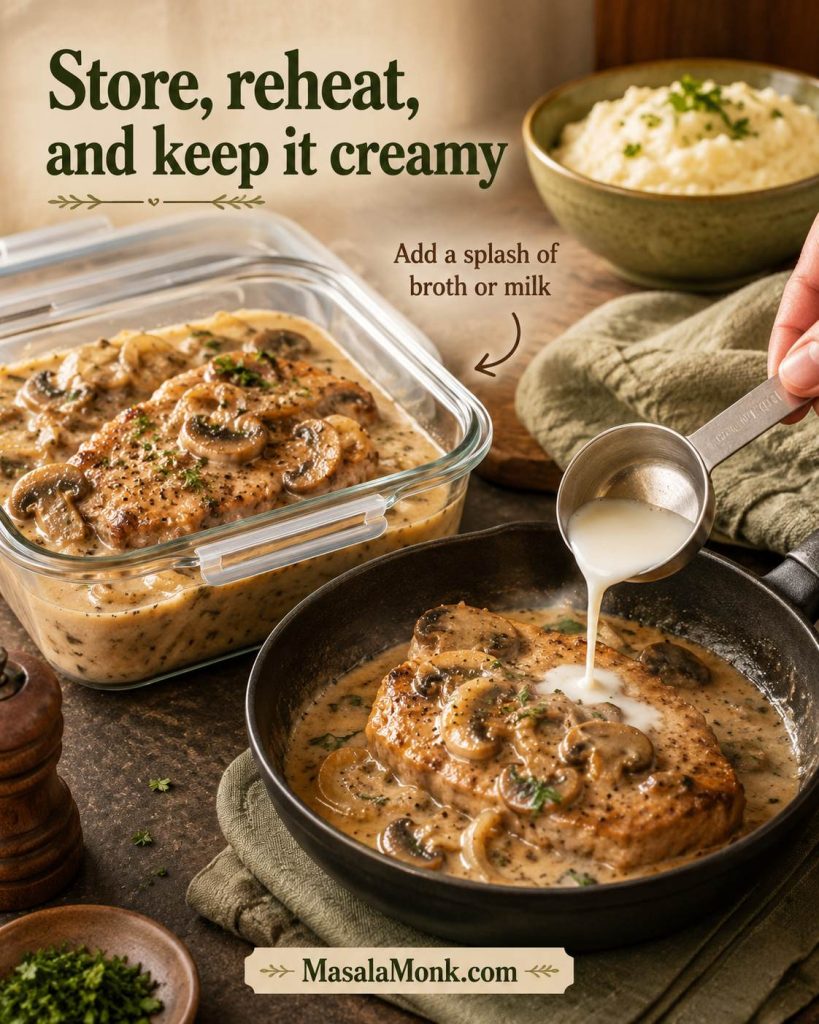
If the pork chops are thick, slicing them before reheating can help them warm faster and more evenly. Add a spoonful of extra gravy over the slices before serving. Reheat gently; boiling leftover pork in the sauce can make it tighter.
Troubleshooting the Pork Chops and Mushroom Gravy
The mistake section prevents problems. This section is for the moment when dinner is already in the pan and you need a fix. When the chops are already done, move them out first, then repair the gravy.
| Problem | Fix now | Fix next time |
|---|---|---|
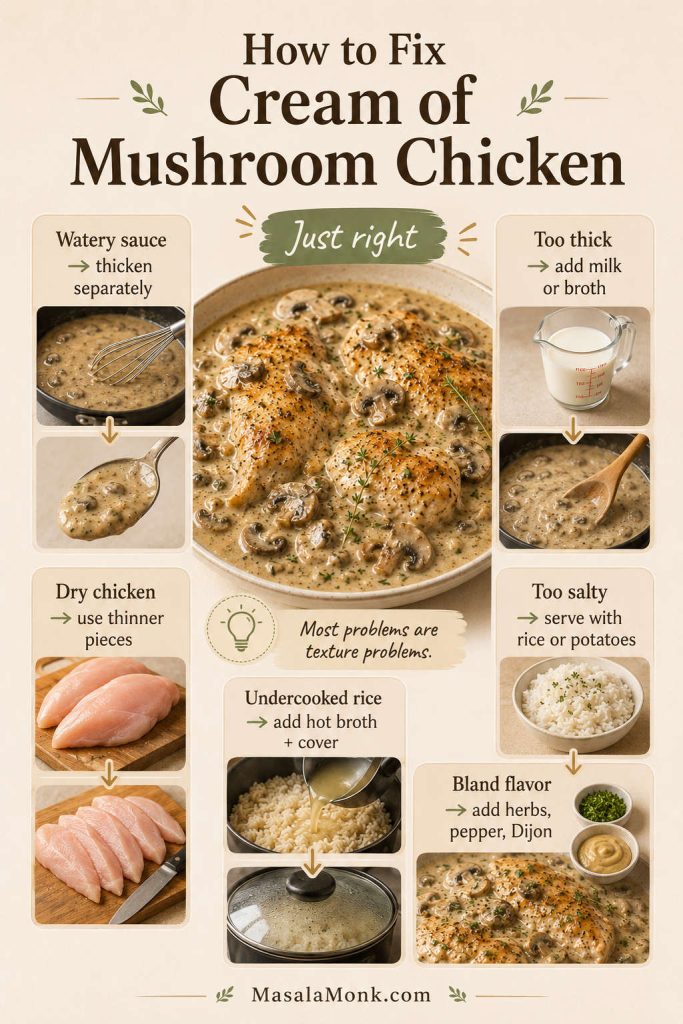
| Pork chops turned tough | Slice thinly across the grain and spoon hot gravy over the slices. | Use thicker chops, simmer gently, and check temperature earlier. |
| Sauce is too thick | Add broth, milk, or water a splash at a time over low heat. | Start with ⅓ cup liquid, then adjust gradually. |
| Gravy looks watery | Remove pork and simmer the sauce uncovered until it coats a spoon. | Thaw pork fully, pat dry, and avoid adding too much liquid at the start. |
| Gravy tastes too salty | Stir in milk, cream, unsalted broth, or sour cream; serve with plain sides. | Use low-sodium soup or broth and go easy on seasoning mixes. |
| Pork tastes bland | Add black pepper, Worcestershire, Dijon, parsley, or extra sautéed mushrooms to the gravy. | Brown the pork harder and build more flavor before the soup goes in. |

Ready to cook? Return to the recipe card or review the common mistakes before you start.
FAQs
How long do pork chops cook in cream of mushroom soup?
After browning, thin pork chops may need only 1–3 minutes in the sauce. Chops around ¾ to 1 inch thick usually need about 4–10 minutes, depending on whether they are boneless or bone-in. The thickest part should reach 145°F, followed by a 3-minute rest.
What temperature keeps pork chops juicy and safe?
Pork chops should reach 145°F / 63°C, followed by a 3-minute rest. That keeps the pork juicier than old-school overcooked chops while still giving you a safe finished dinner.
How much water do you add to cream of mushroom soup for pork chops?
For one 10.5-ounce can of condensed cream of mushroom soup, use ⅓ to ½ cup liquid. Use ⅓ cup for thicker gravy and ½ cup for a looser sauce. Water is classic, broth is more savory, and milk makes the sauce creamier.
Is milk, broth, or water best for the gravy?
Chicken broth is a good default because it makes the gravy taste more savory without much effort. Milk gives a softer, creamier sauce. Water gives the most classic Campbell’s-style flavor and is useful when the soup or seasoning mix is already salty.
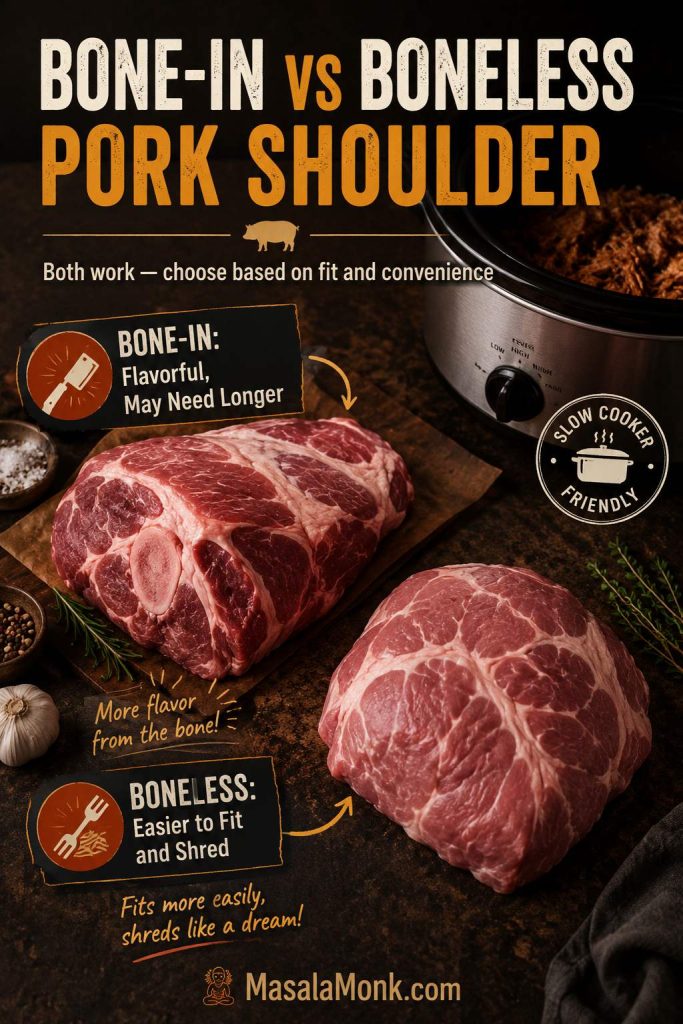
Boneless or bone-in pork chops: which is better?
Boneless chops cook faster and are easiest for a quick skillet dinner. Bone-in chops are often more forgiving and can stay juicier, but they may need a little more time near the bone.
Thin pork chops keep drying out. What should I do?
Sear them briefly, make the sauce, then return them only long enough to warm through and finish. Very thin chops should not simmer like thick chops.
Skillet or oven: which method is easier?
The skillet is faster and gives you better control over the gravy. The oven is easier when you want a covered baked version or when you are adding rice, potatoes, or stuffing. Either way, brown the pork first when possible and cook by temperature.
Crock pot pork chops with cream of mushroom soup: what should I know?
Use thawed, thicker chops rather than very thin boneless chops. Slow cookers trap moisture, so the sauce may look loose at the end; thicken it after cooking if needed. For fall-apart-style chops, many slow-cooker recipes run longer, often 6–8 hours on low.
Can I cook rice in the same pan?
Not for the quick skillet method. Uncooked rice needs extra liquid, covered heat, and more time than skillet pork chops should spend cooking. Use cooked rice as a side, or make a covered baked casserole built around the rice.
Why did the pork chops turn tough?
They were probably too thin for the timing, simmered too hard, or cooked past the right doneness point. Creamy gravy helps the plate, but it cannot fully undo overcooked lean pork.
Final Thoughts
Cream of mushroom pork chops are not trying to be fancy. They earn their place because they ask so little and give back so much: browned pork, creamy mushroom gravy, and a plate that feels complete with rice, potatoes, noodles, or whatever simple side you already have.
Keep the gravy spoonable, keep the heat gentle, and stop while the chops are still juicy. That is the whole promise of this dinner: one can of soup, one skillet, and a plate of creamy mushroom pork chops that tastes like you gave it more effort than you did.