Posted on — Leave a comment

Chicken Paprikash Recipe: Easy Hungarian Paprika Chicken With Sour Cream

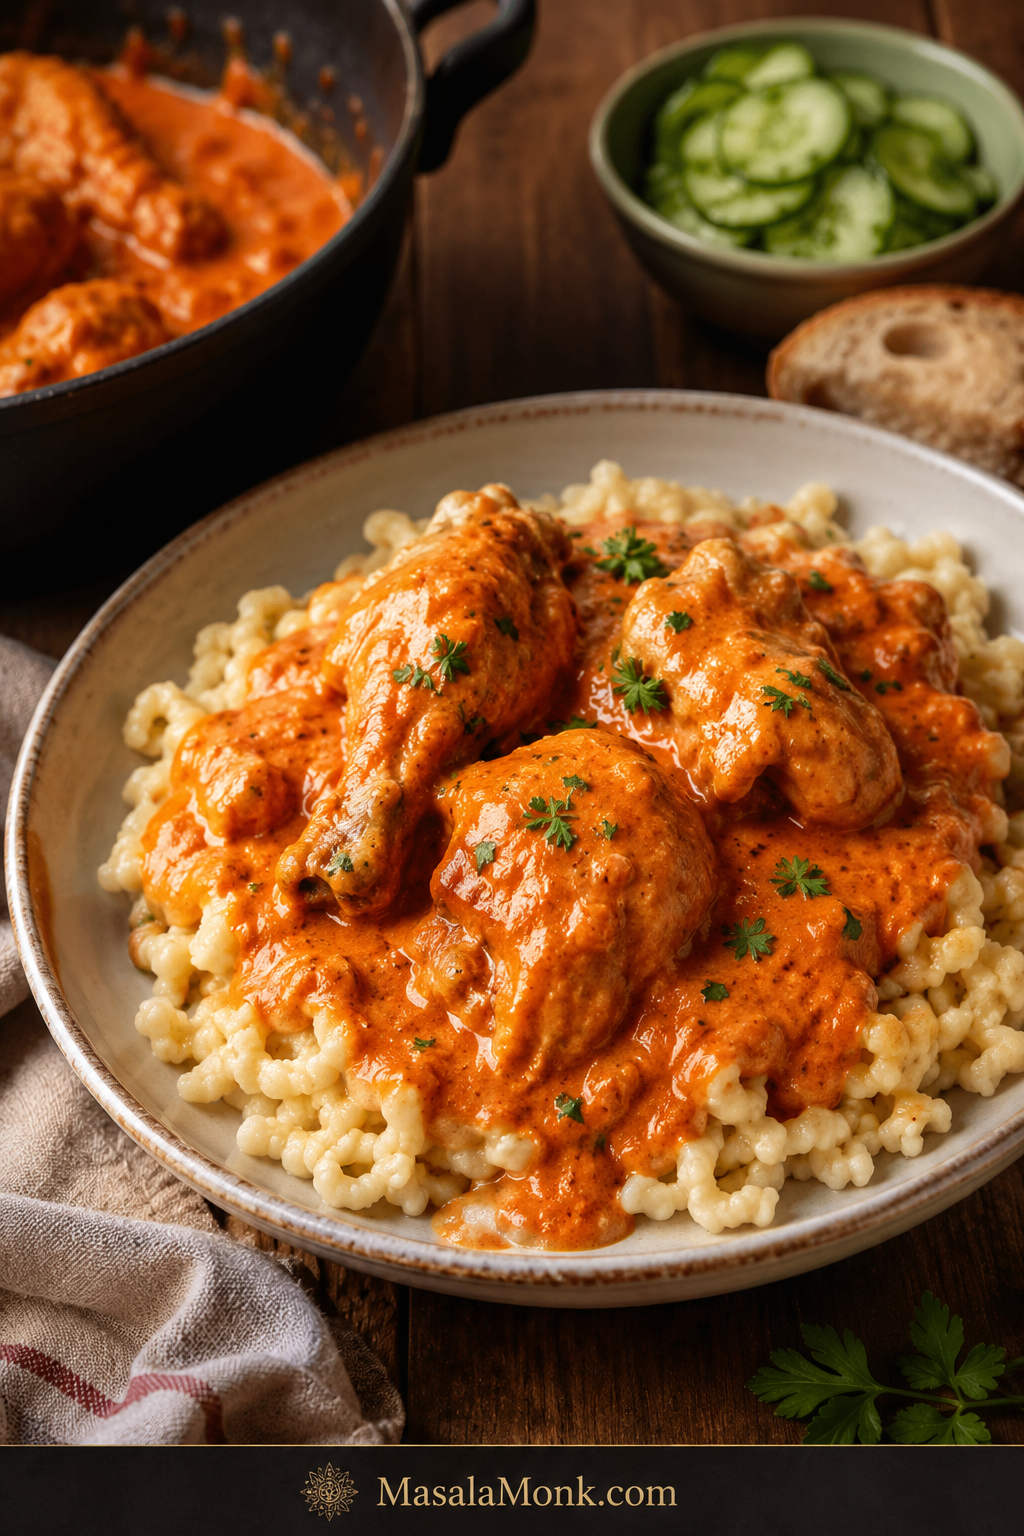
Chicken paprikash with red-orange sour cream sauce served over noodles, garnished with parsley, with cucumber salad and bread nearby.

Chicken paprikash looks like a simple pot of chicken in sauce, but the magic is in a few small moments: the onions softening until they smell sweet, the paprika blooming just long enough to wake up, and the sour cream turning the sauce creamy and red-orange at the end.

Rush those moments and the sauce can taste flat, bitter, or grainy. Handle them gently and you get tender chicken in a paprika-rich sour cream sauce that begs for noodles, dumplings, rice, mashed potatoes, or a piece of crusty bread.

This easy chicken paprikash keeps the familiar Hungarian-style comfort of paprikás csirke, but makes it practical for a normal evening: no scorched paprika, no grainy sour cream, no mandatory dumplings, and enough sauce to make the whole plate feel generous.

Quick Answer: What Is Chicken Paprikash?

Chicken paprikash is a Hungarian chicken dish made with chicken, onions, paprika, broth, and sour cream. The sauce is creamy, savory, red-orange, lightly tangy, and paprika-forward. It is usually mild rather than spicy, unless hot paprika or cayenne is added.

  • Chicken to use: boneless thighs for an easy weeknight version; bone-in thighs or legs for deeper flavor.
  • Paprika to use: sweet Hungarian paprika, ideally fresh and fragrant.
  • Key technique: bloom the paprika briefly off harsh heat, then add sour cream gently at the end.
  • Sides that work: nokedli, spaetzle, egg noodles, rice, mashed potatoes, cucumber salad, or crusty bread.
  • Main mistake to avoid: letting paprika scorch or boiling the sauce after sour cream goes in.

Make This Chicken Paprikash When

  • Creamy chicken sounds good, but you want more character than a plain cream sauce.
  • A cozy dinner needs to feel special without fancy ingredients.
  • You want something saucy enough for noodles, dumplings, rice, or potatoes.
  • Comfort food should reward careful heat, not complicated technique.

Boneless thighs keep it practical, while the important details stay protected: warm paprika, tender chicken, smooth sour cream, and enough sauce to carry the whole plate.

The 4 Details That Make or Break Chicken Paprikash

Chicken paprikash does not need many ingredients, but it does need a little care. These four details make the biggest difference.

  1. Start with good paprika. Old paprika makes the dish taste flat, even if you use enough of it.
  2. Protect the paprika from high heat. It only needs a short bloom, not a long fry.
  3. Simmer gently. The chicken should cook in small, steady bubbles, not a hard boil.
  4. Add sour cream carefully. Temper it first and stir it in after the strongest heat has passed.

This is not a fussy dish, but it does ask you to pay attention for a few small moments. Paprikash rewards patience, not perfection. Slow down for the paprika and sour cream, and the rest of the recipe is very forgiving.

Choose Your Paprikash Path

Are you making the weeknight version or the deeper traditional version? That choice decides the chicken and the side more than anything else.

VersionUse this whenWhat changes
WeeknightYou want dinner fasterUse boneless thighs with egg noodles, rice, or mashed potatoes
More traditionalYou want deeper flavorUse bone-in thighs or drumsticks with nokedli or spaetzle
Extra saucyYou are serving dumplings or noodlesKeep extra broth nearby and loosen as needed
Slow cookerYou want hands-off cookingSauté onions and bloom paprika first for better flavor
ShortcutYou have cooked chickenMake the paprika base first, then fold chicken in at the end

Chicken Paprikash Recipe Card

Recipe: Chicken Paprikash Recipe: Easy Hungarian Paprika Chicken With Sour Cream
Prep time: 15 minutes
Cook time: 40 minutes
Total time: 55 minutes
Servings: 4

Main flavorSweet paprika, onion, chicken, sour cream
TextureTender chicken in a creamy, spoonable sauce
Sauce colorRed-orange, not pale beige
Weeknight chickenBoneless skinless chicken thighs
More traditional optionBone-in thighs, drumsticks, or cut-up chicken
PaprikaSweet Hungarian paprika
Chicken doneness165°F / 74°C internal temperature
Good sidesNokedli, spaetzle, egg noodles, rice, mashed potatoes
Key techniqueUse gentle heat for paprika and sour cream

Useful Equipment

  • Dutch oven or deep 12-inch skillet with lid
  • Sharp knife and cutting board
  • Mixing bowl for tempering sour cream
  • Whisk or fork
  • Wooden spoon or spatula
  • Instant-read thermometer, helpful for checking chicken doneness

Ingredients

For the chicken

  • 2 lb / 900 g boneless skinless chicken thighs, cut into large bite-size pieces
  • 1 teaspoon fine salt
  • 1/2 teaspoon black pepper
  • 2 tablespoons neutral oil, chicken fat, or lard

For the paprika base

  • 2 large yellow onions, finely chopped
  • 1/4 teaspoon fine salt, plus more to taste
  • 3 garlic cloves, minced
  • 3 tablespoons sweet Hungarian paprika
  • 1/4 teaspoon hot Hungarian paprika or cayenne, optional
  • 1 1/4 to 1 1/2 cups / 300 to 360 ml low-sodium chicken broth, plus more if needed

To finish

  • 3/4 cup / 180 g full-fat sour cream, set out while the chicken cooks so it is not ice-cold
  • 1 tablespoon all-purpose flour, optional, for a thicker sauce
  • 1 teaspoon lemon juice or a small splash of vinegar, optional, only if the sauce needs brightness
  • Chopped parsley, optional, for serving

For serving

  • Nokedli, spaetzle, egg noodles, rice, mashed potatoes, or crusty bread

Instructions

Brown, bloom and simmer

  1. Season the chicken. Pat the chicken dry. Season with 1 teaspoon salt and the black pepper.
  2. Brown the chicken. Heat the oil in a Dutch oven or deep skillet over medium-high heat. Brown the chicken in batches for 2 to 3 minutes per side. It does not need to cook through yet. Transfer to a plate.
  3. Cook the onions. Reduce heat to medium. Add the chopped onions and the remaining 1/4 teaspoon salt. Cook for 8 to 10 minutes, stirring often, until soft and lightly golden. Stir in the garlic for 30 seconds.
  4. Add the paprika carefully. Lower the heat or briefly move the pot off the burner. Stir in the sweet paprika and optional hot paprika for 20 to 30 seconds. If the pot looks dry or too hot, add a small splash of broth right away.
  5. Simmer the chicken. Pour in 1 1/4 cups broth and scrape up the browned bits from the bottom of the pot. Return the chicken and any juices to the pot. Bring to a gentle simmer with small bubbles, not a hard boil. Partly cover and cook for 18 to 22 minutes, or until the chicken is tender and reaches 165°F / 74°C.

Finish the sauce gently

  1. Check the sauce before adding sour cream. It should be spoonable and flavorful. A thin sauce needs a few uncovered minutes before the sour cream goes in. A tight sauce needs the remaining 1/4 cup broth, or a little more as needed.
  2. Temper the sour cream. In a bowl, whisk the sour cream with the flour, if using. Slowly whisk in a few spoonfuls of hot sauce from the pot to warm the sour cream mixture gradually.
  3. Finish gently. Turn the heat to very low or off. Stir the tempered sour cream mixture into the pot. Warm through for 2 to 3 minutes without boiling. Taste and adjust salt. Add lemon juice or vinegar only if the sauce tastes too heavy.
  4. Serve. Spoon the chicken paprikash over nokedli, spaetzle, egg noodles, rice, or mashed potatoes. Garnish with parsley if you like.

Recipe Notes

  • Bone-in chicken: use thighs, drumsticks, or a mix. Simmer for 35 to 45 minutes, or until tender and cooked through.
  • Chicken breast: simmer gently and check early so it does not dry out.
  • Thicker sauce: use the flour in the sour cream mixture or simmer the paprika base uncovered before adding sour cream.
  • Gluten-free thickener: mix 1 teaspoon cornstarch with 1 tablespoon cold water, stir it into the simmering base before adding sour cream, and cook briefly until slightly thickened.
  • Looser sauce: skip the flour and add a splash more broth if needed.
  • Best paprika flavor: use fresh sweet Hungarian paprika as the base, add a small pinch of hot Hungarian paprika if you want more depth, and keep the heat gentle when blooming it.
  • Before serving: taste for salt, warmth, and brightness. Add salt if flat, a tiny splash of lemon juice or vinegar if heavy, or a spoonful of sour cream if too sharp.
  • Serving amounts: plan on about 8 oz / 225 g dry egg noodles, 3 to 4 cups cooked nokedli or spaetzle, 3 cups cooked rice, or 4 portions mashed potatoes for 4 servings.

Need help before you cook? See which paprika to use, which chicken cut works best, how to keep sour cream smooth, or what to serve with chicken paprikash.

Once the recipe is clear, the rest is about control: choosing the right paprika, keeping the sour cream smooth, and knowing what the finished dish should look and taste like.

What Is Chicken Paprikash?

Chicken paprikash, often called paprikás csirke, is a Hungarian chicken dish built around onion, paprika, liquid, and sour cream. It is sometimes called chicken paprika in English-language recipes.

What makes it different from plain creamy chicken is the paprika. The finished dish should taste warm, savory, gently sweet from the onions, lightly tangy from the sour cream, and clearly paprika-forward. If it tastes like cream sauce with a little red color, the paprika has not done its job.

Paprikash is not a dry chicken dish with a little sauce on the side. The creamy red-orange sauce is the reason the noodles, dumplings, rice, or potatoes make sense.

If you like creamy chicken dinners such as cream of mushroom chicken, this gives you the same cozy feel in a paprika, onion, and sour cream direction.

Authentic-Style vs Easy Chicken Paprikash

This is a practical home-style version of paprikás csirke, built around the essentials: chicken, onion, paprika, liquid, and sour cream. Hungarian families make paprikash in many ways, so this version keeps the core flavor while making the method easier for a normal evening.

More traditional versions often use bone-in chicken pieces, sweet Hungarian paprika, sour cream, and nokedli or spaetzle on the side. Some cooks add tomato or sweet pepper, while others keep the pot focused on onion, paprika, and sour cream.

Boneless thighs cook faster than bone-in pieces, egg noodles or rice can stand in for dumplings, and the sauce still gets the care it needs: softened onions, protected paprika, gentle simmering, and sour cream added at the end.

For a deeper, more traditional result, use bone-in thighs or drumsticks and simmer them longer. For the easiest dinner, use boneless thighs and serve the chicken over egg noodles, rice, or mashed potatoes.

Why This Recipe Works

This version gives you classic paprikash comfort without making dumplings mandatory, without using hard-to-find steps, and without making the dish grainy or bitter.

The method works because it protects the two delicate parts of the dish: paprika and sour cream. The paprika blooms briefly away from harsh heat, and the sour cream is warmed gradually before it goes into the pot.

Boneless thighs keep the chicken juicy, softened onions give the paprika base body, and the consistency is adjusted before the dairy goes in. The result is tender chicken in a dish that feels rich without being heavy, creamy without being bland, and warm with paprika in every bite.

Ingredients for Chicken Paprikash

Because this recipe uses a short ingredient list, each ingredient matters. Paprika is not just color here; it is the main flavor.
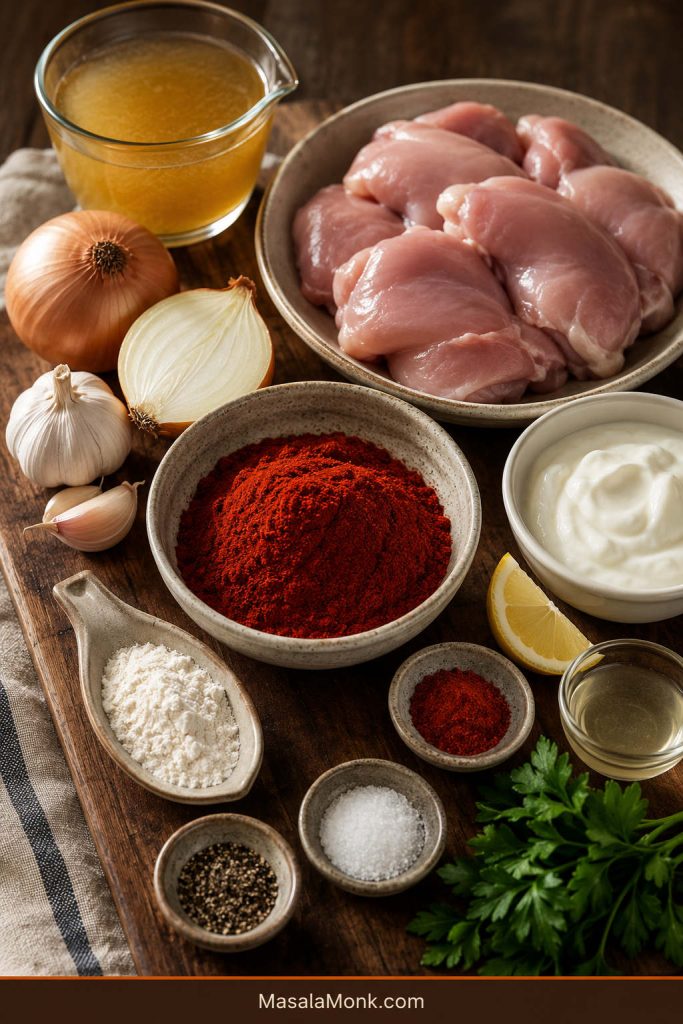
Boneless chicken thighs, sweet paprika, onions, garlic, broth, sour cream, flour, lemon, parsley, salt and pepper arranged on a wooden board.
Chicken paprikash starts with a short ingredient list, so freshness matters. Good paprika brings warmth and color, while onions, broth, and full-fat sour cream build the body of the dish.

Chicken

Boneless skinless chicken thighs are the easiest choice for this version. They stay tender, cook quickly, and hold up well in the sauce. Bone-in thighs and drumsticks give more flavor, while chicken breast gives a leaner but less forgiving result.

Paprika

Use sweet Hungarian paprika if possible. Fresh paprika should smell warm, peppery, and fragrant. A small pinch of hot Hungarian paprika adds depth if you want more character without making the dish truly spicy.

Regular sweet paprika can work if it smells fresh. Smoked paprika should not be the main paprika here because it turns the dish in a smokier direction. Use it only as a small accent if you love the flavor.

Onions

Onions create the body of the sauce. Cook them until soft and lightly golden so they bring sweetness instead of raw sharpness.

Garlic

Garlic should stay in the background here. You want it to round the sauce, not pull attention away from the paprika.

Broth

Broth does two quiet jobs: it loosens the paprika base and pulls the browned bits from the pot into the sauce. Start with 1 1/4 cups and add more if the sauce reduces too much or if you are serving it with noodles or dumplings.

Sour Cream

Sour cream gives paprikash its creamy tang. Full-fat sour cream is the safest choice because it handles gentle heat better than low-fat versions. Add it at the end and keep the heat low.

Flour

Flour is optional, but helpful if you want a sauce that clings more confidently to noodles or dumplings. You can skip it for a looser result, or use the cornstarch slurry in the recipe notes if you need a gluten-free thickener.

Tomato or Pepper

Some versions include a little tomato, tomato paste, or fresh pepper. Others do not. Use 1 small chopped tomato, 1 teaspoon tomato paste, or 1/2 finely chopped bell pepper if you like, but keep it subtle so the dish still tastes like paprika and sour cream, not tomato chicken stew.

The ingredient notes above give the basics. These two choices — paprika and chicken — are where the dish changes most.

Choosing Paprika

Sweet Hungarian paprika gives chicken paprikash its red-orange color and warm pepper flavor without making it overly spicy. Before you measure it, smell it. Good paprika should smell warm and peppery, not dusty or flat.
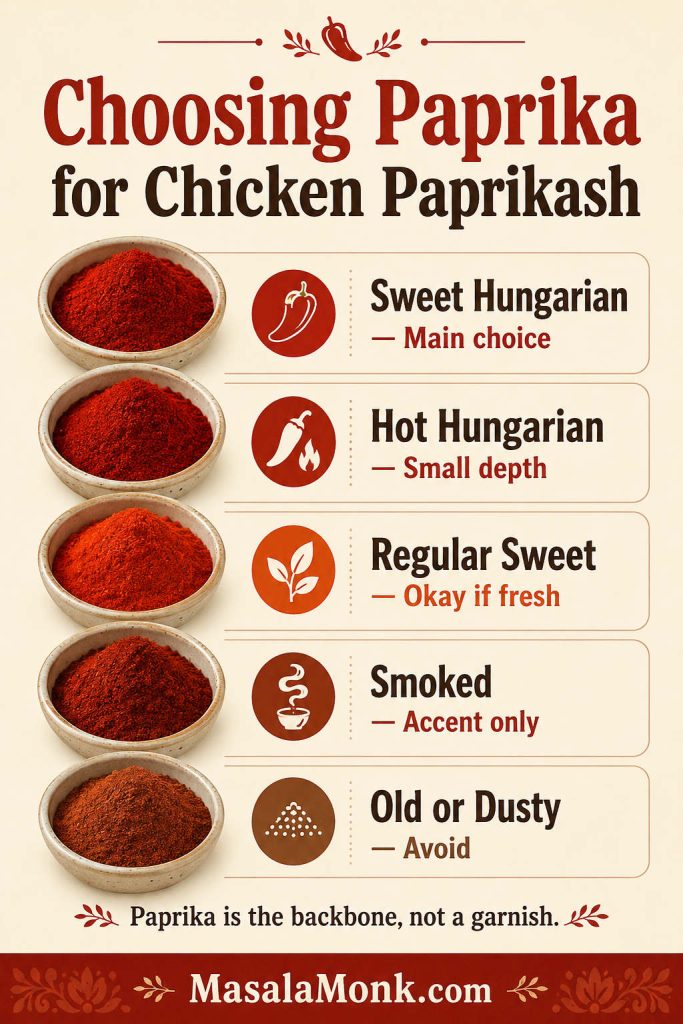
Infographic comparing sweet Hungarian paprika, hot Hungarian paprika, regular sweet paprika, smoked paprika and old paprika for chicken paprikash.
Sweet Hungarian paprika is the main flavor in chicken paprikash, not just a color booster. Use fresh paprika for depth, add hot paprika only for gentle heat, and keep smoked paprika as an accent.

Three tablespoons of paprika may look like a lot, but paprikash needs more than a dusting. The spice is the backbone of the dish, not a garnish.

For more depth, use mostly sweet Hungarian paprika with a small pinch of hot Hungarian paprika. Cayenne can add heat, but hot Hungarian paprika keeps the flavor closer to the dish.

Paprika brings both color and flavor here, but it is delicate. A short bloom in onion fat helps it open up; a long fry on high heat makes it harsh. Once the paprika goes in, stay close to the pot. You should smell the paprika before you worry about seeing a big change. The color deepens quickly, but the aroma is the real cue.

Paprika typeUse it?What to know
Sweet Hungarian paprikaYesBest default for classic paprikash flavor
Regular sweet paprikaYes, if freshWorks, but may taste less deep than Hungarian paprika
Hot Hungarian paprikaYes, in small amountsAdds warmth and depth without changing the dish too much
Smoked paprikaOnly as an accentCan taste good, but changes the dish into a smokier version
Old paprikaAvoidMakes the finished dish taste flat and dusty
CayenneOptionalUseful if you want heat but not more paprika flavor

Choosing the Chicken

The right cut depends on the kind of dinner you want. Boneless thighs are the easiest all-around choice for weeknight paprikash. Bone-in chicken gives deeper flavor. Chicken breast works, but it needs a gentler hand.

Guide showing boneless thighs, bone-in chicken pieces, chicken breast and cooked chicken as options for chicken paprikash.
Boneless thighs are the easiest choice for weeknight chicken paprikash because they stay juicy. Bone-in pieces are worth using when you want deeper flavor and have time for a longer simmer.

If chicken breast is what you have, this baked chicken breast guide is useful for understanding timing, thickness, and how to avoid dry white meat.

Chicken cutDoes it work?Use when
Boneless thighsYesYou want a juicy, easy weeknight version
Bone-in thighs or drumsticksYesYou want deeper flavor and a longer simmer
Chicken breastYesYou want a leaner version and can cook gently
Rotisserie chickenYesYou want a shortcut and already-cooked chicken
Shredded cooked chickenYesYou want leftovers, bowls, noodles, or quick lunches

For rotisserie chicken, make the paprika base first, then fold in the cooked chicken just long enough to warm it through.

Once the chicken is chosen and the paprika is ready, the cooking is mostly about building the dish in the right order.

How to Make Chicken Paprikash

The recipe card gives you the full method. This section shows what to look for as you cook, because paprikash is easier when you can see and smell the right moments.

The recipe is not difficult because it has many steps. It is difficult only if the heat gets impatient. Keep the pot gentle, and the dish gives you back more comfort than the ingredient list promises.

Step 1: Brown the chicken for flavor, not doneness

The chicken should pick up color on the outside, but it does not need to cook through yet. Those browned bits on the bottom of the pot will dissolve into the paprika base later.
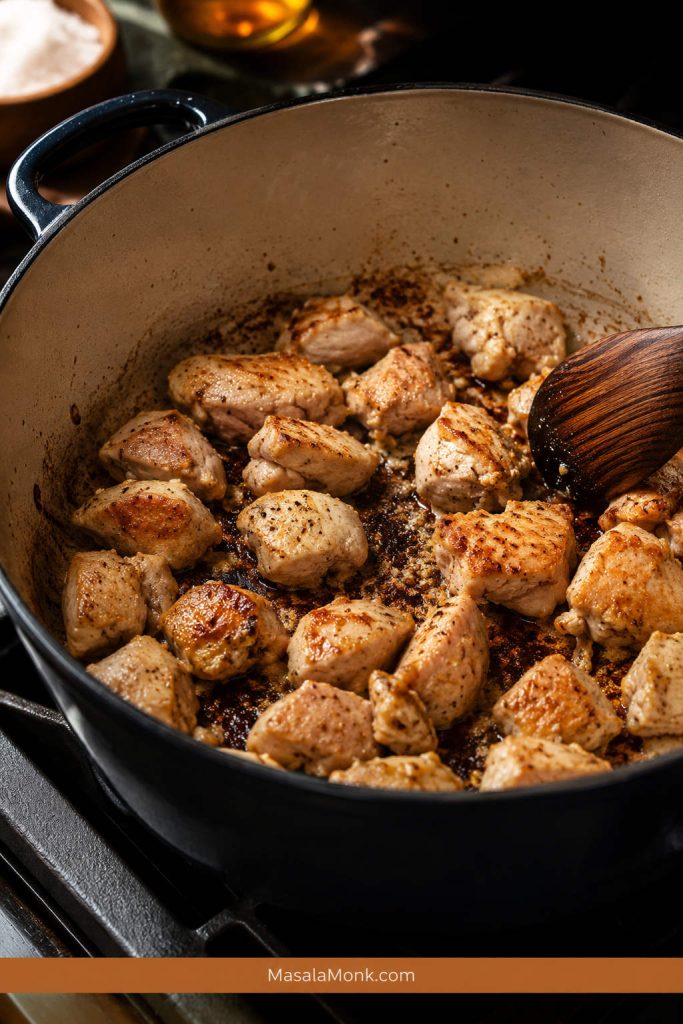
Boneless chicken thigh pieces browning in a Dutch oven with golden edges and browned bits on the bottom.
Brown the chicken for flavor, not doneness. Those golden edges and browned bits will later dissolve into the paprika base and make the finished dish taste richer.

Step 2: Cook the onions until they smell sweet

The onions should soften, shrink, and smell sweet instead of sharp. This is where the dish starts getting body. Rushed onions make a thinner-tasting paprikash.

Step 3: Bloom the paprika briefly

Lower the heat before the paprika goes in. The spice should hit warm fat and smell fragrant almost immediately. That is the moment to add broth. A good bloom smells warm and peppery; a scorched one smells harsh.
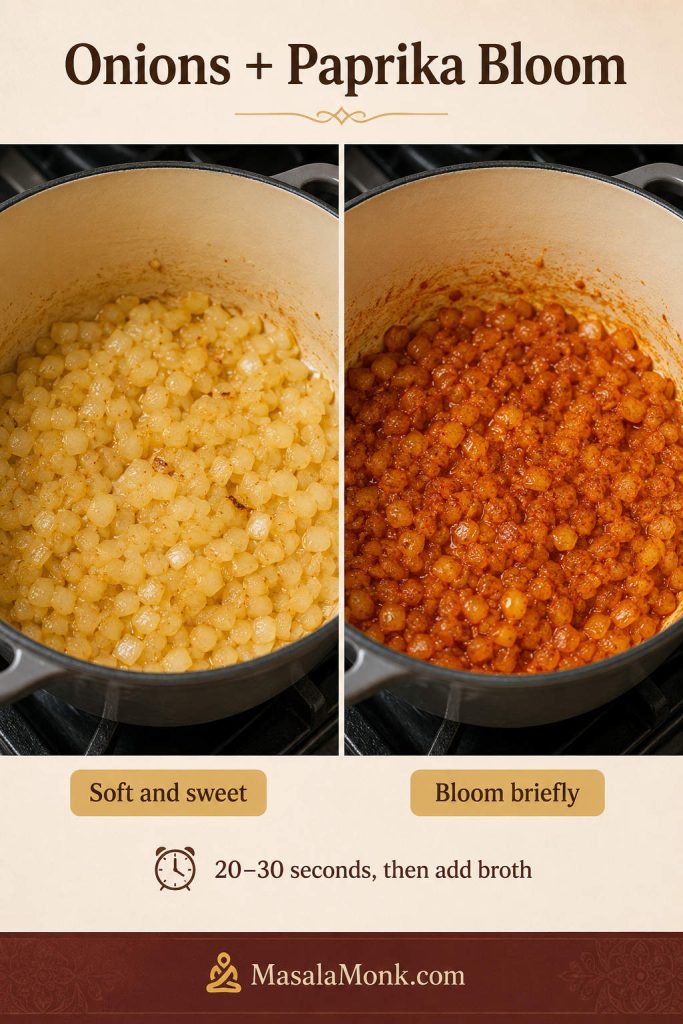
Two-panel guide showing softened onions on one side and paprika blooming with onions on the other side.
Let the onions turn soft and sweet before adding paprika. Once the spice smells warm and peppery, add liquid so it blooms without scorching.

Step 4: Simmer gently

The pot should bubble quietly, not aggressively. Gentle simmering keeps the chicken tender and lets the paprika base pick up flavor without reducing too fast.
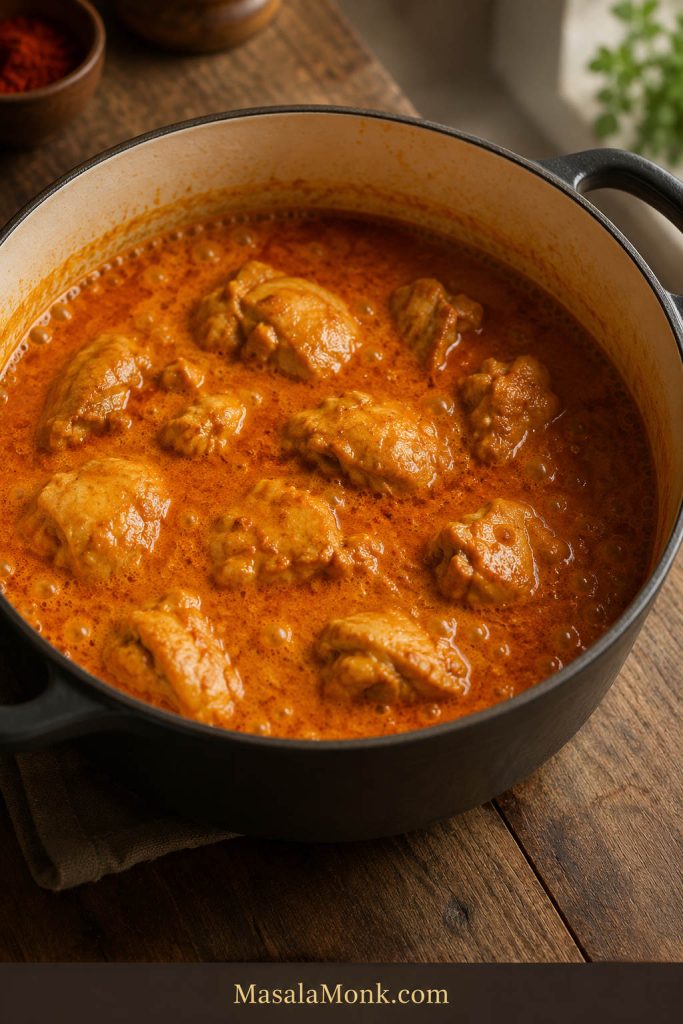
Boneless chicken pieces gently simmering in red-orange paprika sauce with small bubbles around the edge of the pot.
Keep chicken paprikash at a quiet simmer with small bubbles. This helps the chicken stay tender while the paprika base reduces slowly.

Step 5: Fix the consistency before the sour cream goes in

The sauce should already taste savory and spoonable before the dairy is added. Reduce it if it looks watery. Loosen it with broth if it looks tight. Once sour cream goes in, you want to warm the dish, not wrestle with it.

Step 6: Temper the sour cream

Whisking hot sauce into sour cream first keeps the temperature change gentle. The mixture should look smooth in the bowl before it goes back into the pot.
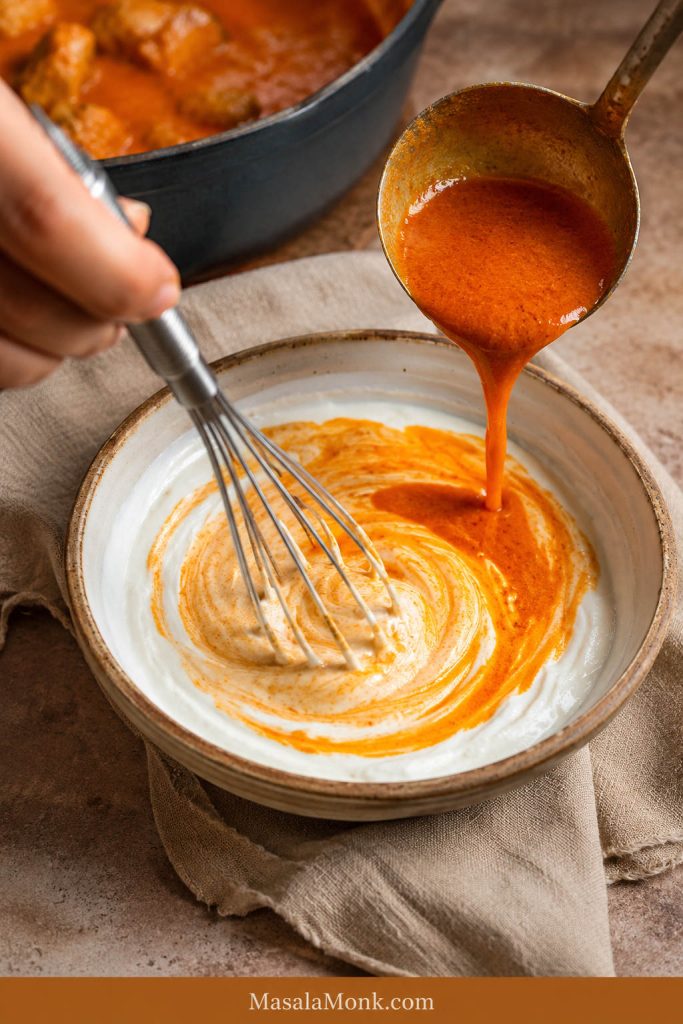
Sour cream being whisked in a bowl while hot paprika sauce is added gradually from a spoon.
Tempering sour cream protects the creamy finish. Whisk in a little hot paprika sauce first, then stir the warmed mixture back into the pot on low heat.

Step 7: Finish low and slow

Once the sour cream goes in, the sauce is no longer something to boil; it is something to warm. The finished dish should look creamy, red-orange, and ready to coat every noodle, dumpling, or spoonful of rice underneath.

How It Should Look and Taste

The finished dish should look creamy, warm, and generous. It should be red-orange from paprika, not pale beige and not tomato-red. It should coat the chicken and spoon easily over noodles, dumplings, rice, or potatoes.
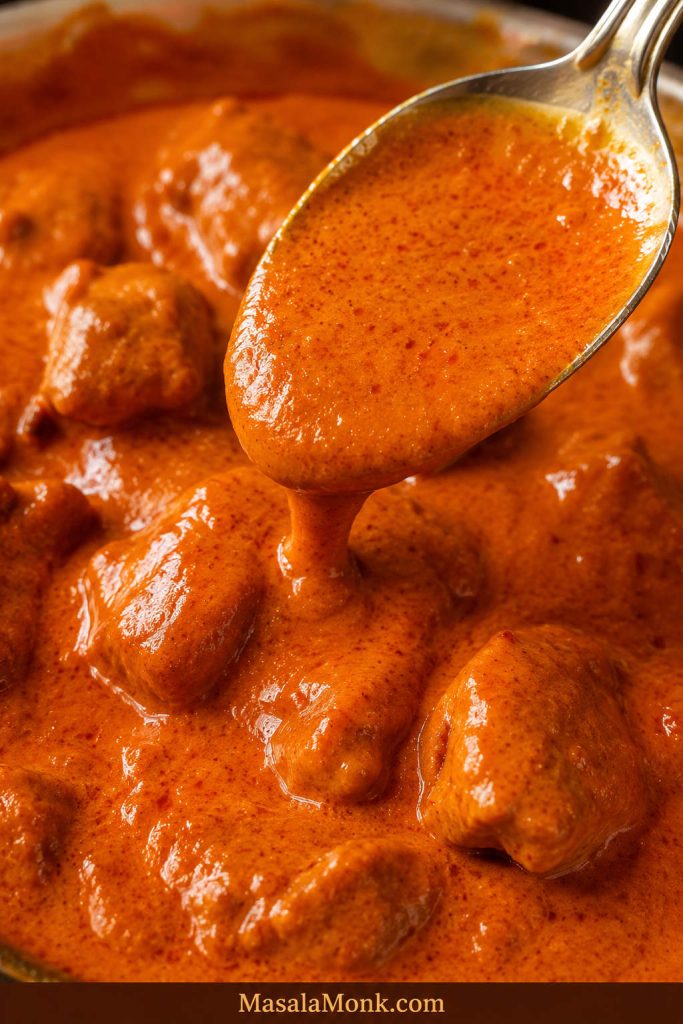
Close-up of finished chicken paprikash sauce coating chicken and a spoon with a glossy red-orange texture.
The finished sauce should coat a spoon but still flow easily. Before serving, adjust it so it clings to noodles, rice, nokedli, or potatoes without turning heavy.
  • Color: red-orange and paprika-rich.
  • Texture: creamy and spoonable, not watery or paste-thick.
  • Chicken: tender pieces that still hold their shape.
  • Flavor: savory, paprika-forward, lightly tangy, and gently sweet from onions.
  • Heat level: mild unless you add hot paprika or cayenne.
  • Sauce amount: generous enough to coat whatever you serve underneath.

A good paprikash should coat a spoon and leave a brief trail when you drag the spoon through the pan, but it should still flow easily over noodles, dumplings, rice, or potatoes.

The plate should not look tidy; it should look saucy. Every noodle should catch a little red-orange cream.

If the dish tastes flat, it may need salt or a little brightness. Dull flavor from the start often points to old paprika. Bitterness usually means the paprika caught too much heat.

Sauce not looking right yet? Jump to the troubleshooting guide before serving.

How to Keep the Sour Cream Smooth

The sour cream is where paprikash becomes silky and comforting, as long as the heat stays gentle. If the sauce gets too hot after the sour cream goes in, the creamy finish can turn grainy.
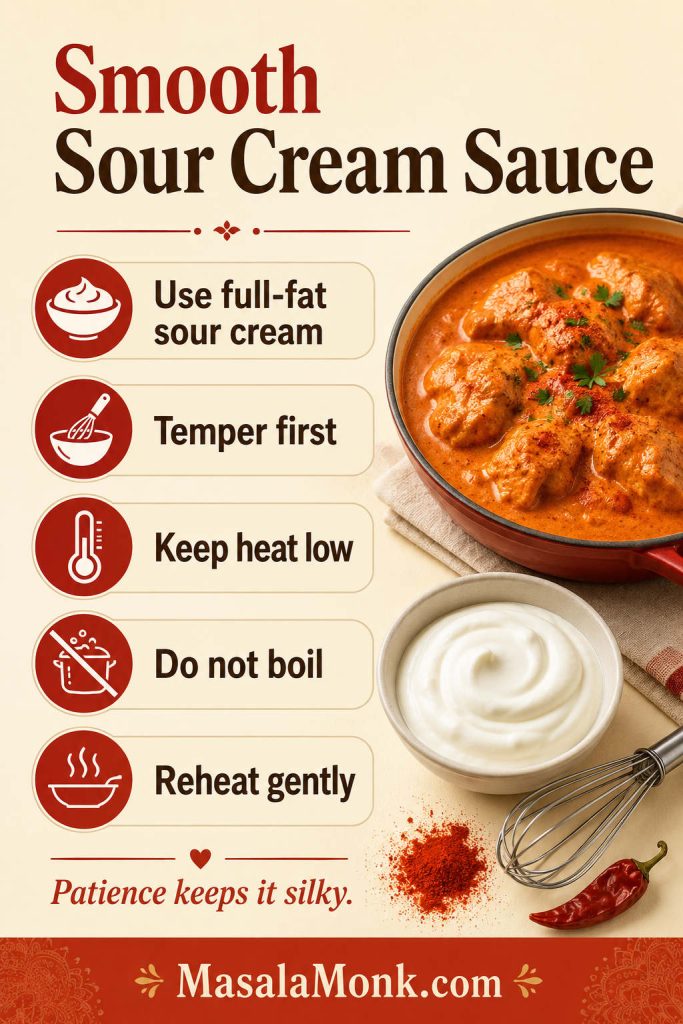
Infographic with tips for smooth sour cream sauce, including using full-fat sour cream, tempering first and keeping heat low.
Sour cream stays smooth when it is warmed gradually and kept away from hard boiling. Low heat is what keeps chicken paprikash silky instead of grainy.

Sour cream behaves better when it is warmed gradually. Tempering is not a fancy step; it simply narrows the temperature gap between cool dairy and hot sauce.

  • Use full-fat sour cream. It is more stable and gives better texture.
  • Do not add it ice-cold. Let it sit while the chicken cooks so it loses the refrigerator chill.
  • Temper it first. Whisk a little hot sauce into the sour cream before adding it to the pot.
  • Lower the heat. Add sour cream on very low heat or off heat.
  • Warm it through. Boiling is what puts the sauce at risk.
  • Reheat slowly. Leftovers need low heat and patience.

The dish does not need bravery here; it needs patience. If sour cream sauces make you nervous, turn the heat off before adding it. You have more control than you think.

If the sauce does split, lower the heat, add a small splash of broth, and stir gently. It may not become perfectly silky again, but it will still taste good.

Ready to cook now? Return to the recipe card and add the sour cream only after the strongest heat has passed.

Chicken Paprikash With Dumplings, Nokedli, Spaetzle or Egg Noodles

A saucy dish like this needs somewhere soft to land. In a more traditional plate, that usually means nokedli or spaetzle. On a weeknight, egg noodles, rice, or mashed potatoes still do the job beautifully.

Split image comparing chicken paprikash served over nokedli or spaetzle with chicken paprikash served over egg noodles.
Nokedli or spaetzle gives chicken paprikash a more traditional feel, while egg noodles make it easier for a weeknight dinner. Either way, the side should be soft enough to catch the sauce.

Want the Traditional Side Without a Project?

Nokedli are small Hungarian-style dumplings and one of the most traditional partners for this dish. Spaetzle is very similar and works beautifully. Egg noodles are the easiest weeknight option when you want the comfort of dumplings without making dumplings from scratch.

Use store-bought spaetzle, homemade nokedli, or egg noodles. For homemade nokedli, keep the batter soft and cook the dumplings separately in boiling water, then spoon the paprikash over the top. Do not simmer dumplings directly in the finished sauce unless you want a thicker, heavier pot. The shortcut version is not a failure; it is dinner moving at real-life speed.

SideAmount for 4 servingsUse when
Nokedli3 to 4 cups cookedYou want the most traditional serving
Spaetzle3 to 4 cups cookedYou want an easy dumpling substitute
Egg noodles8 oz / 225 g dryYou want a fast weeknight dinner
Rice3 cups cookedYou want a simple gluten-free meal
Mashed potatoes4 portionsYou want full comfort food

Dumplings make the plate feel most traditional. Egg noodles make it weeknight-easy. Rice keeps it simple. Mashed potatoes make it full comfort. None of them are wrong; the only mistake is not having enough sauce.

If rice is your easiest side, this guide on how to cook perfect rice helps you time the grains while the chicken simmers. For a deeper comfort-food version, spoon the paprika sour cream sauce over creamy mashed potatoes instead.

The side is not just filler here. It is the thing that catches the red-orange cream and makes every forkful feel complete.

Once you choose the base, see what to serve with chicken paprikash for fresh sides that balance the plate.

What to Serve With Chicken Paprikash

Because the dish is rich and creamy, the rest of the plate works best when it adds freshness, crunch, or something simple for wiping up the last spoonfuls.
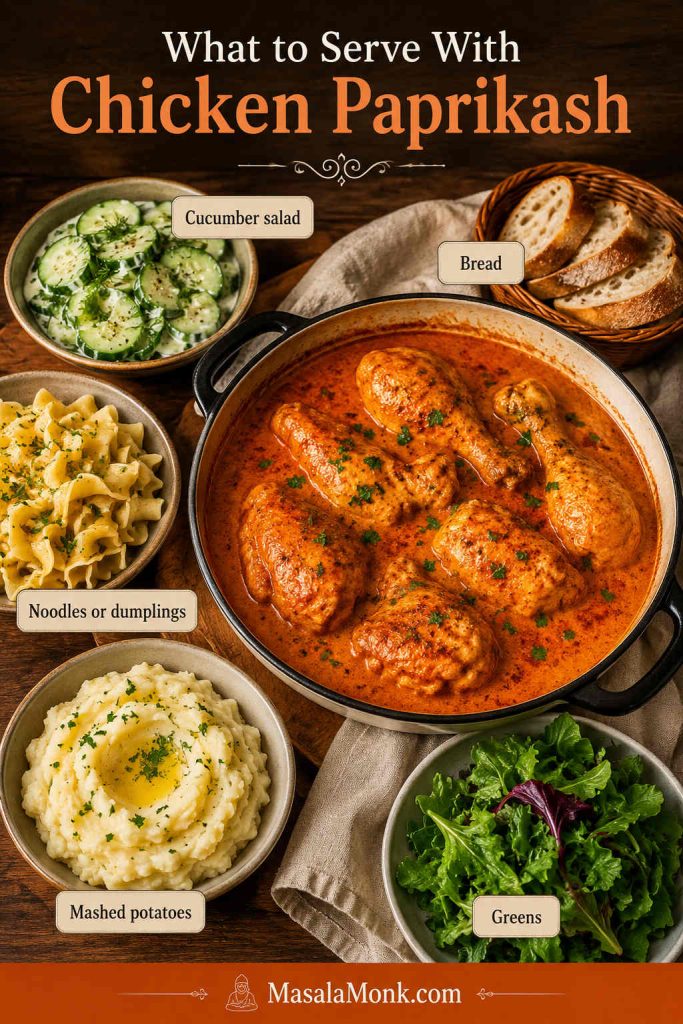
Chicken paprikash served with cucumber salad, bread, noodles or dumplings, mashed potatoes and greens on a wooden table.
Rich chicken paprikash works best with contrast. Cucumber salad and greens add freshness, while noodles, dumplings, mashed potatoes, or bread give the paprika sauce somewhere to land.
  1. Cucumber salad: crisp and refreshing against the creamy sauce, especially a cold cucumber salad with vinegar, dill, and onion.
  2. Green salad: helpful when you want the meal to feel lighter.
  3. Roasted or steamed vegetables: green beans, cabbage, carrots, broccoli, or peas work well.
  4. Roasted potatoes: a crispier potato option if you are not serving mashed potatoes.
  5. Crusty bread: perfect for wiping up the last spoonfuls in the pan.

Choose noodles if you want the dish to feel lighter, dumplings if you want it to feel most traditional, and mashed potatoes if you want the plate to lean fully into comfort.

For the most balanced dinner, serve the chicken with noodles or dumplings and a crisp cucumber salad or green salad on the side.

Slow Cooker and Crock Pot Chicken Paprikash

The stovetop version gives you the best feel for the dish, but the same flavors can work in a slow cooker or Crock Pot as long as the sour cream is added at the end.

Chicken paprikash can be made in a slow cooker or Crock Pot two ways: the deepest-flavor method and the dump-and-go shortcut.
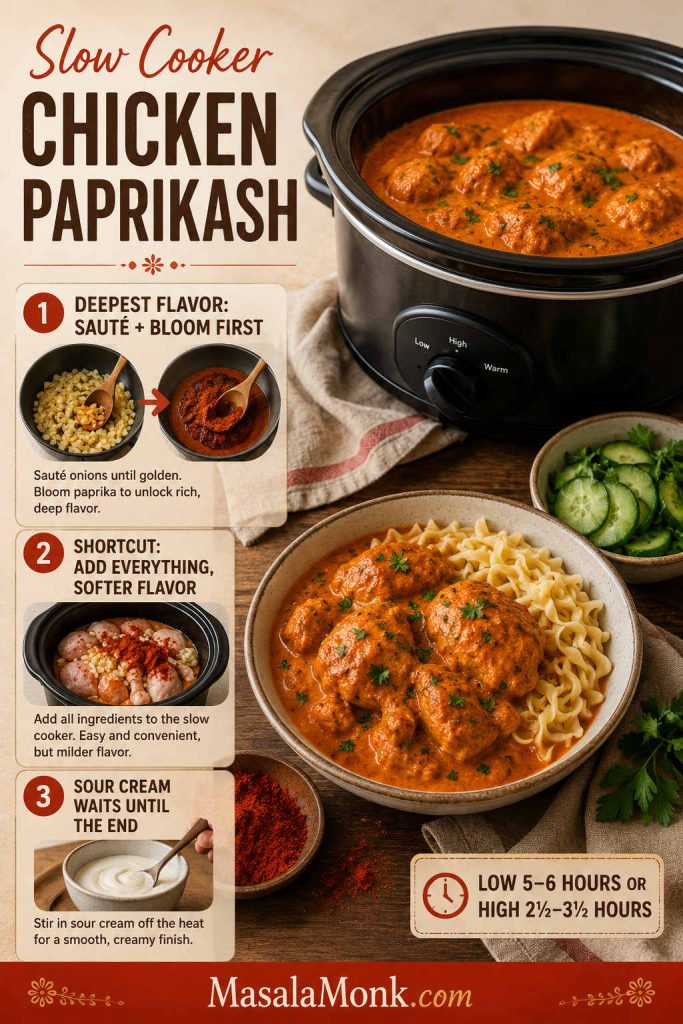
Slow cooker chicken paprikash guide showing a Crock Pot, sautéed onions, paprika bloom, sour cream and egg noodles.
For deeper slow cooker chicken paprikash, sauté the onions and bloom the paprika before everything goes into the Crock Pot. Add sour cream at the end so it stays creamy instead of grainy.

For the deepest flavor

  1. Sauté the onions in a skillet until soft.
  2. Add garlic, then lower the heat and stir in the paprika for 20 to 30 seconds.
  3. Add a splash of broth to loosen the paprika-onion mixture.
  4. Transfer the mixture to the slow cooker with the chicken, salt, pepper, and remaining broth.
  5. Cook boneless thighs on low for 5 to 6 hours or on high for 2 1/2 to 3 1/2 hours, until tender and cooked through.
  6. Whisk a little hot cooking liquid into the sour cream, then stir the tempered sour cream into the slow cooker at the end.

Dump-and-go shortcut

Add chicken, onions, paprika, salt, pepper, and broth directly to the slow cooker. This works, but the flavor will be softer because the onions are not browned and the paprika is not bloomed first. Stir in tempered sour cream only at the end.

Chicken thighs are better than chicken breast for slow cooker paprikash because they stay juicier during long cooking. If you are set on using breast meat, this guide to crock pot chicken breast recipes goes deeper into keeping lean chicken tender in the slow cooker.

If the slow cooker version looks thin, transfer the liquid to a pan and simmer briefly before adding sour cream, or thicken it with a small cornstarch slurry.

For the stovetop version, use the main recipe card. For sauce issues, keep the troubleshooting table nearby.

Instant Pot, Baked and One-Pot Methods

Instant Pot Chicken Paprikash

Instant Pot chicken paprikash works best with boneless thighs. Keep the sour cream out until after pressure cooking.
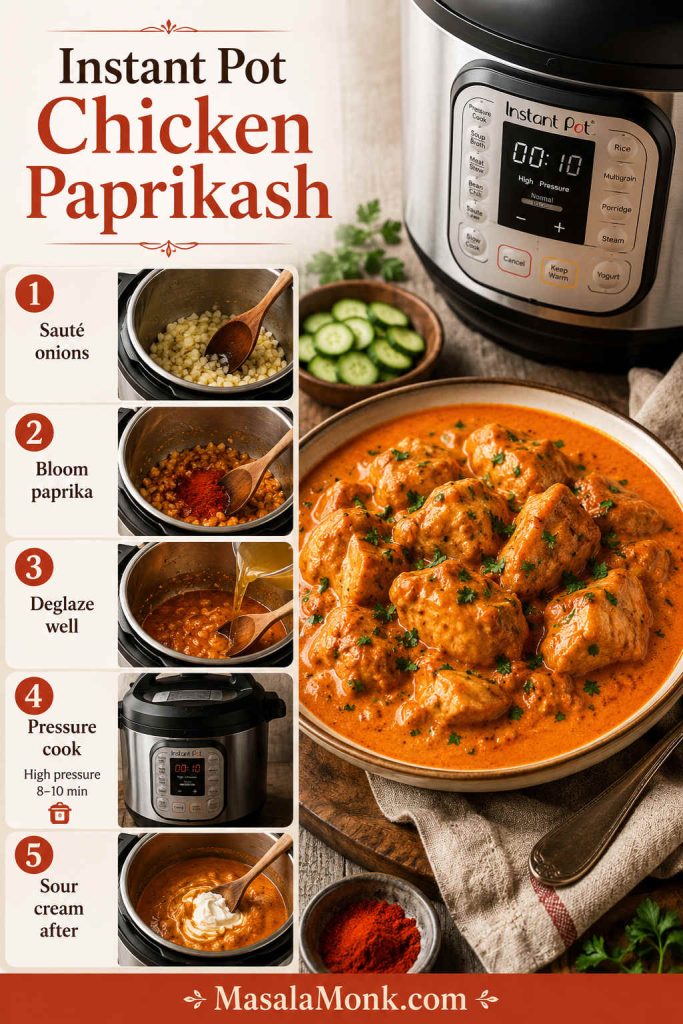
Instant Pot chicken paprikash step guide showing sautéing onions, blooming paprika, deglazing, pressure cooking and adding sour cream after cooking.
In the Instant Pot, deglazing protects the recipe. Scrape the bottom well before pressure cooking, then add sour cream after cooking for a creamy finish.
  1. Sauté the onions first, then add garlic.
  2. Lower the heat briefly and stir in paprika for 20 to 30 seconds.
  3. Add broth and scrape the bottom very well so no browned bits are stuck.
  4. Add the chicken and pressure cook on high for 8 to 10 minutes.
  5. Let the pressure release naturally for 5 minutes, then quick release.
  6. Stir in tempered sour cream after pressure cooking.

Baked Chicken Paprikash

Baked chicken paprikash works best with bone-in pieces. Start the onions and paprika base on the stovetop, add the chicken, cover, and bake at 350°F / 175°C for about 35 to 45 minutes, or until the chicken is cooked through and tender. Stir in sour cream after baking so the sauce stays smoother.

One-Pot Chicken Paprikash

The stovetop version is already a one-pot chicken paprikash if you cook the chicken and paprika base in one Dutch oven or deep skillet. Cook noodles, rice, or dumplings separately so they do not soak up everything before serving.

Cooking by pressure cooker instead? Return to the Instant Pot steps, or use the main recipe card for the classic stovetop flow.

Can You Make Chicken Paprikash Without Sour Cream?

Can you make it without sour cream? Yes. Will it taste like classic chicken paprikash? Not exactly.

Sour cream gives the dish its familiar creamy tang. Without it, the recipe becomes closer to paprika chicken stew or creamy paprika chicken, depending on what you use instead.

SubstituteHow it worksImportant note
Greek yogurtTangy and creamyMore likely to split; add off heat
Heavy creamRich and smoothLess tangy than sour cream
Crème fraîcheSmooth, tangy, and richUsually more heat-stable but heavier
Dairy-free sour creamUseful for dairy-free mealsFlavor and texture depend on the brand
No creamy ingredientLighter paprika dishLess familiar and less creamy

For the most familiar paprikash flavor, use full-fat sour cream and add it gently at the end.

Chicken Paprikash vs Goulash

Chicken paprikash and goulash both use paprika, but they are not the same dish. The easiest difference is texture and finish: paprikash is creamy and saucy, while goulash is usually more stew-like.

DishMain ideaTextureDairy?
Chicken paprikashChicken in paprika sour cream sauceCreamy and saucyUsually finished with sour cream
GoulashPaprika stew, often beef-basedBrothy or stew-likeUsually not finished the same creamy way

This dish should be creamy and saucy, not thin like soup. If you make it much brothier, it starts moving toward chicken paprikash soup or paprika chicken stew instead of the creamy version most people expect.

How to Store, Freeze and Reheat Chicken Paprikash

Fridge

Store leftovers in an airtight container in the fridge for 3 to 4 days. If possible, store noodles, rice, or dumplings separately so they do not soak up too much sauce.

Freezer

You can freeze chicken paprikash, but sour cream can change texture after thawing. For the smoothest result, freeze the chicken and paprika base before adding sour cream, then add sour cream after reheating.

Reheating

Leftovers are still cozy, but creamy sauces need gentle reheating to stay their best. Reheat on the stovetop over low heat and add a splash of broth if the sauce looks too thick.

Make-Ahead Tip

For guests, cook the chicken and paprika base first, then cool and refrigerate it without the sour cream. Reheat gently and stir in the sour cream right before serving so the dish tastes freshly made.

Troubleshooting the Sauce and Chicken

Paprikash is forgiving until the heat gets aggressive. A dish that is too thick, too thin, slightly split, or a little flat can usually be brought back enough for dinner. Use this table before you give up on the pot.
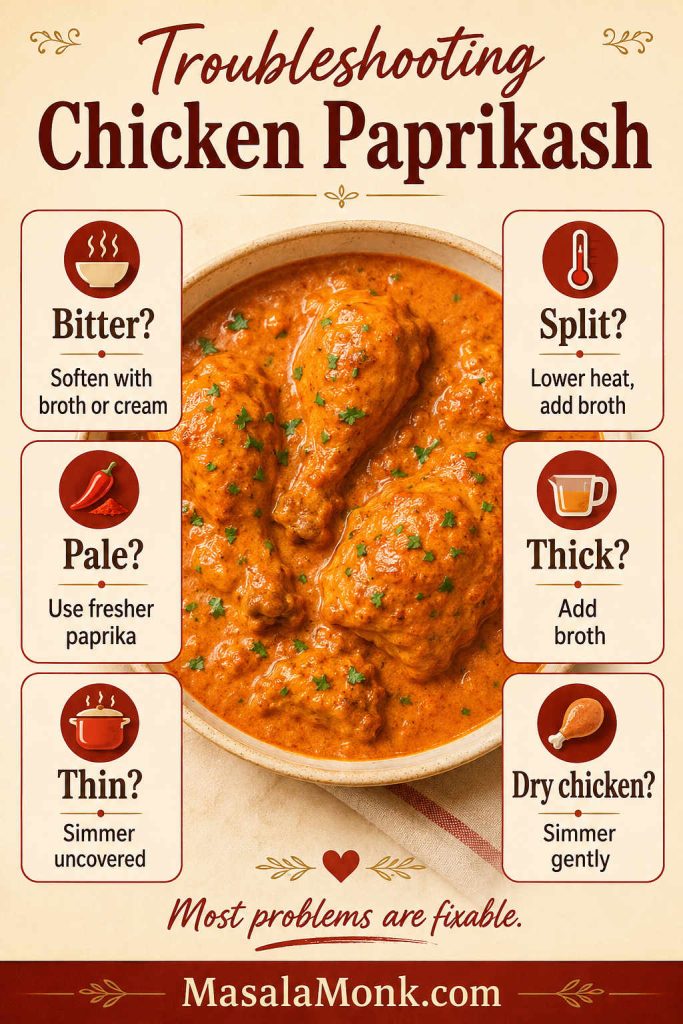
Troubleshooting guide for chicken paprikash with fixes for bitter sauce, split sauce, pale sauce, thin sauce, thick sauce and dry chicken.
Most chicken paprikash problems come back to heat, paprika freshness, or texture. Fortunately, you can soften bitterness, loosen thick sauce, reduce thin sauce, and keep sour cream away from boiling.
ProblemLikely causeFix
Tastes bitterPaprika scorched or heat was too highAdd a little broth or cream to soften the bitterness; next time lower heat before adding paprika
Tastes flatOld paprika, not enough salt, or undercooked onionsSeason in layers, cook onions until soft, and use fresher paprika next time
Looks paleNot enough paprika or paprika is weakUse fresh sweet paprika and let it bloom briefly off high heat
Tastes too tomatoeyToo much tomato or tomato pasteAdd broth and sour cream to rebalance; next time keep tomato subtle
Sour cream curdledAdded cold sour cream to very hot sauce or overheated after addingTemper sour cream first and stir it in off heat or on very low heat
Too thinToo much broth or not enough reductionSimmer uncovered before adding sour cream, or thicken with flour or cornstarch
Too thickReduced too much or used too much flourAdd chicken broth a splash at a time until smooth
Chicken is dryChicken breast overcooked or heat was too highUse thighs next time, or simmer breast pieces gently and check early
Split when reheatedReheated too hot after sour cream was addedReheat on low and stir in a splash of broth or sour cream

FAQ About Chicken Paprikash

What is chicken paprikash made of?

Chicken paprikash is usually made with chicken, onions, paprika, broth or water, and sour cream. Some versions also include garlic, tomato, pepper, flour, hot paprika, or cayenne.

Is chicken paprikash Hungarian?

Chicken paprikash is a Hungarian dish often known as paprikás csirke. This recipe is an easy home-style version with the familiar paprika and sour cream sauce.

Can I use regular paprika if I do not have Hungarian paprika?

Regular sweet paprika works if it is fresh and fragrant. Hungarian paprika gives a deeper flavor, but regular paprika can still make a good dish if it has not gone stale.

Should chicken paprikash be spicy?

Usually, chicken paprikash is more warm and paprika-rich than hot. Use sweet paprika for the base, then add hot paprika or cayenne only if you want extra heat.

Why does my chicken paprikash taste bitter?

Bitter paprikash usually means the paprika scorched. Lower the heat or move the pot off the burner before adding paprika, stir briefly, then add broth before the spice burns.

Does chicken breast work for chicken paprikash?

Chicken breast works, but it asks for a gentler hand. Keep the simmer quiet and check it early so it stays juicy.

Why did my sour cream curdle?

Sour cream usually curdles when the sauce is too hot or the sour cream is too cold. Temper it with warm sauce first, then stir it in off heat or on very low heat.

Do I need dumplings, or are noodles okay?

You do not need dumplings. Nokedli and spaetzle are traditional choices, but egg noodles are a very good weeknight option. Rice, mashed potatoes, and bread also work well.

Can chicken paprikash be frozen?

The sauce is smoother if you freeze it before adding sour cream. Reheat the chicken and paprika base gently, then stir in sour cream just before serving.

Can I make chicken paprikash ahead of time?

For the smoothest make-ahead version, cook the chicken and paprika base ahead, then reheat gently and stir in the sour cream just before serving.

Is chicken paprikash the same as goulash?

No. Chicken paprikash is usually chicken in a paprika sour cream sauce. Goulash is usually more stew-like and often made with beef, vegetables, broth, and paprika.

Can I make chicken paprikash in a slow cooker or Crock Pot?

The slow cooker works, but the sour cream should wait until the end. For deeper flavor, sauté the onions and bloom the paprika before transferring everything to the slow cooker.

Chicken paprikash is simple food, but it pays you back for the few moments when you slow down. Let the onions sweeten, let the paprika bloom, keep the sour cream gentle, and give the sauce something soft to land on. That is the whole comfort of the dish: tender chicken, a warm red-orange sauce, and a plate that feels generous from the first spoonful.

Did you go traditional with nokedli, weeknight-easy with egg noodles, or full comfort with mashed potatoes? Leave a comment and tell us what caught the sauce.
Posted on — 2 Comments

Tuna Noodle Casserole Recipe with Egg Noodles

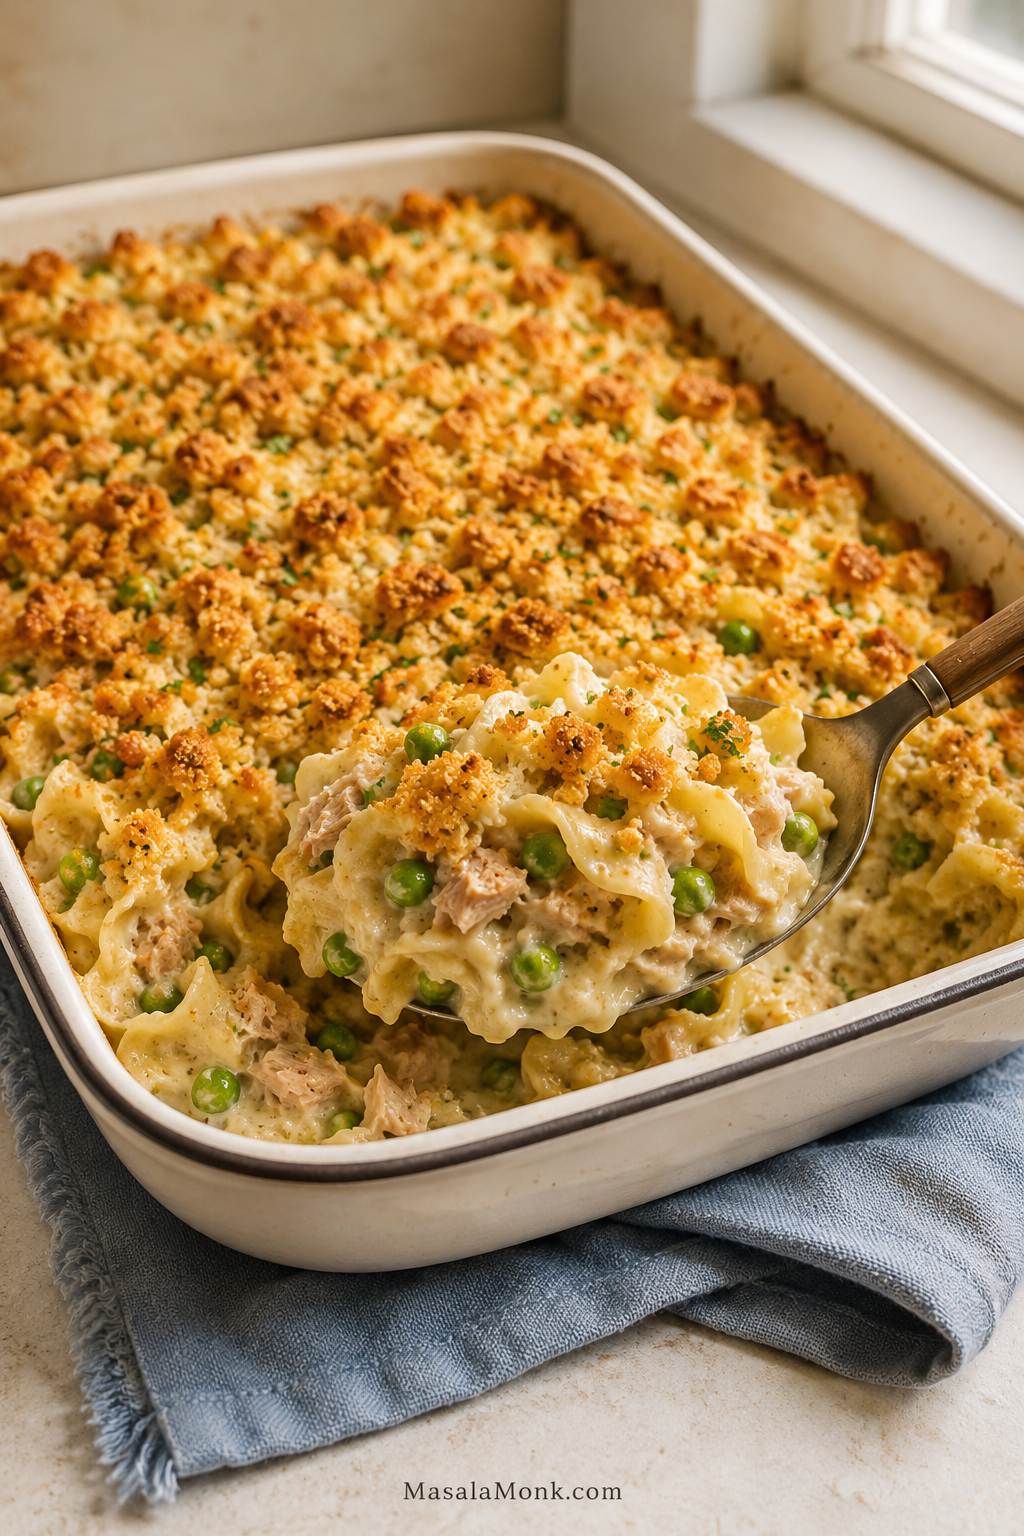
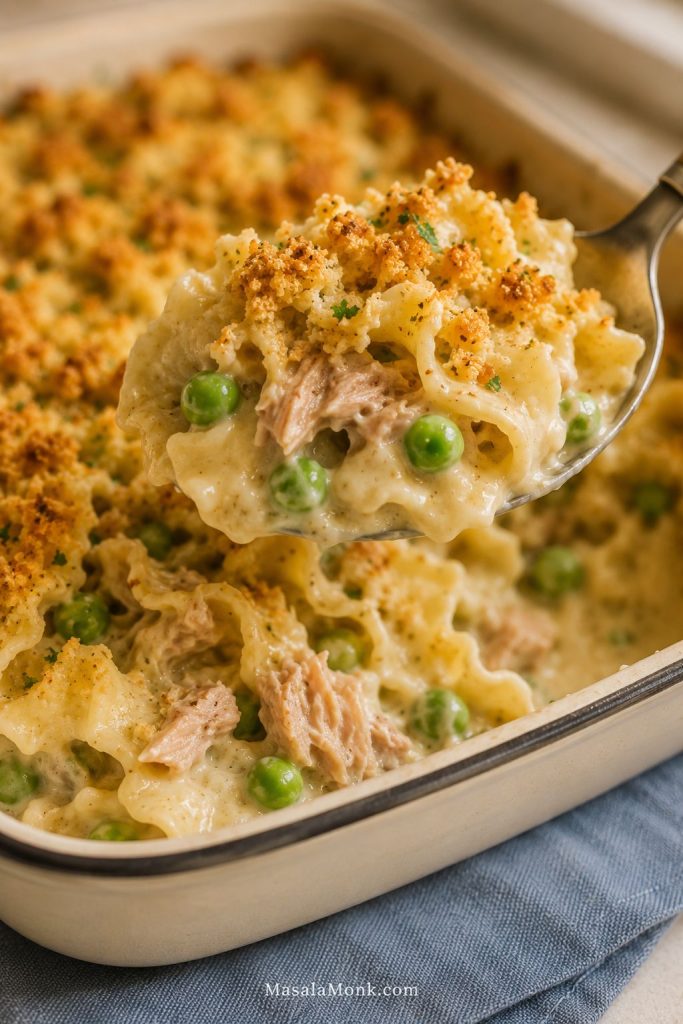
Baked tuna noodle casserole in a cream enamel dish with a spoonful lifted, showing egg noodles, peas, tuna flakes, creamy sauce, and golden topping.

This tuna noodle casserole recipe with egg noodles is the creamy, cozy baked dinner people usually mean when they talk about old-fashioned tuna casserole: wide egg noodles, canned tuna, peas, cream of mushroom soup, milk, optional cheddar, and a crunchy potato chip, cracker, or breadcrumb topping.

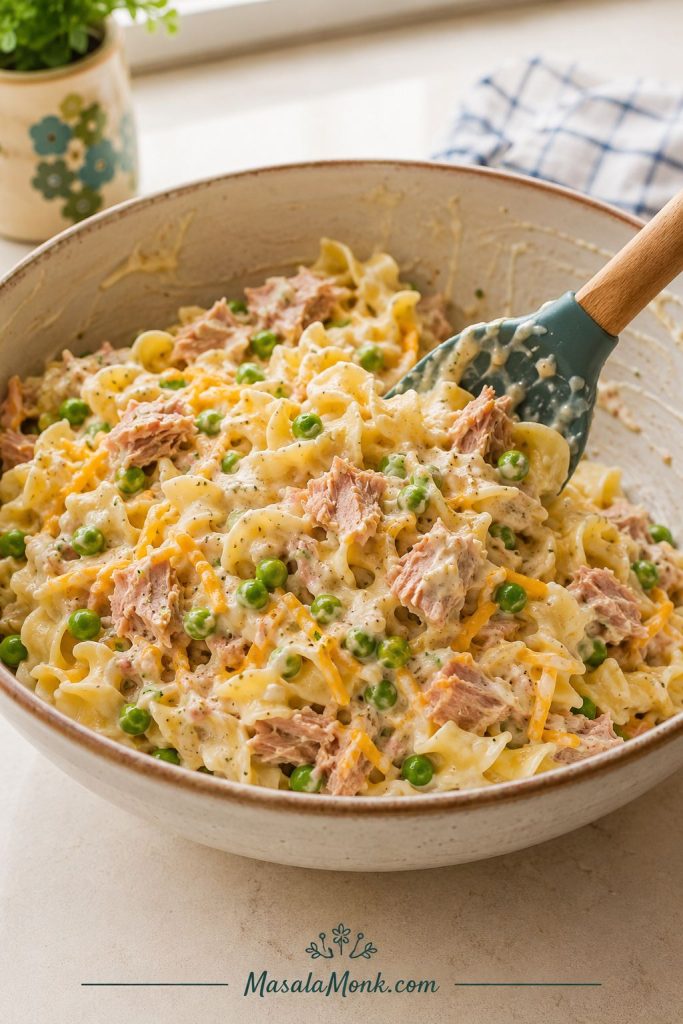
It is pantry comfort food, but it should still scoop creamy instead of baking into a dry noodle block. The key is simple: cook the noodles just shy of tender, use enough sauce for the full 9×13-inch dish, and pull the casserole when the edges are bubbling and the center still looks moist.

Close spoonful of tuna noodle casserole with saucy egg noodles, peas, tuna flakes, and crisp crumbs lifted from the dish.
This close scoop shows the goal before serving: soft egg noodles that stay moist underneath the crisp topping.

You’ll also find the no-soup version, topping choices, make-ahead and freezer notes, a small-batch option, and fixes for the usual problems: dry, watery, bland, or mushy tuna noodle casserole.

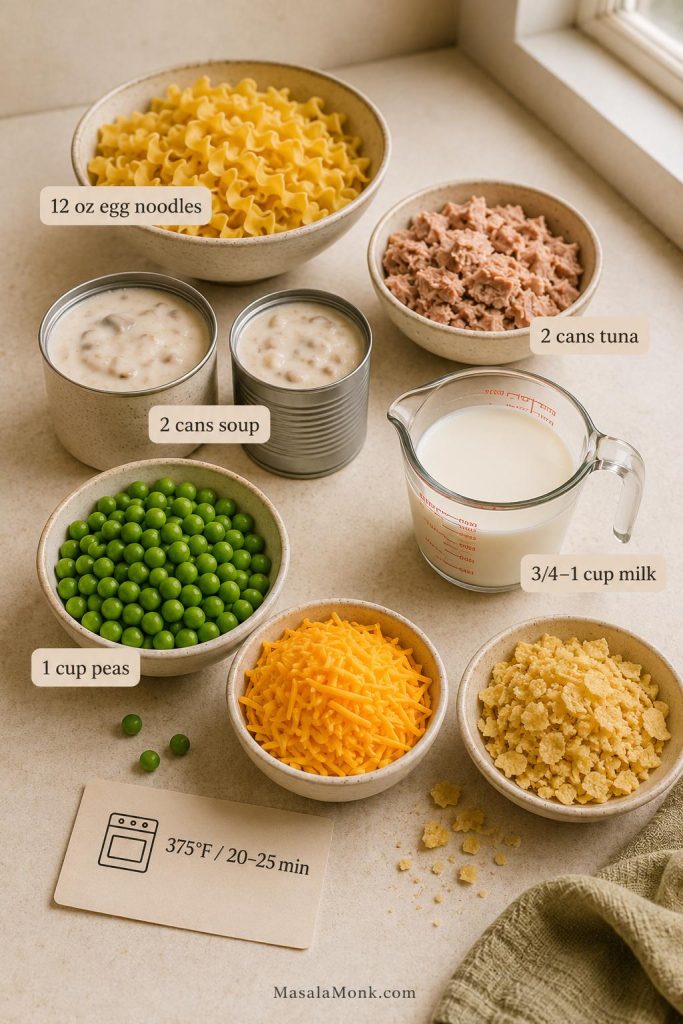
At a glance: This tuna noodle casserole uses 12 oz / 340 g wide egg noodles, 2 cans tuna, 2 cans cream of mushroom soup, 3/4 to 1 cup / 180 to 240 ml milk, 1 cup / 140 g peas, optional cheddar, and a crunchy topping. Bake in a 9×13-inch / 23×33 cm dish at 375°F / 190°C for 20 to 25 minutes, until bubbling at the edges.
Prep board with egg noodles, tuna, cream of mushroom soup, milk, peas, cheddar, crunchy topping, and bake time for tuna noodle casserole.
The classic full-pan formula starts with egg noodles, tuna, cream of mushroom soup, milk, peas, and a crisp topping, then bakes until the edges bubble.

Quick Answer: Tuna Noodle Casserole with Egg Noodles

To make tuna noodle casserole with egg noodles, boil wide egg noodles until just shy of tender. Mix them with well-drained canned tuna, peas, cream of mushroom soup, milk, seasonings, and cheddar if using. Spread into a greased 9×13-inch dish, add a crunchy topping, and bake at 375°F / 190°C for 20 to 25 minutes, until the edges bubble and the top is lightly golden.

Texture cue: before baking, the noodles should be generously coated and easy to stir. If the mixture already feels stiff in the bowl, it will be dry after baking.

Why This Tuna Noodle Casserole Works

The goal is not a fancy casserole. The goal is the old-school one done properly: creamy noodles, flaky tuna, sweet peas, and a crisp top. This version keeps the familiar cream-of-mushroom flavor while using enough sauce for a full 9×13-inch dish.

  • Wide egg noodles give the casserole its soft-but-sturdy bite.
  • Two cans of soup plus milk make enough sauce for a full pan.
  • Frozen peas add sweetness and color without extra prep.
  • Gently folded tuna stays in flakes instead of disappearing into the sauce.
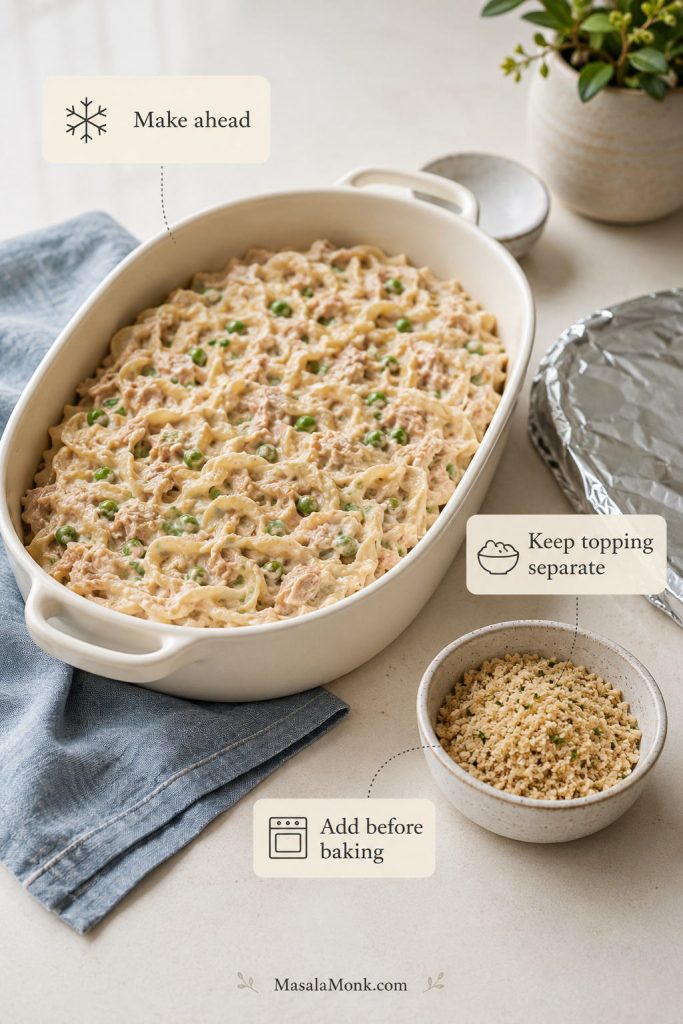
  • A topping added right before baking stays crisp instead of steaming soft.

Best First Batch

If this is your first time making tuna noodle casserole, start with the classic version: cream of mushroom soup, wide egg noodles, tuna, peas, milk, and either potato chips or buttered panko on top. Once that base is right, the variations are easy.

Prefer homemade sauce instead? Jump to the tuna noodle casserole without soup section.

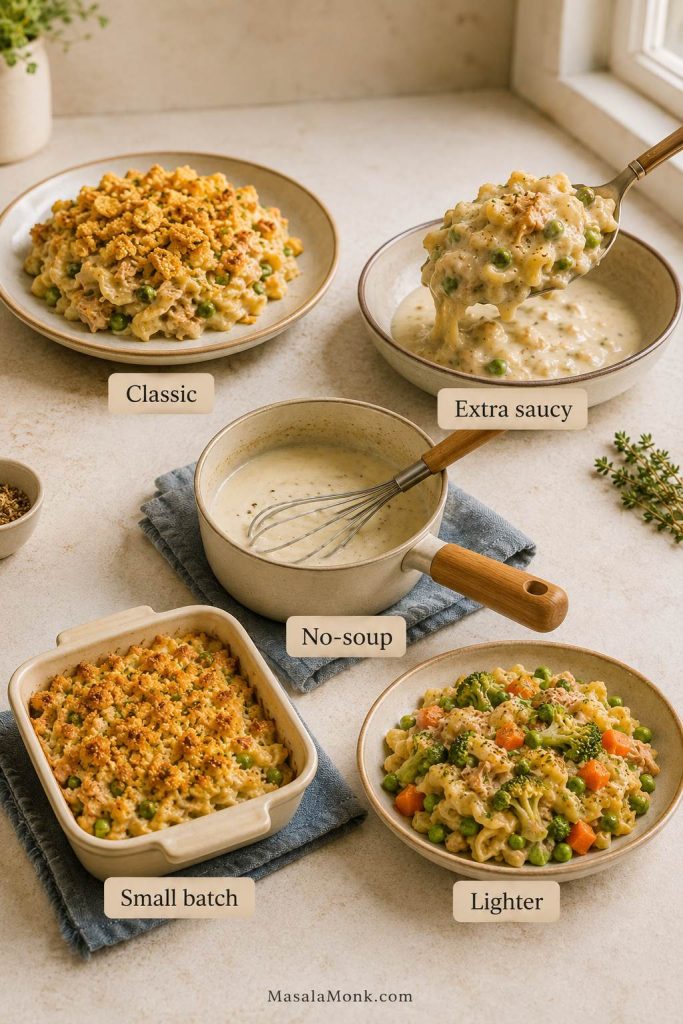
Version Use This When Key Change
Classic You want old-fashioned flavor Use 2 cans cream of mushroom soup and potato chips or crackers.
Extra creamy You worry about dry casserole Use the full 1 cup / 240 ml milk and optional sour cream.
No-soup You want homemade sauce Use butter, flour, milk, broth, mushrooms, onion, and celery.
Small batch You are cooking for 1–2 people Use 4 oz / 115 g noodles, 1 can tuna, and an 8×8-inch dish.
Lighter You want less richness Use more vegetables, less cheese, and the no-soup sauce option.

For the safest first batch, keep it classic: cream of mushroom soup, wide egg noodles, peas, optional cheddar, and potato chips or crackers on top. After that, adjust the sauce, topping, or vegetables to match your taste.

Five tuna noodle casserole version cues showing classic, extra saucy, no-soup, small batch, and lighter options.
Start with the classic tuna noodle casserole first, then adjust one part at a time: sauce, topping, batch size, or vegetables.

Ingredients for Tuna Noodle Casserole

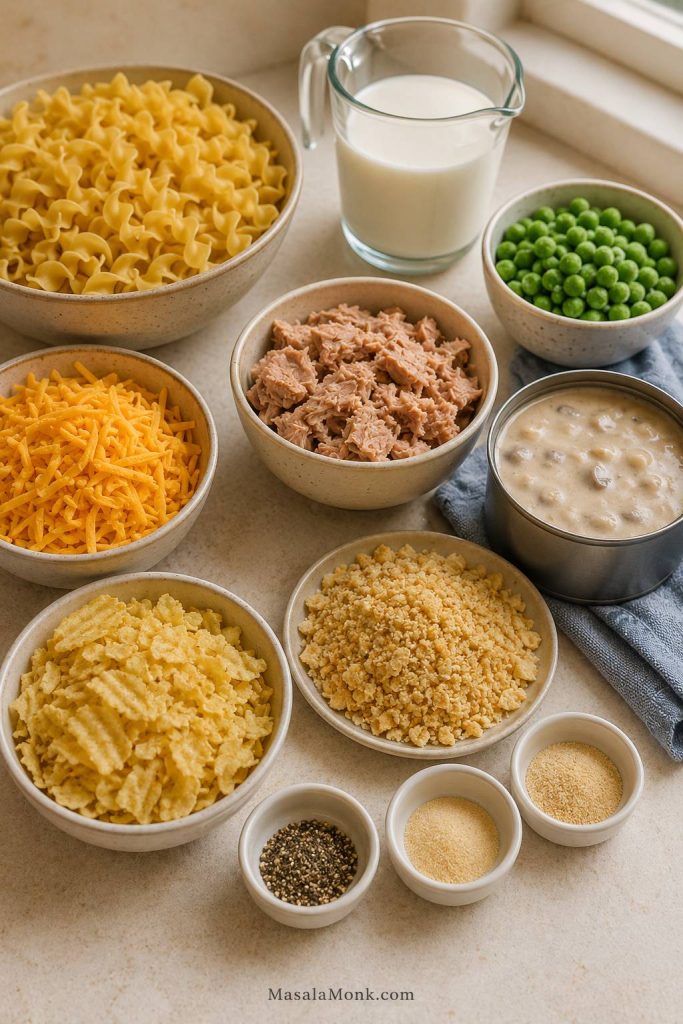
The familiar version is built from pantry and freezer staples, but each ingredient still matters. Wide noodles give the casserole its soft structure, tuna adds protein, peas bring sweetness, condensed soup creates the sauce, and the topping adds the crunch that makes the bake feel finished.

Tuna noodle casserole ingredients arranged on a counter, including egg noodles, tuna, soup, milk, peas, cheddar, seasonings, and topping.
Simple pantry staples work best when each one has a job: noodles for structure, tuna for protein, peas for sweetness, and crumbs or chips for crunch.

For the biggest texture decisions, start with the egg noodle guide and the tuna comparison below.

Egg Noodles

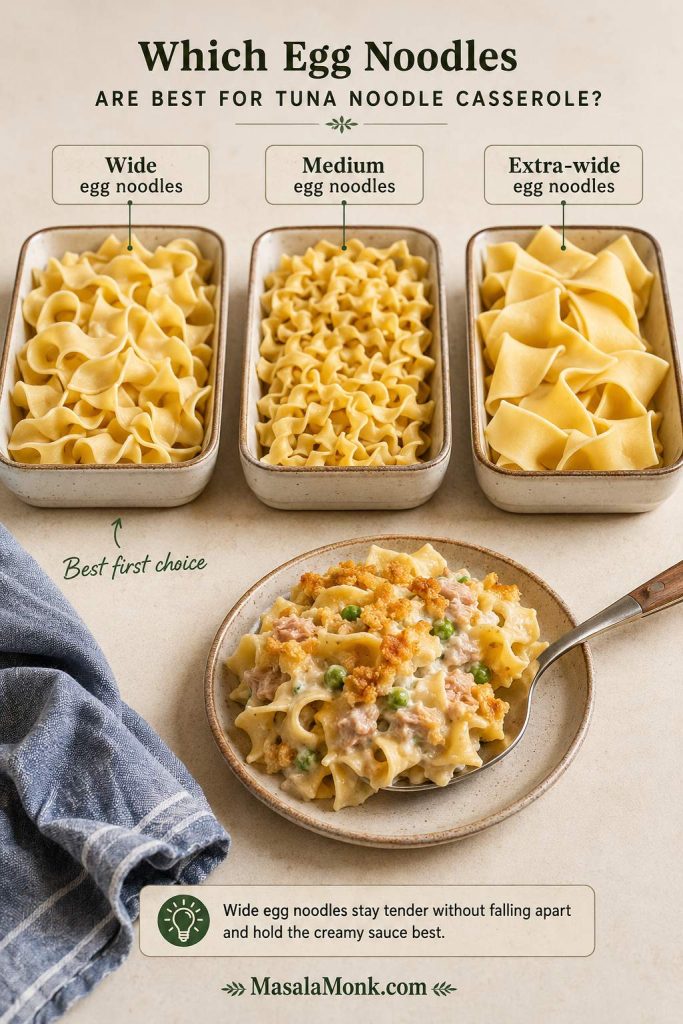
Wide egg noodles are part of what makes this casserole taste like tuna noodle casserole instead of just tuna pasta. They are tender but sturdy, hold sauce well, and give the dish the old-school texture people expect. Cook them 1 minute shy of al dente so they finish softening in the oven without turning mushy.

Wide, medium, and extra-wide egg noodles compared for tuna noodle casserole, with wide egg noodles marked as the best first choice.
Wide egg noodles give the most familiar bite; meanwhile, thinner noodles soften faster and extra-wide noodles need a little more sauce.
Noodle Type Best For What to Know
Wide egg noodles Best old-fashioned tuna noodle casserole texture Soft, saucy, and sturdy enough for baking.
Medium egg noodles Softer casserole texture Cook quickly, so check early and avoid overboiling.
Extra-wide egg noodles More rustic, hearty texture Need enough sauce because the larger noodles absorb more.
Elbow macaroni Tuna mac-style casserole Works well, but feels less like an egg noodle casserole.
Rotini or penne Pasta bake style Better for a tuna pasta bake than this old-school noodle casserole.

Canned Tuna

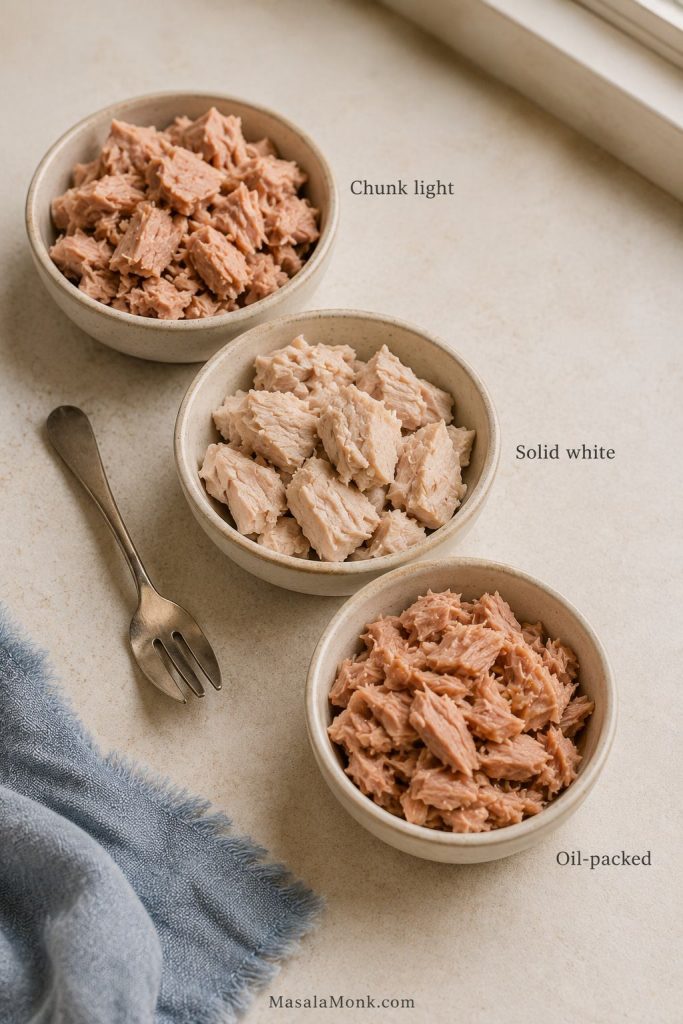
Two standard 5 oz / 142 g cans of tuna are enough for a full 9×13-inch casserole without making the dish taste overwhelmingly fishy. Chunk light tuna gives a milder, softer casserole, while solid white albacore gives larger, firmer flakes. Either works, but fold the tuna in gently so it does not disappear into the sauce.
Chunk light tuna, solid white albacore, and oil-packed tuna compared in small dishes for tuna noodle casserole.
Choose tuna by texture: chunk light blends in gently, while solid white tuna gives the casserole larger, more visible flakes.
Tuna Type Best For What to Know
Chunk light tuna in water Classic mild casserole Soft, affordable, and easy to mix into the sauce.
Solid white albacore Larger tuna flakes Firmer texture and cleaner pieces, but usually stronger tasting.
Tuna packed in oil Richer flavor Drain very well or the casserole can feel heavy.

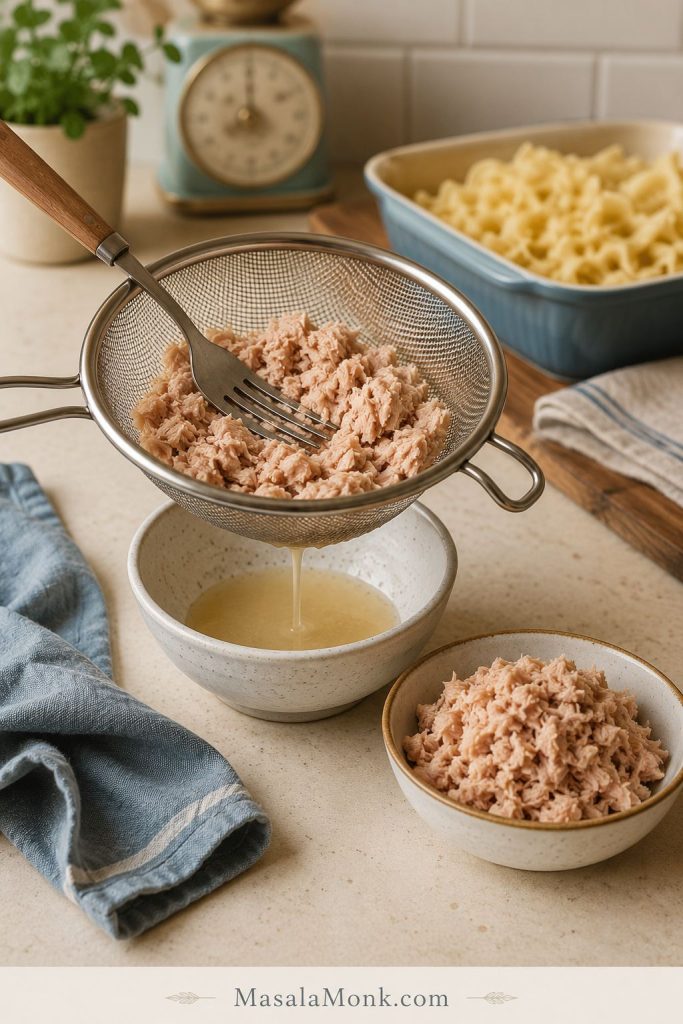
Whatever tuna you use, drain it well. Extra liquid from the can can make the sauce loose in the wrong way, while undrained oil can make the casserole taste heavy. If you want a lighter canned-tuna meal for another day, these healthy tuna salad recipes give you avocado, Greek yogurt, Mediterranean, no-mayo, and high-protein options.

Canned tuna being drained in a fine mesh strainer before adding it to tuna noodle casserole.
Drain the tuna before mixing; extra liquid can make the sauce thin before the casserole even reaches the oven.

Cream of Mushroom Soup

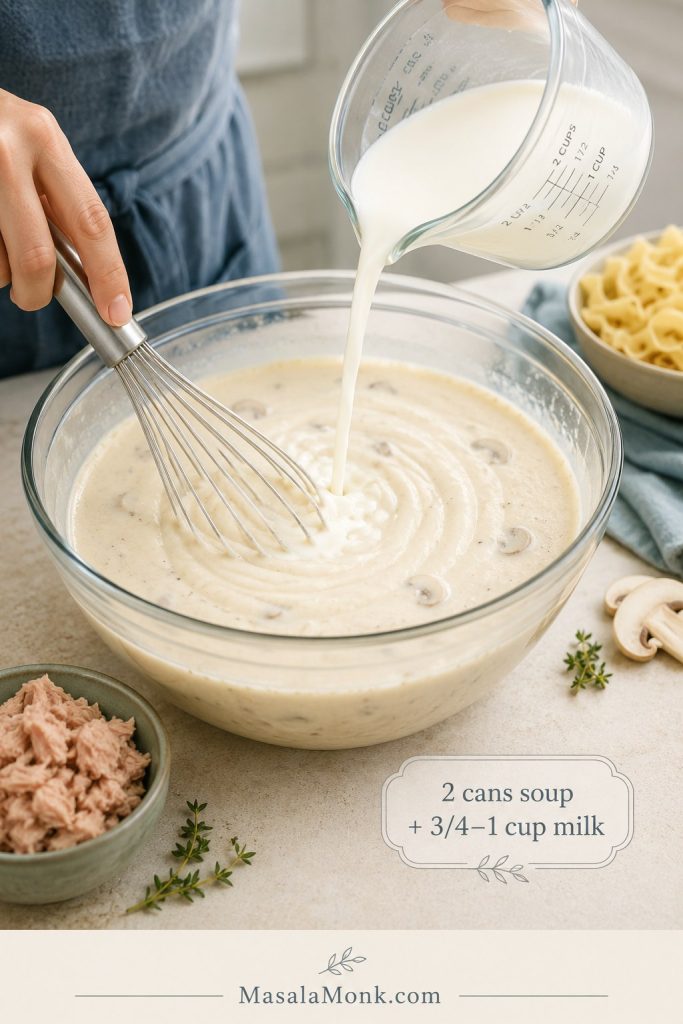
Condensed cream of mushroom soup is the shortcut sauce behind the old-school flavor most people expect here. For a 9×13 casserole, use 2 cans, 10.5 oz / 298 g each, then loosen the condensed soup with 3/4 to 1 cup / 180 to 240 ml milk before adding the noodles.

Milk

Milk turns the condensed soup into a bakeable sauce. Start with 3/4 cup / 180 ml for a thicker casserole, or use a full cup / 240 ml if you want the noodles more generously coated or plan to make the casserole ahead.
Cream of mushroom soup being whisked with milk to make a smooth sauce for tuna noodle casserole.
Whisk cream of mushroom soup with milk before adding noodles so the sauce coats evenly instead of staying thick in pockets.

Peas and Vegetables

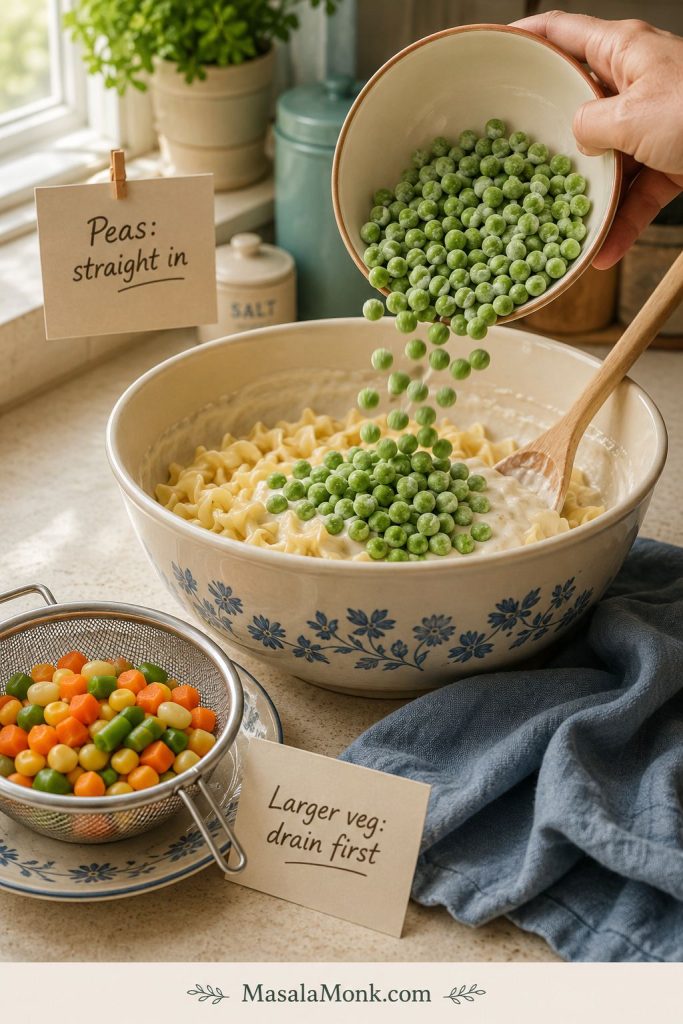
Frozen peas are the easiest vegetable here because they cook quickly and add sweetness. You do not need to thaw frozen peas before mixing them in; they warm through quickly in the oven. If using larger frozen vegetables, thaw and drain them first so they do not water down the sauce.

You can also add sautéed onion, celery, mushrooms, carrots, or a small amount of spinach. Watery vegetables should be cooked or drained first.

Frozen peas being added to tuna noodle casserole mixture with drained vegetables nearby.
Frozen peas can go straight into tuna noodle casserole, while larger vegetables should be thawed and drained so they do not thin the sauce.

Cheddar Cheese

Cheddar is optional, but it makes the casserole richer and more family-dinner friendly. Use 1 cup / 113 g for a balanced version or 1 1/2 cups / 170 g for a cheesier casserole.

Crunchy Topping

Potato chips, buttery crackers, panko, breadcrumbs, and fried onions all work. Add the topping right before baking so it stays crisp instead of turning soft from the sauce.

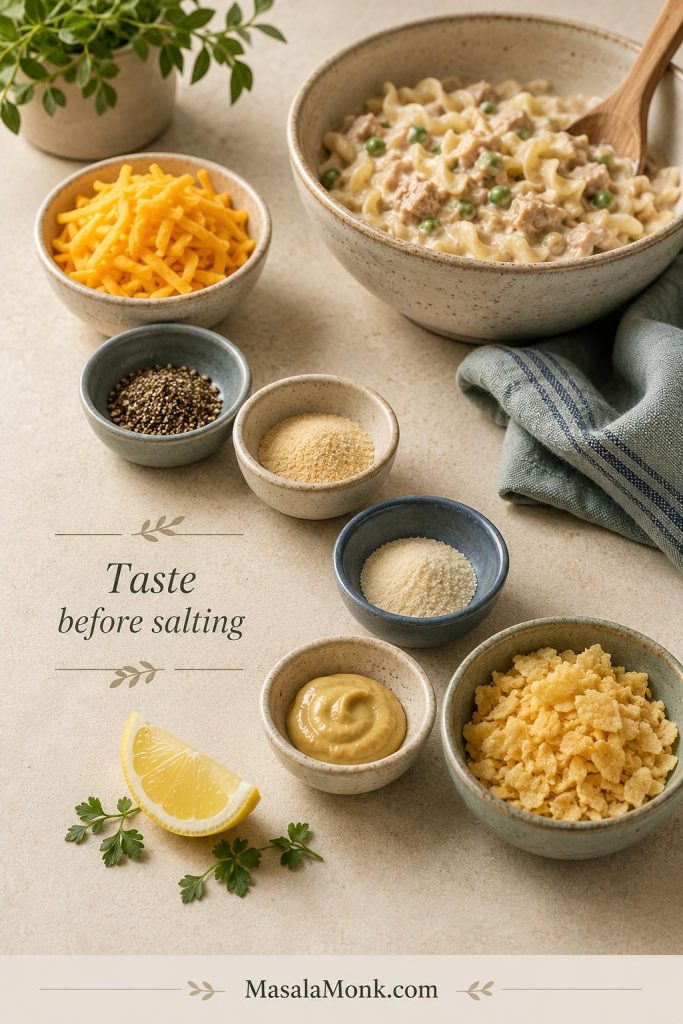
Because condensed soup, canned tuna, cheddar, crackers, chips, and fried onions can all be salty, taste the sauce before adding extra salt. Black pepper, garlic powder, onion powder, Dijon mustard, or a small squeeze of lemon can add flavor without making the casserole too salty.

Cheddar, pepper, garlic powder, onion powder, Dijon, lemon, and crushed topping arranged for seasoning tuna noodle casserole.
Since soup, tuna, cheese, chips, and crackers can all be salty, build flavor with pepper, garlic, onion, Dijon, or lemon before adding more salt.

Equipment You Need

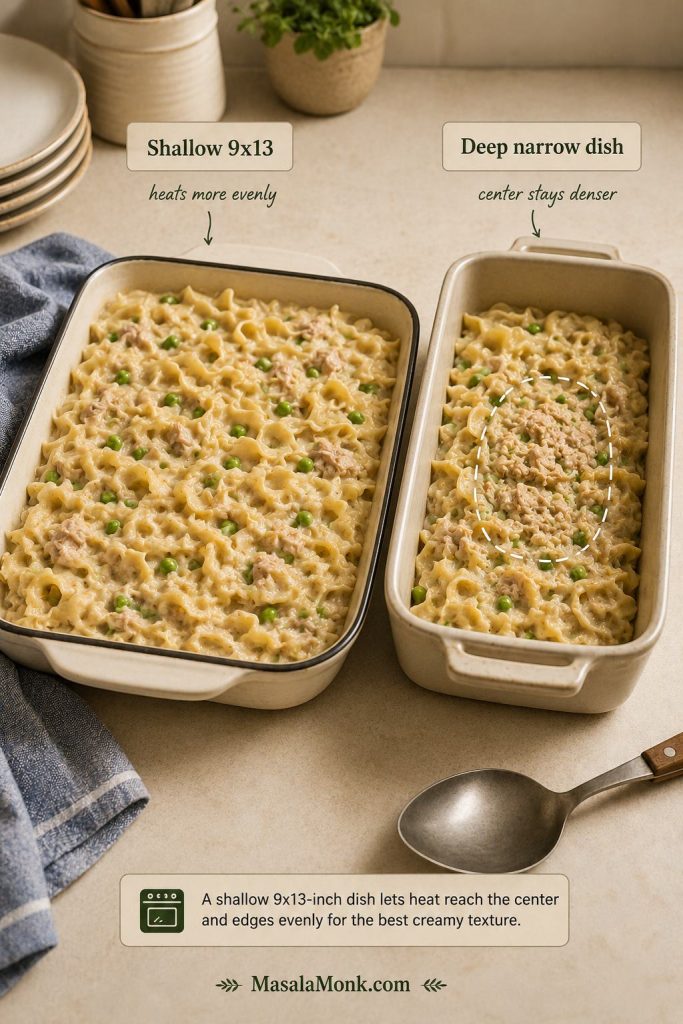
You do not need special equipment, but the pan size matters more than it seems. A shallow 9×13-inch / 23×33 cm baking dish is better than a deep, narrow dish because the casserole heats evenly and does not turn dense in the center before the edges are hot.

Shallow 9x13 baking dish compared with a deep narrow dish for tuna noodle casserole.
A shallow 9×13 dish spreads the tuna noodle casserole evenly, so the center heats through before the edges overbake.
  • Large pot for boiling egg noodles
  • Colander for draining noodles
  • Large mixing bowl or deep skillet
  • 9×13-inch / 23×33 cm baking dish, about 3 quarts
  • Small bowl for mixing the topping
  • Foil for make-ahead, reheating, or chilled casserole baking
  • Optional skillet or saucepan if making the no-soup sauce

How to Make Tuna Noodle Casserole

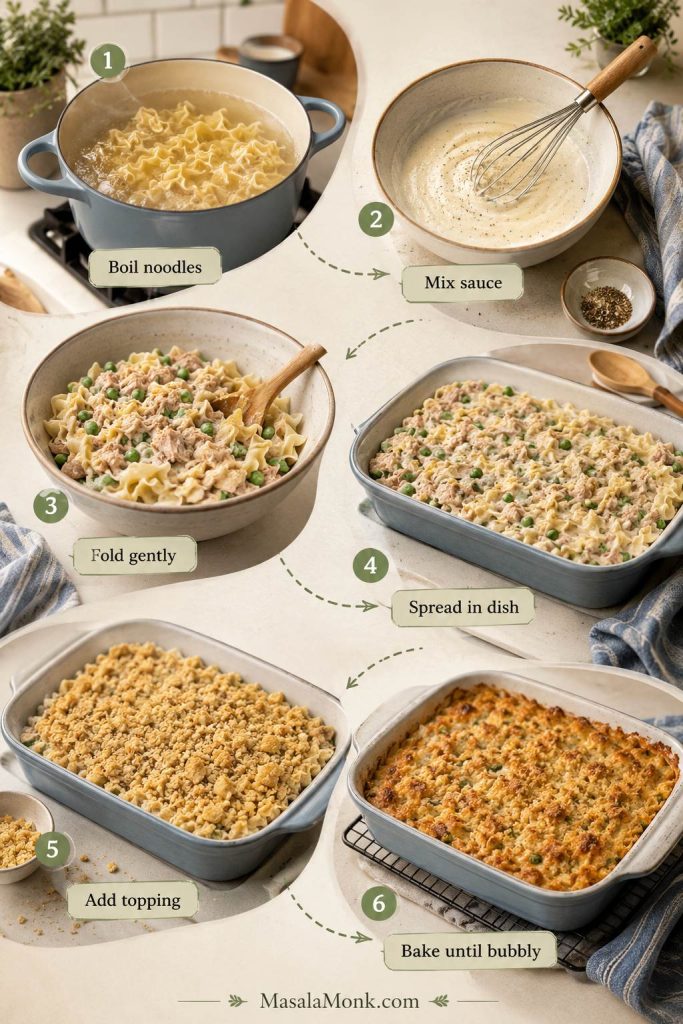
Six-step guide showing noodles, sauce, tuna and peas, casserole dish, topping, and baked tuna noodle casserole.
The order keeps the texture in check: cook the noodles, mix the sauce, fold gently, spread evenly, then add topping just before baking.

1. Boil the Egg Noodles

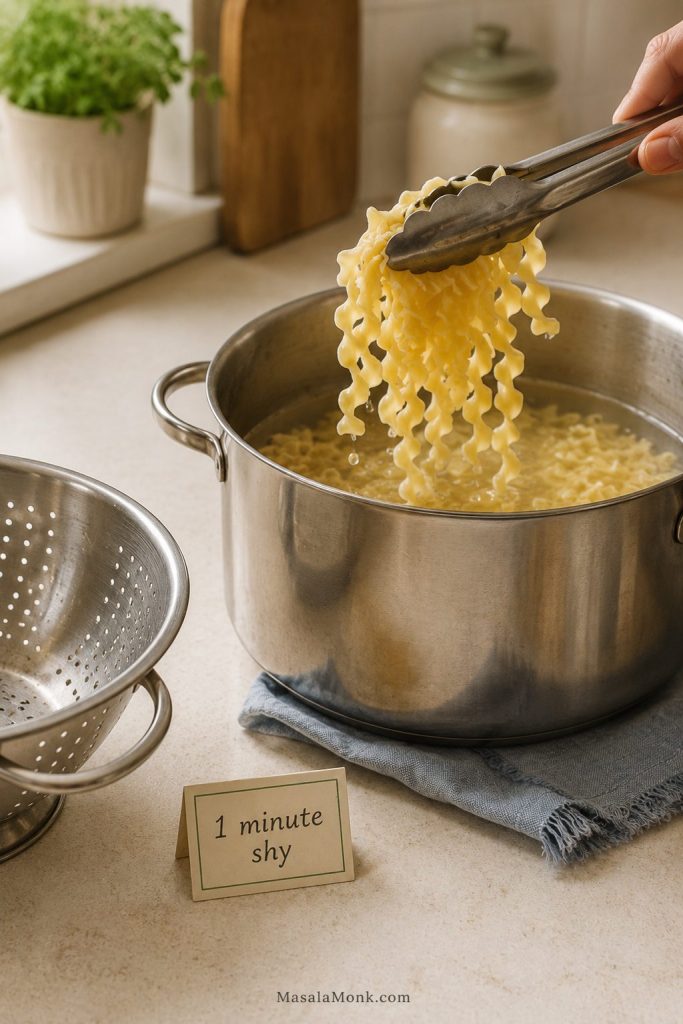
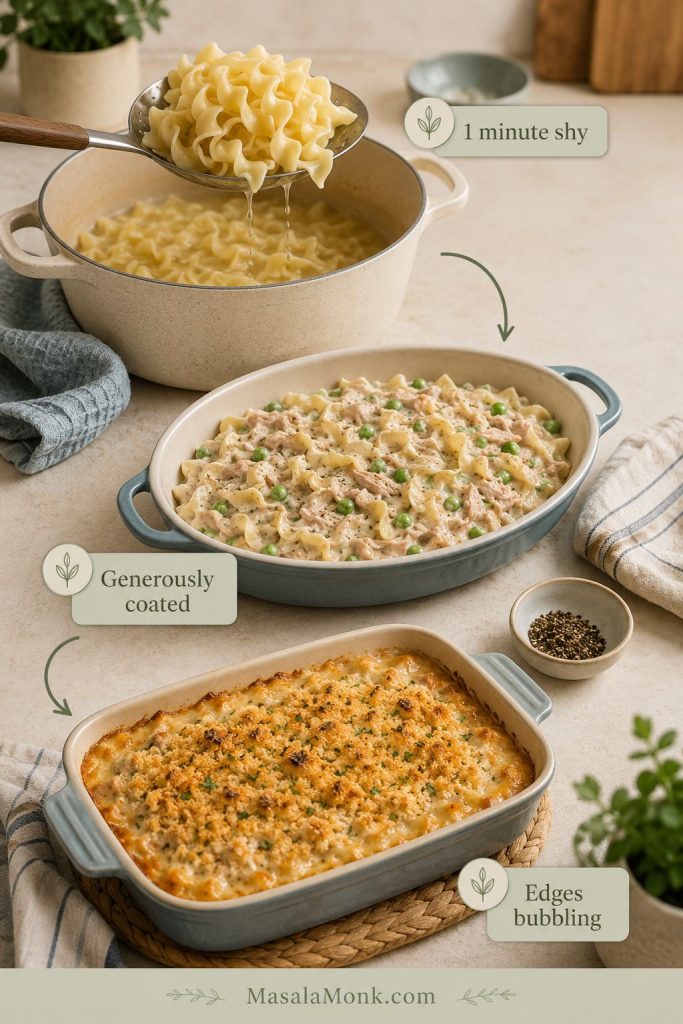
Bring a large pot of salted water to a boil. Add 12 oz / 340 g wide egg noodles and cook them about 1 minute less than the package’s al dente time. The noodles should bend easily but still have a little firmness in the center.

Egg noodles lifted from a pot with a one-minute-shy cue for tuna noodle casserole.
Pull the egg noodles early because they keep absorbing sauce in the oven, which helps prevent a mushy tuna noodle casserole.

2. Mix the Creamy Sauce

In a large bowl, whisk together the cream of mushroom soup, milk, black pepper, garlic powder, and onion powder. The sauce should be smooth before the noodles go in.

3. Fold in Tuna, Peas, Cheese, and Noodles

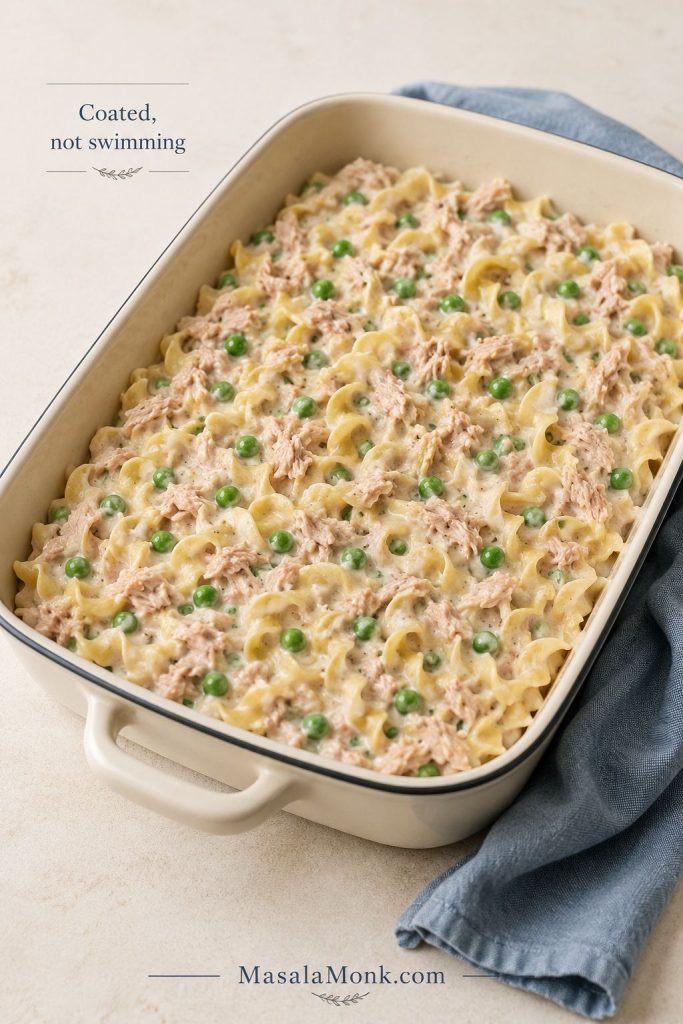
Add the well-drained tuna, frozen peas, cheddar, and cooked egg noodles. Fold gently so the tuna stays in small flakes instead of disappearing into the sauce. The noodles should be coated, but not swimming.

Tuna, peas, cheddar, egg noodles, and creamy sauce being folded together in a mixing bowl.
Gentle folding keeps the tuna in flakes and helps the sauce coat the egg noodles without turning the filling pasty.

4. Spread Into a Baking Dish

Grease a 9×13-inch / 23×33 cm baking dish and spread the mixture evenly. Do not pack it down firmly; a lighter layer heats more evenly.

Unbaked tuna noodle casserole mixture spread in a shallow dish with coated noodles, peas, tuna, and no topping yet.
Before the topping goes on, the casserole mixture should spread easily, with sauce clinging to the noodles instead of pooling in the dish.

5. Add the Crunchy Topping

Sprinkle crushed potato chips, crackers, or buttered panko over the top. If using breadcrumbs or panko, mix them with melted butter first so they brown instead of drying out.

6. Bake Until Bubbly

Bake uncovered at 375°F / 190°C for 20 to 25 minutes, until the edges are bubbling and the topping is lightly golden. Rest for 5 minutes before serving.

Tuna Noodle Casserole Recipe Card

Tuna Noodle Casserole Recipe with Egg Noodles

This is the classic pantry-style tuna noodle casserole: wide egg noodles, tuna, peas, cream of mushroom soup, milk, cheddar, and a crisp potato chip, cracker, or breadcrumb topping. It is simple, cozy, and built to stay soft, saucy, and scoopable after baking.

Prep Time15 minutes
Cook Time25 minutes
Total Time40 minutes
Yield6–8 servings

Equipment: large pot, colander, large mixing bowl, 9×13-inch / 23×33 cm baking dish, small topping bowl.

Ingredients

  • 12 oz / 340 g wide egg noodles
  • Salt for the pasta water, plus extra only if the sauce needs it
  • 2 cans tuna, 5 oz / 142 g each, drained well
  • 2 cans condensed cream of mushroom soup, 10.5 oz / 298 g each
  • 3/4 to 1 cup / 180 to 240 ml milk
  • 1 cup / 140 g frozen peas, no need to thaw
  • 1 cup / 113 g shredded cheddar cheese, optional but recommended
  • 1/2 teaspoon black pepper
  • 1/4 teaspoon garlic powder
  • 1/4 teaspoon onion powder
  • 1 cup crushed potato chips or buttery crackers, about 35 to 45 g depending on the topping

Optional Buttered Breadcrumb Topping

  • 1/2 cup / about 30 g panko or breadcrumbs
  • 2 tablespoons / 28 g melted butter
  • 2 tablespoons grated parmesan, optional

Optional Add-Ins

  • 1/2 cup chopped celery, sautéed
  • 1/2 cup chopped onion, sautéed
  • 8 oz / 225 g mushrooms, sautéed
  • 1/2 cup sour cream or 2 to 3 tablespoons mayo for an extra creamy version
  • 1 teaspoon Dijon mustard or a small squeeze of lemon for brightness

Instructions

  1. Preheat the oven. Heat oven to 375°F / 190°C. Grease a 9×13-inch / 23×33 cm baking dish.
  2. Cook the noodles. Bring a large pot of salted water to a boil. Cook the egg noodles 1 minute shy of al dente. Drain well.
  3. Make the sauce mixture. In a large bowl, whisk together cream of mushroom soup, 3/4 cup milk, black pepper, garlic powder, and onion powder. If using sour cream, mayo, Dijon, lemon, sautéed celery, onion, or mushrooms, stir them into the sauce now. Add the remaining 1/4 cup milk if the sauce looks very thick.
  4. Add the filling. Fold in the well-drained tuna, peas, cheddar, and cooked egg noodles. Mix gently so the tuna stays in flakes instead of breaking down completely.
  5. Fill the dish. Spread the mixture evenly into the prepared baking dish. It should look creamy and slightly loose, with the noodles fully coated but not swimming in sauce. If it looks stiff before baking, stir in 2 to 4 tablespoons more milk.

  6. Add topping. Sprinkle crushed potato chips or crackers over the top. If using panko or breadcrumbs, mix them with melted butter first, then sprinkle over the casserole.

  7. Bake. Bake uncovered for 20 to 25 minutes, until the edges are bubbling and the topping is lightly golden.

  8. Rest and serve. Let the casserole rest for 5 minutes before serving.

Notes

  • Taste the sauce before adding extra salt because condensed soup, tuna, cheese, chips, and crackers can all be salty.
  • For a faster bake, use 400°F / 200°C and check after 15 minutes.
  • If baking from chilled, cover loosely for the first half of baking and add 10 to 15 extra minutes.
  • Add crunchy topping right before baking, especially for make-ahead casserole.
  • For leftovers, add a splash of milk before reheating; the reheating section shows the cue.
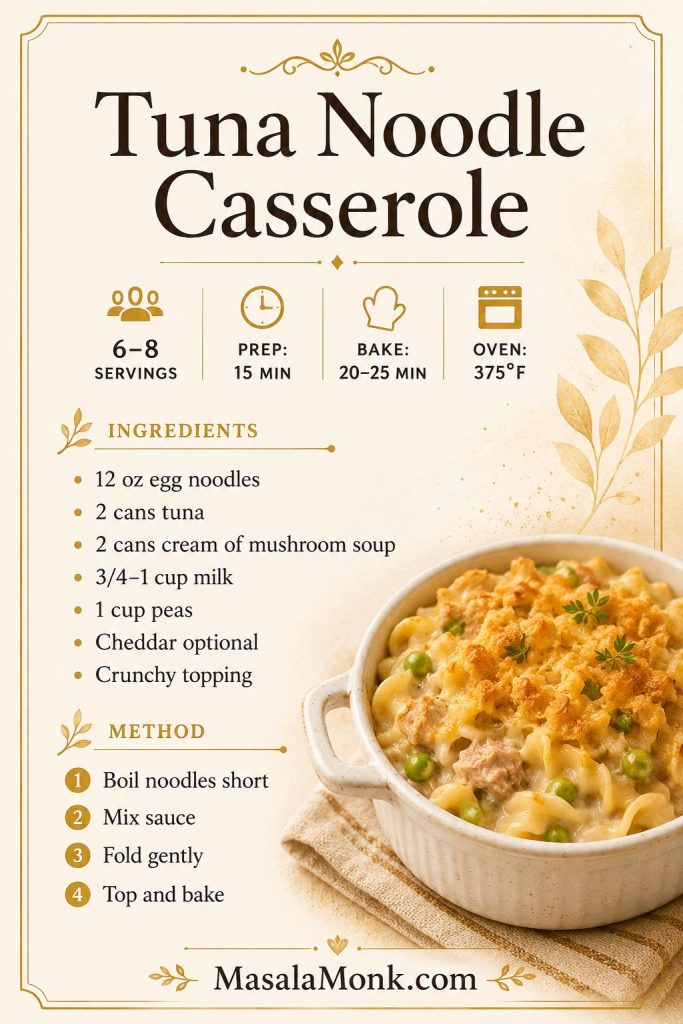
Saveable tuna noodle casserole recipe card with servings, prep time, bake time, oven temperature, ingredients, and short method.
Keep the core tuna noodle casserole formula handy: egg noodles, tuna, soup, milk, peas, topping, and a 375°F bake until bubbling.

A quick safety note for families: for general fish-consumption guidance, especially for children or people who are pregnant or breastfeeding, see the FDA’s advice about eating fish.

How Long to Bake Tuna Noodle Casserole

The best default is 375°F / 190°C for 20 to 25 minutes. This temperature heats the casserole through without drying the noodles too quickly or burning the topping.

Oven Temperature Best Use Approximate Time
375°F / 190°C Best all-purpose creamy bake 20–25 minutes
400°F / 200°C Faster weeknight bake if the mixture is warm 15–20 minutes
425°F / 220°C Very fast bake 15–20 minutes, but watch for drying or topping browning too quickly
375°F / 190°C from chilled Make-ahead casserole from the refrigerator 30–40 minutes; cover loosely for the first half if needed
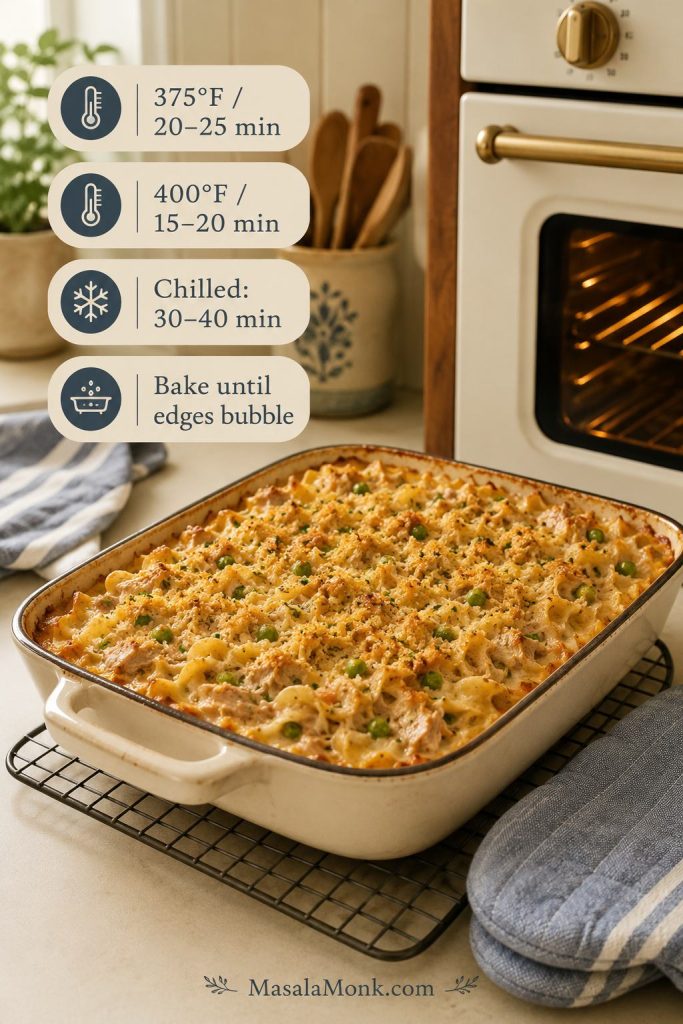
Tuna noodle casserole bake time guide with 375°F, 400°F, chilled bake times, and a bubbling-edge cue.
Bake time is a cue, not just a number; when the edges bubble and the center is hot, the casserole is ready.

The casserole is done when the edges bubble, the center is hot, and the topping is golden in spots. If the topping browns before the center is hot, loosely tent the dish with foil and continue baking.

If the casserole is coming from the fridge, check the make-ahead guidance before baking.

Should Tuna Noodle Casserole Be Covered While Baking?

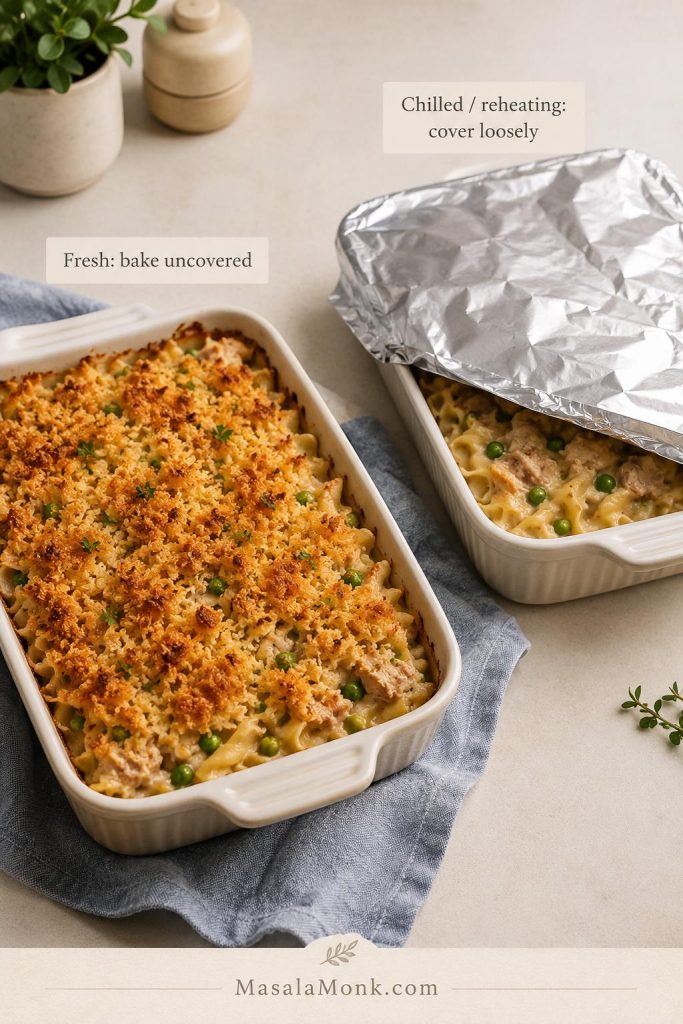
Bake freshly assembled tuna noodle casserole uncovered so the topping can crisp. Cover it loosely with foil only if the casserole is cold from the refrigerator, the topping is browning too fast, or you are reheating leftovers.

Covered and uncovered tuna noodle casserole dishes showing when to bake uncovered or cover loosely with foil.
Bake fresh tuna noodle casserole uncovered for crunch; cover loosely only when reheating, baking from chilled, or slowing down browning.

Tuna Noodle Casserole with Cream of Mushroom Soup

The cream-of-mushroom version is the main recipe here because it matches the comfort-food casserole most people are looking for: quick, pantry-friendly, creamy, and familiar. For a 9×13-inch tuna noodle casserole, use 2 cans condensed cream of mushroom soup and 3/4 to 1 cup milk.

Prefer a homemade sauce? Skip ahead to the without-soup method.

Stir the soup and milk together before adding noodles so there are no thick pockets of soup. Cream of celery soup gives a lighter vegetable flavor, while one can cream of mushroom plus one can cream of chicken makes the sauce richer and more savory.

If you like understanding sauce texture, this easy cheese sauce recipe shows how milk, cheese, and gentle heat keep sauces smooth instead of grainy or gluey.

Tuna Noodle Casserole Without Soup

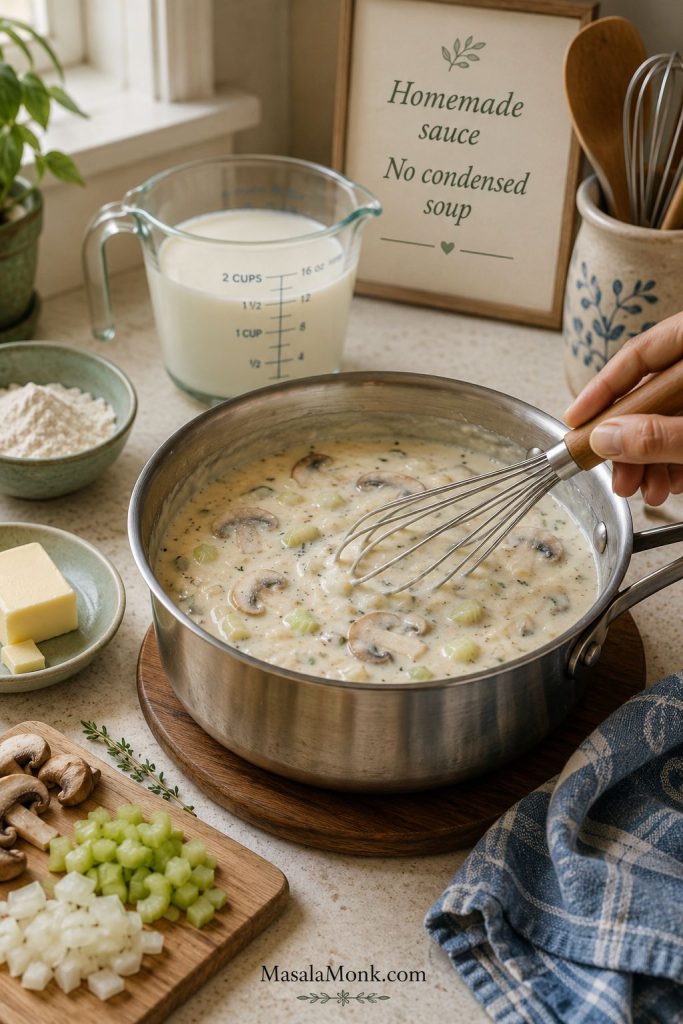
For a homemade version without condensed soup, make a quick white sauce with butter, flour, milk, broth, mushrooms, onion, and celery. Melt 4 tablespoons / 56 g butter in a skillet. Cook 1 small chopped onion, 1 to 2 celery ribs, and 8 oz / 225 g mushrooms until softened. Add 2 minced garlic cloves, then stir in 1/3 cup / 40 g flour.

Slowly whisk in 1 1/2 cups / 360 ml milk and 1 1/2 cups / 360 ml broth. Simmer until creamy, then fold in tuna, peas, noodles, and cheese if using. If the sauce thickens before the noodles are added, loosen it with extra milk or broth 2 tablespoons at a time.

Homemade white sauce for tuna noodle casserole being whisked with mushrooms, onion, celery, milk, and broth.
For tuna noodle casserole without soup, a quick white sauce gives you better control over salt, thickness, and mushroom flavor.

For a deeper white-sauce reference, this béchamel sauce guide explains the butter-flour-milk method that also helps a homemade tuna casserole sauce stay smooth.

Best Tuna Noodle Casserole Toppings

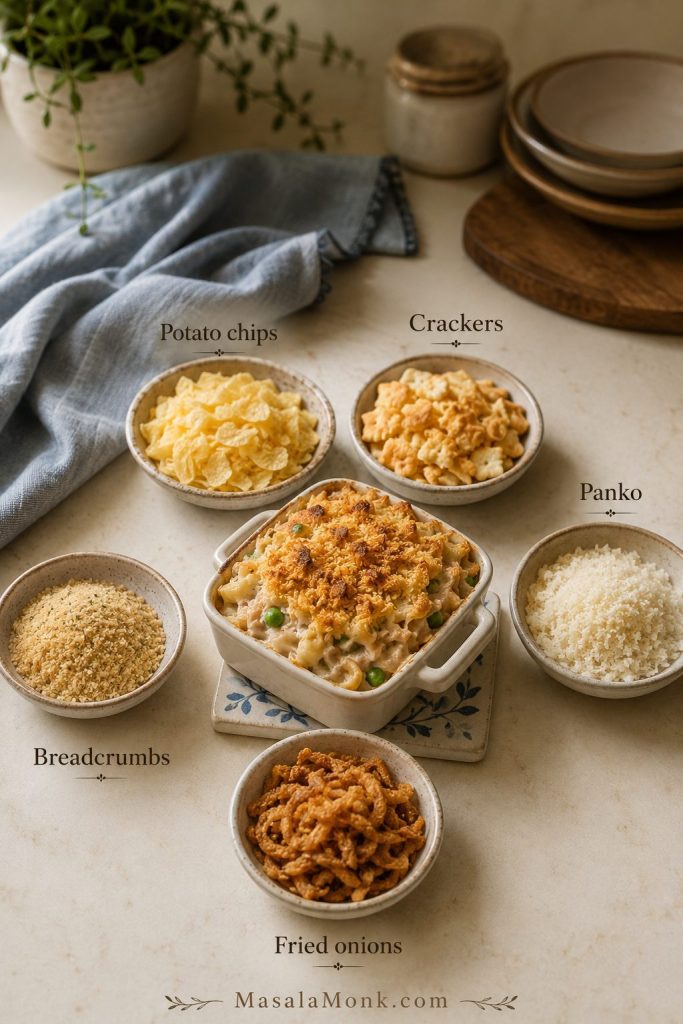
The topping changes the whole personality of the casserole. Potato chips make it salty and old-fashioned, crackers make it buttery, panko makes it crisp, and fried onions make it taste more like a holiday casserole.

Potato chips give you the nostalgic church-supper casserole. Buttered panko gives you a cleaner, crispier top.

Topping Best For How to Use It
Potato chips Old-fashioned salty crunch Crush lightly and add right before baking.
Ritz or buttery crackers Buttery comfort-food topping Crush coarsely; mix with a little melted butter if needed.
Panko Crispest clean topping Mix with melted butter and optional parmesan.
Breadcrumbs Classic balanced topping Use with melted butter so they brown evenly.
Fried onions Green bean casserole-style crunch Use lightly because the flavor is strong.
Potato chips, crackers, panko, breadcrumbs, and fried onions compared as toppings for tuna noodle casserole.
The topping changes the whole casserole: potato chips taste nostalgic, crackers feel buttery, and panko gives a cleaner crunch.
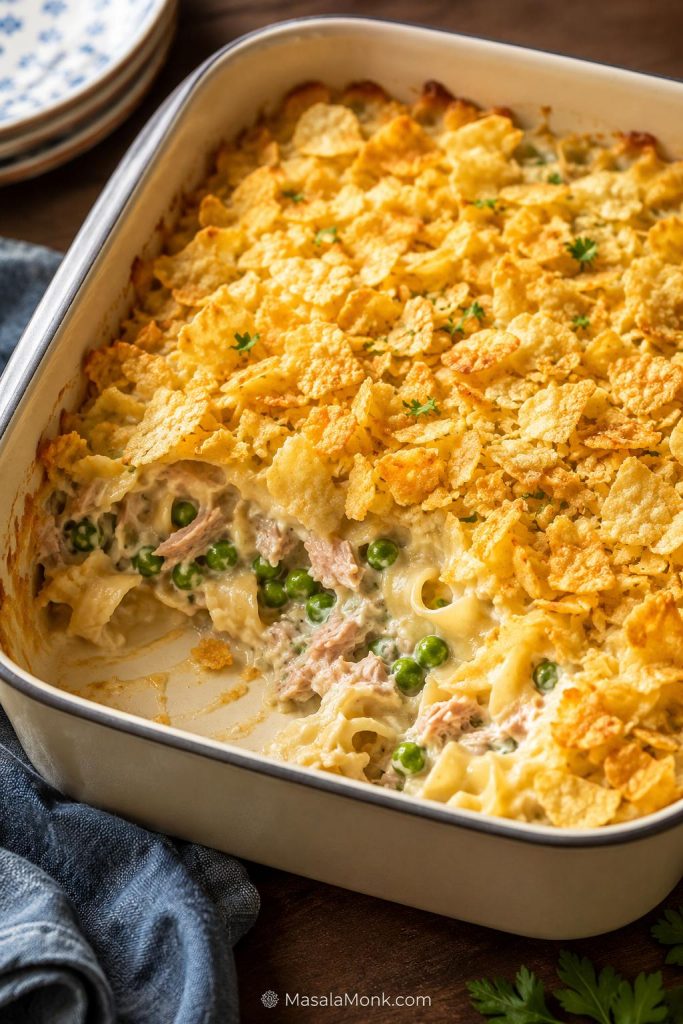
Old-fashioned tuna noodle casserole with crushed potato chip topping and a scooped corner showing noodles, peas, and tuna.
Crushed potato chips are the old-fashioned choice when you want salty crunch and a true retro tuna casserole finish.

Choosing a topping for a make-ahead casserole? See the make-ahead notes so the topping stays crisp.

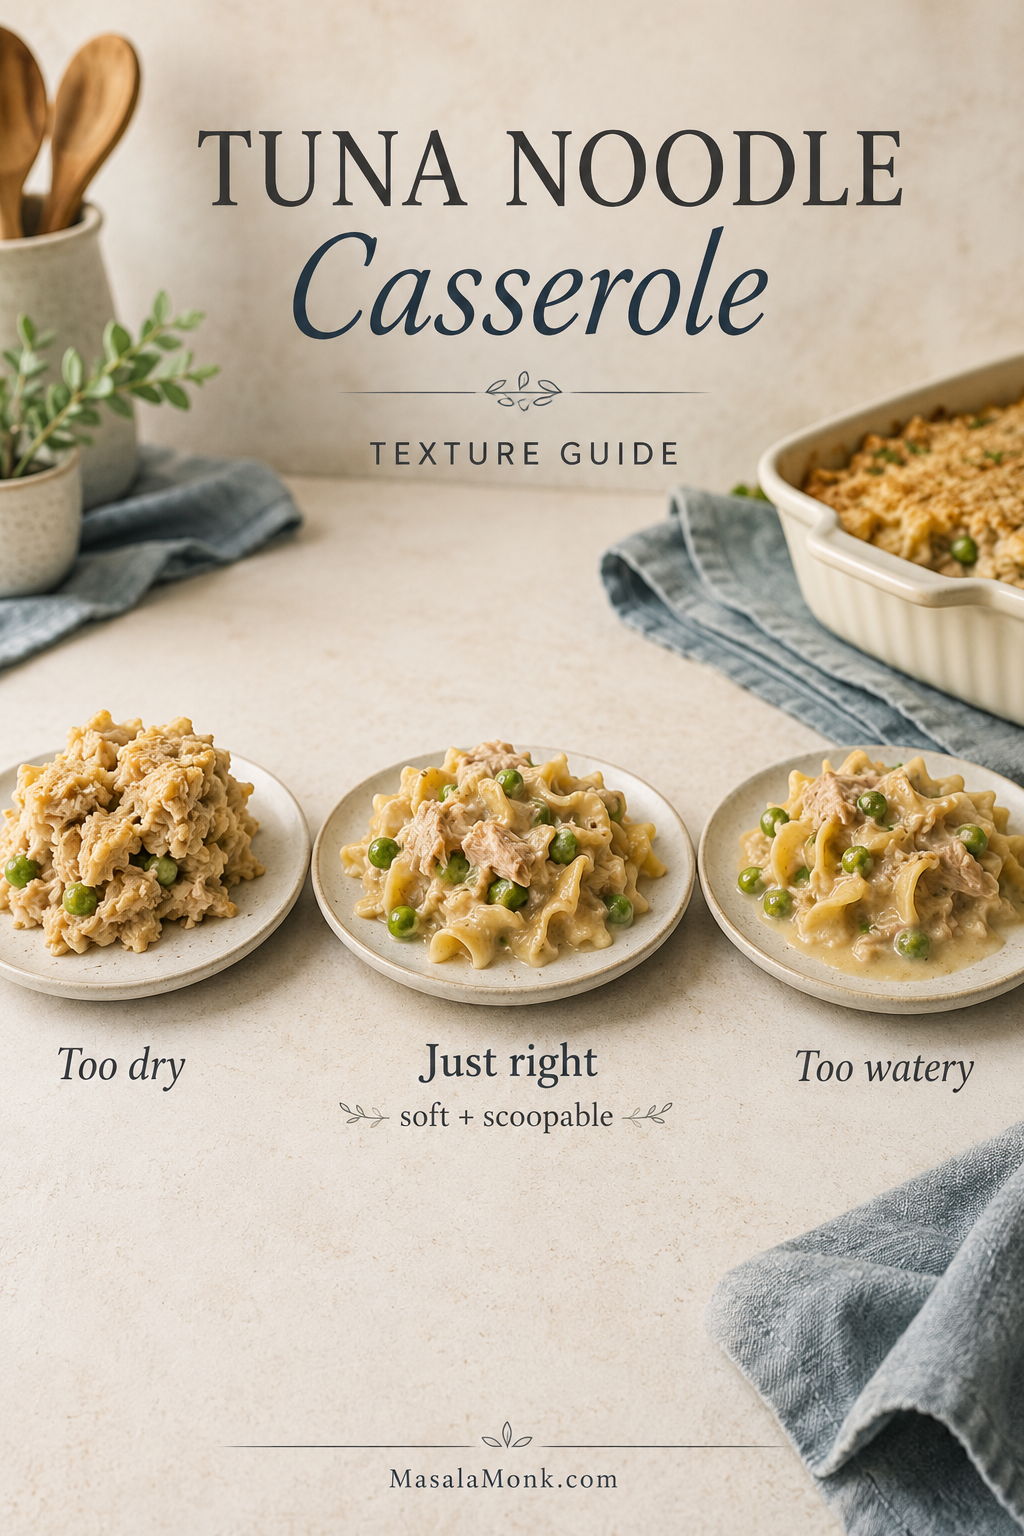
How to Keep Tuna Noodle Casserole Creamy, Not Dry

The fix for dry tuna casserole happens before it goes into the oven, not after it comes out. Dryness usually comes from overcooked noodles, sauce that was too thick before baking, too much time in the oven, or leftovers reheated without adding moisture back.

Three-step guide showing one-minute-shy noodles, generously coated casserole mixture, and bubbling edges for creamy tuna noodle casserole.
The best texture starts before baking: slightly firm egg noodles, a generous sauce coating, and a stop point when the edges bubble.

Before Baking

  • Cook the noodles 1 minute shy of al dente.
  • Use the full 1 cup / 240 ml milk if making the casserole ahead.
  • Do not pack the noodles tightly into the baking dish.

After Baking or Reheating

  • Rest the casserole for 5 minutes, not 15 or 20.
  • For leftovers, add a splash of milk before reheating.
  • Cover while reheating, then uncover briefly to crisp the topping.
  • If a serving is already dry, stir in a spoonful of warm milk or cream before serving.
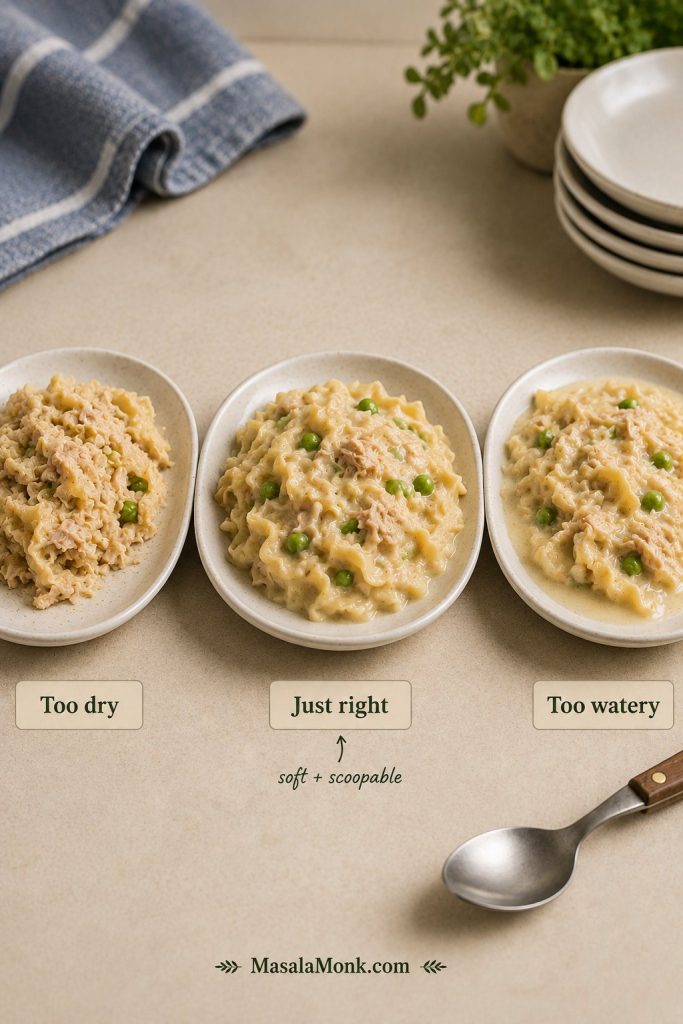
Three plates of tuna noodle casserole showing too dry, just right, and too watery textures.
The best tuna noodle casserole is soft and scoopable; if it slices like a block or leaks sauce, the balance needs adjusting.

If the casserole is already baked and the texture still seems off, use the troubleshooting guide to decide whether the issue is sauce, noodles, topping, or bake time.

No-Boil Tuna Noodle Casserole: Is It Worth It?

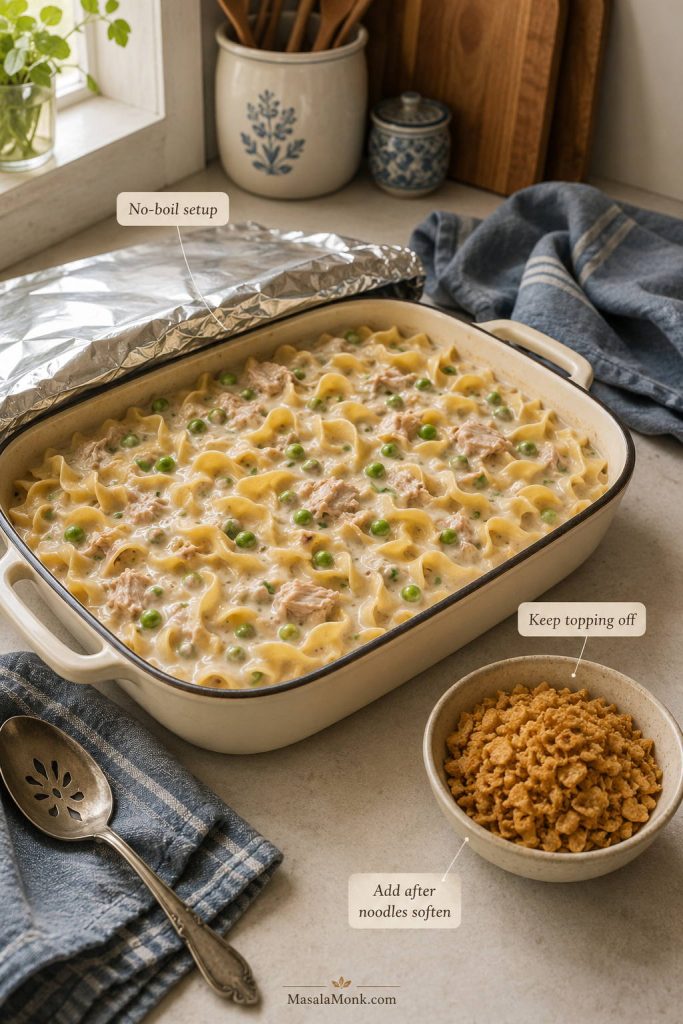
No-boil tuna noodle casserole works when convenience matters more than perfect noodle texture. It saves a pot, but the noodles need more liquid, a tightly covered pan, and a longer bake so they can soften in the sauce.

For the best egg noodle texture, boiling the noodles separately still gives the best result. If you do try a no-boil version, make the sauce much looser, press the noodles under the liquid, and cover the pan tightly with foil.

Add the topping only after the noodles are tender; otherwise the top can brown before the casserole is fully cooked.

No-boil tuna noodle casserole setup with noodles under sauce, foil nearby, and topping kept separate.
No-boil tuna noodle casserole needs extra liquid and patience, so keep the topping off until the noodles have softened.

Stovetop Tuna Noodle Casserole

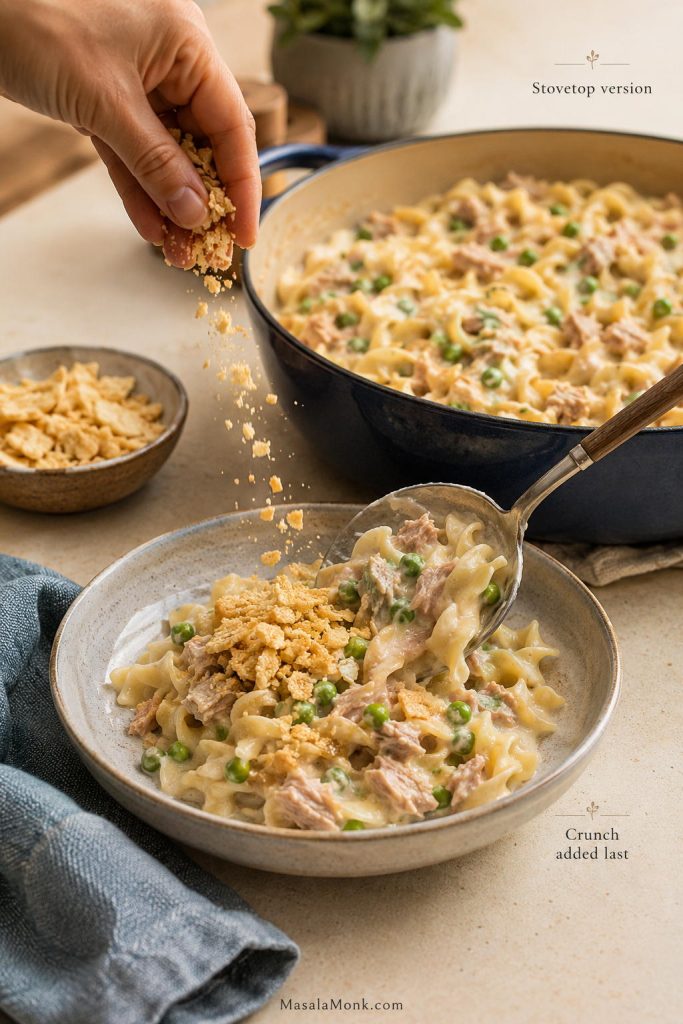
This is the weeknight version when you want the flavor of tuna noodle casserole without waiting for a baked top. It will be softer and saucier than the oven version, and the topping is sprinkled on at the end instead of browned in the oven.

Cook the noodles separately, or simmer them gently in a creamy sauce in a Dutch oven. Stir in the tuna and peas near the end so the tuna stays flaky and the peas do not overcook. Finish each serving with crushed crackers, potato chips, or toasted breadcrumbs for crunch.

Stovetop tuna noodle casserole in a deep skillet with a serving topped with crushed crackers or chips.
The stovetop version stays softer and saucier, while the crunch comes from adding chips, crackers, or crumbs at the end.

Tuna Noodle Casserole for Two

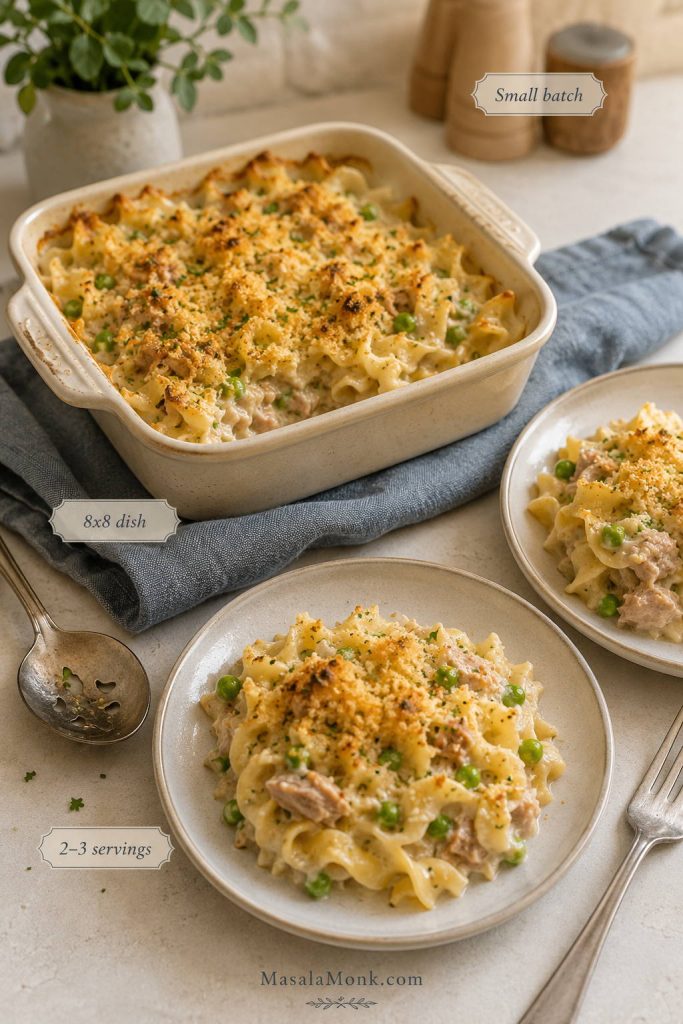
A full 9×13-inch pan is great for family dinner, but an 8×8-inch dish or 1.5-quart baking dish is easier when you only want a few servings. Keep the sauce generous, add the topping right before baking, and check early because a smaller casserole heats faster.

Ingredient Small-Batch Amount
Egg noodles 4 oz / 115 g
Tuna 1 can, 5 oz / 142 g, drained
Peas 1/2 cup / 70 g
Cream of mushroom soup 1/2 to 2/3 can for balanced sauce, or 1 full can for extra creamy
Milk 1/4 to 1/3 cup / 60 to 80 ml
Dish 8×8-inch dish or 1.5-quart baking dish
Bake time 15–20 minutes at 375°F / 190°C
Small batch tuna noodle casserole in an 8x8 dish with two plated servings.
Use an 8×8 dish when you want the same comfort-food flavor without committing to a full 9×13 pan.

Old-Fashioned Tuna Noodle Casserole

For an old-fashioned tuna noodle casserole, keep the ingredients simple: egg noodles, canned tuna, cream of mushroom soup, milk, peas, cheddar, and crushed potato chips. Use light seasoning, add celery or onion only if you like that retro casserole flavor, and taste before salting because the soup, tuna, cheese, and chips already bring plenty.

What to Serve with Tuna Noodle Casserole

Tuna noodle casserole is rich, creamy, and filling, so the best sides are usually fresh, crisp, or simple. You do not need a heavy side dish unless you are feeding a larger crowd.

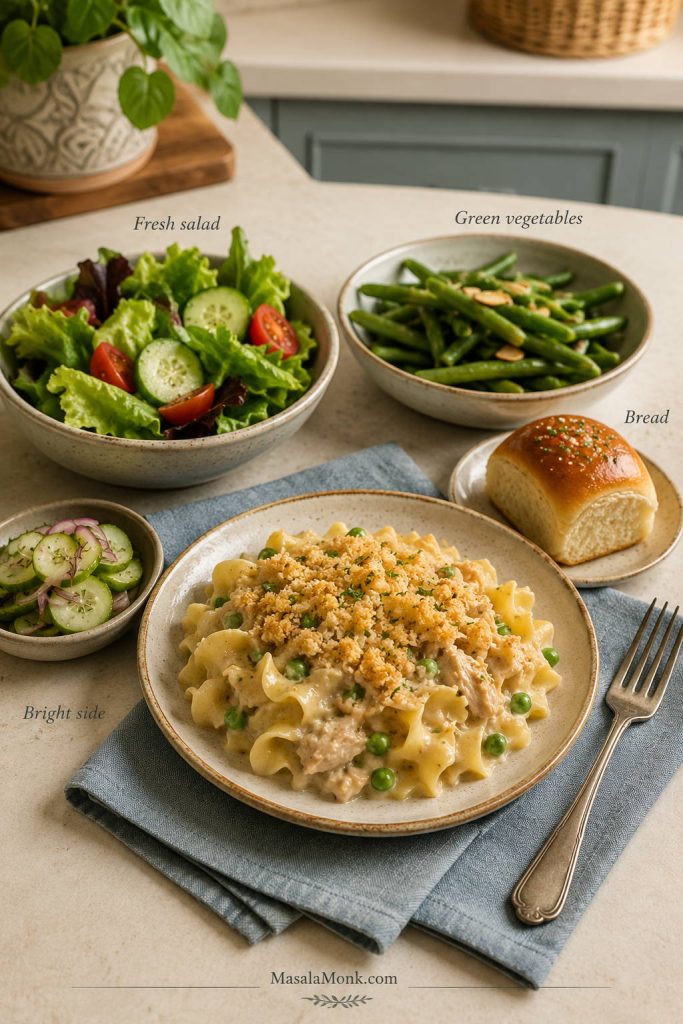
  • Fresh sides: green salad, cucumber salad, coleslaw, or tomato cucumber salad.
  • Vegetables: steamed broccoli, green beans, roasted carrots, asparagus, or peas and carrots.
  • Bread: dinner rolls, biscuits, garlic bread, or a simple slice of toasted sourdough.
  • Bright sides: pickles, lemony salad, or vinegar-based slaw to balance the creamy casserole.
Tuna noodle casserole served with green salad, green vegetables, bread, and a bright side.
Because tuna noodle casserole is rich and filling, fresh salad, green vegetables, bread, or a bright pickle-style side keeps the plate balanced.

Serve it soon after the short rest, while the sauce is still creamy and the topping has some crunch.

Make Ahead, Store, and Freeze Tuna Noodle Casserole

Make Ahead

Assemble the casserole without the crunchy topping, cover, and refrigerate for up to 1 day. When ready to bake, let it sit at room temperature while the oven preheats, stir in a small splash of milk if the noodles have absorbed too much sauce, add the topping, and bake. A chilled casserole may need 10 to 15 extra minutes. For topping choices that hold up best, jump back to the topping guide.

Make-ahead tuna noodle casserole filling in a baking dish with crunchy topping stored separately.
For make-ahead tuna noodle casserole, refrigerate the filling without the topping so the crumbs, chips, or crackers stay crisp.

Storage

Store leftovers in an airtight container in the refrigerator for 3 to 4 days. For general leftover safety guidance, see the USDA’s leftovers and food safety guide.

Freezing

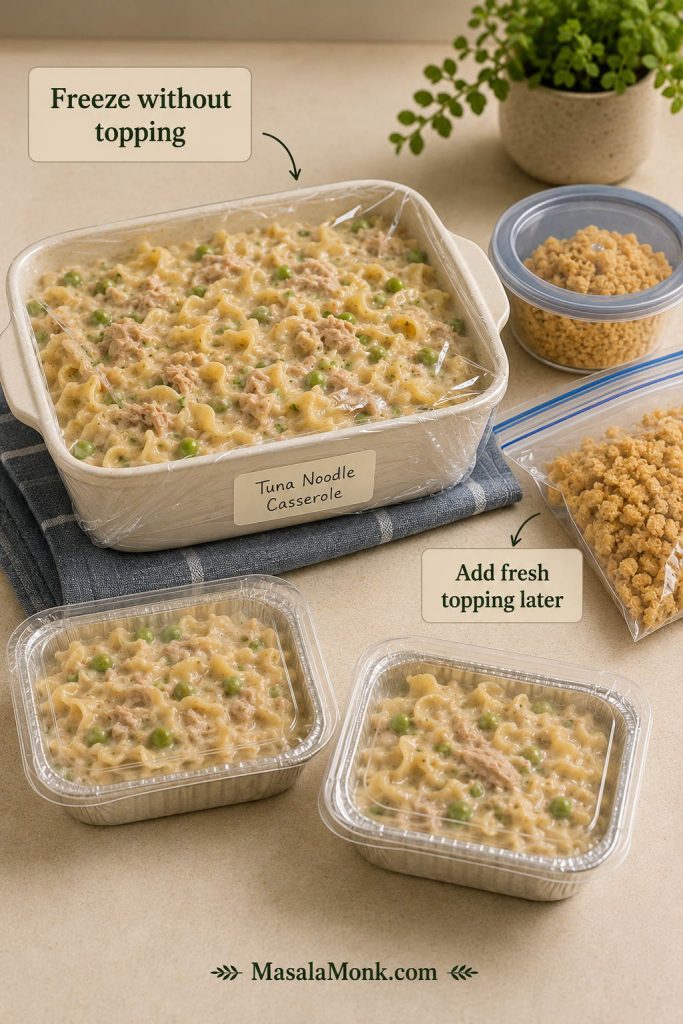
You can freeze tuna noodle casserole before or after baking, but the noodles will soften slightly after thawing. For best texture, freeze the casserole without the topping, then add fresh topping before baking or reheating.

Freezer-ready tuna noodle casserole in containers with crunchy topping stored separately for later.
Freeze tuna noodle casserole without the topping; then add fresh chips, crackers, or crumbs before baking or reheating.

Reheating

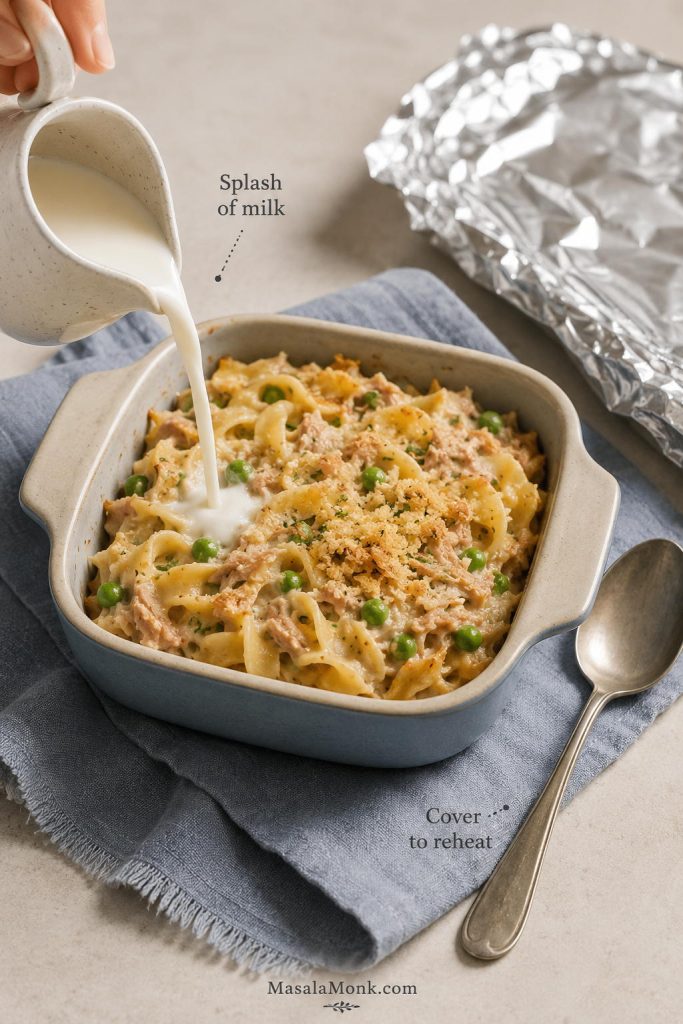
To reheat, add a splash of milk, cover loosely with foil, and warm in a 325°F / 165°C oven until hot. Remove the foil for the last few minutes if you want to re-crisp the topping. For single servings, microwave gently with a splash of milk and stir halfway through. If leftovers still seem dry, check the creamy, not dry tips for moisture fixes.

Leftover tuna noodle casserole in a small dish with milk being poured in and foil nearby for reheating.
When reheating tuna noodle casserole, a small splash of milk helps loosen the sauce after the noodles absorb moisture in the fridge.

Tuna Noodle Casserole Variations

Extra Cheesy Tuna Noodle Casserole

For a cheesier family-style bake, increase the cheddar to 1 1/2 or 2 cups and sprinkle a little extra cheese under the topping. For a sharper flavor, use sharp cheddar or add parmesan to the crumb topping. If you are in a full cheesy comfort-food mood, this macaroni and cheese recipe covers stovetop, baked, and Southern-style versions with similar creamy-baked pasta logic.

Tuna Noodle Casserole with Celery, Onion, or Mushrooms

Sautéed celery, onion, or mushrooms make the casserole taste a little fresher and more homemade. Cook them in a little butter before adding them to the dish so they add flavor without releasing too much water in the bake.

Healthier Tuna Noodle Casserole

For a lighter but still creamy version, use whole wheat egg noodles or a higher-protein pasta, add more vegetables, reduce the cheese, and use the no-soup sauce option.

Tuna Noodle Casserole Without Peas

Leave the peas out or replace them with corn, broccoli, mushrooms, spinach, or mixed vegetables. If using watery vegetables, cook or drain them first.

Tuna Hotdish

Tuna hotdish is often very similar to tuna noodle casserole, especially in Midwestern-style cooking. It usually means a creamy baked casserole with noodles or another starch, canned tuna, vegetables, and a crunchy topping.

Troubleshooting Tuna Noodle Casserole

Most tuna casserole problems are fixable once you know whether the issue came from the noodles, the sauce, the topping, or the bake time.

Tuna noodle casserole troubleshooting guide with fixes for dry, watery, mushy, and soggy topping problems.
Most tuna casserole problems come from the noodles, sauce, topping, or bake time; once you spot the cause, the fix is usually simple.
Problem Likely Cause Fix
Dry casserole Too little sauce, overcooked noodles, or overbaking Add more milk before baking, cook noodles short, and bake only until bubbly.
Mushy noodles Noodles boiled too long or held too long before baking Cook 1 minute shy of al dente and bake soon after mixing.
Watery sauce Undrained tuna, too much milk, or watery vegetables Drain tuna well, do not overdo the milk, thaw and drain larger frozen vegetables, and bake uncovered.
Bland flavor Not enough seasoning or too much plain pasta Add black pepper, garlic powder, onion powder, mustard, sharp cheddar, or a squeeze of lemon.
Soggy topping Topping added too early, casserole covered while hot, or leftovers stored with topping Add topping right before baking. For leftovers, refresh with a few new crumbs or chips after reheating.
Topping browns too fast Oven too hot or topping too close to broiler Tent loosely with foil and continue baking until the center is hot.

Once baked, the tuna noodle casserole should scoop easily, with creamy noodles underneath and a lightly crisp topping on top. If it looks bubbly at the edges and still moist in the center, it is ready.

FAQs

Do you cook egg noodles before baking tuna casserole?

Cook the egg noodles first, but stop about 1 minute before they are fully al dente. They will continue softening in the oven.

How much milk do you add to tuna noodle casserole?

For a 9×13-inch tuna noodle casserole with 2 cans of condensed soup, use 3/4 to 1 cup / 180 to 240 ml milk. Use the full cup if you want it creamier or are making it ahead.

Do you need one or two cans of cream of mushroom soup?

For a full 9×13-inch casserole with 12 oz / 340 g egg noodles, 2 cans of condensed soup give the best creamy texture. One can is better for a smaller casserole.

What kind of tuna works best?

Chunk light tuna works well for a softer, milder casserole, while solid white albacore gives larger flakes and a firmer bite. Drain either type well.

Should tuna noodle casserole be covered while baking?

Bake it uncovered if the casserole is freshly assembled. Cover loosely with foil only if it is chilled, reheating, or browning too quickly before the center is hot.

Why is my tuna noodle casserole dry?

It probably had too little sauce, overcooked noodles, or baked too long. The casserole should come out when the edges are bubbling, not when the top looks dry.

What can replace cream of mushroom soup?

Cream of celery soup is the closest easy swap. Cream of chicken makes the sauce richer, and a homemade butter-flour-milk sauce gives you the most control over salt and texture.

Can tuna noodle casserole be made ahead?

Make it up to 1 day ahead, but leave off the topping until just before baking. If the noodles absorb too much sauce in the fridge, stir in a small splash of milk before baking.

Can you freeze tuna noodle casserole?

Freezing works, though the noodles soften after thawing. Freeze without the topping for the best texture, then add fresh topping before baking or reheating.

Is tuna hotdish the same as tuna noodle casserole?

They are very similar. “Hotdish” is often the Midwestern term for a creamy baked casserole with a starch, protein, vegetables, and a topping.

What vegetables go well in tuna noodle casserole?

Peas are the classic choice, but celery, onion, mushrooms, carrots, broccoli, spinach, corn, and mixed vegetables all work. Cook or drain watery vegetables first so they do not thin the sauce.