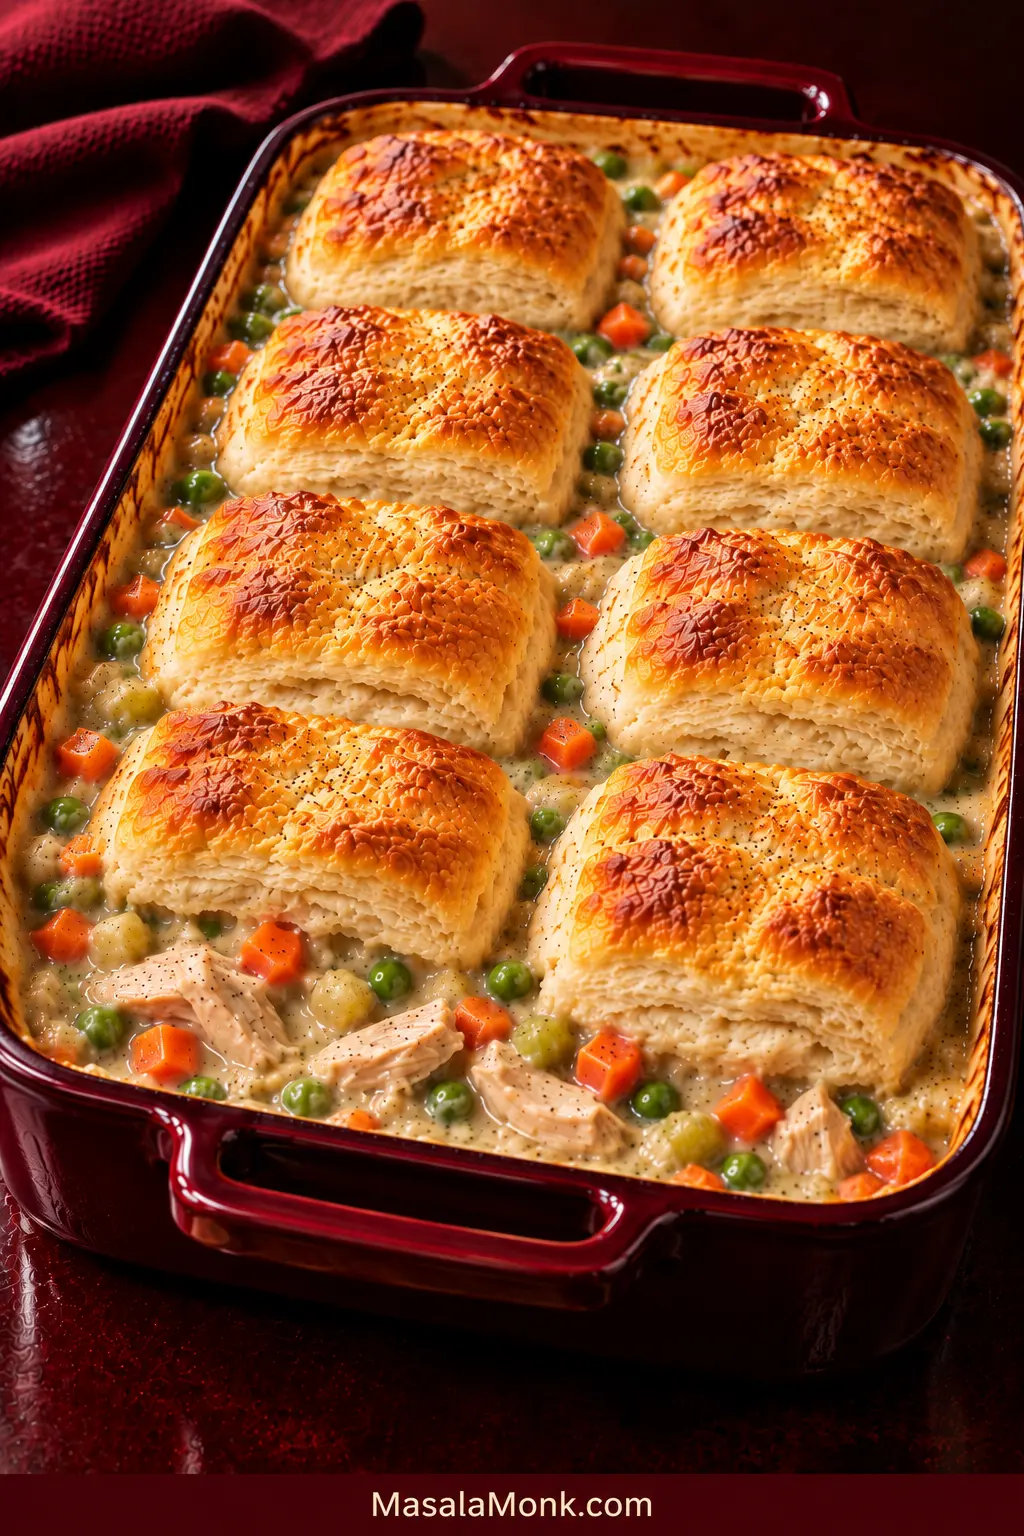
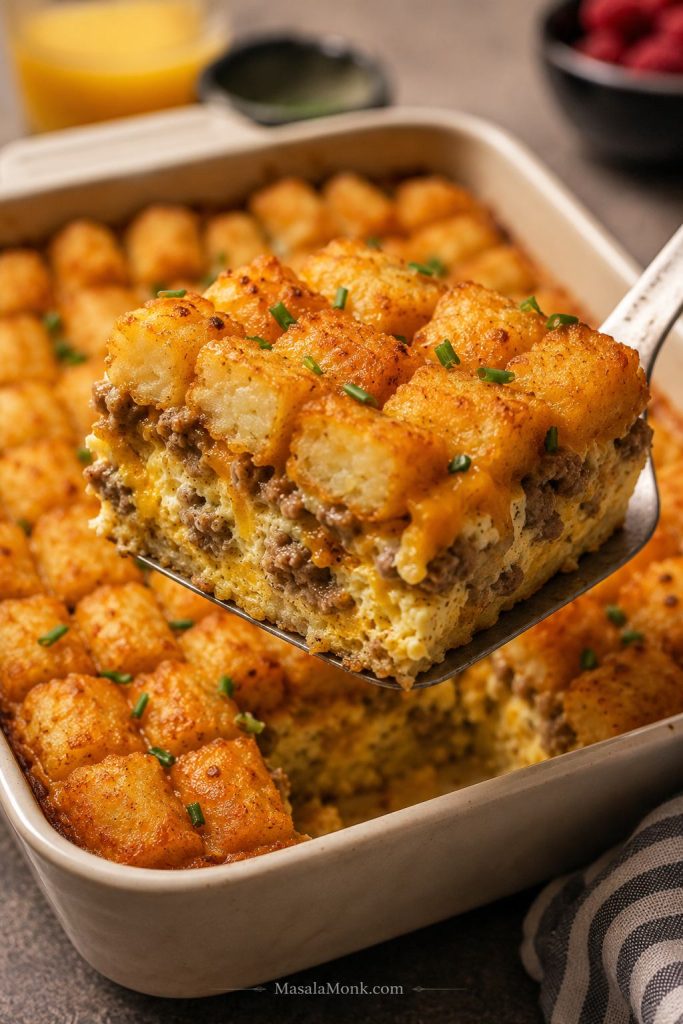
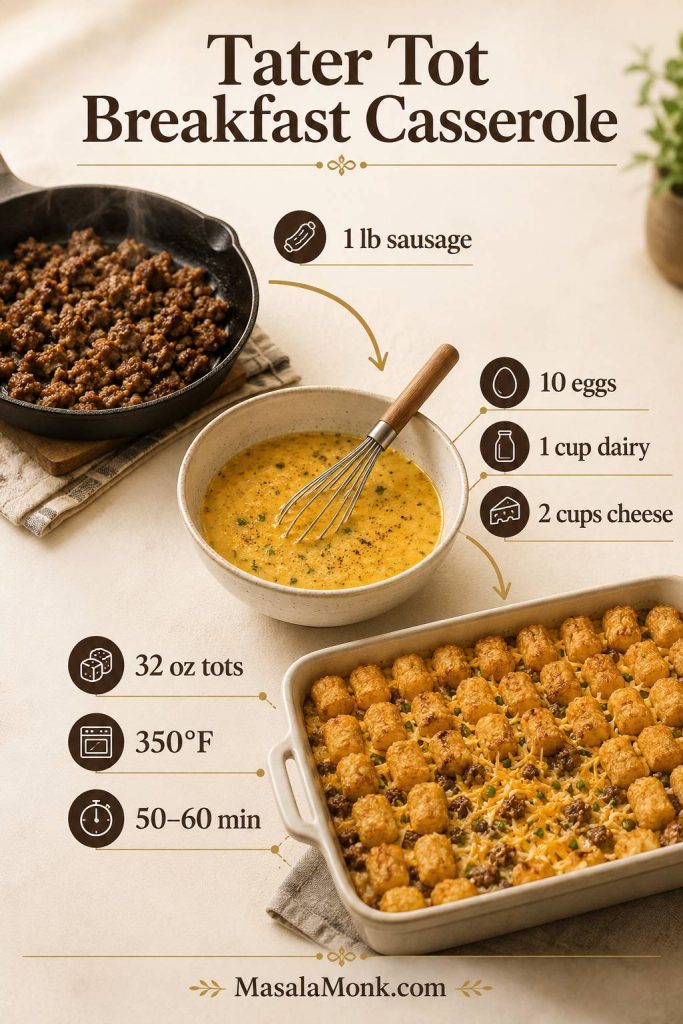
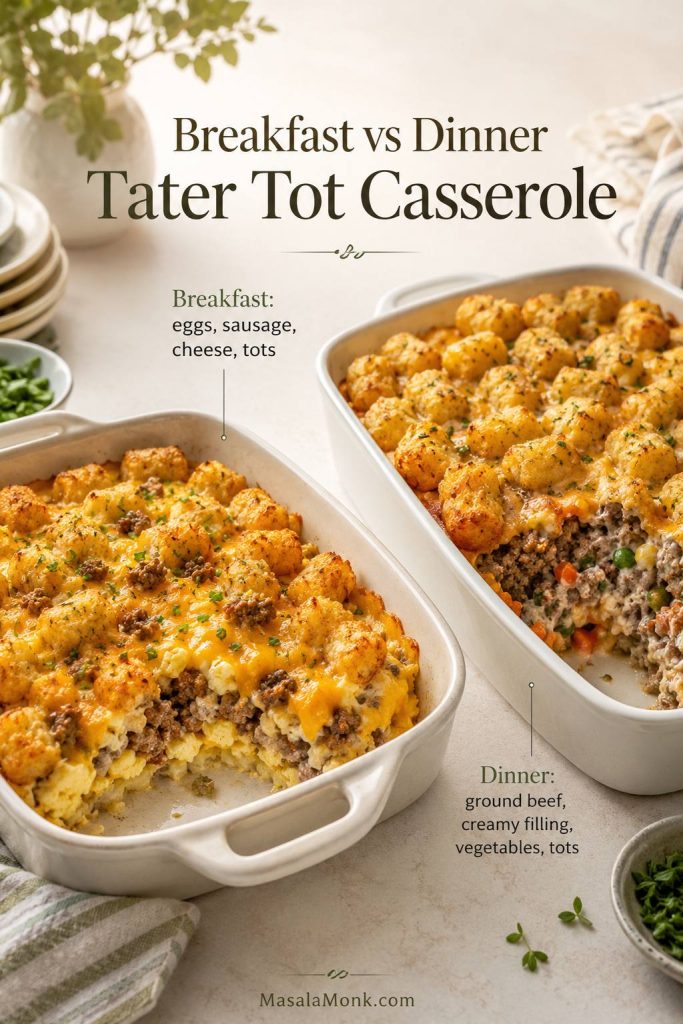
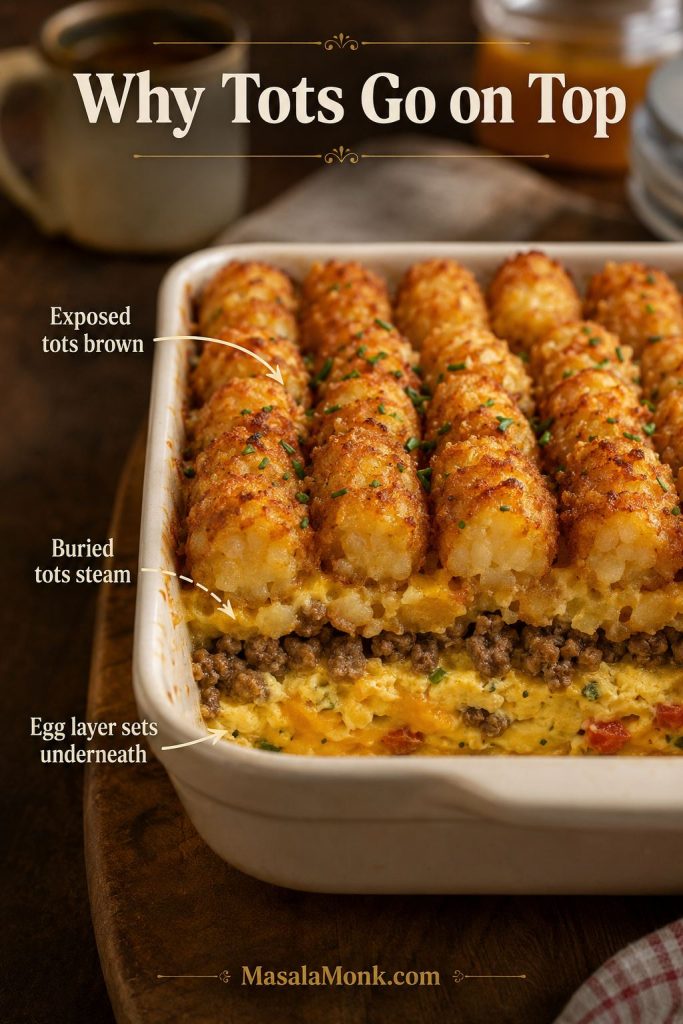
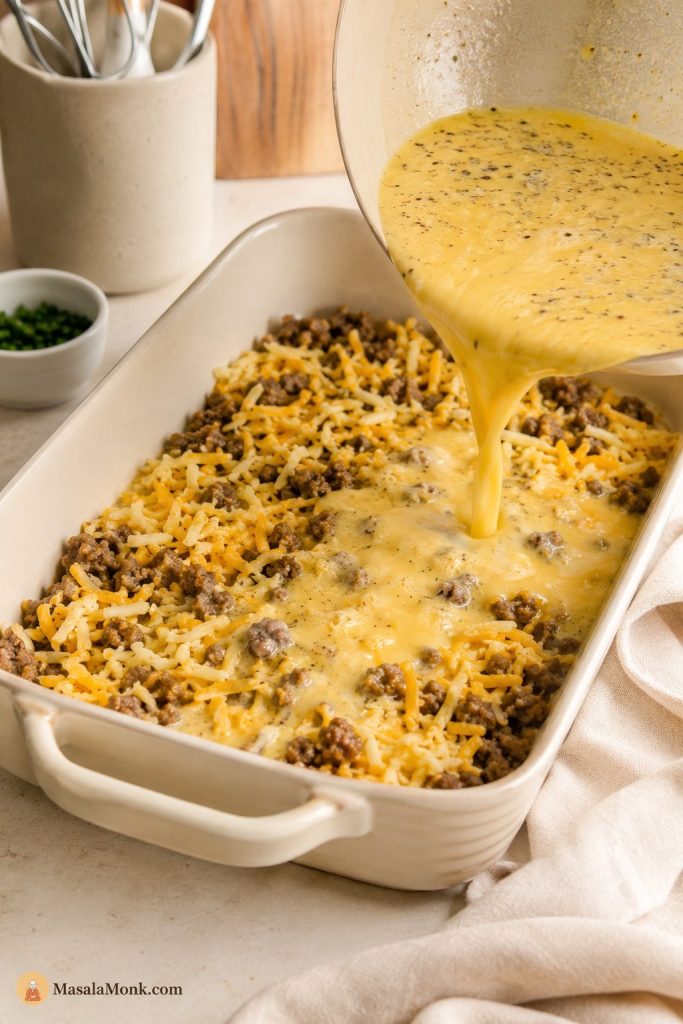
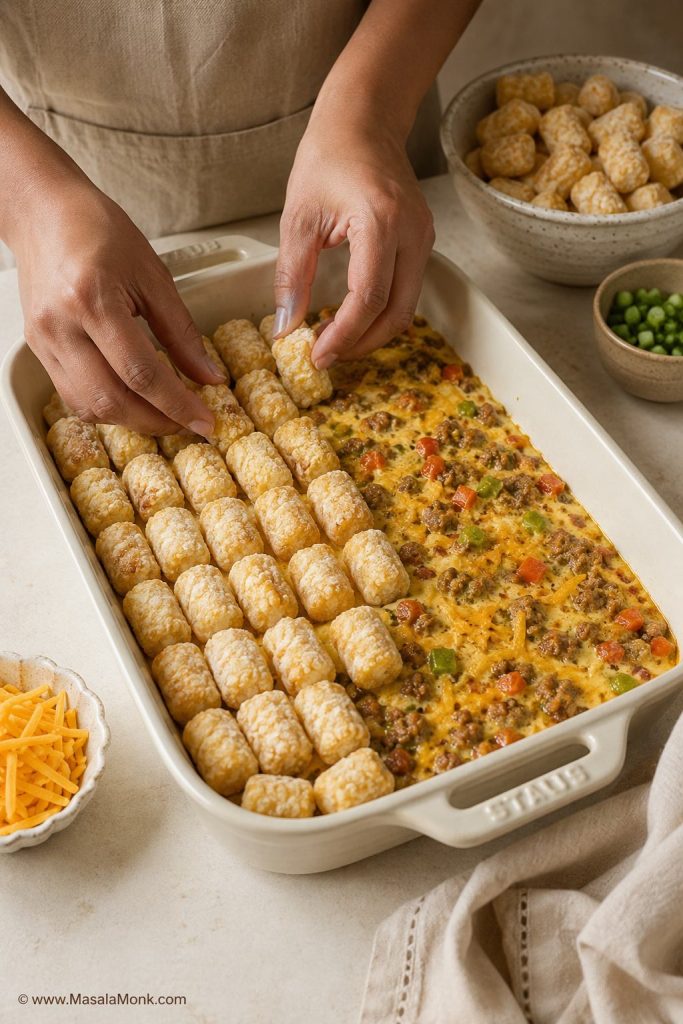
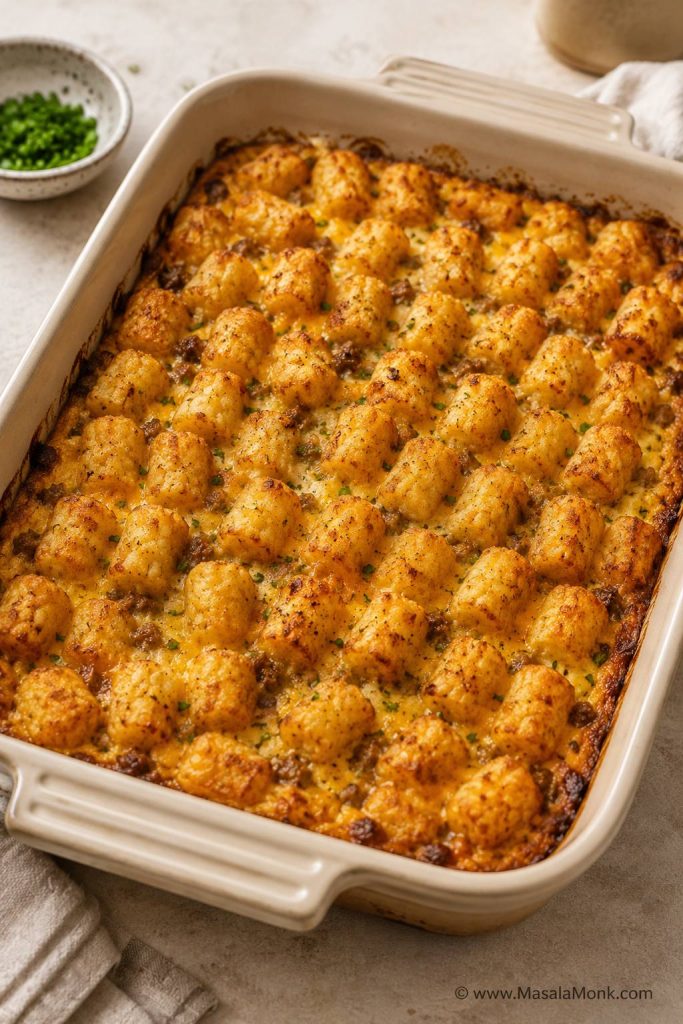
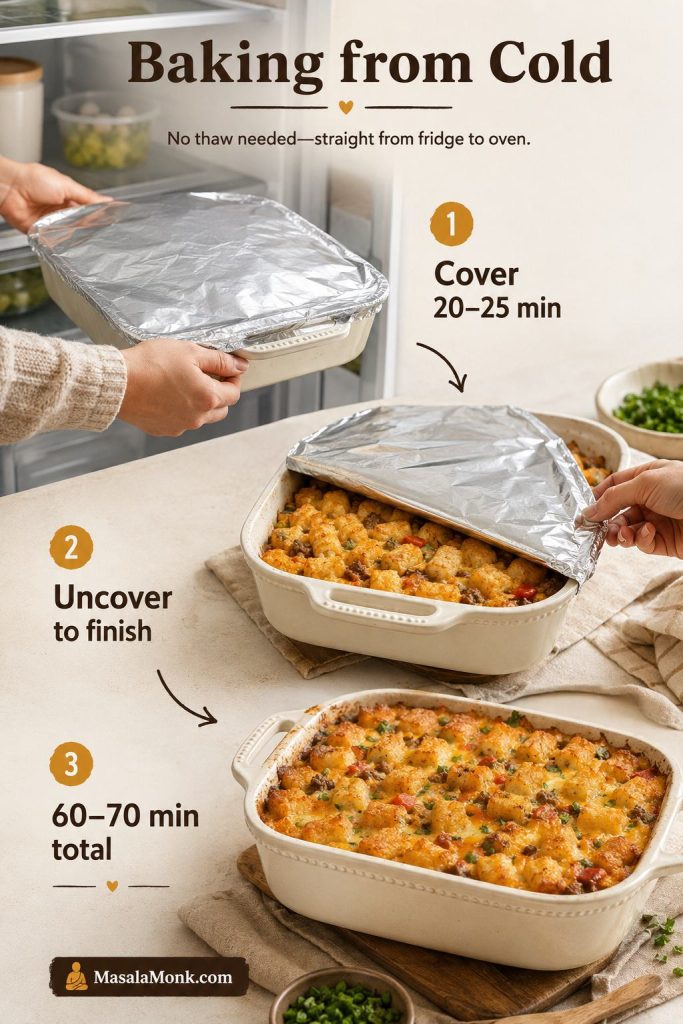
This is the version for the night when you want chicken pot pie but not a pastry project. You still make a proper creamy filling, but cooked chicken and refrigerated biscuits take the fiddliest parts off your plate.
For an easy chicken pot pie casserole, this recipe builds the filling with a quick butter-and-flour gravy instead of condensed soup, while refrigerated biscuits handle the topping.
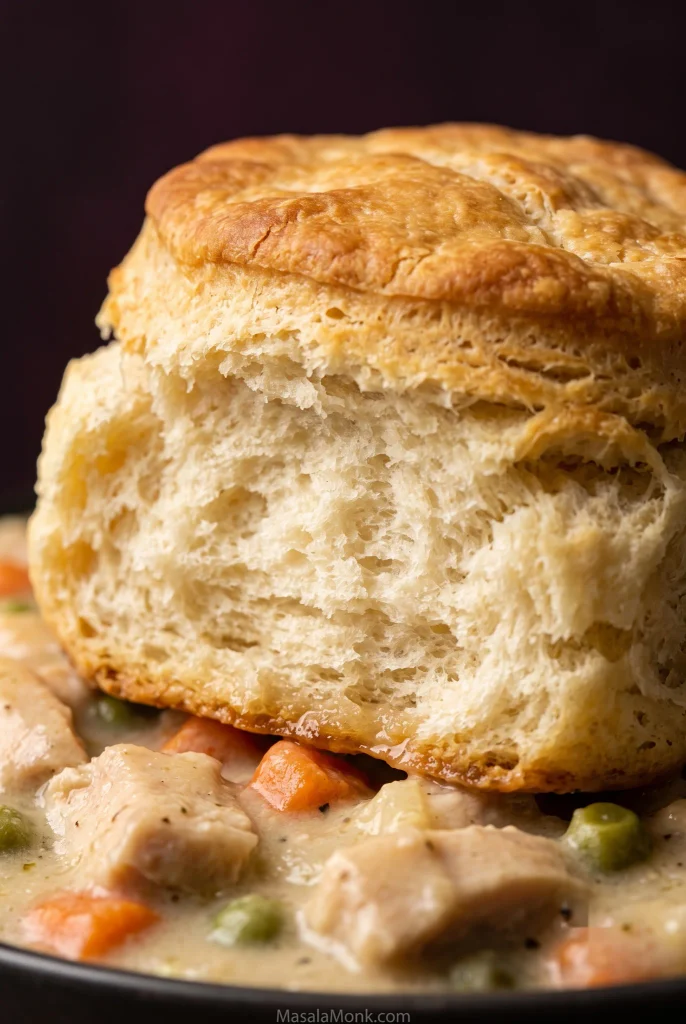
A good scoop catches chicken, vegetables and plenty of gravy with a piece of biscuit that flakes on top and stays tender underneath. That gravy-soft bottom is part of the appeal; gummy dough in the middle is not.
The biscuits get a short head start before they meet the gravy, so their centers have a chance to cook through before the tops get too dark.
Chicken pot pie casserole is creamy chicken-and-vegetable pot pie filling baked under biscuits instead of pie crust. Plan on about 60–70 minutes start to finish. Bake this version at 375°F / 190°C in a 9×13-inch / 23×33 cm dish.
Partially bake the biscuits first, then set them over filling that is already hot and properly thickened. Finish until the gravy is bubbling between the biscuits and one near the center opens up fluffy, with no gummy raw dough inside.
The rule to remember: hot filling, thick gravy, biscuits with a head start.
2 medium carrots, cut into small, even dice, about 1 cup / 130 g
2 celery ribs, cut into small, even dice, about ½ cup / 60 g
2 garlic cloves, minced / about 6 g
⅓ cup all-purpose flour / 40–42 g
2 cups low-sodium chicken broth / 475 ml, plus 2–4 tablespoons / 30–60 ml more only if needed
¾ cup whole milk / 180 ml
1 teaspoon dried thyme
½ teaspoon freshly ground black pepper, plus more to taste
½ teaspoon poultry seasoning, optional
½ teaspoon fine salt to start, plus more after tasting
4 cups cooked chopped or shredded chicken / about 500–550 g cooked weight
1 cup frozen peas / about 140–150 g; no need to thaw
Rotisserie chicken and leftover roast chicken both work well. If you are cooking chicken specifically for the casserole, our baked chicken breast recipe is an easy starting point. Starting with raw chicken? Cook it fully first, then measure 500–550 g cooked chicken.
Rotisserie chicken can already be quite salty, so taste the gravy after the chicken goes in before adding more salt. Poultry seasoning is optional, but it gives the filling a more familiar pot-pie flavor.
For the biscuit topping
8 large refrigerated flaky biscuits, about 16.3 oz / 462 g total, such as a Grands-style biscuit
1 tablespoon melted butter / 14 g
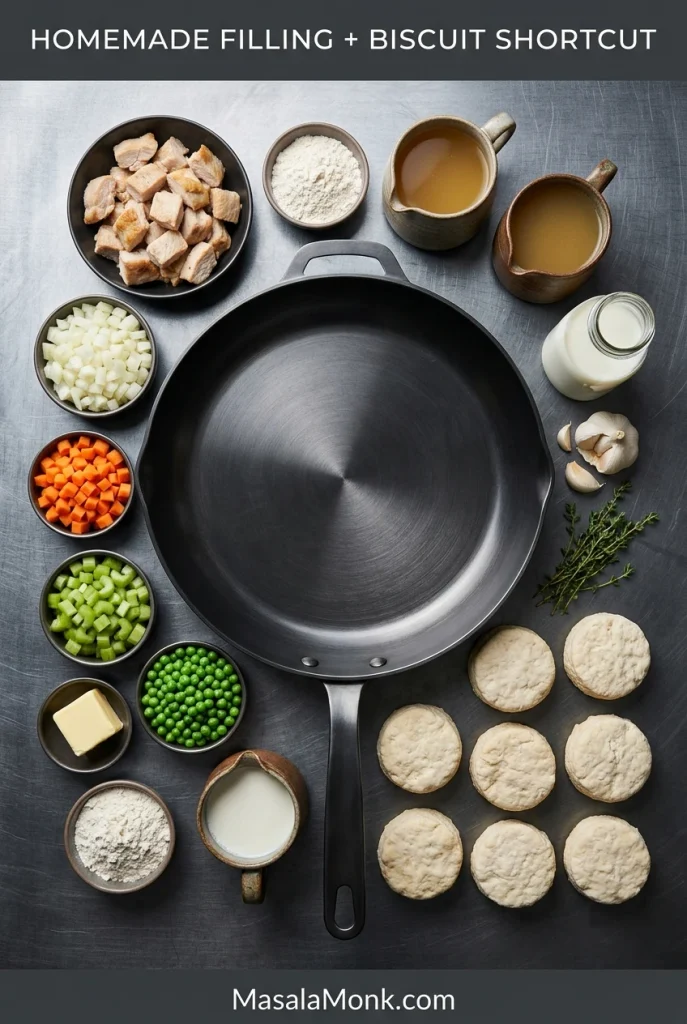
The shortcut is deliberate: cooked chicken and refrigerated biscuits save time, while the homemade gravy is where you control thickness and seasoning.
The recipe mixes scratch-made filling with practical shortcuts.
Equipment
9×13-inch / 23×33 cm baking dish
Large skillet or sauté pan
Rimmed baking sheet
Parchment paper
Whisk
Wooden spoon or silicone spatula
Aluminum foil, if needed
1. Start the biscuits
Heat the oven to 375°F / 190°C. Line a rimmed baking sheet with parchment and arrange the biscuits with some space between them.
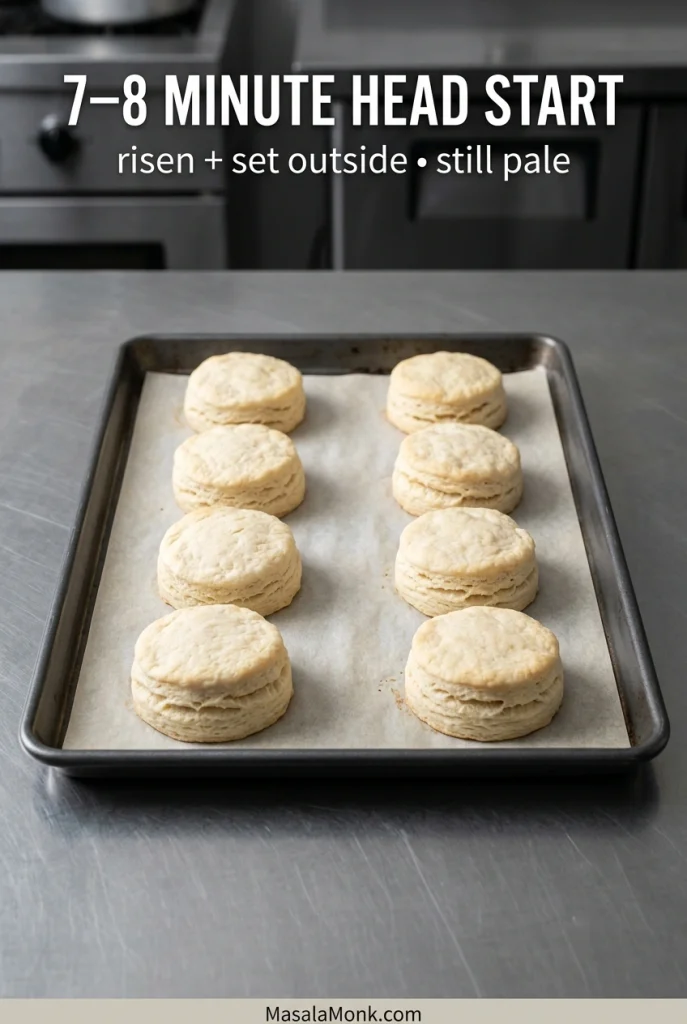
Bake for about 7–8 minutes. Package times vary, so let the biscuits tell you when to stop: they should have started rising and setting on the outside but still look pale and clearly underdone.
While the biscuits bake, begin the vegetables. After 7–8 minutes, take the biscuits out and set them aside; leave the oven at 375°F / 190°C.
Pale is right here. Deep browning now means the tops may outrun the centers later.
2. Soften the vegetables
Melt the butter in a large skillet over medium heat. Add the onion, carrots and celery and cook for about 6–8 minutes, stirring occasionally. Keeping the carrot and celery fairly small and even helps them soften at the same rate.
The onion should be soft and translucent. Bite a piece of carrot or celery if you are unsure; it should be noticeably softer but still hold its shape. Add the garlic and cook for about 30 seconds, just until fragrant.
3. Make the gravy
Sprinkle the flour over the vegetables and stir for 1–2 minutes. Slowly whisk in the 2 cups / 475 ml broth, starting with a small splash. Once the roux is smooth, continue adding the rest gradually. Stir in the milk, thyme, black pepper, poultry seasoning if using, and the initial ½ teaspoon salt.
Bring the sauce to a gentle simmer and cook for about 3–5 minutes, stirring frequently.
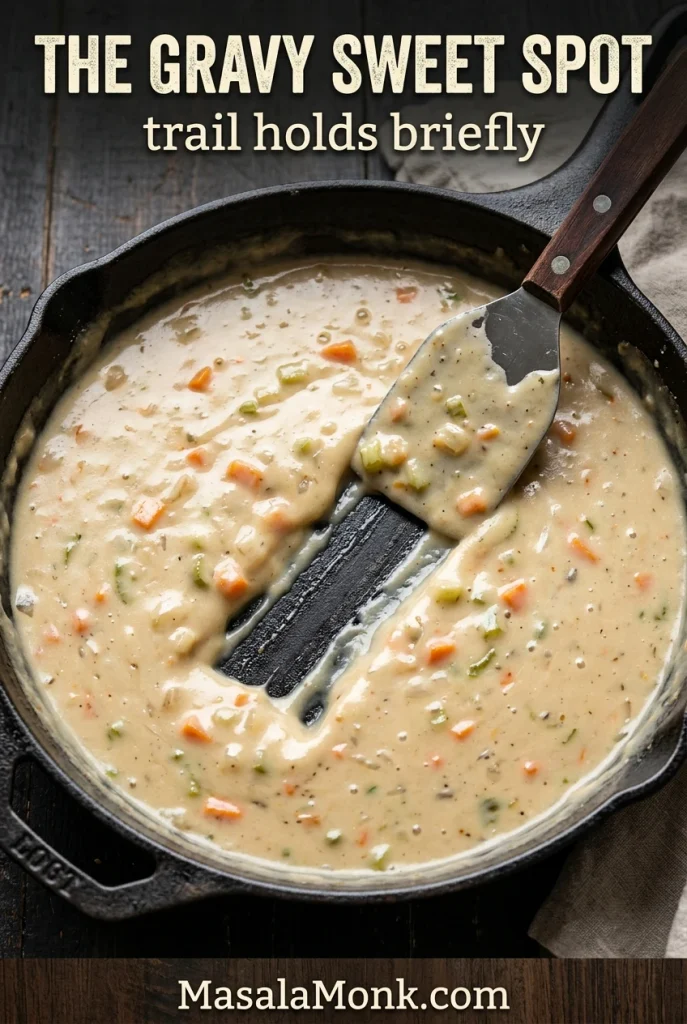
Drag a spatula across the bottom of the skillet. The path should remain visible briefly before the gravy flows back together. That’s the consistency you want before the chicken goes in.
A brief spatula trail signals the right thickness; instant closing is too loose, while barely closing is too thick.
4. Add the chicken and peas
Fold in the cooked chicken and frozen peas. Cook for another 2–3 minutes, until the chicken is hot and small bubbles are breaking through the filling.
The gravy should coat the chicken and vegetables while still moving easily when stirred. If it feels too tight, add the reserved broth a tablespoon at a time.
Taste now. The filling should already be something you’d happily eat on its own; the biscuits are finishing the casserole, not rescuing bland gravy. Add more salt, pepper or thyme only if it needs it.
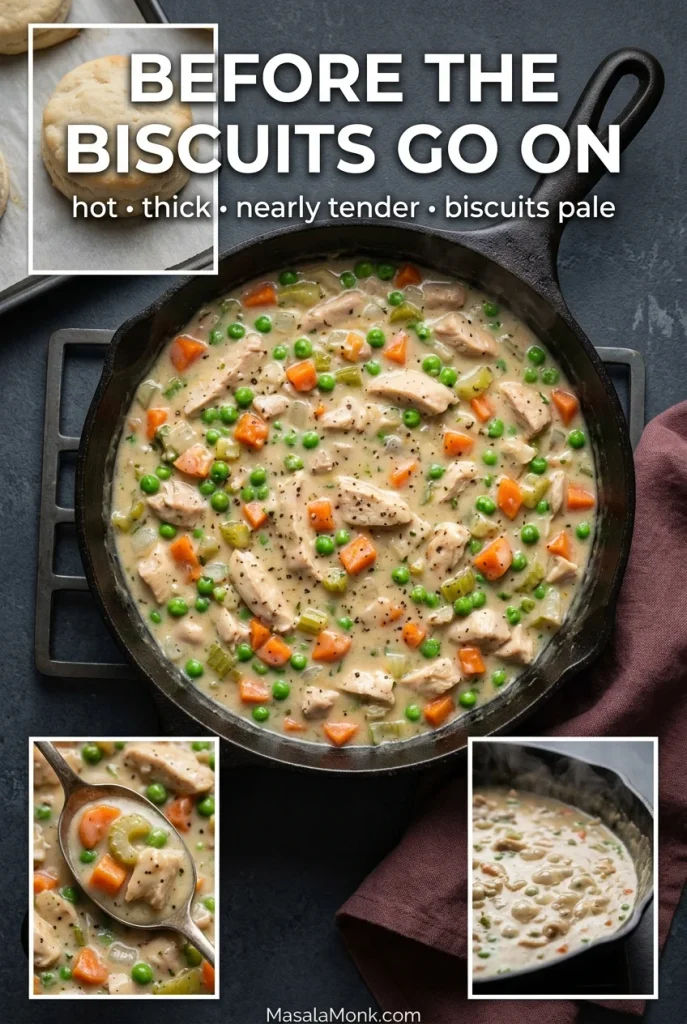
Before the Biscuits Go On
Take a quick look at four things:
Vegetables: nearly tender.
Filling: hot, with small bubbles breaking through.
Gravy: properly thickened but still easy to stir.
Biscuits: partly risen and set, but still pale.
Anything lagging is easier to correct now than after the biscuits go on.
This is the last easy correction point for vegetable tenderness, gravy thickness, seasoning and biscuit readiness.
5. Assemble the casserole
Transfer the filling to the baking dish and spread it evenly.
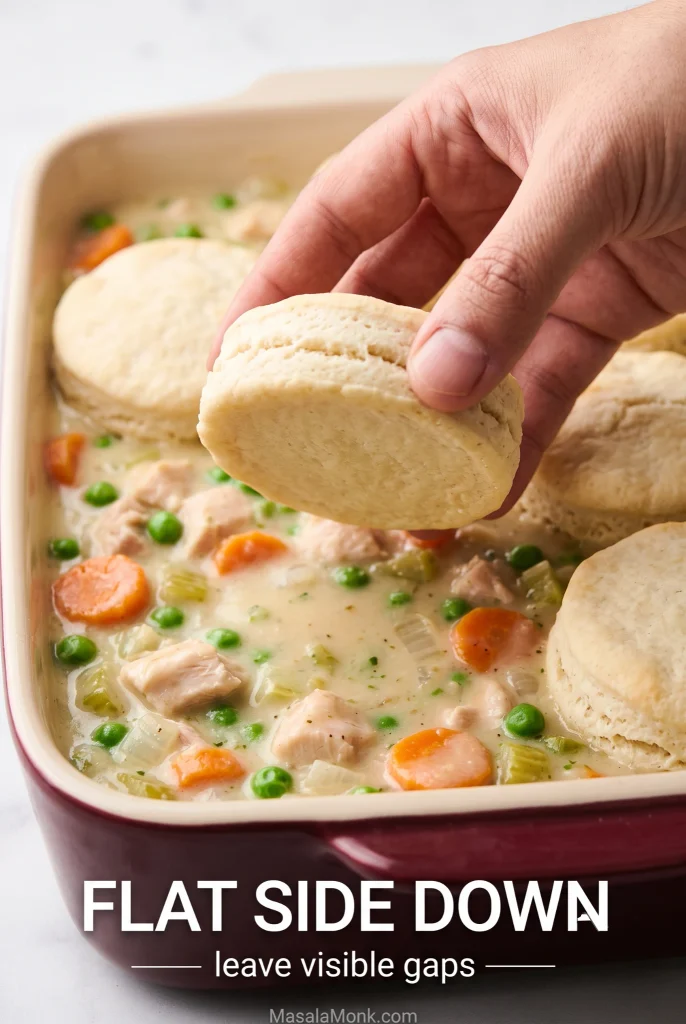
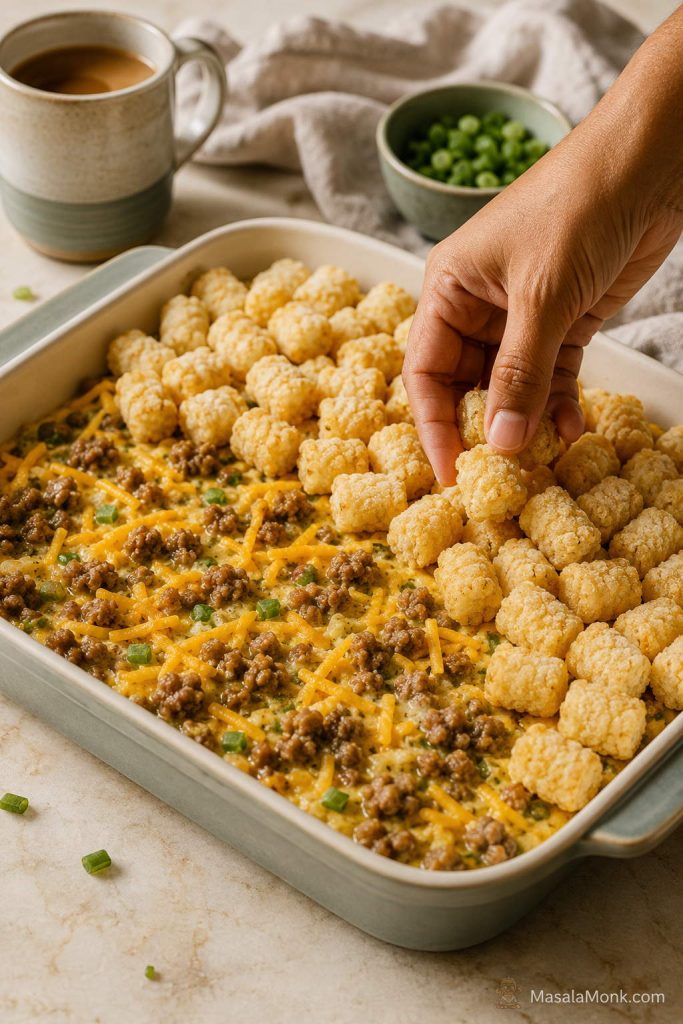
Arrange the partially baked biscuits over the top in two rows of four. They do not need to touch; leave some visible filling between them.
Transfer the biscuits with the flat sheet-pan side facing down against the filling. Brush the exposed tops lightly with melted butter.
Set the firmer baked side on the gravy and leave gaps so the topping stays distinct.
6. Finish in the oven
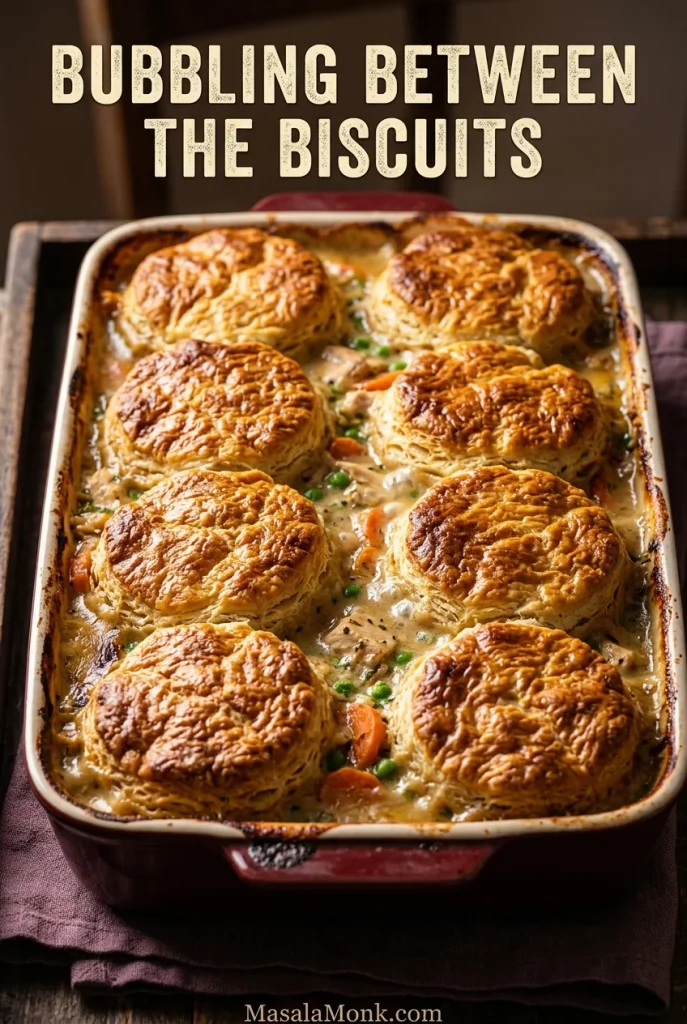
Bake for about 15–20 minutes, until gravy is bubbling through some of the gaps and the biscuit tops are deep golden brown.
Look for both cues: deep-golden tops above and gravy bubbling through several gaps below.
If the tops get there first, no problem. Cover the dish loosely with foil and give the centers more time.
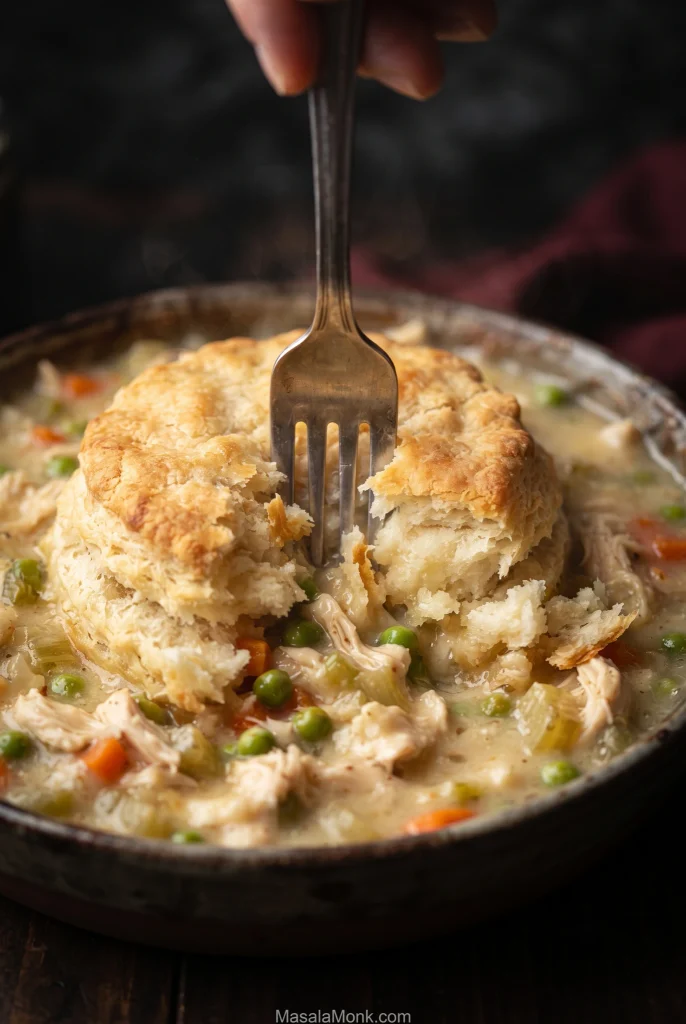
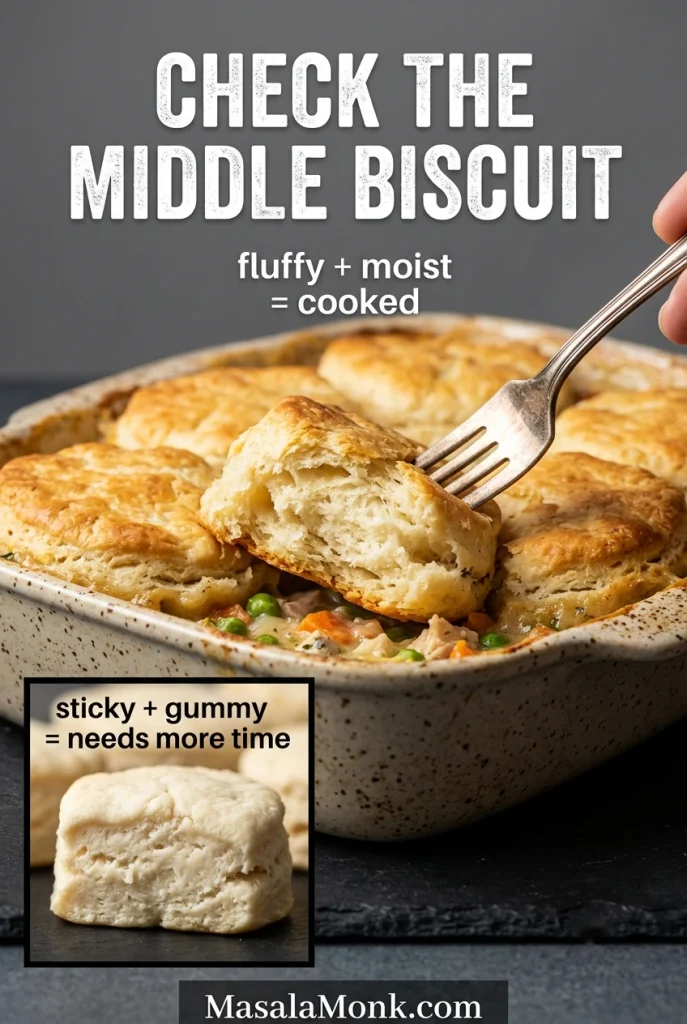
Check a biscuit near the middle rather than one at the edge. Open it gently: the center should be fluffy and cooked, not sticky, gummy or pasty.
A cooked center should separate into soft layers, not smear or stretch like raw dough.
By now, the biscuits should be buttery and toasted on top, with creamy filling bubbling around them. Rest the casserole for 10 minutes so the gravy settles and each scoop holds together better.
Thick biscuits can brown on top before the center is cooked through. The top bakes in dry oven heat while the underside sits over moist gravy, so the middle can lag behind.
Start with filling that is already hot. Put biscuit dough over refrigerator-cold gravy and much of the final bake gets spent warming the casserole instead of cooking the dough.
Large refrigerated biscuits become quite thick as their layers rise, so the center has farther to cook than the browned top suggests. The short first bake begins setting those layers before they meet the gravy.
Which Side Goes Down?
Put the flat, partially baked side down against the filling. The sheet-pan side will look flatter and feel firmer. That is the side you want on the gravy.
The biscuits do not need to form a solid lid. Leave some visible filling between them. Gravy bubbling through those gaps is exactly what you want to see.
Check the Middle Biscuit, Not the Prettiest One
Check a biscuit near the center before you take the casserole out. The biscuits around the edges often finish first, so the prettiest golden one may not tell you what is happening in the middle of the dish.
The center biscuit is the stress test; distinct layers there usually mean the edge biscuits are safely done.
Soft Underneath Does Not Automatically Mean Raw
A cooked biscuit can be tender where it touches the gravy. The best part is where biscuit and filling meet: flaky above, gravy-soft underneath.
Moisture alone does not mean raw dough. Clear layers that hold together matter more.
Cooked but tender
Still underdone
Moist where it touches the gravy
Sticky or pasty inside
Fluffy layers through the center
Dense or gummy middle
Pulls apart cleanly
Dough smears or stretches
For completely crisp bottoms, bake the biscuits separately and place one over each serving.
What If My Biscuits Are a Different Size?
The 7–8 minute head start in this recipe is for large refrigerated flaky biscuits. Very tall refrigerated biscuits may need a little longer; smaller ones may need less.
Homemade cut biscuits and drop biscuits have different moisture and thickness, so they need their own timing even though the same doneness cues still matter.
For something intentionally softer and more dumpling-like, our Crockpot Chicken and Dumplings with Biscuits cooks canned dough in a much steamier environment. With the large refrigerated biscuits used here, thickness and appearance matter more than an exact package-to-package minute.
The filling should coat the chicken and vegetables but still move when stirred. If it runs freely around them, simmer it longer. When it sits stiffly in the pan, loosen it with broth a tablespoon at a time.
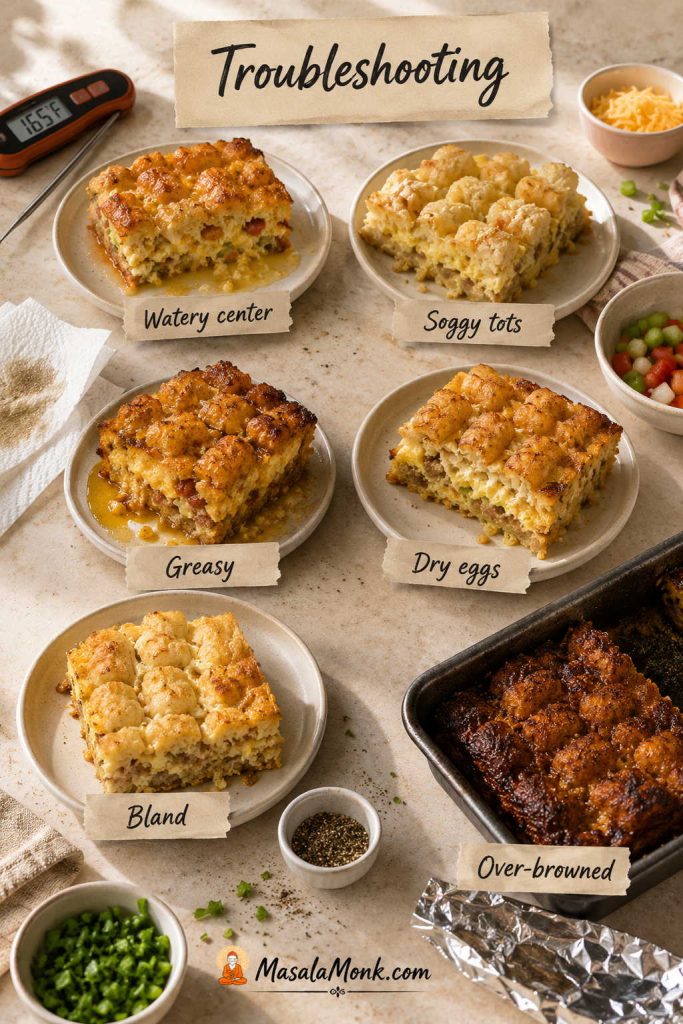
If Your Casserole Isn’t Coming Together
Problem
Do this now
Biscuits are browning before the centers cook
Tent loosely with foil and keep baking until a biscuit near the center is fluffy and cooked through.
Filling is watery before assembly
Simmer uncovered until it thickens enough to coat the chicken and vegetables.
Filling is too thick
Add broth a tablespoon at a time until the filling moves easily when stirred.
Vegetables are still hard
If they are only slightly firm, serve as is. If they are genuinely hard, lift off the biscuits, transfer the filling back to a skillet and cook until tender.
The filling tastes flat
Season individual servings with salt and pepper; once the biscuits are on, it is difficult to correct the whole casserole evenly.
Chicken Pot Pie Casserole with Cream of Chicken Soup
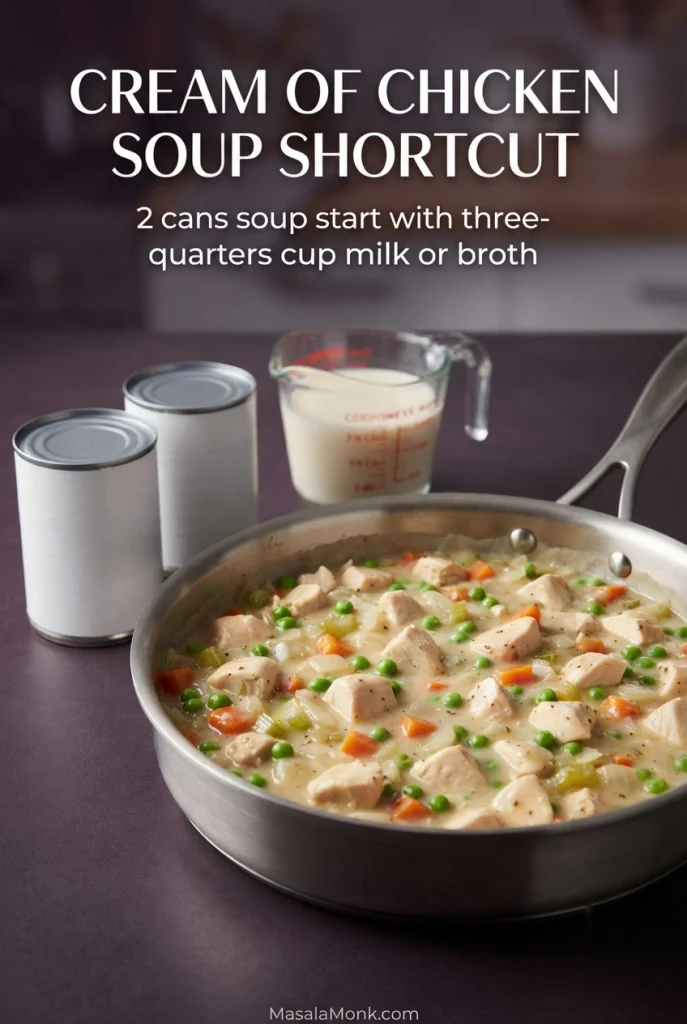
If you want to keep the biscuit method but skip making the roux, this condensed-soup shortcut cuts down the stovetop work. Start thick and loosen only if needed.
Use 2 tablespoons butter / 28 g to soften the onion, carrots and celery.
Skip the flour and the main recipe’s broth-and-milk quantities.
Stir in 2 cans condensed cream of chicken soup, 10.5 oz / 298 g each.
Start with ¾ cup / 180 ml milk or low-sodium chicken broth.
Heat everything thoroughly before deciding whether it needs more liquid. Add up to another ¼ cup / 60 ml, a few tablespoons at a time, only if the filling feels too thick.
Judge thickness only after the soup mixture is fully hot, then loosen it a little at a time.
Fold in the chicken and peas, taste for salt, then continue with the partially baked biscuits.
One can of cream of chicken can also be replaced with cream of mushroom. If cream of mushroom is what you keep on hand, it also works in our Cream of Mushroom Chicken.
Chicken Pot Pie Casserole Substitutions
Most of the filling is easy to adapt; the two things to watch are extra moisture and ingredients that need longer to soften.
If you have…
What to do
Leftover turkey
Swap it for the chicken 1:1. For a pastry-topped version, use our Turkey Pot Pie Recipe.
Frozen mixed vegetables
Heat them until the densest pieces are nearly tender before assembly.
Potatoes
Dice them small and cook or par-cook them first.
Mushrooms
Sauté until their excess moisture has cooked away before making the gravy.
Can You Make Chicken Pot Pie Casserole Ahead?
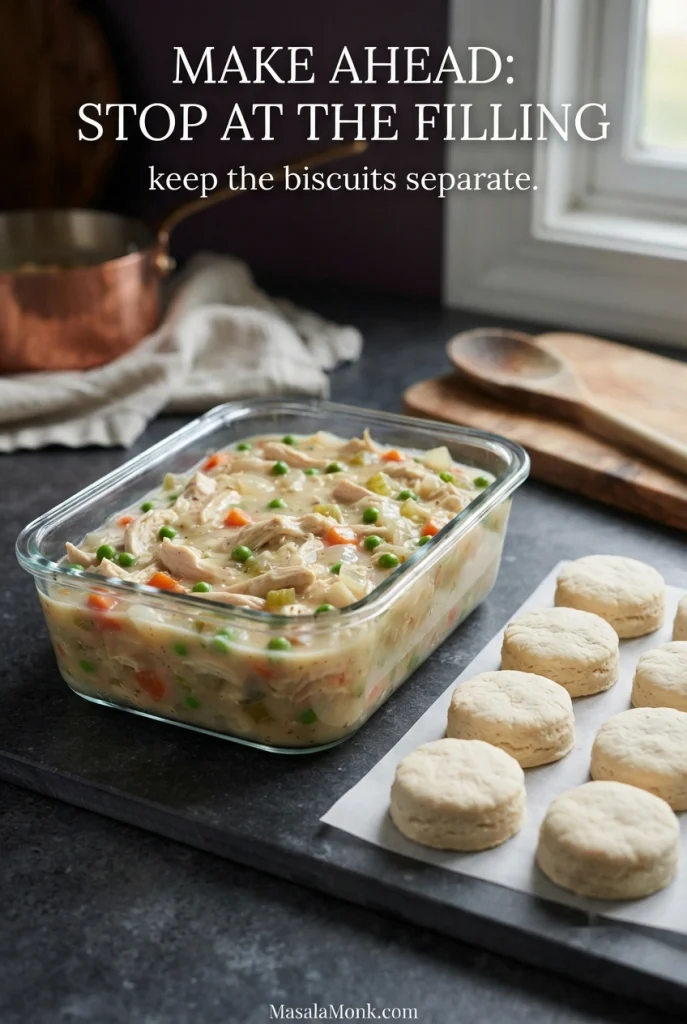
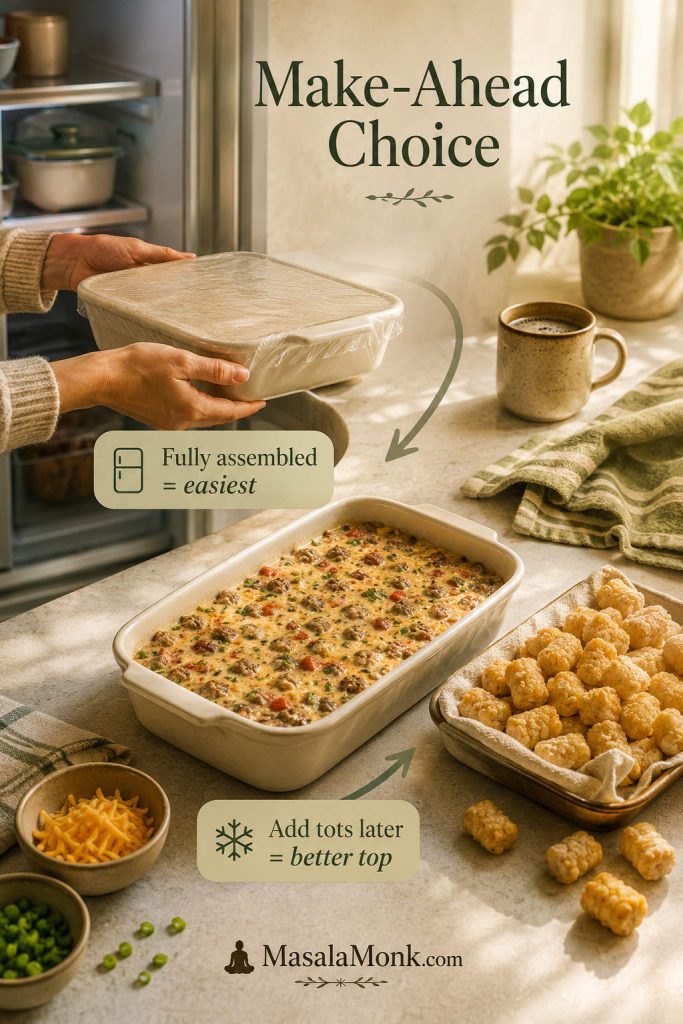
Yes—stop at the filling. You can make it 1–2 days ahead for best quality. Cool it promptly, cover and refrigerate it, and keep the biscuits separate.
At dinner time, bring the filling back to a gentle simmer, give the biscuits their short first bake and assemble the casserole while everything is hot.
Reheat the filling before assembly so the final bake can focus on the biscuits, not a cold center.
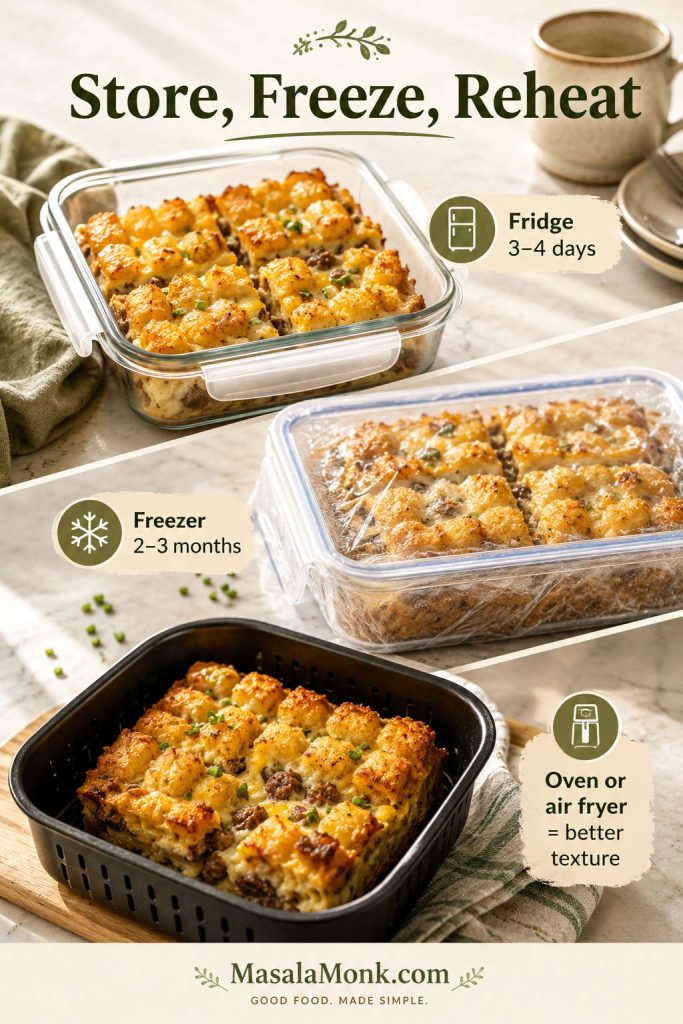
Freeze the filling without the biscuits in an airtight freezer-safe container. For best quality, use it within about 2–3 months. Thaw it overnight in the refrigerator, reheat thoroughly, then add freshly prepared biscuits.
How to Reheat It Without Soggy Biscuits
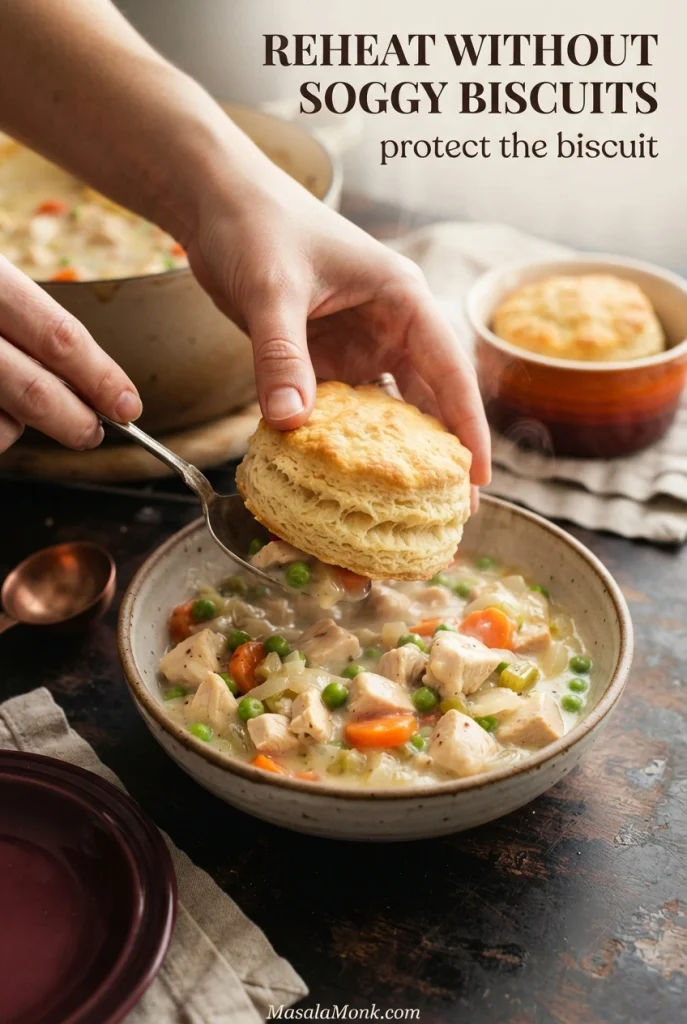
Lift the biscuits off when practical, heat the filling separately, and warm the biscuits in the oven or toaster oven before putting everything back together. The microwave works for a quick portion too; just expect a softer biscuit.
Reheat the filling gently; dry oven heat gives the biscuit a better chance to regain its crust.
For lunch tomorrow, the biscuit is the part worth protecting. Leave it sitting on gravy overnight and it will keep absorbing moisture, so store the biscuits separately whenever it is easy to do so.
Refrigerate leftovers promptly. The USDA lists cooked chicken leftovers and cooked chicken casseroles at 3–4 days in a refrigerator at 40°F / 4°C or below, and reheated leftovers should reach 165°F / 74°C. See the USDA food-safety guidance.
What Goes with Chicken Pot Pie Casserole?
Because the casserole already covers the rich, hearty part of dinner, lighter sides work especially well. For something cold and crunchy, our easy coleslaw recipe gives the creamy filling some welcome tang.
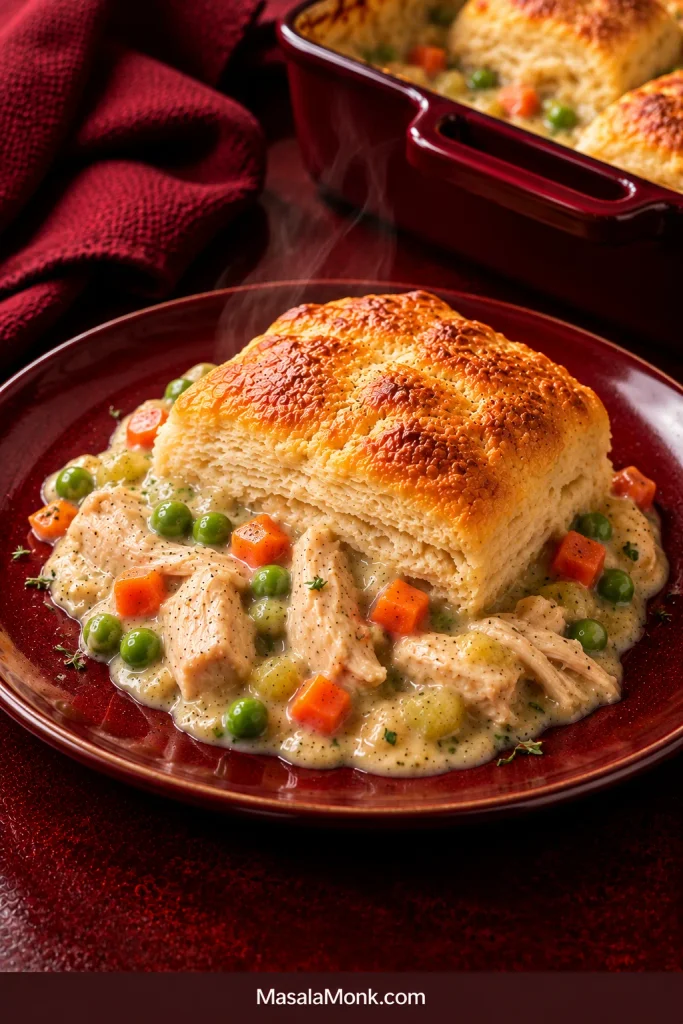
Spoon it while the gravy is still creamy and the biscuits are warm enough to pull apart. Their tops should flake, their centers should be fluffy, and the bottoms should have absorbed some gravy. That contrast—flaky above, gravy-soft underneath—is what makes the biscuit version worth making.
After the 10-minute rest, the gravy stays creamy while the biscuit keeps its flaky top and tender underside.
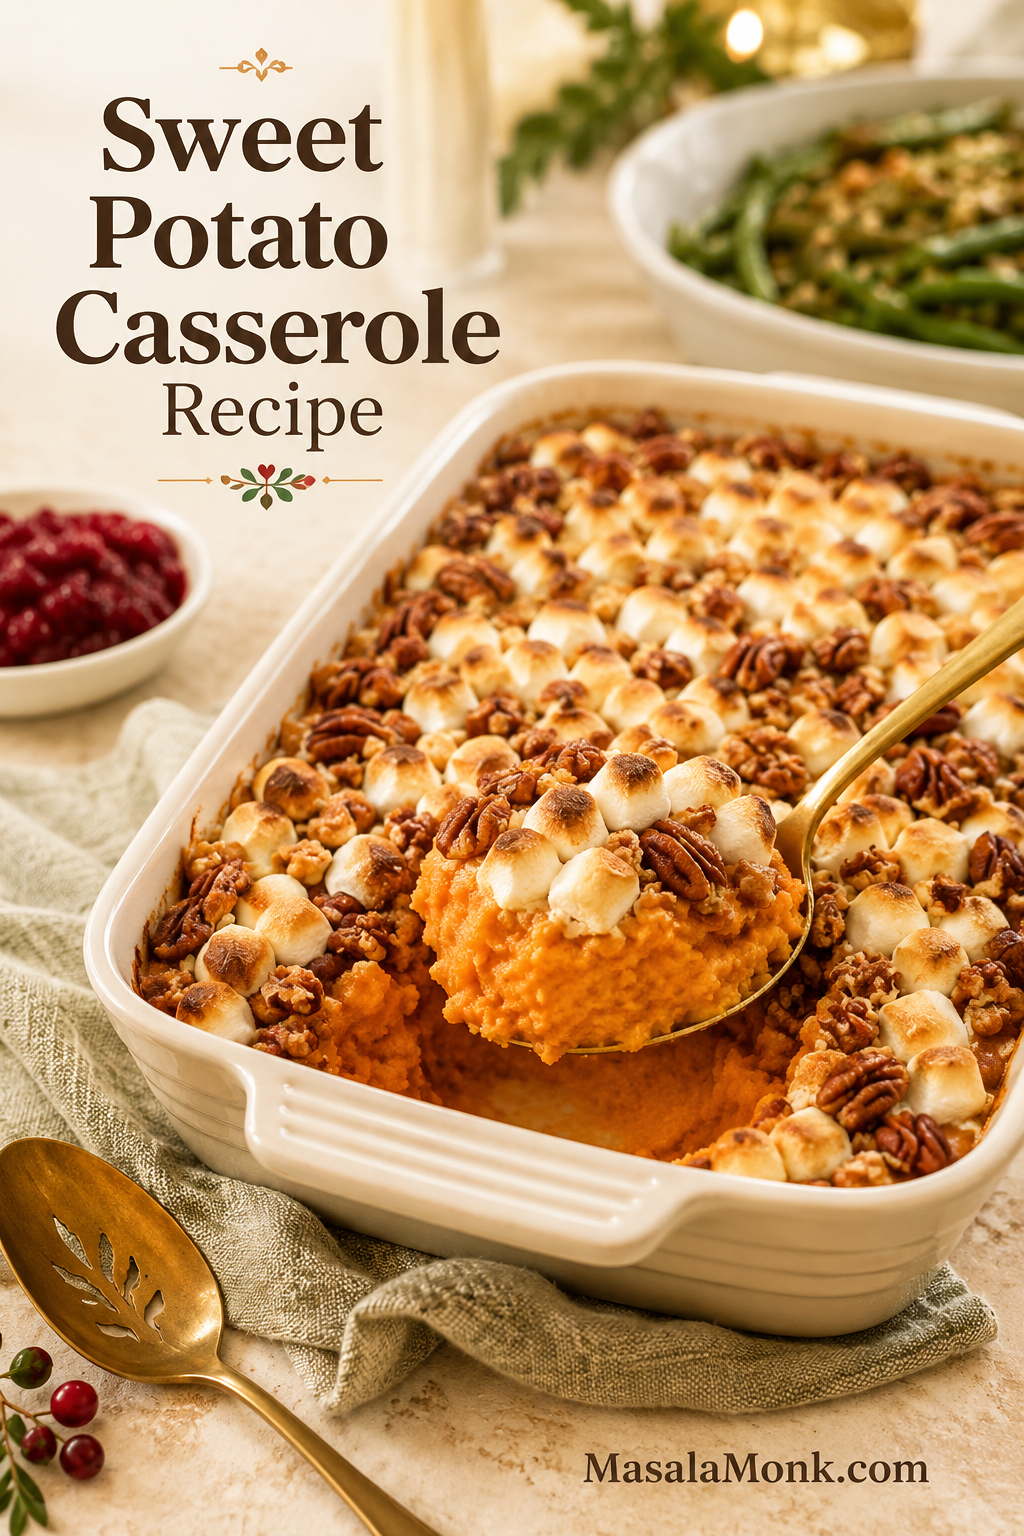
A good sweet potato casserole has to do more than taste sweet. It needs to be creamy without turning watery, rich without feeling heavy, golden on top without burning, and easy enough to fit into a busy oven schedule that already has too much going on.
This sweet potato casserole recipe is built for that exact moment, especially when Thanksgiving or a big holiday meal has several dishes competing for the oven. You can make it with fresh sweet potatoes or drained canned yams, finish it with marshmallows, pecan streusel, or both, and prep most of it ahead so the final bake feels calm instead of chaotic.
The filling is smooth, spoonable, lightly set, and warmly seasoned with butter, brown sugar, vanilla, cinnamon, and just enough salt to keep the sweetness balanced. It should feel like a satiny orange mash under a golden, buttery topping — sweet, but not candy-sweet.
Think of this as one dependable base for a table full of opinions: the marshmallow crowd, the pecan-streusel crowd, the canned-yam shortcut cook, and the person who wants the dish to stay more side than dessert.
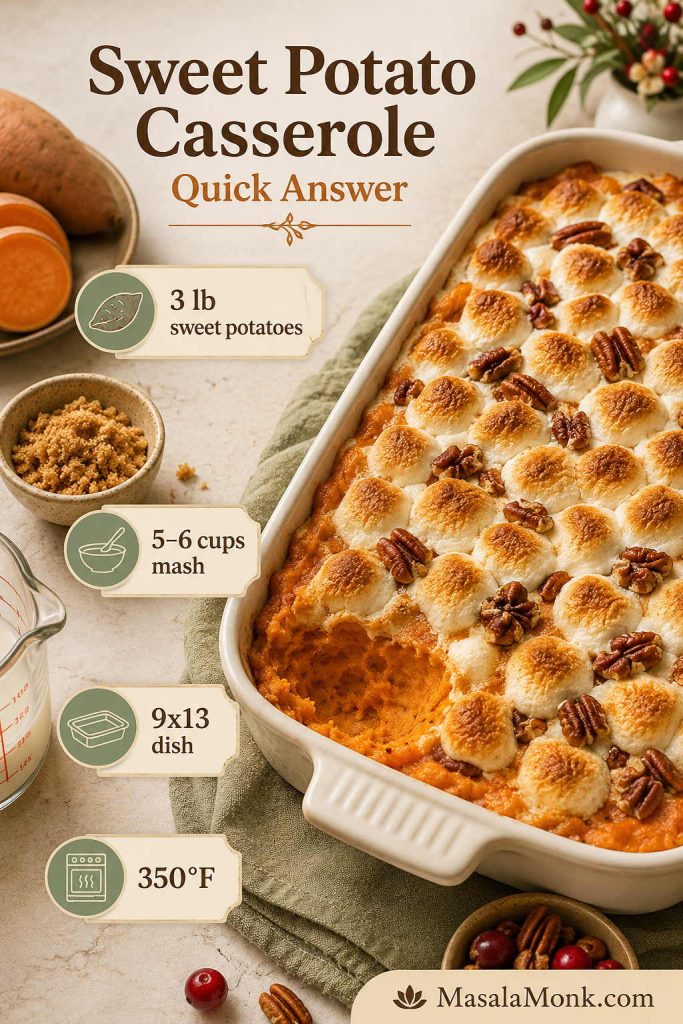
For a full sweet potato casserole, use 3 lb / 1.36 kg fresh sweet potatoes, which gives about 5–6 cups cooked mashed sweet potato. Mix the mash with melted butter, ⅓ cup brown sugar for a balanced version, milk or cream, eggs, vanilla, cinnamon, nutmeg, and salt, then spread it in a 9×13-inch / 3-quart baking dish.
Bake at 350°F / 175°C until the casserole is hot and lightly set. Because the filling contains eggs, the center should reach 165°F / 74°C if you check with an instant-read thermometer.
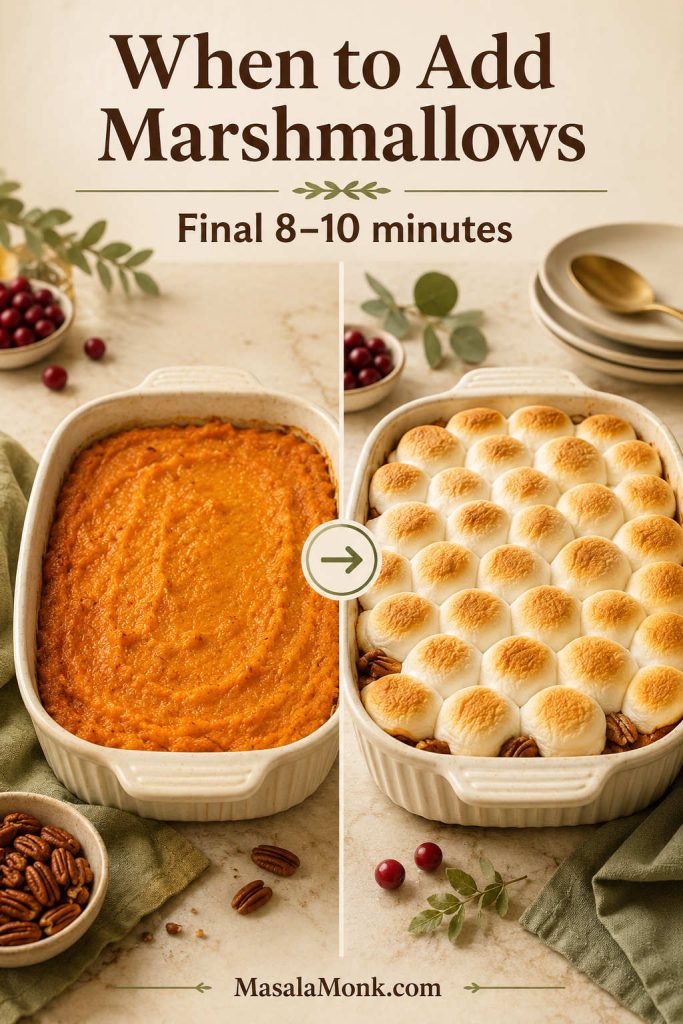
Pecan streusel goes on before baking. Save marshmallows for the final 8–10 minutes so they puff and brown instead of melting away.
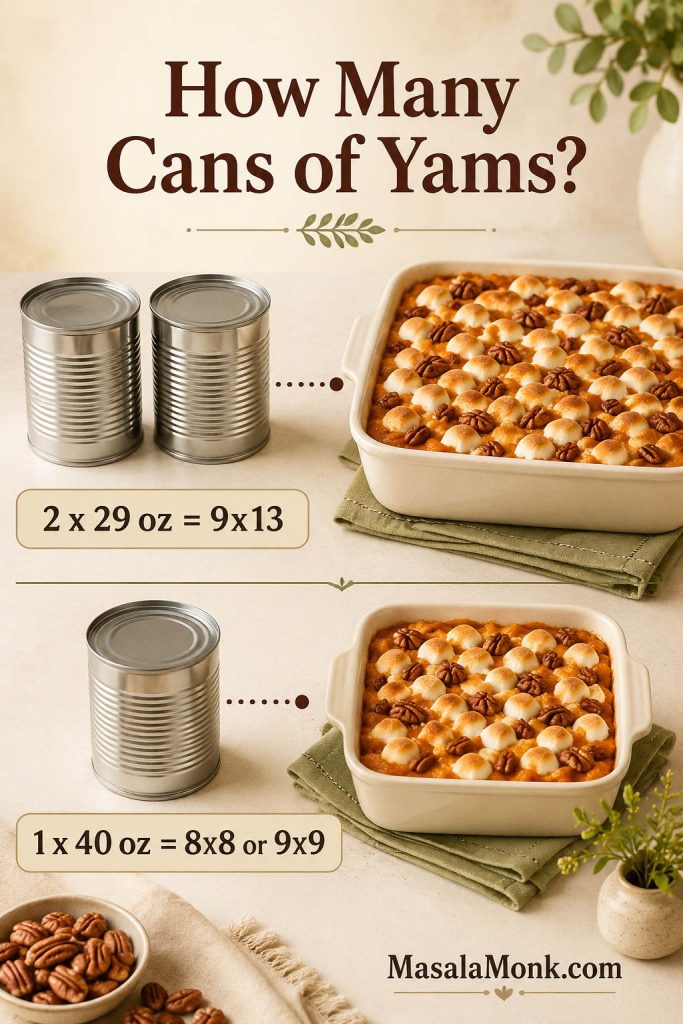
For canned yams, use 2 x 29 oz cans, drained, for a 9×13 casserole, or 1 x 40 oz can, drained, for an 8×8 or 9×9 dish. If the cans are syrup-packed, start with less sugar.
Use this quick formula as the anchor, then adjust the casserole for canned yams, pecan streusel, marshmallows, or a less-sweet holiday table.
Best crowd version: Use the balanced filling with pecan streusel for structure, then add mini marshmallows at the end if your table expects them. You get buttery crunch, soft toasted pockets, and a casserole that still eats like a side dish.
12–20 minutes for boiling, or 40–50 minutes for roasting
Bake time
30–35 minutes, or 40–50 minutes if chilled
Servings
10–12 side-dish servings
Texture
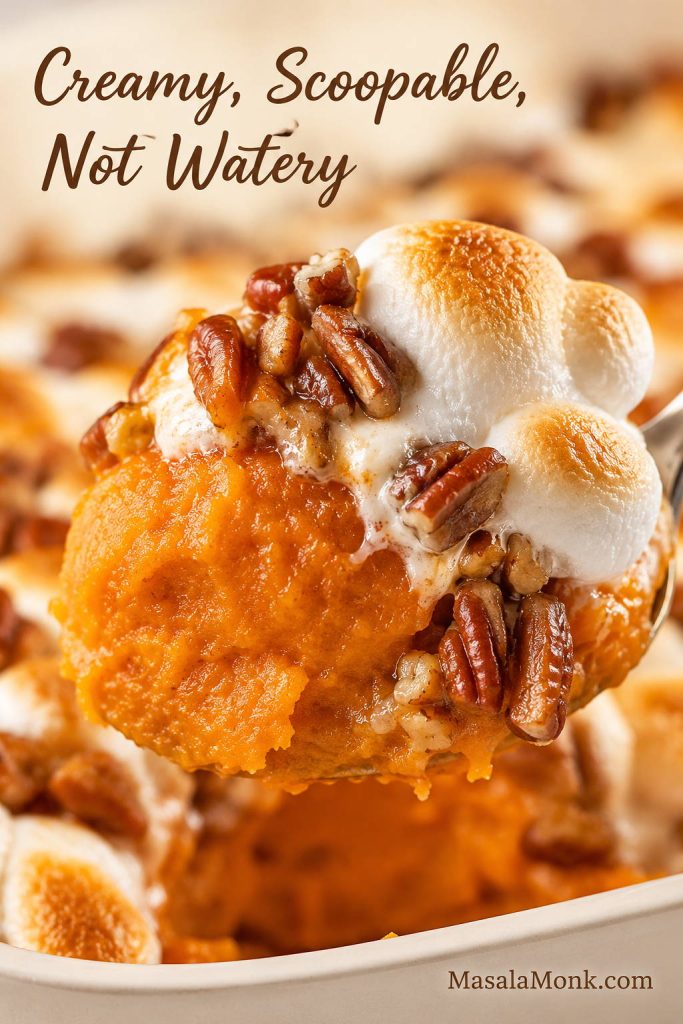
Creamy, scoopable, lightly set, not watery
Best topping paths
Pecan streusel, marshmallows, or both
Make-ahead
Base can be made 1–2 days ahead; topping stays better when added later
Canned-yam option
Yes, drain well, measure the mash, and reduce sugar/liquid as needed
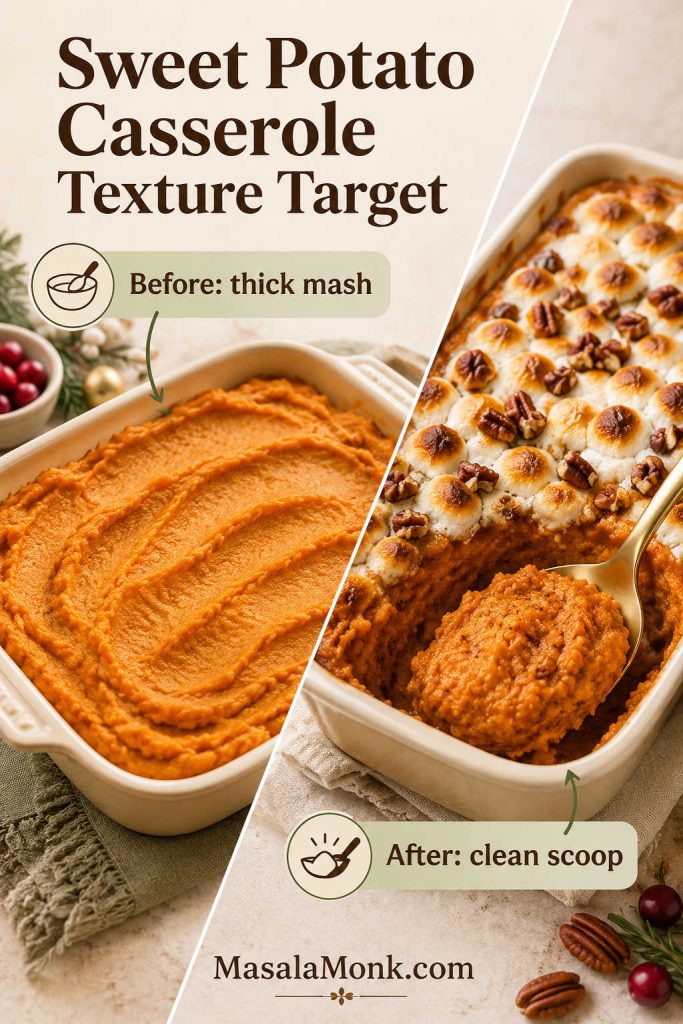
The spoon test matters because a good casserole should lift in a creamy scoop, not slide apart like loose mashed sweet potatoes.
Why This Sweet Potato Casserole Works
The whole recipe depends on one idea: build a thick, balanced sweet potato base first, then treat the topping as a separate timing decision. The sweet potato mixture needs to be thick, seasoned, and creamy before it goes into the oven. The top needs enough heat to turn golden, but not so much time that it burns, sinks, or goes sticky.
Three pounds of sweet potatoes gives enough mash for a proper 9×13 casserole without making the filling too thin.
Butter and milk or cream make the mash rich, while controlled liquid keeps it from turning soupy.
Eggs help the filling set just enough to scoop neatly. Leave them out for a softer, spoonier casserole.
Brown sugar stays flexible. Use ⅓ cup when you want a side-dish sweet casserole, or ½ cup when your table expects the sweeter classic version.
Pecan streusel bakes from the start. Marshmallows wait until the casserole is hot or nearly hot.
The canned version needs a lighter hand because it is already tender and often sweeter or wetter than fresh cooked sweet potatoes.
Resting time matters. A 10–15 minute rest helps the casserole scoop cleanly and lets the streusel settle into a buttery crunch.
That is the difference between a casserole that simply tastes sweet and one that earns its space on the holiday plate: a hot, creamy center, a topping with texture, and a first scoop that holds together instead of sliding apart.
Not Sure Which Version to Make?
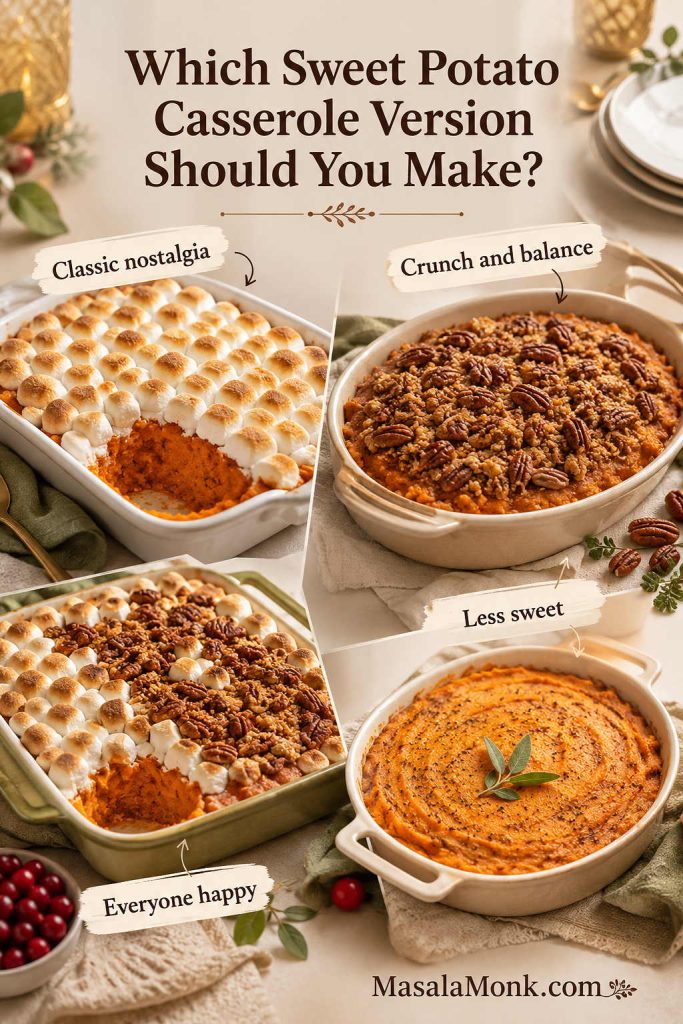
Sweet potato casserole is one of those dishes people remember before they even taste it. One person wants the marshmallows from childhood. Another wants pecans and less sweetness. Sometimes the main goal is simply getting the dish to come out hot while the oven is full.
Your table wants…
Make this version
Classic nostalgia
Mini marshmallow topping
Crunch and balance
Pecan streusel topping
Everyone happy
Pecan streusel plus marshmallows added near the end
Less sweetness
¼–⅓ cup brown sugar with pecan, oat, cornflake, or savory crumb topping
Fastest shortcut
Drained canned yams, less sugar, and milk added slowly
Make-ahead calm
Filling made ahead, topping stored separately, marshmallows added late
The best version is the one your table will actually reach for twice. Choose the topping that matches the people you are feeding, then keep the base creamy, hot, and well rested.
Choose the version before you bake so the topping matches your table: nostalgic marshmallows, crunchy pecans, both together, or a quieter less-sweet finish.
Ingredients and What Each One Does
The ingredient list is simple, but small choices matter. The goal is a casserole that tastes warm and generous, not thin, sugary, or heavy.
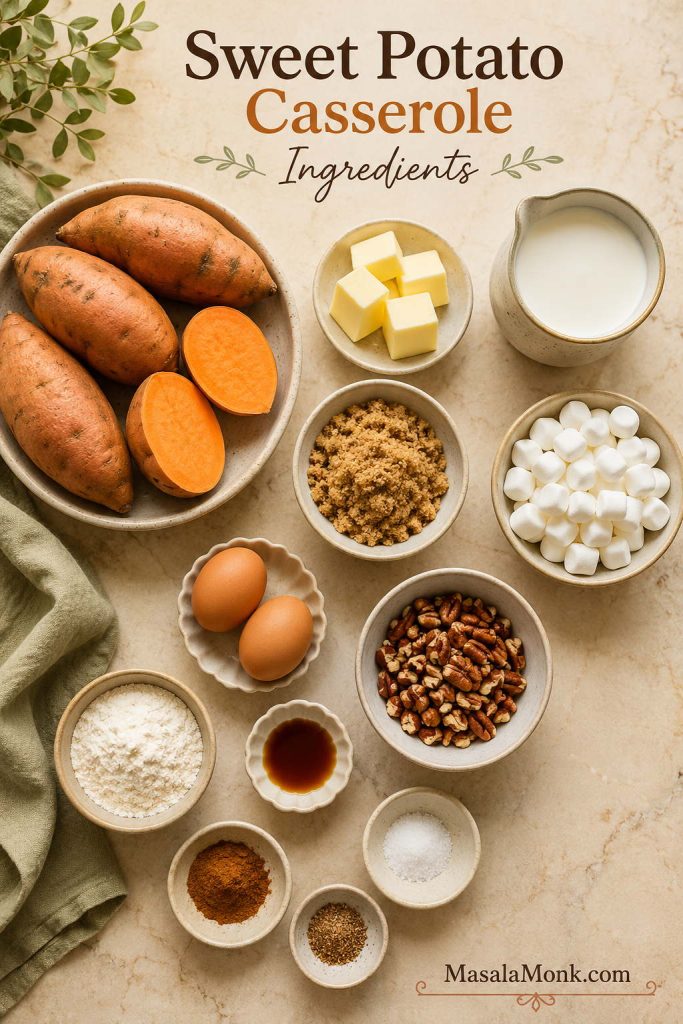
These simple ingredients work best when each one has a job: butter rounds the flavor, eggs help structure, liquid softens, and salt balances the sweetness.
For the Sweet Potato Filling
Sweet potatoes: Use 3 lb / 1.36 kg fresh sweet potatoes for a full 9×13 casserole. Orange-fleshed sweet potatoes give the classic color, sweetness, and creamy texture. For a separate look at calories, carbs, fiber, and portions, see MasalaMonk’s sweet potato nutrition facts.
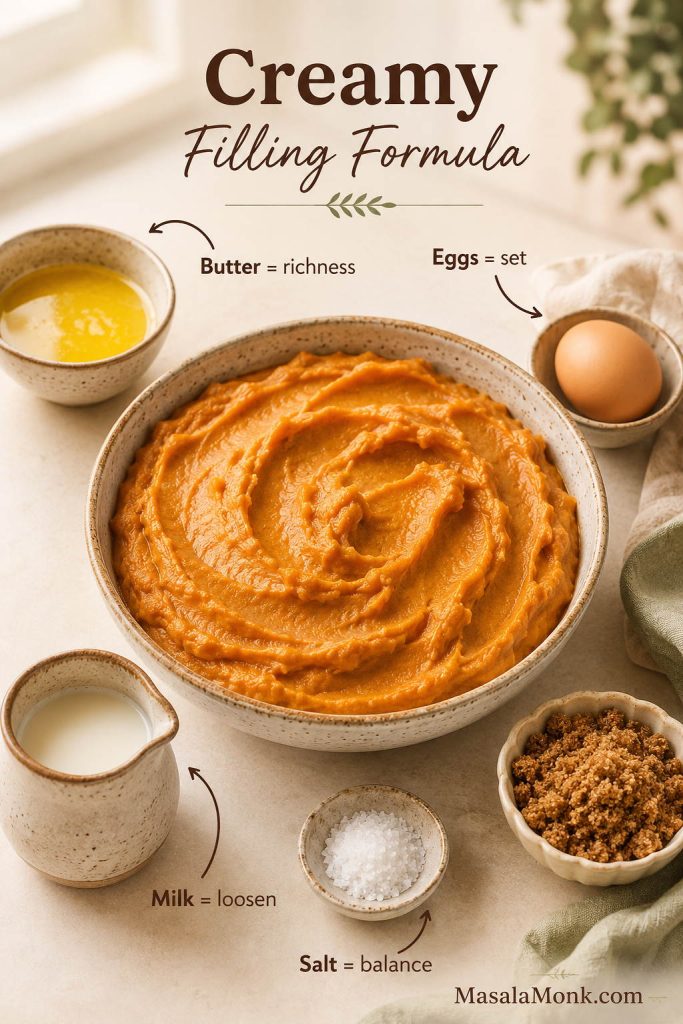
Butter: Melted butter adds richness and helps the mash taste rounded instead of flat.
Brown sugar: Use ⅓ cup / about 65–70 g for a side-dish sweet casserole, or ½ cup / 100 g for the sweeter classic version. Start lower if your cans are syrup-packed.
Milk, half-and-half, cream, or evaporated milk: This loosens the mash and makes it creamy. Evaporated milk gives a slightly old-fashioned richness without using heavy cream.
Eggs: Eggs help the casserole set and scoop neatly. If you skip them, the dish will be softer and more spoonable.
Vanilla: A little vanilla belongs in the background here. You want warmth, not a filling that tastes like dessert pudding.
Cinnamon and nutmeg: Cinnamon gives the main warmth. Nutmeg is optional but helpful in small amounts. You can also use 1–1½ teaspoons pumpkin pie spice instead.
Salt: Salt keeps the sweetness from going flat. It is especially important when marshmallows or a brown sugar topping are involved.
Before the topping goes on, the filling needs balance: rich enough from butter, lightly set from eggs, loosened carefully with milk, and sharpened with salt.
For the Pecan Streusel Topping
Pecans: Pecans bring crunch and a buttery flavor that balances the soft filling. Toast them for 3–5 minutes in a dry skillet if you want a deeper nutty edge.
Brown sugar: Helps the topping caramelize and gives the crumble a classic flavor.
Flour: Holds the topping together so it bakes into crumbs instead of a sugary butter puddle.
Butter: Melted butter binds the topping. Start with 5 tablespoons and add the 6th only if the mixture still looks dry.
Cinnamon and salt: These keep the topping warm and balanced.
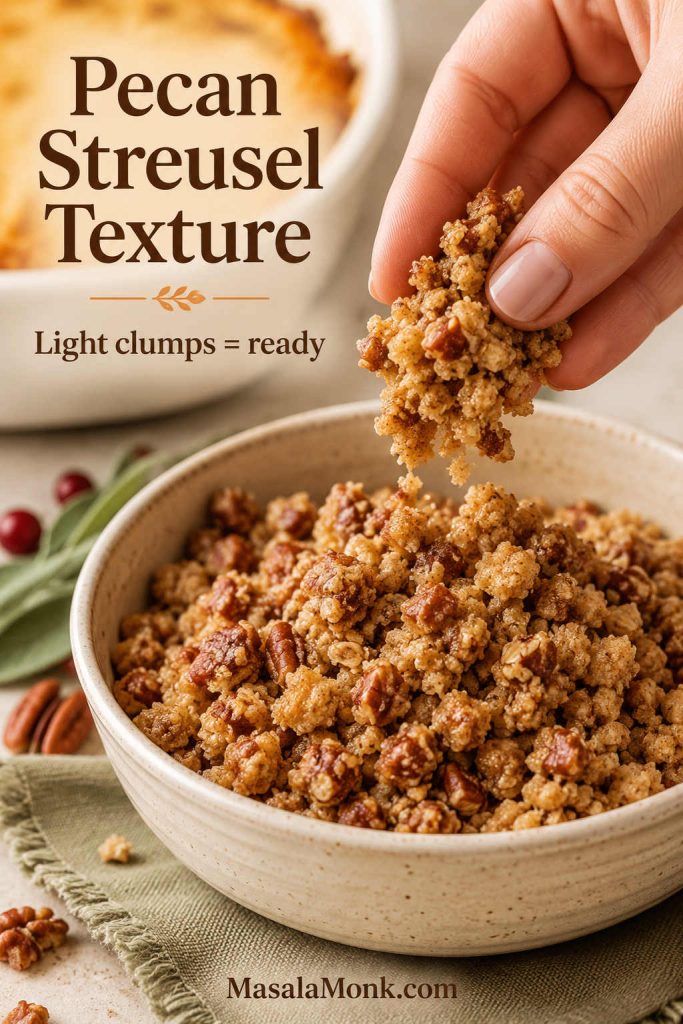
If the streusel clumps lightly when squeezed, it has enough butter. If it looks sandy and dry, add the remaining tablespoon before scattering it over the casserole.
Nut-free option: Replace pecans with crushed cornflakes, oat crumble, or plain brown sugar crumble.
For the Marshmallow Topping
Mini marshmallows are easiest to distribute and brown more evenly than large ones. Use 2–3 cups for a 9×13 casserole, depending on whether you want a light scattered top or a full classic layer.
If you only have large marshmallows, cut them into smaller pieces before adding them. Whole large marshmallows brown unevenly and can make the top patchy.
MasalaMonk note: When using both pecans and marshmallows, bake the pecan layer first and add marshmallows at the end. That gives you buttery crunch underneath and soft toasted pockets on top.
Fresh Sweet Potatoes or Canned Yams: Which Should You Use?
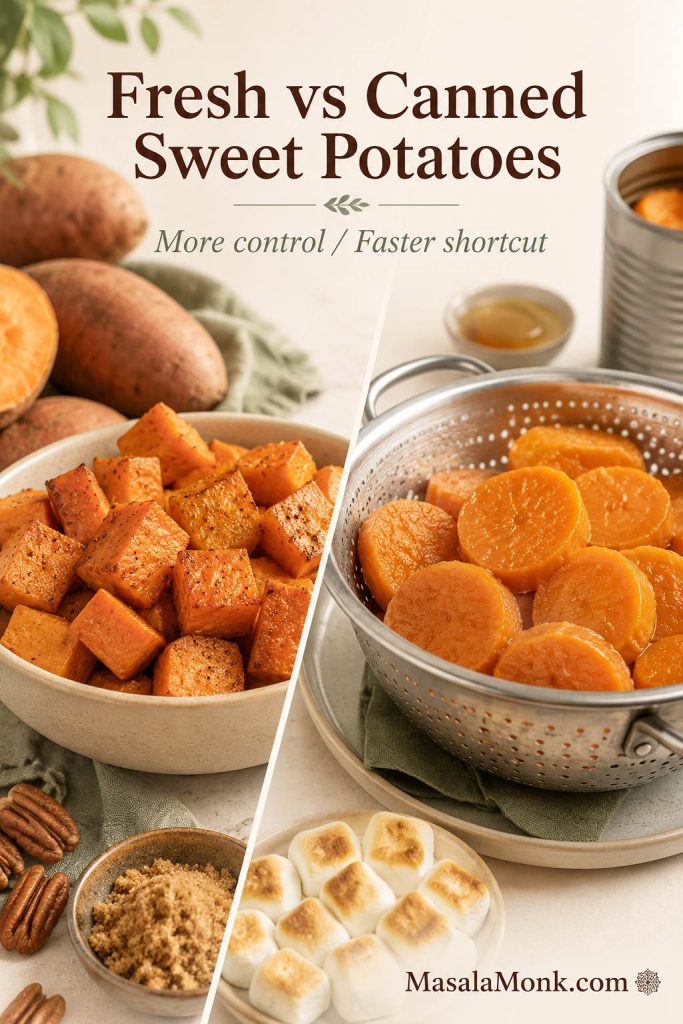
Fresh sweet potatoes give the deepest flavor and the most control over texture. Shortcut cans are faster and completely useful when you are cooking a big meal and need one less thing to peel, chop, boil, or roast.
The goal is not to prove anything; it is to get a creamy, well-balanced casserole on the table. A canned version can still taste intentional when the pieces are drained, mashed gently, seasoned well, and kept thick enough before baking.
Fresh sweet potatoes give the most control, but canned yams are still a smart shortcut when they are drained well and sweetened with a lighter hand.
Canned-yam shortcut: Can sizes are only a starting point. Drain first, then measure the mash. Aim for 5–6 cups for a full 9×13 casserole or 3–4 cups for a smaller one.
In many U.S. grocery stores, “canned yams” are usually canned sweet potatoes. True yams are a different root vegetable, but for this style of casserole, most U.S. canned “yams” are the orange sweet potatoes readers expect.
The main difference is moisture and sweetness. Fresh cooked sweet potatoes can be steam-dried or roasted until sturdy. Canned pieces are already tender and may be packed in syrup, so taste before adding the full sugar amount and add milk gradually.
How Many Cans of Yams Do You Need?
For shortcut batches, think in mashed yield rather than can labels alone. Once you know your amount, use the watery-casserole prevention tips before adding milk.
Instead of guessing from can size alone, aim for the right amount of mashed sweet potato for your pan: 5–6 cups for a full 9×13 casserole.
Starting point
Amount to use
Where it fits
Fresh sweet potatoes
3 lb / 1.36 kg
Full 9×13 casserole
Cooked mashed sweet potato
5–6 cups
Same as the main full batch
Canned yams or canned sweet potatoes
2 x 29 oz cans, drained
Full 9×13 canned shortcut
Canned yams or canned sweet potatoes
1 x 40 oz can, drained
Smaller 8×8, 9×9, or 2-quart casserole
Small batch mash
3–4 cups
6–8 servings
How to Use Canned Yams Without Making the Casserole Watery
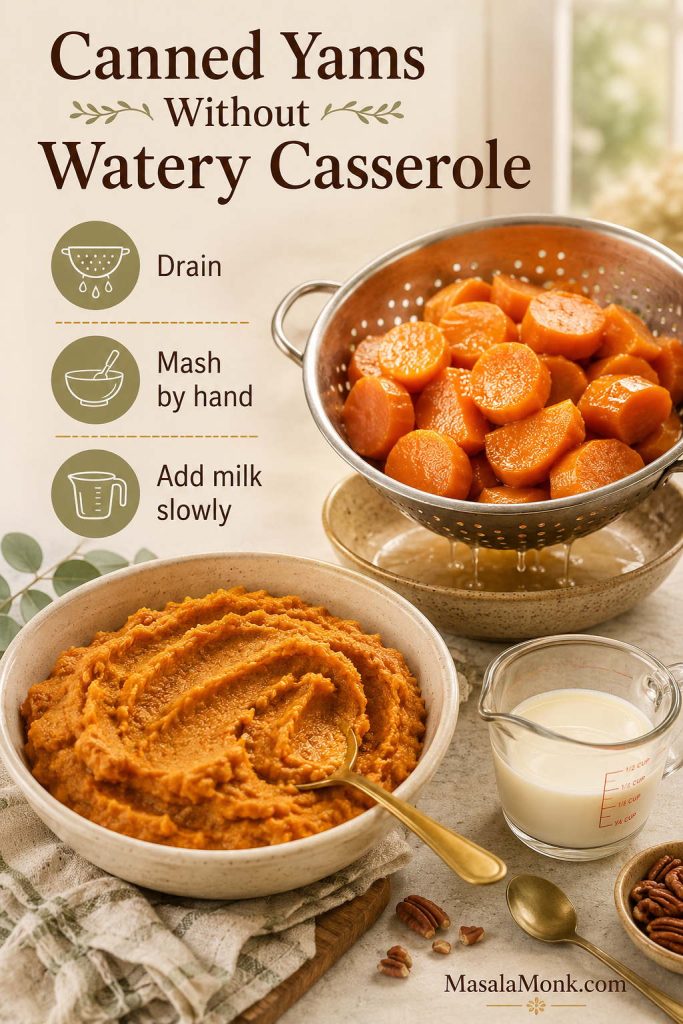
Let excess syrup run off. A few minutes in a colander helps more than rushing straight to the bowl.
Start lower on sugar. Syrup-packed cans often need only ¼–⅓ cup brown sugar in the filling.
Add milk slowly. Stop when the mash looks creamy but still holds soft ridges.
Mash by hand. A potato masher gives better control than a blender or food processor.
Taste before topping. The filling should taste pleasantly sweet and slightly salty before the final layer goes on.
For canned-yam sweet potato casserole, draining comes first; after that, add milk slowly so the mash turns creamy instead of watery.
Handled this way, the shortcut does not feel like a compromise. It feels like the calm choice on a crowded cooking day.
What Pan Size Should You Use?
Pan size matters because sweet potato casserole should be deep enough to stay creamy, but not so deep that the center stays cold while the top browns. A too-deep pan is one of the quiet reasons casseroles come out cold in the middle.
Do not overthink the dish, but do respect the depth. A shallow casserole heats faster and gives you more topping in every scoop; a deeper one stays creamier but needs more time.
Dish size
Sweet potato mash amount
Works well for
Approx. servings
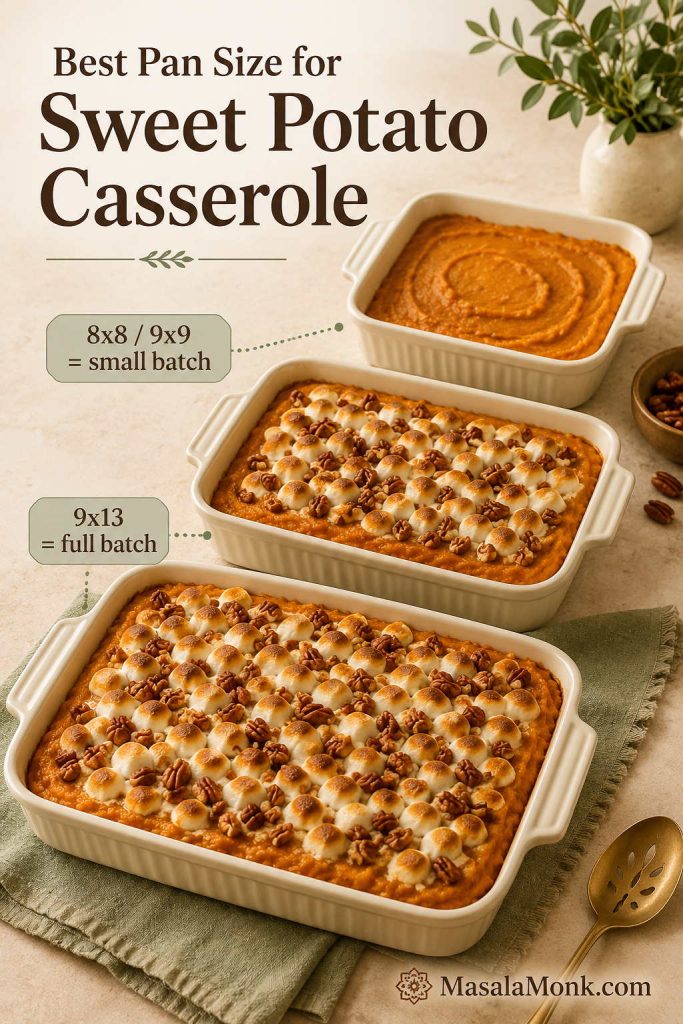
8×8-inch or 9×9-inch dish
3–4 cups
Small batch, canned-yam version, smaller gathering
6–8
2-quart baking dish
3–4 cups
Classic smaller casserole
6–8
9×13-inch / 3-quart dish
5–6 cups
Full side-dish batch
10–12
Half batch
2½–3 cups
Small family side
5–6
Mini batch
1½–2 cups
Two to four people
2–4
Match the pan to the amount of mash: a full 9×13 casserole feeds a crowd, while smaller dishes give a thicker, cozier bake.
If you are using a deeper dish or baking from cold, the fridge-to-oven timing guide will help you avoid a cold center.
For most families, the 9×13 version is the most practical full batch. For a smaller dinner, the 8×8 version feels more generous because every scoop gets topping.
If your casserole is in a deeper dish, expect it to take longer to heat through. If it is in a wider, shallower dish, the topping may brown faster. Either way, the center should be hot before you call it done.
If you like this kind of full-pan side, MasalaMonk’s hashbrown casserole follows a similar 9×13 comfort-food logic, but moves in a savory, cheesy potato direction instead of a sweet one.
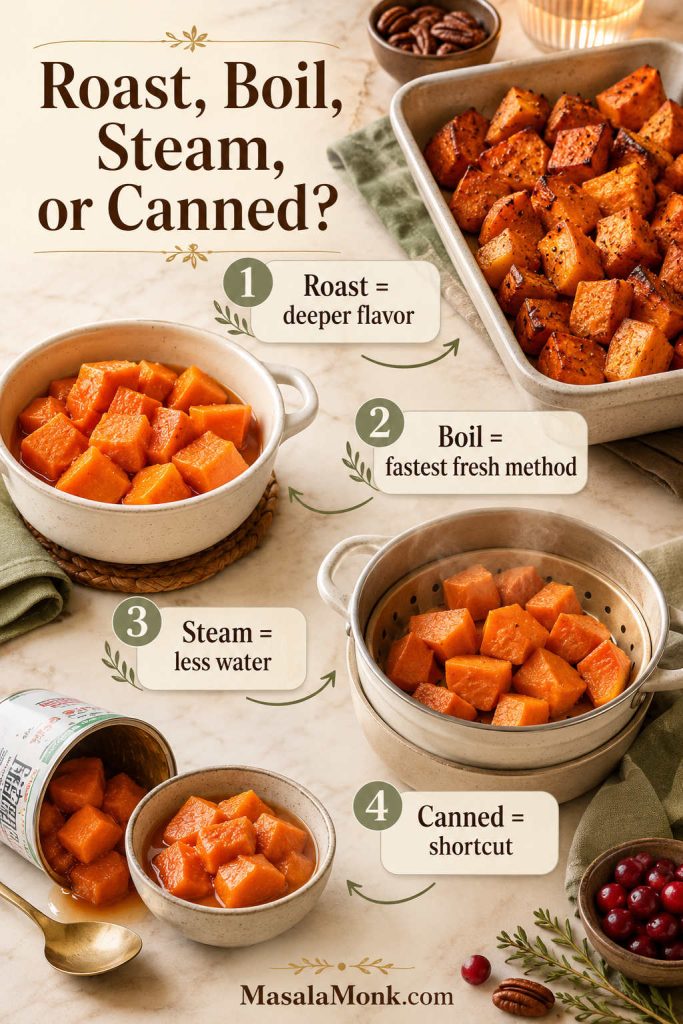
Roast, Boil, Steam, or Open a Can?
There is no single correct way to prepare the sweet potatoes. The right method depends on the kind of cooking day you are having: slow and flavor-focused, or busy and shortcut-friendly.
Method
Timing
Choose this if
Watch for
Roasting
425°F / 220°C for 40–50 minutes, depending size
You want a more concentrated flavor and a sturdier mash
Takes longer; cool slightly before scooping and mashing
Boiling
12–20 minutes for peeled chunks
You want the fastest fresh method
Drain very well and steam-dry 3–5 minutes before mashing
Steaming
15–25 minutes, depending chunk size
You want good texture with less water absorption than boiling
Needs a steamer basket or enough pot space
Drained canned sweet potatoes or yams
No cooking before mixing, just drain and mash
You want the fastest shortcut
Reduce sugar and add liquid gradually
Pick the method around your schedule: roast for deeper flavor, boil for speed, steam for moisture control, or use canned yams when time is tight.
If you have time, roasting gives a more concentrated flavor because the sweet potatoes lose some moisture and become naturally sweeter. If you need the practical version, boiling peeled cubes is faster and still works well as long as you let them steam-dry before mixing.
You do not need to heavily salt the cooking water because the filling is seasoned after mashing.
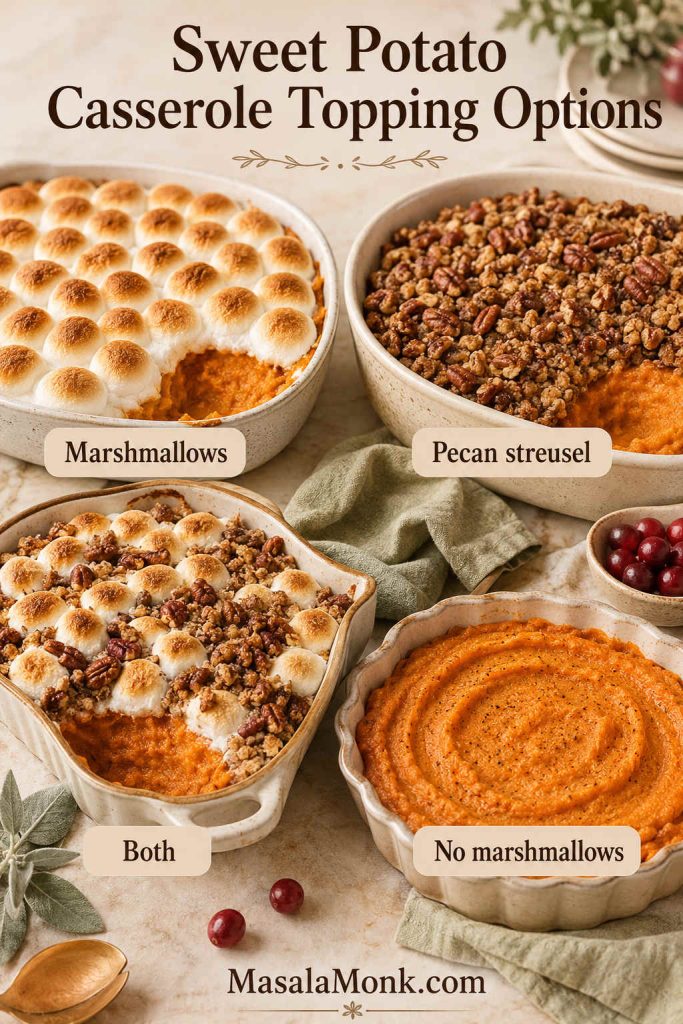
Marshmallows, Pecans, or Both?
This is where family opinions usually show up. Some people want the marshmallows they grew up with; others want pecans, crunch, and less sweetness. The base recipe is flexible enough to satisfy both camps without making two casseroles.
Topping
Choose this if
What it brings
Mini marshmallows
You want the classic nostalgic version
Soft, sweet, toasted pockets
Pecan streusel
You want crunch and less dessert-heavy sweetness
Buttery texture and a sweet-salty edge
Pecans + marshmallows
You want a reliable crowd compromise
Crunch underneath, golden marshmallows on top
No marshmallows
You want a more savory-table-friendly casserole
A less dessert-like finish
Nut-free topping
You are serving a table with nut allergies
Crunch from cornflakes or oats, or softness from marshmallows
The topping sets the mood of the whole dish, from soft marshmallow nostalgia to pecan-streusel crunch or a simpler side-dish-style finish.
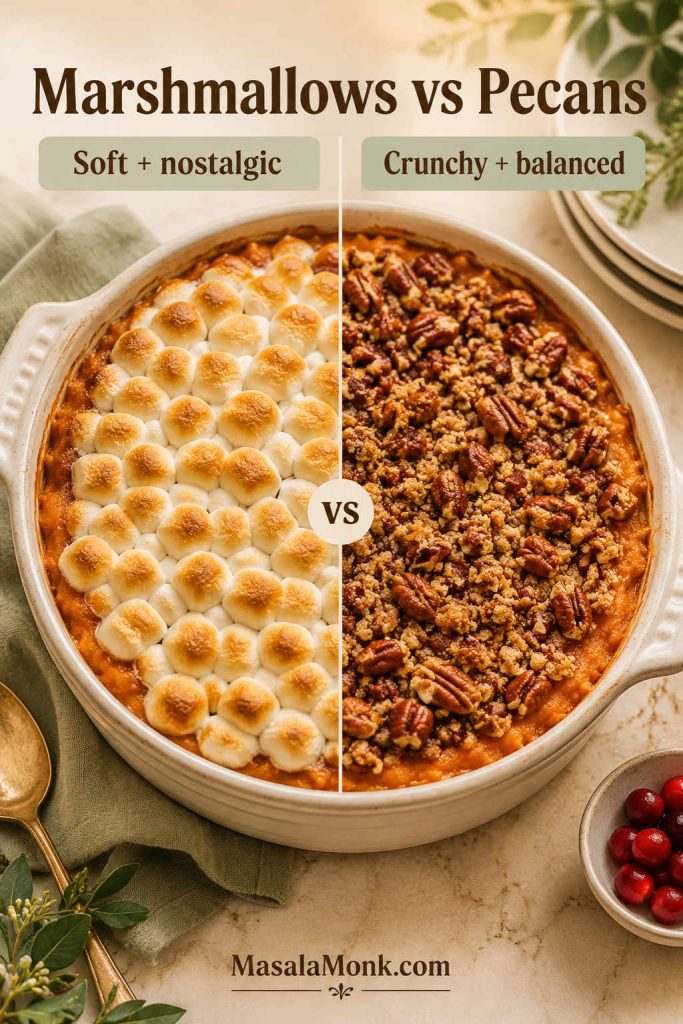
Marshmallows vs Pecans: Which Topping Fits Your Table?
Marshmallows make the casserole softer and sweeter, while pecan streusel adds crunch that helps it sit comfortably beside savory holiday sides.
If you are unsure, the pecan-plus-marshmallow version keeps both camps happy: buttery crumble for the people who want texture, and toasted marshmallows for the people who would miss them.
Marshmallow Topping
Marshmallows are the classic choice for many tables. Let the casserole get hot first, then give the marshmallows just enough oven time to puff, brown, and stay visible on the surface.
Pecan Streusel Topping
Pecan streusel turns the casserole into something more textured and less dessert-heavy. The best spoonfuls have creamy sweet potato underneath and a little buttery crunch on top.
If You Do Not Want Marshmallows
Skip them and use pecan streusel, oat crumble, cornflake crumble, or a savory breadcrumb topping. This is the path for a table that wants sweet potatoes to stay firmly beside the savory food.
Broiler warning: If you use the broiler to brown marshmallows, stay at the oven. They can go from golden to scorched in seconds. Broil for 30–90 seconds only, watching constantly.
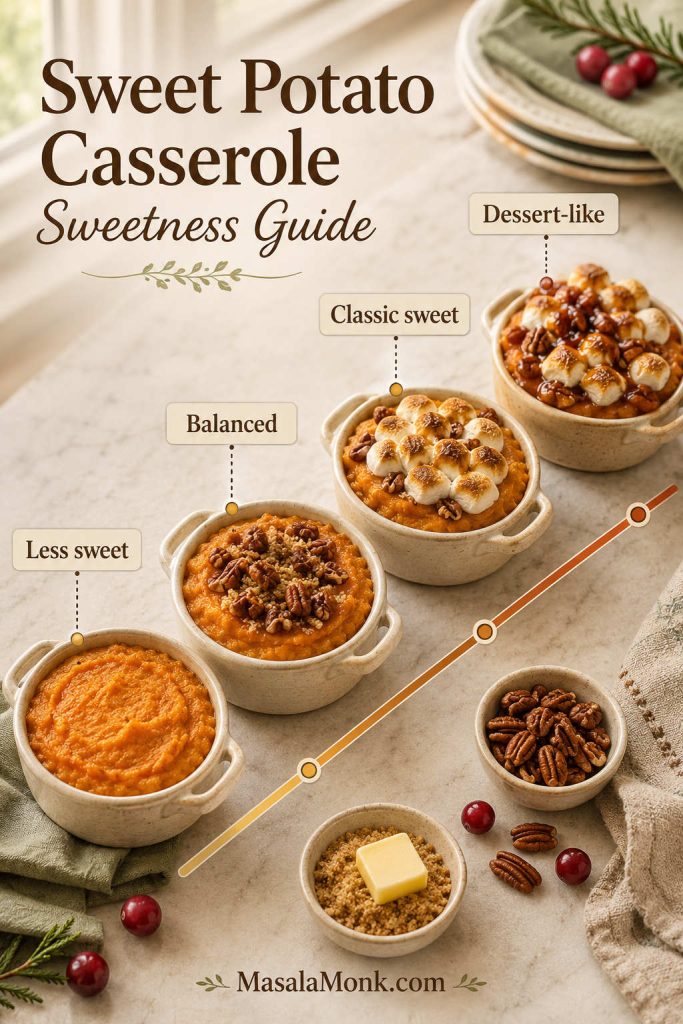
How Sweet Should It Be?
Sweet potato casserole sits in a funny place: it is a side dish, but it often shares ingredients with dessert. This is where a lot of casseroles go wrong: the filling is sweetened like dessert, then covered with an even sweeter topping.
Start with the kind of dish you want, then choose the sugar level. If you are using marshmallows or syrup-packed cans, the filling usually needs less sugar than you think.
Style
Brown sugar in filling
Topping idea
Result
Less sweet
¼–⅓ cup / 50–65 g
Pecan, oat, cornflake, or savory crumb
More like a side dish
Balanced
⅓ cup / about 65–70 g
Pecans, marshmallows, or both
Sweet but not candy-like
Classic sweet
½ cup / 100 g
Marshmallows or pecan streusel
Traditional sweetness
Dessert-like
½ cup or more
Marshmallows plus sweeter streusel
Very sweet, closer to pie filling
Decide the sweetness before adding the topping, because marshmallows and syrup-packed canned yams can quickly push the recipe toward dessert.
If you are starting with syrup-packed cans, revisit the canned-yam notes before adding the full sugar amount.
For most tables, ⅓ cup brown sugar in the filling is the safest starting point. It leaves room for a sweet topping without making the whole dish feel heavy. If you are nervous about sweetness, start lower. You can always make the topping sweeter, but you cannot easily pull sugar back once the filling is mixed.
Texture Target Before You Bake
Look for this: The mash should be thick, creamy, and able to hold soft ridges when you drag a spoon through it. It should not pour like soup. After baking, the edges should look hot and slightly puffed, the center should be hot, and the casserole should rest 10–15 minutes before serving.
A thick mash that holds spoon ridges is your best early clue that the baked casserole will scoop neatly after it rests.
This is the quiet moment where the casserole is either set up for success or headed toward watery. When the base is thick before baking and fully hot before serving, the first scoop feels generous: soft, creamy, and steady enough to hold its place on the plate.
How to Make Sweet Potato Casserole
This is the main fresh-sweet-potato method. Use the canned-yam notes above if you are starting with canned sweet potatoes.
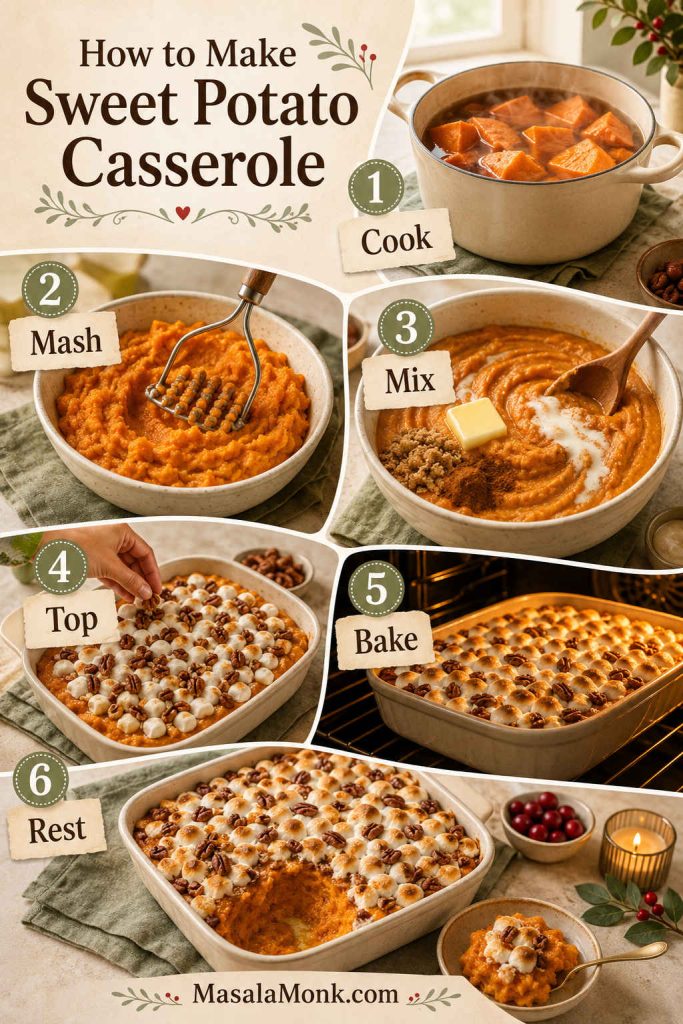
The process stays simple when you follow the order: cook, mash, mix, top, bake, and let the casserole rest before the first scoop.
Step 1: Cook the Sweet Potatoes
Peel the sweet potatoes and cut them into even chunks. Add them to a large pot, cover with water, and simmer until fork-tender, usually 12–20 minutes depending on the size of the pieces. Drain very well, then let them sit in the hot pot for 3–5 minutes so extra steam can escape.
If roasting, halve the sweet potatoes or roast them whole at 425°F / 220°C until completely tender, usually 40–50 minutes depending on size. Let them cool slightly, then scoop out the flesh. Roasting takes longer, but it gives a thicker, more flavorful mash.
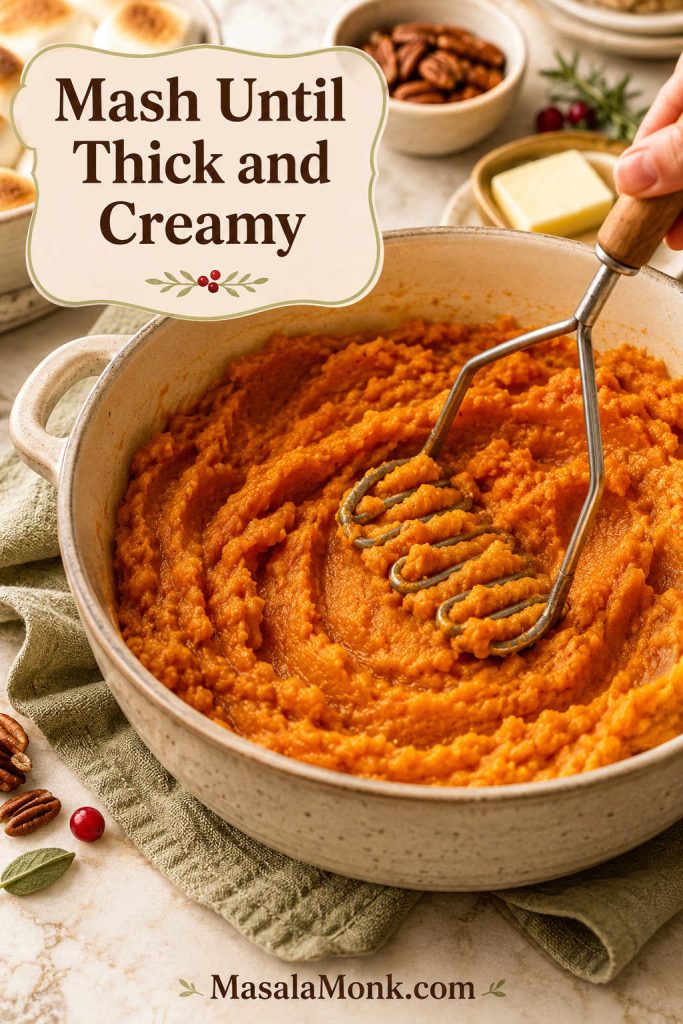
Step 2: Mash Until Thick and Mostly Smooth
Mash the cooked sweet potatoes with a potato masher until mostly smooth. A few small soft pieces are fine. Avoid over-processing in a food processor, especially if your potatoes are very moist, because the filling can become too loose.
Stop when the mash looks creamy and holds soft ridges. If it levels out immediately, wait before adding more milk.
After boiling, let the sweet potatoes steam-dry before mashing; otherwise, extra water can weaken the base before the filling is even mixed.
Step 3: Add Butter, Sugar, Milk, Vanilla, Spices, and Salt
Stir in melted butter, brown sugar, milk or cream, vanilla, cinnamon, nutmeg, and salt. Start with the lower sugar amount if you prefer a less-sweet casserole, if you plan to use marshmallows, or if your shortcut yams were packed in syrup.
Taste the filling before adding the eggs. Once the eggs go in, it is better not to keep tasting the raw mixture.
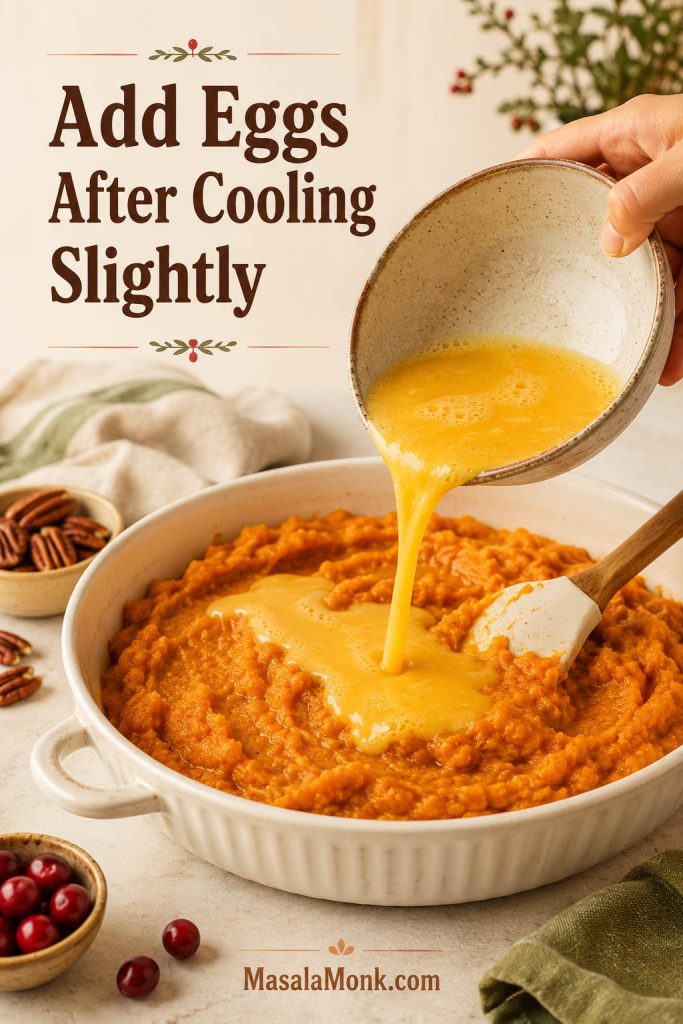
Step 4: Cool Slightly, Then Add Eggs
Let the mash cool for a few minutes before stirring in the eggs. The potatoes can be warm, but they should not be steaming hot. This prevents the eggs from scrambling and helps them blend smoothly into the filling.
If you are making the casserole without eggs, skip this step and use a little less milk so the filling stays sturdy.
Let the mash cool slightly before adding eggs so they blend into the filling instead of tightening into uneven bits.
Step 5: Spread in the Baking Dish
Grease a 9×13-inch / 3-quart baking dish and spread the filling evenly. Smooth the top, but do not pack it down too firmly. This is a scoopable casserole, not a sliceable cake.
If using a smaller 8×8, 9×9, or 2-quart dish, use 3–4 cups mashed sweet potato instead of the full 5–6 cups.
Step 6: Add the Topping
Sprinkle pecan streusel evenly over the casserole before baking. If using marshmallows only, bake the filling until nearly hot first. With both toppings, start with the pecan layer and finish with marshmallows.
Pecan Streusel Texture Cue
The pecan topping should look crumbly but moist enough to gather in small pieces, which helps it bake into buttery crunch.
When to Add Marshmallows
Wait until the casserole is hot before adding marshmallows; then they toast on top instead of disappearing into the filling.
Step 7: Bake Until Hot and Lightly Set
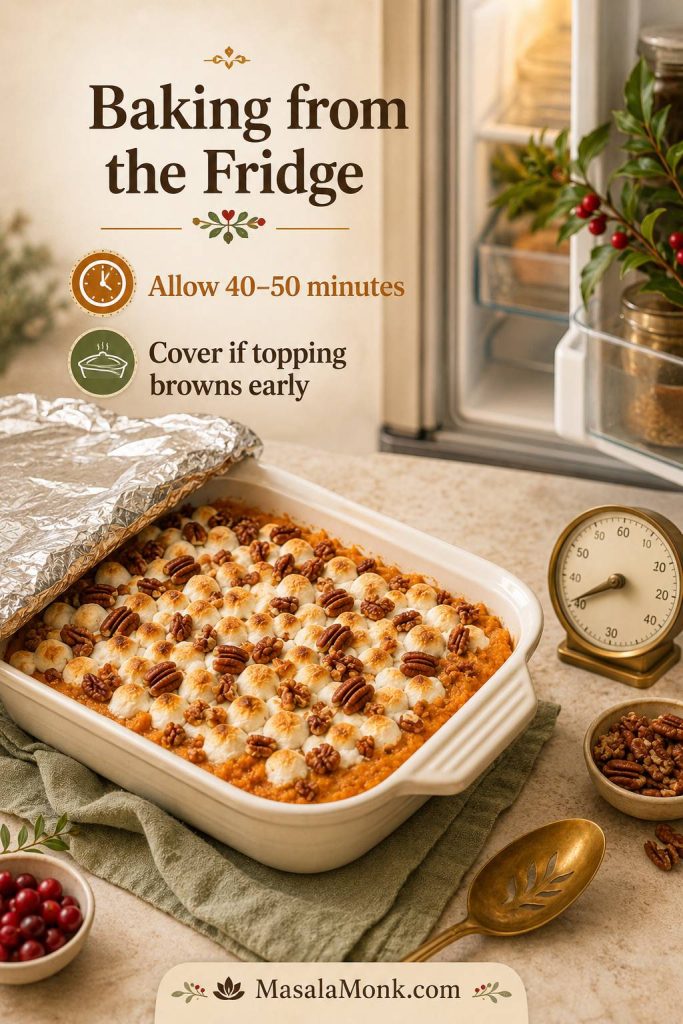
Bake at 350°F / 175°C until the filling is hot in the center and the topping looks golden. A room-temperature casserole usually takes 30–35 minutes. A chilled make-ahead casserole may need 40–50 minutes, especially if it goes into the oven straight from the fridge.
Because this filling contains eggs, you can check the center with an instant-read thermometer if you want precision: it should reach 165°F / 74°C. If the topping is ready but the center is not, cover the top loosely with foil and keep baking.
Step 8: Rest Before Serving
Let the casserole rest for 10–15 minutes before serving. This helps the filling settle, makes it easier to scoop, and lets the streusel firm up slightly. The first spoonful should look creamy and generous, not watery or collapsed.
At the table, the best scoop should feel soft underneath, with just enough golden crunch or toasted marshmallow on top to remind everyone why this dish always disappears.
Sweet Potato Casserole Recipe
This sweet potato casserole is creamy, lightly set, and flexible enough for marshmallows, pecan streusel, or both. For the most crowd-friendly version, use pecan streusel with marshmallows added near the end, but either topping works on its own.
Prep Time 20 minutes
Potato Cook Time 12–20 minutes
Bake Time 30–35 minutes, or 40–50 if chilled
Total Time About 1 hour 10–15 minutes, plus resting
Total time is based on boiling the sweet potatoes and baking the casserole right away. If roasting, add about 25–30 minutes. If baking from chilled, allow 40–50 minutes of bake time. Let the casserole rest 10–15 minutes before serving.
Equipment
9×13-inch / 3-quart baking dish
Large pot or sheet pan
Potato masher
Mixing bowls
Measuring cups and spoons
Foil, if making ahead or reheating
Instant-read thermometer, optional
Ingredients
For the Sweet Potato Filling
3 lb / 1.36 kg fresh sweet potatoes, peeled and cut into chunks, or 2 x 29 oz cans of canned yams, drained, aiming for 5–6 cups mashed
4 tbsp / 57 g butter, melted
⅓–½ cup / 65–100 g brown sugar, depending on sweetness preference
⅓ cup / 80 ml milk, half-and-half, cream, or evaporated milk
2 large eggs, lightly beaten
1 tsp / 5 ml vanilla extract
1 tsp ground cinnamon
⅛–¼ tsp ground nutmeg, optional
¾ tsp fine salt, or to taste
For the Pecan Streusel Topping
1 cup / 100–115 g chopped pecans
½ cup / 100 g brown sugar
⅓ cup / 42 g all-purpose flour
5–6 tbsp / 70–85 g butter, melted
½ tsp ground cinnamon
Pinch of salt
Nut-free option: Replace pecans with crushed cornflakes, oat crumble, or plain brown sugar crumble.
For the Marshmallow Topping
2–3 cups mini marshmallows / about 100–150 g
Instructions
Cook and Mix the Filling
Cook the sweet potatoes. Add the peeled sweet potato chunks to a large pot and cover with water. Bring to a boil, then simmer until fork-tender, about 12–20 minutes. Drain very well and let the potatoes steam-dry in the hot pot for 3–5 minutes. If using canned yams, drain them very well and skip to mashing.
Preheat the oven. Heat the oven to 350°F / 175°C. Grease a 9×13-inch / 3-quart baking dish.
Mash the sweet potatoes. Mash until mostly smooth. A few small soft pieces are fine, but avoid leaving large chunks.
Mix the filling. Stir in melted butter, brown sugar, milk or cream, vanilla, cinnamon, nutmeg, and salt. Taste and adjust sweetness or salt before adding eggs.
Add the eggs. Let the mash cool slightly, then stir in the beaten eggs until evenly mixed. Do not add eggs to steaming-hot potatoes.
Fill the dish. Spread the sweet potato filling evenly in the prepared baking dish.
Top, Bake, and Rest
Make the pecan topping, if using. In a bowl, mix pecans, brown sugar, flour, 5 tablespoons melted butter, cinnamon, and salt until crumbly. Add the 6th tablespoon of butter only if the mixture still looks dry. Sprinkle over the sweet potato filling.
Bake the casserole. Bake with the streusel on top if using pecan topping. For marshmallows only, bake the filling for about 20–25 minutes first, until nearly hot. A refrigerated casserole may need about 40–50 minutes total bake time, covered loosely if the top browns too quickly. For egg-based doneness, the center should reach 165°F / 74°C.
Add marshmallows near the end. Scatter marshmallows over the hot or nearly hot casserole during the last 8–10 minutes of baking. If using both pecans and marshmallows, add them over the baked streusel. Bake until puffed and golden.
Rest and serve. Let the casserole rest for 10–15 minutes before serving.
Recipe Notes
Shortcut canned version: Use 2 x 29 oz cans for a full 9×13 batch, or 1 x 40 oz can for a smaller 8×8 or 9×9 batch. Drain well and aim for 5–6 cups mashed.
Roasted sweet potatoes: Roast whole or halved sweet potatoes at 425°F / 220°C for 40–50 minutes, then scoop and mash.
Less sweet: Start with ¼–⅓ cup brown sugar, especially if using syrup-packed cans or marshmallows.
Nut-free: Use marshmallows, oat crumble, cornflake crumble, or plain brown sugar crumble instead of pecans.
No egg: Omit the eggs and reduce the milk slightly. The casserole will be softer and more spoonable.
Make-ahead: Prepare the filling 1–2 days ahead and refrigerate covered without topping. Add topping before baking.
Storage: Refrigerate leftovers for 3–4 days. Freeze the base without topping for up to 3 months.
Make-Ahead Timeline
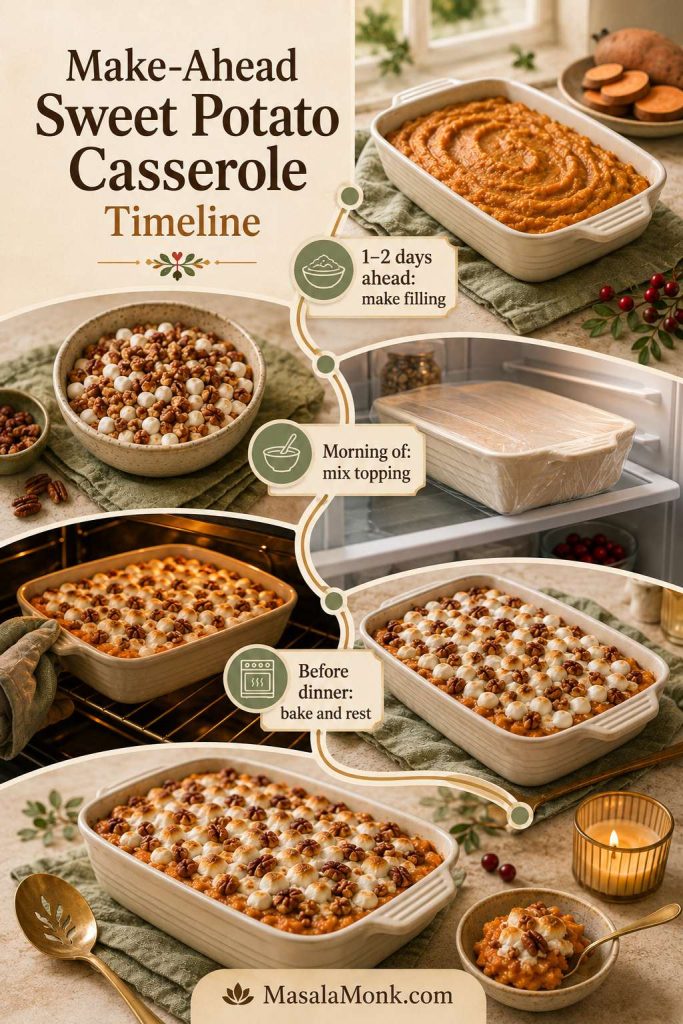
Sweet potato casserole is one of the easier big-meal sides to make ahead because the filling holds well in the fridge. The most reliable make-ahead version is not the one where everything is assembled as early as possible. It is the one where the filling waits calmly and the topping stays fresh until the final bake.
Holiday timing plan: Make the filling 1–2 days ahead, mix the topping the morning of serving, bake the chilled casserole 60–75 minutes before dinner, add marshmallows near the end if using them, then rest before serving.
For a make-ahead sweet potato casserole that still tastes fresh, prepare the filling early but save the topping for baking day.
When
What to do
2 days before
Cook, drain, and mash the sweet potatoes. Refrigerate the mash in an airtight container.
1 day before
Mix the filling and spread it in the baking dish. Cover and refrigerate without topping.
Morning of serving
Mix the pecan streusel separately if using. Keep marshmallows in the bag until needed.
60–75 minutes before serving
Bake the chilled casserole until hot through, allowing extra time for topping and resting.
Near the end of baking
Finish any marshmallow topping until puffed and golden.
Before serving
Rest 10–15 minutes so the filling settles and the topping has a moment to firm up.
If the assembled casserole is going straight from the refrigerator to the oven, use the baking-from-the-fridge guide before planning your final topping.
This is also a good moment to handle other make-ahead sides. A bright cranberry sauce with orange juice can be made ahead and chilled, which helps keep the final cooking window focused on dishes that need the oven.
That small separation — filling ready, topping fresh — keeps the casserole from tasting like leftovers before dinner even starts.
Should You Add Marshmallows Before Refrigerating?
No. Marshmallows should be added right before the final part of baking. If they sit on the casserole overnight, they can absorb moisture, collapse, or melt unevenly in the oven.
Can You Add Pecan Topping Ahead?
You can, but the texture is better if you store the topping separately and sprinkle it on before baking. If the topping sits on the filling overnight, it may absorb moisture and bake up softer.
Can You Bake It Straight from the Fridge?
Yes, but allow 40–50 minutes of bake time if the casserole is cold from the fridge. If your baking dish is not safe for sudden temperature changes, let it sit at room temperature for about 30 minutes before baking.
When baking from the fridge, plan for a longer oven window and use foil as backup if the top finishes before the middle.
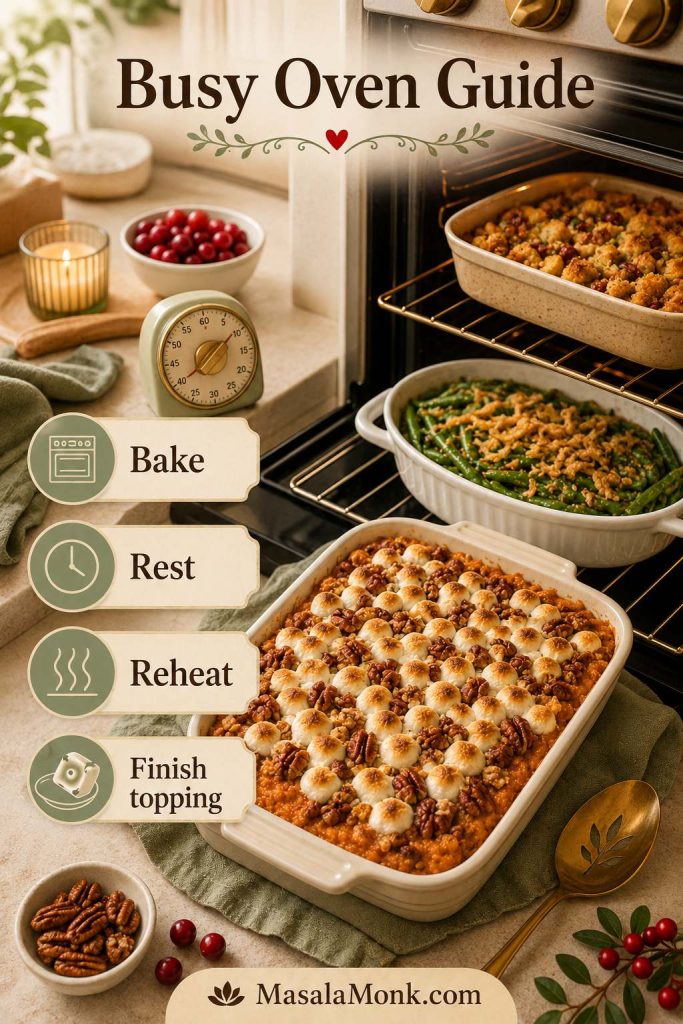
How to Fit It Into a Busy Oven
Sweet potato casserole is usually not the only thing fighting for oven space. The good news is that it is flexible. It can bake at 350°F / 175°C with many other sides, sit for a short rest before serving, or be baked earlier and reheated gently.
If you are also baking green bean casserole, keep both dishes on the same 350°F / 175°C schedule when possible. The sweet potato casserole can rest while another side finishes, and marshmallows can still go on at the very end.
Best Timing Paths for a Crowded Oven
At 350°F / 175°C: Bake as written. This is the most forgiving temperature for the casserole.
For a hotter oven: Check early and cover loosely if the topping browns before the center is hot.
Already baked: Reheat covered at 325–350°F until hot, then uncover briefly to refresh the topping.
Using marshmallows: Add them only after the filling is hot or nearly hot, especially when reheating.
When oven space is tight: Use the slow cooker to warm or hold the filling, then broil marshmallows in a baking dish if you want a toasted top.
When dinner is delayed: Keep the casserole loosely covered in a warm spot, but avoid sealing it tightly while hot because trapped steam softens the topping.
How to Finish the Topping Before Serving
During a crowded holiday oven schedule, this casserole can bake early, rest safely, reheat gently, and still get a fresh final topping.
If oven space is the main problem, the slow cooker option can hold the base while other sides finish.
Think of the casserole as a side that can wait a little. Bake it before the final rush, rest it while other dishes finish, and add marshmallows late enough that they still look fresh when it reaches the table.
If the casserole is running late, do not rush the marshmallows. Get the filling hot first. A pale marshmallow topping can be browned in a minute, but a cold center cannot be fixed at the table.
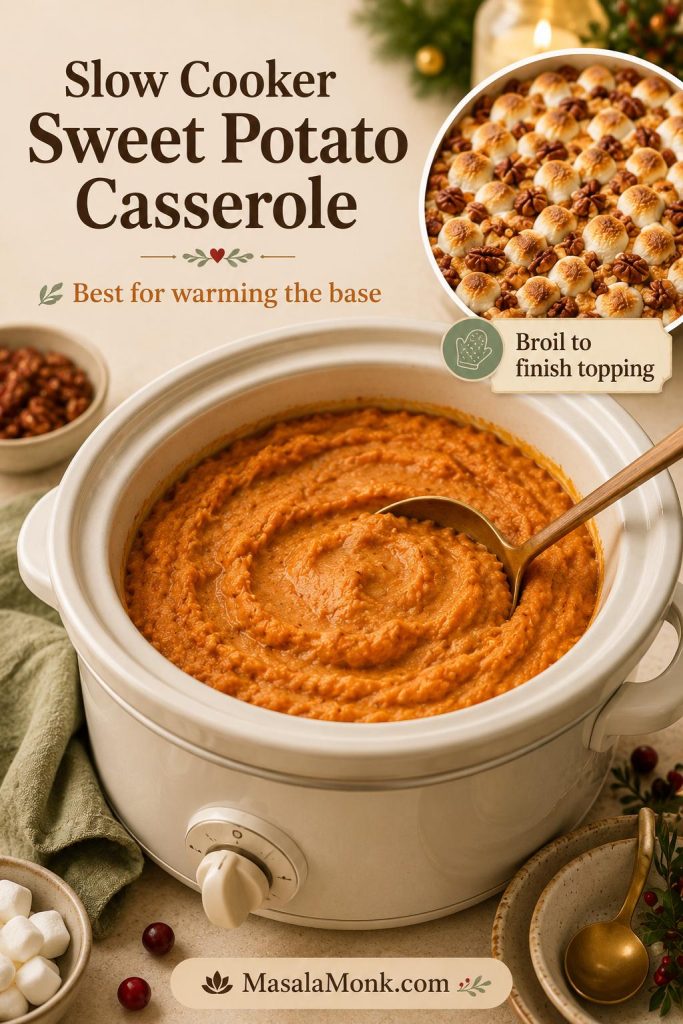
Slow Cooker Sweet Potato Casserole Option
The slow cooker is useful when the oven is full, but it changes the topping. Think of it as a warming tool here, not the place to create a crisp top. It keeps the sweet potato base warm and soft, but pecan streusel will not crisp the way it does in the oven, and marshmallows will become gooey rather than deeply toasted.
Use this route when oven space matters more than a perfect topping. Then, if you want the golden holiday look, transfer the hot filling to a baking dish and finish it under the broiler.
A slow cooker solves the oven-space problem, but a quick broiler finish is what gives marshmallows and pecans their best texture.
Slow cooker situation
Timing
What to know
Prepared filling, already cooked sweet potatoes
Low for 2–3 hours, or high for 1–1½ hours
Good for warming and holding the casserole base
Marshmallows in slow cooker
Last 10–15 minutes only
They soften and melt; they will not toast like oven marshmallows
Pecan topping in slow cooker
Add near the end or finish in oven
Expect a softer topping unless broiled or baked briefly
For the most practical slow cooker version, prepare the sweet potato filling and spread it in a greased slow cooker. Warm until hot through. If condensation is dripping onto the topping, place a clean kitchen towel under the lid, making sure it does not touch the heating element.
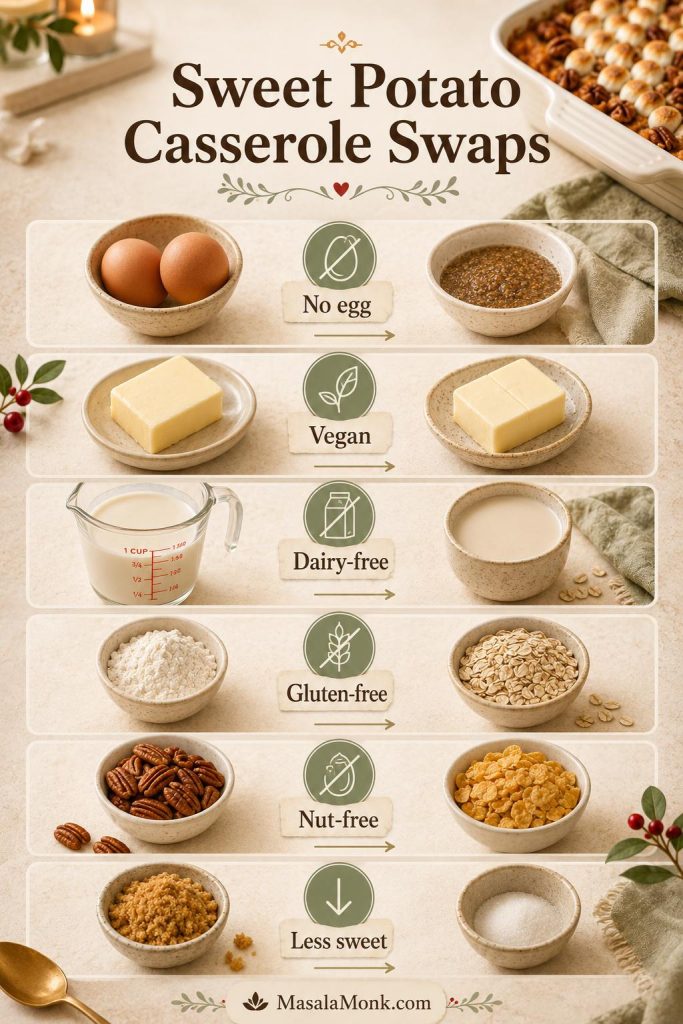
No Egg, Vegan, Dairy-Free, and Other Easy Swaps
The base recipe is classic, but it is easy to adapt. Keep the sweet potato mash thick, add liquids gradually, and choose a topping that fits the version you need.
Need
How to adjust
Texture note
No egg
Omit the eggs and reduce the milk slightly
Softer and more spoonable, less set
Vegan
Use vegan butter, non-dairy milk, no eggs, and vegan marshmallows if using
Keep the mash thick so the filling does not loosen
Dairy-free
Use dairy-free butter and oat milk, almond milk, coconut milk, or another non-dairy milk
Coconut milk gives richer flavor; oat milk is more neutral
Gluten-free
Use gluten-free flour, oat flour, or certified gluten-free oats in the topping
Check all topping ingredients if serving someone with a strict allergy or intolerance
Nut-free
Use marshmallows, oat crumble, cornflake topping, or plain brown sugar crumble
Cornflakes give the most crisp, sweet-salty crunch without pecans
Less sweet
Use ¼–⅓ cup brown sugar, skip marshmallows, and use pecan or oat topping
Add enough salt, cinnamon, and vanilla so the flavor still feels full
No marshmallows
Use pecan streusel, oat crumble, cornflake topping, or savory crumb topping
Good when you want a side dish, not a dessert-like casserole
Whether the casserole is no-egg, vegan, dairy-free, gluten-free, nut-free, or less sweet, the key is keeping the mash thick before baking.
Regular marshmallows often contain gelatin, so check the label if the dish needs to be vegetarian or vegan. For gluten-free guests, use certified gluten-free oats if you choose an oat topping, and check packaged ingredients carefully.
Flavor Variations
Brighter: Add orange zest or fold in a few small pieces of tart apple. Use orange juice sparingly because too much can thin the filling.
Maple-sweet: Replace part of the brown sugar with maple syrup, then reduce the milk slightly if the filling loosens.
Fruitier: Add well-drained crushed pineapple for a sweeter, old-fashioned variation.
More savory: Skip the sugar and marshmallows. Use butter, herbs, black pepper, and a savory breadcrumb or pecan topping.
Praline-style: Increase the pecans and brown sugar for a sweeter, more dessert-like topping.
Sweet Potato Casserole vs Sweet Potato Souffle
Sweet potato casserole and sweet potato souffle are closely related, and you will see the names used loosely, especially in holiday recipes. In general, sweet potato casserole is denser, more spoonable, and more flexible with toppings like marshmallows, pecans, or both.
Sweet potato souffle is usually smoother, lighter, and more egg-based. It often has a pecan topping and a more custardy interior. This recipe sits firmly in classic casserole territory: creamy and lightly set, but not so airy or eggy that it becomes a true souffle.
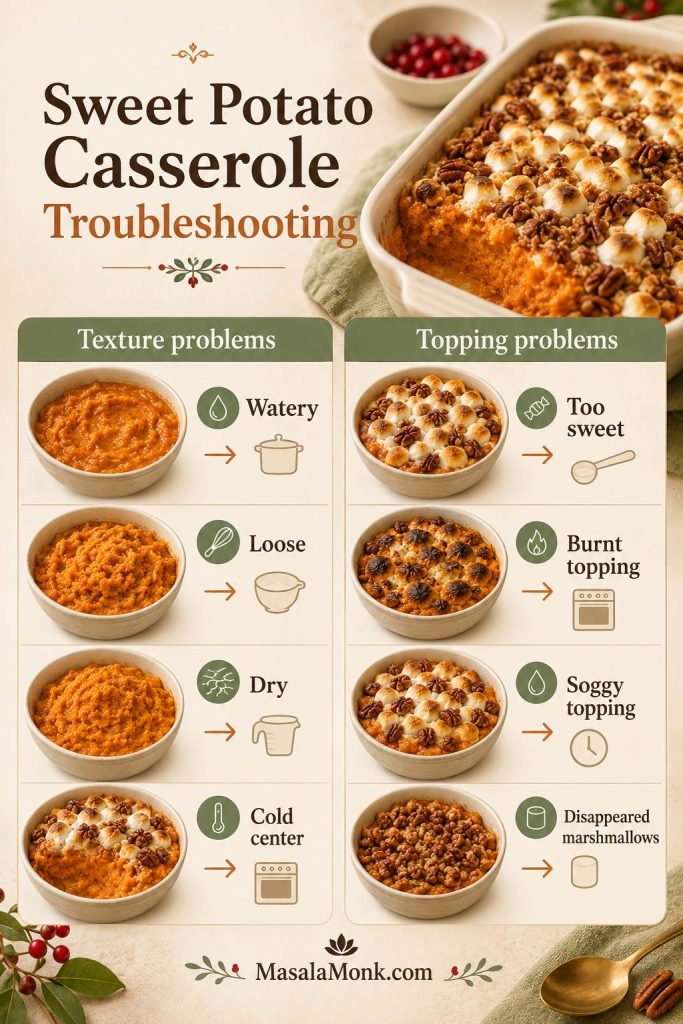
Troubleshooting Sweet Potato Casserole
If the casserole does not look perfect halfway through, do not panic. This is a forgiving dish, and most problems come from the same few places: too much moisture, topping added at the wrong time, or sweetness that was not balanced before baking.
Most sweet potato casserole problems trace back to moisture, sweetness, heat, or topping timing, so spotting the cause makes the fix much easier.
If the problem starts before baking, compare your mash with the texture target; if it starts after chilling, check the fridge-to-oven timing.
Texture and Moisture Problems
Problem
Why it happened
Fix now
Fix next time
Watery casserole
Potatoes absorbed too much water, the cans were not drained well, or too much milk was added
Bake uncovered a little longer; if the topping is browning, cover only the top loosely with foil
Drain and steam-dry potatoes; drain shortcut yams very well; add liquid gradually
Filling is too loose
No eggs, too much liquid, or underbaking
Bake longer and rest before serving
Use eggs or reduce milk slightly for egg-free versions
Dry filling
Too little liquid or overbaking
Add a splash of warm milk or melted butter when reheating
Measure liquid carefully and avoid baking long after the center is hot
Stringy texture
Fibrous sweet potatoes or not enough mashing
Mash more thoroughly if still possible
Choose good orange-fleshed sweet potatoes and remove tough fibers before mixing
Cold center
Casserole went into the oven chilled and did not bake long enough
Cover loosely and continue baking until hot in the center
Add 10–15 minutes when baking from cold
Topping browns before filling is hot
Dish was too deep, oven was too hot, or casserole was cold
Cover loosely with foil and keep baking
Let chilled casserole sit out briefly and use the right dish size
Topping and Sweetness Problems
Problem
Why it happened
Fix now
Fix next time
Too sweet
Too much sugar, syrup-packed cans, or marshmallow topping
Add a small pinch of salt, then serve small scoops with tart cranberry sauce, green beans, salty ham, or other savory sides
Use ¼–⅓ cup sugar and choose pecan topping instead of marshmallows
Burnt marshmallows
Marshmallows were added too early or broiled too long
Remove the darkest pieces if needed
Add marshmallows only during the last 8–10 minutes and watch closely
Marshmallows disappeared
They were added too early or the filling was too wet
Add a fresh layer and bake briefly
Add marshmallows near the end and make sure the filling is thick
Soggy pecan topping
Topping sat on the filling too long or absorbed refrigerator moisture
Return to the oven uncovered for a few minutes, or broil briefly while watching closely
Store topping separately and add before baking
Storage, Freezing, and Reheating
Leftover sweet potato casserole stores well, but the topping changes texture over time. The leftovers will still taste good after reheating, but the topping will never be quite as crisp or fluffy as it was on the first day. That is normal.
Marshmallows soften, pecan streusel loses some crunch, and any crumb topping will absorb moisture in the fridge. For general food-safety timing, the USDA’s leftovers and food safety guidance is a useful reference.
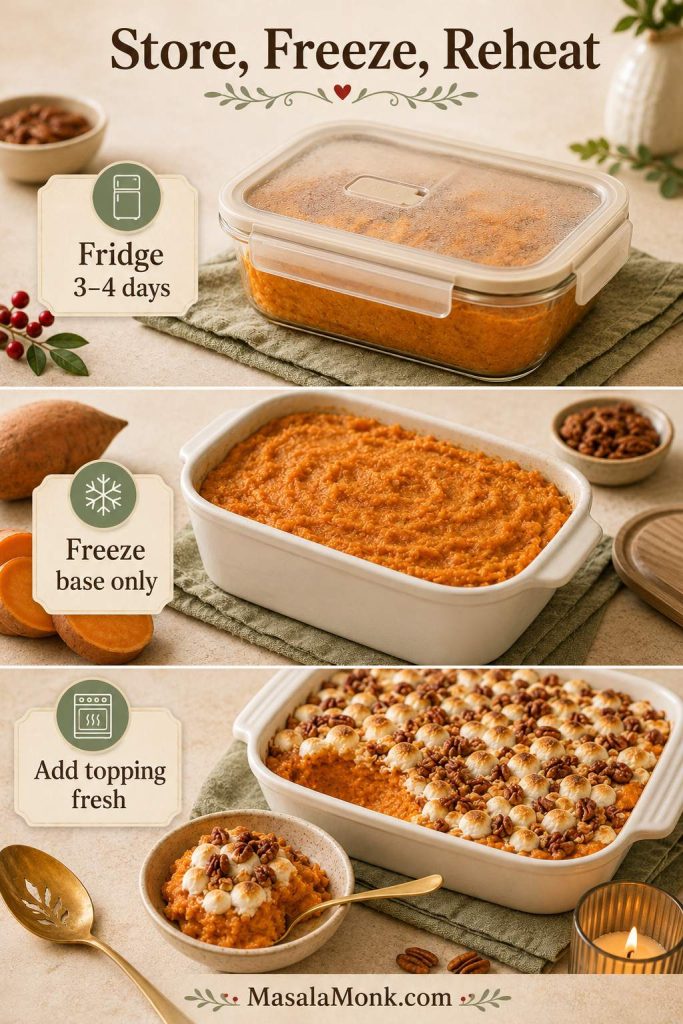
Refrigerator: Store covered for 3–4 days.
Freezer: Freeze the sweet potato base without topping for up to 3 months.
Thawing: Thaw the base overnight in the refrigerator before baking or reheating, then add topping fresh.
Marshmallow topping: Add fresh for the cleanest texture. Marshmallows do not freeze or reheat as cleanly as the filling.
Pecan topping: Can be frozen separately, but it is crispiest when mixed and baked fresh.
Oven reheating: Cover and reheat at 325–350°F until steaming hot throughout, then uncover briefly to refresh the topping.
Microwave reheating: Works for single servings, but the topping will soften.
The filling handles storage better than the topping, so freeze the base plain and add fresh marshmallows or crumble after reheating.
For broader sweet potato freezing guidance, the National Center for Home Food Preservation has a helpful reference on freezing sweet potatoes, including mashed sweet potatoes.
What to Serve With Sweet Potato Casserole
Sweet potato casserole is sweet, rich, and soft, so the rest of the plate should bring contrast. Think savory, tart, crunchy, green, or herb-heavy rather than more soft sweetness.
Meal
Good plate balance
Thanksgiving plate
Turkey, stuffing, green beans, tart cranberry sauce, and a scoop of sweet potato casserole
Ham dinner
Salty ham, roasted Brussels sprouts or green beans, sharp mustard or cranberry sauce, and the casserole on the side
Vegetarian holiday table
Mushroom gravy, roasted vegetables, green bean casserole, salad, and pecan-topped sweet potato casserole
Potluck plate
A small scoop of casserole beside something savory, something crisp, and something acidic so the sweetness does not take over
For a classic side-dish table, serve it with green vegetables, stuffing, roasted vegetables, a simple savory main, and creamy garlic mashed potatoes. The casserole brings softness and sweetness; the rest of the plate should make it feel complete.
FAQs About Sweet Potato Casserole
Do canned yams work here?
Yes. The canned version works well when you want a faster casserole. Drain the pieces thoroughly, reduce the sugar if they were packed in syrup, and add milk gradually because they are already tender and more delicate than fresh cooked sweet potatoes.
How many cans of yams do I need?
For a full 9×13 casserole, use 2 x 29 oz cans, drained. For a smaller 8×8 or 9×9 casserole, use 1 x 40 oz can, drained. Because drained yield varies, aim for about 5–6 cups mashed sweet potato for a full batch or 3–4 cups for a smaller batch.
When should marshmallows go on top?
Add marshmallows during the last 8–10 minutes of baking, once the filling is hot or nearly hot. This gives them time to puff and brown without melting completely or burning before the center is ready.
How do I keep it from getting watery?
Drain the sweet potatoes well, let boiled potatoes steam-dry before mashing, drain canned yams thoroughly, and add milk gradually. The mash should be creamy but thick before it goes into the baking dish.
How far ahead can I make it?
You can make the filling 1–2 days ahead. Spread it in the baking dish, cover, and refrigerate without topping. Add pecan topping before baking and marshmallows near the end.
Does it freeze well?
The sweet potato base freezes well without topping for up to 3 months. Marshmallows and crumb toppings are best added fresh after thawing.
Do you have to put eggs in sweet potato casserole?
No. Eggs help the filling set and scoop neatly, but you can leave them out for a softer casserole. If skipping eggs, reduce the milk slightly so the mash stays thick.
Can I make it without marshmallows?
Yes. Use pecan streusel, oat crumble, cornflake topping, or a savory breadcrumb topping instead. Without marshmallows, the casserole tastes less candy-like and works better as a true side dish.
Can I make it in a slow cooker?
Yes, especially if you need to save oven space. The slow cooker is best for warming or holding the sweet potato base. Marshmallows will soften rather than toast, so transfer to a baking dish and broil briefly if you want a browned top.
What is the difference between casserole and souffle?
Sweet potato casserole is usually denser and more spoonable. Sweet potato souffle is usually smoother, lighter, and more egg-based. Many recipes blur the line, but this recipe is written as a classic casserole.
How much do I need for 10 people?
A 9×13-inch casserole made with about 5–6 cups mashed sweet potato serves 10–12 people as a side dish. If it is one of many sides, portions can be smaller.
Once the mash is thick, the sweetness tastes right, and the topping goes on at the right moment, you can stop worrying about this dish. It goes to the table hot, creamy, golden, and ready for the first generous scoop.
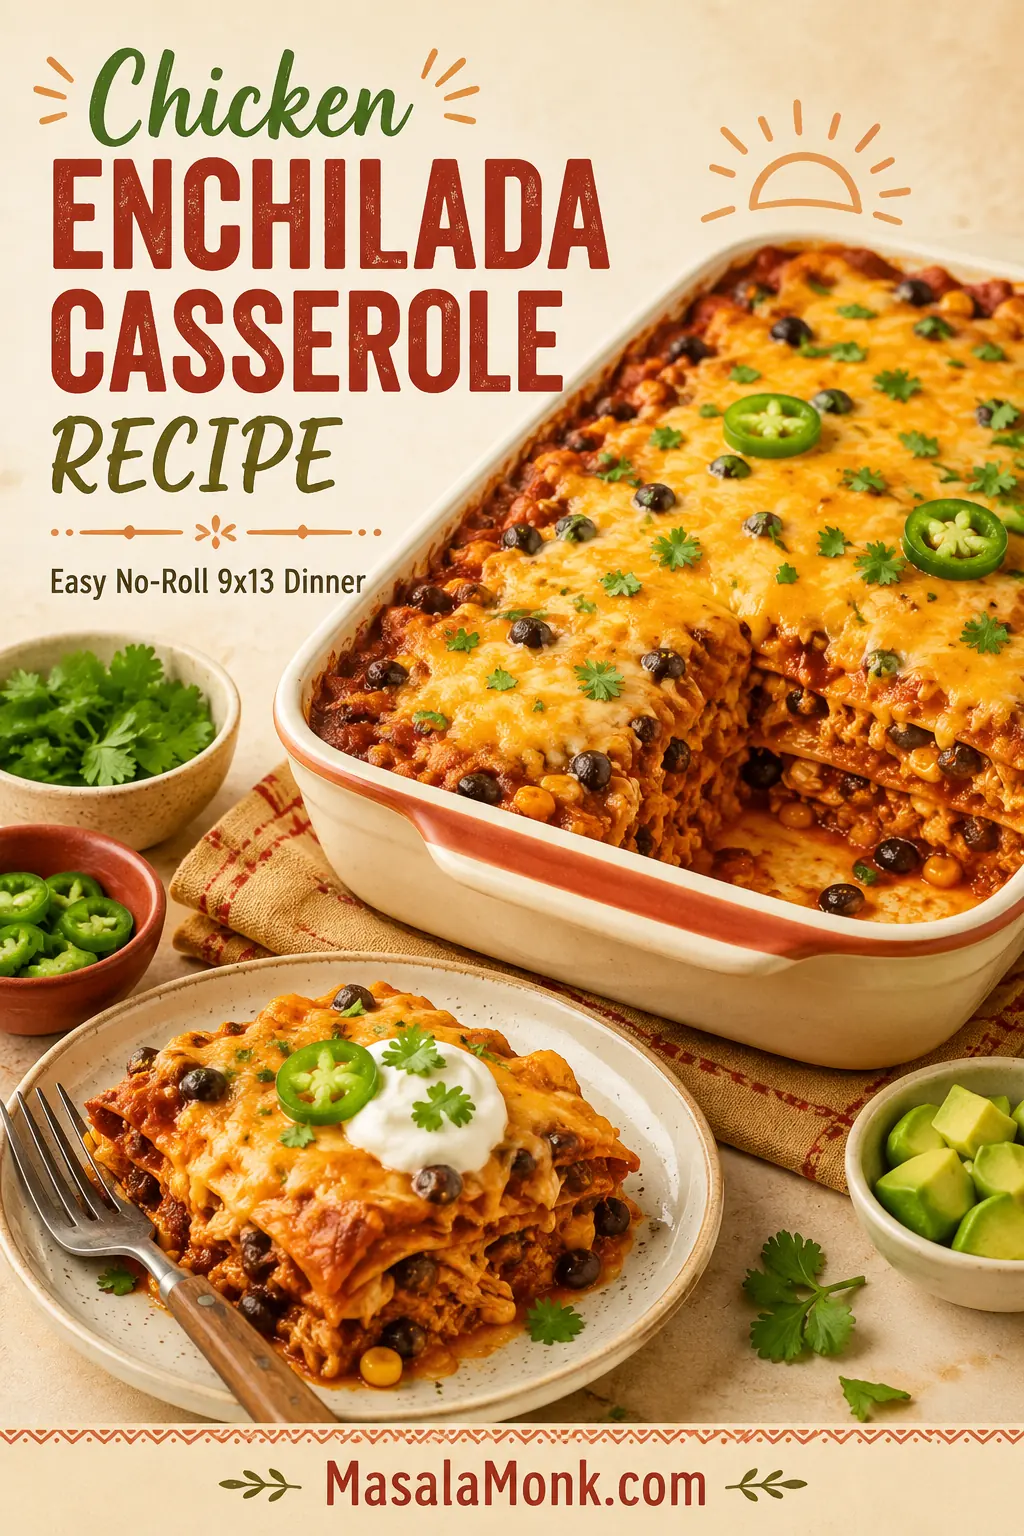
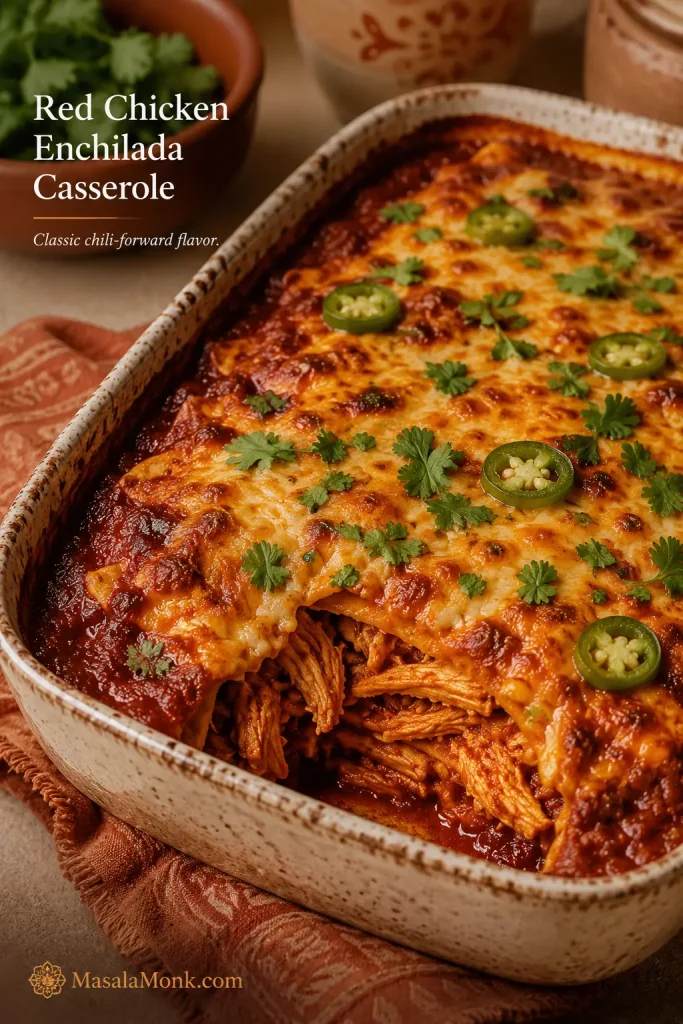
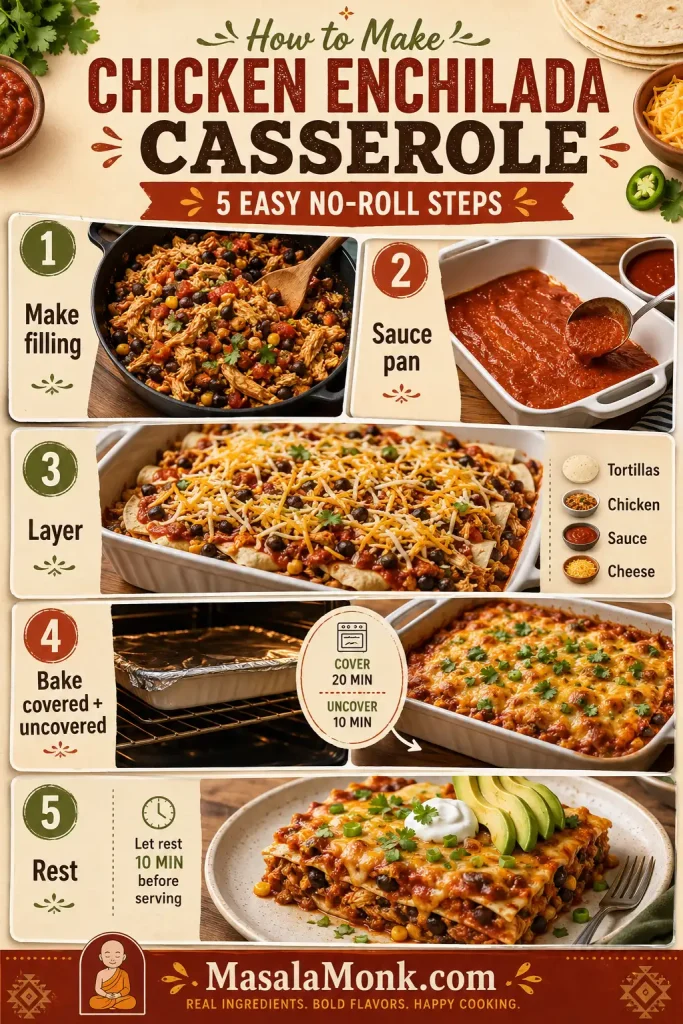
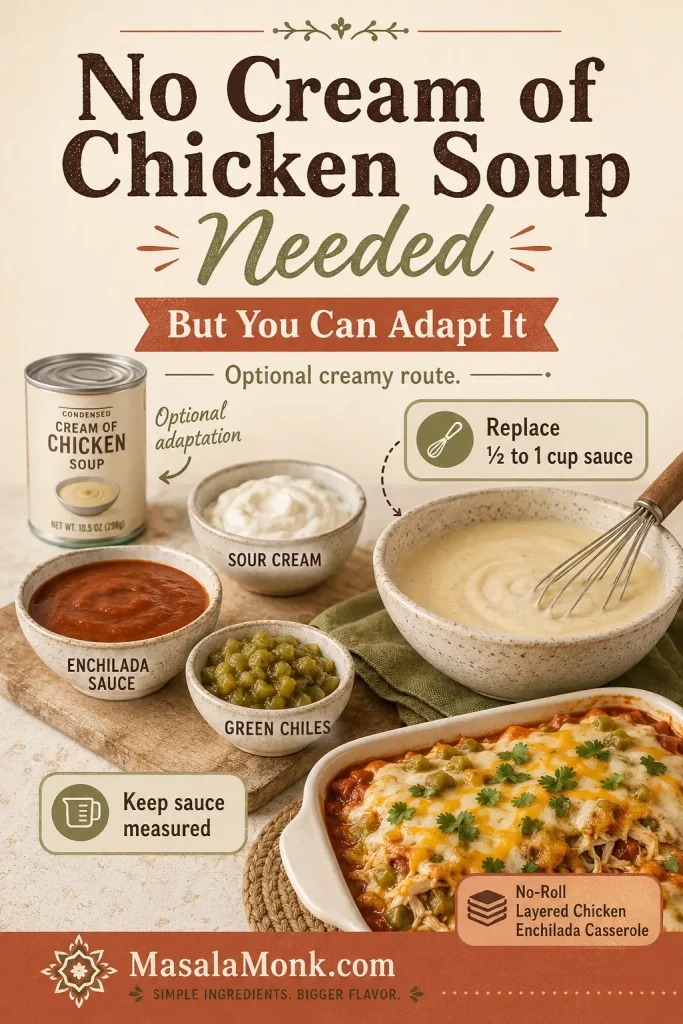
This chicken enchilada casserole recipe is for the night you want enchiladas, but not the whole enchilada project. No warming every tortilla one by one. No filling, rolling, tearing, and trying to fit everything neatly in the pan while dinner waits. You get the same saucy, cheesy comfort by layering tortillas, shredded chicken, enchilada sauce, and cheese in a 9×13 dish and baking it until bubbling.
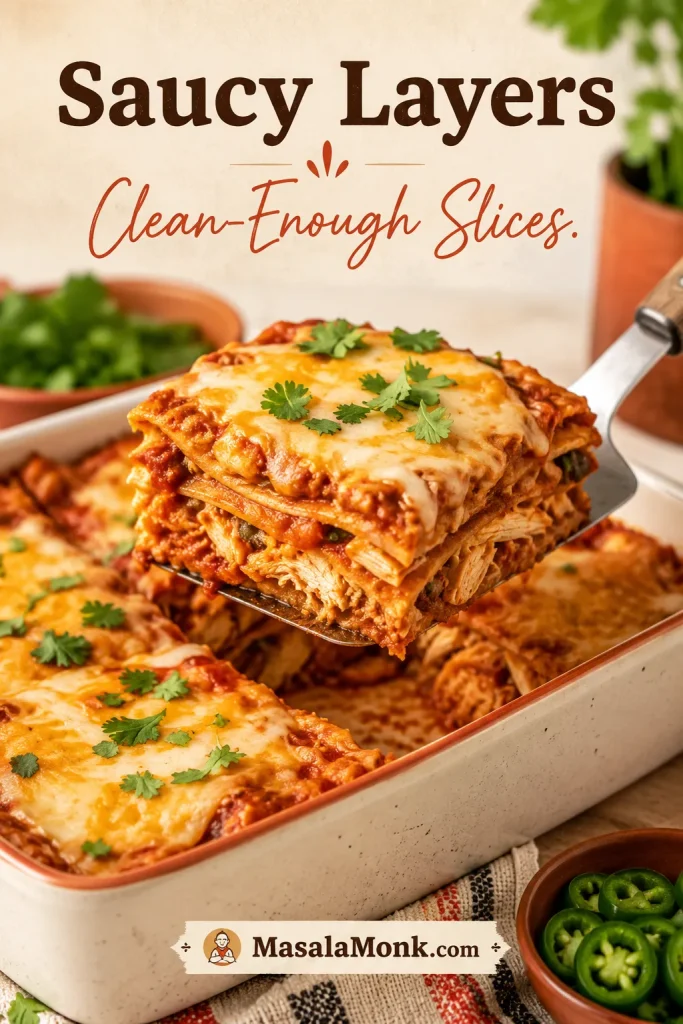
It comes out bubbling at the edges, soft through the middle, and melted on top — the kind of dinner that feels generous without asking you to roll a dozen enchiladas first. The goal is simple: saucy layers, weeknight shortcuts, and clean-enough slices without a loose, watery pan.
This no-roll casserole is weeknight-friendly, rotisserie-chicken friendly, and flexible enough for red sauce, green sauce, beans, corn, or a creamy white variation.
Quick Answer: Chicken Enchilada Casserole
Chicken enchilada casserole is a no-roll version of chicken enchiladas made by layering tortillas, cooked shredded chicken, enchilada sauce, and cheese in a baking dish. Instead of filling and rolling each tortilla, you build the casserole in a 9×13 pan and bake it until the sauce bubbles and the cheese melts.
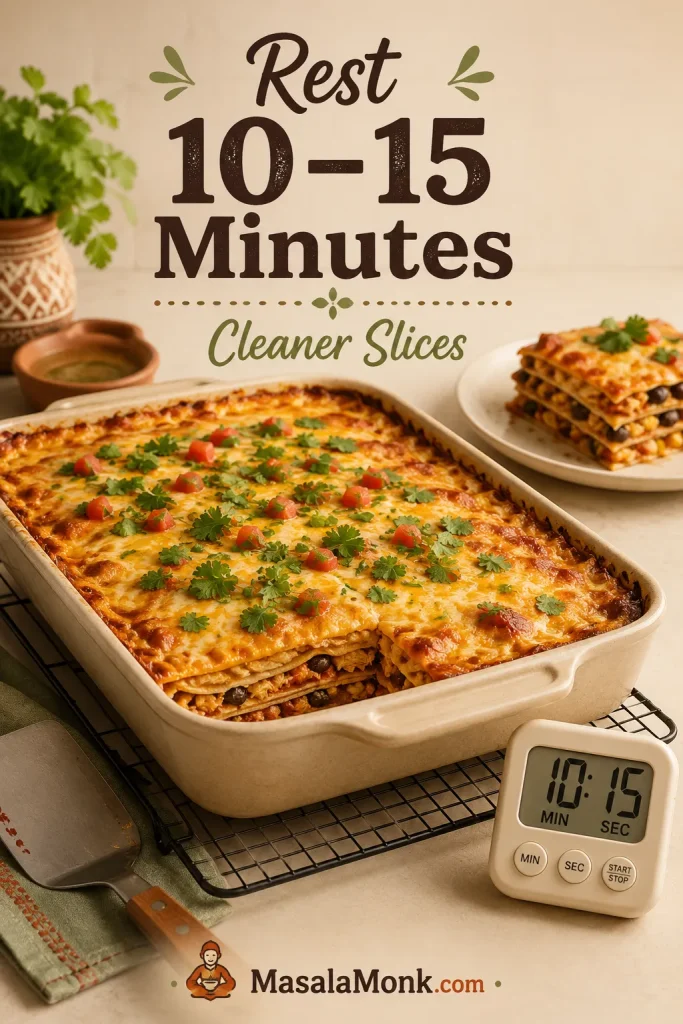
For the most dependable texture, use corn tortillas, about 3 cups of enchilada sauce, 3½ cups of cooked shredded chicken, and 3 cups of shredded cheese. Bake the casserole covered first so the center heats through, then uncover it so the top can bubble and some moisture can escape. Let it rest before slicing so the layers settle instead of sliding apart.
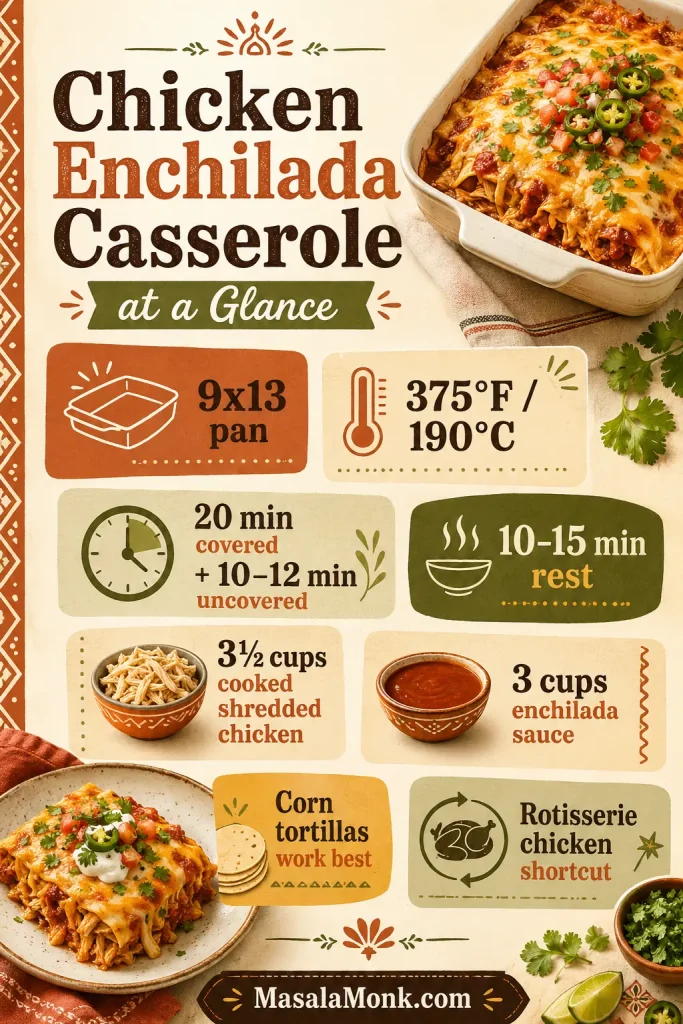
Use this as the quick decision guide before you start cooking.
Pan9×13-inch / 23×33 cm
Oven375°F / 190°C
Bake20 min covered + 10–12 min uncovered
Rest10–15 minutes before slicing
Chicken3½ cups cooked shredded chicken
Sauce3 cups red or green enchilada sauce
Most forgiving tortillaCorn tortillas for better structure
ShortcutRotisserie chicken works beautifully
Before you start, use the basic formula to check the pan size, sauce amount, bake time, and tortilla choice.
Already know you are making it? Jump straight to the recipe card. Still deciding between corn and flour tortillas, red and green sauce, or make-ahead timing? The guide below answers those questions before you start layering.
Why This No-Roll Chicken Enchilada Casserole Works
Regular enchiladas are delicious, but they can feel like a lot on a weeknight. Tortillas tear. Filling falls out. The pan gets crowded. This oven method keeps the comfort and skips the fussy part.
The trick is that the casserole does not try to be fancy. It keeps the parts people crave — tortillas, sauce, chicken, and cheese — and makes them easier to build in layers.
This is the kind of casserole that works for rotisserie-chicken nights, casual family dinners, meal-prep Sundays, and evenings when you want something cozy but do not want to stand at the counter rolling tortillas.
No rolling: The tortillas are layered, so there is less handling and less tearing.
Good use for cooked chicken: Rotisserie chicken, leftover roasted chicken, poached chicken, or shredded chicken breasts all work.
Classic red or tangy green: Red enchilada sauce gives deeper flavor; green sauce makes a brighter chicken casserole.
9×13 family-dinner size: It serves about 8 and reheats well.
Built-in texture control: Corn tortillas, measured sauce, an uncovered finish, and a short rest help prevent sogginess.
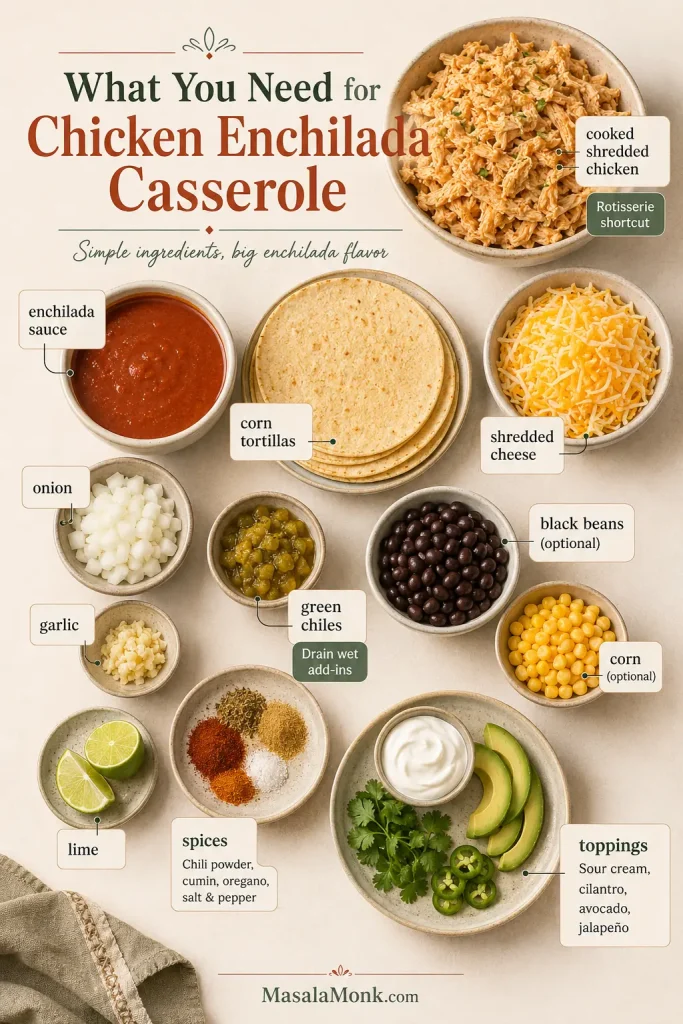
What You Need for Chicken Enchilada Casserole
The ingredient list is simple, but the choices matter. Cooked chicken makes the recipe fast, corn tortillas give the casserole better structure, and the sauce needs enough flavor to carry the whole dish.
The ingredient list stays simple, but draining wet add-ins and using flavorful sauce make a big difference in the final texture.
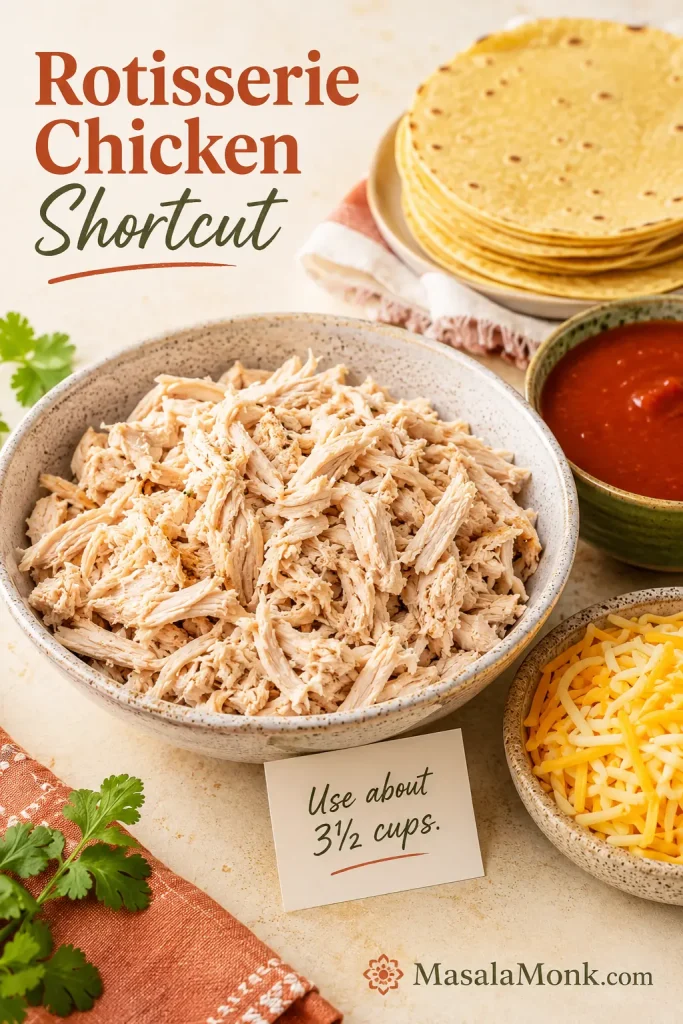
You need 3½ cups cooked shredded chicken, or about 525 g. One average rotisserie chicken usually gives about 3 to 4 cups shredded meat, depending on size, so it is a practical shortcut.
Shredded chicken blends into the layers better than large chunks. If you prefer more bite, you can use small diced cooked chicken, but avoid large pieces because they make the casserole harder to slice neatly. If you are starting with raw chicken breasts, MasalaMonk’s baked chicken breast recipe is a useful prep method before shredding.
Rotisserie chicken is the fastest shortcut here; however, shredding it finely helps the filling spread evenly between the tortilla layers.
Enchilada Sauce
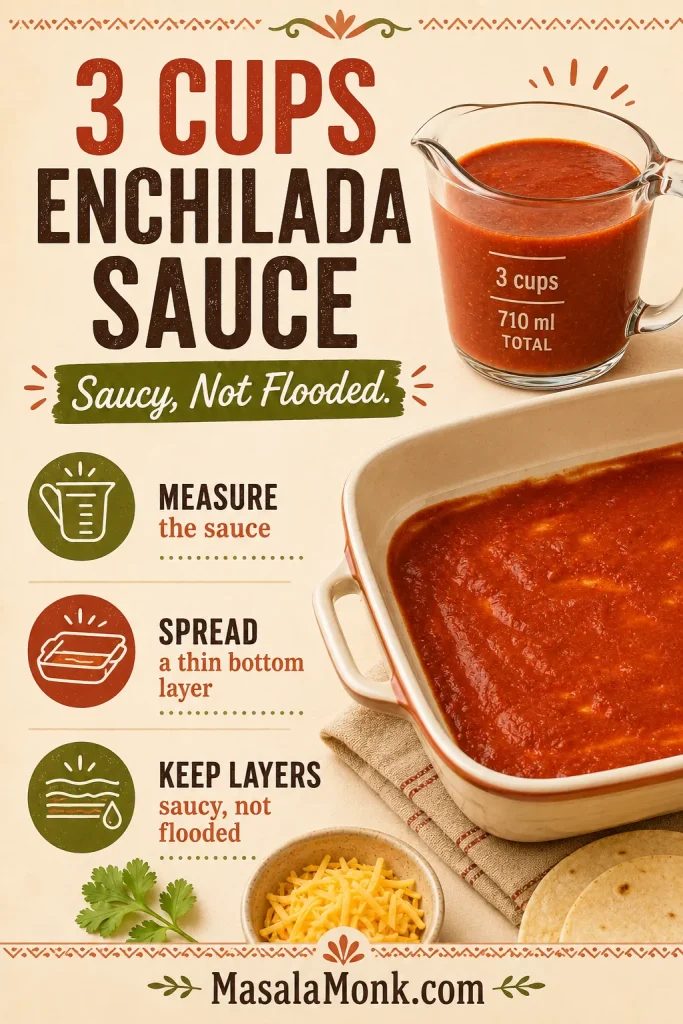
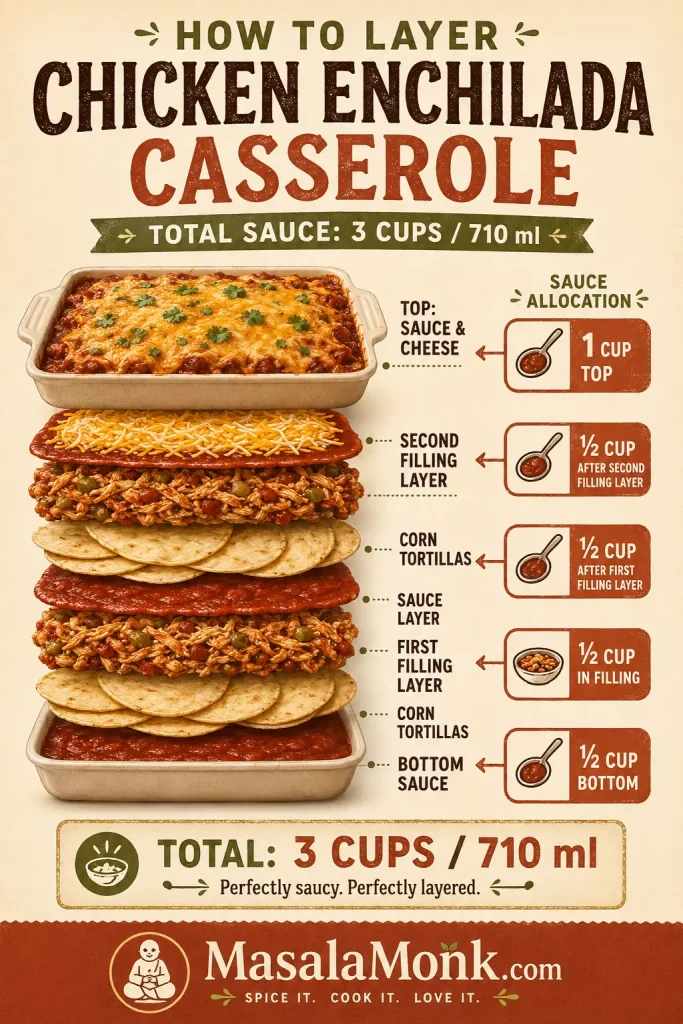
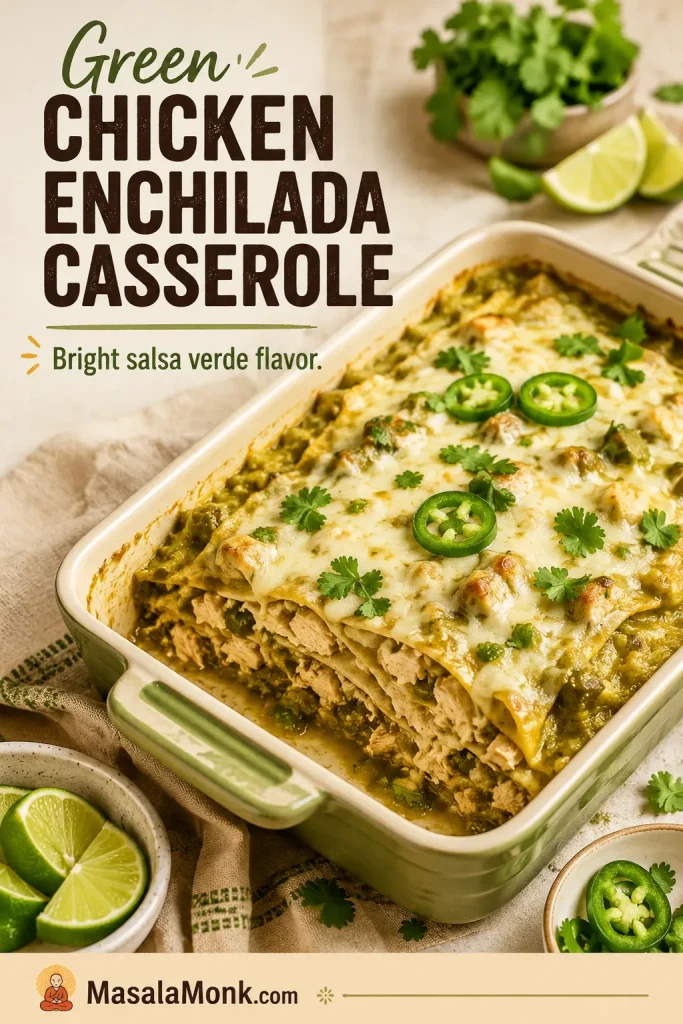
Use 3 cups / 710 ml enchilada sauce total. Red enchilada sauce gives the casserole a classic chili-forward flavor. Green enchilada sauce tastes brighter, tangier, and especially good with chicken.
Store-bought sauce is fine for a weeknight dinner. Homemade sauce works too. For a fresher green variation, salsa verde is excellent; MasalaMonk’s salsa verde recipe is a natural fit if you want a brighter tomatillo-style direction.
Measuring the enchilada sauce keeps the casserole moist without flooding the layers, so the finished pan is saucy instead of watery.
If you are worried about using too much sauce, the layering guide shows exactly where the 3 cups go.
Corn Tortillas
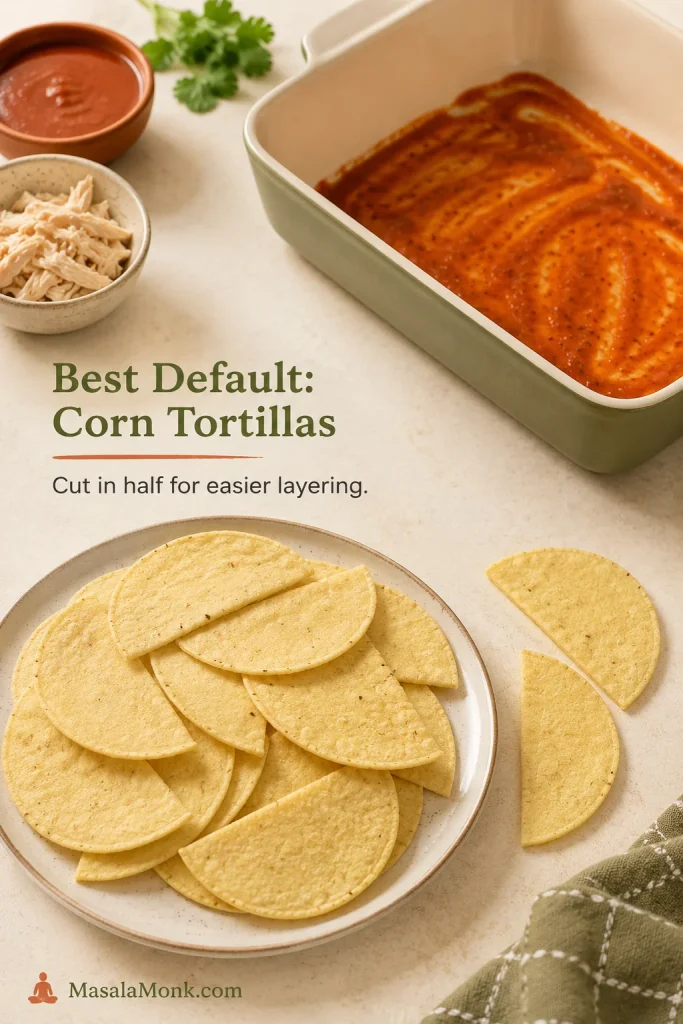
Use 12 small 6-inch corn tortillas, about 300–330 g total. Cut them in half so they fit the baking dish more evenly. Corn tortillas give the most classic enchilada flavor and hold their structure better under sauce.
Corn tortillas are the best default because they bring classic enchilada flavor and hold their shape better under sauce.
Cheese
Use 3 cups / 12 oz / 340 g shredded cheese. Monterey Jack melts the smoothest, cheddar-Jack brings a little more flavor, and a Mexican-style cheese blend is convenient. Freshly shredded cheese usually melts better, but pre-shredded cheese is fine for a practical casserole.
Add-Ins and Heat Level
A small can of diced green chiles adds easy enchilada flavor without making the dish aggressively spicy. Black beans and corn are optional, but they make the casserole heartier and more colorful.
Drain beans, corn, and chiles well. Extra liquid is one of the fastest ways to turn an enchilada casserole watery. If you use both beans and corn and the skillet looks very full, save a little filling for tacos, bowls, or nachos instead of forcing every last spoonful into the baking dish.
As written, this casserole is usually mild to medium, depending on the enchilada sauce you use. For more heat, add jalapeño, a hotter sauce, or hot sauce at the table. For a family-friendly pan, keep the bake mild and let people add heat to their own plates.
Toppings
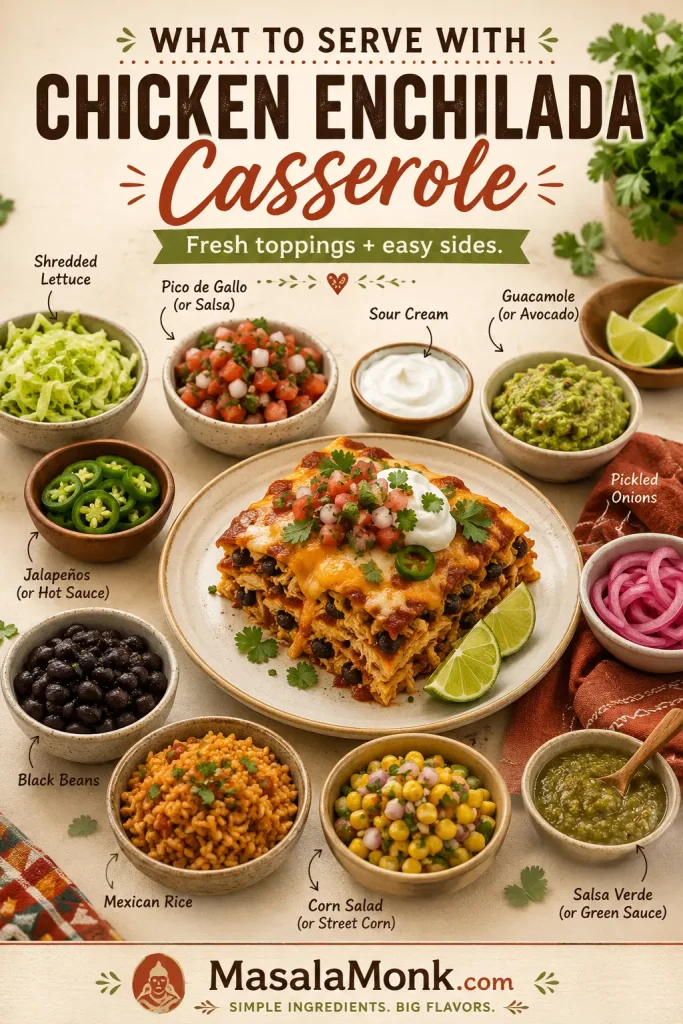
Add toppings after baking. Sour cream, chopped cilantro, avocado, sliced jalapeños, diced red onion, pico de gallo, salsa verde, and lime wedges all work well. Fresh toppings are especially helpful because the casserole itself is rich and saucy. If you want a creamy avocado topping, MasalaMonk’s easy guacamole recipe fits naturally here.
Pan, Oven Temperature, and Bake Time
The most forgiving pan for this recipe is a 9×13-inch baking dish, about 23×33 cm. That size gives you enough room for three balanced layers without making the center too thick.
Detail
Use This
Why It Matters
Pan size
9×13-inch / 23×33 cm
Creates even layers and reliable baking.
Oven temperature
375°F / 190°C
Hot enough to bubble the sauce and melt the cheese without drying the casserole.
Covered bake
20 minutes
Lets the center heat through before the top browns.
Uncovered bake
10–12 minutes
Lets the cheese bubble and excess moisture escape.
Rest time
10–15 minutes
Lets the layers settle so the casserole slices better.
If you prefer baking at 350°F / 175°C, bake covered for 25–30 minutes, then uncover and bake for another 10–15 minutes. The lower temperature works; it simply needs a little more time.
How to Tell When It Is Done
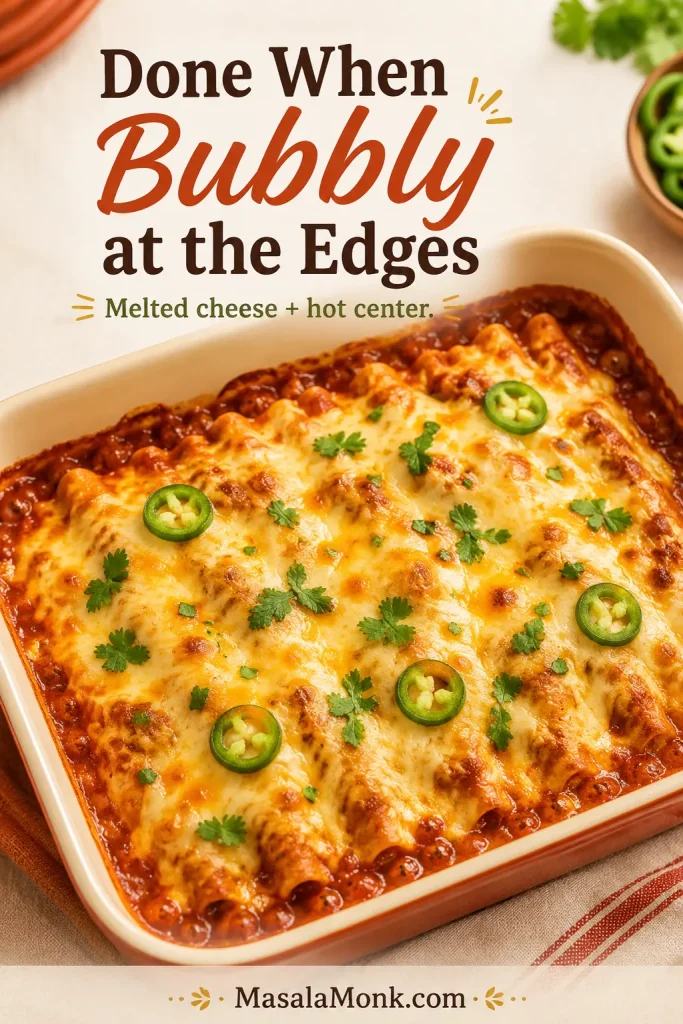
The casserole is done when the sauce is bubbling around the edges, the cheese is fully melted, the center is hot, and the tortillas have softened. At that point, it should smell like warm chili, toasted corn, and melted cheese. If the top still looks wet or loose, give it a few more uncovered minutes. If the cheese is browning too fast, loosely tent the dish with foil.
Bubbling edges and melted cheese are the clearest signs that the center is hot and the casserole is ready to rest.
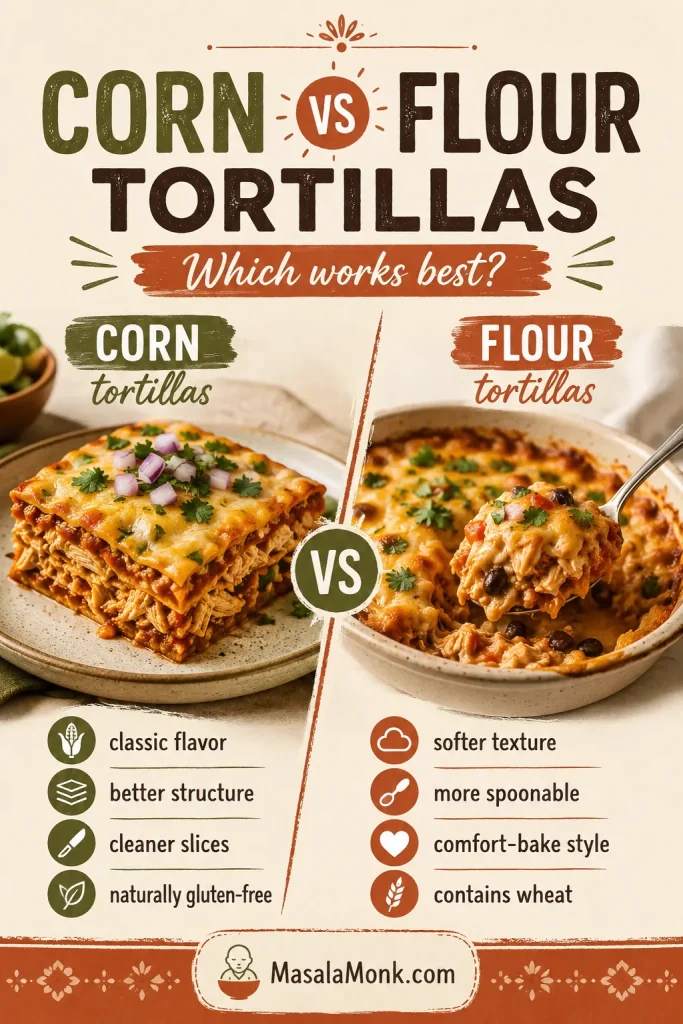
Corn vs Flour Tortillas for Chicken Enchilada Casserole
The tortilla choice changes the casserole. It affects flavor, structure, softness, and whether the final dish slices cleanly or collapses into a saucy scoop.
Corn tortillas give cleaner pieces, while flour tortillas create a softer comfort-bake texture; therefore, the best choice depends on how sliceable you want the casserole.
Why Corn Tortillas Work Best
Corn tortillas are the most forgiving choice for a classic chicken enchilada casserole because they taste more like enchiladas and hold up better under sauce. They soften as the casserole bakes, but they usually do not become as gummy as flour tortillas.
Corn tortillas also make the dish easier to keep gluten-free, as long as the enchilada sauce and other packaged ingredients are certified gluten-free.
When Flour Tortillas Are Okay
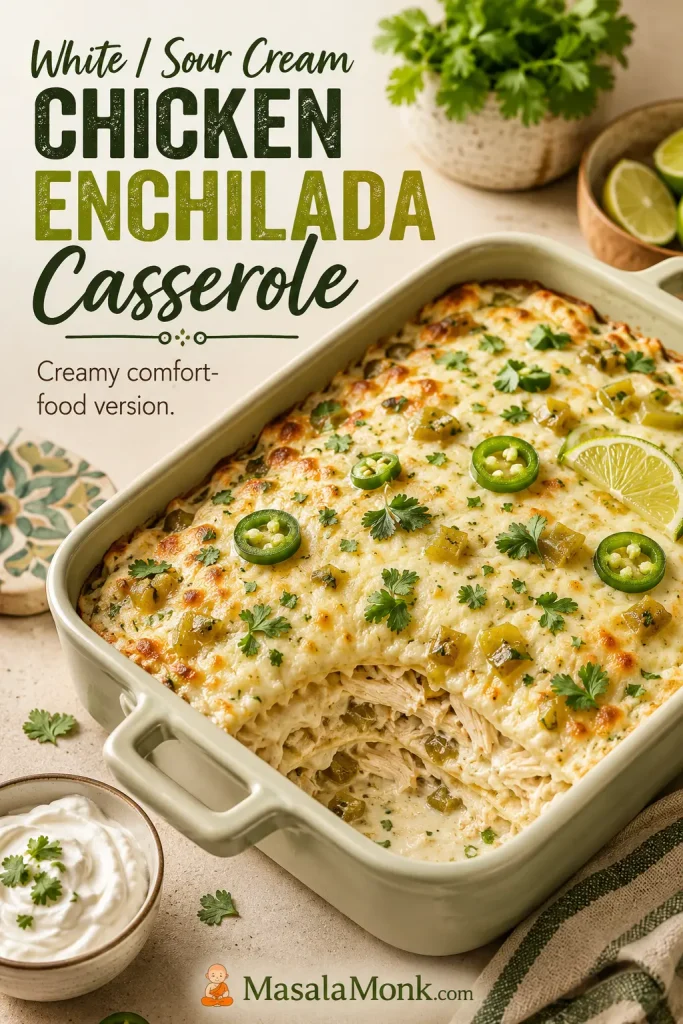
Flour tortillas work if you want a softer, more comfort-food-style casserole. They are common in creamy white chicken enchilada casserole versions, where the goal is soft and rich rather than sliceable and structured.
If flour tortillas are what you have, the casserole will still taste good. It will simply be more tender and spoonable, so think comfort bake rather than neat enchilada squares. Because flour tortillas absorb sauce differently, the soggy-fix section is worth reading before you assemble.
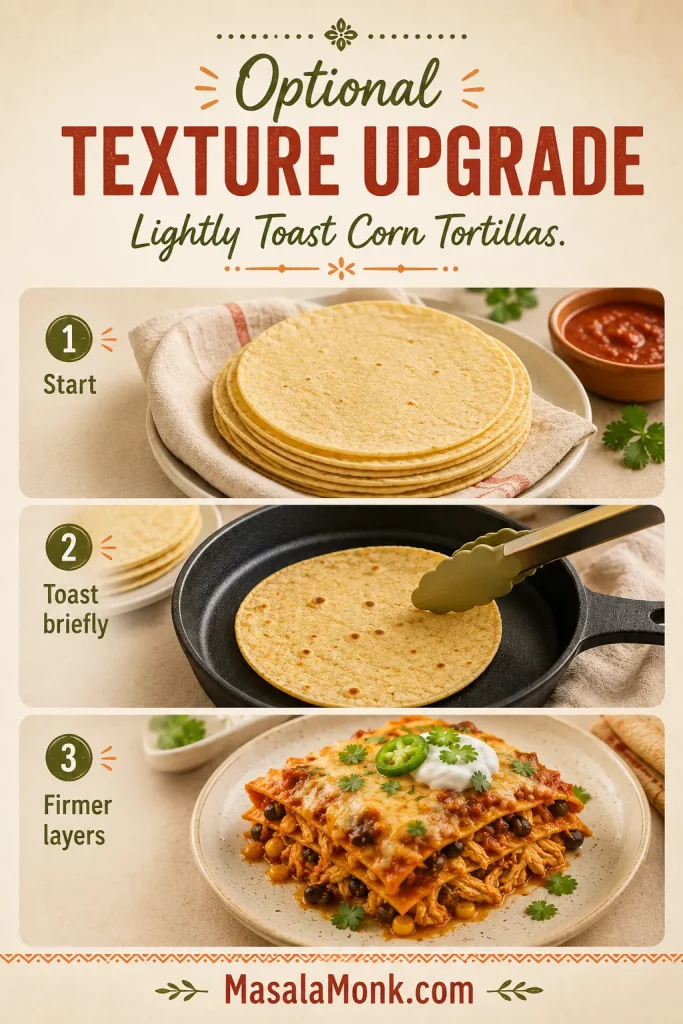
Should You Toast or Fry the Tortillas First?
You do not have to fry tortillas for this no-roll casserole. However, if you want firmer layers, you can lightly toast corn tortillas in a dry skillet or warm them quickly with a small amount of oil before layering.
This extra step is optional, but useful if your enchilada sauce is thin, if you plan to make the casserole ahead, or if you want neater pieces.
Toasting corn tortillas is optional, but it is useful when you want firmer layers or plan to assemble the casserole ahead.
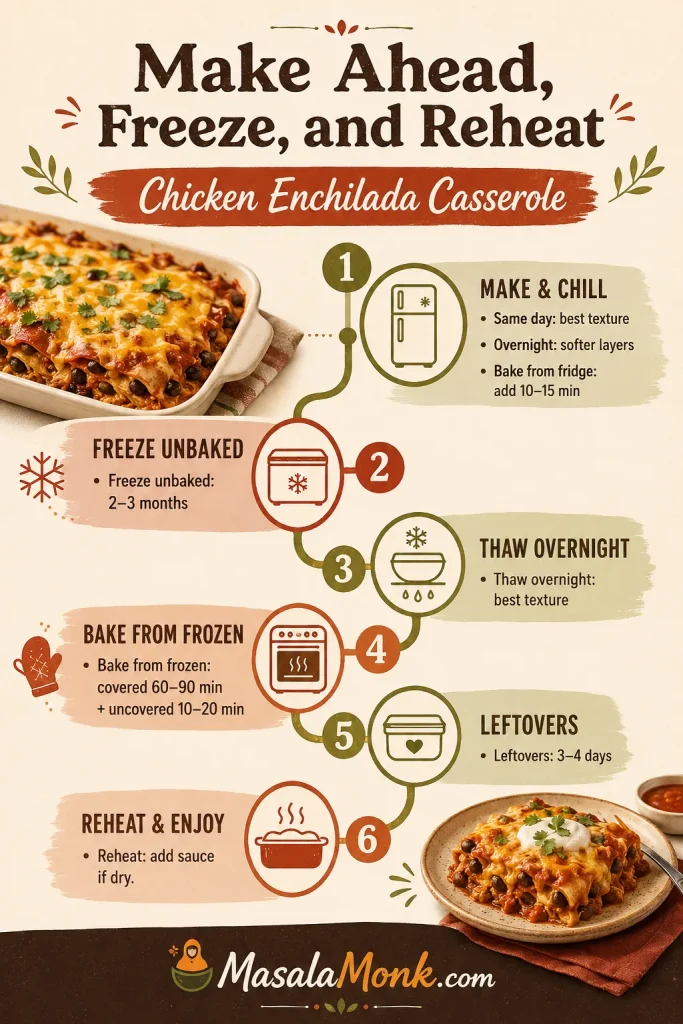
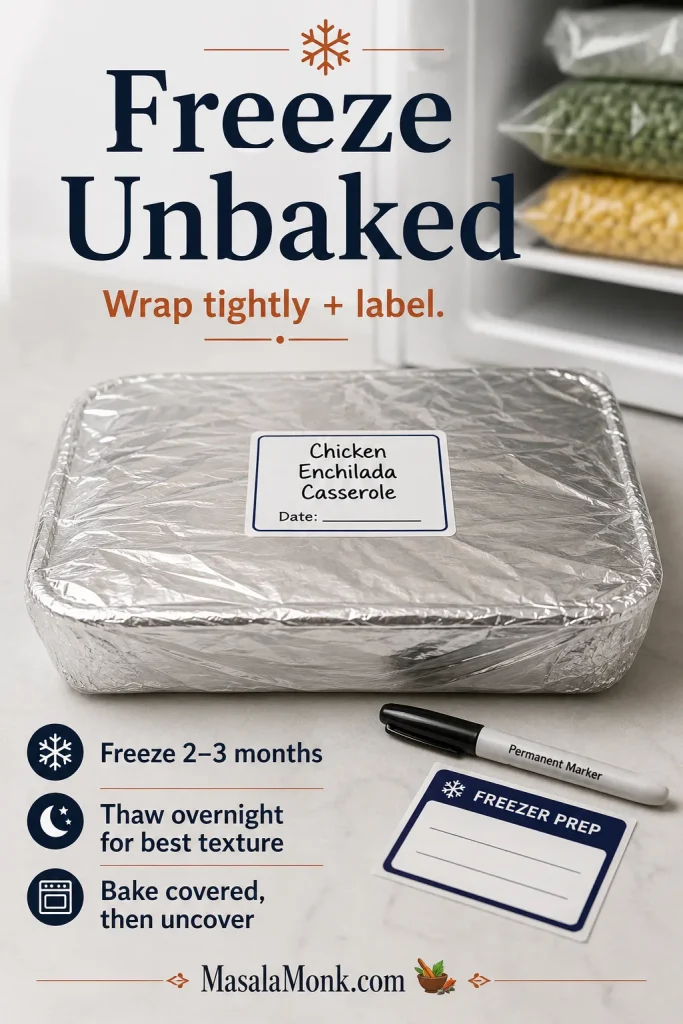
This step matters most when you are making the casserole ahead; the make-ahead and freezer notes explain how the tortilla texture changes as it sits.
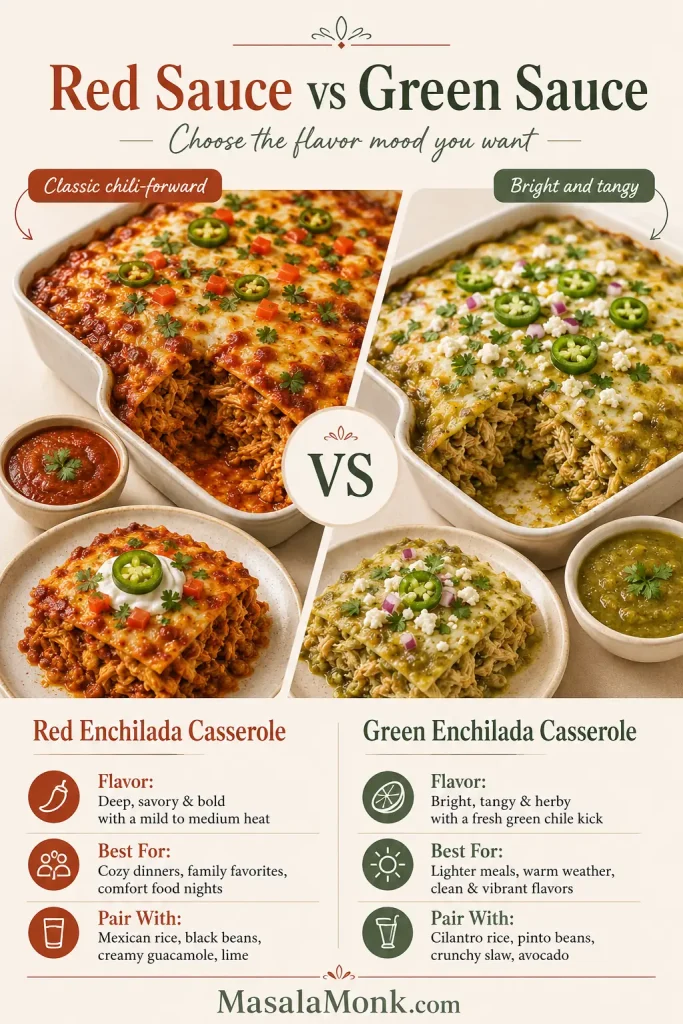
Red Sauce vs Green Sauce
This recipe works with either red or green enchilada sauce. The right choice depends on the flavor mood you want: red is deeper, cozier, and more classic, while green is brighter, tangier, and especially lively with chicken.
Red enchilada sauce gives a deeper, cozier flavor, while green sauce makes the chicken casserole brighter and tangier.
Sauce
Flavor
Best For
Red enchilada sauce
Deeper, chili-forward, classic
Traditional chicken enchilada casserole
Green enchilada sauce
Brighter, tangier, slightly sharper
Green chicken enchilada casserole
Salsa verde
Fresh, tomatillo-forward, lively
A fresher green variation with cilantro and lime
Creamy green sauce
Rich, tangy, soft
White or creamy chicken enchilada casserole
Use red enchilada sauce for a classic, cozy pan or green enchilada sauce for a brighter chicken casserole. If using salsa verde, taste it first because some jars are saltier or more acidic than others. For extra heat at the table, a few drops from MasalaMonk’s pepper sauce guide can add sharp chili flavor without changing the whole casserole.
Red enchilada sauce gives the layers a deeper chili flavor, especially when it is measured instead of poured freely.
Choose your version: Go red sauce + corn tortillas for classic enchilada flavor, green sauce or salsa verde + Monterey Jack for a brighter chicken casserole, sour cream or white sauce for a creamier comfort-food bake, and rotisserie chicken + jarred sauce for the fastest dinner.
How to Make Chicken Enchilada Casserole
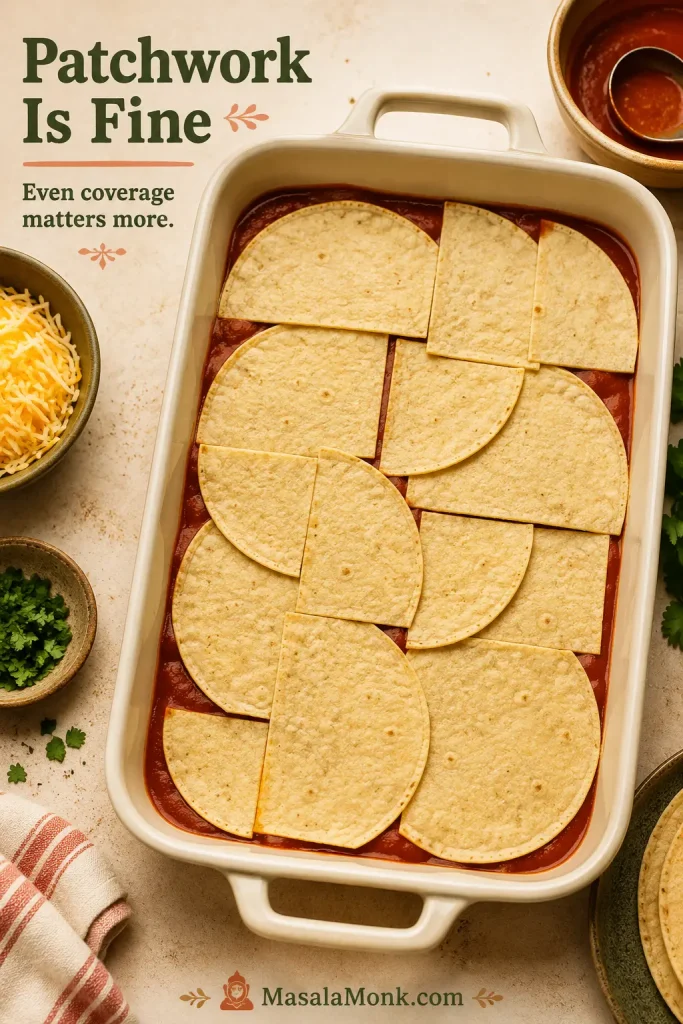
Once the filling is mixed, the rest is simple layering: build the pan, bake it covered, finish it uncovered, and give it a short pause before serving. This does not need to look perfect in the dish. Even coverage matters more than pretty rows, and the oven will pull everything together.
Once the filling is mixed, the rest is relaxed layering: sauce the pan, build the stack, bake, and let it settle.
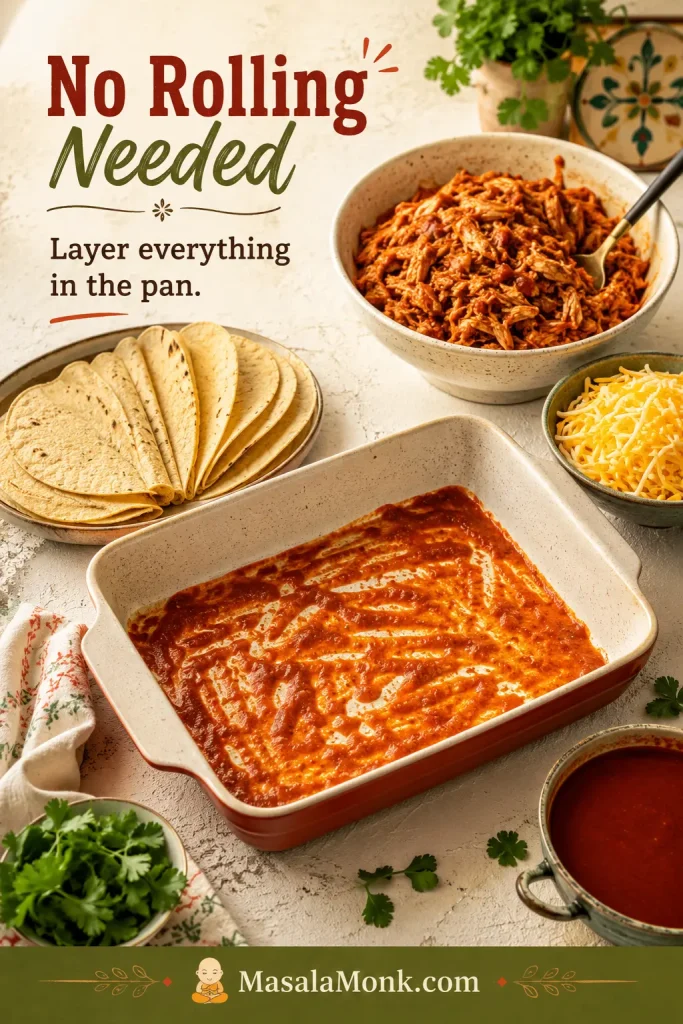
No-Roll Assembly Setup
Before you start building layers, set the sauced pan, tortilla halves, chicken filling, cheese, and remaining sauce within reach. That keeps the assembly relaxed and prevents overthinking each layer.
Instead of filling and rolling each tortilla, keep the assembly relaxed: layer the ingredients directly in the dish and let the oven pull them together.
1. Make the Chicken Filling
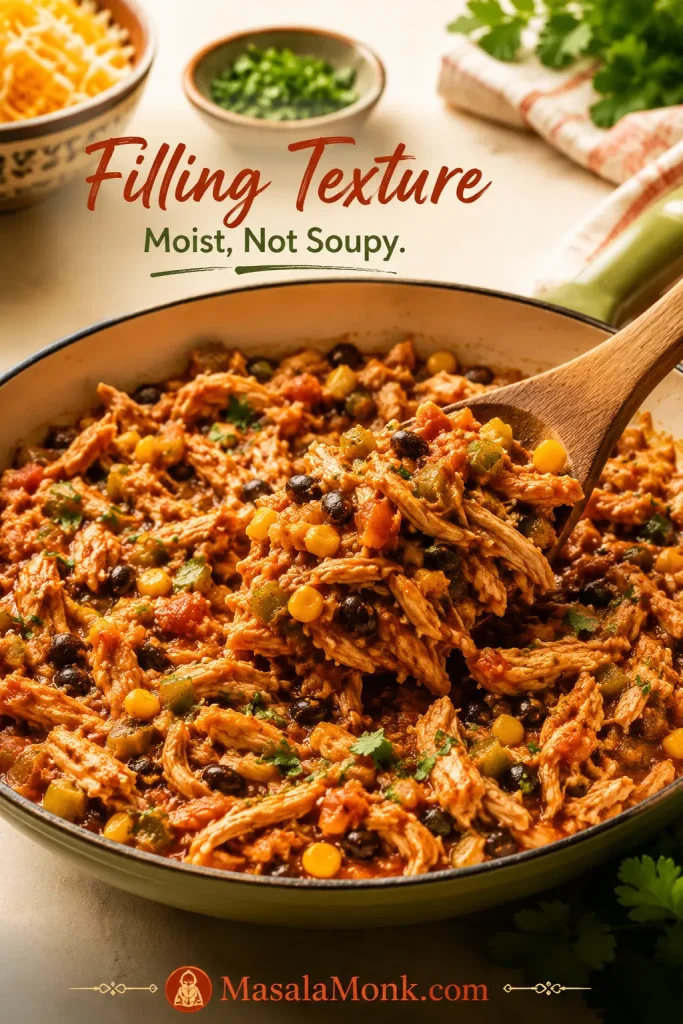
Warm oil in a skillet, then cook the onion until softened. Add garlic, cumin, chili powder, paprika, oregano, salt, and diced green chiles. Stir in the shredded chicken, optional black beans, optional corn, a little enchilada sauce, and lime juice.
The filling should be moist and flavorful, but not soupy. If it looks watery, cook it for another minute or two so extra liquid can evaporate.
The filling should taste seasoned and saucy on its own, but it should not be so wet that it loosens the whole baking dish.
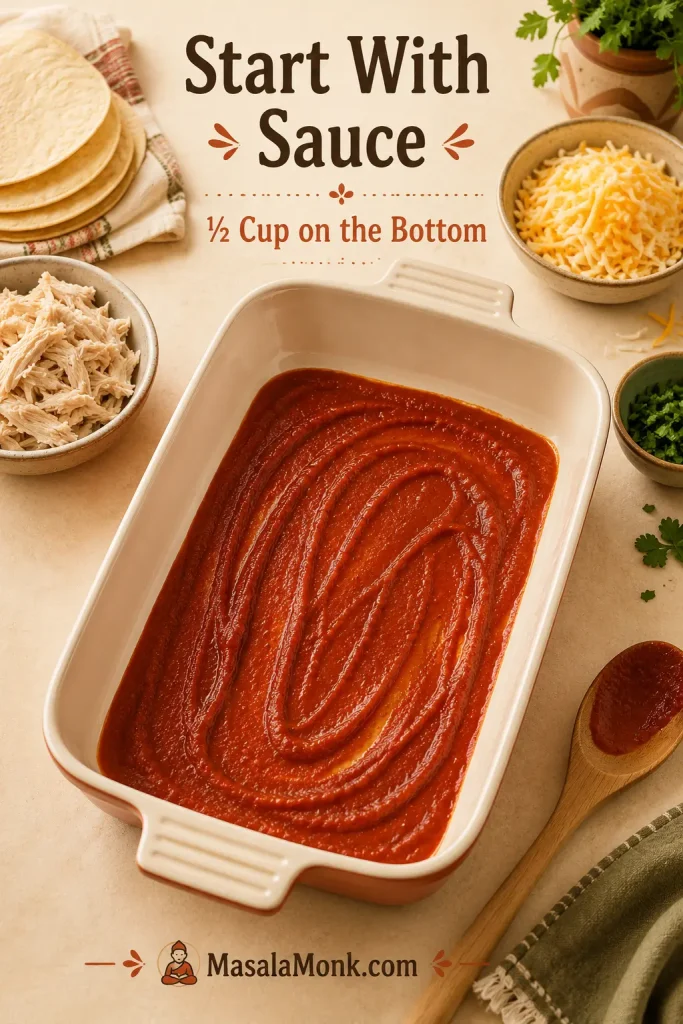
2. Sauce the Bottom of the Pan
Spread ½ cup / 120 ml enchilada sauce across the bottom of the baking dish. This prevents the first tortilla layer from drying out and gives the casserole a saucy base.
Starting with a thin sauce layer protects the first tortillas from drying out without adding too much liquid to the bottom of the pan.
3. Layer the Tortillas, Chicken, Sauce, and Cheese
Add a layer of tortilla halves, overlapping slightly. Spread one-third of the chicken filling over the tortillas, spoon on some sauce, and sprinkle with cheese. Repeat until you have three layers.
4. Bake Covered, Then Uncovered
Cover the dish with foil and bake for 20 minutes. Remove the foil and bake for another 10–12 minutes, until the sauce bubbles around the edges and the cheese is melted on top.
5. Rest Before Slicing
Let the casserole rest for 10–15 minutes before cutting. This is what turns the bubbling pan into something sliceable. If you scoop it immediately, it will taste good, but it will not hold together as well.
A short rest gives the cheese and sauce time to settle, so the casserole serves in cleaner, more stable pieces.
How to Layer Chicken Enchilada Casserole So It Holds Together
The casserole needs enough sauce to soften the tortillas, but not so much that every layer swims. This part is where many cooks worry about making the pan messy, but it does not need to look perfect.
Use the Sauce as Your Layering Guide
The goal is saucy, not flooded. If your enchilada sauce is very thin, hold back a few tablespoons and add more only if the top looks dry before baking.
Sauce Use
Amount
Where It Goes
Chicken filling
½ cup / 120 ml
Stir into the seasoned chicken mixture.
Bottom of pan
½ cup / 120 ml
Spread before the first tortilla layer.
After first filling layer
½ cup / 120 ml
Spoon lightly over the chicken before cheese.
After second filling layer
½ cup / 120 ml
Add just enough to moisten, not flood.
Top layer
1 cup / 240 ml
Spread over the final tortilla layer before the last cheese.
Total
3 cups / 710 ml
Enough sauce for soft layers without a watery casserole.
The measured sauce allocation keeps every layer moist without letting the bottom of the pan turn loose or watery.
If the pan looks too wet at any point, check the soggy casserole fixes before adding more sauce.
Build the Layers Without Overthinking It
After the sauce is measured, the layers are simple: spread a thin sauce layer on the bottom, add tortilla halves, scatter one-third of the filling, spoon on the measured sauce, and add about 1 cup / 113 g cheese. Repeat until the pan is full, finishing with sauce and cheese on top.
Overlap tortilla halves slightly so there are no large gaps.
Spread the chicken filling evenly, but do not pack it down hard.
Keep the middle layers saucy, not flooded.
Finish with enough sauce and cheese on top to keep the casserole moist as it bakes.
If your tortillas are small, use enough pieces to cover each layer. If they are larger, trim or tear them to fit. The goal is even coverage, not a perfect pattern.
Patchwork Tortilla Layers Are Fine
Do not worry if the tortilla pieces look a little patchwork in the pan. Once the sauce and cheese melt into the layers, neat coverage matters more than a perfect arrangement. The pan may look imperfect before baking, but the finished casserole settles into soft, saucy layers.
The tortilla layer does not need to look perfect; even coverage matters more than neat rows once the sauce and cheese melt.
What Clean-Enough Slices Look Like
The best version is still generous and saucy, not dry or stiff. A slice should lift cleanly enough to serve while still showing soft tortilla, chicken, cheese, and sauce layers.
The goal is not a dry, perfect square; instead, aim for saucy layers that hold together enough to serve.
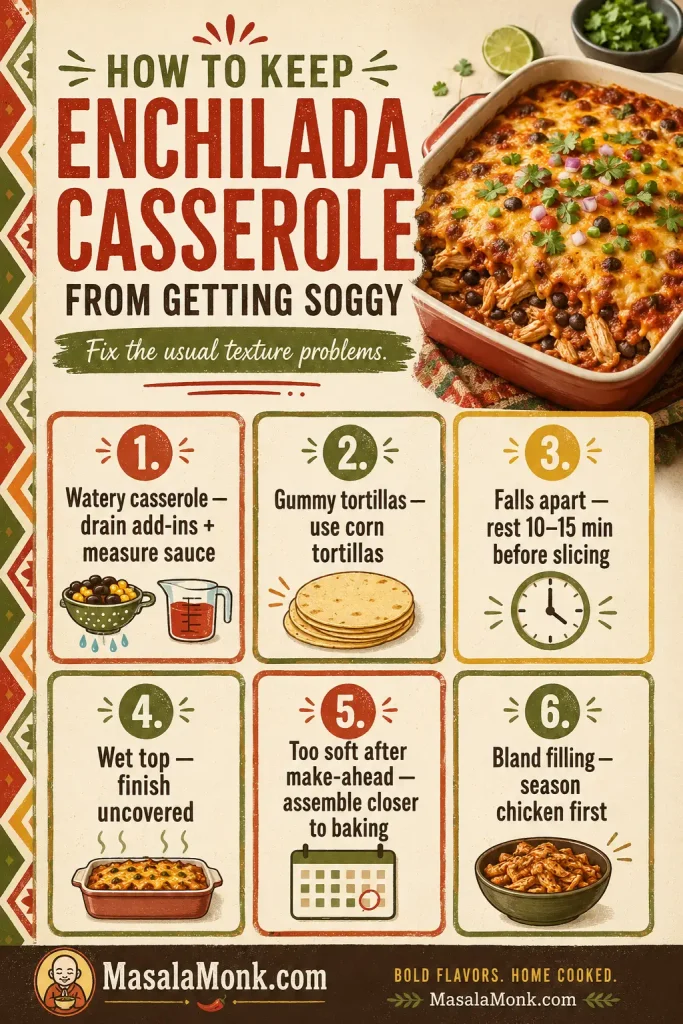
How to Keep Enchilada Casserole From Getting Soggy
Sogginess is the main thing that can ruin chicken enchilada casserole. Fortunately, most soggy casseroles are not ruined by one big mistake. Usually, it is a few small things adding up: wet add-ins, too much sauce, soft tortillas, and serving the casserole before it has had a chance to settle.
Too much liquid from sauce, beans, corn, or chiles
Drain add-ins well and use about 3 cups sauce total.
Gummy tortillas
Flour tortillas or too much sauce
Use corn tortillas, or reduce sauce slightly if using flour.
Casserole falls apart
Cut too soon after baking
Rest 10–15 minutes before slicing.
Wet top
Baked covered the whole time
Uncover for the final 10–12 minutes.
Too soft after make-ahead
Tortillas absorbed sauce while refrigerated
Use corn tortillas and avoid assembling too far ahead if you want firmer layers.
Bland filling
Chicken was not seasoned before layering
Season the filling with spices, chiles, sauce, and lime before assembling.
If the pan usually turns soft or watery, start with moisture control: drain add-ins, measure sauce, and give the bake time to settle.
Most fixes come down to controlling moisture before the pan goes into the oven. If the first scoop looks softer than you expected, give the pan another few minutes before serving the rest. Enchilada casserole firms up as it cools, especially when the cheese and sauce have time to settle.
Mistakes to Avoid
Keep these three guardrails in mind: use cooked chicken, not raw chicken; use cooked rice only if you add rice; and do not pack the baking dish so full that the layers cannot settle.
These three guardrails keep the recipe safe, evenly baked, and easier to serve without changing the basic method.
Raw chicken changes the recipe. This casserole is built around cooked shredded chicken, so raw chicken would change the bake time, moisture level, and food-safety timing.
Raw rice needs its own recipe. It needs more liquid and a longer bake, so use cooked rice only if you want a rice variation.
An overfilled pan gets messy fast. If the filling is more than your dish can comfortably hold, save the extra for tacos, bowls, or nachos.
Chicken Enchilada Casserole Variations
These are adaptation notes for the main casserole, not all separate full recipes. Red or green sauce swaps stay closest to the original 9×13 bake. Rice, slow cooker, keto, and tortilla-free versions change the texture or timing more, so use those as direction rather than simple one-for-one swaps. If you plan to make a variation ahead, check the make-ahead notes because creamy, rice, and slow cooker versions soften differently.
Green Chicken Enchilada Casserole
Green sauce gives the casserole a brighter, tangier feel, especially with chicken. Use green enchilada sauce or salsa verde, add diced green chiles to the filling, choose Monterey Jack or cheddar-Jack, and finish with cilantro and lime.
Green enchilada sauce or salsa verde gives the casserole a fresher finish, especially with Monterey Jack, cilantro, and lime.
White, Sour Cream, or Creamy Chicken Enchilada Casserole
For a creamier comfort-food pan, use a sour cream, cream cheese, or simple white sauce direction with green chiles and Monterey Jack. Flour tortillas are common in white enchilada casseroles because they make the texture softer, but corn tortillas still hold better if you want neater pieces.
A white or sour cream version leans creamier and softer, so think comfort bake rather than sharply sliced layers.
No Cream of Chicken Soup Needed — But Here’s How to Adapt It
This recipe does not need cream of chicken soup because enchilada sauce already gives the pan moisture and flavor. However, if the casserole you grew up with was creamier, softer, and made with condensed soup, you can still take this recipe in that direction.
Replace ½ to 1 cup of the enchilada sauce with a sour cream and cream-of-chicken mixture, then keep the remaining sauce measured. Condensed soup plus sour cream makes the casserole richer and softer, so this route works best when you want an old-school creamy bake rather than the cleanest layered pieces.
The main recipe does not need condensed soup, but this adaptation shows how to take it toward an old-school creamy casserole without losing control of the sauce.
Chicken Enchilada Rice Casserole
Cooked rice can make the casserole heartier. Stir in 1½ to 2 cups cooked rice with the chicken filling and reduce the tortillas slightly if the pan feels too full. Do not use raw rice here; it needs a different liquid ratio and longer bake time.
Cooked rice makes the casserole heartier; however, raw rice needs a different liquid ratio and should not be added to this version.
Slow Cooker Chicken Enchilada Casserole
The slow cooker version is convenient, but it will be more spoonable than the oven-baked casserole. Cook chicken with enchilada sauce first, shred it, then stir in tortilla strips and cheese near the end so the tortillas do not become mushy. For more shredded-chicken dinner ideas, MasalaMonk’s crock pot chicken breast recipes are useful.
The slow cooker version is convenient and spoonable, but adding the tortillas near the end helps keep them from turning mushy.
Healthy, Keto, or Tortilla-Free Notes
A lighter pan can use more chicken, black beans, extra vegetables, slightly less cheese, and corn tortillas. For a low-carb version, use low-carb tortillas or skip the tortillas and make a saucy chicken enchilada bake with peppers, cauliflower rice, or zucchini. MasalaMonk’s sheet pan chicken fajitas recipe is a good lighter companion if you want a quick Tex-Mex-style chicken dinner with more peppers and less cheese.
For a lighter or lower-carb direction, keep the enchilada flavor and shift the base toward chicken, vegetables, and low-carb swaps.
Make Ahead, Freezer, and Reheating Tips
Chicken enchilada casserole is a good make-ahead dinner, but tortilla texture changes the longer the casserole sits with sauce. If you want the neatest layers, assemble it the same day you plan to bake it. If convenience matters more, assemble it ahead and expect a more tender texture.
To keep the make-ahead texture firmer, use the corn tortilla guidance and avoid over-saucing the layers.
When serving company, bake it fresh if you can. On a busy weeknight, assembling it ahead is still worth it. The make-ahead version is not about perfect slices; it is about having dinner mostly handled before the evening gets busy.
Need
What to Do
Texture Note
Make ahead same day
Assemble, cover, and refrigerate until ready to bake.
Very good texture.
Make ahead overnight
Refrigerate up to 24 hours.
Tortillas soften more, especially flour tortillas.
Bake from fridge
Add 10–15 minutes to the covered bake time.
Keep covered until hot in the center.
Freeze unbaked
Wrap tightly and freeze for 2–3 months.
Corn tortillas freeze better than flour.
Bake after thawing
Thaw overnight in the fridge, then bake covered and finish uncovered.
Best freezer texture.
Bake from frozen
Bake at 350°F / 175°C covered for 60–90 minutes, then uncovered for 10–20 minutes.
Time depends on pan depth and how solidly frozen it is.
Store leftovers
Refrigerate in an airtight container for 3–4 days.
Good for lunches.
Reheat
Warm covered at 350°F / 175°C or microwave individual portions.
Add a spoonful of sauce if it seems dry.
Make-ahead prep is practical, although the layers soften slightly; careful chilling, wrapping, and reheating keep the pan worth serving.
Freeze Unbaked Chicken Enchilada Casserole
Freezing the unbaked pan is useful when you want dinner ready for a future busy night. Wrap the dish tightly, label it clearly, and thaw overnight for the best texture before baking.
Wrapping and labeling the unbaked casserole protects it in the freezer, while thawing overnight gives the best baked texture later.
For general leftover safety, the USDA’s food-safety guidance is a helpful reference for cooked dishes and refrigerated leftovers: USDA leftovers and food safety. For poultry safety specifically, the USDA’s safe minimum internal temperature chart is useful if you are cooking chicken before shredding it.
What to Serve With Chicken Enchilada Casserole
This casserole is filling on its own, but the right sides make it feel like a complete dinner. Since the casserole is saucy and cheesy, fresh, crunchy, or bright sides work especially well. Think of toppings as balance: lime, cilantro, and pico de gallo add brightness; sour cream, avocado, and guacamole add creaminess; jalapeños and pepper sauce add heat; lettuce, onion, or slaw add crunch.
Mexican rice or cilantro lime rice
Black beans or refried beans
Guacamole or sliced avocado
Pico de gallo or MasalaMonk’s mango salsa recipe for a sweet-bright topping
Salsa verde
Shredded lettuce with lime
Corn salad
Pickled onions
Jalapeños
Lime wedges
If serving this for guests, put toppings in small bowls and let everyone finish their own plate. It turns a hot, cheesy casserole into an easy toppings-bar dinner, and the cool, fresh extras make every serving feel a little brighter.
Bright toppings, crunchy sides, beans, rice, and salsa make the saucy baked pan feel fresh enough for a full dinner.
Chicken Enchilada Casserole Recipe
This easy chicken enchilada casserole is a no-roll 9×13 dinner with soft tortilla layers, saucy shredded chicken, and melted cheese on top. Use red sauce for a classic chili-forward bake or green sauce for a brighter, tangier chicken casserole.
Prep Time20 minutes
Cook Time30–32 minutes
Rest Time10–15 minutes
Servings8
Equipment
9×13-inch / 23×33 cm baking dish
Large skillet
Mixing spoon or spatula
Foil
Knife and cutting board
Measuring cups and spoons
Ingredients
1 tablespoon neutral oil / 15 ml
1 small onion, diced / about 120 g
2–3 garlic cloves, minced
1 teaspoon ground cumin
1 teaspoon chili powder
½ teaspoon smoked paprika or regular paprika
½ teaspoon dried oregano
½ teaspoon kosher salt, plus more to taste
1 can diced green chiles / 4 oz / 113 g, drained if watery
3½ cups cooked shredded chicken / about 525 g
1 can black beans, drained and rinsed / 15 oz / 425 g, optional
1 cup corn / about 150–165 g, optional
3 cups enchilada sauce, red or green / 710 ml, divided
1 tablespoon lime juice / 15 ml
12 small corn tortillas, 6-inch, halved / about 300–330 g total
3 cups shredded Monterey Jack, cheddar-Jack, or Mexican blend cheese / 12 oz / 340 g
Optional Toppings
Sour cream
Chopped cilantro
Avocado or guacamole
Sliced jalapeños
Diced red onion
Lime wedges
Pico de gallo or salsa verde
Instructions
Heat the oven. Preheat the oven to 375°F / 190°C. Lightly grease a 9×13-inch / 23×33 cm baking dish.
Make the filling. Heat the oil in a large skillet over medium heat. Add the onion and cook for 3–4 minutes, until softened.
Add the seasoning. Stir in the garlic, cumin, chili powder, paprika, oregano, salt, and diced green chiles. Cook for about 30 seconds, just until fragrant.
Add chicken and extras. Stir in the shredded chicken, black beans if using, corn if using, ½ cup / 120 ml enchilada sauce, and lime juice. Cook for 1–2 minutes, just until everything is combined and lightly saucy. Taste and adjust salt if needed.
Start the layers. Spread ½ cup / 120 ml enchilada sauce across the bottom of the baking dish. Add a layer of tortilla halves, overlapping slightly.
Add filling and cheese. Spread one-third of the chicken filling over the tortillas. Spoon over about ½ cup / 120 ml sauce, then sprinkle with about 1 cup / 113 g cheese.
Repeat. Add another tortilla layer, another third of the filling, another ½ cup / 120 ml sauce, and another cup of cheese. Add the final tortilla layer, the remaining filling, the remaining sauce, and the last cheese.
Bake covered. Cover the dish with foil and bake for 20 minutes. If the dish is very full, tent the foil slightly so it does not stick to the cheese.
Finish uncovered. Remove the foil and bake for another 10–12 minutes, until the casserole is bubbling around the edges and the cheese is melted.
Rest before serving. Let the casserole rest for 10–15 minutes before slicing. Add toppings just before serving.
Recipe Notes
Baking at 350°F / 175°C: Bake covered for 25–30 minutes, then uncovered for 10–15 minutes.
Green chicken enchilada casserole: Use green enchilada sauce or salsa verde, Monterey Jack cheese, and extra cilantro/lime to finish.
Creamier casserole: Stir ½ cup / 120 g sour cream into the filling after it cools slightly, or use it as a topping.
Neater slices: Use corn tortillas and let the casserole rest before cutting.
Softer casserole: Flour tortillas can be used, but they may become more tender or gummy.
FAQs
Do I have to roll the tortillas?
No. That is the beauty of the casserole. The tortillas are layered in the pan instead of filled and rolled, so you get enchilada flavor without the assembly line.
How much chicken do I need?
Use about 3½ cups cooked shredded chicken. One average rotisserie chicken usually gives about 3 to 4 cups shredded meat, depending on size.
Are corn or flour tortillas better?
Corn tortillas give more classic enchilada flavor and better structure. Flour tortillas work, but they create a softer, more spoonable casserole and can turn gummy if the dish is too saucy.
Is red or green enchilada sauce better for this casserole?
Both work. Red sauce gives a deeper, more classic flavor, while green enchilada sauce tastes brighter and tangier with chicken, Monterey Jack, cilantro, and lime.
How do I keep chicken enchilada casserole from getting soggy?
Use corn tortillas, drain wet add-ins, measure the sauce, bake uncovered at the end, and give the casserole time to settle before serving. If you want firmer layers, lightly toast the tortillas before assembling.
How far ahead can I assemble it?
You can assemble it up to 24 hours ahead and refrigerate it covered. When baking from the fridge, add 10–15 minutes to the covered bake time so the center heats through.
What is the best way to freeze it?
Freeze it unbaked or baked, tightly wrapped, for 2–3 months. For the best texture, thaw it overnight in the refrigerator before baking or reheating. Corn tortillas usually freeze better than flour tortillas.
Is the slow cooker version as good as the oven version?
The slow cooker version is convenient, but it will be softer than the oven method. Cook the chicken with enchilada sauce first, shred it, then add tortilla strips and cheese near the end so the tortillas do not become too mushy.
Should rice go in this casserole or on the side?
Cooked rice can go in the casserole if you want it heartier. Stir in 1½ to 2 cups cooked rice with the chicken filling. Raw rice needs different liquid ratios and a longer bake time, so it is better handled as its own chicken enchilada rice casserole.
How long does chicken enchilada casserole last in the fridge?
Leftover chicken enchilada casserole keeps well in the refrigerator for 3–4 days in an airtight container. Reheat individual portions in the microwave or warm larger portions covered in a 350°F / 175°C oven.
Once you know the sauce amount, tortilla choice, and the value of a short pause before serving, this becomes the kind of forgiving dinner you can make without overthinking it. Keep it classic with red sauce, brighten it with green sauce, or set out sour cream, lime, avocado, salsa, and jalapeños so the whole pan feels easy, generous, and personal.
This tater tot breakfast casserole is for the morning when people are already wandering into the kitchen hungry. The sausage is savory, the eggs bake up tender but sliceable, and the frozen tots turn into the crisp-edged potato topping everyone reaches for first.
It feels generous enough for holidays, brunch guests, and slow weekend mornings, but it is still practical: one skillet, one bowl, one 9×13 pan, and no frying potatoes on the side. Make it when breakfast needs to feel abundant without turning the cook into a short-order chef; the oven does most of the work while the kitchen starts to smell like sausage, potatoes, and melted cheese.
The key is keeping the tots on top instead of burying them under the eggs. That way, the center can bake into a tender egg casserole while the potatoes stay visible, crisp-edged, and browned.
After resting, a well-baked casserole should lift from the pan in clean squares instead of collapsing into loose egg and potatoes.
For a golden-browned, sliceable tater tot breakfast casserole, use 1 pound / 454 g breakfast sausage, 10 large eggs, 1 cup / 240 ml milk or half-and-half, 2 cups / about 225 g shredded cheese, and 32 oz / 907 g frozen tater tots. Brown the sausage, whisk the eggs with the dairy, layer everything in a greased 9×13-inch pan, arrange the tots on top, and bake uncovered at 350°F / 175°C for 50–60 minutes.
The overnight choice is simple: easiest morning, or better potato texture. A fully assembled overnight casserole works, but the topping loses some crispness. For the neatest potato top, prep the sausage and egg mixture ahead, then add the tots right before baking.
Best first version: sausage, cheddar, 10 eggs, 1 cup dairy, and a full layer of tots. It is hearty, sliceable, and built for a browned potato top without needing a separate pan of breakfast potatoes.
For the quickest path to a reliable 9×13 brunch bake, keep the ratio simple: meat, eggs, dairy, cheese, and frozen tots.
At a Glance
Detail
Recommended Setup
Pan
9×13 inch / 23×33 cm baking dish
Tater tots
32 oz / 907 g frozen tater tots
Eggs
10 large eggs
Protein
1 lb / 454 g breakfast sausage
Dairy
1 cup / 240 ml milk or half-and-half
Cheese
2 cups / about 225 g shredded cheese
Oven
350°F / 175°C
Bake time
50–60 minutes, longer if chilled
Rest time
10 minutes before slicing
Doneness
165°F / 74°C in the center
Those amounts give you a casserole that slices cleanly without turning into a dry block of eggs and potatoes. The bottom stays savory and tender, while the top gives you the crisp potato bite people usually reach for first, especially around the edges.
What Is Tater Tot Breakfast Casserole?
A tater tot breakfast casserole is an egg-based brunch bake with frozen tots, cheese, and a breakfast-style filling such as sausage, bacon, ham, or vegetables. It gives you the comfort of eggs and potatoes in one pan, with the tots standing in for hash browns or breakfast potatoes on the side.
If you want crispy potatoes without the full egg bake, these air fryer hash browns are a quicker potato side. This casserole is for the morning when you want the eggs, sausage, cheese, and potatoes baked together in one pan so you can slice and serve it to a group without juggling separate skillets on the stove.
Unlike a classic dinner-style tater tot casserole, this breakfast version does not use cream of mushroom soup. Eggs, milk, and cheese hold everything together, so the finished dish eats like a brunch egg bake rather than a creamy ground-beef casserole.
Breakfast Version vs Dinner Casserole
If you landed here looking for the dinner-style version, MasalaMonk also has a cozy tater tot casserole recipe made with ground beef, creamy filling, vegetables, cheese, and crisp tots. This breakfast version is different: it is built around eggs, breakfast sausage, cheese, and frozen tots, so it eats more like a brunch casserole than a creamy dinner bake.
Version
Main Ingredients
Best For
Tater tot breakfast casserole
Eggs, sausage or bacon, cheese, milk, frozen tots
Brunch, holiday breakfast, breakfast meal prep
Regular tater tot casserole
Ground beef, creamy sauce, vegetables, cheese, frozen tots
Dinner, potlucks, comfort food meals
Hash brown breakfast casserole
Eggs, sausage or bacon, cheese, shredded hash browns
A classic breakfast casserole with a softer potato base
Although both versions use tots, the breakfast casserole is egg-based, while the dinner casserole usually depends on ground beef and a creamy filling.
If you want a more traditional shredded-potato brunch bake, use this breakfast casserole with hash browns. If you want the crisp-topped, golden-potato version, this egg-and-tot bake is the better fit.
Why This Recipe Works
The problem with many tater tot breakfast casseroles is that the top looks ready before the egg center is fully cooked, or the tots turn limp because they are buried under too much filling. This version is built around two things: an egg layer that sets properly and a potato layer that gets a chance to brown.
The tots stay exposed. That gives the potatoes a chance to brown instead of steaming inside the egg layer.
The sausage is browned first. This gives the casserole flavor and prevents greasy raw sausage from cooking inside the eggs.
Vegetables are cooked before baking. Onion, peppers, mushrooms, and spinach can release water. Cooking them first keeps the middle from turning watery.
Ten eggs are deliberate. For a 9×13 pan, 10 eggs give the best middle ground: 8 eggs make the casserole looser and more potato-heavy, while 12 eggs push it closer to a firm egg bake.
One cup of dairy keeps the eggs tender. It softens the texture without flooding the pan.
Frozen tots make the method predictable. They hold their shape, cover the top neatly, and are less likely to collapse into the egg layer.
Since the potato layer needs dry heat to brown, the tots work better as a topping than as a hidden layer inside the eggs.
Choose Your Version
If you already know the kind of morning you are cooking for, use this as a shortcut. The base recipe stays the same; the meat, timing, and topping method change the personality of the casserole.
Want This?
Make It This Way
Classic brunch pan
Sausage, cheddar, 10 eggs, and tots arranged on top.
Easiest holiday morning
Fully assemble, cover, refrigerate, then bake covered first and uncovered to finish.
Crispest tot topping
Prep the sausage and egg mixture ahead, then add frozen tots in the morning.
Bacon-lover version
Use cooked bacon with cheddar-Jack or sharp cheddar.
Leftover ham brunch
Use diced ham with cheddar, Swiss, or Monterey Jack.
Vegetable-packed bake
Use cooked mushrooms, peppers, onions, spinach, broccoli, or roasted poblanos.
Creamier high-protein bake
Add cottage cheese and reduce the milk slightly.
Once the base is right, the same casserole can shift toward classic sausage, smoky bacon, leftover ham, vegetarian, or higher-protein brunch versions.
Ingredients for Tater Tot Breakfast Casserole
The ingredient list is short, so the ratios do most of the work. Too many eggs make the bake firm, too much dairy loosens the center, and thawed tots lose structure.
The ingredients are familiar, but the balance matters: enough eggs for structure, enough dairy for tenderness, and frozen tots for a defined top.
Frozen tater tots
Use 32 oz / 907 g frozen tater tots for a generous 9×13 casserole. Keep them in the freezer until you are ready to assemble so they hold their shape and are less likely to break apart.
Breakfast sausage
Breakfast sausage brings seasoning, fat, and savory depth. Use 1 pound / 454 g pork breakfast sausage, turkey sausage, chicken sausage, or spicy breakfast sausage. Brown it fully and drain excess grease before layering it into the casserole.
Eggs
Ten large eggs give the casserole enough structure for a 9×13 pan without making it feel dry or rubbery. For a lighter, more potato-heavy bake, use 8 eggs. However, if you want it firmer and more egg-forward, use 12.
For a 9×13 pan, 10 eggs give the most balanced texture; 8 eggs lean looser, while 12 eggs make the bake firmer.
If you want a smaller skillet egg bake instead of a full brunch pan, this frittata recipe uses a similar cooked-filling logic but bakes faster and serves fewer people.
Milk or half-and-half
Use 1 cup / 240 ml whole milk or half-and-half. This helps the eggs bake into a tender layer. Too much dairy can make the center loose, especially if you also add vegetables that release moisture.
Cheese
Use 2 cups / about 225 g shredded cheese. Sharp cheddar gives the boldest flavor, while Monterey Jack, Colby Jack, or pepper jack melt smoothly. A cheddar-Jack blend gives you both flavor and melt.
Vegetables and seasonings
Onion and bell pepper are optional but useful. Cook them with the sausage so they soften before going into the baking dish. Garlic powder, onion powder, black pepper, dry mustard, and a little hot sauce all help the egg mixture taste seasoned instead of flat.
Try to keep added vegetables to about 1 1/2 to 2 cups cooked total so the egg layer still sets cleanly.
Before vegetables go into the casserole, sautéing them helps remove moisture so mushrooms, peppers, onions, and spinach do not loosen the egg layer.
Which Tater Tots to Use
Regular frozen tater tots are the easiest choice for this breakfast bake because they hold their shape and brown predictably. They are already shaped, par-cooked, and ready to go straight from the freezer to the casserole.
Type of Tot
Will It Work?
Notes
Regular frozen tater tots
Recommended
Strong structure and the most predictable bake time.
Mini tots
Yes
They brown faster, so start checking earlier.
Extra-crispy tots
Yes
Good for a stronger crunch on top.
Thawed tots
Not ideal
They can soften, break, and lose structure.
Seasoned tots
Sometimes
Use less added salt if the tots are already salty.
Regular frozen tots are the safest first choice; however, mini, extra-crispy, and seasoned tots can work when timing and salt are adjusted.
If you are using a smaller bag, 28 oz / about 794 g will still work. The top layer will be a little less full, but the casserole will bake well.
Tots on Top vs Tots on Bottom
This is the biggest texture decision in the whole recipe. Some tater tot breakfast casserole recipes place the tots on the bottom, some mix them in, and some arrange them on top. None of those methods is wrong, but they do not give the same result.
Method
Texture
When to Use It
Tots on top
Crisp, browned top, clear potato layer
Best for a classic tater tot topping
Tots on bottom
More hotdish-style, absorbs egg mixture
Overnight casseroles or a softer potato texture
Tots mixed in
Easy, but least crisp
Casual family bake
Pre-baked tots
Crunchiest, but takes extra time
When you do not mind an extra step
Placement changes the texture: tots on top stay more distinct, while bottom or mixed-in tots create a softer, hotdish-style bite.
For this recipe, the tots go on top because that is where they can actually brown. The eggs, sausage, and cheese bake underneath, while the corners get the best crisp-edged potato bites. Once you choose that texture, follow the step-by-step method below.
How to Make Tater Tot Breakfast Casserole
The method is easy, but a little order makes a big difference. Brown and drain the sausage first, season the eggs before they hit the pan, and keep the tots frozen until the casserole is ready for the oven. If you are baking a chilled casserole, use the bake time and doneness section before you start.
The casserole comes together more predictably when the filling is cooked first, the eggs are seasoned separately, and the tots are added last.
1. Brown the sausage
Heat a large skillet over medium heat. Add 1 pound / 454 g breakfast sausage and cook until browned, no longer pink, and the crumbles have a little color. If you are using onion or bell pepper, add them once the sausage has started to brown and cook until softened.
Drain excess grease so the bottom of the casserole does not turn heavy or oily.
Browning the sausage before baking adds deeper flavor, and draining it helps keep the finished egg layer from turning greasy.
2. Whisk the eggs
In a large bowl, whisk 10 large eggs with 1 cup / 240 ml milk or half-and-half. Add garlic powder, onion powder, black pepper, dry mustard if using, hot sauce if using, and a little salt. Be careful with salt if your sausage and cheese are already salty.
3. Layer the filling
Grease a 9×13-inch / 23×33 cm baking dish. Spread the cooked sausage mixture evenly over the bottom. Sprinkle most of the cheese over the sausage, saving a little for the top if you like a cheesy finish.
4. Add the egg mixture
Pour the egg mixture evenly over the sausage and cheese. Tilt the dish gently if needed so the eggs settle into the corners.
Once the filling is spread evenly, pouring the eggs slowly helps them reach the corners and hold the casserole together when sliced.
5. Arrange the frozen tots
Place the frozen tater tots on top in a single layer. They do not need to be perfectly lined up, but try to keep them exposed rather than buried under the egg mixture.
Instead of thawing them first, add the tots frozen so they keep their shape and remain visible as the casserole bakes.
6. Bake and rest
Bake uncovered at 350°F / 175°C for 50–60 minutes, until the egg layer has firmed and the tots are crisp-edged and golden. Add the remaining cheese during the last 5–10 minutes if you want a cheesy top. Let the casserole rest for 10 minutes before slicing so the squares hold together.
By the end, the edges should look lightly browned and the center should feel set rather than sloshy.
By the end of baking, the tots should look golden-browned and crisp-edged, but the center still needs a final doneness check.
For the best-looking top: keep most or all of the cheese under the tots. If adding cheese on top, sprinkle it lightly during the last 5–10 minutes instead of covering the tots completely.
Bake Time and Doneness
The top will usually look ready before the middle is done, so use the clock as a guide and the center as the final judge. For a freshly assembled 9×13 tater tot breakfast casserole, plan on 50–60 minutes at 350°F / 175°C. If the casserole is cold from the refrigerator, it may need 60–70 minutes total.
Version
Temperature
Approximate Time
Freshly assembled 9×13 casserole
350°F / 175°C
50–60 minutes
Cold overnight casserole
350°F / 175°C
60–70 minutes
Covered start for chilled casserole
350°F / 175°C
Cover 20–25 minutes, then uncover until done
More browned top
Finish at 400°F / 200°C
Last 5 minutes only, if needed
Baking from Cold
Cover only a cold casserole that needs help warming through before the top gets too brown. For a freshly assembled casserole, bake uncovered from the start.
When the dish starts cold, a covered start helps the middle warm through before the potato topping gets too dark.
For the simplest safe target, check the center with an instant-read thermometer and look for 165°F / 74°C. FoodSafety.gov lists casseroles, including meatless casseroles, at 165°F / 74°C, so that is the clearest doneness target for this full breakfast bake. You can review the safe internal temperature guidance from FoodSafety.gov.
If you do not have a thermometer, look for no loose wobble in the middle and no raw egg on a knife inserted near the center.
Because the surface can brown early, the safest cue is the center: look for 165°F, no loose wobble, and no raw egg on the knife.
Do not pull it too early: a casserole can look browned on top while the egg center is still loose underneath. Check near the middle, not just the edges. If the center stays loose or the tots are browning too fast, use the troubleshooting table.
Sausage, Bacon, Ham, and Vegetarian Variations
Once the egg-to-dairy balance is right, the casserole is forgiving. The flavor can go smoky with bacon, milder and holiday-friendly with ham, or vegetable-heavy with a vegetarian version as long as the moisture is cooked off first.
Sausage tater tot breakfast casserole
Sausage works especially well because it seasons the whole pan as it cooks. Use 1 pound / 454 g breakfast sausage, cooked and drained. Pork sausage gives the richest flavor, but turkey or chicken breakfast sausage works too. For a spicier casserole, use hot breakfast sausage or add pepper jack cheese.
If your sausage is very salty, reduce the salt in the egg mixture. The cheese and tots will add salt too.
For a richer sausage-and-cream-cheese version, stir 4 oz / 115 g softened cream cheese into the cooked sausage before layering. Keep the milk at 1 cup so the egg layer does not turn too loose.
Bacon tater tot breakfast casserole
Bacon gives the casserole a smokier, saltier flavor than sausage. Use 12–16 oz / 340–454 g bacon, cook it until crisp, drain it well, and crumble it before adding it to the dish. For a few strips, this air fryer bacon guide keeps the process quick. For a full pack, oven bacon is usually easier because you get more space and less batch work.
Because bacon adds more salt and fat than sausage, go lighter with added salt and avoid pouring bacon grease into the casserole.
Since bacon brings salt, smoke, and fat, the best bacon version usually needs less added salt in the egg mixture.
Ham and cheese tater tot casserole
Diced ham turns this into a milder, holiday-friendly brunch casserole. Use 12–16 oz / 340–454 g diced cooked ham, especially if you have leftovers from Easter, Christmas, or a weekend dinner.
Ham can be salty, so season the eggs carefully. Cheddar, Monterey Jack, Swiss, or a cheddar-Jack blend all work well, while green onions, bell peppers, or a little Dijon-style mustard in the egg mixture help balance the richness.
Leftover ham gives the casserole a milder holiday-brunch feel, especially with cheddar, Swiss, or Monterey Jack.
Vegetarian tater tot breakfast casserole
A vegetarian version works well as long as the vegetables are cooked first. Mushrooms, peppers, onions, spinach, broccoli, green onions, and roasted poblano peppers are all good choices.
The key is managing moisture. Mushrooms, spinach, peppers, and onions can all release water as they bake. Sauté them before adding them to the casserole, and squeeze spinach dry if using frozen spinach.
For a vegetarian tater tot breakfast casserole, cooked vegetables add color and flavor while helping the center stay set.
Cottage cheese or high-protein version
For a higher-protein version, add 1/2 to 1 cup cottage cheese to the egg mixture and reduce the milk slightly. This makes the egg layer creamier and more filling. Blend the cottage cheese first if you want a smoother texture. For a smaller breakfast with the same creamy, higher-protein idea, try these scrambled eggs with cottage cheese.
You can also use turkey sausage and add extra egg whites, but avoid making the casserole too lean or it can bake up dry.
Make-Ahead and Overnight Tips
This is the section to read if you are making the casserole for Christmas morning, a brunch table, overnight guests, or a weekend when you do not want to think before coffee.
The tradeoff is simple: easiest morning, or best tot texture. Both work. You just decide which one matters more that day.
The best topping comes from prepping the filling ahead and adding the tots just before baking; the fully assembled overnight version is easier, but the top bakes less crisp.
The make-ahead choice depends on the morning: fully assembled is easiest, while adding tots later gives a more defined top.
Method
What to Do
Result
Fully assemble overnight
Assemble the casserole, cover, and refrigerate overnight
Easiest morning, less crisp topping
Add tots in the morning
Cook sausage, prep egg mixture, refrigerate separately, then add tots before baking
Better browned top and clearer potato layer
Same-day bake
Assemble and bake right away
Most predictable texture
Either way, let the casserole sit at room temperature while the oven preheats. That short rest takes the chill off the dish and helps the center bake more evenly.
If convenience matters most, assemble the whole casserole the night before. Cover it tightly and refrigerate. In the morning, bake it covered for the first 20–25 minutes, then uncover and continue baking until the center reaches 165°F / 74°C.
Add Tots in the Morning for Better Texture
If the topping matters most, cook the sausage and vegetables the night before, whisk the eggs and milk, and refrigerate those separately. In the morning, layer everything in the baking dish and add the tots right before baking.
Adding frozen tots right before baking is the better make-ahead move when the topping matters more than total overnight convenience.
If you are planning several freezer-friendly breakfasts at once, these meal prep breakfast burritos are a good companion recipe because they use the same no-soggy logic: cool the filling first, control moisture, and reheat with texture in mind. For leftover casserole slices, use the storage, freezing, and reheating section below.
Storage, Freezing, and Reheating
Let leftovers cool briefly, then refrigerate them in an airtight container within 2 hours. Stored properly, the casserole keeps for 3–4 days. The tots will lose some crispness as they sit, but the flavor stays good. The FoodSafety.gov cold storage chart gives the same general window for baked egg casseroles: 3–4 days in the refrigerator and 2–3 months in the freezer.
For freezing, baked portions work better than an unbaked fully assembled casserole. Wrap slices tightly or store them in freezer-safe containers for up to 2–3 months. Thaw overnight in the refrigerator before reheating.
For better texture, reheat slices in a 350°F / 175°C oven or air fryer until hot. The microwave is faster, but the oven or air fryer helps the tots regain more texture than the microwave gives.
After baking, fridge or freezer portions reheat best with dry heat, so the oven or air fryer gives better texture than the microwave.
For a smaller freezer breakfast that reheats faster, these egg muffins are easier to portion, while this casserole is better when you want one big brunch pan.
Troubleshooting
Most problems with this casserole come down to moisture, timing, or where the tots sit in the pan. The fixes are simple once you know what caused the problem.
Problem
Likely Cause
Fix
Watery center
Raw vegetables, too much dairy, or underbaked eggs
Sauté vegetables first, use 1 cup dairy, and bake until the center reaches 165°F / 74°C.
Soggy or soft tots
Tots were buried, thawed, or fully assembled overnight
Use frozen tots, keep them exposed, and add them just before baking when texture matters.
Greasy casserole
Sausage or bacon was not drained
Drain cooked meat before layering it into the dish.
Dry eggs
Overbaked casserole or too little dairy
Use 1 cup milk or half-and-half and start checking near the low end of the bake time.
Bland flavor
Egg mixture was not seasoned
Season the eggs directly and use sharp cheese or spicy sausage.
Too salty
Sausage, bacon, ham, cheese, and tots all added salt
Reduce added salt and balance with vegetables, herbs, or a milder cheese.
Middle not setting
Casserole was cold, pan was deep, or egg layer was too thick
Bake longer, cover briefly if the top browns too fast, and check the center temperature.
Tots browned before eggs set
Oven runs hot or pan is too close to top heat
Loosely tent with foil and keep baking until the center is done.
Most fixes start with one question: is the problem moisture, timing, seasoning, or tot placement? That usually points to the right correction.
What to Serve with It
Because this casserole is hearty, fresh sides help the plate feel lighter. A bowl of berries, sliced oranges, salsa, avocado, or a sharp green salad cuts through the eggs, cheese, and potatoes.
For a brunch table, pair it with coffee, orange juice, berries, and something crisp or acidic on the side. Hot sauce, salsa, or pickled jalapeños are especially good if you use mild sausage and cheddar because they cut through the richness.
If you want something handheld and freezer-friendly instead, this breakfast burrito recipe is easier to eat on the go. For a lighter brunch side, a cold berry smoothie keeps the meal bright and easy.
Recipe Card: Tater Tot Breakfast Casserole
This tater tot breakfast casserole is a hearty 9×13 breakfast bake with sausage, eggs, melted cheese, and frozen tots arranged on top for a golden-browned potato finish.
Prep Time
20 minutes
Cook Time
50–60 minutes
Rest Time
10 minutes
Total Time
1 hour 20–30 minutes
Yield
10–12 servings
Equipment
9×13-inch / 23×33 cm baking dish
Large skillet
Mixing bowl
Whisk
Measuring cups and spoons
Instant-read thermometer, recommended
Ingredients
1 lb / 454 g breakfast sausage
1/2 cup / about 75 g diced onion, optional
1/2 to 1 cup / about 75–150 g diced bell pepper, optional
10 large eggs
1 cup / 240 ml whole milk or half-and-half
1/2 teaspoon garlic powder
1/2 teaspoon onion powder
1/2 teaspoon black pepper
1/2 teaspoon dry mustard, optional
1–2 teaspoons hot sauce, optional
1/2 to 3/4 teaspoon salt, depending on your sausage and cheese
2 cups / about 225 g shredded cheddar, Monterey Jack, Colby Jack, or a blend
32 oz / 907 g frozen tater tots, do not thaw
Butter or oil, for greasing the dish
Instructions
Preheat the oven to 350°F / 175°C. Grease a 9×13-inch / 23×33 cm baking dish.
Cook the sausage in a large skillet over medium heat, breaking it into crumbles, until browned and cooked through.
If using onion and bell pepper, add them to the skillet and cook until softened. Drain excess grease.
In a large bowl, whisk the eggs, milk or half-and-half, garlic powder, onion powder, black pepper, dry mustard, hot sauce, and salt.
Spread the sausage mixture evenly in the prepared baking dish.
Sprinkle about 1 1/2 cups of the cheese over the sausage.
Pour the egg mixture evenly over the filling.
Arrange the frozen tater tots on top in a single layer.
Bake uncovered for 50–60 minutes, until the center reaches 165°F / 74°C and the tots are golden-browned. If using the remaining 1/2 cup cheese on top, add it during the last 5–10 minutes.
Let the casserole rest for 10 minutes before slicing.
Notes
Keep the tots frozen and add them right before baking for the neatest topping; thawed tots soften and break more easily.
For the best-looking top, keep most or all of the cheese under the tots. If adding cheese on top, sprinkle it lightly during the last 5–10 minutes instead of covering the tots completely.
Bake on the center rack so the eggs cook evenly. If the tots need more color at the end, move the dish slightly higher for the last few minutes or finish briefly at 400°F / 200°C.
Overnight choice: fully assemble for ease, or prep the filling separately and add tots in the morning for better texture.
If baking from cold, plan on 60–70 minutes total. Cover for the first 20–25 minutes if the tots are browning before the center is done, then uncover and finish baking.
For bacon, use 12–16 oz / 340–454 g cooked and crumbled bacon.
For ham, use 12–16 oz / 340–454 g diced cooked ham and reduce the added salt.
Serve It from One Hot Brunch Pan
Once the filling is browned, the eggs are whisked, and the tots are added, the oven turns the dish into a breakfast people can serve themselves from — the kind of brunch that feels relaxed even when the kitchen is full.
Finally, the payoff is one hot brunch pan that feeds the table without making anyone stand over the stove for separate eggs, meat, and potatoes.
FAQs
Do tater tots need to be thawed first?
No. Keep them frozen so they hold their shape on top. Thawed tots can soften, break apart, and sink into the egg layer instead of giving you a clear potato topping.
Is it better to put tater tots on top or bottom?
Put them on top if you want a browned, classic tater tot topping. Put them on the bottom if you prefer a softer, hotdish-style casserole where the tots absorb more of the egg mixture.
How many eggs go in a 9×13 tater tot breakfast casserole?
Ten large eggs are a good middle ground for a 9×13 pan with 32 oz / 907 g tots. Eight eggs will make it a little lighter and more potato-heavy; 12 eggs will make it firmer and more egg-forward.
Why did my casserole turn watery?
The most common causes are raw vegetables, too much milk, greasy sausage, or an underbaked center. Cook vegetables first, drain meat well, keep the dairy to about 1 cup, and bake until the center reaches 165°F / 74°C.
How far ahead can I assemble it?
Assemble it the night before and refrigerate it, or prep the sausage and egg mixture separately and add the tots in the morning. Fully assembled is easiest; morning-added tots give the better topping.
Does this casserole freeze well?
Baked portions freeze better than an unbaked fully assembled casserole. Let it cool, slice it, wrap portions tightly, and freeze for up to 2–3 months. Reheat in the oven or air fryer for better texture than the microwave gives.
What is the difference between tater tot breakfast casserole and breakfast hotdish?
The terms can overlap. “Breakfast hotdish” is often used for a hearty baked dish with potatoes, eggs, cheese, and meat, especially in Midwest-style cooking. This recipe fits that style, though most readers will recognize it as an egg-and-tot breakfast casserole or brunch bake.
What can I use instead of sausage?
Use cooked bacon, diced ham, turkey sausage, chicken sausage, chorizo-style sausage, sautéed vegetables, or a mix of vegetables and cheese. If you skip meat entirely, cook and drain the vegetables well so the casserole does not turn watery.
Can I use hash browns instead of tater tots?
Yes, but the recipe becomes a different style of breakfast casserole. Shredded hash browns create a softer potato base, while frozen tots give this version a more defined, golden topping. If swapping them here, use thawed shredded hash browns and expect a softer, less crisp casserole.
This tater tot casserole recipe is the cozy 9×13 dinner people come back to for seconds: seasoned ground beef, creamy mushroom filling, melted cheddar, and frozen tots that bake golden and crisp on top.
The small upgrade is all in the layering. Most of the cheese goes under the tots, the filling stays creamy but not loose, and the casserole bakes uncovered so the topping browns instead of steaming. That one change helps keep the casserole from turning into a soft, heavy pan of potatoes and sauce.
It does not ask much from you: one skillet for the beef, one baking dish, and a bag of tots straight from the freezer. Make it with cream of mushroom soup, green beans, corn, or mixed vegetables, or use the no-soup version below when you want a homemade sauce.
Best of all, it feels bigger than the effort: a little browning, a little stirring, one layer of tots, and then the oven turns everything into a bubbling, scoopable casserole. It is the kind of dinner that works on a cold night, a busy school night, or any evening when you want something familiar, filling, and easy to scoop straight from the pan.
To make tater tot casserole, brown 1 pound of ground beef with onion and seasoning, stir in cream of mushroom soup, sour cream, milk, vegetables, and cheese, spread the filling in a 9×13-inch baking dish, top with frozen tater tots, and bake uncovered at 375°F for 40–45 minutes. For the best texture, keep the tots frozen, arrange them in one layer, and add extra cheese only near the end.
Start with the basics: a 9×13 pan, frozen tots, 375°F heat, and an uncovered bake so the topping can brown.
When it comes out of the oven, the edges should be bubbling, the filling should scoop easily, and the tots on top should still have that little crisp bite. That balance comes from using a filling sturdy enough to support the tots, draining excess grease and vegetable liquid, and avoiding a heavy cheese layer over the top too early.
A good scoop should hold together without turning soupy, while the tater tots on top still give the casserole a crisp finish.
If your biggest worry is a soft topping, check the crispy tater tot tips before you bake.
What makes this version different: The cheese-under-the-tots rule keeps most of the cheddar in the middle instead of burying the potato layer from the start. You still get a cheesy casserole bite, but the tots stay exposed to the oven so they have a better chance to turn golden instead of soft.
By moving most of the cheddar under the tots, you keep the casserole cheesy without covering the potato layer too early.
This method is especially helpful when your old version tasted good but came out with soft tots, because it fixes the two biggest texture problems: trapped steam and loose filling.
Tater Tot Casserole at a Glance
Here is the simple version to keep in mind before you start cooking. It uses a full bag of frozen tater tots, a savory ground beef filling, and a 9×13-inch baking dish so the topping has enough room to brown.
Oven temperature
375°F / 190°C
Pan size
9×13-inch / about 3-quart baking dish
Bake time
40–45 minutes, plus 5–10 minutes resting
Best meat
Lean ground beef or hamburger
Tater tots
Use frozen tots, not thawed
Best vegetables
Green beans, corn, peas and carrots, or mixed vegetables
Make ahead?
Yes, but add frozen tater tots right before baking for the best topping
Freezer friendly?
Yes, especially if you freeze the cooked filling separately and add tots before baking
Why This Recipe Works
A good tater tot casserole should be creamy underneath, cheesy in the middle, and crisp on top. This tater tot casserole recipe keeps the comfort-food flavor people love, but it avoids the usual soggy topping problem by using a sturdy filling, a wide baking dish, frozen tots, and an uncovered bake.
Each layer has a job: beefy filling below, cheddar through the middle, and browned tots on top for contrast.
The cheese placement does a lot of the work. Most of the cheddar melts over the beef filling, so you still get that cheesy casserole bite. Meanwhile, the tots stay exposed to the oven heat. A small final sprinkle of cheese can go on near the end if you want a little extra melt.
That matters because the best bite is not just creamy or cheesy. It is the contrast: hot beefy filling underneath, melted cheddar in the middle, and a potato topping that still has texture when your spoon breaks through.
The filling is creamy without being runny, the beef tastes seasoned rather than flat, and the vegetables add enough balance to keep each scoop from feeling too heavy. Because the filling is sturdy, the tots can sit on top instead of sinking into the sauce.
Ingredients for Tater Tot Casserole
The ingredient list stays simple: ground beef, frozen tater tots, cream of mushroom soup, cheese, and vegetables. However, small upgrades like sour cream, Worcestershire sauce, garlic, paprika, and careful layering give the casserole better flavor without making it fussy.
Although the ingredients are familiar, Worcestershire, garlic, and proper layering help the filling taste more balanced than a plain soup-and-beef mix.
Frozen tater tots
Use 28–32 ounces of frozen tater tots, or enough to cover the casserole in one generous layer. If a few are left in the bag, save them rather than piling them too high. Thawed tots soften quickly and are more likely to turn mushy on top of the filling.
A single layer is ideal. The tots do not need to be arranged perfectly, but they should not be stacked into a thick mound. More exposed edges mean better browning and more crunch.
When the tots stay frozen and sit in one layer, they hold their shape better and get more direct heat around the edges.
For more texture help, the crispy tater tot tips explain how pan size, cheese placement, and uncovered baking work together.
Ground beef or hamburger
Lean ground beef gives this casserole its familiar flavor. An 85–90% lean blend works well because it browns nicely without leaving too much grease. Drain excess fat before adding the creamy ingredients so the filling does not turn oily or watery.
Ground turkey can work too, but it tastes milder. If you use turkey, add a little extra Worcestershire sauce, garlic powder, or paprika so the filling still has enough savory depth.
Cream of mushroom soup
Condensed cream of mushroom soup is the traditional base for this kind of casserole. It gives the beef filling a creamy, savory texture and helps everything hold together.
If you do not like mushroom soup, cream of chicken or cream of celery can work too. Also, there is a homemade no-soup sauce later in the post for anyone who wants more control over salt, thickness, and flavor.
There is no need to apologize for the soup version. This is the flavor many people grew up with, and it is the reason the casserole is fast, creamy, and dependable. The homemade sauce is there when you want it, not because the classic version needs fixing.
That same creamy, pantry-friendly style is why dishes like tuna noodle casserole are still so comforting: the sauce, filling, and topping all need to stay balanced.
Sour cream and milk
Sour cream makes the filling richer, while a little milk loosens the condensed soup so it spreads evenly. The sauce should coat the beef and vegetables without pooling in the pan. If it looks loose before baking, simmer it for another minute or two in the skillet.
Green beans, corn, or mixed vegetables
Green beans give the casserole an old-school hotdish feel, corn makes the filling sweeter and more kid-friendly, and mixed vegetables make it feel more like a full dinner in one pan. Drain canned vegetables well and thaw frozen vegetables if they are icy.
That draining step matters. Otherwise, extra liquid from canned green beans, corn, or frosty frozen vegetables can thin the filling and soften the potato topping from below.
Since vegetables can add hidden moisture, drain canned green beans or corn well and thaw icy frozen vegetables before mixing them in.
Cheddar cheese
Sharp or medium cheddar works best. For a better topping, put most of the cheese over the filling and under the tots. Then, save a small handful for the last few minutes of baking.
Pre-shredded cheese is convenient, while freshly shredded cheddar melts more smoothly. Either one works here.
Easy Ingredient Swaps
You can bend this casserole in a lot of directions, but the filling still needs to stay thick enough to hold up the tots. These swaps keep that balance in mind.
Instead of
Use
What changes
Ground beef
Ground turkey, ground chicken, or plant-based crumbles
Milder flavor; add extra Worcestershire, garlic, or paprika
Cream of mushroom soup
Cream of chicken, cream of celery, cheddar soup, or homemade sauce
Changes the flavor and salt level of the filling
Green beans
Corn, peas, carrots, or mixed vegetables
Adjusts sweetness, color, and texture
Cheddar cheese
Colby Jack, Monterey Jack, or a cheddar blend
Softer, meltier cheese profile
Sour cream
Greek yogurt or a little extra milk
Tangier with yogurt; looser with milk
How to Make Tater Tot Casserole
The filling comes together in one skillet, and then the oven does the rest. The only real trick is layering it so the tots stay on top where they can brown.
1. Brown and season the beef
Cook the ground beef and onion in a large skillet until the beef is browned and the onion has softened. Break the meat into small crumbles so the filling spreads evenly through the casserole.
Next, drain excess grease. Then, stir in garlic, Worcestershire sauce, garlic powder, paprika, salt, and pepper. Let the seasonings cook for 30–60 seconds so the beef tastes savory before the creamy ingredients go in.
Before the soup and sour cream go in, season the beef well so the whole casserole starts with a savory base.
2. Make the creamy filling
Stir in the cream of mushroom soup, sour cream, milk, and vegetables. The mixture should be creamy but sturdy enough to hold the tots on top. After that, spread it evenly in a greased 9×13-inch baking dish.
Drain canned green beans or corn well before stirring them in. For frozen mixed vegetables, thaw any icy pieces first so the sauce does not thin out in the oven.
If the filling looks loose in the skillet, simmer it briefly; a thicker base helps keep the tater tot topping from softening underneath.
3. Add cheese under the tots
Sprinkle about 1 1/2 cups of cheddar over the filling. This gives the casserole a cheesy middle layer while leaving the top clear for browning.
Sprinkling cheddar at this stage gives you a melted middle layer while leaving the top clear for the frozen tots.
You still get plenty of melted cheese, but the tots are not trapped under a heavy blanket of cheese for the entire bake. Instead, they stay on the surface where the oven heat can reach them.
4. Arrange frozen tots in one layer
Place the frozen tater tots over the cheese in one generous layer. Try not to pile them too tightly. A little space helps hot air reach more edges.
The tots do not need to be perfectly lined up, but a neat layer does bake more evenly and looks better when served.
Once the filling is spread, the order is simple: cheese next, tots last, and then an uncovered bake for better texture.
5. Bake uncovered until golden and crisp
Bake uncovered at 375°F for about 40 minutes. Then, sprinkle the remaining 1/2 cup of cheddar over the top if you want extra cheese. Finally, bake 5 minutes more, until the filling bubbles at the edges and the tots are golden and crisp.
Let the casserole rest for 5–10 minutes before scooping. That short rest helps the filling settle so it serves more neatly. Try not to let it sit too long, though, because the topping will slowly soften from the steam.
Before You Bake
The beef filling should be creamy, not runny.
Canned vegetables should be drained well.
Frozen vegetables should not be icy.
The cheddar should sit mostly under the tots.
The tots should cover the dish in one layer, not a pile.
The casserole should go into the oven uncovered.
Before the dish goes into the oven, check the texture basics: thick filling, drained vegetables, cheese below, and tots exposed.
After those checks, use the bake-time guide to judge when the center is hot and the topping is browned.
How Long to Bake Tater Tot Casserole
The best balance of bubbling filling and crisp tater tots comes from baking at 375°F / 190°C for 40–45 minutes. It is ready when the edges are bubbling, the center is hot, and the potato topping is browned.
Rather than relying only on the timer, look for bubbling edges, a hot center, and browned tots before pulling the casserole out.
A lower oven temperature gives the filling more time to heat gently, but the topping may not brown as much. A hotter oven can work; however, it can also make the filling bubble too hard, especially if the dish is very full. That is why 375°F is the best default for this version.
If your baking dish is very full, set it on a rimmed baking sheet before it goes into the oven. It catches any bubbling sauce and makes the casserole easier to move in and out of the oven.
Oven temperature
Approximate bake time
Best use
350°F / 175°C
45–55 minutes
Gentler bake, slightly softer topping
375°F / 190°C
40–45 minutes
Best default for this recipe
400°F / 200°C
35–45 minutes
Can brown well, but watch for aggressive bubbling
From the fridge
Add 10–15 minutes
Best if the filling was made ahead
From frozen
Covered first, then uncovered
Use a thermometer to check the center
If your casserole is coming from the refrigerator, see the make-ahead notes before you add extra time.
If you are baking the casserole from cold or reheating leftovers, check that the center is hot before serving. The USDA recommends reheating leftovers to 165°F / 74°C, and an instant-read thermometer is the easiest way to check a deep casserole. See the USDA safe temperature guidance here.
How to Keep Tater Tots Crispy in Casserole
Soggy tots usually come from too much moisture, overcrowding, thawed tots, or a heavy cheese layer trapping steam. Fortunately, a few small choices make a big difference.
For crispier tater tots, control moisture first: use frozen tots, a wide pan, sturdy filling, cheese underneath, and no cover.
Use frozen tots. Do not thaw them before adding them to the casserole.
Use a 9×13-inch dish. A wide dish helps the top layer spread out instead of steaming in a deep pile.
Keep the filling sturdy. Drain beef grease and vegetables well.
Arrange tots in one layer. Avoid piling them on top of each other.
Bake uncovered. Covering traps steam and softens the top.
Use the cheese-under-the-tots rule. Put most of the cheddar under the potato layer and add only a small final sprinkle near the end.
Serve after a short rest. Let it settle for 5–10 minutes, but do not let it sit too long before serving.
Reheat in the oven or air fryer. The microwave works, but the tots will soften.
Extra-crispy option: Pre-bake the frozen tots on a sheet pan for about 10 minutes while you cook the beef filling. Then arrange them on top of the casserole and bake as directed.
Another useful trick is to avoid overfilling the dish. If the filling comes too close to the top of the pan, it can bubble up through the tots and soften them. A 9×13-inch dish gives the filling room to heat while the potato layer stays exposed to dry oven heat.
If you like this kind of creamy potato bake but want a softer side-dish version, this hashbrown casserole recipe uses frozen potatoes in a different way.
Common Mistakes That Make Tater Tot Casserole Soggy
When the topping turns soft, the usual suspects are thawed tots, watery filling, too much early cheese, or trapped steam.
Using thawed tater tots instead of frozen ones.
Adding too much milk or soup so the filling turns loose.
Not draining ground beef grease or canned vegetables.
Using icy frozen vegetables without thawing or draining them first.
Covering the casserole for the whole bake.
Piling on cheese too early and trapping steam over the tots.
Using a deep small dish instead of a wide 9×13 pan.
Tater Tot Casserole with Cream of Mushroom Soup
The traditional version uses condensed cream of mushroom soup because it thickens the filling, adds savory flavor, and keeps the recipe fast. One 10.5-ounce can is enough for this 9×13 casserole when mixed with sour cream and a little milk.
The cream-of-mushroom version stays popular because it gives the filling body, savory flavor, and comfort-food familiarity without extra sauce work.
Cream of mushroom blends especially well with ground beef, green beans, corn, and cheddar. It also gives the dish the familiar flavor many people expect from tater tot hotdish.
If you want a slightly different flavor, cream of chicken, cream of celery, or cheddar cheese soup can also work. Cream of mushroom gives the most familiar flavor, while cream of chicken tastes milder. Cheddar soup, meanwhile, makes the filling richer and more obviously cheesy.
Prefer not to use canned soup? Use the no-soup version below.
Tater Tot Casserole Without Cream of Mushroom Soup
To make it without cream of mushroom soup, use a quick homemade sauce with butter, flour, beef broth, milk, and Worcestershire sauce. This replaces the canned soup, sour cream, and milk mixture in the main recipe.
Instead of condensed soup, the no-soup version uses a quick homemade sauce when you want more control over thickness and flavor.
The soup version wins on speed. The homemade sauce wins when you want more control over salt, thickness, and mushroom flavor. Either way, the sauce should coat the beef and vegetables without turning loose in the pan.
No-soup ingredient
Amount
Butter
2 tbsp / 28 g
All-purpose flour
2 tbsp / 16–18 g
Beef broth
1 cup / 240 ml
Milk or half-and-half
1/2 cup / 120 ml
Worcestershire sauce
1 tbsp / 15 ml
Sour cream, optional
1/4–1/2 cup / 60–120 g
To make it, melt the butter in the skillet after browning the beef, sprinkle in the flour, and cook for about 1 minute. Slowly stir in the broth and milk, then simmer until thick. Once it thickens, fold the sauce into the beef and vegetables, then continue with the cheese and tater tot topping.
If the homemade sauce looks thin, simmer it a little longer before transferring it to the baking dish. Otherwise, a loose sauce can make the tots soften from underneath.
Once the sauce is ready, use it in the main recipe card in place of the canned soup mixture.
Tater Tot Hotdish vs Tater Tot Casserole
Tater tot hotdish and tater tot casserole are basically the same family of dish. “Hotdish” is the Midwest and Upper Midwest name, especially for a baked dish made with meat, vegetables, creamy sauce, and a starch topping. “Tater tot casserole” is the broader name many people use elsewhere.
Whether you call it hotdish or casserole, the same comfort-food formula remains: meat, vegetables, creamy sauce, cheddar, and tots.
Whatever you call it, the comfort-food idea is the same: savory beef, creamy sauce, vegetables, cheddar, and a potato topping that comes out browned instead of soggy.
Some hotdish versions use green beans, corn, or mixed vegetables. Others use two cans of soup for a heavier filling. This version, however, keeps the spirit of the dish but uses a balanced amount of sauce so the casserole stays creamy without drowning the tots.
Best Vegetables for Tater Tot Casserole
The vegetable changes the whole feel of the casserole: green beans make it old-school, corn makes it sweeter, and mixed vegetables make it feel more like a full dinner in one pan.
Green beans make it classic, corn makes it sweeter, and mixed vegetables make the tater tot casserole feel more like a full meal.
Vegetable
Best for
Tip
Green beans
Classic hotdish flavor
Drain canned green beans well
Corn
Sweeter, kid-friendly casserole
Use drained canned corn or thawed frozen corn
Mixed vegetables
Easy family dinner
Thaw if icy so the filling does not get watery
Peas and carrots
Classic creamy casserole feel
Use frozen or canned, but avoid excess liquid
Mushrooms
Deeper savory flavor
Sauté first to remove moisture
Green beans are the most nostalgic choice for many people, but corn is often the version kids go for first. If your family has a strong opinion about the “right” vegetable in tater tot casserole, this is usually where the debate starts.
Avoid very watery vegetables unless you cook off the moisture first. Zucchini, fresh mushrooms, spinach, and bell peppers can all work, but they should be sautéed before they go into the filling. That way, the casserole stays creamy instead of loose.
Make Ahead, Freezer, Storage, and Reheating
Tater tot casserole is make-ahead friendly, but the best method depends on whether you care more about convenience or texture. For the best result, the filling can wait in the fridge; meanwhile, the tots should wait in the freezer.
Best make-ahead method
Cook the beef filling, spread it in the baking dish, cover, and refrigerate. When you are ready to bake, add the cheese and frozen tater tots, then bake as directed. If the filling is very cold, add 10–15 minutes to the bake time.
For make-ahead tater tot casserole, prep the filling first; then add frozen tots only when you are ready to bake.
That way, you get the convenience of a make-ahead dinner without letting the tots sit on the wet filling for hours. It is especially helpful if you are assembling dinner during a busy afternoon or prepping for guests.
It is also the best method if you are bringing the casserole to another family, prepping for a weeknight dinner, or trying to get the messy skillet work done before the evening rush.
For a brunch version of the same make-ahead comfort-food idea, this breakfast casserole with hash browns uses eggs, sausage, cheese, and potatoes in a 9×13 pan.
Best freezer method
Freeze the cooked beef filling separately in an airtight container. Then, thaw it overnight in the refrigerator, spread it into the baking dish, add cheese and frozen tater tots, and bake uncovered until hot, bubbling, and golden on top.
Freezing the filling separately protects texture because the tots can go on fresh from the freezer instead of thawing on the sauce.
The texture is better this way because the tots are added fresh from the freezer instead of freezing and thawing on top of the filling.
Fully assembled freezer method
You can freeze the fully assembled casserole, but the tots may not bake quite as well. Wrap tightly and freeze for up to 2–3 months. Bake covered first until the center is hot, then uncover near the end so the top can brown.
How to store leftovers
Store leftovers in an airtight container in the refrigerator for 3–4 days. The topping will soften as it sits, but the flavor stays good.
How to reheat tater tot casserole
For the best texture, reheat leftovers in a 350°F oven or air fryer until hot. The microwave is fastest, but it will soften the tots.
If reheating a larger portion, cover it loosely at first so the center warms through. Then, uncover for the last few minutes to help the topping crisp again.
When you are ready to cook, use the timing in the recipe card and add extra minutes if the filling is cold.
Which Version Should You Make First?
If this is your first time making tater tot casserole, start with the classic cream-of-mushroom version. It gives you the familiar creamy filling, beefy flavor, cheddar middle layer, and golden potato topping most people expect. After that, adjust the vegetable, sauce, or cheese to match your table.
Start with the classic version for familiar flavor, then adjust with corn, a no-soup sauce, or extra-crispy tots based on your table.
Choose this version
Best for
What to do
Classic green bean version
Old-school comfort
Use cream of mushroom soup, green beans, cheddar, and frozen tots.
Corn version
Kid-friendly sweetness
Swap green beans for drained corn and keep the seasoning mild.
No-soup version
More control over salt and thickness
Use the homemade butter, flour, broth, milk, and Worcestershire sauce base.
Extra-crispy version
Best topping texture
Keep cheese under the tots and pre-bake the frozen tots for about 10 minutes.
For more ways to change the filling, protein, or seasoning, see the variation ideas next.
Tater Tot Casserole Variations
Keep the main recipe simple the first time. Once the basic method works, you can change the vegetable, protein, seasoning, or sauce without losing the creamy filling and crisp topping.
After the basic method works, the same casserole can shift toward taco night, brunch, chicken bacon ranch, or the classic green bean version.
Classic family versions
Green bean version: Use 2 cups drained green beans for the most old-school option, especially with cream of mushroom soup and cheddar.
Corn version: Use drained corn instead of green beans for a sweeter, softer, and usually more kid-friendly filling.
Mixed vegetable version: Use peas, carrots, corn, or a frozen mixed vegetable blend when you want the casserole to feel more like a full dinner in one pan.
Bigger flavor twists
Taco tater tot casserole: Add taco seasoning, corn, black beans, and Mexican-style cheese.
Chicken bacon ranch: Use cooked chicken, ranch seasoning, bacon, cheddar, and cream of chicken soup.
Breakfast tater tot casserole: Use eggs, breakfast sausage or bacon, cheese, and tots in a brunch-style bake. For another make-ahead breakfast option with smaller portions, these egg muffins are easier to pack, reheat, and meal prep than a full 9×13 casserole.
Meat, vegetarian, and method swaps
Hamburger tater tot casserole: Same as the main recipe; “hamburger” is another common name for ground beef here.
Ground turkey version: Use ground turkey instead of beef and add extra Worcestershire, garlic, or paprika so the filling does not taste flat.
Vegetarian version: Skip the beef and use sautéed mushrooms, extra vegetables, or plant-based crumbles.
Slow cooker tater tot casserole: Use the same flavor base, but expect a softer topping than the oven version. If you are in more of a crock pot mood, this slow cooker sausage casserole is built for a softer, saucier comfort-food dinner.
The best first variation is usually the vegetable: green beans for old-school comfort, corn for sweetness, or mixed vegetables when you want the casserole to feel more like dinner in one pan.
Once you choose a version, use the recipe card as the base and adjust only the vegetable, protein, or seasoning.
What to Serve with Tater Tot Casserole
Tater tot casserole is rich, creamy, and filling, so simple sides work best. Try it with a crisp green salad, roasted broccoli, steamed green beans, coleslaw, pickles, fruit salad, or soft dinner rolls.
For a lighter plate, choose something fresh and crunchy next to the casserole. A vinegar-based slaw, cucumber salad, or simple green salad helps balance the creamy filling and cheesy potato topping.
Recipe Card: Tater Tot Casserole
This version has enough sauce to stay creamy, but not so much that the tots sink or steam. You still get a cheesy middle layer, while the potato topping stays exposed to the oven heat.
If you ignore everything else, remember the cheese-under-the-tots rule. Keep the tots frozen, and do not bury them under cheese too early. Those two choices make the difference between a soft topping and the crisp golden layer everyone reaches for first.
Tater Tot Casserole Recipe
This easy tater tot casserole recipe is made with seasoned ground beef, creamy mushroom filling, vegetables, cheddar cheese, and a frozen tater tot layer that bakes golden and crisp on top.
Prep Time15 minutes
Cook Time40–45 minutes
Rest Time5–10 minutes
Servings6–8
Equipment: 12-inch skillet, 9×13-inch / 3-quart baking dish, spatula or wooden spoon, measuring cups and spoons.
Ingredients
28–32 oz / 800–900 g frozen tater tots, or enough for one generous layer
1 lb / 454 g lean ground beef
1 medium yellow onion, diced, about 120–150 g
2 garlic cloves, minced
1 tbsp / 15 ml Worcestershire sauce
1 can / 10.5 oz / 298 g condensed cream of mushroom soup
1/2 cup / 120 g sour cream
1/3 cup / 80 ml milk
2 cups / about 250–300 g drained canned green beans, drained corn, or thawed mixed vegetables
2 cups / 225 g shredded cheddar cheese, divided
1/2 tsp garlic powder
1/2 tsp paprika
1/2 tsp black pepper
1/2 tsp salt, plus more to taste
Chives or green onions, optional, for serving
Instructions
Preheat the oven to 375°F / 190°C. Grease a 9×13-inch baking dish.
In a large skillet over medium-high heat, cook the ground beef and onion until the beef is browned and the onion is softened. Drain excess grease.
Add garlic, Worcestershire sauce, garlic powder, paprika, salt, and black pepper. Cook for 30–60 seconds.
Stir in the cream of mushroom soup, sour cream, milk, and vegetables. The filling should be creamy but thick enough to support the tots.
Spread the filling evenly in the prepared baking dish.
Sprinkle 1 1/2 cups of cheddar cheese over the filling.
Arrange the frozen tater tots in one generous layer over the cheese. Do not force extra tots on top if the dish is already covered.
Bake uncovered for about 40 minutes, until the edges are bubbling and the tots are golden.
Sprinkle the remaining 1/2 cup cheddar over the top, if using, and bake 5 minutes more.
Rest for 5–10 minutes before serving. Garnish with chives or green onions if desired.
Notes
For crispier tots, follow the cheese-under-the-tots rule: bake uncovered, keep most cheddar under the potato layer, and add only a small sprinkle near the end.
This casserole is best served after a short 5–10 minute rest while the tots still have texture.
For the best make-ahead version, prepare the beef filling ahead and add frozen tots right before baking.
For a no-soup version, use the homemade sauce in the section above.
If baking from the refrigerator, add 10–15 minutes to the bake time.
If using salty soup, canned vegetables, or pre-shredded cheese, start with less salt and adjust after the filling is mixed.
Place the baking dish on a rimmed sheet pan if it is very full, because the sauce can bubble at the edges.
For best leftover texture, reheat in the oven or air fryer instead of the microwave.
For a quick saveable version, use this visual recipe card as a reminder of the core timing, pan size, and cheese placement.
Save the main method: bake in a 9×13 pan at 375°F, keep the tots frozen, and place most of the cheese below the potato layer.
If you grew up with tater tot casserole, I’d love to know what version was on your table: green beans, corn, mixed vegetables, extra cheese, or no vegetables at all? And if soggy tots have ever ruined a pan for you, try the cheese-under-the-tots method once and tell me if it changed the texture.
FAQs
Do you cook tater tots before adding them to casserole?
No, you do not need to cook tater tots before adding them. Put them on the casserole frozen so they bake on top while the filling heats underneath. For extra crunch, you can pre-bake them for about 10 minutes before layering.
Should tater tots be frozen or thawed for casserole?
Use frozen tater tots. Thawed tots soften quickly and can turn mushy during baking.
Do you cover tater tot casserole when baking?
For the best topping, bake tater tot casserole uncovered. Covering traps steam and can soften the tots. However, if baking from frozen or very cold, you can cover it first to heat the center, then uncover near the end to brown the top.
What temperature is best for tater tot casserole?
375°F / 190°C is the best default temperature. It gives the filling enough time to heat through while helping the tater tots turn golden and crisp.
How do you keep tater tot casserole from getting soggy?
Use frozen tots, drain excess grease and vegetable liquid, keep the filling sturdy, bake uncovered, and arrange the tots in one layer. Also, putting most of the cheese under the tots helps the top brown better.
Can I make tater tot casserole ahead of time?
For the best make-ahead texture, prepare the beef filling first, refrigerate it, and add the cheese and frozen tater tots right before baking.
Can I assemble tater tot casserole the night before?
You can make the beef filling the night before and refrigerate it, but wait to add the frozen tater tots until right before baking. If the tots sit on the creamy filling overnight, they are more likely to soften.
Can you freeze tater tot casserole?
Yes. The best method is to freeze the cooked filling separately, then thaw it, top with cheese and frozen tots, and bake. You can also freeze the fully assembled casserole, but the tots may bake softer.
What can I use instead of cream of mushroom soup?
You can use cream of chicken, cream of celery, cheddar cheese soup, or a homemade sauce made with butter, flour, beef broth, milk, and Worcestershire sauce.
Is tater tot hotdish the same as tater tot casserole?
They are basically the same style of dish. “Hotdish” is the Midwest name, while “casserole” is the broader term many people use elsewhere.
What meat works besides ground beef?
Ground turkey, ground chicken, cooked shredded chicken, or plant-based crumbles can work. Ground beef gives the most familiar flavor, but the same creamy filling and tater tot topping can handle many swaps.