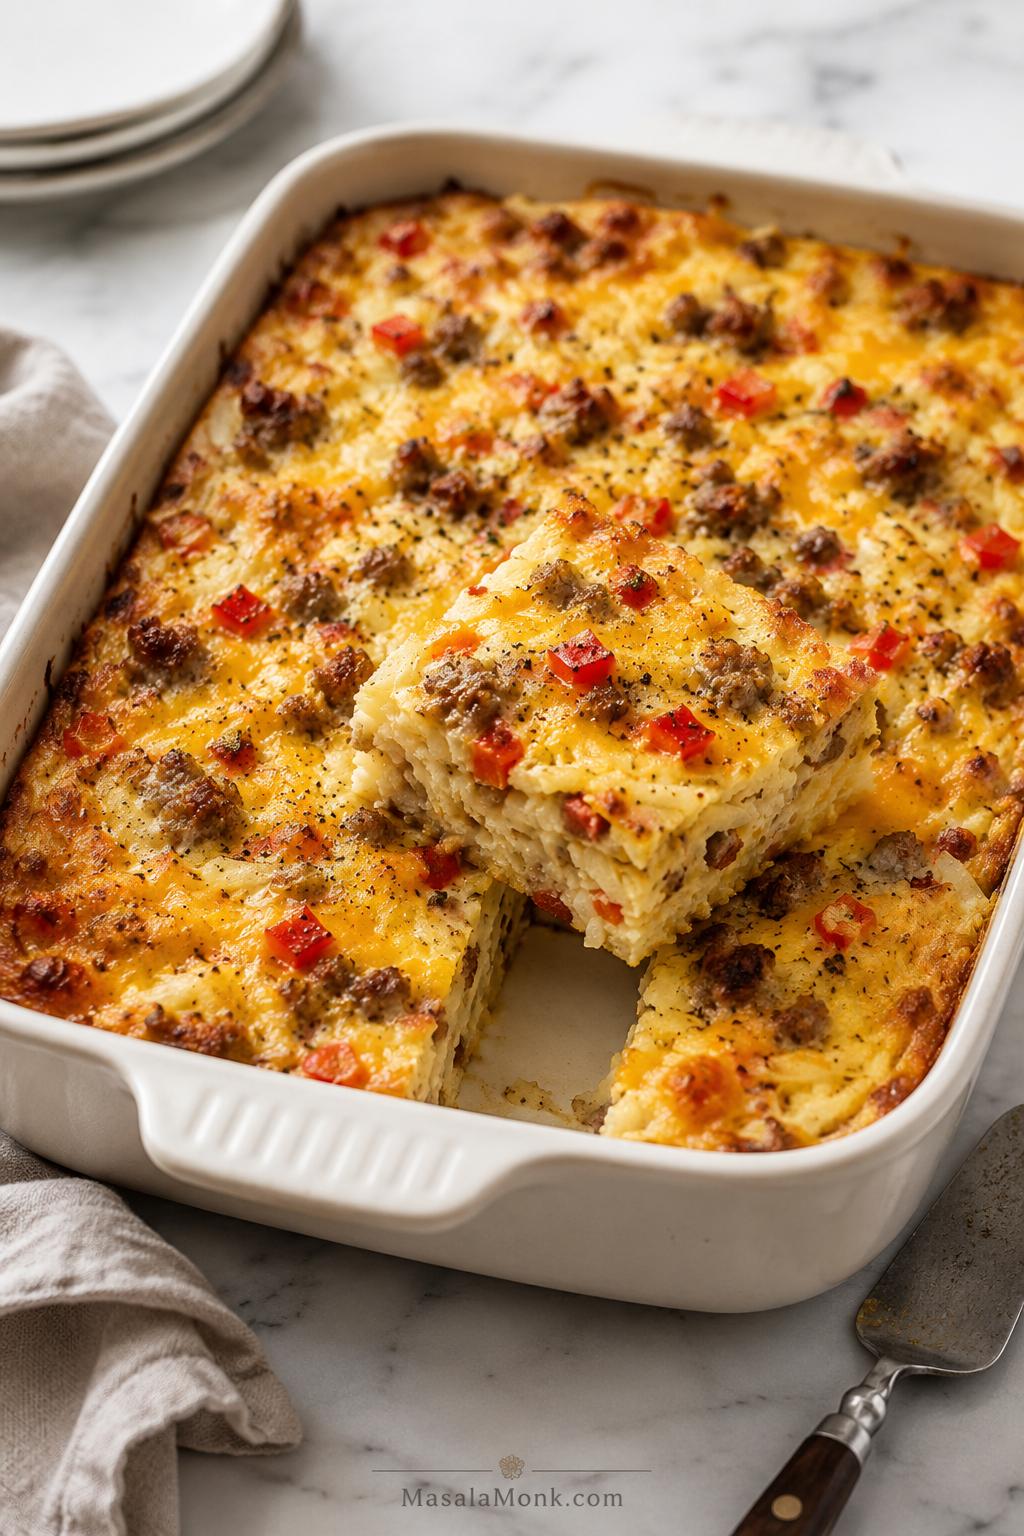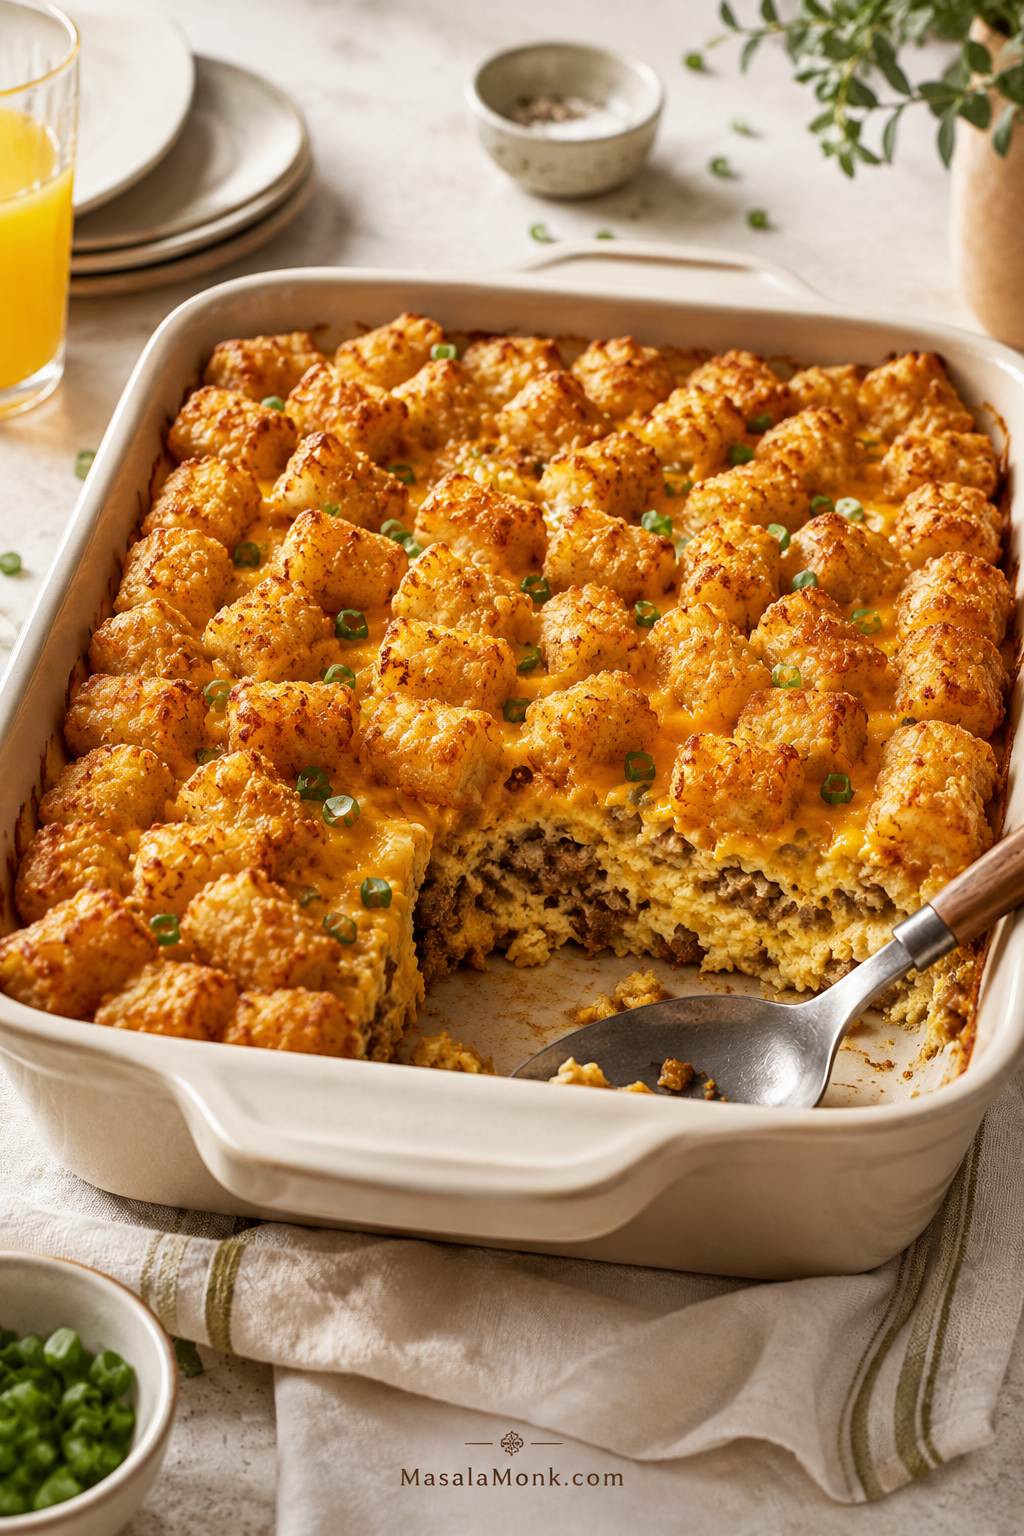
This tater tot breakfast casserole is for the morning when people are already wandering into the kitchen hungry. The sausage is savory, the eggs bake up tender but sliceable, and the frozen tots turn into the crisp-edged potato topping everyone reaches for first.
It feels generous enough for holidays, brunch guests, and slow weekend mornings, but it is still practical: one skillet, one bowl, one 9×13 pan, and no frying potatoes on the side. Make it when breakfast needs to feel abundant without turning the cook into a short-order chef; the oven does most of the work while the kitchen starts to smell like sausage, potatoes, and melted cheese.
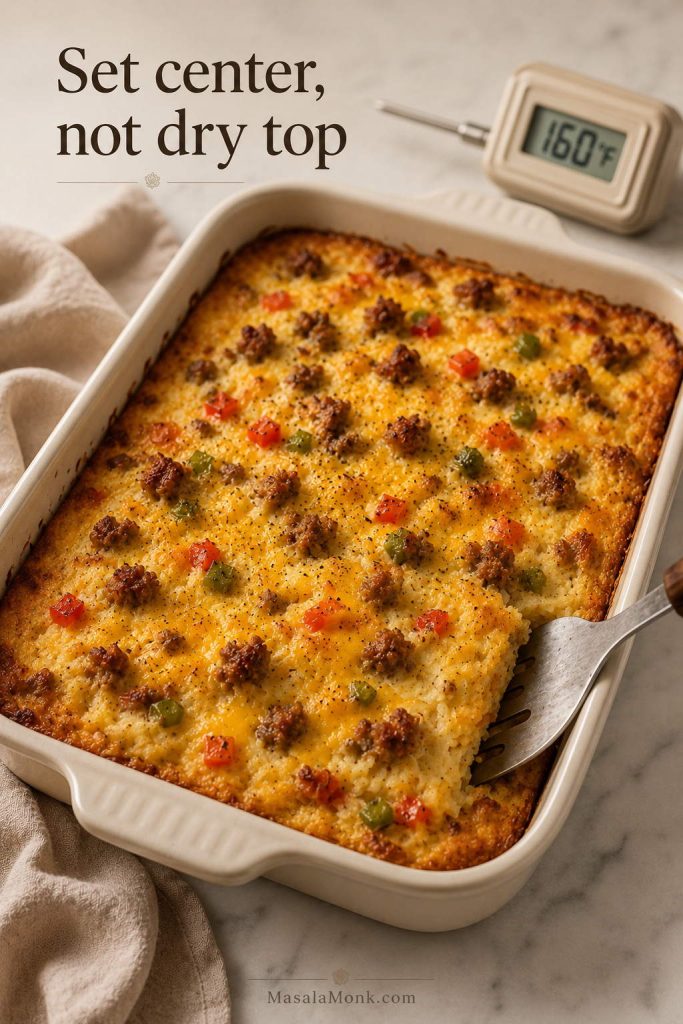
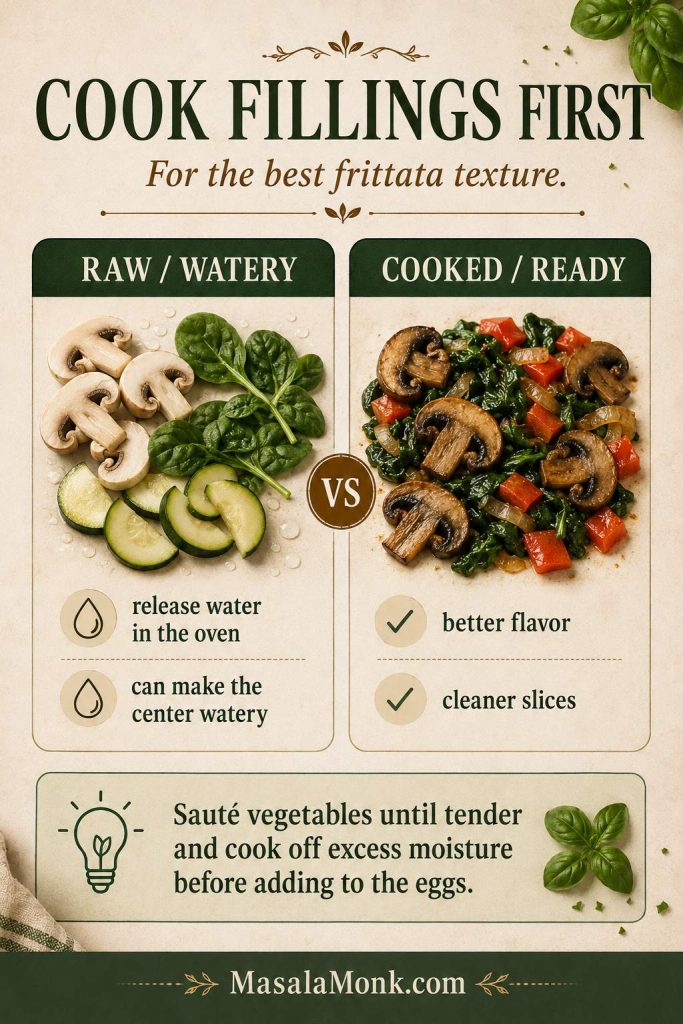
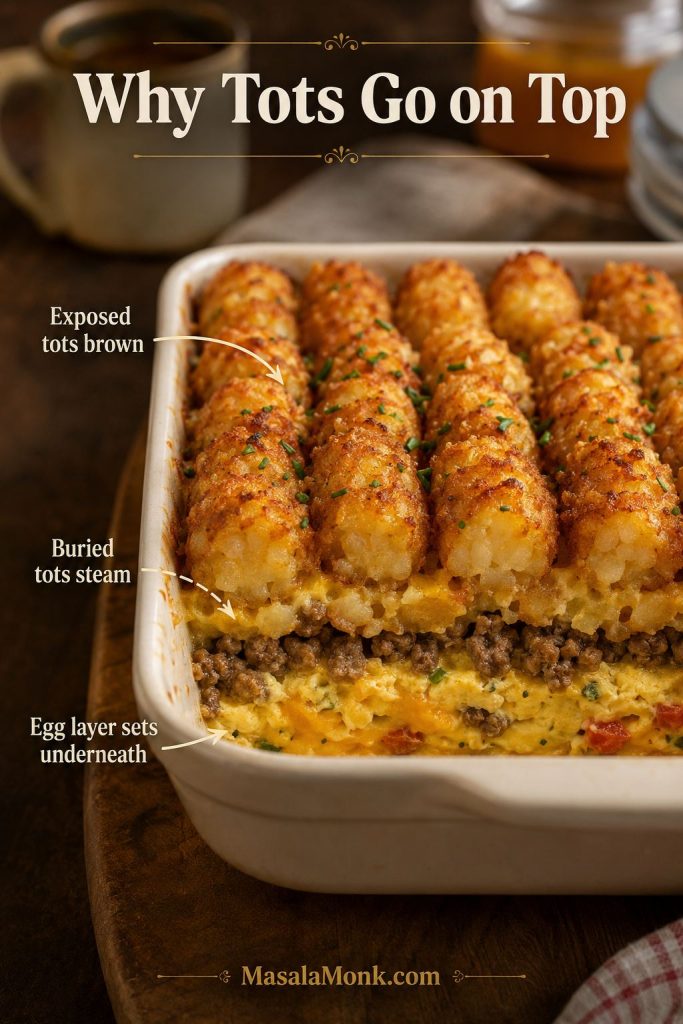
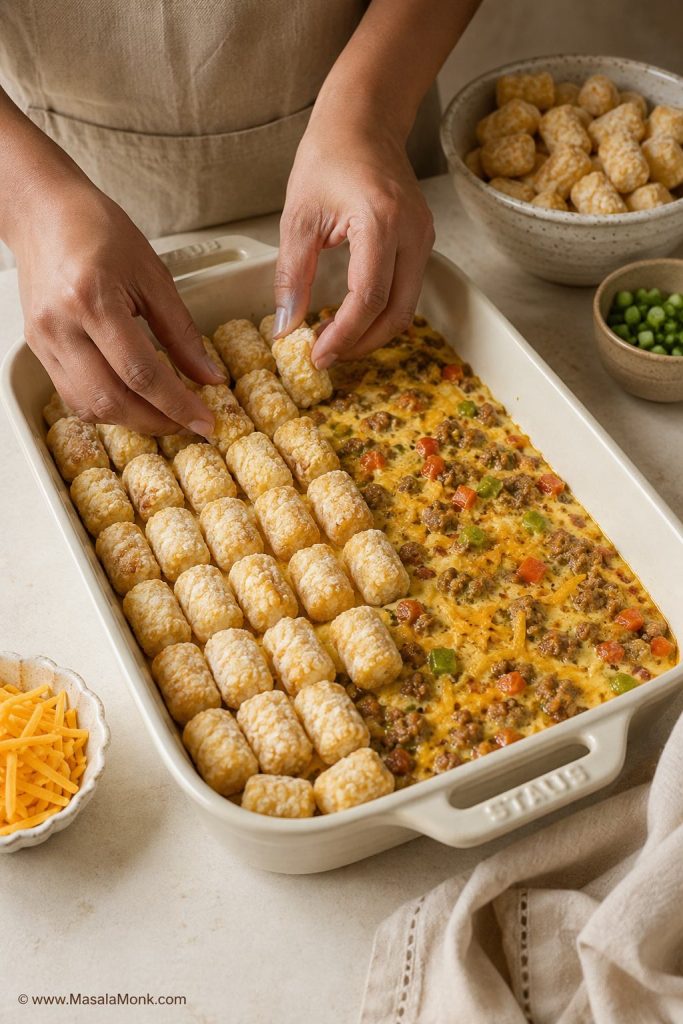
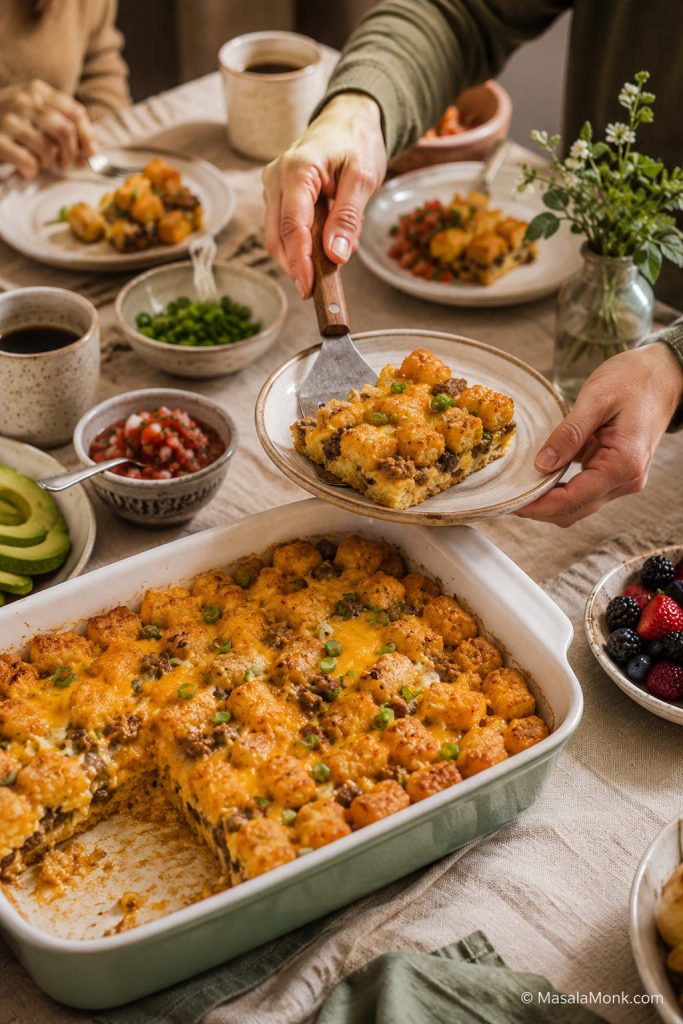
The key is keeping the tots on top instead of burying them under the eggs. That way, the center can bake into a tender egg casserole while the potatoes stay visible, crisp-edged, and browned.
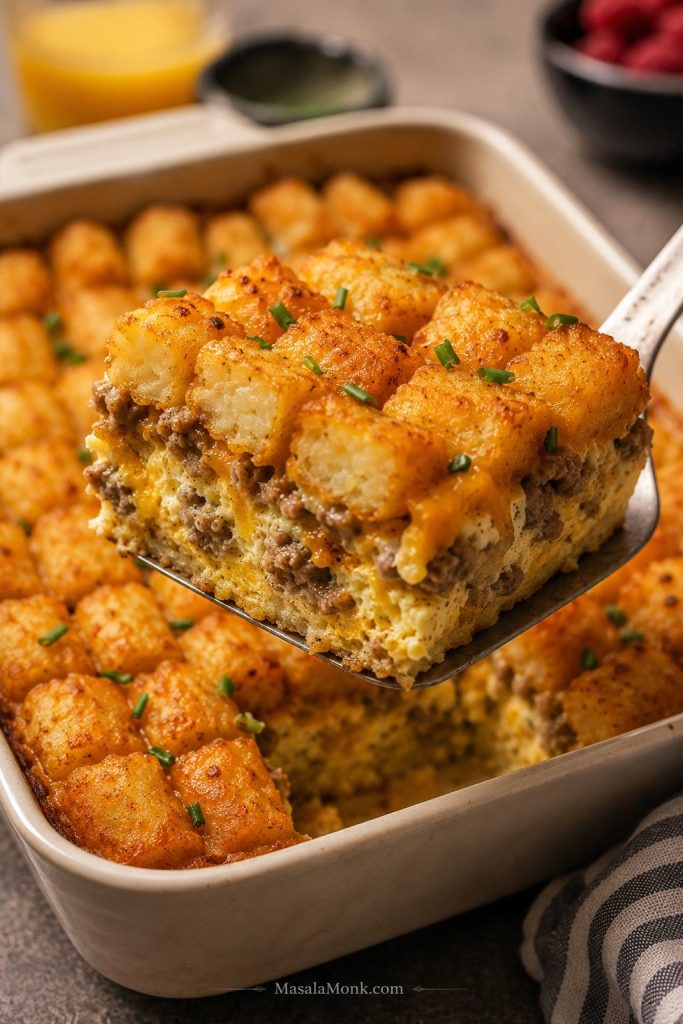
Table of Contents
Start Here
Cook It Right
Quick Answer: Tater Tot Breakfast Casserole
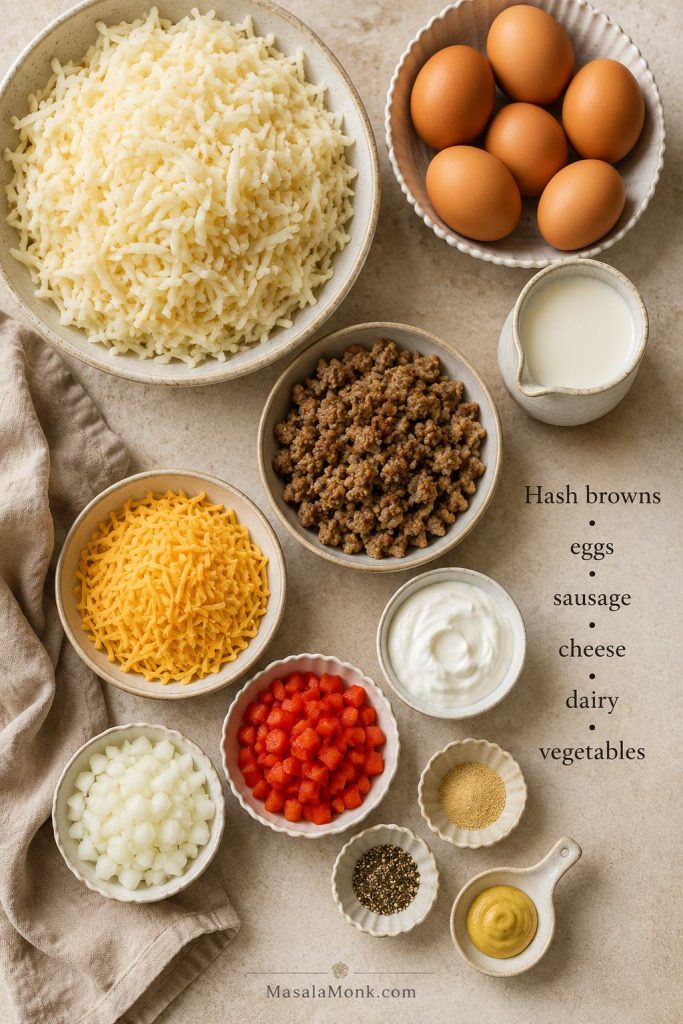
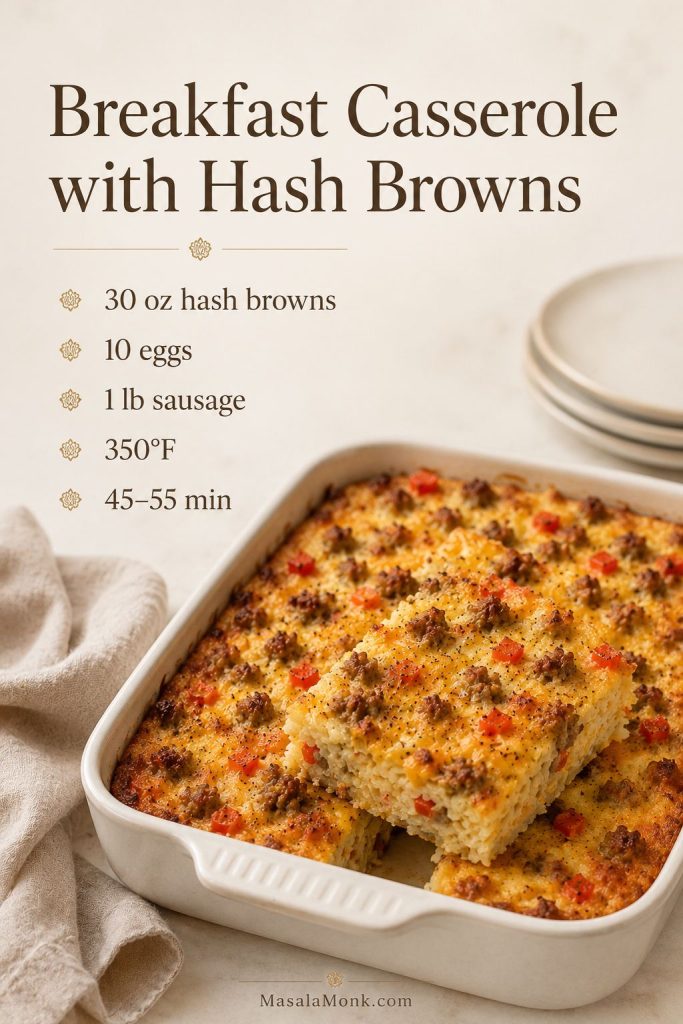
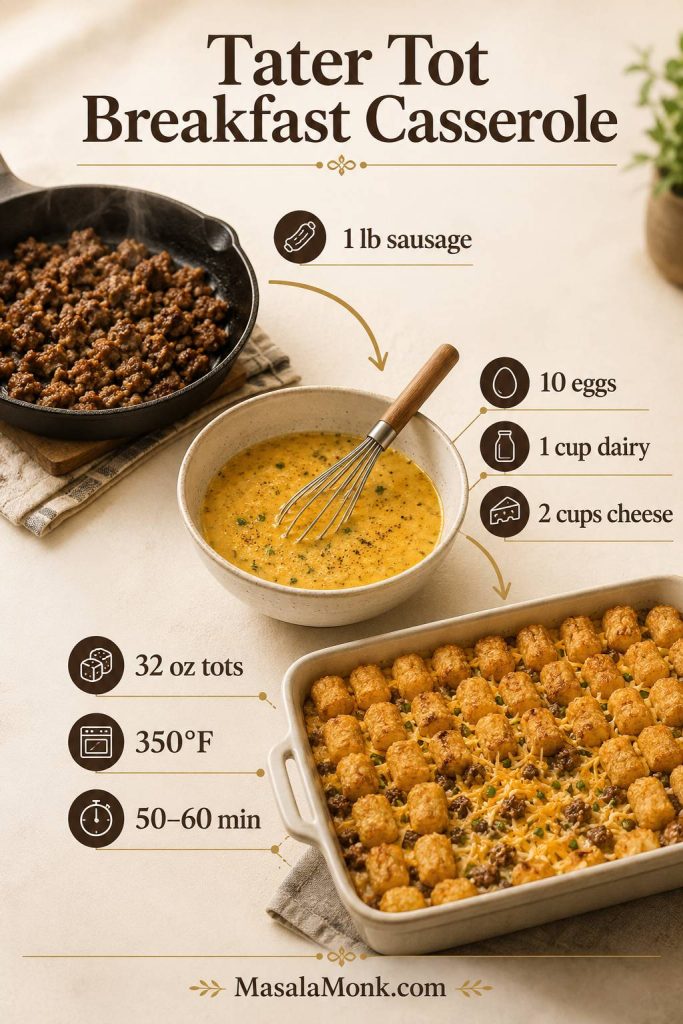
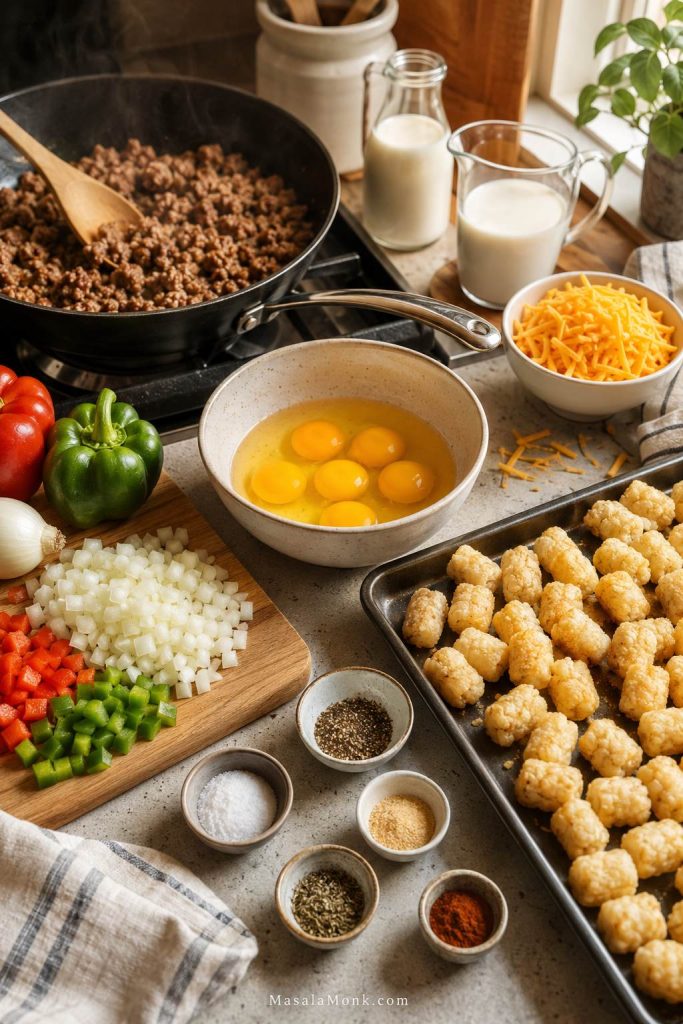
For a golden-browned, sliceable tater tot breakfast casserole, use 1 pound / 454 g breakfast sausage, 10 large eggs, 1 cup / 240 ml milk or half-and-half, 2 cups / about 225 g shredded cheese, and 32 oz / 907 g frozen tater tots. Brown the sausage, whisk the eggs with the dairy, layer everything in a greased 9×13-inch pan, arrange the tots on top, and bake uncovered at 350°F / 175°C for 50–60 minutes.
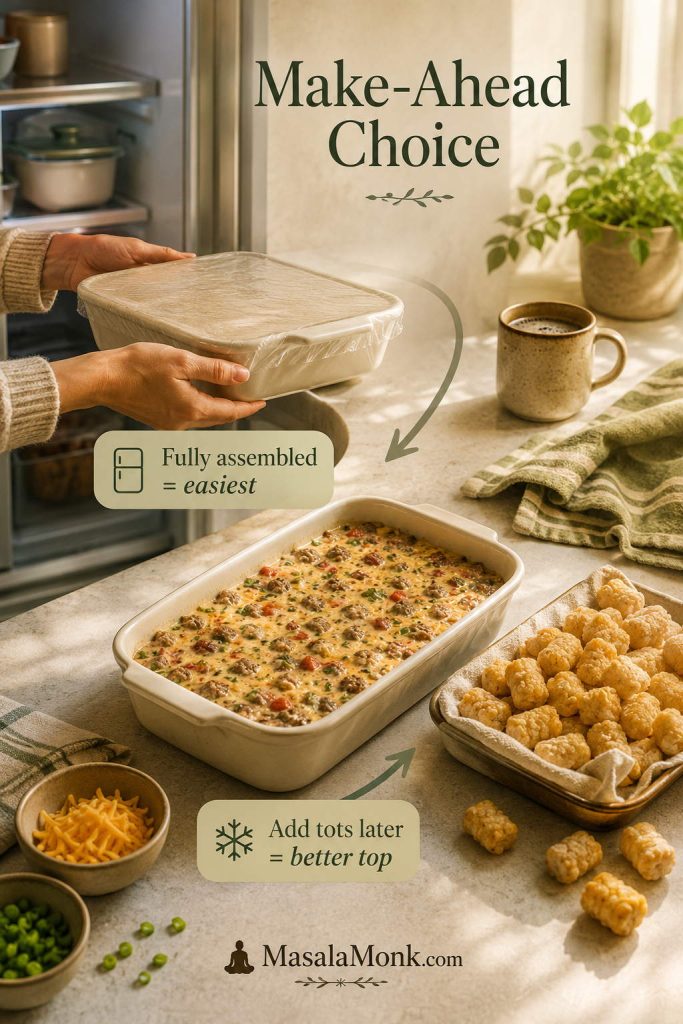
The overnight choice is simple: easiest morning, or better potato texture. A fully assembled overnight casserole works, but the topping loses some crispness. For the neatest potato top, prep the sausage and egg mixture ahead, then add the tots right before baking.
At a Glance
| Detail | Recommended Setup |
|---|---|
| Pan | 9×13 inch / 23×33 cm baking dish |
| Tater tots | 32 oz / 907 g frozen tater tots |
| Eggs | 10 large eggs |
| Protein | 1 lb / 454 g breakfast sausage |
| Dairy | 1 cup / 240 ml milk or half-and-half |
| Cheese | 2 cups / about 225 g shredded cheese |
| Oven | 350°F / 175°C |
| Bake time | 50–60 minutes, longer if chilled |
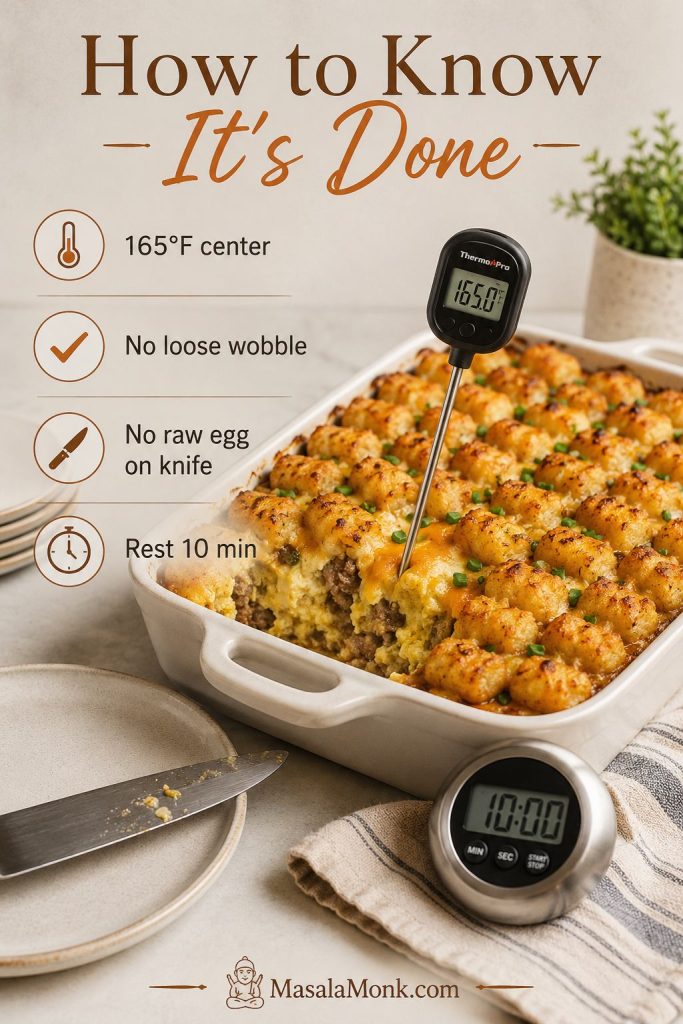
| Rest time | 10 minutes before slicing |
| Doneness | 165°F / 74°C in the center |
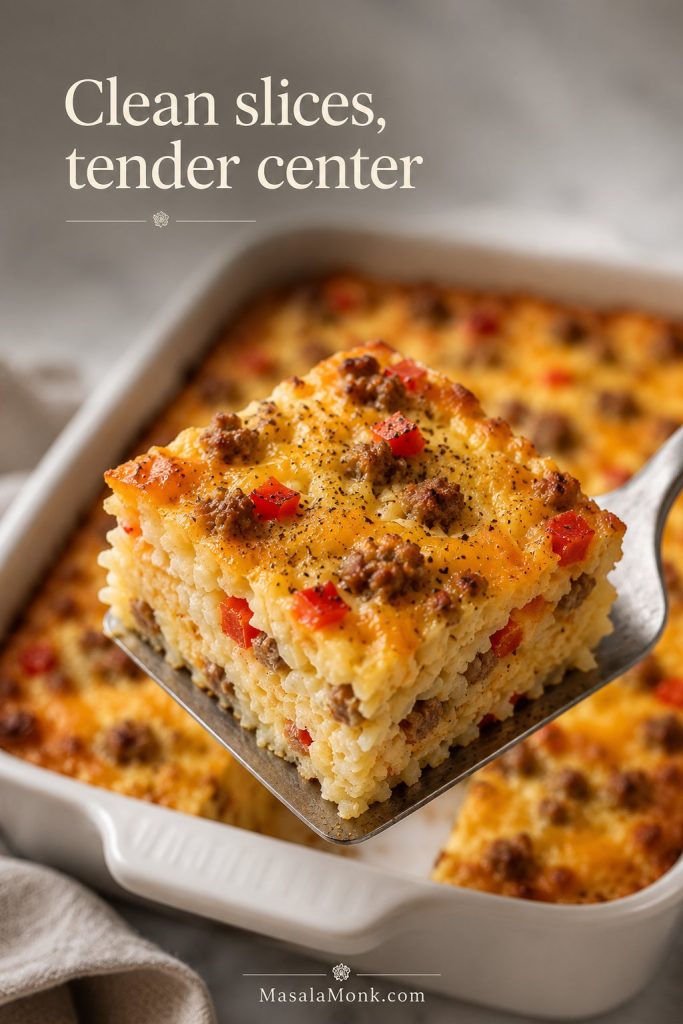
Those amounts give you a casserole that slices cleanly without turning into a dry block of eggs and potatoes. The bottom stays savory and tender, while the top gives you the crisp potato bite people usually reach for first, especially around the edges.
What Is Tater Tot Breakfast Casserole?
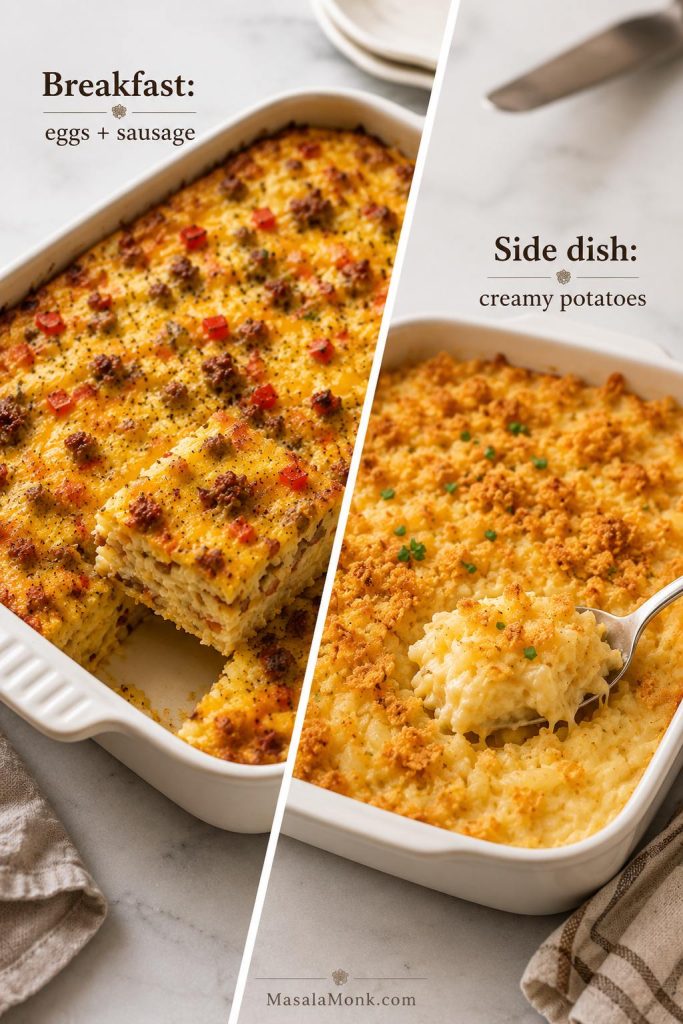
A tater tot breakfast casserole is an egg-based brunch bake with frozen tots, cheese, and a breakfast-style filling such as sausage, bacon, ham, or vegetables. It gives you the comfort of eggs and potatoes in one pan, with the tots standing in for hash browns or breakfast potatoes on the side.
If you want crispy potatoes without the full egg bake, these air fryer hash browns are a quicker potato side. This casserole is for the morning when you want the eggs, sausage, cheese, and potatoes baked together in one pan so you can slice and serve it to a group without juggling separate skillets on the stove.
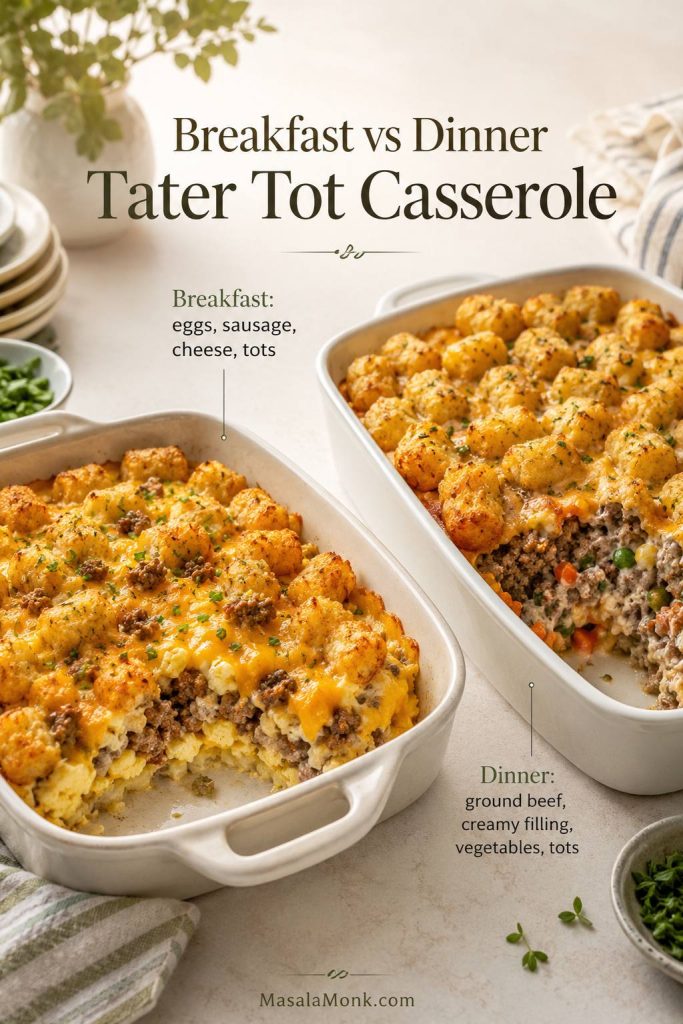
Unlike a classic dinner-style tater tot casserole, this breakfast version does not use cream of mushroom soup. Eggs, milk, and cheese hold everything together, so the finished dish eats like a brunch egg bake rather than a creamy ground-beef casserole.
Breakfast Version vs Dinner Casserole
If you landed here looking for the dinner-style version, MasalaMonk also has a cozy tater tot casserole recipe made with ground beef, creamy filling, vegetables, cheese, and crisp tots. This breakfast version is different: it is built around eggs, breakfast sausage, cheese, and frozen tots, so it eats more like a brunch casserole than a creamy dinner bake.
| Version | Main Ingredients | Best For |
|---|---|---|
| Tater tot breakfast casserole | Eggs, sausage or bacon, cheese, milk, frozen tots | Brunch, holiday breakfast, breakfast meal prep |
| Regular tater tot casserole | Ground beef, creamy sauce, vegetables, cheese, frozen tots | Dinner, potlucks, comfort food meals |
| Hash brown breakfast casserole | Eggs, sausage or bacon, cheese, shredded hash browns | A classic breakfast casserole with a softer potato base |
If you want a more traditional shredded-potato brunch bake, use this breakfast casserole with hash browns. If you want the crisp-topped, golden-potato version, this egg-and-tot bake is the better fit.
Why This Recipe Works
The problem with many tater tot breakfast casseroles is that the top looks ready before the egg center is fully cooked, or the tots turn limp because they are buried under too much filling. This version is built around two things: an egg layer that sets properly and a potato layer that gets a chance to brown.
- The tots stay exposed. That gives the potatoes a chance to brown instead of steaming inside the egg layer.
- The sausage is browned first. This gives the casserole flavor and prevents greasy raw sausage from cooking inside the eggs.
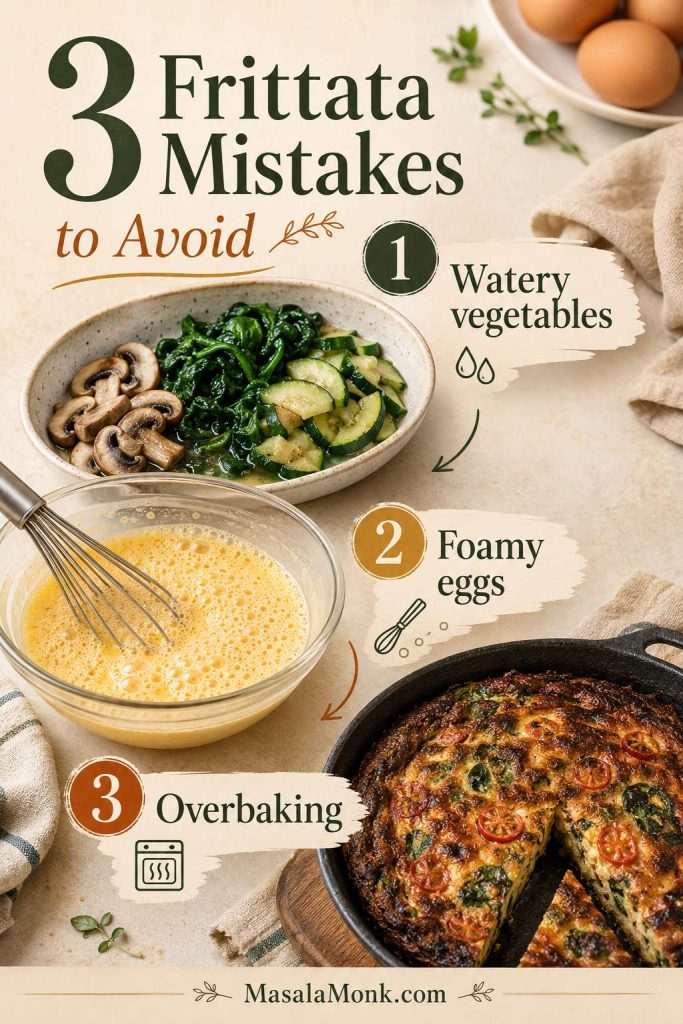
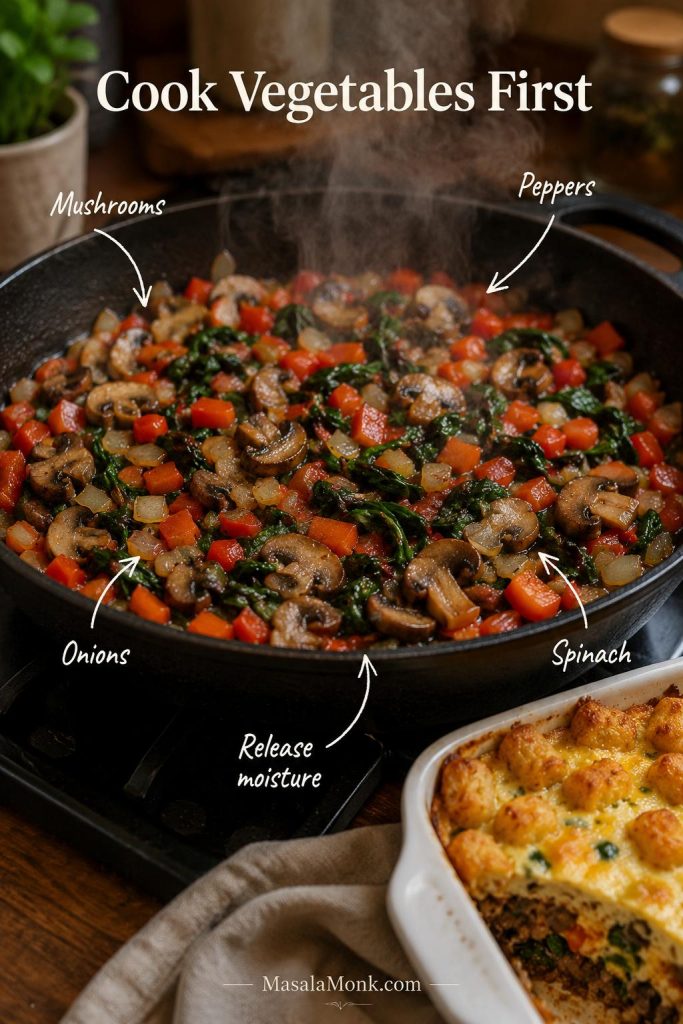
- Vegetables are cooked before baking. Onion, peppers, mushrooms, and spinach can release water. Cooking them first keeps the middle from turning watery.
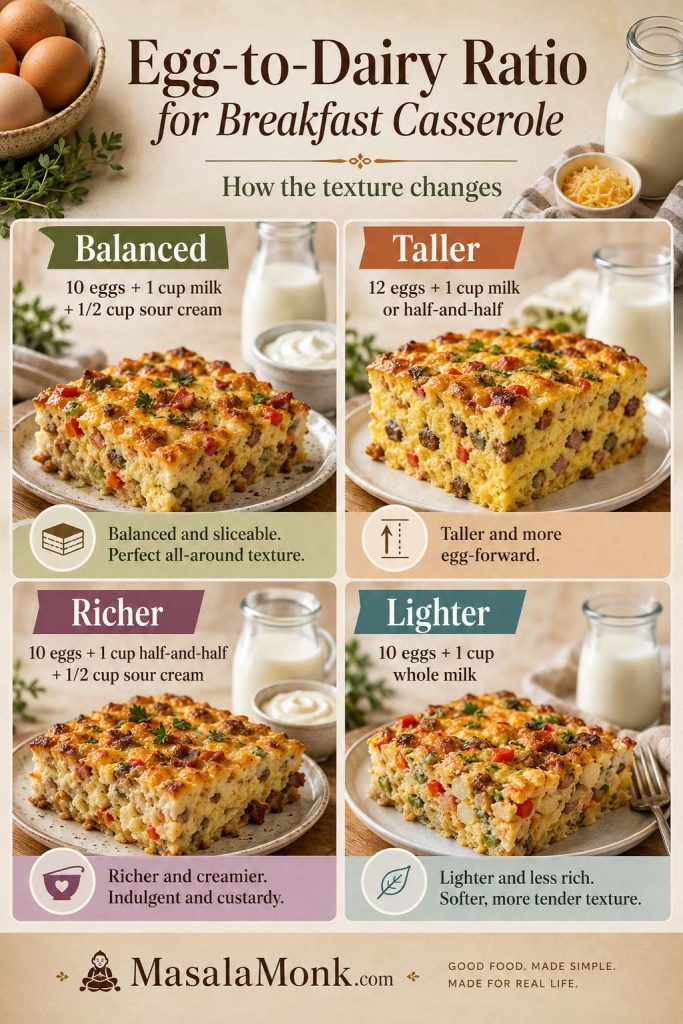
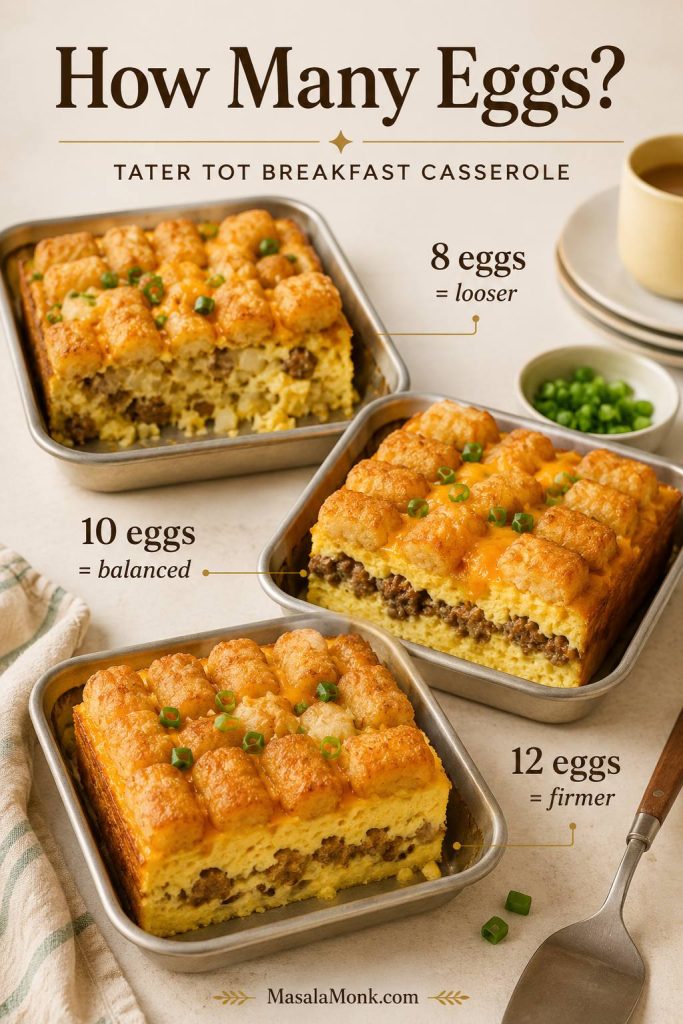
- Ten eggs are deliberate. For a 9×13 pan, 10 eggs give the best middle ground: 8 eggs make the casserole looser and more potato-heavy, while 12 eggs push it closer to a firm egg bake.
- One cup of dairy keeps the eggs tender. It softens the texture without flooding the pan.
- Frozen tots make the method predictable. They hold their shape, cover the top neatly, and are less likely to collapse into the egg layer.
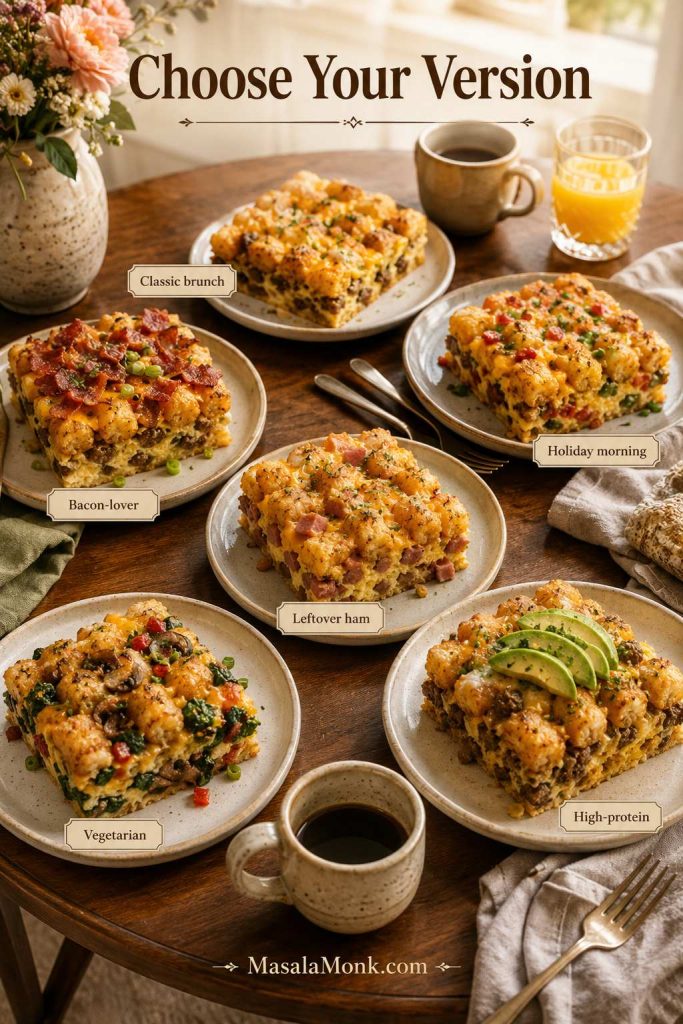
Choose Your Version
If you already know the kind of morning you are cooking for, use this as a shortcut. The base recipe stays the same; the meat, timing, and topping method change the personality of the casserole.
| Want This? | Make It This Way |
|---|---|
| Classic brunch pan | Sausage, cheddar, 10 eggs, and tots arranged on top. |
| Easiest holiday morning | Fully assemble, cover, refrigerate, then bake covered first and uncovered to finish. |
| Crispest tot topping | Prep the sausage and egg mixture ahead, then add frozen tots in the morning. |
| Bacon-lover version | Use cooked bacon with cheddar-Jack or sharp cheddar. |
| Leftover ham brunch | Use diced ham with cheddar, Swiss, or Monterey Jack. |
| Vegetable-packed bake | Use cooked mushrooms, peppers, onions, spinach, broccoli, or roasted poblanos. |
| Creamier high-protein bake | Add cottage cheese and reduce the milk slightly. |
Ingredients for Tater Tot Breakfast Casserole
The ingredient list is short, so the ratios do most of the work. Too many eggs make the bake firm, too much dairy loosens the center, and thawed tots lose structure.
Frozen tater tots
Use 32 oz / 907 g frozen tater tots for a generous 9×13 casserole. Keep them in the freezer until you are ready to assemble so they hold their shape and are less likely to break apart.
Breakfast sausage
Breakfast sausage brings seasoning, fat, and savory depth. Use 1 pound / 454 g pork breakfast sausage, turkey sausage, chicken sausage, or spicy breakfast sausage. Brown it fully and drain excess grease before layering it into the casserole.
Eggs
Ten large eggs give the casserole enough structure for a 9×13 pan without making it feel dry or rubbery. For a lighter, more potato-heavy bake, use 8 eggs. However, if you want it firmer and more egg-forward, use 12.
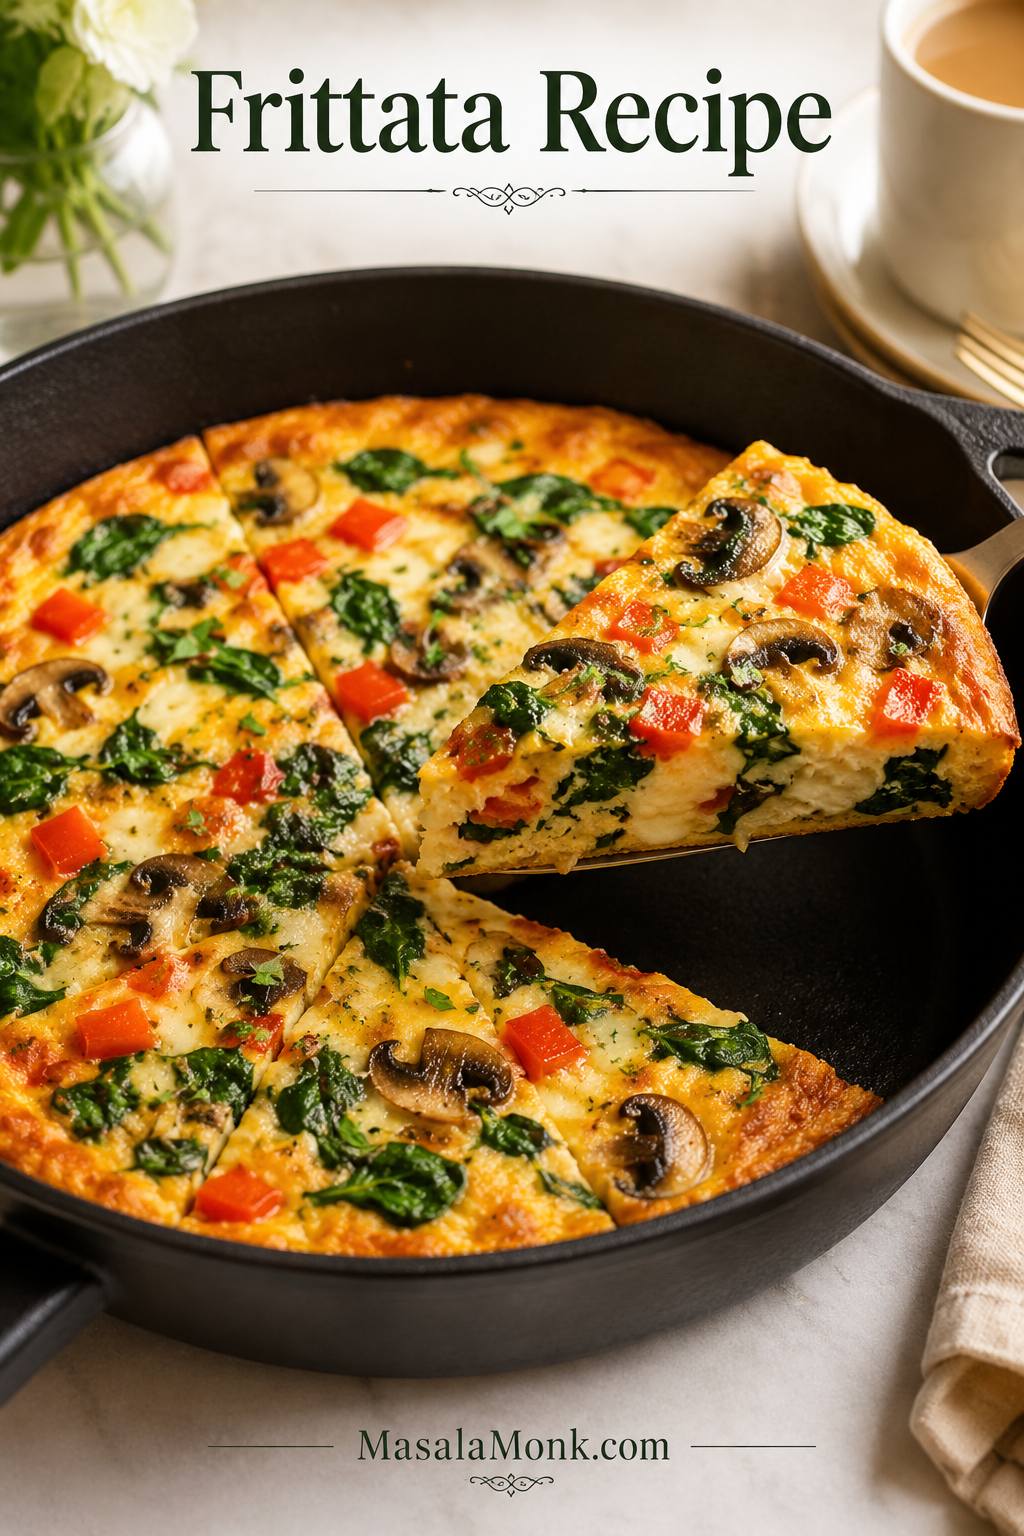
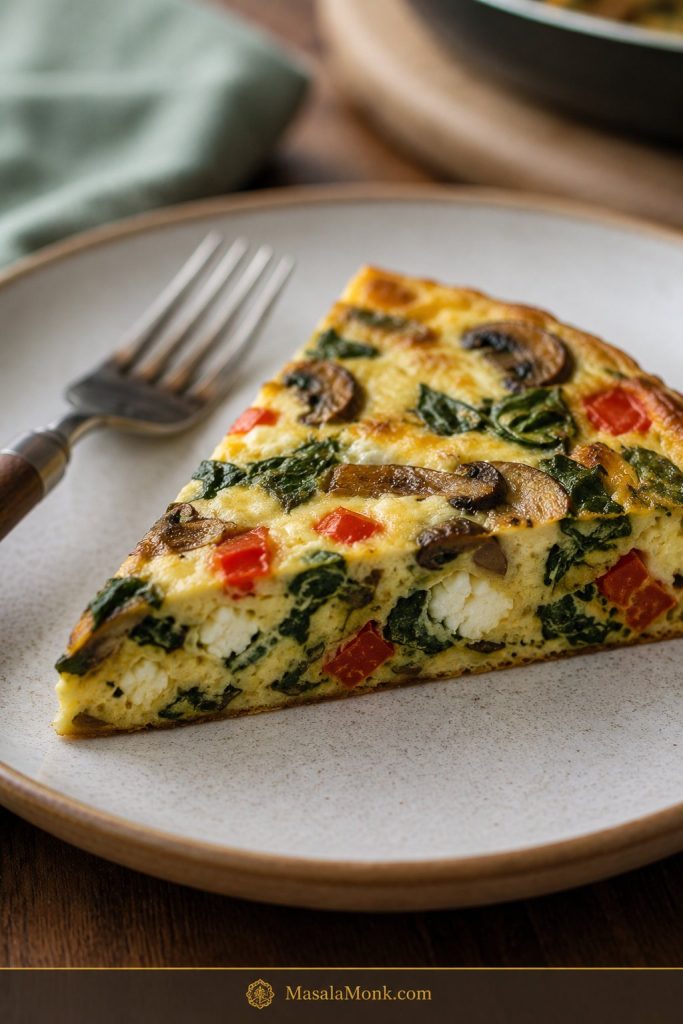
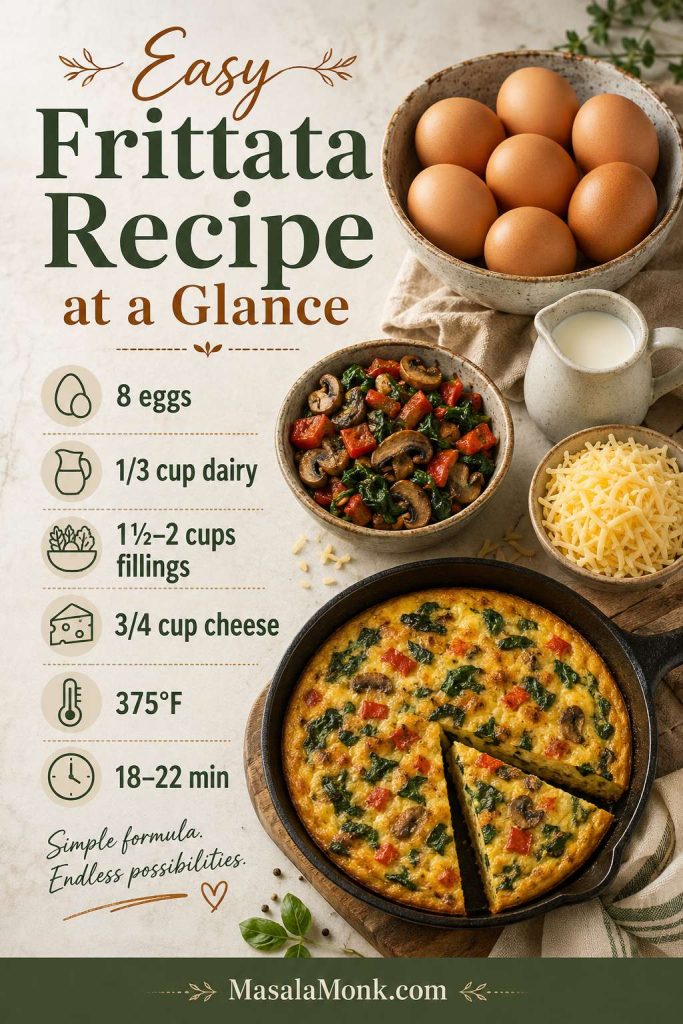
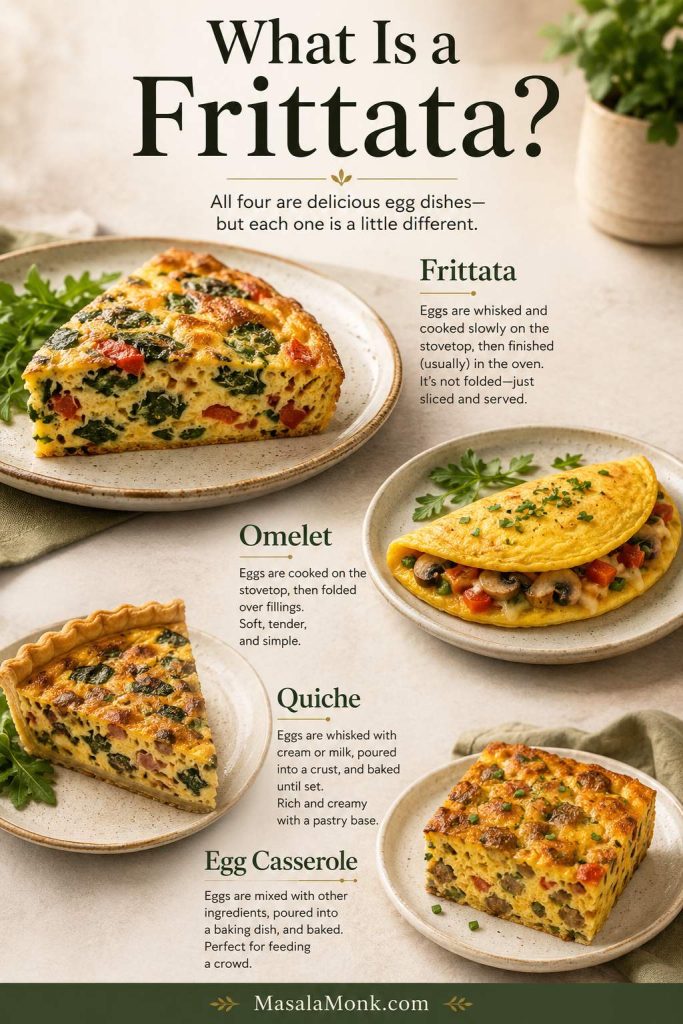
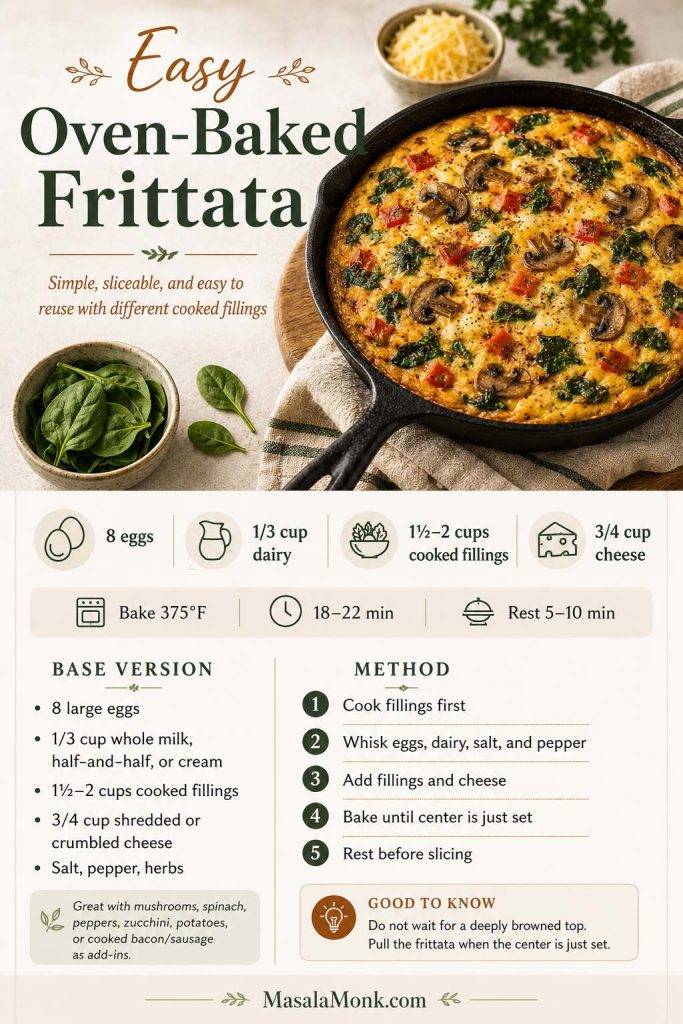
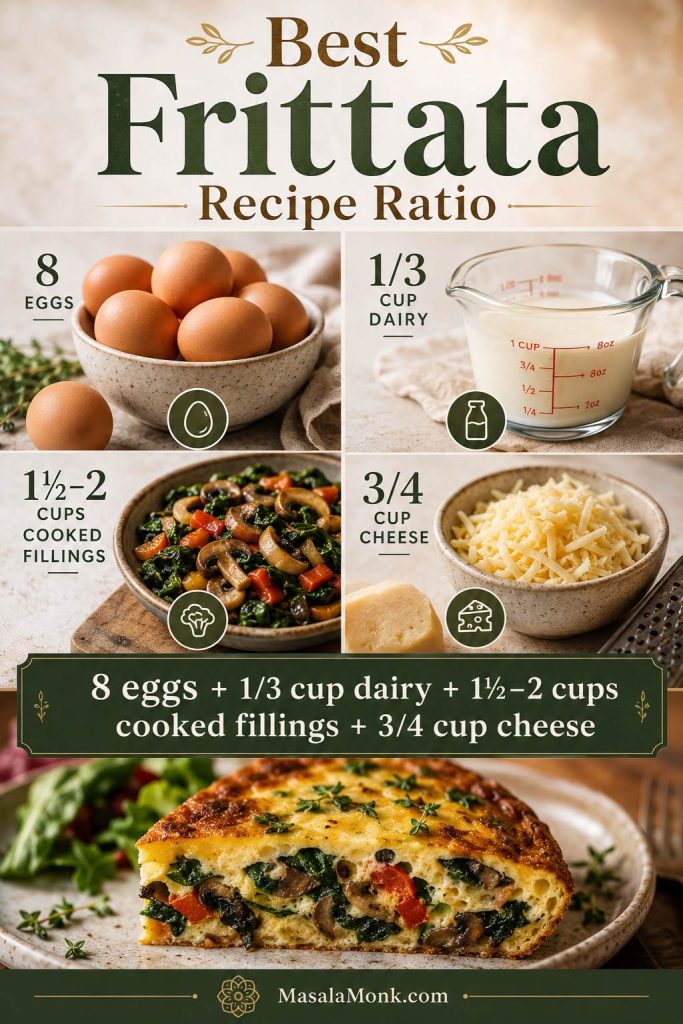
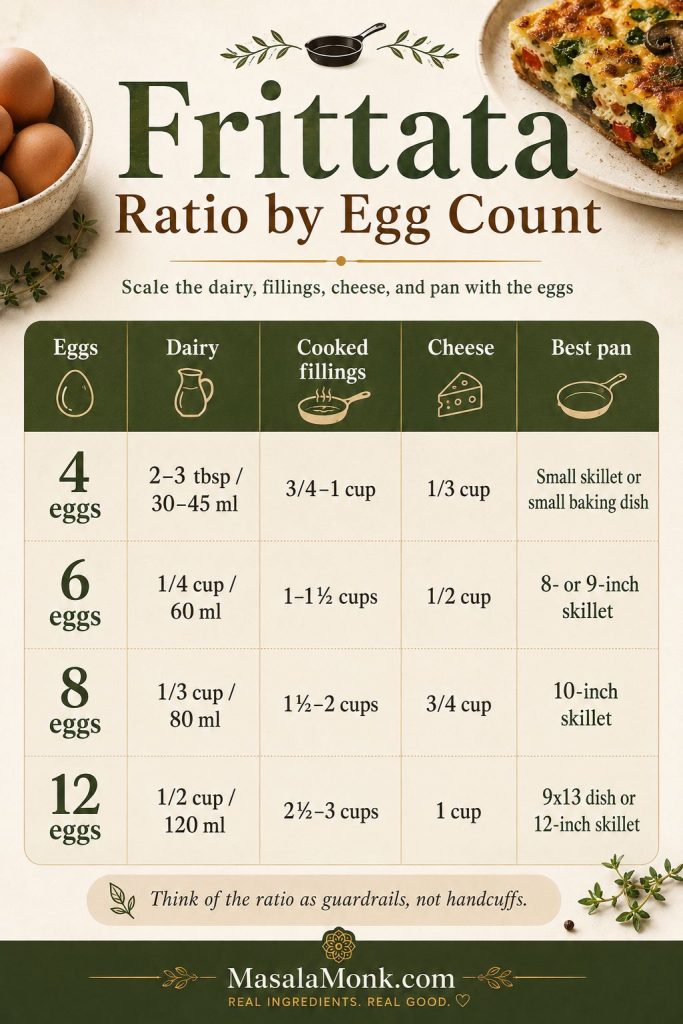
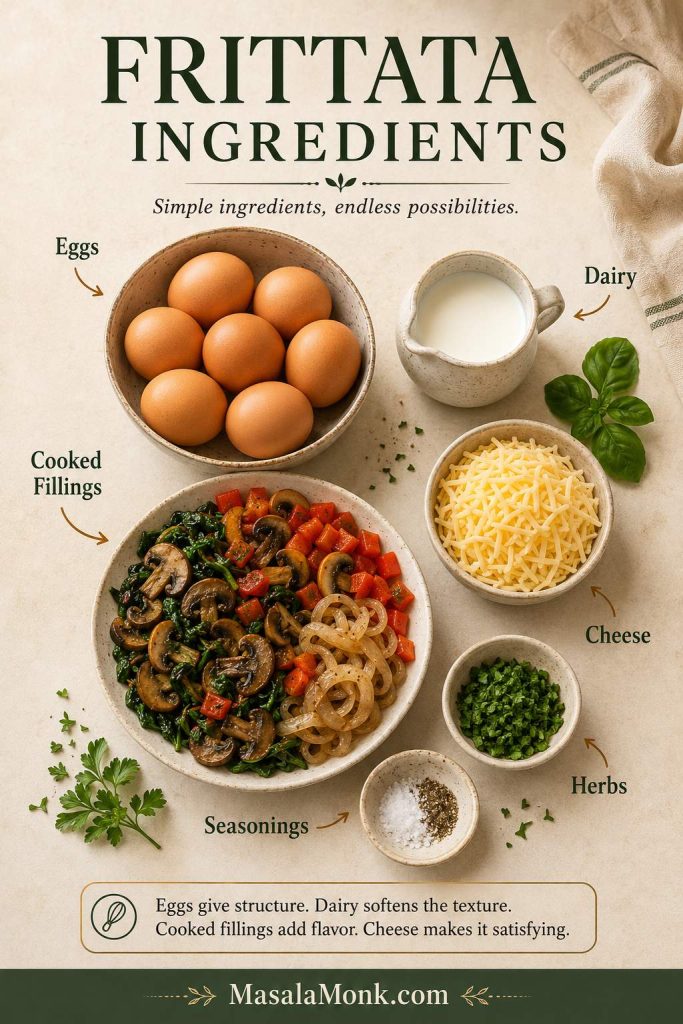
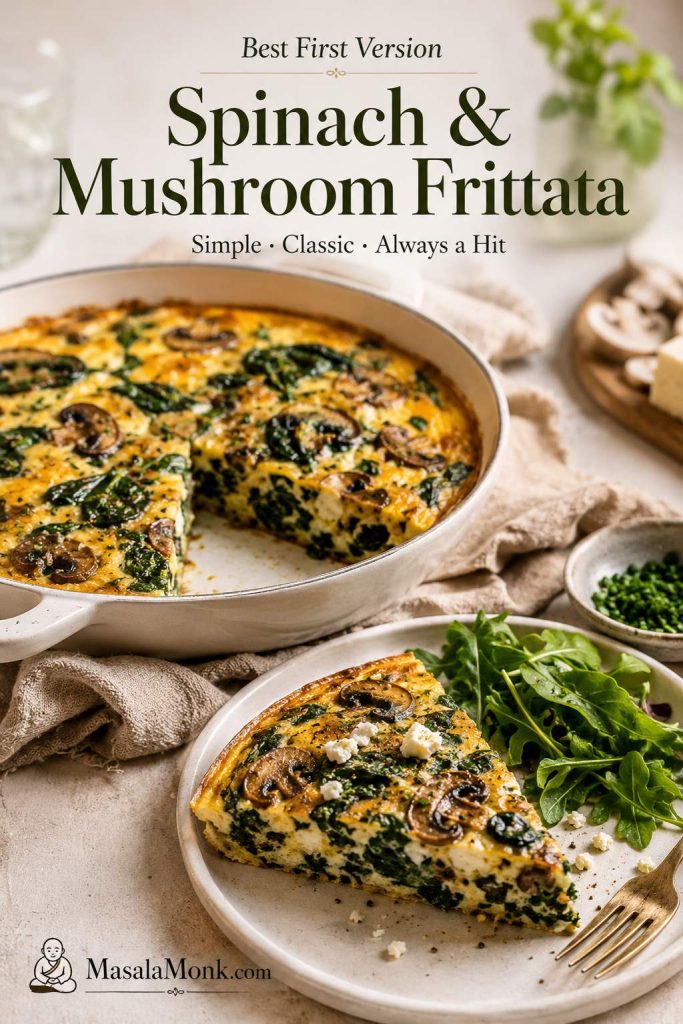
If you want a smaller skillet egg bake instead of a full brunch pan, this frittata recipe uses a similar cooked-filling logic but bakes faster and serves fewer people.
Milk or half-and-half
Use 1 cup / 240 ml whole milk or half-and-half. This helps the eggs bake into a tender layer. Too much dairy can make the center loose, especially if you also add vegetables that release moisture.
Cheese
Use 2 cups / about 225 g shredded cheese. Sharp cheddar gives the boldest flavor, while Monterey Jack, Colby Jack, or pepper jack melt smoothly. A cheddar-Jack blend gives you both flavor and melt.
Vegetables and seasonings
Onion and bell pepper are optional but useful. Cook them with the sausage so they soften before going into the baking dish. Garlic powder, onion powder, black pepper, dry mustard, and a little hot sauce all help the egg mixture taste seasoned instead of flat.
Try to keep added vegetables to about 1 1/2 to 2 cups cooked total so the egg layer still sets cleanly.
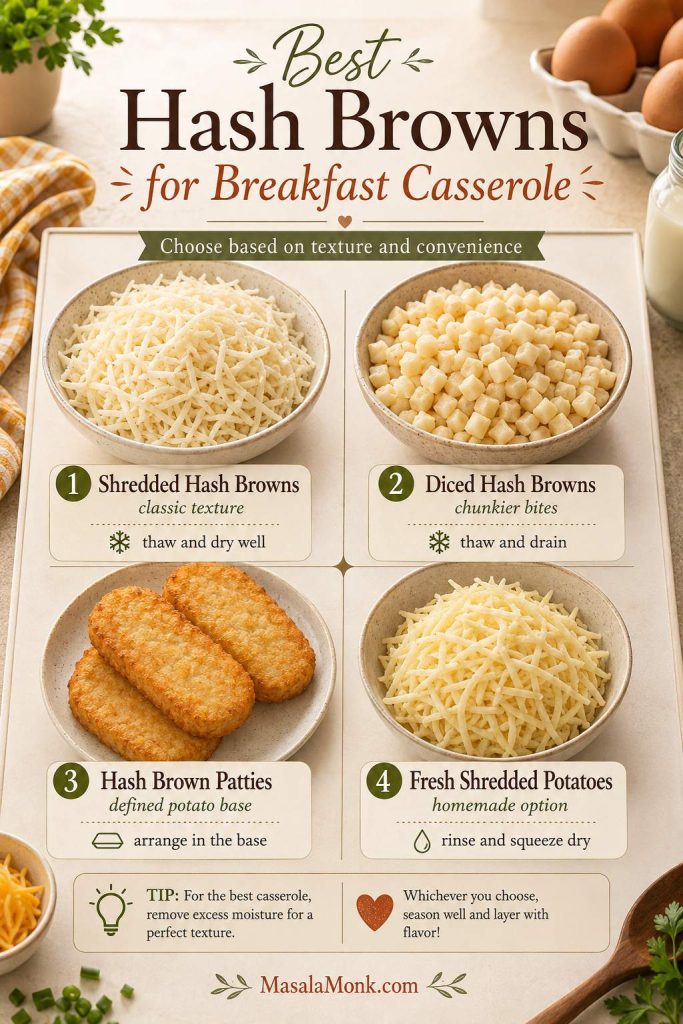
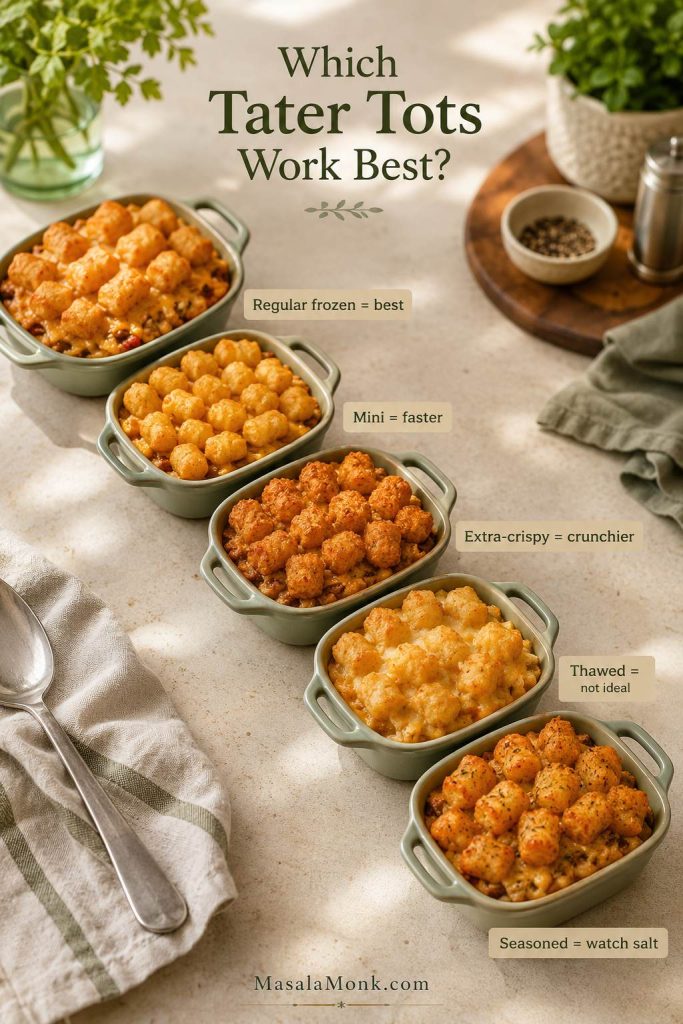
Which Tater Tots to Use
Regular frozen tater tots are the easiest choice for this breakfast bake because they hold their shape and brown predictably. They are already shaped, par-cooked, and ready to go straight from the freezer to the casserole.
| Type of Tot | Will It Work? | Notes |
|---|---|---|
| Regular frozen tater tots | Recommended | Strong structure and the most predictable bake time. |
| Mini tots | Yes | They brown faster, so start checking earlier. |
| Extra-crispy tots | Yes | Good for a stronger crunch on top. |
| Thawed tots | Not ideal | They can soften, break, and lose structure. |
| Seasoned tots | Sometimes | Use less added salt if the tots are already salty. |
If you are using a smaller bag, 28 oz / about 794 g will still work. The top layer will be a little less full, but the casserole will bake well.
Tots on Top vs Tots on Bottom
This is the biggest texture decision in the whole recipe. Some tater tot breakfast casserole recipes place the tots on the bottom, some mix them in, and some arrange them on top. None of those methods is wrong, but they do not give the same result.
| Method | Texture | When to Use It |
|---|---|---|
| Tots on top | Crisp, browned top, clear potato layer | Best for a classic tater tot topping |
| Tots on bottom | More hotdish-style, absorbs egg mixture | Overnight casseroles or a softer potato texture |
| Tots mixed in | Easy, but least crisp | Casual family bake |
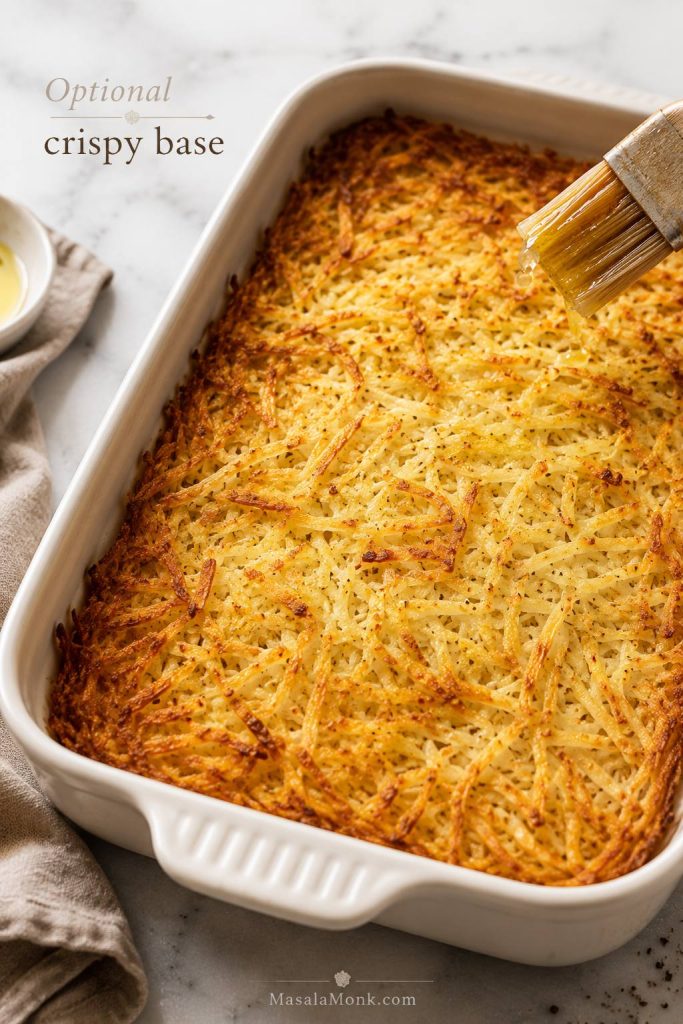
| Pre-baked tots | Crunchiest, but takes extra time | When you do not mind an extra step |
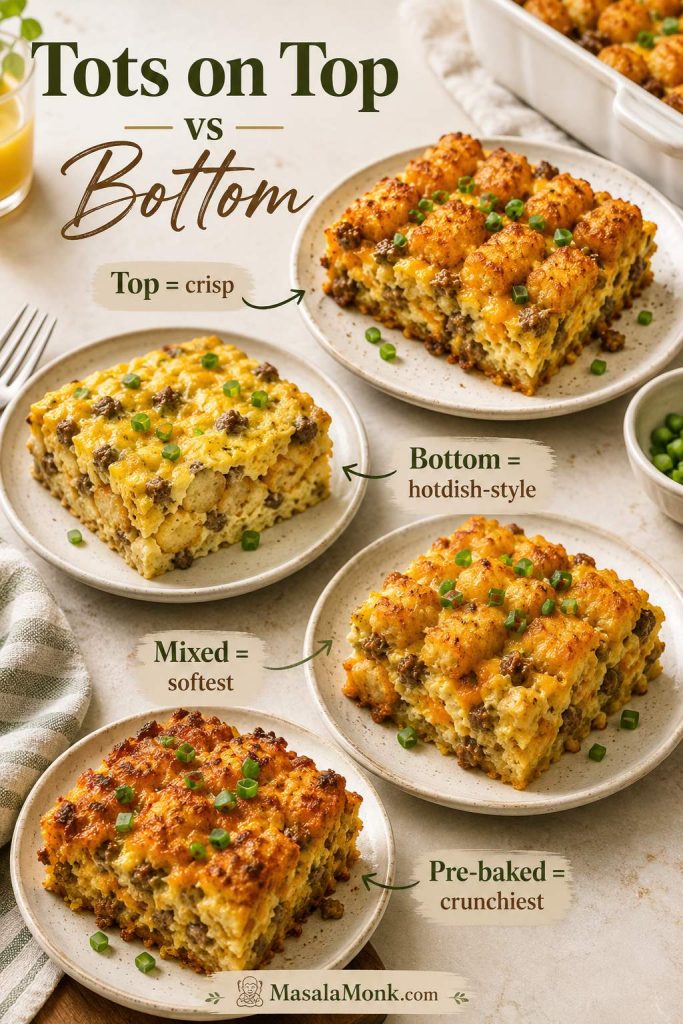
For this recipe, the tots go on top because that is where they can actually brown. The eggs, sausage, and cheese bake underneath, while the corners get the best crisp-edged potato bites. Once you choose that texture, follow the step-by-step method below.
How to Make Tater Tot Breakfast Casserole
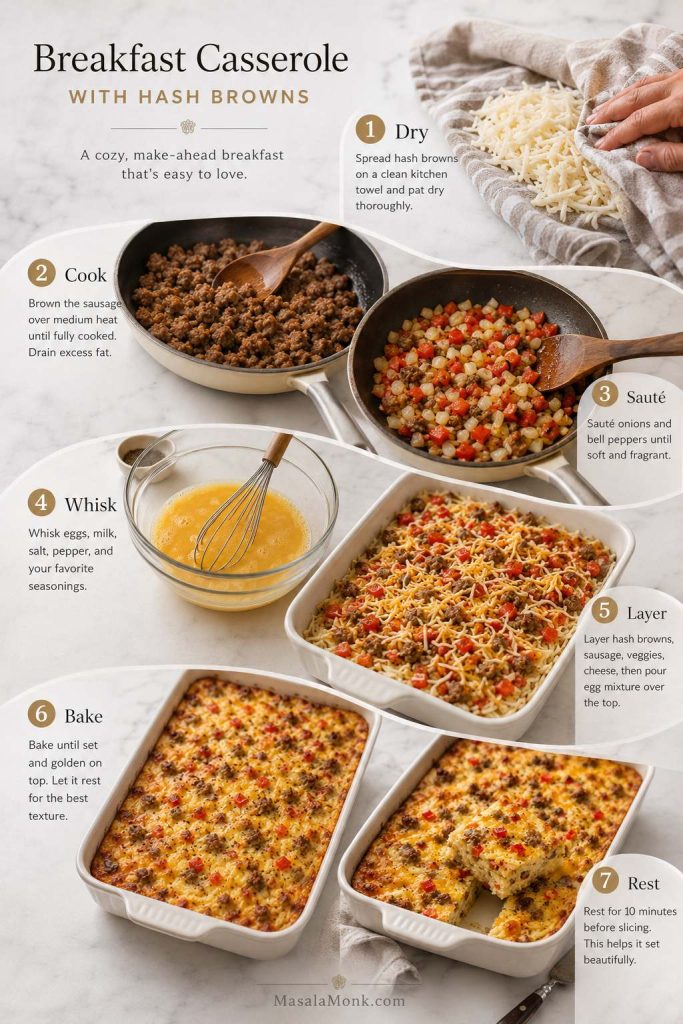
The method is easy, but a little order makes a big difference. Brown and drain the sausage first, season the eggs before they hit the pan, and keep the tots frozen until the casserole is ready for the oven. If you are baking a chilled casserole, use the bake time and doneness section before you start.
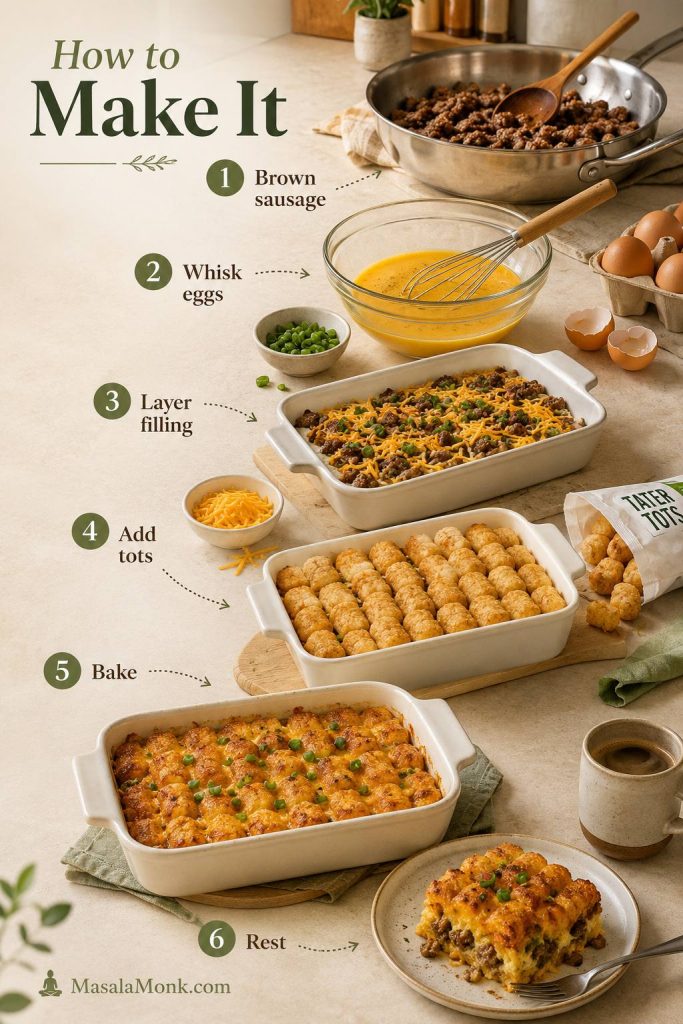
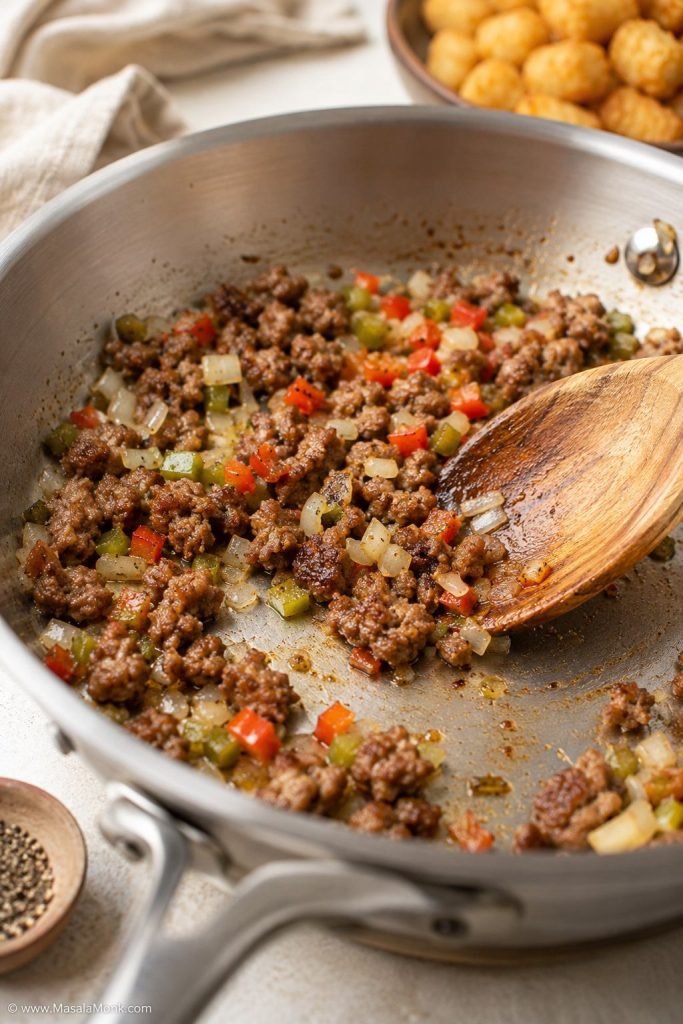
1. Brown the sausage
Heat a large skillet over medium heat. Add 1 pound / 454 g breakfast sausage and cook until browned, no longer pink, and the crumbles have a little color. If you are using onion or bell pepper, add them once the sausage has started to brown and cook until softened.
Drain excess grease so the bottom of the casserole does not turn heavy or oily.
2. Whisk the eggs
In a large bowl, whisk 10 large eggs with 1 cup / 240 ml milk or half-and-half. Add garlic powder, onion powder, black pepper, dry mustard if using, hot sauce if using, and a little salt. Be careful with salt if your sausage and cheese are already salty.
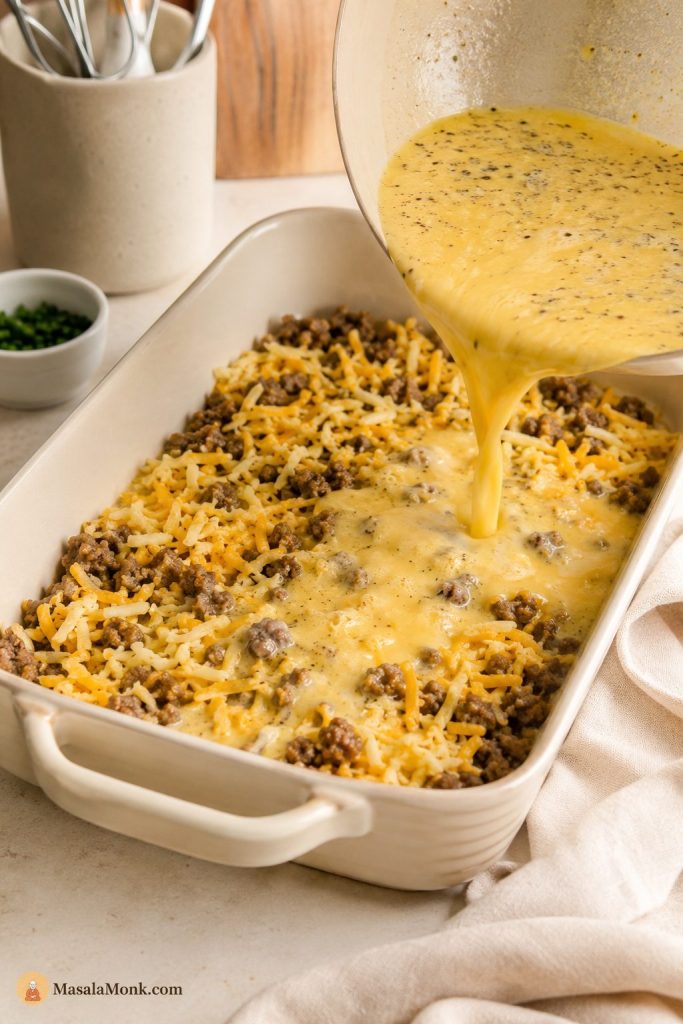
3. Layer the filling
Grease a 9×13-inch / 23×33 cm baking dish. Spread the cooked sausage mixture evenly over the bottom. Sprinkle most of the cheese over the sausage, saving a little for the top if you like a cheesy finish.
4. Add the egg mixture
Pour the egg mixture evenly over the sausage and cheese. Tilt the dish gently if needed so the eggs settle into the corners.
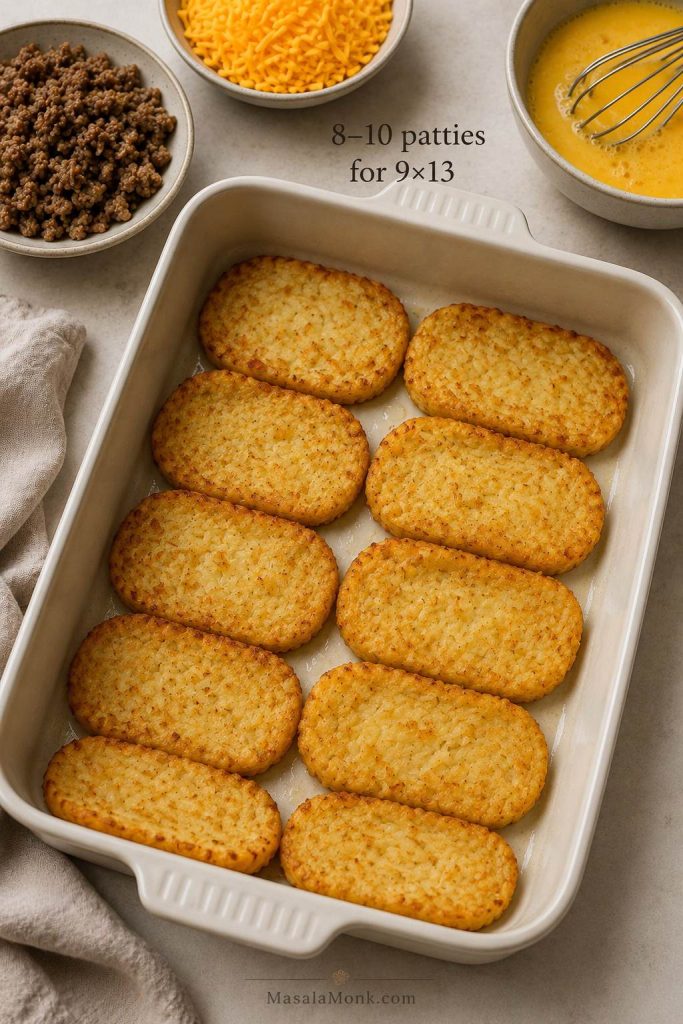
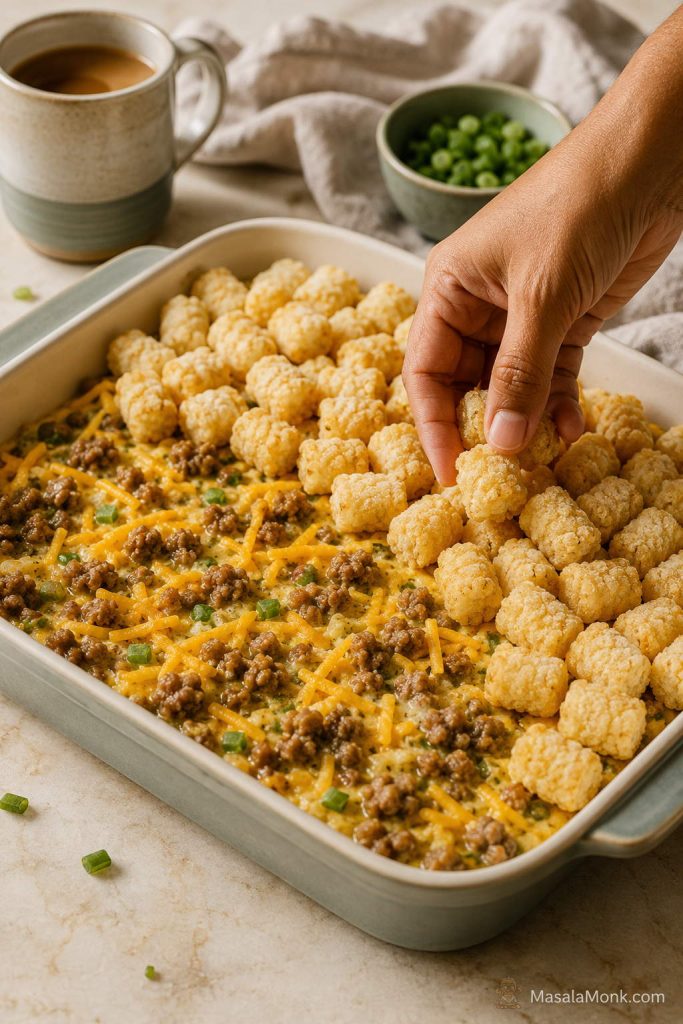
5. Arrange the frozen tots
Place the frozen tater tots on top in a single layer. They do not need to be perfectly lined up, but try to keep them exposed rather than buried under the egg mixture.
6. Bake and rest
Bake uncovered at 350°F / 175°C for 50–60 minutes, until the egg layer has firmed and the tots are crisp-edged and golden. Add the remaining cheese during the last 5–10 minutes if you want a cheesy top. Let the casserole rest for 10 minutes before slicing so the squares hold together.
By the end, the edges should look lightly browned and the center should feel set rather than sloshy.

Bake Time and Doneness
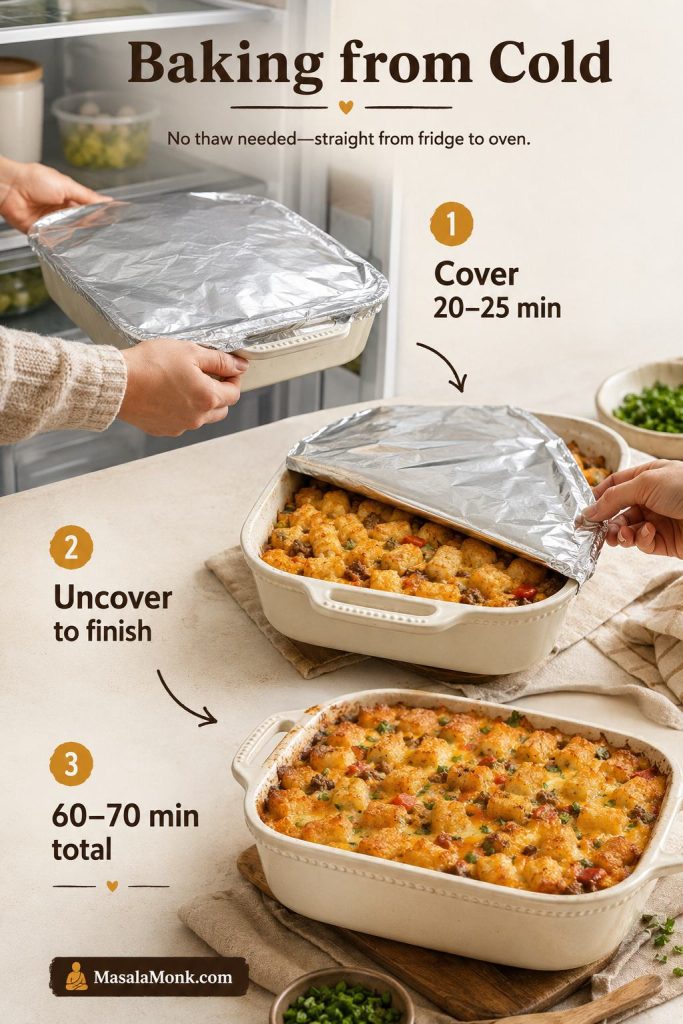
The top will usually look ready before the middle is done, so use the clock as a guide and the center as the final judge. For a freshly assembled 9×13 tater tot breakfast casserole, plan on 50–60 minutes at 350°F / 175°C. If the casserole is cold from the refrigerator, it may need 60–70 minutes total.
| Version | Temperature | Approximate Time |
|---|---|---|
| Freshly assembled 9×13 casserole | 350°F / 175°C | 50–60 minutes |
| Cold overnight casserole | 350°F / 175°C | 60–70 minutes |
| Covered start for chilled casserole | 350°F / 175°C | Cover 20–25 minutes, then uncover until done |
| More browned top | Finish at 400°F / 200°C | Last 5 minutes only, if needed |
Baking from Cold
Cover only a cold casserole that needs help warming through before the top gets too brown. For a freshly assembled casserole, bake uncovered from the start.
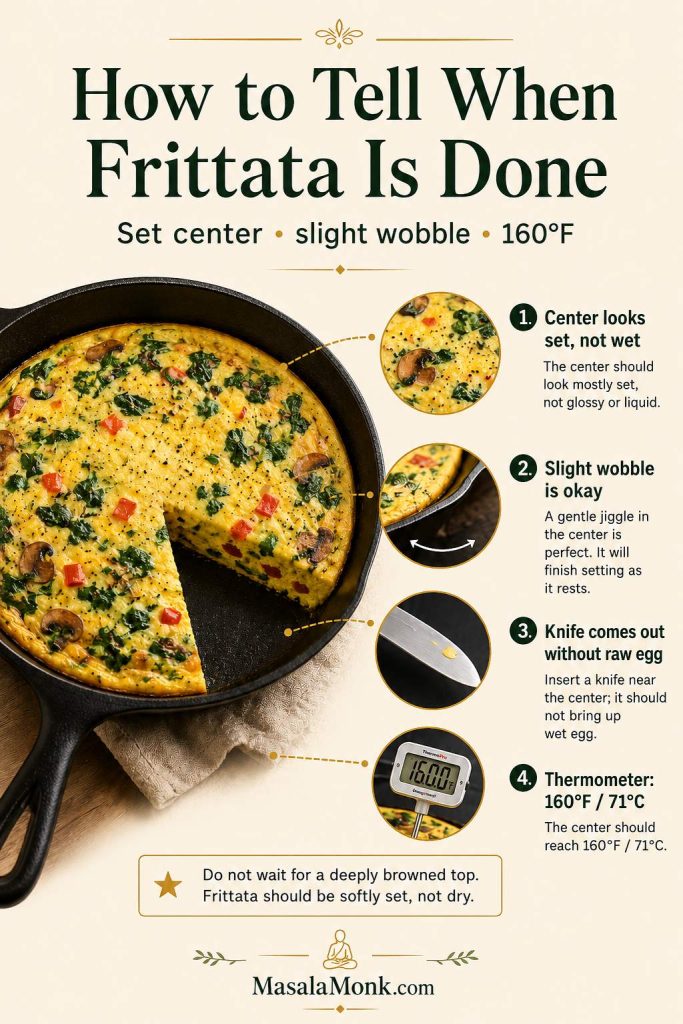
For the simplest safe target, check the center with an instant-read thermometer and look for 165°F / 74°C. FoodSafety.gov lists casseroles, including meatless casseroles, at 165°F / 74°C, so that is the clearest doneness target for this full breakfast bake. You can review the safe internal temperature guidance from FoodSafety.gov.
If you do not have a thermometer, look for no loose wobble in the middle and no raw egg on a knife inserted near the center.
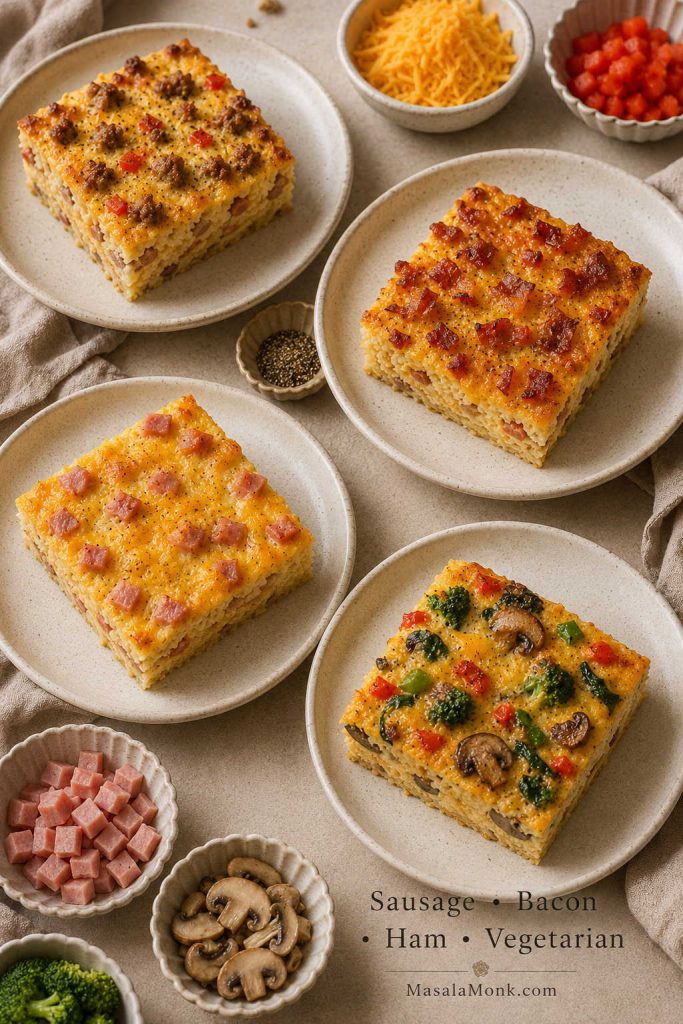
Sausage, Bacon, Ham, and Vegetarian Variations
Once the egg-to-dairy balance is right, the casserole is forgiving. The flavor can go smoky with bacon, milder and holiday-friendly with ham, or vegetable-heavy with a vegetarian version as long as the moisture is cooked off first.
Sausage tater tot breakfast casserole
Sausage works especially well because it seasons the whole pan as it cooks. Use 1 pound / 454 g breakfast sausage, cooked and drained. Pork sausage gives the richest flavor, but turkey or chicken breakfast sausage works too. For a spicier casserole, use hot breakfast sausage or add pepper jack cheese.
If your sausage is very salty, reduce the salt in the egg mixture. The cheese and tots will add salt too.
For a richer sausage-and-cream-cheese version, stir 4 oz / 115 g softened cream cheese into the cooked sausage before layering. Keep the milk at 1 cup so the egg layer does not turn too loose.
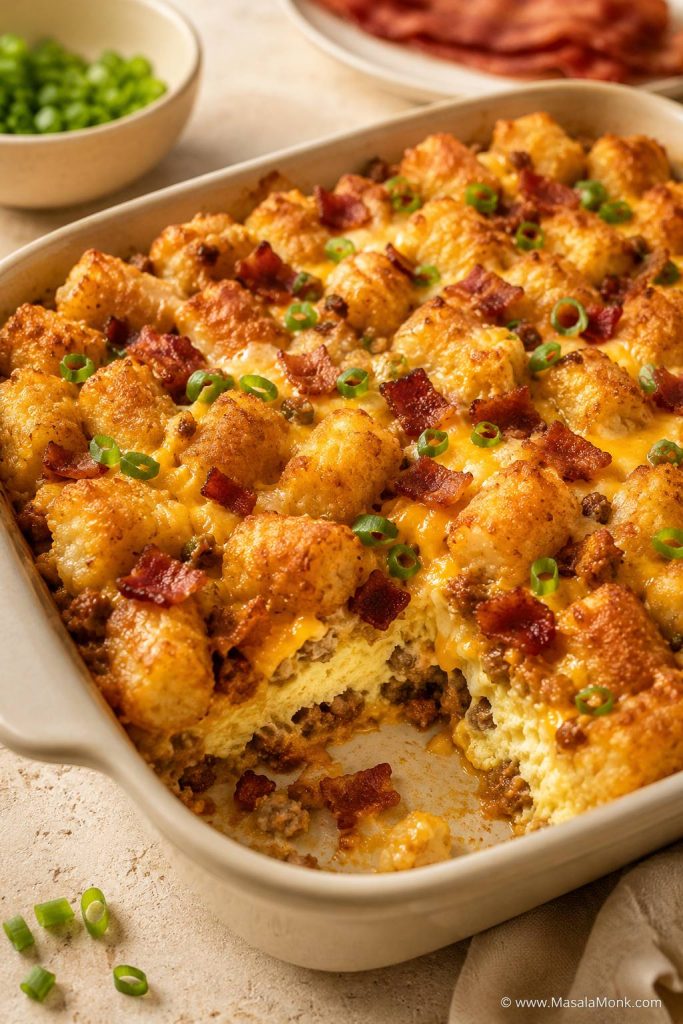
Bacon tater tot breakfast casserole
Bacon gives the casserole a smokier, saltier flavor than sausage. Use 12–16 oz / 340–454 g bacon, cook it until crisp, drain it well, and crumble it before adding it to the dish. For a few strips, this air fryer bacon guide keeps the process quick. For a full pack, oven bacon is usually easier because you get more space and less batch work.
Because bacon adds more salt and fat than sausage, go lighter with added salt and avoid pouring bacon grease into the casserole.
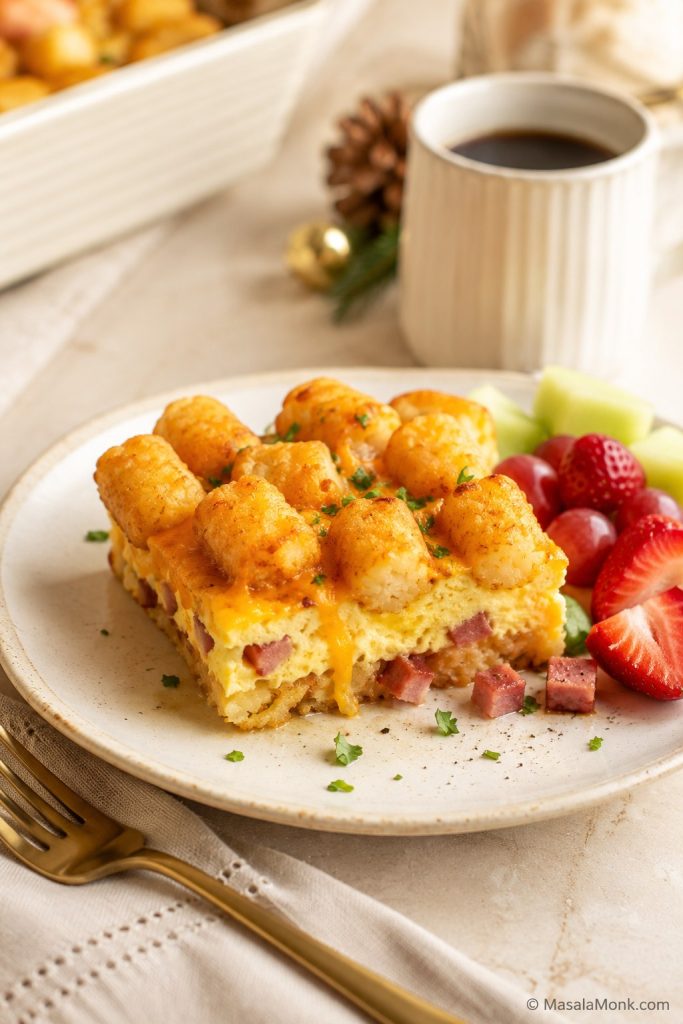
Ham and cheese tater tot casserole
Diced ham turns this into a milder, holiday-friendly brunch casserole. Use 12–16 oz / 340–454 g diced cooked ham, especially if you have leftovers from Easter, Christmas, or a weekend dinner.
Ham can be salty, so season the eggs carefully. Cheddar, Monterey Jack, Swiss, or a cheddar-Jack blend all work well, while green onions, bell peppers, or a little Dijon-style mustard in the egg mixture help balance the richness.
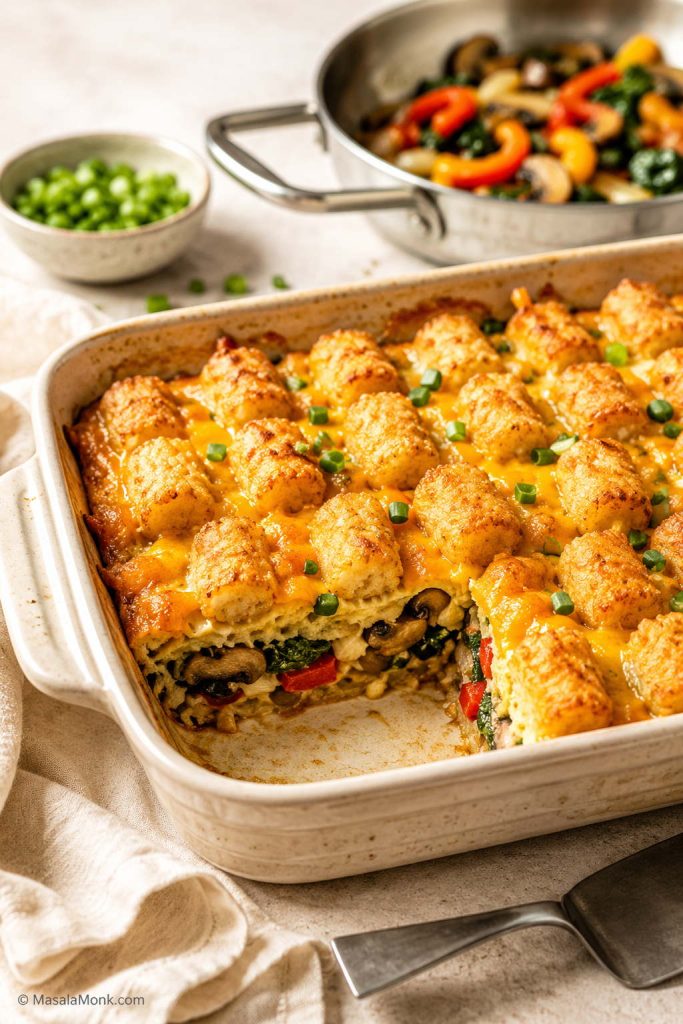
Vegetarian tater tot breakfast casserole
A vegetarian version works well as long as the vegetables are cooked first. Mushrooms, peppers, onions, spinach, broccoli, green onions, and roasted poblano peppers are all good choices.
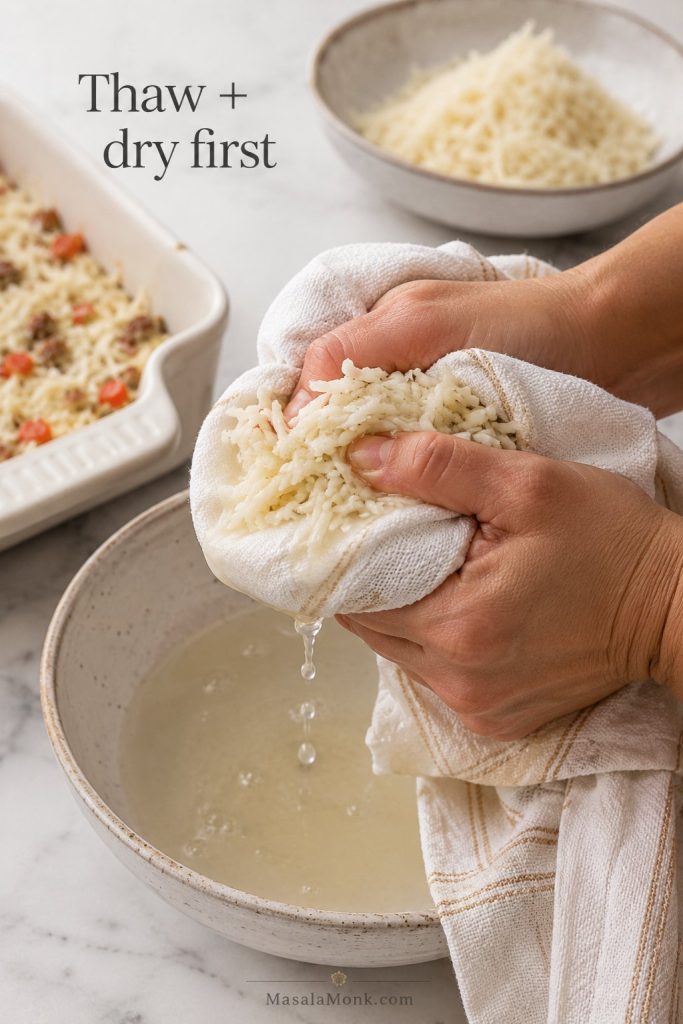
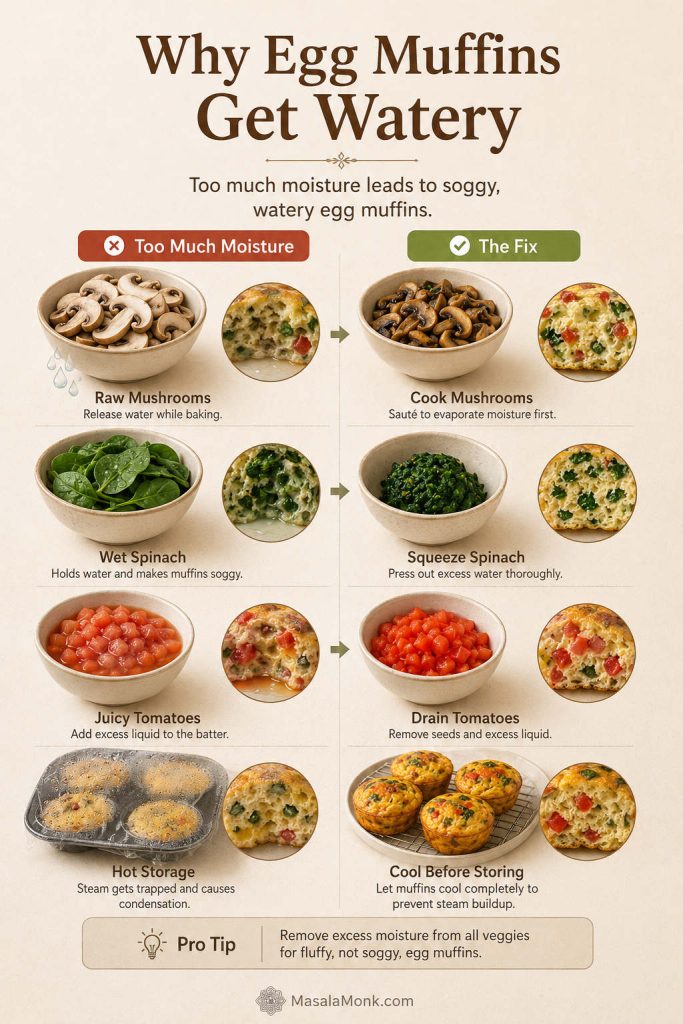
The key is managing moisture. Mushrooms, spinach, peppers, and onions can all release water as they bake. Sauté them before adding them to the casserole, and squeeze spinach dry if using frozen spinach.
Cottage cheese or high-protein version
For a higher-protein version, add 1/2 to 1 cup cottage cheese to the egg mixture and reduce the milk slightly. This makes the egg layer creamier and more filling. Blend the cottage cheese first if you want a smoother texture. For a smaller breakfast with the same creamy, higher-protein idea, try these scrambled eggs with cottage cheese.
You can also use turkey sausage and add extra egg whites, but avoid making the casserole too lean or it can bake up dry.
Make-Ahead and Overnight Tips
This is the section to read if you are making the casserole for Christmas morning, a brunch table, overnight guests, or a weekend when you do not want to think before coffee.
The tradeoff is simple: easiest morning, or best tot texture. Both work. You just decide which one matters more that day.
The best topping comes from prepping the filling ahead and adding the tots just before baking; the fully assembled overnight version is easier, but the top bakes less crisp.
| Method | What to Do | Result |
|---|---|---|
| Fully assemble overnight | Assemble the casserole, cover, and refrigerate overnight | Easiest morning, less crisp topping |
| Add tots in the morning | Cook sausage, prep egg mixture, refrigerate separately, then add tots before baking | Better browned top and clearer potato layer |
| Same-day bake | Assemble and bake right away | Most predictable texture |
Either way, let the casserole sit at room temperature while the oven preheats. That short rest takes the chill off the dish and helps the center bake more evenly.
If convenience matters most, assemble the whole casserole the night before. Cover it tightly and refrigerate. In the morning, bake it covered for the first 20–25 minutes, then uncover and continue baking until the center reaches 165°F / 74°C.
Add Tots in the Morning for Better Texture
If the topping matters most, cook the sausage and vegetables the night before, whisk the eggs and milk, and refrigerate those separately. In the morning, layer everything in the baking dish and add the tots right before baking.
If you are planning several freezer-friendly breakfasts at once, these meal prep breakfast burritos are a good companion recipe because they use the same no-soggy logic: cool the filling first, control moisture, and reheat with texture in mind. For leftover casserole slices, use the storage, freezing, and reheating section below.
Storage, Freezing, and Reheating
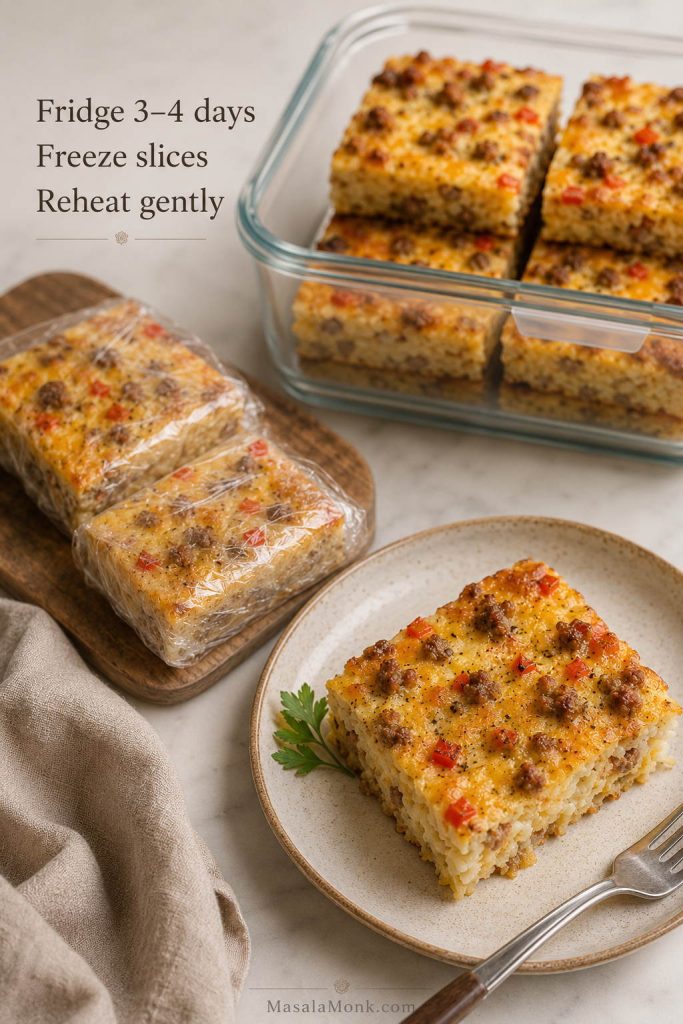
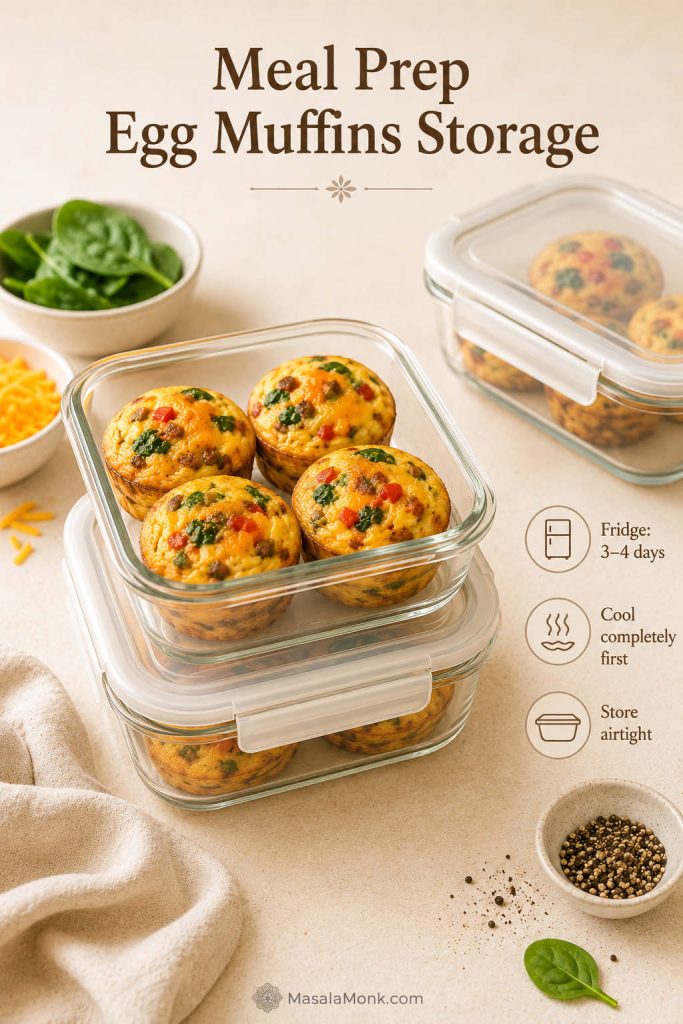
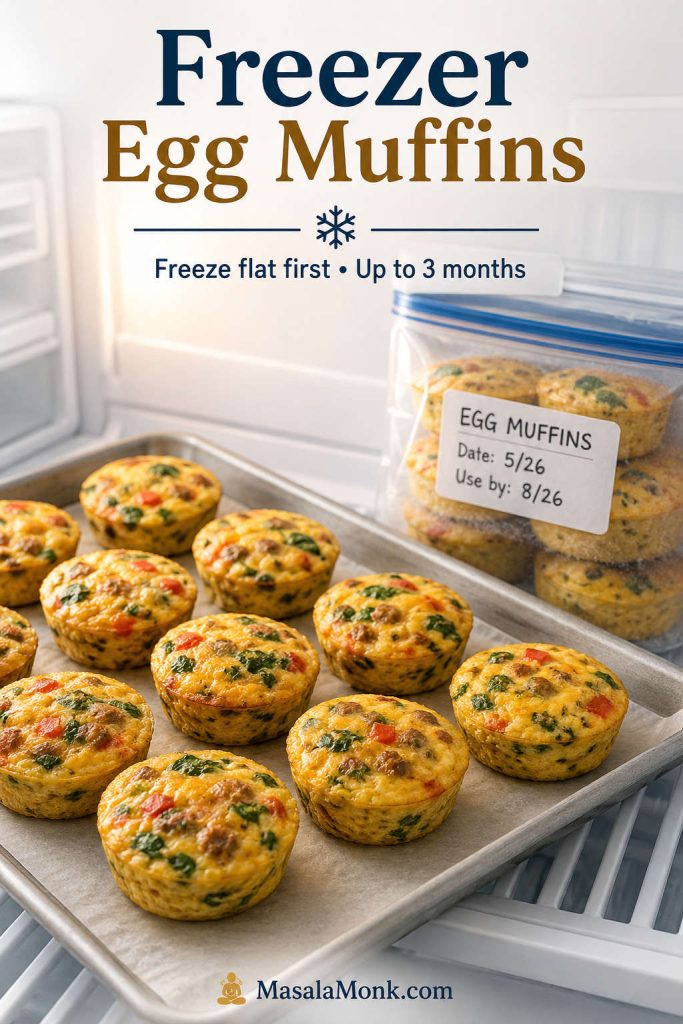
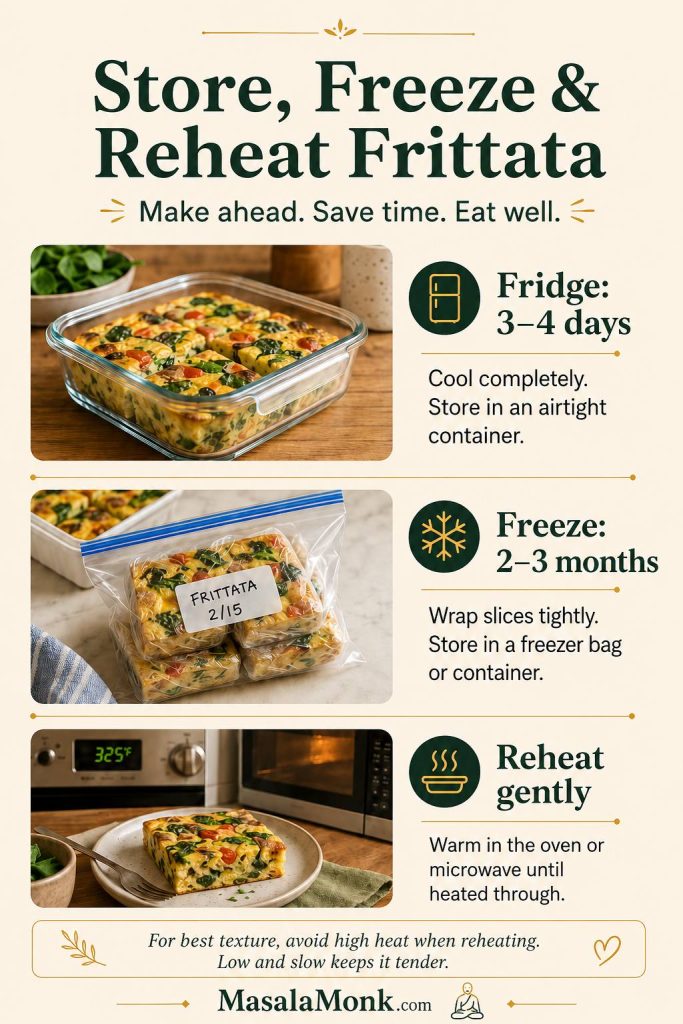
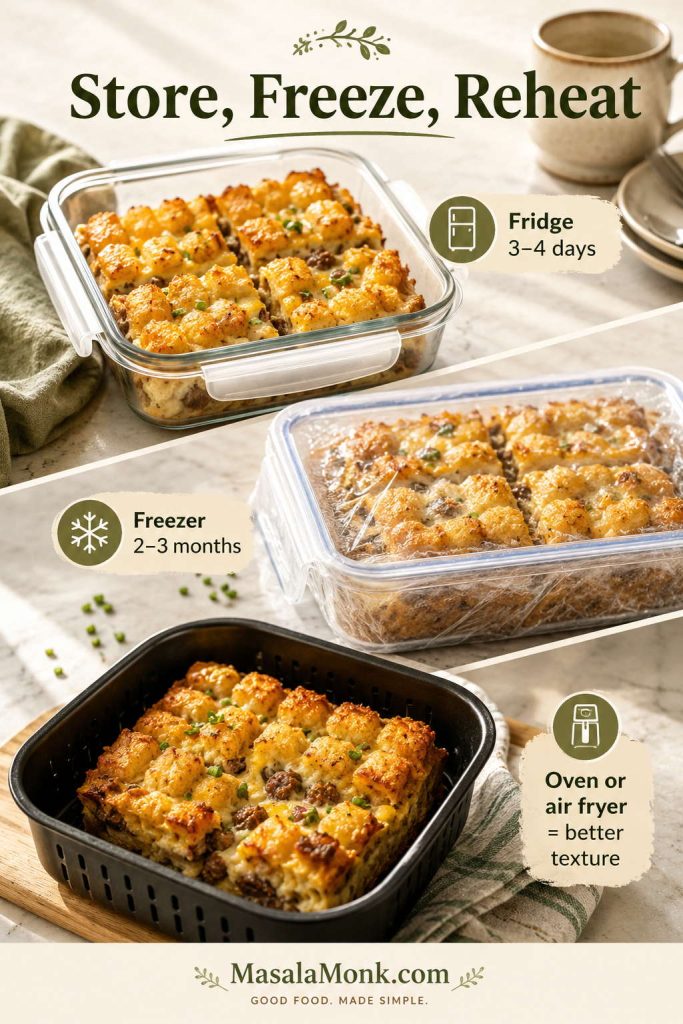
Let leftovers cool briefly, then refrigerate them in an airtight container within 2 hours. Stored properly, the casserole keeps for 3–4 days. The tots will lose some crispness as they sit, but the flavor stays good. The FoodSafety.gov cold storage chart gives the same general window for baked egg casseroles: 3–4 days in the refrigerator and 2–3 months in the freezer.
For freezing, baked portions work better than an unbaked fully assembled casserole. Wrap slices tightly or store them in freezer-safe containers for up to 2–3 months. Thaw overnight in the refrigerator before reheating.
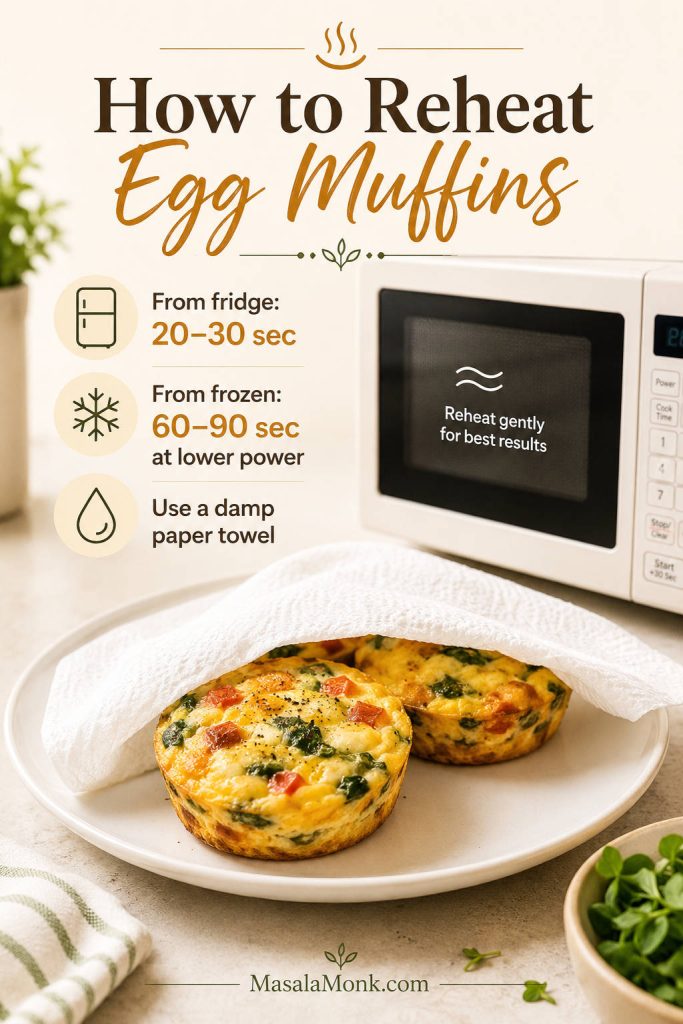
For better texture, reheat slices in a 350°F / 175°C oven or air fryer until hot. The microwave is faster, but the oven or air fryer helps the tots regain more texture than the microwave gives.
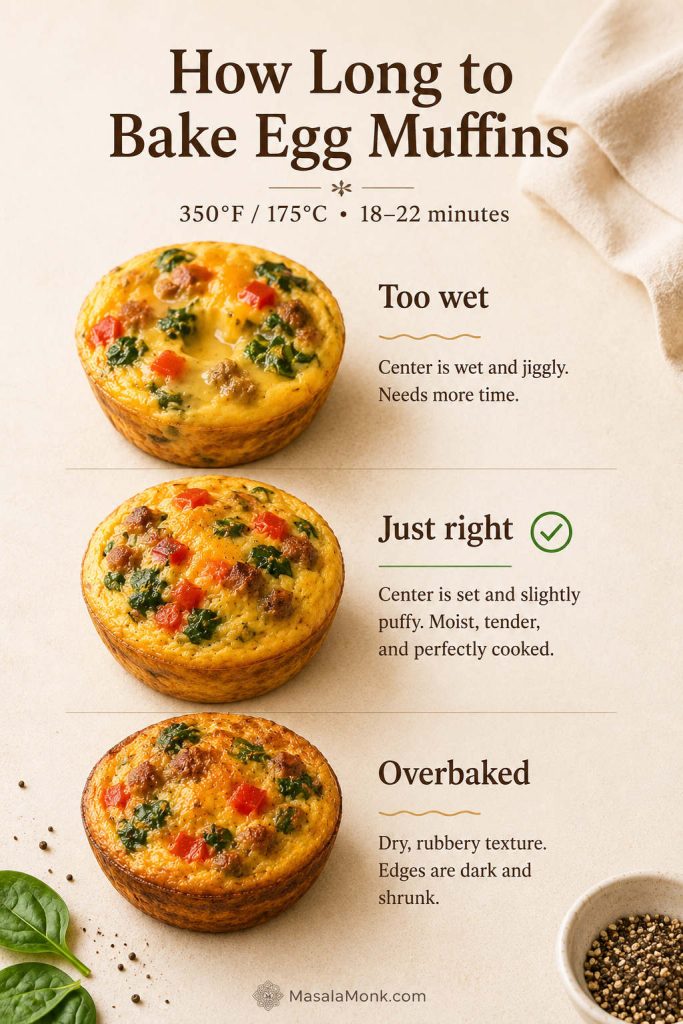
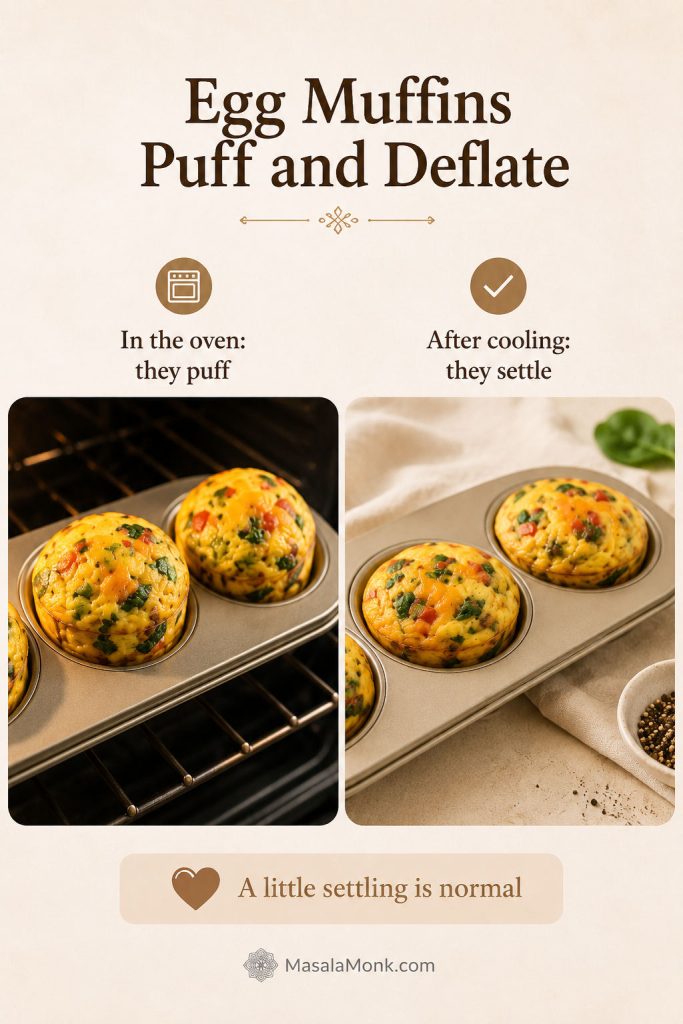
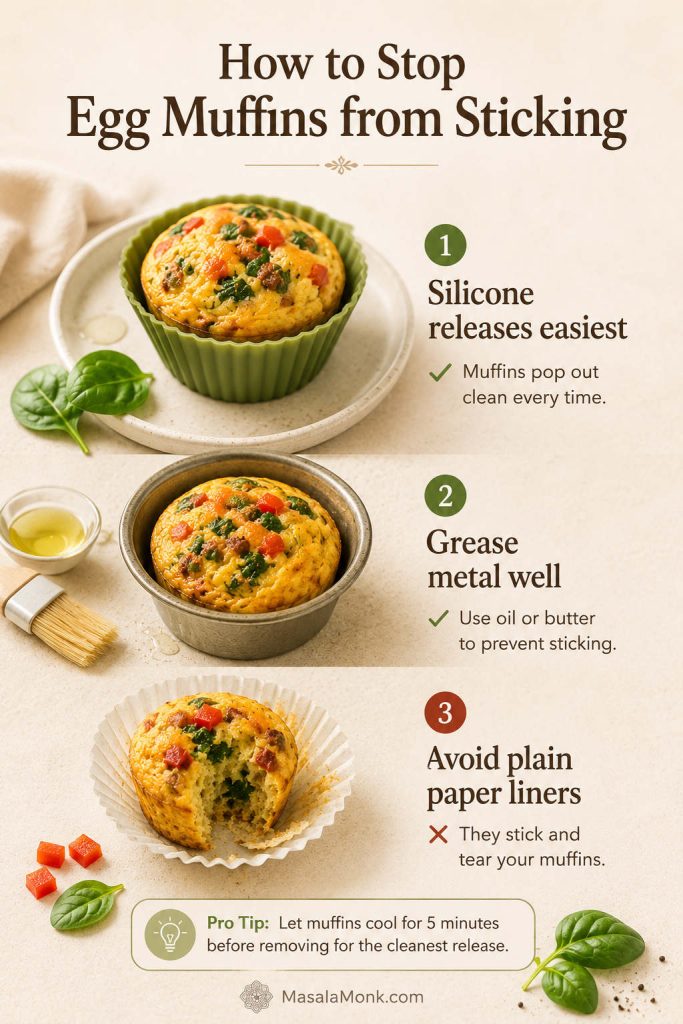
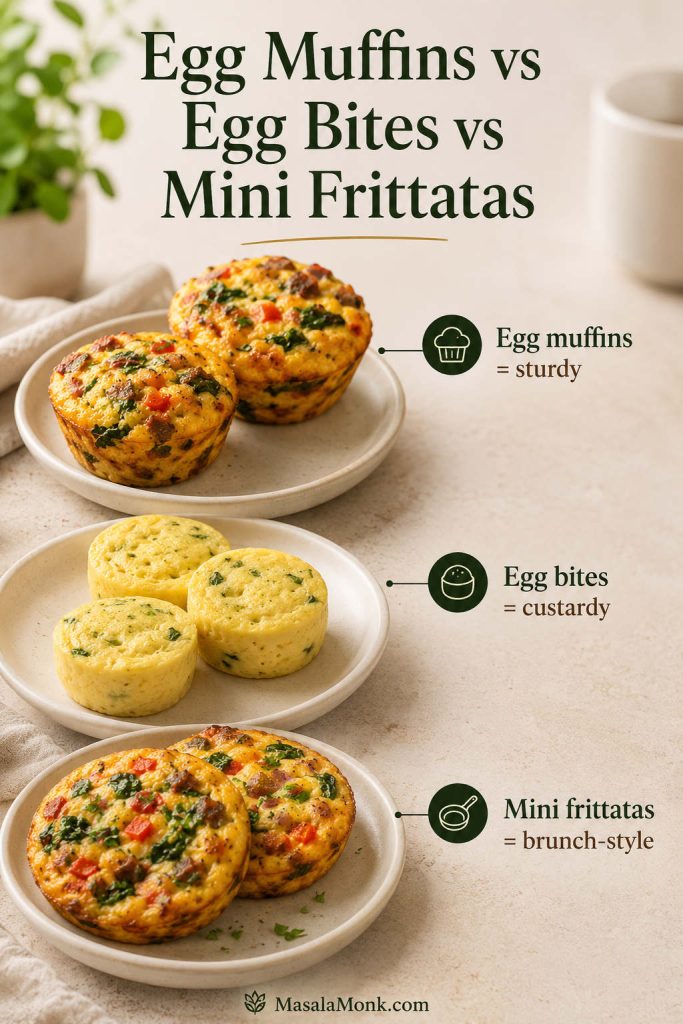
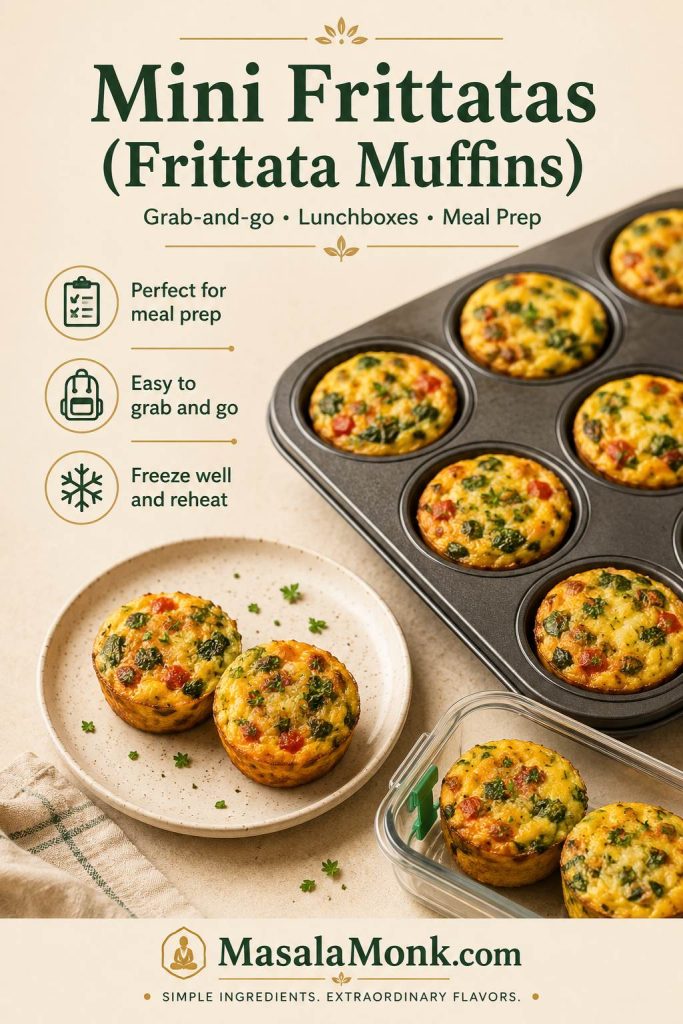
For a smaller freezer breakfast that reheats faster, these egg muffins are easier to portion, while this casserole is better when you want one big brunch pan.
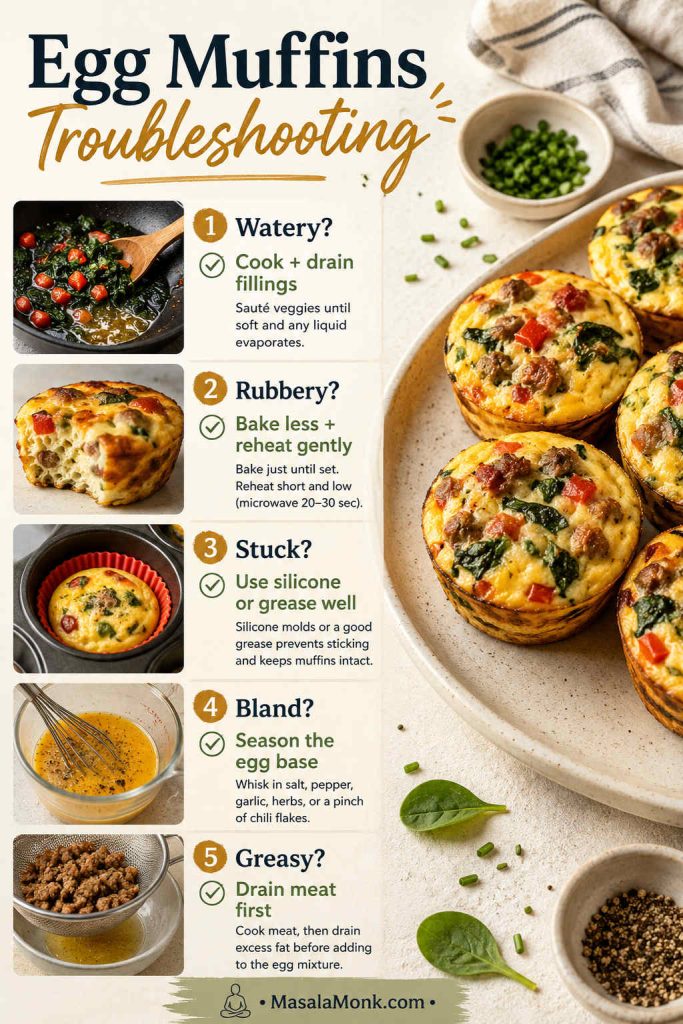
Troubleshooting
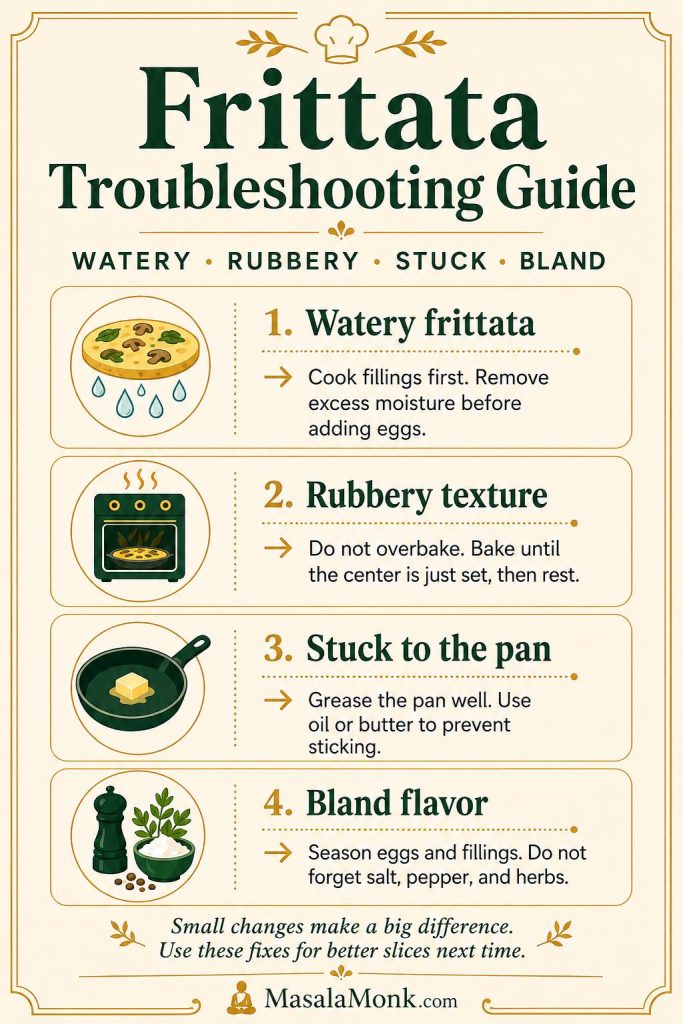
Most problems with this casserole come down to moisture, timing, or where the tots sit in the pan. The fixes are simple once you know what caused the problem.
| Problem | Likely Cause | Fix |
|---|---|---|
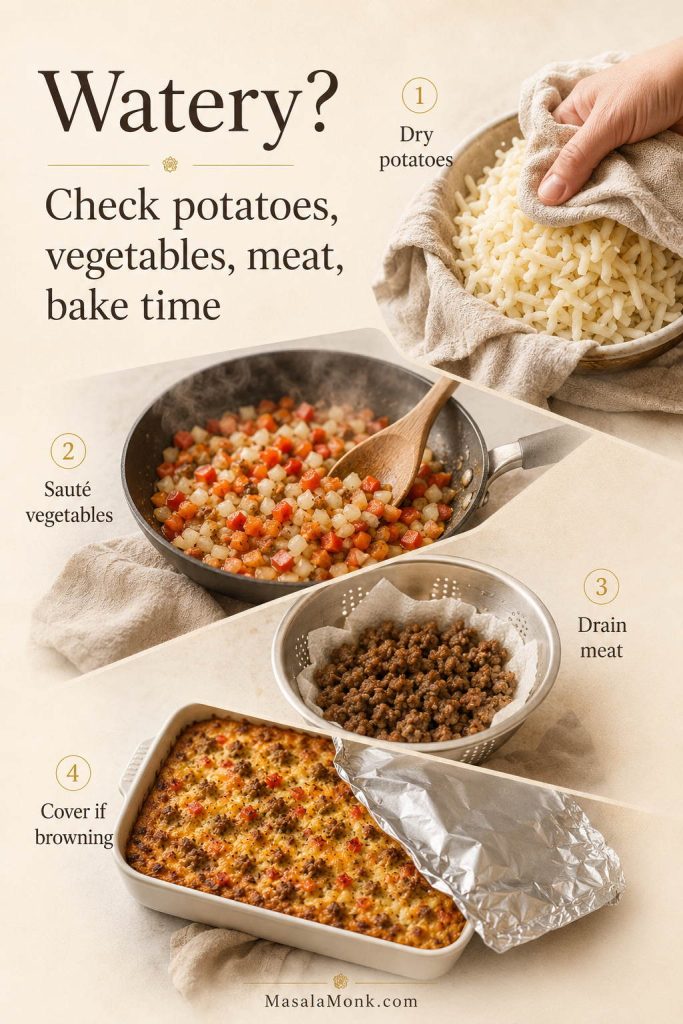
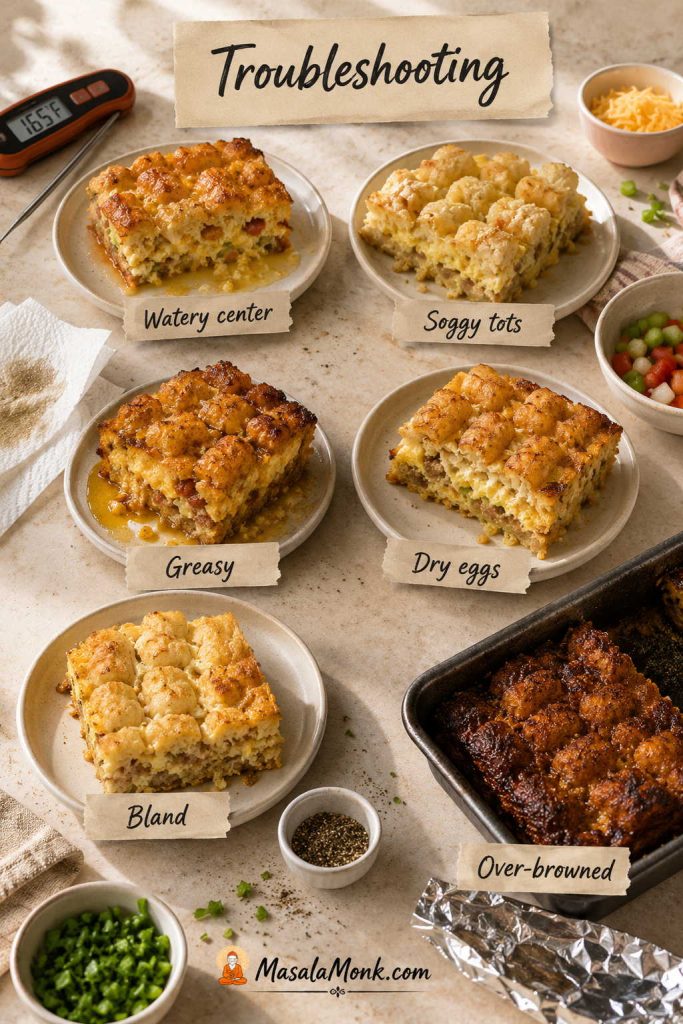
| Watery center | Raw vegetables, too much dairy, or underbaked eggs | Sauté vegetables first, use 1 cup dairy, and bake until the center reaches 165°F / 74°C. |
| Soggy or soft tots | Tots were buried, thawed, or fully assembled overnight | Use frozen tots, keep them exposed, and add them just before baking when texture matters. |
| Greasy casserole | Sausage or bacon was not drained | Drain cooked meat before layering it into the dish. |
| Dry eggs | Overbaked casserole or too little dairy | Use 1 cup milk or half-and-half and start checking near the low end of the bake time. |
| Bland flavor | Egg mixture was not seasoned | Season the eggs directly and use sharp cheese or spicy sausage. |
| Too salty | Sausage, bacon, ham, cheese, and tots all added salt | Reduce added salt and balance with vegetables, herbs, or a milder cheese. |
| Middle not setting | Casserole was cold, pan was deep, or egg layer was too thick | Bake longer, cover briefly if the top browns too fast, and check the center temperature. |
| Tots browned before eggs set | Oven runs hot or pan is too close to top heat | Loosely tent with foil and keep baking until the center is done. |
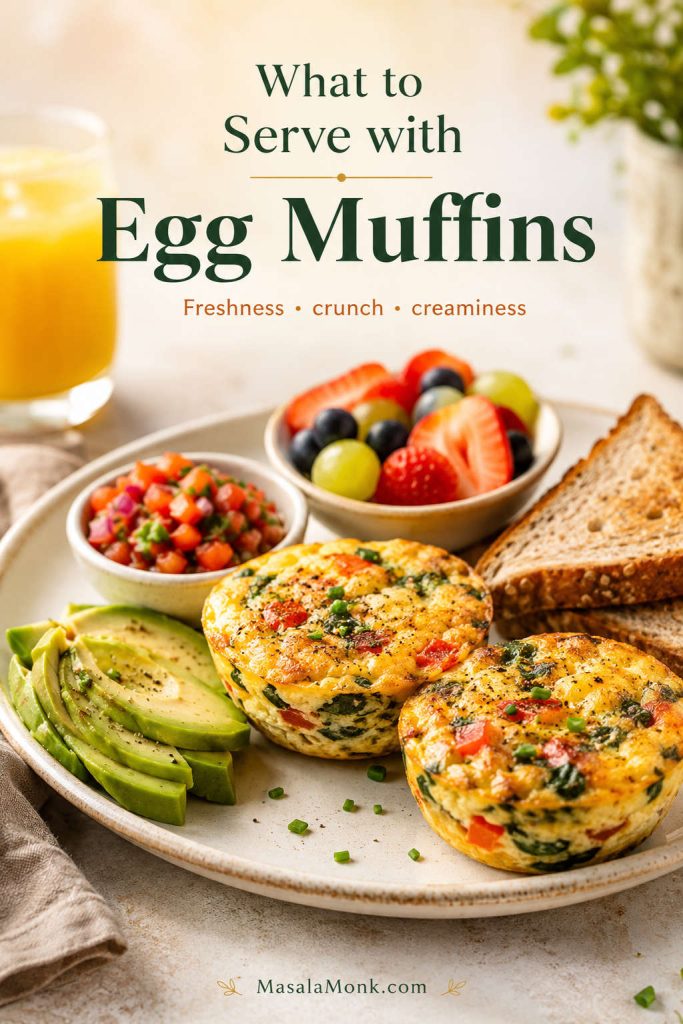
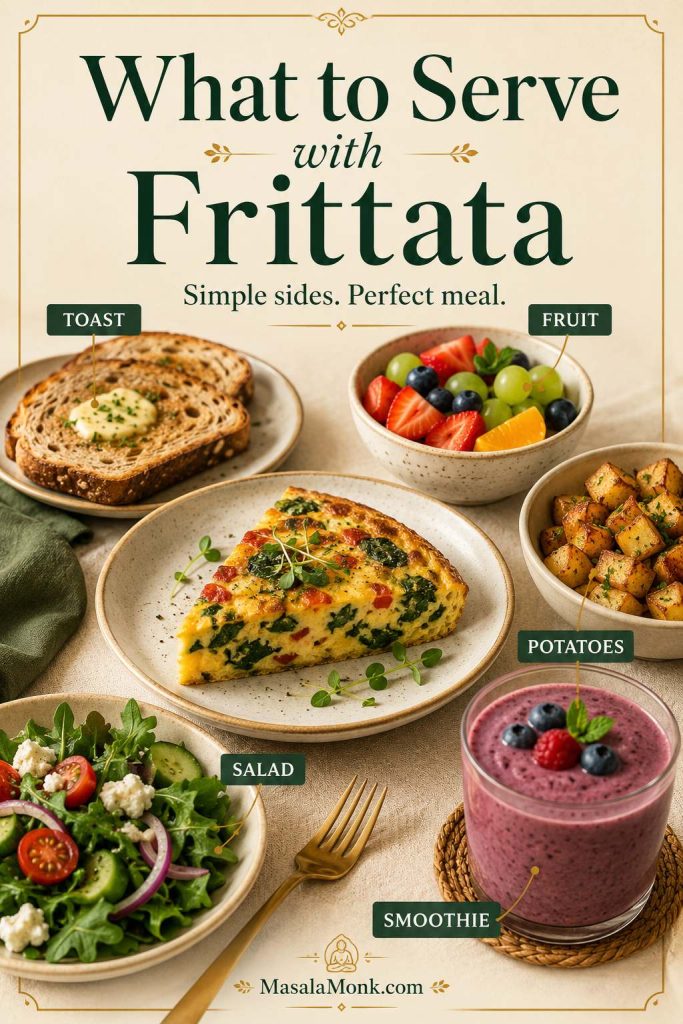
What to Serve with It
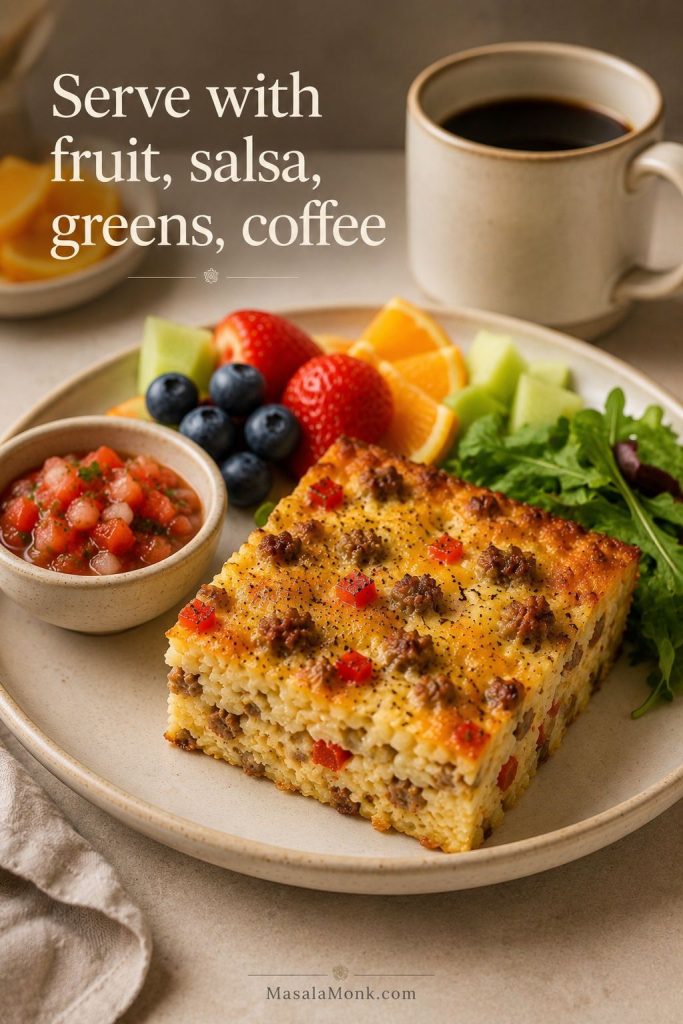
Because this casserole is hearty, fresh sides help the plate feel lighter. A bowl of berries, sliced oranges, salsa, avocado, or a sharp green salad cuts through the eggs, cheese, and potatoes.
For a brunch table, pair it with coffee, orange juice, berries, and something crisp or acidic on the side. Hot sauce, salsa, or pickled jalapeños are especially good if you use mild sausage and cheddar because they cut through the richness.
If you want something handheld and freezer-friendly instead, this breakfast burrito recipe is easier to eat on the go. For a lighter brunch side, a cold berry smoothie keeps the meal bright and easy.
Recipe Card: Tater Tot Breakfast Casserole
This tater tot breakfast casserole is a hearty 9×13 breakfast bake with sausage, eggs, melted cheese, and frozen tots arranged on top for a golden-browned potato finish.
Equipment
- 9×13-inch / 23×33 cm baking dish
- Large skillet
- Mixing bowl
- Whisk
- Measuring cups and spoons
- Instant-read thermometer, recommended
Ingredients
- 1 lb / 454 g breakfast sausage
- 1/2 cup / about 75 g diced onion, optional
- 1/2 to 1 cup / about 75–150 g diced bell pepper, optional
- 10 large eggs
- 1 cup / 240 ml whole milk or half-and-half
- 1/2 teaspoon garlic powder
- 1/2 teaspoon onion powder
- 1/2 teaspoon black pepper
- 1/2 teaspoon dry mustard, optional
- 1–2 teaspoons hot sauce, optional
- 1/2 to 3/4 teaspoon salt, depending on your sausage and cheese
- 2 cups / about 225 g shredded cheddar, Monterey Jack, Colby Jack, or a blend
- 32 oz / 907 g frozen tater tots, do not thaw
- Butter or oil, for greasing the dish
Instructions
- Preheat the oven to 350°F / 175°C. Grease a 9×13-inch / 23×33 cm baking dish.
- Cook the sausage in a large skillet over medium heat, breaking it into crumbles, until browned and cooked through.
- If using onion and bell pepper, add them to the skillet and cook until softened. Drain excess grease.
- In a large bowl, whisk the eggs, milk or half-and-half, garlic powder, onion powder, black pepper, dry mustard, hot sauce, and salt.
- Spread the sausage mixture evenly in the prepared baking dish.
- Sprinkle about 1 1/2 cups of the cheese over the sausage.
- Pour the egg mixture evenly over the filling.
- Arrange the frozen tater tots on top in a single layer.
- Bake uncovered for 50–60 minutes, until the center reaches 165°F / 74°C and the tots are golden-browned. If using the remaining 1/2 cup cheese on top, add it during the last 5–10 minutes.
- Let the casserole rest for 10 minutes before slicing.
Notes
- Keep the tots frozen and add them right before baking for the neatest topping; thawed tots soften and break more easily.
- For the best-looking top, keep most or all of the cheese under the tots. If adding cheese on top, sprinkle it lightly during the last 5–10 minutes instead of covering the tots completely.
- Bake on the center rack so the eggs cook evenly. If the tots need more color at the end, move the dish slightly higher for the last few minutes or finish briefly at 400°F / 200°C.
- Overnight choice: fully assemble for ease, or prep the filling separately and add tots in the morning for better texture.
- If baking from cold, plan on 60–70 minutes total. Cover for the first 20–25 minutes if the tots are browning before the center is done, then uncover and finish baking.
- For bacon, use 12–16 oz / 340–454 g cooked and crumbled bacon.
- For ham, use 12–16 oz / 340–454 g diced cooked ham and reduce the added salt.
Serve It from One Hot Brunch Pan
Once the filling is browned, the eggs are whisked, and the tots are added, the oven turns the dish into a breakfast people can serve themselves from — the kind of brunch that feels relaxed even when the kitchen is full.
FAQs
Do tater tots need to be thawed first?
No. Keep them frozen so they hold their shape on top. Thawed tots can soften, break apart, and sink into the egg layer instead of giving you a clear potato topping.
Is it better to put tater tots on top or bottom?
Put them on top if you want a browned, classic tater tot topping. Put them on the bottom if you prefer a softer, hotdish-style casserole where the tots absorb more of the egg mixture.
How many eggs go in a 9×13 tater tot breakfast casserole?
Ten large eggs are a good middle ground for a 9×13 pan with 32 oz / 907 g tots. Eight eggs will make it a little lighter and more potato-heavy; 12 eggs will make it firmer and more egg-forward.
Why did my casserole turn watery?
The most common causes are raw vegetables, too much milk, greasy sausage, or an underbaked center. Cook vegetables first, drain meat well, keep the dairy to about 1 cup, and bake until the center reaches 165°F / 74°C.
How far ahead can I assemble it?
Assemble it the night before and refrigerate it, or prep the sausage and egg mixture separately and add the tots in the morning. Fully assembled is easiest; morning-added tots give the better topping.
Does this casserole freeze well?
Baked portions freeze better than an unbaked fully assembled casserole. Let it cool, slice it, wrap portions tightly, and freeze for up to 2–3 months. Reheat in the oven or air fryer for better texture than the microwave gives.
What is the difference between tater tot breakfast casserole and breakfast hotdish?
The terms can overlap. “Breakfast hotdish” is often used for a hearty baked dish with potatoes, eggs, cheese, and meat, especially in Midwest-style cooking. This recipe fits that style, though most readers will recognize it as an egg-and-tot breakfast casserole or brunch bake.
What can I use instead of sausage?
Use cooked bacon, diced ham, turkey sausage, chicken sausage, chorizo-style sausage, sautéed vegetables, or a mix of vegetables and cheese. If you skip meat entirely, cook and drain the vegetables well so the casserole does not turn watery.
Can I use hash browns instead of tater tots?
Yes, but the recipe becomes a different style of breakfast casserole. Shredded hash browns create a softer potato base, while frozen tots give this version a more defined, golden topping. If swapping them here, use thawed shredded hash browns and expect a softer, less crisp casserole.