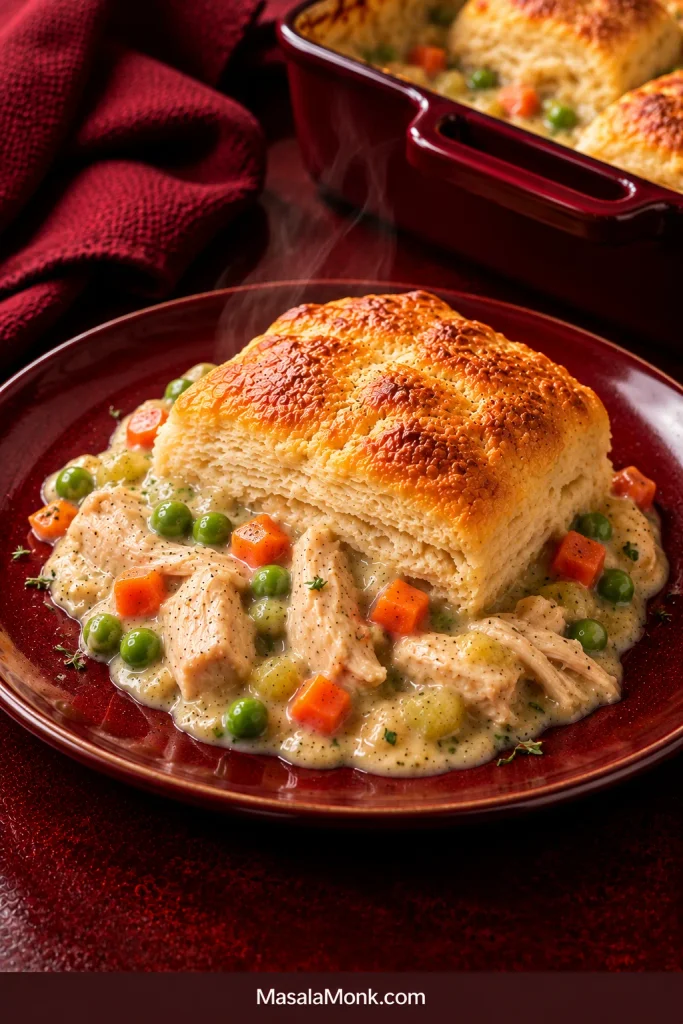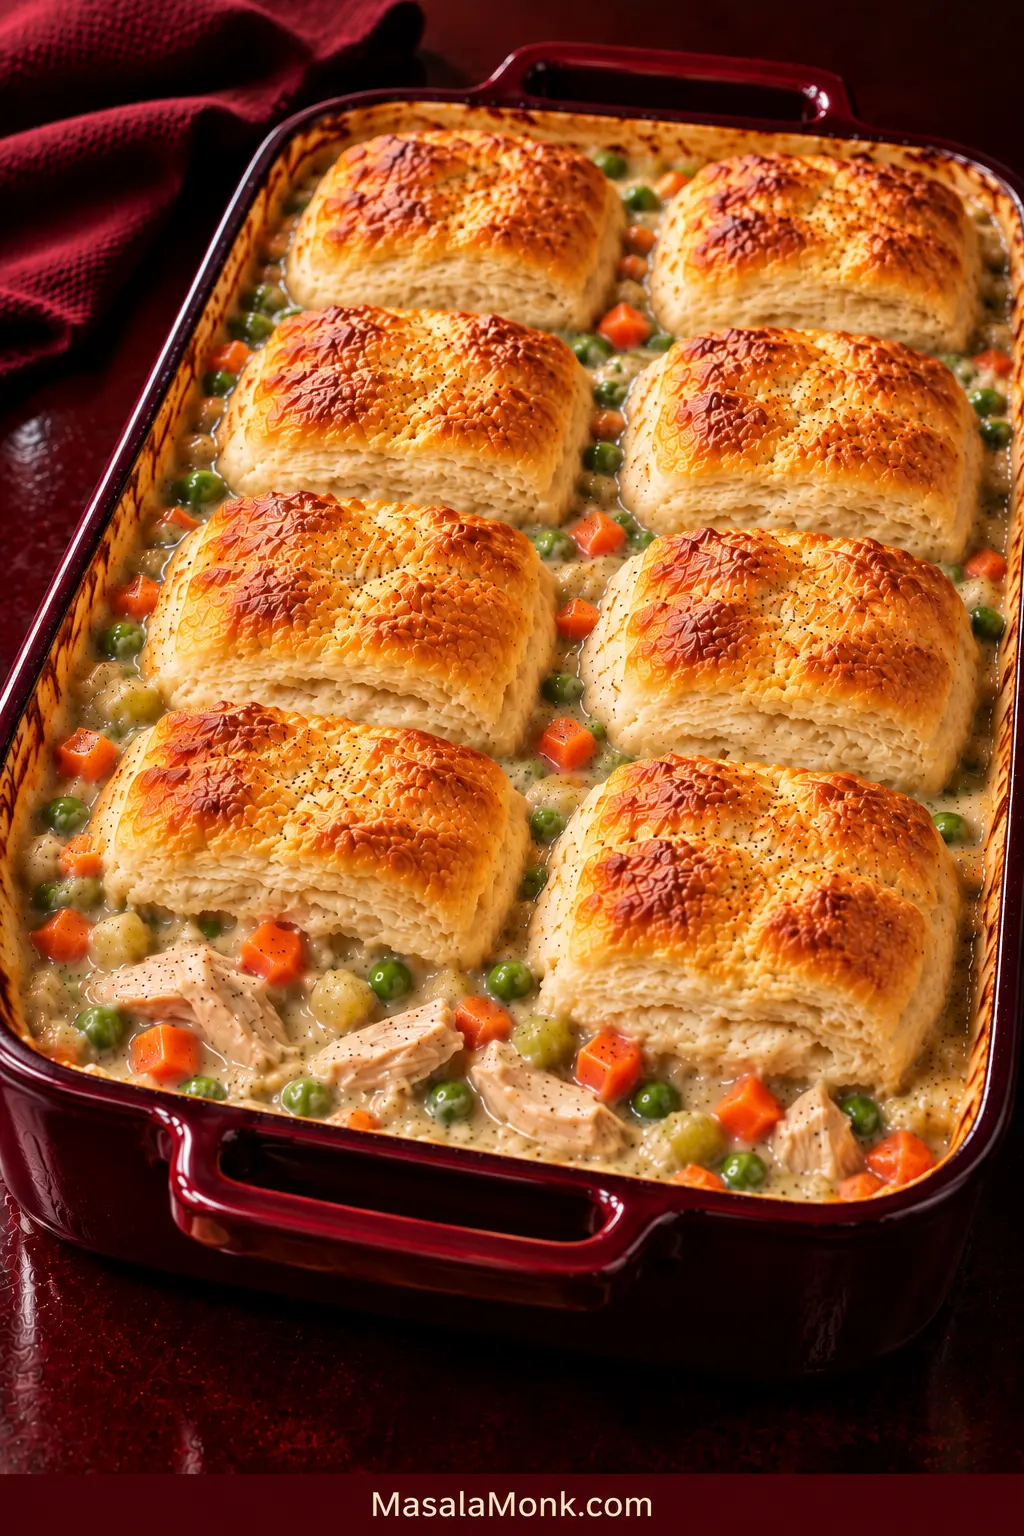
This is the version for the night when you want chicken pot pie but not a pastry project. You still make a proper creamy filling, but cooked chicken and refrigerated biscuits take the fiddliest parts off your plate.
For an easy chicken pot pie casserole, this recipe builds the filling with a quick butter-and-flour gravy instead of condensed soup, while refrigerated biscuits handle the topping.
A good scoop catches chicken, vegetables and plenty of gravy with a piece of biscuit that flakes on top and stays tender underneath. That gravy-soft bottom is part of the appeal; gummy dough in the middle is not.
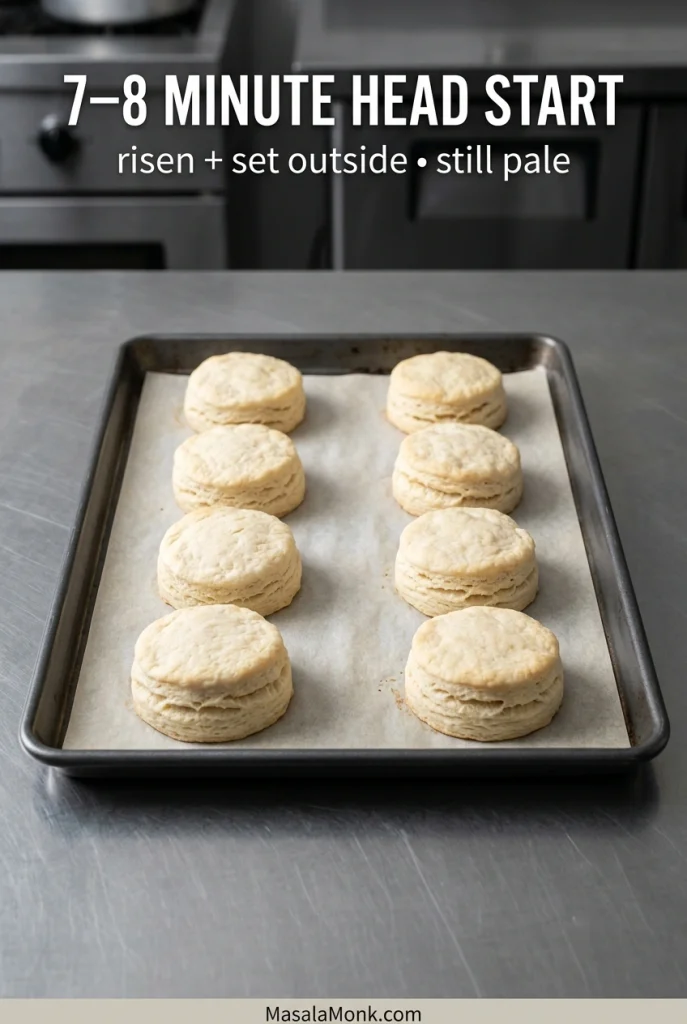
The biscuits get a short head start before they meet the gravy, so their centers have a chance to cook through before the tops get too dark.
Quick Answer
Chicken pot pie casserole is creamy chicken-and-vegetable pot pie filling baked under biscuits instead of pie crust. Plan on about 60–70 minutes start to finish. Bake this version at 375°F / 190°C in a 9×13-inch / 23×33 cm dish.
Partially bake the biscuits first, then set them over filling that is already hot and properly thickened. Finish until the gravy is bubbling between the biscuits and one near the center opens up fluffy, with no gummy raw dough inside.
The rule to remember: hot filling, thick gravy, biscuits with a head start.
In This Guide
Recipe & Key Checkpoints
Shortcuts, Storage & Serving
Easy Chicken Pot Pie Casserole Recipe
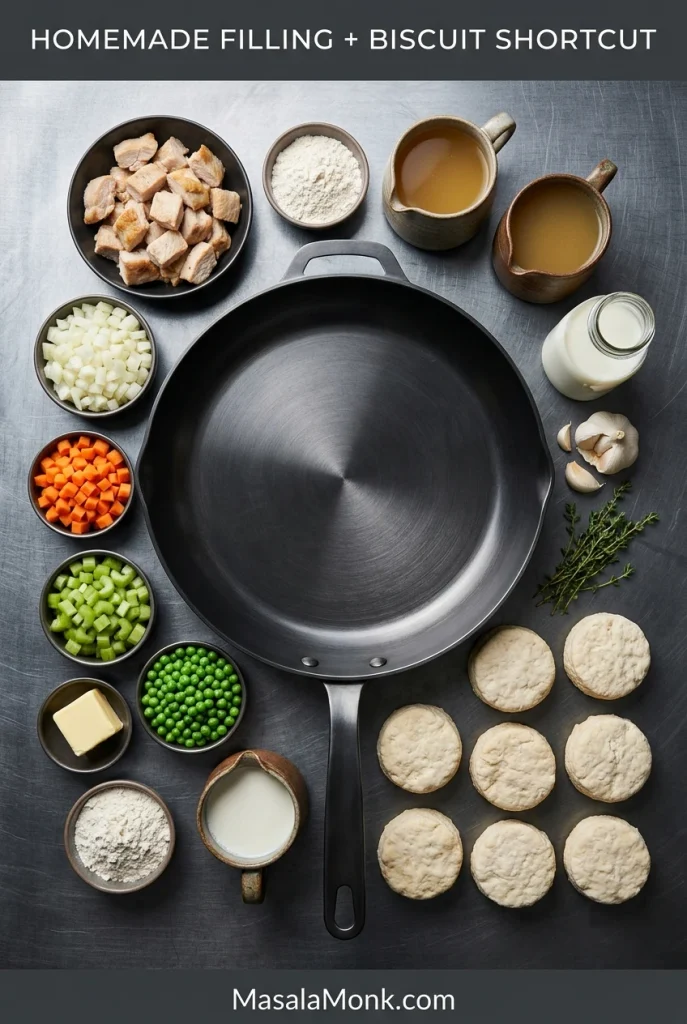
For the creamy chicken filling
- 4 tablespoons unsalted butter / 57 g
- 1 medium yellow onion, diced, about 1 cup / 150 g
- 2 medium carrots, cut into small, even dice, about 1 cup / 130 g
- 2 celery ribs, cut into small, even dice, about ½ cup / 60 g
- 2 garlic cloves, minced / about 6 g
- ⅓ cup all-purpose flour / 40–42 g
- 2 cups low-sodium chicken broth / 475 ml, plus 2–4 tablespoons / 30–60 ml more only if needed
- ¾ cup whole milk / 180 ml
- 1 teaspoon dried thyme
- ½ teaspoon freshly ground black pepper, plus more to taste
- ½ teaspoon poultry seasoning, optional
- ½ teaspoon fine salt to start, plus more after tasting
- 4 cups cooked chopped or shredded chicken / about 500–550 g cooked weight
- 1 cup frozen peas / about 140–150 g; no need to thaw
Rotisserie chicken and leftover roast chicken both work well. If you are cooking chicken specifically for the casserole, our baked chicken breast recipe is an easy starting point. Starting with raw chicken? Cook it fully first, then measure 500–550 g cooked chicken.
Rotisserie chicken can already be quite salty, so taste the gravy after the chicken goes in before adding more salt. Poultry seasoning is optional, but it gives the filling a more familiar pot-pie flavor.
For the biscuit topping
- 8 large refrigerated flaky biscuits, about 16.3 oz / 462 g total, such as a Grands-style biscuit
- 1 tablespoon melted butter / 14 g
The shortcut is deliberate: cooked chicken and refrigerated biscuits save time, while the homemade gravy is where you control thickness and seasoning.
Equipment
- 9×13-inch / 23×33 cm baking dish
- Large skillet or sauté pan
- Rimmed baking sheet
- Parchment paper
- Whisk
- Wooden spoon or silicone spatula
- Aluminum foil, if needed
1. Start the biscuits
Heat the oven to 375°F / 190°C. Line a rimmed baking sheet with parchment and arrange the biscuits with some space between them.
Bake for about 7–8 minutes. Package times vary, so let the biscuits tell you when to stop: they should have started rising and setting on the outside but still look pale and clearly underdone.
While the biscuits bake, begin the vegetables. After 7–8 minutes, take the biscuits out and set them aside; leave the oven at 375°F / 190°C.
2. Soften the vegetables
Melt the butter in a large skillet over medium heat. Add the onion, carrots and celery and cook for about 6–8 minutes, stirring occasionally. Keeping the carrot and celery fairly small and even helps them soften at the same rate.
The onion should be soft and translucent. Bite a piece of carrot or celery if you are unsure; it should be noticeably softer but still hold its shape. Add the garlic and cook for about 30 seconds, just until fragrant.
3. Make the gravy
Sprinkle the flour over the vegetables and stir for 1–2 minutes. Slowly whisk in the 2 cups / 475 ml broth, starting with a small splash. Once the roux is smooth, continue adding the rest gradually. Stir in the milk, thyme, black pepper, poultry seasoning if using, and the initial ½ teaspoon salt.
Bring the sauce to a gentle simmer and cook for about 3–5 minutes, stirring frequently.
Drag a spatula across the bottom of the skillet. The path should remain visible briefly before the gravy flows back together. That’s the consistency you want before the chicken goes in.

4. Add the chicken and peas
Fold in the cooked chicken and frozen peas. Cook for another 2–3 minutes, until the chicken is hot and small bubbles are breaking through the filling.
The gravy should coat the chicken and vegetables while still moving easily when stirred. If it feels too tight, add the reserved broth a tablespoon at a time.
Taste now. The filling should already be something you’d happily eat on its own; the biscuits are finishing the casserole, not rescuing bland gravy. Add more salt, pepper or thyme only if it needs it.
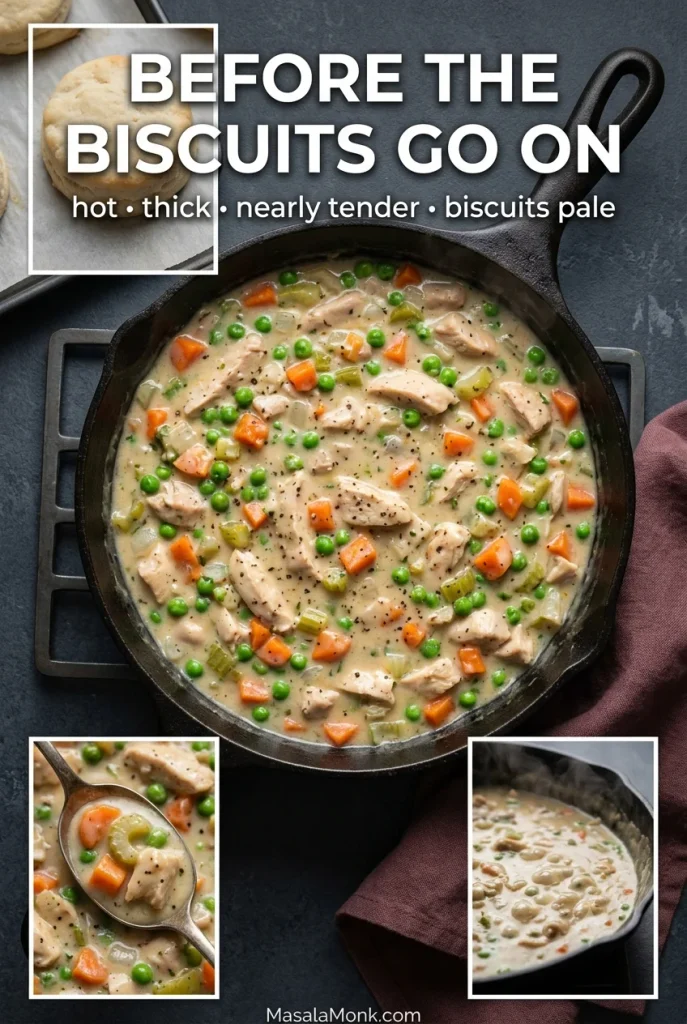
Before the Biscuits Go On
Take a quick look at four things:
- Vegetables: nearly tender.
- Filling: hot, with small bubbles breaking through.
- Gravy: properly thickened but still easy to stir.
- Biscuits: partly risen and set, but still pale.
Anything lagging is easier to correct now than after the biscuits go on.
5. Assemble the casserole
Transfer the filling to the baking dish and spread it evenly.
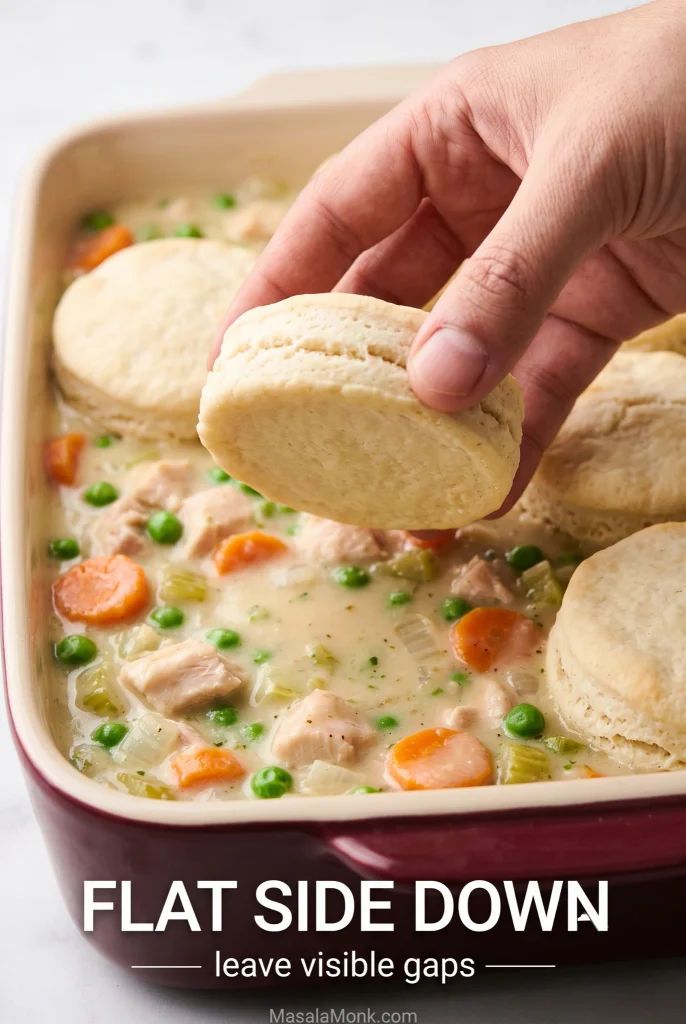
Arrange the partially baked biscuits over the top in two rows of four. They do not need to touch; leave some visible filling between them.
Transfer the biscuits with the flat sheet-pan side facing down against the filling. Brush the exposed tops lightly with melted butter.
6. Finish in the oven
Bake for about 15–20 minutes, until gravy is bubbling through some of the gaps and the biscuit tops are deep golden brown.
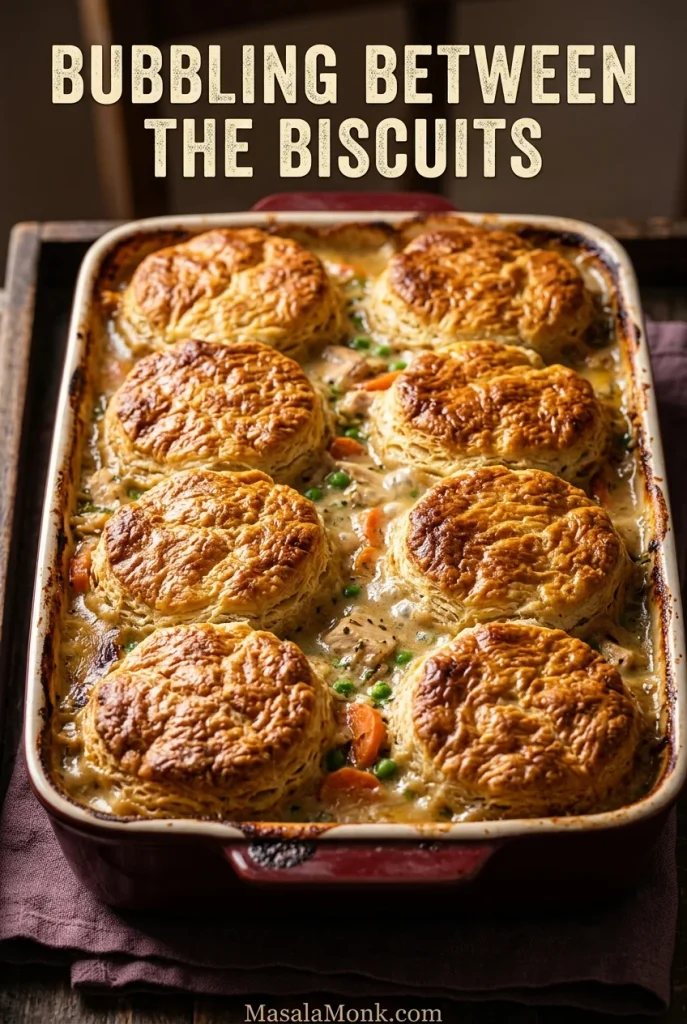
If the tops get there first, no problem. Cover the dish loosely with foil and give the centers more time.
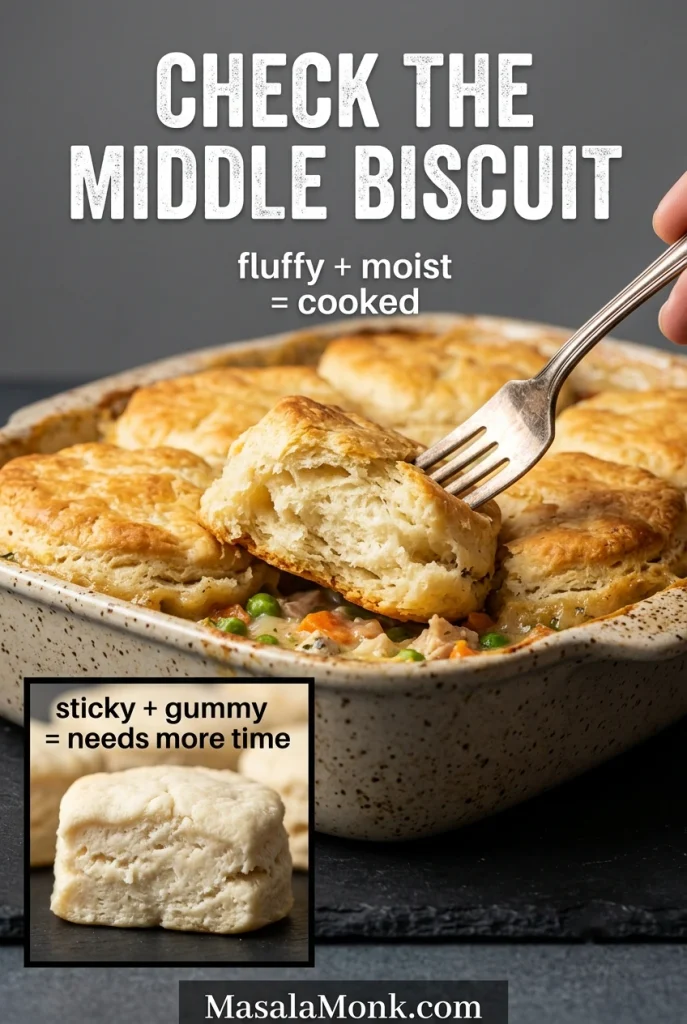
Check a biscuit near the middle rather than one at the edge. Open it gently: the center should be fluffy and cooked, not sticky, gummy or pasty.
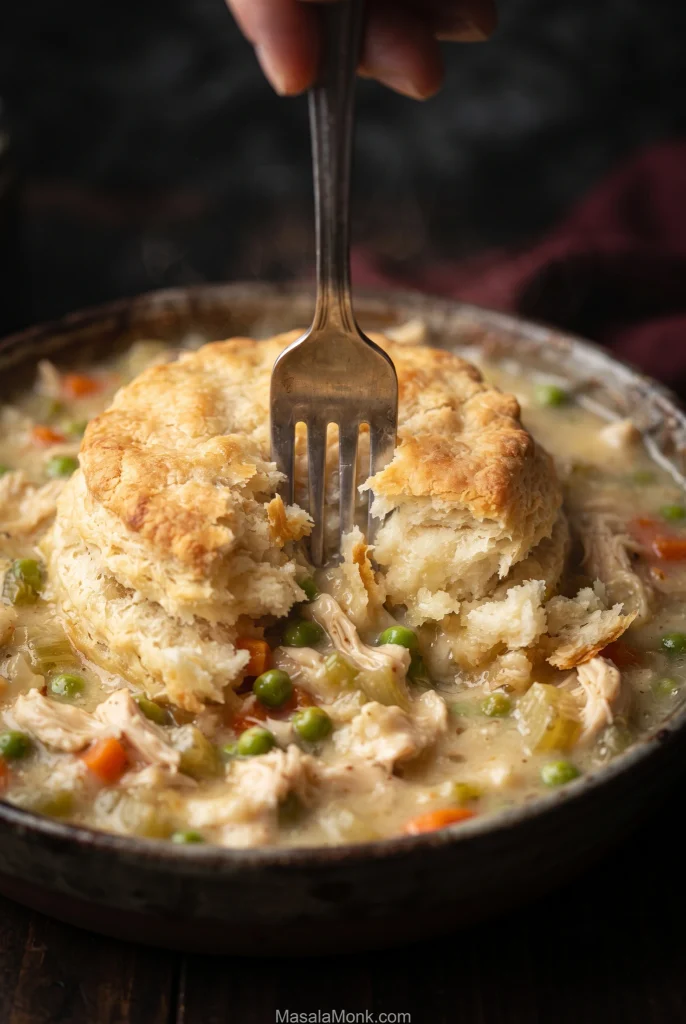
By now, the biscuits should be buttery and toasted on top, with creamy filling bubbling around them. Rest the casserole for 10 minutes so the gravy settles and each scoop holds together better.
Why Are the Biscuits Raw Underneath?
Thick biscuits can brown on top before the center is cooked through. The top bakes in dry oven heat while the underside sits over moist gravy, so the middle can lag behind.
Start with filling that is already hot. Put biscuit dough over refrigerator-cold gravy and much of the final bake gets spent warming the casserole instead of cooking the dough.
Large refrigerated biscuits become quite thick as their layers rise, so the center has farther to cook than the browned top suggests. The short first bake begins setting those layers before they meet the gravy.
Which Side Goes Down?
Put the flat, partially baked side down against the filling. The sheet-pan side will look flatter and feel firmer. That is the side you want on the gravy.
The biscuits do not need to form a solid lid. Leave some visible filling between them. Gravy bubbling through those gaps is exactly what you want to see.
Check the Middle Biscuit, Not the Prettiest One
Check a biscuit near the center before you take the casserole out. The biscuits around the edges often finish first, so the prettiest golden one may not tell you what is happening in the middle of the dish.
Soft Underneath Does Not Automatically Mean Raw
A cooked biscuit can be tender where it touches the gravy. The best part is where biscuit and filling meet: flaky above, gravy-soft underneath.
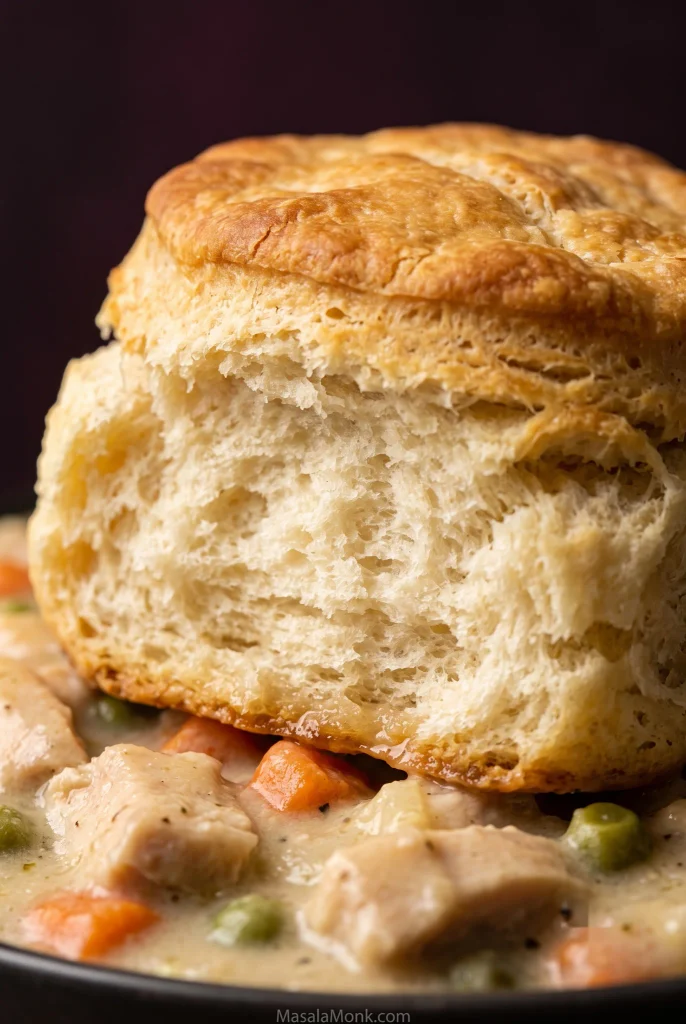
| Cooked but tender | Still underdone |
|---|---|
| Moist where it touches the gravy | Sticky or pasty inside |
| Fluffy layers through the center | Dense or gummy middle |
| Pulls apart cleanly | Dough smears or stretches |
For completely crisp bottoms, bake the biscuits separately and place one over each serving.
What If My Biscuits Are a Different Size?
The 7–8 minute head start in this recipe is for large refrigerated flaky biscuits. Very tall refrigerated biscuits may need a little longer; smaller ones may need less.
Homemade cut biscuits and drop biscuits have different moisture and thickness, so they need their own timing even though the same doneness cues still matter.
For something intentionally softer and more dumpling-like, our Crockpot Chicken and Dumplings with Biscuits cooks canned dough in a much steamier environment. With the large refrigerated biscuits used here, thickness and appearance matter more than an exact package-to-package minute.
How Thick Should Chicken Pot Pie Filling Be?
The filling should coat the chicken and vegetables but still move when stirred. If it runs freely around them, simmer it longer. When it sits stiffly in the pan, loosen it with broth a tablespoon at a time.
If Your Casserole Isn’t Coming Together
| Problem | Do this now |
|---|---|
| Biscuits are browning before the centers cook | Tent loosely with foil and keep baking until a biscuit near the center is fluffy and cooked through. |
| Filling is watery before assembly | Simmer uncovered until it thickens enough to coat the chicken and vegetables. |
| Filling is too thick | Add broth a tablespoon at a time until the filling moves easily when stirred. |
| Vegetables are still hard | If they are only slightly firm, serve as is. If they are genuinely hard, lift off the biscuits, transfer the filling back to a skillet and cook until tender. |
| The filling tastes flat | Season individual servings with salt and pepper; once the biscuits are on, it is difficult to correct the whole casserole evenly. |
Chicken Pot Pie Casserole with Cream of Chicken Soup
If you want to keep the biscuit method but skip making the roux, this condensed-soup shortcut cuts down the stovetop work. Start thick and loosen only if needed.
- Use 2 tablespoons butter / 28 g to soften the onion, carrots and celery.
- Skip the flour and the main recipe’s broth-and-milk quantities.
- Stir in 2 cans condensed cream of chicken soup, 10.5 oz / 298 g each.
- Start with ¾ cup / 180 ml milk or low-sodium chicken broth.
Heat everything thoroughly before deciding whether it needs more liquid. Add up to another ¼ cup / 60 ml, a few tablespoons at a time, only if the filling feels too thick.
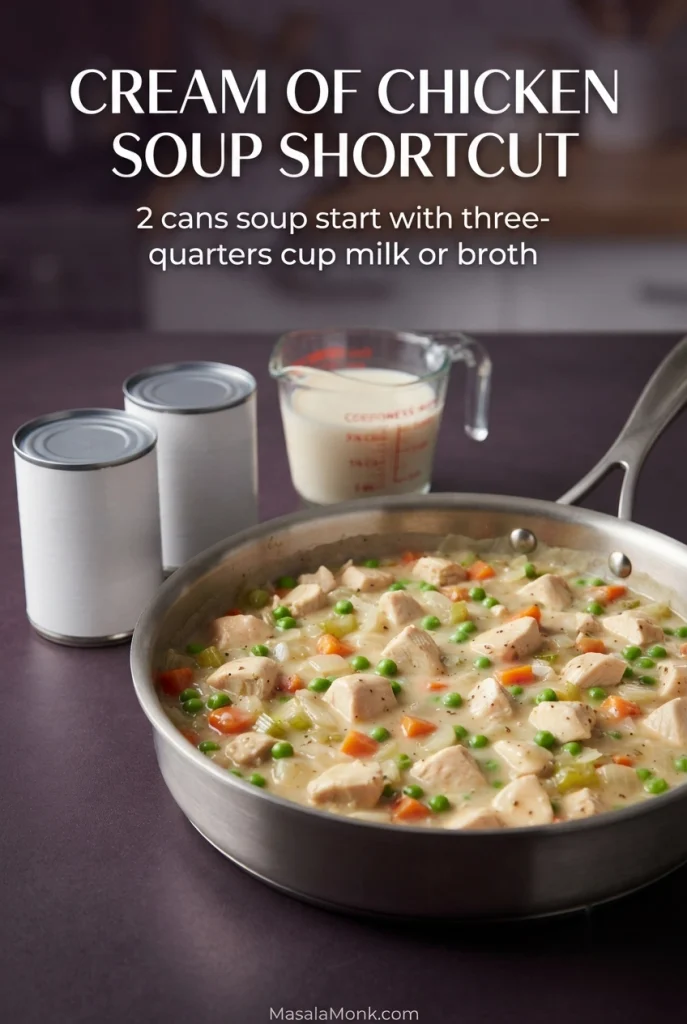
Fold in the chicken and peas, taste for salt, then continue with the partially baked biscuits.
One can of cream of chicken can also be replaced with cream of mushroom. If cream of mushroom is what you keep on hand, it also works in our Cream of Mushroom Chicken.
Chicken Pot Pie Casserole Substitutions
Most of the filling is easy to adapt; the two things to watch are extra moisture and ingredients that need longer to soften.
| If you have… | What to do |
|---|---|
| Leftover turkey | Swap it for the chicken 1:1. For a pastry-topped version, use our Turkey Pot Pie Recipe. |
| Frozen mixed vegetables | Heat them until the densest pieces are nearly tender before assembly. |
| Potatoes | Dice them small and cook or par-cook them first. |
| Mushrooms | Sauté until their excess moisture has cooked away before making the gravy. |
Can You Make Chicken Pot Pie Casserole Ahead?
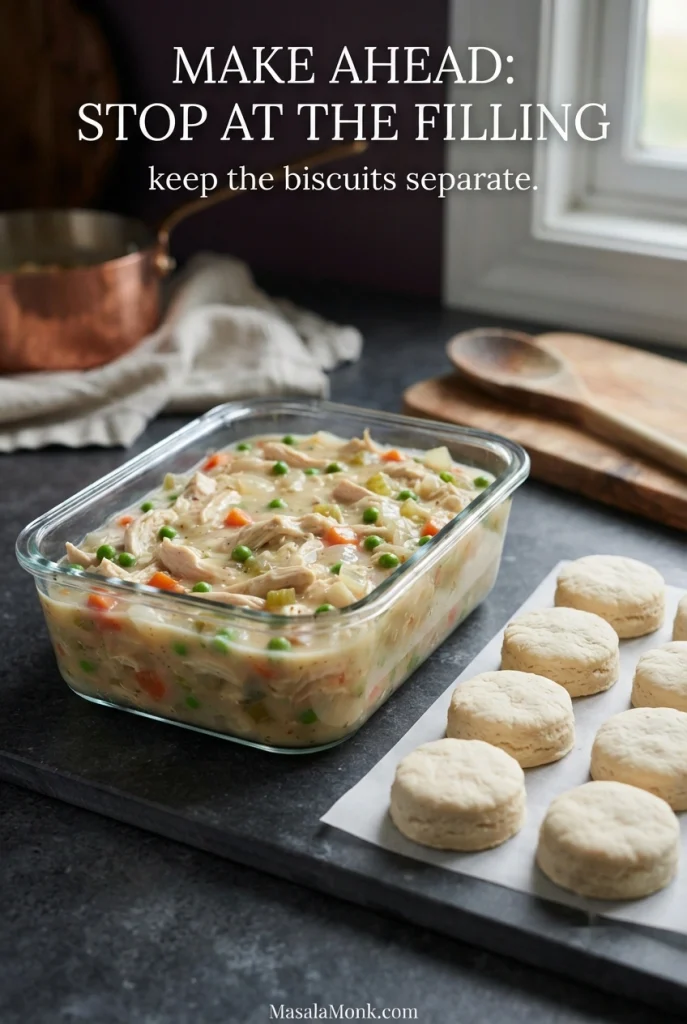
Yes—stop at the filling. You can make it 1–2 days ahead for best quality. Cool it promptly, cover and refrigerate it, and keep the biscuits separate.
At dinner time, bring the filling back to a gentle simmer, give the biscuits their short first bake and assemble the casserole while everything is hot.
Planning for leftovers too? See how to reheat the casserole without soggy biscuits.
Freezing the Filling
Freeze the filling without the biscuits in an airtight freezer-safe container. For best quality, use it within about 2–3 months. Thaw it overnight in the refrigerator, reheat thoroughly, then add freshly prepared biscuits.
How to Reheat It Without Soggy Biscuits
Lift the biscuits off when practical, heat the filling separately, and warm the biscuits in the oven or toaster oven before putting everything back together. The microwave works for a quick portion too; just expect a softer biscuit.
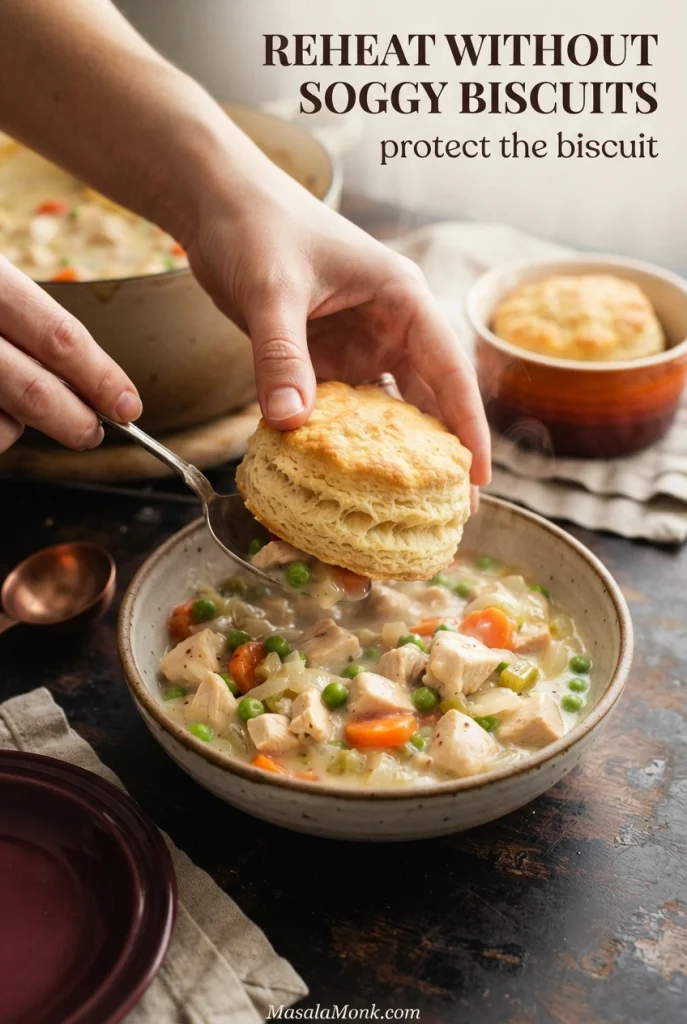
For lunch tomorrow, the biscuit is the part worth protecting. Leave it sitting on gravy overnight and it will keep absorbing moisture, so store the biscuits separately whenever it is easy to do so.
Refrigerate leftovers promptly. The USDA lists cooked chicken leftovers and cooked chicken casseroles at 3–4 days in a refrigerator at 40°F / 4°C or below, and reheated leftovers should reach 165°F / 74°C. See the USDA food-safety guidance.
What Goes with Chicken Pot Pie Casserole?
Because the casserole already covers the rich, hearty part of dinner, lighter sides work especially well. For something cold and crunchy, our easy coleslaw recipe gives the creamy filling some welcome tang.
- A crisp green salad with vinaigrette
- Green Beans Almondine with toasted almonds and lemon
- Steamed or roasted broccoli with lemon
Spoon it while the gravy is still creamy and the biscuits are warm enough to pull apart. Their tops should flake, their centers should be fluffy, and the bottoms should have absorbed some gravy. That contrast—flaky above, gravy-soft underneath—is what makes the biscuit version worth making.