Posted on Leave a comment

Million Dollar Chicken Casserole Recipe: Creamy, Cheesy & Easy

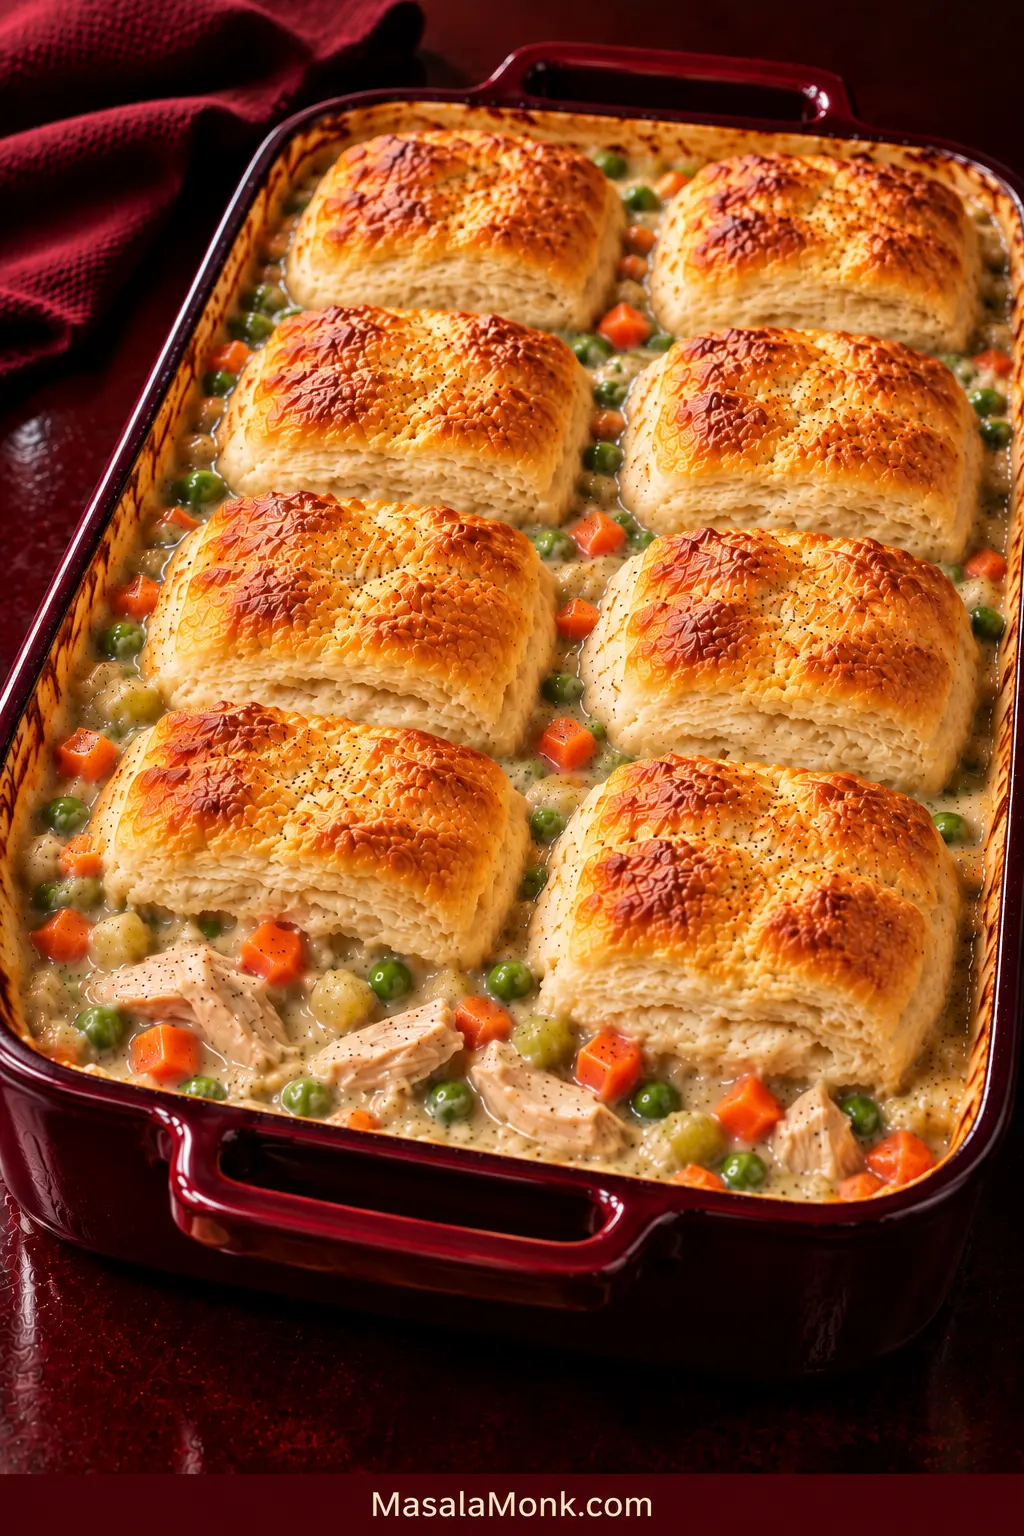
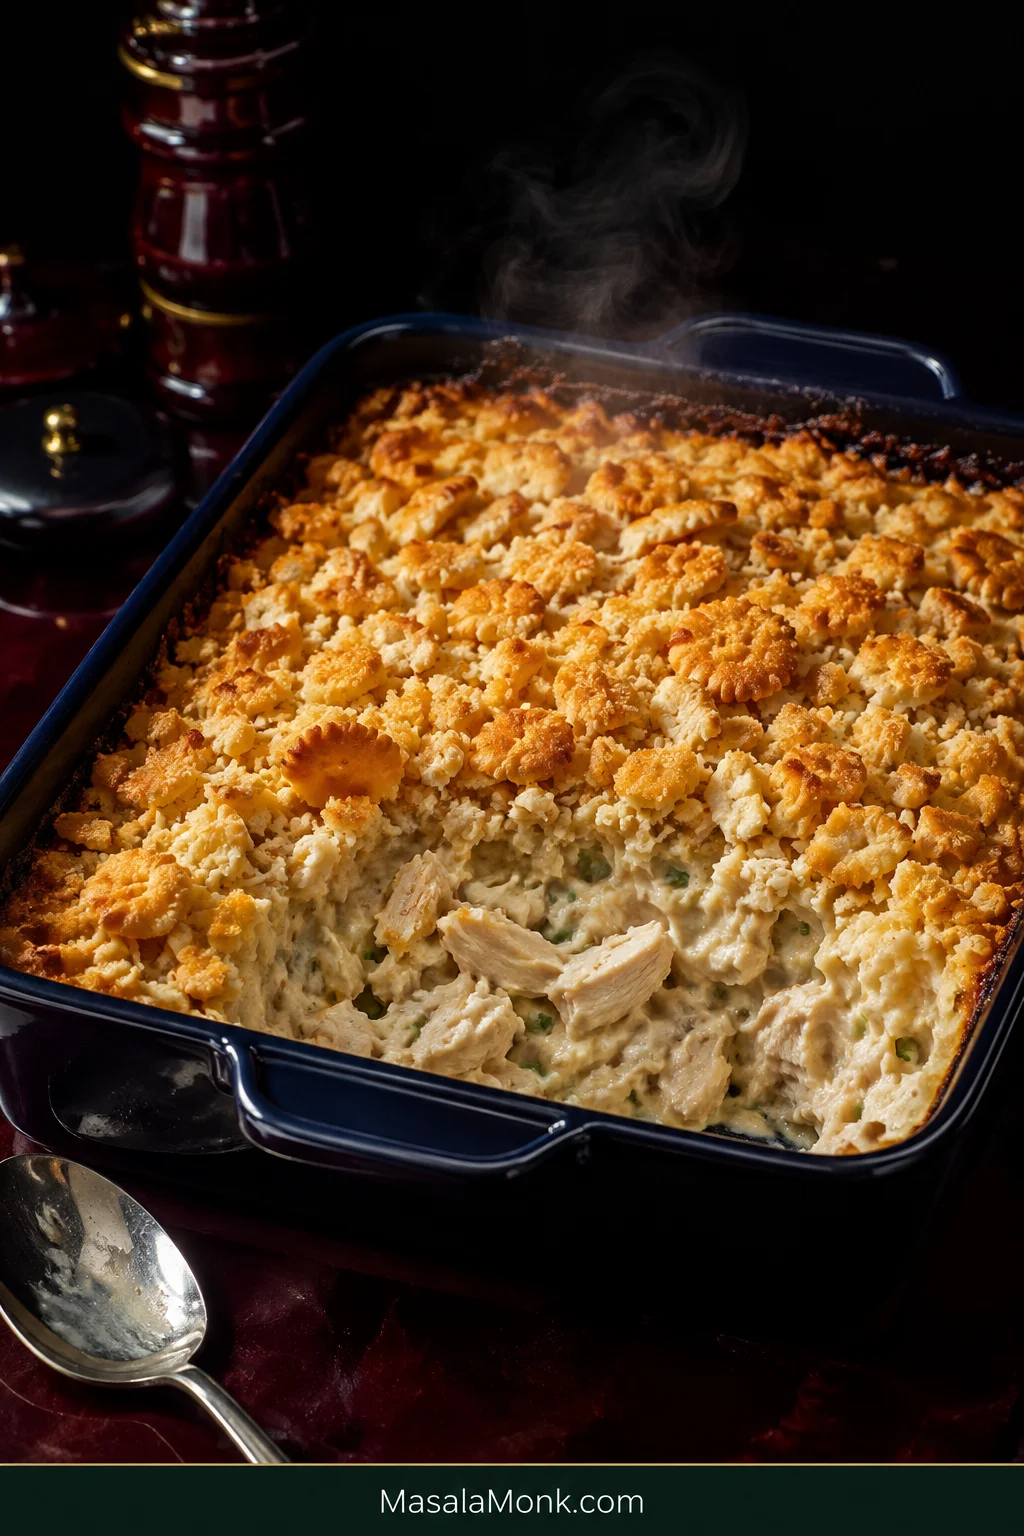
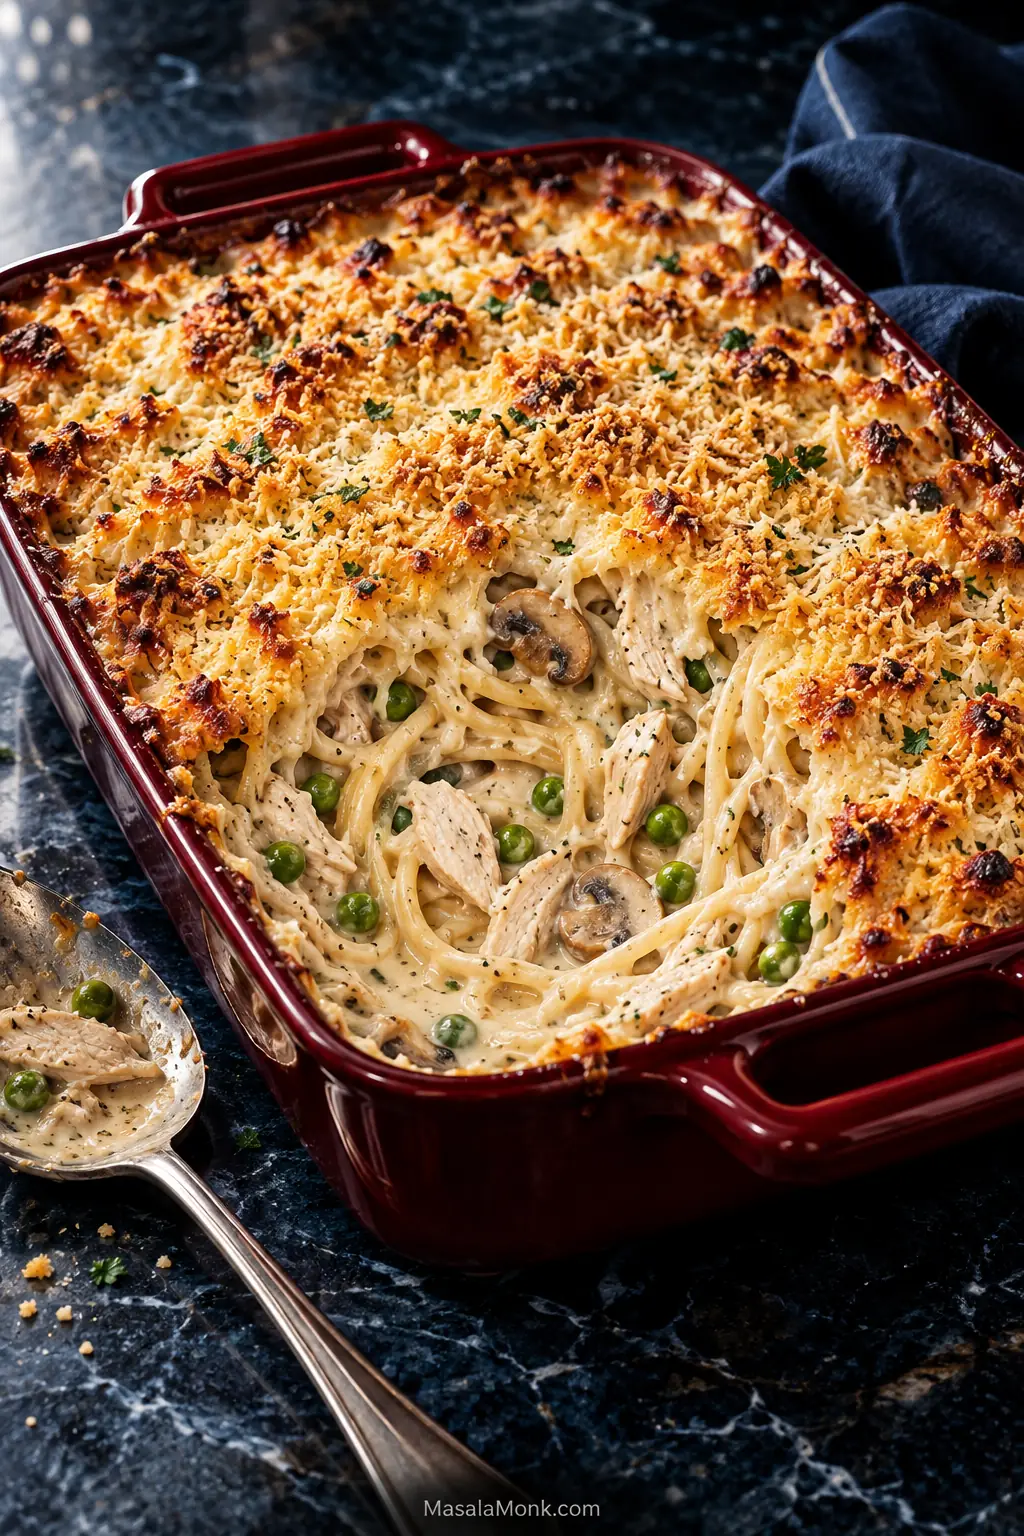
Million Dollar Chicken Casserole in a dark blue baking dish with golden buttery cracker topping and exposed thick creamy chicken filling.

Million Dollar Chicken Casserole brings tender chicken, a rich, savory sauce and buttery golden crackers together in the kind of dinner that asks very little from you.

The best version isn’t the one with the most dairy piled into it. It’s the one where everything lands in balance: chicken with some texture, enough sauce to coat every piece, plenty of savory flavor, and crisp crumbs breaking through all that softness.

That balance is especially handy when there’s cooked chicken in the fridge and you want tonight’s dinner to feel like a new meal rather than leftovers again.

With the chicken ready, plan on about 15 minutes of prep. Mix, spread, top and bake at 350°F / 175°C. Then give the casserole 10 minutes before you scoop it so the bubbling sauce has time to settle around the chicken.

Quick Answer: How to Make Million Dollar Chicken Casserole

  1. Mix: Combine 4½ loosely packed cups cooked shredded chicken, about 1⅓ lb / 600 g, with softened cream cheese, cottage cheese, sour cream, undiluted condensed cream of chicken soup and savory seasonings.
  2. Spread: Spoon the thick chicken mixture into a 9×9-inch baking dish.
  3. Top: Coarsely crush 3½ oz / 100 g buttery round crackers—roughly 30–32 Ritz crackers—and toss with 4 tbsp / 57 g melted unsalted butter.
  4. Bake: Bake uncovered at 350°F / 175°C for 35–40 minutes, until the edges bubble, the crackers are golden and the center reaches 165°F / 74°C.
  5. Rest: Leave the casserole for 10 minutes before serving.

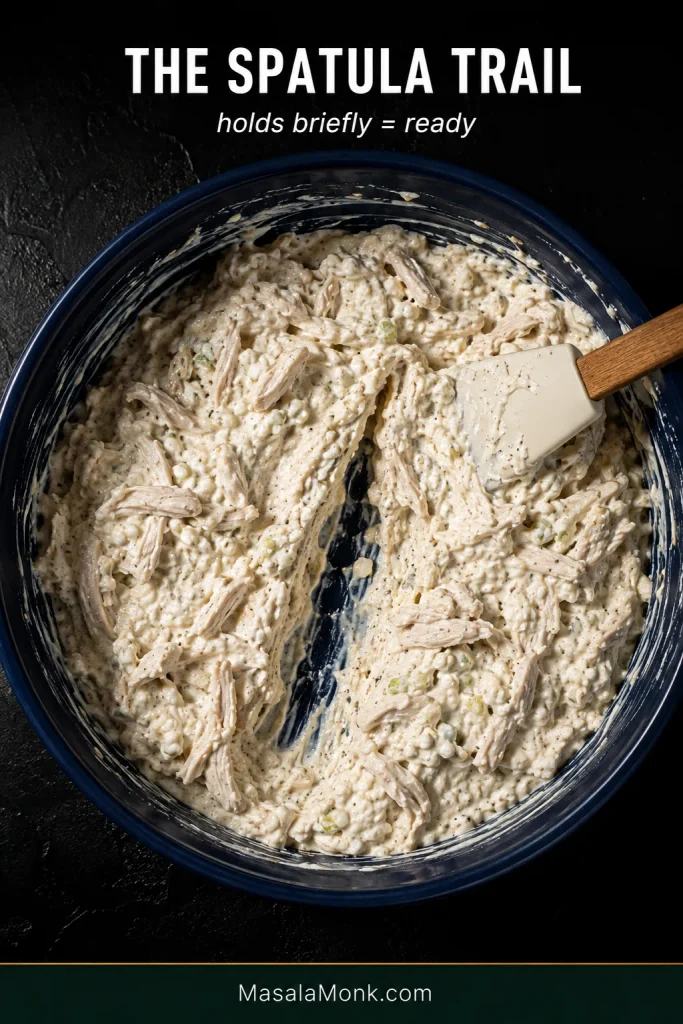
Before baking, drag a spatula through the mixture. The trail should remain visible for a moment. After resting, the finished casserole should be creamy and easy to scoop, without liquid pooling around the serving.

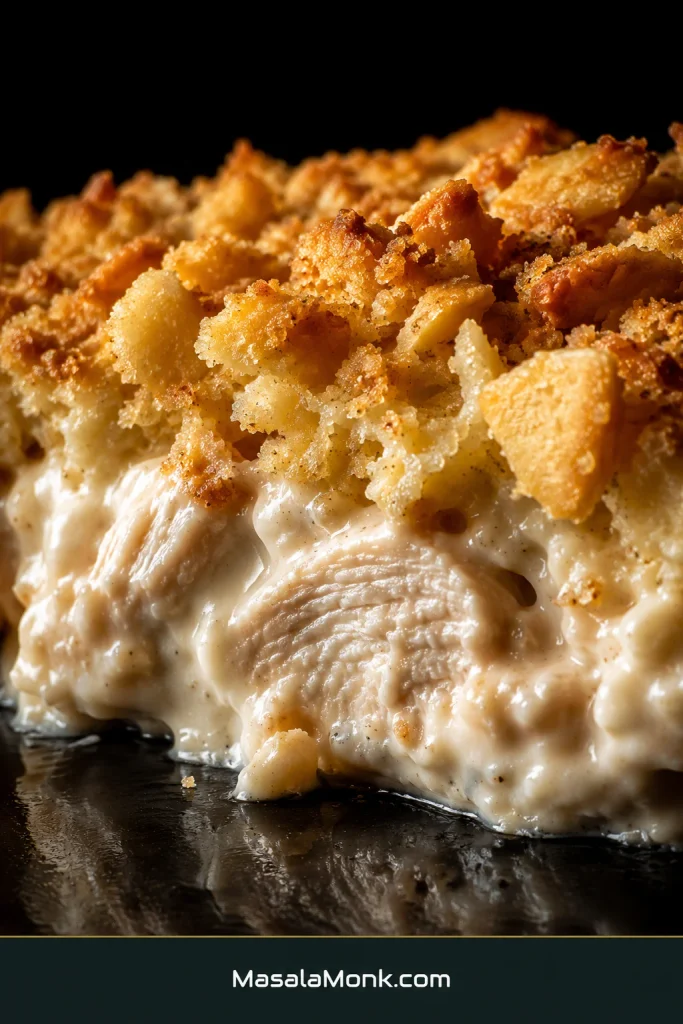
Close-up cross-section of golden cracker crust above thick creamy sauce clinging to pieces of chicken.
Notice the boundary between the layers: crisp crumbs stay above the sauce instead of forming a damp, soaked band where topping and filling meet.

Million Dollar Chicken Casserole Recipe

Recipe at a Glance

Prep15 minutes
Bake35–40 minutes
Rest10 minutes
Oven350°F / 175°C
Best dish9×9 in / 23×23 cm / roughly 2 qt
Yield6 hearty main-dish servings or up to 8 smaller portions with substantial sides
Look forBubbling edges, golden crackers and sauce that settles around the chicken after resting

Equipment

  • 9×9-inch / 23×23 cm baking dish, roughly 2-quart capacity
  • Large mixing bowl
  • Small bowl for the cracker topping
  • Spatula or sturdy spoon

An instant-read thermometer helps with the center, especially when the casserole starts refrigerator-cold. If the dish is filled close to the rim, a sheet pan underneath can catch bubbling drips.

Ingredients

For the chicken filling

  • 4½ loosely packed cups cooked shredded chicken, about 1⅓ lb / 600 g
  • 1 can condensed cream of chicken soup, 10.5 oz / 298 g, undiluted; reduced-sodium is helpful when the chicken is already fairly salty
  • 4 oz / 113 g cream cheese, fully softened
  • ¾ cup / about 170 g small-curd cottage cheese
  • ½ cup / about 120 g sour cream
  • ¾ tsp garlic powder
  • ¾ tsp onion powder
  • ½ tsp freshly ground black pepper
  • 2 tbsp thinly sliced scallions, optional but recommended
  • 1 tbsp chopped fresh parsley, optional
  • Fine salt, only if needed after tasting
  • ½ cup / 2 oz / 55–60 g shredded mozzarella, Monterey Jack or mild cheddar, optional for a more visibly cheesy casserole

For the buttery cracker topping

  • 3½ oz / 100 g buttery round crackers, roughly 30–32 Ritz crackers
  • 4 tbsp / 2 oz / 57 g unsalted butter, melted
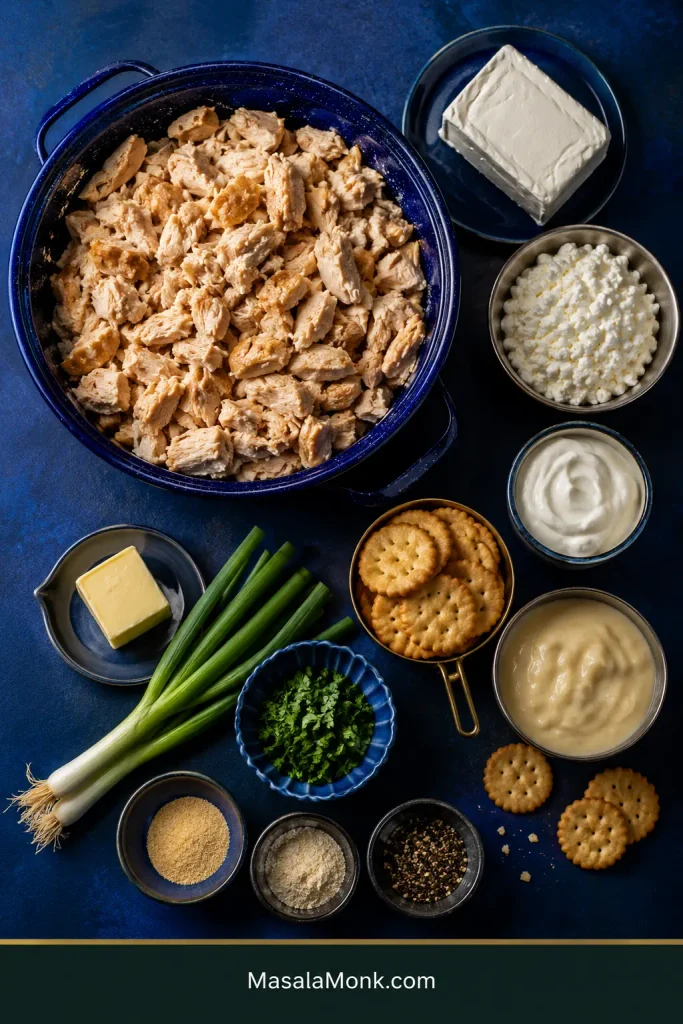
Ingredients for Million Dollar Chicken Casserole arranged around a large bowl of cooked chicken, including cream cheese, cottage cheese, sour cream, soup, crackers, butter and seasonings.
Chicken should supply most of the bulk; the dairy is the creamy binder, not the main event.

Before you start: use the condensed soup straight from the can, without added water or milk. The cream cheese needs to be soft enough for a spatula to press through easily, while remaining creamy rather than melted or oily.

Method

  1. Heat the oven to 350°F / 175°C and lightly grease a 9×9-inch baking dish.
  2. Mix the sauce. Stir the softened cream cheese, sour cream and condensed cream of chicken soup until mostly smooth. Stir in the cottage cheese, garlic powder, onion powder, black pepper, scallions and parsley.
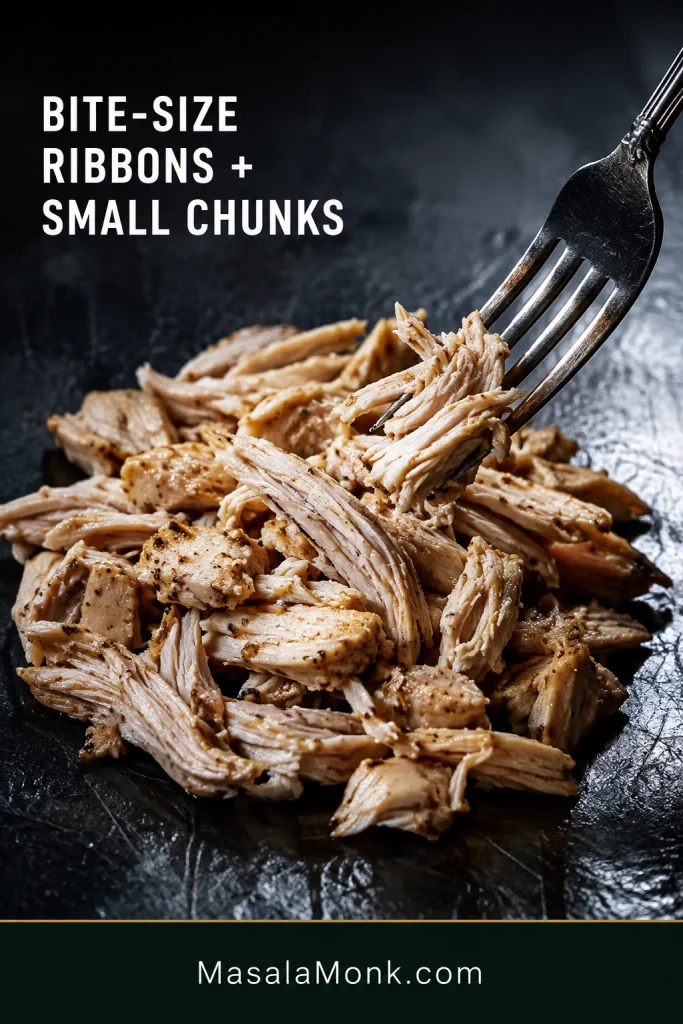
  3. Add the chicken and taste. Keep the chicken in bite-size ribbons and small chunks so you get distinct pieces in every scoop. Fold it through the sauce gently. Taste before adding salt; if the filling is salty enough but tastes dull, pepper, garlic, onion or herbs can bring more flavor without adding more salt.
  4. Check the Spatula Trail. Drag the spatula through the bowl once. The path needs to stay open briefly. If thin liquid immediately runs back in, check for obvious cottage-cheese whey, wet chicken or another ingredient carrying excess moisture. Spread the thick mixture evenly into the baking dish. Sprinkle the optional shredded cheese over the filling now, if using.
Thick creamy chicken mixture in a blue bowl with a spatula trail that remains open briefly.
This check becomes especially valuable when chicken, cottage cheese or brands vary in moisture; instead of guessing from ingredients, you judge the consistency in the bowl.

Top, Bake & Rest

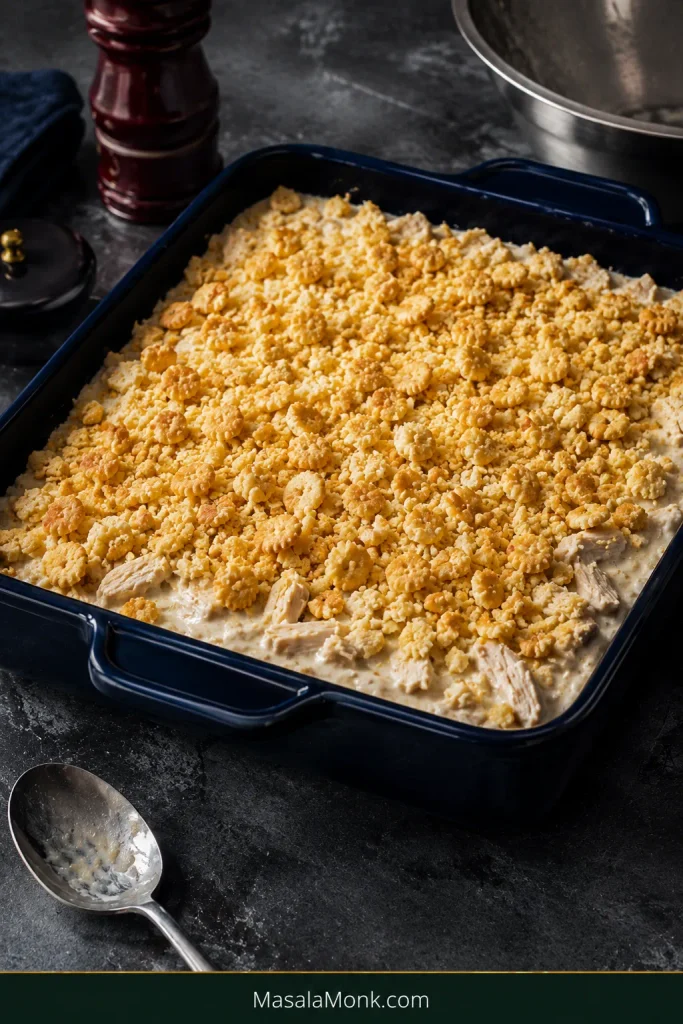
  1. Add the cracker topping. Crush the crackers coarsely so fine crumbs sit alongside small irregular pieces. Toss with the melted butter and scatter over the chicken.
Unbaked creamy chicken casserole in a dark blue dish covered with loose buttery cracker crumbs and small cracker pieces.
Before baking, the topping should still look dry and sit above the filling—not pasted down or saturated.
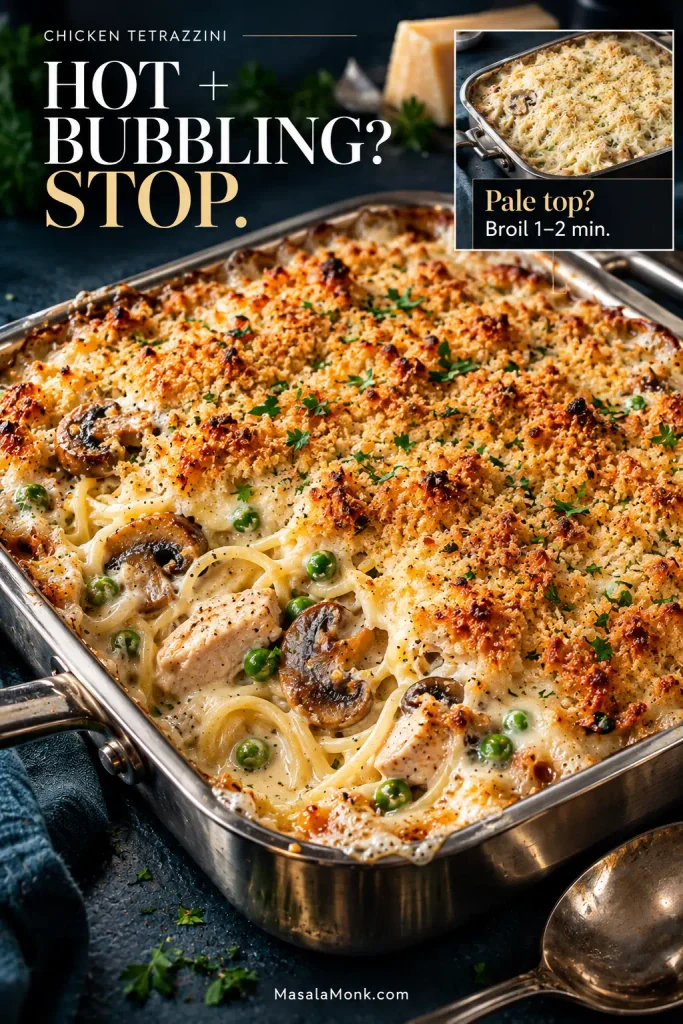
  1. Bake uncovered for 35–40 minutes. Look for bubbling around the edges and crackers that have turned golden and toasted.
  2. Check the center. It needs to reach 165°F / 74°C. If the topping gets deeply browned first, cover the dish loosely with foil and keep baking.
  3. Rest for 10 minutes, then scoop and serve.

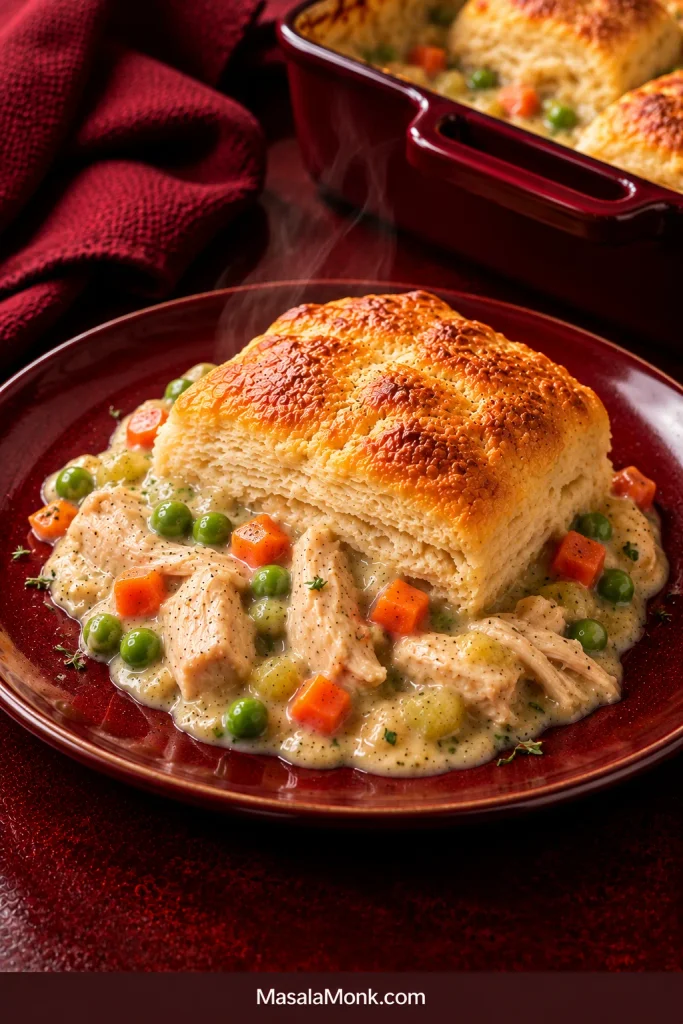
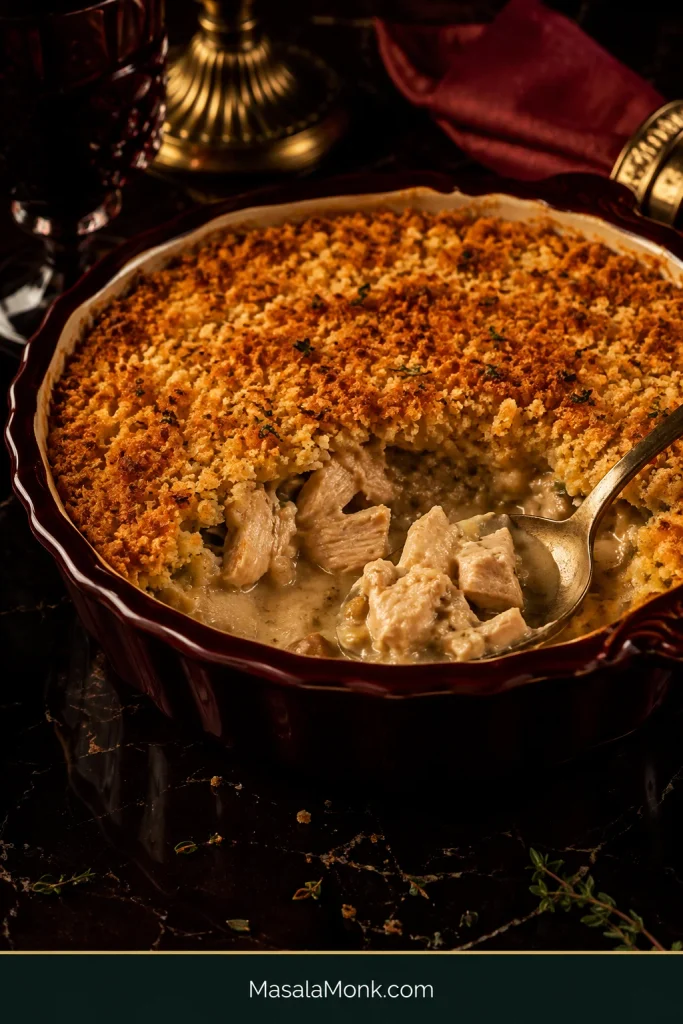
When it is right, a spoon breaks through crisp golden crumbs into tender pieces of chicken coated in a thick, pale sauce. The serving can relax a little on the plate; what you don’t want is a puddle of liquid left around it.

Freshly served scoop of chicken casserole with golden cracker crust and thick creamy filling after resting.
A little slump is normal. What matters is that the sauce stays with the chicken instead of pooling separately.

Cooking right now? Stop here—you have everything you need. The rest is optional help for substitutions, make-ahead cooking and anything that looks different from what you expected.

In This Guide

Make it right

Change it safely

Plan & fix

What Is Million Dollar Chicken Casserole?

Million Dollar Chicken Casserole is cooked shredded chicken baked in a rich sauce of cream cheese, cottage cheese, sour cream and condensed cream of chicken soup, with buttery cracker crumbs across the top.

The “million dollar” name signals indulgent comfort food made from ordinary ingredients. Creamy dairy coats the chicken, while the toasted crackers break up all that softness with a crisp, buttery bite.

Choose Your Chicken: Rotisserie, Leftovers or Freshly Cooked

Rotisserie chicken, cooked breast, thigh and leftovers all work here. Measure the cooked meat instead of relying on “one rotisserie chicken,” since whole birds vary widely in size.

Rotisserie chicken is the quickest route. Plain or lightly seasoned meat gives you the most control; a strongly flavored bird brings those seasonings into the casserole too. Remove the skin before shredding and taste the mixture before adding salt.

Leftover roasted or baked chicken works just as well. Leave excess pan juices behind so yesterday’s chicken doesn’t carry unnecessary liquid into tonight’s dinner.

Canned chicken can work in a pinch too. Drain it very well, expect a softer texture, and taste the filling before adding salt.

Freshly cooked breast is milder and leaner; thigh is richer and more forgiving. Let either cool until comfortable to handle, then tear or shred it into bite-size ribbons with a few small chunks.

Cooked chicken pulled into bite-size ribbons and small chunks, showing the desired texture for the casserole.
Think of this as the stopping point for shredding. Once the chicken reaches irregular bite-size pieces, pulling it further only makes those pieces easier to lose in the sauce.

Cooking chicken specifically for this dish? This baked chicken breast recipe gives you juicy cooked meat that is easy to cool and shred.

Can You Use Raw Chicken?

Not in this version. The timing assumes the chicken is already cooked. Here, the oven’s job is to heat the creamy filling through and brown the cracker topping.

Raw chicken breasts baked under cream cheese, cheddar or bacon belong to a different Million Dollar Chicken Bake style with its own timing and proportions.

The Cottage Cheese Question

If you’re already looking suspiciously at the tub of cottage cheese, this is usually the ingredient that makes people pause.

Can You Taste the Cottage Cheese?

Usually not as a distinct cottage-cheese flavor. Baked with the cream cheese, sour cream, soup and chicken, it blends into the sauce and contributes mild tang and richness.

Small-curd cottage cheese is the easiest choice because the curds disappear more readily among the chicken. See a puddle of watery whey in the container? Leave the obvious liquid behind. There’s no need to squeeze the cottage cheese dry.

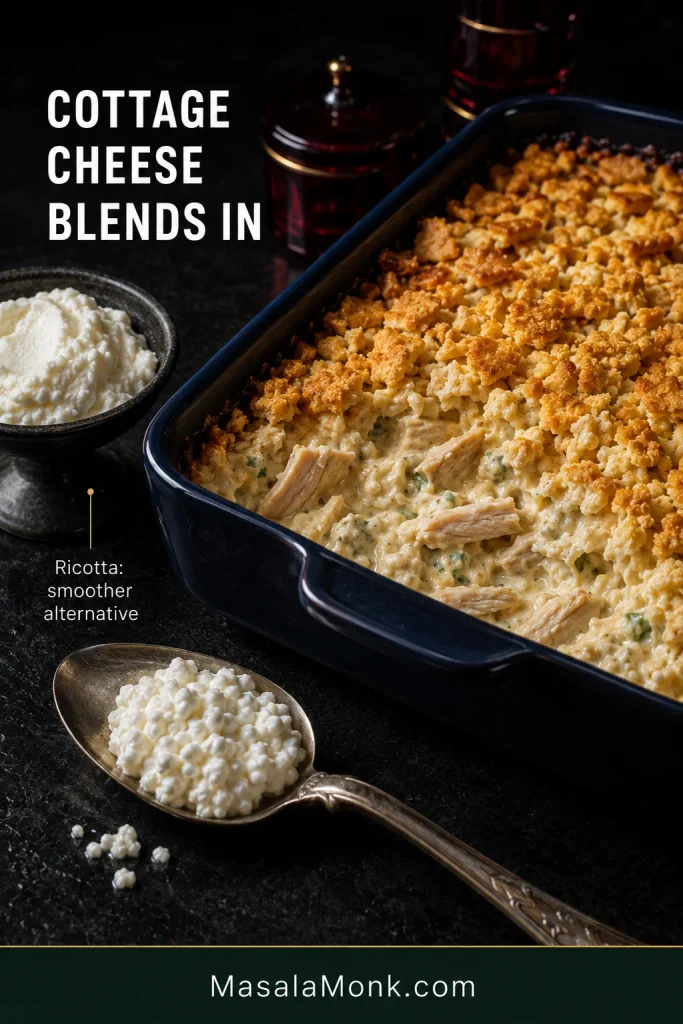
No Cottage Cheese? Use Ricotta

Whole-milk ricotta is a practical replacement. Start with roughly the same volume, leave behind obvious excess liquid and check that the chicken mixture remains thick and spreadable before baking.

Ricotta produces a smoother, slightly denser casserole. Simply omitting the cottage cheese removes a substantial part of the creamy base.

Blending cottage cheese is another option when you mainly want to hide the curds, although brands vary in moisture. Ricotta is the simpler choice when a completely smooth texture matters most.

Cottage cheese on a spoon beside finished creamy chicken casserole and a bowl of smooth ricotta as an alternative.
Cottage cheese looks much more obvious before baking. Afterward, the curds largely disappear into the creamy filling.

The 3 Controls of a Better Casserole

For a recipe this simple, three details do most of the work: moisture, flavor and cracker texture.

1. Moisture: Creamy, Not Watery

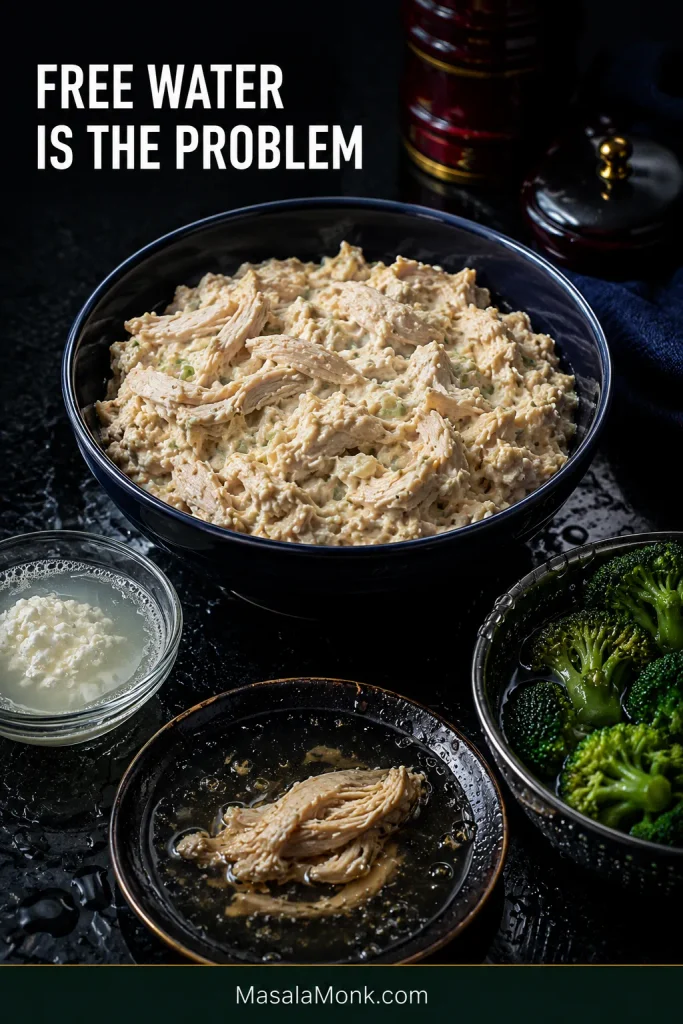
Broccoli isn’t the problem. Cottage cheese isn’t the problem. Even rotisserie chicken isn’t the problem. Free water is.

Condensed soup stays undiluted. Obvious cottage-cheese whey stays in the container. Cooking juices stay out of the bowl. Watery vegetables get drained or cooked before they go in.

Thick creamy chicken mixture surrounded by cottage cheese whey, chicken juices and wet broccoli to show sources of excess moisture.
A better way to judge moisture is to look for liquid that moves independently. An ingredient can be naturally moist without being a problem; free-running liquid is what changes the casserole’s balance.

The same Spatula Trail from the recipe is your quickest final check before the bowl is scraped clean. A thick mixture keeps the path visible briefly; a thin mixture closes over almost immediately.

Already baked and looking watery? Jump to Troubleshooting and judge it after the 10-minute rest.

2. Flavor: More Salt Isn’t Always the Answer

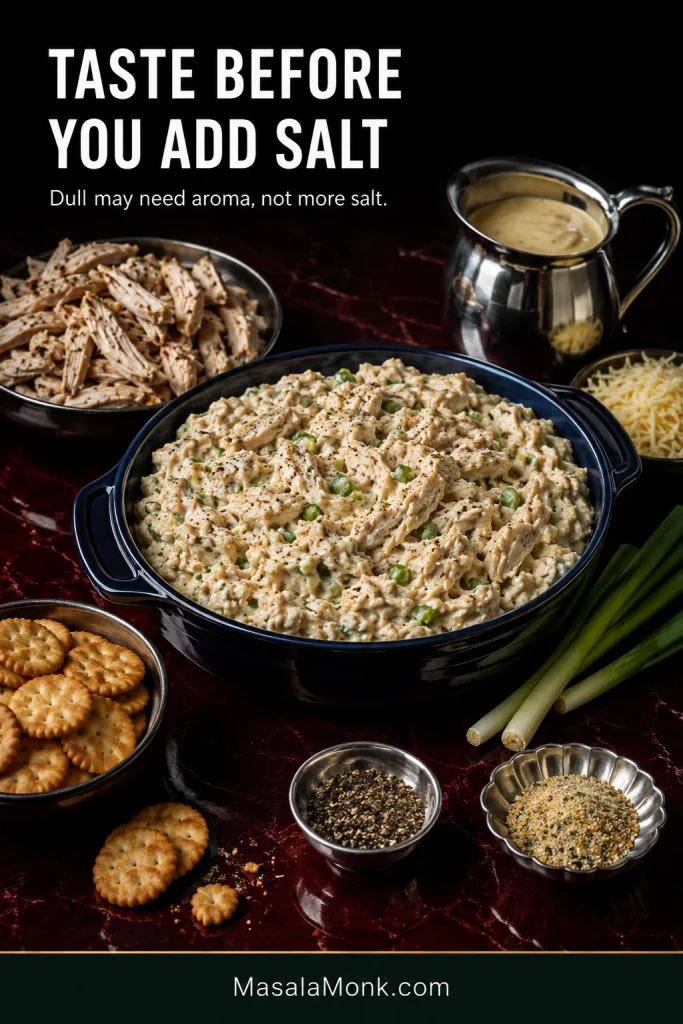
Rotisserie chicken arrives seasoned. Condensed soup and crackers bring seasoning of their own. Taste the mixed filling before adding more salt.

If the filling is salty enough but tastes dull, wake it up with pepper, garlic, onion, scallions, parsley or another salt-free seasoning.

Creamy chicken mixture surrounded by cooked chicken, condensed soup, crackers, scallions and seasonings, emphasizing tasting before adding salt.
Seasoning is cumulative. Once seasoned chicken and condensed soup are combined, ask whether the filling actually needs salt—not simply whether you have added any yet.

For a little extra spice, ½–1 tsp Creole or Cajun seasoning works well. Check the label first because the salt level varies considerably between blends.

3. Cracker Crunch: Butter Them Late

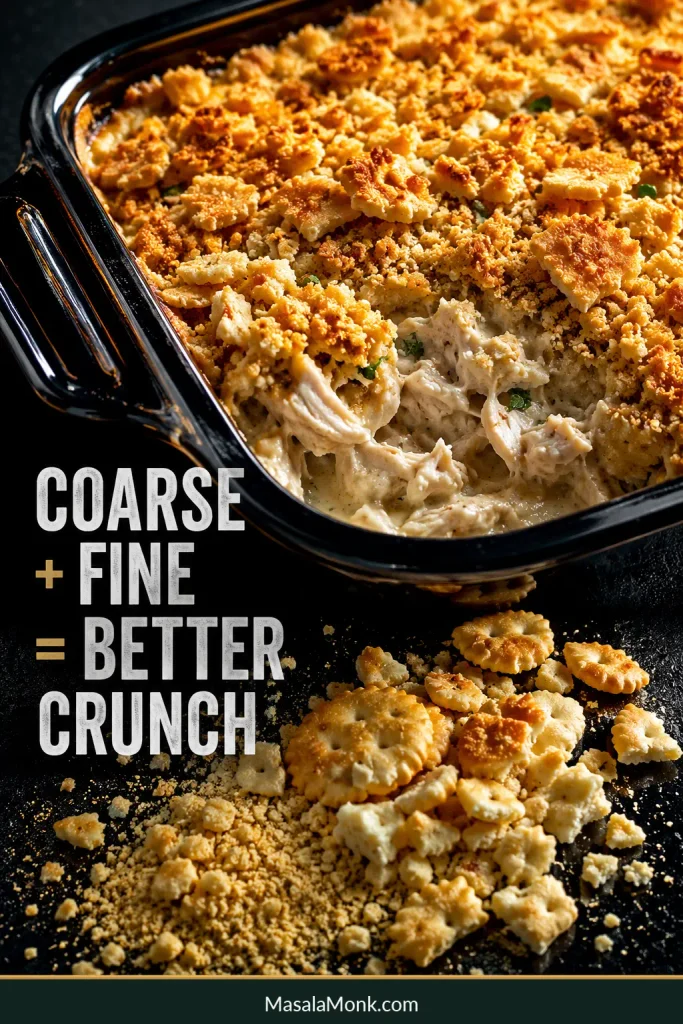
Crush and butter the crackers when you’re ready to bake. A mixture of fine crumbs and small irregular pieces gives the top a better bite than pulverized crumbs alone.

Crushed crackers in fine crumbs and larger pieces beside a casserole with an irregular crisp golden cracker crust.
The two crumb sizes do different jobs: fine crumbs improve coverage, while larger shards add height, exposed edges and more places for the buttery topping to toast.

For make-ahead and freezer versions, store the cracker topping separately until baking day.

None of this makes the casserole delicate. Cooked chicken, condensed soup, a thick filling and freshly buttered crackers will take you most of the way there.

Quick jumps: Recipe · Doneness · Troubleshooting · Back to Top

How to Know When It’s Done

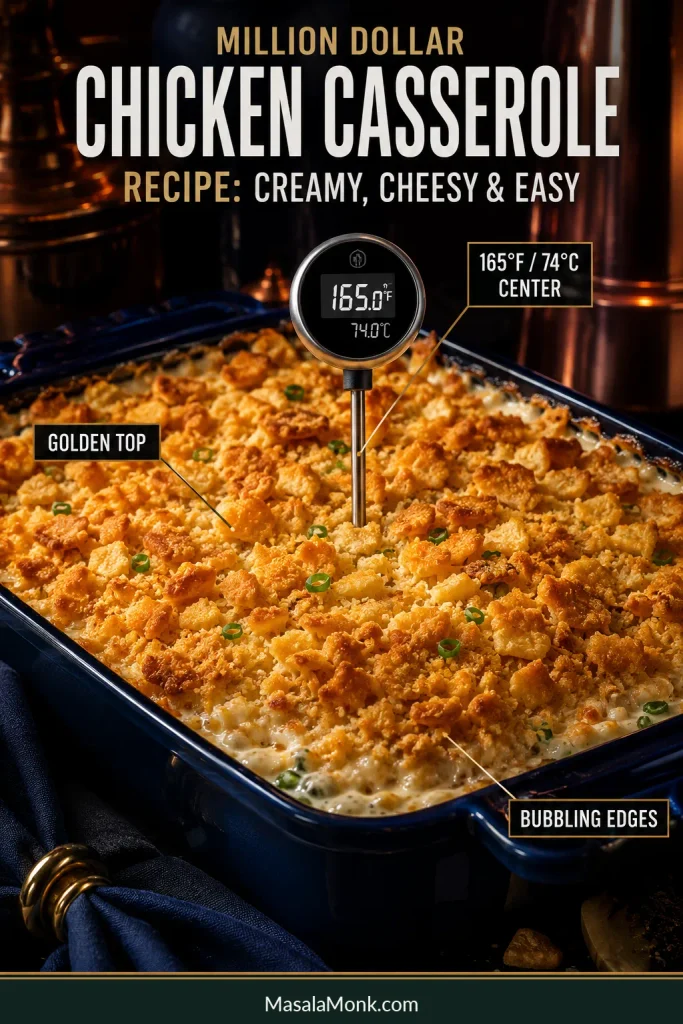
Look for bubbling edges, a golden cracker topping and a center temperature of 165°F / 74°C.

By then the kitchen smells buttery and toasted, and the sauce underneath has noticeably more body than it did when it first began bubbling.

StageWhat Success Looks Like
Before bakingThick filling with a brief spatula trail
Near the endBubbling edges and a golden cracker topping
Center165°F / 74°C
After restingCreamy, scoopable filling with no puddle around the serving
Finished chicken casserole with a golden top, bubbling edges and a thermometer showing 165°F and 74°C in the center.
When color, bake time and center temperature disagree, trust the center. Refrigerator-cold or deeper casseroles can brown beautifully before the middle has fully caught up.

Golden top, cool center? Cover the casserole loosely with foil and keep baking until the middle catches up. This comes up most often with a refrigerator-cold or unusually deep dish.

What You Can Change—and What Needs Another Recipe

Some substitutions leave the basic casserole intact. Others change moisture, starch or cooking time enough to need a different formula.

ChangeUse It Here?What to Know
Cooked breast ↔ cooked thighYesBoth work; thigh gives a richer result
Ritz ↔ similar buttery crackersYesMatch approximately by weight because sleeve sizes vary
Sour cream → thick plain Greek yogurtUsuallyStart with roughly the same amount; choose a genuinely thick plain Greek yogurt and expect a tangier, slightly less rich result
Gluten-free soup + crackersYesCheck every packaged ingredient when strict gluten avoidance matters
Cottage-cheese replacementNeeds adjustmentUse another dairy such as whole-milk ricotta instead of simply omitting it
Homemade cream-of-chicken replacementNeeds adjustmentKeep it thick like condensed soup
Raw chickenDifferent recipeCooking time and method change substantially
Pasta, noodles or rice inside the casseroleDifferent recipeThose starches need additional liquid and their own cooking plan

Can You Make It Without Canned Cream of Chicken Soup?

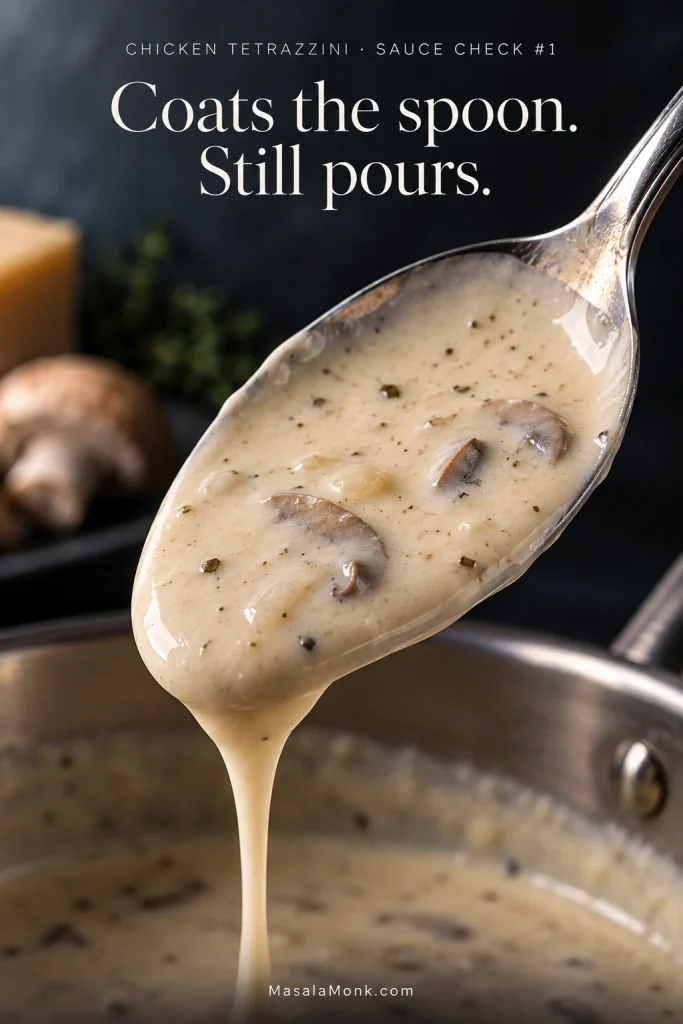
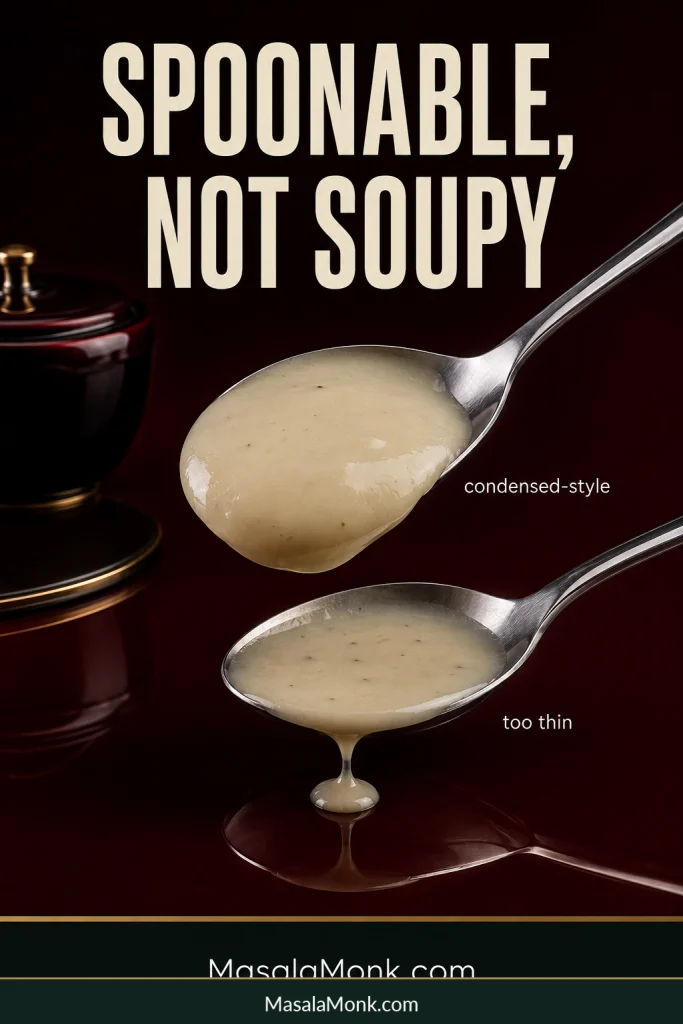
Yes, but keep the replacement thick and spoonable. Prepared cream soup is generally too loose for a direct swap.

Use about 10½ oz / 300 g of a condensed-style homemade chicken sauce with enough body to cling to a spoon.

Two spoons comparing thick condensed-style cream sauce that clings to the spoon with a thinner sauce that drips.
Matching the amount of canned soup isn’t enough—the replacement also has to match its concentration. Two equal weights of sauce can carry very different amounts of free water.

Adding Vegetables Without Making It Watery

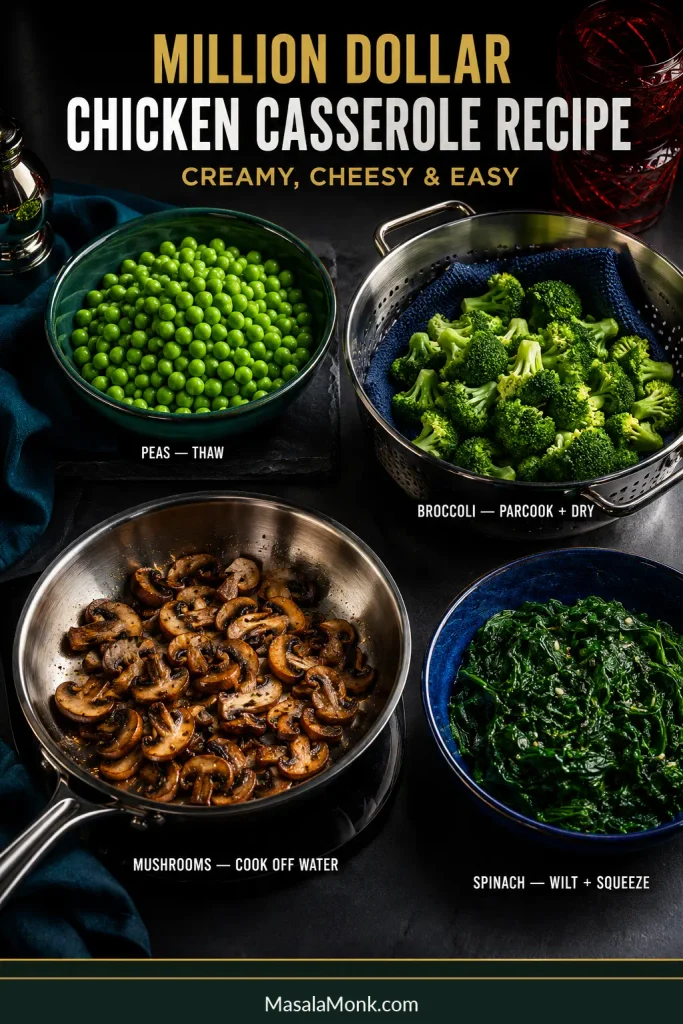
Peas are the easiest addition. Broccoli, mushrooms and spinach work too once any excess water is dealt with before they reach the casserole.

For a first try, around 1 cup of prepared vegetables is a sensible starting point for the base batch. That adds color and texture without pushing the chicken into the background.

  • Peas: fold them straight in; thaw first if they’re heavily coated in ice.
  • Broccoli: cut into small florets, blanch or parcook for 1–2 minutes, drain and pat dry.
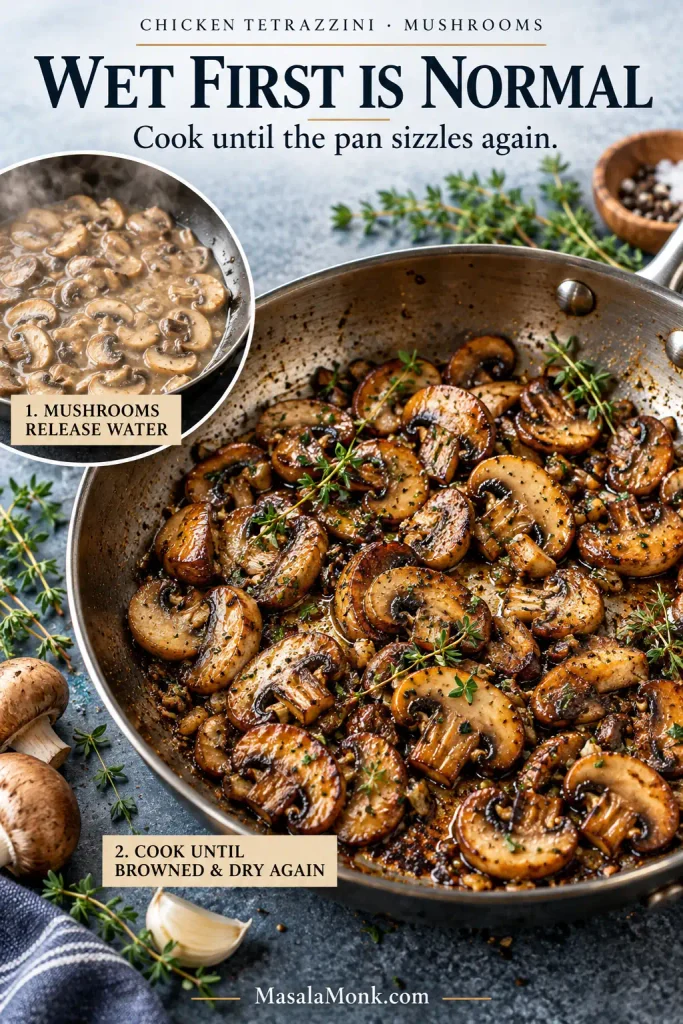
  • Mushrooms: sauté until the moisture they release has cooked away.
  • Spinach: wilt first and squeeze well.
Prepared peas, dried parcooked broccoli, browned mushrooms and squeezed wilted spinach showing how to control moisture before adding vegetables.
Measure vegetables after thawing, cooking and draining whenever possible. That way, the roughly 1-cup guideline reflects what actually enters the casserole rather than water or volume lost during prep.

If broccoli and rice are what you really want for dinner, cheesy chicken broccoli rice is built for that combination from the start.

Or keep the vegetable beside the casserole. Crispy roasted Brussels sprouts bring dark caramelized edges and a little bitterness that works especially well with the creamy chicken.

Troubleshooting

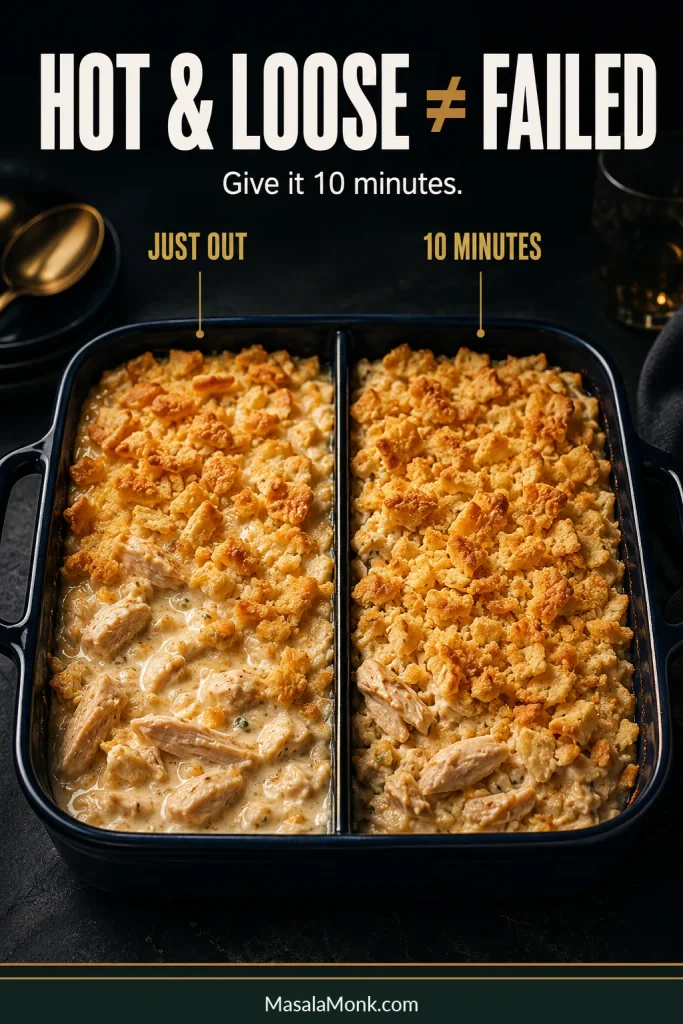
A casserole that looks loose while it is still bubbling may only need its 10-minute rest. Give it that time first. If something is still off afterward, the pattern usually points to the cause.

Comparison of chicken casserole just out of the oven with a looser filling and the same casserole more settled after 10 minutes.
Troubleshooting begins after the rest, not at the oven door. Waiting those few minutes prevents a normally hot, mobile filling from being mistaken for a genuinely watery casserole.
ProblemLikely CauseWhat to Do
Still watery after resting Extra whey, wet chicken, diluted soup or a watery add-in Serve it if needed; next time remove that excess moisture before baking
Too salty Seasoned chicken, soup, crackers, cheese or spice blends have stacked their sodium Use unsalted butter, consider reduced-sodium soup and taste the filling before adding salt
Salty enough but still bland The casserole needs more aromatic seasoning Add pepper, garlic, onion, scallions, parsley or another salt-free seasoning
Soggy cracker topping The crackers sat on the moist filling too long or softened during reheating Add the buttered topping just before baking; use the oven when restoring crunch matters
Cream-cheese lumps The cream cheese went into the bowl too cold Soften it fully and mix it into the sour cream and soup before adding chicken
Looser after reheating Chilled dairy can release a little moisture as it reheats Heat gently and let the portion stand briefly before serving

Quick jumps: Recipe · 3 Controls · Make Ahead & Reheat · Pan Size · Back to Top

Make Ahead, Freeze & Reheat

Can You Make It Ahead?

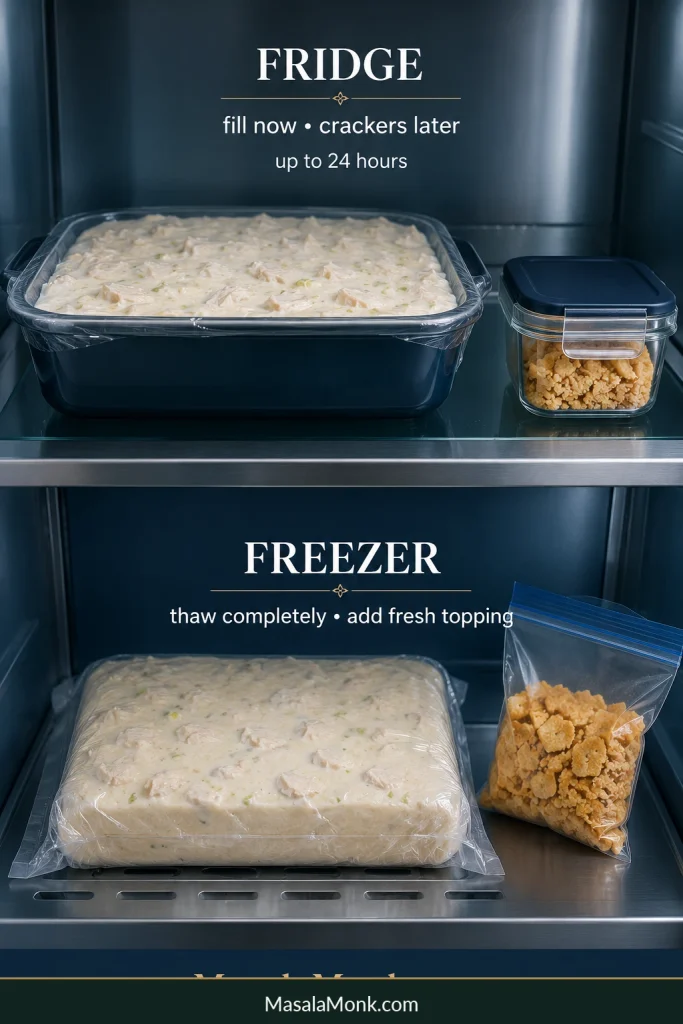
Yes. Assemble the chicken filling up to 24 hours ahead, cover and refrigerate it, then add the buttered cracker topping just before baking.

This is the useful kind of make-ahead dinner: the messy part can be finished before anyone is hungry.

A refrigerator-cold casserole often needs about 5–10 extra minutes, and a deeper dish can take longer. Start checking in that range, then let the center temperature and visual cues decide when dinner is ready.

Using glass bakeware? Follow the manufacturer’s guidance on moving the dish between refrigerator and oven temperatures.

Can You Freeze It?

The casserole freezes best without the cracker topping. Wrap it well and use it within about 3 months for best quality.

Thaw completely in the refrigerator; depending on the depth of the casserole, allow overnight or longer. Add freshly buttered crackers before baking.

Fresh gives you the smoothest sauce and crispest top. Freezing makes sense when having dinner ready matters more than getting the very crispiest topping.

Untopped creamy chicken casserole stored for the refrigerator and freezer with buttery cracker topping kept separately.
Refrigerate for tomorrow; freeze for later. In either case, keep the buttery crackers separate until baking day.

Store and Reheat Leftovers

Refrigerator: refrigerate leftovers within 2 hours and use them within about 3–4 days.

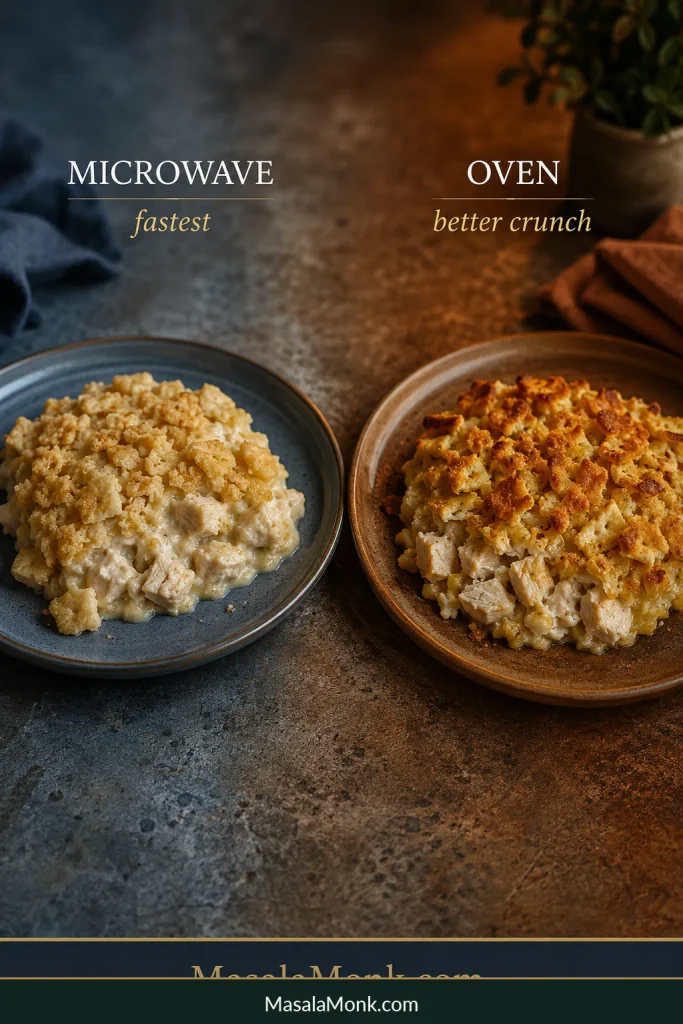
The microwave is fastest for individual portions, although the crackers soften. Oven reheating takes longer but brings back more of that toasted texture. Reheated leftovers should reach 165°F / 74°C.

Two reheated servings of chicken casserole showing a softer cracker topping from the microwave and a crisper browned topping from the oven.
For leftovers, the filling isn’t really the deciding factor—the topping is. Choose the microwave when time matters most and the oven when preserving cracker texture matters more.

Pan Size, Doubling & Feeding a Crowd

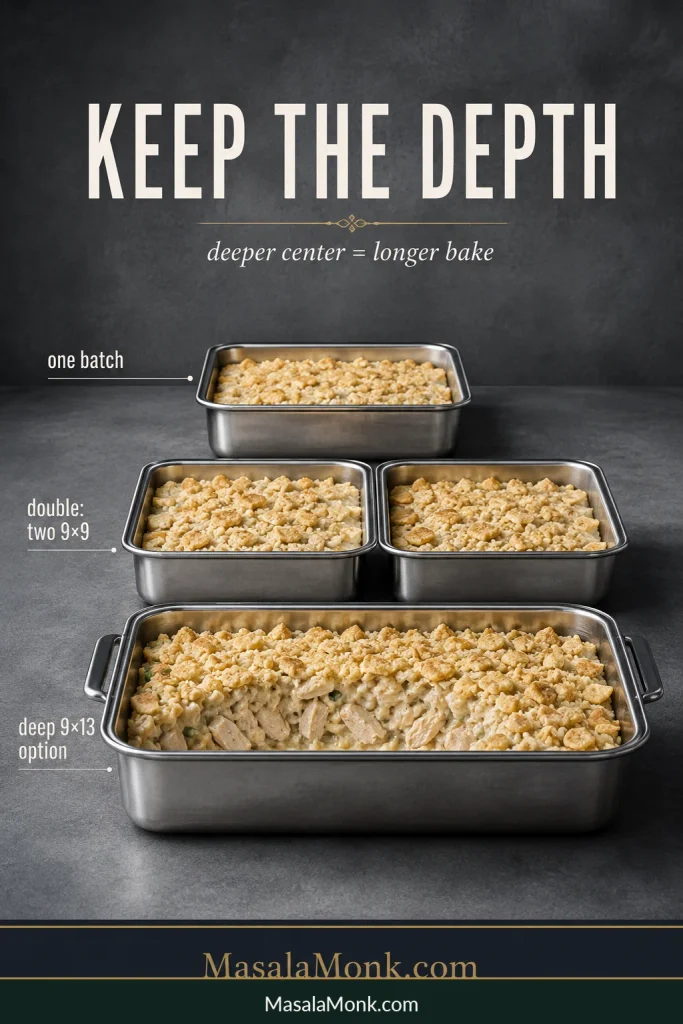
For one batch, use a 9×9-inch baking dish. When doubling, two 9×9 dishes give the most predictable result because each casserole keeps roughly the same depth as the original.

Pan / BatchRecommendationWhat Changes
9×9 in / ~2 qtBest for one batchGood filling depth and topping-to-chicken balance
11×7 inGood alternative when capacity is similarResult stays close to the base recipe
9×13 with one batchPossible but not preferredThe casserole becomes noticeably shallower and may heat faster
Two 9×9 dishes, doubled recipeMost predictable double batchDepth and bake behavior stay closest to the original
Deep 9×13, doubled recipeOne-pan optionThe casserole is deeper, needs good headroom and usually takes longer to heat through
One 9×9 casserole, two 9×9 casseroles at similar depth, and a deeper 9×13 casserole illustrating why pan depth affects baking time.
Pan depth is often more informative than total area when scaling a chicken casserole. It tells you how far heat must travel before the center reaches serving temperature.

The ingredients double; the baking time usually doesn’t. Two 9×9 dishes can stay close to the original timing. A doubled batch in one deep 9×13 needs longer because the center has farther to heat.

For dinner, count on roughly 6 hearty main-course portions from the base batch. With substantial sides, it can stretch to around 8 smaller servings. A basket of soft dinner rolls makes an easy addition when you’re feeding a larger table.

What to Serve With It

Serve Million Dollar Chicken Casserole with a crisp salad or green vegetable for contrast, or add rice, rolls, egg noodles or bread for a fuller comfort-food meal.

The casserole already brings plenty of richness, so smaller portions often feel better beside something fresh, green or lightly acidic.

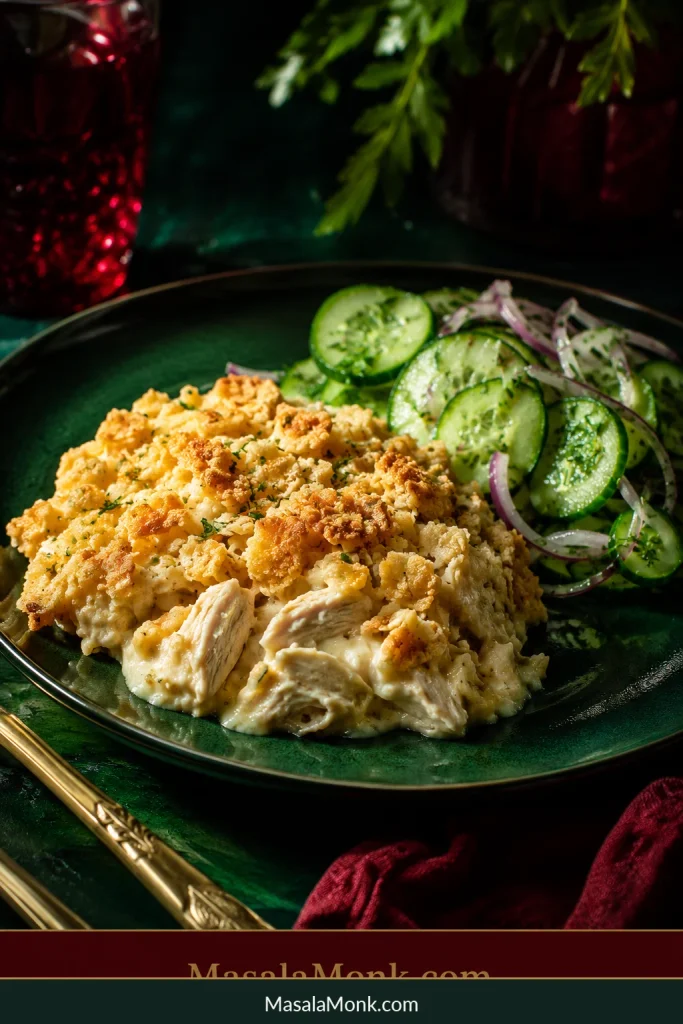
A cold cucumber salad with vinegar and dill is especially good here: crisp, cool and bright against the warm sauce.

Serving of creamy cracker-topped chicken casserole on a dark green plate beside a fresh cucumber and red onion salad.
If vegetables are mainly there to bring freshness, keeping them beside the casserole has another advantage: you gain contrast without introducing extra moisture into the creamy filling.

Roasted broccoli, green beans, asparagus or a simple green salad work for the same reason. They don’t compete with the casserole; they give it some space.

For the full comfort-food plate, mashed potatoes, buttered egg noodles or crusty bread all fit naturally beside it.

Rice works beautifully too. Keep it on the side; if you need help with the pot itself, this guide to cooking rice covers stovetop, rice-cooker and Instant Pot methods. Dry rice or noodles baked into the casserole need their own liquid and cooking plan.

Easy Comfort Food Should Still Be Reliable

There is a reason casseroles like this get assembled before busy evenings, carried to potlucks and dropped off when somebody could use a dinner they don’t have to think about.

After you’ve made it once, most of the details turn into routine: bowl, baking dish, buttery crumbs, oven.

Then comes the best part—the smell of those crackers turning buttery and toasted, the sauce bubbling around the edges, and a few quiet minutes on the counter before the serving spoon goes in.

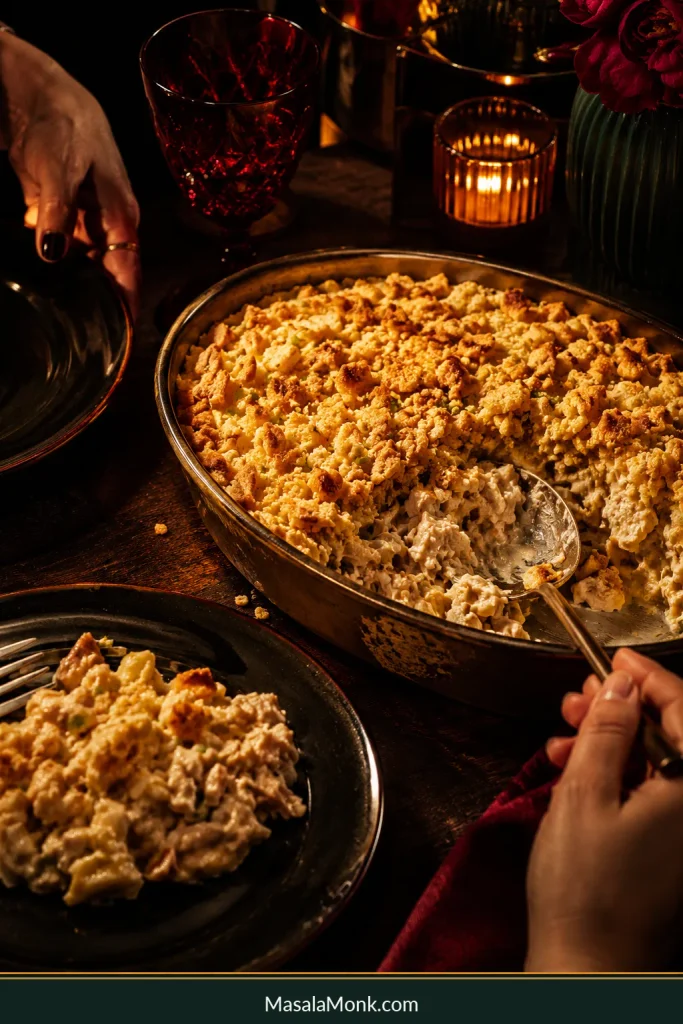
Warm dinner-table scene with a partly served chicken casserole, golden cracker topping, serving spoon, plates and hands reaching to serve.
Once rested, the casserole should need nothing more—just a serving spoon and a place at the table.
Posted on Leave a comment

Chicken Enchilada Casserole Recipe

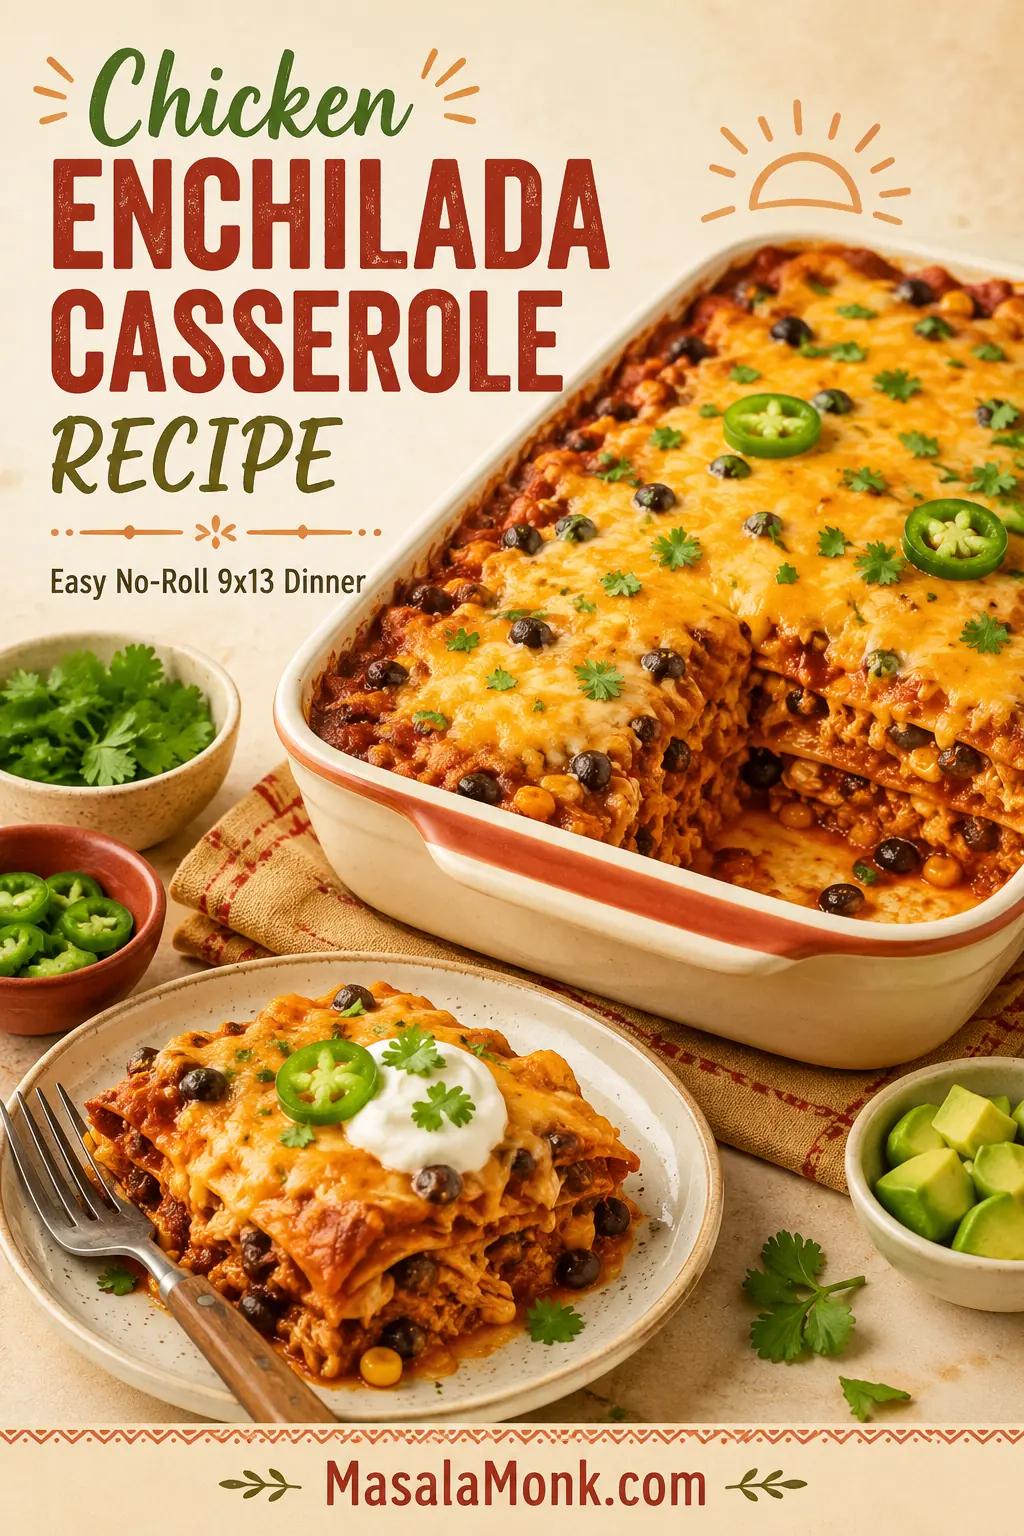
A 9x13 dish of chicken enchilada casserole with one portion removed and a layered serving on a plate.

This chicken enchilada casserole recipe is for the night you want enchiladas, but not the whole enchilada project. No warming every tortilla one by one. No filling, rolling, tearing, and trying to fit everything neatly in the pan while dinner waits. You get the same saucy, cheesy comfort by layering tortillas, shredded chicken, enchilada sauce, and cheese in a 9×13 dish and baking it until bubbling.

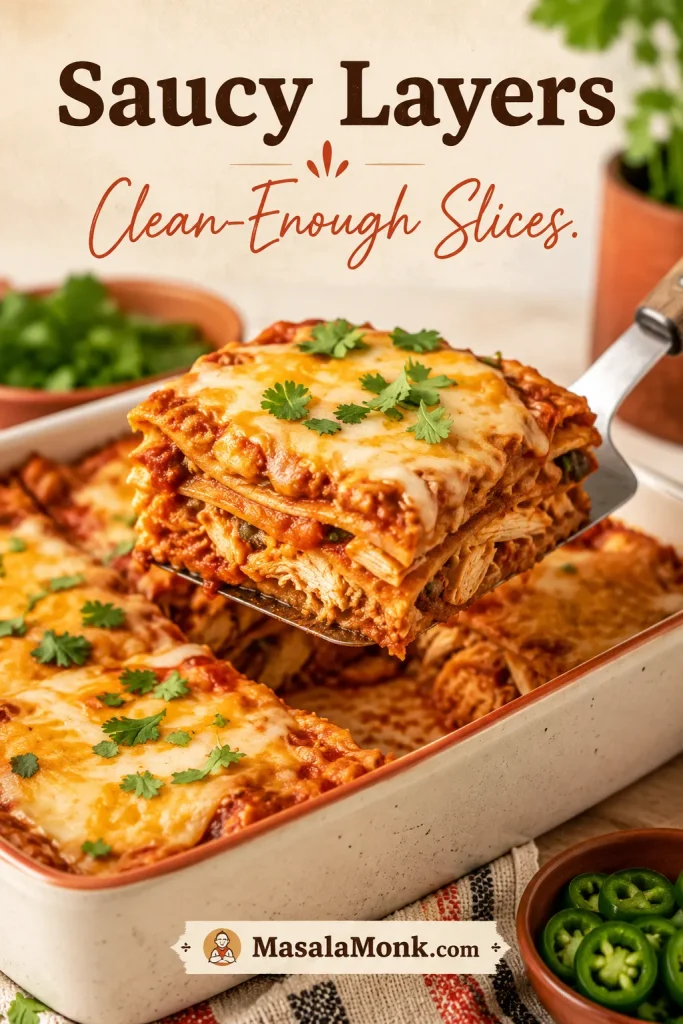
It comes out bubbling at the edges, soft through the middle, and melted on top — the kind of dinner that feels generous without asking you to roll a dozen enchiladas first. The goal is simple: saucy layers, weeknight shortcuts, and clean-enough slices without a loose, watery pan.

This no-roll casserole is weeknight-friendly, rotisserie-chicken friendly, and flexible enough for red sauce, green sauce, beans, corn, or a creamy white variation.

Quick Answer: Chicken Enchilada Casserole

Chicken enchilada casserole is a no-roll version of chicken enchiladas made by layering tortillas, cooked shredded chicken, enchilada sauce, and cheese in a baking dish. Instead of filling and rolling each tortilla, you build the casserole in a 9×13 pan and bake it until the sauce bubbles and the cheese melts.

For the most dependable texture, use corn tortillas, about 3 cups of enchilada sauce, 3½ cups of cooked shredded chicken, and 3 cups of shredded cheese. Bake the casserole covered first so the center heats through, then uncover it so the top can bubble and some moisture can escape. Let it rest before slicing so the layers settle instead of sliding apart.

If you are deciding on tortillas first, jump to the corn vs flour tortilla guide. If your main worry is texture, go straight to how to keep enchilada casserole from getting soggy.

Reliable basic formula: 3½ cups cooked shredded chicken + 3 cups enchilada sauce + 12 small corn tortillas + 3 cups shredded cheese in a 9×13-inch pan.

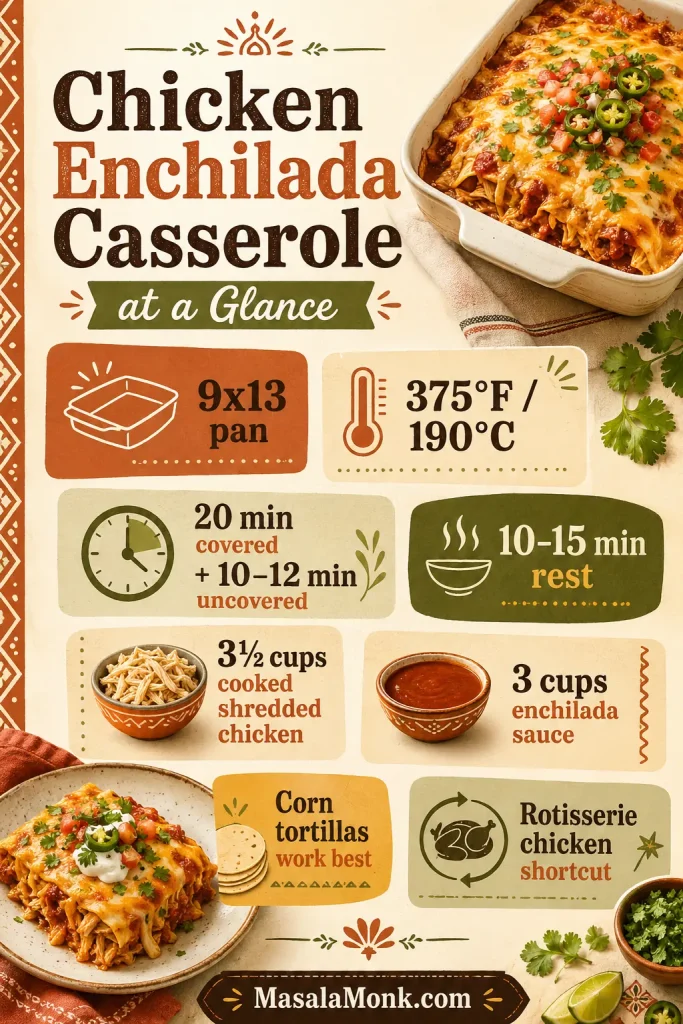
Chicken Enchilada Casserole at a Glance

Use this as the quick decision guide before you start cooking.

Pan9×13-inch / 23×33 cm
Oven375°F / 190°C
Bake20 min covered + 10–12 min uncovered
Rest10–15 minutes before slicing
Chicken3½ cups cooked shredded chicken
Sauce3 cups red or green enchilada sauce
Most forgiving tortillaCorn tortillas for better structure
ShortcutRotisserie chicken works beautifully
At-a-glance chicken enchilada casserole guide showing pan size, oven temperature, bake time, chicken, sauce, tortillas, and rest time.
Before you start, use the basic formula to check the pan size, sauce amount, bake time, and tortilla choice.

Already know you are making it? Jump straight to the recipe card. Still deciding between corn and flour tortillas, red and green sauce, or make-ahead timing? The guide below answers those questions before you start layering.

Why This No-Roll Chicken Enchilada Casserole Works

Regular enchiladas are delicious, but they can feel like a lot on a weeknight. Tortillas tear. Filling falls out. The pan gets crowded. This oven method keeps the comfort and skips the fussy part.

The trick is that the casserole does not try to be fancy. It keeps the parts people crave — tortillas, sauce, chicken, and cheese — and makes them easier to build in layers.

This is the kind of casserole that works for rotisserie-chicken nights, casual family dinners, meal-prep Sundays, and evenings when you want something cozy but do not want to stand at the counter rolling tortillas.

  • No rolling: The tortillas are layered, so there is less handling and less tearing.
  • Good use for cooked chicken: Rotisserie chicken, leftover roasted chicken, poached chicken, or shredded chicken breasts all work.
  • Classic red or tangy green: Red enchilada sauce gives deeper flavor; green sauce makes a brighter chicken casserole.
  • 9×13 family-dinner size: It serves about 8 and reheats well.
  • Built-in texture control: Corn tortillas, measured sauce, an uncovered finish, and a short rest help prevent sogginess.

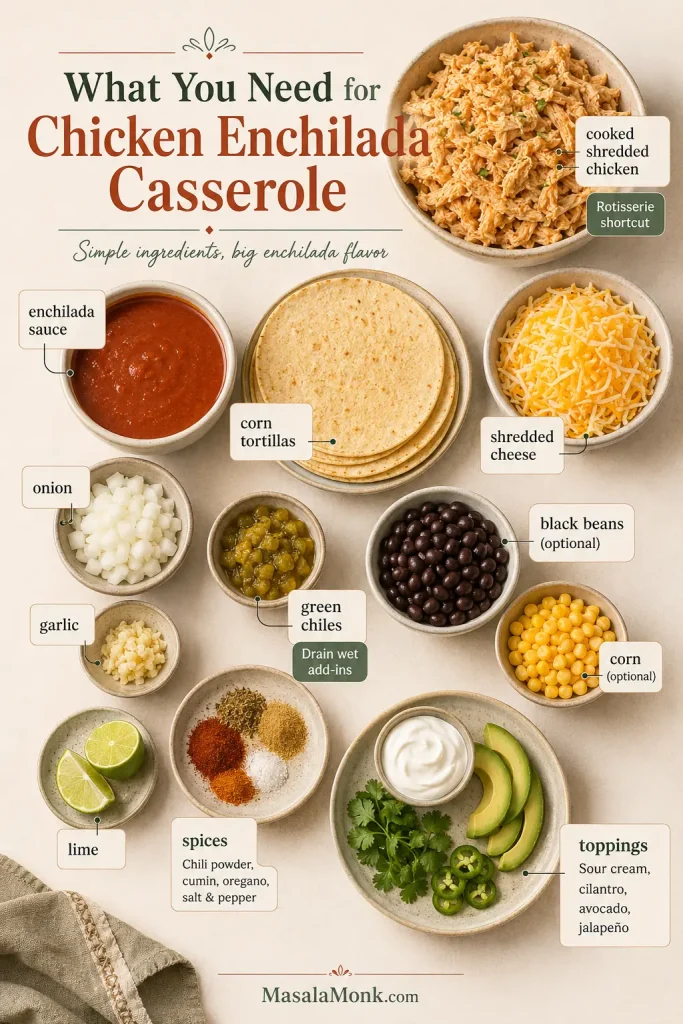
What You Need for Chicken Enchilada Casserole

The ingredient list is simple, but the choices matter. Cooked chicken makes the recipe fast, corn tortillas give the casserole better structure, and the sauce needs enough flavor to carry the whole dish.

Ingredients for chicken enchilada casserole, including shredded chicken, enchilada sauce, corn tortillas, cheese, green chiles, beans, corn, lime, and toppings.
The ingredient list stays simple, but draining wet add-ins and using flavorful sauce make a big difference in the final texture.

For the two biggest texture decisions, check the enchilada sauce amount and the corn vs flour tortilla guidance before assembling the pan.

Cooked Shredded Chicken

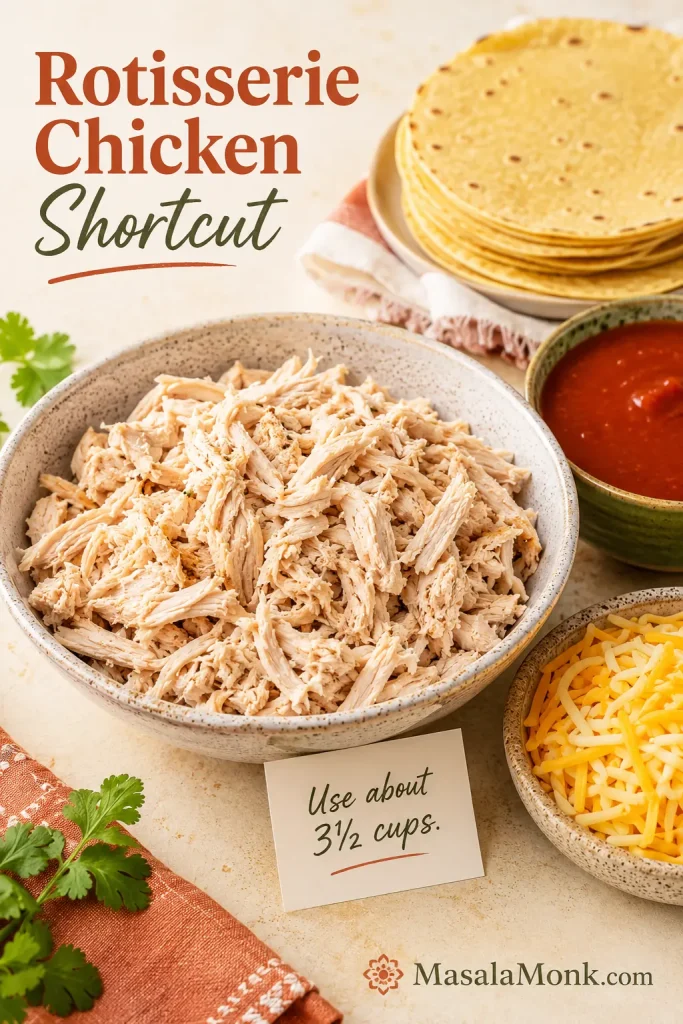
You need 3½ cups cooked shredded chicken, or about 525 g. One average rotisserie chicken usually gives about 3 to 4 cups shredded meat, depending on size, so it is a practical shortcut.

Shredded chicken blends into the layers better than large chunks. If you prefer more bite, you can use small diced cooked chicken, but avoid large pieces because they make the casserole harder to slice neatly. If you are starting with raw chicken breasts, MasalaMonk’s baked chicken breast recipe is a useful prep method before shredding.

Shredded rotisserie chicken measured for chicken enchilada casserole with tortillas, sauce, and cheese nearby.
Rotisserie chicken is the fastest shortcut here; however, shredding it finely helps the filling spread evenly between the tortilla layers.

Enchilada Sauce

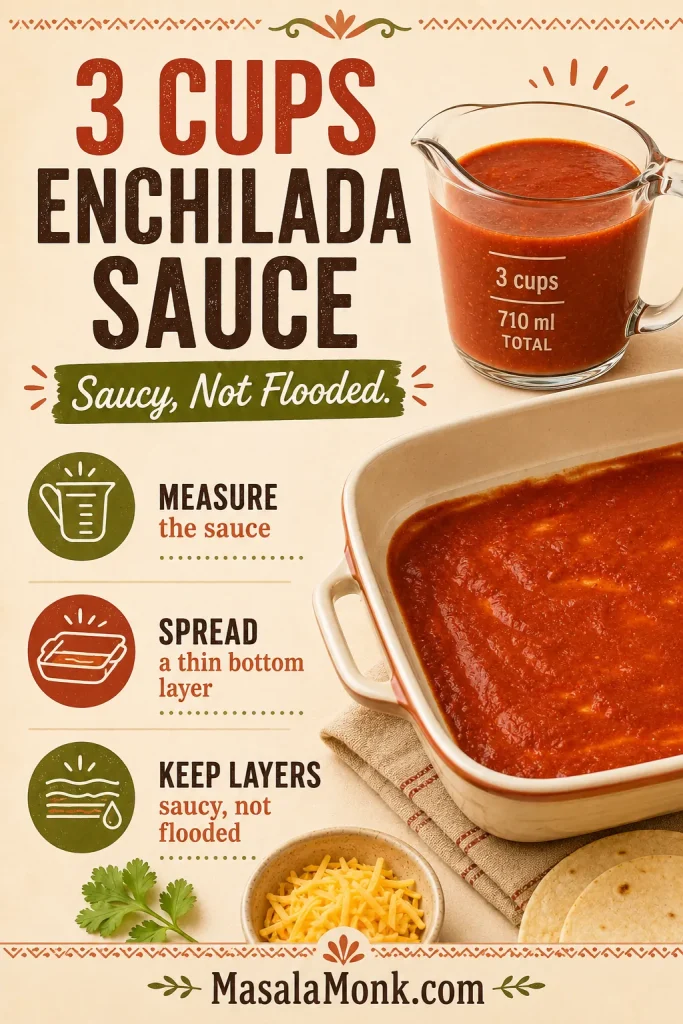
Use 3 cups / 710 ml enchilada sauce total. Red enchilada sauce gives the casserole a classic chili-forward flavor. Green enchilada sauce tastes brighter, tangier, and especially good with chicken.

Store-bought sauce is fine for a weeknight dinner. Homemade sauce works too. For a fresher green variation, salsa verde is excellent; MasalaMonk’s salsa verde recipe is a natural fit if you want a brighter tomatillo-style direction.

Enchilada sauce amount guide showing 3 cups or 710 ml total sauce for a saucy but not flooded casserole.
Measuring the enchilada sauce keeps the casserole moist without flooding the layers, so the finished pan is saucy instead of watery.

If you are worried about using too much sauce, the layering guide shows exactly where the 3 cups go.

Corn Tortillas

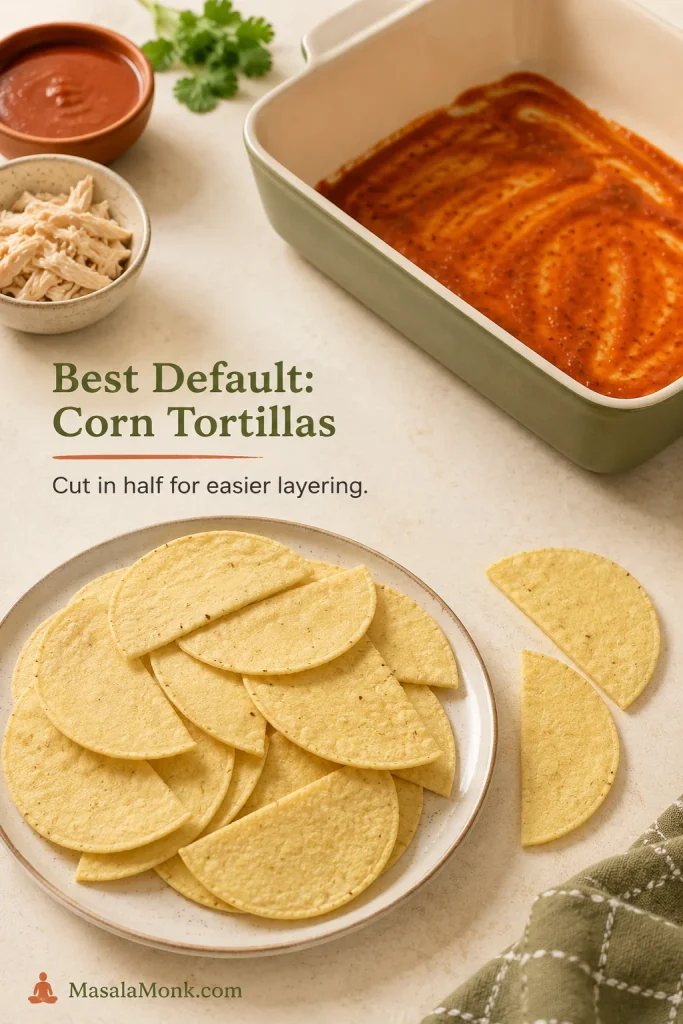
Use 12 small 6-inch corn tortillas, about 300–330 g total. Cut them in half so they fit the baking dish more evenly. Corn tortillas give the most classic enchilada flavor and hold their structure better under sauce.

Corn tortillas cut in half and ready to layer in a sauced 9x13 baking dish.
Corn tortillas are the best default because they bring classic enchilada flavor and hold their shape better under sauce.

Cheese

Use 3 cups / 12 oz / 340 g shredded cheese. Monterey Jack melts the smoothest, cheddar-Jack brings a little more flavor, and a Mexican-style cheese blend is convenient. Freshly shredded cheese usually melts better, but pre-shredded cheese is fine for a practical casserole.

Add-Ins and Heat Level

A small can of diced green chiles adds easy enchilada flavor without making the dish aggressively spicy. Black beans and corn are optional, but they make the casserole heartier and more colorful.

Drain beans, corn, and chiles well. Extra liquid is one of the fastest ways to turn an enchilada casserole watery. If you use both beans and corn and the skillet looks very full, save a little filling for tacos, bowls, or nachos instead of forcing every last spoonful into the baking dish.

As written, this casserole is usually mild to medium, depending on the enchilada sauce you use. For more heat, add jalapeño, a hotter sauce, or hot sauce at the table. For a family-friendly pan, keep the bake mild and let people add heat to their own plates.

Toppings

Add toppings after baking. Sour cream, chopped cilantro, avocado, sliced jalapeños, diced red onion, pico de gallo, salsa verde, and lime wedges all work well. Fresh toppings are especially helpful because the casserole itself is rich and saucy. If you want a creamy avocado topping, MasalaMonk’s easy guacamole recipe fits naturally here.

Pan, Oven Temperature, and Bake Time

The most forgiving pan for this recipe is a 9×13-inch baking dish, about 23×33 cm. That size gives you enough room for three balanced layers without making the center too thick.

DetailUse ThisWhy It Matters
Pan size9×13-inch / 23×33 cmCreates even layers and reliable baking.
Oven temperature375°F / 190°CHot enough to bubble the sauce and melt the cheese without drying the casserole.
Covered bake20 minutesLets the center heat through before the top browns.
Uncovered bake10–12 minutesLets the cheese bubble and excess moisture escape.
Rest time10–15 minutesLets the layers settle so the casserole slices better.

If you prefer baking at 350°F / 175°C, bake covered for 25–30 minutes, then uncover and bake for another 10–15 minutes. The lower temperature works; it simply needs a little more time.

How to Tell When It Is Done

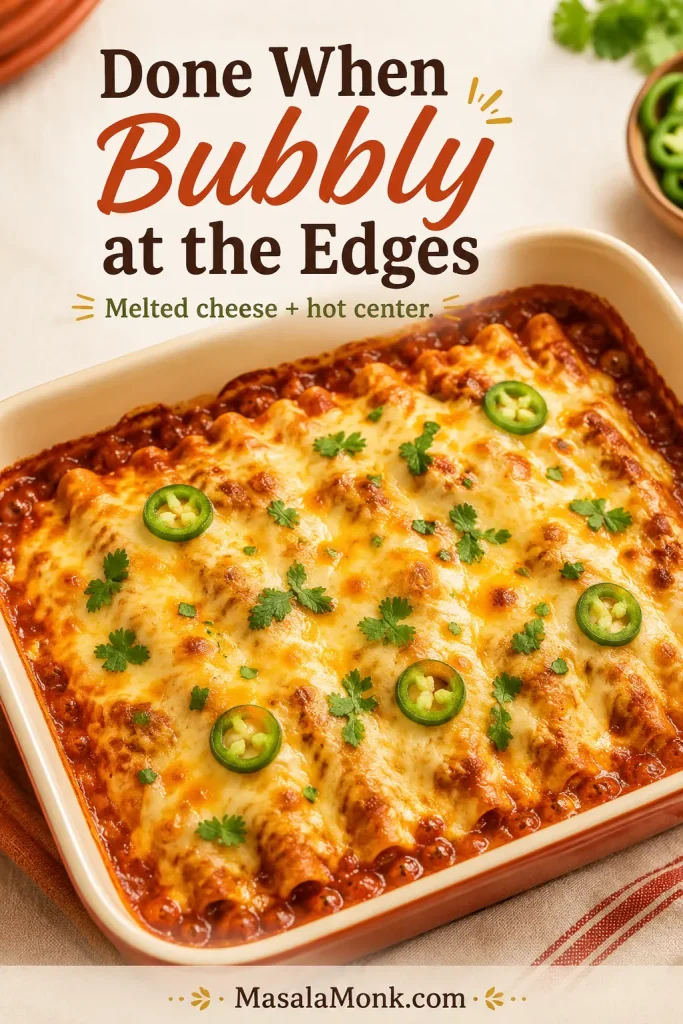
The casserole is done when the sauce is bubbling around the edges, the cheese is fully melted, the center is hot, and the tortillas have softened. At that point, it should smell like warm chili, toasted corn, and melted cheese. If the top still looks wet or loose, give it a few more uncovered minutes. If the cheese is browning too fast, loosely tent the dish with foil.

Baked chicken enchilada casserole with bubbling red sauce around the edges and melted cheese on top.
Bubbling edges and melted cheese are the clearest signs that the center is hot and the casserole is ready to rest.

Corn vs Flour Tortillas for Chicken Enchilada Casserole

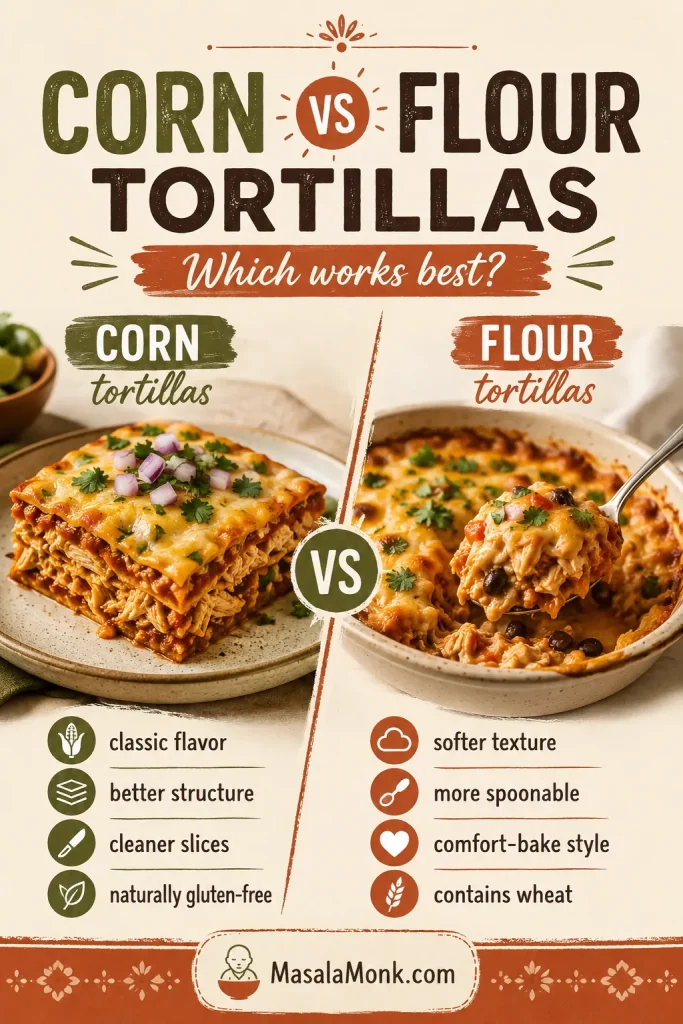
The tortilla choice changes the casserole. It affects flavor, structure, softness, and whether the final dish slices cleanly or collapses into a saucy scoop.

Corn versus flour tortilla comparison for chicken enchilada casserole, showing cleaner corn tortilla layers and softer flour tortilla texture.
Corn tortillas give cleaner pieces, while flour tortillas create a softer comfort-bake texture; therefore, the best choice depends on how sliceable you want the casserole.

Why Corn Tortillas Work Best

Corn tortillas are the most forgiving choice for a classic chicken enchilada casserole because they taste more like enchiladas and hold up better under sauce. They soften as the casserole bakes, but they usually do not become as gummy as flour tortillas.

Corn tortillas also make the dish easier to keep gluten-free, as long as the enchilada sauce and other packaged ingredients are certified gluten-free.

When Flour Tortillas Are Okay

Flour tortillas work if you want a softer, more comfort-food-style casserole. They are common in creamy white chicken enchilada casserole versions, where the goal is soft and rich rather than sliceable and structured.

If flour tortillas are what you have, the casserole will still taste good. It will simply be more tender and spoonable, so think comfort bake rather than neat enchilada squares. Because flour tortillas absorb sauce differently, the soggy-fix section is worth reading before you assemble.

Should You Toast or Fry the Tortillas First?

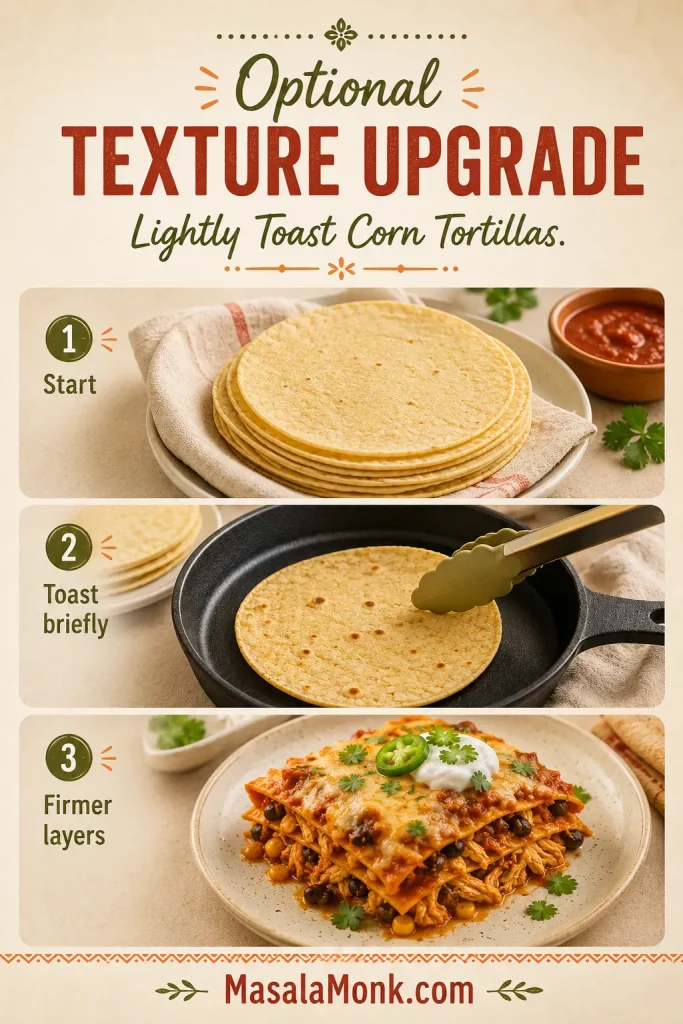
You do not have to fry tortillas for this no-roll casserole. However, if you want firmer layers, you can lightly toast corn tortillas in a dry skillet or warm them quickly with a small amount of oil before layering.

This extra step is optional, but useful if your enchilada sauce is thin, if you plan to make the casserole ahead, or if you want neater pieces.

Corn tortillas shown before and after light toasting, with a casserole layer cue for firmer texture.
Toasting corn tortillas is optional, but it is useful when you want firmer layers or plan to assemble the casserole ahead.

This step matters most when you are making the casserole ahead; the make-ahead and freezer notes explain how the tortilla texture changes as it sits.

Red Sauce vs Green Sauce

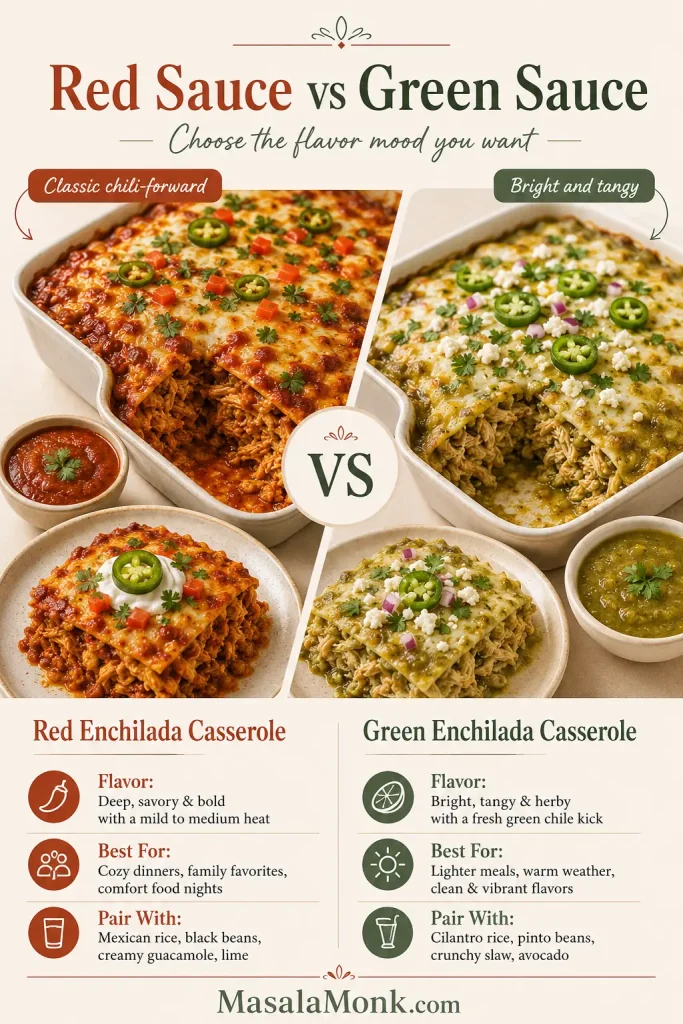
This recipe works with either red or green enchilada sauce. The right choice depends on the flavor mood you want: red is deeper, cozier, and more classic, while green is brighter, tangier, and especially lively with chicken.

Red sauce versus green sauce comparison for chicken enchilada casserole with red enchilada sauce and green salsa verde cues.
Red enchilada sauce gives a deeper, cozier flavor, while green sauce makes the chicken casserole brighter and tangier.
SauceFlavorBest For
Red enchilada sauceDeeper, chili-forward, classicTraditional chicken enchilada casserole
Green enchilada sauceBrighter, tangier, slightly sharperGreen chicken enchilada casserole
Salsa verdeFresh, tomatillo-forward, livelyA fresher green variation with cilantro and lime
Creamy green sauceRich, tangy, softWhite or creamy chicken enchilada casserole

Use red enchilada sauce for a classic, cozy pan or green enchilada sauce for a brighter chicken casserole. If using salsa verde, taste it first because some jars are saltier or more acidic than others. For extra heat at the table, a few drops from MasalaMonk’s pepper sauce guide can add sharp chili flavor without changing the whole casserole.

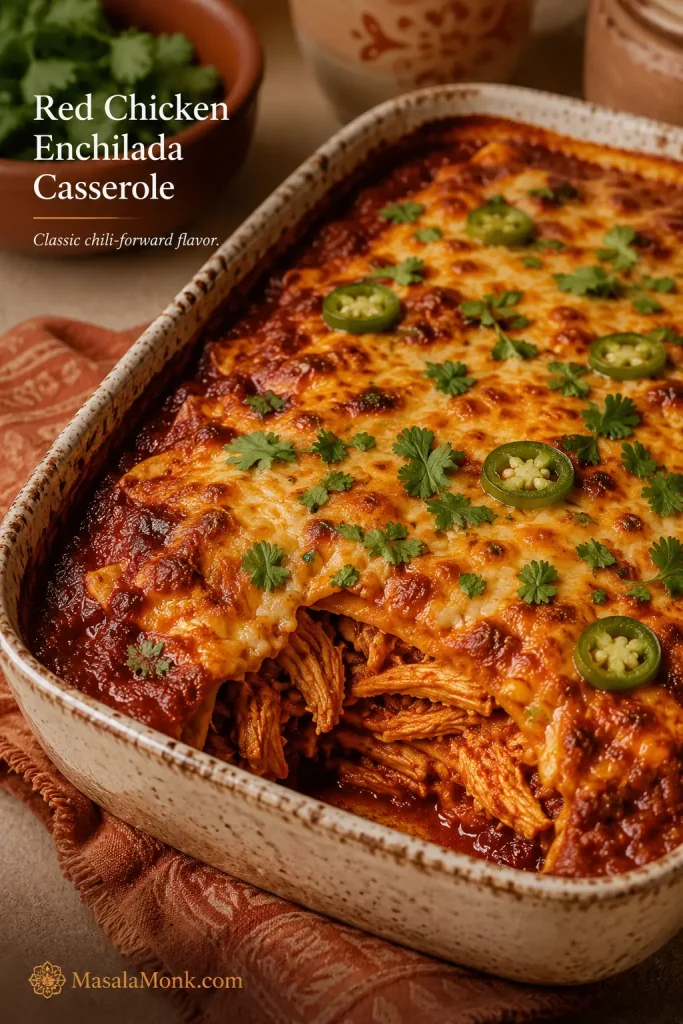
Close-up of red chicken enchilada casserole with melted cheese, red sauce, cilantro, jalapeños, and visible layers.
Red enchilada sauce gives the layers a deeper chili flavor, especially when it is measured instead of poured freely.

For a full green-sauce direction, see the green chicken enchilada casserole variation. For a softer creamy bake, jump to the white or sour cream version.

Choose your version: Go red sauce + corn tortillas for classic enchilada flavor, green sauce or salsa verde + Monterey Jack for a brighter chicken casserole, sour cream or white sauce for a creamier comfort-food bake, and rotisserie chicken + jarred sauce for the fastest dinner.

How to Make Chicken Enchilada Casserole

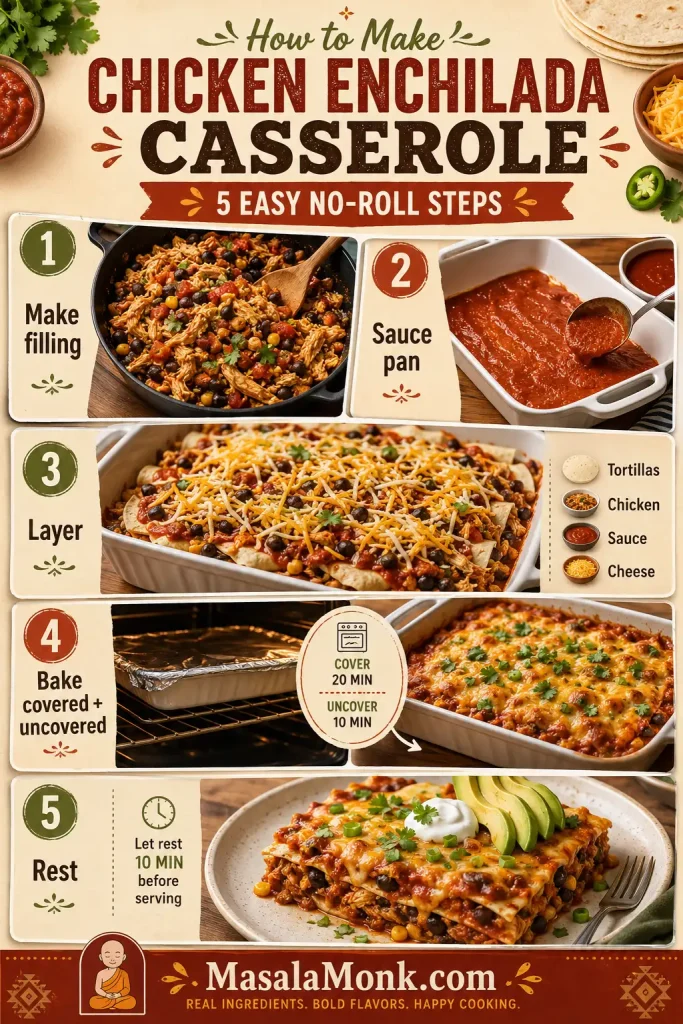
Once the filling is mixed, the rest is simple layering: build the pan, bake it covered, finish it uncovered, and give it a short pause before serving. This does not need to look perfect in the dish. Even coverage matters more than pretty rows, and the oven will pull everything together.

Step-by-step board showing how to make chicken enchilada casserole by making filling, saucing the pan, layering, baking, and resting.
Once the filling is mixed, the rest is relaxed layering: sauce the pan, build the stack, bake, and let it settle.

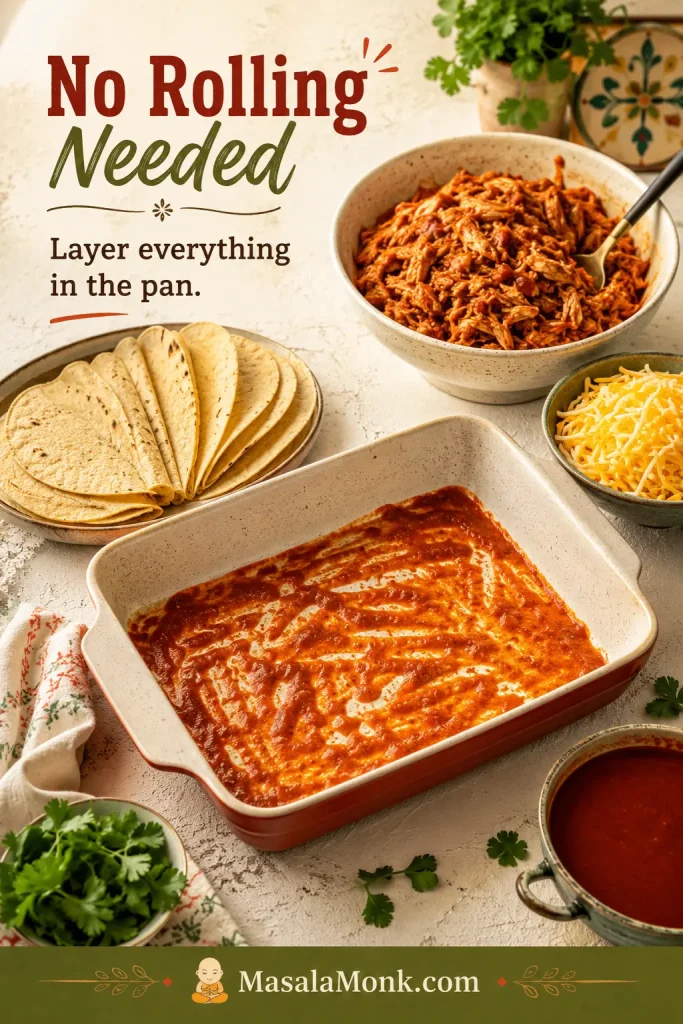
No-Roll Assembly Setup

Before you start building layers, set the sauced pan, tortilla halves, chicken filling, cheese, and remaining sauce within reach. That keeps the assembly relaxed and prevents overthinking each layer.

No-roll chicken enchilada casserole setup with a sauced baking dish, tortillas, shredded chicken filling, cheese, and sauce.
Instead of filling and rolling each tortilla, keep the assembly relaxed: layer the ingredients directly in the dish and let the oven pull them together.

1. Make the Chicken Filling

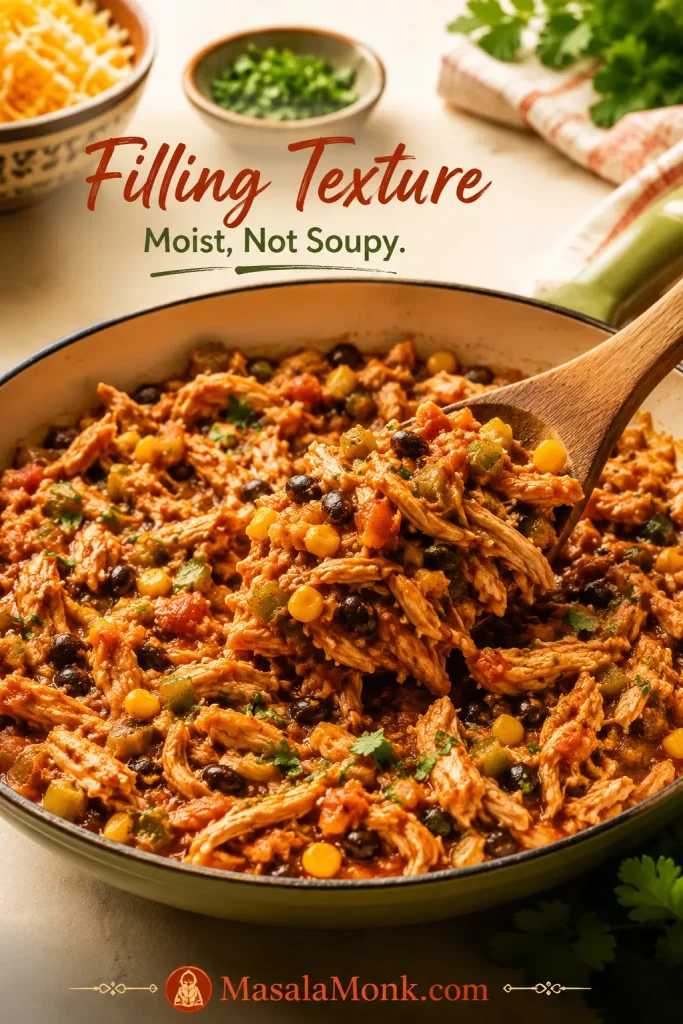
Warm oil in a skillet, then cook the onion until softened. Add garlic, cumin, chili powder, paprika, oregano, salt, and diced green chiles. Stir in the shredded chicken, optional black beans, optional corn, a little enchilada sauce, and lime juice.

The filling should be moist and flavorful, but not soupy. If it looks watery, cook it for another minute or two so extra liquid can evaporate.

Chicken enchilada casserole filling in a skillet with shredded chicken, sauce, beans, corn, and a spoon showing moist but not soupy texture.
The filling should taste seasoned and saucy on its own, but it should not be so wet that it loosens the whole baking dish.

2. Sauce the Bottom of the Pan

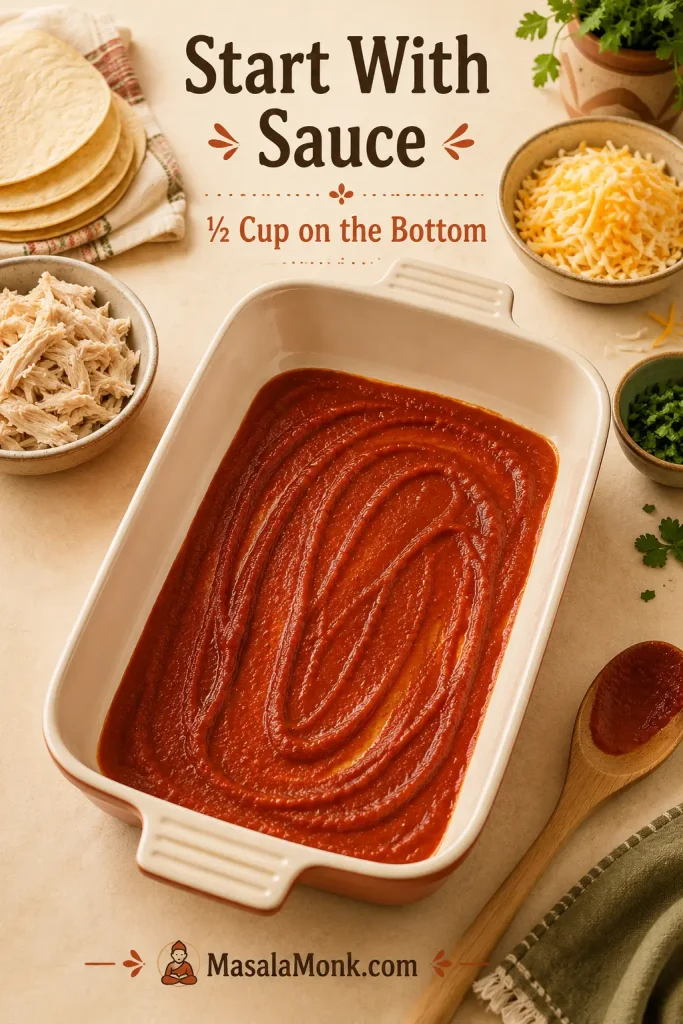
Spread ½ cup / 120 ml enchilada sauce across the bottom of the baking dish. This prevents the first tortilla layer from drying out and gives the casserole a saucy base.

Red enchilada sauce spread in a thin layer on the bottom of a 9x13 baking dish before adding tortillas.
Starting with a thin sauce layer protects the first tortillas from drying out without adding too much liquid to the bottom of the pan.

3. Layer the Tortillas, Chicken, Sauce, and Cheese

Add a layer of tortilla halves, overlapping slightly. Spread one-third of the chicken filling over the tortillas, spoon on some sauce, and sprinkle with cheese. Repeat until you have three layers.

4. Bake Covered, Then Uncovered

Cover the dish with foil and bake for 20 minutes. Remove the foil and bake for another 10–12 minutes, until the sauce bubbles around the edges and the cheese is melted on top.

5. Rest Before Slicing

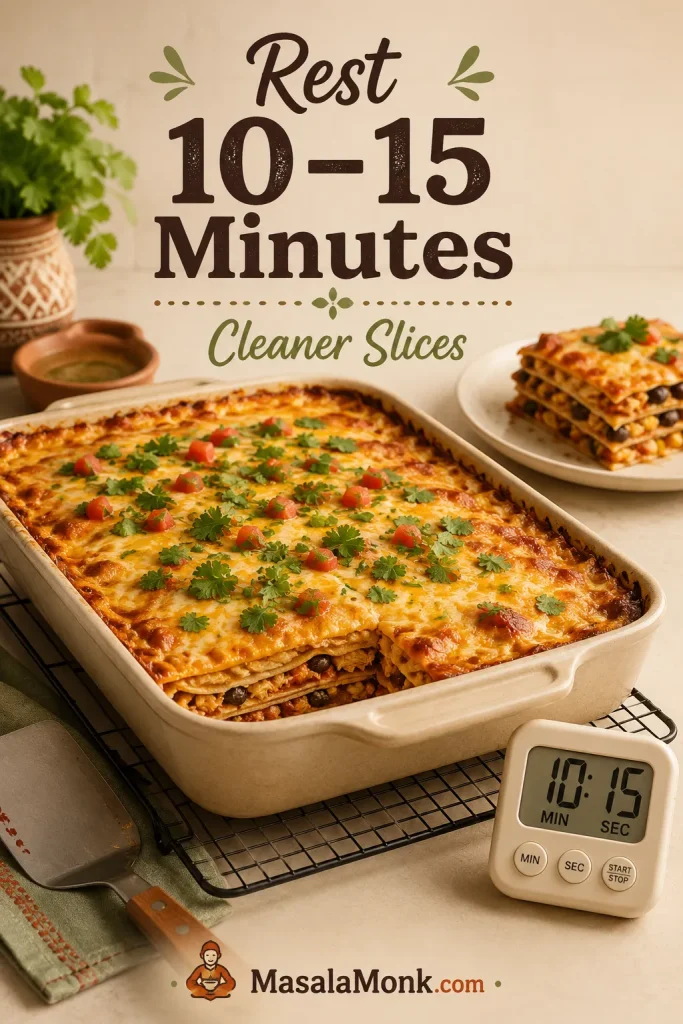
Let the casserole rest for 10–15 minutes before cutting. This is what turns the bubbling pan into something sliceable. If you scoop it immediately, it will taste good, but it will not hold together as well.

No-roll layered chicken enchilada casserole resting on a cooling rack with a timer and spatula nearby.
A short rest gives the cheese and sauce time to settle, so the casserole serves in cleaner, more stable pieces.

How to Layer Chicken Enchilada Casserole So It Holds Together

The casserole needs enough sauce to soften the tortillas, but not so much that every layer swims. This part is where many cooks worry about making the pan messy, but it does not need to look perfect.

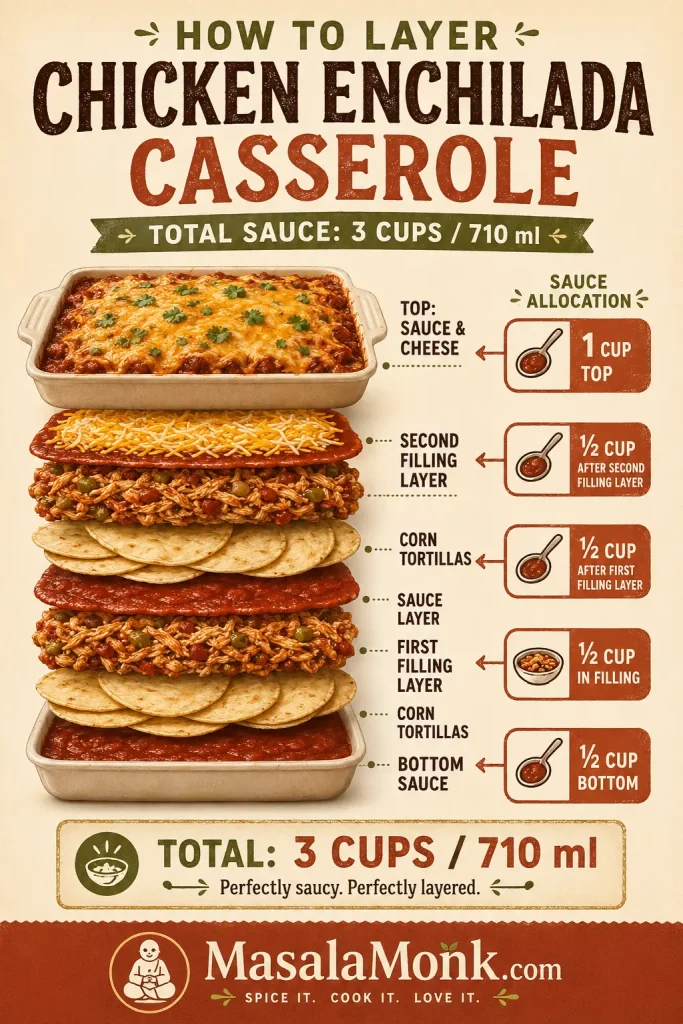
Use the Sauce as Your Layering Guide

The goal is saucy, not flooded. If your enchilada sauce is very thin, hold back a few tablespoons and add more only if the top looks dry before baking.

Sauce UseAmountWhere It Goes
Chicken filling½ cup / 120 mlStir into the seasoned chicken mixture.
Bottom of pan½ cup / 120 mlSpread before the first tortilla layer.
After first filling layer½ cup / 120 mlSpoon lightly over the chicken before cheese.
After second filling layer½ cup / 120 mlAdd just enough to moisten, not flood.
Top layer1 cup / 240 mlSpread over the final tortilla layer before the last cheese.
Total3 cups / 710 mlEnough sauce for soft layers without a watery casserole.
Layering diagram for chicken enchilada casserole showing corn tortillas, chicken filling, cheese, and a 3-cup sauce allocation.
The measured sauce allocation keeps every layer moist without letting the bottom of the pan turn loose or watery.

If the pan looks too wet at any point, check the soggy casserole fixes before adding more sauce.

Build the Layers Without Overthinking It

After the sauce is measured, the layers are simple: spread a thin sauce layer on the bottom, add tortilla halves, scatter one-third of the filling, spoon on the measured sauce, and add about 1 cup / 113 g cheese. Repeat until the pan is full, finishing with sauce and cheese on top.

  • Overlap tortilla halves slightly so there are no large gaps.
  • Spread the chicken filling evenly, but do not pack it down hard.
  • Keep the middle layers saucy, not flooded.
  • Finish with enough sauce and cheese on top to keep the casserole moist as it bakes.

If your tortillas are small, use enough pieces to cover each layer. If they are larger, trim or tear them to fit. The goal is even coverage, not a perfect pattern.

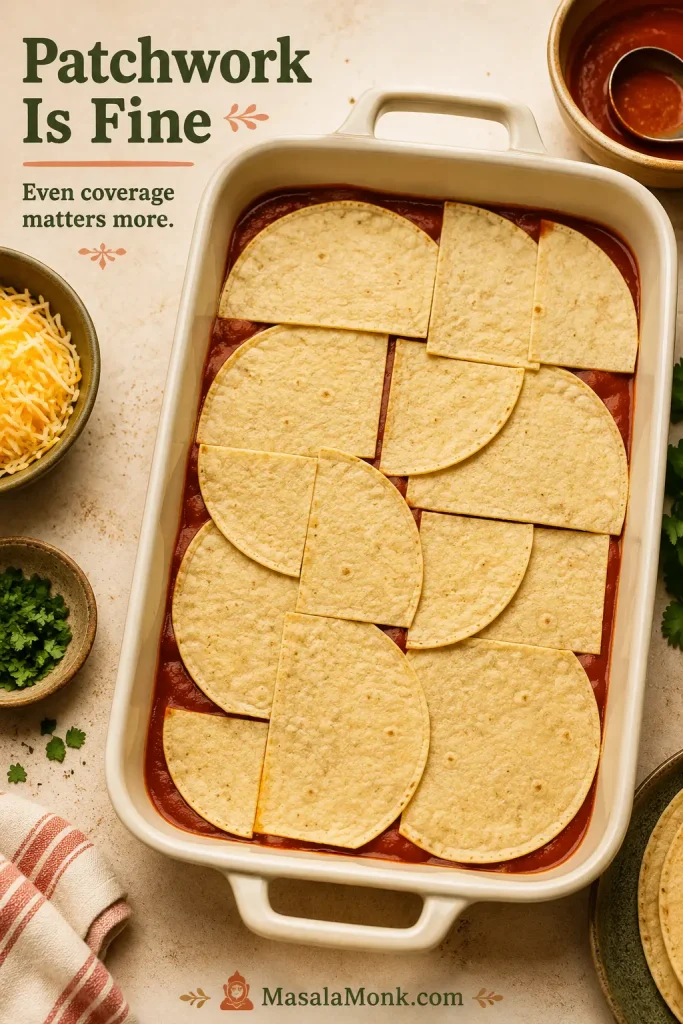
Patchwork Tortilla Layers Are Fine

Do not worry if the tortilla pieces look a little patchwork in the pan. Once the sauce and cheese melt into the layers, neat coverage matters more than a perfect arrangement. The pan may look imperfect before baking, but the finished casserole settles into soft, saucy layers.

Halved corn tortillas arranged in a patchwork layer over red sauce in a 9x13 baking dish.
The tortilla layer does not need to look perfect; even coverage matters more than neat rows once the sauce and cheese melt.

What Clean-Enough Slices Look Like

The best version is still generous and saucy, not dry or stiff. A slice should lift cleanly enough to serve while still showing soft tortilla, chicken, cheese, and sauce layers.

A spatula lifting a saucy layered slice of chicken enchilada casserole from a baking dish.
The goal is not a dry, perfect square; instead, aim for saucy layers that hold together enough to serve.

How to Keep Enchilada Casserole From Getting Soggy

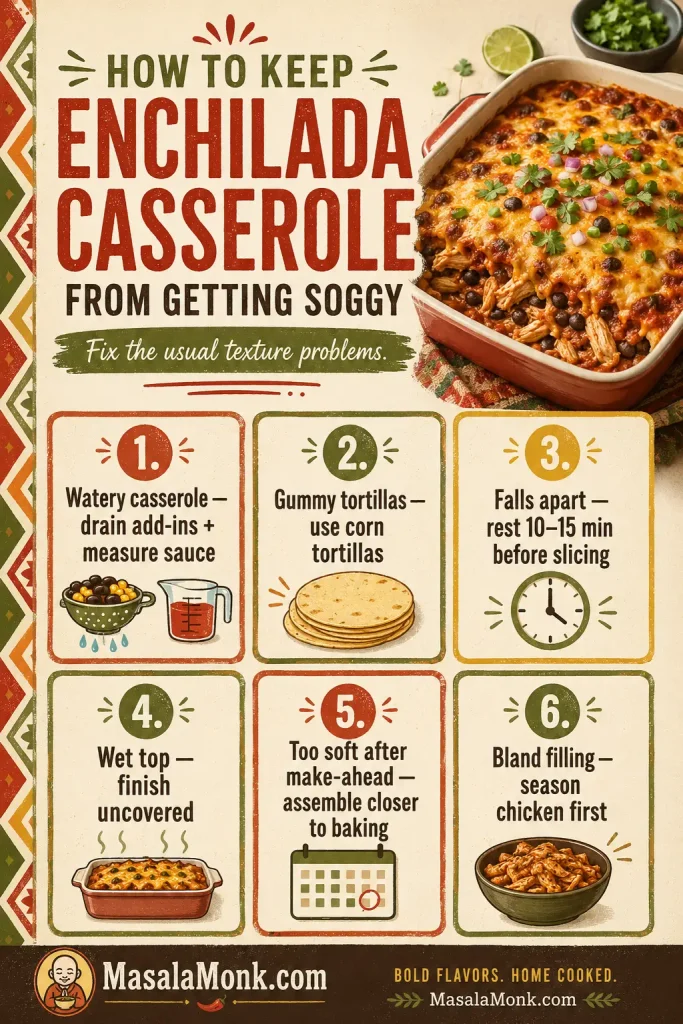
Sogginess is the main thing that can ruin chicken enchilada casserole. Fortunately, most soggy casseroles are not ruined by one big mistake. Usually, it is a few small things adding up: wet add-ins, too much sauce, soft tortillas, and serving the casserole before it has had a chance to settle.

To prevent the problem before it starts, focus on the sauce allocation and the corn vs flour tortilla choice first.

ProblemLikely CauseFix
Watery casseroleToo much liquid from sauce, beans, corn, or chilesDrain add-ins well and use about 3 cups sauce total.
Gummy tortillasFlour tortillas or too much sauceUse corn tortillas, or reduce sauce slightly if using flour.
Casserole falls apartCut too soon after bakingRest 10–15 minutes before slicing.
Wet topBaked covered the whole timeUncover for the final 10–12 minutes.
Too soft after make-aheadTortillas absorbed sauce while refrigeratedUse corn tortillas and avoid assembling too far ahead if you want firmer layers.
Bland fillingChicken was not seasoned before layeringSeason the filling with spices, chiles, sauce, and lime before assembling.
Troubleshooting board for preventing soggy enchilada casserole, with fixes for watery sauce, gummy tortillas, falling apart, wet top, make-ahead softness, and bland filling.
If the pan usually turns soft or watery, start with moisture control: drain add-ins, measure sauce, and give the bake time to settle.

Most fixes come down to controlling moisture before the pan goes into the oven. If the first scoop looks softer than you expected, give the pan another few minutes before serving the rest. Enchilada casserole firms up as it cools, especially when the cheese and sauce have time to settle.

Mistakes to Avoid

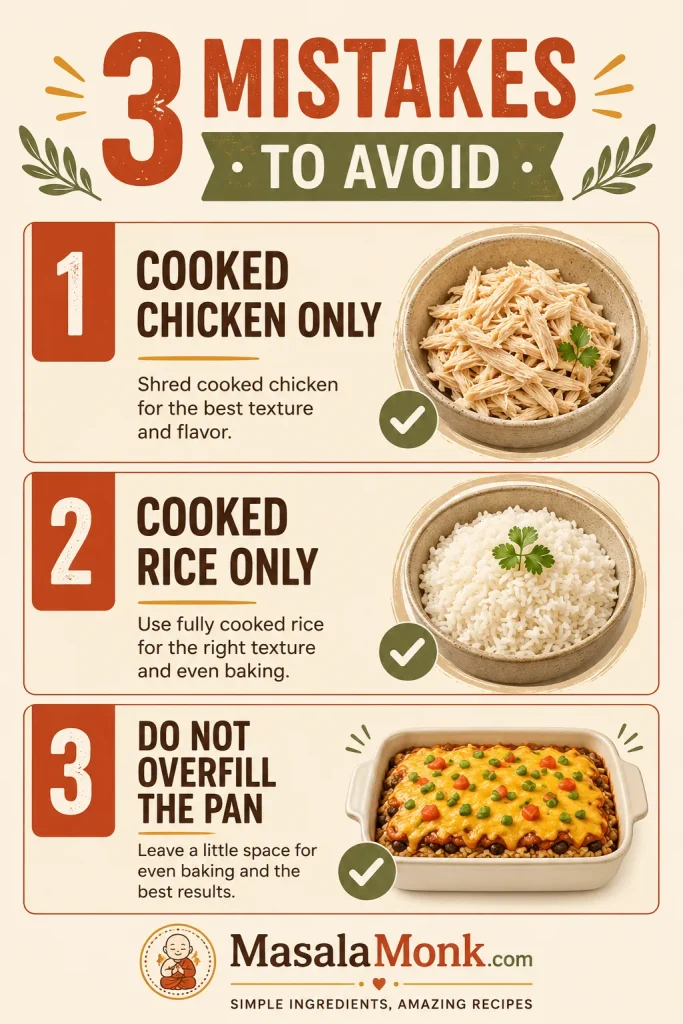
Keep these three guardrails in mind: use cooked chicken, not raw chicken; use cooked rice only if you add rice; and do not pack the baking dish so full that the layers cannot settle.
Three mistakes to avoid when making chicken enchilada casserole: use cooked chicken, use cooked rice, and do not overfill the pan.
These three guardrails keep the recipe safe, evenly baked, and easier to serve without changing the basic method.
  • Raw chicken changes the recipe. This casserole is built around cooked shredded chicken, so raw chicken would change the bake time, moisture level, and food-safety timing.
  • Raw rice needs its own recipe. It needs more liquid and a longer bake, so use cooked rice only if you want a rice variation.
  • An overfilled pan gets messy fast. If the filling is more than your dish can comfortably hold, save the extra for tacos, bowls, or nachos.

Chicken Enchilada Casserole Variations

These are adaptation notes for the main casserole, not all separate full recipes. Red or green sauce swaps stay closest to the original 9×13 bake. Rice, slow cooker, keto, and tortilla-free versions change the texture or timing more, so use those as direction rather than simple one-for-one swaps. If you plan to make a variation ahead, check the make-ahead notes because creamy, rice, and slow cooker versions soften differently.

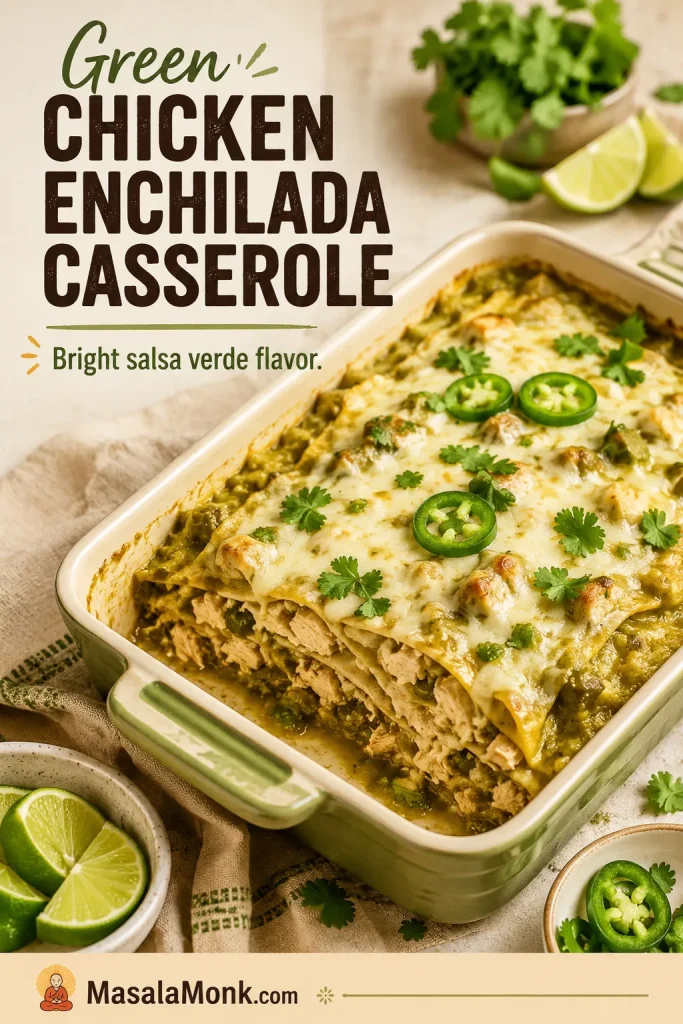
Green Chicken Enchilada Casserole

Green sauce gives the casserole a brighter, tangier feel, especially with chicken. Use green enchilada sauce or salsa verde, add diced green chiles to the filling, choose Monterey Jack or cheddar-Jack, and finish with cilantro and lime.

Green chicken enchilada casserole with salsa verde, Monterey Jack cheese, cilantro, lime, jalapeños, and visible chicken layers.
Green enchilada sauce or salsa verde gives the casserole a fresher finish, especially with Monterey Jack, cilantro, and lime.

White, Sour Cream, or Creamy Chicken Enchilada Casserole

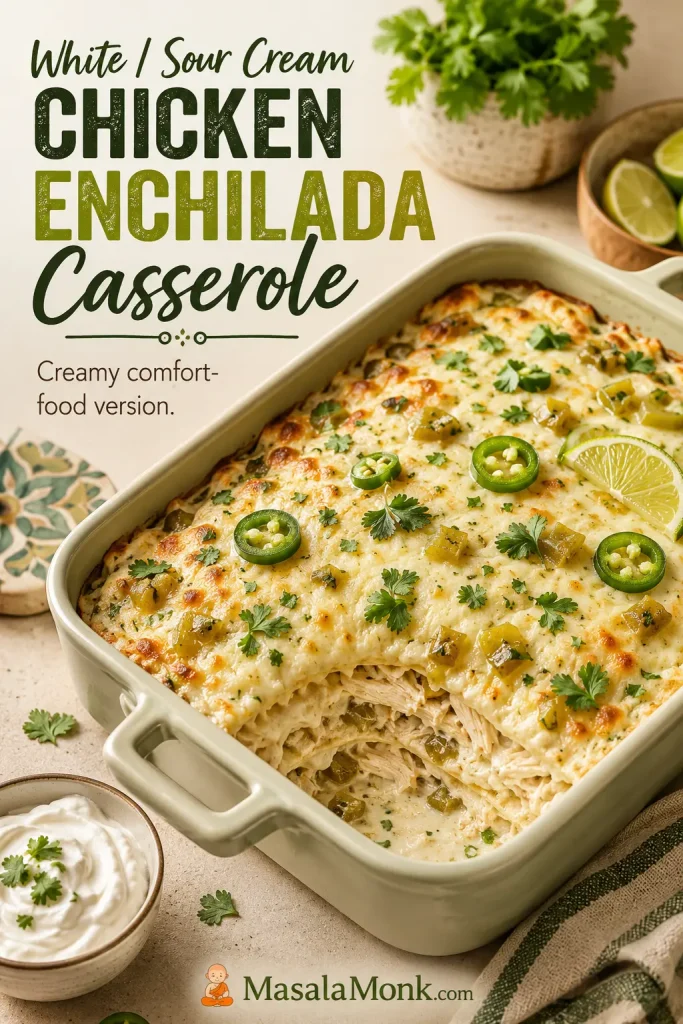
For a creamier comfort-food pan, use a sour cream, cream cheese, or simple white sauce direction with green chiles and Monterey Jack. Flour tortillas are common in white enchilada casseroles because they make the texture softer, but corn tortillas still hold better if you want neater pieces.

White sour cream chicken enchilada casserole with creamy sauce, melted cheese, green chiles, cilantro, jalapeños, and lime.
A white or sour cream version leans creamier and softer, so think comfort bake rather than sharply sliced layers.

No Cream of Chicken Soup Needed — But Here’s How to Adapt It

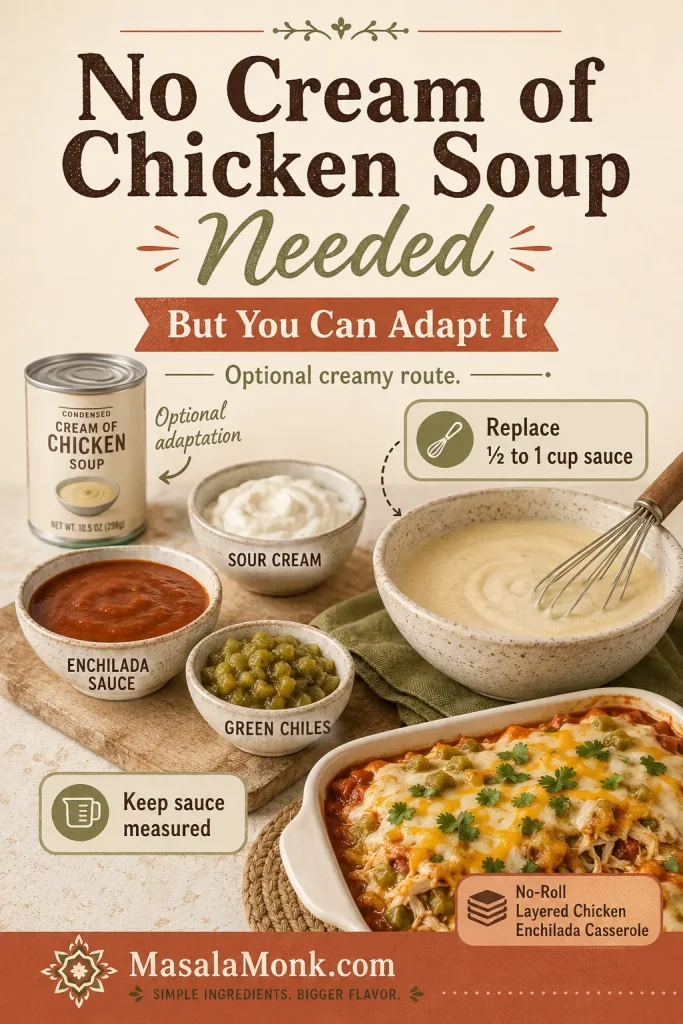
This recipe does not need cream of chicken soup because enchilada sauce already gives the pan moisture and flavor. However, if the casserole you grew up with was creamier, softer, and made with condensed soup, you can still take this recipe in that direction.

Replace ½ to 1 cup of the enchilada sauce with a sour cream and cream-of-chicken mixture, then keep the remaining sauce measured. Condensed soup plus sour cream makes the casserole richer and softer, so this route works best when you want an old-school creamy bake rather than the cleanest layered pieces.

Cream of chicken soup adaptation board with condensed soup, sour cream, enchilada sauce, green chiles, creamy sauce, and a no-roll layered casserole.
The main recipe does not need condensed soup, but this adaptation shows how to take it toward an old-school creamy casserole without losing control of the sauce.

Chicken Enchilada Rice Casserole

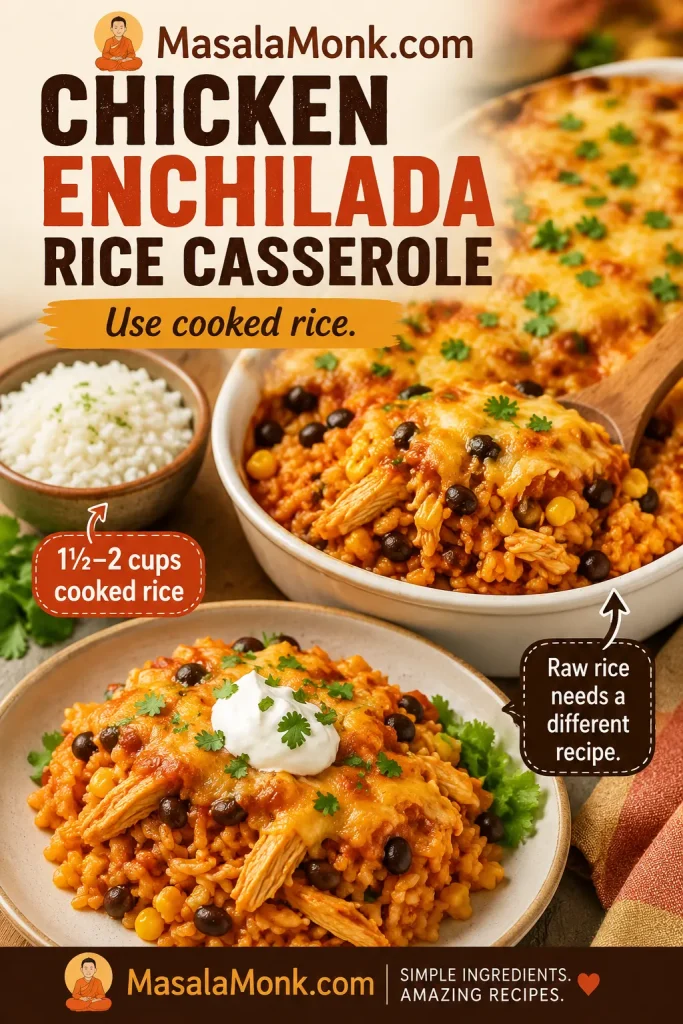
Cooked rice can make the casserole heartier. Stir in 1½ to 2 cups cooked rice with the chicken filling and reduce the tortillas slightly if the pan feels too full. Do not use raw rice here; it needs a different liquid ratio and longer bake time.

Chicken enchilada rice casserole variation with cooked rice, shredded chicken, red enchilada sauce, black beans, corn, cheese, and sour cream.
Cooked rice makes the casserole heartier; however, raw rice needs a different liquid ratio and should not be added to this version.

Slow Cooker Chicken Enchilada Casserole

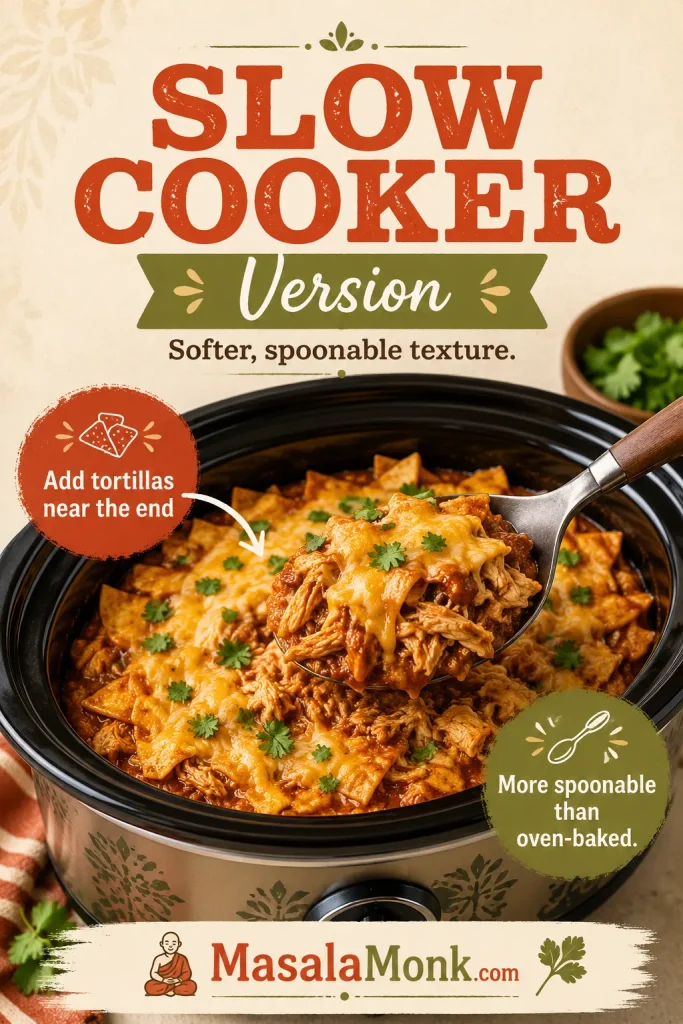
The slow cooker version is convenient, but it will be more spoonable than the oven-baked casserole. Cook chicken with enchilada sauce first, shred it, then stir in tortilla strips and cheese near the end so the tortillas do not become mushy. For more shredded-chicken dinner ideas, MasalaMonk’s crock pot chicken breast recipes are useful.

Slow cooker chicken enchilada casserole with saucy shredded chicken, tortilla pieces, melted cheese, cilantro, and a spoonful being served.
The slow cooker version is convenient and spoonable, but adding the tortillas near the end helps keep them from turning mushy.

Healthy, Keto, or Tortilla-Free Notes

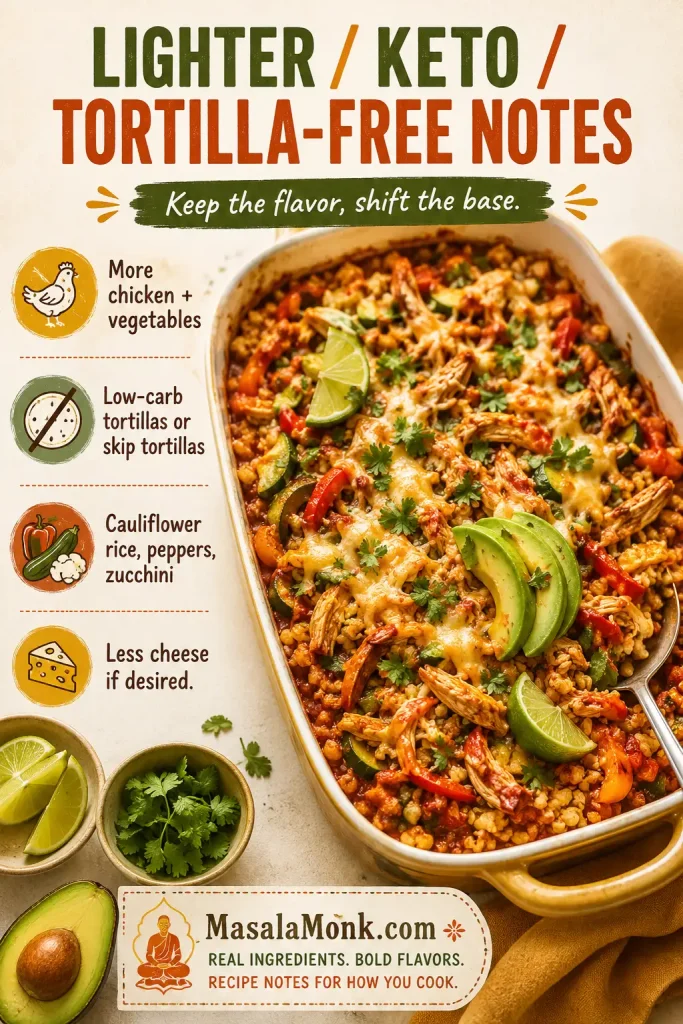
A lighter pan can use more chicken, black beans, extra vegetables, slightly less cheese, and corn tortillas. For a low-carb version, use low-carb tortillas or skip the tortillas and make a saucy chicken enchilada bake with peppers, cauliflower rice, or zucchini. MasalaMonk’s sheet pan chicken fajitas recipe is a good lighter companion if you want a quick Tex-Mex-style chicken dinner with more peppers and less cheese.

Lighter keto chicken enchilada casserole notes with shredded chicken, peppers, zucchini, cauliflower rice, avocado, lime, and less cheese.
For a lighter or lower-carb direction, keep the enchilada flavor and shift the base toward chicken, vegetables, and low-carb swaps.

Make Ahead, Freezer, and Reheating Tips

Chicken enchilada casserole is a good make-ahead dinner, but tortilla texture changes the longer the casserole sits with sauce. If you want the neatest layers, assemble it the same day you plan to bake it. If convenience matters more, assemble it ahead and expect a more tender texture.

To keep the make-ahead texture firmer, use the corn tortilla guidance and avoid over-saucing the layers.

When serving company, bake it fresh if you can. On a busy weeknight, assembling it ahead is still worth it. The make-ahead version is not about perfect slices; it is about having dinner mostly handled before the evening gets busy.

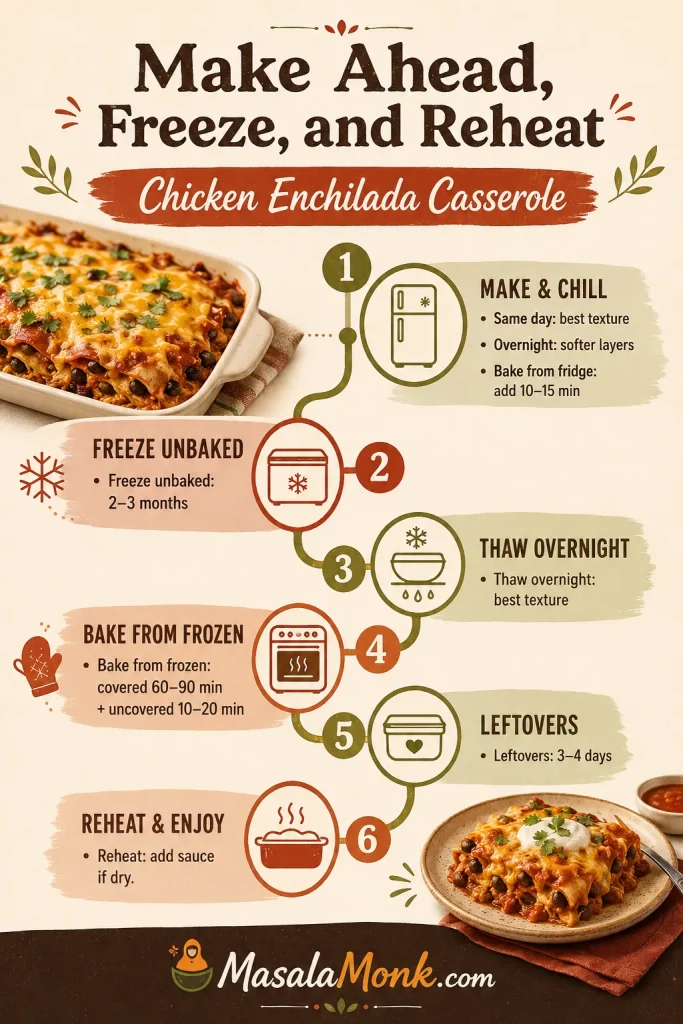
NeedWhat to DoTexture Note
Make ahead same dayAssemble, cover, and refrigerate until ready to bake.Very good texture.
Make ahead overnightRefrigerate up to 24 hours.Tortillas soften more, especially flour tortillas.
Bake from fridgeAdd 10–15 minutes to the covered bake time.Keep covered until hot in the center.
Freeze unbakedWrap tightly and freeze for 2–3 months.Corn tortillas freeze better than flour.
Bake after thawingThaw overnight in the fridge, then bake covered and finish uncovered.Best freezer texture.
Bake from frozenBake at 350°F / 175°C covered for 60–90 minutes, then uncovered for 10–20 minutes.Time depends on pan depth and how solidly frozen it is.
Store leftoversRefrigerate in an airtight container for 3–4 days.Good for lunches.
ReheatWarm covered at 350°F / 175°C or microwave individual portions.Add a spoonful of sauce if it seems dry.
Make-ahead, freezer, and reheating workflow board for chicken enchilada casserole with fridge, freezer, oven, leftovers, and reheat steps.
Make-ahead prep is practical, although the layers soften slightly; careful chilling, wrapping, and reheating keep the pan worth serving.

Freeze Unbaked Chicken Enchilada Casserole

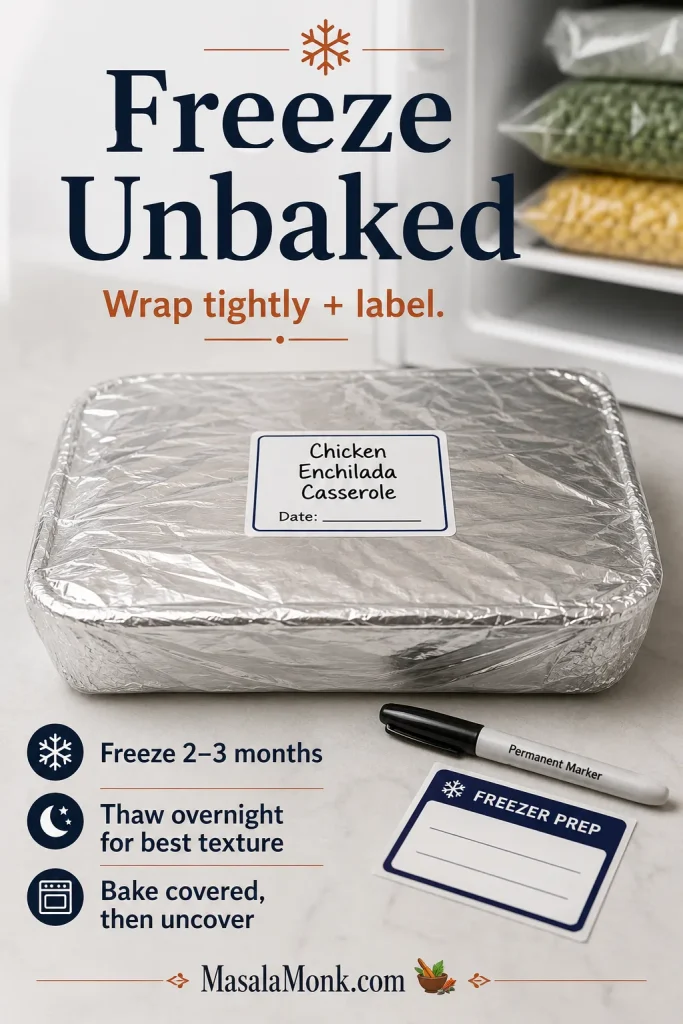
Freezing the unbaked pan is useful when you want dinner ready for a future busy night. Wrap the dish tightly, label it clearly, and thaw overnight for the best texture before baking.

Unbaked chicken enchilada casserole wrapped tightly in foil with a freezer label, marker, and freezer-prep notes.
Wrapping and labeling the unbaked casserole protects it in the freezer, while thawing overnight gives the best baked texture later.

For general leftover safety, the USDA’s food-safety guidance is a helpful reference for cooked dishes and refrigerated leftovers: USDA leftovers and food safety. For poultry safety specifically, the USDA’s safe minimum internal temperature chart is useful if you are cooking chicken before shredding it.

What to Serve With Chicken Enchilada Casserole

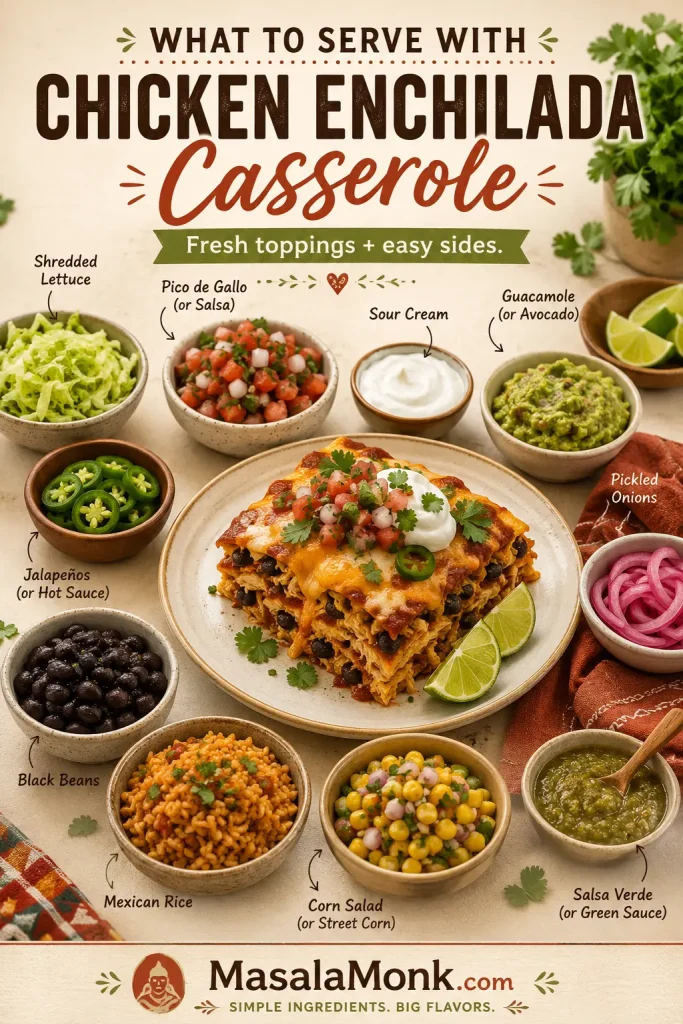
This casserole is filling on its own, but the right sides make it feel like a complete dinner. Since the casserole is saucy and cheesy, fresh, crunchy, or bright sides work especially well. Think of toppings as balance: lime, cilantro, and pico de gallo add brightness; sour cream, avocado, and guacamole add creaminess; jalapeños and pepper sauce add heat; lettuce, onion, or slaw add crunch.

  • Mexican rice or cilantro lime rice
  • Black beans or refried beans
  • Guacamole or sliced avocado
  • Pico de gallo or MasalaMonk’s mango salsa recipe for a sweet-bright topping
  • Salsa verde
  • Shredded lettuce with lime
  • Corn salad
  • Pickled onions
  • Jalapeños
  • Lime wedges

If serving this for guests, put toppings in small bowls and let everyone finish their own plate. It turns a hot, cheesy casserole into an easy toppings-bar dinner, and the cool, fresh extras make every serving feel a little brighter.

Serving ideas for chicken enchilada casserole with a plated slice, lettuce, pico de gallo, sour cream, guacamole, jalapeños, beans, rice, corn salad, pickled onions, lime, and salsa verde.
Bright toppings, crunchy sides, beans, rice, and salsa make the saucy baked pan feel fresh enough for a full dinner.

Chicken Enchilada Casserole Recipe

This easy chicken enchilada casserole is a no-roll 9×13 dinner with soft tortilla layers, saucy shredded chicken, and melted cheese on top. Use red sauce for a classic chili-forward bake or green sauce for a brighter, tangier chicken casserole.

Prep Time20 minutes
Cook Time30–32 minutes
Rest Time10–15 minutes
Servings8

Equipment

  • 9×13-inch / 23×33 cm baking dish
  • Large skillet
  • Mixing spoon or spatula
  • Foil
  • Knife and cutting board
  • Measuring cups and spoons

Ingredients

  • 1 tablespoon neutral oil / 15 ml
  • 1 small onion, diced / about 120 g
  • 2–3 garlic cloves, minced
  • 1 teaspoon ground cumin
  • 1 teaspoon chili powder
  • ½ teaspoon smoked paprika or regular paprika
  • ½ teaspoon dried oregano
  • ½ teaspoon kosher salt, plus more to taste
  • 1 can diced green chiles / 4 oz / 113 g, drained if watery
  • 3½ cups cooked shredded chicken / about 525 g
  • 1 can black beans, drained and rinsed / 15 oz / 425 g, optional
  • 1 cup corn / about 150–165 g, optional
  • 3 cups enchilada sauce, red or green / 710 ml, divided
  • 1 tablespoon lime juice / 15 ml
  • 12 small corn tortillas, 6-inch, halved / about 300–330 g total
  • 3 cups shredded Monterey Jack, cheddar-Jack, or Mexican blend cheese / 12 oz / 340 g

Optional Toppings

  • Sour cream
  • Chopped cilantro
  • Avocado or guacamole
  • Sliced jalapeños
  • Diced red onion
  • Lime wedges
  • Pico de gallo or salsa verde

Instructions

  1. Heat the oven. Preheat the oven to 375°F / 190°C. Lightly grease a 9×13-inch / 23×33 cm baking dish.
  2. Make the filling. Heat the oil in a large skillet over medium heat. Add the onion and cook for 3–4 minutes, until softened.
  3. Add the seasoning. Stir in the garlic, cumin, chili powder, paprika, oregano, salt, and diced green chiles. Cook for about 30 seconds, just until fragrant.
  4. Add chicken and extras. Stir in the shredded chicken, black beans if using, corn if using, ½ cup / 120 ml enchilada sauce, and lime juice. Cook for 1–2 minutes, just until everything is combined and lightly saucy. Taste and adjust salt if needed.
  5. Start the layers. Spread ½ cup / 120 ml enchilada sauce across the bottom of the baking dish. Add a layer of tortilla halves, overlapping slightly.
  6. Add filling and cheese. Spread one-third of the chicken filling over the tortillas. Spoon over about ½ cup / 120 ml sauce, then sprinkle with about 1 cup / 113 g cheese.
  7. Repeat. Add another tortilla layer, another third of the filling, another ½ cup / 120 ml sauce, and another cup of cheese. Add the final tortilla layer, the remaining filling, the remaining sauce, and the last cheese.
  8. Bake covered. Cover the dish with foil and bake for 20 minutes. If the dish is very full, tent the foil slightly so it does not stick to the cheese.
  9. Finish uncovered. Remove the foil and bake for another 10–12 minutes, until the casserole is bubbling around the edges and the cheese is melted.
  10. Rest before serving. Let the casserole rest for 10–15 minutes before slicing. Add toppings just before serving.

Recipe Notes

  • Baking at 350°F / 175°C: Bake covered for 25–30 minutes, then uncovered for 10–15 minutes.
  • Green chicken enchilada casserole: Use green enchilada sauce or salsa verde, Monterey Jack cheese, and extra cilantro/lime to finish.
  • Creamier casserole: Stir ½ cup / 120 g sour cream into the filling after it cools slightly, or use it as a topping.
  • Neater slices: Use corn tortillas and let the casserole rest before cutting.
  • Softer casserole: Flour tortillas can be used, but they may become more tender or gummy.
FAQs

Do I have to roll the tortillas?

No. That is the beauty of the casserole. The tortillas are layered in the pan instead of filled and rolled, so you get enchilada flavor without the assembly line.

How much chicken do I need?

Use about 3½ cups cooked shredded chicken. One average rotisserie chicken usually gives about 3 to 4 cups shredded meat, depending on size.

Are corn or flour tortillas better?

Corn tortillas give more classic enchilada flavor and better structure. Flour tortillas work, but they create a softer, more spoonable casserole and can turn gummy if the dish is too saucy.
Is red or green enchilada sauce better for this casserole?

Both work. Red sauce gives a deeper, more classic flavor, while green enchilada sauce tastes brighter and tangier with chicken, Monterey Jack, cilantro, and lime.
How do I keep chicken enchilada casserole from getting soggy?

Use corn tortillas, drain wet add-ins, measure the sauce, bake uncovered at the end, and give the casserole time to settle before serving. If you want firmer layers, lightly toast the tortillas before assembling.

How far ahead can I assemble it?

You can assemble it up to 24 hours ahead and refrigerate it covered. When baking from the fridge, add 10–15 minutes to the covered bake time so the center heats through.

What is the best way to freeze it?

Freeze it unbaked or baked, tightly wrapped, for 2–3 months. For the best texture, thaw it overnight in the refrigerator before baking or reheating. Corn tortillas usually freeze better than flour tortillas.

Is the slow cooker version as good as the oven version?

The slow cooker version is convenient, but it will be softer than the oven method. Cook the chicken with enchilada sauce first, shred it, then add tortilla strips and cheese near the end so the tortillas do not become too mushy.

Should rice go in this casserole or on the side?

Cooked rice can go in the casserole if you want it heartier. Stir in 1½ to 2 cups cooked rice with the chicken filling. Raw rice needs different liquid ratios and a longer bake time, so it is better handled as its own chicken enchilada rice casserole.

How long does chicken enchilada casserole last in the fridge?

Leftover chicken enchilada casserole keeps well in the refrigerator for 3–4 days in an airtight container. Reheat individual portions in the microwave or warm larger portions covered in a 350°F / 175°C oven.

Once you know the sauce amount, tortilla choice, and the value of a short pause before serving, this becomes the kind of forgiving dinner you can make without overthinking it. Keep it classic with red sauce, brighten it with green sauce, or set out sour cream, lime, avocado, salsa, and jalapeños so the whole pan feels easy, generous, and personal.

Back to top