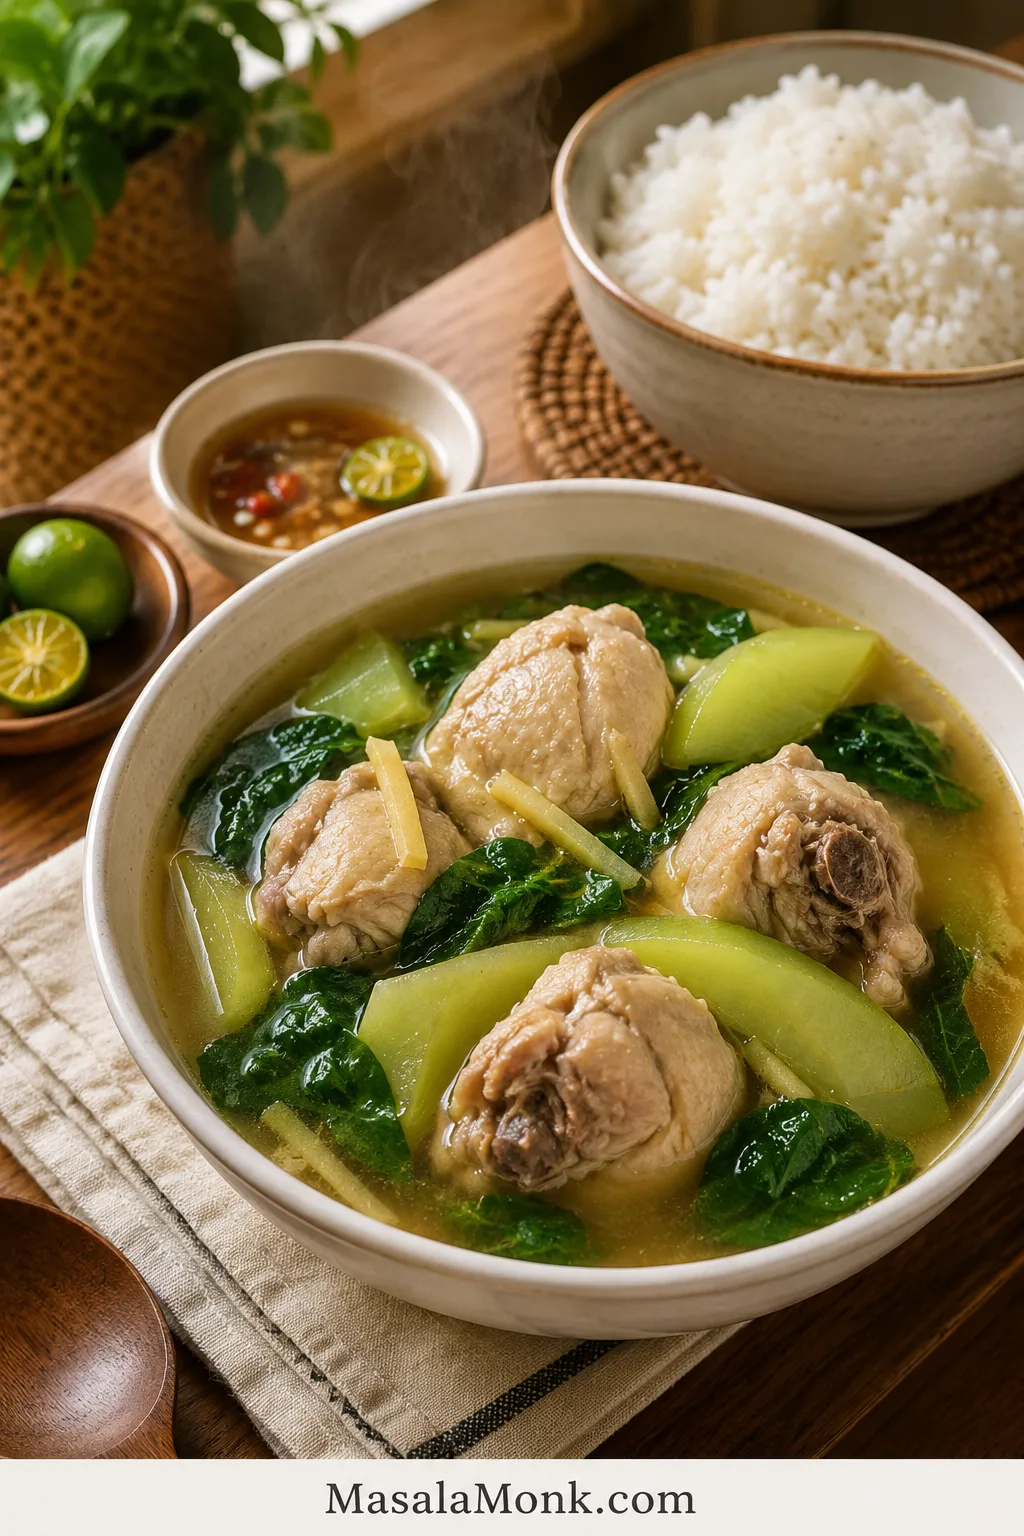
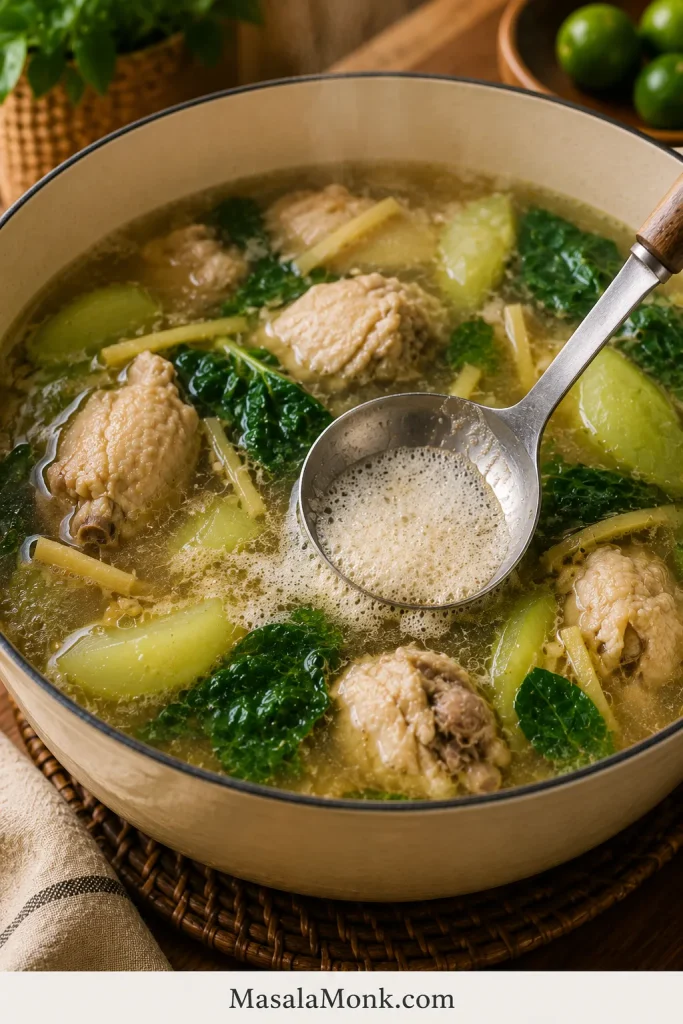
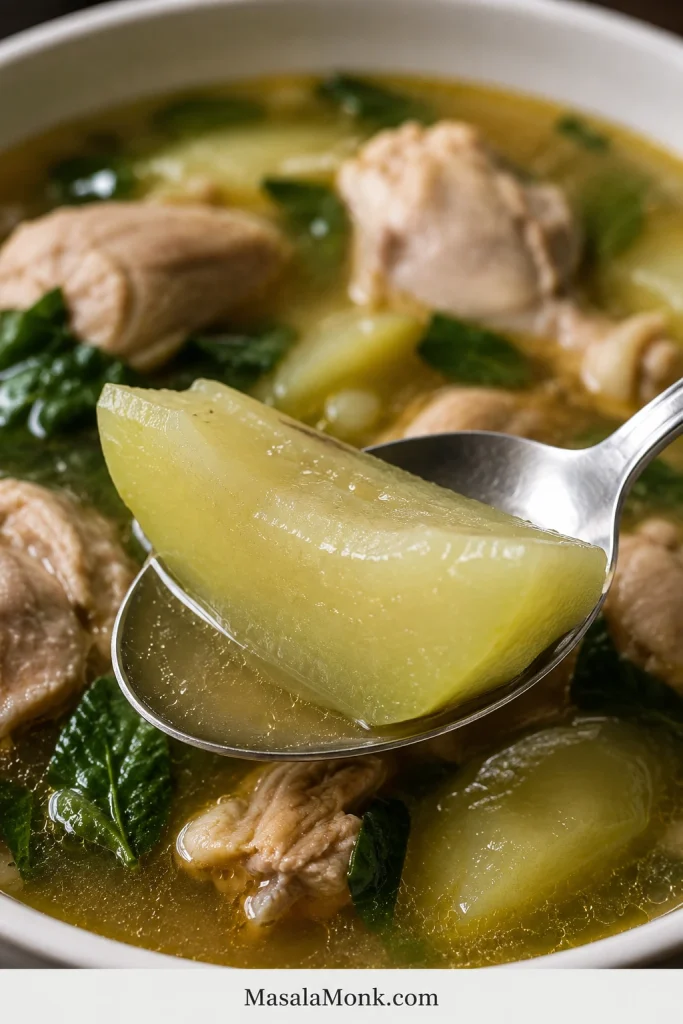
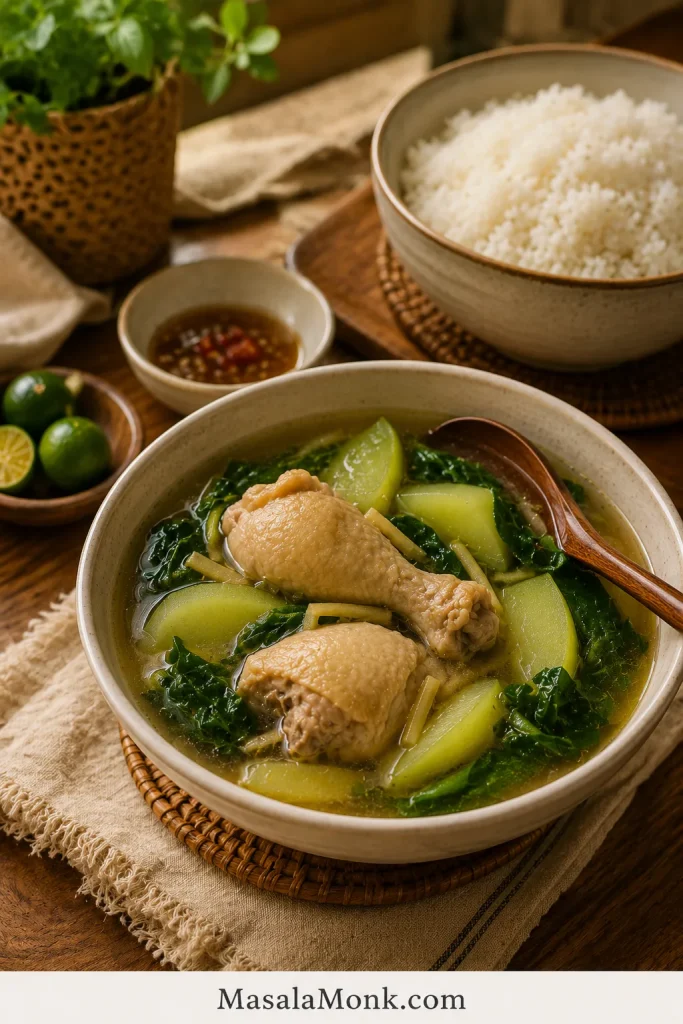
Tinola is the kind of Filipino chicken soup that feels light and restorative, but still filling when poured over rice. In a good pot, the broth is clear, gingery, and savory, the chicken is tender, and the green papaya or sayote softens without falling apart.
It is the kind of soup that feels right when you want something gentle, but not empty — warm broth, tender chicken, fresh greens, and rice that soaks up every spoonful.
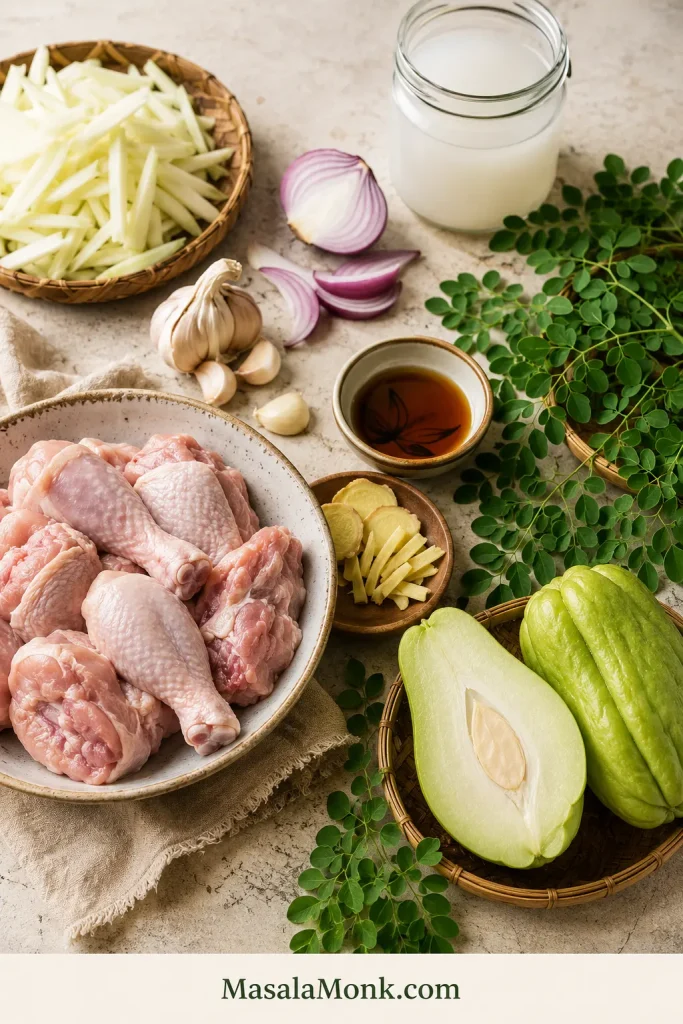
This Tinola recipe, also called Chicken Tinola or Tinolang Manok, is made with bone-in chicken, fresh ginger, garlic, onion, fish sauce, green papaya or sayote, and leafy greens like malunggay, dahon ng sili, spinach, or pechay.
This version keeps the flavor classic, but it also works in real kitchens: sayote if you cannot find green papaya, spinach if malunggay is not available, and clear timing cues so the soup tastes full instead of flat.
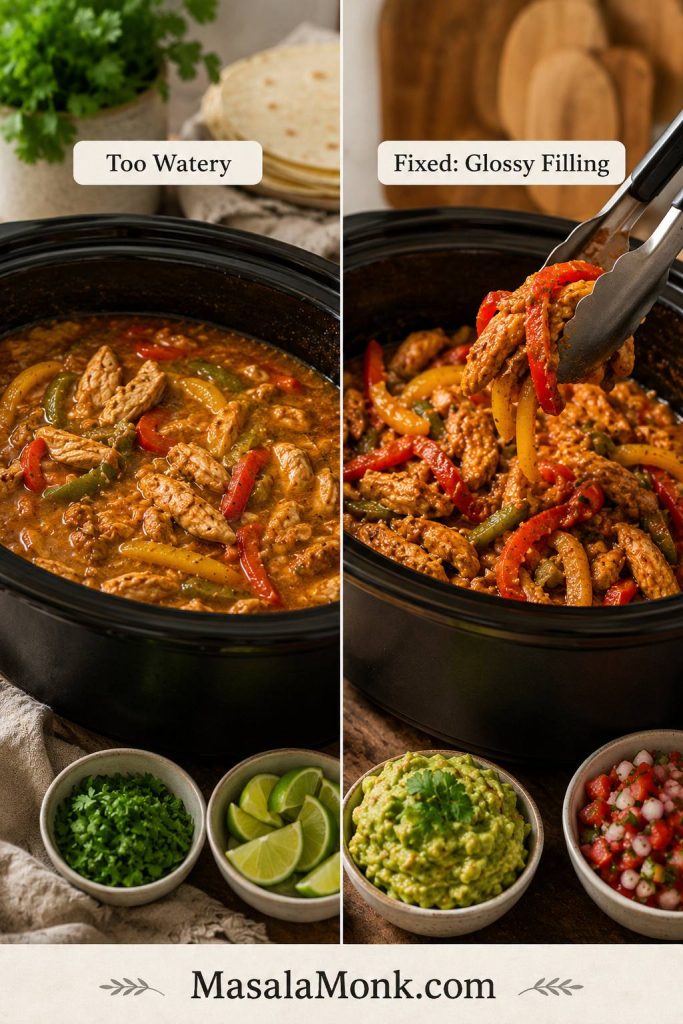
Most importantly, it is built around the two things that make or break Tinola: a broth that tastes gingery and full, not watery, and vegetables that turn tender without collapsing.
Quick Answer: What Is Tinola?
Tinola is a Filipino broth-based dish. The most common version is Tinolang Manok, which means Chicken Tinola. It is usually made with chicken, ginger, garlic, onion, fish sauce, green papaya or sayote, and leafy greens such as malunggay or dahon ng sili.
In English, Chicken Tinola is best described as a Filipino ginger chicken soup. It is usually eaten as a main dish with rice, not just as a starter soup.
- Best chicken: bone-in thighs, drumsticks, wings, or mixed cuts.
- Flavor base: fresh ginger, fish sauce, garlic, and onion.
- Vegetable choice: green papaya for a softer classic feel, or sayote for a firmer bite.
- Best greens: malunggay or dahon ng sili if available; spinach, pechay, or bok choy if not.
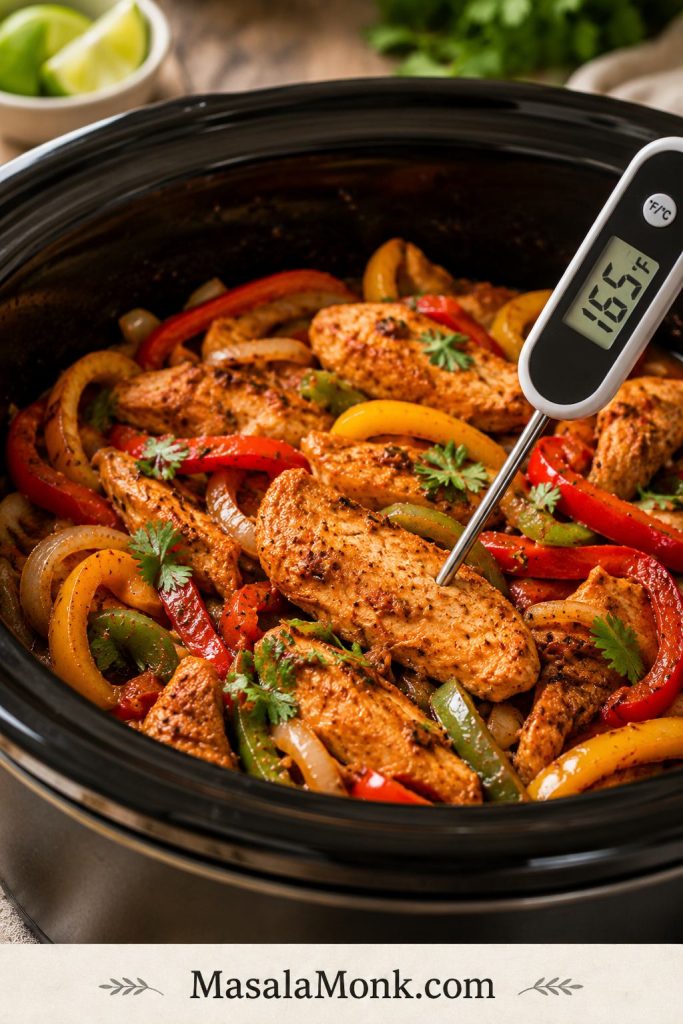
- Best cooking cue: simmer gently until the chicken is tender and reaches 165°F / 74°C.
Make It Now
Have your chicken, ginger, and vegetables ready? Use this quick path, then follow the recipe card for exact amounts.
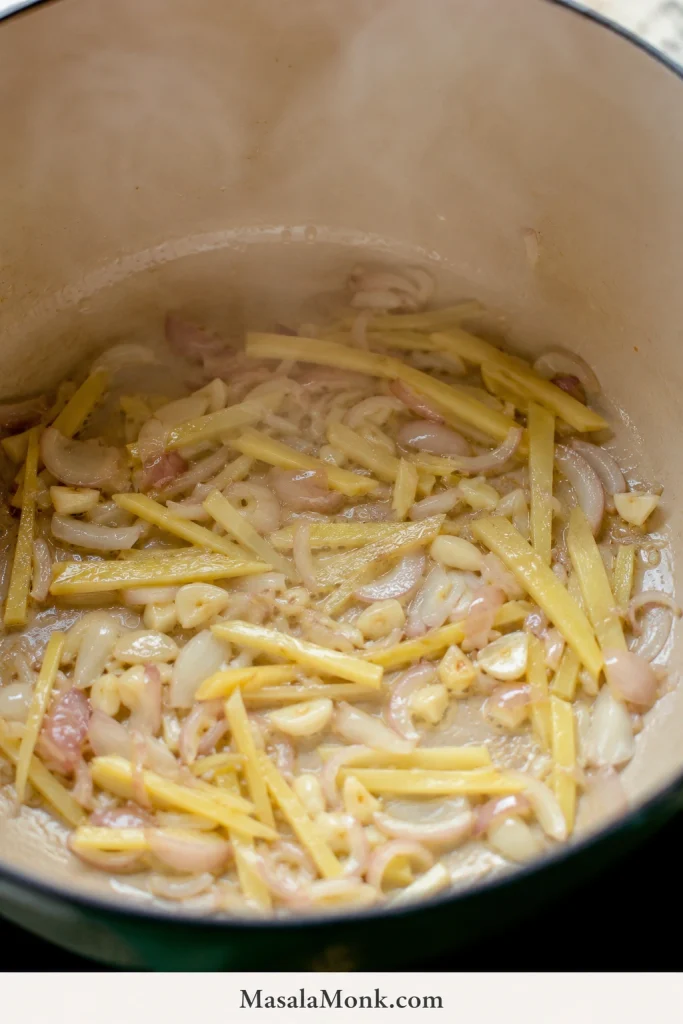
- Sauté ginger, garlic, and onion until fragrant.
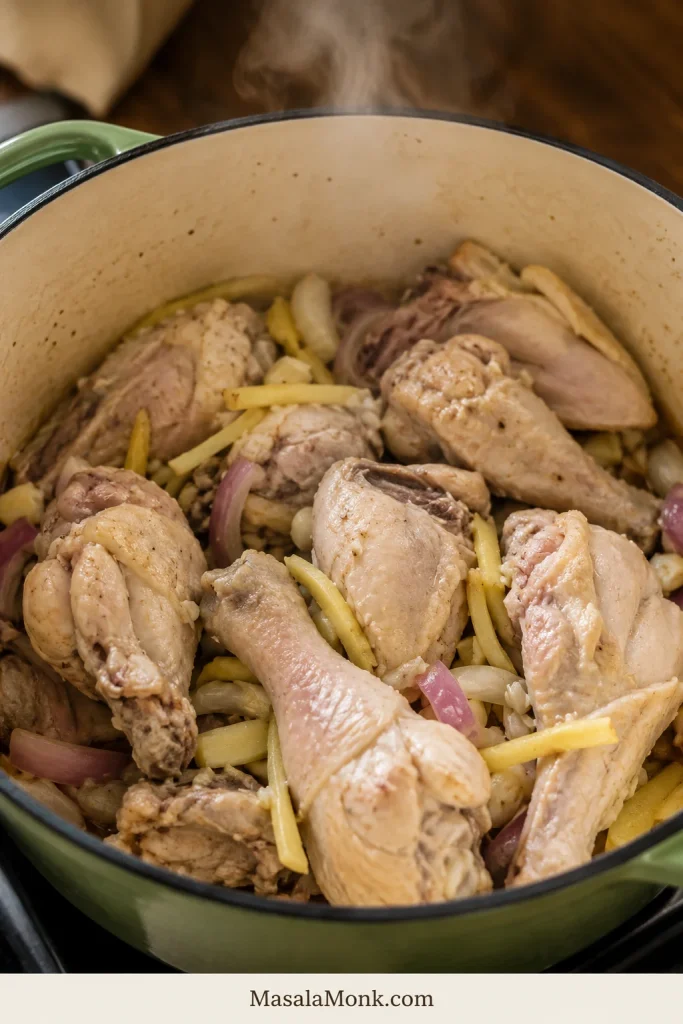
- Add chicken and cook until the surface loses its raw color.
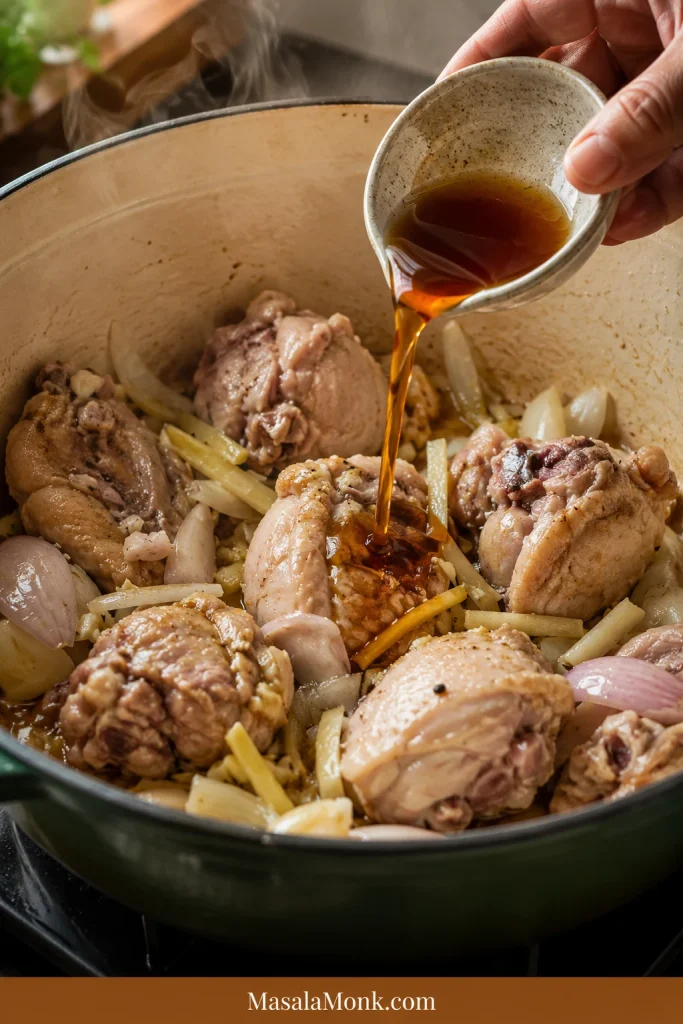
- Add fish sauce before the liquid so the chicken is seasoned early.
- Simmer gently until the chicken is tender.
- Add your chosen vegetable near the end, then finish with greens.
Classic but flexible: classic Tinola often means chicken, ginger, patis, green papaya, and malunggay or dahon ng sili. But Tinola is also a home dish, so many cooks use sayote when papaya is hard to find, spinach when malunggay is unavailable, and chicken broth or rice wash when the chicken needs a little help. The point is not to make the pot rigid; it is to keep the soup gingery, savory, clear, and good with rice.
A good pot of Tinola should feel simple, but not thin. The broth should taste like the chicken, ginger, and patis had time to become one thing, not like separate ingredients floating in hot water. That is why this recipe builds the flavor early and waits before adding the vegetables.
Save this Tinola rule: ginger early, patis before broth, chicken until tender, papaya or sayote late, greens last.
Tinola Recipe Card
Filipino Chicken Tinola / Tinolang Manok
This Chicken Tinola recipe keeps the two common problems away: watery broth and vegetables that fall apart before the chicken is tender. The chicken is seasoned early, the simmer stays gentle, and the vegetables go in when the meat is nearly ready.
| Prep Time | 15 minutes |
|---|---|
| Cook Time | 45 minutes |
| Total Time | 1 hour |
| Servings | 4 to 6 |
| Method | Stovetop |
| Cuisine | Filipino |
| Main Equipment | 5 to 6 quart / 4.7 to 5.7 L pot or Dutch oven |
Ingredients
- 2 to 2 1/2 lb / 900 g to 1.1 kg bone-in chicken pieces, such as thighs, drumsticks, wings, or mixed cuts
- 1 1/2 to 2 tablespoons neutral oil / 22 to 30 ml
- 1 medium onion, sliced
- 4 garlic cloves, minced or crushed
- 45 to 60 g / 1 1/2 to 2 oz fresh ginger, sliced, julienned, or lightly smashed
- 2 to 3 tablespoons fish sauce / patis / 30 to 45 ml, plus more to taste
- 6 cups water, low-sodium chicken broth, or rice wash / 1.4 L
- 350 to 500 g / 12 to 18 oz green papaya or sayote/chayote, peeled and cut into wedges. Remove seeds if using papaya.
- 2 packed cups / 60 to 90 g malunggay, dahon ng sili, spinach, pechay, or bok choy
- 1/2 teaspoon black pepper, plus more to taste
- Salt, only if needed after tasting
Optional Ingredients
- 1 chicken cube, only if using water and you want a stronger shortcut broth
- Calamansi or lime, for serving
- Fresh chili, for heat
- Extra fish sauce, for serving
- 1 stalk lemongrass, bruised, for a fragrant variation
Instructions
- Prep the chicken and vegetables. Cut the chicken into similar-sized pieces if needed. Peel your chosen vegetable. If using green papaya, remove the seeds. Cut the pieces into 1 1/2 to 2 inch wedges.
- Sauté the aromatics. Heat oil in a large pot over medium heat. Add onion, garlic, and ginger. Cook for 2 to 3 minutes, stirring often, until fragrant and softened. The pot should smell warm and clearly gingery.
- Add the chicken. Cook for 5 to 7 minutes, turning occasionally, until the chicken loses its raw color and begins to lightly brown on the surface.
- Season early. Add 2 tablespoons fish sauce and stir well. Cook for 1 to 2 minutes so the fish sauce coats the chicken and aromatics.
- Add liquid and skim. Pour in water, broth, or rice wash. Bring to a boil, then skim off foam or scum from the surface.
- Simmer gently. Lower the heat, cover partially, and simmer for 25 to 35 minutes, or until the chicken is tender and reaches 165°F / 74°C internally.
- Add the vegetables. Simmer for 5 to 12 minutes, depending on the size and firmness of the pieces, until fork-tender but not mushy.
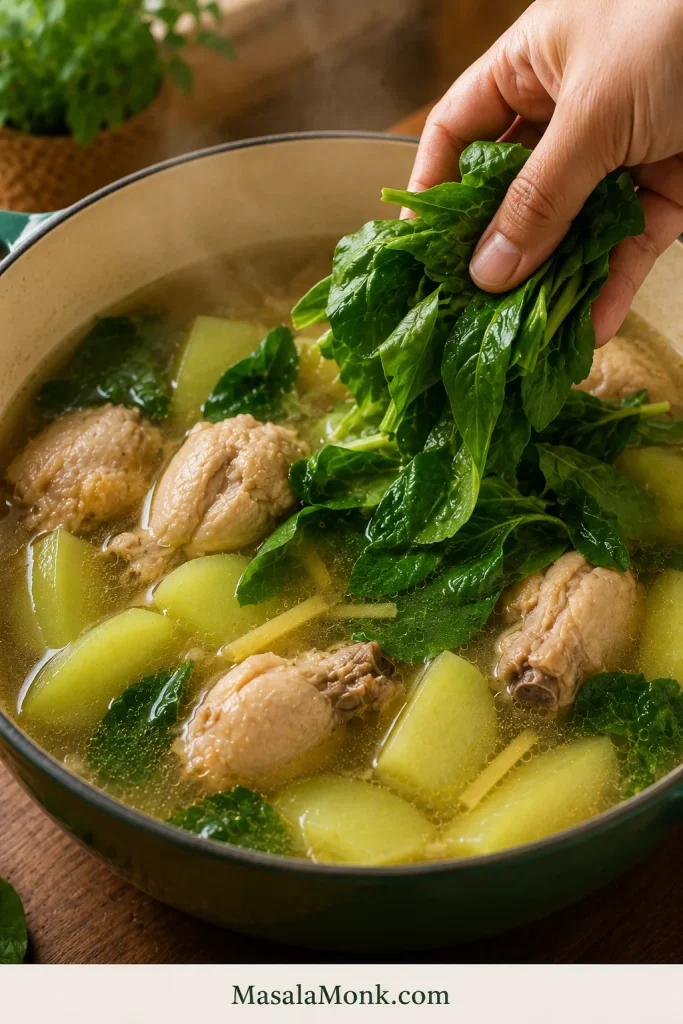
- Finish with greens. Add malunggay, dahon ng sili, spinach, pechay, or bok choy. Cook for 1 to 2 minutes, or turn off the heat and cover until the greens wilt.
- Taste and serve. Adjust with more fish sauce, salt, black pepper, calamansi, or chili. Serve hot with steamed rice.
Recipe Notes
- Bone-in thighs and drumsticks are the easiest choice if you want tender chicken and a fuller broth.
- The pot should smell clearly of ginger before the liquid goes in.
- Green papaya gives a softer, slightly sweet, more classic feel. Sayote stays firmer and fresher.
- Delicate greens need only enough heat to wilt. Fold them in at the end so they stay bright.
- A chicken cube can rescue a weak pot, especially if you are using plain water or lean chicken. Start with less fish sauce if you add one, then adjust at the end.
Need help before cooking? Ingredients explained · Papaya vs sayote · Fix bland broth
What’s in This Guide
- What good Tinola should taste like
- Why this Tinola recipe works
- Ingredients explained
- Best chicken cuts
- Green papaya vs sayote
- Tinola greens
- Equipment and pot size
- Cooking time by stage
- Step-by-step Tinola method
- Fix bland Tinola broth
- Keep the broth clear
- Tinola ingredients in Tagalog and English
- Serving suggestions
- Storage, freezing, and reheating
- Tinola variations
- Common mistakes
- FAQ
What Good Tinola Should Taste Like
A good bowl of Tinola tastes light, gingery, savory, and balanced. The soup is not heavy, but it has enough seasoning and chicken flavor to make you want to spoon it over rice.
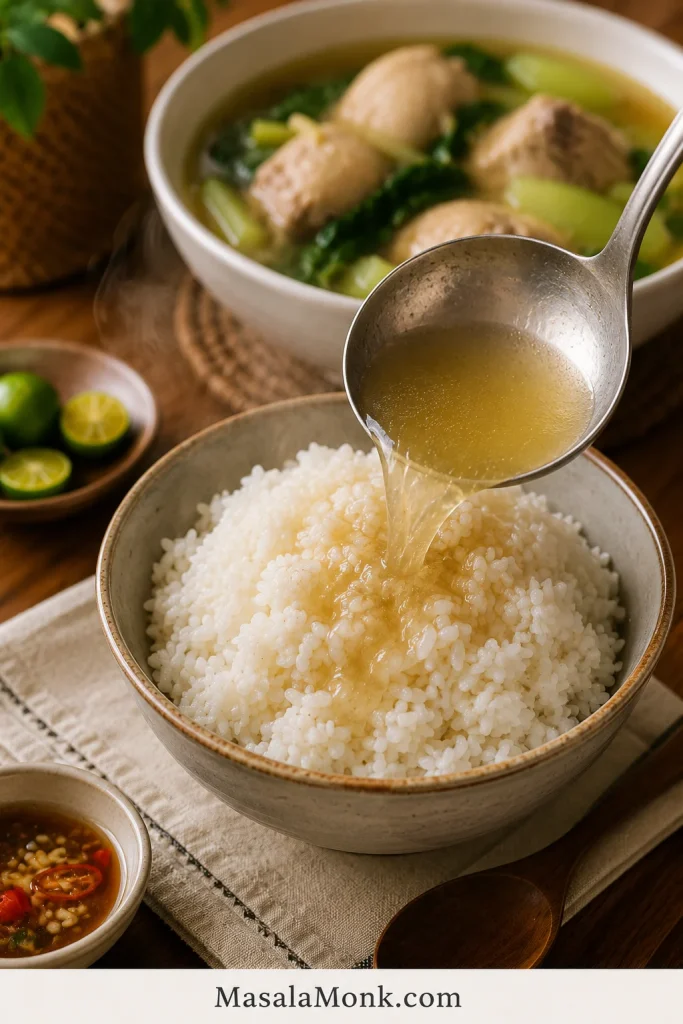
The easiest test is the rice: spoon a little broth over hot rice. If it tastes warm, gingery, and savory without needing rescue, the pot is ready.
- Ginger tastes noticeable, warm, and fresh.
- Fish sauce gives depth without making the soup taste fishy.
- Chicken turns tender, especially near the bone.
- Green papaya softens more; sayote keeps a slightly firmer bite.
- The greens taste fresh, not dull or overcooked.
Why This Tinola Recipe Works
This recipe is built to solve two common Tinola problems: broth that tastes watery and vegetables that turn mushy. The fix is not complicated. Start the flavor before the liquid goes in, simmer the chicken gently, then add the pieces only when the meat is nearly tender.
- The flavor starts before the broth. Ginger, garlic, and onion cook in oil first so the soup has a warm aromatic base.
- Fish sauce seasons the chicken early. Salt can season Tinola, but patis gives the broth its rounded, savory depth.
- The simmer stays gentle. A steady simmer helps the chicken turn tender without making the liquid rough or cloudy.
- The vegetables go in late. Do not add them just because the broth is boiling. Add them when the chicken is already nearly tender.
- The greens stay fresh. Finish with them at the end so the soup keeps a bright green finish.
The simple idea: build flavor before the broth, wait for the chicken to turn tender, then add the vegetables and greens in stages. That is the difference between flat Tinola and a bowl you want to spoon over rice.
The rule below is the whole Tinola method in one glance: build ginger and patis early, give the chicken time, then protect the vegetables and greens at the end.

Ingredients Explained
Think of the ingredients in layers: ginger for warmth, chicken for body, fish sauce for depth, papaya or sayote for texture, and greens for freshness. Once those layers make sense, the recipe becomes much easier to adjust without losing what makes Tinola taste like Tinola.
Chicken
Bone-in chicken gives Tinola the kind of body that plain water cannot create on its own. Thighs, drumsticks, wings, or a whole chicken cut into serving pieces all work well.
Boneless thighs can work if you want a faster version, but the broth will be lighter. Chicken breast is lean, but it can dry out if boiled hard or cooked too long. Use a gentle simmer and check it earlier if breast meat is what you have.
Ginger
Ginger is the backbone of Tinola. A small token slice is not enough. Use about 45 to 60 g / 1 1/2 to 2 oz fresh ginger for a full pot. Slice it, julienne it, or lightly smash it so it releases flavor into the oil and broth.
When the ginger hits the oil, the pot should smell sharp, warm, and awake. A weak aroma usually means the final broth will taste weak too. If the ginger feels shy, the Tinola will too.
Garlic and Onion
Garlic and onion round out the ginger. Cook them just until fragrant and softened before the chicken goes in; they do not need to brown deeply.
Fish Sauce / Patis
Fish sauce is where the broth starts getting its backbone. Let it hit the hot pot before the water goes in, and it seasons the chicken instead of just floating salty on top later.
Give it a minute in the hot pot so the sharp edge cooks off and the soup starts with depth instead of last-minute saltiness.
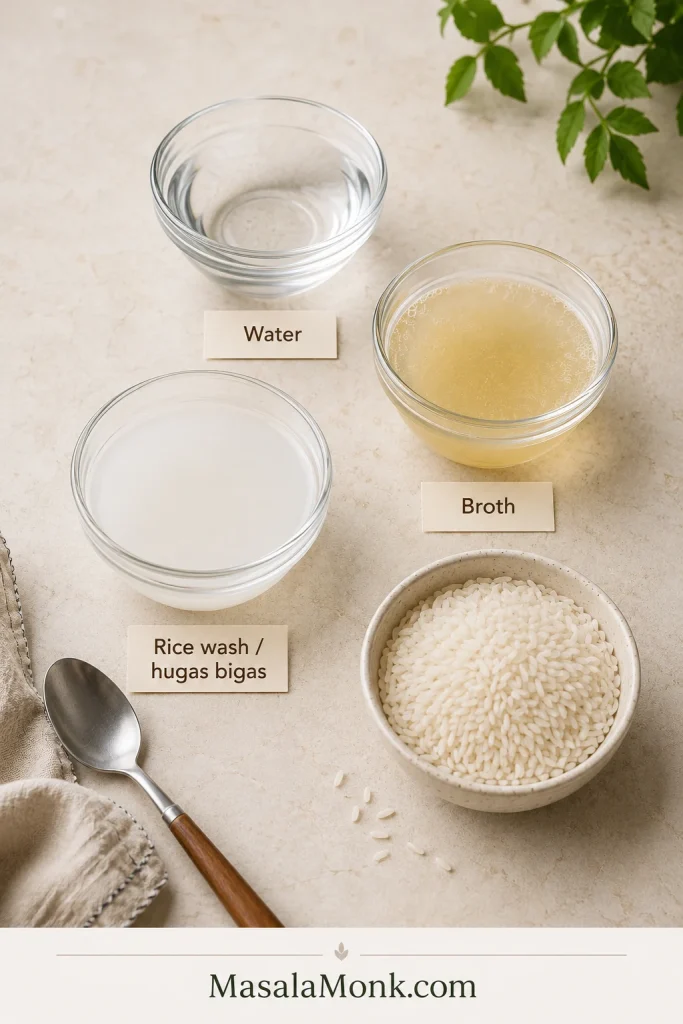
Water, Chicken Broth, or Rice Wash
Water works well if you use bone-in chicken, enough ginger, and proper seasoning. Low-sodium chicken broth gives a stronger shortcut flavor. Rice wash, sometimes called hugas bigas, gives the soup a little more body and a softer feel.
If using rice wash, use the second rinse rather than the first. The second rinse is usually cleaner while still giving the soup a little body. Use rice wash when you want a softer, slightly fuller broth; use water or low-sodium broth when you want a cleaner, lighter-tasting pot.
A chicken cube can rescue a weak pot, especially if you are using plain water or lean chicken. Use it if you need it, but let ginger, chicken, and fish sauce do most of the work.
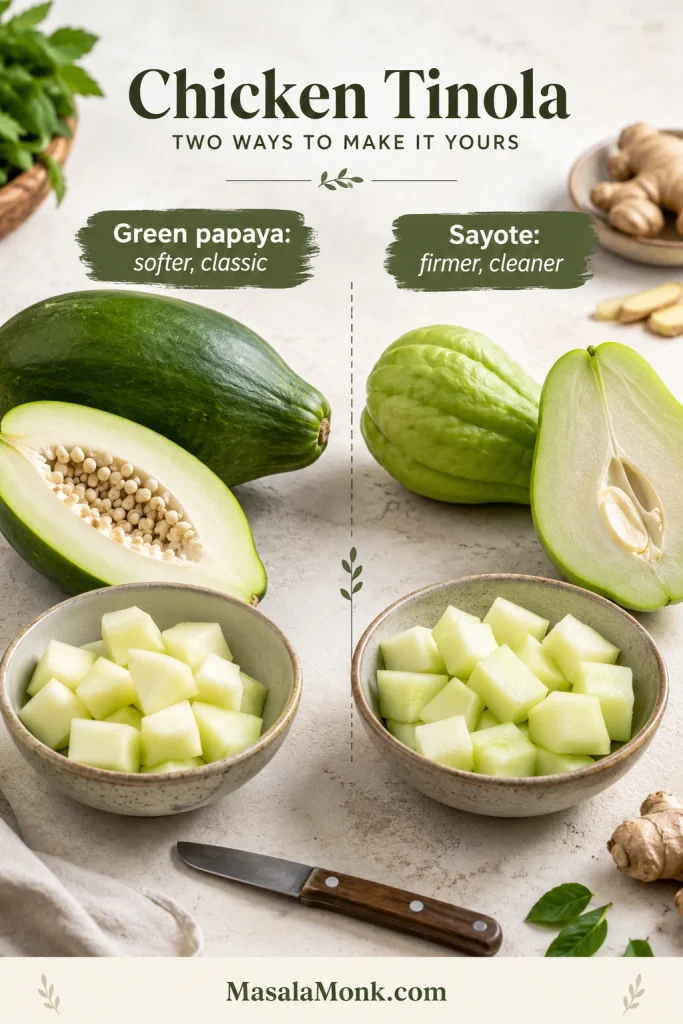
Green Papaya or Sayote
Green papaya and sayote are both common in Tinola. Papaya becomes softer and slightly sweet, while sayote, also called chayote, stays firmer with a milder, fresher flavor.
Use the one your market gives you. Tinola is forgiving as long as the broth is gingery and the vegetable goes in at the right time.
Leafy Greens
Malunggay and dahon ng sili are classic Tinola greens. Spinach, pechay, and bok choy are practical substitutes. The exact leaf matters less than the timing.
Add something green and fresh at the end, then stop before the leaves lose their brightness.
Shopping Tip
Filipino markets may have the classic leaves and green papaya. At a regular supermarket, sayote/chayote and spinach can still get you a good, comforting pot.
Best Chicken Cuts for Tinola
The chicken cut matters because Tinola is not only about the meat — it is also about what the meat gives back to the pot.
Bone-in thighs, drumsticks, wings, or mixed cuts are the most forgiving choices for this soup because they can simmer without drying out.
| Chicken Cut | Best For | Notes |
|---|---|---|
| Bone-in thighs | Best flavor and tenderness | The easiest all-round choice. |
| Drumsticks | Budget-friendly family meals | Easy to serve and good for broth. |
| Wings | Extra collagen and body | Great mixed with thighs or drumsticks. |
| Whole chicken, cut up | Traditional family-style pot | Gives different textures in one soup. |
| Boneless thighs | Faster weeknight version | Less broth depth, but still flavorful. |
| Chicken breast | Lean version | Can dry out; simmer gently and avoid overcooking. |
Chicken should reach 165°F / 74°C internally. FoodSafety.gov lists 165°F / 74°C as the safe minimum internal temperature for chicken, turkey, and other poultry. See the safe minimum internal temperature chart.
Best all-round choice: use bone-in thighs and drumsticks. They give the soup enough flavor, cook evenly, and stay tender even if the pot simmers a little longer.
If you bought a larger pack of thighs and want a dry, crispy dinner another night, this air fryer chicken thighs recipe uses the same reliable cut in a completely different way.
Green Papaya vs Sayote
For many cooks, the first big choice is green papaya or sayote.
Green papaya gives the bowl a softer, more classic feel. Sayote keeps a firmer, cleaner bite. Neither one ruins the dish, so choose based on what you can find and what texture you like.
| Option | Texture | Flavor | Best For |
|---|---|---|---|
| Green papaya | Soft-tender and absorbs broth | Mild, slightly sweet | A more classic Tinola feel |
| Sayote / chayote | Firmer and cleaner | Mild, fresh, neutral | Easy supermarket version |
| Semi-ripe papaya | Softer and sweeter | Noticeably sweet | Use only if you intentionally want a sweeter soup |
| Upo | Soft and watery | Delicate | Available substitute |
| Kalabasa | Creamier and sweeter | Richer, less classic | A variation, not the default |
| Labanos / daikon | Firm and slightly peppery | Sharper | Works in a pinch |
If you want a clearer, more ginger-forward bowl, sayote is a very good choice. For the softer texture many people associate with Tinola, use green papaya.
If you buy a whole green papaya and have extra left after Tinola, you can use it in a fresh salad like this raw papaya salad.
Cut whichever one you use into wedges large enough to hold their shape. Add the pieces only after the chicken is nearly tender. If they go in too early, they can turn mushy before the chicken is done.
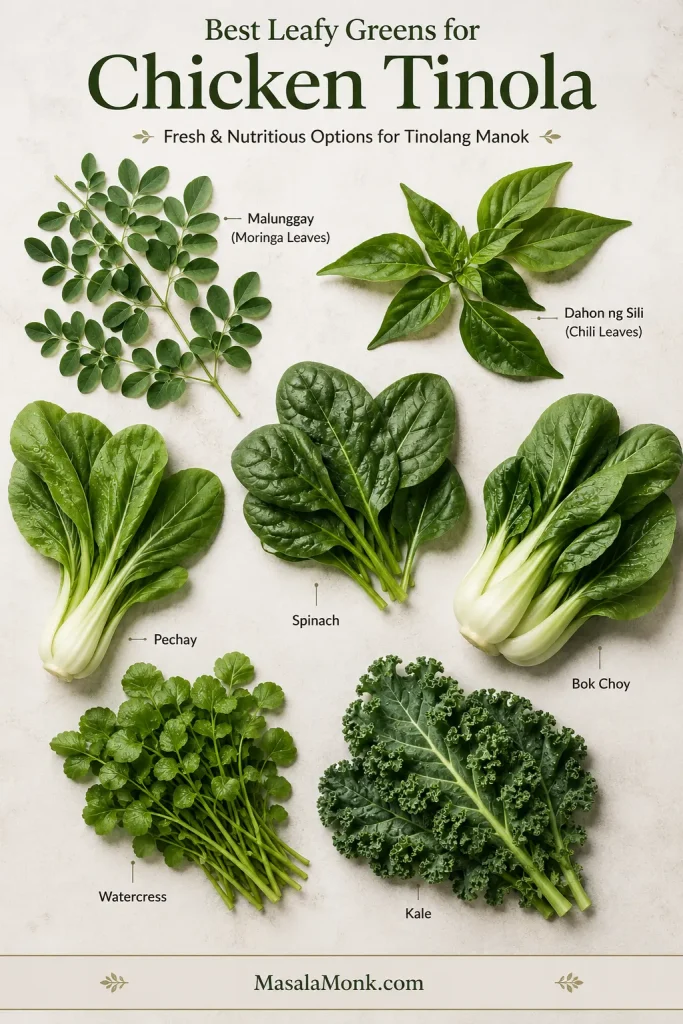
Tinola Greens: Malunggay, Dahon ng Sili, Spinach, Pechay, or Bok Choy
Traditional Tinola often uses malunggay or dahon ng sili. Outside the Philippines, those can be harder to find. Spinach, pechay, bok choy, or watercress will not make the soup wrong — they simply make it more practical for your kitchen.
| Green | Traditional? | Flavor | How to Add |
|---|---|---|---|
| Malunggay / moringa | Yes | Earthy, green, slightly bitter | Last 1 to 2 minutes |
| Dahon ng sili / chili leaves | Yes | Mildly peppery | Last 1 to 2 minutes |
| Spinach | Substitute | Soft and mild | Off heat or last 1 minute |
| Pechay / bok choy | Substitute | Mild with more body | Stems first, leaves last |
| Kale | Substitute | Stronger and chewier | Simmer 2 to 4 minutes |
| Watercress | Substitute | Peppery and fresh | Last minute |
Do not add delicate greens too early. The leaves should still look alive, not dull. If you are using bok choy or pechay, add the thicker stems first and the leaves later. With spinach, turn off the heat and let the leaves wilt gently.
Equipment and Pot Size
Tinola is a simple one-pot soup, but the pot still matters. Use a pot wide enough that the chicken can sit in the aromatics before the liquid goes in. If the pot is too crowded, the chicken steams instead of picking up flavor from the ginger, garlic, onion, and fish sauce.
- 5 to 6 quart / 4.7 to 5.7 L pot or Dutch oven: roomy enough for bone-in chicken, broth, papaya or sayote, and greens without boiling over.
- Wide spoon or ladle: useful for skimming foam, scum, and extra oil from the surface.
- Tongs: helpful for turning chicken pieces while they cook with the aromatics.
- Instant-read thermometer: the most reliable way to check that chicken reaches 165°F / 74°C.
A smaller pot can still work, but keep the simmer gentle and watch the liquid level once the vegetables go in.
Cooking Time by Stage
Tinola is simple, but timing decides whether the bowl tastes clean and tender or flat and overcooked.
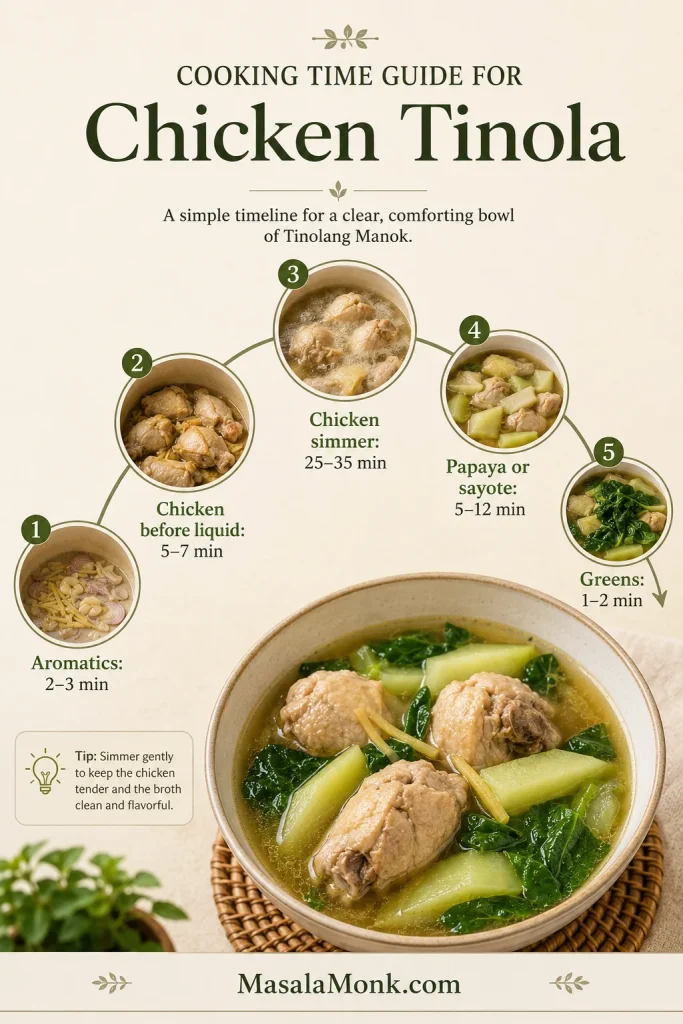
| Stage | Approximate Time | What to look for |
|---|---|---|
| Sauté ginger, garlic, and onion | 2 to 3 minutes | Aromatics smell warm, sharp, and fragrant. |
| Cook chicken before liquid | 5 to 7 minutes | Chicken loses raw color and lightly browns on the surface. |
| Fish sauce with chicken | 1 to 2 minutes | Fish sauce coats the chicken and smells savory. |
| Chicken simmer | 25 to 35 minutes | Chicken is tender and reaches 165°F / 74°C. |
| Papaya or sayote | 5 to 12 minutes | Pieces are fork-tender but still hold shape. |
| Leafy greens | 1 to 2 minutes | Leaves are just wilted and still fresh-tasting. |
Timing note: in most home pots, bone-in thighs and drumsticks begin turning tender around 30 minutes after the broth starts simmering. Sayote often softens faster than thick green papaya wedges, so start checking the vegetables at 5 minutes. Spinach wilts best off heat, while pechay and bok choy work better when the stems go in before the leaves.
Native chicken or very large bone-in pieces may need more time before the vegetables go in. Wait until the meat is already turning tender, or the pieces may overcook before the chicken is ready.
Step-by-Step Tinola Method
Once the aromatics are fragrant, the rest of the soup is mostly about patience: simmer the chicken gently, then add the vegetables when the meat is nearly tender.
1. Prep the Chicken and Vegetables
Pat the chicken dry if it is very wet. If the pieces are very uneven, cut larger pieces down so they cook more evenly.
Peel the green papaya or sayote. If using green papaya, remove the seeds. Cut the vegetable into 1 1/2 to 2 inch wedges so the pieces can simmer without falling apart.
2. Sauté Ginger, Garlic, and Onion
Heat oil in a large pot over medium heat. Add the onion, garlic, and ginger. Cook for 2 to 3 minutes, stirring often.
The aromatics should smell warm, sharp, and fragrant. This is where the soup starts becoming Tinola, so do not rush past the ginger.
3. Add the Chicken and Lightly Brown It
Add the chicken pieces to the pot. Cook for 5 to 7 minutes, turning occasionally. The chicken does not need a deep brown crust, but the surface needs to lose its raw color and pick up some flavor from the aromatics.
This step gives the soup more depth than simply boiling raw chicken in water.
4. Add Fish Sauce Early
Add 2 tablespoons fish sauce and stir well. Let it cook with the chicken for 1 to 2 minutes before adding the liquid.
This gives the meat and aromatics a savory base. You can always add more fish sauce at the end, but adding some early helps the flavor cook into the soup instead of sitting only on the surface.
5. Add Liquid, Boil, and Skim
Pour in 6 cups water, chicken broth, or rice wash. Bring the pot to a boil. As foam rises, skim it off with a wide spoon or ladle.
Skimming at this stage keeps the liquid clearer. It is much easier to remove foam before the vegetables and greens go in.
6. Simmer Until the Chicken Is Tender
Lower the heat to a gentle simmer. Cover the pot partially and cook for 25 to 35 minutes, or until the chicken is tender and reaches 165°F / 74°C internally.
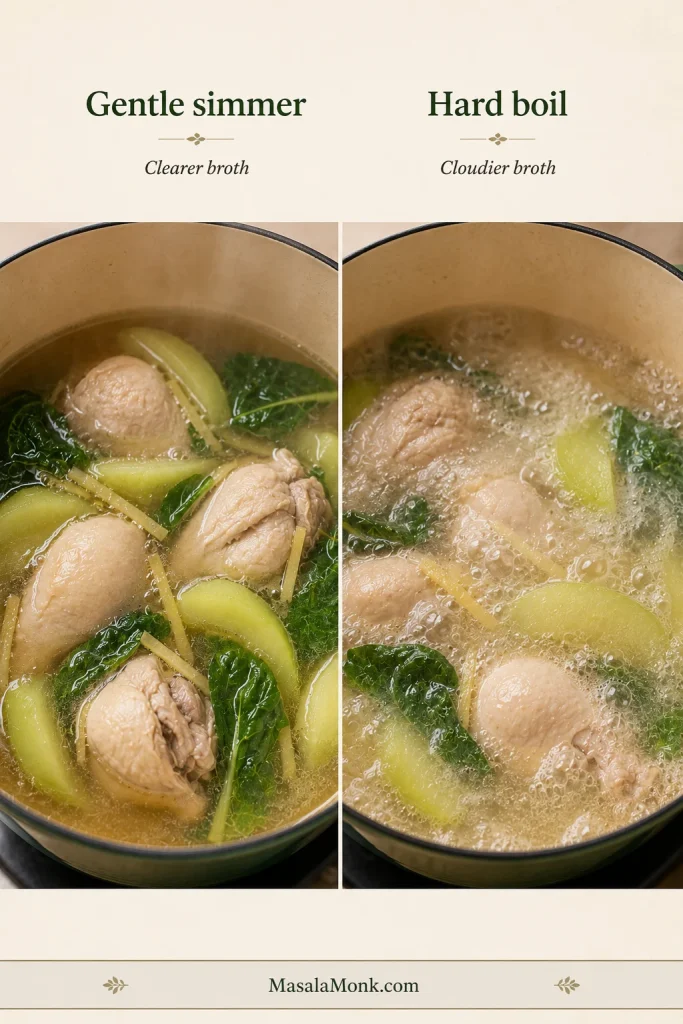
The chicken should feel tender near the bone. Avoid a hard boil. A rough boil can make the broth cloudy and the chicken tougher.
7. Add Green Papaya or Sayote
Add the green papaya or sayote once the chicken is nearly tender. Do not add them just because the broth is boiling; wait until the meat has already started giving flavor back to the pot. Simmer for 5 to 12 minutes, depending on how large and firm the pieces are.
Look for tender edges with enough firmness in the center that the wedges do not collapse in the bowl. If they start breaking apart, they have gone too far.
8. Add the Greens at the End
Add malunggay, dahon ng sili, spinach, pechay, or bok choy near the end. Delicate leaves need only 1 to 2 minutes. Spinach can often be added off heat and covered until wilted.
Pull them off the heat while they are still bright and just wilted. If they look dull and tired, they have cooked too long.
9. Taste and Serve
Taste the soup before serving. Adjust with more fish sauce, salt, black pepper, calamansi, or chili.
The test is the rice: spoon a little broth over hot rice. If it tastes warm, gingery, and savory without needing rescue, the pot is ready. The broth can taste a touch stronger from the spoon than it does in the bowl, because rice softens everything.
Timing cue: add the vegetables after the chicken is mostly tender, not at the beginning. That one choice keeps the pieces from collapsing before the chicken is done.
Fix Bland Tinola Broth
Bland Tinola is frustrating because it can look right before it tastes right — clear broth, chicken, greens, rice — but the spoonful feels empty.
It usually means one of four things: not enough ginger, not enough fish sauce, weak boneless chicken, or too much liquid without final seasoning.
The fix is usually not more salt alone. Tinola needs ginger warmth, chicken flavor, fish sauce depth, and a final taste before serving.
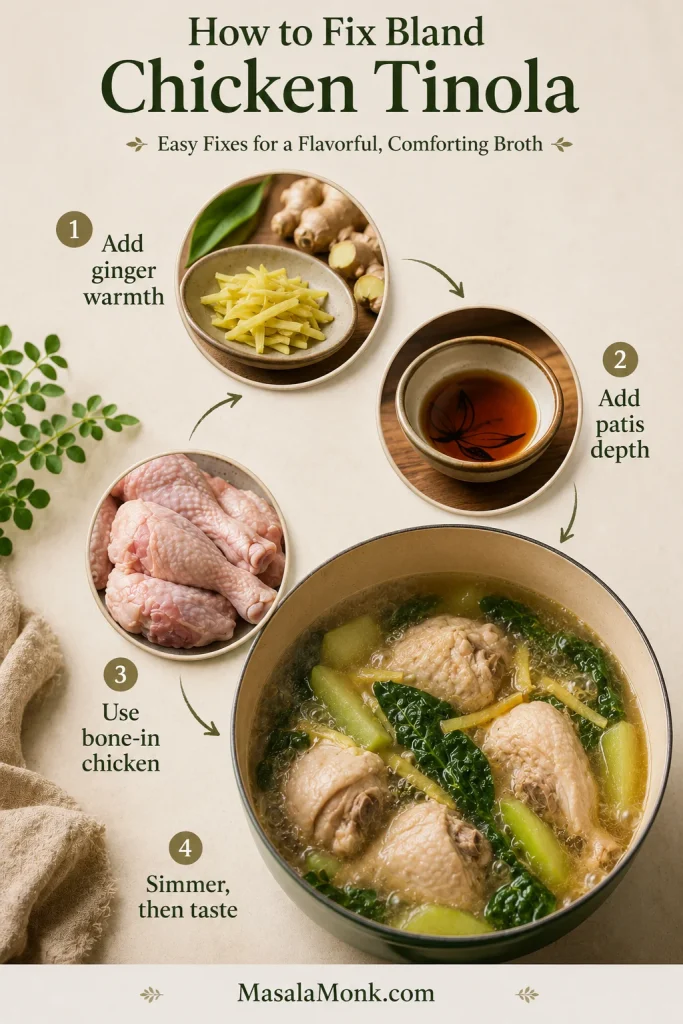
- Use bone-in chicken. It gives the broth more body than boneless breast.
- Use enough fresh ginger. Tinola should smell warm and gingery before the liquid even goes in.
- Sauté the aromatics first. Do not just boil everything together from the start.
- Add fish sauce before simmering. Let it coat the chicken and aromatics.
- Simmer gently. This keeps the chicken tender and the soup balanced.
- Skim foam and extra oil. This improves both flavor and appearance.
- Taste at the end. The soup may need more patis, salt, pepper, calamansi, or chili.
If your Tinola has ever tasted like hot water with chicken in it, start with ginger and patis before reaching for more salt. A few extra minutes of gentle simmering can also help the chicken give more back to the pot.
Fast fix for bland Tinola: simmer a few fresh ginger slices in the broth for 5 minutes, add a small splash of fish sauce, then taste again. If the soup still feels thin, let it simmer uncovered for a few minutes to concentrate slightly.
Keep Tinola Broth Clear
Clear Tinola broth comes from gentle cooking and good timing. Bring the liquid to a boil first, then skim off the foam or scum that rises to the surface. After that, lower the heat to a gentle simmer.
- Boil first, then skim. Remove foam while the surface is still easy to see.
- Lower the heat after skimming. A gentle simmer keeps the broth calmer.
- Use a wide spoon or ladle. It is easier to lift off scum and extra oil without stirring everything back in.
- Finish with greens at the end. Delicate leaves stay brighter when they are not boiled for long.
- Avoid hard boiling the chicken. Rough heat can make the liquid cloudy and the meat tougher.
- Stop stirring aggressively once foam rises. Let it collect on the surface so you can skim it cleanly.
- Pull delicate leaves before they turn dull. Fresh-looking greens make the whole bowl feel cleaner.
A home pot of Tinola does not need restaurant-perfect clarity. Skim what you can, keep the simmer gentle, and focus on a broth that tastes balanced and aromatic.
Tinola Ingredients in Tagalog and English
Tinola recipes often move between English, Tagalog, and market names, especially when you are shopping outside the Philippines. If you are shopping at a Filipino market, reading a family recipe, or watching a Tagalog cooking video, these are the ingredient names you are most likely to see.
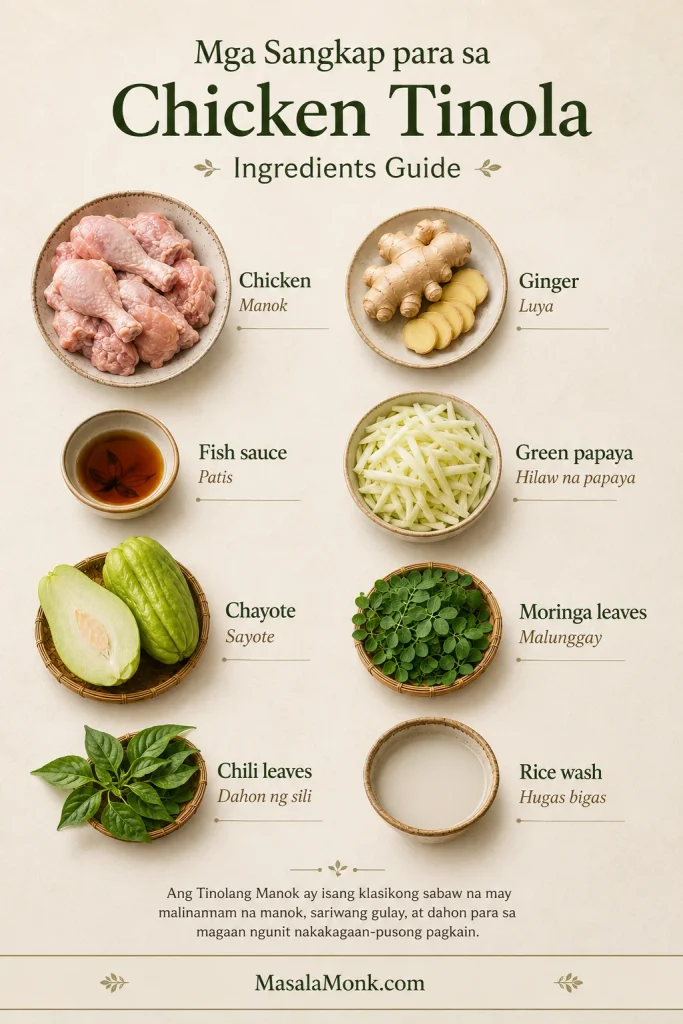
| English | Filipino / Common Name |
|---|---|
| Chicken | Manok |
| Ginger | Luya |
| Garlic | Bawang |
| Onion | Sibuyas |
| Fish sauce | Patis |
| Green papaya | Hilaw na papaya |
| Chayote | Sayote |
| Moringa leaves | Malunggay |
| Chili leaves | Dahon ng sili |
| Rice wash | Hugas bigas |
| Black pepper | Paminta |
A short Tagalog-style procedure would be:
Paano lutuin: igisa ang luya, bawang, sibuyas at manok; lagyan ng patis; pakuluan hanggang lumambot; idagdag ang papaya o sayote; tapusin sa malunggay o dahon ng sili.
In English: sauté ginger, garlic, onion, and chicken; season with fish sauce; simmer until tender; add papaya or sayote; finish with malunggay or chili leaves.
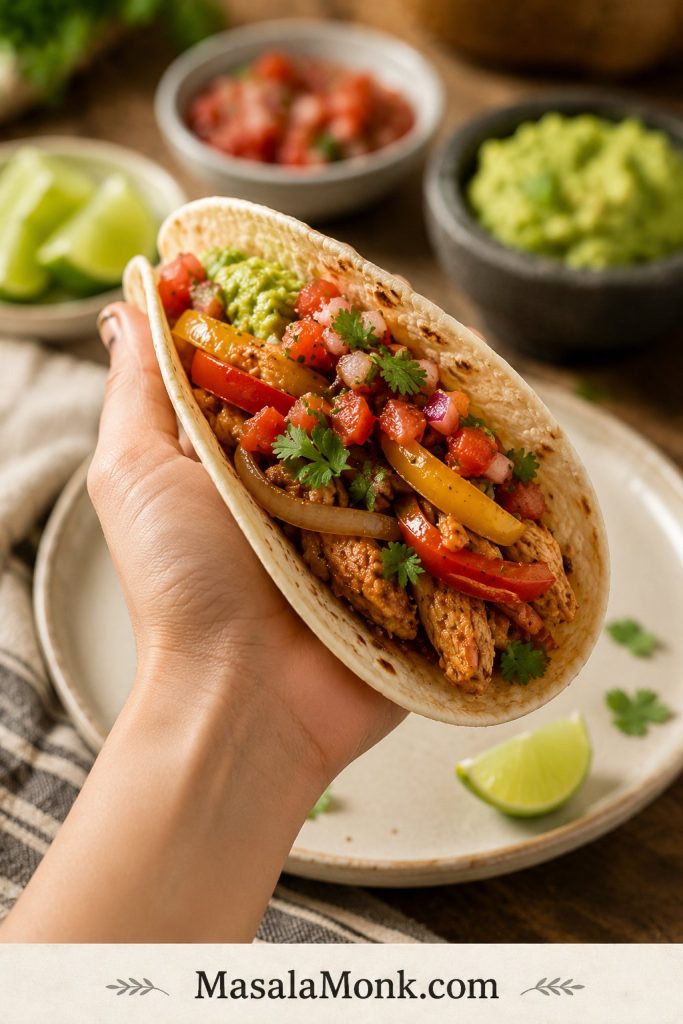
Serving Suggestions
Tinola is usually served as a main dish with steamed rice. The broth is often spooned over rice, so it needs enough flavor to carry the meal.
- Steamed white rice
- Extra fish sauce / patis on the side
- Calamansi or lime
- Fresh chili
- Black pepper
- A small dipping sauce of patis and calamansi
The broth does not need to taste salty by itself; it needs to wake up when it hits hot rice. If the soup tastes slightly strong alone but perfect over rice, you are in the right zone.
For another Filipino chicken classic, make Chicken Adobo on a different night. Adobo is darker, tangier, and braised, while Tinola is lighter, gingery, and broth-based.
For a Filipino vegetable dish that also belongs with rice, try Pinakbet Tagalog, a savory mix of tender vegetables and bagoong.
Tinola is especially good when you want something warm, light, and restorative. It is the kind of soup that feels gentle but still satisfying.
Storage, Freezing, and Reheating
Let leftover Tinola cool, then transfer it to an airtight container and refrigerate within 2 hours.
- Refrigerator: store for up to 3 days.
- Freezer: freeze the chicken and broth if needed, but expect the vegetables and greens to soften after thawing.
- Best texture: freeze without the greens, then add fresh spinach, malunggay, pechay, or bok choy when reheating.
- Reheating: warm gently on the stovetop until hot throughout. Reheated chicken should reach 165°F / 74°C.
Green papaya and sayote can soften after freezing, so expect a gentler texture if you freeze the finished soup.
Tinola Variations
Once the basic ginger broth method makes sense, you can adjust the vegetable, greens, broth, or protein. Keep the same quiet logic: build the flavor first, cook the main ingredient gently, and finish with the delicate pieces last.
Easy Swaps for This Recipe
- Tinola with green papaya: softer, slightly sweet, and more classic in feel. Use firm green papaya, not ripe orange papaya.
- Tinola with sayote: firmer, cleaner, and easy to find in many markets.
- Tinola with malunggay: earthy, green, and traditional. Add it at the end.
- Tinola with spinach or pechay: practical when malunggay or dahon ng sili are not available.
- Tinola with rice wash: slightly fuller broth. Use the second rice rinse for a clearer flavor.
Variations That Cook a Little Differently
- Native chicken Tinola: deeper flavor, but usually needs a longer simmer before the vegetables go in.
- Instant Pot Tinola: pressure cook the chicken first, then add the vegetables separately so they do not overcook.
- Fish or seafood Tinola: use the same ginger-broth idea, but cook fish or mussels briefly so they stay tender.
- Tinola sa gata or golden Tinola: coconut milk, turmeric, or squash make the soup richer and less like the clear classic version.
Common Mistakes
| Mistake | What Happens | Fix |
|---|---|---|
| Using only boneless breast | Weak broth and dry meat | Use bone-in pieces, or simmer breast gently and check it early. |
| Not using enough ginger | Soup tastes flat | Use 45 to 60 g / 1 1/2 to 2 oz fresh ginger. |
| Adding fish sauce only at the end | Flavor tastes salty but shallow | Add some before simmering, then adjust later. |
| Using a chicken cube with full fish sauce | Soup becomes too salty | Start with less patis if using a cube, then adjust after simmering. |
| Adding too much water | Soup tastes thin even after seasoning | Use about 6 cups liquid for 2 to 2 1/2 lb chicken, then simmer uncovered briefly if needed. |
| Boiling too hard | Cloudy broth and tougher chicken | Skim first, then simmer gently. |
| Adding the vegetable too early | Pieces turn mushy | Add them after the chicken is nearly tender. |
| Overcooking greens | Dull, tired leaves | Finish with greens at the end. |
| Not tasting before serving | Final soup tastes bland | Adjust with patis, salt, pepper, calamansi, or chili. |
| Using ripe papaya by mistake | Soup becomes too sweet | Use green papaya or switch to sayote. |
FAQ
What is Tinola in English?
Tinola is often described in English as Filipino ginger chicken soup. The chicken version is called Tinolang Manok or Chicken Tinola.
What does Tinola mean?
Tinola generally refers to a Filipino broth-based dish. Tinolang Manok is the chicken version most people mean when they say Chicken Tinola.
Is Tinola the same as Tinolang Manok?
Tinola is the general dish. Tinolang Manok is the chicken version. Since chicken is the most common version, many people use Tinola and Tinolang Manok to mean the same thing.
What should Tinola taste like?
Tinola should taste light but not empty: gingery, savory, and good enough that the broth makes plain rice feel like a meal. If the soup tastes flat, it usually needs more patis, more ginger, or a few more minutes for the chicken to flavor the broth.
What are the main ingredients of Chicken Tinola?
The main ingredients are chicken, ginger, garlic, onion, fish sauce, water or broth, green papaya or sayote, and leafy greens such as malunggay, dahon ng sili, spinach, or pechay.
Do you use green papaya or sayote for Tinola?
Both work. Green papaya gives Tinola a softer, slightly sweet, more classic texture. Sayote stays firmer and tastes mild and fresh, which makes it useful when you want cleaner pieces in the bowl.
What can I substitute for green papaya in Tinola?
Sayote or chayote is the best substitute for green papaya. Upo, kalabasa, or labanos can work in some variations, but they change the flavor and texture.
What leaves are used in Tinola?
The classic choices are malunggay and dahon ng sili. When those are hard to find, spinach, pechay, bok choy, watercress, or kale can work. The important part is adding the greens late enough that they stay fresh.
What can I substitute for malunggay?
Spinach is the easiest substitute for malunggay. Pechay, bok choy, watercress, or kale can also work. Add delicate greens at the end so they do not overcook.
Can I use spinach, pechay, or bok choy in Tinola?
Yes. Spinach wilts quickly and can be added off heat. Pechay and bok choy work best when the thicker stems go in before the leaves.
What is dahon ng sili?
Dahon ng sili means chili leaves. They are used in some traditional Tinola recipes and give the soup a mild peppery green flavor.
What is the best chicken part for Tinola?
Bone-in thighs and drumsticks are the easiest all-round choice. They stay tender, add body to the broth, and are harder to overcook than breast meat.
How long should Tinola simmer?
Tinola usually simmers for about 25 to 35 minutes after the liquid is added, depending on the size of the chicken pieces. Add the vegetables near the end and cook for another 5 to 12 minutes.
How do you keep Tinola broth clear?
Bring the broth to a boil, skim off the foam, then lower the heat to a gentle simmer. Avoid hard boiling the soup for a long time.
Why does my Tinola taste bland?
Tinola tastes bland when the broth lacks ginger, patis, bone-in chicken flavor, or enough simmering time. More salt alone will not fix an empty broth; add ginger warmth, fish sauce depth, and enough time for the chicken to give flavor back to the pot.
Can I make Tinola without fish sauce?
You can, but fish sauce gives Tinola much of its savory depth. If avoiding fish sauce, use salt plus low-sodium chicken broth, and consider adding a little soy sauce or coconut aminos. The flavor will not be exactly traditional.
Can I freeze Chicken Tinola?
Chicken Tinola can be frozen, but the greens and vegetables may soften after thawing. For best results, freeze the chicken and broth, then add fresh greens when reheating.
What is the difference between Tinola and Nilagang Manok?
Tinola is a ginger-forward Filipino chicken soup usually made with fish sauce, green papaya or sayote, and leafy greens. Nilagang Manok is a simpler boiled chicken soup that often uses vegetables like cabbage, potatoes, or saba banana and does not have the same strong ginger profile.
Final Note
Tinola does not need to shout. No watery broth, no collapsed vegetables, no loud tricks — just generous ginger, chicken that has time to flavor the pot, patis added early, and greens folded in last. When those pieces come together, the soup tastes calm but complete: simple food that still feels cared for.