Posted on Leave a comment

Chicken Enchilada Casserole Recipe

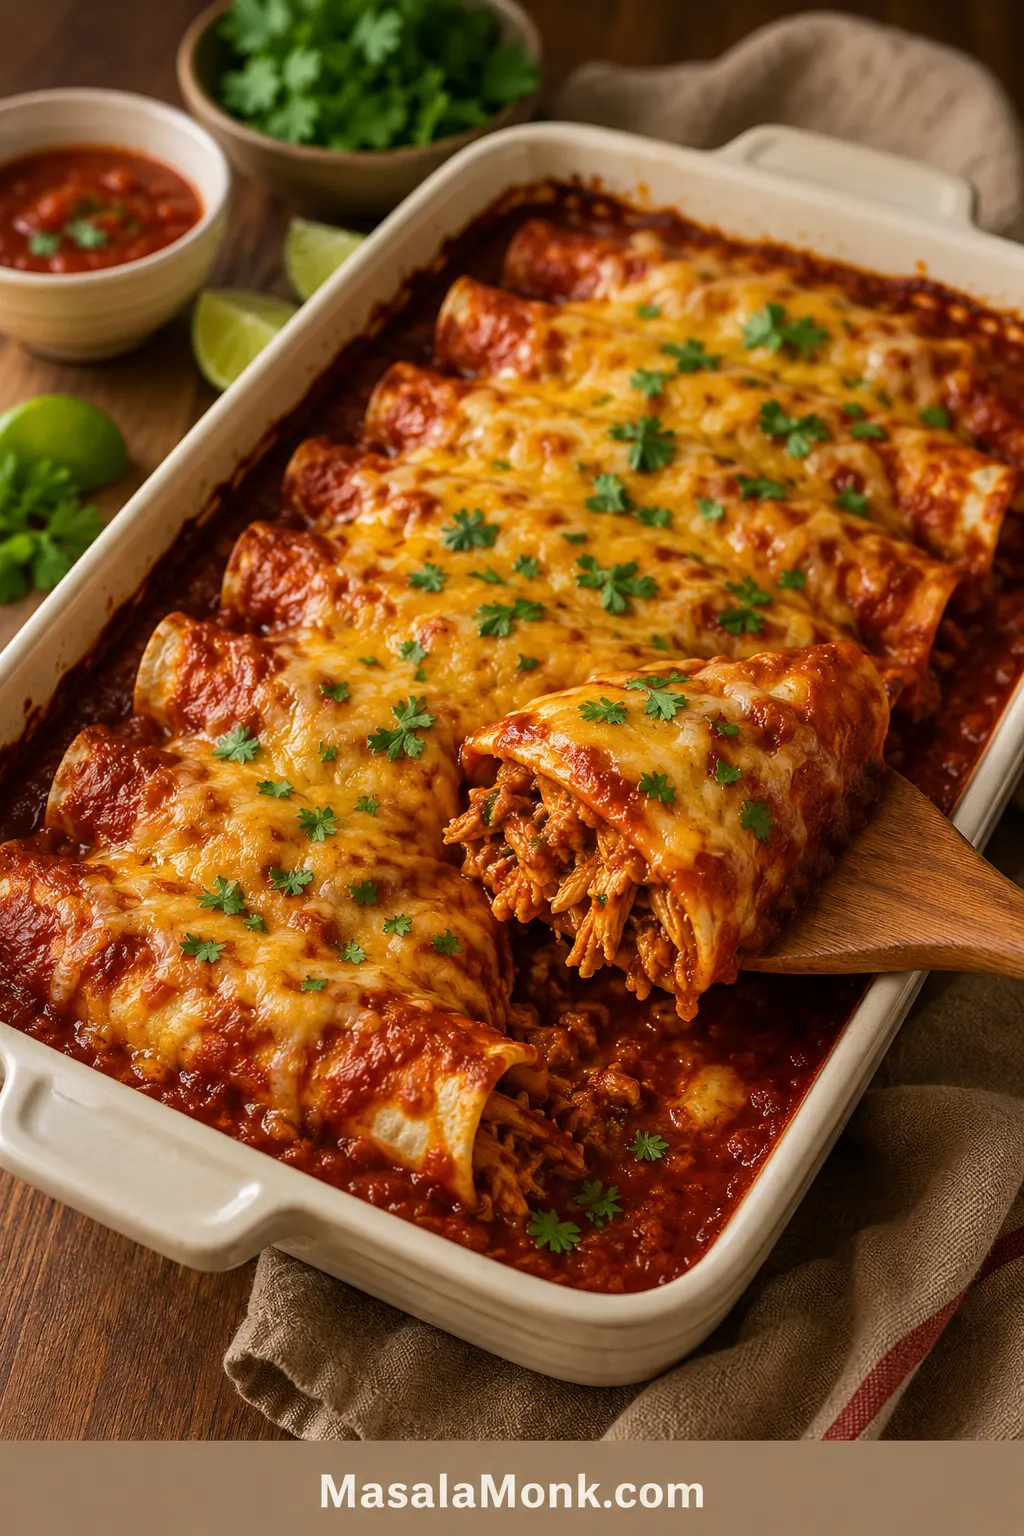
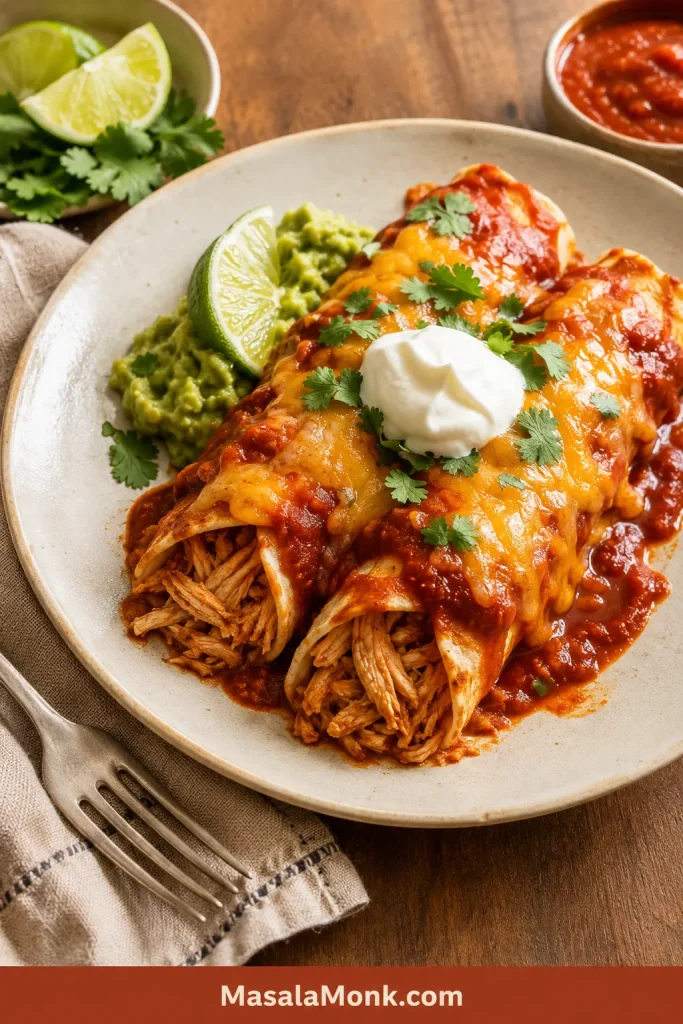
A 9x13 dish of chicken enchilada casserole with one portion removed and a layered serving on a plate.

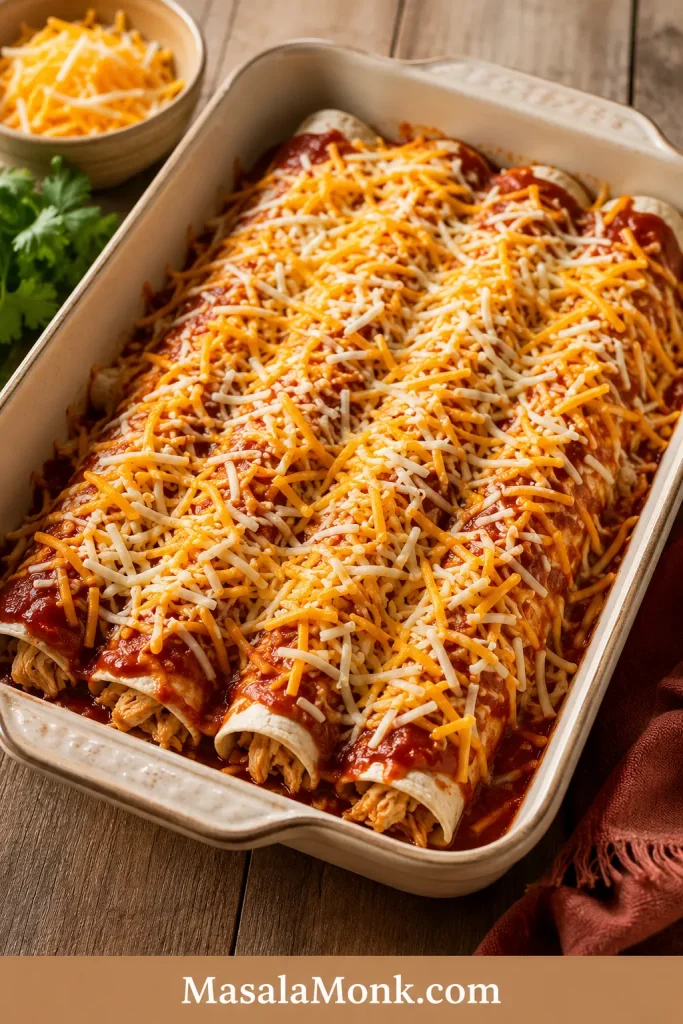
This chicken enchilada casserole recipe is for the night you want enchiladas, but not the whole enchilada project. No warming every tortilla one by one. No filling, rolling, tearing, and trying to fit everything neatly in the pan while dinner waits. You get the same saucy, cheesy comfort by layering tortillas, shredded chicken, enchilada sauce, and cheese in a 9×13 dish and baking it until bubbling.

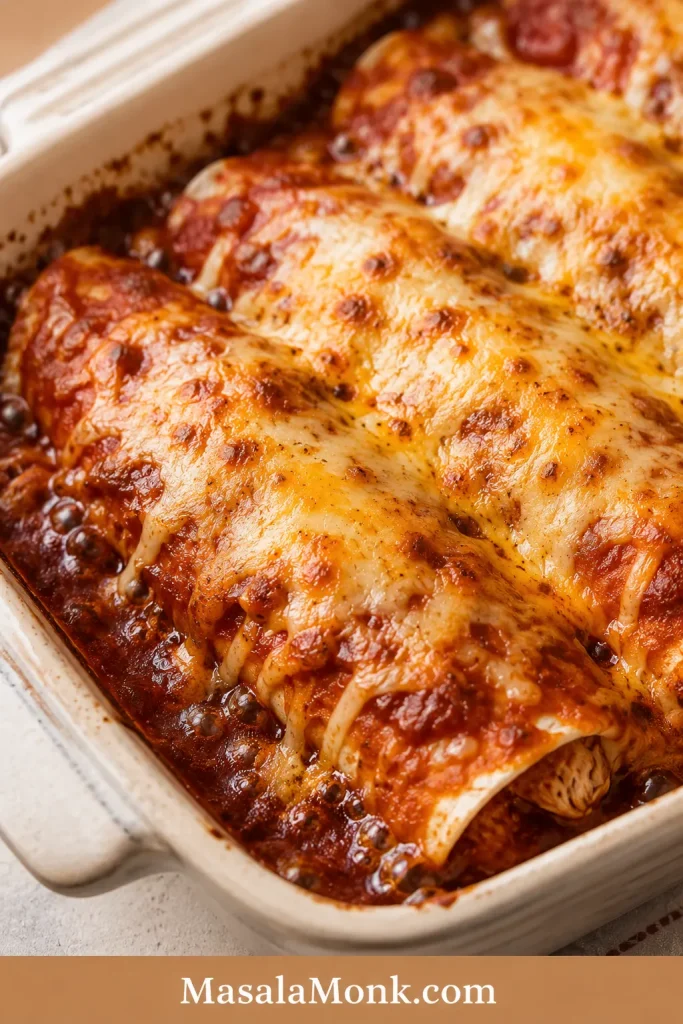
It comes out bubbling at the edges, soft through the middle, and melted on top — the kind of dinner that feels generous without asking you to roll a dozen enchiladas first. The goal is simple: saucy layers, weeknight shortcuts, and clean-enough slices without a loose, watery pan.

This no-roll casserole is weeknight-friendly, rotisserie-chicken friendly, and flexible enough for red sauce, green sauce, beans, corn, or a creamy white variation.

Quick Answer: Chicken Enchilada Casserole

Chicken enchilada casserole is a no-roll version of chicken enchiladas made by layering tortillas, cooked shredded chicken, enchilada sauce, and cheese in a baking dish. Instead of filling and rolling each tortilla, you build the casserole in a 9×13 pan and bake it until the sauce bubbles and the cheese melts.

For the most dependable texture, use corn tortillas, about 3 cups of enchilada sauce, 3½ cups of cooked shredded chicken, and 3 cups of shredded cheese. Bake the casserole covered first so the center heats through, then uncover it so the top can bubble and some moisture can escape. Let it rest before slicing so the layers settle instead of sliding apart.

If you are deciding on tortillas first, jump to the corn vs flour tortilla guide. If your main worry is texture, go straight to how to keep enchilada casserole from getting soggy.

Reliable basic formula: 3½ cups cooked shredded chicken + 3 cups enchilada sauce + 12 small corn tortillas + 3 cups shredded cheese in a 9×13-inch pan.

Chicken Enchilada Casserole at a Glance

Use this as the quick decision guide before you start cooking.

Pan9×13-inch / 23×33 cm
Oven375°F / 190°C
Bake20 min covered + 10–12 min uncovered
Rest10–15 minutes before slicing
Chicken3½ cups cooked shredded chicken
Sauce3 cups red or green enchilada sauce
Most forgiving tortillaCorn tortillas for better structure
ShortcutRotisserie chicken works beautifully
At-a-glance chicken enchilada casserole guide showing pan size, oven temperature, bake time, chicken, sauce, tortillas, and rest time.
Before you start, use the basic formula to check the pan size, sauce amount, bake time, and tortilla choice.

Already know you are making it? Jump straight to the recipe card. Still deciding between corn and flour tortillas, red and green sauce, or make-ahead timing? The guide below answers those questions before you start layering.

Why This No-Roll Chicken Enchilada Casserole Works

Regular enchiladas are delicious, but they can feel like a lot on a weeknight. Tortillas tear. Filling falls out. The pan gets crowded. This oven method keeps the comfort and skips the fussy part.

The trick is that the casserole does not try to be fancy. It keeps the parts people crave — tortillas, sauce, chicken, and cheese — and makes them easier to build in layers.

This is the kind of casserole that works for rotisserie-chicken nights, casual family dinners, meal-prep Sundays, and evenings when you want something cozy but do not want to stand at the counter rolling tortillas.

  • No rolling: The tortillas are layered, so there is less handling and less tearing.
  • Good use for cooked chicken: Rotisserie chicken, leftover roasted chicken, poached chicken, or shredded chicken breasts all work.
  • Classic red or tangy green: Red enchilada sauce gives deeper flavor; green sauce makes a brighter chicken casserole.
  • 9×13 family-dinner size: It serves about 8 and reheats well.
  • Built-in texture control: Corn tortillas, measured sauce, an uncovered finish, and a short rest help prevent sogginess.

What You Need for Chicken Enchilada Casserole

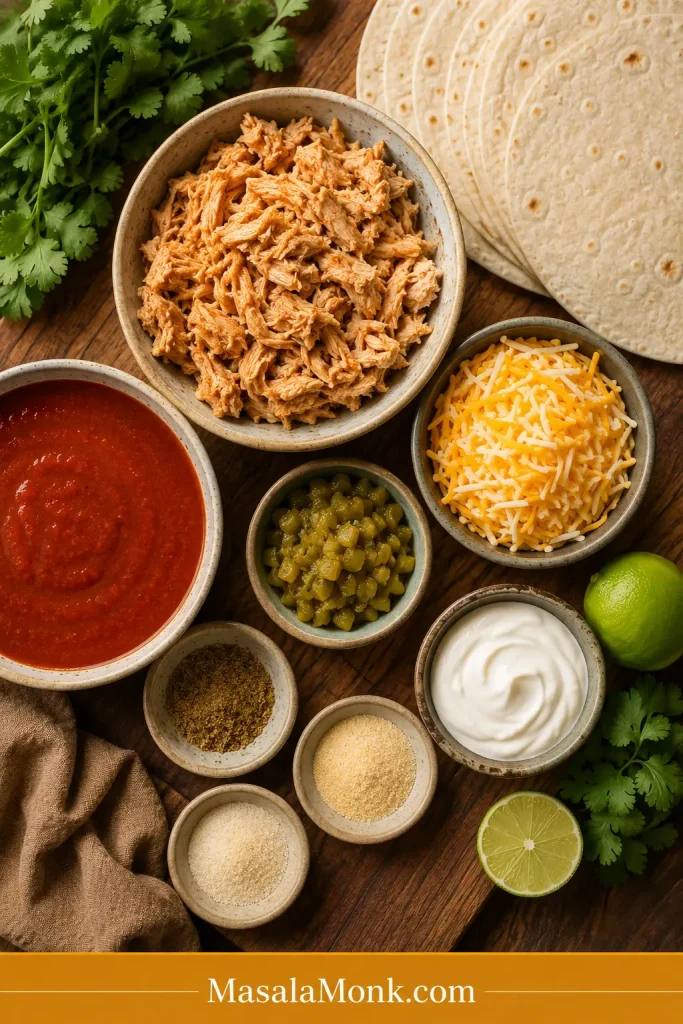
The ingredient list is simple, but the choices matter. Cooked chicken makes the recipe fast, corn tortillas give the casserole better structure, and the sauce needs enough flavor to carry the whole dish.

Ingredients for chicken enchilada casserole, including shredded chicken, enchilada sauce, corn tortillas, cheese, green chiles, beans, corn, lime, and toppings.
The ingredient list stays simple, but draining wet add-ins and using flavorful sauce make a big difference in the final texture.

For the two biggest texture decisions, check the enchilada sauce amount and the corn vs flour tortilla guidance before assembling the pan.

Cooked Shredded Chicken

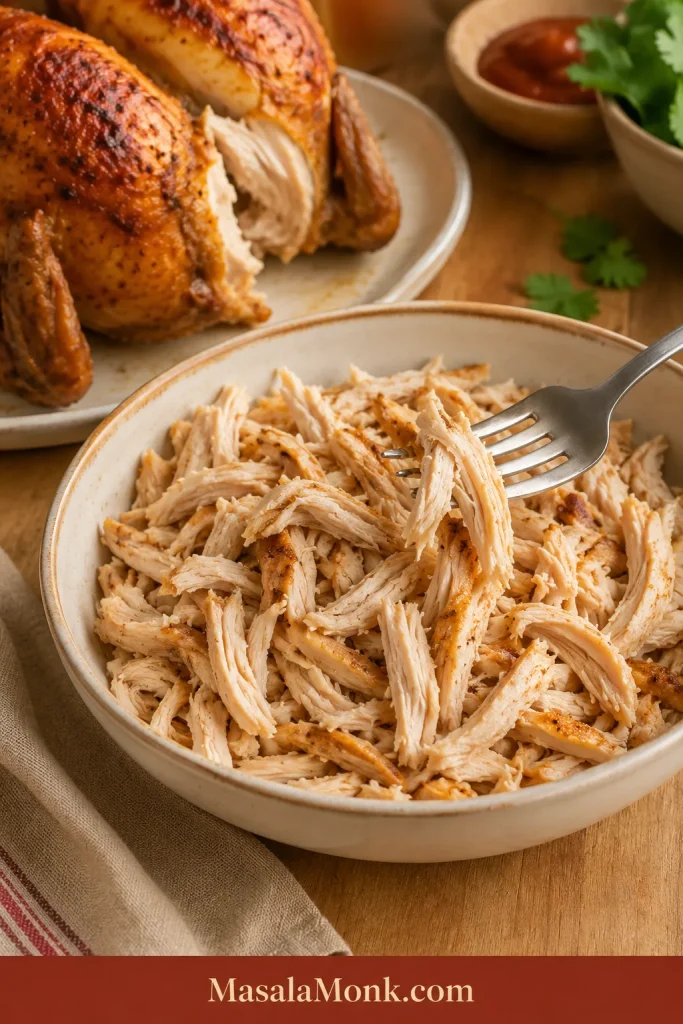
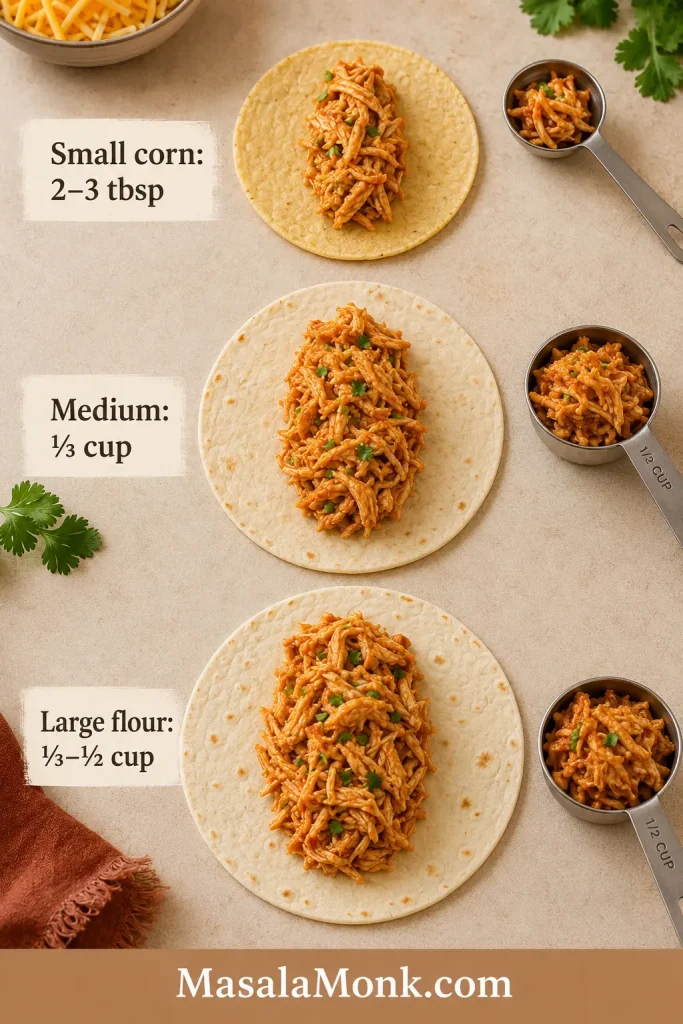
You need 3½ cups cooked shredded chicken, or about 525 g. One average rotisserie chicken usually gives about 3 to 4 cups shredded meat, depending on size, so it is a practical shortcut.

Shredded chicken blends into the layers better than large chunks. If you prefer more bite, you can use small diced cooked chicken, but avoid large pieces because they make the casserole harder to slice neatly. If you are starting with raw chicken breasts, MasalaMonk’s baked chicken breast recipe is a useful prep method before shredding.

Shredded rotisserie chicken measured for chicken enchilada casserole with tortillas, sauce, and cheese nearby.
Rotisserie chicken is the fastest shortcut here; however, shredding it finely helps the filling spread evenly between the tortilla layers.

Enchilada Sauce

Use 3 cups / 710 ml enchilada sauce total. Red enchilada sauce gives the casserole a classic chili-forward flavor. Green enchilada sauce tastes brighter, tangier, and especially good with chicken.

Store-bought sauce is fine for a weeknight dinner. Homemade sauce works too. For a fresher green variation, salsa verde is excellent; MasalaMonk’s salsa verde recipe is a natural fit if you want a brighter tomatillo-style direction.

Enchilada sauce amount guide showing 3 cups or 710 ml total sauce for a saucy but not flooded casserole.
Measuring the enchilada sauce keeps the casserole moist without flooding the layers, so the finished pan is saucy instead of watery.

If you are worried about using too much sauce, the layering guide shows exactly where the 3 cups go.

Corn Tortillas

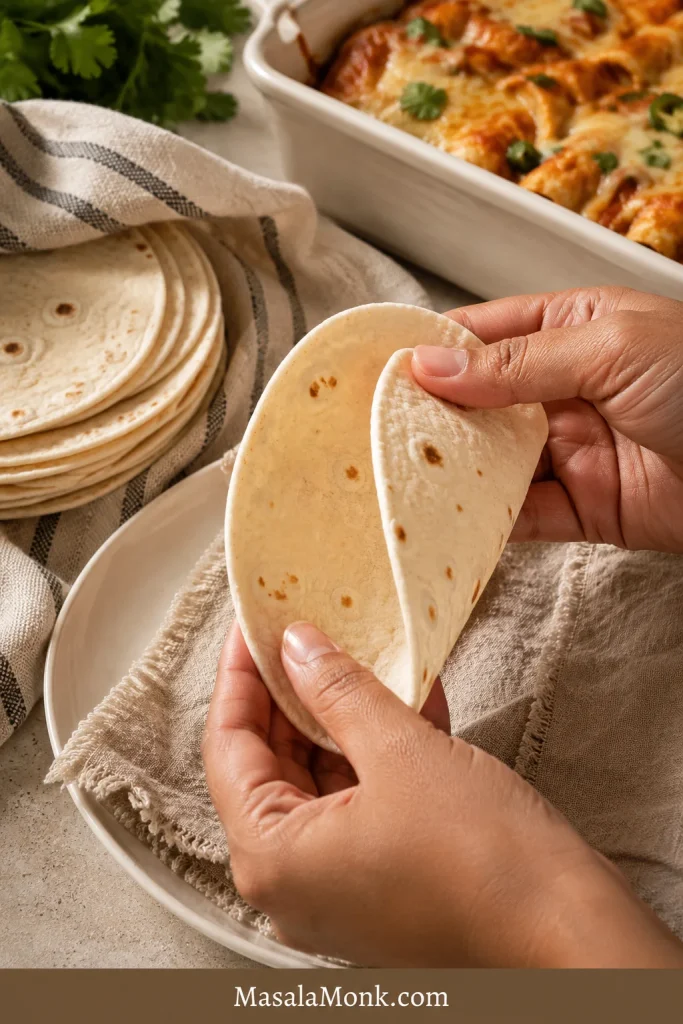
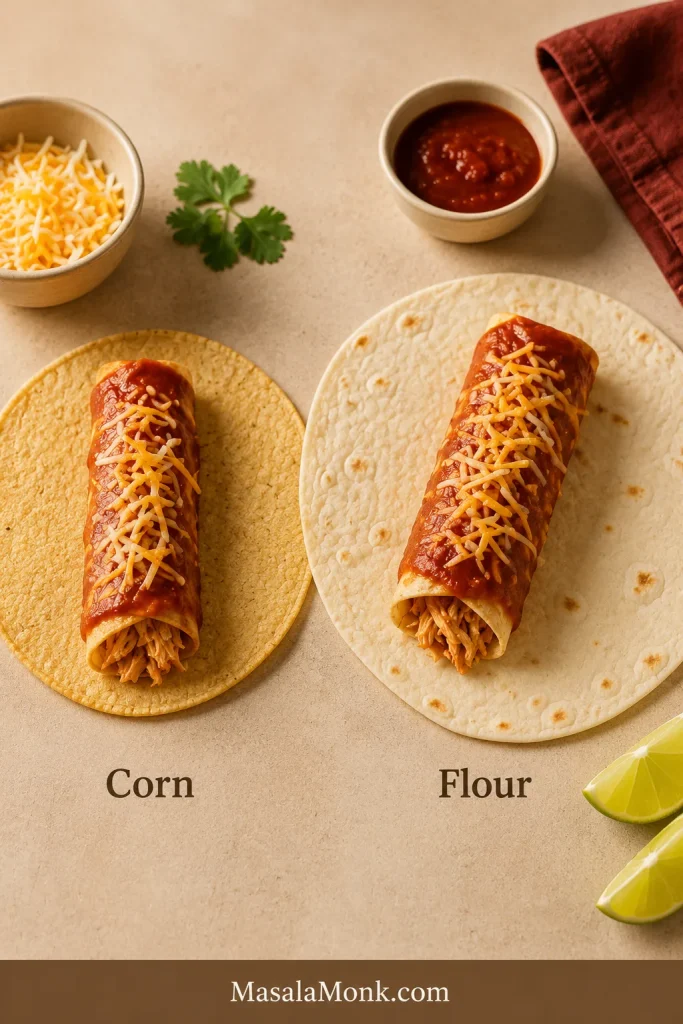
Use 12 small 6-inch corn tortillas, about 300–330 g total. Cut them in half so they fit the baking dish more evenly. Corn tortillas give the most classic enchilada flavor and hold their structure better under sauce.

Corn tortillas cut in half and ready to layer in a sauced 9x13 baking dish.
Corn tortillas are the best default because they bring classic enchilada flavor and hold their shape better under sauce.

Cheese

Use 3 cups / 12 oz / 340 g shredded cheese. Monterey Jack melts the smoothest, cheddar-Jack brings a little more flavor, and a Mexican-style cheese blend is convenient. Freshly shredded cheese usually melts better, but pre-shredded cheese is fine for a practical casserole.

Add-Ins and Heat Level

A small can of diced green chiles adds easy enchilada flavor without making the dish aggressively spicy. Black beans and corn are optional, but they make the casserole heartier and more colorful.

Drain beans, corn, and chiles well. Extra liquid is one of the fastest ways to turn an enchilada casserole watery. If you use both beans and corn and the skillet looks very full, save a little filling for tacos, bowls, or nachos instead of forcing every last spoonful into the baking dish.

As written, this casserole is usually mild to medium, depending on the enchilada sauce you use. For more heat, add jalapeño, a hotter sauce, or hot sauce at the table. For a family-friendly pan, keep the bake mild and let people add heat to their own plates.

Toppings

Add toppings after baking. Sour cream, chopped cilantro, avocado, sliced jalapeños, diced red onion, pico de gallo, salsa verde, and lime wedges all work well. Fresh toppings are especially helpful because the casserole itself is rich and saucy. If you want a creamy avocado topping, MasalaMonk’s easy guacamole recipe fits naturally here.

Pan, Oven Temperature, and Bake Time

The most forgiving pan for this recipe is a 9×13-inch baking dish, about 23×33 cm. That size gives you enough room for three balanced layers without making the center too thick.

DetailUse ThisWhy It Matters
Pan size9×13-inch / 23×33 cmCreates even layers and reliable baking.
Oven temperature375°F / 190°CHot enough to bubble the sauce and melt the cheese without drying the casserole.
Covered bake20 minutesLets the center heat through before the top browns.
Uncovered bake10–12 minutesLets the cheese bubble and excess moisture escape.
Rest time10–15 minutesLets the layers settle so the casserole slices better.

If you prefer baking at 350°F / 175°C, bake covered for 25–30 minutes, then uncover and bake for another 10–15 minutes. The lower temperature works; it simply needs a little more time.

How to Tell When It Is Done

The casserole is done when the sauce is bubbling around the edges, the cheese is fully melted, the center is hot, and the tortillas have softened. At that point, it should smell like warm chili, toasted corn, and melted cheese. If the top still looks wet or loose, give it a few more uncovered minutes. If the cheese is browning too fast, loosely tent the dish with foil.

Baked chicken enchilada casserole with bubbling red sauce around the edges and melted cheese on top.
Bubbling edges and melted cheese are the clearest signs that the center is hot and the casserole is ready to rest.

Corn vs Flour Tortillas for Chicken Enchilada Casserole

The tortilla choice changes the casserole. It affects flavor, structure, softness, and whether the final dish slices cleanly or collapses into a saucy scoop.

Corn versus flour tortilla comparison for chicken enchilada casserole, showing cleaner corn tortilla layers and softer flour tortilla texture.
Corn tortillas give cleaner pieces, while flour tortillas create a softer comfort-bake texture; therefore, the best choice depends on how sliceable you want the casserole.

Why Corn Tortillas Work Best

Corn tortillas are the most forgiving choice for a classic chicken enchilada casserole because they taste more like enchiladas and hold up better under sauce. They soften as the casserole bakes, but they usually do not become as gummy as flour tortillas.

Corn tortillas also make the dish easier to keep gluten-free, as long as the enchilada sauce and other packaged ingredients are certified gluten-free.

When Flour Tortillas Are Okay

Flour tortillas work if you want a softer, more comfort-food-style casserole. They are common in creamy white chicken enchilada casserole versions, where the goal is soft and rich rather than sliceable and structured.

If flour tortillas are what you have, the casserole will still taste good. It will simply be more tender and spoonable, so think comfort bake rather than neat enchilada squares. Because flour tortillas absorb sauce differently, the soggy-fix section is worth reading before you assemble.

Should You Toast or Fry the Tortillas First?

You do not have to fry tortillas for this no-roll casserole. However, if you want firmer layers, you can lightly toast corn tortillas in a dry skillet or warm them quickly with a small amount of oil before layering.

This extra step is optional, but useful if your enchilada sauce is thin, if you plan to make the casserole ahead, or if you want neater pieces.

Corn tortillas shown before and after light toasting, with a casserole layer cue for firmer texture.
Toasting corn tortillas is optional, but it is useful when you want firmer layers or plan to assemble the casserole ahead.

This step matters most when you are making the casserole ahead; the make-ahead and freezer notes explain how the tortilla texture changes as it sits.

Red Sauce vs Green Sauce

This recipe works with either red or green enchilada sauce. The right choice depends on the flavor mood you want: red is deeper, cozier, and more classic, while green is brighter, tangier, and especially lively with chicken.

Red sauce versus green sauce comparison for chicken enchilada casserole with red enchilada sauce and green salsa verde cues.
Red enchilada sauce gives a deeper, cozier flavor, while green sauce makes the chicken casserole brighter and tangier.
SauceFlavorBest For
Red enchilada sauceDeeper, chili-forward, classicTraditional chicken enchilada casserole
Green enchilada sauceBrighter, tangier, slightly sharperGreen chicken enchilada casserole
Salsa verdeFresh, tomatillo-forward, livelyA fresher green variation with cilantro and lime
Creamy green sauceRich, tangy, softWhite or creamy chicken enchilada casserole

Use red enchilada sauce for a classic, cozy pan or green enchilada sauce for a brighter chicken casserole. If using salsa verde, taste it first because some jars are saltier or more acidic than others. For extra heat at the table, a few drops from MasalaMonk’s pepper sauce guide can add sharp chili flavor without changing the whole casserole.

Close-up of red chicken enchilada casserole with melted cheese, red sauce, cilantro, jalapeños, and visible layers.
Red enchilada sauce gives the layers a deeper chili flavor, especially when it is measured instead of poured freely.

For a full green-sauce direction, see the green chicken enchilada casserole variation. For a softer creamy bake, jump to the white or sour cream version.

Choose your version: Go red sauce + corn tortillas for classic enchilada flavor, green sauce or salsa verde + Monterey Jack for a brighter chicken casserole, sour cream or white sauce for a creamier comfort-food bake, and rotisserie chicken + jarred sauce for the fastest dinner.

How to Make Chicken Enchilada Casserole

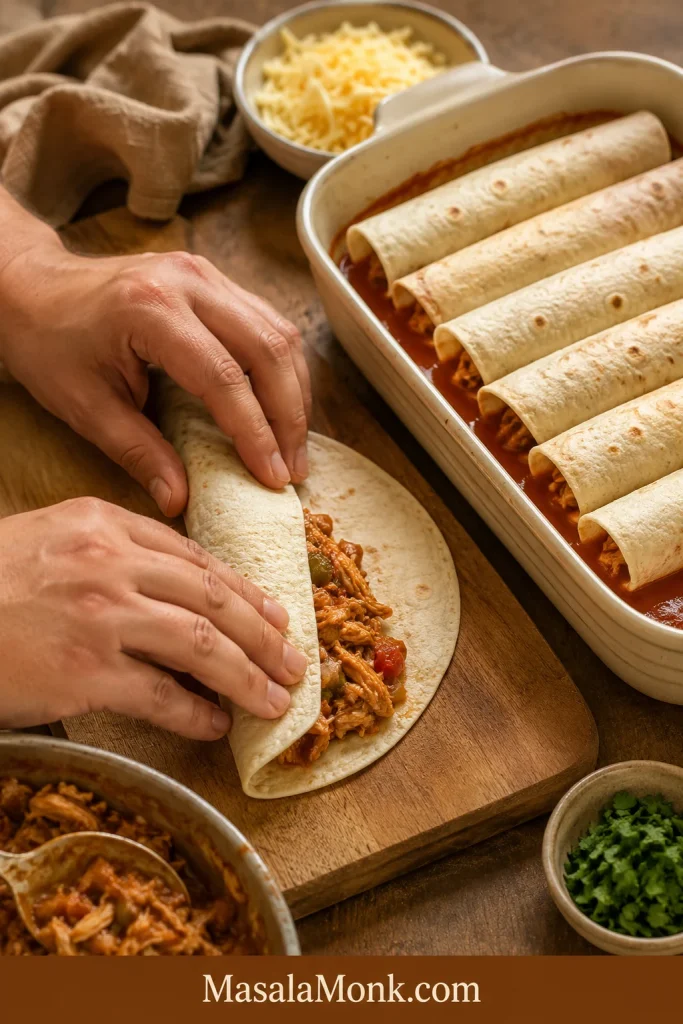
Once the filling is mixed, the rest is simple layering: build the pan, bake it covered, finish it uncovered, and give it a short pause before serving. This does not need to look perfect in the dish. Even coverage matters more than pretty rows, and the oven will pull everything together.

Step-by-step board showing how to make chicken enchilada casserole by making filling, saucing the pan, layering, baking, and resting.
Once the filling is mixed, the rest is relaxed layering: sauce the pan, build the stack, bake, and let it settle.

No-Roll Assembly Setup

Before you start building layers, set the sauced pan, tortilla halves, chicken filling, cheese, and remaining sauce within reach. That keeps the assembly relaxed and prevents overthinking each layer.

No-roll chicken enchilada casserole setup with a sauced baking dish, tortillas, shredded chicken filling, cheese, and sauce.
Instead of filling and rolling each tortilla, keep the assembly relaxed: layer the ingredients directly in the dish and let the oven pull them together.

1. Make the Chicken Filling

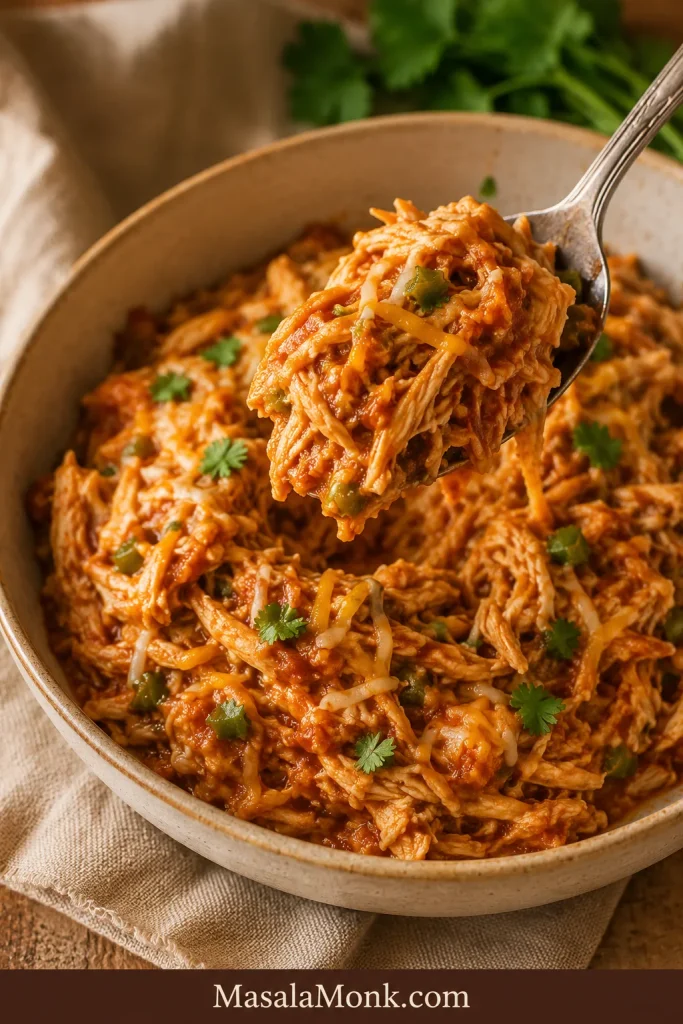
Warm oil in a skillet, then cook the onion until softened. Add garlic, cumin, chili powder, paprika, oregano, salt, and diced green chiles. Stir in the shredded chicken, optional black beans, optional corn, a little enchilada sauce, and lime juice.

The filling should be moist and flavorful, but not soupy. If it looks watery, cook it for another minute or two so extra liquid can evaporate.

Chicken enchilada casserole filling in a skillet with shredded chicken, sauce, beans, corn, and a spoon showing moist but not soupy texture.
The filling should taste seasoned and saucy on its own, but it should not be so wet that it loosens the whole baking dish.

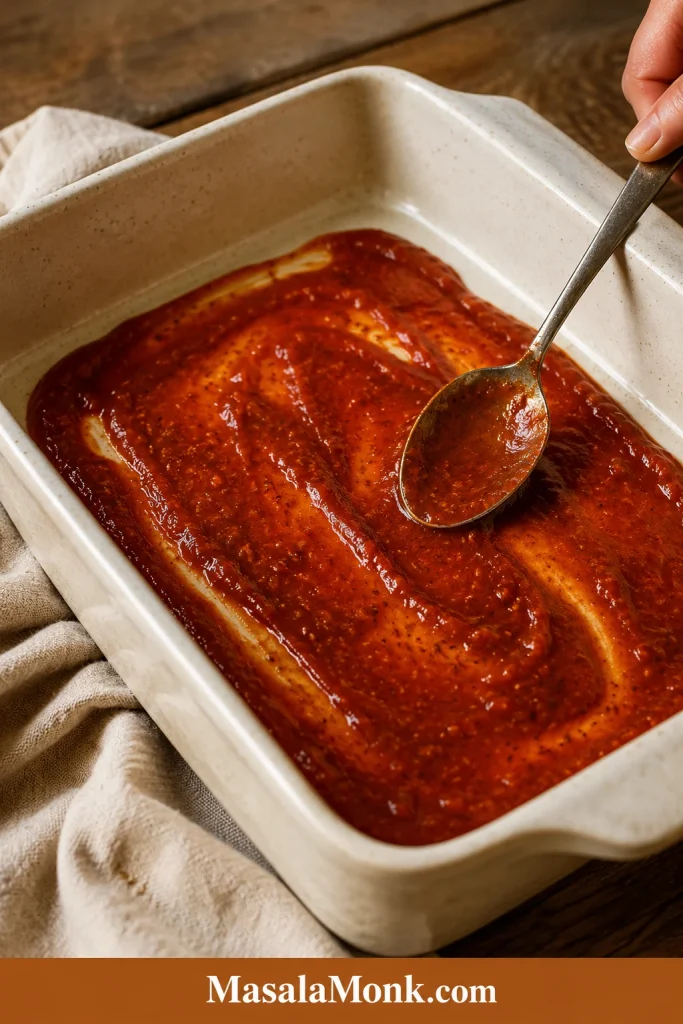
2. Sauce the Bottom of the Pan

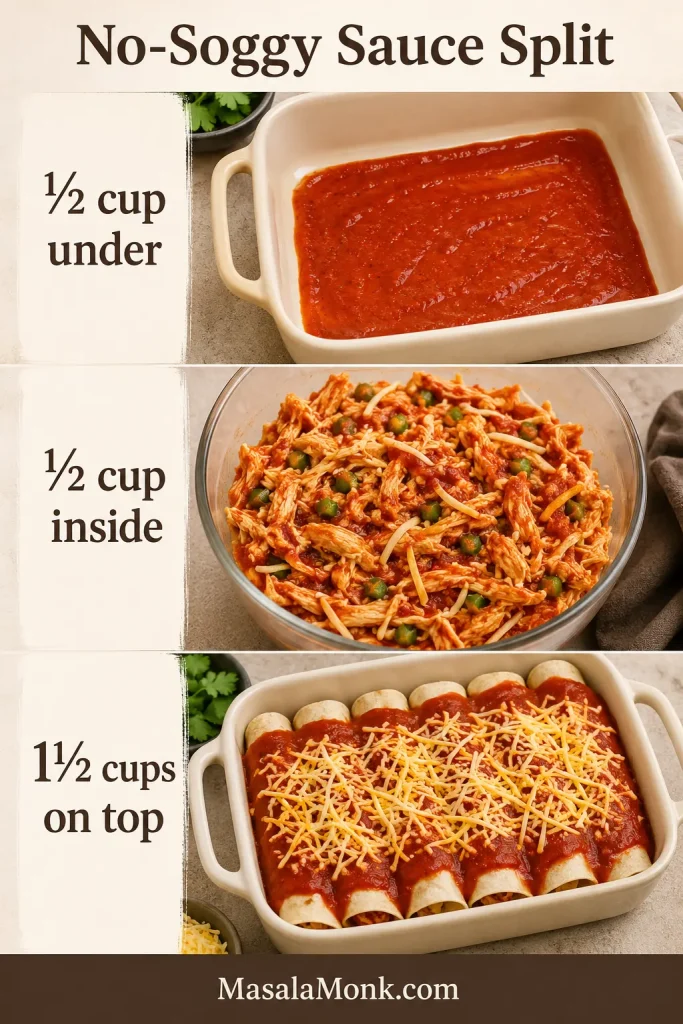
Spread ½ cup / 120 ml enchilada sauce across the bottom of the baking dish. This prevents the first tortilla layer from drying out and gives the casserole a saucy base.

Red enchilada sauce spread in a thin layer on the bottom of a 9x13 baking dish before adding tortillas.
Starting with a thin sauce layer protects the first tortillas from drying out without adding too much liquid to the bottom of the pan.

3. Layer the Tortillas, Chicken, Sauce, and Cheese

Add a layer of tortilla halves, overlapping slightly. Spread one-third of the chicken filling over the tortillas, spoon on some sauce, and sprinkle with cheese. Repeat until you have three layers.

4. Bake Covered, Then Uncovered

Cover the dish with foil and bake for 20 minutes. Remove the foil and bake for another 10–12 minutes, until the sauce bubbles around the edges and the cheese is melted on top.

5. Rest Before Slicing

Let the casserole rest for 10–15 minutes before cutting. This is what turns the bubbling pan into something sliceable. If you scoop it immediately, it will taste good, but it will not hold together as well.

No-roll layered chicken enchilada casserole resting on a cooling rack with a timer and spatula nearby.
A short rest gives the cheese and sauce time to settle, so the casserole serves in cleaner, more stable pieces.

How to Layer Chicken Enchilada Casserole So It Holds Together

The casserole needs enough sauce to soften the tortillas, but not so much that every layer swims. This part is where many cooks worry about making the pan messy, but it does not need to look perfect.

Use the Sauce as Your Layering Guide

The goal is saucy, not flooded. If your enchilada sauce is very thin, hold back a few tablespoons and add more only if the top looks dry before baking.

Sauce UseAmountWhere It Goes
Chicken filling½ cup / 120 mlStir into the seasoned chicken mixture.
Bottom of pan½ cup / 120 mlSpread before the first tortilla layer.
After first filling layer½ cup / 120 mlSpoon lightly over the chicken before cheese.
After second filling layer½ cup / 120 mlAdd just enough to moisten, not flood.
Top layer1 cup / 240 mlSpread over the final tortilla layer before the last cheese.
Total3 cups / 710 mlEnough sauce for soft layers without a watery casserole.
Layering diagram for chicken enchilada casserole showing corn tortillas, chicken filling, cheese, and a 3-cup sauce allocation.
The measured sauce allocation keeps every layer moist without letting the bottom of the pan turn loose or watery.

If the pan looks too wet at any point, check the soggy casserole fixes before adding more sauce.

Build the Layers Without Overthinking It

After the sauce is measured, the layers are simple: spread a thin sauce layer on the bottom, add tortilla halves, scatter one-third of the filling, spoon on the measured sauce, and add about 1 cup / 113 g cheese. Repeat until the pan is full, finishing with sauce and cheese on top.

  • Overlap tortilla halves slightly so there are no large gaps.
  • Spread the chicken filling evenly, but do not pack it down hard.
  • Keep the middle layers saucy, not flooded.
  • Finish with enough sauce and cheese on top to keep the casserole moist as it bakes.

If your tortillas are small, use enough pieces to cover each layer. If they are larger, trim or tear them to fit. The goal is even coverage, not a perfect pattern.

Patchwork Tortilla Layers Are Fine

Do not worry if the tortilla pieces look a little patchwork in the pan. Once the sauce and cheese melt into the layers, neat coverage matters more than a perfect arrangement. The pan may look imperfect before baking, but the finished casserole settles into soft, saucy layers.

Halved corn tortillas arranged in a patchwork layer over red sauce in a 9x13 baking dish.
The tortilla layer does not need to look perfect; even coverage matters more than neat rows once the sauce and cheese melt.

What Clean-Enough Slices Look Like

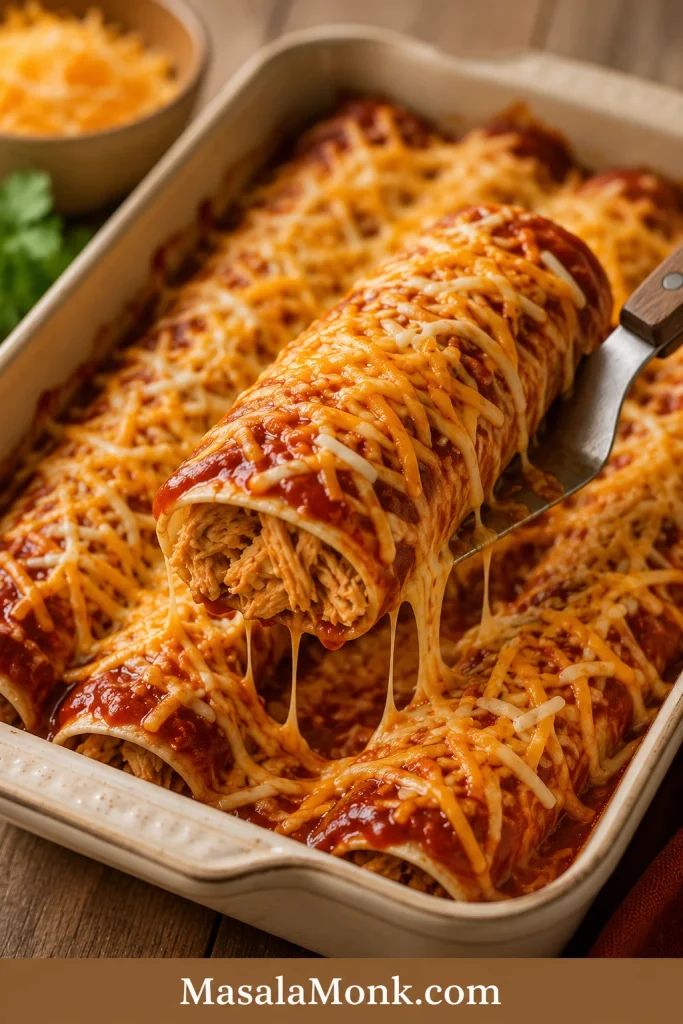
The best version is still generous and saucy, not dry or stiff. A slice should lift cleanly enough to serve while still showing soft tortilla, chicken, cheese, and sauce layers.

A spatula lifting a saucy layered slice of chicken enchilada casserole from a baking dish.
The goal is not a dry, perfect square; instead, aim for saucy layers that hold together enough to serve.

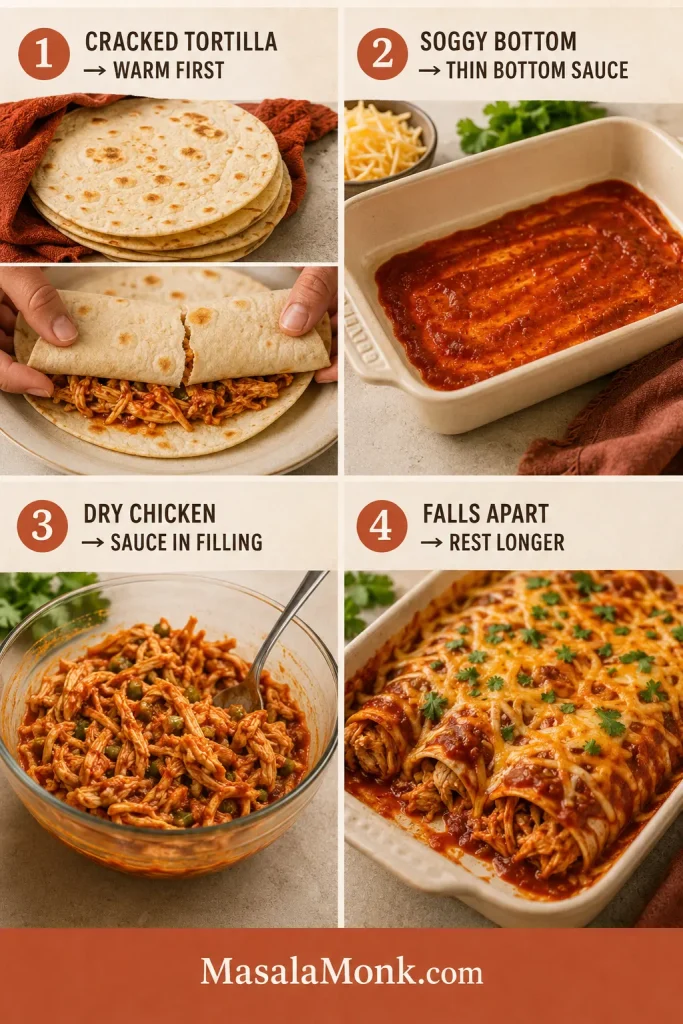
How to Keep Enchilada Casserole From Getting Soggy

Sogginess is the main thing that can ruin chicken enchilada casserole. Fortunately, most soggy casseroles are not ruined by one big mistake. Usually, it is a few small things adding up: wet add-ins, too much sauce, soft tortillas, and serving the casserole before it has had a chance to settle.

To prevent the problem before it starts, focus on the sauce allocation and the corn vs flour tortilla choice first.

ProblemLikely CauseFix
Watery casseroleToo much liquid from sauce, beans, corn, or chilesDrain add-ins well and use about 3 cups sauce total.
Gummy tortillasFlour tortillas or too much sauceUse corn tortillas, or reduce sauce slightly if using flour.
Casserole falls apartCut too soon after bakingRest 10–15 minutes before slicing.
Wet topBaked covered the whole timeUncover for the final 10–12 minutes.
Too soft after make-aheadTortillas absorbed sauce while refrigeratedUse corn tortillas and avoid assembling too far ahead if you want firmer layers.
Bland fillingChicken was not seasoned before layeringSeason the filling with spices, chiles, sauce, and lime before assembling.
Troubleshooting board for preventing soggy enchilada casserole, with fixes for watery sauce, gummy tortillas, falling apart, wet top, make-ahead softness, and bland filling.
If the pan usually turns soft or watery, start with moisture control: drain add-ins, measure sauce, and give the bake time to settle.

Most fixes come down to controlling moisture before the pan goes into the oven. If the first scoop looks softer than you expected, give the pan another few minutes before serving the rest. Enchilada casserole firms up as it cools, especially when the cheese and sauce have time to settle.

Mistakes to Avoid

Keep these three guardrails in mind: use cooked chicken, not raw chicken; use cooked rice only if you add rice; and do not pack the baking dish so full that the layers cannot settle.
Three mistakes to avoid when making chicken enchilada casserole: use cooked chicken, use cooked rice, and do not overfill the pan.
These three guardrails keep the recipe safe, evenly baked, and easier to serve without changing the basic method.
  • Raw chicken changes the recipe. This casserole is built around cooked shredded chicken, so raw chicken would change the bake time, moisture level, and food-safety timing.
  • Raw rice needs its own recipe. It needs more liquid and a longer bake, so use cooked rice only if you want a rice variation.
  • An overfilled pan gets messy fast. If the filling is more than your dish can comfortably hold, save the extra for tacos, bowls, or nachos.

Chicken Enchilada Casserole Variations

These are adaptation notes for the main casserole, not all separate full recipes. Red or green sauce swaps stay closest to the original 9×13 bake. Rice, slow cooker, keto, and tortilla-free versions change the texture or timing more, so use those as direction rather than simple one-for-one swaps. If you plan to make a variation ahead, check the make-ahead notes because creamy, rice, and slow cooker versions soften differently.

Green Chicken Enchilada Casserole

Green sauce gives the casserole a brighter, tangier feel, especially with chicken. Use green enchilada sauce or salsa verde, add diced green chiles to the filling, choose Monterey Jack or cheddar-Jack, and finish with cilantro and lime.

Green chicken enchilada casserole with salsa verde, Monterey Jack cheese, cilantro, lime, jalapeños, and visible chicken layers.
Green enchilada sauce or salsa verde gives the casserole a fresher finish, especially with Monterey Jack, cilantro, and lime.

White, Sour Cream, or Creamy Chicken Enchilada Casserole

For a creamier comfort-food pan, use a sour cream, cream cheese, or simple white sauce direction with green chiles and Monterey Jack. Flour tortillas are common in white enchilada casseroles because they make the texture softer, but corn tortillas still hold better if you want neater pieces.

White sour cream chicken enchilada casserole with creamy sauce, melted cheese, green chiles, cilantro, jalapeños, and lime.
A white or sour cream version leans creamier and softer, so think comfort bake rather than sharply sliced layers.

No Cream of Chicken Soup Needed — But Here’s How to Adapt It

This recipe does not need cream of chicken soup because enchilada sauce already gives the pan moisture and flavor. However, if the casserole you grew up with was creamier, softer, and made with condensed soup, you can still take this recipe in that direction.

Replace ½ to 1 cup of the enchilada sauce with a sour cream and cream-of-chicken mixture, then keep the remaining sauce measured. Condensed soup plus sour cream makes the casserole richer and softer, so this route works best when you want an old-school creamy bake rather than the cleanest layered pieces.

Cream of chicken soup adaptation board with condensed soup, sour cream, enchilada sauce, green chiles, creamy sauce, and a no-roll layered casserole.
The main recipe does not need condensed soup, but this adaptation shows how to take it toward an old-school creamy casserole without losing control of the sauce.

Chicken Enchilada Rice Casserole

Cooked rice can make the casserole heartier. Stir in 1½ to 2 cups cooked rice with the chicken filling and reduce the tortillas slightly if the pan feels too full. Do not use raw rice here; it needs a different liquid ratio and longer bake time.

Chicken enchilada rice casserole variation with cooked rice, shredded chicken, red enchilada sauce, black beans, corn, cheese, and sour cream.
Cooked rice makes the casserole heartier; however, raw rice needs a different liquid ratio and should not be added to this version.

Slow Cooker Chicken Enchilada Casserole

The slow cooker version is convenient, but it will be more spoonable than the oven-baked casserole. Cook chicken with enchilada sauce first, shred it, then stir in tortilla strips and cheese near the end so the tortillas do not become mushy. For more shredded-chicken dinner ideas, MasalaMonk’s crock pot chicken breast recipes are useful.

Slow cooker chicken enchilada casserole with saucy shredded chicken, tortilla pieces, melted cheese, cilantro, and a spoonful being served.
The slow cooker version is convenient and spoonable, but adding the tortillas near the end helps keep them from turning mushy.

Healthy, Keto, or Tortilla-Free Notes

A lighter pan can use more chicken, black beans, extra vegetables, slightly less cheese, and corn tortillas. For a low-carb version, use low-carb tortillas or skip the tortillas and make a saucy chicken enchilada bake with peppers, cauliflower rice, or zucchini. MasalaMonk’s sheet pan chicken fajitas recipe is a good lighter companion if you want a quick Tex-Mex-style chicken dinner with more peppers and less cheese.

Lighter keto chicken enchilada casserole notes with shredded chicken, peppers, zucchini, cauliflower rice, avocado, lime, and less cheese.
For a lighter or lower-carb direction, keep the enchilada flavor and shift the base toward chicken, vegetables, and low-carb swaps.

Make Ahead, Freezer, and Reheating Tips

Chicken enchilada casserole is a good make-ahead dinner, but tortilla texture changes the longer the casserole sits with sauce. If you want the neatest layers, assemble it the same day you plan to bake it. If convenience matters more, assemble it ahead and expect a more tender texture.

To keep the make-ahead texture firmer, use the corn tortilla guidance and avoid over-saucing the layers.

When serving company, bake it fresh if you can. On a busy weeknight, assembling it ahead is still worth it. The make-ahead version is not about perfect slices; it is about having dinner mostly handled before the evening gets busy.

NeedWhat to DoTexture Note
Make ahead same dayAssemble, cover, and refrigerate until ready to bake.Very good texture.
Make ahead overnightRefrigerate up to 24 hours.Tortillas soften more, especially flour tortillas.
Bake from fridgeAdd 10–15 minutes to the covered bake time.Keep covered until hot in the center.
Freeze unbakedWrap tightly and freeze for 2–3 months.Corn tortillas freeze better than flour.
Bake after thawingThaw overnight in the fridge, then bake covered and finish uncovered.Best freezer texture.
Bake from frozenBake at 350°F / 175°C covered for 60–90 minutes, then uncovered for 10–20 minutes.Time depends on pan depth and how solidly frozen it is.
Store leftoversRefrigerate in an airtight container for 3–4 days.Good for lunches.
ReheatWarm covered at 350°F / 175°C or microwave individual portions.Add a spoonful of sauce if it seems dry.
Make-ahead, freezer, and reheating workflow board for chicken enchilada casserole with fridge, freezer, oven, leftovers, and reheat steps.
Make-ahead prep is practical, although the layers soften slightly; careful chilling, wrapping, and reheating keep the pan worth serving.

Freeze Unbaked Chicken Enchilada Casserole

Freezing the unbaked pan is useful when you want dinner ready for a future busy night. Wrap the dish tightly, label it clearly, and thaw overnight for the best texture before baking.

Unbaked chicken enchilada casserole wrapped tightly in foil with a freezer label, marker, and freezer-prep notes.
Wrapping and labeling the unbaked casserole protects it in the freezer, while thawing overnight gives the best baked texture later.

For general leftover safety, the USDA’s food-safety guidance is a helpful reference for cooked dishes and refrigerated leftovers: USDA leftovers and food safety. For poultry safety specifically, the USDA’s safe minimum internal temperature chart is useful if you are cooking chicken before shredding it.

What to Serve With Chicken Enchilada Casserole

This casserole is filling on its own, but the right sides make it feel like a complete dinner. Since the casserole is saucy and cheesy, fresh, crunchy, or bright sides work especially well. Think of toppings as balance: lime, cilantro, and pico de gallo add brightness; sour cream, avocado, and guacamole add creaminess; jalapeños and pepper sauce add heat; lettuce, onion, or slaw add crunch.

  • Mexican rice or cilantro lime rice
  • Black beans or refried beans
  • Guacamole or sliced avocado
  • Pico de gallo or MasalaMonk’s mango salsa recipe for a sweet-bright topping
  • Salsa verde
  • Shredded lettuce with lime
  • Corn salad
  • Pickled onions
  • Jalapeños
  • Lime wedges

If serving this for guests, put toppings in small bowls and let everyone finish their own plate. It turns a hot, cheesy casserole into an easy toppings-bar dinner, and the cool, fresh extras make every serving feel a little brighter.

Serving ideas for chicken enchilada casserole with a plated slice, lettuce, pico de gallo, sour cream, guacamole, jalapeños, beans, rice, corn salad, pickled onions, lime, and salsa verde.
Bright toppings, crunchy sides, beans, rice, and salsa make the saucy baked pan feel fresh enough for a full dinner.

Chicken Enchilada Casserole Recipe

This easy chicken enchilada casserole is a no-roll 9×13 dinner with soft tortilla layers, saucy shredded chicken, and melted cheese on top. Use red sauce for a classic chili-forward bake or green sauce for a brighter, tangier chicken casserole.

Prep Time20 minutes
Cook Time30–32 minutes
Rest Time10–15 minutes
Servings8

Equipment

  • 9×13-inch / 23×33 cm baking dish
  • Large skillet
  • Mixing spoon or spatula
  • Foil
  • Knife and cutting board
  • Measuring cups and spoons

Ingredients

  • 1 tablespoon neutral oil / 15 ml
  • 1 small onion, diced / about 120 g
  • 2–3 garlic cloves, minced
  • 1 teaspoon ground cumin
  • 1 teaspoon chili powder
  • ½ teaspoon smoked paprika or regular paprika
  • ½ teaspoon dried oregano
  • ½ teaspoon kosher salt, plus more to taste
  • 1 can diced green chiles / 4 oz / 113 g, drained if watery
  • 3½ cups cooked shredded chicken / about 525 g
  • 1 can black beans, drained and rinsed / 15 oz / 425 g, optional
  • 1 cup corn / about 150–165 g, optional
  • 3 cups enchilada sauce, red or green / 710 ml, divided
  • 1 tablespoon lime juice / 15 ml
  • 12 small corn tortillas, 6-inch, halved / about 300–330 g total
  • 3 cups shredded Monterey Jack, cheddar-Jack, or Mexican blend cheese / 12 oz / 340 g

Optional Toppings

  • Sour cream
  • Chopped cilantro
  • Avocado or guacamole
  • Sliced jalapeños
  • Diced red onion
  • Lime wedges
  • Pico de gallo or salsa verde

Instructions

  1. Heat the oven. Preheat the oven to 375°F / 190°C. Lightly grease a 9×13-inch / 23×33 cm baking dish.
  2. Make the filling. Heat the oil in a large skillet over medium heat. Add the onion and cook for 3–4 minutes, until softened.
  3. Add the seasoning. Stir in the garlic, cumin, chili powder, paprika, oregano, salt, and diced green chiles. Cook for about 30 seconds, just until fragrant.
  4. Add chicken and extras. Stir in the shredded chicken, black beans if using, corn if using, ½ cup / 120 ml enchilada sauce, and lime juice. Cook for 1–2 minutes, just until everything is combined and lightly saucy. Taste and adjust salt if needed.
  5. Start the layers. Spread ½ cup / 120 ml enchilada sauce across the bottom of the baking dish. Add a layer of tortilla halves, overlapping slightly.
  6. Add filling and cheese. Spread one-third of the chicken filling over the tortillas. Spoon over about ½ cup / 120 ml sauce, then sprinkle with about 1 cup / 113 g cheese.
  7. Repeat. Add another tortilla layer, another third of the filling, another ½ cup / 120 ml sauce, and another cup of cheese. Add the final tortilla layer, the remaining filling, the remaining sauce, and the last cheese.
  8. Bake covered. Cover the dish with foil and bake for 20 minutes. If the dish is very full, tent the foil slightly so it does not stick to the cheese.
  9. Finish uncovered. Remove the foil and bake for another 10–12 minutes, until the casserole is bubbling around the edges and the cheese is melted.
  10. Rest before serving. Let the casserole rest for 10–15 minutes before slicing. Add toppings just before serving.

Recipe Notes

  • Baking at 350°F / 175°C: Bake covered for 25–30 minutes, then uncovered for 10–15 minutes.
  • Green chicken enchilada casserole: Use green enchilada sauce or salsa verde, Monterey Jack cheese, and extra cilantro/lime to finish.
  • Creamier casserole: Stir ½ cup / 120 g sour cream into the filling after it cools slightly, or use it as a topping.
  • Neater slices: Use corn tortillas and let the casserole rest before cutting.
  • Softer casserole: Flour tortillas can be used, but they may become more tender or gummy.

FAQs

Do I have to roll the tortillas?

No. That is the beauty of the casserole. The tortillas are layered in the pan instead of filled and rolled, so you get enchilada flavor without the assembly line.

How much chicken do I need?

Use about 3½ cups cooked shredded chicken. One average rotisserie chicken usually gives about 3 to 4 cups shredded meat, depending on size.

Are corn or flour tortillas better?

Corn tortillas give more classic enchilada flavor and better structure. Flour tortillas work, but they create a softer, more spoonable casserole and can turn gummy if the dish is too saucy.

Is red or green enchilada sauce better for this casserole?

Both work. Red sauce gives a deeper, more classic flavor, while green enchilada sauce tastes brighter and tangier with chicken, Monterey Jack, cilantro, and lime.

How do I keep chicken enchilada casserole from getting soggy?

Use corn tortillas, drain wet add-ins, measure the sauce, bake uncovered at the end, and give the casserole time to settle before serving. If you want firmer layers, lightly toast the tortillas before assembling.

How far ahead can I assemble it?

You can assemble it up to 24 hours ahead and refrigerate it covered. When baking from the fridge, add 10–15 minutes to the covered bake time so the center heats through.

What is the best way to freeze it?

Freeze it unbaked or baked, tightly wrapped, for 2–3 months. For the best texture, thaw it overnight in the refrigerator before baking or reheating. Corn tortillas usually freeze better than flour tortillas.

Is the slow cooker version as good as the oven version?

The slow cooker version is convenient, but it will be softer than the oven method. Cook the chicken with enchilada sauce first, shred it, then add tortilla strips and cheese near the end so the tortillas do not become too mushy.

Should rice go in this casserole or on the side?

Cooked rice can go in the casserole if you want it heartier. Stir in 1½ to 2 cups cooked rice with the chicken filling. Raw rice needs different liquid ratios and a longer bake time, so it is better handled as its own chicken enchilada rice casserole.

How long does chicken enchilada casserole last in the fridge?

Leftover chicken enchilada casserole keeps well in the refrigerator for 3–4 days in an airtight container. Reheat individual portions in the microwave or warm larger portions covered in a 350°F / 175°C oven.

Once you know the sauce amount, tortilla choice, and the value of a short pause before serving, this becomes the kind of forgiving dinner you can make without overthinking it. Keep it classic with red sauce, brighten it with green sauce, or set out sour cream, lime, avocado, salsa, and jalapeños so the whole pan feels easy, generous, and personal.

Back to top

Posted on 1 Comment

Cream of Mushroom Chicken Recipe

Cream of mushroom chicken served over mashed potatoes with sliced mushrooms, creamy sauce, black pepper, and fresh herbs.

This cream of mushroom chicken recipe is for the night when you have chicken in the fridge, a can of cream of mushroom soup in the pantry, and no patience for a complicated sauce. The goal is simple: tender chicken, creamy mushroom gravy, and a dinner that works with rice, egg noodles, mashed potatoes, biscuits, or whatever vegetable you already have.

This is the kind of dinner that feels like a shortcut while it cooks, but like comfort food once it hits the plate. It is not fancy food; it is the creamy, spoon-over-something meal you make when the day has been long and everyone still needs to eat.

Bake it when you want the easiest family dinner. Use the skillet when dinner needs to happen faster, the slow cooker when the meal should take care of itself, and the rice bake when chicken and rice should land in one dish.

The dish works best with condensed cream of mushroom soup, thin or evenly pounded chicken, and just enough milk or broth to turn the soup into a spoonable sauce. A thermometer keeps the chicken from drying out while still getting it safely to 165°F / 74°C.

Quick Answer: How to Make Cream of Mushroom Chicken

To make cream of mushroom chicken, season chicken breasts or thighs, place them in a baking dish, whisk condensed cream of mushroom soup with milk or low-sodium chicken broth, pour the sauce over the chicken, cover, and bake until the chicken reaches 165°F / 74°C. Uncover near the end if the sauce needs to thicken or cheese is going on top.

The result should be chicken that slices easily with creamy mushroom gravy you can spoon over rice, noodles, mashed potatoes, biscuits, or vegetables. This is still a low-effort dinner: about 10 minutes of prep, then the oven does most of the work.

The skillet version is faster, the slow cooker version is more hands-off, and the rice bake turns it into a one-dish meal. The trick is changing the liquid slightly for each method, so use the version guide or the soup and liquid ratios before switching methods.

Best first version: Bake thin chicken breasts or thighs with 1 can condensed cream of mushroom soup and ½ cup milk or broth at 375°F / 190°C. Cover first for moisture, then uncover near the end so the sauce thickens.
Quick answer board showing cream of mushroom chicken, chicken pieces, condensed soup, milk or broth, and covered baking instructions.
For the simplest version, build the dish in four parts: chicken, condensed cream of mushroom soup, a little milk or broth, and a covered bake.

For food safety, chicken should reach 165°F / 74°C in the thickest part; FoodSafety.gov lists poultry and casseroles at this internal temperature.

Which Version Should You Make?

Before you open the soup can, decide how dinner needs to work tonight. The same basic ingredients can become an easy oven dinner, a quick skillet meal, a slow cooker comfort dish, or a chicken-and-rice bake.

The one thing that changes most between versions is the soup-to-liquid ratio. The oven, skillet, slow cooker, and rice bake each need slightly different treatment, which is what keeps the chicken juicy and the sauce creamy instead of watery.

Choose This Version Best When Key Ratio
Baked cream of mushroom chicken You want the easiest family dinner with minimal prep. 1 can soup + ½ cup milk or broth
Skillet cream of mushroom chicken You want dinner faster and more control over the sauce. 1 can soup + ½–1 cup broth or milk
Slow cooker cream of mushroom chicken You want hands-off creamy chicken for rice, noodles, or potatoes. 2 cans soup + ½ cup liquid
Cream of mushroom chicken and rice You want a full one-dish meal. 1 can soup + 1 cup liquid + ¾ cup rice
Creamy chicken over egg noodles You want mushroom-sauce chicken without baking rice. Cook noodles separately and spoon sauce over them
Guide comparing baked, skillet, slow cooker, and chicken and rice versions of cream of mushroom chicken.
Instead of using one formula for every method, adjust the liquid for baked, skillet, slow cooker, and chicken-and-rice versions.

How Much Liquid to Add to Cream of Mushroom Soup

Use these ratios as starting points, then adjust until the sauce looks spoonable, not stiff and not soupy.

Version Condensed Soup Added Liquid Why It Works
Baked chicken 1 can / 10.5 oz / 298 g ½ cup / 120 ml milk or broth Creates a creamy, spoonable sauce without making the dish watery.
Skillet chicken 1 can / 10.5 oz / 298 g ½–1 cup / 120–240 ml broth or milk The sauce reduces as it simmers, so you can loosen or thicken it as needed.
Slow cooker chicken 2 cans / about 596 g total ½ cup / 120 ml broth or water The slow cooker traps moisture, so too much liquid makes the sauce thin.
Small chicken and rice bake 1 can / 10.5 oz / 298 g 1 cup / 240 ml liquid + ¾ cup rice Rice needs measured liquid and trapped steam to cook properly.
Large 9×13 rice bake 2 cans / about 596 g total 2 cups / 480 ml broth + 1¼ cups rice Better for a family-size casserole with more rice and chicken.
Liquid ratio guide for baked, skillet, slow cooker, and chicken and rice cream of mushroom chicken recipes.
Condensed soup gives the sauce body; however, each cooking method needs a different amount of liquid to stay creamy.

Once the ratio is right, everything gets easier: the chicken cooks gently, the sauce stays spoonable, and the sides do half the work. When you are ready to cook the oven version, go straight to the cream of mushroom chicken recipe card.

Water works in a pinch, but broth gives the dish more savory flavor and milk makes the sauce softer and creamier. Regular condensed soup, regular broth, cheese, and onion soup mix can all add salt, so taste before adding more.

Basic Oven Method at a Glance

Use this as the quick map before the full recipe card.

  1. Thin and season the chicken. Slice large breasts in half lengthwise or pound them evenly, then season lightly.
  2. Whisk the soup mixture. Mix condensed cream of mushroom soup with milk or broth until smooth.
  3. Cover and bake. Pour the mixture over the chicken, cover with foil, and bake so the meat stays moist.
  4. Uncover, check, and rest. Finish uncovered, cook to 165°F / 74°C, and rest before serving.
Four-step oven method for cream of mushroom chicken showing thin chicken, soup mixture, covered baking, and temperature check.
Once the chicken is even in thickness and the soup mixture is loosened, the oven version becomes simple and predictable.

Cream of Mushroom Chicken Recipe Card

This baked cream of mushroom chicken is the oven version to make first: tender chicken, condensed cream of mushroom soup, a little milk or broth, simple seasonings, and enough creamy mushroom sauce to spoon over rice, egg noodles, mashed potatoes, or vegetables.

Prep Time10 minutes
Cook Time30–35 minutes
Total Time40–45 minutes
Yield4 servings

Course: Dinner
Cuisine: American
Method: Baked
Equipment: 9×13-inch baking dish, foil, mixing bowl, instant-read thermometer

Ingredients

  • 1½ lb / 680 g boneless skinless chicken breasts or thighs
  • 1 can condensed cream of mushroom soup, 10.5 oz / 298 g
  • ½ cup / 120 ml milk or low-sodium chicken broth
  • ½ tsp garlic powder, divided
  • ½ tsp onion powder, divided
  • ½ tsp paprika, divided
  • ¼ tsp black pepper, divided, plus more to taste
  • 8 oz / 225 g sliced mushrooms, optional
  • ¼–½ cup / 60–120 g sour cream, optional
  • ¾–1 cup / 85–115 g shredded mozzarella, Monterey Jack, or cheddar, optional
  • Salt only after tasting, if needed

Instructions

  1. Heat oven to 375°F / 190°C. Lightly grease a 9×13-inch baking dish.
  2. Slice large chicken breasts in half lengthwise or pound them to an even thickness.
  3. Place the chicken in the baking dish. Sprinkle with about half of the garlic powder, onion powder, paprika, and black pepper.
  4. Scatter raw mushrooms around the chicken for convenience, or brown them first for deeper flavor and less extra moisture.
  5. In a bowl, whisk the condensed cream of mushroom soup with milk or broth and the remaining garlic powder, onion powder, paprika, and pepper until smooth. Whisk in sour cream now if using it for the baked version.
  6. Taste the sauce. Add salt only if it needs it. A flat-tasting sauce can take a little more pepper, paprika, thyme, garlic powder, or Dijon.
  7. Pour the sauce over the chicken and spread it so the chicken is mostly covered.
  8. Cover the dish tightly with foil.
  9. Bake for 25 minutes.
  10. Uncover and bake 5–10 minutes more, or until the chicken reaches 165°F / 74°C in the thickest part.
  11. Sprinkle cheese over the chicken during the uncovered finish if using it, then bake until melted.
  12. When the chicken is done but the sauce is still thin, move the chicken to a plate and thicken the sauce separately in a small pan, or in the baking dish only if your dish is stovetop-safe.
  13. Rest for 5 minutes before serving.
  14. Serve over rice, egg noodles, mashed potatoes, biscuits, broccoli, green beans, or roasted vegetables.

Notes

  • Use condensed cream of mushroom soup, not ready-to-eat mushroom soup.
  • Browned mushrooms give the sauce a deeper, less canned flavor.
  • Water works if that is all you have, but broth gives better flavor and milk makes the sauce creamier.
  • A cream of chicken swap works too: replace half or all of the cream of mushroom soup with condensed cream of chicken soup.
  • For skillet or slow cooker versions, add sour cream or cheese near the end over gentle heat for the smoothest finish.
Recipe card for cream of mushroom chicken with prep time, cook time, oven temperature, chicken, condensed soup, milk or broth, and method notes.
Save this basic baked cream of mushroom chicken formula first, then use the other sections when you want skillet, slow cooker, or rice variations.

Making a different version? Use the skillet method, slow cooker method, or chicken and rice bake so the liquid and timing stay right.

Why This Recipe Works

The baked version works because it solves two problems at once: thick chicken and loose sauce. Thin pieces cook before they dry out, while condensed soup gives the sauce enough body to stay creamy. A small splash of milk or broth loosens the canned base, covered baking protects the chicken, and the uncovered finish lets the sauce settle.

The real win is not making it fancy. It is keeping the chicken juicy and turning the canned soup into a sauce that tastes like it belongs on the plate.

Ingredient Notes That Keep It Creamy, Not Watery

Nothing here is precious. The point is knowing which shortcuts help and which ones make the dish watery, salty, or dry.

Ingredients for cream of mushroom chicken including chicken, condensed mushroom soup, milk or broth, mushrooms, seasonings, sour cream, and cheese.
A pantry base can still taste rounded when you add smart upgrades like broth, browned mushrooms, thyme, pepper, sour cream, or cheese.
  • Chicken: Boneless skinless breasts or thighs both work. Breasts give you a classic sliced dinner; thighs give you more forgiveness.
  • Condensed cream of mushroom soup: The word condensed matters because the soup starts thick and becomes sauce when you add liquid.
  • Milk, broth, or water: Broth gives savory depth, milk gives a softer creamy finish, and water works when that is all you have.
  • Fresh mushrooms: Raw mushrooms are convenient, but browned mushrooms add deeper flavor and release less water into the dish.
  • Sour cream: Use it for tang. Whisk it into the oven version before baking, or stir it into skillet and slow cooker versions near the end over gentle heat.
  • Cheese: Mozzarella, Monterey Jack, cheddar, Swiss, or Muenster can turn this into a richer family bake.
Taste before baking: Once the soup, liquid, and seasonings are mixed, taste the sauce before pouring it over the chicken. A bland sauce can take black pepper, garlic powder, paprika, thyme, or a small spoon of Dijon; a salty sauce does not need extra salt.

For the oven version, a 9×13-inch baking dish, foil, a mixing bowl, and an instant-read thermometer are enough. The stovetop route needs a lidded skillet, while the crockpot option works best in a 4–6 quart slow cooker.

Using Campbell’s or Any Condensed Mushroom Soup

Campbell’s condensed cream of mushroom soup works well here, and so do other condensed brands. The label matters less than the word condensed.

Condensed vs Ready-to-Eat Soup

Condensed soup is thick enough to become sauce when mixed with a small amount of milk, broth, or water. Ready-to-eat mushroom soup is already diluted, so it can make the dish watery unless you reduce or skip the added liquid.

Comparison of thick condensed cream of mushroom soup and thinner ready-to-eat mushroom soup.
Condensed cream of mushroom soup starts thick, while ready-to-eat soup is already diluted; that difference matters when you want a creamy sauce.

Low-sodium condensed soup gives you more control if you are also using broth, cheese, onion soup mix, or another salty ingredient.

The same cream-soup comfort logic shows up in MasalaMonk’s tuna noodle casserole recipe, where condensed soup turns into a creamy noodle bake.

Best Chicken to Use: Breasts, Thighs, or Cubed Chicken

That is really the whole chicken decision: breasts for a classic sliced dinner, thighs when you want more forgiveness, and cubed chicken when you want a faster skillet or casserole-style meal.

Chicken guide showing breasts, thighs, cubed chicken, and thinner cutlets for cream of mushroom chicken.
Your cut changes the result: breasts slice neatly, thighs stay juicy, and cubed chicken cooks quickly for skillet-style dinners.

Chicken Breasts

Chicken breasts work well when they are not too thick. Large breasts should be sliced in half lengthwise to make thinner cutlets, or pounded to an even thickness. This helps the chicken cook through before the sauce dries out.

For more detail on baking chicken breast without drying it out, see MasalaMonk’s baked chicken breast recipe.

Chicken Thighs

Boneless skinless thighs stay juicy even when the dish needs a few extra minutes. They are especially good for the slow cooker or chicken-and-rice versions because they can handle longer cooking better than thin breasts.

Cubed Chicken

Cubed chicken is useful for a quick skillet dinner or a casserole-style variation. It cooks faster and mixes easily with noodles or rice, though it does not give you the same sliced-chicken presentation as baked breasts or thighs.

Baked Cream of Mushroom Chicken

This is the version to make first. It gives you the classic creamy mushroom chicken experience without needing a skillet, a roux, or a separate sauce.

The best pan comes out bubbling around the edges, with mushroom gravy tucked around the chicken and enough creamy sauce to drag through rice, noodles, or mashed potatoes.

Before Baking

The dish should look assembled but not finished: chicken tucked into the mushroom mixture, mushrooms visible, and just enough sauce to coat the pan before it is covered.

Raw chicken breasts in a baking dish with cream of mushroom sauce, sliced mushrooms, foil, and a spoon nearby.
Before baking, the chicken should be coated and nestled into the mushroom mixture, not buried under too much liquid.

Baked Version at a Glance

Detail Best Answer
Oven temperature 375°F / 190°C
Baking dish 9×13-inch dish
Chicken 1½ lb / 680 g boneless skinless breasts or thighs
Soup 1 can condensed cream of mushroom soup, 10.5 oz / 298 g
Liquid ½ cup / 120 ml milk or low-sodium chicken broth
Covered bake 25 minutes
Uncovered finish 5–10 minutes
Safe internal temperature 165°F / 74°C
Resting time 5 minutes
Baked cream of mushroom chicken guide showing 375°F oven, covered baking, uncovered finish, 165°F temperature, and resting time.
Baked cream of mushroom chicken works best with a covered start, a short uncovered finish, and a thermometer check at 165°F.

Once this version is in the oven, there is not much left to do except make something for the sauce to land on.

Covered or Uncovered?

Cover the chicken for the first part of baking. The foil traps steam, keeps the meat moist, and prevents the sauce from drying out too quickly. The final uncovered minutes help looseness cook off and let cheese melt if you are using it.

Very thin pieces should be checked early. Thicker pieces need a thermometer more than they need a guessed time.

Comparison of covered and uncovered baked cream of mushroom chicken in a casserole dish.
Covering helps the chicken stay moist; afterward, uncovering lets the creamy mushroom sauce reduce just enough.
If the chicken is done but the sauce is thin: Do not keep baking the chicken just to thicken the sauce. Move the chicken to a plate, cover it loosely, and thicken the sauce in a small pan, or in the baking dish only if your dish is stovetop-safe.

What the Sauce Should Look Like

The finished sauce should be creamy and spoonable, thick enough to coat the chicken but loose enough to run into rice, noodles, or mashed potatoes. It should not be stiff like paste, and it should not run like soup.

A sauce that looks too thick before baking needs another splash of milk or broth. When the sauce looks watery but the chicken still needs time, uncover the dish for the last few minutes. Once the chicken is already at 165°F / 74°C, remove it and thicken the sauce separately instead of overbaking dinner.

Sauce texture guide for cream of mushroom chicken showing too thick, just right, and too thin sauces.
Look for sauce that coats a spoon without running like soup, since that texture will sit better on rice, noodles, or mashed potatoes.

In the oven version, ½ cup / 120 ml milk or broth per 10.5 oz / 298 g can of condensed soup is the safest starting point. The skillet version can handle more liquid because the pan sauce reduces as it simmers. The slow cooker needs less because the lid traps moisture as everything cooks. When the texture looks off, use the troubleshooting guide instead of guessing.

Skillet Cream of Mushroom Chicken

The skillet version is best when dinner needs to be faster and the sauce needs more hands-on control. It tastes a little more cooked, not just assembled, because the chicken and mushrooms get direct heat before the sauce comes together.

This is the version with the most dinner-pan flavor: a little browning, a little butter, and creamy mushroom sauce pulled together in the same skillet.

Skillet cream of mushroom chicken with seared chicken, browned mushrooms, creamy sauce, black pepper, and herbs.
The skillet version adds extra savory depth because the chicken and mushrooms brown before the cream sauce is finished.

Skillet Formula

  • 1½–2 lb / 680–900 g chicken
  • 1 tbsp oil or butter, for searing
  • 1 can condensed cream of mushroom soup, 10.5 oz / 298 g
  • ½–1 cup / 120–240 ml milk, water, or low-sodium chicken broth
  • 8 oz / 225 g sliced mushrooms, optional
  • Garlic powder, onion powder, paprika, black pepper, and herbs to taste

Oil helps the chicken sear without burning. A small knob of butter added with the mushrooms gives the pan a richer, rounder flavor.

Skillet Timing

Chicken Type Timing What to Watch
Thin chicken cutlets Sear 3–4 minutes per side, then simmer 5–8 minutes in sauce Check early so they do not dry out.
Boneless thighs Sear 4–5 minutes per side, then simmer 8–12 minutes in sauce They stay juicier and can handle a little longer cooking.
Cubed chicken Cook 8–12 minutes total, depending on cube size Stir often so the sauce coats the pieces evenly.
Skillet formula and timing guide for cream of mushroom chicken with cutlets, thighs, and cubed chicken.
Skillet cream of mushroom chicken cooks quickly, so cut size matters: thin cutlets, thighs, and cubed chicken all need different timing.

How to Make It in a Skillet

Season the chicken, then sear it in a large skillet until lightly browned on both sides. Add fresh mushrooms after removing the chicken briefly, then cook them until they release moisture and start to brown. Whisk in the condensed soup with enough broth or milk to make a sauce, then return the chicken to the pan.

Step-by-step skillet method showing seared chicken, browned mushrooms, sauce mixture, returned chicken, and gentle simmering.
Sear first, then simmer gently; that sequence builds flavor while keeping the chicken from drying out.

Cover and simmer gently until the chicken reaches 165°F / 74°C. A pan sauce that tightens too much only needs a tablespoon or two of milk or broth. A loose sauce needs the opposite: a few uncovered minutes so extra moisture can cook off. Use the sauce texture guide if you are unsure whether to loosen or reduce it. For a quick slurry, mix 1 tsp cornstarch with 1 tbsp cold water, then stir it into the simmering sauce. Sour cream should go in near the end over low heat so everything stays smooth.

Slow Cooker Cream of Mushroom Chicken

The slow cooker is best when you want tender, saucy chicken waiting for you later. It is less about speed and more about having creamy chicken ready when the rice, noodles, or potatoes are done.

Because the lid traps moisture, start with less liquid than you would use in the oven or skillet. Thawed chicken gives the most predictable timing and texture; frozen chicken releases more moisture and can make the sauce thin.

Slow cooker cream of mushroom chicken before and after cooking, with chicken, mushrooms, condensed soup, and creamy finished sauce.
Slow cooker cream of mushroom chicken needs a thicker starting mixture because the covered cooker creates its own moisture.

If you like this kind of hands-off chicken dinner, MasalaMonk’s crock pot chicken breast recipes has more ways to keep slow-cooked chicken juicy instead of dry.

Slow Cooker Formula

  • 1½–2 lb / 680–900 g chicken breasts or thighs
  • 2 cans condensed cream of mushroom soup, 10.5 oz / 298 g each
  • ½ cup / 120 ml low-sodium chicken broth or water
  • 8 oz / 225 g sliced mushrooms, optional
  • ½ packet onion soup mix, optional, only if you like a saltier old-school flavor
  • Sour cream or cheese near the end, optional
Slow cooker formula board for cream of mushroom chicken with chicken, condensed soup, broth or water, timing, and temperature.
Start the slow cooker with less liquid than the oven version, then adjust near the end if the sauce needs loosening or enrichment.

Cook on High for 3–4 hours or Low for 6–7 hours, until the chicken reaches 165°F / 74°C. Thighs handle the longer cook better than thin breasts. By the end, the chicken should be fork-tender and the sauce should taste like it has had time to settle into the meat.

Serve the pieces whole, or shred the chicken into the sauce if you want it to spoon over rice, noodles, or potatoes. Add sour cream or cheese near the end, not at the beginning, for the smoothest finish.

How to Thicken Slow Cooker Cream of Mushroom Chicken

A thin slow cooker sauce can be fixed by removing the lid for a short time, shredding the chicken into the sauce, or thickening it with a small slurry made from 1 tsp cornstarch and 1 tbsp cold water. Use this fix before the chicken overcooks.

Guide showing how to thicken slow cooker cream of mushroom chicken sauce by removing the lid, shredding chicken, or adding slurry.
If slow cooker sauce turns thin, you can fix it calmly with uncovered time, shredded chicken, or a small cornstarch slurry.

For another saucy crockpot chicken dinner, MasalaMonk’s slow cooker French onion chicken follows a similar comfort-food idea with onion gravy, cheese, and a base of noodles, potatoes, rice, or toast.

Cream of Mushroom Chicken and Rice

Rice can absolutely work here, but it needs its own formula. Dry rice needs extra liquid, trapped steam, and more time than the basic baked chicken version. Before you bake, scan the rice mistakes to avoid if you are using brown rice, instant rice, or thick chicken pieces.

Rice version rule: Use extra liquid, a tight foil cover, and longer baking time. The soup base alone is too thick to cook raw rice evenly.
Cream of mushroom chicken and rice casserole in a baking dish with tender rice, mushrooms, creamy sauce, and a serving spoon.
Cream of mushroom chicken and rice needs its own method, since dry rice requires extra liquid, trapped steam, and resting time.

Campbell’s classic one-dish chicken and rice bake follows this same condensed-soup pattern: condensed soup, measured liquid, uncooked long-grain white rice, and chicken baked together under a tight cover. You can see that reference here: Campbell’s One-Dish Chicken & Rice Bake.

Small Classic Chicken and Rice Bake

This smaller rice bake makes about 4 servings.

  • 1 can condensed cream of mushroom soup, 10.5 oz / 298 g
  • 1 cup / 240 ml water or low-sodium chicken broth
  • ¾ cup / about 140 g uncooked long-grain white rice
  • 1¼ lb / 565 g boneless skinless chicken breast or thighs
  • ¼ tsp paprika, plus pepper and garlic powder if desired

Mix the soup, liquid, rice, and seasoning in a greased baking dish. Place the chicken on top, cover tightly, and bake at 375°F / 190°C for about 45 minutes, or until the rice is tender and the chicken reaches 165°F / 74°C. Let it stand for 10 minutes before serving so the rice can finish absorbing the sauce.

Chicken and rice timing tip: Thicker chicken pieces or thighs work better for rice bakes because the rice needs longer to cook. Thin chicken breasts may finish before the rice is tender. When that happens, remove the chicken, keep the rice covered, and continue baking the rice until soft.

Larger 9×13 Family Rice Bake

A larger family-style casserole needs more soup, more rice, and more liquid.

  • 2 cans condensed cream of mushroom soup, 10.5 oz / 298 g each
  • 2 cups / 480 ml low-sodium chicken broth
  • 1¼ cups / about 230 g long-grain white rice
  • 1½–2 lb / 680–900 g chicken
  • Optional onion, thyme, Dijon, black pepper, or Parmesan

Cover tightly and bake at 350°F / 175°C for about 60 minutes. Check the rice, stir gently around the chicken if needed, add a splash of hot broth if the rice is still firm, then cover again and bake 10–15 minutes more. Rest 10 minutes before serving.

Chicken and Rice Formula Guide

Use the small bake when you want a compact dinner, and use the 9×13 formula when the casserole needs to feed more people without leaving the rice undercooked.

Formula guide for small and family-size cream of mushroom chicken and rice bakes with soup, liquid, rice, chicken, oven temperature, and time.
Use the right chicken-and-rice formula from the start, and you avoid the common problem of tender chicken with undercooked rice.

Rice Mistakes to Avoid

The rice version is forgiving once the steam is right, but it is less forgiving when the cover is loose or the liquid is guessed.

  • A loose cover will not trap enough steam. Rice needs a tight cover to soften properly.
  • Brown rice needs a different plan. It takes more time and usually more liquid than white rice.
  • Instant rice cooks too fast for this long bake. It can turn mushy unless you change the method.
  • Ready-to-eat soup can make the bake watery. It is already diluted, unlike condensed soup.
  • The chicken can finish before the rice. Check both before calling the dish done.
  • Resting matters. The rice absorbs the final sauce as it stands.
Chicken and rice mistakes guide showing loose cover, wrong rice, too little liquid, chicken done before rice, skipped resting time, and rice choices.
Long-grain white rice is the easiest choice; brown rice and instant rice need different liquid and timing to work well.

Serving the chicken over plain rice instead of baking rice in the dish? MasalaMonk’s how to cook rice guide is useful for getting fluffy grains that do not turn gummy under the sauce.

Cream of Chicken + Cream of Mushroom Variation

You can mix cream of chicken and cream of mushroom soup. Cream of chicken makes the sauce milder and more savory, while cream of mushroom adds deeper mushroom flavor. A 50/50 mix works especially well for larger bakes, chicken and rice, and slow cooker meals.

For a bigger casserole or crockpot dinner, try 1 can cream of mushroom soup and 1 can cream of chicken soup. Low-sodium versions are the safest choice because two condensed soups can make the dish salty fast.

Comparison of cream of mushroom soup, cream of chicken soup, and a 50 50 blend spooned over chicken.
Cream of mushroom brings deeper flavor, cream of chicken tastes milder, and a 50/50 blend gives a softer creamy sauce.

This same cream-soup swap logic also shows up in comfort casseroles like MasalaMonk’s green bean casserole recipe ideas, where condensed cream soup is part of the classic creamy base.

How to Make Cream of Mushroom Chicken Taste Better

The shortcut works as-is, but one or two small upgrades can make it taste more like a creamy mushroom dinner than plain canned soup.

The easiest upgrades are browned mushrooms for depth, broth for savoriness, and a small spoon of Dijon or thyme for balance.

Flavor upgrade board for cream of mushroom chicken with browned mushrooms, broth, thyme, Dijon, sour cream, cheese, pepper, and parsley.
Small upgrades like browned mushrooms, broth, Dijon, thyme, sour cream, cheese, pepper, and parsley make the shortcut taste more complete.

Browned vs Raw Mushrooms

Raw mushrooms can go straight into the dish, but browning them first gives the sauce more flavor and reduces the extra moisture that can loosen the pan.

Comparison of raw sliced mushrooms and browned mushrooms for cream of mushroom chicken.
Raw mushrooms keep prep easy; meanwhile, browned mushrooms add deeper flavor and reduce extra moisture in the sauce.
  • Brown fresh mushrooms first: This adds real mushroom flavor, cooks off extra moisture, and gives the sauce a deeper base.
  • Choose broth instead of water: Low-sodium chicken broth gives the dish more savory depth.
  • Add garlic and onion powder: These make the pantry version taste fuller.
  • Add thyme: Thyme works naturally with mushrooms and chicken.
  • Stir in a small spoon of Dijon: It cuts through the richness without making the dish taste mustardy.
  • Finish with sour cream: It gives the sauce a tangier, creamier finish. In skillet and slow cooker versions, add it near the end over gentle heat.
  • Melt cheese on top: Mozzarella, Monterey Jack, cheddar, Swiss, or Muenster can turn this into a cheesy baked chicken dinner.
  • Add black pepper and parsley at the end: This keeps the final plate from tasting too heavy.

What to Serve with Cream of Mushroom Chicken

The sauce is the point, so serve it with something that catches every spoonful: fluffy rice, buttered egg noodles, mashed potatoes, biscuits, broccoli, or green beans.

Side dish guide for cream of mushroom chicken with rice, egg noodles, mashed potatoes, biscuits, broccoli, and green beans.
The best sides give the sauce somewhere to go, whether you choose rice, egg noodles, mashed potatoes, biscuits, broccoli, or green beans.

Over Rice

Plain white rice is the easiest pairing. Brown rice, leftover rice, or seasoned rice also work, but keep them separate unless you are following a true chicken-and-rice bake formula.

Cream of mushroom chicken served over fluffy white rice with sliced mushrooms, creamy sauce, black pepper, and herbs.
Rice keeps this creamy chicken dinner simple, filling, and easy to serve on a busy weeknight.

Over Egg Noodles

Egg noodles make this feel like old-school chicken and gravy. Cook the noodles separately, then spoon the chicken and mushroom sauce over the top. Dry egg noodles should not go into the baking dish unless you are using a tested noodle-casserole formula.

Cream of mushroom chicken served over broad egg noodles with creamy mushroom sauce, chicken pieces, herbs, and a fork lifting a bite.
Broad egg noodles hold the mushroom sauce in their folds, so this version feels cozy without needing extra prep.

Over Mashed Potatoes

Mashed potatoes make the plate even cozier. If you want a creamy potato side that will hold the sauce without turning gluey, try MasalaMonk’s garlic mashed potatoes recipe.

Sliced cream of mushroom chicken served over mashed potatoes with mushrooms, creamy sauce, black pepper, and herbs.
Mashed potatoes make the richest plate because the soft potatoes hold the creamy mushroom sauce instead of letting it run.

With Vegetables

Green beans, broccoli, peas, carrots, roasted mushrooms, or a simple salad balance the richness. For a holiday-style comfort plate, serve it with green bean casserole, roasted vegetables, or a crisp side salad.

For a bigger comfort-food spread, MasalaMonk’s hashbrown casserole recipe also works as a creamy potato side, especially when the chicken is served with green beans or salad. Planning leftovers? The storage and reheating tips explain how to loosen the sauce again without drying out the chicken.

How to Fix Cream of Mushroom Chicken

Even when this dish goes a little sideways, it is usually fixable. Most problems are texture problems: the sauce is too thick, too watery, or too salty, while the chicken dries out because the pieces were too thick or cooked too long.

The usual culprits are ready-to-eat soup instead of condensed soup, too much liquid, a loose cover on rice, or thick chicken breasts that needed more time than the sauce did.

Common Sauce, Chicken, and Rice Fixes

Problem What Happened How to Fix It
Sauce is too thick or gluey Not enough liquid was added to the condensed soup. Add milk or broth 1–2 tbsp at a time until it is spoonable.
Sauce is watery Too much liquid was added, ready-to-eat soup was used, or raw mushrooms released extra moisture. When the chicken still needs time, bake uncovered 5–10 minutes. When the chicken is already done, remove it and thicken the sauce separately with a small slurry: 1 tsp cornstarch mixed with 1 tbsp cold water.
Sauce is too salty Condensed soup, broth, cheese, or onion soup mix added too much salt. Serve with rice, noodles, or potatoes to soften the saltiness. A spoonful of sour cream can also mellow the sauce. Next time, use low-sodium soup and broth.
Chicken is dry The pieces were too thick, uncovered too long, or cooked past 165°F / 74°C. Slice breasts thinner, cover while baking, check early, or use thighs.
Chicken is done but sauce is thin The sauce needs more time, but the chicken does not. Remove the chicken, cover it loosely, and thicken the sauce separately in a small pan.
Rice is undercooked The dish needed more steam, liquid, or time. Add ¼–½ cup hot broth, cover tightly again, and bake longer.
Rice is mushy Too much liquid or too much bake time. Use long-grain white rice, measure carefully, and rest the dish instead of overbaking.
Dish tastes bland The sauce was not boosted with enough seasoning or fresh ingredients. Add black pepper, garlic powder, onion powder, thyme, paprika, Dijon, or browned mushrooms.
Sauce splits when reheated It was reheated too aggressively. Reheat gently with a splash of milk or broth and stir slowly.
Troubleshooting guide for cream of mushroom chicken showing fixes for watery sauce, thick sauce, salty sauce, dry chicken, undercooked rice, and bland flavor.
Most cream of mushroom chicken problems are fixable once you know whether the issue is texture, salt, timing, or seasoning.

Storage, Freezing and Reheating

Store leftovers in an airtight container in the refrigerator for 3–4 days. Rice or noodles are best stored separately when possible so they do not soak up all the sauce.

To reheat, warm the chicken gently on the stovetop or in the microwave with a splash of milk or broth. The sauce thickens as it chills, so that splash of liquid helps bring it back to a spoonable texture.

You can freeze the cooked chicken and sauce, but the sauce may loosen or look slightly grainy after thawing. It is still usable; reheat gently and whisk in a splash of milk or broth to bring it back together.

Chicken-and-rice leftovers thicken more in the fridge because the rice keeps absorbing the sauce. Reheat them with a splash of broth or milk so the rice loosens instead of turning dry.

Storage guide for cream of mushroom chicken showing a fridge container, freezer bag, and reheating in a skillet with milk or broth.
Creamy leftovers thicken in the fridge, so reheat gently and add a splash of milk or broth to bring the sauce back.

Cream of Mushroom Chicken FAQs

How long should cream of mushroom chicken bake?

Thin boneless chicken breasts or thighs usually need about 25 minutes covered at 375°F / 190°C, then 5–10 minutes uncovered. Thickness matters more than the clock, so check that the chicken reaches 165°F / 74°C.

Covered or uncovered?

Cover the dish first so the chicken stays moist and the sauce does not dry out. Uncover near the end when the sauce needs to thicken or cheese is going on top.

Campbell’s soup vs other condensed brands

A standard 10.5 oz / 298 g can of Campbell’s condensed cream of mushroom soup works well, but other condensed brands work too. The important detail is that the soup is condensed, not ready-to-eat.

Chicken breasts vs thighs

Boneless skinless thighs are the more forgiving choice because they stay juicy even when the dish needs a few extra minutes. Breasts work well too, but they should be thin and even before baking.

How much liquid should I add to condensed soup?

For baked chicken, ½ cup / 120 ml milk or low-sodium broth per 10.5 oz / 298 g can makes a creamy sauce. Skillet chicken can take ½–1 cup / 120–240 ml because the pan sauce reduces as it simmers.

How to make it on the stove

The stovetop version works best with thin pieces because they cook quickly and stay tender. Sear them first, then simmer gently in the mushroom sauce until they reach 165°F / 74°C. A few uncovered minutes will tighten a loose pan sauce.

Homemade mushroom sauce instead of canned soup

This becomes a different style of recipe, but it can work. For a quick homemade mushroom cream sauce, start with 2 tbsp butter, 8 oz mushrooms, 1 minced garlic clove, 2 tbsp flour, 1 cup broth, and ½ cup milk or cream, then cook the chicken in that sauce. For the classic shortcut flavor, use condensed soup.

Adding rice safely

Rice can work beautifully, but treat it like its own bake, not a last-minute add-in. It needs extra liquid, trapped steam, and more time than the basic chicken version. Start with 1 can condensed soup, 1 cup / 240 ml water or broth, ¾ cup / about 140 g long-grain white rice, and about 1¼ lb / 565 g chicken.

Should you use frozen chicken?

Thawed chicken is the safer bet here because it cooks more evenly and keeps the sauce from turning watery. Frozen chicken can release a lot of moisture, especially in the oven or skillet, so thaw it first when you can.

Why the sauce turns watery

Watery sauce usually comes from too much liquid, ready-to-eat soup instead of condensed soup, raw mushrooms releasing moisture, or keeping the dish covered for the whole bake. Once the chicken is done, remove it and thicken the sauce separately with a small slurry made from 1 tsp cornstarch and 1 tbsp cold water.

Fixing a salty sauce

Condensed soup is already salty, and broth, cheese, or onion soup mix can add even more. Rice, noodles, or potatoes help soften the saltiness on the plate. A spoonful of sour cream can also mellow the sauce.

Best sides for creamy mushroom chicken

Rice, egg noodles, mashed potatoes, biscuits, broccoli, green beans, peas, carrots, and roasted mushrooms all work. The best side is something that catches the creamy mushroom sauce.

Slow cooker ratio

In the slow cooker, use less liquid than you might expect because the lid traps moisture. For 1½–2 lb / 680–900 g chicken, use 2 cans condensed cream of mushroom soup and about ½ cup / 120 ml broth or water. Cook on High for 3–4 hours or Low for 6–7 hours, until the chicken reaches 165°F / 74°C.

Final Thoughts

Start with the oven version first. Once you understand the soup-to-liquid ratio, the recipe bends to the night: faster in a skillet, easier in the slow cooker, or heartier with rice.

However you make it, the goal stays the same: juicy chicken, creamy mushroom gravy, and a dinner that asks very little from you but still feels like someone cared.

Back to top

Posted on 6 Comments

Chicken Adobo — Step-by-Step Recipe — Classic Filipino Adobong Manok

A close-up fork lifts a juicy bite of chicken adobo over a bowl of rice, with a thick glossy soy-vinegar sauce dripping from the bite. The chicken is coated in dark caramelized sauce with visible garlic bits and peppercorns against a moody black background, with the text “Chicken Adobo” and “Glossy sauce, every time” plus MasalaMonk.com at the bottom.

This chicken adobo recipe is the kind of dinner that feels like it’s doing you a favor: rich, tangy, and deeply savory, yet built from pantry staples and one dependable method. Even when the day has been long, you can still end up with tender chicken in a glossy adobo sauce that tastes like it took far more effort than it did.

What makes Filipino chicken adobo so beloved is the balance. Vinegar keeps everything bright. Soy sauce brings depth and color. Garlic turns sweet and mellow as it simmers, while bay leaves and peppercorns give that unmistakable “adobo” perfume. Then, right at the end, the sauce is reduced until it clings—so each bite carries the full flavor instead of leaving it behind in the pot.

Just as importantly, once you learn the rhythm of this chicken adobo recipe—sear, simmer, reduce—you can adjust it without stress. You can make it saucier or drier, sweeter or sharper, with potato for a one-pot feel, or with coconut milk for a creamy finish. For now, though, we’ll start with a classic chicken adobo recipe that’s clear, measured, and reliable, with enough detail that you’ll cook it confidently the first time.

Also Read: Sweetened Condensed Milk Fudge: 10 Easy Recipes


Chicken Adobo Recipe Ingredients and Measurements (Adobo Sangkap)

A traditional adobo recipe can look slightly different from home to home, yet the core stays recognizable. Think of these ingredients as the backbone of an adobong manok recipe that tastes right whether you’re cooking for yourself or feeding a table.

Overhead flatlay of chicken adobo ingredients on a dark surface: raw bone-in chicken, soy sauce, vinegar, water, smashed garlic, bay leaves, peppercorns, and ginger. Text overlay reads “Chicken Adobo Ingredients + Measurements (Adobo Sangkap)” with quantities for classic adobong manok (serves 4–5), including soy sauce, vinegar, water, garlic, bay leaves, and peppercorns, plus optional sugar, onion, oyster sauce, and chili.
The easiest way to make classic chicken adobo taste “right” is getting the base ratios nailed before you even turn on the stove. This quick Adobo Sangkap card is your cook-along checklist for adobong manok—chicken, garlic, bay, peppercorns, plus the soy–vinegar–water balance that becomes that glossy adobo sauce after reduction. Save it for your next grocery run, and when you’re ready, follow the full step-by-step method here, in this blog post.

Chicken adobo recipe ingredients list (for classic adobong manok)

Chicken

  • 1.2 to 1.5 kg chicken, preferably bone-in thighs and drumsticks (skin-on optional)

For browning

  • 1 tbsp neutral oil (canola, sunflower, rice bran)

For the adobo braise

  • 10–12 cloves garlic, smashed (keep them chunky, not minced)
  • 3 bay leaves
  • 1 to 1½ tsp whole black peppercorns (or ¾ tsp coarsely cracked pepper)
  • ½ cup (120 ml) soy sauce
  • ⅓ cup (80 ml) vinegar (cane vinegar is classic; white vinegar works; coconut vinegar is lovely)
  • ¾ to 1 cup (180–240 ml) water

Optional, depending on the style

  • 1–2 tsp brown sugar (for sweet chicken adobo)
  • 1 small onion, sliced (softens the sauce and adds gentle sweetness)
  • 1 tbsp oyster sauce (extra depth; use carefully because it adds salt)
  • 1-inch knob ginger (luya), sliced (clean warmth)
  • 1–2 small chilies, whole (warmth without turning the whole pot fiery)

If you ever find yourself wondering why your soy sauce tastes saltier than expected—or why one bottle makes the sauce darker and another stays lighter—this MasalaMonk guide makes the basics easy to understand: Soy Sauce Saga: Are You Drizzling, Dipping, and Cooking Right?.

Choosing the chicken for this chicken adobo recipe

Bone-in thighs and drumsticks are the most forgiving cut for Filipino style adobo. They stay juicy, they tolerate simmering without drying out, and they contribute richness to the sauce as they cook. In contrast, chicken breast can work, though it needs gentler timing and a slightly different finish so it stays tender.

Infographic showing the best chicken cuts for chicken adobo on a wooden board: thighs, drumsticks, wings, and chicken breast, each labeled with a short tip. Thighs are noted as juiciest and most forgiving, drumsticks as classic with great glaze, wings as fastest for a sticky “tuyo” finish, and breast as workable if pulled early and glazed at the end. Bay leaves, peppercorns, and garlic appear as adobo aromatics, with MasalaMonk.com in the footer.
Not all cuts cook the same in Filipino chicken adobo—and choosing the right one is the easiest way to guarantee tender meat and a glossy adobo sauce. Use thighs for the juiciest, most forgiving result, drumsticks for a classic adobong manok feel, wings for a faster sticky “tuyo” finish, or breast if you pull it early and glaze at the end. Save this cut guide for your next adobo night, then follow the full step-by-step recipe in this post.

Wings are another great option if you love sticky, glossy adobo. Because they’re smaller, they cook faster, and they glaze beautifully when you reduce the sauce into an adobong manok na tuyo style finish.

Vinegar and soy sauce: how the balance actually works

Vinegar is the brightness. Soy sauce is the depth. Water is the buffer that prevents the dish from feeling aggressively salty or sharply sour before reduction brings everything together.

Cane vinegar is often used in classic Filipino chicken adobo because it’s bright yet not harsh. White vinegar works too—especially if you like a crisp tang—although you may want to start with the lower end of the water range (or add vinegar gradually near the end) so the sharpness doesn’t dominate early.

Infographic explaining Filipino adobo sauce balance on a dark stone surface: three small bowls show soy sauce, vinegar, and water labeled “Soy = depth,” “Vinegar = brightness,” and “Water = buffer.” Arrows point to “Reduce = glossy sauce,” with a spoon holding shiny reduced adobo sauce at the bottom. Text reads “Adobo Sauce Ratio That Works Every Time” and includes MasalaMonk.com.
If your chicken adobo ever tastes too sharp, too salty, or just “not quite right,” it usually comes down to balance. This quick adobo sauce ratio guide shows what each part does—soy for depth, vinegar for brightness, water as the buffer—then the real secret: reduce at the end until the sauce turns glossy and clings to the chicken. Save this for your next adobong manok night.

Coconut vinegar, if you have it, can taste softer and rounder. As a result, it pairs especially well when you plan to add coconut milk later.

Also Read: Sourdough Recipe: 10 Easy Bread Bakes (Loaves, Rolls & Bagels)


Chicken Adobo Recipe Step by Step (Procedure in Cooking Adobo)

This is the chicken adobo recipe step by step method you can follow without guessing. You’ll build flavor with browning, tenderness with simmering, and that glossy finish with reduction.

Step 1: Prep the chicken so it browns instead of steaming

Pat the chicken dry with paper towels. That small step changes everything: moisture on the surface turns into steam, and steam prevents browning. Meanwhile, check the pieces. If you’re working with large leg quarters, separate them into thighs and drumsticks so they cook evenly.

Infographic showing how to brown chicken for adobo so it doesn’t steam. Photo shows hands patting raw chicken pieces dry with a paper towel on a wooden board, with a wide pan heating in the background. Text overlay lists four tips: pat chicken dry, use a wide pan, don’t crowd (cook in batches), and don’t move too soon (let it release naturally). Note says browned bits add instant flavor for adobo sauce, with MasalaMonk.com in the footer.
Want chicken adobo with deeper flavor and a richer adobo sauce? It starts before the simmer. This quick guide shows the 4 fixes that stop chicken from steaming: pat it dry, use a wide pan, cook in batches, and leave it alone long enough to brown and release naturally. Those golden browned bits become pure flavor once you deglaze and build the braise—so your adobong manok tastes bold even with simple pantry ingredients. Save this browning checklist, then follow the full step-by-step recipe here, in this post.

At this point, avoid salting heavily. Since soy sauce already brings salt, you’ll get a better final balance by waiting until the sauce has reduced before deciding if it needs anything.

Step 2: Optional short marinade (adobo marinade recipe, simplified)

Some cooks marinate, others skip it completely. For a practical middle path, you can do a short marinade that builds flavor without turning dinner into a project.

Recipe-card infographic for a 15-minute adobo marinade for chicken adobo. Photo shows chicken pieces in a bowl with soy sauce and vinegar being poured over smashed garlic. Text overlay lists the quick mix: 2 tbsp soy sauce, 1 tbsp vinegar, 3–4 smashed garlic cloves. Instructions say to toss with chicken for 15–30 minutes, keep covered, then cook as usual (brown, simmer, reduce). MasalaMonk.com appears in the footer.
Optional but useful: a quick 15–30 minute adobo marinade (soy, vinegar, smashed garlic) deepens the garlic flavor before you brown, simmer, and reduce into glossy adobo sauce.

In a bowl, combine:

  • 2 tbsp soy sauce
  • 1 tbsp vinegar
  • 3–4 smashed garlic cloves

Toss the chicken and let it sit for 15–30 minutes while you prepare everything else. Even so, if you skip this step, the dish still works—because the braise does the real seasoning.

Step 3: Brown the chicken (build the base, not the final color)

Heat 1 tablespoon oil in a wide, heavy pan over medium-high heat. Once the oil shimmers, place chicken pieces in a single layer. Don’t crowd the pan; otherwise, the chicken releases moisture and steams.

Side-by-side infographic showing browning levels for chicken adobo. Left panel labeled “Too pale” shows chicken pieces that look steamed with little color. Right panel labeled “Right level of browning” shows chicken with golden-brown patches in the pan. Text below lists tips: golden patches (not fully dark), single layer only, brown 2–4 minutes per side then flip, and browned bits create the flavor base for adobo sauce. MasalaMonk.com appears at the bottom.
Aim for golden patches—not deep dark crust. This is the browning level that builds flavor for chicken adobo without turning the sauce bitter when you deglaze and simmer.

Let the chicken sit for a few minutes without moving it. When it’s ready, it will release easily and show golden patches. Turn and brown the other side briefly, then transfer to a plate.

You are not trying to cook it through here. Instead, you’re creating a flavor foundation that will melt into the adobo sauce later.

Step 4: Bloom the garlic, then add bay and peppercorn

Lower heat to medium. Add smashed garlic (and onion, if using). Stir for 30–60 seconds until fragrant.

Split-panel infographic about garlic for chicken adobo. Left panel labeled “Fragrant” shows lightly cooked chopped garlic in oil, pale-golden and aromatic. Right panel labeled “Bitter” shows garlic browned too dark and scorched. Text overlay reads “Garlic for Adobo: Fragrant, Not Bitter” and lists tips: lower heat after browning chicken, stir 30–60 seconds until aromatic, if it browns fast add a splash of water then aromatics, then add bay leaves and peppercorns. MasalaMonk.com is in the footer.
Keep the garlic lightly golden and aromatic—if it darkens too fast, lower the heat and add liquid sooner so your adobo sauce stays rich, not bitter.

Keep it gentle. Garlic should smell sweet and aromatic, not bitter. If it starts to brown too quickly, lower the heat and add a splash of water to calm the pan.

Next, add bay leaves and peppercorns. At this stage, the kitchen smell shifts into something instantly recognizable: warm bay, peppery lift, and garlic at the center.

Step 5: Build the braise (soy + vinegar + water)

Pour in the water first and scrape up the browned bits. Those little stuck-on pieces are concentrated flavor; they belong in the sauce, not on the pan.

Infographic titled “Deglaze for Adobo Sauce (Don’t Waste the Flavor Bits).” Photo shows water being poured into a hot pan while a wooden spoon scrapes up browned bits (fond) from the bottom. Text overlay lists steps: add water first, scrape browned bits into the liquid, then add soy sauce and vinegar, and bring to a lively simmer. MasalaMonk.com appears in the footer.
Deglazing pulls the browned bits into the pot—so the flavor you built while searing turns into the foundation of a richer, more savory adobo sauce.

Then add soy sauce and vinegar. Bring the pot to a lively simmer.

A classic habit in many kitchens is to let the vinegar simmer briefly before stirring aggressively. In practice, giving it 1–2 minutes at a simmer helps soften that raw sharpness so the final sauce tastes integrated rather than harsh.

Step 6: Simmer chicken adobo until tender

Return the chicken (and any juices on the plate) to the pot. Once it returns to a simmer, reduce heat to low, cover, and cook gently.

Infographic titled “Chicken Adobo Simmer Times (By Cut).” Photo shows chicken pieces gently simmering in adobo sauce in a pan with a glass lid and a bay leaf visible. Text lists cook times: thighs/drumsticks 25–35 minutes (gentle simmer), wings 18–25 minutes, and chicken breast 12–18 minutes (pull early, glaze later). A doneness cue says “Knife slides in easily / 165°F (74°C).” MasalaMonk.com appears in the footer.
Use these simmer times as your guide—then finish by reducing the sauce so it turns glossy and coats the chicken instead of staying thin.

Use these times as a guide:

  • Bone-in thighs and drumsticks: 25–35 minutes
  • Wings: 18–25 minutes
  • Chicken breast pieces: 12–18 minutes, then remove early
Infographic titled “Chicken Breast Adobo (Stay Tender)” with two pan photos: on the left, chicken breast pieces simmering in adobo liquid while tongs lift one out; on the right, chicken breast glazed in a thicker, glossy adobo sauce. Text tips say: simmer 12–18 minutes only, pull breast when just done, reduce sauce separately, and return chicken to glaze for 1–2 minutes. MasalaMonk.com appears in the footer.
For tender chicken breast adobo, simmer briefly, pull the breast as soon as it’s done, then reduce the sauce separately and return the chicken for a quick 1–2 minute glaze.

If you’re using chicken breast, don’t try to “force” tenderness by cooking longer. Instead, pull it when it’s just done, then finish reducing the sauce separately and return the chicken briefly to glaze.

If you prefer certainty, chicken is considered safely cooked at 165°F / 74°C. (Food Safety and Inspection Service)

Step 7: Reduce the sauce into glossy adobo sauce (classic or “tuyo”)

Once the chicken is tender, remove the lid. Raise heat to medium and simmer uncovered.

At first the liquid looks thin, almost broth-like. However, as it reduces, it becomes shiny and sauce-like. Turn the chicken once or twice so it glazes evenly, and stir occasionally so nothing sticks.

Split comparison infographic titled “Reduce Adobo Sauce: Classic vs ‘Tuyo’ Finish.” Left panel shows chicken simmering in a thinner, saucy adobo with bay leaves, labeled “Classic saucy.” Right panel shows adobong manok na tuyo (dry-style) with chicken coated in thick, lacquered sauce. A spoon inset shows sauce coating. Text notes: thin to glossy (coats a spoon), classic reduction 8–12 minutes, tuyo 12–18 minutes (clings and lacquered), and to turn chicken to glaze evenly. MasalaMonk.com appears in the footer.
Reduce the braising liquid until it turns glossy and coats a spoon—stop earlier for a saucier chicken adobo, or go longer for adobong manok na tuyo with a sticky, lacquered glaze.
  • For a classic saucy finish, reduce 8–12 minutes until the sauce coats the back of a spoon.
  • For adobong manok na tuyo (drier finish), reduce longer—12–18 minutes—until the sauce clings tightly and looks lacquered.
Three-panel instructional infographic titled “Adobong Manok na Tuyo (Extra Glossy Glaze).” Panel 1 shows chicken being lifted from the pan with tongs while the sauce simmers. Panel 2 shows the adobo sauce reducing vigorously in the pan. Panel 3 shows chicken returned to the pan and coated in a thick, lacquered, sticky glaze. Text steps read: remove chicken when tender, reduce sauce hard 3–5 minutes, return chicken and toss to coat, stop when lacquered + sticky. MasalaMonk.com is in the footer.
For extra-glossy adobong manok na tuyo, lift the chicken once it’s tender, reduce the sauce hard for a few minutes, then return the chicken and toss until it’s lacquered and sticky.

If you want sweet chicken adobo, stir in 1–2 teaspoons brown sugar during the final few minutes of reduction. Added late, it melts into the sauce and tastes rounded; added early, it can taste flat.

Step 8: Rest before serving (it really helps)

Turn off the heat and rest the chicken in the pan for about 5 minutes. During that pause, the sauce settles into its final texture, and the chicken reabsorbs juices.

Instructional card titled “Rest Chicken Adobo 5 Minutes (Then Serve).” Photo shows two pieces of chicken adobo on a bowl of white rice while a spoon pours glossy adobo sauce over the chicken. Text notes: sauce thickens slightly as it settles, chicken reabsorbs juices, spoon sauce over hot rice, and an optional finish with a pinch of sugar for sweet adobo or chili on the side. MasalaMonk.com appears in the footer.
Resting the chicken adobo for a few minutes helps the sauce settle and cling—then spoon it over hot rice so every bite gets that glossy, savory finish.

Serve hot with rice and spoon the sauce over everything.

If you want rice that behaves perfectly under a bold sauce—fluffy, not gummy—this MasalaMonk guide makes the timings easy whether you’re using stovetop, a rice cooker, or Instant Pot: How to Cook Perfect Rice (Stovetop, Cooker, Instant Pot).

Also Read: Kahlua Drinks: 10 Easy Cocktail Recipes (Milk, Vodka, Coffee)


Chicken Adobo Recipe Flavor Balance (So It Tastes “Right” Every Time)

Even a perfect method can land slightly differently depending on vinegar strength, soy sauce saltiness, chicken size, and how hard you reduce the sauce. Fortunately, this chicken adobo recipe is easy to steer back on track—especially if you make adjustments at the right moment.

Infographic titled “Fix Your Chicken Adobo (Fast Flavor Adjustments).” Photo shows chicken adobo in a pan with a spoon pouring glossy adobo sauce over the chicken. Below, three columns give quick fixes: “Too sour?” reduce longer then add a tiny pinch of sugar, or splash water and re-simmer; “Too salty?” add a splash of water, simmer uncovered, and taste again; “Too thin?” reduce uncovered, or remove chicken, reduce sauce harder, then return chicken to glaze. MasalaMonk.com is in the footer.
A quick rescue guide for chicken adobo: adjust by reducing longer for body, adding a small splash of water to soften salt or sharpness, and glazing the chicken after reducing for the richest sauce.

If the adobo tastes too sour

Before changing ingredients, reduce the sauce a little longer. Often the dish tastes overly sharp simply because there’s still too much water in the pot.

If, after reduction, it still tastes too tangy, you have a few gentle options:

  • Add a small pinch of brown sugar and simmer 1–2 minutes.
  • Add a splash of water, then simmer uncovered again to re-balance.
  • Add a spoonful of chicken fat (skin-on pieces help naturally) to soften the edges.

The goal isn’t to erase vinegar. Rather, it’s to make the tang feel woven into the sauce.

If the adobo tastes too salty

Saltiness is usually a concentration issue. Add a splash of water, simmer uncovered, and taste again. That may feel backward at first, yet it works because you’re diluting salt while still keeping flavor from the aromatics and reduction.

Next time, use a slightly less salty soy sauce, or start with a bit less soy and add it gradually near the end. If you want to understand what kind of soy sauce you’re working with, the quick breakdown in Soy Sauce Saga can save you a lot of guesswork later.

If the sauce feels thin

Keep reducing. That’s the simplest fix, and it’s usually the correct one. Meanwhile, make sure your pan is wide enough that evaporation can happen at a steady pace.

If you want an even clingier finish, you can:

  1. Remove the chicken when tender
  2. Reduce the sauce more aggressively for a few minutes
  3. Return the chicken to glaze

That approach gives you maximum shine without overcooking the meat.

If the garlic tastes bitter

Bitterness usually comes from garlic browning too hard early on. Next time, lower heat after browning chicken, stir garlic briefly, then add liquid sooner so it doesn’t scorch.

Still, if you’re already mid-cook and the garlic tastes sharp, reduction and resting often mellow it. In addition, serving with rice and something creamy on the side can soften that perception.

If the chicken feels tough

Toughness can happen if the simmer is too hard (boiling can tighten protein), or if the chicken pieces are particularly mature. If you’re using native chicken, longer gentle simmering helps, and thighs/drumsticks are far more forgiving than breast.

Instead of turning the heat up, keep it at a lazy simmer and extend the cooking time. Once the chicken is tender, proceed with the reduction as usual so the sauce still turns glossy.

Also Read: 10 Vegan Chocolate Cake Recipes (Easy, Moist, & Dairy-Free)


Chicken Adobo Recipe Serving Ideas (What to Eat With Adobo)

Rice is the classic partner because it absorbs adobo sauce like it was built for it. That said, the dish becomes even more satisfying when you add contrast: something crisp, something creamy, or something spicy on the side.

Infographic titled “What to Eat With Chicken Adobo (Best Sides).” Photo shows a bowl of chicken adobo on steamed white rice, with small bowls of crisp cucumber/quick pickles and chili sauce on the side, plus an optional creamy side resembling potato salad. Text suggests pairings: steamed rice (classic), crisp cucumber or quick pickles (fresh contrast), chili on the side (heat control), and an optional creamy side (potato salad/coconut adobo night). MasalaMonk.com appears in the footer.
Chicken adobo loves contrast—serve it with hot steamed rice, something crisp and tangy like cucumber or quick pickles, and chili on the side so everyone can dial in their own heat.

The rice that makes adobo feel complete

For everyday bowls, plain white rice is perfect. For a weekend feel, you can cook jasmine or basmati and let the aroma do extra work. Either way, if you want clean, fluffy grains—especially if you’re cooking rice alongside the simmer—MasalaMonk’s rice guide keeps it simple across methods: How to Cook Perfect Rice.

A creamy side that loves tangy sauce

A potato salad might not be the first thing you think of, yet it works surprisingly well. The creaminess softens the vinegar edge, while the tang makes the potatoes taste brighter.

If you want options beyond one “standard” bowl, this guide gives you several directions: Potato Salad Recipe: Classic, Russian, German, Vegan & More.

Heat on the side, not in the whole pot

One of the nicest ways to serve adobo is letting everyone control their own heat. A bright, vinegar-based chili sauce makes each bite feel sharper and more alive without changing the entire pot.

If you enjoy exploring different chili styles—from thin hot pepper vinegar to chipotle-based sauces—this MasalaMonk guide is a fun rabbit hole: Pepper Sauce Recipe | Ultimate Guide: 30+ Hot & Chili Sauces.

Also Read: Cold Brew Espresso Martini: How to Make It (Step-by-Step Recipe)


Chicken Adobo Recipe Variations (Same Method, Different Mood)

Once you’ve cooked the classic once, variations become easy because the core doesn’t change. You still brown, braise, and reduce. After that, one ingredient or one timing shift can take the dish somewhere new.

Infographic titled “Chicken Adobo Variations (Same Method, Different Mood)” showing a 2x3 grid of six Filipino chicken adobo styles. The tiles are labeled: adobong manok na tuyo (dry-style), adobo with potato (one-pot comfort), sweet chicken adobo (1–2 tsp brown sugar), adobo with pineapple (bright sweet-sour), adobo with oyster sauce (deeper umami), and adobo with luya (ginger warmth). MasalaMonk.com appears in the footer.
Once you know the classic method, chicken adobo becomes endlessly flexible—choose a dry-style tuyo finish, add potatoes, go subtly sweet, brighten with pineapple, deepen with oyster sauce, or warm it up with ginger.

Chicken adobo recipe: adobong manok na tuyo (dry-style)

If you love sticky chicken, this is the finish to aim for. Follow the classic method, then reduce longer until the sauce clings tightly and looks lacquered.
For an even more dramatic glaze, remove the chicken when it’s tender, reduce the sauce harder for a few minutes, then return the chicken and toss until it shines.

Chicken adobo recipe with potato (one-pot comfort)

Potatoes make the pot feel heartier and more generous, and they soak up sauce like sponges.

Add 2 medium potatoes, peeled and cut into chunks, right after you return chicken to simmer. Then simmer covered as usual until chicken is tender and potatoes are cooked through. Finally, reduce the sauce uncovered and let the potatoes glaze slightly at the edges.

Sweet chicken adobo (subtle, not sugary)

Sweet adobo chicken is best when it’s restrained. You’re aiming to round out the tang, not turn the dish into a sticky dessert.

Two-panel infographic titled “Sweet Chicken Adobo (Subtle, Not Sugary).” Left panel shows a spoon adding brown sugar into simmering adobo sauce; right panel shows chicken pieces coated in glossy adobo glaze. Text tips say: reduce sauce first until glossy, stir in 1–2 tsp brown sugar near the end, simmer 1–2 minutes to melt in, and taste—stop when the tang feels “rounded.” MasalaMonk.com appears in the footer.
For sweet chicken adobo, reduce the sauce until glossy first, then add a small amount of brown sugar right at the end so it melts in and rounds the vinegar tang without turning the dish sugary.

Add 1–2 teaspoons brown sugar during the final reduction. That timing matters because it melts cleanly into the glossy sauce and tastes integrated.

Chicken adobo with pineapple (bright sweet-sour)

Pineapple brings a playful sweetness and a tropical edge that pairs beautifully with garlic and soy.

Two-panel infographic titled “Chicken Adobo with Pineapple (Bright Sweet-Sour).” Left panel shows pineapple chunks being added to simmering chicken adobo sauce in a pan. Right panel shows finished chicken adobo pieces coated in glossy sauce with pineapple chunks. Text tips say: add ½–1 cup pineapple near the end, simmer 10 minutes so it stays juicy, use a splash of juice only if needed, and reduce briefly to glaze. MasalaMonk.com appears in the footer.
Add pineapple near the end so it stays juicy and bright—then reduce briefly to glaze, giving chicken adobo a clean sweet-sour lift without turning the sauce syrupy.

Add ½ to 1 cup pineapple chunks during the last 10 minutes of simmering, then reduce as usual. If you use canned pineapple, a small splash of juice can help, though too much can push the sauce toward syrupy, so go lightly.

Chicken adobo with oyster sauce (deeper umami)

This is a modern variation rather than a classic, yet it can be delicious when you want extra savory depth.

Two-panel infographic titled “Adobo with Oyster Sauce (Deeper Umami).” Left panel shows oyster sauce being poured into simmering chicken adobo after the liquids are added; right panel shows finished chicken coated in glossy dark adobo sauce. Text tips say: stir in 1 tbsp oyster sauce after adding liquids, start with slightly less soy, simmer as usual, then reduce, taste, and adjust at the end. MasalaMonk.com appears in the footer.
Oyster sauce adds deeper umami to chicken adobo—stir it in after the braising liquids, start with a little less soy, then reduce and taste at the end so the sauce stays balanced, not overly salty.

Stir in 1 tablespoon oyster sauce after adding soy, vinegar, and water. Because oyster sauce adds salt, consider starting with a little less soy sauce, then adjust near the end.

Adobo with luya (ginger)

Ginger makes the sauce feel cleaner and warmer without shouting “ginger.” It’s especially comforting on a cool day.

Two-panel infographic titled “Adobo with Luya (Ginger) — Clean Warmth.” Left panel shows sliced ginger being added to a pan with garlic after browning chicken. Right panel shows chicken adobo simmering in glossy sauce with visible ginger slices, peppercorns, and bay. Text tips say: add 1-inch ginger sliced, sauté with garlic after browning chicken, simmer as usual, then reduce and taste-adjust at the end. MasalaMonk.com appears in the footer.
Adding sliced ginger (luya) with the garlic gives chicken adobo a cleaner, warmer aroma—simmer as usual, then reduce at the end so the sauce turns glossy and the ginger flavor stays balanced.

Add a 1-inch knob of sliced ginger with the garlic, then proceed as usual.

Adobong puti (white adobo)

White adobo skips soy sauce and leans into vinegar, garlic, bay, and pepper. It tastes brighter, sharper, and a bit more minimalist.

Recipe-card infographic titled “Adobong Puti (White Adobo) — No Soy Sauce.” Photo shows chicken pieces simmering in a light vinegar-based broth with whole garlic cloves, bay leaves, and peppercorns. Text tips say: vinegar + garlic + bay + peppercorn, season with salt gradually, keep water a bit higher at first, and reduce at the end for body. MasalaMonk.com appears in the footer.
Adobong puti (white adobo) skips soy sauce and leans on vinegar, garlic, bay leaves, and peppercorns—start with a bit more water, season with salt gradually, then reduce at the end for a flavorful, silky broth.

To adapt this chicken adobo recipe into adobong puti:

  • Omit soy sauce
  • Add salt gradually (start with 1 to 1½ teaspoons)
  • Keep water closer to the higher end at first
  • Reduce near the end for body

Because soy sauce isn’t there to deepen the sauce, reduction becomes even more important.

Chicken adobo sa gata (coconut milk adobo)

Coconut milk turns the dish creamy and luxurious while still keeping the adobo backbone.

Instructional infographic titled “Adobo sa Gata (Creamy Coconut Adobo).” Two photos show chicken adobo in a pan: left image shows coconut milk being poured into cooked adobo near the end, and right image shows the finished creamy coconut adobo sauce coating the chicken. Text tips say: cook adobo until chicken is tender, stir in ¾ cup coconut milk near the end, simmer gently 5–8 minutes (don’t hard-boil), and reduce slightly for a creamy, glossy sauce. MasalaMonk.com is in the footer.
For adobo sa gata, cook the chicken adobo until tender first, then stir in coconut milk near the end and simmer gently—no hard boiling—so the sauce turns creamy, glossy, and smooth.

Cook the chicken until tender using the classic steps. Then, once you remove the lid and begin reducing, stir in ¾ cup coconut milk. Simmer gently for 5–8 minutes. Avoid a hard boil because coconut milk can split if pushed.

If you ever want to make coconut milk yourself, this step-by-step guide is straightforward: How to Make Coconut Milk at Home.

Also Read: Peanut Butter Fudge: Recipes & Guide (8 Methods + Easy Variations)


Chicken Adobo Recipe Storage and Reheating (So Leftovers Stay Great)

One of the best things about chicken adobo is that it often tastes even better the next day. The sauce settles, the garlic mellows, and the whole pot feels more cohesive.

Still, leftovers deserve a little care.

Infographic titled “Store + Reheat Chicken Adobo (So It Stays Glossy).” Top photo shows leftover chicken adobo stored in an airtight container inside a refrigerator. Bottom photo shows chicken adobo reheating in a saucepan while water is poured in from a spoon. Text tips include: cool fast and store airtight, fridge 3–4 days, reheat gently on stovetop, add a splash of water if needed, and simmer uncovered 1–2 minutes to restore a glossy adobo sauce. MasalaMonk.com appears in the footer.
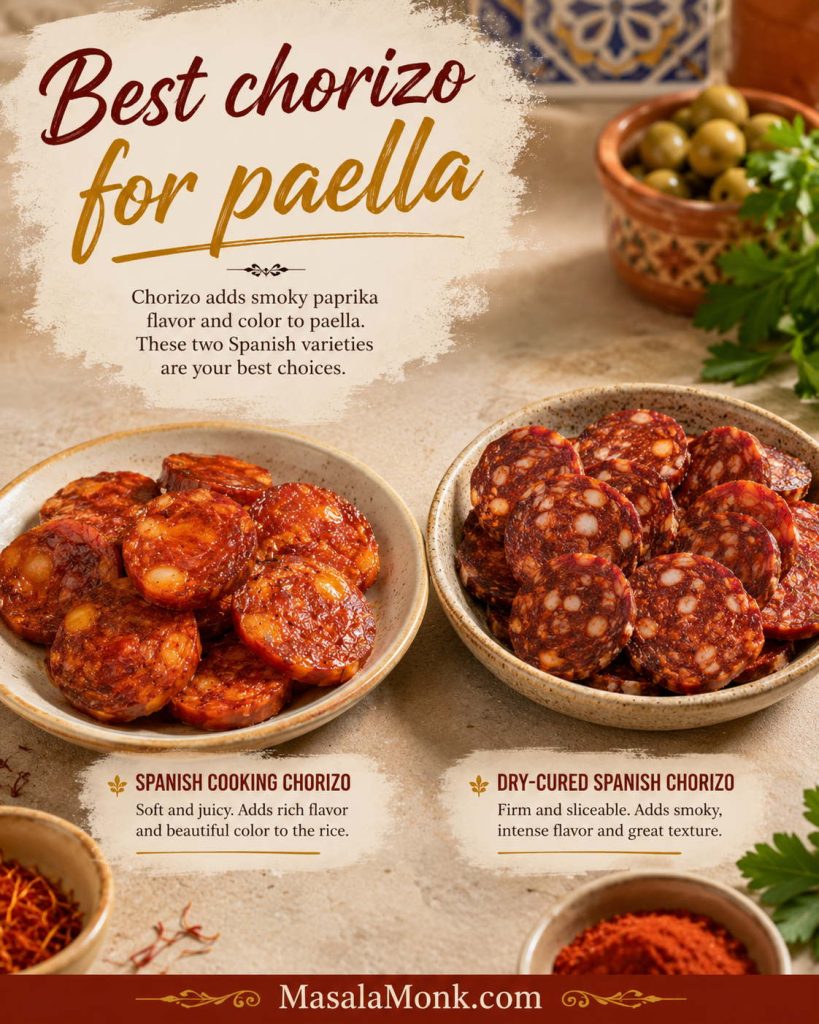
Leftover chicken adobo reheats best on the stovetop—add a small splash of water and simmer uncovered briefly so the sauce turns glossy again instead of drying out.
Cool promptly and refrigerate within two hours

Food-safety guidance commonly emphasizes the “danger zone” and the two-hour window for refrigeration, especially for cooked meats. (Food Safety and Inspection Service)

A practical way to cool faster is to transfer adobo into shallower containers rather than leaving a deep pot on the counter. The sauce cools more quickly, and you’re not waiting on a dense mass of food to drop in temperature. (Food Safety and Inspection Service)

How long cooked chicken keeps

USDA guidance recommends using cooked chicken within three to four days when refrigerated (40°F / 4°C or lower). (Ask USDA)

If you want longer storage, freezing is an option. For best texture, freeze in portions with enough sauce to protect the meat from drying out when reheated.

Reheating chicken adobo the right way

Reheat until steaming hot, and if you like certainty, bring it back to 165°F / 74°C. (Food Safety and Inspection Service)

For texture, stovetop reheating is the gentlest:

  • Add a small splash of water
  • Warm over medium-low until hot
  • Then simmer uncovered briefly so the sauce becomes glossy again

That last step matters because the sauce thickens in the fridge. A quick uncovered simmer wakes it up and restores its shine.

Also Read: Manhattan Cocktail Recipe (Classic + 6 Variations)


Make-Ahead and Next-Day Ideas (So One Pot Feeds You Well)

If you like cooking once and eating twice, this chicken adobo recipe is a natural fit. In fact, adobo is one of those dishes that doesn’t mind being made ahead; it often rewards you for it.

The simplest make-ahead plan

Cook the adobo fully, including the reduction. Cool and refrigerate. The next day, reheat gently and add a splash of water only if the sauce feels too thick. Then simmer uncovered briefly to re-gloss.

Step-by-step infographic titled “Crispy Skin Adobo (Without Changing the Sauce).” Three photos show leftover chicken adobo lifted from the sauce onto a rack, then crisped in a hot pan, and finally served over rice while reduced adobo sauce is spooned on top. Text instructions say: lift chicken from sauce, pat dry lightly, crisp in hot pan or broiler 1–2 minutes, and spoon reduced adobo sauce over the crispy skin. MasalaMonk.com appears in the footer.
For next-day chicken adobo, crisp the cooked chicken briefly in a hot pan or under the broiler, then spoon the reduced adobo sauce over the top—crispy skin and glossy sauce in the same bite.

Crispy skin option (without changing the sauce)

If you used skin-on chicken and you miss that crispness after simmering, there’s an easy workaround:

  • Remove cooked chicken pieces from the sauce
  • Pat dry lightly
  • Crisp under a broiler or in a hot pan for a minute or two
  • Then spoon reduced sauce over the top

This way, you get crisp edges and glossy sauce together, rather than choosing one over the other.

Instructional graphic titled “Leftover Chicken Adobo Rice Bowl (Fast Remix).” A bowl of white rice is topped with chopped or shredded chicken adobo and a glossy adobo sauce, with sliced cucumber and fresh herbs on the side and a red chili pepper. Text steps say: chop or shred leftover adobo chicken, warm with a spoon of sauce, pile over hot rice, add fresh cucumber/herbs for contrast, and optional chili on the side. MasalaMonk.com appears in the footer.
Turn leftover chicken adobo into a fast rice bowl—warm shredded chicken with a spoon of sauce, pile over hot rice, then add fresh cucumber and herbs for crisp contrast.

Leftovers that feel like a new meal

Sometimes the best “variation” is simply serving the same pot differently.

  • Adobo rice bowl: Chop leftover chicken, warm with a spoonful of sauce, pile over rice, and add fresh cucumber or herbs for contrast.
  • Shredded adobo chicken: Pull meat from the bone, toss with sauce, and use it as a savory filling.
Instructional graphic titled “Shredded Chicken Adobo (Easy Filling Idea).” A white bowl holds shredded chicken adobo coated in glossy adobo sauce. Beside it, a wrap is being filled with the shredded adobo chicken, shredded cabbage, sliced cucumber, carrots, and green onions, with a red chili nearby. Text tips say: pull meat from the bone, toss with warm adobo sauce, use in wraps/sandwiches/bao/lettuce cups, and add crunchy vegetables and chili on the side. MasalaMonk.com appears in the footer.
Shred leftover chicken adobo, warm it with a spoon of sauce, and use it as a savory filling—wraps, sandwiches, or lettuce cups all work, especially with crunchy vegetables on the side.

If you’re already in a chicken-for-the-week mindset, these internal recipes can keep things varied without leaving the comfort zone:

And if you end up with extra rice, turning it into something crisp and snacky the next day is a satisfying upgrade: How to Turn Leftover Rice into Gourmet Arancini Balls.

Also Read: Rob Roy Drink Recipe: Classic Scotch Cocktail (Perfect + Dry + Sweet Variations)


A Few Trusted References for Classic Filipino Chicken Adobo (If You Like Comparing Styles)

Every family has a “best adobo” version, and that’s part of the charm. Still, if you enjoy seeing how other well-tested recipes handle ratios and method choices, these are strong baselines:

For food-safety references on temperatures and cooling guidance:

Also Read: Sandwich for Breakfast: Breakfast Sandwich Recipe + 10 Variations


Closing: why this chicken adobo recipe keeps earning its place

A good chicken adobo recipe doesn’t need theatrics. It needs the right balance, a patient simmer, and a final reduction that turns the pot into something glossy and irresistible. Once you’ve cooked it this way, you’ll start to see how adaptable it is: classic and saucy one night, dry-style and sticky the next, then creamy coconut adobo when you want comfort.

Most of all, it stays true to what makes adobong manok special—bold flavor from simple ingredients, built with a method you can repeat whenever you want dinner to feel like it went exactly right.

Also Read: Classic Rum Punch + 9 Recipes (Pitcher & Party-Friendly)

FAQs

1) What is the best chicken adobo recipe for beginners?

If you’re new to adobo, start with a classic chicken adobo recipe using bone-in thighs and drumsticks. Because those cuts stay juicy during simmering, you get tender meat and a flavorful adobo sauce without needing perfect timing. In addition, the method is forgiving: sear for depth, simmer for tenderness, then reduce for a glossy finish.

2) What are the chicken adobo ingredients in a classic adobong manok?

A traditional ingredient list for adobong manok usually includes chicken, garlic, soy sauce, vinegar, bay leaves, and whole peppercorns. Meanwhile, water helps balance the sauce while it simmers. Optionally, you can add onion for softness or a small amount of sugar for a sweeter chicken adobo.

3) What is the vinegar and soy sauce ratio for Filipino chicken adobo?

A common starting point is more soy sauce than vinegar, often around 1/2 cup soy sauce to 1/3 cup vinegar, plus water to mellow the mixture early on. However, the ideal ratio depends on your vinegar strength and soy sauce saltiness. As a result, it’s smart to reduce the sauce at the end, then adjust only if needed.

4) Is marinating required for an authentic adobo recipe?

Not necessarily. Many authentic adobo recipes skip a long marinade and rely on simmering to season the chicken thoroughly. Still, a short 15–30 minute rest in soy, vinegar, and garlic can deepen flavor. Either way, the final sauce reduction is what makes the dish taste cohesive.

5) How do you cook chicken adobo step by step without overcooking it?

First, brown the chicken lightly for deeper flavor. Next, simmer gently until the meat is tender. Finally, reduce the sauce uncovered until it turns glossy and coats the chicken. For chicken breast, shorten the simmer time and finish the reduction after pulling the breast pieces, then return them briefly to glaze.


6) What is the correct procedure in cooking adobo if my sauce tastes too sour?

Before changing anything, let the sauce reduce longer; often, extra liquid makes vinegar seem louder than it really is. If it still tastes sharp afterward, add a splash of water and simmer again, or stir in a tiny amount of sugar to round the edges. Moreover, serving with rice naturally softens the tang.

7) How can I make low sodium adobo without losing flavor?

Use a low-sodium soy sauce, then build flavor with garlic, bay leaves, peppercorns, and a proper reduction. Additionally, browning the chicken first adds depth, so you won’t rely only on saltiness for taste. If needed, finish with a small squeeze of citrus or a pinch of sugar for balance rather than extra soy.

8) How long should you simmer chicken adobo for tender results?

For bone-in thighs and drumsticks, simmering often takes about 25–35 minutes at a gentle bubble. Meanwhile, wings can finish sooner, and chicken breast needs less time to avoid drying out. Instead of boiling hard, keep the heat low so the meat stays juicy and the sauce stays smooth.

9) Why is my chicken adobo tough even after simmering?

Usually, the heat is too high or the cut needs more time at a gentle simmer. Toughness can also happen with older or leaner chicken. Therefore, lower the heat, cover, and extend the simmer until a knife slides in easily. After that, reduce the sauce only once the chicken is tender.

10) How do you make adobong manok na tuyo (dry-style chicken adobo)?

Cook the chicken adobo recipe as usual, then reduce the sauce longer until it clings tightly and looks lacquered. For an even drier finish, remove the chicken when tender, reduce the sauce more aggressively, and return the chicken to coat. Consequently, you get a sticky glaze rather than a pool of sauce.

11) How do I make sweet chicken adobo without making it sugary?

Add only a small amount of sugar—often 1–2 teaspoons—during the final reduction so it melts into the sauce instead of tasting separate. Alternatively, a few pineapple chunks near the end can add sweetness with a brighter flavor. Either way, the goal is to round the tang, not overpower it.

12) Can I cook chicken adobo with potato in the same pot?

Yes. Add peeled potato chunks after returning the chicken to the braise, then simmer until both are tender. As the potatoes cook, they also slightly thicken the sauce. Later, reduce the liquid uncovered so the potatoes and chicken get coated in glossy adobo sauce.

13) What is adobo sa gata, and when do you add coconut milk?

Adobo sa gata is a creamy version of Filipino adobo made by adding coconut milk near the end. After the chicken is tender, stir in coconut milk and simmer gently for a few minutes. Importantly, avoid a hard boil, because coconut milk can split if cooked too aggressively.

14) What is adobong puti, and how is it different from classic adobo?

Adobong puti (white adobo) usually skips soy sauce, relying on vinegar, garlic, bay leaves, and peppercorns instead. Because it’s brighter and more vinegar-forward, careful simmering and reduction matter even more. As a result, it tastes clean, sharp, and aromatic—yet still unmistakably adobo.

15) What are the most common mistakes in a classic chicken adobo recipe?

Common issues include skipping browning (which can make the sauce taste flatter), boiling too hard (which can toughen the chicken), and reducing too early (before the chicken is tender). Also, adding too much vinegar or soy without tasting after reduction can throw off balance. Instead, simmer gently, reduce at the end, then adjust in small steps.

16) How do I know chicken adobo is fully cooked?

The chicken should be tender and the juices should run clear. Additionally, the safest check is temperature: the thickest part should reach 74°C / 165°F. Once that’s done, you can focus on reducing the sauce for texture and flavor.

17) Can I make chicken adobo ahead of time?

Definitely. In fact, chicken adobo often tastes better the next day because the flavors settle and the sauce thickens slightly. Reheat gently with a splash of water if the sauce is too thick, then simmer uncovered briefly to bring back the glossy finish.

18) How do you store and reheat leftover chicken adobo?

Cool leftovers promptly, then store in an airtight container in the fridge. When reheating, warm gently on the stovetop so the sauce doesn’t scorch. Finally, simmer uncovered for a minute or two to restore the glossy adobo sauce texture.

19) What is the best cut for Filipino chicken breast adobo?

If you prefer breast, use larger pieces and shorten the simmer time. Then finish reducing the sauce separately and return the breast briefly to coat. Consequently, you keep the chicken tender while still getting the full flavor of the sauce.

20) What does “adobo” mean in Filipino cooking?

In Filipino cooking, “adobo” generally refers to the method: braising in vinegar and salt (often soy sauce), along with garlic, bay leaves, and peppercorns. Because it’s both flavorful and practical, the technique has become one of the most iconic Filipino dishes—especially chicken adobo and pork adobo.