Posted on Leave a comment

Tinola Recipe: Filipino Chicken Tinola / Tinolang Manok with Papaya or Sayote

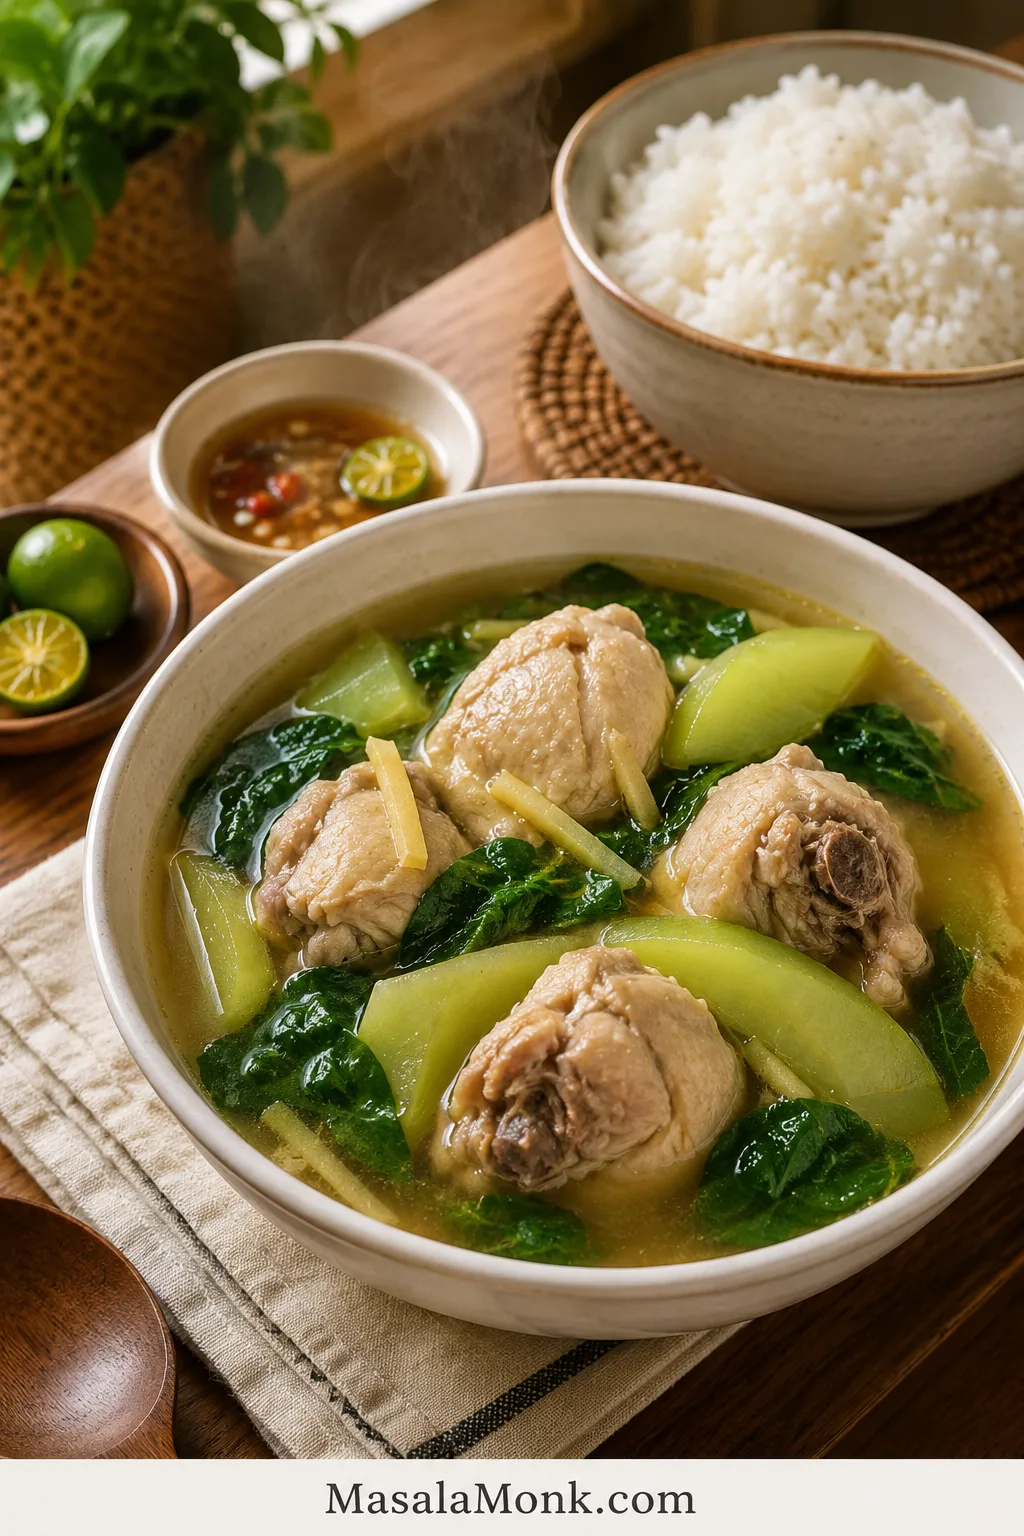
Bowl of Chicken Tinola with golden broth, bone-in chicken, green papaya or sayote wedges, leafy greens, steamed rice, calamansi, and dipping sauce.

Tinola is the kind of Filipino chicken soup that feels light and restorative, but still filling when poured over rice. In a good pot, the broth is clear, gingery, and savory, the chicken is tender, and the green papaya or sayote softens without falling apart.

It is the kind of soup that feels right when you want something gentle, but not empty — warm broth, tender chicken, fresh greens, and rice that soaks up every spoonful.

This Tinola recipe, also called Chicken Tinola or Tinolang Manok, is made with bone-in chicken, fresh ginger, garlic, onion, fish sauce, green papaya or sayote, and leafy greens like malunggay, dahon ng sili, spinach, or pechay.

This version keeps the flavor classic, but it also works in real kitchens: sayote if you cannot find green papaya, spinach if malunggay is not available, and clear timing cues so the soup tastes full instead of flat.

Most importantly, it is built around the two things that make or break Tinola: a broth that tastes gingery and full, not watery, and vegetables that turn tender without collapsing.

Quick Answer: What Is Tinola?

Tinola is a Filipino broth-based dish. The most common version is Tinolang Manok, which means Chicken Tinola. It is usually made with chicken, ginger, garlic, onion, fish sauce, green papaya or sayote, and leafy greens such as malunggay or dahon ng sili.

In English, Chicken Tinola is best described as a Filipino ginger chicken soup. It is usually eaten as a main dish with rice, not just as a starter soup.

  • Best chicken: bone-in thighs, drumsticks, wings, or mixed cuts.
  • Flavor base: fresh ginger, fish sauce, garlic, and onion.
  • Vegetable choice: green papaya for a softer classic feel, or sayote for a firmer bite.
  • Best greens: malunggay or dahon ng sili if available; spinach, pechay, or bok choy if not.
  • Best cooking cue: simmer gently until the chicken is tender and reaches 165°F / 74°C.

Make It Now

Have your chicken, ginger, and vegetables ready? Use this quick path, then follow the recipe card for exact amounts.

  1. Sauté ginger, garlic, and onion until fragrant.
  2. Add chicken and cook until the surface loses its raw color.
  3. Add fish sauce before the liquid so the chicken is seasoned early.
  4. Simmer gently until the chicken is tender.
  5. Add your chosen vegetable near the end, then finish with greens.

Classic but flexible: classic Tinola often means chicken, ginger, patis, green papaya, and malunggay or dahon ng sili. But Tinola is also a home dish, so many cooks use sayote when papaya is hard to find, spinach when malunggay is unavailable, and chicken broth or rice wash when the chicken needs a little help. The point is not to make the pot rigid; it is to keep the soup gingery, savory, clear, and good with rice.

A good pot of Tinola should feel simple, but not thin. The broth should taste like the chicken, ginger, and patis had time to become one thing, not like separate ingredients floating in hot water. That is why this recipe builds the flavor early and waits before adding the vegetables.

Save this Tinola rule: ginger early, patis before broth, chicken until tender, papaya or sayote late, greens last.

Tinola Recipe Card

Filipino Chicken Tinola / Tinolang Manok

This Chicken Tinola recipe keeps the two common problems away: watery broth and vegetables that fall apart before the chicken is tender. The chicken is seasoned early, the simmer stays gentle, and the vegetables go in when the meat is nearly ready.

Prep Time15 minutes
Cook Time45 minutes
Total Time1 hour
Servings4 to 6
MethodStovetop
CuisineFilipino
Main Equipment5 to 6 quart / 4.7 to 5.7 L pot or Dutch oven

Ingredients

  • 2 to 2 1/2 lb / 900 g to 1.1 kg bone-in chicken pieces, such as thighs, drumsticks, wings, or mixed cuts
  • 1 1/2 to 2 tablespoons neutral oil / 22 to 30 ml
  • 1 medium onion, sliced
  • 4 garlic cloves, minced or crushed
  • 45 to 60 g / 1 1/2 to 2 oz fresh ginger, sliced, julienned, or lightly smashed
  • 2 to 3 tablespoons fish sauce / patis / 30 to 45 ml, plus more to taste
  • 6 cups water, low-sodium chicken broth, or rice wash / 1.4 L
  • 350 to 500 g / 12 to 18 oz green papaya or sayote/chayote, peeled and cut into wedges. Remove seeds if using papaya.
  • 2 packed cups / 60 to 90 g malunggay, dahon ng sili, spinach, pechay, or bok choy
  • 1/2 teaspoon black pepper, plus more to taste
  • Salt, only if needed after tasting

Optional Ingredients

  • 1 chicken cube, only if using water and you want a stronger shortcut broth
  • Calamansi or lime, for serving
  • Fresh chili, for heat
  • Extra fish sauce, for serving
  • 1 stalk lemongrass, bruised, for a fragrant variation

Instructions

  1. Prep the chicken and vegetables. Cut the chicken into similar-sized pieces if needed. Peel your chosen vegetable. If using green papaya, remove the seeds. Cut the pieces into 1 1/2 to 2 inch wedges.
  2. Sauté the aromatics. Heat oil in a large pot over medium heat. Add onion, garlic, and ginger. Cook for 2 to 3 minutes, stirring often, until fragrant and softened. The pot should smell warm and clearly gingery.
  3. Add the chicken. Cook for 5 to 7 minutes, turning occasionally, until the chicken loses its raw color and begins to lightly brown on the surface.
  4. Season early. Add 2 tablespoons fish sauce and stir well. Cook for 1 to 2 minutes so the fish sauce coats the chicken and aromatics.
  5. Add liquid and skim. Pour in water, broth, or rice wash. Bring to a boil, then skim off foam or scum from the surface.
  6. Simmer gently. Lower the heat, cover partially, and simmer for 25 to 35 minutes, or until the chicken is tender and reaches 165°F / 74°C internally.
  7. Add the vegetables. Simmer for 5 to 12 minutes, depending on the size and firmness of the pieces, until fork-tender but not mushy.
  8. Finish with greens. Add malunggay, dahon ng sili, spinach, pechay, or bok choy. Cook for 1 to 2 minutes, or turn off the heat and cover until the greens wilt.
  9. Taste and serve. Adjust with more fish sauce, salt, black pepper, calamansi, or chili. Serve hot with steamed rice.

Recipe Notes

  • Bone-in thighs and drumsticks are the easiest choice if you want tender chicken and a fuller broth.
  • The pot should smell clearly of ginger before the liquid goes in.
  • Green papaya gives a softer, slightly sweet, more classic feel. Sayote stays firmer and fresher.
  • Delicate greens need only enough heat to wilt. Fold them in at the end so they stay bright.
  • A chicken cube can rescue a weak pot, especially if you are using plain water or lean chicken. Start with less fish sauce if you add one, then adjust at the end.

What Good Tinola Should Taste Like

A good bowl of Tinola tastes light, gingery, savory, and balanced. The soup is not heavy, but it has enough seasoning and chicken flavor to make you want to spoon it over rice.

The easiest test is the rice: spoon a little broth over hot rice. If it tastes warm, gingery, and savory without needing rescue, the pot is ready.

  • Ginger tastes noticeable, warm, and fresh.
  • Fish sauce gives depth without making the soup taste fishy.
  • Chicken turns tender, especially near the bone.
  • Green papaya softens more; sayote keeps a slightly firmer bite.
  • The greens taste fresh, not dull or overcooked.

Why This Tinola Recipe Works

This recipe is built to solve two common Tinola problems: broth that tastes watery and vegetables that turn mushy. The fix is not complicated. Start the flavor before the liquid goes in, simmer the chicken gently, then add the pieces only when the meat is nearly tender.

  • The flavor starts before the broth. Ginger, garlic, and onion cook in oil first so the soup has a warm aromatic base.
  • Fish sauce seasons the chicken early. Salt can season Tinola, but patis gives the broth its rounded, savory depth.
  • The simmer stays gentle. A steady simmer helps the chicken turn tender without making the liquid rough or cloudy.
  • The vegetables go in late. Do not add them just because the broth is boiling. Add them when the chicken is already nearly tender.
  • The greens stay fresh. Finish with them at the end so the soup keeps a bright green finish.

The simple idea: build flavor before the broth, wait for the chicken to turn tender, then add the vegetables and greens in stages. That is the difference between flat Tinola and a bowl you want to spoon over rice.

The rule below is the whole Tinola method in one glance: build ginger and patis early, give the chicken time, then protect the vegetables and greens at the end.

Five-step Chicken Tinola cooking rule showing ginger early, patis before broth, chicken until tender, vegetables late, and greens last.
Follow this Tinola order to build flavor and protect texture: ginger early, patis before broth, chicken until tender, vegetables late, and greens last.

Ingredients Explained

Think of the ingredients in layers: ginger for warmth, chicken for body, fish sauce for depth, papaya or sayote for texture, and greens for freshness. Once those layers make sense, the recipe becomes much easier to adjust without losing what makes Tinola taste like Tinola.
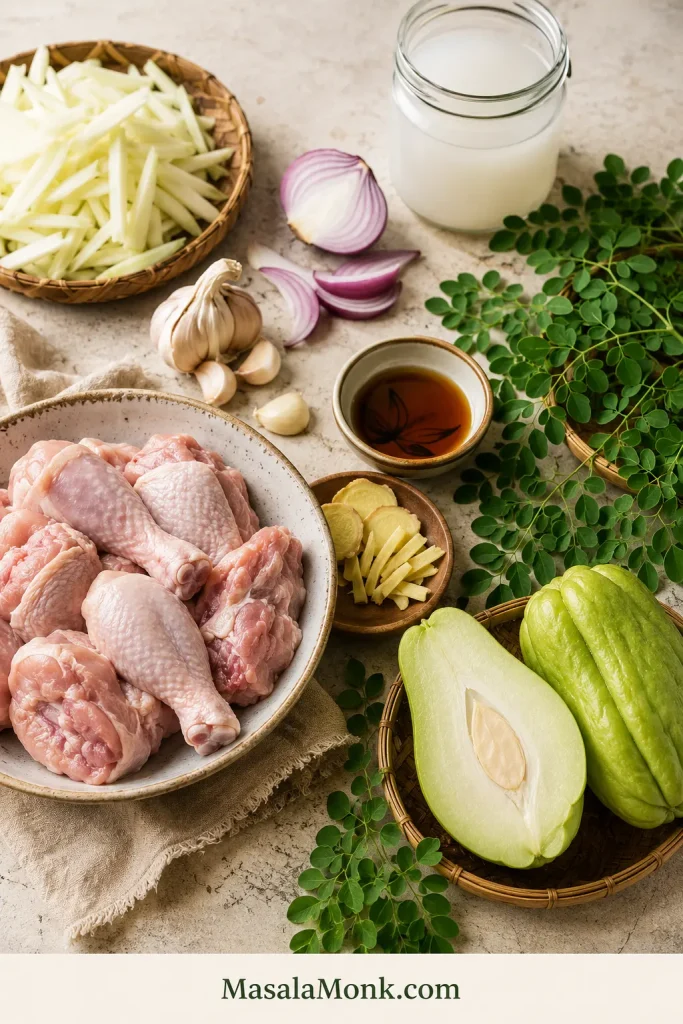
Chicken Tinola ingredients on a board, including bone-in chicken, ginger, garlic, onion, fish sauce, green papaya, sayote, malunggay leaves, and rice wash.
These Tinola ingredients each have a job: chicken gives body, ginger brings warmth, patis adds savory depth, and papaya or sayote gives the soup its gentle bite.

Chicken

Bone-in chicken gives Tinola the kind of body that plain water cannot create on its own. Thighs, drumsticks, wings, or a whole chicken cut into serving pieces all work well.

Boneless thighs can work if you want a faster version, but the broth will be lighter. Chicken breast is lean, but it can dry out if boiled hard or cooked too long. Use a gentle simmer and check it earlier if breast meat is what you have.

Ginger

Ginger is the backbone of Tinola. A small token slice is not enough. Use about 45 to 60 g / 1 1/2 to 2 oz fresh ginger for a full pot. Slice it, julienne it, or lightly smash it so it releases flavor into the oil and broth.

When the ginger hits the oil, the pot should smell sharp, warm, and awake. A weak aroma usually means the final broth will taste weak too. If the ginger feels shy, the Tinola will too.

Garlic and Onion

Garlic and onion round out the ginger. Cook them just until fragrant and softened before the chicken goes in; they do not need to brown deeply.

Fish Sauce / Patis

Fish sauce is where the broth starts getting its backbone. Let it hit the hot pot before the water goes in, and it seasons the chicken instead of just floating salty on top later.

Give it a minute in the hot pot so the sharp edge cooks off and the soup starts with depth instead of last-minute saltiness.

Water, Chicken Broth, or Rice Wash

Water works well if you use bone-in chicken, enough ginger, and proper seasoning. Low-sodium chicken broth gives a stronger shortcut flavor. Rice wash, sometimes called hugas bigas, gives the soup a little more body and a softer feel.

If using rice wash, use the second rinse rather than the first. The second rinse is usually cleaner while still giving the soup a little body. Use rice wash when you want a softer, slightly fuller broth; use water or low-sodium broth when you want a cleaner, lighter-tasting pot.

A chicken cube can rescue a weak pot, especially if you are using plain water or lean chicken. Use it if you need it, but let ginger, chicken, and fish sauce do most of the work.
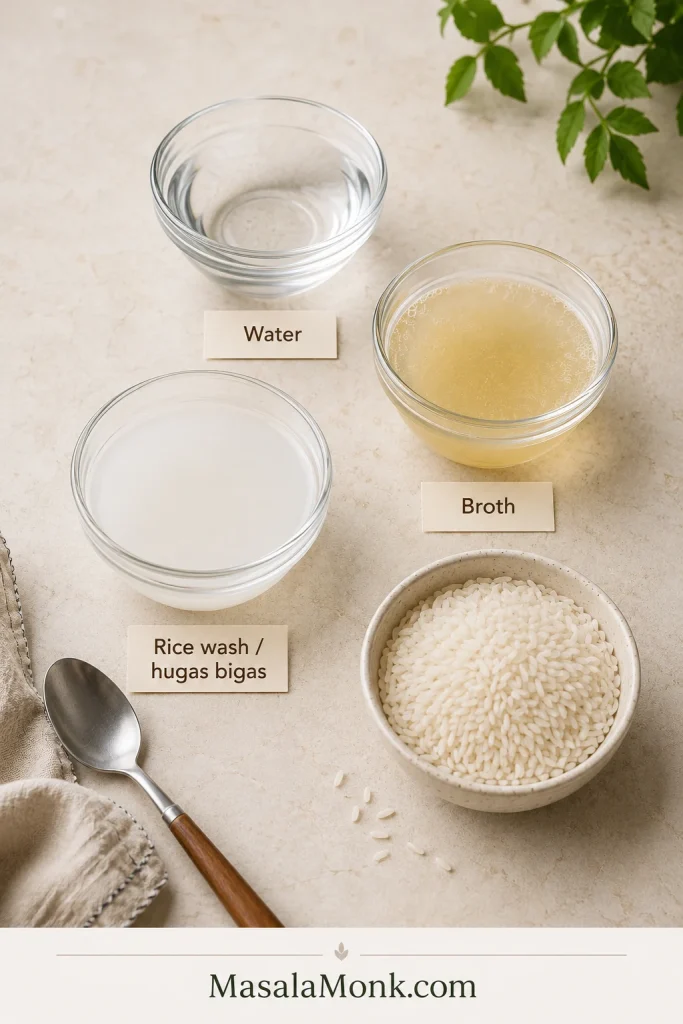
Three bowls labeled water, broth, and rice wash or hugas bigas, with uncooked rice nearby for making Chicken Tinola.
Rice wash, or hugas bigas, gives Tinola a softer body; meanwhile, plain water keeps it light, and broth adds shortcut depth.

Green Papaya or Sayote

Green papaya and sayote are both common in Tinola. Papaya becomes softer and slightly sweet, while sayote, also called chayote, stays firmer with a milder, fresher flavor.

Use the one your market gives you. Tinola is forgiving as long as the broth is gingery and the vegetable goes in at the right time.

Leafy Greens

Malunggay and dahon ng sili are classic Tinola greens. Spinach, pechay, and bok choy are practical substitutes. The exact leaf matters less than the timing.

Add something green and fresh at the end, then stop before the leaves lose their brightness.

Shopping Tip

Filipino markets may have the classic leaves and green papaya. At a regular supermarket, sayote/chayote and spinach can still get you a good, comforting pot.

Best Chicken Cuts for Tinola

The chicken cut matters because Tinola is not only about the meat — it is also about what the meat gives back to the pot.

Bone-in thighs, drumsticks, wings, or mixed cuts are the most forgiving choices for this soup because they can simmer without drying out.

Chicken CutBest ForNotes
Bone-in thighsBest flavor and tendernessThe easiest all-round choice.
DrumsticksBudget-friendly family mealsEasy to serve and good for broth.
WingsExtra collagen and bodyGreat mixed with thighs or drumsticks.
Whole chicken, cut upTraditional family-style potGives different textures in one soup.
Boneless thighsFaster weeknight versionLess broth depth, but still flavorful.
Chicken breastLean versionCan dry out; simmer gently and avoid overcooking.

Chicken should reach 165°F / 74°C internally. FoodSafety.gov lists 165°F / 74°C as the safe minimum internal temperature for chicken, turkey, and other poultry. See the safe minimum internal temperature chart.

Best all-round choice: use bone-in thighs and drumsticks. They give the soup enough flavor, cook evenly, and stay tender even if the pot simmers a little longer.

If you bought a larger pack of thighs and want a dry, crispy dinner another night, this air fryer chicken thighs recipe uses the same reliable cut in a completely different way.

Green Papaya vs Sayote

For many cooks, the first big choice is green papaya or sayote.

Green papaya gives the bowl a softer, more classic feel. Sayote keeps a firmer, cleaner bite. Neither one ruins the dish, so choose based on what you can find and what texture you like.
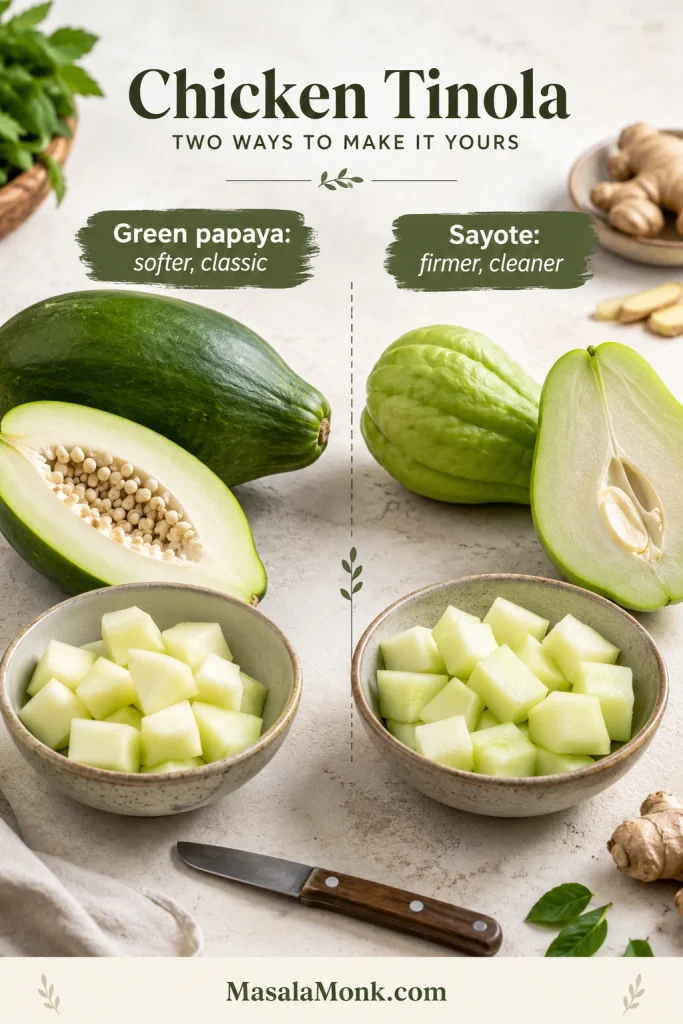
Green papaya and sayote shown side by side with whole and cut pieces for comparing vegetables used in Chicken Tinola.
Green papaya makes Tinola softer and more classic, while sayote stays firmer, cleaner, and easier to find in many markets.
OptionTextureFlavorBest For
Green papayaSoft-tender and absorbs brothMild, slightly sweetA more classic Tinola feel
Sayote / chayoteFirmer and cleanerMild, fresh, neutralEasy supermarket version
Semi-ripe papayaSofter and sweeterNoticeably sweetUse only if you intentionally want a sweeter soup
UpoSoft and wateryDelicateAvailable substitute
KalabasaCreamier and sweeterRicher, less classicA variation, not the default
Labanos / daikonFirm and slightly pepperySharperWorks in a pinch

If you want a clearer, more ginger-forward bowl, sayote is a very good choice. For the softer texture many people associate with Tinola, use green papaya.

If you buy a whole green papaya and have extra left after Tinola, you can use it in a fresh salad like this raw papaya salad.

Cut whichever one you use into wedges large enough to hold their shape. Add the pieces only after the chicken is nearly tender. If they go in too early, they can turn mushy before the chicken is done.

Tinola Greens: Malunggay, Dahon ng Sili, Spinach, Pechay, or Bok Choy

Traditional Tinola often uses malunggay or dahon ng sili. Outside the Philippines, those can be harder to find. Spinach, pechay, bok choy, or watercress will not make the soup wrong — they simply make it more practical for your kitchen.
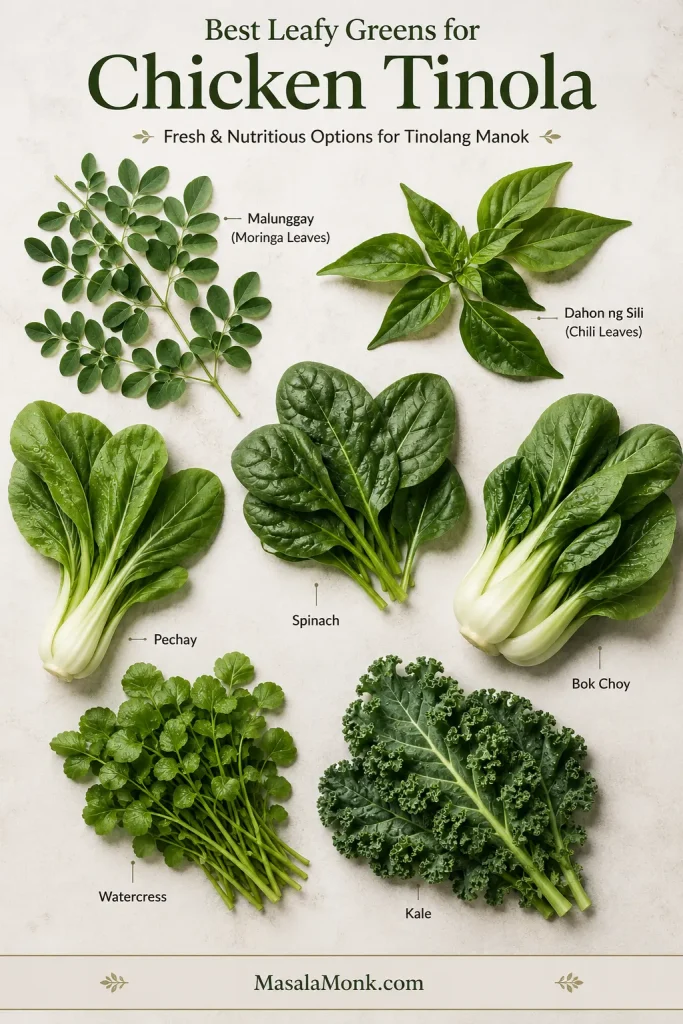
Labeled guide board of Tinola greens, including malunggay, dahon ng sili, spinach, pechay, bok choy, watercress, and kale.
Malunggay and dahon ng sili are classic Tinola greens; however, spinach, pechay, bok choy, watercress, or kale can still work when timed well.
GreenTraditional?FlavorHow to Add
Malunggay / moringaYesEarthy, green, slightly bitterLast 1 to 2 minutes
Dahon ng sili / chili leavesYesMildly pepperyLast 1 to 2 minutes
SpinachSubstituteSoft and mildOff heat or last 1 minute
Pechay / bok choySubstituteMild with more bodyStems first, leaves last
KaleSubstituteStronger and chewierSimmer 2 to 4 minutes
WatercressSubstitutePeppery and freshLast minute

Do not add delicate greens too early. The leaves should still look alive, not dull. If you are using bok choy or pechay, add the thicker stems first and the leaves later. With spinach, turn off the heat and let the leaves wilt gently.

Equipment and Pot Size

Tinola is a simple one-pot soup, but the pot still matters. Use a pot wide enough that the chicken can sit in the aromatics before the liquid goes in. If the pot is too crowded, the chicken steams instead of picking up flavor from the ginger, garlic, onion, and fish sauce.

  • 5 to 6 quart / 4.7 to 5.7 L pot or Dutch oven: roomy enough for bone-in chicken, broth, papaya or sayote, and greens without boiling over.
  • Wide spoon or ladle: useful for skimming foam, scum, and extra oil from the surface.
  • Tongs: helpful for turning chicken pieces while they cook with the aromatics.
  • Instant-read thermometer: the most reliable way to check that chicken reaches 165°F / 74°C.

A smaller pot can still work, but keep the simmer gentle and watch the liquid level once the vegetables go in.

Cooking Time by Stage

Tinola is simple, but timing decides whether the bowl tastes clean and tender or flat and overcooked.
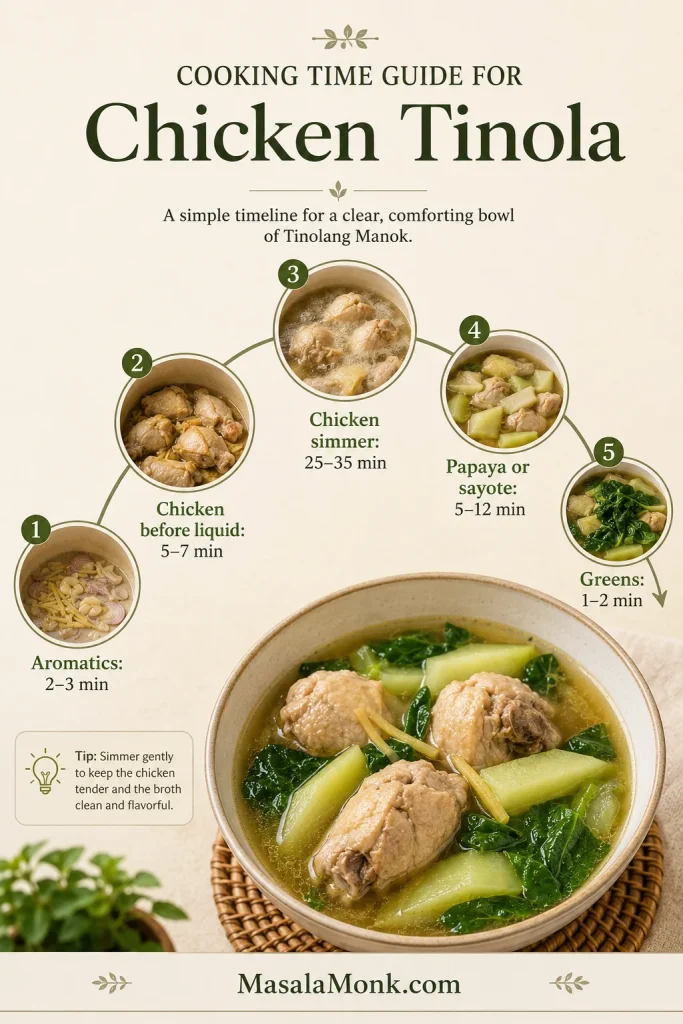
Cooking time guide for Chicken Tinola showing aromatics for 2 to 3 minutes, chicken before liquid for 5 to 7 minutes, chicken simmer for 25 to 35 minutes, papaya or sayote for 5 to 12 minutes, and greens for 1 to 2 minutes.
Good Tinola is mostly timing: aromatics first, chicken long enough to tenderize, vegetables near the end, and greens for the final minute.
StageApproximate TimeWhat to look for
Sauté ginger, garlic, and onion2 to 3 minutesAromatics smell warm, sharp, and fragrant.
Cook chicken before liquid5 to 7 minutesChicken loses raw color and lightly browns on the surface.
Fish sauce with chicken1 to 2 minutesFish sauce coats the chicken and smells savory.
Chicken simmer25 to 35 minutesChicken is tender and reaches 165°F / 74°C.
Papaya or sayote5 to 12 minutesPieces are fork-tender but still hold shape.
Leafy greens1 to 2 minutesLeaves are just wilted and still fresh-tasting.

Timing note: in most home pots, bone-in thighs and drumsticks begin turning tender around 30 minutes after the broth starts simmering. Sayote often softens faster than thick green papaya wedges, so start checking the vegetables at 5 minutes. Spinach wilts best off heat, while pechay and bok choy work better when the stems go in before the leaves.

Native chicken or very large bone-in pieces may need more time before the vegetables go in. Wait until the meat is already turning tender, or the pieces may overcook before the chicken is ready.

Back to top ↑

Step-by-Step Tinola Method

Once the aromatics are fragrant, the rest of the soup is mostly about patience: simmer the chicken gently, then add the vegetables when the meat is nearly tender.

1. Prep the Chicken and Vegetables

Pat the chicken dry if it is very wet. If the pieces are very uneven, cut larger pieces down so they cook more evenly.

Peel the green papaya or sayote. If using green papaya, remove the seeds. Cut the vegetable into 1 1/2 to 2 inch wedges so the pieces can simmer without falling apart.

2. Sauté Ginger, Garlic, and Onion

Heat oil in a large pot over medium heat. Add the onion, garlic, and ginger. Cook for 2 to 3 minutes, stirring often.

The aromatics should smell warm, sharp, and fragrant. This is where the soup starts becoming Tinola, so do not rush past the ginger.
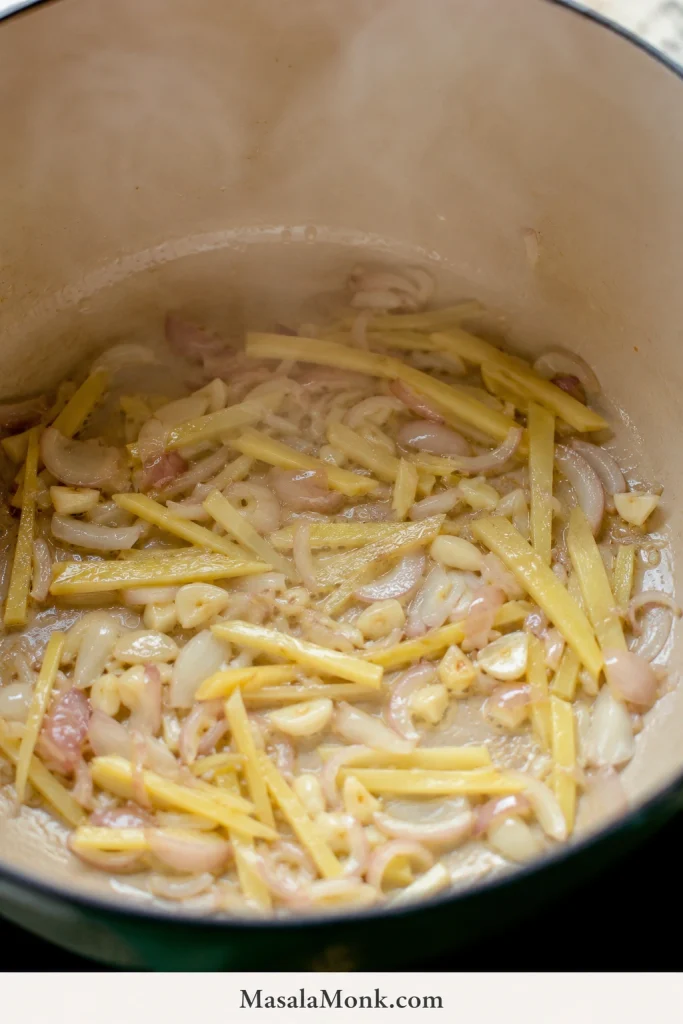
Sliced ginger, garlic, and onion sautéing in oil inside a pot for Chicken Tinola.
Start with ginger, garlic, and onion before adding water; as a result, the broth begins with aroma instead of tasting flat later.

3. Add the Chicken and Lightly Brown It

Add the chicken pieces to the pot. Cook for 5 to 7 minutes, turning occasionally. The chicken does not need a deep brown crust, but the surface needs to lose its raw color and pick up some flavor from the aromatics.

This step gives the soup more depth than simply boiling raw chicken in water.
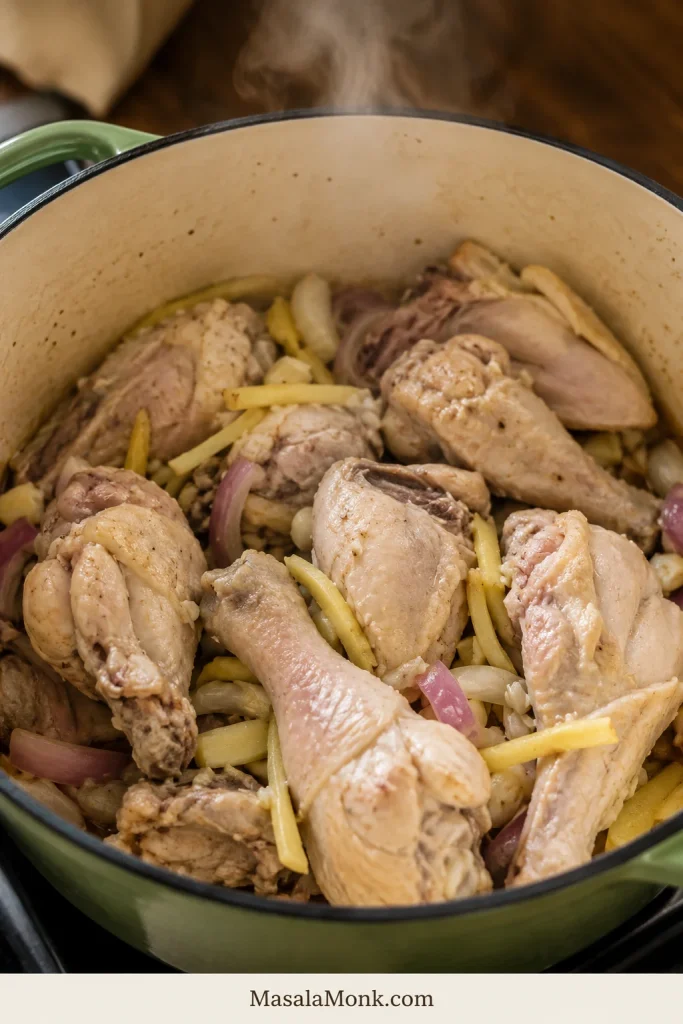
Bone-in chicken pieces cooking with sliced ginger, garlic, and onion in a pot before broth is added.
Cooking chicken with ginger and aromatics before the liquid goes in helps the meat season early and gives Tinola a fuller broth.

4. Add Fish Sauce Early

Add 2 tablespoons fish sauce and stir well. Let it cook with the chicken for 1 to 2 minutes before adding the liquid.

This gives the meat and aromatics a savory base. You can always add more fish sauce at the end, but adding some early helps the flavor cook into the soup instead of sitting only on the surface.
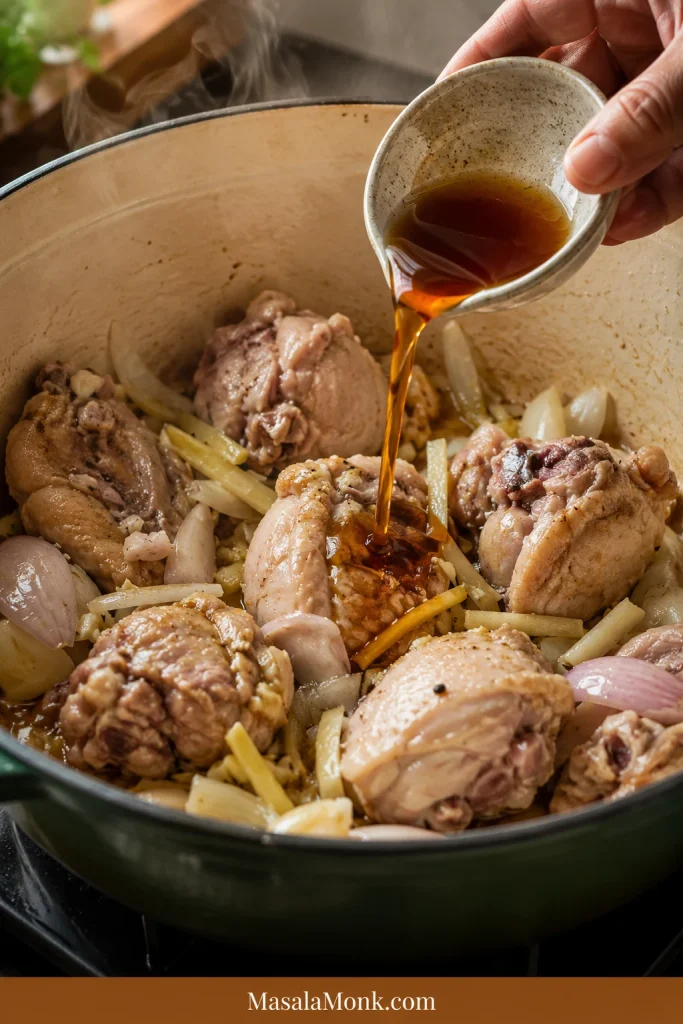
Fish sauce being poured into a pot with bone-in chicken, ginger, garlic, and onion before any broth is added.
Add patis before the broth, not after everything is diluted; this lets the chicken and aromatics absorb savory depth from the start.

5. Add Liquid, Boil, and Skim

Pour in 6 cups water, chicken broth, or rice wash. Bring the pot to a boil. As foam rises, skim it off with a wide spoon or ladle.

Skimming at this stage keeps the liquid clearer. It is much easier to remove foam before the vegetables and greens go in.
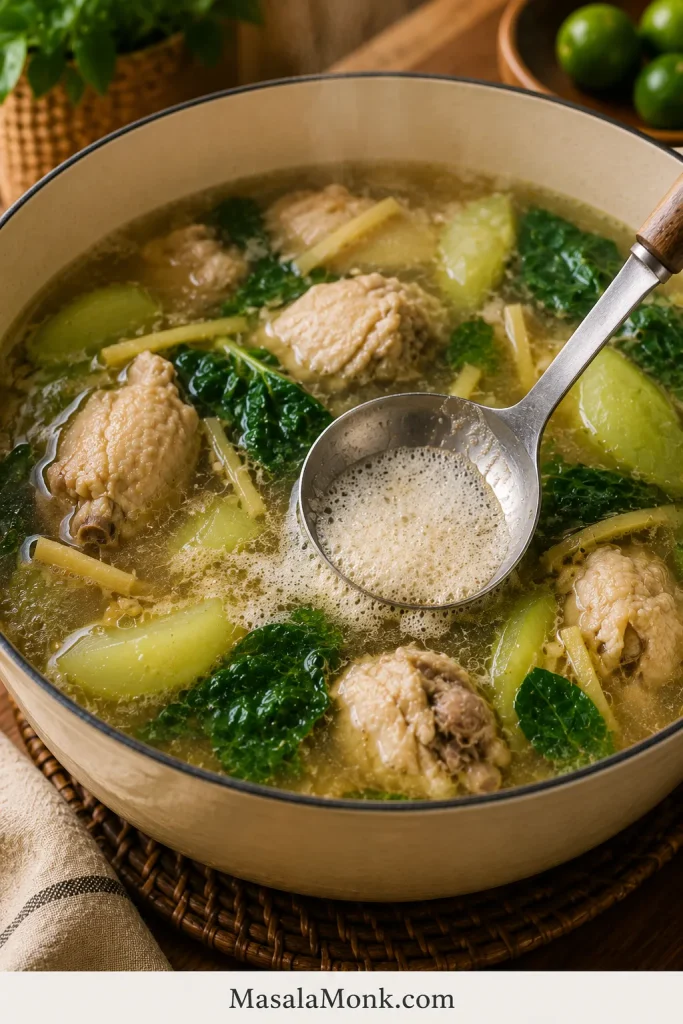
Ladle skimming foam from the surface of Chicken Tinola broth with chicken, ginger, greens, and vegetable pieces in the pot.
Skim the foam after the first boil, then lower the heat; this keeps Tinola broth cleaner without overworking the chicken.

6. Simmer Until the Chicken Is Tender

Lower the heat to a gentle simmer. Cover the pot partially and cook for 25 to 35 minutes, or until the chicken is tender and reaches 165°F / 74°C internally.

The chicken should feel tender near the bone. Avoid a hard boil. A rough boil can make the broth cloudy and the chicken tougher.

7. Add Green Papaya or Sayote

Add the green papaya or sayote once the chicken is nearly tender. Do not add them just because the broth is boiling; wait until the meat has already started giving flavor back to the pot. Simmer for 5 to 12 minutes, depending on how large and firm the pieces are.

Look for tender edges with enough firmness in the center that the wedges do not collapse in the bowl. If they start breaking apart, they have gone too far.
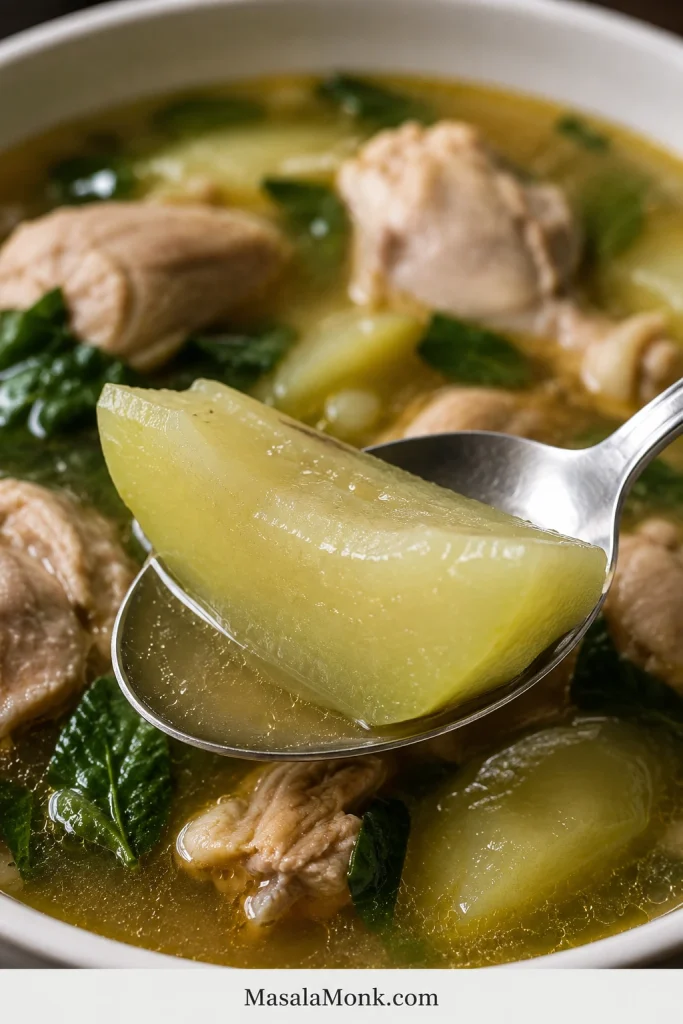
Spoon lifting an intact green papaya or sayote wedge from Chicken Tinola broth, with chicken and greens in the background.
Add papaya or sayote near the end so the edges soften while the pieces still hold their shape in the bowl.

8. Add the Greens at the End

Add malunggay, dahon ng sili, spinach, pechay, or bok choy near the end. Delicate leaves need only 1 to 2 minutes. Spinach can often be added off heat and covered until wilted.

Pull them off the heat while they are still bright and just wilted. If they look dull and tired, they have cooked too long.
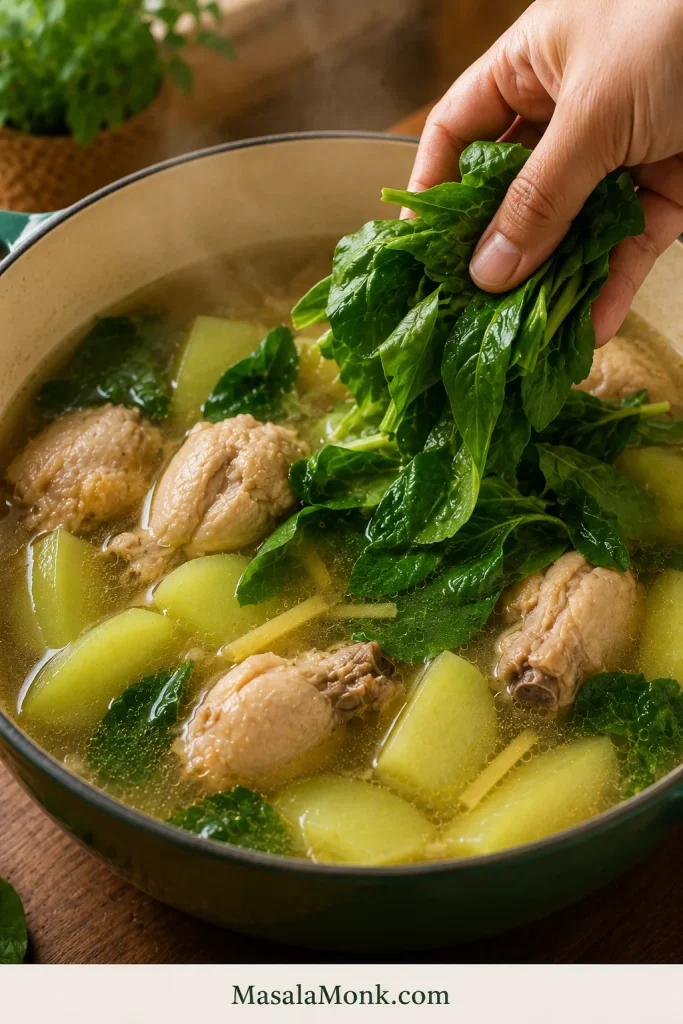
Hand adding fresh leafy greens to a pot of Chicken Tinola with broth, chicken pieces, and green vegetable wedges.
Greens go in last because they only need enough heat to wilt; that way, Chicken Tinola stays fresh, bright, and not overcooked.

9. Taste and Serve

Taste the soup before serving. Adjust with more fish sauce, salt, black pepper, calamansi, or chili.

The test is the rice: spoon a little broth over hot rice. If it tastes warm, gingery, and savory without needing rescue, the pot is ready. The broth can taste a touch stronger from the spoon than it does in the bowl, because rice softens everything.

Timing cue: add the vegetables after the chicken is mostly tender, not at the beginning. That one choice keeps the pieces from collapsing before the chicken is done.

Fix Bland Tinola Broth

Bland Tinola is frustrating because it can look right before it tastes right — clear broth, chicken, greens, rice — but the spoonful feels empty.

It usually means one of four things: not enough ginger, not enough fish sauce, weak boneless chicken, or too much liquid without final seasoning.

The fix is usually not more salt alone. Tinola needs ginger warmth, chicken flavor, fish sauce depth, and a final taste before serving.
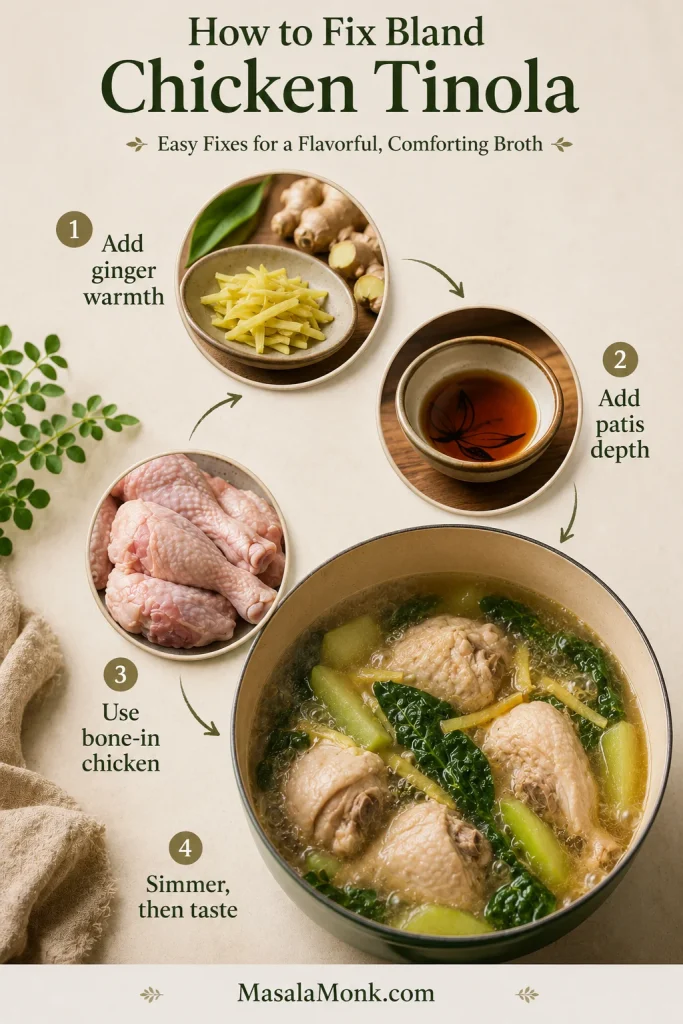
Troubleshooting guide for bland Chicken Tinola broth with ginger, fish sauce, bone-in chicken, and a simmering pot.
When Chicken Tinola tastes thin, fix the base first: strengthen the ginger, deepen with patis, simmer the chicken properly, then taste again.
  • Use bone-in chicken. It gives the broth more body than boneless breast.
  • Use enough fresh ginger. Tinola should smell warm and gingery before the liquid even goes in.
  • Sauté the aromatics first. Do not just boil everything together from the start.
  • Add fish sauce before simmering. Let it coat the chicken and aromatics.
  • Simmer gently. This keeps the chicken tender and the soup balanced.
  • Skim foam and extra oil. This improves both flavor and appearance.
  • Taste at the end. The soup may need more patis, salt, pepper, calamansi, or chili.

If your Tinola has ever tasted like hot water with chicken in it, start with ginger and patis before reaching for more salt. A few extra minutes of gentle simmering can also help the chicken give more back to the pot.

Fast fix for bland Tinola: simmer a few fresh ginger slices in the broth for 5 minutes, add a small splash of fish sauce, then taste again. If the soup still feels thin, let it simmer uncovered for a few minutes to concentrate slightly.

Keep Tinola Broth Clear

Clear Tinola broth comes from gentle cooking and good timing. Bring the liquid to a boil first, then skim off the foam or scum that rises to the surface. After that, lower the heat to a gentle simmer.
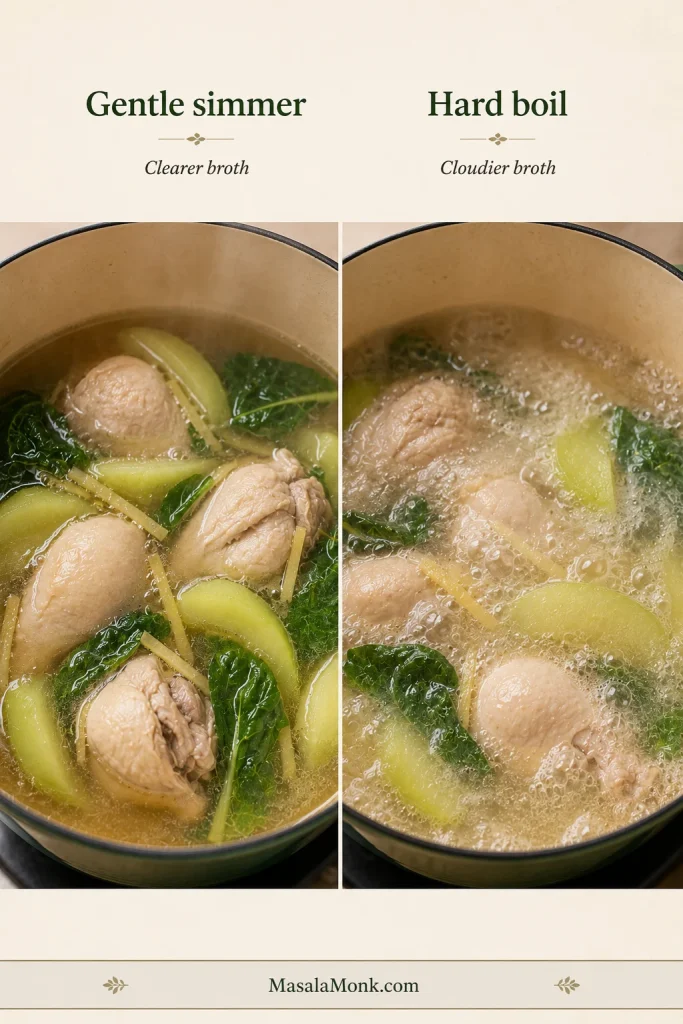
Comparison graphic showing gentle simmer with clearer Chicken Tinola broth beside hard boil with cloudier broth and stronger bubbling.
A gentle simmer keeps Tinola calmer and clearer; by contrast, a hard boil can make the broth cloudy and the chicken tougher.
  • Boil first, then skim. Remove foam while the surface is still easy to see.
  • Lower the heat after skimming. A gentle simmer keeps the broth calmer.
  • Use a wide spoon or ladle. It is easier to lift off scum and extra oil without stirring everything back in.
  • Finish with greens at the end. Delicate leaves stay brighter when they are not boiled for long.
  • Avoid hard boiling the chicken. Rough heat can make the liquid cloudy and the meat tougher.
  • Stop stirring aggressively once foam rises. Let it collect on the surface so you can skim it cleanly.
  • Pull delicate leaves before they turn dull. Fresh-looking greens make the whole bowl feel cleaner.

A home pot of Tinola does not need restaurant-perfect clarity. Skim what you can, keep the simmer gentle, and focus on a broth that tastes balanced and aromatic.

Tinola Ingredients in Tagalog and English

Tinola recipes often move between English, Tagalog, and market names, especially when you are shopping outside the Philippines. If you are shopping at a Filipino market, reading a family recipe, or watching a Tagalog cooking video, these are the ingredient names you are most likely to see.
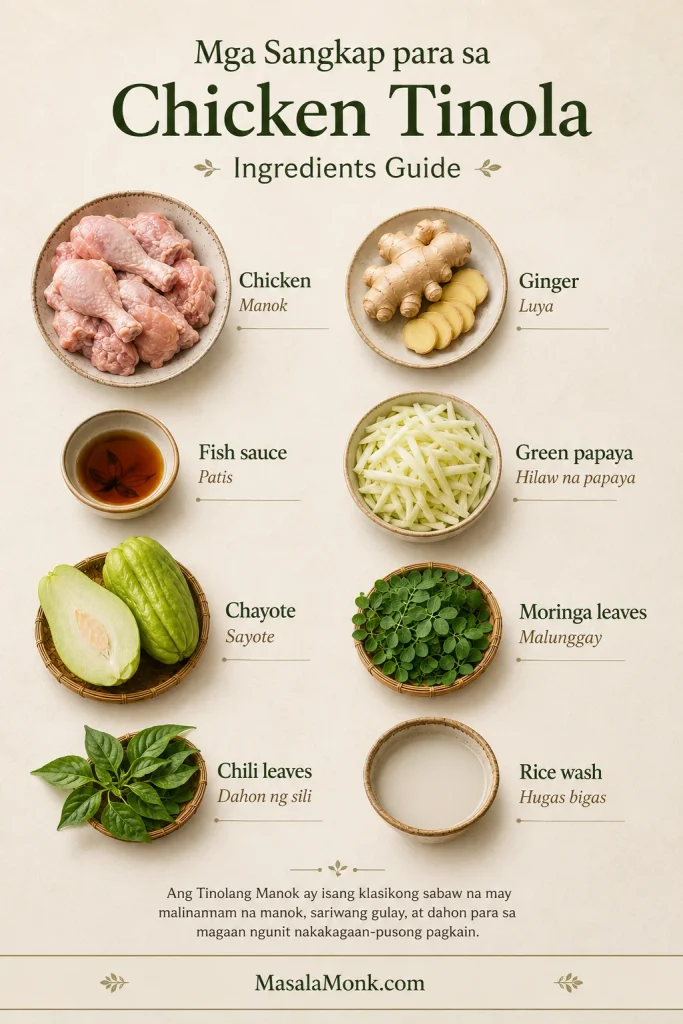
Tagalog-English ingredient guide for Chicken Tinola showing chicken as manok, ginger as luya, fish sauce as patis, green papaya as hilaw na papaya, chayote as sayote, moringa leaves as malunggay, chili leaves as dahon ng sili, and rice wash as hugas bigas.
This Tagalog-English Tinola guide makes shopping and recipe reading easier, especially for manok, luya, patis, sayote, malunggay, and hugas bigas.
EnglishFilipino / Common Name
ChickenManok
GingerLuya
GarlicBawang
OnionSibuyas
Fish saucePatis
Green papayaHilaw na papaya
ChayoteSayote
Moringa leavesMalunggay
Chili leavesDahon ng sili
Rice washHugas bigas
Black pepperPaminta

A short Tagalog-style procedure would be:

Paano lutuin: igisa ang luya, bawang, sibuyas at manok; lagyan ng patis; pakuluan hanggang lumambot; idagdag ang papaya o sayote; tapusin sa malunggay o dahon ng sili.

In English: sauté ginger, garlic, onion, and chicken; season with fish sauce; simmer until tender; add papaya or sayote; finish with malunggay or chili leaves.

Serving Suggestions

Tinola is usually served as a main dish with steamed rice. The broth is often spooned over rice, so it needs enough flavor to carry the meal.

  • Steamed white rice
  • Extra fish sauce / patis on the side
  • Calamansi or lime
  • Fresh chili
  • Black pepper
  • A small dipping sauce of patis and calamansi

The broth does not need to taste salty by itself; it needs to wake up when it hits hot rice. If the soup tastes slightly strong alone but perfect over rice, you are in the right zone.
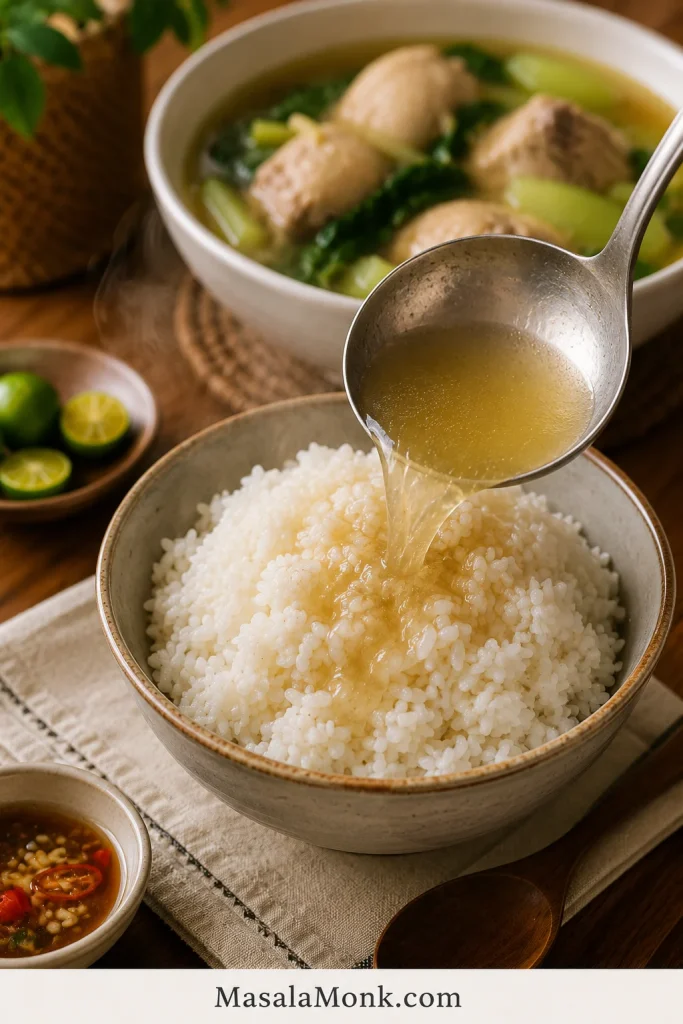
Golden Chicken Tinola broth being poured from a ladle over steamed white rice, with a bowl of Tinola in the background.
The rice test is simple: once the broth touches hot rice, it should taste rounded, savory, and alive — not weak or watery.

For another Filipino chicken classic, make Chicken Adobo on a different night. Adobo is darker, tangier, and braised, while Tinola is lighter, gingery, and broth-based.

For a Filipino vegetable dish that also belongs with rice, try Pinakbet Tagalog, a savory mix of tender vegetables and bagoong.

Tinola is especially good when you want something warm, light, and restorative. It is the kind of soup that feels gentle but still satisfying.

Storage, Freezing, and Reheating

Let leftover Tinola cool, then transfer it to an airtight container and refrigerate within 2 hours.

  • Refrigerator: store for up to 3 days.
  • Freezer: freeze the chicken and broth if needed, but expect the vegetables and greens to soften after thawing.
  • Best texture: freeze without the greens, then add fresh spinach, malunggay, pechay, or bok choy when reheating.
  • Reheating: warm gently on the stovetop until hot throughout. Reheated chicken should reach 165°F / 74°C.

Green papaya and sayote can soften after freezing, so expect a gentler texture if you freeze the finished soup.

Tinola Variations

Once the basic ginger broth method makes sense, you can adjust the vegetable, greens, broth, or protein. Keep the same quiet logic: build the flavor first, cook the main ingredient gently, and finish with the delicate pieces last.

Easy Swaps for This Recipe

  • Tinola with green papaya: softer, slightly sweet, and more classic in feel. Use firm green papaya, not ripe orange papaya.
  • Tinola with sayote: firmer, cleaner, and easy to find in many markets.
  • Tinola with malunggay: earthy, green, and traditional. Add it at the end.
  • Tinola with spinach or pechay: practical when malunggay or dahon ng sili are not available.
  • Tinola with rice wash: slightly fuller broth. Use the second rice rinse for a clearer flavor.

Variations That Cook a Little Differently

  • Native chicken Tinola: deeper flavor, but usually needs a longer simmer before the vegetables go in.
  • Instant Pot Tinola: pressure cook the chicken first, then add the vegetables separately so they do not overcook.
  • Fish or seafood Tinola: use the same ginger-broth idea, but cook fish or mussels briefly so they stay tender.
  • Tinola sa gata or golden Tinola: coconut milk, turmeric, or squash make the soup richer and less like the clear classic version.

Back to top ↑

Common Mistakes

MistakeWhat HappensFix
Using only boneless breastWeak broth and dry meatUse bone-in pieces, or simmer breast gently and check it early.
Not using enough gingerSoup tastes flatUse 45 to 60 g / 1 1/2 to 2 oz fresh ginger.
Adding fish sauce only at the endFlavor tastes salty but shallowAdd some before simmering, then adjust later.
Using a chicken cube with full fish sauceSoup becomes too saltyStart with less patis if using a cube, then adjust after simmering.
Adding too much waterSoup tastes thin even after seasoningUse about 6 cups liquid for 2 to 2 1/2 lb chicken, then simmer uncovered briefly if needed.
Boiling too hardCloudy broth and tougher chickenSkim first, then simmer gently.
Adding the vegetable too earlyPieces turn mushyAdd them after the chicken is nearly tender.
Overcooking greensDull, tired leavesFinish with greens at the end.
Not tasting before servingFinal soup tastes blandAdjust with patis, salt, pepper, calamansi, or chili.
Using ripe papaya by mistakeSoup becomes too sweetUse green papaya or switch to sayote.

FAQ

What is Tinola in English?

Tinola is often described in English as Filipino ginger chicken soup. The chicken version is called Tinolang Manok or Chicken Tinola.

What does Tinola mean?

Tinola generally refers to a Filipino broth-based dish. Tinolang Manok is the chicken version most people mean when they say Chicken Tinola.

Is Tinola the same as Tinolang Manok?

Tinola is the general dish. Tinolang Manok is the chicken version. Since chicken is the most common version, many people use Tinola and Tinolang Manok to mean the same thing.

What should Tinola taste like?

Tinola should taste light but not empty: gingery, savory, and good enough that the broth makes plain rice feel like a meal. If the soup tastes flat, it usually needs more patis, more ginger, or a few more minutes for the chicken to flavor the broth.

What are the main ingredients of Chicken Tinola?

The main ingredients are chicken, ginger, garlic, onion, fish sauce, water or broth, green papaya or sayote, and leafy greens such as malunggay, dahon ng sili, spinach, or pechay.

Do you use green papaya or sayote for Tinola?

Both work. Green papaya gives Tinola a softer, slightly sweet, more classic texture. Sayote stays firmer and tastes mild and fresh, which makes it useful when you want cleaner pieces in the bowl.

What can I substitute for green papaya in Tinola?

Sayote or chayote is the best substitute for green papaya. Upo, kalabasa, or labanos can work in some variations, but they change the flavor and texture.

What leaves are used in Tinola?

The classic choices are malunggay and dahon ng sili. When those are hard to find, spinach, pechay, bok choy, watercress, or kale can work. The important part is adding the greens late enough that they stay fresh.

What can I substitute for malunggay?

Spinach is the easiest substitute for malunggay. Pechay, bok choy, watercress, or kale can also work. Add delicate greens at the end so they do not overcook.

Can I use spinach, pechay, or bok choy in Tinola?

Yes. Spinach wilts quickly and can be added off heat. Pechay and bok choy work best when the thicker stems go in before the leaves.

What is dahon ng sili?

Dahon ng sili means chili leaves. They are used in some traditional Tinola recipes and give the soup a mild peppery green flavor.

What is the best chicken part for Tinola?

Bone-in thighs and drumsticks are the easiest all-round choice. They stay tender, add body to the broth, and are harder to overcook than breast meat.

How long should Tinola simmer?

Tinola usually simmers for about 25 to 35 minutes after the liquid is added, depending on the size of the chicken pieces. Add the vegetables near the end and cook for another 5 to 12 minutes.

How do you keep Tinola broth clear?

Bring the broth to a boil, skim off the foam, then lower the heat to a gentle simmer. Avoid hard boiling the soup for a long time.

Why does my Tinola taste bland?

Tinola tastes bland when the broth lacks ginger, patis, bone-in chicken flavor, or enough simmering time. More salt alone will not fix an empty broth; add ginger warmth, fish sauce depth, and enough time for the chicken to give flavor back to the pot.

Can I make Tinola without fish sauce?

You can, but fish sauce gives Tinola much of its savory depth. If avoiding fish sauce, use salt plus low-sodium chicken broth, and consider adding a little soy sauce or coconut aminos. The flavor will not be exactly traditional.

Can I freeze Chicken Tinola?

Chicken Tinola can be frozen, but the greens and vegetables may soften after thawing. For best results, freeze the chicken and broth, then add fresh greens when reheating.

What is the difference between Tinola and Nilagang Manok?

Tinola is a ginger-forward Filipino chicken soup usually made with fish sauce, green papaya or sayote, and leafy greens. Nilagang Manok is a simpler boiled chicken soup that often uses vegetables like cabbage, potatoes, or saba banana and does not have the same strong ginger profile.

Final Note
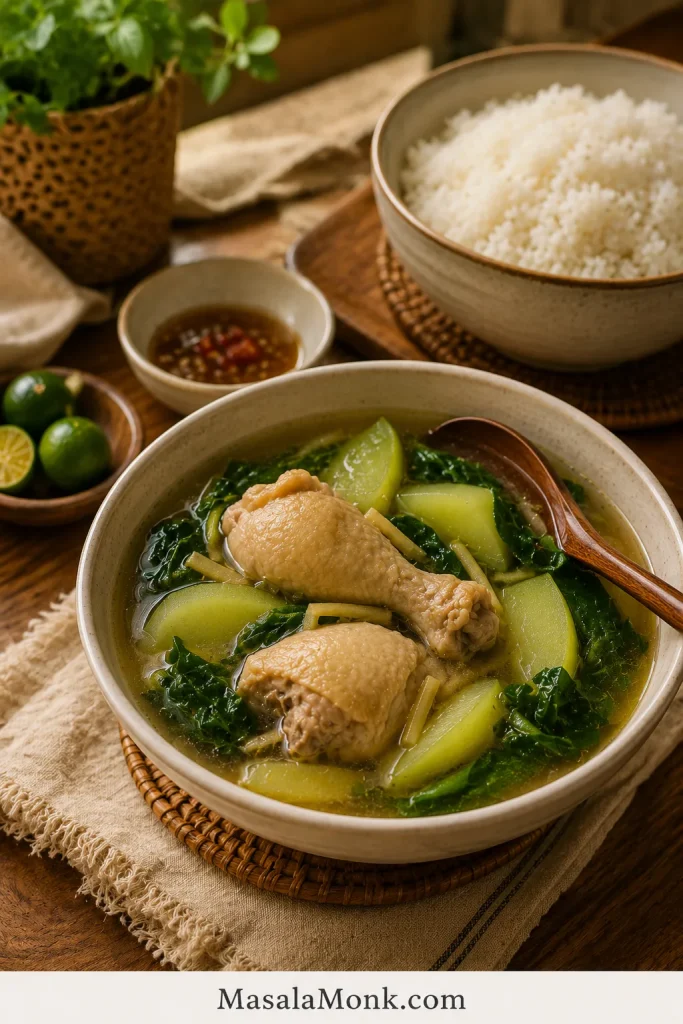
Served bowl of Chicken Tinola with ginger broth, bone-in chicken, green papaya or sayote, leafy greens, steamed rice, calamansi, and dipping sauce.
A finished bowl of Chicken Tinola should feel quiet but complete: warm broth, tender chicken, bright greens, and rice that makes the soup feel like dinner.

Tinola does not need to shout. No watery broth, no collapsed vegetables, no loud tricks — just generous ginger, chicken that has time to flavor the pot, patis added early, and greens folded in last. When those pieces come together, the soup tastes calm but complete: simple food that still feels cared for.
Back to top ↑

Posted on 1 Comment

Pad Kra Pao Recipe: Thai Basil Chicken, Pork, or Beef: Thai Basil Chicken, Pork, or Beef

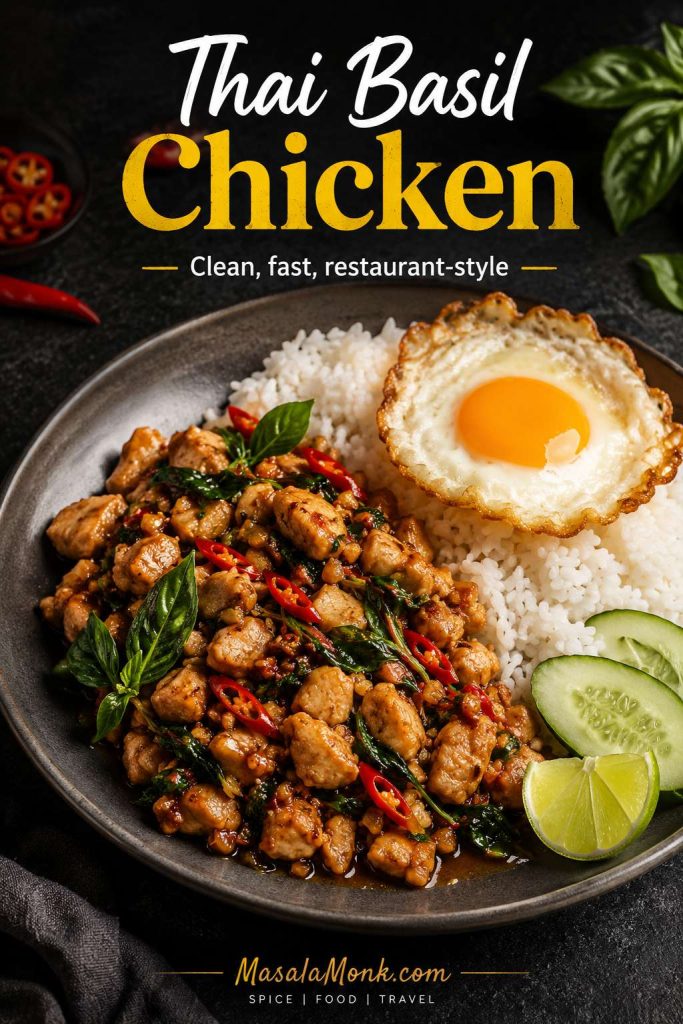
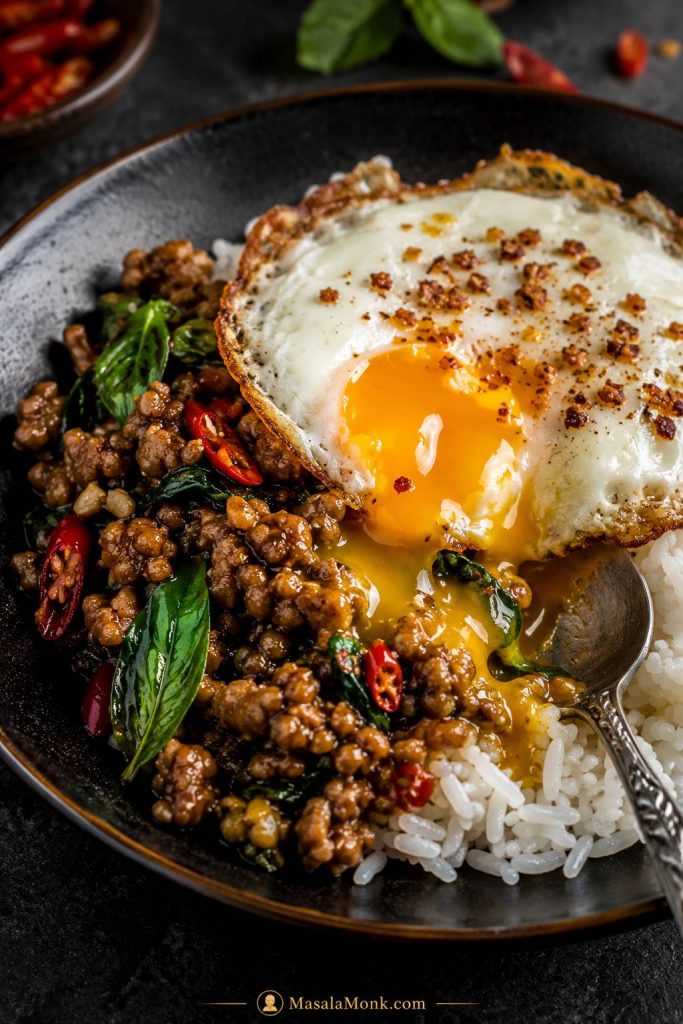
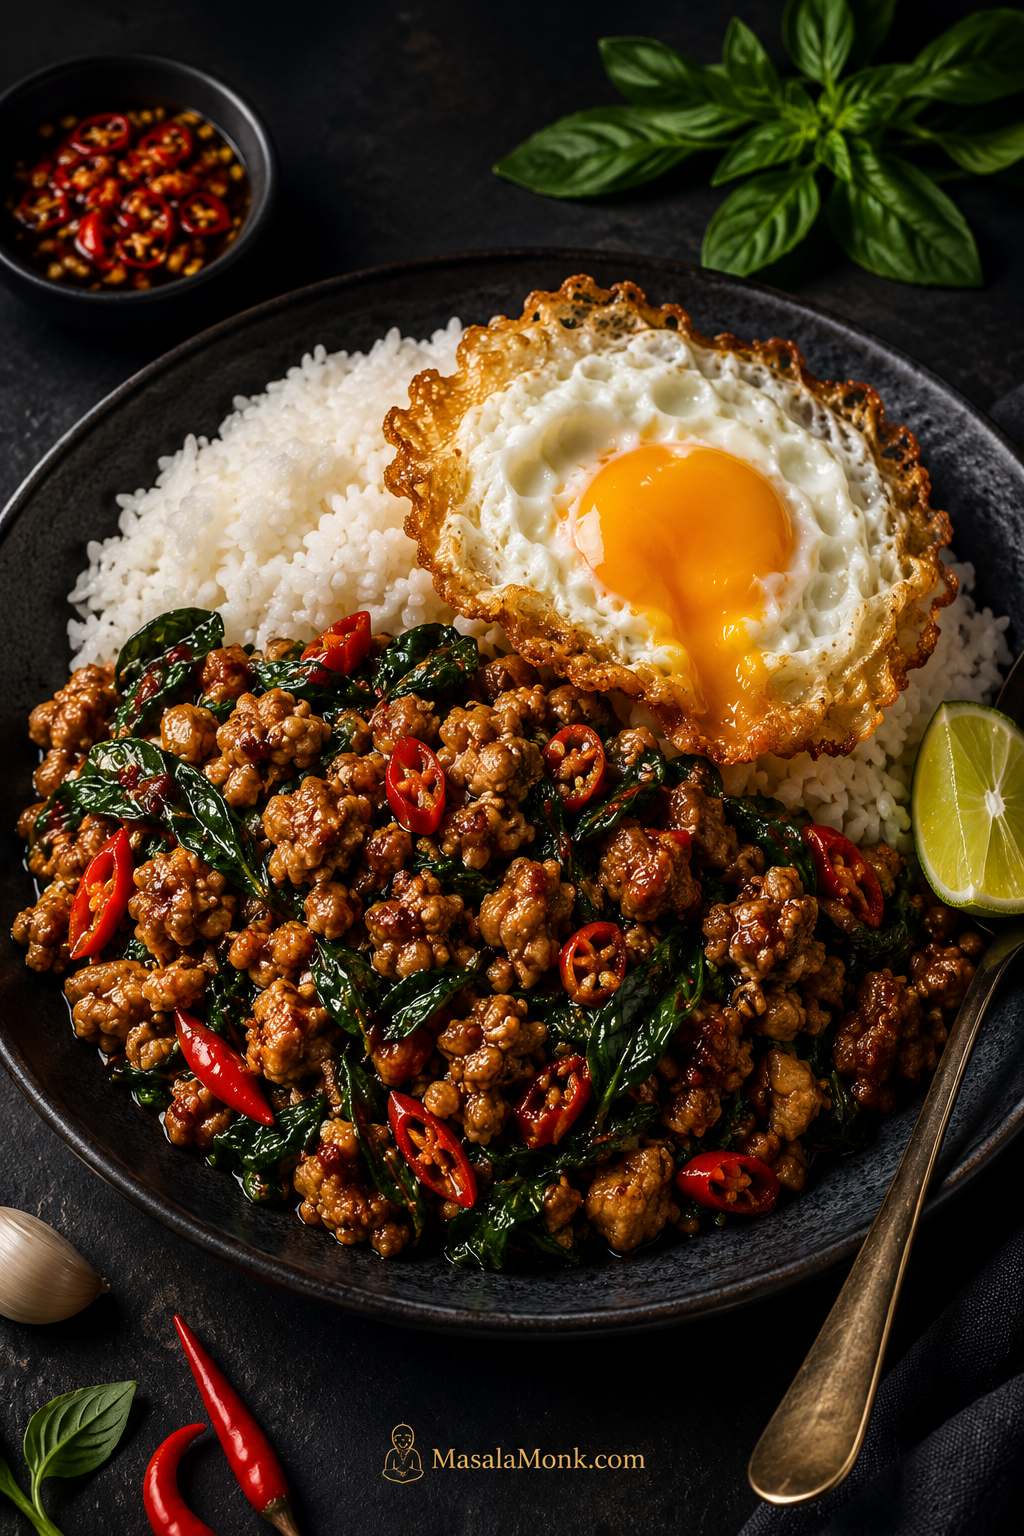
Finished Pad Kra Pao rice plate with glossy basil minced meat, red chilies, fluffy white rice, lime, and a crispy fried egg on a dark plate.

Pad Kra Pao is the Thai rice plate you want when dinner needs to be fast but still loud: garlic in hot oil, chilies, glossy minced meat, fresh basil, steamed rice, and a crispy fried egg that breaks into the sauce.

It is bold without being complicated. Once the rice is ready and the sauce is mixed, the stir-fry itself takes only a few minutes, which is why this dish works so well for weeknights, leftovers, and those “I want takeout, but I can cook” nights.

You may know this dish as Thai basil chicken, pad krapow, pad ka pow, kra pao, or holy basil chicken. The names and spellings vary, but the craving is usually the same: a spicy basil stir-fry that tastes fresh, savory, chili-hot, and glossy.

Here, you can make it with chicken, pork, or beef, then use the same base for tofu or eggplant. You will also see what to do if you only have Thai basil instead of holy basil, how to adjust the sauce, and how to fix the common problems that make homemade Pad Kra Pao taste flat, salty, or dry.

Quick Answer: What Is Pad Kra Pao?

Pad Kra Pao is a Thai basil stir-fry made with garlic, chilies, meat or tofu, a salty-savory sauce, and basil. It is usually served over rice, often with a crispy fried egg on top.

If you came here looking for Thai basil chicken, this is the same dish family. Thai basil chicken is the version many people know from Thai restaurants: minced or chopped chicken stir-fried with garlic, chilies, basil, and sauce, then spooned over rice.

The most traditional version is made with holy basil, which has a sharper, peppery, clove-like aroma. Thai basil gives a different but still excellent home version: sweeter, more anise-like, and closer to many restaurant-style Thai basil chicken plates outside Thailand.

Best quick version: Use 450g / 1 lb ground chicken, pork, or beef; 5–8 garlic cloves; 3–6 chilies; 1½–2 cups basil leaves; and a sauce made with oyster sauce, fish sauce, soy sauce, dark soy, sugar, and a little water or stock. Stir-fry hot and fast, add basil at the end, and serve over rice with a crispy fried egg.

Need exact measurements? See the sauce ratio or jump to the recipe card.
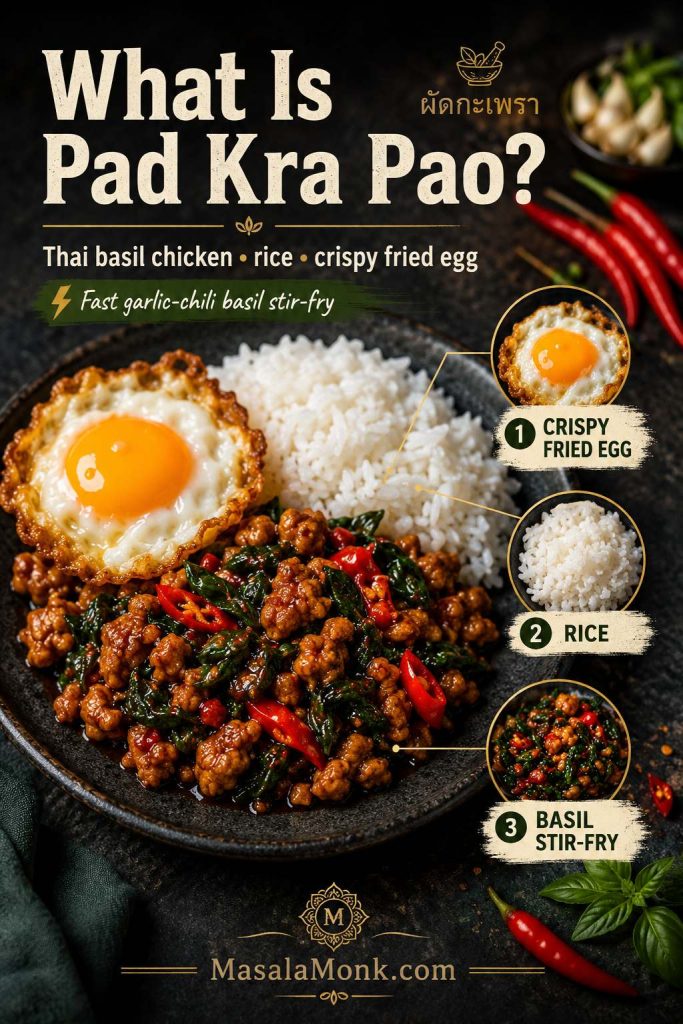
Labeled Pad Kra Pao plate with basil stir-fry, white rice, and crispy fried egg callouts.
If you know this dish as Thai basil chicken, the idea is the same: a fast garlic-chili basil stir-fry made to land on rice, usually with a crispy fried egg on top.

Why This Pad Kra Pao Works

The flavor does not come from marinating or simmering. It comes from a hot pan, crushed garlic and chilies, meat that sizzles instead of steams, sauce that reduces until glossy, and basil added right at the end.

Keep those five things in place and the dish tastes bold even with practical substitutions. When it works, the pan smells sharp with garlic and chilies, the meat looks shiny instead of wet, and the basil hits at the end with a fresh, peppery lift.

That rhythm is the whole dish: hot, sharp, glossy, fresh.

Pad Kra Pao, Pad Krapow, Pad Ka Pow: Why So Many Spellings?

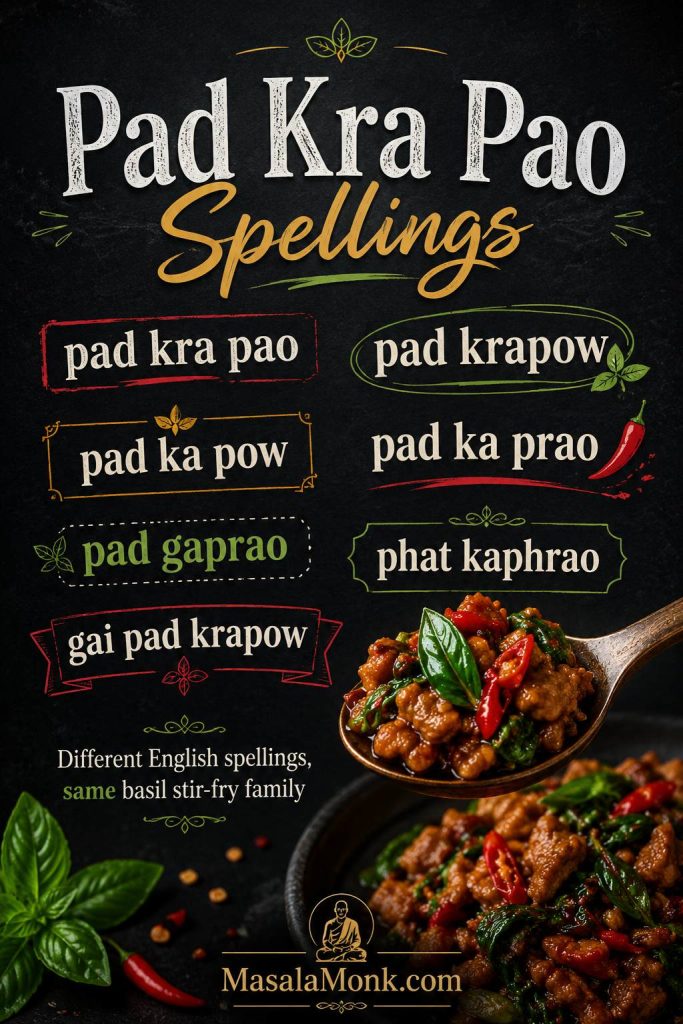
You may see this dish written as pad kra pao, pad krapow, pad ka pow, pad ka prao, pad gaprao, phat kaphrao, kra pao, or gai pad krapow. These spellings come from different ways of transliterating Thai into English.

For a home cook, the idea is simpler than the name: a hot, fast basil stir-fry with garlic, chilies, sauce, rice, and usually a fried egg. Here, we’ll call it Pad Kra Pao for consistency, but if a menu uses another spelling, you are still in the right place.

Editorial spelling guide for Pad Kra Pao with terms pad krapow, pad ka pow, pad gaprao, and a small plated basil stir-fry.
Because Thai names are transliterated several ways, pad kra pao, pad krapow, pad ka pow, and pad gaprao usually lead readers to the same basil-heavy stir-fry family.

Holy Basil vs Thai Basil

The basil question matters because it changes the flavor of the dish. It should not stop you from cooking, though.

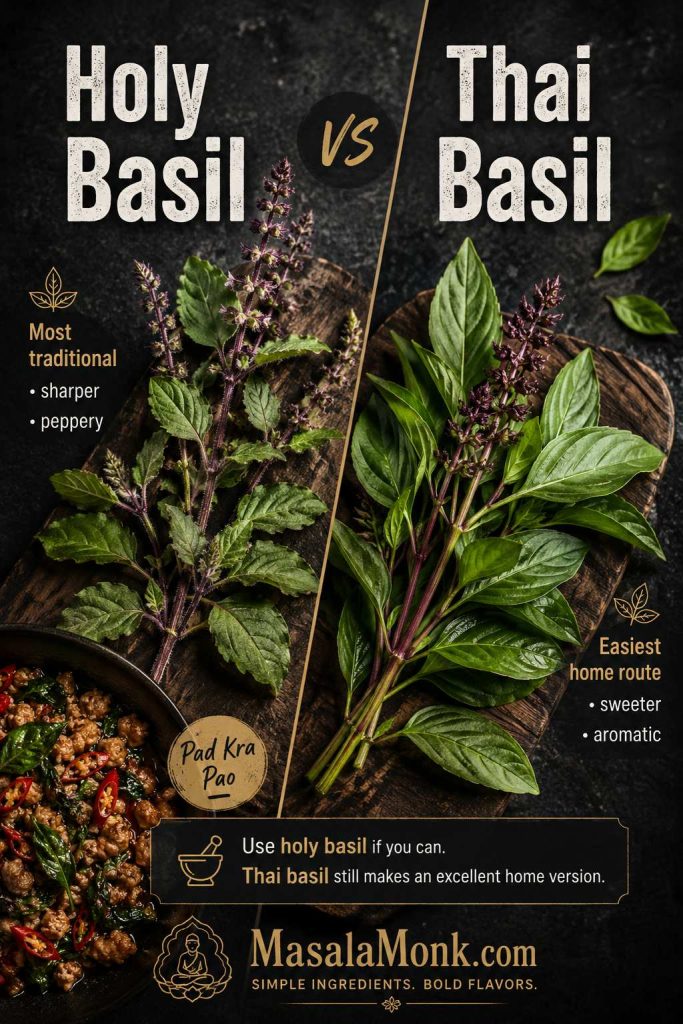
Strictly speaking, holy basil is what gives Pad Kra Pao its name and sharper, peppery character. Thai basil is the easiest excellent home-cook route: not identical, but fresh, aromatic, easy to find, and deeply satisfying in this garlic-chili rice plate. For a deeper Thai cooking perspective on the dish, see this explanation from Hot Thai Kitchen.

Comparison board showing holy basil and Thai basil leaves with flavor notes beside a small Pad Kra Pao dish.
Holy basil gives Pad Kra Pao its sharper traditional bite; however, Thai basil is often the easiest excellent route for a home-style Thai basil chicken plate.

Holy Basil

Holy basil is the most traditional choice for Pad Kra Pao. It has a sharper, peppery, slightly clove-like flavor. If you can find Thai holy basil at an Asian grocery store, use it.

The leaves wilt quickly, so add them at the very end. Do not simmer them for several minutes or the aroma will fade.

Thai Basil

For most home cooks, Thai basil is the easiest reliable substitute. Its aroma is sweeter and more anise-like than holy basil, and it is easier to find in many places.

Many restaurant-style Thai basil chicken recipes use Thai basil, so the flavor will still feel familiar and satisfying. If you are cooking this on a normal weeknight, do not let the basil question stop dinner.

Sweet Basil

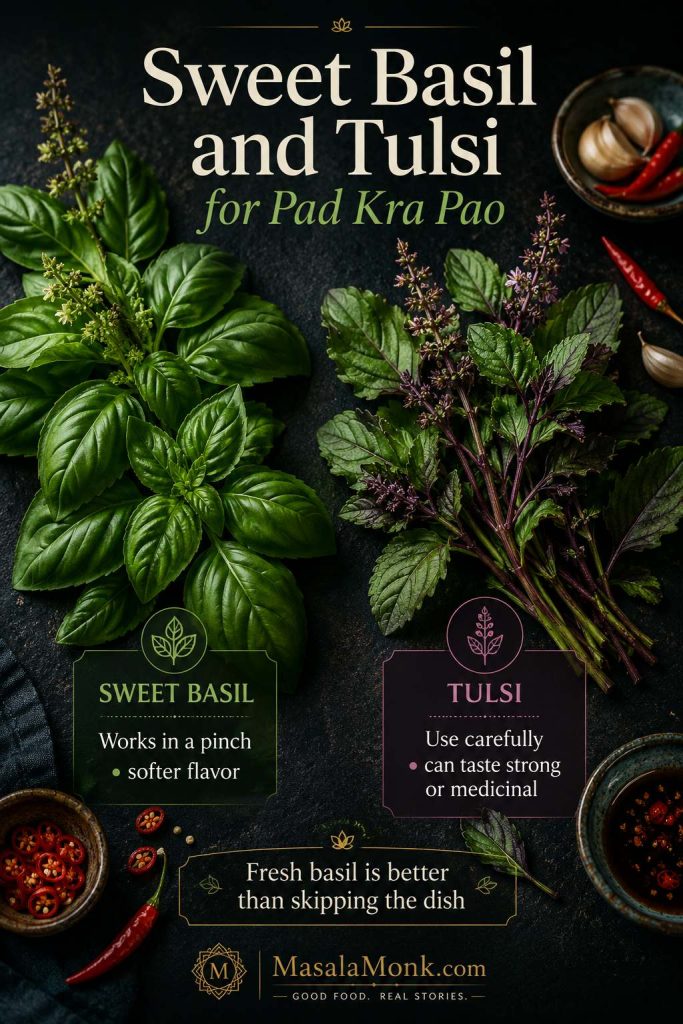
Sweet basil, also called Italian basil, will not taste the same as holy basil or Thai basil. Still, it can work when that is all you have.

The result will taste softer, sweeter, and less peppery. It may lean slightly toward a regular basil stir-fry rather than classic Pad Kra Pao, but it is better to make a good basil rice plate than to skip the dish completely.

Can You Use Tulsi?

Tulsi is related to holy basil, but it is not always a simple one-for-one replacement in cooking. Depending on the variety, it can taste medicinal, bitter, or very strong when used in large amounts.

If you want to try tulsi, use a smaller amount first and mix it with Thai basil or sweet basil if possible. Fresh basil in a hot pan is still better than waiting for the perfect herb and never cooking the dish.

Whatever basil you use, wash the leaves ahead of time and dry them well. Wet basil can splutter in the pan and add extra moisture right when you want the sauce to stay glossy.

Sweet basil and tulsi fallback herb board with notes about softer flavor and careful tulsi use.
When holy basil and Thai basil are not available, fresh herbs still help; sweet basil makes the dish softer, while tulsi should be used lightly because its flavor can turn strong.
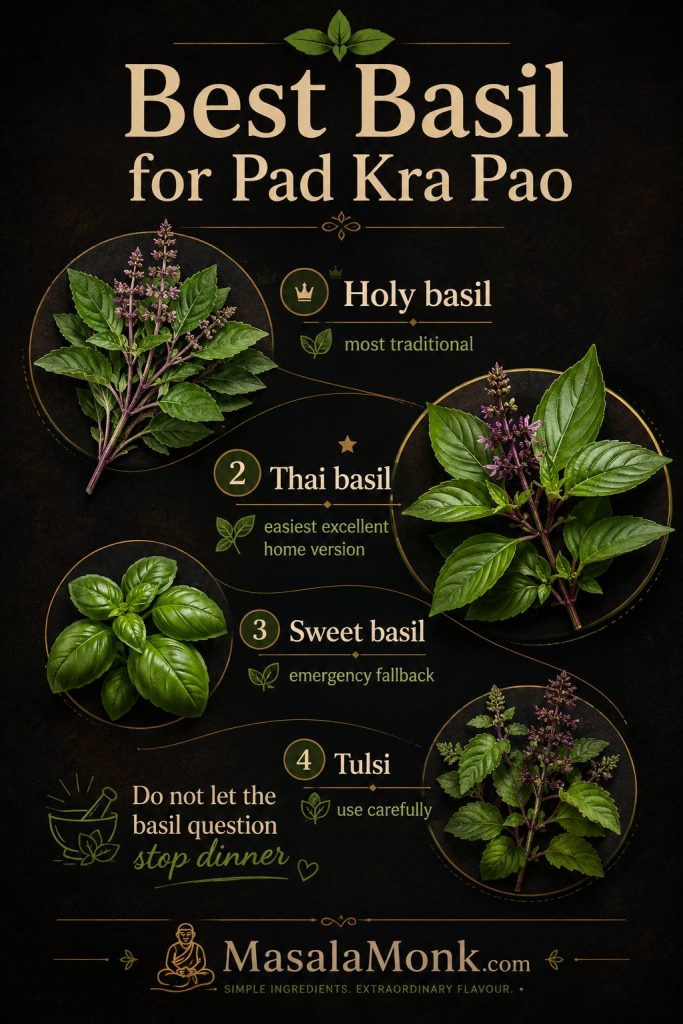
Simple basil rule: use holy basil if you can get it, Thai basil when you want the easiest excellent home version, sweet basil only if that is what you have, and tulsi carefully.

Already know your basil choice? Go to the ingredients.
Decision board comparing holy basil, Thai basil, sweet basil, and tulsi for Pad Kra Pao.
Use the best basil you can find, but do not pause dinner over the herb question; the bigger win is keeping the garlic-chili-basil structure intact.

Ingredients You Need

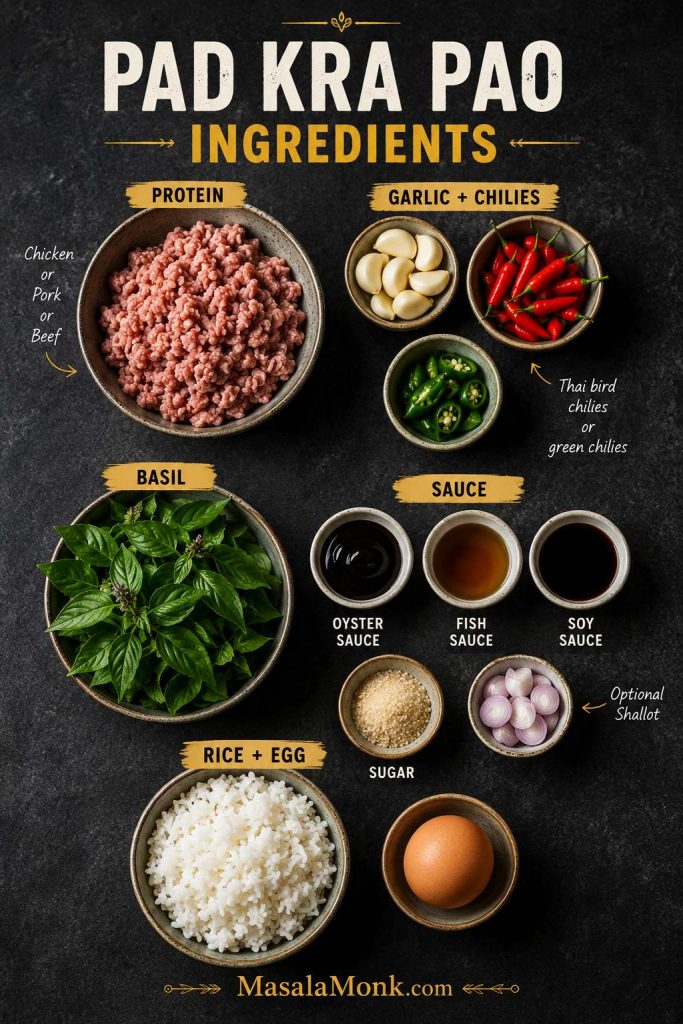
Pad Kra Pao is short on ingredients, but every ingredient has a job. Think of them in two groups: the loud things that wake up the pan — garlic, chilies, basil — and the salty-sweet sauce that makes the rice worth eating.

Overhead Pad Kra Pao ingredient map with protein, garlic, chilies, basil, sauce ingredients, rice, egg, and shallot.
The ingredients work in groups: protein catches the sauce, garlic and chilies wake up the pan, basil finishes fresh, and rice plus egg turn it into dinner.

Chicken, Pork, Beef, Tofu, or Eggplant

Ground meat is easiest because it cooks quickly and catches the sauce well. Use ground chicken, ground pork, ground beef, or finely chopped boneless meat. Hand-chopped chicken thigh gives a slightly chunkier, more restaurant-style bite.

For the main recipe, use 450g / 1 lb meat. If your pack is 500g, that is fine. You may need a small extra handful of basil or a splash more water, but do not automatically increase every sauce ingredient.

You do not need to marinate the meat. The flavor comes from the hot garlic-chili base, the sauce reducing onto the meat, and the basil added at the end.

Pork gives the juiciest, most classic-feeling version. Chicken is the version many people recognize from Thai restaurant menus. Beef gives a deeper, richer stir-fry.

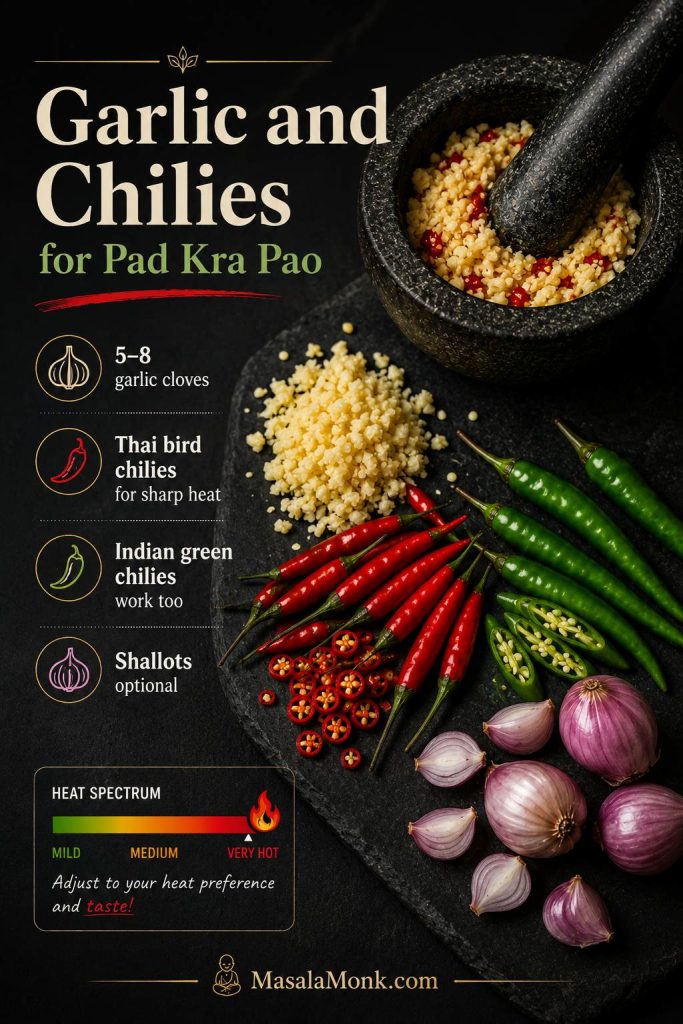
Garlic and Chilies

Do not be shy with garlic. Pad Kra Pao should taste bold.

Use 5–8 garlic cloves for 450g / 1 lb meat. For heat, use 3–6 Thai bird chilies, or use 2–4 Indian green chilies if that is what you have. For a mild family version, start with 1 Thai chili or 1 small green chili, then add extra chopped chilies at the table.

Shallots are optional. They add a little sweetness and body, but the dish still works without them.

A mortar and pestle gives the strongest aroma because it crushes the garlic and chilies instead of only cutting them. Finely chopping with a knife also works. The goal is rough, fragrant pieces, not a watery paste.

Garlic and chili guide with crushed garlic, Thai bird chilies, Indian green chilies, optional shallots, and a heat spectrum.
Garlic and chilies are not background flavor here; instead, they create the sharp first hit that keeps Pad Kra Pao from tasting like a regular soy-sauce stir-fry.

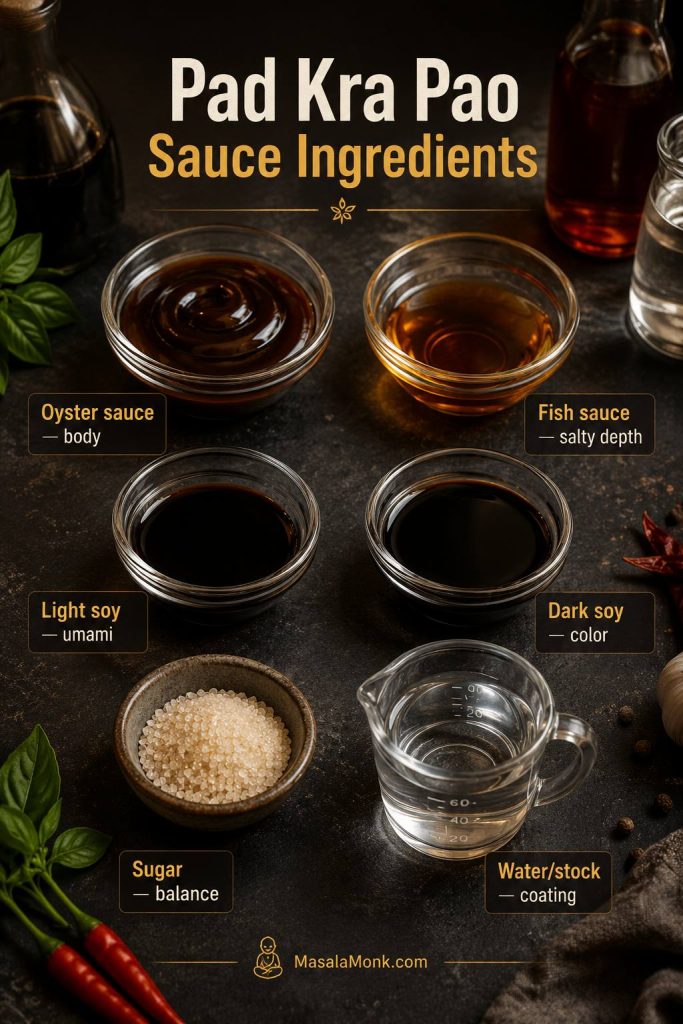
Sauce Ingredients

The sauce usually includes oyster sauce, fish sauce, light soy sauce, optional dark soy sauce, sugar, and a little water or stock.

Oyster sauce gives body and savory sweetness. Fish sauce gives salty depth. Light soy adds more salt and umami. Dark soy adds color, but the dish can still work without it. Sugar rounds the heat and salt.

For a vegetarian version, use vegetarian oyster sauce or mushroom sauce, replace fish sauce with light soy sauce, and keep the sugar modest because many mushroom sauces are already slightly sweet.

Pad Kra Pao sauce ingredients board with oyster sauce, fish sauce, light soy, dark soy, sugar, and water or stock role labels.
Oyster sauce gives body, fish sauce adds depth, soy brings umami, and a splash of water or stock helps the sauce coat instead of clump.

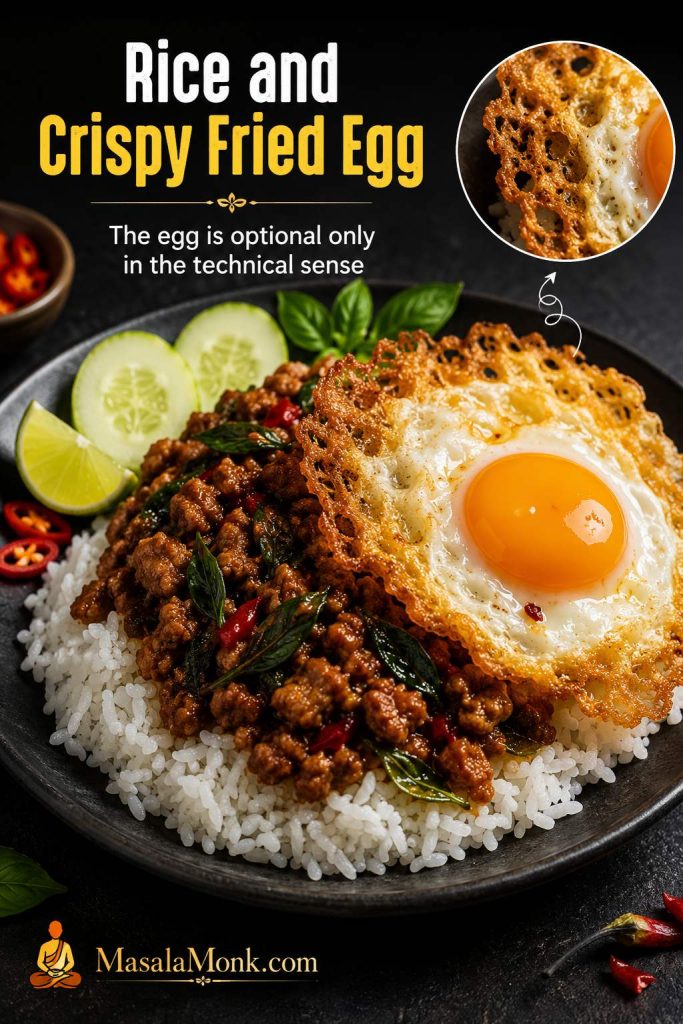
Rice and Crispy Fried Egg

Serve it over hot rice so the sauce has somewhere to land. Jasmine rice gives the most classic feel, but plain steamed rice, basmati, or even leftover rice will still do the job.

The crispy fried egg is optional only in the technical sense. In practice, it makes the plate feel complete. The runny yolk mixes with the salty basil stir-fry and rice, while the crisp edges add texture. If the egg yolk runs into the rice, that is not a problem. That is the point.

Pad Kra Pao rice plate with glossy basil meat, fluffy rice, a lacy crispy fried egg, and a close-up egg texture inset.
The crispy fried egg is more than garnish; once the yolk runs into hot rice, it softens the salty chili-basil stir-fry into a satisfying plate.

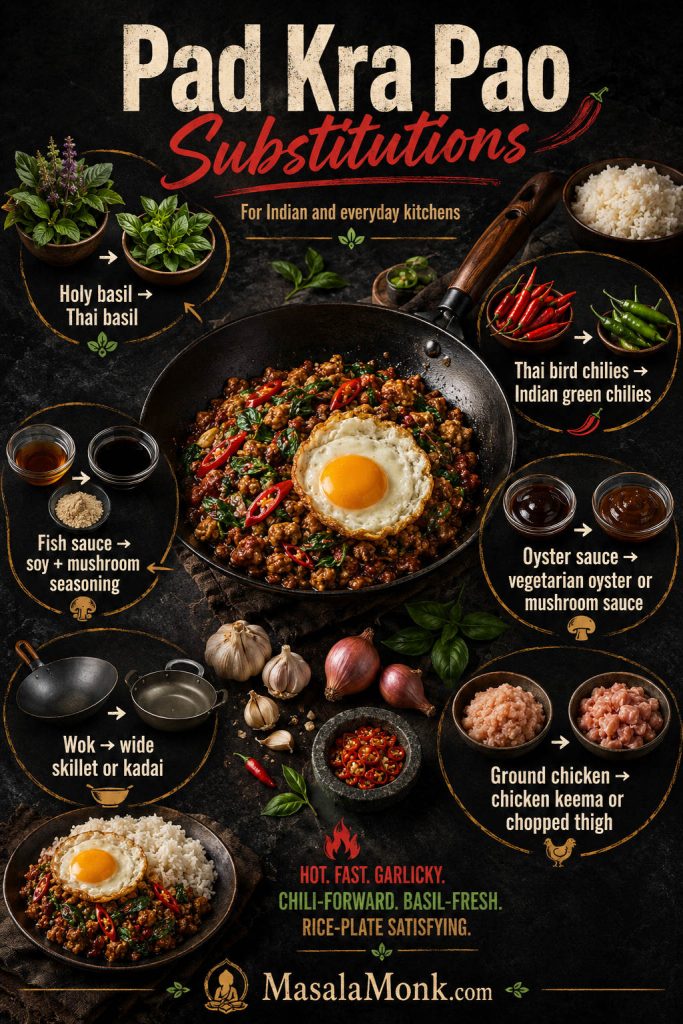
Easy Substitutions for Indian and Everyday Kitchens

Missing one bottle should not kill the dish. Losing the garlic-chili-basil structure will.

The goal is not to fake perfection. It is to keep the core of the dish intact with what you can actually buy.

Pad Kra Pao substitutions board for Indian kitchens with basil, green chilies, sauces, chicken keema, garlic, and a skillet or kadai cue.
Even with everyday swaps, keep the structure intact: fresh basil, sharp chilies, a salty-savory sauce, and a hot wide pan.
If You Do Not Have… Use This What Changes
Holy basil Thai basil Sweeter and more anise-like, but still excellent
Thai basil Sweet basil Softer and less peppery; still fresh and usable
Thai bird chilies Indian green chilies or serrano chilies Heat is less sharp, but the recipe still works
Dark soy sauce Skip it, or use a tiny extra splash of light soy Less dark color, but the flavor is still good
Fish sauce Light soy sauce plus a pinch of mushroom seasoning Less funky depth, but still savory
Oyster sauce Vegetarian oyster sauce or mushroom sauce Best vegetarian replacement for body and umami
Jasmine rice Plain steamed rice Less fragrant, but perfectly usable
Ground chicken Chicken keema or finely chopped boneless thigh Similar texture; chopped thigh stays juicier
Wok Wide skillet or wide kadai Works well if the pan is hot and not crowded

If your regular soy sauce is very dark and salty, use it like light soy sauce and skip the dark soy. Some supermarket soy sauces do not map neatly to “light soy” and “dark soy,” so taste and adjust gently.

The biggest substitution mistake is not using the “wrong” basil. It is crowding the pan and boiling the meat instead of stir-frying it. A hot, wide pan matters more than having every bottle exactly right.

Once your swaps are sorted, check the sauce ratio before you start cooking.

Best Pan and Equipment for Pad Kra Pao

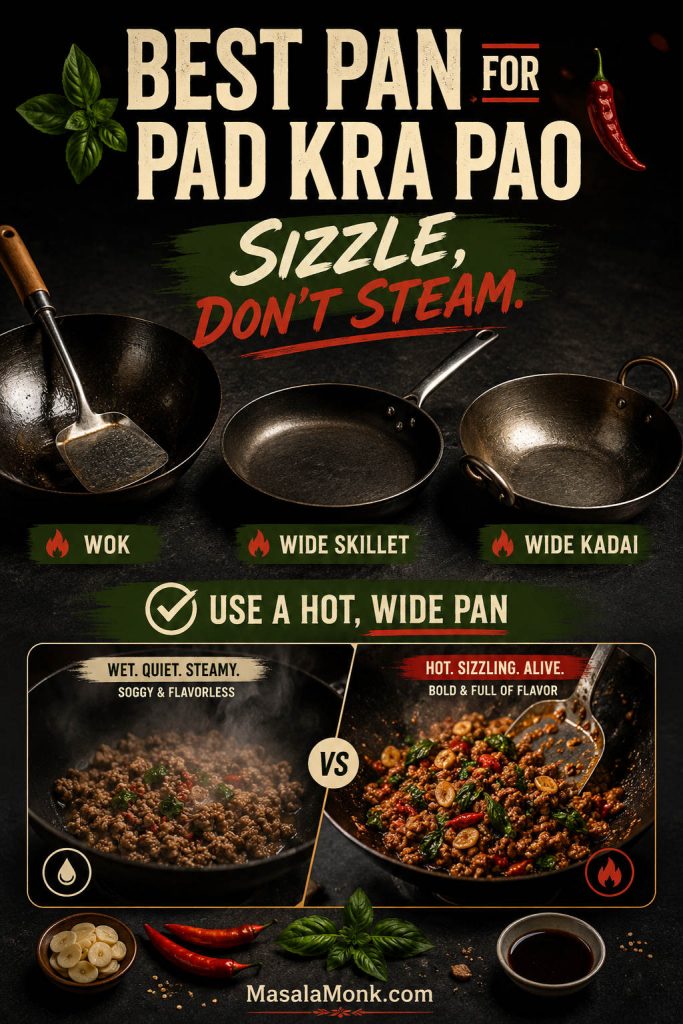
A wok gives you quick heat and fast evaporation, but a wide skillet works very well for home cooking.

Use a 12-inch / 30cm skillet if you do not have a wok. A wide kadai can also work if it gives the meat enough surface area. Avoid using a small deep pan for a full batch because the meat will steam and release liquid.

For nonstick pans, use medium-high heat instead of the highest possible heat. For a wok or stainless-steel skillet, high heat is fine as long as you keep the food moving.

You will also need a small bowl for the sauce, a knife or mortar and pestle for the garlic and chilies, and a small frying pan if you are making crispy eggs.

Pan rule: the meat should sizzle, not steam. If the pan sounds quiet and wet, it is not stir-frying yet.
Best pan guide showing wok, wide skillet, and wide kadai with a sizzle versus steam cue for Pad Kra Pao.
A wide hot pan is the difference between stir-fried and steamed meat; therefore, listen for a real sizzle before adding the sauce.

If your pan setup is ready, go straight to the method.

Pad Kra Pao Sauce Ratio

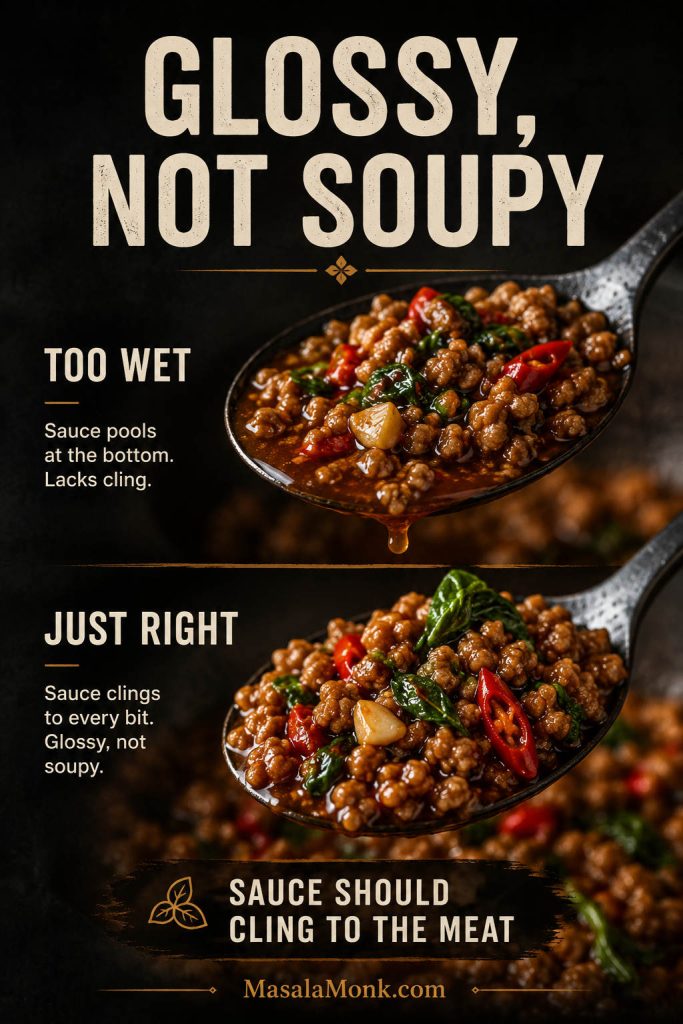
The sauce should cling to the meat first and season the rice second. It should look glossy, not soupy.

When the sauce hits the pan, it should bubble hard almost immediately. When it looks like the rice underneath will want a spoonful of it, but the pan is not swimming, you are in the right zone.

Texture comparison board showing too wet Pad Kra Pao versus just-right glossy meat with basil and chilies.
The best texture is glossy and spoonable, not soupy; once the sauce clings to the meat, it flavors the rice without flooding the plate.

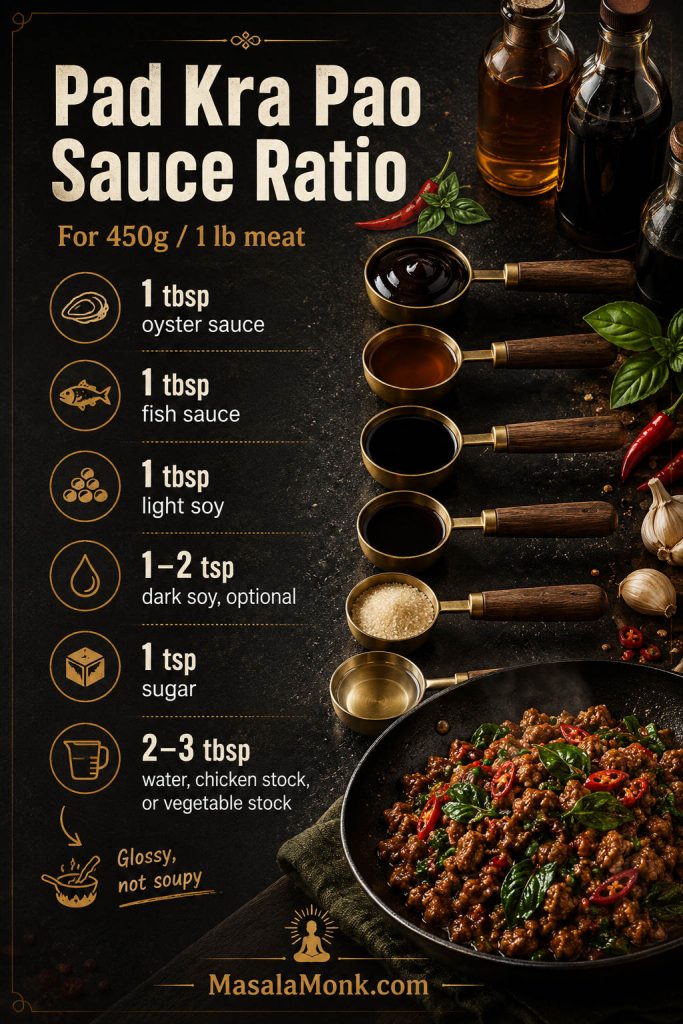
Balanced Sauce for 450g / 1 lb Meat

Ingredient Amount What It Does
Oyster sauce 1 tbsp / 15 ml Adds savory body and slight sweetness
Fish sauce 1 tbsp / 15 ml Gives salty, Thai-style depth
Light soy sauce 1 tbsp / 15 ml Adds salt and umami
Dark soy sauce 1–2 tsp / 5–10 ml, optional Adds color and deeper flavor
Sugar 1 tsp / about 4g Rounds the salt and chili heat
Water, chicken stock, or vegetable stock 2–3 tbsp / 30–45 ml Helps the sauce coat the meat
Saveable Pad Kra Pao sauce ratio card with measured oyster sauce, fish sauce, light soy, dark soy, sugar, and water or stock.
This Pad Kra Pao sauce ratio is built for 450g or 1 lb of meat, so the sauce should cling to the mince and lightly season the rice below.

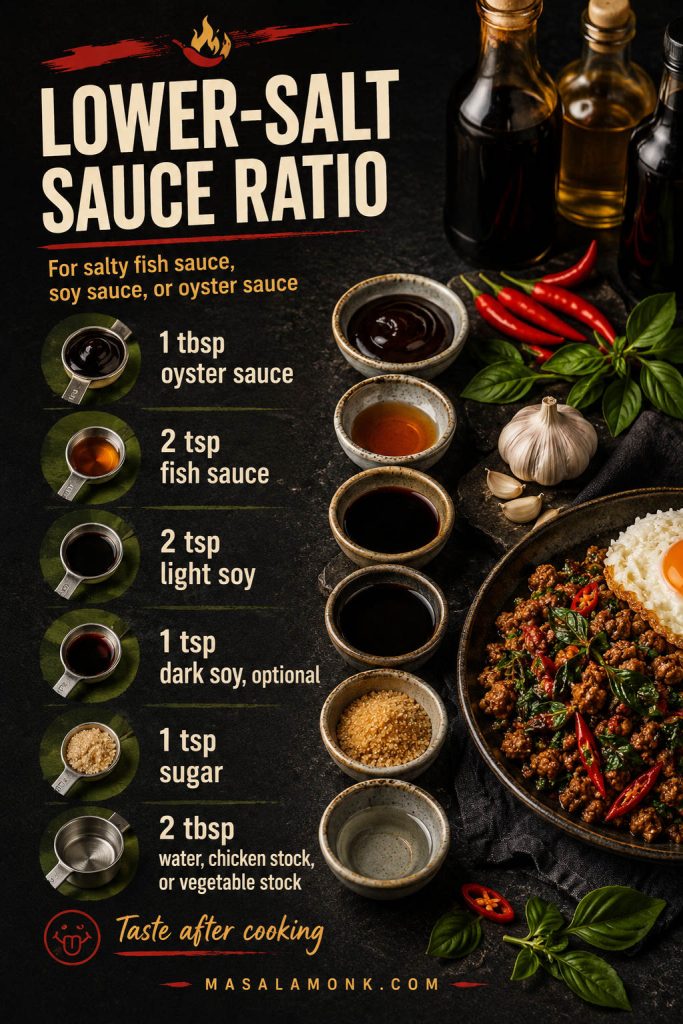
Lower-Salt Sauce Ratio

If your fish sauce, soy sauce, or oyster sauce tastes especially salty, use this version first.

Ingredient Amount
Oyster sauce 1 tbsp / 15 ml
Fish sauce 2 tsp / 10 ml
Light soy sauce 2 tsp / 10 ml
Dark soy sauce 1 tsp / 5 ml, optional
Sugar 1 tsp / about 4g
Water, chicken stock, or vegetable stock 2 tbsp / 30 ml
Lower-salt Pad Kra Pao sauce ratio card with smaller fish sauce and soy sauce amounts for salty sauce brands.
If your fish sauce or soy sauce tastes very salty, start lower; then, after cooking, balance the plate with rice, lime, or a small extra splash of sauce.

Sauce brands vary, especially oyster sauce and soy sauce. If yours tastes very salty or very sweet straight from the bottle, start with the lower-salt ratio and adjust after cooking.

Taste after cooking. If the stir-fry is too salty, serve it with more rice and reduce fish sauce next time. If it tastes flat, it may need more garlic, chili, basil, or a better salt-sugar balance.

Once the sauce is mixed, move to the cooking method.

How to Make Pad Kra Pao

Pad Kra Pao cooks quickly, so the method is more about timing than difficulty. Once everything is lined up, the cooking feels fast rather than stressful.

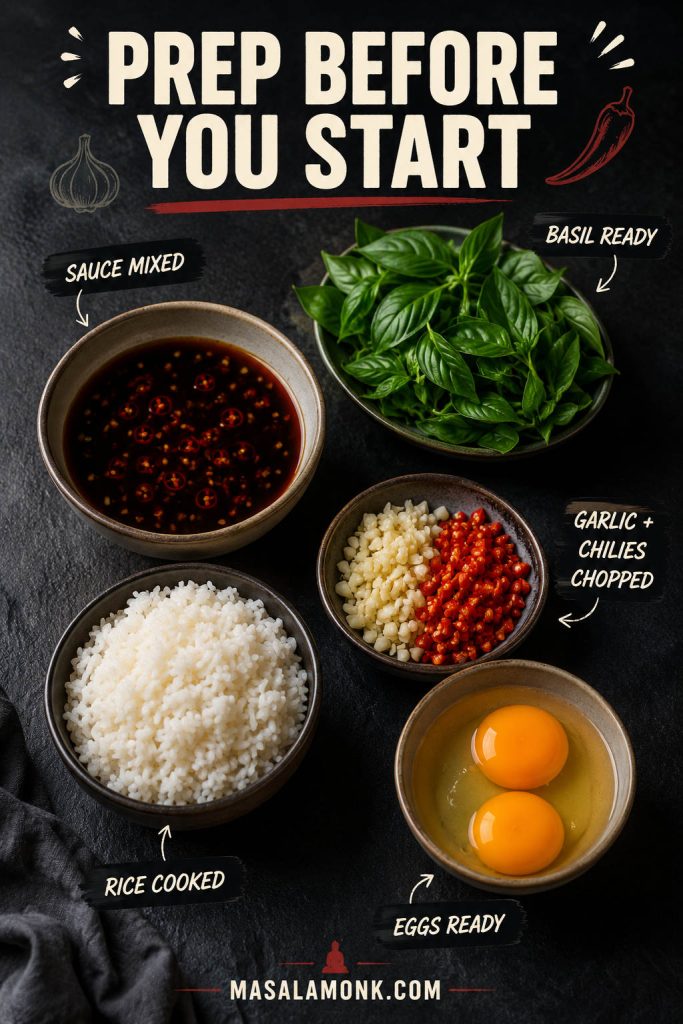
Before turning on the stove, have the sauce mixed, basil picked and dried, garlic and chilies chopped, rice cooked, and eggs ready to fry. Once the pan is hot, there is not much time to stop and measure.

Pad Kra Pao prep setup with mixed sauce, basil, chopped garlic and chilies, cooked rice, and eggs on a dark surface.
Because Pad Kra Pao moves fast, prep the sauce, basil, aromatics, rice, and eggs first; then the cooking feels quick instead of chaotic.

Cook the Rice First

Start the rice before you cook the stir-fry. Once the garlic and chilies hit the pan, the dish moves fast.

Jasmine rice is the classic choice, but any plain steamed rice will work. If rice timing or water ratios are the part that usually slows you down, MasalaMonk’s guide to cooking perfect rice can help you get the base ready before the stir-fry starts. Avoid heavily seasoned rice because the stir-fry already has plenty of salt, chili, garlic, and basil.

Mix the Sauce Before You Start

Stir the oyster sauce, fish sauce, soy sauces, sugar, and water or stock in a small bowl.

Measure the sauce first, because garlic can burn while you are still looking for bottles.

Pound or Chop Garlic and Chilies

For the strongest aroma, pound garlic and chilies together in a mortar and pestle until roughly crushed. You do not need a smooth paste.

If you do not have a mortar and pestle, finely chop everything with a knife. A mini chopper also works, but stop before the mixture turns wet and pasty.

Fry the Crispy Egg

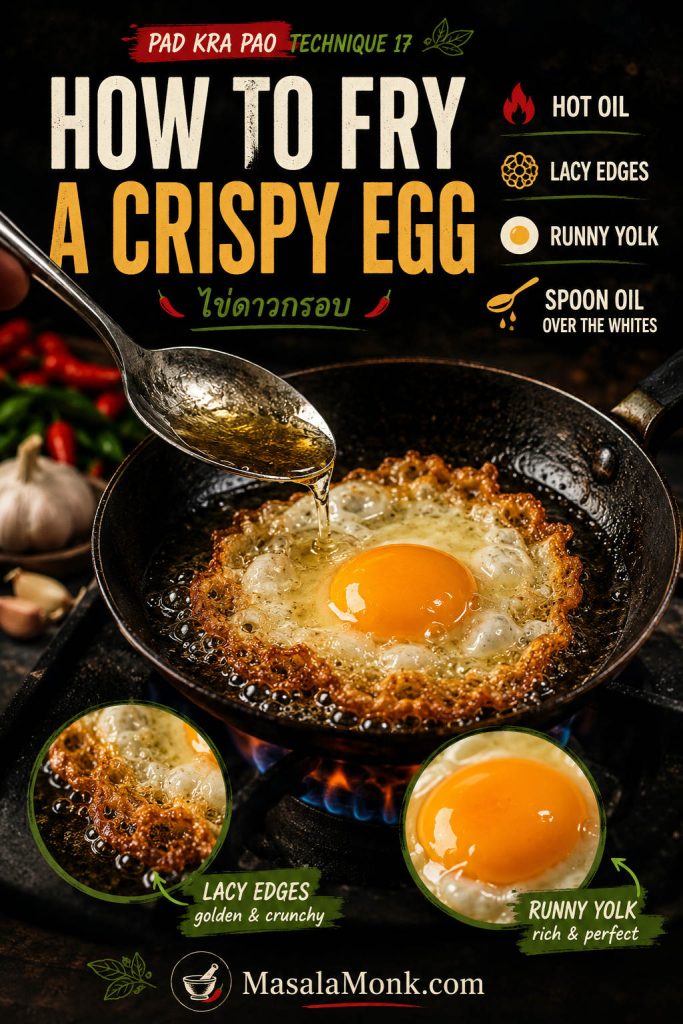
For each serving, use one egg. Heat 2–3 tablespoons of oil in a small pan, then fry the eggs one at a time or in batches. Add a little more oil between eggs only if the pan gets dry.

Crack in the egg and spoon hot oil over the whites until the edges are crisp and lacy. Keep the yolk runny if you like the classic rice-plate effect.

You can fry the eggs before the stir-fry and set them aside, or fry them right after the stir-fry if you prefer the egg hot from the pan.

Crispy fried egg technique board with hot oil, lacy golden edges, runny yolk, and spooning oil over the whites.
For a Thai-style crispy egg, hot oil matters; spoon it over the whites so the edges turn lacy while the yolk stays rich.

Stir-Fry the Meat Hot and Fast

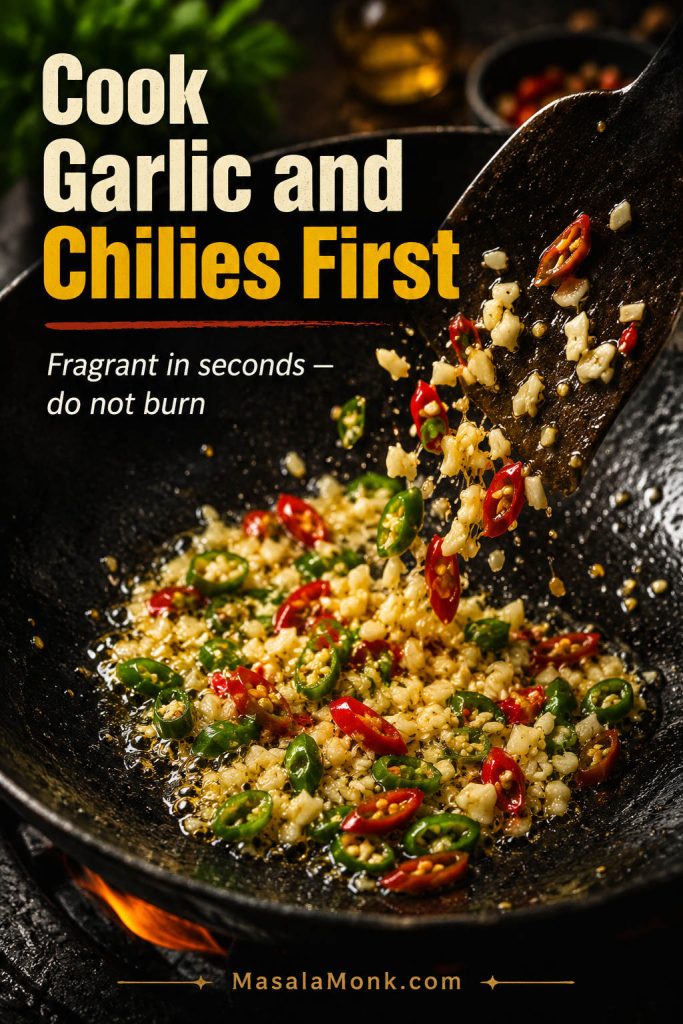
Heat a wok over high heat, or use medium-high heat if you are cooking in a nonstick skillet. Add oil, then the garlic, chilies, and optional shallots.

The garlic and chilies should become fragrant within seconds. Do not let the garlic turn dark brown. This is the point where the kitchen should smell sharp, garlicky, and a little wild.

Garlic and sliced red and green chilies sizzling in oil in a wok with a spatula.
This is the aroma stage, so move quickly: the garlic should smell sharp and toasty before it gets dark.

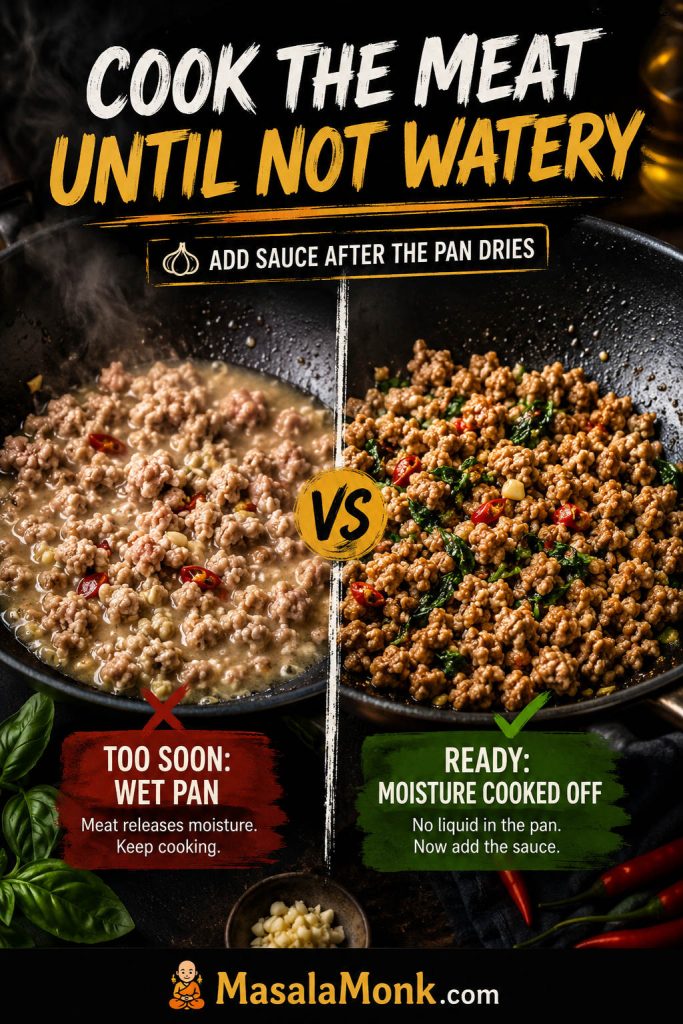
Add the meat and break it up as it cooks. It should sizzle, not sit in liquid. If it releases moisture, spread it across the pan and keep cooking until most of that moisture evaporates.

If you add the sauce while the pan is still watery, the finished dish can taste boiled instead of stir-fried.

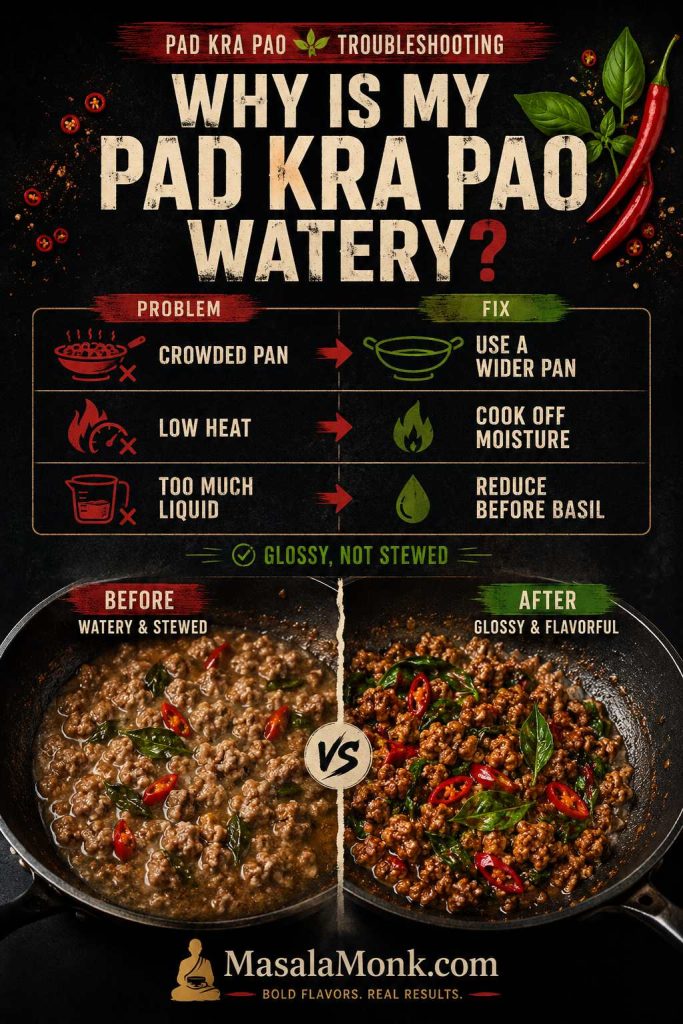
Before-and-after pan comparison showing wet minced meat versus moisture-cooked-off meat ready for sauce.
Add sauce only after the released moisture cooks off; otherwise, Pad Kra Pao turns boiled and watery instead of glossy.

If your pan is already looking wet, jump to the troubleshooting guide before adding basil.

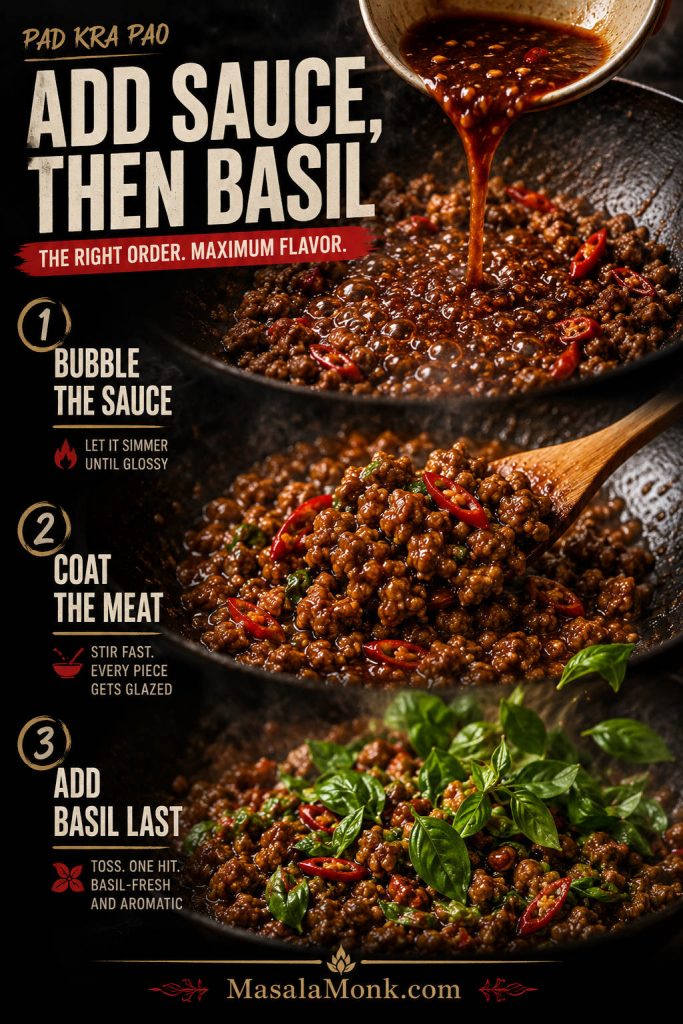
Add Sauce and Reduce Until Glossy

Pour in the sauce and toss well. It should bubble quickly, coat the meat, and tighten around the pieces instead of pooling underneath.

If the pan looks dry, add 1–2 tablespoons of water or stock. If the pan looks soupy, keep cooking over high heat for another minute before adding basil.

The finished meat should look shiny and loose, not wet or clumpy.

Add Basil at the End

Turn the heat down or off, then add the basil leaves. Toss just until wilted.

Once the basil hits the hot meat, the whole pan should wake up. Long cooking dulls that aroma, so let the leaves collapse into the stir-fry and stop there.

Sequential board showing sauce bubbling into minced meat, coating the meat, and fresh basil added last.
Sauce goes in before basil because it needs heat to reduce; meanwhile, basil should only wilt at the end so the aroma stays fresh.

Serve Immediately

Spoon the basil stir-fry over hot rice. Add a crispy fried egg, cucumber slices, and lime if you like.

The first bite should be hot, salty, fresh, and softened by rice and yolk. This is not a dish that improves by sitting around, so serve it while the basil still smells alive.

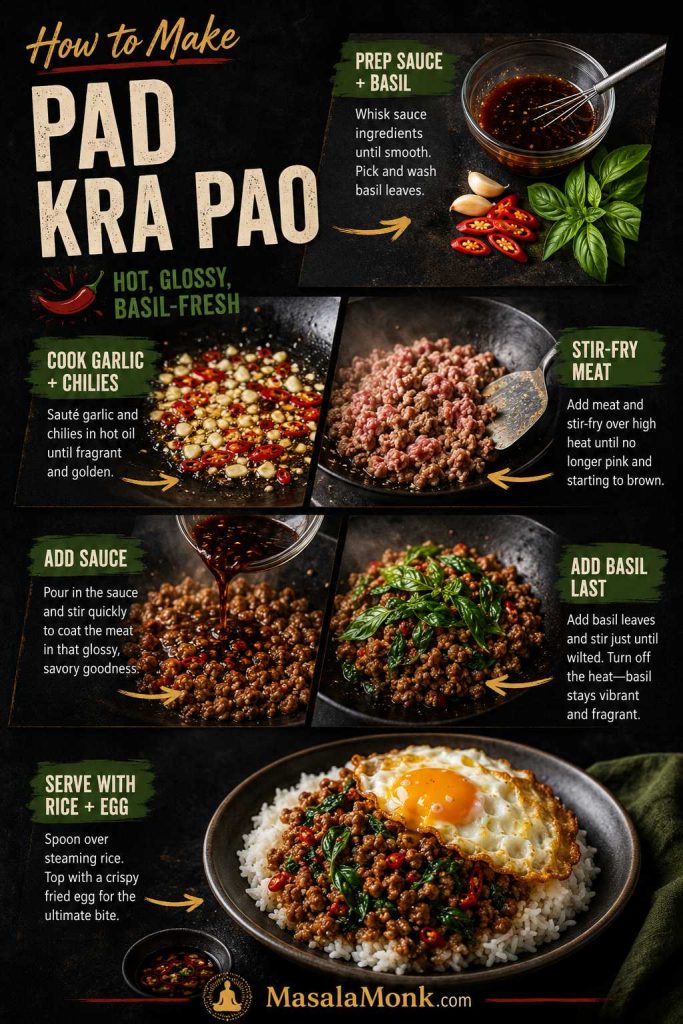
Step-by-step Pad Kra Pao board with sauce, basil, garlic and chilies, stir-fried meat, sauce, basil, and a finished rice plate.
The method is simple when the order is clear: prep first, cook aromatics, brown the meat, reduce the sauce, then add basil right at the end.

Chicken, Pork, or Beef: Which Version Should You Make?

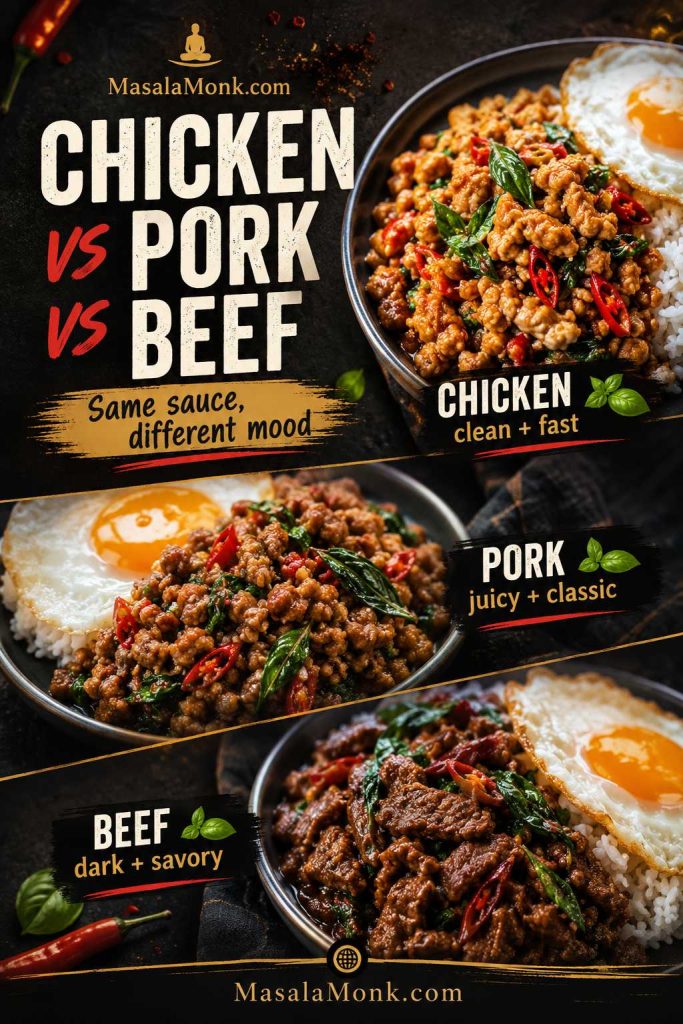
The same sauce and method work for chicken, pork, or beef, but each one gives the plate a different mood.

Choose chicken for the cleanest restaurant-style Thai basil chicken, pork for the juiciest street-food-style version, and beef for the darkest, most savory bowl.

Three-way Pad Kra Pao chooser board comparing chicken, pork, and beef rice plates with text labels.
The same sauce can lead to three moods: chicken is clean and fast, pork is juicy and classic, and beef is darker and more savory.

Once you choose the protein, use the recipe card for exact quantities and timing.

Thai Basil Chicken Version

For Thai basil chicken, use ground chicken, chicken keema, or finely chopped boneless chicken thigh.

Hand-chopped thigh gives little juicy pieces that catch the sauce, while ground chicken keeps the dish quick and familiar. Chicken breast works too, but it dries out faster, so chop it small and cook it quickly.

This is the lightest, fastest version and lets the basil come through clearly.

Thai basil chicken plate with glossy chicken pieces, red chilies, basil, rice, cucumber, lime, and crispy fried egg.
Thai basil chicken is the cleanest, fastest version; however, it still needs enough garlic, chilies, and basil to taste bold.

Pork Pad Kra Pao Version

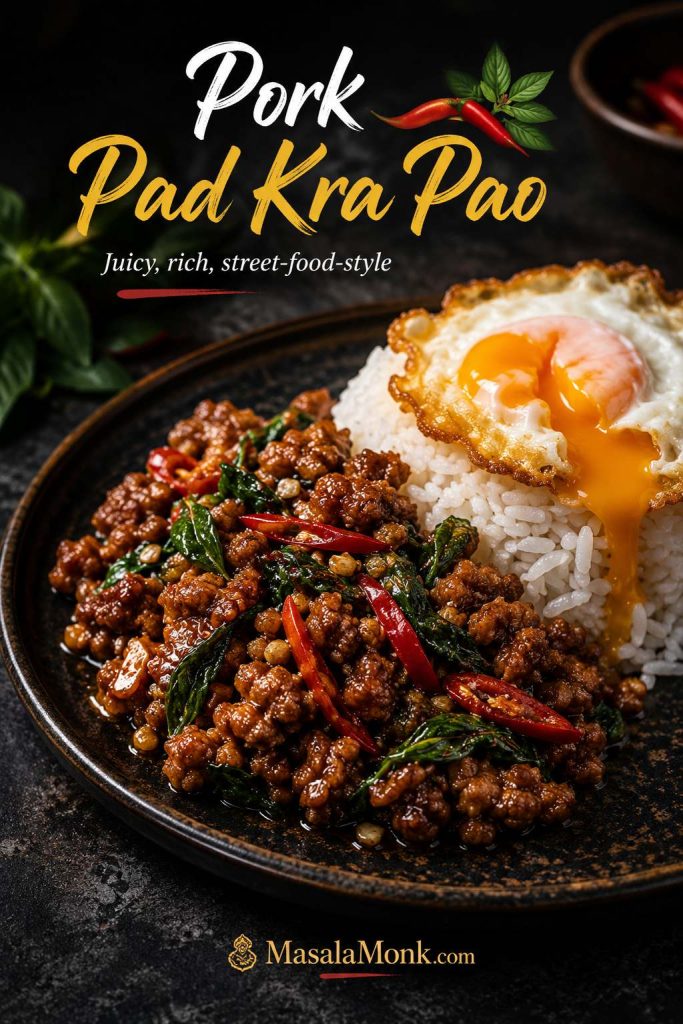
Ground pork gives the richest, juiciest Pad Kra Pao. It is the version to make when you want the dish to feel more street-food-style and deeply satisfying.

Use 450g / 1 lb ground pork. If the pork is fatty, use slightly less oil and let some edges brown before adding the sauce. If it is very lean, keep the full 2 tablespoons of oil and avoid overcooking.

The fat carries the garlic and chili beautifully, especially if you can find holy basil.

Pork Pad Kra Pao plate with glossy browned pork mince, basil, red chilies, rice, and a crispy egg with runny yolk.
Pork gives the juiciest Pad Kra Pao because the fat carries garlic and chili especially well, while the egg makes the rice plate feel complete.

Thai Basil Beef Version

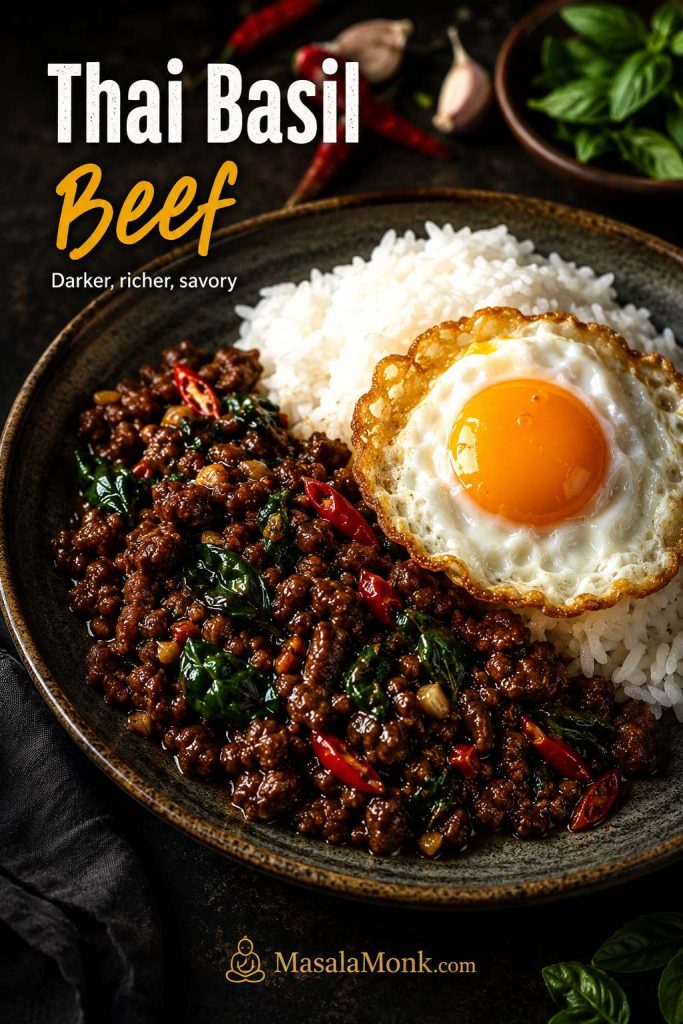
Thai basil beef gives the deepest, most savory bowl. Use ground beef, minced beef, or very thinly chopped steak.

Beef needs a hot, wide pan. If it steams instead of browns, the flavor turns flat. Cook in batches if needed, and use the higher end of the dark soy sauce range if you want a deeper color.

This is the version for a darker, richer rice plate with a strong garlic-chili base.

Thai basil beef rice plate with dark glossy beef, basil, red chilies, white rice, and crispy fried egg.
Thai basil beef should taste deeper and more savory than chicken, so keep the pan hot enough to brown without turning the basil dark.

Vegetarian, Tofu, and Eggplant Options

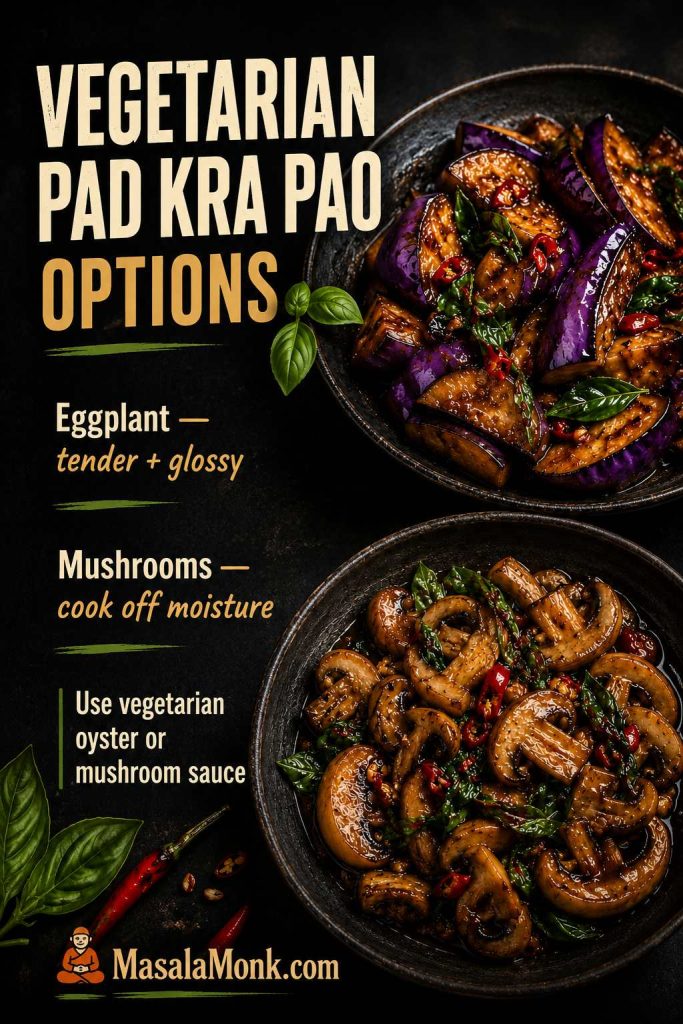
You can make a vegetarian Pad Kra Pao-style stir-fry with tofu, eggplant, mushrooms, or a mix of vegetables. These versions are not exactly the same as the classic meat rice plate, but the same garlic-chili-sauce-basil structure works well if you control moisture.

The best vegetarian version still needs the same attitude as the meat version: high heat, strong aromatics, and enough basil that the pan smells alive at the end.

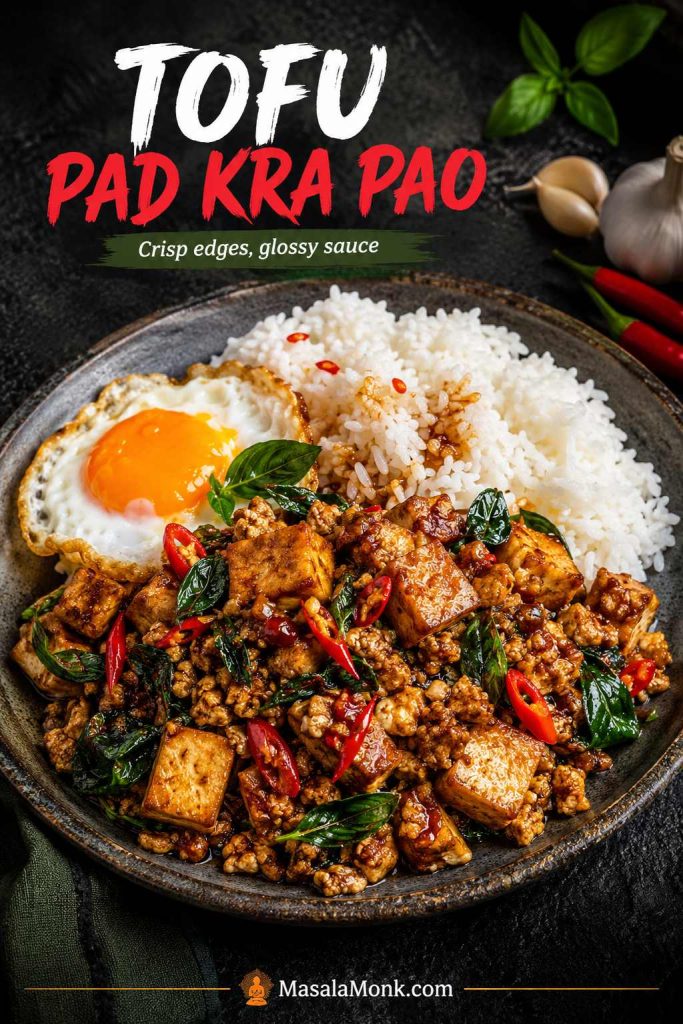
For tofu, use firm or extra-firm tofu. Press it if it is very wet, then crumble it into small pieces. Cook it in a hot pan until the edges look lightly browned. The goal is the same as with meat: drive off moisture first, then let the sauce cling instead of slide off.

Tofu Pad Kra Pao plate with crisp glossy tofu, basil, red chilies, rice, and fried egg on a dark plate.
Tofu works best when it gets crisp edges first; after that, the sauce can cling instead of sliding off a wet surface.

If tofu is your main protein more often than a one-time swap, MasalaMonk’s tofu meal prep ideas go deeper into pressing, browning, saucing, and building rice-box style meals that still taste good later.

For eggplant, cut it into small pieces and cook it until tender before adding the sauce. Eggplant absorbs oil, so use a wide pan and avoid stirring too aggressively once it softens.

For mushrooms, cook them until their liquid evaporates. Then add the garlic-chili base, sauce, and basil.

Vegetarian Pad Kra Pao options board with glossy eggplant bowl and browned mushroom bowl with basil and red chilies.
Eggplant should turn tender and glossy, while mushrooms need their moisture cooked off first; otherwise, the vegetarian version can taste watery.

Use vegetarian oyster sauce or mushroom sauce. Replace fish sauce with soy sauce and, if you have it, a small pinch of mushroom seasoning.

For vegetarian sauce swaps, use the substitution guide before cooking.

What to Serve With Pad Kra Pao

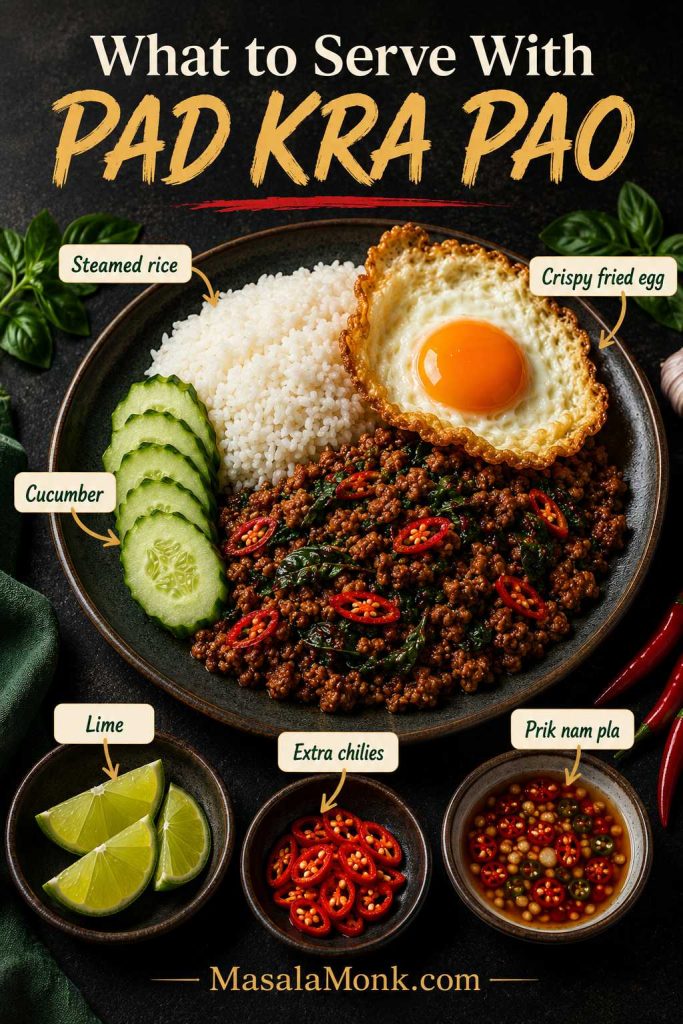
Pad Kra Pao is usually served as a rice plate, not as a saucy curry. Keep the sides simple so the basil, garlic, chilies, and fried egg stay in focus.

  • Steamed jasmine rice
  • Crispy fried egg
  • Cucumber slices
  • Lime wedges
  • Extra chopped chilies
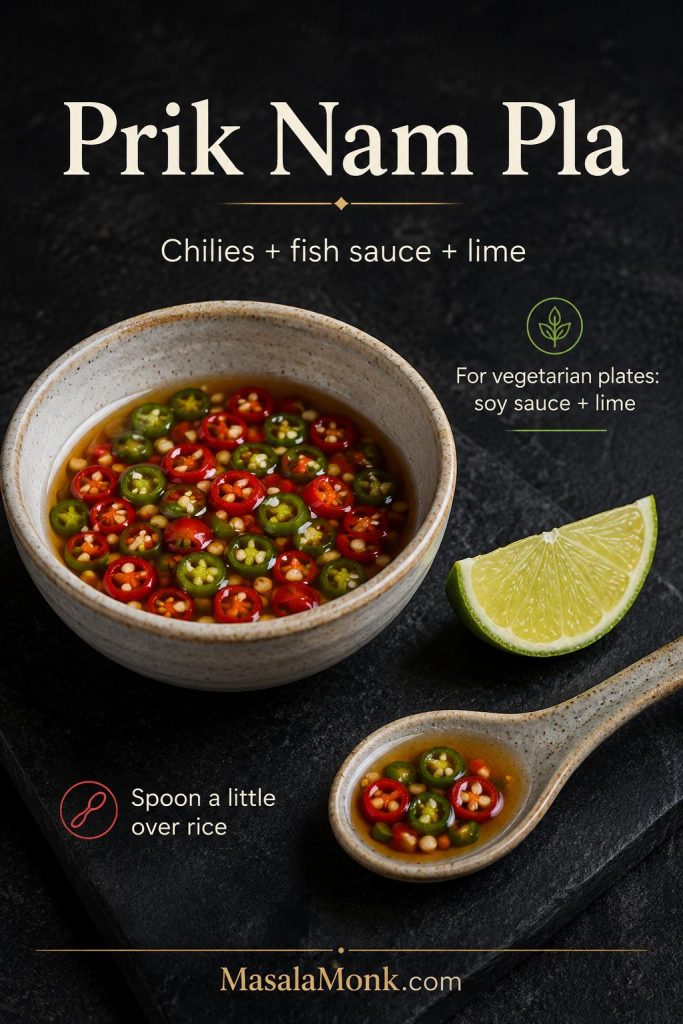
  • Prik nam pla — chopped chilies in fish sauce and lime — or soy sauce and lime for a vegetarian plate
Serving spread for Pad Kra Pao with rice, crispy fried egg, cucumber, lime, extra chilies, and prik nam pla labels.
The best sides are simple on purpose: cucumber cools the heat, lime brightens the sauce, extra chilies add control, and prik nam pla sharpens the rice.

Cucumber is especially useful because it cools the heat and gives the plate a fresh crunch. If you want that cooling side to feel a little more complete, a simple cucumber salad works well beside the hot basil stir-fry.

For a brighter Thai-style side, you can also serve it with a small portion of vegan Som Tam raw papaya salad. The crunch, lime, chili, and freshness make sense next to the rich fried egg and savory basil meat.

For the table-side chili condiment, keep the spoonful small and bright rather than drowning the rice.

Prik nam pla condiment bowl with sliced red and green chilies in fish sauce and lime, plus a soy-lime vegetarian note.
Prik nam pla adds salty heat in tiny spoonfuls; for vegetarian plates, soy sauce with lime gives a similar bright table-side lift.

If you bought a large bunch of basil, use the extra leaves quickly in another fresh herb recipe rather than letting them wilt. This dish is best when the basil tastes alive, not tired.

How to Fix Pad Kra Pao

Most Pad Kra Pao problems come from heat, timing, or sauce balance. Fortunately, the fixes are usually simple once you know what happened.

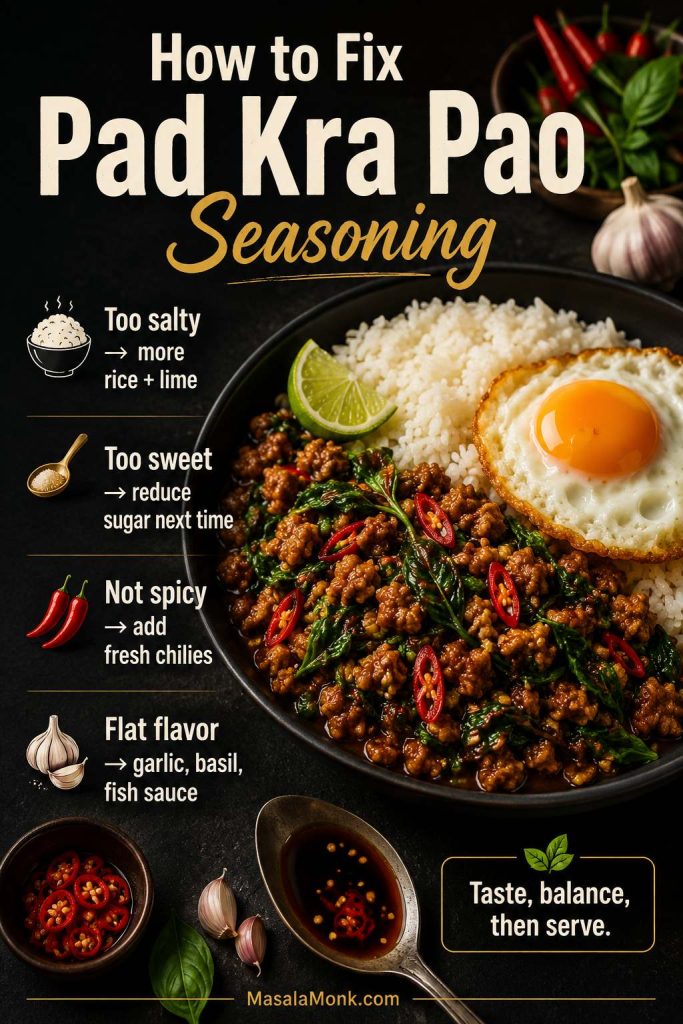
Fast diagnosis: watery usually means crowding or low heat, bland usually means weak garlic-chili-basil energy, salty usually means the sauce needs more rice or a lower-salt ratio, and dull basil flavor usually means the basil cooked too long.
Seasoning troubleshooting board for Pad Kra Pao with rice, lime, chilies, garlic, basil, fish sauce, and a glossy stir-fry bowl.
Fix the plate before you panic: rice and lime soften salt, fresh chilies restore heat, and garlic, basil, or fish sauce can wake up flat flavor.

Too Watery

Watery Pad Kra Pao almost always means the meat steamed before it fried.

Keep cooking until the liquid evaporates before adding basil. Next time, use a wider pan, higher heat, and do not double the recipe in one skillet. For larger batches, cook the meat in rounds.

Troubleshooting board showing watery Pad Kra Pao from a crowded pan and low heat beside glossy fixed stir-fry.
Watery Pad Kra Pao usually starts before the sauce goes in, so use a wider pan and cook off moisture before adding basil.

Sauce Is Pooling Under the Meat

Pooling sauce usually means the sauce went in before the pan was ready.

Keep the pan on high heat and toss until the sauce clings to the meat. Next time, start with 2 tablespoons water or stock, then add more only if the pan looks dry.

Too Salty

Salty Pad Kra Pao is usually easiest to fix on the plate, not in the pan.

Serve it with more plain rice and add a squeeze of lime. Next time, use the lower-salt sauce ratio and reduce fish sauce and light soy before reducing oyster sauce, because oyster sauce also gives body.

Too Sweet

Too much sweetness usually comes from sweet oyster sauce, dark sweet soy, or too much sugar.

To balance the current batch, add a small splash of fish sauce or light soy and serve it with plain rice. Next time, keep the added sugar modest.

Too Dry

If the meat tastes plain and dry instead of glossy, the pan probably needed a small splash of liquid near the end.

Add 1–2 tablespoons of water or stock and toss briefly over heat. The meat should be glossy enough to season the rice, not dry like plain mince.

Not Spicy Enough

If the dish tastes warm but not lively, the chilies are probably too mild or too few.

Add more chopped fresh chili next time, or serve extra chilies on the side. Fresh chilies give sharper flavor and better aroma than chili flakes alone.

Tastes Like Generic Stir-Fry

If it tastes like a regular soy-sauce stir-fry, the sharp things have been muted: garlic, chili, fish sauce, basil, or heat.

Use enough fresh basil, add it at the end, and make sure the sauce reduces onto the meat instead of staying loose in the pan.

Not Enough Basil Flavor

Weak basil flavor usually means one of two things: too little basil, or basil added while the pan was still boiling.

Use 1½–2 cups basil leaves for 450g / 1 lb meat. Add them only at the end and toss just until wilted.

Basil Turned Dark or Lost Its Aroma

Basil turns dull when it cooks too long.

Add it after the sauce has reduced and the heat is low or off. The leaves should wilt into the meat, not simmer.

Garlic Tastes Burnt

Burnt garlic means the aromatics waited too long before the meat went in.

Next time, stir the garlic and chilies only until fragrant, then add the meat as soon as the garlic smells sharp and toasty.

Meat Turned Rubbery

Rubbery meat is usually an overcooking problem, especially with chicken breast or lean beef.

Stir-fry until just cooked, reduce the sauce quickly, then finish with basil.

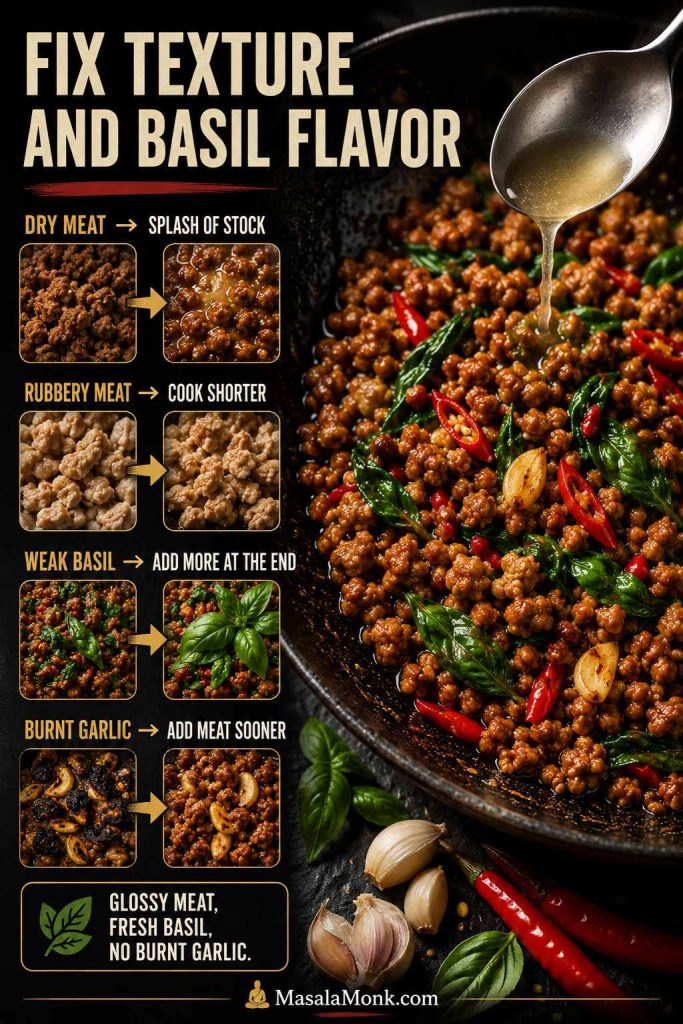
For texture and basil problems, focus on timing: keep the meat glossy, keep the garlic golden, and add basil only at the end.

Texture and basil troubleshooting board with dry meat, rubbery meat, weak basil, burnt garlic, glossy meat, basil leaves, and spooned stock.
Texture problems have small fixes: a splash of stock rescues dry meat, shorter cooking prevents rubbery meat, and basil belongs at the end.

Need to cook another batch instead? Return to the recipe card with the fixes in mind.

Storage and Reheating

Pad Kra Pao tastes best immediately, when the basil is fresh and the egg is crisp, but leftovers are still useful.

Store the cooked stir-fry in an airtight container in the fridge for up to 3 days. That sits within the USDA’s general 3–4 day guidance for refrigerated leftovers. Store rice separately if possible. Fried eggs are best cooked fresh, but you can skip the egg when reheating and fry a new one before serving.

To reheat, warm the stir-fry in a skillet with a splash of water. Heat just until hot. Do not cook it for too long or the basil flavor will fade further.

Leftovers will not have the same just-wilted basil aroma, but they still make a very good rice bowl the next day.

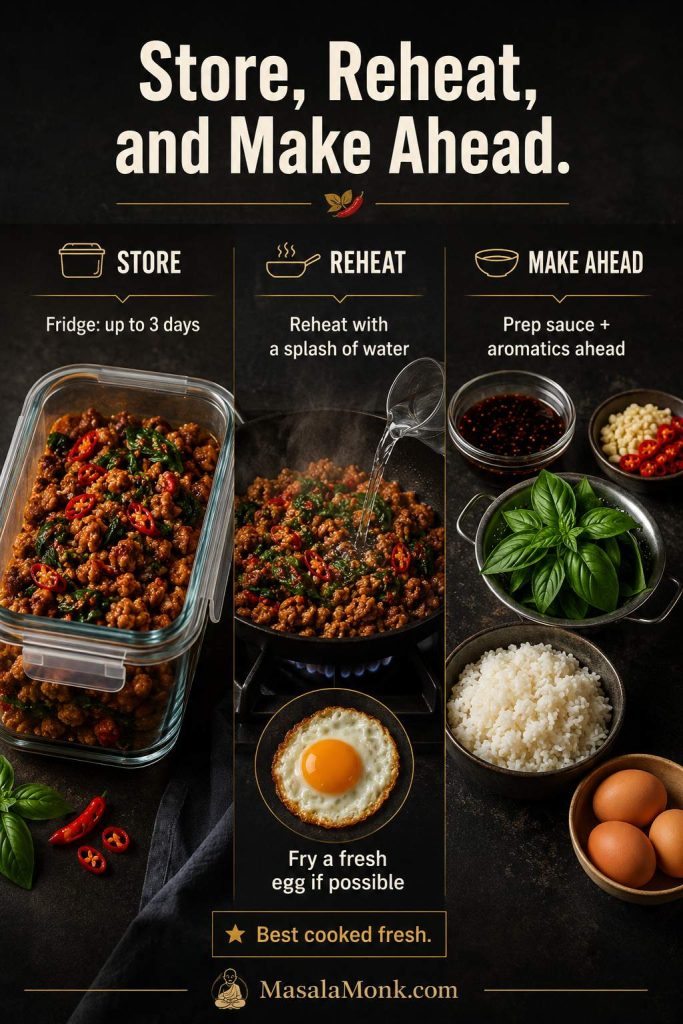
If you want to prep ahead, mix the sauce, chop the garlic and chilies, wash and dry the basil leaves, and cook the rice. Leave the actual stir-fry for right before eating.

Storage, reheating, and make-ahead board with cooked Pad Kra Pao in a glass container, reheating skillet, rice, eggs, sauce, basil, garlic, and chilies.
Pad Kra Pao is best fresh, but leftovers still work; reheat with a splash of water and fry a fresh egg if possible.

If you like salty-garlicky rice-plate dinners, MasalaMonk’s chicken adobo recipe is another strong one to cook next.

Pad Kra Pao Recipe Card

If this is your first time making it, start with the balanced sauce, use Thai basil if holy basil is hard to find, and keep the pan wide and hot. The first batch will quickly teach you your preferred salt, chili, and basil level.

Pad Kra Pao Recipe: Thai Basil Chicken, Pork, or Beef

This Pad Kra Pao recipe gives you a fast, garlicky Thai basil rice plate with chicken, pork, or beef, glossy sauce, and a crispy fried egg. Use holy basil if you can find it, or Thai basil for the easiest restaurant-style home version.

Prep Time 10 minutes
Cook Time 10–12 minutes
Total Time 20–22 minutes
Servings 4

Equipment

  • Wok or 12-inch / 30cm skillet
  • Small bowl for mixing the sauce
  • Mortar and pestle, knife, or mini chopper
  • Small frying pan for eggs
  • Spatula

Ingredients

For the Stir-Fry

  • 450g / 1 lb ground chicken, pork, or beef
  • 2 tbsp neutral oil, for the stir-fry
  • 5–8 garlic cloves, finely chopped or pounded
  • 3–6 Thai bird chilies, chopped, or 2–4 Indian green chilies
  • 1–2 shallots, thinly sliced, optional
  • 1½–2 cups holy basil or Thai basil leaves, about 30–60g depending on how tightly packed the leaves are
  • Steamed jasmine rice, for serving
  • 4 eggs
  • 2–3 tbsp neutral oil to start, plus more as needed for frying the eggs
  • Cucumber slices, optional
  • Lime wedges, optional

For the Sauce

  • 1 tbsp oyster sauce, 15 ml
  • 1 tbsp fish sauce, 15 ml
  • 1 tbsp light soy sauce, 15 ml
  • 1–2 tsp dark soy sauce, 5–10 ml, optional for deeper color
  • 1 tsp sugar, about 4g
  • 2–3 tbsp water, chicken stock, or vegetable stock, 30–45 ml

Instructions

  1. Cook the rice first. Pad Kra Pao cooks quickly, so have rice ready before you start the stir-fry.
  2. Mix the sauce. In a small bowl, stir together oyster sauce, fish sauce, light soy sauce, optional dark soy sauce, sugar, and water or stock.
  3. Prepare the aromatics. Pound or finely chop the garlic and chilies. Pick the basil leaves from the stems, wash them if needed, and dry them well.
  4. Fry the eggs. Heat 2–3 tablespoons oil in a small pan. Fry the eggs one at a time or in batches, spooning hot oil over the whites until the edges are crisp. Add more oil only if the pan gets dry. Set aside.
  5. Heat the pan. Heat a wok over high heat, or a wide nonstick skillet over medium-high heat.
  6. Cook the garlic and chilies. Add oil, then garlic, chilies, and optional shallots. Stir briefly until fragrant, without letting the garlic burn.
  7. Add the meat. Add ground chicken, pork, or beef. Break it up and stir-fry until cooked through and most moisture has evaporated.
  8. Add the sauce. Pour in the sauce and toss until the meat is glossy and coated. It should not be soupy.
  9. Add basil last. Turn the heat down or off, add basil, and toss just until wilted.
  10. Serve immediately. Spoon over rice and top each serving with a crispy fried egg. Add cucumber and lime if you like.

Notes

  • Holy basil gives the most traditional flavor; Thai basil is the easiest excellent home version.
  • Use neutral oil because olive oil or strongly flavored oils can fight the basil, garlic, and fish sauce.
  • You do not need to marinate the meat. The sauce and aromatics flavor it during the fast stir-fry.
  • If using 500g meat instead of 450g, keep the same sauce ratio first, then adjust only if needed.
  • For a less salty or milder version, reduce fish sauce and soy slightly, and start with 1 Thai chili or 1 small green chili.
  • If doubling the recipe, cook the meat in batches and add the basil only at the end.
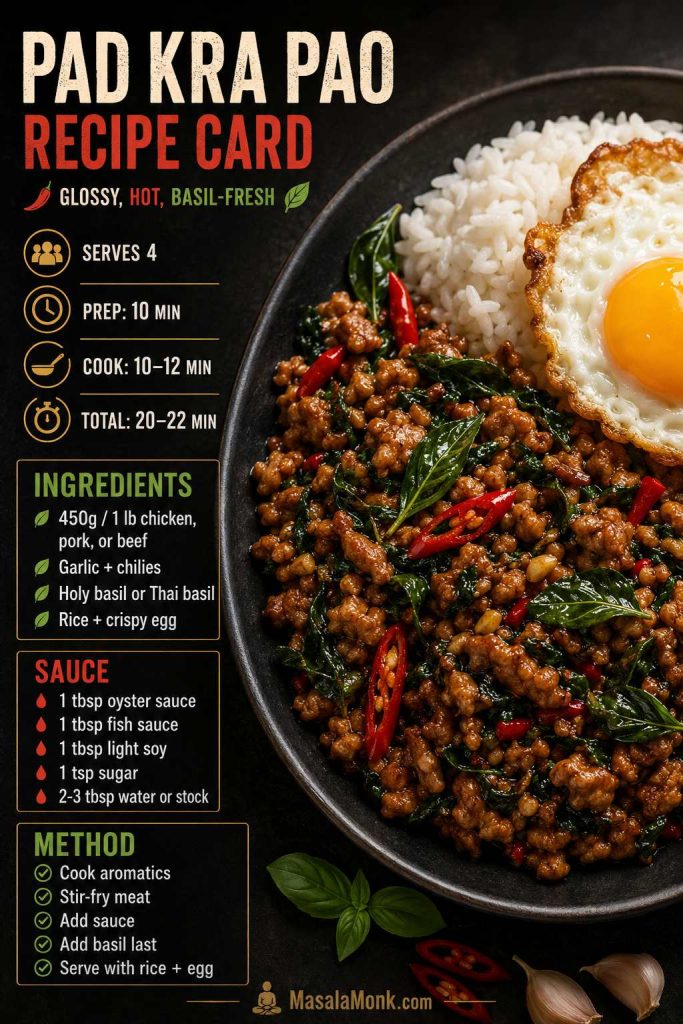
Pad Kra Pao recipe card with serving time, ingredients, sauce amounts, method bullets, and a plated basil stir-fry with rice and egg.
Keep this card for the core formula: 1 lb meat, bold aromatics, balanced sauce, basil at the end, and rice plus egg to serve.

By the time the rice, basil stir-fry, and egg come together, the plate should feel hot, glossy, and immediate.

Close-up final Pad Kra Pao serving with glossy basil meat, white rice, crispy fried egg, runny yolk, red chilies, basil leaves, and spoon.
A good final plate should feel immediate: glossy meat, fresh basil, hot rice, and a yolk that runs into everything.

FAQs

Is Pad Kra Pao the same as Thai basil chicken?

Thai basil chicken is usually the chicken version of Pad Kra Pao. Traditionally, the dish is made with holy basil, but many restaurant and home versions use Thai basil because it is easier to find.

What does Pad Kra Pao taste like?

Pad Kra Pao tastes garlicky, salty-savory, spicy, and fresh from the basil. It should feel bold and punchy, with just enough glossy sauce to season the rice without turning the plate into curry.

What basil is best for Pad Kra Pao?

Holy basil gives the most traditional sharp, peppery flavor. Thai basil is the best practical substitute for most home kitchens. Sweet basil works only in a pinch; it makes the dish softer and less like classic Pad Kra Pao.

Can I use dried basil?

Dried basil is not a good replacement because Pad Kra Pao depends on the fresh aroma of basil added at the end. If dried basil is all you have, you can still make a garlic-chili stir-fry, but it will not taste like Pad Kra Pao or a fresh Thai basil chicken-style stir-fry.

Is Pad Kra Pao supposed to be saucy?

No, it should be glossy rather than soupy. You want enough sauce to season the rice, but not so much that the meat swims. Think juicy rice plate, not curry.

Does Pad Kra Pao need a fried egg?

The fried egg is technically optional, but it is part of the pleasure of the plate. The crisp edges add texture, and the yolk softens the salty, spicy meat into the rice.

Chicken breast, sliced chicken, or ground chicken: which works best?

Ground chicken or chopped chicken thigh is easiest and juiciest. Sliced chicken works too if you cut it small and cook it quickly. Chicken breast is usable, but it dries out faster than thigh.

What can replace fish sauce?

Use light soy sauce with a small pinch of mushroom seasoning if you have it. The flavor will be less funky and less Thai-style, but still savory.

What can replace oyster sauce?

Vegetarian oyster sauce or mushroom sauce is the best replacement. If you do not have either, use soy sauce with a little sugar, but the sauce will be thinner and less rounded.

Why did my Pad Kra Pao turn watery?

Watery Pad Kra Pao usually means the meat steamed before it fried. Use a wider pan, higher heat, and cook off moisture before adding the sauce.

Can I make Pad Kra Pao ahead?

You can prep the sauce, garlic, chilies, basil, and rice ahead of time. For the best flavor, cook the stir-fry right before eating because basil tastes freshest when added at the end.

How long does Pad Kra Pao keep in the fridge?

The cooked stir-fry keeps for up to 3 days in an airtight container. Reheat it in a skillet with a splash of water. Fry a fresh egg when serving if possible.

Once this rhythm clicks, Pad Kra Pao becomes less like a strict recipe and more like a rice-plate formula you can repeat with chicken, pork, beef, tofu, or whatever needs cooking.

Back to top ↑