Posted on Leave a comment

Tomato Bisque Recipe

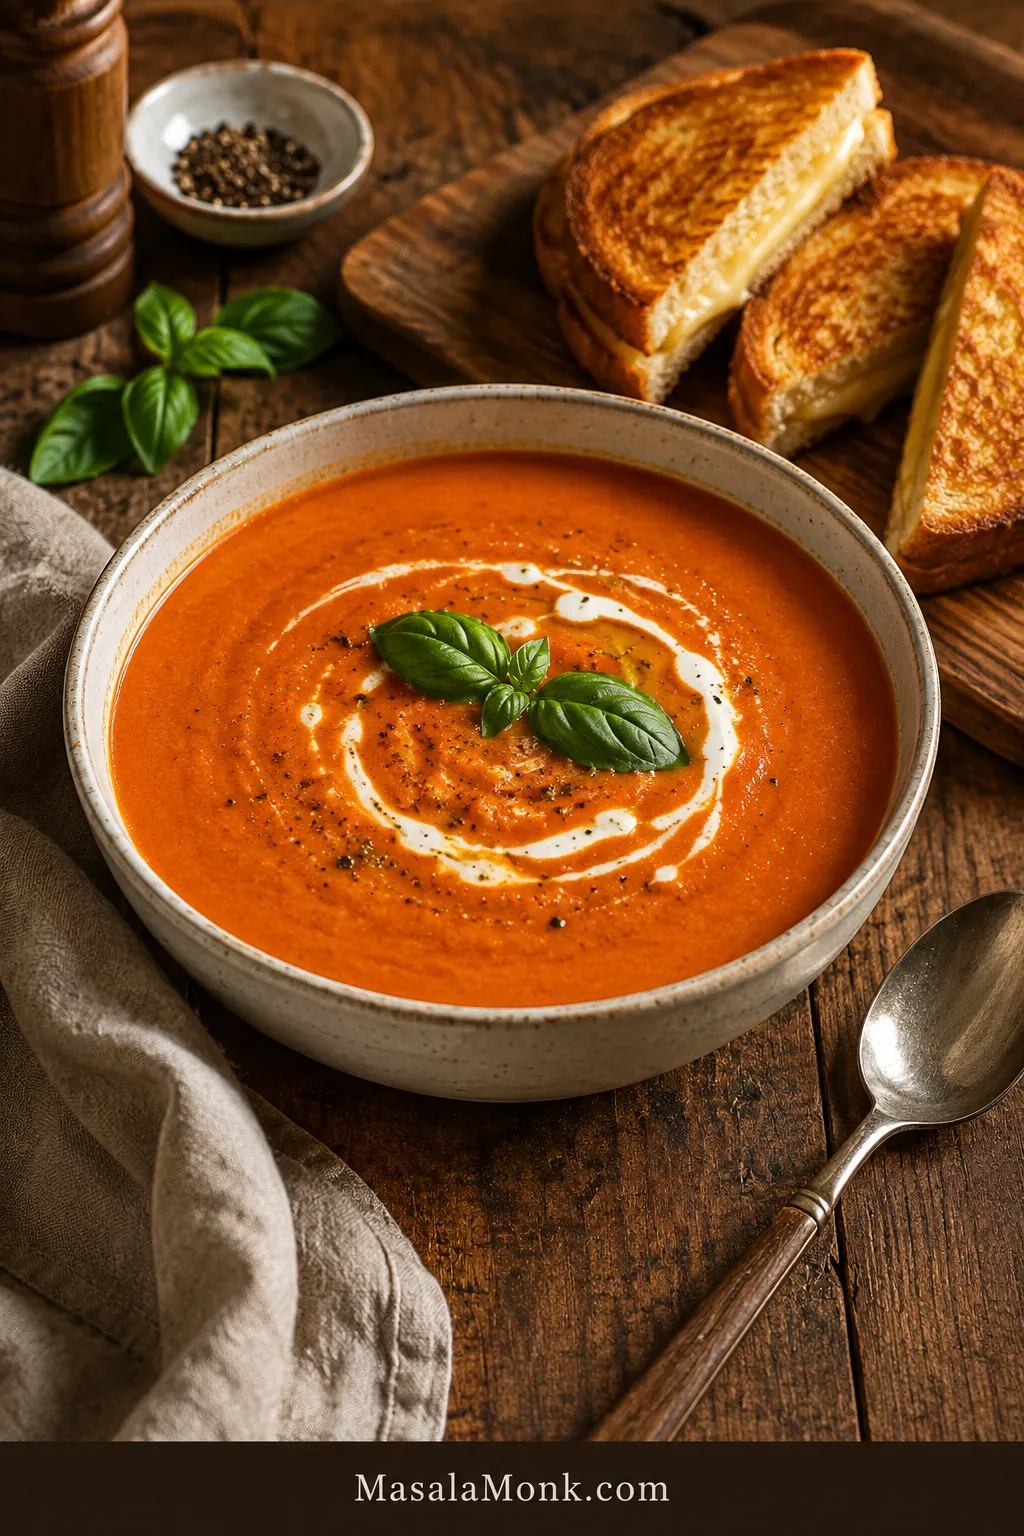
Bowl of creamy tomato bisque with a cream swirl, basil garnish, black pepper, and grilled cheese on the side.

A good tomato bisque should feel like tomato soup got dressed up for grilled cheese night: glossy, velvety, rich enough to comfort you, but still bright enough to taste like tomatoes. This is the bowl you make when classic tomato soup sounds good, but you want it creamier, smoother, and a little more special.

The main recipe starts with canned tomatoes because they are reliable, pantry-friendly, and easy to turn into a rich, blended soup. When fresh tomatoes are ripe and sweet, you can use those too. Either way, the method is simple: cook the vegetables, deepen the tomato paste, simmer the tomatoes, blend, then finish gently with cream.

The one rule to remember is this: blend first, loosen later, cream last. That keeps the soup silky instead of watery, rounded instead of heavy, and creamy without splitting.

If you want the lightest fresh-tomato bowl, make this fresh tomato soup recipe. This one is the richer lane: blended, cream-softened, spoon-coating, and built for a grilled cheese dunk.

Quick Answer: What Is Tomato Bisque?

For most home cooks, tomato bisque means tomato soup made smoother, richer, and creamier. It is blended until silky and finished with cream, milk, butter, or a creamy dairy-free alternative.

Tomato soup can be light, brothy, chunky, or fresh-tasting. A bisque is usually smoother, thicker, fuller-bodied, and more rounded. Some restaurant-style versions use a roux, but you do not need one for a good homemade bowl.

The promise: This recipe stays spoon-coating because the broth is controlled early, the vegetables are blended into the base, and the cream goes in only after the soup is already smooth. It is better to start slightly thick; the blender will tell you what the soup needs.

Texture Cue Before You Start
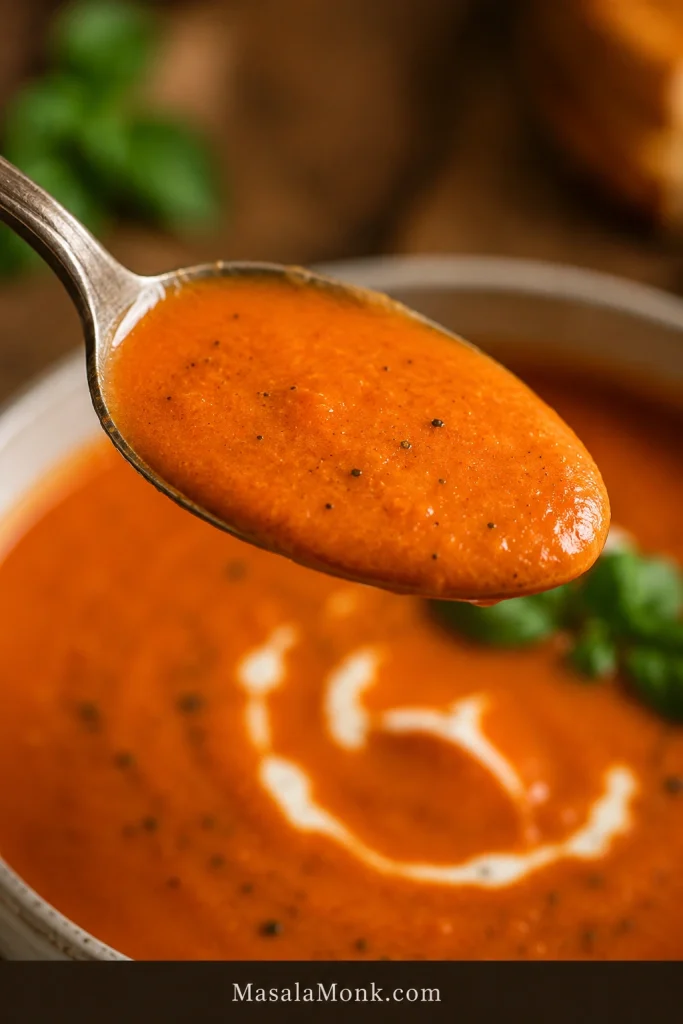
Spoon coated with smooth creamy tomato bisque above a bowl.
Before serving, check the spoon. The bisque should cling in a smooth layer instead of running off like broth or sitting thick like sauce.

At a Glance

Here is the recipe logic before you start.

Main versionEasy creamy canned tomato bisque
Total timeAbout 40 minutes
Servings4 large bowls or 6 smaller bowls
YieldAbout 6 to 7 cups soup
Tomatoes1 can whole peeled or crushed tomatoes, 28 oz / about 794 g
Fresh tomato swap2.5 lb / about 1.1 kg ripe tomatoes, or up to 3 lb / 1.35 kg if watery
Broth for canned tomatoesStart with 2 cups / 480 ml
Broth for fresh tomatoesStart with 1 to 1 1/2 cups / 240 to 360 ml because fresh tomatoes release liquid
Cream1/2 cup / 120 ml heavy cream, half-and-half, or cashew cream
Best toolImmersion blender
Texture cueSmooth, glossy, spoon-coating, and pourable
Best pairingGrilled cheese

Recipe Card

Prep time: 10 minutes
Cook time: 30 minutes
Total time: 40 minutes
Servings: 4 large bowls or 6 smaller bowls
Yield: About 6 to 7 cups
Method: Stovetop
Difficulty: Easy

Ingredients

  • 2 tablespoons olive oil or butter, about 30 ml oil or 28 g butter
  • 1 medium onion, chopped, about 150 g
  • 1 medium carrot, chopped, about 70 to 80 g
  • 1 celery rib, chopped, about 40 to 50 g
  • 3 garlic cloves, minced, about 9 to 12 g
  • 2 tablespoons tomato paste, about 30 g
  • 1 can whole peeled tomatoes or crushed tomatoes, 28 oz / about 794 g
  • Fresh tomato option: use 2.5 lb / about 1.1 kg ripe tomatoes, or up to 3 lb / 1.35 kg if watery
  • 2 cups vegetable broth or chicken broth, 480 ml, for canned tomatoes
  • For fresh tomatoes, start with 1 to 1 1/2 cups broth, 240 to 360 ml, plus more as needed
  • 1 teaspoon dried basil or Italian seasoning
  • 1/2 teaspoon dried oregano or thyme
  • 1/2 teaspoon salt, then more to taste
  • 1/4 teaspoon black pepper
  • Pinch of red pepper flakes, optional
  • 1/2 cup heavy cream, half-and-half, or cashew cream, 120 ml
  • 1 tablespoon butter, optional, for finishing, about 14 g
  • Fresh basil, Parmesan, croutons, or grilled cheese, for serving

Instructions

  1. Warm the olive oil or butter in a large non-reactive soup pot or Dutch oven over medium heat.
  2. Add the onion, carrot, and celery. Cook for 6 to 8 minutes, stirring often, until the vegetables soften and the onion turns translucent.
  3. Add the garlic and cook for about 30 seconds, just until fragrant.
  4. Stir in the tomato paste. Cook for 1 to 2 minutes, until it darkens slightly and smells deeper. If it starts sticking, splash in a spoonful of broth and scrape the bottom of the pot.
  5. Add the canned tomatoes with their juices. If using whole peeled tomatoes, crush them lightly with a spoon in the pot.
  6. Add 2 cups broth for canned tomatoes, or 1 to 1 1/2 cups broth for fresh tomatoes. Stir in the dried basil or Italian seasoning, oregano or thyme, salt, black pepper, and red pepper flakes if using.
  7. Bring to a gentle boil, then reduce the heat and simmer uncovered for 20 to 25 minutes, until the vegetables are very soft and the tomato flavor tastes less sharp.
  8. Blend the soup until smooth with an immersion blender. For an extra-silky texture, use a countertop blender in batches.
  9. Check the texture. If the soup is too thick, add broth a little at a time until it is spoon-coating and pourable.
  10. Lower the heat. Stir in the cream and warm gently for 2 to 3 minutes. Do not boil hard after adding cream.
  11. Taste and adjust with more salt first. Add butter or Parmesan for richness, or basil for freshness.
  12. Serve hot with fresh basil, croutons, Parmesan, or grilled cheese.

Recipe Notes

  • Best tomato choice: whole peeled tomatoes or crushed tomatoes.
  • Texture rule: blend first, loosen later, cream last.
  • Fresh tomato swap: use 2.5 lb / about 1.1 kg ripe tomatoes, or up to 3 lb / 1.35 kg if the tomatoes are watery.
  • Broth for fresh tomatoes: start with 1 to 1 1/2 cups / 240 to 360 ml broth because fresh tomatoes release more liquid.
  • Optional depth upgrade: simmer the soup with a small Parmesan rind, then remove it before blending. Or finish with a tiny splash of sherry vinegar or lemon juice if the soup tastes flat. Skip the Parmesan rind for dairy-free soup.
  • Thicker bowl: use the optional roux method or simmer uncovered a little longer.
  • Dairy-free soup: use vegetable broth, olive oil, and cashew cream.

Make This When

This is the soup to make when you want comfort without a complicated cooking project. It works especially well when:

  • Tomato soup sounds good, but you want it richer and creamier.
  • Grilled cheese is already part of the plan.
  • A pantry dinner needs to feel more homemade than a plain can of soup.
  • Fresh tomatoes are out of season, but deep tomato flavor still matters.
  • Restaurant-style tomato soup sounds good, but a heavy floury roux does not.

For a lighter meal around the soup, a fresh side like this chickpea salad adds brightness and protein without making the bowl itself heavier.

Choose Your Version

The easiest reliable version starts with canned tomatoes, not fresh tomatoes and not canned tomato soup. Canned whole peeled tomatoes or crushed tomatoes give steady flavor, enough body, and repeatable results without waiting for perfect summer produce.

Make the main pot first, then choose the lane that fits your tomatoes, time, and mood. Once you make the base once, you will probably know your house version: basil-heavy, extra creamy, roasted, spicy, or built around grilled cheese.

You want…Make this versionWhat to change
The easiest reliable bowlCanned tomato bisqueUse 28 oz / 794 g canned whole peeled or crushed tomatoes
Fresh garden flavorFresh tomato bisqueUse 2.5 lb / 1.1 kg ripe tomatoes and start with less broth
Deeper fresh tomato flavorRoasted tomato bisqueRoast fresh tomatoes before simmering
Brighter herb flavorTomato basil bisqueAdd fresh basil near the end, then blend
Smoky-sweet flavorRoasted red pepper tomato bisqueAdd one drained 12 oz / 340 g jar roasted red peppers
Restaurant-style thicknessRoux-thickened tomato bisqueAdd a small butter-and-flour roux
Dairy-free creaminessVegan tomato bisqueUse vegetable broth and cashew cream
A quick pantry shortcutCanned tomato soup bisqueUpgrade condensed tomato soup with milk or half-and-half, butter, herbs, and Parmesan

Visual Guide to Tomato Bisque Versions
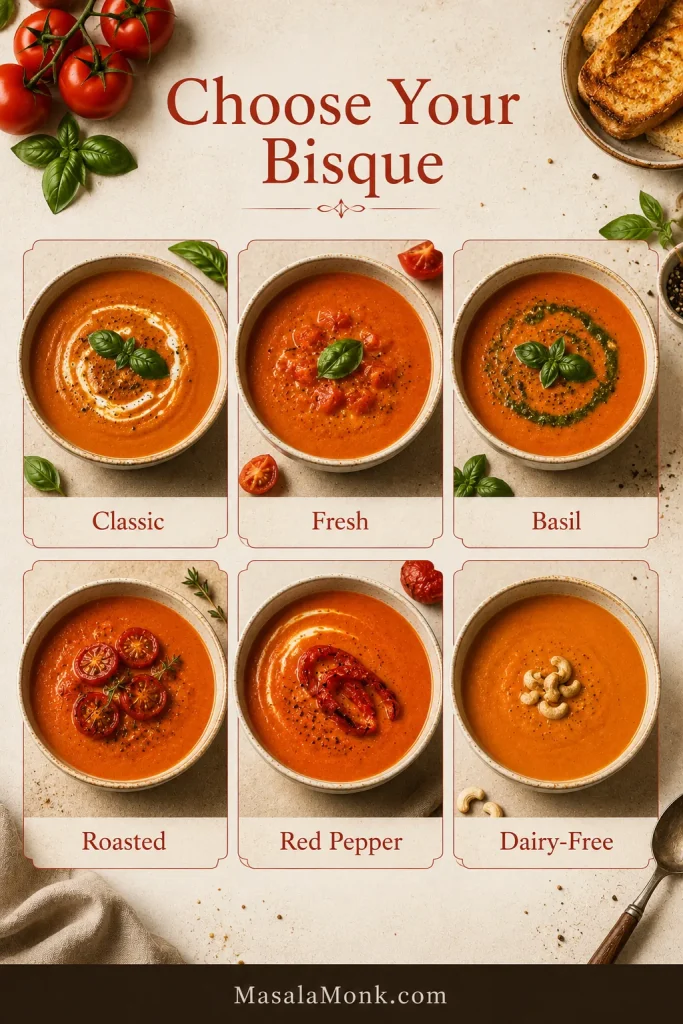
Guide board showing tomato bisque variations labeled classic, fresh, basil, roasted, red pepper, and dairy-free.
Use this guide to choose your tomato bisque style, from classic and fresh to basil, roasted, red pepper, or dairy-free.

Why This Recipe Works

The recipe is not trying to be fancy. It is trying to keep the tomato flavor deep, the texture smooth, and the cream from taking over.

  • Tomato paste adds depth. Give it a minute in the pot and it stops tasting raw, turning deeper and almost sweet.
  • Onion, carrot, and celery soften the acidity. The carrot especially helps balance sharp tomatoes naturally.
  • Canned tomatoes make the result reliable. You do not have to wait for peak-season tomatoes to make a good bowl.
  • Blending creates body. The vegetables become part of the texture, not just flavor in the background.
  • Gentle cream keeps the flavor balanced. It should soften the tomato edge, not make the soup pale and sleepy.

Equipment You Need

The only tool that really changes the experience is the blender. Everything else is basic soup-pot cooking.

  • Large non-reactive soup pot or Dutch oven: stainless steel, enamel-coated cast iron, or a heavy nonstick soup pot works well.
  • Immersion blender: the easiest tool because you can blend directly in the pot.
  • Countertop blender: gives the silkiest texture, but hot soup must be blended carefully in batches.
  • Fine mesh sieve, optional: use it only if you want an ultra-smooth restaurant-style finish.

Hot blender safety: If using a countertop blender, do not fill the jar more than halfway. Vent the lid, cover it with a towel, and start on low speed. Hot soup expands quickly in a sealed blender.

Ingredients You Need

The ingredients are simple, but each one has a job in the pot.

Ingredient Snapshot
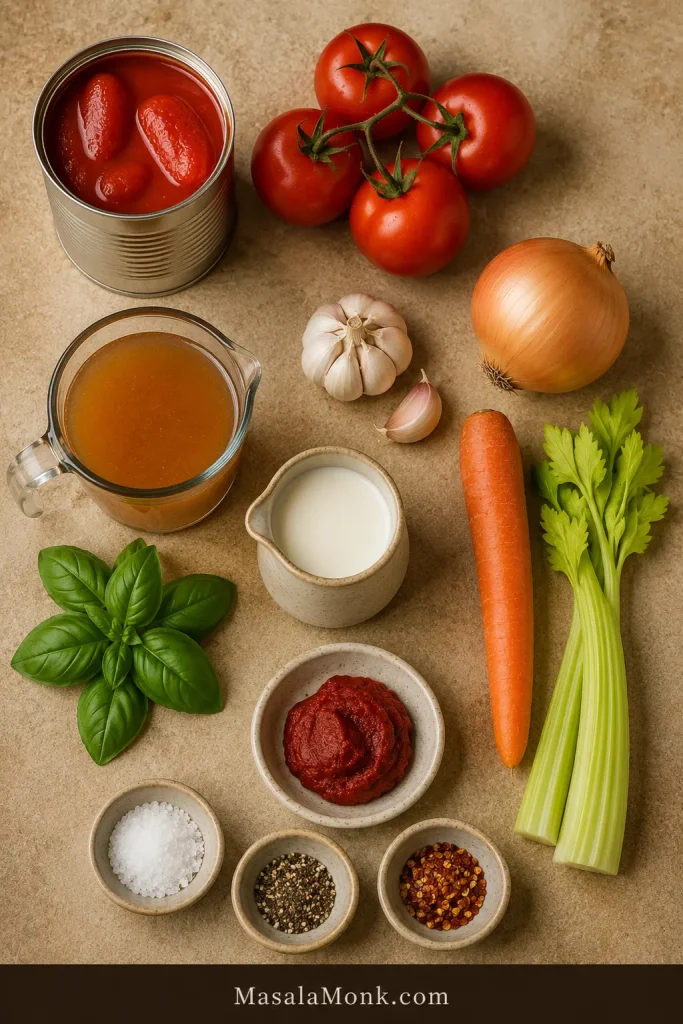
Tomato bisque ingredients arranged on a surface, including tomatoes, onion, carrot, celery, garlic, cream, broth, basil, and tomato paste.
Each ingredient has a job: aromatics build body, tomato paste adds depth, and cream finishes the soup.

Tomatoes

A 28 oz / 794 g can of whole peeled or crushed tomatoes is the easiest starting point. Whole peeled tomatoes usually give the best balance of flavor and body. Crushed tomatoes are convenient and blend quickly. Diced tomatoes can work, but they may need longer blending. Fire-roasted tomatoes add smoky depth if you want a bolder bowl.

If you are choosing between whole, crushed, diced, and fire-roasted tomatoes, this guide to canned tomato types is helpful.

Onion, Carrot, Celery, and Garlic

This is the flavor base. Onion brings sweetness, carrot helps soften tomato acidity, celery adds savory depth, and garlic makes the soup taste fuller. Cook them until the pot smells sweet and savory before the tomatoes go in.

Tomato Paste

Tomato paste is the little shortcut to deeper flavor. Stir it into the softened vegetables and let it cook for 1 to 2 minutes before adding broth. When it is ready, it should smell less sharp and more like roasted tomatoes.

Broth

Vegetable broth keeps the recipe vegetarian. Chicken broth gives a slightly deeper savory flavor. Canned tomatoes need about 2 cups / 480 ml broth to start. Fresh tomatoes release more liquid, so they need less at first.

Cream

Heavy cream gives the most classic finish. Half-and-half makes it lighter. Cashew cream gives the best neutral dairy-free texture. The color should turn slightly softer after cream, not pale orange.

Herbs and Finishes

Dried basil or Italian seasoning can simmer with the tomatoes. Fresh basil tastes best near the end, when it still smells bright. Parmesan, butter, croutons, black pepper, and grilled cheese all make the finished bowl more satisfying.

Canned Tomatoes vs Fresh Tomatoes

Both canned and fresh tomatoes can work. The best choice depends on what you have and how the tomatoes taste before they go into the pot.

Canned vs Fresh Tomato Guide
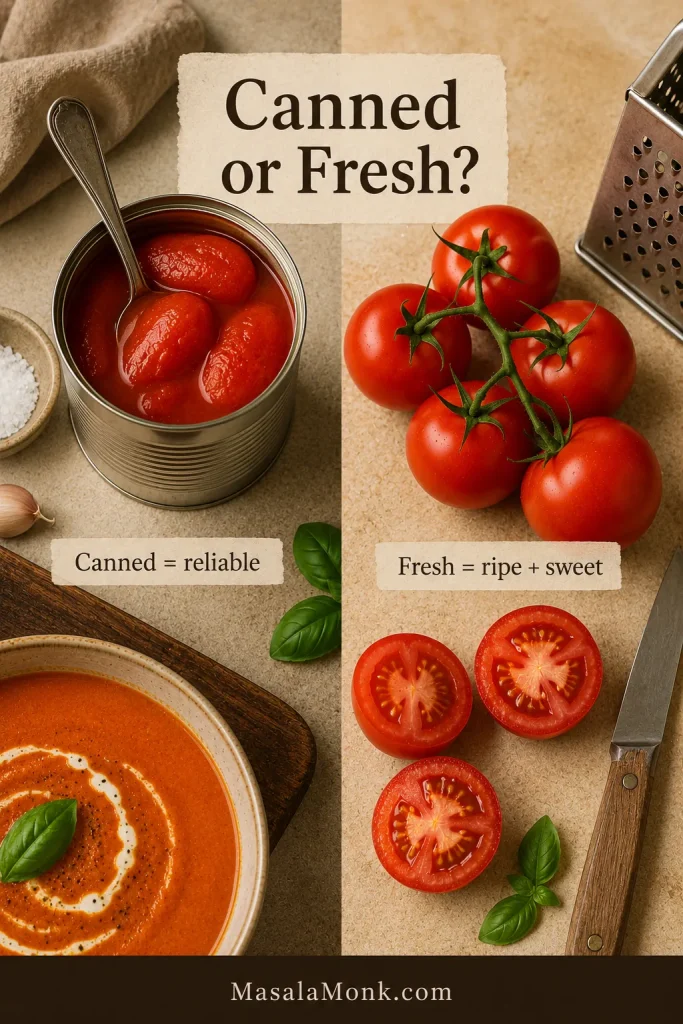
Canned tomatoes and fresh tomatoes compared side by side for tomato bisque.
Canned tomatoes are the reliable year-round choice. Fresh tomatoes work best when they smell sweet, taste ripe, and are in season.
Canned tomatoes work best when…Fresh tomatoes work best when…
You want reliable flavor year-roundTomatoes are ripe, sweet, and in season
You want the easiest versionYou want a brighter garden-style bowl
You want less prepYou do not mind peeling, grating, roasting, or simmering longer
Your fresh tomatoes are bland or wateryYour fresh tomatoes smell sweet and taste good raw

One 28 oz can of tomatoes is about 794 g. For the closest fresh swap, use 2.5 lb / about 1.1 kg ripe tomatoes. If your tomatoes are watery or you want a fuller fresh-tomato base, use up to 3 lb / 1.35 kg.

Fresh Tomato Grating Shortcut

For the smoothest fresh version, peel the tomatoes first or roast them before blending. If you do not want to peel tomatoes, halve them and grate the cut side on the large holes of a box grater. The pulp goes into the bowl, and most of the skin stays in your hand. Use that pulp in place of peeled chopped tomatoes.
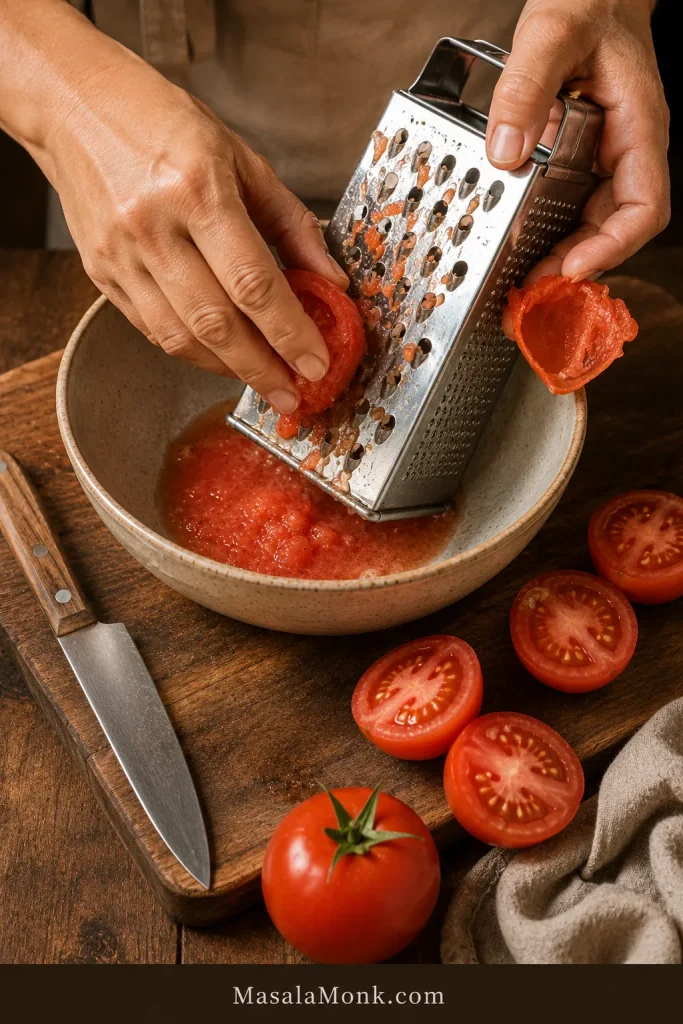
Hands grating fresh tomato halves on a box grater over a bowl of tomato pulp.
For fresh tomato bisque, grate ripe tomatoes when you want the pulp without peeling. Most of the skin stays behind on the grater.

If fresh tomatoes taste watery raw, roast them or use canned tomatoes instead. A soup that looks thick before blending is usually on the right track. Adjust the body after it has been blended.

If you have more ripe tomatoes than this soup needs, turn the rest into this tomato sauce from fresh tomatoes for pasta, pizza, or freezer meals.

How to Make Tomato Bisque

The tricky part is not the cooking. It is adding too much liquid before the soup has a chance to blend smooth. Keep the order simple: build the base, deepen the tomato paste, simmer, blend, adjust the body, then add cream.

Step 1: Soften the Vegetables

Warm olive oil or butter in a large non-reactive pot over medium heat. Add the onion, carrot, and celery. Cook for 6 to 8 minutes, stirring often, until the onion is translucent and the vegetables are softening. The carrot should be tender enough to blend cleanly later.
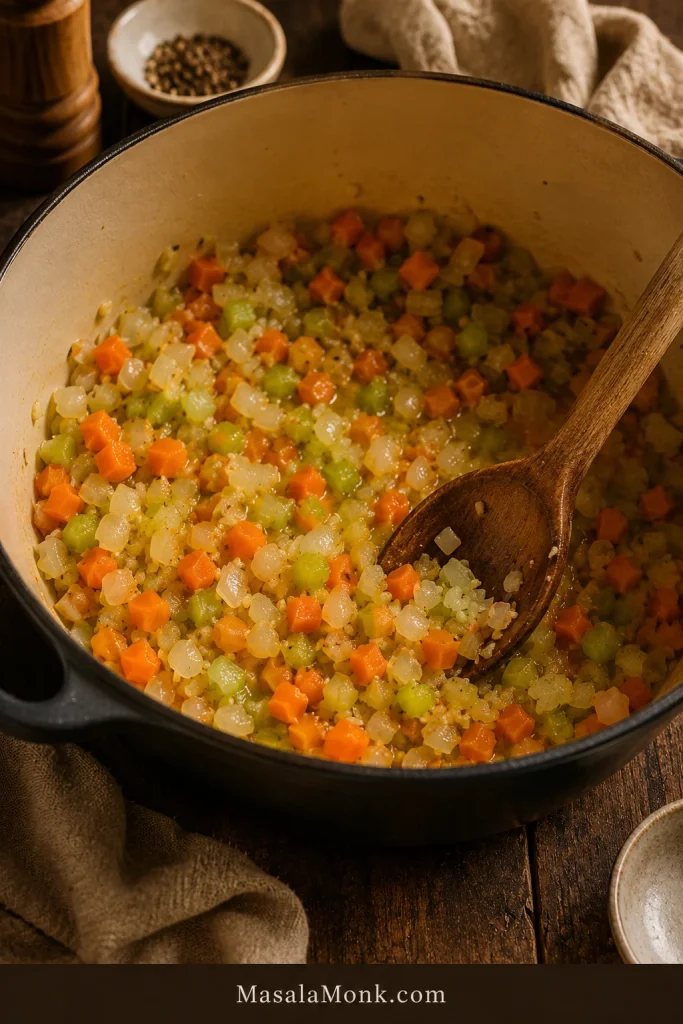
Chopped onion, carrot, celery, and garlic softening in a pot.
First, soften the onion, carrot, celery, and garlic until the pot smells sweet and savory. This gives the soup body before tomatoes go in.

Step 2: Cook the Tomato Paste

Add the garlic and cook for about 30 seconds. Stir in the tomato paste and cook for 1 to 2 minutes. It should darken slightly and leave rusty streaks on the vegetables. If the bottom of the pot gets sticky, add a spoonful of broth and scrape it clean as you stir.
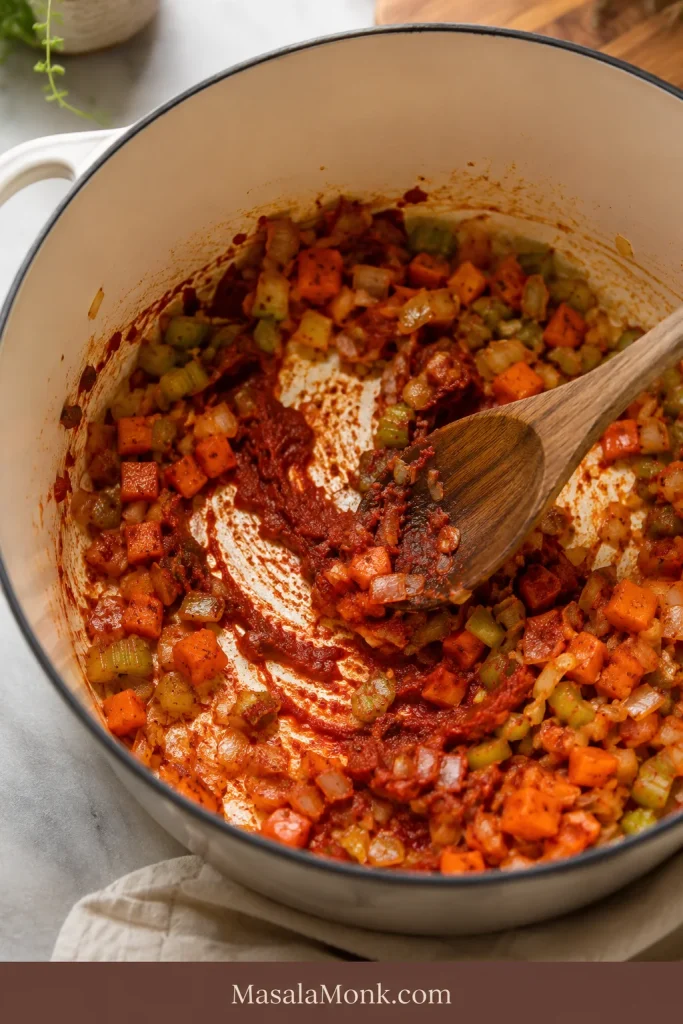
Tomato paste cooked into softened onion, carrot, celery, and garlic in a light-colored pot with a wooden spoon.
Next, cook the tomato paste into the vegetables until rusty red-orange streaks appear. That small step makes the tomato flavor deeper.

Step 3: Simmer the Tomatoes

Add the tomatoes with their juices. Crush whole peeled tomatoes lightly with a spoon so they simmer evenly. Add broth, herbs, salt, pepper, and red pepper flakes if using. Simmer uncovered for 20 to 25 minutes, until the vegetables are very soft and the tomato flavor tastes rounder.
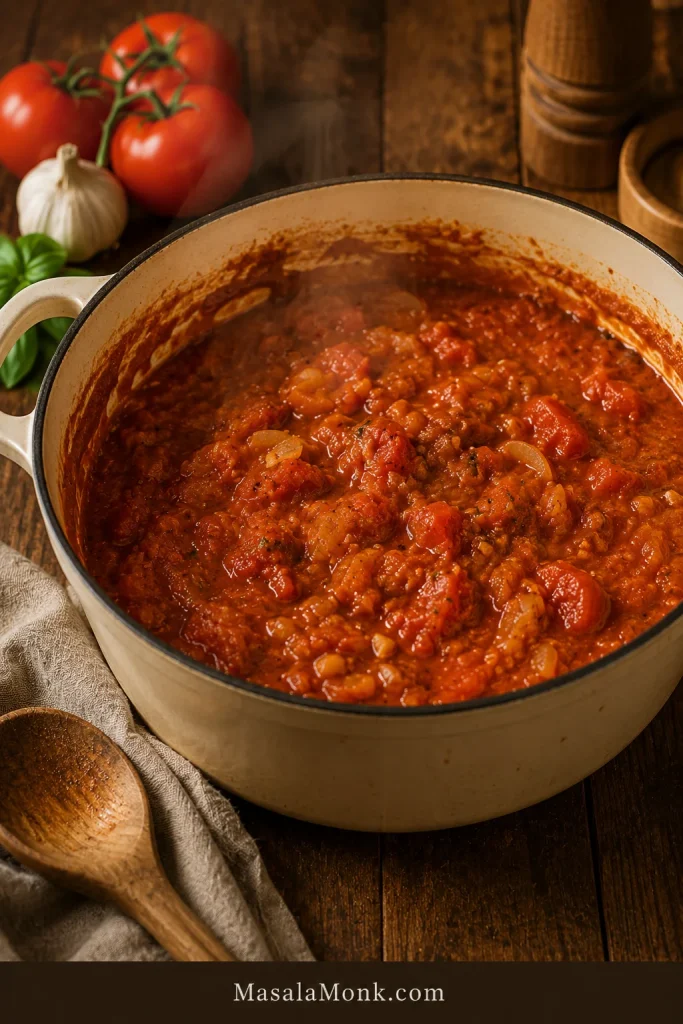
Thick tomato bisque base simmering in a pot before blending, with softened tomatoes and vegetables visible.
Before blending, the soup base should look thick and concentrated. A slightly thick pot is easy to loosen; a watery one is harder to fix.

Step 4: Blend and Adjust

Blend until smooth. An immersion blender is easiest; a countertop blender gives a silkier finish. After blending, the soup should fall from a spoon in a smooth ribbon, not splash like broth. If it is too thick, add broth a splash at a time.
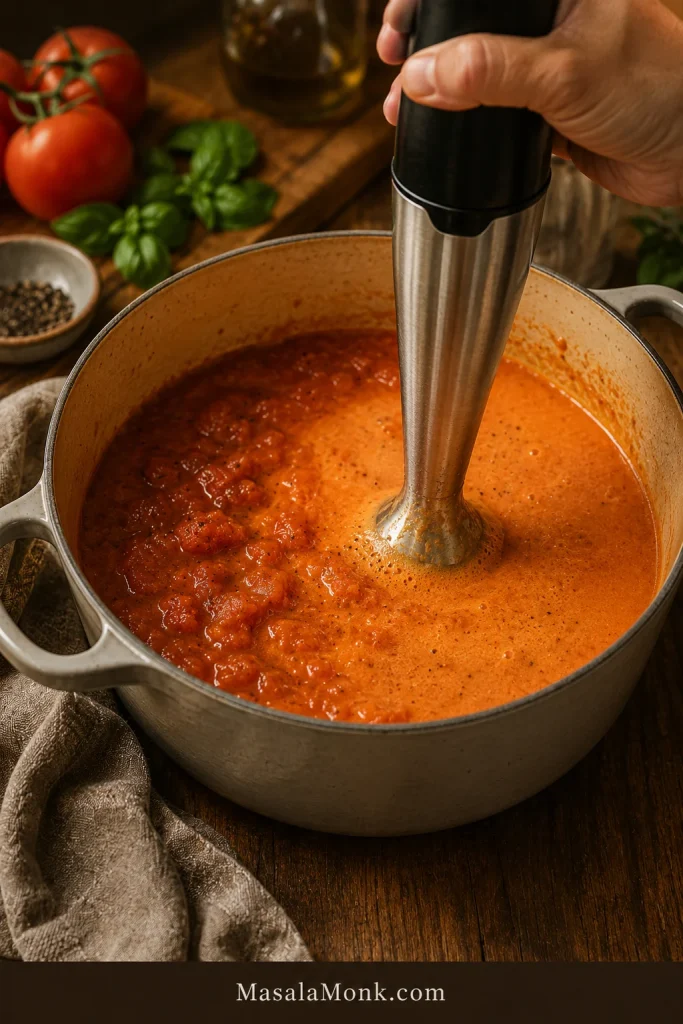
Immersion blender smoothing tomato bisque in a pot.
Once the vegetables are soft, blending turns the tomato base into one smooth, creamy body.

Step 5: Finish Gently

Lower the heat and stir in the cream. Warm gently for 2 to 3 minutes. Taste and adjust with salt first, then richness or brightness if needed. The final spoonful should feel rounded, not heavy, with enough tomato brightness to make you want the next bite.
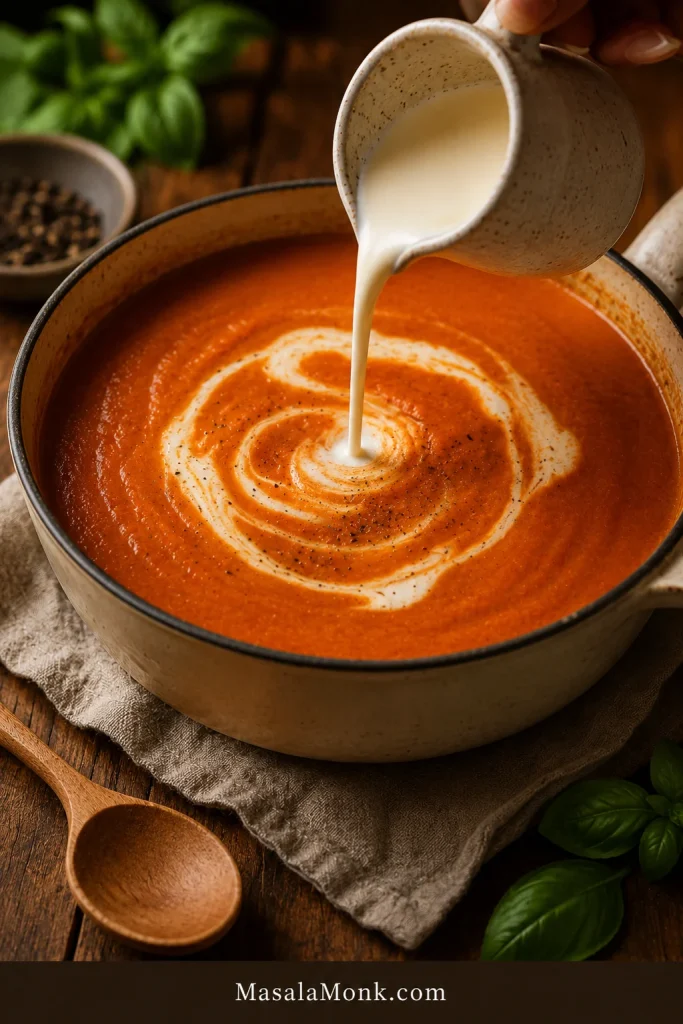
Cream being poured into smooth tomato bisque.
Add cream only after the soup is blended, then warm it gently. This keeps the bisque smooth instead of grainy or split.

Success Cues

  • Vegetables: the carrot and celery should be soft enough to mash against the side of the pot.
  • Tomato paste: it should smell deeper and less metallic.
  • After simmering: the tomato flavor should taste rounder, not raw or sharp.
  • Blended texture: the soup should be glossy, smooth, and spoon-coating.
  • Before serving: if it tastes flat, add salt first; if it tastes sharp, add butter, cream, or a very small pinch of sugar.

Smooth Ribbon Texture
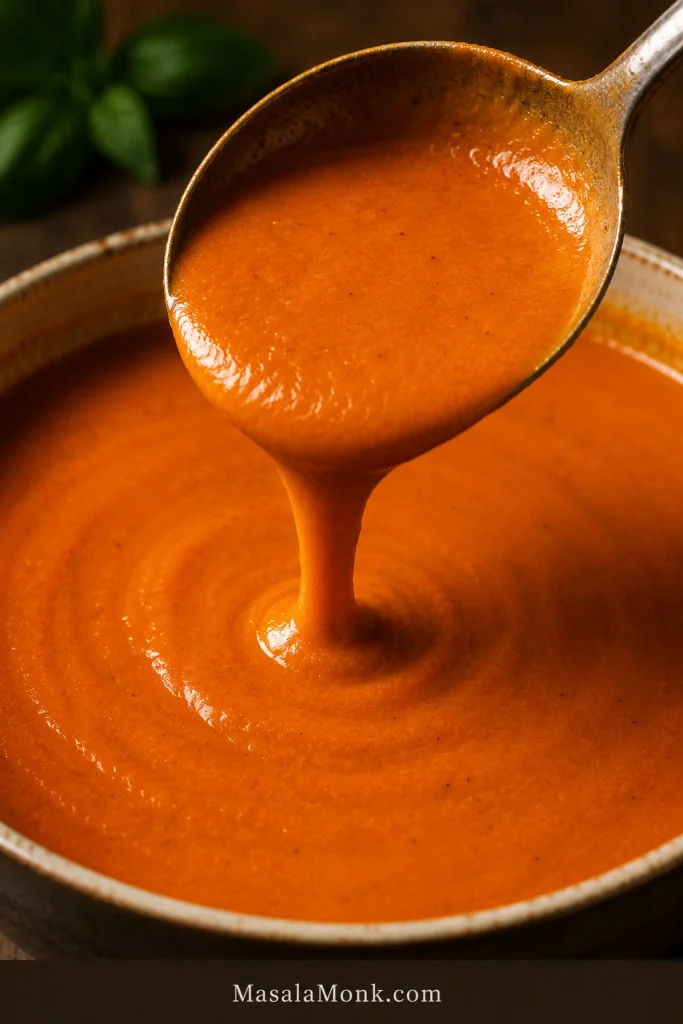
Tomato bisque falling from a spoon in a smooth ribbon back into a bowl.
After blending, look for a smooth ribbon from the spoon. That means the soup is creamy, spoon-coating, and still pourable.

Creamy Options

Creaminess is mostly about restraint. You want the finish to soften the tomato edge, not bury the tomato flavor.

If you want…Use…Watch for…
Classic richnessHeavy creamWarm gently after adding
A lighter finishHalf-and-halfThe soup may be slightly thinner
Dairy-free creaminessCashew creamBlend the cashew cream completely smooth
More glossButterAdd near the end
More savory depthParmesanAdd less salt first
A green finishBasil pestoUse a small spoon on top, not too much

A small spoon of basil pesto works well on top, especially if you want more basil flavor without adding more cream.

Optional Restaurant-Style Roux

You do not need a roux for this recipe. The blended vegetables and tomatoes already give the soup body. Use a small roux only if you want a thicker, restaurant-style bowl.

For that version, use 2 tablespoons butter / 28 g and 2 tablespoons flour / about 16 g. After the vegetables soften, melt the butter, stir in the flour, and cook for 1 to 2 minutes. Slowly add the broth while stirring, then add the tomatoes and continue with the recipe.

Keep the roux small. Too much flour can mute tomato brightness and make the soup taste more like cream sauce. To keep it gluten-free, skip the roux and control thickness with less broth, longer simmering, and good blending.

For a restaurant-style finish, blend until completely smooth, strain only if you want it extra silky, then serve with a small swirl of cream, cracked black pepper, basil oil, or Parmesan. Aim for a glossy bowl, not a grainy one.

Variations

You do not need any of these to make a good bowl. They are simply easy ways to steer the same base in a different direction.

Tomato Basil

For a brighter, greener bowl, add 1 cup loosely packed fresh basil, about 20 to 25 g, after simmering. Blend it into the hot soup, then save a few leaves for garnish if you like. Long simmering can make fresh basil taste dull.
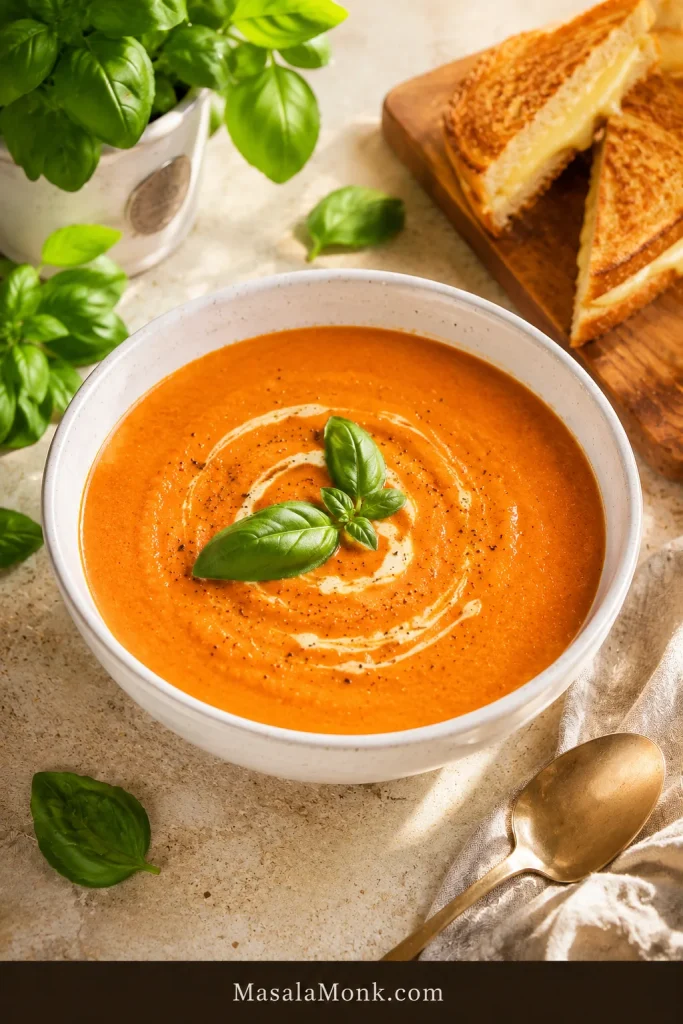
Bowl of tomato basil bisque with fresh basil garnish and grilled cheese nearby.
For tomato basil bisque, add fresh basil near the end so the flavor stays green, fragrant, and bright instead of cooked down.

If you want a lighter basil-forward soup rather than a creamier bisque, use this tomato basil soup recipe.

Roasted Tomato

Roasting is best when fresh tomatoes are ripe but a little watery. It concentrates their flavor, softens acidity, and gives the soup deeper sweetness.

Use 2.5 to 3 lb / 1.1 to 1.35 kg fresh tomatoes. Halve them and roast with olive oil, onion, and garlic at 400°F / 200°C for 25 to 35 minutes, until the tomatoes collapse and the edges start to caramelize. Add the roasted tomatoes to the pot with broth and continue with the main recipe.
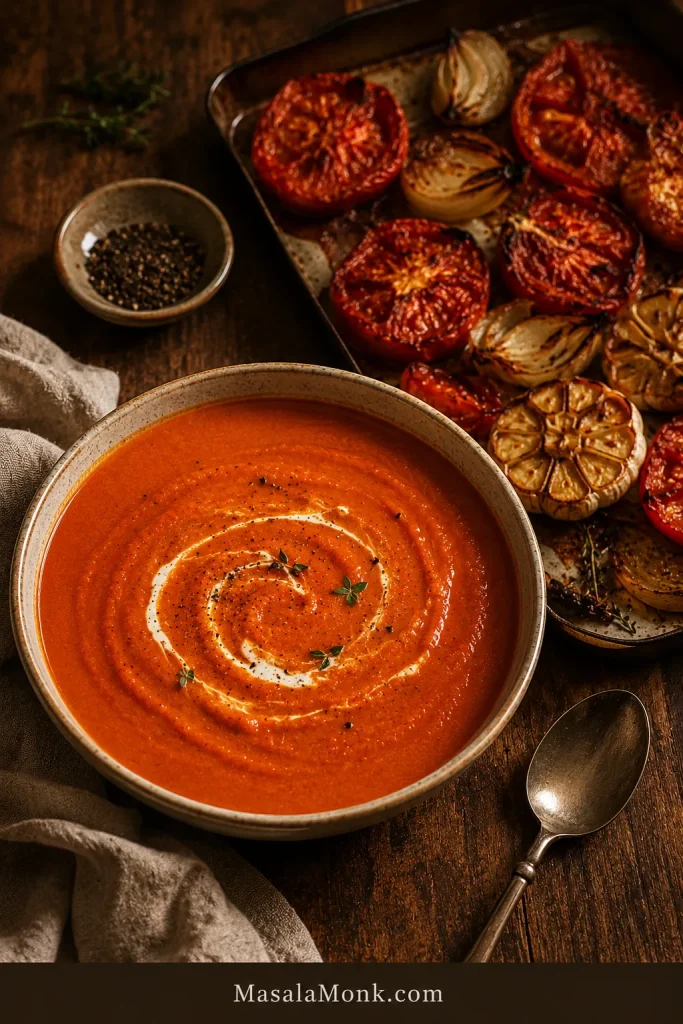
Bowl of roasted tomato bisque beside a tray of roasted tomatoes, onions, and garlic.
Roasting the tomatoes first concentrates their sweetness, giving the bisque deeper flavor and a softer acidic edge.

If you are building a fuller soup-night meal, these roasted carrots keep the table warm, sweet, and simple without making the soup heavier.

Roasted Red Pepper

Roasted red peppers make the bowl sweeter, deeper, and slightly smoky. Add one drained 12 oz / 340 g jar with the tomatoes before simmering. Blend until smooth, then finish with cream. A small pinch of smoked paprika works well, but keep it light.
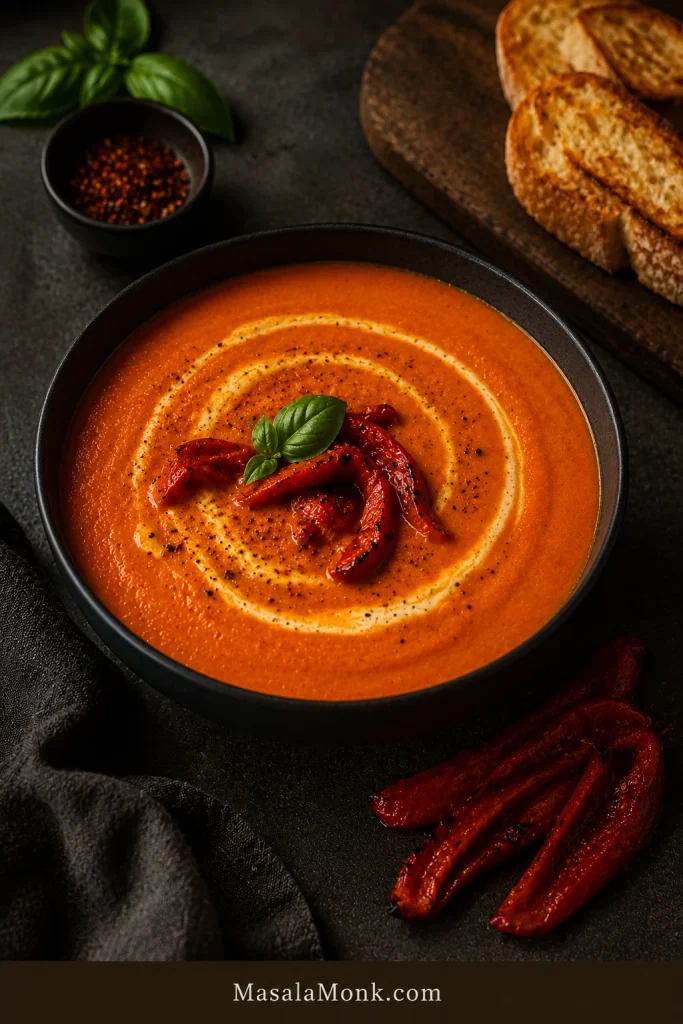
Bowl of roasted red pepper tomato bisque with roasted red pepper strips on top and beside the bowl.
Roasted red peppers bring smoky sweetness to the bowl, making tomato bisque taste richer without relying on extra cream.

Can You Make Tomato Bisque From Canned Tomato Soup?

Yes. You can turn canned tomato soup into a quick pantry version when speed matters more than full homemade flavor. Think of the can as the foundation, not the finished soup: a little fat, dairy, seasoning, and a fresh garnish can make it taste more intentional.

Shortcut From Condensed Tomato Soup

For 1 can condensed tomato soup, add:

  • 1 can milk or half-and-half, or milk with a splash of cream
  • 1 tablespoon butter
  • 1/4 teaspoon garlic powder
  • 1/4 teaspoon onion powder
  • 1/2 teaspoon dried basil or Italian seasoning
  • Black pepper to taste
  • 1 to 2 tablespoons Parmesan, optional

Simmer gently for 8 to 10 minutes, stirring often. Finish with fresh basil, croutons, Parmesan, or grilled cheese.
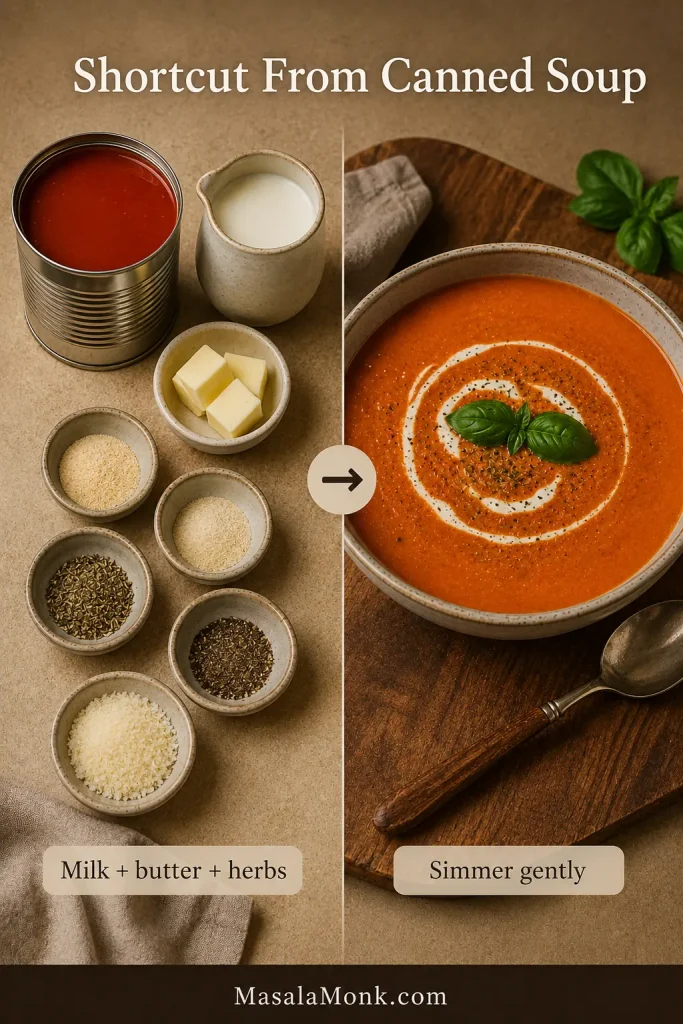
Shortcut guide showing canned tomato soup, milk, butter, herbs, Parmesan, and a finished bowl of tomato soup.
When using canned tomato soup, treat it as a base. Milk or half-and-half, butter, herbs, pepper, and Parmesan make it taste more intentional.

For the best flavor, start with canned tomatoes or fresh tomatoes instead of canned tomato soup. When speed matters, the shortcut works. To make a true homemade bowl, use the main recipe.

Dietary Options

The creamy finish is flexible, so no one has to miss the comfort of the bowl. Once the broth, fat, cream, and toppings match your needs, the recipe still works.

NeedHow to adjust
VegetarianUse vegetable broth. The rest of the main recipe can stay the same.
VeganUse vegetable broth, olive oil instead of butter, and cashew cream instead of heavy cream.
Dairy-freeCashew cream or a plain unsweetened plant-based cream works best. Leave out Parmesan and the Parmesan rind.
Gluten-freeSkip the optional roux, or use a gluten-free thickener if needed. Check broth and toppings.
Lower sodiumUse no-salt-added canned tomatoes and low-sodium broth, then season at the end.

Dairy-Free Cashew Cream

To make cashew cream, soak 1/2 cup cashews in hot water for 20 to 30 minutes. Drain, then blend with 1/2 cup fresh water until completely smooth. Add about 1/2 cup to the soup, then add more only if needed.
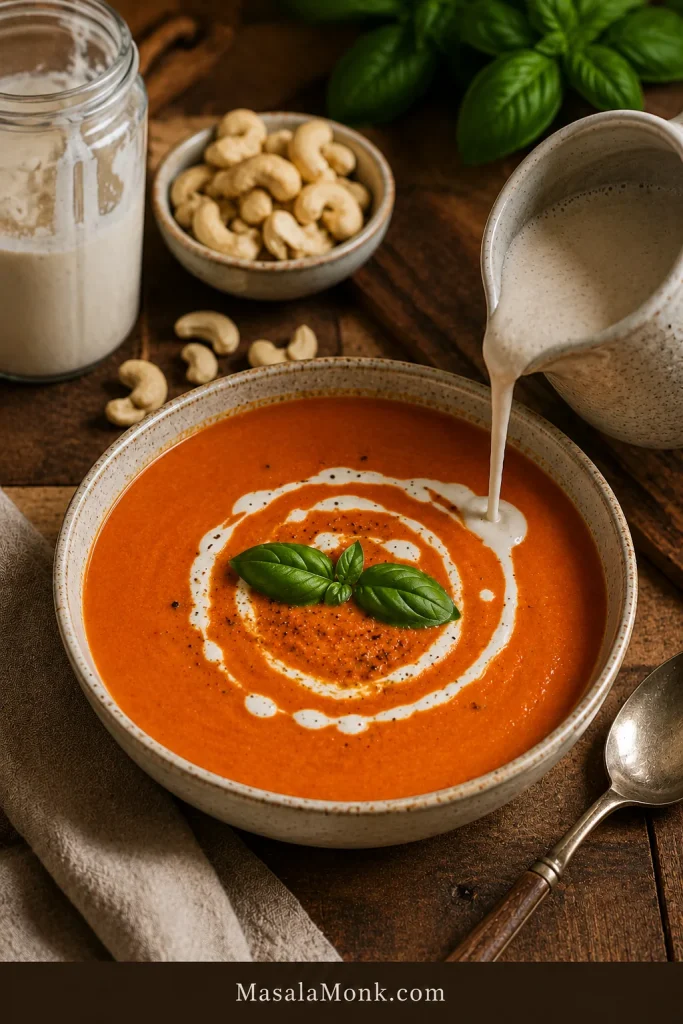
Bowl of tomato bisque with cashew cream being poured in, with cashews and basil nearby.
For dairy-free tomato bisque, cashew cream gives the soup a smooth, neutral finish without coconut flavor.

Slow Cooker, Instant Pot / Pressure Cooker, and Blender Notes

The stovetop method gives the most control, but the recipe adapts well when you need a more hands-off path. These versions are best for the days when you want the same cozy bowl without standing over the stove.

Keep the same order in mind: cook for flavor, blend for body, then add cream at the end.

Slow Cooker and Pressure Cooker Tomato Bisque
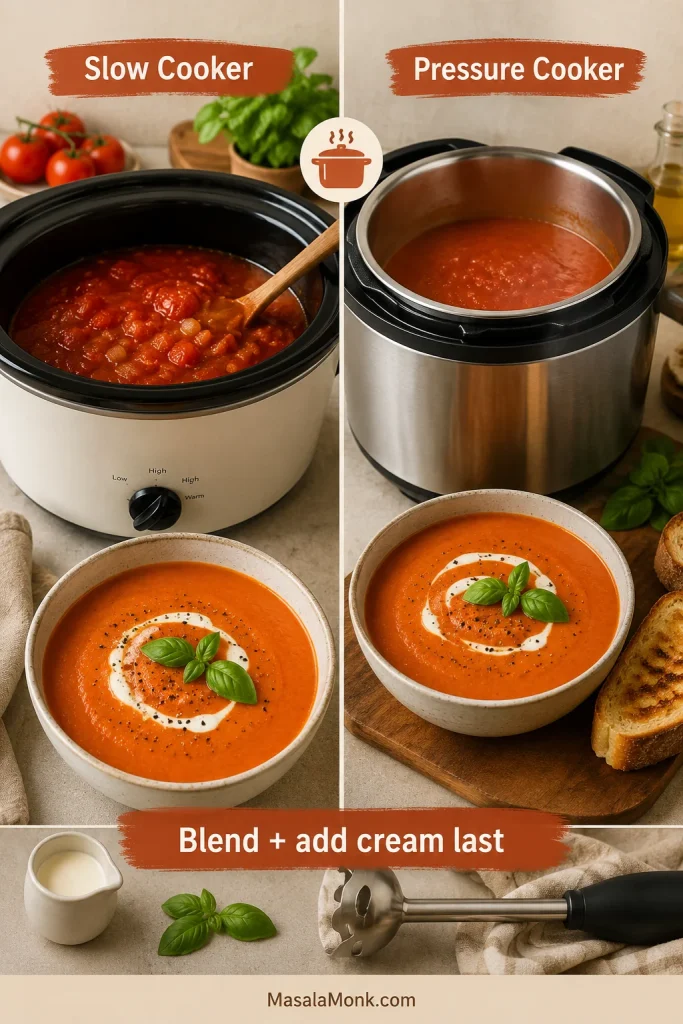
Split guide showing tomato bisque in a slow cooker and pressure cooker with finished bowls.
Slow cooker or Instant Pot / pressure cooker both work, but the rule stays the same: blend the tomato base first, then add cream last.

Slow Cooker

For best flavor, sauté the onion, carrot, celery, garlic, and tomato paste first. Add them to the slow cooker with the tomatoes, herbs, and broth. Cook on low for 6 to 8 hours or high for 3 to 4 hours. Blend until smooth, then stir in the cream at the end.

For a heartier tomato-rich slow cooker dinner, this crock pot lasagna soup goes in a pasta-and-ricotta direction instead of a smooth creamy bisque.

Instant Pot or Pressure Cooker

Use the sauté function for the onion, carrot, celery, garlic, and tomato paste. Add the tomatoes, broth, and herbs. Pressure cook for 8 to 10 minutes, let the pressure release naturally for 5 minutes, then quick release. Blend smooth and stir in the cream after cooking.

Countertop Blender

If blending hot soup in a countertop blender, work in batches, vent the lid, cover with a towel, and start slowly. A high-speed blender gives the smoothest texture.

What to Serve With Tomato Bisque

This is where the soup turns into dinner. Grilled cheese is the classic pairing for a reason: the soup is creamy and tangy; the sandwich is crisp, buttery, and salty. The best bite is the corner of grilled cheese after it has been dipped: crisp at the edge, soft where it meets the soup, salty enough to make the tomato taste brighter.

Grilled Cheese Dunk

Hand dipping a grilled cheese sandwich into creamy tomato bisque.
Serve tomato bisque with grilled cheese for contrast: crisp bread, melted cheese, and creamy soup clinging to the corner.

If you want bread on the side instead of a sandwich, this homemade garlic bread loaf is a natural fit with a creamy tomato bowl. For a grilled cheese upgrade, a thin layer of garlic aioli adds savory depth without needing another filling.

  • Classic cheddar grilled cheese
  • Sourdough grilled cheese
  • Garlic bread
  • Parmesan croutons
  • Toasted cheese sandwich
  • Basil oil or fresh basil
  • Simple green salad
  • Roasted vegetables
  • Crusty bread
  • Parmesan toast

Mistakes to Avoid

  • Adding too much broth early: start with the listed amount, then adjust after blending.
  • Skipping the tomato paste step: cooked tomato paste gives deeper flavor.
  • Using bland fresh tomatoes without roasting: watery tomatoes make watery soup.
  • Adding cream before blending: the base should be smooth first.
  • Boiling after adding cream: gentle heat keeps the texture creamy.
  • Under-seasoning: tomato-based soups often taste flat until they have enough salt.
  • Overdoing the roux: too much flour can dull the tomato flavor.

Troubleshooting

Most problems come down to the same three things: acidity, thickness, and heat. If your first taste seems too sharp, do not panic. Tomato soups often settle after a few more minutes of simmering and a small amount of cream or butter.

Tomato Bisque Troubleshooting Guide
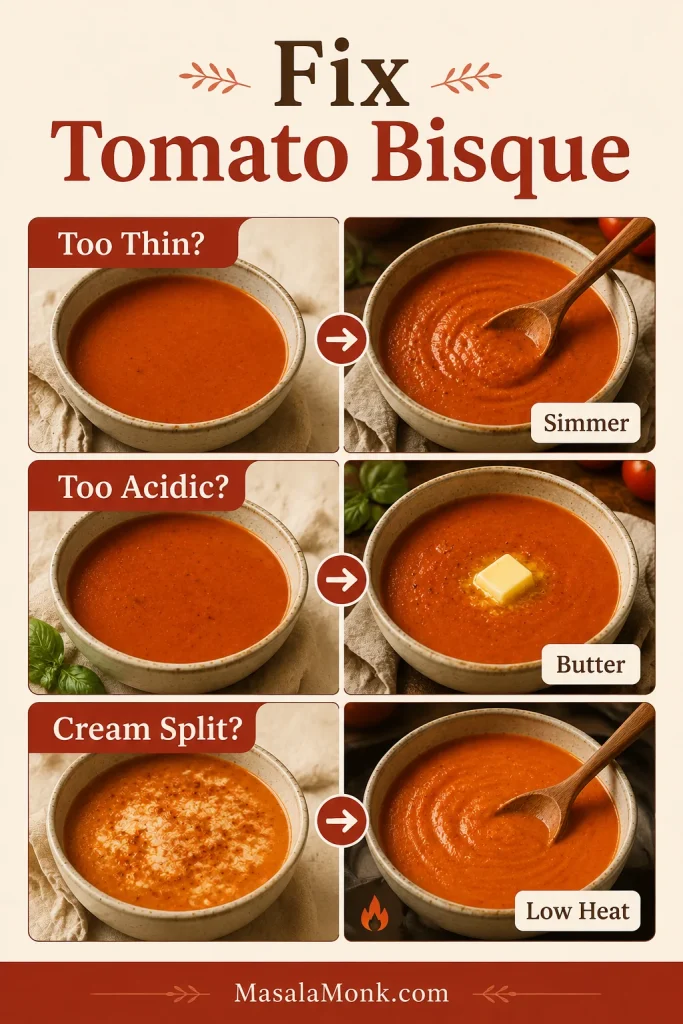
Troubleshooting guide for tomato bisque showing fixes for soup that is too thin, too acidic, or has split cream.
Most tomato bisque problems have simple fixes: simmer thin soup, soften sharpness with butter or cream, and lower the heat if cream splits.

Why does it taste too acidic?

Simmer it a little longer, then taste again. If it still tastes sharp, add a pinch of sugar, a little more cream, or a tablespoon of butter. A very small pinch of baking soda can also help, but use less than 1/8 teaspoon to start. Too much baking soda can make the soup taste dull.

How do I fix thin soup?

Simmer uncovered for a few more minutes. For a thicker version, use the optional roux, add cream or cashew cream, or blend in a little more cooked carrot.

How do I thin it without making it watery?

Add broth or water a little at a time until it reaches the texture you like. Warm gently and taste again after thinning because you may need more salt or pepper.

Why did the cream split?

The heat was probably too high. Add cream after blending, lower the heat, and warm the soup gently. Avoid boiling once the cream is in the pot.

How do I make it smoother?

Blend it longer. A countertop blender gives a silkier texture than an immersion blender. For a very smooth restaurant-style finish, strain the blended soup through a fine mesh sieve before adding cream.

Why does it taste flat?

Add salt first. If it still needs brightness, add black pepper, fresh basil, Parmesan, or a tiny splash of lemon juice.

Storage, Freezing, and Reheating

This soup reheats well, especially if you store the tomato base before adding cream. Reheated gently, it makes tomorrow’s lunch feel planned instead of leftover.

How long does it last in the fridge?

Cool the soup before storing, and refrigerate leftovers within 2 hours. Store it in an airtight container for 3 to 4 days. For general leftover safety, the USDA’s leftovers and food safety guide also recommends using refrigerated leftovers within 3 to 4 days.

Can you freeze it?

It freezes best before cream is added. Freeze the blended tomato base for up to 3 months, then thaw, reheat, and stir in the cream at the end. If the soup already has cream in it, you can still freeze it, but the texture may be less smooth after thawing.

How should you reheat it?

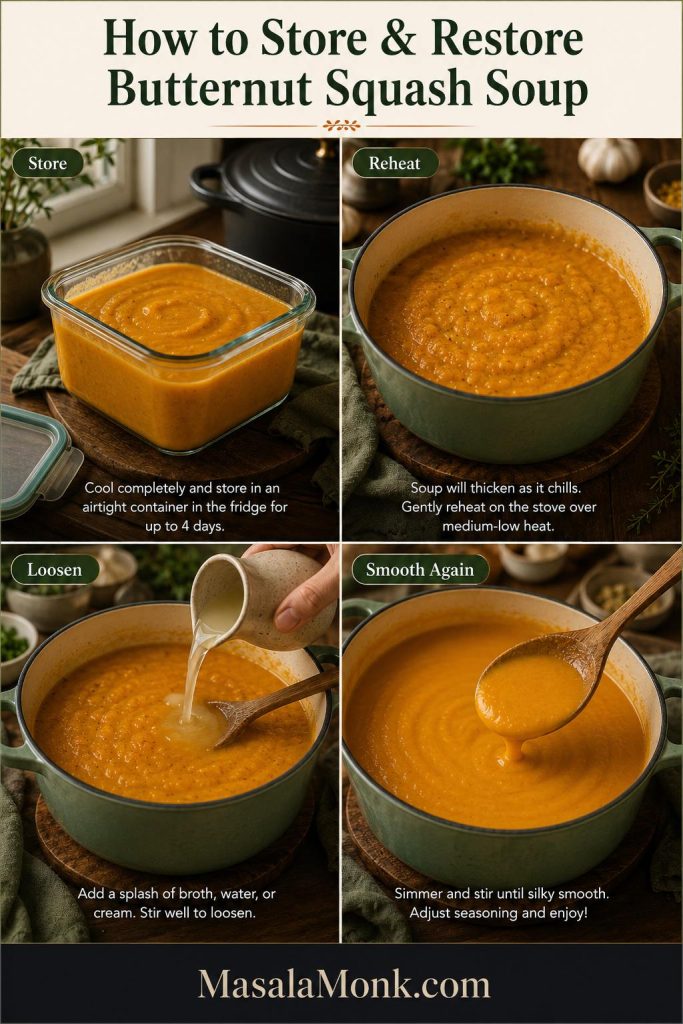
Reheat over low to medium-low heat, stirring often. Do not boil hard after cream has been added. Add a splash of broth or water if the soup thickens in the fridge.

If you want a chunkier tomato-broth soup with beans, vegetables, and pasta, this minestrone soup recipe is the better direction for another night.

FAQs

What is the difference between tomato soup and tomato bisque?

Tomato bisque is usually smoother, creamier, and richer than basic tomato soup. It is blended until silky and finished with cream, butter, milk, or a creamy alternative. Some restaurant-style versions also use a roux.

Are canned tomatoes or fresh tomatoes better?

Canned tomatoes are better for reliable flavor and easy cooking. Fresh tomatoes are best when they are ripe, sweet, and in season. If fresh tomatoes taste watery, roast them first or combine them with canned tomatoes.

What kind of canned tomatoes should I use?

Whole peeled tomatoes are the best first choice because they usually bring the best balance of flavor and body. Crushed tomatoes are the easier shortcut when you want less blending. Diced tomatoes can work, but they may need more blending.

How many fresh tomatoes replace a 28 oz can?

Start with about 2.5 lb / 1.1 kg ripe tomatoes to replace one 28 oz / 794 g can. Go up to 3 lb / 1.35 kg if your tomatoes are watery or you want a fuller fresh-tomato base.

Does tomato bisque need cream?

Classic tomato bisque is usually creamy, but you have options. Heavy cream is richest, half-and-half is lighter, and cashew cream works well for dairy-free soup.

What is the best way to thicken tomato bisque?

Blend the vegetables into the soup, start with controlled broth, and simmer uncovered if needed. For a restaurant-style texture, use a small roux with butter and flour. A dairy-free thicker soup can use cashew cream.

Can you make tomato bisque from canned tomato soup?

Yes. Add milk or half-and-half to condensed tomato soup, then season it with butter, garlic powder, onion powder, basil, black pepper, and Parmesan. A splash of cream can make it richer, but a full can of cream may be too heavy.

How do I make vegan tomato bisque?

Use vegetable broth, olive oil instead of butter, and cashew cream or another dairy-free cream instead of heavy cream. Cashew cream gives the most neutral creamy texture.

Can you freeze tomato bisque without ruining the texture?

Freeze the blended tomato base before adding cream. Thaw, reheat gently, and stir in the cream at the end. If the soup already contains cream, the texture may change slightly after freezing.

What goes well with tomato bisque?

Grilled cheese is the classic pairing. It also goes well with garlic bread, Parmesan croutons, sourdough toast, basil oil, a green salad, roasted vegetables, or a toasted cheese sandwich.

The Bowl You’re Aiming For

Once you understand the method, this soup becomes flexible. Make it richer, make it fresher, add basil, roast the tomatoes, or rescue a can on a busy night. As long as you smooth the base before thinning and add cream gently at the end, you are in control of the bowl.

Are you making the classic creamy version, the fresh tomato version, or the canned-soup shortcut tonight? Whichever way you go, keep the order gentle: blend the base smooth, adjust the body slowly, and add the cream at the end. Do that, and you get a glossy, velvety bowl with enough richness for comfort and enough brightness to keep every spoonful alive.

Ladle it into a warm bowl, add basil or a swirl of cream, and keep the grilled cheese close.
Posted on Leave a comment

Smoked Haddock Chowder Recipe: Creamy, Smoky, Easy Fish Soup

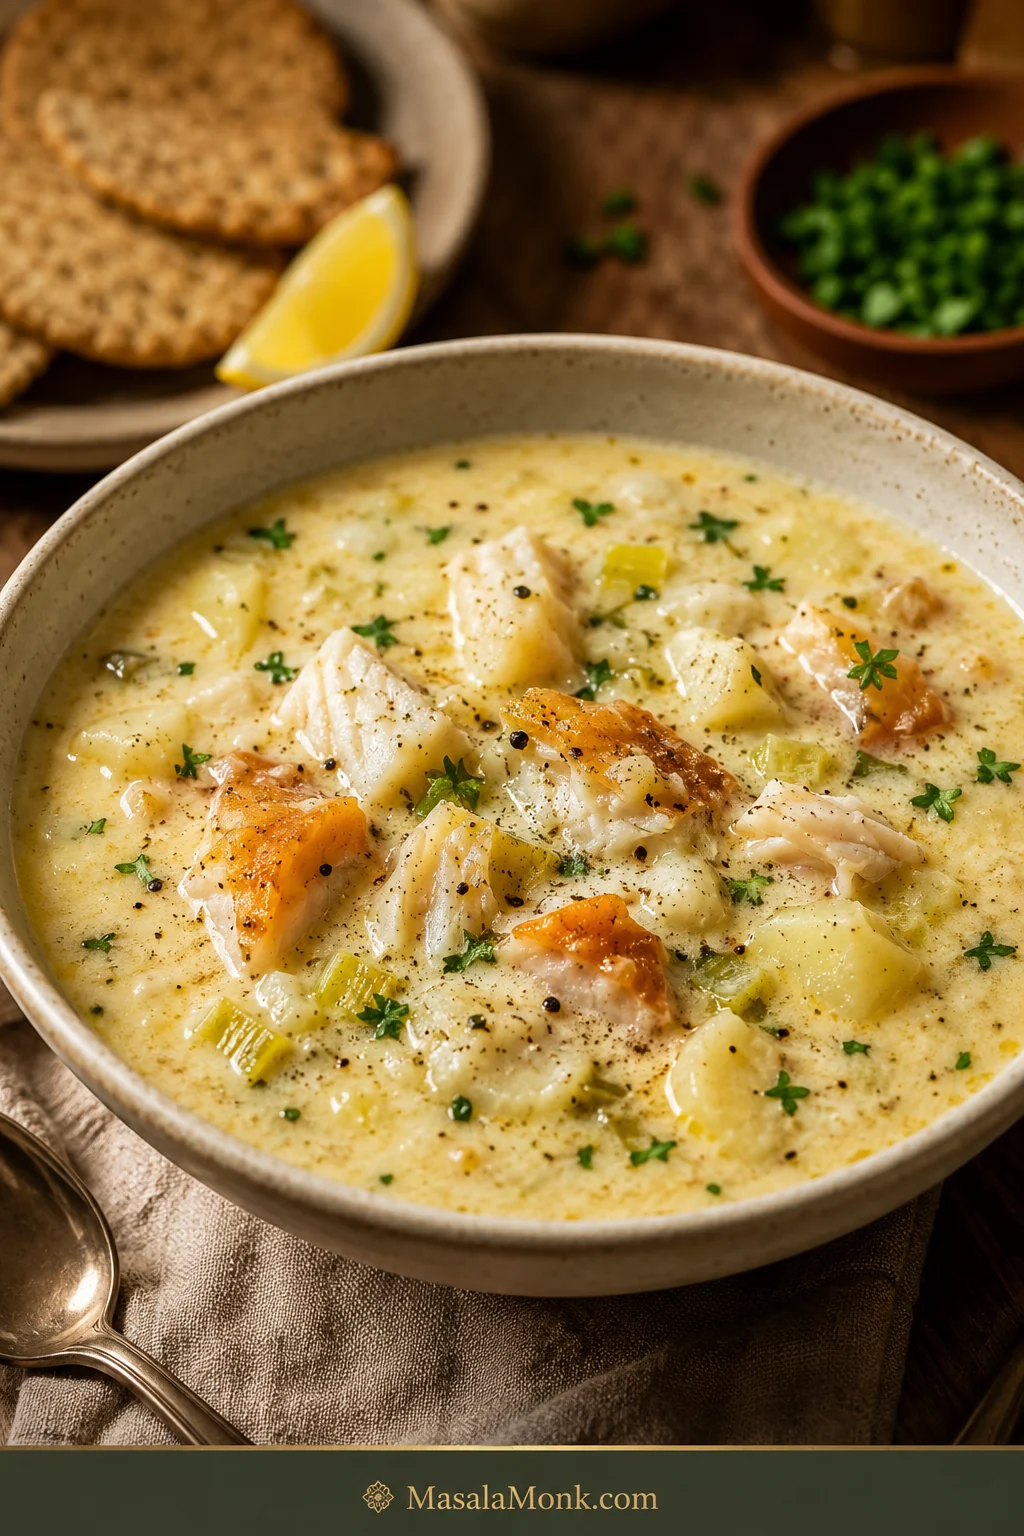
Bowl of smoked haddock chowder with fish flakes, potato chunks, herbs, black pepper, crackers, and a lemon wedge on a wooden table.

A good smoked haddock chowder should feel like a full meal in a bowl: soft potatoes, tender flakes of fish, and a creamy broth that carries the smoke without turning salty or heavy. This version is smoke-kissed enough to feel special, rounded enough to be comforting, and sturdy enough to serve with nothing more than bread on the side.

This version keeps the base simple: smoked haddock, milk, potatoes, leek, onion, celery, and herbs. From there, you can make the bowl sweeter with sweetcorn, richer with cream, deeper with bacon, or more seafood-forward with prawns. The heart of the recipe stays the same: gently poached smoked fish, smoky milk, and potatoes mashed just enough to thicken the soup naturally.

The method is built to avoid the usual smoked haddock chowder problems: over-salted broth, split milk, rubbery flakes, and a thin base. It feels like weekend comfort, but the cooking is simple enough for a weeknight.
Those small details matter most at the end, when the milk, seasoning, and flaked haddock come together. For another cozy fish-and-potato bowl, this creamy salmon soup follows the same comforting, gentle-cooked idea.

Quick Answer: What Is Smoked Haddock Chowder?

Smoked haddock chowder is a creamy fish soup made with smoked haddock, potatoes, leek or onion, and milk. The best method is to poach the haddock gently in milk first, use that smoky milk in the soup base, mash some potatoes for body, then fold the fish back in at the end so it stays tender.

It is closely related to Cullen skink, the traditional Scottish smoked haddock soup, but chowder is broader and more flexible. Cullen skink usually stays close to smoked haddock, potatoes, onion or leek, milk, and sometimes cream. Chowder can include sweetcorn, bacon, celery, prawns, stock, herbs, or a richer creamy finish.
The key: Treat the haddock gently. Once it has been poached, the chowder is mostly about building a soft potato base and folding the fish back in without breaking it up.

Jump to the recipe card · See the 3 rules first

Before You Cook: 3 Things That Make the Chowder Better

Smoked haddock is easy to cook, but it has a strong personality. A little care with heat and seasoning keeps the chowder mellow, creamy, and balanced.

  1. Save salt for the end. Smoked haddock, bacon, pancetta, and stock can all bring salt. Taste the finished chowder before seasoning.
  2. Keep the dairy gentle. Milk and cream stay smoother when they are warmed quietly instead of pushed into a rolling boil.
  3. Warm the fish through instead of re-cooking it. Once the haddock is poached and flaked, it only needs a few minutes in the finished chowder.
Guide graphic showing three smoked haddock chowder rules: salt at the end, keep dairy gentle, and warm fish through.
These three rules protect the chowder before trouble starts: season late, keep the dairy gentle, and warm the fish through instead of boiling it.

Best for: smoky comfort without an over-salted soup, a creamy chowder without a heavy roux, and one base recipe you can turn sweeter with sweetcorn, deeper with bacon, or more seafood-forward with prawns.

Jump to the recipe card

Smoked Haddock Chowder Recipe

Easy Creamy Smoked Haddock Chowder

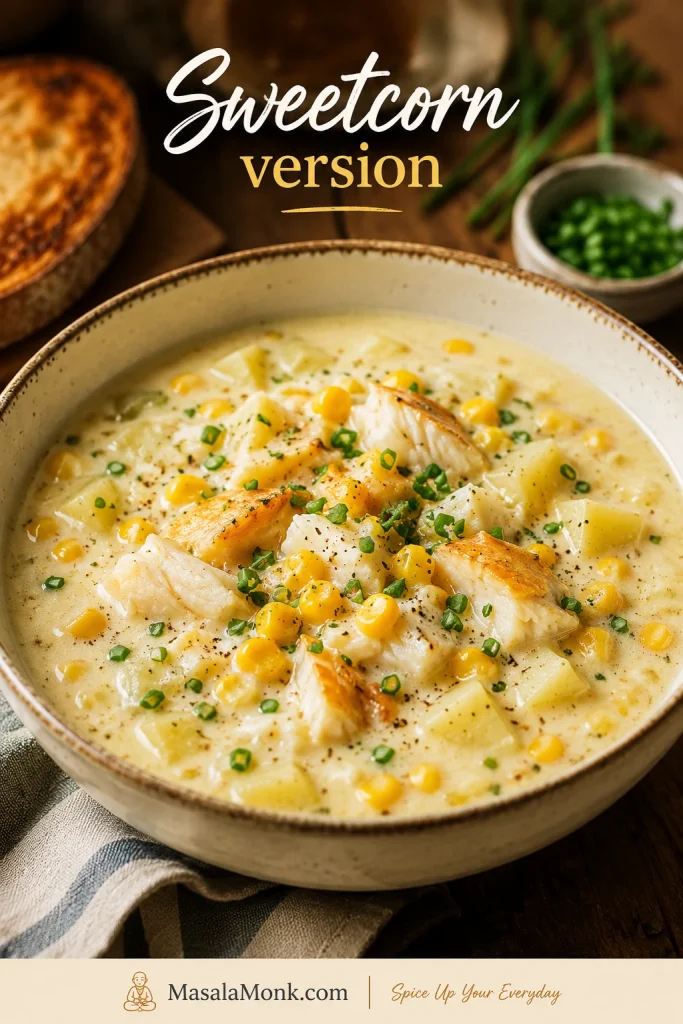
This is a cozy stovetop chowder with milk-poached smoked haddock, soft potatoes, leek, onion, celery, and herbs. Sweetcorn is optional but lovely for a sweeter family-style bowl; cream and bacon are optional richer finishes. The potatoes thicken the base naturally, the poaching milk carries the smoked-fish flavour, and the haddock goes back in at the end so the flakes stay tender.

Prep time15 minutes
Cook time35 to 40 minutes
Total time50 to 55 minutes
Servings4 generous bowls
MethodStovetop
DifficultyEasy
TextureCreamy, chunky, smoky, spoon-coating

Ingredients

  • 400 to 450 g / 14 to 16 oz smoked haddock fillets
  • 600 ml / 2½ cups whole milk
  • 250 to 300 ml / 1 to 1¼ cups unsalted fish stock, unsalted vegetable stock, or water
  • 500 to 600 g / 1 lb 2 oz to 1 lb 5 oz potatoes, peeled and diced into 1 to 1.5 cm pieces
  • 1 large leek, cleaned and sliced
  • 1 small onion, finely chopped
  • 1 celery stick, finely sliced
  • 30 to 40 g / 2 to 3 tablespoons unsalted butter
  • 1 bay leaf
  • 1 teaspoon thyme leaves, or 2 thyme sprigs
  • 100 to 150 g / about ⅔ to 1 cup sweetcorn, optional, recommended for a sweeter family-style bowl
  • 75 to 100 ml / ⅓ cup to scant ½ cup cream, optional
  • 75 to 100 g / about 2½ to 3½ oz bacon or pancetta, optional
  • Black pepper, to taste
  • Chopped parsley or chives, to finish
  • Lemon wedges, optional

Salt note: Taste after the smoked haddock is back in the pot, then add salt only if the chowder needs it.

Instructions

Poach the fish and start the base

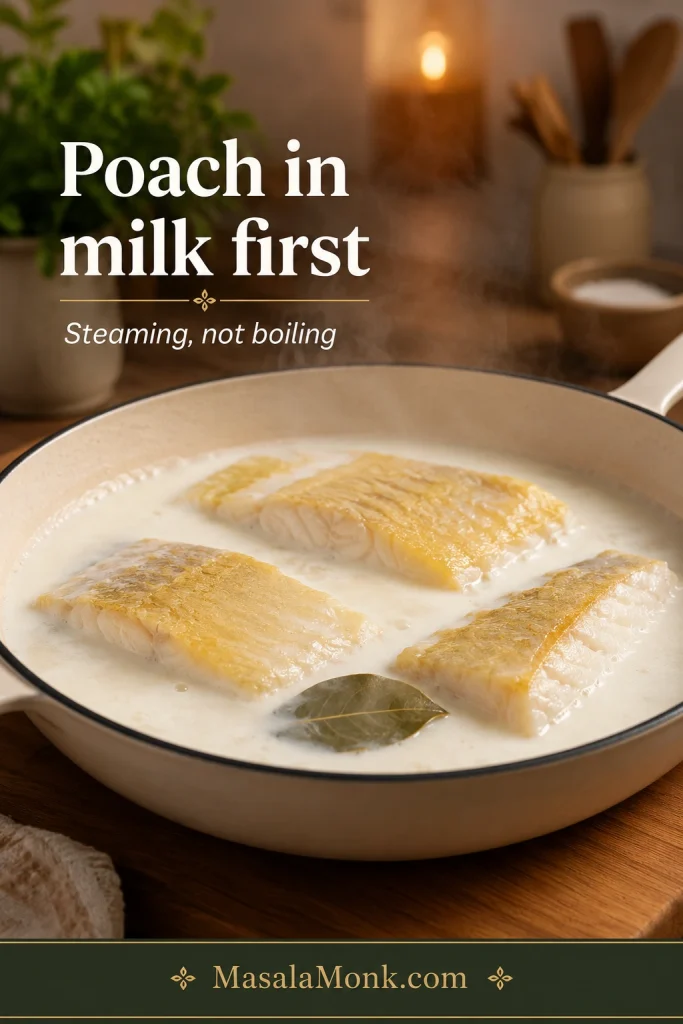
  1. Poach the smoked haddock. Place the smoked haddock in a wide pan. Add the milk and bay leaf. Warm over low to medium-low heat until the milk is steaming and barely simmering.
  2. Cook the fish gently. Poach for 5 to 7 minutes, depending on thickness, until the fish is opaque and flakes easily.
  3. Reserve the smoky milk. Lift the fish out with a slotted spoon. Strain and reserve the poaching milk. Remove skin or bones if needed, then flake the haddock into large pieces.
  4. Start the base. Melt the butter in a large soup pot over medium-low heat. If using bacon or pancetta, cook it first until golden, then remove some crispy pieces for topping if you like.
  5. Soften the vegetables. Add the leek, onion, and celery. Cook for 8 to 10 minutes, stirring often, until soft and glossy but not browned. The leeks should smell sweet before the potatoes go in.

Thicken, finish, and serve

  1. Simmer the potatoes. Add the diced potatoes, thyme, and unsalted stock or water. Simmer for 10 to 15 minutes, or until the potatoes are tender.
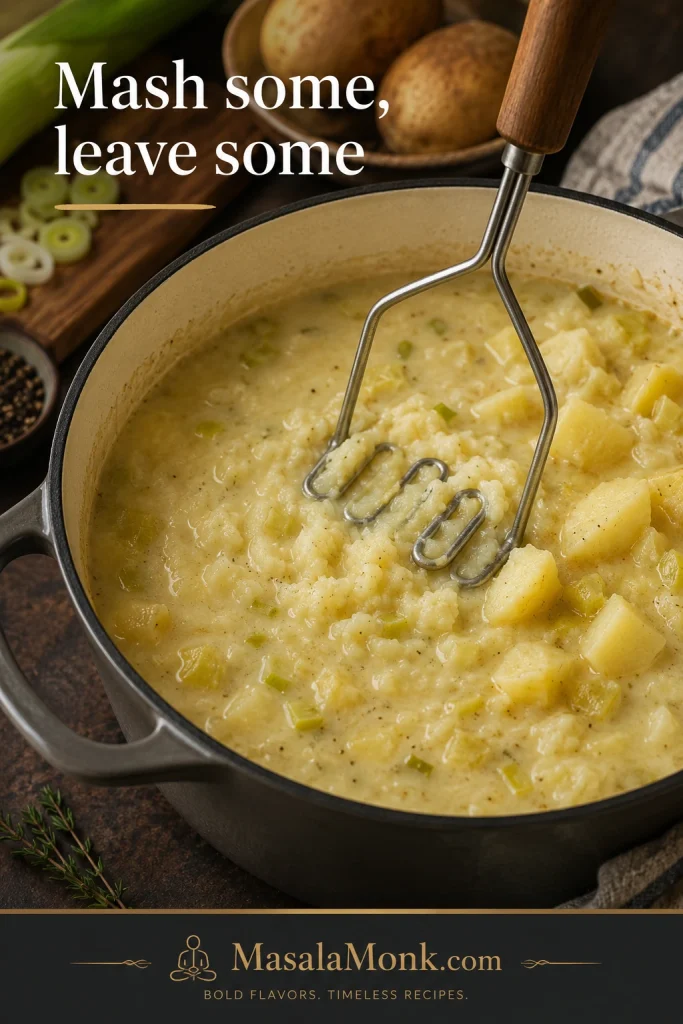
  2. Thicken naturally. Mash some of the potatoes directly in the pot. Leave some chunks whole so the bowl stays hearty.
  3. Add the milk and sweetcorn. Pour in the reserved poaching milk. Add the sweetcorn, if using. Warm gently for 3 to 5 minutes.
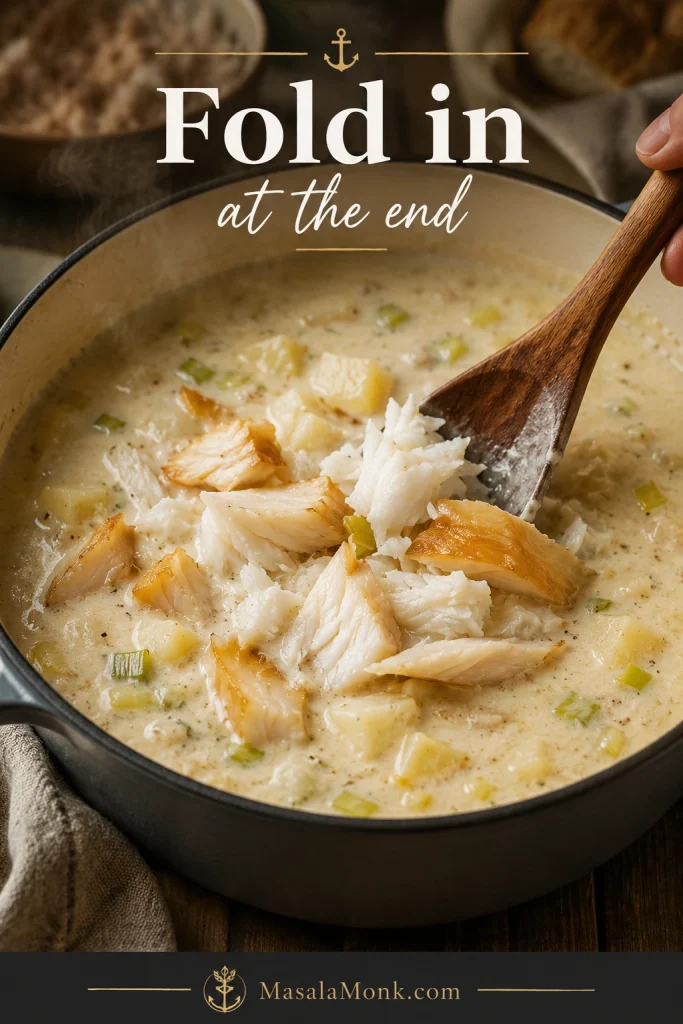
  4. Finish with cream and fish. Stir in the cream, if using, then add the flaked smoked haddock. Keep the heat low and warm through for 2 to 3 minutes. The pot should be hot, not bubbling hard.
  5. Rest, taste, and serve. Let the chowder sit off the heat for 5 minutes if you have time; the potatoes settle and the smoky flavour rounds out. Finish with black pepper, herbs, lemon, and a little salt only if needed. Serve hot with crusty bread, toast, oatcakes, crackers, or a simple green salad.

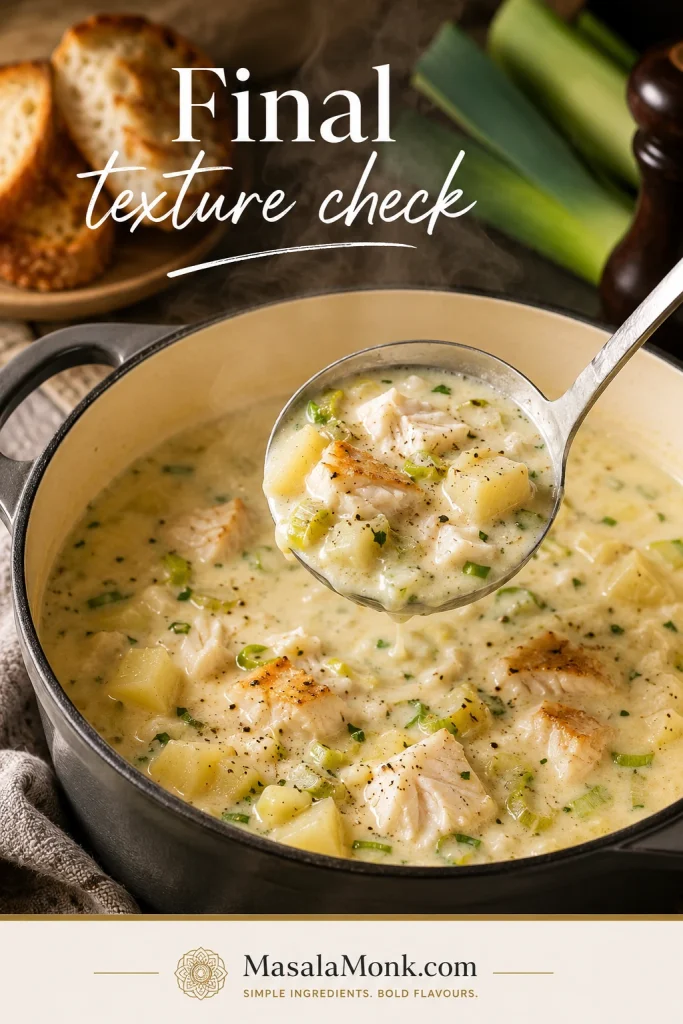
Best texture cue: The chowder should be spoon-coating, with tender potato pieces and large flakes of fish. It should feel generous, creamy, and smoky without becoming heavy.

Once you understand the base, this chowder becomes easy to bend. Keep the fish tender, keep the seasoning balanced, then choose the version that fits the meal you want.

See the variations · Need a fix?

Smoked Haddock Chowder Variations: Sweetcorn, Bacon, Prawn, Creamy, or Lighter

Choose the bowl you want, but keep the spine of the recipe steady: smoked fish, milk, potatoes, leek or onion, and gentle heat. The variations below let you make the same pot lighter, richer, sweeter, or more generous without relearning the recipe.

Six-panel guide showing classic, sweetcorn, bacon, prawn, lighter, and Cullen skink-style smoked haddock chowder variations.
After the base is right, choose the mood of the bowl: sweeter with sweetcorn, richer with bacon, lighter without cream, or more seafood-forward with prawns.
If you want…Do thisResult
Classic cozy bowlUse milk, potatoes, leek, onion, celery, thyme, and a little cream.Rounded, creamy, balanced
Lighter weeknight bowlSkip bacon and cream, mash extra potatoes, and finish with herbs and lemon.Creamy without feeling heavy
Sweetcorn chowderAdd 100 to 150 g / about ⅔ to 1 cup sweetcorn near the end.Softer smoke, little sweet pops
Bacon chowderCook bacon or pancetta first, then soften the vegetables in the fat.Deeper, savoury, bacon-smoky
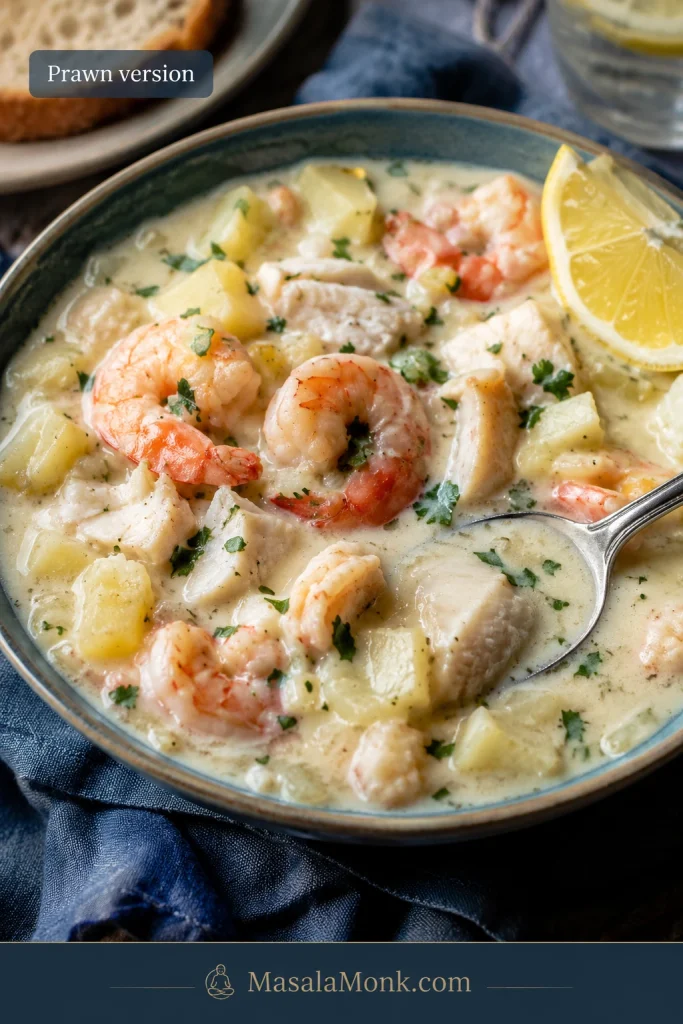
Prawn or shrimp chowderAdd raw prawns or large shrimp near the end and cook just until pink.More seafood-forward and generous
Cullen skink-style bowlSkip sweetcorn, bacon, celery, and prawns. Keep smoked haddock, potatoes, onion or leek, milk, and herbs.Simpler, cleaner, more traditional
Dairy-free coconut bowlUse light coconut milk and water instead of dairy milk and cream.Smoke-kissed, lighter, less traditional

Why This Recipe Works

Milk-poaching makes the biggest difference. The fish cooks quietly, the milk takes on a gentle smoke, and the kitchen starts to smell smoky and savoury before the soup base is even built.

Potatoes give the soup body without needing a heavy flour base. Once they are tender, mash some directly into the pot. The starch thickens the broth naturally, leaves the flavour cleaner than a roux, and still gives you enough potato chunks to make the bowl feel hearty.

Adding the fish back at the end keeps the flakes large and tender instead of dry, rubbery, or broken into tiny pieces. The same gentle-finish idea also matters in creamy fish dishes like this creamy salmon pasta.

Late seasoning keeps the bowl balanced. Smoked haddock varies from mild to very salty, and richer add-ins like bacon or pancetta can change the salt level quickly. Waiting until the end gives you control.

The Texture We’re Going For

The finished chowder should sit in the comfortable middle: thicker than a thin fish soup, lighter than a heavy seafood stew, and creamy without becoming heavy or stodgy. The broth should coat a spoon lightly, the potatoes should be soft, and the fish should stay tender instead of breaking down into the base.

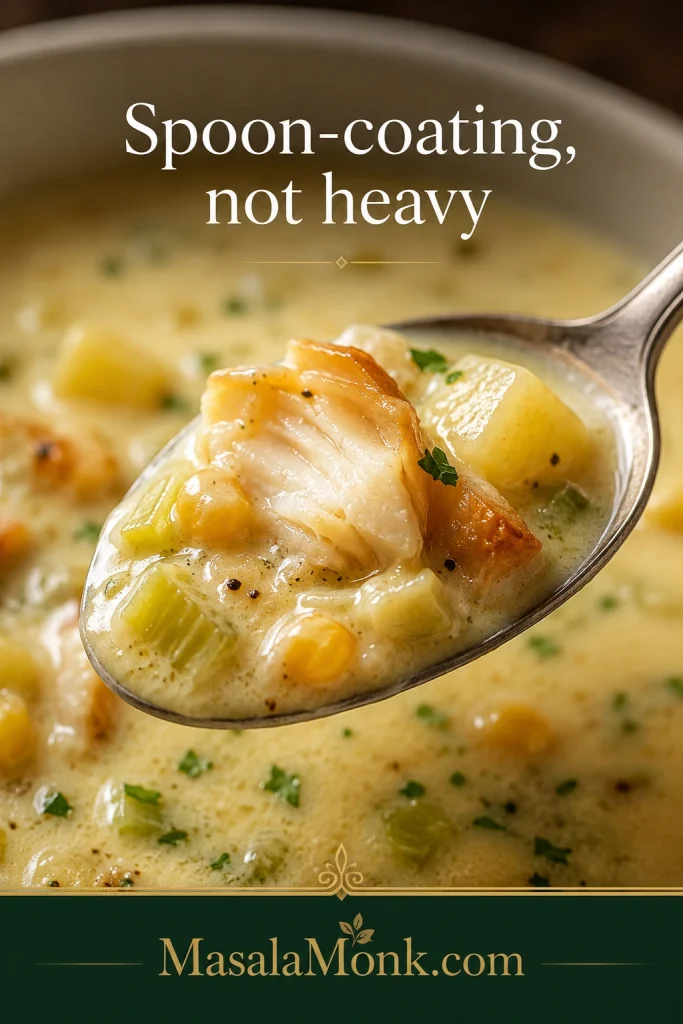
Spoon lifting smoked haddock chowder with creamy broth, fish flakes, potato, leek, herbs, and a few sweetcorn kernels.
Look for this texture at the end: spoon-coating broth with tender haddock flakes and potato pieces still clearly visible.

The finished bowl should feel settled and comforting: soft potatoes, mellow smoke, and clear pieces of haddock, not tiny fragments lost in the soup. If the pot looks a little loose before the haddock goes back in, give the potatoes a gentle mash and a few minutes to settle. If it looks too thick, a splash of warm milk or unsalted stock will bring it back.

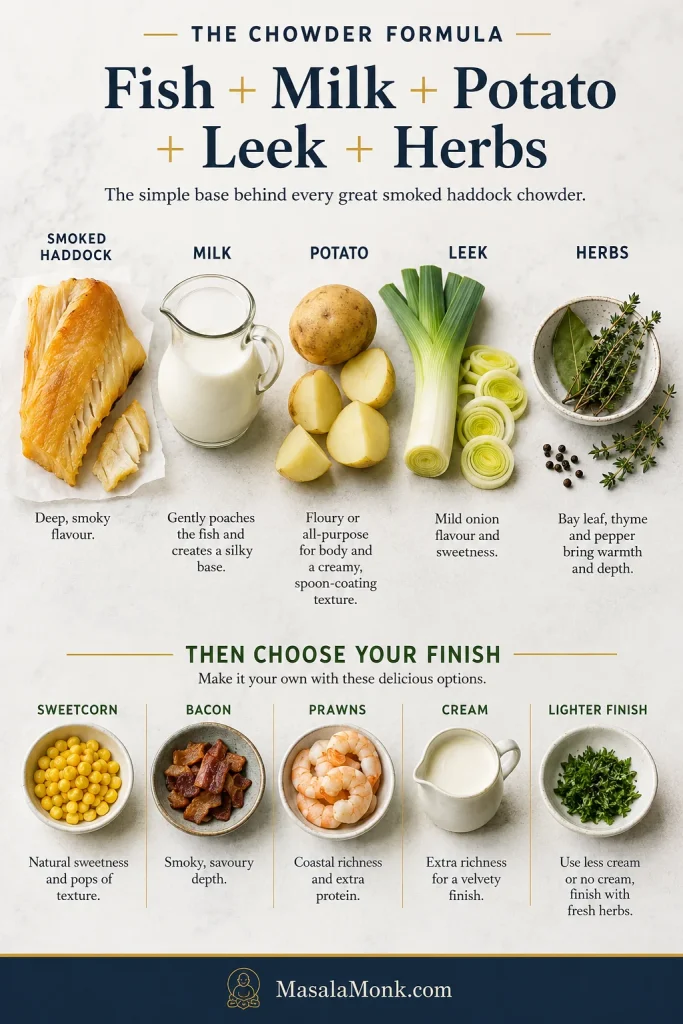
The Chowder Formula

Once the fish is handled gently, the rest of the chowder is built from simple, comforting things: potatoes for body, leek for sweetness, milk for softness, and herbs for a fresh finish.

Ingredient guide showing a smoked haddock chowder formula with fish, milk, potatoes, leek, herbs, and optional finishes.
The formula is easy to remember: smoked fish for depth, milk for softness, potatoes for body, leek for sweetness, and herbs for lift.
FishSmoked haddock, ideally undyed if available
BaseWhole milk for poaching, plus unsalted stock or water for the potatoes
BodyDiced potatoes, partly mashed into the soup
SweetnessLeek, onion, and optional sweetcorn
RichnessCream or bacon, both optional
FreshnessParsley, chives, black pepper, and lemon at the end
Main cueQuiet heat after the dairy and fish go in

Ingredients and Smart Swaps

The ingredient list is simple, but each choice shapes the bowl: smoke from the fish, sweetness from the leek, body from the potatoes, softness from the milk, and freshness from herbs and lemon.

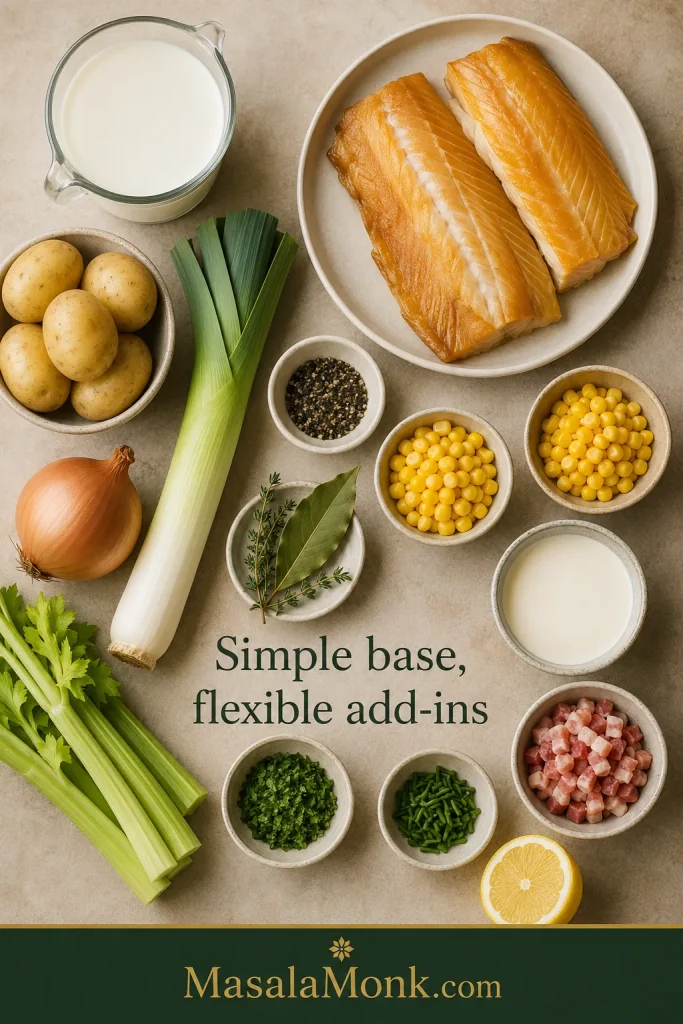
Overhead flatlay of smoked haddock, milk, potatoes, leek, onion, celery, herbs, sweetcorn, cream, bacon, lemon, and seasonings.
Because smoked haddock brings plenty of flavour, the best base stays simple: milk, potatoes, leek, onion, celery, herbs, and only the extras you need.

Smoked Haddock

Choosing the Fish

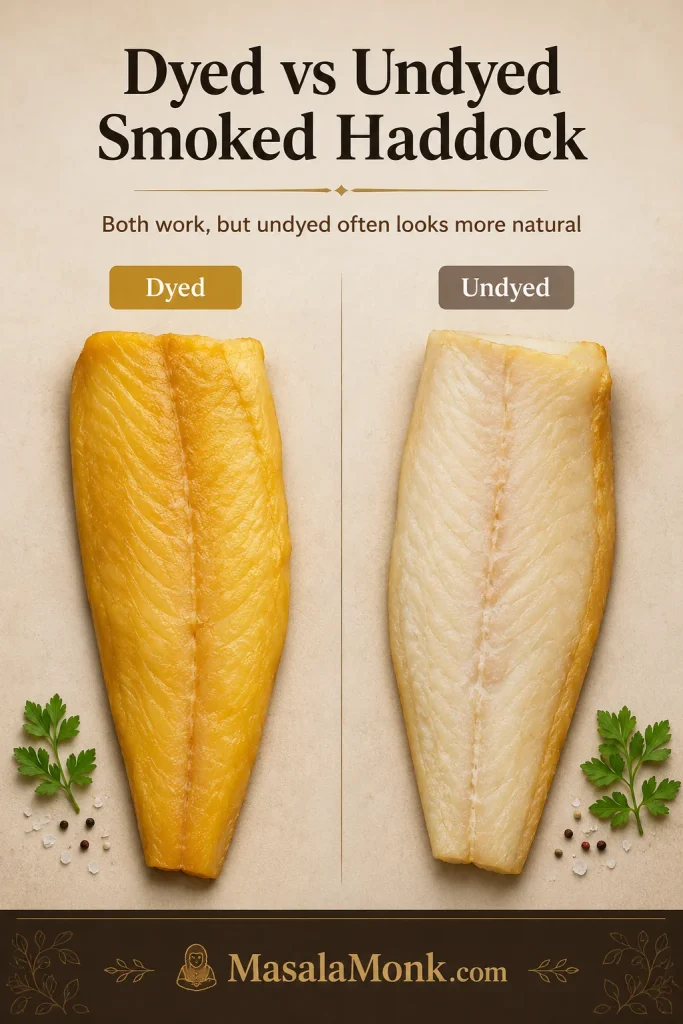
Use 400 to 450 g / 14 to 16 oz smoked haddock for four generous bowls. Undyed smoked haddock is ideal if you can find it because the colour is natural and the flavour is usually cleaner. Dyed smoked haddock also works, but it will give the soup a stronger yellow colour.

Side-by-side comparison of yellow dyed smoked haddock and paler undyed smoked haddock on a light surface.
Dyed haddock works, but undyed smoked haddock usually gives the chowder a cleaner colour and a more natural-looking finished bowl.

When the fish has skin, poach it with the skin on, then remove the skin before flaking. Pull out any bones as you break the fish into large pieces.

Frozen Fish, Substitutes, and Salt Balance

Frozen smoked haddock works well when it is thawed overnight in the fridge before poaching. Pat it dry, then cook gently as usual. When poaching from frozen, use lower heat and allow extra time, though thawed fish gives better texture and more even cooking.

When smoked haddock is unavailable, use smoked cod, smoked pollock, smoked whiting, or another smoked white fish. For very strong smoked fish, use part smoked fish and part plain white fish.

Very strong or salty haddock can overpower the pot, so use a little less of the poaching milk and balance the chowder with fresh milk, unsalted stock, or extra potato. You still get the smoked-fish flavour without letting it take over the bowl.

Extra cooked smoked haddock is worth keeping in large flakes for potato-based leftovers. This crispy fish cakes recipe is a useful next idea when you have fish and potato to use up.

Milk

Whole milk gives the best texture and flavour because it does two jobs at once: it poaches the fish and becomes part of the base. Semi-skimmed or 2% milk can work too, but it needs lower heat because leaner milk is less forgiving.

Potatoes

Floury potatoes make the thickest, creamiest chowder because they break down slightly. Maris Piper, King Edward, Russet, or Yukon Gold are all good choices. Waxy potatoes hold their shape and give a chunkier bowl, which is also fine if that is what you like.

Dice the potatoes into roughly 1 to 1.5 cm pieces so they cook in 10 to 15 minutes. Mash some of the cooked potatoes into the soup before adding the fish back, and leave the rest whole for texture. The best bowls have both: a rounded base from the mashed edges and a few soft pieces left for the spoon.

You can replace 150 to 200 g of the potato with sweet potato for a slightly sweeter chowder, especially if you are using prawns, sweetcorn, or a lighter no-cream version.

Leek, Onion, and Celery

Leek gives a soft sweetness that suits smoked fish. Slice it, then rinse well in a bowl or colander to remove grit between the layers. Onion adds depth, and celery gives the pot a classic savoury base.

If you only have onion, use one large onion and skip the leek. If you love leeks, use two leeks and skip the onion. For a more leek-forward smoked haddock and leek chowder, use two leeks and skip the celery.

Sweetcorn

Sweetcorn is optional, but it works beautifully here. It gives little pops of sweetness against the creamy potato base and softens the salty-smoky edge of the fish. Frozen sweetcorn can go straight into the hot chowder. Canned sweetcorn should be drained first. Fresh corn can be cut from the cob and simmered for a few minutes until tender.

Stock or Water

Unsalted fish stock, unsalted vegetable stock, or water gives you the most control. If your stock is already salted, start with less and adjust the finished bowl instead of seasoning early.

Bacon or Pancetta

Bacon or pancetta makes the bowl deeper, richer, and more pub-style. Cook it first, then soften the leek and onion in the rendered fat. If the bacon releases plenty of fat, use less butter before adding the vegetables. Taste the finished chowder before seasoning because bacon can push the salt up quickly.

Cream

Cream is a finishing touch, not the thing that holds the chowder together. Single cream, heavy cream, or cooking cream all work. If using double cream, use the smaller amount because it is richer. Add cream near the end over low heat.

For another rich finish, stir in a small handful of mature cheddar off the heat. Keep it modest and taste before adding salt, because smoked haddock and cheese can make the bowl salty quickly.

Herbs, Pepper, Mustard, and Lemon

Parsley and chives bring freshness to the finished bowl. Black pepper works better than early salt. Lemon is optional, but a small squeeze at the end can wake up a rich chowder, especially if you used cream or bacon.

A small teaspoon of Dijon or English mustard can also sharpen the soup without making it taste obviously mustardy. It is especially useful if the base tastes creamy but a little flat.

Jump to the step-by-step method · Back to recipe card

Useful Equipment

You only need a wide pan for poaching, a soup pot for the base, a sieve for the smoky milk, and a potato masher or sturdy spoon for thickening. An immersion blender is optional, but blend only part of the potato mixture so the chowder keeps some texture.

How to Poach Smoked Haddock in Milk

Milk-poaching is the step that makes the chowder taste rounded instead of sharp. The fish cooks quietly, the milk absorbs the smoke, and you get a base that already tastes like smoked haddock before the soup is built.

Smoked haddock fillets gently poaching in milk in a shallow pan with a bay leaf and light steam.
Poaching the haddock in milk first does two jobs at once: it keeps the fish tender and turns the milk into the smoky chowder base.

Milk-Poaching Steps

  1. Place the smoked haddock in a wide pan in a single layer.
  2. Add the milk and bay leaf. The fish does not need to be submerged perfectly, but it should be mostly covered.
  3. Warm slowly over low to medium-low heat until the milk is steaming and just beginning to tremble at the edges.
  4. Poach for 5 to 7 minutes, depending on the thickness of the fillets.
  5. Lift the fish out as soon as it turns opaque and flakes easily. If checking with a thermometer, look for 63°C / 145°F.
  6. Strain the milk and keep it for the chowder. The reserved milk should smell gently smoky, not harsh; that is the flavour that will carry through the whole pot.
  7. Remove skin and bones if needed, then flake the haddock into large pieces.

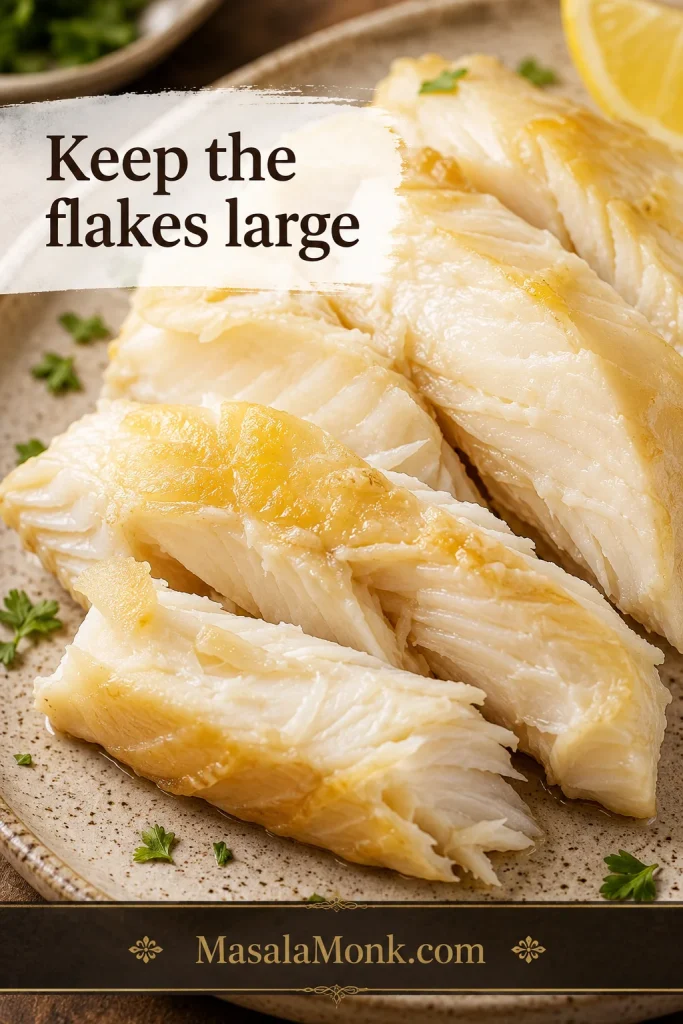
Visual cue: Keep the cooked haddock in large flakes before it goes back into the chowder.

Large flakes of cooked smoked haddock on a plate with the text “Keep the flakes large.”
Once the fish is cooked, flake it generously rather than finely so the haddock still feels like the main ingredient in each spoonful.

Give this step gentle heat and a few calm minutes. The fish may not look dramatic at this stage, and that is fine. You are only cooking it until it flakes, not trying to brown or crisp it.

Continue to the step-by-step method · Back to recipe card

How to Make Smoked Haddock Chowder

Once the haddock is poached and the smoky milk is reserved, the chowder comes together like a simple potato soup. Build flavour before the dairy goes back in, then finish with low, patient heat.

1. Soften the Leek, Onion, and Celery

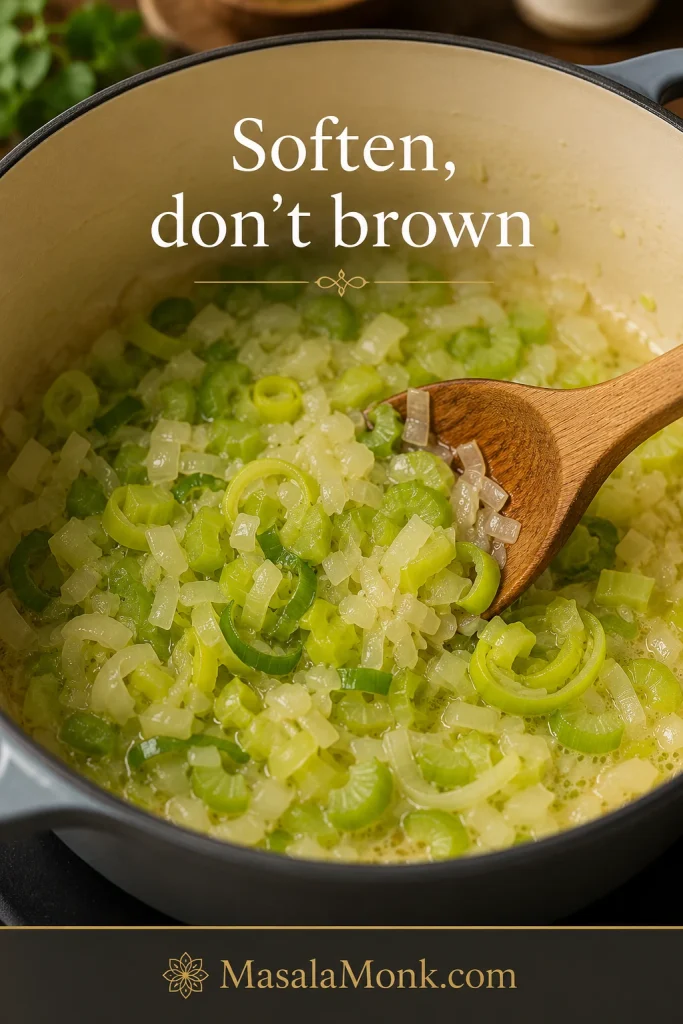
Melt the butter in a large soup pot over medium-low heat. Add the leek, onion, and celery, then cook for 8 to 10 minutes until soft and glossy. The vegetables should smell sweet and savoury, not browned.

Leek, onion, and celery softening in butter in a pan with a wooden spoon and the text “Soften, don’t brown.”
Soften the leek, onion, and celery until glossy and mellow; browning them pushes the chowder away from its soft, creamy flavour.

2. Simmer the Potatoes

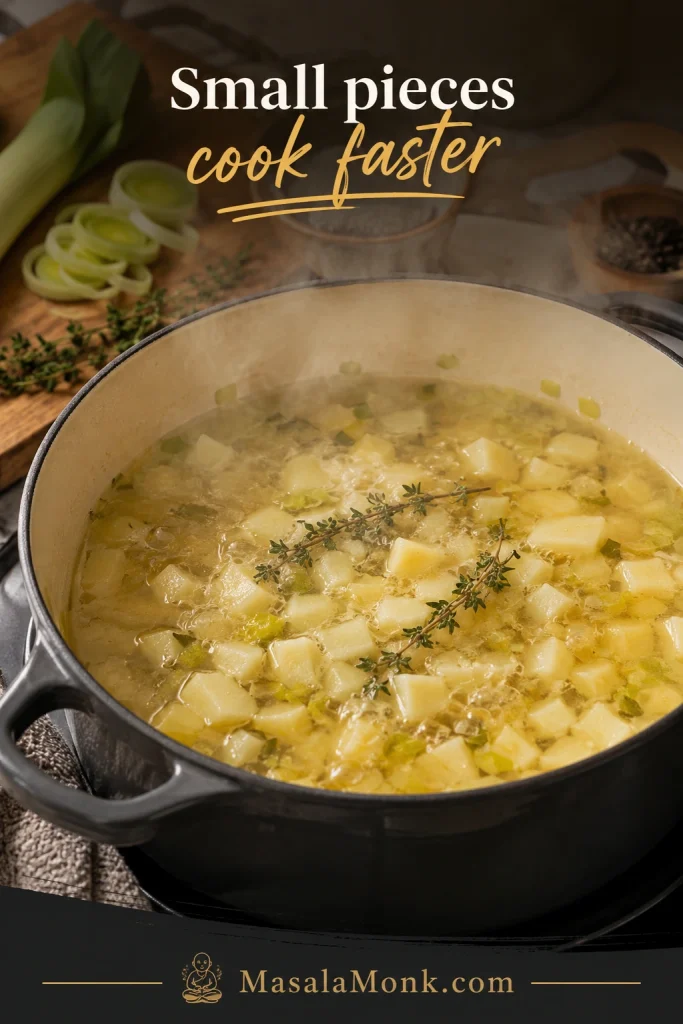
Add the diced potatoes, thyme, and unsalted stock or water. Simmer until the potatoes are tender, usually 10 to 15 minutes. Smaller potato pieces cook faster and make the chowder easier to thicken.

Diced potatoes simmering with leek and thyme in a pot, with the text “Small pieces cook faster.”
Next, simmer small potato pieces until tender so they cook evenly and can later thicken the chowder without a floury roux.

3. Mash Some Potatoes for Body

Mash some of the potatoes directly in the pot. This is the easiest way to thicken the soup without making it heavy. Leave enough potato chunks whole so each bowl still has texture.

Potato masher pressing cooked potatoes in a pot with leeks, leaving some potato chunks whole.
Mash only part of the potatoes into the pot; that gives the chowder body while leaving enough chunks for a hearty bowl.

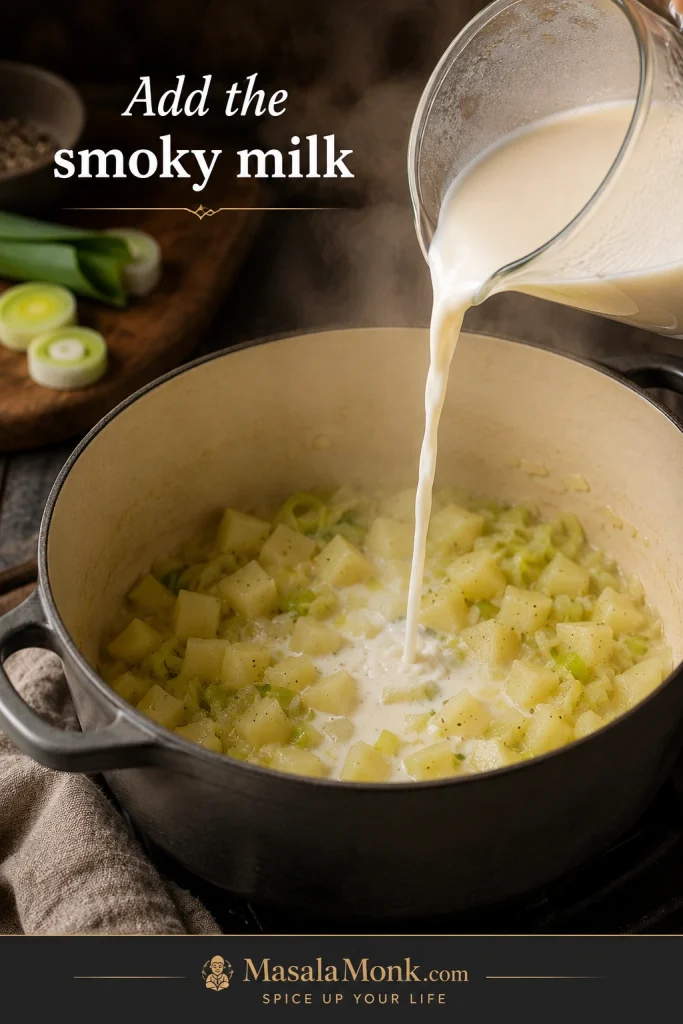
4. Add the Reserved Smoky Milk

Pour in the strained poaching milk and stir gently. The pot should start to smell smoky and mellow, not sharp or fishy. This is the moment it starts to taste like chowder instead of potato soup. If the chowder looks a little loose, mash a few more potatoes and let the base settle for a minute.

Milk being poured from a jug into a pot of potatoes and leeks with steam rising.
Then pour in the reserved smoky milk slowly, letting the potato base loosen into a creamy chowder instead of a thin soup.

5. Finish With Fish, Sweetcorn, and Cream

Stir in the sweetcorn and warm it through. Add the cream if using, then fold in the flaked smoked haddock. A few broken flakes are fine; just avoid stirring so hard that the fish disappears into the soup.

Large flakes of smoked haddock being folded into creamy chowder in a pot with a wooden spoon.
Add the haddock near the end and fold gently, because the flakes only need to warm through, not simmer for ages.

6. Taste at the End

Finish with black pepper, parsley or chives, and a squeeze of lemon if the chowder needs brightness. Add mustard if the base tastes creamy but flat. The final herbs and lemon lift the bowl and make it feel rich without becoming heavy.

Check final texture cues · Troubleshoot the chowder

Final Texture and Taste Cues

A good smoked haddock chowder should look smooth and spoon-coating, not gluey. The broth should coat a spoon lightly, the potatoes should be tender, and the haddock should sit in large flakes rather than tiny broken pieces. The bowl should feel generous, not heavy.

Ladle lifting finished smoked haddock chowder with fish flakes, potatoes, leeks, herbs, and creamy broth.
Before serving, check the ladle: you want creamy broth, tender fish, soft potatoes, and enough movement that the chowder still feels silky.
  • Fish: opaque, tender, and easy to flake.
  • Potatoes: soft enough to mash at the edges, with some chunks left whole.
  • Liquid: smooth and rounded, not separated or grainy.
  • Seasoning: smoke first, gentle sweetness from leek and corn, and only enough salt to feel balanced.

If the chowder tastes flat, it usually needs pepper, herbs, lemon, mustard, or a little extra smoked-fish flavour. If it tastes too salty, the fix is usually more potato, milk, cream, or unsalted stock.

More Ways to Adjust the Chowder

The base recipe gives you a classic spoon-coating chowder. These notes help you steer the same pot lighter, richer, sweeter, or more seafood-heavy without changing the method.

Creamy Version

A splash of cream makes the bowl fuller and softer. Stir in 75 to 100 ml / ⅓ cup to scant ½ cup near the end so it rounds out the broth without drowning the smoked fish.

Lighter or No-Cream Version

Skip the bacon and cream, use milk as the main liquid, mash extra potatoes for body, and finish with herbs and lemon instead of extra fat. The bowl still feels rich and rounded, but the body comes from potatoes rather than cream.

Smoked Haddock and Sweetcorn Chowder

Sweetcorn is the easiest way to soften the smoke. Add 100 to 150 g / about ⅔ to 1 cup near the end for little sweet pops against the salty fish and creamy potato base. Frozen, canned, or fresh corn all work.

Bowl of smoked haddock and sweetcorn chowder with fish flakes, potato chunks, herbs, black pepper, and visible sweetcorn.
For a sweeter family-style version, sweetcorn softens the smoky edge and adds bright pops of texture against the potato base.

Smoked Haddock and Bacon Chowder

Bacon pushes this into pub-style territory. Cook 75 to 100 g / about 2½ to 3½ oz chopped bacon or pancetta first, then let the leek and onion soften in the rendered fat. Taste the finished chowder before seasoning.

Bowl of smoked haddock chowder topped with crispy bacon, herbs, potatoes, leeks, and creamy broth in a dark bowl.
For a deeper pub-style bowl, bacon adds savoury crunch and smoke, but taste before salting because it seasons the chowder too.

Smoked Haddock and Prawn Chowder

Prawns make the bowl feel more generous and seafood-forward. Add raw prawns, or large shrimp, near the end and cook gently for 2 to 3 minutes, just until pink and opaque. If using cooked prawns, add them only long enough to warm through. For a separate quick seafood dinner where prawns are the main event, try this shrimp scampi recipe.

Bowl of smoked haddock and prawn chowder with pink prawns, fish pieces, potatoes, herbs, lemon, and creamy broth.
For the prawn version, add prawns near the end so they stay pink, tender, and sweet instead of shrinking into the broth.

Dairy-Free Coconut Version

This will not taste like a classic British chowder, but it can still be lovely: smoky, light, and gently spiced. Use light coconut milk and water instead of dairy milk and cream, then add ginger, turmeric, chilli, or smoked paprika if you want more warmth.

Small Batch for 2 People

For two bowls, use about 200 to 225 g / 7 to 8 oz smoked haddock, 300 ml / 1¼ cups milk, 250 to 300 g potatoes, and one small leek or half an onion. A smaller pan helps keep the fish mostly covered while it poaches.

Budget-Friendly Version

To stretch the pot, use 250 to 300 g smoked haddock instead of the full amount, then add more potato, sweetcorn, and leek. The flavour will be milder, but the smoky poaching milk still carries through the soup.

Smoked Haddock Chowder vs Cullen Skink

Cullen skink is the more traditional Scottish smoked haddock soup; smoked haddock chowder is the broader, more flexible version. Cullen skink usually stays close to smoked haddock, potatoes, onion or leek, milk, and sometimes cream, while chowder may include celery, sweetcorn, bacon, prawns, stock, herbs, or extra cream.

Make the Cullen skink-style version when you want something simpler and more traditional. Make this chowder when you want a flexible bowl with sweetcorn, bacon, prawns, or a richer finish.

Split comparison showing a simpler Cullen skink-style bowl beside a fuller smoked haddock chowder with optional add-ins.
Cullen skink-style keeps things simpler and more traditional, while chowder gives you more room for cream, herbs, sweetcorn, bacon, or prawns.

For a more traditional direction, this Cullen skink recipe keeps the focus on smoked fish, potatoes, onion, and a simple milk-rich base.

For a stricter Cullen skink-style bowl, skip the sweetcorn, bacon, celery, prawns, and heavy add-ins. Use smoked haddock, potatoes, leek or onion, milk, a little cream if you like, black pepper, and herbs.

DishUsually includesBest for
Smoked haddock chowderSmoked haddock, potatoes, milk, leek or onion, celery, sweetcorn, bacon, cream, herbs, or seafood add-insA flexible creamy fish soup
Cullen skinkSmoked haddock, potatoes, onion or leek, milk, cream, herbsA more traditional Scottish smoked haddock soup

Back to top

Troubleshooting

Most chowder problems happen near the end, when the milk gets too hot, the fish is stirred too hard, or the smoked haddock brings more salt than expected. The fixes below will usually save the pot.

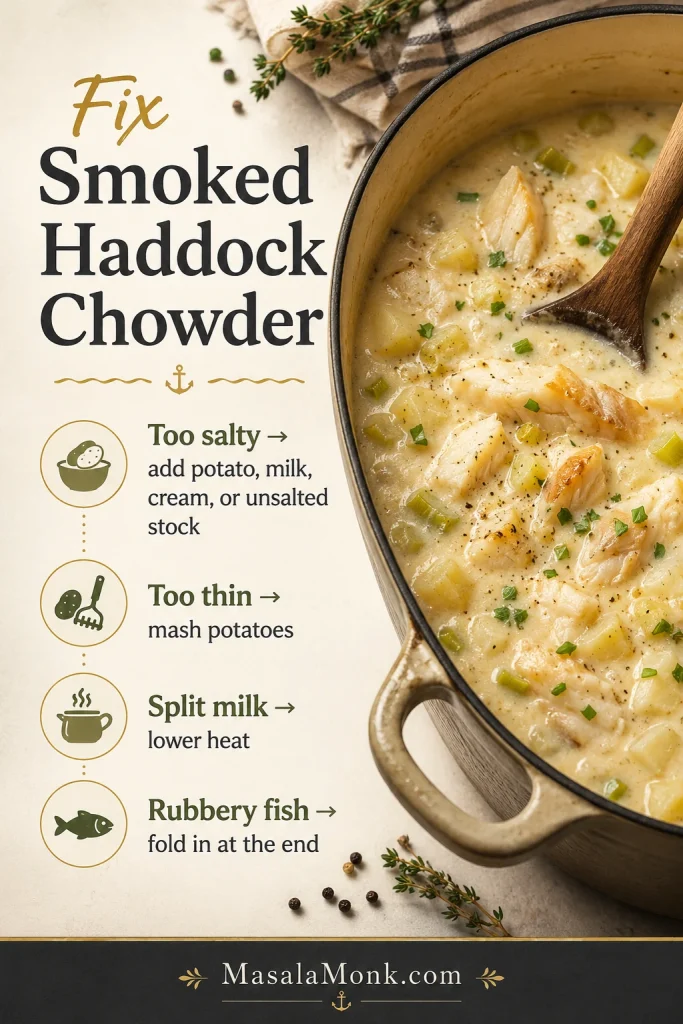
Troubleshooting guide for smoked haddock chowder with fixes for too salty, too thin, split milk, and rubbery fish.
If the chowder needs rescuing, fix the cause: potatoes add body, milk or stock softens saltiness, and lower heat protects the dairy and fish.

Texture and heat fixes

ProblemWhat happenedHow to fix it
Chowder is too thinThe potatoes did not break down enough.Mash some potatoes into the soup or simmer the base uncovered briefly before adding the fish.
Chowder is too thickThe potatoes thickened the base more than expected.Loosen with warm milk, stock, or water until the texture feels right.
Milk split or turned grainyThe heat was too high after the milk or cream went in.Lower the heat and avoid a hard boil. A split chowder is usually edible, but the texture may look grainy.
Fish is rubberyThe haddock was boiled or cooked too long.Poach gently and add the flaked fish back near the end only to warm through.
Fish broke into tiny piecesThe haddock was stirred too much after flaking.Fold the fish in gently at the end and avoid aggressive stirring.

Flavour and seasoning fixes

ProblemWhat happenedHow to fix it
Chowder is too saltyThe smoked haddock, bacon, pancetta, or stock added more salt than expected.Add potato, milk, cream, or unsalted stock to soften the salt. Next time, season at the end.
Chowder tastes too smokyThe smoked haddock was very strongly smoked.Add potato, sweetcorn, milk, or cream to soften the smoke. Next time, use part smoked fish and part plain white fish.
Chowder tastes blandThe base needs more lift or seasoning.Add pepper, herbs, lemon, mustard, or a little extra smoked-fish flavour.
Chowder is too richToo much cream, bacon, or butter made it heavy.Loosen with milk or stock and finish with lemon and herbs. Next time, skip cream and thicken with potato.
Chowder tastes fishyThe fish may not be fresh enough, may have been overcooked, or may be too strong for your taste.Use fresh-smelling smoked haddock, avoid boiling, and finish with lemon and herbs.

Back to recipe card · Storage and reheating

Storage, Freezing, and Reheating

This chowder is best freshly made, but leftovers can still be lovely if you warm them slowly. Fish and dairy prefer patience, not high heat.

Smoked haddock chowder in a bowl and glass storage container with a small jug of milk, herbs, spoon, and lemon.
For leftovers, cool the chowder promptly, store it gently, and reheat it slowly with a splash of milk or stock if it thickens.

To Refrigerate

Let the chowder cool briefly, then store it in an airtight container in the fridge for up to 2 to 3 days. Because it contains fish and dairy, get it into the fridge promptly.

To Reheat

Reheat on low heat, stirring gently, until hot all the way through. Add a splash of milk or stock if the chowder has thickened in the fridge.

To Freeze

You can freeze it, but the texture may change because milk, cream, and potatoes can become slightly grainy after freezing. For the best make-ahead result, freeze the potato and milk base before adding cream and fish, then add freshly poached smoked haddock when reheating.

Best Make-Ahead Method

Make the leek, potato, and milk base ahead of time, then add the flaked smoked haddock when you reheat the chowder. This keeps the fish from breaking apart or turning tough.

What to serve with it · Back to recipe card

What to Serve With Smoked Haddock Chowder

The chowder is filling enough to be a meal on its own, especially when it has potatoes and sweetcorn in the bowl. A simple side makes it feel complete.

Anything toasted, crunchy, or slightly sharp works well here because the chowder itself is soft, smoky, and spoon-coating. Toast, oatcakes, crackers, or crusty bread give you contrast against the creamy bowl.

Bowl of smoked haddock chowder served with toasted bread, salad, lemon wedges, oatcakes, butter, herbs, and black pepper.
To make the chowder feel like a full meal, add contrast with toasted bread, oatcakes, crackers, lemon, herbs, or a crisp green salad.
  • Crusty bread
  • Buttered toast
  • Soda bread
  • Oatcakes or crackers
  • Simple green salad
  • Roasted carrots or other roasted vegetables
  • Lemon wedges
  • Extra chives, parsley, or black pepper

For something homemade to dip into the bowl, this homemade garlic bread loaf is a strong fit.

For a fresher plate, pair the chowder with a crisp salad. This cucumber salad recipe gives you the cool, sharp contrast that creamy soups often need.

Final tips · Back to top

FAQ

Should I poach smoked haddock in milk first?

Yes. It keeps the fish tender and gives you smoky milk for the base.

What should I do with the poaching milk?

Strain it and use it in the chowder. It carries smoked-fish flavour into the whole soup.

Does frozen smoked haddock work for chowder?

Yes. Thaw it overnight in the fridge for the best texture, then poach it in milk. Cooking from frozen works, but it takes longer and cooks less evenly.

Can I use dyed smoked haddock?

Yes. Dyed smoked haddock works, but it gives the soup a stronger yellow colour. Undyed smoked haddock usually looks more natural and often tastes cleaner.

How do I make it without cream?

Skip the cream and mash more potatoes into the soup. Whole milk and potatoes are enough to make the bowl feel full-bodied.

How do I make a lighter version?

Skip bacon and cream, use a little more stock if you want a looser base, and finish with lemon, herbs, and black pepper.

Is sweetcorn good in smoked haddock chowder?

Yes. Sweetcorn softens the salty-smoky edge of the fish and adds little pops of sweetness. Frozen, canned, or fresh corn all work.

Should I add bacon?

Add bacon for a richer, pub-style bowl. Cook it first, then soften the leek and onion in the fat. Taste before adding salt.

How is this different from Cullen skink?

Cullen skink is usually simpler: smoked haddock, potatoes, onion or leek, milk, and sometimes cream. This chowder is broader and can include sweetcorn, bacon, celery, prawns, herbs, or extra cream.

Why did my chowder turn out too salty?

Smoked haddock, bacon, pancetta, and stock can all add salt. Add more potato, milk, cream, or unsalted stock to soften the saltiness.

Does smoked haddock chowder freeze well?

It can be frozen, but dairy and potatoes may turn slightly grainy. For the best result, freeze the potato and milk base, then add freshly poached haddock when reheating.

What can I use instead of smoked haddock?

Use smoked cod, smoked pollock, smoked whiting, or another smoked white fish. If the flavour is too strong, use part smoked fish and part plain white fish.

How do I make the chowder thicker?

Mash more cooked potatoes into the soup. If it still feels loose, simmer the potato base briefly before adding the milk, cream, and fish.

What is the best make-ahead method?

Make the potato and milk base ahead, then add the smoked haddock when reheating. This keeps the fish tender and prevents it from breaking apart.

Final Tips for the Best Smoked Haddock Chowder

The best smoked haddock chowder is gentle from start to finish. Warm the milk slowly, let the leeks soften properly, use the potatoes for body, and add the fish back only when the base is ready. That is how you get smoke, creaminess, and tender haddock in the same spoonful.

If the first spoonful tastes smoky, mellow, and a little sweet from the leek or corn, you have done it right. Make it richer with cream, lighter with extra mashed potato, sweeter with sweetcorn, or deeper with bacon. Serve it hot, keep the bread close, and do not be surprised if the last bit in the bowl gets wiped clean.

Hand dipping a piece of crusty bread into smoked haddock chowder with fish flakes, potatoes, herbs, and black pepper.
Finally, keep bread close by; the creamy broth, smoky fish, and soft potatoes are exactly the kind of bowl made for dipping.

Back to top

Posted on Leave a comment

Tinola Recipe: Filipino Chicken Tinola / Tinolang Manok with Papaya or Sayote

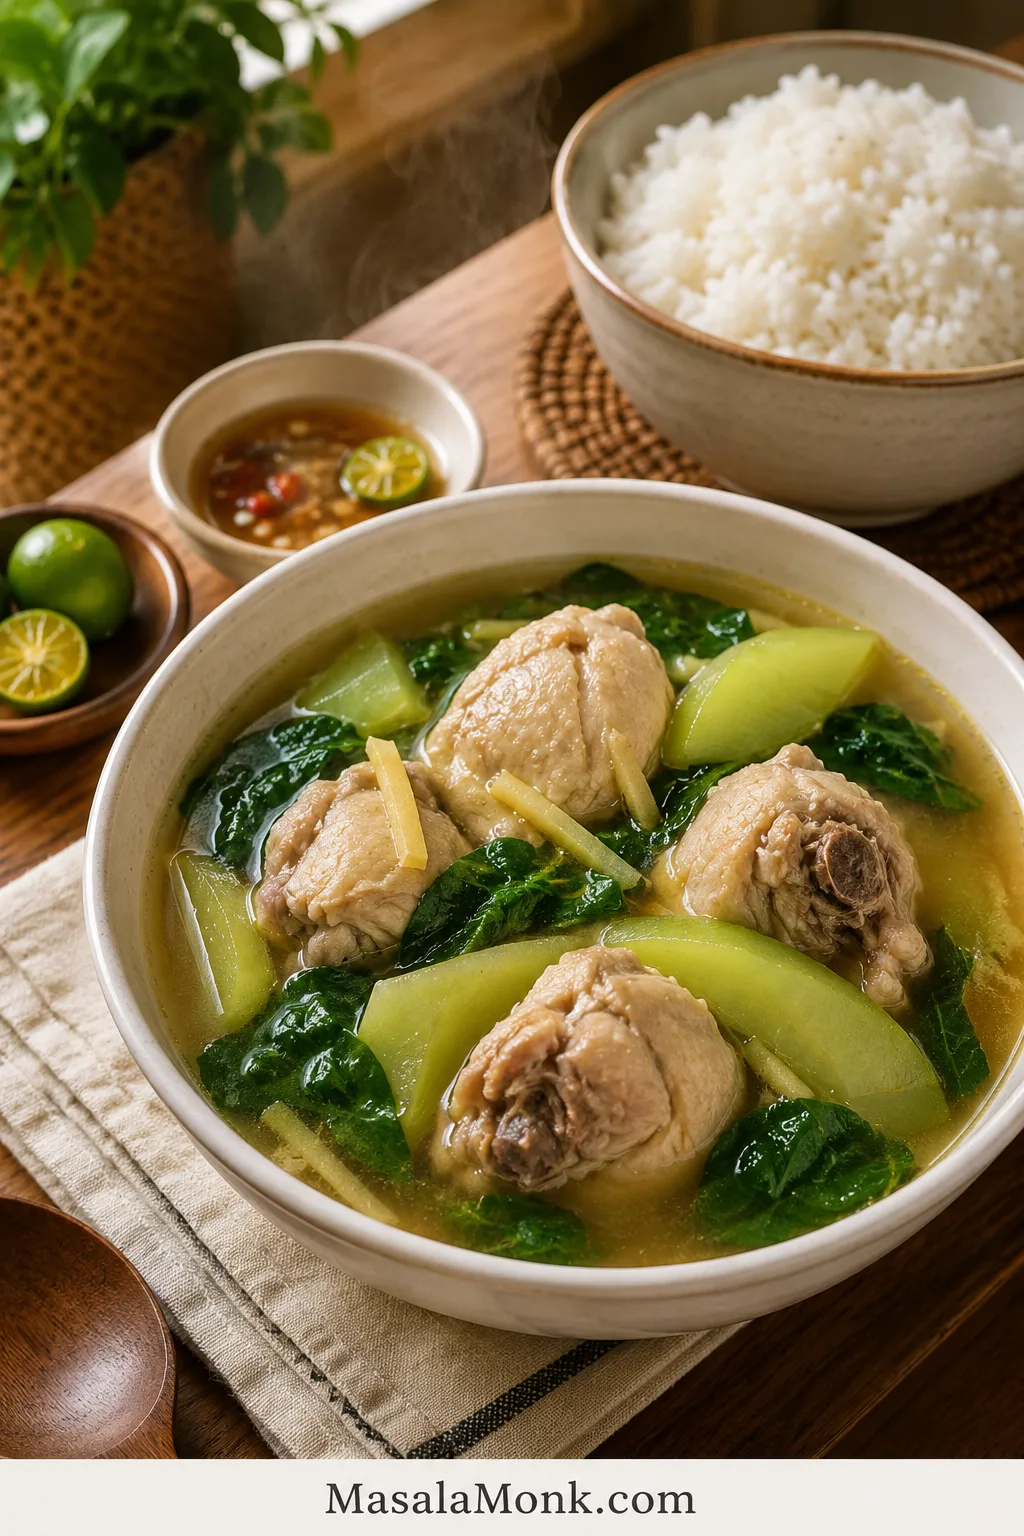
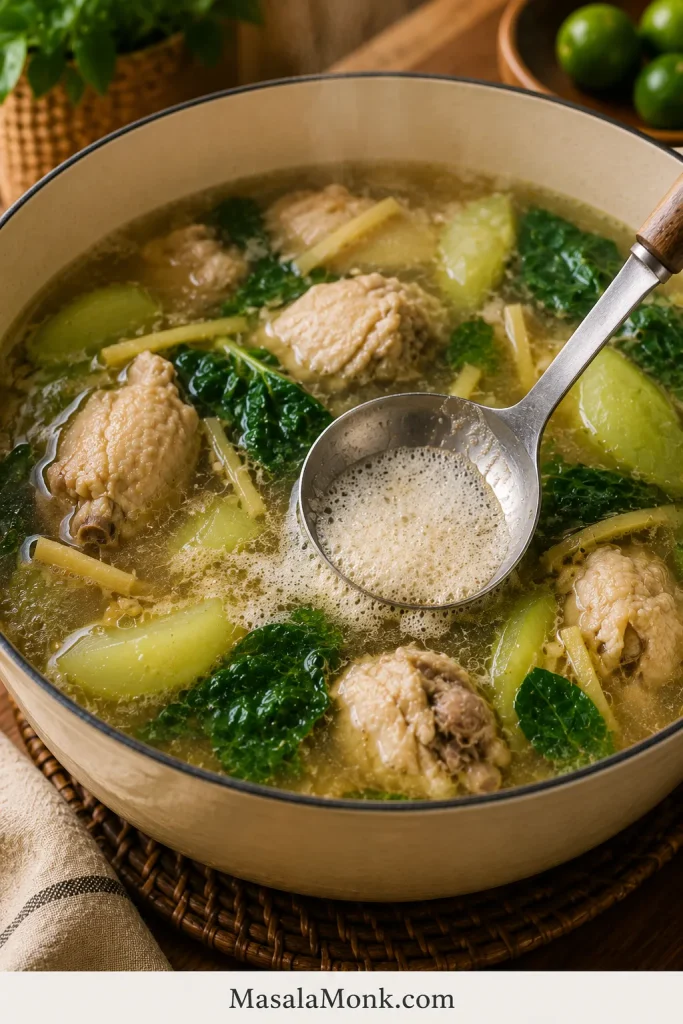
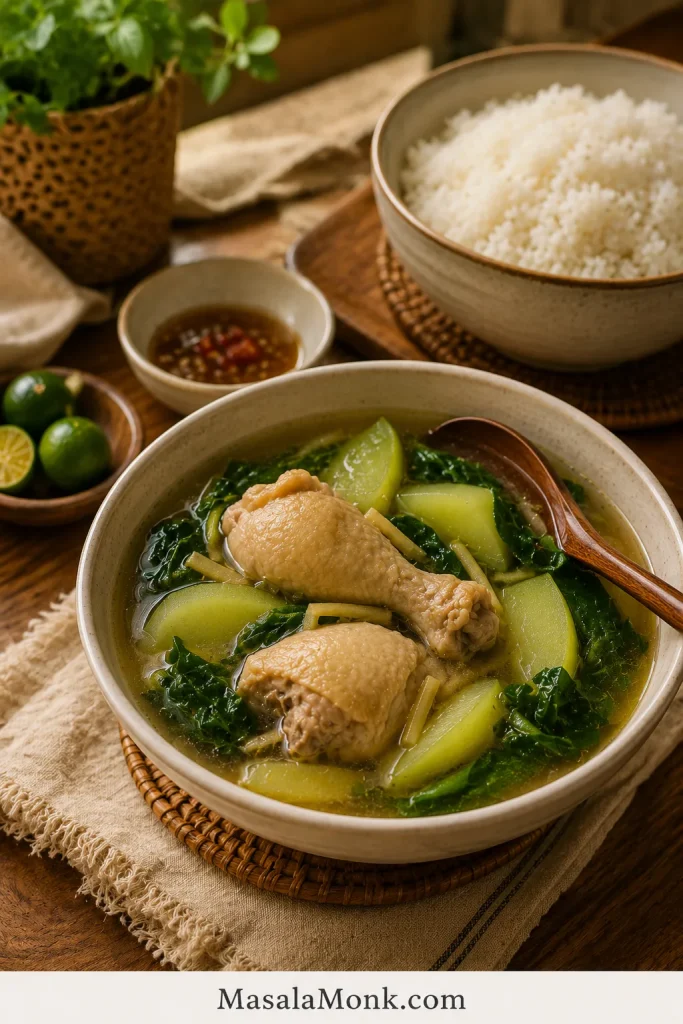
Bowl of Chicken Tinola with golden broth, bone-in chicken, green papaya or sayote wedges, leafy greens, steamed rice, calamansi, and dipping sauce.

Tinola is the kind of Filipino chicken soup that feels light and restorative, but still filling when poured over rice. In a good pot, the broth is clear, gingery, and savory, the chicken is tender, and the green papaya or sayote softens without falling apart.

It is the kind of soup that feels right when you want something gentle, but not empty — warm broth, tender chicken, fresh greens, and rice that soaks up every spoonful.

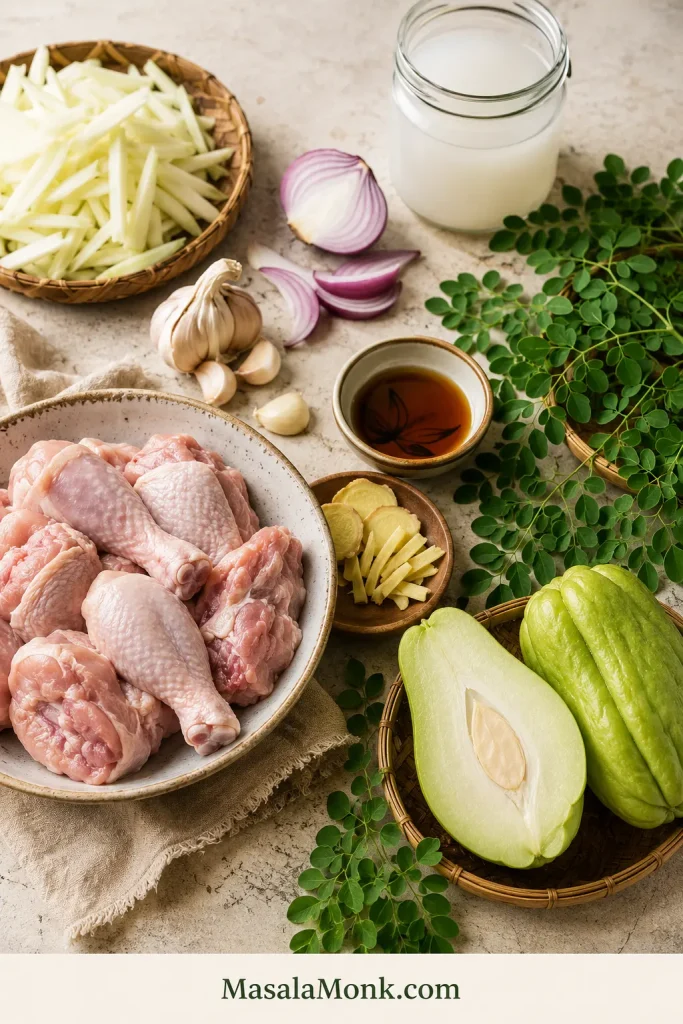
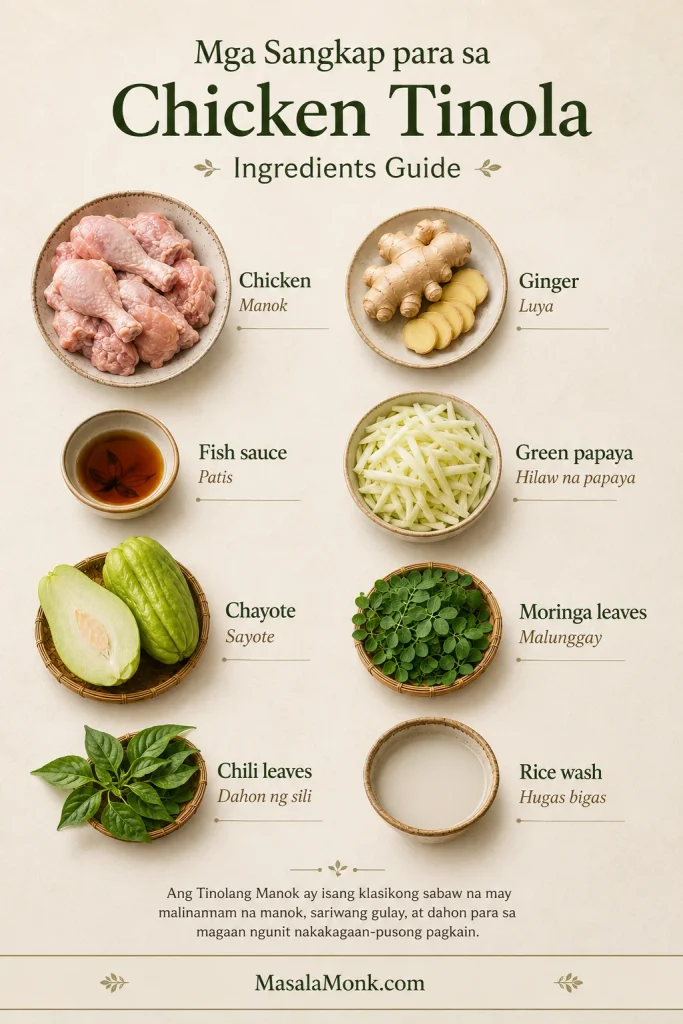
This Tinola recipe, also called Chicken Tinola or Tinolang Manok, is made with bone-in chicken, fresh ginger, garlic, onion, fish sauce, green papaya or sayote, and leafy greens like malunggay, dahon ng sili, spinach, or pechay.

This version keeps the flavor classic, but it also works in real kitchens: sayote if you cannot find green papaya, spinach if malunggay is not available, and clear timing cues so the soup tastes full instead of flat.

Most importantly, it is built around the two things that make or break Tinola: a broth that tastes gingery and full, not watery, and vegetables that turn tender without collapsing.

Quick Answer: What Is Tinola?

Tinola is a Filipino broth-based dish. The most common version is Tinolang Manok, which means Chicken Tinola. It is usually made with chicken, ginger, garlic, onion, fish sauce, green papaya or sayote, and leafy greens such as malunggay or dahon ng sili.

In English, Chicken Tinola is best described as a Filipino ginger chicken soup. It is usually eaten as a main dish with rice, not just as a starter soup.

  • Best chicken: bone-in thighs, drumsticks, wings, or mixed cuts.
  • Flavor base: fresh ginger, fish sauce, garlic, and onion.
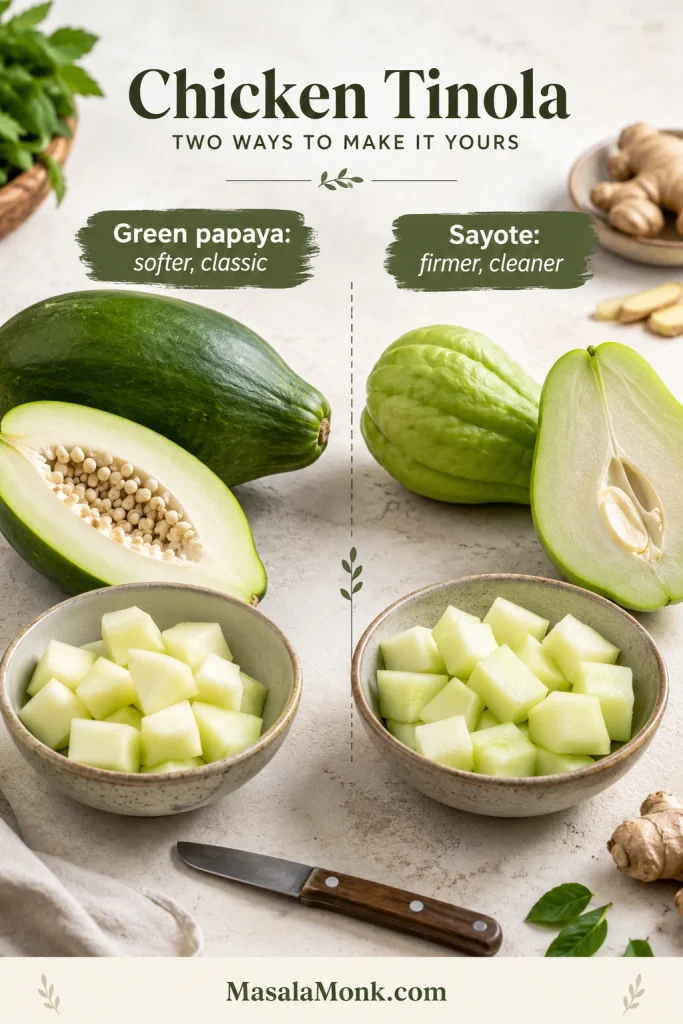
  • Vegetable choice: green papaya for a softer classic feel, or sayote for a firmer bite.
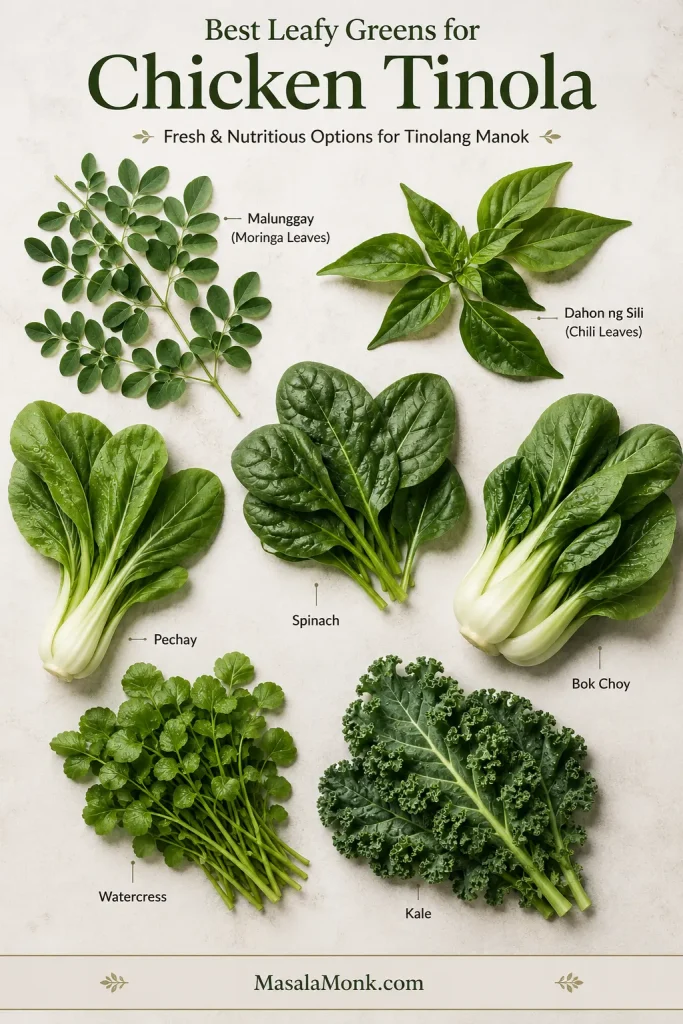
  • Best greens: malunggay or dahon ng sili if available; spinach, pechay, or bok choy if not.
  • Best cooking cue: simmer gently until the chicken is tender and reaches 165°F / 74°C.

Make It Now

Have your chicken, ginger, and vegetables ready? Use this quick path, then follow the recipe card for exact amounts.

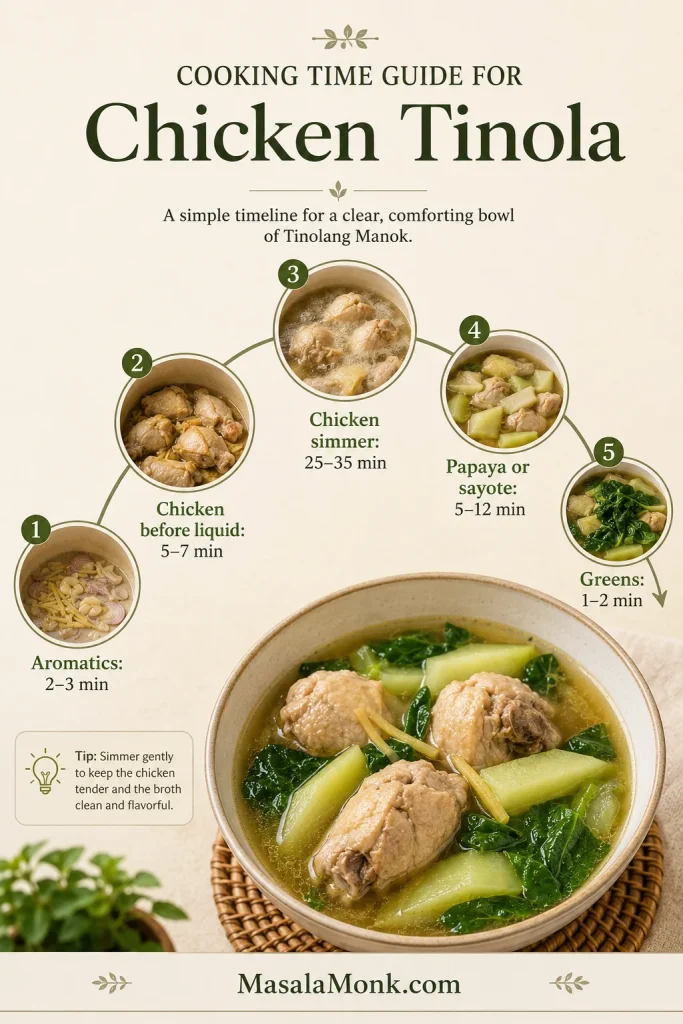
  1. Sauté ginger, garlic, and onion until fragrant.
  2. Add chicken and cook until the surface loses its raw color.
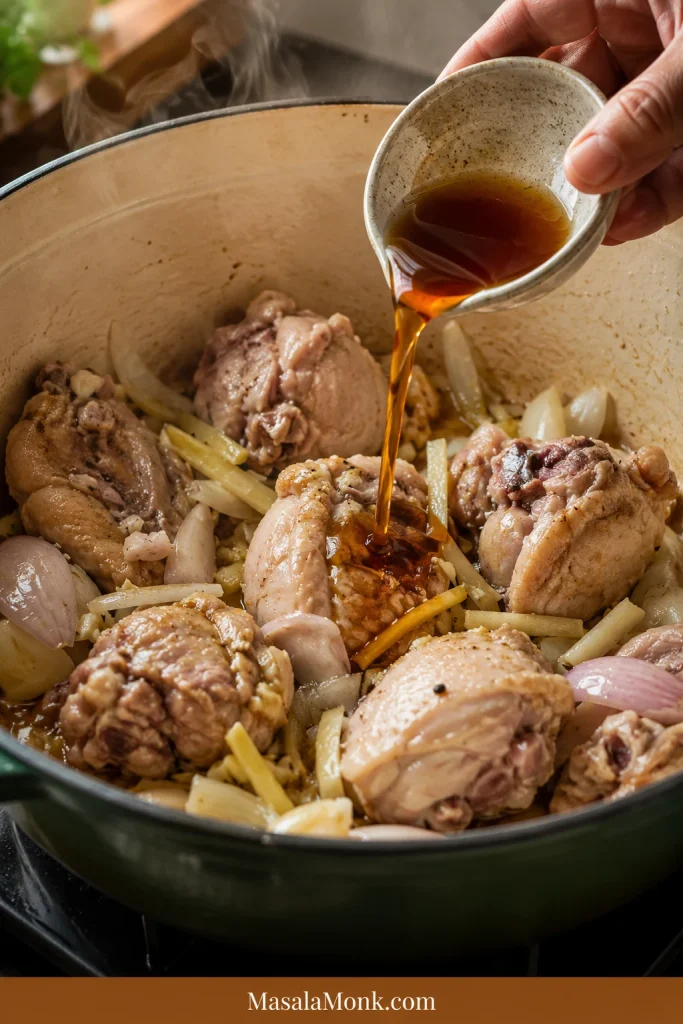
  3. Add fish sauce before the liquid so the chicken is seasoned early.
  4. Simmer gently until the chicken is tender.
  5. Add your chosen vegetable near the end, then finish with greens.

Classic but flexible: classic Tinola often means chicken, ginger, patis, green papaya, and malunggay or dahon ng sili. But Tinola is also a home dish, so many cooks use sayote when papaya is hard to find, spinach when malunggay is unavailable, and chicken broth or rice wash when the chicken needs a little help. The point is not to make the pot rigid; it is to keep the soup gingery, savory, clear, and good with rice.

A good pot of Tinola should feel simple, but not thin. The broth should taste like the chicken, ginger, and patis had time to become one thing, not like separate ingredients floating in hot water. That is why this recipe builds the flavor early and waits before adding the vegetables.

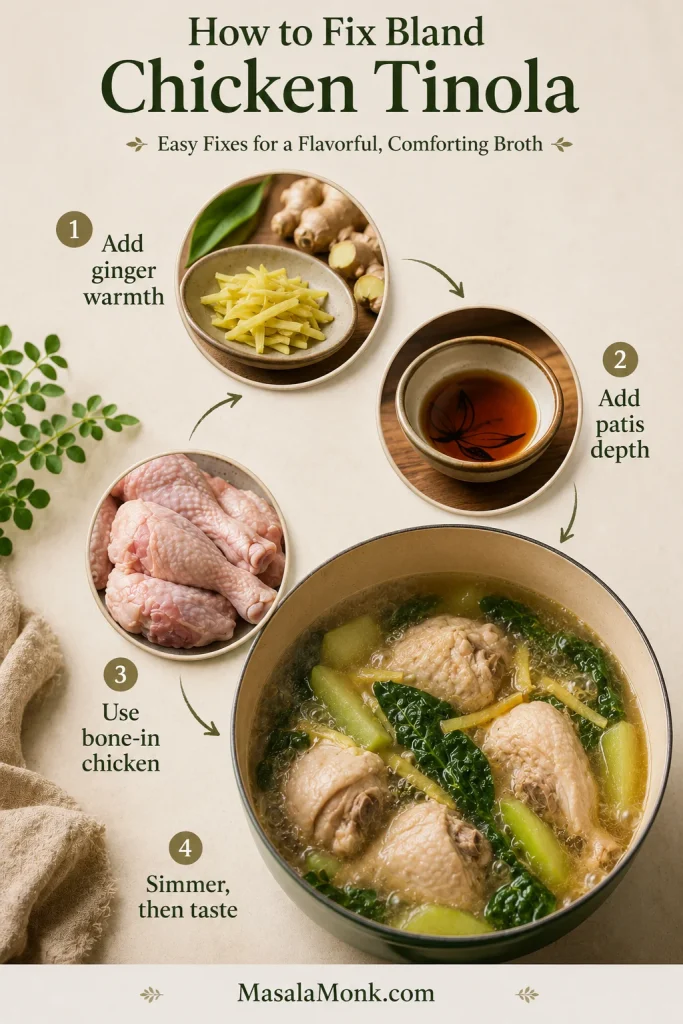
Save this Tinola rule: ginger early, patis before broth, chicken until tender, papaya or sayote late, greens last.

Tinola Recipe Card

Filipino Chicken Tinola / Tinolang Manok

This Chicken Tinola recipe keeps the two common problems away: watery broth and vegetables that fall apart before the chicken is tender. The chicken is seasoned early, the simmer stays gentle, and the vegetables go in when the meat is nearly ready.

Prep Time15 minutes
Cook Time45 minutes
Total Time1 hour
Servings4 to 6
MethodStovetop
CuisineFilipino
Main Equipment5 to 6 quart / 4.7 to 5.7 L pot or Dutch oven

Ingredients

  • 2 to 2 1/2 lb / 900 g to 1.1 kg bone-in chicken pieces, such as thighs, drumsticks, wings, or mixed cuts
  • 1 1/2 to 2 tablespoons neutral oil / 22 to 30 ml
  • 1 medium onion, sliced
  • 4 garlic cloves, minced or crushed
  • 45 to 60 g / 1 1/2 to 2 oz fresh ginger, sliced, julienned, or lightly smashed
  • 2 to 3 tablespoons fish sauce / patis / 30 to 45 ml, plus more to taste
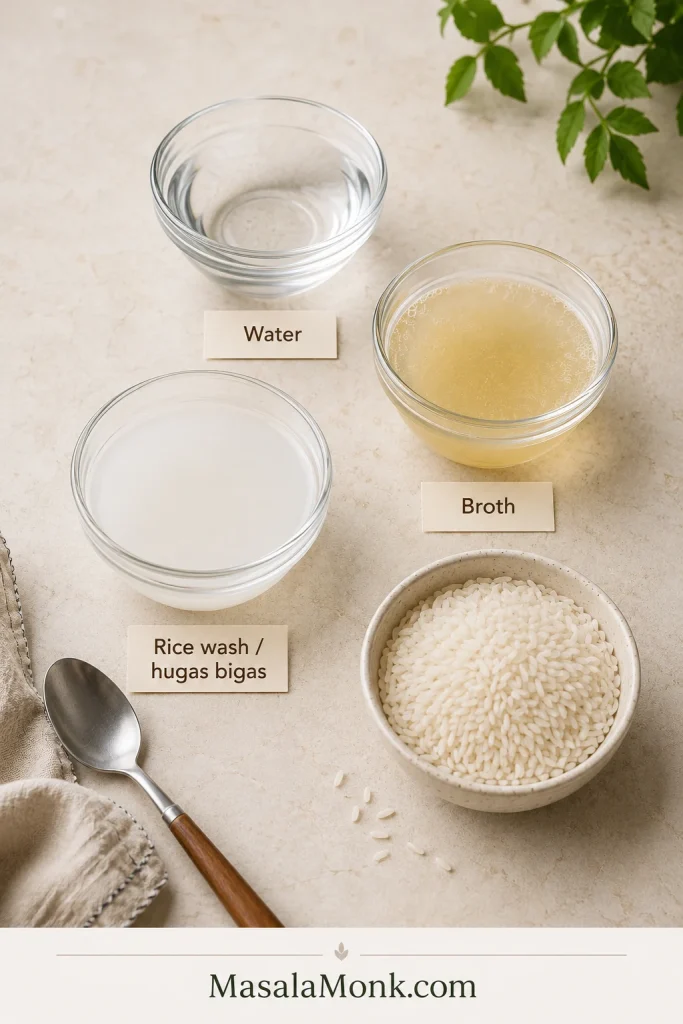
  • 6 cups water, low-sodium chicken broth, or rice wash / 1.4 L
  • 350 to 500 g / 12 to 18 oz green papaya or sayote/chayote, peeled and cut into wedges. Remove seeds if using papaya.
  • 2 packed cups / 60 to 90 g malunggay, dahon ng sili, spinach, pechay, or bok choy
  • 1/2 teaspoon black pepper, plus more to taste
  • Salt, only if needed after tasting

Optional Ingredients

  • 1 chicken cube, only if using water and you want a stronger shortcut broth
  • Calamansi or lime, for serving
  • Fresh chili, for heat
  • Extra fish sauce, for serving
  • 1 stalk lemongrass, bruised, for a fragrant variation

Instructions

  1. Prep the chicken and vegetables. Cut the chicken into similar-sized pieces if needed. Peel your chosen vegetable. If using green papaya, remove the seeds. Cut the pieces into 1 1/2 to 2 inch wedges.
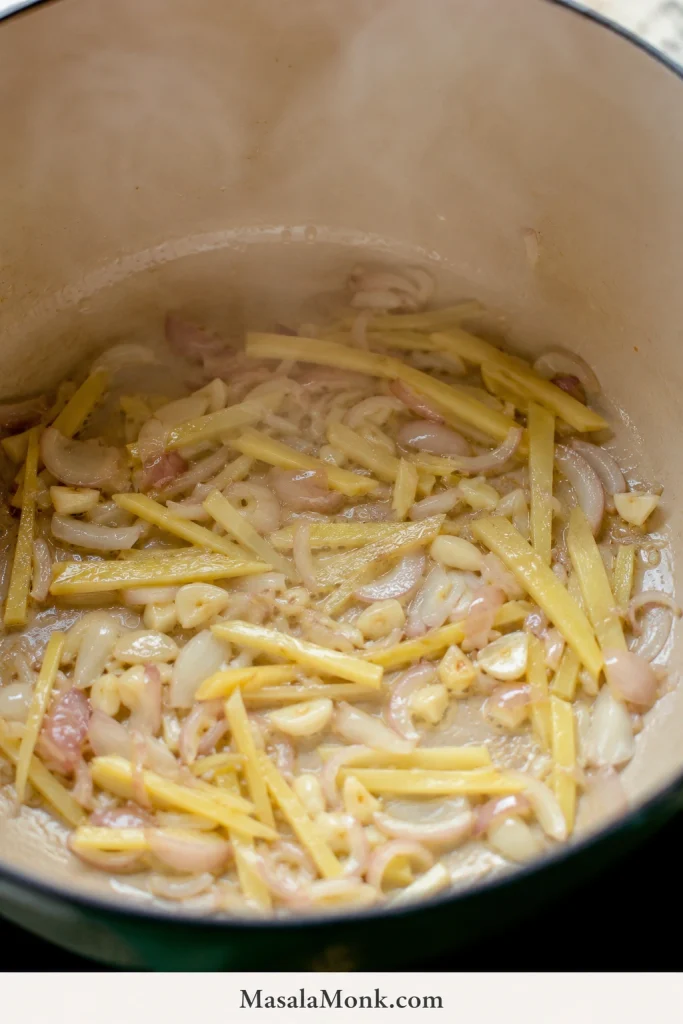
  2. Sauté the aromatics. Heat oil in a large pot over medium heat. Add onion, garlic, and ginger. Cook for 2 to 3 minutes, stirring often, until fragrant and softened. The pot should smell warm and clearly gingery.
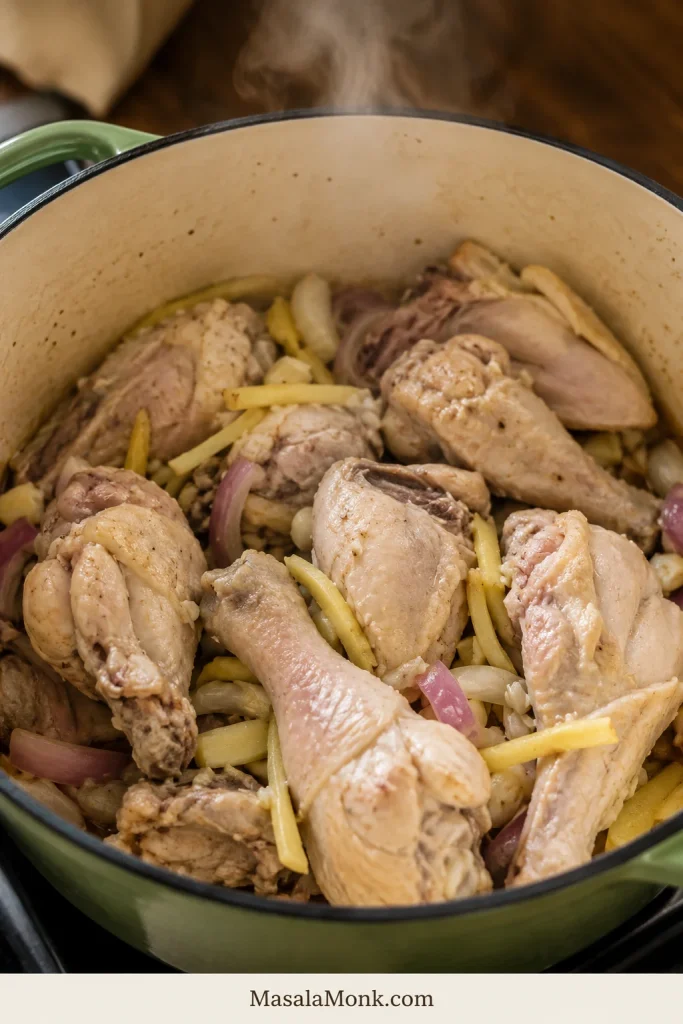
  3. Add the chicken. Cook for 5 to 7 minutes, turning occasionally, until the chicken loses its raw color and begins to lightly brown on the surface.
  4. Season early. Add 2 tablespoons fish sauce and stir well. Cook for 1 to 2 minutes so the fish sauce coats the chicken and aromatics.
  5. Add liquid and skim. Pour in water, broth, or rice wash. Bring to a boil, then skim off foam or scum from the surface.
  6. Simmer gently. Lower the heat, cover partially, and simmer for 25 to 35 minutes, or until the chicken is tender and reaches 165°F / 74°C internally.
  7. Add the vegetables. Simmer for 5 to 12 minutes, depending on the size and firmness of the pieces, until fork-tender but not mushy.
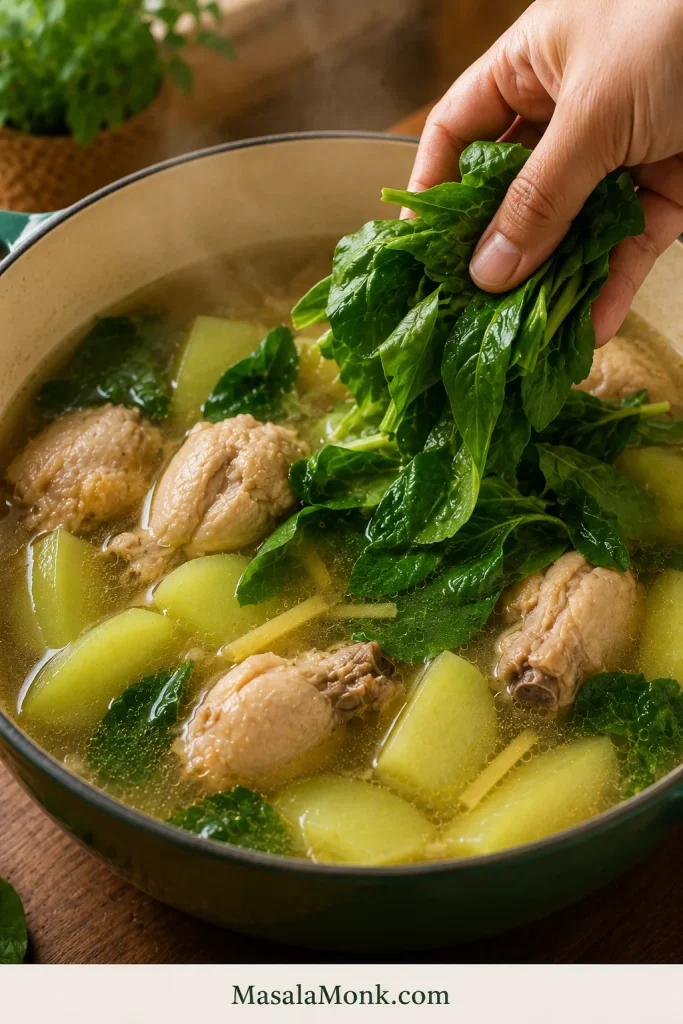
  8. Finish with greens. Add malunggay, dahon ng sili, spinach, pechay, or bok choy. Cook for 1 to 2 minutes, or turn off the heat and cover until the greens wilt.
  9. Taste and serve. Adjust with more fish sauce, salt, black pepper, calamansi, or chili. Serve hot with steamed rice.

Recipe Notes

  • Bone-in thighs and drumsticks are the easiest choice if you want tender chicken and a fuller broth.
  • The pot should smell clearly of ginger before the liquid goes in.
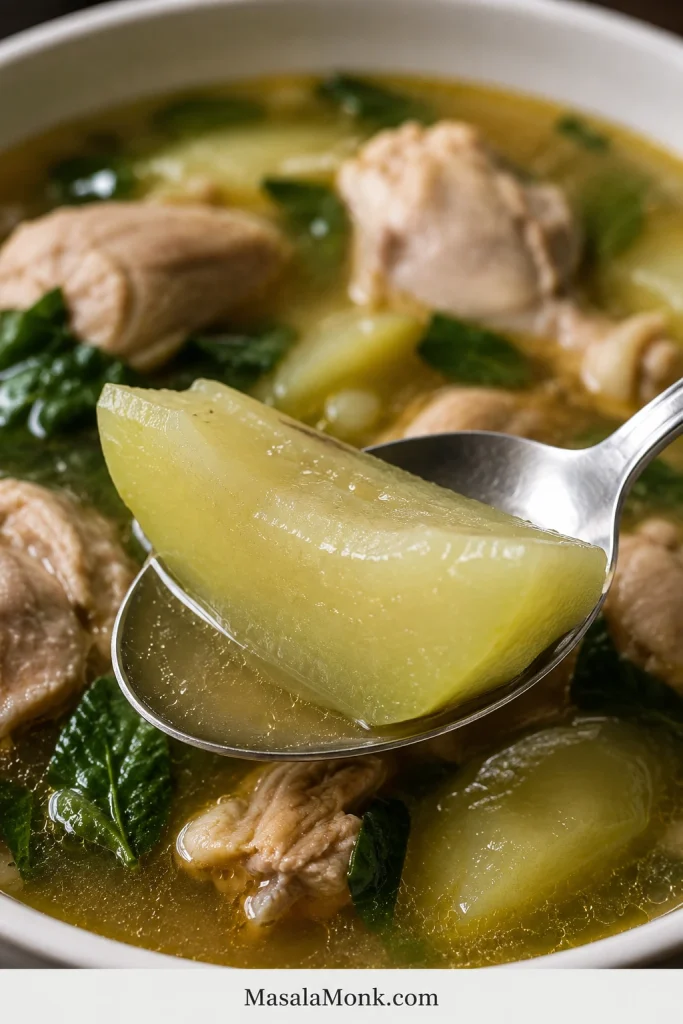
  • Green papaya gives a softer, slightly sweet, more classic feel. Sayote stays firmer and fresher.
  • Delicate greens need only enough heat to wilt. Fold them in at the end so they stay bright.
  • A chicken cube can rescue a weak pot, especially if you are using plain water or lean chicken. Start with less fish sauce if you add one, then adjust at the end.

What Good Tinola Should Taste Like

A good bowl of Tinola tastes light, gingery, savory, and balanced. The soup is not heavy, but it has enough seasoning and chicken flavor to make you want to spoon it over rice.

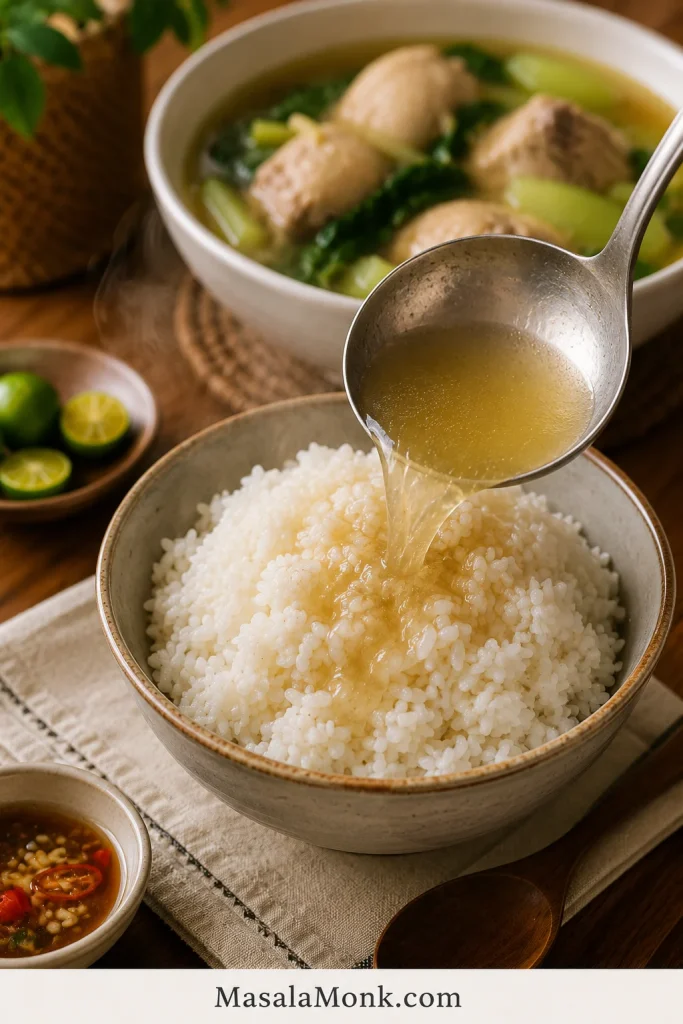
The easiest test is the rice: spoon a little broth over hot rice. If it tastes warm, gingery, and savory without needing rescue, the pot is ready.

  • Ginger tastes noticeable, warm, and fresh.
  • Fish sauce gives depth without making the soup taste fishy.
  • Chicken turns tender, especially near the bone.
  • Green papaya softens more; sayote keeps a slightly firmer bite.
  • The greens taste fresh, not dull or overcooked.

Why This Tinola Recipe Works

This recipe is built to solve two common Tinola problems: broth that tastes watery and vegetables that turn mushy. The fix is not complicated. Start the flavor before the liquid goes in, simmer the chicken gently, then add the pieces only when the meat is nearly tender.

  • The flavor starts before the broth. Ginger, garlic, and onion cook in oil first so the soup has a warm aromatic base.
  • Fish sauce seasons the chicken early. Salt can season Tinola, but patis gives the broth its rounded, savory depth.
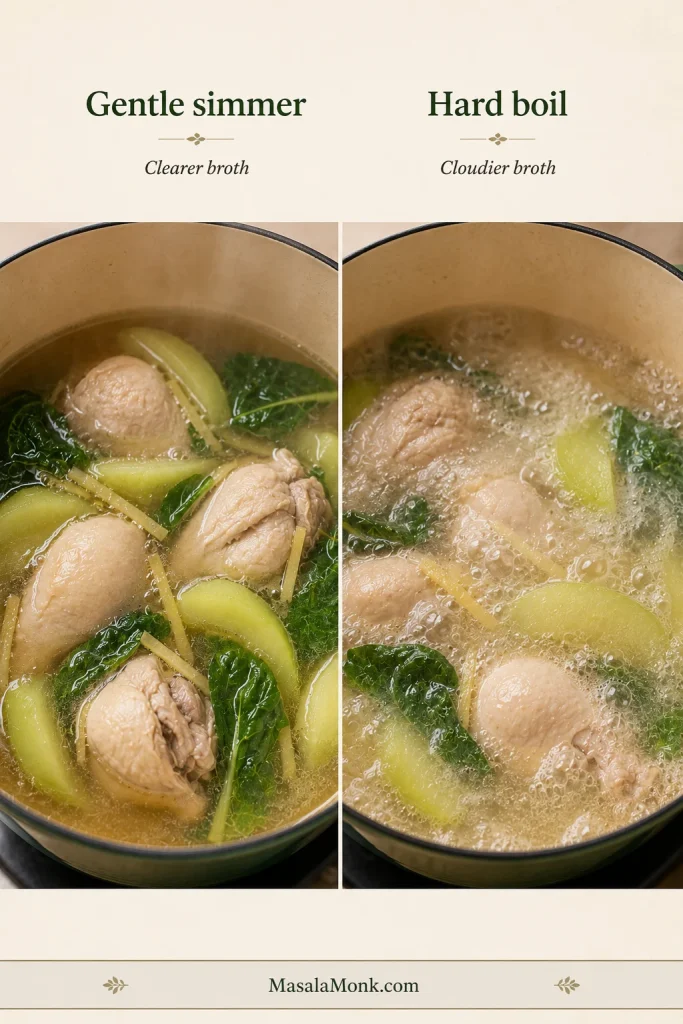
  • The simmer stays gentle. A steady simmer helps the chicken turn tender without making the liquid rough or cloudy.
  • The vegetables go in late. Do not add them just because the broth is boiling. Add them when the chicken is already nearly tender.
  • The greens stay fresh. Finish with them at the end so the soup keeps a bright green finish.

The simple idea: build flavor before the broth, wait for the chicken to turn tender, then add the vegetables and greens in stages. That is the difference between flat Tinola and a bowl you want to spoon over rice.

The rule below is the whole Tinola method in one glance: build ginger and patis early, give the chicken time, then protect the vegetables and greens at the end.

Five-step Chicken Tinola cooking rule showing ginger early, patis before broth, chicken until tender, vegetables late, and greens last.
Follow this Tinola order to build flavor and protect texture: ginger early, patis before broth, chicken until tender, vegetables late, and greens last.

Ingredients Explained

Think of the ingredients in layers: ginger for warmth, chicken for body, fish sauce for depth, papaya or sayote for texture, and greens for freshness. Once those layers make sense, the recipe becomes much easier to adjust without losing what makes Tinola taste like Tinola.

Chicken Tinola ingredients on a board, including bone-in chicken, ginger, garlic, onion, fish sauce, green papaya, sayote, malunggay leaves, and rice wash.
These Tinola ingredients each have a job: chicken gives body, ginger brings warmth, patis adds savory depth, and papaya or sayote gives the soup its gentle bite.

Chicken

Bone-in chicken gives Tinola the kind of body that plain water cannot create on its own. Thighs, drumsticks, wings, or a whole chicken cut into serving pieces all work well.

Boneless thighs can work if you want a faster version, but the broth will be lighter. Chicken breast is lean, but it can dry out if boiled hard or cooked too long. Use a gentle simmer and check it earlier if breast meat is what you have.

Ginger

Ginger is the backbone of Tinola. A small token slice is not enough. Use about 45 to 60 g / 1 1/2 to 2 oz fresh ginger for a full pot. Slice it, julienne it, or lightly smash it so it releases flavor into the oil and broth.

When the ginger hits the oil, the pot should smell sharp, warm, and awake. A weak aroma usually means the final broth will taste weak too. If the ginger feels shy, the Tinola will too.

Garlic and Onion

Garlic and onion round out the ginger. Cook them just until fragrant and softened before the chicken goes in; they do not need to brown deeply.

Fish Sauce / Patis

Fish sauce is where the broth starts getting its backbone. Let it hit the hot pot before the water goes in, and it seasons the chicken instead of just floating salty on top later.

Give it a minute in the hot pot so the sharp edge cooks off and the soup starts with depth instead of last-minute saltiness.

Water, Chicken Broth, or Rice Wash

Water works well if you use bone-in chicken, enough ginger, and proper seasoning. Low-sodium chicken broth gives a stronger shortcut flavor. Rice wash, sometimes called hugas bigas, gives the soup a little more body and a softer feel.

If using rice wash, use the second rinse rather than the first. The second rinse is usually cleaner while still giving the soup a little body. Use rice wash when you want a softer, slightly fuller broth; use water or low-sodium broth when you want a cleaner, lighter-tasting pot.

A chicken cube can rescue a weak pot, especially if you are using plain water or lean chicken. Use it if you need it, but let ginger, chicken, and fish sauce do most of the work.

Three bowls labeled water, broth, and rice wash or hugas bigas, with uncooked rice nearby for making Chicken Tinola.
Rice wash, or hugas bigas, gives Tinola a softer body; meanwhile, plain water keeps it light, and broth adds shortcut depth.

Green Papaya or Sayote

Green papaya and sayote are both common in Tinola. Papaya becomes softer and slightly sweet, while sayote, also called chayote, stays firmer with a milder, fresher flavor.

Use the one your market gives you. Tinola is forgiving as long as the broth is gingery and the vegetable goes in at the right time.

Leafy Greens

Malunggay and dahon ng sili are classic Tinola greens. Spinach, pechay, and bok choy are practical substitutes. The exact leaf matters less than the timing.

Add something green and fresh at the end, then stop before the leaves lose their brightness.

Shopping Tip

Filipino markets may have the classic leaves and green papaya. At a regular supermarket, sayote/chayote and spinach can still get you a good, comforting pot.

Best Chicken Cuts for Tinola

The chicken cut matters because Tinola is not only about the meat — it is also about what the meat gives back to the pot.

Bone-in thighs, drumsticks, wings, or mixed cuts are the most forgiving choices for this soup because they can simmer without drying out.

Chicken CutBest ForNotes
Bone-in thighsBest flavor and tendernessThe easiest all-round choice.
DrumsticksBudget-friendly family mealsEasy to serve and good for broth.
WingsExtra collagen and bodyGreat mixed with thighs or drumsticks.
Whole chicken, cut upTraditional family-style potGives different textures in one soup.
Boneless thighsFaster weeknight versionLess broth depth, but still flavorful.
Chicken breastLean versionCan dry out; simmer gently and avoid overcooking.

Chicken should reach 165°F / 74°C internally. FoodSafety.gov lists 165°F / 74°C as the safe minimum internal temperature for chicken, turkey, and other poultry. See the safe minimum internal temperature chart.

Best all-round choice: use bone-in thighs and drumsticks. They give the soup enough flavor, cook evenly, and stay tender even if the pot simmers a little longer.

If you bought a larger pack of thighs and want a dry, crispy dinner another night, this air fryer chicken thighs recipe uses the same reliable cut in a completely different way.

Green Papaya vs Sayote

For many cooks, the first big choice is green papaya or sayote.

Green papaya gives the bowl a softer, more classic feel. Sayote keeps a firmer, cleaner bite. Neither one ruins the dish, so choose based on what you can find and what texture you like.

Green papaya and sayote shown side by side with whole and cut pieces for comparing vegetables used in Chicken Tinola.
Green papaya makes Tinola softer and more classic, while sayote stays firmer, cleaner, and easier to find in many markets.
OptionTextureFlavorBest For
Green papayaSoft-tender and absorbs brothMild, slightly sweetA more classic Tinola feel
Sayote / chayoteFirmer and cleanerMild, fresh, neutralEasy supermarket version
Semi-ripe papayaSofter and sweeterNoticeably sweetUse only if you intentionally want a sweeter soup
UpoSoft and wateryDelicateAvailable substitute
KalabasaCreamier and sweeterRicher, less classicA variation, not the default
Labanos / daikonFirm and slightly pepperySharperWorks in a pinch

If you want a clearer, more ginger-forward bowl, sayote is a very good choice. For the softer texture many people associate with Tinola, use green papaya.

If you buy a whole green papaya and have extra left after Tinola, you can use it in a fresh salad like this raw papaya salad.

Cut whichever one you use into wedges large enough to hold their shape. Add the pieces only after the chicken is nearly tender. If they go in too early, they can turn mushy before the chicken is done.

Tinola Greens: Malunggay, Dahon ng Sili, Spinach, Pechay, or Bok Choy

Traditional Tinola often uses malunggay or dahon ng sili. Outside the Philippines, those can be harder to find. Spinach, pechay, bok choy, or watercress will not make the soup wrong — they simply make it more practical for your kitchen.

Labeled guide board of Tinola greens, including malunggay, dahon ng sili, spinach, pechay, bok choy, watercress, and kale.
Malunggay and dahon ng sili are classic Tinola greens; however, spinach, pechay, bok choy, watercress, or kale can still work when timed well.
GreenTraditional?FlavorHow to Add
Malunggay / moringaYesEarthy, green, slightly bitterLast 1 to 2 minutes
Dahon ng sili / chili leavesYesMildly pepperyLast 1 to 2 minutes
SpinachSubstituteSoft and mildOff heat or last 1 minute
Pechay / bok choySubstituteMild with more bodyStems first, leaves last
KaleSubstituteStronger and chewierSimmer 2 to 4 minutes
WatercressSubstitutePeppery and freshLast minute

Do not add delicate greens too early. The leaves should still look alive, not dull. If you are using bok choy or pechay, add the thicker stems first and the leaves later. With spinach, turn off the heat and let the leaves wilt gently.

Equipment and Pot Size

Tinola is a simple one-pot soup, but the pot still matters. Use a pot wide enough that the chicken can sit in the aromatics before the liquid goes in. If the pot is too crowded, the chicken steams instead of picking up flavor from the ginger, garlic, onion, and fish sauce.

  • 5 to 6 quart / 4.7 to 5.7 L pot or Dutch oven: roomy enough for bone-in chicken, broth, papaya or sayote, and greens without boiling over.
  • Wide spoon or ladle: useful for skimming foam, scum, and extra oil from the surface.
  • Tongs: helpful for turning chicken pieces while they cook with the aromatics.
  • Instant-read thermometer: the most reliable way to check that chicken reaches 165°F / 74°C.

A smaller pot can still work, but keep the simmer gentle and watch the liquid level once the vegetables go in.

Cooking Time by Stage

Tinola is simple, but timing decides whether the bowl tastes clean and tender or flat and overcooked.

Cooking time guide for Chicken Tinola showing aromatics for 2 to 3 minutes, chicken before liquid for 5 to 7 minutes, chicken simmer for 25 to 35 minutes, papaya or sayote for 5 to 12 minutes, and greens for 1 to 2 minutes.
Good Tinola is mostly timing: aromatics first, chicken long enough to tenderize, vegetables near the end, and greens for the final minute.
StageApproximate TimeWhat to look for
Sauté ginger, garlic, and onion2 to 3 minutesAromatics smell warm, sharp, and fragrant.
Cook chicken before liquid5 to 7 minutesChicken loses raw color and lightly browns on the surface.
Fish sauce with chicken1 to 2 minutesFish sauce coats the chicken and smells savory.
Chicken simmer25 to 35 minutesChicken is tender and reaches 165°F / 74°C.
Papaya or sayote5 to 12 minutesPieces are fork-tender but still hold shape.
Leafy greens1 to 2 minutesLeaves are just wilted and still fresh-tasting.

Timing note: in most home pots, bone-in thighs and drumsticks begin turning tender around 30 minutes after the broth starts simmering. Sayote often softens faster than thick green papaya wedges, so start checking the vegetables at 5 minutes. Spinach wilts best off heat, while pechay and bok choy work better when the stems go in before the leaves.

Native chicken or very large bone-in pieces may need more time before the vegetables go in. Wait until the meat is already turning tender, or the pieces may overcook before the chicken is ready.

Back to top ↑

Step-by-Step Tinola Method

Once the aromatics are fragrant, the rest of the soup is mostly about patience: simmer the chicken gently, then add the vegetables when the meat is nearly tender.

1. Prep the Chicken and Vegetables

Pat the chicken dry if it is very wet. If the pieces are very uneven, cut larger pieces down so they cook more evenly.

Peel the green papaya or sayote. If using green papaya, remove the seeds. Cut the vegetable into 1 1/2 to 2 inch wedges so the pieces can simmer without falling apart.

2. Sauté Ginger, Garlic, and Onion

Heat oil in a large pot over medium heat. Add the onion, garlic, and ginger. Cook for 2 to 3 minutes, stirring often.

The aromatics should smell warm, sharp, and fragrant. This is where the soup starts becoming Tinola, so do not rush past the ginger.

Sliced ginger, garlic, and onion sautéing in oil inside a pot for Chicken Tinola.
Start with ginger, garlic, and onion before adding water; as a result, the broth begins with aroma instead of tasting flat later.

3. Add the Chicken and Lightly Brown It

Add the chicken pieces to the pot. Cook for 5 to 7 minutes, turning occasionally. The chicken does not need a deep brown crust, but the surface needs to lose its raw color and pick up some flavor from the aromatics.

This step gives the soup more depth than simply boiling raw chicken in water.

Bone-in chicken pieces cooking with sliced ginger, garlic, and onion in a pot before broth is added.
Cooking chicken with ginger and aromatics before the liquid goes in helps the meat season early and gives Tinola a fuller broth.

4. Add Fish Sauce Early

Add 2 tablespoons fish sauce and stir well. Let it cook with the chicken for 1 to 2 minutes before adding the liquid.

This gives the meat and aromatics a savory base. You can always add more fish sauce at the end, but adding some early helps the flavor cook into the soup instead of sitting only on the surface.

Fish sauce being poured into a pot with bone-in chicken, ginger, garlic, and onion before any broth is added.
Add patis before the broth, not after everything is diluted; this lets the chicken and aromatics absorb savory depth from the start.

5. Add Liquid, Boil, and Skim

Pour in 6 cups water, chicken broth, or rice wash. Bring the pot to a boil. As foam rises, skim it off with a wide spoon or ladle.

Skimming at this stage keeps the liquid clearer. It is much easier to remove foam before the vegetables and greens go in.

Ladle skimming foam from the surface of Chicken Tinola broth with chicken, ginger, greens, and vegetable pieces in the pot.
Skim the foam after the first boil, then lower the heat; this keeps Tinola broth cleaner without overworking the chicken.

6. Simmer Until the Chicken Is Tender

Lower the heat to a gentle simmer. Cover the pot partially and cook for 25 to 35 minutes, or until the chicken is tender and reaches 165°F / 74°C internally.

The chicken should feel tender near the bone. Avoid a hard boil. A rough boil can make the broth cloudy and the chicken tougher.

7. Add Green Papaya or Sayote

Add the green papaya or sayote once the chicken is nearly tender. Do not add them just because the broth is boiling; wait until the meat has already started giving flavor back to the pot. Simmer for 5 to 12 minutes, depending on how large and firm the pieces are.

Look for tender edges with enough firmness in the center that the wedges do not collapse in the bowl. If they start breaking apart, they have gone too far.

Spoon lifting an intact green papaya or sayote wedge from Chicken Tinola broth, with chicken and greens in the background.
Add papaya or sayote near the end so the edges soften while the pieces still hold their shape in the bowl.

8. Add the Greens at the End

Add malunggay, dahon ng sili, spinach, pechay, or bok choy near the end. Delicate leaves need only 1 to 2 minutes. Spinach can often be added off heat and covered until wilted.

Pull them off the heat while they are still bright and just wilted. If they look dull and tired, they have cooked too long.

Hand adding fresh leafy greens to a pot of Chicken Tinola with broth, chicken pieces, and green vegetable wedges.
Greens go in last because they only need enough heat to wilt; that way, Chicken Tinola stays fresh, bright, and not overcooked.

9. Taste and Serve

Taste the soup before serving. Adjust with more fish sauce, salt, black pepper, calamansi, or chili.

The test is the rice: spoon a little broth over hot rice. If it tastes warm, gingery, and savory without needing rescue, the pot is ready. The broth can taste a touch stronger from the spoon than it does in the bowl, because rice softens everything.

Timing cue: add the vegetables after the chicken is mostly tender, not at the beginning. That one choice keeps the pieces from collapsing before the chicken is done.

Fix Bland Tinola Broth

Bland Tinola is frustrating because it can look right before it tastes right — clear broth, chicken, greens, rice — but the spoonful feels empty.

It usually means one of four things: not enough ginger, not enough fish sauce, weak boneless chicken, or too much liquid without final seasoning.

The fix is usually not more salt alone. Tinola needs ginger warmth, chicken flavor, fish sauce depth, and a final taste before serving.

Troubleshooting guide for bland Chicken Tinola broth with ginger, fish sauce, bone-in chicken, and a simmering pot.
When Chicken Tinola tastes thin, fix the base first: strengthen the ginger, deepen with patis, simmer the chicken properly, then taste again.
  • Use bone-in chicken. It gives the broth more body than boneless breast.
  • Use enough fresh ginger. Tinola should smell warm and gingery before the liquid even goes in.
  • Sauté the aromatics first. Do not just boil everything together from the start.
  • Add fish sauce before simmering. Let it coat the chicken and aromatics.
  • Simmer gently. This keeps the chicken tender and the soup balanced.
  • Skim foam and extra oil. This improves both flavor and appearance.
  • Taste at the end. The soup may need more patis, salt, pepper, calamansi, or chili.

If your Tinola has ever tasted like hot water with chicken in it, start with ginger and patis before reaching for more salt. A few extra minutes of gentle simmering can also help the chicken give more back to the pot.

Fast fix for bland Tinola: simmer a few fresh ginger slices in the broth for 5 minutes, add a small splash of fish sauce, then taste again. If the soup still feels thin, let it simmer uncovered for a few minutes to concentrate slightly.

Keep Tinola Broth Clear

Clear Tinola broth comes from gentle cooking and good timing. Bring the liquid to a boil first, then skim off the foam or scum that rises to the surface. After that, lower the heat to a gentle simmer.

Comparison graphic showing gentle simmer with clearer Chicken Tinola broth beside hard boil with cloudier broth and stronger bubbling.
A gentle simmer keeps Tinola calmer and clearer; by contrast, a hard boil can make the broth cloudy and the chicken tougher.
  • Boil first, then skim. Remove foam while the surface is still easy to see.
  • Lower the heat after skimming. A gentle simmer keeps the broth calmer.
  • Use a wide spoon or ladle. It is easier to lift off scum and extra oil without stirring everything back in.
  • Finish with greens at the end. Delicate leaves stay brighter when they are not boiled for long.
  • Avoid hard boiling the chicken. Rough heat can make the liquid cloudy and the meat tougher.
  • Stop stirring aggressively once foam rises. Let it collect on the surface so you can skim it cleanly.
  • Pull delicate leaves before they turn dull. Fresh-looking greens make the whole bowl feel cleaner.

A home pot of Tinola does not need restaurant-perfect clarity. Skim what you can, keep the simmer gentle, and focus on a broth that tastes balanced and aromatic.

Tinola Ingredients in Tagalog and English

Tinola recipes often move between English, Tagalog, and market names, especially when you are shopping outside the Philippines. If you are shopping at a Filipino market, reading a family recipe, or watching a Tagalog cooking video, these are the ingredient names you are most likely to see.

Tagalog-English ingredient guide for Chicken Tinola showing chicken as manok, ginger as luya, fish sauce as patis, green papaya as hilaw na papaya, chayote as sayote, moringa leaves as malunggay, chili leaves as dahon ng sili, and rice wash as hugas bigas.
This Tagalog-English Tinola guide makes shopping and recipe reading easier, especially for manok, luya, patis, sayote, malunggay, and hugas bigas.
EnglishFilipino / Common Name
ChickenManok
GingerLuya
GarlicBawang
OnionSibuyas
Fish saucePatis
Green papayaHilaw na papaya
ChayoteSayote
Moringa leavesMalunggay
Chili leavesDahon ng sili
Rice washHugas bigas
Black pepperPaminta

A short Tagalog-style procedure would be:

Paano lutuin: igisa ang luya, bawang, sibuyas at manok; lagyan ng patis; pakuluan hanggang lumambot; idagdag ang papaya o sayote; tapusin sa malunggay o dahon ng sili.

In English: sauté ginger, garlic, onion, and chicken; season with fish sauce; simmer until tender; add papaya or sayote; finish with malunggay or chili leaves.

Serving Suggestions

Tinola is usually served as a main dish with steamed rice. The broth is often spooned over rice, so it needs enough flavor to carry the meal.

  • Steamed white rice
  • Extra fish sauce / patis on the side
  • Calamansi or lime
  • Fresh chili
  • Black pepper
  • A small dipping sauce of patis and calamansi

The broth does not need to taste salty by itself; it needs to wake up when it hits hot rice. If the soup tastes slightly strong alone but perfect over rice, you are in the right zone.

Golden Chicken Tinola broth being poured from a ladle over steamed white rice, with a bowl of Tinola in the background.
The rice test is simple: once the broth touches hot rice, it should taste rounded, savory, and alive — not weak or watery.

For another Filipino chicken classic, make Chicken Adobo on a different night. Adobo is darker, tangier, and braised, while Tinola is lighter, gingery, and broth-based.

For a Filipino vegetable dish that also belongs with rice, try Pinakbet Tagalog, a savory mix of tender vegetables and bagoong.

Tinola is especially good when you want something warm, light, and restorative. It is the kind of soup that feels gentle but still satisfying.

Storage, Freezing, and Reheating

Let leftover Tinola cool, then transfer it to an airtight container and refrigerate within 2 hours.

  • Refrigerator: store for up to 3 days.
  • Freezer: freeze the chicken and broth if needed, but expect the vegetables and greens to soften after thawing.
  • Best texture: freeze without the greens, then add fresh spinach, malunggay, pechay, or bok choy when reheating.
  • Reheating: warm gently on the stovetop until hot throughout. Reheated chicken should reach 165°F / 74°C.

Green papaya and sayote can soften after freezing, so expect a gentler texture if you freeze the finished soup.

Tinola Variations

Once the basic ginger broth method makes sense, you can adjust the vegetable, greens, broth, or protein. Keep the same quiet logic: build the flavor first, cook the main ingredient gently, and finish with the delicate pieces last.

Easy Swaps for This Recipe

  • Tinola with green papaya: softer, slightly sweet, and more classic in feel. Use firm green papaya, not ripe orange papaya.
  • Tinola with sayote: firmer, cleaner, and easy to find in many markets.
  • Tinola with malunggay: earthy, green, and traditional. Add it at the end.
  • Tinola with spinach or pechay: practical when malunggay or dahon ng sili are not available.
  • Tinola with rice wash: slightly fuller broth. Use the second rice rinse for a clearer flavor.

Variations That Cook a Little Differently

  • Native chicken Tinola: deeper flavor, but usually needs a longer simmer before the vegetables go in.
  • Instant Pot Tinola: pressure cook the chicken first, then add the vegetables separately so they do not overcook.
  • Fish or seafood Tinola: use the same ginger-broth idea, but cook fish or mussels briefly so they stay tender.
  • Tinola sa gata or golden Tinola: coconut milk, turmeric, or squash make the soup richer and less like the clear classic version.

Back to top ↑

Common Mistakes

MistakeWhat HappensFix
Using only boneless breastWeak broth and dry meatUse bone-in pieces, or simmer breast gently and check it early.
Not using enough gingerSoup tastes flatUse 45 to 60 g / 1 1/2 to 2 oz fresh ginger.
Adding fish sauce only at the endFlavor tastes salty but shallowAdd some before simmering, then adjust later.
Using a chicken cube with full fish sauceSoup becomes too saltyStart with less patis if using a cube, then adjust after simmering.
Adding too much waterSoup tastes thin even after seasoningUse about 6 cups liquid for 2 to 2 1/2 lb chicken, then simmer uncovered briefly if needed.
Boiling too hardCloudy broth and tougher chickenSkim first, then simmer gently.
Adding the vegetable too earlyPieces turn mushyAdd them after the chicken is nearly tender.
Overcooking greensDull, tired leavesFinish with greens at the end.
Not tasting before servingFinal soup tastes blandAdjust with patis, salt, pepper, calamansi, or chili.
Using ripe papaya by mistakeSoup becomes too sweetUse green papaya or switch to sayote.

FAQ

What is Tinola in English?

Tinola is often described in English as Filipino ginger chicken soup. The chicken version is called Tinolang Manok or Chicken Tinola.

What does Tinola mean?

Tinola generally refers to a Filipino broth-based dish. Tinolang Manok is the chicken version most people mean when they say Chicken Tinola.

Is Tinola the same as Tinolang Manok?

Tinola is the general dish. Tinolang Manok is the chicken version. Since chicken is the most common version, many people use Tinola and Tinolang Manok to mean the same thing.

What should Tinola taste like?

Tinola should taste light but not empty: gingery, savory, and good enough that the broth makes plain rice feel like a meal. If the soup tastes flat, it usually needs more patis, more ginger, or a few more minutes for the chicken to flavor the broth.

What are the main ingredients of Chicken Tinola?

The main ingredients are chicken, ginger, garlic, onion, fish sauce, water or broth, green papaya or sayote, and leafy greens such as malunggay, dahon ng sili, spinach, or pechay.

Do you use green papaya or sayote for Tinola?

Both work. Green papaya gives Tinola a softer, slightly sweet, more classic texture. Sayote stays firmer and tastes mild and fresh, which makes it useful when you want cleaner pieces in the bowl.

What can I substitute for green papaya in Tinola?

Sayote or chayote is the best substitute for green papaya. Upo, kalabasa, or labanos can work in some variations, but they change the flavor and texture.

What leaves are used in Tinola?

The classic choices are malunggay and dahon ng sili. When those are hard to find, spinach, pechay, bok choy, watercress, or kale can work. The important part is adding the greens late enough that they stay fresh.

What can I substitute for malunggay?

Spinach is the easiest substitute for malunggay. Pechay, bok choy, watercress, or kale can also work. Add delicate greens at the end so they do not overcook.

Can I use spinach, pechay, or bok choy in Tinola?

Yes. Spinach wilts quickly and can be added off heat. Pechay and bok choy work best when the thicker stems go in before the leaves.

What is dahon ng sili?

Dahon ng sili means chili leaves. They are used in some traditional Tinola recipes and give the soup a mild peppery green flavor.

What is the best chicken part for Tinola?

Bone-in thighs and drumsticks are the easiest all-round choice. They stay tender, add body to the broth, and are harder to overcook than breast meat.

How long should Tinola simmer?

Tinola usually simmers for about 25 to 35 minutes after the liquid is added, depending on the size of the chicken pieces. Add the vegetables near the end and cook for another 5 to 12 minutes.

How do you keep Tinola broth clear?

Bring the broth to a boil, skim off the foam, then lower the heat to a gentle simmer. Avoid hard boiling the soup for a long time.

Why does my Tinola taste bland?

Tinola tastes bland when the broth lacks ginger, patis, bone-in chicken flavor, or enough simmering time. More salt alone will not fix an empty broth; add ginger warmth, fish sauce depth, and enough time for the chicken to give flavor back to the pot.

Can I make Tinola without fish sauce?

You can, but fish sauce gives Tinola much of its savory depth. If avoiding fish sauce, use salt plus low-sodium chicken broth, and consider adding a little soy sauce or coconut aminos. The flavor will not be exactly traditional.

Can I freeze Chicken Tinola?

Chicken Tinola can be frozen, but the greens and vegetables may soften after thawing. For best results, freeze the chicken and broth, then add fresh greens when reheating.

What is the difference between Tinola and Nilagang Manok?

Tinola is a ginger-forward Filipino chicken soup usually made with fish sauce, green papaya or sayote, and leafy greens. Nilagang Manok is a simpler boiled chicken soup that often uses vegetables like cabbage, potatoes, or saba banana and does not have the same strong ginger profile.

Final Note

Served bowl of Chicken Tinola with ginger broth, bone-in chicken, green papaya or sayote, leafy greens, steamed rice, calamansi, and dipping sauce.
A finished bowl of Chicken Tinola should feel quiet but complete: warm broth, tender chicken, bright greens, and rice that makes the soup feel like dinner.

Tinola does not need to shout. No watery broth, no collapsed vegetables, no loud tricks — just generous ginger, chicken that has time to flavor the pot, patis added early, and greens folded in last. When those pieces come together, the soup tastes calm but complete: simple food that still feels cared for.

Back to top ↑

Posted on Leave a comment

Pea and Ham Soup Recipe: Split Pea Soup with Ham Bone, Ham Hock or Gammon

Bowl of thick pea and ham soup with shredded ham, black pepper, parsley, crusty bread, and a spoon on a rustic table.

This pea and ham soup recipe is for the ham bone in the fridge — the one you almost tossed, then kept because it still had one good meal left in it. A smoked hock, gammon joint, ham hough, or diced leftovers can get you there too.

The main recipe is the classic dried split pea version: green split peas, ham, vegetables, water or stock, and enough time for the peas to collapse into a thick, comforting bowl. This recipe is built around the ham you actually have — a leftover bone, smoked hock, ham hough, gammon joint, or diced cooked ham — so you can get the salt, timing, and texture right the first time.

Start with the ham you have. The soup follows from there.

It will not stay bright green, and it does not need to. This is a smoky, spoonable, bread-dipping soup that gets its comfort from time, not flash.

Quick Answer

Best default formula

For classic pea and ham soup, simmer 500g / 1 lb dried green split peas with 1.2–1.5kg / 2.5–3 lb ham bone, smoked ham hock, ham hough, or gammon, plus 2 litres / about 8 cups water or low-sodium stock. Cook until the peas lose their shape, the broth coats a spoon, and the ham is soft enough to shred.

Split peas usually do not need soaking. Salt only after the ham has cooked into the broth. If the soup gets too thick, loosen it with hot water or stock; if it is too thin, simmer uncovered or blend a small portion after removing bones and bay leaves.

Before you cook: Use this as the quick mental map: split peas build body, ham seasons the broth, vegetables balance the pot, and time does the thickening.

Pea and ham soup ingredients arranged with the text “Split peas + ham + vegetables + time.”
Before the pot goes on, think of the soup in four parts: split peas for body, ham for seasoning, vegetables for sweetness, and time for the thick, spoonable finish.

Choose Your Ham Route

First, identify the ham before you worry about the exact method. A meaty bone gives depth, a smoked hock gives smoke, gammon gives a UK-style pot, and diced ham needs stock behind it. Use this table as a quick matchmaker for the ham in front of you.

Route cue: Choose the ham before the method.

Four ham options for pea and ham soup labeled ham bone, smoked hock or hough, gammon, and diced ham.
Your ham choice sets the path. A bone, smoked hock, ham hough, gammon joint, or diced leftover ham changes how salty, smoky, and long-cooked the soup needs to be.
You haveBest routeKey tip
Meaty ham boneClassic stovetop soupSimmer from the start, then shred any attached meat.
Smoked ham hock or ham houghTraditional slow-simmer soupCook until the meat pulls away easily; remove skin and excess fat.
Gammon jointClassic soup with careful salt controlIf raw, cook fully until tender before shredding. Rinse or soak first if very salty.
Leftover diced ham onlyFaster split pea soupUse low-sodium stock and add the ham near the end so it stays tender.

Most pots start with one of these four ham situations. Frozen peas, yellow split peas, and no-ham versions can still work, but they move away from the classic dried split pea pot. Extra cooked ham is also perfect for ham and cheese quiche if you have more than this soup needs.

Next: cook the soup or check cook time by ham type.

Pea and Ham Soup Recipe Card

Pea and Ham Soup Recipe with Ham Bone, Ham Hock or Gammon

Servings: 6–8
Prep time: 15 minutes
Cook time: 2 hours 15 minutes
Total time: About 2 hours 30 minutes
Method: Stovetop
Equipment: 5–6 qt / 5–6 L Dutch oven or heavy soup pot

Done when: the peas have collapsed, the broth coats a spoon, and the ham pulls away easily from the bone, hock, hough, or gammon.

Pot size note: do not use a small saucepan. Split pea soup foams, thickens, and needs room to simmer. A 5–6 qt / 5–6 L pot gives the peas and ham enough space.

Ingredients

  • 500g / 1 lb dried green split peas, about 2¼ cups, rinsed and sorted
  • 1.2–1.5kg / 2.5–3 lb ham bone, smoked ham hock, ham hough, or gammon joint
  • 2 litres / about 8 cups water or low-sodium chicken stock, plus more as needed
  • 1 large onion, finely chopped, about 180–220g
  • 2 medium carrots, diced, about 150g
  • 2 celery ribs, diced, about 80–100g
  • 3 garlic cloves, minced, about 1 tablespoon
  • 1 tablespoon olive oil or butter
  • 2 bay leaves
  • 1 teaspoon dried thyme, or 1 tablespoon fresh thyme leaves
  • ½ teaspoon black pepper, plus more to taste
  • Fine salt, to taste after cooking, added in small pinches
  • Fresh parsley or mint, optional, for finishing

If using leftover diced ham instead of a bone or hock: use 300–450g / 10–16 oz diced cooked ham and choose low-sodium stock instead of plain water for better flavor. Add the diced ham near the end.

If using raw gammon: cook it until fully cooked and tender before shredding, following the package guidance if needed. Use a meat thermometer if needed and follow the package’s safe-cooking guidance. For very salty gammon, rinse it or soak it according to the package directions before adding it to the soup.

Instructions

Build the Base
  1. Rinse the split peas. Place the split peas in a sieve, rinse well under cold water, and remove any small stones or damaged peas.
  2. Soften the vegetables. Heat the oil or butter in a large Dutch oven or heavy soup pot over medium heat. Add the onion, carrot, and celery. Cook for 6–8 minutes, stirring often, until the vegetables soften.
  3. Stir in the aromatics. Add the garlic, bay leaves, thyme, and black pepper. Cook for 30 seconds, just until fragrant.
  4. Combine peas, ham, and liquid. Add the rinsed split peas, your chosen ham, and 2 litres / about 8 cups water or stock. The ham does not have to be fully underwater, but it should be mostly submerged. Add a little extra water if your pot is wide or the ham sits too high.
  5. Bring to a boil. Increase the heat and bring the pot to a boil. Skim off any foam if needed.
  6. Simmer gently. Reduce the heat to low, partly cover the pot, and simmer for 2 to 2½ hours, stirring occasionally, until the split peas have softened, the soup has thickened, and the ham is tender.
Shred, Adjust and Finish
  1. Stir more often near the end. Once the split peas begin breaking down, keep the heat low and stir from the base of the pot so the soup does not catch.
  2. Remove the ham and bay leaves. Lift out the ham bone, hock, hough, or gammon. Remove and discard the bay leaves. Let the ham cool slightly.
  3. Shred the meat. Remove the meat from the bone. Discard bone, tough skin, and excess fat. Shred or chop the ham.
  4. Return the meat to the soup. Stir the shredded ham back into the pot.
  5. Adjust the thickness. For a too-thick soup, add hot water or stock, ½ cup / 120ml at a time. When it is too thin, simmer uncovered for 10–20 minutes or blend a small portion after the bones and bay leaves have been removed.
  6. Taste before salting. Add salt in small pinches only after the ham has seasoned the broth. Finish with parsley, mint, extra black pepper, or a small squeeze of lemon if desired.

Recipe Notes

  • Cook time varies by ham size, pea age, and whether the ham is raw, smoked, cured, or already cooked.
  • A glazed ham bone makes a slightly sweeter soup; smoked hock gives the pot a deeper smoky edge.
  • For a smoother soup, blend only part of it so you still keep some shredded ham and texture.
  • Always remove bones and bay leaves before blending.
  • This soup thickens as it cools, so expect to loosen leftovers with water or stock.

If you remember only three things: salt late, cook until the peas collapse, and adjust the thickness after the ham is shredded back in.

While it simmers: Keep these guardrails in mind, especially before adding salt, blending, or thinning the soup.

Rustic note card beside soup ingredients with the rules “Salt late. Cook until peas collapse. Thin after ham returns.”
Use these as your guardrails while cooking: season near the end, wait for the split peas to break down, then judge the final thickness after the ham returns.

Pea and Ham Soup: Key Cooking Cues

The finished soup should be thick enough to coat the spoon, soft enough to settle back into the bowl, and loose enough that it does not sit like paste. Use these cues before you decide it is done.

Texture cue: Do not stop at the clock alone; check whether the split peas have broken down and the soup coats a spoon.

Spoon lifting thick pea and ham soup with collapsed split peas, shredded ham, and steam rising from the bowl.
Once the split peas stop looking like firm little discs and the soup coats the spoon, the pot is ready for final seasoning, thinning, or serving.
CueWhat it means
Peas still look like little discsKeep simmering. They need to collapse for the soup to thicken properly.
Soup is olive green or khakiNormal for dried split peas cooked with ham. Do not judge the pot by frozen-pea color.
Ham does not shred easilyIt needs more time, especially if using hock, hough, or gammon.
Soup coats the spoonGood sign. It should be thick but still spoonable.
Soup stands up too stifflyThin it after cooking with hot water or stock.
Broth tastes salty earlyWait before adding more salt; the flavor changes as the pot cooks.
Bottom starts catchingLower the heat and stir from the base of the pot.

Cook’s note: do not judge the soup before the ham is shredded back in. The broth, salt, color, and thickness all settle after the peas collapse and the meat returns to the pot.

Need help? Jump to troubleshooting or fix the thickness.

Why This Recipe Works

Every part of the pot has a job: ham seasons the broth, split peas build body, and vegetables add sweetness. Wait until the ham has flavored the liquid before you decide how much salt the soup needs.

  • Split peas thicken the soup naturally. They soften, collapse, and create a creamy texture without cream.
  • Bone-in ham builds the broth. Simmering a bone, hock, hough, or gammon piece from the beginning gives the soup depth that diced ham alone cannot provide.
  • The recipe follows texture, not just time. The soup is ready when the peas lose their shape and the ham shreds.
  • It works with real-life leftovers. Use the ham you have, then adjust the method and timing around it.

Make This Soup When

This is the kind of soup that makes leftovers feel intentional.

  • Leftover ham bone is waiting after Christmas, Easter, Thanksgiving, a Sunday roast, or honey glazed ham.
  • Smoked ham hock sounds right because you want an old-fashioned soup with deep flavor.
  • Ham hough is what you have, and a Scottish-style pea and ham soup makes sense.
  • Gammon is in the fridge, and you want a UK-style pot that is hearty, thrifty, and freezer-friendly.
  • The slow cooker would help because dinner can simmer gently while you do other things.
  • Only diced leftover ham is left, and you need stock to make the broth taste deeper.

What Is Pea and Ham Soup?

Pea and ham soup is a hearty soup made by cooking peas with ham until the peas soften and the ham flavors the broth. In the UK and Australia, it is often called pea and ham soup. Across the US and Canada, many people search for the same style of soup as split pea soup with ham, ham bone split pea soup, or ham hock split pea soup.

The names change by region, but the comfort is the same: peas, ham, vegetables, and time turning into a bowl that feels bigger than its ingredients.

For the classic version, dried split peas are the usual base. Frozen peas make a brighter, lighter soup, but they do not thicken the pot in the same way. The old-fashioned spoonable version needs dried split peas for body.

Ingredients for Pea and Ham Soup

Ingredient cue: This base gives the soup body, smoke, sweetness, and balance without needing cream, flour, or complicated extras.

Dried green split peas, ham, onion, carrot, celery, garlic, herbs, black pepper, and stock arranged on a rustic surface.
Each ingredient has a job. Split peas thicken the soup, ham flavors the broth, vegetables round out the base, and herbs keep the pot from tasting flat.

Green Split Peas

Dried green split peas are the best choice for classic pea and ham soup. They start dry and plain, then slowly melt into the broth until the soup turns creamy without cream. Rinse them well before cooking and quickly sort through them for small stones or dry, damaged pieces.

Freshness matters. A very old bag of split peas can take longer to soften. If your pot looks dull and khaki halfway through, do not judge it yet; dried split pea soup deepens as it cooks.

Ham Bone, Ham Hock, Ham Hough, Gammon or Leftover Ham

The ham choice changes the flavor, salt level, and cook time. A meaty ham bone is excellent after a roast, while a smoked hock or hough gives deeper flavor.

Gammon works well for a UK-style soup, but it can be salty and may be raw depending on how it is sold. Leftover diced ham is the fastest option, but it needs stock because it will not flavor the broth as strongly as a bone-in piece.

A hock or hough is a tough, bony cut with skin, fat, connective tissue, and deep flavor. Even a bare ham bone can give more flavor than it looks like it should. After cooking, keep the tender meat and discard tough skin or any fat you do not want in the bowl.

Onion, Carrot, Celery and Garlic

This simple vegetable base gives the soup sweetness and balance. The vegetables should not shout in the bowl; they should melt into the background and make the ham and peas taste rounder. A leek can also be added if you want a slightly sweeter UK-style flavor.

Bay, Thyme and Black Pepper

Bay leaf and thyme are classic with split peas and ham. Black pepper cuts through the richness. Parsley gives a clean finish, while mint works especially well if you add frozen peas for a brighter green variation.

Water or Stock

If you are using a strong ham bone, smoked hock, or gammon joint, water can be enough because the ham will create a rich broth as it cooks. With diced leftover ham only, use low-sodium chicken stock or vegetable stock so the pot does not taste flat.

Best Ham for Flavor: Bone, Hock, Hough or Gammon?

Here, the ham is not just an ingredient; it is the seasoning. The best ham for this soup is the piece that can flavor the broth while the peas soften. Bone-in pieces build the pot slowly; diced cooked ham is faster, but it needs good stock behind it so the soup still tastes full.

If you are buying ham just for this soup, choose a smoked ham hock for deeper flavor, or ask for a meaty ham bone if you want more shredded ham in each bowl. This is where the soup starts tasting like more than peas and water.

Ham Options at a Glance

Ham optionBest forHow to use it
Ham boneLeftover holiday ham or roast ham flavorSimmer from the start, then remove and shred any attached meat.
Meaty ham boneBest leftover optionGives broth, meat, and body. Add extra diced ham only if needed.
Smoked ham hockDeep smoky flavorSimmer until tender, then remove skin, excess fat, and bone before shredding the meat.
Ham houghScottish-style pea and ham soupUse like ham hock. Cook until the meat pulls away easily.
Gammon jointUK-style pea and ham soupIf raw, simmer until fully cooked and tender. Taste carefully before adding salt.
Leftover diced hamQuick split pea soup with hamAdd near the end so it does not dry out. Use stock for better flavor.
Smoked turkey legSmoky non-pork optionUse like a ham hock if it fits your diet, then adjust seasoning at the end.
BaconExtra smoky flavorUse with stock and, if possible, diced ham. Bacon adds flavor but does not replace the body of a bone or hock.

Ham stock upgrade: for extra-deep hock flavor, simmer a ham hock or ham hough first, strain the cooking liquid, then use that ham stock as the soup liquid. It adds time, but the broth tastes rounder and more deeply hammy. Shred the cooked meat and add it back near the end. Taste the ham stock before adding salt, because it can be very salty.

What if the Ham Bone Has Barely Any Meat?

Use it anyway if it has good flavor. Simmer the bone with the split peas and vegetables, then add diced cooked ham near the end. The bone gives the broth body, while the diced ham makes sure every bowl still has enough meat.

If you like the smoky beans-and-meat direction, red beans and rice is another slow-simmer comfort meal where seasoning, bean age, and final texture matter.

What if the Gammon Is Very Salty?

Check the package first. Some gammon should be soaked or rinsed before cooking. If yours is very salty, soak or rinse it as directed, use water or unsalted stock, and do not add salt until the soup is finished.

Best Peas to Use for Pea and Ham Soup

The peas decide the texture, which is why split peas and frozen peas should not be treated as the same soup. Green split peas are the classic choice because they break down and thicken the broth. Frozen peas are sweeter and brighter, but they make a different bowl.

Pea choice: Pick the pea by the texture you want: dried split peas for the classic thick soup, frozen peas for a brighter variation.

Dried split peas and frozen peas shown with two different pea and ham soups for comparison.
Split peas and frozen peas do not behave the same way. Dried split peas make the classic thick soup, while frozen peas create a brighter, lighter variation.
Pea typeResultBest use
Green split peasSpoonable, classic, earthy soupBest for this main recipe.
Yellow split peasThick, milder, earthier soup with yellow colorGood variation, especially with gammon or smoked ham.
Frozen peasBright green, sweeter, lighter soupBest for a quick cooked-ham variation, not the classic version.
Fresh peasSweet and delicateBetter for a light spring soup than a ham bone soup.

Important: frozen peas and split peas are not a direct swap. Split peas break down and thicken the soup. Frozen peas stay sweet and bright, but they need potato, cream, or blending for body.

Using frozen peas? See the quick variation. Ready to cook? Go to the method.

How to Make Pea and Ham Soup with a Ham Bone or Hock

The method is simple: soften the vegetables, add split peas, ham, herbs, and liquid, then simmer until the peas collapse and the ham turns tender. As it cooks, the broth goes from thin and separate to cloudy, then creamy.

Method cue: Early simmering looks loose and separate; the creamy texture comes later as the split peas soften and collapse.

Pea and ham soup simmering in a Dutch oven with ham, split peas, carrots, celery, and broth visible.
At first, the soup may look thin and separate. As it simmers, the split peas soften, the ham seasons the broth, and the texture slowly turns creamy.
  1. Rinse the split peas. This removes dust and gives you a chance to check for small stones.
  2. Soften the vegetables first. Onion, carrot, and celery taste better when cooked before the liquid is added.
  3. Stir in herbs and garlic. Bay, thyme, black pepper, and garlic create the classic soup base.
  4. Add the ham and liquid. Bone-in ham, hock, hough, or gammon should go in early so it can flavor the broth.
  5. Simmer slowly. Keep the heat gentle once the pot has boiled. Hard boiling can make thick pea soup stick.
  6. Remove bones and bay leaves before blending. This is the one step not to skip.
  7. Shred the ham. Return only the tender meat to the pot.
  8. Finish by texture and taste. Adjust thickness, then season after tasting.

Shredding cue: After the ham is tender, remove the bones and bay leaves first, then return only the edible shredded meat to the pot.

Tender ham being shredded from a bone on a wooden board with a soup pot in the background.
After simmering, lift out the ham bone, hock, hough, or gammon before shredding the tender meat. Keep the meat, but discard bones, bay leaves, tough skin, and excess fat.

By the end, the ham should be soft, the broth settled, and the finish peppery.

Pea and Ham Soup Cook Time by Ham Type

This is the part where patience pays you back. Diced leftover ham is already tender. A ham bone, hock, hough, or gammon joint needs longer because it has to flavor the broth and soften enough to pull apart.

MethodApproximate timeBest for
Stovetop with diced leftover ham1 hour 30 minutes to 1 hour 45 minutesQuickest split pea soup with ham.
Stovetop with ham bone2 to 2½ hoursLeftover roast ham bone soup.
Stovetop with ham hock or ham hough2 to 2½ hours, sometimes longerTraditional pea and ham soup, smoky if the ham is smoked.
Stovetop with gammon2 to 2½ hours, depending on sizeUK-style pea and ham soup.
Slow cooker on low8–10 hoursHands-off ham hock or ham bone soup.
Slow cooker on high5–6 hoursFaster crockpot version.
Instant Pot with diced ham or small bone15–25 minutes high pressure + natural releaseFast pressure-cooker version.
Instant Pot with large ham hock, hough, or gammon45–75 minutes high pressure + natural releaseLarge pieces that need time to become shreddable.

If the peas still look firm or the ham does not pull away easily, keep cooking. Trust the pot, not just the clock.

Changing method? See slow cooker notes or see Instant Pot notes.

Do You Need to Soak Split Peas?

No, split peas usually do not need soaking for pea and ham soup. Soaking is mainly useful if the peas are old or you want to shorten the cook time.

Most split peas can go straight into the pot. They are small enough to cook without soaking, which is why this soup can start straight from the bag.

If you add lemon, vinegar, wine, or tomatoes as a variation, wait until the split peas are soft. Acidic ingredients can slow softening when added too early.

Slow Cooker Pea and Ham Soup Notes

The slow cooker is especially good for bone-in ham, smoked hocks, ham houghs, and gammon because the long, gentle heat gives the meat time to soften. It is also the version that makes the kitchen smell like dinner long before anyone asks what is cooking.

Slow-cooker cue: For a hands-off version, give ham hock, ham hough, gammon, or a meaty bone enough time to soften gently.

Slow cooker filled with thick pea and ham soup, shredded ham, carrots, split peas, and a ladle.
The slow cooker works especially well for ham hock, ham hough, gammon, or a meaty ham bone because the meat softens slowly as the split peas thicken the broth.
  • Add the split peas, onion, carrot, celery, garlic, bay, thyme, ham, and liquid to a 6 qt / 5.7 L slow cooker.
  • Cook on low for 8–10 hours or high for 5–6 hours.
  • Remove the ham and bay leaves when the soup is done.
  • Shred the meat and stir it back into the soup.
  • Let the soup rest for a few minutes before judging the thickness.
  • Taste before adding salt.

If the soup looks too thick near the end, stir in hot water or stock before serving. Slow cooker split pea soup often thickens more after it rests.

For another busy-day soup, this slow cooker broccoli cheese soup goes creamy and cheesy instead of smoky and hearty.

Instant Pot Pea and Ham Soup Notes

Use the pressure cooker when you want the split peas softened faster, but do not expect it to cheat a tough hock into tenderness without enough time. Large hocks, houghs, and raw gammon need a longer cook; diced leftover ham and small cooked bones are much faster.

A 6 qt or larger pressure cooker is best because split pea soup foams, thickens, and leaves starchy residue.

Pressure-cooker cue: Pressure cooking speeds up the split peas, but tough ham pieces still need enough time and natural release.

Instant Pot filled with pea and ham soup, shredded ham, split peas, carrots, steam, and a ladle.
Pressure cooking softens split peas faster, but large ham hocks, houghs, and gammon still need enough time to become tender. Use natural release for a better final texture.
Pressure cooker versionSuggested timingNote
Diced leftover ham15 minutes high pressure + 10–15 minutes natural releaseFastest version; use stock for flavor.
Small ham bone20–25 minutes high pressure + natural releaseGood when the bone is already from cooked ham.
Large smoked ham hock or ham hough45–75 minutes high pressure + natural releaseNeeds longer to become tender enough to shred.
Raw gammon joint45–75 minutes high pressure + natural release, depending on sizeMust be fully cooked and tender before shredding.

Use the longer end of the range for large, tough, or raw pieces, and the shorter end for smaller cooked bones or diced ham. Keep the soup below your pressure cooker’s max-fill line for beans, grains, or foamy foods if your model has one.

Let the pressure release naturally, and clean the lid, gasket, and valve after cooking because split pea soup can leave starchy residue.

Quick Frozen Pea and Ham Soup Variation

This is not the classic split pea version, but it is useful when you want a brighter green soup in about 30 minutes. Use frozen peas with leftover ham or cooked gammon for a lighter, fresher bowl.

Cook onion and garlic in butter, add diced potato if you want extra creaminess, then pour in stock and simmer until the potato is tender. Add frozen peas near the end and cook just until bright green. Blend the soup, then stir in diced ham or shredded gammon. Finish with mint, parsley, black pepper, or a little cream.

Avoid These Pea and Ham Soup Mistakes

Before you blend: Most problems start before the final simmer, so scan this checklist before you salt, blend, or swap the peas.

Pea and ham soup mistake board with labels for salting late, removing bones, using split peas, low simmer, and stock.
Most pea and ham soup mistakes happen early. Salt near the end, remove bones before blending, keep the simmer gentle, and use stock when diced ham cannot flavor the broth alone.
  • Salting before the ham has simmered. Ham can season the whole pot as it cooks.
  • Judging the soup before the peas collapse. Split peas need to lose their shape for the broth to thicken.
  • Blending before removing bones and bay leaves. Take them out first every time.
  • Using water with diced ham only and expecting deep broth. Diced ham needs stock behind it.
  • Boiling hard once the soup thickens. A low simmer protects the bottom of the pot.
  • Assuming frozen peas behave like split peas. Frozen peas make a different, lighter soup.

Already happened? Go to the fix-it section.

How to Thicken Pea and Ham Soup

To thicken pea and ham soup, simmer it uncovered, mash some peas, or blend a small portion after removing the bones and bay leaves.

  • Need it thicker? Simmer uncovered for 10–20 minutes.
  • Want it smoother? Blend a small portion with an immersion blender after removing bones and bay leaves.
  • Prefer it rustic? Mash some peas against the side of the pot.
  • Did it thicken too much? Add hot water or stock, ½ cup / 120ml at a time.

You usually do not need flour, cornstarch, or potato flakes. Split pea soup is supposed to thicken from the peas themselves.

Troubleshooting Pea and Ham Soup

This is a forgiving soup, but it does have moods: sometimes the peas take longer, sometimes the ham is saltier, and sometimes yesterday’s perfect soup turns into a thick block in the fridge. None of that means the pot is ruined.

Quick Texture and Salt Fixes

Fix-it cue: Use this section when the pot is already cooked but the texture, thickness, or salt level still needs fixing.

Troubleshooting board for pea and ham soup with bowls labeled too thick, too thin, and too salty.
If the pot goes wrong, it is usually fixable. Add hot stock when the soup is too thick, simmer or blend when it is too thin, and dilute carefully when it tastes too salty.
ProblemUrgencyWhat to do
Split peas are still hardNeeds timeKeep simmering and add hot water if needed. Old peas, hard water, salt too early, or acidic ingredients can slow softening.
Too saltyFix carefullyAdd unsalted water or stock, more cooked peas, diced potato, cream, or a little lemon for balance.
Too thinEasy fixSimmer uncovered, blend a portion, mash some peas, or let the soup rest.
Too thickEasy fixAdd hot water or stock, ½ cup / 120ml at a time, until it loosens.
Bland brothEasy fixAdd black pepper, thyme, parsley, bay, a little lemon, or more ham. If using diced ham only, use stock instead of water.
Bottom starts catchingAct nowLower the heat and stir from the base of the pot before it burns.
Ham hock is fattyNormalRemove skin and excess fat before returning the shredded meat to the soup.
Solid after chillingNormalReheat gently with water or stock until spoonable again.
Too smokyBalance itAdd more stock, a little cream, parsley, black pepper, or a small squeeze of lemon.
Too sweetBalance itThis can happen with a glazed ham bone. Balance with black pepper, herbs, lemon, and unsalted stock.

Most imperfect pots need only one thing: more time, more liquid, or a better final balance.

Once fixed: serve the soup or store and freeze leftovers.

What to Serve with Pea and Ham Soup

This is a bread-dipping soup, not a delicate starter. Serve it with something crisp, buttery, or slightly sharp to balance the bowl.

Serving cue: Serve the soup with something sturdy and crisp enough to balance the thick split pea texture and smoky ham.

Thick pea and ham soup served with crusty bread dipping into the bowl.
Choose bread that can handle dipping. The thick split pea texture, smoky ham, and crusty edges make this bowl feel like dinner, not just a starter.
  • Crusty bread or sourdough
  • Buttered toast
  • Garlic croutons
  • Soda bread
  • Grilled cheese
  • A simple green salad
  • Pickles or mustard on the side
  • Extra black pepper, parsley, or mint

For bread that can stand up to a thick bowl, sourdough focaccia is especially good because the crisp edges and airy center can handle dipping.

Later in the week, French onion soup goes in a completely different direction with caramelized onions, savory broth, toast, and melted cheese.

How to Store, Freeze and Reheat Split Pea Soup with Ham

Leftovers are one of the reasons to make the full pot. This is a good make-ahead soup because it thickens and deepens after a night in the fridge. The next-day bowl is often even better, especially with extra black pepper and a splash of stock to loosen it.

  • Fridge: Store in an airtight container for 3–4 days.
  • Freezer: Freeze in portions for up to 3 months for best quality.
  • Cooling: Cool the soup before storing it, and divide large batches into smaller containers so they chill faster.
  • Reheating: Warm gently on the stovetop or in the microwave, stirring often, until steaming hot throughout.
  • Thinning after storage: Add water or stock until the soup returns to the texture you like.

For safe leftover timing, the USDA recommends using refrigerated leftovers within 3–4 days; freeze extra soup if you want to keep it longer.

Back to Recipe Card · Back to Table of Contents

Frequently Asked Questions

These are the doubts that usually come up once the pot is already on the stove.

Is a ham bone enough for pea and ham soup?

Yes, especially if it still has some meat attached. Simmer it with the split peas, then remove the bone, shred any meat, and stir the meat back in.

Ham hock or ham bone: which tastes better?

A smoked ham hock is usually smokier and richer, while a ham bone tastes more like the roast it came from. Both work well. Choose smoked hock for smoke and ham bone for leftovers.

What is ham hough?

Ham hough is another name for ham hock, commonly used in Scotland. Use it the same way: simmer until tender, then remove the skin, excess fat, and bone before shredding the meat.

How salty is gammon in soup?

Gammon can be quite salty, depending on how it is cured. Use water or low-sodium stock, follow any soaking or rinsing guidance on the package, and season only after tasting near the end.

How much diced ham do I need without a bone?

Start with 300–450g / 10–16 oz diced cooked ham. Add it near the end and use stock instead of plain water so the broth has enough flavor.

Do split peas really need soaking?

No, not usually. Split peas can cook directly in the soup. Soaking can help if your peas are old or you want to shorten the cook time.

Why did my split peas stay hard?

They may be old, the water may be hard, or acidic ingredients may have gone in too early. Keep simmering and add hot water as needed.

Why did my soup turn khaki instead of green?

That is normal. Dried split peas cooked with ham usually turn olive green, khaki, or golden-green. Bright green pea soup is usually made with frozen or fresh peas.

Should pea and ham soup be smooth or chunky?

Either works. For the best texture, blend only part of the soup so it stays creamy but still has shredded ham and a little body.

Can I use yellow split peas?

Yes. Yellow split peas still make a thick, comforting soup, but the flavor is a little earthier and the color will be golden instead of green.

Can I use frozen peas instead of split peas?

You can, but it becomes a different soup. Frozen peas make a brighter, sweeter, lighter bowl; split peas make the old-fashioned thick version.

Can I use the water from cooking ham hock?

Yes, if it tastes good and is not too salty. Strain it first, then use it as part or all of the soup liquid.

Best way to fix pea and ham soup that is too salty?

Add unsalted water or stock, more cooked peas, diced potato, or a splash of cream. A small squeeze of lemon can help balance the flavor.

Can I make pea and ham soup the day before?

Yes. It is an excellent make-ahead soup. Chill it, then reheat gently with extra water or stock until it loosens back to a spoonable texture.

Can I make it in a slow cooker?

Yes. Use a 6 qt / 5.7 L slow cooker and cook on low for 8–10 hours or high for 5–6 hours. Remove and shred the ham at the end.

Can I make it in an Instant Pot?

Yes, but timing depends on the ham. Diced leftover ham or a small cooked ham bone can work in about 15–25 minutes at high pressure, plus natural release. Large hocks, ham hough, or raw gammon need longer, often 45–75 minutes.

What if I need a no-ham version?

Use vegetable stock, onion, carrot, celery, garlic, bay, thyme, smoked paprika, and olive oil or butter for richness. For a vegetable-heavy soup instead, try minestrone soup.

Best way to freeze pea and ham soup?

Freeze it in portions for up to 3 months for best quality. Thaw, then reheat with a splash of water or stock because the soup thickens after freezing.

Final Recipe Notes

The best pea and ham soup starts with the ham in front of you. Once you know whether it is a bone, hock, hough, gammon, or diced leftovers, the rhythm is simple: simmer until the peas collapse, shred the tender meat, and adjust the final texture.

It is humble food, but that is the point: peas, ham, vegetables, water, time, and patience becoming a pot that feeds people well.

Back to Table of Contents

Posted on Leave a comment

Butternut Squash Soup Recipe

Creamy butternut squash soup in a matte ceramic bowl with pumpkin seeds, chili oil, herbs, black pepper, a cream swirl, and toast on the side.

This is the butternut squash soup for the nights when you want something creamy and comforting, but still balanced rather than heavy — sweet from the squash, savory from onion and garlic, and bright enough at the end that the bowl never tastes flat.

Butternut squash soup can easily go watery, bland, baby-food sweet, or too heavy if the liquid, salt, and finish are not handled carefully. This version avoids that with one simple idea: cook the squash until tender, blend first, thin later, then brighten the pot at the end.

You can roast the squash for deeper caramelized flavor, or make the whole soup on the stovetop when you want something faster. It also works with fresh squash, pre-cut cubes, frozen squash, canned puree, or leftover roasted squash — and you can finish it with cream, coconut milk, olive oil, butter, or no cream at all.

Here is the goal: a smooth, cozy bowl that does not turn watery, bland, or too sweet. At the finish, the soup should coat a spoon, taste savory before it tastes sweet, and end with just enough brightness to make you want the next bite. It is the kind of bowl that makes a piece of toast feel like dinner, especially when the top has something crunchy, creamy, or a little spicy.

Jump to Recipe · Quick Answer · Make It Now · Less-Broth-First Method · Roasted vs Stovetop · Cream, Coconut Milk, or No Cream · Fix Bland or Thin Soup

Use this quick visual check before you adjust the pot: watery, bland, and overly sweet butternut squash soup each need a different fix.

Four-panel comparison showing watery butternut squash soup, bland puree-style soup, overly sweet soup, and a thick glossy finished soup.
Before fixing the pot, identify the real problem: thin soup needs body, flat soup needs seasoning, and overly sweet soup needs acid, heat, or savoriness.

Quick Answer: How to Make Butternut Squash Soup

To make butternut squash soup, cook butternut squash until very tender, then blend it with sautéed onion, garlic, carrot, broth, herbs, and seasoning until smooth. Roast the squash at 425°F / 220°C when you want the deepest flavor. When speed matters, simmer peeled squash cubes directly in the pot with broth until soft.

If peeling raw squash feels annoying, roast the halves first and scoop the soft flesh out later. That gives you deeper flavor and skips the hardest part of squash prep.

The most important technique is to use less liquid at first. Start with 3 cups / 720 ml broth, blend the soup, then loosen it only once the texture is clear. That keeps the bowl creamy instead of watery, whether you finish it with cream, coconut milk, olive oil, butter, or no cream at all.

Before serving, taste once and wake the pot with lemon juice, lime juice, or apple cider vinegar. A small acidic finish keeps the squash from tasting dessert-sweet.

Need exact amounts? Go straight to the recipe card. Still choosing a method? Compare roasted vs stovetop, or check the fresh, frozen, pre-cut, and canned squash guide.

Make It Now: The Best Default Version

Do not overthink the versions yet. When in doubt, make the MasalaMonk default: roasted squash, a simple onion-carrot-garlic base, herbs, 3 cups / 720 ml broth, and the creamy finish that fits your bowl — cream, coconut milk, butter, or olive oil.

For the safest, most flavorful bowl tonight, roast one large butternut squash, sauté the onion, carrot, garlic, and herbs in a soup pot, add the roasted squash and broth, then blend until silky. Finish with either ½ cup / 120 ml cream, 1 cup / 240 ml coconut milk, or 1–2 tablespoons butter or olive oil.

Before serving, taste the soup and add a small splash of lemon juice, lime juice, or apple cider vinegar. That simple order keeps the soup thick, smooth, and balanced instead of watery, grainy, or too sweet.

NeedBest Choice
Best flavorRoast the squash first
Fastest methodUse the stovetop method with peeled cubes
No raw peelingRoast squash halves, then scoop the flesh
Dairy-free creamy soupUse full-fat coconut milk
No-cream soupBlend well and finish with olive oil, butter, lemon, or lime
Thicker soupStart with less broth and adjust the body at the end

Butternut Squash Soup Recipe Card

Creamy Butternut Squash Soup

This creamy butternut squash soup is smooth, comforting, and easy to adjust. Roast the squash for deeper flavor, or make it fully on the stovetop for a faster weeknight soup. Finish it with cream, coconut milk, butter, olive oil, or a simple splash of lemon or lime for a lighter version.

Prep Time15 minutes
Cook Time45 minutes roasted / 30 minutes stovetop
Total TimeAbout 1 hour roasted / 45 minutes stovetop
Servings6
YieldAbout 8 cups / 1.9 L soup
Main MethodRoasted or stovetop
Diet NotesVegetarian; gluten-free if using gluten-free stock; vegan and dairy-free options included

Timing note: the roasted total assumes you prep and sauté the aromatics while the squash finishes roasting.

Ingredients

  • 1 large butternut squash, about 3 lb / 1.3–1.4 kg whole, or about 8 cups / 1.1–1.2 kg peeled cubes
  • 2 tablespoons / 30 ml olive oil, plus a little more if roasting cubes
  • 1 large yellow onion, about 200 g, chopped
  • Carrot: 1 large, about 150 g, chopped
  • 3–4 garlic cloves, minced
  • 1 teaspoon grated fresh ginger, optional
  • 3 cups / 720 ml vegetable broth to start, plus up to 1 cup / 240 ml more as needed
  • 1 teaspoon fine salt, plus more to taste
  • ½ teaspoon black pepper
  • ½ teaspoon smoked paprika or ⅛ teaspoon ground nutmeg
  • 1 teaspoon dried thyme, sage, or rosemary, or 1 tablespoon chopped fresh herbs
  • Finish with 1–2 teaspoons lemon juice, lime juice, or apple cider vinegar

Choose One Creamy Finish

  • Classic creamy soup: ½ cup / 120 ml heavy cream
  • Dairy-free creamy soup: 1 cup / 240 ml full-fat coconut milk
  • Creamy soup without cream: 1–2 tablespoons butter or olive oil
  • Lighter soup: skip the creamy finish and use lemon, lime, herbs, and black pepper to brighten the bowl

Equipment

  • Large baking sheet, if roasting
  • Parchment paper, optional
  • Sharp chef’s knife
  • Vegetable peeler, if making the stovetop cube version
  • Large spoon for removing seeds
  • Dutch oven or heavy-bottomed soup pot
  • Immersion blender or countertop blender
  • Ladle
  • Measuring cups and spoons
  • Kitchen scale, optional but helpful

Roasted Method

  1. Heat the oven to 425°F / 220°C.
  2. Cut the butternut squash in half lengthwise and scoop out the seeds. For faster roasting, peel and cube the squash instead.
  3. Rub the squash with 1 tablespoon olive oil and a pinch of salt. If roasting cubes, use enough oil to lightly coat them.
  4. Roast cut-side down on a baking sheet for 40–50 minutes, or until the flesh is very tender and the edges smell sweet and nutty. If using cubes, roast for 35–40 minutes, tossing once, until lightly caramelized.
  5. Heat the remaining 1 tablespoon olive oil in a Dutch oven or soup pot over medium heat.
  6. Add the onion and carrot. Cook for 6–8 minutes, stirring occasionally, until softened.
  7. Add garlic, ginger if using, herbs, smoked paprika or nutmeg, black pepper, and salt. Cook for 30–60 seconds, just until fragrant.
  8. Scoop the roasted squash flesh into the pot. Add 3 cups / 720 ml broth.
  9. Simmer for 5–10 minutes so the flavors come together.
  10. Blend until completely smooth using an immersion blender or countertop blender.
  11. Thin the soup in small splashes until it reaches your preferred texture.
  12. Stir in your chosen creamy finish, if using.
  13. Finish with lemon juice, lime juice, or apple cider vinegar. Taste and adjust salt, pepper, and acidity before serving.

Stovetop Method

  1. Peel, seed, and cube the butternut squash.
  2. Heat 2 tablespoons olive oil in a Dutch oven or soup pot over medium heat.
  3. Add onion and carrot. Cook for 6–8 minutes, until softened.
  4. Add garlic, ginger if using, herbs, smoked paprika or nutmeg, salt, and pepper. Cook for 30–60 seconds.
  5. Add the squash cubes and 3 cups / 720 ml broth.
  6. Bring to a boil, then reduce to a simmer.
  7. Cover and cook for 20–30 minutes, or until the squash is very soft.
  8. Blend until smooth.
  9. Loosen the soup only if it needs more liquid.
  10. Stir in your chosen creamy finish, if using.
  11. Finish with lemon juice, lime juice, or apple cider vinegar, then adjust seasoning.

Important texture note: start with 3 cups / 720 ml broth, not the full amount. Squash size and water content can vary. It is much easier to thin the soup after blending than to fix a watery pot later.

Vegan note: use vegetable broth, olive oil, and coconut milk or cashew cream instead of butter or heavy cream.

Now tune the bowl: texture method · creamy finish · toppings · troubleshooting.

What’s Inside

The recipe above gives you the main bowl. From there, the guide below helps you tune it to your kitchen — the squash you have, the method you prefer, the finish you want, and the fixes that save the pot if something tastes off.

Start Here

Choose Your Version

Serve, Store, Fix

The Less-Broth-First Method

This recipe uses the Less-Broth-First Method: start with 3 cups / 720 ml broth, blend the cooked squash until smooth, then thin only after you know the soup’s real texture.

That one method is what makes the recipe flexible. If your squash is huge, watery, frozen, canned, or already roasted, the soup still works because the final thickness is adjusted after blending, not guessed before cooking.

The finished soup should feel velvety on the spoon, not loose like broth and not stiff like puree. Once the texture is right, salt, richness, herbs, and a little acid make the flavor complete.

Three-panel guide showing thick blended butternut squash soup, a small amount of broth being added, and a spoonful of smooth soup with spoon-coating texture.
Because squash varies in moisture, blend the soup thick first; then loosen it gradually so it stays creamy instead of turning watery.

Why This Butternut Squash Soup Works

This soup tastes complete when the squash’s sweetness has something savory, rich, and bright around it. Onion, garlic, carrot, herbs, spice, salt, fat, and acidity all help the bowl taste full instead of flat.

Roasting brings out deeper, caramelized flavor. The stovetop method is faster and still gives you a smooth, comforting result, especially when the onion, garlic, carrot, and spices are cooked properly before the broth goes in.

When the cut side comes out deeply golden and the kitchen smells sweet and nutty, you know the soup already has a head start. Those roasted edges are where the bowl gets its deeper, almost nutty sweetness.

Seasoning the aromatics before the broth goes in keeps the soup from tasting diluted later. Carrot helps the soup taste rounder and look brighter, while ginger, herbs, black pepper, smoked paprika, or nutmeg add warmth. Lemon juice, lime juice, or apple cider vinegar keeps the final spoonful lively.

Ingredient Notes: What Each One Does

None of the ingredients are here just for show. Squash brings body and sweetness. Onion, garlic, and carrot make the soup savory. Herbs, ginger, and spices add warmth. Broth controls thickness. Your creamy finish decides how rich the final bowl feels.

Ingredients for butternut squash soup arranged on a wooden board, including squash, onion, carrot, garlic, ginger, herbs, broth, cream, olive oil, lime, salt, and pepper.
Notice the balance before cooking: squash brings body, aromatics build depth, broth controls texture, and citrus wakes up the final flavor.

Butternut Squash

Butternut squash is naturally sweet, creamy when blended, and perfect for soup. One large squash, about 3 lb / 1.3–1.4 kg, is usually enough for 6 servings.

Whole fresh squash, peeled cubes, frozen squash, canned puree, and leftover roasted squash can all work. The method changes slightly depending on what you have, but the same rule stays true: cook it until very tender before blending.

Onion, Garlic, and Carrot

Onion and garlic give the soup its savory base. Carrot is part of the default version because it rounds out the flavor and deepens the color. You can skip it if you do not have one, but the bowl may taste slightly less full.

Ginger, Herbs, and Spices

Fresh ginger adds warmth and keeps the soup from tasting heavy. Sage, thyme, rosemary, nutmeg, smoked paprika, curry powder, garam masala, and black pepper all work well here.

Classic version: use sage, thyme, rosemary, or nutmeg. For a warmer spiced bowl, add ginger with a little curry powder or garam masala and finish with lime.

Broth

Vegetable broth keeps the recipe vegetarian and works well with the natural sweetness of the squash. Chicken broth can also be used if you are not keeping the soup vegetarian.

Think of broth as an adjustment, not the whole base. The soup should coat a spoon, not pour like thin broth. Add more only after blending if the texture needs it.

Cream, Coconut Milk, Butter, or Olive Oil

You do not need heavy cream to make this soup creamy. Creaminess comes from fully cooked squash, controlled broth, and thorough blending first. The blender should turn the squash glossy before any cream goes in.

Cream, coconut milk, butter, or olive oil can add richness, but they should not be doing all the work. Coconut milk is the easiest dairy-free finish. For more ways to use it in cooking, see this guide to coconut milk benefits and uses.

Lemon, Lime, or Apple Cider Vinegar

This is the small step that makes the soup taste finished. Use lemon juice for a clean finish, lime juice for a spiced or coconut version, and apple cider vinegar for a warmer fall-style bowl.

Fresh, Frozen, Pre-Cut, or Canned Squash

Fresh, frozen, pre-cut, canned, and leftover roasted squash can all make a good soup. The handling changes, but the method stays forgiving: cook the squash until fully soft, blend, then adjust the texture and flavor.

Guide showing whole fresh butternut squash, pre-cut squash cubes, frozen squash cubes, butternut squash puree, and leftover roasted squash.
Whether you use fresh, frozen, pre-cut, canned puree, or leftover roasted squash, adjust the liquid after blending because moisture levels change.

Choose the Squash You Have

What You HaveAmount for This RecipeWhat to Adjust
Whole fresh butternut squash1 large squash, about 3 lb / 1.3–1.4 kgBest flavor. Roast halves or cubes, or peel and simmer on the stovetop.
Pre-cut fresh squashAbout 8 cups / 1.1–1.2 kg cubesGreat shortcut. Roast for flavor or simmer for speed. Check that the cubes are firm and fresh.
Frozen butternut squash cubesAbout 8 cups / 1.1–1.2 kg cubesAdd directly to the pot. Frozen cubes may release extra water, so start with less broth.
Canned or packaged squash pureeAbout 4 cups / 900–950 g pureeSauté onion, garlic, and spices first. Then whisk in the puree and broth slowly.
Frozen squash pureeAbout 4 cups / 900–950 g pureeWarm gently, then blend with cooked aromatics and hot broth.
Leftover roasted squashAbout 4 cups mashed or scooped fleshFastest option. Blend with sautéed onion, garlic, and hot broth.

Frozen squash may look watery at first. Let it simmer until very soft, blend well, then adjust the body after blending.

Canned or packaged puree can taste flatter than roasted squash, so give the onion, garlic, and spices time to bloom before adding it. A small splash of lemon juice or apple cider vinegar at the end helps wake up the flavor.

Leftover roasted squash makes this almost instant. Since the squash is already cooked, focus on building a good onion-garlic base, then blend with hot broth and finish with salt, fat, and acidity.

Once you know your squash type, compare roasted vs stovetop or move into how to make the soup.

Roasted vs Stovetop Butternut Squash Soup

Both methods work. Pick based on the night you are having: the oven when you want deeper flavor, the stovetop when you want dinner faster.

Side-by-side comparison of roasted butternut squash soup and stovetop butternut squash soup served in two bowls.
For deeper caramelized flavor, choose roasted squash; for a faster butternut squash soup with a softer taste, use the stovetop method.
MethodBest ForFlavorTime
Roasted squashBest overall flavorSweet, caramelized, deepLonger
StovetopFast weeknight soupSmooth, clean, lighterFaster
Pre-cut or frozen squashConvenienceGood if seasoned wellFastest
Leftover roasted squashQuickest rich soupDeep and already cookedVery fast

Use the roasted method when you want the best flavor. Roasting concentrates the squash and adds caramelized edges, which makes the final soup taste richer.

The stovetop method is better when you want a faster, simpler dinner. It will still be smooth and cozy, but it may need a little more seasoning, spice, or acidity at the end.

Pre-cut or frozen squash is for the nights when convenience matters. The bowl can still be very good, especially if you build flavor with onion, garlic, ginger, herbs, and enough salt.

Chosen your route? Go to how to make butternut squash soup, or return to the recipe card.

How to Make Butternut Squash Soup

Use this quick method guide as the visual map for the full process: cook the squash, build the savory base, blend until smooth, then thin only if needed.

Four-step guide showing roasted or simmered squash, sautéed aromatics, blended smooth soup, and finished soup thinned only if needed.
First cook the squash, then build the flavor base, blend until silky, and adjust thickness only once you can see the final texture.

1. Prepare the Squash

For roasted soup, cut the squash in half lengthwise and scoop out the seeds. Roast it cut-side down, then scoop out the soft flesh later. This route avoids peeling raw squash.

Roasted butternut squash halves on parchment paper with soft orange flesh being scooped from the skin using a spoon.
Instead of peeling raw squash, roast the halves first; once tender, the flesh scoops out cleanly and blends into a smoother soup.

With the stovetop method, peel the squash, remove the seeds, and cut it into cubes. Smaller pieces cook faster. Pre-cut or frozen cubes can go straight into the pot with only small broth adjustments.

2. Roast or Simmer Until Very Tender

In the roasted method, cook the squash at 425°F / 220°C until the flesh is soft and the edges have some color. This usually takes 40–50 minutes for halves or 35–40 minutes for cubes.

Close-up of roasted butternut squash cubes with browned edges, caramelized spots, black pepper, and steam on a baking sheet.
After roasting, look for browned edges and caramelized spots; that color is what gives roasted butternut squash soup deeper, rounder flavor.

On the stovetop, simmer the cubes with broth for 20–30 minutes, until they are soft enough to mash with a spoon. Do not rush this step. Undercooked squash can make the soup taste grainy instead of silky.

3. Build the Flavor Base

Cook onion and carrot in olive oil until softened. Add garlic, ginger, herbs, and spices only after the onion has softened. Garlic and ground spices can burn if they cook too long over dry heat.

This base is what keeps the soup from tasting like plain squash puree.

Onion, carrot, garlic, ginger, herbs, spices, and bay leaf sautéing in a green Dutch oven with a wooden spoon.
Meanwhile, soften the onion, carrot, garlic, ginger, and herbs before adding broth so the soup starts savory instead of turning flat later.

4. Add Broth Carefully

Add 3 cups / 720 ml broth first. After blending, add more only if the soup is too thick. If too much liquid goes in early, simmer uncovered or blend in more cooked squash, sweet potato, carrots, lentils, or beans.

5. Blend Until Smooth

An immersion blender lets you blend directly in the pot. A countertop blender usually gives the silkiest finish, especially after roasting.

If using a countertop blender, blend in batches and do not fill the jar too high. Hot soup expands when blended. Start on low speed and protect your hand with a towel if steam can escape from the lid.

Blend longer than you think you need to. That extra time helps the squash turn glossy and silky instead of pulpy.

Smooth orange butternut squash soup being poured from a blender into a Dutch oven on the stove.
Once blended, the soup should pour in a smooth ribbon with a glossy surface; that is the cue that it is silky, not grainy.

6. Finish and Balance

After blending, choose your finish: heavy cream for classic richness, coconut milk for dairy-free creaminess, butter or olive oil for no-cream richness, or lemon/lime for brightness.

A good batch tastes mellow first, then bright at the end. If it feels sleepy, add salt before adding more spice, then finish with a small splash of lemon, lime, or vinegar.

Instant Pot, Slow Cooker, and Blender Notes

For after-work soup, use the stovetop or Instant Pot method. When you have a little more time, roast the squash and let the oven do the flavor work.

MethodHow to Do ItBest Tip
Instant PotSauté onion, carrot, garlic, ginger, and spices. Add peeled squash cubes and 3 cups / 720 ml broth. Pressure cook on high for 10 minutes, let it naturally release for 5 minutes, then quick release, blend, and finish.Add cream or coconut milk after pressure cooking.
Slow cookerFor best flavor, sauté the onion, carrot, garlic, and spices first. Add them to the slow cooker with peeled squash cubes, broth, herbs, salt, and pepper. Cook on high for 3–4 hours or low for 6–8 hours, until very soft. Blend and finish.Use less broth at first; slow-cooked vegetables release liquid.
High-speed blenderRoast or simmer the squash first, then blend with hot broth and cooked aromatics. Use a heated soup cycle only if your blender is designed for it.Hot soup expands, so blend carefully and never overfill.
Immersion blenderBlend directly in the pot after the squash is fully cooked.Easy and safe, but may not be as silky as a countertop blender.

A countertop blender gives the smoothest result. An immersion blender is less fussy and easier to clean, so use whichever one makes the soup more likely to happen tonight.

If the slow cooker is your favorite route for cozy soups, this slow cooker broccoli cheese soup follows the same gentle-finish idea for keeping creamy soups smooth.

How to Make Butternut Squash Soup Creamy

Creaminess does not have to mean heavy cream. It comes from fully tender squash, careful broth, and enough blending. Once the base is smooth, you can make the bowl rich, dairy-free, light, or extra silky with one finishing choice.

Four bowls of butternut squash soup showing cream, coconut milk, olive oil or butter, and no-cream finishing options.
With a smooth base, choose your finish: cream adds richness, coconut milk softens it, olive oil adds gloss, and no cream keeps it lighter.
Creamy OptionBest ForHow to Use It
Heavy creamClassic creamy soupStir in ½ cup / 120 ml after blending. Do not boil hard.
Coconut milkDairy-free or vegan soupAdd 1 cup / 240 ml after blending. Great with ginger, curry, chili, and lime.
ButterCreamy without creamBlend in 1–2 tablespoons at the end.
Olive oilLighter no-cream versionDrizzle in after blending or blend in 1 tablespoon.
Cashew creamVegan richnessBlend soaked cashews with water, then stir in.
Sweet potato or potatoThicker bodyReplace part of the squash or add a small amount while simmering.
No creamLightest versionBlend very well and finish with lemon/lime and a little olive oil.

A coconut milk version works best with full-fat coconut milk. Light coconut milk is fine, but the soup will be thinner and less silky.

For a vegan bowl, use vegetable broth, olive oil, coconut milk or cashew cream, and plant-based toppings like pumpkin seeds, roasted chickpeas, herbs, or chili oil.

Add cream, coconut milk, or cashew cream near the end, after blending. This keeps the texture smoother and prevents dairy from boiling too hard.

After choosing your finish, try a flavor variation or use troubleshooting if the soup tastes flat, thin, or too sweet.

Butternut Squash Soup Variations

Think of the variations as small turns, not separate recipes. The soup stays familiar; only the mood changes.

Six small bowls of butternut squash soup variations labeled classic, curried, coconut ginger, spicy, apple, and lentil.
Start with the same base, then shift the mood: curry adds warmth, ginger adds brightness, lentils add body, and apple brings autumn sweetness.
VersionWhat to Add
Classic butternut squash soupSage, thyme, rosemary, black pepper, and a little nutmeg
Curried butternut squash soupCurry powder or garam masala, ginger, coconut milk, and lime
Spicy butternut squash soupChili flakes, chili oil, chipotle, or black pepper
Coconut ginger soupCoconut milk, fresh ginger, lime, and cilantro
Apple autumn soup1 peeled apple, cinnamon, nutmeg, and a small drizzle of maple syrup
Sweet potato butternut soupReplace 2 cups of squash with sweet potato cubes
Carrot butternut soupAdd 2–3 carrots and ½ cup extra broth if the soup gets too thick
Lentil butternut soupAdd ½ cup red lentils and 1–1½ cups extra broth for a thicker, meal-style soup
Roasted garlic soupRoast garlic with the squash and blend it in
No-cream light soupSkip cream and finish with lemon, herbs, and olive oil

For a warm spiced version, add ginger, a little curry powder or garam masala, coconut milk, black pepper, and lime juice. It gives the soup depth without making it heavy.

Lentils are the easiest way to turn this into a heartier vegetarian meal. This guide to vegan lentil soup recipes has more ideas for using lentils in cozy, filling bowls.

For the apple-autumn version, a small pinch of homemade pumpkin pie spice can bring cinnamon, ginger, nutmeg, allspice, and clove notes without needing several jars on the counter.

When the flavor lane is set, finish the bowl with toppings or turn it into dinner with serving ideas.

Best Toppings for Butternut Squash Soup

Once the soup is blended and balanced, toppings are where the bowl stops feeling like plain puree and starts feeling like dinner. A silky soup needs something that crunches, swirls, snaps, or wakes it up — seeds, herbs, chili oil, cream, yogurt, roasted chickpeas, or crisp toast.

Bowl of butternut squash soup surrounded by pumpkin seeds, chili oil, herbs, croutons, roasted chickpeas, apple slices, nuts, black pepper, and toast.
Because creamy soup is soft by nature, toppings should add contrast: crunch, heat, herbs, pepper, toast, or something bright.
What the Soup NeedsGood Toppings
CrunchToasted pumpkin seeds, croutons, roasted chickpeas, toasted almonds, walnuts, or pecans
Creamy contrastCream swirl, coconut milk, yogurt, sour cream, or cashew cream
HeatChili oil, chili crisp, red pepper flakes, black pepper, sambal, or hot sauce
FreshnessCilantro, parsley, chives, scallions, basil, or dill
Sweet-salty contrastDiced apple, crispy bacon, blue cheese, feta, or dried cranberries
Meal upgradeRoasted chickpeas, cooked lentils, beans, grilled cheese cubes, or toasted bread

Think of toppings as balance. Sweeter batches need heat, salt, herbs, or acidity. For a fuller meal, add chickpeas, lentils, beans, seeds, or toast.

Easy Topping Combos

StyleUse This Combo
ClassicCream swirl + black pepper + toasted pumpkin seeds
VeganCoconut milk + chili oil + cilantro + roasted chickpeas
Fall dinnerToasted pecans + diced apple + thyme
SpicedLime + chili oil + toasted seeds + cilantro
Protein boostLentils or roasted chickpeas + yogurt or coconut milk
Simple lunchCroutons + olive oil + black pepper + parsley

A swirl of cream softens the edges, pumpkin seeds snap against the silky soup, and chili oil or lime keeps the sweetness awake.

To make the bowl feel more like lunch, serve it with a scoop of chickpea salad on the side. Chickpeas add protein and texture without making the meal feel heavy.

What to Serve With Butternut Squash Soup

This soup can be a starter, lunch, or light dinner. To make it more filling, serve it with something crisp, toasted, or protein-rich.

Butternut squash soup served with garlic toast, cucumber salad, chickpea salad, and rustic bread on a cozy table.
Turn butternut squash soup into dinner by pairing the bowl with crisp toast, garlic bread, chickpea salad, or cucumber salad.
  • Crusty bread
  • Garlic bread
  • Grilled cheese
  • Cheese toast
  • Simple green salad
  • Roasted chickpeas
  • Lentil salad
  • Quinoa bowl
  • Baked potato
  • Sandwiches
  • Roasted vegetables

Bread turns this into the kind of meal people linger over. A warm slice of homemade garlic bread loaf works especially well because it adds crunch, butteriness, and something sturdy to dip.

Cucumber salad keeps the meal from feeling too soft or sweet. The vinegar, dill, and onion cut through the squash’s natural sweetness.

If you love cozy soup dinners, try this French onion soup next. For tonight, keep this butternut squash soup as the main bowl with toast, salad, and crunchy toppings.

Storage, Freezing, and Reheating

This soup is excellent for meal prep because it stores and reheats well. It may look thicker the next day, but that is normal; a splash of broth, water, cream, or coconut milk brings it back.

Four-panel guide showing butternut squash soup in a storage container, thick reheated soup, liquid being stirred in, and smooth soup on a spoon.
As the soup chills, it thickens. Reheat gently and stir in a small splash of broth, water, cream, or coconut milk until smooth again.
Storage MethodGuidance
FridgeStore in an airtight container for up to 4 days.
FreezerFreeze for up to 3 months for best texture and flavor.
Reheating on stoveWarm gently over medium-low heat, stirring often.
Reheating in microwaveHeat in short intervals, stirring between each one.
If too thick after chillingAdd broth, water, cream, or coconut milk a little at a time.
If separated after freezingWhisk well or blend briefly after reheating.

For general food safety, the USDA leftover safety guidance recommends using refrigerated leftovers within 3–4 days.

Cream-based soup can sometimes separate slightly after freezing. It is still fine to eat, but the texture may need whisking or blending.

Coconut milk versions usually freeze well, though they may also need stirring after reheating.

For the smoothest freezer results, freeze the soup before adding cream, then add cream or coconut milk after reheating.

Need to rescue leftovers or a tricky batch? Jump to fixes for thick, thin, bland, grainy, or separated soup.

Avoid These Common Mistakes

Most problems are easy to avoid if you control the liquid, cook the squash fully, and balance the flavor at the end.

  • Do not add all the broth at once. Start with 3 cups / 720 ml and thin after blending.
  • Do not blend undercooked squash. The squash should be soft enough to mash easily with a spoon.
  • Do not skip salt and acid. Butternut squash is sweet, so it needs seasoning and brightness.
  • Do not boil hard after adding cream. Add cream or coconut milk near the end and heat gently.
  • Do not rely only on sweetness. Use onion, garlic, herbs, ginger, spice, or acidity for balance.
  • Do not judge the texture before blending. The soup often looks chunky or loose before it turns smooth.

Troubleshooting Butternut Squash Soup

If the pot is already made and something feels off, do not start over. A bland or thin soup is not a failure — it usually just needs salt, acid, time, or a little more body.

Why is my butternut squash soup bland?

Most bland soup needs salt first, then acid. Add salt gradually, then wake it up with lemon juice, lime juice, or apple cider vinegar. Still flat? Add black pepper, smoked paprika, curry powder, ginger, or a small amount of butter or olive oil.

Why does my soup taste like plain puree?

If the soup tastes like plain puree or too sweet and one-note, it usually needs contrast. Add salt first, then try lemon, lime, vinegar, black pepper, chili oil, toasted seeds, herbs, roasted chickpeas, or crisp toast on top.

Why is my soup too sweet?

Butternut squash is naturally sweet. Balance it with lemon juice, lime juice, vinegar, black pepper, chili flakes, curry powder, or a little extra broth. Savory toppings like roasted chickpeas, pumpkin seeds, yogurt, or herbs also help.

How do I fix soup that is too thick?

Add hot broth ¼ cup / 60 ml at a time, blending or stirring after each addition, until the soup reaches the texture you want.

How do I fix soup that is too thin?

Simmer it uncovered until some liquid evaporates. You can also blend in more roasted squash, cooked sweet potato, cooked carrots, red lentils, or beans.

Why is my soup grainy?

The squash may not have cooked long enough, or the soup may need more blending. Simmer until the squash is very soft, then blend thoroughly. A countertop blender usually gives the smoothest texture.

Why did my soup separate after freezing?

Cream and coconut milk can separate slightly after freezing and reheating. Warm the soup gently and whisk well. If needed, blend it briefly to bring the texture back together.

How do I make the soup richer without cream?

Blend in 1–2 tablespoons butter, a drizzle of olive oil, coconut milk, cashew cream, or a small amount of cooked sweet potato. Roasting the squash first also gives the soup deeper flavor without needing extra cream.

Is Butternut Squash Soup Healthy?

It can be a nourishing, vegetable-heavy soup, but the final nutrition depends on broth, cream, toppings, and serving size. The base is naturally smooth, so you do not need a lot of cream to make it satisfying.

A lighter version still feels satisfying because the squash does the creamy work before any cream goes in. For the lightest bowl, use broth, olive oil, lemon, herbs, and crunchy seeds.

A more filling vegetarian version can use lentils, beans, chickpeas, Greek yogurt, or pumpkin seeds. Richer cream-or-butter versions work best in smaller bowls.

If you are not keeping it vegetarian, grilled chicken or turkey also works. For lower sodium, use low-sodium broth and adjust salt at the end.

To check ingredient-level nutrition details, search for raw or cooked butternut squash in USDA FoodData Central.

For a low-carb or keto-style approach, butternut squash needs more care because it is naturally starchy. This guide to butternut squash on keto explains that angle in more detail.

Frequently Asked Questions

Do you need to peel butternut squash for soup?

If you are roasting the squash in halves, you do not need to peel it first. Roast it until soft, then scoop the flesh out of the skin. If you are making the stovetop version with cubes, peel it before cooking.

Is roasted butternut squash soup better than stovetop?

Roasting usually gives deeper flavor because the squash caramelizes in the oven. The stovetop version is faster and easier, but it may need a little extra seasoning, spice, or acidity to taste as rich.

What makes butternut squash soup creamy?

Butternut squash itself becomes creamy when cooked until soft and blended well. Cream, coconut milk, butter, olive oil, cashew cream, sweet potato, or potato can make it richer, but good blending and broth control matter most.

How do you make butternut squash soup without cream?

Skip the cream and blend the soup very well. Use less broth at first, then thin only as needed. Finish with olive oil, butter if not vegan, coconut milk, cashew cream, or a splash of lemon or lime juice for balance.

Does coconut milk work in butternut squash soup?

Yes — especially with ginger, curry powder, chili, lime, and cilantro. Full-fat coconut milk gives the creamiest texture.

When should you add cream or coconut milk?

Add cream or coconut milk after the squash is cooked and the soup is blended. Warm it gently after adding. Avoid boiling hard once cream has been added because the texture can become less smooth.

Why does my butternut squash soup taste bland?

Most bland soup needs salt first, then acid. Add salt gradually, then brighten it with lemon juice, lime juice, or apple cider vinegar. For more flavor, add ginger, black pepper, smoked paprika, curry powder, sage, thyme, or chili oil.

How do you thicken butternut squash soup?

Simmer it uncovered, or blend in more cooked squash, sweet potato, carrots, lentils, beans, or potato. For best results, avoid adding too much broth before blending.

What spices go well with butternut squash soup?

Sage, thyme, rosemary, nutmeg, black pepper, smoked paprika, ginger, curry powder, cinnamon, chili flakes, and garam masala all work well here.

Can frozen butternut squash be used for soup?

Yes — use about 8 cups / 1.1–1.2 kg frozen cubes for this recipe. Add them directly to the pot and simmer until very soft. Start with less broth because frozen squash can release extra water.

How much butternut squash puree equals one squash for soup?

For this recipe, use about 4 cups / 900–950 g puree in place of one large 3 lb / 1.3–1.4 kg squash. Sauté the onion, garlic, carrot, and spices first, then whisk in the puree and broth slowly.

Can you make butternut squash soup in an Instant Pot or slow cooker?

Yes. For Instant Pot soup, sauté the aromatics, add squash and broth, pressure cook on high for 10 minutes, naturally release for 5 minutes, then blend and finish. Slow cooker soup takes 3–4 hours on high or 6–8 hours on low, until the squash is very soft. Add cream or coconut milk after cooking.

How long does butternut squash soup last?

It lasts up to 4 days in the fridge when stored in an airtight container. You can also freeze it for up to 3 months. For the best texture, freeze the soup before adding cream, then add cream or coconut milk after reheating.

Back to Recipe Card · Back to Top

Final Tips for the Best Butternut Squash Soup

Use roasted squash when you have time and the stovetop method when dinner needs to happen faster. Start with less broth, blend until the soup turns glossy, then loosen it only if needed.

Before serving, taste once. If the bowl feels flat, add salt first, then a small splash of lemon, lime, or vinegar. Too thick? Loosen it gently. Too sweet? Give it herbs, heat, crunch, or acidity.

That is the bowl you want: creamy without being dull, sweet without being sugary, warm without being heavy, and easy enough to make again next week — especially with toast, seeds, or a little chili oil on top.