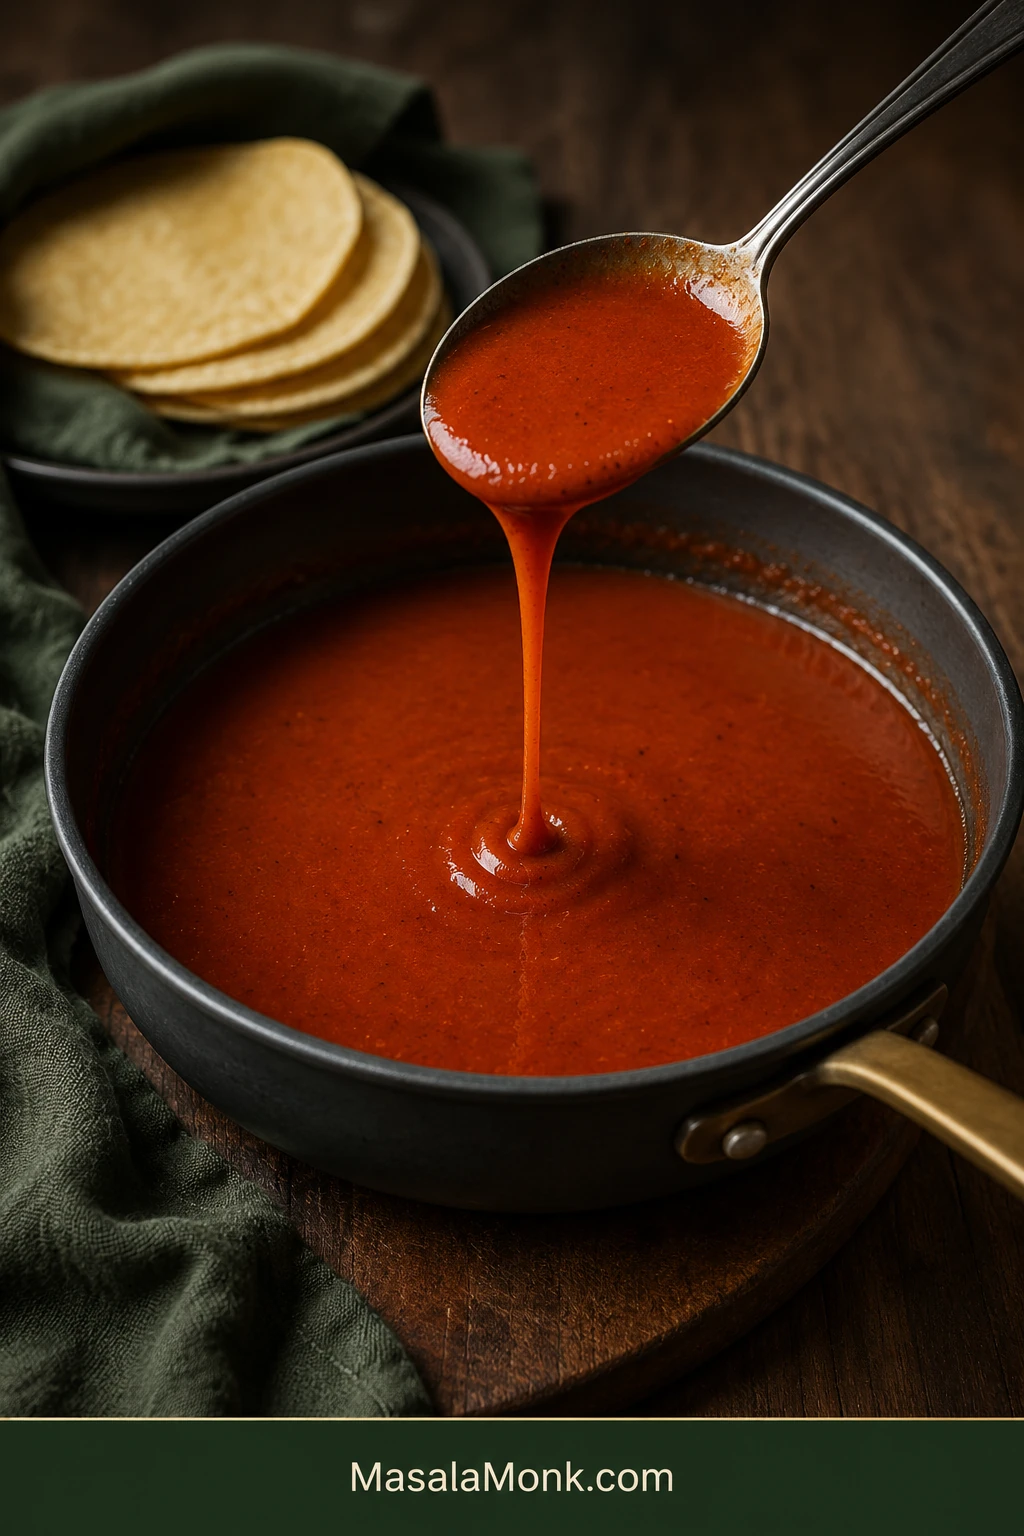
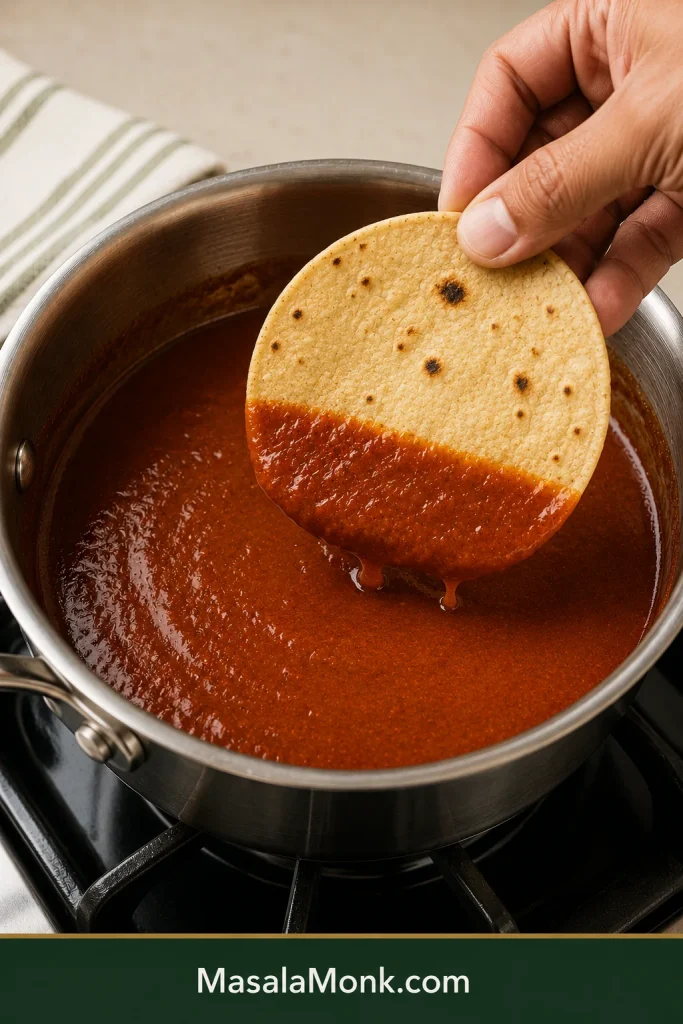
A good red enchilada sauce should pour in a smooth red ribbon, cling lightly to a tortilla, and taste of warm chile before the tomato underneath rounds everything out. Savory and flowing, it needs enough body to coat without becoming heavy.
And it does not need to turn dinner into a project. In about 15 minutes, one saucepan and one whisk give you about 2 cups, with no blender, strainer or dried-chile prep.
If you know what kind of chili powder you are using and what ready sauce looks like, you are most of the way there. After that, the sauce is pretty forgiving.
Four things matter most: keep the roux light, warm the spices only until fragrant, whisk the first splash of broth completely smooth, and take the pan off while the sauce still flows easily. Salt and a little apple cider vinegar bring the finished sauce into balance.
Whole-dried-chile sauces and darker Tex-Mex chili gravy follow different methods. This is the quick pantry-style red sauce for enchilada night.
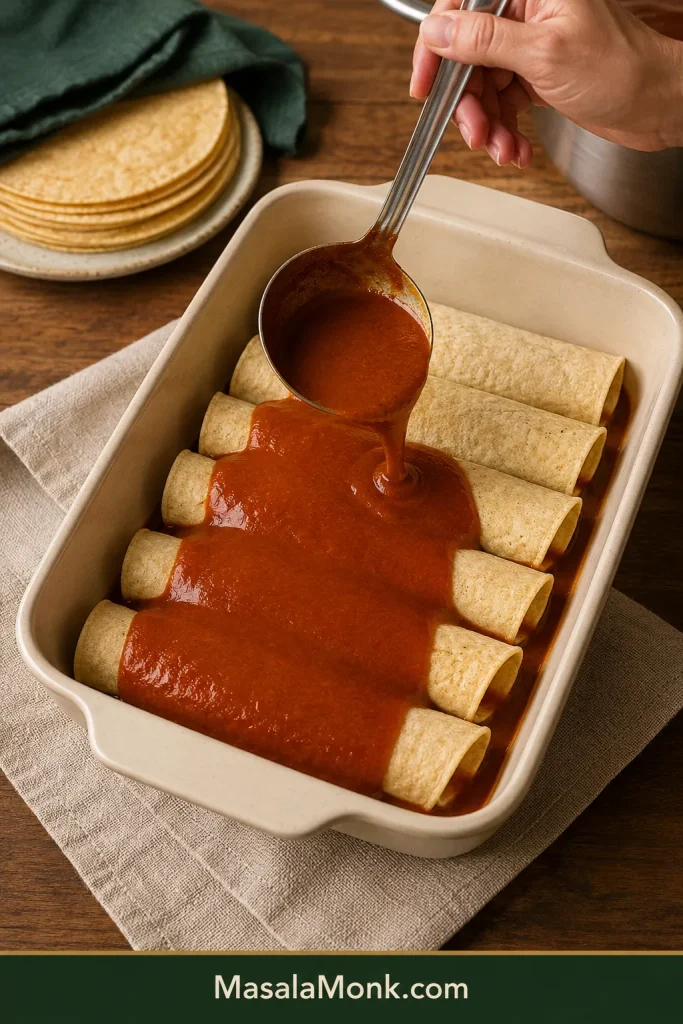
Keep the rolls visible beneath the sauce; generous coverage should not turn the dish into a pool.
How to make red enchilada sauce
Makes: about 2 cups · Time: about 15 minutes · Equipment: 2-quart (about 2-liter) or larger saucepan and whisk
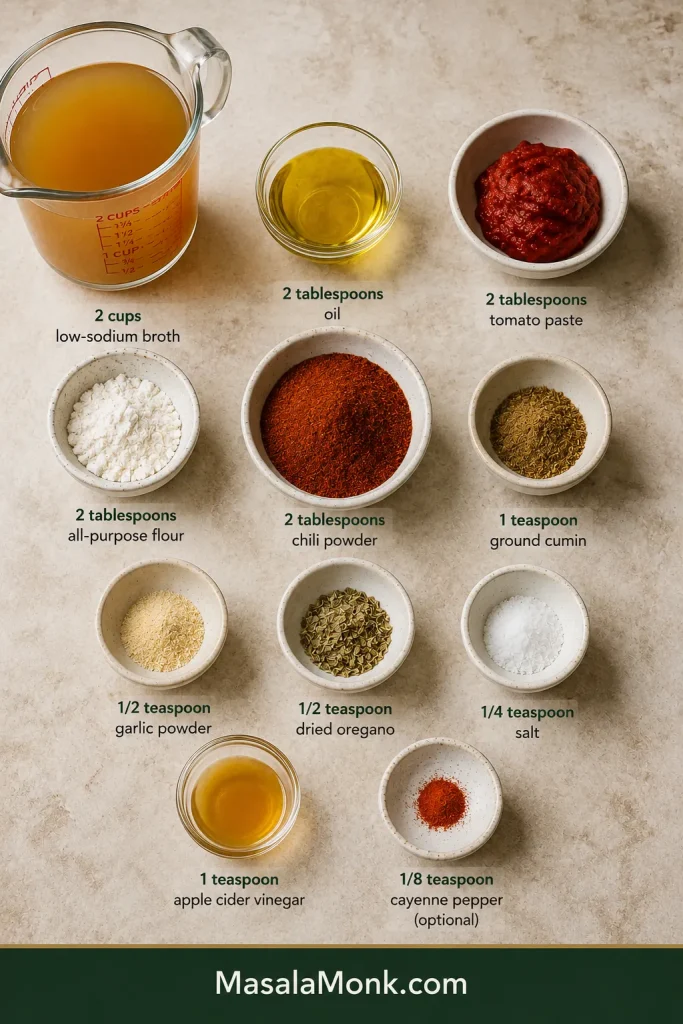
Ingredients
2 tablespoons (30 mL) neutral oil or mild olive oil
2 tablespoons (about 16 g) all-purpose flour
2 tablespoons American-style chili powder — preferably a mild blend; if the brand is unfamiliar, use 1 tablespoon for your first batch
1 teaspoon ground cumin
½ teaspoon garlic powder
½ teaspoon dried Mexican oregano or regular dried oregano
2 tablespoons (about 32 g) tomato paste
2 cups (480 mL) low-sodium chicken or vegetable broth
¼ teaspoon fine salt, then more to taste
1 teaspoon (5 mL) apple cider vinegar
⅛ teaspoon cayenne, optional, for extra heat
Measure first; once the pan is hot, the roux and spice bloom move quickly.
Get everything ready. Measure the broth and keep it beside the stove. Stir together the chili powder, cumin, garlic powder and oregano. Once those spices hit the hot pan, the broth needs to follow quickly.
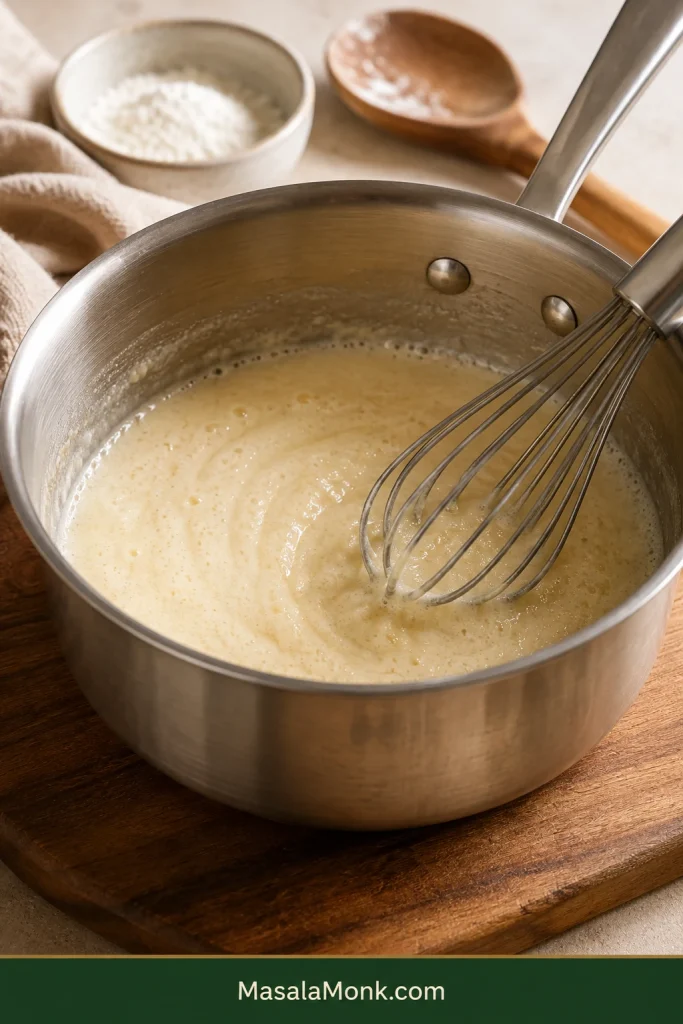
Cook the flour. Warm the oil over medium heat. Whisk in the flour and cook for about 1 minute. It should bubble gently and lose its raw-flour smell without becoming dark brown.
Keep the roux pale so the chile and tomato stay in front.
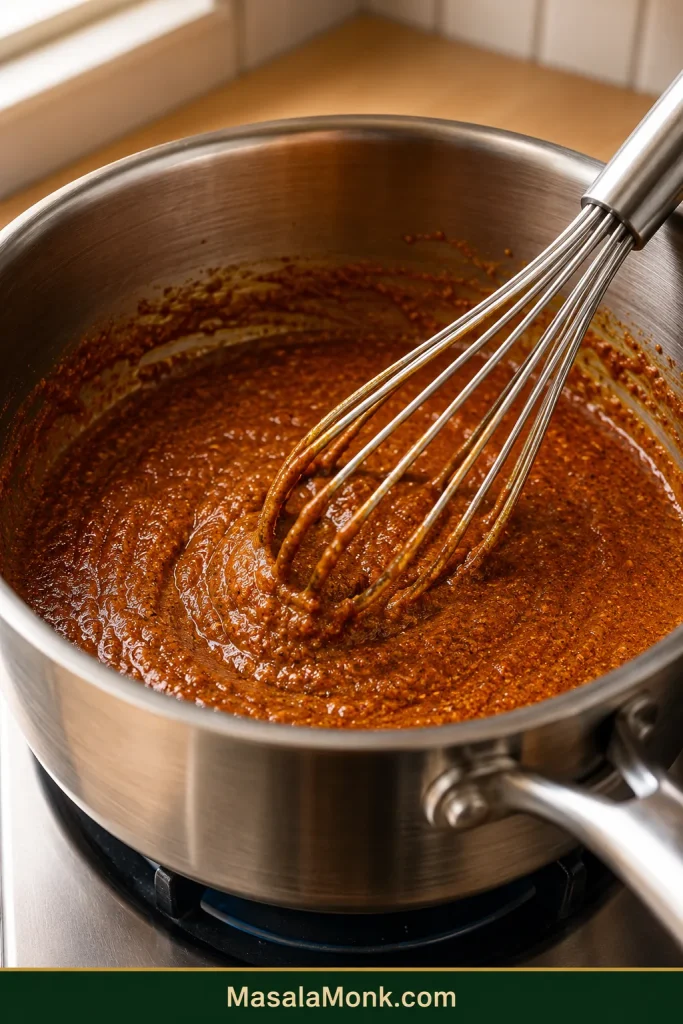
Wake up the spices. Whisk in the seasonings for about 15–20 seconds. Warm chile and cumin should become fragrant almost immediately. That aroma is your cue to keep moving.
Glossy is right; dry or scorched patches mean the pan is too hot.
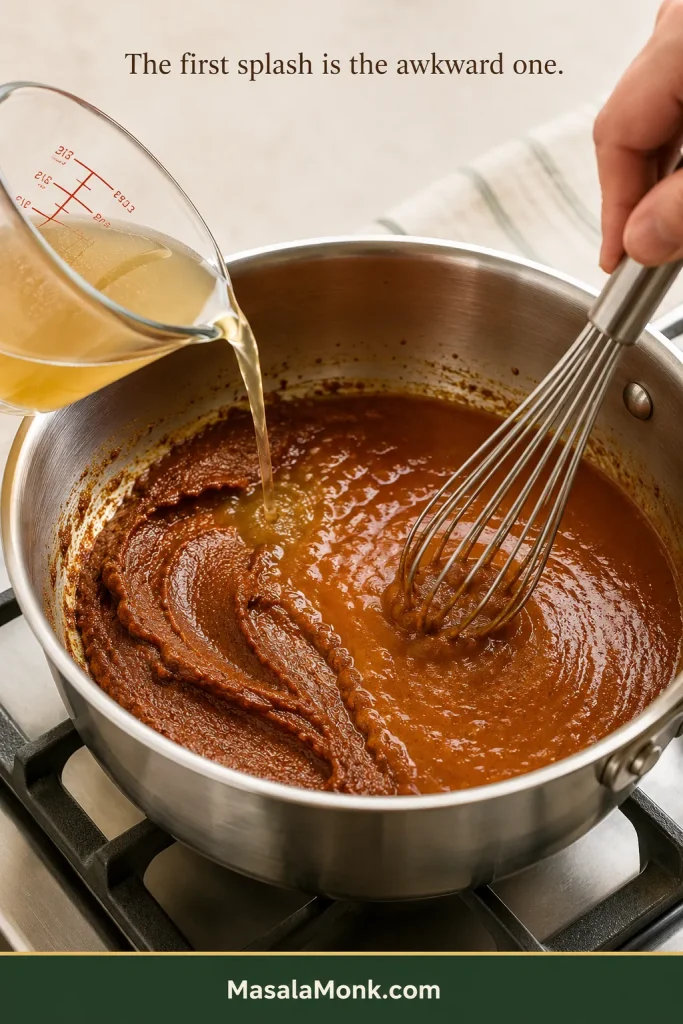
Make the first splash count. Add ¼ cup (60 mL) broth and whisk until completely smooth. The first splash is the awkward one; when that is lump-free, the rest becomes easy.
Whisk the first splash completely smooth before adding the rest.
Add the remaining broth and tomato paste. Pour in the rest of the broth while whisking, then whisk in the tomato paste until no streaks remain.
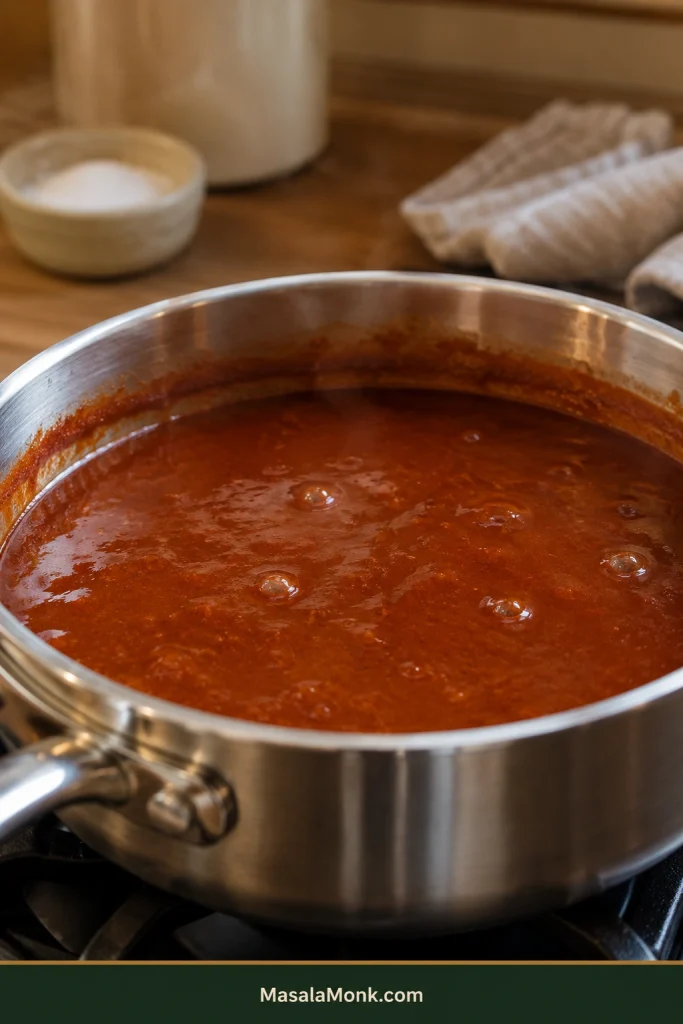
Simmer until it coats but still pours. Bring the sauce to a gentle simmer and cook for roughly 2–5 minutes. Saucepan width and burner strength matter more here than the clock. Stop when it flows easily from a spoon but leaves a thin red film behind. Err slightly loose; the sauce thickens as it stands.
A few lazy bubbles are enough; a hard simmer reduces faster.
Finish the sauce. Stir in the vinegar and ¼ teaspoon salt. Taste before adding more salt or heat. The vinegar should make the sauce taste brighter, not vinegary. Add cayenne only when you want more fire.
How do you know when enchilada sauce is ready?
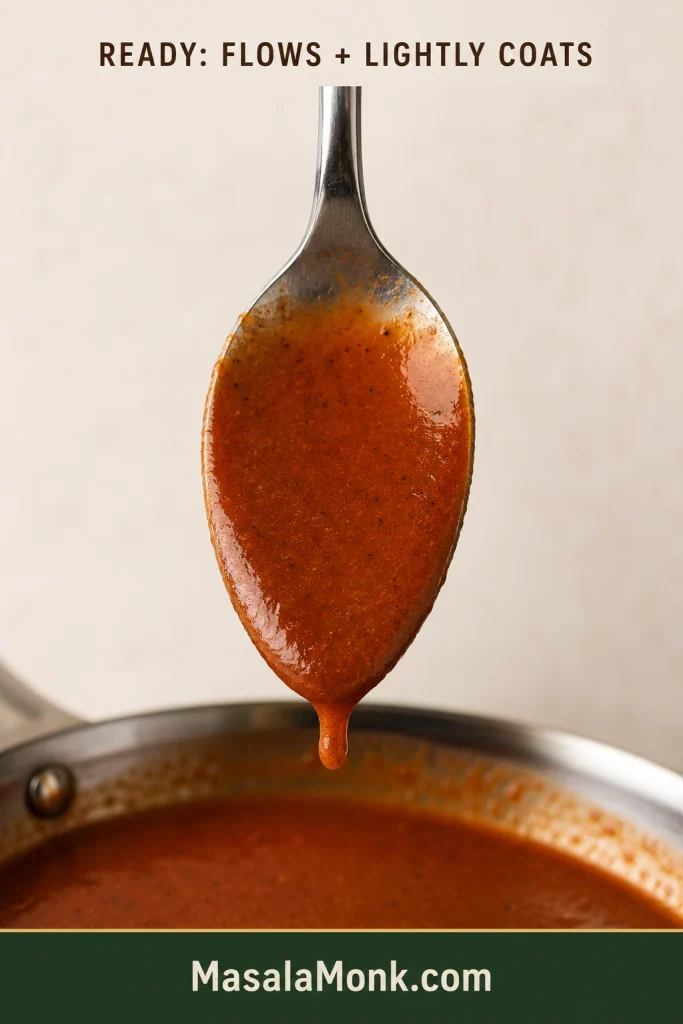
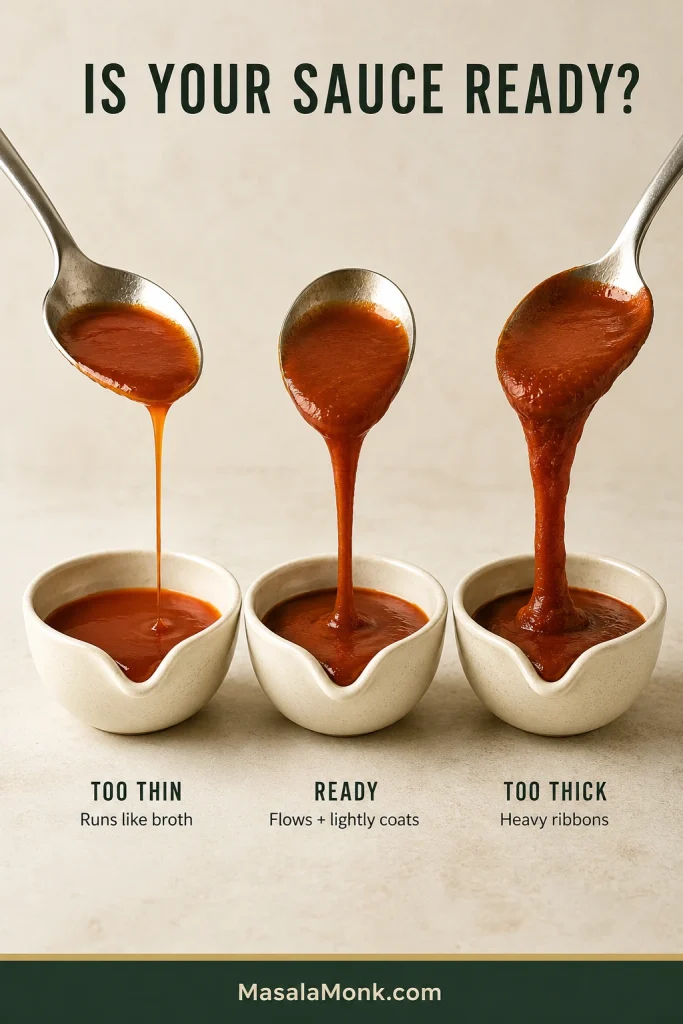
Enchilada sauce is ready when it pours freely, leaves a thin coating on a spoon and clings lightly to a tortilla.
Tilt the spoon after coating it: ready sauce begins sliding again instead of holding its shape like gravy or dropping in a heavy lump.
Taste it too. You should get warm, earthy chile, savory broth and tomato underneath, with brightness at the end keeping everything lively. No single flavor should dominate.
Drag the edge of a tortilla through the saucepan. The sauce should hang on instead of running straight off. Spoon it over a warm tortilla and that deep, savory chile aroma should arrive immediately—the sauce is there to make the filling and cheese taste richer, not simply wetter.
For a more practical test, look for a thin veil on the tortilla; a thick opaque layer suggests the sauce could use a little loosening before assembly.
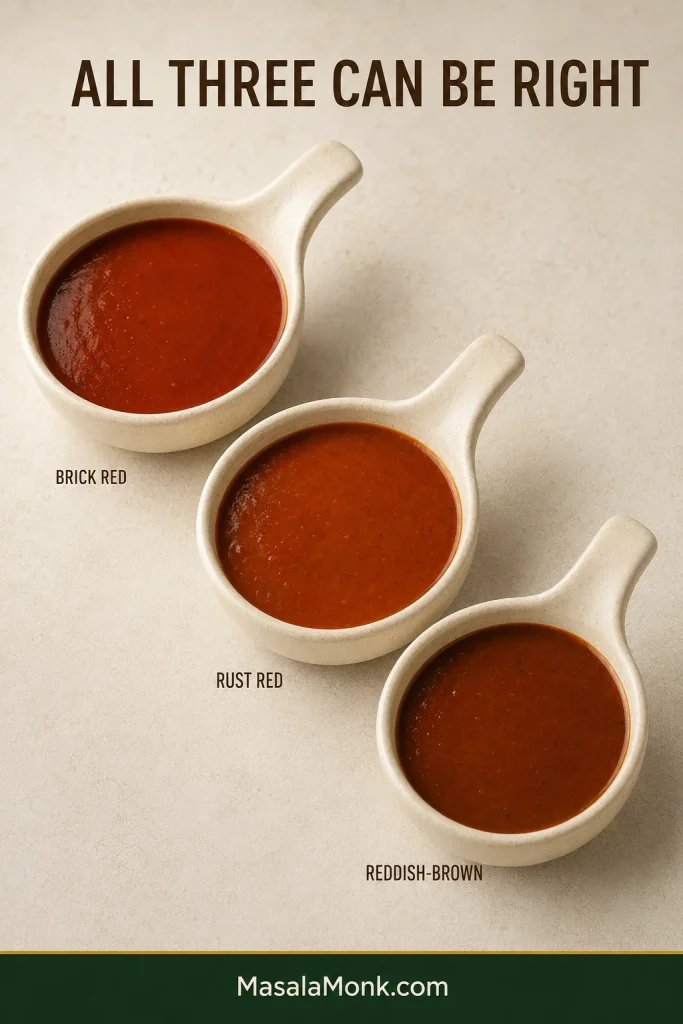
If your sauce comes out brick red, rust red or reddish-brown, that can still be exactly right. Chili powders vary considerably in color, so trust the texture and taste instead of trying to match one particular shade.
If the sauce looks browner than expected, resist correcting the color with extra chili powder; flavor and flow are the better tests.
What if the enchilada sauce is too thin or too thick?
What you see
Next move
Runs almost like broth
Simmer another minute and check again.
Pours freely and leaves a light coating
Take it off the heat.
Falls in heavy ribbons or sits like gravy
Whisk in broth or water 1 tablespoon (15 mL) at a time.
When the spoon test feels ambiguous, judge the fall rather than the surface: movement separates thin, ready and over-thick sauce more clearly than gloss does.
Most consistency problems are easy to correct. Burnt chile is the stubborn one, which is why the brief spice bloom matters more than chasing an exact number of seconds.
If the chile tastes good and the sauce coats the spoon, you have already done the important part.
This red enchilada sauce is made with chili powder, oil, flour, broth, tomato paste, cumin, garlic, oregano, salt and vinegar.
Chile drives the flavor and color. The roux is deliberately light—just enough to help the sauce cling to a tortilla while keeping it fluid. Broth and tomato paste build the base; cumin, garlic and oregano round it out, and salt and vinegar bring everything into balance.
Nothing here needs to shout. The ingredients should taste like they have settled into one sauce rather than arriving one at a time.
Most of them are straightforward. Chili powder is the exception.
Which chili powder should you use?
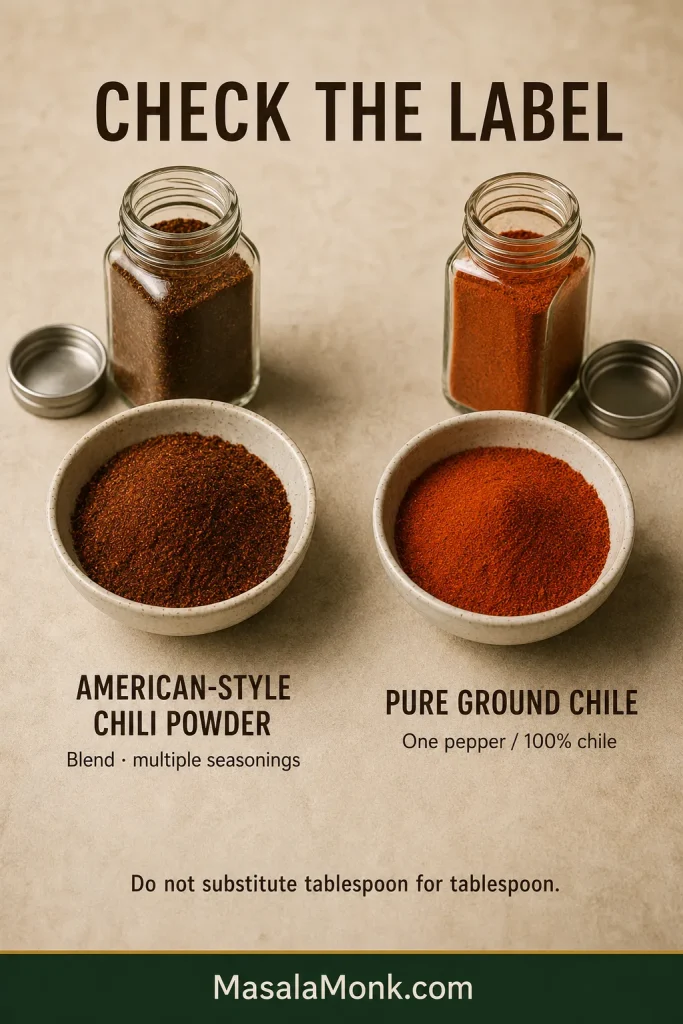
For this recipe, use American-style chili powder—a seasoning blend—not cayenne or the same volume of pure ground chile.
This is where recipes written in different countries can go spectacularly sideways. In the US and Canada, “chili powder” commonly means a fairly mild blend containing ground chile or paprika along with seasonings such as cumin, garlic and oregano. A tablespoon or two does not necessarily make a dish fiercely hot.
Elsewhere, a jar labelled “chilli powder” may contain only ground hot chile. If the ingredient list says 100% ground chile, cayenne, or names one hot pepper as the only ingredient, treat it as pure chile rather than the bulk seasoning used here.
Before measuring, trust the ingredient list more than the words on the front: a single-pepper powder should not be dosed like the American-style chili-powder blend used here.
Cayenne and hot Indian red chile powder are better added by the pinch.
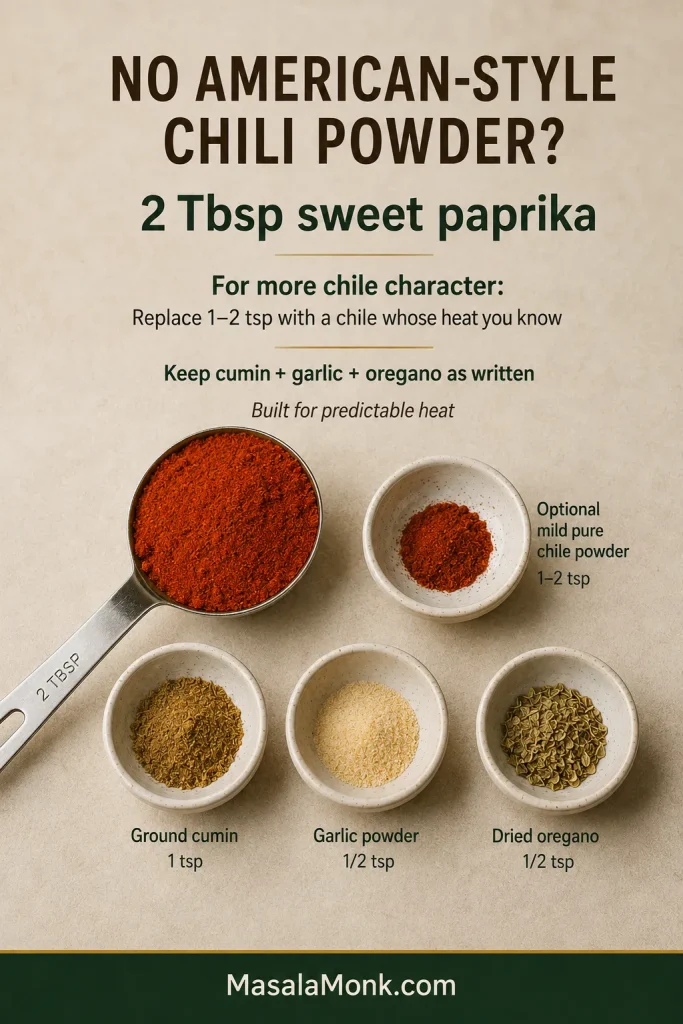
No American-style chili powder?
For the gentlest fallback, use 2 tablespoons sweet paprika as the bulk red seasoning.
For more chile character, replace 1 or 2 teaspoons of that paprika with a ground chile whose heat you already know—such as ancho powder or a familiar Kashmiri chile powder. Keep the cumin, garlic and oregano in the main recipe as written.
If the American blend is unavailable, sweet paprika can provide the seasoning volume and color, while a much smaller amount of familiar mild chile supplies character.
It will not taste exactly like every American chili-powder blend; the point of this fallback is predictable heat.
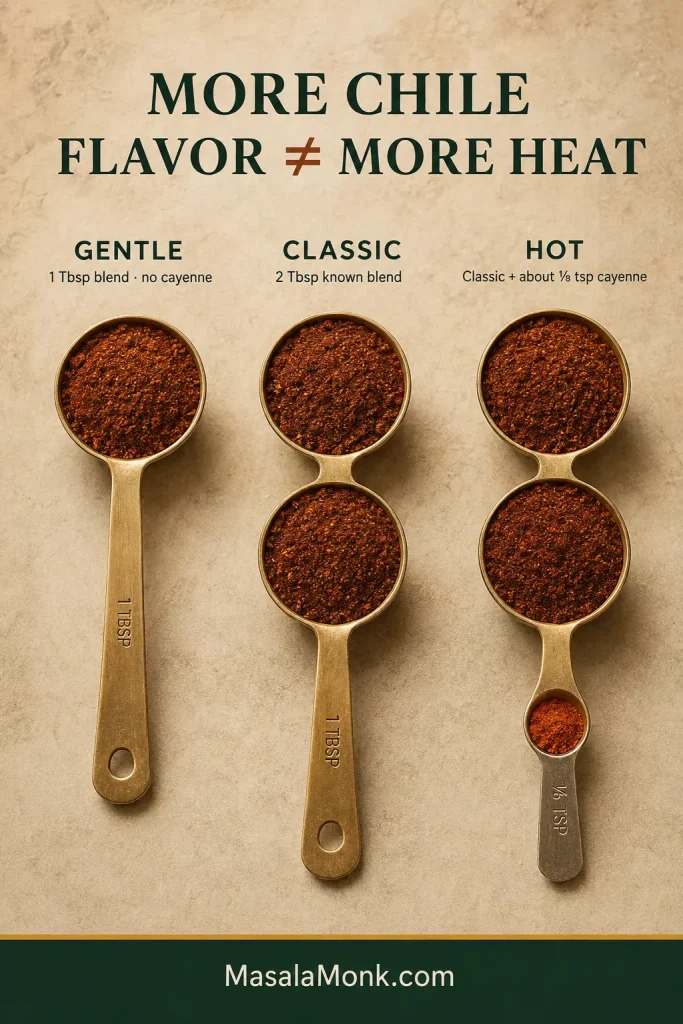
Choose your heat: gentle, classic or hot
More chile flavor does not have to mean more heat. Let the base carry the chile character; use cayenne or another hot chile when you actually want more fire.
Unfamiliar blend or heat-sensitive eaters: use 1 tablespoon American-style chili powder and no cayenne. For the first batch, stop there. Once you know the blend, use the full 2 tablespoons next time.
Classic: use the full 2 tablespoons once you know that amount gives you the heat you want.
Hot: make the classic version, then stir in about ⅛ teaspoon cayenne after simmering. Taste before adding another pinch.
A little cayenne can raise the heat dramatically without changing the base seasoning.
Everyone seems to have a different definition of “medium.” Keeping the main batch comfortable and passing extra pepper sauce at the table is often easier than making the whole pan hot.
Still unsure what your jar contains? McCormick’s chili powder guide explains the difference between American chili seasoning and straight ground chile.
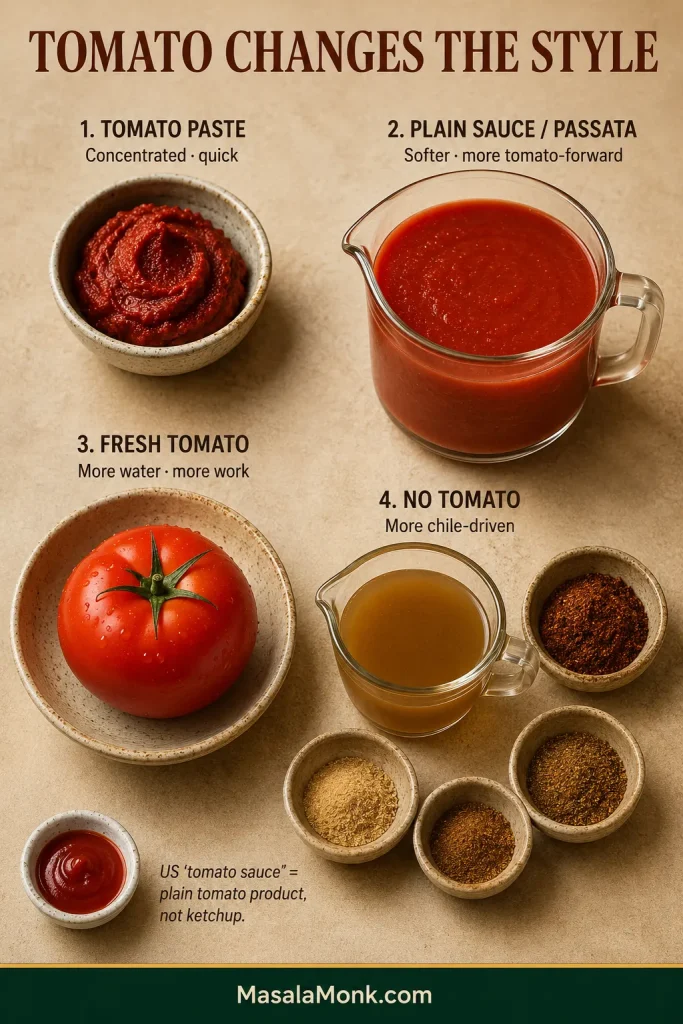
Tomato paste, tomato sauce or no tomato?
Tomato is a style choice, not a requirement in every red enchilada sauce. Some sauces contain none at all, while others use tomato as a major part of the base.
Tomato choice
What it gives you
Tomato paste
Concentrated depth and body with very little extra liquid
US canned tomato sauce / plain passata
A softer, more tomato-forward sauce with more liquid
Fresh tomatoes
Fresh flavor but variable water; usually more cooking and often blending
No tomato
A sauce driven more directly by chile and broth
Tomato paste adds concentrated depth with little liquid; passata or fresh tomato needs more reduction.
Two tablespoons of tomato paste give this version depth and body while keeping the cooking time short. The chile still arrives first; tomato fills in behind it instead of becoming the main event.
American “tomato sauce” is not ketchup
In an American ingredient list, canned tomato sauce generally means a smooth, fairly plain tomato product. Plain passata or strained tomatoes are much closer equivalents in places where that style of canned sauce is uncommon. Ketchup and seasoned pasta sauce bring much more sweetness, salt and seasoning.
Want a green tomatillo sauce instead? Our salsa verde recipe is the better fit.
Red enchilada sauce troubleshooting
Most batches that look a little wrong are still dinner. Find the closest problem, make one adjustment, then taste again before changing anything else.
Problem
First thing to do
Much too spicy
Add broth and tomato paste, then simmer briefly. For extreme heat, use the rescue below.
Simmer gently; loosen with broth if the sauce also feels heavy.
Grainy or gritty
Simmer and whisk. Strain or blend briefly if coarse spice particles remain distracting.
Too tomato-forward
Check the salt first. Extra tomato changes the balance; a large amount of raw chili powder will not restore it.
Too salty
Loosen with unsalted broth or water.
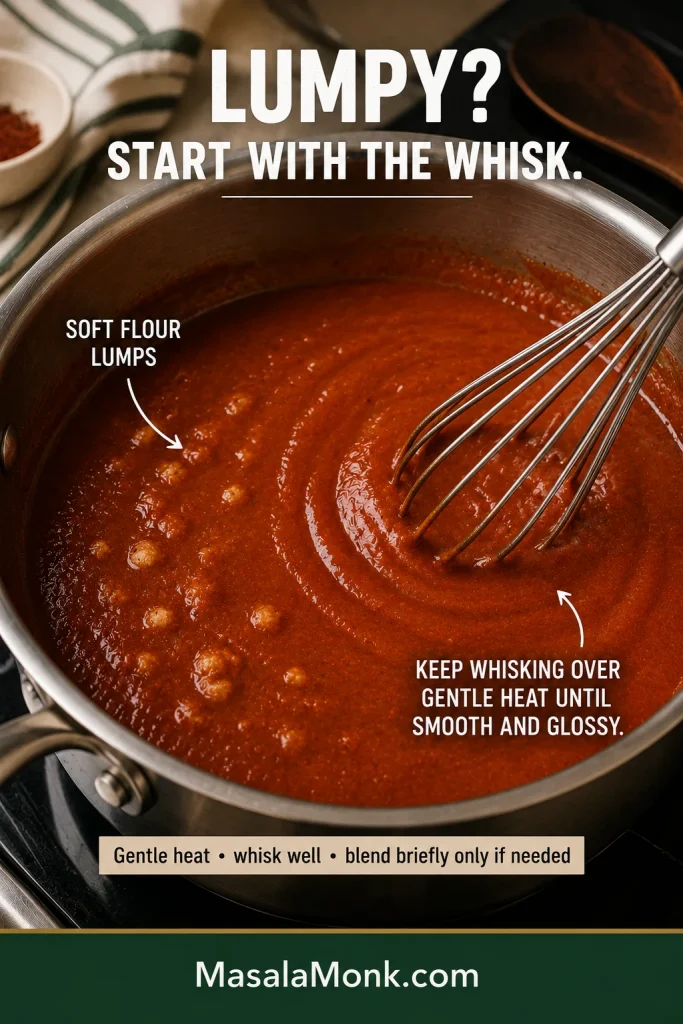
How to fix lumpy enchilada sauce
Start with vigorous whisking over gentle heat. If the sauce is also heavy, loosen it with a small splash of broth before reaching for a blender; soft flour pockets often smooth out once the sauce can move freely.
If a lump softens and smears beneath the whisk, it is probably a flour pocket; hard or gritty particles suggest a different problem than simple roux lumping.
The sauce is painfully spicy. Is it salvageable?
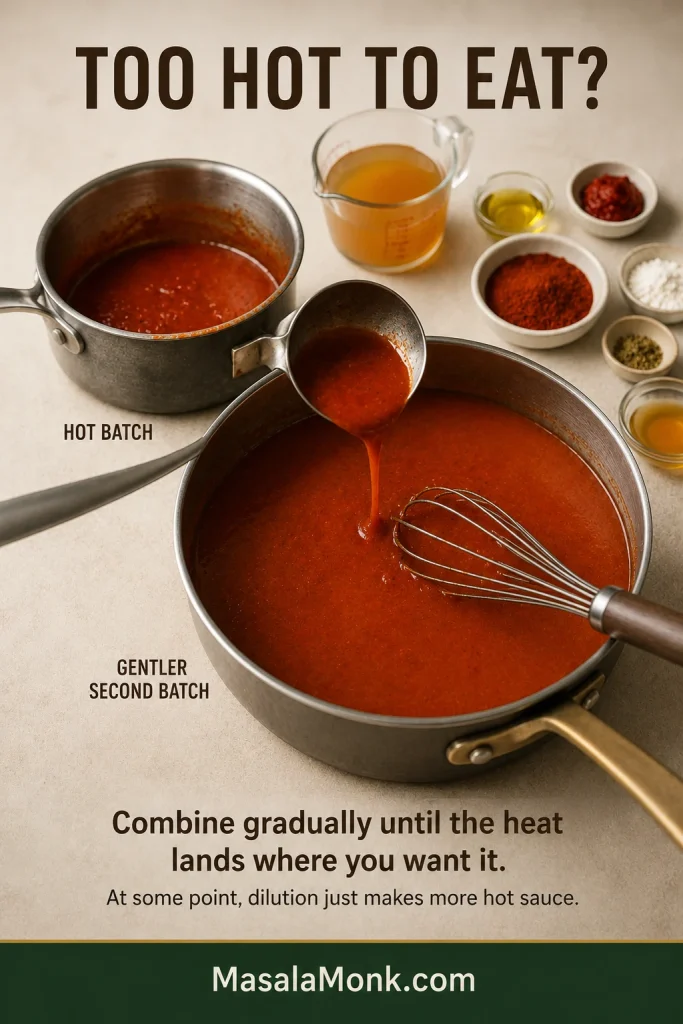
A sauce that is merely hotter than planned can usually take more broth and tomato paste; simmer briefly after adding them so the tomato paste blends back into the sauce. Once tablespoons of genuinely hot chile have gone into the pan, though, dilution has limits. At some point you are simply making more hot sauce.
A second batch made without the offending hot chile is often the cleaner rescue. Stir the fiery sauce into it gradually until the heat lands somewhere you actually want to eat.
Add the fiery sauce a little at a time rather than combining both pans at once; once the heat overshoots again, the rescue gets harder.
Why does enchilada sauce sometimes taste bitter?
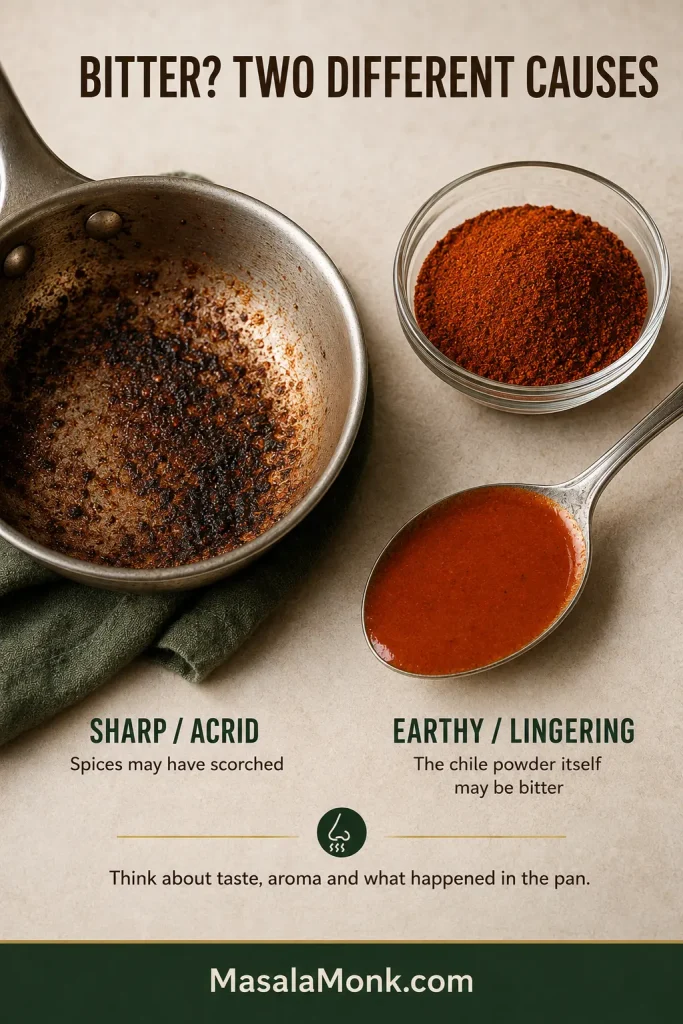
Burnt bitterness usually tastes sharp and acrid, and you may remember the spices darkening quickly or smelling harsh in the pan. That points back to the spice bloom.
A more earthy, lingering bitterness can come from the chile powder itself. If nothing scorched but you still dislike the bitter edge, changing the chili powder next time may help more than changing your technique.
Use both memory and aroma here: a harsh smell during the spice bloom is stronger evidence of scorching than the final sauce color alone.
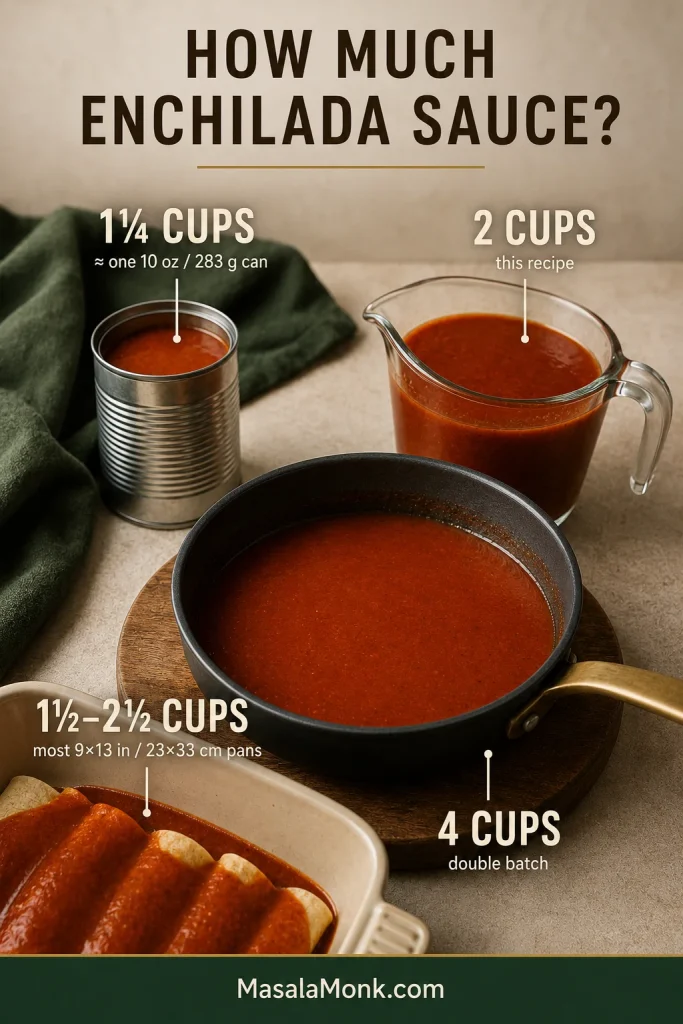
Use about 1¼ cups of homemade sauce in place of one standard 10-ounce (283 g) can of enchilada sauce. Brands vary in thickness, so a small difference in volume rarely matters in most recipes.
This 2-cup batch replaces roughly 1½ standard cans.
Treat these amounts as working anchors rather than rigid rules; sauce thickness and where you use it can shift the total a little.
How much sauce for a 9×13-inch pan?
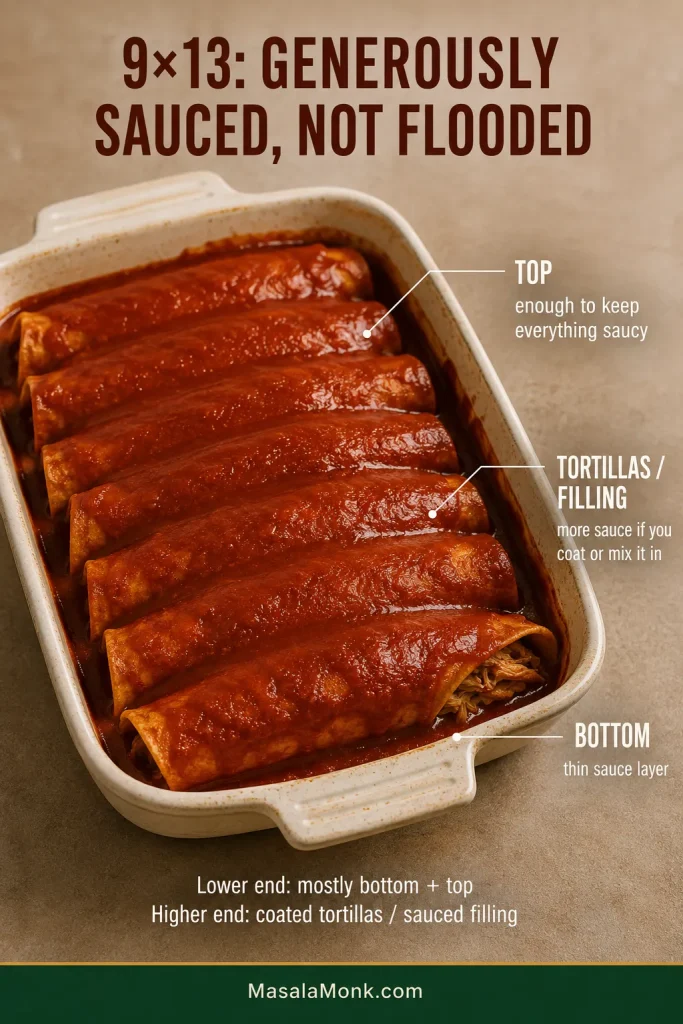
For most 9×13-inch (23×33 cm) enchilada pans, 1½–2½ cups is a useful range.
Sauce mainly underneath and over the top puts you near the lower end. Coat each tortilla generously or add sauce to the filling and you will use more.
Aim for generously sauced tortillas that still hold their shape. Tortilla preparation matters too, but flooding the pan can push the finished texture toward mushy instead of saucy.
Look at the pan as well as the measuring cup: shallow pooling is useful; deep pooling is a warning sign.
Our easy chicken enchiladas show how sauce can be distributed across the bottom, filling and top without leaving the finished pan swimming.
Need more? Make 1½ batches for about 3 cups, or double everything for about 4 cups. A larger saucepan makes a doubled batch much easier to whisk.
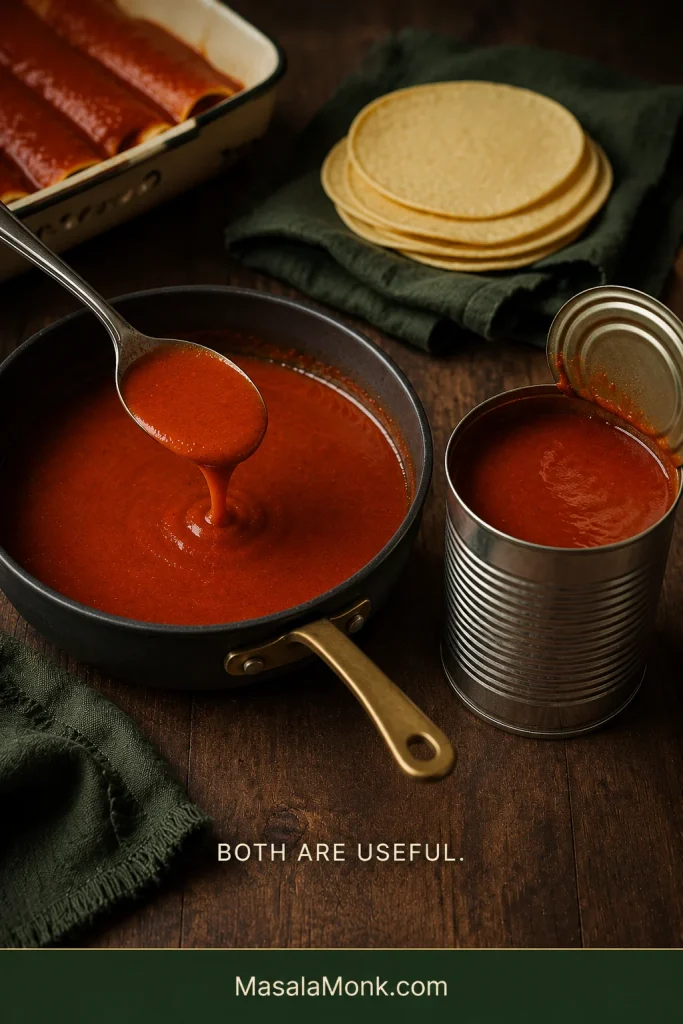
Already have a can? Use it.
Some nights, opening the can is exactly the right decision.
Homemade gives you control; canned sauce gives you dinner faster. Both are useful.
Warm canned sauce first; its thickness may tell you more than the label about what it needs.
Warm canned sauce before deciding what it needs. Broth can loosen a heavy sauce. Cumin or oregano can deepen one that tastes flat. A few drops of lime or vinegar can wake up a dull batch.
That is all “better than canned” needs to mean here.
Swaps and substitutions
Chicken or vegetable broth both work; use vegetable broth for a vegetarian or vegan sauce. Water works in a pinch, though you will want to pay closer attention to seasoning at the end. Neutral oil and mild olive oil both work too.
Gluten-free and flourless options
A cup-for-cup or 1:1 gluten-free flour blend designed to replace wheat flour is the closest swap for the roux. Different blends thicken differently, so trust the spoon test; the exact cooking time may vary. Need it strictly gluten-free? Check the broth and packaged spice-blend labels too.
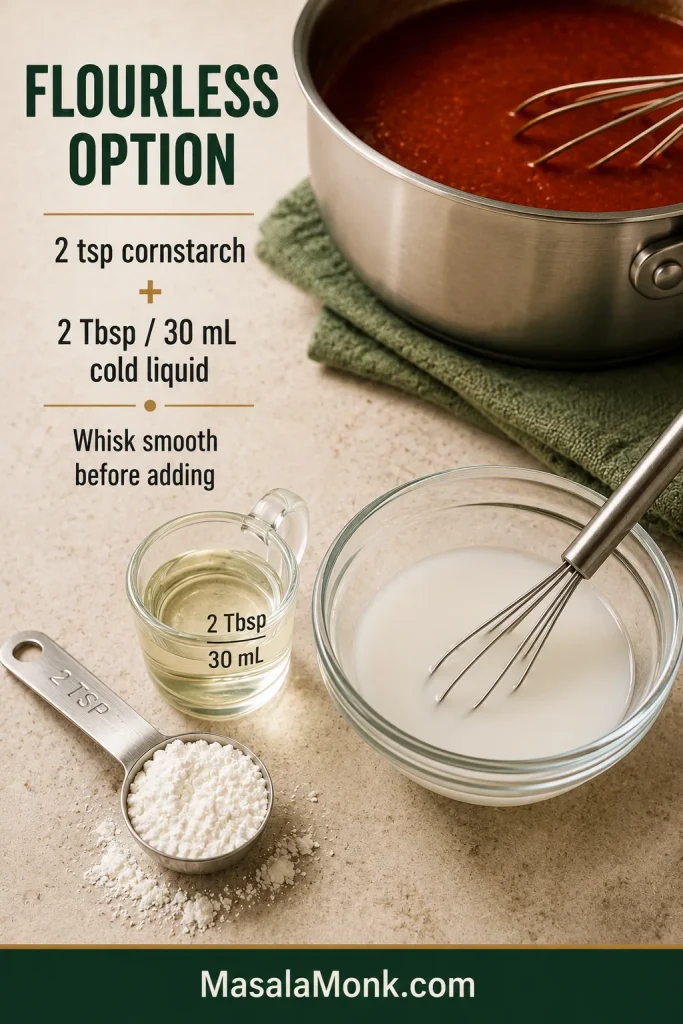
For a flourless sauce, skip the flour and initial roux. Briefly warm the spices in the oil, then add the broth and tomato paste. Start with 2 teaspoons cornstarch mixed with 2 tablespoons (30 mL) cold broth or water. Whisk the slurry into the simmering sauce, cook for about a minute and check the consistency before adding more.
Mix cornstarch with cold liquid first; dry starch added straight to the hot pan is far more likely to clump.
Using tomato sauce instead? Tomato sauce brings much more water, so it changes both the flavor and thickness. For best results, use a sauce formulated around tomato sauce or passata.
Want to use whole dried chiles? If you want the deeper character of guajillo, ancho or other whole dried chiles, start with a sauce designed for them. They need their own soaking or toasting, blending and sometimes straining method.
Even half a cup is worth keeping. Once it is in the fridge, think of it less as leftover sauce and more as a head start on the next meal.
About ½ cup: spoon it over eggs, breakfast potatoes or beans, or add it after reheating one of our breakfast burritos.
About 1 cup: make a small batch of chilaquiles, stir it into rice or beans, or use it for a small tray of cheese enchiladas.
A full batch: use it for rolled chicken, beef, cheese or vegetable enchiladas.
About 3 cups: scaled-up batches work well for layered dishes; our chicken enchilada casserole is a good example.
Even a small leftover spoonful can carry eggs, potatoes or beans into another meal.
At the table, the enchiladas do not need a dozen competing sides. Something cool such as fresh guacamole is plenty against warm chile and melted cheese.
Storage, freezing and make-ahead
Refrigerator: Cool the sauce, transfer it to a covered container and refrigerate promptly. Plan to use it within 4 days. It will look thicker straight from the refrigerator; a splash of broth and gentle heat will loosen it again.
Make-ahead: Prepare the sauce ahead, cool and refrigerate it, then warm gently before assembling the enchiladas. Add a splash of broth if it has thickened.
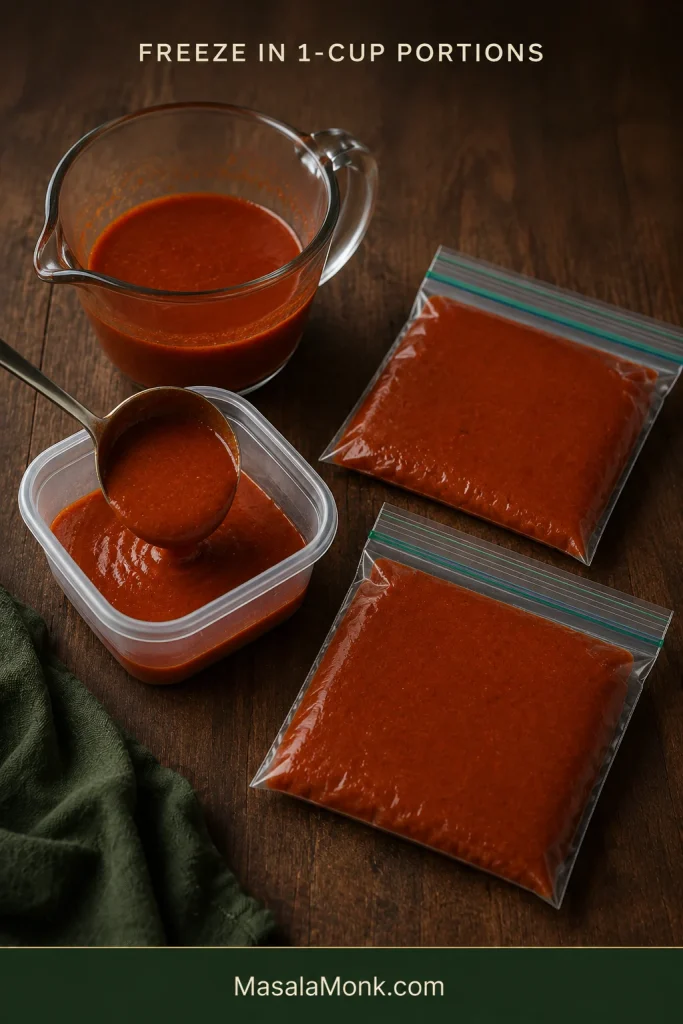
Freezer: Freeze cooled sauce in tightly sealed freezer-safe containers or bags. One-cup portions are especially handy. For best quality, aim to use it within about 3 months.
Flat one-cup portions stack neatly and thaw faster when the next meal needs only a little sauce.
Thawing and reheating: Thaw in the refrigerator, then warm over low to medium-low heat. A flour-thickened sauce can look slightly uneven after freezing. Gentle heat and a whisk usually bring it back together; add broth if it needs loosening.
Can this sauce be canned for shelf storage?
This roux-thickened recipe was made for the refrigerator and freezer, not shelf-stable home canning. For pantry storage, use a preservation recipe specifically developed and tested for canning. The National Center for Home Food Preservation explains why acidity, ingredient proportions and thickeners matter in tested tomato-and-chile preservation recipes.
If you make it, tell us which chili powder you used and how the heat landed—brand and country are especially useful here.
The first batch teaches you your chili powder—how strong it tastes, how much heat it carries and what you would change next time. After that, it becomes the kind of saucepan recipe you start making by feel.
Give the flour its minute, let the spices wake up, whisk the broth smooth, and take the pan off while the sauce still flows.
Then it is just enchilada night.
The best finish is when the sauce supports the tortillas, filling and cheese—and then disappears into dinner.
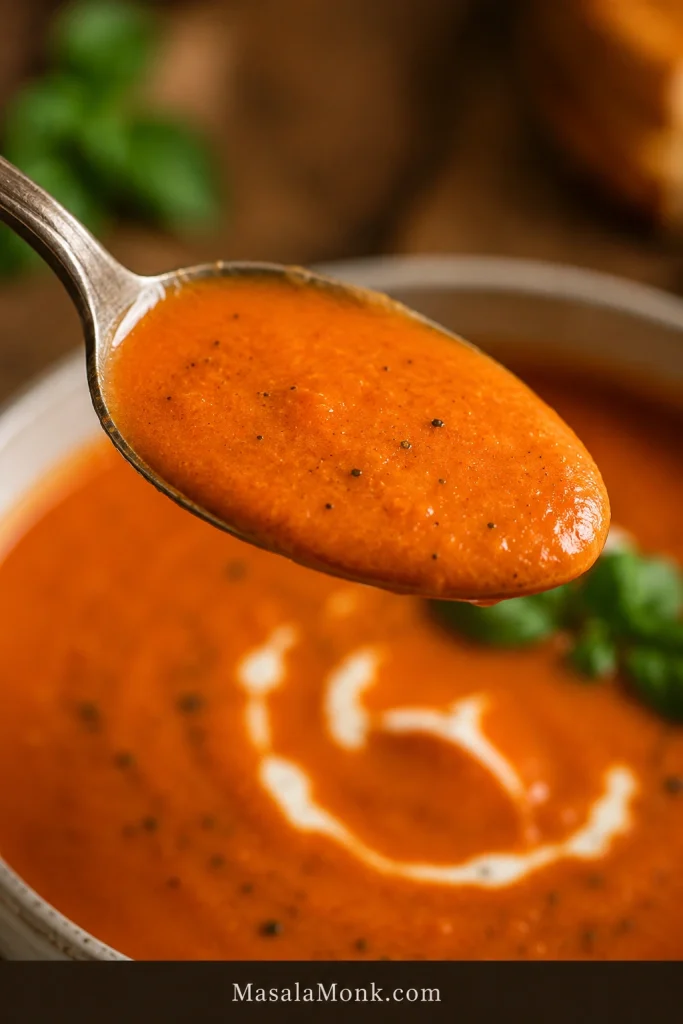
A good tomato bisque should feel like tomato soup got dressed up for grilled cheese night: glossy, velvety, rich enough to comfort you, but still bright enough to taste like tomatoes. This is the bowl you make when classic tomato soup sounds good, but you want it creamier, smoother, and a little more special.
The main recipe starts with canned tomatoes because they are reliable, pantry-friendly, and easy to turn into a rich, blended soup. When fresh tomatoes are ripe and sweet, you can use those too. Either way, the method is simple: cook the vegetables, deepen the tomato paste, simmer the tomatoes, blend, then finish gently with cream.
The one rule to remember is this: blend first, loosen later, cream last. That keeps the soup silky instead of watery, rounded instead of heavy, and creamy without splitting.
If you want the lightest fresh-tomato bowl, make this fresh tomato soup recipe. This one is the richer lane: blended, cream-softened, spoon-coating, and built for a grilled cheese dunk.
For most home cooks, tomato bisque means tomato soup made smoother, richer, and creamier. It is blended until silky and finished with cream, milk, butter, or a creamy dairy-free alternative.
Tomato soup can be light, brothy, chunky, or fresh-tasting. A bisque is usually smoother, thicker, fuller-bodied, and more rounded. Some restaurant-style versions use a roux, but you do not need one for a good homemade bowl.
The promise: This recipe stays spoon-coating because the broth is controlled early, the vegetables are blended into the base, and the cream goes in only after the soup is already smooth. It is better to start slightly thick; the blender will tell you what the soup needs.
Texture Cue Before You Start
Before serving, check the spoon. The bisque should cling in a smooth layer instead of running off like broth or sitting thick like sauce.
At a Glance
Here is the recipe logic before you start.
Main version
Easy creamy canned tomato bisque
Total time
About 40 minutes
Servings
4 large bowls or 6 smaller bowls
Yield
About 6 to 7 cups soup
Tomatoes
1 can whole peeled or crushed tomatoes, 28 oz / about 794 g
Fresh tomato swap
2.5 lb / about 1.1 kg ripe tomatoes, or up to 3 lb / 1.35 kg if watery
Broth for canned tomatoes
Start with 2 cups / 480 ml
Broth for fresh tomatoes
Start with 1 to 1 1/2 cups / 240 to 360 ml because fresh tomatoes release liquid
Cream
1/2 cup / 120 ml heavy cream, half-and-half, or cashew cream
Best tool
Immersion blender
Texture cue
Smooth, glossy, spoon-coating, and pourable
Best pairing
Grilled cheese
Recipe Card
Prep time: 10 minutes Cook time: 30 minutes Total time: 40 minutes Servings: 4 large bowls or 6 smaller bowls Yield: About 6 to 7 cups Method: Stovetop Difficulty: Easy
Ingredients
2 tablespoons olive oil or butter, about 30 ml oil or 28 g butter
1 medium onion, chopped, about 150 g
1 medium carrot, chopped, about 70 to 80 g
1 celery rib, chopped, about 40 to 50 g
3 garlic cloves, minced, about 9 to 12 g
2 tablespoons tomato paste, about 30 g
1 can whole peeled tomatoes or crushed tomatoes, 28 oz / about 794 g
Fresh tomato option: use 2.5 lb / about 1.1 kg ripe tomatoes, or up to 3 lb / 1.35 kg if watery
2 cups vegetable broth or chicken broth, 480 ml, for canned tomatoes
For fresh tomatoes, start with 1 to 1 1/2 cups broth, 240 to 360 ml, plus more as needed
1 teaspoon dried basil or Italian seasoning
1/2 teaspoon dried oregano or thyme
1/2 teaspoon salt, then more to taste
1/4 teaspoon black pepper
Pinch of red pepper flakes, optional
1/2 cup heavy cream, half-and-half, or cashew cream, 120 ml
1 tablespoon butter, optional, for finishing, about 14 g
Fresh basil, Parmesan, croutons, or grilled cheese, for serving
Instructions
Warm the olive oil or butter in a large non-reactive soup pot or Dutch oven over medium heat.
Add the onion, carrot, and celery. Cook for 6 to 8 minutes, stirring often, until the vegetables soften and the onion turns translucent.
Add the garlic and cook for about 30 seconds, just until fragrant.
Stir in the tomato paste. Cook for 1 to 2 minutes, until it darkens slightly and smells deeper. If it starts sticking, splash in a spoonful of broth and scrape the bottom of the pot.
Add the canned tomatoes with their juices. If using whole peeled tomatoes, crush them lightly with a spoon in the pot.
Add 2 cups broth for canned tomatoes, or 1 to 1 1/2 cups broth for fresh tomatoes. Stir in the dried basil or Italian seasoning, oregano or thyme, salt, black pepper, and red pepper flakes if using.
Bring to a gentle boil, then reduce the heat and simmer uncovered for 20 to 25 minutes, until the vegetables are very soft and the tomato flavor tastes less sharp.
Blend the soup until smooth with an immersion blender. For an extra-silky texture, use a countertop blender in batches.
Check the texture. If the soup is too thick, add broth a little at a time until it is spoon-coating and pourable.
Lower the heat. Stir in the cream and warm gently for 2 to 3 minutes. Do not boil hard after adding cream.
Taste and adjust with more salt first. Add butter or Parmesan for richness, or basil for freshness.
Serve hot with fresh basil, croutons, Parmesan, or grilled cheese.
Recipe Notes
Best tomato choice: whole peeled tomatoes or crushed tomatoes.
Texture rule: blend first, loosen later, cream last.
Fresh tomato swap: use 2.5 lb / about 1.1 kg ripe tomatoes, or up to 3 lb / 1.35 kg if the tomatoes are watery.
Broth for fresh tomatoes: start with 1 to 1 1/2 cups / 240 to 360 ml broth because fresh tomatoes release more liquid.
Optional depth upgrade: simmer the soup with a small Parmesan rind, then remove it before blending. Or finish with a tiny splash of sherry vinegar or lemon juice if the soup tastes flat. Skip the Parmesan rind for dairy-free soup.
Thicker bowl: use the optional roux method or simmer uncovered a little longer.
Dairy-free soup: use vegetable broth, olive oil, and cashew cream.
This is the soup to make when you want comfort without a complicated cooking project. It works especially well when:
Tomato soup sounds good, but you want it richer and creamier.
Grilled cheese is already part of the plan.
A pantry dinner needs to feel more homemade than a plain can of soup.
Fresh tomatoes are out of season, but deep tomato flavor still matters.
Restaurant-style tomato soup sounds good, but a heavy floury roux does not.
For a lighter meal around the soup, a fresh side like this chickpea salad adds brightness and protein without making the bowl itself heavier.
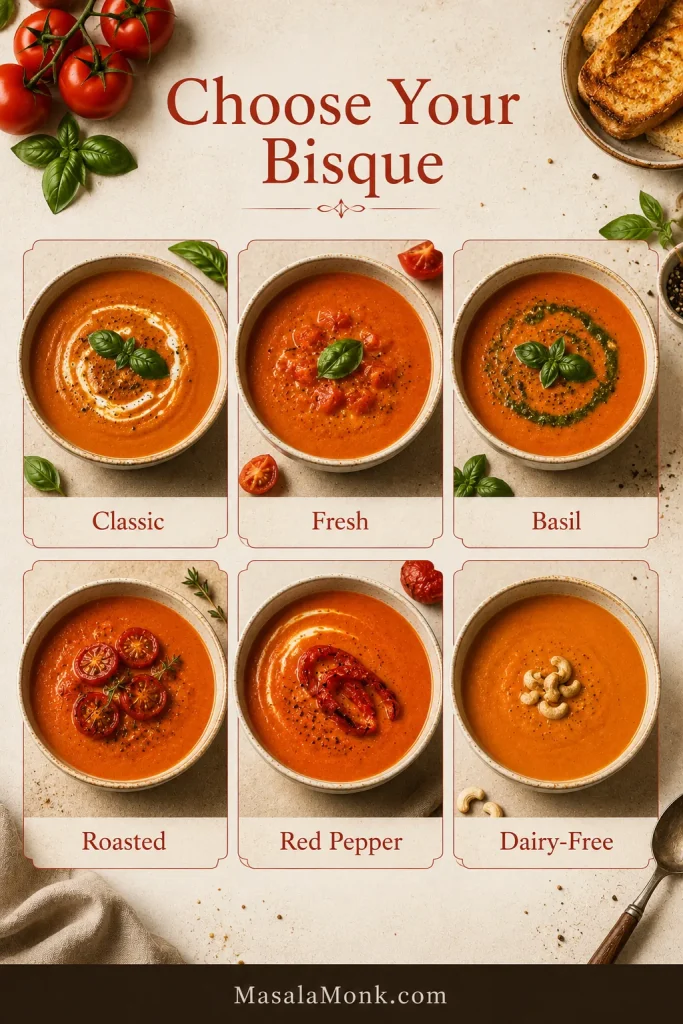
Choose Your Version
The easiest reliable version starts with canned tomatoes, not fresh tomatoes and not canned tomato soup. Canned whole peeled tomatoes or crushed tomatoes give steady flavor, enough body, and repeatable results without waiting for perfect summer produce.
Make the main pot first, then choose the lane that fits your tomatoes, time, and mood. Once you make the base once, you will probably know your house version: basil-heavy, extra creamy, roasted, spicy, or built around grilled cheese.
You want…
Make this version
What to change
The easiest reliable bowl
Canned tomato bisque
Use 28 oz / 794 g canned whole peeled or crushed tomatoes
Fresh garden flavor
Fresh tomato bisque
Use 2.5 lb / 1.1 kg ripe tomatoes and start with less broth
Deeper fresh tomato flavor
Roasted tomato bisque
Roast fresh tomatoes before simmering
Brighter herb flavor
Tomato basil bisque
Add fresh basil near the end, then blend
Smoky-sweet flavor
Roasted red pepper tomato bisque
Add one drained 12 oz / 340 g jar roasted red peppers
Restaurant-style thickness
Roux-thickened tomato bisque
Add a small butter-and-flour roux
Dairy-free creaminess
Vegan tomato bisque
Use vegetable broth and cashew cream
A quick pantry shortcut
Canned tomato soup bisque
Upgrade condensed tomato soup with milk or half-and-half, butter, herbs, and Parmesan
Visual Guide to Tomato Bisque Versions
Use this guide to choose your tomato bisque style, from classic and fresh to basil, roasted, red pepper, or dairy-free.
The recipe is not trying to be fancy. It is trying to keep the tomato flavor deep, the texture smooth, and the cream from taking over.
Tomato paste adds depth. Give it a minute in the pot and it stops tasting raw, turning deeper and almost sweet.
Onion, carrot, and celery soften the acidity. The carrot especially helps balance sharp tomatoes naturally.
Canned tomatoes make the result reliable. You do not have to wait for peak-season tomatoes to make a good bowl.
Blending creates body. The vegetables become part of the texture, not just flavor in the background.
Gentle cream keeps the flavor balanced. It should soften the tomato edge, not make the soup pale and sleepy.
Equipment You Need
The only tool that really changes the experience is the blender. Everything else is basic soup-pot cooking.
Large non-reactive soup pot or Dutch oven: stainless steel, enamel-coated cast iron, or a heavy nonstick soup pot works well.
Immersion blender: the easiest tool because you can blend directly in the pot.
Countertop blender: gives the silkiest texture, but hot soup must be blended carefully in batches.
Fine mesh sieve, optional: use it only if you want an ultra-smooth restaurant-style finish.
Hot blender safety: If using a countertop blender, do not fill the jar more than halfway. Vent the lid, cover it with a towel, and start on low speed. Hot soup expands quickly in a sealed blender.
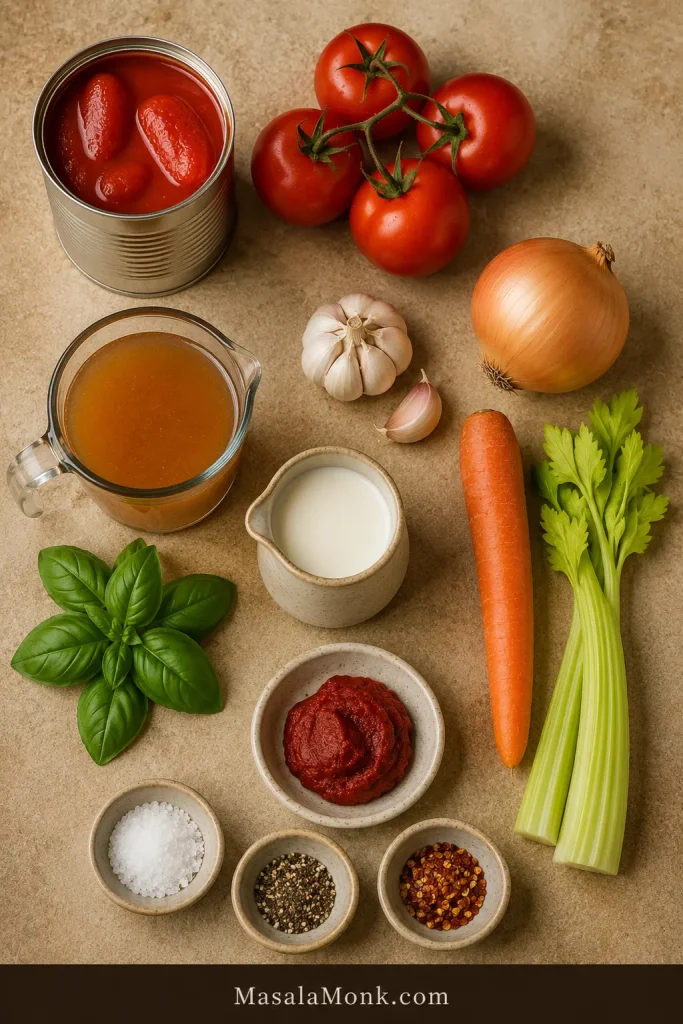
Ingredients You Need
The ingredients are simple, but each one has a job in the pot.
Ingredient Snapshot
Each ingredient has a job: aromatics build body, tomato paste adds depth, and cream finishes the soup.
Tomatoes
A 28 oz / 794 g can of whole peeled or crushed tomatoes is the easiest starting point. Whole peeled tomatoes usually give the best balance of flavor and body. Crushed tomatoes are convenient and blend quickly. Diced tomatoes can work, but they may need longer blending. Fire-roasted tomatoes add smoky depth if you want a bolder bowl.
If you are choosing between whole, crushed, diced, and fire-roasted tomatoes, this guide to canned tomato types is helpful.
Onion, Carrot, Celery, and Garlic
This is the flavor base. Onion brings sweetness, carrot helps soften tomato acidity, celery adds savory depth, and garlic makes the soup taste fuller. Cook them until the pot smells sweet and savory before the tomatoes go in.
Tomato Paste
Tomato paste is the little shortcut to deeper flavor. Stir it into the softened vegetables and let it cook for 1 to 2 minutes before adding broth. When it is ready, it should smell less sharp and more like roasted tomatoes.
Broth
Vegetable broth keeps the recipe vegetarian. Chicken broth gives a slightly deeper savory flavor. Canned tomatoes need about 2 cups / 480 ml broth to start. Fresh tomatoes release more liquid, so they need less at first.
Cream
Heavy cream gives the most classic finish. Half-and-half makes it lighter. Cashew cream gives the best neutral dairy-free texture. The color should turn slightly softer after cream, not pale orange.
Herbs and Finishes
Dried basil or Italian seasoning can simmer with the tomatoes. Fresh basil tastes best near the end, when it still smells bright. Parmesan, butter, croutons, black pepper, and grilled cheese all make the finished bowl more satisfying.
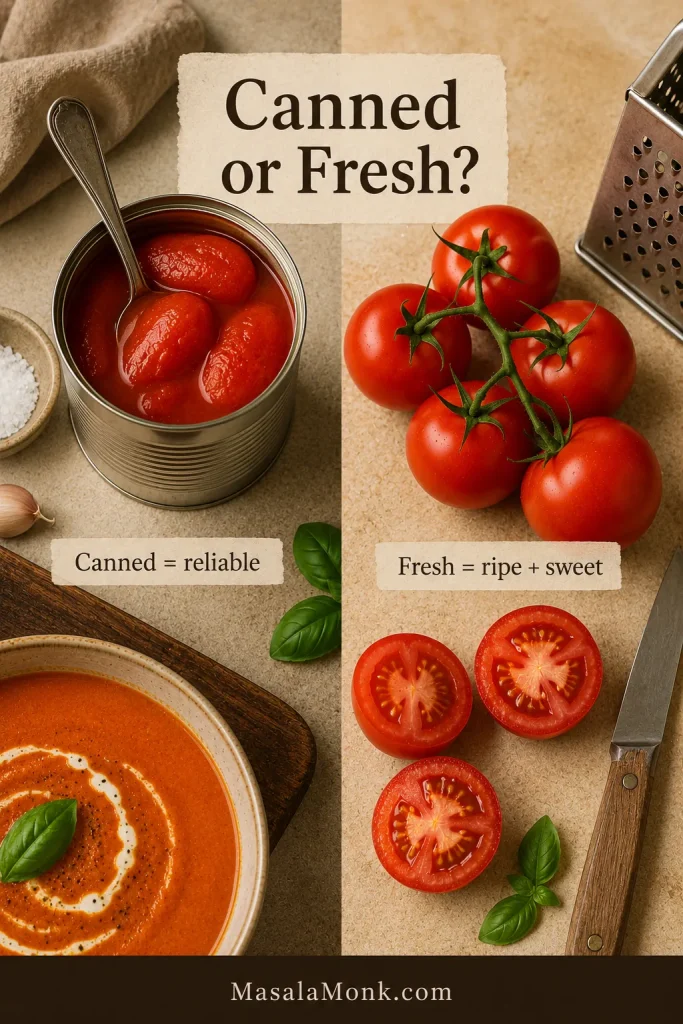
Canned Tomatoes vs Fresh Tomatoes
Both canned and fresh tomatoes can work. The best choice depends on what you have and how the tomatoes taste before they go into the pot.
Canned vs Fresh Tomato Guide
Canned tomatoes are the reliable year-round choice. Fresh tomatoes work best when they smell sweet, taste ripe, and are in season.
Canned tomatoes work best when…
Fresh tomatoes work best when…
You want reliable flavor year-round
Tomatoes are ripe, sweet, and in season
You want the easiest version
You want a brighter garden-style bowl
You want less prep
You do not mind peeling, grating, roasting, or simmering longer
Your fresh tomatoes are bland or watery
Your fresh tomatoes smell sweet and taste good raw
One 28 oz can of tomatoes is about 794 g. For the closest fresh swap, use 2.5 lb / about 1.1 kg ripe tomatoes. If your tomatoes are watery or you want a fuller fresh-tomato base, use up to 3 lb / 1.35 kg.
Fresh Tomato Grating Shortcut
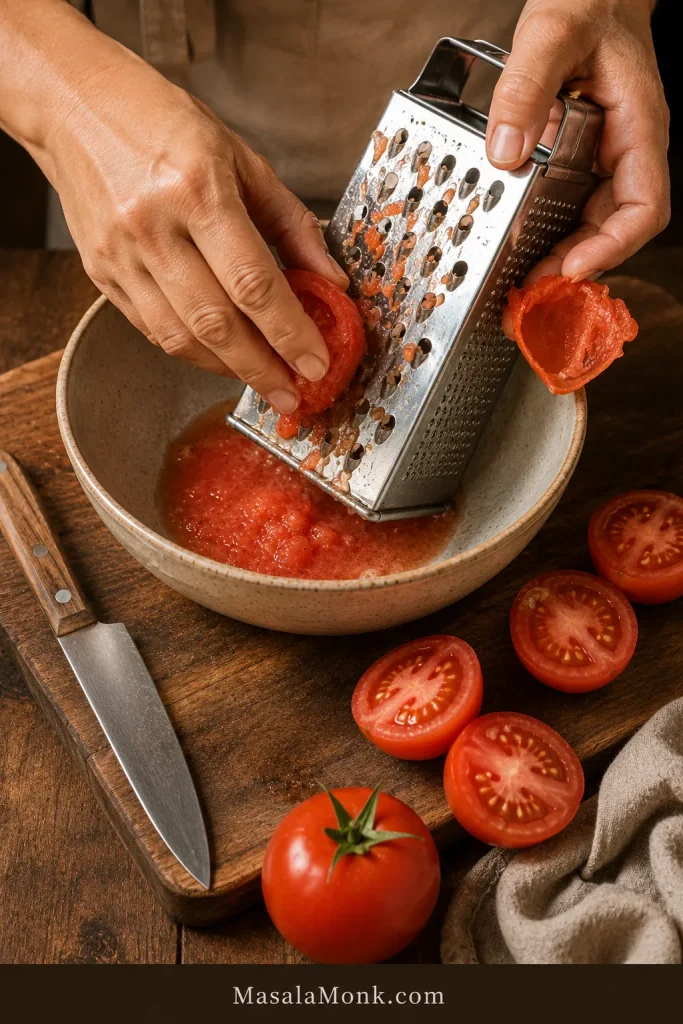
For the smoothest fresh version, peel the tomatoes first or roast them before blending. If you do not want to peel tomatoes, halve them and grate the cut side on the large holes of a box grater. The pulp goes into the bowl, and most of the skin stays in your hand. Use that pulp in place of peeled chopped tomatoes.
For fresh tomato bisque, grate ripe tomatoes when you want the pulp without peeling. Most of the skin stays behind on the grater.
If fresh tomatoes taste watery raw, roast them or use canned tomatoes instead. A soup that looks thick before blending is usually on the right track. Adjust the body after it has been blended.
If you have more ripe tomatoes than this soup needs, turn the rest into this tomato sauce from fresh tomatoes for pasta, pizza, or freezer meals.
How to Make Tomato Bisque
The tricky part is not the cooking. It is adding too much liquid before the soup has a chance to blend smooth. Keep the order simple: build the base, deepen the tomato paste, simmer, blend, adjust the body, then add cream.
Step 1: Soften the Vegetables
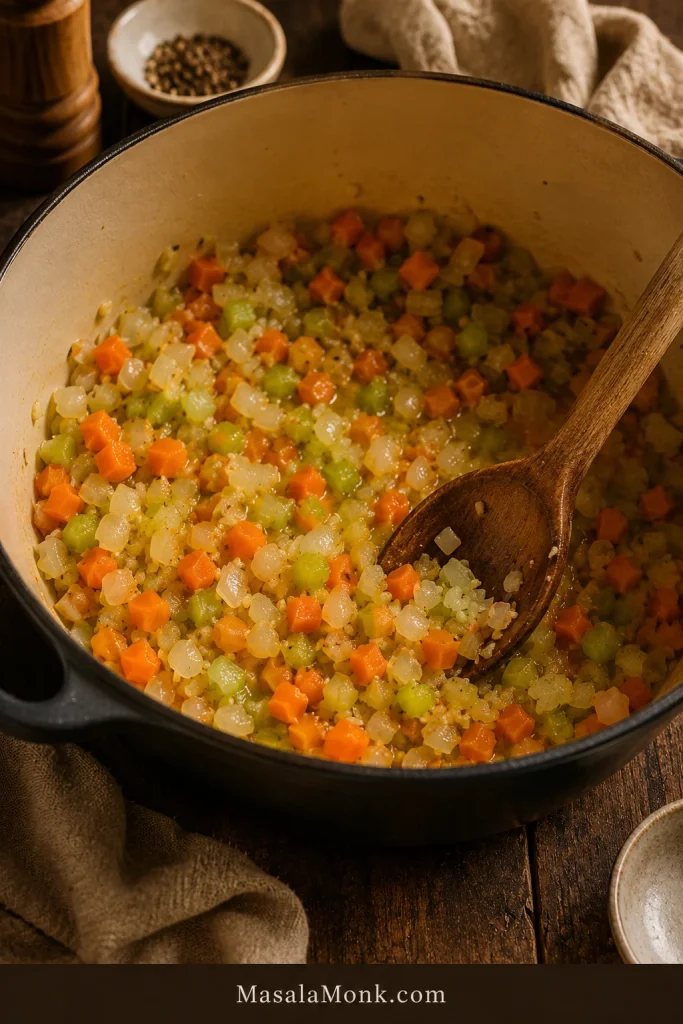
Warm olive oil or butter in a large non-reactive pot over medium heat. Add the onion, carrot, and celery. Cook for 6 to 8 minutes, stirring often, until the onion is translucent and the vegetables are softening. The carrot should be tender enough to blend cleanly later.
First, soften the onion, carrot, celery, and garlic until the pot smells sweet and savory. This gives the soup body before tomatoes go in.
Step 2: Cook the Tomato Paste
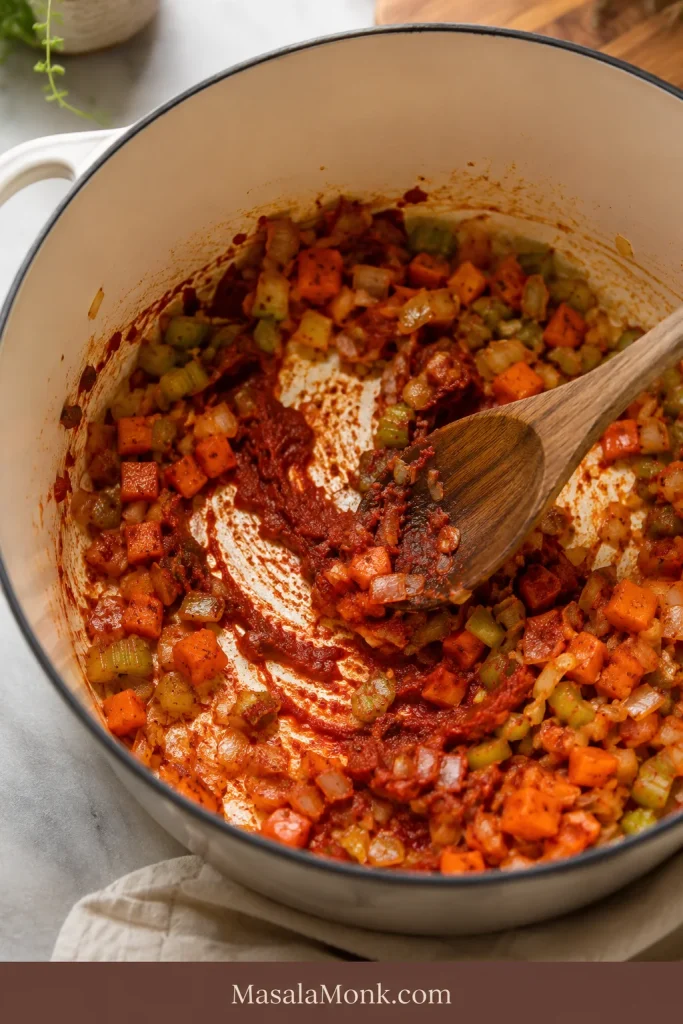
Add the garlic and cook for about 30 seconds. Stir in the tomato paste and cook for 1 to 2 minutes. It should darken slightly and leave rusty streaks on the vegetables. If the bottom of the pot gets sticky, add a spoonful of broth and scrape it clean as you stir.
Next, cook the tomato paste into the vegetables until rusty red-orange streaks appear. That small step makes the tomato flavor deeper.
Step 3: Simmer the Tomatoes
Add the tomatoes with their juices. Crush whole peeled tomatoes lightly with a spoon so they simmer evenly. Add broth, herbs, salt, pepper, and red pepper flakes if using. Simmer uncovered for 20 to 25 minutes, until the vegetables are very soft and the tomato flavor tastes rounder.
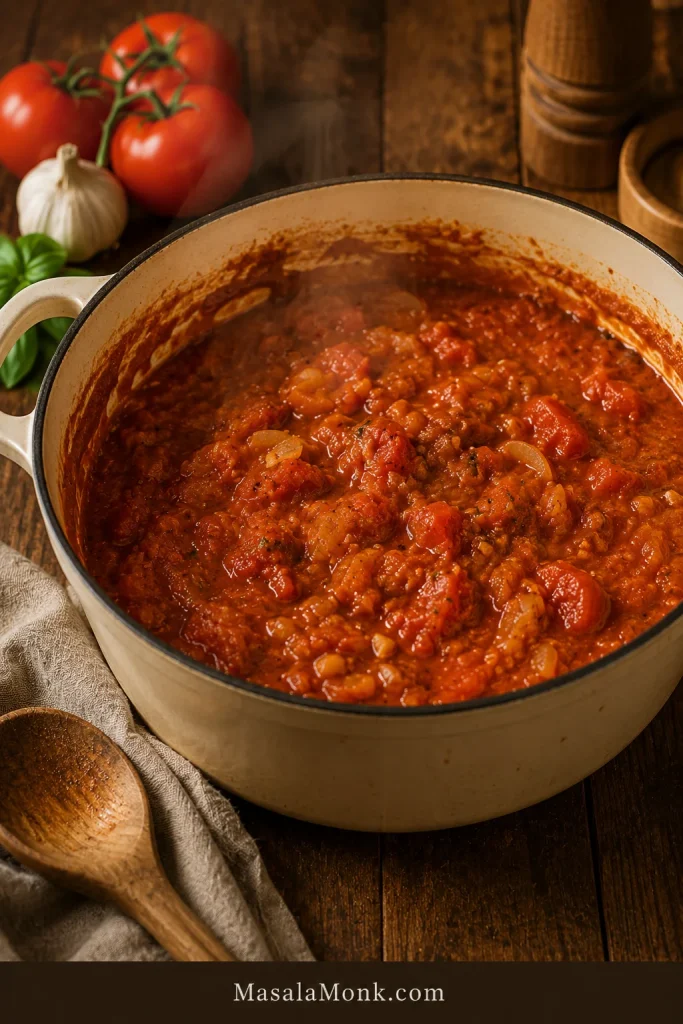
Before blending, the soup base should look thick and concentrated. A slightly thick pot is easy to loosen; a watery one is harder to fix.
Step 4: Blend and Adjust
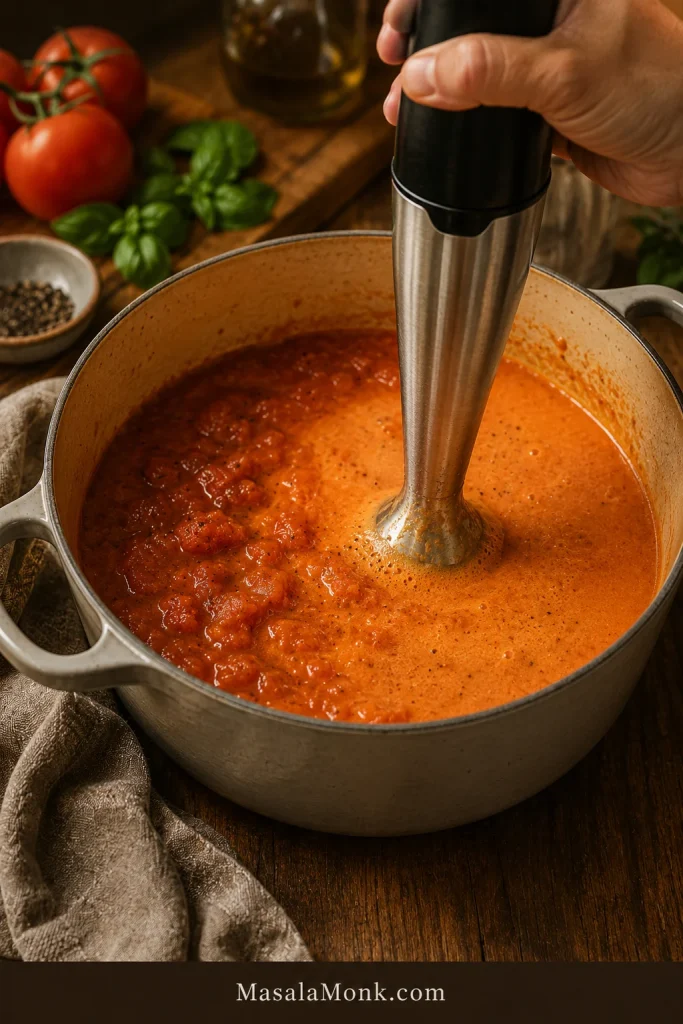
Blend until smooth. An immersion blender is easiest; a countertop blender gives a silkier finish. After blending, the soup should fall from a spoon in a smooth ribbon, not splash like broth. If it is too thick, add broth a splash at a time.
Once the vegetables are soft, blending turns the tomato base into one smooth, creamy body.
Step 5: Finish Gently
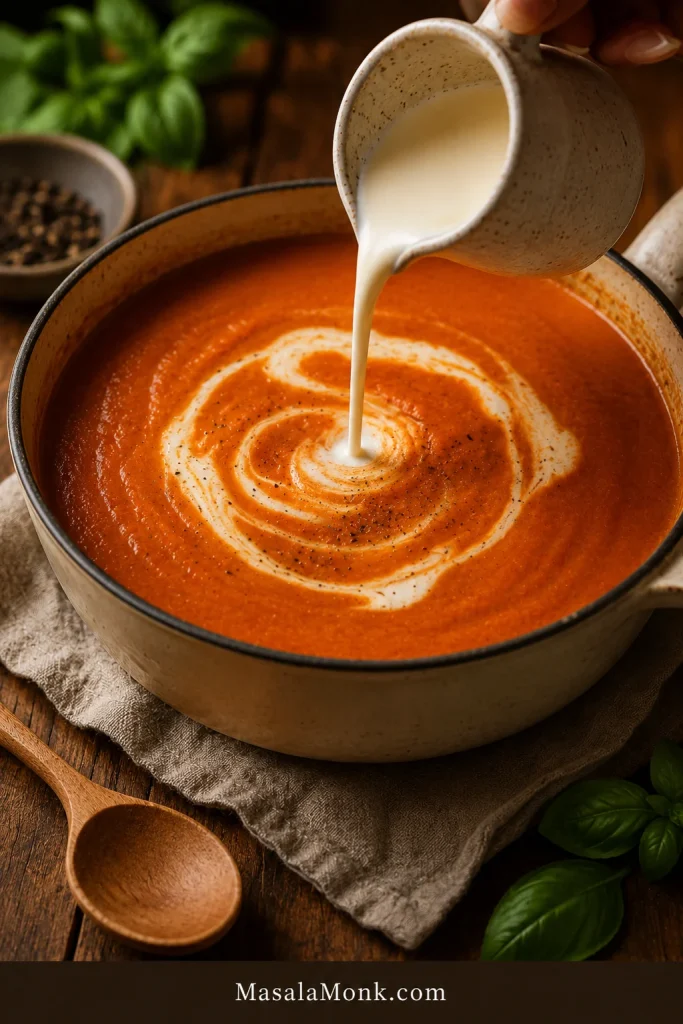
Lower the heat and stir in the cream. Warm gently for 2 to 3 minutes. Taste and adjust with salt first, then richness or brightness if needed. The final spoonful should feel rounded, not heavy, with enough tomato brightness to make you want the next bite.
Add cream only after the soup is blended, then warm it gently. This keeps the bisque smooth instead of grainy or split.
Success Cues
Vegetables: the carrot and celery should be soft enough to mash against the side of the pot.
Tomato paste: it should smell deeper and less metallic.
After simmering: the tomato flavor should taste rounder, not raw or sharp.
Blended texture: the soup should be glossy, smooth, and spoon-coating.
Before serving: if it tastes flat, add salt first; if it tastes sharp, add butter, cream, or a very small pinch of sugar.
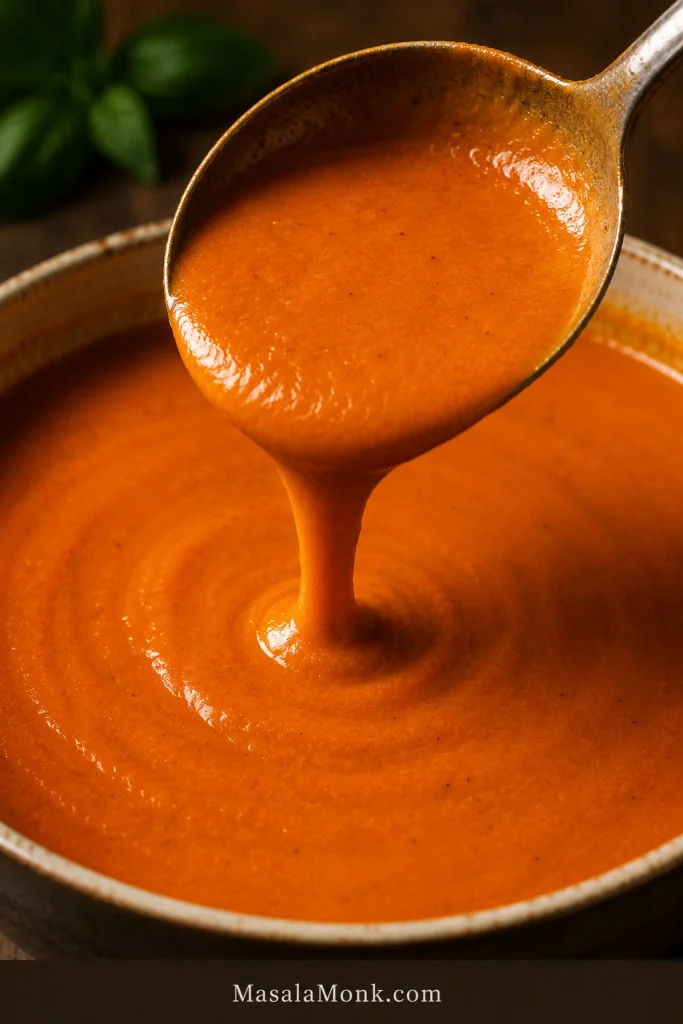
Smooth Ribbon Texture
After blending, look for a smooth ribbon from the spoon. That means the soup is creamy, spoon-coating, and still pourable.
Creaminess is mostly about restraint. You want the finish to soften the tomato edge, not bury the tomato flavor.
If you want…
Use…
Watch for…
Classic richness
Heavy cream
Warm gently after adding
A lighter finish
Half-and-half
The soup may be slightly thinner
Dairy-free creaminess
Cashew cream
Blend the cashew cream completely smooth
More gloss
Butter
Add near the end
More savory depth
Parmesan
Add less salt first
A green finish
Basil pesto
Use a small spoon on top, not too much
A small spoon of basil pesto works well on top, especially if you want more basil flavor without adding more cream.
Optional Restaurant-Style Roux
You do not need a roux for this recipe. The blended vegetables and tomatoes already give the soup body. Use a small roux only if you want a thicker, restaurant-style bowl.
For that version, use 2 tablespoons butter / 28 g and 2 tablespoons flour / about 16 g. After the vegetables soften, melt the butter, stir in the flour, and cook for 1 to 2 minutes. Slowly add the broth while stirring, then add the tomatoes and continue with the recipe.
Keep the roux small. Too much flour can mute tomato brightness and make the soup taste more like cream sauce. To keep it gluten-free, skip the roux and control thickness with less broth, longer simmering, and good blending.
For a restaurant-style finish, blend until completely smooth, strain only if you want it extra silky, then serve with a small swirl of cream, cracked black pepper, basil oil, or Parmesan. Aim for a glossy bowl, not a grainy one.
Variations
You do not need any of these to make a good bowl. They are simply easy ways to steer the same base in a different direction.
Tomato Basil
For a brighter, greener bowl, add 1 cup loosely packed fresh basil, about 20 to 25 g, after simmering. Blend it into the hot soup, then save a few leaves for garnish if you like. Long simmering can make fresh basil taste dull.
For tomato basil bisque, add fresh basil near the end so the flavor stays green, fragrant, and bright instead of cooked down.
If you want a lighter basil-forward soup rather than a creamier bisque, use this tomato basil soup recipe.
Roasted Tomato
Roasting is best when fresh tomatoes are ripe but a little watery. It concentrates their flavor, softens acidity, and gives the soup deeper sweetness.
Use 2.5 to 3 lb / 1.1 to 1.35 kg fresh tomatoes. Halve them and roast with olive oil, onion, and garlic at 400°F / 200°C for 25 to 35 minutes, until the tomatoes collapse and the edges start to caramelize. Add the roasted tomatoes to the pot with broth and continue with the main recipe.
Roasting the tomatoes first concentrates their sweetness, giving the bisque deeper flavor and a softer acidic edge.
If you are building a fuller soup-night meal, these roasted carrots keep the table warm, sweet, and simple without making the soup heavier.
Roasted Red Pepper
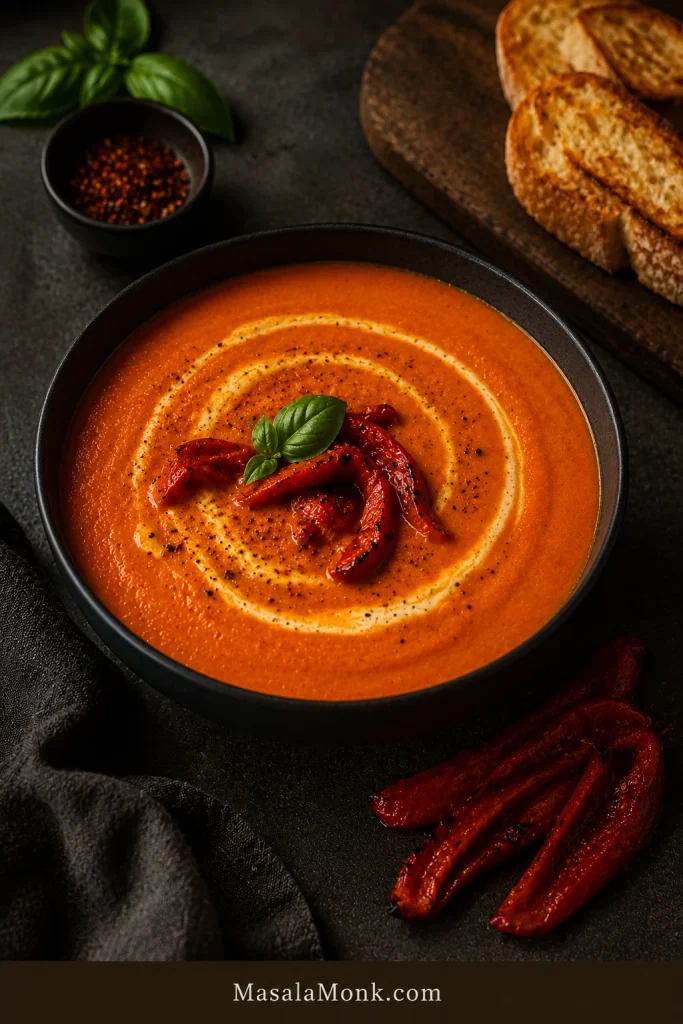
Roasted red peppers make the bowl sweeter, deeper, and slightly smoky. Add one drained 12 oz / 340 g jar with the tomatoes before simmering. Blend until smooth, then finish with cream. A small pinch of smoked paprika works well, but keep it light.
Roasted red peppers bring smoky sweetness to the bowl, making tomato bisque taste richer without relying on extra cream.
Can You Make Tomato Bisque From Canned Tomato Soup?
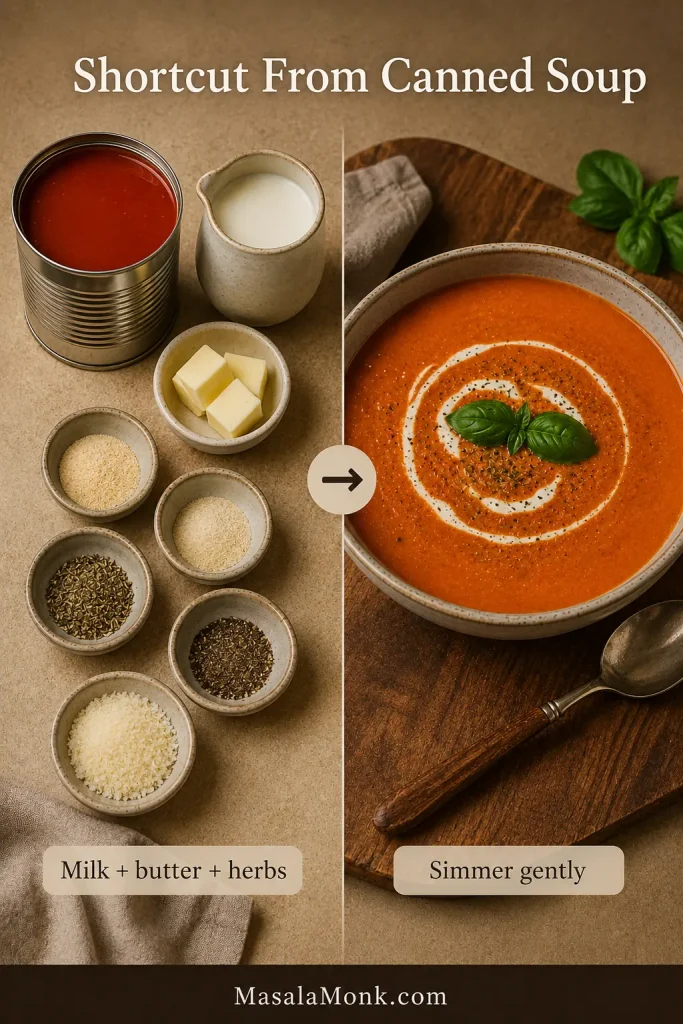
Yes. You can turn canned tomato soup into a quick pantry version when speed matters more than full homemade flavor. Think of the can as the foundation, not the finished soup: a little fat, dairy, seasoning, and a fresh garnish can make it taste more intentional.
Shortcut From Condensed Tomato Soup
For 1 can condensed tomato soup, add:
1 can milk or half-and-half, or milk with a splash of cream
1 tablespoon butter
1/4 teaspoon garlic powder
1/4 teaspoon onion powder
1/2 teaspoon dried basil or Italian seasoning
Black pepper to taste
1 to 2 tablespoons Parmesan, optional
Simmer gently for 8 to 10 minutes, stirring often. Finish with fresh basil, croutons, Parmesan, or grilled cheese.
When using canned tomato soup, treat it as a base. Milk or half-and-half, butter, herbs, pepper, and Parmesan make it taste more intentional.
For the best flavor, start with canned tomatoes or fresh tomatoes instead of canned tomato soup. When speed matters, the shortcut works. To make a true homemade bowl, use the main recipe.
Dietary Options
The creamy finish is flexible, so no one has to miss the comfort of the bowl. Once the broth, fat, cream, and toppings match your needs, the recipe still works.
Need
How to adjust
Vegetarian
Use vegetable broth. The rest of the main recipe can stay the same.
Vegan
Use vegetable broth, olive oil instead of butter, and cashew cream instead of heavy cream.
Dairy-free
Cashew cream or a plain unsweetened plant-based cream works best. Leave out Parmesan and the Parmesan rind.
Gluten-free
Skip the optional roux, or use a gluten-free thickener if needed. Check broth and toppings.
Lower sodium
Use no-salt-added canned tomatoes and low-sodium broth, then season at the end.
Dairy-Free Cashew Cream
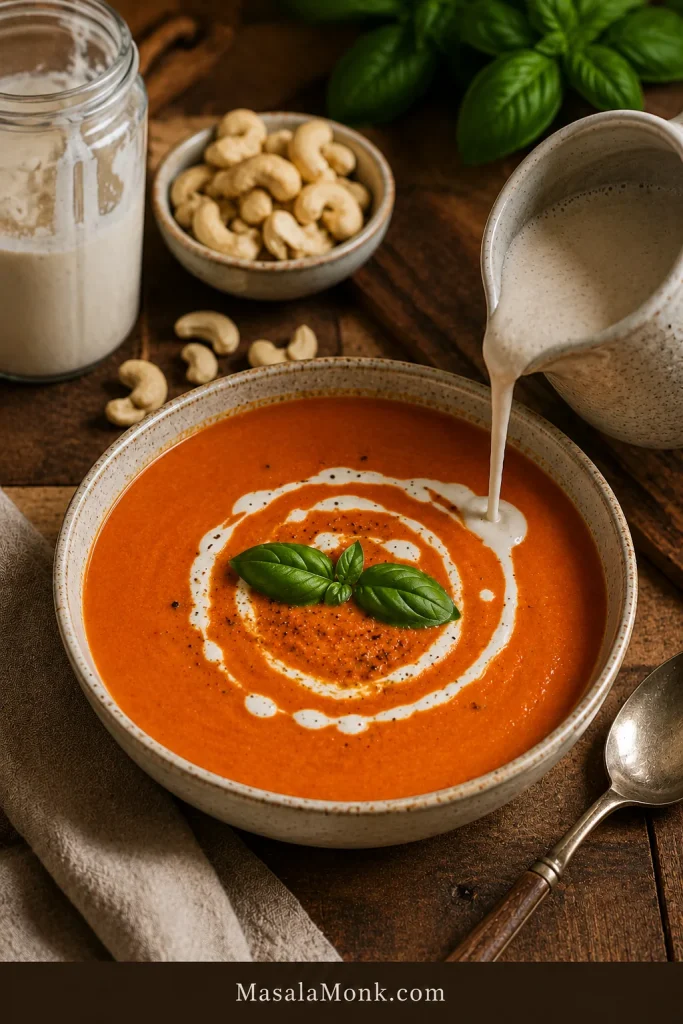
To make cashew cream, soak 1/2 cup cashews in hot water for 20 to 30 minutes. Drain, then blend with 1/2 cup fresh water until completely smooth. Add about 1/2 cup to the soup, then add more only if needed.
For dairy-free tomato bisque, cashew cream gives the soup a smooth, neutral finish without coconut flavor.
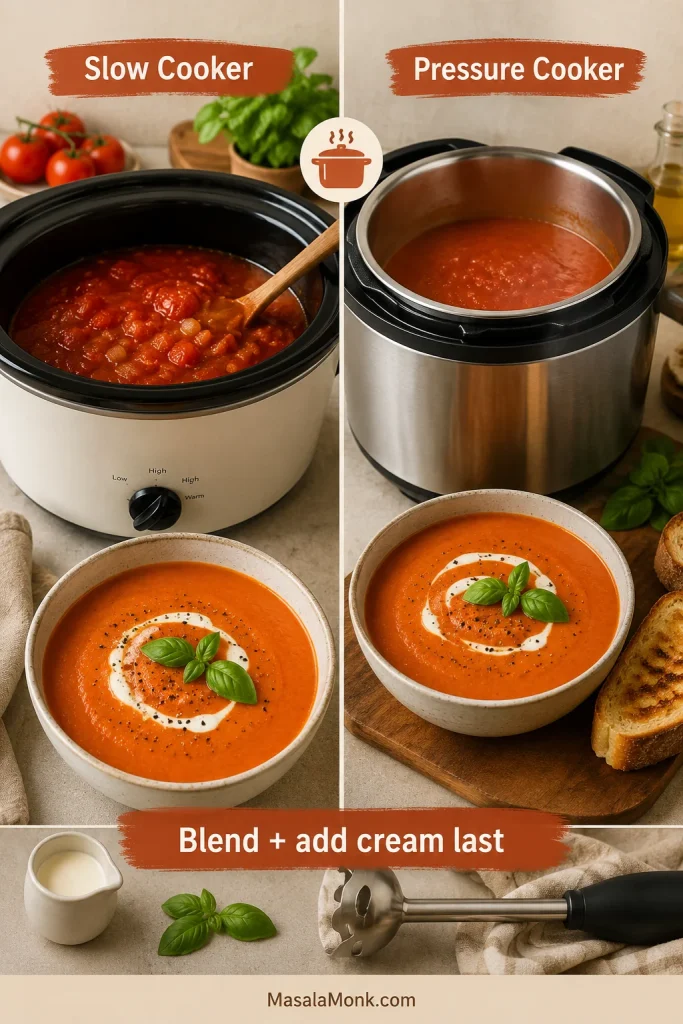
Slow Cooker, Instant Pot / Pressure Cooker, and Blender Notes
The stovetop method gives the most control, but the recipe adapts well when you need a more hands-off path. These versions are best for the days when you want the same cozy bowl without standing over the stove.
Keep the same order in mind: cook for flavor, blend for body, then add cream at the end.
Slow Cooker and Pressure Cooker Tomato Bisque
Slow cooker or Instant Pot / pressure cooker both work, but the rule stays the same: blend the tomato base first, then add cream last.
For best flavor, sauté the onion, carrot, celery, garlic, and tomato paste first. Add them to the slow cooker with the tomatoes, herbs, and broth. Cook on low for 6 to 8 hours or high for 3 to 4 hours. Blend until smooth, then stir in the cream at the end.
For a heartier tomato-rich slow cooker dinner, this crock pot lasagna soup goes in a pasta-and-ricotta direction instead of a smooth creamy bisque.
Instant Pot or Pressure Cooker
Use the sauté function for the onion, carrot, celery, garlic, and tomato paste. Add the tomatoes, broth, and herbs. Pressure cook for 8 to 10 minutes, let the pressure release naturally for 5 minutes, then quick release. Blend smooth and stir in the cream after cooking.
Countertop Blender
If blending hot soup in a countertop blender, work in batches, vent the lid, cover with a towel, and start slowly. A high-speed blender gives the smoothest texture.
What to Serve With Tomato Bisque
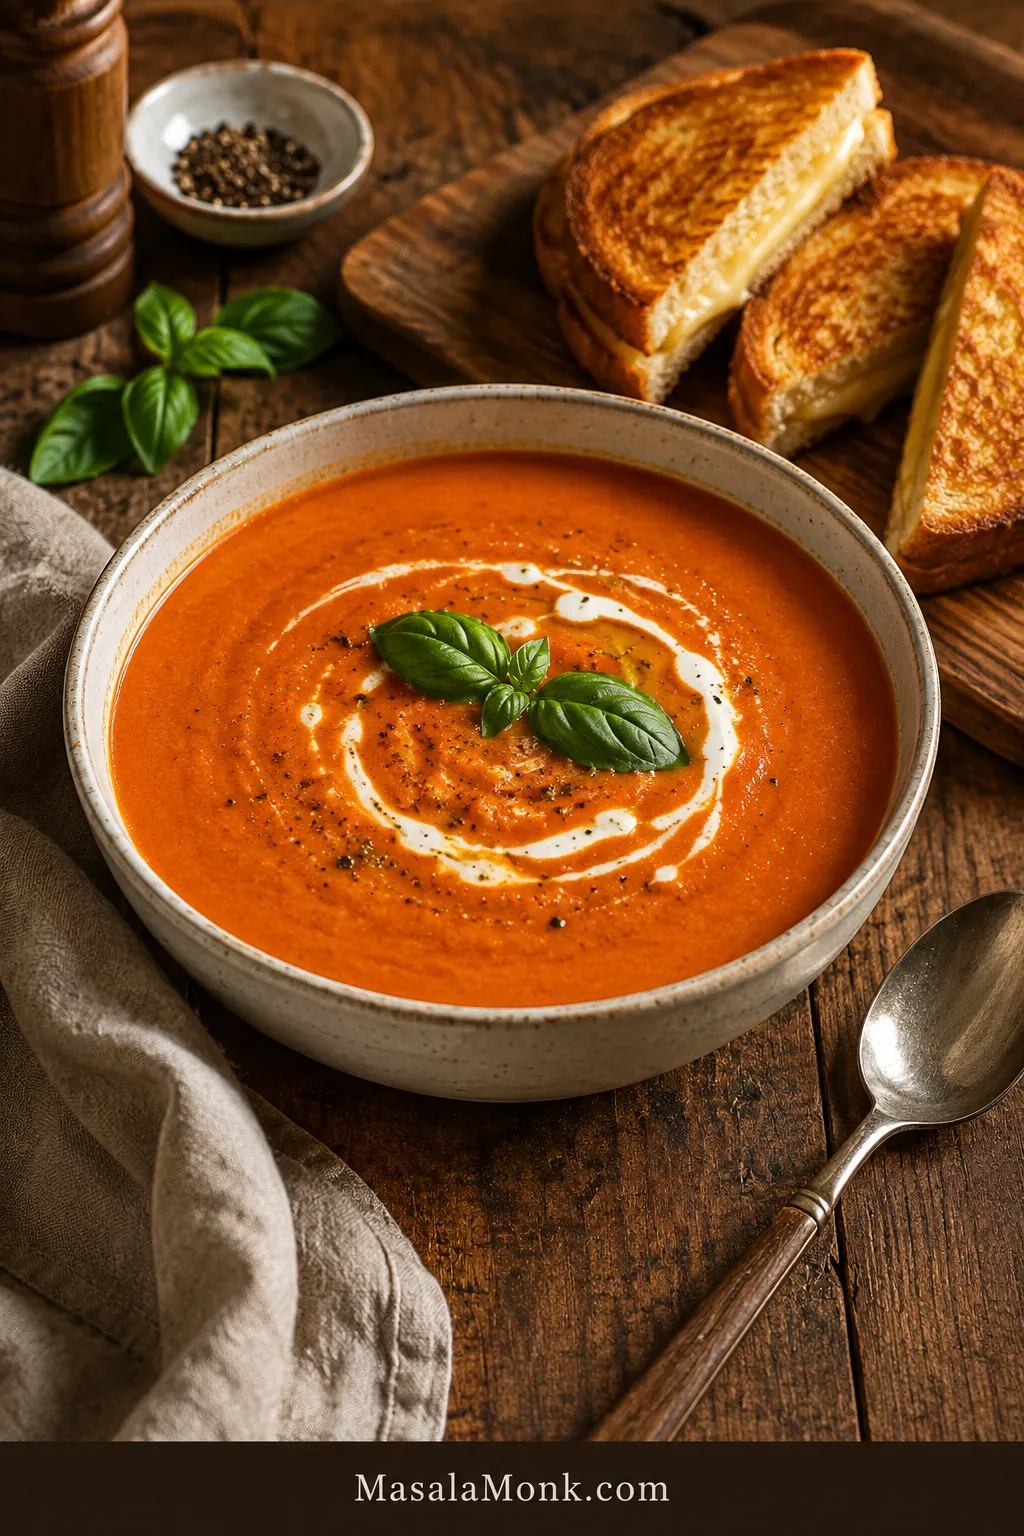
This is where the soup turns into dinner. Grilled cheese is the classic pairing for a reason: the soup is creamy and tangy; the sandwich is crisp, buttery, and salty. The best bite is the corner of grilled cheese after it has been dipped: crisp at the edge, soft where it meets the soup, salty enough to make the tomato taste brighter.
Grilled Cheese Dunk
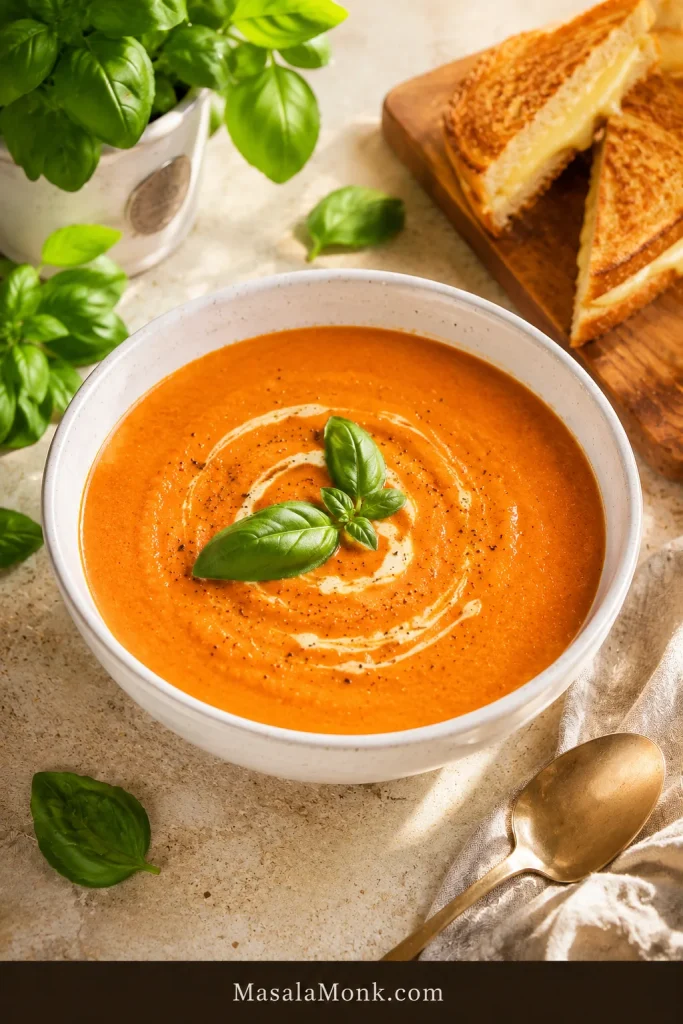
Serve tomato bisque with grilled cheese for contrast: crisp bread, melted cheese, and creamy soup clinging to the corner.
If you want bread on the side instead of a sandwich, this homemade garlic bread loaf is a natural fit with a creamy tomato bowl. For a grilled cheese upgrade, a thin layer of garlic aioli adds savory depth without needing another filling.
Classic cheddar grilled cheese
Sourdough grilled cheese
Garlic bread
Parmesan croutons
Toasted cheese sandwich
Basil oil or fresh basil
Simple green salad
Roasted vegetables
Crusty bread
Parmesan toast
Mistakes to Avoid
Adding too much broth early: start with the listed amount, then adjust after blending.
Using bland fresh tomatoes without roasting: watery tomatoes make watery soup.
Adding cream before blending: the base should be smooth first.
Boiling after adding cream: gentle heat keeps the texture creamy.
Under-seasoning: tomato-based soups often taste flat until they have enough salt.
Overdoing the roux: too much flour can dull the tomato flavor.
Troubleshooting
Most problems come down to the same three things: acidity, thickness, and heat. If your first taste seems too sharp, do not panic. Tomato soups often settle after a few more minutes of simmering and a small amount of cream or butter.
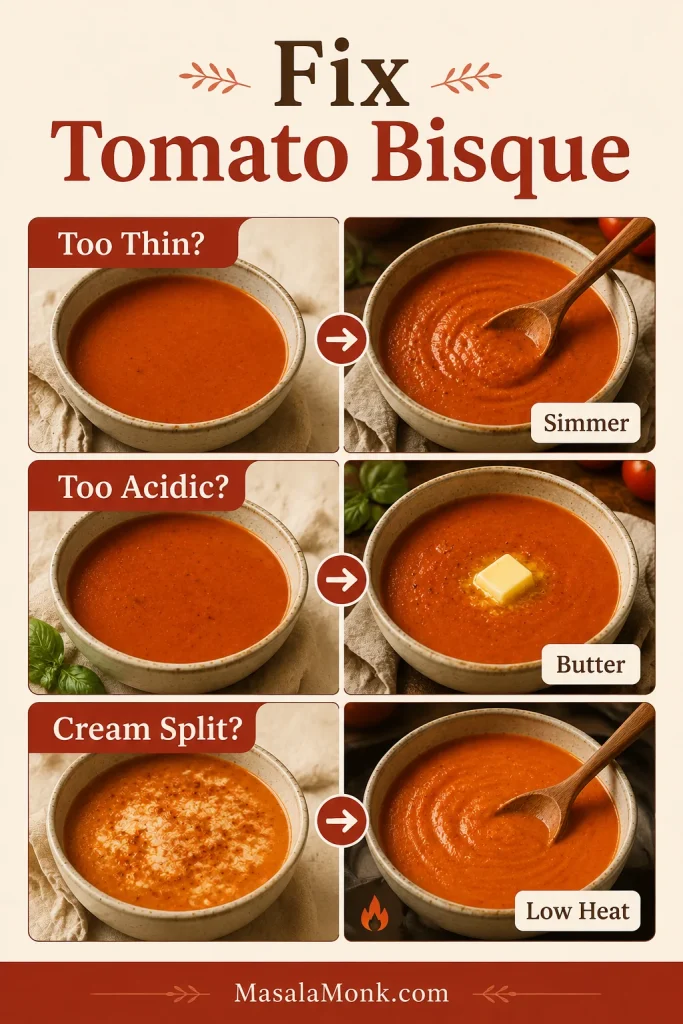
Tomato Bisque Troubleshooting Guide
Most tomato bisque problems have simple fixes: simmer thin soup, soften sharpness with butter or cream, and lower the heat if cream splits.
Simmer it a little longer, then taste again. If it still tastes sharp, add a pinch of sugar, a little more cream, or a tablespoon of butter. A very small pinch of baking soda can also help, but use less than 1/8 teaspoon to start. Too much baking soda can make the soup taste dull.
How do I fix thin soup?
Simmer uncovered for a few more minutes. For a thicker version, use the optional roux, add cream or cashew cream, or blend in a little more cooked carrot.
How do I thin it without making it watery?
Add broth or water a little at a time until it reaches the texture you like. Warm gently and taste again after thinning because you may need more salt or pepper.
Why did the cream split?
The heat was probably too high. Add cream after blending, lower the heat, and warm the soup gently. Avoid boiling once the cream is in the pot.
How do I make it smoother?
Blend it longer. A countertop blender gives a silkier texture than an immersion blender. For a very smooth restaurant-style finish, strain the blended soup through a fine mesh sieve before adding cream.
Why does it taste flat?
Add salt first. If it still needs brightness, add black pepper, fresh basil, Parmesan, or a tiny splash of lemon juice.
Storage, Freezing, and Reheating
This soup reheats well, especially if you store the tomato base before adding cream. Reheated gently, it makes tomorrow’s lunch feel planned instead of leftover.
How long does it last in the fridge?
Cool the soup before storing, and refrigerate leftovers within 2 hours. Store it in an airtight container for 3 to 4 days. For general leftover safety, the USDA’s leftovers and food safety guide also recommends using refrigerated leftovers within 3 to 4 days.
Can you freeze it?
It freezes best before cream is added. Freeze the blended tomato base for up to 3 months, then thaw, reheat, and stir in the cream at the end. If the soup already has cream in it, you can still freeze it, but the texture may be less smooth after thawing.
How should you reheat it?
Reheat over low to medium-low heat, stirring often. Do not boil hard after cream has been added. Add a splash of broth or water if the soup thickens in the fridge.
If you want a chunkier tomato-broth soup with beans, vegetables, and pasta, this minestrone soup recipe is the better direction for another night.
FAQs
What is the difference between tomato soup and tomato bisque?
Tomato bisque is usually smoother, creamier, and richer than basic tomato soup. It is blended until silky and finished with cream, butter, milk, or a creamy alternative. Some restaurant-style versions also use a roux.
Are canned tomatoes or fresh tomatoes better?
Canned tomatoes are better for reliable flavor and easy cooking. Fresh tomatoes are best when they are ripe, sweet, and in season. If fresh tomatoes taste watery, roast them first or combine them with canned tomatoes.
What kind of canned tomatoes should I use?
Whole peeled tomatoes are the best first choice because they usually bring the best balance of flavor and body. Crushed tomatoes are the easier shortcut when you want less blending. Diced tomatoes can work, but they may need more blending.
How many fresh tomatoes replace a 28 oz can?
Start with about 2.5 lb / 1.1 kg ripe tomatoes to replace one 28 oz / 794 g can. Go up to 3 lb / 1.35 kg if your tomatoes are watery or you want a fuller fresh-tomato base.
Does tomato bisque need cream?
Classic tomato bisque is usually creamy, but you have options. Heavy cream is richest, half-and-half is lighter, and cashew cream works well for dairy-free soup.
What is the best way to thicken tomato bisque?
Blend the vegetables into the soup, start with controlled broth, and simmer uncovered if needed. For a restaurant-style texture, use a small roux with butter and flour. A dairy-free thicker soup can use cashew cream.
Can you make tomato bisque from canned tomato soup?
Yes. Add milk or half-and-half to condensed tomato soup, then season it with butter, garlic powder, onion powder, basil, black pepper, and Parmesan. A splash of cream can make it richer, but a full can of cream may be too heavy.
How do I make vegan tomato bisque?
Use vegetable broth, olive oil instead of butter, and cashew cream or another dairy-free cream instead of heavy cream. Cashew cream gives the most neutral creamy texture.
Can you freeze tomato bisque without ruining the texture?
Freeze the blended tomato base before adding cream. Thaw, reheat gently, and stir in the cream at the end. If the soup already contains cream, the texture may change slightly after freezing.
What goes well with tomato bisque?
Grilled cheese is the classic pairing. It also goes well with garlic bread, Parmesan croutons, sourdough toast, basil oil, a green salad, roasted vegetables, or a toasted cheese sandwich.
The Bowl You’re Aiming For
Once you understand the method, this soup becomes flexible. Make it richer, make it fresher, add basil, roast the tomatoes, or rescue a can on a busy night. As long as you smooth the base before thinning and add cream gently at the end, you are in control of the bowl.
Are you making the classic creamy version, the fresh tomato version, or the canned-soup shortcut tonight? Whichever way you go, keep the order gentle: blend the base smooth, adjust the body slowly, and add the cream at the end. Do that, and you get a glossy, velvety bowl with enough richness for comfort and enough brightness to keep every spoonful alive.
Ladle it into a warm bowl, add basil or a swirl of cream, and keep the grilled cheese close.
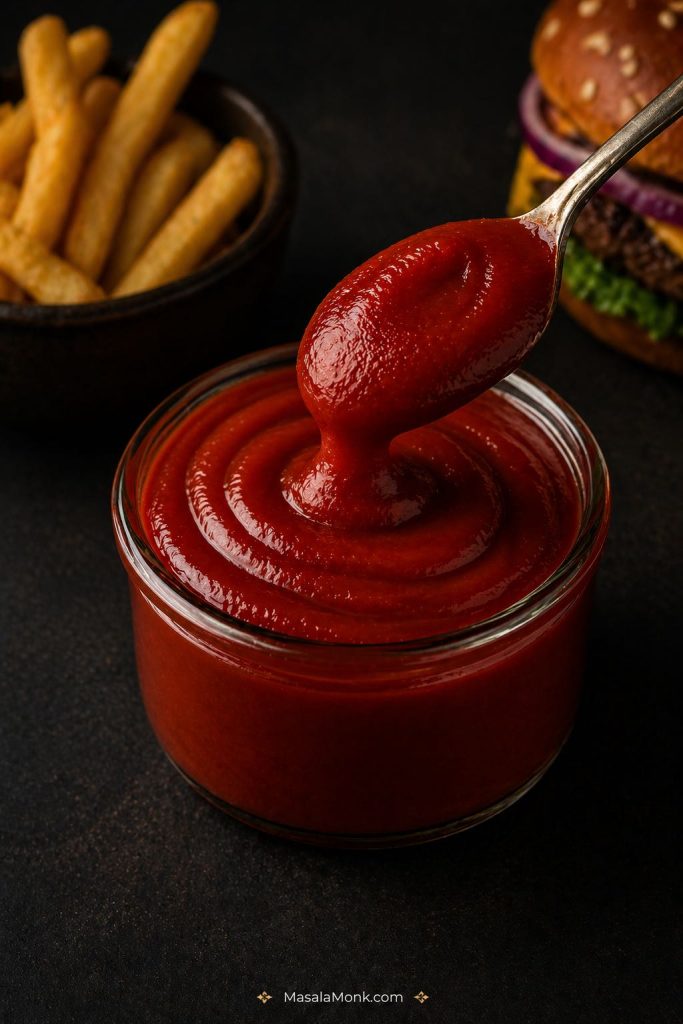
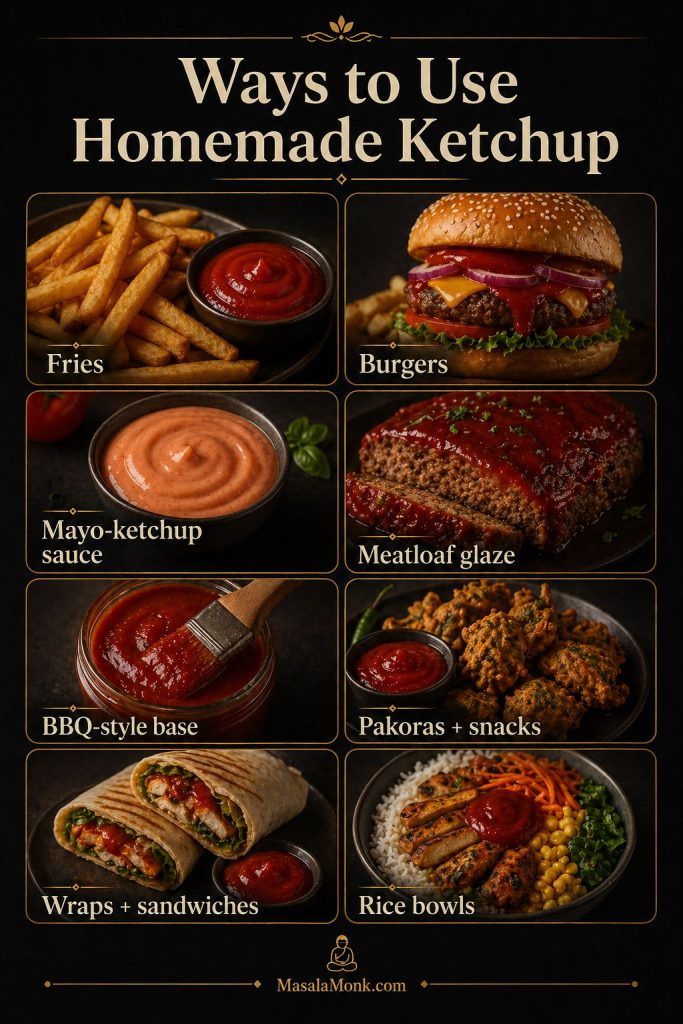
A good homemade ketchup recipe should taste bright, tangy, lightly sweet, deeply tomato-forward, and smooth enough for dipping, spreading, spooning, or squeezing. It should be thicker than tomato sauce, sharper than tomato chutney, and balanced enough for fries, burgers, sandwiches, wraps, pakoras, grilled snacks, and quick dipping sauces. You can also use it as a simple meatloaf glaze or a base for burger sauce.
This homemade tomato ketchup gives you the full fresh tomato method first: ripe tomatoes cooked down with onion, garlic, vinegar, sweetener, salt, mustard, and warm spices until glossy and thick. Then, because real kitchens are not always full of perfect summer tomatoes, you also get a quick tomato paste ketchup recipe, a sugar-free option, texture fixes, storage guidance, and clear canning notes.
In many kitchens, especially in India, this would simply be called a tomato ketchup recipe or homemade tomato sauce. Here, though, the goal is classic ketchup texture: smooth, glossy, thick, tangy-sweet, and easy to dip.
Most importantly, this is a recipe about control. Once you understand the tomato-to-vinegar-to-sweetener balance, you can make ketchup sweeter, tangier, smoother, thicker, spicier, lower in sugar, or closer to bottled ketchup without guessing. That way, the same base can work for fries, burgers, wraps, snacks, and quick sauces without needing a separate recipe every time.
For that reason, the recipe below does not force one version on every kitchen. Instead, it shows you when fresh tomatoes are worth the longer simmer and when tomato paste is the smarter shortcut.
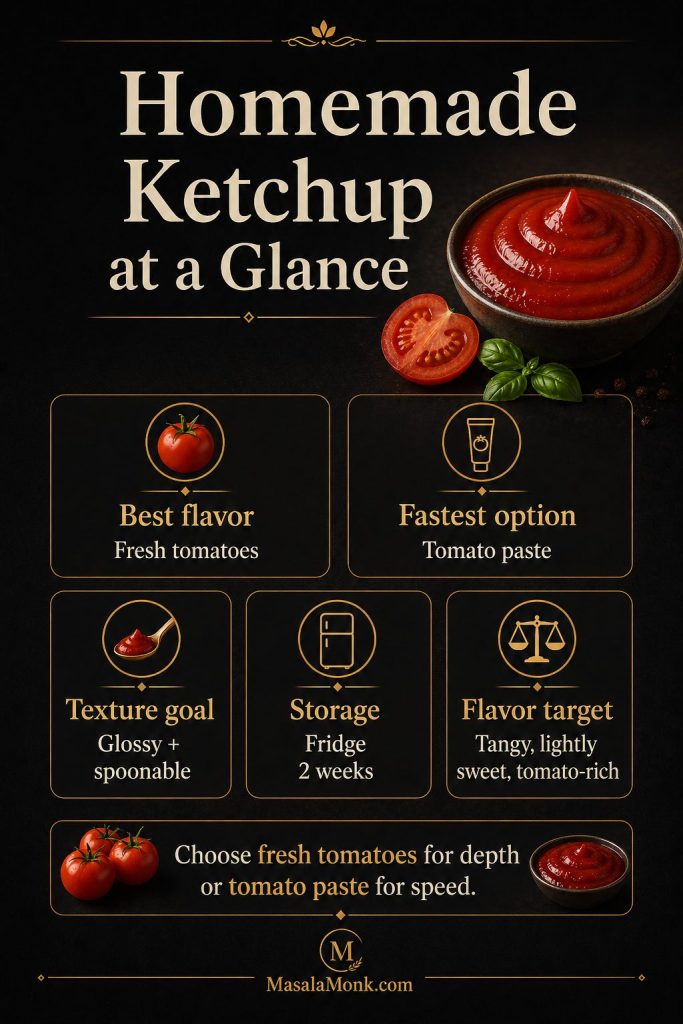
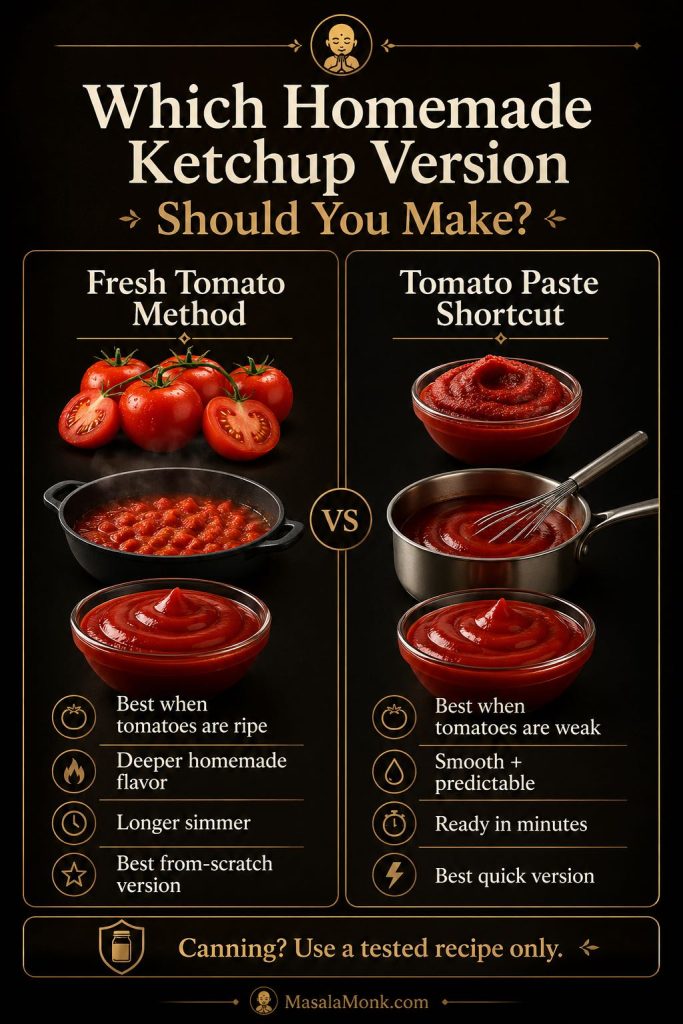
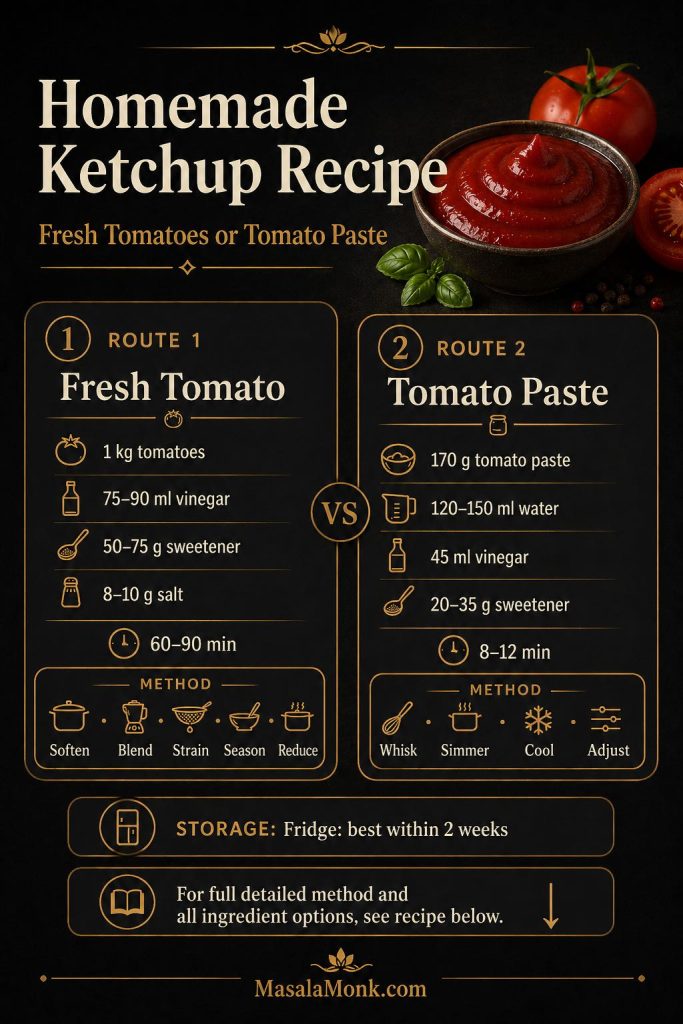
If you want the short version first, this guide shows the key homemade ketchup decisions: which method to choose, how it should taste, and how to store it safely.
Before you start: choose the version based on your tomatoes. If they are ripe and flavorful, use the fresh tomato method. However, if they are watery or bland, use the tomato paste shortcut instead. That way, you get a thick, balanced ketchup without fighting the ingredients.
Quick Answer: The Best Homemade Ketchup Recipe Ratio
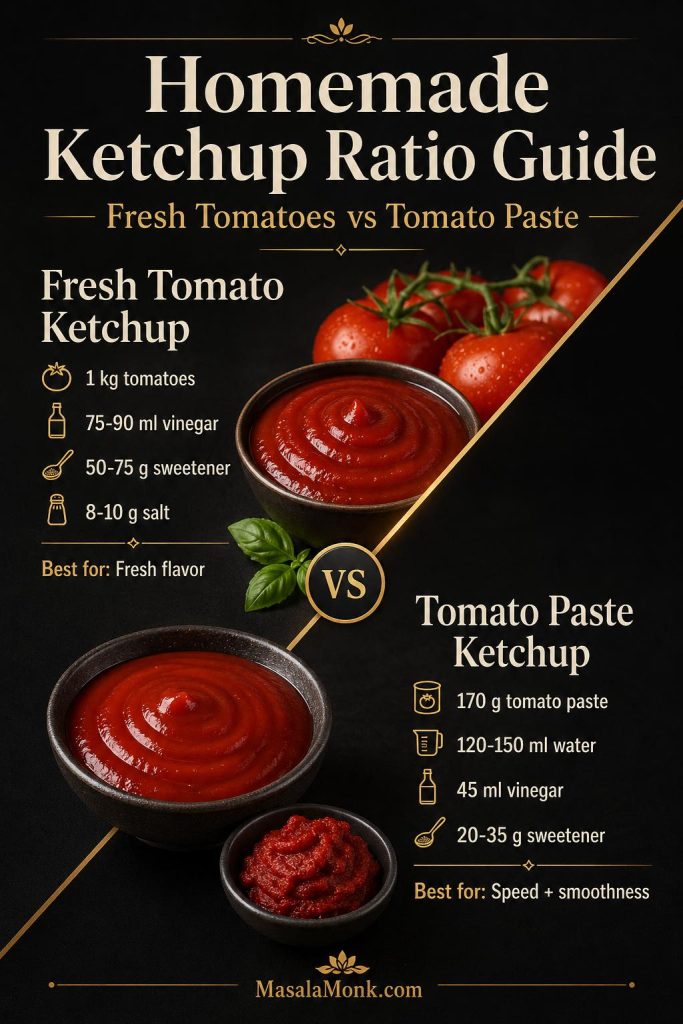
Fresh Tomato Ketchup Ratio
To make homemade ketchup with fresh tomatoes, first cook ripe tomatoes with onion and garlic until soft. Next, blend them smooth and strain them for a finer texture. From there, simmer the tomato puree with vinegar, sugar or jaggery, salt, mustard powder, and warm spices until thick and glossy.
Tomato Paste Ketchup Ratio
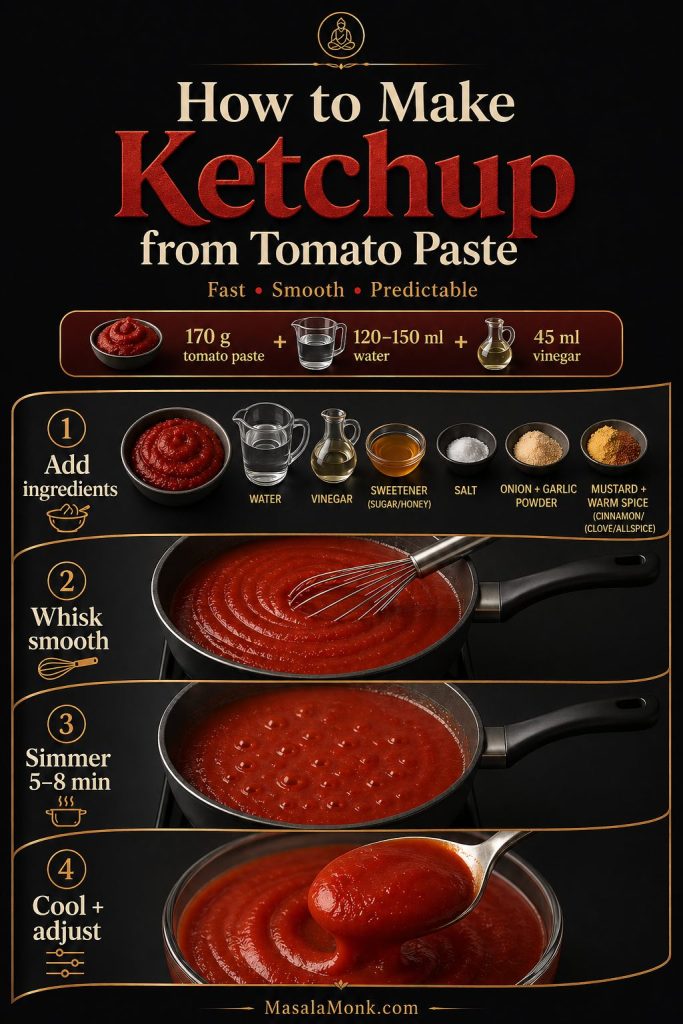
For a faster version, whisk tomato paste with water, vinegar, sweetener, salt, onion powder, garlic powder, mustard powder, and a tiny pinch of warm spice. Then, simmer it for 5–8 minutes. Compared with the fresh tomato version, tomato paste ketchup is quicker, smoother, and more predictable, although it tastes less seasonal.
As a starting point, use the fresh tomato ratio when flavor matters most and the tomato paste ratio when speed and smoothness matter more.
Version
Quick Ratio
Best For
Fresh tomato ketchup
1 kg tomatoes + 75–90 ml vinegar + 50–75 g sweetener + 8–10 g salt
Ripe summer tomatoes, fresh flavor, and from-scratch ketchup
Tomato paste ketchup
170 g tomato paste + 120–150 ml water + 45 ml vinegar + 20–35 g sweetener
Quick ketchup, smooth texture, burgers, fries, and weeknight meals
Use the fresh tomato ratio when flavor matters most, and the tomato paste ratio when speed, smoothness, and consistency matter more.
That is why this ketchup recipe gives you two practical paths: a fresh tomato version for deeper flavor and a quick tomato paste version for speed.
Because this ketchup recipe is homemade, you can adjust the vinegar, sweetener, salt, and spices near the end instead of being locked into one fixed bottled flavor.
How the Ketchup Should Taste
Flavor target: good ketchup should taste tomato-rich first, then tangy, lightly sweet, salty enough to pop, and only gently spiced. If you can clearly taste cinnamon, clove, or allspice, the warm spice is too strong.
That flexibility is what makes a homemade ketchup recipe useful: the method gives you a starting point, but the final balance comes from tasting and adjusting.
The finished ketchup should taste tomato-rich, tangy-sweet, savory, and gently spiced in the background. When it tastes like plain tomato sauce, it needs more vinegar, sweetener, salt, mustard, or a tiny pinch of warm spice. However, when it tastes like chutney, the warm spices or sweetener are probably too strong.
Which Homemade Ketchup Version Should You Make?
Before you start cooking, decide what problem you are solving. Fresh tomatoes give the best homemade flavor when they are ripe, while tomato paste gives better control when the tomatoes are watery, pale, or out of season.
The easiest way to choose is to look at your tomatoes, your time, and how you plan to store the ketchup. When the tomatoes are ripe and red, fresh tomatoes give the best homemade flavor. On the other hand, when the tomatoes are watery, pale, or out of season, tomato paste gives the fastest, smoothest, most predictable result. If you are reducing sugar, however, the ketchup needs a little more balancing so it still tastes like ketchup instead of plain tomato sauce.
Fresh tomatoes are best when they are ripe and flavorful, while tomato paste is the smarter shortcut when you want faster, smoother, more predictable ketchup.
In other words, the best homemade version is not always the longest ketchup recipe. It is the version that fits your tomatoes, your time, and the way you want to serve it.
Situation
Best Version
Why It Works
Ripe summer tomatoes
Fresh tomato ketchup
This gives the best flavor and the most homemade character.
Watery, pale, or bland tomatoes
Tomato paste ketchup
The paste gives more predictable color, body, and flavor.
Ketchup needed in about 10 minutes
Quick tomato paste ketchup recipe
No long reduction is needed.
Lower-sugar ketchup
Sugar-free ketchup option
This lets you control the sweetener while keeping the sauce balanced.
Pantry-stable jars
Tested canning recipe only
A flexible fridge ketchup should not be canned casually.
This recipe works because it treats ketchup as a balance problem, not just a tomato puree. The tomatoes soften first so their flavor turns rounded, the mixture is blended and strained for texture, and the seasoned puree reduces slowly until the vinegar, sweetener, salt, mustard, and spices taste like one glossy sauce.
The fresh tomato version gives deeper homemade flavor, while the tomato paste version gives speed and consistency. Together, they cover both real kitchen situations: good ripe tomatoes and the nights when you need a quick ketchup for fries, burgers, wraps, or snacks. Because both versions use the same sweet-acid-salt logic, you can adjust them in the same way near the end.
Homemade Ketchup Ingredients: Tomatoes, Vinegar, Sugar, Salt and Spices
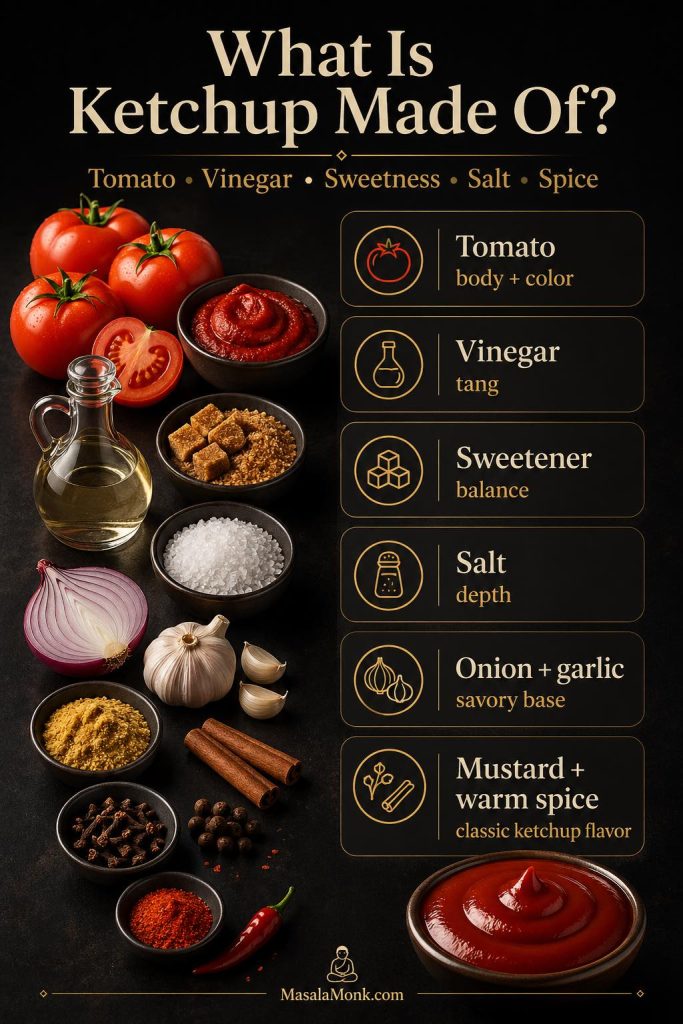
Ketchup tastes simple, but it depends on balance. Tomatoes give the sauce body, while vinegar adds the sharp tang. Sweetener rounds the acidity, and salt makes the tomato flavor pop. Finally, onion, garlic, mustard, and warm spices turn cooked tomato into ketchup instead of plain tomato sauce.
Because the sauce reduces as it cooks, the balance of vinegar, salt, and sweetener becomes more concentrated near the end. Therefore, it is better to start slightly cautious and adjust after the sauce thickens.
What Is Ketchup Made Of?
Ketchup is usually made from tomatoes or tomato paste, vinegar, sugar or another sweetener, salt, onion, garlic, mustard, and warm spices. The main ingredient is tomato, but the familiar ketchup flavor comes from the balance of tomato, vinegar, sweetness, salt, and spice.
Compared with many bottled ketchup ingredients lists, homemade ketchup gives you more control. You can choose fresh tomatoes or tomato paste, adjust the sugar, use 5% acidity vinegar, control the salt, and keep the spice level gentle.
Homemade ketchup gets its classic flavor from balance: tomatoes for body, vinegar for tang, sweetener for roundness, salt for depth, and spices for warmth.
Tomatoes and Vinegar
Tomatoes give the ketchup body, color, and fresh flavor. Meanwhile, vinegar gives the sauce its sharp ketchup tang. For this small-batch fridge version, apple cider vinegar gives a rounder flavor, while white vinegar tastes cleaner and sharper.
Sweetener, Salt and Spices
Sweetener balances tomato acidity, salt sharpens the flavor, and spices make the sauce taste like ketchup instead of plain tomato sauce. In this ketchup recipe, the homemade flavor comes from restraint: mustard powder, cinnamon, and a tiny pinch of clove or allspice are enough. Too much warm spice can push the sauce toward chutney.
Once you understand what each ingredient does, the recipe becomes easier to adjust. The table below shows the fresh tomato amounts first because that version depends most on balance and reduction.
Measurement note: metric weights are more accurate for tomatoes, onion, sweetener, and salt. The US cup and spoon measures are included for convenience, but final yield can vary because tomatoes contain different amounts of water.
Fresh Tomato Ketchup Ingredient Amounts
Ingredient
Amount for Fresh Tomato Ketchup
Why It Matters
Ripe red tomatoes
1 kg / 2.2 lb
Tomatoes form the body, color, and main flavor. Roma, plum, San Marzano-style, or other meaty tomatoes reduce faster and taste richer.
Onion
80–100 g / 3–3.5 oz / 1 small onion
Onion builds a savory base and helps the ketchup taste rounded.
Garlic
8–12 g / 2–3 cloves
Garlic deepens the flavor. Use less if you want a cleaner bottled-style ketchup.
5% acidity vinegar
75–90 ml / 5–6 tbsp
Vinegar gives ketchup its sharp tang. Apple cider vinegar tastes rounder; white vinegar tastes cleaner and sharper.
Sugar, jaggery, or brown sugar
50–75 g / 1.75–2.6 oz / about ¼–⅓ cup packed
Sweetener balances tomato acidity and keeps the sauce from tasting like sour tomato puree.
Fine salt
8–10 g / about 1½ tsp
Salt sharpens the tomato flavor. Add it carefully because reduction concentrates the sauce.
Mustard powder
1–2 g / ½–1 tsp
Mustard powder brings the classic ketchup sharpness without making the sauce taste mustardy.
Cinnamon
Pinch to ⅛ tsp
A small amount adds warmth. Too much can push the ketchup toward chutney.
Clove or allspice
Tiny pinch / 1/16 tsp or less
This gives the familiar background spice, but it becomes overpowering quickly.
Cayenne or chili powder
Optional, ⅛–¼ tsp
Use this for mild heat without turning the ketchup into hot sauce.
How Much Sugar Is in This Homemade Ketchup?
This ketchup recipe uses 50–75 g added sugar, jaggery, or brown sugar for a homemade batch that finishes at about 2–2½ cups. That works out to roughly 1.25–2.3 g added sweetener per tablespoon, depending on your final yield and how much sweetener you use.
For a less sweet ketchup, start with 50 g sweetener and adjust only after the sauce has reduced. Because reduction concentrates flavor, the ketchup may taste sweeter and saltier near the end than it did at the start. Still, do not remove all sweetness unless you want a sharper tomato-sauce-style condiment. Instead, reduce the sweetener gradually and taste again after the ketchup cools.
It is also useful when you want a no-corn-syrup ketchup and prefer to choose the sweetener yourself. For a lighter or more controlled version, homemade ketchup lets you adjust the sugar, salt, and vinegar instead of relying on a fixed bottled formula.
Use 5% acidity vinegar for this recipe, especially when you are also reading the canning section. For regular fridge ketchup, apple cider vinegar, white vinegar, or a mix of the two all work. Apple cider vinegar gives a slightly fruitier ketchup; by contrast, white vinegar gives a cleaner, sharper ketchup.
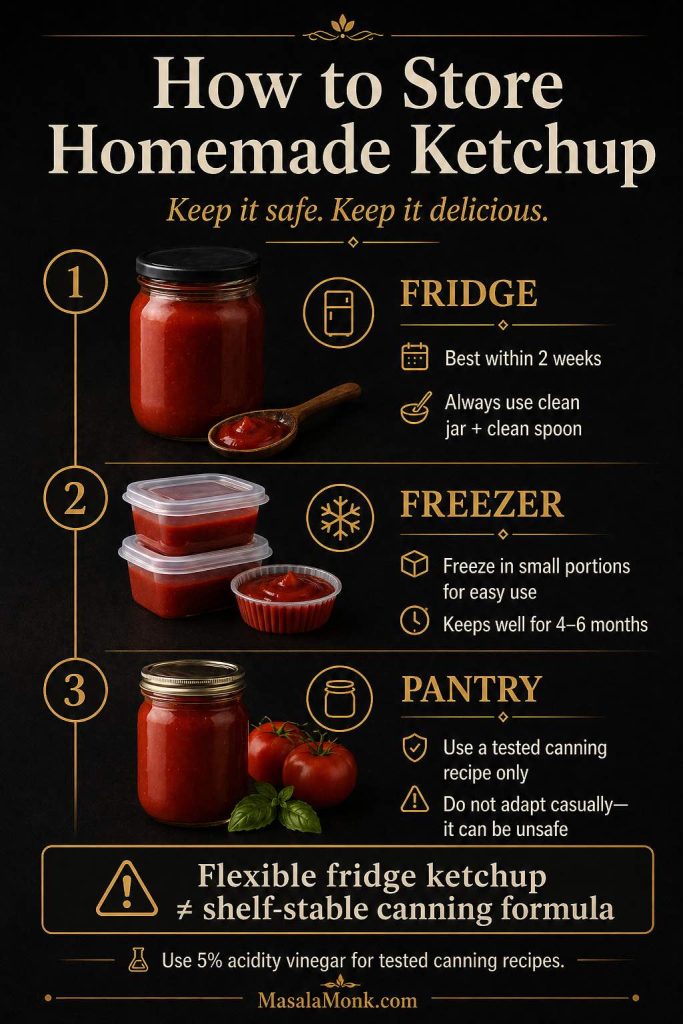
Important: this flexible recipe is for fridge and freezer storage. If you want shelf-stable canned ketchup, use a tested canning formula and do not casually change vinegar, tomato, onion, vegetable, jar, or processing-time ratios.
Homemade Ketchup Recipe with Fresh Tomatoes
This is the main ketchup-from-scratch version to make when tomatoes are ripe, red, and flavorful. In practice, it starts with 1 kg / 2.2 lb fresh tomatoes and reduces into about 500–600 g / 17.5–21 oz / 2–2½ cups of ketchup, depending on the tomato variety and how thick you cook it.
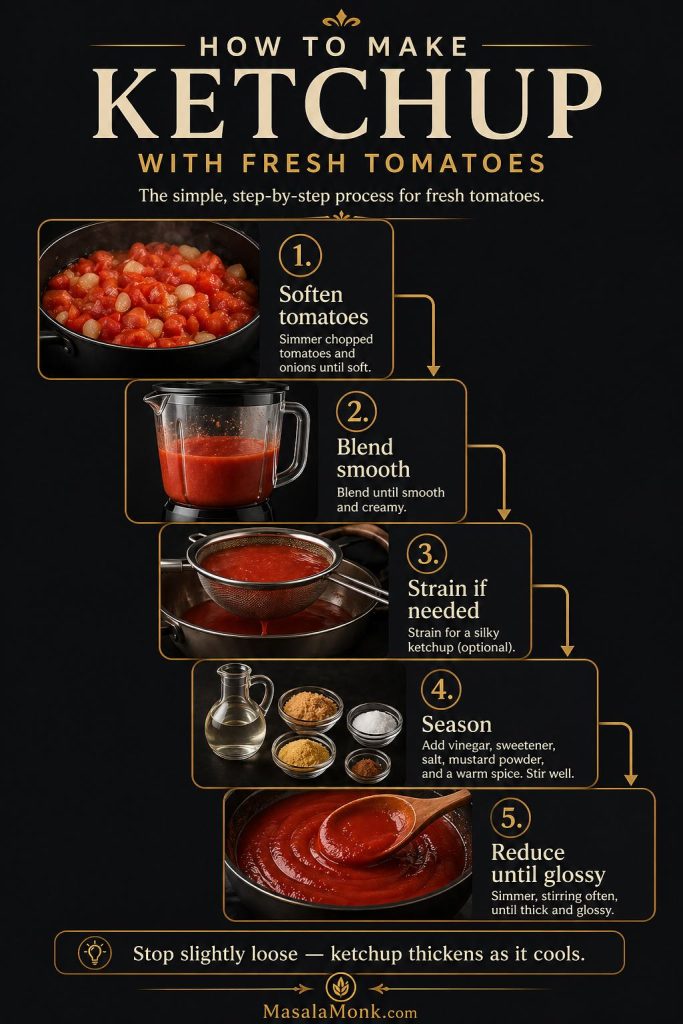
The method is simple, even though the simmer takes time: soften the tomatoes, blend, strain if needed, season, then reduce until the sauce turns glossy and spoonable.
The fresh tomato method is simple: soften the tomatoes, blend them smooth, strain if needed, season, and reduce until the ketchup turns glossy and spoonable.
Best Tomatoes for Homemade Ketchup
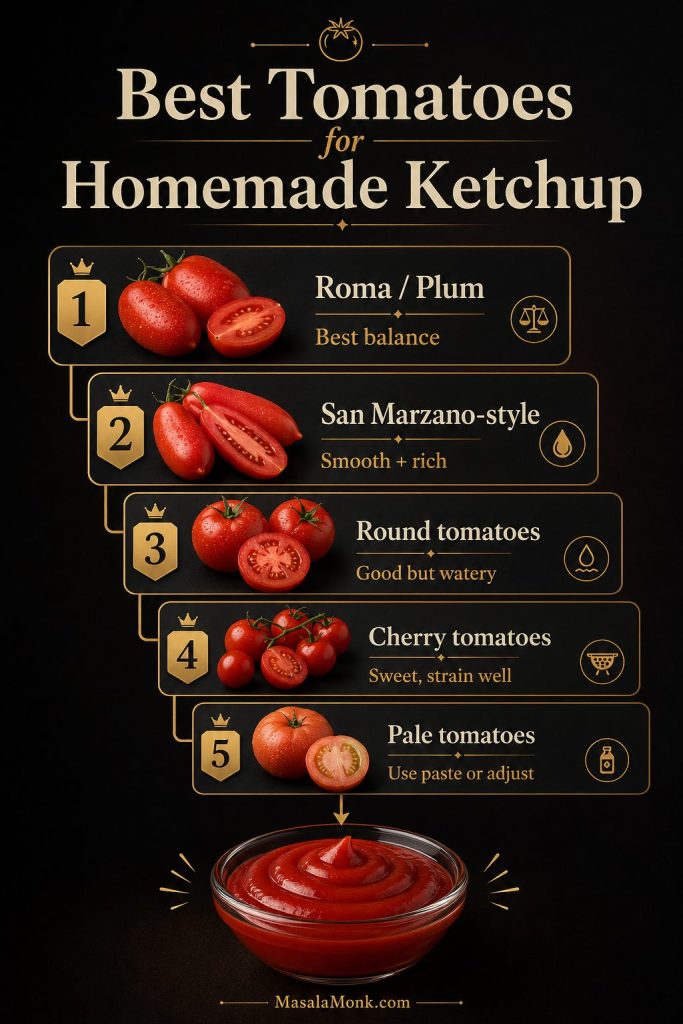
The best tomatoes for homemade ketchup are meaty, ripe, and deeply red. For example, Roma, plum, San Marzano-style, and other paste tomatoes are ideal because they have more flesh and less water. Regular round tomatoes also work; however, they usually take longer to reduce. In addition, cherry tomatoes can make a sweet ketchup, although they are often seedier and may need straining.
Homemade ketchup may look slightly darker or softer red than bottled ketchup, especially if you use brown sugar, jaggery, apple cider vinegar, or long cooking. For the brightest color, use ripe red paste tomatoes, white vinegar, white sugar, and gentle heat.
Meaty, ripe, deeply red tomatoes make the best homemade ketchup because they reduce faster, taste richer, and give the sauce better color.
Tomato Type
How It Works in Ketchup
Adjustment
Roma / plum tomatoes
Best balance of flesh, flavor, and low water
Follow the main formula.
San Marzano-style tomatoes
Excellent for smooth, rich ketchup
Use the recipe as written.
Regular round tomatoes
Good flavor but often watery
Give them extra simmering time in a wide pan.
Cherry tomatoes
Sweet and bright but more skins/seeds
Blend thoroughly, then strain for a smoother finish.
Pale or underripe tomatoes
Sharper, less sweet, less red
Increase the sweetener slightly or switch to tomato paste.
Step 1: Cook the Tomatoes, Onion, and Garlic
Wash and roughly chop 1 kg / 2.2 lb ripe tomatoes. Then, add them to a wide heavy-bottomed pan with 80–100 g chopped onion and 2–3 garlic cloves. Once everything is in the pan, cover and cook over medium-low heat for 15–20 minutes, until the tomatoes collapse, release their juices, and soften completely.
At this stage, do not add the vinegar, sugar, or salt yet. Starting with just the tomatoes, onion, and garlic lets the vegetables soften evenly before the final reduction.
Step 2: Blend and Strain
After the tomatoes soften, blend the mixture until smooth. An immersion blender is easiest, but a countertop blender gives a finer texture. When using a countertop blender, work in batches and let steam escape safely.
Texture Goal
What to Do
Rustic homemade ketchup
Blend only, leaving a little skin and seed texture.
Smooth ketchup
Pass the blended mixture through a coarse sieve.
Bottled-style ketchup
Use a food mill or fine sieve, then blend again after reducing.
For a smoother finish, strain the puree before the final reduction. If you are new to reducing fresh tomatoes, MasalaMonk’s guide to tomato sauce from fresh tomatoes is useful because it explains the food mill method, the no-food-mill path, and why tomato reduction changes texture.
Step 3: Add Vinegar, Sweetener, Salt, and Spices
From there, return the blended and strained tomato puree to the pan. Add:
75–90 ml / 5–6 tbsp 5% acidity vinegar
50–75 g sugar, brown sugar, or jaggery
8–10 g fine salt, or about 1½ tsp
½–1 tsp mustard powder
Pinch to ⅛ tsp cinnamon
Tiny pinch clove or allspice
Optional ⅛–¼ tsp cayenne or chili powder
Start with the lower amount of sugar and vinegar when your tomatoes are already sweet and flavorful. If the tomatoes taste flat, watery, or very acidic, use the higher amount instead. Either way, taste again near the end because the flavor changes as the ketchup reduces.
Step 4: Simmer Until Thick and Glossy
Simmer the ketchup uncovered over low to medium-low heat for 45–70 minutes after blending and seasoning, stirring more often as it thickens. The total cook time is usually 60–90 minutes including the first tomato-softening stage, but watery tomatoes can take longer.
The pan should show small, steady bubbles, not an aggressive boil. Near the end of cooking, the ketchup can catch on the bottom quickly, so use a splatter screen when needed and stir more often as it thickens. Instead of rushing the heat, give the sauce time to reduce slowly; that way, it stays brighter, smoother, and less bitter.
Heat cue: keep the ketchup at a gentle simmer with small, steady bubbles, not a rolling boil. If the sauce spits aggressively, darkens quickly, or sticks to the bottom, lower the heat and stir more often. Gentle reduction gives you brighter flavor, smoother texture, and better color.
Stage
Approximate Amount
Visual Cue
Fresh chopped tomatoes
1 kg / 2.2 lb
Chunky, raw, watery
After softening and blending
About 900 ml–1.1 L
Loose tomato puree
After straining
About 750–950 ml
Smoother but still thin
Final ketchup
About 500–600 g / 2–2½ cups
Glossy, thick, spoonable
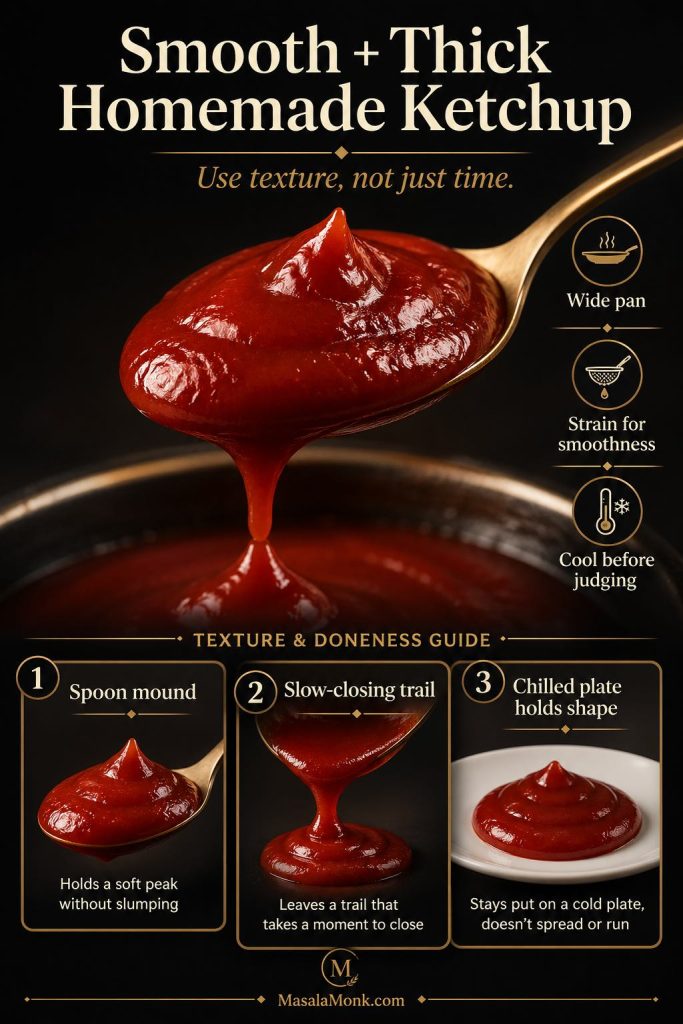
Step 5: Test the Thickness
Rather than relying only on time, use the texture as your guide. Because tomatoes vary so much, the exact cook time can shift from batch to batch. Near the end of cooking, check the ketchup with one or more of these doneness tests:
Test
What You Should See
Spoon mound test
The ketchup should mound slightly on a spoon instead of running off like tomato juice.
Trail test
Drag a spatula through the pan; the trail should close slowly, not immediately flood back.
Cold plate test
Drop a little ketchup on a chilled plate. After 30 seconds, it should hold shape instead of spreading into a watery puddle.
When in doubt, stop slightly before it looks perfect because ketchup thickens as it cools.
Step 6: Taste and Adjust
Once the ketchup is thick, taste it before you store it. A flat flavor usually needs a little salt first. When the sauce tastes too sweet, add vinegar 1 teaspoon at a time. If the flavor leans too sour, balance it with sweetener in small amounts. When it tastes like plain tomato sauce instead of ketchup, add vinegar, sweetener, salt, mustard, and a very tiny pinch of clove or cinnamon until the flavor tastes rounded.
Do not worry if the ketchup tastes slightly sharp while hot. After cooling, the vinegar softens, the sweetness feels rounder, and the texture becomes thicker.
Step 7: Cool and Store
Before you store it, let the ketchup cool fully. Then, transfer it to a clean glass jar. Refrigerate and use within 2 weeks for best quality, or freeze for longer storage.
For the best flavor, chill the ketchup for at least 2 hours before serving. While it is hot, freshly cooked ketchup can taste sharper than expected. After cooling, the sweetness, acidity, salt, and spices settle into a rounder flavor.
Quick Tomato Paste Ketchup: How to Make Ketchup from Tomato Paste
When fresh tomatoes are weak or you need ketchup quickly, tomato paste is the better starting point. Because it has already been cooked down, this version thickens in minutes, needs less guesswork, and gives you a smoother, more predictable ketchup. It is not as fresh-tasting as the fresh tomato version, but it is much faster.
A standard 6 oz / 170 g can of tomato paste is the easiest starting point for this shortcut. If your paste is very thick or double-concentrated, start with the higher amount of water and adjust after simmering.
Tomato paste ketchup is the fast route: whisk the ingredients smooth, simmer for a few minutes, cool, and adjust the thickness or tang before serving.
Detail
Spec
Yield
About 300–350 g / 10.5–12 oz / 1¼–1½ cups
Prep time
3 minutes
Cook time
5–8 minutes
Total time
8–12 minutes
Best for
Fries, burgers, sandwiches, dips, and weeknight meals
Tomato Paste Ketchup Ingredients
Ingredient
Metric
US / Imperial
Tomato paste
170 g
6 oz can
Water
120–150 ml
½–⅔ cup
5% acidity vinegar
45 ml
3 tbsp
Sugar, honey, jaggery, or maple syrup
20–35 g
1½–2½ tbsp
Fine salt
4–5 g
About ¾ tsp
Onion powder
—
½ tsp
Garlic powder
—
¼–½ tsp
Mustard powder
—
¼–½ tsp
Cinnamon, clove, or allspice
—
Tiny pinch
How to Make Ketchup from Tomato Paste
Add tomato paste, water, vinegar, sweetener, salt, onion powder, garlic powder, mustard powder, and spices to a small saucepan.
Whisk until the mixture is completely smooth.
Simmer over low heat for 5–8 minutes, stirring often.
If it is too thick, add more water 1 tablespoon at a time.
For more tang, add vinegar 1 teaspoon at a time.
Cool before judging the final thickness.
Best use: tomato paste ketchup is the easiest version for burgers, fries, sandwiches, wraps, and quick mayo-ketchup sauce. It is not as fresh-tasting as the fresh tomato version, but it is smoother and faster.
Sugar-Free, No-Sugar and Keto Homemade Ketchup Option
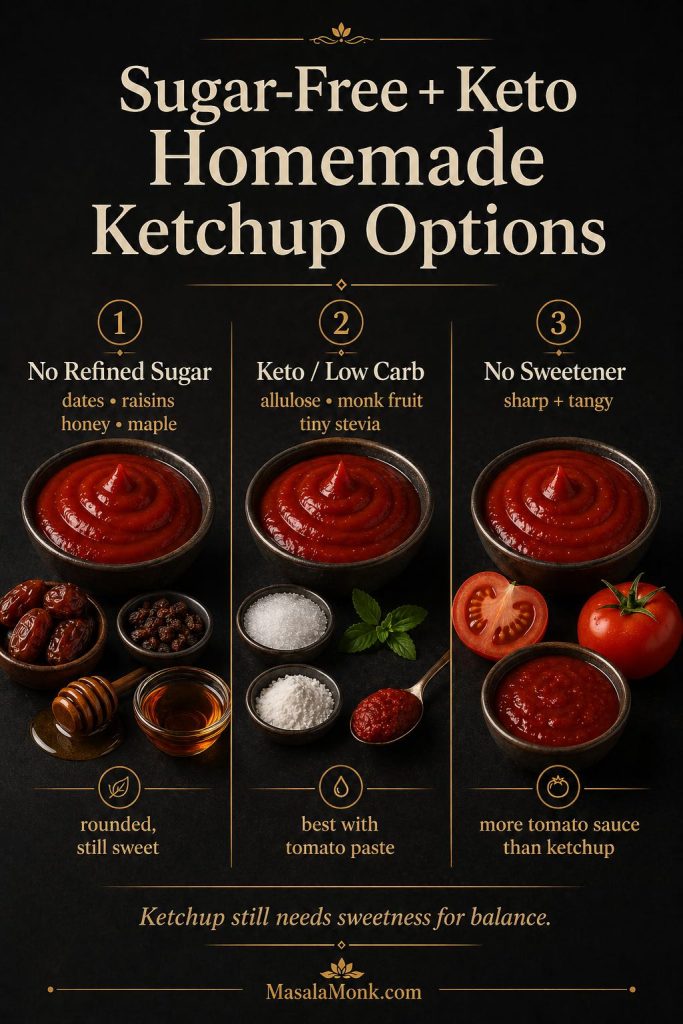
Classic ketchup needs sweetness to balance tomato acidity. Without any sweetness, the sauce will not taste like familiar bottled ketchup. Instead, it will taste sharper, more acidic, and more like seasoned tomato sauce. However, you still have several good options depending on what “sugar-free” means for you.
This section is for readers looking for ketchup without sugar, no-sugar tomato ketchup, zero-sugar ketchup, or a lower-carb ketchup option. The key point is that ketchup still needs sweetness for balance, so the best sugar-free version uses a low-carb sweetener instead of removing sweetness completely.
Ketchup still needs some sweetness for balance, so the best sugar-free version replaces sweetness thoughtfully instead of removing it completely.
Once the basic ketchup tastes balanced, you can lower the sugar more safely. The important thing is to replace sweetness thoughtfully instead of removing it all at once.
Sweetener Options for Sugar-Free Ketchup
Version
What to Use
Flavor Result
No refined sugar
Dates, raisins, apple, jaggery, honey, or maple syrup
Still rounded and ketchup-like, but not strictly sugar-free
Keto / low-carb
Allulose, monk fruit, or a tiny amount of stevia
Closest low-carb option, especially with tomato paste ketchup
No sweetener
Skip sweetener
Sharper, tangier, more like tomato sauce than ketchup
How to Adjust the Sweetness
In the fresh tomato recipe, replace the 50–75 g sugar with 40–60 g chopped dates or raisins and blend very thoroughly. For keto ketchup, the tomato paste version is easier because it is already thick and consistent. Start with 1–2 tablespoons allulose or monk fruit sweetener, then adjust after simmering.
The best sugar-free ketchup still tastes slightly sweet. If you remove sweetness completely, the sauce becomes tangy tomato sauce, not classic ketchup.
If you are building low-carb burger plates or bowls, this sugar-free ketchup variation fits better than sugary bottled sauces. MasalaMonk’s keto hamburger recipes also explain why ketchup-heavy sauces can become a hidden carb trap.
Neither version is automatically better. Instead, the right choice depends on your tomatoes and your timing. When tomatoes are ripe and flavorful, fresh tomato ketchup gives the best flavor. By contrast, tomato paste ketchup works better when you want speed, smoothness, and consistency.
In short, the best homemade ketchup recipe for you depends on whether you care more about fresh tomato flavor, speed, smoothness, or consistency.
Need
Fresh Tomato Ketchup
Tomato Paste Ketchup
Fresh flavor
Best when tomatoes are ripe and sweet
Good, although less fresh
Speed
Slower because it needs reduction
Fastest option because paste is already concentrated
Texture
Smooth only after careful straining
Usually smooth and consistent
Predictability
Depends on the tomatoes
More predictable because the base is concentrated
Summer tomatoes
Ideal choice when tomatoes are in season
Useful when fresh tomatoes are weak
Beginner-friendliness
Good, although slower
Easiest because it skips long reduction
Canning suitability
Only with a tested canning recipe
Only with a tested canning recipe
How to Make Homemade Ketchup Smooth and Thick
In practice, the two biggest homemade ketchup problems are texture and thickness. Because fresh tomatoes contain a lot of water, ketchup needs reduction. If you stop too early, it tastes like thin tomato sauce. However, if you cook it too hard or too long, it can scorch, darken, or become pasty. Therefore, the goal is slow reduction, not aggressive boiling.
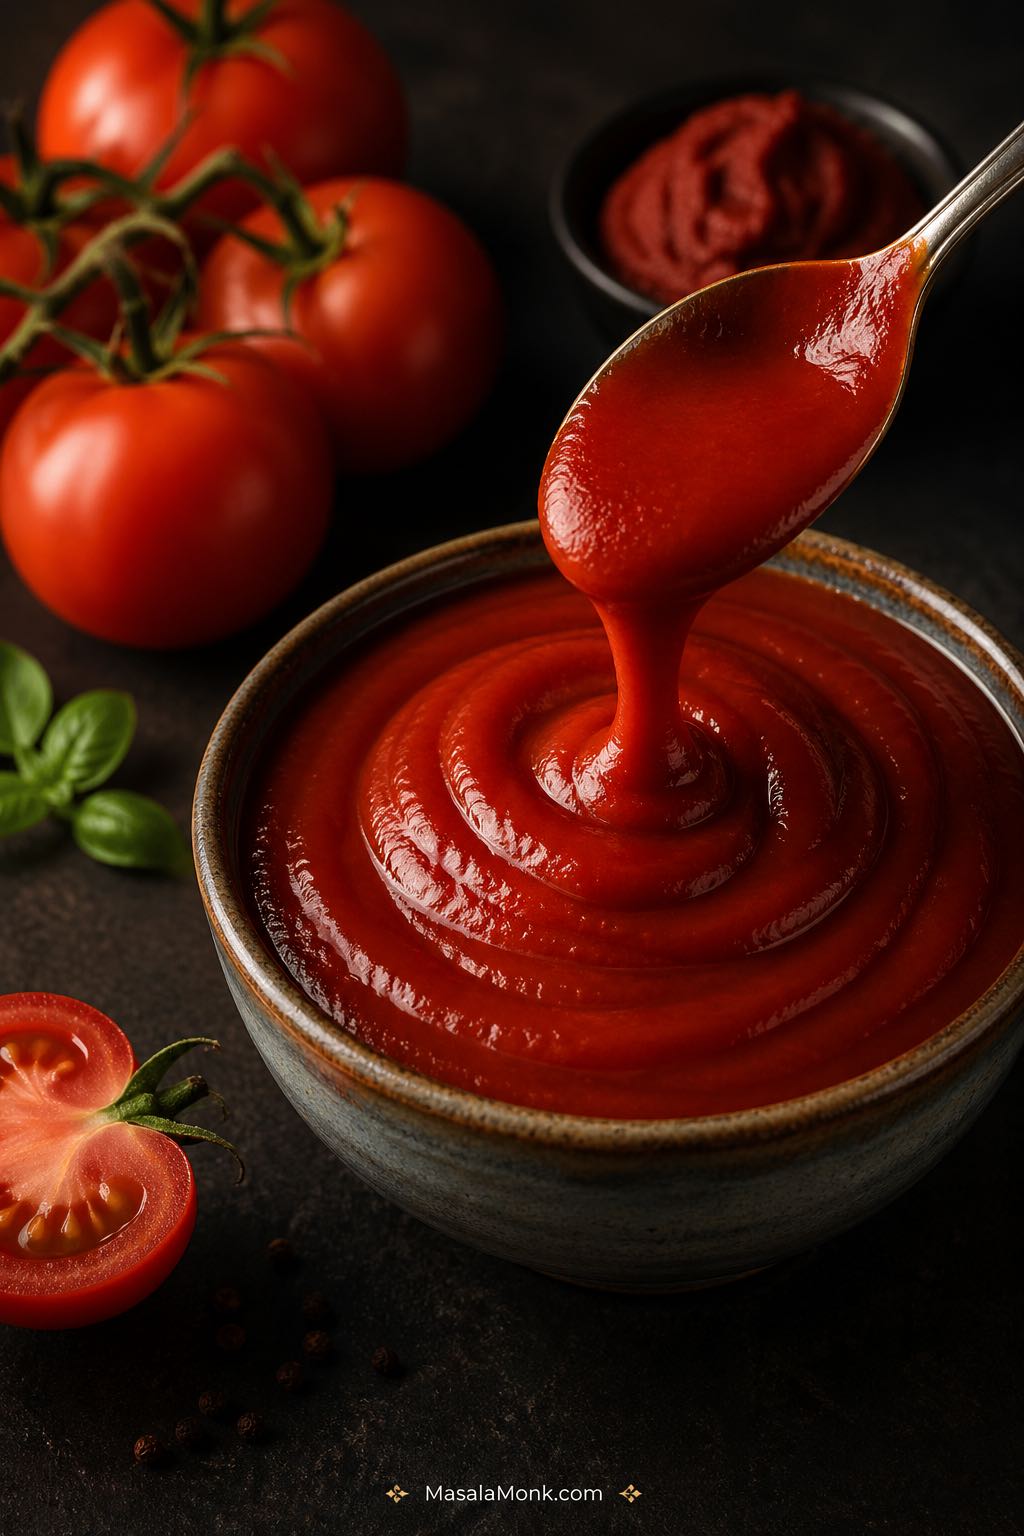
The texture goal is glossy and spoonable, not watery like tomato puree and not stiff like tomato paste.
Good homemade ketchup should look glossy, mound slightly on a spoon, leave a slow-closing trail in the pan, and hold shape on a chilled plate.
Use a Wide Pan
A wide pan helps water evaporate faster. By contrast, a tall narrow pot traps steam and makes the ketchup take longer to thicken. For a 1 kg tomato batch, a 26–30 cm / 10–12 inch wide pan is ideal.
Strain for a Smoother Finish
Tomato skins and seeds can make homemade ketchup feel rough. For a smoother finish, blend the softened tomatoes, then pass them through a sieve or food mill before the final reduction.
Reduce Slowly
Keep the ketchup at a gentle simmer. As it thickens, stir more often and scrape the bottom of the pan. The sauce should look glossy, not dry or scorched.
Cool Before Judging Thickness
Hot ketchup looks thinner than cooled ketchup. Therefore, stop when it is slightly looser than your ideal final texture, then let it cool before deciding whether it needs more reduction.
Texture reminder: after cooling, ketchup becomes thicker and smoother. Because of that, stop a little early rather than reducing it until it looks perfect in the hot pan.
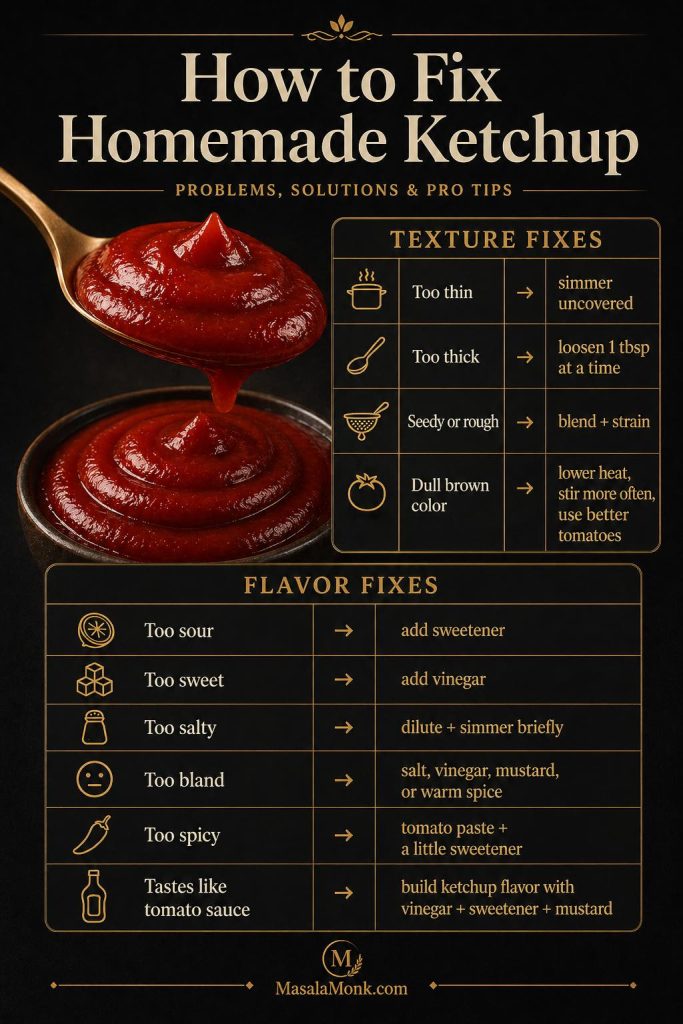
Homemade ketchup is easy to adjust when you know what is wrong. First, decide whether the problem is texture, flavor, or color. Then, make small changes and taste again after the ketchup cools slightly on a spoon.
Most homemade ketchup problems are easy to fix once you know whether the issue is texture, acidity, sweetness, salt, or spice.
Texture Fixes
Problem
Likely Cause
Fix
Runny or thin
Watery tomatoes or not enough reduction
Simmer uncovered in a wide pan until the ketchup thickens and the extra water cooks off.
Stiff or pasty
Over-reduced sauce or too much tomato paste
Loosen it with water, tomato juice, or vinegar 1 tablespoon at a time.
Rough or seedy
Skins or seeds remain
Blend longer, then strain through a sieve or food mill for a smoother texture.
Flavor and Color Fixes
Problem
Likely Cause
Fix
Sharp or sour
Too much vinegar or underripe tomatoes
Add sugar, jaggery, honey, dates, or raisins in small amounts until the acidity tastes rounded.
Overly sweet
Too much sweetener
Add vinegar 1 teaspoon at a time. Afterward, add a small pinch of salt or mustard powder if the flavor still feels flat.
Salty or harsh
Salt added early or sauce reduced too far
Dilute the flavor with unsalted tomato paste, tomato puree, or a little water, then simmer briefly.
Flat or bland
Not enough salt, vinegar, or spice
Start with salt. Then add vinegar, mustard powder, or warm spice in small amounts.
Too spicy
Too much cayenne or chili
Round out the heat with tomato paste and a little sweetener.
Brown or dull
Overcooking, burning, dark sugar, or dull tomatoes
Next time, use ripe red tomatoes, lower the heat, stir more often, and avoid scorching.
Tomato-sauce flavor
Missing ketchup’s sweet-acid-spice balance
Build ketchup flavor with vinegar, sweetener, salt, mustard powder, and a tiny pinch of clove or cinnamon.
After the ketchup tastes right, storage matters as much as flavor. This is especially true for small-batch homemade ketchup because it does not have commercial stabilizers or a tested shelf-stable process.
Store it in a clean glass jar, use a clean spoon, and keep it refrigerated. After serving, return the jar to the fridge rather than leaving it on the counter.
This small-batch ketchup is best treated as a fridge or freezer condiment unless you follow a tested canning recipe exactly.
Fridge, Freezer and Room Temperature Storage
Storage Method
Recommendation
Fridge
For best quality, use within 2 weeks.
Freezer
For longer storage, freeze for 4–6 months in small portions.
Room temperature
Only keep ketchup at room temperature when it has been properly canned with a tested recipe.
After thawing
After thawing, stir well; if watery, simmer briefly to bring the texture back.
Jar hygiene
Because homemade ketchup has no commercial stabilizers, use clean jars and clean spoons every time.
Can You Can Homemade Ketchup?
Think of this recipe as a fridge ketchup, not a pantry ketchup. You can freeze it safely, but do not treat it like a shelf-stable jarred product unless you follow a tested canning recipe.
For that reason, this flexible MasalaMonk ketchup recipe is not a shelf-stable canning formula.
For canning ketchup, use a tested canning formula from a reliable source such as the National Center for Home Food Preservation tomato ketchup recipe. Do not casually reduce vinegar, increase tomatoes, add extra onion, add extra vegetables, change jar size, change headspace, or shorten processing time.
For context, the NCHFP tomato ketchup formula is a large tested batch using 24 lb ripe tomatoes, 3 cups chopped onions, 3 cups 5% acidity cider vinegar, sugar, salt, and whole spices, with a yield of 6–7 pints. That is a different type of recipe from this flexible small-batch fridge ketchup.
Canning safety note: fridge ketchup is flexible. Canning ketchup is not. For shelf-stable jars, follow a tested recipe exactly, use vinegar with 5% acidity, and process jars according to the tested time for your altitude.
Healthy Canning’s quick ketchup guidance explains the same principle clearly: sweetness, salt, and dry spices are more flexible, but vinegar and low-acid vegetable ratios should not be casually changed in a water-bath canning recipe. If you want a pantry-stable ketchup, use tested canning instructions instead of adapting this small-batch fridge recipe.
Catsup and ketchup usually refer to the same sweet-tangy tomato condiment. “Ketchup” is the dominant modern spelling, but some readers still search for homemade catsup, homemade tomato catsup, or a recipe for tomato catsup.
If you came here looking for catsup, you are in the right place. The spelling changes, but the method is the same: tomatoes are reduced with vinegar, sweetener, salt, mustard, and spices until the sauce becomes thick, glossy, tangy, and balanced.
Homemade ketchup should look smooth, glossy, and spoonable, with enough body to coat fries and burgers without tasting heavy.
Ways to Use Homemade Ketchup
Homemade ketchup is more than a dip for fries. Once you have a jar in the fridge, it becomes a quick base for sauces, glazes, spreads, marinades, and snack plates. For everyday meals, that means one batch can cover burgers, wraps, fries, bowls, and quick dipping sauces.
A jar of homemade ketchup can do much more than dip fries — it also works in burger sauce, glazes, barbecue-style sauces, and snack platters.
Use it on burger buns or fold it into mayo for a creamy burger sauce.
Mayo ketchup sauce
Stir 2 parts mayo with 1 part ketchup for a quick fry sauce. MasalaMonk’s homemade mayonnaise guide already covers mayo-ketchup sauce as a useful variation.
Meatloaf glaze
Blend ketchup with brown sugar or honey and a splash of vinegar, then brush it over meatloaf.
BBQ sauce base
Turn it into a quick barbecue-style sauce with vinegar, brown sugar, smoked paprika, black pepper, and Worcestershire-style seasoning.
Pakoras and snacks
Serve it as a tangy-sweet dip when chutney feels too sharp.
Wraps and sandwiches
Add a thin layer inside grilled cheese, paneer rolls, tofu wraps, or egg sandwiches.
Rice bowls
Spoon it into spicy tomato rice, fried rice-style bowls, or quick sauce bases.
For a fruitier, hotter homemade sauce, try MasalaMonk’s mango habanero sauce. For a sharper fruit-and-mustard dip, try the mango mustard sauce. Both fit naturally into the same homemade sauce and condiment family.
This quick visual recap summarizes both homemade ketchup routes, while the full recipe card below gives the detailed method and ingredient options.
Before you jump to the recipe card: choose the fresh tomato version when tomatoes are ripe and flavorful. However, choose the tomato paste shortcut when you want a faster, smoother, more predictable ketchup. Either way, taste again after cooling because ketchup thickens and mellows in the fridge.
Homemade Ketchup Recipe with Fresh Tomatoes or Tomato Paste
A smooth, tangy homemade ketchup made with ripe fresh tomatoes, vinegar, sweetener, salt, onion, garlic, mustard, and warm spices. This small-batch recipe includes a tomato paste shortcut, sugar-free notes, storage guidance, and texture fixes.
Prep Time15 minutes
Cook Time60–90 minutes
Total Time1 hr 15 min–1 hr 45 min
Yield500–600 g / 2–2½ cups
Equipment
Wide heavy-bottomed pan or Dutch oven
Immersion blender or countertop blender
Sieve or food mill, optional but recommended
Spatula
Clean glass jar
Ingredients
1 kg / 2.2 lb ripe red tomatoes, roughly chopped
80–100 g / 3–3.5 oz onion, chopped
2–3 garlic cloves, about 8–12 g
75–90 ml / 5–6 tbsp 5% acidity vinegar, apple cider or white vinegar
50–75 g / about ¼–⅓ cup packed brown sugar, jaggery, or sugar
8–10 g fine salt, about 1½ tsp
½–1 tsp mustard powder
Pinch to ⅛ tsp ground cinnamon
Tiny pinch ground clove or allspice, 1/16 tsp or less
Optional: ⅛–¼ tsp cayenne or chili powder
Optional: ¼ tsp black pepper
Method
Prep the tomatoes. Wash and roughly chop the tomatoes. Chop the onion and garlic.
Soften. Place the tomatoes, onion, and garlic in a wide pot. Cover and cook over medium-low heat for 15–20 minutes, until the tomatoes collapse and release their juices.
Blend. Blend the mixture until smooth with an immersion blender or countertop blender.
Strain, optional. For smoother ketchup, pass the blended mixture through a sieve or food mill. For rustic ketchup, skip this step.
Season. Return the tomato puree to the pot. Stir in vinegar, sweetener, salt, mustard powder, cinnamon, clove or allspice, and optional cayenne or black pepper.
Reduce. Simmer uncovered over low to medium-low heat for 45–70 minutes. Stir more often as the ketchup thickens so it does not catch on the bottom.
Test. Check that the ketchup mounds slightly on a spoon, leaves a slow-closing trail in the pan, and holds shape on a chilled plate.
Adjust. Taste before storing. Add sweetener if sour, vinegar if sweet, salt if flat, or water if too thick.
Cool and store. Cool the ketchup, transfer it to a clean jar, and refrigerate. Use within 2 weeks for best quality.
Quick Tomato Paste Option
Whisk together 170 g / 6 oz tomato paste, 120–150 ml / ½–⅔ cup water, 45 ml / 3 tbsp vinegar, 20–35 g sweetener, 4–5 g salt, ½ tsp onion powder, ¼–½ tsp garlic powder, ¼–½ tsp mustard powder, and a tiny pinch of cinnamon or clove. Simmer 5–8 minutes, then cool.
Notes
For faster thickening and better color, use ripe, meaty tomatoes.
A 26–30 cm / 10–12 inch pan works best for a 1 kg tomato batch because it evaporates water faster.
Ketchup thickens as it cools, so stop reducing slightly before it looks perfect.
For the best flavor, chill the ketchup for at least 2 hours before serving.
If you want a smoother bottled-style finish, strain the tomato mixture before the final reduction.
If using a countertop blender, blend hot tomatoes in batches and vent the lid so steam can escape safely.
Reduction concentrates flavor, so add salt carefully.
When doubling the recipe, use a wider pan or expect a longer reduction time. A double batch will not thicken in the same time.
For a lower-sugar or sugar-free variation, use allulose, monk fruit, dates, or raisins.
This homemade ketchup recipe is flexible for fridge and freezer storage, but it should not be used as a canning formula. For shelf-stable jars, follow a tested canning recipe exactly.
FAQs About Homemade Ketchup
How do I make homemade ketchup from fresh tomatoes?
Fresh tomatoes make excellent homemade ketchup when they are ripe, red, and flavorful. To make it, cook them with onion and garlic, then blend, strain if needed, and reduce with vinegar, sweetener, salt, mustard, and spices until thick.
How do I make ketchup from tomato paste?
Tomato paste ketchup is the fastest version because the tomato base is already concentrated. To make it, whisk tomato paste with water, vinegar, sweetener, salt, onion powder, garlic powder, mustard powder, and a tiny pinch of spice. Then simmer for 5–8 minutes.
Why is my homemade ketchup too thin?
Thin ketchup usually means the tomatoes were watery or the sauce has not reduced enough. To fix it, simmer the ketchup uncovered in a wide pan and stir often as it thickens. The sauce is ready when it mounds slightly on a spoon and holds shape on a chilled plate.
Why does my ketchup taste too sour?
Too much vinegar, underripe tomatoes, or not enough sweetener can make ketchup taste sour. To balance it, gradually add sugar, jaggery, honey, dates, raisins, or a low-carb sweetener until the acidity tastes rounded.
Why does my homemade ketchup taste like tomato sauce?
Your ketchup can taste like tomato sauce when it does not have enough sweet-acid-spice balance. To fix that, add a little vinegar for tang, sweetener for roundness, salt for depth, mustard powder for sharpness, and a tiny pinch of clove, cinnamon, or allspice for classic ketchup flavor. After that, chill it briefly and taste again.
Is homemade ketchup good without sugar?
You can make homemade ketchup without refined sugar, but the flavor changes. For a no-refined-sugar version, use dates, raisins, apple, honey, maple, or jaggery. Meanwhile, keto ketchup works better with allulose, monk fruit, or a very small amount of stevia. Without any sweetener, however, the sauce will taste more like tangy tomato sauce than classic ketchup.
How long does homemade ketchup last?
This small-batch fridge ketchup is best within 2 weeks. For that reason, keep it refrigerated in a clean jar and use a clean spoon. For longer storage, freeze it in small portions for 4–6 months. After thawing, stir before serving.
Does homemade ketchup freeze well?
Freezing works well for homemade ketchup. After cooling, use small containers or ice cube trays. Then, after thawing, stir well. If it separates or turns watery, simmer it briefly to bring the texture back.
Is this homemade ketchup recipe safe for canning?
Do not can this flexible recipe as written. Instead, use it for fridge and freezer storage. For shelf-stable canning, use a tested ketchup canning recipe from a reliable source and follow the vinegar, jar size, headspace, and processing-time instructions exactly.
Is catsup the same as ketchup?
Usually, yes. Catsup and ketchup are alternate names for the same sweet-tangy tomato condiment. Today, ketchup is the more common spelling; however, homemade catsup and homemade tomato catsup usually refer to the same type of recipe.
What makes this a homemade ketchup recipe instead of tomato sauce?
A homemade ketchup recipe uses tomato, vinegar, sweetener, salt, mustard, and warm spices in a tighter balance than tomato sauce. As a result, the finished ketchup tastes tangy-sweet, glossy, concentrated, and dip-friendly.
What is ketchup made of?
Ketchup is usually made from tomatoes, vinegar, sugar or another sweetener, salt, onion or onion powder, garlic or garlic powder, mustard, and warm spices. For homemade ketchup, cinnamon, clove, allspice, or celery seed should stay in the background rather than dominate the sauce. Otherwise, the ketchup can start tasting like chutney instead of a classic dip.